• Welcome to Smashboards, the world's largest Super Smash Brothers community! Over 250,000 Smash Bros. fans from around the world have come to discuss these great games in over 19 million posts!

    You are currently viewing our boards as a visitor. Click here to sign up right now and start on your path in the Smash community!

Make Your Move 3.0-Starts Soon

Status
Not open for further replies.

Marie_54

Smash Ace
Joined
Jan 1, 2008
Messages
502
Location
Puerto Rico
Wow...


L and Light shinigami, all moves instant death.


jk, just had to do it for the stereotype lols.


Someone needs to make one of Dave Mustaine... Something like dips*** kick, hair metal genocide punch, guitar throw, fire a band member, Black Friday FS and "Killing Is My Business and Business Is good!", "F*** Metallica!" taunts.

I would but i'm too sleepy...
 

PolarisJunkie

Smash Apprentice
Joined
Feb 17, 2007
Messages
171
Location
California
NNID
PolarisJunkie
3DS FC
0361-7305-7321
Cammy White


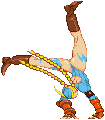
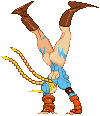
Cammy, also known by the full name Cammy White (in Super Street Fighter II) and the codename Killer Bee (in Street Fighter Alpha 3), is a video game character in the Street Fighter series. She first appeared in the fighting game Super Street Fighter II, which was released in 1993, as one of the "New Challengers", the four new characters introduced in that title. She is the second female character in the Street Fighter series, following Chun-Li. Out of the four New Challengers, Cammy is by far the most prominent, having many more game appearances than the others, as well as more appearances in games and other media than many of the original "world warriors." This is a work in progress, so keep checking back!
And PJ has entered this round of the contest as well! Cammy White is one of my favorite characters in the Street Fighter franchise of games, and I figured, why not, she could totally fit into the hectic and crazy world of Smash. Cammy's quick, she strikes fast and packs a punch. However, while shes relitively balanced on her moves, shes rather light, and if she gets hit by say, DK's Super Punch....bye. Hah. The key to using Cammy effectively in Smash is to use her combo potential to hit and run and overcome her weakness.

Standard A Moves


AAA: A standard jab, followed by an elbow jab, finished with an uppercut punch, as seen using Cammy's in-game sprites. This is a great combo starter, and the finishing elbow jab has some considerable knockback.


Dash Attack: During a run, Cammy will perform a somersault, similar to Diddy Kong's dash. It does rather low damage with zero to no knockback.


FTilt: Cammy does a side punch, with amazing strength. A great clearing move if you feel you're getting set up for a combo. Can potentially K.O. at high percentages as well.


UTilt: Cammy uses her upper body strength and gets on the floor. She uses one hand to lift her body and legs up to strike. It was low knockback and low damage.


DTilt: Cammy quickly does a quick swipe with her leg and foot. Does low damage with no knockback, but came be spammed quickly.


Foward Smash: Cammy charges a punch, embalmed in Psycho Energy. The punch comes out quick and fast, and when fully charged is incredibly powerful. A fantastic K.O. move, and an almost guaranteed one if the opponent is at 90 or above percent.


Down Smash: Cammy does a side swiping double kick with both legs on the ground, covering both sides of her. A decently strong move, however its mostly used for clearing.


Up Smash: Cammy does an uppercut punch, sending the flow flying into the air. This is a STRONG smash attack, but its has such a small hitbox, that you'll very rarely see it connect the way you want it too. When it does, however, expect KOs in the 40s and 50s.​
 

RWB

Smash Ace
Joined
Jan 28, 2006
Messages
969
Toph, "The Blind Bandit"


Backstory:


[table of content goes here]


Stats:


Strength 1:
5/10
Since Toph tend to have two striking areas, there is a need for two stats.
This one is for her actual hitting you with body movements.
Toph is rather strong (as a 15-year old guy who trained to be a warrior since he was very young put it: "She has bigger arms than me!"),
but only her aerial moves uses her full physical strength (8/10).


Strength 2:
8/10
This deals with the attacks from Tophs disjointed hitbox,
namely the earth she uses to attack. Basically, she attacks you by throwing rocks at you,
hard(not literally). It hurts quite a bit.
See quirks for additional info on this disjointed hitbox.

Weight:
3.5/10
She's a rather buff 12-year old girl, but she is also short,
so even if she is somewhat buff, she's still very light.

Attack speed:
6.5/10
Toph isn't exactly a speed demon (She was even described as "One who waits and listens"),
and her moves take a little time to come to their end(but not that long, and as long as she is on ground, it's hard to punish her). They are fast to start though,
so that she can punish mistakes(which is her preferred way of fighting).

Range 1:
2/10
Toph is, as previously noted, quite short. This keeps her range very low,
when you only take into account her attacks with the body.

Range 2:
4/10-10/10
The attack that involves the earth is very differing in range, some can hit at distance that is almost projectile-class, while some hit pretty close to Toph.

Ground speed:
5.5/10
As Toph is just a 12-year old, short girl... She isn't exactly going to be Maurice Green.

Jump:
3.5/10
Unlike most other fighters in Avatar, Toph has never shown any feats of near inhuman agileness. Also, she doesn't like leaving the ground. Thus both her jumps are very low.

Aerial speed:
5/10
As I think of this as the speed she moves to the sides... it's somewhat decent.

Fall speed:
4/10
She falls pretty slow, but fast enough to fall back into a juggle early on.

Dashing jump speed:
6/10
This jump carries over her running speed.


Quirks:

Toph is an earthbender, meaning she can "bend"(manipulate to a certain degree) earth. This includes mud, rocks, and in her case, even metal.
This is what her moveset circulates around. She performs a movement(actually Kung Fu), and the earth reacts to that. The earths way of hitting is simple, you get hit by the front of the attack. If Toph raises it like a wall, it acts like that, hindering progress and and can even somewhat defend her. If an enemy is outside the stage and wants to get in... remember that her earth is tetherable.
In the show, the moves usually started close to her and covered a long distance, but I made it a litle different, the moves now starts further from her(in general) and hasn't the dramatic area of effect her moves tend to have in the show(this is to keep her from brokenness).
She can hit you up close with the movement, but that isn't really going to do much damage, because her hits aren't at full strength. The earth hits at another location. You could teorethically get hit by both, but it isn't likely.

Also, Toph can't swim, and thus sinks pretty fast in the water.

Battle Thingies


Entrance:A whole in the ground opens up, and Toph jumps out.

Idle pose: She has two; either she scratches herself on the back, or picks her nose.

Taunts:
-Takes a stance and pumps her arm into the air, shouting "I'm the worlds greatest Earthbender!" Pic is a little dark

-Points and says "I didn't see that coming either!"

-Laughs arrogantly.


Victory tune:
Ending part of this:
http://www.youtube.com/watch?v=ha8osVsNuT4

Victory poses:
-Takes a pretty arrogant pose, smirks, and says: "A tiny, blind little girl just kicked your butt. Now how does that feel?"
-
-

Losing pose:
-Standing with her back turned, obviously seething.

Fighter Description:
Toph is, as long as you don't get really close, a complete monster at fighting on the ground.
Up close she is somewhat normal, but the aim for her enemies is to get her airborne-
while toph hit hard when airborne, her hitboxes are small and usually badly placed.
They also lack priority, except the fair. As she is also exceedingly easy to juggle,
and a good part of her specials literally become useless in the air she really doesn't
want to get into the air. Espescially outside the stage as her recovery suck major ***
(a tether recovery and below average jumps).

So Ground Toph= Monster, exceedingly powerful if the player spaces her right.
Meanwhile Airborne Toph= pretty much EPIC FAIL!


The moves:


Specials:

NEUTRAL B:
Rushing Rock:
Damage: 10%-39%
Toph thrusts her hand forward, striking away a rock that shoots out of the ground at the start of the attack(this happens faster than it sounds that it would do).
This can be charged, and the size of the rock will change drastically change. Carriable charge. At full power, it's a very powerful attack, damaging, high knockback, and a huge hitbox... Even good speed.
Just make sure the enemy isn't to close; if they get hit by the rock shooting out of the ground, they just suffer 3% and nearly no hitstun, so you can get very badly punished if you don't watch out.
Still, a fearsome projectile. Also, one of the few moves that doesn't involve you getting hit by her movements.

Vid of uncharged: 2:51-
http://www.youtube.com/watch?v=JYTeJhLy6Zs
Vid of fully charged: 0:56-
http://www.youtube.com/watch?v=10P92LN31Ao

FORWARD B:
Meteorite Grapple:
Damage: Airborne 9%
Toph is wearing a black bracelet; it's part of a meteorite and seems to very easy to bend. She uses this as grappling tool. Also, this is Tophs only recovery move.
If Toph grabs you in the air, she'll automatically throw you behind her, using the momentum gained to move forward.
As it's quicker than a regular "tethering grab", it's exceedingly helpful.

DOWN B:
Rock Armor:
Damage: none
Toph raises and puts a layer of rocks all over herself. This acts as a defensive tool, but also sligthly offensive.
The Rock Armor lowers damage and knockback taken by hits quite a bit, and she suffers only a fragment of the regular hitstun while getting hit.
It also gives a small damage and knockback boost to her hitting you.
Now this may seem like a very good thing, but there are some weaknesses too. if you get knocked of stage in this state, you have no second jump to save you, as this move only allows single jumps.
It makes her fall very fast too. The other weakness is that when the armor breaks(if it gets to many hits), Toph is sent into the air, kinda like when the regular shield breaks (but without the dizzy).
Also... the armor takes damage over time. Even if you don't use it for a long time, it keeps the damage taken. Also, it's not as durable as it may seem.

UP B:
Metalbending/Earth Break:
Damage: Can vary, but generally about 10%-12% for the close one, 5-6% for the stage parts.
Here Toph shows of what she really can do; She bends the STAGE. When she does,
her location will make the attack effect very different. If she's close to the edge she's facing(Less than say... a third of it?),
it is a very quick move, which makes the edge flip upwards, hitting the enemy,
or depending on the enemy characters recovery move, steal their chance to grab the edge.
If she's far from the edge she's facing, it's slower, and works a little different;
She literally breaks the stage apart, then quickly puts it together again.
Each of the pieces of the stage does little knockback, but together they can cause some damage.
You can see pretty clearly when Toph's about to break it apart; She looks as if she's trying to tear apart an invisble paper, then shoves her hands forward to do it.


A Moves:

JAB
?:


DASH ATTACK
?:

Tilts:

FORWARD
?:


UP
?:
DOWN
?:

Smashes

FORWARD
?:

UP
?:

DOWN
?:

AERIALS


NEUTRAL A
?:

FORWARD A
?:

UP A
?:

BACK A
?:

DOWN A
?:

Shielding Moves and Throws:

SIDESTEP:

ROLL:

GRAB:

THROWS:
A attack:

Forward throw:

Up throw:
I
Back throw:

Down throw:

FINAL SMASH:
?:


Alt Colors:

White:

Black:

Red:

Green:

Blue:

Yellow:


Stage:
?

Song:
?:

[Unlockable songs][/SIZE]

Song:
?:
 

GreatClayMonkey

Smash Lord
Joined
Sep 24, 2007
Messages
1,674
Location
Rigging the enemy base with explosives, which is l
@Gardevoir: Great move set. She is one of my favorite pokemon. It is a bit brief but still definetly great a moveset.

@Aqua Teen Hunger Force: As I already said this is one of the best I've seen so far. At first I thought it was gonna be an Ics clone but then I read it and WOW! Its so technical and well written.

@FLUDD: You sir are a legend. Thats amazing. His final smash seems a bit um useless Hey just like the FLUDD.

@Eddie and Beat: Like I already told you I love how this is another one that tries to switch up the ICs play style.

@Shaq: It's a little more detailed than your first one. Thats good. Hes a unique character thats for sure. Great moveset ma boy.

@Sean Connery: No one will judge your offense profanity....maybe. Loved back when you made it still love it now.

@Phoenix Wright: I wanted someone to do him. I was going to but I'M LAZY. Hope you finish it.

@Cammy White: Glad to see you submitting Polaris. Kinda hard to judge it now but those sprites make it easier to understand. Hope ya finish.

@Toph: Nice start 2 thumbs up. Also you uh haven't finished hallow Ichigo yet.

I'll be submitting my new one to. Peace.
 

Mario & Sonic Guy

Old rivalries live on!
Joined
Sep 18, 2007
Messages
22,469
Location
Mushroom Kingdom
NNID
TPitch5
3DS FC
5327-1637-5096
Gallade


-----------------------
Stats

Power: 4
Defense: 3
Speed: 4
Recovery: 3
Jump Height: 4
Mid-air Jump Height: 4
Descent Speed: 4
Weight: 2
-----------------------
Standard Attacks

neutral - Fury Cutter: Does a series of slash attacks. Tap the attack button to do a repeated number of attacks. Does up to 4% damage per hit.

f-tilt - Slash: Does a slash attack on the target. Can do up to 10% damage.

u-tilt - Uppercut: Sends its arm upwards to damage the foe. Does up to 8% damage.

d-tilt - Low Cut: Does a low angled slash. Does up to 8% damage and is a Meteor Smash move.
-----------------------
Smash Attacks

f-smash - Power Cut: Does two slash attacks, with the second slash being the most damaging. Does up to 15% damage uncharged, but can do up to 24% damage if fully charged.

u-smash - High Slash: Does a pose that's similar to Sheik's u-smash. Can deal up to 15% damage from the blades uncharged, but can do up to 24% damage if fully charged.

d-smash - Spin Slash: Does a slash attack in front and behind. Does up to 12% damage uncharged, but can do up to 21% damage if fully charged.
-----------------------
Aerial Attacks

n-air: It does a few aerial cut attacks to damage the foe. Deals up to 11% damage.

f-air: Slashes its target with both arms. Does up to 14% damage.

b-air: Does a kick from its back side. Does up to 10% damage.

u-air: Moves its arm upwards to strike the foe. Does up to 8% damage.

d-air: Slams the target with its feet. Sends foes flying sideways, so it's not a Meteor Smash move. Does up to 14% damage.
-----------------------
Special Attacks

standard - Night Slash: Charges up power to do a strong slash move. If fully charged, it can break through shields. Does up to 26% if fully charged.

side - Psycho Cut: Fires a blade made from psychic energy at the target. Does up to 12% damage at close range, but does 5% damage if it hits from a distance.

up - Sky Uppercut: Does an uppercut that gives it some ascension. Does up to 12% damage if the move hits correctly.

down - Feint: Negates the foe's shield, then does a counterattack to deal damage. Does up to 8% damage.
-----------------------
Grabs & Throws

grab: Attempts to grab with its arms.

attack: Does a weak smack with its arm. Does up to 2% damage.

f-throw: Spins once and hurls the foe forward. Does up to 8% damage.

b-throw: Imitates Mario's b-throw and then hurls the foe sideways. Does up to 10% damage.

u-throw: Throws the foe upwards and then slashes it. Does up to 10% damage.

d-throw: Slams the foe and slashes it. Does up to 10% damage.
-----------------------
Final Smash

Close Combat: Attacks its target with a series of slash attacks. The final blow is the most devastating. Deals up to 60% damage and can also deliver instant KOs depending on the stage size.
-----------------------
Battle Entrance

Appears out of nowhere.
-----------------------
Taunts

/\ taunt: Strikes a fighting pose with its arms spread out.

<> taunt: Meditates for a moment.

\/ taunt: Releases energy from its body after spreading out its arms.
-----------------------
Alternate Costumes

Recolors affect its head, chest, horns on its chest, and eyes. Its body is always colored white.

Default (Green)
Red (eye color and horns is purple)
Blue (eye color and horns is orange)
Yellow (eye color and horns is green)
Black (eye color and horns is red)
Pink (eye color and horns is light blue)
-----------------------
Side Notes

This Gallade will sound like it can speak human language. However, it's using telepathy to speak (just like Lucario). Also, it's male gendered (of course all Gallade are male anyway).
-----------------------
How to unlock

Clear Classic Mode with Gardevoir.

Have Gallade join your party in the Subspace Emissary. It officially joins your party after clearing stage 29 (Subspace) (see below for more).
-----------------------
Solid Snake Codec

Snake: This being looks pretty tough. Makes me wonder if I can handle its moves.

Otacon: Snake, Gallade is a tough physical fighter. It may not be as skilled with long range attacks as Gardevoir, but it's fast and knows a lot of unpredictable attacks.

Snake: Gardevoir has an alternate form? Your making my head hurt.

Otacon: Well technically, Gallade is Kirlia's alternate evolution. If a male Kirlia is exposed to the Dawn Stone, it'll become what you're fighting now.

Snake: Seems to make sense, but doesn't really help me much.

Otacon: All I can tell you is to beware of its powerful fighting attacks. If you get caught in one of its attack onslaughts, prepare to say good-bye.

Snake: ............
-----------------------
Subspace Emissary Role

*Event after stage 5, but before stage 6; takes place in The Forest*
Gallade first appears at the forest with Gardevoir at its side. While relaxing near a tree, they notice the Halberd and a bunch of Shadow Bugs appearing. Eventually they get surrounded by Primids. The two attempt to escape from the Primids, but were eventually ambushed by Wario.

Wario tries to turn either Gardevoir or Gallade into a trophy with his Dark Cannon, but the two escape the blast easily. However, swarms of Primids begin to gang up on Gardevoir. Wario takes that opportunity to get a perfect shot in. However, Gallade attempts to save Gardevoir by taking the Dark Cannon blast. Wario takes hold of the Gallade trophy and runs off. Angered that its friend was taken, Gardevoir wipes out the Primids near it and goes after Wario.

*Luigi's trophification*
After Dedede turned Luigi into a trophy, he waits for Wario to show up. In his possession are the Ness, Peach/Zelda, and Gallade trophy. He sees the Luigi trophy and attempts to take it, but the Waddle Dees swarm in and Dedede takes the four trophies for himself. Dedede is later pursued by Mario, Pit, Link, Yoshi, Kirby, and Gardevoir.

*At Dedede's castle*
Managing to get back to his castle, Dedede polishes the four trophies that he has. He then takes out four badges. The first three went on Luigi, Ness, and Gallade. For Peach/Zelda, Dedede realizes that he has the last badge, so he gives the last badge to Peach/Zelda. Unfortunately, the castle roof begins to cave in, and Bowser shows up to find the Peach/Zelda trophy. He finds it and runs off.

Not long after that event, the 6 pursuers reach the room that Dedede was in and notices a hole in the wall. Gardevoir was unaware that Gallade was buried in the debris.

*The badges activate*
Some time after Tabuu turned everyone into trophies, the badges begin to activate back at Dedede's castle. Luigi, Ness, and Gallade were revived and they saw the Dedede trophy lying around. They revive Dedede and he was happy that the badges worked. The four make an alliance and begin their job of reviving everyone else that was defeated by Tabuu.

At some point, Gallade finds the Gardevoir trophy, but a bunch of Shadow Bugs swarm right at it. Thus, a giant False Gardevoir was created.

After the False Gardevoir is defeated, Gallade revives the Gardevoir trophy left behind, and the two become happy that they're back together again. They later assist the other fighters in the fight against Tabuu.
-----------------------
 

RWB

Smash Ace
Joined
Jan 28, 2006
Messages
969
I have not finished him yet, but I will.

...I hate writing the background for non-OCs.
 

Patchi

Smash Rookie
Joined
Oct 13, 2007
Messages
16
Location
In a house, in a state, in a country, on a plantet
Bulleta (AKA Baby Bonnie Hood)

Bulleta Sprite Sheet


Bulleta is from the game series Vampire (Darkstalkers) and first appeared in the game's third installment, Vampire Saviour (Jedah's ****ation). Little is known about Bulleta and how she became a Darkstalker, but it IS known that she is a merciless bounty hunter, and can strike fear into the hearts of many a horrifiying creature. Bulleta is made to represent the evil mankind has in it's hearts, and what that evil can do. Bulleta looks like a sweet little girl, bt this hides her true killing nature, where her porcelain face turns demonic. her basket hides many things, like poisonous apples, mine bombs, missiles, knifes and machettes, many different guns, exploding dolls, grenades, and so much more. She has a butler, so her bounties must have paid off somewhat. Bulleta is also a very talented singer.

Gameplay: Bulleta has very strange gameplay. Most of her normal attacks are very innocent, like skipping, smelling a flower, and jumping out of fear from seeing a mole pop out at her. Then she has her demonic, bounty attacks, like slashing at you with knifes, shooting at you with bullets (she doesn't give a crap about the rules of no guns), and shoting about 50 missiles at you at once. She has great range with her demon attacks, and a lot of lag for her innocent attacks. Bulleta is aways surronded by butterflies you flutter around her, and her happy little puppy, Harry. But, they are both just for show..... Or ARE they?

Stats:
Power: 4.5/5 She has a lot of power in a little girl, but her flaws are her innocent attacks
Speed: 3/5 Takes her time skipping, but runs like lighting when she spots a bounty
Jump: Her jumps are on par with Peach on height and floatiness
Weight: 3/5 A very light character, but the dog weighs her down considerably.
Traction: 3/5 Normal traction despite her having all of these weapons.

A Tilts and Aireals:
A: Basket: A simple swipe with her basket. If A is pressed again shortly after using with attack, she with do a back swipe with the basket. This attack is very similar to the IC's A attack, but with mroe power anbd a tiny bit more knockback. Bulleta is very vunerable from behind during this attack.
Dash A: Machette Pendelum: Bulleta pulls out two knifes and swings her arms forward while lungin forward. The attacks pulls the opponent in for a combo (about 10 slashes) and on the final blow, Bulleta qiuckly pullls the knifes back and stabs the opponent in the chest, knocking them away. To make up for combos and knockback, this attack doesn't really do a lot of damage.
Side Tilt: Sneeze Reflex: Bulleta rears back for an attack, but instead, sneezes. While sneezing, she quickly lifts her leg up, kicking the opponent away. There's a LOT of lag at the beggining of the attack, but makes up for good power and retraction time. If used close up, the attack can actually blow you away quite a distance! Hey, why don't you cover you nose!?
Down Tilt: Flower Push: Bulleta smiles as she plays with a flower in the ground. Somehow, the flower does something to attack, for the opponent in sent flying similar to Peach's Down Tilt.
Up Tilt: Mole: Bulleta is about to do an attack when a mole pops out of the ground. Bulleta screams in fright as she knees upward, but then realized it's a mole and regain compusure. The mole also dissappears. The knee does moderate damge, but if the opponent is behind Bulleta when the attack initiates, the mole with send the opponents rocketing upwards.
Nair: Palm: Bulleta shoots her palm out in the air.... Okay. Um... The attack doesn't do a lot.... I wonder why? The attack is atually really good to start combos. So.... Maybe that's a.... LITTLE bit of an upside..... Kinda.
Fair: Basket Smash: Bulleta brings her basket over her head and swiftly swings it forward. The attack is a little laggy, but pays off in the end. The attack can become a meteor smash if timed right.
Uair: Explosion: Similar to Ivysaur's Uair, Bulleta puts her basket over her head. The basket opens and a fiery explosion (as big as Zelda's Uair) puffs out. The force of the explosion pushes Bulleta downwards.
Bair: Back Palm: Bulleta spins around and kicks out her leg while pushing her palm out at the same time. The attack first stuns you with the palm, the pushes you away with the kick.
Dair: Apple Core: Bulleta happily plays with the butterflies around her. Unbeknownst to her, an apple falls out of her basket. The apple explodes on impact with a character or the ground.

Smashes:
Forward Smash: Basket Bash: Bulleta pulls her basket back and spins it around. As it charges, the basket slowly gets larger and larger. When the attack is launched, Bulleta steps forward and smashes the the basket forward. The attack does more damage the longer you charge it (obviously).

Down Smash: B.B Doll: Bulleta pulls out her blanket covering her basket, and a small doll that looks similar to Bulleta pops out. When it's out it can thrown (similar to Bonsly) and when it flashes, it will explode after five more seconds. The longer the attack charges, the longer the doll will last.

Up Smash: Wine Bottle: Bulleta pulls out a wine bottle from her basket and starts to shake it rapidly. When the attack is unleashed, the cork pops open and flames burst out of the bottle. The more the attack is charged, the longer the flames will spurt.


Specials:
Neutral Special: Uzi Shot: This may probably be one of the most versatile (coughbrokencough) attacks in the whole game. Bulleta pulls out her famous Uzi from her basket. You can either push B (to make her shoot out a few bullets) or keep pressing B (to shoot continuously). Bulleta can run, duck, and jump while using this attack. She can also control the direction of the bullets. Similar to Mario's FLUDD, it will stay out for a while when she takes it out, and will eventually dissappear. In order to make this attack balanced, the range is not very far, and the ammo depletes fairly quickly. It will take 25 seconds to charge, and if you try to use the attack when it is still charging, the gun will only shoot small puffs of air.

Side Special: Bazooka Ransha: A missile shoots out of a secret compartment in Bulleta's basket. Bulleta cannot move around during this attack, but she can use it in the air and while ducking. On the ground, you can control the missile, and if you continuously press B, you can shoot a maximum of 3 missiles, but they cannot be controlled. You can also goes from standing to ducking and vice versa when shooting a barrage. In the air, a group of missiles shoot out, and collide in an big explosion in front of Bulleta (which also gives her a small boost in the air).

Up Special: Dokkan!
On the ground, flowers surround Bulleta, and she takes out a microphone. She sings, and a small shockwave occurs around her and stuns opponnets and breaks shields. In the air, a microphone is lowered from the sky and Bulleta grabs it. She sings and spins upwards and eventually jumps off. You can jump off at anytime during the air attack. There's a 1/8 chance during the ground move that Bulleta will do some rap, where the shockwave is larger than usual, and also has bigger knockback.


Down Special: Mine Bomb: This is annother attack that can be used in both in air, ground, and while ducking. On the ground normally, Bulleta does a curtsie and kicks out a small mine bomb onto the ground. This mine bomb acts as a normal mine (in which, if ANYONE steps on the mine, the mine will explode). While ducking, Bulleta does a roundhouse kick and kicks out the bomb a short distance away. In the Air, Bulleta spins violently (good for comboing) and kicks out the mine. The kick is very good for knockback.


Throws:
Grab: Grab: A normal grab where Bulleta reaches out and grabs the opponent. Once grabbed, Bulleta holds the opponent by the shoulders.
Grab Hit: Knee: A very simple knee. This attack does moderate damage, and comes out very quickly.
Forward Throw: Tornado: Bulleta skips in place while humming, and then a glint appeares in her eye. Bulleta tightly holds onto to her opponent's shoulders, and quickly spins AROUND the opponent, spinning them around. She soon releases them and backflips backwards. When the opponent hits the ground, they are dazed for a short while, leaving them open for an attack.
Up Throw: Fake Out: Bulleta holds out an apple with joy, then jumps back and lays on te ground, holding her head. When she jumps back, the apple explodes, blasting the opponent upward.
Back Throw: Slice and Dice: Bulleta slips to the opponent's back, and slits their neck. After sliting the neck of her victim, Bulleta flips backwards.
Down Throw: Shoot Down: Bulleta throwns her opponent to the ground. She puts her Uzi to their stomach and shoots rapidly, slowly sending her upwards while shooting.

Final Smash: Revenge: In the background, a sweet old woman dressed similar to Bulleta appears in the background. Bulleta starts to sob, then charges forward (crying) swinging knifes in her hands. The opponents caught in this phase have no hope of escaping. After slashing for the longest time, Bulleta start to smash rocks into the opponents heads. Meanwhile, her tears cause an ocean to appear under her. Soon after smashing the rocks, Bulleta grabs the opponents, lifts them over her head, and throw them into the ocean. They are shot out and off the stage, and any opponents not caught in the blast will be pushed away forcefully by big puffs of water. After shooting the opponents away, Bulleta claspes her hands together and smirks evilly.


Animations:
Dizzy: Bulleta eyes roll around, her shaking and swaying.
Sleeping: Bulleta lays on her stomach and puts her head in her arms, snoring.
Entrance: Bulleta skips onstage and giggles. Her eyes glint mischeviously while giggling. If Bulleta is facing Fox or Wolf in battle, she will appear lying on the ground, reading a book, and flips a page. She looks up, puts her book away and smirks at Fox/Wolf.
Taunts:
1. Bulleta takes out her uzi and (her finger in the finger holder) spins the gun around, and then grabs it at points it in front of her. If the Uzi is out of ammo/charging during this attack, the gun will fly out of her hands and bonks her head giving her 1% damage and goes into a dizzy state.
2. Bulleta kneels down and plays with Harry. If her gun is out of ammo/charging, a B.B. Doll wil walk out of her basket. Harry will run a fair distance away and will cover his head and cower in fright (he will do this during any explosion and during any final smash). The doll will explode damaging Bulleta and anyone around her.
3. Bulleta spins around and punches towards the screen.
Victory poses:
1. Bulleta pulls out two knives (one in each hand) and gets into a menacing pose, her arm bent and pointing at the screen.
2. Bulleta spins around and does a onw-two punch to the screen. Her animation goes straight to her punching again, and repeats one more time.
3. Bulleta takes out a cigar and lights it. An old bulter walks over to her and hands her a wad of money, bowing to her and saying something in japanese. Bulleta replies to him in japanese, smoking and looking through the money.
Losing Pose: Bulleta eyes become angry and are slightly hidden by her hood. She pulls out a piece of paper, and shows it to the screen. It is a Wanted poster, and the picture of the match winner is on the poster.

Alternate Colors/Costumes (NOTE: Harry's bow tie color matches Bulleta's outfit color and The Butterflies are the same color at Bulleta's hair)
Normal/Red: A Red outfit with Blonde hair.
Blue: A Blue outfit with Blonde hair.
Green: A Green outfit with Pink hair.
Other1: An Orange Outfit with Blonde hair.
Other2: A Dark Blue outfit with Blue hair.
Other3: A Pink outfit with Blonde hair.
Other4: A Purple outfit with Pink hair.
Secret 1: A secret outfit that is not available on the select screen that has a 1/32 chance of recieving it. A Gold outfit with Auburn hair. This outfit will boost Bulleta's speed and Jumping height/speed, but lowers her strength.
Secret 2: A secret outfit that is not available on the select screen that has a 1/32 chance of recieving it. A Black outfit with Silver hair. This outfit will boost Bulleta's strength and give her more ammo, but slows her down and lower jumping height/speed.

Music (NOTE: All Other Darkstalkers characters (HINTHINT) will have the same music (and stage) except each will have their own theme.)
Victory Theme: Darkstalkers Theme: A condensed version of the Darkstalkers theme.
Bulleta's Theme: Bulleta's theme from the game.
****ation: Jedah's ****ation opening.
Darkstalkers: The Darkstalkers DIC cartoon Opening.
Unlockable: Darkstalkers ver. 2: The Darkstalkers Anime Opening.

Stage: Vampire Gate (NOTE: 1:04) A dark, yet tranquil looking stage. It is a small island surrounded in darkness. there is actually nothign very intresting about this stage. There are no hazards. it is a small stage, and very visually appealing, similar to Melee's Fountain of Dreams. Depending on what time it is, the sun will shine three different colors.
8:01 PM - 5:00 AM = Dark Blue
5:01 AM - 11:59 AM = Orange
12:00 - 8:01 = Blood Red
 

TMS

Smash Journeyman
Joined
Oct 17, 2007
Messages
339
Location
Indiana
Professor Hershel Layton

"Critical thinking is the key to success!
Stats:
Power: 3
Defense: 4
Speed: 3
Recovery: 2
Jump: 2
Weight: 3

Standard Attacks:
AAA: Series of pokes. Right hand first, them left, then right again. 12%

Dash attack: Layton runs foward and swings his hand in a horizontal motion. 11%

Ftilt: Layton brings his right hand down in a chopping motion. 10%

Utilt. Layton swings an arc above his head with a finger. 9%

Dtilt: Layton crouches down and does a small kick. 12%

Smash Attacks
Fsmash: Layton grabs his hat hat swings it hard at the opponent. Uncharged it does 17%. Fully charged it can deal 35%.

Usmash: Layton grabs the rim of his hat with both hands and then lifts it up very fast. Does 15% uncharged, 28% at full charge.

Dsmash: Layton first takes hit hat off, jumps, and slams the hat into the ground. Does 20% uncharged, 35% charged.

Arial Attacks
Nair: He swings both of his arms 180 degrees. 10%

Fair: Points out his finger and thrusts it out at great speed. 14%

Bair: Layton brings out his left foot and does a short kick. 10%

Uair: Layton grabs his hat and motions an arc with it above his head. 12%

Dair: Layton brings his knees up to his waist and then thrusts them down at great force. This attack is a meteor smash and has a few frames of landing lag. 16%

Special moves:

Neutral B: Puzzle
This attack confronts you opponent with a puzzle and confuses them. The confusion lasts 3 seconds. The range is equal to that of Jigglypuff's Sing move.

Forward B: Laytonmobile
The Professor brings out his trusty car and rams it across the stage. Once the Professor uses it, he cannot get off unless he runs into an edge, so be careful! Does 15% damage per hit.

Up B: Hat Expansion
Layton's hat is suddenly filled with air! It flies straight up unless you command it to go a different direction. But be wary, this attack doesn't last forever, only about 3 seconds! It will also hurt you opponent if you hit them while the hat fills with air.

Down B: Another Puzzle Solved!
This one is a different one. The Professor needs to think to solve puzzles, right? Well, once the Professor does this attack once, it doesn't seem to do anything! But after a fourth time, it makes a large explosion! The range of this attack is equal to that of Donkey Kong's Final Smash.

Why exactly does it take four times to use the attack? Well, like I said, the Professor needs time to think!

Grabs and throws
Fthrow: The Professor grabs the opponent with one hand, grabs hit hat with another, and swing the opponent away as if the hat was a baseball bat! 10%

Bthrow: This one is almost identical to the Fthrow, only backwards. The only difference is that he hits them on the other side of his opponent. 11%

Uthrow: Layton throws his opponent up, and then throws hit hat up almost simultaneously! 10%

Dthrow: Layton jumps on his opponents back and then hits them three times with the rim of his hat. This attacks sends the opponent flying right and can be used for chaingrabs. 12% per throw.

Final Smash: The Villagers of St. Mystere
In Professor Layton and the Curious Village, the villagers of the town always pestered the Professor about solving puzzles. Well, this is what happens here too! Many villagers come onto the stage, confusing the opponent characters. The Professor can then do attacks to all of his sitting duck-like opponents, because the confusion lasts for 10 seconds!

Taunts:
Up taunt: He grabs out a notebook and pen and says, "Yes, that should do it."

Left/Right taunt: He points toward the screen and says "Critical thinking is the key to success!"

Down taunt: He folds his arms and says "Another puzzle solved!"

Victory poses
Victory Pose A: Layton fold his arms, nods two time and says "Another puzzle solved!"

Victory Pose B: The Professor takes his hat off and bows.

Alternate colors:
*All colors are variations of his hat, coat and pants.

Regular Brown
Red
Blue
Green
White
Black
 

Sun-Wukong

Smash Journeyman
Joined
Nov 24, 2007
Messages
392
Location
Eastern Kentucky
I'm working on a new character that's sure to make 2D purists *** in excitement. I'm not quite done yet, so while you're waiting I'll give you an Assist Trophy based on one of the coolest games on the Dreamcast and of all time!

Crazy Taxi Driver​


A simple but awesome Assist Trophy. A random driver from the first game appears in their respective taxi. To see the characters and their cars (and just to bask in the game's awesomeness), see this. If you don't feel like watching the video, here's a list of the characters.

* Axel
* BD Joe
* Gena
* Gus

They pick up the player who summoned them, and one of 7 great songs from the game plays in the background.

* Bad Religion - Inner Logic
* Bad Religion - Ten in 2010
* Bad Religion - Them and Us
* Bad Religion - Hear It
* The Offspring - All I Want
* The Offspring - Way Down the Line
* The Offspring - Change the World

Obviously, you can't control the taxi, it just wouldn't work. The taxi drives back and forth across the stage like Wario's Side B, but more powerful and completely automatic. Anyone who's played the game or even seen someone play it should not that a stages terrain won't hinder the driver's progress, so don't worry if you get it on Hyrule Temple. They continue to drive for 30 seconds of pure awesome until the character that summoned it gets out and the taxi drives away, off to find it's next fare.

Keep in mind that there's a 75% chance of the song that plays being "All I Want". Why? Well, that's pretty much how it works in the original game, so why change it.
 

Sun-Wukong

Smash Journeyman
Joined
Nov 24, 2007
Messages
392
Location
Eastern Kentucky
Old School Mario


~Miscellaneous~
Back Story: This is the original Mario. Before 3D, even before Yoshi’s Island. “Why?” you ask. Simple, the old games rocked. Hard.

Basic Info: A lot of his moves involve the various suits and power ups in Super Mario Bros. 3. However, a fair share of his moves are based on things from other games on the NES and SNES. On that note, he can glide after his Up B using the cape from Super Mario World. He stays animated (or should I say, sprited) like he was in the first Super Mario Bros. game when idle, then changes styles when he does certain attacks. i.e. when he does an attack involving Super Mario World, he turns into a set of Super Mario World sprites, etc.

Stats
Size: 6/10
Weight: 7/10
Walk Speed: 6/10
Dash Speed: 8/10
First Jump: 7/10
Second Jump: 8/10
Fall Speed: 7/10
Traction: 6/10
Priority: 7/10
Crouch: 6/10

Neutral A Combo: Two punches, the first one does 2% damage and the second one does 3% damage. The third attack is an uppercut like regular Mario’s Up B, but without the coins. It’s ¼ as powerful as the original move, but twice as quick. The relative consistency at which it hits the opponent is the same though.

Dash Attack: As he runs he sticks his foot forward like when he kicks a Koopa shell out of the way in the first and third game. The thing to remember is that the kick doesn’t rise up, he just sticks his foot in front of him while he’s running. It’s like Ganondorf’s forward tilt but weaker.

Push The Attack Button After Being knocked down to get back up: He does a push up, nothing fancy.

Push The Attack Button While hanging off a ledge to get back up: He pulls himself up and does a back flip onto the stage. Damage and knock back are minimal.

~Tilts~
Down Tilt: He bends forward to pluck a vegetable like in Super Mario Bros. 2. However, he bends over sideways towards his opponent rather than toward the screen like in the original game. Also, he doesn’t actually pluck one, that would make it to similar to Peach’s Down B. If he does it close enough to some one, his hands cause a small amount of damage to his opponent. It launches opponents into the air slightly.

Side Tilt: He pulls a turnip out of nowhere and swings it through the air in front of him. The hits scored by this attack are like those dealt by the flipper item in Melee.

Up Tilt: Like his Side Tilt, he swings a turnip through the air over his head backwards.

~Smashes~
Up Smash: He sits atop the cloud used to skip levels on the menu screen of SMB3 and rises up extremely fast, then falls through the cloud back onto the stage. High damage and knock back.

Side Smash: He slams down the hammer used to crush obstacles on the map screen in SMB3 in front of him. The damage and knock back is like the Mr. G&W’s Down Smash, but only on one side. Also, it takes him a little longer to pick it back up, which makes it a little lagy.

Down Smash: He slams his raccoon tail behind him like a beaver. Medium damage, but high upward knock back.

~Specials~
Neutral B: Hammer Toss- This ones is pretty self-explanatory. He tosses a hammer through the air much like one of regular Mario’s fireballs. As far as damage and knock back goes, It's about half of the Hammer Bros. Assist Trophy's.

Up B: Charge Jump- As seen in Super Mario Bros. 2 (Not the lost levels), Mario crouches for ½-3 seconds and jumps high into the air. The height of the jump depends on how long you charge the move.

Side B: Koopa Shell- He holds out a Koopa shell and kicks it out in front of him, it becomes an item afterwards. Only one can be on stage at a time.

Down B: Tanooki Statue- Mario turns to stone and falls fast. It’s basically Kirby’s Down B, but it’s a Tanooki statue.

Final Smash: Pow Block- Making a triumphant return from Mario Bros. on the arcade (and NES), it appears above Mario. He jumps up and hits it with his fist. The stage rumbles with great intensity like an earthquake, causing characters to trip uncontrollably and take constant damage like after being hit with Lip’s Stick, minus the flower. However, the damage is racked up twice as fast. Old School Mario doesn’t take any damage, but does trip like the other characters. The effect of this attack last for 10 seconds.

~Aerials~
Uair: He swings a turnip above him. Basically his Up Tilt in Midair.

Bair: He whips his raccoon tail up and down very fast like Yoshi’s Bair.

Nair: It’s like his Bair, but with his tail pointing down.

Fair: One of Birdo’s eggs appears beneath him and he rides forward on it a short distance, making it a good secondary recovery. The egg itself is the only part of the attack that does any damage, that being low with average knock back.

Dair: He swings a turnip below him. Basically his Uair upside down.

~Grab/Grab Attack/Throws~
Grab Attack: He whacks them with his raccoon tail. It’s like the fan, but only does 2% damage.

Up Throw: He sends them upward with the cloud from his Up Smash.

Forward Throw: He kicks his opponent forward like a Koopa Shell from his Side B.

Back Throw: He turns around and does his Forward Throw.

Down Throw: He does his Down B on top of the opponent he grabbed.

~Non-Attack Moves~
Entrance: He rides onto the stage on Yoshi-back. He jumps off and Yoshi continues to walk off stage.

Up Taunt: Plays the Warp Whistle. The classic tune plays in the background.

Side Taunt: Fireworks set off behind Mario’s back, and either a firework Star Man, Fire Flower, or Mushroom rises up from behind him.

Down Taunt: "Mama Mia!" Need I say more?

Victory Pose 1: Mario gives the player the “peace out” sign like when you beat a level in Super Mario World.
Victory Pose 2:
Victory Pose 3:

Defeat Pose: He jumps up and falls off the screen, like in the first game.

Victory Jingle: The tune that plays when you beat a level in Super Mario World.
 

Norm

Smash Lord
Joined
Oct 10, 2007
Messages
1,103
Location
Newfoundland, Canada
NNID
Sheldon86
Here it is the ultimate Yoshi move list (not really).

Now I know this wont count towards the contest but i thought of the move list and though it would make Yoshi actually likable rather than just like by obsessive Yoshi fans (note i Like yoshi i just don't like him in Smash Bros). Also this move set is based more on the Yoshi's Island, Yoshi.


-------------------------------------------------
Notes: Yoshi's second jump is shortened i've changed up his b move set so that he has an actual recovery move.


-------------------------------------------------

A Attacks

A: Jab
AA: Jab,Kick

A combo: Yoshi balances on his tail and does his flutter kick (same as any rapid attack)

Dash A: Running head Butt

> Tilt A: Head bash - yoshi drops his head and bucks it up hitting the oppenent

^ Tilt A: Yoshi does a hand stand and swings his tail around over head

V Tilt A: Yoshi angles his head down and butts toward the ground.

> Smash A: Yohis's current smash lean's back and delivers a savage head butt

^ Smash A: Swings his head in an arc over him

V Smash A: Spins his tail around himself


*~~~~~~~~~~~~~~~~~~~~~~~~~~~~~~~~~~~~~~~~~~~~~~~~~ ~~~~~~~~~~~~~~~~*

Aerial Attacks

Neutral A: Flutter Kick

> Tilt A: Head Butt

< Tilt A: Tail Swipe

^ Tilt A: Swings head in arc over himself

V Tilt A: Dropping Flutter Kick


*~~~~~~~~~~~~~~~~~~~~~~~~~~~~~~~~~~~~~~~~~~~~~~~~~ ~~~~~~~~~~~~~~~~*

B Attacks - This where the main change is i thought up what i believe to be a better move set not entirely different just altered so it's better

Neutral B: Tongue Lick - Like his neutral B he licks out and swallows what he was and ****s out an egg but the change is he can swallow items and characters and items when the egg come out it follows him much like in the game he can have 6 total the size of the item equals the size of the egg. Characters can still break out of the egg after a short time.


Side B: Egg toss - Like in the game when you press over b Yoshi picks up an egg the red X aimer comes up and moves up and down in an arc similar to the game you can move back and forth but you can't turn around. The size of the egg effects the toss.

Small egg - goes the farthest does the least damage.

Medium egg - Goes mid distance and mid damage.

Big egg - goes small distance does the most damage.

character eggs - goes the same distance as a Medium egg, the character in the egg takes damage if tossed Character eggs deal more damage than Medium eggs.

If hit Yoshi drops the egg.

^ B: Yoshi does a flutter jump into the air and then spins into a hip drop

V B: Yoshi does his egg roll like the side normal Side B.

Note: The major improvement in this is the egg toss and the fact that he has an actual recovery move


*~~~~~~~~~~~~~~~~~~~~~~~~~~~~~~~~~~~~~~~~~~~~~~~~~ ~~~~~~~~~~~~~~~~*

Grabs and Throws

Grab: Same as his current grab


Running Grab: Same as current


Grab Attack: Bite


> Throw: Spits the character forward


< Throw: Spits the character forward licks out his Tongue catches them and throws them backwards


^ Throw: Spits the character up and then jumps up and head-butts them (Dinosaurs like their head-butts)


V Throw: Spits the character into the air licks out his Tongue catches them and smashes them to the ground.


*~~~~~~~~~~~~~~~~~~~~~~~~~~~~~~~~~~~~~~~~~~~~~~~~~ ~~~~~~~~~~~~~~~~*

Taunts can be the same as current.

------------------------------------------------

Final Smash: Super Baby Mario

A stork flies over head and drops baby mario Yoshi catches him on his back a star falls and boom Yoshi turns into an egg and your running around as Super Baby Mario he doesn't have any attacks you just crash into people and do damage you can jump and glide with him though so even flyers are not safe from Baby Mario. At the end Mario goes back to normal and the Stork comes back to pick up his dropped cargo.

Note: I am going to do a little more fiddling with this when i get home i'm at work now.
 

quatripain

Smash Journeyman
Joined
Dec 3, 2007
Messages
241
Not for the thing but im gonna post clones
PART 1:N64 chars
waluigi-a mario clone with a tennis ball for nuetral b and down b is stomp attack
pacman-a kirby clone that doesnt copy
funky kong-a DK clone
black shadow-captain falcon clone(what'd you think it would be a freaking yoshi clone?)
yoshi with mario-a yoshi clone with baby mario ontop
raichu-pikachus ganon
leon-fox clone
archer from FE-link clone
poo-ness clone
chansey-jiggs
baby mario-luigi clone(baby luigi is an alt)
sylux-samus clone

next up is meele necomers
 

quatripain

Smash Journeyman
Joined
Dec 3, 2007
Messages
241
double post but its been a long time
PART 2:MEELE NEWCOMERS(no clones lol)
dry bowser-bowser
mario bros-IC
daisy-peach
toon zelda/tetra-do i need to say it
sothe-marth
deoxys-mewtwo
mrs game and wach-lol worthy
plusle and minun-pichu with down b switch(plusle is stronger with less recovery)
 
Joined
Jun 26, 2007
Messages
1,403
Location
koopa cape located at the end of rainbow road
Waluigi:

Ill only do the specials and fs cause thats all i can think of right now.


up special: Its gotta be his defensive move from mario power tennis (i forgot what its called). You know the one where he swims on the cout. Well in brawl the move has limited vertical recovery, but a disgustingly huge horizontal recovery.

side special: he throws a bomb or something (a cookie for anyone who remembers that reference).

neutral special: Does the waluigi spin (also from mario tennis) is a clone of metaknights neutral special.

down special: His stomp from his AT.

Final Smash: He gets that evil glint in his eye then suddenly starts throwning bom-ombs around him at a quick pace, not quite as powerful as regular bombs though.
 

quatripain

Smash Journeyman
Joined
Dec 3, 2007
Messages
241
PART 3:bRAWL NEWCOMERS
angel kirby-pit
fat mario-wario(lolz)
jessica alba-zss
roy-ike
may-PT(mudkip,grovile,blazekin)
dixie-diddy
zoro-mk
master chief-snake
porky-lucas
knuckles-sonic(neutral he jumps and punches)
king ganbowde-dedede
louie-tell me wat u think
riolu-lucario
rob 64-rob
 

BlueYoshiPinkShoes

Smash Apprentice
Joined
Dec 6, 2007
Messages
120
Location
Flint
Sakurai

A- Delay
Utilt-Delay
Dtilt-Delay
FTilt-Delay

FSmash- Delay
DSmash- Delay
USmash- Delay

Fair-Delay
Nair-Delay
Dair- Delay
Bair- Delay

Grab- He grapples, and screams BRAWL IS DELAYED

^B- Sakurai shouts, "I MUST RECOVER!" and than immediatley gets a Smash Ball, disabling your Wii forever
>B- Delay
DownB- Delay

Taunt- Delay


Sorry guys, had to do it!
I'ma chargin mah flame shield!
 

kingofwaddles

Smash Apprentice
Joined
Apr 27, 2008
Messages
80
i see no skull kid ) :
majoras mask style, that mask got sum wikkid powerz

edit: wouldnt scyther be bad ass?
 

Fawriel

Smash Master
Joined
Apr 2, 2007
Messages
4,245
Location
oblivion~
Sakurai

A- Delay
Utilt-Delay
Dtilt-Delay
FTilt-Delay

FSmash- Delay
DSmash- Delay
USmash- Delay

Fair-Delay
Nair-Delay
Dair- Delay
Bair- Delay

Grab- He grapples, and screams BRAWL IS DELAYED

^B- Sakurai shouts, "I MUST RECOVER!" and than immediatley gets a Smash Ball, disabling your Wii forever
>B- Delay
DownB- Delay

Taunt- Delay


Sorry guys, had to do it!
I'ma chargin mah flame shield!
Dude, that is so lacking!

Needs more "for the fans", "character balance", "up until now", "like a sport"... and exclamation marks. Lots of exclamation marks. And that doesn't even cover the ellipses!
 

The Dinkoman

Smash Lord
Joined
Apr 13, 2008
Messages
1,277
Location
Back!
SPYRO
http://z.about.com/d/gameboy/1/7/n/6/-/-/6204_08.jpg

Standard "B" attack: Fire or Ice depends on percentages (evens: fire, odds: ice)

Down "B" attack: does a back flip and lands on his horns

Side "B" attack: tail whip

Up "B" attack: Spins upwards then glides to desired place

Dash "B" attack: running head but

Standard "A" attack: hits with wings

Down "A" attack: spins around with wings out

Up "A"

sorry guys Im lazy... I'll finish this later
 

RWB

Smash Ace
Joined
Jan 28, 2006
Messages
969
The Dinkoman, SPYRO was part of the last contest and therefore can't be submitted as an entry for this one.


You can however make it just because you want too. But it's not gonna be part of the contest.
 

Chozo Link

Smash Rookie
Joined
Apr 24, 2008
Messages
7
Leerooy Jenkiins !!!!!!!!!

B) shout: summons monsters to kill him and his allies

Side B) agro: runs fast and causes his allies damage when he touches enemies

Up B) leap: makes Leroy Jenkins jump like an idiot and if he touches an enemy while doing this he will fall back down and take damage.

Down B) die: Leeroy Jenkins plays dead and is invincible but takes damage while doing this.
 

Steck

Smash Journeyman
Joined
Mar 23, 2008
Messages
238
Location
East Coast
Karl Marx- philosopher and founder of modern communism/socialism!

http://en.wikipedia.org/wiki/Karl_marx

He is just a bit taller then mario and weighs about as much as Link

A: stabs with sickle
AAA: Stabs with sickle twice then pounds with hammer
ftilt- hits opponent with a heavy book
dtilt- jabs with hammer
uptilt- Struggles with heavy book, swinging it over head
Running A- Dives at opponent and hits him with his giant beard

B- Hammersickle blast- Shoots a hammer and sickle shaped beam that can be directed tward opponent (like pk freeze)
FB- Socialist Rose- throws roses at opponent
UpB- Fist of Revolution- His right hand becomes giant and red, uppercuts opponent, extends so it can act as a tether recovery
Down B- What are Comrades for?- Uses a worker as a shield- stops projectiles

Nair- swings a red flag in a vertical circle
UpAir- Jabs with red flag upwards
FAir- needs to be pressed repeatedly- flaps two red flags like wings, hurts people they come in contact with
Bair- spins red flag in a horizontal circle
Dair- jabs with red flag downward

Hit grab- After grabbing someone he hits them with a hammer
Up throw- throws them upward about two character lengths, if B is pressed he can throw roses at them
Down throw- throws them down, if A is pressed he will body slam the opponent
Forward throw- throws the opponent a good distance, if A is pressed he will throw a iron gear at the opponent
backward throw- throws them a small distance, if A is pressed he will hit them with a Red Flag

Final Smash(s)-Final Smash 1- has a 90% chance of happening after he gets the smash ball- Communist Revolution- He leads a bunch of angry workers across the stage at a good speed, he returns to his original position after it ends, can be avoided by jumping, won't freeze when he is doing it
Final Smash 2- has a 10% chance of happening- Workers of the World Unite- A giant fist made of millions of workers comes up through the center of the stage- lasts about 15 seconds- hurts whoever it contacts (fire damage)- KOs whoever was under it while it was coming up - Marx is free to walk around the stage and over the fist

taunts
1- Faces the camera crosses the hammer and sickle and shouts "For the Workers!"
2- Crosses his arms with one hand stroking beard- he is thinking
3- Lifts fist up in the air and says "Show me your revolutions"

Alternate colors
Red- gets a red suit and a yellow tie
Green- Gets a Russian Military outfit
Blue- Gets a blue suit
Yellow- Yellow suit and red tie
Stone Marx- Turned completely grey
Young Marx- looses the beard , gets a afro and a tan
 

Chozo Link

Smash Rookie
Joined
Apr 24, 2008
Messages
7
Gir

B) explode: Charge up and release to make Gir explode (causes himself and close by enemies damage)

Side B) random phrase: Gir screams one of his hilarious phrases and makes people die

Up B) Tuna Jets: blast off like a rocket and then crash back down onto the stage

Down B) Doom Song: Sing the Doom song and cause anyone in the area to go insane and either go on a killing rampage or kill themselves.
 

Samurai_Sushi

Smash Rookie
Joined
Dec 2, 2007
Messages
9
Eh I'll try but neither of my characters were really popular for this game. Forgive me but I have no clue how to post pics or make a balanced character stat-wise.

Skull Kid

http://www.chrisgrahamart.com/images/skullkidposed_full.png

"What's with that stupid horse of yours?! It doesn't listen to a word that's said to it.... There's no point in riding a thing like that, so I did you a favor and got rid of it."

"I... I shall consume... consume... consume everything."

---------------------------

Stats

Power: 2
Defense: 3
Speed : 4
Recovery: 4
Jump Height: 4
Descent Speed: 3
Weight: 3

Standard Attacks

A - Skull Kid does a simple backhand
AA - Backhand followed by a slash attack (think like shadow claws's animation, he doesn't have claws but attacks in that style)
AAA - Backhand, claw, Roundhouse kick which deals minor shock damage
Dash Attack - Runs and does a cartweel, hitting 4 times with all 4 of his limbs

Tilts

Forward Tilt - Skull Kid does a simple side kick
Down Tilt - Skull Kid does a low leg kick
Up tilt - Skull kid lurches his mask upwards, hitting his opponent with the spikes

Smashes

Forward Smash - Side kick followed by backhand, deals shadow damage (or w/e GDorf does)
Down Smash - Swipes his wooden flute downwards in a circular motion (like most DSmashes)
Up smash - Swipes his fist upwards, dealing shadow damage

Aeriels

Forward Air -Does an average, forward kick which deals minor shock damage
Neutral Air- Spins midair, doing a claw attack first, followed by a backhand
Up Air - Flips upside down and does two quick upward kicks
Down Air - Grasps both hands together and smashes the opponent - Meteor smash
Back Air - Spins backwards and points his finger, causing explosive shadow damage, kind off around Samus's BackA Air strength

Specials

Neutral B - Pulls out his flute and shoots needles similar to Sheik, however his deals poison damage, just like the White Pikmin.
Forward B - Skull Kid unleashes a tentacle similar to the ones on Majora's Wrath, and it works in the same fashion as Zamus's Side B. Deals shadow damage
Down B - Curses the oponent, which causes random effects, such as slow motion, growth, shrinkage, tripping, turning them into a weak monster from their franchise, and more (EX: Mario to Goomba, Samus to Metroid, etc) has the range of about Mewtwo's Down B
Up B - Pulls out both Tatl & Tael in both hands who violently fly upwards diagnally.

Grabs

Shoots out tentacle, just like Borward B
Grab Attack - Headbutt
F/B throw - Throws opponent F/D/B/U, and then pierces them quickly with the other arm tentacle. Deals shadow damage. Can also work as a Zair when done in midair and can grab onto ledges.
D throw - Shoves the opponent to the ground and stomps several times, dealing shock damage.
U throw - Tosses the opponent in the air shoots several small energy balls, dealing shock damage.

Final Smash

End of Days
Skull Kid teleports to the background (like Lucario does for his FS) and lets out a wailing call, and the stage goes dim. The moon comes plummetting down, around half the speed of one of Lucas's PK starstorm attacks. There is fire engulfing the moon aswell. Every five seconds, when you click A, the moon will unleash a gravitational pull which can suck in fighters. Once a fighter has hit the moon, they will be stuck in it, kind of like Samus's FS. At the very end, the moon will release an explosion, which is the main finisher and then move out of the stage upwards.

Taunts

Up - SK whips out his flute and plays some of Saria's Song
Side - SK shakes the mask violently, releasing some small static, and glows the mask's eyes brightly
Down - Does his classic where he turns around and smacks his butt in your face (Whatever it was when you looked at him in the observatory in the game)

I know he wasn't the most popular character but I still like him. I think his specials need work but other than that I like it. I'd like to give some credit to some people in the thread Skullkid made, but I think it's over 50 pages long and I really don't want to look up the people who came up with the tentacle thing.

Stage

Clock Town - Probobly the area in MM were the biggest events take place. It will start on day 1 and go through the three day cycle. I'm thinking it the layout would be similar to Onett, but with more barriars and objects, and of course no cars. On the final day, the countdown will begin, and at midnight the moon falls with the clock tower ringing, but the giants will stop it and force it back into the air. The cycle will then restart. Some of the music that would play should be:
Stone Tower Temple Music - http://www.youtube.com/watch?v=fNDLoncWz30
3 Day cycle - http://www.youtube.com/watch?v=HW0DorzdOUk
http://www.youtube.com/watch?v=so8Nr6yzLtc&feature=related
http://www.youtube.com/watch?v=eH9PFo8hea0&feature=related
http://www.youtube.com/watch?v=nXdEIap7HB0&feature=related
(basically a remix of clock town day 1, 2, and 3, going along with the stages 3 day cycle, and finally the final hour music.)
Chase Theme - http://www.youtube.com/watch?v=Di7QvivIg70
Majora's Wrath Battle - http://www.youtube.com/watch?v=cHaCSR61Puw
 

bivunit94

Smash Journeyman
Joined
Feb 15, 2007
Messages
364
Location
Vault 101
WARNING! CHALLENGER APPROACHING!


Super-Eraser

History:
Super-Eraser is the star of the comic book series, "The Twisted Tales of Super-Eraser", which was both written and illustrated by yours truly. He has starred in over 15 comic books, which also include one crossover with the famed Super Mario Bros.

Story:
Out in the middle of nowhere, in a dark laboratory, a new project was under development. This project was known as Project E. The objective was to create an eraser that could not only erase pencil, but even objects or living beings. After countless experiments, a lone scientist, named Dr. Pencil, finally thought he had the solution. He had devised the formula perfectly, and it was time to test his hypothesis. He took two radioactive, electrically charged tongs and rewrote the DNA of the eraser. The eraser began to glow, and the power became too much for the containment facility to handle. The lab's systems overloaded, and soon, the eraser vanished into a huge, mind-blowing explosion. Everyone in the lab was able to evacuate except for Dr. Pencil, and of course the other test subjects in the lab. When the dust cleared, the eraser was no longer an ordinary eraser…he was Super-Eraser, savior of shavings, expeller of error, and the ultimate super-hero! He was granted the abilities of speech, sight, and hearing, along with super-human powers, like flight and laser beams. Also, when he is exposed to a rare Star Gem, he is turned into the golden-clad Ultra-Eraser for a short while. Super-Eraser went on to do battle with the now maniacal Dr. Pencil, who had also been altered by the fierce explosion in the lab. Also caught in the explosion were a piece of lined paper, a pencil eraser, and a test tube, which went on to become Super-Eraser's greatest allies. They were known as Super F, Penciltop Lad, and Super Hydrochloric Acid Man, respectively. The heroes turned the damaged laboratory into their HQ, and began to use their powers to protect the nearby Supply City. They have never let evil win the battle, and do not plan to do so in the future.

Statistics:
Power: **
Speed: ****
Jumping: ****
Weight: **
Range: ***
Fall Speed: **

Abilities:
Wall Jump? No
Wall Cling? No
Gliding? Yes
Crawling? No

Playstyle:
Super-Eraser is a very mixed bag. He floats around the stage, similar to Metaknight or Mewtwo's dashing animation. He is quite floaty and quick both on the ground and off. His falling speed is quite low, and his jumping is above average. However, his attacks are not too powerful, yet they are dished out rather quickly. Super-Eraser's range suffers a bit from his lack of limbs, but he makes up for it with the few projectiles he has up his sleeve.

Non-Attack Moves:
Entrance: A normal eraser is zapped with tongs, and then comes to life.
Taunt 1: Spins around once and says, "I…am Super-Eraser!"
Taunt 2: Gives a harsh glance and declares, "For justice!"
Taunt 3: Does a back flip and grunts.
Victory Pose 1: Turns his back to the screen and says darkly, "Evil…will never triumph."
Victory Pose 2: Has a headset on. He talks into it saying, "This is Super-Eraser…justice has been served."
Victory Pose 3: Flies onto the screen from far in the distance, and lands.
Losing Pose: Puts his head down and nods back and forth.
Stance: Stands halfway facing the screen, his cape lightly blowing in the wind. He has a serious expression on his face and looks around continously. After a while without moving, he'll put his head down and shut his eyes, fallen asleep.

Standard Attacks:
A: A forward, weak headbutt. (3%)
A,A: An up-and-down erasing motion with his head. (4% each hit)
A,A,A: Erasing motion continues. (See above)

Dash Attack: Like Snake's, except it gives Super-Eraser a bit more distance than his. (6%)
Get-Up Attack: Swipes his cape forward, blocking himself as he jumps back onto his "feet". (3%)
Edge Attack: Pulls himself up with his cape and does a short, forward aerial kick. (5%0

Ftilt: A weak, forward swipe with cape. (5%)
Dtilt: A ground-bound "kick" with the lower corner of his body. (3%)
Utilt: Small, upward jump attack. (10%)

Fsmash: Crouches and charges (think Green Missile) and goes forward a very short distance. Very powerful. (10-25%)
Dsmash: Breakdance-like ground spin. (like Wario's Dsmash) (15-20%)
Usmash: Looks up and releases a continuous red beam from his eyes that travels back and forth once in an arc-shaped motion. (15-30%)

Fair: Same as Falco's Fair. (5% each hit)
Dair: He flips upside-down and plummets straight to the ground. (25% MASSIVE KNOCKBACK)
Uair: Upwards aerial flipkick. (10%)
Bair: Flaps his cape behind him multiple times. (5% each hit)
Nair: Spins around in a somersault-like motion. (10%)

Grab: Wraps opponent in cape.
Grab Attack: Headbutt. (3%)
Fthrow: Drops opponent and blasts them forward with a powerful spray of eraser shavings from his mouth. (15%)
Dthrow: Puts opponent on ground, flips himself upside down and does and erasing motion on them with his head. (10%)
Uthrow: Throws opponent above his head and does a powerful upward headbutt. (20%)
Bthrow: Holds opponent in his cape and simply throws them backwards. (5%)

Specials:
Neutral B: Eraser Beam
Shoots a short, continuous red beam from his eyes. He can move during this attack, and end it with absolutely no lag at anytime. Think ROB's Final Smash, but much, much weaker and smaller. Damage: 3% each hit.

Side B: Shaving Breath
Super-Eraser takes a big breath, and then shoots out a long-ranged, fast-traveling stream of 3 eraser shavings. Each eraser shaving stops the opponent dead in their tracks. The way they travel is similar to Sheik's needles. This move has a decent amount of both starting and ending lag. Damage: 5-6% each shaving.

Up B: Eraser's Flight
Super-Erase uses his marvelous power of flight. Acts the same way as Pit's, with a few minor differences. Super-Eraser has more mobility and speed, but the move lasts a few seconds shorter. It also has less starting lag than Pit's. Damage: 0%

Down B: Erase Cape
Super-Eraser sticks his cape out in front of him. Any projectiles that hit the cape are instantly erased and give no damage to Super-Eraser at all. Super-Eraser can stay like this forever, however he can still be damaged by any melee attacks and projectiles can still hurt him from behind. There is little starting lag on this move, and decent ending lag as well. Damage: 0%

Final Smash: Ultra-Eraser
A Star Gem appears next to Super-Eraser and he grabs it. There is a flash of bright light, and when it clears, Ultra-Eraser is revealed. The way you control this is the same as Super Sonic, but Ultra-Eraser is much harder to control. To make up for this, one direct hit from him gives a whopping 35% damage, and extremely high knockback. Also, if you hit the special move button during this, he will send out a focused, straight beam that gives 14% damage to whoever it hits. The beam has little to no knockback though. The move lasts about 20 seconds.

Other:

Alt. Costumes:
  1. Standard: Red Mask, Red Cape, Pink Skin
  2. Green Mask, Green Cape, Pink Skin
  3. Blue Mask, Blue Cape, Pink Skin
  4. Dark Purple Mask, Dark Purple Cape, Grey Skin
  5. Hot Pink Mask, Hot Pink Cape, Pink Skin
Assist Trophy: Super Hydrochloric Acid Man
Super Hydrochloric Acid Man is a test tube with a bubbly green chemical inside of it, and a cork sealing it. He has a pair of eyes, a mouth, and a yellow "H" on his front, while he wears a yellow cape on his back. When he is summoned, he charges powerfully at the nearest opponent, pushing them along while coating them with hydrochloric acid and racking up 10% damage every few hits. After a short time, he shatters, disappearing with a circular blast of high-knockback glass, which does 25% damage.

Item: Tongs
A similar item to the ones that gave birth to Super-Eraser, the series' item is a pair of tongs. When picked up, you can poke at opponents with them, giving them 10% slash and shock damage. They wear out after ten slashes.

Boss: Dr. Pencil
Dr. Pencil is a tall, standard #2 pencil with super powers. He has dark, purple eyes and a jagged purple mouth that resembles that of a Jack O' Lantern. He stands with his point acting as a foot. He has four attacks. First, he will try to stab you with his point. This does decent damage and knockback. Secondly, he'll float horizontally and start spinning. Once he is spinning rapidly, he will shoot himself directly at you, going across the screen. If hit, you will be drilled repeatedly, each spin giving about 10% damage. He will repeat this a few times before ending the attack. His third attack is a simple body slam. Lastly, when his health gets down low, he will unleash his drawing attack. He will retreat to the background of the stage and quickly draw lines and shapes on the screen, causing damage to anyone unlucky enough to be caught in his drawing motion.

Stage: The Labs
This stage is basically a laboratory room. You fight atop a lab table. On the far left of the table is a beacon filled with acid that damages anyone who falls in. Past this is a walk-off ledge. In the middle of the stage there are a few test tubes in a holder. Two are empty, but one has acid inside. If you proceed to the right more, the table ends. There is a small gap after this, and all the way to the right is a vat of nuclear waste. This instantly drowns and kills anyway who is knocked into it. This stage is fun to play on with friends, but might not please the more competitive players.

Trophies:
[Super-Eraser],[Penciltop Lad],[Dr. Pencil],[Nega-Eraser],[Brain Drain],
[Super F],[Super Hydrochloric Acid Man],[Tongs],[Ultra-Eraser],[Star Gem],
[The Labs],[Locust Lad],[Mr. Peesnow]

Snake Codec Conversation:

Snake: Otacon, what's this thing I'm fighting?
Otacon: Well, Snake that's Super-Eraser.
Snake: An...eraser ? This should be easy.
Otacon: Not exactly. He's a genetically enhanced eraser.
Snake: And...?
Otacon: Let's just say he can do more than correct your homework, Snake.
Otacon: Some even believe that at full power, he can erase things from existance!
Snake: Sounds like a challenge.
Otacon: Be careful, Snake!


Wow, I worked hard on that...please let me know what you think, even if it's bad.


Sabrewulf238

Smash Hero
Joined
Oct 17, 2007
Messages
5,164
Location
Ireland
Greatclaymonkey said:
Rule 4-No Repeating Universes: more than three people from the same universe or what ever you want to call it. I want to try and get some diversity.
What makes you think characters from the same universe can't be different? That blows my series idea out of the water, I guess I'll have to divide the series in half and make two series/universes.

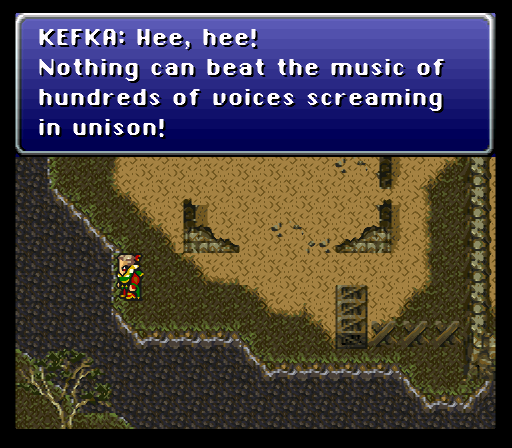
Anyway I'm going to post Kefka here since it wasn't entered before:


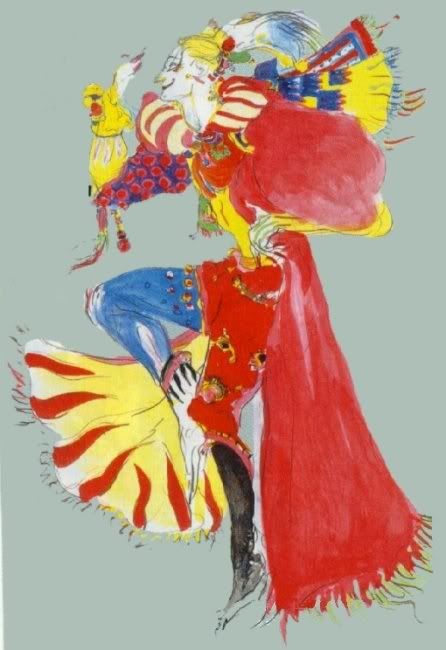
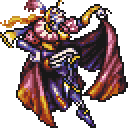
Kefka


Some images straight from Final Fantasy 6


A moves

A - Flicks hand forward
AA - Flicks hand forward and slaps downwards
AAA - Flicks hand forward, slaps down and knees foe.

B Moves

B Neutral
Hmm I'm still thinking about this one, the other ideas just came to me but not this one....I guess I'll sleep on it

B Right/left - Random spell
It's random wheater He'll use a thunder, blizzard or fire based attack. Depending on his damage percentage he'll use different strengths of these spells:

0% to 50% - Uses Fire, Thunder or Blizzard
51% to 100% - Uses Fira, Thundara or Blizzara
101% to 200% - Uses Firaga, Thundaga or Blizzaga
200% upwards - Ultima (I'm not even sure if he uses this in the game)

Fire based attacks will give foes a burn, the stronger the spell the longer the burn will last
Thunder based attacks will stun foes as if they had broken thier shield, the stronger the spell the longer the stun will last
Blizzard based attacks will freeze foes and again the strong the spell the longer they will be frozen.
Ultima isn't as devastating as it is in the final fantasy games. It does medium damage and slows foes movement speed.

B Down - Excited Stamp
Laughs and begins stamping his feet on the ground rapidly(and I mean REALLY fast). Any foe caught near Kefka will either:

1. Get stuck under Kefka's feet, theres no knockback but the damage you can get from the attack is very large.

2. Take low damage from the attack but has very high knockback.

B up - Reach for power
We all know(or maybe we don't.....check wikipedia) how much Kefka lusts for power. Which is why I always get this image of Kefka flying upwards reaching for something and I'm putting that into this move.

Kefka puts his right hand reaching upwards and soars upwards in an arc like movement. Sometimes Kefka will find what he's looking for....in the shape of a white glowing ball. When he grabs this(which appears on the path he takes when soaring upwards) he throws it down below him and the ball explodes causing medium damage and all characters caught will be stunned for a very short amount of time.

Grabs

Grab A - Finger Jab
Jabs one of his fingers into the foe. (Thats it really)

Grab up - You don't come down
Throws foe into the air, makes his hands flat and then when the foe comes back down he moves his hands up and down really fast.(He makes his hands.....like if you placed your hand flat on a desk then held it above your head in the same position)

Grab right/Left - Shock n Run
Puts on a shocked expression and pushes foe away. His expression changes to his default look(evil) and runs forward to knee the foe.

Grab Down -Meet the Ground
Presses foe against the ground and begans to headbutt them rapidly.

Final Smash - Magicite Storm
Kefka throws back his head and laughs. Suddenly a large amount of Magicite surrounds him on screen, then the magicite moves away from him and he jumps into an imperial magictic armor and it runs off the stage. Theres one other magitek armour for another character to escape. The magicite then begins the line itself along the sides of the screen (like a frame) and they tunr into various espers (shiva, ifrit, ramuh etc) and basically they begin shooting flames, ice, thunder all over the stage and there is no escape for the other two characters still on the stage.

Overall this attack does about 50-60% damage

Magicite


Imperial Magitek armour


Taunts

Up Taunt
Throws head back and laughs(look for a video about kefka on youtube, chances are you'll hear his laugh)

Right/Left Taunt
Points finger forward(while waving it a bit, like when edgeworth from ace attorney waggles his finger when he's pointing) and Says "Enee meanie minie moe which one should I hurt the most?

Down Taunt
Swipes arm forward and says "Run Away!! Run away!! It's your only hope" and laughs.

Losing Pose
You didn't think he'd clap would you? Instead he can be seen in the backround banging his head on the ground.

Victory Poses

Victory pose 1
Smiles evily and says "My victory was obvious from the very Begining"

Victory Pose 2
Laughs and a dark aura of magic surrounds him flinging the clapping losers into the distance.

Victory Pose 3
Presses face up against the screen and screams "Feeling the pressure!!?"

Stage - Doma Castle
In front of the castle(It's quite a basic castle, think of any castle you know and you're halfway there), there are five platforms, they are positioned in a triangle direction like this:


Just turn the picture upside down and you have the positioning of the platforms on Doma Castle.

The stage is on solid ground, they're just extra platforms. Between the castle and the battlefield is a river.(It surrounds the battlefield too). At the start of the battle the river is a crystal blue colour but after 1 minute the water turns purple and touching it will damage your character. In the background(but in front of the castle which is in the background you can see soldiers falling over after drinking the water. (Yes it's quite a depressing sight)

Music playing on Doma Castle Stage

Boss Battle
http://www.youtube.com/watch?v=T2SQwGog27Q

Kefka's Theme
http://www.youtube.com/watch?v=EmmZyTwVVqY (not sure what it sounds like because videos don't work for me on youtube anymore....but I'll trust the title)

Celes's Theme
http://www.youtube.com/watch?v=x3vcEd1PRb8 (Again I'm hoping this is the right one, I'll check on my wii internet channel later, if it's the right one you should hear a more calming more sad song then the previous two)

Assist Trophys

Moogles & Chocobos

A large crowd of moogles and chocobos stampede across the screen. Moogles latch on to any foe to come in contact with and keep attacking till they're flung off.(like pikmin) The chocobos simply stampede back and forth across the stage a few times.

Relm

Relm runs to the nearest foe and begins painting a picture of that character. When she is finished a completly white copy of that character appears to fight by your side. The copy character has about 50hp so they won't last forever in battle.

Shadow

Shadows a Ninja....so it's only natural he throws shruikens. He'll run back and forth across the stage(Very ninja-like running) throwing shruikens in random directions. A shruiken actually does more damage if it just nips the foe instead of hitting them fully. But if a shruiken does make direct contact it will have less damage but higher knockback.
 

cena_wolf

Smash Journeyman
Joined
Jul 30, 2005
Messages
271
Location
NintendoLand Castle, NintendoLand
Ok, so, I'm officially moving my Ginny Moveset into this thread.

I am hearby reserving this space for GINNY WEASLEY!


Ginny Weasley

Ginerva Molly Potter (née Weasley) (born 11 August, 1981 in Ottery St. Catchpole, Devon, England), more commonly known as "Ginny", is a British Witch, former Quidditch Player (most famous for her time with the Holyhead Harpies as a seeker), and Auror. Ginny was an active participant in the Second War against Lord Voldemort, particularly as a member of Dumbledore's Army and The Order of The Phoenix.

Ginerva Molly "Ginny" Potter
Born: 8.11.1981
Occupation: Pro Quidditch Player, Auror
Abilities: Witch, above-average power
Traits: Firey Personality
Family:
  • Mr. Prewett (maternal grandfather)
  • Mrs. Prewett (maternal grandmother)
  • Septimus Weasley (paternal grandfather)
  • Cedrella Weasley (paternal grandmother)
  • Arthur Weasley (father)
  • Molly Weasley (mother)
  • Bill Weasley (brother)
  • Charlie Weasley (brother)
  • Percy Weasley (brother)
  • Fred Weasley (brother) †
  • George Weasley (brother)
  • Ron Weasley (brother)
  • Harry Potter (future husband)
  • James Potter II (future son)
  • Albus Potter (future son)
  • Lily Potter (future daughter)
  • Fabian Prewett (maternal uncle)
  • Gideon Prewett (maternal uncle)
  • Bilius (uncle) †
  • Various nieces, nephews, and in-laws

History
(From The Harry Potter Wiki)
Ginny is the only daughter in the Weasley family, and lived at The Burrow during her childhood. Her room was on the third floor, overlooking the Weasley family's orchard, and was decorated with posters of The Weird Sisters and Gwenog Jones. Despite the majority of her brothers being keen Quidditch players, she wasn't allowed to play with them when she was a child. She then broke into the family broom shed from the age of six to take each of their brooms out in turn. She was never caught, and it only came to light eight years later when she tried out for the Gryffindor House team. Ginny had been looking forward to attending Hogwarts School of Witchcraft and Wizardry ever since her oldest brother, Bill started at the school.

On September 1st, 1991, she accompanied her mother to King's Cross station to see off her brothers as they departed for Hogwarts. Despite being too young to attend the school, she still begged her mother to let her go with them. While saying goodbye to her brothers, she found out that Harry Potter was on the train, and tried to get her mother to let her go on the train to see him. As the train pulled out, she began to cry, despite her brothers promising to send her loads of owls and a Hogwarts toilet seat. She ran along the platform after the train, half-laughing and half-crying, then stopped to wave them off.

When the Hogwarts Express returned to King's Cross in June, 1992, Ginny was with her mother to welcome her brothers back, and was again excited to see Harry, pointing him out to her mother as he came through the barrier between platforms nine and ten.

The summer of 1992
After seeing Harry at King's Cross, Ginny developed a crush on him, and talked about him all summer. When Harry arrived at The Burrow after being rescued from the Dursleys by Ron, Fred and George Weasley, she became extremely shy in his presence. On their first meeting, she came down to breakfast to find him sitting at the table. Startled, she retreated back to her room, and stared at Harry as he passed her bedroom on his way to Ron's. Ginny became extremely clumsy around Harry, and had a habit of knocking things over when he entered a room. On the day their Hogwarts letters arrived, she knocked over a porridge bowl with a loud clatter, and put her elbow in the butter dish when Harry asked her if she was starting at Hogwarts.

Ginny travelled to Diagon Alley with her family to buy her school supplies, and her excitement of finally going to Hogwarts was tempered by the fact that, due to the Weasley's financial situation, she would have to make do with a lot of second hand products, including her robes and books. In Flourish and Blotts, however, she became the owner of a brand new set of Gilderoy Lockhart's collected works. Harry, having been given them by Lockhart as a publicity stunt, gave them to her since he could afford a set of his own. With this act of kindness and recognition, Ginny finally spoke in front of Harry, standing up to Draco Malfoy when he started to insult him. Draco was with his father, Lucius, and the elder Malfoy took the opportunity to insult the Weasley family for associating with Muggles and — in his eyes — being a disgrace to wizards. During his tirade, he managed to slip Tom Riddle's diary into Ginny's battered second-hand copy of A Beginner's Guide to Transfiguration.

Tom Riddle's diary and the Chamber of Secrets
Ginny started Hogwarts on September 1st, 1992, and was sorted into Gryffindor. She discovered Tom Riddle's diary in amongst her school things, and began writing in it. To her amazement, the diary wrote back, and she started to confide in Tom Riddle's memory, writing about how her brothers teased her, how she had to come to school in with second-hand robes and books, and how she thought that Harry would never like her. She poured her heart out to the diary, and told Tom's memory all about Harry's story. At least once, Ginny went down towards Hagrid's hut, hoping to see Harry. She continued to write in the diary, and confided in it her deepest fears and darkest secrets. Her despair, however, served to strengthen Tom Riddle's memory, and he began to pour a little of his own soul back into her, and slowly started to possess her.

By the start of October, the signs of the possession began to show on Ginny. She started to look peaky, but a spate of colds in the school covered up the true nature. Her brother, Percy, forced her to take Pepperup Potion to get her over it. By the 31st of October, the memory of Tom Riddle was able to take full control of Ginny, and used her to open the Chamber of Secrets, releasing the basilisk and petrifying Argus Filch's cat, Mrs. Norris.

Following the attack, Ginny seemed upset over Mrs. Norris, and her brothers put it down to the fact that she was a cat-lover. She opened the Chamber of Secrets another two times, resulting in the petrification of Colin Creevey and Justin Finch-Fletchley. She became more visibly upset, and again, her brothers put it down to other causes - she sat next to Colin in Charms, and that she was worried that Ron might be expelled if he got in trouble. Fred and George attempted to cheer her up, but went about it the wrong way by leaping out at her from behind statues covered in fur or boils.

Ginny confided in the diary, however, that she thought she was going mad. She woke up with rooster feathers on her robes, and couldn't remember where she had been on Halloween and when Colin was attacked. She started to think that she was attacking everyone.

Along with her brothers, Ginny remained at Hogwarts over Christmas instead of going to visit her brother Bill in Egypt with her parents. She had started to become suspicious of the diary, and several weeks after Christmas attempted to get rid of it by throwing it down a toilet in Moaning Myrtle's bathroom.

Free of the diary, Ginny sent Harry an anonymous Singing Valentine on February 14th, 1993. He received it in front of her as she was going into a Charms lesson when he was accosted by a dwarf assigned to deliver it. During the delivery, Harry's bag was torn, and the contents were dropped onto the floor. To Ginny's horror, she saw that Harry now had the diary. To make matters worse, Draco Malfoy implied that she had sent Harry the Singing Valentine in front of everyone.

Fearful that Harry would discover her secrets and that she might be responsible for the attacks, she waited until the boy's dormitory was empty then ransacked Harry's belongings to recover the diary. Recovering it, Ginny was once more possessed by the memory of Tom Riddle, and opened the Chamber again, this time petrifying Hermione Granger and Penelope Clearwater.

Ginny tried to tell Harry and Ron what was going on, but couldn't get the words out, and she was interrupted by Percy. The memory of Tom Riddle was furious, however, as he had been planning on taking on Harry Potter himself after learning his story. Realizing that Harry would come to save Ginny, he made her write a farewell on a corridor wall, then enter the Chamber of Secrets to die. She had poured so much of her life into the diary that she couldn't fight Tom's possession of her, and the last thing she remembered as she lay down on the floor of the Chamber was Tom coming out of the diary. The memory of Tom Riddle had fed off her, gaining enough strength to become corporeal. As Tom grew stronger, the life in Ginny faded away until she slipped into an unconscious state.

Rescue from the Chamber
Ginny awoke in the Chamber to find that Harry had saved her and destroyed Riddle's diary by piercing it with a basilisk fang, and Ginny's vitality was restored to her. Tearful and scared, Ginny revealed what had happened to Harry, and was sure she was going to be expelled from school. After leaving the Chamber with the aid of the phoenix, Fawkes, Ginny was reunited with her parents in Dumbledore's office. Despite her fears, Dumbledore did not place the blame onto her, saying that older and wiser wizards had been duped by Lord Voldemort, and sent her to the hospital wing to recover from her ordeal with a mug of hot chocolate.

Following her ordeal, Ginny returned to normal, and was happy and relaxed for the rest of the summer term. At the end of the school year, she travelled back to King's Cross with her brothers, Harry, and Hermione on the Hogwarts Express, playing Exploding Snap.

Second year
Ginny traveled to Egypt in the summer of 1993 with the rest of her family to visit her brother Bill after her father won seven hundred galleons in the annual Daily Prophet Grand Prize Galleon Draw. She visited various tombs, but her mother wouldn't allow her to go in the last one because of all the mutant skeletons.

Ginny and her family stayed at the Leaky Cauldron the night before setting off to start her second year at Hogwarts, and she met Harry again. She was even more embarrassed in front of him than usual, muttering a hello but not looking at him. The next day, on Platform 9¾, she did meet his eyes as they shared a laugh over Percy's behavior when trying to impress his girlfriend.

On the Hogwarts Express, Ginny was separated from her brothers until the train stopped because of the Dementors. In the dark, she found her way into the compartment containing Harry, Hermione, Ron and Professor Lupin. When the Dementors came to the compartment, Ginny was one of the worst affected by them because of her experiences with Tom Riddle's diary. She went very pale and shook like mad, eventually sobbing and having to be comforted by Hermione.

Later in the year, after Harry fell from his broomstick in a Quidditch match, Ginny visited him in the hospital wing. She had made him a get well card that sang shrilly when opened, and presented it to him while blushing furiously.

Summer of 1994 and the Quidditch World Cup
In the summer of 1994, Ginny spent a lot of time with Hermione, who was staying at The Burrow before and after the Quidditch World Cup. They shared Ginny's room, and a tent at the World Cup, and solidified their growing friendship. Aware of her interest in Harry, Hermione advised Ginny to relax around him more and show him what she was really like since she could barely talk if he was in the same room as her. She even told Ginny to start going out with other people. Although she was still shy around Harry, who was also staying at The Burrow, she took Hermione's advice and was much more relaxed and spent time with him, Ron and Hermione. She attended the Quidditch World Cup with the majority of her family, and was shaken by the appearance of Death Eaters in the aftermath of the Irish victory.

Hogwarts and the Yule Ball
Ginny returned to Hogwarts, and maintained a good relationship with Hermione. Ginny was the only one that Hermione confided in when Viktor Krum asked her to the Yule Ball. As a third year, Ginny wasn't allowed to attend the ball unless asked by an older student. Neville Longbottom asked her to go, and she accepted since she was friends with him and it was a good opportunity. She comforted her brother, Ron, when he asked Fleur Delacour to the ball while under the influence of her part-Veela heritage.

However, she still harboured feelings for Harry, and was displeased to hear that he had asked Cho Chang to the ball. She was even more despondent when Ron suggested that Harry take her to the ball since he didn't have a date. Struggling with the idea that she could have gone with Harry, she nevertheless remained loyal to her agreement with Neville and attended the ball with him. At the ball, she met Michael Corner, and started dating him at the end of the year.

Number 12, Grimmauld Place
With the revelation that Lord Voldemort had returned, Ginny's parents became active members of the reconstituted Order of the Phoenix. As a result, the family was relocated to the Order's headquarters at Number 12, Grimmauld Place during the summer of 1995. Ginny stayed at headquarters, sharing a room with Hermione, and helped her mother to clean the place to make it a suitable base of operations. She learned the truth about Sirius Black, and met Nymphadora Tonks, who acted like a big sister towards her and Hermione. When Harry arrived at Number 12, Ginny was pleased to see Harry, and, due to her relationship with Michael Corner, was relaxed and composed in his presence, showing none of the embarrassment and shyness towards him that she had shown during previous meetings.

Due to her age, however, Ginny was never allowed into Order meetings, and, when Sirius insisted on filling Harry in on the Order and Voldemort, she was the only one banished from the meeting by her mother. However, Hermione - who was allowed to hear - told her everything anyway. When Harry was acquitted at his hearing for using magic in front of a Muggle while underage, she was extremely pleased, and sang and danced with Fred and George.

Dumbledore's Army
Ginny returned to Hogwarts in the September of 1995 with her brothers. During the train ride on the Hogwarts Express, Ginny introduced Harry and Neville to Luna Lovegood, a fourth year Ravenclaw. With the arrival of new Defence Against the Dark Arts teacher Dolores Umbridge and a theory-based course, Harry, Ron and Hermione decided to form a study group to teach practical defence spells. Ginny joined the group, bringing her boyfriend Michael Corner with her, and several other Ravenclaws. During the first official meeting of the group, she came up with the name for the group - Dumbledore's Army.

Quidditch and Saint Mungo's
Just before the Christmas of 1995, Harry, along with Fred and George, received a life-long Quidditch ban from Umbridge for attacking Draco Malfoy during their game against Slytherin. Ginny tried out for the team, and became the new seeker, although she admitted that Harry was better than her, and that she preferred playing Chaser and scoring goals.

What should have been a happy time for Ginny was marred by the attack on her father by Nagini just prior to Christmas. Along with her brothers and Harry, she was instantly sent to Number 12, Grimmauld Place to await news. Relieved to find out he was ok, Ginny saw him the next day in St Mungo's and hugged him immediately. Following the visit, she noticed that Harry started to distance himself from everyone. Learning that Harry had convinced himself that he had been possessed by Lord Voldemort and attacked her father, she railed on him for not seeking advice from the one person who had definitely been possessed by the Dark Lord. She quieted his fears by relaying her experiences to him, and admitted that she had never truly gotten over it.

She spent Christmas at Number 12, Grimmauld Place, and visited her father again on Christmas Day. During this time, along with Harry, Ron and Hermione, she found out the truth about Neville Longbottom's parents, and how they had been tortured into insanity by Bellatrix Lestrange using the Cruciatus Curse.

Returning to Hogwarts after Christmas, Ginny played her first game for the Gryffindor House team against Hufflepuff. Despite losing the match, Ginny captured the Golden Snitch, although she downplayed the achievement by saying it wasn't a fast snitch and that the opposing seeker, Summerby, had a cold. Probably as a result of her being more confident and relaxed in front of Harry, her willingness to stand up to him, and their shared experiences of being a seeker, Harry and Ginny grew closer. Around Easter, he confided in her that he needed to speak to Sirius, and she encouraged him to; she then went to Fred and George, and asked them to find a way for Harry to do so.

In May, Ginny played her second game of Quidditch for the Gryffindor team against Ravenclaw. She managed to capture the Golden Snitch, beating Cho Chang, and securing the Quidditch Cup for Gryffindor. In the aftermath of the victory, Michael Corner became very moody and sulked about the result. Because of his attitude, Ginny dumped him shortly after the match.

Battle of the Department of Mysteries
When Harry had a vision of Sirius being tortured in the Department of Mysteries by Voldemort in June, Ginny helped Ron and Hermione to convince him to check Grimmauld Place before setting off on a rescue attempt. With Harry and Hermione breaking into Umbridge's office, and Ron distracting her with news that Peeves was wrecking havoc, Ginny and Luna stopped people from entering the corridor leading to the office by saying that someone had flooded it with Garrotting Gas. Unfortunately for them, Umbridge saw through their ruse since she knew of Peeves's true location, and ordered her Inquisitorial Squad to round them up. Ginny was captured by Warrington, and when Neville saw what was happening and tried to help, he was caught as well.

Held in Umbridge's office with the threat of expulsion hanging over them, Harry and Hermione managed to lure Umbridge into the Forbidden Forest. While alone with the Inquisitorial Squad, Ginny, along with Ron, Luna and Neville, managed to break free using skills that they had acquired in their DA sessions. Ginny utilized the Bat Bogey Hex on Malfoy with great success, and they managed to regroup with Harry and Hermione.

Convinced that Sirius was in mortal danger, Harry resolved to travel to London and rescue him. After a lot of arguing, Ginny managed to persuade Harry that she, Neville and Luna should go as well. Flying Thestrals to London, they entered the Ministry of Magic using the visitor's entrance, and headed for the Department of Mysteries. In the Hall of Prophecies, they found no sign of Sirius, but Neville did find a prophecy pertaining to Harry. As Harry removed it from the shelf, the group was surrounded by Death Eaters led by Lucius Malfoy, and learned that Voldemort had used the connection between himself and Harry to lure him there to remove the prophecy. Ginny was threatened with torture by Bellatrix Lestrange, who wanted to use the Cruciatus Curse on her to force Harry to hand over the prophecy. Acting as one, the six of them fired off defensive spells to ward off the Death Eaters, and began running.

Ginny, along with Luna and Ron, were separated from the other three, and were chased through various rooms by Death Eaters. In one room containing a three-dimensional representation of the solar system, one of the Death Eaters grabbed Ginny by the ankle. Luna, using the Reductor Curse, blew up Pluto in the Death Eater's face, but the resulting explosion broke Ginny's ankle. She was helped to safety by Luna, but she was in shock and pale, and played no further part in the battle. Luckily, the Death Eaters were intent on grabbing the prophecy from Harry, and were soon distracted by the arrival of members of the Order of the Phoenix.

Following the battle, Ginny recovered in the hospital wing at Hogwarts where Madam Pomfrey fixed her ankle in a trice. On the train ride back to London, Ginny revealed that she had ditched Michael Corner. Ron told her to choose better next time, while casting Harry an oddly furtive look while doing so, to which she replied that she already had. She was now dating his classmate Dean Thomas.

Fifth year and the Battle of the Astronomy Tower
Ginny spent the summer of 1996 at The Burrow with Harry, Ron and Hermione. Despite having to put up with her brother Bill's new fiancé, Fleur Delacour (who she nicknamed "Phlegm"), she had a good summer practising Quidditch and planning to try out for the House team as a chaser. On a trip to Fred and George's new shop, Weasleys' Wizard Wheezes, in Diagon Alley, she bought her first pet, a purple Pygmy Puff that she named Arnold.

On September 1st, she met up with Dean Thomas on the Hogwarts Express, but was interrupted by fellow DA member Zacharias Smith, who attempted to get information out of her regarding what had happened that night in the Department of Mysteries. Tired of his continued questioning, she cursed him with the Bat Bogey Hex, and was seen by the new Potions teacher, Horace Slughorn. She feared detention, but Slughorn was so impressed that he invited her to take lunch with him as part of a select group of students he hoped to cultivate.

As term started, Ginny tried out for the Gryffindor House Quidditch team, of which Harry had been made the Captain. She excelled as a chaser, and was given a spot on the roster. Following one Quidditch practice, she and Dean were caught kissing by Harry and Ron. She and Ron had a blazing argument over her kissing Dean in public, but Ginny countered that Ron only saw it as wrong because he had never kissed anyone himself. The argument led to a frosty relationship between the two siblings.

During the first Quidditch match of the season against Slytherin, Ginny scored several goals to help the team to victory. Following the match, she purposely crashed her broomstick into the commentary box because the commentator, Zacharias Smith, had been making disparaging remarks about the Gryffindor team. Her feud with Ron over his attitude towards her and Dean was worsened when, in the aftermath of the victory, he began going out with Lavender Brown. Ginny branded her brother a "filthy hypocrite" for his actions.

Ginny spent Christmas at The Burrow with her family, and when she returned to Hogwarts, she seemed unenthusiastic about meeting up with Dean. After Ron was accidentally poisoned on his birthday, Ginny visited him in the hospital wing and they seemingly forgave each other. She and Harry discussed what had happened to Ron endlessly, trying to come up with an explanation for what had happened.

Ginny played in the Quidditch match against Hufflepuff, where Ron's bedridden status forced Harry to play reserve keeper Cormac McLaggen. During the match, McLaggan took one of the beater's clubs, and accidentally knocked a bludger directly at Harry. Harry was knocked unconscious and suffered a fractured skull. Dean, who had been playing as reserve chaser in place of Katie Bell, laughed about the incident, causing him and Ginny to have a row. Ginny subsequently visited Harry in the hospital wing.

Ginny and Dean were going through a rocky patch, and in April they finally split up when she accused Dean of always trying to help her through the portrait door into the Gryffindor common room. In reality, Harry had been wearing his invisibility cloak, and bumped into her while under the influence of Felix Felicis, but the incident finally brought an end to their already unstable relationship. Despite the break-up - or because of it - Ginny was still her usually bubbly self, and hung around with Harry and Ron more because of Quidditch training. She also defended Harry's use of the Sectumsempra spell against Draco Malfoy, even if it had earned him a detention that forced him to miss the last Quidditch match of the year.

With Harry in detention, Ginny took the role of seeker for the Gryffindor team for the final match against Ravenclaw. They won the match and the Quidditch cup, and, during the post-match celebrations, Ginny and Harry spontaneously kissed. Ginny, who had never really given up on Harry, was over the moon, as was he, as he had been harbouring feelings for her all year. Ginny and Harry started dating, although their time together was limited due to Harry's weekly detentions and Ginny's O.W.L. revisions.

In June, Death Eaters were let into the school by Draco Malfoy while Dumbledore and Harry were away searching for one of Lord Voldemort's Horcruxes. Harry, who had suspected that Draco was a Death Eater for a while, forewarned Ron and Hermione to be vigilant, and gave them the remains of the Felix Felicis potion. Ginny, along with Neville and Luna, joined Ron and Hermione in taking the potion, giving them extra luck in case they needed it. Along with Ron and Neville, Ginny staked out the entrance to the Room of Requirement, which Harry believed that Draco was using for some unknown purpose.

They watched Draco emerge from the room with the Hand of Glory; when he saw them, he threw Peruvian Instant Darkness Powder, blinding them and leading Death Eaters into Hogwarts via a vanishing cabinet. Fighting their way clear of the darkness, they met up with Remus Lupin and other members of the Order of the Phoenix that were patrolling the school under orders from Dumbledore.

In the ensuing battle Ginny duelled with Amycus Carrow, but suffered no injuries due to the Felix Felicis potion. In the aftermath, Ginny was shocked to find that her brother Bill had been badly injured and permanently scarred by Fenrir Greyback. She was able to lead Harry away from Dumbledore's body and up to the hospital wing, where Harry broke the news that Dumbledore had been killed by Severus Snape. She seemed to accept Bill and Fleur's relationship after watching her with him in the hospital wing.

Ginny took her O.W.L.s despite the tragedy that had occurred at the school, and attended Dumbledore's funeral. After the former headmaster had been laid to rest, Harry broke up with Ginny, fearing that if Voldemort knew how he felt about her, she would become a target and he could not knowingly endanger her life. Despite saying that she knew the risks involved in being with Harry, she accepted his decision, although she was very distraught.

With the death of Dumbledore, and the knowledge that the protective charm over Harry was due to end soon, the Weasley family and the Order of the Phoenix arranged to move him to protection of The Burrow. While most of her family went off to assist in the operation, Ginny stayed behind with her mother. As the team started to miss their portkeys, Ginny started to worry for their safety, and was only partially relieved to see Harry turn up at the Burrow. When George turned up with his ear cursed off, Ginny was shocked and helped her mother tend to him. Finally, as each member of her family returned, she relaxed, but the death of Mad-Eye Moody sobered the occasion.

Over the next few days, Ginny interacted little with Harry because of their split, despite her feelings towards him. However, while setting the table for dinner, Harry let slip that he, Ron and Hermione were about to set off on a quest to stop Voldemort. On Harry's seventeenth birthday, Ginny confessed that she didn't know what to give Harry since anything she gave him would have to be small enough for him to carry around. Instead, she kissed him like she never had before in the hopes of giving him something to remember her by. However, they were interrupted by Ron with Hermione in tow.

On August 1st, she attended the wedding of Bill and Fleur, serving in the capacity of bridesmaid. She wore a golden dress, and as the ceremony began, her Auntie Muriel remarked in a carrying whisper that her dress was far too low cut. Ginny responded to this by turning around and winking at Harry. During the reception, she danced with Luna, Lee Jordan, and others. Harry, disguised a member of the Weasley family, jealously warned Viktor Krum off of speaking with her when he remarked on Ginny's attractiveness, warning him that she had a big and jealous boyfriend. In the middle of the celebration, the guests were warned by Kingsley Shacklebolt's Patronus that the Ministry of Magic has fallen, that Rufus Scrimgeour was dead, and that the Death Eaters were coming. Although Death Eaters appeared and questioned the Weasley family, Ginny was unharmed. As part of the new Ministry's regime, Ginny was allowed to attend Hogwarts. However, while there, she joined up with Neville and Luna, and began an underground resistance against Snape's new regime. They openly defied authority and snuck out at night painting graffiti on the walls of the corridors - Dumbledore's Army, Still Recruiting. On one occasion, she attempted to steal the Sword of Gryffindor from Snape's office along with Neville and Luna, but was caught and punished. She served detention with Hagrid in the Forbidden Forest, and was banned from all trips to Hogsmeade. During the Easter holidays, Ginny was at The Burrow when the Weasley's were forced into hiding at Aunt Muriel's.

The Battle of Hogwarts
When Harry returned to Hogwarts in search of a Horcrux, he was met by Neville and the remnants of Dumbledore's Army that had stood up to Snape. Acting on a promise to Ginny, Neville sent word to her, via the enchanted galleons, that Harry was at the school. Ginny arrived with her brothers and Lee Jordan on the understanding that a battle was about to be fought.

As more members of Dumbledore's Army and the Order of the Phoenix arrived for battle, Mr and Mrs Weasley forbade their daughter to take part in the fighting since she was underage. Ginny argued against it, not wanting to leave when her whole family would be fighting and wait at home for news. Lupin offered a compromise; Ginny would stay in the Room of Requirement so as to be on the scene, but not involved in the fighting. Although she didn't like it, she agreed.

During the battle, Harry needed the Room of Requirement to change form in order to retrieve Rowena Ravenclaw's Diadem. He asked Ginny to leave the room, on the proviso that she would re-enter it once he had completed his task. Freed of her sanctuary, Ginny joined the battle. After the initial fighting, Lord Voldemort called a temporary truce to allow the combatants to retrieve their dead, and for Harry to give himself up to avoid further killing. Ginny was shocked and heartbroken by the death of her brother, Fred, and was comforted by Hermione. She later assisted in the recovery of the wounded outside the castle. When Harry passed her on his way to face Voldemort in the Forbidden Forest under the Invisibility Cloak, she was comforting a girl wounded in the battle. Though she sensed something was there, she and Harry had no contact.

When the seemingly lifeless body of Harry was presented to the defenders of Hogwarts by Voldemort, Ginny could not believe it. However, his apparent death spurred the defenders on, and Neville took up the Sword of Gryffindor and beheaded Nagini. With the battle rejoined, Ginny, along with Luna and Hermione, duelled with Bellatrix. Just as a Killing Curse missed her by inches, her mother took up the fight and killed the woman who had threatened her daughter. Ginny was overjoyed to find Harry still alive, and watched as he duelled and finally defeated Lord Voldemort in the Great Hall.


<Everything past this did not happen yet (in the SSBB canon).>​

<This depiction of Ginny is the Ginny from 1998, when she would be approximately 17 years old. As Ginny is a canon character in NintendoLand, she will be included in that canon, but will get a new symbol. Also, in this canon (SPOILER ALERT), Tonks is not dead.>

After the war
After the end of the Second War, Ginny and Harry rekindled their romance. Ginny became a celebrated Quidditch player for the Holyhead Harpies for several years, and married Harry at some point. She then retired and had a family with Harry which produced two children; James Sirius and Albus Severus.

Unknown to the public, Ginny became an Auror like her husbuand Harry. She was part of the Auror graduating class of 2004, alongside Alexis McGuiness. The two were very good friends, and she was puzzled at her sudden disappearance.

Persephone
Ginny was one of the threats that Persephone, NintendoLand Queen Katarina Sindel's alterego, viewed as worthy of capture. At the Battle of the Ministry, King Cena of NintendoLand and Yoshi help rescure her alongside Tonks. Ginny participated as leader of Grey Team at the Battle at Twilight's End.

After the war, she left for England, where she and Harry would be blessed with a little girl, Lily Luna.

Moveset
All directional input assumes a player facing left.
Strength: ****
Speed: ****
Jump: ***
Recovery: ***
Weight: **
Traction: **
Final Smash: *****

Since Ginny is considered a powerhouse by her peers (and grudgingly by her brothers), her spells in SSBB have to be just as powerful, right? Well, duh!

However, there aren't much incidents of her actually dueling (the wizard term for fighting) so she might actually have some physical attacks, too! I mean, she did have 6 brothers growing up...

Therefore, most of her tilts will be physical attacks, while her smashes, specials, throws, and Final Smash will be spells.

Standard Attacks
While Standing A, A, A - Spark - 4%, 4%, 9% - MinKB (first 2 hits), Mod KB
Ginny punches left, then right, before stabbing forward with her wand. A spark eminates from it, increasing the hitbox.

While Dashing A - Lioness - 11%, 8% - Mod KB, Mod KB
Ginny dives forward and rolls upon hitting the ground. The roll counts as an attack as well.

While Standing > (<) A - Power Heel - 15% - Mod KB
Ginny does a spinning heel kick.

While Standing ^A - Stupefy - 13% - Min-Mod KB
Ginny does a Stunner Spell upward.

While Standing vA - Lumos Maxima - 10% - Min KB
Ginny executes a Light spell downward, creating a spark. The majority of her lower half is the hitbox.

While Standing Smash > (<) A - Bombarda - 20-45%, MajKB
CS: Ginny holds her wand above her right breast.
Ginny points her wand forward. A huge blast explodes from it. It has a bit of a slow startup, though, kinda like Snake's FSmash, but not as slow.

While Standing Smash ^A - Flipendo Maxima - 12-28% - Min-MajKB (Tripping)
CS: Ginny bends slightly while holding her wand to her leg.
Ginny slashes upward with her wand, creating a wave of energy. Anyone hit by the wave (not the actual hitbox) will be tripped.

While Standing Smash vA - Aguamenti - 19-31% - Maj KB
CS: Ginny holds her wand above her head.
Ginny points downwards, launching a wave of water.

Aerials
While In Air A - Protergo - 2-12% - Min-ModKB
Ginny creates a wall of energy around herself, hurting people. For a few frames, the attack can reflect projectiles.

While in Air >A - Weasel's Elbow - 14% - ModKB
Ginny elbows forward.

While in Air <A - Flame Wheel - 15% - Mod KB (Spike)
Ginny backflip kicks. Spike if hit by foot.

While in Air ^A - Lioness Fury - 17% - Mod-MaxKB
Ginny, while still upright, kicks upward, much like Peach's UAir.

While in Air vA - Divebomb - 20% - Mod-MaxKB
Ginny summons her broom, gets on, and divebombs downwards. Auto DI downward until contact.

Specials
While Standing/While in Air B - Reducto - 20-30% - Mod-MaxKB
Ginny shoots a Reductor Curse forward that explodes on impact. Possible to hold. Holding increases distance, damage, and blast radius. Possible to use during Glide State. Possible to angle.

While Standing/While in Air > (<) B - Inpedimenta - 10-20% - No KB
Ginny shoots an Inpediment jinx (in the form of a blue whip the length of 3 standard character models). When it hits, it latches onto the opponent, wraps around them, spins them, then causes them to enter Shield Stun State. Possible to tether recover in WiA.

While Standing/While in Air ^B - Apparition - 5% - MinKB
Ginny apparates based on directional input. When she reappears, she jumps on her broom and enters Glide State.

While Standing/While in Air vB - Expecto Patronum - No Damage - Mod-MaxKB
Ginny unleashes her Patronus, a horse. The initial summon unleashes a burst of positive energy from Ginny. Control input determines where the Patronus flies. This attack deals no damage, only pushback. If Ginny is hit during this attack, the Patronus fades away. Shielding will cause the same effect.

Throws
While Standing/While Dashing L(R)+A (Z) - Accio - n/a - n/a
Ginny does a Summoning Charm, which grabs enemies at a short range beyond her predicted reach. Enter Grab State.

During Grab State A - Bat-Bogey Hex - 1-2% - n/a
Ginny causes a bat to appear, biting her opponent. Maintain Grab State.

During Grab State > - Flippendo - 10% - ModKB
Ginny uses her wand to shoot her opponent forward, flipping them.

During Grab State < - Wingardium Leviosa - 15% - Mod-MaxKB
Ginny casts a Levitation Charm to lift her opponent above her, behind her, and launches them.

During Grab State ^ - Levicorpus - 13% - Mod-MaxKB
Ginny casts the Levicorpus jinx to lift the opponent above her, spins, and uses a Reductor Curse to launch them upwards.

During Grab State v - Petrificus Totalus - 14% - ModKB
Ginny uses a Full-Body Bind Curse on her opponent; after they fall, Ginny stomps of them.

Final Smash: Reducto Maxima
Ginny jumps on her broom and flies off-screen, returns in the background, fies through the center of the main platform (above it, not through the actual platform. As she passes the stage, she shouts "Reducto...MAXIMA!", shooting an Enhanced Reductor Curse at the center of the stage. The Curse explodes, creating a blast radius the size of Final Destination. All within the blast radius take multihit damage, similar to a Smart Bomb's explosion, with one last hit for MaxKB. Ginny returns to the stage from the top of the screen.

Taunts
While Standing Dpad ^
Ginny whips some hair from her face and says "I'm stronger than I look!"

While Standing Dpand < (>)
Ginny punches the air, poses, and shouts "Dumbledore's Army! Still Recruiting!"

While Standing Dpad V
Ginny puts her hands together to her chest, closes her eyes, and says "Harry..." softly.

Win Poses
  • Ginny walks forward, stops, and smiles.
  • Ginny smiles and looks in wonder as her Horse Patronus prances around her.
  • Ginny flies in on her broom, both legs hanging on one side and waves while saying "That was intense! Good Quidditch practice!"
  • Ginny looks in shocked awe as she emmits poweful magic from her wand.

Costumes
Wario shares something in common with Ginny. No, it's not their immese strength or their affinity for Garlic (Ginny hates the stuff, BTW); they both have 2 costumes!


Her Hogwarts Uniform (minus the sweater...)


...and her Christmas 1995 outfit!

Here's a breakdown of her costume colors.

Hogwarts Uniform
Color choices are most apparent in the color of the tie and the color of the skirt (which, except for the Hogwarts Default Black, is plad).
- Gryffindor Red/Gold (Default, RedTeam, Uniform Default)
- Ravenclaw Blue/Bronze (BlueTeam)
- Slytherin Green/Sliver (GreenTeam)
- Hufflepuff Yellow/Black
- Hogwarts Default Black
- Gryffindor Red/Gold w/Hogwarts Sweater (shown above)


Muggle (Casual)
- Green Sweater/Orange Undershirt (Casual Default, shown above)
- Red Sweater/Pink Undershirt (RedTeam)
- Blue Sweater/Light Blue Undershirt (BlueTeam)
- Green Sweater/Lime Undershirt (GreenTeam)
- Black Sweater/Grey Undershirt, Black Hair
- White Sweater/Blue Undershirt, Blonde Hair


That's it for now! I might add stage data and music soon.
 

Sun-Wukong

Smash Journeyman
Joined
Nov 24, 2007
Messages
392
Location
Eastern Kentucky
I have a question for GreatClayMonkey. I was just wondering if the fake Dojo you make will also include the items, stages and assist trophies we submit.
 

BlueYoshiPinkShoes

Smash Apprentice
Joined
Dec 6, 2007
Messages
120
Location
Flint
I suppose it's time for a real submission. and seeing as how IceClimbersUser1 never did quite show up with that Sora moveset, it's time for Sora to join the Brawl!

Sora


Sora, of the Kingdom Hearts series, joins the Brawl!
Biography
Sora, fifteen years old, originally hailed from Destiny Island. His time was well spent, as he spent it training with his friends Tidus, Wakka, Selphie, and his two closest, Riku and Kairi. While life on Destiny Island was easy, the gang dreamed of getting away, and had been working on a raft. One night, the islands are attacked by darkness and shadow creatures. Sora seeks out his friends, finding Riku, who disappears into darkness. At the same time, Sora obtains the Keyblade. The islands are destroyed, and Sora is left adrift. Meanwhile, King Mickey has left his world to deal with the increasing darkness and left instructions for mage Donald and knight Goofy to find the "key". Sora ends up in a place called Traverse Town, and the journey against evil would continue....

Stats
Speed- Sora is young and agile, and with the ability to dismiss and call forth the Keyblade at anytime, he has very little cumberance. Sora nears the speed of Sonic. Five out of Five stars. *****

Power
Sora wields the ultimate weapon, though it's strength is primarily against the Heartless and the Nobodies. Sora's enemies will not be Heartless or Nobodies, but normal people, hence, his strength will be hindered slightly. Four out of Five Stars. ****

Defense
Sora is not so much the master of defense, or magic. Defense is for Goofy and Magic is for Donald, so Sora's focus is mostly swordplay. Sora's defense suffers greatly. Two out of Five stars. **

Jumps
Sora has good jump height due to his high jump ability. About as high as Falco's. Five out of Five stars. Sora also has a glide, but unlike the others. Sora cannot angle his glide, but he glides quite quickly, with quite a rapid pace of falling. *****

Weight
Sora is more light than heavy, due to the fact of his being a young boy. Two out of Five stars. **

Traction
There is nothing spectacular about Sora's traction. Three out of Five Stars. ***

A Attacks, Tilts, and Aerials

Neutral A: Sora swings the Keyblade horizontally.
Neutral A combo: Sora Swings in a one two punch sort of way. Horizontal, Vertical, Vertical
Utilt: Sora Performs Upper slash, which knocks the opponent about the height of a Sora into the air.
Dtilt: Sora swings the Keyblade at the ground in a sweeping motion, tripping anyone who is hit by it.
Ftilt: Sora swings the Keyblade forward in a motion similar to Link's Ftilt. Simliar also to knockback and damage.
Nair: Sora spins the Keyblade around him, a simple aerial.
Fair: Sora brings the Keyblade down in front of him, hitting with the tip is beneficial.
Dair: Sora thrusts the Keyblade downwards with much force, not stopping even if he hits someone.
Bair: Sora's only spike. Sora thrusts the Keyblade backwards, and swings it around under him. The spike is at the tip of the blade as he brings it under him.

Smashes

Fsmash: Sora performs Guard Break, bouncing backwards, than lunging forward with all of his might. A powerful smash with good damage and knockback.
Dsmash: Sora Swings the Keyblade downward with all his might from about mid-low range, than brings it around to the back. Front hit does good damage with mediocre knockback, while back does good knockback with mediocre damage.
Usmash: Sora Performs Aerial Sweep, and spins upward in a sprial motion. It is a unique smash because it launches him into the air, but he falls back down with invincibility frames and no lag upon landing.

B Attacks
Neutral B: Ars Arcanum- Sora unleashes a fury of ground attacks, bashes on the head, and finsishes with a lunge straight through the opponent. Unlike Marth's dancing blade, it requires only three button pushes. One to start the combo, to use the bash command, and to finish with the lunge.

Forward B: Strike Raid- Sora hurls the Keyblade at the enemy, leaving them slightly stunned for about 1 second. If the B button is pushed in the right timing, the keyblade will appear in Sora's hand, and gives him another opportunity to throw it, this is called Raid. After three Raids are performed, Judgement becomes available, and Sora reels back, grabs the Keyblade with both hands, and prepares to hurl it with all of his might. Sora has the ability to charge Judgement, but it could give the enemy an opportunity to escape.

Down B: Explosion- Sora performs Explosion, a finishing move in Kingdom Hearts II. Sora points the Keyblade forward, creating 4 or 5 white circles of energy around him. After which these hurt enemies in a slightly weak multi-hit combo, the circles explode. This causes minimal damage and decent knockback.

Up B: Aerial Rush- Sora throws his Keyblade and chases after it grabbing it and striking with it. Similiar to Ike's Aether but with aiming capabilities of Extreme Speed from Lucario. Travels about as far as Aether. If the strike connects, it deals decent damage and good knockback.


Grabs

Sora's grabs are very simple, and linear. The only Grab worth mentioning is his Dthrow, in which he grabs, throws them on the ground, and sits on their chest. After he is seated, he slaps the victim in the face multiple times, chuckling in a feel-good manner.

Final Smash

Sora's Final Smash is, nothing unexpected, his Drive forms! These Last about 30 seconds. After grabbing the Smash Ball, Sora says one of two names. If you press the B button, than he shouts for "Donald!", but if you press the A button he shouts "Goofy!" If Sora shouts for Donald, than he enters

Valor Form: Valor Sora is a more agile, stronger version of Sora. After turning Valor, Donald comes and joins the Brawl! While Sora gains the ability to attack with Two Keyblades, he also gains much strength, and agility. Most of his Smashes can kill at mid to low 50's. All the while, Donald runs around casting a random multitude of spells, i.e, Blizzard, Fire, Thunder, Gravira, and Aero.

If Sora shouts for Goofy, than he enters

Wisdom Form: Wisdom Sora is a more magically inclined, and more willful Sora. After turning Wisdom, Goofy joins the Brawl. While Sora gains the ability to shoot projectiles, he also gains the ability to float. All of his specials are Vamped up. The projectiles are fired with the A button, and are about as strong as uncharged Aura balls from Lucario, and in random increments of five, a much more powerful ball, as strong as a fully charged Aura Ball, will appear. All the while, Goofy runs around in a manner similar to Gray Fox, bashing all competitors on screen with his shield.

A random occurence will happen at any time. Sora will turn into Anti-Sora. Anti-Sora is much lighter, takes much heavier damage, but almost all of his attacks stun, making for easy-to-do combos. Also, at random times, Sora will turn into Final Form. Final Sora can fly, and he does not have to hold any Keyblades, but rather they float around him orbitally, automatically hitting any enemies that approach him. Also, Even in the air, Sora can perform his ground attacks.

Alternate Colors: Sora's Alternate colors are as follows:

1. Sora's Kingdom Hearts I costume
2. Sora is in an Organization XIII robe and hood.
3. Sora is in his Endless River Costume
4. Sora is in his Halloween Town costume.
5. Sora is in his Tron costume.
5. What's this?! Sora suddenly becomes Roxas!

Quirks
Sora has many of what you would call "quirks". First, all of his costumes wield a Different Keyblade, although when in Valor/Final Form, the second Keyblade is always the Kingdom Key.

1. KHI Costume- Sora wields the Kingdom Key, which increases defense if Sora is above 120 percent. He Wields the Oblivion as his second for Drive Forms.
2. ORGXIII Costume- Sora Wields the Oblivion, which makes his offense a little stronger against Smash Balls. But only when attacking Smash Balls.
3. Retro Sora- Sora wields the Monochrome, which increases the effect of items.
4. Halloween Sora- Sora wields the Decisive Pumpkin, and after any 3 hit, non automatic, consecutive combo, a ten percent damage boost is added.
5. Tron Sora- Sora wields the Photon Debugger. Very Slight, and barely noticable, lightning damage is added to Sora's attacks.
6. Roxas- Roxas wields the Oathkeeper. This allows for an extra two seconds of Roxas' Drive Forms. Oblivion is the secondary Keyblade in this case.

Also, at random, instead of assistance from Donald and Goofy during his Final Smash, Sora's other allies may join instead! These are Simba, Beast, Mulan, Jack Sparrow, Auron, Timeless Mickey, Jack Skellington, and King Mickey. Each of these will respectively perform a different attack, and for those that have it, will perform their Limit Breaks.
 

cena_wolf

Smash Journeyman
Joined
Jul 30, 2005
Messages
271
Location
NintendoLand Castle, NintendoLand
Ok, so, I'm officially moving my Ginny Moveset into this thread.

I am hearby reserving this space for GINNY WEASLEY!


Ginny Weasley

Ginerva Molly Potter (née Weasley) (born 11 August, 1981 in Ottery St. Catchpole, Devon, England), more commonly known as "Ginny", is a British Witch, former Quidditch Player (most famous for her time with the Holyhead Harpies as a seeker), and Auror. Ginny was an active participant in the Second War against Lord Voldemort, particularly as a member of Dumbledore's Army and The Order of The Phoenix.

Ginerva Molly "Ginny" Potter
Born: 8.11.1981
Occupation: Pro Quidditch Player, Auror
Abilities: Witch, above-average power
Traits: Firey Personality
Family:
  • Mr. Prewett (maternal grandfather)
  • Mrs. Prewett (maternal grandmother)
  • Septimus Weasley (paternal grandfather)
  • Cedrella Weasley (paternal grandmother)
  • Arthur Weasley (father)
  • Molly Weasley (mother)
  • Bill Weasley (brother)
  • Charlie Weasley (brother)
  • Percy Weasley (brother)
  • Fred Weasley (brother) †
  • George Weasley (brother)
  • Ron Weasley (brother)
  • Harry Potter (future husband)
  • James Potter II (future son)
  • Albus Potter (future son)
  • Lily Potter (future daughter)
  • Fabian Prewett (maternal uncle)
  • Gideon Prewett (maternal uncle)
  • Bilius (uncle) †
  • Various nieces, nephews, and in-laws

History
(From The Harry Potter Wiki)
Ginny is the only daughter in the Weasley family, and lived at The Burrow during her childhood. Her room was on the third floor, overlooking the Weasley family's orchard, and was decorated with posters of The Weird Sisters and Gwenog Jones. Despite the majority of her brothers being keen Quidditch players, she wasn't allowed to play with them when she was a child. She then broke into the family broom shed from the age of six to take each of their brooms out in turn. She was never caught, and it only came to light eight years later when she tried out for the Gryffindor House team. Ginny had been looking forward to attending Hogwarts School of Witchcraft and Wizardry ever since her oldest brother, Bill started at the school.

On September 1st, 1991, she accompanied her mother to King's Cross station to see off her brothers as they departed for Hogwarts. Despite being too young to attend the school, she still begged her mother to let her go with them. While saying goodbye to her brothers, she found out that Harry Potter was on the train, and tried to get her mother to let her go on the train to see him. As the train pulled out, she began to cry, despite her brothers promising to send her loads of owls and a Hogwarts toilet seat. She ran along the platform after the train, half-laughing and half-crying, then stopped to wave them off.

When the Hogwarts Express returned to King's Cross in June, 1992, Ginny was with her mother to welcome her brothers back, and was again excited to see Harry, pointing him out to her mother as he came through the barrier between platforms nine and ten.

The summer of 1992
After seeing Harry at King's Cross, Ginny developed a crush on him, and talked about him all summer. When Harry arrived at The Burrow after being rescued from the Dursleys by Ron, Fred and George Weasley, she became extremely shy in his presence. On their first meeting, she came down to breakfast to find him sitting at the table. Startled, she retreated back to her room, and stared at Harry as he passed her bedroom on his way to Ron's. Ginny became extremely clumsy around Harry, and had a habit of knocking things over when he entered a room. On the day their Hogwarts letters arrived, she knocked over a porridge bowl with a loud clatter, and put her elbow in the butter dish when Harry asked her if she was starting at Hogwarts.

Ginny travelled to Diagon Alley with her family to buy her school supplies, and her excitement of finally going to Hogwarts was tempered by the fact that, due to the Weasley's financial situation, she would have to make do with a lot of second hand products, including her robes and books. In Flourish and Blotts, however, she became the owner of a brand new set of Gilderoy Lockhart's collected works. Harry, having been given them by Lockhart as a publicity stunt, gave them to her since he could afford a set of his own. With this act of kindness and recognition, Ginny finally spoke in front of Harry, standing up to Draco Malfoy when he started to insult him. Draco was with his father, Lucius, and the elder Malfoy took the opportunity to insult the Weasley family for associating with Muggles and — in his eyes — being a disgrace to wizards. During his tirade, he managed to slip Tom Riddle's diary into Ginny's battered second-hand copy of A Beginner's Guide to Transfiguration.

Tom Riddle's diary and the Chamber of Secrets
Ginny started Hogwarts on September 1st, 1992, and was sorted into Gryffindor. She discovered Tom Riddle's diary in amongst her school things, and began writing in it. To her amazement, the diary wrote back, and she started to confide in Tom Riddle's memory, writing about how her brothers teased her, how she had to come to school in with second-hand robes and books, and how she thought that Harry would never like her. She poured her heart out to the diary, and told Tom's memory all about Harry's story. At least once, Ginny went down towards Hagrid's hut, hoping to see Harry. She continued to write in the diary, and confided in it her deepest fears and darkest secrets. Her despair, however, served to strengthen Tom Riddle's memory, and he began to pour a little of his own soul back into her, and slowly started to possess her.

By the start of October, the signs of the possession began to show on Ginny. She started to look peaky, but a spate of colds in the school covered up the true nature. Her brother, Percy, forced her to take Pepperup Potion to get her over it. By the 31st of October, the memory of Tom Riddle was able to take full control of Ginny, and used her to open the Chamber of Secrets, releasing the basilisk and petrifying Argus Filch's cat, Mrs. Norris.

Following the attack, Ginny seemed upset over Mrs. Norris, and her brothers put it down to the fact that she was a cat-lover. She opened the Chamber of Secrets another two times, resulting in the petrification of Colin Creevey and Justin Finch-Fletchley. She became more visibly upset, and again, her brothers put it down to other causes - she sat next to Colin in Charms, and that she was worried that Ron might be expelled if he got in trouble. Fred and George attempted to cheer her up, but went about it the wrong way by leaping out at her from behind statues covered in fur or boils.

Ginny confided in the diary, however, that she thought she was going mad. She woke up with rooster feathers on her robes, and couldn't remember where she had been on Halloween and when Colin was attacked. She started to think that she was attacking everyone.

Along with her brothers, Ginny remained at Hogwarts over Christmas instead of going to visit her brother Bill in Egypt with her parents. She had started to become suspicious of the diary, and several weeks after Christmas attempted to get rid of it by throwing it down a toilet in Moaning Myrtle's bathroom.

Free of the diary, Ginny sent Harry an anonymous Singing Valentine on February 14th, 1993. He received it in front of her as she was going into a Charms lesson when he was accosted by a dwarf assigned to deliver it. During the delivery, Harry's bag was torn, and the contents were dropped onto the floor. To Ginny's horror, she saw that Harry now had the diary. To make matters worse, Draco Malfoy implied that she had sent Harry the Singing Valentine in front of everyone.

Fearful that Harry would discover her secrets and that she might be responsible for the attacks, she waited until the boy's dormitory was empty then ransacked Harry's belongings to recover the diary. Recovering it, Ginny was once more possessed by the memory of Tom Riddle, and opened the Chamber again, this time petrifying Hermione Granger and Penelope Clearwater.

Ginny tried to tell Harry and Ron what was going on, but couldn't get the words out, and she was interrupted by Percy. The memory of Tom Riddle was furious, however, as he had been planning on taking on Harry Potter himself after learning his story. Realizing that Harry would come to save Ginny, he made her write a farewell on a corridor wall, then enter the Chamber of Secrets to die. She had poured so much of her life into the diary that she couldn't fight Tom's possession of her, and the last thing she remembered as she lay down on the floor of the Chamber was Tom coming out of the diary. The memory of Tom Riddle had fed off her, gaining enough strength to become corporeal. As Tom grew stronger, the life in Ginny faded away until she slipped into an unconscious state.

Rescue from the Chamber
Ginny awoke in the Chamber to find that Harry had saved her and destroyed Riddle's diary by piercing it with a basilisk fang, and Ginny's vitality was restored to her. Tearful and scared, Ginny revealed what had happened to Harry, and was sure she was going to be expelled from school. After leaving the Chamber with the aid of the phoenix, Fawkes, Ginny was reunited with her parents in Dumbledore's office. Despite her fears, Dumbledore did not place the blame onto her, saying that older and wiser wizards had been duped by Lord Voldemort, and sent her to the hospital wing to recover from her ordeal with a mug of hot chocolate.

Following her ordeal, Ginny returned to normal, and was happy and relaxed for the rest of the summer term. At the end of the school year, she travelled back to King's Cross with her brothers, Harry, and Hermione on the Hogwarts Express, playing Exploding Snap.

Second year
Ginny traveled to Egypt in the summer of 1993 with the rest of her family to visit her brother Bill after her father won seven hundred galleons in the annual Daily Prophet Grand Prize Galleon Draw. She visited various tombs, but her mother wouldn't allow her to go in the last one because of all the mutant skeletons.

Ginny and her family stayed at the Leaky Cauldron the night before setting off to start her second year at Hogwarts, and she met Harry again. She was even more embarrassed in front of him than usual, muttering a hello but not looking at him. The next day, on Platform 9¾, she did meet his eyes as they shared a laugh over Percy's behavior when trying to impress his girlfriend.

On the Hogwarts Express, Ginny was separated from her brothers until the train stopped because of the Dementors. In the dark, she found her way into the compartment containing Harry, Hermione, Ron and Professor Lupin. When the Dementors came to the compartment, Ginny was one of the worst affected by them because of her experiences with Tom Riddle's diary. She went very pale and shook like mad, eventually sobbing and having to be comforted by Hermione.

Later in the year, after Harry fell from his broomstick in a Quidditch match, Ginny visited him in the hospital wing. She had made him a get well card that sang shrilly when opened, and presented it to him while blushing furiously.

Summer of 1994 and the Quidditch World Cup
In the summer of 1994, Ginny spent a lot of time with Hermione, who was staying at The Burrow before and after the Quidditch World Cup. They shared Ginny's room, and a tent at the World Cup, and solidified their growing friendship. Aware of her interest in Harry, Hermione advised Ginny to relax around him more and show him what she was really like since she could barely talk if he was in the same room as her. She even told Ginny to start going out with other people. Although she was still shy around Harry, who was also staying at The Burrow, she took Hermione's advice and was much more relaxed and spent time with him, Ron and Hermione. She attended the Quidditch World Cup with the majority of her family, and was shaken by the appearance of Death Eaters in the aftermath of the Irish victory.

Hogwarts and the Yule Ball
Ginny returned to Hogwarts, and maintained a good relationship with Hermione. Ginny was the only one that Hermione confided in when Viktor Krum asked her to the Yule Ball. As a third year, Ginny wasn't allowed to attend the ball unless asked by an older student. Neville Longbottom asked her to go, and she accepted since she was friends with him and it was a good opportunity. She comforted her brother, Ron, when he asked Fleur Delacour to the ball while under the influence of her part-Veela heritage.

However, she still harboured feelings for Harry, and was displeased to hear that he had asked Cho Chang to the ball. She was even more despondent when Ron suggested that Harry take her to the ball since he didn't have a date. Struggling with the idea that she could have gone with Harry, she nevertheless remained loyal to her agreement with Neville and attended the ball with him. At the ball, she met Michael Corner, and started dating him at the end of the year.

Number 12, Grimmauld Place
With the revelation that Lord Voldemort had returned, Ginny's parents became active members of the reconstituted Order of the Phoenix. As a result, the family was relocated to the Order's headquarters at Number 12, Grimmauld Place during the summer of 1995. Ginny stayed at headquarters, sharing a room with Hermione, and helped her mother to clean the place to make it a suitable base of operations. She learned the truth about Sirius Black, and met Nymphadora Tonks, who acted like a big sister towards her and Hermione. When Harry arrived at Number 12, Ginny was pleased to see Harry, and, due to her relationship with Michael Corner, was relaxed and composed in his presence, showing none of the embarrassment and shyness towards him that she had shown during previous meetings.

Due to her age, however, Ginny was never allowed into Order meetings, and, when Sirius insisted on filling Harry in on the Order and Voldemort, she was the only one banished from the meeting by her mother. However, Hermione - who was allowed to hear - told her everything anyway. When Harry was acquitted at his hearing for using magic in front of a Muggle while underage, she was extremely pleased, and sang and danced with Fred and George.

Dumbledore's Army
Ginny returned to Hogwarts in the September of 1995 with her brothers. During the train ride on the Hogwarts Express, Ginny introduced Harry and Neville to Luna Lovegood, a fourth year Ravenclaw. With the arrival of new Defence Against the Dark Arts teacher Dolores Umbridge and a theory-based course, Harry, Ron and Hermione decided to form a study group to teach practical defence spells. Ginny joined the group, bringing her boyfriend Michael Corner with her, and several other Ravenclaws. During the first official meeting of the group, she came up with the name for the group - Dumbledore's Army.

Quidditch and Saint Mungo's
Just before the Christmas of 1995, Harry, along with Fred and George, received a life-long Quidditch ban from Umbridge for attacking Draco Malfoy during their game against Slytherin. Ginny tried out for the team, and became the new seeker, although she admitted that Harry was better than her, and that she preferred playing Chaser and scoring goals.

What should have been a happy time for Ginny was marred by the attack on her father by Nagini just prior to Christmas. Along with her brothers and Harry, she was instantly sent to Number 12, Grimmauld Place to await news. Relieved to find out he was ok, Ginny saw him the next day in St Mungo's and hugged him immediately. Following the visit, she noticed that Harry started to distance himself from everyone. Learning that Harry had convinced himself that he had been possessed by Lord Voldemort and attacked her father, she railed on him for not seeking advice from the one person who had definitely been possessed by the Dark Lord. She quieted his fears by relaying her experiences to him, and admitted that she had never truly gotten over it.

She spent Christmas at Number 12, Grimmauld Place, and visited her father again on Christmas Day. During this time, along with Harry, Ron and Hermione, she found out the truth about Neville Longbottom's parents, and how they had been tortured into insanity by Bellatrix Lestrange using the Cruciatus Curse.

Returning to Hogwarts after Christmas, Ginny played her first game for the Gryffindor House team against Hufflepuff. Despite losing the match, Ginny captured the Golden Snitch, although she downplayed the achievement by saying it wasn't a fast snitch and that the opposing seeker, Summerby, had a cold. Probably as a result of her being more confident and relaxed in front of Harry, her willingness to stand up to him, and their shared experiences of being a seeker, Harry and Ginny grew closer. Around Easter, he confided in her that he needed to speak to Sirius, and she encouraged him to; she then went to Fred and George, and asked them to find a way for Harry to do so.

In May, Ginny played her second game of Quidditch for the Gryffindor team against Ravenclaw. She managed to capture the Golden Snitch, beating Cho Chang, and securing the Quidditch Cup for Gryffindor. In the aftermath of the victory, Michael Corner became very moody and sulked about the result. Because of his attitude, Ginny dumped him shortly after the match.

Battle of the Department of Mysteries
When Harry had a vision of Sirius being tortured in the Department of Mysteries by Voldemort in June, Ginny helped Ron and Hermione to convince him to check Grimmauld Place before setting off on a rescue attempt. With Harry and Hermione breaking into Umbridge's office, and Ron distracting her with news that Peeves was wrecking havoc, Ginny and Luna stopped people from entering the corridor leading to the office by saying that someone had flooded it with Garrotting Gas. Unfortunately for them, Umbridge saw through their ruse since she knew of Peeves's true location, and ordered her Inquisitorial Squad to round them up. Ginny was captured by Warrington, and when Neville saw what was happening and tried to help, he was caught as well.

Held in Umbridge's office with the threat of expulsion hanging over them, Harry and Hermione managed to lure Umbridge into the Forbidden Forest. While alone with the Inquisitorial Squad, Ginny, along with Ron, Luna and Neville, managed to break free using skills that they had acquired in their DA sessions. Ginny utilized the Bat Bogey Hex on Malfoy with great success, and they managed to regroup with Harry and Hermione.

Convinced that Sirius was in mortal danger, Harry resolved to travel to London and rescue him. After a lot of arguing, Ginny managed to persuade Harry that she, Neville and Luna should go as well. Flying Thestrals to London, they entered the Ministry of Magic using the visitor's entrance, and headed for the Department of Mysteries. In the Hall of Prophecies, they found no sign of Sirius, but Neville did find a prophecy pertaining to Harry. As Harry removed it from the shelf, the group was surrounded by Death Eaters led by Lucius Malfoy, and learned that Voldemort had used the connection between himself and Harry to lure him there to remove the prophecy. Ginny was threatened with torture by Bellatrix Lestrange, who wanted to use the Cruciatus Curse on her to force Harry to hand over the prophecy. Acting as one, the six of them fired off defensive spells to ward off the Death Eaters, and began running.

Ginny, along with Luna and Ron, were separated from the other three, and were chased through various rooms by Death Eaters. In one room containing a three-dimensional representation of the solar system, one of the Death Eaters grabbed Ginny by the ankle. Luna, using the Reductor Curse, blew up Pluto in the Death Eater's face, but the resulting explosion broke Ginny's ankle. She was helped to safety by Luna, but she was in shock and pale, and played no further part in the battle. Luckily, the Death Eaters were intent on grabbing the prophecy from Harry, and were soon distracted by the arrival of members of the Order of the Phoenix.

Following the battle, Ginny recovered in the hospital wing at Hogwarts where Madam Pomfrey fixed her ankle in a trice. On the train ride back to London, Ginny revealed that she had ditched Michael Corner. Ron told her to choose better next time, while casting Harry an oddly furtive look while doing so, to which she replied that she already had. She was now dating his classmate Dean Thomas.

Fifth year and the Battle of the Astronomy Tower
Ginny spent the summer of 1996 at The Burrow with Harry, Ron and Hermione. Despite having to put up with her brother Bill's new fiancé, Fleur Delacour (who she nicknamed "Phlegm"), she had a good summer practising Quidditch and planning to try out for the House team as a chaser. On a trip to Fred and George's new shop, Weasleys' Wizard Wheezes, in Diagon Alley, she bought her first pet, a purple Pygmy Puff that she named Arnold.

On September 1st, she met up with Dean Thomas on the Hogwarts Express, but was interrupted by fellow DA member Zacharias Smith, who attempted to get information out of her regarding what had happened that night in the Department of Mysteries. Tired of his continued questioning, she cursed him with the Bat Bogey Hex, and was seen by the new Potions teacher, Horace Slughorn. She feared detention, but Slughorn was so impressed that he invited her to take lunch with him as part of a select group of students he hoped to cultivate.

As term started, Ginny tried out for the Gryffindor House Quidditch team, of which Harry had been made the Captain. She excelled as a chaser, and was given a spot on the roster. Following one Quidditch practice, she and Dean were caught kissing by Harry and Ron. She and Ron had a blazing argument over her kissing Dean in public, but Ginny countered that Ron only saw it as wrong because he had never kissed anyone himself. The argument led to a frosty relationship between the two siblings.

During the first Quidditch match of the season against Slytherin, Ginny scored several goals to help the team to victory. Following the match, she purposely crashed her broomstick into the commentary box because the commentator, Zacharias Smith, had been making disparaging remarks about the Gryffindor team. Her feud with Ron over his attitude towards her and Dean was worsened when, in the aftermath of the victory, he began going out with Lavender Brown. Ginny branded her brother a "filthy hypocrite" for his actions.

Ginny spent Christmas at The Burrow with her family, and when she returned to Hogwarts, she seemed unenthusiastic about meeting up with Dean. After Ron was accidentally poisoned on his birthday, Ginny visited him in the hospital wing and they seemingly forgave each other. She and Harry discussed what had happened to Ron endlessly, trying to come up with an explanation for what had happened.

Ginny played in the Quidditch match against Hufflepuff, where Ron's bedridden status forced Harry to play reserve keeper Cormac McLaggen. During the match, McLaggan took one of the beater's clubs, and accidentally knocked a bludger directly at Harry. Harry was knocked unconscious and suffered a fractured skull. Dean, who had been playing as reserve chaser in place of Katie Bell, laughed about the incident, causing him and Ginny to have a row. Ginny subsequently visited Harry in the hospital wing.

Ginny and Dean were going through a rocky patch, and in April they finally split up when she accused Dean of always trying to help her through the portrait door into the Gryffindor common room. In reality, Harry had been wearing his invisibility cloak, and bumped into her while under the influence of Felix Felicis, but the incident finally brought an end to their already unstable relationship. Despite the break-up - or because of it - Ginny was still her usually bubbly self, and hung around with Harry and Ron more because of Quidditch training. She also defended Harry's use of the Sectumsempra spell against Draco Malfoy, even if it had earned him a detention that forced him to miss the last Quidditch match of the year.

With Harry in detention, Ginny took the role of seeker for the Gryffindor team for the final match against Ravenclaw. They won the match and the Quidditch cup, and, during the post-match celebrations, Ginny and Harry spontaneously kissed. Ginny, who had never really given up on Harry, was over the moon, as was he, as he had been harbouring feelings for her all year. Ginny and Harry started dating, although their time together was limited due to Harry's weekly detentions and Ginny's O.W.L. revisions.

In June, Death Eaters were let into the school by Draco Malfoy while Dumbledore and Harry were away searching for one of Lord Voldemort's Horcruxes. Harry, who had suspected that Draco was a Death Eater for a while, forewarned Ron and Hermione to be vigilant, and gave them the remains of the Felix Felicis potion. Ginny, along with Neville and Luna, joined Ron and Hermione in taking the potion, giving them extra luck in case they needed it. Along with Ron and Neville, Ginny staked out the entrance to the Room of Requirement, which Harry believed that Draco was using for some unknown purpose.

They watched Draco emerge from the room with the Hand of Glory; when he saw them, he threw Peruvian Instant Darkness Powder, blinding them and leading Death Eaters into Hogwarts via a vanishing cabinet. Fighting their way clear of the darkness, they met up with Remus Lupin and other members of the Order of the Phoenix that were patrolling the school under orders from Dumbledore.

In the ensuing battle Ginny duelled with Amycus Carrow, but suffered no injuries due to the Felix Felicis potion. In the aftermath, Ginny was shocked to find that her brother Bill had been badly injured and permanently scarred by Fenrir Greyback. She was able to lead Harry away from Dumbledore's body and up to the hospital wing, where Harry broke the news that Dumbledore had been killed by Severus Snape. She seemed to accept Bill and Fleur's relationship after watching her with him in the hospital wing.

Ginny took her O.W.L.s despite the tragedy that had occurred at the school, and attended Dumbledore's funeral. After the former headmaster had been laid to rest, Harry broke up with Ginny, fearing that if Voldemort knew how he felt about her, she would become a target and he could not knowingly endanger her life. Despite saying that she knew the risks involved in being with Harry, she accepted his decision, although she was very distraught.

With the death of Dumbledore, and the knowledge that the protective charm over Harry was due to end soon, the Weasley family and the Order of the Phoenix arranged to move him to protection of The Burrow. While most of her family went off to assist in the operation, Ginny stayed behind with her mother. As the team started to miss their portkeys, Ginny started to worry for their safety, and was only partially relieved to see Harry turn up at the Burrow. When George turned up with his ear cursed off, Ginny was shocked and helped her mother tend to him. Finally, as each member of her family returned, she relaxed, but the death of Mad-Eye Moody sobered the occasion.

Over the next few days, Ginny interacted little with Harry because of their split, despite her feelings towards him. However, while setting the table for dinner, Harry let slip that he, Ron and Hermione were about to set off on a quest to stop Voldemort. On Harry's seventeenth birthday, Ginny confessed that she didn't know what to give Harry since anything she gave him would have to be small enough for him to carry around. Instead, she kissed him like she never had before in the hopes of giving him something to remember her by. However, they were interrupted by Ron with Hermione in tow.

On August 1st, she attended the wedding of Bill and Fleur, serving in the capacity of bridesmaid. She wore a golden dress, and as the ceremony began, her Auntie Muriel remarked in a carrying whisper that her dress was far too low cut. Ginny responded to this by turning around and winking at Harry. During the reception, she danced with Luna, Lee Jordan, and others. Harry, disguised a member of the Weasley family, jealously warned Viktor Krum off of speaking with her when he remarked on Ginny's attractiveness, warning him that she had a big and jealous boyfriend. In the middle of the celebration, the guests were warned by Kingsley Shacklebolt's Patronus that the Ministry of Magic has fallen, that Rufus Scrimgeour was dead, and that the Death Eaters were coming. Although Death Eaters appeared and questioned the Weasley family, Ginny was unharmed. As part of the new Ministry's regime, Ginny was allowed to attend Hogwarts. However, while there, she joined up with Neville and Luna, and began an underground resistance against Snape's new regime. They openly defied authority and snuck out at night painting graffiti on the walls of the corridors - Dumbledore's Army, Still Recruiting. On one occasion, she attempted to steal the Sword of Gryffindor from Snape's office along with Neville and Luna, but was caught and punished. She served detention with Hagrid in the Forbidden Forest, and was banned from all trips to Hogsmeade. During the Easter holidays, Ginny was at The Burrow when the Weasley's were forced into hiding at Aunt Muriel's.

The Battle of Hogwarts
When Harry returned to Hogwarts in search of a Horcrux, he was met by Neville and the remnants of Dumbledore's Army that had stood up to Snape. Acting on a promise to Ginny, Neville sent word to her, via the enchanted galleons, that Harry was at the school. Ginny arrived with her brothers and Lee Jordan on the understanding that a battle was about to be fought.

As more members of Dumbledore's Army and the Order of the Phoenix arrived for battle, Mr and Mrs Weasley forbade their daughter to take part in the fighting since she was underage. Ginny argued against it, not wanting to leave when her whole family would be fighting and wait at home for news. Lupin offered a compromise; Ginny would stay in the Room of Requirement so as to be on the scene, but not involved in the fighting. Although she didn't like it, she agreed.

During the battle, Harry needed the Room of Requirement to change form in order to retrieve Rowena Ravenclaw's Diadem. He asked Ginny to leave the room, on the proviso that she would re-enter it once he had completed his task. Freed of her sanctuary, Ginny joined the battle. After the initial fighting, Lord Voldemort called a temporary truce to allow the combatants to retrieve their dead, and for Harry to give himself up to avoid further killing. Ginny was shocked and heartbroken by the death of her brother, Fred, and was comforted by Hermione. She later assisted in the recovery of the wounded outside the castle. When Harry passed her on his way to face Voldemort in the Forbidden Forest under the Invisibility Cloak, she was comforting a girl wounded in the battle. Though she sensed something was there, she and Harry had no contact.

When the seemingly lifeless body of Harry was presented to the defenders of Hogwarts by Voldemort, Ginny could not believe it. However, his apparent death spurred the defenders on, and Neville took up the Sword of Gryffindor and beheaded Nagini. With the battle rejoined, Ginny, along with Luna and Hermione, duelled with Bellatrix. Just as a Killing Curse missed her by inches, her mother took up the fight and killed the woman who had threatened her daughter. Ginny was overjoyed to find Harry still alive, and watched as he duelled and finally defeated Lord Voldemort in the Great Hall.


<Everything past this did not happen yet (in the SSBB canon).>​

<This depiction of Ginny is the Ginny from 1998, when she would be approximately 17 years old. As Ginny is a canon character in NintendoLand, she will be included in that canon, but will get a new symbol. Also, in this canon (SPOILER ALERT), Tonks is not dead.>

After the war
After the end of the Second War, Ginny and Harry rekindled their romance. Ginny became a celebrated Quidditch player for the Holyhead Harpies for several years, and married Harry at some point. She then retired and had a family with Harry which produced two children; James Sirius and Albus Severus.

Unknown to the public, Ginny became an Auror like her husbuand Harry. She was part of the Auror graduating class of 2004, alongside Alexis McGuiness. The two were very good friends, and she was puzzled at her sudden disappearance.

Persephone
Ginny was one of the threats that Persephone, NintendoLand Queen Katarina Sindel's alterego, viewed as worthy of capture. At the Battle of the Ministry, King Cena of NintendoLand and Yoshi help rescure her alongside Tonks. Ginny participated as leader of Grey Team at the Battle at Twilight's End.

After the war, she left for England, where she and Harry would be blessed with a little girl, Lily Luna.

Moveset
All directional input assumes a player facing left.
Strength: ****
Speed: ****
Jump: ***
Recovery: ***
Weight: **
Traction: **
Final Smash: *****

Since Ginny is considered a powerhouse by her peers (and grudgingly by her brothers), her spells in SSBB have to be just as powerful, right? Well, duh!

However, there aren't much incidents of her actually dueling (the wizard term for fighting) so she might actually have some physical attacks, too! I mean, she did have 6 brothers growing up...

Therefore, most of her tilts will be physical attacks, while her smashes, specials, throws, and Final Smash will be spells.

Standard Attacks
While Standing A, A, A - Spark - 4%, 4%, 9% - MinKB (first 2 hits), Mod KB
Ginny punches left, then right, before stabbing forward with her wand. A spark eminates from it, increasing the hitbox.

While Dashing A - Lioness - 11%, 8% - Mod KB, Mod KB
Ginny dives forward and rolls upon hitting the ground. The roll counts as an attack as well.

While Standing > (<) A - Power Heel - 15% - Mod KB
Ginny does a spinning heel kick.

While Standing ^A - Stupefy - 13% - Min-Mod KB
Ginny does a Stunner Spell upward.

While Standing vA - Lumos Maxima - 10% - Min KB
Ginny executes a Light spell downward, creating a spark. The majority of her lower half is the hitbox.

While Standing Smash > (<) A - Bombarda - 20-45%, MajKB
CS: Ginny holds her wand above her right breast.
Ginny points her wand forward. A huge blast explodes from it. It has a bit of a slow startup, though, kinda like Snake's FSmash, but not as slow.

While Standing Smash ^A - Flipendo Maxima - 12-28% - Min-MajKB (Tripping)
CS: Ginny bends slightly while holding her wand to her leg.
Ginny slashes upward with her wand, creating a wave of energy. Anyone hit by the wave (not the actual hitbox) will be tripped.

While Standing Smash vA - Aguamenti - 19-31% - Maj KB
CS: Ginny holds her wand above her head.
Ginny points downwards, launching a wave of water.

Aerials
While In Air A - Protergo - 2-12% - Min-ModKB
Ginny creates a wall of energy around herself, hurting people. For a few frames, the attack can reflect projectiles.

While in Air >A - Weasel's Elbow - 14% - ModKB
Ginny elbows forward.

While in Air <A - Flame Wheel - 15% - Mod KB (Spike)
Ginny backflip kicks. Spike if hit by foot.

While in Air ^A - Lioness Fury - 17% - Mod-MaxKB
Ginny, while still upright, kicks upward, much like Peach's UAir.

While in Air vA - Divebomb - 20% - Mod-MaxKB
Ginny summons her broom, gets on, and divebombs downwards. Auto DI downward until contact.

Specials
While Standing/While in Air B - Reducto - 20-30% - Mod-MaxKB
Ginny shoots a Reductor Curse forward that explodes on impact. Possible to hold. Holding increases distance, damage, and blast radius. Possible to use during Glide State. Possible to angle.

While Standing/While in Air > (<) B - Inpedimenta - 10-20% - No KB
Ginny shoots an Inpediment jinx (in the form of a blue whip the length of 3 standard character models). When it hits, it latches onto the opponent, wraps around them, spins them, then causes them to enter Shield Stun State. Possible to tether recover in WiA.

While Standing/While in Air ^B - Apparition - 5% - MinKB
Ginny apparates based on directional input. When she reappears, she jumps on her broom and enters Glide State.

While Standing/While in Air vB - Expecto Patronum - No Damage - Mod-MaxKB
Ginny unleashes her Patronus, a horse. The initial summon unleashes a burst of positive energy from Ginny. Control input determines where the Patronus flies. This attack deals no damage, only pushback. If Ginny is hit during this attack, the Patronus fades away. Shielding will cause the same effect.

Throws
While Standing/While Dashing L(R)+A (Z) - Accio - n/a - n/a
Ginny does a Summoning Charm, which grabs enemies at a short range beyond her predicted reach. Enter Grab State.

During Grab State A - Bat-Bogey Hex - 1-2% - n/a
Ginny causes a bat to appear, biting her opponent. Maintain Grab State.

During Grab State > - Flippendo - 10% - ModKB
Ginny uses her wand to shoot her opponent forward, flipping them.

During Grab State < - Wingardium Leviosa - 15% - Mod-MaxKB
Ginny casts a Levitation Charm to lift her opponent above her, behind her, and launches them.

During Grab State ^ - Levicorpus - 13% - Mod-MaxKB
Ginny casts the Levicorpus jinx to lift the opponent above her, spins, and uses a Reductor Curse to launch them upwards.

During Grab State v - Petrificus Totalus - 14% - ModKB
Ginny uses a Full-Body Bind Curse on her opponent; after they fall, Ginny stomps of them.

Final Smash: Reducto Maxima
Ginny jumps on her broom and flies off-screen, returns in the background, fies through the center of the main platform (above it, not through the actual platform. As she passes the stage, she shouts "Reducto...MAXIMA!", shooting an Enhanced Reductor Curse at the center of the stage. The Curse explodes, creating a blast radius the size of Final Destination. All within the blast radius take multihit damage, similar to a Smart Bomb's explosion, with one last hit for MaxKB. Ginny returns to the stage from the top of the screen.

Taunts
While Standing Dpad ^
Ginny whips some hair from her face and says "I'm stronger than I look!"

While Standing Dpand < (>)
Ginny punches the air, poses, and shouts "Dumbledore's Army! Still Recruiting!"

While Standing Dpad V
Ginny puts her hands together to her chest, closes her eyes, and says "Harry..." softly.

Win Poses
  • Ginny walks forward, stops, and smiles.
  • Ginny smiles and looks in wonder as her Horse Patronus prances around her.
  • Ginny flies in on her broom, both legs hanging on one side and waves while saying "That was intense! Good Quidditch practice!"
  • Ginny looks in shocked awe as she emmits poweful magic from her wand.

Costumes
Wario shares something in common with Ginny. No, it's not their immese strength or their affinity for Garlic (Ginny hates the stuff, BTW); they both have 2 costumes!


Her Hogwarts Uniform (minus the sweater...)


...and her Christmas 1995 outfit!

Here's a breakdown of her costume colors.

Hogwarts Uniform
Color choices are most apparent in the color of the tie and the color of the skirt (which, except for the Hogwarts Default Black, is plad).
- Gryffindor Red/Gold (Default, RedTeam, Uniform Default)
- Ravenclaw Blue/Bronze (BlueTeam)
- Slytherin Green/Sliver (GreenTeam)
- Hufflepuff Yellow/Black
- Hogwarts Default Black
- Gryffindor Red/Gold w/Hogwarts Sweater (shown above)


Muggle (Casual)
- Green Sweater/Orange Undershirt (Casual Default, shown above)
- Red Sweater/Pink Undershirt (RedTeam)
- Blue Sweater/Light Blue Undershirt (BlueTeam)
- Green Sweater/Lime Undershirt (GreenTeam)
- Black Sweater/Grey Undershirt, Black Hair
- White Sweater/Blue Undershirt, Blonde Hair
Just in case.

10char
 
Status
Not open for further replies.
Top Bottom