So I did just yellow Pikachu by itself (completely fresh MnSlChr), and the problem persisted. When I checked the palette in Photoshop, it said I only had two colours (the whole image was just different transparencies of yellow). I then put a solid black background behind it and well... it worked. Is there no way to fix the transparency issue? It's not the end of the world if I put black backgrounds on everything I suppose, but I'd still like to know.
http://puu.sh/hCRps/20d5814d0e.rar
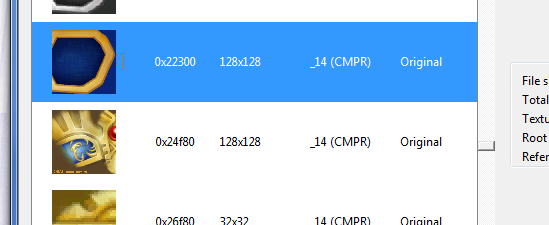
^ a sample of some of the textures I use if it helps.
EDIT: This is what it looks like with solid backgrounds (I just need to untexture the Red/Blue/Yellow/Green player colours behind them). If it's too hard to fix don't worry about it, this is an adequate solution (also yes, the green character icons were intentional).
Oh, I didn't even realize how the CSPs were supposed to look at first. I thought the white wireframes were intentional and just the green & blue Pikachus were the problem.
achilles is right that you can use "replacement colors". Like you said though, the problem is that you want many different levels of transparency. I only designed DTW with 2 levels in mind; magenta (ff00ff) will turn into full transparency, and lime green (00ff00) will turn into the shadow/half-transparency.
A little while back I did some
CSPs for the Fighting Wire Frames, which are just about the same as these.
In the download for those there are _9.png copies with palettes, as well as copies with full transparency ranges that you can compare to. You can see a difference, but even with only two levels of transparency the _9 versions still turned out pretty well I think. The purple background they have on their body makes it hard to tell they don't have transparency there. To do something similar, maybe you could just mimic the color that will be behind the CSP to make it appear to be transparent. And generate a palette in your png (I don't have GIMP with me, so I can't check the images you posted atm).
I haven't tried it, but it should be possible to get more levels of transparency. _9 with transparency should use RGB5A3 for the palette format, which means 3 bits are available for the alpha channel, allowing for 8 different values. The full two bytes that you'd see for each color in the tpl file work like this:
0
110000010001000
The first/top bit tells whether all of the bits will be used for color, or if some of them will be used for an alpha channel. 0 I'm pretty sure designates alpha use. If it uses one, the
alpha channel is the next 3 bits, followed by the colors at 4 bits each. To convert to hex you would multiply the alpha by 0x20, and the colors by 0x11. So in the example above you would have green and blue at 0x88 (full color = #008888), and alpha at 0xC0, or a value of 192 out of 256 (75% opaque). So in other words that should be a 25% transparent teal. You would do the reverse to convert a color to the two byte format.
Even if you have multiple pixels that are the same color, if they have different transparencies then they'll each take more counts out of your palette total. But since you have so few colors in your images already that shouldn't really matter. You could have full transparency range (of 0-7 levels anyway) of up to 32 colors, which would be way more than enough.
But of course the problem with all of this is that you'd have to manually put these colors into the tpl. (At least I think so; I'll need to experiment with the tRNS chunk in pngs and see if it's properly used by the image converter (wimgt). It could be that we just haven't been outputting files correctly from our image editors. If you see an option to generate the tRNS chunk in Photoshop, try it with a paletted texture.) You'd have to create one of these byte values for each of the 8 transparency levels, for each color in the 118 CSPs. Although that's only like 6 colors, right? Anyway, like I said, there's a few things I'll have to look at in GIMP once I'm home.
And yeah, I agree with Cell, that CSS is looking pretty cool. I like these CSPs.
Btw, if you want to know the locations of any other textures, like the back button, HMN buttons, or behind the selection icons, let me know, I should be able to find them. Hm. Maybe the moving text behind the whole menu too. Maybe change it to lines of 1s and 0s or something. For the CSPs, I wonder if it would look good to add a gray line at the top, so it looks like the section with the name is intentionally divided (not necessary if I figure out better transparency though). Or it might work better to get rid of the current gray border entirely, and add a border to the CSP images instead. Just some ideas.

") Though that wouldn't make the functionality you have useless. It would be awesome to be able to browse a whole dat, but that would be tedious if there's a specific texture someone wants to find. Especially if they don't know what file it's in. So something that can browse as well as search would be ideal. This and more is what I hope to pack into DTW 3.0. However, I'm also rewriting parts of it so I can go from Python 3.4 to 2.7, which has better support for some interface features I want to use.
Though that wouldn't make the functionality you have useless. It would be awesome to be able to browse a whole dat, but that would be tedious if there's a specific texture someone wants to find. Especially if they don't know what file it's in. So something that can browse as well as search would be ideal. This and more is what I hope to pack into DTW 3.0. However, I'm also rewriting parts of it so I can go from Python 3.4 to 2.7, which has better support for some interface features I want to use.