Welcome to Smashboards, the world's largest Super Smash Brothers community! Over 250,000 Smash Bros. fans from around the world have come to discuss these great games in over 19 million posts!
You are currently viewing our boards as a visitor. Click here to sign up right now and start on your path in the Smash community!
It appears that you are using ad block :'(
Hey, we get it. However this website is run by and for the community... and it needs ads in order to keep running.
Please disable your adblock on Smashboards, or go premium to hide all advertisements and this notice. Alternatively, this ad may have just failed to load. Woops!
Hey there! I had the exact same problem with the masking part which is why I went with painting both shells then applying the sticker paper. You should try cleaning off the paint with acetone then sand the entire controller again . I'm working on another controller, but this time i'm going to try using a tablet sized screen protector (for cutting out the templates similar to what this guy is doing at 5:10 https://www.youtube.com/watch?v=D2fxY74I1Bg except he used a self adhesive book cover )to hopefully prevent the paint from bleeding inside. I'm also gona do the same technique for apply the emblem.)
Try 80 gritt?
Did you sand and clean the controller first before applying the primer?
What do you mean by sparkly? If you mean shining/gleaming, then they either used many coats of a glossy finish clear coat or some good automotive paint.
Hey there! I had the exact same problem with the masking part which is why I went with painting both shells then applying the sticker paper. You should try cleaning off the paint with acetone then sand the entire controller again . I'm working on another controller, but this time i'm going to try using a tablet sized screen protector (for cutting out the templates similar to what this guy is doing at 5:10 https://www.youtube.com/watch?v=D2fxY74I1Bg except he used a self adhesive book cover )to hopefully prevent the paint from bleeding inside. I'm also gona do the same technique for apply the emblem.)
Actually, I think I've already found a solution. I've recently found out about this paint remover called Goo Gone. apparently it's been working for a majority of people, so I might try it out.
Hi there! Im new to this forum, but I had some questions about customizing a controller. I was wondering how important it is to sand the GC controller and spraypaint it over if I am only planning on adding on decals.
And, what is the best way to go about making those decals? I was thinking of using waterslide paper, but I have no experience with that.
I've got a quick question. My controller came out very well thanks to this guide, but the controller is prone to getting banged up quite easily and dirty. It attracts a lot of fuzz and hair and it gets stuck on it, and if you press your nail on it at all it will definitely leave nail marks. Anything to solve this?
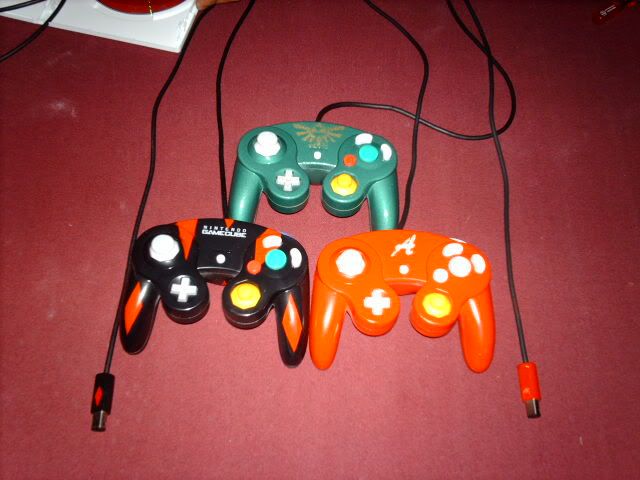
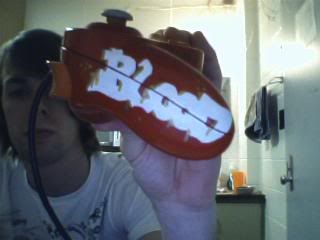
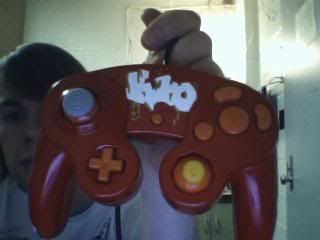
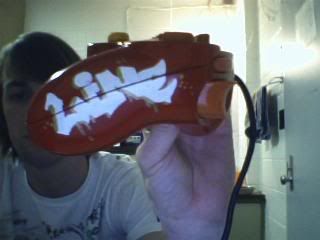
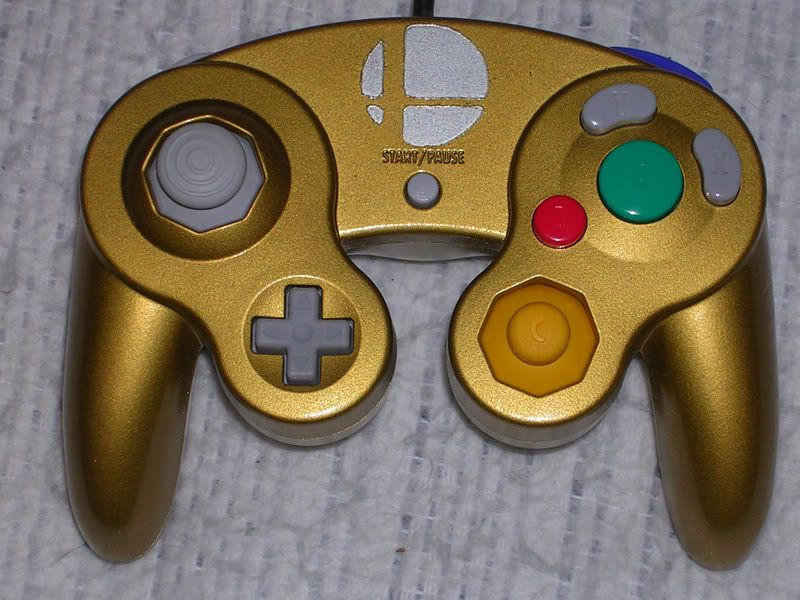
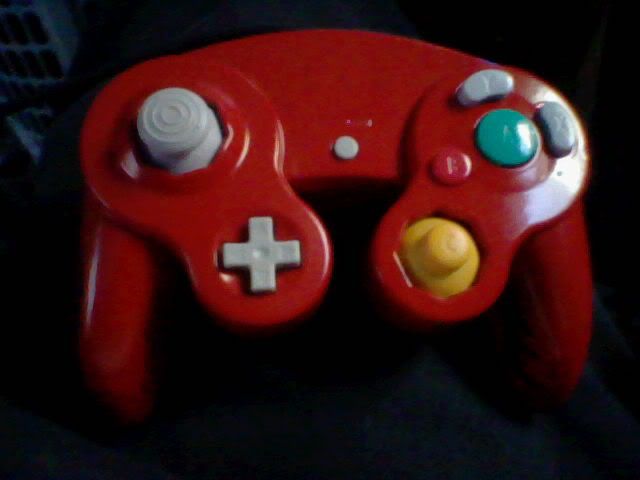
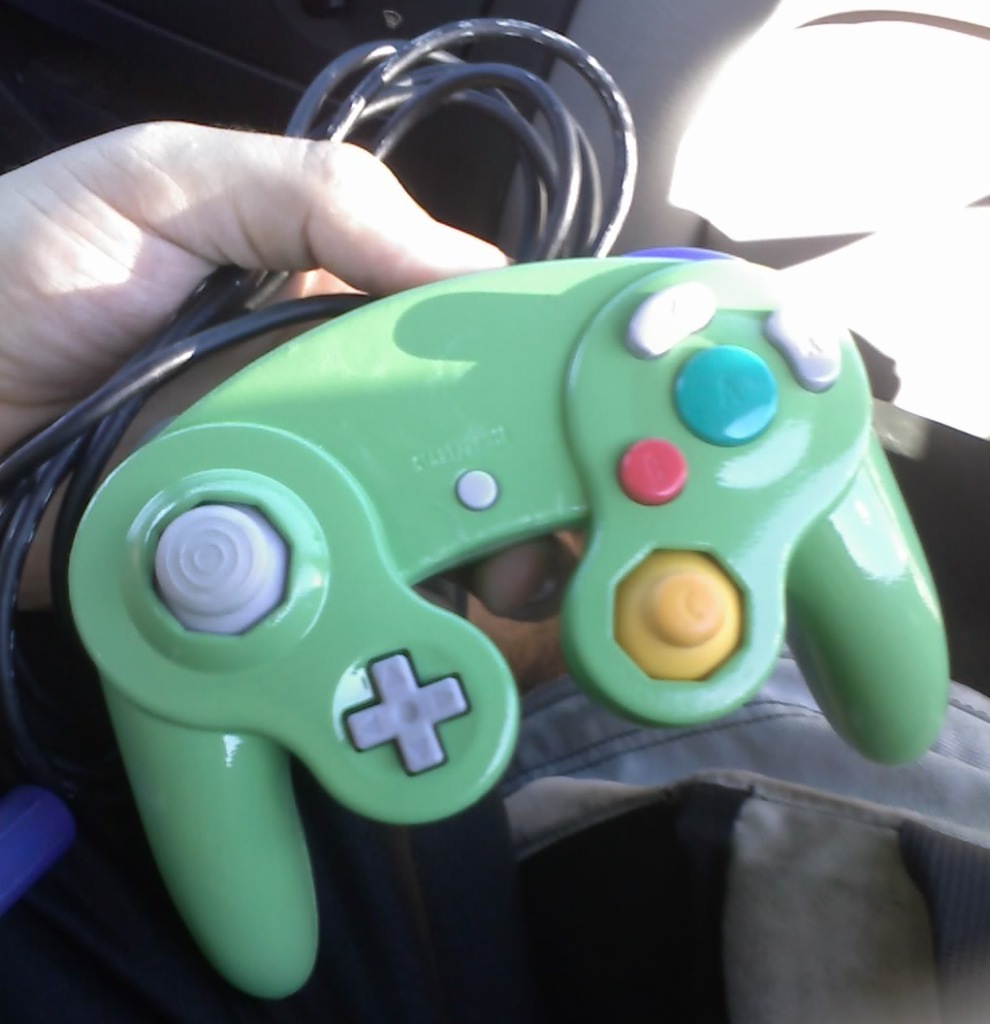
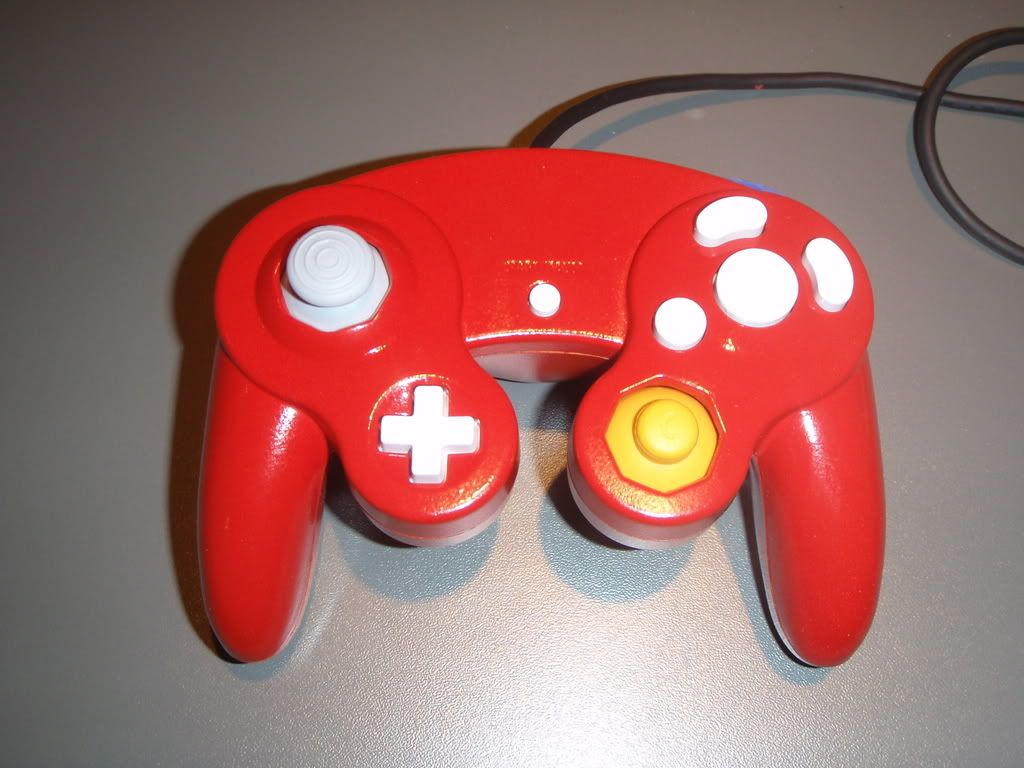
Wish it were a little more red on top, and I'd like to add in the Gerudo symbol up top, but I call this a success for my first time! Thanks so much for the guide, Shök
!
Used Valspar brand Primer+Paint and High Gloss Clear Coat
Well, I made like 15 or so passes at the very top of the controller (it was also about 20 degrees outside, so I wasn't getting much paint from the can). I made fewer and fewer as I went down. Then I did the opposite working my way up with the other color. It's easier than it looks!
I've got a quick question. My controller came out very well thanks to this guide, but the controller is prone to getting banged up quite easily and dirty. It attracts a lot of fuzz and hair and it gets stuck on it, and if you press your nail on it at all it will definitely leave nail marks. Anything to solve this?
Alright, I just finished going through all 18 pages, and the only doubt I have is that I want a little "shine" above the start button, to do it I was thinking about just making the first layer of paint after the primer be the color of the shine, letting the paint rest for a day, and then covering the shape I want with painter's tape, then doing 2 (or 3, depending on how it looks) layers of the main color, letting it dry for a day, removing the tape and applying the 3 or 4 layers of clear.
Would that be right? The only thing I don't want an uneven surface, I don't want the shine to be "lower" than the rest of the paint job because it has only 1 layer, am I overestimating the difference in height?
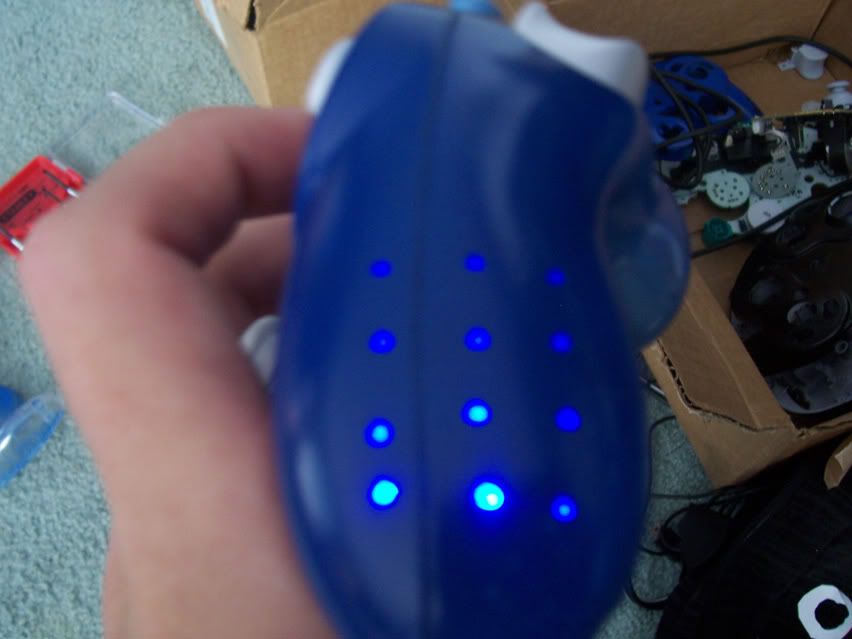
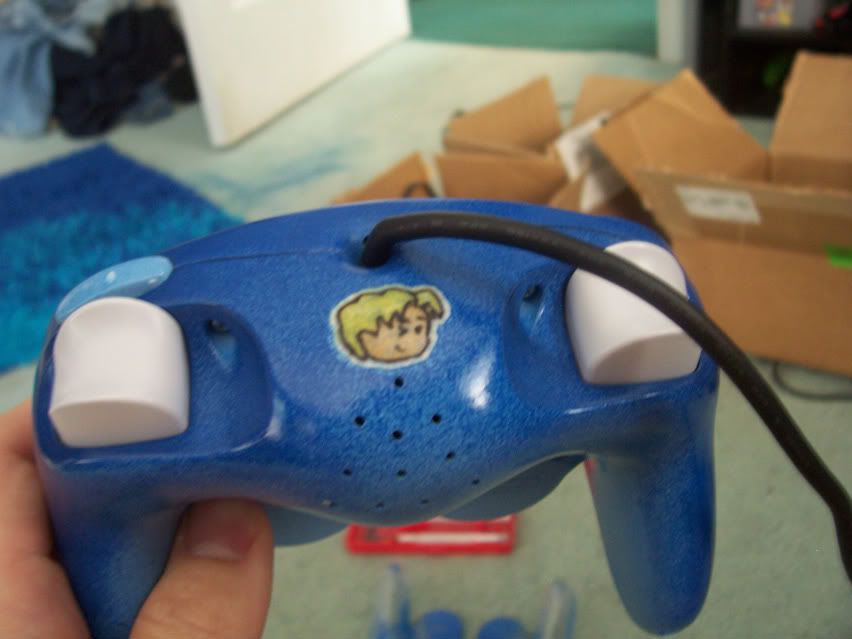
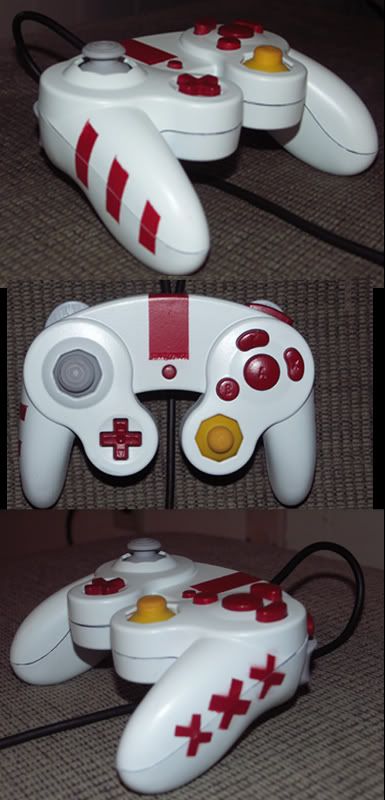
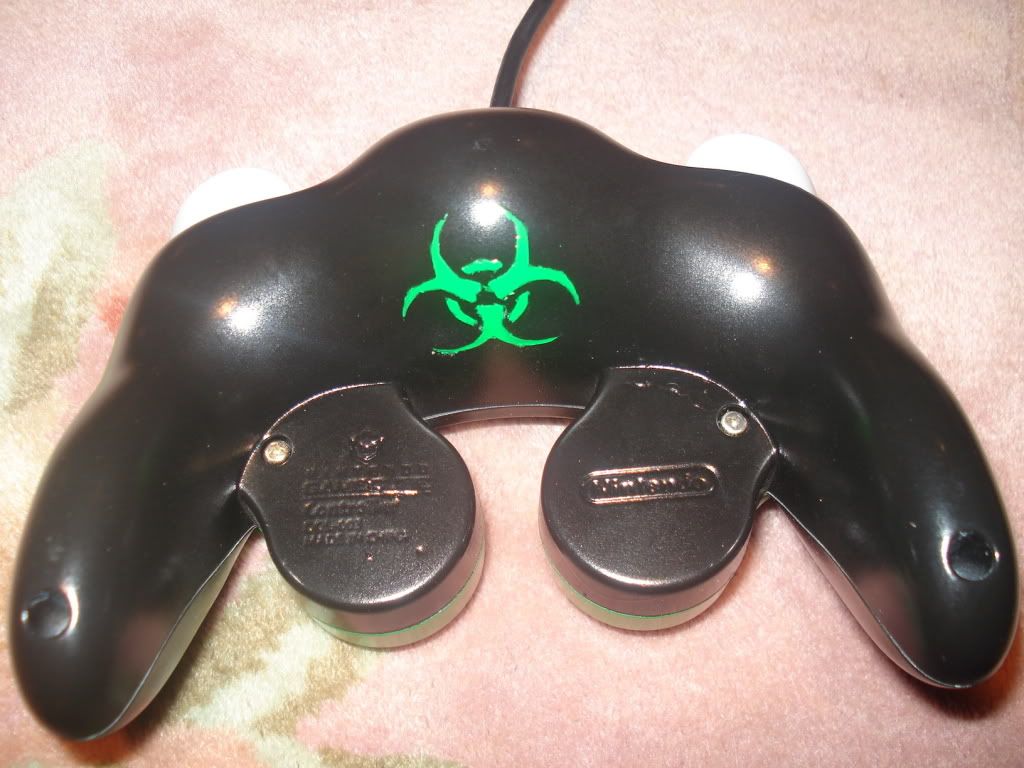
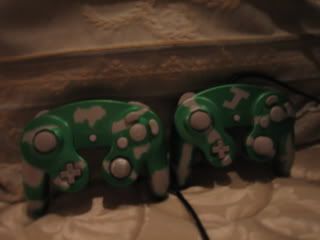
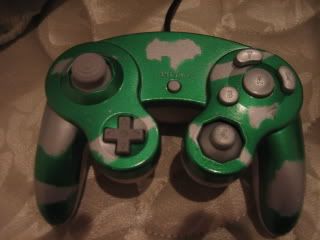
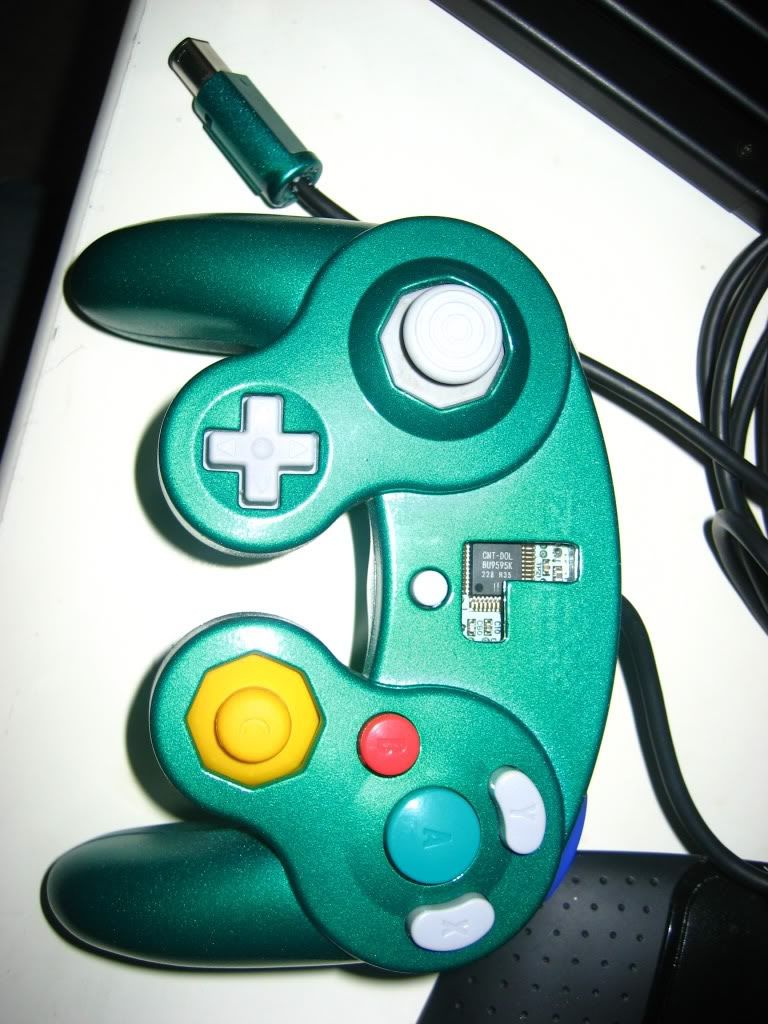
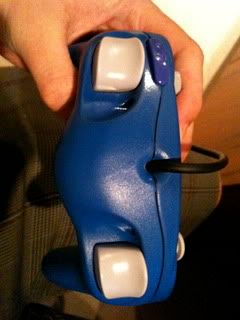
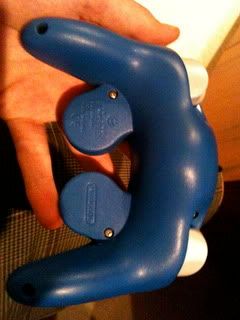
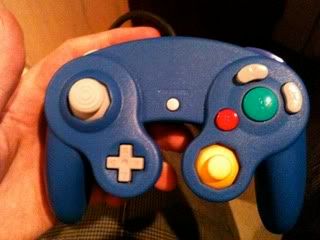
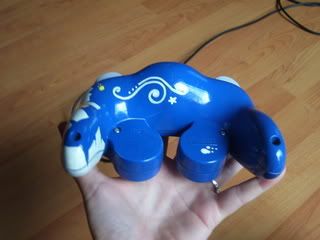
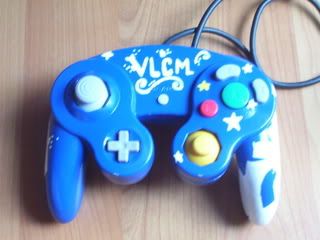
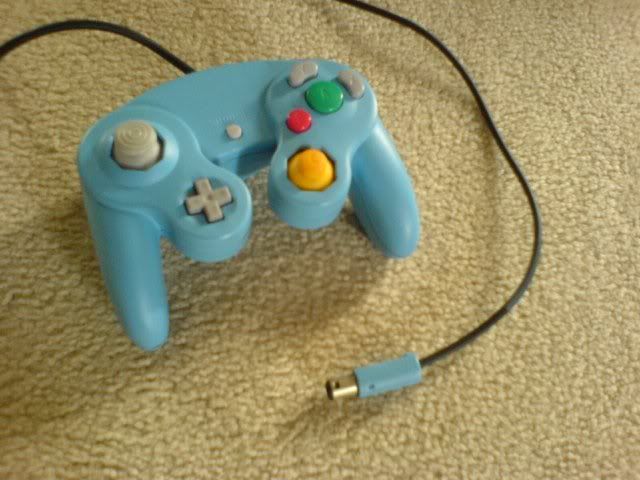
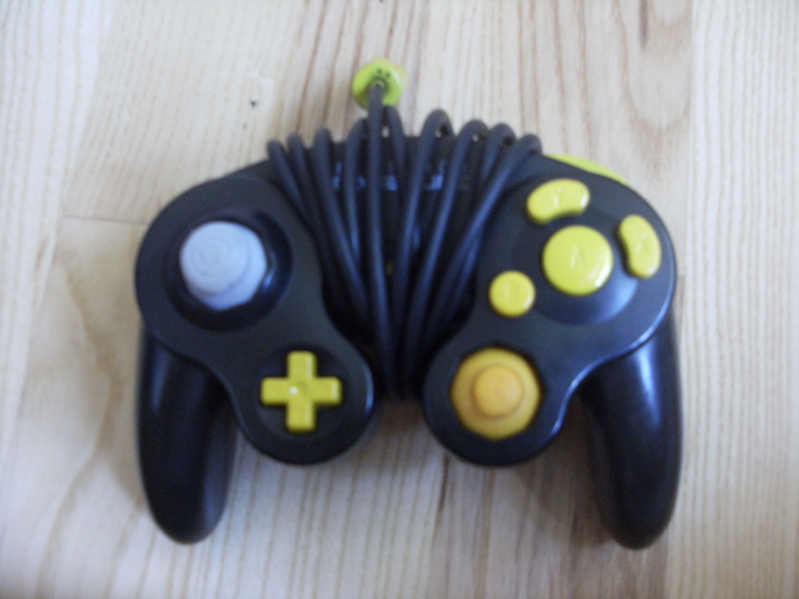
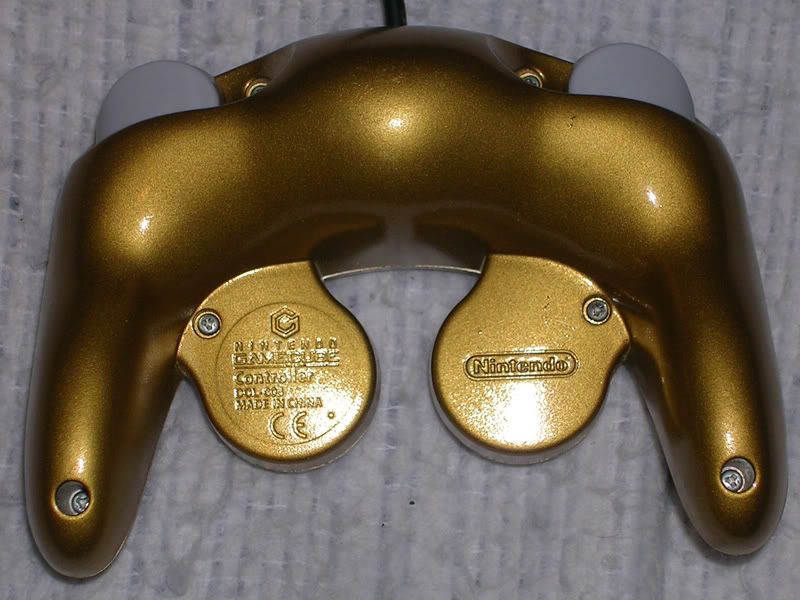
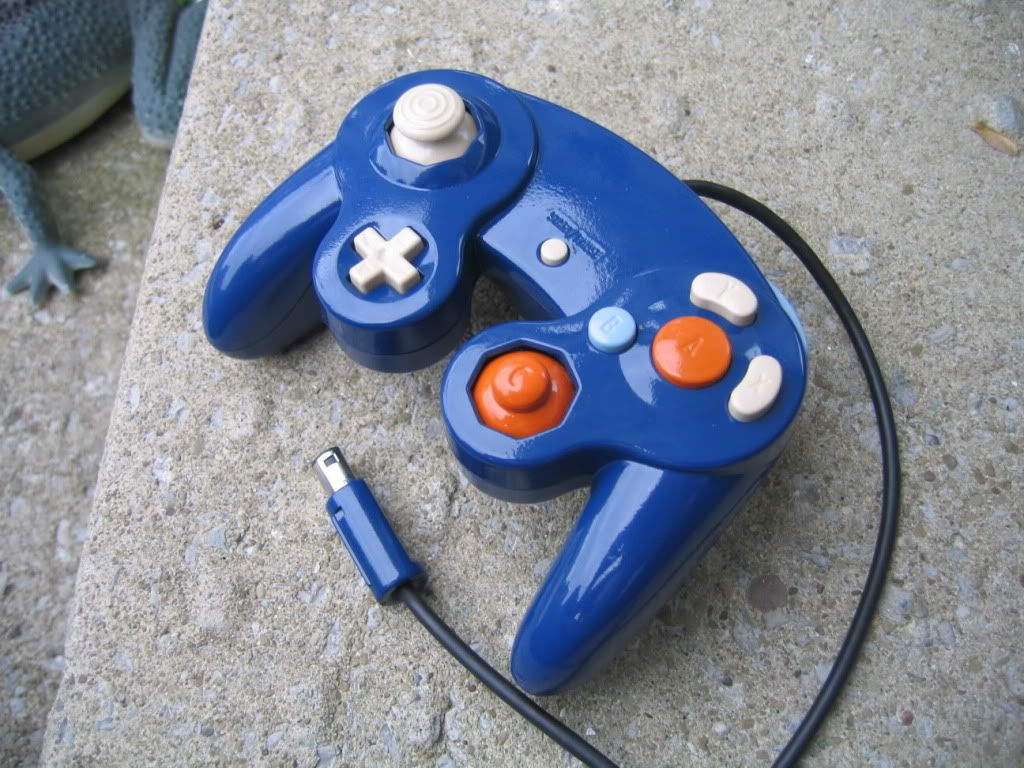
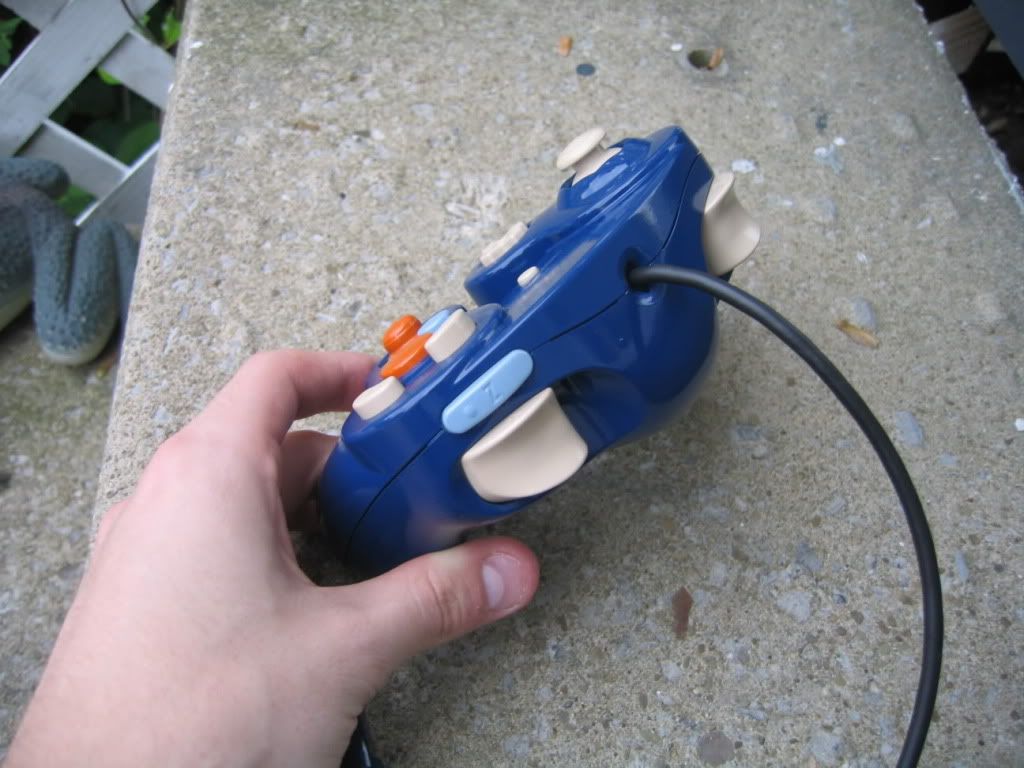
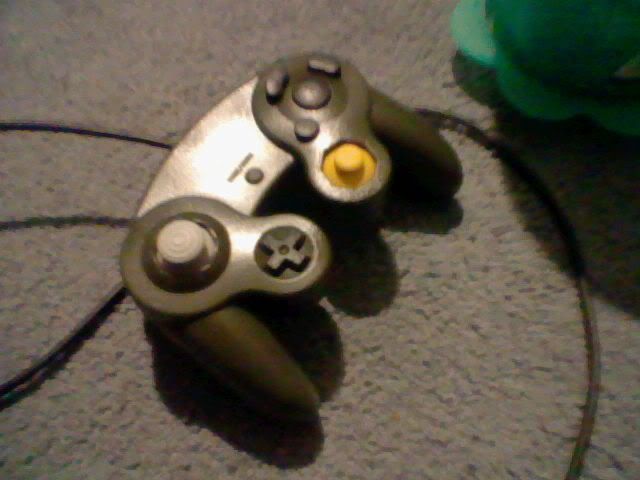
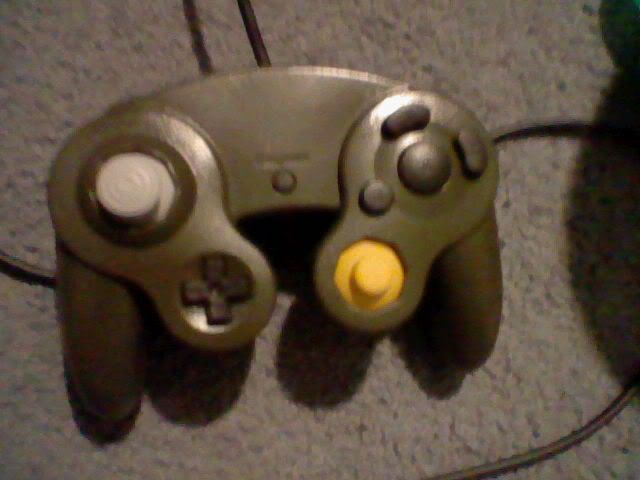
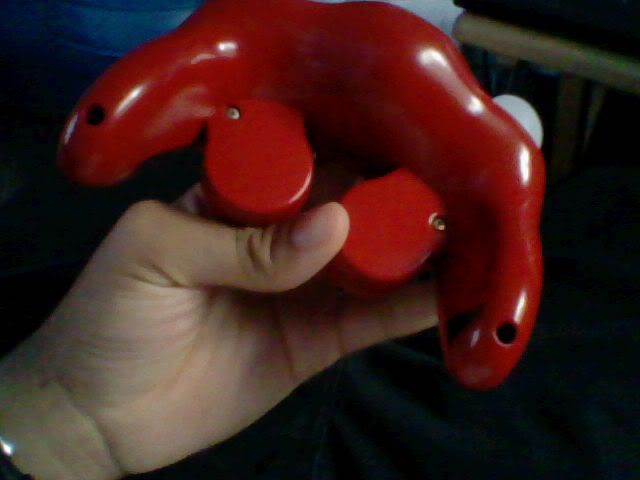
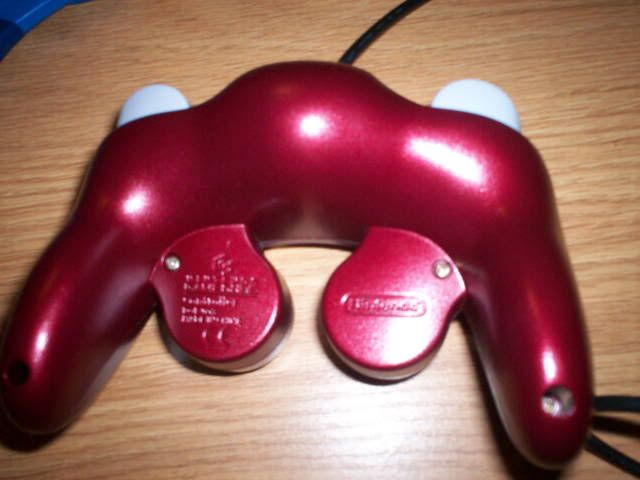
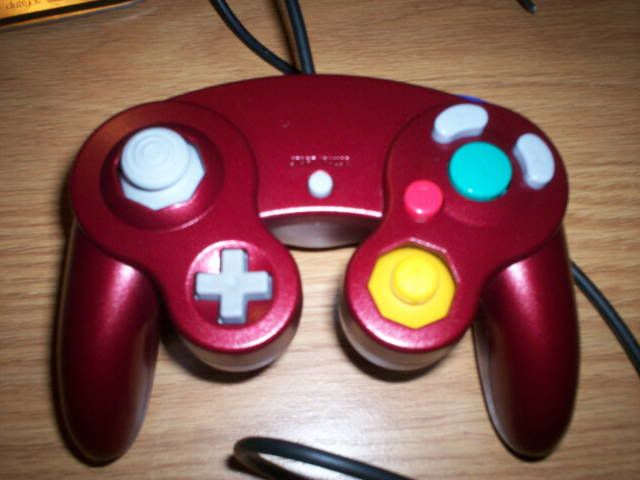
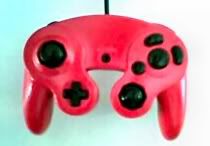
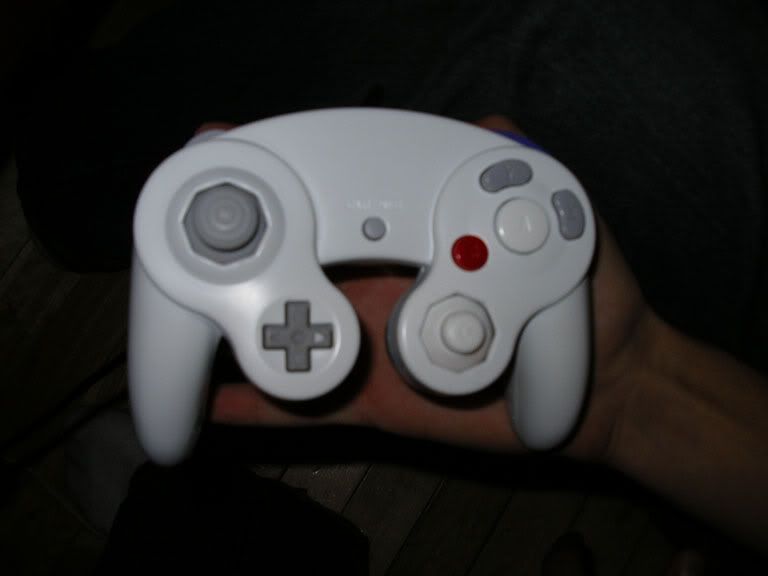
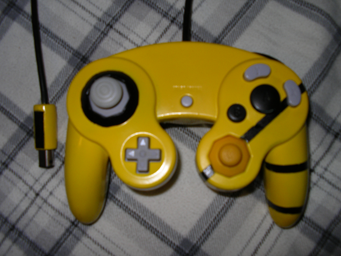
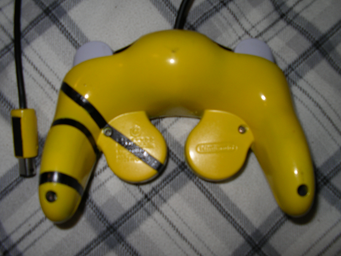
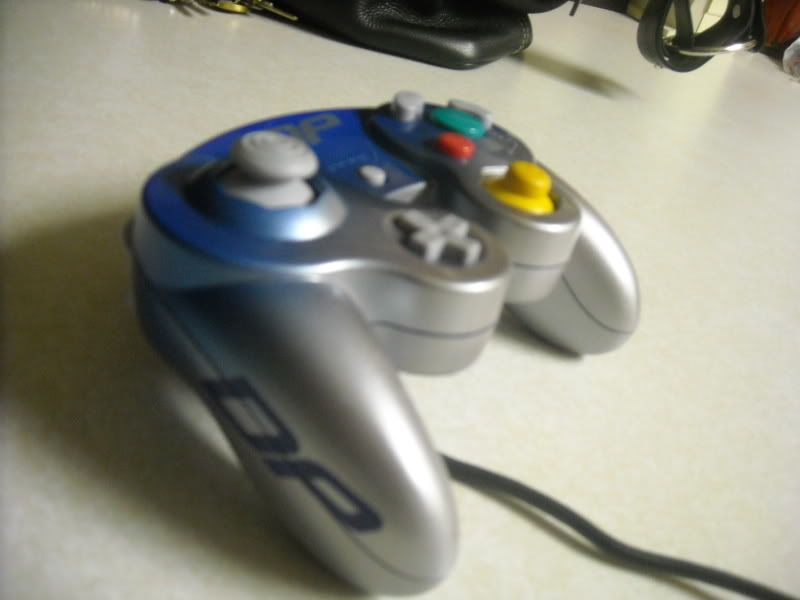
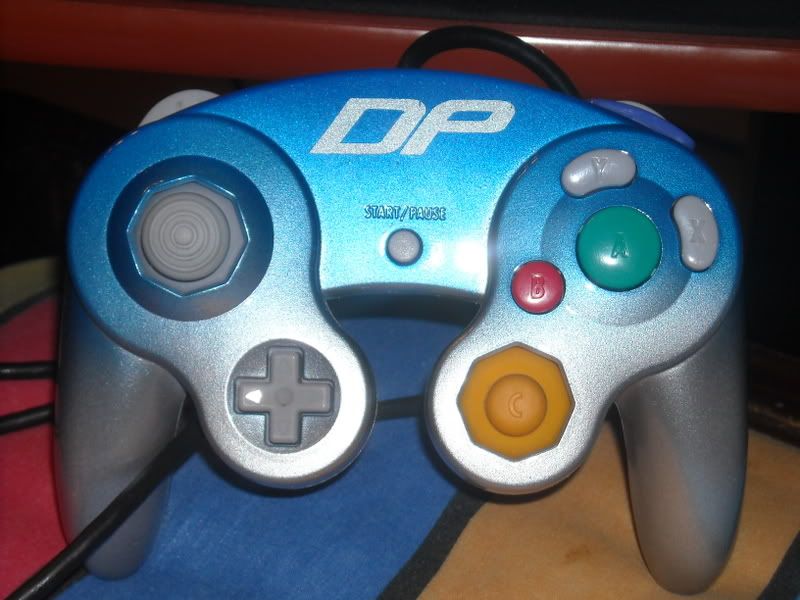
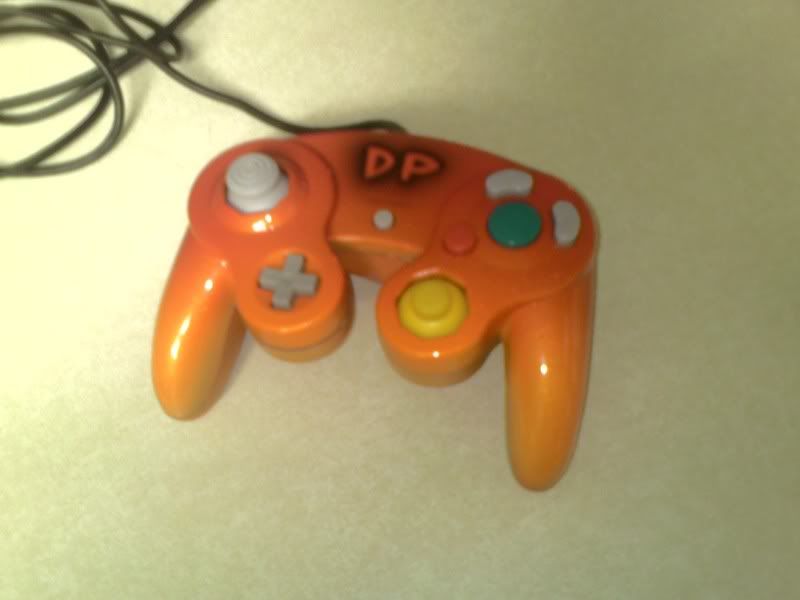
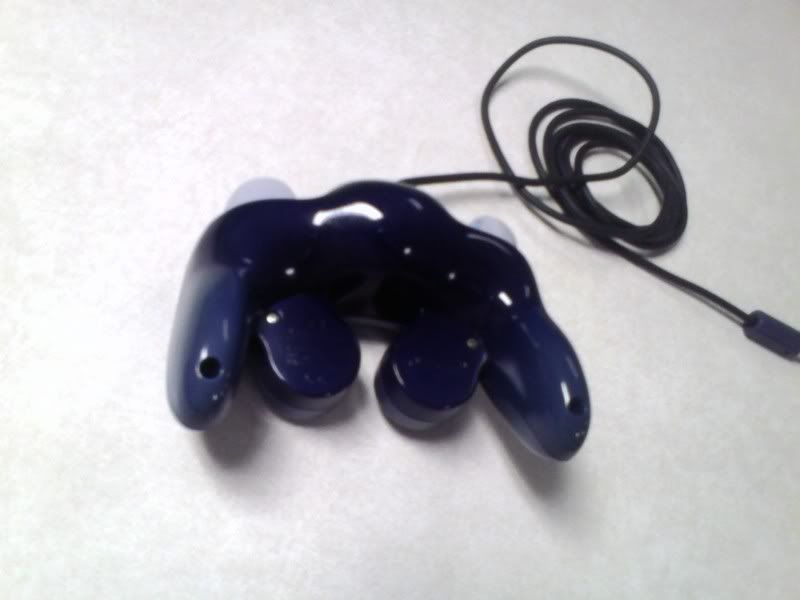
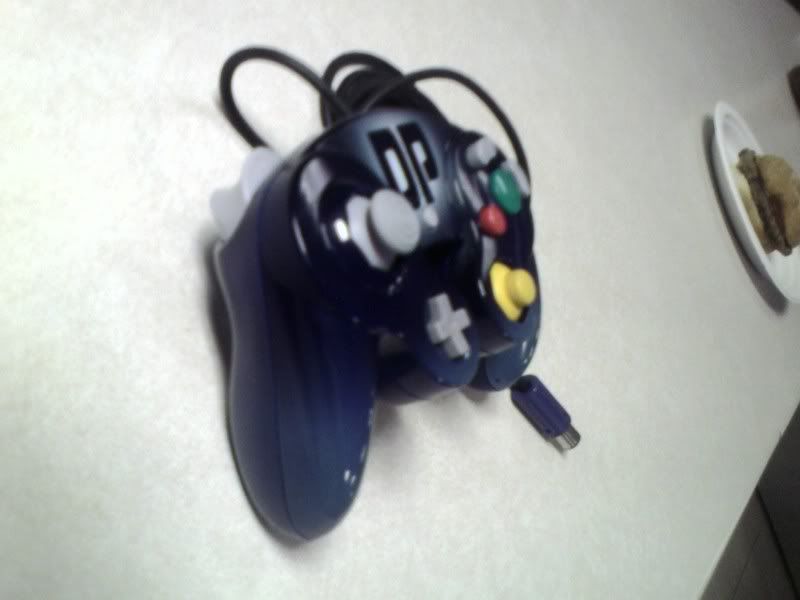
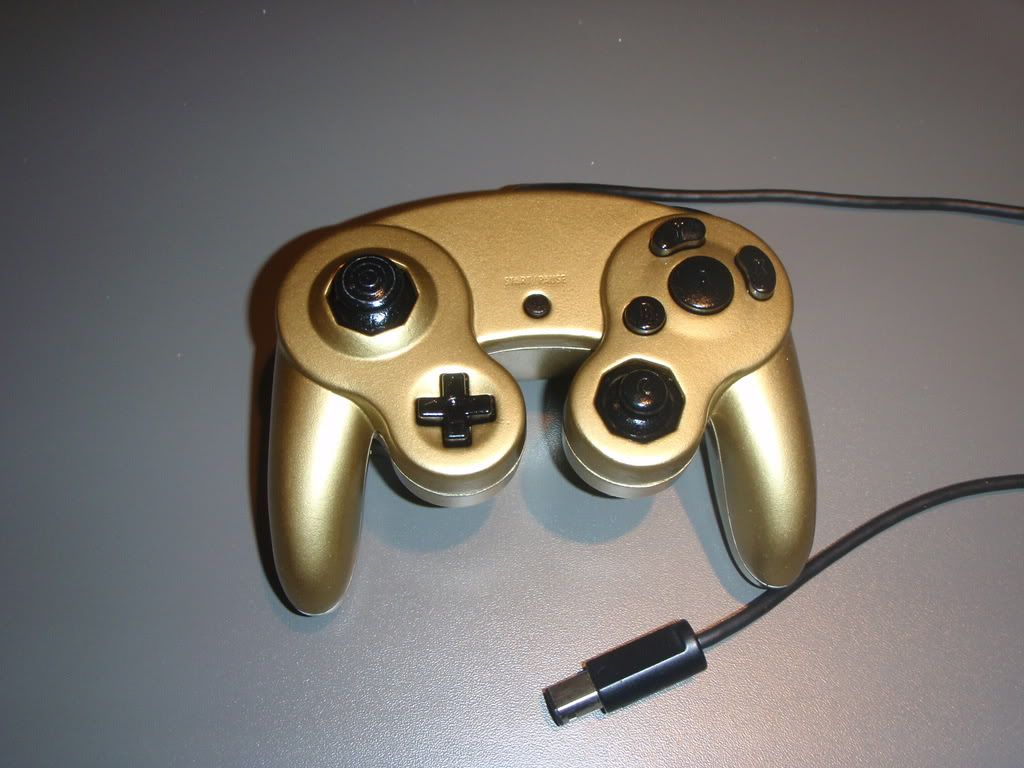
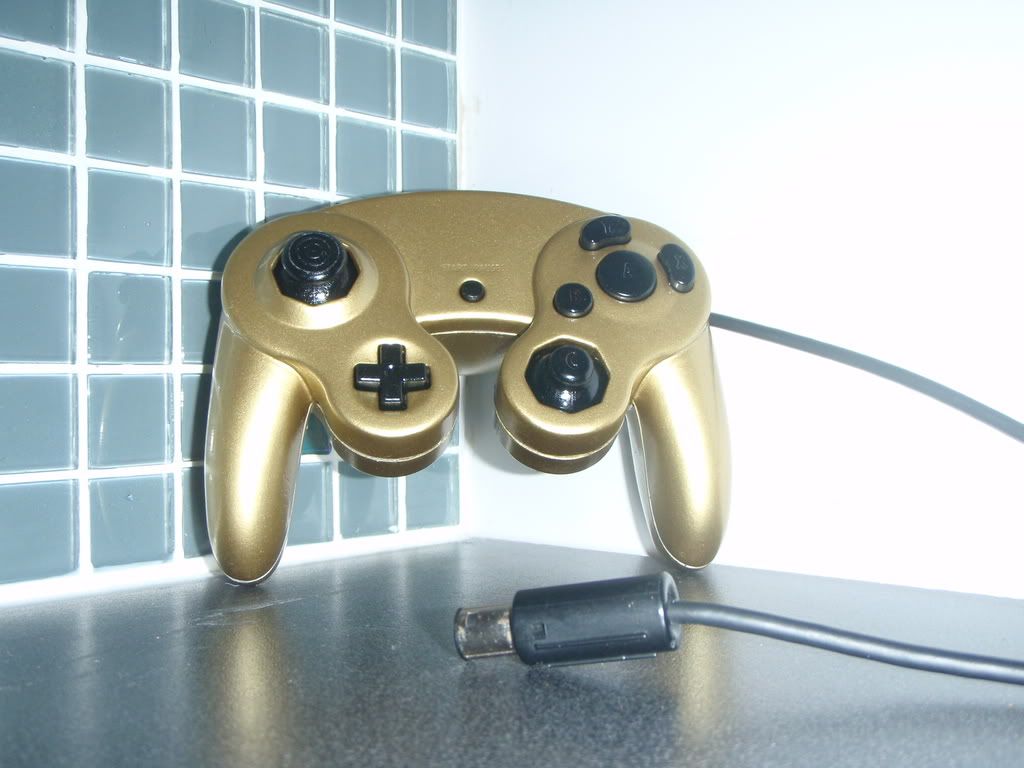
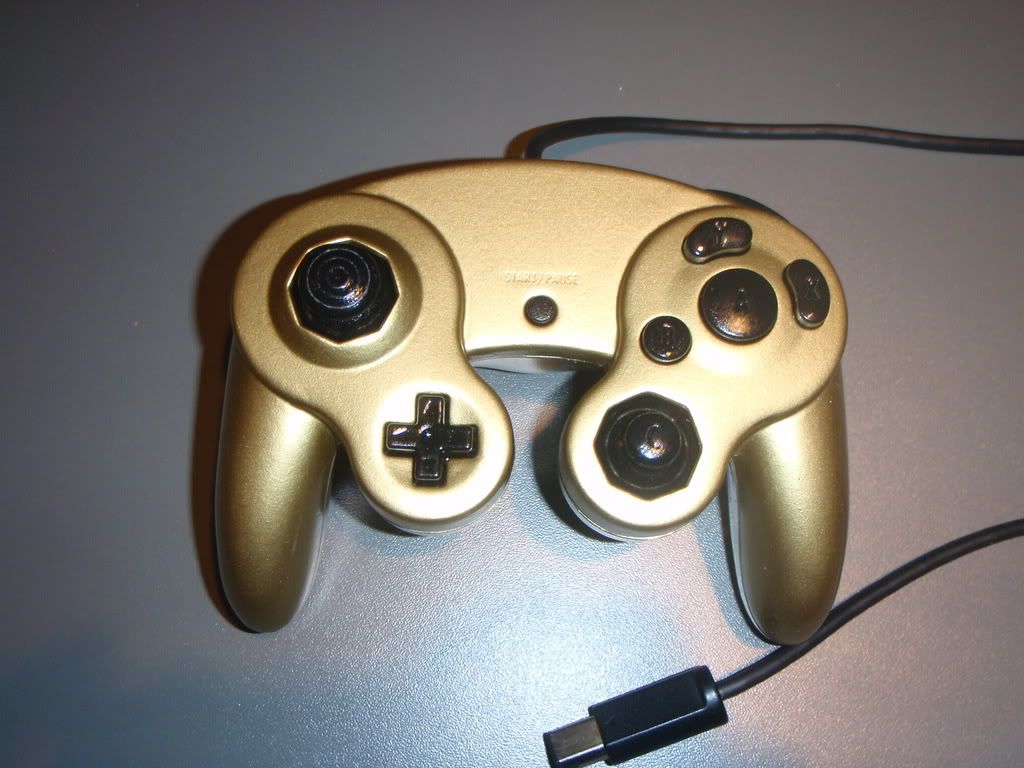
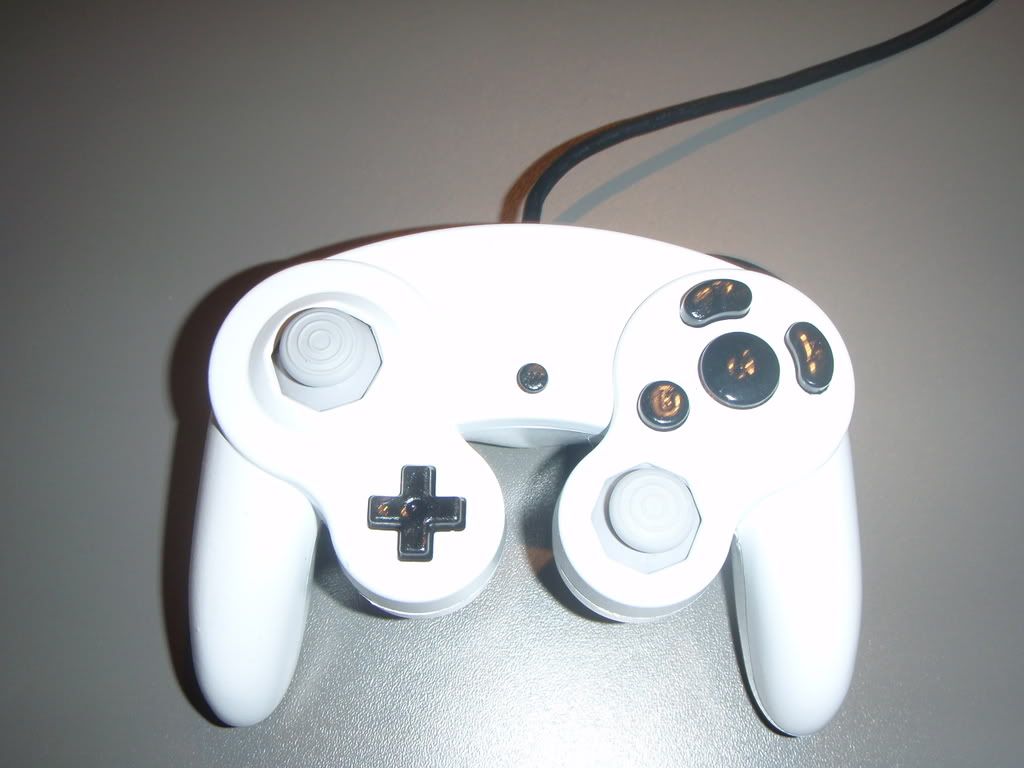
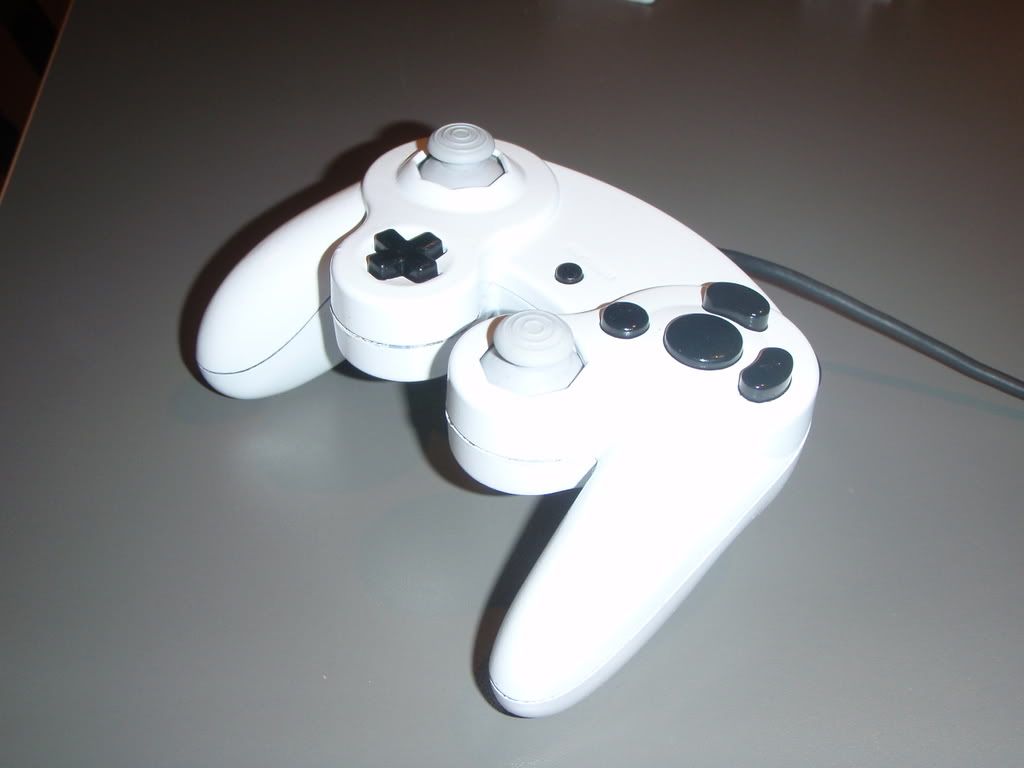
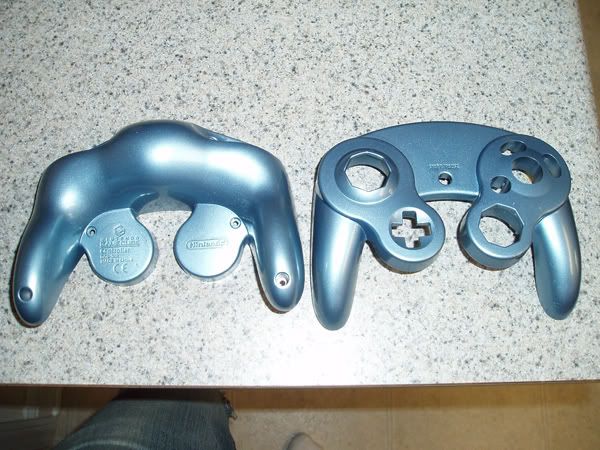
Hey there people ! I recently made a custom controller myself :
Thing is, i had some issue during the process resulting as an not-so-good controller for competitive use :/
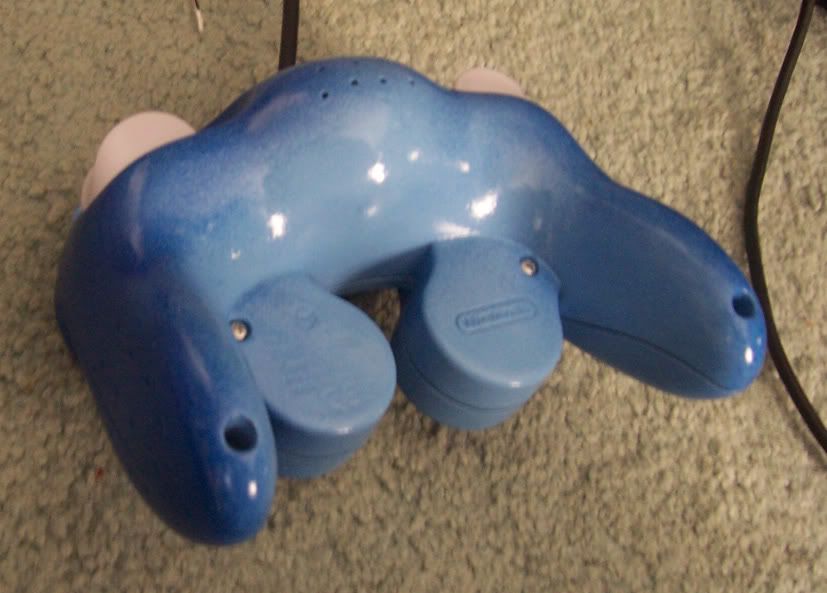
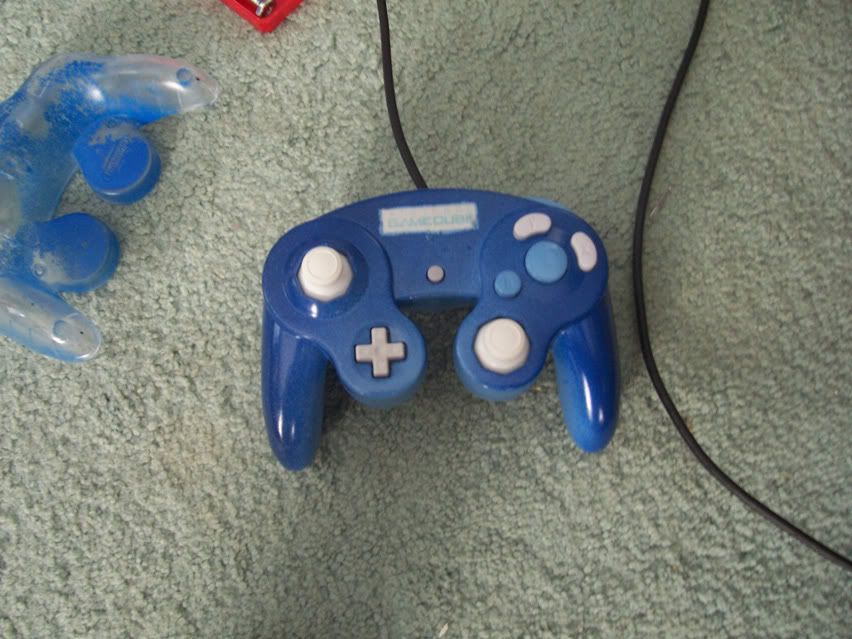
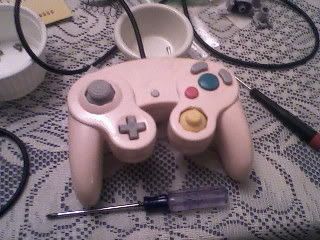
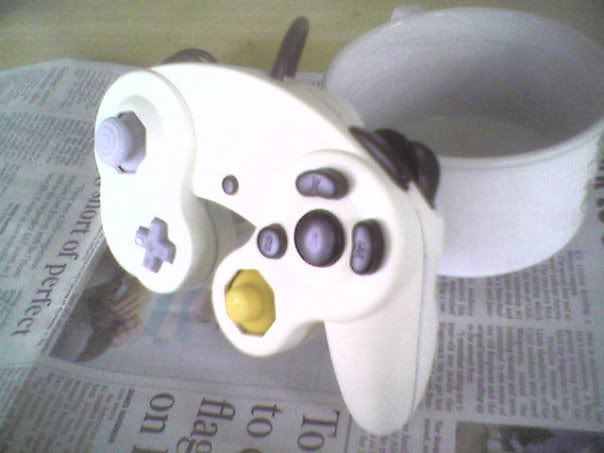
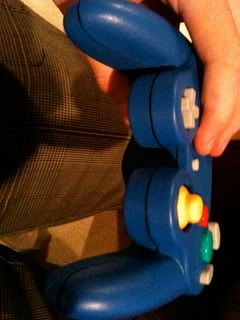
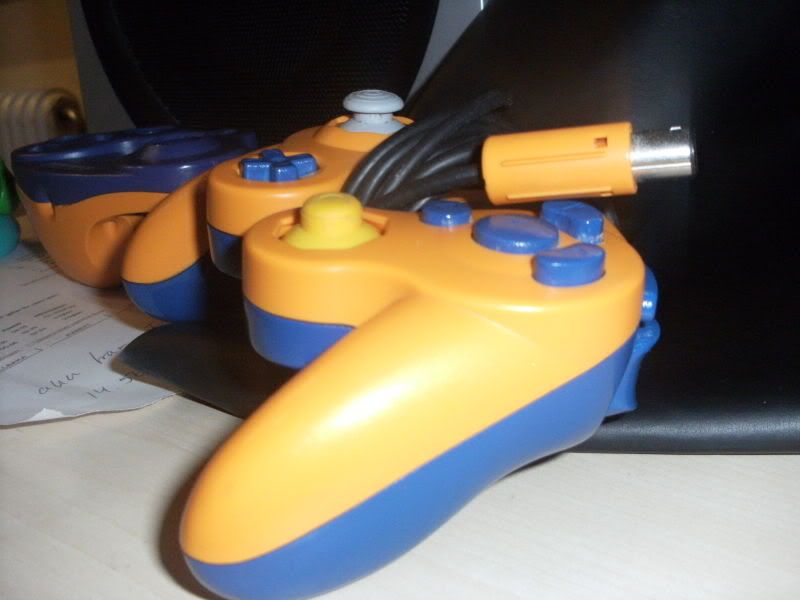
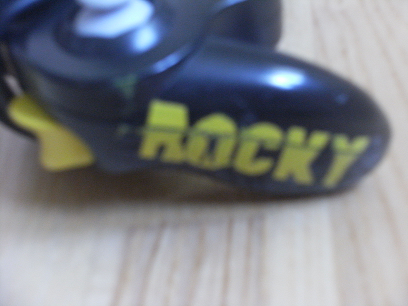
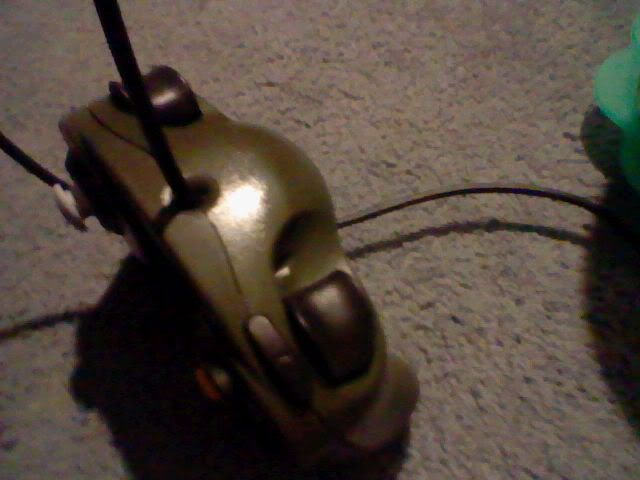
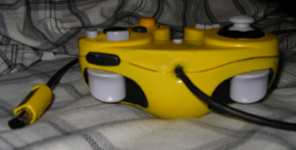
First of all i had a problem with protecting parts of the shell : dispite all the tape i put on the white part i wanted to keep, some painting managed to go through the tape as you can see on pic 3 & 4. I had to sand theses part and it was really painful for some corner
Secondly the edge between the black and the white part is not totally flat and it's kinda annoying cuz i can feel it when i'm holding the controller. i know i can try to sand this part a bit but i might loose the accuracy of the line .. :/
I might re-paint the whole controller, idk yet.. But i have an european major next week sooooooooo i need to find a solution if i want to have a hype custom controller for the event lol
New to smashboards, but thought I'd share my findings on spray painting a GCC.
This is really for those who are apprehensive about just going for it (such as myself):
1) Don't spray paint on a windy day- took extra time to coat the shell
2) Don't paint under a tree, unless you like a little nature in your controller-I've got little pieces of leaf and debris which is oddly charming
3) Clear coat comes out faster than spray paint and a lot more runny- spray lightly with clear coat two or three times
4) coat every nook and cranny- I missed a few key corners; doesn't take away from the controller, but it's not evenly coated
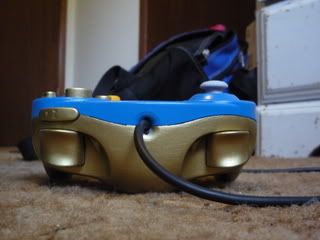
Despite all of these factors, here are pictures of the final product. (Krylon Catalina Mist Satin + Krylon Low Odor Clear Finish)
The PS3 sticks I sell here are compatible without any potentiometer replacement (a little sanding of the plastic knob on the pot at the most, usually the work without any sanding) : http://gcsgamingcustoms.storenvy.com/products/7721187-colored-ps3-analog-stick-1pc
Also, PS2 work, if you are willing to sand the plastic knob of the pot, you should be able to fit it in. I would recommend a dremmel to speed up the process.
Hello everyone, I'm starting the daunting task of painting my GameCube controller for Melee. I'm using Red Krylon Primer + Paint for the basecoat, and I'm planning on painting the raised areas with the buttons a second color, another Krylon Primer + Paint combo (Black). I just got done with the first color application over the whole controller, and I'm waiting for it to fully dry before using painter's tape to cover the unwanted areas for the second color. The first color took about 4 somewhat light coats.
Questions:
1. Will using Krylon Paint + Primer work just as well as regular methods, in the beginning of the thread (separate primer, then spraypaint)?
2. Do you think coloring the raised button/stick areas with a second color over the first is a bad idea? Will the paint be too thick, and cause button stickyness?
3. Does custom paint jobs affect your shield drop notches? I modded mine and filed/sanded them down to perfection, so I'm a bit worried that they will change for the worse.
I wish I asked this before I started, now I fear that I've started something I'm going to regret.
Follow up to my previous post: controller paint job went extremely well. Didn't affect my shield drop notches by much at all - I think the trick is to do as many light coats as you possibly can. The Krylon Paint+ Primer combo worked excellent, and came out really nice, as well as doing the second color. I recommend a mix of vinyl tape and painter's tape to do a design pattern like mine; use very thin vinyl tape so you can just cover the curves where the raised part of the controller starts rising. Prevents bleeding excellently if you're careful with application. (NOTE: be very careful with applications of clear coat. I used three VERY, very thin layers and that worked perfect.)
I have a lot of questions about LEDs for anyone who's installed them
1. How expensive are purple and clear controllers and how much are normal clear controllers?
2. How much are the other things I need?
3. How hard is it gonna be for someone with no experience in soldering and a very basic knowledge of electronics (I built my computer but that's about it). Also can I damage my controller if I mess up?
4. If rumble is turned off, does the motor still receive power?
1.I saw one for 19bucks on amazon but usually they're around 25- 35 bucks.
2.I cant say but shouldn't be too much
3. Follow this guide it helps alot especially if you need pictures http://www.meleeitonme.com/modding-your-controller-with-leds/
4. I don't know
I know third party is frowned upon but I just need the shells,buttons,and sticks. I plan on using http://data:image/webp;base64,UklGRvgVAABXRUJQVlA4IOwVAABQggCdASosASwBPrFSoEkmJCKTmZVgZAsE9LdwuaB1jsdvYmal1V8c1seLaVu72v/s/dE9PuHgn56Ek636jZtzyng4bZ4ut+KtZm07ynlXoeVeh5VfPxudYfHxOcfQV7LVtV2cKoH0uCNOODH8ON4kr25Y0X+2+VeOu9zyqkZs333ewlOoteVY68Wh+ZN/eBLpuS0DALVgS2N7PhxvKvQ8q9DtO+r2cXC39VWgLNkg6CaTJR84YRjZYWOfih1u7ctpPoAqJUNJY0X+2+TSaksdjt2zd/Viihdfb1Gi85+kY/VucKTuCAhijEmKxVpp0M2zdV42lXjMnW0S6vmEHEP//I6dR9iTY/E8qdmz3HxRBm/0G+MdTTQl6S2i5CC6HlXoeVeNun2UkCEe6+0mO/l/ej+oXimyDU+C8bCc/reQYsJxd/r3tGH32urGi/23yr0Qtt63pce4v63Vw/dUyqfqNDsIXp/g37RZBoK5NrcgY90b9jgOWN60+qpqxvPW4cJ9cXKh9e3ymapP/kTeY5Uoijbzve8OgkMipbUGsZDREiBPt5VRXlAifu1wi3aDhGqrZ1bjZuOytMBv+TeclLQHxljEFkZ9fxiNRBTzw0H+/TM7drQN+MDAcjj70b1369EKkkaBKTMjR3z3V8KmFeMJL6EgCHTgoayDh85L4wVLjhLst7fWhBP6B4eg2h2X7bDB1OxRjqaautwGImZOqyjqLs5w3upWjz2Zn6J49T5piVvPqYuGwCSkI4ClbR1hdkQVAYXN1NGwr5EPjBDj1lAKb5JtD0S0O0f4MnNz16arwxecw9k8mbtd0ayuzd8GRkgsNWxdHip2uZzXyKg6Mvr/59AP/P7ViHVBg7XjlJjyH8q3KYhdUh5cbRFN86laRDLgUaHegO+fllaxqlc52FOEyF3ukBjv6eUzszIdkAllHsPdJ2+MrmuGDoI2Pb8kxBjNoGwjW+QpBLFMwd3fuNhb6fC97YniRyMdbjR6nyYrUnsj1dFoCTasJ5SGGA5q2+UmKpo7FZhmbvnhiBa3mboEOEb6ZCic8ytNZorqHqQKQWx3mgRknxUveP/5BmA2Rp59u2l7cwSwVpoGf6vfk1TpMAbuqscQ7AGyH4bXHqsmPkYBlPVUwR4w0zaWEvoaHNeo5ZqBFI0M8nRUy/T7pMGoUpWfn0HxcwM19XRvJsnnrRquZUpPuMZqimU4fW0KaeIV+RWC9dZh8+hpVasIPuHBB/9ZJCny8Si4TFU3+K7fWbTc4/2xjYgm+Ii0PshGdCcwJgVUr6nMs5tDR4/5MnyLEDjIBwJCNzkxGow01rnB4t0YpadnPD0+A34sY8q8bSfWQLegdwT9O9JxmpRjGL4moPoUQzP/HqDN00tg4/5OA6lrP05Nj327m5QAAP7/NjHqzIlGC6cfentKQRrYxvkUS9gA2V7iXybqKRHXZkRTgoiTNWv2IhldcNzSO+RW/WmKU+u1SV3d8ePEn6zp6n2gGLoxQnOUDYO03mwbwcU+sFYE0FcLgWczf2fou0Ei1bAHtwBaAodmr/l8SGtWvwCq53SGHGLBdLWZXWzjY/2XOf0FXACBZNuCLV49se9lQV42cwLrw7XBWwhG4UVoywUtHRyplKLtsNs/auvKYR2+gCtV/cA2VIil2/RTeu2L6OUlfBzINuzEqqkkism8LBgzJjxIXmM5yU+VC/73GhwkpwvB5DHafOOfoaRRhTaIFJ/MRuISt7aXwaLvnb5yQ5ZTgv4z7oph51g/ATy/AKZ01oDjsj/MKtdgxSIQt+OBKaVOzK6/ZEQcDMqapM/Ss8UlkObEGzAFj96UVn5twYoIvlyuqIs55JZhMH1qj5H/UeMyIlfFVyUl5ouwDg1oKJhwgPe5UQ9OOTXsVH66aUzXMdnIQ9kGwyRCbJGUmXLZQCbe+duwzkXWEUKqCPg1obtYnS4z9vvgcFZlKXEkU9IgALbkyYDuIHF/8FSoMM27br4kPo4naySF8ptg0yUE9iQrASeUefnlCCqwQ6kvQkeyNx4plNyWT2ij9jGk/9FYSSkkvtKyeyyMGNU0B9YrnOmyJG2lCLBNUj6T+u96T11AGCVnbeWrjmCvie8jrdoRMT2o7QJfpp9bdcrtBw6I8nAC0Fs/Th+Vcad+Hdg0BjC5Jrg6XsXRGCHRzy2kqq6RUwpH2BxYc/Q1WOF9mZZ4zjEBo9KG03GR4NhWD/0X7BJID1PXpkJF3Pskd8tBCMj/Tsy2CljmTP24Xnh5L9KM+ozHcSWDowYgzoc/93G+zbA/yWrtCldWT0HV7wdQrsRu/fPjob2qZ6X0fDOe3q1VGM0REk9zPUqq+wQgT2RTpYV6XeECbt9WcDc/pixcifeOmiIWIyJJxcS6Q2KF3IwiOQFUGptY6X44WHfO7GZ+wkRCQhlg7gBsU7DVNwd+J5uZOS5SK3ZTOixh1bIn3EzkjmfGVj8YIEHv0UpEEKHbyONuuxfr79RXZqncz1we6OYDVnfbj8hwO80SlwRGlWJQlSxY+ZnUbNS64wb9f9Bg5ZqgkuGeQO9q/zotNv0ayiFg0Kkf8h6NgmhV9ZMKd7YRD7hg05Ly481Oacqq6mnl5NDtk0MKXtiUZIfFb/N0TYsCijUkv9q6bGxH2fFymc1hYD+5zHYmVBb2VczKRBr5hutVeDWOH7jTBWayR6db6aQSH3z3u5zgm57Gb8hwunIOCpkOaxmfC1cdCP1bZujYqm9ks40xr7HWOwhb5F5Z7ntJOHHglwXjhHXwoqHGpnbCN6KjpnXdhOxPUFgwJcZB9bHZ0Hs59A0gpzpcI/bEF1riO1hvtsJoWULwegs8eQAKRNRmhWbb4urNLB/WHWwFklEa8a2hIeKtTeuwKX/XDL5jtmUOEzSpiz7GM4PLduwhTGyizpoOzq6MmCwqvzJs22V32iqVLF+6WYqtEolZBYQOIyfsz5WOmEadxCWSOC349Vny87I19h03WXca9mNr4zitkhbsZC/FPBKZzjXzbgZzWPXoZV3zuJtK6nWt3i2nF7+8HPGvdktIH72CvLu4oso9ByoUJIqEv/5BaNykpBNZRf/w8cufZHa7sWfma/gu2dUdCQN6tbRRlhPWhofKTbf5ZrKGpDhr8fza7Xhrnrl/QPGB+2gmvkaohuxrYSerifyJ2No9DdyH/GAEKbuLVrQv7Mf8ygk5Py0bvY0LDaOkqxILHBFW01wRCiNNIQ3LqR9lDn4sdUaXYdQUbga8U+tm+icuMU51U2lvIj2atgacRv3FV94veAAV19BlENiqMiYz24lHGlQq5xlbMU+q1mmCz6G4pUdcXr0heogbfouuRHJ56NRXiIxppwv6LAtOAY/VI8p2rwWDKdKvc9QAIU5gY/hovYBJW348YcT+Nc7PRYEOuNQWmuQgbQTjvm9B/X+kpujgoLh4KPJQo+F2uq7sIjFZJArMUBBVi8pAVm+GB83Tq9Jnus4vHpFrqSlYTsFYBG1aAjZVppkRDXEIzjtoXoNvfHe1tbxJJmqKpPUaoMBUcItHVFx+ueFGakRVcS4C6vmpStLKlBtwbccjSL/v+mUzcb717UuxIeKYhUKTK1nFAal0ryrvY1Lc1aV5DP3RCDtLb4nAzi+ZuJ329jAgf9LueXtxLl914nQ63ZVySeTt2DDH8AgvhAR1ky7obpVr3YGhbAcFZCiLhWIXU0UjtP/0odSCPWCFyk4zNbC+i5JxW9vFCfHXJfdt7JQMh4Xz/qCl1HRXeIywlqAnJMh9WuNCKa4iaQGs+7S0o6Aio4B5adPYSexMaB4WVr6S3e12dD6rkSPsXMsTEMLX2x8cS2U7XJyzaYjWPkM5CE3nt6jbsUQuQFlr6qa6ubsb5U8929yh6ongghV/KnZ8RPilauhppCyf6ri+R80Eo19FyX3Ti+3TzC7tZddjJ6Lq1kEp4MEo+GuHTnA30dqm/QskLiuK575Iqp7mE5VHRPZddAjKLCs7MY8A8bSjQboXzSFFtlAdAffeltkr9zsrvJaMuCd+WSbV7mNVthlc0rShtzjeUYVBKzz5bxlHL5UKoB96oZaTXJCFroDW5x0Y4ytjrxDBGYXcUkWNPswmAap2hGLV3FqCVK4vzuP8iSlzLP7TTjnrGZv3NN9RdLXFAJVUDo1+fzBogSkTzwId6E8mgRXyqaKKY5XkLs+JSYuTZqcmZxhwp9IWoeYdsors/vnhSH1nNlHQdNkR93mEe2r7vImWqPKToSuHFr9iZkkXJ+fQat3g7vt7qJWpMV66MCqm/ZBipygZGyX+mxSpEMRKV/mLlr9XKTrTIuw/Wv+WWBEph/LYwVKZCb7bR1FB7Mngkd2UWbj8p7Biqo63RWpwITfwQjhtmn7piSVQajW1wxGukrJ7meWVWQmtKEMVYcVewNkB1IyFOQSG2HBOLm+k6o4TdfiaGWVUPwS9AN3wuwHaEAjkPgvACSqhEDnYsLoIFixWllEQP8ULkWCid6yKzntN+lV49ncRGhQKtE2owT1ADpkry1BEtoZpOJPKD2MjP4FdPCBViraIEyTj6pZwBAcNiDXbn7Kv5Huc0dMZRIbwlWclP4jXrvOUYiMurKxDhTBJFx7yjBn1UER7bYK8RTOViMP4I58MA7gXnaVVXpcusY0aA2ZViKjxjUFD45HskC94ds1s71B3ykvwdMWzswrz9PzkWyecFsa1URil/2sQAEJg0yIMMkxRdJ8rd6r7zEk74b2P2s7NmcyHrIISojO/hv4xRSZ6XB4a1xbFdbwp+w6Ljj6PsJPk8mGB5L3NAqpxVOUi71oVFHqn7E4mpot46Yfam13XVQu9qwY9L5eLlUh4lVELhK5fPJ0//DKJ9iGyWbNGBywbvhWLLF0XCNLmjOu/E9lUm9rwnHjIvMbjNiTi1hqAdIQ6iZWyJlrlfUU5WtWJ1JWchLNphx8tjue+V8DN+daLpLnr1fUGAxVzfdWJTmj6yy9807b24/gww0rnk9zwTVkylUiN60c9/ZOpUXSi4nK7ZzXHlid6aScYO/g+Z0FN8+cZ6+8+iA1kp0wIWTX4UIbz2mtNIHwR5L/CJ2HV5rAL+dMTLjIBk5Ra6o/NayYH7V4JSJY4ut9Du8nYMryr5eihkDGLbVdVmQNO+EEe2rdqXsr/2qDys73xzXd/9B44088RrqV0Qp4X2kiuX+mduCdN7cgu9lehRVAuFzDH6ow3HS3G2N9sLzy0Y61+eYE+mVJ4QdLJN//TN8eAGDj02XGDORihkBrxKTMe/KXg8GwypTVqgpLzp7TlQrSlAwTuYKyvRoTmyI3Njoof0nJ/EC2THGP5jBDXiStdEK6dFsS2s/oPIlM3RuA1Qx2WPt4lcE9u6Lt98Bk+8jQkOXTm6p63ZRBCtJVaYvFSq9ipnkj1P+nNpVPe5fQjd8+l7r17zHypokUzw4ewWoRjJpOpRtpc+XL2ASSgBPsTh6mRsFZZXclslzNQgYjpY0yeNrYc+OKWipr9jWW1A6dLHGqeR1vxcHx5s5uCcrRb+h93y8YcnWYo0K/YScnkhdtM10YDCqEM9F61aoLQp92ot4xZsG3e+T3bZc8cB6dKlBQ/BQDBwbUVM7h5whfiDnsXxiiS5RD3Dm00oNoQTa4ymmItOckOCF4JS04fgH4hac8bLWB10hsekIyCXRpYbAhmT1eusKJS4v6foIG01kN/fxNPSE0xqQvVewTvNsbuFf8iPbp9rr3BInIswq19R1RIBxo1mgoYY4XDdqV8EBDVdv0tbX2YJUTfpGqKZvXBk1GG2M6W00RWTU8v+xw70DLfUUp85gBQTWQpNkbd3X6hy4DPG2i+FYRtg0Vo2m7HonWuYPh/gOIuvrSEtF3To84GwGA2K2Fsemvwf2fq+xpP9Afa1M+gN1MaDLs+Db2v8tB3loiBhyx7EW2y2dWZd+fi1mMKUJDkT0ngb1eeP5cGhpOOF67VkfzUiQmYN3NDhlQgc1QbxDsIQjmp3MCdWpjPdl9dmpTzhAl6nCZVcfQDRvPdVZ61xdJ2/4Dq5jE7GbhKT3N+RceGwdT8CqQpN6lRbG5Q6tPgkWDLjB7eav8jc5V4dfgID5M8bvUzvJCoq7xcb4BzxpYh6GQqnPHDMfiS8ibshGrpVkZZyNqy5s/IM6qkVzD0mers2eEh8Cz0HWvrLsb/ptrfELyBWPtWrXINhdxcHhGwdKnFFnaPEvH+PV9Qh/NavP3HOjpfI+UKBULIaY7WGhZqlbtqI6m3qUIGiwnkrzpBwhQS5ZWus0Pcexq0iHuQ6hGx7I3uL4qMY+q8X3JwI0knPXuIrxlcWpkpJdG3w1w5msomnXFON89g9kCkKvCkCFKNIBQy3fwYZdl8j8TA2kzd0i7vFIrny/fS/iIFkzV8mDGzSnnv0KIhglmlzQgN8e7OkFA1Gx1NE7NDqtu0xsUUQp4bPDHjsx/9pXxWiznMLXU+ZZ/KXesBkqiF0xczfj1m+NoDLoBHpe5Sj5Pd9wiRidLnq0aMVpX1RXzc7/miE2bmpNH5mu/DSUghayt3piVLqmej+j//2rI/4PPMu+mtAh694q48bcPRP69VsOR+eBSB6IgHhMP+oKpPqM6aALbqaEVpWXYTq62rC+wtLgLe9yvqZzqQPHmEiGu1ibLHb0aaSA6OHTdkuezgEDBv7DmtUhCbTBejj1D2YJnrB37HEmPS+2exaqJukuwTFAfOnEBw78tipcvIQoGq3TZZANC+afwR5k+ZNSyZE5Dkum6VJtKmR2WO4gZQftti5LyMFzAKnEaIT1Myv4jwp9EMoHbBKVwuddkdA+f2PVgAPO1qXRVSRJi95LpwfbpVey31OBu4+w2EyBt/bN8bK88wsMjUjOEQUpnFReMUi3frm53EVS5hUf1I0zz7tTMwj6NiUnDPW35W69rbUsWwyIga14iqQi8FUs/h9QIg74XCA0griRWDPz8ea8nCvHuUItP7h+6GjIKMimYLlQ3v3ytik5CfeoVoWOlWyskPgPuR7OJ3dwD2gg5o46vyCmMcCme1ujpNSTahd4j252lYc+5FrN73OHvwL6c1c7C8xTIXzBCSO/JBTUJwuxkTJRquC85Kr+q5RTjFEoeXd2uq0AAAAUClr6aqGZo3SDCV0xiQGErrMihKM2pO2/RLDbZ/02pmGVCQFLvw7Nkx6IGqMHRVwBDAroLhxSX/tJnDSV4nHggQva8I0xWxxa9f4zP5OpLt+tDcIpPUPArBnoLZpQ+Ly3+fRIQMf+GltC/nJSFqDOgiagkNV07QKqR2cG/HXihRTf/5jBjBL8WPRgTGJvN5Jy7mMNi4sZZAMnSzGMiHU4lZkvyQakOeA6a8WJ8NyhN0P5RMddIPQeSGG/g9fT3xbKByXQmGDEzaR80EbKQQ7/J0HH815RGTZtyOAu+9Hdh/vNWhM32ZebgS8GiFjG3p0qBjASv9p976dDVvl2g/hOQUOa4gAACfwwccdRoeGTpA8ldcTYdZPrn8vhr4P6toAAAAAA== the motherboard from my original gc controller anyways. I also know I need to modify the shell a bit to make the board fit. Are these sturdy like original shells? or do they have a cheap plastic feel that seems like it might break?
I actually already got the back and installed the lights lol. I heard from someone else that those shells are good but you might need to sand them to make them fit.
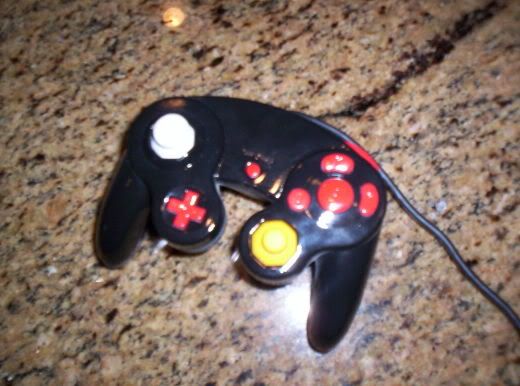
I tried this about a year ago and it didn't turn out too great....
What's the best way to dissolve and remove all the dried spray paint so I can try again?
First I sanded the controller with 320 grit, and then I put this Rust-Oleum primer on:
and waited for it to dry.
And here's where the problems start.
My plan was to color the the sections that hold the buttons, DPad, control stick and C-Stick red. SO, I duct taped all the parts I didn't want being painted because I was going to paint them another color. Then put on three coats of red Rust-Oleum spray paint,( BTW everything I use here will be Rust-Oleum except the clear coat(which is Krylon)) and then waited for it to dry. But, to my absolute horror, when I took off the duct tape, the paint had somehow gotten through the tape into the parts of the controller I didn't want them to get through. So then I try to sand those parts off with the sandpaper. But the controller was putting up a huge fight and I couldn't get it to come off. So I decided I would just paint the entire top red, and I put on my first coat after resanding. Although, from my terrible sanding attempt earlier, there were very noticeable bumps left on the controller. So I tried to re-sand it, but it was even harder to get off then before. I then tried to scrape the paint off with an X-acto Knife, which was actually working, but would take too long and still wouldn't come off correctly. I then left in a bucket of soap and water for 24 hours, but nothing happened. I'm not sure what exactly to do at this point. Here's what it looks like now:
Help would be VERY appreciated! And also, thanks for the sticker paper links, aVerySneakyBox
Those were very helpful.
Questions (please answer someone):
Can I use Varnish instead of primer for my controller?
Can I paint my Joystick and my C-Stick because of the rubber coat?
Cant I use regular brush on satin paint instead of spray paint?
and
Can I use Decal Waterslide paper designs on the surface I just painted?
I would appreciate it if someone answers asap thank you
try using nail polish remover or paint thinner. I only had experience with nail polish remover and seen people recommend paint thinner but to be careful because it will damage the plastic if not done properly.
Questions (please answer someone):
Can I use Varnish instead of primer for my controller?
Can I paint my Joystick and my C-Stick because of the rubber coat?
Cant I use regular brush on satin paint instead of spray paint?
and
Can I use Decal Waterslide paper designs on the surface I just painted?
I would appreciate it if someone answers asap thank you
Varnish is ok but make sure it is completely dry, when it is dry wait one more day to be safe.
For the sticks I tried painting mine and the paint eventually comes off ( mine lasted 4 months before they started chipping so I just switched to PS3/4 sticks and wii controller sticks.
Sorry not sure about regular brushes, I have no experience.
and YES decals are ok to use just clean the surface and give it a clear coat.
Thank you. I appreciate your reply
P.S. Ive already watched the video you linked but thx anyway. Thats why I was a bit sceptacle about the decals on painted surfaces.
A Guide To Re-Spray Painting Your Gamecube Controller
Guide by Shök, YES!, and RelaxImAProfessional
Guide Editing, Picture Compiling, and Guide Inspiring by Shök and RelaxImAProfessional
L.E.D Guide by Yeroc
Guide Compiled by Shök
Last Updated: October 13, 2015
Everyone, don't let Nintendo force you into color-communism. Customize and...taste theRAINBOW!
Read First: - This process can take anywhere from 20 minutes to an hour or so once you have the tools. This is, pretty much, really easy to do and straight forward. Once you are good, it could takes 20 minutes to open, sand, and paint a controller. Then you just let it set somewhere to dry. You pretty much have to wait a day for them to dry correctly before use. I would highly recommend you just use a different controller for a week. How long it takes before you can use your controller again depends a lot on how good you painted it, the paint you used, etc. Since Smash is an aggressive game, just try to wait for more then a day.
- A new addition to the guide provides the procedure on how to insert L.E.D lights into your controllers.
1. It DOES NOT show how to deal with wavebirds since they are usually banned unless the tourney is small. Wavebirds are banned because of frequency issues.
2. It DOES NOT show how to mod controller’s functionality.
3. It DOES NOT guide you in how to solder, cut out, or replace parts because tournament directors might ban it since replacing parts can alter controller functionality.
What You Will Need:
Tournaments do allow cosmetically modified controllers but that's the extent of it.
1. Tri-Wing Screwdriver- For opening the controller, someone suggested a flathead with some pressure. I, personally, would use a "Tri-wing Screwdriver" because it's a specific fit to the screw. You can find one on eBay or Playasia for about $6.00 including shipping and handling. It also opens other Nintendo products, so it's not a complete waste. I just used it for my controller and I’m 100% satisfied with it.
2. Sandpaper - Just find the finest grit that you can. Something that will take the paint off your controller. When going to buy sandpaper you might want to take your controller with you and ask someone what kind of sandpaper they have that will take the paint off of it.
3.Primer - Primer comes in a spray can just like spray paint. This goes on right before the spray paint. Primer is an adhesion to help the paint stick and not run.
4. Spray-paint color of choice for plastics or regular spray paint- I believe someone said that spray paint will make your controller stickier. I don't agree. It usually depends on how many layers of paint and clear coat you apply. The rough-ness or smoth-ness depends on that.
5. Clear Coat - This goes on after the paint. It is coating for the paint. It keeps your controller smooth and protected.
The Process:
1. Open controller with your Tri-Wing Screwdriver and remove innards carefully. Remember how the put it back together. Don't worry. Putting the controller back together is very simple and straight forward.
A note from Yes! - about the use of a flathead screwdriver. i don't have experience with this, but apparently, some people have had great success. that's great! but...please be careful if this causes any stripping of the screw. if the screwdriver is turning the screw but causes any damage, be careful.. i personally have opened up my controller a fair amount of times for maintenance and cleaning. if for every time, i had stripped the screw a little bit, i would have destroyed it...so don't hesitate on spending a mere $6 for a tri-wing screwdriver. BUT, if the flathead truly does work without a hitch, power to you!
A note from Relaximaprofessional - I got my triwing screwdriver from ebay, about 5 bucks including shipping.
A note from Shök - I got my Tri-Wing from Playasia. I highly recommend buying one. It's cheap and it's definitely worth it.
2. Wash the shell. Make sure to get all the grime and dirt from the sides.
3. Dry it. (Towel, blow-dryer, air-dry, whatever works).
4. Sand down the entire surface lightly with 600 grit sandpaper. (You could also use the highest grit you can find) When you start to sand the bare controller, (with very fine sandpaper, 600 grit should work), the plastic will turn opaque. Slightly white and that should be enough. Nothing too serious.
5. Apply Primer. 1 or 2 good coats chould be enough. You don't have to sand the primer. The nature of the primer itself should allow enough adhesion to the color paint. Let the primer dry according the can's instructions.
6. Apply spray-paint color of choice. 3-4 coats should be enough. When painting the controller, you'll find that it's difficult to get the area between the 2 pods that house the C-stick and D-pad. Don't be tempted to spray those areas without keeping constant motion of the can. Just try an up-down motion, then some diagonal motions. You'll get it.
7. Let the paint dry according the can's instructions.
8. Start applying your clear coat the same way you did with your color. 4 coats should be enough. The more coats you apply, the smoother it will turn out.
9. Fight off your temptation and let the sucker completely dry. About one whole day of drying should be enough.
10. Reassemble. Enjoy.
Some Quick Spray painting Tips:
1. Start and stop spraying away from the controller. The initial sprays tend to shoot out large droplets, something that you don't want. You want a nice, even spray so everything is nice and smooth.
2. Practice your pressure and motion on newspaper to get the hang of things.
3. Keep a constant speed and motion when you spray the controller.
4. Do NOT be tempted to go back and forth with one spray. Some people can do this, but it is suggested that you do everything in small spurts of single passes.
5. Make sure you have good lighting so that you can see where you haven't covered with color yet.
6. Do NOT reassemble until 24 hours after your final layer of clear coat. RESIST all temptation.
Other Important Info. To Know When Painting:
1. I recommend a facemask, in case you breathe in paint particles, lots of newspaper, and a pair of steady hands.
2. All the supplies should not cost you that much. Personally, I think the cost and the effort was all worth it, because, in the end, my controller is very noticeable in a crowd of original colors. It does, however, put more pressure on you to perform well because people see your elite controller and expect you to be just as elite.
3. There are dyes available that bond to the plastic. This can be good since you won't have to worry about chipping, applying primer, or sanding your controller. Painting this controller is essentially like painting a computer case/mouse and there are several guides out there. You can skim those so that you are more confident going into this.
4. There is a brand called "Krylon" which is the most expensive and probably the best paint out there. I don't think you need to dish out the extra cash, though, since you will be covering everything will clear coat.
Button Painting And Plug Painting:
From RelaxImAProfessional- Along with coloring my controller, I painted my buttons too. I painted the A, B, and Z buttons white, and left X, Y, R, L buttons grey. It came out oh so nice. BUT, my arch nemesis, friction, eventually reared his ugly head and the original plastic is showing through the sides of my A and B buttons because of the intense rubbing against the shell. Oh well, I can go back and paint it. If you choose to do it as did and paint your buttons, I suggest 2 LIGHT coats of primer, 2 coats of color, 3 LIGHT coats of clear coat. I say light because you don't want the primer+color+clear getting so thick that it no longer slides in the hole easily.
Also, if you've gone this far, might as well do the controller plug too! Use masking tape to cover the silver part, use masking tape to cover the cord as close as you can to the plug. Then put the controller with the remaining unexposed cord into a plastic grocery bag for protection. Follow the same steps to color the plug.
A Guide To Inserting L.E.D Lights Into Your Controller
Guide by Yeroc.
This is a new addition to the guide. It's a procedure that shows you how to insert L.E.D lights into your controller. Any questions about this procedure should go to Yeroc.
If you're dead set on painting buttons, be prepared to sand out the walls a good bit because they really do chip a lot otherwise. It's been probably close to 10 months now since I painted my controller and the buttons still look rather nice. One small green spot on A, some small slivers of primer showing through, and that's it. There was more damage done to the paint by the oils on my fingers than by pushing the buttons.
I also don't recommend trying to paint C-sticks unless you either have a paint that really bonds to the rubber tip or you take the tip off completely.
Here we are.
Guide To Adding L.E.Ds To A Gamecube Controller
Adding LEDs to a Gamecube controller circuit is a fairly straightforward mod for anyone with any electronics and/or soldering experience. ***DISCLAIMER*** I accept no responsibility for damage to persons or property from attempting to use the information in this guide. Use this information at your own risk.*** That said, only a few simple tools are needed for this project, and they are:
- Triwing or 2mm flathead screwdriver
- Low power Soldering Iron (15-25W)
- 60/40 rosin core electronics solder
- LEDs
- Resistors (more on these later)
- Hookup wire (22 gauge or higher ideally)
- Basic soldering and electronics knowledge (how to solder, what series/parallel are, what basic components do)
There are two* ways to wire the LEDs into the controller, depending on how you want them to act in the finished product. We're going to be using the power supply for the rumble motor for this, so Wavebird owners, you're outta luck. You wouldn't want to be running LEDs off of AA batteries anyhow. Now this is a curious, but understandable, quirk in the controller's design: The rumble motor is powered by a separate source from the data processors of the rest of the controller. Yet the distribution of power is actually controlled by the other source. This presents us with an interesting range of possibilities for this mod, with or without normal rumble motor functionality. The possible wiring arrangements are:
- Always on (in parallel with rumble circuit)
- Flashing (in parallel with or in place of rumble motor itself)
* There's actually a third way to do it, but it's not compatible with either of the other two ways, disables the rumble, and has special conditions regarding the circumstances of it's functionality. It was the first mode I found when putting LEDs in controllers, but I find either of the others or a conjunction of the two to be superior to this one. I will include a small note about it at the end.
Part One: Opening the Controller
I'm going to assume that you already understand the basics of electronics wiring, including how to solder, so we can get onto the actual installation procedures. This portion is common to all modes. The first thing we must do is open the gamecube controller, just like you would for painting it. Turn it face down and remove the back half of the controller using a triwing or 2mm flathead (and a little patience), and set it aside for now. Carefully pull the turn of the cord off of its post and lift the circuit board from the front shell of the controller. You'll notice, among other things, two particular runs of wire. These are the six wires that compose the controller cord, and also the two wires that connect the rumble motor to the circuit board, and it is these two areas that we will be focusing on. The different configurations will involve making connections to one of these two places.
Always-On Mode
This mode piggybacks the LEDs on the rumble supply voltage, and runs it in parallel. Using this mode, your LEDs will be lit whenever your controller is plugged into a powered on system (even a Wii on standby).
Take a look at the base of the controller cord, where the six wires are soldered to the board. This assembly is called a header, and in this header you will find a blue, yellow, red, green, white, and black wire. The wires we're interested in are the yellow one (the voltage supply) and the black one (ground).
For this mode, we're going to need a resistor in the LED circuit path. This is because LEDs are current driven devices. Without a resistance in series with them, basically they like to explode. Now, not everyone is going to want to configure their controllers the same way (and not all colors of LEDs have the same voltage rating) so I'd recommend visiting http://ledcalc.com/#calc. I like this site because it has many modes and even suggests some typical voltage ratings of different colored LEDs if you don't know or aren't sure of what you're going to be using.
Once you find your resistance values and have obtained your resistor(s) and LED(s), you can get started tying them into the controller circuit. We're going to run the resistor in parallel with the path of the yellow wire (if you decide to use multiple resistors, they'll all be in parallel with each other. Follow the diagram given to you on the LED site). You're going to cut the yellow wire in about half, and strip off some ends to work with. make a loop in the leg of the resistor, and you're going to solder both ends to the loop.
You now have a resistor sticking off of your yellow wire, and from here it's your discretion as to how you want to array your LEDs. I'll use a single LED as an example here. You'll be using hookup wire to make runs to other parts of the controller if you're looking to do that. Look for information on basic wiring and/or practice soldering runs of wire together in different patterns until you're sure you know what you're doing.
In our example, we're only using one LED, so the only thing to do is solder the positive end (the long leg) of the LED to the free end of the resistor. You can trim it if you need to, just be sure you know how to tell the ends apart. LEDs only work one way. Solder the positive leg of the LED to the end of the resistor, and then we're going to connect the other end of the LED (or another bit of wire solder onto it) to the black wire in the same way we did with the resistor. Cut the black wire in half, get some stripped ends, and connect all three of your parts together. To test your circuit, just plug your controller into a Gamecube or Wii and turn it on. If the LED lights up, good job. If not, check to see if the LED is still good, or if you wired it the wrong way.
If you're planning on doing more complicated LED runs, remember to research wiring practices and techniques. I can't go through and give a detailed explanation for every possible combination, because there is, literally, an infinite number of possibilities.
Flashing Mode
If you like the idea of LEDs flashing when your controller rumbles, like I do, then this is the method you want to use.
You're going to wire your LEDs to the contact points on the bottom of the controller near the D-pad, where the wires for the actual motor are attached. You can do this in two ways: you can replace the motor with your LEDs, or you can wire them all in parallel together.
This method is much easier than the other. You may not even need a resistor for this part. Good electronics practices would dictate using one, but I personally haven't had any problems without one in this area. Basically, you're going to take your resistor-LED assembly and hook it up to the positive and negative solder pads across the rumble motor. The pads are labeled, so it's easy. The same rules apply here as did to the other mode, so rereading them should help. Once you connect your resistor to the positive pad, and the positive end of you LED to the resistor, connect the other end of the LED to the negative pad and you're all set.
Hybrid Mode
There was a weird phenomenon I discovered several years ago when trying to figure out how to add LEDs to controllers for the first time. I was rather inexperience with electronics, but my friend and I managed to wire up a working configuration by putting an LED directly in series with the rumble circuit. Basically you cut the yellow wire and attach those ends to the positive and negative ends of an LED. I used a blue LED, which has a higher voltage rating, and was able to withstand this. Don't try it with a red or green LED. Now, I don't know why it even worked in the first place, unless as I suspect there's a buffer (resistance) on the front end of the rumble circuit. Anyway, the LED worked, functioned like this: The LED would come on when the controller rumbled, but due to the voltage drop across the LED, the motor wouldn't turn anymore. No biggie for me. Here's the strange bit. When first turning on the system and entering the game, the first rumble would cause the LED to come on and stay on, albeit dimmer than when it rumbled. And it would continue to stay on, and brighten upon rumbling, for an indistinct period of time. In Melee, it was for the first game played. And only the first game. I don't know why. Afterwards, the LED would go off and only light up on rumble. But you could always reset it by going to the rumble menu and turning the rumble off and back on, and the game would light up the LED again. Confusing, I know. I don't recommend trying this, as the other two methods are much more simpler and convenient, and also less finicky. But I thought I'd mention it for those of you who were curious.
That's it for my guide. I hope it helps any of you interested in figuring out how to put those LEDs into your controllers, as it's just about the coolest thing you could do to one. There are many possibilities for adding LEDs to your controllers. Depending on your knowledge and experience level, just about anything is possible. Have fun exploring the world of electronic illumination, and make those controllers shine.
Painted Controllers Now for some results of members from SWF. Thanks to all of the Members of SWF for posting their results. Keep 'em coming, guys.
Frequently Asked Questions
- Q: How long do you dry your controller? Does the paint tell you or does the controller surface require more or less time to dry?
A: The spray-paint can should give you specific instructions for drying. They suggest applying additional layers either within the hour or after 24 hours. I don't understand why the times are so different, but maybe it has to do with how the paint cures (dries). The Nintendo controller plastic isn't anything special, so you can treat it just like any other plastic. Actually, to be honest, I started applying 1-2 hours after each coat because I couldn't stand to wait. My paint job doesn't have a scratch on it till this day.
- Q: My paint job was ruined when I applied clear coat. “Wrinkles” started appearing as soon as I started applying clear coat. Why did this happen and how can I avoid this from happening again?
A: This usually happens due to the lack of distance between the cleat coat can and the controller when spraying. You need to apply clear coat in distance recommended in the can. If you clear coat too close to the controller, your paint job will be saturated in clear coat, which causes the wrinkles to appear.
This is an amazing guide. I have done my fair share of console paint jobs/mods but I haven't ever landed on something with this much info. I have learned most of the same information by trial and error and a LOT of sanding, spraying, and buying new parts. So mad props to you on this guide. I do have a question that I would like answered though. Well, first, I am curious if the painted buttons makes it difficult to execute frame perfect commands, but also, I am curious about the Led modding. I understand the voltage differences in the controller, and even those on the power rack directly inside the gamecube, but I have recently been trying to add 4-6 leds inside my cube for the controller port lights and possibly 2 for the fan (the fan is not necessary I just want to add it if I can). I have blown through a good amount of leds as well as a few power bricks in the process. I am not a stranger to electrical work, and I have done the math for my circuit, but it will NOT work. Do you happen to have any experience led modding the console itself? If so any info you can provide would be massively helpful. Thanks!
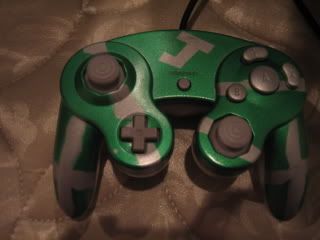
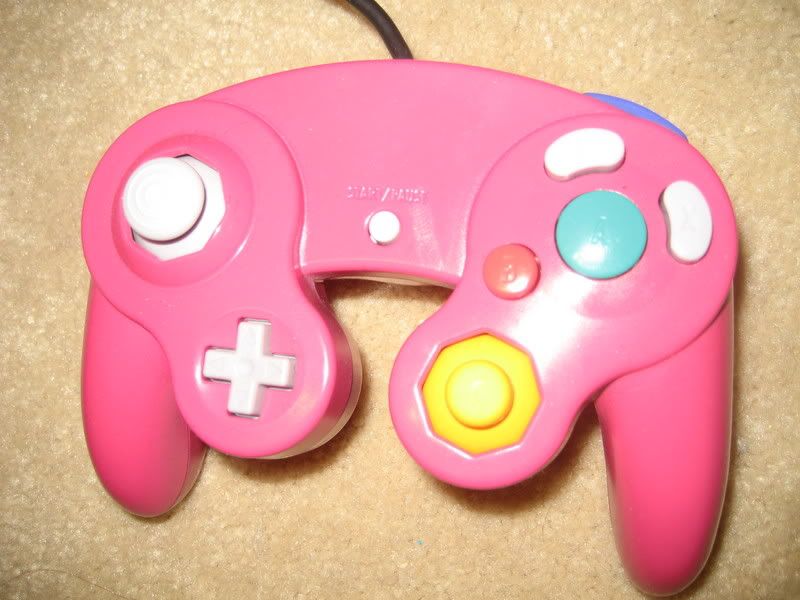
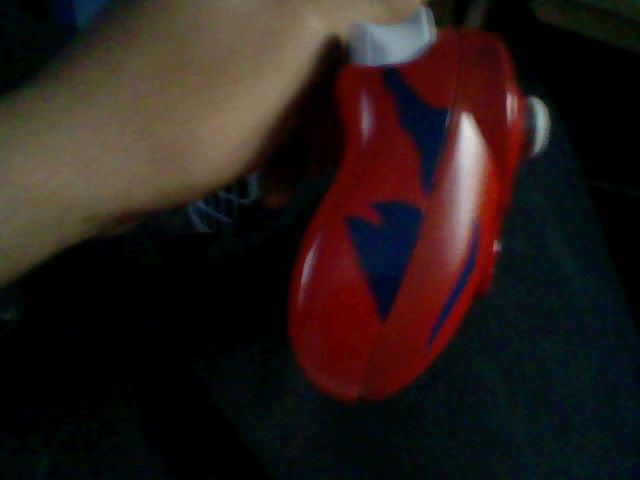
Just wanted to share a few creations of my own. Am getting pretty into this... Especially on a financial lvl :O but enjoying the obsession. Let me know if u have any questions or critique
I have a Krylon spray can that is both a primer, and a paint in one. Do I need to apply a primer before hand like the guide says, or will my two-in-one work?
Sorry if this is already answered in the thread, and I didn't see it. If that's the case someone please refer me to it! Any help would be so so appreciated! Thank you in advance!
To whomever is still browsing this thread; I just gave a half-assed attempt at a design:
Black controller. Only primed the A button out of the four I coloured. Proceeded to spray all four with two coats of black spray paint (waiting 1hr after the first coat), and then applying a clear coat 1hr after the paint. I then waited roughly 1-2hr before touching the buttons.
They feel matte instead of glossy. Don't know if it's for better or for worse, it doesn't really bother me. What does bother me is that it's pretty easy to scratch the paint off completely if you use your nails. This leaves me not wanting to continue doing this on my main controller (and potentially all my friends' controllers) since if it comes off that easily I feel like it won't be long until it starts looking like ****. Hitting the A button at a slightly claw-ier angled claw grip? GG all the paint just flew right off the button.
Pretty bummed because even thought it was a really sloppy job it looked pretty damn baller, and if I'm confined to the original colours on the buttons I can't be arsed painting patterns and **** on the rest of the controller with a permanent golden marker (which, by the way, sticks to the casing plastic like a ****ing mountain, and without any clear coat).
My question is this:
If I apply a clear coat 5 times, waiting a few hours in between each pass, would the paint come off if I scratched it with my nails?
EDIT: Sprayed some paint on a spot underneath the controller. 12 hrs later, tried scratching some off. Couldn't do it. Not on the button either, which I did with ease last night. I guess waiting for the spray paint to settle is pretty important.
With regards to the LED mod, it says yo use a low power soldering iron but would it be okey to use a higher power one? The one i was hoping to use is around 60W.