Kirby's Epic Guide for 3DS & Wii U
- - - - - - - - - -

I. Introduction
About this Guide
Hello, and welcome to version 2.2 of Kirby's Epic Guide!
This version will attempt to be as inclusive as possible in regards to up-to-date data. To go along with the data the entire guide has also been given a visual upgrade. I'm a competent designer with artistic talents, so I felt obligated to decorate the guide a little.
While the artwork itself is straight from Kirby games, the artistic creations found within this guide are entirely mine own. Taking cue from the title of the guide itself, I chose to continue with the "Yarn & Storybook" style of Kirby's Epic Yarn.
About the Author
I'm t1mmy, Kirby player extraordinaire. As of this writing I've been a competitive Smasher for over 10 years, and a fan of the Kirby games for even longer. During this time I've traveled across the United States and had the honor to play with many other Smashers, great and small, as well as competed in many tournaments... so many I've lost count at this point.
Over the years I've learned a good many things from my experience within the Smash Bros. community and with it I always enjoy giving back to others. It is with my most sincere pleasure that I write my third guide with aspirations to give others the best possible source of information regarding Kirby as I can.
![]()
About Kirby
Kirby is the protagonist in Nintendo's self-titled Kirby video game series. He is small, cute, innocent, perhaps a little too naive... and voraciously hungry. What's not to love about Kirby?
In the fourth installation of Super Smash Bros. (colloquially referred to as "Smash 4" or just "SSB4"), Kirby is a fairly under-represented character and as such is generally thought of as lower-tier [1]. In the past, Kirby has ranged from a strong threat (SSB) to exceptionally weak (Melee) and then mediocre (Brawl). The differences among 'strong' and 'weak' characters in SSB4 is not as severe as with the past games, so regardless of Kirby's relative strength he's still a fun and viable character.
Characters in SSB4 generally fall into some sort of vague category; they have specific strengths, weaknesses, and even styles of fighting. The following traits can give a good idea of what kind of fighter Kirby is in SSB4.
Style:
"Brawler" (Close-Quarters)
Strengths:
Exceptional combos
Multiple mid-air jumps
Short height
Extremely short Crouch
Powerful KO options
One of the best Pummels
Weaknesses:
Light Weight
Short-ranged attacks
Relatively slow ground speed
Relatively slow air mobility
Generally poor Special Attack options
Generally easy to punish
Fighter Summary:
Due to his slow movement, Kirby can have trouble with spacing opponents who have a range or speed advantage against him. His short-ranged attacks combined with his speed translates to poor approach options and results in an inability to keep his opponents under threat of attack. The good news is that Kirby can get a good deal of damage in, once he gets into striking range.
Kirby's strength when going toe-to-toe is his ability to get his opponents into the air, which puts Kirby into a strong position to punish. He can also knock opponents away, off-stage, where Kirby is very effective at gimping or outright KOing. In this regard, Kirby's main strategy is to vie for 'stage-control'.
Defensively, Kirby's small size is a boon since his short height can make it more difficult for the opponent to hit him, especially from the air or from farther away with ranged attacks. When ducking, Kirby is even more difficult to hit. Even attacks that would normally land a solid hit on a standing Kirby can completely miss Kirby when he Crouches. While Dodging can be punishable, it's not an especially bad idea for Kirby since Dodging combined with his small size can make him even harder to hit. Additionally, due to his slower speed, it can be used as a faster movement option.
Off-stage, Kirby's multiple air-jumps give him more options. These can be used offensively to chase down launched opponents, guard the stage, and to perform multiple Aerial Attacks before returning back to the stage. Defensively Kirby can use multiple Jumps to evade incoming attacks, provide multiple jumping Air Dodges, or be used to hover above an opponent to bait out an attack.
Kirby's Rankings & Statistics
Weight: 77 (52 out of 55)
Walking Speed: 36 (out of 48)
Running Speed: 30-33rd (out of 48)
Horizontal Speed: 7.0 (49th out of 52)
Fall Speed: 4.8 (47th out of 50)
Fast-Fall Speed: 2.8 (43rd out of 50, tied with four others)
Crawl: No
Wall-Jump: No
Wall-Cling: No
About this Guide
Hello, and welcome to version 2.2 of Kirby's Epic Guide!
This version will attempt to be as inclusive as possible in regards to up-to-date data. To go along with the data the entire guide has also been given a visual upgrade. I'm a competent designer with artistic talents, so I felt obligated to decorate the guide a little.
While the artwork itself is straight from Kirby games, the artistic creations found within this guide are entirely mine own. Taking cue from the title of the guide itself, I chose to continue with the "Yarn & Storybook" style of Kirby's Epic Yarn.
About the Author
I'm t1mmy, Kirby player extraordinaire. As of this writing I've been a competitive Smasher for over 10 years, and a fan of the Kirby games for even longer. During this time I've traveled across the United States and had the honor to play with many other Smashers, great and small, as well as competed in many tournaments... so many I've lost count at this point.
Over the years I've learned a good many things from my experience within the Smash Bros. community and with it I always enjoy giving back to others. It is with my most sincere pleasure that I write my third guide with aspirations to give others the best possible source of information regarding Kirby as I can.
About Kirby
Kirby is the protagonist in Nintendo's self-titled Kirby video game series. He is small, cute, innocent, perhaps a little too naive... and voraciously hungry. What's not to love about Kirby?
In the fourth installation of Super Smash Bros. (colloquially referred to as "Smash 4" or just "SSB4"), Kirby is a fairly under-represented character and as such is generally thought of as lower-tier [1]. In the past, Kirby has ranged from a strong threat (SSB) to exceptionally weak (Melee) and then mediocre (Brawl). The differences among 'strong' and 'weak' characters in SSB4 is not as severe as with the past games, so regardless of Kirby's relative strength he's still a fun and viable character.
Characters in SSB4 generally fall into some sort of vague category; they have specific strengths, weaknesses, and even styles of fighting. The following traits can give a good idea of what kind of fighter Kirby is in SSB4.
Style:
"Brawler" (Close-Quarters)
Strengths:
Exceptional combos
Multiple mid-air jumps
Short height
Extremely short Crouch
Powerful KO options
One of the best Pummels
Weaknesses:
Light Weight
Short-ranged attacks
Relatively slow ground speed
Relatively slow air mobility
Generally poor Special Attack options
Generally easy to punish
Fighter Summary:
Due to his slow movement, Kirby can have trouble with spacing opponents who have a range or speed advantage against him. His short-ranged attacks combined with his speed translates to poor approach options and results in an inability to keep his opponents under threat of attack. The good news is that Kirby can get a good deal of damage in, once he gets into striking range.
Kirby's strength when going toe-to-toe is his ability to get his opponents into the air, which puts Kirby into a strong position to punish. He can also knock opponents away, off-stage, where Kirby is very effective at gimping or outright KOing. In this regard, Kirby's main strategy is to vie for 'stage-control'.
Defensively, Kirby's small size is a boon since his short height can make it more difficult for the opponent to hit him, especially from the air or from farther away with ranged attacks. When ducking, Kirby is even more difficult to hit. Even attacks that would normally land a solid hit on a standing Kirby can completely miss Kirby when he Crouches. While Dodging can be punishable, it's not an especially bad idea for Kirby since Dodging combined with his small size can make him even harder to hit. Additionally, due to his slower speed, it can be used as a faster movement option.
Off-stage, Kirby's multiple air-jumps give him more options. These can be used offensively to chase down launched opponents, guard the stage, and to perform multiple Aerial Attacks before returning back to the stage. Defensively Kirby can use multiple Jumps to evade incoming attacks, provide multiple jumping Air Dodges, or be used to hover above an opponent to bait out an attack.
Kirby's Rankings & Statistics
Weight: 77 (52 out of 55)
Walking Speed: 36 (out of 48)
Running Speed: 30-33rd (out of 48)
Horizontal Speed: 7.0 (49th out of 52)
Fall Speed: 4.8 (47th out of 50)
Fast-Fall Speed: 2.8 (43rd out of 50, tied with four others)
Crawl: No
Wall-Jump: No
Wall-Cling: No
- - - - - - - - - - - - - - - - - - - - - - - - - - - - - - - - - - - - - - - -

II. Move Set Data
Damage is written in percentages ("%").
Each hitbox is indicated with brackets "[" and "]".
An ellipse ("...") indicates the attack may go on indefinitely.
A tilde ("~") represents a "chargeable" attack that generally gets stronger the longer it is charged.
Numbers separated by a hyphen indicate a range. (e.g. "4 - 6").
_______________________
![]()
Standard Attacks
-----------------------------------------
![]()
Basic Attack (1)
Damage: 2%
Hits on: 3
Knockback: 8 base, 30 growth
Trajectory: 55
IASA: 7, into Basic Attack (2)
![]()
Basic Attack (2)
Damage: 3%
Hits on: 3-4
Knockback: 8 base, 30 growth
Trajectory: 70
ISASA: 9, into Basic Attack (3)
![]()
Basic Attack (3) "Vulcan Jab"
Damage: 1%...
![]()
Basic Attack (4)
Damage: 2%
Hits on: 5-6
Knockback: 80 base, 120 growth
Deadly Blow: 312%
Trajectory: 45
![]()
Dash Attack
Damage: 1% (x5)
Hits on: ?
Knockback: ?
_________________

Strong Attacks
-----------------------------
![]()
↓ Strong, Down (D-Tilt)
Damage: 6%*
Hits on: 4 - 6
Knockback: 30 base, 30 growth
Trajectory: 361
Deadly Blow: 883%
![]()
→ Strong, Forward (F-Tilt)
Damage: 8%
Hits on: 5 - 8
Knockback: 12 base, 100 growth
Trajectory: 361
Deadly Blow: 230%
![]()
![]()
↑ Strong, Up (U-Tilt)
Damage: 5%
Hits on: 4 - 5
Knockback: 40 base, 116 growth
Trajectory: 100
Deadly Blow: 264%
(pictured left)
__________________

Smash Attacks
------------------------------
![]()
↓ Down-Smash
Damage: 14%
Hits on: 10 - 14
Knockback: 25 base, 102 growth
Trajectory: 76
Deadly Blow: 135%
![]()
→ Forward-Smash
Damage: 15%
Hits on: 13 - 15
Knockback: 30 base, 99 growth
Deadly Blow: 111%
Trajectory: 361
→ F-Smash (angled up)
Damage: 16%
Deadly Blow: 103%
Damage: 14%
Deadly Blow: 120%
![]()
↑ Up-Smash
Damage: 15%
Hits on: 14
Knockback: 34 base, 96 growth
Deadly Blow: 126%
Trajectory: 75
Flag: Slash
![]()
↑ U-Smash (hitting behind)
Damage: 14%
Hits on: 15 - 16
Knockback: 20 base, 96 growth
Deadly Blow: 145%
Trajectory: 88
![]()
↑ U-Smash (hitting behind/down)
Damage: 12%
Hits on: 17 - 19
Knockback: 10 base, 50 growth
Deadly Blow: 365%
Trajectory: 50
________________

Aerial Attacks
---------------------------
![]()
← Back-Air
Damage: 13%
Hits on: 6 - 7
Knockback: 20 base, 102 growth
Deadly Blow: 135%
Trajectory: 361
Aerial Attack Lag: 17
![]()
↓ Down-Air
Damage: [1%] x5
Hits on: 18 - 19
Knockback: 20 base, 107 growth
Deadly Blow: 704%
Trajectory: 366
Hit Lag: 1.5
SDI Modifier: 1.2
Aerial Attack Lag: 17
Hits on: 34
Knockback: 20 base, 110 growth
Deadly Blow: 707%
Trajectory: 270
![]()
→ Forward-Air (1)
Damage: 4%
Hits on: 10 -11
Knockback: 35 base, 50 growth
Deadly Blow: 717%
Trajectory: 45
Aerial Attack Lag: 13
![]()
→ Forward-Air (2)
Damage: 3%
Hits on: 17 - 18
Knockback: 28 base, 30 growth
Deadly Blow: ?
Trajectory: 366
![]()
→ Forward-Air (3)
Damage: 5%
Hits on: 25 - 26
Knockback: 30 base, 145 growth
Deadly Blow: 196%
Trajectory: 361
Auto-Cancel: 1-4, 42~
![]()
-- Neutral-Air
Damage: 10%
Hits on: 10 - 11
Knockback: 30 base, 90 growth
Deadly Blow: 198%
Trajectory: 46
Aerial Attack Lag: 10 frames
Hits on: 12 - 15
Deadly Blow: 242%
Hits on: 16 - 20
Deadly Blow: 306%
![]()
↑ Up-Air
Damage: 9%
Hits on: 10 - 15
Knockback: 20 base, 100 growth
Deadly Blow: 224%
Trajectory: 70
Aerial Attack Lag: 12 frames
Auto-Cancel: 1, 24~
________________

Special Attacks
---------------------------
![]()
![]()
![]()
![]()
![]()
↓ Down-Special
Damage, Aerial: 18%
Hits on: ?
Knockback: 65 base, 70 growth
Deadly Blow: 119%
Trajectory: 70
![]()
Damage: 0%
![]()
![]()
![]()
→ Side-Special
Used on Ground
Damage: 19% ~ 35%
Hits on: ?
Knockback: 60? base, 70? growth
Deadly Blow: 117%? ~ 30%?
Trajectory: 53?
Hit-Lag: 1.2?
Flag: Fire (when charged)
![]()
↑ Up-Special
Damage: 5%
Hits on: ?
Knockback: 100 f, 117 weighted
Trajectory: 85
SDI multiplier: 1.3
Flag: Slash
![]()
Hits on: ?
Knockback: 100 f, 100 weighted
Trajectory: 275
SDI multiplier: 1.3
Flag: Slash
Hits on: ?
Knockback: 30 base, 180 growth
Deadly Blow: 285%
Trajectory: 361
Flag: Slash
![]()
Knockback: 70? base, 100? growth
Deadly Blow: 216%?
Trajectory: 361?
_________________

Holds & Throws
----------------------------
![]()
Grab (Neutral)
Damage: Grab
Hits on: 6 - 7
IASA: 8
Damage: Grab
Hits on: 8 - 9
IASA: 10
Damage: Grab
Hits on: 10 -11
IASA: 12
Damage: 1.55%
Hits on: 9
Knockback: 100f, 100 weighted
Trajectory: 361
IASA: 10
![]()
↓ Down Throw
Multi-Hits
Damage: 0.4% x 9
Hits on: 9 - 10
Knockback: 100f, 10 weighted
Trajectory: 270
Hits on: 1 - 8
Knockback: 60 base, 180 growth
Deadly Blow: 286%
Trajectory: 63
![]()
← Back Throw
Damage: 8%
Hits on: 1 - 2
Knockback: 30 base, 120 growth
Deadly Blow: 187%
Trajectory: 130
IASA: 13
![]()
→ Forward Throw
Damage: 7%
Hits on: 1 - 2
Knockback: 40 base, 100 growth
Deadly Blow: 265%
Trajectory: 59
IASA: 9
![]()
↑ Up Throw
Damage: 10%
Hits on: 1 - 2
Knockback: 75 base, 63 growth
Deadly Blow: 216%
Trajectory: 78
IASA: 6
_______________

Miscellaneous
-------------------------
Damage is written in percentages ("%").
Each hitbox is indicated with brackets "[" and "]".
An ellipse ("...") indicates the attack may go on indefinitely.
A tilde ("~") represents a "chargeable" attack that generally gets stronger the longer it is charged.
Numbers separated by a hyphen indicate a range. (e.g. "4 - 6").
_______________________
Standard Attacks
-----------------------------------------
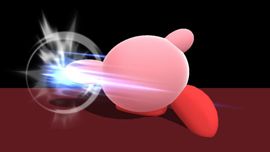
Basic Attack (1)
Damage: 2%
Hits on: 3
Knockback: 8 base, 30 growth
Trajectory: 55
IASA: 7, into Basic Attack (2)
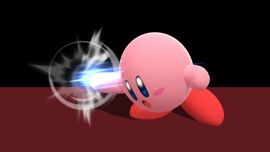
Basic Attack (2)
Damage: 3%
Hits on: 3-4
Knockback: 8 base, 30 growth
Trajectory: 70
ISASA: 9, into Basic Attack (3)
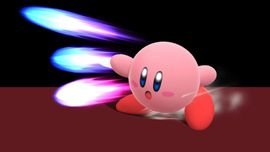
Basic Attack (3) "Vulcan Jab"
Damage: 1%...
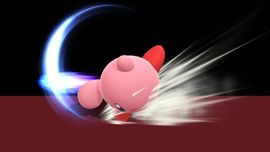
Basic Attack (4)
Damage: 2%
Hits on: 5-6
Knockback: 80 base, 120 growth
Deadly Blow: 312%
Trajectory: 45
The "one-two" punch is a quick, close ranged attack best used to out-speed the opponent. The opponent will not be stunned very long (i.e. you will have a frame disadvantage after HitStun), it is is most reliable to simply move onto the Vulcan Jab combo with a standard finish.
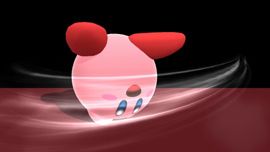
Dash Attack
Damage: 1% (x5)
Hits on: ?
Knockback: ?
Final Hit
Damage: 4%
Hits on: 35 - 37
Knockback: 100 base, 70 growth
Deadly Blow: 352%
Trajectory: 62
Hit-Lag: 2.0
Damage: 4%
Hits on: 35 - 37
Knockback: 100 base, 70 growth
Deadly Blow: 352%
Trajectory: 62
Hit-Lag: 2.0
The amount of start-up of this attack prevents it from being used as a quick option out of a Dash, this attack however is not without other merits. It is a multi-hitting attack with a lot of Active Frames which allow you to catch opponents out of Dodges (especially backward Rolls). Kirby's Dash Attack also has a small cool-down which makes it a little safer on a whiff. The distance and angle the opponent is sent does not allow for combos, but still puts you in an advantageous position, especially if the opponent is sent off-stage.
Strong Attacks
-----------------------------
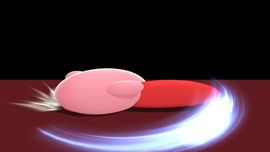
↓ Strong, Down (D-Tilt)
Damage: 6%*
Hits on: 4 - 6
Knockback: 30 base, 30 growth
Trajectory: 361
Deadly Blow: 883%
D-tilt is an excellent "poke" attack, not only because of its quick start-up and decent reach, but also because Kirby squishes down making himself more difficult to hit. D-tilt's damage output and Knockback are not a lot, but it has a useful chance of causing the opponent to Trip. Follow-up a Trip with F-tilt, Grab, a Tech Chase, or go for the KO with a lucky Smash Attack.
*May trip. Trip Rate: 0.3 at the toes, or 0.35 at the base of the foot.
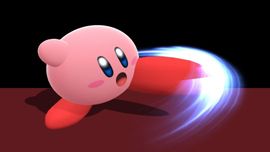
→ Strong, Forward (F-Tilt)
Damage: 8%
Hits on: 5 - 8
Knockback: 12 base, 100 growth
Trajectory: 361
Deadly Blow: 230%
Sour-spot
Damage: [7%] (at the toes)
Deadly Blow: 257%
Damage: [7%] (at the toes)
Deadly Blow: 257%
The utility of Kirby's F-tilt is limited, yet useful: A quick kick that sends the opponent away. Use this attack for quick punishes and to get the opponent off-stage for a more strategic positioning.
This attack may be angled up (Up-Angled F-Tilt) or down (Down-Angled F-Tilt).
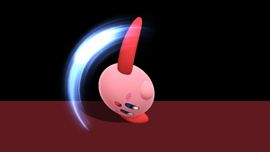
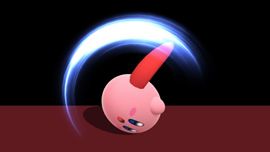
↑ Strong, Up (U-Tilt)
Damage: 5%
Hits on: 4 - 5
Knockback: 40 base, 116 growth
Trajectory: 100
Deadly Blow: 264%
(pictured left)
Sour-spot
Damage: 4% (toward the ending of the attack)
Hits on: 6 - 9
Knockback: 40 base, 110 growth
Trajectory: 88
Deadly Blow: 324%
(pictured right)
Damage: 4% (toward the ending of the attack)
Hits on: 6 - 9
Knockback: 40 base, 110 growth
Trajectory: 88
Deadly Blow: 324%
(pictured right)
This upward striking kick hits primarily behind Kirby, but it has a secondary "sour spot" that can strike in front of Kirby as well. Use the launching power of this attack at low-percents to start an overhead combo (a juggle). At higher percents, the U-tilt loses its combo potential but is still useful as a safe attack to throw out against an opponent who might be baiting a more risky attack. The "sour spot" of this attack can help extend the combo set-up to higher percents as it does significantly less Knockback than the primary Hitbox yet still launches the opponent for a juggle.
Smash Attacks
------------------------------
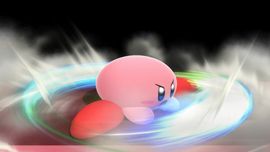
↓ Down-Smash
Damage: 14%
Hits on: 10 - 14
Knockback: 25 base, 102 growth
Trajectory: 76
Deadly Blow: 135%
Sour-spot
Damage: 10%
Hits on: 15 - 22
Deadly Blow: 135%
Damage: 10%
Hits on: 15 - 22
Deadly Blow: 135%
Of the three Smash Attacks, this is overall the weakest of them. The usefulness of this move is that it hits on both sides of Kirby as he spins. It is also Kirby's fastest Smash Attack in terms of start-up which might give you a stronger punish option than either F-smash or U-smash.
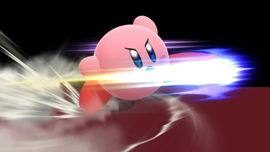
→ Forward-Smash
Damage: 15%
Hits on: 13 - 15
Knockback: 30 base, 99 growth
Deadly Blow: 111%
Trajectory: 361
Sour-spot
Damage: 11%
Hits on: 16 - 19
Knockback: 90 base, 66 growth
Deadly Blow: 189%
Trajectory: 60
Damage: 11%
Hits on: 16 - 19
Knockback: 90 base, 66 growth
Deadly Blow: 189%
Trajectory: 60
→ F-Smash (angled up)
Damage: 16%
Deadly Blow: 103%
Sour-spot
Damage: 13%
Deadly Blow: 161
→ Forward-Smash (angled down)Damage: 13%
Deadly Blow: 161
Damage: 14%
Deadly Blow: 120%
Sour-spot
Damage: 10%
Deadly Blow: 207%
Damage: 10%
Deadly Blow: 207%
A powerful horizontal kick that is best reserved for a defenseless opponent who has left themselves wide open. The reason this attack is best kept in check is because of how easy it is to be punished on a whiff. A secondary use of this attack is to use its pure power to plough through a weaker attack; this takes knowledge of 'priority' to use effectively. This Smash Attack may be angled up or down.
F-smash charge begins on frame 12.
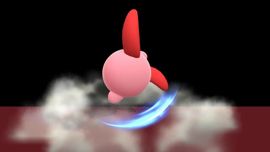
↑ Up-Smash
Damage: 15%
Hits on: 14
Knockback: 34 base, 96 growth
Deadly Blow: 126%
Trajectory: 75
Flag: Slash
Sour-spot
Damage: 14% (at the toes)
Hits on: 14
Deadly Blow: 140%
Flag: Slash
Damage: 14% (at the toes)
Hits on: 14
Deadly Blow: 140%
Flag: Slash
↑ U-Smash (hitting behind)
Damage: 14%
Hits on: 15 - 16
Knockback: 20 base, 96 growth
Deadly Blow: 145%
Trajectory: 88
Sour-spot
Damage: 12% (at the toes)
Deadly Blow: 170%
Damage: 12% (at the toes)
Deadly Blow: 170%
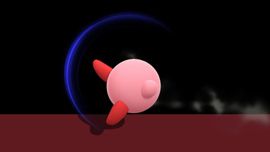
↑ U-Smash (hitting behind/down)
Damage: 12%
Hits on: 17 - 19
Knockback: 10 base, 50 growth
Deadly Blow: 365%
Trajectory: 50
Sour-spot
Damage: 11% (at the toes)
Deadly Blow: 395%
Damage: 11% (at the toes)
Deadly Blow: 395%
A powerful vertical kick. As with Kirby's other powerhouse attacks, it's best used against an opponent who's defenses are left wide-open. Use this attack to get a "Star KO", which works best on characters who are KO'd more easily off the top boundaries. This attack is strongest in front of Kirby and close to the base of his feet.
Aerial Attacks
---------------------------
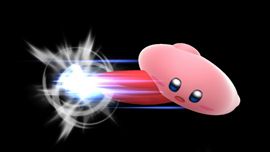
← Back-Air
Damage: 13%
Hits on: 6 - 7
Knockback: 20 base, 102 growth
Deadly Blow: 135%
Trajectory: 361
Aerial Attack Lag: 17
Sour-spot
Hits on: 8 - 14
Damage: 8%
Deadly Blow: 223%
Auto-Cancel: 1-4, 19~Hits on: 8 - 14
Damage: 8%
Deadly Blow: 223%
Though this attack is technically a "drop-kick" style attack, Kirby's aerial-based fighting style allows his B-air to be used either while rising or falling. Since the B-air finishes somewhat quickly, Kirby can Fast-Fall and incur only normal Landing Lag (Auto-Cancel) or he can jump before touching the ground, ready for more aerial action.
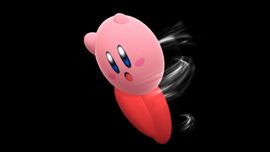
↓ Down-Air
Damage: [1%] x5
Hits on: 18 - 19
Knockback: 20 base, 107 growth
Deadly Blow: 704%
Trajectory: 366
Hit Lag: 1.5
SDI Modifier: 1.2
Aerial Attack Lag: 17
Meteor Smash
Damage: 2%Hits on: 34
Knockback: 20 base, 110 growth
Deadly Blow: 707%
Trajectory: 270
Landing Hit
Damage: 2%
Hits on: 1 - 3
Deadly Blow: ?
Trajectory: 60
Auto-Cancel: 1-3*, 39~Damage: 2%
Hits on: 1 - 3
Deadly Blow: ?
Trajectory: 60
The classic Kirby Attack is back and better than it was in Brawl. This "Drill Kick" style attack can be used effectively on a grounded or airborne opponent. When used on a grounded opponent the 'landing hit' will keep the opponent just within range for a quick attack such as a Grab or Tilt - if you're feeling bold, you can go for riskier follow-ups like F-smash.
When used on an airborne opponent, the final hitbox will send the opponent downward with a Meteor Smash. If you Fast-Fall with this Meteor Smash you might be able to combo into a Foolstool sending the opponent tumbling helplessly downward!
This this attack has many benefits on-hit, the risk:reward is balanced out by its noticeably long start-up. Because of this start-up, play Kirby's D-air to its advantages and you'll find it an excellent part of his game!
* The D-air Auto-Cancel when used on frames 1-3 is known as a "Hup-Cancel". This is because Kirby will land on the ground without incurring the D-air Landing Lag and he will say "Hup!" at the same time. Cute!
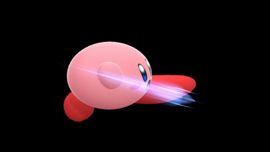
→ Forward-Air (1)
Damage: 4%
Hits on: 10 -11
Knockback: 35 base, 50 growth
Deadly Blow: 717%
Trajectory: 45
Aerial Attack Lag: 13
"Secret Hit-Box"
Deadly Blow: 753%
Trajectory: 80
Deadly Blow: 753%
Trajectory: 80
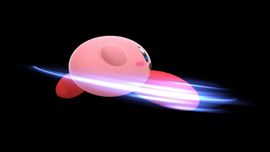
→ Forward-Air (2)
Damage: 3%
Hits on: 17 - 18
Knockback: 28 base, 30 growth
Deadly Blow: ?
Trajectory: 366
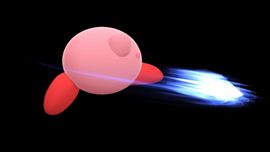
→ Forward-Air (3)
Damage: 5%
Hits on: 25 - 26
Knockback: 30 base, 145 growth
Deadly Blow: 196%
Trajectory: 361
Auto-Cancel: 1-4, 42~
A triple-hitting aerial spin-kick, primarily used to knock opponents horizontal, but also useful when spaced against possible Sidesteps or Shields. The Aerial Attack Lag is minimal, so Fast-Fall this attack if used out of a Short Hop. You can cancel out any number of kicks when you land. If you hit with only the 2nd kick and cancel the F-air into the ground while the opponent is off-stage this will result in pseudo-Meteor Smash. F-air is also useful off-stage when intercepting an opponent's return.
There is a 'secret hitbox' on the first kick of F-air, right at the tip of Kirby's foot which sends the opponent at a vertical ascent. Great for juggles or set-ups.
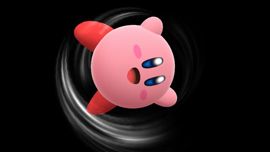
-- Neutral-Air
Damage: 10%
Hits on: 10 - 11
Knockback: 30 base, 90 growth
Deadly Blow: 198%
Trajectory: 46
Aerial Attack Lag: 10 frames
Sour-spot A
Damage: 8%Hits on: 12 - 15
Deadly Blow: 242%
Sour-spot B
Damage: 6%Hits on: 16 - 20
Deadly Blow: 306%
Sour-spot C
Damage: 4%
Hits on: 21 - 34
Deadly Blow: 412%
Auto-Cancel: 1-3, 32-34Damage: 4%
Hits on: 21 - 34
Deadly Blow: 412%
The "Spinning Star" Aerial Attack is an intricate move with malleable uses dependent on timing, distance, and situation. The initial hitbox (frame 10) is used at very low percents (0% ~ 10%) as a lead and at higher percents as a general 'knock-away attack'. The weakest hitbox can also be used at higher percents (60% ~ 100%) as a lead in the same way as the initial hitbox.
I call the N-air 'malleable' because you must form it to the situation you plan to use it; which angle, at what height, if/when to Fast-Fall, etc. However it is used, one benefit of this attack is the relatively quick Aerial Attack Lag which gives reason to Fast-Fall this attack and get back to the ground as soon as possible.
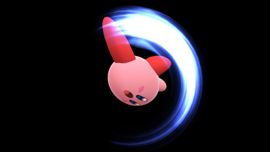
↑ Up-Air
Damage: 9%
Hits on: 10 - 15
Knockback: 20 base, 100 growth
Deadly Blow: 224%
Trajectory: 70
Aerial Attack Lag: 12 frames
Auto-Cancel: 1, 24~
This somersaulting kick is both very useful and very awkward. It is very useful because of its launch trajectory, its low amount of Aerial Attack Lag, and its easy Auto-Cancel. What makes this attack awkward is its slightly lengthy start-up combined with its rather close-range hitbox as well as it's reverse-striking hitbox.
Put this all together and you'll see that the best theoretical way of getting a Auto-Canceled lead is to leap backward and drop a reverse kick on top of the opponent's head ... talk about fighting flair! A more practical use for this attack is to use the front-hitting kick while facing toward the opponent and then Fast-Fall the U-air to take advantage of the low landing lag. This will launch the opponent for some nice juggle combos in a much more practical manner.
Special Attacks
---------------------------


↓ Down-Special
Damage, Aerial: 18%
Hits on: ?
Knockback: 65 base, 70 growth
Deadly Blow: 119%
Trajectory: 70
Stone, Ground
Damage: 14*
Hits on: ?
Knockback: 40 base, 40 growth
Deadly Blow: 271%
Trajectory: 0
Damage: 14*
Hits on: ?
Knockback: 40 base, 40 growth
Deadly Blow: 271%
Trajectory: 0
-- Neutral-SpecialKirby's Stone is much the same as it has been in all previous Smash games: a slow start-up transformation before Kirby plummets downward. This time around, a new mechanic seems to have been added: Kirby can now cancel 'on-hit'. This cancel is not limited to hitting an opponent, you can cancel with any 'collision' occurs with Kirby's Stone hitbox, as well as when Kirby hits the ground. There is still a minimal amount of time Kirby must remain in Stone form before he can cancel.
While Kirby is in Stone form he benefits from a kind of "Ablative"† Super Armor. As usual with Super Armor he will not suffer Knockback from attacks hitting him, but unlike normal Super Armor he will also not take damage. There is a downside to Kirby's Stone Armor and that is it can be 'broken' with 40% of damage or more - this damage is "Ablative" in that it doesn't require a single hit to be broken, consecutive hits will add up. If and when the Stone is broken, Kirby will suffer half the damage and Knockback of the attack that broke him out of Stone form.
*Will only hit an opponent who is on the ground.
† Ablation: (Geological Science) the wearing away of a rock or glacier.[6]
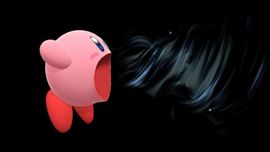
Damage: 0%
Copy: 10%
Star-Shot: 6%
Hits on: 18...Star-Shot: 6%
See "Copy Abilities & Hats" for more details.
→ Side-Special
Used on Ground
Damage: 19% ~ 35%
Hits on: ?
Knockback: 60? base, 70? growth
Deadly Blow: 117%? ~ 30%?
Trajectory: 53?
Hit-Lag: 1.2?
Flag: Fire (when charged)
Used in Air
Damage: 15% ~ 27%
Hits on: ?
Knockback: 60? base, 70? growth
Deadly Blow: 157%? ~ 61%?
Trajectory: 55?
Flag: Fire (when charged)
Damage: 15% ~ 27%
Hits on: ?
Knockback: 60? base, 70? growth
Deadly Blow: 157%? ~ 61%?
Trajectory: 55?
Flag: Fire (when charged)
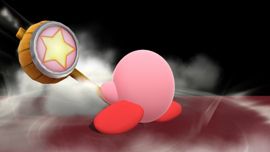
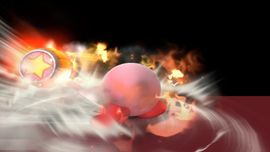
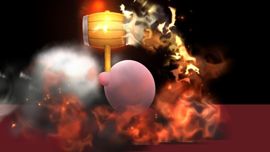
Kirby's Hammer operates in a similar manner as King Dedede's Jet Hammer. It is an extremely slow attack with a lot of damage/knockback that charges as you hold the button and then strikes when you release the button. When the Hammer reaches maximum charge, Kirby will begin taking damage at 1% intervals until he reaches 100%.
The Aerial Hammer has two swings and can also be charged. The aerial swings are much weaker than the ground-based swing. The Hammer will counted as "Aerial" only while Kirby is in the air (i.e. if you charge the Hammer in the air and then land on the ground when you attack, the Hammer will have ground-based damage/knockback and not aerial-based damage/knockback).
Note: Kirby gains Super Armor when swinging his full-charged Hammer. This starts on frame 5 of the swing and ends on frame 14 (8 frames of Super Armor total).
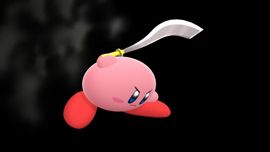
↑ Up-Special
Damage: 5%
Hits on: ?
Knockback: 100 f, 117 weighted
Trajectory: 85
SDI multiplier: 1.3
Flag: Slash
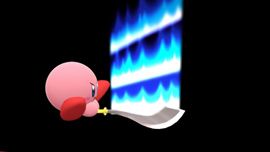
Downward Strike
Damage: 2%Hits on: ?
Knockback: 100 f, 100 weighted
Trajectory: 275
SDI multiplier: 1.3
Flag: Slash
Sour Spot (Downward Strike)
Damage: 2%Hits on: ?
Knockback: 30 base, 180 growth
Deadly Blow: 285%
Trajectory: 361
Flag: Slash
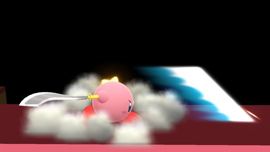
Cutter Blade
Damage: 5%Knockback: 70? base, 100? growth
Deadly Blow: 216%?
Trajectory: 361?
The "Final Cutter" is primarily a vertical recovery option first and an attack second (it's use as a projectile is a distant third). The multiple hits of the Final Cutter now combo much more reliably, but it is now possible for the opponent to "Tech" the 2nd hit when spiked into the ground (even when standing on the ground when spiked).
While the rising blade can be used to out-range incoming opponents, the start-up, damage output, and recovery lag is generally not worth it.
Note: Kirby cannot ledge-cancel the Final Cutter on the ledge when facing away from the ledge. (It also does not ledge-cancel at all when rising up with any facing).
Holds & Throws
----------------------------
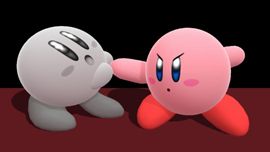
Grab (Neutral)
Damage: Grab
Hits on: 6 - 7
IASA: 8
Dash GrabKirby's standard Grab attack. After Grabbing, input Attack to perform a Pummel or input a direction (Up/Down/Left/Right) to initiate a Throw!
Damage: Grab
Hits on: 8 - 9
IASA: 10
Pivot GrabThis is Kirby's Grab out of a Dash or Run action. It is slower to start than a regular Grab and has more recovery when missed.
Damage: Grab
Hits on: 10 -11
IASA: 12
PummelPivot Grabs generally have a much longer grab-range.
Damage: 1.55%
Hits on: 9
Knockback: 100f, 100 weighted
Trajectory: 361
IASA: 10
Kirby's 'Pummel' is to smack his opponent very quickly with his free fist..
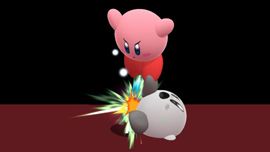
↓ Down Throw
Multi-Hits
Damage: 0.4% x 9
Hits on: 9 - 10
Knockback: 100f, 10 weighted
Trajectory: 270
Penultimate Hit
Damage: 2%Hits on: 1 - 8
Knockback: 60 base, 180 growth
Deadly Blow: 286%
Trajectory: 63
Final Hit
Damage: 1%
Hits on: 56 - 57
Knockback: 10 base, 100 growth
Deadly Blow: 859%
Trajectory: 90
Total Damage: 6.6%Damage: 1%
Hits on: 56 - 57
Knockback: 10 base, 100 growth
Deadly Blow: 859%
Trajectory: 90
A multi-hitting 'stomping' attack that send the opponent away and upward.
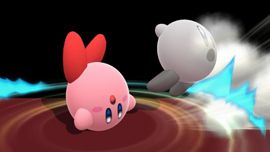
← Back Throw
Damage: 8%
Hits on: 1 - 2
Knockback: 30 base, 120 growth
Deadly Blow: 187%
Trajectory: 130
IASA: 13
Sends the opponent behind Kirby. There is very little ending recovery-lag after using this attack allowing Kirby to combo into B-air on some opponents at low damage. This Throw can be used to score a KO at about 150% and above.
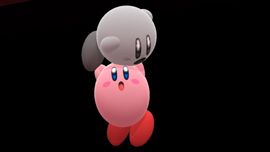
→ Forward Throw
Damage: 7%
Hits on: 1 - 2
Knockback: 40 base, 100 growth
Deadly Blow: 265%
Trajectory: 59
IASA: 9
Sends the opponent up and away.
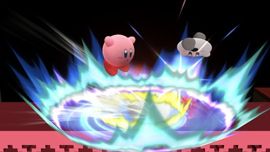
↑ Up Throw
Damage: 10%
Hits on: 1 - 2
Knockback: 75 base, 63 growth
Deadly Blow: 216%
Trajectory: 78
IASA: 6
Flies straight up and slams the opponent down with an explosion. This Throw is good for it's damage output as well as for landing on overhead platforms which may help KO at higher percents.
Miscellaneous
-------------------------

III. Inhale & Copy Abilities
Star Shot Damage Chart
![]()
![]() Bowser
Bowser
Fire Breath (1%...)
![]() Bowser Jr.
Bowser Jr.
Canon Ball (6% ~ 15%), (4% ~ 12% weak hit)
![]() C. Falcon
C. Falcon
Falcon Punch (25%) (28%, turning)
![]() Charizard
Charizard
Flamethrower (2%, 2%, 1% ... )
![]() Dark Pit
Dark Pit
Dark Arrow (3% ~ 10%)
![]() Diddy Kong
Diddy Kong
Peanut Popgun (3% ~ 11%), (23% backfire)
![]() Donkey Kong
Donkey Kong
Giant Punch (10% ~ 28%)
![]() Dr. Mario
Dr. Mario
Pills (5% near), (4% far)
![]() Duck Hunt
Duck Hunt
Sharpshooter (8% - 11%)
![]() Falco
Falco
Blaster, Falco (3%)
![]() Fox
Fox
Blaster, Fox (1% far), (2% mid-range), (3% point-blank)
![]() Game & Watch, Mr.
Game & Watch, Mr.
Chef (4% food), (9% pan)
![]() Ganondorf
Ganondorf
Warlock Punch (30%), (37% turning)
![]() Greninja
Greninja
Water Shuriken [3% ~ 12%]
![]() Ike
Ike
Eruption (10% ~35%)
![]() Jigglypuff
Jigglypuff
Rollout [7% ~ 14%]
![]() King Dedede
King Dedede
Inhale (0%), (10% star shot)
 Kirby
Kirby
Varies based on the Hat Kirby is wearing, if any.
![]() Link
Link
Hero's Bow (4% ~ 12%)
![]() Little Mac
Little Mac
Straight Lunge (14% ~ 25%), (9% ~ 20% far)
![]() Lucario
Lucario
Aura Sphere (6% ~ 17%)
![]() Lucina
Lucina
Shield Breaker (8% ~ 21%)
![]() Luigi
Luigi
Fireball, Green (6%)
![]() Mario
Mario
Fireball, Red (5%), (4% far)
![]() Marth
Marth
Shield Breaker (9% ~ 24% tip), (8% ~ 22%)
![]() Mega Man
Mega Man
Meta Blade (3%, 3%), (5%, 5% if picked up and thrown)
![]() Meta Knight
Meta Knight
Mach Tornado (1, 1, 1, 1, 1, 1, 3)
 Mii (Brawler)
Shot Put (15%), (11% weak)
 Mii (Gunner)
Charge Blast: (3% ~ 22%)
 Mii (Sword Fighter)
Gale Strike (4%, 3%), (weak: [2%, 2%]) <- has a gust
![]() Ness
Ness
PK Flash (9% ~ 37%)
![]() Pac-Man
Pac-Man
Bonus Fruit:
Cherry [4%]
Strawberry [6%]
Peach [8%]
Apple [9%]
Melon [12%]
Spaceship [11%]
Key [15%]
![]() Palutena
Palutena
Auto Reticle (2%, 3%, 3%)
![]() Peach
Peach
Toad (2%, 2%, 2%, 2%, 2%, 2%, 2%)
![]() Pikachu
Pikachu
Thunder Jolt: 4% (ball), 6% (arc)
![]() Pikmin & Olimar/Alph
Pikmin & Olimar/Alph
Pikmin Toss:
7% (red)
6% (yellow)
6% (blue)
5% (white)
9% (fat)
![]() Pit
Pit
Palutena's Bow (3% ~ 8%)
![]() R.O.B.
R.O.B.
Robo Beam (4% ~ 10%), (7% at the base)
![]() Robin
Robin
Thunder: [2%, 3%, 2%], [3% ~ 10%] (20 weak uses, 3 Thoron)
![]() Rosalina
Rosalina
Luma Shot (5% ~ 16%)
![]() Samus
Samus
Charge Shot (3% ~ 25%)
![]() Samus, Zero Suit
Samus, Zero Suit
Paralyzer (4% ~ 6%)
![]() Sheik
Sheik
Needle Storm: 1% ~11% (1% per needle)
![]() Shulk
Shulk
Monado Arts: 0%*
![]() Sonic
Sonic
Homing Attack (12%)
![]() Toon Link
Toon Link
Hero's Bow (4% ~ 12%)
![]() Villager
Villager
Pocket (0%)
![]() Wario
Wario
Bite (grab)
![]() Wii Fit Trainer
Wii Fit Trainer
Sun Salutation (5% ~ 18%)**
![]() Yoshi
Yoshi
Egg Lay (7%)
![]() Zelda
Zelda
Nayru's Love (2%, 2%, 2%, 5%)
* Stat changes according to Monado Arts
** Heals 1%
Star Shot Damage Chart
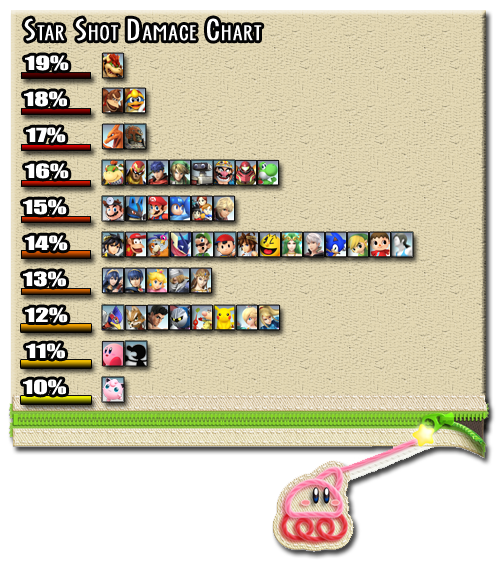
Fire Breath (1%...)
Canon Ball (6% ~ 15%), (4% ~ 12% weak hit)
Falcon Punch (25%) (28%, turning)
Flamethrower (2%, 2%, 1% ... )
Dark Arrow (3% ~ 10%)
Peanut Popgun (3% ~ 11%), (23% backfire)
Giant Punch (10% ~ 28%)
Pills (5% near), (4% far)
Sharpshooter (8% - 11%)
Blaster, Falco (3%)
Blaster, Fox (1% far), (2% mid-range), (3% point-blank)
Chef (4% food), (9% pan)
Warlock Punch (30%), (37% turning)
Water Shuriken [3% ~ 12%]
Eruption (10% ~35%)
Rollout [7% ~ 14%]
Inhale (0%), (10% star shot)
Varies based on the Hat Kirby is wearing, if any.
Hero's Bow (4% ~ 12%)
Straight Lunge (14% ~ 25%), (9% ~ 20% far)
Aura Sphere (6% ~ 17%)
Shield Breaker (8% ~ 21%)
Fireball, Green (6%)
Fireball, Red (5%), (4% far)
Shield Breaker (9% ~ 24% tip), (8% ~ 22%)
Meta Blade (3%, 3%), (5%, 5% if picked up and thrown)
Mach Tornado (1, 1, 1, 1, 1, 1, 3)
Shot Put (15%), (11% weak)
Charge Blast: (3% ~ 22%)
Gale Strike (4%, 3%), (weak: [2%, 2%]) <- has a gust
PK Flash (9% ~ 37%)
Bonus Fruit:
Cherry [4%]
Strawberry [6%]
Peach [8%]
Apple [9%]
Melon [12%]
Spaceship [11%]
Key [15%]
Auto Reticle (2%, 3%, 3%)
Toad (2%, 2%, 2%, 2%, 2%, 2%, 2%)
Thunder Jolt: 4% (ball), 6% (arc)
Pikmin Toss:
7% (red)
6% (yellow)
6% (blue)
5% (white)
9% (fat)
Palutena's Bow (3% ~ 8%)
Robo Beam (4% ~ 10%), (7% at the base)
Thunder: [2%, 3%, 2%], [3% ~ 10%] (20 weak uses, 3 Thoron)
Luma Shot (5% ~ 16%)
Charge Shot (3% ~ 25%)
Paralyzer (4% ~ 6%)
Needle Storm: 1% ~11% (1% per needle)
Monado Arts: 0%*
Homing Attack (12%)
Hero's Bow (4% ~ 12%)
Pocket (0%)
Bite (grab)
Sun Salutation (5% ~ 18%)**
Egg Lay (7%)
Nayru's Love (2%, 2%, 2%, 5%)
* Stat changes according to Monado Arts
** Heals 1%

IV. Tactics & Strategies
Leads, Follow-ups, & Combos
Note, this is a preliminary list. These combos may or may not be 'easy' to duplicate, but they are possible (they registered as a "Combo" in Training Mode).
Right now only the "0% combos" are listed (the opponent is at 0% damage when starting the combo). This is currently Mario-only as he works well as a character with 'average' stats; character specific combos will be added later.
To read the list:
Find the starting hit (the "Lead" hit) and follow the arrow to the next attack. If there is more than one arrow, then you have a choice as to which listed attack you want to combo into.
Game-play Tips & Tricks
To be added in a future update.
Match-ups
To be added in a future update. For now, check out the Kirby Match-Up Discussion thread.
Sheik
Diddy Kong
Leads, Follow-ups, & Combos
Note, this is a preliminary list. These combos may or may not be 'easy' to duplicate, but they are possible (they registered as a "Combo" in Training Mode).
Right now only the "0% combos" are listed (the opponent is at 0% damage when starting the combo). This is currently Mario-only as he works well as a character with 'average' stats; character specific combos will be added later.
To read the list:
Find the starting hit (the "Lead" hit) and follow the arrow to the next attack. If there is more than one arrow, then you have a choice as to which listed attack you want to combo into.
D-tilt (Trip)
U-tilt
N-air
F-air1
U-air
B-throw
 Bowser: 0-10
 Bowser Jr.: 0-12, 16
 Charizard: 0-27
 Dedede: 0-26
 Diddy Kong: 0-18
 Donkey Kong: 0-1, 2-12
 Duckhunt: 0-8
 Kirby: 0-3, 4-9
 Ganondorf: 0-3
 G&W: 0-9
 Link: 0-3
 Little Mac: 0-5, 6
 Jigglypuff: 0-10
 Lucina: 0-7
 Marth: 0-8
 Meta Knight: 0, 1-3*
 Mii: varies (possibly up to 18%)
 Ness: 0-24
 Pac-Man: 0-11
 Peach: 0-6
 Robin: 0-5
 Rosalina: 1
 Sonic: 0-3, 4-6*
 Toon Link: 0-4
 Villager: 0-21
 Wario: 0-10
 Yoshi: 0-11, 12
→ Grab
→ F-air
→ F-smash
→ Dash Attack
→ F-air
→ F-smash
→ Dash Attack
U-tilt
→ Jab
→ U-tilt
→ F-tilt
→ U-air
→ N-air
→ F-air
→ B-air
→ Grab
→ Inhale
→ U-tilt
→ F-tilt
→ U-air
→ N-air
→ F-air
→ B-air
→ Grab
→ Inhale
N-air
→ Jab
→ F-tilt
→ D-tilt
→ Grab
→ F-tilt
→ D-tilt
→ Grab
F-air1
→ Jab
→ Grab
F-air3→ Grab
→ Jab
→ F-tilt
→ D-tilt
→ Grab
D-air→ F-tilt
→ D-tilt
→ Grab
→ Jab
→ F-tilt
→ D-tilt
→ U-tilt
→ Grab
B-air→ F-tilt
→ D-tilt
→ U-tilt
→ Grab
→ F-tilt
U-air
→ Jab
→ F-tilt
→ D-tilt
→ U-tilt
→ Grab
→ F-tilt
→ D-tilt
→ U-tilt
→ Grab
B-throw
→ B-air*
→ U-air*
*see chart below for specific characters→ U-air*
True Combos:
 Charizard: 3-6%
 Donkey Kong: 5-20%
 Duck Hunt: 1-4%
 Jigglypuff: 1-2%
 King Dedede: 2-28%
 Kirby: 0-9%
 Little Mac: 4-5%
 Lucina: 3%, 5%
 Marth: 2-3%
 Meta Knight: 0-4%
 Ness: 2-8%
 Sonic: 5%
 Toon Link: 2-3%
 Villager: 2-7%
 Wario: 9%
 Yoshi: 6-12%
Plausible Follow-Ups:
 Bowser: 0-2%
 Captain Falcon: 0%
 Charizard: 0-2%
 Ganondorf: 0-2%
 Jigglypuff: 0%
 King Dedede: 0-1%
 Ness: 0-1%
 Toon Link: 0-1%
 Villager: 0-1%
* Thanks to MikeKirby for help with the B-throw to U-air combos.
Plausible Follow-Ups:
* Thanks to MikeKirby for help with the B-throw to U-air combos.
To be added in a future update.
Match-ups
To be added in a future update. For now, check out the Kirby Match-Up Discussion thread.
Sheik
Diddy Kong

V. Advanced Play
Advanced Techniques
Turbo Stone
[SSB4] Kirby's Epic Guide
Hup-Cancels
Air-Dodge -> Hup
U-throw -> Hup
B-throw or F-throw -> Hup
Cupid Hover
Using Kirby's "Silver Bow" Copy Ability (from Dark Pit), Kirby can 'hover' while he charges the arrow. See the above link for more details.
Getting hit out of a Copy
Some characters have a 'guarenteed hit' on Kirby if he chooses to use a Copy on them. See the above link for a list of those characters and which attacks they can use.
Appendix
Useful Links:
Kirby Q&A/FAQ/Directory
Kirby Video Thread
Kirby Moveset & General Information
Ducking Viability and Discussion
Kirby Tournament Data
List of Kirby Strategies & Techniques
Resources & Credits:
[1] "Latest Japanese tier list released", "Anther's tier list"
[2] "Smash 4 Weight Rankings"
http://smashboards.com/threads/smash-4-weight-rankings.367479/
[3] "Smash 4 Running & Walking Speeds"
http://smashboards.com/threads/smash-4-running-walking-speed-rankings.371564/
[4] "Pummel Damage Data"
http://smashboards.com/threads/pummel-damage-data.372509/
[5] "Smash 4 Aerial Speed List"
http://smashboards.com/threads/smash-4-aerial-speed-list-horizontal-fall-and-fastfall.382495/
[6] The Free Dictionary - "ablation"
http://www.thefreedictionary.com/ablation
[7] Complete Hitbox/Frame Data For Every Character
[8] SSBWiki (for pix of the Kirby Hats)
http://www.ssbwiki.com/Copy_Ability_(SSB4)
Last, but not least:
Masahiro Sakurai, and all the individuals of all the companies that put in so much work making this great game!
Last edited:

