
Dark.Pch
Smash Legend
- Joined
- May 13, 2006
- Messages
- 16,918
- Location
- Manhattan, New York
- NNID
- Dark.Pch
- 3DS FC
- 5413-0118-3799

Updates:
Peach tutorial season 2
Peach grab setup/frame trap.
Im decided to make this guide in update of peach and her meta game. I think this guide might be the most helpful one in any other guide or teachings I have done over the years with peach. I hope both new and old comers to this characters will learn alot.
I would like to point out that I was wrong on one thing. I use to say Peach being played aggressive was bad and get you beat up. I was wrong with this statement on a high level. There are some characters where Peach needs to be on top off most of the time. Where others you need to play keep away. I realized this after I read the marvel vs capcom 3 guide.
I read on how to play tronne well. She is a character you wanna keep people in the corner as much as possbile and pressure. Reason for this is cause she has a hard time zoning in on characters with projectiles. And does not have many good approaches. When you have the enemy near a wall she really shines and has mix ups. Now if You relate this to peach against lets say, falco, You are gonna want to stay on falco as much as you can and pound on him. if you play keep away too much you will just be taking hits from lasers, and risking lots of damage trying to approach him along with him S-B.
So how one should use peach depends on match ups. But she can be played both aggro and Defensive. but one mistake alot of people do is just play based on one style. This is one thing you can not do any rely one unless your opponent is really bad. You get too predictable and will have a harde time when you really should not be. Also if the player shuts your aggro/defensive game down, you have nothing left to fight with since you focus on one thing. If you are gonna base your style on aggro, make sure you have some defensive play on you to back you up. Same with being defensive. let yourself have options. Also, keep in mind that some characters can counter w/e style you use. So I say if you can,learn both styles with Peach for her to really shine and be on the safe side.
Peach Introduction

Despite her initial appearance, and contrary to popular belief, Peach is a very decent character in Brawl. Peach is known for her unique float ability, effective and combo-heavy air game, safe shield pressuring capabilities, breakneck close quarters options, and random game-breaking death turnips and items. Negatively, Peach is known for her incredibly weak kill options, her light weight, and her steep learning curve.
Peach only wins in the hands of a player strictly disciplined to play on precision alone. Exact spacing, adaptive pressure, and patience are absolute requirements when playing Peach. After the first 40%, Peach's freebies are gone - the player is now required to keep a lightweight alive, and to kill without kill moves. Make it work.
Strengths
Float
Projectile item
Attacks safe on block
Random chance to pull a Bomb-omb, Beam Sword, Mr. Saturn or Stitchface
Lengthy horizontal recovery
Large variety of combos
Chaingrab on about half of cast
Can be played in there different ways.
Weaknesses-
Lack of easily-landed powerful kill moves
Lightweight
Poor vertical recovery
Very slow fall speed
Slow dash speed
Peach Stats

PHYSICS AND STATS
Air Speed, Spotdodge Data, Etc.]Fitting for a princess, Peach is a light and floaty character. Unfortunately, this limits her basic movement options, but thanks to floating and advanced techniques such as glidetossing, Peach is kept from being a completly slowed character.
Peach cannot wall jump.
Peach cannot wall cling.
Peach cannot crawl.
Weight
Peach is 26th on the weight list and is the 10th lightest character below Toon Link and above Marth.
[Collapse=Weight List]1. Bowser (120)
2. Donkey Kong (116)
3. Snake (113)
4. King Dedede (112)
5. Charizard (110)
6. Ganondorf (109)
7. Samus (108)
8. Wario (107)
8. Yoshi (107)
10. R.O.B. (106)
11. Ike (105)
12. Captain Falcon (104)
12. Link (104)
14. Wolf (102)
15. Ivysaur (100)
15. Lucario (100)
17. Mario (98)
18. Luigi (97)
19. Sonic (95)
20. Lucas (94)
20. Ness (94)
20. Pit (94)
23. Diddy Kong (93)
24. Ice Climbers (92)
24. Toon Link (92)
26. Peach (90)
27. Marth (87)
28. Sheik (85)
28. Zelda (85)
30. Falco (82)
30. Olimar (82)
32. Zero Suit Samus (81)
33. Fox (80)
34. Meta Knight (79)
34. Pikachu (79)
36. Kirby (78)
37. Mr. Game & Watch (75)
37. Squirtle (75)
39. Jigglypuff (68)[/Collapse]
Air Speed
Peach is 24th on the air speed list and is one of the 9th slowest characters below Pikachu and above Ganondorf.
[COLLAPSE=Air Speed List]1. Yoshi (1.32)
2. Jigglypuff (1.27)
3. Wario (1.22)
3. Wolf (1.22)
5. Captain Falcon (1.18)
6. Sonic (1.11)
7. Donkey Kong (1.08)
7. Mr. Game & Watch (1.08)
7. Squirtle (1.08)
10. Lucas (1.05)
11. Bowser (1.03)
11. Marth (1.03)
11. Zero Suit Samus (1.03)
14. Charizard (0.99)
14. Lucario (0.99)
14. Samus (0.99)
14. Zelda (0.99)
18. Ness (0.96)
19. Mario (0.94)
19. Snake (0.94)
19. Toon Link (0.94)
22. Ike (0.92)
23. Pikachu (0.91)
24. Falco (0.89)
24. Fox (0.89)
24. Peach (0.89)
24. Pit (0.89)
24. R.O.B. (0.89)
29. Ganondorf (0.85)
29. Kirby (0.85)
29. Sheik (0.85)
32. Diddy Kong (0.83)
33. Olimar (0.82)
34. Link (0.81)
35. Ice Climbers (0.77)
36. Ivysaur (0.75)
36. Meta Knight (0.75)
38. Luigi (0.73)
39. King Dedede (0.66)[/COLLAPSE]
Fall Speed
Peach is 38th on the fall speed list and is the 2nd slowest faller below Samus and above Jigglypuff.
[COLLAPSE=Fall Speed List]1. King Dedede (2.73)
2. Link (2.67)
3. Captain Falcon (2.57)
4. Fox (2.56)
5. Snake (2.42)
6. Falco (2.39)
7. Pikachu (2.38)
8. Ganondorf (2.31)
8. Ike (2.31)
10. Donkey Kong (2.21)
10. Sheik (2.21)
12. Marth (2.10)
12. Squirtle (2.10)
14. Diddy Kong (2.00)
14. Sonic (2.00)
14. Zero Suit Samus (2.00)
17. Pit (1.99)
18. Wario (1.96)
19. Bowser (1.95)
19. Meta Knight (1.95)
21. Lucas (1.92)
22. Kirby (1.90)
22. Toon Link (1.90)
22. Wolf (1.90)
25. Charizard (1.89)
25. Ivysaur (1.89)
27. Ness (1.83)
28. Olimar (1.82)
29. Yoshi (1.81)
30. Mario (1.79)
31. Mr. Game & Watch (1.74)
32. Luigi (1.71)
33. Ice Climbers (1.68)
33. Lucario (1.68)
33. R.O.B. (1.68)
36. Zelda (1.58)
37. Samus (1.50)
38. Peach (1.47)
39. Jigglypuff (1.37)[/COLLAPSE]
Walk Speed
Peach is 29th on the walk speed list and is one of the 7th slowest walkers below Ike and above Captain Falcon.
[COLLAPSE=Walk Speed List]1. Marth (1.5)
2. Fox (1.45)
3. Sonic (1.40)
4. Zero Suit Samus (1.33)
5. Sheik (1.30)
5. Wolf (1.30)
7. Falco (1.28)
8. Diddy Kong (1.25)
9. Pikachu (1.24)
10. Meta Knight (1.22)
10. Toon Link (1.22)
12. Donkey Kong (1.20)
12. Link (1.20)
12. Squirtle (1.20)
15. Pit (1.18)
16. Yoshi (1.15)
17. Mario (1.10)
17. Mr. Game & Watch (1.10)
17. R.O.B. (1.10)
20. Luigi (1.08)
21. Ivysaur (1.05)
21. Samus (1.05)
23. Lucario (1.00)
24. Ice Climbers (0.96)
25. King Dedede (0.95)
25. Kirby (0.95)
27. Olimar (0.90)
28. Ike (0.88)
29. Ness (0.86)
29. Peach (0.86)
31. Captain Falcon (0.85)
31. Wario (0.85)
33. Snake (0.84)
34. Lucas (0.82)
35. Bowser (0.80)
35. Zelda (0.80)
37. Ganondorf (0.73)
38. Charizard (0.70)
38. Jigglypuff (0.70)[/COLLAPSE]
Running Speed
Peach is 31st on the running speed list and is one of the 6th slowest runners below Squirtle and above Luigi.
[Collapse=Running Speed List]1. Sonic (3.50)
2. Captain Falcon (2.18)
3. Fox (2.08)
4. Zero Suit Samus (1.93)
5. Sheik (1.92)
6. Meta Knight (1.85)
7. Charizard (1.80)
8. Pikachu (1.76)
9. Diddy Kong (1.72)
10. Marth (1.70)
11. Yoshi (1.68)
12. Toon Link (1.65)
13. Donkey Kong (1.62)
14. Pit (1.58)
15. Mr. Game & Watch (1.55)
16. Bowser (1.53)
17. Ivysaur (1.50)
17. Lucas (1.50)
17. Mario (1.50)
17. R.O.B. (1.50)
21. Samus (1.45)
22. Falco (1.43)
23. Lucario (1.41)
24. Olimar (1.40)
24. Wolf (1.40)
26. Ice Climbers (1.39)
26. Ness (1.39)
28. Ike (1.37)
28. Kirby (1.37)
28. Squirtle (1.37)
31. Peach (1.35)
31. Snake (1.35)
31. Wario (1.35)
34. Luigi (1.34)
35. Link (1.33)
36. King Dedede (1.22)
36. Zelda (1.22)
38. Ganondorf (1.16)
39. Jigglypuff (1.10)[/Collapse]
Spot Dodge
Peach has an average spotdodge.
[Collapse=Spot Dodge List]2-20 / 22 Link
2-20 / 22 Pikachu
2-20 / 22 Falco
2-20 / 22 Yoshi
2-20 / 22 Toon Link
2-20 / 24 Marth
2-20 / 25 Mario
2-20 / 25 Samus
2-20 / 25 Zero Suit Samus
2-20 / 25 Kirby
2-20 / 25 Fox
2-20 / 25 Game & Watch
2-20 / 25 Luigi
2-20 / 25 Diddy
2-20 / 25 Zelda
2-20 / 25 Sheik
2-20 / 25 Pit
2-20 / 25 Metaknight
2-20 / 25 Squirtle
2-20 / 25 Ivysaur
2-20 / 25 Charizard
2-20 / 25 Ike
2-20 / 25 Snake
2-20 / 25 Peach
2-20 / 25 Ganondorf
2-20 / 25 Ice Climbers
2-20 / 25 Wolf
2-20 / 25 Lucario
2-20 / 25 Ness
2-20 / 25 Sonic
2-20 / 25 Wario
2-20 / 25 R.O.B
2-20 / 25 Captain Falcon
2-20 / 25 Lucas
3-20 / 25 Olimar
3-16 / 25 Jigglypuff
2-20 / 27 King Dedede
2-23 / 30 Donkey Kong
3-24 / 32 Bowser[/Collapse]
Forward Roll
Peach has an above average forward roll.
[Collapse=Forward Roll List]5-12 / 23 Metaknight
4-19 / 27 Lucario
4-17 / 27 Pit
4-15 / 27 Zero Suit Samus
4-19 / 29 Diddy
4-19 / 29 Squirtle
4-20 / 31 Kirby
4-19 / 31 Donkey Kong
4-19 / 31 Fox
4-19 / 31 Pikachu
4-19 / 31 Luigi
4-19 / 31 Zelda
4-19 / 31 Sheik
4-19 / 31 Falco
4-19 / 31 Peach
4-19 / 31 Ganondorf
4-19 / 31 Ice Climbers
4-19 / 31 Wolf
4-19 / 31 Ness
4-19 / 31 Sonic
4-19 / 31 Captain Falcon
4-19 / 31 Lucas
3-19 / 32 Jigglypuff
4-19 / 32 Mario
4-19 / 32 Ivysaur
4-19 / 32 King Dedede
4-19 / 32 Olimar
4-19 / 33 Ike
4-21 / 34 R.O.B
4-19 / 34 Yoshi
4-19 / 35 Charizard
4-19 / 35 Marth
4-19 / 35 G&W
4-17 / 35 Snake
4-21 / 37 Wario
4-19 / 37 Link
4-19 / 37 Toon Link
5-20 / 39 Bowser
4-23 / 44 Samus[/Collapse]
Back Roll
Peach has an above average back roll, though it starts one frame later then most.
[Collapse=Back Roll List]4-19 / 27 Lucario
4-19 / 29 Diddy
4-19 / 29 Squirtle
4-20 / 31 Kirby
4-19 / 31 Donkey Kong
4-19 / 31 Fox
4-19 / 31 Pikachu
4-19 / 31 Luigi
4-19 / 31 Zelda
4-19 / 31 Sheik
4-19 / 31 Falco
4-19 / 31 Lucas
4-19 / 31 Wolf
4-19 / 31 Ness
4-19 / 31 Sonic
4-19 / 31 Ganondorf
4-19 / 31 Ice Climbers
4-19 / 31 Captain Falcon
5-20 / 31 Peach
4-19 / 32 Jigglypuff
4-19 / 32 Mario
4-19 / 32 King Dedede
4-19 / 32 Ivysaur
4-19 / 32 Olimar
4-17 / 32 Pit
4-19 / 33 Snake
4-12 / 33 Metaknight
4-21 / 34 R.O.B
4-23 / 35 Marth
4-19 / 35 G&W
4-19 / 36 Charizard
4-21 / 37 Wario
4-19 / 37 Ike
4-19 / 37 Link
4-19 / 37 Zero Suit Samus
4-19 / 37 Yoshi
4-19 / 37 Toon Link
5-20 / 39 Bowser
4-23 / 44 Samus[/Collapse]
Airdodge
Peach has the worst airdodge in the cast. It is missing about ten invincible frames during the end half.
[COLLAPSE="Air dodge"]3-29 / 39 Metaknight
4-29 / 39 Zero Suit Samus
4-29 / 39 Diddy
4-29 / 39 Pit
4-29 / 39 Squirtle
4-29 / 39 Ivysaur
4-29 / 39 Charizard
4-29 / 39 Ike
4-29 / 39 Snake
4-29 / 39 King Dedede
4-29 / 39 Lucario
4-29 / 39 Wario
4-29 / 39 R.O.B
4-29 / 39 Olimar
4-29 / 48 Ice Climbers
4-29 / 48 Ness
4-29 / 48 Sonic
4-29 / 48 Lucas
4-30 / 49 Bowser
4-29 / 49 Mario
4-29 / 49 Donkey Kong
4-29 / 49 Link
4-29 / 49 Samus
4-29 / 49 Kirby
4-29 / 49 Fox
4-29 / 49 Pikachu
4-29 / 49 G&W
4-29 / 49 Luigi
4-29 / 49 Zelda
4-29 / 49 Sheik
4-29 / 49 Falco
4-29 / 49 Yoshi
4-29 / 49 Ganondorf
4-29 / 49 Wolf
4-29 / 49 Toon Link
4-29 / 49 Captain Falcon
4-29 / 49 Jigglypuff
5-30 / 49 Marth
4-19 / 49 Peach
[/COLLAPSE]
MOVESET
Standard Moves
[COLLAPSE=Jab, Dash Attack, Ftilt, Utilt, Dtilt]
Jab (First Hit) ~Royal Slap~


Damage: 3%
KO at: N/A
Knockback: ★ | Speed: ★★★★★| Range: ★★
Hitboxes: 4 from frames 2-3 (1 hit) | Sweet Spot: No
Special Properties: Set knockback
Description: Peach slaps the opponent very quickly.
Frame Data
Start-up: 1 | Active: 2-3 (2) | Cooldown: 4-19 (16) | Duration: 19
Shield Stun: 1 | Shield Advantage: -16 | Shield Drop Advantage: -9
Jab 1 can be canceled into second jab: 8-30
Summary
Widely considered one of the best jabs in the game, Peach's two frame jab is her fastest and safest move. Very versatile with its speed, jab can be used as an instant interrupt against moves like Snake's ftilt, comboed into other moves such ftilt, dsmash, and grab, and used to cover landings after aerials - making Peach near unpunishable. When in doubt: jab.
Jab (Second Hit) ~Double Royal Slap~KO at: N/A
Knockback: ★ | Speed: ★★★★★| Range: ★★
Hitboxes: 4 from frames 2-3 (1 hit) | Sweet Spot: No
Special Properties: Set knockback
Description: Peach slaps the opponent very quickly.
Frame Data
Start-up: 1 | Active: 2-3 (2) | Cooldown: 4-19 (16) | Duration: 19
Shield Stun: 1 | Shield Advantage: -16 | Shield Drop Advantage: -9
Jab 1 can be canceled into second jab: 8-30
Summary
Widely considered one of the best jabs in the game, Peach's two frame jab is her fastest and safest move. Very versatile with its speed, jab can be used as an instant interrupt against moves like Snake's ftilt, comboed into other moves such ftilt, dsmash, and grab, and used to cover landings after aerials - making Peach near unpunishable. When in doubt: jab.

Damage: 3%
KO at: 436% [Sideways]
Knockback: ★ | Speed: ★★★★★| Range: ★★★★★
Hitboxes: 4 from frames 2-3 (1 hit)| Sweet Spot: No
Special Properties: None
Description: After the first slap, Peach slaps with the other hand very quickly.
KO at: 436% [Sideways]
Knockback: ★ | Speed: ★★★★★| Range: ★★★★★
Hitboxes: 4 from frames 2-3 (1 hit)| Sweet Spot: No
Special Properties: None
Description: After the first slap, Peach slaps with the other hand very quickly.
Frame Data
[Solo] Start-up: 1 | Active: 2-3 (2) | Cooldown: 4-22 (19) | Duration: 22
[+Jab 1] Start-up: 1-8 (8) | Active: 9-10 (2) | Cooldown: 11-29 (19) | Duration: 29
Shield Stun: 1 | Shield Advantage: -19 | Shield Drop Advantage: -12
[Solo] Start-up: 1 | Active: 2-3 (2) | Cooldown: 4-22 (19) | Duration: 22
[+Jab 1] Start-up: 1-8 (8) | Active: 9-10 (2) | Cooldown: 11-29 (19) | Duration: 29
Shield Stun: 1 | Shield Advantage: -19 | Shield Drop Advantage: -12
Summary
Peach's follow-up jab combines the speed of her first jab with the added range of the golf club fsmash! Unfortunately though, the second jab is punishable by a number of characters out-of-shield options. For utmost safety, players are recommended to cancel the first jab into defensive maneuvers instead.
Dash Attack (First Hit) ~Lady Push~Peach's follow-up jab combines the speed of her first jab with the added range of the golf club fsmash! Unfortunately though, the second jab is punishable by a number of characters out-of-shield options. For utmost safety, players are recommended to cancel the first jab into defensive maneuvers instead.

Damage: 4%
KO at: 720% [Sideways]
Knockback: ★| Speed: ★★★★ | Range: ★★★★
Hitboxes: 3 from frames 6-9 (1st hit)| Sweet Spot: No
Special Properties: None
Description: Peach extends her arms and lunges forward upon hearing good or shocking news.
Frame Data
Start-up: 1-5 (5) | Active: 6-9 (4), 17-19 (3) | Cooldown: 20-37 (17) | Duration: 37
Shield Stun: 1 | Shield Advantage: -19 | Shield Drop Advantage: -12
Summary
Quick and ranged, dash attack is one of Peach's more accessible punishing moves. The lunge forward mixed with the disjointed range of the second hit allows Peach to answer landings and punish generally "safe" moves - notably Meta Knight's Tornado. Like most dash attacks though, the move is susceptible to shield grabs.
Combos
Dsmash -> sends them behind you
Dash attack -> first hit catches them as they bounce on the ground
Running up smash -> catches them as the invincibility from their get-up animation wears off
Dash Attack (Second Hit) ~Double Lady Push~KO at: 720% [Sideways]
Knockback: ★| Speed: ★★★★ | Range: ★★★★
Hitboxes: 3 from frames 6-9 (1st hit)| Sweet Spot: No
Special Properties: None
Description: Peach extends her arms and lunges forward upon hearing good or shocking news.
Frame Data
Start-up: 1-5 (5) | Active: 6-9 (4), 17-19 (3) | Cooldown: 20-37 (17) | Duration: 37
Shield Stun: 1 | Shield Advantage: -19 | Shield Drop Advantage: -12
Summary
Quick and ranged, dash attack is one of Peach's more accessible punishing moves. The lunge forward mixed with the disjointed range of the second hit allows Peach to answer landings and punish generally "safe" moves - notably Meta Knight's Tornado. Like most dash attacks though, the move is susceptible to shield grabs.
Combos
Dsmash -> sends them behind you
Dash attack -> first hit catches them as they bounce on the ground
Running up smash -> catches them as the invincibility from their get-up animation wears off

Damage: 4%
KO at: 235% [Upwards]
Knockback: ★ | Speed: ★★★★ | Range: ★★★★
Hitboxes: 3 from frames 17-19 (2nd hit) | Sweet Spot: No
Special Properties: When opponent is at high % the second hit is harder to connect, since the first hit sends them out of range. After opponent is above 220%, only the first hit will connect if the attack is attempted at short range.
Description: Peach extends her arms and lunges forward. Attack happens just after the first hit ends.
*Frame data, summary and combos above*
Front Tilt ~Can-Can Kick~KO at: 235% [Upwards]
Knockback: ★ | Speed: ★★★★ | Range: ★★★★
Hitboxes: 3 from frames 17-19 (2nd hit) | Sweet Spot: No
Special Properties: When opponent is at high % the second hit is harder to connect, since the first hit sends them out of range. After opponent is above 220%, only the first hit will connect if the attack is attempted at short range.
Description: Peach extends her arms and lunges forward. Attack happens just after the first hit ends.
*Frame data, summary and combos above*


Damage: 13%, 11%, 10%, 6%
KO at: 139%, 166%, 182% [Upwards]
Knockback: ★★★★ | Speed: ★★★★ | Range: ★★★★
Hitboxes: 3 from frames 6-8, then another 3 from frames 9-16 (1 hit) | Sweet Spot: Close Range
Special Properties: None
Description: Peach stretches backwards and throws a 90˚ angled kick.
Frame Data
Start-up: 1-5 (5) | Active: 6-16 (11) | Cooldown: 17-36 (20) | Duration: 36
Shield Stun: 4 | Shield Advantage: -26 | Shield Drop Advantage: -19
Summary
Offering fast and powerful range, ftilt is Peach's best tilt in terms of versatility. The move spaces with its sheer speed, lasting multiple hitboxes, and disjointed range, kills well vertically, and comboes to set-up juggles. It's major flaw is its significant cooldown - making it very rewarding on hit, but very punishable on miss. Careful when flashing.
Up Tilt ~Heart Bash~KO at: 139%, 166%, 182% [Upwards]
Knockback: ★★★★ | Speed: ★★★★ | Range: ★★★★
Hitboxes: 3 from frames 6-8, then another 3 from frames 9-16 (1 hit) | Sweet Spot: Close Range
Special Properties: None
Description: Peach stretches backwards and throws a 90˚ angled kick.
Frame Data
Start-up: 1-5 (5) | Active: 6-16 (11) | Cooldown: 17-36 (20) | Duration: 36
Shield Stun: 4 | Shield Advantage: -26 | Shield Drop Advantage: -19
Summary
Offering fast and powerful range, ftilt is Peach's best tilt in terms of versatility. The move spaces with its sheer speed, lasting multiple hitboxes, and disjointed range, kills well vertically, and comboes to set-up juggles. It's major flaw is its significant cooldown - making it very rewarding on hit, but very punishable on miss. Careful when flashing.

Damage: 13%
KO at: 158% [Upwards]
Knockback: ★★★ | Speed: ★★★ | Range: ★★★★★
Hitboxes: 2 from frames 10-14 (1 hit) | Sweet Spot: No
Special Properties: None
Description: Peach raises both arms and unleashes a big heart-like magic.
Frame Data
Start-up: 1-9 (9) | Active: 10-14 (5) | Cooldown: 15-37 (23) | Duration: 37
Shield Stun: 4 | Shield Advantage: -23 | Shield Drop Advantage: -16
Summary
One of the larger single hitboxes in the game, Peach's utilt plainly beats every character's dair. Extremely powerful in combination with platforms, the massive disjointed range halts almost everything dropping from above - including projectiles. Its startup and cooldown stop it from being incredibly versatile, but it excels in its one purpose: hitting things above Peach.
Combos
Dair > Uair > FF > Utilt - You can add an extra Dair depending on the opponent's weight.
FF Dair > Utilt
Ftilt > Utilt
Dtilt > Utilt (low percents)
Fsmash (Pan) > Utilt
Down Tilt ~Elegant Sweep~KO at: 158% [Upwards]
Knockback: ★★★ | Speed: ★★★ | Range: ★★★★★
Hitboxes: 2 from frames 10-14 (1 hit) | Sweet Spot: No
Special Properties: None
Description: Peach raises both arms and unleashes a big heart-like magic.
Frame Data
Start-up: 1-9 (9) | Active: 10-14 (5) | Cooldown: 15-37 (23) | Duration: 37
Shield Stun: 4 | Shield Advantage: -23 | Shield Drop Advantage: -16
Summary
One of the larger single hitboxes in the game, Peach's utilt plainly beats every character's dair. Extremely powerful in combination with platforms, the massive disjointed range halts almost everything dropping from above - including projectiles. Its startup and cooldown stop it from being incredibly versatile, but it excels in its one purpose: hitting things above Peach.
Combos
Dair > Uair > FF > Utilt - You can add an extra Dair depending on the opponent's weight.
FF Dair > Utilt
Ftilt > Utilt
Dtilt > Utilt (low percents)
Fsmash (Pan) > Utilt


Damage: 10%
KO at: 174% [Upwards]
Knockback: ★★★ | Speed: ★★★ | Range: ★★★★★
Hitboxes: 4 from frames 12-13 (1 hit) | Sweet Spot: No
Special Properties: Meteors when opponents are really close to Peach's body when the attack connects. When used frequently Peach moves forward at a slow speed. Peach also retreats when you use down tilt and another move.
Description: Peach crouches, leans forward a little bit and throws a low angled slap.
Frame Data
Start-up: 1-11 (11) | Active: 12-13 (2) | Cooldown: 14-27 (14) | Duration: 27
Shield Stun: 3 | Shield Advantage: -13 | Shield Drop Advantage: -6
Summary
Ranged and virtually lagless, dtilt offers a variety of niche uses. With as much range as the golf club fsmash, dtilt is lauded as an excellent spacing move - its purely vertical trajectory only complimenting it. The end of the move has interrupt-as-soon-as frames, which allows Peach to cancel the ending lag into any action (turnip pull, pivot, jump) while sliding backwards. Dtilt is also Peach's only meteor smash, and the third strongest grounded meteor in the game.
Advanced Techniques
Dtilt Cancel Glide
Combos
Dtilt > Utilt (low percents)
Dtilt > Nair
Dtilt > Fair
Jab > Dtilt
Dtilt > Fsmash
[/COLLAPSE]Smash AttacksKO at: 174% [Upwards]
Knockback: ★★★ | Speed: ★★★ | Range: ★★★★★
Hitboxes: 4 from frames 12-13 (1 hit) | Sweet Spot: No
Special Properties: Meteors when opponents are really close to Peach's body when the attack connects. When used frequently Peach moves forward at a slow speed. Peach also retreats when you use down tilt and another move.
Description: Peach crouches, leans forward a little bit and throws a low angled slap.
Frame Data
Start-up: 1-11 (11) | Active: 12-13 (2) | Cooldown: 14-27 (14) | Duration: 27
Shield Stun: 3 | Shield Advantage: -13 | Shield Drop Advantage: -6
Summary
Ranged and virtually lagless, dtilt offers a variety of niche uses. With as much range as the golf club fsmash, dtilt is lauded as an excellent spacing move - its purely vertical trajectory only complimenting it. The end of the move has interrupt-as-soon-as frames, which allows Peach to cancel the ending lag into any action (turnip pull, pivot, jump) while sliding backwards. Dtilt is also Peach's only meteor smash, and the third strongest grounded meteor in the game.
Advanced Techniques
Dtilt Cancel Glide
Combos
Dtilt > Utilt (low percents)
Dtilt > Nair
Dtilt > Fair
Jab > Dtilt
Dtilt > Fsmash
[COLLAPSE=Fsmash, Usmash, Dsmash]
Front Smash (Golf Club) ~Peach Swing~


Damage: 15% Uncharged, 21% Charged
KO at: 140% Uncharged, 93% Charged [Sideways]
Knockback: ★★★★ | Speed: ★★★ | Range: ★★★★★
Hitboxes: 4 from frames 15-19, 1 from Frame 16-19 (1 hit) | Sweet Spot: No
Special Properties: Comes out randomly. Doesn't appear twice in a row.
Description: Peach grabs a Golf Club and swings it forward.
Frame Data
Start-up: 1-14 (14) | Active: 15-19 (5) | Cooldown: 20-40 (21) | Duration: 40
Shield Stun: 5 | Shield Advantage: -21 | Shield Drop Advantage: -14
Charge Release: 5
Summary
Possibly the best weapon out of the fsmash line-up, the golf club is Peach's most ranged move. Compared to the both the racket and pan, the club never needs a sweet spot and is easiest to work with due to its superior range. Although its hampered by fsmash's random mechanic, this can be helped by eliminating one of the weapons beforehand (such as the pan), and leaving the club a 50/50 chance of appearing.
Front Smash (Tennis Racket) ~Peach Swing~KO at: 140% Uncharged, 93% Charged [Sideways]
Knockback: ★★★★ | Speed: ★★★ | Range: ★★★★★
Hitboxes: 4 from frames 15-19, 1 from Frame 16-19 (1 hit) | Sweet Spot: No
Special Properties: Comes out randomly. Doesn't appear twice in a row.
Description: Peach grabs a Golf Club and swings it forward.
Frame Data
Start-up: 1-14 (14) | Active: 15-19 (5) | Cooldown: 20-40 (21) | Duration: 40
Shield Stun: 5 | Shield Advantage: -21 | Shield Drop Advantage: -14
Charge Release: 5
Summary
Possibly the best weapon out of the fsmash line-up, the golf club is Peach's most ranged move. Compared to the both the racket and pan, the club never needs a sweet spot and is easiest to work with due to its superior range. Although its hampered by fsmash's random mechanic, this can be helped by eliminating one of the weapons beforehand (such as the pan), and leaving the club a 50/50 chance of appearing.


Damage: 12% Uncharged Unsweetspotted, 16% Charged Unsweetspotted, 13% Uncharged Sweetspotted, 18% Charged Sweetspotted
KO at: 216% Uncharged Unsweetspotted, 150% Charged Unsweetspotted, 99% Uncharged Sweetspotted, 65% Charged Sweetspotted [Sideways]
Knockback: ★★★★★/★★ | Speed: ★★★ | Range: ★★★★
Hitboxes: 4 from frames 15-19, 1 from frames 16-19 (1 hit)| Sweet Spot: The very edge of the racket.
Special Properties: Comes out randomly. Doesn't appear twice in a row.
Description: Peach grabs a Tennis Racket and swings it forward.
Frame Data
Start-up: 1-14 (14) | Active: 15-18 (4) | Cooldown: 19-40 (22) | Duration: 40
Shield Stun: 4 | Shield Advantage: -21 | Shield Drop Advantage: -14
Charge Release: 5
Summary
At first, the racket can be seen as her worst fsmash weapon: shorter range than the club, the lowest damage of the three, and very weak KO power. A second look yields an incredibly powerful sweet spot; located at the very tip, the sweet spot KOs below 100% at the center of FD, and at 60% near the edge. Although very small and precise to land, the racket is the most volatile of the fsmash weapons.
Combos
The weak spot of Bair > Racket
Front Smash (Frying Pan) ~Peach Swing~KO at: 216% Uncharged Unsweetspotted, 150% Charged Unsweetspotted, 99% Uncharged Sweetspotted, 65% Charged Sweetspotted [Sideways]
Knockback: ★★★★★/★★ | Speed: ★★★ | Range: ★★★★
Hitboxes: 4 from frames 15-19, 1 from frames 16-19 (1 hit)| Sweet Spot: The very edge of the racket.
Special Properties: Comes out randomly. Doesn't appear twice in a row.
Description: Peach grabs a Tennis Racket and swings it forward.
Frame Data
Start-up: 1-14 (14) | Active: 15-18 (4) | Cooldown: 19-40 (22) | Duration: 40
Shield Stun: 4 | Shield Advantage: -21 | Shield Drop Advantage: -14
Charge Release: 5
Summary
At first, the racket can be seen as her worst fsmash weapon: shorter range than the club, the lowest damage of the three, and very weak KO power. A second look yields an incredibly powerful sweet spot; located at the very tip, the sweet spot KOs below 100% at the center of FD, and at 60% near the edge. Although very small and precise to land, the racket is the most volatile of the fsmash weapons.
Combos
The weak spot of Bair > Racket


Damage: 18% Uncharged, 25% Charged
KO at: 135% Uncharged, 87% Charged [Upwards]
Knockback: ★★★★ | Speed: ★★★ | Range: ★★★
Hitboxes: 3 from frames 15-19, 1 from frames 16-19 | Sweet Spot: Grip of handle (inside Peach)
Special Properties: Comes out randomly. Doesn't appear twice in a row.
Description: Peach grabs a Frying Pan and swings it forward.
Frame Data
Start-up: 1-14 (14) | Active: 15-18 (4) | Cooldown: 19-40 (22) | Duration: 40
Shield Stun: 6 | Shield Advantage: -20 | Shield Drop Advantage: -13
Charge Release: 5
Summary
Straight from the kitchen comes Peach's most damaging fsmash weapon, though the shortest ranged. The pan is advisably best used on stages with short ceilings, such as Halberd, to best capitalize on its vertical KO power. Also, the sound is awesome.
Combos
Pan > Utilt (low percents)
Pan > Nair
Pan > Fair
Up Smash ~Pirouette~KO at: 135% Uncharged, 87% Charged [Upwards]
Knockback: ★★★★ | Speed: ★★★ | Range: ★★★
Hitboxes: 3 from frames 15-19, 1 from frames 16-19 | Sweet Spot: Grip of handle (inside Peach)
Special Properties: Comes out randomly. Doesn't appear twice in a row.
Description: Peach grabs a Frying Pan and swings it forward.
Frame Data
Start-up: 1-14 (14) | Active: 15-18 (4) | Cooldown: 19-40 (22) | Duration: 40
Shield Stun: 6 | Shield Advantage: -20 | Shield Drop Advantage: -13
Charge Release: 5
Summary
Straight from the kitchen comes Peach's most damaging fsmash weapon, though the shortest ranged. The pan is advisably best used on stages with short ceilings, such as Halberd, to best capitalize on its vertical KO power. Also, the sound is awesome.
Combos
Pan > Utilt (low percents)
Pan > Nair
Pan > Fair


Damage: 8% Uncharged Sourspotted, 11% Charged Sourspotted, 15% Uncharged Unsweetspotted, 21% Charged Unsweetspotted, 17% Uncharged Sweetspotted, 23% Charged Sweetspotted
KO at: 195% Uncharged Sourspotted, 143% Charged Sourspotted, 93% Uncharged Unsweetspotted, 59% Charged Unsweetspotted, 80% Uncharged Sweetspotted, 47% Charged Sweetspotted [Upwards]
Knockback: ★★★★★ | Speed: ★★★ | Range: ★★
Hitboxes: 4 from frames 14-16, 2 from frames 17-20 | Sweet Spot: Peach's shoulders
Special Properties: None
Description: Peach raises one arm and spins a few times.
Frame Data
Start-up: 1-13 (13) | Active: strong hit 14-16 (4), weak hit 17-20 (4) | Cooldown: 21-44 (23) | Duration: 44
Shield Stun: 6 | Shield Advantage: -24 | Shield Drop Advantage: -17
Charge Release: 5
Summary
Dynamite with a laser beam: Peach's usmash is devastating when allowed to be landed successfully, killing most of the cast cleanly below 100% - otherwise a sour-spotted usmash kills as well as a floppy fish. Its small sweet spot range keeps it from being Peach's most consistent kill move - but with enough trickery, even just one early kill with an usmash can be enough to win any game.
Recommended Reading: How to Land an Usmash
Down Smash ~Double-Edged Gown~KO at: 195% Uncharged Sourspotted, 143% Charged Sourspotted, 93% Uncharged Unsweetspotted, 59% Charged Unsweetspotted, 80% Uncharged Sweetspotted, 47% Charged Sweetspotted [Upwards]
Knockback: ★★★★★ | Speed: ★★★ | Range: ★★
Hitboxes: 4 from frames 14-16, 2 from frames 17-20 | Sweet Spot: Peach's shoulders
Special Properties: None
Description: Peach raises one arm and spins a few times.
Frame Data
Start-up: 1-13 (13) | Active: strong hit 14-16 (4), weak hit 17-20 (4) | Cooldown: 21-44 (23) | Duration: 44
Shield Stun: 6 | Shield Advantage: -24 | Shield Drop Advantage: -17
Charge Release: 5
Summary
Dynamite with a laser beam: Peach's usmash is devastating when allowed to be landed successfully, killing most of the cast cleanly below 100% - otherwise a sour-spotted usmash kills as well as a floppy fish. Its small sweet spot range keeps it from being Peach's most consistent kill move - but with enough trickery, even just one early kill with an usmash can be enough to win any game.
Recommended Reading: How to Land an Usmash


Damage: 5% Uncharged, 7% Charged
KO at: 343% Uncharged, 264% Charged [Sideways]
Knockback: ★★ | Speed: ★★★★ | Range: ★★★
Hitboxes: 4 on frames 6-7, 11-12, 16-17, 21-22 (4 hits) | Sweet Spot: No
Special Properties: Multiple hitbox attack
Description: Peach extends her dress and spins.
Frame Data
Start-up: 1-5 (5) | Active: 6-7, 11-12, 16-17, 21-22 (2) | Cooldown: 23-44 (22) | Duration: 44
Shield Stun: 1 | Shield Advantage: -23 | Shield Drop Advantage: -16
Charge Release: 4
Summary
While not as blatantly powerful as most smash attacks, dsmash offers a very strong GTFO option. Fast start-up, long duration, and very heavy shield poking potential all combine to make dsmash an impressive answer against spot-dodges, shields, and anything with the audacity to get in close to Peach.
Combos
Jab > Dsmash
Dsmash > Fsmash (low percents)
[/COLLAPSE]Aerial AttacksKO at: 343% Uncharged, 264% Charged [Sideways]
Knockback: ★★ | Speed: ★★★★ | Range: ★★★
Hitboxes: 4 on frames 6-7, 11-12, 16-17, 21-22 (4 hits) | Sweet Spot: No
Special Properties: Multiple hitbox attack
Description: Peach extends her dress and spins.
Frame Data
Start-up: 1-5 (5) | Active: 6-7, 11-12, 16-17, 21-22 (2) | Cooldown: 23-44 (22) | Duration: 44
Shield Stun: 1 | Shield Advantage: -23 | Shield Drop Advantage: -16
Charge Release: 4
Summary
While not as blatantly powerful as most smash attacks, dsmash offers a very strong GTFO option. Fast start-up, long duration, and very heavy shield poking potential all combine to make dsmash an impressive answer against spot-dodges, shields, and anything with the audacity to get in close to Peach.
Combos
Jab > Dsmash
Dsmash > Fsmash (low percents)
[COLLAPSE=Nair, Fair, Bair, Uair, Dair]
Neutral Air ~Princess Twirl~

Damage: 13% Sweetspotted, 9%-10% Unsweetspotted
KOs: 151% Sweetspotted, 196%, 216% Unsweetspotted [Sideways]
Knockback: ★★★★ | Speed: ★★★★★ | Range: ★★★
Hitboxes: 3 (1 hit - strong, weak)| Sweet Spot: Beginning of move
Auto-Cancel: Yes
Special Properties: None
Description: Peach spins while airborne removing unwanted hair that leaves you with smooth, soft, radiant skin that lasts.
Frame Data
Start-up: 1-2 (2) | Active: strong hit 3-6 (4), weak hit 7-23 (17) | Cooldown: 24-49 (26) | Duration: 49
Shield Stun: 4, 3 | Optimal Shield Advantage: -7 | Optimal Shield Drop Advantage: -16
Landing Lag: 11
Auto-Cancel: 36
Summary
Plainly: nair is fast. Hitting on frame three, nair hits quickly, strongly, and has a long duration - all while being able to autocancel. Although it lacks range, nair is incredibly versatile as a combo-breaker, a combo starter or follow-up, a KO move, and probably one of her best out-of-shield attacks.
Advanced Techniques
Double Hitting Aerial
Combos
Dtilt > Nair (low percents)
Ftilt > Nair
Dair > Nair
Forward Air ~Crown Smack~KOs: 151% Sweetspotted, 196%, 216% Unsweetspotted [Sideways]
Knockback: ★★★★ | Speed: ★★★★★ | Range: ★★★
Hitboxes: 3 (1 hit - strong, weak)| Sweet Spot: Beginning of move
Auto-Cancel: Yes
Special Properties: None
Description: Peach spins while airborne removing unwanted hair that leaves you with smooth, soft, radiant skin that lasts.
Frame Data
Start-up: 1-2 (2) | Active: strong hit 3-6 (4), weak hit 7-23 (17) | Cooldown: 24-49 (26) | Duration: 49
Shield Stun: 4, 3 | Optimal Shield Advantage: -7 | Optimal Shield Drop Advantage: -16
Landing Lag: 11
Auto-Cancel: 36
Summary
Plainly: nair is fast. Hitting on frame three, nair hits quickly, strongly, and has a long duration - all while being able to autocancel. Although it lacks range, nair is incredibly versatile as a combo-breaker, a combo starter or follow-up, a KO move, and probably one of her best out-of-shield attacks.
Advanced Techniques
Double Hitting Aerial
Combos
Dtilt > Nair (low percents)
Ftilt > Nair
Dair > Nair

Damage: 15%
KO at: 133% [Sideways]
Knockback: ★★★★★ | Speed: ★★★ | Range: ★★★★
Hitboxes: 1 (1 hit) | Sweet Spot: No
Auto-Cancel: Yes
Special Properties: None
Description: While in midair, Peach takes her crown and hits the opponent with it.
Frame Data
Start-up: 1-15 (15) | Active: 16-19 (4) | Cooldown: 20-54 (35) | Duration: 54
Shield Stun: 5 | Optimal Shield Advantage: 0, -2 | Optimal Shield Drop Advantage: +7, +5
Landing Lag: 22
Auto-Cancel: 20
Summary
Peach's signature move, fair kills, combos, and spaces by taking advantage of the move's massive range and nonexistent ending lag. Its flaw is its noticeable start-up, but if it's not beaten to the punch, the move is unpunishable on shield when autocanceled correctly. A side effect of its versatility may be its susceptibility to move decay - by the time the opponent is at high percents, fair's KO potential would be severely diminished. Literally, fair may be too good.
Back Air ~Flying Hip~KO at: 133% [Sideways]
Knockback: ★★★★★ | Speed: ★★★ | Range: ★★★★
Hitboxes: 1 (1 hit) | Sweet Spot: No
Auto-Cancel: Yes
Special Properties: None
Description: While in midair, Peach takes her crown and hits the opponent with it.
Frame Data
Start-up: 1-15 (15) | Active: 16-19 (4) | Cooldown: 20-54 (35) | Duration: 54
Shield Stun: 5 | Optimal Shield Advantage: 0, -2 | Optimal Shield Drop Advantage: +7, +5
Landing Lag: 22
Auto-Cancel: 20
Summary
Peach's signature move, fair kills, combos, and spaces by taking advantage of the move's massive range and nonexistent ending lag. Its flaw is its noticeable start-up, but if it's not beaten to the punch, the move is unpunishable on shield when autocanceled correctly. A side effect of its versatility may be its susceptibility to move decay - by the time the opponent is at high percents, fair's KO potential would be severely diminished. Literally, fair may be too good.

Damage: 14% Sweetspotted, 7% Unsweetspotted
KO at: 150% Sweetspotted, 375% Unsweetspotted [Sideways]
Knockback: ★★★★ | Speed: ★★★★ | Range: ★★★
Hitboxes: 2 (1 hit)| Sweet Spot: Beginning of move
Auto-Cancel: Yes
Special Properties: None
Description: Peach hits you with her hips.
Frame Data
Start-up: 1-5 (5) | Active: strong hit 6-8 (3), weak hit 9-19 (11) | Cooldown: 20-55 (36) | Duration: 55
Shield Stun: 5, 2 | Optimal Shield Advantage: -4 | Optimal Shield Drop Advantage: +3 | Optimal Shiel Advantage Auto-Canceled: 0 | Optimal Shield Drop Advantage Auto-Canceled: +7
Landing Lag: 9
Auto-Cancel: 20
Summary
Seen by many as the compromise between fair and nair, bair boasts both range and speed without losing much strength or duration. Able to autocancel and interesting in that it moves Peach's hurtbox significantly, bair offers a variety of uses with little sacrifice.
Advanced Technique
Double Hitting Aerial
Up Air ~Floating High Kick~KO at: 150% Sweetspotted, 375% Unsweetspotted [Sideways]
Knockback: ★★★★ | Speed: ★★★★ | Range: ★★★
Hitboxes: 2 (1 hit)| Sweet Spot: Beginning of move
Auto-Cancel: Yes
Special Properties: None
Description: Peach hits you with her hips.
Frame Data
Start-up: 1-5 (5) | Active: strong hit 6-8 (3), weak hit 9-19 (11) | Cooldown: 20-55 (36) | Duration: 55
Shield Stun: 5, 2 | Optimal Shield Advantage: -4 | Optimal Shield Drop Advantage: +3 | Optimal Shiel Advantage Auto-Canceled: 0 | Optimal Shield Drop Advantage Auto-Canceled: +7
Landing Lag: 9
Auto-Cancel: 20
Summary
Seen by many as the compromise between fair and nair, bair boasts both range and speed without losing much strength or duration. Able to autocancel and interesting in that it moves Peach's hurtbox significantly, bair offers a variety of uses with little sacrifice.
Advanced Technique
Double Hitting Aerial

Damage: 11%, 12%, 13%
KO at: 179% [Sideways], 161%, 143% [Upward]
Knockback: ★★★★ | Speed: ★★★ | Range: ★★★★
Hitboxes: 3 (Bottom, center, and top)| Sweet Spot: Peach's heel
Auto-Cancel: Yes
Special Properties: None.
Description: Peach launches a high kick above her.
Frame Data
Start-up: 1-7 (7) | Active: 8-12 (5) | Cooldown: 13-35 (23) | Duration: 35
Shield Stun: 3 | Optimal Shield Advantage: -5 | Optimal Shield Drop Advantage: +2
Landing Lag: 9
Auto-Cancel: 23
Summary
Another blade in Peach's Swiss Army knife, uair fills the role of juggler. Strong and quick in duration, uair's vertical trajectory kicks opponents back up into the air for more uairs, or any number of grounded retaliations. The move serves well as a KO move when higher up, and it is Peach's best move to get out of hitstun when trying to survive a KO attempt.
Advanced Technique
Uair Combo
Combos
Dair > Uair
Down Air ~Stiletto Kick~KO at: 179% [Sideways], 161%, 143% [Upward]
Knockback: ★★★★ | Speed: ★★★ | Range: ★★★★
Hitboxes: 3 (Bottom, center, and top)| Sweet Spot: Peach's heel
Auto-Cancel: Yes
Special Properties: None.
Description: Peach launches a high kick above her.
Frame Data
Start-up: 1-7 (7) | Active: 8-12 (5) | Cooldown: 13-35 (23) | Duration: 35
Shield Stun: 3 | Optimal Shield Advantage: -5 | Optimal Shield Drop Advantage: +2
Landing Lag: 9
Auto-Cancel: 23
Summary
Another blade in Peach's Swiss Army knife, uair fills the role of juggler. Strong and quick in duration, uair's vertical trajectory kicks opponents back up into the air for more uairs, or any number of grounded retaliations. The move serves well as a KO move when higher up, and it is Peach's best move to get out of hitstun when trying to survive a KO attempt.
Advanced Technique
Uair Combo
Combos
Dair > Uair

Damage: 3%, 5% last hit
KO at: N/A, 219% [Upwards]
Knockback: ★ | Speed: ★★★ | Range: ★★★
Hitboxes: 2 (4 hits)| Sweet Spot: No
Auto-Cancel: Yes
Special Properties: Multiple hitbox attack.
Description: Peach launches four speedy kicks beneath her.
Frame Data
Start-up: 1-11 (11) | Active: 12-13, 18-19, 24-25, 30-31 (2) | Cooldown: 32-39 (8) | Duration: 39
Shield Stun: 1 | Optimal Shield Advantage: -9 | Optimal Shield Drop Advantage: -2 | Optimal Shiel Advantage Auto-Canceled: -3 (-5 hard landing) | Optimal Shield Drop Advantage Auto-Canceled: +4, +2
Landing Lag: 9
Auto-Cancel: 32
Summary
Peach's dair is pure pressure. Almost explosive with combo potential, a landed dair during early percents nearly always ends with a fresh 0-40% combo - that is, if the opponent isn't capable of decent SDI. Otherwise, the move can be used with floating to be a turret storm on shields, or just used out of short hops to catch spot dodges - all while landing with zero lag.
[/COLLAPSE]Special MovesKO at: N/A, 219% [Upwards]
Knockback: ★ | Speed: ★★★ | Range: ★★★
Hitboxes: 2 (4 hits)| Sweet Spot: No
Auto-Cancel: Yes
Special Properties: Multiple hitbox attack.
Description: Peach launches four speedy kicks beneath her.
Frame Data
Start-up: 1-11 (11) | Active: 12-13, 18-19, 24-25, 30-31 (2) | Cooldown: 32-39 (8) | Duration: 39
Shield Stun: 1 | Optimal Shield Advantage: -9 | Optimal Shield Drop Advantage: -2 | Optimal Shiel Advantage Auto-Canceled: -3 (-5 hard landing) | Optimal Shield Drop Advantage Auto-Canceled: +4, +2
Landing Lag: 9
Auto-Cancel: 32
Summary
Peach's dair is pure pressure. Almost explosive with combo potential, a landed dair during early percents nearly always ends with a fresh 0-40% combo - that is, if the opponent isn't capable of decent SDI. Otherwise, the move can be used with floating to be a turret storm on shields, or just used out of short hops to catch spot dodges - all while landing with zero lag.
[COLLAPSE=Toad, Peach Bomber, Parasol, Turnip]
Neutral B ~Toad~
Damage: 3%
KO at: 193% [Sideways]
Knockback: ★★★ | Speed: ★★ | Range: ★★★
Hitboxes: 6 | Sweet Spot: No
Special Properties: Counter move. Only activates if Peach is hit while Toad is out. Peach has invincibility frames during a brief period (just after she brings out Toad).
Description: Peach gets out her Toad and counters any hit thrown at her (excluding grabs).
Frame Data
Start-up: 1-10 (10) | Active: 11-31 (21) | Cooldown: 32-64 (31) | Duration: 64
Summary
Surprisingly hard-hitting when successful, but when missed, Toad staggers with massive cooldown, allowing the enemy a punishment of their choice. While a strong wake-up against predictability for opponents, the risks involved with using Toad echo the same to Peach players: do not be predictable.
Recommended Reading: Royal Protection - A guide on using Toad
Side B ~Peach Bomber~KO at: 193% [Sideways]
Knockback: ★★★ | Speed: ★★ | Range: ★★★
Hitboxes: 6 | Sweet Spot: No
Special Properties: Counter move. Only activates if Peach is hit while Toad is out. Peach has invincibility frames during a brief period (just after she brings out Toad).
Description: Peach gets out her Toad and counters any hit thrown at her (excluding grabs).
Frame Data
Start-up: 1-10 (10) | Active: 11-31 (21) | Cooldown: 32-64 (31) | Duration: 64
Summary
Surprisingly hard-hitting when successful, but when missed, Toad staggers with massive cooldown, allowing the enemy a punishment of their choice. While a strong wake-up against predictability for opponents, the risks involved with using Toad echo the same to Peach players: do not be predictable.
Recommended Reading: Royal Protection - A guide on using Toad
Damage: 15%
KO at: 240% [Sideways]
Knockback: ★★★ | Speed: ★★ | Range: ★★★★★
Hitboxes: 1| Sweet Spot: No
Special Properties: Passes through people's shields, unless the shield is really small (it breaks it in that case).
Description: Peach launches herself a long distance and hits the opponent with her hip.
Frame Data
Grounded Peach Bomber
Start-up: 1-23 (23) | Active: 24-46 (23) | Cooldown: 47-73 (27) | Duration: 73
Landing Lag: 33 - # of frames into aerial cooldown
Lag After Hit: 18
Aerial Peach Bomber
Start-up: 1-33 (33) | Active: 34-56 (23) | Cooldown: 57-83 (27) | Duration: 83
Landing Lag: 33 - # of frames into aerial cooldown
Lag After Hit: 18
Summary
Peach Bomber is quintessentially Peach's high risk, high reward attack. While slow, the move is ranged and does a good chunk of damage, but when missed, the landing lag is enough for an opponent to do as they wish. There are three types of Peach Bombers: 1) the regular Bomber, 2) the slingshot Bomber which sends Peach backwards a bit before launching, and 3) the smash Bomber which gains more distance then the previous versions.
Advanced Techniques
Ledge Canceled Special
Recommended Reading: Exploding Hearts: A guide to Peach Bomber
Up B ~Peach Parasol~KO at: 240% [Sideways]
Knockback: ★★★ | Speed: ★★ | Range: ★★★★★
Hitboxes: 1| Sweet Spot: No
Special Properties: Passes through people's shields, unless the shield is really small (it breaks it in that case).
Description: Peach launches herself a long distance and hits the opponent with her hip.
Frame Data
Grounded Peach Bomber
Start-up: 1-23 (23) | Active: 24-46 (23) | Cooldown: 47-73 (27) | Duration: 73
Landing Lag: 33 - # of frames into aerial cooldown
Lag After Hit: 18
Aerial Peach Bomber
Start-up: 1-33 (33) | Active: 34-56 (23) | Cooldown: 57-83 (27) | Duration: 83
Landing Lag: 33 - # of frames into aerial cooldown
Lag After Hit: 18
Summary
Peach Bomber is quintessentially Peach's high risk, high reward attack. While slow, the move is ranged and does a good chunk of damage, but when missed, the landing lag is enough for an opponent to do as they wish. There are three types of Peach Bombers: 1) the regular Bomber, 2) the slingshot Bomber which sends Peach backwards a bit before launching, and 3) the smash Bomber which gains more distance then the previous versions.
Advanced Techniques
Ledge Canceled Special
Recommended Reading:
Exploding Hearts: A guide to Peach Bomber


Damage: 1%, 4% last hit, 3% when umbrella is already opened.
KO at: 182% [Upwards]
Knockback: ★★ | Speed: ★★★★ | Range: ★★★★
Hitboxes: 6 (Five rising hits, the final one with knockback, and the lingering open parasol hitbox)| Sweet Spot: Last hit, when the parasol opens.
Special Properties: Multiple hitbox attack. First hits have set knockback. When the attack is done Peach keeps her parasol open to increase horizontal movement.
Description: Peach jumps with her umbrella, and then opens it and starts falling slowly.
Frame Data
Start-up: 1-6 (6) | Active: 7, 11, 19, 27, 32 | Cooldown: ? | Duration: ?
Landing Lag: 39
Summary
While Parasol is Peach's go-to recovery move, in combat, the move offers little reward in exchange for almost 40 frames of landing lag. Relatively the move is fast, Peach is covered in hitboxes, and the move quickly launches her upwards - sometimes scoring her an unexpected KO near the top of the screen - but with Peach being one of the slowest fallers in the game, landing without harm is usually unlikely.
Advanced Techniques
Ledge Canceled Special
Down B ~Vegetable/Turnip~KO at: 182% [Upwards]
Knockback: ★★ | Speed: ★★★★ | Range: ★★★★
Hitboxes: 6 (Five rising hits, the final one with knockback, and the lingering open parasol hitbox)| Sweet Spot: Last hit, when the parasol opens.
Special Properties: Multiple hitbox attack. First hits have set knockback. When the attack is done Peach keeps her parasol open to increase horizontal movement.
Description: Peach jumps with her umbrella, and then opens it and starts falling slowly.
Frame Data
Start-up: 1-6 (6) | Active: 7, 11, 19, 27, 32 | Cooldown: ? | Duration: ?
Landing Lag: 39
Summary
While Parasol is Peach's go-to recovery move, in combat, the move offers little reward in exchange for almost 40 frames of landing lag. Relatively the move is fast, Peach is covered in hitboxes, and the move quickly launches her upwards - sometimes scoring her an unexpected KO near the top of the screen - but with Peach being one of the slowest fallers in the game, landing without harm is usually unlikely.
Advanced Techniques
Ledge Canceled Special

Damage: *See the "Veggies In-Depth" section*
KO at: *See the "Veggies In-Depth" section*
Knockback: Depends on the face of the turnip.| Speed: ★| Range: ★★★★★
Hitboxes: 1 | Sweet Spot: No
Special Properties: Peach can pull a variety of turnips, each with different damage and knockback. She can also pull Bob-ombs, Mr. Saturns and Beam Swords.
Description: Peach ducks and gets a vegetable out of the floor.
Frame Data
Duration: 29
Summary
While the individual turnips themselves can be seen as mediocre as far as projectiles go (slow, low damage, low hitstun), Peach's turnip pull puts an immensely powerful thing in her hands: an item. This grants her quick and long-ranged out-of-shield options, a variety of advanced techniques such as glidetossing, and the option to projectile camp. This is in addition to the random chance of pulling out a game-winning item such as a bomb-omb. The vast amount of doors and windows turnips open in Peach's game is why most consider it her most important and best move.
Advanced Techniques
Ledge Canceled Special
Dash Pull
Free Pull
Recommended Reading: Raving Radishes - A guide on Turnips and the wonderful things you can do with them
[/COLLAPSE]Grabs/ThrowsKO at: *See the "Veggies In-Depth" section*
Knockback: Depends on the face of the turnip.| Speed: ★| Range: ★★★★★
Hitboxes: 1 | Sweet Spot: No
Special Properties: Peach can pull a variety of turnips, each with different damage and knockback. She can also pull Bob-ombs, Mr. Saturns and Beam Swords.
Description: Peach ducks and gets a vegetable out of the floor.
Frame Data
Duration: 29
Summary
While the individual turnips themselves can be seen as mediocre as far as projectiles go (slow, low damage, low hitstun), Peach's turnip pull puts an immensely powerful thing in her hands: an item. This grants her quick and long-ranged out-of-shield options, a variety of advanced techniques such as glidetossing, and the option to projectile camp. This is in addition to the random chance of pulling out a game-winning item such as a bomb-omb. The vast amount of doors and windows turnips open in Peach's game is why most consider it her most important and best move.
Advanced Techniques
Ledge Canceled Special
Dash Pull
Free Pull
Recommended Reading: Raving Radishes - A guide on Turnips and the wonderful things you can do with them
[COLLAPSE=Grab, Pummel, Fthrow, Bthrow, Uthrow, Dthrow]
Grab Attack ~Heel Stomp~
Standing Grab

Dash Grab

Pivot Grab

Dash Grab
Pivot Grab
Damage: 2%
KO at: N/A
Knockback: N/A | Speed: ★★★ | Range: N/A
Hitboxes: 1| Sweet Spot: No
Special Properties: None
Description: Peach stomps them.
Frame Data
Standing grab
Start-up: 1-5 (5) | Active: 6-7 (2) | Cooldown: 8-29 (22) | Duration: 29
Dash Grab
Start-up: 1-5 (5) | Active: 6-7 (2) | Cooldown: 8-39 (32) | Duration: 39
Pivot Grab
Start-up: 1-12 (12) | Active: 13-14 (2) | Cooldown: 15-39 (24) | Duration: 39
Summary
Although not especially ranged, Peach excels in getting grabs due to the lack of lag in her moveset. Jabs and autocanceled aerials easily lead into grabs. Her pummel is of average speed and damage, but can importantly be used to unstale her kill moves.
Front Throw ~Royal Slap~KO at: N/A
Knockback: N/A | Speed: ★★★ | Range: N/A
Hitboxes: 1| Sweet Spot: No
Special Properties: None
Description: Peach stomps them.
Frame Data
Standing grab
Start-up: 1-5 (5) | Active: 6-7 (2) | Cooldown: 8-29 (22) | Duration: 29
Dash Grab
Start-up: 1-5 (5) | Active: 6-7 (2) | Cooldown: 8-39 (32) | Duration: 39
Pivot Grab
Start-up: 1-12 (12) | Active: 13-14 (2) | Cooldown: 15-39 (24) | Duration: 39
Summary
Although not especially ranged, Peach excels in getting grabs due to the lack of lag in her moveset. Jabs and autocanceled aerials easily lead into grabs. Her pummel is of average speed and damage, but can importantly be used to unstale her kill moves.
Damage: 2%, 8% last hit
KO at: 234% [Sideways]
Knockback: ★★★ | Speed: ★★★★ | Range: N/A
Hitboxes: 2| Sweet Spot: No
Special Properties: None
Description: Peach slaps the opponent's face.
Summary
Peach's signature slap, fthrow is her second most damaging throw and is very quick. At 0%, two to three throws can be landed in succession against heavy characters if unexpected. At incredibly high percents, fthrow can be used as a last ditch KO move against very light characters.
Back Throw ~Iron Hip~KO at: 234% [Sideways]
Knockback: ★★★ | Speed: ★★★★ | Range: N/A
Hitboxes: 2| Sweet Spot: No
Special Properties: None
Description: Peach slaps the opponent's face.
Summary
Peach's signature slap, fthrow is her second most damaging throw and is very quick. At 0%, two to three throws can be landed in succession against heavy characters if unexpected. At incredibly high percents, fthrow can be used as a last ditch KO move against very light characters.
Damage: 2%, 9% last hit
KO at: 355%. [Sideways]
Knockback: ★★ | Speed: ★★ | Range: N/A
Hitboxes: 2 | Sweet Spot: No
Special Properties: None
Description: Peach puts her opponent behind and hits with her hip.
Summary
"Dat ***" - Peach's bthrow is her most damaging throw, if only by one percent. Without consideration to positioning, bthrow should always be the first throw used due to that reason. Every percent counts.
Up Throw ~Gut Punch~KO at: 355%. [Sideways]
Knockback: ★★ | Speed: ★★ | Range: N/A
Hitboxes: 2 | Sweet Spot: No
Special Properties: None
Description: Peach puts her opponent behind and hits with her hip.
Summary
"Dat ***" - Peach's bthrow is her most damaging throw, if only by one percent. Without consideration to positioning, bthrow should always be the first throw used due to that reason. Every percent counts.

Damage: 2%, 6% last hit
KO at: 303% [Upwards]
Knockback: ★★ | Speed: ★★★ | Range: N/A
Hitboxes: 2 | Sweet Spot: No
Special Properties: None.
Description: Peach puts opponents above her and then she hits them with both hands.
Summary
Well, it's an uthrow. Not exceptional in most regards, but it's natural vertical trajectory is useful for positioning.
Down Throw ~The Royal Treatment~KO at: 303% [Upwards]
Knockback: ★★ | Speed: ★★★ | Range: N/A
Hitboxes: 2 | Sweet Spot: No
Special Properties: None.
Description: Peach puts opponents above her and then she hits them with both hands.
Summary
Well, it's an uthrow. Not exceptional in most regards, but it's natural vertical trajectory is useful for positioning.
Damage: 7%
KO at: 313% [Upwards]
Knockback: ★ | Speed: ★★ | Range: N/A
Hitboxes: 1 | Sweet Spot: No
Special Properties: None
Description: Peach puts opponents beneath her and she falls towards them.
Summary
Dthrow's heavy combo potential lead it to be Peach's best in terms of damage raking. Every dthrow is capable of being ended in an ftilt, utilt, fsmash, or bair. This is without considering the chaingrab on almost half the cast - for more info, see the in-depth section in the guide below.
[/COLLAPSE]TauntsKO at: 313% [Upwards]
Knockback: ★ | Speed: ★★ | Range: N/A
Hitboxes: 1 | Sweet Spot: No
Special Properties: None
Description: Peach puts opponents beneath her and she falls towards them.
Summary
Dthrow's heavy combo potential lead it to be Peach's best in terms of damage raking. Every dthrow is capable of being ended in an ftilt, utilt, fsmash, or bair. This is without considering the chaingrab on almost half the cast - for more info, see the in-depth section in the guide below.
[COLLAPSE=Up Taunt, Side Taunt, Down Taunt]
Up Taunt

Description: Peach gets her parasol out and spins it while saying "sweet".
Side Taunt

Description: Peach dances around moving her dress and singing "lala-la-lalala".
Down Taunt

Description: Peach does a spin then she winks while saying "aha".[/COLLAPSE]ADVANCED TECHNIQUES
[COLLAPSE=Float, Moveset, and Turnip Techniques]
FLOAT TECHNIQUES
FLOAT "WAVEDASH"
Description: By quickly starting and canceling a float, Peach moves in an awkward and unpredictable manner.
Description: By quickly starting and canceling a float, Peach moves in an awkward and unpredictable manner.
- Button Inputs: Quickly start and release a float while moving back and forth.
- Difficulty: Easy
WASPING
Description: By autocanceling Peach's bair or fair early, Peach gains a slight slide.
Description: By autocanceling Peach's bair or fair early, Peach gains a slight slide.
- Button Inputs: Ground float, bair or fair, and release immediately.
- Difficulty: Easy
LEDGE FLOAT CANCEL
Description: By abusing float mechanics, Peach can rise from the ledge while still retaining some invincibility.
Description: By abusing float mechanics, Peach can rise from the ledge while still retaining some invincibility.
- Button Inputs: On ledge: rise from float, cancel float, and perform action.
- Difficulty: Moderate - Difficult
- Useful Links: New AT: Ledge Float Cancelling /w new video!
DTILT CANCEL GLIDE
Description: Taking advantage of the move's IASA frames - interrupting the latter bit of dtilt will cause Peach to slide backwards while simultaneously performing another move.
Description: Taking advantage of the move's IASA frames - interrupting the latter bit of dtilt will cause Peach to slide backwards while simultaneously performing another move.
- Button Inputs: Any action inputted after the later half of dtilt.
- Difficulty: Easy
B REVERSE
Description: Simply perform a special move in the opposite direction Peach was facing.
Description: Simply perform a special move in the opposite direction Peach was facing.
- Button Inputs: Quickly tilt control stick in opposite direction and perform Toad, Parasol, or Peach Bomber.
- Difficulty: Easy
LEDGE CANCELED PEACH BOMBER
Description: During the ending lag of Peach Bomber, skimming and falling off a ledge cancels any normally suffered lag.
Description: During the ending lag of Peach Bomber, skimming and falling off a ledge cancels any normally suffered lag.
- Button Inputs: Space Peach Bomber to end on the tip of a ledge.
- Difficulty: Easy
LEDGE CANCELED PARASOL
Description: After using Parasol, aiming the fall to skid off a ledge cancels any landing lag.
Description: After using Parasol, aiming the fall to skid off a ledge cancels any landing lag.
- Button Inputs: Aim Parasol to just scrape a ledge while pushing forward.
- Difficulty: Moderate
- Useful Links: New Peach AT: Parasol Ledge Cancel
DOUBLE HITTING AERIALS
Description: Due to an unknown mechanic, dropping a float while hitting with bair or nair hits the opponent twice.
Description: Due to an unknown mechanic, dropping a float while hitting with bair or nair hits the opponent twice.
- Button Inputs: When either bair or nair is landed, drop a float and the move will hit twice.
- Difficulty: Easy - Moderate
- Useful Links: How to get the two hits from Peach's Nair and Bair...
BAIR TRAP
Description: Peach has an aerial jab lock by knocking characters to the ground, then locking them with the weak hits of bair or nair.
Description: Peach has an aerial jab lock by knocking characters to the ground, then locking them with the weak hits of bair or nair.
- Button Inputs: Knock characters to the ground and quickly hit with and cancel the weak hits of either bair or nair in succession.
- Difficulty: Difficult
- Useful Links: New AT! Peach's Bair Trap (Vid)
UAIR COMBO
Description: Capitalizing on uair's low landind lag and knockback, Peach gains an immensely powerful and frame-guaranteed combo.
Description: Capitalizing on uair's low landind lag and knockback, Peach gains an immensely powerful and frame-guaranteed combo.
- Button Inputs: Ground floar uair repeatedly, full hop uair, follow up with nair or double jump nair.
- Difficulty: Difficult
- Useful Links: An in-depth look into Peach's uair string
TURNIP TECHNIQUES
GLIDETOSS
Description: Canceling a roll with an item throw, Peach slides in conjunction with a thrown item in any direction.
Description: Also known as "turnip dashing", performing a weaker glidetoss allows Peach to slide while recatching a thrown turnip - over and over again.
Description: Cover your airdodge by dropping a turnip immediately during.
Description: Canceling a roll with an item throw, Peach slides in conjunction with a thrown item in any direction.
- Button Inputs: Roll, and during the first 2 to 5 frames, interrupt with a throw.
- Difficulty: Easy
- Useful Links: The glide toss follow-ups
Description: Also known as "turnip dashing", performing a weaker glidetoss allows Peach to slide while recatching a thrown turnip - over and over again.
- Button Inputs: Roll, immediately release control stick and press a. Recatch turnip with a, repeat.
- Difficulty: Moderate - Difficult
- Useful Links: New ATs: Glide Drop, Weak Glide Toss, and More
Description: Cover your airdodge by dropping a turnip immediately during.
- Button Inputs: Press airdodge then a or z right after.
- Difficulty: Easy
TURNIP SMASHING
Description: By holding an attack button while obtaining an item, usually during a turnip pull, Peach can then immediately afterward fsmash while holding the turnip.
Description: By holding an attack button while obtaining an item, usually during a turnip pull, Peach can then immediately afterward fsmash while holding the turnip.
- Button Inputs: Down+B and hold attack button during and after pull animation, fsmash with cstick while releasing the attack button
- Difficulty: Easy
LEDGE CANCELED TURNIP PULL
Description: While running or walking off a ledge, performing a turnip pull will pull the turnip without suffering any lag.
Description: While running or walking off a ledge, performing a turnip pull will pull the turnip without suffering any lag.
- Button Inputs: Run or walk off an edge, pull the turnip right before falling off, all while pressing forward.
- Difficulty: Moderate
TURNIP FREE PULL
Description: During Peach's turn-around animation, Peach can slide while pulling a turnip.
Description: During Peach's turn-around animation, Peach can slide while pulling a turnip.
- Button Inputs: Perform a soft turn-around and as Peach is turning input the turnip pull.
- Difficulty: Moderate - Difficult
TURNIP DASH PULL
Description: AKA "Bonewalking" after Peach main Bone made the technique popular, the dash pull carries the momentum of a dash to shoot Peach forward while pulling a turnip.
[/COLLAPSE]CHAINGRABSDescription: AKA "Bonewalking" after Peach main Bone made the technique popular, the dash pull carries the momentum of a dash to shoot Peach forward while pulling a turnip.
- Button Inputs: Foxtrot, down+B, diagonally down and forward, forward.
- Difficulty: Moderate - Difficult
- Useful Links: ~(**How to Bone-Walk**)~
- The Secret to Bone-Walking.
[COLLAPSE=Dthrow Chaingrabs]Dthrow Damage Chart
# of Dthrows - Damage
x1 - 7%
x2 - 13%
x3 - 19%
x4 - 24%
x5 - 29%
x6 - 33%
x7 - 37%
x8 - 40%
CG Finishers
Dthrow (3-6%) to:
-Bair (14%): I think this guaranteed on every character if buffered except on Marth, Wolf, and ZSS.
-Utilt (13%): Works on most characters.
-Ftilt weak (10%): Fastest one and works on everyone.
-Nair (13%): Not sure who this works on, haven't tested it much.
-Grab: On Fox, Wolf, Sheik, and CF you can buffer grab again, but you won't have any guaranteed follow ups after that.
DThrow - Down throw
BGrab - Buffered turn around grab
Grab - Normal turn around grab
RGrab - Running grab
 Marth
Marth0-7%
-(Dthrow>BGrab)x1
Sonic0-13%
-(Dthrow>Grab)x1 > (Dthrow>RGrab)x1
Wario0-19%
-(DThrow>BGrab)x1 > (DThrow>RGrab)x2
Zero Suit Samus0-19%
-(Dthrow>BGrab)x1 > (Dthrow>Grab)x1 > (Dthrow>RGrab)x1
Squirtle0-19%
-(DThrow>BGrab)x1 > (DThrow>Grab)x1 > (DThrow>RGrab)x1
Pikachu0-19%
-(DThrow>BGrab)x1 > (Dthrow>Grab)x1 > (Dthrow>RGrab)x1
Falco0-24%
-(Dthrow>BGrab)x4
Metaknight0-24%
-(Dthrow>BGrab)x4
Fox0-24%
-(Dthrow>BGrab)x4
:shiek: Sheik
0-24%
-(Dthrow>BGrab)x4
DK0-24%
-(Dthrow>BGrab)x2 > (Dthrow>Grab)x1 > (Dthrow>RGrab)x1
Ike0-33%
-(Dthrow>BGrab)x6
Captain Falcon0-33%
-(Dthrow>BGrab)x6
Wolf0-33%
-(Dthrow>BGrab)x6
Charizard0-33%
-(Dthrow>BGrab)x1 > (Dthrow>Grab)x1 > (Dthrow>RGrab)x4
Link0-33%
-(Dthrow>BGrab)x1 > (Dthrow>Grab)x1 > (Dthrow>RGrab)x4
 King Dedede
0-37%
-(Dthrow>BGrab)x5 > (Dthrow>Grab)x2
Snake0-37%
-(Dthrow>BGrab)x4 > (Dthrow>RGrab)x3
Bowser0-37%
-(Dthrow>BGrab)x3 > (Dthrow>Grab)x4
Ganondorf0-37%
-(Dthrow>BGrab)x2 > (Dthrow>Grab)x3 > (Dthrow>RGrab)x2[/COLLAPSE]
Keys-
FL= Float
GFL= Ground Float
RVS= Reversal (you do an attack instantly the other way)
OoS=
JC= Jab Cancel
GT= Glide toss
FL= Float
GFL= Ground Float
RVS= Reversal (you do an attack instantly the other way)
OoS=
JC= Jab Cancel
GT= Glide toss
Styles and it's uses
Here I will explain the three styles people can be used and it's pros/cons. if you are having a hard time how to use a style, this can help you.
Aggressive Peach-
When using this style Peach can make it really hard for the enemy to break away from you. Same time theor shield is getting drained hard. Which a good pressure game, Peach can eat just about half ones shield. And this point if you link another pressure attempt, you will ether shield poke or just have then roll, dodge. With her pressure you can actually control your opponents evasive ways to get away. Really if in a corner.
*remember with pressured near the ledge, the enemy can not roll back. They go no where. So in this case they have to ether dodge or roll behind you, which you can easily take care of with a dsmash , Grounded Nair or short hop Dair.
Another good use of this style is her frame advantage. All her air moves have frame advantage on shield. If spaced correctly, You usually get +2. Which means you have to do a move within 2 frames for you not to get attacked, grab. Peach's jab is 2 frames. Thus you can use her air moves to a jab and not get punished with a grab/attack OoS. You can add mix ups with her jab since by now, people usually wait for her double jab. One way is to delay the second jab. This helps with a punish out of shield. or jab cancel. it would make it really Hard to wait for a second jab and then grab. if the enemy wants to wait for a second Jab, jab once then mind **** them with a followed grab. or maybe Jab once, then roll behind them if they want to grab/attack OoS and Jab/jab cancel or Ground float nair. many other options I could be here all day with.
It is best to go with with quick moves to start your pressure. Slow moves can be seen comming. So when you get close you can go in with spaced grounded nairs, to a Jab and take it from there. or a Bair to a reverse jab and go from there. Though if you have the time, dair is really good to start pressure. Do w/e the situation calls. You can also have a turnip cover you to start pressure if you are gonna use slow moves such as fair. For it would usually put people in shield.
* I say usally cause people could just simply Zgrab them. Or they just roll/dodge.
Turnips are all good to add on pressure. Bait a shield with it, hit the shield with turnip and follow up. here is some spressure mix up you can start out with;
- FL Dair (do a second set of you want or able too)> Zdrop> bair> RVS JC Dsmash
- FL Dair (do a second set of you want or able too)> Zdrop> bair> RVS Jab>grab
- FL Dair (do a second set of you want or able too)> Falling Nair, RVS GT.
- Falling Dair> RVS GT> Jab cancel> Roll behind> Jab cancel> grab.
There is a hell lot more you can play around with it all you want. mix and match. create your own pressure and mix ups. Mess with peoples heads. Be creative. The list I gave above you can even do it backwards. it does not have to be in that other. You can do half of list one and att list 2 or even three. Hell if you that godly, all them all!
Now while playing aggressive seems beast, you need to understand there are flaws to this style. Peach does not have any fast air attacks in front of her outside her nair (3 frames) But the range is short. And for those that think her Dair is quick, it isnt. (12 frames). So if you try to go rambo alot against a smart player, you will be in for a world of hurt with attacks they can see coming. Also with all the pressure and damage you will be doing, you will be burning your kill moves. Some of your kill moves you might need to use alot just to get in and start getting damage with moves you don't use to kill. Peach Fair might be one her her best moves to get in, but it is sloooooooooow. (16 frames, 17 at max range). Every character in this game can easily stop that. If there are characters that have fast ground or air attacks from the front, that move might be a good choice to use so much. Which takes away the only good rane Peach has in the front. And move of the time, you will be facing the enemy.
To cover this problem, rotate Fair and Bair. Bair does not has as much range as her Fair. But the range is good enough and can get the job done with 6 frames start out. You can use that in place of fair to rack up damage, get inside range moves and save your prime kill moves.
*If your aggro game is broken on the spot, it can become hard to get space since now your enemy is in control and you are wide open. this can lead to danagerous situations, really if pinned to the ledge.
Tips to keep in mind-
* You get frame advantage on shield pressure and there is nothing your any can do about it for punishment expect for the Up-Bs of
~ Mario
~ Marth
~ Meta knight
~ Bowser
~ Charizard
~ G&W
~ Samus? (Not sure as of yet, I'll find out for sure and update this)
~ Pit (the windbox pull and all depends on how you pressured and the distance between you 2)
*If you are gonna end a pressure game or it gets broken, one way to save youself and brake away is to have your back turned. That way you can use a fast spaced ariel like bair.
*Pay attention to ones shield. Don't do laggy moves that they can block and punish you for. Like Dsmash. make sure the shield is small enough for you to shield poke the Dsmash. if they are able to block it, you are open for a hit. Ether continue the pressure with a new chain or just get space.
*Mix up how you pressure someone. Don't do the same type of pressure all the time. it will/can stall your attacks are obviously makes you really predictable. The enemy can just wait and punish your pressure game when they really should not be able too.
Defensive style
Ways to keep your enemy away is with spaced fairs. Wether ariel or grounded. retreating Z Drop turnips help for running away. You can also turnip juggle. You just toss 2 in the air. Grab the first one you tossed and throw it. Then grab the secons one ant then throw that soon after. you can have 2 turnips lined up and getting tossed at the enemy. Space air moves with a turnip in hand and then do retreating glide tosses. A good use of turnips with her spaced attacks can make it really annoying for people to get in. if you are hear someone complain to you about turnips in a match, you are doing a good job with them and keeping them out. also racking up damage through your defensive play. Don't ever take that comment as being cheap or foul. When there are other characters doing it worst.
Peach has alot of shield options when one attacks it or breaks through your defensive. OoS you can do as follow to counter attack:
- Nair
- GFL Nair
- Bair
- GFL Bair
- Jab
-Dsmash
- Zdrop turnip (or w/e item you are holding expect a bomb. but if you are like at 0 and it gets you the kill, go for it)
Now while you might do dair OoS, I listed these as her best options since they are fast. You can can get way with things such as fair or dair OoS. But remember this and the other options I losted above depend on
* The distance between you and the enemy.
* How much time you have to punish them once the attak hits shield.
* Shield stun (Yes, while the shield stun is not like melee it still plays a big part in all this)
Bone walking and freepulling also help with playing defensive. it makes it really hard for the enemy to touch you. And also helps you run away while covering your tracks. Best to learn how to do these 2 things really well if you wanna get full use of her defensive play style. if you do not wanna have your back turned while evading You can do a RVS freepull. You slide back while getting a turnip and your face is at the enemy.
Now while all this makes peach hard to hit, there are some flaws in this style. For one thing, this type of style might pin you to a corner. And oif the opponent breaks through that defensive, this can least to big trouble. This can go bad aginst characters such as Marth for he excels when once is cornerd. He has options to bait you to roll, sidestep and punish it. As well ase making it really hard to get to the other stage. And once you are off stage, it can become a pain to come back. You can slow be forced to shield and have your evasive tatics controlled by the enemy. pretty much the enemy may give you lil to no option on how to defend, Which can make it easy for them to read you and execute a move/grab to deal damage. You can have a hard time getting away from the enemy. And if you do, you mught be taking losts of damage. Keep in mind in this style you can not abuse frame advantage.
This style can also have peach be forced to go to the air, or get launched in the air. Whih lots of characters can take abuse of, really with her crappy air dodge.
* Peach has the worst air dodge in the game followed by Marth
Tips for defensive style-
*if your defense is broken and are pin to a corner, the best and quick option you have is her jab. its a quick move and has decent range. you can do a jab combo and reverse the assult quick and then get your space.
*You would be at best if you can control the center of the stage. if you stay in the middle alot you have options to break away or even counter attack if your style is broken. Also does not give the enemy much breathing room.
*practice spacing your moves. But don't always try to space, go in for the hit sometimes. To knock the enemy way and have more time to build up the defense and keep then at bay. Go to training mode an do moves as close as possible to the enemy and hot hit them. You can but the cpu to walk/run and practice spacing while retreating
*Utilize turnip juggles with spaced grounded airs to JC or RVS JC to make it hard to get hit, get some damage, launch them away and buil up your wall.
*Practice bonewalking and freepulling. it helps with quick and save evasive get aways.
*turnip cancels off the platfroms to Zdrops or RVS turnip tosses help cover your tracks and get space if you are on a platfrom and wanna get off.
*Spaced Dtilts help since you can slide back to a Turip to escapce counter attacks. or space a move if one chooses to follow you. Like Dtilt slide to a Fsmash.
Versitale Style
Just about the best style Peach has. And a style alot of characters don't have. This style is just a mixture of both aggressive and defensive. You cover your weaknesses with your strengths. And have hella lot more options then using just one style. This can make it really hard for people to deal with you. For they shut down one thing, you have another to use and cover you. You now have the ablity to cover just about all your options.
Now with if they shut down both? its not all lost. peach is a character with many tools Remember for if one gets shut down, there might be a time when you can not execute the other right away. like with my Marth example. he shut down your defensive play. You can not just go aggro on him right there on the stop. What you need to figure out now is how to get to a safe zone so you can execute your style of choice or what it calls for. Whith this style you can be forced to just drop everything and figure out some way to can control which nether style can help you with. Sometimes you might need to take a hit to execute a style as silly as this sounds. but that can help you take control of a match. or gain control.
another example of that is taking hits of falcos laser on purpose if near the near and he is a few feet away. That way if he grabs you, he can not down throw you across the stage to a spike and even if that does not kill you, still puts you in a spot you do now wanna be. How many times you fell and cried when you were learning to walk. or riding a bike? What does not destroy you makes you better at things you are trying to do/learn.
This style is the best one and can be hard to get use too. for you would need to know when to switch up. It csn be based on character or just the players habits. A style that would get you destroyed against a character can lead to you three stocking them cause cause of the players habits or he has no clue how to deal with it. This style requires you to make quick choices on the go along with quick reaction time and being obvservant.
Tips for this style-
* Make for both aggro and defensive style are actually match in strength for best use.
* learn how to make quick choices and learn when to switch up.
*Make sure you can cover up one style if it fails with the others.
* Rotate both so it can be hard for the enemy to read you wonger and harder to deal with. which makes this style stronger
Style recommendation list
Here is a list of the whole Roster and what styles work best on them. of courses you can just give me a big F U and go by what you want If you don't agree. Which is fine. This is based on my opinion anyway. though you have been warned.......* A= Aggro
* D= Defensive
* V= Versitale
Mario= V
Luigi= V
Peach= V
Bowser=V
DK= V
Diddy= A
Yoshi= A
Wario= V
Link= A
Zelda= V
Toon Link= A
Ganon= V
Samus= A
Pit= A
IC=V
ROB= A
Kirby= D
Meta= D
DDD= V
Olimar= A
Fox= A
Falco= A
Wolf= A
Falcon= V
Pika= A
Squirtle=A
Charizard= V
Ivysaur= V
Lucario= V
Jiggz= V
Marth= D
Ike= V
Ness= V
Lucaus= A
Snake= V
Sonic=A
Sheik=V
Some characters that have a hard time dealing with Peach pressures and take hell of alot of damage is aggro. Also style is best for characters with projectiles. This limits their use for it. aslo fast characters that can be hard to hit or get away from if they are aggressive on you also get this style.
Some characters that you can't pound on their shield all day For they have good counter attacks. You need to keep them at bay to get damage. Make them come to you. really if they have no projectile. good with characters who have sort range. or have quick OoS options for your pressure. This is where your defensive style in a match up shines.
Characters that you sometimes need to run away from if you can't pressure anymore and need to refresh moves, versitale works best. So for characters like snake, You maybe need to break away from him and refresh moves since he lives for days. Als you could have launched him, which can restart the appoaching position. if he is camping you can not rush the appoach. For he has alot of moves in front of him that have range and can hit you with easy. And he has good defense. Thus you have to work a safe way to get in. once you do, abuse your frame advantage on him and toss him around till he dies or you can't keep the pressure up anymore and restart position.
Air game/Floating

Peach is one of the best air fighters in the game. She has come good air options. Really thanks to her floating and the ability to fight in the air with items in hand. this can lead to many options and air counters. To use her air game well you need goo control of her floating.
One of Peach’s best features, and honestly her saving grace, is the fact she floats after you jump. She suspends in the air for about three seconds, during which she can attack and move backwards and forwards. She is the only character in the entire game that can do this. It confuses the **** out of people, so use it often, and use it wisely.
Basic procedure is to float at head-height, and combo dair into another dair, and then even another dair. This does about 50%. At higher levels, this combo is very escapable, but the basics of the combo lend themselves unto other more advanced strings. More experienced Peach players commonly float dair into an uair and then an utilt, a 40% combo which is almost impossible to escape.
Peach can also float on the floor by holding the jump button while pressing down on the control stick. This gives Peach the unique ability to bring her aerials to the ground, and most importantly allows her to cancel her moves as quickly as she throws them out. This subtle but devastating benefit is what allows Peach to even consider playing with the big boys. It makes her fast, it makes her impenetrable if played perfectly, and if used at top levels, gives her the power to do a 70% inescapable death combo.
So that’s what Peach can do, but we won’t be learning that all now. Right now if there was any single advice you could be given as a new Peach player it’s this: learn to control Peach.
This includes:
Understanding how to float at different levels and on the ground
When to cancel her aerials so as to have no lag (out of float and jumps)
Learning how to glidetoss and her other basic ATs
Floating at the right height can make it hard for the enemy to touch you while you pound on them. For example, If Snake is holding a grenade on his shield while you Dair, You can set it off and not get hit, eating snakes shield even more and increaseing your shield pressure on him. This al depends on character. Now while this may seem all so godly, there are some problems with all this you should keep in mind:
*Peach is slow in the air and as I said before, only have one ranged move in front of her with is really slow. so you can become easy to hit.
* Her dair leaves her open from the waiste up. And completely open fron the back since her body slants in front of her. lost of full hoped moves can take you down easy.
*Her float has slow movement.
Floating is not something to be use so much for it decreases your speed of combat. You should be mixing her floating with her short/full hopped moves. This leads to great options and more pressure. Also can make you really hard to hit. When you have control of floating and used in the best ways possible you get these bonuses in combat:
* You become hard to hit.
* Great for evasion
* Great to approach.
* Great for spacing
* You can get by projectiles just by floating over them.
* You can evade and attack at the same time.
getting use to her float can take some time for great use in battle. Switch also requires heights of characters and spacing. And also when to drop so you can dish out your next move and gain frame advantage. The timing of when you drop from your float is very important when doing attacks. If you screw up, you will not gain your frame advantage and can get countered attack/grabbed.
Tips for her air game/floating-
*if you toss a turnip and it hits the enemy and ones shield, you can Z grab it and then Float an air attack and start a Dair pressure game with the list I made in this guide.
* You can GFL your moves to bring your air game to the ground and increasing your combat speed. since you will touch the floor much sooner and cancel your air moves to w/e you want.
*Pay attention to the height of you and the opponent. This matters to a great deal of wether you can be punished after an air attack.
*Short hoped moves are nearly as good as GFL moves since you will touch the floor sooner while the move is still out and cancel it to w/e you want. if someone wants to short hope their moves, you can Full hop dairs which can counter alot of short hoped moves in the game.
* D-air sheild pokes really well from the GFL
*using it as a mindgame to create the illusion that you are going to attack. (my favorite method) you can use this method many ways. such as approaching with float, quickly land, and that rush w/ dash grab. or weave in and out draw out an attack, say.. marth's Fsmash, than punish
Surviving with Peach

One of the important things in this game is knowing how to DI. Some characters have certain ways to DI which we call "momentum cancel" You pretty much cancel your momentum when getting launched to live longer than usual.
To DI correctly with Peach, in general, the procedure is:
[All while aiming toward the upper corners from the instant you are hit.]
GET HIT -> Uair (fastfall'd) -> Double Jump
Check out Swordgard's DI and Survival Guide for more info.
"How do you recover with Peach?"
Peach's recovery consists of five separate elements.
Second Jump
Float
Peach Bomber
Toad
Parasol
The major flaw with this collection is that none of these moves have exceptional vertical distance. Horizontal distance is covered wholesomely between float, Peach Bomber, and Parasol. Second jump is usually delegated to momentum canceling, but it can give a bit of horizontal movement (it provides near non-existent height). Peach Bomber launches Peach an excellent distance to the side and also sweet-spots the edge. Toad is used as a one-time air stall, also providing a miniature hop. Parasol is the main recovery tool, providing normally very adequate vertical reach. It sweet spots from a very far distance, and it contains a hitbox on the tip which knocks off ledge-hogging enemies allowing Peach to grab a hold (though opponents can dodge it with properly timed ledge invincibility). The Parasol can still grab the ledge backwards if it is pressed downward to close.
Note: Parasol suffers a landing penalty if Peach ever closes the parasol - it is not removed if reopened. Also known as RCO lag or the third jump glitch, the penalty is added frames of lag whenever next touching ground. Exactly 15 extra frames from a soft landing, 30 from a hard landing.
Aprroaching

Peach has many ways to approach. It all depends on character cause some can kill some of your approaches. Here is a list of a Few.
- Fair
- FC>Fair
- Dair
- FC>Dair
- FC>Nair
- Turnip>Fair
- FC>Turnip>Fair
- Bair
- Glide tossing
- Nair
Advance approaches:
- Glide toss> FC>Nair
- Glide toss>reverse Bair
- Glide toss>Nair
- Glide toss>Grab
- Reverse Glide toss> Dsmash or Fsmash
- Reverse Glide toss> Bair
Tips when approaching:
*The distance between you and the opponent.
* The range of there attacks wether they have their back turned or looking at you
* Make sure whatever way you choose to approach is safe and reward is much higher then the risk.
Finishing the enemy off
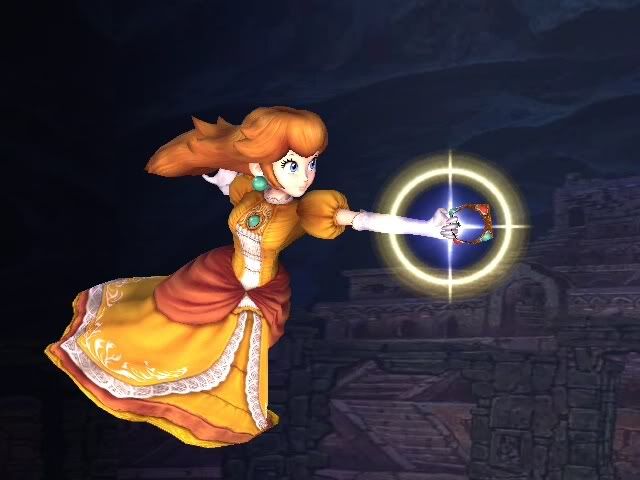
Though it may be a pain to kill with Peach at times, she does have a few kill options.
**= Can kill well with and mostly used for a finisher
* Can Kill but not as great as a kill move with 2 starts
- Fair **
- Bair **
- Nair
- Uair*
- Dair (% has to be quite high. Best to catch them in the air with it to make it a lil easier to kill with)
- Utilt **
- Ftilt *
- Dtilt (% has to be quite high)
- Fsmash **
- F-B (High damage or gimps)
-Up-B (% has to be pretty high. But this type of task can be easier if you do it high in the air or on a platform)
- Usmash**
- Turnips(Yes I am serious....turnips)**
- Toad (Yes......toad, but the % of the enemy has to be pretty darn high and it depends on character and stage.)
Now remember that this all depends on:
- How many times you used the attack
- Stage
- character you are playing
- the % or the enemy
- What part of the stage you are on when you unleashed the attack.
Save your moves that you need for killing. Use lots of jabs, get damage off of grabbing. When you grab them don't always launch them so fast. Kick them a few good times then toss them. N-air cant kill so well so use that alot. Dair helps since its not a Kill move. Space dtilts. And turnips. Once you get them to a good % Now you can fely on your kills moves like Fsmash and Up smash. Your fair and bairs, even upairs. uptilt as well. Try to save your most important moves to kill. Cause when you get them to that good %, all of your kill moves will be at full power. And it will be less of a struggle to kill.
Also Her upthrow can be a good tool for Killing.
"What, an Upthrow? the hell, How, that throw sucks and people hardly use it."
Oh? Well let me explain. At 50% and over, you really can't combo into anything. if you was to Fthrow them and Back throw them, then what. They are out of your range. and have to repeat the process of approaching them again. When you up throw them, They are over you, you can use turnips to at least hit them, or make it harder for them to touch the floor. And set up to land an attack on them. This is the more better ways to hit someone after a throw. This is center stage though. Near the edge you can just toss them out. but with some characters, Like DDD, DK, you are not gonna kill them off of a throw. So the hell with that right? Toss them up and get extra hits of of turnips, and even if that dont hit, they have to worry about evading them and then you hitting them while trying to land saftley to the floor. They will still Be in your attack range for turnips and even finishers more than any other throw at 50%+
Also she is good at racking up damage in w ways. Her Attacks and turnips. If you are gonna spam anything. it should not be your fair. it should be:
-Nair
-Dair
-Dtilt
-Jab
-Dsmash
-Turnips
-Grabs
-Up-B, used right and I am dead serious. 12% of damage I believe and good knock back at the final hit so you can't get punished for it that easy.
-Bair (sometimes.)
Uptilt (sometimes)
Uair (sometimes)
Now look at this list here. What is missing from here? Thats right, her kill options:
Fair
Fsmash
Upsmash.
The moves that have (somestimes) in them are moves that can kill as well but sometines are used to rack up damage, like within comboes. Now when I say spamm I don't mean be a dunce with the moves. uses them wall and with a brain to get some hits off. Then you still got your kill moves to kill earlier than expected. You can't just play Peach to play her. if your character can't just boldly kill, you can;t just go swinging attacks and playing so typical. This is why Peach does not get anywhere and people don't really see what she is about. Thus she is bias on her self and against characters. As well as people saying the typical stuff about her for over a year now.
"how can Peach rack up damage quick and early?"
Besides the chain grab we have:
Basic combos
-Dthrow>uptilt
-Dair>Nair
-Dair>Uair
-Dair>Fair
-Dair>Bair
-Jab>Dtilt
-Jab>grab
-Jab>Nair
-Jab>Nair
-Turnip>fair
-Turnip>Nair
Advance combos ( you would need good control of Peach and her floating as well)-
*= Depends on where your enemy is/goes after the first or second hit of the combo
-*Dair>Dair>Fair
-Dair>Dair
-Dair>Dair>Dair
-Dair>Dair>Dair>Uair
-*Dair>Dair>Dair>Uair>Up-B
-*Dair>Dair>falling Dair>Usmash/Utilt/Up-B
-*Dthrow>Ftilt>Uptilt/Usmash/Up-B
-*Dthrow>Ftilt>Jab>grab>Dthrow>Utilt/Uair/Up-B
-Bair>grab
-Fair>Jab>grab> (look at the list of what you can do after grabs)
-*Falling Dair>Jab>(look at the list of what you can do after jabs/grabs)
-*Falling Dair> Usmash/Utilt/Up-B/Nair/Bair
Now look at the list of moves I said to use alot that have (sometimes) in them. Then look at the combo list. Makes since to why it has (sometimes) next to them right you might already be using the move to get damage. So the won' be fresh for kill. other times they will.
Peach is like Chess, you just CAN'T go in there and say "ok, I wanna get this pawn with my rook" When there is a pawn right by it that can take you out. Now in Brawl terms.
You can just go swinging all your kill moves and all. You can get all the hits you wan't. Then when you get to that kill %, you are in trouble, you can't kill them at % they should be dead. And that sucks for you, and you already not a solid killer. oh man. then your enemy is gonna take you out easy. So you have to think how you gonna keep them kill moves fresh, and get your damage by new means. Peach and chess have something in common so you know.
Turnips
turnips are not only a weapon for damage. You just don't get one and toss them hoping to hit one. Turnips are a damm mindgame. Just by holding a turnip in your hand. You are already toying with your opponents head. When you get one, it buts your opponent on the defense cause they do not wanna get hit. You did not have to do anything to them to screw with them. Turnips are a tool to mess with the mind and THEN get your damage off.
"pluck turnip"
"toss it"
NO!^ There is about maybe 6 steps before you toss it. Also Peach can fight with items in her hand via floating. And she can bring that Floating to the ground for more of a confusing. Your opponent won't be able to tell when you will toss the damm turnip. She is like the drunken master. Maybe His wife, w/e. Just holding that thing in your hand can lead to so much confusing. Hell, might even confuse the hell out of you. Yes it is that serious.
Turnip Pillar

This is not an infinite combo or anything, people can easily shield this or roll away. The point of this is for pressure and mix ups. After you do like one pillar or do and they shield, you can Z drop the turnip. then land to a Jab mix up. Just mix and match stuff. Play around with it. To Do this, you can Zdrop to a Dair and repeat. Or throw it down and dair. The Dair is used to catch the turnip.
Turnip Cross

You can create a cross with turnips so it can be hard for the enemy to approach if you wanna play keep away (Defensive) You pretty much cover both air and ground approaches. And if they get through, you can follow up and punish. cause they have to deal with a wall of turnips plus you at once.
Turnip Barrier

Another way to create a wall with turnips. What you do is you smash throw one turnip upward. With the next one you normal throws it. Then with the last one you jump back and Z drop it.
Turnip Juggle

You grab a turnip, toss it up, grab another one, toss that up, then jump and Z grab the first you toss and toss it up again and do the same for the second. Then grab another. If you want you chain 2 turnip juggles and toss it off stage, so you have 2 turnips going out at the anemy, then you can follw up with an assult. You can aslo link a turnip juggle to a turnip cancel off stages. To cover more vertical range. And even horizontal range. Then go in for an assult of bait moves/airdodges and attack. You can have about three turnips guarding the air at once. Even 4. You would have to tunip juggle, Then platform cancel a turnip and toss it up. Then run back and quickly do it again as the turnip is about to come down and durnip cancel to a Z drop and grab the air. Do you realize how much you have covered? Just picture it for a min.
Working with this some more, I noticed you can do it with three. Here is how. Grab a turnip, toss it up, grab another and toss it up. Grab a third one and toss it up. Now remember the first one you toss? By the time you toss the third one, the first will be in your face. But you won't have time to Z grab it. Sp Just Tap A. And Peach will just grab it. Then toss it up agaib. And repeat with the other 2. Once you toss that last one for a second time, it will vanish in the air. And this is where you start from step one to perform the juggle.
Now, when you catch the third one with her Jab, you can jump, toss it in the air and then isntantly Z grab the other 2 and toss them in the air. Ether way you will create a nice wall if done correctly. three turnips at a time if you do this correctly will be on stage. And at least one will always be on the stage no matter what.
Now here is a lil somthing I thought of with this. I was praticeing this in training mode. When I said to myself "I have all these turnips out here at once. it be nice to send an army of them off the stage to the enemy at one time" So was thinking how this can be done. And I figure it out. There is something called instant throw. it's where you grab an item by air dodging and quicky toss it. Like as soon as you grab it from an air dodge. it takes pratice and timing. but it is not that hard.
So How would this work out? Start the tunip juggle. When you grab the third one with her Jab, toss it out the stage quickly. Then instant throw the last 2 that come down. You will send a barrage of turnips at the enemy. making it a pain to get back. And can time an edgehog or an air assult for the K.O Can even lead to a gimp. From doing this, 2 turnips can be right close to each other back to back. And there be a lil distance between the other one. So incase people wanna be bold and dodge or even catch one air bor., they still have 1-2 more turnips to deal with. I call this one "the turnip barrage"
Now this is really putting that instant throw to use. Also from the turnip juggle, You can create a temperary wall in front of you. When you toss all three in the air, get them and jump, Z-drop and then do the same with the others. You can do this while move back a lil for evasion. Or to set stuff up. Be creative with it.
I love doing all this. Edgeguarding has never been more fun. You can also do the juggle with turnip cancles off the platforms/edges. Like on battlefield. turnip cancel off the top platform, then do the same off the other. Then start the juggle grounded. You may be able to have more then three turnips on the statr for more longer juggles. his is good of characters are over the stage comming down. if done on the top platform on battlefield. Do the turnip cancels in this direction:
----------->
<---------
Or
<--------
------->
That way it is all lined up before you touch the ground. But you can go in a straight directions from platforms if you wanna keep a lil wave going. This also has it's uses. And for faster juggles, do this with the instant toss. Takes time getting use to all of this and you need goof reaction speed. if you are slow while doing all of this, It wont work too well.
Turnip Damage
[imghttp://i107.photobucket.com/albums/m290/Zepher18/200px-Peach_Turnip.png[/img]
The closer you are to the enemy when you throw them, the more damage it does. I noticed this while I was playing with the help menu. Here is a list of how much Power Each turnip has thrown up close when you throw it and smash throw it.[imghttp://i107.photobucket.com/albums/m290/Zepher18/200px-Peach_Turnip.png[/img]
Regular turnips: =)
Regular throw- 9%
Smash throw- 12%
Thrown with a lil more space in between with a regular throw- 5%
Thrown with a lil more space in between with a Smash throw- 6%
Thrown in the air with a regular throw- 7%
Thrown in the air with smash throw-7%
Ditto turnip:
Regular throw- 19%
Smash throw- 22%
Thrown with a lil more space in between with a regular throw- 15%
Thrown with a lil more space in between with a Smash throw- 16%
Thrown in the air with a regular throw- 17%
Thrown in the air with smash throw-17%
Bored/tired turnip: -.-
Regular throw- 9%
Smash throw- 12%
Thrown with a lil more space in between with a regular throw- 5%
Thrown with a lil more space in between with a Smash throw- 6%
Thrown in the air with a regular throw- 7%
Thrown in the air with smash throw-7%
Winky/ow turnip: ;o
Regular throw- 13%
Smash throw- 16%
Thrown with a lil more space in between with a regular throw- 9%
Thrown with a lil more space in between with a Smash throw- 10%
Thrown in the air with a regular throw- 11%
Thrown in the air with smash throw-11%
Shocked turnip: O.O
Regular throw- 9%
Smash throw- 12%
Thrown with a lil more space in between with a regular throw- 5%
Thrown with a lil more space in between with a Smash throw- 6%
Thrown in the air with a regular throw- 7%
Thrown in the air with smash throw-7%
Sleepy turnip: -_-
Regular throw- 9%
Smash throw- 12%
Thrown with a lil more space in between with a regular throw- 5%
Thrown with a lil more space in between with a Smash throw- 6%
Thrown in the air with a regular throw- 7%
Thrown in the air with smash throw-7%
Laughing turnip :D
Regular throw- 9%
Smash throw- 12%
Thrown with a lil more space in between with a regular throw- 5%
Thrown with a lil more space in between with a Smash throw- 6%
Thrown in the air with a regular throw- 7%
Thrown in the air with smash throw-7%
Stichface: X_X
Regular throw- 37%
Smash throw- 40%
Thrown with a lil more space in between with a regular throw- 33%
Thrown with a lil more space in between with a Smash throw- 32%
Thrown in the air with a regular throw- 31%
Thrown in the air with smash throw-31%
Bonus- items
Mr. Saturn-
Regular throw- 6%
Smash throw- 8%
Thrown with a lil more space in between with a regular throw- 5%
Thrown with a lil more space in between with a Smash throw- 6%
Thrown in the air with a regular throw- 5%
Thrown in the air with smash throw-6%
Beam sword-
Regular throw- 12%
Smash throw- 15%
Thrown with a lil more space in between with a regular throw- 12%
Thrown with a lil more space in between with a Smash throw- 15%
Thrown in the air with a regular throw- 12%
Thrown in the air with smash throw-12%
Bomb-
Regular throw- 32%
Smash throw- 35%
Thrown with a lil more space in between with a regular throw- 31%
Thrown with a lil more space in between with a Smash throw- 35%
Thrown in the air with a regular throw- 33%
Thrown in the air with smash throw-34%
Advance techs
[Glide Tossing]- As soon as you roll, toss the turnip up, down, left, or right and you will glide in the direction you rolled and toss the turnip. its easier if you use the c-stick to toss the turnip. You can glide toss foward or backwards. and toss the turnip in any direction you want.
Video- http://www.youtube.com/watch?v=w_-qWE3N84g
[Dtilt Cancel Glide]- If you Dtilt with Peach and time a move right as she pulls back, you will glide backwards while doing your attack. You can do this with jumping too. Takes practice but once you get the hang of it, its quite easy. And it is good for spacing.
Video- http://www.youtube.com/watch?v=6DKbKcTIlPI&feature=related
[Turnip Cancel]- You can pull a turnip out and cancel the animation half way off a platform or the edge. Run to the edge of the platform or edge and pull a turnip, as soon as you do it, hold it to the stick to the direction you was running. Done right and you can pull one off the edge/platform.
Here is the trick to do it, that people fail to realize or noticed. Just Run and pull a turnip towards the middle of the stage................Ok, Now do it but this time, after you pluck a turnip, Hold the control stick Foward. Noticed how Peach slides.
Now Run towards the edge, get a turnip and as soon as she goes to pull one out, hold the stick foward, and Peach will slide off and get a turnip. Thats how you REALLY do it. some people run to the edge and pull one out but dont hold the control stick foward. Thus you wont slide and can't turnip cancel.
Video- http://www.youtube.com/watch?v=hvFUOowcLa0&NR=1
[Turnip free Pull]- Video explains it all plus a couple of bonus tricks
Video- http://www.youtube.com/watch?v=FieBCZAn_o0
[Floatland]- If you did not waste your float, you can do this by jumping off the edge and float. As soon as you hop off the edge., let go of it.
Video- http://www.youtube.com/watch?v=iPYB1zqJ810
[Dtilt Spike]- Here is a video explaining how to get a spike off of her Dtilt And Yes, this can be done off the edge for an official spike. For those who have trouble reading the text on the video:
You have to Dtilt Before it comes in contact with the enemy. if you do it as soon as your enemy is about to touch the floor, you won't spike with the Dtilt.
Video:
http://www.youtube.com/watch?v=rfafXVa9Xmk&fmt=18
[Reverse Peach bomber and Toad Technique. (Fair ledge cancel *bonus*)]- To do reverse bomber, you have to dash. And as soon as you hit B, quickly tap the stick in the other direction. Done right, You will F-B the other way from your dash animation.
For the reverse toad, Do you a dash and hit the control stick the other way. As soon as you tap the stick, let go of it quickly and hit B. Done right Peach will stop and toad in the other direction.
If you do a fair on stage from the edge fast enough, you can attack with Fair and it will auto cancel and you can do w/e you want right after. fair is the only air move that lags if you land at the wrong. if you unleash the attack and Peach's arm does not swing all the way down a few frames before the attack is over, you will lag.
Video:
http://www.youtube.com/watch?v=K2MD77y4eqw&feature=channel_page&fmt=18
[Death strike]- it is a footstool look that you can do at any % between 0-110. Around that 100 mark. I think it varies between characters. That I have yet to check out fully. So I say around 90% you should stop and follow up with something else after the reset.
Now there are some important things to know to pull this off:
Rules:
- The height of the character matters. Same with how fat/slim they are. The thinner/smaller they are, the harder it is to do.
- Not all characters have the same footstool animation/drop So timing is different. You might have to do it soon after the footstool. Or pause, then execute the lock. Like ROB, He drops way too fast and I can't do it to him. Seems impossible. Peach falls to fast to the floor cause of it.
- Certain characters are easier to hit them with Nair then bair and vice versa. So it is best to learn how to do it both ways. For example. With Boswer you can lock him both ways. But Bair is easier to do it with. But here is a extra with the nair. With nair, you can lock him in Place. Just Nair behind him over and over and we will just go left and right. Then when ready, sweet spot an up smash.
- If you Nair lock someone, you CAN pull another turnip from the ground and lock them again. Sometimes it is hard to catch the turnip from nair lock. So you have this options if it becomes a pain.
-For slim characters, when you Hit them with a turnip, they have to fall to the floor facing you. (like when they get up they will be looking at you) If they don't, you won't be able to hit them with bair.
- Bair is best for slim characters . Nair is good for big/fat ones that you can keep in place and lock them to death. Overall You will find yourself best with bair.
- This works up to a certain % Like 110. Something around there. it depends on character. But universal wise, up 100-110%
How to perfom:
Get a turnip and Z drop it on the opponent. Once the turnip hits their head, footstool them. But footstool into a float. When that footstool connects, quickly let go of the float to a Bair. So the formula is like this:
Zdrop>Footstool>float>falling bair>repeat
1- Z drop
2- Footstool
3- Float
4- Falling Bair
5- Repeat step 1-4
You should be able to catch the turnip with the Bair when you fall. Though if you don't, you can be quick enough to get another and keep it going.
Now you might be here thinking. "Hmm, another lock with Peach that is too hard to do nor do I see myself doing"
I have you know that this time, you wont have to worry about that. You can follow tech chases like this. or the best and legit way is out of shield. Ever been stuck in your shield with a turnip when the opponent is right in front of you? What most do is glide toss behind, away or roll/side step. Well you can Zdrop out of shield and hit them to start it. OoS options just got better, Really with turnips. it only takes one frame to z drop and the hit box to be out. 1 freaking frame. So if you get this down and you are in shield with a turnip, end their stock with this.
And yes, you can lock them with stitch Face. The can eat around 100 or so with 2-3 locks at low Percent. if they are to high, Zdrop foot stool and just recatch the turnip. Let them lie there and then get up. You still got that stitch in your hand. In which you can land the same way again. or just finish them off with it.
Characters comfirmed to get locked:
The colors on each character show the difficulty to perform this.
Green= Easy
Lime= Medium
Red=Hard
Snake
Bowser
DDD
DK
Peach
Marth
Falco
Lucario
Charizard
Falcon
Ike
Lucario
ZSS
Video- http://www.youtube.com/watch?v=fifCOptiDHo
** With ROB you can not footstoll lock him. But you can do things like this after the footstool.
Video- http://www.youtube.com/watch?v=wDqgjVWdy7o
Princess Peach tutorial Video
Here is a series of tutorials I made for learning to play Princess Peach You can check them all out in this playlist.
Princess Peach Tutorial
Peach tutorial Season 2
Peach grab setup/frame trap
This is a set of videos with a general talk on Peach
Princess Peach discussion
Handling Peach match ups

Peach match up guide
A friend of mine is working on a new universal chart for smashboards. Where on one page you can click on 2 characters and the character on the left will have info on how to fight the character on the right. So it is easy access to match ups. I will be having peach updated by him with my match up discussions I have gone on about. So far the one ones that are on File are Meta Knight, DDD, Diddy, IC, Marth, Snake, ZZS, Lucario Pika. Over time more will be added and the ones that are already on here will have more info. Also don't worry about the ratio nipsnumbers, its just random numbers thrown in for testing program my friend is working on very hard.
Here is a series of tutorials I made for learning to play Princess Peach You can check them all out in this playlist.
Princess Peach Tutorial
Peach tutorial Season 2
Peach grab setup/frame trap
This is a set of videos with a general talk on Peach
Princess Peach discussion
Handling Peach match ups
Peach match up guide
