- Game Versions
- Smash 3DS, Smash Wii U
TABLE OF CONTENTS
1)Intro
2)Character Description
3)Is Meta Knight Right For You?
4)Moveset
5)Combos
6)Recovery
7)How to KO
8)Play Style
9)OOS Options
10)Matchups
11)Weak Points
12)Conclusion
INTRO
Before we start, I'll give you some terminology just in case you don't know what I'm saying.
Hello! Last time you got a guide from me, it was on Dr.Mario. And I'm back with another character guide for my favourite Kirby character-and one of my mains. SSB4 is my first Smash game and I got it days after the 3DS launch, but despite being so new to the series, I believe I'm good enough to teach others. I've been playing Meta Knight for a while now, and I'd be glad to help others learn. Enough about me though. I may still update this guide. If you review it,tell me anything that I missed, or any ways I can improve this guide. So, let's begin!
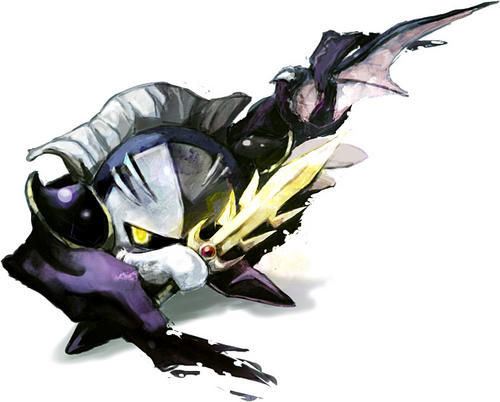
![]()
Meta Knight, the Batman of the Kirby series! A favourite among Kirby fans, it's no surprise that he got into Smash. Many remember him as the guy who was WAY too OP in Brawl. As a result, he brought multiple nerfs with him when he came to Smash 4. To make sure he's not underpowered, he also got some small buffs and has seen only buffs in the updates, except for one with the second hit of his f-air no longer spiking. Meta Knight has proven to still be a very good character, even after getting the biggest nerf in Smash history!
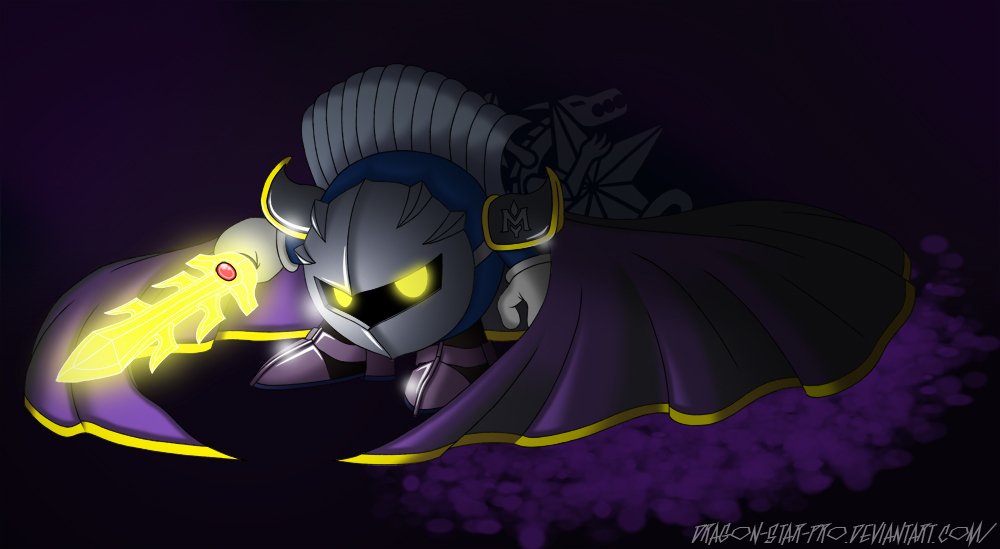
![]()
Meta Knight's no Sonic, but he's gotta go fast. He baits you, then rushes in with a flurry of combos until you're at KO percents, and then he just does a dash attack to up B. Or side smash...Or, you know, something that KOs. He's not just an Up air spammer. He requires patience and precision to learn. You must know how to switch playstyles mid-battle. This knight is no joke, and he's here to prove it.
Pros:
•Can KO pretty early for such a fast character
•Very quick movement, both on ground and in the air
•Amazing grab combos
•Excellent recovery
•Dominates offstage play
•Awesome dash attack
•Disjointed hitboxes
•Great at juggling
•Fast attack speed-moves are nearly lagless. His frame data: http://kuroganehammer.com/Smash4/Meta Knight
•Versatile moveset
•Can play both defensively and offensively
•Short, meaning he has a small hurtbox
Cons:
•Disadvantage in the neutral game against most fighters
•Really light weight makes him easy to KO
•Predictable approach
I hope this guide is pretty accurate. Now, without further ado, this guide shall begin!
~CrimsonSSB
1)Intro
2)Character Description
3)Is Meta Knight Right For You?
4)Moveset
5)Combos
6)Recovery
7)How to KO
8)Play Style
9)OOS Options
10)Matchups
11)Weak Points
12)Conclusion
INTRO
Before we start, I'll give you some terminology just in case you don't know what I'm saying.
N-air:Neutral air. When you press A in midair.
F-air:Forward air. When you press forward and A in midair.
B-air:Back air. When you press backwards and A in midair.
D-air:Down Air. When you press down and A in midair.
U-air:When you press up and A in midair.
Hurtbox:The area of a fighter in which they can get hit, obviously growing with size. Example:Meta Knight has a small hurtbox, and Bowser has a big hurtbox.
Hitbox:The area of an attack that can hit a fighter. Example:Shulk's b-air has a large hitbox.
Running Up Smash:Using an Up Smash straight out of a dash. Every character can do this.
Dthrow:Down Throw.
Fthrow:Forward Throw.
DI:Directional Influence. This is used to change the knockback and knockback angle of moves to get out of combos and survive longer. This is done by moving the control stick in the direction you want the knockback to be closer to the moment you get hit.
Hello! Last time you got a guide from me, it was on Dr.Mario. And I'm back with another character guide for my favourite Kirby character-and one of my mains. SSB4 is my first Smash game and I got it days after the 3DS launch, but despite being so new to the series, I believe I'm good enough to teach others. I've been playing Meta Knight for a while now, and I'd be glad to help others learn. Enough about me though. I may still update this guide. If you review it,tell me anything that I missed, or any ways I can improve this guide. So, let's begin!
Meta Knight, the Batman of the Kirby series! A favourite among Kirby fans, it's no surprise that he got into Smash. Many remember him as the guy who was WAY too OP in Brawl. As a result, he brought multiple nerfs with him when he came to Smash 4. To make sure he's not underpowered, he also got some small buffs and has seen only buffs in the updates, except for one with the second hit of his f-air no longer spiking. Meta Knight has proven to still be a very good character, even after getting the biggest nerf in Smash history!
Meta Knight's no Sonic, but he's gotta go fast. He baits you, then rushes in with a flurry of combos until you're at KO percents, and then he just does a dash attack to up B. Or side smash...Or, you know, something that KOs. He's not just an Up air spammer. He requires patience and precision to learn. You must know how to switch playstyles mid-battle. This knight is no joke, and he's here to prove it.
Pros:
•Can KO pretty early for such a fast character
•Very quick movement, both on ground and in the air
•Amazing grab combos
•Excellent recovery
•Dominates offstage play
•Awesome dash attack
•Disjointed hitboxes
•Great at juggling
•Fast attack speed-moves are nearly lagless. His frame data: http://kuroganehammer.com/Smash4/Meta Knight
•Versatile moveset
•Can play both defensively and offensively
•Short, meaning he has a small hurtbox
Cons:
•Disadvantage in the neutral game against most fighters
•Really light weight makes him easy to KO
•Predictable approach
I hope this guide is pretty accurate. Now, without further ado, this guide shall begin!
You need to know if a character is right for you before you start to play them. Meta Knight could be right for you if...
1)You don't like bad recoveries
2)You love getting combos
3)You love speed (Sonic may do better at that, but still)
4)You like playing as a calm, mysterious character
5)You like characters with good aerial games
6)You're fine with baiting and punishing
7)You like him as a character
If some of these apply to you, you will enjoy playing Meta Knight.
Meta Knight has a number of interesting moves. Let me go over them all. Credit to MrDanishButterCookie for the gifs I used. They were all made off of his Meta Knight video guide.
That took a while. Well, on to combos! Finally.
Jab(8%, can deal more if you hold A):
![]()
This move actually has nice range. It can easily net you 12% if you hold A. Iy does have a bit of end lag though, so only use it when you're sure it'll hit. This may also be used near the ledge, as it can be held indefinitely and thus might interrupt some recoveries.
Speed:Fast start, mid end
Power:Mid
Utility:Mid
Down tilt (5%):
![]()
This move is tied for the fastest D-tilt in the game, tied with ROB's and Little Mac's. It's literally as fast as Sheik's F-tilt. Amazing, isn't it? As Meta Knight's jab and side tilt don't jab-lock opponents, this does the job instead. Due to its speed, it can be used in combos and you can even get a kill confirm from it. Its speed also means it can be used to bait; short hop, fast fall, and down tilt immediately when you hit the ground for some good bait.
Speed:Fast
Power:Low
Utility:High
Up tilt (5% sourspot, 7% sweetspot):
![]()
It has pretty good power for its speed, can be used a few times in rapid succession, and has some good follow-ups. It also has nice upwards range, making it Meta Knight's best anti-air. However, it is no longer the KO move it was in Brawl.
Speed:Fast
Power:Low-Mid
Utility:High-Mid
Forward tilt (2%, 2%, 4% Total:8%):
![]()
If Meta Knight had a jab that was similar to every other jab in the game, this would be it. Its range is above average and can be jab-cancelled decently, but not to reliably. It KOs on the edge at about 150%, but it's not very reliable, and thus will not be in the KO section. Basically good for racking up damage and getting opponents away.
Speed:Fast
Power:Low
Utility:Mid
Down smash (7-9% front, 10-14 back):
![]()
This move comes out almost immediately. The front hit of this move is incredibly weak, only KOing Mario at the edge of Final Destination at 151% when uncharged. It only deals 9% when fully charged, which is the same amount of an uncharged up smash. The back hit is kinda decent, dealing 10% when uncharged and KOing Mario at the edge at 108%. Its main use is for punishing rolls, but if it misses, you could get punished due to its end lag.
Speed:Fast start, slow end
Power:Low
Utility:Low
Up smash (9% uncharged-12% charged):
![]()
It comes out with blinding speed, and ends with only a small bit of end lag. Its speed allows you to use it as a powerful combo finisher on the ground. Despite that speed, it actually KOs decently (125% on Mario, Final Destination). However, a grounded Up B or an Up B out of a combo KOs much better, so save this for the combos.
Speed:Fast
Power:Low
Utility:Mid-High
Side Smash (16% uncharged-22% charged):
![]()
Fear this move. It starts out with a tiny bit of startup lag, but has next to no end lag. This makes it the ultimate baiting move. Throw it out to bait, stop their attack with a shield or even a jump, and punish with a flurry of combos. And when it hits...It's amazing. It has huge range. It deals huge damage, and KOs Mario at 118%...If you're on the ledge but hitting away from it. If you're on the ledge and hitting towards it, it KOs Mario at 71%. This makes it a great KO move AND his best baiting move, along with an amazing punisher. Always watch out for this move when you're going up against Meta Knight!
Speed:Mid start, fast end
Power:High
Utility:High

This move actually has nice range. It can easily net you 12% if you hold A. Iy does have a bit of end lag though, so only use it when you're sure it'll hit. This may also be used near the ledge, as it can be held indefinitely and thus might interrupt some recoveries.
Speed:Fast start, mid end
Power:Mid
Utility:Mid
Down tilt (5%):

This move is tied for the fastest D-tilt in the game, tied with ROB's and Little Mac's. It's literally as fast as Sheik's F-tilt. Amazing, isn't it? As Meta Knight's jab and side tilt don't jab-lock opponents, this does the job instead. Due to its speed, it can be used in combos and you can even get a kill confirm from it. Its speed also means it can be used to bait; short hop, fast fall, and down tilt immediately when you hit the ground for some good bait.
Speed:Fast
Power:Low
Utility:High
Up tilt (5% sourspot, 7% sweetspot):

It has pretty good power for its speed, can be used a few times in rapid succession, and has some good follow-ups. It also has nice upwards range, making it Meta Knight's best anti-air. However, it is no longer the KO move it was in Brawl.
Speed:Fast
Power:Low-Mid
Utility:High-Mid
Forward tilt (2%, 2%, 4% Total:8%):
If Meta Knight had a jab that was similar to every other jab in the game, this would be it. Its range is above average and can be jab-cancelled decently, but not to reliably. It KOs on the edge at about 150%, but it's not very reliable, and thus will not be in the KO section. Basically good for racking up damage and getting opponents away.
Speed:Fast
Power:Low
Utility:Mid
Down smash (7-9% front, 10-14 back):
This move comes out almost immediately. The front hit of this move is incredibly weak, only KOing Mario at the edge of Final Destination at 151% when uncharged. It only deals 9% when fully charged, which is the same amount of an uncharged up smash. The back hit is kinda decent, dealing 10% when uncharged and KOing Mario at the edge at 108%. Its main use is for punishing rolls, but if it misses, you could get punished due to its end lag.
Speed:Fast start, slow end
Power:Low
Utility:Low
Up smash (9% uncharged-12% charged):

It comes out with blinding speed, and ends with only a small bit of end lag. Its speed allows you to use it as a powerful combo finisher on the ground. Despite that speed, it actually KOs decently (125% on Mario, Final Destination). However, a grounded Up B or an Up B out of a combo KOs much better, so save this for the combos.
Speed:Fast
Power:Low
Utility:Mid-High
Side Smash (16% uncharged-22% charged):

Fear this move. It starts out with a tiny bit of startup lag, but has next to no end lag. This makes it the ultimate baiting move. Throw it out to bait, stop their attack with a shield or even a jump, and punish with a flurry of combos. And when it hits...It's amazing. It has huge range. It deals huge damage, and KOs Mario at 118%...If you're on the ledge but hitting away from it. If you're on the ledge and hitting towards it, it KOs Mario at 71%. This makes it a great KO move AND his best baiting move, along with an amazing punisher. Always watch out for this move when you're going up against Meta Knight!
Speed:Mid start, fast end
Power:High
Utility:High
U-air (5%):
![]()
This move is used for only combos, but it does astoundingly well at that. Get a throw in, and it can be an easy follow-up. It combos into itself, B-air, F-air, N-air, Up B, and B. It can chain into itself 4 or 5 times and end with an Up B for a combo that does huge damage and can KO. It combos off of Dthrow, Fthrow, itself, Dash attack and U-tilt. This is all due to its low lag and knockback. Use this move well and often!
Speed:Fast
Power:Low
Utility:High
D-air (6%):
![]()
This move is quite the ignored one. It auto-cancels out if a short hop and with its decent range, it can be used to approach and can follow up into itself. However, it won't be a true combo. It also allows you to cover yourself when falling towards an opponent under you, as well as being pretty good for edgeguarding.
Speed:High
Power:Low
Utility:Low-Mid
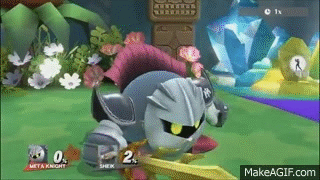
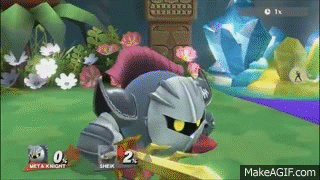
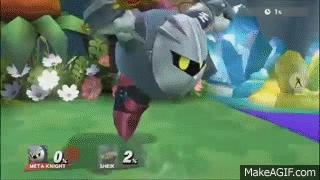
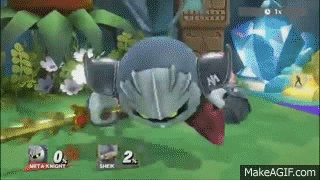
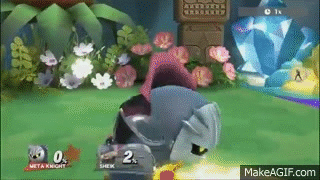
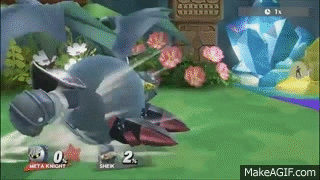
B-air (2%, 1%, 4% Total:7%):
![]()
After you trump your opponent, jump off the ledge and use this move. It 's actually very strong, being one of Meta Knight's KO moves. If you hit with the first two hits and fast-fall to the ground, the opponent will be spiked and you can follow up with 3 D-tilts as a jab-lock, and then you can follow that up with a dash attack and combo them further from there.
Speed:Mid-Fast
Power:Mid
Utility:High
F-air (2%, 1%, 3% Total:6%):
![]()
This move is one that you can use to gimp others and even do a Wall of Pain by using F-air twice or three times when they're offstage. It can also be used it combos and you can get an Up B off of this from low to mid %s.
Speed:Mid-Fast
Power:Low
Utility:Mid-High
N-air (10% clean, 7% late):
![]()
This is Meta Knight's main gimping tool. It combos off of Dthrow, Fthrow, Dash Attack, U-tilt, and U-air. Due to it great damage, decent range, low lag, and high power, it allows it to stop a majority of recoveries. And the fact that it stays out long makes it even better. You'll be using this move quite a lot. Due to its power, it is one of MK's most prominent KO moves.
Speed:Fast
Power:High
Utility:High

This move is used for only combos, but it does astoundingly well at that. Get a throw in, and it can be an easy follow-up. It combos into itself, B-air, F-air, N-air, Up B, and B. It can chain into itself 4 or 5 times and end with an Up B for a combo that does huge damage and can KO. It combos off of Dthrow, Fthrow, itself, Dash attack and U-tilt. This is all due to its low lag and knockback. Use this move well and often!
Speed:Fast
Power:Low
Utility:High
D-air (6%):

This move is quite the ignored one. It auto-cancels out if a short hop and with its decent range, it can be used to approach and can follow up into itself. However, it won't be a true combo. It also allows you to cover yourself when falling towards an opponent under you, as well as being pretty good for edgeguarding.
Speed:High
Power:Low
Utility:Low-Mid
B-air (2%, 1%, 4% Total:7%):
After you trump your opponent, jump off the ledge and use this move. It 's actually very strong, being one of Meta Knight's KO moves. If you hit with the first two hits and fast-fall to the ground, the opponent will be spiked and you can follow up with 3 D-tilts as a jab-lock, and then you can follow that up with a dash attack and combo them further from there.
Speed:Mid-Fast
Power:Mid
Utility:High
F-air (2%, 1%, 3% Total:6%):

This move is one that you can use to gimp others and even do a Wall of Pain by using F-air twice or three times when they're offstage. It can also be used it combos and you can get an Up B off of this from low to mid %s.
Speed:Mid-Fast
Power:Low
Utility:Mid-High
N-air (10% clean, 7% late):

This is Meta Knight's main gimping tool. It combos off of Dthrow, Fthrow, Dash Attack, U-tilt, and U-air. Due to it great damage, decent range, low lag, and high power, it allows it to stop a majority of recoveries. And the fact that it stays out long makes it even better. You'll be using this move quite a lot. Due to its power, it is one of MK's most prominent KO moves.
Speed:Fast
Power:High
Utility:High
Neutral B, Mach Tornado (8% no mashing, 22% with mashing):
![]()
You can't spam this move like you could in Brawl, but it's still good. It can be used to recover when you're far offstage (though you will rarely use it for this, as there are better options and it you can't grab the ledge out of it) and due to its large damage, the combos that this finishes will help you win the neutral. But miss, and you will either be punished from the end lag or just accidentally fly of the ledge to your doom. Also, this move auto-cancels at about full hop height when you mash and triple-jump height when you do.
Speed:Mid-Low
Power:High
Utility:Mid-High
Down B, Dimensional Cape (14% retreating, 15% stationary, 16% advancing):
![]()
The side smash baits, and this punishes. Hold B and you will attack, but don't do that too much or your opponent will predict this move, shield, and punish the large ending lag. Normally reappearing has little lag and is less punishable. When you punish with this, your opponents go flying. Its high power allows it to be one of Meta Knight's best KO moves, and it even has a KO confirm. It can also be used to recover and is hard to gimp because you disappear, but do not do the attack while recovering because you will not snap on to the ledge. Just don't hold B while recovering with this and you're good.
Speed:Low
Power:High
Utility:Mid-High
Side B, Drill Rush (1% each hit, 3% last hit. Total: Max is 10%):
![]()
This is used for recovery only. It goes super far, can be angled, and can stage spike anyone who comes near you when you get to the ledge. Hit just below the ledge. Meta Knight will bounce to grab the ledge and your opponent will be stage spiked-they cannot tech this. However, due to its lag at both the start and the end, using it on stage is a bad idea.
Speed:Low
Power:Mid
Utility:Mid
Up B, Shuttle Loop (15% grounded, 12% aerial)
![]()
This move is one of his most useful. It goes very far upwards, so use it for recovery when a side B would have you hit the stage and fall until you're KO'd. It combos off of Dthrow, Dash attack, U-air, F-air, and U-tilt if you're lucky. It's his best KO move as you can get opponents up high then up B, and on the ground, the extra power allows it to still KO. In short, it can KO, finish combos, and let you recover. The only downside is that it puts you in a helpless state until you touch the ground. So fast-fall after you use it if you're on stage.
Speed:Fast
Power:High
Utility:High
You can't spam this move like you could in Brawl, but it's still good. It can be used to recover when you're far offstage (though you will rarely use it for this, as there are better options and it you can't grab the ledge out of it) and due to its large damage, the combos that this finishes will help you win the neutral. But miss, and you will either be punished from the end lag or just accidentally fly of the ledge to your doom. Also, this move auto-cancels at about full hop height when you mash and triple-jump height when you do.
Speed:Mid-Low
Power:High
Utility:Mid-High
Down B, Dimensional Cape (14% retreating, 15% stationary, 16% advancing):
The side smash baits, and this punishes. Hold B and you will attack, but don't do that too much or your opponent will predict this move, shield, and punish the large ending lag. Normally reappearing has little lag and is less punishable. When you punish with this, your opponents go flying. Its high power allows it to be one of Meta Knight's best KO moves, and it even has a KO confirm. It can also be used to recover and is hard to gimp because you disappear, but do not do the attack while recovering because you will not snap on to the ledge. Just don't hold B while recovering with this and you're good.
Speed:Low
Power:High
Utility:Mid-High
Side B, Drill Rush (1% each hit, 3% last hit. Total: Max is 10%):

This is used for recovery only. It goes super far, can be angled, and can stage spike anyone who comes near you when you get to the ledge. Hit just below the ledge. Meta Knight will bounce to grab the ledge and your opponent will be stage spiked-they cannot tech this. However, due to its lag at both the start and the end, using it on stage is a bad idea.
Speed:Low
Power:Mid
Utility:Mid
Up B, Shuttle Loop (15% grounded, 12% aerial)

This move is one of his most useful. It goes very far upwards, so use it for recovery when a side B would have you hit the stage and fall until you're KO'd. It combos off of Dthrow, Dash attack, U-air, F-air, and U-tilt if you're lucky. It's his best KO move as you can get opponents up high then up B, and on the ground, the extra power allows it to still KO. In short, it can KO, finish combos, and let you recover. The only downside is that it puts you in a helpless state until you touch the ground. So fast-fall after you use it if you're on stage.
Speed:Fast
Power:High
Utility:High
Dash attack (6% clean, 5% late):
![]()
This attack is also amazing. It comes out super fast, and has next to no end lag. Combined with its low knockback and its angle, you've got an amazing combo tool and probably the best dash attack in the game. It's perfect for following up with aerials, tilts, or an Up Tilt. It also can lead into 5 U-airs and an Up B for a combo that could quite easily KO. And at high %s, follow up with just an Up B for a super easy KO combo. You need to be using this move a LOT.
Speed:Fast
Power:Low
Utility:High
Dthrow (7%):
![]()
This move is literally the exact same as the dash attack. Everything that applies to that applies here.
Speed:Fast end, start N/A
Power:Low
Utility:High
Fthrow (9%):
![]()
While it isn't as good as Dash Attack and Dthrow, it still has good combo ability. It combos into pretty much the same things as the other two, more reliably for some, and less reliably for others. At 0%, follow this up with a dash attack on heavies and fast-fallers.
Speed:Fast end, start N/A
Power:Mid
Utility:Mid-High
Bthrow (10%):
![]()
You can follow this up with a dash attack if they don't DI well as a mixup. This usually works well at lower %s, and is a true combo on some characters. It can also KO near the ledge at high %s.
Speed:Fast end, start N/A
Power:High damage, Mid knockback
Utility:Mid
Uthrow (10%):
![]()
Don't use this throw until high %s. It KOs, but has no follow ups. It could easily get you punished, as its end lag is high. So wait until late in the stock to use this.
Speed:Slow end, start N/A
Power:High damage, low knockback
Utility:Mid-Low
This attack is also amazing. It comes out super fast, and has next to no end lag. Combined with its low knockback and its angle, you've got an amazing combo tool and probably the best dash attack in the game. It's perfect for following up with aerials, tilts, or an Up Tilt. It also can lead into 5 U-airs and an Up B for a combo that could quite easily KO. And at high %s, follow up with just an Up B for a super easy KO combo. You need to be using this move a LOT.
Speed:Fast
Power:Low
Utility:High
Dthrow (7%):

This move is literally the exact same as the dash attack. Everything that applies to that applies here.
Speed:Fast end, start N/A
Power:Low
Utility:High
Fthrow (9%):

While it isn't as good as Dash Attack and Dthrow, it still has good combo ability. It combos into pretty much the same things as the other two, more reliably for some, and less reliably for others. At 0%, follow this up with a dash attack on heavies and fast-fallers.
Speed:Fast end, start N/A
Power:Mid
Utility:Mid-High
Bthrow (10%):

You can follow this up with a dash attack if they don't DI well as a mixup. This usually works well at lower %s, and is a true combo on some characters. It can also KO near the ledge at high %s.
Speed:Fast end, start N/A
Power:High damage, Mid knockback
Utility:Mid
Uthrow (10%):
Don't use this throw until high %s. It KOs, but has no follow ups. It could easily get you punished, as its end lag is high. So wait until late in the stock to use this.
Speed:Slow end, start N/A
Power:High damage, low knockback
Utility:Mid-Low
That took a while. Well, on to combos! Finally.
Here, Meta Knight excels. A lot. His speed makes combos pretty varied. I'll list a few for you.
(Heavies:45-60%
Middleweights:35-45%
Floaties:25-40%
Fast Fallers:40-50%)Down Throw/Dash Attack-->Up tilt string (3 to 5 times)-->Up B (Deals 38% max)
This combo can KO if executed well, and if it doesn't, you still gave a LOT of damage.
Update:In patch 1.1.5, MK's U-air was nerfed a little. It's easier to SDI out of and has a slightly lower angle with 1% less damage. As a result, you need to have some knowledge to do this combo. Basically, you have to be able to move more while doing the combo, without accidentally doing the F-air (which shouldn't be too had). You will also need to be able to work accordingly to their DI, in order to make sure the Up B hits. However, it's very similar to what it was before the patch. I've found that it seems to still KO about as much as it did before. So, no worries.
(Heavies:0-100%
Middleweights:0-75%
Floaties:0-70%
Fast Fallers:0-70%)Down throw-->F-air (deals 13%)
A simple, easy combo that deals some damage. Pretty good to start a match with.
(16%-55%)Dash Attack/Down throw-->F-air-->Up B (deals 24%)
A really good mid-% combo. Deals good damage. Pretty much identical to the previous one, with one more move.
(7%-58%) Forward throw-->F-air-->Up B (deals 27%)
It works at a wider % range that the previous combo. Aside from that, it's practically the same.
(0% only)Down throw-->Dash Attack-->Up Smash (You need to be fast! This one is pretty difficult!) (deals 22%)
This is very good to start a match with. While it only works at 0% and is a bit difficult, it does really nice damage to give you a head start. This is mostly used to deal with an opponent who DIs away from you, allowing the dash attack to hit.
(0%-25%)Down tilt-->Dash Attack-->Up tilt-->N-air (deals 27%)
It's decently easy, and yet does high damage. Pretty reliable.
(0%-30%)Dash attack-->Up tilt -->Up air (deals 17%)
Modest damage and low difficulty. The Up Tilt has some follow up potential.
(0%-158%)Down throw/Dash Attack/Forward Throw-->Up B (KO combo) (Dthrow:22% Dash attack:21% Fthrow:21%)
The combo that everybody knows. It can be done in a HUGE range of %s, does great damage, is super easy, and KOs.
(0%-261%)2 hit B-air-->Side tilt (deals 11%)
Low damage, but very, very easy. Use the combo below for more damage, but higher difficulty.
(0%-261%)2 hit B-air-->quickly turn around and down tilt x3-->Dash attack or Mach Tornado (24+ for dash attack, the + is because the dash attack can do follow ups) (38% for Mach Tornado)
Remember to fast-fall with the B-air. The dash attack is usually the better option because it has follow-ups.
(0%-60%)Down Throw-->B (Deals 27% if you mash B)
Just mash B to it's full potential it will do high damage for its low difficulty. However, it has no follow-ups (of course).
(Both start at 0%, dash attack ends at 23%, down throw ends at 40%)Down Throw/Dash Attack-->Running Up Smash (Deals 15%)
It's simple, but deals low damage. You can do this with little effort, and for that difficulty level, its damage is acceptable.
Meta Knight's rapid jab means he will be pushed back as he attacks. Use the jab near the ledge to push off the ledge before the final blow-you will take no lag from this and you can follow up easily! Remember to hold down on the control stick while the jab is being executed so you don't grab the ledge. This is called a rapid jab edge-cancel. This is used to follow up with Meta Knight's Up B, Shuttle loop, or his Down B, Dimensional Cape.
(0%-...Let's just say you can do this at all percents under 600 and maybe over.) Rapid Jab Edge-Cancel-->Up B or Down B(Can KO, but isn't as reliable for KOing as Dash attack/Dthrow to Up B) (Deals 19% for Up B, 23% for Down B)
It's pretty hard to pull off, and the damage on the Up B doesn't properly compensate. The Down B does better damage and is easier. Don't think you'll get this combo very often.
(0%-69%)Dash Attack-->N-air (Deals 17%)
This combo is really, really easy. Too easy, almost. Deals good damage for its low difficulty.
(0%-84%)Down Throw-->N-air (Deals 18%)
Same as the previous one.
(0%-11%)Dash Attack-->Up tilt-->Up tilt-->N-air (Deals 30%)
It's % range is small, but it's damage is high. It's also very easy to get-use it well!
(% ranges on all characters: https://docs.google.com/spreadsheets/d/1Bu_kzIKSo28rM6DdRDqDiyO1Qg6FZC5PBK8qUisXbZw/edit#gid=0 Credit to Jbmill for making a guide on this.) D-tilt-->Down B (Deals 21%)
The combo counter in training won't pick this up, but at the %s in the link, it is inescapable no matter what they do. This is, indeed, a kill confirm for Meta Knight. I'll give a tiny bit of detail: At high %s, the D-tilt knocks opponents into the air. During this hitstun on certain %s, they cannot jump away. If they just land, they will get hit by it. Same with a tech and all tech rolls. Move forward with the Down B every time. This could make KOing much easier for Meta Knight!
(0%-132)U-tilt-->Up B (Deals 22% at max)
This combo could deal more or less depending on whether or not you hit the sweetspot of the U-tilt and if you get the Up B on the ground or in midair. It doesn't KO until about 110% depending on the fighter.
There are a LOT of combos to work with. I can't even list them all. Try Meta Knight and see for yourself!
Meta Knight's recovery is a very good one. One of the best in the game. All of his B moves help to recover and are hard to gimp. His air speed is pretty good and he has 5 midair jumps. The jumps should do the job, but you should use B moves in certain situations.
Down B:Used when near the edge to punish those waiting at the ledge, but is super easy to punish if you hold B to attack. Goes a bit farther if you don't hold B, grants invincibility during the teleport and can let you easily grab the ledge. Hard to gimp because you disappear during it, and so does your hurtbox. However, it can be punished if you hold B. Very similar to Mewtwo's Teleport if you don't attack.
Up B:Vertical recovery, used when below ledge. Hard to gimp due to its large hitbox.
Side B:Horizontal and vertical recovery, nearly impossible to gimp because if you hit a fighter and then grab the ledge, they could get stage spiked if you hit a wall and an opponent. Also goes very far. Probably his best recovery move, alongside Down B.
B:Far horizontal recovery, but easier to gimp than all other recovery moves. Only use this when you're far out. Likely his least viable recovery.
Now we get into the KO section. I'm surprised you put up with my crap for this long.
Meta Knight actually KOs decently, for a character who relies so heavily on speed and combos. Use him right, and KOing will be easy for you. A lot of your KOs will end up being gimps, because Meta Knight has some powerful aerial attacks and a recovery superior to a majority of the roster.
Side Smash:Amazingly strong, but slower than his other KO moves in startup. Despite this, it has low end lag.
Up Smash:KOs later than side smash, but is super fast. It's actually pretty good.
Up B:Super reliable. KOs early after up air strings. Also, it can easily KO at higher %s if you're on the ground.
Up throw:KOs a bit late, but is still of use. KO %s on common stages: http://smashboards.com/threads/meta-knights-up-throw-kill.400394/
Back air:KOs very well after a trump or when gimping opponents.
Down B: A pretty bit reliable with high knockback. Used for punishes but nothing else.
Down smash:Before you tell me how weak this us, hear me out. The front hit is not optimal, but the back hit is kinda okay. It can KO at high %s if you read someone's roll. Don't rely on this too much though.
N-air:Jump to a recovering opponent and use this move. This results in a very powerful gimp and a likely KO.
Back Throw:High damage and KOs late on the ledge. Only a bit better than Up Throw.
Meta Knight tends to be limited in the neutral game, usually using mostly grabs and the dash attack. You should make a habit of jumping around the stage to bait opponents, bait out shields so you can grab, and the like. Play it safe in the neutral-you should bait them, then punish with combos or a down B. A good option is to cancel your dash into a shield, forcing your opponent to do something and allowing you to act based on whatever they do. Meta Knight's fast roll also makes dashing and then rolling back a viable option. You can throw out D-tilts and forward smashes to bait them, though the D-tilt is better at low %s due to its possible follow-ups. Meta Knight has a bait & punish playstyle in the neutral. Throw out moves to bait, and then lash out with a punish. The moment you win the neutral, play aggressively. Use your spped to gain the upper hand, trying to land combos and reads left and right. Once the opponent is offstage, go deep and gimp them. You can easily net KOs this way and still recover due to Meta Knight's recovery being superior to that of most of the cast. When it's time to KO, be smart. You will need to either land a KO combo or a read, and possibly a gimp.
Be fast, unpredictable, and remember how to punish.
Be fast, unpredictable, and remember how to punish.
For those who don't know, OOS stands for 'out of shield'. Basically you act...well, out of your shield. You can jump and attack, or maybe up B. Trust me, it's more useful than I'm making it sound. This is mainly used for punishes. Here are some OOS options for you:
Jump & N-air
Jump & F-air
Jump & B-air (more unreliable than others)
Up B OOS (Can KO)
Up Smash OOS (Must be jump-cancelled, can KO)
Jump & N-air
Jump & F-air
Jump & B-air (more unreliable than others)
Up B OOS (Can KO)
Up Smash OOS (Must be jump-cancelled, can KO)
Match ups were a bit of a challenge to describe, but, here they are.
General match ups:
Slow fallers: Some of Meta Knight's combos won't work as well, but he can still work around them and combo them well. The majority of these are lightweights, so take advantage of this and focus on KOing earlier.
Fast fallers: You'll have to be faster with your combos because they reach the ground faster, but some combos will work even better on them. Choose your moves wisely! Some are lighter, but most are heavyweights. Remember this, and you'll be throwing out combos all over the place.
Mid-fallers: These guys have a majority of combos working on them, and a bit of them not working. Just be more mindful of what you're doing, as they can have combos work on them, but they can escape.
Heavyweights: Combo them. Combo them HARD. Everyone knows heavyweights are really susceptible to combos, and with Meta Knight, you need to take full advantage of this. However, KOing will become quite the problem for you. Take advantage of his dash attack/Dthrow-->Up air string-->Up B combo and you can get past this.
Lightweights: You'll be reliant on punishes at least a bit more, because lightweights aren't as easy to combo. Catch them off guard, and punish, and KO them when they least expect it. Remember that Down B!
Middleweights: What can I say? They're right in between. Not as easy to combo as heavyweights, but easier to combo than lightweights. Just bait, punish with combos, punish any predictability, and soon you can finish with a KO.
Specific match ups (I plan to add more in the future. I will put this in spoilers, as it will be a long list when I'm done.):
 : This character has the ability to combo Meta Knight very well, and Sheik also has nearly lagless moves, making her harder to punish. You'll need to watch out for these combos, and get out of the neutral game as quickly as possible. Meta Knight becomes disadvantaged in the neutral, because of Sheik's needle camping shenanigans. Luckily, Meta Knight also has a lot of combos up his sleeve...er, glove, so use them well and wisely! Your KO power is also superior to hers, so use this wisely. Shiek falls fast, allowing for you to pull off ridiculous combos. This is probably your greatest strength in this matchup. Her recovery is very great, but decently gimpable if you know what you're doing. Avoid the Bouncing Fish, then punish the lag.
: This matchup often relies on finishing of the Luma, then using Rosalina's vulnerability to your advantage. If you act quickly enough (The side tilt kncoks Luma offstage with no trouble), you can KO Luma pretty efficiently-then Rosalina is so much more vulnerable to pretty much everything you do! Rosalina has a very light weight despite being big-she's even lighter than MK! Use this fully, get her offstage, and gimp her, because her recovery has no hitbox whatsoever. This makes her recovery super safe to attempt to gimp. Bait the Luma out, KO it, and Rosalina's yours. You can get Meta Knight's Dash Attack-->4 or 5 U-airs-->Up B combo at around 20% and it almost always works if you do it right.
: You will be pretty combo reliant when facing Falcon, because he's pretty heavy and falls very fast. A very potent tool in this match up is gimping- Meta Knight's recovery is much, much better than Falcon's, allowing you to mess with him quite a bit. Use the n-air a lot when he's offstage, as its high knockback and lingering hitbox are useful assets for edgeguarding. His kill moves tend to be a bit laggy at the end; capitalize on this as much as possible with a dash attack. Falcon's speed makes him overwhelming at times, so remember to stay calm in this matchup. And whatever you do, avoid the Knee, because if it hits you...Rest in peace.
: Watch out for her down smash! As it paralyzes you, it allows ZSS to take full advantage of your small weight, and you'd hate for that to happen. Once you notice her beginning to use it, Down B for a punish or roll behind her and attack. When she begins to use her down throw, DI. She can use d-throw to Up B as a KO combo and on Meta Knight, it's super potent due to his weight...Unless you DI, which greatly affects it. Her fast-ish fall speed does make her a bit more easy to combo, so utilize that well. ZSS spaces very, very well, and that makes things difficult for MK, as his range isn't as good as hers.
: Mario is known to be the all-around character. He will have no trouble getting combos until you're at KO %s, but you'll have not much trouble doing the same to him. Keep yourself away from the top of him to avoid his strong upwards options. Stay on your toes, use those combos, and edgeguard efficiently. Why? Well, hit Mario out of his double jump, and he's in a bad position to recover. This gives you an extra edge, but remember that he could easily combo and KO you, due to your fall speed and weight. Your speed and range are also better than his outside of the fireball, so space him out whenever possible.
:Everything that applies to Mario in that matchup applies to Luigi in this one. However, Luigi is much slower on ground and in the air. He is also lighter, and is actually pretty easy to KO. However, you must keep watch of the Super Jump Punch, which can easily turn the tide of the match due you having low weight too. However, it is very punishable.
:I'll say it straight away. Watch out for Rest. With your light weight, you're screwed if it hits past 54%. You both have amazing recoveries, but Jiggs lacks an upwards recovery move, thus giving you the upper hand. Use those footstools. Just like Rosalina, Jigglypuff is also far lighter than Meta Knight. This makes KOing a breeze for you, and thus you can easily KO at low %s too.
: Play it smart, and you could win a match in a ridiculously short time. Let your guard down, and you could lose in the same amount of time. Little Mac is the glass cannon of SSB4. With his ridiculously bad air and recovery game, you could take advantage of this, as Meta Knight's recovery is likely the best in the game and his edguarding is amazing. However, Mac is super powerful on the ground. You need to watch out, as he will take advantage of your low weight to wreck you hard with those super shield smashes. Keep him offstage and in the air, and the match is yours.
:This matchup is very heavily in Meta Knight's favour. Ganon's high weight allows you to combo him into oblivion until he's at KO %s. Yeah, those %s are high, but with all those combos, you'll have no trouble getting him there. His recovery is also terrible, allowing you to get him offstage and gimp him HARD. However, you must make sure you don't get hit as Ganon's moves have high power. But due to their lag, you can punish a majority of his moves with no trouble.
/:While they do have multiple jumps and a far going recovery, it lacks a hitbox and thus is pretty gimpable.If you get hit by the side B, they'll just plummet to their doom unless they're super close to the ledge. They aren't light enough to get out of your combos,so use that well. They also don't have the speed that you do, giving you an extra edge as you blast across the stage, too fast for them to keep up.
:Don't underestimate Yoshi's speed. Seriously, he is ridiculously fast on the ground and in the air, obviously making him a threat. He won't have much trouble getting combos and strings due to your fall speed, but you won't either due to Yoshi's weight. His N-air is a combo breaker, so be careful when you're doing an untrue combo. You must always be on the watch, as he can easily KO you at lower %s. But your best tool is your better recovery. Yoshi's Up B is pretty bad for recovery, even though he does have great air speed, so if you get him far away from the stage (especially after his second jump), he's done for. Even though Yoshi is underplayed, it's always good to know the matchup.
: It will be a game of aerials. Both characters have very good air games. Pikachu can combo you into oblivion, yet you can do the same. Pikachu is one of the lightest characters in the game, thus meaning he isn't as easy to combo, but he does get KO'd much easier than normal. You need to bait out his moves, and punish quickly. He's not very easy to gimp, as Pikachu's recovery is one of the most unpredictable. Hit him during his Side B, or get the 2-frame punish with the N-air if he grabs the ledge.
More matchups are to come, and these will be tweaked as time goes on. I hope this helped you.
General match ups:
Slow fallers: Some of Meta Knight's combos won't work as well, but he can still work around them and combo them well. The majority of these are lightweights, so take advantage of this and focus on KOing earlier.
Fast fallers: You'll have to be faster with your combos because they reach the ground faster, but some combos will work even better on them. Choose your moves wisely! Some are lighter, but most are heavyweights. Remember this, and you'll be throwing out combos all over the place.
Mid-fallers: These guys have a majority of combos working on them, and a bit of them not working. Just be more mindful of what you're doing, as they can have combos work on them, but they can escape.
Heavyweights: Combo them. Combo them HARD. Everyone knows heavyweights are really susceptible to combos, and with Meta Knight, you need to take full advantage of this. However, KOing will become quite the problem for you. Take advantage of his dash attack/Dthrow-->Up air string-->Up B combo and you can get past this.
Lightweights: You'll be reliant on punishes at least a bit more, because lightweights aren't as easy to combo. Catch them off guard, and punish, and KO them when they least expect it. Remember that Down B!
Middleweights: What can I say? They're right in between. Not as easy to combo as heavyweights, but easier to combo than lightweights. Just bait, punish with combos, punish any predictability, and soon you can finish with a KO.
Specific match ups (I plan to add more in the future. I will put this in spoilers, as it will be a long list when I'm done.):
: This character has the ability to combo Meta Knight very well, and Sheik also has nearly lagless moves, making her harder to punish. You'll need to watch out for these combos, and get out of the neutral game as quickly as possible. Meta Knight becomes disadvantaged in the neutral, because of Sheik's needle camping shenanigans. Luckily, Meta Knight also has a lot of combos up his sleeve...er, glove, so use them well and wisely! Your KO power is also superior to hers, so use this wisely. Shiek falls fast, allowing for you to pull off ridiculous combos. This is probably your greatest strength in this matchup. Her recovery is very great, but decently gimpable if you know what you're doing. Avoid the Bouncing Fish, then punish the lag.: This matchup often relies on finishing of the Luma, then using Rosalina's vulnerability to your advantage. If you act quickly enough (The side tilt kncoks Luma offstage with no trouble), you can KO Luma pretty efficiently-then Rosalina is so much more vulnerable to pretty much everything you do! Rosalina has a very light weight despite being big-she's even lighter than MK! Use this fully, get her offstage, and gimp her, because her recovery has no hitbox whatsoever. This makes her recovery super safe to attempt to gimp. Bait the Luma out, KO it, and Rosalina's yours. You can get Meta Knight's Dash Attack-->4 or 5 U-airs-->Up B combo at around 20% and it almost always works if you do it right.: You will be pretty combo reliant when facing Falcon, because he's pretty heavy and falls very fast. A very potent tool in this match up is gimping- Meta Knight's recovery is much, much better than Falcon's, allowing you to mess with him quite a bit. Use the n-air a lot when he's offstage, as its high knockback and lingering hitbox are useful assets for edgeguarding. His kill moves tend to be a bit laggy at the end; capitalize on this as much as possible with a dash attack. Falcon's speed makes him overwhelming at times, so remember to stay calm in this matchup. And whatever you do, avoid the Knee, because if it hits you...Rest in peace.: Watch out for her down smash! As it paralyzes you, it allows ZSS to take full advantage of your small weight, and you'd hate for that to happen. Once you notice her beginning to use it, Down B for a punish or roll behind her and attack. When she begins to use her down throw, DI. She can use d-throw to Up B as a KO combo and on Meta Knight, it's super potent due to his weight...Unless you DI, which greatly affects it. Her fast-ish fall speed does make her a bit more easy to combo, so utilize that well. ZSS spaces very, very well, and that makes things difficult for MK, as his range isn't as good as hers.: Mario is known to be the all-around character. He will have no trouble getting combos until you're at KO %s, but you'll have not much trouble doing the same to him. Keep yourself away from the top of him to avoid his strong upwards options. Stay on your toes, use those combos, and edgeguard efficiently. Why? Well, hit Mario out of his double jump, and he's in a bad position to recover. This gives you an extra edge, but remember that he could easily combo and KO you, due to your fall speed and weight. Your speed and range are also better than his outside of the fireball, so space him out whenever possible.:Everything that applies to Mario in that matchup applies to Luigi in this one. However, Luigi is much slower on ground and in the air. He is also lighter, and is actually pretty easy to KO. However, you must keep watch of the Super Jump Punch, which can easily turn the tide of the match due you having low weight too. However, it is very punishable.:I'll say it straight away. Watch out for Rest. With your light weight, you're screwed if it hits past 54%. You both have amazing recoveries, but Jiggs lacks an upwards recovery move, thus giving you the upper hand. Use those footstools. Just like Rosalina, Jigglypuff is also far lighter than Meta Knight. This makes KOing a breeze for you, and thus you can easily KO at low %s too. : Play it smart, and you could win a match in a ridiculously short time. Let your guard down, and you could lose in the same amount of time. Little Mac is the glass cannon of SSB4. With his ridiculously bad air and recovery game, you could take advantage of this, as Meta Knight's recovery is likely the best in the game and his edguarding is amazing. However, Mac is super powerful on the ground. You need to watch out, as he will take advantage of your low weight to wreck you hard with those super shield smashes. Keep him offstage and in the air, and the match is yours.:This matchup is very heavily in Meta Knight's favour. Ganon's high weight allows you to combo him into oblivion until he's at KO %s. Yeah, those %s are high, but with all those combos, you'll have no trouble getting him there. His recovery is also terrible, allowing you to get him offstage and gimp him HARD. However, you must make sure you don't get hit as Ganon's moves have high power. But due to their lag, you can punish a majority of his moves with no trouble. /:While they do have multiple jumps and a far going recovery, it lacks a hitbox and thus is pretty gimpable.If you get hit by the side B, they'll just plummet to their doom unless they're super close to the ledge. They aren't light enough to get out of your combos,so use that well. They also don't have the speed that you do, giving you an extra edge as you blast across the stage, too fast for them to keep up.:Don't underestimate Yoshi's speed. Seriously, he is ridiculously fast on the ground and in the air, obviously making him a threat. He won't have much trouble getting combos and strings due to your fall speed, but you won't either due to Yoshi's weight. His N-air is a combo breaker, so be careful when you're doing an untrue combo. You must always be on the watch, as he can easily KO you at lower %s. But your best tool is your better recovery. Yoshi's Up B is pretty bad for recovery, even though he does have great air speed, so if you get him far away from the stage (especially after his second jump), he's done for. Even though Yoshi is underplayed, it's always good to know the matchup.: It will be a game of aerials. Both characters have very good air games. Pikachu can combo you into oblivion, yet you can do the same. Pikachu is one of the lightest characters in the game, thus meaning he isn't as easy to combo, but he does get KO'd much easier than normal. You need to bait out his moves, and punish quickly. He's not very easy to gimp, as Pikachu's recovery is one of the most unpredictable. Hit him during his Side B, or get the 2-frame punish with the N-air if he grabs the ledge.More matchups are to come, and these will be tweaked as time goes on. I hope this helped you.
Meta Knight is not flawless, like every other character. Let's go over his weak points.
Of course, comboing is not a problem at all-it's starting the combo. He doesn't have much to start a combo aside from grabs and the dash attack. Those are also the tools he relies on most in the neutral.
His approach game and his SHFF (short hop fast fall) game aren't too good. His aerials don't auto cancel out of a short hop. His d-air can be used to approach, but it has next to no follow ups. This is part of why he is limited in the neutral, and even more hindering is the fact that others can pressure him
from too far away to effectively attack.
He's also very light. He may not be as light as Jigglypuff, Rosalina and Pikachu, but his weight is still below average. This is why you must limit your mistakes-getting punished could get you KO'd early. You must master DI in order to survive longer as a Meta Knight player.
He is also pretty susceptible to combos. Yeah, he's light, but he falls fast, meaning he is more vulnerable against combos. This compounds his aforementioned problem-a flaw you don't want to have. Not only can they combo you to high %s, your KO %s are early. DI is also vital to get past this.
I'm sorry if this guide was lacking in any areas. But overall, Meta Knight is a speedy combo character who will soon finish you off if you make a mistake. He's quite the fun character, in my opinion. Because, honestly, who can say no to a cross between Batman and Kirby? I'm so sorry.
I hope this guide helped you become a better Meta Knight player!
Goodbye for now. Tell me if I missed anything, and have a great day! Bye, and remember, more is on the way!
![]()
I hope this guide helped you become a better Meta Knight player!
Goodbye for now. Tell me if I missed anything, and have a great day! Bye, and remember, more is on the way!