Yaay... finals are over.
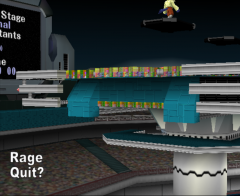
Maybe now I can get back to some Melee work. But first! Question time with Durgan:
The cause:
This is due to a certain kind of texture called a mipmap texture.
mipmapping in Melee and other GameCube games is used to improve image quality and also speed up rendering, specifically when viewing textures at a distance. Basically, this works by avoiding the need to downsize large images (more in-depth details available in the mipmap link above) by simply including multiple copies of the same image at different resolutions. One full set of mipmap images includes the "original", full-resolution image, plus 1/2 divisions of that resolution. For example, [64×64, 32×32, 16×16, 8×8, 4×4, 2×2, 1×1 (a single pixel)].
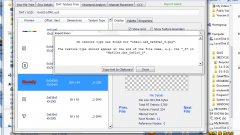
In DTW (public v5.0.1 at the time of this writing), mipmaps are identified by being highlighted in a light blue. You can load up Yoshi's Story to see some examples, which famously has a bunch of mipmap textures (it's a wonder there are so many hacks of that stage). However, you're only seeing the first image in the set. Features for full support for these textures is planned.
You can calculate where the image data is for any texture's various mipmap levels (resolutions) though with a few facts: First of all, the image data for each level is in order, and directly follows one another in the DAT file, starting from the largest resolution to the smallest. Look in DTW's DAT Texture Tree tab and you'll see that it shows you the offset of a texture (this will be the largest mipmap in a set). If you take that offset and add the length of the image data (also provided by DTW, in parenthesis; that's what the "len" value is), then you'll have the offset of the next mipmap level. The data length of that level will be 1/4th that of the previous (because you're downsizing by half in two dimensions). In this manner you can get the offsets for all of the mipmap textures/levels.
The solutions:
1) The easiest solution: wait until DTW fully supports these directly (sorry, no ETA ATM, but it's high on the todo list. I mean it this time!).
(You'll need to know how to use a hex editor to do any of the following methods.)
Replace all iterations of the mipmap texture; method 1:
- Create copies of your texture at the required resolutions. If a height/width dimensions for the image would hit 1 before the other, just keep going for the other dimension. e.g. 16x4, 8x2, 4x1, 2x1, 1x1
- Calculate the offsets of the various textures (mipmap levels) as described in the "The Cause" section above.
- Use DTW's "Manual Placements" tab to import the PNG textures, using the offsets you got from step 2. Explanation on using this tab can be found in the mostly-but-not-entirely-outdated guide, [/COLOR]How to Hack Any Texture. Or, the "User Guide & Info.txt" file from DTW v2.x.
3) Replace all iterations of the mipmap texture; method 2:
- Create copies of your texture at the required resolutions. If a height/width dimensions for the image would hit 1 before the other, just keep going for the other dimension. e.g. 16x4, 8x2, 4x1, 2x1, 1x1
- Convert them to the actual format the game uses: TPL. You can easily do this with the "PNG to-from TPL.bat" script that comes in the DTW download.
- Calculate the offsets of the various textures (mipmap levels) as described in the "The Cause" section above.
- Copy/paste the image data in the TPL files to the appropriate places in the DAT file you're working with. To learn how to find the offset of where the image data starts in the TPL file, see this post on the internals of TPL files.
4) Replace all iterations of the mipmap texture; method 3. This works pretty well, but Dolphin might not dump all copies of a texture, or you might not be able to find/identify them all (particularly the small ones). This is probably how most have done mipmaps in the past, which is why some textures mysteriously change as you zoom out on some texture hacked stages.
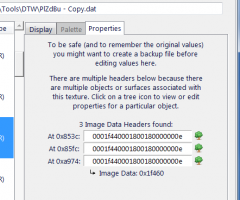
5) Disable the mipmap. I would recommend the method above to this, since this is kinda hacky and would be less efficient for the game, but it's still an option. Image Data Headers include a boolean value (True/False; 0 or 1), a flag, at offset 0xC, which indicates whether mipmapping is enabled for that texture. The value here is actually 4 bytes long, so you'll see seven 0s before the important 1 or 0 in question. Visual example. Now, you'll need to open up the file in a hex editor and go to the image data header(s). You can get the offset of the header(s) via the Properties tab in DTW, shown below:
View attachment 129228
So go to the header(s) offset, then move forward another 0xC bytes, +3 more which should be all zeroes, and you should find a 01. Change that to a 00. Do this for each image data header referencing that texture.
Mipmapping should be disabled for that texture now, and zooming out with that texture in view should have the game pull from the full res copy of the texture instead of any smaller copies. I actually haven't tested this and I only assume educated guess it will work.  Lmk if you try it.
In the "visual example" I gave above (showing the booleans, not the image on the Properties tab), the final 4 bytes of the header are the number of mipmap images in the set, as a float, (maxLOD, or max level of detail). And the "zeroes between these two values" I mention in that post are the minLOD, or minimum level of detail (I've only seen this as 0). You might also need to change these values to zeroes as well. Unlikely, but again, test and let me know!


 Lmk if you try it.


