-
Welcome to Smashboards, the world's largest Super Smash Brothers community! Over 250,000 Smash Bros. fans from around the world have come to discuss these great games in over 19 million posts!
You are currently viewing our boards as a visitor. Click here to sign up right now and start on your path in the Smash community!
It appears that you are using ad block :'(
Hey, we get it. However this website is run by and for the community... and it needs ads in order to keep running.
Please disable your adblock on Smashboards, or go premium to hide all advertisements and this notice.
Alternatively, this ad may have just failed to load. Woops!
Please disable your adblock on Smashboards, or go premium to hide all advertisements and this notice.
Alternatively, this ad may have just failed to load. Woops!
Studying in the Cerulean Cave: Maedhros's Comprehensive Guide to Mewtwo
- Author Sonicninja115
- Creation date
Directory:
Use Ctrl + F to find a certain section
Section 1: How to Play and Directory
Section 2: Moveset Analysis
Section 3: Movement and Neutral
Section 4: Combos and Kill Percents
Section 5: Off-Stage and Playstyles
Section 6: Advanced Topics
Section 7: Terms, Discussion Topics and Update Log
Section 1:
How to Play: A General Introduction To Mewtwo
Introduction:
Mewtwo falls into the archetype of a Glass Cannon. He is does a lot of damage and KOs early however he is easy to KO himself. Unlike the typical glass cannons who are small, fast and rely on relentless aggression, Mewtwo can switch between a high risk high reward playstyle to go for extended combos and chase opponents offstage or set up a defensive wall thanks to his large range on many attacks. Mewtwo has a diverse matchup spread which while like most characters, struggles versus the top tier characters, Mewtwo can hold his own and beat the majority of the cast when the correct playstyle is chosen for the right situation.
Mewtwo in Smash 4 has a moderately developed metagame but it has fallen behind many characters due to initial perceptions of his viability being poor. In a game where many characters have very easy and high rewarding grab combo games, Mewtwo lacks any true combos from this throws. As a result, he is unpopular and many people are unaware of how viable he is in the game. What Mewtwo lacks in throw combos he more than makes up for with a stellar punishing game, high damaging tilt combos and the 2nd strongest set of throws in the game. Getting the most out of these attributes requires dedication and practice, Mewtwo is not a character for those who want results quickly.
Mewtwos weaknesses however unlike his strengths, are very easily defined. His low weight of only 72 ranks him as the second lightest fighter in the game and is especially weak to off-the-side KO moves. His large frame may give him long range but it also gives him a large hurtbox which can be easily clipped during his ledgesnap and techroll. Mewtwos out-of-shield options are powerful but not quick enough to escape shield pressure that top tier characters can put on him with his fastest actually being his upsmash, a risky move to throw out in defense.
If you want to main Mewtwo you need patience and a lot of it. His combo game is unorthodox but extremely powerful, his recovery goes an extreme distance but needs precision on the teleport and his playstyle requires a rapid shift from defense to offense at the right time. Mewtwo has without a doubt, the widest array of the strongest punishes in the game. Choosing the right option at the right time is critical as failure to do so leaves Mewtwo vulnerable and a character of his weight can not afford to leave himself open to punishing. Study this guide and you will learn all that you need to know to make the enemy scared to approach Mewtwo, not knowing what elaborate combo he is about to pull off to end their stock at 40%.
Attributes:
Weight: 74 (57th)
Gravity: 0.082 (38th)
Air Acceleration: 0.03 (50-53)
Jumpsquat: 5 (14-42)
Run Speed: 2.05 (7th)
Walk Speed: 1.2 (15-17)
Air Speed: 1.25 (3rd)
Fall Speed: (32-35)
Max Fall Speed: 1.5
Fast Fall Speed: 2.4
Pros:
Punish Game:
Mewtwo has one of the best Punish games in Sm4sh, rivaling ZSS. The biggest difference is that ZSS is more rewarding in general and her combos are usually easier to pull off. With his fast Dtilt and strong aerials, Mewtwo is able to punish a plethora of mistakes and lag. Mewtwo is scarier when you know how to combo and capitalize off of the punish, as punishes tend to deal 30% and can kill at higher Percents. His Dtilt is an instant anti-approach tool and Utilt is an excellent anti-air.
Recovery:
Mewtwo has four recovery options that, by themselves, are mediocre. When put together, however, they are stunning. Mewtwo has one of the best recoveries in the game, beaten only by Olimar and villager. With it, Mewtwo is able to recover from anywhere on the screen, and oftentimes, still have an option left open.
Combo Tools:
Mewtwo's combo tools are fast and lengthy. Dtilt will combo into an aerial from 0-130% on average, and Utilt is a great anti-air and can combo into Bair and Uair. His aerials can combo into each other and if they don't, they often link. His Jab guarantees a base Dtilt, and if you read, it can combo into a grab or disable. One of the reasons Mewtwo is so difficult to play is because his combo game is different from the rest of the cast.Kill Options:
Mewtwo has a plethora of great kill options, his smash attacks kill before 100% and his aerials are great for edge-guarding or getting an early kill with Fair. His specials are great, as they can, stun, LC, kill and set-up a disadvantaged state. All of these can lead to a kill. He may die early, but he kills the enemy almost as early as they kill Mewtwo. Also, Mewtwo has a couple of kill combos, they aren't too difficult so make sure to look into them.
Cons:
Lightweight:
Being a lightweight, Mewtwo dies earlier then most. However, because of his stellar recovery options, Mewtwo can often live longer then heavy characters. Being part of his glass cannon nature, Mewtwo dies at 80%.
Juggly:
Mewtwo is rather easy to juggle. This is because of a variety of reasons, the most consequential being that he doesn't have any fast aerials, and that he has a large hurtbox. Mewtwo usually has a very hard time landing, thankfully, his specials give him movement mix-ups that allow Mewtwo to sometimes have an easier time.
Hit/Hurtbox:
Mewtwo's hurtboxes are perfectly fine, and there is a link in the useful threads section that proves it. The hitbox problem is only on three moves, Uair, Bair and Grab, it is a pain in the butt, however, it will most likely get patched.
Close Quarters Combat:Is Mewtwo Right For You?
Mewtwo relies on spacing, thus, if you can't keep the opponent out of your bubble, Mewtwo suffers. Luckily, Mewtwo has many great spacing moves, and a jab if the opponent gets too close. All these moves can combo, making it very dangerous to be unsafe near Mewtwo. This is more of a small thing that many characters suffer from, however, these characters suffer from this because they have great medium/long range attacks.
Mewtwo is a Defensive and Punishing character. This means that he fits in a very specific spot in the Metagame, and if he doesn't fit your style, prepare to suck.Mewtwo Training Guide
Defensive Characters:
These Characters all rely on there Defensive capabilities. Link and DHD use their projectiles to keep the enemy away, Megaman uses lemons to maintain his territory and RosaLuma isn't aggressive at all.
Punishing Characters:
Punishes are key with these characters. They don't have the best kill options and thus rely on reading or punishing the opponent. Metaknight with his Fsmash and DA, ZSS with Boost Kick and Ike with Bair and Usmash.
Mewtwo is a very interesting character, and by no means is he easy to learn, especially if you are an aggressive or campy player. Find out your playstyle, and if it lines up either halfway or completely, then dive right in! Otherwise, I would suggest that you find someone more suitable for your playstyle.
You know the joke about Fox doing 100 wavedashes, 100 waveshines and 10 minutes of dashdancing, right? Well, it's not a joke. On to Mewtwo!
Daily:
5 Perfect Pivots
5 Lagless Ledge Get-Up (use Lylat if necessary)
5 Shield Drops
3 Ledge Cancels from 5 different sections
30 sec. of Extended Dash Dancing
20 Foxtrots
10 Instant Ledge Grab
10 Stutterstep Fsmashes
5 Phase-Tipper Uair-Usmash
5 B-Reverse Confusions
10 B-Reverse ShadowBalls
10 Dtilt-Uair-Fair
10 Dtilt-Nair-Bair
5 Dtilt-Nair-Fair
Section 2:
Moveset Analysis:
Attacks-
Jab-

Damage- Initial hit 4% Multi hit 1% Finisher 2% Total 12%Dash Attack-
Kill Potential- None
Use- Combo and Damage
Combo Potential- Follow-up with Jab-Grab/ Jab-Dtilt/Jab-DA
Hitbox Active: 6
FAF: 25
Frames on Shield: -5/-16
Analysis: Jab is great at getting a little damage in and reliving unwanted pressure. For example, characters like Shiek and Luigi will constantly be in Mewtwo's face, and Jab is quick enough to punish shielded aerials and clumsy approaches. Dtilt is a better option for spacing while Jab is good to set-up into a Dtilt or a grab or any other option to get some easy damage and more importantly, some space for Mewtwo to breathe.
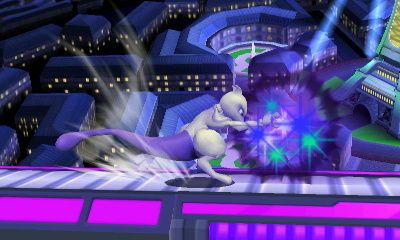
Damage- 10%, 9%, 6%Forward Tilt-
Kill Potential- Medium
Use- Pressure, Damage and Follow-ups.
Combo Potential- Follow-up with an Uair or Fair
Hitbox Active: 10-11
FAF: 39
Frames on Shield: -15
Analysis: DA is a great quick punish and a mediocre combo tool. It's main use should be to put the opponent into a disadvantageous position and then capitalizing on it. As a combo tool, the late hitbox will send the opponent into enough hitstun that a Fair/Uair can true out of it. The timing on this is rather strict and most of DA's combo potential has yet to be explored.
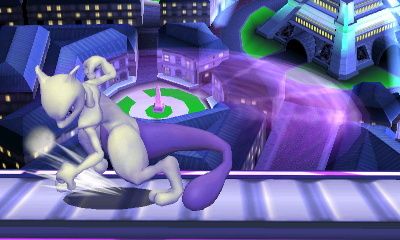
Damage- 10%, 9%, 8%Up Tilt-
Kill Potential- Medium
Use- Spacing and High % Killing
Combo Potential- None
Hitbox Active: 10-12
FAF: 36
Frames on Shield: -12/-12/-13
Analysis: There is not much use for Ftilt. Except as a keep away tool and a mediocre punish. In short, Mewtwo has better options. It's main use will be defensive, when angled forward it can stop a dash in, when angled up it is good at stopping jump ins depending on the character and down angled can catch people doing ledge games.
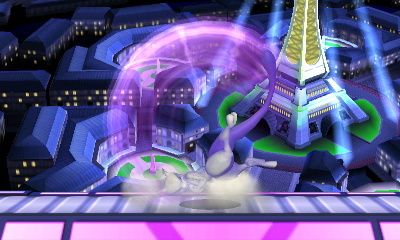
Damage- 6%, 5%, 4%, 3%Down Tilt-
Kill Potential- Medium
Use- Anti-Air and Combos
Combo Potential- Utilt-Bair/ Utilt-Utilt
Hitbox Active: 8
FAF: 30
Frames on Shield: -8
Analysis: A great anti-air as well as a good combo starter. It is fast enough to punish an aerial option through reaction, and the different hitboxes lead into aerials like Fair/Uair/Bair. When combined with PP, it is possible to do a semi-juggle to get that extra percent. This move has little purpose against a grounded opponent as it is outclassed by Dtilt.
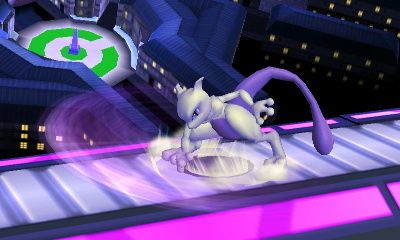
Damage- 5%, 4%
Kill Potential- Low
Use- Spacing and Combos
Combo Potential- Large
Hitbox Active: 6-7
FAF: 21
Frames on Shield: -1
Analysis: The quintessence of Mewtwo's combo game. Without Dtilt, Mewtwo would be so thoroughly heckled that smashers would be made fun of to even mention Mew2king. Thankfully, this isn't the case. Mewtwo's Dtilt is not only fast, it is safe on shield. When spaced to avoid a shield grab, there is nothing your opponent can do to punish it. At low percents, the tip combos into DA, a solid 15% combo. While the tail combos into Fair, Uair, Nair and Dair, each of these creating a plethora of follow-up options. The base combos into everything above as well as Usmash. Mid percents open up the damaging strings. Such as Rising Uair-Fair/Bair and Nair-Bair/Fair. At high percents, Uair is the only true follow-up, and requires a read in order to kill.
Smash Attacks:
Forward Smash-
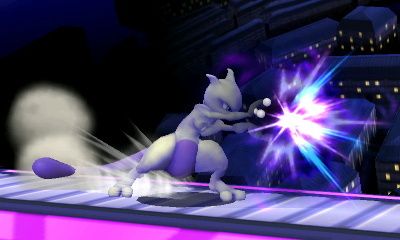
Damage- 19%-26% (Sweetspot) 15%-21% (Sourspot)Up Smash-
Kill Potential- High
Use- Killing and Damaging
Combo Potential- None
Hitbox Active: 19-21
FAF: 53
Frames on Shield: -17/-15
Analysis: Fsmash has a semi-powerful sweetspot, when compared to other sweetspots of course. It is passably fast and can kill as early as 90% at the edge. It is a good punish option, especially when used with pivot Fsmash as Mewtwo slides and if spaced properly it is quite easy to sweetspot.
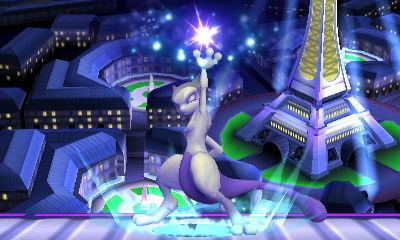
Damage- 1% (Hits 1-6) 10%-14% (Last hit)Down Smash-
Kill Potential- High
Use- Killing and Damaging
Combo Potential- Read Only
Hitbox Active: 9
FAF: 68
Analysis: Quick start-up, large hitbox above Mewtwo and kill power make this a very viable kill option. Dtilt will combo into it and it also serves as an anti-air tool. If an opponent is caught in it, they are put into a disadvantageous position, allowing for further combo potential.
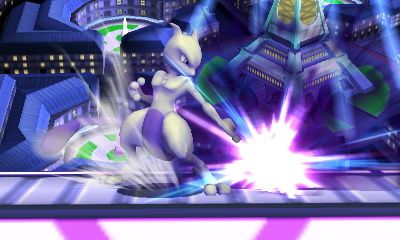
Damage- 15%-21%Aerials-
Kill Potential- High
Use- Killing and Damaging
Combo Potential- None
Hitbox Active: 21-22
FAF: 44
Frames on Shield: -6
Analysis: Very fast with surprisingly low end-lag. It will also kill rather early and would be much better except it sends the opponent into the upper corner. Very good to punish a read or when the opponent is stunned. It is also completely safe on shield at medium charge. Dsmash also has the unique property of being able to hit these characters through a platform.
Neutral Aerial-
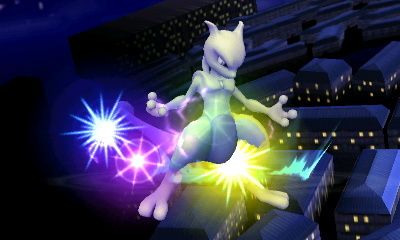
Damage- 1% (Hits 1-8) 4% FinisherForward Aerial-
Kill Potential- None
Use- Combo and Damage
Combo Potential- Bair and Fair
Hitbox Active: 7-40
FAF: 46
Landing Lag: 16 (Autocancels: Frame 46)
Frames on Shield: -2
Analysis: one of Mewtwo's best aerials, as it does 12% in damage and will lead into a Bair/Fair at most percents. It will catch the opponent and drag them along, making it so that Mewtwo is in control of where they will go flying. It is rather easy to set them up in a disadvantageous position. In combination with FF, Nair can even gimp. As it will drag the opponent far down to the areas that a good portion of the cast can't recover from. It can also be used at an advanced level to combo into moves like Dtilt or Utilt, or it can be used to cross through people's shields as a mix-up.
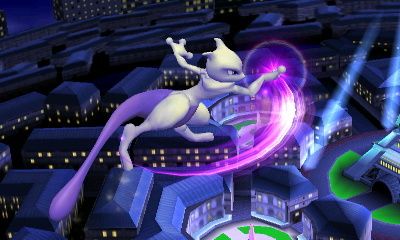
Damage- 13%Back Aerial-
Kill Potential- High
Use- Linking Combos, Damaging and Killing.
Combo Potential- High
Hitbox Active: 7-8
FAF: 38
Landing Lag: 14
Frames on Shield: +2
Analysis: Forward Air is the crowning glory of Mewtwo's legendary moveset (get what I did there)
It is fast and does considerable damage. It's kill power is great, allowing it to kill off-stage as early as 70%. Fair is also a low percent combo starter, as it combos into Fair, Dtilt and Utilt.
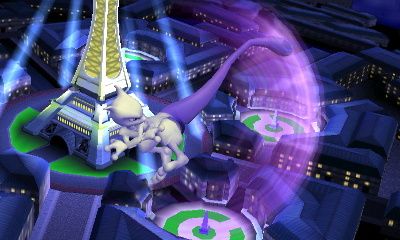
Damage- 13%, 11%, 9%Up Aerial-
Kill Potential- Medium
Use- Gimp and Damage
Combo Potential- Into Bair
Hitbox Active: 13-17
FAF: 40
Landing Lag: 17
Frames on Shield: -3
Analysis: Bair is a brilliant move. It can gimp easily on account of it's large hitbox and can also kill if sweetspotted. It is the end of quite a few linking combos and can be used as a keep away too if spaced properly. Another use for Bair is Stage-Spiking, as it has a long lasting and disjointed (most of it) hitbox.
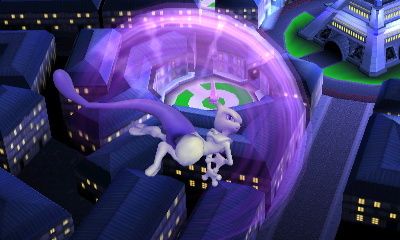
Damage- 11%, 10%, 9%Down Aerial-
Kill Potential- Medium
Use- Combo and Damage
Combo Potential- Into Fair and Uair
Hitbox Active: 10-14
FAF: 40
Landing Lag: 13
Frames on Shield: +2/+2/+/- 0
Analysis: Uair is a strong combo move, with decent kill potential. It is fairly easy to link and it's combos yield high damage. Falling Uair is rather hard to get used to, but when mastered, it is safe on shield and literally unstoppable.
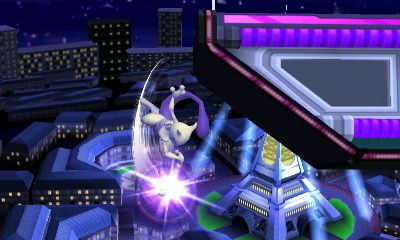
Damage- Grounded, 14% Aerial, 15%
Kill Potential- High
Use- Spike and Damage
Combo Potential- Medium
Hitbox Active: 15-18
FAF: 46
Landing Lag: 18
Frames on Shield: -1
Analysis: It is the goat kick of destiny, banishing all who dare challenge it into the shadow realms. Plus it does 15% and can KO on-stage at 130%ish. Dair can combo into many aerials. While not his best or safest combo starter, it is one nonetheless. dair combos into all aerails except itself and a fair amount of grounded moves as well. Also, a SH Dair autocancels.
Special Attacks-
Shadowball-Grabs-
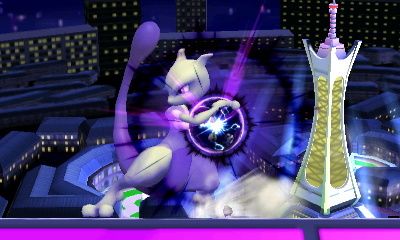
Uncharged-Confusion-
Damage- 2.5%-24%Fully Charged-
Use- Jab locking and keep away
Hitbox Active: 23-
FAF: 49
Frames on Shield: -16
Analysis: Uncharged SB's can Jab-lock, camp and provide a little extra damage. It is a good option to force an opponent to approach or run away.
Damage- 26%
Kill Potential- High
Use- Damaging and Killing
Hitbox Active: 23-
FAF: 49
Frames on Shield: -3
Analysis: FC SB is a great KO option and also a recovery/gimp option. It can KO early and provide damage at lower percents.
Note: for more on SB and it's uses check the thread listed below in the useful threads section. Credit to @Browny

Damage-1% (9 Hits)Teleport-
Use- Aerial confusion to Fair, Command Grab and Reflector.
Hitbox Active: 12-15
FAF: 45
Frames on Shield: Command Grab
Analysis: Confusion is a reflector and defensive option. It can reflect up to 51% of damage and can combo into moves at best and at worst it can put them into a disadvantaged. Aerial confusion will give Mewtwo a slight boost in the air, and if the opponent is hit in the air then it can true combo into Fair/Uair-Fair. Confusion can also force some opponents to land on an upper platform, resulting a guaranteed Usmash.
Damage- 0%Disable-
Use- Recovery, Movement and Mix-ups.
Intangible: 9-17
Analysis: Teleport is a essential in Mewtwo's toolbox. It is used for recovery, escape and mix-ups. When used with LC it is almost unpunishable and as an escape move it is best used as a mix-up. For recovery, It is intangible and he disappears for most of it. When used in certain locations you can create mix-ups using this knowledge. Mewtwo can snap the ledge from above, so you could position yourself to be able to teleport to either the platform or the ledge.
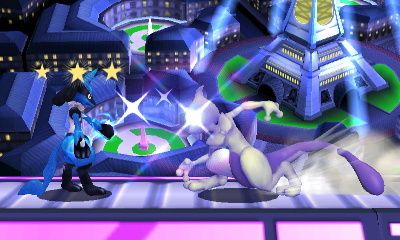
Damage- 1%
Use- Stunner
Hitbox Active: 16-22
FAF: 48
Frames on Shield: -24/-18
Analysis: Disable is useful as a mix-up and a soft read option. It's main use comes out at the 80%+ range as that is when Mewtwo can get a kill from it. It is safeish on shield now but still punishable. Use it, but don't spam it and it is probably best to reserve it for reads.
Pummel-Miscellaneous:
Damage- 2%Forward Throw-
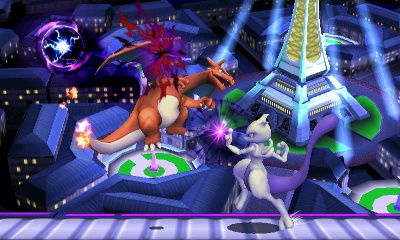
Damage- 13%Back Throw-
Kill Potential- None
Use- Damage and Stage control
Combo Potential- None
Analysis- Fthrow is a high damaging throw that grants stage control and a free SB. It is Mewtwo's second best throw behind Uthrow and is great at low-mid percents.
Damage- 10%Up Throw-
Kill Potential- High
Use- Killing and Stage Control
Combo Potential- None
Analysis- Mewtwo has the fourth best Bthrow in the game, it can kill Mario on BF from the edge at 115% without DI or rage. Bthrow can also be used to damage the opponent and put them at a disadvantaged state. One of it's better uses is also to gain stage control and time to charge a SB.#1 Ness
31% gap LOL
#2 Lucas
1% gap
#3 Villager
2% gap
#4 Mewtwo
Damage- 12%Down Throw-
Kill Potential- High
Use- Kill and Minor Follow-ups
Combo Potential- Uair, Minor
Analysis- Mewtwo has the best Uthrow in the game, without DI on BF it will kill Mario at 143%. Uthrow is good at sealing off a stock against opponents that are to fast for a smash attack. At lower percents, Uthrow can be followed up with a juggling situation, but it is often best to save it for killing as staling will make it kill 10% later after one use.#1 Mewtwo
14% gap
#2 Lucas
5% gap
#3 Olimar
5% gap
#4 Charizard
Damage- 9%
Kill Potential- None
Use- Minor Follow-ups
Combo Potential- Fair, Minor
Analysis- After the recent changes, Dthrow has been different. It is easier to get an Usmash as long as the opponent doesn't jump out, and there are even situational true combos. All tech chasing capabilities, however, have been removed.
Platform Lock Percents:
BF: 49-71% DL 66-84%
Airdodge:
Invincibility Frames: 2-24Spotdodge:
Length: 29 frames
Rank: 1st
Special Attributes: Maintains momentum when buffered out of Hitstun and Mewtwo disappears for the duration of it.
Invincibility: 2-14Forward Roll:
Length: 25 frames
Rank: 10th
Special Attributes:
Invincibility: 4-13Back Roll:
Length: 30 frames
Rank: 29th
Special Attributes: None
Invincibility: 4-13
Length: 30 frames
Rank:29th
Special Attributes: None
Section 3:
Movement:
Movement Styles Overview:
Movement Styles are a suggestion. As I have played Mewtwo, I have tried many styles, and this is my analysis of some of them. Find out which one suits you best, or take advice from here and there. Do what you want with this section, skip it or read it, but Movement is a huge part of Sm4sh.
Defensive:
Ground Based Defensive Movement:
Ground based defensive movement revolves around rolls, spot dodges and well timed tilts and SB's. This movement style is referred to as camping or turtleing, one has a bad stigma to it and the other doesn't. Ground based movement has to be defensive, as aerial movement with Mewtwo is generally offensive. The objective of Ground based movement should be to get around your opponent to get a punish off, while remaining as safe as possible. Rolls and Perfect Shields are used here.
Aerial Based Defensive Movement:
LC and Phasing are the main defensive aerial movements, as Phasing and LC can be used to retreat and punish at the same time. Mewtwo is often in a disadvantaged state whil in the air, so limit yourself to SH and try to remain unpredictable.
Putting it all together:
Take phasing and LC and combine it with careful ground movement. As this is a defensive movement style, Mewtwo should use phasing and LC for retreating or positioning, rather then to press an advantage. Use aerial movements warily, and keep to the ground for the most part, using phasing to move around and escape, with a possible phased fair as a mix-up. Try to keep a SB ready for the implied pressure and Shadow Flight, and use grabs to reposition or kill the opponent rather then try to combo off of them. Never remain still, try extended DD or DD so that Mewtwo has access to multiple options that might otherwise be kept from him.
Aggressive:
Ground Based Aggressive Movement:
Aggressive ground movement revolves around quick movement and rolls. Keep pressuring your opponent with implied pressure and take advantage of openings. Try to corner them and keep them stuck in that corner.
Aerial Based Aggressive Movement:
Phasing is a staple of Aggressive aerial movement. Use Phase Fair and Uair to keep your opponent guessing. Try to catch him in a Nair-Bair combo to rack up damage. Use aerial mix-ups to keep your opponent grounded.
Putting it all together:
This style isn't very viable with Mewtwo, hence the shortness. However, against certain characters it can be beneficial. Avoid this style, but don't forget it.
Punishing:
Putting it all together:
Punishing is a rather interesting style. Keep the opponent away as much as possible, and use PP and Extended DD to make them guess as to what your next move will be. Perfect shield as many advances as possible, and punish with a swift grab or combo. Use phasing as a mix-up to try and create an opening. Use SB cancel to trick them into trying to punish and use Dtilt to discourage grounded approaches.
Movement Options:
Movement Options Overview:
This section explains the moves and there various abilities for movement.
Teleport:
Teleport can be used in many ways. Ledge-Canceling, Recovering and for quickly moving from one place to another.
Ledge-Canceling: By standing a certain distance away from the Ledge/Edge you can teleport off without suffering any endlag or freefall. The applications of this are many. Gimp by combining with an aerial or quickly and unpredictably are a few options to name. See this thread for semi-guide.
Recovering: Teleport has sizable range and renders Mewtwo invisible for most of it. Teleport also has some invincibility frames which are considerably helpful. It can go in any direction and sweetspotting the ledge is not difficult after a little practice.
Moving quickly: Ledge/Edge cancelling is one form of this, however Teleport can also be used to escape some combos and retreat to safety.
Confusion:
Confusion is mainly used as a Mix-up and a way of recovering
Mix-up: On account of Confusions interesting lift, it is largely unpredictable. Allowing for unpredictable movement with a hitbox in front.
Recovering: It has sizable vertical range when used in the air, allowing for an easier approach to the edge and positioning for a Teleport sweetspot.
Confusion can also be B-reversed the applications of which will soon follow.
Shadowball:
Uncharged: Uncharged Shadowball(or SB) can be used as a bait and a movement option.
Bait: As it can be cancelled with both an airdodge and shield, it becomes a bait option. In other words, Mewtwo can quickly cancel SB and then punish the opponent's approach.
Movement Option: It changes the direction of Mewtwo's direction allowing for a split second switch to get back to the stage and possibly trick your opponent into a less then optimal decision. it also allows for quick movement and sudden changes in momentum to try and land safely.
Full Charged: This move, in conjunction with B-Reverse can be used as a Movement Option.
Movement Option: This move when used out of a SH will send Mewtwo flying across the ground allowing for quick movement and a opportunity for a Usmash, Grab or Dtilt.
These Options can all be strengthened with the addition of B-reverse.
AT Movement Options:
AT Movement Overview:
AT Movement is a crucial part of any smash game. It provides mix-ups and allows for better combo extensions. Some are more worthwhile then others, but it is best to know them all.
Perfect Pivoting (PP):
Perfect Pivoting is one of Mewtwo's greatest movement options. PP's general uses are spacing, causing people to mis-space, retreating, movement and punishing.
PP allows Mewtwo to quickly slide backwards and throw out a Dtilt, or slide into a Short Hopping opponent and Utilt. PP messes up their spacing, and usually the opponent cannot react fast enough. Dtilt, Grab and Disable are all good, and rather easy, punishes.
PP also serves as a retreat option. A PP backwards at the ledge can be used to safely get away after baiting an option. Or, PP-Shield is safe and quick.
Foxtrot:
Foxtrot's main use is either to change Mewtwo's momentum while running or to do a stutterstep Fsmash out of it. Not much use in this game or with Mewtwo.
Dash Dancing (DD):
DD is used as a mix-up, bait and a tactic to buy time/slow the pace of the match. This tech, however, has been nerfed in sm4sh. It is much harder and outclassed by it's easier extended counterpart.
Extended Dash Dancing:
Extended DD is great with Mewtwo. It allows for him to make many options out of run while being perfectly safe. DA and jump into an aerial are great ways to punish an opponent and it keeps them guessing as to what Mewtwo is going to do.
There is a poor man's method to do this tech (which I personally use) and that is similar to foxtrotting, just foxtrot one direction and then foxtrot the other. With correct timing, Mewtwo won't experience turn around lag and will be able to act out of it. This might just be an easier way to Extended DD as it looks just as fast.
Phasing (SHAD):
Making a separate guide on this.
Ledge-Cancelling:
Ledge-Cancelling (LC) is one of Mewtwo's best AT's. Considering he has about five it is not surprising. LC's main uses are mix-ups and movement. This tech requires a lot of practice, but it is worth it as it is virtually unpunishable.
Movement and Positions:
Movement wise, LC can be used to quickly ledge trump and escape. It can also be used as a staller to buy time and react to the opponent's approach option. With proper practice, Mewtwo is able to teleport around the stage and is practically un-punishable while doing so. I have a picture of Battlefield with the approximate LC zones but they are not perfect.
View attachment 74801
Ground to Ledge- If Mewtwo is running then teleport right before Mewtwo goes under the platform. If Mewtwo is not running then teleport while Mewtwo is slightly under the platform.
Input-+
(towards ledge)
Platform to Ledge- While standing on the platform, teleport and then point the joystick down while facing the ledge.
Input-+
Air to Platform-
Version 1- Full hop and then at the apex of the jump teleport straight down.
Input-+
+
Version 2- This one requires precise timing and spacing, but is a very useful tool in avoiding bad situations or landing quickly and safely.
Interesting Properties of LC-
1. If Mewtwo is running then he will teleport farther, but if he runs and teleport backwards it counts as a standing teleport.Practicing LC:
2. When standing on dreamlands lower platforms it is impossible to LC with a down input as it will always send Mewtwo into the middle of the stage.
3. It is possible for Mewtwo to LC on the top platform of BF and then immediately LC on the lower platform.
4. Stages have different sweetspot zones because of there size and platform placement, but the LC zone is always in the same area.
5. You can LC the main platform of Lylat from the respawn platform.
6. Not really LC, but you can snap to the ledge from the SV platform.
Run/jump around the stage and LC from random positions that work. My style is I will run and LC from the ground to the ledge, then I will run and jump onto a platform. The second I hit the platform I LC to the ledge. I also mix this up with FH platform LC and LC from an angle on a platform. this helps with the frantic mess in a match.
At the beginning it is probably best to LC from a standing position to get a feel for the zones.
Mix-ups:
Mewtwo is able to do anything out of LC, thus, he has a lot of mix-ups.
1. LC can be used to punish approach options. If the opponent is approaching Mewtwo then LC and act accordingly. If they jump then DJ Uair/Fair, if they retreat then charge/launch a SB and if they run then falling Fair them.For a more in-depth guide check out this thread:
2. LC can be used to quickly punish a laggy move and then retreat.
3. LC can be used as a bait to draw them into a disadvantaged state.
4. LC can be used to edgeguard, gimp and trump.
Neutral:
Overview:
Moves In Neutral:
Mewtwo's Neutral is defensive in nature. Mewtwo's tilts are great at setting up combos, and giving Mewtwo the advantage. Thus, in my experience, I have found it best to be patient in neutral. Walk around instead of running. Implement PP, Foxtrot Dancing and Phasing as your extra movement options besides walking. While walking, Mewtwo has full access, and complete control over his tilts and spacing. PP allows Mewtwo to mess up his opponents spacing and punish them with a Dtilt. Foxtrot Dancing allows Mewtwo to be moving and forces the opponent to really think about what you are going to do next. As out of it you can approach, retreat, PP, stop altogether, or continue on.
Phasing is a great tool in Neutral, as it allows Mewtwo to retreat in peace, and to condition the opponent to take a certain action. All these things are essential in Neutral. Running can be useful, but only from a certain distance. When running, Mewtwo has fewer options. He has to stop in order to Dtilt, and otherwise he can only Shield, Dash Attack, Jump or Grab. Running makes it easier for your opponent to predict what you are going to do. This is not to say, that running is pointless. Learn at what point you want to do a dashing approach. If you dash at someone from all the way across the stage, you are most likely going to be punished, but if you approach from a shorter distance, they have less time to react. Learn the spacing for approaching with a dash.
The point of Neutral, is to get an advantage. Neutral ends as soon as you get a grab, Dtilt, Utilt or disable, but starts as soon as they get back on the stage in a neutral position. Your job in the neutral, is to get that hit, and capitalize on it. A bit of a warning, don't overextend. Stick to your BnB, Dtilt-Fair or Dtilt-DJ Uair-Fair. Don't go for anything crazy, reset the neutral or gain stage control. What I mean by this, is that going for the falling Nair off-stage after a Dtilt > Fair is often unsafe, and if you miss, the opponent gains control of the stage, putting you at a disadvantage. If the opponent gets a solid hit in, then you have lost Neutral, and are now in disadvantage. Your job is to now get back to the stage while taking as little damage as possible, and resetting Neutral.
Example: In Pokken, you have Field phase and Dual phase. Field phase is neutral, where you want to get a hit in and activate Dual phase in your favor. Dual phase is the advantaged and disadvantaged state, where you either want to get as much damage as possible, or get out fast.
Tech in Neutral:
Dtilt:
Dtilt, being -1 on shield drop is incredibly safe in neutral. Stutter Dtilt is great as you are throwing out a safe move, while erratically moving forward. Upon hit, Mewtwo wins Neutral and can easily follow-up. If the opponent tries jumping over for a punish, Utilt easily blocks them, or Mewtwo can simply shield and punish.Utilt:
Usefulness: 4/5, Almost spammable.
Nair:
Utilt is a great anti-air, as it has both speed and combo options in it's favor. Mainly used as a prediction or swift punish, Utilt can cause the opponent to think twice before attacking from above. Though great, it is situational in it's usage.
Usefulness: 2/5, Don't spam it, only use as a safe anti-air punish.
Fair:
Don't. Just don't. Nair is extremely punishable as it is easily broken by anything, even a jab. Use as a read or OoS option. It has great reward, and does good shield damage/pressure, but is relatively unsafe. for more info, read KillerJawz's thoughts on it:
Nair for mewtwo is a really unique tool. it has several different uses and these uses differ depending on the zones you're controlling, as well as match ups, stages and other things. the move itself has no place in neutral. and most of the time abadango attempted to 'approach' with this move, he gained literally nothing, and was frequently anti aired. watch void/mars vs abadango and you can see how often his nairs got stuffed for using them too far away.
when you're directly next to someone however, nair becomes an incredible move, but not just because of what it does, but because of what mewtwo can do in this situation. if the opponent's back is to you and yours is to them, but you're really close to eachother, you obviously can't bair (you wouldn't anyway), so nair can cover them, provided you gets yours out first.
aba always dashes into a zone where he's just outside of dtilt range so he can apply direct pressure with several moves, nair included. the reason this is so strong is because it's a constant hitbox that doesn't require any specific timing, as the move refreshes itself really quickly. if he uses it outside of this zone when an opponent has an answer ready, he gets punished (as he did many many times).
nair is a strong tool for mewtwo. it covers ledge beautifully if you time it correctly, it combos into many moves, can be used to set up a foostool combo, is safe on block, can cross up, does good damage and can pressure platforms among even more things i haven't listed, but you cannot and should not use this move to dart across the air. the hitboxes are still tiny, even after the changes, you will STILL lose to everything that comes your way, you will still lose trades, that didn't change.
Usefulness: 2/5, Very situational.
The crowning jewel of Mewtwo's moveset. Fair is +2 on Shield Drop, making it insanely safe. It can be used out of Phase, a FH Nair and a SH, either rising or falling. It combos into itself and can easily kill 90%+.Shadowball:
Great way to catch SH's and frame trap the opponent. Simply a good all-around move in Neutral.
Usefulness: 5/5, Insanely good for whatever purpose.
Whether in mini form or full-charged, SB has it's plethora of uses. Mini SB's stop approaches and can bait out airdodge, all from the ample protection of half a stages distance between you and the target. On the other hand, FCSB can catch techs or whiffed moves, as well as landings, for a whopping 26% and a advantaged state.
Usefulness: 4/5, Don't use at close range, mid-long range only.
Phasing:
The Phasing Guide will have more on this. Phasing is great because of it's invisibility and frame advantage properties. You can retreat or advance on a whim, and chances are the opponent won't be able to read which way you go, or even be able to punish the 10 frame window. With the ability to use Fair or SB out of it, the possibilities are almost endless.Perfect Pivoting:
Usefulness: 4/5, Can become predictable, especially with MU experience.
Perfect Pivots are always useful. Mewtwo can PP Shield for safety, or PP Tilt to stop approaches, or force a whiff. It is also good for micro-spacing Dtilt. While it's uses may seem few, each one is very nice to have, and can lead to big punishes.Foxtrot Dancing:
Usefulness: 3/5, Very good.
Ledge-Cancelling:
Foxtrot dancing is a great thing to do instead of standing still. This gives Mewtwo options, while forcing the opponent to think about what your next move is. More of a mind game then anything.
Usefulness: 3/5, Good, but not that rewarding.
LC is very useful to escape bad situations and to maneuver around the opponent. It allows for quick mobility and an endless amount of mix-ups.
Usefulness: 2/5, Stage dependent and requires a lot of tech skill.
Section 4:
Combo Game:
Check out the Combo Compendium for a character specific list!
Mewtwo's Combo Game: Overview
True Combo: A true combo is a combo that registers in the training room, unless it's confusion. This means that this combo is only avoidable through DI, and sometimes that might not even work. True Combos are also called Guaranteed Combos.
Linking Combo:
A linking combo is a combo that works, but there is an option or two to get out. Such as, when Shiek Dthrow-Uair's Diddy Kong, Diddy Kong can escape by Fast Falling and Fairing. Thus, A linking combo isn't guaranteed, meaning there is at least one frame where the opponent can act out of it. If you don't have a frame one attack, sucks for your character. Not many characters have a frame 1 attack, however, and most linking combos have 3-6 open frames.
Read Combo:
A Read Combo is a combo where you have to read your opponent. Like a Melee tech chase/chaingrab. These combo's could be partly true, and the finish with a read on their jump/attack/airdodge. For example, Mewtwo can double Fair characters while only using one jump, thus you can use his second jump to punish their escape option. If they jump, Uair. If they airdodge, Dair. Make a read, and capitalize on it.
Situational Combo:
A situational combo requires certain elements to be in effect for it to work, like the opponent has to be in the 60-70% range and standing in the middle of the platform above me in order for it to work. These are the combos mainly used for styling and such, not much use in a real match except as a potential mix-up.
Overview:
Mewtwo's combo game relies around punishes and reads. His throws do not combo and his aerials aren't safe enough on shield or fast enough to link/combo properly. Thus, Mewtwo has to rely on tilts, reads and baiting to get a combo off. The upside to this is that he has one of the best punish games in SSB4. His tilts have long range, making them relatively safe and if he wants it is almost possible to just turtle up. This allows Mewtwo to have a safe punish game. It must be used properly, however, to be viable.
Mewtwo's combos aren't like most of the casts. Very few characters rely on tilts, or even use tilts, to start a combo. Because of this, Mewtwo is a rather hard character to pick up. All of his combos are rather advanced, such as Dtilt-Nair-Bair/Fair or Dtilt-Uair-Fair. At first, these combos are too difficult and are useless, but as time goes on and practice is put into them, they become B&B combos.
Mewtwo is a character with more linking combos then true combos. Meaning that when learning to play or when trying to master Mewtwo, test out random aerial combinations and see what works. You might come up with a new situational combo or a new kill combo. I myself discovered that Dtilt-Fair-Rising Fair kills Fox at 28% and true combos. There are many things still to be discovered in Mewtwo's combo game.
Mewtwo's Combo Game: Guide:
Introduction:
This Section explains the different properties and possibilities available from each combo starting move.Dtilt:
Dtilt's combo game is amazing. It has guaranteed follow-ups until 130% and is safe on shield if spaced correctly and sometimes even incorrectly. It has kill combo, damage combos and re-positioning combos.Utilt:
Dtilt is the sort of move that Mewtwo can use as either a punish, or a read. If the opponent dashes in then Dtilt is a great counter, and if they dash into a jump, there is still time to get a Utilt off.
Low Percents: This is when Dtilt is arguably the most useful. Both Dtilt-Fair and Dtilt-Nair work at these percents, allowing high damage combos that will send the opponent into the lower 40%ies. This is also when Dtilt-Usmash works, however, I tend to avoid this combo as it stales Usmash.
Medium Percents: Dtilt-Fair usually stops working at around 35%, but Dtilt-Nair-Fair/Bair is the best combo in the 40-80% range. On average, this combo will do 29% and depending on how well you position the finisher, this combo might even kill. Other then that, Dtilt-Uair starts working at these percents, but will not start comboing into Fair until the upper 70%ies
High Percents: This is when Dtilt-DJ Uair-Fair will work and kill. This combo is not super reliable as it is rather hard to pull off. This combo can kill, however, making it important to learn.
Utilt's combo game is only in the lower percents, 0-40%. Outside of this, it is only useful for anti-air and really high percent killing.Jab:
Low Percents: At really low percents, Utilt can combo into itself. In the 15-40% it can combo into Bair and sometimes Uair. This is mainly a B&B combo as it is not hard to pull off and adds a healthy 20% to there damage.
Jab has very low KB, in other words, it will almost always combo into something. It is mainly used to start a combo for the extra percent it provides. The KB on it makes it easy to land a sweetspot Dtilt, making Jab even more beneficial.Nair:
Nair has set KB on certain portions, allowing it to be a good, but difficult, combo starter. Check out the Nair KB section to learn how to combo with it. Otherwise, Nair can combo at 10-70% dealing up to 29%. It is possible to kill with Fair if you have complete control over the KB and lucky stage positioning.FF Uair:
FF Uair is one of Mewtwo's best combo moves. It is safe on shield, and it's risk/reward ratio is in his favor, being low risk/high reward. FF Uair starts kill combos as well as 50% strings that are inescapable. each hitbox has different combo potential, allowing Mewtwo to combo for an extended period compared to Fair.Fair:
Note: FF Uair does not work onas they are too short.
Fair is a great combo starter at low percents, and combos into itself at medium percent. Fair trues into Dtilt and Utilt, allowing for high damaging strings right off the bat. Because of it's high damage and low landing lag, Fair is safe on shield if spaced properly. Rising Fair also leads into a jab-lock situation if they miss the strict timing.Confusion:
Aerial Confusion is much better then grounded confusion, and will always combo into DJ Fair or a read for the Uair-Fair combo.
The Mewtwo boards are currently updating this list. Please understand.
Platform Combo Extensions: ADD
Overview:
Example:
Combo's with Mewtwo tend to send the opponent in to the air instead of in front of Mewtwo. (Dtilt,Utilt,Dthrow) Using the platforms allows for extended combos and an optimized punish game. This is mostly thoughts and opinions mixed together with facts. Dthrow can also be used as a starter, check out the Tech Chase guide in the Moveset Spoiler!
(Note: None of the combo's are true, however, Mewtwo has so many options that it is rather scary.)
Possible Combo List: ADD
Mewtwo is playing on BF and hits Link with a Dtilt at 20%. Mewtwo then follows-up with a Fair and FF's to the platform right below. Mewtwo then proceeds to do an Utilt, extending the combo and leading to an advantaged state.
Mewtwo can also read the opponents option and respond accordingly. Uair is also an option out of Dtilt and Dtilt, Usmash and jab can be used as prediction options, other moves can be used as well, but these are the basic ones.
Dtilt-
Dtilt-Fair-Utilt-Uair/UsmashUtilt-
Dtilt-Fair-Read Airdodge-Dtilt-Uair/Fair/Nair-Fair/Bair
Dtilt-Fair-Read Airdodge-Jab-Dtilt-Uair/Fair/Nair-Fair/Bair
Dtilt-Nair-Dtilt-Combo
Dtilt-Nair-Jab-Dtilt-Combo
Dtilt-Uair-Utilt-Uair/Usmash/Bair
Dtilt-Uair-Uair
Dtilt-Uair-Read Airdodge-Jab-Dtilt-Fair/Uair/Nair-Fair/Bair
Utilt-SH Uair-Utilt-Uair/Usmash
Utilt-SH Uair-Read Options
Utilt-Bair-Tech Chase
General Guide:
Learning to do this is mainly practice and stage awareness. It is definitely optimal to go for these options, but be careful that Mewtwo doesn't get punished by faster characters. Catch them off-guard. It is relatively simple as long as you know the general percent windows and the places in which the combos can be pulled off.
Kill Set-ups:
Jab-Utilt-Usmash:
Variation:
Dair Reads:
Dtilt-DJ Uair-Dair:Dtilt-Fair (Ledge):
Dtilt-Fair-Fair-Dair:
Dthrow-Dair:
Dtilt-Dair/Fair 50/50:
Rising Dair > Fair
DJ Uair>Dair
Kill Percents:
(Note: These were done on Mario, FD. For vertical kills, it was tested in the middle of the stage. For horizontal, the edge.)
Example:
Move:
Without DI
With DI
Attacks:
Jab:
200+%
200+%
Dash Attack:
170+%
170+%
Utilt:
160+%
160+%
Dtilt:
200+%
200+%
Ftilt:
128%
145%
Usmash:
101%
104%
Dsmash:
86%
99%
Fsmash Sweetspot:
76%
84%
Fsmash Sourspot:
80%
89%
Aerials:
Uair:
145%
152%
Dair:
Spikes at: 32%
On Stage:
130%Fair:
138%
90%
115%
Bair:
110%
125%
Nair:
250+%
250+%
Specials:
Shadowball (FC):
70%
90%
Throws:
Uthrow:
133%
135%
Bthrow:
105%
120%
Attacks:
Jab:
200+%
200+%
Dash Attack:
170+%
170+%
Utilt:
160+%
160+%
Dtilt:
200+%
200+%
Ftilt:
128%
145%
Usmash:
101%
104%
Dsmash:
86%
99%
Fsmash Sweetspot:
76%
84%
Fsmash Sourspot:
80%
89%
Aerials:
Uair:
145%
152%
Dair:
Spikes at: 32%
On Stage:
130%Fair:
138%
90%
115%
Bair:
110%
125%
Nair:
250+%
250+%
Specials:
Shadowball (FC):
70%
90%
Throws:
Uthrow:
133%
135%
Bthrow:
105%
120%Section 5:
Off-Stage, Playstyles:
Off-Stage:
Mewtwo has many recovery options.
1. Teleport
2. DJ
3. Confusion
4. B-Reverse FC SB/Confusion
5. Disable (stalling)
Teleport sends Mewtwo into freefall, forcing it to be the last means of recovery, however, as it makes Mewtwo disappear and gives him invincibility frames it is still quite good.
Double Jump sends Mewtwo in a rolling motion through the air, Mewtwo cannot grab the ledge in the middle of his DJ only at the end. DJ can be cancelled by any special making it a great positioning move and it is also a way to get closer to the ledge. Be careful, if you get footstooled out of your DJ, then it is almost certain that you are going to die.
Confusion sends Mewtwo in a little hopping motion when used for the first time in the air. If used a second time he will not get the same momentum boost. Confusion has moderate horizontal recovery and is good for setting up teleport or DJ. If Mewtwo is being ledge-guarded after a failed ledge-guard attempt then he needs to B-reverse confusion to get the desired distance.
FC SB has enough KB to make a b-reverse afterwards have a rather dramatic change in direction, while not as useful as pre-1.1.3 SB, it still has it's uses.
Disable should mainly be used to mix-up Mewtwo's falling speed and to avoid an opponents ledge-guard. Disable will halt Mewtwo's aerial momentum for a small amount of time but it is still enough to be used as a mix-up.
Gimping/edge-guarding
As far as gimping goes, there's a lot Mewtwo can do. He can throw shadow balls, however strong to restrict horizontal recoveries. Nair can be used to great effect against poor recoveries to gimp or cause easy damage against those who lack hitboxes. Shadow Claw is useful as always if you can surprise them or punish. Bair of course has a nice large hitbox to use, and is fairly good at punishing airdodges with good timing. Depending on the character you're facing and their percentage you can sometimes string several together in a wall-of-pain like sequence.
Finally there's his Dair which is for the most part your typical meteor Dair. Though one should not hesitate to use it if a golden opportunity comes offstage or on. Short-hop Dairs can be a useful surprise attack on tall characters as well.
Mewtwo can go very, very deep to either the side or bottom blast zones to edge-guard so make sure to take full advantage of this when a gimp opportunity comes along. However if you go low to edge-guard and miss, be careful not to get footstooled out of your midair jump. It's key for his vertical recovery.
Thanks to @meleebrawler for this post which I literally just copied and pasted.
Wall-Jump:
Aerial:
Shadowball:
Teleport:
Ledge-Options:
Playstyle:
Advice/Info on how to play Mewtwo with different styles. Example, some MU will require a more campy playstyle while others may require a more aggressive playstyle. Oftentimes it is best to switch playstyles mid-match as a mix-up.
Aggressive:
Mewtwo is not a close combat character, and thus, he doesn't do well aggressively. When playing aggressively, Mewtwo still wants to space with his tilts as much as possible and use Nair or SHAD Fair as approach tools. LC is also a good way to quickly approach the opponent. Aggressive Mewtwo plays a bit like Marth, aggressive, but always spacing his moves and never getting too close to the opponent. If he does, then his best option is to Jab-Dtilt or grab for stage control.
Defensive:
Defensive play with Mewtwo is usually done at the beginning of a match and high percents. With defensive play, Mewtwo wants to be charging his SB whenever he can and spacing with Dtilt, Utilt and Ftilt whenever the opponent approaches. In this period, Mewtwo wants to focus more on the little pokes and percents while keeping SB in play to punish any mistake. When in this playstyle, constantly look for openings. If the opponent gets too aggressive, then read there option and punish with one of Mewtwo's devastating punishes. Dtilt-Fair will work regardless of which part of the tail hits at low percents. All grabs should be with the purpose of damage or stage control with a possibility of killing at high percents.
Punishing:
Punishing is a mixture of aggressive and defensive with defensive being prominent. In punishing, Mewtwo is being defensive, but as soon as he gets a combo starter he maximizes the combo and turns the tide of the match and keeps the momentum by playing aggressively. In the Defensive stage, Mewtwo wants to be more active then a regular defensive strategy. Mewtwo needs to be baiting and playing mindgames to move the momentum of the battle. Dthrow is useful in this style to instigate tech chases and kill confirms.
Camping:
This strategy is Hyper-Defensive. Mewtwo never approaches and never follows up on a combo besides a fair off a dtilt, nothing big. Mewtwo constantly spaces with his tilts and keeps the opponent away with small and medium SB. The point of this playstyle is mainly to build up percent and aggravate the opponent.
Capitalization:
Capitalization is a defensive/aggressive playstyle. This way is comparable to Punishing, but with differences. In capitalization, Mewtwo wants to get the best out of every possible situation. To do this, Mewtwo needs to play a mix. Switching between aggressive and defensive. Aggressive shouldn't be limited to punishing, and in Capitalization, Aggressive is mixed with defensive and used with punishing as well. Mewtwo can play defensively and LC to get around before suddenly pressing an advantage to take control of the match. The gist of this style is to take advantage of any flaws the opponent has and press the advantage on any mistake.
Putting It All Together:
When playing a match, Mewtwo doesn't have to stick with one style. To optimize Mewtwo, one can start off Camping, and then suddenly move into Aggressive. Look into what styles fit your playstyle and see what you can do to bring your Mewtwo game to the max!
Advanced Playstyles:
Phasing Oriented:
Zoning Oriented:
Punish Oriented:
Defense Oriented:
Section 6:
Advanced Topics:
Patch 1.1.1 Shieldstun Analysis and how it affects Mewtwo
Shieldstun has been changed and everyone is freaking out.
Explanation:
Perfect Shield: 1-3
Shield Lock (Can Jump, grab, roll and other OoS options): 4-11
Shield Drop (Time when the shield is gone and Mewtwo is experiencing lag): 12-18/19?
Shieldstun starts as soon as someones shield is hit. So if someone is hit on frame four of their shield by Mewtwo's Dsmash, then he cannot do any OoS options for about 10 frames. so it would then look like this.
1-3 Perfect Shield
4-11 Shield Lock
4-14 Shieldstun
15-22 Shield Drop Lag.
As you can see, shieldstun overlaps with shield lock. Causing shield lock to be meaningless.
If Mewtwo hits someone on frame 30 of their shield it will look like this.
1-3 Perfect Shield
4-11 Shield Lock
12-29 Shield
30-40 Shieldstun
41-48 shield drop
Any questions, please ask.
(Note: This assumes that the opponent just lets go as soon as they are hit to try to punish with an OoS option.)
In general, this change affects OoS options and punishing. Making the game more aggressive and shieldbreak combos a thing.
They also changed some Hitstun mechanics so that both the attacker and defender have Hitstun and they decreased shield HP so they will break easier and it takes about 10 seconds to fully charge from almost broken.
Shieldstun Compendium:
Attacks
Ftillt- (10/9/8 / 1.75)+2= 7.71/ 7.14/ 6.57 frames of shieldstunSpecials
Dtilt- (5/4.5/4 / 1.75)+2= 4.85/ 4.57/ 4,28 frames of shieldstun
Utilt- (6/5/4.5 / 1.75)+2= 5.42/ 4.85/ 4.57 frames of shieldstun
DA- (10/9 Late 6/4 / 1.75)+2= 7.71/ 7.14/ Late 5.42/ 4.28 frames of shieldstun
Jab- (4 / 1.75)+2= 4.28 frames of shieldstun
Fsmash- (15/19 / 1.75)+2= 10.57/ 12.85 frames of shieldstun
Dsmash- (15 / 1.75)+2= 10.57 frames of shieldstun
Usmash- (16 / 1.75)+2= 11.14 frames of shieldstun
(Note: Smash attacks are only counting the base percent. So Dsmash FC could be completely safe on shield and you might even have positive frames! Also, Usmash doesn't really matter much because of how little it hits most shields.)
Shadowball FC- (26 / 1.75)+2= 16.85 frames of shieldstunAerials
Shadowball Half Charged- (13 / 1.75)+2= 9.42 frames of shieldstun
Shadowball uncharged- (3 / 1.75)+2= 3.71 frames of shieldstun
Fair- (13 / 1.75)+2= 9.42 frames of shieldstun
Dair- (15/14 / 1.75)+2= 10.57/ 10 frames of shieldstun
Uair- (11/10/9 / 1.75)+2= 8.28/ 7.71/ 7.14frames of shieldstun
Bair- (13/11/9 / 1.75)+2= 9.42/ 8.28/ 7.14 frames of shieldstun
Nair- (4 (Final Hit) / 1.75)+2= 4.28 frames of shieldstun
Safe on Shield?:
Attacks:
Ftilt-
Shieldstun- 7.71/ 7.14/ 6.57Dtilt-
Hitbox Active-10
FAF-36
Frames on shield- -12/-12/-13
Analysis- Not safe on shield. An opponent could probably DA or a faster character could dash grab. If the opponent is hit with the tip, it is much safer then the base as they have a longer period to run and are pushed back a bit.
Shieldstun- 4.85/ 4.57/ 4.28
Hitbox Active- 6
FAF- 21
Frames on shield- -1
Analysis- Not spammable, it has -6 frames so it doesn't work to spam it. But it is still completely safe on shield.
Utilt-
Shieldstun- 5.42/ 4.85/ 4.57
Hitbox Active- 8
FAF- 30
Frames on shield- -8
Analysis- Nothings changedDash Attack-
Shieldstun- 7.71/ 7.14/ Late 5.42/ 4.28Jab-
Hitbox Active- 10
FAF- 39
Frames on shield- -15
Analysis- Nothings changed
Shieldstun- 4.28Fsmash-
Hitbox Active- 6
FAF- 25, 36 for rapid jab
Frames on shield- -5/-16
Analysis- Nothings changed
Shieldstun-10.57/ 12.85Dsmash-
Hitbox Active- 19
FAF- 53
Frames on shield- -17/-15
Analysis- Can no longer be punished by a strong smash attack, and it is rather safe as it sends the opponent s pretty far, even in shield. This is assuming it is uncharged, thus if it is full-charged it is probably perfectly safe. Will add later.
Shieldstun-10.57Usmash-
Hitbox Active- 21
FAF- 44
Frames on shield- -6
Analysis- Punishable by a DA or a quick grab.
Shieldstun-11.14
Hitbox Active- 9
FAF- 74
Frames on shield- Difficult to say, it is definitely punishable because of the high hitbox of Usmash though.
Analysis- Nothing changed since pre-shield nerfs.
Specials:
FC ShadowBall-
Shieldstun- 16.85
Hitbox Active- 23
FAF- 49
Frames on shield- -3
Half-charged ShadowBall-
Shieldstun- 9.42Uncharged ShadowBall-
Hitbox Active- 23
FAF- 49
Frames on shield- -10
Shieldstun- 3.71
Hitbox Active- 23
FAF -49
Frames on shield- -16
Written Explanation-
FC Shadowball Hitbox is active on frame 23 and FAF is 49. So, if shielded right next to Mewtwo, then Mewtwo has -3 on shield. This means that the opponent has three frames in which Mewtwo cannot move. Making FC Shadowball nearly unpunishable from any distance. Half charged has -10, making it completely unsafe on shield and uncharged has a wopping -16 frames on shield. Thus, the only form of SB safe on shield at a short distance is Full-Charged. With others, make sure to put some distance in.
Aerials
Nair-
Shieldstun- 4.28
Hitbox Active- 7
Landing Lag- 16
Frames on shield- -2
Analysis- Nair is a tricky case as it is a multi-hit move. It is, however, safe on shield if Mewtwo hits with the last hit, As Mewtwo has no landing lag after that.
Fair-
Shieldstun- 9.42Dair-
Hitbox Active-8
Landing Lag- 14
Frames on shield-+2
Analysis- Really safe on shield. Use in conjunction with Phasing and SH to maximize it's utility. Watch out for perfect shields and shield grabs though.
Shieldstun- 10.57/ 10Uair-
Hitbox Active- 15
Landing Lag- 18
Frames on shield- -1
Analysis- Safe on shield, be careful though, as it isn't super safe. It can start a vortex situation, which might lead to a punish.
Shieldstun- 8.28/ 7.71/ 7.14Bair-
Hitbox Active- 10
Landing Lag- 13
Frames on shield- +2/+2/+/-0
Analysis- low risk/High reward. Learn the spacing and combos, please...
Shieldstun- 7.14
Hitbox Active- 13
Landing Lag- 17
Frames on shield- -3
Analysis- Relatively safe on shield. Try to hit with the tip, as that will push the opponent away and most likely make it safe.
Advanced Techniques:
B-Reverse
ShadowBall:Video:
Confusion:
How: Press Standard B and then quickly press the direction opposite of Mewtwo's.
Use: B-reverse SB can be used to quickly change momentum midair to provide a mix-up. It can also be used to re-position Mewtwo, bait out the opponent and to easily fire in the other direction.
Difficulty: Easy
Video:
Credit goes to @kirby3021 for the video and tech!
How: Press side B and then quickly press the opposite direction, like B-reverse except starting from the side instead of the center.
Use: This tech is great for aerial mix-ups and for quick aerial movement.
Difficulty: Medium
Shadowball Cancel
Explanation: This can be done to bait an opponent, or to perform an OoS option.
How: Cancel the Shadowball's charge with shield
Use: SBC can be used as a bait option and a way to escape a charge. It is mainly used for mindgames.
Difficulty: Easy
Wave ShadowBall
How: While running, b-reverse a SB. This will cause Mewtwo to turn around and slide a bit.
Use: Mix-up and a surprise option. Especially now that SB is safe from practically anywhere.
Difficulty: Medium
Thoughts: Look at Shieks like Vinnie's. He uses wave needles a lot.
Shadow Hopping (DJCSBCBSD)
How: DJ and then cancel it with SB, as soon as you press SB, hold shield. A shield will appear the first frame that you touch the ground.
Use: This is useful as a mix-up and a way to quickly get into shield out of a foxtrot. There are also some applications when used with SB.
Difficulty: Medium
Video:
Shadowball Buffer Shield Drop
Credit goes to Zan for the discovery, video and description.
1st Description: When you shadow ball you can't cancel it with shield immediately, but if you hold shield he'll keep charging. So if you do Shadow Ball then hold shield, and buffer down, at the right timing he'll do an immediate shield drop that you can act out of. Compared to shielding then letting go then dropping or trying to manually do it, this is much faster and can really help his landing options.
2nd Description: To do this, when you charge shadow ball and immediately hold shield, you'll notice if you do it quick enough he'll just keep going for a moment and then shield. In that moment, you need to buffer down as well as holding shield. In the air, theres a certain point before you land once you're holding shield where you press down and you'll do it. Hint: if you're shielding you're pressing down too early, and if you're spot dodging you're doing it too late. Its not hard once you get the timing down.
Use: This tech (can we find a cool name for it?) can be used to quickly slip through a platform and surprise an opponent. it can also be used as a recovery mix-up if the opponent thinks Mewtwo is going toward a platform and a punish option.
Difficulty: Medium (Timing Based)
Video-
Teleport Ledge-Cancel (LC/TC)
Explanation: LC is a great way to quickly grab the ledge, retreat and reset the neutral or as a quick way to ledge-guard. It can be done on any stage, though it's benefits vary.
How: Teleport a set distance from the ledge to cancel all lag and slip off the ledge. This can be done from the air or a platform as well as the ground.
Use: Edge-guarding, Slip Edge, Escape, reset to neutral
Difficulty: Medium, requires practice.
Video:
Instant Teleport Ledge-Cancel Trump
Credit goes to ToTs for the video and the discovery of the Instant Trump
Explanation: This is a way to perform a instant ledge-grab out of LC.
How: Watch the Video, it is difficult to explain.
Use: ITL-CT can be used to quickly and efficiently trump the opponent. If the opponent buffers a roll then they will not be trumped, to combat this Mewtwo can teleport in place and then punish the roll with a smash attack or disable.
Difficulty: Medium/Hard (Requires Ledge Cancel)
Video:
Feet Stun
Not really an AT but hey, nowhere else to put it...
Explanation: An easy and unexpected way to get a stun. use in Combination with Usmash for a kill.
How: When the opponent is on a platform or ledge, jump up and Stun them. The disable will hit their feet and be perfectly safe for Mewtwo.
Use: It can be used as a safe Disable option.
Difficulty: Easy
Video:
Phasing (Short Hop Air Dodge, SHAD)
Explanation: Phasing can be used to quickly approac and retreat from an opponent without any lag, and as Mewtwo disappears while doing this, it is also a good mix-up.
How: Short Hop, and then Air Dodge
Use: Phasing is good for approaching and retreating. It can also be timed so that it is possible to use a Fair out of it. Mewtwo will disappear while Air Dodging causing the opponent to have to guess where Mewtwo is going.
Difficulty: Easy
Video:
Rising Aerials
Explanation: This is a good way to extend the range of Mewtwo's aerials, as most hitboxes last the entire DJ. It can also be used to extend combos in some cases.
How: Jump and use an aerial right afterward. Mewtwo will rise into the air and use an aerial at the same time.
Use: It can be used as a mix-up and a way to extend Mewtwo's combos.
Difficulty: Easy
Double Jump Cancelling
Explanation: This is mainly used after a footstool to get the Jab-lock. However, it can also be used in other ways, such as to switch up momentum.
How: Mewtwo's DJ can be cancelled by any special or item toss.
Use: DJC gives Mewtwo the ability to make the jankiest recoveries. JC Disable also extends Disables hitbox.
Difficulty: Easy
Sliding Pivots
How: Video explains how to do this AT.
Use: Tomahawk into Dtilt or a smash/grab.
Difficulty: Timing based
Video:
Lagless Ledge Get-up
Explanation: Very good tech to learn. Mewtwo doesn't have the best ledge options, and this allows him to do many things.
How: Fall back off the ledge, jump and press forward.
Use: NO LAG. Fast attack, grab a shield, only downside is the loss of invincibility, but it only takes 5 frames to get up.
Difficulty: Hard
Video:
Thanks to My Smash Corner.
U-Turn
How: As Mewtwo turns, input a move. Mewtwo will slide and use the tilt or smash.
Use: Mix-up and the ability to use a tilt while moving.
Difficulty: Easy
Video:
Boost Grabbing:
How: Press Attack and then immediatly following, Grab.
Use: Extends Dash Grabs range.
Difficulty: Medium
Video:
Special-Extended Jump:
How: By using a Special at the height of Mewtwo's DJ, Mewtwo will gain a small boost in height.
Use: You go higher. Spacing and recovery.
Difficulty: Easy
Video:
Coming Soon!
A-Landing:
How: Input a move with an auto-cancel window right before you land. The timing differs depending on the length of the window.
Use: No lag tumble destroyer. Don't go into a tech read situation.
Difficulty: Hardish, only two frames on Uair and Bair.
Video:
Bounce Tech:
How: Input a move instead of a tech during the usual tech window.
Use: It is actually a bit of a gray area for me. It is great for counter-attacks, but I don't know how good it is when compared to teching.
Difficulty: Easy
Video:
Momentum Cancelling:
How: Use a certain move after being hit to extend your stock by a small amount.
Use: Survive longer.
Difficulty: Easy
Smashboards Thread:
http://smashboards.com/threads/hurtbox-shifting-instant-momentum-cancel.423544/
Video:
Crouch Cancelling:
How: Crouch before being hit.
Use: Live a lot longer.
Difficulty: Requires a semi-read.
Video:
U-Turn:
Section 7:
Terms, Useful Topics and Update Log:
Terms:
FF: Fast Fall
SH: Short Hop
FH: Full Hop
SHAD: Short Hop Air Dodge
FAF: First Actable/Actionable Frame
IASA: Interrupt as soon as
D-Move: Down move/grab
U-Move: Up move/grab
F-Move: Forward move/grab
DA: Dash Attack
AT: Advanced Technique
DJ: Double Jump
DJC: Double Jump Cancel
LC/TC: Ledge/Teleport-Cancel
SB: ShadowBall
MU: Match-Ups
FG: For Glory
T&C: Town and City
BF: Battlefield
FD: Final Destination
DH: Duck Hunt
SV: Smashville
TO: Tournament Organizer
GOAT: ZeRo and Mango
FC: Full-Charged
KB: Knock Back
ATM: At This Moment
ASAP: As Soon As Possible
OP: OverPowered or Original Post (this post!)
IIRC: If I Remember Correctly
PP: Perfect Pivoting
DD: Dash Dancing
EDD:Extended Dash Dancing
OoS: Out of Shield
B&B: Bread and Butter
Phasing: SHAD for Mewtwo, it's so good with him we might as well give it a cool name
Base: Mewtwo's sweetspot, the base of the tail, used for combo purposes
Tail: Mewtwo's sourspot, the tail used for combo purposes
Tip: Mewtwo's second sourspot, the tip of the tail, used for combo purposes
Move.B: The base of a move, sweetspot
Move.T: The tail of a move, sourspot 1
Move.t/tip: The tip of a move, sourspot 2
Players to watch:
LoF Blue:
Region:
TristateTournies:
KTAR XV: 7thNotable Battles:
KTAR XIV: 9th
The Break: 1st (Top 3 regular)
Smash & Clash: High Placings, 3rd?
Wii Bear Bairs: 1st (Top 3 regular)
Smash4Ever: High placing 3?
TSB Chaos:Stream/Youtube:
CT/MVG Vex: 1st, Pennysylvania
Liquid Nairo: 1st, New Jersey
RNG Apple:
DMG Hooded: 6th, Pennysylvania
RushHour Smash
Jason Axelrod
Bros. Calamity
Mewsquared: PR'ed 1st, DFW Texas, March 2016
Region:Rich Brown: PR'ed 14th, SoCal, March 2016
DFW, TexasTournies:
Shockwave: 1st (Top 5 regular)Notable Wins:
Bit Wars 4: 2nd
Austins Really Feeling it: 4th
Denti: 2nd, DFWStream/Youtube:
MVG/COG Mew2King (Twice)
SU Megafox: really good, but apparently doesn't go to enough tourneys to be PR'ed.
HTX Jerm: PR'ed somewhere, can't find it...
Tourney Locator
Region:Hitaku: PR'ed 15th, NorCal, November 2015
SocalTournies:
Fire & Dice: 2ndNotable Wins:
K9sBruce: 4th, SoCalStream/Youtube:
2s Nicko: 9th, SoCal
Aphro: 10th, SoCal
Mr. ConCon: 7th, SoCal
Richbrown
FADgames/Fire and Dice
2GG/2GGaming
Region:Zerxion: PR'ed 6, Pacific Inland Northwest, December 2015. PR'ed 10th, Washington, February 2016
North CaliforniaTournies:
Come On and Ban: Top 8 regularNotable Wins:
Norcal Regionals:
WtF, Trevonte: 1st, NorCalStream/Youtube:
NME | 8Bit | Zex: 3rd, NorCal
Mr. Eric: 7th, MD/VA
Showdowngg/Showdown
Region:
Pacific Inland NorthwestTournies:
Black Wolf: Top 8Notable Wins:
JamntOast, PR'ed 2nd, PINStream/Youtube:
BnBGames/Bread n' Butter Games
Feral: Pr'ed 3rd, Manitoba, March 2016
Region:
ManitobaTournies:
NUC: 3rdNotable Wins:
Shad, PR'ed 5th, ManitobaStream/Youtube:
Dr. Kart, PR'ed 6th, Manitoba
Mudbunglechops, PR'ed 3rd, Manitoba
manitobasmash/Manitoba Smash
Euthanasio: PR'ed HM, Quebec City, February 2016
Region:KillerJawz: Doesn't attend tournaments anymore, but extremely good.
ManitobaTournies:
Smash4GC: Top 8Notable Wins:
Goulmania, PR'ed 6th, Quebec CityStream/Youtube:
Smash4QC
Region:SaucyDancer: PR'ed 6th, New South Wales, March 2016
EuropeTournies:
NoneNotable Wins:
Finding them out.Stream/Youtube:
None/KillerJawz
Region:Katakiri: PR'ed 2nd, Ohio, March 2016
AustraliaTournies:
Ganon's Castle Trials: ??Notable Wins:
Boundaries: 8th, New South WalesStream/Youtube:
Unknown/SydneySmash
Region:Secondary:
OhioTournies:
Pinnacle 5: 1stNotable Wins:
BxA l TekNoStream/Youtube:
GooshiGaming/GooshiGaming
Unknown/Pinnacleesports
Void: PR'ed 1st, SoCal, March 2016
Region:
SoCalTournies:
Xanadu: 1stNotable Wins:
Glitch LTT: 1st
Pinkfresh: 6th, MD/VA
Dath: 8th, South Florida
Average Joe: 20th, MD/VA
Zage: 16th, MD/VA
TheReflexWonder: PR'ed 1st, Georgia, February 2016
Region:ZD: Pr'ed 12th, MD/VA, February 2016
GeorgiaTournies:
KiT: 1stNotable Wins:
Unknown
Region:Average Joe: Pr'ed 20th, MD/VA, February 2016
MD/VATournies:
XanaduNotable Wins:
Unknown
Region:Doublenickels: PR'ed 1st, Wyoming, January 2016
MD/VATournies:
XanaduNotable Wins:
Unknown
Region:
WyomingTournies:
UnknownNotable Wins:
Unknown
MagiMagi: PR'ed 9th, Ireland, January 2016
Region:Abadango: Pr'ed 5th, Japan, January 2016
Tournies:
Notable Wins:
Region:
JapanTournies:
TUSTournament 2: 1stNotable Wins:
Nyanko: 15th, JapanStream/Youtube:
SHI-G
SaucyDancer: PR'ed 9th, New South Wales, December 2015
Region:Revax: PR'ed 9th, Victoria, March 2016
New South WalesTournies:
Notable Wins:
Region:Zohup: PR'ed 3rd, Sao Paulo, March 2016
VictoriaTournies:
Notable Wins:
MagoNevo: PR'ed 2nd, Nebraska, March 2016
Players to Watch (Smashboards)
@meleebrawler
Sonicninja115
@Metalex
@420quickscoper
@Mewtwo - Chainz
@U-Throw
@PEACE7
@Raykz
@KillerJawz
Thanks to everyone who helped create and proofread this guide!
Discussion Topics:
Did Abadango Deserve his Pound 6 Win? Player or Character?
Coming soon!
C-Stick, Smash or Tilts?:
Coming soon!
Mini Shadowball, Half-Charged Shadowball or Full-Charged Shadowball?
Advantages for Mini SB:
Mini SB is great for frame traps, comboing into Grab, and abusing the 50 frame no ledge grab window. Mini SB covers your approach, and allows you to safely retreat as well. Mini SB also allows you more movement options, in the form of Wave SB and B-Reverse SB.
Disadvantages for Mini SB:
Mini SB doesn't kill, can't stuff approaches and only does 3%.
Advantages for HC SB:
HC SB allows Mewtwo to still have limited access to B-reverse movement, and have a 18% projectile with some killing potential. It is also easy to charge into it's full charged form and doesn't show the opponent how charged it is.
Disadvantages for HC SB:
None really. Sorta a middle-grounds.It has some of the disadvantages of Mini, and some of FC. However, it has some of the advantages of Mini, and of FC.
Advantages for FC SB:
Kills stupidly early, does 26%, travels fast, pressures the opponent, catches techs and rolls, insane shield damage. It has a lot going for it.
Disadvantages for FC SB:
It takes approximately ?? seconds to charge, in which you usually have to give up stage control or advantage to get. Cannot frame trap as well, and shows the opponent that you have it full-charged through his glowing hands.
Consensus:
They are all good, but IMO, it is best to HC, and then get the FC through movement and such. Mini's are great for frame trapping and edge-guarding, but HC has a ton of uses and can easily and quickly be charged into FC, or released to get a mini SB. Consensus: HC when possible, otherwise, Mini's work great.
Patches, how good were they???
Patch 1.1.3:
Patch 1.1.5:
- Ground walk/run speed increased
- Notes: This made him the 13th fastest character in the game. Very good buff. Allowed some combos to work easier and his approach game wasn't as bad.
- F-Smash
- Hitbox 0 (non-sweetspot) damage 15.0 -> 16.0
- Hitbox 0 size 2.0 -> 3.0
- Notes: Interesting buff. Fsmash wasn't bad before, so this was basically just a QOL buff. Not needed, but nice.
- Nair
- Landing Lag reduced 16 -> 13
- Notes: This was a great buff. This allowed Nair to easily combo into a grounded move, previously, it was harder and nearly frame tight.
- Fair
- Hits on frame 7 -> 6
- Hitbox moved 1 unit forward
- Landing Lag reduced 18 -> 14
- Notes: This was an amazing buff. The extended hitbox allowed for Fair to string easier and made it safer on shield, while the decreased start-up and landing lag made certain combos possible and most easier.
- Bair
- Hitbox 0 moved to a different bone, position adjusted, size 5.1 -> 5.5
- Landing Lag reduced 21 -> 17
- Notes: Nothing much. Slightly safer, but still has a deadzone on the very bottom.
- Uair
- Hitbox 1 damage 9.0 -> 10.0
- Hitbox 2 damage 7.5 -> 9.0
- All hitboxes KBG 100 -> 97
- All hitboxes BKB 0 -> 40
- Hitbox 0 size 4.7 -> 5.0
- Hitbox 1 size 3.9 -> 4.5
- Hitbox 2 size 3.1 -> 4.0
- Landing Lag reduced 16 -> 13
- Notes: This patch made Uair able to kill, combo into three aerials out of a DJ, and combo into practically everything when fastfalled.
- Dair
- Hitboxes moved down one unit
- Hitbox duration 2 -> 4 frames
- Landing Lag reduced 22 -> 18
- Notes: Hitbox duration is the main thing. This made Dair a bit less precise.
- Neutral Special
- Projectile size increased
- Aerial momentum shift reduced
- Notes: SB size was increased, and the crazy knockback Mewtwo recieved was nerfed. The size buff alows Mewtwo to hit both an opponent on a platform, and a grounded opponent, while the KB thing allows Mewtwo to get some combos off.
- Side Special
- Unknown Grab Box parameters increased (could be size or positioning)
- Notes: We still don't know...
- D-Throw
- Angle 69 -> 74
- Notes: This made it so that Dthrow cannot lead into tech chases, and can no longer Platform Lock at kill percents.
Useful Threads:
- Weight: 72 -> 74
- Notes: Really nice buff. Mewtwo dies about 3% later now, and considering his incredible recovery makes gimping him neigh impossible, I will accept a nice boost to livability.
- Run Speed: 1.9 -> 2.05
- Notes: We run as fast as Shiek.... 7th fastest in the game... Who's bright idea was this?
- Usmash Total Duration: 73F -> 68F
- Notes: Kills stupidly early, comes out frame 9, wonky hitboxes to deter punishes, less cooldown...
- Nair Multihit Hitbox Size: 2.3 -> 3.0
- Notes: Not really that major. Just a bit harder to fall out of now.
Match-ups Discussion-
General Match-up Discussion-
Combo Compendium-
Combo and Tech Sharing Thread-
Nair Knockback Guide-
Frame Data-
ShadowBall Guide-
Mewtwo's Hurtbox-
In Depth LC/TC Guide-
Mewtwo Jab-Utilt-Usmash Percents-
Jab-Lock Guide-
Update Log:
0.0 Basic set-up added
0.1 Added movement options and descriptions. As well as updated the AT section.
0.2 Changed Moveset Analysis and added some analysis of moves. Continued to update the AT section.
0.3 Finished the Moveset Analysis and AT section.
0.4 Added a LC section, playstyle spoiler, updated grabs, finished Off-Stage and made a abbreviation guide.
0.5 Large General Update.
0.6 Combo section + Moveset analysis updates.
0.7 Added a how to play section and minor, but consequential, updates.
0.8 Minor adjustments, moved it to it's own thread.
0.9 Additions and adjustments. Players to watch and training guide added.
1.0 Updated multiple areas, starting to proofread and then post.
1.1 Keeping up with the patch! ( Do you see those shieldstun numbers???)
1.2 Kill percents added. Updated Combo section.
1.3 Large General Update.
1.4 Notable players list added. General Update.
1.5 Discussion Topics added and General Update.
(Note: A General Update is just spelling errors, slight corrections, rewrites of old sections. Maybe a few new small things, etc.)
Final Note:
Thanks for everyone who helped proofread and create this guide! Also, a big thanks to everyone who allowed me to use their videos!
This is not the final version of the guide. I am planning on updating it to work with the patch changes and to add much more.
