
JOE!
Smash Hero
Seeing as theres been a...flurry of activity at the Sprite Shop recently, Iv have created a simple guide to spriting to see if I can interest more people into becoming spriters,a nd helping us out ")
ok, there are a few steps in your basic fusion/recolor process:
In order to sprite, you will need some form of Photoshop in order to use layers, and it's tools. But other programs are fine if you are more comfortable.
You will also need to have a bit of knowledge of your program. For example, you will need to know the difference between JPG and PNG files.
a JPG is a normal image, and will have a white background and tend to be as non-pixelated as possible.
PNG has NO BACKGROUND, and will keep itself essentially as it is down to the Pixel from your editing.
Sprites will by default be PNG, so all you have to do is save the final product as a PNG.
Also, you will usually need a photobucket account or the like in order to post your final product.
Normally, I get my sprites from BULBAPEDIA. Its like a Wikipedia for Pokémon. Simply search for the Pokémon you want to edit, then scroll down their page to where it shows their sprites.
for our example, lets take:
Voltorb
 and
and
 Pikachu
in general, use the newest generation sprites unless the request asks otherwise, because of their graphical finesse.
now you can pretty much start fusing sprites.
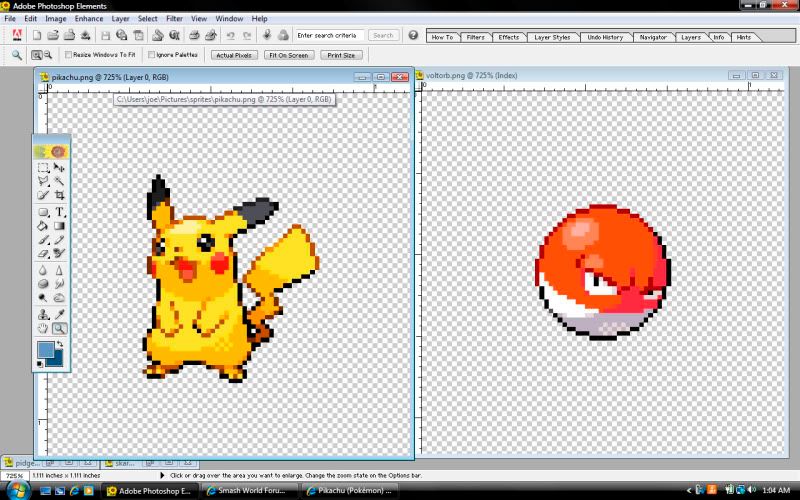
1st, you will open up your 2 sprites into your photoshop program. Do not maximize them, but rather use your Zoom tool, and select "Fit on Screen".
This should keep them big enough to see each pixel well, and small enough to have both on screen.
next, you will choose which sprite to be your "base"
the base is the sprite you use as the final fusion's skeleton so to speak. you will keep the most elements from that sprite and attack features of the other sprite(s) to it.
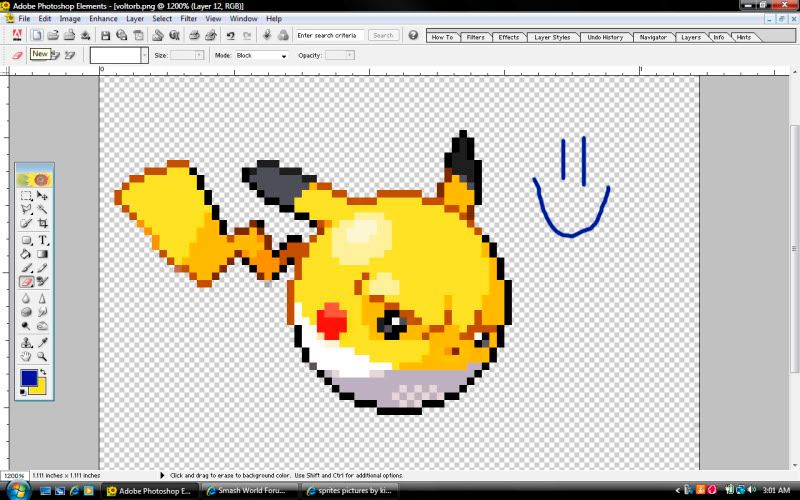
For our example, we will use Voltorb as the base.
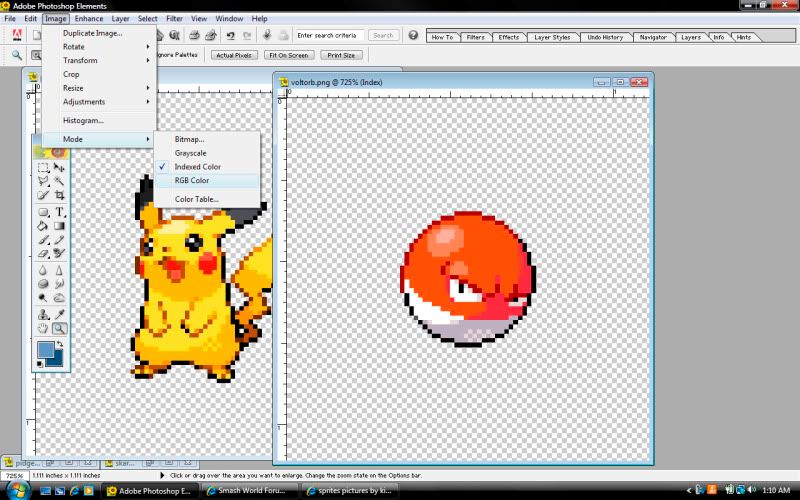
1st, you will want to change the sprite's MODE by going into IMAGE, then MODE, then changing it from Index to RGB image.
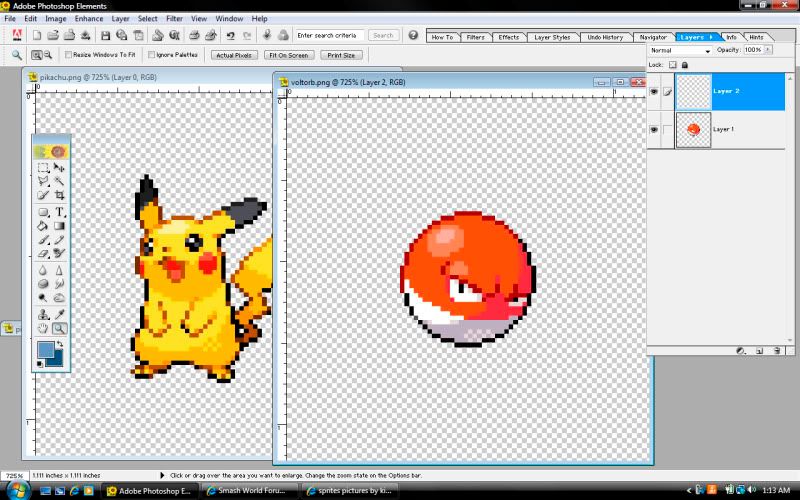
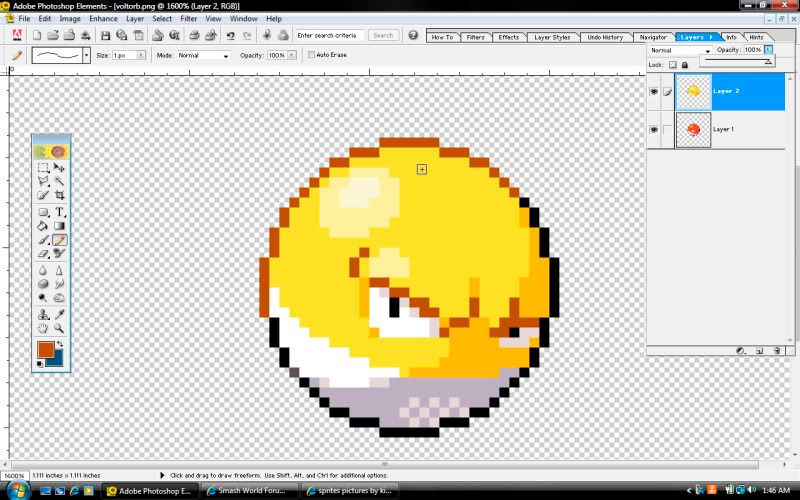
once that is done, you can go to layers, and make a NEW layer above Voltorb.
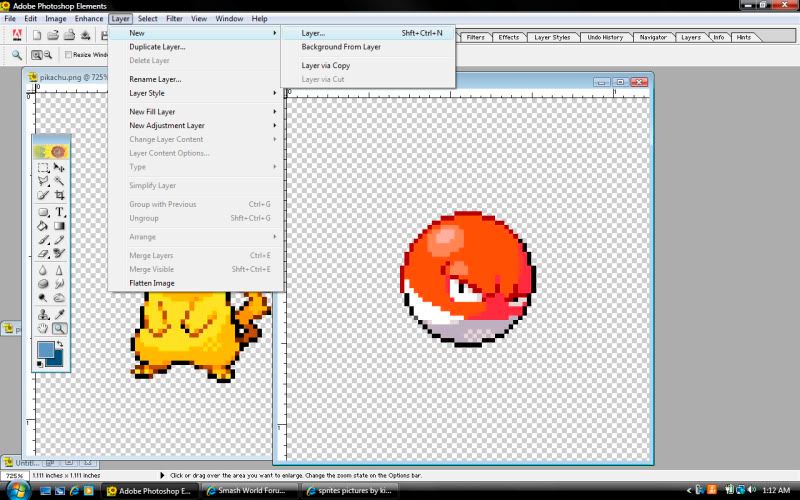
This allows you to change the voltorb image, without accidentally altering your base image, seeing as you should be using the base as a guide.
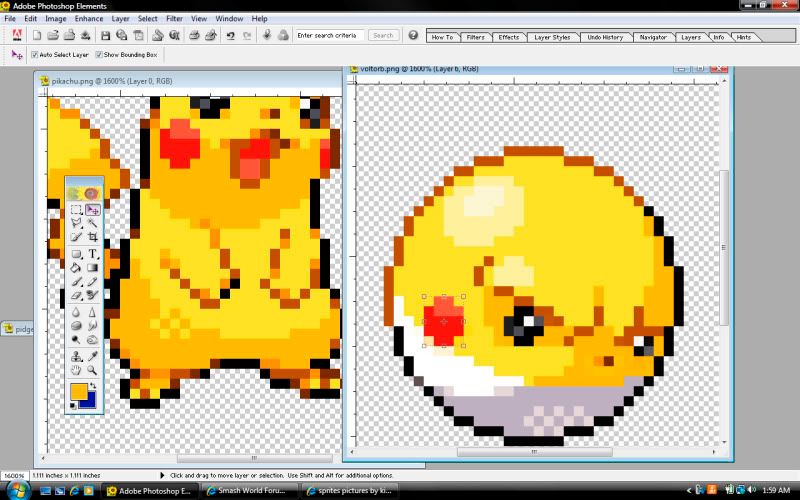
now that you have a new layer, decide what you want to take over from the Pikachu.
For our purposes, we will take the face, colors, lower legs, ears and tail.
(i have flipped pikachu to face the way Voltorb is facing as well for ease)
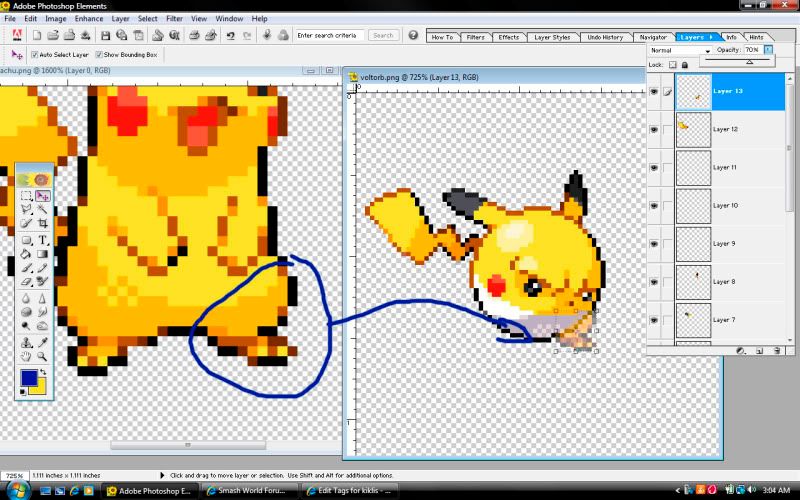
i made this a separate section due to it's ease of explanation:
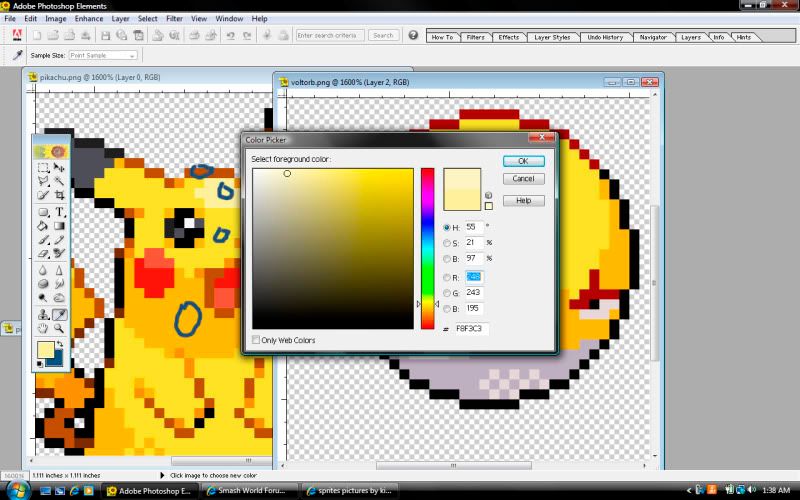
the areas circled in blue are places where i copied colors to put onto the voltorb sprite.
Each color represents a level of shading, so a shadowed area of Voltorb will have the dark yellow, a shiny part will have light yellow and the outlines of dark red will become brown, like on pikachu.
I had to choose a lighter yellow not found on pikachu for the final highlight on Voltorb however, do not be afraid to do this if the final result will be better.
Final result:
next on the list is to actually port over features of Pikachu onto Voltorb.
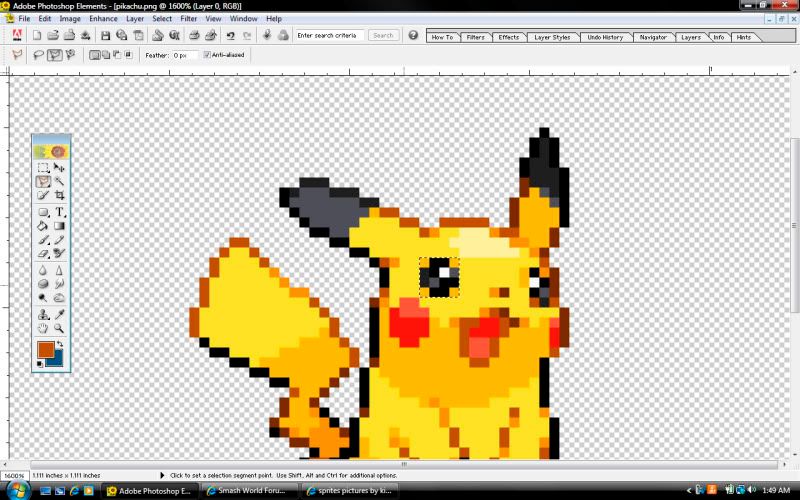
Let's start with the eyes:
what you will want to do is use some form of selector tool, and isolate the Pixels on Pika that make his eye:
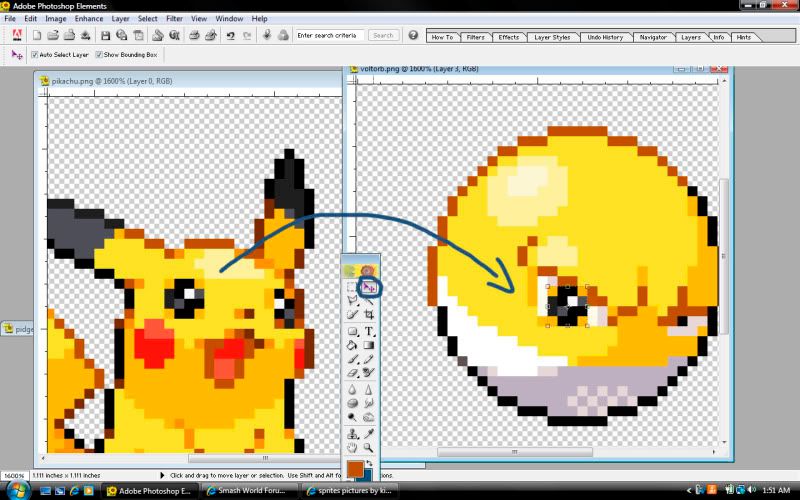
then, using the move tool, drag and drop the selected sprites onto where you want them on Voltorb
now, some clipping can occur on one part of the bottom layer, and this new one.
To fix this, simply go to the layer menu, and change the "opacity" (transparency) to about 50%, and find where the new layer obstructs something you want to keep from the lower layer. (highlighted in blue)
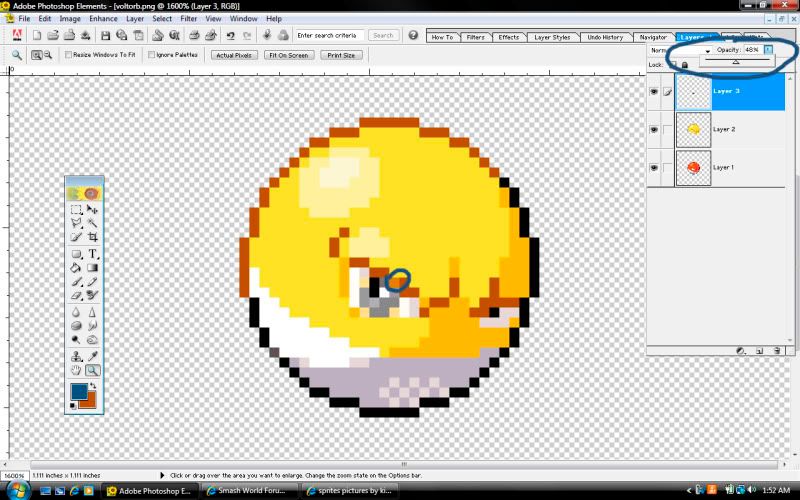
afterwords, fill the remaining white with the color from around the eye, to get a feeling of depth.
do the same as you did with the 1st eye to the second eye. You will need to probably get rid of more obstructions.
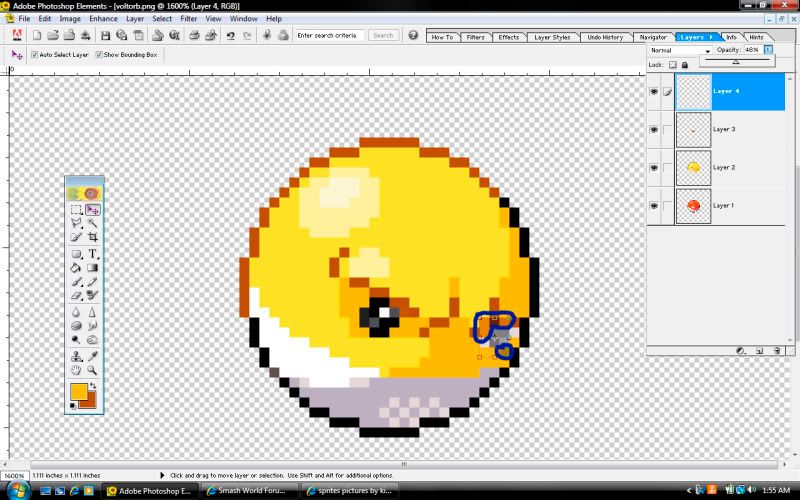
remember to put Opacity back at 100% after editing, then repeat the steps as shown for other facial features:
After doing simple edits to the face, it is time to actually add things onto Voltorb.
Do the same thing you did to the ears as you did to pika's eyes. Select, then drag them over to where you think they should go.
after this, you may want to do the tail, but find it will look bad if you try to put it as-is from pika, seeing as it will clip, ALOT:
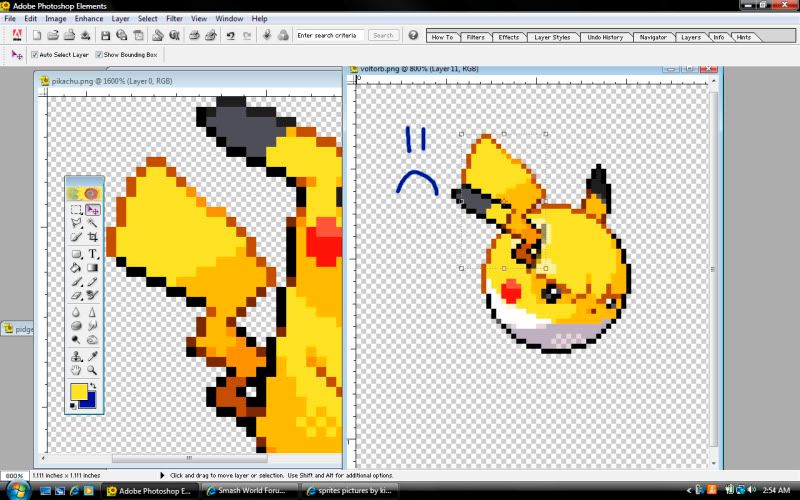
so a simple solution would be to open a new file, put the tail in said file and modify the image as follows:
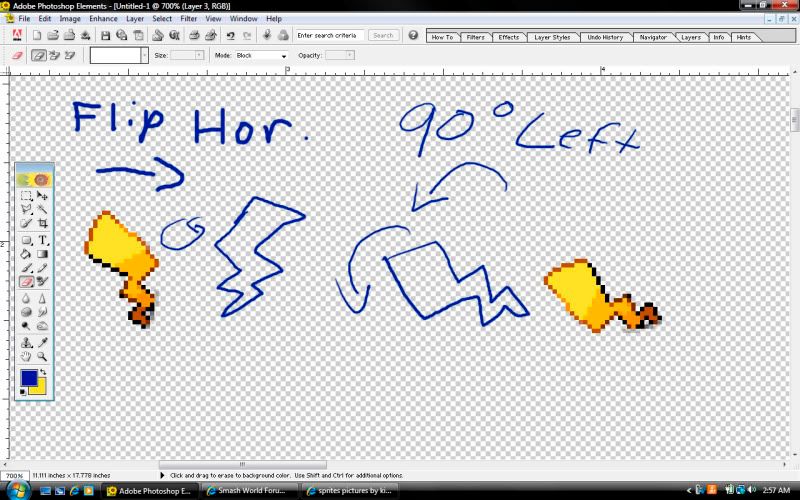
now the tail should fit better, and still be unmistakably Pikachu's
Clip where needed.
after all that, it is safe to say it is a good splicing of both Pikachu and Voltorb, being able to see elements of both.
Now, from here you can wrap it up, but Ive chosen to add a little extra: LEGS
To do this, just do as you've done with all other selections, and put the leg about where you'd think it would go, then clip where needed
after this, you should do the same to the other leg, but now, revert to the recoloring stage, coloring the legs the same as the bottom half of voltorb with whites and greys.
The left leg will then need the foot moved slightly, do this the same way as you've moved everything from Pika to Voltorb.
Select the foot, then use the move tool to move it to the right slightly.
Then, using the pencil tool, draw a slight black outline going from the inner side into voltorb to flesh out the leg some, and apply shading as needed.

lastly, go to the zoom tool again and select "actual pixels".
this will show you what the sprite will look like before posting.
If nothing stands out, at first, try making a NEW LAYER, and moving it under all other layers.
Fill it with a dark grey color to simulate the board's background. if nothing is outside the sprite, you've made no screw-ups
If there are little messes, they should be easily spotted and erased. Afterwords, delete this layer.
Now that that's over, save the new sprite as a PNG file (make sure it's interlaced if a pop up shows up), and perhaps call it: "Voltachu"
Do your thing with photobucket (or whatever you use....)
annnnnndddd....voila!
Presenting:

Voltchu.
Feel free to post questions here, or in the Pokémon Sprite Shop where I work
ok, there are a few steps in your basic fusion/recolor process:
1) GET YOUR EQUIPMENT
In order to sprite, you will need some form of Photoshop in order to use layers, and it's tools. But other programs are fine if you are more comfortable.
You will also need to have a bit of knowledge of your program. For example, you will need to know the difference between JPG and PNG files.
a JPG is a normal image, and will have a white background and tend to be as non-pixelated as possible.
PNG has NO BACKGROUND, and will keep itself essentially as it is down to the Pixel from your editing.
Sprites will by default be PNG, so all you have to do is save the final product as a PNG.
Also, you will usually need a photobucket account or the like in order to post your final product.
2) SELECT YOUR SPRITES.
Normally, I get my sprites from BULBAPEDIA. Its like a Wikipedia for Pokémon. Simply search for the Pokémon you want to edit, then scroll down their page to where it shows their sprites.
for our example, lets take:
Voltorb
in general, use the newest generation sprites unless the request asks otherwise, because of their graphical finesse.
3) FUUUUU....SSSSIIOONNN.....HAAA!
now you can pretty much start fusing sprites.
1st, you will open up your 2 sprites into your photoshop program. Do not maximize them, but rather use your Zoom tool, and select "Fit on Screen".
This should keep them big enough to see each pixel well, and small enough to have both on screen.
next, you will choose which sprite to be your "base"
the base is the sprite you use as the final fusion's skeleton so to speak. you will keep the most elements from that sprite and attack features of the other sprite(s) to it.
For our example, we will use Voltorb as the base.
1st, you will want to change the sprite's MODE by going into IMAGE, then MODE, then changing it from Index to RGB image.
once that is done, you can go to layers, and make a NEW layer above Voltorb.
This allows you to change the voltorb image, without accidentally altering your base image, seeing as you should be using the base as a guide.
now that you have a new layer, decide what you want to take over from the Pikachu.
For our purposes, we will take the face, colors, lower legs, ears and tail.
(i have flipped pikachu to face the way Voltorb is facing as well for ease)
4) RECOLORING
i made this a separate section due to it's ease of explanation:
the areas circled in blue are places where i copied colors to put onto the voltorb sprite.
Each color represents a level of shading, so a shadowed area of Voltorb will have the dark yellow, a shiny part will have light yellow and the outlines of dark red will become brown, like on pikachu.
I had to choose a lighter yellow not found on pikachu for the final highlight on Voltorb however, do not be afraid to do this if the final result will be better.
Final result:
5) COPY/PASTE
next on the list is to actually port over features of Pikachu onto Voltorb.
Let's start with the eyes:
what you will want to do is use some form of selector tool, and isolate the Pixels on Pika that make his eye:
then, using the move tool, drag and drop the selected sprites onto where you want them on Voltorb
now, some clipping can occur on one part of the bottom layer, and this new one.
To fix this, simply go to the layer menu, and change the "opacity" (transparency) to about 50%, and find where the new layer obstructs something you want to keep from the lower layer. (highlighted in blue)
afterwords, fill the remaining white with the color from around the eye, to get a feeling of depth.
do the same as you did with the 1st eye to the second eye. You will need to probably get rid of more obstructions.
remember to put Opacity back at 100% after editing, then repeat the steps as shown for other facial features:
6) PUTTING IT ALL TOGETHER
After doing simple edits to the face, it is time to actually add things onto Voltorb.
Do the same thing you did to the ears as you did to pika's eyes. Select, then drag them over to where you think they should go.
after this, you may want to do the tail, but find it will look bad if you try to put it as-is from pika, seeing as it will clip, ALOT:
so a simple solution would be to open a new file, put the tail in said file and modify the image as follows:
now the tail should fit better, and still be unmistakably Pikachu's
Clip where needed.
8) FINAL TOUCHES, AND WRAPPING IT UP
after all that, it is safe to say it is a good splicing of both Pikachu and Voltorb, being able to see elements of both.
Now, from here you can wrap it up, but Ive chosen to add a little extra: LEGS
To do this, just do as you've done with all other selections, and put the leg about where you'd think it would go, then clip where needed
after this, you should do the same to the other leg, but now, revert to the recoloring stage, coloring the legs the same as the bottom half of voltorb with whites and greys.
The left leg will then need the foot moved slightly, do this the same way as you've moved everything from Pika to Voltorb.
Select the foot, then use the move tool to move it to the right slightly.
Then, using the pencil tool, draw a slight black outline going from the inner side into voltorb to flesh out the leg some, and apply shading as needed.
lastly, go to the zoom tool again and select "actual pixels".
this will show you what the sprite will look like before posting.
If nothing stands out, at first, try making a NEW LAYER, and moving it under all other layers.
Fill it with a dark grey color to simulate the board's background. if nothing is outside the sprite, you've made no screw-ups
If there are little messes, they should be easily spotted and erased. Afterwords, delete this layer.
Now that that's over, save the new sprite as a PNG file (make sure it's interlaced if a pop up shows up), and perhaps call it: "Voltachu"
Do your thing with photobucket (or whatever you use....)
annnnnndddd....voila!
Presenting:
Voltchu.
Feel free to post questions here, or in the Pokémon Sprite Shop where I work