
sjb.dario
Smash Apprentice
- Joined
- Aug 1, 2015
- Messages
- 188
- NNID
- greatdario
A while back, I posted my visualizations of warp's applications on the social thread. But, since not everyone visits the thread, I've decided to post them on here where any visitors can take a look at.
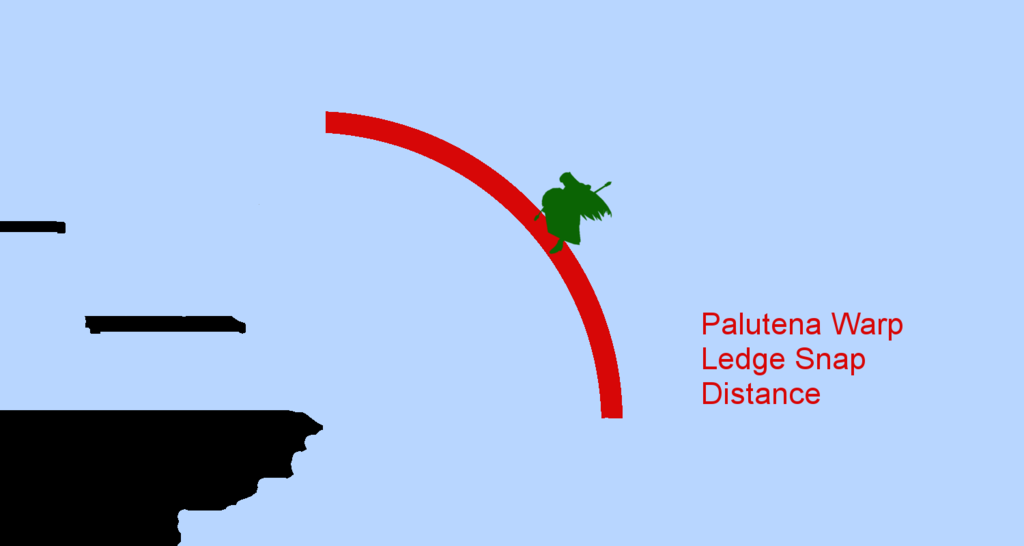
Warp Ledge Snap Distance:
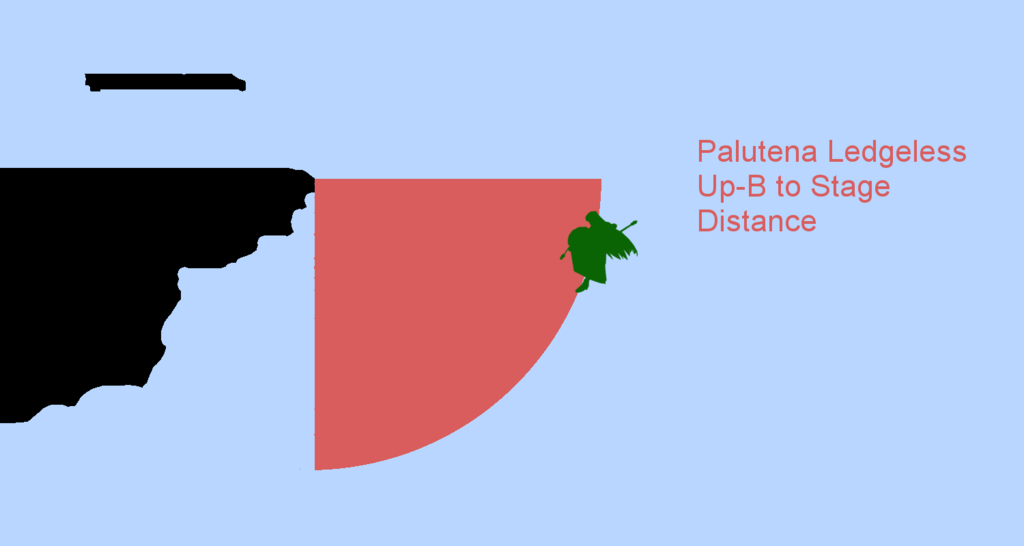
Warp Ledgeless Up-B Distance:
Warp Ledge-Cancel Distances (for Battlefield):
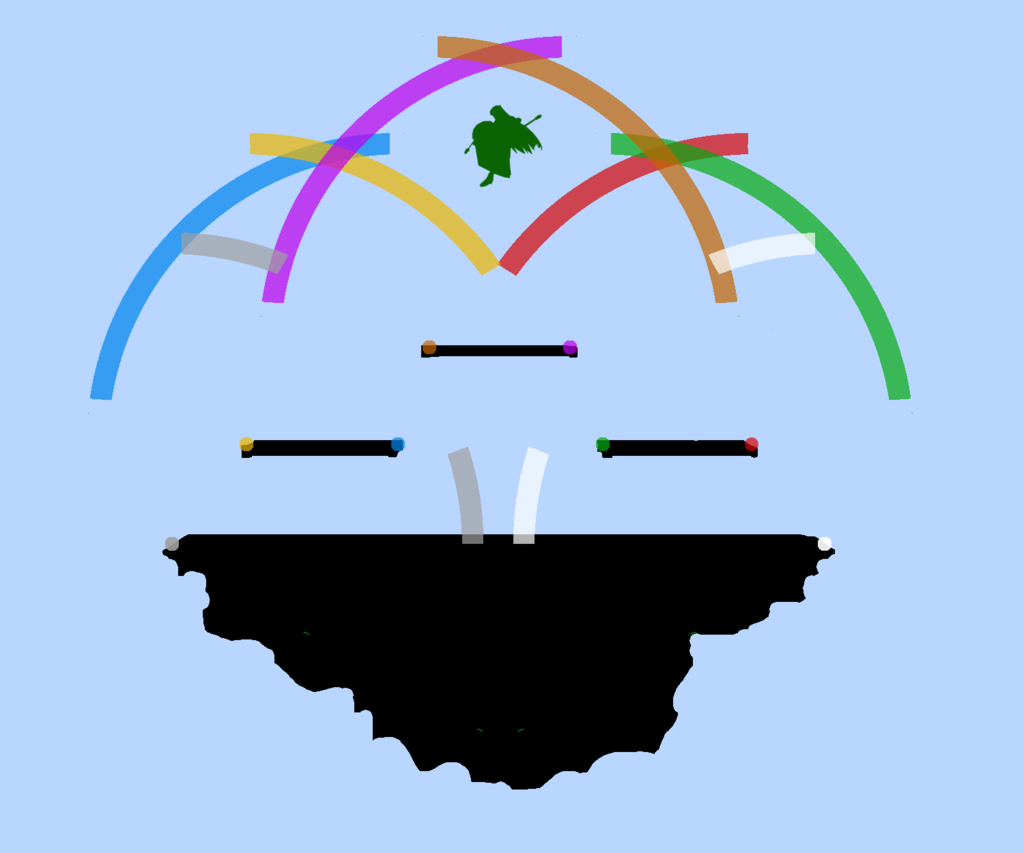
Interesting point to note is how there are several areas where the circular arcs intersect. I believe utilizing those areas will allow Palutena to become more deceptive with her movement; consequently, I think properly utilizing these points will legitimately push her tier-placement higher.
I made these visualizations without the intent of ever sharing them. But, since I dropped her, I don't really need these for myself anymore. I hope at least one of you Palutena players will find these images useful.
Cheers.
Warp Ledge Snap Distance:
Warp Ledgeless Up-B Distance:
Warp Ledge-Cancel Distances (for Battlefield):
Interesting point to note is how there are several areas where the circular arcs intersect. I believe utilizing those areas will allow Palutena to become more deceptive with her movement; consequently, I think properly utilizing these points will legitimately push her tier-placement higher.
I made these visualizations without the intent of ever sharing them. But, since I dropped her, I don't really need these for myself anymore. I hope at least one of you Palutena players will find these images useful.
Cheers.
Last edited: