
- Game Versions
- Smash 3DS, Smash Wii U
Most is written from my own experience of the 2000+ matches / 60+ hours of playing as Lucina on "For Glory" mode since the Japanese release. I wrote a guide for gameFAQs as well, a lot of which will likely reflect here in content. Please note that character match ups are simple advice.
As a disclaimer, I do not consider myself to be "tournament level" or anything of the sort at all --nor do I intend to be. This may even make some higher level players cringe. But, I hope someone just starting out or just looking into a bit more information on Lucina will find use for this guide.
---
Use Ctrl + F to find the section listed in the brackets below! Spoiler Tags are used to reduce the need for scrolling.
Table of Contents:
[S01] General Information
[S02] Moveset / Custom Moves
- [M001] Standard / Tilt / Recovery Attacks
- [M002] Air Attacks
- [M003] Smash Attacks
- [M004] Special Attacks / Customs
- [M005] Grabs/Throws
- [M006] Taunts
[S03] General Strategies [Includes Main Weaknesses]
[S04] Lucina Versus... (Character Match Ups)
[S05] Map Strategies [Non Omega]
---
General Information [S01]
Basic information, such as Character History/Unlock Methods/Trophy Info/Differences from Marth.
Basic information, such as Character History/Unlock Methods/Trophy Info/Differences from Marth.
Brief History---------------------------------
From the Fire Emblem series.
She first appears in Fire Emblem 13, "Awakening." Wielding Falchion, she deeply admires and poses as the Hero King of Legend, Marth. As such, her move set and fighting style are identical.
Unlocking Lucina---------------------------------
3DS
She is very straightforward to Unlock. Simply running through Classic Mode as
Marth without continues will let you challenge her when done. Beat her to
unlock her. This can be done literally within the first ten minutes of
starting the game up.
Alternatively, you may do 40 VS Matches in Smash mode, which may take a little
longer but is a reliable method.
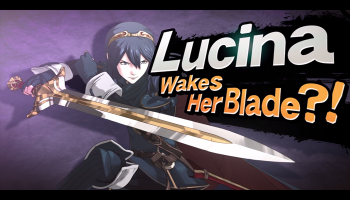
When unlocked, the Milestone message states:
"Lucina, hero from a doomed future, has joined the battle!"
Wii U
Play 30 VS Matches in Smash mode.
Alternate Outfits--------------------------------
![]()
All of her outfits are based on various colors of different characters from
Fire Emblem Awakening. If scrolling from default to the right, the order is:
-Nowi (light green hair, purple outfit)
-Cherche (red hair, black outfit)
-Cordelia (red hair, whie outfit)
-Tiki (dark green hair, pink/red outfit)
-Lissa (blonde hair, yellow outfit)
-Tharja (black hair, gold and black outfit)
-Sumia (grey hair, purple outfit)
Obviously, they make no differences to gameplay.
Differences between Marth and Lucina----------------------
As a Marth "clone," Lucina and Marth share the exact same moves. So what are
the differences?
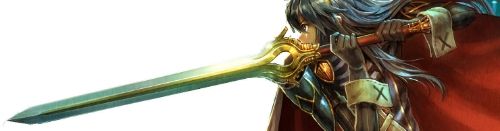
The most notable difference is that Lucina lacks the "tipper" sweetspot on her
sword. However, the trade off is she also lacks the sourspot on the rest of her
blade.
This means that damage she does anywhere on the blade is the same. Marth does
more damage at the tip, but less down the blade. This is the key difference
between them.
Trophy Descriptions ------------------------------
Lucina
-Unlocked by beating Classic Mode
(3DS)
"Chrom's daughter and the future Princess of Ylisse. When she arrives from a
doomed future seeking to prevent it from ever happening, she goes by the name
Marth before her identity is revealed. She fights much like her adopted
namesake, but more than just the tip of her sword is powerful."
(Wii U)
"Chrom's daughter and the future Princess of Ylisse. When she arrives from a
doomed future seeking to prevent it from ever happening, she goes by the name
Marth before her identity is revealed. She fights much like her adopted
namesake, but her entire blade is equally powerful instead of having a more
powerful tip."
Lucina (Alt.)
(3DS)
-Unlocked by beating All-Star Mode
-Dressed as Tiki (from: Fire Emblem: Awakening)
(Wii U)
-Unlocked at Trophy Shop for 1000 G
-Dressed as Cordelia (From: Fire Emblem: Awakening)
"Lucina's moves are much like Marth's, but there are subtle differences. With
Marth, you need to try to hit with the tip of his sword, but Lucina's sword
is equally powerful all along the blade. her Shield Breaker move lets her
attack opponents and break their shields at the same time. Charge it fully to
shatter shields in one hit."
Critical Hit (Lucina)
-Unlocked by beating All Star Mode (Wii U)
"In Lucina's Final Smash, she raises her sword high before dashing swiftly
forward to deliver a deadly blow to whomever she makes contact with first.
Even if their damage is low, this strike is powerful enough to take out foes
in a single hit. Just make sure you don't dash off the stage when you use it
in midair!"
Victory Poses / Lines -----------------------------
She has various victory lines. Some are special depending on who she is
fighting. I point out the Japanese (that I translated) just to show the slight
personality difference it presents her with in English. A small tidbit and
somewhat irrelevant, but interesting none the less.
General: (English)
"The future is not written!"
"Father, I won!"
"You'll never defeat me."
General: (Japanese)
未来を替えて見せます!
"Mirai o kaetemisemasu!" (Watch me change the future!)
勝ちましたよ、お父様
"Kachimashi ta yo, otousama" (I won...father.)
負けるはいけません!
"Makeru wa ikemasen!" (I cannot lose!)
Specific: (English)
VS Marth: "This is the Hero King?"
VS Ike: "And they called you the Radiant Hero?"
Specific: (Japanese)
VS Marth:
これが英雄王の力?
"Kore ga eiyuuou no chikara?"
(This is the Hero King's power...?)
VS Ike:
これがそうえんの勇者?
"Kore ga souen no yuusha?" (This is the Radiant Hero...?)
Palutena's Guidance Conversation (Wii U) ----------
Pit: "That lady's moves are awfully similar to Marth's."
Palutena: "That's Lucina."
"She used to introduce herself as Marth. so certain similarities
seem inevitable."
Pit: "What? She stole someone else's identity?"
Viridi: "Well, it wasn't quite like that."
Palutena: "Marth had become a legend by her time --the Hero-King."
"So Lucina took that name to bolster the morale of her own army.
Think of it as a symbol of hope in the depths of despair."
Pit: "That's pretty deep."
Viridi: "You can't tell by looking at her, but I hear she's got a great sense
of humor."
Pit: "I'll try cracking a few jokes and see if that softens her up."
Palutena: "The tip of her blade doesn't deal as much damage as Marth's."
"But her attacks are more balanced, even if they're not tremendously
powerful."
Weight Ranking ---------------------------------
"Weight" is one of the factors that determines resistance to "knockback."
Generally, the higher the weight, the lower you get pushed back by attacks,
and less distance sent flying, or harder to KO. It's also harder to land combo
attacks on lighter characters as they are sent farther away from each attack,
and so harder to line up combo moves.
Lucina ranks at lower-middle weight, with a value of 90, or a ranking of 32
(out of 55, which includes Shulk and his various arts changing weight).
She is the same as Marth. What this means to you is you get hit fairly far,
but it is harder to land combos on you for some characters. It is something
to keep in mind as you accumulate damage, as well as when fighting other
characters (Bowser, for instance. Keep his weight in mind
to determine the sort of strategy you want to take against him).
Custom Equipment Types -------------------------------
These are the types of Custom Equipment Lucina can use. The categories
are Attack, Defense, and Speed. (A, D, and S).
Anything with the below titles in it she can equip (for example: The "Well-
Worn Boots" can be equipped as they are in the "Boots" category. "Super Brawn
Badge" can be equipped because it is in the "Brawn Badge" category."
Attack (Orange): (A+ / D-)
Brawn Badges / Sword
Defense (Blue): (D+ / S-)
Protection Badges / Cape
Speed (Green): (S+ / A-)
Agility Badges / Boots
She has generally good speed already, so upping her defense is more
worthwhile. However, it really depends on your strategies that you are taking
her into. A generally more balanced Lucina (all positive categories) is the
best approach for general usage, as one would imagine.
Brief History---------------------------------
From the Fire Emblem series.
She first appears in Fire Emblem 13, "Awakening." Wielding Falchion, she deeply admires and poses as the Hero King of Legend, Marth. As such, her move set and fighting style are identical.
Unlocking Lucina---------------------------------
3DS
She is very straightforward to Unlock. Simply running through Classic Mode as
Marth without continues will let you challenge her when done. Beat her to
unlock her. This can be done literally within the first ten minutes of
starting the game up.
Alternatively, you may do 40 VS Matches in Smash mode, which may take a little
longer but is a reliable method.
When unlocked, the Milestone message states:
"Lucina, hero from a doomed future, has joined the battle!"
Wii U
Play 30 VS Matches in Smash mode.
Alternate Outfits--------------------------------

All of her outfits are based on various colors of different characters from
Fire Emblem Awakening. If scrolling from default to the right, the order is:
-Nowi (light green hair, purple outfit)
-Cherche (red hair, black outfit)
-Cordelia (red hair, whie outfit)
-Tiki (dark green hair, pink/red outfit)
-Lissa (blonde hair, yellow outfit)
-Tharja (black hair, gold and black outfit)
-Sumia (grey hair, purple outfit)
Obviously, they make no differences to gameplay.
Differences between Marth and Lucina----------------------
As a Marth "clone," Lucina and Marth share the exact same moves. So what are
the differences?
The most notable difference is that Lucina lacks the "tipper" sweetspot on her
sword. However, the trade off is she also lacks the sourspot on the rest of her
blade.
This means that damage she does anywhere on the blade is the same. Marth does
more damage at the tip, but less down the blade. This is the key difference
between them.
Trophy Descriptions ------------------------------
Lucina
-Unlocked by beating Classic Mode
(3DS)
"Chrom's daughter and the future Princess of Ylisse. When she arrives from a
doomed future seeking to prevent it from ever happening, she goes by the name
Marth before her identity is revealed. She fights much like her adopted
namesake, but more than just the tip of her sword is powerful."
(Wii U)
"Chrom's daughter and the future Princess of Ylisse. When she arrives from a
doomed future seeking to prevent it from ever happening, she goes by the name
Marth before her identity is revealed. She fights much like her adopted
namesake, but her entire blade is equally powerful instead of having a more
powerful tip."
Lucina (Alt.)
(3DS)
-Unlocked by beating All-Star Mode
-Dressed as Tiki (from: Fire Emblem: Awakening)
(Wii U)
-Unlocked at Trophy Shop for 1000 G
-Dressed as Cordelia (From: Fire Emblem: Awakening)
"Lucina's moves are much like Marth's, but there are subtle differences. With
Marth, you need to try to hit with the tip of his sword, but Lucina's sword
is equally powerful all along the blade. her Shield Breaker move lets her
attack opponents and break their shields at the same time. Charge it fully to
shatter shields in one hit."
Critical Hit (Lucina)
-Unlocked by beating All Star Mode (Wii U)
"In Lucina's Final Smash, she raises her sword high before dashing swiftly
forward to deliver a deadly blow to whomever she makes contact with first.
Even if their damage is low, this strike is powerful enough to take out foes
in a single hit. Just make sure you don't dash off the stage when you use it
in midair!"
Victory Poses / Lines -----------------------------
She has various victory lines. Some are special depending on who she is
fighting. I point out the Japanese (that I translated) just to show the slight
personality difference it presents her with in English. A small tidbit and
somewhat irrelevant, but interesting none the less.
General: (English)
"The future is not written!"
"Father, I won!"
"You'll never defeat me."
General: (Japanese)
未来を替えて見せます!
"Mirai o kaetemisemasu!" (Watch me change the future!)
勝ちましたよ、お父様
"Kachimashi ta yo, otousama" (I won...father.)
負けるはいけません!
"Makeru wa ikemasen!" (I cannot lose!)
Specific: (English)
VS Marth: "This is the Hero King?"
VS Ike: "And they called you the Radiant Hero?"
Specific: (Japanese)
VS Marth:
これが英雄王の力?
"Kore ga eiyuuou no chikara?"
(This is the Hero King's power...?)
VS Ike:
これがそうえんの勇者?
"Kore ga souen no yuusha?" (This is the Radiant Hero...?)
Palutena's Guidance Conversation (Wii U) ----------
Pit: "That lady's moves are awfully similar to Marth's."
Palutena: "That's Lucina."
"She used to introduce herself as Marth. so certain similarities
seem inevitable."
Pit: "What? She stole someone else's identity?"
Viridi: "Well, it wasn't quite like that."
Palutena: "Marth had become a legend by her time --the Hero-King."
"So Lucina took that name to bolster the morale of her own army.
Think of it as a symbol of hope in the depths of despair."
Pit: "That's pretty deep."
Viridi: "You can't tell by looking at her, but I hear she's got a great sense
of humor."
Pit: "I'll try cracking a few jokes and see if that softens her up."
Palutena: "The tip of her blade doesn't deal as much damage as Marth's."
"But her attacks are more balanced, even if they're not tremendously
powerful."
Weight Ranking ---------------------------------
"Weight" is one of the factors that determines resistance to "knockback."
Generally, the higher the weight, the lower you get pushed back by attacks,
and less distance sent flying, or harder to KO. It's also harder to land combo
attacks on lighter characters as they are sent farther away from each attack,
and so harder to line up combo moves.
Lucina ranks at lower-middle weight, with a value of 90, or a ranking of 32
(out of 55, which includes Shulk and his various arts changing weight).
She is the same as Marth. What this means to you is you get hit fairly far,
but it is harder to land combos on you for some characters. It is something
to keep in mind as you accumulate damage, as well as when fighting other
characters (Bowser, for instance. Keep his weight in mind
to determine the sort of strategy you want to take against him).
Custom Equipment Types -------------------------------
These are the types of Custom Equipment Lucina can use. The categories
are Attack, Defense, and Speed. (A, D, and S).
Anything with the below titles in it she can equip (for example: The "Well-
Worn Boots" can be equipped as they are in the "Boots" category. "Super Brawn
Badge" can be equipped because it is in the "Brawn Badge" category."
Attack (Orange): (A+ / D-)
Brawn Badges / Sword
Defense (Blue): (D+ / S-)
Protection Badges / Cape
Speed (Green): (S+ / A-)
Agility Badges / Boots
She has generally good speed already, so upping her defense is more
worthwhile. However, it really depends on your strategies that you are taking
her into. A generally more balanced Lucina (all positive categories) is the
best approach for general usage, as one would imagine.
Moveset / Custom Moves [S02]
Grabs, Throws, Final Smash, and customized Special Moves.
I describe their damage ranges, as well as some notes on when best used, or
how best used in my experience.
Check out the video at the end of the section for a summary of how they look and operate!
Use Ctrl F to skip to a specific section:
- [M001] Standard /Tilt Attacks
- [M002] Air Attacks
- [M003] Smash Attacks
- [M004] Special Attacks / Customs
- [M005] Grabs/Throws
- [M006] Taunts
------------------------------------------------------------------------------
The Wii U version can use the Nintendo Gamecube Controller, Nintendo 3DS (as
a controller), the Wii U Gamepad, the Wii U Pro Controller, the Wii Classic
Controller, the Wii Remote, and the Wii Remote + Nunchuck, among some others.
Also, the Wii U version has much more controller mapping ability. You can
adjust everything down to changing what the taunt buttons do, for instance.
The controls I display below are a hard default and you should pay much more
attention to what type of attack it is rather than the button itself.
I describe the Gamecube Controller and Nintendo 3DS below, but the terminology
will apply to all controllers with the respective buttons.
Note: I had customized my controls to better fit my play style, but this will
assume you are keeping basic controls, so:
Gamecube Controller:
L = Grab
R = Shield
X/Y = Jump
A = Attack
B = Special Attack
D-Pad [DP]= Taunts
Joystick [CP]= Movement
C-Stick [CS] = Quick Aerials / Smash Attacks
3DS (Standard):
L = Grab
R = Shield
X/Y = Jump
A = Attack
B = Special Attack
D-Pad [DP]= Taunts
Circle Pad [CP]= Movement
Notes for NEW 3DS:
For anyone who has the New 3DS, the second circle pad (C-stick) allows you
to perform functions that are the same as using the Circle Pad + Attack
button. Unlike the C-stick of previous Smash Brothers games, it allows you
to charge your Smash Attacks too. (Hold Up to charge and then release to
use).
In Lucina's case, the second pad is very useful for performing Aerial Attacks
(covered below) quickly and effectively --especially performing a Back-Air
with ease.
---
However, this guide will stick with assuming you have a regular 3DS, and
indeed it is best to master the standard way before going on to the easier
way. It also depends on your play style in the end!
All damage of the moves is recorded from testing in training mode. Some have
ranges that will be noted as ##-##%. Launch is determined on a scale from S
(highest) to F (lowest).
Notes will talk about usefulness of the moves themselves.
Sections are marked in Spoiler Tags just for cleaning formatting --be sure to click the section you want to read!
Lastly, all the move names are from the official Famitsu Smash Bros Strategy
Guide (Japan). They are listed in square brackets []. I still refer to them
by the usual name (neutral air, attack, etc), but just for those who are
curious.
---Standard Attacks (A button) [M001]
This refers to Tilt attacks and standard (non Smash, non Air) attacks.
Neutral Attack (A Button, no direction) [Slash]
Damage: 4-5% (each swing)
Launch: D+ <Forward>
-She swings her sword in arcs over her head, starting from her front and then
going over her head. She can do two attacks consecutively before a brief
pause.
Notes: This move can hit enemies coming from above, but will not hit enemies
behind her. Useful for quickly stopping an enemy from doing an attack
with longer set up.
Tilt Attacks: (A Button + Direction)
-This refers to when your Circle-Pad is "tilted" to a direction, but not doing
a charge up "Smash Attack."
Up Tilt (CP Up + A) [Anti-Air Slash]
Damage: 6-7%
Launch: B+ <Upward>
-She swings her sword in a longer, higher arc than her neutral attack. There
is a brief pause before she can swing again. She starts in the direction she
faces, and swings up and around to her back.
Notes: Unlike her neutral attack, this one can hit opponents standing directly
behind her. In fact, it does 7% damage at the back compared to 6% at the
front. Very useful for hitting aerial enemies that may be hopping up
from the ledge. It's a little slower than her other tilts, however.
Forward Tilt (CP Forward + A) [Hard Edge]
Damage: 9/10%
Launch: D+ <Forward>
-She swings her sword from low to high in an arc from her front.
Notes: The move has longer range than her neutral attack, as well as her Down
Tilt attack, and is great for going from Down Tilt to Forward Tilt, as
well as cancelling an opponent's move. Thanks to the low arc, it can
hit enemies who may be ducking in front of her, or coming from on high.
An especially useful ledge guarding move.
It is easy to go into this move from the Down Tilt as well as her dash
attack; and she swings faster than a lot of other opponents' forward
tilts as well as decent range, making it a preferred move. Especially
useful is if you Down Tilt in one direction, and the opponent rolls
behind you, you may simply tilt in the opposite direction and she will
instantly turn and execute the attack.
Down Tilt (CP Down + A) [Low Thrust]
Damage: 8%
Launch: C+ <Forward>
-She gets low to the ground, and does a quick jab forward. She can attack
over and over as you please. She knocks opponents back a safe distance,
especially at higher damage.
Notes: This is a very useful move for quick opponents who come close or roll
often. She can get to the ground and jab very quickly, and so coming
from any other tilt move it can be useful. She can dash forward then
get low to the ground quickly, executing the attack quickly and possibly
confusing an opponent who may have been expecting a dash attack. The
quick movement allows her to often hit the opponent and make them flinch
before they can strike her. It's very useful near the edge too, often
able to hit an opponent who may be just about to grab a ledge.
Dash Attack (Run + A) [Raid Chop]
Damage: 10%
Launch: B+ (Diagonally Forward Up)
-She lets out a horizontal slash at the end of her dash, knocking opponents
back.
Notes: Useful if your opponent keeps rolling backward, just keep running, by
the time they roll back again, do the slash and it will usually send
them far back enough for you to run up and do a follow up attack. Use
sparingly though, as it may become quite predictable after a few uses.
It may be more useful to run up and grab, or perhaps go into down tilt.
Ledge Recovery Attack (Ledge Grab + A) [Ledge Climbing Attack]
Damage: 7%
Launch: C+ (Diagonally Forward Up)
-She comes on the platform with a stabbing motion forward.
Notes: This move is just to clear the platform, it is fairly useful and has
good range to knock the opponent off their feet. However, it is
generally a better idea to roll back onto the platform, or to clear
it over head with a dodge. It does largely depend on what your
opponent is doing, however. If you think they will aim upward
anticipating a jump, then stab them. If you think they are anticipating
a roll and aiming the other way, then stab them. But if they assume
you will stab them, then be sure to do a roll or jump!
Again, it will largely depend on what your opponents' habits are.
Learn them and use which option works best.
Recovery Attack (From Floor + A)
[Face Up / Fall on Behind / Face Down Recovery Attack]
Damage; 7%, 7% (Two Swings) / 7% / 5% (Varies on position)
Launch: C+ (Forward)
-There are several variations:
-She recovers from the floor swinging her sword to both sides. (If face down)
-She recovers with a quick swing. (If she lands on her bottom)
-She recovers with a quick swing. (If she landed on her stomach)
Notes: Very useful for when the opponent has a tendency to rush you when you
are down for a follow up attack. When they realize you are about to
attack getting up, they usually roll, but since you attack both
sides, it usually gets them. It is generally a safe option to recover
with the attack if you did not tech upon landing.
If facing an opponent that is charging a projectile instead, or stays
away from you, it may be best to recover with a roll instead. Toward
them if projectile, and away if they decide to charge you and it is
too late for an attack. Likewise, get up straight if they are not
projectile, but are staying away and readying a smash attack in case
you roll toward them!
---Air Attacks (Midair + Direction + A) [M002]
-These are attacks done in midair. There are five types, depending on what
direction you tilt the CirclePad to.
-A key to a lot of her air moves is what is known as "short hopping," or
lightly tapping the jump buttons (X/Y) so you jump at a shorter height than
usual, allowing you to execute these attacks while low to the ground.
-The other key is the fast fall, used to return to the ground at quicker speed.
She needs this to allow her Neutral and Forward Air to be effective against
any height of target, as well returning to the ground quickly after an
intercept, so that she may be able to quickly repeat it.
-Be weary of her landing lag, sometimes it is unforgiving and leaves you
quite open to attack. It would be best to try entering a shield or low tilt
as quick as possible, but it can vary depending on who you are fighting to
determine what to do here.
Up Air (Midair + CP Up + A) [Luna Slash]
Damage: 10%
Launch: C+ (Upward)
-She swings a full arc over her head while in midair.
Notes: Incredibly useful when used with short hop. When an opponent is coming
down, rather than use both jumps to intercept them high in the air, you
can do this close to the ground. It has more maneuverability than the
normal Up Tilt while doing a bit more damage. When the opponent is very
high, doing a quick double jump and Up Tilt will usually end them. It
can also be used to intercept those who return from the ledge and choose
to jump over you.
Forward Air (Midair + CP Forward + A) [Flag Cut]
Damage: 8%
Launch: C+ (Forward)
-She does a full swing from top to bottom in front of her.
Notes: One of the most useful for general attacking, when used with a short
hop, she can hit even shorter targets. Mix with a fast fall to get to
the ground and perform a Down Tilt for any follow up attack your
opponent may do. You can hop forward doing this move, sometimes getting
opponents to the edge with ease. This is also incredibly useful for
off stage combat, as well as ledge guarding. Use it the moment the
opponent tries to get back onto the ledge, and be it air or ground,
you will hit them if done right.
Don't be afraid to do a jump off the map to hit the opponent with the
forward air, or even use both your jumps, it will usually K.O. them.
Just be sure to hold the tilt toward the stage after you execute the
attack, as this will allow her to drift back either onto the stage, or
into safe distance to use her Dolphin Slash (Up Special) to return
safely.
Neutral Air (Midair + No Direction + A) [Double Slash]
Damage: 2%, 7%
Launch: B+ (Forward)
-She swings horizontally around herself in midair.
Notes: This move is incredibly useful for ledge guarding, as well as general
offensive. She hits opponents both in front, above, or behind her.
A useful technique is at the edges of the stage, when the opponent is
returning, perform a short hop and do the Neutral Air, so if they were
to jump, they run right into your blades.
It attacks twice, the first swing (2%) weaker than the second, more
important swing (7%). You can short hop forward using it, and then mix
it with a fast fall to hit opponents on the ground/hanging onto the
ledge, too. One of her most useful techniques. Works well on bigger
targets too.
Down Air (Midair + CP Down + A) [Half Moon]
Damage: 11-13%
Launch: B+ (Diagonally Upward Forward) / (Straight Downward [Meteor])
-She swings in an arc below her. Has Meteor Smash effect.
Notes: A useful move to perform a Meteor Smash when off the map, but also to
hop over opponents and reliably hit them. It's a little slower than the
others and has a higher recovery time, but also does more damage.
Generally I recommend the Forward Air more, but this will have uses
for reasons mentioned above. Be careful when using it off map,
especially if used with fast fall. Ensure you still have your second
jump and Dolphin Slash ready to return to the map as you will have gone
a fair distance down. You can do your second jump right after the move
earlier than you think.
The Meteor Smash point is the very tip of her blade.
Back Air (Midair + CP Back + A) [Upper Swing]
Damage: 9-10%
Launch: C+ (Backward)
-She swings the sword in a quick arc behind her.
Notes: A little trickier to use toward the opponent, it usually provides a
good escape move. You have to jump facing one way, and use the tilt to
start drifting the opposite way, so you approach your opponent facing
the other way. Then tilt the control stick to whatever direction is
behind you, and push A to execute the attack. The quick swing and
approach often catches them off guard.
It's also useful if both of you are in mid air, and your opponent behind
you. It deals fair damage and swings quickly.
---Smash Attacks (CP Direction Tap + A) [M003]
-These refer to the charge up attacks that require you to tap a direction with
the circle pad and hold A. There are three of them. They are the moves with
best launch power, but also longer set up than standard attacks, best used
when you have predicted an opponent's move and know exactly where they will
be.
-Notes: Damage range is lowest (no charge) to highest (full charge). Charges
go for about 2 seconds to max. You can release anytime in between the
charge, which is where timing can come in to land the attack.
Up Smash (Tap CP Up + A) [Justice Sword]
Damage: 17-24%
Launch: A+ (Upward)
-She thrusts her sword straight up, launching opponents upward. It can hit
opponents right next to her on either side, too.
Notes: A fair ranged upward smash attack. Useful for if your opponent is going
to land either next to you or above you. It can out range quite a few
of the other characters' Down Air moves, usually allowing you to safely
hit them and launch them upward.
Be wary of the set up time and recovery time, if you miss, you are
vulnerable to your opponent! The Up Tilt is more useful if juggling
your opponent. Use this if you can guarantee a hit.
Forward Smash (Tap CP Forward + A) [Dragon Killer]
Damage: 14-20%
Launch: A+ (Forward)
-She slams her sword down from high to low in front of her.
Notes: A great launching move, can hit opponents a bit above her as well as
in front of her with ease. If used at the very edge of the ledge, it
can often hit opponents before they reach the ledge itself. If you
can time it well enough to hit the opponent right after their ledge
invulnerability wears off, sending them flying.
Another thing to keep in mind. If the opponent rolls a lot, but mostly
in one direction, simply aim to where they will roll rather than aim
at them. Their roll will give you at least a full second to charge,
and then you will more likely than not send them flying. If they happen
to shield, follow up with a grab.
Down Smash (Tap CP Downward + A) [Whirlwind]
Damage: 9-13% (Forward Swing) 14-20% (Rear Swing)
Launch: A+ (Diagonally Backward Upward)
-She swings her sword first in front of her, than behind her.
Notes: Great for if the opponent keeps getting around you, or stays low to the
ground. Keep in mind she will swing in the direction she is facing
first, rather than a lot of other characters who have downward smashes
that cover both sides at the same time.
The advantage to her doing both sides separately is that if the opponent
rolls to the other side of you when you start the attack, they will be
hit by the stronger, follow up attack.
You can easily follow up with a Down Tilt and vice-versa.
---Special Attacks (B Button) [M004]
-These are the moves that utilize the B button to unleash special attacks.
There are 4 types (Upward, Horizon, Neutral, Downward). Custom moves are also
listed here, and fall into the four categories. There are 12 moves total.
I will focus most on the Default moves, as I have most experience with them,
and "For Glory" does not allow use of the custom moves.
Neutral Special Attacks (No Direction + B)
1.) Shield Breaker (Default)
Damage: 8-21% (No charge - Full charge)
Launch: A+ (Forward)
"Thrust the sword forward to pierce through shields. Can be charged."
Notes: Just as it says, this is the move I utilize most offensively. She
can tear through shields with ease, a no charge shield breaker will
reduce it far enough that if the opponent holds shield a little longer,
it will break. A full charge one shatters shields. It can be blocked
with only a power shield, or shielding at just the right moment.
It has great range too, mixed with a short hop it can throw opponents
off. Mix up your charge time to throw off opponent timings. Use it
coming from the air too.
A full charge shield breaker in mid-air will thrust Lucina herself
forward, which can throw opponents off sometimes. Be very careful when
using it for stage return though --as she goes forward she will not
grab the ledge on her own, so be sure to use the Up Special right after.
Also if using for return, be weary of the type of map you are playing
on. Some are walls, while some have no underside. Sometimes you may
slide right down rather than grabbing the ledge, causing the stage
itself to kill you.
Doing a backward Short Hop with the Shield Breaker will often catch
a player off guard. They likely reflexively go into Shield, at which
point is your chance to shatter it.
You can do a "Reverse Shield Breaker," much like Captain Falcon's
Reverse Falcon Punch, by pushing the button and holding the opposite
direction to where you are facing quickly. She should spin and aim the
other way. It is very, very useful for those who constantly roll behind
you and enter a shield. You can pull it off by holding the opposite
direction lightly too and pushing the button. I've tested both ways,
and they both work. The second method, however, may lead you into your
Side B instead, however! So be careful. It is a tricky maneuver, but
will be lethal when mastered.
2.) Storm Thrust (Custom)
Damage: 3-10%
Launch: C+ (Forward)
"Thrust the sword forward. The tip creates a gust of wind that pushes
opponents back."
Notes: The gust that it creates can be good for shoving opponents off, as well
as preventing their return. Distance yourself from the opponent to
allow the gust to your advantage. Try it when they attempt returning
to the ledge too.
It does some damage too if they are up close, but the biggest feature
is mainly the fact it sends them flying quite far!
If friendly damage is on in Team Battles, you could position yourself
behind your partner, making sure the blade won't hit them, but the gust
will. They can charge a Smash Attack and be sent toward the opponent
fully ready, for instance.
3.) Dashing Assault (Custom)
Damage: 5-15% (No charge - Full Charge)
Launch: C+ (Diagonally Forward Upward)
"Thrust while dashing forward. Deals slightly less damage than normal."
Notes: She can over almost the entire map at full charge if it's an Omega (flat) map. The weakened power means she won't break shields as easily, but will still do a fair bit of damage to the shield itself.
Amazing for return too, as used in mid air carries her incredibly far. Great in custom Team Battles to zip around the stage.
Horizontal Special Attacks (CP Forward/Backward + B)
1.) Dancing Blade (Default)
Damage: Varies by direction
Middle Swings (Red) : 3-3-4-6%
Upward Swings (Blue) : X-3-4-7%
Downward Swings (Green): X-X-6-13%*
Launch: Varies by hit
Middle Swings (Red) : E+ (Up) - E+ (Up-Forward) - D+ (Forward) - B+ (Forward)
Upward Swings (Blue) : -- - E+ (Up) F+ (Up-Forward) - B+ (Up)
Downward Swings (Green): -- - -- - D+ (Forward) - B+ (Forward)
*-if all three hits land
X = first move is always a horizontal slash.
"Attack up to four times. Press up or down to change the combo type."
Notes: Great for combos, as said above. The first move is always Red, then
after that you can tilt the CirclePad upward or downward to influence
which move happens next. You can do any combination, red-blue-green-
blue, or red-green-blue-green, for instance. Very useful and hard to
predict, allowing her to be very versatile and hard to predict.
What is predictable though is that she only has up to four hits. Someone
who knows this can wait and perform an easy counter attack. The best
way around this is to use the final downward swing, which does multiple
attacks, as people seem to either forget about the multiple hits, or
charge in anyway.
There are several different timings with this move. You can do all four
moves quickly, or give a bit of a lag between them, great for tricking
opponents to lower their shield thinking you have finished. It requires
precise timing though, so give it a lot of practice!
Upward swing is useful for launching, the fourth move has great KO
capability, as does the fourth horizontal swing.
You can begin to set it up from mid air. If approaching an opponent,
start your first swing in midair so you can follow up with whatever
types you like.
Be very careful not to use this off stage, as you may accidentally do
midair combo that will miss the ledge. You may see some doing the first
swing (Red) to stay afloat longer, a tactic from older games, but it is
generally safer to not risk it.
2.) Effortless Blade (Custom)
Damage: 2-2-3-4% (Red/Middle Only)
Launch: E+ (Up) - E+ (Up-Forward) - E+ (Up) - B+ (Up-Forward)
"You can't change the combo type, but you can wait longer between attacks.
Lower damage."
Notes: You can only do the Red combination (middle). It is useful if you want
to trick your opponent by waiting slightly before the next move, but
lacks the damage building capability of the original version, as the
direction cannot be changed to hit upward or downward.
I highly recommend the default over this one.
3.) Heavy Blade (Custom)
Damage: Varies by direction
Middle Swings (Red) : 7-10-10-14%
Upward Swings (Blue) : X-9-10-13%
Downward Swings (Green): X-X-10-19%*
Launch: Varies by direction
Middle Swings (Red) : C+ (Forward) - C+ (Forward) - A+ (Up-Forward) - A+ (Up-Forward)
Upward Swings (Blue) : -- - C+ (Up-Forward) - A+ (Up) A+ (Up)
Downward Swings (Green): -- - -- - A+ (Forward) - C+ (Forward)
*-if all three hits land
X = first move is always a horizontal slash.
"Each strike is stronger but launches foes, making it hard to pull off a
combo."
Note: Just as it says, each attack hurts significantly more, with greater
range and launching power. The only draw back is the timing cannot be
changed, and the moves have a timing lag between them (it just "feels"
heavier when using). You can do the four instant swings like default.
When used right, though, this is a very destructive move, as unlike the
Easy Combination, the next hit type can still be changed. Very deadly.
Upward Special Attacks (CP Up + B)
1.) Dolphin Slash (Default)
Damage: 7-11% (7 at tip, 11 from base)
Launch: A+ (Forward)
"Strike upward with your sword as you rise into the air. Deals most damage
at the start."
Notes: It does carry her a nice distance upward, useful for return. It also
clears the way of anyone possibly trying to intercept you, as her slash
is very fast and so hard to hit when she's doing it. Of course, it can
be done, so remain cautious about this.
I use it sparingly on the map itself, as it leaves you completely
vulnerable after using it until you land. However, it has great
launching ability if used right up to your opponent. It works as a last
ditch move after your Dancing Blade, too, where their shield may be
down as they move to counter you.
For intercepting midair opponents, it is generally a better idea to use
the air attacks rather than this one, as they leave you less vulnerable
to counter attacks.
The angle of the Dolphin Slash makes it good for approaching the ledge
from below, but not too great from the side. The other issue is if you
happen to miss the ledge and dolphin slash a little above it, you are
left incredibly vulnerable to your opponent, who may be able to KO you
with a smash attack. It is highly recommended you use this to get to
the ledge, not above it.
Remember that if you are hit during your Dolphin Slash, you can use it
again. if intercepted, keep using that Dolphin Slash to get back to the
ledge!
2.) Crescent Slash (Custom)
Damage: 7-12% (7 at base, 12 at middle)
Launch: C+ (Forward)
"Rise in an arc while attacking. Deals most damage at the midpoint. Doesn't
go as high."
Notes: As said, it has less of a height and more of a horizontal jump distance.
Unlike the Dolphin Slash, most damage is from the middle.
3.) Dolphin Jump
Damage: None
Launch: None
"Jump really high, but you won't deal any damage."
Notes: A great return move, she has great height in her jump, but it lacks
any offensive power, making her easy to intercept. It may be more useful
for the likes of Smash Run.
Downward Special Attacks (CP Down + B)
1.) Counter (Default)
Damage: Varies (Base 8%, Enemy Attack x1.2)
Launch: Varies (Base C+ Forward)
"Prepare for an attack and strike back if hit. The power depends on your
enemy's attack."
Notes: A very, very useful move in a variety of situations. If you are familiar
with how every other character plays, their timings, their ranges, etc,
then this will work greatly for you.
Most useful is intercepting a combos, or someone returning to the stage,
or preventing your return to the stage.
The damage is greater for enemy moves that do greater damage, which is
useful as some strong attacks have long set ups, allowing you to use
this with ease.
Some notable uses are, if your opponent attacks from the ledge a lot,
stand there and counter. If you are returning to the stage and the
opponent keeps hitting you, counter right in front of them to clear
the ledge.
If your opponent is a big character (Ike, Bowser, Ganon), take advantage
of their slower hits to set up counters whenever possible.
Just be careful --the set up is only for about a second, if your
opponent expects a counter, they may lag their move, or grab you. It
leaves you pretty vulnerable if you fail the counter.
2.) Easy Counter (Custom)
Damage: Varies (Base 4%, Enemy Damage x0.7)
Launch: Varies (Base C+ Forward)
"Your counter stance lasts longer, but the attack power is lower."
Notes: As suggested, the duration is longer (more than 1 second for default),
but will do less damage overall.
I recommend the first counter, but this may be a good starting point,
or a counter to counter enemies that extend their moves to avoid her
default counter duration.
3.) Iai Counter (Custom)
Damage: Varies (Base 6%, Enemy Damage x1.4)
Launch: Varies (Base C+ Backward)
"A successful counter knocks opponents behind you. Faster but does less
damage."
Notes: As said above, this counter sends the opponents off behind you a fair
distance. If used at the edge of the map it will knock them off that
way. It has the same duration as the default counter as well, but
strikes back faster.
Final Smash (Smash Ball + B) [Critical Hit]
Damage: 60%; OHKO
"Time to change fate!" (Unmei o Kaemasu! 運命を変えます!)
-She lunges forward in a quick, straight line, stopping at the first opponent
and sending them flying as their HP drains.
Notes: It sends opponents from 0 to 60% damage, and I have never seen anyone
survive it.
One thing you must be cautious of is if she uses it in midair,
she will usually go very far off the map --if not KO'd, then it will
be really hard to return regardless. Most safely used while on ground,
where she will stop at the edge of a flat map, or any other obstacle
in the way.
However, you CAN stop the move by pushing Attack or the Grab button.
She will stop exactly when you push it and slash there instead. Useful
to stop yourself if you miss the target and don't want to go too far
off!
---Grabs/Throws (L, or R + A) [M005]
-Useful for getting around an opponent's shield. Use these as a follow up to
a dash, combo, or hit if you feel your opponent may shield or counter.
-You can hit them a few times by tapping A repeatedly while holding them. You
can launch them in any direction afterward.
-Her general grab range is okay, be sure to be very close to them.
-"Pivot Grabbing" (spinning around and grabbing) will add to her grab range a
little.
Grab + Hit (L/R+A + A) [Grab Knee]
Damage: 4%
Launch: None
Notes: I recommend hitting only once or twice as the opponent may break free
depending on their damage. Launch them afterward and follow up with air
attacks.
Upward Throw (Grab + CP Up) [Casting]
Damage: 4%
Launch: C+ (Upward)
Notes: Useful to KO light characters with high damage simply by throwing them
upward. For heavier characters, I recommend down throw to follow up
with moves.
Downward Throw (Grab + CP Down) [Grab Drop]
Damage: 5%
Launch: D+ (Upward)
Notes: Useful for slightly more damage, and to follow up with Up Airs and
other attacks. Great for building damage. You can try to grab them
again when they land if you are good enough.
Forward Throw (Grab + CP Forward) [Roll Over]
Damage: 4%
Launch: D+ (Forward]
Notes: Standard forward throw, good to follow up with Forward Airs, or for sending the opponent off and following up with a meteor smash. It provides ample opportunity to do so!
Backward Throw (Grab + CP Backward) [Leg Hooker]
Damage: 4%
Launch: D+ (Backward)
Notes: Just like forward throw, good for setting up an opponent for a meteor
smash. In this case, a Back Air is good to do too.
Damage: 4%
Launch: None
Notes: I recommend hitting only once or twice as the opponent may break free
depending on their damage. Launch them afterward and follow up with air
attacks.
Upward Throw (Grab + CP Up) [Casting]
Damage: 4%
Launch: C+ (Upward)
Notes: Useful to KO light characters with high damage simply by throwing them
upward. For heavier characters, I recommend down throw to follow up
with moves.
Downward Throw (Grab + CP Down) [Grab Drop]
Damage: 5%
Launch: D+ (Upward)
Notes: Useful for slightly more damage, and to follow up with Up Airs and
other attacks. Great for building damage. You can try to grab them
again when they land if you are good enough.
Forward Throw (Grab + CP Forward) [Roll Over]
Damage: 4%
Launch: D+ (Forward]
Notes: Standard forward throw, good to follow up with Forward Airs, or for sending the opponent off and following up with a meteor smash. It provides ample opportunity to do so!
Backward Throw (Grab + CP Backward) [Leg Hooker]
Damage: 4%
Launch: D+ (Backward)
Notes: Just like forward throw, good for setting up an opponent for a meteor
smash. In this case, a Back Air is good to do too.
Taunts [M006]
These do nothing for combat. They are just taunts, or "appeals" in Japanese.
Up Taunt (DP Up)
Poses, saying "Come at me!" (English)
Poses, saying "Kakattekinasai" (Come on). (Japanese)
Horizontal Taunt (DP Left/Right)
Sheaths sword, "I cannot lose."
Sheaths sword, "Makeraremasenkara" (I cannot lose.) (Japanese)
Down Taunt (DP Down)
Puts on mask. Then removes it.
Poses, saying "Come at me!" (English)
Poses, saying "Kakattekinasai" (Come on). (Japanese)
Horizontal Taunt (DP Left/Right)
Sheaths sword, "I cannot lose."
Sheaths sword, "Makeraremasenkara" (I cannot lose.) (Japanese)
Down Taunt (DP Down)
Puts on mask. Then removes it.
Moveset Summary:
Here is a video on Youtube courtesy of the EWNetwork --very helpful in showing her move set. Customs are not included, but this will give you the idea of everything I listed above!
Please thank them for their time and effort in uploading this!
Here is a video on Youtube courtesy of MarkoGaming64, which shows off Lucina's move custom moves. If you are on this forum, I hope you do not mind me using this video. Please subscribe to their channel!
-General-
Lucina lacks any sort of projectile, so has to get pretty close to her
opponents to attack. She can utilize counter and short hop dodging to make her way over to those that do have projectiles. It varies depending which
projectile character she is fighting (see VS Character section for specific details).
For other non projectile fighters, she does well with her range being able
to out do quite a few, and her quick moves and counter letting her hold her
own against them up close, though it also becomes a matter of timing.
She is more the forward attacker sort in Team Battles, but can shift to a
defensive role providing counter and quick moves to protect a teammate that
may be setting up their own moves.
-Weaknesses-
One must be aware of Lucina's own weaknesses, of which she unfortunately has
a few that can really cause problems for players. Here are some points to look
out for:
1 Issues with the Forward Air / Aerials
The Forward Air / fast fall combination, while it does have a large sweeping
range, if missed, will allow the opponent to set up an attack to which you
will be vulnerable. It may take some practice to be able to do a quick forward
air, and the quicker you do it the faster you get out of it. In this guide,
despite recommending it a lot as a useful move, one must be cautious that if
the opponent starts to catch on to you doing Forward Airs a lot, they will
likely be finding ways to counter it. The Neutral Air fast drop may work
better in your favor as it leaves Lucina in a slightly less vulnerable
position upon landing.
Aerials in general may end up leaving her vulnerable with the landing lag. I
do not seem to run into too much trouble with this, as I manage to move to
a quick side or down tilt to knock the opponent that moves in to attack, but
it is a word of caution that other players have had difficulty with.
2 Recovery / Dolphin Slash
Lucina has decent recovery --if not interrupted. Sometimes even the opponent
knocking you slightly back after your second jump will make you be unable to
recover. While this is a general rule for all characters, the Dolphin Slash's
angle makes it harder to gain sideways movement, and sometimes leads to your
death at even lower damages, essentially a waste of a life.
You also have to be weary of two things regarding the Dolphin Slash. I covered
it in the Dolphin Slash section, but here it is again:
The Dolphin Slash has a more upward angle. This is good for coming from under
the ledge --but not so great for needing horizontal momentum if coming from
far away. I recommend practicing in Training to see just how limited the
Dolphin Slash's angle makes it for Lucina to return.
The Dolphin Slash leaves you incredibly vulnerable, and has the tendency to
miss the ledge invulnerability and leave you open. What I mean by this is,
due to how it works, if you come at an angle and miss the ledge, and instead
fly over it, the opponent can set up a Smash Attack to likely KO you, as you
are completely helpless after this jump.
Remember that if hit when doing the Dolphin Slash, you can do it again. This
is useful for enemies that keep intercepting you off stage as you attempt to
recover.
Always come from below the ledge when possible, though of course make
exceptions when you clearly see an opponent setting up a meteor smash... but
you may not get a choice sometimes.
Also, never give up if you think you're too far from the ledge. Sometimes
tilting the right way and using your jumps at the right time with the Dolphin
Slash makes for surprise recovery. Never give up!
3 Combos
Aside from her Dancing Blade, she does not have many combos. You can toss
your opponent and land an Up-Tilt and follow it with a Up Air, for instance,
but more often than not the opponent will escape this. She can do Forward Airs
to Down Tilts, or Neutral Attacks to Side Tilts, but in the end they never
seem to go beyond two hits. She seems to be more the type who relies on
precise timing and prediction/reading to smash her opponents off the map.
Getting opponents to high damage with her relies on quick one-two attacks and
then retreating, or dodging/shielding before your next attacks. She is all
about patiently building damage, rather than being able to do miraculous
combos to get her way up there.
4 Counter
The counter, as I mention in the respective section, is incredibly useful, but
also incredibly dangerous to you, the user. The brief second you have, if
missed, leaves you vulnerable to all sorts of mishaps. The first example that
comes to mind is if you Counter Dedede's Side Smash too early, that hammer
comes down completely unforgiving. You have to know exactly how your opponent's
moves lag, or operate, to get the timing down precisely.
Use this for only the most predictable opponents as you start out.
5 Omega Maps
For Glory is played only on Omega Maps. This gives her a severe disadvantage
against Projectile characters, and others like Little Mac who can dominate
the stage without worries of doing much in the air.
She has to face an uphill battle approaching projectile opponents, as well as
quick/rapid dodging/combotastic ones. In For Glory mode, you will have to
jump quite a bit, but this also leaves you quite predictable, unfortunately.
In local games and tournaments, more likely than not, it will not be just
Omega maps, and maps more beneficial to Lucina (such as Battlefield) will
work more in your favor, utilizing platforms with your tilts, air attacks,
and especially approaching/projectile avoidance.
6 Close Quarters
She lacks any sort of projectiles. She has to get up close to her opponents
to do damage. This can be problematic, and is quite problematic, on especially
flat maps. Precise countering, power shielding, and dodging helps her
approach, but stresses the user to no end compared to the easy time the
projectile user has firing at you.
This can also be a problem for when she has to face big characters, especially
with moves that do not flinch easily. Approaching Ganon and Bowser, for
instance.
Keep your cool. Be patient. If someone keeps firing projectiles, learn their
patterns, their "rhythm." You can shield and wait it out if they insist and
wait until they come at you, or you can learn their patterns and approach.
Either way, just do not stress out as you will be more prone to making
mistakes. Once she gets up to them, she can often do some serious damage. If
they attempt to roll away, you will finally have them on the run, and so
continue to pursue them.
-Map Types-
She works okay on Omega Style maps (flat/Final Destination), but it also
puts her at a severe disadvantage versus characters who can use projectiles
as well as rack up high combos.
As such, she is most benefited by a Neutral Stage (Battlefield) that has some
platforms she can utilize to avoid projectiles.
Maps that have a lot of changes/movement/hazards may be bad for her, as her
jumps and recovery are fair, but severely lacking compared to some other
characters, making some maps unforgiving (Paper Mario...)
-Free For All (4 Player)-
She's not really built to fight in the middle of a crowd, unless you want to
jump in and try your luck at countering.
What she is good at though is picking off the weakest member quickly and with
ease. It is best to avoid the center of the action and attack from the sides,
rolling back over when you're done before doing your next attack.
The Shield Breaker is very useful on an opponent distracted or shielding from
another opponent --take advantage of this. Just be sure to KO them before the
opponent does.
-1 on 1-
With just one player to focus on, she is quite strong here. Generally, you
will want to strike fast and avoid being grabbed, as a lot of her moves leave
her vulnerable to grabbing.
You want to make use of her Dancing Blade for damage, but never feel the need
to complete all four moves as your opponent may have shielded or dodged by
then. Be sure to mix up your moves as not to become too predictable. It is
better to land a few Tilt attacks and retreat rather than complete a Dancing
Blade and leave yourself open.
Your biggest advantage is edge guarding. You can space yourself from the ledge
to avoid the opponent's ledge attack and still hit them with a well placed
shield breaker or smash attack.
Projectile opponents will require a lot of short hopping and precise
countering, especially on an Omega map. On non Omega maps, you may be
benefited by any platforms that are around to help you get closer without
the constant jumping and dodging. Short hop air dodging is very useful as
you stay low enough that they will attempt to fire a projectile at you, but
your air dodge will let it go right through, placing you right in front of
them for a follow up attack. Again, if your opponent starts to see this
pattern, then they may attack you when you come close, using projectiles to
lure you instead.
In that case, use your second jump to go above them, and do a Down Air onto
them while they would be swinging forward to hit where they thought you may
have been.
Be sure to take advantage of when your opponent is hit off the map to follow
up with your own attacks. Just be weary of the specific opponent. (I cover
specific fighters below). that may be able to counter you pretty easily in the air.
-Team Battle-
She does great defending projectile support characters (such as Robin). She
can keep the enemy at bay with her tilts while the partner charges his/her
moves.
Another great advantage is hiding behind the mass of a bigger partner (Bowser,
Dedede), and charging the Shield Breaker. More often than not, you will smash
the opponent's shield, letting you or your partner KO them with a full charged
attack afterward.
There is a lot going on in a 2 v 2 Team Battle, so your opponent will struggle
to keep up with dodging your Shield Breaker while your partner attacks them,
too.
-Sudden Death-
You can do one of three things:
1.) You can rush the opponent and hit them with a quick dash attack or Forward
Air, or preferably a throw.
2.) You can stay back shielding, and if they charge you, simply grab and throw
them away. This usually works a bit better than the above. Use a counter too
if you feel it, though it is harder to pull off, and if you make a mistake,
you will no doubt be sent flying as punishment.
3.) Or, your safest bet is to abuse the Bob Ombs that will drop about 10
seconds or so in. Go to the ledge closest to you, hang off of it. Drop down,
jump, then Up Special back to the ledge. If they come after you, you can
Dolphin Slash them off the map, or Up Air them. If they stay away, the Bob-
Ombs will start dropping and likely send them flying. This usually works, and
is best against projectile enemies who will not approach you as well as be
difficult to approach. Though it is a little cheap too, this is only if you
want to "win" rather than try your own skill with the first two options.
Lucina Versus ..........................[S04]

This is a section that provides brief tips facing various character match ups and specific strategies that come to mind when fighting them. Will be an ongoing update as I get more experience with facing them!
These do not include customized characters aside from Mii Fighters. I make a note
to say how much I've fought a certain character (Rare,Uncommon,Common).
Please note this is all from my own experience fighting these characters both online and offline, as well as using these characters and exploiting their weaknesses as Lucina. These tips are simply to be taken as advice and are subject to change!
Fighters are in Full Roster order (Top left to bottom right). Use CTRL + F to find their section simply by typing in their character names in full caps (and make
sure it is case sensitive).
Example: Wendy would be WENDY.
Lucina Versus:
01 Mario
02 Luigi
03 Peach
04 Bowser
05 Yoshi
06 Rosalina & Luma
07 Bowser Jr.
08 Wario
09 Mr. Game & Watch
10 Donkey Kong
11 Diddy Kong
12 Link
13 Zelda
14 Sheik
15 Ganondorf
16 Toon Link
17 Samus
18 Zero Suit Samus
19 Pit
20 Palutena
21 Marth
22 Ike
23 Robin
24 Kirby
25 King Dedede
26 Meta Knight
27 Little Mac
28 Fox
29 Falco
30 Pikachu
31 Charizard
32 Lucario
33 Jigglypuff
34 Greninja
35 Duck Hunt
36 R.O.B.
37 Ness
38 Captain Falcon
39 Villager
40 Olimar
41 Wii Fit TRAINER
42 Dr. Mario
43 Dark Pit
44 Lucina
45 Shulk
46 Pac-Man
47 Mega Man
48 Sonic
49 Mii Fighter/Gunner/Brawler
XX Master Core
------------------------------------------------------------------------------
01 MARIO / 42 DR. MARIO
Common - Plenty of people use Mario that I've encountered.
Note: Dr. Mario is here too as the general strategy is the same.
-You want to look out for his Forward Air --it's his Meteor Smash. A lot of
the players will be aiming to set you up for this.
-His grab and punch ranges are relatively short, so you can focus on out
ranging him. Your Forward Tilt among others will be the most useful thing
against him. He is relatively short so you will utilize Forward Air more than
Neutral Air.
-He does jump a lot though, use Neutral Air to deal with this. If he short
hops a lot, he is likely trying to set up his Back Air, which hurts quite a
bit, too. Be ready to counter if he does this constantly.
-Mario's Down Air is rather deadly, allowing him to get a lot of damage onto
you and recovery very quickly. If he is approaching from over you, either try
to intercept with an Up-Tilt, Short Hop Up Air, or just dodge. He can go
from his Down Air to side punches and other moves very quickly!
-Watch out for that cape, it may disorientate your combos leaving you open
to his attack.
-His fireballs can be a problem if they utilize it correctly, the bouncing
effect makes them slightly harder to dodge. Make your way up timing your jumps
and unleash a counter if close enough.
-The FLUDD (Water Jet) can sabotage your return to the map, if you see him
charging this at any point, be sure that you do a low approach to the ledge
so the water does not send you flying too far where your Dolphin Slash will
be unable to save you.
FOR DR. MARIO
-Instead of the FLUDD, he has a spinning tornado move. It can get damage on
you much like Luigi's, and send you flying.
---
02 LUIGI
Uncommon - Only seen a few here and there.
-Don't let him get too close to you. If they constantly are trying, he is
likely trying to do his critical uppercut.
-He floats around quite a bit, use air attacks to do him in. His recovery is
easy to mess up, so if you hit him off the map, follow up and make sure he
stays out there. Forward airs!
-Watch out for Luigi's own air attacks. He has quite the range with his air
kicks.
-His Down Special has the ability to lock you in and do serious damage.
-His fireballs fly straight unlike Mario, a bit easier to avoid. Be cautious
on the approach as well as when you're recovering that he doesn't intercept
you with a fireball.
---
03 PEACH
Rare - I haven't got to fight many.
-Her Side B is a lot faster in this game, if you see it coming you can set up
a quick counter, but you're better off trying to dodge it and follow up qucikly
with an attack.
-Her Down B projectiles are fairly easy to dodge, you can also catch them in
midair with the jump-dodge method of catching.
-Her ability to float as well as her Up Special umbrella are two things to
look out for, as she may throw off your ledge guard precision by just floating
over. Jump up and intercept her whenever possible, keeping her clear of the
map.
-She has a counter ability in the form of her Neutral Special, Toad. Watch
out for this when doing the Danclng Blade, which is predictable for those who
know you have a max limit of four hits. Be careful about using shield breaker
for the same reason. Try throwing off her timing by adding time between swings
from the Dancing Blade, or perhaps just cancelling at two or three rather than
going all the way up to four.
---
04 BOWSER
Common - Oh dear.
-A ton of people use his fire to keep you at bay and add damage. Your counter
can't hit him either if you try. The solution is to jump and use a low hit
shield breaker, or perhaps a forward air.
-All of his moves hurt. A lot. You should use air attacks then back up before
you do the next one.
-Watch out for his Side Smash attack (where he jumps with both legs out). The
timing is a little strange so if you counter at the start of his jump he will
still get you. You have to brave it and wait just a second when he actually
starts his jump and counter there. It will be worth the reward --but if you
mess up you will likely be sent flying very far.
-A safe bet is to grab him and slam him to the ground. Usually Bowser follows
up with a Down Special (comes slamming down), or a Down Attack, both cause him
to fall and do damage. Just dodge to the side when you see him do this, and
prepare a side smash or shield breaker.
-Don't shield too much, his moves will break it quickly, and his Side B is
a destructive grab based attack. You're better off dodging the beast.
-If you hit him off the stage, do quick attacks to make sure he stays out there
to make him fall victim to his own weight.
-Thanks to his height and width, the Neutral Air is a good bet to constantly
hit him and drive him back. Just be sure those short hops are down.
-If you're both down to your last life, don't let him Side Special you. If
he belly flops with you off the map. you get KO'd before he does, leading to
his victory.
---
05 YOSHI
Common - A lot of Yoshi!
-Remember that he has a high jump, but his Up Special is not the greatest
recovery. If hit off the map, be sure to land another hit on him after that
jump.
-Watch out for his eggs. I've seen some very good Yoshis who spam that Egg
knowing you can't throw anything back! It also prevents your Forward Air and
other air attacks. You may have to stick to the ground.
-Yoshi has a Meteor Smash to look out for. When recovering from ledges, try
to make sure you come from low to avoid being hit by this.
-He has a decent grab range with his tongue, but he does not use it unless
you yourself shield a lot, as it leaves him quite exposed if he misses it.
-He has a move (down special) that will cause him to rocket down to the
ground. Watch out for this, either dodging to set up a Shield Breaker/Side
Smash, or a counter if he's right above you.
---
06 ROSALINA & LUMA
Common - One of the hardest to deal with.
-A player well versed with these two can give Lucina a hard time. The Luma
follows Rosalina's attacks. More experienced Rosalina players can space the
Luma forcing you to jump right into Rosalina's attacks in order to even hit
her. If you don't jump, you're stuck dealing with the Luma anyway.
-If the player dodges a lot, use the touch screen to highlight their
character so you will see which direction they are dodging in.
-The floating Rosalina is rather hard to grab, where it seems she can be
grabbed she cannot. She also has decent range to her moves not even counting
the Luma.
-Watch out for her Neutral Special, where she can charge and launch Luma. It's
especially deadly if you are attempting to recover from the air. Remember that
even if you dodge the Luma projectile --the Luma can still attack you right
after!
-If you manage to Shield Break Rosalina, be very careful. Just because she is
stunned does not mean the Luma cannot attack. In fact it can attack quite
aggressively! Be sure to dodge roll behind Rosalina where the Luma can't hit,
and then do a full charge Smash Attack or Shield Breaker.
-Focus on Rosalina. As tempting as it is to eliminate the Luma, you will take
more damage for just a few seconds without it, considering Rosalina recovers
her Luma fairly quickly.
-You have to use a lot of jump attacks and grabs. The Dancing Blade often only
ends in Rosalina's favor. You have to jump right between Rosalina and Luma,
making this pretty deadly if Luma attacks you from behind.
-Be wary of intercepting her off the map, her recovery is great enough that
she can take her time to counter your counter.
-Use Counter more than any other attack to get rid of that Luma, as it does a
better job of destroying it than conventional moves while protecting yourself.
-If you hit Rosalina off the map and decide not to follow up, and her Luma is
left behind, go ahead and attack it while you can.
-They often dodge to make use of the teleport style dodge. This can throw you
off in the sense that you can't see which direction they are dodging too. This
will depend mostly on the player. If they go behind you often, make use of the
Down Smash. If they go away from you, just run toward where they may go and
set up a Smash Attack or grab.
-If she does her Up Special recovery, she is completely vulnerable until she
lands. She can still alter her direction, but use this as a chance to set up
a powerful attack.
-More novice Rosalina players I noticed get stuck in doing a combo after
launching their Luma. Use this as a chance to get behind them and hit them
hard.
---
07 BOWSER JR.
Common - He's so cute! Though people often use the other Koopalings.
-He has a cannonball projectile move. It's fairly easy to see coming and to
dodge, so it is safer to avoid rather than attempt to counter.
-The Mecha Koopa (toy that runs around) can be picked up by you. You have to
jump-dodge to pick it up from the ground. A lot of Bowser Jr. players seem
to be caught off guard when you do this. Just be careful and practice it, as
it can be tricky.
-Watch out for his Side Special move, which makes the cart drive across the
map. It's pretty hard to counter as it comes quickly, try doing a Down Air
over it as it passes by.
-His medium height makes him vulnerable to both Air and Ground attacks. Mix
these up.
-Bowser Jr. can still attack after using Up Special, be cautious about that
hammer he may pull out if you move to intercept him.
-Watch out for his downward smash, as it covers both sides at the same time.
It is fairly easy to counter though.
-His Side Smash (the twin drills) lasts longer than it looks. Be careful not
to approach him until the move is done.
---
08 WARIO
Uncommon - Fought a few here and there!
-When you see him on his motorcycle, get ready to Counter. It seems to do
best against it, destroying the bike and dealing damage to him if he's still
on it.
-He has deceiving range in his attacks --they strike a lot farther than you
think they will.
-He is relatively short, so if you utilize the Dancing Blade, always aim low
to get the most damage.
---
09 MR. GAME & WATCH
Uncommon - A few here and there.
-He has his Neutral B (Bacon) moves that shoot random projectiles and will
prevent your approach, especially from the air. Get around this by jumping
over him or approaching him via rolling. You could try to find holes in the
projectiles too, or go low to do a Down Tilt.
-Watch out for when he is returning to the map. He has a Down Air that will
make him come down fast and hit hard.
-His Up Special sends him upward, but be careful when following up as he will
deploy a parachute to slow his descent. Adjust for this and counter
accordingly!
-I have not seen many use his hammer, likely due to the RNG involved, but
just be cautious as you would be with anyone if he keeps trying to get close
to you.
-He is relatively short, so Forward Air will work better than Neutral Air
here.
---
10 DONKEY KONG
Uncommon - But the few I've met...
-Like with any other big character, he is vulnerable to Neutral Airs and
Forward Airs. Just be careful about his punches. All of them.
-More dodging than shielding against him. He has pretty impressive range to
his moves too and can do quick set ups.
-He has a pretty easy to use Meteor Smash, so if you see him jumping to get
you while you come back to the map, either hit him quickly with a forward
air, or get ready to dodge.
---
11 DIDDY KONG
Uncommon - But I ran into someone who used him 30 times in a row...
-He does not have much to go against you with. His Peanut Gun provides a
projectile you can dodge or even grab the bullet for yourself.
-His Banana Peel may trip you, but is very easy to see coming.
-Watch out for his Side Special, as it counts as a grab, where he will jump
on you and deal some damage before flinging you away.
---
12 LINK
Common - And deadly.
-When properly used, Link can be one of the hardest fights for Lucina. Link
has a balance of projectiles and powerful melee attacks. You will have to
approach and dodge with great caution.
-He stay at one side and projectile you until you approach him. Usually he
will use the boomerang followed by arrows, then hit you with the sword when
you get close.
-You can easily dodge projectiles, but remember the Boomerang will bring you
close to him, and he will usually attack. You can use this to your advantage
and ride the boomerang to him while preparing a Shield Breaker.
-His range is pretty good, so you may have to attack close and get out of
there, though he may follow with a projectile.
-You can try to grab him more often than hit him. He usually does not utilize
his grab as much as it leaves him very vulnerable if he misses.
-Remember he will not take damage if he throws the bomb at you at close range.
-When he does his forward swing, remember there is a more powerful second
swing coming up. Either counter or get out of there!
-Try not to approach him from above if knocked upward. He has a three hit
Upward Smash that usually ends in a KO, as well as a quicker Up Tilt. You
should land a safe distance away, or just far enough to hit him with an air
attack to knock him back and secure a safe landing.
-You may have to patient; build up Link's damage with Down Tilts among other
quick moves.
-When he is at the edge, or attempting to recover, it is your best change to
attack him. Look out for his Up Special which can easily hit you considering
he's spinning. You can get a well placed Down Air on him for a Meteor Smash
though, or just wait at the ledge until right after his spin is complete and
knock him back off.
-Watch out for his Down Air if you move to intercept him in midair. It can
be pretty deadly and hit you with great damage when trying to hit him.
-Generally doing the short hop Neutral Air against him works well. Be sure
to do the fast fall after it to ensure it hits him.
---
13 ZELDA
Rare - Only a few times.
-Her teleport deals damage in this game, and can be quite troublesome because
you can not tell which direction she will be going. You can attempt to either
counter the moment she teleports, or sidestep dodge. Just be ready to change
direction to grab or attack if she appears behind you.
-Tap her icon on the Touch Screen which will highlight her. So if she does
her longer range teleports, you will see which direction she goes in. It can
be useful for setting up a counter. Be wary of this, however, as if it were
to get banned from tournaments or other avenues of playing, you may be lost.
In case of this scenario, try learning how she moves and get an idea, and then
try playing with it off after you have mastered predicting the movements.
-Her Side Special fireball is pretty deadly, but also easy to avoid. Be
sure to roll more away from her, because if you get close, you may be grabbed
or hit by her deadly smash attacks. If going toward her, try doing the short
hop air dodge. It is a safer approach. Go from this into a Down Tilt attack.
-Her Neutral B also can hurt if you're too close.
-Watch out for her air moves. They're more deadly than they appear.
--
14 SHEIK
Common - Quite a few ninjas!
-Sheik has some projectiles, one that deals damage but hardly any knock back,
and a newer one that can KO you at high enough damage. Be weary of this, it
has an obvious set up time so be prepared to dodge.
-Tap her icon on the Touch Screen which will highlight her. So if she does
her Up Special, you will see which direction she goes in. It can be useful for
setting up a counter and avoiding damage. Be wary of this, however, as if it
were to get banned from tournaments or other avenues of playing, you may be
lost. In case of this scenario, try learning how she moves and get an idea,
and then try playing with it off after you have mastered predicting the
movements.
-I've seen a lot of them use a combo of the Side Special (bomb) followed up
by her flip kick. You can either be ready to counter it, or just dodge. Just
be careful if the opponent seems to be repeating it often.
-Sheik has a lot of trouble hitting you off the map even at high damage. Her
most deadly moves are usually her Up Smash and Up Air, so when approaching
from the air, she will likely try to hit you. Dodge your way in. Using counter
will block her attack, but not really hit her either as Lucina swings upward,
not hitting the opponent who is below her. They could follow up with another
attack if you do it that way.
-Sheik has to get up close to you, so be ready for close quarters combat.
She will likely grab often, and is fast. Use the Down Tilt to knock her off
her feet, and the Down Smash if she constantly rolls back and forth.
-Sheik's returning Up Special does damage if she passes you. It has a shorter
range than Zelda's teleport, so you can learn to predict where she will land,
setting up a powerful Smash Attack to unleash the moment she reappears.
--
15 GANONDORF
Common - And scary.
-His moves take long to set up often, but do great damage. You will want to
attack him with your own quicker attacks, but be ready to back off if he uses
the Warlock punch.
-Watch out for his Side Special, as it counts as grabbing and cannot be
shielded. You are better off dodging.
-The Warlock punch --don't try to hit him when he does this, he will hardly
flinch. Instead, if you're stuck unable to dodge or brave enough, wait and
deploy your Counter. It will usually deal a massive amount of damage too.
-He has a deadly Meteor Smash, watch out for it when returning to the stage.
-Don't keep rolling around him, as his Downward Smash attacks both sides much
like Lucina's, ensuring he will kick whoever just dodged behind him.
-Forward Airs and Neutral Airs will do well against him and his large size.
-If you are both down to your last life, then watch out for his Side Special,
especially if used in midair off the stage. He will grab you and take you
straight down, KOing you first before himself. I've seen many do this attempt,
it works if you're at the ledge too, at the corner. He will take you down
with him. You have to dodge, because it counts as a grab, so can get you
through shield, too.
---
16 TOON LINK
Uncommon - But around.
-Like Link, he has the good mix of projectiles and melee attacks. Use similar
tactics regarding spacing while dealing with him.
-Unlike Link, his boomerang will not draw you in. Continue to dodge as you
have been.
-His Down Smash locks you in, sending you behind him for a second attack. Both
deal intense damage, so watch out.
-He is shorter than Link too, so using Forward Air will be more beneficial
than using Neutral Air.
-His Down Air comes straight down and fast, with Meteor Smash effects. You
will want to avoid this as much as possible when facing him.
-He has a grab that leaves him very vulnerable if he misses. His range is not
as good as Link either, so you can use this to your advantage when counter
attacking.
-Forward Tilt and Down Tilt is recommended when fighting him.
---
17 SAMUS
Common - Dangerous. Very dangerous.
-She has a mix of hard hitting attacks and great projectiles, often making it
very hard for Lucina to approach her. If you stay away too long, she can
charge her beam. If you get too close, she can either roll away or make use
of her powerful smash attacks.
-A lot of Samus players try a triple combo involving sending you up into the
air, followed by an Up Air, then followed by an Up Special. The Up Special
locks you in and gives intense damage before launching you off when you're
at high damage. Watch out! Be ready to counter if you see this pattern, or
preferably dodge.
-Her grab range is long, and while it makes her vulnerable if she misses, you
have to have good timing to hit her or grab her before she rolls away.
-The missiles can be hard to hop over as there is usually another following,
and she may fire her own plasma blast to follow up. When approaching her
while shes charging, be ready to shield as they may fire before it is fully
charged.
-Try approaching with Short Hop Air Dodges when she keeps abusing her Neutral
Special (Plasma Charge Shot). It may trick her into firing (and missing) so
you can do follow up attacks.
-Watch out when intercepting her in the air. Her air attacks pack a huge
punch.
-You will want to grab and use your tilt moves more than anything against her.
The Dancing Blades work nicely too, but can go bad if she retreats to the edge
in order to continue to fire projectiles at you.
-Watch out for her ledge recovery, she can dish quite a bit of damage if you
mess up in hitting her back off. She can fire from off the platform too to
throw off your set up too.
-I highly recommend doing short hop air dodges as you approach and jump
around her as a harassment method. It is safer in case she fires a projectile,
or tries to grab you. You will avoid both.
-Various players play in her in many ways. You will have to do some
adjustment. If they focus on projectiles, they usually fire in some sort of
pattern. You will have to learn it and move to counter it accordingly.
---
18 ZERO SUIT SAMUS
Common - Very fast.
-She relies on speed and acrobatics to deal damage to you. You'll have to
be ready for her to be in your face at one moment and gone the next. Down Tilt
and short hop Forward Air can help prevent this.
-Watch out for her Stun Gun, it is pretty easy to hop over and hit her with
a Forward Air attack, but sometimes she can be tricky with the timing.
-Likewise, her power whip will out range your normal moves, so is another
thing to look out for.
-When in the air, be sure to be ready to avoid follow up air attacks she may
do. Try to dodge and land safely before actually trying your own attacks.
---
19 PIT / 43 DARK PIT
Common - Lots of Pits!
Note: Dark Pit here since strategy is the same.
-Pit makes use of the bow for his ranged attacks, but also has the Upperdash
Arm for his Side Special that can attack and uppercut you with ease. He often
uses it as both a return method and ledge clearing method. You can Counter it
if quick enough, but it is much safer to dodge.
-He can manipulate the direction of the arrows, so your best bet is to either
side step them, or preferably jump and air dodge as you approach him.
-He has great recovery, so keep this in mind if you do off stage combat with
the intention of knocking him out. You may not make it back to the stage while
he does.
---
20 PALUTENA
Uncommon - Just a few Goddesses.
-She's pretty tall, so Neutral Airs work nicely against her as much as forward
Airs.
-Tapping her icon on the bottom screen will help keep track of where she
dodges too, as it highlights her character even when she's dodging. Be wary
of this, however, as if it were to get banned from tournaments or other
avenues of playing, you may be lost. In case of this scenario, try learning
how she moves and get an idea, and then try playing with it off after you
have mastered predicting the movements.
-She has a projectile attack which will fire a volley of shots at you. If you
manage to dodge it toward her, then run up to her and attack, as the follow
up shots do not home onto you, as they will still be firing at hte same place.
-She has a counter to look out for, which she may use just as you would use
yours. She can deploy it fairly quick, too, so be cautious when using your
Dancing Blade and Shield Breaker.
-Her Down Smash has incredible range and covers both sides of her, so be
careful if up close to her and dodging side to side.
-Likewise, her Forward Smash has her grow wings and attack, if out of the
damage range, the wind still pushes you back. This can throw off any attack
attempt and let her follow up with her own move.
-She has a teleporting dodge as well, making it difficult to determine where
she is going. As usual, this depends on the player. Adjust to their habit.
If they go behind you, be sure to aim there ahead of time. If away, follow
up and head toward where you think they may go. Just be careful!
-Her Side Special is a reflect barrier. Lucina does not have to worry about
this, but I note it here in case you are in a Team Battle and your partner
uses projectiles --as it may cause you to end up getting hurt. You can turn
it around and counter the reflected projectile, but it may be safer to dodge.
---
21 MARTH / 44 LUCINA
Uncommon - Attack of the clones!
Note: Lucina is here since strategy is mostly the same. Differences will be
noted.
I generally dislike mirror matches... for some reason knowing what the
opponent CAN do makes it harder, huh?
-You will have to watch out for that tipper. You should try to get closer
to Marth and use your lack of tipper to attack him, as his moves will be
weaker attacking you at that range.
-Watch out for Forward Airs/Neutral Airs. You use them a lot, but now they
will be used against you. Counter with your own going first, back off to
avoid them.
-Watch out for the Shield Breaker. Obviously, don't shield, dodge! But, if
you must, then time it so you power shield, in which case the shield will
take no damage. The best method is to side step dodge though, as it allows
a quick Forward Tilt afterward. Or, you can counter them for intense damage,
just don't mess up and get hit by it yourself.
-When in the air, they may follow up with some Up Airs and Forward Airs. Be
sure to be ready to dodge, and counterattack if necessary.
-If Marth is returning to the stage, be ready to counter, as he may swing at
you before grabbing the ledge with a Forward Air. Doing counter will send him
back out. Likewise, it will prevent his Dolphin Slash.
-Likewise, if you are returning to the stage and Marth is guarding, do a
a counter and hopefully you will send him flying from the edge to clear it
for you.
-You both may end up countering, the best thing to do is a quick Forward Tilt
after that, or a grab. Forward Tilt if they intend to grab you, or grab if
they intend to counter you again. It can become pretty complicated!
For Lucina specifically:
-Keep in mind your own strength and weaknesses. Remember they are playing as
the exact same character; but that does not mean you two are playing the
exact same way. You will have to learn what habits they made of their own
Lucina and counter them with your own. Remember that it will not matter what
part of the blade they hit you with, it will do the same damage, so unlike
Marth, spacing won't matter as much.
---
22 IKE
Common - Lots of friends to fight for!
-His moves have a bit of set up time, though his basic Neutral Attack combo
is pretty fast. Use this set up time to your advantage --your moves will hit
first most of the time. Your Down Tilt, your Forward Tilt, and your Forward
Air will attack him quicker than he can attack back.
-Remember he has a counter too. It does not seem to do as much as your own
counter, but the fact he has one means you should make your moves quick and
not too predictable. You could also lag your combos a little to trick his
counter and then follow up. You can do the safest approach and grab him right
after his counter, too.
-Watch out for well, all of his Smash Attacks. They will send you flying. You
can bravely counter them, or just avoid them. You can also try to intercept
them, but missing the timing even slightly will lead to pretty nasty
punishment.
-His forward special attack dash is pretty deadly. If you have good timing,
you can use your Shield Breaker to hit him as he charges you. But it is
generally safest to be ready to dodge and use an air attack, or use a counter.
-Ike's Aether (Up Special) is deadly and deals a great amount of damage.
Watch out of if he uses it near the edge. It is best to space yourself right
outside of his Aether range, and then Shield Break him when he gets back onto
the stage itself.
-His general air combat is slow, so he is easy to intercept. If off the stage,
try to Forward Air him before he uses Aether on you.
-You can also guard the ledge by using Counter as he will most often be
using an attack to clear the ledge, such as Aether.
---
23 ROBIN
Uncommon - I refer to her as her, but know that I am talking about the same
character you are thinking of.
-Arcfire will force you close to her, and she will usually be charging her
Thunder behind it. You can hop over the Arcfire, and the safest approach is
to usually counter. If they dodge out of the way, you will have recovered by
then to shield. If they try to grab you, you may be in a bit of trouble. If
they unleash Thunder or any other attack, your counter will handle it.
Alternatively, try to jump into a down tilt and hit them that way.
-Thoron is easier to avoid than the Giga Thunder. Thoron is the highest level,
which is fast and a straight line. You can jump dodge it, or shield from it.
Giga Thunder is the slow orb that does a combo attack when it hits you, which
more often Robin goes for. Be cautious of this.
-If Robin keeps using Arcfire, remember she has limited uses. When you see
her toss the tome, you can go in for the attack. Just watch out, because the
tome itself does damage if it hits you.
-Watch out for Nosferatu, her Down Special. She will recover damage pretty
well with this move, while adding to yours. If she keeps trying to get close
to you, she is likely setting up for this attack. Use Down Tilts to keep her
away.
-Don't roll around her too much. She may do her Down Smash, which uses her
Levin Sword to do a electrical attack that attacks both her sides. She also
can use this attack if you approach from the air, as it swings down from
above her head and will hit you too.
-The Levin Sword in general has good range and is a powerful attack. You will
want to be ready to counter, or use your quicker Forward Tilt. She will toss
the Levin Sword after a few uses. You can grab it in midair and use it as
a projectile.
-If you get caught in the Arcfire, try to go up and out of it. Robin usually
tries to close in with a dash attack which will send you flying otherwise.
-If you hit Robin off the map and follow up, just be careful you don't go
under her, as her Elwind has a Meteor Smash effect. It is best to hit her in
the head with a Forward Air.
-She is generally slow on the ground, relying on projectiles to slow your
approach. Use your speed to your advantage and make sure she gets no down
time to set up her projectiles. If she continues to spam, wait until her
energy is out and she tosses her tomes away.
---
24 KIRBY
Common - Lots of floating!
-He is sent flying easily as the lightest character in the game. His short
height makes it hard to hit him with Neutral Airs, so try using Forward Air
and quick drops instead. Down Tilts will be very helpful, too.
-His side smash has deceiving range. Be careful of this when facing him,
and dodge accordingly.
-Watch out for his Up Special. It is easy to counter on the ground, but hard
to hit with air attacks without getting hit yourself.
-Kirby will usually use his Down Special when returning from high up, which
can do damage if you're below him. Avoid him and run in for a grab, as that
form is also invulnerable from normal attacks.
-Kirby's hammer is drawn out before attacking in this game, allowing you to
set up a counter to counter it. Some players are tricky and hop around with it
out to try and off set your counter. If this is the case, just run to the
other side of the map, as Kirby starts to take damage holding it too long.
This usually causes the player to put the hammer away and you can resume your
attack.
-Off stage combat with Kirby is risky, as his return is far superior to you.
However, if hit right with Forward Airs, he will have trouble coming back,
or be KO'd at high damage. It is safer to guard from the ledge itself.
---
25 KING DEDEDE
Common - Dededes everywhere!
-As a large character, as usual his moves are slow and easy to see coming,
but do a ton of a damage and are risky to approach. You will want to use a lot
of fast moves against him, and then stay clear when he tries to counterattack.
-Watch out for his Side Special projectile, the spike ball he launches and
bounces at you. If a safe distance away, use a Smash Attack to hit it back
at him, or use your Counter.
-He has good recovery despite his size, and also has a slamming move with his
Up Special. It has a larger range than it looks, so be sure to dodge clear of
it when he does so.
-You will want to utilize Counter for quite a bit of his moves, but you should
have an easy time doing so, as they are really easy to see coming. He can be
tricky and difficult to deal with though, so use caution as you attack him.
---
26 META KNIGHT
Rare - Not too many...
-He has quick sword slashes and a lot of combo building moves, so you may
want to counter him often, as well as utilize Down Tilts and quicker attacks
to get him away from you.
-He has great air combat, such as his Up Air that has great launching
capability and hits twice.
-Watch out for his own sort of counter, as well as his other spinning attacks
that can tear down your shield pretty quickly.
-He is also rather speedy, and can run up and grab you pretty easily.
-With his small height and great air combat, it is safer to stay grounded.
-The best thing to do is out range him. While he has a lot of massive combo
attacks, his range is rather short. A Forward Smash will usually out do him.
If he starts a combo just outside his range and he can't hit you, throw a
Smash Attack at him to send him flying.
---
27 LITTLE MAC
Common - This guy is a beast.
-He is very difficult to fight on the ground. I find the best strategy usually
exploits his weakness regarding air combat. You can throw him up in the air
and start juggling him with Up Air and Up Tilts. Just watch out for his
counter which he will throw out. It acts fast and does decent damage.
-Little Mac tries to get back to the center often, as his recovery is
terrible. Take advantage of this, and stick to the edges. If he comes close,
grab him and throw him off behind you, then follow up with a Forward or Back
air to send him out. He will have a hard time coming back, and you can KO him
at very little damage.
-When he does his hop punch (Side Special), and you are close to the edge,
if you side step dodge, he will go off tumbling to his doom, as he cannot
recover from it.
-If he starts to charge a punch, he will not flinch from the quick moves you
can do, so either prepare to counter or dodge. You can also learn the range
of his punch, and move to right outside of it and ready a Shield Breaker or
Smash Attack. This is risky if you are not too familiar with fighting him,
though.
-If his KO meter is filled, keep avoiding him or getting behind him. It has
the ability to break through shields, so shielding will not work. Once he
misses, he is vulnerable to a Smash Attack as he recovers.
-While his Air is terrible, he can still do his Up Special to send you flying
upward off the map, so watch out.
-He is faster than he appears, and has great range with some punches, and
every punch as great power behind them. Use Down Tilts to throw him off
with Forward Airs. Just be careful about that counter again.
---
28 FOX
Uncommon -Surprisingly...
-Fox seems to have less going on with air combat this time around, with his
jump height and speed seeming off. You can attack him with Forward Airs as
well as Down Tilts, both work well. Watch out for his kicking combo that can
lock you in to deal damage. Try to get out of it by going up.
-His projectile is his blaster, but it does not make you flinch. It will still
give damage, so don't let the enemy abuse it too much as your damage will
go pretty high over time if he keeps doing so.
-He has a Reflector that can damage you if too close, so be sure to do your
attack or grab him before he is able to activate it.
-His Side Special dash is fairly easy to see coming and does not do too much
damage, he may use it to get back onto the stage.
-His Up Special is very easy to see coming, but hurts a lot. So watch out for
the fire fox. You can set up a move to hit him right at the very end of his
move. If he is doing this off map, it is safer to wait at th edge for him to
come back before you hit him, rather than trying to intercept him.
---
29 FALCO
Rare - Poor guy prefers the air.
-He is slower than Fox, and easy to land Forward Airs against. However, his
attacks do more damage, so be careful as you approach.
-His blaster, unlike Fox, will cause you to flinch. He fires slower though,
so it is not impossible to approach him. Likewise, his Reflector he uses as
a projectile, making it another thing to look out for.
-Regarding intercepting and air combat, it is the same as Fox. Best avoid
out of stage interception if he uses the flaming move, and wait at the ledge
to attack him.
-His air combat is better than Fox. His Forward Air does great damage and has
launching capability, so try to avoid being set up for it.
-He has an impressive Meteor Smash Down Air that is fairly easy to use. Watch
out for this. You would have to time an Up Air carefully to hit him before he
does it, so you may be safer dodging.
---
30 PIKACHU
Uncommon - Pika!
-Speedy and with upgraded Thunder, the bolt will still come down if you hit
him when he uses it, unlike previous games. Watch out for this, he will likely
try to use it when you are returning from the ledge or coming from the air.
-He is very small, so you will have to use very low Forward Airs, or the
Down/Forward tilts to get good hits on him. Dancing Blade (green/down) will
also work nicely on him.
-They may spam the electric attack, and it has great range and bounces,
making it really difficult to approach Pikachu without getting damaged. You
will have to do a lot of short hop air dodging and dodging in general just
to make it up to him.
-Watch out for his Downward Smash attack, as his electric spin catches both
sides in and gives great damage. Likewise, his side smash has good range and
power. You will want to have your Counter ready.
---
31 CHARIZARD
Uncommon - That Flare Blitz...
-All of his attacks hurt quite a bit and have good range. You will have to
do some Neutral and Forward Airs, as well as retreating quickly. He has good
recovery too, making air combat with him pretty difficult.
-You will know when he is about to do the flame charge move, as there is a
sound he makes before he does it. Get a counter ready, or side step dodge
to let him keep going hopefully off the map. He takes damage each time he
does the move too, so if they keep spamming it, keep dodging it to let them
build up their own damage.
-Watch out for his Meteor Smash. He does it fairly easily when off the map.
Try not to approach from under him.
-He has fire like Bowser that can keep you too far from him to counter. You
will want to jump and Shield Break him, or Forward Air him, to avoid that
flame.
---
32 LUCARIO
Uncommon - Aura power! Very deadly.
-With the new Aura mechanic, you will want to watch out for Lucario as you
deal more damage to him, as he will be more powerful the more you attack. He
has great projectiles in the form of Aura Sphere and an extended Force Palm
at high damage, as well as a counter, and force Palm up close as a grab move.
His recovery is simply amazing at high damage too, and he has the ability to
cling to walls that can be used to getting back to the stage.
-You will want to be ready to air dodge or shield from the Aura Sphere, as
well as dodge away, or sidestep, the Force Palm. He is tall enough to Forward
Air safely, but has quick, powerful attacks if you get too close.
-He can be intercepted before he uses his Up Special attack, but if you fail
he can ram you with it, which may hurt quite a bit.
-His moves at higher power from high damage will have range longer than they
appear, so be cautious of his forward smash attack as well as his downward
smash attack. His downward smash attacks both sides, so be careful if dodging
to his other side!
-Force Palm at higher damage is very deadly. If too close, it counts as a
grab, if too far, it is a projectile. Both are bad for Lucina. However, I have
noticed not many players will abuse this advantage that I have seen, despite
Lucario being capable of doing so.
-He can fire his Aura Sphere from off stage and still safely recover, and
likewise constantly fire from the stage when you attempt to recover. This may
keep you at bay, and so you will have to jump often and dodge your way up
to him, and hit him quick enough before he can hit you with his own move. He
may counter, and if he does, you may have a quick chance to shield. If you
see him disappear --shield!
---
33 JIGGLYPUFF
Uncommon - Puff!
-Jigglypuff has amazing recovery and a lot of air, floating attacks. It also
has the Rest move that can send you flying, but if it misses, leaves it
extremely vulnerable.
-Most often people float around and use the Side Special punch to increase
float duration. It also has a decent range with that move, so will likely
try to hit you with it in addition to other air moves.
-Jigglypuff is easy to intercept in the air, but it can be risky due to your
relatively weaker recovery. If intercepting, do so over the stage itself.
-If Jigglypuff uses sing, it is probably trying to set you up to do it's
Down Special Rest on. You can move away from it and charge a Shield Breaker
to attack it with while it is vulnerable.
-Use quicker attacks on Jigglypuff rather than strong ones. Forward Tilt and
Down Tilt will work better than Smash Attacks. However, if you see a good
opportunity for a Shield Break, do it. If Jigglypuff shields, and it breaks,
it causes it to "pop," going straight up and out of the map. It's actually
quite amusing...
---
34 GRENINJA
Common - Greninja...
-He uses quick moves and has some pretty decent attacks to send you flying. He
also has a counter among other moves to throw you off balance. Once you know
his moveset it is relatively easy to get around him, but it varies from
player to player.
-Keep an eye on his shadow. If the player attempts to Shadow Sneak, you will
spot the shadow moving. Quickly dodge and set up for a Smash Attack, and
strike the moment he appears.
-He has a counter, but it's slow enough to shield after you hit him. If he
disappears like Lucario, then shield!
-He has Water Shuriken as a projectile --be careful! At full power, it does
consecutive damage and ends with a launch. Do not counter, as you will only
counter the first hit and still be hit by the follow up hits.
-I see players sometimes get you off the map and use their Up Special to
launch you far away. Be careful if Greninja looks like it's about to set up
to do this, as it can push you out of ledge grabbing range. Be ready to
dodge, or prevent it from doing it in the first place.
-At the ledge, watch out for Greninja's Up and Side smash, as it covers a
good range and can often hit you right back out. When dodging around, too,
the Up Smash can hurt you on either side of him. You will want to prepare a
counter, or a quick Forward Tilt/Forward Air.
---
35 DUCK HUNT
Common - Sighhh...
-This dog has amazing projectiles and defense when used right. His Can
projectile can be manipulated from inside his shield, even! His plate throw
and gunner just add to the variety of projectiles. To top it off, he has
great recovery and attacks in general. You have to be very cautious against
him, and he gives Lucina great trouble.
-The short height makes air attacks difficult, and the Can constantly
bouncing around can make approach difficult. You will want to dodge and attack
fast before it attacks back. Often players use the Can and Plate both.
-You want to use more low moves, such as Green Dancing Blade (low), or Down
and Forward Tilts. Duck Hunt stays close to the ground, and has decent defense
range, so you have to be quick.
-When off the map, you may be safer at the ledge than attempting to intercept.
It has better air moves than it looks like it will have.
-Watch out when rolling behind it, as his down smash will attack both sides.
-You can launch it into the air via throwing or doing a Blue Dancing Blade
(Up), and keep juggling. Just be careful about any Cans there may be laying
around!
---
36 R.O.B.
Rare - Rob!
-He has a laser projectile, as well as a spinning top of sorts. They are
fairly easy to see coming and dodge accordingly. You will want to be most
cautious of his air attacks, as they pack quite a bit of punch, especially his
side and down airs. He also has great recovery, so watch out for that.
-He is pretty easy to intercept when using his Up Special to return, but all
the same remain cautious of whether he will utilize a different move while
doing so or not.
-He has a very easy Down Air Meteor Smash, with a good range too. You can
usually tell it's coming by the player moving to set up, and when the thruster
goes off for a brief moment.
-He has a spinning attack that is really easy to jump in and counter for an
easy counter hit on him.
---
37 NESS
Uncommon - PK Thunder!
-Ness has some deadly moves and is short, so gives a few different problems.
Some moves are hard to utilize against him, such as Neutral Air, unless he
keeps floating around. But if on ground, you're better off with the Forward/
Down Tilt attacks.
-Watch out for his Back air and Forward air moves, as they can pack a punch.
He may try to trap you in his PK Fire, in which case getting out as quick as
possible before he does a dash attack or bats you would be best.
-His PK Flash isn't too much of a problem to avoid, sometimes they can time
it very well, but usually it isn't used.
-His throws, especially back throw, is very deadly, and so take all
precautions to ensure you don't get grabbed by him!
-I've seen several players use PK Thunder to keep juggling Lucina. If this
starts happening, focus on dodging rather than approaching them. Sometimes
they may try to PK Thunder themselves for a powerful attack. Either get out
of range, or get ready for a counter. Or, best is to try and intercept it
before they get hit.
-If Ness is knocked off stage and has already used his second jump, he is
really easy to keep away. He will have to rely on PK Thunder to give him a
boost. You can either go and hit him farther away with an intercept, or you
can do something a bit sneakier and just take a hit from his PK Thunder and
recover to the ledge to let him fall to his demise.
---
38 CAPTAIN FALCON
Common - Paunch!
-One of the most common fighters online, he is fast and powerful, and has a
good variety of attacks. His main Falcon Punch isn't actually used too much,
the Kick and uppercut, and especially the Forward Air knee I see more often
He can run up and grab you pretty easily, so be prepared for close quarters
combat.
-You can set up your counters pretty easily as his flame moves you can see
starting up pretty visibly. It's his quick punches and kicks that are harder
to see coming, along with his dash and grab. You will want to use the low
tilts (Forward, Down) to keep him at bay, as well as Forward Airs to keep
pushing him back.
-When off stage, he is safe to intercept. Don't go under him though, as he has
an easy Meteor Smash he could do to you. Watch out for his upward special too
as it will count as a grab.
-He is overall not too difficult to deal with, but again it depends on the
player. But the basic moves that do well against him will remain the same.
---
39 VILLAGER
Common - Bowling ball...
-Villager has quite a few projectile moves. His rocket and slingshot are two
to look out for. He also plants a tree that deals huge damage when it gets
chopped down, as well as the axe that he uses to chop it. You will have to
be used to fighting him ahead of time and be familiar with his moves to start
to be able to beat him easily. His short height also adds to the difficulty,
and to top it off, amazing return both horizontally and vertically via his
rocket and balloons.
-Against his rocket, if he is riding it, simply counter, as it will destroy
the rocket and hurt him. If he's just launching it, it's easy enough to hop
over. Some players use it hoping you jump toward them so they can grab you,
so surprise them with a forward air, or dodge up and backward. Sometimes they
use the rocket to set up a tree.
-If they plant a seed, you can quickly intercept and keep them away from
growing it. If they manage to water it, a tree will grow out. If you see them
about to water, just stay away as the tree growing will launch you.
-If the tree is grown, they will start chopping when close. What you can do
is either wait around until they get tired of waiting, or you can jump and
arm a Shield Breaker. If done right, it will pierce through the tree and hit
the Villager behind it, too. It has worked many times, destroying the tree
and sometimes the Villager's shield, or sends them flying. You have to be
careful, because if he swings his axe and you're too close to the tree, it
will hurt you a lot. Also make sure it is during his first swing or else the
second swing will cut down the tree and you will be in real trouble when it
lands on you.
-Once there was a Villager who did stage edge harassment, hanging from the
ledge, hopping up, shooting sling shot (his forward air) and going back to
grabbing the ledge. You can move to air intercept when he next comes up, or
go down under him and do a Dolphin Slash upward to knock him off. You can
also get close enough to counter if he tries again.
-If he comes back via balloons, you can pop them. He flies very high, so be
ready to intercept just as high. He has enough flight to fly under some Omega
maps that allow it.
-If you're hanging on the ledge, he will most likely be getting a bowling ball
to drop on you. You should quickly drop down then angle a bit away from the
edge and then slash back up. If you hop over the ledge he may drop it at the
right time. Either way, if coming back to the stage and he's already arming
it, he's planning to drop it, so you may want to dodge then quickly Dolphin
Slash back up.
-If he uses that bowling ball on the ground, you can easily counter it.
-His Down Smash traps you into the ground, and is usually followed by a
Bowling Ball. Escape and air dodge out of there as quick as you can.
---
40 OLIMAR
Rare - Alph is even rarer.
-Olimar has low height and deceiving ranges since it depends on his pikmin.
They each have their own effects too that one who is not too familiar with
him can find difficult to keep track of. His grab range and special range is
decent. He also has better recovery in this game. You will want to use the
usual lower moves (Dancing Blade green, Down Tilt, Forward Tilt) as well
as counter to eliminate the Pikmin when they're thrown at you.
-Be weary of his Side Special that throws Pikmin at you. The damage from that
accumulates over time and can really add up.
-Try and intercept him off stage when possible, but if his recovery is proving
to be too much of a hassle, take the safer approach and sit at the edge and
be ready to smash upwards or to the side depending on what angle he is coming
from.
---
41 WII FIT TRAINER
Rare - So much for that.
-Wii Fit Trainer has some pretty stiff looking moves, but they pack quite a
punch. The moves to look out for are her throws and Forward Smash attack, as
well as her ability to heal and use a light based projectile. You will want to
intercept her when possible using Forward Airs and other quick attacks so she
cannot heal nor use her projectile.
-Her Forward Tilt and Smash hit both sides of her, so you have to be careful
when you approach.
-She has a lighter projectile in the form of a Soccer Ball she hits into you.
It is fast so you have to be ready to dodge as you approach.
---
45 SHULK
Common - He's really feeling it!
-Shulk has impressive range with his sword, and to add to it he has all the
different styles to increase his Speed/Launch/Power/Jump/Defense. You will
have to learn to keep track of which is which (list provided below). This will
help adjust your strategy accordingly --but they do not make too much of a
difference overall. He says the name of each style, but I will put the colors
below to make it easier for you, too. Other than those, he has an impressive
counter with a very long range to look out for.
-Jump (Green) - Higher jump, lower defense. Your hits will hurt him more, but
his return will be better this way. If he does this, start going on the
offensive.
-Speed (Blue) - Faster movement, lower jump/attack power. You can go on the
defensive here, but even if he gets up to you his general attack will be
weaker. As Lucina his speed should not be too much of a problem for you.
-Shield (Yellow) - Higher defense, but lower jump, attack power, and slower.
I see players use this most when at high damage, for good reason. But at
high damage, that increased defense will not save them from being launched.
If they use it at the start of the match, keep doing quick moves to slowly
give them damage. The effect will wear off eventually, and that accumulated
damage will make a difference.
-Buster (Purple) - Stronger attacks, but weaker launch and defense. This is
the most common one I see people start off with, with the hopes to hit you
hard and fast. The weak defense will allow you to use simple moves or Dancing
Blade to give him a lot of damage very fast, and simply shield your way from
his attacks that have longer set up. Countering will hurt more too, as it is
based on the damage they would have done to you, so use this to your advantage.
-Smash (Red) - Strong launch, but weaker attack/launch resistance. If they use
this at high damage, they will go flying pretty easily with even your tilt
moves. Of course, you have to be careful if at high damage yourself. It may
come down to a quick Forward Air or Counter to get the best of Shulk this way.
-Shulk's counter has a large horizontal range, but the advantage is he can
miss you often with it. If you attack from below or above, his swing usually
seems to miss. Keep this in mind if the opponent keeps countering.
-Shulk's Upward Special is a double hit, so be weary of the second slash.
-Shulk has the "Backslash" that he uses often when coming from high, you can
dodge and take a swing as he attempts to recover.
-Most of his moves you can beat to the punch, as they have long set ups. You
can choose to use a Tilt to cancel him, or use a counter. Watch out if you
come from above or below him, as his Upward and Downward smashes are quite
deadly.
---
46 PAC-MAN
Common - Waka waka
-He has some decent projectile and ranged moves, and he can be either really
easy to deal with or really hard. Most of the time it leans on the easier
side, as his moves are easy to see coming and to intercept. His range is not
the best, either.
-The Hydrant. People use it to clear the ground below them, but some use it
to power up a move and let the water carry them to you. The best thing to do
is when the hydrant is dropped, get to the side opposite of Pacman and launch
it at him with a Smash Attack. He probably intends to do the same with you,
in which case get ready to dodge. You can also use the water to charge a
shield breaker and head toward him if he ended up farther away. The hydrant
will only fire jets of water twice.
-Projectiles. He charges up fruit and various projectiles, highest being the
key. You will get used to the effects of different projectiles, but they're
all easy to see coming, and can be grabbed in midair with a jump dodge. You
can easily hit him when he's prepping it too.
-His Side Special makes him deploy a power pellet before he launches into
an attack. You can hit him with a quick Forward Air when he does so to cancel
this move, and even consume the Pellet for yourself to heal damage. He tries
this often off stage so is a great intercept move to keep him off the stage.
-His Down Smash attack will attack both sides, so be sure to stay clear of
this or to attack from the air when he does so.
-His Upward Special will see him bounce on a trampoline several times. Often
it takes several bounces to make it back to the ledge, so intercept to hit
him off course and possibly miss the trampoline.
-As you fight him more you will start to see the cues to counter. His large
ball shaped size makes it easier to hit him with Forward Airs despite his
height.
---
47 MEGA MAN
Uncommon - Capcom!
-Mega Man has a ton of projectile moves in his smash and special attacks. He
also packs powerful melee attacks, making him pretty difficult to deal with
depending on the player, much like Samus. You will have to approach him and
be ready for quick counters, dodges, grabs, and air slashes.
-His default projectiles (like his quick and basic attack) can be dodged
by hopping over or just running toward him and taking the damage. The one to
look out for is his forward smash, which is a charge beam with great range
and incredible power. You can move in for a counter if close enough, or do
a sidestep dodge.
-His Neutral Attack, Side Tilt, and Neutral Air are all the same mini
projectile attacks. It can make it hard to approach him for one who uses these
right, often jumping and hitting you. They have a bit of knock back, and hit
far enough so your counter cannot hit them. You can Short Hop Air Dodge into
them, or try to angle yourself so your Forward Air hits them without you
being hit by the projectiles.
-If you're hit off the stage, watch out for his Meteor Smash, as it is very
easy to pull off, as he fires a shot down below him. Try to come from a
diagonal angle if possible.
-He seems vulnerable to the Dancing Blade (green), a great way to get a high
amount of damage on him.
-If you get hit by his sticky bomb, you can just hold shield when it's about
to explode, and it won't hurt you. If you touch him too, it will stick to him.
-You can catch the gear projectile he throws, but it's easier to just dodge it
and attack him directly.
-He is pretty easy to intercept in midair, but look out for his flaming blade
when he returns to the stage. It is often used.
-If you're coming from above him, be weary of his Tornado projectile that can
carry you up and off the map, as well as his upward smash which can send you
flying. It's safer to not approach him from directly above.
---
48 SONIC
Uncommon - Spindash!
-Sonic, as you can imagine, relies heavily on his speed and quick but
effective attacks. He dashes around the field quickly, and can launch into
the air and come back down quickly with all of his moves. More often than not
the Sonic players I've run into use the same strategies.
-Often they will do a rolling spin that then goes upward into a scissor kick
of sorts. Knowing this, simply side step dodge, then follow to where they will
be, and intercept in midair.
-His Dash Attack can send you flying horizontally at a low angle, very
deadly if not prepared for a quick return!
-His off stage combat is not too good, so you can feel free to intercept him
when he is off the stage. The one move you have to look out for however, is
his homing attack, it especially makes your own return difficult.
-His Side Smash is easy to see coming, so use Counters accordingly. In fact,
Counters are very useful against him in general.
-He is pretty short, but Forward Airs often help anyway as he is often off
the ground, or close enough by the time you jump that it will hit him anyway.
---
49 MII FIGHTERS
Friends/Local Only
Mii Fighters are something else. They usually emulate several fighters who
are in the same category as them (Fighter like Little Mac, Gunner like Samus,
etc).
With the above in mind and the fact it is among friends and local, I will only
equate the sort of strategies you would need to adjust for their height, but
otherwise you will follow a mix of strategies that apply to the above
characters.
Mii Brawler - Deal with them as you would with Little Mac. Their return is
a bit better, but they have a lot of close punches and are pretty easy to
counter and take off the map. Watch out for that Shot put projectile though,
if they use it. It is easy to see coming, but a hassle none the less.
Mii Gunner - Deal with them as you would Samus. Some differences are however
in their customization, so it really depends what sort of build you're facing.
Mii Swordsman - You should be able to out range them with your own sword, but
be weary of the counter and possible combo moves they may have. It varies a
lot, but those ones are usually there. Prepare your own counter for their
combos, and grab for their counter.
In general, all three always have the same height, and Forward Airs should
work fine, Neutral Airs may have a bit more of a problem. Dancing Blade will
come in handy, using whatever direction fits what you want to do with them.
---
XX MASTER CORE
A bonus section.
This is just a brief guide on Master Core as Lucina. It is pretty straight-
forward and logical, but I thought to add this in anyway as people have asked
me often how she could beat him without any buffs. It's more about memorizing
what he does rather than doing anything as Lucina, so is more one size fits
all with any fighter, really.
If you reach him on Difficulty 9.0 (2200 G run), then he will start in his
first, humanish form. Try to take as little damage during master hand as
you can (dodge and then a lot of Neutral Airs!) You only need to damage
Master/Crazy hand a certain amount before the fight starts.
1st Form--- (Human...thing)
The weak spot is that purple glowing part of the head. You will be using a
lot of Neutral Airs, Forward Airs, Up Airs, and Upward Smash attacks when
you can. Simply dodge the attacks I list below, which will always give you
a few seconds to rush in and do a few of these attacks.
The attacks he has:
-Where he holds his head, then screams out a purple wave. This has a high
launch ranges, but does not do too much damage. You have to be ready to air
dodge, but preferably roll dodge. Don't roll right up to him, rolling away
seems to work best.
-Where he spasms and shakes and then two golden glowing hands come out. If
you get caught, even when shielding, you will be consumed and take damage.
To avoid this, you can either roll dodge, or do what I find easier and run to
the edge of the stage, falling then dolphin slash to the ledge. The hands
will have passed you by now.
-One where he fires a beam after swinging his arm through the air. When you
see him swing his arm, wait for the black beam to come first, then air dodge
to avoid the actual beam that comes after. Very easy to avoid.
-One where orbs form on his head, and then he headbutts the floor and they
spread out and explode in cross shapes. You can land a few hits before he
headbutts. Then, rush to a safe place away from the orbs, and either duck to
avoid them if all high, or use shield if out of most of their range. Be
careful though, if you are in range of more than two your shield will likely
break. If you get lucky and the orbs aren't around the head, you can unleash
several smash attacks on his head while the orbs explode.
-One where he makes orbs in the air and then lifts the stage up to them. You
can go grab onto the ledge, or just find an empty space and shield. The stage
does not stay up there too long.
These are the moves he does. They are in random order when he does them. So
learn the patterns and unleash Lucina's air attacks on him!
2nd Form (Scorpion...thing)
You can land a full shield breaker on him if you start as soon as the black
stuff starts to materialize the beast. Aim at the center.
Afterward, the attacks below can easily be followed up with side smash attacks
as well as quick Forward Airs to deal great damage.
-One attack will see him hop into the air glowing yellow. This means he will
either come down on the right or left of the stage. The camera angle should
tell you which. You can shield or roll dodge toward the center to avoid this.
-One attack will see him arch with tail high up, meaning he's about to unleash
a purple attack all around his body. Go off to the side or roll dodge out of
the way, then jump toward him preparing a Shield Breaker to do awesome
damage as soon as it ends.
-One attack will see spikes appear from him. This means either shield or roll
dodge as a pillar of spikes will appear from below you. Easy to dodge.
-One where he jumps to the background then comes back to bite you. You can
shield quickly or air dodge to avoid this.
3rd Form (Swords!)
This is the hardest form for Lucina to deal with, but has an easier time than
others do, using Neutral Airs and Forward Airs. You will have to do a lot of
jumping to reach the Swords. You can land a few hits while it materializes,
too.
-One attack will see it unleashes four small orbs. Be sure to avoid the swings
that start them, too.
-One attack will unleash two larger orbs. Watch out as they will head back
toward the swords, too.
-One attack unleashes a flurry of blades. You can see the blades charging up
first. It ends with a very hard to avoid launching attack. You can shield
through the flurry though it breaks your shield before the launch. If you're
at low damage this is safe enough, though. Another way to do it is to jump
to trick it to start the flurry high up, and then run to the bottom right
ledge and it should miss you. Lastly, what works best is run to the right of
the stage as it charges, then run left, it will begin swinging. Now, just
shield, and if you had a full shield, you can survive the other attacks as
well as the final swing it does.
-One attack will have a flash and then a powerful launching swing. Simply
jump to air dodge or roll out of the way.
-One attack will see the swords surround you, then swing until the main one
swings down. The best method is simply sidestep dodge the swords as they come
in rhythm, and then roll out of the way at the final sword and unleash a
smash attack on it while it recovers.
Final Form (You!)
Now this can go good or bad. Try not to do too many Smash Attacks, because as
Lucina, they just have to do one counter to likely kill you with your high
damage. The safest option is to grab them and whittle down their HP. They
run on an HP system, so you do not need to KO them the conventional way. You
can use Downward Tilts and quick attacks to whittle down the HP too, bu the
safest is to constantly dodge and grab it.
Since they start large, Neutral Airs work well at first, too!
Now knock that orb out of here and you did it! It may take some practice and
a few run throughs, but she doesn't have too hard a time with it for sure.
You can refer to the Marth/Lucina section above for 1 v 1 if you need more
help with this part.
Map Strategies [S05]
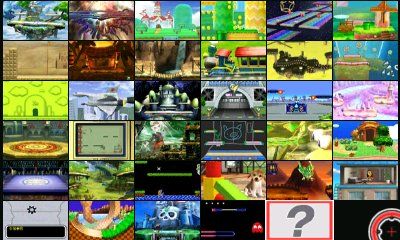
This section is about Lucina's strategies on specific maps. This is for local
or For Fun mode, as it is the standard maps, not Omega (which For Glory has).
Obviously, the strategies may change depending on who you are fighting, and
these are just general strategies regarding the stage itself. Look at
strategies versus specific characters (other section) and mix with strategies
on maps for the best usage!
3DS:
I refer to "Battlefield" strategies as some maps have a similar make up and
so strategy. When I say that, just refer to that section. Likewise, strategies
for Omega maps are covered under Final Destination, as they are based on that
map.
A lot of these are simply general strategies and point out stage hazards.
As usual, use Ctrl + F, type in the map's name in all caps. So, if the map
was "Ylisse", you would type in YLISSE. Make sure its case sensitive.
Stages: (3DS)
01 Battlefield
02 Final Destination (Omega Map Strategies)
03 3D Land
04 Golden Plains
05 Rainbow Road
06 Paper Mario
07 Mushroomy Kingdom
08 Jungle Japes
09 Gerudo Valley
10 Spirit Train
11 Brinstar
12 Yoshi's Island
13 Dream Land
14 Corneria
15 Unova Pokemon League
16 Prism Tower
17 Mute City
18 Magicant
19 Arena Ferox
20 Flat Zone 2
21 Reset Bomb Forest
22 WarioWare, Inc.
23 Distant Planet
24 Tortimer Island
25 Boxing Ring
26 Gaur Plain
27 Balloon Fight
28 Living Room
29 Find Mii
30 Tomodachi Life
31 Pictochat 2
32 Green Hill Zone
33 Wily Castle
34 PAC-MAZE
---
01 BATTLEFIELD
-A standard map with three platforms in a triangle shape.
On this map, you can utilize the platforms to avoid those with projectiles by
hopping up to safety (or dropping depending on where they're firing from). It
is the most optimal map for Lucina as it allows her to approach projectile
enemies a lot easier than on Omega maps.
Her Up Tilt can hit from below both the side platforms, as well as her Up
Smash. Very useful for hitting opponents above you.
If you're on a platform with another opponent, you can drop down below the
platform, and perform an Up Air as you do so to knock the opponent upward. A
useful move that usually catches them off guard. This is easier performed on
the New 3DS's second circle pad though.
You will probably utilize a lot of Aerials to hit opponents on the higher
platform. Likewise, opponents may attempt to recover by flying over the ledge
onto one of these. You can move to intercept very easily.
---
02 FINAL DESTINATION (OMEGA MAPS)
-A flat map.
Final Destination is the basis for Omega Maps. Completely flat, you are
actually at a disadvantage. This map benefits projectile users and fast
characters such as Samus and Little Mac.
All of the For Glory strategies apply to this sort of map, as For Glory mode
only plays on Omega Maps. You have to approach projectile opponents with a
lot of shielding, dodging, and jumping.
You will have to rely on sending opponents off the map and keeping them out
there, then doing your best guarding the edge. I am very broadly speaking here,
as I cover Omega maps in the rest of the guide there is not as much to say
here!
---
03 3D LAND
-A scrolling map that goes through several stages.
This is a scrolling map, meaning it will slowly be moving from left to right.
This means the KO boundary moves with it, and so the players have to be on the
move constantly.
There are several stages to the level.
Stage 1: A lot of platforms and terrain. Some high, some low. High terrain
allows you to KO opponents upward easily. During Stage 1, it is really easy
to knock opponents out the left side of the screen even at low damage, as
the boundary is moving to the right so they hardly have time to recover.
If you are confident, you can stand at the edge, grabbing opponents and tossing
them out the left and running right, or hitting them with tilts even if you
can't see you and the opponent fighting.
Stage 2: Four Platforms in a diamond shape. The map isn't scrolling anymore,
so it is more like a normal map. The platforms may change to a different angle
depending on the circumstances, and you may have to adjust accordingly. Side
tilts and smashes are useful as their arc covers even the diagonal platforms.
Be weary of recovery, however, it is surprisingly easy to fall to your death.
Stage 3: The platforms land, and you are back to a scrolling portion. The
first part goes down hill, with plenty of crevices to hide in and do upward
hits. But remember that the map is constantly moving! Lucina can utilize good
speed to keep up, but has to watch out for hard hitters that could easily
send her flying out the map. You can use aerials to send opponents to the left
as you continue forward.
Be very careful when you get to the spinning blocks. They make Lucina's
awkward recovery even harder. At this point, I recommend avoiding the enemy
as much as possible and focusing on staying on the map itself. However,
depending on who the opponent is, they may be having as much trouble as you
are. If this is the case, you can attempt to sabotage them if comfortable
enough, intercepting them with aerials. This gives poor Little Mac a lot of
trouble, especially.
Eventually you get to a series of pipes, which for the most part will remain
flat, a good chance to move to KO opponents who may have built up damage by
now.
Stage 4: Three platforms on a colorful track. What makes this tricky is the
platforms move and change position, and stage hazards start to break the
platforms too. If you are on the higher platform, it is okay to risk aerials,
but be weary of where the lower platform is at for the sake of recovery.
The section does not last long, and will bring you back to Stage 1.
---
04 GOLDEN PLAINS
-A map with coins and occasional scrolling.
This map scrolls too, either left or right. It is not constantly scrolling,
however. There are coins on the map, and collecting 100 of them will power you
up. Blue/Red coins appear to give you more than 1 coin of value.
In Lucina's case, what she has to look out for is power characters getting
power ups. Collect coins too, but focus on attacking them. Pay special
attention to which way the map is moving to line up your KOs to send opponents
flying opposite to where it scrolls. (If map moving left, Smash them to the
right).
Utilize the terrain and platforms to avoid projectiles to give those who use
projectiles a hard time.
---
05 RAINBOW ROAD
-A map that goes down the Rainbow Road on a flat platform, stopping at
several areas.
This one starts on a flat platform, so Omega Map rules apply for that section.
It constantly goes back to the flat platform after stopping briefly at
different stages.
Note that during the flat platform, you can come from underneath --however
your entire body needs to clear the platform to stand on it, meaning if you
intend to Dolphin Slash, make sure you come up fully. The downside is you
are left vulnerable too with that, making this very dangerous. Always come
from the ledge when possible.
There are racers as a stage hazard you have to look out for. The stages below
are sometimes in different order, so I describe them best I can.
Stage 1: Two platforms, with a big gap in the middle. Watch out that you're
not falling through the gap when the flat platform lands here. Watch out for
the racers that approach from the right sometimes. There will be a warning
sign when they do. It is recommended staying in the lower left to avoid them
and knock opponents into them with your up tilts.
Stage 2: Two platforms, and a place to stand in the lower left. Racers may
appear from the top left, and you have to stand in the lower right to avoid
them. There is limited standing room, meaning projectile opponents may be
close to you, a chance to attack them and send them flying.
Stage 3: Two platforms on the sides, and the stage underneath. Racers will
appear from the background. Use the side platforms to avoid projectile
opponents from the ground, and use the ground to avoid the ones on platforms,
or simply shield or jump. It is harder to get up to them due to the racers
and the stage itself.
Stage 4: A tumbling tunnel. You will have to keep moving opposite of the
screen in order not to get thrown out the side. There are stationary
platforms you can take advantage of. Knock your opponents to the ground and
use the rolling tunnel against them while staying on the platform yourself.
You are fast enough to keep running with the wheel if you please, however.
You can also set up a Dancing Blade or Shield Breaker, using the tumbling
to assist you in getting close to an opponent to hit them away.
Stage 5: Lands at the finish line, a flat part of the map, Same rules as the
Omega Maps/Flat platform apply! However, racers may appear from the back,
with no platforms this time, be careful about them. Use some jumps and air
dodges to avoid them best you can while watching out for your opponent who
will likely be dodging too. Use aerials to intercept them if you see the
opportunity.
Stage 6: Three platforms in a triangle shape, with a lower white colorful
platform beneath. Racers will appear from behind. Use the platforms to avoid
them as usual. The side platforms are too high for your Up Smash to reach,
so you will have to use Up Airs in order to hit opponents from below.
---
06 PAPER MARIO
-A map with several stages, each differing in the gimmicks they feature.
This map is pretty bad for Lucina, especially Stage 3. I recommend trying to
KO the opponent before then.
Stage 1: There is a low ground (left) and high (right) with a green pipe
that shoots air out. A fan occasionally appears in the background to blow
fighters to the right side, adding an air effect that makes you more floaty.
There is also a platform in the top left sometimes. It is easy to KO people
off to the right with the fan blowing.
Stage 2: A ship with several platforms. Moves up and down a lot. You will
want to be most cautious of when the ship is going high up and down if you
are attempting to return from off the stage. Use the ship platforms to avoid
projectiles and approach enemies rather than straight on.
Stage 3: A big Bowser head platform in the center with platforms on both
sides that move up and down. This section is very unfriendly to Lucina's
recovery. You are better off avoiding the opponent and staying on side
platforms. Some try to lure you to the center which starts spinning,
especially when they are a character with good recovery or generally good
air combat. You can knock them away and return to the side platforms, just
ensure you have your second jump or Dolphin Slash still available. Be
extra careful when the center is spinning. There is no "ledge" for the
center. it will return to Stage 1 after this.
---
07 MUSHROOMY KINGDOM
-A scrolling map with a lot of obstacles and holes.
This map is another scrolling one with plenty of obstacles in the way. There
are breakable blocks, as well as pipes and holes in the ground. Note that
for the holes, there is no ledge to grab onto. This catches a lot of people
off guard who fall right in. Watch out!
It is hard to KO people upward out of this map, as the ceiling is quite high.
There are still certain platforms this is easier from which may be high up,
but for the most part it is difficult.
The most optimal direction is to smash them to the left. You can find items
in the ? Boxes as you jump into them.
Thanks to all the obstacles and terrain, it is easy to approach projectile
users on this map. Use the platforms and obstacles to cover your approach.
---
08 JUNGLE JAPES
-A map with a few platforms and rushing rapids that sweep you away.
This map is deadly if you slip up in returning. The rapids sweep you away
incredibly fast, and so you have to remain extra cautious. Sometimes a
creature jumps from the river to attack too, usually leading to a KO.
There are four platforms. Left, top, bottom, right. Left is most dangerous
as you have little chance to recover if you fall into the river. Right is best
in that sense as you may be able to recover by the time you get to the left.
The center platform is where most the fighting will take place, and is best
for you to stand too, being able to knock opponents to the left, right, or
upward. Left may be best for the reasons described above.
Watch out for projectile opponents who may use the side platforms to their
advantage, forcing you to have to go up to them, where they can easily knock
you away due to limited space. If this happens, you will have to rely on
quick dodges and aerials. Thankfully, the limited space gives good countering
opportunities, as your counter range will hit them too even if they use a
projectile so long as you are on the same platform.
---
09 GERUDO VALLEY
-A flat map with a breakable bridge.
This map is mostly flat, but the bridge can give away leading to a drop in
the center. There are some platforms under there to save you, but you have
to watch out for other hazards as well.
Twinrova (the two laughing witches) also appear, and will either engulf the
left side in flames, or freeze the right side. There is some time between
when their blast hits and when that side of the stage becomes hazardous,
however, so most players will be jumping to the other side. This is an
excellent time to meteor smash them downward, especially if the bridge is
gone. It catches plenty off guard.
Otherwise, hitting off to the sides is the easiest approach to KOing on this
level. There are some platforms provided to avoid projectile users too,
making this a pretty good map for Lucina.
Be careful about the lower Dancing Blade combo on that bridge, it usually
causes it to break while you're still mid combo, and may lead to your
demise.
---
10 SPIRIT TRAIN
-A train that moves swiftly on the railroad, with the last car constantly
changing.
This map can be pretty annoying, especially against fighters that can easily
knock Lucina around.
If you fall onto the tracks, you go off the right of the screen very, very
fast. Occasionally platforms will appear above, but most of the fighting
will take place on the train.
The train constantly shifts to the right, when the rear trailer is changing.
This makes it incredibly easy to KO to the right (as well as get KO'd). You
will want to ideally place yourself as far left as possible while knocking
opponents to the right.
Be weary of some of the rear train forms. The broken up train, for instance,
does not have any place to stand, so you will fall onto the tracks below.
Some stage hazards include other trains that push the main stage to the
sides, as well as some that come onto the stage and explode. There is some
warning before them, so keep an eye out for them.
So; stay left, avoid tracks, use light moves (tilts) to hit opponents away
or onto the tracks.
---
11 BRINSTAR
-A level with some platforms and lava that rises occasionally.
This map, if not for the lava, is generally favorable to you. It has three
platforms and a main stage. You can use the same Battlefield rules until
the lava rises. The top platform will never be taken by the lava, but the
side platforms will, so watch out.
Also, be weary of the little bit of stuff that connects the two sides of
the stage. It can be damaged enough to split the stage apart. This can happen
often if you use the Dancing Blade too, and if you happen to split it while
stuck in a combo, you will probably fall through and have difficulty
recovering.
If you fall off the map and the lava is high enough, you will be launched
back up, which can save you sometimes, mostly by accident. However, at high
damage, it will simply launch you upward off the screen, or right into the
opponent who can follow up.
---
12 YOSHI'S ISLAND
-A simple level with a stage and large platform above it. Occasional extra
platforms appear on the side.
This level is preferable to others. The simple platform allows you to dodge
projectiles pretty easily, as well as approach anywhere on the stage pretty
safely. Unlike Battlefield, it is just one big platform rather than three
split ones. It will occasionally tilt.
The edge can be a little awkward to grab onto, so be careful when returning
to the stage. Sometimes platforms appear on the sides, but do not last long.
They are good to start an air interception with your Forward and Neutral
Airs, however --just be careful to account for the fact the platform may
be gone by the time you finish your intercept, and so would need to tilt
hard to get back to the stage itself.
Other than that, apply the rules of Battlefield to this stage.
---
13 DREAM LAND
-A retro scrolling map. The terrain changes often.
The stages below I believe are randomized, aside from Stage 1. Same general
rules apply to scrolling segments. Stay away from the left, but aim to KO
your enemies by throwing or hitting them to the left. Watch the terrain for
holes and platforms. Avoid holes, and use platforms for evading attacks.
Stage 1: From the start up, it stays still for a moment. This is a pretty
good chance to get good damage on opponents, as well as KO them. The KO
boundaries make it relatively easy to do so. Flat map (Omega) rules apply
for the most part, as it is flat. There is no ledge to fall off of, however.
It ends when a hand points to begin scrolling the stage.
When Scrolling: Now you will have to start keeping track of your footing while
fending other players off. Air moves will be useful in doing this. Avoid the
edges as much as possible --beyond the grey zone is the KO boundary. This
stage will see terrain changes, as well as pits!
Stage 2: A stairway like stage with a cliff to the right. This is at the end
of a scrolling section before it changes.
Stage 3: A high tower with some platforms on the right, and just one on the
left. You will want to avoid the left side, as the single platform makes for
an easy target to KO you to the left, too. Especially with no projectiles,
standing there will get you easily KO'd by a projectile opponent. Stick to
the middle platforms on the right for best versatility, but the top may work
nicely for evasion.
Stage 4: You end up in a ring. This is a flat map with no ledges, so same
rules as Stage 1. If this comes at a later stage, it is a good opportunity to
KO opponents, but be weary of projectiles that may KO you!
Stage 5: Four platforms, one higher left, one lower right. one higher right,
one lower left. The top right one is very small. This part can vary, but you
may face a deadly drop if hit into the roof of a higher platform and bounced
downward. You will want to generally avoid being near the edges too long.
The bottom left platform has the most room, but also the quickest way down.
You will have to use caution and adjust depending on who you are fighting.
Note that you can jump from underneath the platforms.
It will scroll right from here usually to various other clouds, platforms,
and holes. Scrolling rules apply, now.
Stage 6: This one has four cloud platforms too, two center, one high right,
one low left. You should stick with the middle platform, and if someone is
spamming projectiles on the left, either do a cautious approach and hit them
out, or use the right higher platform to avoid them.
Stage 7: Three platforms, one high, two low on both sides, and then the flat
stage at the bottom. This is the same shape as battlefield, but much larger
and higher platforms. They should be treated as several flat stages. But,
the fact you can still ascend or descend to higher or lower platforms means
you have more evasion opportunities. On this part, you cannot come from under
the platforms, so be careful!
Stage 8: Two platforms on the sides, and flat stage underneath. These
platforms cannot be jumped through, and you can't fall through them either.
It may be a bit harder to avoid jumping projectile hits if the opponent uses
them, so stick around the middle so you can go higher (or lower) if you
need to.
Stage 9: Two platforms with water in between. One low on the left, one a bit
higher on the right. The right platform has no ledge to grab, and can be
dropped through. Keep this in mind if attempting to recover. The lower
platform has a ledge, but cannot be jumped through! It will start scrolling
again after this. Scrolling rules will apply.
Stage 10: A small platform left, then four platforms, two center, two right
that are higher. The middle low platform is probably the safest.
---
14 CORNERIA
-On the back of a flying ship, where Arwings will fire at you.
The map is not exactly flat, thanks to the ship's tail and rear platforms.
This can help immensely at dealing with projectile fighters. Terrain is key to
the map. At the tip of the tail, it is very easy to knock opponents upward and
out. The rear allows you to hit to the right with ease.
There are some stage hazards to look out for, namely the aircraft that fire
at you. Some come in from the side, some from the background. If you stand on
them they may lift you up and out of the map, so watch out.
You CAN stand on the forward gun (below the cockpit), but it usually launches
you off when it charges to fire, so look out for that.
---
15 UNOVA POKEMON LEAGUE
-A map where Pokemon appear to hinder players.
This stage has a Battlefield-like set up, so those rules apply. However, there
are some stage hazards in the form of Pokemon, as well as additional stage
space that appears temporarily as stairways at the sides of the map.
When the stairs appear, you cannot fall off the map, but you can walk all the
way to the side boundaries. You can use it to knock opponents off the sides
with light hits, or throw them, but depending on the opponent, it may be
safer to stay around the center. The bridges can give away at various
moments too, and your relatively poor return will not help if you are too far
out.
Zekrom (the black Pokemon) sometimes appears and charges an attack. The attack
will either destroy the bridges, tilt the map to one side, or move the map
to a side. Sometimes it just fires at the center of the map too. You get
slight fore-warning in the form of a glowing blue area that will be hit. Watch
out for this!
Reshiram (the white Pokemon) unleashes flames that appear either on the right
center of the stage, or left. The bridges are usually burned too. You will
have to wait and see which side is burned as it is randomized.
Some other Pokemon appear but do not do anything to harm the players on the
stage itself.
---
16 PRISM TOWER
-A platform that moves to various zones.
This map will move around a lot. Like Rainbow Road, it is a flat platform
that will go to various parts of the stage. You can come from under the
platform, but have to clear it entirely to stand on it. You are always safer
approaching from the ledge sides when you can.
Stage 1: The beginning is always flat on the ground in front of the tower.
There is no place to drop, but the map is flat and you can go off the sides,
so the standard Omega rules may apply here. It is very temporary, and the
platform may appear quickly, so be sure not to miss it.
Stage 2: The flat platform stops, like an omega map now, flat, and with sides
to fall off of. Omega rules apply here.
Stage 3: Four platforms, main one shrinks and goes to bottom, and other three
are in a triangular shape, making for a diamond shape. The side platforms are
rather far off to the sides, making them easy to KO/get KO'd being close to
the edge. Staying on the main platform is likely best, but don't be afraid
to jump and Up-Air people on the top platform.
After this stage, the top platform comes along for the ride, making it more
like Yoshi's Island.
Stage 4: The top platform will leave, the main platform stays, and the two
side platforms appear again. Same rules as Stage 3, but now without a top
platform to Up Air opponents. They will either try to attack you now on the
main platform, or avoid you on the sides.
Stage 5: Like an Omega map once again; see Stage 3/Omega Maps. This will go
back to Stage 1!
---
17 MUTE CITY
-Platforms above race cars, with the cars able to be stood on too.
There are two main platforms that stay, the top left and right, slightly
lower. There is always at least one car in the center down, but they can
change often. Falling to the road causes you to be launched upward, so watch
out.
Other cars come in as temporary platforms, and when it says "CHECK!" above
one, it means that car is about to get knocked out, along with the people
standing on top of it.
To stay safe, stick to the higher platforms. The difference in height makes
it easier to avoid and attack projectile users, too.
---
18 MAGICANT
-A mysterious level with multiple platforms and Flying Men.
This level has three constant platforms, but many come and go from below and
above. The top platform (to the right) is where the Flying Men most likely
appear from. Tagging them gets them on your side as a valuable partner.
It may be good to attempt camping here if you feel the need for them. Of
course, they may appear elsewhere in which case you may be in big trouble.
Only five appear total. If they are your enemy, you can KO them like anybody
else, but they can be tough.
The left platform is the most neutral, not too high or low, but lets you get
launched out to the left or upward pretty easily.
If falling, watch out for the platforms that appear below crossing the map,
they may save you!
---
19 ARENA FEROX
-A constantly changing arena.
This is your home stage as Lucina. It starts off flat with ledges like an
Omega map, but will quickly change to grow platforms of various sorts.
The platforms will provide good cover and evasion/approach techniques for
projectile users. They are mostly slanted platforms though, so you may want
to use arching moves (Forward Tilt) when attacking opponents. Some platforms
are breakable too, so if you are using them a lot you would want to watch
out. Likewise if your opponent abuses them you can bring them to the ground.
Keep track of the white platforms (that you can fall through) and brown/gold
ones (that you cannot go through).
You can often bounce opponents off the harder platforms and send them to their
doom with a Side Smash. This map often forces opponents up close to you to
attack in some of these forms.
It will revert to the Omega look between each stage. Below they are in
random order.
Stage 1: Slanted platforms center, hard platforms side. Flat map below.
Stage 2: Platform center, three more (two side, one top) in triangle shape.
Flat map below. A wall that splits the flat stage in two. You can go through
the red platforms. The top three platforms swing.
Stage 3: Statues appear holding platforms. The statues are breakable. If
broken, the platform they are holding also crumbles. Use it to bring opponents
down, or be weary if opponents try to bring you down.
Stage 4: A center platform, one right, then two that move on a rail on the
left.
---
20 FLAT ZONE 2
-A retro level that has a close KO boundary.
This map has no ledges, and relies on side and upward KOs. More often the
side boundary will be where most of the KOs come in from. With a thin
boundary, you will want to stay around the middle as often as you can. There
are several stage forms and hazards to look out for, however!
Stage 1: Several platforms, and a tall building to the left. Each balcony
can be stood on. During this stage, you can use the platforms to dodge and
approach enemies. The balconies to the left should be avoided, as they are
very close to the edge. However, if you see an enemy recovering on one, feel
free to intercept them with an air attack for a easy KO! One of the platforms
moves around a bit with the character that's holding them up.
Stage 2: This one has three platforms over the stage. There are two zookeepers
to the sides who move to three different levels at random. They deal damage
if you touch them, launching you opposite of them, sometimes getting high
damage as they hit you into the other. This can be annoying if you move around
a lot when fighting, so you may want to go to the highest platform, or keep
to the sides. That can be dangerous however depending on who you are fighting,
as an enemy could stay in the middle and launch projectiles at you with good
timing. As you would be close to the edge, it could potentially KO you. You
may want to stick with the middle, but practice defensive strategies during
this part, as well as launching enemies into the zookeepers themselves.
Stage 3: Like Stage 1, there is an apartment. However, now there are two
firemen with a trampoline. You can use this to jump pretty high. Good for a
quick intercept or a quick escape.
Stage 4: Gas station. There are two platforms, and then two characters on
the ground floor. If you do an attack and they are hit by it, they will strike
back, which can be a nuisance. You may want to stick with the two higher
platforms for this reason. It is easy to launch an enemy upward into a KO
from the top platform.
---
21 RESET BOMB FOREST
-A stage that changes drastically after a certain amount of time.
There are two versions of the map, with different strategies to both.
Stage 1: The starting. There are three platforms, middle low, two right. The
stage itself has a split in the middle. The split does have ledges that can
be grabbed onto. It is usually best to stick to the left side, as the right
has the other platforms that you would have to account for, allowing the
enemy to approach you in several ways, compared to the left which only has
a single platform, so a bit easier to keep track and intercept. Of course
the opposite applies too, that if your enemy is on the right, you have
several avenues of approach. It depends if you are playing offensively or
defensively, really! As usual, you can use platforms to your advantage to
both dodge and approach. Avoid the highest platform on the right as it is
easy to get KO'd upward there.
The stage changes when Viridi (the voice/figure in the back) talks. There
is a white glow where it becomes a flat stage temporarily.
Stage 2: Now this side is more difficult to get anything done. You have to
be extra weary with Lucina's recovery capability in mind that you find the
nearest ledges to grab onto when attempting recovery. The platforms are all
mangled and awkwardly shaped, minus the top right and bottom left. the top
left area with the reverse L shaped structure is destructible. It also allows
you to get high damage on an opponent by constantly hitting them into the
wall there, as they have the tendency to bounce around. I advise a defensive
strategy here, especially against more floaty characters who would have no
problem being off platforms for a long time.
The platforms you can come up from underneath, but you have to clear them
completely to stand on them, or else you will fall right back through. The
ones on the right have no ledges to grab either, so be careful!
Occasionally a flying creature comes in, and will damage you upon contact.
Eventually the map reverts back to Stage 1 with the same white flat stage
in between. It is a good chance to move to KO someone if their damage is
high enough. If your damage is high, be extra careful that a projectile
opponent or quick opponent doesn't rush you at this stage.
---
22 WARIOWARE, INC.
-A stage that has a few platforms, but also transfers to various mini-games
that provide power ups when won.
This map is pretty kind to Lucina. With four platforms that are symmetrical
and the main platform below that, all relatively close to each other, it means
you can use tilts from below platforms to hit those above you, as well as
easily dodge projectile spamming opponents while approaching them. You can
do various heights of ledge guarding or aerial intercepts using the platforms
to your advantage. Your enemy may aim for the higher platforms upon return,
but your tilts and upward attacks can easily get them if they choose to do
so.
There are several mini-games to be weary of. They appear at random with quick
instructions. If you follow them, you get various bonuses (increased size,
temporary invulnerability, etc). It may be beneficial to follow them when
possible.
Mini-game 1: "Pop!" - Pop the single object that appears by attacking it.
Mini-game 2: "Taunt!" - Taunt at any point. Any taunt will do.
Mini-game 3: "Dodge" - Dodge the object that comes from the side indicated.
Sometimes it will try to trick you, by stopping for a moment,
or by jumping. It is best to do a quick short hop air dodge, and
a second jump after that with a dodge again to account for all
the possibilities. Pay attention to the angle the warning points
to!
Mini-game 4: "Chisel!" - You have to chisel the figure. The Neutral Air makes
short work of it very quickly. It only takes one Neutral Air
followed by a Neutral Air Fast Fall to chisel it completely.
Mini-game 5: "Look out!" - Avoid the shadow, as a foot will stomp on you.
Mini-game 6: "Don't move!" - Don't move. Often it can be worth smashing your
opponents who are near you who attempt not to move either. Do
this if they are at high damage for an easy KO. If they don't get
KO'd, they may get a power up suitable for revenge, though. If
you hit them and they don't input anything, they still get the
reward.
Mini-game 7: "Jump!" - You have to jump to avoid the earthquake caused by the
giant with a hammer in the back. If you are on the ground when he
hits, you get buried.
Mini-game 8: "Sidestep!" - You have to avoid a volley of arrows. Look for the
gap as they fly in the background, and move to avoid them.
Mini-game 9: "Stay dry!" - You have to stay under the umbrella with the cat
avoiding the rain. You lose if you get even a little wet.
---
23 DISTANT PLANET
-A map with some platforms that lower depending on your weight.
There are three platforms in the center, made of leaves. The center stage is
also the same, so will bend as you walk on it, slightly changing the angle.
The left side has a ramp with a ledge.
Flowers grow at random with items you can use to throw at opponents, that can
be useful as a temporary projectile for you to utilize. A beast appears from
the right at times too, when the mouth is open, anyone who steps in there
will get KO'd when it leaves the map instantly to the right. Likewise, if the
mouth is closed, and you stand on top of it, it will eventually snap up and
eat you too. So just avoid it in general.
The right side of the main stage has a ledge, but the left side does not. Be
careful on your recovery.
Lastly, when it rains, the rushing water will cause the ramp on the left to
become slippery. You can still grab the ledge there, however.
The general strategy should be to stick to the main platform, using your tilts
and airs to attack anyone on the leaves above you, or even charge a smash
attack if they are about to land on the leaf --as it will lower right into
your range.
---
24 TORTIMER ISLAND
-An island with some trees and a dock.
The dock appears on either the left or right side. There are trees in the
middle that yield fruit that can heal you as well as be used as projectiles.
The trees can be stood on, providing platforms to help evasion and approach
in your case. It is a rather wide map, making KO's to the side more difficult,
but allows you to better avoid projectiles too.
Sometimes a boat appears to add a little extra space to the stage. Likewise,
a shark may appear, doing damage to anyone too close. The dock does have a
ledge, but the dockless side does not.
Overall this is a more preferred stage to fight on, like Battlefield.
---
25 BOXING RING
-A straightforward fighting arena.
This map is extremely high and wide. It is easy to accumulate and give a great
amount of damage before getting KO'd. You can use the ropes to the sides to
jump very high up in the air, up to the lights above, which can be damaged
and brought down to smash opponents and send them flying.
The main ring is flat, but the sides are at slight angles. As the ropes are
used a lot, you can do a lot of air intercepts, or set up for Up Smashes
when you predict where the opponent may land. The ropes also stop projectiles
so you can use that to your advantage.
The best opportunity for side smashes is when you manage to bring your
opponent out to the sides of the ring, and smash them in whichever direction
is closer.
---
26 GAUR PLAIN
-A map with several small platforms scattered about.
This map is incredibly unfriendly to Lucina. There are no totally flat
platforms, making footing difficult, as well as recovery more awkward, as it
can be hard to tell where the ledges are, exactly. Sticking to the two highest
and longest platforms is problematic as it is very easy to be thrown out
either side, or upward. I recommend the second level of platforms to be the
most optimal places to generally stick around, but again, it depends who you
are fighting.
There will be plenty of opportunities to Meteor Smash opponents, considering
the big gap down the center of the stage.
You will want to grab more than attempt counters, as being left open on this
map can get you KO'd even at low damage.
---
27 BALLOON FIGHT
-A retro level with several platforms, a unique boundary line, and water with
hazards.
This level has a lot of scattered platforms, but friendlier to your recovery
too, making this a better map for you. There are some hazards to worry about,
such as the obstacles that will knock you over upon contact, the lightning
clouds that fire bolts, and the fish in the water that will attempt to grab
and take you underwater with it.
The unique aspect is the boundary on this level. Walking out left or right
will make you end up on the other side of the level. However, if you are hit
by the enemy into the boundary, you get KO'd. This can be useful if used
right, as you can get to the other side without platforms and hazards, as
well as come behind an opponent this way. Simply grabbing them and tossing
them back toward the boundary is an easy KO if they hug the edges a lot.
If you are the one on the defensive, then you will want to stay on the
middle platforms so you have time to prepare if the opponent comes from the
left or the right.
---
28 LIVING ROOM
-A living room that changes terrain often.
This map starts flat with no ledges/holes. You can only be KO'd to the sides
or upward. The ceiling is rather high, so most KO's will come from the sides.
At the start you may have some trouble with projectile opponents, so Omega
map style rules apply here. Eventually, shadows will appear. Avoid these
zones, as objects will start to drop to form new terrain for the map, but do
damage to you at the same time.
With the terrain changes will come different strategies, but as it will no
longer be flat, it will benefit you in some ways, allowing you to utilize
terrain for dodge and approach.
---
29 FIND MII
-A simple map, but with serious stage hazards.
The map itself is just a flat platform and a higher, smaller flat platform.
However, the Emperor creature in the background can make things difficult. It
occasionally comes out to the center of the map, attacking, or just getting
in the way between the two platforms. It powers up random players, and also
destroys the platform on the right side of the map with an earthquake.
The platform on the right will crumble slowly, giving you ample time to
escape.
With the right platform gone, it essentially becomes an Omega Map, though
not as wide as one.
Breaking the cage with the Mii in it will get rid of the Emperor quicker.
Stage hazards aside, certain players can still hit you with projectiles from
the right platform, and may use this against you. (Samus's charge shot
is wide enough to still hit you in the head if you are on the left, for
instance). Keep this in mind if you see them sticking to that side of the
stage. If that is the case, it may be good to let the Emperor destroy it...
---
30 TOMODACHI LIFE
-A several-story building with various rooms.
This map can be beneficial to you, with a total of four levels of flat
platforms to fight upon. The top floor allows for an easy upward KO, and all
floors with easy side KO's, and finally the bottom floor with hardly any
room for recovery for easy lower KOs.
The only ledges on this level are at the lowest floor. You will have to make
your recoveries quick.
As Lucina, the quick Forward Air will cover both the floor you are on and the
one above you thanks to the wide arc. Likewise, the quick Up Air will allow
you to launch opponents to higher floors and eventually off the map with
ease. It is better to use the Up Air and Tilt rather than the Up Smash as
the Up Smash will require more precise aiming, while the others do arcs and
so cover a wider range.
Projectiles can be easily avoided on this map, as you can move either upward
or downward with ease. Use Down Airs if approaching from above, or aim to
come down from the side into a quick Side Tilt for opponents who may be
aiming upward.
---
31 PICTOCHAT 2
-A flat map with constantly changing backgrounds that can become hazards, or
change the terrain slightly.
This map has Omega Map rules when not counting the stage hazards that will
appear quite often. There are quite a few variations and objects that come,
but most of them are deadly.
Note the ledges are at an awkward location, with a sharp upward incline right
after them. Also, the lower boundary of the stage is fairly close to the
stage, so be weary of this if attempting quick downward moves off stage.
Some hazards/map changes are listed below. The general strategy is to avoid
them and play defensive, but they come so often that it will really depend
which enemy you are fighting. Some may be disadvantaged more than you:
-Boots that will stomp you into the ground, or carry you off the map if you
stand on them.
-Two faces that shoot random shapes at each other (heart, explosion, etc)
-Pac-man shaped figures that will be around the map. Touching causes damage.
-Map adds width as a car drives along. There will be warning signs as to where
it is coming from.
-Dolphins that may carry you off the map.
-A stream of water that will slide you off the map.
-Platforms appear with electrical hazards that move around them. One will
come across the main stage itself, too.
-A bottle of ink will appear as a platform, and anything the quill writes
becomes platforms, too.
-Hopping platforms that constantly change height.
-Two stick figures that hold up random sides of the map.
-Warp pipes that appear. Jumping into one will lead you to come out of
another.
-Clouds appear that move left and right as various platforms.
-A road is drawn, with the two bold lines as inclined platforms to stand on.
-A face that blows upward from the mouth. It will lift you high if you stand
or jump over the mouth.
-The infinity sign appears as a platform. You can stand both inside and
on top of it.
-The room goes black. The moon appears in phases, then goes dark afterward.
Your Player signs are still above your head, but otherwise you cannot see. It
may be good to highlight your opponent using the touch screen.
-A tornado appears. Launching you upward constantly.
-Several ramps appear, with a figure at the top rolling hazards down the
ramps (reminiscent of Donkey Kong). Sometimes hazards are dropped straight
down or off the sides, so watch out.
-A clock appears, with a hand that can be stood on.
-A see-saw appears in the middle, weight causing it to incline if a player
stands on it.
-Paper airplanes appear. They can be stood on, but may carry you away.
-Escalators appear. They carry you to the top. But, they will not push you
off once at the top.
-A platform appears in the center, with other platforms moving upward or
downward on the sides.
-A sunset image, the Sun and horizon can be stood on, as can the bird.
---
32 GREEN HILL ZONE
-A stage with close side boundaries and breakable terrain.
This is a rather small map, and can be pretty unfriendly to you depending
who you are fighting. You will want to avoid breaking the ground, as the
recovery can be awkward and sudden --especially if you are locked in a
Dancing Blade combo that may send you to your doom.
You will preferably hit opponents off to the sides, but the same applies to
them KOing you. There are some checkpoints (the objects with blue orbs at
the top) that you can hit to damage other opponents who touch them.
The center left area will hold together, but the grass right will not if
attacked often.
---
33 WILY CASTLE
-A flat stage with various hazards and platforms that appear.
This map resembles an Omega map at first, so those rules will apply. It stays
as one mostly, but platforms may appear from overhead or to the sides that
either aid recovery, or aid interception. Use them depending on whether you
are being offensive or defensive.
The Yellow Devil appears sometimes, and will begin to attack. You can destroy
it by doing damage to the single eye. Use Neutral Airs to give it damage
quickly. The resulting explosion can do quite a bit of damage to the opponent.
You will know you are the one who destroyed it as it will be labeled with
your player number.
Otherwise, you can stand behind it to avoid any damage from it, but there is
very little space between it and the stage edge, so you may want to be
careful. However, it can then attack your opponents who may be trying to
approach you, and you can easily use Up Smashes to attack them when they
come from overhead in an attempt to jump over the Yellow Devil.
The Yellow Devil will warp to the other side of the stage piece by piece, the
pieces doing damage, so remain cautious about this.
---
34 PAC-MAZE
-A retro level with pellets that can power you up.
This level has two main platforms that you cannot come from underneath,
instead they will act as a roof and bounce you back if hit into them. There
are other platforms that you can traverse both upward and downward, however.
Collecting a certain number of small pellets will make a pellet with your
player sign attached to it, which you can use to power up. Likewise, you
can destroy opponent's pellets by attacking them.
Stage hazards appear in the form of the Pac-Man ghost enemies.
The general strategy should be to KO opponents off the sides, but upward if
you are fighting on the top platform. From the bottom platform, hitting
opponents upward may cause them to bounce and then go flying downward.
Wii U stages will be coming in the next update as strategies are explored!

As for the recent Tier lists, I do not pay too much attention to them, but I assume it varies by the way a player is played and who is playing them. The most important thing for you to do is just play at your best against every other character and not worry about whether your character is "naturally good" or "naturally bad" :)