
Hello Sm4shers.
As you can see, this guide is still in progress and has a LONG way to go, but for now, here are some techniques present in smash 4. This will be updated frequently, and will likely include several more techniques within the next few days, but for now, here are some basic and advanced survival techniques. Enjoy!
Section 1: Survival Techniques
1-1: Teching
1-2: Launch DI
1-3: Smash DI
1-4: Wall Jump and Wall Cling
1-5: Crouch Cancelling
Section 2: Ground Movement Techniques
2-1: Fox-Trotting
2-2: Extended Dash Dancing
Section 3: Shielding Techniques/Options
3-1: What You Must Know About Shields
3-2: The Most Basic Out of Shield Options
3-3: Upsmash and Up-B Out of Shield
Section 4: Aerial Movement Techniques
4-1: Short Hop Fast Fall Aerial
Section 5: Ledge Techniques
Nothing to see here
Section 6: Special Move Techniques
Soon, my child
Section 7: Footstools and Jab-Locking
Yes, these 2 techniques need their own section
Section 8: Character Specific AT's
A long way from here
Section 1: Survival Techniques
Section 2: Ground Movement Techniques
Section 3: Shield Techniques/Options
Section 4: Aerial Movement Techniques
As you can see, this guide is still in progress and has a LONG way to go, but for now, here are some techniques present in smash 4. This will be updated frequently, and will likely include several more techniques within the next few days, but for now, here are some basic and advanced survival techniques. Enjoy!
Section 1: Survival Techniques
1-1: Teching
1-2: Launch DI
1-3: Smash DI
1-4: Wall Jump and Wall Cling
1-5: Crouch Cancelling
Section 2: Ground Movement Techniques
2-1: Fox-Trotting
2-2: Extended Dash Dancing
Section 3: Shielding Techniques/Options
3-1: What You Must Know About Shields
3-2: The Most Basic Out of Shield Options
3-3: Upsmash and Up-B Out of Shield
Section 4: Aerial Movement Techniques
4-1: Short Hop Fast Fall Aerial
Section 5: Ledge Techniques
Nothing to see here
Section 6: Special Move Techniques
Soon, my child
Section 7: Footstools and Jab-Locking
Yes, these 2 techniques need their own section
Section 8: Character Specific AT's
A long way from here
Section 1: Survival Techniques
Teching is a very basic technique that is absolutely necessary if you plan on getting anywhere in smash. Normally, when you hit the ground, after being hit by an aerial, you will create a very large thud, which leaves you vulnerable for quite some time. However, if you press the  ,, or even button 6 frames (1/10 of a second) before you land, you will do an instant getup.
![]()
Megaman performing a successful ground-tech.
You have three options out of a tech, you can either do a standard getup as shown above, or, by inputting the control stick or , you can perform a tech-roll, which will allow you to instantly roll upon landing.
You can also tech most aerials and certain ground moves like Peach's d-tilt or Ganondorf's side-b. Teching while grounded will prevent you from being sent up into the air.
The other type of Teching is known as wall teching. Normally, when you get hit into the stage off-stage, you will bounce off of it, and will usually result in the loss of a stock, however, you can prevent this by performing the same inputs as you would for regular teching.
![]()
Fox performing a wall-tech in Melee.
When you tech off the wall, you can wall-jump and gain additional height.
UNTECHABLE SITUATIONS:
While Teching helps your survivability, there are situations where it is impossible to tech.
For Ground Teching:
If you are sent into a "tumble" animation, you lose the ability to tech. You can enter a tumble animation by either falling off of a platform via a weak hit, or by getting footstooled. More on footstools later. In addition to that, certain aerials like Ganondorf and Falco's d-air cannot be teched while grounded.
For Wall Teching:
These situations are a bit harder to explain, but in sum, if you are too close to the wall when getting stage-spiked, you will be unable to tech the wall. For an exact explanation on how this works, check out Beefy Smash Doods' video on it.
https://m.youtube.com/watch?v=a8rpifNUEYo
WHEN YOU MISS A TECH:
When you miss a tech, you still have options. You can either do a getup attack by pressing, or you can roll, however, it is still important to get techs, because if you don't, you become in danger of getting jab-locked. (More on that later.)
,, or even button 6 frames (1/10 of a second) before you land, you will do an instant getup.
Megaman performing a successful ground-tech.
You have three options out of a tech, you can either do a standard getup as shown above, or, by inputting the control stick
or , you can perform a tech-roll, which will allow you to instantly roll upon landing.You can also tech most aerials and certain ground moves like Peach's d-tilt or Ganondorf's side-b. Teching while grounded will prevent you from being sent up into the air.
The other type of Teching is known as wall teching. Normally, when you get hit into the stage off-stage, you will bounce off of it, and will usually result in the loss of a stock, however, you can prevent this by performing the same inputs as you would for regular teching.

Fox performing a wall-tech in Melee.
When you tech off the wall, you can wall-jump and gain additional height.
UNTECHABLE SITUATIONS:
While Teching helps your survivability, there are situations where it is impossible to tech.
For Ground Teching:
If you are sent into a "tumble" animation, you lose the ability to tech. You can enter a tumble animation by either falling off of a platform via a weak hit, or by getting footstooled. More on footstools later. In addition to that, certain aerials like Ganondorf and Falco's d-air cannot be teched while grounded.
For Wall Teching:
These situations are a bit harder to explain, but in sum, if you are too close to the wall when getting stage-spiked, you will be unable to tech the wall. For an exact explanation on how this works, check out Beefy Smash Doods' video on it.
https://m.youtube.com/watch?v=a8rpifNUEYo
WHEN YOU MISS A TECH:
When you miss a tech, you still have options. You can either do a getup attack by pressing
, or you can roll, however, it is still important to get techs, because if you don't, you become in danger of getting jab-locked. (More on that later.)Launch Directional influence is when you use your control stick to slightly change the direction you are launched in. This technique will help you survive longer, and may even help you escape certain throw combos. The general rule of thumb for DI is to always DI towards the stage, however, there is an optimal way to DI every smash attack.
When you are launched horizontally, the optimal way to DI is if you are launched to the left, or if you are launched to the right. If you are launched vertically at a 90 degree angle, the ideal way to DI is or based on your position in the stage.
When you are launched in a mix of horizontal and vertical, the ideal way to DI is and away from your opponent.
Here is a way you can Launch DI most kill moves. Credits to MySmashCorner for the information. (Note: At the moment, this list is incomplete. I will add these myself later.)
When you are launched horizontally, the optimal way to DI is
if you are launched to the left, or if you are launched to the right. If you are launched vertically at a 90 degree angle, the ideal way to DI is or based on your position in the stage.When you are launched in a mix of horizontal and vertical, the ideal way to DI is
and away from your opponent.Here is a way you can Launch DI most kill moves. Credits to MySmashCorner for the information. (Note: At the moment, this list is incomplete. I will add these myself later.)
Optimal Trajectory DI examples (opponent on right):
Mario:
Usmash: launches 70°
Optimal DI: 90° away from Mario
DI allows you to survive 4% more vs no DI.
Luigi:
Fsmash: launches 45°
Optimal DI: 90° towards stage
DI allows you to survive ~15% more vs no DI.
Reverse Usmash (Luigi on right): launches 105°
Optimal DI: down and slight right
DI allows you to survive ~21% more vs no DI.
Peach:
Forward air: launches 25°
Optimal DI: 90° towards stage
DI allows you to survive ~14% more vs no DI.
Bowser:
D-smash: launches 120°
Optimal DI: Down
DI allows you to survive ~21% more vs no DI.
Yoshi:
F-smash: Launches 25°
Optimal DI: 90° towards stage
DI allows you to survive ~7% more vs no DI.
Rosalina:
Up air: Launches 75°
Optimal DI: 90° away from Rosalina
DI allows you to survive ~4% more vs no DI.
Bowser Jr:
Fsmash:
Optimal DI: 90° towards Bowser Jr.
DI allows you to survive ~4% more vs no DI
Smash Directional influence, or hitstun shuffling, may share a similar name to launch DI, but SDI works completely different. While launch DI changes the angle at which you are launched after hit, SDI changes the position you are in during the freeze frames when you are hit. In other words, your position can be altered while being hit, and not just after being hit. This can be used for several purposes like escaping multi-hit moves or surviving an attack longer. You can also use SDI while in shield when being hit by a multi-hit move to push yourself away from their attack.
![]()
Snake using SDI to shuffle position after being hit by Captain Falcon's knee in Brawl.
Note: While this is an example of SDI, it should be noted that SDI is not nearly as powerful in smash 4 as it is in Brawl.
SDI can be performed in one of three ways.
Snake using SDI to shuffle position after being hit by Captain Falcon's knee in Brawl.
Note: While this is an example of SDI, it should be noted that SDI is not nearly as powerful in smash 4 as it is in Brawl.
SDI can be performed in one of three ways.
METHOD 1: AUTOMATIC SMASH DI (ASDI)
If you move the c-stick in any direction while in hitlag, the game will automatically smash DI in that direction. This is known as Automatic Smash DI, or ASDI for short.
Pros:
For minor attacks, this can really simplify the process of SDI, and is overall the easiest way to SDI.
Cons:
For bigger attacks with more hitlag, it will not be optimal as the other methods allow you to shuffle your position much more than if you ASDI.
METHOD 2: CONTINUOUS RESET
This method of SDI involves using the control stick to change your direction by continuously moving the control stick in one direction and then resetting it to neutral. It looks something like this.
Pros:
This is by far the best way to SDI while in shield.
Cons:
Method 3 is usually faster and better for big attacks, and method 1 is usually better for smaller, singular hit attacks.
METHOD 3: STICK ROLLING
This method of SDI involves using the control stick to change your direction by rolling the stick back and forth between three points. If SDIng to the right, it looks something like this.
Pros:
This is definitely the most effective way to SDI when being hit by a big attack.
Cons:
It is not very useful for small attacks or while in shield, as where the other 2 options are better.
Note: Wall Tech Jumping is not included here. That is explained in the teching section, or 1-1.
Wall-jumping is a technique that certain characters can do that can help your recovery. The reason why wall-jumping is useful is that you gain additional height without using up your second jump. To wall jump, you must be at a stage wall, and while your character is touching the wall, input the opposite direction on your control stick. Your character should bounce off the wall. For example, if you are on a wall to the right of you, input left on your control stick and vice versa.
![]()
Fox wall-jumping in Brawl.
Wall clinging in when your character can stick to the wall for a short while before you jump off of it. In order to wall cling, you must have your control stick facing towards the wall, instead of away, like in wall-jumping.
![]()
Lucario Wall-Clinging in Smash 4.
Here is a handy list of all the characters that can wall-jump and wall-cling.
Characters that can wall jump:
Characters that can wall cling:
Wall-jumping is a technique that certain characters can do that can help your recovery. The reason why wall-jumping is useful is that you gain additional height without using up your second jump. To wall jump, you must be at a stage wall, and while your character is touching the wall, input the opposite direction on your control stick. Your character should bounce off the wall. For example, if you are on a wall to the right of you, input left on your control stick and vice versa.

Fox wall-jumping in Brawl.
Wall clinging in when your character can stick to the wall for a short while before you jump off of it. In order to wall cling, you must have your control stick facing towards the wall, instead of away, like in wall-jumping.
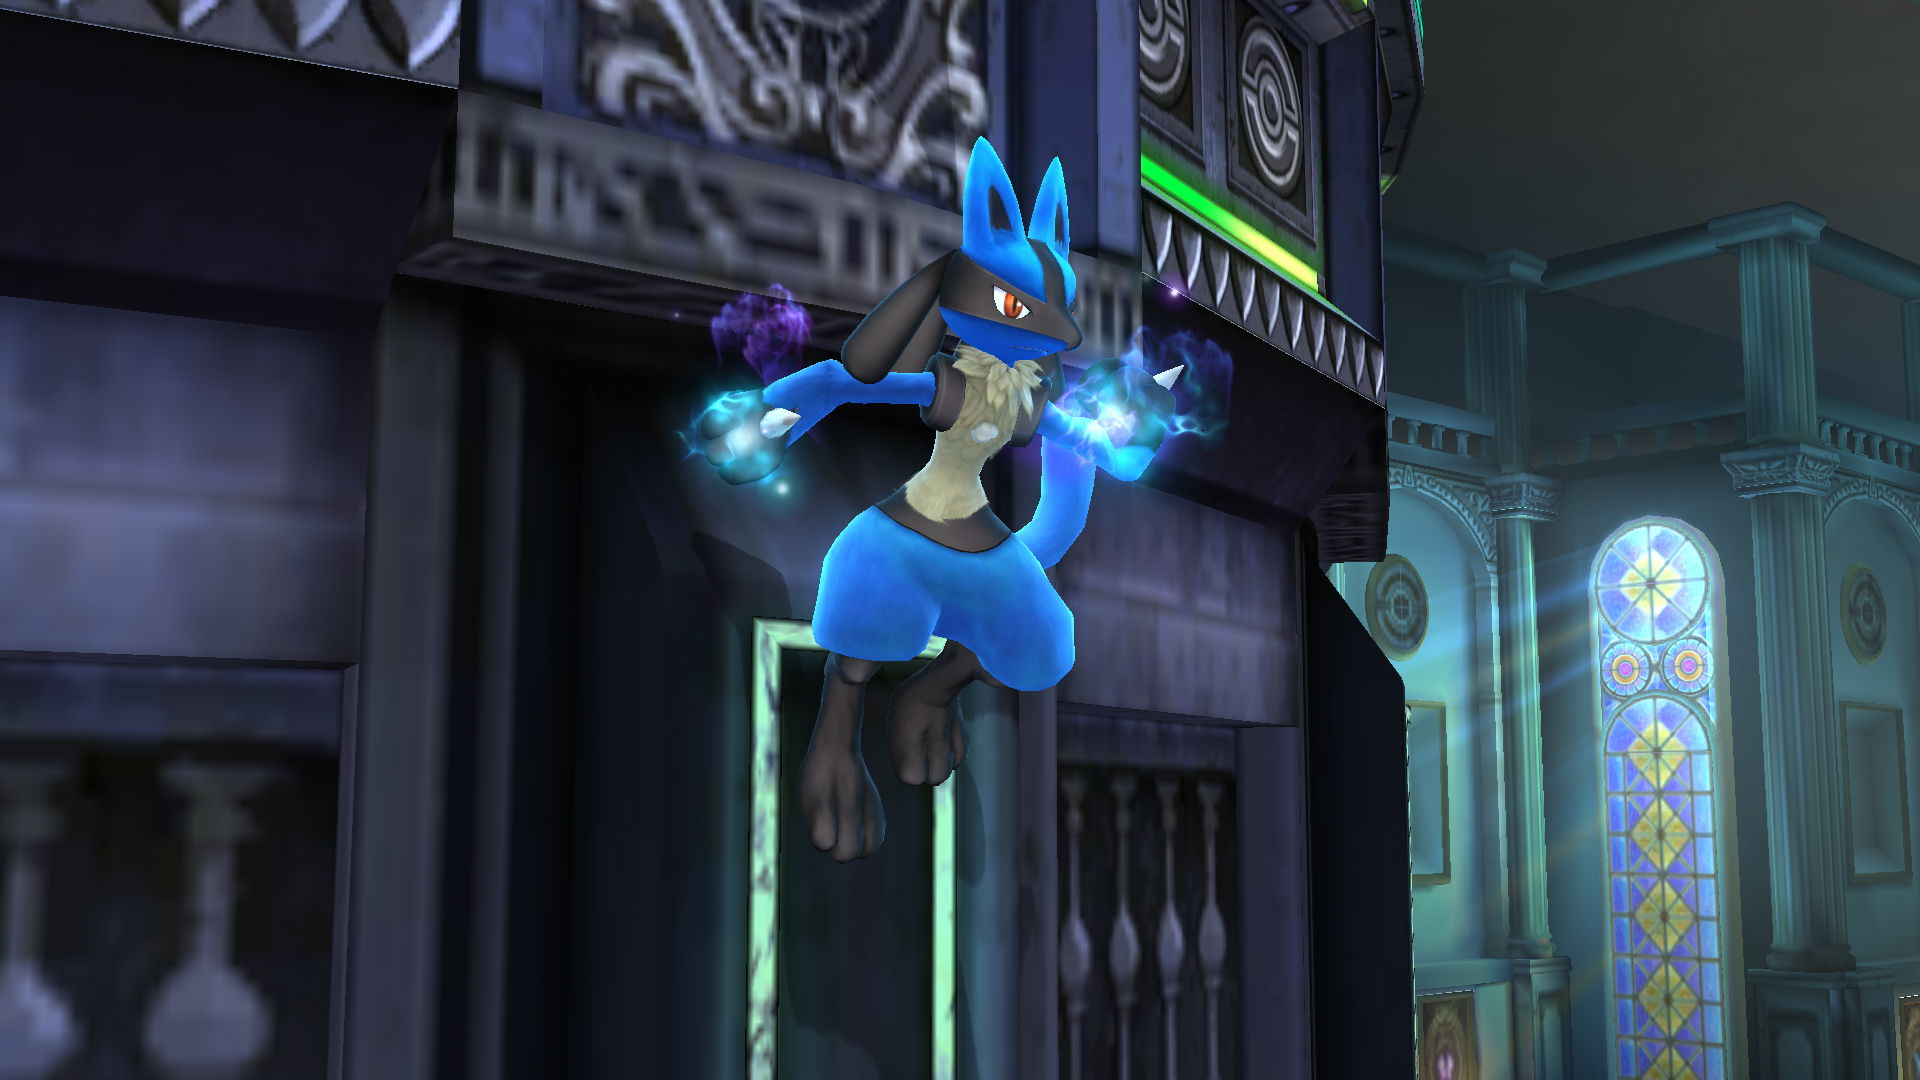
Lucario Wall-Clinging in Smash 4.
Here is a handy list of all the characters that can wall-jump and wall-cling.
Characters that can wall jump:
Characters that can wall cling:
When you are hit in a crouch position, the amount of knockback your character takes is reduced by one-seventh of its initial value.
This is separate from DI, since crouch canceling is applied as hitlag starts, while the effect of DI is applied as hitlag ends.
Normally, both the hitter and the one being hit have the same amount of hitlag before you take knockback from an attack, but when crouch canceling, the one being hit has their hitlag cut in half, allowing them to start moving again before their opponent.
This can be useful for surviving longer or reducing frame advantage on certain moves.
Multi-hit moves get you out of the crouch position after the first hit, so crouch canceling is only effective against single hits, but it still helps regardless.
Certain characters can crawl, or move and crouch at the same time. This can improve your options for when you want to crouch cancel a move.
List of characters that can crawl:
Section 2: Ground Movement Techniques
Fox-trotting is the act of repeatedly initiating your initial dash animation, as opposed to entering your running animation. Certain characters actually run faster by fox-trotting than running, because their initial dash-animation is faster than their running animation. To perform it, you have to repeatedly start dashing and resetting to neutral, or . Fox-Trotting has a different timing for every character, so play around with your character and see what their timing is.
![]()
Snake performing Fox-Trotting in Brawl.
What are the uses of Fox-Trotting?
Well, as I mentioned earlier, certain characters move faster from fox-trotting than from running, but beside that, fox-trotting on its own isn't too useful. With that being said, fox-trotting still leads into several other important techniques like extended dash-dancing (dance trotting,) and increases your movement overall.
Sorry, no list here. I couldn't find any info about who has faster foxtrots.
. Fox-Trotting has a different timing for every character, so play around with your character and see what their timing is.
Snake performing Fox-Trotting in Brawl.
What are the uses of Fox-Trotting?
Well, as I mentioned earlier, certain characters move faster from fox-trotting than from running, but beside that, fox-trotting on its own isn't too useful. With that being said, fox-trotting still leads into several other important techniques like extended dash-dancing (dance trotting,) and increases your movement overall.
Sorry, no list here. I couldn't find any info about who has faster foxtrots.
Extended Dash Dancing is the act of Cancelling a foxtrot to run in the other direction continuously.
To perform extended Dash Dancing, begin a Foxtrot, and as soon as you start the second Foxtrot, move in the other direction and rinse and repeat.
Inputs:
![]()
Pikachu performing an extended dash dance.
This technique is used primarily used for mindgames to confuse the opponent. For example, one might think you are retreating and try to chase you, but instead you dash the other way towards them and you hit them instead. Another example is that an opponent may try and punish you for running in, but instead you turn and run out, and run back in while they are in the endlag of the attack to punish them.
It should be noted that the faster and longer your foxtrot is, the more useful the technique is. For example, Little Mac benefits a ton from Dash-dancing, but Jigglypuff makes very limited use out of her dash dance. Try it out yourself, and see if your character can take advantage of this.
To perform extended Dash Dancing, begin a Foxtrot, and as soon as you start the second Foxtrot, move in the other direction and rinse and repeat.
Inputs:
Pikachu performing an extended dash dance.
This technique is used primarily used for mindgames to confuse the opponent. For example, one might think you are retreating and try to chase you, but instead you dash the other way towards them and you hit them instead. Another example is that an opponent may try and punish you for running in, but instead you turn and run out, and run back in while they are in the endlag of the attack to punish them.
It should be noted that the faster and longer your foxtrot is, the more useful the technique is. For example, Little Mac benefits a ton from Dash-dancing, but Jigglypuff makes very limited use out of her dash dance. Try it out yourself, and see if your character can take advantage of this.
Section 3: Shield Techniques/Options
The shield is an incredibly important part of smash 4, and before we head into out of shield options, you should know everything you can about shields.
Putting Up and Putting Away Your Shield
First and foremost, your shield comes out on frame 1, however, it does not become visible until frame 2. From frames 1 to 3, of your shield will have the ability to powershield, or block an attack without taking shield damage.
No matter what, you will have to remain in shield for a minimum of 10 frames before you can drop it. This does not incorporate shield stun, or stun you recieve in shield after being hit by an attack. You do not experience shield stun if you powershield the attack.
At the minimum of frame 11, your shield drop animation will start. The shield drop animation lasts 7 frames, meaning that you have a minimum of 17 frames in shield.
If you powershield and let go of your shield button before frame 10, or the minimum time you need to be in shield, you can can cancel your shield drop animation with either a jump, an attack, or a special.
Basically, the goal when pulling up your shield for an attack is to always get a powershield so you can act faster out of it.
Shield Stun and Shield Depletion
When hit by an attack in shield, you recieve shield stun. When in shield stun, you have added time from when you can exit your shield. The stronger the attack is, or the more shield damage it does, the longer you are stuck in shield. Once again, if you powershield, then you do not recieve shield stun from attacks unless they are multi-hit.
While in shield stun, you can SDI. (Refer to section 1-3 for more info)
The shield health in this game is around 42 units. When holding your shield down, your shield health automatically depletes at a rate of around 7.7 units per second. In other words, if you hold your shield for around 5.5 seconds straight, you will break your shield. When not in shield, your shield heals at a rate of around 3.8 units per second. This means that it can take a maximum of around 11 seconds for your shield can regenerate.
When your shield breaks, your time in the shield-break animation is dependent on your percent and how fast you mash out of it. After you recover from a shield break, your shield will always have 30 units of health.
In sum, don't let your shield break.
While you still have considerably less options in shield then when on the move, there are still some basic options you can perform OOS that come out quickly. When you perform some actions in shield, you can get avoid your character going through their shield dropping animation, meaning that you can punish or escape certain things you wouldn't be able to punish otherwise. Here are the most basic OOS and shielding options.
Spotdodge OOS:
If you press while holding the shield button, you will perform a Spotdodge OOS.
![]()
Little Mac Spotdodging OOS to avoid being grabbed by Fox.
Roll OOS:
If you press or while holding the shield button, you will perform a Roll OOS.
![]()
Little Mac rolling OOS to punish a whiffed grab from Fox.
Shield Grabbing
First, a quick note on the mechanics of grabbing. In game, the conditions to perform a grab are to either be pressing or having the shield button and active at the same time. This means that, if you press or (or whatever button you use for grabbing) while in shield, you will perform a grab OOS, or a shield grab.
![]()
Zero Suit shield grabbing Donkey Kong to punish a smash attack on shield.
Jumping OOS:
You can jump out of shield by simply initiating a jump while in shield. This opens up the option to either perform an aerial out of shield, jump to escape a situation, or you can perform 2 other options. (Look at section 3-3, or the next section.)
Running Into Shield:
If while running, you press thed shield button, you will run into shield. This can be used to run towards someone while keeping safe, and also to block aerial attacks and then punish them.
Adjusting Your Shield:
If you move the joystick around just a little bit while in shield, you can adjust the postion of your shield. This is useful when your shield is damaged, as you can protect areas you would normally be hit with.
While it will be difficult to implement these into you play at first, it is important to always be mindful of your shield options and to constantly think about what you can do.
Spotdodge OOS:
If you press
while holding the shield button, you will perform a Spotdodge OOS.
Little Mac Spotdodging OOS to avoid being grabbed by Fox.
Roll OOS:
If you press
or while holding the shield button, you will perform a Roll OOS.
Little Mac rolling OOS to punish a whiffed grab from Fox.
Shield Grabbing
First, a quick note on the mechanics of grabbing. In game, the conditions to perform a grab are to either be pressing
or having the shield button and active at the same time. This means that, if you press or (or whatever button you use for grabbing) while in shield, you will perform a grab OOS, or a shield grab.
Zero Suit shield grabbing Donkey Kong to punish a smash attack on shield.
Jumping OOS:
You can jump out of shield by simply initiating a jump while in shield. This opens up the option to either perform an aerial out of shield, jump to escape a situation, or you can perform 2 other options. (Look at section 3-3, or the next section.)
Running Into Shield:
If while running, you press thed shield button, you will run into shield. This can be used to run towards someone while keeping safe, and also to block aerial attacks and then punish them.
Adjusting Your Shield:
If you move the joystick around just a little bit while in shield, you can adjust the postion of your shield. This is useful when your shield is damaged, as you can protect areas you would normally be hit with.
While it will be difficult to implement these into you play at first, it is important to always be mindful of your shield options and to constantly think about what you can do.
When you Jump, you enter a state known as a jumpsquat. If you do not know what this is, I strongly suggest referring to Section 4-1 under the information on shorthops. The point is, you can interrupt the jumpsquat animation with one of 2 moves. Those two moves are Upsmash and Up-B. I will be doing an input guide to these with and without tap jump before going over the applications.
The applications of these moves will vary depending on the characters. These options are typically used to get the best and most powerful punish while in shield and can help one punish moves they otherwise would not be able to if they did not interrupt the jumpsquat. Play around with these options and see how your character can make use of them.
With tap jump, executing these options are relatively simple.
For Up-Smash:
Hold while in shield, and then press. The game will automatically register the input as an up-smash.
For Up-B:
Hold while in shield, and then press . The game will automatically register the input as an Up-B.
For Up-Smash:
Hold
while in shield, and then press. The game will automatically register the input as an up-smash.For Up-B:
Hold
while in shield, and then press . The game will automatically register the input as an Up-B.Without tap Jump is nearly the same as executing it with tap jump, but with an added step.
For Up-Smash:
Hold while in shield, and then press or . QUICKLY after, press . The game will then cancel the jump and register the input as an Up-Smash.
For Up-B:
Hold while in shield, and then press or. QUICKLY after, press . The game will then cancel the jump and register the input as an Up-B.
For Up-Smash:
Hold
while in shield, and then press or . QUICKLY after, press . The game will then cancel the jump and register the input as an Up-Smash.For Up-B:
Hold
while in shield, and then press or. QUICKLY after, press . The game will then cancel the jump and register the input as an Up-B.The applications of these moves will vary depending on the characters. These options are typically used to get the best and most powerful punish while in shield and can help one punish moves they otherwise would not be able to if they did not interrupt the jumpsquat. Play around with these options and see how your character can make use of them.
Shield dropping is by far the best and most difficult to pull off out of shield option in the game.
![]()
Good Shield Drop Stages:
Battlefield
Dreamland
Lylat Cruise
Okay Shield Drop Stages:
Smashville
Town and City
Halberd
Bleh Shield Drop Stages:
Castle Seige
Isle Delfino
Duck Hunt
Useless Shield Drop Stages:
Final Destination

Good Shield Drop Stages:
Battlefield
Dreamland
Lylat Cruise
Okay Shield Drop Stages:
Smashville
Town and City
Halberd
Bleh Shield Drop Stages:
Castle Seige
Isle Delfino
Duck Hunt
Useless Shield Drop Stages:
Final Destination
Section 4: Aerial Movement Techniques
A short hop, fast fall aerial is when you shorten your first jump so that you can apply pressure from aerials while stimoutaneuously shortening the time that you are in the air after you reach the apex of your jump. While this sounds complicated, it is surprisingly simple.
The Short Hop:
When you use your initial jump off of the ground, your character enters a "jump squat" animation. If you release your jump during this animation, your character will perform a short hop. While the standard jumpsquat animation time is 5 frames, (1/12 of a second) they will very from character to character. The following list is of the time that a character is in their jumpsquat animation.
8 frames:
7 frames:
6 frames:
5 frames:/
4 frames:
I do NOT reccomend you use tap jump for this. Instead I reccomend using the or buttons depending on your preference. If you're having trouble, try flicking your finger off the buttons rather then pressing them.
The Fast Fall:
This part is the simplest part of the technique. After you have reached the falling part of your jump, you can simply press on the control stick and you will fast faster. A successful fast-fall is indicated by a twinkle you can see on your character. The falling speed varies from character to character, but regardless, your character will still fall quicker then they normally would.
The aerial:
You can add any aerial you would like to this. You can use either the c-stick, the z button, or the A button to input aerials. One note is that you can perform Nairs with your c-stick by flicking the stick diagonally.
The Short Hop:
When you use your initial jump off of the ground, your character enters a "jump squat" animation. If you release your jump during this animation, your character will perform a short hop. While the standard jumpsquat animation time is 5 frames, (1/12 of a second) they will very from character to character. The following list is of the time that a character is in their jumpsquat animation.
8 frames:
7 frames:
6 frames:
5 frames:
/ 4 frames:
I do NOT reccomend you use tap jump for this. Instead I reccomend using the
or buttons depending on your preference. If you're having trouble, try flicking your finger off the buttons rather then pressing them.The Fast Fall:
This part is the simplest part of the technique. After you have reached the falling part of your jump, you can simply press
on the control stick and you will fast faster. A successful fast-fall is indicated by a twinkle you can see on your character. The falling speed varies from character to character, but regardless, your character will still fall quicker then they normally would.The aerial:
You can add any aerial you would like to this. You can use either the c-stick, the z button, or the A button to input aerials. One note is that you can perform Nairs with your c-stick by flicking the stick diagonally.
- Applicable Games
- Smash 3DS, Smash Wii U