• Welcome to Smashboards, the world's largest Super Smash Brothers community! Over 250,000 Smash Bros. fans from around the world have come to discuss these great games in over 19 million posts!

    You are currently viewing our boards as a visitor. Click here to sign up right now and start on your path in the Smash community!

Game: CHALLENGER APPROACHING

ChickenWing13

Banned via Warnings
Joined
Jun 1, 2010
Messages
1,237
NNID
Frosty93
The game is simple.

1) Post any character

2) Create their moveset + Final Smash, etc.

Ex.

Challenger Approching: Riku


(Skipping basic attacks =p)

Neutral B = Dark Firaga
Side B = Quick Blitz
Down B = Dark Gaurd
Up B = Double Flight

Final Smash = Eternal Session

Weopon of Choice: Way to Dawn (Keyblade)

Weight Class: Mid

Str = 7/10 Def. = 8/10
 

Fortanono

Smash Ace
Joined
Sep 24, 2013
Messages
893
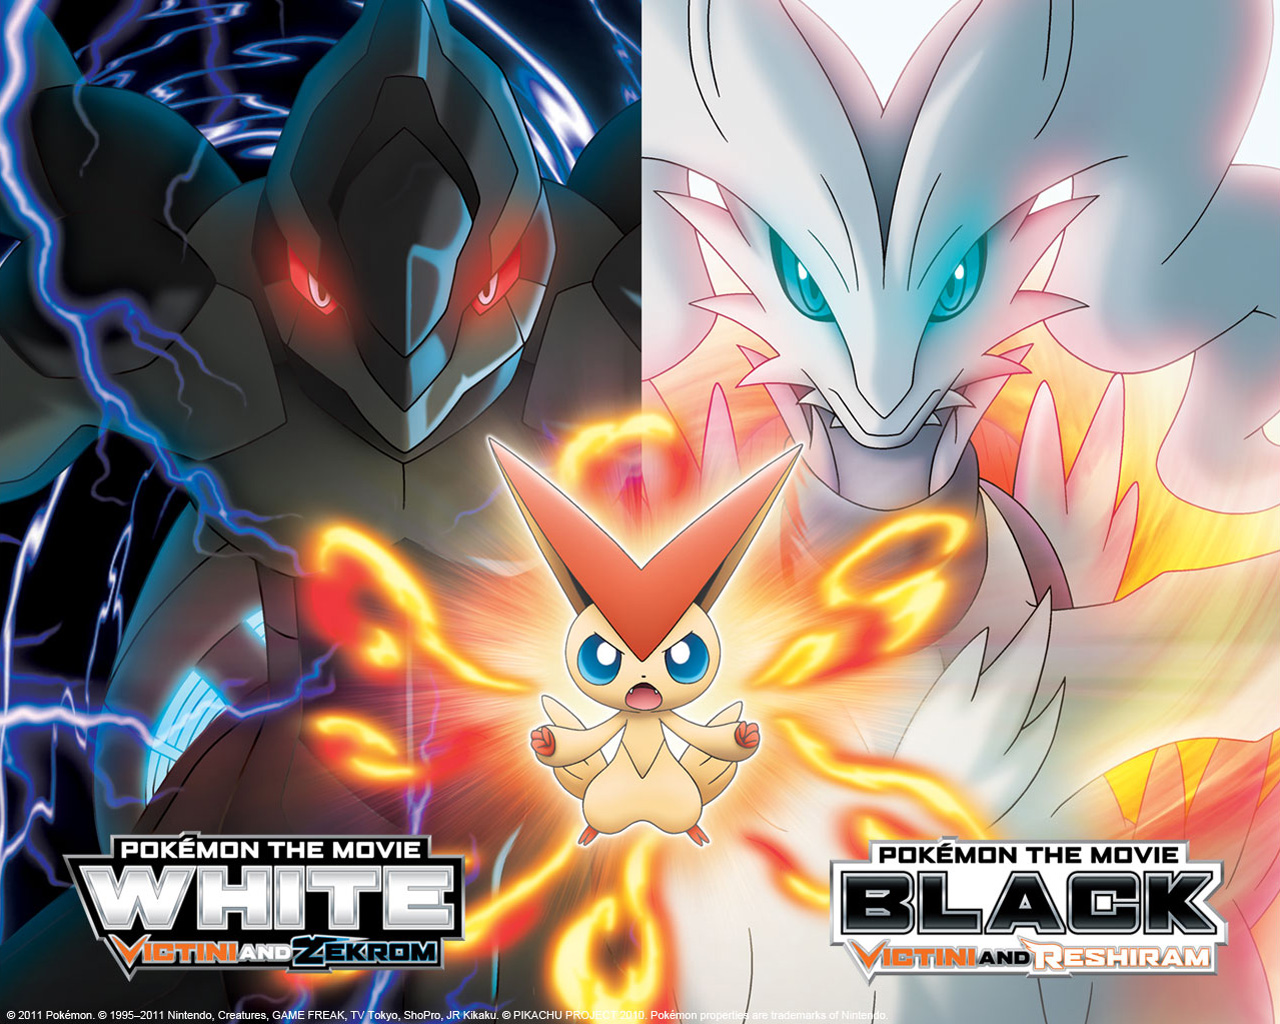
Challenger Approaching: Victini


Moveset:

  • B: Blue Flare
  • Side B: Psychic
  • Up B: Bolt Strike
  • Down B: Searing Shot
  • Final Smash: V-Create
 

APC99

Smash Master
Joined
Jun 12, 2013
Messages
4,244
Location
Appleton, WI
NNID
APC-99
3DS FC
3840-8265-8211
Challenger Approaching: Amigo


N-Special: Shake It!
S-Special: Uplifting Beat
U-Special: Sombrero Spin
D-Special: Speaker
Final Smash: Samba de Smash
 

XTheElegantShadowX

Smash Journeyman
Joined
Oct 9, 2013
Messages
265
Location
Asgard
3DS FC
3625-7979-8675
Oho! I've always wanted to do one of these. Now, let's see:


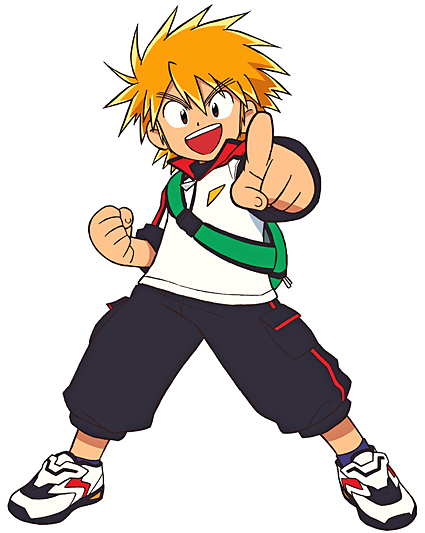
Kou and G Red join the fray! (I couldn't find a picture of them together.)
_____________________________

Overview:

G-Red is a mid weight character with a lot of mobility and quite a few ways of getting in on the opponent; his attacks also have a lot of priority once their out and possesses a good amount of killing power. However, his Normals and Smashes lack both range and speed, so he must be careful and observant as to when he should apply pressure or go for a combo.

Moveset:

Neutral-Special:

G-Blaster:

G-Red fires a small beam that goes forward. Can be rapid fired up to 3 times and G-Red is able to do short dashes in between each shot. Can be used during G-Jet.

Up-Special:

Name: G-Jet

What it does: G-Jet allows G-Red to slowly hover/fly through the air in a similar fashion to Rob or Snake. The maximum amount of time G-Red can stay air-born is around 7 to 10 seconds. Cannot be used again until G-Red has landed.

Side-Special:

Name: G-Crash

What it does: G-Red dashes at the opponent(s), inflicting multiple hits and ending with an uppercut that sends said opponent(s) flying. Has a short start up before the actual attack, however, the charge itself has a hit-box in front and above him.

Down-Special:

Name: G-Mega Laser:

What it does: G-Red Shoots a beam that grows the longer you hold the button. Can KO easily when charged enough, but G-Red is left very vulnerable during the charge. Can be stored just like Lucario's Aura Sphere. Moves in a straight line in front of G-Red.

Final Smash:

Name: Neo G-Red

Kou unites with G-Red causing him to transform into Neo G-Red. While in this form his moveset is stronger with added effects AND his Normals and Smashes have longer reach:

G-Blaster: G-Red is able to move freely while shooting. Can be rapid fired up to 5 times.

G-Jet can last for the entire duration of the Final Smash.

When using G-Crash, G-Red charges sword first at the opponent ending in a downward slash that Meteor Smashes, a forward slash that stuns opponents long enough to follow up with a second attack, or an upward slash that sends opponents flying.

G-Mega Laser is always fully charged and after the blast is finished, G-Red does a short dash with his sword that sends anyone hit by it flying.

Taunts:

Normal:

G-Red and Kou high fives.

G-Red and Kou punch the air twice and then does a fist pump.

Special:

G-Red nods and he and Kou give a thumbs up at the screen.

As Neo G-Red, he tosses his sword in the air, does a flip, and crosses his arms, and then the sword falls in its sheath on his back.
__________________________
And just if you're wondering, Kou walks around the stage in the same fashion as Pokemon Trainer.

So, what do you think?
_________________________

Character Directory (Hehe, I kind of "Borrowed" this idea from PixelPasta. :p):

Billy Hatcher
Yumil/Tia
King Corobo
Ninja/Sasuke
Death Jr and Pandora

Coming soon:

Kalas
Bomberman
 

Lugubrious

Smash Journeyman
Joined
Feb 11, 2013
Messages
236
NNID
Lugubrious
I've made more than thirty of these on Miiverse under the name Cavalier639. I'll just leave my most ridiculously complicated one here.


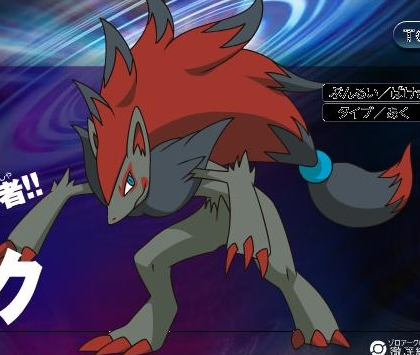
Zoroark is speedy but has great close-range power. His size and low weight make him vulnerable to heavy hitters, though. His moves are very unique, complicated, and hard to use effectively.

Neutral Special: Zoroark uses Illusion, instantly changing into the nearest enemy. It can absorb the damage (but not the knockback) from one attack before changing back. Has a cooldown. The damage absorbed by Zoroark is dealt to the character it's impersonating. In a team battle, an impersonated foe's friendly fire is disabled whilst Illusion is active. When entering the game, Zoroark automatically uses illusion, performing a random foe's entry animation. Using illusion on another Zoroark, disguised or no, results in Zoroark.

Side Special: Zoroark uses Shadow Claw, which allows it to move a little and slash up to six times. Each second slash is a downslash (that can meteor) instead of an upslash, and depending on when you stop mashing the input, the opponent is sent upward or spiked downward. After the barrage of slashes stops or if the first doesn't hit a foe, Zoroark is put into a helpless state.

Up Special: Zoroark uses Pursuit, moving diagonally whilst surrounded by three spiraling, glowing wisps. Damage is dealt to anyone hit, but if the foe's back is turned, damage and knockback is doubled.

Down Special: Zoroark uses Foul Play, which is a counter. This move damages and knocks back both the attacking enemy and the impersonated enemy, if illusion is active.

Final Smash: Zoroark uses Night Daze. It howls, releasing a pitch-black shockwave that damages and stuns all foes within a radius. If illusion was active, Zoroark uses Night Slash to dash to the impersonated character and deal massive damage to them, often an OHKO at higher percentages.


Let me know if you want more.
 

shininimuss

Smash Apprentice
Joined
Nov 10, 2013
Messages
124
NNID
shininimus
Oho! I've always wanted to do one of these. Now, let's see:


Kou and G Red (I couldn't find a picture of them together.)

Moveset:

Neutral-Special:

G-Blaster:

G-Red fires a small beam that goes forward. Can be rapid fired up to 3 times.

Up-Special:

Name: G-Jet

What it does: G-Jet allows G-Red to slowly hover/fly through the air in a similar fashion to Rob or Snake. The maximum amount of time G-Red can stay air-born is around 4 to 7 seconds.

Side-Special:

Name: G-Crash

What it does: G-Red dashes at the opponent(s), inflicting multiple hits and ending with a punch that sends said opponent(s) flying. Has a short start up before the actual attack, however, the charge itself has a hit-box in front and above him.

Down-Special:

Name: G-Mega Laser:

What it does: G-Red Shoots a beam that grows the longer you hold the button. Can KO easily when charged enough, but G-Red is left very vulnerable during the charge. Can be stored just like Lucario's Aura Sphere. Moves in a straight line in front of G-Red.

Final Smash:

Name: Neo G-Red

Kou unites with G-Red causing him to transform into Neo G-Red. While in this form his moveset is stronger with added effects AND his Normals and Smashes have longer reach:

G-Blaster: G-Red is able to move freely while shooting. Can be rapid fired up to 5 times.

G-Jet can last for the entire duration of the Final Smash.

When using G-Crash, G-Red charges sword first at the opponent ending in a downward slash that Meteor Smashes.

G-Mega Laser is always fully charged and after the blast is finished, G-Red does a short dash with his sword that sends anyone hit by it flying.


And just if you're wondering, Kou walks around the stage in the same fashion as Pokemon Trainer.

So, what do you think?
T_T someone knows of gotcha force
 

Malion

Smash Ace
Joined
Nov 6, 2013
Messages
649


Neutral B: Bubble (can be charged by holding the button down for increased power and distance)
Side B: Twirl (does a running twirl similar to the Ice Climbers side-b)
Up-B: Flower Lift: Releases flowers for a quick third jump straight up. Can hover briefly on the flowers afterwards.
Down B: Deku Nut: A deku nut is thrown forward and down and has the same effects as the item only it doesn't effect the user. When in the air the nut goes straight down.

Final Smash: Sonata of Awakening: plays a song to summon an army of Deku which ravages the stage similarly to Olimar's final smash.
 

PixelPasta

Smash Lord
Joined
Jul 27, 2013
Messages
1,147
PIXELPASTA'S CHALLENGER DIRECTORY

I plan on doing a lot of these, so I've transformed this post into a little directory for all of my posts in this thread.

Please note that I do these for my own enjoyment - they do not reflect who I would actually want to be in the game. This is purely for fun, and to give me a little challenge.

CHALLENGERS:
Beedle
Chibi Robo
King Boo
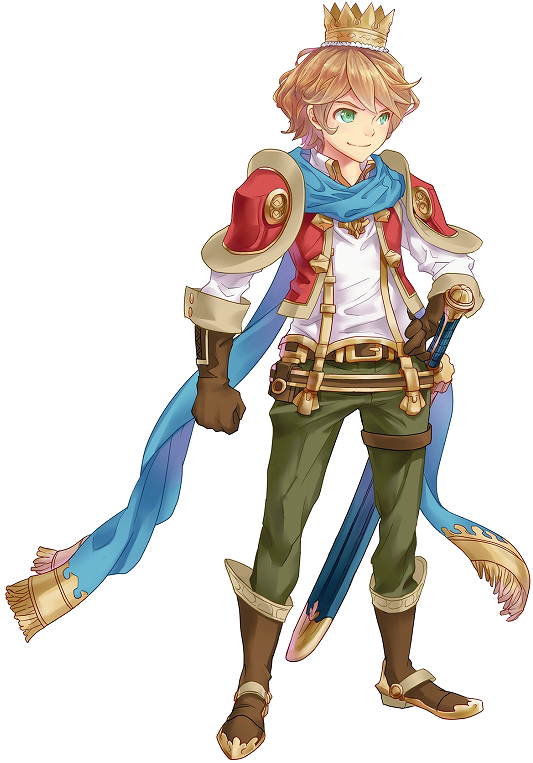
Prince Fluff
Rosalina
Tingle
Waddle Dee
 

Phan7om

ドリームランドの悪夢
Joined
Jun 12, 2013
Messages
1,615
Location
???
CHALLENGER APPROACHING


Neutral B: Flame Ring Homing Attack ~ Like Sonics but with quicker startup and a Fire attribute. Shoots strait, not at an Arc like Sonics. A reliable kill move due to its high knockback.
Side B: Chaos Spear ~ Preforms his famous chaos spear. Travels relatively fast but not too fast, about the same as Wolf's blaster. Has a slight stun. Electric attribute.
Up B: Chaos Control ~ Shadow warps, and can warp in 8 different directions. Really low landing lag. Can attack out of it if you press an Attack/Smash button/stick.
Down B: Chaos Blast ~ Takes a while to charge up, a lot like Wario's fart. Has a really large hitbox. High knockback.
Final Smash: Chaos Control ~ Different from his Up B in that this one slows down all enemies as if Shadow picked up a Timer. Lasts about as long as Sonic's Final Smash.
 

PixelPasta

Smash Lord
Joined
Jul 27, 2013
Messages
1,147
CHALLENGER APPROACHING

Rosalina, the guardian of the cosmos, joins the battle!


Neutral B: Star Bit ~ Rosalina gracefully swishes her arm forward, causing a star bit to quickly fall from above a few steps in front of her. These star bits only do 1% to any opponent that they hit, but they are incredibly fast and can be rapidly shot with almost no delay.
Side B: Polari ~ Rosalina sends her faithful black Luma, Polari, to attack the foe. As Rosalina gracefully beckons forward, Polari rushes ahead (about the distance of one of Olimar's tossed Pikmin) and grabs onto the opponent. From then, the player can press any direction to command Polari to toss the opponent around, dealing a fair amount of damage. Additionally, Polari holds the opponent the perfect distance away from Rosalina so she can hit them with a barrage of star bits while they are trapped in Polari's grasp.
Up B: Launch Star ~ A Luma appears and transforms into a Launch Star, which flings Rosalina into the air. As Rosalina soars, she will deal 8% to anybody she slams into.
Down B: Luma Spin ~ Rosalina quickly twirls around, with a stardust effect surrounding her swooshing dress. This move does about 6% and has fairly good knockback. It also causes Rosalina to jump up slightly, making it sort-of a secondary recovery move.
Final Smash: Cosmic Spirit ~ This one is a 'trapping' style final smash, much like Link's. If Rosalina manages to unleash her final smash while facing a nearby opponent, she will morph into her spirit form for a brief second, and then will possess the opponent in the form of a blue orb (much like she does in SMG2). Rosalina then has full control of the opponent for 12 seconds. She can choose to either use them to beat up other foes, or to simply jump them off a ledge (which will not affect Rosalina's stock, it will only remove stock from whomever she is possessing)


NOTE: Most of Rosalina's other moves involve using Lumas and cosmic magic. Her grabs and throws are very unique in that they utilize pull stars and gravity bubbles.

(back to directory)
 

XTheElegantShadowX

Smash Journeyman
Joined
Oct 9, 2013
Messages
265
Location
Asgard
3DS FC
3625-7979-8675


Billy Hatcher joins the fray!
-------------------------------------
Overview:

Billy Hatcher is a mid-weight character with moderately fast normals and Smashes, but has short reach,
low damage, and suffers from a lack of offensive and defensive options without an Egg Equipped. He possesses a special mechanic, "Egg Grow" and "Equip."

Egg Grow allows Billy to make the egg he holds grow by attacking the opponent with it. After a certain amount of damage has been inflicted, Billy can Hatch the egg with his Neutral-Special.

Equip, as the name suggests, allows Billy to Tame and Equip whichever Creature he summons, which affects his Specials and Normals.

Additional Info:

With an Egg Equipped, his Normals gain more range, attentional hits, and/or effects.

Forward, Down, and Up-Smashes all unequip the Eggs. Air Forward-Special also unequips the Egg.

Unequipped Eggs can be picked back up by Billy.

As the Egg grows, it can deal more damage and take more hits.

And yes, the Egg can break if it's hit too many times.

Equipped Creatures will vanishes after taking a set amount of damage or if Billy is KOed.

Moveset:

Neutral-Special:

Name: Egg Equip/Egg Hatch

What it does: Billy summons a random Egg that he can grab onto and roll around, while Equipped, Billy's Normals, Smashes, and Specials all change/become stronger. The Egg also contains a creature that can further augment his abilities. Can only have one creature out at once; and when a second one is hatched from an Egg, the former vanishes.

Eggs that Billy can Summon:

Blue Egg:

Contains: Clippen

While Equipped, Clappen causes the egg that Billy currently has equipped to be enveloped in Water and makes all opponents hit by it slower and lowers recovery of certain attacks. Clappen can survive a maximum of three hits before vanishing.

Purple Egg:

Contains: Richie

While Equipped, Richie causes the Egg Billy currently has equipped to be encased in Ice, causing the freezing effect on the opponent when they're hit by it and has a chance to completely freeze the opponent. Richie can survive a maximum of three hits before vanishing.

Red Egg:

Contains: Rikol

Rikol works slightly differently than the others. While equipped, Rikol will preform follow up attacks after Billy, and assist him in doing certain attacks, making them stronger. Rikol can survive a maximum of five hits before vanishing.

Red/Orange Egg:

Contains: Glarin

While Equipped, Glarin causes the Egg to be consumed by fire, causing it to have a burning effect on whomever it hits and Billy's egg attacks also deal five percent more damage. Glarin can survive a maximum of four hits before vanishing.

Yellow Egg:

Contains: Recky

While Recky is Equipped, The egg is electrified, causing it to shock whomever it comes into contact with and Billy's jumping, walking, and running speed is also increased. Recky can survive a maximum of 3 hits before vanishing.

Up-Special:

Name: Wings

What it does: Billy dawns a pair of wings and gains four extra jumps and the ability to hover for a few seconds. After the final Jump, Billy will be forced to land and have a small recovery that differs in length depending on how many jumps he used. Is not affected by Equipped Creatures other than Rikol. However, when he has any other Creature out, it will grab onto Billy's leg or back while he jumps.

If Rikol is Equipped, it gives Billy a little boost before he takes flight, even in mid air.

Side-Special:

Name: Punch/Egg Rush

What it does: With an Egg Equipped, Billy dashes straight-forward, Egg first into the opponent. Without an Egg Equipped, he simply Punches the opponent away. Egg version is affected by Creature.

While in the air, the attack changes: Billy Throws the Egg a little ways from himself. Upon hitting the ground, it causes a small shock wave. Meteor Smashes if the opponent is hit by it in mid-air.

Down-Special:

Name: Kick/Egg Bounce/Slam

What it does: With an Egg Equipped Billy does a small jump before bouncing on the equipped Egg. Holding the button causes him to slam into the ground instead of bouncing and creates a shock wave. Without an Egg Equipped, he just Kicks the Opponent upwards. Can be used in the air and is affected by the Equipped Creature.

Final Smash:

Name: GOOD MORNING!

Billy Summons the Chicken Elders to crow at the sun, causing a shock wave about 2/3 the size of Final Destination to appear and transform all opponents in range into chickens. The transformed opponent(s) are only able to jump and use a peck attack that deals 1%.

Taunts:

Normal:

Billy does a small spin and says "Good morning."

Billy jumps up and down a few times with his arms out and says," Yay!"

Special:

Billy pets whichever Creature he has out.

Updated appearance:

Just because I think that this picture looks a bit better.
--------------------------------------------------------
Wow, that was quite a lot. Billy is a lot like Olimar in that he can't do much without an Egg Equipped, much like Olimar can't do much without his Pikmin.

So, what do you think?
 

PixelPasta

Smash Lord
Joined
Jul 27, 2013
Messages
1,147
CHALLENGER APPROACHING

Prince Fluff, the blue boy of Patch Land, joins the battle!


Neutral B: Yarn Whip ~ Prince Fluff whips out a piece of yarn about the length of Yoshi's tongue and grabs onto the opponent. He then turns into a spinning top and starts rotating, swinging the opponent around on the end of the yarn. The B button can be pressed again to send foes flying, doing about 5-8% on impact and damaging any other foes they hit into.
Side B: Yarn Car ~ Prince Fluff transforms into a yarn car, accompanied by a little 'beep-beep' sound. He will then drive forward about double his normal speed until he hits an opponent or a wall. Any foe hit by the car will receive 5% damage and will be decently knocked back. Upon impact he will resume to his normal form - there will be a slight delay when he is transforming back, leaving him open for a few seconds.
Up B: Yarn Parachute ~ Prince Fluff transforms into a parachute and is blown upwards, about the height of Peach's parasol. This does 6% to anybody who is hit during his ascent. It goes pretty much completely vertical, but can be moved back and forth with ease as Prince Fluff safely drifts down (about the speed of Peach's Parasol descent)
Down B: Yarn Weight ~ Prince Fluff transforms into a weight and drops down, much like Kirby's Stone - this attack deals 15% to anybody hit in the air and 12% to anybody hit on the ground only.
Final Smash: Yarn Tankbot ~ Prince Fluff transforms into the Tankbot - he is slightly smaller than a Landmaster. He moves very slow, and cannot jump, but he receives practically no damage or knockback. In Tankbot form, Prince Fluff's A moves will cause it to use a powerful Boxing Glove attack, while the B moves will cause it to fire quick missiles. This lasts about 18 seconds.

(back to directory)
 

PixelPasta

Smash Lord
Joined
Jul 27, 2013
Messages
1,147
CHALLENGER APPROACHING

Chibi Robo, the caretaker of the Sanderson household, joins the battle!


IMPORTANT NOTE: Chibi Robo has a mechanic called 'Battery Power'. A small battery meter, much like the one from Chibi-Robo, is displayed near his percentage and stock. If he runs low on battery, all of his attacks will become virtually useless. His battery can be replenished with a move that I will cover later.

Neutral B: Chibi Blaster ~ Chibi Robo takes out his Chibi Blaster and fires a shot. The shot is small, quick and does about 3-4%. They can be shot fairly quickly and can be charged up by holding B to do around 10%.
Side B: Water Squirter ~ Chibi Robo takes out his water squirter and squirts out a splash of water. The water pushes opponents around, and occasionally will leave a small puddle that causes opponents to slip.
Up B: Chibi Copter ~ The Chibi Copter gadget pops out of Chibi Robo's head and he flies upwards. He can fly for about 8 seconds. Any opponent who touches the whirring propeller will be dealt 1-2% damage.
Down B: Plug In ~ To recharge his battery, Chibi Robo must periodically plug in. An outlet appears on the ground and Chibi Robo inserts his plug into it. He will then be in a charging state, where he cannot move very far (as his is sort of tethered to the spot where he plugged in). Any foe who touches him will be electrocuted. This move lasts until his battery power is entirely replenished.
Final Smash: Drake Redcrest Costume ~ Chibi Robo changes into his Drake Redcrest outfit and becomes significantly powered up - incredibly strong attacks, no battery loss, faster walking and higher jumping. This lasts for about 15 seconds.


NOTE: Other moves include the spoon toothbrush (forward tilt), shovel (down smash), scissors (forward smash), and mug (shield).

(back to directory)
 

XTheElegantShadowX

Smash Journeyman
Joined
Oct 9, 2013
Messages
265
Location
Asgard
3DS FC
3625-7979-8675


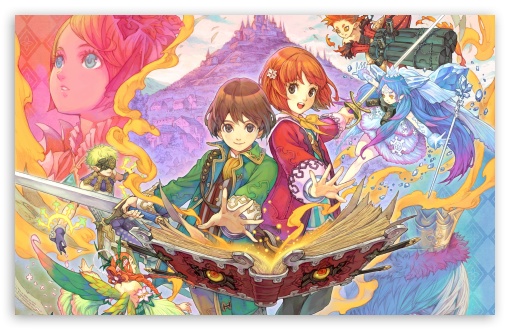
Yumil/Tia joins the fray! (will be referred to as Yumil from this point on, for the sake of convenience.)
___________________________

Overview:

Yumil is a mid-weight character with a variety of tools to confuse and harass the opponent. He's a Jack of all trades type of character, but with a twist. He possesses a special ability, "Weapon Code":

Weapon Code (His Down-Special) allows Yumil to switch between the four weapon classes (Sword, Hammer, Dagger, and Bomb,) at will. His Smashes, Normals, and Specials change depending on the weapon he currently has equipped.

Yumil always starts the battle with the Sword equipped.

Moveset:

Neutral-Special

Sword:

Name: Eastern Sword Style: Cross Slash/Eastern Sword Style: Whirlwind Blade

What it does: Yumil slashes his sword in an X pattern and creates a beam of the same shape that quickly moves forward. Will disappear after making contact with an opponent; the maximum travel distance is about 1/2 the length of Final Destination. In the air he aims it downwards.

If the opponent is close enough, s/he will be hit with both slashes before the beam comes out.

Holding the Button changes this move to Eastern Sword Style: Whirlwind Blade, After a short charge, Yumil goes into a wild spin similar to Link's Spin Attack except that Yumil can move around while doing it; it hits about 5-7 times before finally ending with a powerful, upward slash.

Yumil is left vulnerable during the charge and after the attack is completed.

The final hit can be canceled into any Normal or Smash.

Holding the button further allows Yumil to store the attack.

Cannot be used in Mid-air and will come out as Cross Slash instead.

Dagger:

Name: Southern Flight Style: Psychic Dagger/Southern Flight Style: Homing Raven

What it does: Yumil throws a Dagger in one of three directions, in front, Above, or 30 degrees above him. The dagger can travel the entire length of the screen, but vanishes upon making contact with an opponent. In the air he shoots the Dagger in front, below, or 30 degrees below him.

Can move a little bit after throwing the Dagger.

Can bounce off solid surfaces up to three times before just completely ignoring and passing through them. However, will go through passable platform.

Only three Daggers can be out at once; attempting to throw out a forth will result in the first Dagger vanishing.

Holding the button changes this move to Southern Flight Style: Homing Raven, Yumil charges and releases a Dagger cloaked in yellow energy that takes the shape of a Raven. It homes in on the closest opponent and hits three times before finally disappearing. Unlike Psychic Dagger, it has a set time limit of 7 seconds before finally vanishing.

Can be controlled.

Cannot be used in mid-air and will come out as Psychic Dagger if attempted.

Bomb:

Name: Western Bomb Style: Big Bang/Western Bomb Style: Scapegoat.

What it does: Yumil sets a small bomb on the ground that detonates 2 seconds after an opponent comes within a certain distance of it. In the air, Yumil drops the Bomb straight down.

Holding the button changes this move to Western Bomb Style: Scapegoat, Yumil fumbles around for a moment before pulling out a mini version of himself. When the opponent comes near it, after a few seconds it will explode into a column of fire that stays active for 3 seconds.

Only two Bombs (Scapegoat included) can be out at once; Attempting to set out more than two will cause the first one set to vanish.

Bombs will stay out even after switching Weapons.

Cannot be used in mid-air and will come out as Big Bang instead.

Hammer:

Name: Northern Hammer Style: Colossus/Northern Hammer Style: Like Flying.

What it does: Yumil swings his hammer above his head and brings it down full force. The impact causes a small shock wave that moves slight to each side and above him. In the air, Yumil starts spinning vertically with his hammer out in a similar fashion to Kirby with his hammer in Melee. Upon hitting the ground it has the same effect as the grounded version.

Can hit above and on both sides of Yumil.

The shock wave causes the opponent to stumble.

The air version Meteor Smashes.

Holding the button changes this move to Western Hammer Style: Like Flying, Yumil charges and does a small spin before flying straight-forward Hammer first. Any enemy hit by the Hammer will be sent flying.

The spin has a hit box and causes opponents hit by it to stumble.

Flight can be canceled by pressing the button again.

CAN be used in mid-air.

Up-Special

Sword:

Name: Eastern Secret Technique: Rising Sun.

What it does: Yumil does a short hop and slashes upwards as he ascends before doing a downwards spin slash.

The second hit Meteor Smashes.

Is a better recovery than it sounds.

Dagger:

Name: Southern Secret Technique: Bird's Prey.

What it does: Yumil throws a Dagger above him attached to a wire, upon hitting the opponent they are pulled to the ground.

Seeks out ledges just like Link and Samus's Grabs.

Bomb:

Name: Western Secret Technique: Firework.

What it does: Yumil pulls out a bomb and sets it below him, and immediately detonates it, causing him to fly upwards. After a short period of time, he explodes in a display of color and whimsy.

Where Yumil flies can be controlled to some extent.

The entire move has a hit box starting from when the bomb detonates to when the second explosion happens.

Hammer:

Name: Secret Technique: Eight Paths of the Wind.

What it does: Yumil swings his Hammer and uses the velocity to move in one of eight directions.

If the Hammer touches a ledge, it counts as Yumil grabbing onto it.

Side-Special:

Name: Book of Prophecy.

What it does: Yumil opens the Book of Prophecy and creates a random Item.

List of Items that can be created:

Fire Flower, Superspicy Curry, Beam Sword, Sticky Bomb, Freezie, Food, Ray Gun. Maxim Tomato, Bunny Hood, Hammer, Lip's Stick.

Down-Special:

Name: Weapon Switch.

What it does: Yumil quickly cycles through each of his weapons. Each Weapon is tied to a direction on the control-stick/pad

Up: Dagger

Neutral: Swords

Side: Hammer

Down, Bomb

Each Weapon has its own uses, pros and cons:

The Sword is good for combing and offers the most in terms of balance, speed and range. However, it lacks a effective recovery and has the second lowest damage of the four Weapons.

In short:

Pros: Has fast attacks, easy to combo with and is the most balanced Weapon.

Cons: Has nothing really extraordinary about it and lacks a viable means of recovering.

Sword Smashes are swift and hit multiple times.

The Dagger is good for long-range and zoning, and can even be used as cover for approaches. However, it lacks any reliable way of KOing the opponent easily and has the lowest damage of the four Weapons.

In short:

Pros: Has the most in terms of range, has a vast amount of options at long distances, safest moveset, and turns Yumil into a Light Character.

Cons: Has no reliable means of KOing the opponent, has low damage, and makes Yumil a Light Character.

Dagger Up and Down Smashes are close range, but are fast, have a lot of priority, and can push opponents away or stun them for a short time. Forward Smash throws a quick moving dagger forwards.

The Bomb is also a good tool for zoning and can offer a LOT of space control with proper placement of Bombs, it also has the second highest damage potential of the four Weapons. However, it lacks any good close range attacks that won't damage Yumil as well.

In short:

Pros: Has a lot in terms of space control, good damage, and has a good amount of tools to toy with the opponent.

Bomb Smashes deal damage to Yumil, but are easy to KO with and can even move him with the impact of the blasts.

Cons: Quite a few of its stronger attacks deal damage to Yumil, has bad close range options, and requires a strategy to work effectively.

The Hammer has the highest damage potential of the four Weapons and offers a lot in the way of pure power, being the easiest Weapon to Meteor Smash and KO opponents with; Yumil is also granted low super armor on a few of his attacks and is made heavy character. However, it's the slowest of the four Weapons, and Hammer Specials and Smashes have a lot of lag before the actual attack comes out, so they must be timed well to be effective.

In short:

Pros: Has very high damage, has super armor on a lot of attacks, has good range on attacks, and a lot of ways of KOing the opponent, and turns Yumil into a Heavy Character.

Cons: Attacks leave Yumil vulnerable for a short amount of time, very slow, some attacks, while having good range, are easily avoided, and Yumil is turned into a Heavy Character.

Hammer Smashes are powerful and hit on both sides, but still suffer from the same shortcomings as the weapon itself.

Final Smash: Avalon Code: Shackles Released.

Yumil opens the Book of Prophecy and unleashes the Four Spirits to wreak havoc across the battlefield with a combination of fireballs from Rempo, ice spikes from Neaki, tornadoes from Mieli, and thunderbolts from Ur. Upon completing the onslaught, the Four Spirits combine their attacks and cause a huge explosion that sends opponents flying.

Taunts:

Normal:

Yumil opens the Book of Prophecy and reads from it.

Yumil does a pose with his weapon before putting it away.

Special:

One of the Four Spirits appears and does a unique taunt with Yumil depending on who it is:

Rampo high-fives Yumil.

Neaki stares at Yumil then smiles.

Mieli hugs Yumil.

Ur and Yumil bow to one another.
-------------------------------------------------------------

Ah. Finally! I'm finally finished with typing all of that out. 'Twas a labor of love and annoyance, since I had to go research a few things about the game (It's been a while since I've played it and I had forgotten most of what was in it) and just the overall amount if decisions I had to make about how each Weapon would work.

So, what do you think?
 

PixelPasta

Smash Lord
Joined
Jul 27, 2013
Messages
1,147
CHALLENGER APPROACHING

Beedle, Hyrule's travelling merchant, joins the battle!


Neutral B: Horned Colossus ~ Beedle releases his prized Horned Colossus beetle, which can be controlled, similar to Snake's Remote Missile. The Beetle can latch onto any opponent in it's range for a few seconds, dealing gradual damage (up to 10%).
Side B: Pig Bait ~ Beedle tosses a handful of bait. Soon enough, an angry pig charges across the screen to wherever the bait was thrown, dealing 8% and pushing anybody in it's path.
Up B: Hyoi Pear ~ Beedle places a Hyoi pear on the top of his head. Two seagulls then soar in from above (dealing 3% to anybody they manage to peck), grabbing Beedle by the shoulders and lifting him upwards for a safe recovery.
Down B: Bomb ~ Similar in function to Link and Toon Link's move, Beedle pulls out a bomb and tosses it at an opponent, dealing about 6-7% damage.
Final Smash: Insect Cage ~ Beedle takes out his insect cage and releases a swarm of insects that chase down nearby opponents, dealing massive damage.


NOTE: Beedle's grabs, pummels, and throws are like Villager - the use a bug net.

(back to directory)
 

midna.

Smash Cadet
Joined
Nov 3, 2013
Messages
67
Location
hyrule
its sad how people write so much about the things that will probably never happen...
 

XTheElegantShadowX

Smash Journeyman
Joined
Oct 9, 2013
Messages
265
Location
Asgard
3DS FC
3625-7979-8675

King Corobo joins the fray!
_____________________________

Overview:

King Corobo is a light weight character with moderately fast Normals and Smashes, but lacks range and damage without his followers with him. He leads his army of men into the skirmish with his abilities, "Dispatch" and "Formation"

Dispatch allows Corobo to order his troops to preform various actions while being at a distance from him.

Formation allows Corobo to order his troops into various formations that may benefit the current situation.

Always starts the battle with a Soldier by his side.

Corobo is a very strategy based character who is dependent on knowing the layout of the battlefield and how to use it to his advantage.

Additional Info:

Corobo's Smashes will cause his selected troop unit to attack with him:

Soldiers will preform a forward, upward, or dual sided downward slash. The Soldiers will travel farther or hit more times the longer the Smash is held.

Archers will fire arrows forward, skyward, or strike the ground with their bows. The arrows distances increase the longer the Smash is held.

Farmers will flail their arms forward, upwards, or spin around for a short amount of time. The Farmer's attacks will be active a bit longer if Smashes are held.

When Corobo is KOed, his Troops will remain on the stage, however, they'll all take 1 point of damage each.

Moveset:

Neutral-Special:

Name: Call/Dispatch

What it does: Corobo lifts his sword to the air and summons in one of his troops.

Troops that can be summoned and the corresponding button to summon which one:

Troop HP is displayed as little, blue dots above their heads.

Forward. Soldier: Soldiers are brave warriors who aren't afraid to get up close and personal with their opponents. They're both quick and powerful and possesses the ability to guard. Has a chance of Summoning a Knight, which is a slightly stronger version of a Soldier that deals more damage and can take two more hits.

Soldiers will attack in tandem with Corobo to both increase his attack range and damage potential.

Soldiers have a chance of using a special attack that deals massive damage if it sweet spots

Soldiers can take four hits before vanishing.

Up. Archer: Cat eared marksmen who prefer to fight at a distance. Their arrows have a chance of stunning and/or poisoning the opponent and they're excellent for putting the tide of battle in your favor.

Archers will fire arrows in the direction Corobo's attacks are aimed.

Archers can only shoot six arrows before having to reload their ammo. Reload time is roughly two seconds.

Archers can take three hits before vanishing

Down. Farmer: Farmers aren't very good in combat, however, they make for excellent support units by molding the terrain in his fellow soldier's and King's favor.

Farmers will protect their King and army men by catching projectiles and acting as human shields.

Farmers can only take two hits before vanishing.

Neutral. Dispatch: Allows Corobo to order one of his soldiers to stand their ground at the area that Corobo stands. Doing this will activate a special ability from each of his troops:

Soldiers will raise their shields, act as roadblocks, and counter attack. They will automatically unleash an attack if the opponent gets too close.

Archers are able to aim their arrows at opponents and increase the speed at which their arrows are drawn and travel. Where they're aiming is shown by red targets that appear while their searching for a target.

Farmers will dig sinkholes for the enemy to fall into and quickly return to Corobo's side.

Only 6 troops can be out at a time.

Pressing the Normal button will allow you to cycle through your troop types.

Pressing the Grab button will make a selected Soldier, Archer, or Farmer disappear.

Up-Special:

Name: Lift Order

What it does: Two Architects appear and quickly build a floating platform that Corobo is able to hover on for 5 seconds; can be moved in any directing while active.

On the ground, Troops that are rallied around Corobo will jump unto the platform with him. In the air, they'll hand off the platform similarly to how s character would on the edge of a stage.

Side-Special:

Name: Attack Order

What it does: Corobo points his sword forward and commands his troops to unleash an attack:

Soldiers will charge forward and attack the nearest foe with a powerful slash attack. However, if the opponent is close enough to Corobo, they will ignore all other opponents, but the one near him.

Archers will shoot two arrows, one going up and one going forward, at the opponent. However, they will run out of arrows faster.

Farmers will kick up dirt at opponents within range, making them prone to tripping if they are too careless with running.

Down-Special:

Name: Formation Order

What it does: Corobo commands his troops into three formations depending on the direction pressed:

Neutral. Defense Formation:

Corobo commands his non-Dispatched troops to gather around, and protect him from opponent's attacks.

Soldiers will raise their shields and counter attack.

Archers will only attack opponents that approach from above.

Farmers will push opponents away if they get too close.

Forward. Attack Formation:

Corobo commands his non-Dispatched troops to attack with him.

Soldiers will act as usual, though, will have a better chance of unleashing their special attacks.

Archers will fire arrows freely.

Farmers will attempt to hit the opponent on the head with a shovel, stunning them. However, Farmers have a chance of stumbling over themselves while trying to attack and inflict 2% on the opponent if they make contact.

Up: Break Formation.

All troops will return to normal.

Down. Call back.

Corobo calls all troops back to his side.

Final Smash:

Name: A True Knight

What it does. Corobo raises his staff to the air and summons the his loyal vassal, Howser. who will act in a similar fashion to the Soldier, however, he's much stronger and cannot be killed. During the Final Smash, all troops are buffed:

Soldiers deal more damage and are faster.

Archers fire arrows faster, deal more damage, and no longer need to reload.

Farmers are quicker, cannot be killed and all of their attacks have a chance to stun.

Howser will always stay at Corobo's side and cannot be Dispatched. He'll act as a human shield and attack any opponent that comes within attack range of Corobo. He also possess a crossbow that he can shoot from a distance. The Cow he rides on has an attack similar to the Farmer's in that he kicks dirt at the opponent's face and makes them prone to tripping.

Taunts:

Normal

Corobo unsheathes his sword and points it forwards.

Corobo runs his hand through his hair and winks at the screen.

Special:

Corobo points his sword upwards and all troops start to jump and cheer.
___________________________________________________

Well, that was quite a bit to write out, luckily, I managed to press on and complete it. :)

So, what do you think?
 

ChickenWing13

Banned via Warnings
Joined
Jun 1, 2010
Messages
1,237
NNID
Frosty93

King Corobo joins the fray!
_____________________________

Overview:

King Corobo is a light weight character with fast Normals and Smashes, but lacks range and damage without his followers with him. He leads his army of men into the skirmish with his abilities, "Dispatch" and "Formation"

Dispatch allows Corobo to Order his troops to preform various actions while being at a distance from him.

Formation allows Corobo to order his troops into various formations that may benefit the current situation.

Moveset:

Neutral-Special:

Name: Call/Dispatch

What it does: Corobo lifts his sword to the air and summons in one of his troops.

Troops that can be summoned and the corresponding button to summon which one:

Forward. Soldier: Soldiers are brave warriors who aren't afraid to get up close and personal with their opponents. They're both quick and powerful and possesses the ability to guard. Has a chance of Summoning a Knight, which is a slightly stronger version of a Soldier that deal more damage and can take two more hits.

Soldiers will attack in tandem with Corobo to both increase his attack range and damage potential.

Soldiers have a chance of using a special attack that deals massive damage if it sweet spots

Soldiers can take four hits before vanishing.

Up. Archer: Cat eared marksmen who prefer to fight at a distance. Their arrows have a chance of stunning and/or poisoning the opponent and they're excellent for putting the tide of battle in your favor.

Archers will fire arrows in the direction Corobo's attacks are aimed.

Archers can only shoot six arrows before having to reload their ammo.

Archers can take three hits before vanishing

Down. Farmer: Farmers aren't very good in combat, however, they make for excellent support units by molding the terrain in his fellow soldier's and King's favor.

Farmers will protect their King and army men by catching projectiles and acting as human shields.

Farmers can only take two hits before vanishing.

Neutral. Dispatch: Allows Corobo to order one of his soldiers to stand their ground at the area that Corobo stands. Doing this will activate a special ability from each of his troops:

Soldiers will raise their shields, act as roadblocks, and counter attack.

Archers are able to rapid fire their arrows and increase the speed of their arrows.

Farmers will dig sinkholes for the enemy to fall into and quickly return to Corobo's side.

Only 5 troops can be out at a time.

Up-Special:

Name: Lift Order

What it does: Two Architects appear and quickly build a floating platform that Corobo is able to hover on for 5 seconds; can be moved in any directing while active.

Side-Special:

Name: Attack Order

What it does: Corobo points his sword forward and commands his troops to unleash an attack:

Soldiers will charge in the direct that Corobo is facing and use a powerful slash attack. However, if the opponent is close enough to Corobo, Knights will instead charge for the opponent.

Archers will shoot two arrows, one going up and one going forward, at the opponent. However, they will run out of arrows faster.

Farmers will kick up dirt at opponents, making them prone to tripping if they are too careless with running.

Down-Special:

Name: Formation Order

What it does: Corobo commands his troops into three formations depending on the direction pressed:

Neutral. Defense Formation:

Corobo commands his non-Dispatched troops to gather around, and protect him from opponent's attacks.

Soldiers will raise their shields and counter attack.

Archers will only attack opponents that approach from above.

Farmers will push opponents away if they get too close.

Forward. Attack Formation:

Corobo commands his non-Dispatched troops to attack with him.

Soldiers will act as usual.

Archers will fire arrows freely.

Farmers will attempt to hit the opponent on the head with a shovel, stunning them. However, Farmers have a chance of stumbling over themselves while trying to attack and inflict 2% on the opponent if they make contact.

Up: Break Formation.

All troops will return to normal.

Final Smash:

Name: A True Knight

What it does. Corobo raises his staff to the air and summons the his loyal vassal, Howser. who will act in a similar fashion to the Soldier, however, he's much stronger and cannot be killed. During the Final Smash, all troops are buffed:

Knights deal more damage and are faster.

Archers fire arrows faster, deal more damage, and no longer need to reload.

Farmers are quicker and cannot be killed.

Howser will always stay at Corobo's side and cannot be Dispatched.

Taunts:

Normal

Corobo unsheathes his sword and points it towards the screen.

Corobo runs his hands through his hair and winks at the screen.

Special:

Corobo points his sword upwards and all troops start to jump and cheer.
___________________________________________________

Well, that was quite a bit to write out, luckily, I managed to press on and complete it. :)

So, what do you think?
I see you chose to mimic Marth's taunts just a bit :)

In any case great idea, pretty cool!

These are all looking great so far! Truly inspiring.
 

XTheElegantShadowX

Smash Journeyman
Joined
Oct 9, 2013
Messages
265
Location
Asgard
3DS FC
3625-7979-8675
I see you chose to mimic Marth's taunts just a bit :)

In any case great idea, pretty cool!

These are all looking great so far! Very inspiring.
Thanks! I've always felt that Smash was in need of more strategic characters, and who better than a king leading his men. =D

You should try doing one, it's quite fun. :estatic:
 

PLATINUM7

Star Platinum
Joined
Nov 15, 2013
Messages
12,312
NNID
PLATINUM7
3DS FC
1246-8735-0293
Switch FC
2465-5306-3806

Commander Video!
B: Beat (summons a beat and knocks it away with a paddle)
Side B: Runner (hold down B to charge up and once released Commander Video sprints really fast with a trailing rainbow)
Up B: Launch pad (works like Sonic's Up B)
Down B: Void (Commander Video surrounds himself in a void that gets bigger and stronger as it absorbs projectiles, kind of a cross between Samus' charge shot and Game&watch's Oil Panic)
Final Smash: Flux (Kind of like Mario Finale but with a torrent of beats)
 

ChickenWing13

Banned via Warnings
Joined
Jun 1, 2010
Messages
1,237
NNID
Frosty93

Commander Video!
B: Beat (summons a beat and knocks it away with a paddle)
Side B: Runner (hold down B to charge up and once released Commander Video sprints really fast with a trailing rainbow)
Up B: Launch pad (works like Sonic's Up B)
Down B: Void (Commander Video surrounds himself in a void that gets bigger and stronger as it absorbs projectiles, kind of a cross between Samus' charge shot and Game&watch's Oil Panic)
Final Smash: Flux (Kind of like Mario Finale but with a torrent of beats)
Lol I use to love this game when it came out on Wii!

Good choice and great moveset!

He needs to be in Smash WiiU :(
 

PLATINUM7

Star Platinum
Joined
Nov 15, 2013
Messages
12,312
NNID
PLATINUM7
3DS FC
1246-8735-0293
Switch FC
2465-5306-3806
He needs to be in Smash WiiU :(
I would be so freaking happy if this happened. I would be even happier if they used his retro appearance instead of his updated one in Runner 2.
 

ChickenWing13

Banned via Warnings
Joined
Jun 1, 2010
Messages
1,237
NNID
Frosty93
I would be so freaking happy if this happened. I would be even happier if they used his retro appearance instead of his updated one in Runner 2.
Yeah, plus the new HD graphics!

Though I can see GnW having some competition
 

PixelPasta

Smash Lord
Joined
Jul 27, 2013
Messages
1,147
CHALLENGER APPROACHING

Waddle Dee, King Dedede's loyal servant, joins the battle!


Neutral B: Spear Lob ~ Waddle Dee tosses a spear, javelin style. Each one does 5%. If this button is charged, Waddle Dee will throw 3 spears with a spread effect.
Side B: Beam Whip ~ Waddle Dee, as an homage to his Waddle Doo friends, unleashes a powerful beam attack that deals 8-10% and electric damage.
Up B: Spear Copter ~ Waddle Dee quickly spins his spear, causing him to rise off of the ground, like in Return to Dreamland. Anybody who gets caught up in the propeller will be rapidly damaged, similar to R.O.B's 'Arm Rotor'.
Down B: Megaton Punch ~ Waddle Dee raises his fist and then slams into into the earth beneath him. Anybody in proximity to Waddle Dee will be shoved into the ground. This move can be done from the air too, dealing even more damage.
Final Smash: Armored Dee ~ Waddle Dee goes into the big Waddle Dee armor. His attacks now do massive damage and knockback, but he is fairly slow and only has one jump. This form lasts 18 seconds.


NOTE: Most of Waddle Dee's other moves primarily involve his spear and his parasol.

(back to directory)
 

XTheElegantShadowX

Smash Journeyman
Joined
Oct 9, 2013
Messages
265
Location
Asgard
3DS FC
3625-7979-8675


Ninja (who will be referred to as, "Sasuke," from this point on, since the writers of this game were a bit too lax to come up with a real name for him. :I) joins the fray!
_____________________________________________________

Overview:

Sasuke is a light character with high speed (almost able to rival Sonic), fast Normals and Smashes, and a good amount of range. However, he lacks much in the fields of damage, KOing ability, and defense. He possess the abilities of "Sword Upgrade" and "Sword Degrade," which turn the tides of battle in his favor, or leave him a junk character throughout the entire match.

Sword Upgrade allows Sasuke's sword to grow in power the more he attacks/hits an opponent with it, making his overall damage higher and making certain moves grow in size or gain an added effect.

Universal changes to attacks when at a certain level:

Level 1:

Conditions: Starts the battle with this.

Sword Color: Silver.

Buffs: Has no attentional effects and is completely normal.

Time before Degrade: 15 seconds.

Level 2:

Condition: Must hit an opponent(s) with the sword 5 times to raise.

Sword Color: Jade.

Buffs: All attacks gain a damage boost of 5%, more knock back, priority, and speed.

Time before Degrade: 12 seconds.

Level 3:

Condition: Must hit an opponent(s) with the sword 10 times to raise.

Sword Color: Gold.

Buffs: All sword based attack gain a range boost. All attacks gain a damage boost of 8%, more priority, speed, and knock back than level 2, and gain a larger amount of hitstun.

Time before Degrade: 7 seconds.

Sword Degrade is the exact opposite, if Sasuke goes too long without attacking an opponent his sword will slowly weaken to the point of returning to level 1. If at level 1, and his sword still has not inflicted any damage or made contact to an opponent his sword's level will go to Level 0.

Level 0:

Conditions: Must not hit an opponent(s) for 15 seconds.

Sword Color: Brown (Like wood.)

Debuffs: All attacks deal 5% less damage, have less priority, speed, knock back, and hitstun than Level 1.

Will not Degrade.

Addional Information:

Sasuke's sword will always start the battle with at Level 1.

Sword will also degrade if Sasuke is hit too many times.

Upon being KOed, Sasuke's sword will return to Level 1, even if it was at Level 0 when he was defeated.

Hitting multiple opponents counts towards Upgrades.

Sword Degrade time resets after hitting an opponent twice.

Sasuke's Grab is preformed with a chain that works in a similar fashion to Link and Samus's. It also seeks out ledges.

Sasuke is able to hang onto and run up walls for a short amount of time.

Moveset:

Neutral-Special

Name: Secret Ninja Technique: Dance of the Sparrow's Nest.

What it does: Sasuke pulls out a shuriken and throws it forwards. Disappears upon hitting the opponent.

Level 1: No additional effects.

Level 2: Shuriken travels faster, farther, and Sasuke gains the ability to move freely after throwing it.

Level 3: Shuriken grows in size, deals more damage, hits up to three times, and travels as far as the screen's edge or until it hits a wall.

Level 0: Throws a dart that deals 1% damage and leaves Sasuke vulnerable.

Up-Special:

Name: Secret Ninja Technique: Rising Moon Gate of a Thousand Demon Lords.

What it does: Sasuke concentrates then releases a burst of energy that shoots him skywards. Upon ending this move, Sasuke will twirl his Sword around in his hand like a propeller, lowering his falling speed.

Level 1: Has no additional effects.

Level 2: Sasuke is lunged higher, faster, and can cancel into the propeller part at any time during the move.

Level 3: Sasuke can control in what direction he's shot, can cancel into any Air Normal, or Special. Can also be preformed twice in a row, similar to Pikachu's Up-Special.

Level 0: Sasuke does a short hop and enters the propeller part.

Side-Special:

Name: Secret Ninja Technique: Hidden Tiger preys on Mantis.

Sasuke Charges for a bit and rushes forward, upon coming into contact with an opponent, he will use a power slash attack. Holding the button increases the damage and distance traveled

Level 1: No additional effects:

Level 2: Charge time is halved, faster, and gains more knock back,

Level 3: Is always fully charged, deals more damage, sends opponents skywards, and can cancel the move into a teleport that puts him 1 Bowser's length away from his originally targeted destination. Can attack freely directly after cancel.

Level 0: Charge is longer, cannot be charged all the way, slower, travels less distance. and gains extra recovery frames after attack.

Down-Special:

Name: Secret Ninja Technique: Whirlwind Assault of A Thousand Cranes.

What it does: Sasuke parries and counters the opponent's attack with a spin attack that hits 3 times and knocks the opponent away.

At Level 1: Gains no special effects.

At Level 2: recovery for this move is cut in half, hits 5 times, and gains more knock back.

At Level 3: The start up and recovery for this move is nigh instant, hits 8 times, hitbox grows in size, and stuns opponents in place for a short time.

Level 0: The start up for the parry, and counter of this move is doubled, hits 2 times, and Sasuke is left in a dizzied state after using it.

Final Smash:

Name: Ninja Berserker!

Sasuke shouts "NINJA BERSERKER!" and flames start to envelope him, his sword starts glowing and turns white, and the top of his ninja mask comes off, revealing spiky, blond hair.

While in this state, Sasuke's sword will not Degrade and will always be in Level 3 state. All of his attacks are stronger and also gain more range, speed, and stun. His walk becomes his run and his run becomes a teleport that leaves him invincible during the entire duration of the move. He also gains a healing affect and his counter will activate regardless of whether he's been hit. This lasts for 15 seconds, at which point Sasuke will return to normal with a Level 1 Sword.

Taunts:

Normal:

Sasuke sheaths his sword and wipes his forehead.

Sasuke flails his sword around and makes Karate sounds.

Special:

Sasuke puts his hands together in a ninja sign and vanishes. Only to reappear seconds later with a look of confusion.

During his Final Smash he'll start to clench his fists, squat, and an yellow aura will surround him momentarily as be makes grunting noises.
__________________________________________

Ah, that was quite a bit of fun, and didn't even require as much research as I first thought it would. Oh, and in case you're wondering about his Moveset names, considering the tone of the game, and just how goofy Ninja/Sasuke is, I don't think it would be too much of a stretch for him to give his attacks such ridiculous names.

So, what do you think?
 

Smashiny

Smash Journeyman
Joined
Jun 21, 2013
Messages
350
Location
Omicron Persei 8
Challenger Approuching ... Magikarp:


Neutral B : Splash - Does nothing it's just a splash
Side B : Tackle - Weak attack
Up B : Splash - Does nothing it's just a splash
Down B: Flail - Magikarp just flails around

Final Splash:
Everybody starts splashing - this does nothing
 

Burning Boom

Smash Apprentice
Joined
Feb 1, 2013
Messages
149
I've made more than thirty of these on Miiverse under the name Cavalier639. I'll just leave my most ridiculously complicated one here.


Zoroark is speedy but has great close-range power. His size and low weight make him vulnerable to heavy hitters, though. His moves are very unique, complicated, and hard to use effectively.

Neutral Special: Zoroark uses Illusion, instantly changing into the nearest enemy. It can absorb the damage (but not the knockback) from one attack before changing back. Has a cooldown. The damage absorbed by Zoroark is dealt to the character it's impersonating. In a team battle, an impersonated foe's friendly fire is disabled whilst Illusion is active. When entering the game, Zoroark automatically uses illusion, performing a random foe's entry animation. Using illusion on another Zoroark, disguised or no, results in Zoroark.

Side Special: Zoroark uses Shadow Claw, which allows it to move a little and slash up to six times. Each second slash is a downslash (that can meteor) instead of an upslash, and depending on when you stop mashing the input, the opponent is sent upward or spiked downward. After the barrage of slashes stops or if the first doesn't hit a foe, Zoroark is put into a helpless state.

Up Special: Zoroark uses Pursuit, moving diagonally whilst surrounded by three spiraling, glowing wisps. Damage is dealt to anyone hit, but if the foe's back is turned, damage and knockback is doubled.

Down Special: Zoroark uses Foul Play, which is a counter. This move damages and knocks back both the attacking enemy and the impersonated enemy, if illusion is active.

Final Smash: Zoroark uses Night Daze. It howls, releasing a pitch-black shockwave that damages and stuns all foes within a radius. If illusion was active, Zoroark uses Night Slash to dash to the impersonated character and deal massive damage to them, often an OHKO at higher percentages.


Let me know if you want more.
Neutral Special sounds incredibly OP (he'd just always change into somebody to avoid any sort of damage, and either he'd make the opponent beat themselves to death, or the game would go nowhere. How would it be balanced?
 

Burning Boom

Smash Apprentice
Joined
Feb 1, 2013
Messages
149
Challenger Approuching ... Magikarp:


Neutral B : Splash - Does nothing it's just a splash
Side B : Tackle - Weak attack
Up B : Splash - Does nothing it's just a splash
Down B: Flail - Magikarp just flails around

Final Splash:
Everybody starts splashing - this does nothing
However, just for trolling fun, I think that Magikarp should have a ridiculously small hitbox, and be one of the heaviest characters in the game.
 

PixelPasta

Smash Lord
Joined
Jul 27, 2013
Messages
1,147
CHALLENGER APPROACHING

King Boo, Luigi's eternal nemesis, joins the battle!


Neutral B: Lick ~ King Boo sticks out his huge tongue. Anybody who touches it will be dealt 10% and will be poisoned. He keep his tongue hanging out for a bit (like how Wario can keep his mouth open until a foe comes nearby).
Side B: Phantom Flame ~ King Boo spits out a blue fireball that slowly travels across the screen. It does 6% to whoever it touches.
Up B: Spectral Flight ~ King Boo turns semi-transparent and begins to float upwards for about 3-4 seconds. He is impervious to attacks in this state, but afterwards he is helpless.
Down B: Spooky Face ~ King Boo covers his eyes. Once the button is released, he pulls a scary face and screeches, petrifying any nearby opponents, who will be unable to move for 5 seconds.
Final Smash: Boo Breath ~ Like in Luigi's Mansion, King Boo blows a huge gust of chilling winds across the stage, blowing anybody in its path off screen.


NOTE: King Boo's moves are greatly powered up when the foe's back is turned.

(back to directory)
 

Depressed Gengar

Hana Is Best Girl
Joined
Aug 13, 2013
Messages
4,893
Location
The Johto Region
CHALLENGER APPROACHING!
Chef Kawasaki, chef of Dreamland, joins the fray!
N Special: Plate Toss: Kawasaki throws a plate. Occasionally, he throws three instead.
S Special: Pie Dash: Kawasaki holds a pie and lunges forward. Those who come in contact are slowed down for a bit of time.
U Special: Curry Jump: Kawasaki eats some spicy curry, which makes him jump. While jumping, he spews fireballs.
D Special: Pepper Pillar: Kawasaki tosses a pepper. When the pepper hits the ground or a foe, it turns into a fiery pillar.
FS: Food Giveaway: Kawasaki tosses out food. Most of which are poisonous.
Thoughts?
 

Lugubrious

Smash Journeyman
Joined
Feb 11, 2013
Messages
236
NNID
Lugubrious
Neutral Special sounds incredibly OP (he'd just always change into somebody to avoid any sort of damage, and either he'd make the opponent beat themselves to death, or the game would go nowhere. How would it be balanced?

This would be balanced with a significant cooldown (So much so that death is usually a quicker reset than waiting for it to become available again) and low defensive stats, such as lower percentage KO than most characters. This would mean that the counter and illusion would be some of its only staying power. Of course, this is only an amateur concept, and I'm sure the devs could implements Illusion more effectively.
 

TheRealHeroOfWinds

Smash Ace
Joined
Jul 17, 2013
Messages
635

B: Hammer: Charge it up while holding Special. Let go when you are finally done charging. A star will appear when it is at its best. But don't let go early! You won't do too much damage.
>B: Kooper/Koops: Simple kick Kooper/Koops. They go in their shell to do damage. They can do damage on their way back.
>B (Air): Parakarry: Same as Kooper/Koops but he will fly in the air.
VB: Ground Pound: Ground Pound..... simple.
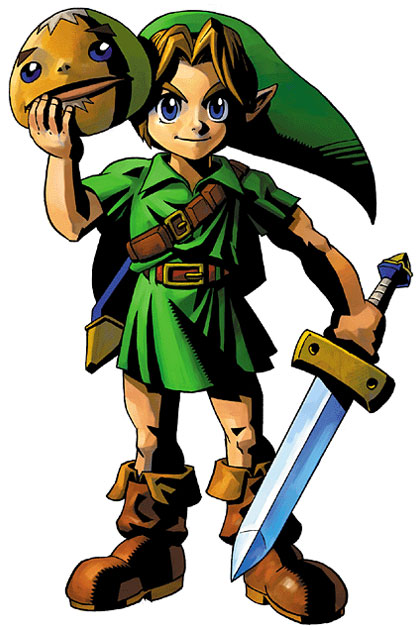
^B: Paper Airplane : He will transform into a airplane and try to fly forward.
FINAL SMASH: Grand Finale: All 7 stars will appear and make a giant laser beam thingy.


Young Link

B: Hero's Bow (Fire and Ice): While charging Bow you can press left and right to change the arrow! Ice if fully charged will freeze enemies. Fire if fully charged will burn enemies.
>B : Deku Stick: Link will take it out of who knows where and will act like a beam sword. But after one hit. It will break. But if some kind of fire hits it, it will act like fire arrows. But can still only hit opponents once.
VB: Transform: Puts on a mask to become Deku Link.
^B: Magic Spin Attack: It can be fully charged with magic and shoot out some aura.
Taunt: Will play Ocarina.

Deku Link

B: Bubble: Will charge a bubble (SNOT) and shoot it afterwards.
B (air): Deku Bomb: Will drop a Deku Nut below... can stun enemies! (Can also be used while using ^B)
>B: Deku Nut: Will stun enemies.
^B: Deku Flower: Will be shot into the air while holding pedals.
VB: Transform: Will turn put on Goron mask.
Taunt: Will play Pipes.

Goron Link

B: Roll Out: Just like Jigglypuff's. But moves barely.
>B: Roll Out: Will charge up and if he moves enough his body will be full of spikes and do massive damage.
^B: Roll Drop: Will curl into a ball and bounce up. (I have no idea I just remember it in Majora's Mask. If you were in the ball you could bounce up)
VB: Transform: Put on Zora Mask.
Taunt: Will play Drums.

Zora Link

B: Boomerang Arms: If you charge they will go farther.
>B: Electric Charge: Will go forward surrounded in electricity.
^B: Twirl of Death: Will spin upwards.
VB: Transform: Will take off Zora Mask and become Young Link.
Taunt: Will play Guitar.

FINAL SMASH: Feirce Deity LINK
Young Link (or any of the other Links) will put on the Feirce Deity Mask.

B: Beam Fire: Will charge up a beam and fire it forward.
>B: Jump Attack: Will jump forward and strike. (Will also fire a beam)
^B: Ultra Magic Spin Attack: Will do more range than the Magic Spin Attack.
VB: (Will turn off Final Smash form if used) Oath to Order: Plays Ocarina of Time to call the Guardians (you know the 4 old guys)
Taunt: Will pull out Majoras Mask.
 

XTheElegantShadowX

Smash Journeyman
Joined
Oct 9, 2013
Messages
265
Location
Asgard
3DS FC
3625-7979-8675

B: Hammer: Charge it up while holding Special. Let go when you are finally done charging. A star will appear when it is at its best. But don't let go early! You won't do too much damage.
>B: Kooper/Koops: Simple kick Kooper/Koops. They go in their shell to do damage. They can do damage on their way back.
>B (Air): Parakarry: Same as Kooper/Koops but he will fly in the air.
VB: Ground Pound: Ground Pound..... simple.
^B: Paper Airplane : He will transform into a airplane and try to fly forward.
FINAL SMASH: Grand Finale: All 7 stars will appear and make a giant laser beam thingy.


Young Link

B: Hero's Bow (Fire and Ice): While charging Bow you can press left and right to change the arrow! Ice if fully charged will freeze enemies. Fire if fully charged will burn enemies.
>B : Deku Stick: Link will take it out of who knows where and will act like a beam sword. But after one hit. It will break. But if some kind of fire hits it, it will act like fire arrows. But can still only hit opponents once.
VB: Transform: Puts on a mask to become Deku Link.
^B: Magic Spin Attack: It can be fully charged with magic and shoot out some aura.
Taunt: Will play Ocarina.

Deku Link

B: Bubble: Will charge a bubble (SNOT) and shoot it afterwards.
B (air): Deku Bomb: Will drop a Deku Nut below... can stun enemies! (Can also be used while using ^B)
>B: Deku Nut: Will stun enemies.
^B: Deku Flower: Will be shot into the air while holding pedals.
VB: Transform: Will turn put on Goron mask.
Taunt: Will play Pipes.

Goron Link

B: Roll Out: Just like Jigglypuff's. But moves barely.
>B: Roll Out: Will charge up and if he moves enough his body will be full of spikes and do massive damage.
^B: Roll Drop: Will curl into a ball and bounce up. (I have no idea I just remember it in Majora's Mask. If you were in the ball you could bounce up)
VB: Transform: Put on Zora Mask.
Taunt: Will play Drums.

Zora Link

B: Boomerang Arms: If you charge they will go farther.
>B: Electric Charge: Will go forward surrounded in electricity.
^B: Twirl of Death: Will spin upwards.
VB: Transform: Will take off Zora Mask and become Young Link.
Taunt: Will play Guitar.

FINAL SMASH: Feirce Deity LINK
Young Link (or any of the other Links) will put on the Feirce Deity Mask.

B: Beam Fire: Will charge up a beam and fire it forward.
>B: Jump Attack: Will jump forward and strike. (Will also fire a beam)
^B: Ultra Magic Spin Attack: Will do more range than the Magic Spin Attack.
VB: (Will turn off Final Smash form if used) Oath to Order: Plays Ocarina of Time to call the Guardians (you know the 4 old guys)
Taunt: Will pull out Majoras Mask.
Aw. I was going to do MM Link. Though, you did a well enough job, but if I may, could I critique one thing?

Young Link's Deku Stick move, what's the point of it? You say that it acts like a Beam Sword, but it only hits once before breaking? That sounds like... it could use a bit more "Omph" to it, if you catch my drift.

Edit: Also, with Goron Link's Neutral-Special, why is it the same as his Forward-Special, but less effective? :o

Anywho, all in all, I couldn't have done it better myself. :)
 

TheRealHeroOfWinds

Smash Ace
Joined
Jul 17, 2013
Messages
635
Aw. I was going to do MM Link. Though, you did a well enough job, but if I may, could I critique one thing?

Young Link's Deku Stick move, what's the point of it? You say that it acts like a Beam Sword, but it only hits once before breaking? That sounds like... it could use a bit more "Omph" to it, if you catch my drift.

Edit: Also, with Goron Link's Neutral-Special, why is it the same as his Forward-Special, but less effective? :o

Anywho, all in all, I couldn't have done it better myself. :)
Yeah I did do a mis spell.

Well there isn't a lot to do with Goron Link's moves. So I had to copy the two.
 

PixelPasta

Smash Lord
Joined
Jul 27, 2013
Messages
1,147
CHALLENGER APPROACHING

Tingle, the mapmaking fairy wannabe, joins the battle!


Neutral B: Kooloo Limpah ~ Tingle says his traditional 'Kooloo Limpah!' and throws a handful of fairy dust around him. This move can inflict a variety of status effects on the opponents: 25% chance of doing damage normally, 30% chance of poisoning, 15% chance of electric damage, 15% chance of shrinking, 10% chance of slowness (for 5 seconds), 10% chance of freezing, and a 5% of malfunctioning and doing nothing.
Side B: Rosy Rupee ~ Tingle tosses a rupee - the color dictates how much damage it does. Green does 1%, blue does 5%, yellow does 10%, and red does 20%. Yellow and red are obviously less common than green or blue. There is also a very rare chance of Tingle taking out a Rupoor, which backfires and does 10% damage to him.
Up B: Tingle Balloon ~ Tingle inflates two balloons on his back and floats upwards. If the balloons are popped, Tingle will fall.
Down B: Tingle Bomb ~ This move is almost exactly like Link's bomb move, with only a few differences: Tingle pulls out bombs slower than Link, but they have a large blast radius.
Final Smash: Tingle Tuner ~ Sort of like Snake's Final Smash - the screen takes the appearance of a Tingle Tuner, which allows Tingle to toss bombs on foes.


(back to directory)
 

XTheElegantShadowX

Smash Journeyman
Joined
Oct 9, 2013
Messages
265
Location
Asgard
3DS FC
3625-7979-8675


Death Jr and Pandora joins the fray!
_____________________________________________________________

Overview:

Death Jr is a fast, mid-weight character with long reaching, safe Normals and Smashes and mild to high damage potential, however, a lot of his attacks are disjointed and are hard to combo without proper support from Pandora, he also lacks a projectile, making it difficult to fight at long distances.

Pandora is a agile, light-weight character with long-ranged Normals and Smashes, she lacks any real close ranged attacks, but make up for it with blazing speed and being fairly good at keeping the opponent within her comfort zone. However, she lacks any good defensive options and killing power without support from Death Jr.

Death Jr and Pandora both possess one special ability in "Death's Clock" and "Sweet Spot."

Death's Clock allows Death Jr to slowly build a counter on above his opponent's head by hitting them with certain attacks. Upon the Counter reaching zero, the opponent will take double damage from all attacks inflicted by Death Jr and Pandora with added effects.

The Counter appears upon the opponent being hit by Death Jr.

The Counter always starts at 13 and resets upon the opponent being KOed.

The Counter increases by half the original number it was upon Death Jr being OKed.

This will not effect the damage inflected upon the opponent by other characters other than Death Jr, Pandora, and allies during Team Battle.

Causes some of the duo's attacks to gain special effects or properties,

Sweet Spot allows Pandora's bullets and blasts to deal more damage at certain ranges and gain added knock back:

(Some of the measurements may be a bit iffy.)

Hitting the opponent point blank with any ranged attack will inflict 1/2 the normal damage with minimum knock back.

Hitting the opponent within 2-4 Mario's width with any ranged attack will inflict double damage with high knock back.

Hitting the opponent within 5-8 Mario's width with any ranged attack will inflict 1/3 with low knock back.

Additional Information:

Pandora can Wall Jump up to three times and run up a wall for a short amount of time.

Some of Death Jr's scythe attacks will reflect projectiles if timed right.

Death Jr's grab have very long reach, but long recovery.

Pandora's only close range move is her Down-Smash, Up-Smash, and Down-Normal.

Death Jr's Normals lower the Counter by one, while his Smashes lower it by two.

Death Jr can grab unto ledges by grabbing in the air.

Moveset:

Neutral-Special:

Name: Dance of Death/Chaos Blast

What it does:

Death Jr: After charging up a bit, Death Jr. unleashes a flurry of attacks in front of him, ending in a spin that hits on both sides.

Lowers the Counter by 2.

Can be charged longer to increase number of attacks and lower the Counter by 3.

Death Jr is able to move around while charging.

If the Counter is at zero, and this attack hits the opponent, the final hit sends them flying.

In the air, he will float while doing the attack and go into a falling state afterwards.

Pandora:

Pandora puts her two guns together and shoots out a small ball of energy that travels 2/3 of Final Destination.

Can be charged up in a similar fashion to Samus's Neutral Special to increase the size and power of the attack.

The attack can be stored via using her Shield, Dodging, or switching to Death Jr.

Can be fired in front, above, and 30 Degrees above her.

If the Counter is at zero, and this attack hits the opponent, the ball will pass through the target and continue traveling until it meets it set end, or hits another opponent with a number above 0.

If in the air, the blast will not charge and will instead the weakest version of the ball, unless it had been charged beforehand.

Up-Special:

Name: Death Copter/Rise of Chaos

What it does:

Death Jr: Pandora appears beneath Death Jr and throws him in one of four directions, after traveling a certain distance, Death Jr starts to spin around like a propeller, causing him to slowly drift downward.

Pandora can throw Death Jr above, in front, 30 Degrees, and 70 Degrees above her.

Death Jr gains a hitbox after being thrown and while twirling around.

Does not add to the Counter upon hitting a opponent. However, if Death Jr manages to hit the opponent when the Death's Clock is at zero, this attack sends opponents flying.

The propeller action can be canceled by pressing down.

Pandora: Pandora jumps off of Death Jr's head, fires her guns behind her, and uses the momentum to travel upwards. If you press the button again, she'll do a flip kick that stops her in mid air.

The gun shots have a hit box that Meteor Smashes.

The flip kick halts her momentum and puts her into a falling state upon completing the attack.

The direction traveled is slightly controllable.

Side-Special:

Name: Guillotine/Pandora's present

What it does:

Death Jr: Death Jr swings his scythe above his head and bring it down, causing a shock wave that stuns opponents in place.

Lowers the counter by 1.

Meteor Smashes on the ground and in the air.

Will cause Death Jr to fall downwards if done in the air.

If the Counter is at zero, the attack inflicts attentional stun and causes the shock wave to grow with every opponent it hits regardless of the Counter Number.

Pandora: Pandora reaches into her box and pulls out another box, then sets it on the ground. If the opponent gets to close to it, the box will open and hit the opponent with either a swarm of bats, a jack-in-the-box, or a giant fist.

The Swarm of Bats deals continues damage over a short period of time. Max damage is around 12%.

The Jack-In-The-Box will wrap itself around the opponent, leaving them vulnerable for a short amount of time.

The Giant Fist will punch upwards and send the opponent flying.

Can only have two out at a time.

Is not affected by Death's Clock.

Down-Special

Name: Tag in.

What it does: Death Jr or Pandora tag each other in.

Can be done directly after an attack, and by doing this, allows the two to combine their attacks into devastating combos.

The two are invulnerable throughout the entire animation.

Can be done in mid-air.

Final Smash:

Name: Armageddon

What it does: Death Jr and Pandora are enveloped in a dark, eerie glow. While in this state, all character's Counters are lowered to zero and will not reset. All of Pandora's attacks will Sweet Spot regardless of the range at which they hit the opponent.

Taunts:

Death Jr will laugh and fall over.

Death Jr will swing his scythe around and say "Bring it on."

Pandora looks inside her box and smiles evilly.

Pandora will point her gun above her, then straight forwards.

Special Taunt:

Death Jr and Pandora will fight with and stick their tongues out each other.
____________________________________________________________________

Oh my. How long has it been since I made one of these? XD

As you can see, they're meant to be a lot like Zelda and Sheik in that one of them is meant to be used to rack of damage, while the other is suppose to strike the finishing blow. Though, they're meant to work with a bit more synergy, similarly to the Ice Climbers.

So, what do you think?
 
Top Bottom