• Welcome to Smashboards, the world's largest Super Smash Brothers community! Over 250,000 Smash Bros. fans from around the world have come to discuss these great games in over 19 million posts!

    You are currently viewing our boards as a visitor. Click here to sign up right now and start on your path in the Smash community!

Make Your Move 9: [Now Defunct]

Status
Not open for further replies.

Pikmin3000

Smash Rookie
Joined
Dec 23, 2009
Messages
20
Location
In A Yellow Submarine
Upon, second glance, I did realize that John Marston's mauser pistol carries 15 bullets, so I have gone back and made the quick edit to a Colt Six-Shooter.

Also a glance, at my upcoming work...


A FATAL ERROR HAS OCCURRED
MissingNo has Joined the Brawl
 

gcubedude

Smash Apprentice
Joined
Aug 15, 2009
Messages
83
Bad Santa
Bad Santa is bad.

The boss set, however, is good. However, I don't know what you mean when you say he can appear as a Fiend in a regular Brawl. Does that mean he just randomly appears and starts attacking everyone? Imagine this during a tournament match, that'd really screw everything up.


Kind Dedede
I like this boss set a lot. The thing with the Waddle Dees/Doos makes you have to think about whether you wanna kill them or not, unlike most boss fights where you always want to kill the minions. The way he ends the boss fights and turns into a regular Brawl is pretty cool as well.

Smashville Christmas
I love the way Resetti gives you a gift. I wonder what would happen if you reset the game after he gives it to you; would he take it back?

I liked this idea, especially the whole snowball fight thing.


Santakuma
I love the Christmas names you put in here. Imagining Ryu with a Rudolph nose made me laugh. The Shin Santakuma mode was pretty cool as well, especially with the 666% health. That was very fitting. His quote during Shin Stocking Goku Stuffer is pretty funny as well. This was a lot of fun to read.


Tutankoopa
I really like the idea behind this set. A powerful ally that will attack you as well as the opponents is awesome. The ways of controlling him were well done. The Down Special was cool, as it give Tutan more power, but a higher risk of dying. The forward special's ability to either pump Chompy or hinder opponents was also really nice. I thought this was a very good set.


Ganondorf Remix
It's a nice set, with a very in-character writing style and some interesting moves. My single problem is that it seems too close to his original Melee/Brawl moveset, especially since some moves are exactly the same as before, except for maybe damage. I like how he finally has a dark ball projectile like he should've had, but it should've completely replaced his Warlock Punch, not been an alternative.

That said, I did enjoy some of the new moves. His Up Special was pretty cool, and his minion summoning moves were cool, especially the Dtilt. His Final Smash was also nice, much better than his Brawl one.
 

Junahu

Smash Ace
Joined
Nov 15, 2005
Messages
899
Location
Shropshire Slasher
So this morning I stumbled across a large stack of comments! I don't know where they came from, but your Pokemon had them. You do want them, yes?
-YES


DIGLETT - Junahu​

I'd love to grinch it up as I just did with Electivire, but unfortunately I'm quite impressed with this set. It represents a feasible implementation of one of the most far-fetched Pokemon into Brawl, and that's pretty hard to argue with
Indeed, it's so unfortunate that you were denied your chance to grinch up Diglett. I will endeavor to make my next feasible moveset represent something that's easier to argue with :awesome:

For all that you say about Pokemon syndrome, I still find it difficult to justify Diglett being dependant on boulders to fight. And in fact I don't believe he ever can learn Rollout
Also, the implementation of the boulders seems silly. It gets stronger with consecutive hits... but not from the momentum gained by rolling down a hill?
This, I admit, was a little bit deliberate. I was going to call it Rock Slide, and make it just as you stated it should work (i.e. a little ball of dirt that gets bigger and stronger as it tumbles down slopes). .
But then I decided I wanted to be a mischievous little troll and tweak the attack to make it sound blatantly out of place. So long as it gets across Diglett's sense of constructive/destructive play, toying around with the mounds and tunnels he makes, I think the Pokemon Syndrome is worth it.
I'll probably change it soon, but until then, think of it as the Diglett equivalent of a Charizard with Rock Smash ;)

Tunneling around invisible doesn't appear to be an advantage at all. It's a mindgame for mindgame's sake, as the Diglett player will also have no idea where he is and on thinner stages risks killing himself (or does he? It's never specified whether it's possible)
I'd say it works well in that it makes it harder for the foe to avoid being hit by Dig. It also makes it much easier to run away (they can't really intercept you, if they don't know where you're going to pop out).
Still, it was never something I wanted casual players to try. This is for the manly Diglett players who can navigate blind. And yeah, shallow stages are Diglett's mortal enemy. There's not really a work around for that.

Diglett is terribly schizophrenic. He leaps from cutesy techniques in his tilts to beastly earth-shattering moves of mass destruction in his smashes. You can't have it both ways, Diglett!
This was intended to represent the unknown factor of Diglett. Everything above ground is cute and ineffectual, yet everything beneath the surface is monstrous and terrifying. I guess it wasn't all too successful though, seeing as you've complained and all.

Thanks for commenting every most movesets! You win... a comment.


Tutankoopa:
damn that is some subtle colouring you have there! I can barely notice it at all, and yet I know it's there. You are a sneaky subversive dastard

Anyway, I'm just going to gloss over the whole playstyle and whatnot (as great/fresh as it may be) and get to the part I actually love. The characterisation. This is treading a very fine line between being completely in character... and being a Kangaskhan. Unlike Kangaskhan, who is optimally played like an amoral jerk, Tutankoopa's playstyle represents something I've never seen represented in ANY moveset (not even real ones) before. Character development. The player takes this unwieldly koopa, who's own summon will kill him if it can, and slowly learns to flip the weakness into a strength, gradually layering in more tricks and feints to fully take advantage of what used to defeat him. And through the player's careful manipulation and skill, Tutankoopa himself learns to move on from his humiliating defeat in Paper Mario. It's heartwarming stuff really, like a Rocky film in moveset form.

I suppose one criticism I can level, in regards to how the set reads, is that you quash Tutankoopa's Chomp problem way too early. Literally, the first attack you describe renders much of the build up in the introduction worthless. Besides, Tutankoopa usually throws Buzzy shells, not Koopa ones.
I am also astonished you went through an entire moveset involving a Chain Chomp, and you didn't tether it to the ground, or a post. I mean, if this was a MasterWarlord moveset, Chomp would be tethered in place faster than you can say "Grabgame first" (and bonus points for a throw that tethers the Chomp to the foe)


Nattorei
I'm not going to lie, Nattorei is not at all a bad moveset. It has decent ideas, and a very distinct tactile 'feel'. The snaring and such is well within character. And in hindsight I suppose Nattorei does kind of lean towards passive damage (wearing the foe down defensively by having them attack his spiked body directly)
But this is where I need to start trolling with the complaint you've already heard from me; this set isn't quite Nattorei.

The biggest complaint I suppose, is how ignorant the set is of Nattorei's rock climbing, ceiling clinging abilities. Nattorei starts with Rock Climb, there aren't very many Pokemon that even learn the move in the first place, so to have it from the get go must mean it's a particularly important move for Nattorei. Seriously, Nattorei climbs rocks and clings from wall/ceilings. That's just how Nattorei rolls, so it's kind of painful to read that he uses Rock Climb to fumble clumsily along the floor.

I'm also a teensy bit disappointed in just how little you let Nattorei attack with that big hunk of metal that is his body. You'd think that with a such a heavy looking spiked weight, Nattorei would fling it around/drop it on the foe's head more.

Hee hee, Random Bulbapedia searching. Apparantly Tesshido learns Metal Claw, despite not having hands/vines.


John Marston:
This moveset brings to mind all the best parts of Solid snake. A multitude of weapons that somehow miraculously feel perfectly normal together, and the sneaky blend between Brawl's wacky world and the gritty 'real' world Marston occupies. Hogtieing is, of course, fun, though it really should have been just a natural extension of his Up-B. I also love how Marston takes advantage of the fact that attacking an explosive makes them explode. For something so simple and obvious, this is the first moveset I've ever seen use it.

One thing I must criticise, is the aerials. With the exception of D-air, the aerials all seem to be things that can be done far easier with Neutral B
Up-tilt and Up-Smash also seem to be the wrong way around, with the simple gun butt unceremoniously taking up a Smash attack.


BKupa666

Barnacled Boss
Moderator
Joined
Aug 12, 2008
Messages
7,788
Location
Toxic Tower
Necky


These rapacious turkey vultures are common airborne antagonists in Donkey Kong Country. They utilize several flight tactics to take down the Kongs; a Necky will either fly in place, soar in a straight line, or flap around a set area. Occasionally, Neckies will land and spit nuts at anyone who nears their nesting area. Unfortunately, Neckies often find their backs used as platforms by apes attempting to reach aerial items. However, this particular Necky has toughened up, and is ready to turn this tactic on its head in the most devious of ways.

Statistics

Aerial Movement: 10
Movement: 8.5
Traction: 7
Jumps: 6
Size: 4
Fall Speed: 2
Weight: 1

Necky is truly a master of the skies; his jumps and glide are reminiscent of Meta Knight, although Necky has more height on his jumps, and has an additional mid-air jump to work with, bringing his total up to six aerial jumps. Necky also has much better aerial DI when compared to Meta Knight (whose lateral aerial movement is among the worst in the game). However, it doesn't take a genius to guess that Necky doesn't have transcending priority on all but one move; to the contrary, Necky is absolute tripe at melee range. He just can't do anything with an active opponent at his extra-large throat. Active is the key word, though; Necky revolves around capitalizing on foes' lag and turning it against them, rather than spamming two moves.

Specials

Up Special - Flight of the Necky
Necky enters his flying animation (rather than his standard hunched-over grounded pose), spreading his wings and flapping them to stay airborne. During this time, tap any of the four cardinal directions for Necky to fly that direction at Mario's dash speed. He cannot move diagonally, but you can alternate between flying horizontally and vertically to reach any point on the stage with ease. He can hold this pose for up to twelve seconds at a time, before he's left with however many jumps he didn't use before activating his flight. While in flight, Necky has full access to his main moveset. He may cancel this pose at any time by air dodging. Once he lands, Necky must wait six seconds before using this again.

With six jumps, a glide, and this, there's no way Necky won't recover if you knock him offstage. However, with such a light weight, Necky will be forced into recovery mode with alarming frequency; no amount of good recovery will prevent a featherweight from being launched right off the blast zone. Necky does not flinch from any hit that deal less than 15% in this pose. Although this helps him recover, it serves a much more important purpose onstage, as does this move as a whole.

Necky also becomes a solid platform (no dropping through) slightly smaller than a Battlefield platform while flying. He can carry characters around on his back without slowing down at all. Necky can either venture offstage with his many jumps and save heavyweight teammates with poor recoveries, or simply carry opponents off too far for them to recover. Necky can also simply fly them up off the top blast zone, sending them into a Star KO. Of course, he'll have to work to ensure opponents don't simply run off his back, or D-Air him to end his flight. Fortunately for him, many of his useless melee range attacks benefit him quite a bit when trying to fly a foe to their doom...


Side Special - Bird of Prey
Necky screeches and begins soaring forward at Captain Falcon's dash speed. While soaring, Necky becomes a platform, just like with Up Special. He can soar as long as he wishes, with a hitbox on his beak all the while. Getting stabbed deals 9% and tosses foes over his head and onto his back in their downed position. If something lands on Necky's back, the swoop automatically transitions into Up Special, allowing him to move whatever he picked up, wherever he wishes (use this on your teammate's traps for repositioning purposes).

If Necky swoops in on a character during one of their lag animations, they'll still take the damage, but will continue performing the move's animation on his back. If Necky picks up an opponent using a move such as Warlock Punch, he'll have plenty of time to fly them whichever way he chooses before they stop lagging. Necky is best off using this move to pick up characters on the ground, while reserving Up Special to catch aerial opponents; both moves are simply easier for their respective purpose. Necky will have trouble timing a Side Special to catch a falling aerial character, while he won't have many opportunities to position himself under a grounded opponent with Up Special.


Neutral Special - Necky Nutmare
Necky rears back for .2 second before hacking up a walnut slightly smaller than a Pokeball. During his startup lag, Necky can aim his nut in any direction; his default shot is in an arc half of Battlefield in front of him. Characters who are conked by the nut take 6% and a set amount of hitstun, depending on their damage (half a second when the foe has no damage).

Although damage itself is not incredibly important to Necky, considering his lack of traditional KO moves, the increase of hitstun with damage allows for him to scoop up opponents and have his way with them more easily. Necky can use Up Special, soar out of reach of opponents, and snipe down at them with nuts to pepper them with hitstun, then come back down to earth and scoop them up with Side Special.


Down Special - Egg Bounce
A Kirby-sized egg appears under Necky, who extracts it with both talons and tosses it forward after .35 second. The egg bounces up and down a Ganondorf while moving horizontally the length of Battlefield at Bowser's dash speed. If Necky uses this while airborne, he simply drops the egg beneath him; it falls at a mdoerate pace before shattering on the ground. Necky may have up to three eggs onstage at a time.

Characters who hit the egg take 8% and get it stuck on them awkwardly (Necky's egg is smaller, of course...), with it covering most of their body. This renders them incapable of jumping, dodging, or moving. To shatter the egg and gain these abilities back, a victim must attack the shell with a hit that deals more than 15%.

Multiple light hits, such as 15% worth of a multi-hit basic combo, will not get the job done; only a solid 15% or higher blow will get the job done. Of course, these attacks are likely to be among the laggier moves in your opponent's arsenal. Necky can take advantage of the lag they must use to free themselves, by using Side Special to scoop them up. Necky can also break the the eggshell himself; he sacrifices the opponent stunning themself if he does so, but all the hits he deals to the eggshell hurt the character inside as well, allowing him to take advantage of the immobile character to build some quick damage.


Standards

Jab - Wing Wind
Necky begins flapping his wings back and forth, with minimal startup lag, dealing no damage, but creating a wind effect in front of him onstage. The strength and range of the wind depends on how fast you mash A during the move; extremely fast button-mashing pushes foes away with slightly more force than Dedede's Inhale pulls you in, while weak mashing merely slides foes back at a snail's pace, like Whispy Woods' wind on Green Greens. The shortest range is a single character width, while the longest range is one-third of Battlefield.

While this move doesn't help Necky much onstage beyond spacing, if he mashes A while in his Up Special flying pose, he flaps up and down, creating a vertical wind effect with identical range and force. Necky has a few little techniques with which to mess with foes. Necky can flap to blow a foe on his back right off the top blast zone if he's close enough. He can also position himself under a character using their D-Air, and flap to blow them up to avoid being hit by the move's hitbox. After avoiding the hitbox but before the D-Air finishes, Necky can then fly upward and catch them, giving the opponent their landing lag conveniently on his back.


Dash Attack - Flap Back
Necky flaps twice rapidly, creating wind to push himself back a Battlefield platform and opponents into their tripped position, over the course of .45 second. Unlike jab, which spaces characters from Necky, dash attack spaces Necky from characters, allowing him to use his ranged moves more efficiently. He can also use Side Special to pick the character up out of their trip; if he gets into the air quick enough, the opponent loses the option to roll off of Necky's back.

Forward Tilt - Sticking Out One's Neck
Necky extends his long pink neck nearly a full Battlefield platform over .6 second. This gives his beak a stunning 5% hitbox with surprising priority for seven seconds, or until Necky, or until you press the input again to cancel the move. It returns to normal size automatically if Necky is attacked. Because he remains hunched-over on the ground, with his neck bent at his feet, Necky can hardly use this move as a melee attack. He can, however, dash while his neck is extended, due to stretching out to glide; once a foe has been stunned, he can use Side Special to give them a nice little ride.

During Up Special, Necky's elongated neck becomes part of his overall 'platform', almost doubling its regular size. This makes it more difficult for opponents to simply run off of Necky's body to escape. With a longer neck, Necky also finds it easier to pick up opponents, as he has more room with which to catch them. Necky does have to beware of the extra length on his stretched-out hurtbox, although his resistance to weaker attacks during Up Special prevents this from becoming a huge bother.


Down Tilt - Ruffled Feathers
Necky lowers his hunched body over and shakes it around a bit, ruffling the feathers on his body over .2 second. On the ground, he has a close-range hitbox with pathetic priority on his body, due to the shuffled sharp feather points, dealing 4-6% and a tiny set knockback. Necky must time this very carefully on the ground if he wishes to use it as a precursor to Side Special; if you dash into a heavyweight fight spamming D-Tilt, you should probably seek professional help to realign your thoughts of suicide.

During Up Special, however, this becomes one of Necky's more valuable tactics. The set knockback pops opponents on Necky's ruffled back up a short distance, allowing Necky to rise up and catch them before they can even react. Because the move is rather spammable, Necky can hit the opponent again with it, hitting them up and catching them multiple times, all the way off the top blast zone. It's not all fun and games, though; Necky will have to time this carefully, as the foe can overcome the move's low priority to stop their aerial ascent.


Up Tilt - Barrel Roll
Necky spreads his wings slightly, rises off the ground a short distance, and performs a rapid barrel roll. Opponents who hit his body are thrown away, taking 7-8% and moderate set knockback. As with various other spacing moves, this won't KO until very high damage levels, but the knockback is enough to put distance in between Necky and attacking opponents. This is a quick move with little warning at all; Necky can perform multiple barrel rolls in a row with ease.

The move is identical during Up Special, but if a foe is on Necky's back, they enter their footstool animation as they're dropped off beneath him (they fall for longer if they have more damage). Although opponents may have trouble timing when Necky will roll them off to gimp them, if he's taking them off the stage to begin with, he's more likely than not planning to finish them with this, so they know what necessary countermeasures they must take ahead of time.


Smashes

Forward Smash - Feather Cloud
Necky begins flapping rapidly, generating a Kirby-sized cloud of molted feathers in front of him. This hitbox remains in front of him as he charges; upon release, Necky flaps one last time, pushing the feathers forward a set distance (one to three Battlefield platforms, depending on charge), with .2 second startup. The feathers deal multiple trapping hits of 1-2%, stunning opponents for .5 second on the last hit. Necky can easily swoop in and grab characters caught in the cloud with Side Special; the cloud is picked up along with the character, stunning them bountifully as Necky flies around with them. While in his flight animation, Necky blows the cloud upward, stunning characters on his back upon contact for additional irritation.

Down Smash - Sand Blind
Necky turns to face the screen, spreads his wings, and begins flapping over .4 second. This causes a Wario-sized cloud of sand to be pushed out from one to two Battlefield platforms on either side of him. The sand particles deal multiple stunning hits of 1%, and surround Necky to provide him with a nifty little defense. This is more effective at keeping opponents from Necky than F-Smash, a similar move, but doesn't have a hitbox during charge time, giving F-Smash the edge when it comes to picking up stunned opponents. In the air with Up Special, Necky has no sand to flap, and simply uses his wings to knock opponents a moderate set horizontal distance off his back, dealing 9-14% in the process. Carry an opponent off and D-Smash for an effective gimp strategy to go with U-Tilt.

Up Smash - Carnivorous Cacophony
Necky points his neck upward and squawks for .5 second, creating a Mario-sized sound wave above his head, which lasts for a full second before vanishing. Characters who come into contact with the wave take 10-15% from the detestable racket and enter their footstool animation. This will more than likely land them at Necky's feet, vulnerable to a nice Side Special.

In the air with Up Special, Necky still bends his neck up to screech; if an opponent is on his back, the screech's soundwave essentially creates a stunning wall covering the front half of the 'platform' Necky is. Necky can U-Smash if they attempt to dash off of his neck in the air, landing them in a prone position on his back again. Of note, if Necky's neck is stretched out, the move's vertical range is increased; although this is helpful on the ground, tiny characters can still run off Necky's enlarged neck in the air, as they dash under the higher-up soundwave.


Aerials

Neutral Air - Loop-De-Loop
Necky simply performs a quick backward flip in mid-air, over .55 second. His body gains an 8% hitbox that deals moderate set knockback to characters not on his back. If Necky flips while carrying a victim, the victim enters a dizzy animation for a split second, thanks to their queasiness. I bet they wish Necky supplied barf bags...If your passenger gets a little restless, just N-Air them, telling them to sit back and relax, whether they want to or not.

Forward Air - Garbage Breath
Necky breathes a Kirby-sized cloud of breath, polluted with the stench of flesh and garbage, in front of him, with .3 second startup. The cloud lingers in front of Necky's beak for a second before vanishing. Characters who hit the cloud take 3-4% and enter their footstool animation automatically, allowing Necky to glide right on down with Up Special and pick them up, like a stranger with candy to a young child. If an opponent tries running off Necky's frontside while the bad breath is present, they suffer this fate as well, giving Necky the opportunity to pick them back up as well.

Back Air - Shake Your Tail Feathers
Necky simply ruffles his tail feathers for half a second, with little lag on either end. This essentially serves the opposite purpose as U-Smash and F-Air; the ruffled tail feathers prevent opponents from running off of Necky's backside. Characters who try take 6% and trip back onto Necky's back. Without an opponent on his back, Necky can simply irritate opponents with multiple B-Airs, as long as he ensures opponents don't overwhelm his feathers' poor range.

Up Air - Arch
Necky quickly arches his back upward, it gaining a pathetic 3% hitbox and lightly tossing up any opponents who come into contact with it, including those on his back. His back remains arched for a second before returning to normal; therein lies the true value of the move. Say Ganondorf is trying to stomp Necky down to save himself...Necky can flap up with Up Special and arch his back, intercepting the move before he can complete the stomp, putting him in his landing lag on your back to boot. The light toss of the move can also send opponents off the top of the blast zone, but it's not as reliable as options as jab or D-Tilt.

Down Air - Dive Bomb
Necky angles his neck downward for .25 second, before swooping out of the sky at an extremely rapid speed. He dives diagonally forward for as long as you hold the input; if you land while diving, Necky's head becomes stuck in the ground, giving him nearly a full second of landing lag as he pulls himself out comically. Characters who hit Necky's beak take 13% and vertical knockback that KOs around 140%.

If Necky uses this move out of Up Special, he resumes his Up Special pose whenever he cancels his dive. If an opponent makes it off Necky's back and begins fast-falling to escape, necky can sky-dive down even faster (in most cases) and be there to welcome his opponent back to earth. Necky can also sky-dive offstage carrying an opponent to the point of no return, them gripping his slanted back for dear life, before dropping them off and returning to the stage.


Grab-Game

Grab - Talon Snatch
Sweet baby Jesus, Necky is just full of innuendos, eh? First nuts and now snatches...moving on, since you guys are in such -dire- anticipation of a Kupa set with a grab involving physical contact.

When grounded, Necky begins flapping on his back, stretching his clawed feet forward a short distance after .25 second startup. He can hold this animation for as long as he wishes, returning to his hunched animation after dropping the grab. As such, Necky can take advantage of characters who mindlessly approach him by greeting them with a face-full of talons. Necky transitions into Up Special once he has an opponent, carrying them beneath him with his talons instead of on his back. Characters with long grab-release animations, such as Luigi, fall farther beneath Necky upon escaping; Necky can take these characters offstage and let them fall to their doom without so much as attacking. Opponents carried beneath Necky also lose the ability to use a strong D-Air and end the animation, unlike with Up Special.

Necky can also grab while airborne. Although he doesn't go out of his way to catch his opponent, his talons gain a hitbox for as long as he holds the grab input. If an opponent runs and falls off Necky's backside while he's grabbing, he'll automatically grab them with his talons. You didn't think it would be so easy, did you?


Pummel - Dig In
Necky grips his opponent tightly with his talons, digging into their flesh and dealing 1% per second. Each individual pummel lasts for three seconds, so although Necky technically does 3% per pummel, it's not a quick, damaging pummel. While digging into characters, however, it does increase the difficulty at which they can escape by half. If the opponent manages to escape, the act of ripping themself away from Necky deals 5% on its own.

Forward Throw - Gale
Necky releases his opponent and begins flapping his wings, pushing his opponent forward with moderate force. He is able to flap in place like this for up to three seconds by holding the input, both onstage and offstage (he enters his regular, non-Up Special aerial stance in mid-air after the move). Him blowing the opponent doesn't hurt them at all, but can push them back too far to recover offstage if Necky has dragged them over a pit. Onstage, this becomes another effective spacing tool for Necky.

Back Throw - Momentum Toss
Necky begins swinging his opponent back and forth with his talons, moving forward and backward every half second. Tap A at any point while swinging your opponent back and forth to toss them with the momentum of your talons. If you press A when your opponent is at the furthest point forward, they are tossed forward with moderate knockback, while if you toss them before your talons reach this point, the knockback is less powerful. By tossing an opponent when they're at the furthest backward point, Necky's toss sends them backward. If you have an opponent offstage, this is the last thing you'll want, of course, but if you manage to snag a teammate, it may just save them from an untimely doom. Any toss deals 5%, no matter the momentum.

Down Throw - Talon Spike
Necky hesitates for .5 second, before squeezing his talons on his opponent tightly, dealing 7% and spiking them down with moderate force. This is yet another awesome gimping tool if Necky is offstage. To have much chance at surviving, opponents must mash out before the .5 second startup lag ends. A slight squeezing sound as the move begins signifies to opponents to start mashing like crazy. To counter this, Necky can make this tougher for victims with his pummel. Onstage, Necky's squeeze knocks opponents upward with the spike, similarly to other onstage spikes

Up Throw - Hop Onboard
Necky simply tosses his victim onto his back, dealing 5% and putting them in their prone position. If he wishes to KO an opponent off the screen top, and has caught them with a grab in their attempt to escape, this is your go-to throw to put your plans back on track. Onstage, Necky automatically begins his Up Special after tossing his opponent upward, ready to break their fall.

Final Smash

Final Smash - Vulture Culture
Necky squawks, causing eggs to fall from the sky at various locations on the stage, hatching Mini-Neckies to aid him in the fight. The number of Mini-Neckies ranges from three to nine, depending on the stage size. These little guys are the size of Olimar, and cough up one Deku-Nut sized walnut per second at the nearest opponent. The walnuts function the same as those from Necky's Neutral Special.

If an opponent touches a Mini-Necky, it grabs them in its beak, holding them for its bigger relative to scoop up. Necky can use Side Special to scoop up Mini-Neckies holding opponents, as well as opponents stunned from their nuts. Mini-Neckies have 30 HP each, but come back as ghosts if you KO them. Ghost Mini-Neckies actively pursue opponents while performing their attacks, rather than simply floating in place. It's best just to let them be and focus on survival. After twenty seconds, the Mini-Neckies fly away, ending the Final Smash.


Playstyle

Necky cannot KO opponents traditionally. It's just too much trouble for him to build enough damage with attacks that are poorly-suited for close combat to finally send foes flying with...oh yeah, non-existent KO moves. Fortunately, Necky excels at a different form of close combat; once an opponent is on his back, they are in big trouble, as he has plenty of means with which to keep them there until the bitter end...their bitter end.

Of course, in order to dominate your opponent, Necky has to get them on his back first. To do so successfully, he'll often want to bait his opponent into a state of vulnerability, whether it be from stun or from the lag of their own attacks. To do so, Necky must play a bit of a game of keep-away. Necky is well-equipped to space opponents from him, or himself from opponents. For starters, Necky is a fast-moving character, on both the ground and in the air, allowing him to put distance between himself and opponents with ease. Opponents who continue to pursue Necky can be blown back with jab, tripped with dash attack, or pushed away with F-Smash or D-Smash. If an opponent is even more obscenely offensive, Necky can even use Up Special to fly out of their reach, and camp down with nuts.

Speaking of nuts, all of this spacing will generally be for the purpose of pegging opponents with nuts and eggs out of their punishing reach. These two projectiles are arguably Necky's only reliable form of damage-building, and they serve that purpose quite well. Although building damage isn't vital to Necky's game, he'll want to have some damage built up so opponents suffer additional stun when they get hit by a nut, and remain vulnerable for longer after he scoops them up. He can use his other grounded moves here and there to stun opponents or wait for them to slip up and use a punishable move, but nuts are more effective in most cases.

To build damage most efficiently, Necky can use a combination of nuts and eggs. Seal an opponent in an eggshell and pepper them with nuts while they're stuck without movement, jumps, or dodges. Necky won't have to worry about breaking the shell, considering nuts don't deal more than 15%. When the opponent breaks free with a laggy attack, give them a lift with Side Special. If you miss the opportunity to get them on your back, keep chipping away with nuts; the opportunity will come knocking again if you stay persistent. If worse comes to worse and your opponent is beating you senseless, use your excellent speed to flee and stay alive long enough to scoop up your opponent as they try finishing you off with a powerful KO move.

Anyways, once you've got the opponent on your back, Necky's options really branch out. Typically, he'll be using his superb aerial abilities to either boost an opponent off the top blast zone, or take them clear off the stage and leave them for dead. Which option you go with should depend on the opponent you're against. When facing characters with great recoveries or a light fall speed, Necky will want to take them off the screen top, due to them being able to recover from a gimp, and them being easier to swoop down and pick back up should they escape.

Against characters with pitiful recoveries who drop like rocks, a gimp is generally preferable; while they stand a chance at escaping by fast-falling unless you're a pro at using D-Air, Necky can drag them offstage and all but completely eliminate that chance. How you carry your opponent to their doom is also a factor to consider; if your opponent has a weak D-Air, Necky won't have much of a problem carrying them on his back. However, if you're transporting Ganondorf, Necky should do so with his grab, as Ganondorf will stomp him out of Up Special every time he tries it.

No matter where or how Necky is carrying an opponent, he'll want to ensure that they cooperate and stay on his back or in his talons, wherever they may go. Fortunately, many of Necky's moves which serve a minor purpose on the ground become much more beneficial during Up Special. When traveling vertically with Up Special, Necky can use D-Tilt or U-Air to push opponents up lightly, before flapping up and catching them. Timed correctly, opponents will barely have any time to react, and will be pushed right off the screen top eventually.

Keeping opponents on your back when traveling horizontally is a bit trickier, but far from impossible. Necky can stretch his neck with F-Tilt to elongate the distance opponents must travel to get off his body, as well as keep an opponent on his back with U-Smash or F-Air from the front, or with B-Air or grab from the back. Which options you use depends on which direction your opponent is attempting to run. Either way, the stun these moves provide not only deter opponents from running off, but prevent them from jumping off in many cases. Speaking of which, jumping opponents can be dealt with by either carefully maneuvering Necky under them, or by F-Smash and N-Air. When moving around with an opponent in his talons, all Necky has to do to hold them there longer is dig in with his pummel.

When it comes time to finish off the opponent you've so graciously given a free air ride, Necky has no shortage of finishers either. He can use jab, D-Tilt, or U-Air to gently nudge an opponent off the top blast zone (or simply carry them up himself), stunning them with F-Smash or N-Air first if necessary. Offstage, Necky can either put an opponent into their footstool animation with U-Tilt or F-Air, spike them with D-Throw, or use D-Air to put them far under the ledge before recovering himself. To gimp off the horizontal blast zone, Necky also has D-Smash, F-Throw, and B-Throw. Don't fool yourself into thinking Necky has no KO options, just because he's a featherweight; he's just...different, is all.

Although Necky requires some momentum early on to build damage, stun opponents, and pick them up, once he's carrying them around, the stock becomes Necky's to lose. The devious vulture has plenty of tricks with which to rule the air, but remember, he still has to come down to earth eventually, where he's much more vulnerable. No amount of aerial dominance and exceptional recovery will change the reality that Necky is a featherweight. As long as you don't get too carried away carrying away opponents that you become predictable, the sky is the limit for Necky.


Match-Ups

Vs. Tutankoopa - 55/45
Necky, as well as Tutankoopa, both prefer staying out of the reach of Chompy (Necky with his flight and Tutankoopa with his platform). Necky doesn't have to worry about Tutankoopa's melee attacks as much as he does the pharaoh's bloody pet. Fortunately, Necky generally doesn't have much difficulty escaping from Chompy; he's certainly quick enough to pressure their master enough that he has difficulty sending out Stone Chomps with which to mindgame the sneaky bird. Tutankoopa's Chomp options against Necky are reasonably limited.

That said, Necky is extremely vulnerable to early KOs against Chompy just as he is. He has to be extremely careful using nuts against Tutankoopa, as just a few projectiles gone astray will drive Chompy up the wall. Tutankoopa isn't overly difficult to KO by carrying him off the screentop or by a gimp, but Necky may have difficulty finding him in a laggy position in the first place, and must be careful not to become vulnerable while looking to make him vulnerable. Despite wanting to stay the hell away from Chompy for the most part, though, Necky can use Chompy to his own benefit. By dropping an egg on Tutankoopa, he can take away the pharaoh's movement right in Chompy's path. He can either allow Chompy's weak chomps to damage his master, or toss nuts at Chompy and make him bowl the poor pharaoh right over. Necky must play with care in this match-up, but he squeaks out a win more often than not against the Koopa pharaoh.


Against M. Trinity - 45/55
Hands down, M. Trinity wipes the floor with Necky at close range. Her variety of damage-building attacks force Necky to take to the skies and camp down at her with nuts. You know she just -loves- those nuts. Fortunately for Necky, his aerial speed with Up Special allows him to get out of MT's reach fairly quickly. When he has to come down, however, he's likely to be greeted by the panties MT will have had the time to lay everywhere. Although MT will still have to dodge Necky's projectiles, she'll easily find the time to lay her undergarments all over the stage.

Necky won't have much trouble carrying MT to a vertical KO, due to her weaker downward attacks, but MT won't have trouble KOing his light weight with her panties either. Even though Necky will be out of her reach for a large chunk of the battle, MT is able to build enough damage to successfully KO Necky when he is forced to return to the ground, weighing the scale slightly in her favor. Necky would likely win this match-up if he just a tad more durable.


Extras

Up Taunt - Nefarious Vulture
Necky cackles to himself and drums his wing feathers together, as if they were fingers.

Side Taunt - Wingspan
Necky puffs himself up slightly, spreading his wings and spinning around in a circle. Maybe he's trying to attract a mate or something?

Down Taunt - Rotten Egg
Necky looks down, surprised, then appears disgusted as he gets up, revealing a broken rotten egg on the ground. He sweeps the egg remains away rapidly, covering up for his little 'mistake'.

Entrance - Sky Dive
Necky performs his D-Air onto the stage, causing his neck to get stuck in the ground. He pulls it out in an even more exaggerated fashion than his D-Air, before entering his regular hunched-over pose.

Victory Pose #1 - Scavenger's Feast
Necky picks away at a generic-looking animal carcass, seemingly more interested in eating dinner than that he won the game.

Victory Pose #2 - Chicken Dance
No, Necky isn't Krow...he just flaps out his wings and struts around a little bit, cockily showing off his victory for the ladies.

Victory Pose #3 - Winners' Flight
Necky flies onscreen from the left, performs a wide loop around the losers, before squawking and flying offscreen to the right.

Victory Theme - Forest Frenzy
A clip from the DKC forest level BGM is played when Necky scores a victory.

Loss Pose - Dizzy Defeat
Necky lies on his back, talons in the air and wings spread out, appearing to be thoroughly beaten. Occasionally, he'll lift his head up, trying to see what's going on, but he's too weak, and he drops his head to the ground again.
 

JOE!

Smash Hero
Joined
Oct 5, 2008
Messages
8,075
Location
Dedham, MA
When you two get together this time, you make a competitive set for competitive players, serious players, and it insists upon itself. I find it very effective at what it wants to do but supremely unambitious and, ultimately, uninteresting. Convince me.
lrn2play


Poison discourages running away because if you run, you wont be making up the damage that is done to you via poison unless you're fox (in which case you're only real option is to run and spam lazer till it's time to run and spam usmash anywho).

Essentially the set is built as a creative means to be competitive, not relyign on any set "mechanic" (except poison, which is subtle compared to 90% of MYM Mechanics) and just require alot of player interaction to work instead.

The reader is supposed to think how they'd use him given his moves instead of letting his moves play for the player via the usual wackiness of MYM (not that that's allways a bad thing, i juts felt like doing a departure and doing somethign a tad more, serious?)
 

LegendofLink

Smash Apprentice
Joined
Feb 17, 2008
Messages
164
Location
Pennsylvania
Sarkhan Vol
"The dragon is a perfect marriage of power and the will to use it."


Ground Speed: 5
Air Speed: 6
Traction: 7
Weight: 7
Jump: 4
Fall Speed: 6


Sarkhan Vol is a planeswalker from the collectable card game Magic the Gathering. Planeswalkers are mages of immense power who posses the ability to travel to other planes of existence throughout the Multiverse. They make connections to the many lands that they travel to and visit, utilizing these connection to draw mana used to power their many spells. Mana is divided into a spectrum of five colors depending on where the mana is drawn from: white, blue, black, red, and green. Each color behaves a certain way, forming only certain types of spells that further the philosophy of that color.

Sarkhan is a dragon shaman, channeling red and green mana in his magic. Red mana is the power of the mountains: passion, rage, and haste. Green mana is the power of the forests: life, growth, and instinct. He spent many years of his life looking to commune with the ultimate dragon, and unfortunately he succeeded. He fell under the thrall of Nicol Bolas, the elder dragon planeswalker, one of the most ancient evils of the Multiverse. As Bolas's influence over him increased, Sarkhan began to use the black mana that pervaded his master's presence in his spellcraft as well. Black mana is the power of the swamps: hunger, greed, and death. This, combined with long periods of isolation, eroded his sanity to nothingness.

Special Mechanic: Madness​
This moveset aims to explore his decent into madness. Sarkhan starts off a match like he was in the beginning, a powerful shaman. He has the option to use black mana to give him additional power though, and each use erodes his sanity and slowly changes his moves and abilities. Eventually his mind will break, completing his transformation into Sarkhan the Mad. Unlike most alternate forms, there is no way back from these changes. Even losing a stock will not return Sarkhan's sanity.


Specials:

Neutral Special: Dark Tutelage
"Greatness, at any cost"
Sarkhan channels black mana in in search of knowledge and power. He quickly finds it, gaining a special buff to each of his other specials for the next 10 seconds. Consulting the darkness is not without its costs, however, and a bit of Sarkhan's sanity is eroded, raising him to the first level of madness. Each level of sanity loss changes certain moves in the moveset until Sarkhan reaches the 5th level of madness. At this point, very few of his original moves will remain.

Side Special: Banefire
"For Sarkhan Vol, the dragon is the purest expression of life's savage splendor."
Sarkhan's left arm takes the form of a dragon's head and charges a fireball as long as you hold B. At no charge, the fireball is about the size of Olimar and deals 5-8% damage with light forward knockback. After charging for three seconds, the fireball reaches its maximum size around that of Bowser, dealing 18-23% damage with heavy forward knockback, KO-ing at 120%. Uncharged fireballs can be fired at a rate of 1 per second. The fireballs travel rather slow, about half way between Gannondorf's walking speed and running speed, but they have an interesting special property: They are not stopped by shields or reflectors, forcing the opponent to dodge. If Sarkhan is powered up by Dark Tutelage, the fireballs fire, charge, and travel twice as fast. This slow moving projectile is made to pressure opponents and force them from a certain point on the stage.

Down Special: Flame Rift
Sarkhan points to the ground in front of him and a pillar of flame the size of Ganondorf erupts from that spot. It deals 8-10% damage to any opponents that touch it, and knocks them away at a low angle, sliding them along the ground. The pillar lasts for 7 seconds before vanishing, and only one can be created at a time. If Sarkhan is powered by Dark Tutelage, he can place create two pillars of fire that last 12 seconds each. If used in the air, the pillar of fire is still created where Sarkhan points, but the move does nothing if he points somewhere with no ground.

Up Special: Draconic Flight
Sarkhan sprouts dragon wings for 10 seconds, gaining 3 jumps in addition to his double jump and the ability to glide. For his glide attack, he swings his staff downward in front of him, spiking airborne opponents and popping grounded ones up into the air, dealing 13-16% damage. If Sarkhan uses this move while under the effects of Dark Tutelage, he gains an additional jump and his wings last twice as long. The wings cannot be called out again for 10 seconds after they disappear.

Smashes:

Forward Smash: Incinerate
"Who said there are no assurances in life? I assure you this is going to hurt."
Sarkhan swings his staff downward in front of him and anything hit by the staff erupts into an explosion of flames, dealing 16-21% damage uncharged and 20-26% damage fully charged, with forward knockabck KO-ing around 110%. When shielded, this attack causes massive shield stun and pushes the opponent back anywhere from 1 to 3 battlefield platforms depending on how long it was charged, causing them to fall off of any ledges they hit in the process.


Down Smash: Pyroclasm
Sarkhan slams his staff into the ground Moses style, except instead of parting a sea, he's creating a sea of fire. The fire spreads out and covers a battlefield platform width of ground. Opponent touching the fire take 9% damage and are knocked into the air. Charging the smash increases the vertical area the flames cover as well as how long they last. Uncharged, they barely leave the ground and last 7 seconds. Fully charged they reach Mario's height and last for 20 seconds. This attack closes off a section of the stage for the opponent, limiting their options and creates a great place to send opponents into with your forward smash or to close off a platform to them.

Up Smash: Shivan Meteor
Sarkhan raises his staff upwards and a large ball of molten rock begins to form as he charges the smash. Uncharged, the ball is not fully formed and consists of several smaller chunks. As the smash is charged, the chunks combine until they form a single meteor the size of Bowser. When released uncharged, 5 rocks float upward to 3 times Ganondorf's height before crashing down to earth, dealing 4% damage each with minimal knockback. When fully charged, the single meteor similarly rises into the air before falling , dealing 25% damage with vertical knockback, KOing around 120%. This is another attack to pressure the opponent to move where you want them to, or it could be what you end up leading them into, it is rather versatile in that regard.

Basic Attacks:

Neutral A: Lava Dart
Sarkhan shoots a small bolt of lava from his hand, which travels forward the length of one battlefield platform, dealing 3-5% damage to enemies it hits, pushing them backwards one quarter of a battlefield platform, even of they shield. He can fire them at a rate of 2 per second. This attack is great for applying pressure to approaching opponents and forcing them into a Pyroclasm, Flame Rift or another hazard, or simply getting them out of your face or off of a platform.

Forward Tilt: Hurricane
Sarkhan sprouts his dragon wings for a moment and realeses a mighty gust of wind forward, blowing anyone within the area of 2 battlefield platforms in front of him forward with force equal to that of Mario's uncharged FLUUD for one second. Anyone hit by his wings when he flaps them takes 6-9% damage and is knocked forward into the wind. The attack has a good bit of ending lag, so one must use it when they know the opponent will be caught in it. The push ignores shields, spot dodges, rolls, and super armor.

Up Tilt: Spitting Earth
Sarkhan makes a raising motion with his hand, and a chuck of rock the size of Mario shoots out of the ground in front of him, dealing 10-13% damage to anyone it hits, knocking them up into the air. The rock lingers on the ground for 10 seconds before crumbling, forcing people to jump to pass it, or creating a point of high ground to stand on. It is also Sarkhan's primary way of knocking opponents into the air. Creating a new rock causes the old one to crumble immediately .

Down Tilt: Seal of Fire
"I am the romancer, the passion that consumes the flesh."
—Seal inscription
Sarkhan places his hand on the ground, a wall if one is directly in front of him, or even the opponent if they are similarly close, and a red glowing rune the size of Kirby appears where he placed his hand. The rune does nothing for two seconds, then it flashes brightly to indicate that it is ready. Any opponent that comes in contact with the rune (which means that runes placed on the opponent automatically activate) is engulfed in a gout of flame similar to Ness's PK Fire, holding them in place and dealing 6 hits of 1-2% damage over 1.5 seconds. The rune fades after 20 seconds, it activates, or you place another. The flames can be shielded and dodged with a roll if the opponent's timing is good, even if the rune was placed on them. This trap holds the opponent in place, making it the ideal way to get time to set up you other hazards or charge a KO move. the seal can also be placed on a stone created by Spitting Earth, and will remain floating in the air afterwards, giving it more vertical reach and making it harder to short hop over. It is also more subtle and harder to keep track of than Sarkhan's other, very flashy hazards, but is obvious enough that it can be easily spotted if the opponent is looking for it.

Dash Attack: Sulfuric Vortex
Sarkhan uses his momentum and spins to create a vortex of fire as tall as Ganondorf. It moves forward from where you created it at a speed equal to Ganondorf's walking speed, grabbing opponents similarly to Meta Knihgt's Mach Tornado, carrying them across the stage dealing rapid hits of 5% damage per second. The vortex travels a distance of two battlefield platforms before fading. This move is useful for carrying opponents into more hazards or pressuring opponents already stuck between multiple hazards. It has a large amount of ending lag though, so using it right in front of the opponent probably isn't a good idea.

Aerials:

Neutral Air: Seal of Primordium
"I am the simplifier, the root that drags all artifice to earth."
—Seal inscription
Sarkhan makes a sweeping motion with his hand, and a glowing green rune similar to the seal of fire appears floating in the air in front of him. This seal only takes one second to arm itself and has a rather different effect. Any opponent who passes through the seal loses their supernatural jumping ability: they lose all jumps past their first, and are limited to their short hop for the next 12 seconds. Otherwise, the seal behaves identically to the Seal of Fire, lasting the same amount of time and fading after being triggered. This move is used to keep your opponent on the ground. Most opponent's short hops aren't high enough to jump over many of Sarkhan's hazards, giving you time to corner them and make it impossible to dodge one of your finishers. It is also a great deterrent for covering aerial escape routes. Do note that affected opponents are still perfectly capable of attacking you and using their specials, so you can't use the seal for gimping unless you knock them off stage after they have been affected.


Forward Air: Flame Slash
Sarkhans slashed downward with his staff, creating an arc of flame in front of him. Being hit by the initial attack deals 9-13% with moderately high horizontal knockback, and also has a shield push effect similar to his forward smash. The arc of flames lingers for 2 seconds n the air, dealing 2-4% damage with flinching knockback to opponents who touch it. This move had moderate landing lag, so don't use it close to the ground. This is another attack that can be used to push your opponent around to where you want them to be. It also serves the secondary purpose of creating temporary walls to cover a retreat or to block another avenue of escape for the opponent.

Down Air: Firebreath
Sarkhan's hand takes the form of a dragon's head again and he releases a stream of fire downward that travels about Ganondorf's height and deals 5 hits of 1-2% damage to opponent's caught in the flames. This attack is great for pressuring the opponent over vertical distances, but has next to no knockback.

Back Air: Might of Oaks
Sarkhan focuses on a spell to increase his strength then swings his staff behind him with all of his might, dealing a mighty blow of 13-16% damage with heavy horizontal knockback that KOs at 110%. Shielding opponents are also pushed back a distance of 2 battlefield platforms. This is also one of Sarkhan's best KO moves, but it has obvious startup and moderate end/landing lag so it should be used sparingly. It punishes shields quite nicely by pushing the opponent either into one of your hazards or off the platform they're standing on. Its best used when the opponent is vulnerable or has no room to dodge thanks to your hazards.

Up Air: Assault Strobe
When breaking someone's face once just isn't enough.
Sarkhan focuses red mana for a moment, then swing his staff above him with incredible speed and makes a second strike in the opposite direction just as fast. The first hit does 5-8% damage with upward knockback, and the second hit deals 4-6% damage with knockback at a 45˚ angle towards the ground. The attack is fast enough that both hits will hit unless Sarkhan is falling or hits with the tip of the attack. Hitting with the tip allows Sarkhan to juggle the opponent if need be or hit them into a hazard placed above them, while the low angle of the second hit is great for gimping or bringing the opponent back down to the ground and into your hazards.

Grab:
Sarkhan's hand takes it's dragon head form and chomps on the opponent. It has decent range, about equal with Marth's.

Pummel:
Sarkhan squeezes the opponent 1-3% damage.

Forward Throw:
Sarkhan blasts the opponent forward with a fireball, dealing 6-9% damage. This throw sends the opponent low to the ground, perfect for hitting your hazards.

Down Throw:
Sarkhan sprouts his wings and flies upward with the opponent to twice Ganondorf's height. Before firing them straight downward in a manner similar to that of his forward throw. This deals 8-11% damage and leaves Sarkhan in the air with his wings activated for the next 5 seconds. This does not put Sarkhan's up special on cooldown, and it may be use immediately after if one so chooses.

Back Throw:
Sarkhan hurls the opponent backwards at a low angle, dealing 5-7% damage. Another useful throw for putting opponents int hazards.

Up Throw:
Sarkhan tosses the opponent up into the air and fires a fireball at them, dealing 4-7% damage with the throw and 5-8% damage with the fireball, making this Sarkhan's best damage racking throw when there are no hazards up.

Playstyle:
Sarkhan is a trap-ish character, though is arsenal of tricks is more varied than most and he lacks almost any form of subtlety. Much of Sarkhan's strength comes from being able to traverse the stage unhindered while the opponent is trapped in your inferno of hazards. This allows Sarkhan to play an interesting pressure game, always pushing either toward the edge or one of his hazards. Banefire is a great tool for forcing you opponents to keep moving. Pyroclasm can close off entire platforms as well as get the opponent out of your face. Seal of Fire is essentially a landmine that either sets the opponent up for a kill o gives you more time to get your hazards set up. Flame Rift makes walls that the opponent must jump over and is very easy to hit opponents into. It can even be used to attack directly if Sarkhan uses it in the air. Speaking of the air, Sarkhan's air game is nothing to write home about, unless he decides to use his up special that is. With his wings, he has the opportunity to play his pressure game from the air. Down aerial has great range and can be used to harass the opponent, while the Seal of Primordium is great for keeping the opponent from joining you in the air. Flame Slash can also keep opponents out of your face and help set up your walls as well as being useful for pushing the opponent back into your traps. You may be tempted to make use of the powers provided by Dark Tutelage, in which case we move on to...


Sarkhan the Mad


Madness Moveset: Level 1
Each time Sarkhan uses Dark Tutelage, his madness increases by one level, and each level of madness has certain moves that overwrite his current ones. I call these Madness Movesets. Madness Movesets are cumulative, causing most of Sarkhan's moveset to be overwritten by the time he reaches the fifth level of madness. Not much has changed in Sarkhan's appearance after one use of Dark Tutelage, but if you look closely, something seems off about Sarkhan. His idle stance is more fidgety and paranoid, and a slight red glow can beset in his eyes from time to time.

Neutral Air: Seal of Doom
"I am the banisher, the ill will that snuffs the final candle."
—Seal inscription

Replacing the Seal of Primordium, this glowing, black rune works the same way, except that it takes four seconds to arm itself, and its effect when activated is much different. When triggered normally it deals 10% damage with no knockback to the opponent. However, if the opponent has more than 120% damage when the seal is triggered, they are instead hit with more than enough vertical knockback to KO them, regardless of weight. That makes this hazard an excellent finisher.

Up Tilt: Doom BladeSarkhan raises his hand in a similar motion to his old up tilt, but instead a blade of darkened slashes upward in front of him, dealing 12-14% damage and knocking the opponent into the air. This attack is much faster than Spitting Earth, and can KO around 150%, but Sarrkhan loses the ability to make stone obstacles and it has a sizable amount of ending lag.

Madness Playstyle: Level 1
Not too much changes the first time around, allowing you to use Dark Tutelage to power up you moves and score the KO. The moves that have changed offer variation on how you were previously capable of finishing opponents, but the loss of the Seal of Primordium makes it slightly more dificult to trap opponents at low percentages.


Madness Moveset: Level 2
Sarkhan certainly looks more crazed than before, no longer holding his staff during his idle animation, keeping it strapped to his back instead. His hands have even taken the form of dragon's claws and some of his attacks have become much more brutal.

Down Special: Fiery TemperSarkhan's madness quickens his temper, and he releases his pent up rage in a blazing charge forward (or downward, if you are in the air) at a speed equal to Mario's dash and for a distance of two battlefield platforms. Any opponent hit by the charge is dealt 7-10% damage and is immediately grabbed, even if they are in the air. If powered by Dark Tutelage, the charge moves at Sonic's dash speed and travels the length of 3 battlefield platforms. This attack is important for enabling Sarkhan's slightly altered grab game, and while he loses one of his best hazards for it, easier grabs means an easier time throwing your opponent into your remaining hazards.

Up Smash: Double Cleave
Sarkhan Spins and quickly delivers 2 quick slashes above his head with his claws, each dealing 6-9% uncharged and 10-13% fully charged, KOing around 130%. Replacing the slow, but powerful Shivan Meteor, this becomes a much more practical move for both damage dealing and KOs, buy you lose yet another of your arsenal of traps.

Forward Tilt: Chaotic Strike
Sarkhan slashes forward with his claws, dealing 4% damage and flinching knockback, but if A is pressed again, he starts a combo similar to Marth's dancing blade, but only the fourth hit is affected by a different direction+A input. The first three hits consist of savage flourishing slashes that carry both Sarkhan and his opponent forward about one and a half battlefield platforms, dealing 4% damage each. An upward input on the last hit creates a slashing uppercut that deals 2-5% damage and knocks the opponent upward. A forward input causes Sarkhan to end the attack with a fireball, dealing 3-6% damage and sending the opponent forward. A downward input causes Sarkhan to do 4 low slashes, tripping the opponent and dealing 1-2% damage each hit. While this move replaces the utility of a guaranteed push effect, this attack can also move the opponent forward and help position them where you want, with an added bonus of a good amount of damage The downside is that it can be shielded/dodged/countered just like any other move and fits a much more aggressive playstyle.

Forward Air: Bladed Whirlwind
Sarkhan spins rapidly with his claws out at a 45˚ angle, dealing 6 hits of 1-2% damage each, with the final hit having decent horizontal knockback. The attack had good range and damage and covers both sides of him, but sacrifices the utility of Flame Slash. This attack has next to no landing lag, so the early hits can combo into ground moves.

Down Throw:
Sarkhan slashes the opponent's feet out from under them and slams them into the ground, dealing 13% damage total and popping the opponent up into the air right in format of Sarkhan. A great combo move, leading into attacks like his Chaotic Strike.

Madness Playstyle: Level 2​
Sarkhan has begun to abuse Dark Tutelage, and is becoming more savage in his playstyle. You have lost two of your hazards, but you have gained more ways of forcing the opponent into your hazards. Firery temper allows grabs to be much easier and chaotic strike allows you to build damage as you frag the opponent into your traps. Simply attacking the opponent and racking damage has also become much easier.

Madness Moveset: Level 3​
Sarkhan has almost lost it now, and is acting even more crazed and feral, his idle stance hunching over similar to Wolf's.


Forward Special: Slave of Bolas
Nicol Bolas doesn't distinguish between servants and victims.
Sarkhan channels his master's dark will and fires a small black beam forward form his hand a distance of one and a half battlefield platforms. The beam deals no damage, but instead forces Nicol Bolas's will upon the opponent, controlling their mind and forcing them to act like a level 3 allied CPU player. This means that controlled opponents will not attack you, but will attack your other opponents. Friendly fire is on for the slave, meaning that both you and your opponents can attack them. The control lasts for 10 seconds, or half that time if the opponent mashes buttons. Controlled opponents ignore any hazards that you have set up, so this is a great chance to knock the opponent into them. When powered by Dark Tutelage, the opponent becomes dazed as if their shield was broken at the end of the mind control. This attack is quite laggy, so be careful in its use.


Forward Smash: Leaping Slash
Sarkhan jumps forward the distance of a battlefield platform slashing downward with both claws, dealing 13-16% damage uncharged and 17-20% damage fully charged, with horizontal knockback KOing at 130%. This attack has very quick start up, but a decent amount of ending lag, making it an excellent combo finisher.

Down Tilt: Earthquake
Sarkhan slams his fist into the ground, causing tremors in an area of one battlefield platform to either side. Opponents touching the ground in this area are dealt 7-9% damage and stumble forward. Stumbling foes suffer a rather laggy animation as they attempt to keep their balance, moving forward half of a battlefield platform in the process. This move is best used to set up a combo, but it can also be sued to get the opponent into Sarkhan's two remaining hazards: Pyroclasm and Seal of Doom. This attack also knocks opponents off of ledges, making it much easier to gimp them.

Back Throw:
Sarkhan spins and slams the opponent into the ground behind him, and begins running and dragging the foe along the ground in that direction, traveling a distance two battlefield platforms, tossing the opponent off any edge that he reaches during the throw. This deals 13-15% damage regardless of where he finishes the throw, and leaves the opponent prone in from of them if he doesn't reach an edge. This throw is ideal for both getting the opponent off of the edge or placing them where you want them on the stage.

Madness Playstyle: Level 3
Sarkhan moves steadily away from his previous playstyle of traps and pressure to a new one of savage combos and even more pressure. Because applying pressure is central to both styles, this point in Sarkhan's decent into madness is when he is at a hybrid of the two styles. He has lost his very important projectile, but still has a decent amount of stage control left in his Pyroclasm, Sulfuric Vortex and Seal of Doom. He is also capable of capitalizing on the opponents limited options and create easy combo fodder out of them with Earthquake, Slave of Bolas, and his down throw.

Madness Moveset: Level 4​
Sarkhan holds on to his sanity by just a thread, looking quite disheveled and crazed.

Down Smash: Ball Ligtining
Sarkhan points his staff at the ground and a lightning elemental erupts from it and zooms forward a distance of two battlefield platforms at Sonic's dash speed, dealing 9-12% damage and stunning the opponent similarly to Zero Suit Samus's Laser. The longer the smash is charged, the longer the duration of the stun is, from half of a second uncharged to a whole second fully charged. This attack has a large amount of startup lag, but very little ending lag, so it is best used to create an opining to capitalize upon.

Dash Attack:
Sarkhan quickly slashes in front of him for 3-5% damage, knocking the opponent a short distance in front of him. However, Sarkhan keeps running after using this attack allowing him to follow up easily. This attack is even fast enough that it can chain into itself at low percents to carry the opponent across the stage. Landing one of these slashes can lead in to almost any of Sarkhan's other attacks, making this one of his new bread and butter.

Madness Playstyle: Level 4
Having now lost the last bit of his stage control strategy, Sarkhan has now become a savage fighter focused on capitalizing on any opening to get in and deal massive amounts of damage. His old aerial pressure game is still there, and thanks to his new forward air, he can link it to his ground game as well. His KO options are limited, but with several moves that are great for harassing off stage opponents, such as his down air, forward air, and down tilt if they have grabbed the ledge, he can do a great job of gimping. With his damage output, reaching the level necessary for a KO via Seal of Doom or a Smash Attack should be no problem anyway.

Madness Moveset: Level 5
Sarkhan has snapped. He is consumed by rage and instinct, and now wishes only to serve his master.

Neutral Special: Beast Within
Having completely lost his sanity, Sarkhan can no longer use Dark Tutelage. Instead, he tries do drag the opponent with him. Sarkhan holds his hand in front of him, attempting to come in contact with the opponent. If he succeeds, he draws out their inner rage and madness, violently transforming them into a dragon! While a dragon, the opponent has nearly identical size, statistics, and moveset to that of Charizard for the next twenty seconds (naturally, this means that Charizard is immune to this attack). While that may not seem like such a bad thing, remember that Sarkhan is now a close range combo character, and a slow heavyweight like Charizard is easy combo fodder for him.

Madness Playstyle: Level 5
You no longer have use of Dark Tutelage, but other wise your goal is the same: Grind your opponent into dust.

Final Smash: Violent Ultimatum
"Words are a waste of time. Destruction is a language everyone understands."

Sarkhan unleashes massive blast that covers 80% of Final Destintion, dealing 75% damage similarly to a smart bomb, KOing at 30%. This attack will break shields easily, leaving anyone who avoided dying that way open for an easy finish.


Overall Playstyle:​

Sarkhan Vol centers around proper use of Dark Tutelage. Use it carelessly, and you may find yourself without the necessary tools for the situation at hand. However, the boost it provides could very easily win you the match, and some stage of madness may be the best one for the particular opponent. Sarkhan Vol achieves versatility through these changes, but one must be capable of dealing with the slowly changing playstyle.
 

MasterWarlord

Smash Champion
Joined
Aug 24, 2008
Messages
2,911
FLYING BONGO TIKI

Necky existed basically entirely to be a large floating platform for players to use to jump across gaps in the games, and you take advantage of his platform status here for a moveset – the reason for his character’s existence is the focus of the moveset. I do quite the concept of making parts of your body solid and then attacking a foe as they’re standing on you, and you have all sorts of various attacks to hit passengers and prevent them getting off. It's all tied together with one of your best playstyle summaries, reminding me a good deal of Zinger's, Necky's good friend. It’s all done very well, and you even manage to make damage still relevant by having it increase the stun of Necky’s Nuts and his grab duration despite him being so focused on gimp-esque KOs. While the question of Necky being overpowered comes into play on a regular basis, the main thing that makes him work is his pathetic weight in combination with foes being able to turn the tables against him with a powerful dair.

While the set –is- great, there are a good quantity of minor complaints I have that become rather substantial when they’re all added up.

  • Too much of his moveset is dedicated to playing with foes on his back – you have a large quantity of moves to make it more awkward for foes to get off his front, but only one to make them get off his rear. You didn’t need so many moves dedicated to this. This wouldn’t be bad and I wouldn’t change many of them, but when Necky’s options are so limited in actually getting a foe on his back I felt it needed to be addressed. I think the obvious thing that could be added are some simple moves to pop the foe in the air off the ground.
  • It’s already a stretch to picture Necky carrying people as heavy as Bowser at all, in Necky’s ftilt where he extends his neck an entire Battlefield Platform (Quite awkward to picture), it feels extremely weird that that’s solid. If Bowser took a single step onto his neck, it wouldn’t support his weight – it’d freaking snap.
  • How in the bloody hell can Necky use every single one of his bloody inputs while flying with Up Special? Firstly, he can use all of his standards and aerials at the same time, which would be input the same way. Secondly, Necky is allowed to move around in mid-flight with a grabbed foe. . .How the hell does he input throws then? The obvious answer would be inputting Z plus a direction, but the fact you don’t state this leaves a sour taste on the tounge.
  • Bad match-ups. With Necky’s ability to fly up so high so easily, Chomps will always be going for Tutankoopa, and Necky can fly up from under Tutankoopa’s drop-through Platform with Up B and scoop him up with ease. For M. Trinity. . .Really? A character who can stay in the air for 12 seconds is afraid of traps that stay on the ground?

INSTANT KHOLDSTARE SUPER VOTE

The basic moveset is a fairly standard trapping moveset, but unlike most blatant trap-centric movesets Sarkhan has a good chunk of moves dedicated to hitting the foe towards his traps, or at least towards an edge if there’s no nearby traps, in which case they can become vulnerable to Sarkhan’s gimping game. A particularly nice trap of Sarkhan’s is his default nair, which prevents foes from jumping over his traps –and- makes them easier for Sarkhan to gimp.

With just the main moveset, though, Sarkhan would be fairly forgettable. What makes Sarkhan truly stick out is his slow descent into madness, losing his traps and gaining more melee moves with each level of the transformation. While this would seem to be a rather “meh” transformation at first as it makes Sarkhan more generic for the most part, one must keep in mind that Sarkhan’s traps he made with the moves he no longer has stick around, meaning Sarkhan can use his new spacing moves to send foes into his old traps better than ever. The fact the traps have fairly short timers give a sense of urgency to it, though, which I like considering how overpowered he’d be otherwise. In particular, Sarkhan’s original nair is quite nice in how it ties in to so much of his game, particularly the earthquake move he gets later on in the transformation to the points of being god-like, but the fact the earthquake move is so far off in the transformation and that Sarkhan loses his original nair at level 1 makes it something you really have to work for to achieve. My only really big gripe with the core playstyle is that the transformation is permanent throughout stocks, which while realistic rather limits all of the juicyness of Sarkhan’s playstyle to his first stock. True, he can stay at level 2 or 3 to keep a few traps, but then he’s not really any more unique of a moveset than he was without transforming at all.

I very much like how you introduce the playstyle in pieces in the transformation, giving a rundown of how he works in each phase. It’s a very smart organizational choice. . .However, you see what I was praising the set for back there? Taking advantage of your upgraded moveset to push foes into existing traps from your earlier forms? You don’t suggest that a single time in the moveset, when that’s really the best part of it by far – it makes me think you were unconscious of it. This in combination with the transformation lasting through stocks really downplays the highlight of this moveset for me. I think this moveset really had the potential to be something amazing.

While this is rather unrelated to the main moveset, you –do- know from the chat how much I utterly LOATHE the alternate form Neutral B and Side B. The Side Special limits the player interaction far too much and introduces a massive luck factor what with the awkward cpu AI, and the Neutral Special just seems like it’d be the first thing Sarkhan attempts to do against any character he has a really bad match-up against. Granted, he’d probably hold off on it so he can take advantage of the traps of the earlier form, but bah humbug.
 

Thrice

Smash Cadet
Joined
Apr 1, 2010
Messages
45
Location
Washington
Urgh. Fine, fine, another comment and all such and what and thing.

TUTANKOOPA

Obviously this has to be the set I comment in this little installment.. First off, before I get started on the actual set, the random color changes at the start seem...really random to me. Not really BAD, but just awkward. Why would you have one half of a word be one color and the other half another? I assume you were going for a sandy atmosphere, and while it works, it can get a bit annoying, and it's a good thing it isn't really used in the actual Moveset portion. The Size One font IN the actual moveset doesn't help the readability too much... The headers, while nice and flashy, are also a teeny bit tough to read.

Startin with the Neutral Special, the Shell's a nice idea, being both a projectile for Tutankoopa and a good control method for Chompy. I'm just gonna assume he moves just fast enough to not catch up with the shell, no matter how fast it's going, right? It lets you nab some good control over Chompy that way, so that's nice. But uh...how long does it take to summon the shell? I wouldn't really think that long, but you still might want to include a sentence about it... Don't go overboard like me and have entire paragraphs about it though.

Side Special..I like it, and of course it goes well with everything and especially Chompy, but being able to essentially freeze your opponent from two (Battlefield?) Platforms away for five seconds while Chompy...chomps away, that's a tad strong. Especially considering you could also do this to Chompy for presumably the same amount of time, increasing damage but still being able to combo the guy. And again, you don't really mention how long it takes Tutankoopa to do this... It's a nice interaction and all, but you might want to tone down the time or the range.

The Up Special...there's not much to say about it. Even YOU don't say much about it. It's just kinda there... It does essentially give him unlimited Recovery, while also offering the opponent a platform to attack him from. Also, how long does the platform stay around if you use it on the ground? Five seconds seems a little short. ALSO, does using it on a platform count as using it in the air or on the ground? If it counts in the air it essentially refreshes the timer of what you're standing on; the ground it summons one above you and you can just camp up top forever.

Down Special doesn't really give Tutankoopa all too many problems, like you seem to say it would. You have two more Chomps to avoid, sure, but you also have unlimited Platforms to abuse, so you won't really be on the ground too often, except maybe to try and sneak in a Stone covering over an opponent or Chompy. Which is nice, and it forces you to actually think and plan about where to go down and when to take to the skies again. It's not a bad thing, but it would be very overwhelming for the opponent. Not that that's not your GOAL or anything, but still, the sheer basis of the move; more of Chompy to go around; seems a bit powerful and unforgiving.

I like a bunch of the moves from there on out, but they all seem a little underdetailed, with some not having any Knockback info and most lacking anything on lag whatsoever. I do like how the Down Smash interacts with the platforms, but you might have wanted to give at least a cap on the damage and pitfall time, to make it easier to understand. Nair is a general GTFO move, and while it works it seems a bit generic. I find it a bit odd that the Fair is one of the most detailed moves in the set...though I DO like the move quite a bit. It doesn't come off as overpowered, and it's a nice thing to add into the set. I'd say that the 35% damage is too strong, but you really have to plan that out, and chances are no one is going to go near you when there are two Chomps by you anyways. Also, you mention lag a couple times in a few moves, such as the Bair, but since there really isn't anything to compare to, it doesn't really help us out all that much.


The Up Air is a neat trick, Footstooling the opponent. It can act as a nice recovery if someone's trying to Spike you, or it could just be a gimping tactic. You mention the "terrible Up Special" but...well I guess that means said Up Special can only be used once in the air, even if you land on the Platform? That's a bit vague, really. The Down Air...I assume he's extending his hands FORWARD? Or is it downwards? That makes the most sense, considering it is a Down Aerial and all. It's overall relatively generic and seems like it would be useful on anyone BUT Tutankoopa; you don't really want to Short Hop and use this. It would lock the opponent into hitstun and make them nice bait for Chompy, but it does the same for you.

I enjoy the Grab and how it lets you grab Chompy as well as actual enemies. It's one good option of how to manipulate Chompy, while still being rather risky to Tutankoopa, which is what you were going for with this entire set, I'm sure. Sadly, none of the throws really stick out to me except for the Down Throw. It interacts well with the Up Throw(if the UThrow is used on a Chomp) and it lets you have a little trap set down for any enemies.

Don't get me wrong here; I like this set and it's a nice change of pace from your...nothing the past...long time. The whole thing plays out well and it exemplifies the character's traits and overall incompetence rather well. And the writing style is excellent; it's refreshing and it doesn't bore into your head that much, trying to force you to remember all these random tidbits of information. But still, the set seems like it could use a BIT of polish. Many moves lack any lag information at all, some lack anything with Knockback, and while droning on about that is a bad thing, it probably still should have included SOMETHING about them, even just a sentence per move. Then there's the bit about some moves not really going into any detail at all about what they do or how they interact in other places, like the Up Special. You never say if it's limited or if using it on a platform is treated as aerial or grounded. Still, you've been out of the loop for a while, and you had that gigantic comment wall to do, so I can't really blame you for anything. This was probably a test, to see if you still have it in you. And, in my opinion, even with the lack of detail and somewhat generic moves, you definitely still have it. If I was doing rankings, I'd give it around a Seven; it has great ideas, an amazing playstyle, and it captures the character well, but it could have done with a good once-over.


And good gravy that's longer than I thought it was when I was writing it.
 

KingK.Rool

Smash Lord
Joined
Nov 26, 2005
Messages
1,810
Who comments on comments? How ungentlemanly...

So next we had...KingK.Rool? And I get first dibs on commenting? Nifty!
TutanKoopa
Firstly, welcome back! I never really got a chance to chat with you, but I certainly know who you are!
Introductions aside...this is a fantastic moveset. The mechanic is beyond cool, something I would absolutely LOVE to see in smash. The playstyle is flowing, and it works well. I can honestly say its one of my favorites so far, and Im excited that your coming back. Also, thanks for the comments!

Aaaaaaaaaannnnnnnnnnnnndddddd Im caught up.
Thanks, geto! See you in the chat sometime. ;)

OHMYGODROOLSETWHATTHEHELLYESYESTHISISDELICIOUS

Great Christmas Present to see you truly participate in this MYM, with not only a fantastic moveset but a gigantic wall of comments. While I’m not holding out for you coming back, you know you’re more than welcome here at MYM, if only so I can eat up more of your sets.

Tutankoopa introduces something surprisingly un-explored in summons characters – he’s vulnerable to his own summons, much like how the Kid was different from the league of trap characters in MYM 5 by being vulnerable to his own traps. Unlike the Kid, Tutankoopa actually has ways of playing around this fact, and can even use it to his advantage as he uses the fact that his Chomps chase him to space them around where he wants. While I considered a Tutankoopa set at one time, I never thought to capitalize on his incomptency (Which is quite prevalent in his dialogue) and his chomps being his demise, but it all feels too in-character. This is further amplified when Tutankoopa himself is typically up on a platform above the action while foes deal with the chomps, and when he’s not he’s typically floating.

All of his moves for spacing his chomps about and keeping the foe on the ground while Tutankoopa stays in the air are great, and while they may seem a tad redundant you’re going to need all of those tools if you want to pull off something as spectacular as the two chomps clashing together and actually hitting the foe in his fair. The sheer amount of potential for ways to control where the chomps go is just staggering, such as the shell rebounding off of raised up ground from the dtilt (Though it should’ve been introduced in the move, not the playstyle summary). A particularly nice passive tactic you have here is making the foe go to attack the stone chomps, but having a disguised Chompy thrown into the mix to make this futile. I feel that the stone status of Chompy should’ve eventually expired, as it feels there’s little reason to not do it when he can just permantely blend in with the other chomps. Also, while Tutankoopa has plenty of options to get the foe out of the air, his options for getting foes off his platform are severely limited – I think he needed some form of more basic melee GTFO. While you may claim that the generic nair and dair serve this purpose, they probably could’ve been more specialized for basic GTFO rather than “chaining hits together spectacularly” like the uairs of the Eeveelutions. A pretty minor complaint, sure, but I can’t suck your cock the whole comment, now can I? Great job.
Ah, I missed uber-positive Warlord comments. Haven't seen one this good since Grunt. :bee:

I could have sworn I did put in a time limit on turning Chompy to stone. I'd go back and change it, but you know... nobody rereads sets or anything...

Speaking of signs of the apocalypse, it appears we just experienced the Second Coming!

And this one I'm sure will be heralded with much more fanfare, seeing as it's accompanied with KingK.Rool not only posting with his own account, but with a comment for every moveset yet posted! That certainly deserves a lot of respect, so well done Rool. I can't imagine how long you must have been sitting on some of those. No prizes to guessing who wins Smady's rankings this week.

I do want to start this off with a discussion on the subject matter of those comments of yours. Specifically on your use of the term, postmodern, to describe some of the new movesets, specifically mine. You've certainly landed on the route I've been pushing with my new movesets, namely, that I'm trying to reduce creativity for creativity's sake, and build playstyles that are robust, give options to the player, without being contrived or overcomplicated.

So some of your criticism feels misplaced, as you criticize Electivire for not introducing anything new. And that is true, because Electivire's goal wasn't to be something new, it was to perfect the whole idea of charge mechanics and combos into a character that was dynamic to play as. If I was trying to create a new idea or genre with a moveset, I certainly wouldn't have chosen Electric-type Pokemon #112 with a built in charge mechanic to boot.

That having been said, there certainly is merit in your point, specifically about creating new ideas and avenues in movesets, something that I think has been a place where I've slightly been in a rut. Originality and creativity are not the same, and the former definitely has more merit for its own sake than the latter.

In retrospect, one moveset I had in mind in particular was in many ways a rehash of ideas that have already been done before; you've reminded me that it's important to do something new too. I've got to remember that the key to a good moveset is a good idea at its core, no matter the implementation. New ideas have been behind some of my most successful sets, and my big three in Make Your Move 7.
Yeah, that's a good point about Electivire and I suppose it's applicable to Toxicroak, too. I'll rethink those a bit but I'm glad you see what I'm getting at.

Now, that all having been said and done, let's get on too...

Tutankoopa

Tutankoopa definitely reinforces what you've been trying to tell us what you're all about: creating a new idea. A character that introduces something just as dangerous to him as to the opponent, and manipulates it to be more dangerous to the opponent is definitely a solid concept to go behind.

I do love the concept of the Neutral Special, meshing well with the dog-like behavior of Chain Chomps into a very playful move to control the creature with. Which also makes it a bit more disappointing when a move like the Forward Tilt changes the creatures' behavior without the same 'internal logic', as you call it.

The air game honestly looks like most characters' air games, being built to force the enemy to the ground. Now, this is normally because the writer already came up with the ground game and has no idea what to do for the air, so the air game just becomes more of the ground game. Tutankoopa though certainly has an in-character reason for forcing the opponent into range for his chomps, playing king of the hill with his platform while his opponents are stuck to the ground, and the multi-hit aerials are a nice touch to berserking the chain chomp only to return safely to your platform.

I also see that you've shortened up your move descriptions quite a bit. While this is all well and good, I can honestly say you went too far when the back-aerial has no damage and the FSmash's knockback is so vaguely referred to I can't tell if it's a kill move or not!

That all having been said though, I really do like this moveset. While a few moves feel a little awkward, in general, the entire moveset works together towards the main goal of making the Chain Chomps a bigger threat to the opponent than the players. It's an indirect style, but it still feels very proactive on the part of Tutankoopa to control and manipulate them without becoming their target himself, and that's very impressive, and what brings this moveset into a very good position in my eyes.

Welcome back Rool. It's a pleasure to have you return, and quite reassuring to know that your prolonged hiatus has not made that noggin any rustier for the wear.


I will comment the MYMinis and the Ganondorf remix, by the way, but I wanted to get this out of the way first and foremost.
I am shortening my descriptions, it's true. One of the things I learned as I was commenting, especially from Victreebell, is that I wanted to keep most of the playstyle in the actual playstyle section and let the move inputs speak for themselves in the meanwhile. Actually, I was also trying to pull a Nurse Joy a little bit and bring it all together at the end.

Appreciate the comment very much, man, and glad you liked it. I wasn't expecting the set to appeal to both you and Warlord. :bee:

Tutankoopa
I really like the idea behind this set. A powerful ally that will attack you as well as the opponents is awesome. The ways of controlling him were well done. The Down Special was cool, as it give Tutan more power, but a higher risk of dying. The forward special's ability to either pump Chompy or hinder opponents was also really nice. I thought this was a very good set.
Thanks, gcubedude!

-YES


Indeed, it's so unfortunate that you were denied your chance to grinch up Diglett. I will endeavor to make my next feasible moveset represent something that's easier to argue with :awesome:
Very nice of you :awesome:

This, I admit, was a little bit deliberate. I was going to call it Rock Slide, and make it just as you stated it should work (i.e. a little ball of dirt that gets bigger and stronger as it tumbles down slopes). .
But then I decided I wanted to be a mischievous little troll and tweak the attack to make it sound blatantly out of place. So long as it gets across Diglett's sense of constructive/destructive play, toying around with the mounds and tunnels he makes, I think the Pokemon Syndrome is worth it.
I'll probably change it soon, but until then, think of it as the Diglett equivalent of a Charizard with Rock Smash ;)
I caaaaaaught yoooooou!

This was intended to represent the unknown factor of Diglett. Everything above ground is cute and ineffectual, yet everything beneath the surface is monstrous and terrifying. I guess it wasn't all too successful though, seeing as you've complained and all.
I guess so. Feels a bit incongruous is all, deliberately or not.

Thanks for commenting every most movesets! You win... a comment.
Not all? Surely the newest ones don't count yet!

Tutankoopa:
damn that is some subtle colouring you have there! I can barely notice it at all, and yet I know it's there. You are a sneaky subversive dastard

Anyway, I'm just going to gloss over the whole playstyle and whatnot (as great/fresh as it may be) and get to the part I actually love. The characterisation. This is treading a very fine line between being completely in character... and being a Kangaskhan. Unlike Kangaskhan, who is optimally played like an amoral jerk, Tutankoopa's playstyle represents something I've never seen represented in ANY moveset (not even real ones) before. Character development. The player takes this unwieldly koopa, who's own summon will kill him if it can, and slowly learns to flip the weakness into a strength, gradually layering in more tricks and feints to fully take advantage of what used to defeat him. And through the player's careful manipulation and skill, Tutankoopa himself learns to move on from his humiliating defeat in Paper Mario. It's heartwarming stuff really, like a Rocky film in moveset form.

I suppose one criticism I can level, in regards to how the set reads, is that you quash Tutankoopa's Chomp problem way too early. Literally, the first attack you describe renders much of the build up in the introduction worthless. Besides, Tutankoopa usually throws Buzzy shells, not Koopa ones.
I am also astonished you went through an entire moveset involving a Chain Chomp, and you didn't tether it to the ground, or a post. I mean, if this was a MasterWarlord moveset, Chomp would be tethered in place faster than you can say "Grabgame first" (and bonus points for a throw that tethers the Chomp to the foe)


Buzzy shells? Damn!

As for the chain, it's not something that didn't occur to me, but I thought it was a little bit too serious and, well, Warlordian for an incompetent lightweight antagonist.

Thanks for the comment, Junahu - and how awesome is it that I got a comment from you, Warlord, and meanie already? That's the Big 3 right there. And me finally on the outside looking in... :awesome:

lrn2play


Poison discourages running away because if you run, you wont be making up the damage that is done to you via poison unless you're fox (in which case you're only real option is to run and spam lazer till it's time to run and spam usmash anywho).
But... you won't make up the damage anyway because you're doing exactly what the Toxicroak player wants you to do. You can't place an effect on an opponent facing Snake to convince them to fight at range because the player know what their priorities are.

Essentially the set is built as a creative means to be competitive, not relyign on any set "mechanic" (except poison, which is subtle compared to 90% of MYM Mechanics) and just require alot of player interaction to work instead.

The reader is supposed to think how they'd use him given his moves instead of letting his moves play for the player via the usual wackiness of MYM (not that that's allways a bad thing, i juts felt like doing a departure and doing somethign a tad more, serious?)
This is true. Toxicroak may be as close as we've come to a character that feasibly functions at higher levels of play.

Urgh. Fine, fine, another comment and all such and what and thing.

TUTANKOOPA

Obviously this has to be the set I comment in this little installment.. First off, before I get started on the actual set, the random color changes at the start seem...really random to me. Not really BAD, but just awkward. Why would you have one half of a word be one color and the other half another? I assume you were going for a sandy atmosphere, and while it works, it can get a bit annoying, and it's a good thing it isn't really used in the actual Moveset portion. The Size One font IN the actual moveset doesn't help the readability too much... The headers, while nice and flashy, are also a teeny bit tough to read.


Oh, a Thrice comment! (SHOCK) My sets don't handle move-by-move analysis too well...

For this part, I haven't been too concerned with readability since circa Zant. I went for a faded-desert colour scheme in the beginning and end and a roll-of-parchment kind of thing for the moveset itself, with every attack named like a spell. Almost a guidebook, if you will.


Startin with the Neutral Special, the Shell's a nice idea, being both a projectile for Tutankoopa and a good control method for Chompy. I'm just gonna assume he moves just fast enough to not catch up with the shell, no matter how fast it's going, right? It lets you nab some good control over Chompy that way, so that's nice. But uh...how long does it take to summon the shell? I wouldn't really think that long, but you still might want to include a sentence about it... Don't go overboard like me and have entire paragraphs about it though.


Detail :mad:

Side Special..I like it, and of course it goes well with everything and especially Chompy, but being able to essentially freeze your opponent from two (Battlefield?) Platforms away for five seconds while Chompy...chomps away, that's a tad strong. Especially considering you could also do this to Chompy for presumably the same amount of time, increasing damage but still being able to combo the guy. And again, you don't really mention how long it takes Tutankoopa to do this... It's a nice interaction and all, but you might want to tone down the time or the range.
Balance :mad:

The Up Special...there's not much to say about it. Even YOU don't say much about it. It's just kinda there... It does essentially give him unlimited Recovery, while also offering the opponent a platform to attack him from. Also, how long does the platform stay around if you use it on the ground? Five seconds seems a little short. ALSO, does using it on a platform count as using it in the air or on the ground? If it counts in the air it essentially refreshes the timer of what you're standing on; the ground it summons one above you and you can just camp up top forever.


I seem to have left out an actually-important detail here: only one platform allowed at a time!


Down Special doesn't really give Tutankoopa all too many problems, like you seem to say it would. You have two more Chomps to avoid, sure, but you also have unlimited Platforms to abuse, so you won't really be on the ground too often, except maybe to try and sneak in a Stone covering over an opponent or Chompy. Which is nice, and it forces you to actually think and plan about where to go down and when to take to the skies again. It's not a bad thing, but it would be very overwhelming for the opponent. Not that that's not your GOAL or anything, but still, the sheer basis of the move; more of Chompy to go around; seems a bit powerful and unforgiving.


Hmm, hmm.

I like a bunch of the moves from there on out, but they all seem a little underdetailed, with some not having any Knockback info and most lacking anything on lag whatsoever. I do like how the Down Smash interacts with the platforms, but you might have wanted to give at least a cap on the damage and pitfall time, to make it easier to understand. Nair is a general GTFO move, and while it works it seems a bit generic. I find it a bit odd that the Fair is one of the most detailed moves in the set...though I DO like the move quite a bit. It doesn't come off as overpowered, and it's a nice thing to add into the set. I'd say that the 35% damage is too strong, but you really have to plan that out, and chances are no one is going to go near you when there are two Chomps by you anyways. Also, you mention lag a couple times in a few moves, such as the Bair, but since there really isn't anything to compare to, it doesn't really help us out all that much.
Yeah, I've come to the conclusion that for the most part it's easier to get your ideas across if you play fast and loose with details. If I fit in a vague descriptor of lag, awesome. If I don't, I hope it's somewhat apparent just by the attack's nature. Words like "suddenly", "gradually", "slowly"... I could include a little statistics thing after each attack, but in my experience nobody cares about that or even gives it much thought beyond a rough skim (unless it's broken in which case everybody notices).

The Up Air is a neat trick, Footstooling the opponent. It can act as a nice recovery if someone's trying to Spike you, or it could just be a gimping tactic. You mention the "terrible Up Special" but...well I guess that means said Up Special can only be used once in the air, even if you land on the Platform? That's a bit vague, really. The Down Air...I assume he's extending his hands FORWARD? Or is it downwards? That makes the most sense, considering it is a Down Aerial and all. It's overall relatively generic and seems like it would be useful on anyone BUT Tutankoopa; you don't really want to Short Hop and use this. It would lock the opponent into hitstun and make them nice bait for Chompy, but it does the same for you.
DAir seemed like the kind of deliberately generic attack that would smooth out a couple of bumps in the moveset at once. It gives him something in the way of a spacing option as well as a method to send Chompy into a rampage. Tutankoopa is an abusive master...


I enjoy the Grab and how it lets you grab Chompy as well as actual enemies. It's one good option of how to manipulate Chompy, while still being rather risky to Tutankoopa, which is what you were going for with this entire set, I'm sure. Sadly, none of the throws really stick out to me except for the Down Throw. It interacts well with the Up Throw(if the UThrow is used on a Chomp) and it lets you have a little trap set down for any enemies.

They're a bit on the generic side, yes. That's mostly deliberate on my end. I tried - really hard - to make the Specials easily the most eccentric parts of the moveset, with creativity in the rest of the moveset stemming from the way it tied to the specials instead of what it contained itself.

Don't get me wrong here; I like this set and it's a nice change of pace from your...nothing the past...long time. The whole thing plays out well and it exemplifies the character's traits and overall incompetence rather well. And the writing style is excellent; it's refreshing and it doesn't bore into your head that much, trying to force you to remember all these random tidbits of information. But still, the set seems like it could use a BIT of polish. Many moves lack any lag information at all, some lack anything with Knockback, and while droning on about that is a bad thing, it probably still should have included SOMETHING about them, even just a sentence per move. Then there's the bit about some moves not really going into any detail at all about what they do or how they interact in other places, like the Up Special. You never say if it's limited or if using it on a platform is treated as aerial or grounded. Still, you've been out of the loop for a while, and you had that gigantic comment wall to do, so I can't really blame you for anything. This was probably a test, to see if you still have it in you. And, in my opinion, even with the lack of detail and somewhat generic moves, you definitely still have it. If I was doing rankings, I'd give it around a Seven; it has great ideas, an amazing playstyle, and it captures the character well, but it could have done with a good once-over.


And good gravy that's longer than I thought it was when I was writing it.
Cool.

I would say that the lack of detail is going to be a bit of a calling card in my movesets from now on, if it wasn't already - that's just an aspect of my approach and my priorities that's going to be a bit divisive from time to time. You're right that this set was partially a test, to see if I could make a moveset that would still be well-received in this different day and age. You're also right that it was a bit unpolished. I'm glad that despite that, you appreciated it, though. Thanks for the comment review, Thrice. ;) But damn your bloody formatting - it's in ur quote blockz hacking ur textz


I made Tutankoopa immediately after doing huge amounts of reading and commenting over the course of a few days. I was trying to be more critical than I've ever been before - I hope I wasn't too harsh, because there really were no sets I disliked. My point here is that I decided I needed to practice what I preached; if I was going to criticize, I had to prove that, if I couldn't do better, at least I could make a moveset that fulfilled all of my own criteria.

I was struck by how differently the big MYMers approached making and presenting their movesets nowadays. Warlord presents his centerpiece, that builds around it, expanding in all directions without a single useless outlying move. meanie presents his character's weaknesses prominently, then proves the character useful by gradually putting together simple moves, so that the reader is surprised when it all clicks. Junahu often puts his best foot forward with his most clever idea, then reveals layers and layers within, like one of those little Russian dolls. Daddy accumulates ideas like a thick sludge, presenting them so fluidly that they feel inextricable and the moveset is entirely insular. That's just a few examples, with MT emphasizing presentation and Kupa doing a whole Dark-Bowser-style thing (thanks for the matchup, by the way).

And me, I want my sets to have a stream-of-consciousness approach, where it feels like the ideas are simply the natural progression of what came before. Factual details would bog it down and prevent the playstyle from hitting home as effectively; I want it to be right there on the surface, clever on a skim, with more depth than can be taken in on a single read.

The lessons being, judging from the very positive reception:

  • We don't all have to MYM like Warlord anymore!
  • Throw away your books, rally in the streets!
  • You can go your own way!
  • After all, tomorrow is another day!
 

Junahu

Smash Ace
Joined
Nov 15, 2005
Messages
899
Location
Shropshire Slasher
Not all? Surely the newest ones don't count yet!
Where's your Sanaki comment? I can't seem to find it, just some mean stuff about MYminis in between Zephr and Harvey.

Daddy accumulates ideas like a thick sludge
That is one win of a quote right there.


Goruugu:
You've done an absolutely remarkable job of understanding Goruugu's supernatural, yet entirely physical brute strength. The unnatural movement provided by Fly does a great job of showing the unnerving Ghost side of Goruugu. And, well, just in general, this moveset seems to understand exactly how Goruugu was meant to use his moves. I'm extremely pleased.

I'm not sure I appreciate the use of traps however, as it kind of undermines him a bit. Goruugu is after all, probably the least mischievous Ghost Pokemon ever designed.

This is certainly the first time I've seen a Night Shade attack where the author actually read the attack description beforehand. However, in a somewhat ironic sense, I don't believe Goruugu would use Night Shade quite like that.
As far as I can tell, I think Goruugu represents a possessed golem (or just, possessed armor, as that is something everyone can relate to), so many of the Ghost attacks would involve the spirit leaving the physical shell in order to "surprise" the foe. The "mirage" of Night Shade here would in actual fact be the physical shell of Goruugu, with the wandering spirit getting the drop on the opponent.

I think I should also complain about Heavy Bomber, as it doesn't seem to take the weights of the combatants into consideration, which I believe is the point of the move. Nonetheless, that is still an awesome interpretation of the attack.
 

JOE!

Smash Hero
Joined
Oct 5, 2008
Messages
8,075
Location
Dedham, MA
But... you won't make up the damage anyway because you're doing exactly what the Toxicroak player wants you to do. You can't place an effect on an opponent facing Snake to convince them to fight at range because the player know what their priorities are.
exactly.

once he gets the poison jab, his whole moveset comes into being as it changes how the opponent would normally fight, which then leads to Toxicroak's game. But even then Toxi has to eb ON THE BALL to capitalize right.

the moral would be: dont get Jabbed
 

darth meanie

Smash Journeyman
Joined
Jun 6, 2008
Messages
452
Ho Ho Ho

Christmas Dedede

I'm not quite sure why this is a boss set, since there isn't really a huge justification for why Dedede's all spruced up for Christmas, but that's a minor complaint. Christmas Dedede does have a lot of stuff going on though, and plenty of moves, modes, and minions to fight with. It's a bit overwhelming in all honesty.

I do think that a boss set would do better with fewer issues to juggle at once, especially since boss movesets don't have the luxury of a human player to make some of the more advanced decisions that Make Your Move movesets require.

I do like how you tried to create a focus on forcing the player to make decisions on how to handle various catch-22s in Boss Dedede's moveset, which is very nice. I really think that making boss movesets can be a good experiment for making our own movesets, as we have to look at move interactions and creativity from the perspective of how an opponent would deal with them, instead of how the player would.

Christmas Smashville

It's Christmastime in Smashville, and your choice of extra as an 'easter egg' in another stage was both unique, short, and sweet. It's got several nice easter eggs, and I 'do' of course love the fact that the snow dampens knockback just like it did with Abomasnow.

It's got a nice song at the end, and it's not so long as to be overbearing. Excellent job Junahu.

Santakuma

Ho ho ho MT.This isn't a hilariously incongruous mash-up at all! Santakuma does seem to be a mostly straightforward boss for the most part, and I can't appreciate most of the references to the character's actual abilities seeing as I'm not a Street Fighter fan.

I do definitely like the Shin Sanatakuma Goku Stocking Stuffer though. You're definitely quite talented at hiding in audacity, MarthTrinity.

Christmas Ganondorf

I do appreciate the change in style for this new Ganon. You definitely got his cocky nature down in this moveset, although I don't think him fighting with just a finger or two at a time really fits. It's definitely an improvement for some of his tilts though.

His Specials are certainly where he needs the most help though. While the Up Special is *MUCH* better than the original, and fits his character and playstyle, the other three specials aren't as strong. The Neutral Special went from underpowered to overpowered, and starting the moveset off with an attack that deals 666% made me almost think this was a jokeset at first.

Removing the slide from the Side Special was also a pretty huge mistake; it was Ganondorf's best move in Brawl for that very reason, since he could chase opponents out of rolls or get up attacks with good prediction and just repeatedly punish the opponent. Now he can't. You also ended up nerfing his Down Air, which he obviously didn't need. (His Dair deals 22% damage!)

While there was definitely good heart in this moveset, it didn't feel particularly focused. The smashes in particular felt awkward, what with him changing his leg for a stomp or summoning Keese. Wouldn't it be more fitting for the awesome power of Ganon to have his smashes be complete brutalizations of his enemy rather than... a summon?

Speaking of summons, the Redead were certainly a great idea, but the Down Tilt seems like a bit of an awkward input for them. Still though, that's really a minor complaint.

Necky

How you pop out these ingenious sets for these Donkey Kong minions is beyond me. You took the utilitarian aspect of an enemy that was more of a platform for DK than an actual foe, and turned it into a very unique kill strategy. That's ingenious, and quite praiseworthy. I especially liked how it flowed directly into his grab-game in the air even if they do escape.

I think you ended up making the moveset more complicated than you actually needed to. The fact that the Up Special and Side Special are two different inputs for what is much the same move feels overcomplicated, like the two types of whirlwinds for different types of inputs that Erufuun had. Speaking of that, how exactly do you use your aerials and tilts in mid-flight anyways?

Giving him fewer, more diverse tools could have streamlined this moveset a lot more than having all of these awkward ways to midly manipulate the same basic mechanic. Beyond that though, I have very few complaints, and Necky is very well built.

I do agree with Warlord that Necky would end up crushing both of the characters you mentioned.

Sarkhan Vol

LegendofLink, you continue to improve by leaps and bounds. Sarkhan is practically devoid of filler inputs, with only a few throws that disappoint, but you still keep true to having simple ideas in each individual move. The fact that you're not only able to do this though, but slowly transform each move over time and keep his playstyle dynamic shows that you have a very solid understanding of how everything fits together and exactly what you want to do with each individual move.

The playstyle he has at first is surprisingly strong. As Junahu-ish of it may be to say this, I love how aggressive you made a stage-controlling character; he's forcing the enemy back with pillars of fire and zoning the opponent to the edge and offstage with a very proactive set of tools to use against the enemy. That's flavorful and very evocative of his character as you portrayed him.

He stays aggressive as he switches, hybridizing a strong melee game with some of his damage fields and transforming into a character who accomplishes pressure and zoning in a very unique way gradually. It's very cool stuff.

You've got plenty of awesome moves too; one of my favorites is the Up Smash, and how you can turn it from a scattergun of rocks uncharged to a flaming KO meteor with full charge. In case it isn't obvious, I really dig this moveset.

Of course, I do have some complaints, the primary being the fillerish throws (but getting throws that stay interesting and relevant is a challenge everyone constantly struggles with), and the Darkness form Side Special and Neutral Special. The Side Special is utterly broken, and the Neutral Special feels like a very awkward capstone move for what should be the final descent into darkness and madness. I'd sooner expect an insane dragon shaman to become a dragon himself, than to turn his enemy into a dragon to enable different combos.

Still, an excellent job, and I eagerly look forward to whatever you have next in store.
 

KingK.Rool

Smash Lord
Joined
Nov 26, 2005
Messages
1,810
Yeah, I seem to have dropped the ball somewhere along the way. Believe me, I did read Sanaki and write a comment, but I think I remember closing my tab and reopening and assuming that the comment was still there. It got lost in the shuffle, so to speak.

Let me remedy that:

SANAKI - gcubedude​


To put it succinctly, this set follows up on your promise from Micaiah, although I think you got a bit carried away with trying to give her everything you could think of. It is awesome that a player gets to choose what element(s) to specialize in and I'd be lying if I said I hadn't considered doing something much like that at some point. I'm sure the set was a blast to write and that enthusiasm comes across to the reader, for sure.

The main problem is how ultimately redundant it is having so many options. In any given Brawl or any given match-up, you'd probably only see one or two getting used, depending on the player. It means that Sanaki is a fun character to envisage in the game but not so much in a Brawl; she's like several characters in one, and you can play her any number of ways, but any one of those ways is not especially unique or flashy. She's a standard-setting magic character, but I think you've got the potential for even greater innovation.


And also:

GANONDORF DRAGMIRE - tirkaro​

I'm so glad to see a tirkaro set, I don't even care that you stretched the page! Anyway, geto proceeded to stretch it even more with that giant Aianto picture, so complaining would hardly do any good anyway. :awesome:

There's still something really compelling about your writing style that I can't pinpoint. Your humorous sets are impeccable and your serious entries - Cirno comes to mind - just have a strange quality that makes them incredibly likable. Maybe it's just your winking, knowing tone.

Ganondorf is a warm-up set, like you said, and it certainly does have a retro fighter appeal; it feels very much like a feasible decloned Ganondorf with a couple of great ideas. The USpecial is compelling and I generally like the way this Ganondorf likes attacks with long durations or with multiple heavy hits - it conveys a certain of sadism, with him preferring to spend as much time as possible near the opponent, breaking down their moral as he cruelly punishes them. I kind of wish you had kept his random flipkick, though - that was always one of his best attacks.
 

MasterWarlord

Smash Champion
Joined
Aug 24, 2008
Messages
2,911
Christmas Dedede

I'm not quite sure why this is a boss set, since there isn't really a huge justification for why Dedede's all spruced up for Christmas, but that's a minor complaint. Christmas Dedede does have a lot of stuff going on though, and plenty of moves, modes, and minions to fight with. It's a bit overwhelming in all honesty.

I do think that a boss set would do better with fewer issues to juggle at once, especially since boss movesets don't have the luxury of a human player to make some of the more advanced decisions that Make Your Move movesets require.

I do like how you tried to create a focus on forcing the player to make decisions on how to handle various catch-22s in Boss Dedede's moveset, which is very nice. I really think that making boss movesets can be a good experiment for making our own movesets, as we have to look at move interactions and creativity from the perspective of how an opponent would deal with them, instead of how the player would.
A boss not having the AI about how to use his attacks properly is a valid concern, but I was going out of my way to make Dedede react differently if the foe was in his face - the most blatant example is the shockwave move. Essentially, all of his moves work in any situation, and half of the attacks aren't directly done by Dedede anyway and thus enables a lot more interaction with multiple attacks going on at once. I've also always been of the opinion that a boss with a low quantity of attacks is pathetically predictable, and instantly disapprove of any boss that has has less than 8.

Sarkhan Vol

LegendofLink, you continue to improve by leaps and bounds. Sarkhan is practically devoid of filler inputs, with only a few throws that disappoint, but you still keep true to having simple ideas in each individual move. The fact that you're not only able to do this though, but slowly transform each move over time and keep his playstyle dynamic shows that you have a very solid understanding of how everything fits together and exactly what you want to do with each individual move.

The playstyle he has at first is surprisingly strong. As Junahu-ish of it may be to say this, I love how aggressive you made a stage-controlling character; he's forcing the enemy back with pillars of fire and zoning the opponent to the edge and offstage with a very proactive set of tools to use against the enemy. That's flavorful and very evocative of his character as you portrayed him.

He stays aggressive as he switches, hybridizing a strong melee game with some of his damage fields and transforming into a character who accomplishes pressure and zoning in a very unique way gradually. It's very cool stuff.

You've got plenty of awesome moves too; one of my favorites is the Up Smash, and how you can turn it from a scattergun of rocks uncharged to a flaming KO meteor with full charge. In case it isn't obvious, I really dig this moveset.

Of course, I do have some complaints, the primary being the fillerish throws (but getting throws that stay interesting and relevant is a challenge everyone constantly struggles with), and the Darkness form Side Special and Neutral Special. The Side Special is utterly broken, and the Neutral Special feels like a very awkward capstone move for what should be the final descent into darkness and madness. I'd sooner expect an insane dragon shaman to become a dragon himself, than to turn his enemy into a dragon to enable different combos.

Still, an excellent job, and I eagerly look forward to whatever you have next in store.
No mention of the rush to use traps from earlier forms before they expire, Meanie? That's what really made the set, and you seem to be praising the more generic offensive parts above all, which quite saddens me.

Also, LoL, sometihng I forgot to put in the original comment - while I quite liked the self contained continuity with pushing foe's shields back and how it played into his playstyle, I wish there was something to do it more consistently - perhaps giving Sarkhan a otherwise great move that's easily countered by shielding?
 

LegendofLink

Smash Apprentice
Joined
Feb 17, 2008
Messages
164
Location
Pennsylvania
Sarkhan Vol

LegendofLink, you continue to improve by leaps and bounds. Sarkhan is practically devoid of filler inputs, with only a few throws that disappoint, but you still keep true to having simple ideas in each individual move. The fact that you're not only able to do this though, but slowly transform each move over time and keep his playstyle dynamic shows that you have a very solid understanding of how everything fits together and exactly what you want to do with each individual move.

The playstyle he has at first is surprisingly strong. As Junahu-ish of it may be to say this, I love how aggressive you made a stage-controlling character; he's forcing the enemy back with pillars of fire and zoning the opponent to the edge and offstage with a very proactive set of tools to use against the enemy. That's flavorful and very evocative of his character as you portrayed him.

He stays aggressive as he switches, hybridizing a strong melee game with some of his damage fields and transforming into a character who accomplishes pressure and zoning in a very unique way gradually. It's very cool stuff.

You've got plenty of awesome moves too; one of my favorites is the Up Smash, and how you can turn it from a scattergun of rocks uncharged to a flaming KO meteor with full charge. In case it isn't obvious, I really dig this moveset.

Of course, I do have some complaints, the primary being the fillerish throws (but getting throws that stay interesting and relevant is a challenge everyone constantly struggles with), and the Darkness form Side Special and Neutral Special. The Side Special is utterly broken, and the Neutral Special feels like a very awkward capstone move for what should be the final descent into darkness and madness. I'd sooner expect an insane dragon shaman to become a dragon himself, than to turn his enemy into a dragon to enable different combos.

Still, an excellent job, and I eagerly look forward to whatever you have next in store.
Thanks for the compliments! On the subject of the Dragon transformation move, that was actually ripped straight from Sarkhan's own card. Its the second ability on here:


The side special wasn't broken in my mind when I made it, because it give the opponent a chance to mash out for only 5 seconds of control loss, and you are certain to be punished if the opponent shields or dodges. Perhaps I should have simply made it last 5 seconds so that nobody would have seen the 10 and immediately hate it...
 

UserShadow7989

Smash Journeyman
Joined
Aug 13, 2007
Messages
315
5 seconds is still quite a long time in a fighting game, where split second decisions are paramount. Of course, I've never been one to pick at balance. I'd be more thorough on this topic, but I've got 20 pages to go through now. @_@
 

MarthTrinity

Smash Lord
Joined
Aug 9, 2007
Messages
1,954
Location
The Cosmos Beneath Rosalina's Skirt
Howdy hoes! I have an important announcement! Due to Christmas being this week there will -NOT- be a Sunday Recap for this week! Rest assured however that all the sets posted this week will be included in next week's Recap!

Also, the submission period for MYmini #2 ends when Christmas ends (Pacific time) and voting will be this Sunday! Our third MYmini will be announced in thread this Sunday so that you can start thinking about your entries! I apologize for this delay of the Recap but...well...you'll see part of the reason in just a few moments...
 

wrkngclsshr

Smash Rookie
Joined
Apr 15, 2010
Messages
17
Location
Bursting Out Into Song
Third time's a charm?

Hee-Ho!
Who are you?​
Guess what?​
Hee-hee!​
I'm going to kill you!​

Jack Frost joins the Brawl!


Jack Frost is a demon snowman, the poster boy for Atlus, and a prominent demon in the Megami Tensei series, being in most of them. Jack actually is normally a low-level demon that can learn low-to-mid-level spells, despite being so well-known and liked.

Jack has a very mischievous personality, playing tricks on many (normally with his brother Pyro Jack). Jack shows that in Brawl with his annoying little playstyle you'll all get to know...


Aerial Movement: 7
Traction: 3
Jumps: 7
Recovery: 6
Movement: 7
Falling Speed: 4
Weight: 4
Size: 3


Jack Frost is a prankster. He loves to run around the stage and jump arond, spreading his "joy!" He is quite small though, so he's light, falls relatively slowly, and is only slightly smaller than Mario. His recovery is only relatively average, however. Jack Frost really shouldn't be above an open area at any times, though. Also, Jack Frost is not affected by slippery platforms like ice.

Oh, yeah, his "joy" is snowflakes! Whenever Jack Frost jumps or starts to dash, he leaves a snowflake in his place! They are about the size of a Smoke Ball. If Jack Frost leaves them in the air, they descend slowly. The snowflakes actually have a lot more to do with Frost other than looking pretty. They contain the following effects:

1. There is NO limit on how many there can be onstage.
2. Lasts on stage for 20 seconds
3. If left in the air, they slowly descend downwards at the rate of Jigglypuff's fall
4. When a character touches a snowflake...
- Jack Frost (in mid-air): Jack gains ANOTHER jump! (Yes, he COULD stall with this, but is it really that hard to hit Jack Frost away? His moves aren't THAT quick for self-defense if Jack Frost decided to stall. Plus, it still falls, albeit very slowly)
- Jack Frost (on the ground): Nothing. The snowflake stays there, unmoved.
- Any other character: The snowflake disappears and inflicts the character with 2% damage
- Any other character's DISJOINTED hitbox: The snowflake disappears and nothing happens (e.g. Marth could slash a snowflake and be unharmed)

5. The snowflake's color corresponds to the Jack Frost (if there are more than two playing). Original Jack Frost is white, Blue Alt. Costume is blue, etc. The snowflakes only work with the Jack Frost of the corresponding color. If there is only one Jack Frost, the snowflake will always be white.

Sure, 1% doesn't seem like much, but it adds up, and the time it takes for Jack Frost to jump and dash is not a lot. Some attacks might even gain a few effects (or rely on) depending on the snowflake count. It really is joyful (for Jack Frost, at least) to play and spread his winter happiness :3


Standard Special - Snowball Fight!

He IS a snowman! Here, Jack rears his arm back, and then pitches a snowball that appears the size of two Smash Balls side-by-side. Jack can fire snowballs at the rate of Falco's laser (while he is on the ground). Each snowball goes in an arc like a Yellow Pikmin, but travels as far and as fast as Wolf's laser, and hits for 4% each. This really isn't too impressive, but if the snowball connects a hit with a foe OR their shield, it releases a snowflake that is popped two Ganondorf upwards. If the snowball misses and hits the ground, though, it will stay as an item (still does the same amount of damage, and 7% Smash-Thrown), and after one second, it will melt and leave a snowflake! Magical!

Side Special - Frostbite

Jack points upwards at a 90 degree angle, and a battlefield platform ahead and two Ganondorfs high, an icicle appears! The icicle will then quickly spin around clockwise, hitting anyone for 3% damage and downwards knockback, before shooting down at the rate of Fox's fast fall. The shard will continue to fall until shattering once it hits the ground or a foe. Foes hit will take 10% damage and medium upwards knockback.

Once the shard hits a foe or the ground, it will shatter (it won't do any damage or knockback) and release five snowflakes in random cardinal directions (or just up if it hits the ground). The start-up of this attack is a bit too long to be spammed, so edgeguarding and possibly blocking approches are Frostbites main uses.

Down Special - Frost Build-Up

Once initiated, Jack will laugh "Hee-ho!" and begin to glow blue for the next five seconds. While in this state, Jack will move 1.5x as fast aerially, gain slightly more invincible frames when dodging, stop producing snowflakes when beignning to dash, and absorb any snowflakes he passes by. After the five seconds (or when an attack is released), the glow will fade, and the next Smash, Snowball, or Frostbite used will gain 2% damage for every Snowflake Jack absorbed. However, if Jack was to be damaged while the blue glow was still present, he takes 1.5x damage and the glow fades away. Any snowflakes absorbed will not return. Of course, other than a boost in damage, it's possible to just be a boost in movement.

Up Special - Frostblast

Here, Jack quickly snaps his fingers, and he will launch himself headfirst, spinning, in a fashion similar to Pikachu's Side Special, in the direction inputted (the player inputs the direction when Jack snaps, and Jack automatically goes upward with no input). Jack will travel a battlefield platform's length, and leave behind one snowflake every Kirby's length. After this, Jack will enter helpless fall. Contact with Jack as he flies will inflict 7% damage, low downwards knockback, and release a snowflake upwards about Kirby's height.

If the direction inputted was down, Jack will fastfall downwards (like Yoshi's Down Special) and spin, and will continue to fall until he hits a surface. However, Jack falls at the rate of Fox's fast fall, making this a quick descent down to the ground. If Jack makes it to the ground, a snowflake will appear where he intitially used the move, as well as the one snowflake per Kirby size made during the descent. Contact with Jack while he falls will inflict 10% damage and medium knockback.


Jab - Blizzard Breath

In the games, this is probably one of Jack's signature animations. Here, Jack leans his head forward, releasing a large breath of icy winds, with a hitbox similar to the Ice Climbers' Side Special, but slightly smaller. If an opponent is caught in the breath from the start, they'll take 6 hits that accumulate 13% damage. Jack can hold out the breath for five seconds until being forced to give out. Also, for every hit Jack gets from this attack, a snowflake will appear behind him from a height slightly higher than his head!

Dash Attack - Backflip

Out of his dash, Jack does a quick backflip two Kirby spaces backwards! The jump deals 5% and a set knockback of half a Battlefield Platform. When Jack jumps, he leaves behind a snowflake on the ground. Jack is also able to jump out of the backflip (it is considered his first jump though). Sure, this isn't very impressive, but if there are 20+ snowflakes on the field, as Jack travels backwards, the ground below him with freeze over! If Jack has the momentum in the game, this could easily secure it, being so quick.

Forward Tilt - Ice Punch

Jack rears back and throws a punch, his fist reaching a little less than Sonic's Forward Smash, but the animation is slightly longer. Jack's punch deals 10% damage and some nice knockback that kills at 120% (the range isn't spectacular, don't expect too much).

The best part of this move isn't the damage or the knockback, but the added effect after the punch: a wave the size of Marth that deals 7% and medium knockback! The wave travels a Bowser ahead usually, but if the ground below it is ice, then the wave will travel as far as it's icy! BUT WAIT! THERE'S MORE!: If the wave hits someone, it will poof away in a mini-explosion and release three snowflakes! This wave is treated as a projectile, and has the unfortunate effect of being reflected two Ganondorfs back when shielded, but with the distance potentially traveled, it shouldn't matter much.

Up Tilt - Snowglobe

This attack could quite possibly be one of the most simple in Jack's arsenal. Jack swipes his hand down, and at this time is which a bright white snowglobe (if you looked closely enough, a little Jack Frost figure is inside!) the size of a Smoke Ball appearing in his hand, and then throws it up freely, reaching a Ganondorf above Jack before disappearing. The snowglobe deals 6% damage and a set upward knockback of a Ganondorf and a half sizes upwards. The attack is very quick and could serve as a set up for aerials! When the snowflake disappears at the peak of the toss, a snowflake appears!

Down Tilt - Permafrost

While crouching, Jack will face downward and place both of his hands on the ground. Jack will then begin to glow a bit. In .20 seconds, Jack will "explode" in an icy blast (possibly freezing) with a radius similar to Meta Knight's jab, dealing 9% damage and medium-high knockback (killing at 150%), and also dropping three snowflakes around Jack. Along with that, a Bowser-sized area of ground around Jack will be frozen into slippery ice!

Also note that from now on, all frozen areas will have the same effects in that they each last for ten seconds, unless a snowflake touches them, in which then they'll last forever until all snowflakes are removed from that area. Frozen areas that overlap will also mix together and be counted as one.


Forward Smash - Bufu

Bufu is the basic ice spell in the Megami Tensei universe, it's only fitting that the snowman of a mascot has it! Jack even puts his own little spin on it. Jack starts this spell by putting both of his hands forward and "charging" up a bit (you can see his eyes squint and his body glow blue). After half a second, an icy explosion the size of Jack himself will set off in front of him! The explosion can freeze foes at high percents and also deals 14% damage with high knockback that kills at 100%. Jack is now free to move, but there's more! After the explosion, it will dissipate to reveal a giant snowflake slightly smaller than Jack! This snowflake is made on the ground and has a stamina of 30%. It works like a regular snowflake in that it keeps frozen surfaces frozen, but is stuck to the ground and foes do not get hurt by passing through it. Also, If the finishing blow to the large snowflake is dealt by Jack, the snowflake will break down into five regular snowflakes! If not, the snowflake will break down into just three.

Up Smash - Snowflake Spray

When inputted, a random snowflake somewhere in the stage will poof and appear in Jack's hand, which he'll throw up a Ganondorf high. The snowflake will be much bigger (about the size of Kirby), glow white, and have a tail like a comet. This has as much lag as a Snake's Up Smash, but if Jack doesn't hit anything, he'll take a little bit longer, as Jack will catch the snowflake again and drop it on the ground. If the snowflake does hit something, it will deal 5% damage and flinching knockback, and Jack will immediately look up, and commence his Blizzard Breath! Jack's breath here won't have the same effects, as the breath is much thinner in width now, going much higher, with a similar shape to Ivysaur's Bullet Seed, but with the stream widening on top a bit. Jack won't be freezing foes either, instead barraging with them 10 snowflakes! All snowflakes aren't guaranteed to hit, normally just around 7 on average sized foes.

Charging the attack will increase the amount of snowflakes sprayed, the number being 20 fully charged. The number of snowflakes already on the stage will increase the damage dealt by the initial snowflake thrown (not the secondary snowflakes sprayed), with 15+ snowflakes bringing it to 12%.

If any of the snowflakes miss, they'll fall and be treated like regular snowflakes. A Jack Frost player could take advantage of this by dashing the Up Smash, so if the initial snowflake hits, Jack will spray the snowflakes a bit off of the foe hit due to sliding a bit, not at them.

Down Smash - Slippery Slope

Jack will face the screen and perform that stupid "ta-da!" pose! Here, a very strong visible (white waves will be visible, not dealing damage) wind push will happen, hastily sending enemies up to a Battlefield Platform away, which also freeze a Battlefield Platform's area of ground on both sides of Frost! There is some ending lag (well-timed aerials can hit Jack then), but almost no noticeable beginning lag.

Charging this move will increase the size of the ground frozen, almost doubling at full charge! Also, while Jack performs this move, snowflakes a Ganondorf above him will fall down much faster!


Neutral Aerial - Cold Wave

Here, Jack expresses his winter spirit, laughs, and performs a mid-air snow angel (he abruptly waves three times)! As he waves, a little circle surrounds Jack, which deals 5% damage and a set knockback of a Bowser away. Not impressive, but this time if Jack passes through a snowflake while making the snow angel, he won't get the extra jump, but instead the snowflake will turn into a Frost Bomb (see Down Aerial)!

Forward Aerial - iCan'tThinkofaCoolNameforThisSoI'llJustCallThisIceBlast


Jack does that cool little Kamehameha pose and then releases his hands forward, sending a wave the size of PK Freeze forward! This has great range, power (able to kill at 110%), damage (13%) and even pushes back Jack. Unfortunately, there is notable lag on all ends of the attack. Start-up takes about twice as much time as DeDeDe takes for his own Forward Aerial. This gives foes a good amount of time to shield, dodge, or interrupt, but Frost's playful style could help land a hit, or just scare enemies.

Back Aerial - Icicle Swipe

Jack quickly turns around and rears his hands back again, as if he was holding something. Then, he slams forward, revealing a staff, with a range a bit smaller than Marth's F-Air. The hit deals 12% damage and medium knockback. The start-up does not take nearly as long as Ice Blast, being relatively quick. The more snowflakes there are, though, the bigger the range of the swipe. With 10+ Snowflakes on the field, the attack goes about Kirby's size farther! This comes at the price of a little more start-up lag, but all-in-all, it's a reliable aerial with the great range and damage, even if it is a B-Air.

Up Aerial - Ice Beam

TWO Pokemon attacks? Jack Frost isn't a Pokemon, stupid! Jack looks up and shouts" Hee-Ho!" as he lets out a fast bluish-white beam from his eyes that's only the size of Ganondorf. If there are snowflakes on the field, however (which I really hope there are), the beam will grow even longer, one Ganondorf height for every three snowflakes. Getting hit by this beam deals 9% damage (+2% for every three snowflakes as well). The beam does not disappear if it hits a character, and the move has some notable ending lag.

If the beam hits a snowflake, the snowflake will turn into a Frost Bomb! (see Down Aerial).

Down Aerial - Frost Bomb

Jack goes all Snake on us and forms a little crystal in his hand, dropping it (as wide as a Grenade, but three times as tall), with it falling as fast as Stone Kirby. This move actually makes a random snowflake somewhere in the stage go poof, but if the Frost Bomb hits a foe, it'll deal 7% damage, low knockback, and a snowflake will pop out a head above the hit. If it hits the ground, it will shatter and freeze the surface! The area frozen is about as wide as Bowser.


Grab - Suffocate

Jack throws his palm and takes a step forward, making four random snowflakes around the stage poof, causing the four to appear in a cross three Kirby spaces ahead of Jack. If a foe is touched by any of the snowflakes, then the snowflakes will surround the foe, set up for pummel and throws. If Jack misses, the snowflakes will simply fall. Keep in mind, this IS a lengthy throw and has a notable bit of start-up. And yes, Jack can hold foes above the edge.

Pummel - Minisplosion

Jack snaps his fingers and causes one snowflake to explode in blue, dealing 5% damage. Obviously, he can only do this four times before letting go of the foe. He can do this quite quickly though, making up to two explode at 0%! The final explosion will knock a held foe upwards with medium knockback, if used.

Forward Throw - Walls

Jack raises both of his hands, causing two walls of ice to appear around the foe like a sideways sandwich. Jack then claps, causing the walls to smash the foe! The smash deals 10% + 1% damage for every snowflake holding the foe. The foe doesn't take knockback, but just falls down on the ground, crippled from the smash.

Back Throw - Sonic Punch

Jack forces the opponent over in front of him, and punches heavily forward! The damage and knockback of this move depends on the number of snowflakes holding the foe. At four, it deals 15% and high knockback that kills at 100%! From then on, it decreases 3% in damage each, and the kill percentage is increased by 10%.

Up Throw - Freeze!

This throw can only be used if all four snowflakes are present. Al four explode in a white smoke and freeze the foe! This move deals 10% damage and moderate upwards knockback. Sure, you don't get as much damage done, but there are plenty of other opportunities available with a frozen foe (at least for Jack).

Down Throw - Multiply

Here, Jack rears his arm back, causing the snowflakes available to glow multiply into three (the extras made are launched upwards one Ganondorf height and are treated as regular snowflakes), then the foe is lightly released. The remaining snowflakes used to grab the foe are then treated as regular snowflakes and float down as usual.


Winter Wonderland

Alright, who's the idiot that let this happen? Once activated, the camera zooms in on Jack, then while zoomed in for that split moment, ALL platforms are frozen and every snowflake is multiplied by two! Jack also gets 1.5x speed boost to all of his attacks and actions! This boost lasts for a whole 10 seconds, but the snowflakes and frozen platforms are treated as usual, ignoring the 10 second duration of the time!


Jack may as well be the most annoying character ever. He's got a slew of projectiles and is able to freeze the ground, hindering movement. Those snowflakes too, which build up damage over time and accompany a good amount of his attacks!

Starting off, the best thing to do with Jack is probably to pelt your foe(s) with as many projectiles as possible to build up snowflake count and damage. This part of the match of strictly keepaway, and projectile spamming (especially Snowballs) may be a need throughout the match. Approachers should be stopped by Frostbite or well-timed attacks. Grabbing MAY work if you have precision.

Is Jack's playstyle really that complicated? Not really. After getting a steady supply of snowflakes out on the field, which probably dealt quite a bit of damage to your foe(s), the next best focus is to freeze over most of the stage as you can. With the stage frozen, trouble will come to those on the ground, forcing them into the air, where snowflakes are. More importantly, where Jack can hit them with Aerials, which can kill-damage-rack, bar Frost Bomb.

What really hurts Jack the most is... himself. Jack needs a constant upper-hand so he can keep the momentum. Should anyone get into Jack's comfort zone, a beating will probably ensue, and since Jack is so light, he's very easy to KO. Somehow destroying all of the frozen areas will harm Jack greatly.

All-in-all, Jack pressures foes, despite being a "glass cannon." Jack may have a bit of trouble killing with so few "kill" moves, but his quick damage-racking skills can fix that. Against Jack, if foes don't keep the pressure on him, then the pressure will go to the platforms, in the air, and... you get it.


...vs. Pyro Jack
40:60
Disadvantage


Well, it IS fire and ice... Also, Pyro Jack floats. Jack Frost freezes the ground. There's a problem there. What keeps Jack from NOT totally dying in the match-up is the snowflakes produced, good range, and the fact that Pyro Jack and Jack Frost are basically matched in the air. Pyro Jack does have a slightly easier time than others to get into Jack Frost's comfort zone, leaving Jack Frost at a solid 40:60 Disadvantange.

...vs. Jack the Ripper
60:40
Advantage


Jack Frost can easily hinder Jack the Ripper's movement with the constant barrage of projectiles and freezing the ground. The snowflakes floating around also provide a certain paranoia with opponents since they can constantly deal damage. Jack the Ripper completely destroys Jack Frost once a few hits are in, since Jack the Ripper can easily take advantage of little whiffs and misses here and there. While Jack Frost can easily take the advantage and keep the momentum, a skilled Jack the Ripper can go against odds and pressure Jack Frost anyways with that constant bloodlust and fury of hits that can be possibly deadly. Overall, a 60:40 Advantage, the match for Jack the Ripper is hard, but not impossible.
 
D

Deleted member

Guest
Click header for playlist


Originating in the Shin Megami Tensei series – which later broke off into the popular Persona series – Pyro Jack is derived from numerous myths about creatures from the beyond who have a pumpkin for a head [such as The Headless Horseman]. Specifically, the name comes from the term Jack O'Lantern – used to describe carved pumpkins on Halloween, with the candle usually inside the pumpkin appearing as an item to be carried by Pyro Jack, along with his hat and coat. As a franchise mascot, he is commonly depicted with one, two or no hands depending on the game he is in, but in the case of this moveset, he permanently uses one to carry his lantern.

Despite his looks, Pyro Jacks are actually a rather mischievous and childish creature, even going so far as to play tricks on enemies when combined with a Jack Frost in Persona 3 for special attacks. Generally speaking, a Pyro Jack will appear early on in a Shin Megami Tensei game – usually only a short while after the Jack Frost demon does. They are not particularly powerful – in Persona 4, they only have access to medium-level fire spells and contrast to Jack Frost in their weakness to ice spells.


Size: 2
Weight: 2
Ground Speed: 5
Air Speed: 10
Fall Speed: 1

Oh my, isn't that a wimpy character! Pyro Jack is one of the smallest characters in the brawl, his main pumpkin head being smaller than even Jigglypuff – only being bigger because of his “body” within his coat, which is almost as big and part of his hurtbox, while his hat is not. On the ground, Pyro Jack can hover back and forth a little faster than Mario – pretty average, but he is constantly half of Kirby's height off of the ground, preventing him from being hit by a lot of ground-based moves. In the air, however, he is extremely fast and has one of the lowest fall speeds in the game, being extremely floaty. Considering his weight is also so low, he greatly benefits from this attribute.


Neutral Special – Pyre Starter

Pyro Jack cackles quietly to himself as he starts to sway the lantern in his hand from side to side, causing pyres to fall from it and below him, taking a moment of time to start up but very little to cease. This move can be held while going into a walk or dash too, though the fiery embers will only fall once every Kirby in distance, meaning you can't effectively fill the entire stage. So, what do pyres do? They cause fires, of course – a pillar of flames the size of a yellow Pikmin will erupt, causing 1% damage per second and knockback similar to that of Ness' PK Fire, stunning them in place. By itself, this pillar will only last for three seconds, however, burning out after that. If used while dashing, Pyro Jack will hold the lantern out in front of himself, it acting as a hitbox that causes 8% damage on collision, as well as releasing three pillars of flame just around where the impact occurred. If used in the air, the pyres will sizzle out after falling one Ganondorf downward.

In terms of size, the pyre is basically a small collection of very hot pieces of paper, slightly smaller than a sticker sheet.

Down Special – Oil Leak

Tipping his lantern on its side, Pyro Jack allows a stream of oil to drip from it, falling at the speed of fast-falling Fox until it hits a surface. It it does, it will spread out much like you would imagine – when used on the ground, it accumulates up to a maximum height of just below hovering height of Pyro Jack after around three seconds – this where it was poured first, but disperses across the surface, also pouring off the side of a stage. If used in the air, the height of the oil can approach higher levels, but pouring it all in one place may not be the wisest choice. This causes reduced traction of 20% for the opponent if they walk on it, and 40% if dashed on. If oil is dropped directly onto them, be it directly from this input or off of a ledge, they will experience reduced jumping to 50% of their normal height. You can also pour oil onto one platform, only for it to then drop onto a lower one, where it will distribute similarly – with the initial area highest with the most oil.

If fire is allowed to touch the oil, it will react by igniting all connecting oil at the speed of Pikachu's descending thunderbolt – including that which is currently being leaked down by higher platforms, igniting them as well. By ignite, that is to say pillars of flames are created entirely similar to ones used by your neutral special on flat oil lying on the ground, with it otherwise simply burning up, but still igniting other areas of oil if leaking down in the air. The fire will last for as long as there is oil on the surface, slowly burning down and through the collected oil below. With the highest amount possible when used on ground – where the oil reaches just below Pyro Jack – the pillars will last for around ten seconds. If oil is poured onto fire, however, it will simply burn up immediately, so you must leak on the oil first. Running or jumping around in the oil will cause small amounts of it to raise off the ground, higher in the air depending on the opponent's mass.

Side Special – Prankster's Grenade

Revealing a hand hidden within his coat, Pyro Jack extracts a perfectly round ball with the appearance of a pumpkin, quickly using his lantern to light a fuse connected to the top of it. After a small amount of start-up lag, Jack tosses the ball underhand, where it will roll for one-and-a-half battlefield platforms on the ground, or fall at the speed of Snake's own grenades in the air in a slight arc downward. At this point, the grenade “explodes,” causing a collection of bright crackling explosions similar to those you'd see with a firecracker and damage of 6-12% for those caught within the radius of two Bowsers.

If thrown on the ground where there is oil, the ball will ignite it every time it passes two Bowsers in distance, as the top with the lit fuse rolls over the floor, creating pillars of flame as seen in the neutral special. Similarly, the end explosion will cause fires to erupt wherever oil is touched – it will also cause slight knockback to the oil, potentially shifting a large amount on a platform down to the main stage.

Up Special – Floating Demon

Turning and leaning forward toward the screen and players, the eyes of Pyro Jack start to glow an ominous blue, also letting out a slight “burst” of blue energy signifying the beginning of the move. For the next five seconds, Pyro Jack will not fall at all, but will be able to move left and right in the air at his already superb air speed. The move can only be used once per trip to the air, meaning you can't abuse it to stay permanently airborne.

We've determined you can't go down, but what about going up? Due to the energy released by burning oil, as long as there are fires burning on top of oil beneath Pyro Jack during this move, he will ascend at a pace of a Ganondorf per second, potentially allowing him to reach near the top of the blast zone. At this point, he can release the move and start pouring oil, releasing pyres from his lantern and tossing down grenades with the opponent unable to do very much to him at all.


Neutral Aerial – Agni's Barrier

Pyro Jack's eyes glow a fierce red for a moment – he brings a hand out of his robe, then turns to face more toward the screen as both hands seem to tightly grip his lantern, as the candle's flame grows more and more violent. After this brief start-up, a burst of red energy bursts from the lantern; a shockwave emits around Jack, damaging opponents for 8%, with set knockback that simply gives him some breathing space, hitting foes within a radius of around half a fully-exploded smart bomb.

Forward Aerial – Dancing Pixies

Revealing a small black cauldron from within his coat, it seems to be holding some sort of red dust inside of it. A prior concealed hand grabs a handful of the substance, throwing it into the air in front of Pyro Jack, with some start-up lag. The dust becomes a cloud with the width of Bowser and length of half a Ganondorf, descending at Jigglypuff's fall speed. It is barely visible while airborne, and actually has no effect on the enemy.

If at any point the dust meets with fire, the entire cloud will erupt into a gaseous explosion that will cause any oil around it to be pushed severely in the opposite direction. Any opponent who comes into contact with it will also be dealt damage of 8% and light knockback. The gas cloud can actually hit a solid platform given enough time, where it will flatten across the bottom of it – also potentially being disguised by oil on top of it. At this point, when ignited, the gas will cause high upward knockback capable of knocking out an opponent around the 90-110% mark who is standing in close proximity to it, as well as severely pushing away all oil around it.

Back Aerial – Change of Spirit

Pyro Jack's eyes glow blue momentarily – he glances at his lantern as it also becomes blue in colour, cackling wildly to himself as he does so. Until you use the input again, this change is constant. What it signifies is a change in the pyres you drop – now, rather than burning out in the air, they will fall until they reach the bottom blast zone, at the speed of Fox's fast fall. When these blue embers hit oil, they will not ignite it – instead, they will sink to the bottom of it. What they will react with is the dust cloud you throw out in your forward aerial, meaning you can blow it up once it also sinks to the bottom of a mound of oil, without having to wait for the rest of it to light up. If only in contact with the ground, the blue pyre will fizzle out after five seconds.

Up Aerial – Malignant Essence

Turning toward the screen, Pyro Jack bows his head somewhat, clasping his as his eyes glow a devilish red. This is a long start-up for your aerials – taking almost a whole two seconds. After this, a small, red, rocket-shaped surge of energy shoots from the lantern's candle, falling directly below Pyro Jack at double the rate of Fox's fast fall. If hit by this rocket, an opponent will suffer 3% damage and slight downward knockback. However, every Kirby that the rocket passes in distance, it will split into two: then double in ratio again and again – at first, this attack is only the width of half a Pikmin, but with enough height on it, you can gather over a dozen of them together, making it easy to be struck by more than one at a pass, as they reach represent a hitbox. This can gimp opponents who are far out off of the side of the stage, or simply press them up against the stage where you want them. Any collisions, except with the foe, will cause the projectile to fizzle out.

Down Aerial – Frenzy Jinx

Pyro Jack chuckles for a moment, bringing out the hand within his coat and conjuring an oddly vibrant flame on top of it. After an intense build-up with the fire beginning to grow in his his palm, Pyro Jack clenches his fist. As a result of this, a strange sort of mist appears – square in shape, a little bigger than Jack – which consists of red-blue-ish coloured spirits, laughing hysterically. This mist falls at just faster than Jack's speed, homing in on opponents within three Bowsers at the speed of Mari's walks.

If it touches the a surface it will evaporate, but cannot be destroyed by disjointed hitboxes such as Marth's sword. If it successfully connects with an opponent, the hysterical laughter seeming to be heard reaches a high, then stops, as the mist seems to filter into the opponent's body. For the next five seconds, they will automatically walk toward you and jump if directly under you, them only being able to negate this effect if they dash in the opposite direction. Walking in your direction will cause them to dash – while dashing will simply make them trip.


Neutral A – Force of Evil

Pyro Jack pulls his hand out of his coat, it briefly emanating a strange red glow, before releasing up to three miniature shockwaves one after another – depending on the amount of times the input is pressed – which each deal 3% each, with minimum knockback enough to keep the enemy away. The move has a double purpose, in that it can actually shift around oil on the floor – pushing it away from either side of Jack.

Dash Attack – Trail Burner

Chuckling creepily to himself as he does so, you lean forward in mid-air, boosting your dashing speed to one-and-a-half times usual. Pyro Jack's body becomes a hitbox, dealing 6% and light knockback capable of knocking out at a paltry 130-150%. After you've passed a battlefield platform in distance, you will stop with some minor end lag – still, it's a good way to get around when Pyro Jack is so slow otherwise.

Forward Tilt – Mocking Apparition

Almost rhythmically, Pyro Jack starts to sway his lantern in front of him, back and forth to a speed and angle that both seem impossible and contradictory to his neutral special. After this minor interlude of start-up lag, Jack's pumpkin face glows an ominous grey, as a semi-transparent skull that reaches down to the ground and approaches the top of Pyro Jack's hovering figure is summoned directly in front of him, facing sideways so that it can bites down on all those caught within this Bowser's width of space. If no one is there, the apparition fizzles out into crackling grey energy similar to that you'd see with a firecracker explosion – if an opponent is bitten by it, they suffer 9% damage and hitstun for half-a-second. Similarly, if within another Bowser distance of the face when it bites down, they will be frozen in place with fear – suffering through the hitstun, but without the damage. Shields and dodges avoiding both of these instances.

Down Tilt – A Burning Soul

Jack brings out a hand from his coat, putting them inside his lantern and pinching out the light on the candle. He then swings the candle a Kirby in front of himself, hitting opponents for 5% damage and very light knockback. If he hits a pillar of flame – the size creates by his pyre, half a Pikmin's width – the candle's flame will return to normal, and instead deal 7% damage and slightly higher knockback if you hit your foe at the same time. You can, in fact, hit up to seven pillars of flame like this – making your candle look like a glowing red orb – and increasing the damage of the attack to 19%, with knockback that knocks out around 80-100%. If you're caught on the ground but still have lots of oil, this is the move to end the current stock with; if not contacting a pillar of flame, your lantern will simply regain its regular state of fire with no extra end lag.

Up Tilt – Agilao

Showing he can actually use magic spells beyond just manipulating his lantern, Pyro Jack conjures up a ball of fire in a hand summoned from within his coat. This orb then homes in quickly on the nearest opponent, travelling at the speed of Sonic's dash. It causes 7% damage and light set knockback, but the really important attributes of this move are its lag and area of effect. On the first note, this lag has very little start-up or ending lag, meaning you can effectively spam it if your opponent is camping on the opposite side of the stage. On the second note, this move causes all oil within a Jigglypuff of the explosion to ignite in pillars of flame – if you want your opponent to take the Agilao and themselves to a part of the stage yet uncontaminated, this is the move to use.


Forward Smash – Flaming Cartwheel

Pyro Jack brings his lantern into a circular motion in front of him, doing so for between one and two seconds. After which, a cartwheel the size of a party ball – a ring, with a hollow innards – appears, rolling away from Jack. As it rolls, it hits for constant damage of 2% per half a second and flinching knockback. It is a viable shield-breaker, considering it can roll between Mario walking and dashing speed, depending on the charge time during the start-up. After travelling a battlefield platform in distance, the flames fizzle out, ending the move.

That is, if there is no oil to exploit. It will continue to roll along as far as the substance is on the ground next to it. This move will not create flaming pillars like your neutral special will, however, instead it will simply burn through the oil as long as it is standing on it. With the flaming carthweel on top of it, oil will burn out one-and-a-half times as fast as it would normally. You can, however, keep the move going abnormally long; if the cartwheel reaches the end of the oil trail, it will go in the reverse direction if oil is available – staying ignited and still incredibly dangerous. With this in mind, you can set the wheel off, then position oil behind it. Throwing a flaming wheel into a line of flaming pillars will actually destroy them.

Down Smash – Smoke Breath

Stuffing his lantern inside his coat and seemingly into his pumpkin head – as the flame lights up his face – he proceeds to then laugh maniacally, causing plumes of smoke to puff from his mouth. This takes about one second, while you can charge it for up to a further second-and-a-half to continue “coughing” smoke. Characters caught within this fog will be dealt constant damage of 2% per second. No matter the charge, this will fill an area equivalent to two Bowsers in width and Ganondorf's height, though the amount of time it will linger can be four-seven seconds, which si dependant on how much you smoke you coughed up while “charging.” All substances thrown around by Pyro Jack are obfuscated – invisible, and this goes for the oil too. It will be obvious if you then short hop and throw down your destructive powder, but the real use of this move is when there's already potential danger in the air – particularly with your down aerial. As you'd expect, returning your lantern to its normal position from within your coat does result in some end lag.

Up Smash – Lighting the Evil Candles

Pyro Jack holds his lantern above his head – charging at this point for up to two seconds, signified by his pumpkin head flashing vibrantly red and orange – after of which, the lantern bursts and erupts into a mini-firestorm the size of Wario, dealing 12-16% damage and knockback that can send an opponent past the top blast zone 100-120%. If your massive flame comes into contact with the top of any pillars of flame created by your neutral special, this effect will pass onto the top of the pillars, dealing the same damage and knockback. These will then themselves light the tops of other pillars, and you can even light pillars in both directions, creating a true hell for a descending opponent.


Grab and Pummel – Fire Cap

Bringing a large pointed cap out of his coat as well as a hand, Pyro Jack attempts to crush the opponent underneath it for a grab. If the opponent is missed but there is a pillar of flame instead, the cap will fall to the bottom of it, also covering up any oil on the floor – creating a stopping point for any spreading of fire on the stage. After four seconds of appearing more and more burnt on the outside, the cap will collapse and disappear, letting out the fire it had otherwise covered. This also acts as a delay – you can cap a fire, then when it releases, it and the oil under it will burn for as long as they would have before they were capped. Also keep in mind that, combined with your flame wheel, you can extinguish a whole line of flame pillars, then throw down a cap to save your oil from all burning up.

An opponent with the cap on can be pummelled for 2% a hit – whereby Pyro Jack will tip his lantern so it is burning the upside down pot – with a possible three hits per two seconds. If you “out mash” your opponent, you can actually smash the pot by overheating it, causing a further 4% damage. Otherwise, the opponent pulls it off themselves.

Down Throw – Hot Iron Boots

Pyro Jack tips his lantern, putting it underneath the opponent – burning their bottom third and creating a noticeable red tint. This releases the opponent from the foe with slight knockback to prevent them from immediately attacking, causing constant damage of 3% per second for the next four seconds. However, for the next six seconds, as the red tint effect persists, the opponent will ignite any oil they stand on – though, as they sink to the bottom of the oil – they will also ignite any of the powder you've thrown out using your forward aerial.

Up Throw – Inferno to Paradiso

Hovering so that he is in front of the opponent dimensionally-speaking – adjacent to the screen – Pyro Jack tips his lantern so that oil pours all over the top-half of the opponent, then ascends as he tips pyre onto them, causing them to catch alight. After this, he will end up a Bowser above the opponent, with them being dealt 3% per second for three seconds. Due to them being doused in oil and then set alight, Jack is able to immediately use his up special to get high up in the air. The opponent can walk out of the way, of course, but this may present problems if Pyro Jack has surrounded them with oil, which will be ignited if he dashes around in it, as that causes it to jump up.

Side Throw – Demonic Waltz

This is a rather ineffectual throw; Pyro Jack simply grabs the opponent with a hand from within his coat, gripping them as he forces them to walk back or forward at their own walking speed – only being able to escape Jack's handle through the usual grab button mashing. At any point, Pyro Jack can finish off by using his down throw to possibly ignite some of the powder from his forward aerial, or pull them to the side of the stage so he can best position for his up throw and then up special.


Super Attack – Maragidyne

Just like in his up tilt, Pyro Jack brings his hand out, with a ball of fire hovering just above his hand. But instead of it simply flying off and homing in on the opponent, Pyro Jack's eyes glow a vicious red as he puts up a lantern below his other hand. Now, as Agilao home in on the opponent, more and more simply appear in the hand where it once was, allowing for constant homing projectiles, and rendering Jack invulnerable for the next fifteen seconds before this move ends. Spells shoot out at the rate of Fox's blaster, meaning you can effectively spam your opponent to death. Position yourself so that you're hitting your opponent off the stage!


Playing for Keeps – Overwhelm and Overtake

Playing as Pyro Jack, you'll want to find time to spread oil around the stage – this most easily done when you're high up in the air, but to do this, you're going to need a little bit of oil first. This is why it may be smartest to at first camp with moves like your side special, up tilt and forward tilt, keeping your opponent from getting close enough that they can punish you for pouring around your oil. Once you have a sufficient amount of oil, burn it up – get into the air as quickly as possible. Conversely, if you don't want to risk using oil at all, you can simply use your neutral special to create pillars, forcing your opponent to try and space them out, forcing either an approach or camping, which will always be to your favour.

Once you're up in the air, you have several options – you may, at this point, want to plant early seeds for your knocking out game by throwing out plenty of powder with your forward aerial, as well as blue pyres with your back aerial. First and foremost, though, set up the rest of your stock by pouring down plenty of oil, as this is your best opportunity, as it is expecting little of your opponent to be able to again return to a good spot in the air within the same stock. Of course, your down aerial is also always a good option in the air, as predictable as it is.

Once you're back on ground, this is when you first want to make really good use of your oil – you don't want to spend all of it, though. If your opponent still desires to camp, try to throw out a forward smash, while guarding the oil closest to you with your grab or fire cap. Moves like your side special enable you to also light up parts of the stage far away to prevent enemy campers. Of course, again to set up your knocking out, a move such as down smash, that hides your falling powder, is always essential.

If you're getting close to respectable percentages on your opponent, now is the time to go for the knock out. This can be easily achieved if you planted some powder earlier – simply try to go for the grab, which shouldn't be too hard if you're throwing out your up or forward smash to make shielding and jumping over your fires difficult, and especially your dash here really earns its spots in being able to let you space around. Once grabbed, you can then use your down throw to force them to kill themselves, or naturally set-up another round of camping in the air with your up throw.

Though you don't necessarily need to grab at this point, if you do fail to knock your opponent out, this is the perfect opportunity to take to the air again – throw out some powder to set up your knock out even earlier, while also now making use of your up aerial and down aerial. By this time, though, you will hopefully have spread so much oil around, it has created a hell for your opponent. Thus, using your up aerial and neutral aerial to keep them away from you will be the best option. If you do end up on the ground for some reason, your down tilt is perfect for such a fiery situation.


Jack Frost: 60:40 – Advantage

Going into this match-up, Pyro Jack starts with two big advantages – his hovering presents him from being hit by the stage effects of Jack Frost, plus he is faster than Jack Frost in the air, nerfing much of Jack Frost's air game otherwise. What will worry Pyro Jack is moves that Frost has which send a myraid of snowflakes into the air – this can lead to a difficult return to the stage and Frost can potentially ruin a good run of the camping air game Pyro has otherwise. However, even with that in mind, many of Frost's primary strategies are based on projectiles, which are unreliable against such a small target as Pyro anyway – adding in how agile he can actually be, it is a solid advantage for Pyro Jack.

Jack Ripper: 45:55 – Slight Disadvantage

In terms of setting up a viable defence, Ripper can easily get the jump on you before you can even allow for something like your up special camping - your enemy's own very strong approaching game far outranks yours. However, if you are capable of getting away in this match at all, Jack Ripper really doesn't have much of a defence. While he has the advantage off the side of the stage, you completely dominate him above the stage - he simply has no counter to your kind of floatiness, but getting to this part of your playstyle is the problem.
 
D

Deleted member

Guest
Click header for another playlist


Jack Ripper [or Jack the Ripper] is one of the Jack Bros., making its debut in the [shockingly] sole Shin Megami Tensei game for the Virtual Boy, imaginatively named Jack Bros. Aside from this game containing one of the more hilarious examples of Japanese to American box art changes, it provides very little information on this character. In fact, upon a scour of the internet, you'd think Jack Ripper doesn't even exist... and he only appears in two games, where he makes a minor impression.

More-or-less, Ripper is the Waluigi of the group – maligned by the fan base, left out of the more mainstream games [such as Persona] and much forgotten by everyone. However, Shin Megami Tensei did throw us a bone with that artwork for the demon – he's a serial killer wannabe, in the vein of the real-life Jack the Ripper. Perhaps he's the reincarnated soul of that dastardly mass murderer, or perhaps just as mischievous as his brothers and wants to create a certain kind of chaos? Either way, Ripper is a Jack Bro, and thus, the show must go on.


Size: 5
Weight: 6
Ground Speed: 4 >>> 8
Air Speed: 2
Fall Speed: 7
Jump: 3
Attack Speed: 4 >>> 8

So, what do we learn about Jack Ripper here? He seems to be incredibly average in most respects – obviously in the air he's pretty much useless, falling extremely fast and having jumps that barely qualify as taller than a short hop. When he walks, he walks as you see him in his art – with his hands perched above his body like a zombie. To this effect, it's characteristic that he walks so slowly.

The catch is, he can potentially double his ground speed [to just below Fox's speed] and the attack speed of all his attacks, with an ability I like to call Blood Lust – signified when Jack Ripper's eyes turn a bloodshot red. Using that handy pocket knife, Ripper likes to create a scene – ooh yeah, he just loves to spray the victim's blood all over. He even loves the very feel of the blood so much, that it makes him thirsty for more! The effects of Blood Lust only last for two seconds upon contact with blood, so don't think you're in for an easy ride – you just have to keep on cutting and cutting and cutting, to get Ripper's fill.

Blood will evaporate if left alone for three seconds, be it in the air or on the floor. This alludes to the fact that, just maybe, Jack the Ripper is just as much a jokester as his brothers, and that the blood is actually just an illusion to freak out the opponent – especially when the opponent may be robotic or otherworldly. Or maybe he's a sadistic and disturbed monster – it's up to you to decide.


Neutral Special – Penetrating Knife Wound

In an incredibly fast stroke – hitting only a few frames in – Ripper stabs forward with the knife, hitting any opponent within a Kirby for 3% damage and no knockback. He can keep on doing this to build up damage – but the main use of this move is that it: creates droplets of blood that fall to the floor with each stab, each thinner than a Pikmin's width [but can still easily be walked over] and that, with each stab, the opponent's stamina slowly decreases. What did you expect when you're being stabbed? For every time stabbed like this, the opponent's ground speed lowers by 1%. That may not sound like a lot, but over time – and especially with this move under the influence of Blood Lust – it stacks.

Side Special – Clumsy Headbutt

Telling by the fact that Ripper seems to be bowing slightly as walks forward for a Bowser – probably thinking about how delicious blood is – he trips slightly, crashing forward with his head while obtaining super armour, for 10% damage and tripping the opponent backward if he hits them. If he does hit them, he stops in place – allowing for a follow-up. However, if he misses, he gathers himself together with some end lag and continues dashing forward. In the air, this operates as a semi-recovery, as Ripper deliberately vaults forward the length of a battlefield platform with his head as a battering ram – capable of knocking out at 110-120% - and having super armour while doing so.

Down Special – Devouring the Victim

Jack Ripper lurches forward at Marth's walking speed, before seeming to collapse forward after going half a battlefield platform with his mouth wide open and biting. Opponents can shield or dodge this, but if they are hit by it, they suffer three consecutive chunks of flesh being ripped out of them for 3% damage each to the opponent as well as 2% healing to yourself, also causing a puddle of blood on the floor the width of Bowser just below the victim. Of course, under the effects of Blood Lust, this move becomes insanely fast – double the rate of Marth's walking speed, making it a very big threat. After the move is over, Jack Ripper backs off a little bit, meaning he isn't immediately given Blood Lust.

In the air, this move is far simpler – Ripper attempts to bite in front of himself, catching anyone within a Kirby of his face's hitbox. If caught, the opponent suffers set backward knockback, and 4% damage – this move can be used over and over in the air, and every time heals Ripper for 3%.

Up Special – Clutches of a Demon

For a moment, Ripper's eyes glow a delightful red, as he raises both arms straighter than usual – also leaning more toward the screen than usual. After between 0.3-0.5 seconds [if you hold the input], Ripper will grab the nearest opponent within a battlefield platform of himself – if they didn't dodge or shield, he instantly grabs them, cuts them for 6% damage and throws them back to his original position, leaving a pool of blood the size of Bowser in the middle of them.

This works similarly in the air – except Ripper can throw them in any direction, which will be the opposite of the directional input. This move also renews your jumps if successfully carried out – and you'll need them with how short your jumps are.


Forward Smash – Persistent Wound

Pulling down the hand with the knife, Ripper wretches that entire arm back for 1.2-2 seconds, before stabbing forward a whole Bowser's distance. This can potentially destroy an enemy's defences – dealing eighty-percent damage to shields, but more importantly 14-18% damage. However, the knockback of this move is only mild, and set to just push them away half a battlefield platform's length – but immediately giving away the true purpose of this move, as the opponent now leaves a trail of blood wherever they go. This will persist for between 3-6 seconds – that's if Ripper got really deep into them. Due to Blood Lust, this makes Ripper almost ecstatic with joy.

Up Smash – Aggravated Assault

Eyes glowing outwards in red for 1-1.5 seconds, Ripper stumbles forward the length of half a battlefield platform, to half of battlefield – with both hands looking to grab – holding his knife inside his thumb. If he comes to an opponent, he starts to wrestle with them in the air; this persisting for four seconds. During this time, somewhat of a button mash contest is held between Ripper and his opponent – every half a second, the person who “lost” in that half a second stumbles backward and if Ripper wins, he even takes a chunk out of his opponent with his teeth, dealing 3% damage and healing for 2%!

Of course, this course a small drop of blood to hit the floor; if Ripper wins two consecutive mashes, he will step over the blood, putting him into Blood Lust mode. While in that state, you gain 25% extra button mashes per each “contest,” making it extremely easy to overwhelm your opponent, and of course the maximum damage you can deal with this move is 24% - a hefty sum to put on a foe!

Down Smash – Time of Death

Ripper turns to the screen, his tongue now noticeably licking his lips for the next 2-3.2 seconds – as he raises his hand holding his knife higher and higher. During this time, any opponent within a Bowser of Jack Ripper who's prone or otherwise on the floor will be homed in on [Jack shuffles along the floor]. After this preparation, Ripper brings down his knife unto the opponent – dealing 25-35% to them, as he noticeably cuts through their body and a sound of the knife hitting the surface below is heard.

The opponent will then get to their feet particularly slowly – with stun similar to that of a shield break, but lasting only a second – giving a lot of time for even a follow-up by Ripper! On top of that, now covered in blood, Ripper's knife will can just be licked with your down tilt to enable Blood Lust, or equally just walking around with it for the next six seconds will produce droplets of blood on the floor the size of half a yellow Pikmin, at the rate of Falco's blaster.


Neutral A or Jab – Trade-Off Fight

Ripper hunches over and starts to slash diagonally back and forth with his knife, carving an “X” shape in the air – a cut for each press of the input. This is at the speed of the first two hits of Ike's jab, meaning he can hit pretty fast – and each hit deals 3% damage – but it's at such a close range, it's difficult to hit with. What you do have in your favour is that, every swing of the knife – while you're swinging the knife – gives you temporary super armour, due to the frenzy Ripper is enjoying – and for every successful slice of the opponent, you get a nice drop of blood on the floor the width of a yellow Pikmin. With Blood Lust on your side, this move actually doesn't get any faster, but you can now hit into the background with the beginning or end of either slash.

Forward Tilt – A Sheep to the Slaughter

Very much mirroring his down special, Jack Ripper appears to do the very same – lurching forward at a slightly faster speed, but not collapsing. In fact, this is a ruse – as soon as an input is pressed again, Jack Ripper will return from the background being covered in shadow, lunging forward before returning to normal. While this move is going on, you can position yourself to jump back into frame on top of an opponent – at your normal walking speed, for up to one second. Once you return to the stage, pass one second in time or if your doppleganger is hit by any attack, it will evaporate into a temporary mist. If you do hit an opponent, you'll gnaw at their back for four consecutive hits of 4% damage, and a puddle of blood on the floor the size of Bowser.

Down Tilt – Cleaning the Murder Weapon

Much to the chagrin of the foe – who are stunned in place if within a short distance of a Kirby while he does this – Ripper licks his knife, enabling Blood Lust if you've created a bloody wound within the last three seconds. Obviously, the stun helps too – your opponent doesn't seem to like that you're drinking their blood, them being forced to stand and look in horror for a whole quarter second after the fact. How you love their disgust, and their blood apparently – healing yourself for 10% damage when you use this move.

Up Tilt – Sinister Rainbow

At his own eye range, Jack Ripper lunges forward one Bowser in distance, stabbing with his knife. If failed, he stumbles back into place with clumsy end lag. If successful, he deals an impressive 10% damage, then seeming to pain the opponent as he pulls the knife out of them and in an arc over his own head, leaving a stream of blood falling unusually slowly. This stream is around the size of a yellow Pikmin, curved, and will evaporate as any other blood would. This mainly allows for better approaches with your aerials, giving you clear access to Blood Lust.

Dash Attack – Taking a Blood Sample

As describes, Ripper takes a blood sample – dashing into a crouch to do so, tripping up any opponents for 6% damage, travelling a Bowser in distance. This is designed to get underneath them, as he then withdraws a rag from within his trenchcoat – soaking up any blood that may have been splattered on the floor. If the input is then pressed again, Jack the Ripper takes out the rag and squeezes it in his hand – causing the blood to run down his hand and onto the floor below him, enabling Blood Lust.


Neutral Aerial – Descending Madness

Ripper brings his feet together, dipping a little bit into a dive – increasing his already fast falling speed to King Dedede's – while he readies his knife with both hands. Aimed down, the knife presents a constant hitbox until he hits the ground. While in this state, Ripper's arm have super armour – making it easier to approach. Hitting an opponent's shield deals it 50% damage, while hitting an opponent deals 8% damage and allows you to then yank it out of them for hitstun allowing you to escape. If botched, the move has some end lag as you get back to your feet.

Forward Aerial – Long Trial

Taking his knife in hand, Ripper slowly cuts through from his top right to bottom left, at the speed of Falco's blaster. This hits anyone dodging directly in front, above or below him as well as dealing constant and capable of upwards of 50% damage to shields due to the slow speed of the move, as well as causing 9% damage. This move causes knockback capable of knocking out an opponent at 100-120%. In tandem with Blood Lust, this move makes dodging very difficult for Ripper's opponent.

Down Aerial – Diving Grab

This should be a fairly obvious input – Ripper actually starts to dive now, with his arms as wide apart as possible – descending at almost double regular fall speed, which is incredibly fast as well as gaining super armour. He will only enter this state for a second, however, meaning you can't misuse it and accidentally suicide. If he hits an opponent – in the air, or who is standing – he'll take them at the same speed downward. Depending on the height of the drop, the opponent will take between 4-12% damage, and this can be used readily as a suicide once you've grabbed an opponent, as both of you plummet downward until you hit [or don't hit] solid ground. If you do hit solid ground, though, and as you probably guessed, you enter into your grab.

Up Aerial – Overhead Compartment Hiding Place

His knife in hand, Jack pulls his weapon of choice over his head and down to his abdomen's height, bringing down any opponent caught by this move with some hitstun, allowing for a possible follow-up. Blood is created in a curved line thinner than a Pikmin, from where you were able to cut the opponent – allowing you to ascend above them and possibly use a move such as your up special to gain a further positional advantage. Opponents hit are dealt 8% damage.

Back Aerial – Wail of Pain

Ripper turns around in mid-air, slashing vertically with virtually no start-up – this very much a way to Wall of Pain an opponent, considering this takes advantage of your short jumps. This deals 7% damage to anyone hit. However, for each slash, you do leave another oddly floating curve of blood about the size of a thin Pikmin, curved around where your blade met the opponent. With this in mind, your Blood Lust actually allows for this to be an extremely effective wall-of-pain – gimp your opponent off the screen.


Grab and Pummel – Zombie Stereotyping

In typical zombie fashion, Ripper collapses on top of his opponent – with range a little over average, as he falls with both arms trying to grab forward. If successful, he and the opponent fall to the floor, with the pummel being where Ripper actually bites them while down there, hitting for 3% as well as healing himself for 2% a second and letting blood hit the floor below them. Escaping from this move, the opponent kicks off Ripper – leaving him standing and the opponent prone.

Forward Throw – Repeated Stab Wounds

With a slight element of luck, Ripper stabs the foe's body five time – each stabbing, causing 3% damage a drop of blood to jump from the site of impact as he raises back up his hand to strike again, hitting anywhere on the ground within a Bowser in front of the two, or behind them. Immediately after, the foe is able to kick Ripper off him as per usual, meaning he can potentially immediately go into Blood Lust mode.

Back Throw – Operation

Using the knife like a surgeon cutting for the very first time, Ripper pulls it down the length of a Kirby on the opponent's body – or their entire length, if they're smaller – creating a small pool of blood on the floor below them. This also causes a total of 13% damage to the opponent, and causes them to kick Ripper up off them as if they had mashed out.

Down Throw – Roll Over Zambies

Taking advantage of the blood below his opponent from his pummel, Ripper flips them over so that he's on the bottom, immediately sending himself into a Blood Lust frenzy – under which, his pummel becomes faster. Use this to your advantage to both cause damage and re-invigorate your Blood Lust as you do – as you're now below, blood will no longer hit the floor. Once the foe button mashes out, Ripper struggles back on top and is kicked off in his usual fashion.

Up Throw – Head Injury

Ripper grabs the opponent's head – or the part of them directly on top – and pulls it toward him, then pushing it back into the ground – causing 10% damage, as well as temporarily dazing them. At higher percentages, the opponent will stay on the ground for up to a second, not counting the time needed to get up. After this, Ripper quickly gets up – perhaps sensing that it's time to use his down smash?


Super Attack – Bleeding Heart

Jack Ripper looks curiously at his knife, before plunging it deep into his chest – causing a comical spurt of blood from his chest... before it seems to erupt! For the next twenty seconds, Ripper is permanently in Blood Lust mode, making him rather deadly.


Playing for Keeps – Persist and Outlive

Despite not being a vampire, Jack the Ripper equally enjoys literally sucking the life out of the opponent – cutting them to pieces, and taking delight in ravishing in their own blood. While this may seem easy enough to do, Ripper's biggest obstacle is overcoming those who like to attack from a distance. He does have approaches for this, however – by using moves such as his side special, down air and forward tilt, he can successfully approach even the furthest away opponents.

Once you're in the opponents face, you have a lot more options open to you – don't try pushing for a grab just next, but try to get a headstart in using your neutral special to drive down the stamina of your opponent, and try to spread around as much blood as possible with moves like your jab and forward smash; keeping Blood Lust going is crucial in being able to hit with your more close-ranged attacks. As it always will be, use of your down tilt and dash attack is essential in keeping the moment of that state going.

Once your opponent is pressured and broken down enough, move on to your more high-risk moves – use your up smash and up tilt to try and pressure them into jumping over you, then use something like your up or down aerial to bring them back to reality. If they're reaching higher percentages, they really won't want to be prone or on the floor against Ripper – use this to your advantage with moves from earlier on when approaching to keep the pressure up.

Once you do get to a decent percentage, you have the capabilities to keep on going – before you go for a kill, be sure that you've healed enough; get in close for a grab if possible, or just latch on with down special or your up smash. Remember that under the influence of Blood Lust, you have little to lose from throwing out otherwise laggy moves like your down smash with no intention to use them; make the stage a bloodbath! The point when playing as Ripper is to outlast your opponent, after all.

Once you've worn down your opponent completely, you have several ways to get them into position for a good kill. One of the best approaches is your down smash – using your grab and up throw, along with Blood Lust, to really drive home the victory. Your shield-breaking and background-hitting arsenal can come in use here, as well as moves like your forward air and jab, neutral air to pressure the opponent even further. Getting your opponent high enough, launch them off them stage with your forward or back aerial, then used in tandem with your up special for a gimp. Of course after the first stock, your suicide also becomes a viable option.


Pyro Jack: 55:45 – Slight Advantage

What screws Pyro Jack a little bit is that he can actually be properly jumped on by Ripper – who can easily pursue even through those pillars of flame created by Pyro Jack. Many of the moves used to approach with Ripper actually negate their stunning effect; such as with your super armoured moves. Due to this Ripper can potentially pressure Pyro Jack and continuously keep him nailed down – his aerials being more than capable of doing that. However, if allowed into the air, there is very little Ripper can actually do to Pyro; you'll have to keep the pressure on, constantly.

Jack Frost: 40:60 – Disadvantage

Jack Frost is reliant on you being hit by his snowflakes and you suffering from his constant disjointed hitboxes, sending out snowflakes and otherwise manipulating the environment. Due to a majority of very close-range brawler-type moves, Jack Ripper definitely has a hard time to start with against Jack Frost – but while Jack Frost is lightweight, Ripper has the potential to heal himself further and further. Many of Ripper's approaching moves have super armour, capable of tearing through any defence Frost has. What really gives Jack Frost the advantage here is the nature of the snowflakes versus blood – Jack Frost can far more easily create snowflakes than Ripper than collect his blood and it's easy enough to try and camp against Ripper as a projectile user, let alone with something like that to assist you.
 

MasterWarlord

Smash Champion
Joined
Aug 24, 2008
Messages
2,911
Just like ATs and pokeballs, Fiends are various characters that appear midmatch to cause havoc. Who says you have to be limited to what Brawl has, for your extras?

Fiends appear as tiny dolls, which will bounce around until eventually coming to a stand-still (they are surprisingly bouncy). When that happens, the fiend itself appears from the doll in a puff of smoke. The fiends do not have any allegiance and will simply attack whoever they can. The dolls can be attacked and launched, and are as heavy as the Soccor ball item. Since the fiends are extremely powerful, most players will team up to launch the doll off-stage, in order to prevent the fiend appearing. Like ATs, only one fiend can be in battle at any one time. Any SSE boss can come out as a fiend, whereupon they will do their (Normal difficulty) thing for 12 seconds.

DR. CLAW​


Dr Claw is the main villain of the Inspector Gadget, and is known for never showing his face on camera and having an insanely exaggerated deep voice. Combined with the fact that he’s constantly stroking his cat like a James Bond villain, Dr. Claw is a gigantic combination of almost every villain cliché, and is parodied on a regular basis. . .Despite the fact that he himself is a parody. Dr. Claw is a relatively common fiend, though he’s certainly above the level of generic enemy fiends.

Once Dr. Claw is spawned, he sits in his chair facing away from the players. He constantly strokes his cat here, seemingly not interfering, but if he’s attacked he’ll exclaim “I’ll get you Gadget!” and press a button on his chair causing an explosion to occur on the ground the person who attacked him is standing on – Claw activated some sort of land mine it seems. If they’re in the air, Dr. Claw will wait until the foe touches the ground. The explosion deals 15% and decent knockback. While players can ignore Claw, after 15 seconds of Claw being on-screen his cat will go out and attack players, moving about at Wario’s dashing speed (It –is- a fat cat) and swiping for 15% and knockback that kills at 160% on contact. If a player attacks the cat, who is only as heavy as Game & Watch and only has a single jump as high as Mario’s, easily killable, Claw will react as if the player attacked him personally.

Claw lasts forever by default, but he takes actual knockback and can be killed – campers will probably want to kill him to get him out of the way. He’s as heavy as Bowser, but takes knockback like a regular character. If he goes off-stage, however, rockets will blast out of the bottom of his chair as he gets propelled upwards by them. Instead of using a mine on the player who knocked him off-stage, he’ll follow the victim’s horizontal position at Ganon’s walking speed until he’s on top of them, then crash down on them, dealing 20% and knockback that KOs at 80%. However, Claw can be baited off-stage to crash his chair down to his doom, once again shouting out “I’LL GET YOU GADGET!”, considerably more strongly than before.
 

Hyper_Ridley

Smash Champion
Joined
Dec 21, 2007
Messages
2,298
Location
Hippo Island
The things I do for MYM...

#479
JALORDA
THE ROYAL POKEMON


Jalorda is one of the new Pokémon from the 5th generation, the final form of the grass starter Smugleaf Snivy. After that ABOMINATION of a second form, Snivy thankfully becomes awesome again for his final stage. Jalorda is a pure grass-type that absorbs sunlight through basking and then amplifies it within its body. I think you know what that means (smirk2). It has a rather pretentious personality, not fighting seriously unless it deems its opponent worthy. It can stop opponents in their tracks with its gaze, but for some reason can only learn Glare as an egg move (hippo).

Like many grass types, Jalorda can conjure vines from its body as weapons, but it’s a non-venomous snake, learning no poisoning moves besides the obligatory Toxic. Its appearance is based off French Emperors as well as the banana snake, quite fitting for such a pompous a-hole. Jalorda currently resides in the UU tier of the metagame, spreading chaos and anarchy with its unique ability Antagonistic (Perversity in Japan), which reverses the effects of all stat-changing moves…and he learns Leaf Storm, a 140 power move that normally halves his special attack on use, but with Antagonistic it DOUBLES with each use (h). There is much to like about our latest grass starter.

STATS​

Ground Movement: It’s below average when walking, as Jalorda does not feel the need to exert much energy on menial tasks, but when dashing Jalorda is quite fast, approaching Fox’s speed,

Traction: Above average

Ground Jump: Once again, Jalorda does not put much effort into such a basic command, only going as high as Ganondorf’s meager jump.

Midair: Jalorda actually tries this time, but as the air is not his affinity, it’s still below average.

Air Control: Average

Falling Speed: Being a grass type, Jalorda has some leaf-inspired wind resistance, allowing him to fall at a just below-average speed.

Size: At 10 feet, Jalorda is quite large, and even coiling up in his idle pose doesn’t help that much as he keeps his front third upright like in this picture. When "walking", he still maintains his posture, but when dashing he finally gets low to the ground to maximize his slithering potential, but now he’s an extremely wide target.

Weight: A bit above average.

TAUNTS

Taunt Up: Jalorda looks away as he turns his nose upright with a “humph!”

Taunt Down: Jalorda chortles as he covers his mouth with his tail.

Taunt Side: Jalorda licks the air in typical snake fashion, but he quickly stops with a look of disgust on his face. The smell of these Smash Peasants is not a pleasant one.

SPECIALS

Neutral Special: Solar Beam
Jalorda’s eyes glow an intense orange as a bright beam of solar energy radiates from his head, shooting infinitely horizontal, even going through walls! You can even see little heat-waves emitting from the point of impact with the beam. The beam lasts for .4 seconds, dealing 10% to anything struck and KOing at 160%. It also has transcendent priority, but the move has above average startup lag, though below average end lag.

As time goes on, Jalorda will automatically gather solar energy into his body to power up this attack. It takes him a minute to reach full power, which not only increases the damage up to 20%, but the knockback also peaks at a 90% KO range, making this a good KO move. To bolster its damage potential even further, the energy Jalorda collects to power this move also ensures that it does not weaken through stale-move negation, but you can still use it to un-stale other moves. You can tell Jalorda is fully charged because he will flashe white periodically like so many other charge moves in Brawl.

Side Special: Leer
Jalorda rears its head back with a glint its eyes before harshly leaning forwards as its eyes glow with an eerie green light. This has above average startup lag and moderate end lag, and deals no damage. However, it has massive range, hitting any opponents who look into his eyes; the range that qualifies as this is infinitely horizontal and Bowser’s height vertically in front of the grass snake. Being struck by Jalorda’s piercing gaze deals no knockback a good deal of hit-stun, and it cannot be blocked or dodged as long as you are in its range. You CAN roll towards Jalorda to avoid it as your character will turn around during their forwards roll, however.

Up Special: Leaf Storm
Jalorda coils up and closes his eyes as a massive amount of leaves fly out of his body and swirl around him in a tornado-like fashion. The twister is the same size as Mach Tornado and carries Jalorda upwards as high as Luigi’s Up-B, making this an ok vertical recovery but a poor horizontal recovery. The whirlwind of leaves deals up to 6 hits of 3% each, the last hit dealing horizontal knockback that KOs at 190%. Moderate startup lag, below average end lag.

What’s really nice about this move is that after the recovery phase is completed, the leaves take a more compact form and continue to swirl around Jarlorda’s front-end, around where the crest on his chest appears. They will last for up to 6 hits minus how many was dealt during the recovery phase, with less and less leaves appearing as Jalorda’s “shield” takes damage. Making contact with this focused torrent of leaves deals 6% and set horizontal knockback for 1/4 of battlefield. This is an excellent shield seeing as it deals damage and allows you to attack during it, but as it only protects a specific area of Jalorda’s body (it does NOT protect his head btw!) you can’t rely on it to block everything your opponent throws at you. Using this move again will replenish any lost leaves in Jalorda’s shield.

His royal highness duly apologizes if you were expecting some special mechanic that referenced Antagonistic where every use of this move magically increased his KO power or something similar. He kindly asks that you shall, as you say, “suck it”.

Down Special: Leaf Blade
En garde! Jalorda learned this attack as a Snivy while training under the late, great Sir Sceptile. Jalorda pulls backs his tail as the tip straightens into a blade-like shape before thrusting it forwards, fencing-style. This has good range as you might imagine, and it deals 12% with horizontal knockback which KOs at 145%. This has moderate startup and end lag. With a smash input, Jalorda feints the attack, performing the startup animation but instantly ending the attack afterwards with no lag whatsoever, allowing him to punish anybody who tried to block or spot-dodge the attack. Finally, if Jalorda’s blow clashes with another melee attack, he swings his tail to the side to parry it, sending the opponent stumbling back 1/5 of battlefield. This has “counter-move priority” so it can still clash with transcendent melee hitboxes such as Meta Knight’s sword.

This is a pretty nifty tool in our ruler’s arsenal. If your opponent shields or dodges the attack, they can potentially punish your end lag, but you can always feint the attack to punish them instead. The feint in turn can be countered by the opponent attacking to interrupt you, but if they do attack they risk being parried and having more distance created between themselves and Jalorda. Of course, I don’t see how all these savages in the roster can even hope to outwit the king.

STANDARDS

Jab: Sandbagging
This is a 2-part jab, something rarely seen in MYM despite Sakurai using it liberally in his own movesets. Jalorda flicks his tail forwards, dealing 4%. Then, he does a shoving-motion, putting more of his tail into this attack, dealing 5% and light horizontal knockback. While this is a pretty safe move, it deals below average damage, has low range, and it doesn’t exactly get the enemy out of Jalorda’s face. His Excellency generally uses this to toy around with his opponent to see if they find a way around it before using other close-range moves to actually fight-off the enemy.

Forward Tilt: Vine Whip
Jalorda extends a vine from himself and lashes out with it, reaching 1/3 of battlefield horizontally. The tip of the whip deals 13% and KOs at 125%, but anywhere else on the vine deals 7% and KOs at 180%. In either case, the base knockback of the move is actually quite good, sending opponents horizontally 1/4 of battlefield. In addition to the move’s amazing range for a melee attack, it also has below average startup lag, but it has above average end lag so opponents can close some distance if they shield it. Also, as the vine is a part of Jalorda’s body, it can be struck to inflict damage on Jalorda himself, but hitting Jalorda’s vines only deals flinching knockback. All thing considered, this is a nice horizontal poke or zoning tool, but don’t use it at close range unless you can ensure it will succeed.

Up Tilt: Bramble Line
Jalorda procures a thorny vine from his backside and after above average startup lag whips it forwards in a downwards arc, reaching twice as high as Bowser at its apex and hitting the ground ¾ of Battlefield away. Anyone struck by the vine is spiked and takes 9%. If the vine should hit a solid platform at time on its journey, or a drop-through past the halfway point, the vine shall latch onto the platform and remain rooted there until Jalorda takes 17%, he uses this input again, or he moves battlefield’s entire platform in distance away from the anchor point of the vine. Jalorda is free to move around and perform any other attack while the vine is anchored.

The vine is a hitbox while anchored, dealing the same damage and spiking effect as before. This also “deals” 1% to the vine; this doesn’t actually add damage to Jalorda’s counter, but it does prevent him from performing any infinite pop-ups into the vine. If you manually retract the vine, it takes a second to do so and does not have a hitbox during this time, but the moment it’s fully retracted Jalorda can release it again.

Down Tilt: Sneaky Snake
Even powerful monarchs like Jalorda enjoyed playing pranks and generally being sneaky *******s in their youth. Jalorda decides to use a trick from his days as a Janovy in this attack, sending a vine straight into the ground, only to poke back up about 1/5 of battlefield in front of him. The vine reaches about Mario’s height upwards, dealing 9% and tripping opponents on the ground and lightly knocking back airborne foes. Additionally, the move has below average startup and end lag, allowing Jalorda to easily perform follow-ups on his opponent, including combing into another use of this move! Hitting a tripped opponent doesn’t re-trip them, but instead launches them upwards as high as Luigi is tall.

To increase the move’s versatility, you have some control over where the vine emerges with the control stick. Tilting the stick down and forwards has the vines emerge ½ of battlefield ahead, and a down+back combination has the vine attack directly in front of Jalorda. If there is not enough room on the platform for the vines to go the full distance, they will strike at the edge of the platform. The damage and lag of the move is not affected by the position of the attack, making any of the possible locations of the attack into danger zones for an opponent. Sure, the opponent can roll past the positions this move controls, but that leaves them vulnerable to other attacks to punish the roll such as FTilt or Solarbeam, and if they jump over it they risk hitting Jalorda’s UTilt vine.

Dash Attack: Wrap
Jalorda stops his dash as he uses the momentum from it to swing his body clock-wise while quickly curling his tail in the direction he is swinging. This has a grab hitbox, and he will wrap his tail around the first opponent he catches, throwing them to the ground as he turns a full 180 degrees. This deals a decent 10% and knocks the opponent about 1/3 of battlefield away. The move has moderate startup lad and while it has below average end lag, Jalorda finishes the move turned around even if he misses. Of course, assuming you have Leaf Storm active, you might catch the opponent with a leaf assuming you end up close enough to them. This move is mainly used on the rare occasion Jalorda is compelled to approach, penetrating defenses of his opponent, while leaving them just close enough for Jalorda to continue his “rushdown” while still having the option to go back to his primary zoning playstyle.

SMASHES

Forward Smash: Cut
Jalorda snaps its head forwards, swiftly biting the opponent and dealing 13-24% and KOing at 115-80%. It’s so fast (a scant 2 frames of startup) that you don’t even get to bear witness to his majesty’s magnificent fangs! On the downside, this move has above average end lag, and as it’s strictly a close-range move, one must be careful not to put oneself in jeopardy by becoming overly reliant on this attack. Besides, using brute-force to solve all your problems isn’t very becoming of a member of the royal court.

Up Smash: Rock Smash
In an impressive display of strength, after moderate startup lag Jalorda thrusts a rather thick vine into the ground that then erupts from the earth Ike’s height directly in front of himself in the background. The vine can be seen holding a Kirby-size chunk of earth, and after 2 seconds of preparation, the vine heaves the rock forwards, becoming a hitbox at this time as it travels across the sky in an arc, hitting the ground ½ of battlefield away. The rock breaks on impact, dealing 14-37% and KOing horizontally at 90-70%. The vine responsible for this attack retracts 1 second after throwing the rock.

Now, while this attack is quite powerful, the move does appear quite unusable due to being so darn slow. However, the sheer brilliance of our great ruler has led him to keeping this boulder-throwing vine on an automated schedule, allowing him to focus on other attacks in the meantime. In other words, once Jalorda has successfully implanted the vine, he can perform any other action besides jump or roll while this attack goes on! And since the vine is in the background, there’s no way to interrupt the boulder toss besides performing an attack that sends Jalorda over ¾ of battlefield away from the vine! If Jalorda uses Leaf Storm while this move is going on, the attack still happens but he will not rise during the “recovery phase”. Finally, do note that Jalorda can only have one vine performing this move at a time, not able to summon another until the current vine retracts. He’s not Roopushin, you know, he doesn’t have over 9000 attack, physical feats such as this do put some strain on him.

Down Smash: Vine Spike
Jalorda plunges 2 thick vines from his shoulders into the ground behind him, which then curl around underground and erupt from the ground a short distance in front of Jalorda at a 60 degree angle, extending Marth’s height out of the soil. If you are wondering why he doesn’t shoot the vines upwards to begin with, first you shall be sent to the guillotine for question our omnipotent ruler, then I shall explain to you that even the segment of the vine behind Jalorda has a hitbox. It deals 9-19% and KOs at 200-175%, but at least it provides some protection from opponents who attack from behind. The vines are much more potent when they re-emerge in front Jalorda, dealing 12-26% and horizontal knockback which KOs at 135-105%. With below average startup lag this is Jalorda’s primary anti-air move, but it has moderate end lag and since it’s mainly a close range move Jalorda can be punished if he uses this attack improperly.

AERIALS

Neutral Aerial: Grass Mixer
Jalorda closes his eyes as he conjures another minor whirlwind. Unlike his infamous Leaf Storm this one only covers his front end including his head, and it doesn’t extend very far from his body, nor does it create any leaves. The wind lasts for .5 seconds, dealing 5 hits of 2% over that time and the last hit deals light horizontal knockback. With below average startup and end lag, this is a pretty nice defensive aerial to try and adjust your spacing or get any enemy off your back.

If Jalorda has a shield of leaves in play, then the leaves will mix in with the tornado, enhancing the strength of the attack. The leaf-infused hitbox deals a boosted 4% per hit, increasing the damage potential of the move to a frightening 20%! On the downside, these hits count towards the leaf-shield’s HP count, so you’re trading the defensive prowess of it for a single offensive blitz. If you’re leaf-shield is at full health and you land all of the hits of this move you actually still end up with 1 hit left on the shield, but it’s not likely you’ll encounter this situation often.

Forward Aerial: Slam
Jalorda prepares 2 vines before quickly whipping each of them in succession at a 20 degree downward angle. The vines are as long as ¼ of Battlefield. The first fine deals 6% and flinching knockback, while the second vine deals 7% and spiking knockback on the tip and 6% and horizontal knockback that KOs at 175% anywhere else (the second vine has a spiky tip which explains why it has a sweetspot and not the first one). Naturally, the first hit combos into the second. There is moderate startup and end lag to the whole move, but it can auto-cancel if Jalorda hits the ground in the brief moment between the 2 vines attacking. This is a pretty nice move, adding another ranged melee attack to Jalorda’s already impressive toolset, the slight downward angle of the move allows him to more easily aim for opponents who aren’t jumping as high if they are caught under Jalorda’s UTilt, and the auto-cancel allows you to use it as a good pressure/zoning tool while going for both hits deals good damage.

Back Aerial: Iron Tail
Unfortunately, Jalorda doesn’t have a fist, so we’ll have to go with the next best iron-encased limb with which he rules. Jalorda’s tail takes on a metallic coloration as he harshly swings it backwards, dealing 13% and KOing at 125%. A pretty nice aerial attack as it has nice range…but turning his tail into its metallic form causes Jalorda’s fall-speed to double, so he’ll probably hit the ground before the hitbox comes out despite it “only” having moderate startup lag. Thankfully, Jalorda creates a small shockwave upon impact with the ground that works just like a single use of DK’s down special. The attack has moderate end lag as well, but his tail loses its iron covering during the end lag.

Up Aerial: Upper Vine
Jalorda extends another of his almighty vines, this one reaching as far as Ike’s sword (Ironically, while Ike has the best overall melee range in standard Brawl, this is on the low end of Jalorda’s attacks). It’s angled about 50 degrees upwards and comes out with low startup lag. Striking the opponent deals 8% and vertical knockback which KOs at 180%, but the base knockback is as high as Yoshi. As the move is already best used to strike opponents coming in from above, there’s a good chance that you might send a hit opponent flying straight into Jalorda’s UTilt, dealing a total of 17% and sending the opponent back into the ground. This move has moderate end lag, a small price to pay for the delicious zoning and punishment you can deal out with this move.

Down Aerial: Escape Passage
Jalorda quickly extends 2 vines straight downwards Ike’s height, hoping to catch the ground. These vines deal 3% and flinching knockback, which potentially sets-up the opponent for part of the move. If the vines do reach the ground, they will anchor themselves as Jalorda quickly pulls himself to the ground, his body dealing 9% and horizontal knockback that KOs at 160%. It seems that the feast of ratattas before the fight did not do not much to our lord’s weight. Strange, it WAS rated among the top percentile of feasts…

With below average startup lag, this is a pretty nice way to catch anybody who tries to escape Jalorda’s bramble cage, and it even knocks them back into the cage while pulling Jalorda to the ground to close up the former gap! Or you can use it when another airborne character moves in for an attack, evading the attack while your opponent heads straight into the thorny vine now in their way. On the other hand the move has moderate end lag whether or not you can pull yourself to the ground, and it doesn’t have a lot of horizontal range until Jalorda himself comes crashing down, giving the opponent a chance to shield and punish it if they can anticipate it.

THROWS

Grab: Magical Leaf
Jalorda’s eyes shine multiple colors as several neon-colored leaves suddenly fly out of his body and hit the ground directly in front of himself. This happens pretty quickly but has moderate end lag. If the leaves hit an opponent while flying out, they will suddenly whirl around the opponent and catch them in a mini-tornado to hold them place, signifying they are “grabbed”. After successfully grabbing an opponent Jalorda rests his head against his tail as he decides what to do with the wretch who dared to attack him.

If the leaves DON’T catch anyone, they will remain on the ground for 10 seconds, spread out over an area as wide as Mario. If Jalroda uses his grab input during this time, rather than make new leaves he will “activate” the leaves on the stage as they spring up a short distance from the ground to attempt to “grab” a victim, with the same lag as before, and if they catch someone they will promptly carry the victim to Jalorda before either player can take action. Note that when used in this trap-like state the leaves don’t have the special priority of regular grabs, and will always be out-prioritized by other attacks. Still, unblockable traps nicely supplement Jalorda’s zoning game, such as covering the blind spots of DTilt. While this comes at the expense of not having your grab available for close-range defense, the leaves end up right in front of Jalorda initially so you have the choice on how to utilize them.

Pummel: Wring Out
The whirlwind of leaves constricts around the foe, dealing 2%. Jalorda can be seen to have a slight smirk on his face as he watches the torturing of his prisoner.

Back Throw: TO THE DUNGEON!
Perhaps the most merciful of the great one’s sentencing, Jalorda points his tail behind himself as the leaves carry the opponent just past 1/2 of battlefield past Jalorda before tossing the opponent to the ground, dealing 5% and light knockback. The leaves will not carry the opponent past the edge of platforms unless there would be solid ground at the end-point of the trip. Jalorda turns around at the end of the throw to face his opponent, with himself and the enemy controllable at the same time. The main use of this throw is if you grab an opponent outside of your UTilt “cage”, so you can immediately get them back INside.

Up Throw: GET OUT OF MY SIGHT!
Jalorda looks away and covers his face with his tail, not able to look at this disgusting vermin any longer. The end of his tail swishes in a dismissive manner as the magical leaves hastily carry the opponent to the furthest part of the current platform from Jalorda before dropping them off. In their haste, they forget to deal damage, but at least the opponent won’t be bothering our ruler any more. Jalorda is completely invincible during the throw animation, so this is actually a good crowd-control move in a FFA game. Send anybody you don’t want to face to the other side of the stage together so they kill each other while you focus on the remaining player. In a walk-off stage, the opponent is dropped off Bowser’s width from the blast zone.

Down Throw: DISPOSE OF THIS TRASH!
Jalorda scowls as he points the tip of his tail straight down, as to give a thumbs-down. In ancient Rome, the emperor would give a thumbs-down if he was not pleased with the performance of the gladiators. Normally they’d be thrown to the lions, or in cartoons have a trap-door comically open from underneath them. Jalorda enjoys a good laugh every so often so this throw “commands” the leaves to do a variation of the latter. The leaves will start to carry the opponent to the nearest pit and if they make it, they will simply drop the opponent in, not wanting to touch the garbage any more than they have to. I don’t quite know how magically-controlled leaves even have sentient thought, but surely his magnificence knows the answer! (please don’t kill me)

Anways, the opponent takes enough hit-stun from being deposited in the makeshift trash-compactor that they end up just under the edge of the platform, which means they have to go through a ledge-grab before returning to the fight. Jalorda can start to move at the same time as the opponent, giving him time to guarantee setting-up something, be it a Leaf Storm, his Utilt, his USmash, a pile of magical leaves for the next grab attempt....surprising versitality for a non-damaging throw, yes? While he doesn’t get any invincibility time, this is another useful throw in a multiplayer battle, as the thrown character does have a weak spiking hitbox during their short fall, so you can use your adversary as a makeshift edge-guarding tool.

As for using this move when there aren’t any pits around, such as Shadow Moses Island? The opponent is dropped off Bowser’s width from the blast zone, just like with the UThrow. Our lord is a consistent one.

Forward Throw: OFF WITH HIS HEAD!
Jalorda acquires a devilish grin as he performs the classic cut-throat motion with his tail. One of the leaves leaves (olololol) the whirlwind and stiffens to become razor-sharp before slicing right through the opponent, dealing 12% and KOing at 90%! However, during the 1 second of prep time before the opponent is executed, they are still capable of escaping the grab. Of course, by the time the move can hit, the opponent will probably be in KO range for it…

FINAL SMASH – FRENZY PLANT
In the ultimate demonstration of his supreme might, Jalorda hisses and bears his fangs. Pants still dry? After hissing, Jalorda thrusts his tail into the ground, moments before a massive thorned vine erupts from the ground, traveling in and out of the soil in Bowser-sized arcs. Being caught in the vine as it travels downwards deals 16% and knocks you into the next location the vine will emerge, and being hit as a vine emerges deals 20% and vertical knockback which KOs at 55%. Touching the vine where it has already traveled deals 12% and vertical knockback that KOs at 80%. The vine travels very quickly through the ground until it reaches the end of the platform, and Jalorda is invincible for the entire duration of the attack.

PLAYSTYLE

As you may gathered from reading this set of moves, Jalorda greatly prefers long range combat. After all, why should he dignify these Smash Peasants with an approach? You’ll have to earn your epic close-range combat. Even more impressive is that Jalorda maintains all this zoning ability with only 2 true projectiles!

While it may not seem like it, Jalorda’s patented Leer is easily one of the centerpieces of this concoction we’ve brewed. The sheer threat of becoming set-up bait is going to make the opponent very cautious as to how they approach Jalorda; they can either use rolls to approach from the ground, or jump backwards to attack from the air. Needles to say, Jalorda loves it when opponents become so predictable out of fear. It allows him to weed out the unworthy.

While your opponent approaches, perhaps you want to set-up an USmash or a Leaf Storm while you wait. It’s not like your opponent will be on top of you with the time it takes to traverse by rolling, and getting either of these in play will only make your opponent stumble even more. However, the scariest move Jalorda has besides Leer is none other than his DTilt! If you are at any point caught vulnerable in the areas DTilt can strike, say hello to 18% tacked onto your damage counter if you are on the ground. If you are in KO range, USmash and FSmash both strike areas that overlap with DTilt. While it’s primarily appears to be a zoning move, DTilt is also an amazing pressure and mix-up tool. If you’re opponent tries to dash towards Jalorda and shield in anticipation of a DTilt, you can use Leer. If they try to roll past DTilt’s hit zones to also keep themselves immune to Leer, if they don’t space themselves properly they can roll right into one of your other ranged melee attacks such as FTilt or DSmash. If they go airborne to stay above DTilt, you have several great anti-air tools such as DSmash and USmash. And of course, while they’re approaching they also have to think parries and feints with Leaf Blade and Solar Beam to punish dodges from any range, it’s maddening for Jalorda’s foe to try and consider all of Jalorda’s options at any one time, and we haven’t even gotten to his air or grab game yet!

When the opponent finally proves themselves and gets into close range, Jalorda still has plenty of options, even if they aren’t as scary as his long range attacks. FSmash outspeeds 99% of the attacks in the game (MK’s DSmash is outsped!) and has both damage and KO potential, but it has punishable end lag. Jab is a quick, safe move, but it has below average damage and doesn’t really provide enough spacing to return to your zoning game. A common weakness between FSmash and Jab is that neither one takes advantage of Leaf Storm. A DTilt retains its scary damage potential on top of setting up for an FSmash for a KO, but it has poor horizontal range and only the point-black position will hope to hit the opponent. Jalorda’s grab is, well, a grab, and while it is punishable and doesn’t offer much in the way of damage, it does provide unique spacing and set-up benefits to take advantage of. In particular, UThrow may deal no damage but if performed in the main platform of the stage can usually buy his majesty time to set-up an UTilt. As you’ve seen throughout the moveset, having a bramble ceiling provides indirect buffs to many moves and allows Jalorda to further limit the enemy’s approaching options. Alternatively, you may wish to use Jalorda’s grab for its trap-like alternate function in order to have that much more danger zones for the opponent on the ground.

While Jalroda prefers to fight on the ground, his aerial provides plenty of unique tools to compliment the rest of his playstyle. FAir and UAir are additional zoning attacks, and FAir in particular assists our ruler when he is forced to be the aggressor. DAir and BAir provide our lord with ways to return to the ground. NAir is a particularly exotic option, providing either a defensive shield or a chance to use up your defenses in a burst of offense.

While this may not be as long as some other playstyle sections, the great Jalorda trusts you to use this as a starting point to come up with your own zoning tactics. Jalorda’s ability to funnel his enemy’s advances is only matched by his ability to punish any poorly-conceived attempts to attack when he drives his opponent to desperation. Only those who have proven themselves of making it through the gauntlet of attacks Jalorda throws at you will find themselves with the distinctive honor of engaging him at close combat, and even then his options can be intimidating.
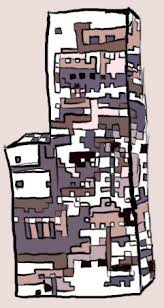
 

Junahu

Smash Ace
Joined
Nov 15, 2005
Messages
899
Location
Shropshire Slasher
It's a christmas content combo!


You can find moar Sonic movesets in the following places;
Sonic: http://www.smashbros.com/en_us/characters/sonic.html
Tails: http://www.smashboards.com/showpost.php?p=5431317&postcount=4810
Knuckles: http://www.smashboards.com/showpost.php?p=10626512&postcount=426
Amy Rose: http://www.smashboards.com/showpost.php?p=7179969&postcount=960
Big the Cat: http://www.smashboards.com/showpost.php?p=5240304&postcount=2146
E102 Gamma: http://www.smashboards.com/showpost.php?p=4550564&postcount=204
E-123 Omega: http://www.smashboards.com/showpost.php?p=6121960&postcount=4038
E101 MK II: http://www.smashboards.com/showpost.php?p=8077752&postcount=699
Rouge the Bat: http://www.smashboards.com/showpost.php?p=5174406&postcount=526
Shadow: http://www.smashboards.com/showpost.php?p=5189039&postcount=1037
Silver the Hedgehog: http://www.smashboards.com/showpost.php?p=8968063&postcount=91
werehog Sonic: http://www.smashboards.com/showpost.php?p=5953997&postcount=255
metal Sonic: http://www.smashboards.com/showpost.php?p=6047474&postcount=3108
Dr Robotnik: http://www.smashboards.com/showpost.php?p=5954102&postcount=262

tails doll: http://www.smashboards.com/showpost.php?p=5981343&postcount=1441
YTP Robotnik: http://www.smashboards.com/showpost.php?p=6518274&postcount=9707
Chaos 0: http://www.smashboards.com/showpost.php?p=7243129&postcount=1143
Dark Gaia: http://www.smashboards.com/showpost.php?p=7247809&postcount=1156
Black Doom: http://www.smashboards.com/showpost.php?p=5996820&postcount=1891
Metal Knuckles: http://www.smashboards.com/showpost.php?p=5275670&postcount=2720
Chao: http://www.smashboards.com/showpost.php?p=5174406&postcount=526
Espio: http://www.smashboards.com/showpost.php?p=4971577&postcount=1251
Vector: http://www.smashboards.com/showpost.php?p=4968753&postcount=1236
Fang: http://www.smashboards.com/showpost.php?p=4955941&postcount=1188
Emerl: http://www.smashboards.com/showpost.php?p=4744381&postcount=596
Cream the Rabbit: http://www.smashboards.com/showpost.php?p=4416596&postcount=109
 

half_silver28

Smash Ace
Joined
Apr 25, 2008
Messages
862
Location
MYM, Ohio
My god this is a monster page. First we have Jack Frost: nice to see another set from you Wrk. Anyhow, I do like the idea with Jack Frost spreading snowflakes around the stage, and the way he uses them for his attacks. He can even create more snowflakes by using them for moves, just moving them all over the place. There’s also a rather cool link between the snowflakes and the ice character-standard ground freezing, this giving Jack more incentive to move the flakes onto those areas. The down special works quite well too, playing right into Jack’s annoying glass cannon nature.

Now onto the bad. Jack is a set of excess: there are TOO many good things he can do. The down smash for example can freeze the entire stage in less than a second, without a very laggy starting animation, and considering the amount of snowflakes Jack can place on the field in a short amount of time, that up aerial is monstrous. And I do think its also bordering onto excessive that pretty much all his moves create snowflakes: foes not named Marth will be drowning in flakes before long. Also, Jack doesn’t need to have the whole stage frozen to force foes into the air: he can potentially just jump snowflake to snowflake, essentially forcing them to follow him.

I do know that my complaints are bordering on nitpicky, but those are the best ones I could come up with. Jack brings everything in excess, but it’s hardly all bad. Great job with his one Wrk!

Now onto Pyro Jack, Jack Frost’s elemental counterpart. He certainly appears to be that with his concept. He does with fire and oil what Frost did with snowflakes and ice, although a bit differently. I like how his up special works with him being able to pour the essential oil down from above (though I feel he just could have been given a special float instead of a move). He can build up damage quickly once he has oil laid by spreading fire around, but he’s got to watch what he uses up too (forward smash and the special grab help with his a lot), less he have to lay more oil. Though he can use the fires he sets to keep himself in the air where he can drop more oil, as well as powder and other things that can make a KO easier to achieve. He can really make life a living hell for his foes with all his fire, and the smoke that he can use to hide his motions can really catch them off-guard to be hit with a down aerial or a KO move.

But I do have several complaints specific moves. The first being that you don’t mention exactly how the blue pyres react with the powder, which seems like it would be essential to know. The up aerial appears to be near unusable due to its lag as well. I just have no clue as to how the down tilt works the way it does: he pinches out the flame when he uses the move, so how does it end up increasing the amount of flame on the candle? Then again Jack makes use of a bit of magic syndrome in many moves, so I guess this move just awkwardly stood out.

Other than that, this is a very solid set from you, much better than Auron. Nice job.

And the third SMT Jack set now: Jack the Ripper. It’s commendable that you’ve made a set for a character with so little information available. A Blood Lust mechanic fits him very well I think, and once he gets the first few hits in, there’s plenty of potential comboing to do. Landing his various lunging moves is also pretty vital in keeping his bloodlust up too: Jack is very grab-focused (including his lunging moves) in addition to using his knife, which is fine for a primarily close range fighter. Though I feel that the healing by biting the foe is a bit much and really unneeded.

I have some more attack-specific concerns about him as well. The up smash I feel is rather random to not be a throw, and 4 seconds is a bit too long to just stop the fight completely I think. Even more awkward is the dash attack, which could easily just have its effects combined with the down tilt’s function. The down tilt is useless without blood on the knife anyway. There are a few times where you trip over your words, specifically the forward tilt description (there were some cases of this in Pyro Jack too). Finally, it seems strange to me how his neutral special is the only move that actually physically weakens the foe when he has so many more brutal moves. It’s not a big problem though. Nice job with this considering the lack of potential or background, Smady.

And now the Jacks are out of the way. I’ll do some more comments later on.
 

Kris121

Smash Journeyman
Joined
Nov 26, 2008
Messages
263
Location
THE INTERWEB
In the game of Brawl there are assist trophies and Pokeballs that summon things for battle. For this MYMini there is an item called a present. Much like assist trophies and Pokeballs, presents summon Christmas characters that affect the battle in their own way. When a brawler picks up a present they take half a second to rip open the wrapping paper and a random character from the list below appears.

Rudolph
When Rudolph is summoned whinnies and a blizzard occurs making the screen whited out and every one takes 1% damage a second. This blizzard takes place for 20 seconds. Also everyone’s vision becomes impaired. Except for around Rudolph’s nose. You see Rudolph prances around the stage slowly for the entirety of the blizzard providing a small beacon of light the size of a smart bomb explosion.
Santa
When Santa is summoned he appears and laughs jollily. He then takes a random item from his bag and proceeds to use it against the opponents of the summoner. He either uses a hammer, a golden hammer, a blaster, a beam sword(he has 15 swings), or a super scope. After his item expires he laughs and hands the summoner a different completely random item to use. You can pick it up out of his hand.
Mrs. Claus
When Mrs. Claus is summoned she appears in front of the character that summoned her. She smiles for a bit one second then pulls a tray of cookies from hammer space. Mrs. Claus will hold this plate for 20 seconds and then disappears. This plate contains 17 cookies and each heals 5% health. Your character can eat this as fast as other foods but if you eat all of them you become so happy that you become lighter and get KO’d 20% easier for the rest of the stock.
Elves​
When the elves are summoned 3 small Christmas elves about the size of squirtle will appear on the stage and laugh. They then run to the extremities of the stage so that they are as far as possible from each other. The elves dance a bit and then hold up their hands. A flash appears in their hands and the three dragoon pieces appear in their hands. The cool thing is that dragoon is Christmas colored. Unfortunately the piece show for only 5 seconds and thus make it hard to get them all with one character.
And to all my MYM’ers that celebrate Christmas.
MERRY CHRISTMAS!!!!​
 

n88

Smash Lord
Joined
Oct 10, 2008
Messages
1,547
Snow Miser can't be far behind. . .


Heat Miser
Heat Miser is one of the central characters from the classic Christmas flick The Year Without a Santa Claus. Despite initially opposing the heroes' quest to spread a little Christmas spirit, due to his fierce rivalry with his brother Snow Miser, he turns out to be fairly harmless, if very grumpy.​

So how does Heat Miser join in the Brawl? Via the Assist Trophy, of course! When summoned, Heat Miser doesn't prove very helpful for his summoner, instead making a beeline to the rightmost part of the stage, moving at Bowser's dash speed in an odd sort of waddling gate, although he's invincible all the way there. Once he reaches the right end of the stage, he begins to camp out, and the music changes to this delightfully catchy tune, which is a must-see for anyone who wants to really understand Heat Miser's Assist Trophy. Oh, and the music isn't just background noise; Heat Miser actually joins in and sings his parts. Oh, and just so you know, Heat Miser is about the size/build of Wario.​

A fire about the size of Kirby appears directly in front of Heat Miser, and his little minions, depicted in the video, begin to hop out of it, using shovels as pogo sticks. A total of six will appear, hopping outward in a line. Once they've spread out in front of him, they'll begin to dance around like they do around the 0:34 mark in the video, although they'll take a few steps back every now and then so they don't actually advance away from Heat Miser. The minions have 15 stamina each, and if one is destroyed, Heat Miser will scowl, and send a new one out eight seconds later.​

Destroying those minions is the only way to get rid of Heat Miser, as it happens. Sure, he'll disappear by himself, eventually, but only after he's done with his song, which is nearly two minutes long. Who wants to put up with Heat Miser for that much time? So like I said, KOing hte minions is the only way to eliminate the otherwise invulnerable Heat Miser. But simply KO'ing them isn't quite enough, as Heat Miser will replenish them eventually. No, you'll have to time things carefully, because in order to get rid of Heat Miser, you need to have all six minions KO'd when it's time for them to sing one of their lines. If this happens, Heat Miser will scowl, stamp his foot in anger, and then disappear in a puff of smoke, his wonderful song totally ruined by you unappreciative hooligans.​

But killing off the minions isn't quite that easy. Heat Miser will throw fireballs comparable to Luigi's (except red in color, and twice as fast) at anyone who attacks the minions. He only dispenses them at a rate of about two per second, but you've still got to be careful. Heat Miser also has a few attacks that he'll use at predetermined points in the song. . .​

. . . He's Mister Heat Blister/He's Mister Hundred and One. . .
Heat Miser will spew a stream of fire one Ganondorf-height forward, which afterward forms into the shape of a burning "101" about the size of Bowser. Both the fire and the 101 deal 10% damage and weak vertical knockback, and have pretty great priority. The song comes back to this line three times, so foes will be seeing a lot of it if they don't get Heat Miser out of there early.

. . . What ever I touch/Starts to melt in my clutch. . .
Heat Miser will teleport to the nearest Brawler and attempt a grab as soon as he gets out the word "touch". Once grabbed, foes will take an impressive 23% damage and set vertical knockback before Heat Miser returns to his normal post. It can be evaded by a dodge, but Heat Miser is pretty fast, and you'll have to dodge before he actually starts to teleport. While that sounds tricky, you are forewarned by the lyrics of the song. Just like the last one, this is sort of the chorus of the song and Heat Miser gets to use this attack three times total during his two-minute reign, each time the song comes back to it.​

. . . I'd rather have it eighty,/Ninety one hundred degrees!. . .
Heat Miser pulls out a thermometer with a rapidly-rising mercury level, which quickly tops out as the whole screen takes on an orange tint, due to the superheated air Heat Miser is creating. This results in massive damage all around, doling out 5% damage per second to all fighters for a full ten seconds, amounting to 50% damage total. Epically powerful, but it comes rather late in the song. If what you've seen already doesn't motivate you to get rid of Heat Miser, surely this will.
 

half_silver28

Smash Ace
Joined
Apr 25, 2008
Messages
862
Location
MYM, Ohio
Pretty cool AT/Fiend/potato, n88. Heat Miser starts up a sub-boss fight all on his own, pretty much requiring the fighters to work together to get rid of him. I do like the effects that certain lines of the song have on the fight, specifically the last 2. Obviously the dance he and Snow Miser (waiting on him (wary) ) do are the most memorable parts of the movie, and are awesome for an x-mas themed summon. Also hope that there can be some interactions between the two, assuming there's a way for them to be summoned at the same time.

I did say I would get more comments out, but those are gonna wait because of what's gonna be on the next page...
 

Katapultar

Smash Lord
Joined
Nov 24, 2008
Messages
1,284
Location
Australia
Heat Miser is a pretty cool Assist Trophy pseudo boss fight. I've never heard of him or the movie, but he sounds like a lot of fun to be with. I'd personally get away as far as possible from him and use my enemy as a shield and grab them so that they succumb to his second move or something.
 

half_silver28

Smash Ace
Joined
Apr 25, 2008
Messages
862
Location
MYM, Ohio
Merry X-mas MYM! Now for a completely unrelated set :[

Life itself is a frightening image for every human being... being strong in life isn't easy.


The respectable yet lecherous monk Miroku joins the Brawl!


Obligatory playlist that is obligatory


Background
Miroku is one of the main characters from the anime and manga series Inuyasha. He is a Buddhist monk who spends his time traveling the countryside, performing exorcisms and other spiritual services... for a price. He teams up with the title character Inuyasha and others early on in the series, who share a common enemy in the demon Naraku: the spiteful main antagonist of the series.

Naraku cursed Miroku's grandfather many years ago, placing a gaping hole of darkness in his right palm. When not properly sealed, the hole sucks up anything and anyone in its path with a powerful funnel of wind, trapping them in what is essentially an eternal purgatory. Thus the hole is known as the Wind Tunnel. However, the hole grows larger with time and extended use, and will eventually go out of control, sucking up the very person it afflicts. The Wind Tunnel is a hereditary curse: it was passed down to Miroku's father and eventually to Miroku himself. The curse can only be broken upon Naraku's death. The demon himself has to take precautions against the very curse he gave him: he uses poisonous demon insects in battle, which would fatally poison Miroku were he to suck them in.

There is another hereditary trait that was passed down to Miroku by his grandfather: lechery. Partly driven by his desire for an heir to carry on his fight against Naraku should he die, the monk has a habit of asking any attractive woman if they will bear his child. In addition, his perverted tendencies lead to him literally grope the behind of various women. His favorite target for this is Sango, a Demon exterminator who joins the group of protagonists a bit after Miroku does. Miroku predictably suffers for his lecherous actions, often receiving a slap in the face or worse.

Despite his lechery, Miroku is arguably the series' most rational and intelligent protagonist, and can hold his own in battle with his sacred Shakujou Staff. His Wind Tunnel puts him in the conversation for the most powerful character in Inuyasha, but he has to watch his use of it, less he makes his already shortened lifespan even shorter. This moveset centers around the Wind Tunnel, along with Miroku's skills as a monk.

Stats
Miroku stands about the same height as Snake, and weighs as much as Wolf. Miroku runs as fast as Luigi: he's in good physical condition, but his robes slow him down a bit. The monk's jumping ability matches Ike's, while his fall speed matches Zelda's. Miroku has all-around average traction. Many of the monk's attacks have good range thanks to his staff: he rivals Marth in this area.

Specials

Neutral Special: Wind Tunnel
May as well go right to Miroku's most powerful technique. Miroku removes the prayer beads that cover the hole in his right hand with about .6 seconds of lag. He then thrusts his right palm in front of him, and unleashes the power of the Wind Tunnel. A giant vacuum of wind pulls in everything around it: items, destroyable stage portions and foes. The Wind Tunnel reaches across 3/4ths of Final Destination, while it's maximum vertical area of effect is 2 Ganondorfs. Once something touches Miroku's hand, it is instantly sucked into the hole, gone forever. As you may have guessed, foes are instantly KOed upon being sucked up.

Now for specifics. The speed at which items, foes and everything else is pulled into the Wind Tunnel directly depends on the weight of the object or character in question. Jigglypuff will be pulled in much more quickly than Bowser is, essentially. But there is another factor taken into account with characters: their damage percent. The Wind Tunnel will barely have any effect on foes with 0% damage, but its power over foes will equal half the pull of Dedede's Inhale when they're at 100%, and will be just as powerful as said move when they're at 150%. This power growth maxes out at 300%, being three times as powerful as Inhale.

So Miroku just has to damage his foe enough to suck them in, right? Well there are a few ways for foes to fight against this. There's the obvious running against the pull (or using another movement option), which is more or less useful depending on their speed. They can shield, but this only cuts the pull of the Wind Tunnel by 1/3rd, and it drains shields at 1.25 times the normal rate. Or they can just run straight at Miroku and jump over him, assuming their jumping isn't awful. At lower percents, foes can simply sidestep past Miroku before he can suck them up. Finally, certain moves such as Jigglypuff's Rollout and Sonic's Spin Dash can roll under Miroku's hand without risk.

Miroku can only use the Wind Tunnel for a total of ten seconds throughout the entire match: only regaining one second of use for every minute that passes (the total time can't go over ten seconds). So it needs to be managed diligently, especially in longer matches.
There is one other flaw of the Wind Tunnel: it can become infected if Miroku sucks in poison gas or gunk or anything like that. Miroku will take constant damage if he sucks in something poisonous, the exact duration of time he takes damage equals the number of seconds he sucks in poisonous substances times ten. Miroku also takes a token 10% damage when he sucks up poisonous foes like Muk or Zinger.

Now Miroku does have the ability to angle the Wind Tunnel 45 degrees up or down by tilting the control stick during the move's start lag. While tilting it up can be useful against aerial foes or whatnot, tilting it downwards is useful for destroying stuff. Most destroyable stage sections will fall to a little under one second of the Wind Tunnel's pull. Also, Miroku can use it to forcibly suck up sections of the stage, creating a hole half a battlefield platform wide and half a Kirby deep over 1.25 seconds. This is useful for preventing foes from escaping the Wind Tunnel easily, or for just trapping them against. The stage goes back to normal when Miroku loses a stock. Miroku has other ways to force the foe into the Wind Tunnel, but those will be discussed later.

Side Special: Sutra Scroll
Miroku makes use of sacred Sutra Scrolls often in the anime: he uses these same items in Brawl as well! With .4 seconds of lag, Miroku places a sutra directly in front him, which simply floats in midair. They all float. The sutras are white cards with writing, about 1.5 times as large as a Brawl sticker, and Miroku can place them just above his feet or at head level by tilting down or up, respectively. Obviously, this gives Miroku a lot of flexibility with where he can place the sutras: he can potentially place them off-stage to screw with opponents' recoveries. In fact, he can place sutras directly onto solid walls and even onto other characters. Miroku can have up to five sutras on the field at any time.

Now the peculiar thing about the sutras is that they don't deal knockback: a foe takes 7% damage and high hitstun upon hitting a sutra (they become invincible to that particular sutra for about a second too). This is great for Miroku: foes become unable to fight the pull of the Wind Tunnel for nearly half a second. This has a greater effect on foes with more damage, obviously. However, sutras can be destroyed by having 15% damage dealt to them, and they all disappear when Miroku loses a stock. Miroku can also use side B next to a sutra to take it and put it back in his robes. Sutras are unaffected by the Wind Tunnel.

There's one part of this move I haven't touched on. When Miroku places a sutra directly onto a foe (or ally), it actually has a positive effect on them: it cures them of any negative status effects such as poison, and prevents them from being afflicted with any for ten seconds. But when those ten seconds pass, the sutra suddenly erupts into a burst of blue flames and disintegrates. This explosion of fire deals 9% damage and high hitstun to whoever happens to have it on them. The explosion can be shielded though (but not spot-dodged). Finally, if someone with a sutra on them grabs Miroku or any other character, they can rip the sutra off themselves and place it on them with their pummel.

Down Special: Blue Scroll
Miroku's second sutra-based special. Miroku produces a sutra from his robe with a bit of lag and holds it between two fingers. The card then suddenly lights ablaze with blue flames, and Miroku tosses it forward (Miroku suddenly channels Gambit here). The sutra travels as fast as Falco's laser once thrown, and can travel across the whole length of Battlefield's main platform before disintegrating. Miroku can slightly angle this move up or down, and he will throw it at a downwards angle in the air like Ness does with PK Fire if it's angled directly downwards. This deals 7-8% damage and flinching knockback to foes, and lights them completely ablaze for a moment as well. This fact becomes important for an interaction with another move later on.

Up Special: Hachi's Trickery
Miroku's only a human being with slightly above average jumping abilities, and as such, calls upon a non-human to help him recover. With a call of "Hachi!", Miroku's anthromorphic tanuki servant by that name appears next to Miroku in a puff of smoke. Hachi puts his hands on Miroku, and the two of them disappear in another puff of smoke. Miroku will then reappear one battlefield platform away in yet another puff of smoke. The direction of this teleport move can be controlled, just like Zelda's recovery. This deals no damage, and puts Miroku into helpless afterwards.

Yawn, generic teleport recovery. Well this WOULD be one, if not for this move's other possible use. If Miroku is stuck in Dedede's stomach after being inhaled, stuck in a Yoshi Egg or being carried around by Donkey Kong or something similar, Miroku is free to use up B. This causes Hachi to appear next to what or whoever has Miroku stuck, and teleport both of them as if the move was used normally. This is pretty useful for escaping from suicide KO moves. Just keep in mind that there are exceptions. Ganon's side B suicide KO generally happens too quickly for this to work, and Miroku is too distracted to call Hachi if he's caught in something like Wario's Chomp move. As for Bowser's Side B suicide KO, up B has to be used before the Koopa King plummets down to save the monk.

Standards

Neutral A Combo: Holy Sh-Staff!
Generic neutral A is go! Miroku attacks with two fairly quick horizontal swings of his staff, and finishes with a vertical swing to deal decent knockback. The first two hits deal 3% damage, and the last one deals 3-4%. There's a bit of end lag after the final hit though: it might be better to chain the first two hits into themselves or another move at low percents. Fairly good for close range mix-ups.

Dash Attack: Shoulder Charge
Whilst running, Miroku lowers his shoulders and charges forward not unlike a rugby or football player. Anyone he hits takes 9% damage and flinching knockback, as well as good hitstun. The monk keeps this attack up for as long as A is held & he keeps running. If Miroku is quick about it, he can turn around and hit them with another move, or start up the Wind Tunnel.

Forward Tilt: Purifying Salt
Another staple of monk...atry. This is a word now (WARY). Anyhow, Miroku reaches into his robes with a decent amount of lag, and tosses a handful of purifying salt before him. The salt reaches a little over a Bowser length in front of him, dealing 5% damage to foes that it hits. If it hits them in the eyes it blinds them, making any attack they try to use over the next two seconds have a 50% chance of missing completely as a result. More importantly though, this move ends up covering a battlefield platform of ground in front of Miroku with purifying salt. This move also has an above-average amount of end lag. Miroku can only have two patches of ground with salt on them at a time, the oldest patch disappearing when more salt is thrown. It's also possible for Miroku to suck up the salt with the Wind Tunnel over the course of a second (he can only do this if he angles the tunnel to the ground). This has the effect of purifying Miroku himself, halting any constant damage the monk is taking from poison or darkness.

This is where the down B comes into play. If Miroku hits any salt with a flaming sutra, or hits any foe standing on salt (it lights them on fire briefly if you forgot), it instantly ignites the salt into a river of flames that reaches up Mario's height. Anyone standing on the salt when it ignites is forced to jump up and down as if they ate spicy curry for the entirety of the three seconds the fire remains on stage, the salt obviously dispersing when those three seconds are up. They take 15% damage during that time as well. Anyone who touches the fire after it initially starts is thrown upwards for decent set knockback and 6% damage, as well as a half second of hitstun. Obviously if you can catch a foe on the fire, you've got a good chance to suck them into the Wind Tunnel. However, the Wind Tunnel will force the fire to go out after about 3/4ths of a second, with the foe regaining control very shortly after. One of Miroku's most effective methods for getting opponents into the tunnel.

Up Tilt: A Glint of Light
The monk raises the front of his staff over his head with average lag, as it starts to glow with a white light. The small hitbox deals 12% damage and knocks foes away with good knockback that won't KO until 185%, a rather straight forward anti-air attack. This move lasts for about .6 seconds, and has moderate end lag.

However, if a foe's face is within a Kirby length of the shining hitbox, they immediately cover their eyes, blinded for two seconds after the duration of the move. This results in their attacks having a 50% chance of missing during that time, halves their dash speed and prevents them from jumping. If they have enough damage (150% or so), it becomes near impossible for them to escape the Wind Tunnel in that condition. This move can become a huge threat if foes are near those damage percents, its mere existence being enough to discourage aerial approaches and hinder recovery attempts.

There's also an alternate use for this move: purification. If Miroku touches a cloud of poisonous gas or something like that, he'll purify it, causing it to disappear over the duration of the move. Note that he can't purify stuff like icy mist with this move: only poison or dark-based stuff. Speaking of darkness, Miroku can instantly repel dark-based moves like Raven's with this, as well as burn through Spadefox's tentacles.

Down Tilt: Holy Quake
Miroku faces the screen and slams the end of his staff on the ground in a rather laggy motion. A burst of white light then suddenly erupts from the bottom of the staff, sending a wave of light along the ground two Kirby lengths on either side of Miroku. This trips any grounded foes near Miroku and deals 5% damage. This cannot be shielded by anyone other than Yoshi (finally! his shield does something useful!) since it runs along the ground, though it can be spot-dodged. A rather useful move to catch foes off-guard, this is pretty easy to follow up on next to a wall (or in a self-created hole). This can also be considered the ground-based counterpart to the up tilt, since this can purify the poison or darkness-based traps created by Raven or others.

Smashes

Forward Smash: Change Your Evil Ways
Cookie for reference. Miroku attacks with a fierce horizontal swing of his staff, dealing 15-23% damage and decent to good knockback depending on the charge. Foes are knocked away at a low trajectory, preventing this move from KOing unless used near a ledge. Even when blocked, this attack can push foes a fair distance forward due to its great shield-push. Try using this to knock them into walls or into self-created holes. Since characters fall down upon being pushed into a hole, Miroku will have a chance to activate Wind Tunnel for a possible KO. Keep in mind this move has moderate end lag, though. One final note: this can be used to smash most projectiles back at their user, though at a lower trajectory.

Up Smash: Pinwheel Staff
The monk raises his staff up vertically, this motion having a separate hitbox that deals 3% damage and low set knockback that puts them right above Miroku. This puts them in perfect position for the main of the attack: Miroku quickly spins his staff in a circle 3 to 5 times depending on charge, dealing 18-26% damage and good upwards knockback that KOs between 175 and 160%. This is a pretty good way to end psedo combos at low percents or against a wall, or to simply catch overly aggressive foes with. Afterwards Miroku will have time to set up purifying salt or sutras and all that. Keep in mind the long duration of this move with two motions if you miss, that combined with average end lag make this a costly one to wiff.

Down Smash: Holy Circle
Setting the front of his staff on the ground, Miroku swings it around himself once in a sweeping motion. This deals 14-23% damage with low knockback, and also flips foe's feet out from under them, knocking them into a prone position. They'll be forced to remain there for a brief moment, enough time for Miroku to position himself to read their next move. Foes that try to roll away could be vulnerable to a down special flaming sutra. Down tilt can be a good follow-up too: it will almost surely hit the foe and trip them up unless they roll away immediately. And if they're against a wall...

Aerials

Neutral Aerial: Holy Slam
Miroku raises his staff above his head, and slams it down in front of him in a laggy telegraphed motion. This is indeed a generic spike, which deals 12% damage and downwards knockback that KOs around 100% damage. Miroku can use this to gimp or edge guard (something he's surprisingly good at), or to simply force foes back to the ground where his Wind Tunnel is most effective.

Forward Aerial: Holy Lance
Miroku points the front of his staff directly before him, and it glows with white light for about a half second, similar to the up tilt. Foes who run into the glowing hitbox take 12% damage and knockback that KOs at 135%, making it one of Miroku's better attacks when it comes to traditional KOing. This makes it a rather effective gimping move. Like the up tilt, this can also be used to purify poisonous gas and all that.

Back Aerial: Behind You!
Miroku simply swings his staff horizontally behind himself, dealing 11% damage and good knockback that KOs at 180%. The knockback is slightly downward angled, so it can be used to force foes to the ground in addition to gimping. This move has some moderate end lag as well.

Up Aerial: Crescent Moon
Miroku quickly raises his staff above his head and spins once in midair, knocking away foes for 8-9% damage and decent knockback. This is a pretty straightforward GTFO aerial, with its only notable feature being the start animation, which looks very similar to that of the neutral air. This allows for potential mind games, considering the difference in execution speed between the two moves.

Down Aerial: Falling Staff
With a bit of lag, Miroku thrusts the front of his staff directly under him. This is a spike that deals 13-14% damage and knockback that KOs at 95%. This is the most forceful of Miroku's aerials, knocking foes down very quickly and unexpectedly. This move has bad end lag and even worse landing lag though, so be careful with using it.

Grabs & Throws

Grab and Pummel
Miroku grabs in front of him with his free hand. It's fast, but only has the range of Marth's grab. Miroku simply punches the foe for his fast pummel, dealing 1% per hit.

Down Throw: Pacifist Monk?
Miroku lets his foe go and simply pushes them forward 2/3rds of a battlefield platform, dealing 6% damage in the process. It takes half a second for them to travel that distance when pushed, being immobile during that time. The moderate end lag prevents Miroku from following up with Wind Tunnel, but that becomes a possibility if he pushes the foe into a sutra or into a hole. There's also the down special flaming sutra if you force them onto purifying salt...

Up Throw: Begone, Demon!
Miroku reaches into his robes and produces a sutra, which he places on the foe's body. He lets them go afterwards, giving neither character a lag advantage. The sutra has the same effects as one place via side special at first, cleansing them of any negative status effects.

This is a different type of sutra through. It starts to glow white a second after it's placed on the opponent, and it suddenly erupts into an explosion of white light two seconds later, dealing 13% damage and upwards knockback that KOs at 150%. This can be shielded though, but anything other then a perfect shield results in a good amount of shield-push. That can give Miroku a chance to grab them again or even use Wind Tunnel. This can really mess with the foe if Miroku can hit them with an attack or two before the thing explodes.

Forward Throw: Holy Fury
Miroku quickly lets his victim go ands steps back. He then slams his staff down on them, dealing 10-11% damage and decent, slightly upward angled knockback. This can be useful for forcing foes into sutras in the air: many characters are more vulnerable to the Wind Tunnel if they get stunned in midair as opposed to on the ground, like Ganon or Ike.

Back Throw: Holy Swing
Miroku quickly positions the foe behind him, and knocks them away with a horizontal swing of his staff, dealing 9% damage and knockback that KOs at 170%. A rather straightforward throw that gives Miroku space to set up.


Final Smash: Demonic Cyclone
Miroku's been using his wind tunnel one too many times: he holds his cursed right hand above his head and unleashes it. This time however, its pull affects the entire stage, and it treats every character as if they were at 125% damage (unless they have more of course). Its pull is twice as strong as that one Ganondorf length above Miroku's hand: any foe caught in that area will almost surely be sucked in. The Wind Tunnel can be angled slightly left or right by tilting the control stick as well. This lasts for 5 seconds.

Playing as Miroku: Into the Eye of the Storm​
Unless you haven't been paying attention this whole time, you'd know that Miroku's playstyle is all about sucking foes into his Wind Tunnel. He's got quite a few methods to force opponents into the tunnel, but he's got to damage them a bit first. He can annoy his foes with both varieties of his sutras: the normal kind that he can place like traps and the flaming sutras that he uses as projectiles. When it comes to close range, Miroku can take advantage of some psedo-combos if he can read his opponent well. He can follow up a down tilt with a down smash or vise versa if they're being overly aggressive. And of course, forcing foes into the tripped or prone positions with those two moves can provide plenty of opportunities to read their reactions. A get-up attack will often result in a forward smash to the face, and a dodged attack can result in a painful up smash. Shielding foes can be tripped up by the down tilt. Try to trap opponents against a wall or in a hole (Wind Tunnel can create those in case you forgot), it becomes far easier to counter their movements. A few uses of the first two hits of the neutral a combo can keep foes on their heels too, don't forget to mix things up. If you're having a hard time keeping the pressure up, try sticking a sutra on your opponent: these can screw with them a bit and potentially give you the opening you need to attack.

Miroku isn't the best character at applying pressure though: he'll need to defend himself at times. His grab and up smash are useful against foes who try to get in his face, while the dash attack is best for when Miroku gets trapped against a wall or whatnot and needs to escape. He can temporarily disable approaching foes with forward tilt or up tilt, and he has the up smash and up tilt to deter aerial approaches. Lighting some salt up with flaming sutras or a simple use of the up throw can provide Miroku with some much-needed time to place sutras or create holes with the Wind Tunnel. While the monk can't compete with projectile spammers directly, he can use sutras as shields or he can duck down in a self-created hole. He can also knock projectiles back at foes with his forward smash, Ness-style.

Now you've got some damage on them: it's time to get them into the Wind Tunnel. They won't go willingly though, so you'll have to create opportunities for yourself. Hitting them into carefully-placed sutras or forcing them to fall into a hole can give Miroku the chance to suck them up. The monk's throws (especially down throw) can be used to push foes into these obstacles, as well as down and forward smash, the latter's shield push being sufficient for this too. You can force them onto purifying salt as well: make sure to have a flaming sutra ready to light it up if you force them onto it. Opponents with over 100% damage are as good as KOed if they get caught in that initial blast. Most of Miroku's aerials launch foes back towards the ground at different angles, another effective way of forcing them into various traps. There's also the up and forward tilts, whose disabling properties can make foes more vulnerable and thus easier to suck in. Finally, a few well-placed sutras can go a long way towards forcing foes into the tunnel: it's possible to drag them through a line of sutras due to the hitstun they inflict, and straight into the Wind Tunnel

While Miroku can force enemies across the stage effectively, he lacks traditional KO potential, naturally relying on the Wind Tunnel. But what Miroku does have is a good edge-guarding and gimping game. Force foes off the edge, and the monk has two effective spiking moves in the neutral and down aerials, and a powerful forward air. The very similar animations shared by the neutral air and the generic-spin-move up air can also provide for a bit of mindgames in this area. And Miroku can gimp with much less fear of the suicide KO thanks to the unique properties of his up special.

Miroku can sometimes find himself in unique matchups if he faces opponents that make use of poison or darkness-based attacks. While poison can inflict serious damage on Miroku if he sucks it up with the Wind Tunnel, he can purify a lot of darkness or poisonous traps with his up tilt or forward air. His ability to heal negative status effects by placing sutras on characters can become a useful support move in 2v2s. He can place them on his ally to heal him or her, and they can try to place them on enemies before they explode. Add to that the fact that creating holes can seriously help characters with chaingrabs. Miroku is quite comfortable playing the role of support character.

Above all, Miroku is about putting opponents where you want them. Whether its knocking them into traps or holes, tripping foes and reading their reactions, forcing them to the ground or off the bottom blast zone or sucking them into the Wind Tunnel. Miroku always has to make sure his enemy is in the right place before he makes his move.


Taunts and Victory Poses

Up Taunt: Peaceful Monk
Miroku places both of his hands together, as if praying, and says "I really hate to be this rough".

Side Taunt: This is a Game, After All
Miroku simply says: "This may come as a surprise, but I'm a very sore loser".

Down Taunt: Awkward Moment / Lecherous Monk
This taunt can take three different forms depending on conditions. Assuming there's a human female in the match (not including Nana), Miroku will turn to face the closest one and say "Aren't you a sight for sore eyes" while checking them out in a vaguely perverted manner. Miroku will do something different if he uses this while right next to a female. Miroku then performs his infamous perverted act, shamelessly groping their backside. This creates a shocked reaction on the part of the female, who then turns to Miroku and slaps him in the face. After the slap, both the female victim and Miroku are free to move.

If there are no females currently in the battle, Miroku will close his eyes and, with a sigh, say: "Well... this is awkward."

Victory Pose 1: Good Monk's Confession
Miroku slowly gets down on one knee, then puts his hands together and closes his eyes in prayer. While he does this he says: "Pain is nothing. It's death that concerns me."

2: Holy Street Fighter
Miroku flips his staff upside down and sticks the sharpened ends of his staff into the ground. He does this while saying: "This is irrational, impossible, against my religion... but somewhat... satisfying".

3: Two-Timing Monk
This pose will only be used if there was a human female (again besides Nana) in the battle. Miroku and whichever female placed highest end up on the screen, and Miroku immediately gets down on one knee and, to the female's embarrassment, grabs their hands between his own. He then says his most famous line: "Would you be willing to bear my child? It would do me great honor". This, predictably, ends with the pissed-off female slapping him across the face. Miroku then ends up face down on the ground and stays motionless.

But the pervert monk isn't finished yet. If you let the results screen stay up long enough, the female will become a bit concerned and kneel down to look at Miroku. Once that happens, Miroku will proceed to unexpectedly grope dat ass. At this, the mortified female stomps on Miroku's head violently until he once again lies motionless. The unfortunate monk never learns, does he?

Victory Theme: Half Demon, Inuyasha (from 0:54 to end)


I have decided that it is much more pleasant traveling with a beautiful lady, after all.


kitsuneko345

Smash Ace
Joined
Dec 20, 2007
Messages
562
Location
*sending Sundance lots of apple pies on Pi Day, as
Have a Haruhi-chan Christmas
as Interpreted by
kitsuneko345


Exposition

Setting: December 24, Random japanese school, SOS brigade Room

Haruhi: Listen! We are having a Christmas party!

Mikuru: Yippee!

Haruhi punches Kyon on the face

Haruhi: Stupid! If you take this pary lightly, they are going to come and kill you.

Ghost of Kyon appears

Ghost of Kyon: Who's "they?"

Haruhi: Those guys jump on roofs with a moutain of gifts on their backs, completing their missionwith without anyone noticing. Their real face must be some secret agents... Yes.


SANTIE-YO!​

Haruhi: They think the SOS Brigade is a hazard and they might be coming to us.

Itsuki: What did you say?

Haruhi: That's why we need a strategy to fight against the threat of Santa. So here it is.

A sign appears saying the "operation"

First, we put up an SOS brigade sign on the convenintly placed battlegrounds next door. Kyon will hide in this foggy glass case and watch the target. The rest of us will wait here and have a party. There is the danger if we get found, but let's hang in there.

Sign signifying the end

Any objections? Not you, Kyon.

Kyon: Let me say something.

Haruhi: And by the way, Tsuruya is going to help us.

Tsuruya: Hey let's have fun!

Haruhi: Tsuruya will be a contributor when we need to fight Santa.

Tsurya: Yes, leave it to me. I'm the master of Tsuruya martial arts... Or that's what my plan is when I become 19.

Kyon: Your plan?

Tsuruya: You don't believe me, Kyon.

Kyon: I can't. It obviously sounds like a fib.

Tsuruya: Then take a look at this.

Kyon: What is this?


Tsuruya: A photo of me battling a bear.​

Mikuru: Wow, awesome.

Kyon: As if!

Haruhi: Okay. We can lure Santa to the battlefield now.

Kyon: For real?

Haruhi: Now what can we surpise Santa with once he opens the glass case...

Haruhi sees a jack-o-lantern with a big enough hole to fit a huan head, complete with blue cloak. She grabs the carved pumpkin.

Haruhi: Kyon, look!

Kyon: I refuse with all my power.

Haruhi: I refuse to your refusal.

Kyon: Damn.

Haruhi: Don't be a poop and put it on. You'll look great.

Kyon: I don't mind not looking good in it.

Haruhi puts the pumpkin on Kyon's head. Cue laughter.

Kyon: Shoot!

Act I:
This is the Only Act

Setting: Battlegrounds, Christmas Eve, appears to be nighttime

Kyon: Let's see if Santa's is really coming. What am I doing here when everyone's having a party. But I don't really want to be home playing with my little sister either.

Someone picks Kyon up and takes off the fogged glass he was hiding in.

Kyon: Huh? What the...

Haruhi: What is it?

Haruhi sees the culprit

It's Santa!!!!!!

The person/thing who picked up Kyon grows two times the size of Kyon and becomes very muscular. The clothes shed to show an Santa suit, complete with hat. It then panickly runs away.

Kyon: He grew big and ran away.

Haruhi: I think he's just running away randomly. Let's chase him.

Haruhi and Kyon chase him


Kyon (inner): I see. That must be how Suzumiya wanted Santa to look like. Her will power must have modified that unsuspecting person. All those other guys attacking don't seem to faze "Santa"; In fact, I think he's just running away from us. Speaking of us, it's been 15 seconds and I can't even catch up.

Kyon faints

Kyon: No, I can't catch up. How does he run like that?

Haruhi: Well, I wasn't just running after him randomly.

Tsuruya appears in front of "Santa"

Kyon: What? Tsuruya?

Tsuruya: Thank you. You can leave him to me.


Tsuruya dealt 15% damage knocking "Santa" back a bit

Tsuruya: Now!


Yuki used the strings to tie up "Santa" on the ground.

Haruhi: Great job, Tsuruya and Yuki.

Kyon: "Tsuruya martial arts" is for real?

Santa escpaes and crab-walks towards some background bushes.

Haruhi: Oh my god. He left his cloths and ran away.

Kyon: Are you okay with him running away?

Yuki: It's fine. I re-modified him from Santa.

Haruhi: COME BAKKU!

Haruhi, Kyon, Yuki, and Tsuruya disappear. A head showing the unsuspecting victim come out of the bushes and thinks "Why am I n-n-naked?" the head goes back down and five seconds later, the victim pops out again.

________________________________​

So yeah... Merry Christmas, I guess!
 

Katapultar

Smash Lord
Joined
Nov 24, 2008
Messages
1,284
Location
Australia
The Melancholy of Haruhi Suzumiya is epic, and this take-on of Episode 19 is funky - it's been a while since there's been any kind of Haruhi Suzumiya-related material for MYM since the SOS Brigade moveset from MYM4.

Despite the fact that the AT is supposed to be set-up like a script used from the 19th Episode, you still make it obvious to the readers what happens. From what I deduce, Kyon appears from the AT, and anybody who grabs him is caught by Haruhi and turned into Santa Claus through her subconscious reality warping powers. From there it seems that the santafied foe is invincible, but after 15 seconds Tsuruya appears and punches the enemy, then Nagato ties them up with her strings, which renders them unable to move for a while. Of course the effects of a move don't have to be obvious. Also I deduce that only males can be santafied...cause like, yeah, it would be awkward otherwise...

Also I have realized that this page has 2 anime entries.
 

MarthTrinity

Smash Lord
Joined
Aug 9, 2007
Messages
1,954
Location
The Cosmos Beneath Rosalina's Skirt
Submission period for MYmini #2 (Christmas Extra) is now -OVER!- Votiong period begins now so send me your votes for the best mini of this week! You can find a full list of the minis that are eligible for voting on the front page of this thread right below the OP! You have until midnight (USA Pacific time) to submit your votes...so basically 24 hours from the time this was posted originally! Three votes, same as last time by the way in case that's keeping y'all from voting; I haven't gotten any votes yet.

This brings us to...

MYmini #3: 2010 Lookback

So! 2010 is coming to a close very soon and lots of crazy stuff happened this year. Your MYmini is quite a broad one this time; we want you to make an extra (any extra) related to something that happened in 2010. This can be an extra based on an event or death during 2010, a movie release, a game...pretty much anything. If it happened in 2010, it's fair game for any kind of extra. Nice and simple, right?

You have a whole week to think up and make your mini so we hope to see a large variety of things considering how the restrictions on this one allow for a huge amount of potential. Good luck and have a happy New Year!
 

Junahu

Smash Ace
Joined
Nov 15, 2005
Messages
899
Location
Shropshire Slasher
grruuuuuuuu, post Christmas post

Jack frost:
I'm loving how Jack has more so many options for leaving snowflakes, giving him a nice degree of freedom in that regard. Jack has such an infectious sense of mischief, always giving the foe a choice between taking the damage, or leaving the flake for Jack to use. The whole set manages to be fun, yet deep too, even if some of the interactions sound rather obtuse (I'm looking at you, mr. passthroughasnowflakewhileusinganeutralaerialtoturnitintoabombthatfreezesthegroundwhenitfalls)

Some of the means to create snowflakes are a little too effective at making them, either being safe, creating a lot of flakes, or both. There really doesn't seem to be much of a point in throwing a snowball, for example, when you can freeze a good swathe of the stage and make three times as many snowflakes in the exact same span of time.


Pyro Jack:
Ah, similar yet entirely different, Jack and er.. Jack have a strange synergy in their playstyles. Though, somewhat annoyingly for a duo, a clear matchup winner, which is unfortunate, because I was so wanting for them to team up.

There's a lot of fun to be had with the oil, and a good few interactions with it, though you seem to make a habit of overcomplicating such mechanics. Some of these interactions are wierd, and arbitrary to the extreme, especially when it comes to fire and explosions that stubbornly refuse to ignite oil. As an example, Flaming Cartwheel could have easily been just a normal haunted cartwheel that flattens oil and spreads it around faster.

Another complaint is that Pyro Jack uses so much oil. It's not something I'd associate with a Jack o Lantern, but Pyro almost bleeds the stuff here. It feels like the oil just exists to complicate matters.

Nonetheless, and almost in spite of all my complaining, I do like this set. It encourages a devious, mischievous kind of play, and much of the pyre/supernatural ghostliness is exactly what I wanted to see out of the little guy.

Dunno why ice is always thought of as bad against fire anyway, I mean, ice is pretty damn good at killing a fire you know? It's cold, it traps air, and it has no feul


Jack the Ripper:
The third and probably my favourite of the Jacks, Ripper operates muchly on a maniacal murderous momentum, getting in the foe's face and never letting them get away. Blood lust is a simple and genuine mechanic. The various ways the blood lands does a great job of making the player think about how best they can make, and collect, blood as they go, rather than having to break off their assualt at any point to refresh.

I have to wonder whether it would be better if the foe was allowed to collect their blood back up, rather than having it evaporate over time. That way the foe would be encouraged to do something stupid like, turn their back on Ripper to collect some blood they just dropped. Then again, I love how you allude to the blood being illusionary

Is there a cap on how much 'stamina' (why'd you have to call it that? That's already the official term for the % in Brawl) the foe can lose? I'd imagine losing 100% of it would be silly.

"as walks forward for a Bowser" is wonderful engrish, it makes me smile.


Penny Gadget:
Yes, I'm commenting my own set, hopefully to get a head start on some of the complaints I'm sure she'll recieve.

Penny and Gadget are meant to represent the balance between control and power, Penny lacking in power, and Gadget lacking in control. And between the two is Brain, who acts as a bridge. That is the concept (of the show and of the moveset) in a nutshell, and I think I've gotten that more or less right.

Something I had to bear in mind when making Gadget, was the fact he was going to be completely AI controlled. This is why there is very little interconnectivity between his moves. Why make things that would be fun for the player to do, if the player can't even control him? You'd just end up frustrated with him performing all these interactions. Still, there are a few things I'm not happy with, so I'll probably be editing the set later down the line.

I was also INSANELY tempted to let Penny hack Gadget's AI settings with her Computer Book.
But then again what would that imply about the cartoon? That Penny is deliberately modifying her mentally handicapped uncle for her own amusement (and for the sake of having an easily controlled parental guardian)?
 

Rychu

Thane of Smashville
Joined
Jul 5, 2010
Messages
817
3DS FC
1908-0105-4965
Im falling WAY behind on comments, so I'll comment what I missed starting now:

GANNY REMICKS
So, I'll make this short: Ganny...isnt that different. I could go into negatives, but Ill stay positive: for a MvC port, or whatever it was originally, its good. The writing style is fun to read, whats new is good, and it holds itself together. Its exactly what it wants to be, and I can't argue against it. Good Job, Tirk.

NECKY
Necky's cool. Its one of those that I didn't want to read, but I was happy I did afterwards. His whole gamestyle is fun to imagine, and honestly I can't think of many negatives about it. Good Job, Kupa!

SARKAHN VOL
Sarkahn...well, is interesting. I like his game, his style...his descent into madness. What you did here is an interesting experiment in what could be done as an ever-evolving character, and its a step up MAJORLY from Breeder. Good Job, LoL.

SNOWMAN JACK
Wrk...this is a cool set. I love the Ideas put into this, and everything thats in it. The snowflake mechanic is especially interesting..,I love it, man. Keep up the good work, Swinub.

I'll get to the others after I've read them. Sorry about the fall back, I've been kinda busy the last few days.

MERRY ****ING CHRISTMAS!
 

MarthTrinity

Smash Lord
Joined
Aug 9, 2007
Messages
1,954
Location
The Cosmos Beneath Rosalina's Skirt
Howdy hoes! Sunday comes to a close right now which means. . .MYmini #2 results are in! So...here they are...


MYmini #2 Winners

1. Smashville Christmas by Junahu (4 votes)

2. Kind Dedede by MasterWarlord (3 votes)
2. Heat Miser by n88_2004 (3 votes)

Holiday Cousins by TheKingOf All Cosmos (2 Votes)
Delibird by Clownbot (2 votes)
Winter Warlock by BKupa666 (2 votes)
Bad Santa by darth meanie (1 vote)​

And that's all for last week's MYmini! Make sure to participate in the MYmini for this week everyone! And remember to -VOTE- as well! Voting period is -ALWAYS- on Sunday.

1,818 posts. W00t.
 
Status
Not open for further replies.
Top Bottom