• Welcome to Smashboards, the world's largest Super Smash Brothers community! Over 250,000 Smash Bros. fans from around the world have come to discuss these great games in over 19 million posts!

    You are currently viewing our boards as a visitor. Click here to sign up right now and start on your path in the Smash community!

Make Your Move 11 - It's Over, Duder!

MasterWarlord

Smash Champion
Joined
Aug 24, 2008
Messages
2,911
WHY I DID NOT READ PACHIRISU

I was thinking I would read this just to get up to 5 sets for this comment block, but there’s just so little for me to say here that I considered just reading another set. There’s very little specific to critique here outside generic complaints about the general genericness of the set, and I see actual redeeming factors in movesets like Cubone, mind you. In any case, two scythes and the various projectiles you have shown aren’t exactly some of the things with the least potential around. I don’t think this should be a character that warrants pity when you can’t make –anything- memorable from this set. Was the grab-game supposed to be some sort of hook or a bottleneck that the rest of the playstyle flowed out of? Because it could’ve been placed at the end of the set and really nothing would’ve changed in the reading experience of the set. She has slightly above average damaging throws I guess. . .? I suppose that could be considered a relevant specific criticism – don’t make sections of a moveset come earlier for no reason. While you’d think it’s harmless, it sets certain expectations of the reader of what you’re doing with that group of moves.

MASTERBURGER

The first thing I want to go over is just how awkward the Burgermeister’s banning of inputs is. There’s no limit to what the Burgermeister can ban (Why ban throws when you can ban the grab?) or how many inputs he can ban, and it seems more to me like his playstyle would revolve around simply occupying the enemy long enough to outlaw their entire moveset. With how powerful the guards are and the fact Burgermeister has some competent melee options, it’s very easy to pressure them into the guards once you’ve made them break a law. Just ban their recovery when they’re knocked off stage, or meta-mindgame and make them think you’ve banned an important move when you haven’t. Burgermeister generally removes himself from the fight in the later phases of his game once his men are done finding toys, and from there it just seems all too easy for him to ban all he wants.

Now, if we ignore Burgermeister banning moves, he’s a pretty painfully simple character bogged down by a lot of David style tacky moves with things like that intimidate move. Of course you don’t have to entirely remove banning moves from the Burgermeister, but if we make it actually fair and only let him ban 3 moves or so, then his playstyle of banning most of the foe’s moveset goes with it, and he becomes a good bit less interesting IMO. Yes, Burgermeister is at his best when he’s trying to play Mikami for me, but it’s much too easy for Burgermeister. There’s that, and there’s the fact that since he obviously can’t be allowed to fight in MYM Brawl due to eliminating interactions, he’d get slaughtered by the Brawl cast while his men are searching for toys.

JIMNY

The fact that the bone automatically comes back to you while you’re free to move sets up for all sorts of fun stuff, and the varying trajectories you can make it come back at with the two specials along with the dtilt provide for a great basis for a moveset. A moveset which isn’t there. The only move that comes to mind as something that might be worth keeping is the fsmash for the motion properties, as better control over Cubone is better control over his bone. I get what you were trying to do with the counter, but he doesn’t need one when the bone serves as an automatic counter, much less when you gave him superarmor on half his moveset already.

A simple character at a glance, but once you realize just how obvious it is to go for projectile tennis it’s hard to give much character pity when so many sets have managed to make it work so well in their own unique ways, most prominently Jeice. It’s not like it had to be projectile tennis – that’s of course not what you wanted with this offensively minded moveset, but letting Cubone attack his bone to deal it knockback feels like something obvious you could’ve played with.

RAGNA

Jin is quite possibly my favorite combo character ever. Giving the foe mutations to extend their hurtbox and other things that can be countered by Jin’s moveset feels like what Jason tried and failed horribly to do all those years ago by giving the foe the machete. Here, it works both gameplay wise and for the enemy/player’s characterization, considering they’re forced into this and they can’t just drop Jason’s machete and be done with it. This isn’t just a straight buff system, though, of course, and the ups and downs of the mutations are quite interesting to think about and leave plenty of room for highly varied comboing. It doesn’t feel overpowered due to Jin always having to apply the mutations to himself before he can give them to the foe, but at the same time doesn’t feel underpowered because Jin can potentially actually use the transformations directly if the foe becomes too paranoid of getting injected.

MAGMORTAR

I’m almost at as much of a loss of words to make a comment for this as I am to make a comment for Geto’s moveset, just because I can’t think of anything specific to critique. In this case, it’s because the moveset is too –good- for me to contribute much of anything rather than too bad. I could try to be Silver and just list my favorite interactions from the set to try to fill this space, talk about all the ways he can build a fortress and stockpile lava bubbles and gas before it leaks to the outside world, talk about the glorious uair as Urabrask weaves in and out of combat while flinging metal at the foe. . .But really now, that’d just be telling you things you already know and only serving as an advertisement for those who haven’t read it. In which case, if you’re reading this comment and haven’t read Urabrask, read it. If I forced some form of criticism, I’d say the moveset feels too defensive for its’ own good considering how it’s trying to be a more truly sophisticated trappy interaction playground than past sets that tried to such as Lemmy, but honestly if it did that the moveset would probably become too lost in finding its’ identity.
 

ForwardArrow

Smash Ace
Joined
Aug 17, 2011
Messages
503
I already told Geto my opinion on Margaret in the chat, so I won't be commenting her here. All I will say is I do not like the moveset at all, but for what it's worth he didn't exactly have much of anything to work on. While we're at it, I can't really level any complaints at Burgermeister past what Warlord mentioned, I will say I kind of liked the game with trapping the foe in a burning toy pile but I don't think it's anything we have not seen before.

Darth Vader
You definently built this set up a bit in the chat before it was released (though I think I am partially to blame there as well), and the result is, for what it's worth a fairly impressive set. Vader definently has two contrasting games to him in a manner similar to Dragonite, but they actually flow pretty darn well together since you can gradually pull the opponent towards you as you build up your melee range power and then use it to launch the foe away again. In particular, I like his ability to launch the foe away on a stage chunk while they are in prone. That, and his whole force grab game really is pretty cool... if albeit it strikes me as enormously frustrating to play against considering it hits ANYWHERE on the screen. That and the set feels very Vader, if you know what I'm saying, the set practically oozes character and it's really cool to see how well you transition him from the movies to Smash Bros.

Mind you, that's not to say there are not things to complain about. I don't really like the way the aura is handled, gradually building up over time. It feels like forced and also makes the transition from his campy game to his close combat game a bit more awkward. That, and when it comes down to it, his melee range game really is kind of bland. Yes, if you didn't do it this way it wouldn't be Darth Vader, but the fact really is that unless there are some twists to it swordplay isn't all that interesting. Vader's combo/follow up game really isn't anything that we haven't seen before, with the twist of it working better at higher percentages really not making it any more interesting. That, and maybe it's just the Warlordian side of me speaking, but I feel you could have done so much more with the stage chunks than just using them as a projectile/occasional method to transport the foe.

If I came across as nitpicky, I had high expectations for this set and I wasn't entirely fulfilled. It's a good effort from you n88, but I think Dark Star was still a fair bit better. I can still see myself voting for this though.
 

Junahu

Smash Ace
Joined
Nov 15, 2005
Messages
899
Location
Shropshire Slasher

Hello again. It's been way too long, but I think I've finally got a handle on my opinions, and can once again start commenting the way I used to. That shiny header up there serves two purposes. One; it's an eternal reminder to myself to never again slip so far into inactivity. Two; I like drawing Donna, so sue me.

I should remind people of a few things regarding my commentry. Most notably, I don't like to exacerbate the idea that movesets can be directly compared along a bar of 'quality'. Everyone makes the sets they want, and I'm very happy with that. I might nudge you in a direction it'd be cool you dabbled with, but other than that, just keep doing whatever, you crazy diamonds you.
Secondly... there is no secondly, let's just go read movesets dood.

Praetors
It couldn't have been easy to develop 5 individual movesets, out of a trading card series that MYM largely ignores. Through these sets I can gather what your approaches are to a number of different problems. The problem of too little inspiration and how to keep smaller ideas interesting over a full moveset. The problem of too much inspiration, and how to organise and prune those ideas into a beautiful overall shape. The problem of how to approach a genre that has been worked at in two vastly different ways (teamwork, Warlord's Hugos vs Junahu's Fluttershys).
What I couldn't find here, however, is a moveset whose making was entirely fluid for you. There always seemed to be obstacles to their creation here, hurdles which you had to overcome. None of the 5 sets really popped out at me as being a definitive FA experience. Which just means I'll have to read more FA movesets from now on.
As a whole, I really liked how individual each moveset looked and felt. Every Praetor has its own identity, and you wanted to bring that across. In the process though, you sacrificed some of their cohesion. I can't see these characters existing together in the same game, which is unfortunate because they should.
Elesh Norn
This is quite the set of sets to come back to. 5 movesets in a row? How dare you do this? Who do you think you are, Duck Twacy?

You've captured a decent snapshot of the more laid back summoner archetype, the kind of person who manipulates everything around her into a sort of concentrated chaos.
There's a creative aspect in the way the moveset is laid out, a kind of subtlety to how inputs are labelled so mutely, as if her attacks themselves are more apparant in the ripples they create, rather than their immediate outcomes.
It's nothing all too new for the genre, but that's not a complaint. Norn is very competantly made, and many of her attacks manage to be both simple and interesting

A stand out attack for me, has to be her Forward Smash. It's immensely satisfying to use this attack while controlling a minion. I kind of wish this extended to all her Smash attacks, as opposed to just one. A close second would be the Neutral air, for its tactile feel.

As for complaints, I'm surprised at just how much the cape plays into Norn's game, to the point were, instead of a disorientating the foe breifly, it becomes this pseudo grab-game that Norn almost revolves around. It feels like a comical slapstick moment to see the foe struggle to escape a flimsy sheet of cloth. It's a bit too much of a mood contrast for me, and I doubt Norn really cares all that much about trapping enemies in her robes.

Jin-Gitaxias
Those mutations are pretty neat, in a strange roundabout way. How fitting for a scientist to ignore the obvious idea of injecting mutations directly into the foe, because when you write out the whole process of mutating the foe, it sounds quite convoluted. Inject the mutation into yourself, puke it back out again, and then splash that puke over the foe (but better put it in a bottle first, of course). Just looking at Jin, I'd have thought he'd be a little more prepared for a brawl, instead of improvising on the fly like this.

But I really like the aspect of experimenting on your foe, and the neccessity to test the mutations on yourself first allows you to play with the deformities as both buffs and debuffs. 2v2 certainly has much potential here.

This is certainly not my kind of moveset, I can't lie about that. Many attacks, while probably useful in the big scheme, feel disjointed and seperate, like many different lesser sets sewn together. If I were KingK.Rool, I'd argue that cut-n-shut approach suits Jin. But I'm not, so I won't.

Sheoldred

Teamwork mechanics I always like, especially when they are as intuitive as they are here. This is probably the closest I'll ever be willing to get to a Hugo type moveset, any more than two characters and you begin to lose fidelity with the group as a whole
The dynamics between Sheoldred's two halves are really cool, as you weigh up the pros and cons between operating seperately, or conjoinedly. There's some fun logic to using your big body as a sort of distractive punching bag, while your invisible torso slithers away to grease up the stage. It's suitably manipulative, and skirts the problem of making such a big bruiser play with some subtlety

I dare say Sheoldred's Forward Smash should involve her main big body, that's just the kind of inputs that Smash attacks are. Then again, maybe it did. It's hard to tell what part of Sheoldred uses which attacks (colour coding would be a nice way to dispel the confusion).
I'm also a might confused about jumping while seperated. I'm assuming just the little torso jumps, leaving the big body on the ground. If you input a smash attack in that situation, would the body do the smash attack, would the torso do an aerial, or would both occur?

Urabrask
Urabrask's magnetic play has a certain level of cleverness behind it, a spacing metagame that you set up like you would regular old traps. It's a bit undermined by the ACTUAL traps Urabrask abuses, metal walls and lava flows, but even those are in service of exploring the magnetism. And I can hardly begrudge the walls, when you use them so well as magnetic barriers, spacers and hitboxes.

Special Lava Time; can Urabrask swim in other instances of Brawl's Lava? And does this ability make him immune to fire in general? Is he immune to other Urabrasks' firey breath? Selective logic like this always sets off warning bells for me.
Then there's the special fire which blasts holes into metal, special fire that welds metal. Special gas, special explosive metal.
It's a bit surreal really. I'm surprised a moveset can revel so much in its own inconsistant physics. It feels complex, yet unfocused, scattershot. I can't really engage myself in a moveset that doesn't feel confident enough in its idea, to simply let it flourish on its own.

Vorinclex
This reads a bit like a MasterWarlord mix-tape, as if it's some sort of crime for a big feral guy to just act big and feral. The set even uses a liberal amount of green, which is the defacto Warlordian colour. Taken as is, this could have turned out a lot worse. Urabrask is probably the better of the two in it's Warlordish manipulations of its core concepts, but Vorinclex still has its own charms.
My favourite aspect of Vorinclex was all the dash inputs, which go a long way in capturing Vorinclex's juggernaut feel. Elements of clinging under the stage were also cool. Something about a guy his size clinging to the underside of Smashville tickles me.

A good too many attacks have special additional effects just because. And I can't find myself enjoying the prospect of micromanaging two layers of stage manipulation. It seems way too intelligent for the big lug. There's oil, and mountains, and holes, and trenches, and oily mountains, and oily sludgey ground. It's too much for me, I wanna punch stuff as the guy who looks like he punches stuff (and eats it too).

WHERE'S THE EATING ATTACK? He's called Vore-inclex for goodness sake!

Pokemon RNG MYM11
I'm just surprised this was participated in at all. It's certainly no picnic making a moveset for a character that is forced on you, so I'd feel a trite stupid commenting on the results like they were willful, enthused projects. Nonetheless, NOT commenting would be rather insulting. After all, it's my fault you guys had to do this.
Crawdaunt
Something as simple as Harden really tickles my fancy here, especially as it swings between movement buff, for defense, and super armor buff, for crabhammer (I swear I didn't read this moveset before making Dragonite), though even I wonder why his molted shells don't stick around, at least as throwing items, or maybe even as temporary homes to hide back into.
This reminds me somewhat of Midbus, which is nice, as Midbus was a digestable pastiche of Warlord goodness that felt practical and real. Crawdaunt's malevolent Dark typing is expertly underplayed here, using his behaviour, rather than his moves to set the mood.

Slaking
I don't think I'd accept anything other than a basic 'beat the bejesus out of the foe and nap' moveset for Slaking. His brainless molesting of the foe is one of the few movesets where'd I'd object to anything smarter. This is a Falcon punch, but in the form of an entire moveset. A satisfying super form that you need to work to maintain.
I will never enjoy the move "Yawn", because it's one of those attack you just can't represent in Brawl, without defaulting to showing a cloud of random sleep gas wavering around.


Glaceon

There's some lovely whimsical play going on here, making snow drifts to hide in and subsequently burst out of, ice 'rinks' to skate across. The effect is obvious but awesome all the same; the foe can never put a sure foot forward, for fear of ice or snow. This is an extremely well crafted moveset (though a little light on exposition sometimes)

Buizel
Much like Glaceon, Buizel has a good sense of play about him, this time through kinetic motion as opposed to prankishly toying with the foe's movement.
The animations and attacks are all extremely believable, that Up-tilt is probably one of the best structured animations I've seen in any moveset.
Just, in general, I feel like this is a marked step up from your previous Pokemon Movesets, especially in how you analyse the pokemon in question.

Cubone
Cubone, I quite enjoy. The core of him is in taking advantage of spacing your bone and yourself and your foe, and that alone makes the moveset interesting. Most of the simpler attacks are wholly justified in that they actually work very well with the core moves Cubone boasts.
A few attacks though, felt a little like padding, lacking in the context needed to explain what it does in spacing/poking/KOing the foe.
At the very least I'd like to know what certain moves are like when taken in context with his bonemerang and bonerush because, again, those form an excellent core for Cubone's moveset

(though argueably, this agressive play is more suited to Marowak).
 

Junahu

Smash Ace
Joined
Nov 15, 2005
Messages
899
Location
Shropshire Slasher
This is the new MYmini somehow

MYM11: Week #13
Comic Sans.


[1st January - 8th January]
Your mini this week is a rather simple one: make an extra based on a comic or a comic character, there’s no limit so long as the character has been in a comic of some sort. No limits on the type of comics either; funny pages, superhero comics, Peanuts, Superman, anything goes!
 

SirKibble

Smash Champion
Joined
May 2, 2008
Messages
2,400
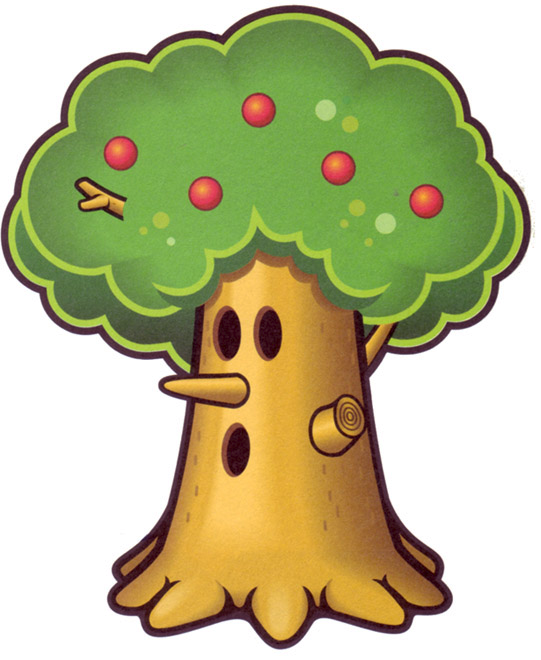
Whispy Woods


Whispy Woods is a recurring boss from the Kirby series. In fact, he’s tied with King Dedede as THE most recurring boss in the series. Whispy is almost always the first boss in the game, and is renowned for always being rather easy to beat. But he keeps showing up, so we’ve got to give him credit for persistence. He attacks Kirby primarily by dropping apples from his branches and blowing gusts of air, though he has shown various other abilities on occasion.


Statistics

SIZE: Whispy is scaled down from how he appears in most of the Kirby games, but he’s still larger than the entire existing Brawl cast. He’s about 1.5x the height of Ganondorf, a little wider, and has a bunch of growth at the top of his trunk (hereafter referred to as his “canopy”) as tall as and a little wider than King Dedede. All of this is part of his hurtbox, but damage done to the canopy does not deal knockback or hitstun to Whispy.

WEIGHT: Whispy is also heavier than the entire existing Brawl cast. He’d probably score about a 15/10 if we scaled the existing cast from 1 to 10, but if you stand still with Whispy for one second, he’ll root himself into the ground in that spot, and this makes him even heavier—in fact, he’s totally invulnerable to knockback until 50% damage is done to him to break his roots’ grip! He is also impervious to hitstun from attacks that don’t do very much. Furthermore, attacks to the canopy do not contribute at all to the breaking of Whispy’s roots.

GROUND CONTROL: Whispy is slow. Very slow. He cannot walk—tilting the control stick will just cause him to lean forward a bit or turn around in place. He can dash, though! When he dashes, he takes some time to uproot himself if he’s not already uprooted, then “dash” at about the speed of Jigglypuff’s walk. His “rolling dodges” move him a pathetic distance as well, so don’t get any ideas. It’s going to take you a while to get anywhere.

AIR CONTROL: Whispy’s jumps are absolutely pitiful. It takes him both jumps to reach the lower platforms on Battlefield. And he can’t move much horizontally during the jumps either. And if it wasn’t obvious, he falls back down very, very fast. Due to his general inability to be in the air, Whispy has access to his “aerials” even while on the ground, so long as you are holding the Jump button while inputting the particular attack. Note that the Jump input must be given twice quickly to uproot him and actually jump, so you can use it once to just access your aerials.

In short, Whispy basically sits in one place and takes hits. Luckily he’s got a lot of weight to keep him there. Just please don’t ever make him play on Rainbow Cruise or something like that, okay?


Special Attacks

Up Special : : Canopy Cover

Whispy tenses up, and his canopy starts to expand horizontally. Each use of this move causes it to gain half a Battlefield platform’s length on either side, a full platform in total. The expansion is a bit slow, but even if interrupted in the middle of the move, Whispy’s canopy will increase the full amount. So while you are somewhat likely to get punished using this move, you’ll still get the benefit. This increase will last indefinitely for Whispy’s current stock, and enlarging your canopy is vital to the effectiveness of several of Whispy’s over moves. You may use this up to five times per stock, and will have to restart at the beginning of a new one.

This move also has an aerial version that differs entirely from the ground one and makes use of your canopy. If Whispy can feel a platform with his canopy, he’ll reach a large root through the background and bury that root in said platform. After this, he’ll exert all his strength to pull himself to the grounded root, effectively moving to the new platform. He can grab both solid and pass-through platforms this way, always grabbing the edge and automatically pulling himself onto the platform. He does this fairly quickly, so if you find yourself tumbling over the ledge, you can use it as your canopy touches the platform to ensure you make it back, though it does take him a while to pull himself up.

Down Special : : Root Network

Whispy’s roots can be spread out just like his canopy. So long as Whispy is rooted in the ground, you can use this move. If you’re not rooted yet, Whispy will instead brace himself and gain brief superarmor, so you can use it to help yourself get rooted in the first place as well. Once you’re rooted into the ground, this attack causes Whispy’s roots to spread out underground. You will be able to see the ground shaking in the area they grow to, so you’ll know how far they’ve spread. They’re twice as wide as the canopy by default, and grow at twice the rate as well. However, whenever Whispy is uprooted, whether by you or an opponent, he will have to start all over again. Opponents over the ground Whispy’s roots are growing under have a decent chance of tripping as a result, but otherwise, this move does nothing to opponents. It happens fairly quickly, and just like with the Up Special, you will complete it even if interrupted, so long as your roots aren’t broken. Additionally, for every time you deepen your roots, the damage Whispy must take to have them broken increases by 20%, but cannot increase it over 100%, though he can use this move five times total in a single location.

Neutral Special : : Apple Growth

Tensing up visibly, Whispy causes an apple to grow within his canopy. These take a little longer to grow as a Pikmin takes for Olimar to pluck. Within the default canopy size, he can form four apples, each of which is as big as the apples he throws on the Green Greens stage. They form from the inside out, and each extra growth of the canopy allows another apple to be grown on either side. These apples can be eaten by opponents standing on Whispy’s canopy to heal 5% damage. However, any attacks that cause hitstun to Whispy will cause an apple to drop quickly, during which time it deals 10% damage and okay upward knockback. The apple will then roll away from Whispy, dealing 5% damage and flinching knockback to anyone it hits. When it strikes a wall, it will disappear, but otherwise, it will roll all the way off the stage, regaining its fall properties when going over ledges. The apples will drop in the same order Whispy causes them to grow.

Side Special : : Cloud Puff

Whispy’s cheeks get big, then he exhales a puff of air in the shape of a cloud about as big as Kirby, which travels forward at the speed of Jigglypuff’s dash, dealing 7% damage and weak knockback to anyone it hits. You can change the trajectory slightly up or down for as long as the cloud is under Whispy’s canopy by tilting up or down on the control stick, though you can also use other moves while it’s flying forward—the input will just count toward both things. Anyway, after going beyond Whispy’s canopy, the cloud will travel about half a Battlefield platform’s length before coming to a stop, and it will hover in the air indefinitely. It no longer does damage to opponents, but if they touch it, it will pull them in. They can escape with one-third grab difficulty. Clouds will take very small amounts of knockback from attacks that hit them. Whispy may have no more than four clouds on the field at a time.


Standard Attacks

Neutral Attack : : Shake Off

Now let’s say you want to manually drop an apple. Well, this is the attack to do it! Whispy shakes briefly in place, causing his entire trunk to become a hitbox that deals 11% damage and okay horizontal knockback. More importantly, perhaps, it makes one of your apples fall. During the shaking, you may press the Attack button a second time to cause a second apple to fall, but no more than two apples may be dropped per use of this move. Still, this is fairly quick, so you can send a pretty good storm of apples around the stage this way with a big enough canopy and the right setup.

Dash Attack : : Angry Snap

Whispy dons an angry face, with a sharp, jagged hole for his mouth, then quickly leans forward and bites down hard. He will keep moving for the duration of this attack and even afterward, but the range is not very good. Still, if you manage to score the hit, your opponents will suffer 21% damage and high diagonal knockback, making this a potent KO move if you can land it. Due to Whispy’s slow nature and the move’s range, however, that’s rather difficult most of the time. Perhaps if you lured your foe into one of your clouds, you could get the time.

Forward Tilt : : Pull In

The tip of Whispy’s roots flips upward out of the ground, whipping back toward him. This covers an area about the size of Kirby, and is pretty quick. It deals 8% damage and semi-weak knockback toward Whispy to anyone hit. Obviously, the more you’ve stretched your roots, the greater range this can have, but at the cost of it not hitting the area right next to you. Still, it can be useful for forcing the foe into Whispy’s face for a close-up attack such as the Neutral Attack.

Up Tilt : : Root Bump

Similar to the Forward Tilt, a portion of Whispy’s roots unearths to attack the opponent. However, this root attack happens in the center of the roots on the front side of Whispy. The roots there will jump up and form a small arch, about the size of Squirtle when crouching, which deals 9% damage and moderate upward knockback. This can halt approaches, although it’s a bit slow, and propel an opponent to your canopy rather than let them attack your trunk.

Down Tilt : : Rootquake

The entirety of Whispy’s root system on the side you’re facing will shake violently for about half a second, though not without significant start lag. Opponents standing over the roots as they shake will take 3 hits of 4% damage each and then be tripped as the attack ends. This attack only affects grounded foes, so opponents can escape by jumping, but hey, maybe that’s what you want them to do anyway. If they don’t jump, you can usually follow up with a second use of this attack as they stand up or roll to get up, unless they roll out of your range.


Smash Attacks

Forward Smash : : Root Needle

This powerful attack makes the most of Whispy’s roots’ range in whatever direction you smash the control stick. While charging, the very tip of the roots will poke out of the ground, causing opponents who run into it to trip. When the charge is released, the tiny tip will burst into a sphere of spikes as big as King Dedede! It will remain that way for a moment, then shrink back underground. The initial spike burst deals 20 – 34% damage and strong knockback, but this move is very slow. With a proper setup forcing opponents into it, though, this can KO around 60%. Of course, this move also leaves you wide open, so be sure to hit with it, or at least ensure your opponent is on the other side of the spikes so they can’t punish you easily.

Down Smash : : Root Spikes

For an attack that really shows your opponent the power of your roots, try this on for size. After charging up, Whispy will cause all of his roots to stick out of the ground as spikes as tall as Mario. One spike will be present every Kirby’s width, so larger characters have no choice but to jump or be hit, while thinner ones could potentially hide in-between spikes if they learn the spots they stick out at. This is easily the slowest of all Whispy’s attacks, both on the front and back ends, but deals a powerful 28 – 38% damage and pretty strong upward knockback as the spikes protrude. This isn’t as potent a KO move as the Forward Smash, only KOing around 80%, but makes up for it with sheer range. The roots also extend and retract pretty quick after the charge, so a spot-dodge will cause opponents to miss the initial attack. Touching the roots while they’re retracting will deal only 5 – 9% damage and weak upward knockback, so opponents who can’t hide in the spaces between roots or who don’t have time to will often opt for this solution. This move generally forces opponents toward Whispy’s canopy at lower percentages, with potential for a KO added at higher damage.

Up Smash : : Tornado Puff

So, with attacks like the Up Tilt and Down Smash pushing the opponent to the canopy, what do you do with them once they’re there. This attack is one option. Charging up, Whispy appears to have his mouth full. He then spits three times in rapid succession, releasing a tornado about the size of Mario with each breath. The tornados curve upward such that after reaching the canopy, they’ll travel almost directly upward. The first tornado reaches the edge of Whispy’s canopy, the second halfway, and the third goes almost straight up from Whispy’s mouth. These tornados will capture anything they touch, inclucing opponents and apples. Opponents in the tornado take 3% damage per quarter second, with an additional 1% for each item or other opponent caught with them. After one second in the tornado, players and items will be thrown out in a random direction with weak knockback. Charging does not increase damage, but will increase the speed of the tornados, which can range from Mario’s dash speed to Captain Falcon’s.


Aerial Attacks

Remember, Whispy can use his Aerial Attacks from the ground by holding the Jump button while you input the attack.

Neutral Aerial : : Rotten Apples

One of Whispy’s apples chosen at random will surge with a purple glow briefly, signifying that it’s gone bad. He’ll then toss all his apples up in a low arc, catching each one in a new position on his canopy. This causes a bit of a mindgame for foes who try to eat the apples to recover damage, as the bad apple will cause them to take 5% damage instead of healing them. The tossing of the apples will also deal one hit of 3% and flinching knockback per apple to anyone hit by the apples. They’ll basically have to be standing on it to be hit, and not all the apples are guaranteed to hit, but between the attack and the mindgame, this is a good way to pressure foes on your canopy. Repeated uses of this can provide extra bad apples, but the apple chosen each time is random, and if it’s one that’s already been affected, this will destroy the apple instead.

Forward Aerial : : Bronto Burt

Whispy’s canopy shakes, and a Bronto Burt emerges from the center, charging forward at about Pikachu’s dash speed just over the canopy. It will grab the first person it hits with its feet, then continue to fly forward at the same speed. If it strikes anyone after this, it will deal 10% damage and decent horizontal knockback to them. When the grabbed opponent breaks the grip, they will be dropped as though footstooled, and take 10% damage. The only thing that can interrupt Bronto Burt’s path is if he comes within a Battlefield platform of one of your clouds, in which case he’ll dart toward it, dropping his victim if he has one, and hide in the cloud. If another Bronto Burt flies near the cloud, they will ignore it and fly on, but whenever an opponent comes within a Battlefield platform’s distance of the cloud containing Bronto Burt, he’ll dart out quickly and ram into them, dealing 12% damage and okay knockback. This will destroy Bronto Burt as well. Bronto Burt can be defeated by opponents’ attacks if they deal 20% damage to him, but he will take no knockback or hitstun from these attacks.

Backward Aerial : : Gordo

Whispy leans backward, causing his canopy to angle such that opponents can no longer stand on it, and revealing at the very back of the canopy…a Gordo! He will hold this position long enough for average-fall speed opponents who were standing at the center of the canopy to strike the Gordo, adjusting the move’s duration based on his canopy size. Of course, opponents can jump to avoid Gordo, but this happens quickly, so if they’re not far enough away from the back of Whispy, they may not get the time to do so. Additionally, depending on your canopy size, you can even use this to strike foes on the ground behind you with Gordo. Speaking of Gordo, he deals 16% damage and high diagonal knockback to anyone who touches him. When Whispy leans back upright, Gordo is again concealed within his branches.

Up Aerial : : Scarfy

Yet another baddie contained within Whispy’s foliage! Scarfy comes out of the center of the canopy, hungry for your opponents. He moves through the air at about Link’s dash speed, homing in on the nearest opponent standing on the canopy or within a Battlefield platform of him. Like Bronto Burt, he’ll make a dash for nearby clouds as well, and when opponents come close, he’ll come out of the cloud to chase them. When Scarfy strikes an opponent, he’ll explode in a Dedede-sized explosion that deals 18% damage and fairly strong upward knockback. Scarfy can be defeated like Bronto Burt, and requires only 10% damage to do so, but he will also explode when this happens. If Scarfy is released when there are no opponents nearby, or if he ever reaches a point where no opponents or clouds are close to him, he will remain in place for about a second, waiting for someone, before exploding on his own.

Down Aerial : : Big Drop

Whispy raises his canopy high, then slams it down, causing everything on it to fall through and hit the ground hard. This happens surprisingly quick, and is pretty powerful, dealing 20% damage to your opponent if they’re caught in it, but it will also destroy all of your apples. If the opponent is already beneath the canopy, getting struck by the falling apples will deal 12% damage and downward knockback. Either way, the opponent will be left in a prone position on the ground.


Grab and Throws

Grab : : Inhale

Whispy opens his mouth wide and starts to inhale. Despite being a rather slow grab, the range makes up for it, being the same as King Dedede’s Neutral Special inhale. Whispy can hold this for up to a second, with any and all opponents who come within the range getting sucked into his mouth. Whispy suffers considerable end lag afterward.

Grab Attack : : Chew

Whispy chews his opponent for a moment, dealing 4% damage. Nothing special. Rather slow as these go.

Side Throw : : Spit

Throwing to the front or back will cause Whispy to spit his victim(s) out in that direction, sending them flying with 11% damage. They’ll also receive set knockback that is always to the edge of Whispy’s canopy. So the bigger your canopy is, the farther away from you you’ll send your opponent(s).

Up Throw : : Canopy Crush

Whispy also spits his opponent for this move, but he leans back and spits them straight into the branches of his canopy. He then constricts his canopy to crush them for 15% damage. The canopy will require one use of the Up Special to regain the size it was before, this effectively neutralizing one previous use (unless you haven’t used it at all yet). The foe receives no knockback from this throw.

Down Throw : : Root Ride

The actual throwing point of this move is determined by the length of your roots. Whispy will spit his victim downward onto a lifted root, then uproots further and further along his roots, effectively carrying them forward. When they reach the tip, he’ll toss them for 10% damage and pretty good diagonal knockback. Easily your best KO throw, as the others have set knockback or down deal it at all.


Final Smash

Final Smash : : Overgrowth

Whispy roots himself firmly in place, then starts growing his branches and roots like mad, fully filling in an area about a Smart Bomb’s radius around him with them. The branches and roots will grab opponents they touch, then crush them between other branches and roots, dealing several hits that usually total around 40%. The opponents caught are then tossed away for pretty good knockback as Whispy returns to normal.


Summary

Whispy may not move fast, but he still has ways to “get around.” Proper spreading of your canopy and roots is vital to Whispy’s effectiveness. It’s recommended that you focus a little more on your canopy to begin with, since its growth is more permanent than that of your roots. Keep a relative balance between the two to avoid handing yourself the short end of the stick on certain attacks, though.

The truth of the matter about Whispy’s game, is that you want to give the opponent the illusion that they’re accomplishing something by damaging your branches. Whispy has plenty of ways to draw opponents there. His Side Special and Neutral Special are both projectiles you can use to frustrate opponents who try to camp against you, in addition to your Up Aerial and Forward Aerial which let you plant enemies in the clouds to make them more dangerous. Your Forward Tilt is also a space remover.

Once an opponent has been drawn in, you have a few ways to force them into your canopy. Unsuspecting opponent may naturally gravitate there for your apples, but if not, an Up Throw works well, as do Whispy’s Down Smash and Up Tilt. Or, if you’d prefer to continue to play a spacing game instead, you can use a Down Throw, Side Throw or Down Tilt to accomplish this. You’ll generally be doing this more when you’re ready to KO, but against some opponents, it may be preferrable at other times.

Opponents in the canopy are subject to plenty more shenanigans. Your Neutral Aerial, Backward Aerial, and Up Smash are all obvious choices, along with the Forward and Up Aerials that you may have used earlier. Relatively frequent use of the Neutral Aerial is recommended, so your opponent doesn’t get to make use of your apples’ healing properties as well. Continue this process to rack damage.

When it’s KO time, you’ll be relying mainly on your Forward Smash, Dash Attack, or at higher percentages, your Down Throw can also work. The Forward Smash is usually easier to pull off than the Dash Attack, even if it’s fairly difficult in its own right. At least it allows you to remain firmly rooted. Set up a solid cloud system near the area where you’re going to be able to use your killing move, then push the opponent toward it. Once they’re locked in, you should have little trouble landing a good hit.

Ideally, Whispy never goes on the defensive, and relies on his root system and heavy natural weight to keep him from getting knocked around, but if you do end up that way, don’t be afraid of the ledges. You’ll tether back when falling and plant yourself right at the ledge, but it’s better to be rooted there than struggling to make it to the center of the stage. If campy opponents try to use this to get a lot of distance on you, you may need to move in closer to the center. Rely on a barrage of apples to keep them somewhat at bay while you do this, then use the normal process you would to draw them in and defeat them.​
 

SirKibble

Smash Champion
Joined
May 2, 2008
Messages
2,400
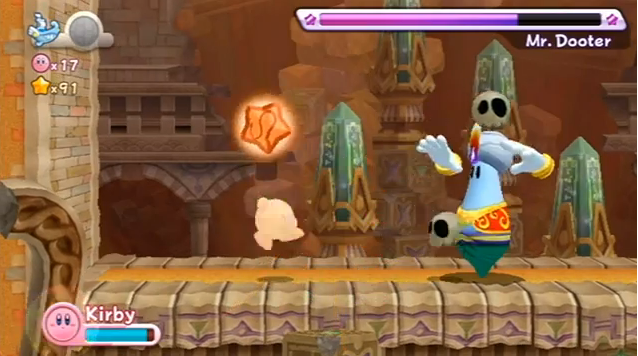
{{ - Mr. Dooter - }}


Mr. Dooter is one of the many bosses in Kirby’s Return to Dream Land. He serves as the boss of the Raisin Ruins level, and holds the left wing of the Lor Starcutter, Magolor’s ship that Kirby and friends are trying to repair. He is a sort of bowling pin-shaped genie, having the ability to summon weapons, objects, and animals from his hat or even from his hands. He is also a physical fighter, attacking with punches and a whirling spin attack that resembles Tornado Kirby’s basic ability.​


{{ - Statistics - }}

SIZE ~ TALL
Mr. Dooter is a tall guy, as tall as any of the Brawl cast. His width is about average.​

WEIGHT ~ AVERAGE
Nothing special, but Mr. Dooter can hold his own in this area.​

GROUND CONTROL ~ BELOW AVERAGE
Dooter hovers inches above the ground, seeming kind of nonchalant as he meanders back and forth. He’s not terribly slow, though.​

AIR CONTROL ~ ABOVE AVERAGE
He moves more quickly in the air, and has a good jump and slow fall speed.​


{{ - Special Attacks - }}

NEUTRAL SPECIAL ~ JUGGLE

Dooter can effortlessly juggle dangerous objects, it not slowing him down or affecting his movement in any way. When you press this input, he’ll quickly add one object to his current juggling act. Normally, this’ll be a skull about half the size of Kirby, but 20% of the time, it’ll be on fire! And another 10% of the time, he’ll materialize a bomb instead!! These all behave the same way for the attacks that use them, but flaming skulls are more powerful than regular ones, and bombs are more powerful still, exploding over the same radius as a Bob-omb. Of note is the fact that Dooter will begin the match juggling two normal skulls, and the maximum number of objects you can juggle is four.​

SIDE SPECIAL ~ MAGIC HAT

Dooter pulls off his hat with one hand, managing to juggle anything he’s juggling with his other hand for a short time while he charges this move. The charge is similar to a typical Smash Attack, and auto-releases when it reaches its limit. Out from Dooter’s turban will pop one to five (depending on charge) little critters. 85% of critters who pop out will be snakes, who slither along the ground at speeds random to each one and ranging from Dedede’s to Meta Knight’s walk speeds, lunging forward a short distance to bit enemies they come close to for 6% damage and weak knockback. But 15% of the time, you’ll get a bat. Bats have a weak homing sense, and always travel at Meta Knight’s aerial speed, lunging toward and biting opponents for 9% damage and weak knockback. Snakes and bats can both remain on the stage for up to ten seconds, or until they take 10% damage. Dooter cannot use this move again until the previous creatures are gone.​

DOWN SPECIAL ~ VANISHING ACT

Dooter will clap his hands, and all his traps, projectiles, etc. within a Smart Bomb’s blast radius of him will disappear immediately in puffs of smoke. Additionally, when you use this move, all objects that have been hidden this way that are within the same range will reappear, acting as though they’d just appeared for the first time (for example, this resets the timer for your Side Special animals, and they have full health again if they didn’t when they disappeared). This attack has almost no start lag, but a bit of end lag. Objects can only be forced to disappear and reappear once, and won’t be affected by a subsequent use of this move. Objects on a trajectory when they disappear will reappear on the same trajectory, going at the same speed.​

UP SPECIAL ~ DOOTER TORNADO

Dooter starts spinning around rapidly, stalling himself in place. You then gain total control over him, and can move him at Mario’s dash speed in any direction for three seconds. Dooter is a high priority hitbox while doing this that deals no damage, but flinching knockback. However, Dooter’s tornado will pick up any items he touches, as well as any of his own projectiles or traps, and create a swirling vortex of pain for enemies he touches this way. Each object added to the tornado adds 2% damage to each hit Dooter deals to enemies he touches, and the weak knockback remains so that you can score multiple hits. Be warned, however, that this move has significant end lag, and will easily leave you open for punishment if you don’t use it properly.​


{{ - Standard Attacks - }}

JAB ~ SPEED SPIN

Mr. Dooter takes whatever he’s currently juggling, and juggles it in a wide arc over his head very quickly. This forms a sort of barrier against aerial approaches, dealing multiple hits of 2% damage each to opponents hit. The frequency of hits will increase if Dooter is juggling more items, and flaming skulls deal 3% damage instead. Dooter can start this move quickly, but he doesn’t end it quite as quickly, leaving a little room for punishment. With no juggling items, Dooter will briefly flail his hands around for 2% damage nearby.​

DASH ATTACK ~ POOF

Dooter disappears in a puff of smoke, reappearing a Battlefield platform’s distance in front of wherever he was previously. This happens quickly, and as Dooter reappeares, he deals 7% damage and low knockback to anyone he hits. However, any objects he was juggling will not teleport with him--they remain juggling themselves in the same spot they were when Dooter disappeared. They are a weak hitbox dealing multiple hits of 1% to anyone who touches them, 3% for flaming skulls. After three seconds hovering there, any bombs you had will explode for 10% damage, and all these objects will disappear.​

FORWARD TILT ~ BOOMERANG

Dooter send one object (whichever has been around the longest) from his juggling slew forward with a thrust of his hands. In case you’re not juggling, this hand thrust does 5% damage. Anyway, the thrown object will travel directly forward a Battlefield platform’s length, where it will then hover for one second before homing in on Dooter and returning to his juggle queue (now as the last object in the queue). Skulls that are sent out deal 5% damage if an opponent touches them, flaming ones deal 8%, and bombs explode on impact for 12% and good knockback. After the initial toss, the player is free to control Dooter, meaning you can toss another object, use your Down Special on the tossed object, etc.​

UP TILT ~ HOVER

Similar to his Forward Tilt, Dooter projects one of his juggling items upward a Battlefield platform’s length, where it sits for a second. Unlike the Forward Tilt, this object doesn’t home in on him again, but drops straight to the ground, breaking to pieces if a skull or exploding if a bomb. Damages are the same as for the Forward Tilt--5%, 8%, and 12%.​

DOWN TILT ~ BOWL

Dooter rolls the first object in his juggling queue forward along the ground like a bowling ball. It rolls one platform’s length before slowing to a stop. Upon impact or after sitting still for half a second, skulls will fall apart and bombs will explode, dealing 6% and weak knockback (skulls), 9% and okay knockback (flaming skulls), or 13% and good knockback (bombs).​


{{ - Smash Attacks - }}

FORWARD SMASH ~ MEGA PUNCH

Dooter brings a fist down in front of him to charge this move, before extending his hand forward one Battlefield platform’s length. He punches 1 - 3 times, in rapid succession, depending on charge. The damage of each punch is determined by the first item in Dooter’s juggling queue, which he’s actually gripping inside that fist. With a regular skull, the punches give 4%, 3%, and 10% (charging adds from the last punch backward, so doing only one punch will deal 10% damage, two punches 3% + 10%, etc.), with the final punch having solid knockback. With a flaming skull, Dooter’s hand will catch fire as he thrusts it forward, for 6%, 6%, and 12% damage with even better knockback on the last hit. If Dooter has a bomb in his hand, the bomb will explode as he begins his punch, launching his fist forward twice the normal distance (this somehow affects all three punches), and dealing 9%, 7%, and then 15% damage with great knockback for the finishing blow. The finishing blow of a bomb-based punch also explodes on impact with an opponent, making it capable of hitting other opponents near them as well. If a bomb is used for this attack, it will be destroyed.​

UP SMASH ~ FIREWORK

Mr. Dooter tosses one of his objects upward at high speed. After going upward almost one Battlefield platform’s length, it will explode, regardless of which object it was. The explosion for flaming skulls is slightly bigger than that of regular skulls, and likewise for bombs over flaming skulls. The damages are also different--10 - 15% for skulls, 14 - 20% for flaming skulls, and 18 - 27% for bombs. All have respectable knockback, but this too increases a little with a better object.​

DOWN SMASH ~ FRUSTRATION

Dooter tosses every item he’s juggling to the ground around him, spreading them roughly over a distance equal to half a Battlefield platform in each direction. With fewer items, he won’t cover as much space. Which item is thrown exactly where is randomized, but for this move, the damage doesn’t vary all that much. Skulls deal 14 - 20%, flaming skulls deal 16 - 22%, and bombs deal 18 - 24%. All deal good knockback. You may repeat this input (similar to Link’s two-part F-Smash) to draw the items back to Dooter’s hands and resume juggling them (they have the same damaging properties on the way back as they had going out). If left alone on the ground, skulls do nothing, flaming skulls act as small fire obstacles that deal 4% damage and flinching knockback to anyone who touches them, disappearing after three seconds, and bombs explode after three seconds.​


{{ - Aerial Attacks - }}

NEUTRAL AERIAL ~ QUICK SPIN

Dooter spins around quickly in mid-air, dealing a little 3% damage and weak knockback to anyone who touches him. This is a simple, weak attack, but it’s very fast. Use it to interrupt your opponents and make approaches so you can use bigger, stronger attacks! In addition, this will pull loose objects that are nearby back to Dooter, and if he has room in his juggling queue, he’ll add them to it.​

FORWARD AERIAL ~ FIRE AT WILL

Dooter full on throws the first item in his queue forward at high speed. It will travel perfectly horizontal until it hits something, moving at about Mario’s dash speed. On contact, it will deal 8%/11%/15% damage and okay knockback.​

BACKWARD AERIAL ~ FOLLOW ME

Dooter casually tosses the first item in his queue behind him. It will float in mid-air and follow him now for the next five seconds, a hitbox the whole time. And yes, he can put multiple objects there at a time. If he does, he can start juggling new ones, but at the end of five seconds, if he has no room for the following object to return to the queue, it will simply vanish into thin air. Objects deal 7%, 10%, or 15% and light upward knockback. This is one of the few instances where bombs will not explode on contact with an opponents.​

UP AERIAL ~ YOU STAY RIGHT THERE

Mr. Dooter quickly lifts the first item in queue, and resumes falling. The lifted object will hover at the exact location it was left, where it will damage opponents who touch it. Skulls and flaming skulls deal 10% and 14% respectively, and can damage multiple times, always for flinching knockback. Bombs, on the other hand, will explode for 19% and good upward knockback. Naturally, they can’t hit multiple times this way, but that bonus knockback can be helpful.​

DOWN AERIAL ~ CRASH LANDING

Dooter performs a fairly basic stall-then-fall, dealing 12% damage to anyone he smashes into on the way down. Of note is the fact that you can use this move and this move only out of your Up Special to immediately end your tornado and pound yourself down where you want to be. This move, like, that one, has significant end lag, but you can mix up whether you use it or not to keep opponents guessing and reduce your probability of being punished.​


{{ - Grab & Throws - }}

GRAB ~ JUGGLE FOE

If Dooter gets his gloved hands on an opponent, he’ll add them to his queue of juggling items! If there’s no room, he’ll quickly toss them forward for 4% damage and weak knockback, so make sure you have room before grabbing! Dooter has no pummel, and his throws in each direction are fairly generic, but they do depend on which item is next in your juggling queue.​

SKULL THROW ~ CHEW ON THIS

A skull is tossed with the opponent, its bony teeth latched onto them. While the initial throw deals a negligible 2% damage with a skull, the skull will continue to sink its teeth in, slightly restricting movement and dealing 2% damage every half second until shaken off. After that, it will lie helpless on the ground doing nothing. This is particularly good on a Down Throw, where the opponent will be preoccupied with shaking the skull and you can land another attack.​

FLAMING SKULL THROW ~ BURST OF FLAMES

The flaming skull tosses along with the victim will erupt in flames when it hits the ground, vanishing but leaving behind a Bowser-sized bonfire that deals 11% damage to any who touch it. The initial throw here is as weak as the other. This works well on a Forward or Backward Throw, where the opponents is basically guaranteed to be caught in the blaze. A Down Throw might also seem that way, but the flames can damage you as well, so it’s not generally a good choice.​

BOMB THROW ~ BLAST OFF

This is a straightforward high-knockback throw. The bomb blows up to rocket the opponent in the direction of the throw, dealing 16% damage and very good knockback. Dooter, however, will also take 8% damage and weak knockback. Forward and Backward Throws performed this way will have diagonal knockback, so an Up Throw is the shortest route to scoring a KO this way.​


{{ - Final Smash - }}

FINAL SMASH ~ THE MAIN EVENT

Dooter snaps his fingers, and the stage goes dark. A moment later, the lights come on again, to reveal that there are now skulls, both regular and flaming, as well as bombs, flying around the stage at high speed. Think of King Dedede’s Final Smash, but this one’s happening more in the air than on the ground. Skulls here deal 12% damage and weak knockback, flaming ones 17% and okay knockback, and bombs explode for 21% damage and great knockback. Dooter can also use his Neutral Aerial to pick up the flying items for his own use. The Final Smash lasts roughly eight seconds.​


{{ - Playstyle Summary - }}

On the surface, Mr. Dooter is a character not unlike Olimar--he depends on his supply of objects, and keeping track of what’s where in your lineup will help you be more successful with your attacks. Dooter’s greater strength, however, lies in the chaotic surprise attack he can pull off with his Down Special and a couple other moves.

The Side Special is a good start for your reappearing act. Those critters have nothing to do with your juggling queue, so they’re easy to get out without any extra thinking. Use them early on to distract your opponent while you worry about your juggling items--get the best ones you can by using quick waste moves like the Forward Aerial to get rid of weak items and focus on a proper setup. You have a variety of moves then to help in your setup, from the Forward Tilt to the Backward Aerial, and then several supplementary moves to help it be even more effective. Try using a Dash Attack to leave a lingering slew of items. Get a couple more items for an Up Tilt, Forward Tilt, or another move, then use the Down Special. Now not only can you try to force your opponent into the reappearing items you have, but you’ll have a full set of items to grab with your Neutral Aerial right away and continue the assault! The Down Smash can work in a similar fashion.

This overwhelming chaos can be great for catching opponents off guard with lots of damage, but it is typically difficult to KO with. Dooter’s KO options include the Forward and Up Smashes, as well as almost any attack that involves a bomb explosion. The bomb-based Throw, particularly when used in an upward direction, is most potent.​
 

Agi

Smash Lord
Joined
Jul 27, 2008
Messages
1,120
Location
SE Washington


Fatty Puffer

Fatty Puffer is a boss appearing in the game Kirby's Return to Dream Land. He serves as the boss of the Onion Ocean and holds the Lor Starcutter's left wing. His design is, of course, based on a puffer fish. Unlike real puffer fish, he does not have any poisonous spikes. Instead, he does a good deal of rolling around and blasting about water, growing and shrinking in size as he does so. Over the course of the battle, he tends to grow in size so as to gain staying power, but as he grows weaker and weaker, he's less able to hold onto his water and more vulnerable to attack... it's a delicate balance.​


*continues to be terrible, but begins working towards being better*
 

MasterWarlord

Smash Champion
Joined
Aug 24, 2008
Messages
2,911
GORIATH


Goriath is a boss from Kirby Return to Dream Land. While he introduces little to the table on his own, the amount of clichés he combines are quite staggering. Firstly, there’s the obvious Donkey Kong comparison as Goriath insists upon pounding the ground. Next up, there’s comparisons to Street Fighter, with Goriath possessing a blatant Hadouken –and- Dhalsim’s stretchy limbs. The Hadouken can also be argued to be more DBZ inspired, though, considering that halfway through the fight his hair randomly turns gold. Goriath is also a fan of MYM logic, as he pounds the ground many times throughout his boss fight for different effects to occur when he does so regardless of him not pounding particularly harder, capable of destroying the stage on a whim.

STATS


Weight: 10
Jumps: 10
Size: 9
Traction: 8
Falling Speed: 6
Aerial Control: 5
Aerial Speed: 4
Ground Movement: 3.5

Goriath’s first jump is the best in the game, just a touch better than Falco’s. His second jump is still perfectly respectable, but it’s not spectacular like the first. Goriath can wall cling for up to 5 seconds, during which time he is capable of using most attacks (Attacks that use two arms will only use a single one). Goriath can uncling to the wall and recling, but still has only 5 total wall clinging seconds to use before having to touch ground.

SPECIALS


DOWN SPECIAL


Used in the air, this becomes a stall then fall on par with Bowser’s Down Special, but knockback that actually knocks the enemy downwards and 9% flinch resistance. Upon contact with the ground, Goriath will create a crater. Normally, this creates an outright pit 1 Ganon deep and 2 Bowsers wide, should the stage have that much room to create a pit. However, Goriath can angle himself as he falls downwards from the sky. If he hits the ground diagonally, he’ll instead create a slope the same width, with the bottom of the slope being a Ganon below him and two Bowsers in the direction Goriath angled himself. Unlike outright pits, slopes can be created on even paper thin platforms, simply bending them.

If the move is used on the ground, Goriath will rapidly pound the ground, creating a hitbox identical to DK’s Down Special. Every .2 seconds Goriath pounds the ground, the ground directly under him will get a Kirby deeper. If Goriath wants to create a slope by pounding instead of a pit, he can angle to pound directly in front of or behind himself, angling his pounds to create sloped terrain.

If Goriath attempts to create a pit (Not a slope) on a portion of the stage that has half a Kirby height of depth or less left, he will destroy that portion of the stage, creating a gaping hole which can be used to gimp foes through. All of Goriath’s terraforming is reverted when he loses his stock.

UP SPECIAL


Goriath extends out his arms 2 platforms, them shooting out at Sonic’s dash speed. Should they come into contact with anything whatsoever, not just a ledge, Goriath will pull himself to that point at Meta Knight’s dash speed. This can grab ledges, but can also grab the side of the stage, at which point Goriath will automatically will cling to what he grabbed once he reels himself in. If he grabs a foe, Goriath will enter his grab-stance in mid-air once he reaches the foe. Keep in mind, though, that the foe can start breaking free the moment Goriath grabs them before he pulls himself in, and if they escape before that point Goriath will enter helpless if in the air.

NEUTRAL SPECIAL


Goriath charges a Hadouken behind himself. The move can be charged as long as DK’s Neutral B, and like said move the charge can be stored. When you release the move, Goriath will fire his Hadouken at whatever angle you please, which is as large as Mario lying on his side and deals 10% and knockback that KOs at 150% on contact regardless of charge. What the charge affects is the speed – with no charge the hadoukens move as slowly as a dashing Jigglypuff, but at max charge they move as fast as Sonic’s run. The maxxed Hadoukens move so fast that the strictly horizontal knockback of the move means that the move can combo into itself at low percents, dragging the foe further off-stage. The slower projectiles are still quite useful, though, due to how long they’ll be sticking around. Use the faster ones to nail foes who attempt to dodge them.

SIDE SPECIAL


Goriath rips a Kirby sized “boulder” out of the ground next to him effortlessly with a single hand. Unfortunately, it’ll have to do, seeing there’s no snow to make snowballs out of to be found on the battlefield. Goriath then throws the rock in whatever direction you please, dealing 6% and knockback that KOs at 200%. Unfortunately, he can’t throw the rock very far due to how heavy it is - it only travels 1.25 platforms before hitting the ground. The rock will stay on the field for 2 seconds before vanishing if nothing happens to it, during which time it behaves as a soccer ball that’s twice as heavy (And thus harder to turn into a powerful hitbox). If it goes onto a slope, it will roll down the slope, unable to be attacked, increasing in power and speed the further it rolls. It gains roughly 6% more in damage and KOs 30% early for each Ganon it rolls downwards.

Aside from the obvious interaction with slopes, you can use this attack while clinging to the edge to make the move into a decent gimping tool, as the fact there’s no ground for the rock to land on significantly increases the potential horizontal range of the move off-stage. You can also take advantage of the Rock’s soccer ball properties on the stage without endangering yourself by making use of your longer range moves.

GRAB-GAME


GRAB


Goriath performs his Up Special. Identical animation and everything. With this move, though, Goriath can only grab foes, and should he grab a foe he’ll pull them to him instead of visa versa. This can obviously be useful in forcing the enemy where you want them, but you have to telegraph it by going there yourself first. This can indeed be used in the air much like Up Special, but will –not- put you into helpless if you miss. For his pummel, Goriath wrings their necks for 4% per pummel.

FORWARD THROW


Goriath curls the foe up into a ball before bowling them along the ground, dealing 8% and knockback that KOs at 130%. If the foe enters a slope, they’ll obviously start rolling down it faster, boosting the “KO percentage”. Aside from rolling the foe into an opening in the stage, if you have two slopes facing each other back to back you can get the foe rolling back and forth for a brief bit as they lose all of their speed to potentially land a follow up. Unfortunately they’re immune to grabs in ball form and hitting them with any attack will cause them to come out of it.

BACK THROW


Goriath performs a throw quite similar in appearance to Mario’s bthrow, dealing 13% and knockback that KOs at 155%. While spinning with the foe, he’ll go up 1.5 Ganon’s height if in the air, enabling him to make grabbing the foe double as a form of recovery. There are no other immediate properties, but if you throw the foe into something solid, AKA a wall that you’ve made by making a slope into the side of a pit, the foe will take another 13% as they splat into it for a massive total of 26%.

UP THROW


Goriath flings the foe up for 9% and a minimum knockback of 5 Ganons, but terrible almost non existent knockback growth that does not KO until 200%. This throw is more of a throw to simply buy some time for set-up early on.

DOWN THROW


Goriath stomps on top of the foe with both feet, dealing 12%. Off-stage, this deals knockback on par with Bowser’s ftilt, but all downwards, making it plenty good for killing. On-stage, this knocks foes into prone. If there’s half a Kirby height or less of ground between the foe and the bottom of the stage, this move will spike them through it. A nice alternative if you don’t think you even need to bother to gimp them personally.

STANDARDS


NEUTRAL ATTACK


Goriath turns to face the camera and beats his chest for the first 6 presses of A, taking place over half a second. This has pitiful range, but if you somehow –are- hit by Goriath beating his chest you’ll get sucked in even closer to him to the point you’re overlapping, each hit dealing 1% and brief stun. On the seventh press of A, Goriath roars, pushing anybody who was overlapping with him 4 Ganons away. Obviously it can be used for GTFO, but using it while clinging to the stage off-stage is rather difficult – even if the foe is forced to approach into you, the range is so pitiful that they can generally maneuver around you or alternatively out-prioritize you beating your chest. The move has to be used as more of a counter to work properly.

DASHING ATTACK


Goriath curls up into a ball and rolls. An utterly unremarkable dashing attack, dealing 9% and knockback that kills at 100% for some nice power, but laggy on both ends. If Goriath uses this on a slope, though, he’ll double his speed every Ganon he travels, as well as gaining 2% in damage and KOing 10% earlier. He won’t come out of the dash until he runs out of speed, meaning that if you have two slopes facing each other that Goriath will attempt to start rolling up the other slope before coming back down, making it a great way to hit dodging foes in the middle.

FORWARD TILT


Goriath extends an arm forward a single platform to punch the foe, dealing 8% and knockback that KOs at 145%. This can be angled like Bowser’s ftilt, the main purpose of which is to angle it downwards to hit foes on lower terrain as they attempt to approach you.

UP TILT


Goriath winds up his arm for some lag before extending it upwards .75 platforms and curling it slightly downwards at the peak so he’s punching at a diagonally downward angle. This deals 10% and knockback on par with Dedede’s utilt, but at a downward angle. This can obviously ground foes on-stage without you ever having to get up, most useful as foes attempt to jump over pits and slopes, as well as gimp them off the stage (Though the hitbox is more awkwardly specific there).

DOWN TILT


Goriath extends out his arms 2 platforms, having them in the foreground/background as he does so before sweeping them into the opposite plane. If his arms reach a slope or pit, they’ll sweep along the slope rather than straight forwards. Contact with Goriath’s arms deals 6% and weak knockback in the air, but far more importantly trips grounded foes.

SMASHES


FORWARD SMASH


Goriath extends out both of his hands 2-4 platforms based off charge at Mario-Sonic’s dashing speed before reeling them back in at twice their usual speed. His hands are not a hitbox, but he is instead pushing foes with his palms rather than smacking or grabbing them, meaning his hands are solid. The move can be angled to make it an even better gimper/spacer, but the thing is if Goriath gets no superarmor or anything here – if the foe hits his hands, Goriath is knocked out of the move and still takes all the usual knockback and such. In order to get this off, you typically have to aid the move with a projectile, or simply fully charge the move so it pushes them faster than they can react.

UP SMASH


Goriath extends out his arms while still holding onto whatever he was. He extends directly forwards if clinging to something, and upwards if on the stage. In any case, he extends a single platform before doing a simple short range kick, dealing 28-40% and knockback that kills at 85-55%. It’s a very short ranged move and the hitbox is impractical to hit with on-stage, though off-stage it can potentially work. Just be cautious you don’t get hit before fully extending if off-stage, as you’ll be sent into helpless in that case. On-stage, though, Goriath has superarmor/anti-grab armor. If hit there, he’ll take the damage before his arms can’t support his body’s weight and he falls down at lightning speed, a hitbox as powerful as the kick in the process. This works as a nigh unstoppable counter if you can get the foe into a narrow pit with you.

DOWN SMASH


Goriath turns to face the camera and stomps about, making an area a platform on either side of him into a hitbox that deals 15-25% and knockback that KOs at 130-90%. Unremarkable outside being a competent KO move at a glance, but if used while clinging to the side of the stage this still works. Aside from clinging to the underside of the stage and performing this move to attack foes from below, you can also turn the ledge and the underside of the stage into a hitbox with this, making this an excellent tool against the inevitable planking that will occur in a match with Goriath.

AERIALS


NEUTRAL AERIAL


Goriath curls up into a ball and spins, becoming a generic GTFO hitbox that deals 7% and knockback that KOs at 160%. Goriath cannot take stun while in this attack’s animation, but can still take knockback, giving him a sort of pseudo superarmor. If Goriath is knocked into something during this attack’s animation, he’ll rebound off of it. With your back to a wall or the stage when off-stage this becomes yet another useful counter.

FORWARD AERIAL


Goriath roars, causing anybody immediately next to him to get pushed away 2 platforms with a wind effect. This can be a generic spacer, but is far more potent as a gimper due to not refreshing the foe’s recovery.

BACK AERIAL


Goriath jabs his elbow behind him at a diagonally downward angle, dealing 7% knockback that KOs at 140% at the same angle. If the foe comes into contact with the ground, they’ll enter prone and slide along the ground for the remainder of their knockback. If they come into contact with a slope, they’ll slide to the bottom no matter what.

UP AERIAL


Goriath laglessly claps above his head in a pseudo grab hitbox, dealing 6%. Goriath doesn’t actually grab the foe though, he simply claps them. The “grab hitbox” simply forces the foe to share Goriath’s DI and fall speed very briefly during the point where they’re clapped, as well as out-prioritize most moves. If spammed, this can be an easy way to bring the foe closer to the stage/bottom blast zone before you casually recover to the bottom of the stage with Up B.

DOWN AERIAL


Goriath kicks downwards for a generic spike as powerful as Rob’s dair. Hey, you gotta have an actual attack that deals downwards knockback in a gimping game, y’know.

FINAL SMASH


Goriath generates a Hadouken so large that it’s probably a Tiger Shot instead of Hadouken, becoming the size of a smart bomb blast. Anybody hit by it takes 40% and knockback that KOs at 70%.
 
D

Deleted member

Guest


Grand Doomer is a boss from Kirby's Adventure Wii [also known as Return to Dreamland], which the player must fight to recover the mast, a piece of the broken "Lor Starcutter," the starship of stranded Magolor who is a newly-found friend of Kirby and co. The mast initially appears defenceless and out in the open, before Doomer is shown to swallow it whole and keep it in his mouth throughout the entire fight. Grand Doomer's appearance shows superiority over the entire Doomer line, with his golden colours and prominent, intricate feathers that decorate the lower half of his body, as well as impressive spikes and teeth. [BOSS FIGHT]

Due to his ability to bend the properties of space-time to his will and his command over fire attacks, he is a threatening opponent. He's also incredibly versatile, being not only able to fly, but also teleport, and disappear into the ground as a mere shadow. Then he just has ridiculous stuff like turning into a ball and summoning minions to only further enhance the chaos on display. It's excessive, but as the Grand Doomer, it's not unexpected that his fighting style would be so bombastic.​


Size: Bowser [Head], Ganondorf+ [w/ Spikes and Feathers]
Weight: Link
Ground Speed: Pit
Air Speed: Jiggylpuff
Fall Speed: Charizard

Grand Doomer's is a deceptive one, as the spikes on top of his head and his wings are never part of his hurtbox. The main, spherical part of him, where his face is, is a little smaller than Bowser, but considering he also always hovers slightly above ground in his idle stance, he is a rather huge target for any attacks. As you'd expect, his aerial capabilities are excellent, while his movement when hovering over ground is rather more considered, but never slow - appropriate, as the only time you'd want to be on the ground is if you're dealing with a wily opponent. You have access to five mid-air jumps, on top of several recovery methods, which could potentially be very devastating on its own. Grand Doomer is an opponent who is naturally impressive; he is the master of his species, after all.​


Neutral Special: Ball Form


Grand Doomer transforms into a big grey ball, losing his fiery look and his wings and spikes. In this form, Grand Doomer can only make use of his other specials, thus losing access to his aerials, standards, grab game and smashes... great. Grand Doomer also now can only move around in bounces, though these bounces can be extremely influenced by the player and landing on top of anything - be it your attacks, the opponent or anything else not part of the stage - will cause it to be meteor smashed down and leave the ball in mid-air, causing 10% damage. In the ball form, Grand Doomer takes no knockback, instead having 30HP. When that is diminished, he is forced out of the form and has to recover from it with lag horrendous enough that a Warlock punch could be landed on him. This is the only way out, so this form is, as always, a last resort and only when you have already laid plenty of traps on-screen to put to your use.

By holding the jump button just as you are about to hit the ground, you cause Grand Doomer to take a particularly large jump into the sky, above where any other player can see you. From here, you can influence Doomer's horizontal position, dropping down at twice the speed of Kirby's down special and causing 15% damage, as well as pulling the opponent all the way down with you until you both hit solid ground.​


Missing with the move leaves Grand Doomer in a vulnerable state where he is even more vulnerable to attack. However, pulling an opponent down with you to the stage causes you to pitfall them, and also allows you to push them past all projectiles that may be in their way - while just spiking them may just result in them ricocheting off one of them, but avoiding the brunt of your set trap. It's a calculated risk. By pressing the neutral special input while still in the move, Grand Doomer summons an assortment of minions to his side: Waddle Dee, Blade Knight, Sheld, Broom Hatter, Bouncy, and Kabu. These will spawn a Bowser above the stage - whether above the main platform, or something like the Battlefield platforms is random, and they are mostly fodder. They can be destroyed in one, or two attacks at best, and attack for 2-4% damage if an opponent comes within their short range. Simply touching the minions causes 1% damage and the most slight amount of flinching knockback possible. The minions will each patrol an area smaller than a battlefield platform around where they were summoned. Summoning them each takes a fraction of a second, but this adds up when you also have to protect your ball from incoming attacks.​

Down Special: Fire Egg


Grand Doomer spirals up into the air with a mouthful, before releasing a fireball to fall directly below him, at a very fast speed. The fireball itself doesn't cause damage, but it will explode if it comes into contact with anything except for Grand Doomer or his other fire-based attacks. Specifically, the fire egg is unstable enough that even your rock form will cause it to explode on contact. The explosion is twice the size of Bowser and causes 7% damage, with knockback starting off just mild, but growing very quickly to start KOing as early as 120%. The knockback also affects your other fireballs. The conundrum here, though, is how to make any use of these eggs when they are so volatile and explode on contact with practically anything.​

Side Special: Black Hole


Grand Doomer summons a black hole to whichever side was input, the black hole being a little bigger than a Smash ball with no charge and as big as Bowser after a Falcon Punch worth of charge time. No matter the size, the black hole hovers slightly if used on the ground. The black hole pulls in opponents that come within a Kirby of them, dealing them constant 1% damage if they allow themselves to be pulled into the black hole itself, but this is remedied by simply running or jumping away from it. However, Grand Doomer can place as many black holes as he wishes - with more than one black hole in play, an opponent will no longer just be dealt damage by a black hole, but also sucked into it and be transported to another one instantaneously. Which black hole that is, is entirely random, with the chance of being transported to each other black hole being split evenly.

Once an opponent comes out of a black hole, it implodes, creating a vaccuum that keeps the foe in place for a moment before releasing them and destroying the black hole itself. Grand Doomer is immune to all of this, naturally.

Black holes will suck up any of Grand Doomer's projectiles or minions that fall into their reach, causing them to go into orbit around them, including fireballs from his down special. This allows you to circumvent their volatile nature and create little asteroid fields to goad opponents away from whatever parts of the stage you don't like. Also note that the explosion from your fire egg down special will blow out any other projectiles that lie in orbit around it, causing a huge, but potentially beneficial mess. Remember that the vacuum that holds the foe in place, will also pull in anything that was orbiting the black hole towards the foe, potentially sealing their doom. Not to mention, setting up a stage full of black holes with circling projectiles, then creating a black hole specifically to push an opponent into, is a scary prospect indeed. No one knows where you'll come out.​

Up Special: Teleport Frenzy


For the grandest Doomer, five mid-air jumps simply isn't enough. Visually, Grand Doomer squashes himself vertically or horizontally before vanishing into thin-air, appearing a half-platform away in a direction selected by the player's directional input, resulting in some mild, but notable end lag. This can be repeated up to four times in the air before Grand Doomer has to return to the stage and using it in quick succession will negate the end lag until the last teleport, be it your second, third or fourth. If you direct yourself toward a black hole and your teleport is in range of it, Grand Doomer will instead elect to perform a spinning attack out of it and cause that black hole to implode and be destroyed in the same way as it would be if an opponent had just used it.


The attack itself makes use of Grand Doomer's long wings as a hitbox as he spins toward the camera, hitting for 11% damage and KOing safely at 160%. Your hitbox is far reduced if in your ball form. What this is more useful for is simply black hole management - if a black hole proves to be useless in a certain placement, you can simply destroy it without any fuss and with relatively little to lose. Grand Doomer ends the move slightly in the foreground before settling back into the main field of play shortly after - the player is given some control here to direct Grand Doomer, for as long as he's in the foreground, he is immune to damage and knockback. This also allows you to hover over your projectiles without unsettling them, if you're in your ball form, but be wary of end lag once you do settle back into the main plane.​


Grab & Pummel: Consume


Grand Doomer opens his mouth wide and attempts to swallow whatever is in front of him in a quick motion, but with slightly less range than the normal grab. If successful, he ensnares whatever that was behind his teeth and play continues. An opponent can mash out as usual, simply being dropped off wherever Grand Doomer currently is if they succeed - likewise, though, Grand Doomer can merely hold the grab input to release them. This grab can be used in the air and just as well on your minions or fireballs as an opponent - with these, however, you can actually swallow up multiple items if they are small enough.

You cannot use your down or neutral special while having anything in your mouth like this, however, you can use your up special and indeed, you can use one of your black holes directly. If you have an opponent in your mouth and you teleport to a black hole, you automatically abandon them there as it implodes, making it as if they were transported to it. For the pummel, Grand Doomer attempts to crush the opponent outright with his teeth, dealing them 3% a hit, but preventing Doomer from moving around again, making this best suited for when you don't mind them mashing free. Biting down on your fireballs causes them to explode, which is significant with your down special, letting you blow up orbits around your black holes in more unique ways and keep opponents off your back, though gimping Grand Doomer's shield-grab game.​

Throw: Crunch

To access your throw, you need to press the grab input [holding it causes Doomer to release the opponent]. Putting his impressive gnashers to the test, Grand Doomer bites down hard on whatever is in his mouth, causing it to be launched out at a frightening speed in whatever direction is pressed, defaulting to straight forward. An opponent is caused 10% damage by this and this starts to comfortably KO at a high 200%. Whatever is launched turns into a hitbox, that will deal 8-16% damage depending on its speed, which is itself dependant on the item's properties, and causes high knockback. An opponent with a high percentage will be launched at the highest speed, while a minion or fireball will always be launched at the highest speed regardless. This allows you to attack opponents with a mouthful of ammunition, but also to directly reposition some of your projectiles without leaving yourself completely vulnerable.​


Forward Smash: Fire Stream

Grand Doomer holds both wings behind him for the entirety of the charge time, building up fiery energy, taking 1-2 seconds to build from minimum to maximum charge. Once finished, Grand Doomer claps both wings together, causing immediate damage of 5-10% and knockback that KOs as early as 110% [though this is highly-telegraphed]. Out of the clap comes a stream of fire, which causes 5% damage on contact with foes and low knockback in the opposite direction, as well as blocking any enemy projectiles. This may not seem very effective, but the fire stream itself is as long as two-five battlefield platforms depending on how much the move was charged and will continue across the screen until it hits the blastzone.

What makes this move doubly effective is the effect black holes have on the fire stream - catching it in its orbit and slowly ravelling the entire stream around the black hole, outside any ring of minions or projectiles. If any other black holes are within range, they will also pull in any fire stream into its orbit - being especially notable when a larger black hole is near to a smaller one with a fire stream on it. While being siphoned from an initial black hole to another, the fire stream on the first remains, allowing you to create full on fire barriers between your black holes that let you shepherd your opponents to their dooms even more easily, as well as safeguarding your more coveted black holes from enemy fire. However, once a black hole implodes, any surrounding fire stream dissipates, ending any devious fun you may have been having.​

Down Smash: Shadow Attack


Grand Doomer descends into the stage itself, turning into a shadow on the ground that the player can move horizontally at the speed of Ganondorf's dash. This lasts for up to 3 seconds, which constitutes the charge time, but the point of the move is faking out the opponent. Once the input is released, Grand Doomer bursts out of the ground in a stretched hitbox the height of three Ganondorfs and as wide as two Bowsers, hitting for 15-30% damage and at max charge, can KO as early as 130% off the top of a normal-sized stage. Grand Doomer ends the move while taking moderate end lag. While by itself, this is quite predictable, having projectiles already on the screen means that you can force an opponent in one direction into a myriad of traps, or into the air where they may be the worst off matched against you.​

Up Smash: Spike Strike

Grand Doomer hovers close to the ground as he charges, arcing himself so that his back full of spikes is facing forward. Charging for 1.5-2.5 seconds, Grand Doomer ends the charge by extending his spikes so that they reach half-a-Ganondorf higher than usual and extend out horizontally more than usual. Any foes who come into contact for them take 20-30% damage and can be KO starting as low as 120%. This move is mostly useful due to its ability to mix well with your dash, and then rush in under your black holes and their surrounding orbits to hit foes on the other side being dragged into the black hole, or foes stuck within a black hole themselves or just recovering from that.​


Neutral Air: Fireball Rampage


Grand Doomer shoots out fireballs as large as Mario's, but replicating his down special fireballs in appearance, shooting three out per second he uses the move. You can aim Grand Doomer in any direction above or in front of him, allowing you to spam the airwaves, but these fireballs also dissipate after travelling the length of final destination, limiting their use somewhat. These fireballs travel at Fox's blast speed and only cause 2% damage each and very mild flinching knockback. Grand Doomer can only shoot up to ten of these at once before being forced out of the move with mild end lag, or the player can simply release the input to voluntarily end the move. These fireballs are even faster to attach to an orbit around a black hole than your "fire eggs" from your down special, allowing you to quickly fill up an entire asteroid ring on any given black hole quickly. The timer on the fireballs is the same, but travelling around the rings, their speed is greatly decelerated, allowing them to last for far longer.​

Forward Air: Wing Flap

Grand Doomer holds his wings behind his back, similarly to his forward smash, then pulls them both forward - not clapping them together, but creating a gust of wind. Anyone hit by the wings when doing this takes 7% damage. Anything that's in front of Grand Doomer and within two battlefield platforms of him is pushed away, especially his projectiles, but not his black holes - his fireballs that are attached to black holes are pushed into open space if they are on the side being blown away from Grand Doomer. Similarly, minions are pushed into the air and fall comically. Opponents largely vary in how they are affected, being blown back more with a higher percentage, but generally being pushed less than your projectiles or minions are.​

Back Air: Wing Spin

Grand Doomer spins in place, expanding out his long wings into hitboxes and turning himself around in mid-air at the same time. Opponents hit by the move take 6% damage and low knockback, but enough to make it a good move to simply get an opponent off your back. If any projectile is next to Doomer, he launches it away in the opposite direction at high speeds, even being able to dislodge fireballs from orbiting a black hole, so that you can disperse your projectiles without totally nullifying everything on one side of you.​

Up Air: Homing Fireballs


Grand Doomer strikes a threatening pose, causing four fireballs slightly bigger than Mario's to spawn at symmetrical angles above him. After some moderate start lag, these fireballs then start to home in on the closest opponent at an exceptionally fast speed, hitting them and dealing 6% damage each and very small knockback - enough that they don't cancel each other out by hitting all at once. These fireballs, like your others, can be lodged in orbit by your black holes as well, but will escape orbit if an opponent gets within a Bowser of the fireball. If there are multiple homing fireballs in orbit and a larger fireball is above them - like your down special fireball - they can potentially pull it out of orbit together, and drag it toward your opponent like a bomb. Your minions can also be pulled along like this, giving them far more range than before and a handy set of armour.​

Down Air: Fireball Barrage


Grand Doomer seems to puff himself up slightly as he winds back, then leaning forward and releasing a barrage of constant fireballs downward. Grand Doomer can aim the trajectory of the fireballs slightly in the space below him, allowing him to fire them diagonally or straight down - after 3.5 seconds of constant fire, however, Grand Doomer will suffer bad end lag that leaves him incredibly open. A fireball comes down at a rate of five per second, though these are far smaller than even Mario's - they are destroyed in a small, neat explosion once they hit something, similarly to your down special, but the explosion causes only 2% damage and low knockback. Mostly, this move is just useful for forcing your opponent into your other traps by pure brute force, or as the absolute best way to fill up your black holes from above.​


Jab Attack: Fiery Wing

Embers light up both of Grand Doomer's wings at once, him using them to swat the air in front of him - hitting opponents for 4% damage, but dealing no knockback to the opponent. Grand Doomer himself is pushed back by this move, being pushed back at Ganondorf's dashing speed as he uses the move and leaving a slightly trail of burning ash in the air that causes 1% damage every second to opponents who stay in it, dissuading them from following him.​

Dash Attack: Swoop


Increasing his dashing speed slightly, Grand Doomer leans forward and swoops forward for the duration of his dash attack, hitting opponents for 5% damage and launching them vertically with moderate knockback. If Grand Doomer hits a wall created by one of his black holes and their orbits, he is pushed back into a semi-forced roll, enabling him to skip past enemies who were chasing him and get the jump on them.​

Forward Tilt: Simple Fireball


Grand Doomer shoots a fireball as big as Mario's from his mouth, it coasting along the ground and only slightly hovering above it, travelling at Falcon's dash speed. Opponents hit by the fireball take 6% damage upon being hit, with more pronounced flinching knockback than any of Grand Doomer's other types of fireballs. The fireball is aimed in just a way that it is barely picked up by black holes created on the ground, allowing it to be picked up in orbit, but circle the black hole at a safe distance and retain its original speed, being a good way to naturally stun the foe around a black hole thus making it easier to then launch them into it.​

Up Tilt: Roar

Grand Doomer releases a quaking roar, causing the area within two Bowsers of him to shake, opponents taking 4% damage and are stunned momentarily, being forced to enter free fall if they are in the air. Grand Doomer suffers mild start and end lag, enough so to stop a player from spamming the move. If black holes are in range, anything in their orbits is dislodged and sent adrift by the roar, allowing you to scatter your collections of projectiles to create somewhat of a minefield for the opponent. This is especially good when used in tandem with moves like your down smash.​

Down Tilt: Take Off

Grand Doomer swoops in lower than he does in his dash attack, continuing at this height for a full battlefield platform, before lifting off into the air energetically, leaving him airborne. If he hits an opponents, minions or his projectiles - including his down special - he embraces them in his wings, before releasing them all at once in a messy pile at the end of the move, above and beyond his initial starting point. If an opponent is hit, this is the perfect way to force them into a position underneath yours, and alongside a heap of your handiwork if you're smart.​


Final Smash: Doomers

Grand Doomer has the smash ball! He spins around to reveal... his entire brethren of Doomer alongside him! One of every type of Doomer appears. They are each more-or-less the same shape as their lord and master, but vary wildly in their abilities. One thing is paramount - they love to spam projectiles just as much as Grand Doomer does, creating an even more chaotic battlefield. The Doomers each have 25HP, but will automatically leave the battlefield after twenty seconds have gone by.​


Playstyle: Devourer of Worlds

Grand Doomer loves to build up glorious cosmoses, only to destroy them a second later in a bid to conquer his opponents. Most of the time, his set-up is entirely tertiary to merely spreading destruction across all four corners of the stage, being that so many of his projectiles easily fit into his game of collecting orbits around his black holes. At the same time, he can pretend to be building up a defensive barricade, only to open up a true vortex to hell and throw an opponent inside of it, sacrificing a black hole that he had previously slaved over to gain the victory. Grand Doomer is malevolent, and his best asset is his versatility in spite of the ability to create very specific patterns - much of the time, he can easily build up multi-purpose defences, but have many options open to him, especially useful given the very obtuse nature of many of his fireballs. The one part of Grand Doomer that is not inherently obvious, is his building of black holes in the first place - which while successful enough when simply scattered around when Grand Doomer makes time for them, truly evolve when they are placed thoughtfully. It's merely an issue of space, of area; knowing where to start building your empire.

On the surface, Grand Doomer is a staggering figure, but his physical state is largely just a way to frighten foes; up close is where Grand Doomer largely does not want to be, instead playing more like a coward who wants to overwhelm the opponent and only truly attack them head-on when he is guaranteed to win. Why gamble your life away when you're the ruler of a whole species? Not to mention, you do have your minions to play around with to occupy the opponent while you're off doing far more important things - just keep in mind that these minions are not supposed to be super powerful or significant, they are merely a layer in a multitude of layers; the Grand Doomer empire. Minions are tools, just like your multitude of fireballs, to box in your opponent and oppress them, locking down their options and forcing them to either act rashly, or to leave themselves slightly vulnerable as they approach an escape. At this time, you pounce - you dislodge your projectiles, you blow them in their direction - or simply swing in there yourself through your up special, destroying the least tactically-advantageous black hole. Grand Doomer's success hinges on his improvisation, without it, he is merely making up for his own incredulous nature.

Like any good warlord, Grand Doomer has his own unique ways of forcing pressure down on his foes - either by specifically locking them in, through his fire stream, creating a blockade that the opponent must work around, or by creating more elaborate black holes that force the opponent to stop you before you build something truly horrifying. How about a bunch of fire eggs from your down special, surrounded on the inside by a whole ring of homing fireballs? I wonder how he foe would like waking up those and being chased - probably preferable to just fight you head on. Of course, it isn't too hard for Grand Doomer to switch between construction and fighting his enemies, but what is especially interesting is his last resort - his ball form. It turns Grand Doomer into a sort of wrecking ball, allowing him to entirely destroy all of his tireless work in a last ditch attempt to kill off a hanger-on, or simply making himself into an even bigger target, causing the foe to chase him into his traps, all the way inviting his minions together to overwhelm the opponent as he usually would do himself. It's hard work being Grand Doomer, but by carefully planting the seeds for future success, you can outmanoeuvre any opponent, no matter how pink or puffy.​
 
Last edited by a moderator:

majora_787

Smash Hero
Joined
Jun 23, 2007
Messages
6,122
Location
Texas
* * * Metal General * * *

Boss of Egg Engines​


Metal General is a boss appearing in Kirby's Return to Dream Land. He serves as the boss of Egg Engines and must be defeated in order to get closer to defeating Landia for Magolor.

When the players first enter the arena, Metal General remains stationary. If they approach him, he will slowly rise up, give out a burst of steam, and the battle will begin.


* * * STATS * * *


WEIGHT: 8 / 11
SIZE: 3 / 10
GROUND SPEED: 5 / 2
AIR SPEED: 2 / 1
FALL SPEED: 8 / 10

Metal General is only slightly bigger than Kirby, being a noticeable departure from past works. However, a noticeable difference is the weight. Metal General is one heavy SOB! So what is it Metal General has going for him? And what do the second stat numbers mean? Well, let's get into that now.


* * * SPECIAL MOVES * * *


Neutral Special: DETONATOR
Metal General's eyes flash white as he lets out a high-pitch noise for a full second. If the move is not stopped, every explosive he has on stage will detonate!

Side B: PROPELLER DASH
Metal General draws his laser sword and spins it in front of him. He then begins to slowly accelerate to Kirby's run speed. Metal General will go up to 5 battlefield platforms. If he hits an opponent or a wall, he will turn around and start the attack again with no beginning lag. If he misses everything, he will stop at either a ledge or the end of his reach and take a half second to let off steam. This move does 15% per hit, and deflects projectiles. He can end this mofe prematurely with another press of B for only a quarter second end lag. After the second attack, if Metal General hits a wall or an opponent, he will stop and a star will bounce off of his back and land a short distance away. If it hits an opponent, it will do a negligible 4% damage.

Up B: ROCKET RIDER
Metal General will spawn a gigantic rocket next to him, about 1.5 times as tall as Bowser. If the input is held, the General will hop onto the rocket and you will be able to control it with the control stick. It will move at a rough speed of Bowser's dash. After roughly four seconds, the rocket will take a nose-dive and explode in a 2 battlefield platform wide explosion for 30%. If the input is tapped, Metal General will create a rocket and leave it to sit on stage. Like the ridden rocket, this rocket cannot be broken by attacks. He can make up to two decoy rockets before automatically riding the third rocket. The decoy rockets will fly around and attempt to smash into opponents for four seconds before nose-diving into the stage and exploding. The ridden rocket acts normally. If the rockets collide, they will detonate. If they collide with an opponent, they will detonate. Metal General takes 10% from the explosion if it hits the ground.

Down B: HR-D3
A large robot the size of Bowser drops down from the sky and lands near where Metal General was when he used this input. Metal General can then go up to the robot and hop in/out with down + B a second time. If the robot is already on stage or was destroyed under 20 seconds ago, then this input does nothing whatsoever. HR-D3 uses the second stat numbers in the stat section, has his own mini moveset, and has 200% hitpoints. HR-D3 has his own damage meter. After taking 100% damage, Metal General will be forcibly ejected from the robot for 12% damage. At this point, HR-D3 will malfunction and wander around the stage attacking both Metal General and the opponent(s) completely at random, all the while taking 1% per second. At this point, Metal General can use Down B to let out a whistle-like sound which will make the malfunctioning HR-D3 stop attacking Metal General and pick a new target. After he dies, he will explode with something slightly larger than a smart bomb explosion, only spontaneous. The explosion will do 40% and send just about anyone packing! A note about controlling HR-D3... He has no recovery move, but his first and second jumps are above average, and his reach to grab onto a ledge is longer than most characters.


Neutral B: LASER SHOT
HR-D3 will pull back for a full second and shoot eye lasers down in front of him at a 45 degree angle. He will then sweep the lasers upwards until the end of the lasers reach two battlefield platforms away. The laser attack does rapid damage at 4% per second of contact. If this move is charged for an extra second and a half by holding the B button down, HR-D3 will pull back and fire a massive laser as tall as he is. The laser will do 7% per second of contact and does heavy knockback. It goes in a straight line off screen, and cannot be swept. These moves are D3's powerhouse projectiles and long-range KO moves!

Side B: ELECTRIC DRILL/PUNCH COMBO
HR-D3 will charge this attack for a full two seconds of beginning lag! He will then fiercely swing his hands at his opponent in a move similar to Lugi's dash attack. If an opponent is hit by the outside of the fist/drill, they will be knocked away for large knockback. If in the middle, they will be buried. This move deals a nasty 20% per hit and carries HR-D3 a battlefield platform and a half forward.

A: PUNCH/DRILL COMBO
HR-D3 swings his fist forward for a 3% hit with low knockback. If the button is pressed again, he will then follow up with his drill, which will do 5%. This is HR-D3's weakest and one of his fastest attacks, being a close-ranged damage racker.

Up Smash: ROCKET RAIN
HR-D3 faces the camera, and hatches in his lower body open and release two rockets which fly upwards at the speed of Bowser's dash. The rockets will go up off the top of the screen if they do not get shot down or hit foreign objects. After four seconds of using this attack, rockets will fall from the top blast line. The number of rockets depends on the stage and how far the camera is zoomed out: They will only fall on-screen, and will be spaced evenly at 1 battlefield platform apart. If the smash attack is fully charged for a second and a half, the rockets will only be half a battlefield platform apart. The missiles will deal 5% damage when they explode on or near an opponent. They will damage HR-D3 as well.

Aerial: BODY SLAM
HR-D3 will stop in mid-air and fall face-first onto the ground. If he is at least his own height over the stage when he uses this attack, he will bury opponents when this connects for 15% damage and will bounce three times before having a two-second ending lag. When bouncing, he can be controlled with the control stick to bounce slightly higher/slower, slightly lower/faster, and farther left or right. If he is closer to the ground, he will not bury but will deal 12% damage and knock opponents away. If an opponent is within half a platform of but not hit by this attack when it hits the ground, they will be stunned briefly by the tremors.


* * * STANDARD ATTACKS * * *


A: RAPID LASER CUT
Metal General draws his laser sword and rapidly chops at his opponent. This move reaches forward the length of his own body and deals 1% per cut...but does 6.5 cuts per second. The button can be held indefinitely. This move negates projectiles and some other attacks, but can also be used to inch a shielding opponent slowly into an explosive.

Dash Attack: RUNNING LASER IMPALER
Metal General draws his laser sword as he runs and impales his opponent as he slows to a stop. The sword shoves opponents away from him and does 4% damage. It's good for occasional aggressive pressuring.

Up Tilt: LASER FLIP
Metal General does a short quick backflip with his sword drawn, a multi-hit attack that deals 4% damage. This move has decent vertical reach, and can be used as a punisher for low attacks; he jumps just far up enough to dodge most attacks, but also hits with an attack.

Side Tilt: LASER PARRY
Metal General draws his sword in a short horizontal cut. This move isn't very complicated, but it has astonishing priority that allows him to negate many smash attacks and specials. It also breaks some traps, defuses explosives, and reflects some laser projectiles. The move deals 5% damage and low knockback.

Down Tilt: LASER SWEEP
Metal General crouches low to the ground and spins, swinging his sword around him as he moves forward a half battlefield platform. The move does 4% and trips opponents instead of dealing knockback. It has a .5 ending lag, the longest of any of his tilts.


* * * SMASH ATTACKS * * *


Forward Smash: SHOCK TACKLE
Metal General becomes covered in electricity and throws himself forward. If the input is held, instead of charging, Metal General will just continuously go forward at the speed of Meta Knight's run. The move cannot be steared, but can be released at any point. If it is released in the air, there will only be one second of ending lag. If it is released on the ground, there will be one full second of ending lag. This is Metal Genera's greatest space maker/waster. He can use it to bulldoze right into his opponents over his own traps, and then leave again in a flash. The only danger is if his opponent has the guts to forward-smash him on his approach, or even spike him to the ground out of this move.

Up Smash: HUNTER ROCKET
Metal General takes a half second to fire two rockets, one on either side of him. The rockets will fly up for a half second and will then proceed to home in on opponents. They will then move at the speed of Meta Knight's walk, easing slowly around projectiles to get to their target. They will explode on contact and deal 8%.

Down Smash: MINE SPREAD
Metal General will spin in the air and throw three mines. One will go straight up, and the other two will go at 45 degree angles upwards. These land mines will act like normal ones. This is one of Metal Genera's better mine-spreading tactics, but it can ruin pre-existing traps due to the difficulty in aiming the mine landing. These mines can be detonated with Detonater.


* * * AERIAL ATTACKS * * *


Up Aerial: MINI-ROCKETS
Metal General fires five rockets upwards. They go up for a half second and scatter toward random opponents. The rockets will NOT avoid obstacles but move at Sonic's run speed across the stage. They deal 3% per rocket, knocking the opponent upwards in a small explosion. This can cause the opponent to be combo'd by rockets in some situations. This is one of MetGen's mass chaos moves that he loves SO MUCH.

Back Aerial: SHOCK NET
Metal General drops a floating black box in the air behind him. This box will activate after a full second, and will open, creating a space between the two halves one bowser high. Between the two halves, a wall of electricity will form. This wall will deal 12% on contact and will repel opponents. This mine can be broken by attacking the very top or bottom. However, it can be caused to explode with Detonator. In which case, it will do as much damage as an explosive mine.

Forward Aerial: SHOCK DISC
Metal General tosses a black disc forward. When it lands, it will activate for a half second and will create an electric wall identical to the Shock Net. However, it can only be broken from above. It also does 12% and repels opponents and projectiles. This can be used to box opponents in and add more chaos to the arena.

Down Aerial: LAND MINE
Metal General drops a small black box down below him. After a half second it will begin blinking red. This signals that it is active! When active, the explosive will detonate on the stage (if it activated in mid-air). It will also detonate on opponents that touch it, dealing 15% damage. They will ALSO detonate if they are too close to each other. However, Metal General does not trip these explosives. They can be detonated with Detonator. If inactive, they will deal 5% damage if they hit an opponent.

Neutral Aerial: ELECTRIC DARTS
Metal General will curl up wherever he is and become covered in an electric barrier. This barrier will hurt opponents that touch it for 3%, but projectiles can still get through to Metal General. After one second, Metal General will fire six electric darts up, down, left, and right all at once. Each dart does 3% damage, making up to 18% possible. If the move is charged for one extra second, Metal General will fire twelve electric darts in eight directions at 45 degree angles between the original four. Each dart will do 3% damage, making up to 36% possible. The projectiles will go all the way across the screen at the speed of Captain Falcon's dash, and can be reflected.


* * * GRAB GAME * * *


GRAB
Metal General impales his opponent with his sword, holding them in place.

PUMMEL
Metal General rapidly spins his sword inside his opponent, dealing 4% damage.

Up Throw: ROCKET STRAP
Metal General straps a rocket to his opponent and releases them. After five seconds, the rocket will go off on the opponent's back. They will be carried forcefully upwards at the speed of Kirby's run. The rocket will go upwards for about 2.5 seconds and detonate, dealing 10% to the opponent. This is good for getting opponents out of the fight temporarily for placing traps.

Forward Throw: LANDMINE STRAP
Metal General straps a black box to his opponent's chest and releases them. After five seconds, the mine will activate and detonate on them, dealing 10%. This move can cause mass explosions if the opponent is on a mine-littered stage. It can be good for causing chain reactions and racking up massive damage-racking explosions.

Back Throw: SHOCK MINE STRAP
Metal General straps a black box to his opponent's chest and releases them. After five seconds, the mine will activate and stun the opponent for about three seconds. This move is another temporary opponent elimination. A TSTP (Temporary Solution to a Temporary Problem) if you will. This can also allow for brief openings to bombard your opponent, get back to your robot, or place more mines.

Down Throw: MAGNET STRAP
Metal General straps a black box to his opponent's chest and releases them. After five seconds, the magnet will activate. The opponent will be rapidly pulled in the direction of the nearest mine/trap at Kirby's run speed. This move is another good option for forcing your traps to work. This can also be decent for clearing the board of mines so you can start anew.


Final smash: TRUE HR-D3
A massive robot appears behind the stage; a gigantic version of HR-D3. Metal General, either with or without his smaller HR-D3, will get into the robot. The robot will then spin his arms in circles in an attack similar to DK's up special, which will do 40% damage. Its fists will be as tall as Beast Ganon and will go through the middle of the stage.


* * * OVERVIEW * * *


Metal General is a character all about chaos. He drops mines all over the stage to restrict his opponents, and goes at them with sword swinging. His best KO moves come from his robot HR-D3, which is also a tool of his that is prominent in the match; however, he cannot be in HR-D3 AND place traps, which makes switching between the two and keeping D3 intact is a real task. However, getting HR-D3 to be damaged allows Metal General to leave his robot to its own devices while it causes its own form of chaos on stage. When Metal General is at his highest quality of use, the stage is a minefield, HR-D3 is wandering the stage and KOing foes, and Metal General is running through the chaos and racking up hits with his laser sword. Of course, focusing more on explosives or HR-D3 are always options, but...
 

Kholdstare

Nightmare Weaver
Joined
Oct 10, 2008
Messages
1,441
. : L a n d i a : .

1693783339636.png

  • Size - 12
  • Weight - 11
  • Ground Speed - 5
  • Aerial Speed - 8
  • Jump Height - 4
  • Fall Speed - 6
  • Glide Type - 5 seconds of free flight default, during which you can attack. Can be increased.

S p e c i a l s

- Neutral Special - - - Fireball -
Landia shoots forward a fireball from one of his mouths, going clockwise starting at the top head. This slightly alters the height at which they hit, although nothing crucial to playstyle. These fireballs are more akin to the projectiles from Wolf's blaster than Mario's fireballs. they each do 3% and okay knockback.

- Side Special - - - Twin Flames -
Landia faces the screen and both of his side heads shoot out jets of fire, flamethrower-style. This is comparable to Charizard's flamethrower in similarity. This functions mainly as a GTFO move, as it's fairly quick and hits on both sides. That also means you will see this used in FFAs a lot. The flamethrowers do die down like Charizard's flamethrower.

- Up Special - - - Swoop -
Landia does a shuttle loop much like Meta Knight's. The distinction between Meta Knight's shuttle loop and Landia's is that you can tap a direction in front of him directly after inputting the move and he'll do a longer or shorter shuttle loop depending on the angle. Tapping horizontal makes Landia cover a longer distance, about two Battlefield platforms, but he doesn't go as high. Likewise, tapping up will make Landia cover a two Battlefield platform's distance up, but little horizontal range. With this, swooping down to hit foes on the ground and also knocking them out of the air becomes a breeze. If Landia comes in contact with the foe, he deals 10% damage and good knockback.

- Down Special - - - Roost -
If you're on the ground, Landia folds his wings together, and looks as if he's resting. Every second he rests, Landia heals 1% and adds one second of free flight to his glide. Landia is completely vulnerable during this. Wait, how is that useful? Because only Landia's main head rests. His other heads are active. Landia can ward off prey by using his regular attacks while resting. While the damage may be insignificantly healed, those seconds of flight time will help Landia's air game a lot. There's a fifteen second limit on this.

S t a n d a r d s

- Jab - - - Cerberus -
This is a four-part jab. The first tap of A makes Landia's right head snap forward in a bite that deals 2%. The second makes the other do the same. The third tap makes the lowest head bite as well. Finally, the last iteration of the attack has all three lower heads bite at once, dealing 7% and good knockback. Of course, it doesn't have much range, but you have other attacks for that.

- Forward Tilt - - - Breath of Fire -
Landia's bottom head looks up and breathes a short-ranged jet of fire, then whips his head down quickly, bringing the fire down like an actual whip. This deals 9% and great knocbkack, so it's pretty useful. It covers about up to the top of Landia's main head and then down to the ground. It's slow, however.

- Up Tilt - - - Pyrotechnics -
In an attack reminiscent of the boxes of fireworks at heavy metal band concerts that shoot out high jets of flames, Landia faces the screen and his side heads look up and open their maws to breath fire. The jets reach about twice Landia's height from the ground, and do good knockback in addition to 7%. What this move's main function is to ward off foes who try to pull off a DAir on a resting Landia. Or you could, you know, act as a living wall.

- Down Tilt - - - Tail Sweep -
Landia spins 360 degrees, swinging his tail out in an attempt to hit foes. It deals 8% and great knockback, and is one of Landia's quickest attacks. The catch is that if you use this three times in quick succession (also known as spamming), Landia enters his dizzy state. Unfortunate noobs who first unlock Landia find this out the hard way by taking a Falcon Punch to the face.

S m a s h e s

- Forward Smash - - - Bolt Beam -
Landia charges electricity in his top head, and when you release it he shoots forward an electric version of R.O.B.'s laser. Of course, it stuns foes, but it also deals 5%. So what happens if you charge it? A mid-charge makes Landia's bottom head do the same, releasing a similar beam. This increases its hitbox, in a way, but the foe can still hit Landia in the middle with a quick projectile to interrupt it. That's where the full charge comes in,

- Up Smash - - - Cataclysm of Flames -
I'll tell you straight up: this is a generic cool fire blast move. Landia's twin lower heads charge up, again, and they release twin jets of flames, again. This time, Landia spins around, creating a cool spiral flame effect. This can deal a massive ammount of damage (minimum of 18% uncharged) and great knockback. A full charge increases the effect, making Landia's top and bottom heads spew out fire as well, creating a huge hitbox that can deal 38%, if you get hit by everything. Of course, that may never happen, but it's good for FFAs and GTFO. Or ground KOs. Maybe.

- Down Smash - - - Scorched Land -
Landia charges up a glowing, brighter orange fireball in his lower mouth, and after a short while releases it, shooting it at an angle at the stage. Charging this increases the number of fireballs (shot from the other two lower heads, of course), and thus increases the intensity and damage, with each fireball dealing 8%. What they do on contact with the stage is erects a very tall pillar of flames. More fireballs means longer duration, with a minimum of one second and a maximum of four. This serves as stage control and defensive measures for Landia.

A e r i a l s

- Neutral Aerial - - - Dragon Roar -
Landia's top head roars loudly, making a transparent hitbox of soundwaves appear for a second. It deals 5% and is quick, and hits all around Landia, so overall it's a useful tool. Tapping this in quick succession makes Landia's other heads join in, increasing the damage to cap at 20%, if the foe is dumb enough to come in and get hit for the fourth hit.

- Forward Aerial - - - Dangerous Winds -
Landia flaps his wings, creating a gust of wind that blows foes back a great distance, but deals minimal damage, about 2%. It sucks in foes above and behind him too, so you can cover quite a bit of range with this. It is ideal for eliminating foes in the air. As an added bonus, any fire hitboxes are fanned and have their hitbox doubled in size for a moment by this move.

- Back Aerial - - - Ring of Fire -
Landia's top head breathes a jet of flames as he spins around, creating a wide hitbox all around him, which also deals 7% and good knockback. While this is a good GTFO move, if you're quick you can weave this in with your Forward Aerial to keep up the pressure on the foe in the air.

- Up Aerial - - - Flaming Cross -
Landia faces the screen, and his heads gout flames in the four cardinal directions, creating a cross of fire that deals 8% and good knockback. This is another essential tool for your air game, as you can cover quite a bit of distance with these attacks.

- Down Aerial - - - Dive Bomb -
Landia folds his wings together and dive bombs directly down or at a 45 degree angle left or right if you tap that direction right before he dives. Contact with his body deals 13% and great knockback, meaning this is a good KO move. Use this to finish off the foe in the air, or attack helpless victims on the ground!

G r a b

- Grab - - - Pick Up -
Landia's bottom head opens up and tries to bite the foe, not to chomp them but to snatch them up into its mouth. While you have the foe grabbed, you can move around, and any movement attacks deal damage to them in addition. Yes, you can Landia-cide. That's the fun of this move. No, this is not a cop-out, what do you mean?

F i n a l . S m a s h

- Final Smash - - - Split Up -
Landia's crown glows with the Final Smash aura, and Landia does something unexpected- he splits into four! I thought he was one being... The four mini-Landias act as a group, synchronizing each other's movements. Yep, that's all the Final Smash does. It takes a lot of energy to split up your being into four.

P l a y s t y l e . P a r t . I

Landia is an aerial tank, with many damage-racking and versatile moves, and a few powerful moves, but can sustain and heal a lot of damage. It takes a lot to kill Landia. Your Roost game consists of using your various moves, you know what they are, to ward off foes while you heal and gain flight energy. After that, grab the foe and take to the skies. As long as you are in the air, you can toss the foe around, barraging them with wind and fire. A Down Aerial is nice for finishing them off. If you're ballsy, you can take the foe offstage and use your long-ranged moves to prevent the foe from recovering.

On the ground, Landia can dole out a good bit of damage too. Boltbeam and Cataclysm are high damage output moves. You can use a soft interaction on your Down Smash and Forward Aerial to spread fire all over the stage. Your foes will have to pressure you, which might be hard with your versatile GTFO moves.

That's the gist of the main playstyle, just being a tank dragon that's hard to kill. Now, for the interesting part...

S p l i t . C h a n g e s

Stat changes;
  • Each Minor Landia is 1/4th the size and weight of normal Landia.
  • They are also 2x faster than normal Landia.
  • They gain flight energy by the crown Landia idling on the ground. No damage is healed. There is no cap on flight energy.
  • KOing any Minor Landia will get rid of it, but you have to KO the crown one to make them lose a stock.
  • Each Minor Landia takes knockback independently. Any damage is done to the whole group.

Moveset changes;
  • Neutral Special - Crown Minor Landia throws a fireball to the nearest dragon. That dragon throws one at the next, and then at the next...
  • Side Special - All Minor Landias breathe a weaker version of Charizard's flamethrower.
  • Up Special - Minor Landias quicky create a diamond formation, with a Battlefield Platform's distance between each.
  • Down Special - Minor Landias quicky create a box formation, with a Battlefield Platform's distance between each.
  • Jab - All Minor Landias bite at once.
  • Forward Tilt - All Minor Landias do this attack.
  • Up Tilt - All Minor Landias do this attack.
  • Down Tilt - All Minor Landias do this attack.
  • Forward Smash - All Minor Landias shoot a beam towards each other, forming a grid of electricity between them, like in the boss fight.
  • Up Smash - All Minor Landias do a spinning version of the Up Tilt.
  • Down Smash - All Minor Landias create a two-second pillar at their location.
  • Neutral Aerial - All Minor Landias roar.
  • Forward and Backward Aerial - All Minor Landias blow a gust of wind in the direction you chose, creating a bigger and stronger force than the regular version.
  • Up Aerial - All Minor Landias do something a bit different, they all create a circle of fire around them. Each circle has the same properties as the Up Aerial, except hitbox shape and size.
  • Down Aerial - Two Minor Landias nearest each other dive bomb, and then the other two.
  • Grab - The Minor Landia nearest the foe tries to grab them. The others can then gang-bang the foe.

This version of Landia has a more chaotic, frenzying version of play. The possibility of free flight is there. Minor Landias can cover obscene distances with attacks, and easily confuse the foe with all the attacks. In fact, with proper positioning, you can cover pretty much the whole stage. Sacrificing tanking for agility and stage control, you can possibly play better as Minor Landias than the full dragon form.
 
Last edited:

SirKibble

Smash Champion
Joined
May 2, 2008
Messages
2,400


”Thank you. You’ve truly earned your reputation as a hero.
Your help defeating Landia was invaluable.


Ah... At long last, it’s mine... The source of limitless power... The Master Crown!!”


MAGOLOR


Magolor is one of the main characters of Kirby’s Return to Dream Land. He sets the events of the game in motion when he crash lands on Pop Star, and Kirby and company help him repair his broken ship, the Lor Starcutter. After repairing the ship and travelling with Magolor back to his home planet of Halcandra, they are attacked by the four-headed dragon Landia, and Magolor employs Kirby’s help to defeat Landia. When the battle finishes, Magolor swipes Landia’s Master Crown for himself, revealing this to have been his plot the whole time. He selects Pop Star as his first target, and Kirby’s gang chases him through an interdimensional rift to defeat him before he can reach their home.


STATISTICS

SIZE LARGE
Magolor is almost the size of Bowser. He floats just above the ground, raising his hurtbox up a little bit. Basically, he’s a pretty easy target to hit.

WEIGHT ABOVE AVERAGE
Magolor is heavy, but not overly so. He can stay in place pretty well.

GROUND CONTROL AVERAGE
Nothing special here. Magolor is neither very fast nor slow moving along the ground. He does have pretty good traction, though.

AERIAL CONTROL GREAT
Magolor moves much more quickly through the air, and has good jumps and a relatively slow falling speed.


SPECIALS

NEUTRAL SPECIAL ENERGY SPHERES
Magolor begins creating small dark purple spheres around himself when you press this input. This is a chargeable move similar to Samus’s Charge Shot--you press the button once to begin, a second time to release, or shield/dodge to cancel partway and retain charge. However, rather than “charge” this move, he will simply keep adding more spheres, which can eventually number six and form a circle all around him. These spheres will spin around him constantly at low speed, and are low-priority hitboxes at all times that deal 1% damage and disappear upon hitting something. The release of the “charge” with a second press of the Special button will launch each sphere around you off in the direction it’s facing, moving at Jigglypuff’s dash speed for two Battlefield platform’s length before disappearing.

DOWN SPECIAL DARK PORTAL
Magolor stretches his hands and forms a dark star-shaped portal right in front of him. These initially do nothing, are about the size of Kirby, and Magolor can have up to three of them on the field at a time. They will last for 20 seconds if you don’t create too many more or use them up via any of your attacks that do so. If the Down Special is used where there is already a portal, Magolor will cause the portal to grow to the size of Bowser for a moment. As it does so, it is a grab hitbox that will suck in opponents it touches. Opponents sucked in leave the field of battle, are nowhere to be seen, and begin taking rapid hits of 1% per 0.2 seconds. After breaking the grip, the portal will breifly reappear to spit them back out with okay knockback. While the initial creation of the portals is fairly quick, this subsequent attack is a bit on the slow side.

SIDE SPECIAL SPHERE DOOMER
Magolor stretches a hand forward, causing one of the energy spheres around him to turn into a Sphere Doomer, which will fly forward at about the speed of Kirby’s dash. While this move is fairly fast, there will a significant added start lag if you have no energy spheres, as Magolor will create one before using this move as he would otherwise. The Sphere Doomer that flies forward follows a perfectly horizontal path, acting as a hitbox of 6% damage and weak knockback.

If you have at least two portals out, you can fire the Sphere Doomer toward one of them to make things a little more chaotic and fun. The Sphere Doomer will slightly home in on a portal it gets close to, so just launch in its general direction. When it reaches the portal, the portal will open up and swallow your Sphere Doomer. Your other portal (or a random one out of the other two if you have three on the field) will then open up and release the Sphere Doomer, who will fly in the direction of your other portal (randomly selected if there are multiple). Sphere Doomers fly in the background past obstacles, so they will always reach the portal they set out toward unless you get rid of it. After a single portal has opened to catch or release a Sphere Doomer six times, it will vanish. However, if you quickly fire many Sphere Doomers at a portal, you can get several in before it closes, maximizing your use of the portals. Note that portals that are open for any other reason will still swallow Sphere Doomers and allow them to continue their attack. The same is true for other, similar moves. Anyway, with proper portal placement, this can be an effective damage-racker and distracter for your opponent, but on the downside, it has the potential to reset you entirely on portal work. Additionally, Sphere Doomers still count toward your maximum of six energy spheres.

UP SPECIAL WARP CHARGE
Magolor hovers briefly as you tilt the control stick to select the direction for this move. Straight up is the default if you don’t specify otherwise. Magolor then launches himself through the air, spinning as he goes and dealing 12% damage and pretty good knockback to those he hits. He travels about one-and-a-half Battlefield platforms’ length before going into helpless. However, if there is a dark star portal in Magolor’s path, he will open it as he reaches it and dive in. The portal will disappear for a moment, before a new one appears about a Battlefield platform’s length away in the direction you tilt the control stick (if you don’t tilt the control stick, it will appear in the same place as the old portal). Magolor will then launch himself out of this portal with the same properties as he had earlier in the attack. Note, however, that this new portal fades after launching Magolor, so you cannot do this infinitely between portals.


STANDARDS

STANDARD ATTACK DARK PULSE
Magolor clasps his hands together and a dark electricity courses through his frame quickly, dealing 5% damage and weak knockback to anyone hit. The pulsing dark energy will also spread to any energy spheres circling Magolor, extending the hitbox a short distance. This is a relatively quick move to execute.

DASH ATTACK SPHERE BOMB
Magolor stretches one hand forward and comes to a stop as one of his energy spheres shoots forward about half a Battlefield platform’s length, then explodes. The violet burst deals 10% damage with pretty good knockback, and is barely larger than the sphere itself. This attack has moderate lag on both ends. With no spheres circling him, Magolor will create a smaller explosion right in the palm of his hand that deals only 6% damage with weaker knockback.

UP TILT CROWN UMBRA
Any energy spheres circling Magolor rise up to circle around the crown on his head. They will remain there after the rest of the attack finishes, allowing you to protect yourself better from above. As they reach that point, the crown will exude a dark aura and a larger purple silhouette of the crown will be superimposed over it briefly, dealing 8% damage and weak upward knockback. The shadow crown is about two-thirds as wide and high as Magolor, giving it good range, but this move is a bit slow.

FORWARD TILT SHADOW SWIPE
Magolor swings a fist in front of him. As he does so, the energy spheres around him will begin revolving around his wrist instead, each one adding 1% to the 6% damage this attack does without them. Knockback is weak unless you have a full six energy spheres, in which case it’s still not great, but significantly better. When the energy spheres resume their regular revolution, they’ll be a bit further forward than before, allowing you to protect your front a little better. Either this or the Up Tilt will cancel the other’s changing of the spheres’ location, so you can’t have them moved upward and forward at the same time.

DOWN TILT SHOCK
Magolor spreads a hand to each side of him, as each one fires a bolt of dark purple lightning to the ground below. With the ground so close, the bolts are short and the range is bad, but this attack deals 14% damage and pretty good knockback if you hit. Lag is moderate. This attack will also return spheres moved to the front or top of Magolor to their default position.


SMASHES

UP SMASH THORN ENCLOSURE
Magolor thrusts his hands upward for 4% damage and weak knockback, which is obviously not the real purpose of this move. As he does so, a huge shadowy spike covered in thorns will suddenly protrude from each of your star portals. Each spike is 1 to 2 Battlefield platforms’ length (depending on charge), points toward the area over Magolor’s head, and deals 19% damage with good knockback. This move is a bit slow on the startup.

FORWARD SMASH DIMENSION LASER
Magolor deliberately thrusts his hands forward and fires a laser beam forward that’s as tall as Mario. This has a lot of startup lag, but the laser deals 4 hits of 6% damage and great knockback on the last hit. The laser lasts for only a moment before vanishing with a lot of ending lag. A solid KO option, but this can be difficult to hit with due to the large amounts of lag and brief hitbox. However, you may be able to catch your opponents off guard by firing this at a dark portal you’ve created. If you have a second portal anywhere on the field, the laser will stop at the one you fire at and continue in the same direction from the other portal. If you have three portals, it will reappear from the one closest to your target portal. The laser can only travel into a portal once per usage of this attack, preventing an infinite laser even with the proper setup.

DOWN SMASH DEMON SPIKES
Magolor crosses his arms to charge this move, then spreads them to either side, causing 4 to 8 (depending on charge) large violet spikes to shoot up from the ground around him. Their range is determined by the number of spikes, each one’s base being about one-quarter of a Battlefield platform’s length. The spikes reach up to Magolor’s own height, and deal 21% damage with strong upward knockback. This move, however, is terribly slow on both ends, being both predictable and punishable.


AERIALS

NEUTRAL AERIAL MYSTIC FIRE
Magolor stretches one hand toward the screen and a mist of lavender fire surrounds him briefly. This deals 7% damage and weak knockback to anyone hit, but perhaps more importantly, sets ablaze with these otherworldly flames any energy spheres circling Magolor. For the next five seconds, their damage is buffed to 4% and their knockback is a bit better as well. This attack has notable ending lag.

UP AERIAL HOMING SPHERES
Magolor raises a hand overhead and shoots two energy spheres into the sky a Battlefield platform’s length. They will hover there for about a second, then fly quickly toward the nearest portal, emerging out of a random portal (which can include the one they flew into) and flying again toward the nearest one. With only one portal, they will fly out and circle it before going back in. They will continue this for about three seconds, and Magolor will destroy the old spheres if he uses this move again. If the spheres last their full three seconds or come in contact with something besides a portal during their flight, they’ll explode in a small dark explosion dealing 7% damage and pretty good knockback. If you use this move with no energy spheres, Magolor will create one for this attack, which adds some start lag.

DOWN AERIAL DOOM RAIN
Magolor extends his hands downward, firing every energy sphere around him down at semi-random angles (they will, for the most part, avoid doubling up on trajectories) up to 30 degrees away from the vertical. The spheres deal regular damage as they go down, but upon impact with the ground, erupt in small explosions for 8% damage and pretty good knockback. From low enough to the ground, it is entirely possible to hit one opponent with several of these explosions, though they aren’t particularly impressive on their own, and this attack uses up every energy sphere surrounding Magolor. With no energy spheres, Magolor will create one, adding some lag to the beginning of this move.

FORWARD AERIAL SKIP LASER
Magolor performs a move very similar to his Forward Smash, but he fires the laser at a slightly downward angle. This laser travels only one Battlefield platform’s length before fading out, but if you hit one of your portals with it, it will reappear out of another portal. If you have a third portal, it will fire the full distance to the third, but if you don’t, it will simply repeat its Battlefield platform-long version. This laser deals 2 hits of 6% damage to those hit, with pretty good knockback.

BACKWARD AERIAL SPHERE WALL
Magolor throws off spheres from around him behind him, slowly forming a vertical wall of them and firing it backward. He falls more slowly while doing this, and you can increase the number of spheres included in the wall by holding the Attack button. This can potentially take about as long as the average Smash Attack to fully charge. When the input is released, or when all the spheres are used up, the wall will move backward at Mario’s dash speed. The spheres gain no special properties for this move, so it’s best to buff them with the Neutral Aerial first if you’re expecting to deal much damage with this attack.


THROWS

GRAB WARP
Magolor attempts a pretty typical grab, with decent range, although it’s a bit slow. However, once he’s grabbed an opponent with one hand, he will stretch the other toward them and immediately cause them to vanish in a puff of dark smoke. The opponent will reappear at this instant in the background of the stage, tumbling over themselves as if hit by an attack but suspended in mid-air in the same spot until they break the grab When they break the grip, they’ll reappear at the point they were grabbed, and be thrust in the direction they tilt the control stick for 5% damage and weak knockback. Use the time your opponent is out of the picture to set up portals, energy spheres, etc. as much as you can and make it a nightmare for them to come back to.

PUMMEL TUMBLE
Using the Grab input while an opponent is in the background will cause Magolor to quickly and casually wave a hand toward the background, causing the opponent caught there to tumble more rapidly and violently for half a second, dealing three hits of 1% damage each. This action is performed quickly on Magolor’s part, but cannot be repeated very often regardless.


FINAL SMASH

FINAL SMASH MAGOLOR SOUL


Magolor transforms into his Soul form, seen above. He gains superarmor and his moveset is replaced with the following Specials-only moveset for the next fifteen seconds.:

NEUTRAL SPECIAL SHADOW SWORD
Magolor stretches his hands, and a sword roughly two Battlefield platforms long appears in each one, he then swings them in wide arcs on either side of his body, dealing 22% damage and good knockback to anyone hit. A solid KO move, if a bit slow.

SIDE SPECIAL DEMON FLAME
Magolor stretches a hand forward, and a long purple flame with a dragon-like head enters from off-screen. It will travel along horizontal path exactly aligned with where Magolor is when he uses the move, and will go all the way across the screen, dealing 15% damage and moderate upward knockback. Use them at different vertical points and in different directions to throw your opponents off and potentially combo them between flames.

UP SPECIAL CHAOS BEAM
Magolor wraps himself in a sphere of electrical energy, and can then be freely moved through the air at Kirby’s dash speed.for up to five seconds. While using this attack, he deals 14% damage and pretty good knockback to anyone hit. This can be cancelled early via any button input, and does not put him in helpless. In addition, while he travels, an identical sphere of dark electricity will mirror his movements (meaning it will treat every direction input given Magolor as the opposite). You can use this to separate yourself from opponents, or move in close proximity to the other sphere to make it more difficult for them to dodge.

DOWN SPECIAL FREEZE HAMMER
Magolor materializes a giant hammer in his hands, covered in deathly icicles. He leans back with it before pounding the ground hard (if you are in the air, he will throw the hammer down toward the ground, delaying the hit a bit). A Ganondorf-high shockwave is emitted from the hammer that will travel the full length of the platform, dealing 10% damage and a lot of hitstun to opponents hit. Furthermore, the shockwave leaves the entire platform covered in tiny sharp icicles, which will last two seconds and freeze opponents who land on them. This can prove a problem for some opponents smart enough to avoid the initial shockwave, as they still can’t touch the ground without making themselves very vulnerable. Either of these hits is a great setup for the Neutral Special as a finishing move.

PLAYSTYLE SUMMARY

Magolor is all about creating enough chaos around the field to allow him easy hits with his powerful KO options. Portals are the first necessity for this, and for maximum efficiency, you’ll want them all over the stage. Put one near each ledge and then add a strategic point, perhaps above the stage. If you’re struggling for time to do this, see if you can land a grab. Magolor’s grab serves primarily to buy time, and it’s greatly needed at the beginning of a match. With portals in place, load yourself up on energy spheres. Using them as Sphere Doomers is a great way to distract your opponent for a little while, but you won’t be able to build up more spheres while they’re flying around.

If Sphere Doomers aren’t working out, Magolor can fire off energy spheres with his Down Aerial, Backward Aerial, or Up Aerial, all of which are best when powered up with the Neutral Aerial. For that matter, the Neutral Aerial turns you into a decent static hitbox with all those energy spheres, so you can approach pretty well if you start with that. The Forward and Up Tilts can also help with said approaches, making your energy spheres lead out and keeping your hurtbox back a bit.

With the aforementioned portal setup, both the Forward Smash and Forward Aerial are powerful options. The Forward Aerial into the center portal produces a sweeping laser across the entire floor, and the Forward Smash gives you a long airborn laser no matter where you fire. In addition, you will likely always have a portal close enough to hit with the Up Smash, which is another viable KO option. The Down Smash pressures opponents into the air (where you can use that Forward Smash), or further away, where Magolor can still hit with his laser or any of the other projectile attacks he has. If they move too far toward the other side of the stage, you may be able to surprise them with an Up Smash from a nearby (to them) portal. Keep things lively and your opponent is sure to lose their footing.​
 

majora_787

Smash Hero
Joined
Jun 23, 2007
Messages
6,122
Location
Texas
* * * Galacta Knight * * *


The Champion of the True Arena


Galacta Knight (Galactic Knight in Japan) is, according to Nova, the greatest warrior in the galaxy, whom Meta Knight wishes to fight in an attempt to best him - only then does he feel that he can be called the greatest warrior in the galaxy himself. Nova recalls that Galacta Knight was sealed away for fear that his powers were too great. Meta Knight gathers the planet's stars to summon Nova who in turn summons the great Galacta Knight for him. When Meta Knight beats him, he flickers white and and retreats until he flies unstable, disappearing unarmed in a bright flash. In his first appearance, he shows up as the final boss of Meta Knightmare Ultra, and then as the penultimate boss of The True Arena of both Super Star Ultra and Return to Dreamland(in which he fights Kirby).


Galacta Knight is a character about beating the crap out of his opponents and overwhelming them with close-range attacks. However, his attacks aren't the strongest... To compromise, GK uses his attack, Galaxy Tornado, to force his opponents up against a wall or into small boxes which he can use to brutally assault his foes without them being able to fight back. The match is a struggle for Galacta Knight to trick his enemies into a trap in which they will be hard-pressed to escape while they are violently assaulted by Galacta Knight. GK can hold his shield up when he blocks, and release it after one second to create a small laser projectile which does 5% and low knockback.


* * * STATS * * *​


WEIGHT: 2
SIZE: 3
GROUND SPEED: 8
AIR SPEED: 7
FALL SPEED: 7

Galacta Knight, to an extent, is comparable to Meta Knight in physique and ability to move. However, Galacta Knight is more capable in the air than Meta Knight. His air speed and maneuverability is much greater, making it one of his strengths. However, he also falls faster than Meta Knight. He's a very fast character who is all about close quarters combat; but his problem is getting his opponents into a position where he can "love them tenderly" with his lance.


* * * SPECIAL MOVES * * *


Neutral B: GALAXY ROTATION BEAM

Creates a three-bladed fan motion of electric projectiles reaching 3 platforms, GK at the center. Goes around in a circle around GK at Ganon’s running speed, deals 10% and forces the opponent in a direction following the fan motion. GK can change direction of the fan by rotating the control stick in the opposite direction. The rotating electricity will stop for a full second before changing directions. This move can be used to trap opponents against the Galaxy Tornado.

Side B: GALAXY MINION
Dashes forward for Two platforms in a strange flight animation. Is capable of passing through walls and Galaxy Tornadoes. If the input is held, GK will drop a random minion on the stage at the halfway point of his dash. If he passes through a wall, he will not drop the minion. If he passes through tornadoes, he will drop the minion after passing through it. This can be used to fill tornado cages with enemies and fill the space in more.

Javalin Knight - Has two attacks. It will stand in place and fire javalins in high arcs at opponents for 2% damage. The javalins can go through tornadoes. Also, will slide quickly back and forth while spinning the javalin overhead for 3%. Bounces off of tornadoes on contact. Galactic Javalin Knights will use the Javalin Spin more often when between two tornadoes with opponents, but will use the javalin toss more often when OUTSIDE a pair of tornadoes.

Mace Knight - Will chuck the heavy spiked end of his mace at opponents. It deals 10% and high knockback on a hit, and will then sit for two seconds before being reeled back in for another throw. If opponents are inside of tornadoes, Mace Knight will throw the mace so that it comes down from above opponents, attempting to keep them in the tornadoes.

Trident Knight - Will toss tridents in pairs in attempt to catch opponents between them. The areas between two tridents on the same platform will be electrified and will damage opponents for 7%. If the tridents do not land on the same level, they will not create a current.

Ax Knight - Will either assault the opponent with 3% ax swings, or will attack opponents through tornado walls by throwing the ax likje a boomerang for 6%. Will only use the ax boomerang on opponents trapped in between tornadoes.

Up B: GALAXY WING
Free flight for three seconds. Very quick with high traction. Does no damage on collision with opponents, instead goes through them. When stationary, lowers gravity below him in an area expanded 45 degrees down and away from GK. Can be used to reject escaping opponents without interfering with other things occuring in the tornado trap. (This effects Galaxy minions, and will actually ruin their projectiles just like it would an opponent’s.) Projectiles are indeed affected by gravity as well. The closer you are to Galacta Knight, the stronger the gravity actually becomes. If you're in the default tornado box and Galacta Knight is using this above the opening of the only exit, it's safe to say that you aren't getting out.

Down B: GALAXY TORNADO
Can be used without charge for a very fast single-hit version of Mach Tornado, 12%
Can be charged for two seconds for a very tall tornado. Does not move. There can only be two on stage at a time. If at any point a third is created, the first tornado made will disappear. Opponents take 5% on contact and are bounced back. One of GK’s signature tactics is trapping opponents between two of these to keep them from moving out of his reach.


* * * STANDARD ATTACKS * * *


A: LANCE PROD

GK bends forward and prods his opponent with his lance. This move is very quick and combos easily with his other standard inputs. It deals 3% damage and reaches one full platform away. It is good for racking damage ion opponents inside the Galaxy Tornado box.

Dash Attack: GALAXY BATTERING RAM
Galacta Knight skids to a stop, ramming his opponent with his shield. Galacta Knight is carried an extra battlefield platform during this attack, and he hits opponents for 4%. If Galacta Knight uses this move but does not hit an opponent, a laser will shoot out similar to his shield laser. This laser does the same damage and knockback, moves at Galacta Knight's own run speed, and will go through tornadoes.

Up Tilt: LANCE JUGGLE
Galacta Knight will perform an upward stab on his opponent which reaches a very short distance forward and knocks opponents straight up for 5% damage. This move, when used on opponents, is very good for juggling enemies in the air or forcing them out of traps. When used on a tornado, it will cause the tornado to shrink to 80% its original width, but become 120% its original height. At minimum width, opponents will be able to attack through the tornadoes but will be hard-pressed to actually escape them. Another issue is that thinner tornadoes do less damage, making it an important trade-off to keep in mind before messing with it.

Side Tilt: GALAXY SPIN
Galacta Knight will suddenly begin spinning, holding his lance outstretched in a fast spin attack. Mashing the A button will allow for the attack to be active longer, extending it for as long as five seconds. However, if the attack goes for five seconds, Galacta Knight will be left dizzy afterwards and be stunned for three seconds. The move is multi-hit and deals 5% per second and low knockback. This move goes through tornadoes, and can be used to rack damage up on foes while they sit in the traps. If it is used in the right position, Galacta Knight can move box traps with opponents inside one half platform at a time using this move. Both tornadoes will move the same distance in the same direction, until eventually one is off-stage and the opponent is left to plummet to their death... probably.

Down Tilt: LANCE TRIPPER
Galacta Knight spins in a quick circle, sweeping his lance on either side of him low to the ground for 3% damage. This move causes opponents to trip when it is used. However, its other use is to undo Lance Juggle's effects on tornadoes. Of course, you could use this move to THICKEN tornadoes. Opponents could take as much as 10% for touching the tornado walls. However, at that point they are half height and they will be much easier to escape.


* * * SMASH ATTACKS * * *


Forward Smash: LASER RAM

GK pulls back for a second and stabs his lance forward. A laser his height shoots out, reaching two and a half battlefield platforms. The laser will remain for another two seconds. The lance stab deals 10%, and the laser deals 20%. The laser can be seen coming by the vortex of energy that appears around GK, but caution is advised. This move is one of GK’s many projectiles that doubles as both something to pin foes AGAINST tornadoes, and to attack foes in ‘boxes’.

Up Smash: LASER FLIP
GK flips in the air and brings his lance down on his opponent. This move deals 14% damage, and lets off a shockwave that deals another 4%. The shockwave and lance reach through Galaxy Tornadoes!

Down Smash: GALAXY ERUPTION
GK points his lance to the sky, and six points- three on either side of him-- appear on the platform. After the 1.5 second buildup, the spots will begin to glow read for two seconds. After that, pillars of fire will shoot from the spots. They shoot up Bowser’s height, and deal 14% damage, knocking the opponent upwards. The flames stay where they are for about three seconds before subsiding. This can be used to make a temporary safe zone for GK, as well as keeping foes at bay while he attempts to multitask and get at trapped enemies.


* * * AERIAL ATTACKS * * *


Up Aerial: ARC LASER

Galacta Knight charges a laser from his lance for 3/4 of a second and sweeps a large laser above him from 45 degrees up and left to 45 degrees up and right at the speed of Bowser's dash. The laser goes one battlefield platform and deals 10% damage. Galacta Knight has a second ending lag, but must wait to use this attack again for two seconds.

Forward Aerial: LIGHT SWORD BURST
Galacta Knight briefly creates three swords of light in front of him... one going straight forward and the other two going 30 degrees higher and lower. He shoots the swords after a fifth of a second, and they burst forward at Sonic's run speed. These projectiles make the opponent flinch and deal 3% per sword. However, this move can be used rapidly. The swords will bounce off of the stage and the blastlines, but they will disappear after half a second. These projectiles go through tornadoes with one exception; if all three projectiles hit a single tornado without bouncing off of anything (i.e. from immediate range), the tornado will move in the same direction as the projectiles by one half platform. This can spread them apart OR force them together, allowing to spring and reset your tornado box trap.

Back Aerial: GALAXY SHUTTLE
Galacta Knight performs a flying backflip in the air and appears a character length and a half away from where he was. This move can be good for getting the jump on opponents in the air. If someone tries to smack Galacta Knight out of the air, he can use this to appear right behind them and hit them with a quick aerial jolt! This move is quick and seamless with minimal lag, but no invincibility frames. It's not a dodge, after all.

Down Aerial: LIGHTNING STRIKE
Galacta Knight holds his lance downward and shoots a bolt of lightning below him with starting lag of 1/2 of a second. The bolt is two times Galacta Knight's width and will deal 12% damage. This move allows for Galacta Knight to stun opponents when near a tornado wall and trap them inside a 'tornado box'. The stun is for roughly 1.5 seconds. The downside is that this move has one second ending lag and cannot be used for another three seconds.

Neutral Aerial: LIGHT SWORD RAIN
Galacta Knight holds his lance in front of him as swords of light form in a semi-circle around him; about ten of them. While the A button is held, you get three seconds *maximum* to aim the semicircle of swords. The swords will go up offscreen in the directions they're aimed, dealing 2% on impact and leaving at the speed of Sonic's run speed. However, after six seconds of being fired, the swords will all fire down from the direction of the middle sword and aim at where Galacta Knight was when he fired the swords. For example, if he fires the swords straight up, the middle sword goes straight up while the others go out at angles as large as 90 degrees away from Galacta Knight. But when the swords come back, they all come straight down from the top blast line. The swords move just as fast, but deal 4% each this time. This move can be used to assault opponents in the tornado while Galacta Knight briefly does something else, allowing for slight multitasking. The move can be released early for as low as 1/5 of a second of startup lag. A thing to note about the swords at this point, however, is that attacking them does not alter them much. When they are leaving the screen, it does nothing; attacking the swords when they are coming back, blocking them, or hitting them with projectiles (even if from Galacta Knight) will cause them to alter their trajectory and begin bouncing around the stage at high speeds. The swords disappear after bouncing twice (on the third contact), and will bounce off of the blast lines and the stage constantly.


* * * GRAB GAME * * *


GRAB

Galacta Knight hucks his lance forward a single battlefield platform, and after a full second it creates a Galaxy Tornado with his lance inside it. This tornado is permanent and will stay in place until Galacta Knight jumps through the tornado and recollects the lance. If an opponent is within a battlefield platform of the tornado, the lance will attempt to stab at the opponent(perfectly horizontally) with a half second ending lag until it hits them or it cannot hit them anymore. If the opponent is caught in the grab, they will be held inside the tornado and spun around constantly. This grab will hold an opponent at 0% for as little as 3 seconds. So, you may be wondering. This is independent of Galacta Knight's movement! How does he use throws? Well, this is a very good question. The answer to that is simple; Galacta Knight will initiate the "throw" phase of his grab if he jumps into the tornado while his opponent is INSIDE it. At this point, Galacta Knight will pull his lance from the tornado, and will float just above it while the opponent is held inside the still spinning tornado. This grab can also be initiated in the air. Failing to do any of these aerials before the opponent breaks out will result in the grab having to be redone completely.

PUMMEL
This grab has no pummel, but the opponent takes 2% for every second they are in the grab.

Up Throw: GALAXY CHAIN
The opponent gets shot upwards out of the tornado, and Galacta Knight catches them on the end of his lance. The opponent will be impaled on Galacta Knight's lance for five seconds, and they will take 50% of the damage done by any lance attacks performed. If the grab is used, they will be automatically grabbed again. However, every time the chain grab is used, the grab will be 50% easier to escape.

Forward / Back Throw: GALAXY CONTAINMENT
This is Galacta Knight's meanest trick. When he has the opponent in the "throw" phase, he can press left and right on the control stick to set up tornadoes half a platform away from the opponent on either side to automatically trap them. The hard part is getting this move to work. Each tornado takes a full second to set up, meaning you have to initiate the throw phase AND set up both tornadoes within three seconds; easier said than done. If the three seconds are up, then you've just wasted your chance and either have one or no tornadoes set up and will have to try again.

Down Throw: GALAXY SPIKE
This is a throw generally useful in the air. The tornado disappears, tossing the opponent upwards to Galacta Knight. Galacta Knight then violently spikes the opponent downwards to the ground. This move deals 10% damage, but can certainly KO foes easily if used in the air.


Final smash: SUPERNOVA
Galacta Knight floats in the middle of the stage and creates a massive implosion that engulfs the entirety of the stage. Opponents get sucked to Galacta Knight unless they are off the stage and out of attack radius. Then they take 50% damage and fall to the ground!


* * * OVERVIEW * * *


Galacta Knight is a character who APPEARS to be built for long range... but this is not actually the case. Galacta Knight's goal in a given match is to trap his foes inside "tornado boxes", which are narrow boxes with two Galaxy Tornadoes on either side to keep opponents in a small confined area. This allows Galacta Knight to deal damage to his opponents the way he likes... at close range with no retaliation. His whole playstyle is based around attempting to set up and abuse the helplessness of his foes!
 

LegendofLink

Smash Apprentice
Joined
Feb 17, 2008
Messages
164
Location
Pennsylvania
Oh dear lord, he's not dead!

Hey guys. So, this holiday I learned that when life happens life happens HARD, so I ended up taking a week+ break from MYM while things sorted themselves out. I'm back though, so massively belated steady catchup comment time!


Elesh Norn
So, first impressions here are that this set is a sort of anti-Elspeth. You have your minions (the permanent meat shield one is a nice touch for interactions while your more useful minions do things), and you buff them, but you almost never ever want to deal with the opponent directly unless they themselves get into your face where you can trap them. Overall it works rather well, with my primary problem being how passive the playstyle can be if the opponent doesn't feel like playing your game. Sure, you get pretty active juggling control of all of the minions and Norn herself in order to trap the foe in a cape or grab, but things can pretty much end up on auto pilot of the opponent decides to play a more long ranged game with a fast projectile to shut down both minions and Norn's slower moves (i.e. most of them, and she's a massive target to boot). Of course, that can apply to a lot of characters, it's just more pronounced when the default strategy against camping is to send AI controlled minions at them while you buff them (or control them, but the minions don't have the most robust moveset for dealing with those situations). I'd say it all works out in the end though.

Jin-Gitaxias
Frankly, this set is disturbing. As such it is completely in character and fits rather well. I like the item manipulation aspects the most, as they give you the most options for any given situation abusing the buff you can give to either yourself or your opponent is also a great thing though. This set does falter in one large area though. You say it is a combo character, when in reality the character is far too slow to really be effective. Sure, with the air bladder you can move well enough in the air, but then your sheer size works against you in such a way to make aerial assaults completely impractical against anyone with enough sense to defend themselves correctly. The mutating and abuse aspects work great, but the combo powers end up rather fillerish when their intended purpose is not really a feasible plan of action. So, half awesome, but then the other half kind of falls flat.


More to come eventually.
 

Junahu

Smash Ace
Joined
Nov 15, 2005
Messages
899
Location
Shropshire Slasher

More comments coming at ya, fresh from the presses at NME.

Kirby Bosses
Ack. First of all, Kibble... link up some music please (thank you). It's a Kirby boss movement, there's all kinds of awesome chooz to stick in a playlist.
Kirby movesets trouble me a little in general. After all, Super Smash Brothers is heavily based on Kirby's general design sense, and Kirby games are ubiquitously so player friendly. It would be a bit of a shame to see any Kirby moveset to forget this, and make an experience that, while interesting to read, strays too far from Kirby's extremely tight and friendly design.
Whispy Woods
Well, at least he can move, even if certain moving stages still kill him. It's wierd using your canopy to get around, but there likely weren't many alternatives.
I wish you could use Up Special to snag foes out of your canopy though.

I like the general structure of this moveset, and the way a match against Whispy would likely flow. You work very well with the neccessary movement restrictions, and still managed to craft a kinetic and fun playstyle at the end of it all. You may be a bit too hasty in implying that getting the foe on your canopy is your goal, since I kind of prefer all the elements at work when you've got a foe at point blank range, caged by your canopy, clouds, apples and roots. That's when Whispy is at its best.
And the use of aerials to create summons is, surprisingly logical, given the nature of how the player can even use these attacks as Whispy. It makes sense, though it's hard to imagine players figuring out.

The clouds though, magically stopping in midair to become traps, sound like they'd look really weird in action.

Mr. Dooter

Could you alter that Neutral Special so that it can also catch projectiles/items thrown at him, and use them as juggling fodder? I want to see Mr Dooter juggling rolling crates, or Charge shots, and then using them in his attacks.
I also think Down Special should have the additional effect of making Dooter juggle backwards (i.e. reversing the item queue)

It's difficult to figure out just what Mr.Dooter wants from a match, but with his ability to launch a chaotic surprise attack at any moment it's easy to see the foe will be hard pressed in making any meaningful assault. Shutting down most of a foe's approach tactics seems to be key in giving Dooter the room he wants to play with his juggling, and that's sounds like it'd be a lot of fun. I like how generally player friendly this moveset is, creating depth by combining simple elements together.

Again though, it's hard to pin down exactly how he plays, since there's potentially a lot going on at once, and you do little explaining.

Goriath
I heard You didn't enjoy making this, but Goriath was really good... when it stuck to its focus (wall clinging and gimping). When it tromped into extreme terraforming, Goriath felt somewhat less than stellar. It really just served as a means to get the foe offstage, which is odd, because I thought the one thing you'd make Goriath do, is create his own walls to cling onto.
Still, the offstage game is quite entertaining, and there are some intuitive ways to combine it with other elements of his game, such as slopes and rolling boulders. Even if parts of the set felt hollow or incomplete, I certainly don't regret reading it.

Grand Doomer
The almost bombastic show this set's appearance provides (in comparison to its fellow Kirby sets) is pretty suitable for the brilliant shining Doomer. He certainly stands out in a crowd
And his creationistic, showoff playground playstyle is also rather suited, with depth and complexity rivalling Banbollow (except here it isn't a total mess). Playing with black holes feels natural. And, while the trap designing stage controlling playstyle is nothing especially new (not that I'm complaining, btw), it's still incredibly 'fun', which is probably at the core of what a Kirby moveset should be.

The biggest complaint I could level at this moveset is how it arranges its attacks onto its inputs (i.e. the 'every input is like a special' complaint).
And, he seems to be bursting with tools to craft his traps, but relatively few moves to take advantage of them once they're made.
 
D

Deleted member

Guest
MYM11 User Rankings #10, #11, #12

Welcome to the User Rankings! Every Monday, I'll be compiling the entire of the last week's activity in the thread and showing off, just who is the most active member? The point of this exercise is to recognise the most dedicated among us – those make your movers who are currently pushing the boundaries, as well as highlighting all movesets made by them.

To get on this list, you need to have made a moveset in this or a previous Make Your Move, as well as having posted in the Make Your Move 10 thread. The cut-off point for tallying usually is 3:59PM on Monday EST, 5:59PM PMT or 11:59PM GMT, however this week proceedings rolled over to Tuesday due to a delay. Other removals or changes are at my own discretion. The breakdown of points is as follows:
30 points for a Moveset
5 points for a Comment
4 points for a Secondary Submission
2 points for a Secondary Submission Comment
1 point for a Regular Post
+Regular Posts do not stack
+Secondary Submissions are MYminis, Joke Movesets and other miscellaneous submissions
Man, a three-weeker. We haven't had one of these in a long time - sorry to anyone who actually cared about this delay, I've simply been very busy and every Monday that popped up, I was doing something specifically. Horribly awkward timing. These were pretty monumental weeks, in all, with the Pokemon RNG, Praetor and Kirby Boss movements, altogether comprising twenty-ish sets. To that end, there are some people with insanely high points... then there's Forward Arrow. FA posted an absolutely gargantuan amount of movesets into the thread over the past three weeks, posting six sets - two a week - and doing some decent commenting to easily secure the top spot. His sets included five Praetor sets and Slaking. In second was Warlord, who out-commented everyone except maybe Smashbot, as well as taking part in both non-solo movements with Crawdaunt and Goriath. SirKibble took up third, and that is really saying something in this compilation, posting Invidia an infinity ago, then much later three sets in the Kirby Boss movement. Impressive stuff.

Remember to check out the stadium to find all of the sets mentioned.

Overall User Rankings


Points: 226, Movesets: Vol Opt, Kyubey, Fruit Yummy Mummy, Gatsaf, Kyoko Sakura, Elesh Norn, Jin-Gitaxias, Sheoldred, Urabrask, Vorinclex, Slaking

Points: 130, Movesets: Gangreen Gang, Le'Quack, Hammerhead, JJJ, Iggy Koopa, Beezwax, Dedede Remix, Crawdaunt, Goriath

Points: 126, Movesets: Sayaka Miki, Cutey Mark Crusaders, Invidia, Whispy Woods, Mr. Dooter, Magolor

Points: 112, Movesets: Linebeck, Mask DeMasque, Gruntilda, Copycat, Giant Bat, Medusa, Mummy Men, The Creature, Piggybank, Dragonite, Pyoro

Points: 95, Movesets: Dr. Facilier, Battleheart

Points: 65, Movesets: Boom Boom, Dark Star, Kanden, 88 Teeth, Jeff Madrox, Glaceon, Darth Vader

Points: 60, Movesets: Marvin the Martian, Freaky Fred, Pussycat Puss, Count Chocula, Princess Kraehe, Dr. House, Yukon Cornelius, Olimar Remix, The Grinch

Points: 60, Movesets: Majora's Sceptile, Leviathan, Deviljho, Jinouga, New Destroyman, Garrick, Mello, Metal General, Galacta Knight

Points: 42, Movesets: Ghirahim, Okami Amaterasu

Points: 40, Movesets: King K. Rool, Double Header, Bowser, Gaston, Burgermeister Meisterburger

Points: 40, Movesets: Farfetch'd, Chaos 0, Pichu, Elspeth, Cubone

Points: 34, Movesets: Octavia, Jack Skellington, Po

Points: 32, Movesets: QWOP, King Ramses, Knight Man, Escavalier, Phantom, Zombie, Jukebox Jaw, Teru Mikami, Landia

Points: 31, Movesets: Swalot, Death, Grand Doomer

Points: 30, Movesets: Fright Knight, Buizel

Points: 30, Movesets: Pachirisu, Margaret Moonlight

Points: 15, Movesets: Ayano Minegishi

Points: 8, Movesets: Rapunzel, DOR-15

Points: 5, Movesets: Kimiko, Pokemon Trainer Mark

Points: 2, Movesets: Mouse Man, Wolf Man, Flat Top, Lucio Fulci
 

ForwardArrow

Smash Ace
Joined
Aug 17, 2011
Messages
503
Goriath comment Parts 1 and 2

I'll comment the other ones when I'm finished the whole lot of them, I just wanted to get that out of the way.
 

Rychu

Thane of Smashville
Joined
Jul 5, 2010
Messages
817
3DS FC
1908-0105-4965
I expect a video review, FA (D)

The Appetizer


Here's a compilation of the best of the Appetizer's moments.

The Appetizer is a terrifying and horrible abomination that comes from under the ocean. He eats and terrorizes anything in his path, eating innocents and slaughtering thousands, all while leaving a brown, gooey mess behind him. His eventual goal is to consume the planet, spreading his goo to every man, woman, and child before devouring them, eventually moving onto the galaxy, and finally, the universe. Or, if you prefer, he was a one-shot joke character in the Spongebob Squarepants episode "Squilliam Returns" that appears for 4 seconds to illustrate how bad Mr. Krabs is at cooking (despite owning the most popular restaurant in Bikini Bottom and obviously having came up with most of the recipes himself) and about how truly screwed and pathetic Squidward is, before disappearing and never being seen again. So basically, he's a characterization of a Big Lipped Alligator Moment.

Stats:
Size - 10
Ground Speed - 2/7
Weight - 12
Jumps - 0

The Appetizer is one of those characters who doesn't take vertical knockback or go into the air. At all. He doesn't leave the stage unless he's pushed off. He'll take his lateral knockback in full, while taking any vertical knockback dealt to him as lateral knockback at 1/2 strength.
Now, to the juicy stuff. When the Appetizer walks, he leaves behind him a brown, gooey mess, which sticks around for 5 seconds after he walks over it. Opponents who walk over this receive what can only be described as the opposite of the Ice effect: speed is halved, traction is increased, and they cannot escape the goop with a single jump, as a long, gooey link to the stage will snap them back unless they double jump. Rolling in the goop covers the foe in it, causing them to have the same effect outside of the goop while doubling the power of the goop itself. The Appetizer, on the other hand, has his speed increase greatly, as shown by his second movement speed stat. truly, he is a master of his own domain.

Special Attacks

Neutral Special - The Main Course
The Appetizer gets a concentrated look on his face, closing his eye and clenching his teeth as he forces his goop to spread out on either side of him. The goop spreads by 1 SBBs every .2 seconds, with the longevity (i.e., how long the goop will stay) increasing by 3 seconds for every .2 seconds the goop spreads. Essentially, by the time the goop has been spreading for a second, it will stay out for 15 seconds, and have spread out across 5 SBBs in either direction. Moving across pre-existing goop does not reset the timer (in fact, this does not happen ever across any goop) but using this move to cover pre-existing goop will. The goop will run over stages and pile up against walls: This move kills on stages with walled off stages like Shadow Moses, where, after the goop reaches the walls on either side, it begins to rise up, 1 SBB by every .3 seconds. Opponents will slowly sink in this, being dealt 1% each second that they are fully submerged. It's unlikely that this will be used too much unless you can create a wall or your opponents are small enough, though this can be an effective damage racker, even if it takes huge amounts of setup.

Side Special - Meal Time
The Appetizer licks his chops, a hungry look in his eye, before lunging forward ravenous mouth open and drooling. He will continue to rush forward as long as the input is held, actively chasing down opponents, resembling the one action he performs in his appearance on television. If he manages to catch the opponent, a minion, item, or physical trap, e eats it, swallowing it whole. A moment later, he shits out forces a small meatball the size of Kirby behind him, containing the eaten item, much like a Yoshi egg. Opponents must simply mash out to escape their gooey captivity, breaking the ball as they do so. Minions/items/assists, on the other hand, have no hope of breaking out, essentially making it more useful on these characters. These balls are movable by attack or pushing against them, by all present characters, though they take knockback like the Appetizer himself does. The meatballs collect mass as they roll across other goop, increasing by 1 SBB in size for every 2 SBBs of goop it covers, also increasing in weight. At first, these things are petite, dealing a miniscule 3% damage and very light knockback. As they collect meat, their damage and knockback output increases: at full size, about 1.2 Bowsers big, it'll deal 16% damage and much higher knockback. The meatballs allow opponents to stand on them like platforms without sinking through, acting as walls as well. Yes. This essentially makes the meatballs solid, walls when not moving. As with other walls, if the Appetizer can get two of these, he can create one of his meaty death traps for the foe. No, you can't place tow of these at the ends of the stage to block the Appetizer from falling off, as the knockback from the Appetizer being knocked into the ball will cause the ball to be knocked over the edge. Also, he can only have 5 of these out at a time, and this includes any meatball he's able to create.

Down Special - Mystery Meat Surprise
The Appetizer sinks down into his goop with only that random foot sticking out for a visual indicator for where he is. He can move through any of his previously laid tracks at a speed of 9. By pressing the special button, the Appetizer pops back out of the glop laglessly, the Appetizer able to move and attack before he even comes all the way back up. Pressing A while under the goop causes something a bit different to happen, the Appetizer forcibly coming out of the goo, head butting straight up, dealing 10% damage and high upwards knockback. He can attack his meatballs from underneath like this, with them still taking the vertical attacks as lateral knockback at 1/2 strength if this is used on a ball of meat that has been used as a wall to create a pool of meat, the wall rolls away, causing the meat to fall into a kind of slope. These, due to being uneven ground, do not cause opponents to sink, though still cause the normal effects of the foe. Of course, this is a great way to create a higher ground, to make an upwards battle for any opponent. He can also use this to create a sort of valley - using two meat pools, he can make two hills for two balls to roll around, constantly increasing in difficulty to dodge for opponents. Speaking of the pools of meaty goop, he can hide out in these for a while, his eyeball being the visual indicator for the player to see where he is. This is obviously used for stalling, but in team matches it can be useful to hide out. Also, the deeper he is, the harder he comes up to hit, dealing an extra 3% for every SBB he goes down. Yes, created stages will be made to exploit this, making the Appetizer very very broken in friendly matches on these.

Up Special - Insectoid Wings
The wings that appear all over the Appetizer's body begin to buzz as he's lifted into the air. WAIT! I thought he didn't leave the ground? Technically, he doesn't: as he rises up, a connecting glob of goop stretches out, think like when you're eating some gooey food and there's a string of goo connecting the food in your spoon to the food in your bowl. Opponents trying to attack this gooey tether will find themselves stuck to the goop, as the Appetizer is free to do what he pleases with his elastic tether. Opponents wishing to harm the Appetizer must attack his body, the Bowser-sized lump at the top. This attack works much like if you were a much slower moving Super Dragon Yoshi attached to a tether to the stage, if you need a reference to the controls. No, this can't be used off stage as a recovery move because of no goop underneath him. The Appetizer accesses his Aerial Attacks from this state. If he comes into contact with a platform, he slides onto it, leaving connecting goop to fall and leave a trail, depending on how far he stretched the goop. By inputting this attack while the Appetizer is up, he plops down in a very funny manner. Another note, the Appetizer takes only downwards knockback while in this state, so going off-stage (though why the hell would you want to do THAT?) is a big no-no.

Standard Attacks

Jab - Chow Down
The Appetizer opens his mouth, leans forward a bit, then bites down, dealing a rather high for a jab 5% and standard knockback (that is to say, very low). Now, there is a very nice other use, as the Appetizer can use this to chomp down on his meatballs, each chomp decreasing the size and weight of the meatballs by one. These bites come back in the Down Smash, so don't worry about no use. As a side note, during the short period that the Appetizer can angle the chomp up and down, also being able to bite at the goop on the ground for the same effect.

Dash Attack - Wash Up
While dashing, the Appetizer thins his body out (consistency wise), hopefully passing over the opponent as he runs. This deals 2% damage and covers the foe in goop. Effectively, a forced version of when the foes roll in the goop, conveniently putting opponents behind you.

Forward Tilt - Body Slam
This is fairly simple, as the Appetizer pushes forward at a faster than usual pace over a distance of 1.5 SBBs. This deals 9% damage to the foe, along with fairly good knockback - enough to keep them off of your ass for a while at least. It's generally a good GTFO move, but can also be used to push around smaller meatballs when you don't have the time to smash them.

Up Tilt - No Threat
The Appetizer, in a grossly mocking move towards his opponent, -spits- on them as an attack. Granted, it's a gooey ball of meat and not spit, but, really, Appetizer? You would sink -that- low just to mock your opponents? And for what, a measly little 5% damage and slight hit stun. Just goes to show how big of a superiority complex one big meathead can have.

Down Tilt - Meatball Crusher
The Appetizer quickly sinks into the ground, leaving that foot sticking up (again) for a visual indicator. He can hold this pose for as long as he wishes, but will automatically come up if hit by an attack, leading to some heavy end lag. Seeing as he's already combo food on his own, we don't need heavy end lag. Anyway, when the input is released, he has the two sides of his body come up, surrounding whatever is above him, before bringing them together and crushing it. To foes, this deals 12% damage and fairly high vertical knockback, as well as a lesson in paying attention to your foes. To your meatballs, however, it means he crushes them, disposing of those he doesn't need anymore.

Smash Attacks

Forward Smash - Terrifying Roar
The Appetizer opens his mouth, sucking in air for the charging animation. Once the charge is unleashed, the monster closes his eye and releases a huge (or not so much, depending on the charge) roar. At no charge, the roar's range (represented by little cartoony sound waves) only reaches a short distance a head of him, dealing 10% damage. At full charge, the roar not only shakes the screen, but also reaches 1/3rd of Final Destination ahead of him, and deals 18% damage. Both deal fairly high knockback for their respective damage outputs. This is the Appetizer's main way of moving his meatballs around, due to the attack's long range, low lag, and high damage output.

Down Smash - Upchuck
The Appetizer gets an almost pained expression on his face as he appears to be forcing something up: he essentially has a hairball. Except meat. The Appetizer spits these things out, the things being significantly smaller-than-Kirby meatballs, at 1-4 per attack, depending on the charge. They are essentially smaller, possibly easier produced (depending on the foe) versions of your already existing meatballs. Yes, the amount you have stored up is the same amount that you have left over from your jab's chomping nonsense. The problem is, you can only have 8 at a time, so you need to ration the uses. From the start, they roll around like crazy and deal tiny 2% damage hits, but, like the others, eventually grow into the giant meatballs you know, love, and so desperately want. If a larger meatball were to come into contact with one of these small guys, the smaller ball sticks to the giant one, making it an even bigger mess, and harder to get around.

Up Smash - Meat Wave
The Appetizer seems to dig himself into the ground, under his meat trail, for the charge animation, seemingly grabbing it as much as he can. When the charge is released, the Appetizer throws (or it looks like he does) the meat trail up in the air, as all the meat rises, up to 6 SBBs at full charge. This creates a wave effect, throwing any small meatballs up into the air (for the first time), though stopping at any meatball that is decently large (larger than say, Yoshi). This also launches opponents into the air, juggling them off of your hopefully tactilly placed meatballs. As the meatballs fall to the ground, any opponent caught under them are dealt 16% damage and get spiked down. The meat falls back down into the trail, as if nothing had happened...except it's moved at least a little bit to the side.

Aerial Attacks

Up Aerial - Launch
The Appetizer rears itself up a bit and flies backward a short distance before snapping itself forward, effectively breaking his gooey chain to the stage in the process. He flies in a very low angle, his body, if it should come into contact with a foe, dealing 6% damage to any unlucky enough sap to be placed in his way. When he lands, it is with a very disgusting plop, usually about 5 SBBs away from his former position, though it varies on the height of the landscape and his own flying height. He is then free to move along his merry way, as this move pretty much allows him to escape a situation gone badly and hopefully get started on a new "project", so to speak.

Standard Aerial - Chomp
Much like in his jab, the Appetizer chomps down hard, dealing 5% damage and decent knockback. This is good for bugging aerial foes, but also serves another purpose: with this move, used at the right time, the Appetizer can swallow projectiles. This works a bit like Mr. Game & Watch's Oil Bucket, with the exception that releasing the projectiles is left up to 2 completely different moves. Remember your useless Up Tilt? After this attack, the Appetizer won't be spitting globs of meat, oh no, now, he's spitting out the last three projectiles that he ate, all in the same high arc, though each maintain their normal damage output, though the knockback is mostly reduced.

Forward Aerial - Relaunch
And this is the other attack that will shoot back those pesky projectiles. This time, however, the Appetizer puts more focus on this sort of thing - first things first, if he doesn't have a projectile to launch, he'll roar instead, with the same cartoony sound wave effect as his Forward Smash, which deals 4% damage and decent pushback on foes, at least getting them off your back. With a projectile swallowed, though, he'll suck in air for a short period before spitting, launching the projectile through the air at the speed of Pit's Light Arrows, which deals 7% damage and decent knockback, plus whatever other effect that the projectile might produce.

Down Aerial - Dive Bomber
The Appetizer unattatches itself to the stage, falling fast. He quickly turns himself upside-down, allowing himself to be guided to the ground before making impact. When he does so, he hopes to hit any opponent on the ground, which deals 10% damage and covers the foe in the goop, though the knockback is unfortunatley minimal. This can be used while the Appetizer is taking knockback.

Back Aerial - Launch the Tether
The Appetizer, still floating, gives some slack to the tether that he's hopefully caught opponents in, taking his time to create a sufficient drop. He then quickly flies upwards, snapping opponents off of the tether, with 7% damage and high knockback. Opponents can get slapped by this if they are in the right place, which has themselves get stuck to the tether, with a nice 5% extra damage for good measure.


Grab and Throws

Grab - Dinner Time!
The Appetizer suddenly gets a look of great urge and wants in its luscum face as he lunges straight for the opponent's . . . mouth? Yes, the Appetizer, being a food and all, only wants to be eaten and enjoyed by everyone, at any means necessary, including forcing itself down their throats or similar opening/crevice. This has fairly good range, rivaling that of the Great Penguin King. Of another note, the Appetizer's grab is a bit harder to escape from, taking 1.5 times the effort.

Pummel - Finish What's On Your Plate
The Appetizer's pummel is a very unique one in the sense that, well, he needs to use it before he can use any of his throws. For every press of the A button, the Appetizer forces itself farther and farther down the opponent's esophagus (or similar organ, damn alien or robot anatomies are gonna be the death of me). If the Appetizer succeeds in pummeling 10 times, he successfully forces his way into their stomach. This can be achieved because of a number of factors: for one, the Appetizer's grab is more difficult to escape than most, 2, the pummel is pretty fast, since it doesn't deal any damage, it's no hard feat to press a button 10 times in a row in a relatively short amount of time, and 3, the Appetizer has probably already dealt the foe damage with his ball rolling antics, making it even harder.
So, now that you're in the stomach, what can you do? Well, the opponent becomes all bloated and sick-looking, though still manages to get around at Charizard's walk speed until you leave the body. How exactly is that achieved? Well, after 3 seconds of this, the opponent promptly vomits you up, leaving you vulnerable to attack, or even worse: stupidity-induced gimping. With puke. This pretty much means that you have 3 seconds to input a direction, and you perform the throw from inside the foe's body. That's right, while the foe is moving around like a fat bloated pig, you get to cause all sorts of food poisoning antics by simply tapping in a throw direction. Although, it's safe to say that you'll only get to use one at a time since they all leave you outside of the body through various means. This is going to be fun, boys (SMIRK).

Up Throw - Nausea
For your sake, I'll start with the least un-pleasant of the throws. For this attack, the Appetizer attacks the opponents head: giving them headaches, dizziness, and stomach problems. This allows you to mess with the opponent's controls for a little bit: you don't have full control over them, but you can influence the direction that they go in by tapping, causing them to stagger back and forth, clutching their heads and bloated bellies. This doesn't take full control away from the opponent at all, just gives them resistance on the direction: tapping back will cause an opponent to stagger backwards every few steps, forward will likely cause them to trip, down will cause them to put their heads down and walk forward in their direction, while up does...nothing. This goes on for 5 seconds before the opponent finally kneels over and throws up the Appetizer, leaving them in a state of constant forward dashing, causing them to hopefully run into even more of your crap for a short spell while the Appetizer can go on with his mischief.

Forward Throw - Projectile Vomit
This is pretty much, as we Tropers say: Exactly what it says on the tin. When the forward throw is input (the "forward" being based on where the foe is currently facing. Same with back throw since I don't like repeating myself), the foe immediately starts dry-heaving, though still being able to move, while the Appetizer can aim his course: the dry heaving lasts for 1 second. After the second is up, and you've hopefully given a trajectory, the opponents violently vomits the Appetizer in an arc in said chosen trajectory. Yes, he does fly through the air in liquid form, and no, he can’t be attacked by opponent’s teammates while he's like this. The foe is dealt 8% damage in the process, as well as being stuck in that same dizzy state for a moment afterwards, while you, the Appetizer, are free to continue your dastardly plot.

Down Throw - Indigestion
This one is pretty different from the others: the opponent lets out a painful belch that deals 4% damage before throwing the Appetizer up. The difference is that this throw has long lasting effects: For each 10% damage the opponent has, they belch another time after 2 seconds, this time dealing 2% damage. Opponents will continue this until either they reach the amount of damage equaling their belches, die, kill the Appetizer, or the Appetizer uses a different throw on them. Essentially, at the damage he's going to have to cause opponents to even get into them, this can be a very serious and very useful damage racker when the Appetizer is getting desperate OR just wants to rub in the victory more.

Backward Throw - Unsettled Stomach
Okay boys, this is the grossest of the gross. The foe begins flashing red, as Wario does when his Wario Waft is particularly bad. The begin to sweat, looking around, still moving, but now a bit faster and more stiff and uncomfortable looking-oh no, it looks like whatever they ate (mainly the Appetizer) is not boding well with their stomach! Alas, with no restroom to be found, the foe accepts their fate, sits down a little, and BOOM, a brownish-greenish explosive gas cloud sends them flying upwards, with enough knockback to kill at oh, 180% or so. Meanwhile, while the smoke (and stench) clears, the Appetizer can be seen in a neat, curled up little brown pile on the ground before regaining composure a moment later, before control is once again regained over the Appetizer.

Final Smash

Consumption
The Appetizer has grabbed the Smashball!...somehow. Anyway, with the press of the special button, the camera focuses in on him, going all crazy and raving mad. He then lurches forward, attempting to bite anything within reach. If he's successful within 3 bites, he clutched them in his jaws, grinding his teeth, muching them up. Then...he swallows, and the opponent loses a stock.

Playstyle Summary

The Appetizer is a character for those who like a lot of buildup with a lot of payoff. At the start of the match, you're at your most vulnerable, as you havent had time to spread your goop around the stage. From the very start, you're going to want to use your side special to at least trap opponents for a short while, and roll it away with either your F Tilt or F Smash to send them away as you spread your goop around with your Neutral Special. Keeping the opponent away at this early stage is pivotal, as well is capturing any of the minions or assists that the opponent may have with them. Playing keep away with the foe while building your meatballs up is going to be difficult, but it's very doable, as long as you keep foes at a safe distance. Once you've built two of them up (using either your opponent's assists or your down smash with your jab's chunks), placing them in the right part of the stage is pivotal. On most stages, the middle is the best, but on larger stages, it'd be better to seal off a little nook all to yourself and lure oppoents in. Some stages with built-in walls are pitch-perfect for you to exploit, as are the ones with the slopes as that makes your next job all that much easier as well: create a slope to roll your meatballs down. Doing this should give you enough time to make a second slope, essentially creating a deadly vally of a stage that opponents are going to want to avoid at all costs. As with foes at this point, you've already made the stage a living hell with your goop covering every which way, so covering the opponent in goop to keep them slow and grounded, therefore all the less powerful to stop you. Once your valley has been created, it's all about getting opponents into the valley. Using your up special to increase your effectiveness against campers is a great way to approach it with most sets in SSBMYM, launching back their projectile attacks and launching yourself into their reach, catching them in your tether and flinging them around. Your Up Smash also works in this situation if you've somehow gotten yourself behind the foe, using your meat trail as a big wave to launch them towards your valley. Of course, getting them to your valley is a fairly easy part of your game, it's keeping them there that will be the hard part. Grabbing them and making them stagger around is a good way to make sure that they stay for a while, as is making them dizzy from indigestion. Opponents will fight you tooth and nail to get out, and seeing as you are complete combo fodder, you're going to take some hits. Eventually, after you've worked them to the point where they could get sent flying by everything, you get them in spectacular fashion with your Back Throw, smashing them between two meatballs, or flinging them off the stage like the insects that they are. Either way, you've got your work cut out for you, but the end result is oh so satisfying.

Extras!

Entrance, Taunts, Victory Animations, Loss Animation
Entrance - The Appetizer bursts open a door in the background, roaring as he emerges onto the battlefield.
Taunt Up - The Appetizer looks up to the sky, roaring and drooling.
Taunt Side - The Appetizer spits in the opponents direction, actually chuckling a bit at what he did.
Taunt Down - The Appetizer sinks down into his own filth, a relieved look on his face, and lets out a satisfied moan. He then straightens himself back up.
Victory Pose 1 - The Appetizer is seen munching on his opponents, their undersides clearly visable. The Appetizer growls.
Victory Pose 2 - The Screen apears black, beforeit's suddenly thrust into the light. The Appetizer glares into the camera, covered in drool as it was just spit out.
Victory Pose 3 - The Appetizer merely throws his head up and roars, intimidating anyone on the screen into cowering in fear.
Loss Pose - The Appetizer is seen for a brief moment, looking beaten, before he sinks into a sewer pipe.

Boss Mode
Obviously, the Appetizer is worthy of a boss set. While he doesn't neccissarilly get a different moveset, he does have the following changes happen:
  • His weight is increased to 17
  • His size is increased to 15
  • His speed off his goop is a 7, on his goop, it is a 10
  • All Smash Attacks automatically charge all the way
  • He loses his Up special, and therefore, his Aerials
  • His knockback taken is reduced to a quarter of it's usual effect
  • All meatballs come out full sized
  • He has a stamina of 720%
  • His grab only takes 5 pummels to get through
Essentially, it's just a bigger, more powerful, land bound version of himself. Taking on 3 opponents is going to be tough but not impossible.

Role in the SSE​
The Appetizer doesn't take on a central role at all, in fact, he just replaces a rather annoying boss fight in the SSE: When the Giant Diddy is fought, instead of cloning Diddy Kong, Bowser unleashes The Appetizer (the Boss Mode version of him) onto them. From then on, after you defeat him, everything goes like normal except the appetizer appearing in Gannon's throne room chained up, and coming with Gannon to face Tabbu, getting trophy-ized in the proccess. He can be rescued and put on your squad to defeat Tabbu, this unlocking him in the normal game.
 

Katapultar

Smash Lord
Joined
Nov 24, 2008
Messages
1,284
Location
Australia
Chun


Chun is a "character" from the Lucky Star: Ryoo Gakuen Otosai visual novel for the Lucky Star franchise. She appears as the antagonist of an in-universe video game "Lucky Star Universe" that the main character and (some of) the girls get trapped in for no reason, followed shortly by them arriving at Chun's castle to save one of their friends. After a conversation consisting of Japanese words I couldn't fully understand from my game, Chun swarms the protagonists with her Knight minions and throws them into a dungeon. Although they escape, the cunning Chun sets a trap that puts the heroes back-to-square-one before the female antagonist insists on finishing them off for good.

Despite being antagonistic there is a certain childish air about Chun, but then again she has the same build and hairstyle as Lucky Star's main character Konata Izumi at 142cm. Chun is likely named after Street Fighter character Chun Li and presumably based off that little Chinese girl from Fullmetal Alchemist: Brotherhood who's name I forgot; she even demonstrates the ability to use alchemy straight from the Fullmetal Alchemist universe to summon and swarm her enemies with her artificial Knight minions.


Size: 4​
Chun is very short but you can't say the same about her insistence.

Weight: 2
Chun's a lightweight female antagonist; she's rather pampered as she leaves the fighting to her Knights.

Ground Speed: 2.5
Chun's nowhere near as athletic as her otaku counterpart for good reason.

Jump: 4
Chun's no crazy acrobat and has no need for such thing.

Aerial Speed: 3
Chun has a rather restrictive feel to her when it comes to being in the air; maybe she's not as free-spirited as we thought...?

Fall Speed: 8
Chun's no airhead, falling at a pace that gives her character a rather quick feel.

Traction: 7
She may have the feel of a child and be a meganekko but by no means is Chun a clumsy person.


Specials


Neutral Special - Steel-Cold Swarm


Not wanting to face her enemy head on, Chun puts her hands together and plants them at the ground FMA style. This dramatic-looking action forces the creation of numerous Alchemy Knights, one being created at an alarming rate of 0.1 seconds though Chun can only have 12 out at a time.

From what you MIGHT have gathered from the picture Alchemy Knights are surprisingly small for what should a KNIGHT, only being as tall as Chun is. That doesn't mean you should take them lightly however; as artificial creations these knights are fully willing to serve their master and aren't bogged down by trivial matters such as pain or morals. This means, for Chun's unfortunate foe, that they're very similar to SSE's Metal Primids in that they have constant Super Amour and can only be knocked back with throws (though Alchemy Knights can actually escape from grabs and throws during mid-animation but they do so at twice the difficulty). That said, they can only take 15% before crumbling to their doom.

When it comes to approaching enemies, Alchemy Knights will walk to the nearest one at Ganon's running speed. Once they're within grab range of an enemy they'll raise their sword before bringing it down as hard as they can; this surprisingly threatening action inflicts 9% and causes the victim be pushed back 0.7 SBBs with a bit of hitstun. If the victim is struck by another slash 7 seconds after being struck by one they'll take 1% more damage and stumble backwards an extra 0.25 SBBs; this can stack continually and if it does so 5 times in a row the victim will be knocked down for 3 seconds before they're allowed to get back up. If an Alchemy Knight attacks a downed character his slash will inflict 18% that KOs at 110%, making for a rather lethal KO move that makes Alchemy Knights threatening in their own right.

What may come as a surprise to Chun's enemies is that her Knights are actually capable of defending themselves with the shield they carry; if an attack's duration goes for more than one second the Knight that'd be hit by it will quickly put up his shield and block the attack, though he does suffer some ending lag for doing so afterwards. Although Knights do have Super Amour their HP is still low enough that they can be killed by strong attacks; the shielding ability simply means they'll be able to block slow-moving projectiles (something MYM seems to favor) and any really laggy moves like charged Smash Attacks.

With this move Chun is obviously free to sit back and let her knights do all the fighting; I won't lie, this is what Chun actually wants to do, because quite frankly, it's the most logical thing to do with an army, is it not?


Side Special - Transmutation Terror

Chun performs an animation similar to the previous move, except this time she creates erratic sparks which travel forward in a similar manner to Pikachu's Thunder Jolt except it's completely flat and moves twice as quickly. When you release the control stick, the lightning will convulse into a Party-Ball sized electric field that sucks in anything directly touching it; this does nothing to an individual object, but if two or more are sucked into this field, they will be fused together...

Which Chun kind of wants to use on her Knights. Fusing two or more together will cause their HP to be combined, as well as for the power of their attacks to increase by 1.1 for every Knight in the fusion: since you can have 12 Knights out at once and they usually stick together, it is very possible to have a single Knight with 180HP that inflicts 2.2X damage and knockback with its attacks! Add the fact that you can create more Knights and do this over and over and over, you can make yourself one hell of an invincible minion. Chun can keep the electric field out for as long as she likes, though she won't be able to move while doing so. Her Knights will continue their advance regardless, which makes the whole fusing business incredibly easy if you're not busy dealing with the foe. Other minion characters can be fused together in the same manner, and as an Easter Egg for item matches Chun is able to fuse items and weapons with minions. You can make your Knights giant or tiny with the mushrooms to change their attacking range, make them metal in order to increase their HP and power, and so on. You can even fuse a Knight with a weapon in order to make it use it for their attacks!

And what happens if a foe enters the electric field, you may ask? Well, they will become the main ingredient for the fusing process! They'll essentially be caught in the sphere in a grab-manner in which they must escape with normal difficulty in which they'll be knocked down after escaping, and that's all that'll happen normally...but if a Knight or two steps into the field with the foe, they'll painfully fuse to the foe for 6%! Only one foe can be in the field at a time, and basically every projectile, item, summon and what not will fuse to the foe and damage them for the 6%; with all your Knights you can damage the opponent for up to 72%! Not a bad way of damage racking seeing as how you can just make more Knights immediately, though you don't want to lose any of your GOOD Knights made from transmuting, and you'll want to save at least one Knight in order to exploit the foe's prone state.


Up Special - Alchemic Path

Out of either desperation or cunning, Chun claps her hands to create a rocky path beneath her 2 Platforms wide on both sides. This path is a solid much like the breakable ones in Skyworld that Chun can stand on, though she cannot create Alchemy Knights on it; doing so will have them materialize on the nearest ground to Chun. This factor serves as an invitation for enemies to approach attack Chun without having to worry about being attacked by Alchemy Knights...

Except it's not that simple. The path is split into 4 equal sections that each have a frail 10HP; any character standing on one when it breaks is spiked down 2 SBBs and knocked down if they hit the ground. Obviously, this is beneficial for knocking enemies into your Knight swarms to have them follow up with their kill move; it helps that they still follow enemies even when they're not on the same plane as they are.

Recovery-wise, if Chun uses this move offstage, no matter how far she is from the ledge vertically or horizontally, the path she creates will attempt to tether itself to the edge of the stage regardless of whether the stage has a ledge or not; this is different from her normal rocky paths and does not affect them in any way. Although the recovery grants Chun an infinite recovery the entire path has 20HP that can easily be destroyed by enemies; it doesn't help that Chun can't make paths until she touches stage ground again for both versions of the move. Obviously only one of each path can exist at a time.


Down Special - Forced Boundary

Chun claps her hands and puts them on the ground, causing alchemic lightning travels along the stage surface at Fox's dash speed; the moment B is released a stone wall will pop up out of the ground, being 2 SBBs tall and 0.5 SBBs wide. This wall has a rather large 80HP, with only one being allowed out at a time. Using this move on a rock path causes the alchemic lightning-cursor to position itself at the closest ground where Chun is.

Though abundant in use, walls are best used for tightening the stage's space and/or keeping your Knights in one place; summon it before or after summoning your Knights and keep them en-caged however way you like. Just be sure not to discourage your foe by standing in a tight space with your Knights or else they'll feel like destroying your wall; keep yourself accessible to them in order to kill them more quickly.


Standards


Standard - Arrogance at it's Best

Knowing her enemy won't be able to defeat her Knights, Chun smirks at their misfortune. If a Knight lands a successful blow on the enemy she'll laugh arrogantly at them, inflicting 2% and making grabs 0.1X more difficult to escape from out of slight despair; to rid themselves of despair the enemy must destroy an Alchemy Knight or inflict 20%/KO Chun. If one of Chun's Knights is destroyed she'll become annoyed and to stop underestimating her enemy, increasing the lag and power/effectiveness of her moves by 0.2X; this means the next Knights Chun creates will become stronger but she'll create them at a slower rate. It also extends the width of rock paths and height of walls she creates at the cost of being made a bit more slowly.

Whenever she's not setting up or fighting off enemies this is Chun's "camping" move. Whether her Knights damage or are damaged by a foe, it's a win-win situation for Chun that's only prevented by not fighting with her Knights.


F-tilt - Realized Fatigue

Chun points towards her enemy before asking them if they're tired from dealing with her minions, taking 1.5 seconds to do so. Providing her enemy's attacked a Knight as least 2 times they'll will realize their fatigue and have their attacking speed and power cut by 7/8s for every time they attacked a Knight. To get rid of this fatigue effect the victim must preserve their energy for 5 seconds by not using any attacks. Chun cannot use this 'taunt' on a fatigued enemy until the effect goes away and cannot use it for 10 second afterwards.

This move's designed to flat-out punish enemies who try to kill your Knights in order to give you a cheap advantage; though extremely predictable and laggy, enemies will likely retreat if they can't knock you out of the move in time as it's effects are impossible to avoid otherwise.


U-tilt - Tomare!

Chun yells the attack's name (Stop in Japanese) which of course, causes all her Alchemy Knights to freeze in place. Afterwards Chun gets the desire to destroy the enemy all by herself, an urge that prevents her from creating Alchemy Knights but increases her movement speed (not attacking speed) by 1.4X, regardless of whether any Knights were out at the time (though there should be some out). Chun's arbitrary desire lasts until she's struck by an attack or reuses the input to release her Knights, though she can only do this 12 seconds after stopping them.

A good example to use this move would be, say, if you wanted to finish off a downed enemy by combining Chun's newfound speed with a move that happens to be stronger than that of the Knight's finishing slash...


D-tilt - Alchemic Layering

Chun puts both hands together on the floor, creating alchemic sparks that travel a SBB along the floor in front of her. These sparks inflict 2% every 0.1 seconds and affect the composition of the victim's feet, increasing the amount of time they're in their downed state for 0.05 seconds per hit. As this move inflicts no knockback or hitstun it's ideal for destroying parts of Chun's rocky path on order to send enemies plummeting into her Knight minions.


Dash Attack - Alchemy Attraction

Due to most of her Standards not being real attacks, Chun just has to have one for her Dash Attack in order to properly defend herself on the ground. Here, she simply hops back a small distance whilst extending her hand forward and beckoning the creation of alchemic lightning in front of where she was beforehand. This lightning lingers for 0.9 seconds, and inflicts hits of 1% for a total of 9%; the attack inflicts no hitstun but it does attract enemies towards itself rather slightly within a Smart Bomb's distance and keeps them in place for its entire duration. Knights will be attracted to the move as well, so you can use this to start an offensive with them or push them away from enemies for some reason if you're standing behind your minions.

If you tap A shortly after Chun has hopped back, she will hop back once more and increase the attack's duration to 1.6 seconds, as well as the total damage to 16% and the power of the pull. It also allows Chun to retreat a little further, though she suffers more ending lag by using this variation.


Smashes


F-Smash - I'll Finish You!


Wanting to finish her enemy off for good, Chun uses the most powerful attack imaginable for someone of her caliber. Taking another hint from FMA, she performs yet another overly long dramatic animation consisting of a clap and hand-planting that causes crystal spikes to shoot out from the ground and travel along the stage's surfaces. The spikes travel at Fox's dash speed until they reach the stage's edge though they'll travel around walls and platforms much like Pikachu's Thunder Jolt, giving them some interactive use with Chun's Up and Down Special solids. The attacks inflicts a rather large 14-30% that KOs at 115-70% to enemies who makes contact with the 1.2 SBB tall spikes when they shoot out of the ground. This being MYM, the spikes stay around as a trap for 0.9 seconds that can potentially spike enemies 2 SBBs upwards for 5% if they continue to touch the spikes after their creation. The only real weakness to this attack is it's insane start-up lag that makes Dedede's F-Smash look like Meta-Knight's D-Smash; this however, actually works in Chun's favor when it comes to protecting her Knights from damage, as they'll simply shield themselves from any damage they'd take from this move due to their guarding mechanic so they'll be able to block enemy attacks during that time.


U-Smash - Casual Arrogance

Chun puts on an incredibly arrogant face to the point where it almost looks cheesy, which she follows up with a quick swipe of her hand that hits in front and above her that's imbued with her alchemy for extra strength. Foes struck by this move take 9-15% with powerful vertical knockback though it has weak enough knockback growth to the point where it'll only KO at 300-260%. This upwards knockback is quite beneficial to Chun in that it can potentially bounce enemies off her Up Special wall for some torturous spamming fun, and itself is quite a reliable attack to use close-up.


D-Smash - Earthly Control

Chun claps her hands once again, but this time her alchemy causes a brief earthquake across all the stage's floors that lasts for 0.2-1 second. Any other character touching the ground during this time takes 3-9% as they automatically trip in place; Alchemy Knights manage to keep their balance and thus are unaffected. The quake also causes any rock paths in creation to collapse, doing 9% that spikes/knocks down any character struck by the debris; if Chun used this move while she was on debris she'll fall with the debris without suffering the usual side effects of being on the collapsing rock path.


Aerials


N-air - Storm of Impalement

Chun throws her arm out before she creates a lance of alchemic lightning that extends from the palm of her gloved-hand a SBB's distance, it being angled slightly downwards. Any foe within range of the lance is skewered for 10% before being pushed towards the lance's edge, taking a further 1-5% depending how close they were to the lance when impaled; tapping the input pushes victims out of the lance quickly while holding it keeps them in for longer, allowing Chun to drag them to the ground with her for her Knights to attack. This move is one of Chun's most direct ones, it being one way to destroy parts of your rock path though it's got a bit of start-up lag to it.


F-air - Thunder Wall

Chun smirks confidently as she holds out a hand that creates a barrier of alchemic lightning in front of her, it being 2 SBBs tall. The barrier inflicts multiple 1% while pushing victims back a little, effectively serving as a way to block the enemy off. That said, the barrier's duration is a surprisingly short one, with Chun being pushed back a little by the force of her alchemy to prevent her from completely being able to block off enemies. Despite what it's cracked up to be this move does have some weaknesses; the wall doesn't inflict hitstun and is extremely thin, meaning that the slightest bit of extra range in a character's F-air can break through to Chun. On the other hand, the wall's height allows Chun to block off enemies above or below her and she doesn't suffer much ending lag after using the move; this is a move that's ideally used from short-hops to compensate for Chun's real lack of "GTFO" moves.


B-air - Alchemic Launcher

Chun's upper-half turns around before she throws a lightning-imbued hand behind her that doubles as an overhead swing. This simple attack inflicts 13% with some good upwards knockback but weak knockback growth that makes the move KO at 220%. The attack's hitboxes allow it to hit behind and above Chun, serving as an effective way for Chun to follow-up with her last 2 Aerials or even stall momentarily to give her Knights time to position themselves beneath Chun's foe.


U-air - Molecular Shift

Chun has no real need for a logically useful U-air, as I doubt anyone's going to be "above her" in terms of superiority (and she has the B-air as seen above). But if such thing does happen you'll find this move useful; Chun raises a hand into the air that flickers with alchemic lightning as she changes the all of the atmosphere above her into a vaguely unbearable one, indicated by the air becoming static-y from alchemic lightning; quite simply enough, any character who tries to jump, float, glide or attack 3 times is instantly footstooled for 7% (if they were on the ground such as Chun's wall they're instead knocked down for at least one second). This may not seem so bad but do take into account that the affected area is everywhere above Chun and lasts for as long as Chun wants to keep the attack out, though she suffers a good deal of end lag once she hits the ground. This being a surprisingly fast attack to execute, it's best used to drag your enemy to the ground for knight-feeding if they try to camp in the air; more logically however, it can be used immediately after Chun jumps off her platform or wall to throw off pursuers.


D-air - Floor Riser

Chun gestures towards the ground beneath her (or the nearest one if she's offstage), causing a Platform's width of ground to quickly rise to her height in the form of a wall before falling back in place after standing upright for 2 seconds. The stone wall inflicts no damage whatsoever but acts as a quick defense against enemy assaults and projectiles, and most obviously gives Chun some ground to stand on momentarily to give her a slight moment to attack.

If you Smash the input while there's an onstage foe in the air, Chun will point towards that character and cause a 2 Platform wide stone wall to emerge from the ground to where they are! Unlike Chun's own wall, this one lasts until the target jumps or falls off the top of the wall or when 10 seconds pass; this may seem good for the enemy as they can stall from Chun but that's kinda what she wants as her Knights will have more than enough time to walk over to the wall and wait for an ambush. With moves like your U-Smash/B-air getting enemies up into the air for this move isn't all that hard.


Grab- Weakling Grasp

For all she makes herself out to be, Chun likely isn't physically strong given her physique. Her grab has her reach out with one hand for the enemy's collar, but she has a rough time trying to keep enemies at bay; the biggest enemies have 0.2X escape difficulty with only characters being as tall or smaller than Chun being able to escape for 0.8X escape difficulty.

What's an overconfident leader to do? Simple: be a coward and grab the enemy when they're down. Remember how Alchemy Knights knock their enemy down for 3 seconds if they attack them 5 times in a row? Be sure to Tomare the Alchemy Knights, for Chun's got plans for her downed victim! All characters grabbed while they're down escape with normal grab difficulty; if they were grabbed out of being knocked down from a Knight's attack they won't be able to button-mash their way out of Chun's grab until they regain conscious.

And while Chun's grab may seem underpowered do note that she can make enemies' escape more difficult by instilling despair into them via her Standard, therefore making it balanced.


Pummel - Abusive Slap

Chun uses her free hand to slap the enemy for 3%; slow but humiliating to the enemy.


F-throw - Alchemy Blast

Chun places her hand on the enemy's chest area before literally blasting them away with her alchemy for 12% with strictly horizontal knockback that KOs at 180%. This is a simple move with the obvious use of forcing enemies into distant Knight Swarms, with the after-effects of the blast increasing the victim's chances of tripping for a short 5 seconds.


B-throw - Through the Castle

Chun forces the enemy onto the floor with all her might as alchemic sparks emanate from her hand, causing the ground beneath her to swallow the enemy! Chun's alchemy forces her victim through the ground behind her where they re-appear at the edge of the stage knocked down with 12%, even if they were somehow on top of one of Chun's walls. This is your best move for transporting enemies through your walls to send into your Knight swarms or just for plain breathing space.


U-throw - Final Torture

Chun gets a rather evil look about her face as she places her free hand on the ground beside her, activating her alchemy in the form of a stone spike that skewers her victim. The attack inflicts a rather brutal 28% that KOs at 52% but it takes Chun 2 seconds to set-up her alchemy. This move acts as Chun's grand finisher on her defeated foes, and is rather fun and more effective to use over simply letting your Knights finish off enemies and sometimes more practical than the F-Smash.


D-throw - One With the Earth

Chun tosses her victim a platform's distance before slamming her hands onto the ground. The ground then erupts with alchemic lightning that fuses the lower part of the victim's body with the ground! This horrific use of alchemy keeps the victim in place but they have Super Amour and can still attack/shield though they cannot roll or dodge; this lasts for 3 seconds before the victim manages to free themselves.

This move's ideal use lies in damage-racking via Chun's Knights in order to take advantage of the enemy's Super Amour; using or having the F-tilt in effect during this time is a massive help as it makes the enemy think twice about fighting back against your Knights.


Playstyle

When you can sit back and summon an army of knights to completely overwhelm your enemies, you have every reason to feel smug and overconfident. For Chun, her biggest source of power comes from her threatening Alchemy Knights, which are capable of swarming and killing enemies in their own right. And while they can be killed by enemies the effort required for it is hardly worth it what with Chun being able to replace dead ones almost as quickly as the enemy can kill them, as well as use her Standard and F-tilt 'taunts' to wear enemies down during their battles. The most obvious thing enemies will do in a battle against Chun is try to kill the female antagonist herself, likely ignoring her minions along the way.

While it's true that Knights are the core of Chun's game, she can also use her Up and Down Specials to set-up beforehand for some extra manipulation. The Up Special serves as an invitation for enemies to attack Chun as it'll always be Knight-free, while the Down Special allows you to tighten the stage's space and keep Knights stuck in one place.

You have plenty of ways to control the flow of your all-important Knights, though none of these ways will change the fact that the enemy will be after your head. When the enemy gets to your platform be sure to knock them into your Knight swarm, taking careful consideration to where and how long it'll take them to reach the underside of your platform. When they've knocked down your Knights can take care of them with their kill move; even if that doesn't finish the job, don't worry, you're just playing with the fool of an enemy. You'll of course being damaging your enemy over time, and if push comes to shove you can easily kill them with one of you Aerials or Smash Attacks.


Final Smash - Game Master

Based off the dialogue from the game that I can vaguely understand and the fact that she's found in a "game-world", it's heavily implied that Chun was actually cheating all along...how dare she!? To be fair, she's sticking fairly close to the rules in her normal moveset but when Smash Ball comes to Smash, cheating's fair game!

Chun gets the most arrogant look on her face as she fills with power that would scare in-game Gods and dudes who've spent years on WOW leveling up their characters...from being invincible to being able to make as many traps as minions as she likes, Chun becomes a force to be reckoned with! For 10 seconds only, that is. At least she gets to keep her traps and summons afterwards, though.


This moveset was actually going to be my mini for week 1, though I felt the character to be too good to waste for a simple boss fight, and instead decided to make her into a moveset. I actually "completed" her around week 3 or 4 of the comp in that she was only 3 inputs away from completion, but it is only now that I come decided to post it...as such, there are numerous quirks about the set that I'm actually above as of now. I don't think this is my best set for sure, and I feel it is kinda bogged down by cliches, but I'm still quite proud with what I managed to achieve...except for the Side Special, which I feel I could have done A LOT more with, though that was actually the very last move I thought up and typed, and it wasn't really central to the original playstyle. Then again Chun isn't really a scientist or anything, so yeah.
 

Davidreamcatcha

Smash Ace
Joined
Feb 9, 2011
Messages
629
LEXCORP


Lexcorp is a company owned by billionaire mogul, Lex Luthor, in the Superman comic books. The stage takes place inside the Lexcorp Building, located in the heart of Metropolis.

The stage starts off on a rather generic office setting on the top floor, about as wide as Melee Final Destination and completely grounded. A large gray panel as wide as 2 Battlefield Platforms is constantly in the middle of the stage, though this is a cosmetic effect for now. The background is a rather large window, from which you can see Metropolis's skyline. There is a 10% chance that during the initial fight, a supervillain from Superman's rogue gallery will destroy the window as they wreck havoc along the skyline. This is entirely cosmetic, however. After 40 seconds in this portion, an elevator as tall as 2 Ganons pops out from the panel, staying out for 10 seconds before it closes and the screen scrolls downwards with the elevator. This cycle repeats itself every section, meaning you'll be Star KOed/Screen KOed if you don't make it onto the elevator.

The second phase is a generic lab, as wide as Brawl Final Destination. The background of the stage is loaded with Ganondorf-sized pods containing generic Superman clones, with two of these pods at the side of each blast zone. If these pods are ever dealt 15% damage, or someone is launched into them with a high enough speed, they will break. This releases a Superman clone onto the battlefield, who fights with Bizarro's moveset with level 3 AI. After 20 seconds, the elevator reappears.

The third phase is the Kryptonite labs, which are the same size as the previous lab. Mounds and mounds of kryptonite are in the background, being constantly tested on. On the side of both Blast Zones are shafts as wide as standard Battlefield Platform, making this the only aerial segment in the stage. Somewhat generic, but moving on.

The fourth and final stage is the car lot, as wide as 1.5 Melee Final Destinations. This is the last segment of the stage, you being unable to travel upward after reaching here. This is a fairly generic grounded stage, though there are numerous cars as tall as Bowser and ranging in width across the stage. Some of these will set of a car alarm when jumped on, though this is easily a cosmetic effect.
 

Waver

Smash Cadet
Joined
Jan 5, 2012
Messages
71
Location
In your cookie jar...
NNID
WaverJR
3DS FC
2964-8605-0439
Switch FC
SW-1450-5084-6730
Hello all! My name is Waver and I'm new here! I like making and looking at other people's movesets. Well, shall we get started?


*Birdo*

I'm surprised I didn't see Birdo. Birdo is a Super Mario character that's probably in love with Yoshi. The gender is quite confusing, but I'm just going to say Birdo is female. Well to move on, here's Birdo's moveset for Super Smash Bros Wii U/3DS!​


Size- Same as Yoshi, but stands taller.
Weight- A bit heavier than Yoshi.
Running- Slightly faster than Mario.
Jumping- First jump is a little higher than Peach, second has average height.
Air movement- Not so free.


Birdo has pretty average stats in terms of movement. So she's a good choice for beginners.

STANDARD ATTACKS​

A: Birdo slaps with her right hand with no knockback. Just hitstun. 2%
AA: Slaps with the back of her right hand. Same affects as the first A. 3%
AAA: Birdo quickly tucks her leg in and thrusts her leg out to kick the victim (think Ness' 3rd Jab). It does minimal knockback. 4%
Dash attack: Birdo a quick leap at the opponent arms first. There's little recovery time, and the knockback sends them up about 2 feet in the air. So if you're quick, you can follow up with any of her Smash attacks. If you think the opponent will retaliate quickly, just be safe and block. 5%
Forward Tilt: Holds her breath for a short period of time and lets out a short ranged burst of wind. Has bad start up due to her having to hold her breath. But the burst of wind has great horizontal knockback, and it can blow people slightly. 7%
Up Tilt: Birbo performs a 180 degree cartwheel-like kick like Lucario's up tilt, but with 2 legs alternatively. Hits twice. The first kick keeps the victim in her range for the second kick. The second leg launches the opponent upward. Using Birdo's up air is a good followup technique. Makes the slashing sounds. 4%+6%=10%
Down Tilt: Birdo crouches down and cup her hands around her big snout. Breaths out a low funnel shape wind burst from her snout. Has very little recovery time, so it can be used to get people in front of you away from you temporarily. Due to it's great speed, it's not very strong. Has strictly medium horizontal launch. 3%

SMASH ATTACKS​

Forward Smash: Pulls her head back a little, and creates a blast in front of her from her snout while having her arms back daintily. The burst she makes is somewhat bigger than Mario's Melee/Brawl forward smash. She has a lot of wind up, so it's kinda slow. But if you time the Smash right, it will also act as a mini shield. Burns the victim and makes explosion sound. 12% charged is 17%
Up Smash: Birdo performs a fast, graceful bicycle kick to the victims face. No startup time. Being in front or above her is the main hit with high launch. Sending them straight up. Behind her just results in medium sideways knockback. This is her killing smash attack. 3 of these smashes will break a shield. In front or above makes the heviest slash sound and effect. Behind just makes the semi heavy hit sound with generic hit effects. Front or above- 14% charged- 19%. Behind- 8% charged- 10%
Down Smash:
Remember her deke in Mario Strikers Charged? Well for the ones that didn't see, she spins around really fast about 7 or 8 times. Hits multiple times, at most 6. When a victim is caught, their being knocked around the pink tornado. It's a great fray breaker. The last hit knocks away slightly more than the multiple hits. Recovery time is awful because she has to go back to her regulars stance with finese. Twinkles fly out from her foot. Just an effect. 1%+1%+2%+2%+2%+3%= 11% or charged- 2%+2%+3%+3%+3%+4%=17%

AERIAL ATTACKS​


Neutral Air: Birdo somersaults in the air once blowing powerful air bursts. Start up takes a while but the affects are rewarding. Has great launch power, sending the victim up and away. Though doesn't burn, it makes the explosion sound effect. 13%
Forward Air: Birdo lays sideways having both legs extended and arms crossed performing a horzontal corkscrew kick (like Kirby's forward air in Super Smash Bros). It hits multiple times (9), and it traps the opponent until it's over. Ohm and the hitbox is everything except her head. It's a good move to use to annoy people since it's good for low jumping. The final hit has great launch. The multiple hits make the light slash sound and the last hit makes the heavy slash sound. The effects are slash marks. The spinning makes the classic drilling sound from SSB. 2%+2%+2%+2%+2%+2%+2%+2%+3%= 19%
Back Air: Birdo spins around once with one leg out. A landed hit makes the heavy hit sound. 14%
Up Air: Birdo faces up with an egg resting on her snout for a short time. It then exlodes into fireworks. Her best killing aerial. Pushes her downward to land back to safety. Though the effects are fireworks, it doesn't burn. 16%
Down Air: A stall and fall air attack. Birdo faces downward, then quickly arrows down snout first. It only spikes if you get hit in the beginning of the attack. Otherwise it will knock away. 11%

GRABS​

Pummel: Birdo slaps the opponent. 2%

Forward throw: Blows the person right in their faces. 6%
Back throw: Bicycle kicks the opponent, but carrying them to the back with the bicycle kick. 8%
Up Throw: She performs half of an overhead toss and double kicks them straight up. 7%
Down throw: Pins them down and quickly shoots an egg bomb. 9%

FINAL SMASH​

Play with me!: Lifts her head up to the sky and shoots a dozen of giant bomb eggs. Once they've reached their apex, the eggs will come raining down alternatively. Each egg takes out 15% upon contact with pretty good launch. The way to dodge it is to look carfully and time your rolls and dodges.

SPECIALS​

B: This is a chargable projectile attack. Press the B button and Birdo inhales. When she reaches the maximum charge time, she'll start flashing like Samus or DK. Release the attack fully charged and she'll shoot 3 eggs every half a second. Not charged and she'll just shoot one. Medium charge are 2 eggs. You can also adjust the angle. Only 90 degrees because any further would make it cheap. Each eggs takes out 6% with significant launch power.
Up B: Birdo grabs a giant egg and boards on it a little. Then the egg pops into fireworks, causing her to bounce up. Giving her good vertical recovery. The downside of this up and B is that lip edges are her enemies. The egg popping hurts any nearby opponent giving the generic up and away knockback. Launch power is pretty low. 8%
Forward B: Birdo takes off her bow and unties it and becomes ribbon like. She uses it as a tether and grabs an opponent. If you're on the ground, she'll do a 180 degree toss ending with upward slightly sidways knockback. If you're in the air, she'll pull the person under her and hops on their head. Causing a small meteor launch. Kinda like Diddy's side B. Ground-14%. Air-16%.
Down B: Birdo plants an egg on the ground. Anyone who steps on the trap will get hit with the egg. Has moderate knockback and will lipstick anyone who got hit by the egg. The indicator is a pink pulsation on the ground. It generally works like Snake's down smash. 9%.

Taunts
^ Taunt: Spins around, then winks at the camera.
> Taunt: Excitedly taps her feet with her arms in. Then raises her arms happily.
v Taunt: Closes her eyes, fixing her bow.

Entrance
Front flips out of her pink spotted egg.

Victory 1: Runs to the first place spot, then slides on her knees blowing kisses.
Victory 2: Her back is turned, waving at the losers. Then faces us posing with her back still facing the losers.
Victory 3: Birdo performs 2 graceful frontflips then stick the dismount.

Colors/Costumes:

Green Birdo
Red Birdo
Purple Birdo
Blue Birdo
Orange Birdo
Strikers outfit Birdo
Japanese Super Mario All Stars commercial outfit

Losing animation: Birdo claps with a back turned pose.

Well I hope you guys liked it! I put in B attacks. I'll work on presentations and colors in the next moveset.
 

Katapultar

Smash Lord
Joined
Nov 24, 2008
Messages
1,284
Location
Australia


Yukari Takara is a minor character from Lucky Star who exists solely for the sake of interacting with the series' Mary Sue and her daughter Miyuki Takara. Although she's a friendly and bubbly person, she's quite notably, err, how should I put this....incredibly stupid and talent-less. Also lazy (but adventurous at that!). She's the type of person who could never survive on her own, yet will always have someone around to look after her; this is blatantly evident from the fact that she not only somehow managed to marry some random filthy rich highly accomplished Japanese working man who we never see in the series, but also managed to birth a daughter who happens to be infinitely times smarter than she could ever be. And like any other generic Japanese person, Yukari is often trolled by the Japanese media in the form of television and other random crap such as raffles and what not since she literally has too much spare time; so much in fact, that she's decided to enter the Super Smashing competition! And yet I can't tell whether that's the most intelligent or just plain STUPIDEST thing she's ever done...​


Yukari is 164cm tall, which is surprisingly short for a 39 year old mother. She's also short on athletic skills and what not, which gives her little freedom of movement, much like a generic Japanese housewife in real life. On the other hand, she has BIG BOOBIES...but not as big as her daughter's!

Or in more extreme cases..... :zerosuitsamus: :smirk:

This alone actually makes her pretty heavy and annoying to knock off the stage, but then again Snake's the third heaviest character in Brawl so why the hell can't Yukari be heavy too!? On the other hand she actually has an impressive aerial speed stat, and is actually quite floaty, possibly due to her....uniqueness. And in case you were wondering, no, Yukari does not possess any cool abilities or mechanics; she doesn't have any in the first place, and even if she did she would end up forgetting about them anyway...​


Neutral Special - Vacuum Cleaner

Yukari takes out the most conventional tool known to Japanese mothers: the vacuum cleaner! Ah, but this is no ordinary crappy cleaner; right behind Yukari is a crate sized crate where every little thing goes! While you hold the input the vacuum will draw in anything in front of Yukari, who is able to move back and forth while doing so (infinite range for max coolness!). Smaller or momentum-prone things (such as Rolling Crates) generally come in much quicker than bigger things, with items, summons, projectiles and enemies of all the sorts being sucked and trapped inside the massively tacky crate upon contact with the hose Yukari holds out in front of her...

If Yukari managed to such in at least one thing when she finishes the attack the crate behind her will stay around and be treated as a Rolling Crate...you remember what those do, right? This crate will naturally store whatever items or summons what were trapped inside it, with foes being able to attack and destroy it from the inside in order to break out...do note that their presence and attacks are able to affect items and summons trapped inside with them (annnnnnnnd if there were any projectiles inside the foe will take all the damage, hitstun and negative effects that said move would inflict!), and that there's every chance that the crate they're trapped inside might explode once they break out of it! And of course it's quite possible for Yukari to say, push the foe off the stage while they're inside the crate like some lazy villain, though most foes will break out before that'd happen, and Yukari's attacks aren't the strongest around (Of course).

Also, do note that there can only be one vacuum-related crate out on the stage at a time, which just happens to look like a normal crate so you might end up forgetting which one's which! Yukari can still use the vacuum even in this situation, though she does little more than simply draw things in.​


Side Special - Shopaholic

Ah, the mobile phone; nothing like a bit of good o'l shopping during the middle of the match! Yukari takes out a high-tech home phone and answers it before quickly talking into it for a whole 2 seconds; while you can't cancel out of this due to Yukari's umm, whatever, you can still Shield and Roll for some degree of safety. Once the call's finished, whether you know it or not, a capsule, crate or rolling crate will randomly spawn within a random interval of 5-20 seconds...oooh, Yukari's ordered item has finally arrived! But what did she get? You know, I don't think she even remembered! Something you should note (which you probably won't) is that once Yukari's done talking on her phone she'll briefly flash white, which she'll also do if you tap B anytime she's talking on the phone. How many times you do so will be indication of how many orders Yukari will make, though there's a limit to how many she can make in that should the incoming items end up causing the 14-item limit to be exceeded Yukari will hang up for some lag and will sigh...looks like she actually went over the normal spending budget, if that's even possible! Note that the actual items that come and which containers they come in are randomly assorted; sometimes a crate will hold multiple items, but otherwise can be a pretty good indication of what Yukari will get:


[COLLAPSE="Items"]
Curry - Yukari loves curry! And it's not the 2-Dimensional stuff you find in Stupid Smash Brothers either! This stuff can be handled by normal people, and tastes real good too! Characters hold the curry like an item and can throw it, or dine in for a second and heal off 21% as a result! But watch out, because curry gets moldy after 15 seconds, and that includes the time it's in the box for! If you're dumb enough to eat that kind of stuff, be warned: your character will get an upset tummy! Aside from some comical visuals and aesthetic indications, said character will take 2% a second, lose 5% worth of their shield per second until it's at 1/3 of its normal size, be stunned for twice as long, take longer to land or stop from their dash, and are held in grabs for twice as long all for 25 seconds. Just make, you know, keep an eye for the M.O.U.L.D...should be as easy as identifying a Mushroom...which in itself isn't really all that easy. There's obviously far more chance of curry getting moldy if the container it's inside is not opened for long periods of time; curry will sometimes come in sets of 3 inside a crate, because Yukari is just silly like that.

Confetti Making Thing - Huuuuuuuuuuuuuuh!? This is a little item, as small as small food! It is also very unique; the moment a player picks up one, it will go POP and confetti will come out! Anyone nearby when this happens will take a mere 1% and take slight hitstun, which is excellent since the user only picks up the item and it goes as if they had eaten a food item. Though I wonder why Yukari brought these...

TV - Wait, what!? No need to worry about the finance my dear, Yukari has lots of money to spend! This is a PLASMA SCREEN TV we're talking about, and it only comes in crates; this television can either be destroyed by dealing 100% to it or picked up and thrown off the stage, but otherwise can be moved through like a crate. Shortly afterwards, the TV will turn itself on and play a random channel for 8 seconds; while most are fun little Easter Eggs, there's a 1/4 chance that one of the advertisements will actually be -relevant-; sometimes the TV advertises stuff to Yukari!
If the TV advertises curry, Yukari will get a thought-bubble above her head with curry in it, which increases the chances of the next item being a curry and will heal Yukari 15% more the next time she eats it!
And sometimes other things will be advertised, with Yukari forgetting about what was advertised before when this new one plays! Can't miss it!
Sometimes, a steel crate will be advertised, and if Yukari makes a call during that time her next item will come in a steel crate that is not only twice as durable as a normal one but also inflicts lots of damage!
There are also light white crates, which are half as durable as a normal crate and don't deal a lot of damage but move reeeeeeeeeeeeally fast when struck!
And sometimes, there might even be an advertisement about increasing space, which doubles the normal item limits (AKA lets you have 28 items out at once and 8 crates instead of the normal 4 since we're assuming this set will be put into a game that magically has infinite processing power and can have one billion characters on the screen at once).
Sometimes, an advertisement might play and offer a bigger bang in your life! Don't call, it's a scam! This makes the item capsule or crate EXPLOSIVE! Dynamic for catching enemies off guard but if you're dumb it can kill you too! (Remember that there's normally a 1/8 chance that the capsule or crate exploding)
When you have a TV out, you'll probably reeeeally want to stay tuned for all those good deals! Or maybe you'll end up being distracted and die from it...

Random Item - And much like the Eagle King's Side Special, if items are turned, there will be a small chance that Yukari will have phoned up for a random one! Even rarer is if she attains a CHARACTER EXCLUSIVE ITEM such as....I dunno, ROB's Gyromite. If you're not playing with items on, then...WHAT THE FREAKING HELL ARE YOU DOING!? Turn them on right now! Or are you afraid of that Fiend guy from Ju-boy's Arche set who doesn't like items...oh yeah....be careful of Fiend Dolls as well.[/COLLAPSE]​


Up Special - Random Joyousness!

Fun! Yukari suddenly jumps upwards with her hands outstretched for a fun little recovery that propels her 2 SBBs high and inflicts 5% with minor hitstun to anyone in the way. Note that Yukari can only travel upwards, which makes the recovery quite predictable, but thankfully Yukari FORGETS to enter helpless state afterwards, and can even grab items during her brief trip! Talk about speed shopping!​


Down Special - Motherly Determination

Like all Japanese mothers, Yukari resolves to change herself! Another advertisement, I suppose? This is indicated by Yukari doing a SUPER YAWN which causes her to becomes sooooooooo focused that her attacking speed is increased to 1.5X its usual amount, but causes her to literally lose sight of her own damage percentage! Not cool, not even one bit! This is rather risky, as now nobody will be able to tell how Yukari's feeling...wouldn't want her to feel more confidence than she really should, now then? But then again I suppose that's how we all feel...wowee. The "buff" lasts until Yukari takes 45% or so, as there's a limit to how confident she can be when faced by SMART players. You should use this move when you want to have lots of FUN.​


Standard - Playful Slap

Yukari puts one hand on her cheek in an "embarrassed" manner and uses the other to slap ahead of her. Said slap is pretty generic in all aspects, though it is fast and gets the job done with a single hit of 2% and some pushback. While it doesn't have the range of say...Peach's slap due to Yukari not leaning forward, it is much quicker and in some ways far more useful, as it can either cancel into other actions or repeat itself for some trolling action...​


Dash Attack - Wee Time!

Yukari lays out her body in mid-air like a SOLID SNAKE with her whole body outstretched! Fun! This comical little move hits in 2 parts; the first inflicts 3% that keeps the enemy in place with a bit of stun while the second inflicts 5% knocks them downwards a little with some horizontal knockback that can even knock them down if they're on the ground. Which is good because Yukari naturally suffers a bit of ending lag as she has to get up and resume the fight....boring.

Or does it have to be? This attack's execution is actually unique enough to warrant a unique little interaction with a Rolling Crate in that if Yukari uses this move right up close at one she'll actually push it forward AND get atop of it at the same time! Wee! You can use this fun little maneuver to hit enemies and score a free ride at the same time! And no worries, cus Yukari is able to recover from the ending while riding on the crate and transition it into an Aerial! You wish you had a life like Yukari's now don't you?​


F-tilt - Pushing the Boundaries

Yukari performs a halfassed shove with one hand that has a surprising amount of force behind it and is quick to boot, kinda like Ganon's Jab but obviously with less range. Struck enemies are pushed back for 6% and horizontal knockback that KOs them at 135%, which you can also obviously use to push like, I dunno, Rolling Crates. While not the most exciting move in the world, it is quite convenient and at the very least isn't a grab that would be ineffective against non-grabby dudes! How exciting!​


U-tilt - Pretentious Tiredness

Ah, the oldest trick in the book; the Fake Yawn! Yukari you sly dog you! Our miraculously mammified mother stretches her arms out above her, which lightly hit enemies who come into contact with them for multiple hits of 0.2% for a total of 4% over a course of 2 seconds! Yes, this attack is quite long and has very punishable lag to it, but if a foe happens to be caught in Yukari's grasp they WILL be trapped with her tiredness for all that time before taking knockback that can KO them at 200%! This is like, totally a better version of Ganon's U-tilt in some ways since you can trap enemies so they will be hit by an item you threw up into the sky, and your hitbox always lingers and is great for catching falling foes! Afterwards however, Yukari really is left in a tired state where her speed and power are cut in half...NOT! Yukari will look tired after the move, but it does nothing but tricks enemies stupider than you! This will probably be Yukari's most spammed move for this reason, as enemies will think you're weakening yourself from all that yawning when you're not, hehe...​


D-tilt - Flingy Flingy Fun!

In her Zelda-esque crouching position, Yukari throws her hands up in the air as if she's chucking sand on Phatty behind her! Fun! This awesome move is not only fast, but flings enemies into the air 1 SBB's distance (along with 1%) and even upchucks items as if Yukari threw them up there herself! Best of all, take less knockback and poke at enemies like a troll all in one! How convenient!

You haven't even seen the best part yet however! If you use this move while on top of a rolling crate you'll actually knock it upwards (as high as one of MK's midair jumps) and not only fly but damage nearby enemies! But watch out; the attack still does SOME damage to the crate to the point where it will break after 20 or so hits! Awwww.​


F-Smash - Expensive Japanese Mobile Phone

Yukari takes out an incredibly-expensive looking mobile phone and stares idly at it for a moment before carelessly throwing it ahead of her...wait, you telling me she DIDN'T LIKE IT!? How far the phone flies depends on the charge (2-8 SBBs), though trying to strengthen this factor can make the attack rather predictable. Still, if you manage to hit a foe with the phone they'll be forced to grab hold of it due to how expensive it is (and how it's such a waste for a rich person to throw out something so good)! If the foe was already holding an item they'll instead take a rather large 12-25% that'll KO them at 140-110%, which is arguably worse...or is it? While the foe is holding the phone they'll suffer the usual consequences of holding an item such as not being able use others or grab, and if they try to throw the phone away (or if it's knocked or taken off them in a different way) they'll automatically take an unavoidable 35% from the pain of having thrown away something so dear! Note that foes don't suffer any hitstun from this move unless hit by the phone while they're holding an item, with the massive amount of damage they take already been more than enough to live up to this move type's namesake.

Oh, and if you're caught dead with a phone and Yukari's on the other side of the line, AKA when she tries to start up her Side Special, be very, very scared...she looooooooves to talk! She once conversed with a telemarketer for over an hour just because she was bored! Do note that it does take a wee while for Yukari to start up the conversation, and the foe CAN throw their bling bling phone away (albeit with consequences...), but if the attack connects, then the screen will momentarily fade to black before returning to normal, interrupting the match for a mere moment...and interrupt the match it does! You won't notice in Stock Matches, but Yukari and her foe will have in fact talked for well over a minute, with this time being shaved right off the clock! As this actually counts as "passing time", the stage will naturally be filled up with items (though for the sake of working in with this move they won't have vanished within the time either), and any time-based mechanics or traps whatever will be affected too. On the other hand, once the attack has stopped the foe's phone will run out of batteries and will shatter, it magically not damaging them (Yukari would've talked for longer too!). So basically, you can choose to damage the foe for 35% or force a whole minute of the match to pass...quite a fun move it is! Just be sure you can get used to the entire composition of the items you've placed on the stage or else you might get into a bit of trouble!​


U-Smash - Voraciously Vanilla Villa

Suddenly, a rectangular-shaped villa magically appears in front of Yukari! Wow, does she really have THAT much money that she can mindlessly spend it just to help her win a fight in Brawl!? Regardless, Yukari becomes very excited when her villa appears; you should be too! The villa is 1/4 the size of Weegee's mansion, though the top part of it is completely solid and there are doors to the side which act as solids that block off anything except players who can open and close them by merely moving through them. The villa in itself has a total of 65-170HP in order for it to be destroyed, which, though Yukari can choose to demolish it anytime she likes by re-using this move, which causes her to take out a remote and BOOM! What a waste of money! This can actually be quite nasty however, as anyone inside the villa when it is destroyed will take multiple hits of up to 28% (3.5% per hit) as the entire structure crumbles beneath them and knocks them down, and also destroys any items that were inside...just imagine the terror if there was explosiveness inside the villa at the same time! Yukari, you wouldn't...

Yukari and the other players can use the inside of the villa to protect themselves from each others' projectiles and summons as a nice little sanctum; they can also use the rooftop as a platform, which is actually slightly curved upwards on both sides so objects such as rolling crates will roll off if placed on there! That's unlikely to happen however as the villa possess an interesting little effect: any and all items that spawn on the stage will spawn inside of it! This kind of de-randomizes the spawning of items to the point where foes may try to get inside the villa to get the items, though since Yukari can control exactly when she wants her villa to blow up this isn't exactly the best of ideas for the foes; they can avoid the blast by shielding in a similar manner to the lazres on Spear Pillar, though dodging it is no.​


D-Smash - Unlock the Power

Ever wished something was something else!? Well you can with the power of I.M.A.G.I.N.A.T.I.O.N! If Yukari is not holding an item, she will start to pout about how bored she is, which should tell you that you need an item for this awkwardly awkward smash to work unless you're as dumb as she is. When you use this Smash with an item, Yukari will fondle and fantasize about that item whilst pinky pinks appear around her! And no this does no damage like the Brawl D-Smashes Yukari is too cool to have, but it does delude Yukari into thinking that every item that comes out of an containment item she breaks open is the item she was fondling! So basically, you could hold a Pokeball or hell, even a special item like those seen in MYM11 OR AN ITEM CAPSULE, and every Capsule or Crate Yukari opens will have those in there! How long you charge the Smash depends on how many more items of whatever are allowed than the normal 14-item limit, starting from 1-10. If you use this move when Yukari is holding no item and the effect is in play, it will de-delude her.​


N-air - Time of Your Life

Wee! Yukari stretches out all her limbs and looks like she's really having a blast! This is a one-hit move that inflicts a minor 13% that KOs enemies at 200%, but gives Yukari brief invincibility for a few frames due to her AWESOMENESS! Unfortunately the move drags out afterwards and suffers quite a lot of ending lag, so it's best to only use this attack sparingly. If any time, it's quite good for breaking open items and containers WITHOUT her taking damage from their possible explosiveness or anything blasty inside of them! No wonder Yukari felt so good! So basically, you could use this on top of a mid-air crate or over an item capsule, bomb-omb or what not and remain completely unscathed; for maximum fun, pray your foe is near an explosive item with you and they'll take all the damage!​


F-air - Spasmodic Shocking Shove

Yukari leans forward and shove with both hands; kinda of like Ness' but you can bet that this variation is FAR MORE AWESOME (of course!). Anything struck by the soft hands is pushed forward a distance depending on its weight; don't expect normal characters to be pushed any further than 1/2 a Platform's distance, but do expect items and little things to be pushed far! This move's nature makes it fairly good for approaches in that it'll entirely ignore shields and can be used to gimp without refreshing recoveries, and can even be used to pick up any items that are thrown towards Yukari! For this reason you can actually hold the A button to keep Yukari's hands out, though they won't push enemies away and more importantly most players will actually forget or won't even be aware that you can do this! But hey, how many people had to actually READ UP about the fact that you could manipulate the falling speed of Mr. Game and Watch's D-air by holding the control stick up or down when falling!? Careful people, or your brains will explode from information overload! Sometimes this is why being dumb is a good thing...​


B-air - Invisible Cozy Time!

Yukari lies on her back and stretches her arms out behind her like she's having the time of her life! She's not even putting any physical effort yet she's doing the same amount of damage as the ones who do! This move inflicts 13% with knockback at a slight downwards angle that can kill at 160%; not to mention there's lots of fun to be had walking off a Rolling Crate in mid-air and pushing it back!

If Yukari would land on the ground from this move she won't bother to get up by herself and will enter downed state! This is pretty funky in that you can troll enemies with your invincibility frames, though it is somewhat inconvenient on your part in that you don't get to transition to your ground game right away.​


U-air - Super Awesome One-Time Push!

Wee! Yukari reaches out as high as she can with her hands, more or less PUSHING the limits of her idiocy as she plunges directly towards the ground in a helpless helpless state. But before that, she ends up pushing enemies higher than where she is for 11% that can kill them at around 140%. She also pushes items upwards half the distance she would "strong throw" them before they come back down albeit in a slightly erratic pattern; this is incredibly convenient when you've just destroyed the Rolling Crate you were standing on and want to hassle your foe with the many items or item capsules that come out.​


D-air - Booby Bomber!

No really, take a wild guess at what this attack does...it involves BOOBIES! Yukari lays down with her entire body outstretched, much like the dash attack except this time she falls at Dedede's falling speed while dragging enemies down with her small yet sexually imposing body, with the attack inflicting up to 16 trapping hits of 1%; the attack will instead inflict 4% with slight pushback if the foe is instead hit by either of Yukari's limbs. The attack has very quick execution to it but drags out for a while; in some cases this can allow Yukari to tear through item capsules and close-to-expiring crates with the multiple hits of this move.


In a fashion that's either overly loving or overly psychotic, Yukari reaches out with her soft hands in order to hug the foe! This is naturally awkward for the receiver, so no worries about it being weaker than other grabs!​


Pummel - Malefic Mammies

Yukari holds the foe closer to her chest, causing their whatever area to be crushed by the sheer power of her BOOBIES! Possibly even deadlier than any Pummel KO, this inflicts a PERMANENT 4% on foes per hit; it obviously takes a wee while to go through compared to your normal boring pummels but sure is fun to watch!
(snapshots, anyone?)


F-throw - A Push in the Right Direction

What mommies do for their little children, but here that's uhhh, not exactly a good thing, especially coming from Yukari of all people. Said mother gets a warm, encouraging smile on her face as she shove her foe with one hand for 1% for horizontal knockback that can kill at the surprising percentage of 120%; this is a funny little move that lets you push enemies into Crates, Rolling Crates what not, getting them where YOU want them. Also, if your opponent is a fat heavyweight male antagonist who doesn't go very far when thrown you can give them another push with a...you guessed it, chaingrab! Looks like mommy just doesn't want to let go!​


B-throw - Special Interest

What's this, Yukari just suddenly ignored her foe!? She'll simply move away from her foe (you can walk, run or dash) and actually release them from her awkward grab...but what in the world could be so interesting to Yukari that she'd suddenly abandon her grab mid-way? Why, the very item her foe was holding that she just MUST HAVE! While she's moving away, Yukari will take out her phone and inquire about this oh-so special item; after the call, that very same item will begin to spawn all around the stage within random intervals of 20 seconds in either Item Capsules or Crates! Note that the amount of items created cannot exceed the usual 14 item limit imposed on matches, though I've actually heard of rare cases where a Yukari player was actually DUMB enough to order in a bunch of stuffed raccoons! Can't say things ended well for that player...

And while Yukari players may very well be tempted to use this move on their foe the very second they have an item in their hands, they need to actually REMEMBER if they have one to begin with; don't be stupid enough to use this move when they don't have one or you'll have just wasted a perfectly good grab!

Oh, and Yukari can inquire about her own mobile phones she's given to a foe...STRANGELY ENOUGH. The phones themselves do nothing however...how scamalicious!​


U-throw - Harem Hammerer

In a bizarre literal sense, Yukari suddenly takes out a metal mallet and attempts to swing it at her foe like a golf club! Holding up on the control stick will have her charge the move for some suspenseful fun, even going as far as to continue doing so if the foe escapes from her! This attack is as deadly as it sounds if it connects with the foe, knocking them upwards for 12% or even 25% if charged for 2 seconds, it being able to kill from 135-70%! This is one dangerous launching move, and while the stronger version is unlikely to hit, let's just say that the foe randomly ate moldy curry and are held for longer in your grab...but what are the hopes of that? You might as well have a better chance of winning the lottery!​


D-throw - The Way Mothers Troll You

Like a mother giving her son/daughter a keepsake, Yukari quickly takes out half a watermelon and gives it to her foe, who has no choice but to accept this nice offer and throw away whatever item(s) they have on them if needby. They are then gently pushed back a small distance. Said watermelon can be thrown for half the damage of Mr. Saturn, or eaten within a timespan of 2 seconds for 15% healing...and yes, while everyone LOOOOOVES healing, especially jellyfish-brained CPUs, they'll have to be careful as if they don't eat the melon Yukari will instead! Also, trying to actually eat the melon would be, you know, pretty stupid of you, because it will give Yukari some TIME to do whatever she wants!

Also, try using this with the F-Smash to massively troll your opponent; pray that they were dumb enough to forget that they had the phone on them in the first place and they won't even know of that extra damage on them! You can also use this with the B-throw by re-grabbing foes for lots of fun!​


Playing as Yukari is all about having FUN. If you're not having fun when using her, go pick another character right away...

So okay, with that out of the way, you want to know how you'll obtain this fun of fun, right? Well, Yukari is a lazy character; she's not all that fast or strong, and as such it means players aren't really going to be pursuing the foe with her. On the other hand, Yukari's little "specialty" is actually what makes her quite a bit of a threat in matches...this is a nice little package provided with her Side Special, which Yukari will be using AS MUCH AS POSSIBLE IN A MATCH...don't believe me? You should, because it'd be fun to use in real life!

...you unfortunately have to WAIT for the full effects of the Side Special, but waiting is nothing to Yukari! Toss a mobile phone to your foe and give em a one minute call to create your merchandise utopia! As long as you have a barrel or two on the stage Yukari can have quite a bit of fun with them, more so than any other character would in the same situation! Enemies will of course try to resist the awesomeness of your phone however, which is why you have to keep trying over and over! You also have moves such as your super cool Neutral Special, which is great for pestering enemies from a distance, and ultimately gives Yukari quite a bit of power in that it protects her from projectiles and summons alike (also GGs the stupid cat!). With said move, as long as you manage to suck in at least one thing, you'll be able to use the barrel at hand for lots of fun! You can also run up to your enemy and beat the crap out of them if you want to, but would you mindlessly do that with someone like Jiggs? Your call.

But of course, once you have your desired items, the fun can REALLY begin! And who knows, maybe even the foe will want to join in! Yukari doesn't mind one bit, and in fact'd be more than happy for her foe to join her; with items in hand, Yukari can take advantage of such and eagerly use her throws in order to keep duplicating the items for never-ending fun! Speaking of items and such, Yukari's F-Smash is of worthy note; while her foe is holding an item, it acts as a base projectile that can score KOs for the lazy Yukari from a distance, but without items it forces one into the foe's hands and threatens to damage foes. You can have quite a bit of fun with this move, such as mass phone inquiries with the B-throw and mixing it together with the D-Smash and so on...

So basically, Yukari is mostly composed of basic attacks but has plenty of ways to have fun in a match despite having a random factor about her with her Side Special, with her most notable moves for doing this being her: Neutral Special, Side Special, All 3 Smashes and B-throw. What I haven't mentioned up until now is Yukari's villa, which creates a fun little fortress for her that attracts the attention of every item on the stage and lets Yukari camp or shelter all her items in place what not; make enemies either try to knock the fortress down from the outside and make them waste time for you to summon items, or if they come in with you you'll be able to trap them with your ever-bouncy items and/or run out and blow them up along with your house from the inside and simply start over! Youkari can be rather cunning with some of these moves of hers, that she can...

So you may be wondering: what kind of character does Yukari really play as? Well, she can actually be quite a lot, for is she not a Japanese mother at heart!? You may choose to camp in the confines of your villa whilst you spawn items and create a fun little cage of death for foes who dare to venture inside (using the dash attack, f-tilt to bounce rolling crates off the doors until foes are knocked out of the villa through the sideways is REALLY, REALLY fulfilling!). You may even decide to go offensive on your foe with a rolling crate and attempt to gimp them via your crate and jumping through the sky via D-tilt, only to push them away with a F-air or even use your mix of aerials to scatter items on them! If you really want to play hardcore aerial games, you can even use your B-air to knock your mid-air crate back to the stage, and maybe even have it bounce off the doors of your villa and hopefully hit the foe! Just pray it doesn't hit you instead!

Yukari's only real weakness in a match is that she's not that great without her items because she'll get bored without them...that and she's not really good at ANYTHING. But hey, how many characters actually become MORE DANGEROUS when they have items on hand? Yukari is simply a character who has the liberty of being able to SUMMON them! But isn't that why you chose her, because all the other dudes are like "ooooh, I don't wanna play with items!"? FUN!


Wait what!? Did you just let Yukari get the Smash Ball!? That's incredibly STUUUUPID of you! Who knows what she'll do with such a freaking powerful object!?

....ah, I think I know. She starts talking..........................................F-O-R-E-V-E-R...

And with that, the match ends! No really, Yukari talked for SO LONG that the match's timer just flew by like it was nothing! And yes, this also works in Stock Matches just because it does. But when I say the match ends just like that, I never said that Yukari actually won it...whether she'll win it or not depends entirely on the player's current scores during the exact time the Final Smash was initiated; not too hard to do in Coin or Stock Matches, though you might have your work cut out for you in Timed Matches! Just don't be STUPID enough to use this when you're losing! And yes, Sudden Deaths can and will be initiated if needby. You ready for that?​
 

ProfPeanut

Smash Ace
Joined
Oct 1, 2008
Messages
727
My last MYMini for this contest:


1647442485276.png


Brendan, the main protagonist of the exquisitely-drawn "The Secret of Kells", is a young red-haired Irish monk who lives in the abbey of Kells. He spawns as an Assist Trophy that-

Wait, but he said this week's Mini should be about a comic character! I'm not a-

You need quills! Goose!

What? Ah!

1647442503459.png


A goose spawns onstage, and starts dashing about madly, dealing 9% to anyone hit by this flurry of feathers. It's only flinch when hit by any kind of attack, and it'll jump high into the air if it hits and edge before turning around and frantically dashing the other way. Brendan will notice it, then chase after it at roughly the same speed, immune to all attacks and having one decent jump, though his only role here is to catch up with the goose. Well, he does also trip any foes he might pass by, but it's not intentional. Anyone could flinch the goose enough for Brendan to catch up, though if it goes on foe about six more seconds-

1647442523966.png


A bunch of monks appear onstage about a SBB behind Brendan, and chase after the goose as well! Quite the varied bunch, aren't they? The goose is as large as Pikachu, and Brendan is about Mario's size, but these guys stick together in a Bowser-sized group, running at the same speed.They won't jump nor do damage, but any foes they run into will be pushed forward with the group, being incredibly difficult to outpace or escape from until the goose turns around to lead them elsewhere. And if this chase goes on for six more seconds-

1647442653572.png


Uh, why does the goose have a ball in its mouth now? Great, now a stampede of kids are after it too. They stick together similar to the monks, but their size is only about as large because of the sticks they're carrying. They'll chase after the goose from the side opposite where Brendan is, meaning that both will dash past each other before the kids chase from the same side at the same speed. They're a pretty rowdy bunch of kids, happily batting any foes with 12% hits that'll send them who-knows-where, though it's unlikely to score a KO this way. By this point, perhaps it would be best to end this wild goose chase, as all these groups will probably be more than disruptive to the battle.

By the way, that top image really is a comic cover-

That doesn't excuse the fact that "The Secret of Kells" is really an animated film, not a comic, y'know.

sigh Yeah, you're right...

Besides, I know you're just doing this to promote the next set, in case no one here really knows what "The Secret of Kells" is. Maybe you should remind them that her name is pronounced ASH-ling ...

 
Last edited:

ProfPeanut

Smash Ace
Joined
Oct 1, 2008
Messages
727
I have lived through many ages...

I have seen the book...the book that turned darkness...into light...

Aisling

1647443535677.png

This moveset has hidden away to safer alcoves. Click the image to follow it.


Side Special: Wolves won't chase anyone that passes by them if that character is also put in hitstun.
Down Special: ...Aisling will be stuck in as a wolf...
Forward Smash:...which is the only thing that will hide the lengthy start-up...
Katapultar, I owe you a review for Yukari Takara.
 
Last edited:

ProfPeanut

Smash Ace
Joined
Oct 1, 2008
Messages
727
Reviews!

Appetizer

Alright, now that was a fun set to read. It's interesting to read a character that changes the stage without actually, you know, terraforming. It's also interesting to see a character that is utterly screwed the moment it moves offstage, if I'm reading this right.

Starting off, I'm concerned about his ability to hide in his goop trails. What stops him from eventually creating a meat pool and hiding out in it for the entirety of the match once he's ahead, coming out just to refresh the meat timer? How high does he go with his Up Special anyway?

The Down Smash bothers me because it says that the meatballs produced by this start rolling by themselves. Why? The Side Special method is useless against quite a number of characters (even if MYM characters balance out that ratio), so I'd rather have a dependable way of creating meatball walls that I don't have to chase down and block from rolling offstage. In fact, a big chunk of this moveset seems to depend on having plenty of meatballs onstage, which, if smart foes withhold creating minions and traps, might take a long time indeed. I'm still unsure of how advantageous creating a valley is, save that I could use Up Special effectively from the peaks, because his ground game doesn't seem to really take advantage of it.

The mini G&W Bucket game is nice, and the grab game is also quite the unique specimen, grossness of the moves aside. All in all, it's a fun moveset to envision, and it does its own thing quite decently. Hmm, I wonder what would happen if it tried to grab Smady's Swalot...

Chun

Jab...is weird.

This doesn't feel like a set for one character - it's more like for one character and 12 minions. Face it, the Knights are just way too easily replaced that they certainly won't be the target of the foe's attacks anytime soon. Is the only reason for keeping the Knights in one place for the sake of transmuting them into stronger ones? Because otherwise I'd rather have them spread around the battlefield as much as possible.

I get this feeling of a Tutankoopa variation from this set, except that here she's using quite a number of inputs for either trying to keep the foe from escaping the Knights or trying to knock them out herself. I don't know whether she needs more minion manipulation or not, because otherwise the Knights are quite practical, but plain indeed. And why must she make so many walls? She really doesn't seem to need them very much!

The UTilt, Dash attack and FSmash are nice, and the throws are cool too. I'll take it her Up Special platforms can't be passed through, which would certainly help her not get killed by people's air games. Aerials are either generic or cool, other Smashes are alright. I still get Tutankoopa vibes from this set, except that Chun here can stand and attack in the middle of a swarm of Knights.

Birdo

Let me be the first to welcome you to this contest, since no one else probably will. It's good to see you listen to advice, which leads to my next bit: please cut out all the parts of a review quote that don't have to do with your set. It stretches the page pointlessly.

Ah, now we have specials, although they usually don't show up after the Final Smash. Specials do have the job of being more, well, special than the rest of the moveset, so they can make or break how a character plays like. For example, it looks like her USpec makes her aerials more accessible in a pinch (with two jumps intact, to boot) and her DSpec gives her some stage control. Nice. Personally, it would have been more interesting to see the Lip's Stick effect applied more throughout the set.

While you've got better sense of appearance than most newbies, the font size of the titles are too large, and the last bunch of lines are too plain in comparison with the rest of the set. There's some articles on set organization and plenty other things on the Bunker (check the first post on this thread) that can help you out. All in all, this is the kind of set that'd be seen on SSB4 speculation threads to justify characters - it's nice in that regard, but in MYM it's more of a simple apple pie in a gourmet contest. Pie is good, but the cook could surely be more imaginative than that. If you want to stick around, then try expanding your ideas, though I'm sure there are other users here who can better point out how you can improve.

Yukari Takara

Wow, strange that your next set would be like Chun in that its approach is similar to another's. However, whereas Tutankoopa was doing Chun's method of winning more solidly, Yukari looks like she's taking the same approach Po is: running on the promise of the sheer enjoyment that this character guarantees to anyone who plays her. And frankly, she's much more successful at it.

This crate thing is hilarious. Seriously, littering the stage with crates and capsules strikes me as ridiculous fun indeed, especially when that character has inputs that interact with riding on rolling crates (I cannot believe we have never tried to take advantage of winning through a method like this). I'd like to know the chances that items exclusive to her Side Special will show up, though.

FSmash is pure awesome. In non-stock matches, it pretty much guarantees free damage (though I can't decide whether 35% is stupidly high, or if the move is hilarious enough to excuse that) because there's no way foes would let themselves have so little time left. But even without a timer, it does something I don't think I've ever seen been done - kill prop set-ups by running them out of time! For the sake of this move, I'm going to assume any other foes left out of the conversation are sleeping and wake up just when the screen fades back in; it's more forgiveable than when Swalot did it. What I'd REALLY like cleared up, though, is whether the phone replaces attacks or is automatically thrown when A is pressed, ala Sensor Mine (because such things might not be so fun for opponents…)

Something else I like about this set is that it's got a deeper understanding of Smash physics than it lets on; this is something Po tried with the transcendent priority thing, but tended to forget that it wasn't the same as super armor. Her Aerials and the whole Rolling Crate do show this, which I appreciate in an environment where people would rather invent their own effects than try make use of existing ones. Speaking of which, permanent 4% from the pummel? As in, it'll be there when they respawn? Hmm…(one could make a set around that…)…

Oh, right, there still are nitpicks to be had. Some tilts and aerials feel a tad generic, though I still see their uses; Up Special, however, is outright bland (noooooooooo!). Down Special is a very cool idea, but it doesn't really fit with the rest of the set, and feels like it belongs in another moveset. The whole thing is treading the line between "silly fun" and "plain bloody silly", the latter side you do not want this set to fall under, but the sporadic typos don't really help this set stay on the good side of this line. And Yukari lacks a move to use in the event that she decides to ride a Rolling Crate with a foe trapped inside with Neutral Special, in case the foe breaks out! How could you?!

But all in all, I really enjoyed this set, and am now sorry that Aisling may have left it where no one will read it. So I say here now that people SHOULD read this Yukari Takara moveset. The very fact that it makes use of a KO method untouched upon (death by Rolling Crates) and yet already present within Brawl makes it win in this MYMer's eyes.
 

Waver

Smash Cadet
Joined
Jan 5, 2012
Messages
71
Location
In your cookie jar...
NNID
WaverJR
3DS FC
2964-8605-0439
Switch FC
SW-1450-5084-6730
Birdo

Let me be the first to welcome you to this contest - and also the first to tell you that you need an image of the character at the start of the moveset. No, seriously, just pull it out of the Super Mario Wiki or something-

Hang on, there aren't any specials in this moveset! Bad form, this won't be admitted as a serious moveset at all! Well, at least the other attacks are acceptable, though I think there's too much deriving out of Yoshi's DAir here. Wait, explosion from the FSmash? How does Birdo do that?

While you've got better sense of appearance than most newbies, the font size of the titles are too large, and the last bunch of lines are too plain in comparison with the rest of the set. There's some articles on set organization and plenty other things on the Bunker (check the first post on this thread) that can help you out. Although without specials, I can't really say much more for your efforts.
I put the B attacks in. I wasn't joking, I just forgot sorry. The explosion in her forward smash happens kind of the same way Ivysaur uses his up smash.
 

Junahu

Smash Ace
Joined
Nov 15, 2005
Messages
899
Location
Shropshire Slasher

More comments coming at ya, fresh from the presses at NME.

Kirby Bosses [continued]
Movements are tricky things to be sure. You have so many different viewpoints and methods on display, and little to bring them together into a cohesive narrative.
This movement, unfortunately has Grand Doomer's peacocking mark a sudden peak, stealing the show from everything else to follow. Something of Grand Doomer's scope should probably have been saved for the finale.
Personally, I would have liked to see a consistant, plump/cute presentation over all of the movesets. Individually personalised sets have only really worked with the Duck Twacy movement, which deliberately invoked a chaotic messy feel.

:urg: Ok, I shouldn't say stuff like that. Movements are really really hard to organise and pull off. And one this big probably deserves a medal or something (psst, Silver, make a 'Best Movement Catagory')
Metal General
There's something pleasingly sadistic about using your own HR-D3 as a towering roving bomb. Even if I can't exactly pin down the specifics of how Metal General wants to play, there are still a lot of fun toys to play with here, and a good few attacks for taking advantage of the situation (mainly throws and tilts). I'm always happy to see simpler attacks that are genuinely useful to use, especially on a character that might otherwise overwhelm a newer player.

Elements of this moveset seems to hinge on the reader already knowing everything about this boss character, particularly in how he moves around and looks in motion. There's also the issue of the write-up being rushed, with bizarre contradictions such as;
If it is released in the air, there will only be one second of ending lag. If it is released on the ground, there will be one full second of ending lag
You also try to pin Metal General as a chaos character, which can be somewhat true when HR-D3 is on the case, but otherwise he's pretty focused on spacing and trapping.
Finally, my biggest complaint; those headers are just impossible to read. Seriously, did you pick the hardest font/colour combination on PURPOSE!?

Landia
I can only assume you were in something of a hurry to get this moveset made, as you hit only the main points and somehow manage to glaze over one of Landia's mechanics (the fact his glide is not a glide but actually genuine free flight).
The way you use Landia's multiple heads to create extendable attacks and to defend yourself while resting, is cool. I also love the smash attacks, in which you can charge up to get more heads involved. Landia's mid-air game is fun and suitably intimidating for the most part, though I wish Neutral Special would angle 45 degrees downward when used while airborne (so he can suppress grounded foes better)

I have to admit that some of these attacks sound rather goofy in terms of how they'd look in motion (up-aerial, for example). And the general brevity of the set itself makes it tricky for me to really get into.

Magolor
Does Magolor start a match with a few energy spheres already orbiting him (like with Olimar's Pikmin)? And can his entrance animation have Magolor come out of a star-portal, which he can then use? Various elements of the moveset require or assume the constant presence of both energy spheres and portals.

Magolor certainly has a Olimar like vibe to him, albeit a more malevolent Olimar, which is pretty nifty. The portal play you have going on, is much more simple and inviting than most other movesets that use the concept, making it somewhat less of a chore figuring out just what they can do. I kind of wish the portals themselves had some sort of passive duty on their own. Even just slowling down enemy projectiles that fly through them would be something.

Like with Metal General and Mr Dooter, you portray Magolor as being a chaotic character, when really he's a spacing and stage controlling character. Forgive this micro-rant, but if it's deliberate, focused and purposeful, it's not 'chaos'.

Galacta Knight
Poor Galacta knight gets the shortest straw of all possible straws. He's a direct aesthetic twin, to existing Brawl ban-man, Meta Knight, to the point where calling this set a remix wouldn't be too far off. If absolutely nothing else, you've got real stones making a moveset for Galacta Knight.

You go to surprising extremes to seperate Galacta Knight from Meta, giving him a faster speed, more awkwardly punishable moves, traps and summons. It's bizarre, but elements of it feel like they would actually work. There's a real sense of loftiness in raining down bolts and beams on the foe from up high and corralling them into his little tornado rooms of death. Your assertion that he won't just camp though, strikes me as having little justification. I don't see any particular downside to camping.
 

Katapultar

Smash Lord
Joined
Nov 24, 2008
Messages
1,284
Location
Australia
Chun

Jab...is weird.

This doesn't feel like a set for one character - it's more like for one character and 12 minions. Face it, the Knights are just way too easily replaced that they certainly won't be the target of the foe's attacks anytime soon. Is the only reason for keeping the Knights in one place for the sake of transmuting them into stronger ones? Because otherwise I'd rather have them spread around the battlefield as much as possible.

I get this feeling of a Tutankoopa variation from this set, except that here she's using quite a number of inputs for either trying to keep the foe from escaping the Knights or trying to knock them out herself. I don't know whether she needs more minion manipulation or not, because otherwise the Knights are quite practical, but plain indeed. And why must she make so many walls? She really doesn't seem to need them very much!

The UTilt, Dash attack and FSmash are nice, and the throws are cool too. I'll take it her Up Special platforms can't be passed through, which would certainly help her not get killed by people's air games. Aerials are either generic or cool, other Smashes are alright. I still get Tutankoopa vibes from this set, except that Chun here can stand and attack in the middle of a swarm of Knights.
I'm quite intrigued by the fact that you've started commenting now; I was going to reply to your message last night when I couldn't get to sleep at 1am but I was too scared to...then in bed I promised myself I would do so in the morning...

This one set I can say for sure I didn't put a super amount of thought into it. To address your point in the 1st paragraph, I was kinda thinking that if you kept your Knights in once place foes would actually get the incentive to attack you, and you could use your attacks and traps to knock them into your Knights...though I guess having 12 around when you're knocked down doesn't really make a difference in the first place...that's actually something I never thought of in the first place, so I guess it wouldn't have made a difference no matter how long I would've thought on this set.

Ummm, I guess when I thought of those walls, I thought of being able to bunch Knights together in groups over trapping foes; I think there were only the Down Special and D-air for walls, which are used in different situations so I don't really think that's too much. I should say yeah the Up Special platform can be passed through, though I guess I didn't make that all to clear what with the Skyworld comparison; players can't pass through those breakable platforms. That probably made the U-Smash whole use thing rather awkward to read.

Your way of commenting seems to be a bit of an amalgamation of what you think of a set without giving it too much of an overall judgement, which is what I seem to get. That is alright at hand.


Yukari Takara

Wow, strange that your next set would be like Chun in that its approach is similar to another's. However, whereas Tutankoopa was doing Chun's method of winning more solidly, Yukari looks like she's taking the same approach Po is: running on the promise of the sheer enjoyment that this character guarantees to anyone who plays her. And frankly, she's much more successful at it.

This crate thing is hilarious. Seriously, littering the stage with crates and capsules strikes me as ridiculous fun indeed, especially when that character has inputs that interact with riding on rolling crates (I cannot believe we have never tried to take advantage of winning through a method like this). I'd like to know the chances that items exclusive to her Side Special will show up, though.

FSmash is pure awesome. In non-stock matches, it pretty much guarantees free damage (though I can't decide whether 35% is stupidly high, or if the move is hilarious enough to excuse that) because there's no way foes would let themselves have so little time left. But even without a timer, it does something I don't think I've ever seen been done - kill prop set-ups by running them out of time! For the sake of this move, I'm going to assume any other foes left out of the conversation are sleeping and wake up just when the screen fades back in; it's more forgiveable than when Swalot did it. What I'd REALLY like cleared up, though, is whether the phone replaces attacks or is automatically thrown when A is pressed, ala Sensor Mine (because such things might not be so fun for opponents…)

Something else I like about this set is that it's got a deeper understanding of Smash physics than it lets on; this is something Po tried with the transcendent priority thing, but tended to forget that it wasn't the same as super armor. Her Aerials and the whole Rolling Crate do show this, which I appreciate in an environment where people would rather invent their own effects than try make use of existing ones. Speaking of which, permanent 4% from the pummel? As in, it'll be there when they respawn? Hmm…(one could make a set around that…)…

Oh, right, there still are nitpicks to be had. Some tilts and aerials feel a tad generic, though I still see their uses; Up Special, however, is outright bland (noooooooooo!). Down Special is a very cool idea, but it doesn't really fit with the rest of the set, and feels like it belongs in another moveset. The whole thing is treading the line between "silly fun" and "plain bloody silly", the latter side you do not want this set to fall under, but the sporadic typos don't really help this set stay on the good side of this line. And Yukari lacks a move to use in the event that she decides to ride a Rolling Crate with a foe trapped inside with Neutral Special, in case the foe breaks out! How could you?!

But all in all, I really enjoyed this set, and am now sorry that Aisling may have left it where no one will read it. So I say here now that people SHOULD read this Yukari Takara moveset. The very fact that it makes use of a KO method untouched upon (death by Rolling Crates) and yet already present within Brawl makes it win in this MYMer's eyes.
Funny, I didn't actually know that was Po's goal in the first place...hehe, I guess those tibits of "awesomeness" weren't for nothing, now were they?

I'll get to the negatives first, because in any comment, they stick out like a sore thumb. First, Up Special; it is kinda hard to make a recovery for someone like Yukari obviously without delving too far into props, and I only usually see Up Specials as being recovery moves unless I can think otherwise. I kinda rage at the negative aspect of "generic attacks" in how they are looked upon, which I do for many reasons. First, they are as simple and essential to making and playing a set in practical terms as say I dunno, walking would be in real life. Not the best comparison I know. And in many good sets they've obviously provided with good fun little interactions that helped keep them up. And finally, I say generic attacks are called generic because people don't really go into enough depth about them, and exactly what they're supposed to do in a match and their purpose for every Brawl character and what not; even in that game, they were all made for a reason.

Down Special I'll admit you were right about that, and I actually FORGOT why I wanted to implement it in the first place....thought it was an okay idea, though I don't really know why (no seriously, I'm not making up the fact that I forgot!). I think I understand a wee bit about the plain bloody silly thing what with the exploding houses and expensive phones and what not, though I don't really understand this part of the complaint. And finally, I perhaps should have elaborated on it a bit more that Yukari can actually ride atop of crates and jump onto them at the same time with her Dash Attack or even knock them away with her B-air, and while she can make it "jump" with her D-tilt, she lacks any way to move one forward whilst riding on it. I guess it's only fair to some extent however. And finally I guess I didn't proof read through the entire set and simply THOUGHT I had few to no spelling mistakes...

And then we get to the positives...I'm quite surprised that this set at hand was received far better than I thought...granted, I guess I ended up making a set that touched upon something in Brawl that was untouched if not elaborated to the best possible extent. Also I guess putting PERMANENT on the pummel was a reeeeeeeeeeeeeeeally misleading idea (it was kinda metaphorically speaking)...still, if it puts ideas in your head it'd help...certainly did so for me just right now. And also, with the whole phone thing I actually assumed from the very beginning that only a Z input would cause it to be thrown and not an A attack, so then foes would still be able to attack normally just not pick up items or use their grab if they don't want to take damage.

Also, about the conversation thing with the phone, in Brawl, do remember that with Captain Falcon's Final Smash that the other players are frozen in time when it is being initiated, in which the same thing happens with other fighting games...that's kinda the premise

But yeah, I'm reeeeally glad you liked this set here of mine! Was hoping to make it a funny one and maybe even win the funniest moveset award! Glad there's no Julius Rocks do impede my progress what with such...or maybe someone will just randomly make another variation on the very last day........oh noooooooooo........
 

crash826

Smash Rookie
Joined
May 6, 2010
Messages
6
[collapse="Light Reading Music"]Have some delightful music!
Love Combination
Go Go Girl (Vocal Ver.)
Hot-Blooded Teacher Raspberyl!
Modern Times[/collapse]

[FONT=&quot]
[/FONT]

[FONT=&quot]RASPBERYL[/FONT]

[FONT=&quot]❦[FONT=&quot] The sweet, charitable delinquent demon of Evil Academy, [/FONT][FONT=&quot]❦[/FONT][/FONT]

[FONT=&quot]❦[FONT=&quot] Raspberyl joins the Brawl! [/FONT][FONT=&quot]❦[/FONT][/FONT]​
Raspberyl is the ultimate Delinquent of Evil Academy, a massive school in the Netherworld. In that hellish place, honor students never attend classes, don't learn anything and devote their time to picking off other honor students for their money and status. Conversely, delinquents donate to charity, pick up litter by the sides of roads, and attend all their classes. And Raspberyl, a mischievous, cheery girl of small stature and magical skill, is the No.1 Delinquent and Valedictorian of Evil Academy. In Disgaea 3, Raspberyl vied against the honor student Mao in his quest to defeat the Overlord as a personal rival, then later joined him as a Monster-type, wielding the unconventional weapon of a book of delinquency rules and statutes. Now she's here to bring love and goodness to every corner of the Brawl, and if she has to pound it into your head, that's no biggie!
[FONT=&quot]❦[FONT=&quot]Specials[/FONT][FONT=&quot]❦[/FONT]

[/FONT] [FONT=&quot]Neutral Special[FONT=&quot]❦[/FONT][FONT=&quot] Moral Bonds [/FONT]
[/FONT] Raspberyl holds her book out and raises a hand above her head, a wicked grin on her face -- as she does, the tome opens and the pages begin rapidly flipping, seemingly infinite. For every .3 of a second you let the pages turn, one small sphere of pink light, encased in a ribbon of words, floats out of the pages of the book and stays in the air, awaiting orders- up to three appearing at once. If you hit B again before these spheres have all released, Raspberyl pulls her book above her head and swings it like a judge's gavel in a fairly laggy animation. The spheres follow suit, floating over Raspberyl's head and then striking the ground in a straight line over 1-3 SSBs (based on the number of spheres). Letting the move charge fully allows Raspberyl to tote the spheres around and fire them with Neutral Special.

Spheres can occupy one foe at once, and when they contact they zap the foe for a weak 4% damage. What's the point, then? Well, a sphere that hits a foe becomes large and encircles them in a ring of lessons, instruction and advice
for being a good delinquent! This ring of light then spins around the target for a dizzying 3 seconds of immobility before clenching around the foe and bursting violently, dealing a further 8% damage. This, of course, is used to give Raspberyl some time to get out her big guns... or to immobilize the foe so you can smash them with a spell you've already got ready.
(Delinquency, 12%; RADS: 1)

[FONT=&quot]Side Special[FONT=&quot]❦[/FONT][FONT=&quot] Volunteer Vortex[/FONT]
[/FONT] Raspberyl's getting passionate about volunteering! She opens her book and points forward, where (about 4 SBBs away) a magic circle around 2.5 SBBs wide begins drawing itself on the ground. After a looong period of casting (2 seconds!), the circle is fully drawn and immediately flashes, sending a pillar of light into the skies. Now, any character standing on the circle when it activates will be stunned in the light- and, a second later, will wink out of reality along with the circle, which collapses in on itself.

A second later, Raspberyl (who is still standing there focusing, by the way) raises her book once more, and a twinkle of light becomes a blast of flames as the vortex reopens and ejects everyone inside like the trash they are. This blast deals 19-23% with pretty high knockback. Not bad, except HOLY **** LAG. Raspberyl even poses and gloats for a second after the explosion (if it hit)! Wow, Razzy, great prioritizing.

(Note: If the vortex catches objects, such as traps, items, barrels, etc., it will de-exist them. Gotta clean up litter on the battlefield, right? So you can get rid of enemies' carefully set up portals, or their traps, or their pivotal gameplay objects- anything trashy really!)
(Delinquency, 19-23%; 3 RADS)

[FONT=&quot]Up Special[FONT=&quot]❦[/FONT][FONT=&quot] Imperial Cross[/FONT]
[/FONT] Well, you've gotta recover sometime. Here, Raspberyl does a surprisingly quick dash upwards! Pity it's 1 SBB long.

Wait, then... again? Yep, Raspberyl does this stupid tiny dash five times, in any of the four cardinal directions - always moving 4 SBBs total in whatever directions. It's okay for recovery... but its real use lies in tactics!

See, when Raspberyl dashes, she doesn't just move. She leaves a clone of herself in each place she stops! These clones dive quickly toward the ground when Raspberyl dashes on, falling book-first with a drop that deals 10% and fair knockback but has a momentary lag period. These clones have 5 HP each and will remain on stage, wandering aimlessly and occasionally attacking with weak moves, until someone kills them, Raspberyl being among the list of possible clonicidal maniacs (Raspberyl can kill her own clones? I wonder why...).

It doesn't really do for Raspberyl to have all four clones out at once, though... especially since they fuel her recovery. That's right- the number of dashes you can use has an inverse relation to the number of clones currently about! Why are you keeping these douches around anyway?
(10% drop)

[FONT=&quot]Down Special[FONT=&quot]❦[/FONT][FONT=&quot] Delta Extreme[/FONT]
[/FONT] Raspberyl's most stupidly-setup, most ridiculously powerful attack. Here we go.

First, Raspberyl draws a circle of fire in the air with her fingertip, about the size of .8 Links. (Of course, she has to jump a little to draw the top bit. She's just small for her age is all!) This takes 2 seconds. Then you have a choice- if you continue to hold down the special, Raspberyl draws a triangle in the center, also made of flame, using three quick finger slices. If you don't, though, you can just walk away- the fire ring will eventually dissipate from having no magical support. If you draw the triangle (1.5 seconds), you can- again- either walk away or go to part three, in which Raspberyl floats her book, opened, to the fire pattern and turns it into a glowing pinky-purple sigil in the air, bubbling with a glowing flame (taking another 2 seconds). This is the ready form of the Delta Extreme. Extreme!

At this point, simply attacking the sigil with any move will do the job- a massive fireball erupts from the magic circle and hurtles in the direction it was hit, dealing a ridiculous 35% damage and astounding knockback to any foe it hits. The fire even cracks the ground with its power- the jagged spikes of rock that the incinerating sphere carves from the earth deal 17% and spike-like knockback to any foe who's careless enough to land on them before they vanish (that is, after 4 seconds).

And here's why you want clones: any clone who happens to come across an unfinished rune will go through the process of finishing it herself! Nice girls, even if they are fakes. They've got that volunteer spirit!
(Delinquency, 17%, 35%; 8 RADS)

[FONT=&quot]❦[FONT=&quot] Negotiation [/FONT][FONT=&quot]❦[/FONT]

[/FONT] [FONT=&quot]Jab[FONT=&quot]❦[/FONT][FONT=&quot] Campfire Cheer[/FONT]
[/FONT] Raspberyl levitates her book open and raises a hand, summoning a gout of flame from the book that persists as long as jab is held- the flame deals about 2% per hit and can hit foes slightly above Raspberyl, since it extends off of the ground. The fire also persists for a few seconds after the move ends, making this a good way to space. (Note: EATS shields)
(Fire, 2%)

Dash[FONT=&quot]❦ Tome Rush
[/FONT] Raspberyl stops suddenly in the midst of her dash and pulls back slightly, then rushes forward at great speed, her book open in front of her like a shield. This book-charge deals a nice little 10% with fair knockback. Its excellent priority means you can just barge through attacks. And that's it. Nothing to write home about here; just a solid attack.
(10% book bash)

Forward Tilt[FONT=&quot]❦ Throw The Book At Them
[/FONT] Exactly what it sounds like. Raspberyl summons up her book of delinquent magics and points forward, and the book is all too happy to comply- it hurtles forward for up to the length of Final Destination, dragging foes it hits fairly well, before vanishing, after which it is usable again. Getting book'd deals a nice little 8% and flinching. Of course, you can't use any book-based (read: any) moves while the book's on its path, but if you used it right the foe's not anywhere near you anyway, are they?

This is more important than it seems, though- while the book is away, you can use the move again to fire another FD-length. And you can use any book-based move. So you can actually detach your close-range attacks from yourself and fire them at enemies from long range. Nifty!
(8% book thwack)

[FONT=&quot]Up Tilt[FONT=&quot]❦[/FONT][FONT=&quot] Hurricane 451 [/FONT]
[/FONT] Beryl holds her book, opened, above her head and lets out some heat as a fiery hurricane. This flame-icane deals constant scorching damage in an area directly around Raspberyl's head, extending five SBBs from the book (the blaze breeze pushes foes directly upward), and ends with a flourish- when you cease to hold the hurricane, Beryl shuts her book with a snap and the flames implode upon themselves, dealing 9% and fair knockback. It's obviously an air spacer, but... who knows what you could do with it?
(1% rapid, 9% boom)

[FONT=&quot]Down Tilt[FONT=&quot]❦[/FONT][FONT=&quot] Blood Donation[/FONT]
[/FONT] This one's different. Waaaay different. Beryl removes a syringe the size of a turkey baster from her pocket and jams it into her arm, dealing herself a measly 1% damage; for as long as the move is held afterward, she'll drain 5% a second from herself in blood, up to 20% total. Afterward, if you drained 15% or more blood, the delinquent queen will stagger into dazedness, for about half the time of a shield-break animation. Afterward, she'll be carrying around the syringe as a throwing item. Either she can re-inject the blood, restoring at the same rate, by using the down tilt, or she can stab a foe, which... heals the stabbed target for as much blood as Raspberyl donated! What the hell!

So what's the point? Well...

[FONT=&quot]❦[FONT=&quot] DELINQUENT HONOR [/FONT][FONT=&quot]❦[/FONT][/FONT]​
When you're a Delinquent of Evil Academy- a world where morality is on the fritz- you've got a rep you have to uphold! And when you're the No. 1 Delinquent... See, Raspberyl's delinquency is based on charity and kindness. Thus, to power certain spells and abilities, she's gotta perform charitable acts!

There are two main D-Rules which Raspberyl can follow to gain rep on a basic level:

[FONT=&quot]D-Rule 1:[FONT=&quot]❦[/FONT][FONT=&quot] Charity [/FONT]
[/FONT] If Beryl gives something to someone else that she got through great personal sacrifice, she automatically gains a massive amount of delinquent cred! Specifically, 2 RADS (Real-Nice Arbitrary Delinquency Score) of cred. Every time this happens, her pendant's eyes flash bright pink to symbolize RADS flowing in; as long as she's got some energy in her, the pendant's eyes glow with pink pupils. (This also happens every time Razzy gets any cred, so remember that.) This applies to health, so... "donate" a vial of blood into your enemy's veins and get 2 RADS of cred per pint (5%) you donated. Of course, even if the foe isn't getting the benefits (read: are at 0%), you're still giving to them, aren't you? And you can donate to your own clones, too...

[FONT=&quot]D-Rule 2: [FONT=&quot]❦[/FONT][FONT=&quot] Volunteer[/FONT]
[/FONT] Of course, you've gotta pick up litter! This is a sanitary battlefield. When Raspberyl throws an item- any item- off stage, she'll gain half a RADS; sucking an item off stage with the Volunteer Vortex will earn a whole RADS. Not nearly as efficient as Blood Donation, but without any of the pain inflicted. You're not gonna be using this much, though.

In any case: Noticed the RADS numbers after certain move names? When you perform that particular move with that amount of RADS available, they become Enhanced- generally speeding up cast time and range. With a mere 1 RADS, Raspberyl can throw out a line of 6 Moral Bonds instead of three, prepared from the get-go; she can cast a Volunteer Vortex in .5 seconds instead of 2.5 for 3 RADS; best of all: for 8 RADS, Raspberyl can instantly call up a Delta Extreme circle whenever she likes. RAD(S)ICAL.

/explaining important mechanics halfway through set

[FONT=&quot]❦[FONT=&quot] Love Hurts [/FONT][FONT=&quot]❦[/FONT]

[/FONT] [FONT=&quot]Forward Smash[FONT=&quot]❦[/FONT][FONT=&quot] Fryer Fire Frapparisque[/FONT]
[/FONT] ...What's a Frapparisque? Is it just there for the alliteration?

In any case, Raspberyl charges by- what else?- letting her book's pages flip rapidly. When the move's fully charged, she opens the book forward, concentrates for a moment and fires a large fireball which begins to zigzag rapidly. This sphere of heat and light follows a straight line which it zigzags past in perfect formation (orderly, like a delinquent should be) until it either hits an enemy (dealing an explosion of 24-32% damage) or just hits a wall and dies off.
(24-32% fire damage)

[FONT=&quot]Up Smash[FONT=&quot]❦[/FONT][FONT=&quot] Hello Throw[/FONT]
[/FONT] Unlike most of Raspberyl's moves, this technique involves absolutely no fire or pink energy beams. Instead, Raspberyl dances in place, obviously antsy, as you charge. When released, she... leaps a ridiculous distance upward? C-sticked, the move is about as high as a single jump from a floaty character; at full charge it equals Sonic's spring jump.

So why? First of all, it's got a ridiculous range- much higher than Raspberyl could normally achieve. And the jump heads upward much faster than a regular jump, allowing it to be used as a sort of dodging mechanism. And, of course, it's a good way to navigate stages.

[FONT=&quot]Down Smash[FONT=&quot]❦[/FONT][FONT=&quot] Law By Range[/FONT]
[/FONT] This technique charges while Raspberyl holds her book by the spine, apparently lost in thought. The eyes of her necklace glow with pink light. Runic rings spiral up around the No. 1 Delinquent- one per 1/3 seconds of charging. Spooky.

When activated, Raspberyl raises a hand, and the magical tension in the air around her discharges, releasing the energy generated by her book. Now, you may notice that you just lost anywhere from 1 to 4 RADS there, depending on charge. Well, now that you've activated your booster, Raspberyl's energy attacks are now doubled in size, range and speed of execution. So now you're hurling around much larger blasts for a length of time ranging from 5 seconds at minimal charge to 15 at the highest.

Be warned, though- while in this mode, all your energy attacks cost RADS to use. At the lowest level, you're going to use up 1 RADS per attack, whereas at highest you'll only use up .5 of an RADS per attack thanks to your responsible earlier investment. Be sure you've got a good stock of good deeds before activating your powers!

[FONT=&quot]❦[FONT=&quot] Heart To The Skies [/FONT][FONT=&quot]❦[/FONT]

[/FONT] [FONT=&quot]Neutral Air[FONT=&quot]❦[/FONT][FONT=&quot] Psycho Barrier[/FONT]
[/FONT] Raspberyl grabs her book, curls up and mutters some nonsense incantation, summoning a oscillating pink bubble around her. This sphere of energy is a simple defensive spell that functions like a shield; instead of taking damage while it's up, Raspberyl merely loses RADS at a conversion rate of (5% = 2 RADS). The technique can be held for a short time upon landing; Raspberyl merely floats in her bubble on the ground for a moment before it evaporates. This, of course, means that with enough time to prepare you can make Raspberyl utterly invincible via RADS.

[FONT=&quot]Side Air[FONT=&quot]❦[/FONT][FONT=&quot] Iron Fist of Love[/FONT]
[/FONT] What? An actual physical attack? Madness!

Beryl ***** a fist and throws a punch that spins her around a few times, in sort of a funny-looking way. The punch deals 7% and mild knockback, and- more importantly- is not an energy attack. Thus it costs no RADS even when being used in Law By Range.
(7% fist)

[FONT=&quot]Back Air[FONT=&quot]❦[/FONT][FONT=&quot] Helping Hand[/FONT]
[/FONT] The Delinquent Queen has no time for your impertinence! Beryl turns around and holds out her hand. If the move doesn't get anyone, you've got nothing but a little end lag when you land; if you contact the foe, however, Beryl grabs them and tosses this sap upward 3 SBBs. And that's it. Obviously a spacing mechanic; the foe isn't going to hit you in the back if you're reaching out a hand to stop them, right?

Oh, also- if Raspberyl extends a Helping Hand when there's a clone nearby (a Negative Zone), they'll return the favor by leaping out and tossing Raspberyl upward in the same way she'd do for them.

[FONT=&quot]Up Air[FONT=&quot]❦[/FONT][FONT=&quot] Giga Firework[/FONT]
[/FONT] Raspberyl swivels onto her back, aims a finger, pistol-like, upward, and blasts a ball of flame about the size of Kirby from her outstretched digit. This fireball shoots upward approximately 5 SBBs before exploding, dealing 15% and good knockback; the ball itself deals excellent knockback upward and deals 10% instead.
(10% fireball, 15% explosion)

[FONT=&quot]Down Air[FONT=&quot]❦[/FONT][FONT=&quot] Fire Body[/FONT]
[/FONT] Raspberyl casts a spell, glowing with runes... and bursts into flame. Her entire body becomes a low-priority hitbox of fire that deals 10% and good knockback as she falls, and she can execute any of her other attacks as her flames scorch direct attackers. Upon landing, the flames discharge themselves via Razzy's feet, creating a small, burning shockwave on the ground that deals minor knockback and 8%. Of course, under Law By Range, the fire extends far beyond Beryl's physical body, essentially shielding her from all physical attacks while falling.
(10% body, 8% shockwave)

[FONT=&quot]❦[FONT=&quot] Throws [/FONT][FONT=&quot]❦[/FONT]

[/FONT] [FONT=&quot]Grab[FONT=&quot]❦[/FONT][FONT=&quot] Grip of Good Will[/FONT]
[/FONT] Raspberyl, like most things she does, grabs with her book- she points, and her book snaps around an unlucky foe nearby, grabbing them and holding them in place. However, this can also be used while the book is away from Raspberyl due to Throw The Book At Them- meaning you can grab and throw someone who's a Final Destination away from you. Nifty. The pummel is merely Raspberyl blasting the foe with short-range fireballs which move pretty quickly- they'll deal 4% a fireball and don't use RADS in Range Mode, but can't hit if the book is over 2 SBBs away.

[FONT=&quot]Forward Throw[FONT=&quot]❦[/FONT][FONT=&quot] Saintly Aggression[/FONT]
[/FONT] Razzy points, and the book tosses the foe forward before spinning and smashing the enemy repeatedly about the head and neck. This bookbeating ends with the book stopping, opening and blasting the foe with dark smoke, flame and trails of delinquent magics, hurling them backward for a total of 12-15% damage.
(12-15% beating/beam)

[FONT=&quot]Up Throw[FONT=&quot]❦[/FONT][FONT=&quot] Heaven's Blessing[/FONT]
[/FONT] The book turns upward, your helpless opponent in its grip, and opens to the skies for the blessings of Celestia, binding the enemy with a mystic bond of light. And respond Celestia does -- a large ball of starlight drops from the heavens, pulverizing objects below, and crashes into the book and foe, dealing 10-21% and bouncing said foe high into the air.
(10-21% divine punishment)

[FONT=&quot]Back Throw[FONT=&quot]❦[/FONT][FONT=&quot] Divine Body [/FONT]
[/FONT] Beryl holds her hands to her heart and glows with the light of ages! Her body, charged with powerful magics, becomes a hitbox of low priority that deals 15% and good knockback. The player then gains movement control over Razzy- the obvious intent being ramming your foes with your magically-charged body. The book keeps restraining the grabbed foe while Raspberyl charges them, but without her focus the grab is twice as easy to break out of. The energy of the heavenly body wears off after 5 seconds.
(15% powered body)

[FONT=&quot]Down Throw[FONT=&quot]❦[/FONT][FONT=&quot] Blood Drive[/FONT]
[/FONT] Who said it had to be Raspberyl's blood? From the book pops a clone Raspberyl in a nurse's outfit, wielding a syringe and an intent to good for a society that doesn't particularly want it. Stabbing the foe with the syringe, the clone drains blood at the same rate that Beryl drains her own blood, although the foe has the ability to struggle free at .5 difficulty of a grab, and with the same dizziness property at >15% drained. She then pops back into the book, which teleports back to Beryl and hands her the syringe. Of course, if you're just returning property you stole in the first place, it's hardly delinquent, is it? Healing a foe or clone with blood you drained from any foe affords you no RADS.

So what can you do, besides healing yourself with the syringe? Why not... take from yourself? Or rather, your other selves? Raspberyl clones (see the Up Special, true believers!) won't attempt to struggle free from Razzy's grip, and their 5% donation self-sacrifice can be used to gain yourself a neat little 2 RADS. Never forget those brave clones who died so you could use your magic powers slightly better. Never.
(5-20% blood removal)

[FONT=&quot]❦[FONT=&quot] FINAL SMASH [/FONT][FONT=&quot]❦[/FONT][/FONT]

[FONT=&quot]ECO FIENDISH[/FONT]​
Oh god, Raspberyl has the Smash Ball. Who turned those on? Seriously?

As the spell is cast, Raspberyl opens her book, covered in eldritch runes, and cries "Which honor student wants to take my lesson?" The book then spews a noxious purple smoke which spreads all over the stage at high speeds, removing all from view. Eyes flash in the darkness, and...

The stage is now a small platform, extending from below and dead center, about 4 SBBs long. There is a giant, five-headed snake. And Raspberyl is riding it. Living the dream. This snake can be commanded to spew smoke from any of its five heads by holding the directional pad in the direction of that head (left, up-left, up, up-right, right), forming spreading clouds in that area of the stage; smoke deals hits of 4% with no knockback at extreme speeds (standing still for four seconds is enough to get 44% in a cloud of gas). So your foes are dancing around their little platform, trying to stay out of your doom smoke, for a full 15 seconds... until all five heads spray smoke, covering the screen in darkness once again. Finally, a skull flashes on screen, dealing 20% and good knockback to all foes caught in the Final Smash (who reappear in their original places, knocked back in no way whatsoever). Hooray!

[FONT=&quot]❦[FONT=&quot]Playstyle[/FONT][FONT=&quot]❦[/FONT]

[/FONT] I personally have no idea how to write playstyle, so I'll keep it short and sweet.

Raspberyl needs space. A lot of space. Her attacks are laggy, and her way of reducing lag leaves her vulnerable to the foe's attacks- and with high damage to boot. That's why she has spacers- means of escape in Hello Throw, an anti-air attack in Hurricane 451, and the ability to separate her origin of attacks and hitbox in Throw The Book At Them. Raspberyl needs to keep her foes occupied- bound up in her Neutral Special or held in her grab- while she drains her blood, absorbs her enemy's trash or draws runes in the air to prepare Delta Extreme.

Secondly, Raspberyl needs RADS. Lots and lots of RADS. They give her fast attacks, a means of defense from any move, ridiculously massive range and the ability to actually get her attacks off without being jabbed into submission. So you're going to be tossing out your Up Special a lot, even when you don't need it to recover; clones mean blood and blood means RADS. Even so, you've got to beware while draining clones; your lack of a recovery means you're taking a great risk, and you had better have your enemy occupied with magic, traps or not existing while you prepare.
 

darth meanie

Smash Journeyman
Joined
Jun 6, 2008
Messages
452
The Greatest Bromance Never Told

Kenji and Hisao


The manliest men ever to grace the halls of Yamaku High, Kenji and Hisao are soul brothers fighting a war against the world. And feminists. There is a war coming, and soon the feminists will attempt to take over the world and destroy all that is manly. The fate of mankind rests on their shoulders.

We're going to need a lot of whiskey.


Disabilities


Unlike other characters, who get 'special mechanics', Kenji and Hisao both instead have their own disabilities. Of course, it's only fair that they have a handicap when their opponents must fight not one, but two of the greatest men of all mankind.

Hisao has arrythmia, a heart condition that could kill him at any time. Regardless of the ticking time bomb he has for a heart, Hisao soldiers on in the fight against feminism. If Hisao takes an attack directly to the front of his chest, he has a heart attack and drops to his knees, clutching his chest, shouting 'HNNNNNNNNNNG' . He takes an extra 50% damage from the attack that put him in the state, but also takes no knockback from the attack either. He's also left helpless as if his shield was broken (in fact, his shield break animation is identical) so he must rely on Kenji to back him up, or else he'll be finished off.

Kenji is legally blind and whenever he performs an attack, there is a 1/3rd chance that he will turn around and attack in the opposite direction, a '?' appearing over his head.


Stats


Kenji and Hisao work as an interesting tag team. Hisao starts off in the lead, and Kenji follows, but they can switch places over the course of the battle. Whoever is following cannot take damage from attacks, but if one of them is launched by an attack into the other, they will collide, slowing them down but dealing damage to them. Kenji and Hisao also share a health bar; soul brothers like them can feel one another's pain.

Other than that, they're fairly average in stats. They're a bit slow on the ground and in the air, but that's just because they take their good time getting where they want to go! And they're a bit lightweight, but that's just because they have slender, manly bodies!

They also have a weird floatiness and awkwardly shaped hurtboxes that make them particularly easy combo and infinite fodder. But hey, what would the fun be if this wasn't a challenge?

Special Moves


Neutral Special - Whiskey!

Whiskey is the beverage of true men! Whoever is standing in the back takes a good long swig of liquid courage. After a second and a half of chugging back some breakfast, they switch to the front and get a good buzz going. For the next five seconds, that character deals extra damage and knockback and has flinch resistance while attacking. However, once those five seconds are up, they get a hangover for ten seconds, during which the character takes extra flinch and has their tripping chance increased tenfold. Characters with a hangover also cannot use recovery moves and their air speed is dropped to a quarter.

Of course, you can always switch them to the back by having their brother take a swig of whiskey instead. Attempting to drink whiskey while already hungover causes the character to vomit, dealing no damage but having a 'F.L.U.D.D' like effect and flinching enemies. This can happen even while the other is being attacked, so it can work as a great emergency combo breaker, but if a character vomits, they can't aid in attacks until after they sober up.

Neutral Special - Manly Picnic

Hisao and Kenji sit down and have themselves a manly picnic! With whiskey! And pretzels.

Once Hisao and Kenji start the picnic, any male character who is nearby them will instantly join them and start drinking the night away with plenty of whiskey. Once they stand up, both the character in the front and the other male guest get a whiskey bonus, while the character in the back munches on pretzels. Of course, after the initial buzz they both get hung over as well.

If a girl gets near though, the picnic stops as Kenji jumps up and yells "Feminists!" and throws a powerful haymaker for 22% damage. It's sadly avoidable though.

Side Special - Katawa Shoujo

Hisao points forwards and shouts "B!tches and Wh@res!", using his wily charms to summon one to their aid. Who he summons is randomly selected, and he can only have one out at a time.

Lily is the first one shown, and she will step out on to the battlefield and stand there, asking, "Did I hear something?" If nothing happens after two seconds, she'll mutter to herself, "No response, must be that deaf bitch," and leaves the stage. If she is attacked by an enemy, she'll laugh, "My, my," and whack them with her cane for an unavoidable 11% damage. If Hisao accidentally hits her though, she calls out, "Oh, is that you Hisao?", grabs him by the neck, and punches him in the face for another 11% damage.

Hanako is second, and she meekly walks on to the stage. If anyone gets within a battlefield platform of her, she shrieks and runs away, her shriek creating a wind hitbox that pushes everyone a set distance of one and a half battlefield platforms away from her.

Rin is third, and she stands in front of Hisao and starts rambling incoherently, a speech bubble appearing above her. If anyone touches the speech bubble, including Hisao, it pops and they are immediately put in their shield break animation. Kenji is immune to this. After this or two seconds pass, she shrugs and walks away.

Shizune is fourth, and when she walks on to the stage she starts flashing gang symbols toward the nearest blast zone. Moments later, Misha comes flying in from offstage, using her jet powered drill hair to home in on the nearest enemy and blast the away, dealing 11% damage and strong knockback.

Emi is last and she gets down for a moment before sprinting offstage, slamming headfirst into anyone in her way. If she hits someone, they're tripped and take 12% damage, while she bounces back, shouts, "Sorry!" and runs off. Hisao can be hit by this attack as well, which will always put him into a heart-clutch animation.​
Up Special - Scarf of Bromance

Kenji wraps his scarf around Hisao as well, allowing them to share their body warmth in a completely manly and heterosexual fashion. While doing this, they are essentially tethered together, effectively increasing their weight massively, but also making whichever character is in back possible to damage as well, making them more vulnerable in another way.

When used in the air, this functions as your average tether recovery, but only if they are not currently bundled up together already. Otherwise, whoever grabs the ledge has to pull their partner up themselves.


Smash Moves


Up Smash - Full Frontal Male Nudity

Hisao braces himself, then grabs Kenji by his shirt and in an instant strips him of all his clothes, leaving his glorious body exposed for all to see.


Kenji's body glows with a marvelous light as he floats slightly in the air, dealing rapid hits of up to 23% damage before launching enemies upwards and away from him. He floats back down, and quickly puts on his clothes as Hisao averts his eyes. This attack has a horrid amount of ending lag, but if they manage to land it lasts so long that it's impossible to shield or dodge it, making it safe only if it hits.

Down Smash - Brofist

Kenji and Hisao turn to each other and nod knowingly. With a flourish, they move towards each other and slam their fists together, each fist dealing 8% damage. Once they hit, a shockwave fires out, their fiery spirit knocking anyone nearby away with wind and dealing a blast of 9% damage around them. Players caught between their punch are launched into the air.

Forward Smash - Overwhelming Bropower

If Kenji is in the lead, he takes his fingers to his temple and loudly proclaims, "Behold! Optic Blast!" A giant purple laser shoots out of his glasses, traveling full screen and dealing 13-20% damage and some knockback.

If Hisao is in the lead, he rips open his shirt, exposing his scar from his heart surgery, which fires a heart shaped projectile out that explodes in front of him for 16-25% damage and strong knockback in a blast the size of Bowser. Afterwards though, he drops to his knee and clutches his chest, as if his shield was broken.

Either Hisao or Kenji can follow up one's attack with the other by tapping the A button again.


Standard Moves


Jab - Double Team

Hisao punches forward, and Kenji performs a roundhouse kick, for 4% and 6% damage respectively, although the strength is boosted somewhat if they're buzzing on whiskey. Each tap of the button causes them to switch between the lead and following, allowing you to control who's in front without drinking whiskey, but why would you when you could be drinking more whiskey?

Holding the button down instead of tapping it causes the partner behind to perform a weaker, rapid version of their jab attack, which they continue even after the lead partner is free to act again.

Dash Attack - Quick Slip

Running that fast isn't good for your heart Hisao! Hisao stumbles forward for several weak hits of 1% before collapsing and grabbing his chest. Kenji meanwhile runs forward, but the pretends to slip and reaches forward to grab someone and pull them down for 6% damage. You can tap the button again to make whoever is behind perform the attack after the person in front.

With the right timing these two attacks make an interesting, unblockable set-up where Hisao catches dodges or forces the opponent to shield, while Kenji brings them down to the ground. Hisao is left in his clutching state though and Kenji is tripped as well, so this leaves absolutely no room for set-up afterwards, and if you mess it up, both characters are about to get taken down.

Interestingly though, if both Hisao and Kenji are wearing the scarf, if one of them is tripped, the other is too. If Kenji trips using this attack while Hisao is clutching his chest, Hisao cancels it into a pratfall, reducing the massive ending lag of the heart clutch into a slightly less massive pratfall.

Forward Tilt - Blatant Misogyny

Hisao reaches out to pull an opponent towards them, while Kenji delivers a punch for 5% damage. If the character is female though, Kenji shouts "Feminist Scum!" and smashes a bottle of whiskey on them for 8% damage and pretty good knockback that can kill.

No matter who's in front, Hisao grabs out to pull the player in, changing the range of the attack around.

Down Tilt - Men's Bowler's League

Kenji pulls out a bowling ball and heaves it forward, whether he's in the front or in the back. Bowling is after all the manliest sport, with mustaches! The bowling ball slowly but inexorably rolls forward, launching anything in its path into the air for 12% damage. Including Hisao.

Fortunately, Hisao takes no damage if he's launched in this way (usually whenever he's in the lead, or when Kenji is in the lead but turns around automatically) but he is still launched away, his body dealing 5% damage to opponents and separating them briefly, though whoever is behind comes running no matter what. This allows for some unique set-ups though.

Any character can pick up the bowling ball and toss it back, making it a pretty useless lone projectile, but with some pressure from the dynamic duo, it can become threatening, especially since it travels slowly enough that they can outrun it.

Up Tilt - Pumping

Kenji and Hisao alternate performing fist pumps, punching up in the air repeatedly for 6% damage each and upwards knockback. Hisao's deals almost purely vertical knockback, while Kenji fires them diagonally backwards, interestingly enough.

If they both perform a fist pump, and then perform a brofist within three seconds, it explodes in a massive blast that covers the area of Gardevoir's barrier and deals double damage.


Aerial Moves


Neutral Aerial - Like Riding A Bike

Whoever is in the lead starts pedaling an imaginary bike in mid-air, kind of like that scene in E.T. or Yoshi's flutter jump. Each kick deals 3% damage and can pull opponents in when they're on the way down, but isn't too hard to DI out of. During this state, they're floatier and have greatly increased aerial DI, but fastfall at the end. While hungover, this is the only saving grace to give them some air movement. If they're tied together by Kenji's scarf, they both pedal as if they're on an imaginary tandem bike.

When Kenji is in the lead and is turned around by blindness though, he will pedal off in the opposite direction.

Forward Aerial - Humiliation

When Hisao is in the lead, this is a pretty fast slapping attack that he can repeat for multiple hits of 4% damage. With Kenji though, he kicks hard, knocking himself into a spin as he punts enemies away for 11% damage.

Up Aerial - Tandem Flip Kick

Kenji and Hisao link arms for a touching moment, and the one in back leans back, sending the other tumbling back with greater range. With their scarf attach, the range of this attack increases even more, using it as a tether to send whoever in in back around in a loop for a powerful kick. It deals 8% or 12% damage, more with a whiskey bonus, and knockback tangential to their angle.

Back Aerial - Dat Kick

Ah, the universal ridiculously good back kick everyone has. Hisao and Kenji both deal 13% damage and strong knockback with this move, but are too clumsy to pull it off quickly out of a shorthop; the move has a bunch of ending lag and they'll stumble when they hit the ground. It's only effective for strictly aerial combat away from the ground and a terrible approach technique.

Down Aerial - Trust Fall

Whoever is in back grabs on to their partner in front, who begins to fall backwards. Their body acts as a powerful hitbox dealing 12% damage and spiking knockback.

With Hisao in back, he struggles but manages to pull Kenji back up at the end of the attack, but Kenji lets go of Hisao, who begins to fastfall. If they're tethered together, Kenji is dragged along with him.

Grab Game


Grab - Rope In

Hisao and Kenji both have fairly standard grabs, but if Kenji is grabbing and isn't scarfed to Hisao, he uses his scarf for a tether grab. It's a very slow tether grab, but the reach is slightly less than Samus'.

Pummel - Gang Up

Whoever is in lead holds the characters' arms behind their back while their partner punches for 2% damage. If it's a girl and Kenji is punching, he deals double damage.

Down Throw - Hold On To This

Kenji pulls out a large box and places it in the opponent's hands, which behaves identical to a crate, but does less damage when thrown. The opponent cannot immediately act and throwing the crate takes a while, as their movement is limited, leaving Kenji and Hisao free to lay a beat down on the opponent.

Up Throw - Dude, I Just Need 500 Yen

Kenji badgers the opponent for money, trapping them in a conversation at grab difficulty, letting Hisao attack freely. As long as the opponent isn't knocked more than a battlefield platform from Kenji, he will continue badgering them, but he can't join in on attacks.

Back Throw - Heave Ho!

Whoever is in back grabs onto the opponents legs, who must button mash to escape at double grab difficulty. Both characters then move wherever you tilt the control stick, and throw the opponent with a heave and 8% damage when you press the A button.

Forward Throw - Definitely Just An Accident

Whoever is in front starts pushing the opponent forward, while the other partner runs ahead and sticks a leg out to trip the player. Once they're tripped, they're launched forward at a barely upward angle for 5% damage, but are still reeling when they start falling, based on damage level.


Final Smash


Bonus Content


This screen pops up. Choosing one of the first two does nothing, but if you're willing to shell out the 1000 Wii Points, the third option allows you to unlock the true Final Smash. The screen is washed bright pink, and nothing can be seen. There's the faint hint of a moan, and then all opponents are launched into the blast zones at ludicrous speed with 999% damage.

You must pay every time to perform the Final Smash.


Playstyle


Kenji and Hisao may be a joke character, but they're hardly a joke moveset. Playing as them is extremely difficult, but with intricate, careful control, can be extremely rewarding as well.

First of all, learning how to control them can be a bit of a challenge. The bonus from drinking whiskey is extremely powerful, and they can mitigate most of the negative side-effects by switching sides, and even turn it around with a well placed barf. Combined with the use of scarf and their interesting ways to mitigate knockback, from being knocked into each other or Hisao tanking knockback by having a heart attack, they can have incredible survivability. On the other hand, they are light, and without the scarf free they have essentially nil recovery. Knowing when and how to use these options is essential.

They can in a way be described as gimp characters, focusing on inviting players into a manly picnic, and then taking advantage of their hangover to nullify their recovery options and use their powerful aerial attacks to launch them away. You can even knock them away with Hanako's shriek, a blast of wind from a brofist, or even a well-placed vomit.

Against women though, their greatest technique is suddenly worthless. You can try to use some useful set-ups like a well-placed bowling ball or some of Hisao's other moves to use Kenji's haymaker, but you're going to be reliant on the Forward Tilt or a few strong aerials to be a ladykiller.

You need whiskey in order to have a chance at approaching, as neither of them have any safe tools to get in and have attacks with a lot of start-up that need that super armor in order to be effective. Fortunately, with their Forward Smash and some good summons using Katawa Shoujo they're not absolutely forced to approach, but camping with them is a difficult endeavor.

The bowling ball is another very effective tool, and can make certain unsafe set-ups a bit safer by making a slow moving threat the opponent has to consider, even if it's meaningless on its own. Following the bowling ball with a pair of dash attacks for example gives the set-up a true combo by knocking the tripped enemy into the air.

Hisao's ladies help them in both encouraging the opponent to approach, and making it much safer to be up close to opponents as well with Rin and Lily punishing rushdown. Rin can also even set-up Kenji's haymaker punch if a girl is being particularly frustrating with the rush-down.

The grab-game is the final piece of the puzzle, giving them more options to set-up gimps and transition into other elements of their game, like launching opponents for air tricks or knocking them off the stage, and can help set-up Kenji's haymaker for fighting women as well.


Yamaku Roof


Yamaku Roof is a new stage. It's about 50% larger than Yoshi's Island, but has no platforms, just a couple of ventilation ducts and a stairwell in the background. It's surrounded by a fence, but any attack has a 33% chance of knocking it down, but otherwise it functions as a wall. It respawns at the same rate as the walls to in Shadow Moses Island.

Whether the fence is there or not, it's impossible to grab the ledges of this stage, and the bottom blast zone is uncomfortably high...
 

Junahu

Smash Ace
Joined
Nov 15, 2005
Messages
899
Location
Shropshire Slasher
Posting sets without commenting on other sets? what a rotten thing to do!

Now let me show you how to Minx


Minnie the Minx
This boistrous troll-faced rascal is Minnie, but you knew that because her name is right above this description, right? She comes from the long-running Beano comics, the most famous of all British comic publications. Essentially a female counterpart of, and second banana to the eponymous Dennis the Menace (no, not the wussy American Dennis)

Minnie is a terror, bullying and 'minxing' the whole town with her mischief. She may be a girl, but that's never stopped her before, and it certainly won't stop her from entering Brawl!

Statistics~#@!*
Minnie is a kid, duh.
She's a scraggly lass, short and dumpy, yet surprisingly speedy. Her attacks are generally serviceable, in terms of speed and power, so don't worry too much if she gets into a right barney with the lads. The rest of her stats are... whatever, loik u care bout stats, hur!


Glossery of Slang~#@!*
Scraggly:- Thin, Gaunt
Dumpy:- Fatty, Ugly
Barney:- Fight
Loik:- Like
Hur:- Ha!
Wot:- What
Rotter:- Meanie
Dodger:- Con-Artist
Cor!:- Wow!
Nosh:- Food
Bangers and Mash:- Sausages and Mashed Potatoes
Mits:- Hands
Pong:- Smell (noun)
Boff:- Smell (verb)
Bully for her!:- Well done to her
Blimey!:- Jeez!
Mush:- Face
y'wot?:- You what!?
Diddled:- Swindled, Cheated


Specials~#@!*
:stick8::bbutton:-Balloon Bother
Our favourite Minxer pulls out a bright red balloon, and cartoon physics dictate that the balloon drags Minnie upwards for up to 4 seconds before popping*. Naturally she may jump off early, or use attacks, and other dumb stuff like that. If she's on the ground as she whips out the balloon, it will stay patiently in her hand, waiting for her to jump before dragging her up up and away. If at any point Minnie touches an opponent, she artfully ties the balloon to the foe, causing THEM to float up. The foe cannot escape early from floating, but can still attack and airdodge.
* As quoted from 'Cartoon Heuristics of hellium', written by Feyk N Aymes

:stick6::bbutton:-Slingshot Silliness
This frightful lass is armed and dangerous! With a flourish of the elbows (?) Minnie arms a slingshot with a tomato. Release B to fling the juicy fruit forwards. If you don't like forwards, you can aim it slightly up or down instead. Full on! While kinda limp for a moving projectile (dealing just 3% damage and flinching), these tomatoes are really rotten, and Minnie relishes the fact that they splatter all over the foe's face. With a gooey face like that, the foe can't see where he's going. His traction wavers all over the place when he moves. Wot a klutz! Har Har Har! this status lasts about 4-7 seconds
If, for some stupid reason you're a terible shot and MISS, the tomato will splatter on the floor. And if anyone walks over this red blight, it'll make em trip (Afterwhich the tomato mysteriously vanishes). You can have up to two tomatoes on the floor at any given time, after which new stains will replace the old.
This move also comes in a slightly different flavour, vanilla! If you smash this input, Minnie will replace the tomato with a little brown hedgehog. Ouch! Those spikes, may not spike the foe, but they do deal 7% damage and significant knockback. Naturally, spikes also pop balloons, like the ones you tie to the foe? Popping their balloon like a total rotter sends the foe briefly tumbling helpless towards the ground. They recover from this quickly, but an opening is an opening, right?
Oh, by the way, if Minnie is holding a balloon when using her slingshot, she'll attach the balloon to her projectile of choice. This causes the object fired to travel straight, ignoring gravity. And after flinging itself a distance of 4 stagebuilder units, the tomato/hedgehog will suddenly stop, and dangle in midair, until someone pops the balloon attached to it. Dangled tomatoes also dissapear after hitting someone.

:bbutton:-Teasing Taunt
Our Minxing dodger starts pulling faces and blowing raspberries. Cor! That's just mean, taunting like that! It doesn't even do anything! Well... the taunting doesn't anyhow. After releasing the B button, Minnie looks to the skies, as an object plummets down, landing right in front of her. The longer you spent taunting, the bigger and heavier that object will be. From a Dog-Dish, to a Barrel, to an Iron Safe, it's dangerous to leave Minnie to her own devices.
The dish and the barrel are kind of 'meh', but decent enough for controlling the air or popping balloons. The Iron Safe though... is not very safe at all. It's solid! And it spikes the foe hard, dealing 16% damage into the bargain! All three items vanish after landing, because- I dunno Brawl logic I guess

:stick2::bbutton:-Stupid Stomping
Good ol Minnie begins strolling across the stage as if nothing was awry. She even whistles as she goes! She does this until you release B, or she strolls up to an edge, after which she suffers some end lag or somethin'. Now, FOR ABSOLUTELY NO DISCERNABLE REASON WHATSOEVER, Minnie is completely invulnerable while strolling. Don't ask me why (seriously, don't, or I'll punch you right in the face) but it's true! Minx your way across a battlefield of danger!

Ground Attacks~#@!*
:abutton::abutton::abutton:-Cloud of Darkness
A right hook (2%), followed by a left jab (4%). Then Minnie decides to just pounce on the foe and pulverise them in a big cartoony cloud of dust. Yeowch! She'll stop mashing the foe once you stop mashing A, and she'll keep going even if the foe DI's out of the brawl (she'll continue pounding on... nothing I guess).
The carnage that is Minnie deals 5% per second of pounding, and can be strafed left and right at a inching pace. The ability to move around can be used either to keep on top of the foe, or direct the party over to some trap or prank you spy nearby.


:stick6::abutton:-Lovely Dish
Minnie takes a platter of tasty nosh (bangers and mash, bonza!) from behind her back, balancing it betwixt thumb and forefinger. Before you can even google the definition of 'betwixt', Minnie lunges forth and smushes that savoury meal into the foe's face. This deals 7% damage and adequate repelling knockback (it also deals good shield push and shield damage, potentially breaking a healthy shield, should you push the foe into a trap or two).
Pehaps more importantly though, devouring this yummy spread of food makes the foe fatter... or at least wider. Each platter you force onto your opponent makes them 1/7th slower than before, both in running and in jumping. The added girth additionally gives the foe some unwelcome inertia, which means their traction also takes a hit. This fattitude lasts until the greedy foe sweats the pounds off, by moving around (usually about 4 seconds worth)


:stick2::abutton:-Warning; Kids at play
From her lowly crouch, our Minxy scatters the floor in front of her with a handful of spiked metal jacks. And boy are they painful to step on! Trampling on these goodies will knock the foe skywards as if they had hit a row of spikes.
Minnie only has enough jacks for one pile, so if she makes a second, the first will dissapear. Jack piles also vanish after 8 seconds.


:stick8::abutton:-A baffling idea
Minnie snaps her fingers above her head, dealing a paltry 5% damage and lowly upward knockback.
Somehow, this attack also causes the nearest of Minnie's traps, to explode. The explosion only deals 4% damage and flinching, and has a pathetic range all around. But there is absolutely a very good reason why you might want to do this, I think.


:abutton: "While Dashing"-Play me off, Sam.
This wily lass turns around mid-dash, yet continues to run in the same direction! She then throws her elbow out behind her (in front of her?) in order to wallop foes outta her way. This curiously odd attack deals 13% damage and can KO from 100%.
Minnie can cancel out of this attack with a jump, and doing so will allow her to leap in the opposite direction, while maintaining all the momentum from her dash (think of it like an instant pivot), or in the same direction as you were already going... if you're feeling bland.
This attack is pretty much all Minnie needs to poke and prod at the foe without endangering her nasty self too much. The fact that it's technically a KO attack is just a neat bonus.

Smash Attacks~#@!*
:cstick6:-Rounders Bat
Batter up! It's Ness' Forward Smash! Knock foes around! Reflect projectiles! Hit a hedgehog dangling from a balloon! The fun never stops when you have a bludgeoning weapon in your grubby mits!

:cstick2:-Smelly Prank
"You'll never catch me! Nyahah!". Minnie laggily hurls a pellet at the floor, which explodes into an obfuscating brown fog 0.8 stagebuilder units big. The cloud dissipates after 5-9 seconds (depending on how long the attack was charged), or when Minnie attempts another Down Smash.
What better way to make your es-- Hack! Hackgraagghg! This isn't a smoke bomb, it's a stink bomb! Poo!
The initial blast of stench knocks foes away with a knockback that could KO from 120%. Obviously though, the stink tends to linger, and in doing so, deals 4% damage per second (along with sporadic flinching) to foes stuck in its murky midst.
Our girl Minnie though appears to be just fine. I guess you just build up a tolerance for your own brew? Well, whatever the reason, Minnie soaks up the dreadful pong from that stank cloud. Once she comes out of the cloud, her clothes will continue to stink for a length of time equal to how long she spent inside. With this stank, she'll deal a 4% per second passive stink damage whenever the foe comes close enough to touch her. Go ahead and grab the foe, so that they get a full on boff of her fragrance. Yummy!


:cstick8:-Clap of Destruction
Minnie claps her scrawny hands above her head, in an attack that deals between 12-26% damage, and knockback that could KO vertically from 95%. The hitbox is decently wide, enough so that it'll strike foes that are just standing next to her.
Somehow, this attack also causes any nearby traps of Minnie's design to explode dealing 12% damage to anyone caught up in the blast. These explosions, while rather short, cover the entirety of the traps being demolished, and deal knockback relative to what the trap actually was. Stink clouds don't blast you away too far, but hedgehogs on balloons certainly will!
Please don't tell dad that Minnie made a hedgehog explode...


Air Attacks~#@!*
:abutton:-Stretch out and have some fun
Our globular gal thrusts her arms and legs out every which way, whilst facing away from the screen. Yup, if you ever wanted to see the back of Minnie's cardigan, this is the attack to get your perverted rocks off to, Mr Weirdo
It hits all around and knocks foes away, dealing 8% damage and potentially KOing on nights with a blue moon. In short, it's a neutral aerial.


:stick6::abutton:-Just a scooch to the left
Minnie the Minx gives her foe the Clap... by which I of course mean she claps her hands in front of her, and the foe flies away. Bully for her!
This deals 9% damage and can KO from 130%. The clapping hands also produce a sharp push of air on anything just outside of their reach. That's pretty handy for moving balloons around in midair eh, reader?


:stick4::abutton:-Checking Blow
Foul! Minnie pokes backward at the foe with a hockey stick she nicked from somewhere. It's a great prodding attack, with decent speed, and knockback that generally keeps the foe close enough to you so that Minnie can poke some more. The damage is on the low end though (5%), and only the tip of the attack carries any sort of weight (hitting with the sour spot could leave the Minx at a disadvantage).
But ol' Minnie is a surprising sort, so if you hit the attack button a second time, Minnie will then swing that bludger basher in a heaving upwards arc, sweeping foes up, and wholloping them into the air. This also deals 5% damage, in case you were wondering.
So, depending on what kind of attack you want, Minnie could just poke at the foe, or catapult them into the sky too. Blimey!


:stick2::abutton:-Slam Dunk
That crafty Minx slams her balled fists down between her legs and right into the top of the foe's skull , spiking them into the abyss! ... well, I guess that's not at all crafty, but whatever. It deals 13% damage, so I'm happy.
You can also use this while dangling from a balloon, to forcefully tie it onto an opponent. A fun trick is to summon a balloon into your hand, dash toward the foe, then jump and Down-air when they try to smack you in the chops.


:stick8::abutton:-Football Friday
Dubbed the 'football friday' (saturday soccer) by no one in particular, this attack would be great if Minnie could summon her own soccerball items (she cannot).
As for the attack itself, Minnie performs one of those generic flip kicks she has so oft heard of. Guess what it does.
If you guessed, "7% damage and light juggling knockback", then well done! You've been paying attention to your Brawl!
Now, specific to just this one particular generic flip kick, the knockback on Minnie's can be angled in any direction by tilting the analogue stick. You can now make that generic upward aerial knock the foe down, or forward, or at the 'Sakurai angle' (whatever that is) if you want!

If your match somehow has items switched on, you can use this attack to knock Soccer balls in pretty much any direction you like. I know, that's so very very exciting, isn't it?

Grab and Throws~#@!*
:zbutton:-Rough house
Like any schoolyard lout, Minnie grasps her foe by the scruff of their woolie jumper and brandishes her fist at them. If you decide to pummel the foe, Minnie puts that fist to work, dealing 2% damage per sock to the mush.
When Minnie the Minx grab-releases the foe, it leaves her at a disadvantage. So, don't do it!


:stick2:-Headlock Deadlock
Minnie gets the foe into a headlock. This doesn't deal damage, but does stall out the foe's escape greatly. Best used if the foe is standing in something unpleasant.

:stick8:-Git along little pony
That crazy girl leaps onto the foe's back. Giddy-up! The foe regains control of their movement for the rest of the throw (i.e. until they escape from the grab), albeit with noticeably reduced jumping power. While being taken along on a piggyback ride to who knows where is a bad thing, Minnie can still get something out of it by pummeling the back of the foe's head as they go. She can deal 4% per pummel, and pummel at quite a rate too. It doesn't cause the foe to flinch, but it's still a lot of damage to pile on. It may even be worth this ludicrous ride, maybe.
Perhaps you surrounded the foe with nasty traps, to the extent that they can't actually go anywhere. In which case, pummel away!


:stick6:-Corny Contraption
Ooh eck! Minnie turns the foe around, then yanks at the back of their neck, slamming them into a sitting position on the floor. Her hand then rests on a lever that mysteriously just appeared... I wonder what it does, let's give it an old pull eh? Sproinnnnnng!
A stagebuilder unit length of ground around where the opponent was sitting suddenly springs up like a catapult, launching the foe 3 stagebuilder units forwards. Unless they tech the landing from this, the opponent will take 6% damage.
This throw also affects any loose objects in the vicinity(like items, tomatoes, etc), catapulting them forward the exact same distance

:stick4:-The Lowest Blow
With a cocksure attitude, Minnie shunts the foe behind her. They turn to look at her just as she pops a bubblegum bubble in their face. This startles the foe so much that they fall backwards onto the floor (or off the stage if they're unlucky). Minnie then delivers a crunchy boot to the foe's crotch, which sends them sliding 1.5 stagebuilder units across the stage. This too can send the foe off the edge of the stage, or at least into some trap somewhere.
This throw deals 8% damage, btw.

Final Smash~#@!* When Minnie activates her Final smash, she prepares the ultimate prank, whatever that is. We never get to see the outcome (it involves a BB Gun, a Garden Hose, a Ball and a Rubber Duck?) because Minnie's terrible Minxing has brought on the wrath of... *gasp*, Dad! Now, there's something you need to know about Minnie the Minx... her dad always wins. This balding, slender, long-faced chap always seems to get Minnie in the end, and he isn't about to let that winning streak go in Brawl! Dad immediately scoops up Minnie, carrying her under his arm while he strolls about the stage dismantling all of the Minx's traps (he uses a pea shooter to pop the balloons, instead of jumping up to them). If a foe strays even remotely near Dad as he goes, he will give them a kick punt off the screen (20% damage, KOs from 70%)
Additional Info~#@!*
Some superfluous information about various elements of the moveset;

*) Balloons can be popped by any attack/hitbox, except those performed by the person tied TO the balloon. Tomatoes too, cannot pop balloons.
*) Over the 4 seconds a balloon rises (when connected to a living player), it rises 3 stagebuilder units. Hitting the player with any attack knocks them off the balloon.
*) The direction a hedgehog knocks the foe, is the direction the spines are facing. Coincidentally, as the hedgehog flies through the air, it flies spines first. If dangling from a balloon, the hedgehog is 'locked' facing the angle it was fired at. By firing hedgehog balloons at different angles, you can control the direction these traps knock the foe.
*) If the foe lands on a tomato and metal jacks at the same time, they trip on the tomato first, then are launched into the air by the jacks.

Playing Stylishly~#@!*
The core of Minnie the Minx is something most MYMers are already familiar with; intense stage control, leading to set ups and payoffs. That's how 95% of all movesets pan out, and I totally defy anyone who disagrees with that statement.

So, what have you got in your bag of tricks? Balloons, tomatoes, hedgehogs, jacks and stink clouds, a surprisingly lean selection for a prankster. But nevertheless! Toon Link can be a camper with three projectiles... we can be a trap artiste with three traps!

Balloons form the meat of the game here, and are the means by which you slowly and eventually surround the foe in static hitboxes. Sure, the foe can jump up and pop the balloon, but so long as you keep Minnie in their face, they shouldn't find too many safe opportunities through which to do so. If you really want a shortcut to your trap layery, then worm your way in and give the foe a happy balloon. With them floating up and away, Minnie has ample time to scatter some other tricks around.

While your air traps need care and work, Minnie can soil the floor with traps without even trying. Simply spamming tomatoes at the foe will lead to some tripping traps, and her Down Tilt is usually safe enough to use whenever. Minnie's Down Smash stink cloud needs a little more deliberation though, as it pull many different duties all at once. It provides a convenient hiding place for you, while symultaneously making Minnie all the more horrid to come near. Problematically, standing still just gives the foe an opportunity to pop any balloons you have out and about, so choose your stink cloud locations with care.

Once you have a chaotic spread prepared, you still need to get the foe to fall into the traps. Spacing pressure only gets you so far with Minnie after all. Messing with the foe's traction is when Minnie can really begin her bullying in ernest. A few tomatoes to the face, and the foe won't know how to approach safely. And you can fatten the pot by shoving bangers and mash down their greedy gullets. Now they'll be terrified to move at all, for fear of falling right into something nasty.

But Minnie won't just let them get away with doing nothing, no way! With a foe as gimped as this, Minnie's grab will flow in naturally. You can combine it with some smelly stench and an Up throw in order to pile on the damage, or you can directly throw them into one of the very traps they wanted to avoid.

Among other tricks to try, Minnie could use F-tilt against a shielding foe, and push them right into some jacks or a stink cloud (or both) in order to break their shield. Before your traps can flinch the foe out of their dizzy state, use Up Tilt to clear them away, leaving you with plenty of time to charge up a Forward Smash.

Oh, and if for some bizarre alien reason you are being defensive as Minnie the Minx (are you losing?), note that you can use Down Special in order to retreat yourself right into your stink cloud, no problem. Stink clouds in general are nifty fortifications, and you could always use that cover in order to plan out your next big prank.


...Neutral Special is for gimping recovering foes, btw. Or for stylishly clonking foes who keep popping your balloons
:fluttershy::fluttershy:Because you guys are lazy and never research anything you don't know about, here's a Minnie the Minx comic, brought to you by the power of Google Image Search:fluttershy::fluttershy:


:pinkiepie: You're welcome :pinkiepie:​
 

Koric

Smash Apprentice
Joined
Feb 10, 2006
Messages
84
Location
Aiken SC

Draco Centauros​


Draco is a half-human, half-dragon character from the Madou matorati / puyo puyo series. Other than her natural abilities as a dragon, she’s also a skilled fighter with a desire to win. Despite being good friends with many of the land, she often concerns herself about her beauty. Whenever she meets an attractive woman, she would become envious instantly. (Though there are secretly many who find her cute)

Draco is indeed a fighter, but doesn’t focus on her skills as a fighter all the way. She is also capable of using her attacks using her dragon half. To match the situation, she either switch between fighter stance (speed) to quickly attack the opponent with efficiency, or to switch to her dragon stance (power) to use her flames to burn her opponents effectively. Her special moves also change depending on her stance.

Using her power stance, she is more focused on her dragon part and focus more on ranged combat. This style allows her to increase the damage of every attack by 40% of her original damage. Her weight is also increased by 2 as well as her range and air movement allowing her to survive better on this mode. Some of her attacks releases flames that surround the hit box extending her attack range by 2/10 stage builder blocks with moderate priority. Also she can use her wings to jump up to five more times in mid air. The downside is that her jump and fall speed is slightly lowered and can take more damage than usual if hit.

Using her speed more, she is more focused on her human part and focuses more on hand to hand combat. Her overall second jump, run, fall speed, and walk is increase by 2. Her traction has also increased by 3 and her attack speed, priority, and attack recovery is also improved. However, her growth knockback for all of her attacks is decreased by 20% of her original attack and she can only double jump once like most flight-less characters.

Dragon stance (power mode)
Jump – 4/10
Second jump – 6/10
Walk – 3/10
Run – 7/10
Air movement speed – 6/10
Fall speed – 3/10
Weight – 6/10
Traction – 4/10

Fighter stance (speed mode)
Jump – 6/10
Second jump – 8/10
Walk – 5/10
Run – 9/10
Air movement speed – 4/10
Fall speed – 5/10
Weight – 4/10
Traction – 7/10


Special Attacks​

Draco can make full use of her talents and then some. Since her specials depends on the stance she’s currently in, it could technically mean that she has 8 specials in total. Keep in mind that she can change her stance after pressing the special button during her counterattack specials.

Normal B – counter…Para-skin (power)/ parry (speed)

Depending on her stance, she can execute two types of counters. Each has its own unique effects.

On power mode, she will execute her Para-skin counter. Draco will hold her body and increase the heat of the area around her. As she makes the area around her hotter, her body begins to produce a strange powder due to her dragon like skin. When the opponent strikes Draco, the powder will be released and surround the area nearby her. The powder is capable of stunning even the heaviest of mortals for up to 1.4 seconds.

It takes 6 frames to set up the counter and to end, but the hit box will last for 18 frames. When she uses this counter in the air, she will descend very slowly until the attack ends.

On Speed mode, she will execute a parry counter. Draco will assume a defensive pose that active on the first frame. She will attempt to intercept any kind of attack. Using her mystical abilities along with her fighting talents, she uses her left wrist to stop the attack and freeze the opponent animation frame for 0.2 seconds while removing the hit box for the rest of their countered attack until they return to their proper stance. (For example, if she parried MK’s tornado and didn’t attack MK, the tornado will still not hit her since the hit box is gone.)

It takes only 1 frame to execute the parry, but the counter only last for 5 frames in total plus the 2 frame recovery rate. It is only wise to use this attack like an advance power shield.

During any counter, by pressing the B button either during either counter will allow her to change stances. However it must be done when she is currently standing on the ground.


Side Specials

Speed - Knee spike

Draco will crouch to her left knee and focus on her power into her attack. When she’s ready, she launches herself in any direction with her knee in place. This attack has two phases.

First, she will execute her flying knee to attack on the direction to where the controller stick is currently tilted (only covering the area in a 180 arc in front of her). By holding the special button, she will begin charging her attacks increasing her distance and damage. From a full charge, she can travel up to 14 stage builder blocks. She can only stop herself if she hits the opponent, hits their shield, or hit a wall. (The recovery time is very long after colliding with a wall or ceiling.) Keep in mind that the hit box is her body.

The attack can do lots of damage for up to 26%, but the attack is only capable of stunning the opponent. They will be stunned for .3 seconds after a successful knee hit (just releasing them before her second attack 0.16 seconds later). Upon the stun release, the opponent is launched depending on their weight. (3/10 of a stage builder block in height assuming the opponent is really heavy to 8/10 of a stage builder block in height assuming if the opponent is really light).

When this attack collides with the opponent body or shield, she recoils to the point where she a half stage block above where her knee has struck and attacks using her right leg to spike the opponent with a downward knockback. Her second attack does 6% damage at most, but it can kill at 66% in average if the opponent doesn’t use a recovery. (Her leg range is 9/10 of a stage builder block, so it will sure to hit)

After her kick, she will be in a helpless state…so try not to use this attack off of the stage. On the other hand, it can be used to quickly move around the stage.


Power - Fire orb

Draco releases a small slow moving fireball. This fireball is small at first, but it grows bigger a little bit every time a fire or explosive attack hits it. The fire orb grows depending on the total damage it takes. For each 20% damage it takes, then the orb will grow. The most it can grow is 60% (or three times its normal size).

It can travel at least 1 stage builder block in 2.4 seconds making it very slow for a projectile. It can do 1% damage to anyone whom is trapped on its flames slightly sending them upward (Draco can also be damaged by her own flame orb). Once the fireball hits a wall or travels about the size 9 stage builder blocks in length, it will create a heavy explosion that can cover twice than the fireball size. Depending on its current size, the explosion can either does little damage or capable of killing at 53% upon explosion. (Its kill power can’t be any stronger than that). Keep in mind that the explosion can harm Draco herself.

There can be only one orb at a time, so after using this attack and if the orb is still on the field, using this attack again will only allow Draco to breathe fire. The fire has moderate priority and can go as far as 1.9 stage builder blocks doing 1-2% damage, however the fire Draco breathe cannot make the opponent even flinch (similar to the knockback of Fox’s blaster). Unlike Bowser and Charizard, the range of her flames doesn’t decrease, but she can’t breathe fire for longer than 4 seconds. She will instantly stop to take a deep breath. It will waste a good 0.8 seconds before she is controllable again. When her face turns red, it indicates that she's almost exalted.

The fireball may look like a projectile, but it does not quality as one meaning it cannot be reflected nor it cannot be absorb by a certain characters down-B. It can’t collide with most energy projectiles, however if it collides with an object projectile like a boomerang, there will be a chance it will explode depending on the object damage. If it connects with an ice or water projectile, its damage or maybe its size will be reduce by that much the ice or water does in damage. (If the orb didn't have a single damage stored, it will disappear)


Down Specials

Speed - Dive kick

Draco can perform a jump on the direction the controller was last tilted at similar to zero suit down special attack except with a great air speed.

At the peak of her jump, she will dive forward diagonally while execute a flying kick capable of killing at 153% with no set knockback doing 12% damage during the attack phase. If the height on the landing point is higher than the area she jumped from, then she will slide greatly with great traction when landing switching to a sliding kick leaving her to travel an additional 3 stage builder blocks doing half the damage but with no change in the knockback except the opponent will be launched upward. If the landing point is lower or equal from where she started from, then she will quickly recover as soon the attack is finished, but retain her current air speed. This can be used to recover horizontal (the recovery frames after landing is 2 frames)


Power - Flame pulse

Draco can jump two stage builders blocks straight up and descend to punch the ground beneath her to not only make the earth shake, but also sends out flames demonstrating her might. In a way, the attack is a mix between Yoshi’s ground pound and dedede’s up-b.

When she lands, she creates a small wave of flames that goes 1.4 stage builder blocks around her position on both directions which burns the foe for damage and to push the opponent slightly away from Draco. Each wave can hit up to 7 times doing 1% damage each.

If her punch actually collides with her opponent before she hits the ground, the opponent will take 19% damage at most and will also be buried within the ground. The time buried is twice as short as DK’s side-b, so it best to attack quickly and precise. If her punch hits the opponent while they in the air instead, they will be launched upward with a strong knockback capable of killing at 106% providing the same damage.


Up Specials

Speed - Dragon uppercut

Draco will stop in her position and execute a flaming uppercut creating a pill of flames around her. She can jump high...but a little short of Sonic’s spring. The horizontal range for this attack is very small, but it has good range above her. When executed, the flames of her fist will drag the opponent above her (similar to Roy’s up special attack) and launches the foe forward at the final hit at the peak height of the attack. The flames remain for a short time as it burns the opponent to the top. At the end of her attack, she will instantly glide to safety. She will still have her second jump so she can still recover after you glide, but you can’t use her Up-b again until you landed.

The attack is weak overall in knockback, but halfway through the attack is where she puts her power into it causing a flare spark. If the opponent is hit near that point, then the attack can kill at 117%.


Power mode - Dragon grab

Draco leaps up high covering several stage builder blocks high and distance. If she overlaps someone while in her leaping animation, she will grab them while in the air like captain falcon and ganondorf up special except she will actually hold them. After the attack ended, if she still has some jumps left with her, she can continue on. However if she missed her attack in general, she will be in her helpless mode.

When they are grabbed, Draco will extend her wings in place while holding the foe in midair. At this point, it is now counted as a grab. Most of these throws cannot really kill unless the opponent is over 200% from the center of a small stage. (If you think of it, an air grapple can be very broken if it was actually treated like a normal throw, eh?)

Grab air attack – 4%
Blow fire on the opponent. It’s longer than the average grab attack...really long.

Forward air throw – 6%
Simply chuck the enemy forward

Up air throw – 5%
Throw the enemy upward. This throw does not use the opponent to hit others

Back air throw – 6%
Fiercely throw the enemy behind her position after spinning in a circle a few times. The knockback is purely horizontal.

Down air throw - foot stool
Draco simply places the opponent below her feet and steps on the foe.


After grab releasing or throwing the opponent and if Draco has no more midair jumps left, she will be given an additional jump. It might be best use the additional jump to glide back to the field.


Standard attacks​

She excels at the arts of hand to hand combat and won’t hesitate to demonstrate her skills into the battlefield. Her attacks are best used on her Fighter stance (speed mode).


Neutral A – quick palm

The palm attack launch will have priority over fire related attacks. She then launches a high knee attack and a spinning kick following if that knee hits.

The kick portion of the attack can reach at least 7/10 stage builder blocks. Also each hit can do at least 1% to 2% damage each.


Up tilt - vertical arc

Like fox, she can tilt her leg upward to the point that her heel reaches to the level of her head stretching a perfect half circle. It’s more of an acrobatic display rather than an attack, but as long it hits, its fine.

The range can mostly cover behind and above her as well around the peak of the kick where it can hit a small area in front of her. It can do up to 7% damage providing a light knockback. It could be decent when setting up chains at low to moderate damage on speed mode.


Down tilt – crouching kick

Draco can crouch on her left knee and perform a hard low kick covering a fair amount of distance. During the attack as, she crouches to that of the same height of snake when he crawls. This allows her to counterattack some mid to high attacks.

This attack has little growth knockback capable of doing no more than 8% damage and also has a good chance of tripping if the opponent is hit very close at moderate to very high damage.


Side tilt – palm thrust

Draco can execute a quick but powerful palm thrust attack. At power mode when she executes this attack, a stream of fire emerges from her hand capable of hitting twice and can travel up to 0.9 stage builder blocks in total.

The palm thrust attack alone can do 6-11 percent damage and can kill at 154% while the flame can do 1-3% percent damage. The hit boxes appears each at the first attack can do damage at the first and last frame of the fire.


Dash attack – gust

Draco quickly stop her running with little to no traction by using her wings to create a gust of wind will emerge from her to push the foe away from her.

The gust effect can go as far as two stage builder blocks. If the foe is 6/10 close to Draco when she uses this attack, they may get dragged over half a small stage. Anyone from 7/10 to 2 stage builder blocks will slightly drag the opponent away from her (like the impact of Toon Link’s down air.)


Ledge attack

Draco quickly attacks with a knee attack. It oddly has high priority and can do 6% damage


100% ledge attack

After struggling to get back to the field, Draco performs a small foot sweep after getting back into the field doing 4% damage at most. The range is pretty high than her normal ground attacks.


Glide attack

Draco performs a quick cross kick to end her glide. Unlike the main brawl flyers, the knockback will launch the opponent forward instead of upward with reduced knockback doing 11% damage. It can kill at 167%


Forward smash – Draco flip

Draco will perform a front flip before executing this attack (Becomes slower when charging). Before the end of her flip, she will attack by slamming her left leg to the ground. The hit box frames of this attack will begin the moment when she begins to drop her leg to the point when she landed the attack (From above her position to the front). The attack can kill at 154% doing up to 23% damage and has a range that can cover 9/10 of a stage builder block not counting she had moved forward about half a stage builder block.


Up smash – Fire bomb

This attack has two parts. When charged, only the second part of the smash attack will take effect. (It doesn’t affect the first part of the attack)

First, Draco wave her hand in an arc above her from where she’s facing releasing a fiery trail that can hit the enemy slightly if they are above or very near her. The knockback is little to none, but it will push the opponent near the center point of the attack so that it would be easier for her to execute her follow-up attack. This small wave will do 3%-5% damage

Just after Draco finishes that, she will quickly thrust her right palm upward releasing an explosion afterwards a stage builder block above her. Its priority is low, but it can kill at 135%. It can also do 13%-18% damage. On power mode, the range of her attack increases by a small fraction.


Down smash – whirlwind kick

Draco will crouch halfway and execute two low spinning sweep kicks.

The overall frames during the attack and startup are quite fast for a smash attack, but the recovery time after the second kick is a bit slow. The range of the hit box are the same on both on both sides and it knockback and damage doesn’t have a difference regardless of which side. The attack in general can do 12% damage while capable of killing at 133%


Grabs and throws​

Draco isn’t very adapt at grappling, but she can perform what she can do and does a good job at it.


Grab attack – elbow smash

Draco delivers a strong elbow to the opponent face doing 3% damage


Throw forward – rising pulse
Draco thrust her palm forward and strikes her foe forward with no growth knockback.

The attack recovery for this throw is very fast, thus allows her to finish the attack while she still in the air. The set knockback of this attack allows her to create a chain attack with most characters with proper mind gaming, but not against very light characters.


Throw back – jump throw

Draco jumps with the foe for ½ stage block and throw the foe behind her to the ground after spinning around with the foe two times for power for 9% damage.

This throw doesn’t damage others when the victim collides with other person. The opponent will recover the moment they were thrown, so you might get hit if you used this throw when the opponent has low damage.


Throw up – rising throw

Draco quickly chucks her foe upward with ease. The attack startup only takes 3 frames, but the recovery time is three times as long. (Similar to jigglypuff’s up throw)

It can do up to 6% to 9% damage with a heavy set knockback. The knockback will sure to travel at least 1/3 of the screen upward at full health. However even with the very little growth knockback, it would still kill slightly over 200%


Throw down – flame palm

Draco submits her foe to the ground and places her hand on their face. Her palm ignites with fire burning the foe’s face for damage. After burning for half a second, she will unleash a fire blast that will launch the foe.

On power mode, this throw attack has only growth knockback applied capable of killing at 98%. It can do 9% damage at most and can do decent damage nearby before the attack is finished.

However on speed mode, this attack always launches the opponent on a set distance averaging 4 stage builder blocks upward doing 5% damage. The opponent will not be able to recover until they start falling.


Aerial attacks​

Though she doesn’t prefer the air, she has no objections to take the battle to the sky. Its maybe better to use while in Dragon Stance (power mode).


Aerial neutral - spin kick

Draco can extend her leg similar to high standing jump kick. She then rapidly spins four times covering the area around her.

The hit box frames appears when the attack is executed instantly capable of doing 6%-7% damage and can kill at 187%. The hit box can last as long as the attack does, which is close to a second. It can also do that much damage upon landing on the ground before the attack is finished.

A power mode, the flames can allow her to negate light attacks from opponents. It’s not as effective as Meta knight’s nado, but it’s suitable.


Aerial down - scrapper

Draco can perform a drill kick using her right leg similar to Jigglypuff’s down air attack.

This attack can do up to 2% damage per hit and can slightly move them forward/upward when their damage is moderate. The attack can rapidly hit 7 times but can only flinch the opponent as a result.


Aerial back - Draco fang

Draco can turn around with her back facing the opponent and deliver a hard kick attack focusing on hitting the opponent’s weak spot. The range overall for this attack is 6/10 of a stage builder block as she is capable of doing 13% damage to her opponent possibly killing her opponent at 154%. The attack recovery is longer than her usual attacks, but it can do an extra hit when she lands on the ground doing half the damage.

When the attack is executed on power mode, it will create flames that resemble the mouth of a dragon. Unlike her normal attack, her kick will have a hit box that has the size of 2/10 of a stage builder block upon the first frame of its hit box. If that frame hits, they will take 15% more damage with a little hit stun with a strong knockback capable of killing at 72% assuming if the attack is successfully executed around the middle of a small stage. (The flames that hit the opponent after that successful hit will not affect its launch.)

Keep in mind that her special hit box is only available in power mode.


Aerial up - upward kick

A high kick is executed while in the air with moderate priority. The attack frames are rather quick for its starting and ending animation.

The attack can cover 5/10 of a stage builder block and covers the area in front and above her position. From the center of a small sized arena, it can kill at 185% as it launches the opponent upward while doing 12% damage at most. It can also change the opponent’s launch direction depending on where the attack hit.


Aerial forward - twin kick

Draco quickly attacks with a jumping side kick before executing a spinning kick.

Draco can quickly execute up to two kicks with fast precision doing 3% or 4% damage each. The attack has a good startup and recovery speed, but it has moderate priority. It can kill at 178% at both attacks. The first kick has her hit box exposed for 5 frames in an attempt to strike the opponent. This delay hit box doesn’t kill, after the first frame of the hit box, but it has a set knockback that slightly pushes the opponent forward and does 1% damage. If the attack button is pressed during the first kick, the second kick is executed. The second kick has no delay hit box unlike the first kick.


Final smash – Dragon trail

Draco gather a unique kind of fire from around her body and later flies off screen. She will reappear from either side of the arena at a very high speed. Draco quickly flies straight across the screen with the dragon fire covering her entire body burning everything in her path and going through walls and floors. On impact, this attack can kill at 72%

After she passed by, by holding the controller pad up or down will determine if she flies slightly upward or downward from where she flew by the last time. Every time she flies by, the flames from her body occasionally fall off from her body. The flames will eventually land on the arena where it will burn for 5 seconds. Every time the opponent overlaps the burning flame, it will do 15% damage and will launch them upward with good power capable of killing at 157%. (At most cases would launch them up to be hit by Draco’s Dragon trail. Once she flew across the screen 8 times, Draco will drop from above the center of the arena signaling the end of her attack.

Extras​

Taunt 1
Draco will roar with a passion from her own burning spirit. Regardless of how much she tries to imitate her foe, her roar still sound cute. GAOOOOO!
Taunt 2 – left
Draco will wink at a foe leaving a pink stream that all looks like a heart.
Taunt 2 – right
Draco will wink at the foe leaving a fire stream that all looks like a heart.
Taunt 3
Draco can stand on a leg similar to the crane fighting stance and laugh friendly.
 
D

Deleted member

Guest
The Submission Period for Make Your Move 11 ends in 24 Hours! That is, 4PM PST, 7PM EST and 12AM GMT. If you post a set after this, it will not be added to the moveset list or be eligible to be voted on.
 

smashbot226

Smash Master
Joined
Sep 1, 2007
Messages
3,027
Location
Waiting for you to slip up.

ZECORA


First off, if you couldn't tell from the art style, Zecora is indeed a My Little Pony character. Unlike characters like Octavia, however, Zecora gets more than fifteen seconds of screentime. In fact, she's a prominent character in at least three episodes so far, which is more than I can say for a majority of the minor characters.

Within the Everfree Forest lives a hermit zebra named Zecora. At first, she's prematurely given the label of "witch"- something that doesn't quite put her in good standings with the rest of the mane six, especially after a patch of Poison Joke just so happens to affect them during their first actual meeting. However, over the course of a single episode, the mane six manage to barge into Zecora's home, ruin her nice decorating, and attack her. She takes things rather nicely and is seen as one of the wiser individuals, making occasional appearances in season two's episodes. However, from what little we do see of her, we can tell she has a great propensity for magic, borderline witchcraft, and providing help to the ponies in their time of need. Friendly black optimistic advice indeed.

=-=-=-=-=-=-=-=-=-=-=
Oh sleep-deprived mind
Do not be lax
Inform the reader
Of Zecora's stats

=-=-=-=-=-=-=-=-=-=-=


Ground Speed:
A hut-bound hermit she may be,
A proper speed comparison would be Yoshi.
Since Zecora's hooves grant a rating of 3,
Let's leave her history of angry mobs be.

Aerial Speed:
A zebra cares not for the skies above;
She's a colorless pony, not a dove.
Her aerial rating is a 2,
Because reasons for being airborne are few.

Aerial Control:
Like I said before,
Staying airborne with Zecora is a chore.
Keep your feet on the ground so the battle can be won,
Else you suffer from Zecora's terrible rating of 1.

Power:
Her spells and tricks do pack a punch
But let's not go off a single person's hunch.
Between her cauldron, hooves, and more,
Zecora gets a healthy 4.

Attack Speed:
A subject slightly harder to label
Since Zecora brings something strange to the table.
Balancing potions and kicks isn't easy
Which is why the hard work pays off for a 3
...sy.

Jump Skills:
Further exacerbation is required?
Perhaps it'd be better if I retired!
Okay, granted, her four hooves, you can see
Get her high up enough to land her a 3.

Weight: A pony Zecora might be
But is she lightweight? Hardly.
Alongside Ganondorf, with whom she can survive
Zecora the mystic gets a 5 out of 5.

Height: All that time spent on her own
Has hardened her every bone
So that her stiffened neck is sore
Zecora gets a rough 4.


=-=-=-=-=-=-=-=-=-=-=
These efforts to rhyme
Are a pain in the bun
Time to show you what makes
Zecora special: the cauldron

=-=-=-=-=-=-=-=-=-=-=


When Zecora spawns into the battle, a large cauldron magically appears directly in front of her. How do we categorize "right in front of", for you slower readers. Well, whatever direction she's facing, that is where the cauldron shall appear. Now as for the cauldron itself, it horizontally a tad smaller than Bowser and vertically a hair shorter than Ganondorf. Which means Zecora stands slightly taller than her own pot, but that makes it easier to dump whatever she pleases into the cauldron. The weight of the cauldron, however, is immense, and any foe inside will add their own weight to the already staggering rating. It lacks a damage percentage so it doesn't take additional knockback the more damage it takes, cannot be used as a regular item, and is unbreakable. However, that doesn't mean it lacks a purpose; since it's Zecora's cauldron, she can obviously move it around at will with her attacks, each one pushing it into a different direction. Most of the time, though, any attack that would knock the cauldron into the air gives it about .10 seconds of air time. So most of your attacks will focus on rolling it around, though that's not entirely bad; it has the rolling speed and hitbox of a slightly larger barrel. Last thing to note is how fast it will fall: from Hyrule Jump distance, it takes slightly over a second for the cauldron to reach past the bottom blast zone. Yes, it's that damn heavy, and like I said before, stuffing a foe into the cauldron makes it even more heavy.

However, since the cauldron is exactly that- a cauldron- let's say an unsuspecting foe were to jump, walk into, be knocked into, or even crushed by the cauldron? It depends on which side hits you. If it's the fat end and you're grounded, you get pitfalled and suffer a nasty 20% damage. The effect becomes even more severe when it strikes an airborne foe: a spike with the roughest change of directional influence in the game. But what happens if the opening of the cauldron makes contact? Well, due to the magical components of Zecora's tampering, foe is sucked into the cauldron as it continues to do whatever it was doing. Which may include falling, rolling off the side, etc. Naturally, the foe can escape from this at a difficulty proportional to their weight. If it's Kyubey, it's at a hilariously easy .25x grab difficulty, whereas Mario requires a slightly more strenuous effort of 1.30x. What about folk like Bowser, Ganondorf, Snake, and even giants such as Vol Opt or Vorinclex? They require a far longer period of direct exposure to the cauldron's opening, with the time required equal to 1/4th their weight rating. Assuming they're inside, the maximum grab difficulty- let's say it's for Vol Opt- is 7x grab difficulty. Yep, watch out you giants. And for anyone curious as to what happens if one escapes from the cauldron, they're launched out in whatever direction the open part of the cauldron was facing at the time at half the velocity of the Jungle Japes barrel.

Zecora is also able to directly interact with her cauldron- it'd be silly if she couldn't- by mixing various brews and even Poison Joke together to create concoctions of varying effects. Naturally, if you're able to cram foes into the cauldron while its bubbling, they'll suffer from the effects as well. There is one problem- you can only have a maximum of two different items at once inside the cauldron, not including your foe, so choose wisely... okay, I lied. There's another problem: if the opening of your cauldron tips over while there's still a concoction inside of it, the brew spills onto the ground in a two and a half Bowser-length range, ensuring whoever steps inside the mess receive the effects. Last words before moving on: if the cauldron falls offstage, don't worry. Really, don't. You'll see why.

=-=-=-=-=-=-=-=-=-=-=-=
Man, this set is taking days
MW must be awful mad
To know a pony's my last set
Though my procrastination is quite bad.

=-=-=-=-=-=-=-=-=-=-=-=


NSpec: Destiny Dust

While Zecora lacks any inherent magical ability due to the lack of a horn on her forehead, her wealth of knowledge pretty much emulates that perfectly. One of her front hooves reaches into hammerspace, using her magical pony hoof grip to hold onto a small patch of dust, then releases it. Naturally, this isn't the end of the move so long as the user holds down the special button. In which case, the swirling dust acts as a constantly levitating Poke Ball-sized projectile that travels at Din's Fire speeds. Well, to be more specific, the speed at which Din's Fire travels after a full second of motion. Unlike Din's Fire, Destiny Dust doesn't disappear after a set time; it'll stay on-screen for as long as the user holds down the special button. Also unlike Zelda's projectile, you're able to move the dust in any direction you please, though attempting to force the dust through solid objects, the stage, or platforms only results in dissipation.

Oh dear, I've gone an entire paragraph without talking about what the dust can actually do! Well, let's assume you manage to splatter some of the dust on a target. At first... nothing really happens. But then, after two seconds of the victim covered in the stuff, he starts twitching uncontrollably and rises into the air before disappearing from sight. What happened?!? Why don't you check the cauldron? Why yes, the dust DOES teleport the foe into Zecora's cauldron regardless of where they are on-screen or how large they are! Remember when I mentioned there would be ways to herd larger foes into the cauldron? Destiny Dust does that very well. However, you're likely wondering what would happen if the cauldron isn't even on the stage! She turns to you and says this. Wastes about two seconds of your time and leaves her open. Then again, actually summoning the dust takes about half a second and prematurely ending the attack lasts for around another half a second. Worse still, you can't even defend yourself while the dust is out! Maybe if you get a teammate to watch your back...

Knowing when to use the dust
Is an almost certain must


USpec: Parasprite Platform


They're so cuuuuute

Once again using her physics-defying hoof grip, Zecora quickly whistles for a horde of Parasprites to appear. Luckily for the zebra, these creatures happen to obey her as opposed to eat her. Why is that? She's a pony shaman, she doesn't have to explain anything! A horde of Parasprites form either directly above (If grounded) or below (If airborne) Zecora, providing a solid platform for her and her teammates to stand on and pass through. Each Parasprite block is about the vertical size of Giga Bowser and the horizontal length of Donkey Kong. Tapping the input again causes the bugs to scatter, meaning users can't summon blocks of Parasprites for a stupidly good recovery. And the foe can attack the Parasprite block itself to break it apart anyway. Doesn't take too much to do so, either.

However, the Parasprites are mean-spirited enough to block foes from jumping through it and let them fall through if standing on it. This also extends to cauldrons, though the Parasprites won't like Zecora very much if she tries to summon a cauldron on top of them. They'll fly away if a cauldron ever passes through them, though you can always summon a new platform five seconds after the first horde disappears. However, should Zecora want to summon/disband a Parasprite swarm, it requires a full second for both actions to fully be completed. Further emphasizing the risk is that the Parasprite swarm requires a few seconds after Zecora whistles to form and disband. In summary, this'll improve Zecora's recovery, spacing, and gimping options to hinder her foe's movement while giving her time to mix her brew.

Yes, it's quite a caricature
The definition of out of character.


DSpec: Patch of Poison Joke

Again with the magical zebra hoof grip! Zecora tosses some barely visible seeds forward, covering about two and a half Bowser-lengths in front of her. If she chooses to use this in the air, she changes the trajectory of the toss and aims diagonally downward instead of straight ahead. For a few moments, it looks as though nothing happened, but after two and a half seconds, some strange-looking foliage sprouts. Looks a little bit like magenta three-leaved clovers. Give the patch a second more and a wavy scent rises from the patch, reaching upward about three Ganondorf-lengths vertically while maintaining the patch. You can also use this on a nearby wall and reverse the height of the scent and the width of the patch. The patch itself lasts for around ten seconds after the Poison Joke sprouts, but the beginning and ending lag on the seed toss is amazing enough for Zecora to cover her tracks quite easily. Oh, she can only have two patches of Poison Joke out at once, and creating a third one automatically kills the earliest patch. Lastly, Zecora CAN coat her opponent- or an ally- in some Poison Joke and ensure they suffer the effects of the foliage wherever they go.

Just like with NSpec, I went an entire paragraph without actually explaining what the move does. Simply put, Poison Joke acts as a negative zone, except instead of random effects, it completely reverses the statistics of whatever is inside it. This might sound a little vague, poor reader, so I'll give you a theoretical situation. Let's say Kyubey gets head-deep in some Poison Joke: so long as he remains within the patch or the scent wave, he weighs and hits as hard as Beezwax and vice versa. Jigglypuff has godawful jumps and aerial control while Ganondorf can jump like a non-white male and both will run like Kenyans. In other words, everything from the weight, falling speed, and jump ability to aerial control, attack power, and attack speed of attacks are reversed. The applications for Poison Joke are endless, and the effects remain with whoever is exposed for an additional 0.75 seconds once they leave the patch/scent. The only thing that remains unaffected by Poison Joke is a character's size: while in the show the effects of Poison Joke are nearly endless, including size changes, doing so in the Smash engine would be... complicated. An even more efficient use of Poison Joke is to help Zecora kill or gimp her opponents. Successfully tossing some Poison Joke onto a recovering opponent may severely hamper their recovery, either by reversing their weight or fall speed. If neither option works, there's always SSpec. Secondly, items are also affected by the Poison Joke, meaning stuff like sliding crates or Zecora's cauldron become incredibly light. On the subject of her cauldron, you're also able to throw some Poison Joke directly into the cauldron. While this doesn't affect the weight of the cauldron, it affects everything inside it. What does this mean for anyone that might be inside your coffin- I mean, cauldron? You can probably guess.

Versatility is the word
Shudders all around were heard.


SSpec: Cauldron Crash

Remember when I mentioned how Zecora's cauldron is made out of some weird magical stuff? That comes into actual play here when Zecora forms an invisible circle using some special clay applied to her hoof- the same stuff that partially makes up the cauldron in terms of structure. Once the circle is complete- which takes less than one tenth of a second- the cauldron suddenly disappears and magical sparks begin to appear directly above the clay circle. After a two second delay, the cauldron blinks back into existence right above the clay circle, with the open end facing upward, and falls to the ground. Despite what real-life physics says, the impact the cauldron makes with the ground won't cause anything inside to spill over. As you can imagine, this is the only way for Zecora to get her cauldron back if it ever falls offstage, since it's pretty much impossible for Zecora to get it back manually otherwise. You can even summon the cauldron to gimp recovering foes in tandem with Poison Joke, brews, or Parasprite swarms. And before you ask, yes, you can bring the cauldron to patches of Poison Joke. However, there are a few major limitations Zecora users should keep in mind. One, you're unable to create another summoning circle for eight seconds after you make one. Two, you're unable to even perform the initial animation when a foe is inside the cauldron. Three, you can't use this move while airborne: how will you be able to plant clay in the air anyway?

A considerably shorter description
For an otherwise simple operation.


=-=-=-=-=-=-=-=-=-=-=-=
Now that I've explained
How Zecora's specials work
Let's move onto her normals
Though only one has a true quirk.

=-=-=-=-=-=-=-=-=-=-=-=


Jab: Shrinking Shroud

With a quick backhand swing from one of her front hooves, Zecora releases a small and multicolored cloud of dust, covering an entire Bowser-length in front of her and subsisting for about one more second as Zecora recovers. If anyone is caught in this dust, they suffer a mere single percent of damage and fixed stun. That's right, stun, not knockback. You'll never ever kill with this thing unless you're fighting a coma patient.

However, whenever you do happen to hit someone with your dust, their size shrinks by a whopping 60%. The change is instant and lasts for about five seconds, but the foe still retains their regular stats, even their weight. So why does making your foe a more difficult target to strike a good thing for you? The smaller your foe is, the less time it takes for them to get sucked into the cauldron. Which means mean mother hubbards like Bowser or Donkey Kong become trapped as quickly as Mario. Ah, but what if you KEEP striking the foe with your dust? Well, an already shrunken foe decreases to 30% of his new size, then 10% of that new one, and then 1%. Then the dust stops working entirely. There is a glaring issue: one that involves lighter foes escaping cauldrons more easily. That will be touched upon later.

Shrink your foe
to the size of your toe


FTilt: Hoof Heave

Zecora digs her front hooves into the ground and spins, using her dug-in hooves as the center of gravity, while striking anything in a two and a half Bowser-length in front of her, before swinging back into her fighting stance. The first thing you'll obviously notice is the range- it's goddamn awesome, and angling it upwards makes for an equally awesome anti-air. The damage is slightly less awesome at 7%, but still just as awesome, and the knockback can kill as low as 120%. The only true weak point of Hoof Heave is the ending lag, requiring Zecora to use up a little under a full second to resettle herself.

A simple enough tilt, right? Well, even though it's advertised as a killing move, that's not what you'll be using it for. When you use the move, you'll notice the knockback is heavily horizontal, with very little vertical rise to it even around 100%. This is perfect for knocking foes into the cauldron, since the heavily horizontal knockback prevents them from flying over it and the long range and short start-up of the move make for an easy poke or punish in case the enemy leaves himself open. Hoof Heave is also one of Zecora's only damage-dealing normal moves that even somewhat affects the cauldron's movement: when struck, the cauldron begins rolling in the direction you kick it in at 1.25x the speed of a rolling barrel. Trapping a foe in the cauldron and then kicking it off the stage is a great way to get KO's, although it'd be even more helpful to throw in some brews or even Poison Joke.

This attack is rather fine
for a black and white equine.


UTilt: Swahili Slam

In true horse fashion- let's ignore the fact that she's technically a zebra for this one move- Zecora stands up on her hind legs, rapidly swinging her hooves in a decent-sized space (About two Kirby-lengths in front of her) in the air, before slamming her front hooves into the ground in front of her. The hoof storm creates a minor 3% with rapid flinching while the slam itself generates a miniature quake that doles out a mere 4%, but enough knockback to potentially force someone into the cauldron. But the slam isn't important; what IS important is the first part's applications. Whenever Swahili Slam manages to hit an airborne foe in the first part of the move, since the effect on grounded foes is simply knockback, Zecora spikes them into the ground, ensuring the second part of the move lands. Of course, the beginning and ending lag on this move isn't the best, meaning it's probably best to reserve this for foes with poor aerial movement or when you can predict when the opponent strikes. Luckily, the quake effect that comes with the second part of the attack can slightly boost the cauldron off the ground for under 1/10ths of a second if there's nothing it and not exposed to Poison Joke. However, it doesn't provide the roll that FTilt provides.

A tilt rightly for anti-aerial use
Let it be one you don't abuse


DTilt: Knee Nip

Zecora swings her long face forward parallel to the ground, biting at the heels or feet of anyone close enough in front of her. Which is pretty damn close, covering less than half a Bowser-length. And even then, it's exclusively a low-hitting hitbox. However, Knee Nip is one of Zecora's only moves guaranteed to trip opponents while they're under 35% and since the damage dealt per nip is a meager 3%, you can use this move to keep foes on their toes. This tactic is encouraged further by the swift beginning and ending lag. Seems like a boring enough move, right? Well, Knee Nip does have a few more strange properties that warrant use, but don't try interacting with the cauldron; it won't even budge. First, using Knee Nip on a dropped item you're able to wield lets you pick up the item from a longer range. Second, using Knee Nip on a prone foe puts them into a tripped animation, except in this case, they'll be startled into a tripping animation by Zecora's bite. Above 35%, Knee Nip deals very low, yet very vertically inclined, knockback; don't expect to kill at percentages as high as 200%. However, I specifically mention the vertical knockback because you're able to combo into UTilt on heavier opponents and lower percentages. Lastly, using this on an airborne foe spikes them while landing Knee Nip on an edge-clinging foe puts them into a footstoolled stance for a second longer than a normal footstool.

A sadly blatant cop out for
a rather magically adept hor...se.


Dash: Rushing Ram

One of Zecora's most notable qualities is her cranium chock full of anecdotes and wisdom. For this input, she'll be using her head in the most literal way possible, galloping at Pikachu speed for a whopping three Bowser-lengths forward, headfirst, when you make the input. Throughout the charge, Zecora's front half is a constant hitbox, leaving a very small frame of punishment open during the rush, deals 9% damage with surprisingly low knockback for a move like Rushing Ram. Better yet, Rushing Ram can be ended early merely by tapping the direction opposite of which you're dashing. If that weren't enough, Zecora can continuously roll the cauldron in whatever direction she's moving as long as the charge subsists, and then it continues to roll after the charge. With all these strong points, there must be at least one weakness other than low killing potential, right? Well, the ending lag is horrendous, with the minimum being an early cancel at .75 seconds and the maximum... well, you can fall off during the charge if you reach an edge. You see, Zecora keeps her head down during the entire charge, meaning she can't very well what's in front. She won't go into helpless, mind you, but it's still exploitable by crafty foes.

At last, a headfirst charge
For rolling that cauldron with the weight of a barge.


=-=-=-=-=-=-=-=-=-=-=-=
From weight and speed
To jumps and descent
Hopefully these smashes
Won't make the set reticent.

=-=-=-=-=-=-=-=-=-=-=-=


FSmash: Avoirdupois Abstract

Zecora rears her head back, teeth clenched on something pulled from hammerspace, before swinging her head around like a club. The move itself deals minor damage (7%) and knockback, normally killing at around 165%. Ah, but what is this mysterious "something" gripped in her mouth? A fan-sized flask full of a sloshing grey liquid designed to increase the weight of anyone directly exposed to the concoction, of course! Ah yes, the swing part of the attack begins and ends quickly, meaning you can repeatedly pull out abstracts at will.

Onto the actual potion: when Zecora performs any of her smash attacks, she will automatically gain a small flask with one of three different colored concoctions, depending on the input obviously, that can be used as a battering item. Unfortunately, it's the size of a fan without the rapid-fire capabilities. "But Smashbot," you clamor, "why can't you just use it as a throwing item?!?" For one, you can; in fact, tossing your currently held potion as you would a battering item- the grab button plus a direction- can create a nasty mess. Successfully landing a toss on an opponent coats them in whatever was inside the potion held and inflicts a status effect for seven seconds. A visual indicator helps out with this; so long as the foe suffers (Or benefits) from these effects, the potion in question drips from their body. Once the dripping stops, you'll know that your quarry is cured. In avoirdupois abstract's case, an exposed fighter would have their weight boosted to greater levels: Jigglypuff now weighs as much as Mario, for instance. This will not affect falling speed or jump height, however: this only affects how much knockback one takes. Oh, and Zecora uses it as a battering item because a glass flask the size of a paper fan has a minor chance of causing serious brain damage. That and so long as she wields them, Zecora will never break her flasks from battering overuse. You're likely wondering if foes can use flasks as cohesively as Zecora and to answer that... well, they can still use flasks as battering items, but are unable to interact with the cauldron.

But we can't have this sort of thing be THAT simple, right? Well, it's not: when you're adjacent to your cauldron and holding onto a potion at the same time and make the SSpec input, Zecora dumps the components of whatever was inside the flask into the cauldron. You can also simply throw it into the cauldron by tossing it like a regular item; just make sure you're airborne and able to actually toss it INTO the cauldron. This means foes aren't just trapped when inside the ceramic prison, but are suffering from one of several status effects that will haunt them for eight seconds, with the timer only starting when whoever is inside the cauldron escapes. This process takes a surprisingly short amount of time to complete, only lasting for a little under 3/4ths of a second to fully carry out. The concoction inside the cauldron itself, however, lasts forever, so long as it doesn't tip over and spill the contents. While a full cauldron spills the liquidy abstract for an amazing three Bowser-lengths (Two if there's only one component inside the cauldron), foes only suffer effects from mixtures for a mere three seconds, and can only contract the effects when standing on affected ground. Another neat tidbit; you can combine the abstract with other potions or even Poison Joke. In which case, the character's weight would decrease equally to the amount an unaffected abstract would increase weight. Combine this with a Poison Joked cauldron and you've got a very easy way to get kills.

A concoction to make end's meet
Gives friends and foes those heavy feet.


And no, there is no way to drink your own potion directly.
The definition of avoirdupois is, "the amount that somebody weighs." I am not making words up and I am not crazy.
USmash: Velocity Vitae

Instead of rearing her head back, Zecora instead lowers her front legs to the point where it looks like she's bowing to the foe... before swinging a flask similar to FSmash's upwards. The main differences include a smaller horizontal hitbox for a considerably larger vertical one and a different color on this particular potion. In case you're wondering the vitae's coloration is more of a deep orange, meant to contrast with the colors of everything else. The first part of the attack is stylistically similar to FSmash, since it's a rather simple attack, in this case a USmash uppercut with a weapon, and the vitae's flask is identical to the abstract's flask.

What DOES differ is the effect. Should anyone be exposed to this particular brew, they find that their falling speed is nearly halved and their jump height slightly increased. In other words, gravity has much less of an effect on them. When exposed to Poison Joke, the effect is, as you likely expected, reversed; Jigglypuff falls about as quickly as Bowser and you don't want to know how low she jumps now. In tandem with Poison Joke and the regular cauldron, you can really lay the hurt down on the opponent, combining the foe's probable high weight rating with the natural bulk of the cauldron. You can also apply these bonuses to teammates of yours, as you could with the abstract and serum.

Something brewed with Warlord's stench
Your gravitational pull could break a bench.


DSmash: Celerity Serum

Well this is new- instead of swinging a flask around with her maw, Zecora instead pulls yet another potion out of hammerspace with her tail, swinging it around in a circle to strike anyone around her before catching it in her mouth. While it sounds like a lengthy move- which it is, lasting almost as long as Wario's DSmash- the initial part of the attack covers quite a bit of area around Zecora and even hits foes above her. And just like the other smash attacks, it ends with Zecora wielding a flask filled with a grassy green fluid. What's it made out of? If I told you, you'd probably swear off liquids forever.

Also like the avoirdupois abstract and the velocity vitae, the celerity serum yields a different effect, and possibly the most noticeable in change; whoever makes contact with the serum has their leg muscles enhanced, allowing them to walk considerably faster and dash a tad more quickly. In other words, some character's walk speeds will actually be greater than their dash speeds. Naturally, if you mix the serum with some Poison Joke, these speeds bonuses become speed penalties- just as drastic as the bonuses. They essentially become slugs, with some of the faster characters becoming nominally less so and the slower characters doomed. The celerity serum assists Zecora with wrangling her foes into spots of the stage that benefit her most, usually involving the cauldron or joke-covered zones. That is to say fast-moving foes aren't a bad thing- their sudden burst of movement speed can lead to them accidentally "tripping" into one of your Poison Joke patches or even your cauldron.

I'm proud to say that this serum marks
Movement faster than the speed of farts.


=-=-=-=-=-=-=-=-=-=-=-=
Aerials? For an earth-bound horse?
Such a notion sounds brash and coarse!
Wait, why is it AA BB now?
is that batman?
=-=-=-=-=-=-=-=-=-=-=-=


NAir: White Wheel

Zecora spreads all four of her limbs outwards after turning toward the screen, spinning vertically clockwise for about two rotations before sluggishly recovering into her aerial fighting stance. The entire sentence prior to this one outlines the basics: starts rather quickly, lasts as an active hitbox for about a second and a half, and requires a full second to end, during which Zecora is wide open. Luckily, the attack itself is rather damaging at 9% and enough knockback to kill at 120%. However, you'll likely notice Zecora's hooves sparkling a little bit during the spinning, as well as the cauldron. That's because there's a direct correlation between White Wheel and the cauldron: White Wheel knocks struck foes toward the cauldron regardless of where the latter may be. If it's offstage, White Wheel will even spike and if it's airborne, White Wheel pretty much guarantees a trapped foe. Needless to say, this works immensely well with UAir and Poison Joke, since you can potentially trap the foe between you and the cauldron, all the while Poison Joke's scent rising toward the top of the screen.

White Wheel lacks the black
Now for the NAACP's attack


FAir/BAir: Blinding Brightness

Reaching into hammerspace, Zecora swipes her hoof in front of behind her, releasing a crescent-shaped cloud of white dust. The dust covers Zecora's entire front/back hurtbox and will persist in the spot Zecora released it in for a good two seconds before dissipating. The dust itself is similar in form to her NSpec, but with an entirely different effect; should any foe expose themselves directly to the dust, they'll... well, it depends on where they are. If in the air, they'll enter their footstooled animation for 1.5x the normal length of an actual footstool. If grounded, they simply be stunned. Unfortunately, the dust itself deals no damage despite the dust itself actually getting into a foe's eyes. However, there's a secondary effect; should a foe be blocking during this, it severely weakens their shield's strength for three and a half seconds and if dodging into a cloud, their bodies will be covered with dust, rendering their dodging animations much slower than normal for three seconds. Obviously useful for foes trying to jump over your cauldron since a footstooled foe will fall in like a fish in a barrel, as well as disabling foe's defenses and letting you add onto the damage, possibly breaking their shield and leaving them open for potion/Poison Joke shenanigans.

No actual darkness was harmed
In the making of this move. Just saying.


UAir: Firkin Fling

Zecora suddenly stops in mid-air, puts her front hooves together in a manner similar to how a monk presses his palms during a prayer, and quickly mutters something in her zebra language. Shortly after, the cauldron- assuming it's still on the stage- shoots upwards for a whopping vertical height of one and a half Giga Bowsers. This height will obviously increase if the cauldron is covered in Poison Joke, even reaching into the top blast zones for several seconds on certain stages, before falling to the ground as quickly as it rose. If the cauldron isn't on the stage, then this move is useless unless you like leaving Zecora open for extended amounts of time. And even when it's on the stage, if Zecora is interrupted during her chant, the entire move cuts off and you don't get a cannoned cauldron. Even then, the sudden mid-air stop makes this UAir useful for recovery, since repeatedly spamming it will help Zecora get back to the stage, similar to Lucario's DAir, except in this case, she isn't negatively influencing her recovery. You can even catch airborne foes with the flung cauldron for hilarious results.

An effective cauldron tactic with the fling
Is to catch airborne foes with the heavy thing.


DAir: Quick Quake

Zecora pauses once more in mid-air, though for a considerably shorter time than in Firkin Fling (Less than one-tenth of a second), and fastfalls to the ground hooves first. You're able to slightly influence the trajectory of the fall by tilting the movement stuck left or right and can even slow or speed up the descent by holding up or down. At any rate, landing on solid ground creates a small quake that boosts opponents slightly into the air, barely hovering above Zecora before they're given free reign of their directional influence. Coming into contact with a foe while falling causes them to become stuck to Zecora's hooves, trapped and unable to escape until the zebra lands, ensuring the follow-up quake lands as well. Yes, you can Zecoracide with it and the foe will always die first, although that's a considerably risky maneuver since the hitbox is very specific on the fall. Good thing you can move Zecora around during to compensate, right? Anyway, making contact with the foe during the fall causes 3% damage and landing with the foe directly under you causes another 11%. Simply hitting the foe with the quake deals a smaller 5%, although the quake causes the same amount of knockback regardless of the foe's percentage. While one would imagine using this in tandem with short-jumping

I'd like to apologize for the last rhyme
I'm really just running out of time.


=-=-=-=-=-=-=-=-=-=-=-=
You might be wondering, dear reader
How Zecora can possibly hold
Onto a foe, regardless of size
An honest answer could not be told.

=-=-=-=-=-=-=-=-=-=-=-=

Good God that was horrifyingly bad

Pummel: Maw Mash

Well this is... awkward. How does a horse grab onto a foe with hooves? Sure, there's cartoon logic, but really, this seems close to impossible. Which is why Zecora's grab is one of the strangest in the game; she leans in close to bite at the foe's face, pushes them back so they'll trip to the ground, and then leaps onto them hoof first. It's a long process that lasts over the course of a full second that is thankfully super armored, but once it ends, requires 3x grab difficulty to escape. What, her hooves are on the foe's limbs for crying out loud! At any rate, her actual throw animation causes 5% damage with the pummel, involving biting the foe's neck, causes a further 4% damage.

A brutal sounding bash
Sure to inflict more than a rash.


FThrow/BThrow: Summoned Stein

Zecora shifts her front hooves so one is beside the foe's head and the other crushing their throat/face, drawing a clay semicircle into the ground around the foe's head, before jumping back... and letting her summoned cauldron crush the foe's body underneath its weight. Yes, it's very similar to the SSpec, which is because it is; the only thing missing is the grounding potential and a considerably longer requirement time of twelve seconds. Hell, you can't even use either FThrow or BThrow and not SSpec at any time before fifteen seconds pass. On the bright side, you're summoning your cauldron AND damaging your foe in one move. Plus, you can still retain whatever is inside your cauldron once you summon it, then quickly tip it over to ensure your foe is coated in... whatever you've been brewing.

An alternative to the good old spec
Is sure to leave certain folk erect.


UThrow: Sprite Snag

Zecora manages a whistle without her hooves as she ducks down, stomping on the foe's already battered limbs, causing 7% damage, before a Parasprite swarm similar to USpec appears directly above Zecora and her opponent. While it's forming, Zecora backs up and stomps on the foe's feet, launching them upward and into the swarm, causing a single percentage of damage over a short period of time. Naturally, during the first two seconds anyone caught can't DI out of it, ensuring at least 4% damage, but afterwards, they're able to DI out of the swarm to ensure infinites aren't possible. However, you can summon the cauldron on top of your trapped foes, cover them in Poison Joke, apply some of your potions/mixtures, launch the cauldron into their suspended forms with UAir, catch surrounding foes in the swarm, end it prematurely with USpec etc. Really, the possibilities are endless.

Alright, I'll be honest, I've ran out of ideas.
No. I'm not kidding. That last rhyme was awful.


DThrow:​

The zebra enchantress takes out some of her Destiny Dust before tossing it onto the opponent's face, stepping back and cackling a bit. The same thing that happens in NSpec happens to the foe, with them transporting to the cauldron assuming it's on the stage. If it isn't then Zecora reaches into her "pocket", before changing her expression to surprised, before stomping the foe in the stomach and stepping backwards, dealing a modest 6% damage and no knockback. Naturally, DThrow is for opponents who stay on the offensive enough to render use of Destiny Dust pointless, since it takes too long to summon the dust anyway and Zecora's grab is difficult to escape, starting an imbalance and demand of how the foe should fight Zecora. Gives her some extra flavor when trying to trap the foe in the cauldron, since it gives you breathing room or a potential link into a cauldron that's already set with traps.

I like a woman like I like my wine:
Unopened, white, and aged below nine.


=-=-=-=-=-=-=-=-=-=-=-=
I needed black
Somewhere in this set
For a zebra? Of course.
Else I'd feel regret.

=-=-=-=-=-=-=-=-=-=-=-=


So much for a proper title for playstyle... Oh right, I should probably explain that. So throughout Zecora, you've probably gotten the impression that she's a status effect character that heavily relies on an apparatus to get a majority of her kills. Well that's true. You'll also notice how her potions grant BONUSES rather than penalties unless we throw in Poison Joke, and even the latter can be helpful. However, if you take into account that, like sparsely mentioned in a few move descriptions, that ANYONE can be subject to these things, it's easy to figure out what Zecora leads into: 2v2 specialization. Yes, she'll work in 1v1 and FFA just as well, taking advantage of the focus on one foe and the chaos of FFA respectively, but in a 2v2 environment she shines. She can offer her ally bonuses that can make up for their shortcomings in ways only accessible by items. Let's take Kyubey, someone I mentioned specifically in DSpec. He's got a 0.1 rating in weight and his other stats aren't too impressive. What if you give him some of that Joke? He's as heavy as the cauldron, removing his key weakness. Heck, you can even make some characters attack and move faster at the expense of their heavy weight becoming light, but that's where Zecora's own strengths come in; her good ground game and defensive play, forcing foes from staying away to remaining offensive.

Naturally, she prefers staying on the ground where her cauldron is: most of her aerial moves revolve around either keeping them on the ground or getting them near her cauldron, either by forcing them toward it with NAir or bringing Zecora's apparatus TO them with UAir. So naturally, approaching from the air unless you plan on short-hopping with DAir is a bad idea. However, that doesn't mean she's useless against mid-air foes; UAir helps ward off incoming aerial foes and if you read it correctly, SSpec can take down an unfortunate victim back to the ground. Of course, when she keeps her foe grounded, that's when she shines, since this gives her the opportunity to brew the mixtures she desires and even set up Poison Joke patches. Of course, you can also focus on providing the ideal mixtures for your teammates while remaining exclusive to Poison Joke when it comes to weakening your foes. You'll still want to, you know, kill your opponent. But you can make it easier for yourself and your teammate when you actually utilize your cauldron and mixtures.

Naturally, Zecora's level of assistance doesn't just extend to cauldrons and potions; since your allies can contain themselves in the cauldron, they can use it as a pseudo shield and even remain in there while Zecora toils and troubles with a mixture; even WHILE they are inside. They can also use Parasprite swarms as platforms and helping them with recovering even more, increasing the recovery ability of certain characters while guaranteeing others with an almost certain chance of making it back to the stage. Of course, Zecora can be selfish about it and ignore her ally's needs, but chances are you can enhance the abilities of your ally in order to make your battles easier, especially if said ally is a character that can cover Zecora's weaknesses well. So where does Zecora stand otherwise? Well, she can create her Joke-brand potions to screw with the foe, push her cauldron around as a threatening KO machine, and keep them on the ground all the while. Naturally, she'll need to be more careful as she doesn't have someone watching her back- or more accurately, her head- but she still stands as a major threat if the foe doesn't take her seriously.
 

half_silver28

Smash Ace
Joined
Apr 25, 2008
Messages
862
Location
MYM, Ohio
I know you want my help because I'm so good!


Yuffie Kisaragi is an optional playable character in that one game everyone has an opinion on, Final Fantasy VII. Yuffie appears randomly in wooded areas on the world map as an enemy, and once defeated, the player can convince her to join the party. She is one of the quickest characters in the game and can attack from a distance using her giant 4-sided Shuriken. The youngest party member in the game, Yuffie is the most energetic and upbeat of the group. She also has an affinity for theft, both in and out of battle. Yuffie has an obsession with Materia: crystals filled with magical energy that grant their holder various abilities. She makes a habit of stealing Materia in order to restore gl-


Hey! Stop talking about me behind my back!


. . .wait what? You mean you're-


That's right! I am the champion of the earth and the sky. I am the conqueror of evil. The single white rose of Wutai. Yuffie Kisaragi!


Well then, would you rather talk about yourself?

Whoa whoa wait a second! I didn't mean it like that! Anyway this is just another one of those stupid movesets right? Count me out on talking about all that boring stuff.

. . .ugh, fine. But I could just handle all that 'boring' stuff ya know. You can just introduce everything and talk about whatever you want. I'm sure the readers would benefit from some input from the great Yuffie herself.

Of course I know you all want to talk to a cute babe like me, but seriously, why'd I want to go on and on for an hour talking about prone abuse?

You could get some Materia out of this too if you're lucky. . .

. . .wait really? Alright alright, you win. But you better not be lying: if you are it'll cost you - big time.


Awesome. So then, how about we start with your Stats?


Hold on, you're not expecting me tell everyone my weight are you? That's a secret!

I think your picture's sufficient for that. You're a lightweight female protagonist, thus Warlord hates you.

Well screw him then! Who needs some fat guy telling you whether you're good or not? Anyway, I'm about 5' 2" (Sheik's height) and the quickest ninja you'll ever see! (Sheik's dash speed) Consider yourself a cheater or just plain lucky if you manage to catch me! Naturally, I'm just as agile as I am quick (fast dodges, able to wall jump) and I can even out-jump that blue fox guy! (able to jump a hair higher than Lucario) I'll give these Brawl guys a taste of pain a-la Yuffie!

. . .that'll do.


Now let's move onto Specials, and you can talk about your favorite thing in the world. . .


Neutral Special: Materia
Of course! I've got quite an impressive collection of Materia if I do say, and I know how to use it! Basically there are 5 types of Materia: Magic, Summon, Command, Support and Independent. Magic Materia enables spells, Summon Materia obviously summons things, Command Materia enables specific actions, Support Materia adds additional effects to stuff and Independent kinda deals with a lot of stuff: stat buffs and auto-abilities and such. There's also White and Black Materia, buuuuuut we don't have to get into that. For these Brawl fights though I only brought along some Magic Materia: I don't want to risk the rare stuff! There are 5 types of Magic Materia I've brought along: Fire, Lightning, Ice, Earth and Poison. They all pretty much do what their name says, so um. . . that's it?

You still have to say what they do, Yuffie.

Oh come on! Do I really have to explain EVERYTHING to these people?


Pretty much. But I guess I can just go over these real quick myself. Materia are pretty much items, but are unique in the fact that they can never run out of ammo and never disappear unless specifically thrown away. This input causes Yuffie to pull out one of the aforementioned 5 Magic Materia at random: since all Magic Materia are green in color, you'll have to test it to figure out what type it is. Pushing this input while Yuffie is holding (one of her own) Materia will cause her to stash it away over half a second. Unless otherwise noted, All 5 types of Magic Materia are held in front of the character and shoot out their respective element when used. All can be angled 45 degrees up or down too.

Fire Materia acts like a fire flower with a bit more range, but can only be held out for 2 seconds at a time. Hitting the ground with it will light a Kirby-sized patch of it on fire for 3 seconds. Ice Materia is similar to the ice from the Ice Climbers' down B, but with 50% more range and can only be held for 2 seconds. When foes get frozen by it, they stick to the ground instead of randomly being boosted up into the air. When concentrated on the ground for a second a patch of Brawl ice that lasts for 15 seconds can be created. Lightning Materia shoots out a bolt of electricity half a BF platform long that deals some damage and stun similar to ZSS's paralyzer. It can also electrify metal platforms for 10 seconds, lightly damaging foes and stunning them for the usual amount.

Poison Materia shoots out a smoke ball-sized ball of green gunk that can travel 3/4ths of Battlefield. This deals a small amount of damage and covers foes in gunk, dealing 12% poison damage over 4 seconds. If the gunk hits the ground it sticks around for 5 seconds and causes anyone who dashes over it to trip and take 5% poison damage. Earth Materia is the oddball of the group: it causes a 1/2 BF platform patch of ground one character length in front of the character to shake violently for 2 seconds. If any damageable target is on or right above that patch, a Mario-sized block of earth bursts out of the ground and deals 14% damage and upwards knockback KOing at 135%.

*yawn* My gaaaaaaawd that took forever. Why do you have to be soooooo overly specific?

Because you will be bashed for being a poorly thought-out set and ranked 2 stars otherwise.

Ugh, this is turning a real pain in the ass. . . it's like keeping Cloud out of trouble but worse. . . *sigh*

Speaking of specific, any character that is attacked for 10% or more damage while using a Materia automatically drops it. So even though the magical orbs belong to Yuffie, she can still lose them.

And that's why I didn't bring along any rare Materia! I mean, it's not like I'll lose them anyway, but still, I've got more important things to use rare Materia for!

Side Special: Cross Shuriken
I might have a lot of Materia, but my main weapon is my good old Cross Shuriken! I'll toss it right at the bad guy's face (the throw can be angled 45 degrees up or down); it doesn't matter how far away they are, I'll still be able to hit 'em! Even if they dodge it the first time, it'll boomerang back and smack them when they least expect it, returning to me afterwards. Pretty cool, huh?

The giant shuriken travels the length of FD at Yoshi's dash speed, looping around over .7 seconds to return to Yuffie's current location. This deals 12% damage and moderate knockback that won't KO until very high percents. If Yuffie doesn't grab the Shuriken when it comes back, it'll take 5 seconds to respawn in her possession, depriving her of all Shuriken moves until then.

Naturally, I can equip my Shuriken with Materia too! With Materia in hand, I'll put it in the middle of my shuriken before throwing it. This'll add the powers of the Materia to it: ya know lighting stuff on fire, freezing stuff solid, all that!

Each Materia generally keeps its effects in-tact when used with the Shuriken: Poison deals the most damage, and Fire and Earth deal the best knockback (KOing at 150%). Ice has a good chance to freeze and Lightning stuns. Yuffie's Shuriken automatically rebounds back to Yuffie upon hitting the ground or a wall. This fact is important to consider when she equips it with Materia. Aside from poison, all the Magic Materia affect the ground or walls in the same manner they normally do upon a collision. Earth Materia doesn't cause a pillar of earth to come out though, it just lightly damages and stuns enemies who get caught in the ground's shaking.

Once the Shuriken returns to Yuffie, the Materia remains in it until it is removed by hitting B. Until then the Materia serves to buff the damage of all Shuriken based attacks, or have a chance to deal increased stun in the case of Ice and Lightning. If a Materia-equipped Shuriken is deflected by an attack (regardless of the Shuriken being used as a projectile or physical attack), the Materia falls out of it as it returns to Yuffie. This can be bad if there's a Materia in there you don't want the foe getting their hands on.

So what if they get one Magic Materia; I've got hundreds of 'em! And besides, I'll just take the thief out and get it back easy!

Um Yuffie. . . you're a thief yourself.

Hey quiet! They aren't supposed to kn-. . . I mean, I'm no thief! You- you jerk!

Up Special: Escape Artist

The ninja clan of Wutai is taught to strike hard and fast when the bad guys are least expecting it and make a quick getaway, and I'm the best when it comes to that! I'll throw down this smoke bomb. . . which is more like a bag filled with dust, but details, details. A bunch of smoke covers me and everything around me, while I slip unnoticed into the background. From there, I'll be able to run around in secret: I'm practically invisible! I can pop out and smack my clueless opponent around, or I can even set traps back there for them; something we'll get further into later on. They won't know what to expect at all. . . pretty scary, huh?

This move has a lot of start lag and can be interrupted: don't think you can use this as a pseudo-counter. Yuffie can stay in the background for 7 seconds, and will be unable to use this for 25 seconds afterwards. Yuffie is invisible while in the background, but background-hitting moves can still knock her out of this early. If a foe dodges into the background they become vulnerable to Yuffie's attacks. Spot-dodging while in the background will cause Yuffie to jump back into the main plane for a second, taunting the foe if no other input is given, before returning. If an attack input is hit right as she dodges, she will perform that attack before returning: if she hits a foe, a simple tap of A following the move will have her remain in the main plane permanently.

And Yuffie briefly mentioned traps: she can set said traps in the background with their normal inputs. Background traps, like Yuffie herself, are invisible, and they activate when foes spot dodge or roll into them. Last of all is the smoke itself: the smoke lingers for 5 seconds and covers up everything in a Bowser-sized area. Yuffie could pop out and set a trap there, which would be covered until the smoke clears. When this is used in the air, Yuffie activates the smoke bomb faster than usual by kicking it. This releases only half the usual amount of smoke. Yuffie does not go into the background this time, and she can use the move again after only 10 seconds. What this does do is refresh Yuffie's second jump (a fairly good one).

More booooring details. . . but yeah! Not only can I kick some serious butt, I can outwit just about anyone! Great ninjas aren't just strong and fast, they're cunning and resourceful too. "Strength without determination means nothing, and determination without strength is equally useless." My old man and I may not have the beeeeest relationship ever, but he manages to say something smart every so often.


Down Special: Grenade
These may not be as good as Materia, but there are plenty of times when I just need something that goes Boom! I've gotten a ton of these from careless Shinra soldiers in the past: they'd sometimes just leave the things lying around! Can you believe that? I'd almost think that they did it on purpose, Shinra being the slimy bastards that they were. Anyhow, I'll hold onto the grenade and toss it to the ground when-

. . .this is just Snake's neutral special. Throw the grenade with B, shield to make it drop to the ground. Exploding 2 grenades next to each other (or exploding one next to an unexploded one) creates a stronger explosion that KOs at 110%, but that's about the only difference.

That's not it: mine's totally different! I can make grenades take longer to explode by holding them for a while: if I hold one for 5 seconds, it'll take 15 seconds to explode! You do the math!

It's still pretty similar though. Smart usage of this move can make every lingering grenade a ticking death trap, ready to be activated by another thrown bomb. And yes, you can freely set and throw grenades while in the background.


Standards


Neutral A Combo: Rapid Strike
. . .I reeeeeeally have to explain THIS too?

You do.

*sigh* whatever. . . I smack the bad guys with my Shuriken a couple times, and after they're hurting good, I spin it around in front of me and tear 'em up.

The first two hits deal 3% and 4% and very small knockback, and the spinning of the Shuriken deals multiple hits of 1%. This can be held out indefinitely: while the priority is terrible, it tears apart shields quickly due to how fast Yuffie spins it.

I'd rather be talking to VINCENT right now. . . even that'd be more exciting than these stupid numbers.

If you're that bored why don't you just call him?

Um. . er. . . I didn't mean it like that. He's not my boyfriend or anything. . . and besides, the jerk won't even let me call his phone!


. . . if that's true, when did this happen? *shows this to Yuffie*

How'd you even get that?! I was just screwing around; that doesn't mean anything!

Screwing around, right.

. . .

Dash Attack: Greased Lightning
This attack here is a "Limit Break", basically a really, really powerful attack! After going into a sprint, I'll bring my Shuriken back behind my head and smash it in front of me with all my might, hitting the ground and probably the bad guy's head along with it. This does some major damage and just might knock them out in one shot! Don't underestimate my strength just 'cause I'm nice and petite!

There's really not much I can add to that: this deals 16% damage and knockback KOing around 120%, being one of Yuffie's better KO moves. Yuffie dashes forward at double her normal speed for a moment as she readies the move, giving this some lag. She suffers the same amount of lag upon a miss, so don't flub this.

I won't be missing through: especially if they're running scared! They won't see it coming!

Indeed, this can be a nice way to punish rolls if Yuffie's dashing at them. She can also punish shields with this thanks to some great shield damage and shield stun/push.

Forward Tilt: Bear Trap
So I guess you have a 100/0 against Minimum Bear.

I didn't understand a word of that ya know. Obviously these kinds of traps are only supposed to trap animals, but they'll work on people just as well. I'll toss one of the metal clamps out just a bit in front of me, where it'll stay til some poor sucker steps on it. Once it clamps down on 'em, they'll have a hard time walking, jumping or doing pretty much anything with their feet. Hehe, might be pretty funny to see them stumble around and stuff. I can even leave a little something extra for them inside the trap: a grenade! Boom baby!


Yeah. . . if a grenade is placed in the bear trap, it'll explode when the trap snaps shut, blasting them into the air in a vulnerable position. The trap normally deals 7% damage and some stun as the victim screams in surprise. Foes with a trap on their foot lose 1/3rd of their dash speed and half their jump power power, and have their trip rate tripled. Additionally, they have a 10% chance of tripping instantly upon inputting a roll. They have to stand idle for 1.25 seconds to remove the trap from themselves (it disappears after removal). Yuffie can only have 3 bear traps out at once (this number increases on large stages).

Also, Yuffie's use of Materia gives her unique opportunities to. . . alter her traps in different ways.

Alter my traps? What are you getting at?

For example, hitting a bear trap with fire from the Fire Materia for a second will superheat the thing for 5 seconds or so, increasing it the damage and stun it deals. Hitting one with Lightning electrifies it for 7 seconds, making it deal a ton of stun. The shaking of the Earth Materia causes the trap to sink partway into the ground, making it very difficult to spot. Poison Materia unfortunately, does not affect it. Of course, hitting the trap with the Shuriken while it has Materia in it spreads these effects too (or hitting the ground near it in the case of Earth Materia).

That. . . makes sense? . . . I guess? But that sounds kinda fun too; I'll have to try that!

Using that Shuriken of yours, you can alter your traps while attacking. But there is a downside: Ice Materia actually freezes bear traps solid, turning them into moderately powerful throwing items. I guess if you want to throw them at people that works, but they no longer function as traps.

Laaaaaaaame.

And like I hinted at, all of Yuffie's traps can be altered in some way using Materia: in both positive and negative ways. So while Materia can help you out, it can also provide foes with an effective counter to your traps.

Up Tilt: Spinning Star
I seriously JUST explained this. . . this is so stupid. I spin my Shuriken above my head. That's it, really.

This attack IS pretty much generic: it hits 2-3 times, dealing 8-9% damage and very low upwards knockback. It can combo into itself at lower precents. Besides being generic anti-air, it has another use that will become relevant as of the next move.

Down Tilt: Ensnared
I can't help but laugh my ass off when people fall for this one. Anyway, I'll crouch down and toss a net on the ground, and then throw a rope into the background to hold it in place. When a bad guy steps on it. . . they'll find themselves hung out to dry! They'll be stuck in the net above the ground for a while, so I can do whatever I want to 'em! They can consider themselves outsmarted by Yuffie: the greatest trap master of Wutai!

This trap doesn't deal any damage on its own and takes a second to set up, limiting its usefulness. Yuffie can only have two of these out on a normal stage. When caught in the net, foes hang one Mario height above the ground, having to escape at 1.5 times grab difficulty. If they get caught by one of these traps in the background, they'll end up hanging over the main plane, not the background. Foes in the net can be attacked for full damage and do take knockback, though in this case the net swings the victim back and forth. If hit repeatedly or hard enough, the net will flip over, causing the victim to tumble to the ground. This deals 10% damage and leaves them in prone for a second if they were mashing to escape at the time.

Here's where the up tilt (and other Shuriken-based moves) become relevant. Using the up tilt right under a net will actually cut the net open, causing the foe to tumble out as if the net was flipped. This probably makes flipping the net a waste of time unless the foe's got high damage. The sides of the net can be cut open too, but all that does is make twice as easy for the victim to escape. On that note, any attack with a sharp weapon can cut open the net.

And finally, we get to Materia effects. Fire actually destroys this trap, so foes will want to get their hands on Fire Materia if they're sick of this one (Fire Materia can be used while caught in the trap by pressing B, destroying the trap at the cost of dealing 5% self-damage). Poison Materia will coat the net in green goop for 10 seconds, making it deal 2% per second to trapped foes. Ice coats the net in ice for 10 seconds, causing foes to become frozen upon being ensnared. They have to unfreeze before they can try to escape, extending their stay in the trap. Earth Materia hides the net underground, same as for the bear trap. Lightning has no effect on this trap.

*yawn* What a boring story.


Should've brought something to read: we'll be going through this same song and dance for every trap in your arsenal.

This had better be worth it too; Reeve'll be mad if he knew I was slacking off!


Smashes


Forward Smash: Deathblow
And yet another attack that I shouldn't even need to explain. I slash at the bad guys with my Shuriken, knocking them far, far away. Hurry up and handle the stupid technical stuff.

All this stupid technical stuff is needed to make this move relevant at all, you know. This deals 16-27% damage and knockback KOing at 135-110%. Aside from being the basic gtfo move Yuffie desperately needs, this can be used to cut nets like every other Shuriken attack. This move deals even better knockback with Fire or Earth Materia equipped, giving Yuffie a chance to actually KO early.

Up Smash: Somersault
No matter how good a ninja is, there'll come a time when you're surrounded by enemies with weapons drawn, and things are looking bad. But for me, I skip that last part and just pull out this little trick to knock 'em all out! I jump up and attack with a lightning-fast flip kick, stretching out as far as I can to make sure everyone gets a of piece of my attack! Even if I'm not surrounded by baddies, I can dash into a crowd and use this to knock their heads in. They won't even see it coming!

This move does have some stellar range when used out of a dash, as Yuffie shorthops half a BF platform forward as she attacks. This move deals 15%-25% damage and knockback KOing at 160%. As you might expect, this move has a rather large hitbox that hits all around Yuffie. Considering Yuffie is vulnerable to her own traps, this is a good way for her to hop over them without stopping her forward movement and attacking at the same time. If her trap(s) aren't visible, jumping over them with this instead of an actual jump may leave foes wondering if Yuffie is merely attacking them or dodging one of her own traps at the same time. And also. . . isn't this one of Tifa's attacks?

Um. . . sure, in a way. . . I'll admit that Tifa's pretty awesome. But I didn't steal this from her! I adapted it! Tifa might be able to hit harder, but my version's way quicker! You gotta use what you got anyway, be true to yourself.

Down Smash: Pitfall
This is without a doubt the sneakiest trap I've got in my arsenal: it's pretty much invisible! I'll kneel down and dig a quick hole in the ground, covering it up when I'm done. Then I just gotta wait for a bad guy to walk over that spot; they'll suddenly find themselves eating dirt! I can just go over and smack 'em while they're trying to get out.

Aside from trapping foes, this deals 12-18% damage and traps them for slightly longer depending on the charge. When set in the background, it will be activated by rolls and dodges and trap foes back there. If a foe gets caught when they have a bear trap on their foot, it'll take them 1.25 times longer to escape. Only one of these can be set on a normal stage, but its invisible nature makes it incredibly versatile. Setting a bear trap on top of the pitfall can set up some evil double-trap shenanigans, or you can lure a foe over with some Materia that they really want.

Hey wait no! I'm not tossing my Materia around like dog biscuits! Though I'll admit that's a pretty crafty idea.

I never said you had to. . . Anyway, on to the actual interactions with Materia. Fire and Lightning don't affect it directly. . . unless the trap is on a metal platform, in which case it takes foes 1.25 times longer to break out because of the platform being electrified. Ice doesn't directly affect the trap either: though spreading ice over it and around the stage does make it easier for foes to slide into it. The shaking caused by Earth destroys the trap, filling in the hole Yuffie dug. Any character holding Earth Materia can escape instantly by using it, though they will end up in prone as a result. The green goop from the Poison Materia seeps down into the hole, causing foes to take 1% damage for every second they remain stuck.


Aerials


Neutral Aerial: Barrier
I kinda lied a bit when I said I only brought 5 types of Magic Materia: I've been saving my Shield Materia for just the right moment! I'll pull out the Materia and use it to make a pretty blue shield around myself for a couple seconds that'll block anything!

Block anything? That shield only blocks attacks that do 10% damage or less, and any move that deals more simply has its damage decreased by 25%, doing full knockback otherwise. There's also some start lag to be aware of.

You just haaaaaad to spoil it, didn't ya? Part of being a ninja is staying mysterious and making your enemies FEAR you; how can I do that if you reveal all my secrets?!

Well sorry, but I have to list off all the effects of your moves, positive or negative. The readers are expecting it. Anyway, Yuffie's shield lasts for 2 seconds and stays with her even when she lands. She puts away the Materia afterwards, and cannot use this again for 4 seconds. She can also take down the shield early by repeating the input. Foes suffer some stun when their attack is blocked by this, giving Yuffie time to take down the shield and counterattack. Yuffie also becomes immune to her own traps when the shield is up (they will not activate at all): useful if she's having a hard time moving through them or has no choice but to land on one.

Riiiiiight. I'd never forget where I set a trap; and even if I did, I know exactly how to avoid them. I grew up Wutai in case you forgot.

There's the players to consider in this too; not everyone can be as observant. If hit by an attack that deals more than 10% damage, Yuffie drops the Shield Materia. So be careful, less you give your foe a new toy to play with (the Materia acts as a normal item for foes, Yuffie immediately puts it away if she picks it up).

Forward Aerial: Repeating Kick
What's there to say here? I can kick real hard and real fast, so I do that. I kick the bad guy right in the face! I mean, it doesn't knock them back that far, but that doesn't matter. What does matter is I'm able to kick 'em again! I've really got it made if they get caught in a net trap: I can juggle 'em back and forth without flipping the net. That's some good old Yuffie-style pain!

This move deals 6% damage and very low knockback, though it scales up to medium knockback at high percents. As Yuffie mentioned, this combos into itself at low percents, and can be used to abuse foes in nets thanks to its speed and low knockback. When they do escape from it, the direction they drop is influenced by where the net was swinging. This fact can be used to drop them into another trap or off-stage to be gimped.

*laughs* There's nothing better than seeing a stupid bad guy go from one trap right into another.

Back Aerial: Reverse Star
Not this boring stuff again *sigh*. . . can you do this one for me? Pleaaaaaaaase?

. . . *rolls eyes*

Come on, say something!


Something.

*slap*

Augh! Fine, fine! Yuffie attacks behind her with a vertical strike from her Shuriken, bringing the weapon from above her head to a slight downwards angle. This deals 11% damage and knockback KOing at 140%. This move has some end lag, but Yuffie keeps the Shuriken held in front of her during it: the weapon spinning to deal 1% and weak knockback. Though basically any move can hit through it. This move can cut through nets too. The spinning Shuriken notably takes a long time to fully cut through nets, so it can be used to pile some damage on a foe that will escape quickly anyway.

Up Aerial: Tightrope
Oh, this trick! One of my favorites. I toss a rope above me into the background, connecting it to. . . well, I'll get to that. Once I land, I'll connect my end of the rope to the ground with a kunai knife and it's done. Now I've just got to activate it at the right time: either by waiting for a dumb bad guy to attack or dash past the rope to break it, or just cutting it myself. Half a second later, a big cage drops down on them! Yep, that's what I tied the rope to in the first place: pretty neat huh? Even if they try to dodge it they'll still get caught: I mean it when I say this thing's big. Unless they can bend metal, they're not gonna get outta there!

This IS assuming that you catch them in the first place. The cage is Marth's height (taller chars hunch over when caught) and slightly wider than Bowser, and it still traps foes if they're in the background at the time. This is also the only trap that can catch multiple foes at once. Like Yuffie said, the trap is activated when attacked by either Yuffie or the foe, or if the foe (not Yuffie) dashes past it. The cage falls right down at the location where the character stood when they cut the rope, unless they used a disjointed/projectile move, in which case it falls right where the rope was tied. While unlikely, if the side of the cage specifically hits a foe, they get wrecked. They take 25% damage and knockback that KOs at 95%. When set in the background the rope is invisible, and is activated when the foe rolls or dodges past it, attacks it, or if Yuffie attacks it. The cage still falls into the main plane, and traps foes in both the main plane and background as usual. Foe will know if they activated a trap this way, as they'll hear the sound of the rope breaking.

This is gonna take forever isn't it? I should just call Tifa. . .

Whatever. When trapped in the cage, foes have two ways to escape. They can deal 60% damage to the bars to bend them, or they can try to flip the cage over by using low attacks. Low attacks lift up that side of the cage, and further attacks against the lifted-up side will eventually cause the cage to flip over on its side completely (it sticks around as a stage hazard for 10 seconds after). There really isn't much Yuffie can do to a trapped foe other than attack them and/or the cage. The foe can pretty easily move out of the way of her attacks, and attacking the cage just barely inches it forward. Either way Yuffie will damage the cage and make it easier for the foe to escape.

*on cell phone* Cloud did whaaaaaat? You've got to make him start leaving notes or something, seriously!

Of course this is just under normal circumstances. If there's ice under the cage (which Yuffie can do), the cage will slide 1/3rd of a platform forward with a good hit. If you can slide the cage offstage quickly, the foe's pretty much a goner. The cage is a hitbox while sliding that deals 5% damage and average knockback. And of course, there's the direct Materia interactions. Using Fire Materia on the cage for 2 seconds superheats it for 10 seconds, causing foes to take 4% damage whenever they attack or touch the sides. Lightning electrifies the cage for 6 seconds, causing foes to take 2% damage and brief stun whenever they attack or touch the sides. Using Ice on the cage for 2 seconds. . . covers it in ice for 5 seconds, making it act as if it were on ice when attacked. Earth Materia only does the shaking part, but it also causes the cage to fall back down if it was partway flipped, foiling foes' attempts to escape. Poison does nothing special. As far as the rope is concerned, Fire, Lightning and Poison simply cut it while Earth does nothing. Ice, however, freezes the rope in 2 seconds, making it a solid obstacle for 10 seconds. This makes it so only attacking the rope will activate the trap.

Regardless of the rope being in the main plane or background, Yuffie can grab onto it and climb it like a ladder. She can use her specials minus Up B while on the rope, as well as a generic kick that deals 7% and average knockback. Foes can climb the rope too if its in the main plane, while Yuffie will jump off the rope into the main plane if she's on a rope in the background when the time on the Up B runs out. If this move is used offstage, Yuffie simply tosses the rope at the stage for a tether recovery. This is without a doubt Yuffie's most versatile move, allowing her to keep enemies on their toes, abuse them once they're trapped and KO them with the help of Materia. The rope allows her to attack from a variety of angles too, not to mention she can activate this trap from across the stage with smart use of projectiles. Try dropping a cage on pitfalled foes: I'm sure they'll enjoy that. Obviously there can only be one of these set on the stage at a time.

Well that's good timing. . . that DID take forever, god. And Tifa said she doesn't own that one move too, so I didn't steal that!

Even I'll admit that took way too long. And goddamn we have less than 3 hours to finish this FUUUUUUUUUU.

Down Aerial: Kunai
You'd never catch a Wutai ninja dead without some of these! I toss about 4 or 5 kunai knives down at the baddies, hopefully hitting with every one of them. Aside from cutting up bad guys, I can activate my cage traps with these too.

Yuffie throws the kunai below her and forwards at a 30 degree angle in a tight group, dealing 3 hits of 4% damage and light downwards knockback along with some nice stun. This also deals some good shield damage and stun. The knives stick in the ground upon hitting it, and stay around for 10 seconds strictly as a visual. Maybe if the player's having a hard time remembering where some traps are, you can use kunai to mark it. Or you can just mark random spots to make foes guess.


Grab & Throws


Grab and Pummel: Theft
I um. . . grab for my grab. Once I've got the bad guy up close (and distract them with my cute charms), I don't beat on them like those other guys. Instead I just reach into their pockets and see what's in there. . . Materia?! They were using Materia this whole time? Pssh, at least they could be honest about it.

Yuffie indeed grabs for her grab, pretty basic. As for stealing Materia from her foe, the Materia is a physical representation of an attack or ability that the foe has. She ends up stealing one of the 5 Materia types that Yuffie mentioned waaaaaaay back in the first move at random: Magic, Summon, Command, Support or Independent Materia. If she takes Magic Materia, the foe is robbed of a specific attack that uses a magical element or magic in general. Summon Materia (red in color) makes them lose the ability to summon minions or other items out of nowhere (ICs ice blocks count). Command Materia (yellow) robs the foe of a specific action: it could be their shield, roll dodge, crawl, grab etc. Support Materia (blue) robs all damage-dealing attacks of any effects besides damage and knockback/stun, screwing over foes with specific mechanics. Independent Materia (purple) causes a random stat besides weight to be nerfed by 1/3rd. Yuffie lets them go after this, in possession of the Materia. Assuming the foe wants their attack/ability back, they'll have to get the Materia back and stash it away again.

Yuffie or any character (besides the one that was robbed) who uses the Materia is granted an attack or ability related to the stolen attack/ability. Magic Materia will take on the effects of one of the 5 types that Yuffie carries if an elemental attack was stolen. Otherwise it just take on an element at random. A dark-based move results in a dark-purple Poison clone and a light-based move results in a white Lightning clone. Summon Materia basically gives the ability to summon the character's weakest minion (Satana's pretty screwed here) or perform an item-summoning move. Command Materia enables the stolen ability on the character holding it assuming it's an ability they don't normally have. Yes. Yuffie will be able to glide. As will Onix. Support Materia enables a stolen move effect at random on the next 3 physical attacks the holder attempts. Independent Materia buffs the same stat on the holder it nerfed on the victim by 1/3rd. Yuffie can load this Materia onto her Shuriken, but only Magic and Support Materia will add effects to it (Support adds a random move effect). This Materia can make better bait depending on what is stolen; thus strategies based around luring foes into traps with it become more relevant. Yuffie can only steal from a single foe twice in one stock, and if she throws the Materia off the stage, the foe will regain their lost moves/abilities in 7 seconds.

Now you're really starting to sound like Vincent . . . if he talked 5 times as much, jeeeeeeeeze.

Just hold for gods sake, we're almost done.

Forward Throw: Throwdown
Once I've robbed the bad guys dry, I've got nothing to do except throw 'em away. And I. . . do that.

This is just a generic throw that deals 9% damage and medium knockback. Aside from the obvious throwing the foe offstage, this just knocks them away so they can find their way into more traps. This throw can also be angled down slightly to put foes into prone if they don't tech: and they might be reluctant to tech or roll away if they're afraid of background traps.

Back Throw: Ground Bounce
I pretty much just throw them again, except right into the ground for some major pain! That'll keep 'em busy for a bit so I can pummel them some more!

Yuffie tosses them into the ground behind her, turning around in the process. This deals 6% damage and low upwards knockback that can be easily comboed off of at low percents. Fire or Ice Materia can trap them in the air for a bit with multiple hits if Yuffie's got one of them. Or you can just let hit the ground and land in prone, at which point they're likely to tech/roll into a background trap.

Up Throw: Shuriken Upper
Now I'm REALLY ready to put the hurt on the baddies! I'll toss them up a tiny bit before jumping into an uppercut with my Shuriken, blasting them into the sky! They'll be in a whole bunch of pain if they can't recover quick enough too.

Yuffie jumps a bit higher than a shorthop during the attack, dealing 10-12% damage and upwards knockback KOing at 130%. Yuffie can cut ropes with this, which, with proper spacing, can set up foes perfectly to be trapped in a cage.

Down Throw: Tripped Up
Instead of smacking the guy around, I'm just gonna mess with 'em a bit. I let go of them and quickly kick their feet out from under them, putting them right on their ass! Of course when you're facing someone as fast as me, you won't have a chance of getting away after falling down.

This deals 5% damage and obviously leaves foes in tripped. Again, this puts them in a bad position as they either have to risk rolling into a trap or get up on the spot and risk being hit by Yuffie.


Final Smash: Knights of the Round
There's actually one more Materia I brought along that ISN'T of the magic variety: it's a summon, and an awesome one at that! But there's no way I'm gonna risk losing a Materia this rare, so I'll only bring it out for a special occasion. . . or if the bad guys are really pissing me off. I'll activate the Materia and-

This happens. The Materia takes half a second to activate, and any foe within 2 Kirbys of Yuffie gets caught in that long animation. It deals 60% damage in total and KOs at 100%.

Ahhh. . . I had a cool description thought up and everything too. . . why have you gotta ruin all my fun?


Playstyle
We're finally at the finale. . . the playstyle section. Now we get to repeat everything we said before for people who only read this section.

Screeeeeeeew that. Can't we just summarize and get this over with?

Well I guess if they still hate the set by this point, this won't be changing their minds: I'm not HR after all. Anyway, Yuffie mainly relies on her traps and using Materia to augment them.

"Mainly"? Don't imply that I NEED to use them to win.

Seeing as you're in Brawl, you won't have much of a chance without using them: the rules are different here you know. As I was saying, Yuffie can really shut her foes' movements down with a combination of visible and invisible traps, including plenty of background traps. Many of her Materia and spinning Shuriken moves deal multiple hits: perfect for abusing foes who get caught in traps or are reluctant to dodge under the threat of falling into background traps. Some of those same moves and a few others can really eat away at shields, so foes can't get away with spamming it if their dodges are taken.

Alright alright, I'll play along. When the bad guys are too scared of falling into traps to move, I'll be the one doing the moving! Being the stealthiest ninja of Wutai, I can easily dart around the traps that trip up everyone else. Of course I actually know where they are, but that's besides the point! I can attack them from anywhere with my Shuriken, including from the top of a rope.

Foes will generally have to follow her up there to get her down or risk activating the cage trap. Speaking of the cage trap, it's one of the most efficient ways to get rid of the foe. Once they're trapped, Yuffie can go to work with Fire, Lightning or Earth Materia to keep them in there, or just go with Ice to prepare the cage to be slid offstage with her victim in tow. When it comes to getting them trapped in the first place, catching them in another trap first is generally the way to go, outside of a perfectly spaced up throw. If they're caught in a net trap and you drop a cage on them they'll instantly break out of the net, though you don't have to worry about this with pitfalled foes. The other traps on their own are mostly useful for damaging foes and leading them into other traps, or into KOs if you manage to damage them enough for Yuffie's comparatively weak KO moves. This includes the grenades, which can have their fuse lengthened and placed in and around different traps to either force foes into them or in the case of the bear trap, set up a deadly time bomb for them.

Wutai ninjas pride themselves on pulling off flawless surprise attacks, and I'm no different. Once I slip into the background, the baddies won't have any clue where I might pop out from. I might be in the air, or on the other side of the stage, or right behind them: they'll learn to FEAR Yuffie Kisaragi! Of course I can set traps back there for them too, or just jump out and grab 'em!

Just to clarify, if Yuffie jumps out from the background and grabs a foe, she'll jump back into the background with them. She's free to use her pummel or grab while the foe can't see what's going on: they won't have a clue what type of Materia she stole from them if she pummels them back there. Yuffie tosses them back into the main plane when she uses a throw.

When it comes to her offstage game, Yuffie has a nice mix of offensive and defensive weapons, and two distinct ways to recover at that. Neutral air and back air provide her with defense and a good gimping move respectively, and the neutral air acts as a last resort protection from her own traps. Forward air gives her a chance to juggle foes offscreen, while the down air is there to keep them falling towards the bottom blast zone.

For the final part there's Materia to discuss. If Yuffie steals an important Materia from her foe, they're obviously gonna want to get it back and will probably to be willing to take damage in the process. Therefore she can potentially use it as "bait" for her traps, or just use their abilities against them if it's something remotely useful. Even if she doesn't steal from them, her own Magic Materia hold the keys to both buffing and nullifying her traps. Thus Yuffie can use those as bait too if need be. Of course since the Magic Materia Yuffie pulls out is random, the player can choose to concentrate on the types of traps that particular Materia buffs, or the type(s) that it nullifies so you can use the Materia as a lure. Equipping the Shuriken with Materia and throwing it is a nice method for luring foes, as their attention will turn to deflecting the projectile to get the Materia. Not to mention how it allows her to attack with magic and buff traps from far away. Yuffie's playstyle is all about being crafty: sneaking around and setting traps everywhere, controlling foes' movements through projectiles and Materia-bait and taking full advantage of the traps, regardless of whether they succeed in trapping foes or not.

. . .we're done now?

Yeah. We're finally finished.

Fiiiiiiiiiinally. Now come on, gimme my Materia! Actually, here, sign this contract saying all the Materia belongs to me first. . . . wait a sec- WHERE ARE YOU GOING?

*is far away* I lied. There's no Materia; thanks for helping me though (HIPPO).


YOU LYING JEEEEEEEEEEEEEEEERK!


BKupa666

Barnacled Boss
Moderator
Joined
Aug 12, 2008
Messages
7,788
Location
Toxic Tower
K l o a k


Kloak is a malicious spirit haunting many of Crocodile Isle's forests in Donkey Kong Country 2. Although he is technically a member of K. Rool's forces, Kloak is the only Kremling in the trilogy with no crocodilian attributes whatsoever. Shrouded in mystery and covered by a massive trench coat, Kloak floats tauntingly out of reach, tossing down an unpleasant mixture of wooden ammo and wild animals; occasionally, he has been known to toss down helpful items as well. Is this some joke of his? Kloak's frequent evil laughter at his adversaries could be an indication.

S t a t i s t i c s

Aerial Movement: 10
Traction: 10
Movement: 5
Size: 4
Jumps: 3
Fall Speed: 2
Weight: 1


While Kloak gives foes a real scare in the air, his stats dwindle from mediocre to miserable in other fields. Tricky evasion is all Kloak has against onstage attackers, really. If foes can intercept Kloak as he hovers a Marth off the ground in no-man's-land, they'll have no trouble hanging him up to dry. With the same sneaky approach in midair, however, Kloak can slowly cut off enemy options until he's placed control of the match conveniently in his pocket...his coat pocket, that is.

S p e c i a l s

Up Special - Gusty Glide
Letting out a cackle, Kloak immediately gains free aerial movement for twelve seconds. He glides through the air at Dedede's dash speed, which accelerates up to that of Mario if Kloak moves continuously in the same direction for 1.25 second. Kloak remains stagnant in midair if he stops gliding, and is able to use his Specials and aerials at any time during his flight, out of which he descends automatically after the move's timer reaches zero. With an air dodge, Kloak can exit his flight early, able to begin it again if he has air time remaining, although if he lands under any condition, he must wait six seconds before soaring into the skies again.

Although Kloak will find himself gliding back to the stage quite often to recover, this is a bread-and-butter move onstage as well. Check out the bottom of Kloak's corporal coat: a blustery cloud of leaves flutter around it as long as the move is active. When Kloak glides, this mixture floats behind him as a thin trail, as thick as a beam sword. A wind trail remains onstage for three seconds, pushing anything in its path along the trail with twice the force of Dedede's Inhale. Much like Kloak himself, these trails serve as both offensive and defensive annoyances, pushing foes into dangerous locations, or simply away from Kloak.


Neutral Special - Spiny Toss
Reaching back into hammerspace for .35 second, Kloak tosses a Spiny forward in a platform-long arc. No, he's not cosplaying as Lakitu, he actually threw wild porcupines in the game. Spinies are as large as Squirtle, meandering around at Ganondorf's dash speed without specifically targeting opponents for fifteen seconds. Of course, those quills aren't just for attracting mates (despite not being big or meaty). If a victim plummets onto a Spiny, they'll suffer 6% with set vertical knockback KOing around 150%; an additional 6% is dealt for every two Marths a foe fell, with double the damage being dealt if they fastfell. Spinies cannot be attacked from above, as their quills are not part of their hurtbox; their gameplay-oriented faces, however, are. Spiny faces still deal a light 4% on contact, but are entirely vulnerable otherwise.


Although each Spiny has a mere 10 HP, Kloak has no limit to how many Spinies he can have onstage at a time. Kloak's Spinies are his main damage-building tools, as are his interactions between them and other move elements, such as wind trails. The versatility with which Kloak can summon Spinies also allows him to coat (heh...) the stage with the cutesy creatures. He can crowd grounded foes to limit their movement, either distracting them as they knock out the Spinies, or attack more liberally while his foe is in the danger zone. This is aided, in part, by Kloak's hovering stance allowing him to pass over Spinies unobstructed while 'onstage.'


Side Special - Barrel Roll
Kloak performs a more exaggeration throwing motion, taking .55 second to roll a Kirby-sized wooden barrel along the stage. The barrel scoops up characters it rolls underneath, dealing 5% and carrying them forward as they 'log roll' upon it to avoid falling off. Barrels will travel off the stage with or without an opponent, leaving victims with little choice but to jump off before it's too late...which won't be long, for the barrels travel at Captain Falcon's dash speed. This blazing speed can also give Kloak some breathing room in a pinch.


Spinies hit by a barrel are launched two Ganondorfs into the air, losing half of their health, but creating a strong 12% aerial hitbox (or a row of them, if multiple Spinies inhabit the stage). These wooden cylinders can be destroyed with one solid hit of 25% (read: not multiple hits), although this can give Kloak an opportunity to intervene, considering the lag of stronger attacks. Two barrels can exist onstage at any given time.


Down Special - Banana Bonus
Rather than tossing down a bunch of bananas, Kloak drops a Soccer Ball-sized one out the bottom of his coat, leaving it unbruised on the stage over .75 second. The potassium-packed snack is every bit as delicious as a food item, but has drastically different properties. To eat a banana bunch, a character must pick it up, before mashing A to peel and eat the individual bananas; feeding foes heal 2% each second for a maximum of 12% recovered. The aid foes can be provided by chowing down may seem counterproductive to Kloak's endgame, although it isn't necessarily a deterrent. Foes eat and throw bunches with the lag of throwing a heavy item, giving Kloak plenty of time to react accordingly (thrown bunches can damage any character except Kloak himself). Bunches can also be used to bait opponents in need of healing around onstage, especially if they're blown around by a wind trail.


Your opponent not enough of a mindless sheep to led around? Try dropping a bunch near a crowd of Spinies instead. You see, foes aren't the only ones eager for a taste of the mellow yellows. A Spiny on the same level as a banana bunch will dash toward it at Mario's dash speed, stopping only when it reaches its destination. The first animal to reach the bananas will rapidly devour them, restoring its minimal health, if only for a little while. Because only one bunch can exist at a time, Kloak is best off using the tasty treat as a way to lure around a crowd of Spines en masse. Throw in a wind trail, and Kloak enters a dastardly Pied Piper role...bwa ha ha indeed. Foes can throw a bunch into the abyss to turn the porcupines into suicidal lemmings, as long as they avoid being dragged down by the mass of fur and quills themselves.


G r a b - G a m e

Grab - Enclose
Opening his coat to reveal utter blackness, Kloak surges forward a character width over .45 second. If a foe or Spiny stands in his path, he'll button up around them, sealing them inside. Both suffer 1% per half second automatically, as Kloak's pummel deals no damage. Spinies are unable to mash free from Kloak's body; unless he throws his minion, he'll be knocking it out himself. While holding a Spiny, however, Kloak can make use of the creature's quill hitbox, which is now transferred to his body. He can still take damage, of course, but foes will generally become much more wary with melee attacks.

Pummel - Flight of the Haunted Jacket
As the player taps the pummel input, Kloak gains the freedom to fly freely over the stage. The speed at which he does so depends on the ferocity of the button-mashing, ranging from Mario to Sheik's dash speed. While soaring around, Kloak will generally attempt to position himself in a prime throwing position, or, if grabbing a Spiny, actively pursue a nearby opponent with a coat full of quills.

Forward Throw - Cold Breeze
Kloak opens the front of his coat, forcing his victim to dash forward a platform by releasing a blast of wind after them. His wind pressure can force a single foe right into Spinies, or a single Spiny right into a foe...your choice. Because of the lack of damage, Kloak will have to rely on these interactions to get much use out of the throw aside from a situational gimp. Foes are able to attack while moving forward, which, while usually not a threat to Kloak, may be something he'll want to defend his Spinies from with a well-timed barrel. Of course, in a team match, Kloak can propel a partner forward to help them with the momentum-based shenanigans they more likely than not possess.

Back Throw - Slam and Scram
Kloak turns around and suddenly plummets to the ground, dumping his opponent in prone before gliding two platforms away from the foe at high speeds. The victim takes 5%, and can be intercepted by nearby Spinies if Kloak times the throw correctly. In desperate situations where Kloak has sustained significant damage, he can quickly put space between them, allowing him to flee to safety above Spinies where he can continue creating wind trails and other traps. Kloak will not glide away if it will cause him to float over the edge of a stage.

Down Throw - Dust Bath
Kloak's opponent drops from the underside of his coat, along with a murky brown cloud of dust. The dust is Bowser-sized initially, expanding to half the size of a Smart Bomb blast over seven seconds before subsiding. Opponents inside the cloud suffer 1% per half second, although they'll generally escape before long. Rather than building damage, Kloak's expanding dust masks the area of both him and whatever he (or a teammate) has set up...Spinies, bananas, wind trails, you name it. Its damage also deters foes from using the dust for the same purpose. Because he must first land a grab to create a cloud, Kloak has no limit to how many areas of concealment he can unleash at once, although it's unlikely he'll ever have out more than two or so at once.

Up Throw - Coattail Riding
Without warning, Kloak suddenly begins surging up, up and away at Mario's dash speed, causing his victim to slip out from inside him and become tangled in the multiple hits of his coattails, which flutter rapidly as he rises. These hits are annoyingly trapping despite only dealing 1%, carrying foes skyward, with slight horizontal DI if the Kloak player tilts the control stick around. The dastardly ghost could easily carry foes off a top blast zone if his foes didn't have the option of escaping at any time. Initiating a fastfall will free a victim from Kloak's coattails almost immediately, although there still may be the problem of Spiny quills waiting to deal extra damage below. Since Spinies themselves are unable to fastfall, Kloak may carry one around as long as it is alive, before dropping it on a grounded foe or into an aerial wind stream from above.

S t a n d a r d s

Jab - Chest Flair
Extracting his final prop of the set, Kloak tosses a Kirby-sized wooden treasure chest to the ground with moderate lag. These travel half as far as a thrown Waddle Dee, dragging back and landing on foes for 7% and knockback KOing around 165%. That box, all locked up with locks, is surely full of precious booty!


After landing, chests become solid walls with 30 HP, thick enough to prevent the vast majority of attacks from poking through. Kloak must destroy a chest once two are present before he can toss out another, although jabbing next to a chest allows him to toss it again (wind trails can push chests as well). Kloak can glide over these like his porcupine summons (albeit with less room underneath to spare), giving foes in pursuit an additional hurdle to hop before catching him. He can also imprison multiple Spinies between chests, creating an area of doom for foes while lessening the creatures' chances of an untimely death.


Dash Attack - Curving Cadaver
As he soars forward, Kloak suddenly drifts down a Kirby from his initial height; he then returns to it, before drifting a Kirby up and back down again. He repeats this pattern as long as the input is held, changing his position each .45 second, although by flicking the control stick up and down while holding A, the player can speed up Kloak’s flight.

Kloak maintains a solid hitbox dealing 8% and decent horizontal knockback while progressing forward. He suffers no damage if he comes in contact with a Spiny, giving him the option to weave through enemy projectiles while hovering over the stage or a crowd of minions. Should he ever need to approach a foe, Kloak’s potentially irregular movements can also create an annoyingly-evasive target.


Forward Tilt - Ghastly Spook
Kloak leans back, shuddering for .4 second, before leaning forward and wailing loudly. The head of his jacket produces a sound wave, as tall as Olimar, which extends forward two character widths for a second, before Kloak suffers .4 second end lag. Foes who enter this stream run away from a floating coat in terror are pushed backward through the air from the ethereal force, with no damage but twice the force of Dedede's Inhale. If the input is held, Kloak travels forward at a leisurely pace while wailing, with his sound wave shrinking down a character width each second after three he holds it. Kloak cannot float off the stage, stopping if you attempt this. A relatively run-of-the-mill way to put space between Kloak and his foes, eh?

If Kloak tries to scare a Spiny, the poor rodent will spook. It enters a stunned pose, being pushed to the end of Kloak's sound wave before dashing the same distance at Mario's dash speed. On a stage full of Spinies, Kloak will have quite a few Spinies to scare, as well as quite a few Spinies -not- to scare. If Kloak floats forward while wailing, he'll startle some animals into dashing away while leaving others walking slowly along, just outside his wave's range. This results in the scared Spinies dashing overtop the calm ones, creating a wave-esque stampede of animals for foes to put up with. At the very least, a foe will have more difficulty KOing Spinies in a pack, while at the worst, they'll be accumulating plenty of damage, possibly while being dragged right over the edge.


Down Tilt - Smother
Kloak opens up, spreading out his coat body to cover a character width, before gliding to the ground over .35 second. Foes who become caught under Kloak suffer a light 3%, entering prone as Kloak 'covers' them against the ground. Kloak remains on top of the victim as long as he holds the input, or until the victim escapes. While down, the foe is dealt 1% per second, but this is no major problem, considering the foe can escape so easily, right? Well...if Kloak is close enough to any Spinies onstage, he can smother a foe as the creatures approach, walking over the prone character.

The foe suffers no damage from the spiky nuisances, as they are shielded by Kloak's coat, but if they roll or stand up into the creatures, they'll surely regret it in the morning. Although Kloak cannot release a foe while being weighed down by minions, him pressing the foe down boosts their damage up regardless. Kloak can land on a Spiny as well, holding it against the stage while gaining a stationary hitbox from its spikes (this will rarely be used outside of team matches, where Kloak can defend himself by becoming a stationary trap). If Kloak lands on a banana bunch, however, Spinies will stop chasing after it; should a foe knock Kloak away, they'll restart the critters' riot, possibly right in their path. This threat may very well keep Kloak safe if he needs to touch down between Up Specials.

This is a fairly easily move to land on foes of medium stature or smaller, due to Kloak's hovering stance allowing him to drop on them from above, although the potential damage from enemy get-up attacks ought to temper its use to some extent.


Up Tilt - Paralyzed with Fear
Without warning, Kloak rears upwards, unleashing a screechy ghost scream in the form of a Kirby-sized sound bubble. Anyone caught in this radius, foe or Spiny, suffers 2% and enters a stunned pose, suspended in midair. Foes remain in this state a half second for each 30% they possess, while Spinies remain airborne a set second. The stunning capabilities of the move give Kloak some measure of defense against foes mounting an aerial assault, although he does suffer from a bit of cooldown, which may aid said assault if he times the scream poorly. On the flipside, if Kloak catches Spinies in his unearthly wail after they've been bumped into the air by a barrel, he can create temporary aerial shields to negate his lag.

S m a s h e s

Forward Smash - Fading Fast
This Smash operates rather differently than others, and, while not an attack in and of itself, allows Kloak to put his other attacks to trickier use. Kloak shudders in place during charge time, giving the player time to input any attacks they wish (end the charge by dodging).

Now, if Kloak uses F-Smash again, he’ll have from seven to twelve seconds to use these attacks, with a ghostly twist. After inputting a move, the player can tap and hold down A for Kloak to turn invisible during the move, pausing it down to the frame he was on when they intervened. The player now has a second to release A for Kloak to reappear, resuming the move where he left off. During this second, Kloak can float in any direction at Fox’s dash speed before reappearing. Although Kloak can disappear and reappear as many times as he wishes, he must reappear before his second is up, or he will suffer .75 second lag. This Smash does not permit stalling.

There is no limit to the number of attacks that can be inputted during charge time, although this brief time frame is not exceedingly liberal. In addition, Kloak’s charge still sets a time limit for him to use the moves he selected, which may not be long enough for him to use them all. He can use them out of order, but if he wishes to use one move multiple times, it must be inputted the same number of times first. To input an aerial, a jump must be inputted prior to the desired move.

With his vanishing antics on full display, it can become a daunting task to successfully attack Kloak. He is free to materialize around the stage, potentially striking the same opponent multiple times with the same attack’s frames. Kloak may also find himself playing defensively, pushing a foe back multiple times as he flickers away from them, making it more difficult to catch him for the easy KO. If Kloak uses an object-throwing move or a grab, he’ll stop flickering once his object leaves his clutches or a victim enters them, respectively. Although the possibilities for this move are bountiful, one of the most applicable may be using it to boost Up Special’s capabilities, allowing Kloak to make multiple disconnected wind trails all over the stage.


Down Smash - Twister
Kloak rises a Kirby as he charges, waving his arms above his head to conjure the ensuing hitbox: a spinning vortex of wind, hovering in both the foreground and background. The longer Kloak charges, the wider his Mario-high vortex becomes, stretching from one to three character widths. If a character walks (or dodges, if standing in the calm 'eye' of the storm) into the wind stream during its seven to eleven second duration, they begin spinning around the circle. The constant spinning deals 1-3% per second, forcing foes to DI out to escape. Upon doing so, they leave with a bit of force, which can KO them at 160-145%. Foes hit by spinning characters also suffer a bit of damage and set knockback, as they spin around the circle approximately once each second. Two vortexes can remain onstage at a time.

Of course, Kloak's Spinies can get swept up by the vortex as well, spinning helplessly around in a circle. Most Spinies caught in a vortex will be KOed, unless the storm is about to subside and free them. Depending on how large the storm is, the Spinies will be carried along a fairly large portion of the background, spiking dodging foes painfully rather than letting the storm sweep them up. Kloak's floating prevents him from hiding inside the vortex, although it does provide him with a safer area to fight. Foes will be wary of being spun into a dangerous location by the vortex itself, or spiked vertically into Kloak's waiting arms if he throws in Spinies. Throwing new Spinies into a stream as old ones get KOed can maintain the hitbox for longer; banana bunches can also be tossed in, causing onstage Spinies to charge in.


Up Smash - Pirouette
Spreading his arms slightly and sinking to a Kirby above the stage, Kloak begins spinning rapidly in place for 1.15 second. Upon hitting a foe, Kloak traps them in multiple hits of 2-3% (up to 24-27% with all hits) with horizontal knockback KOing from 185-170%. In a way, this is a prolonged version of ROB's D-Smash, with a slight change; if the player taps up on the control stick during the move, Kloak will rise into the air while spinning, entering his aerial state after the move finishes. Depending on how early into the move the player initiated this, Kloak can rise from one to three Marths at Dedede's dash speed. In ideal scenarios, Kloak can lift up foes he's batting around to start bringing them overtop a swarm of Spinies. If this doesn't work out, he can try rising above the punishing blows that are sure to come.

A e r i a l s

Neutral Air - Twist and Shout
Kloak spins like any other Smash character, slapping foes away with his sleeves for 8% and average set knockback. Putting space between Kloak and an opponent with his spin is important if he wishes to avoid retaliation. Because of his light weight, Kloak's spin causes him to twist his body up tightly, giving him .75 second end lag. If it weren't for the player being able to tap A during this time for Kloak to perform a follow-up unwinding spin, this would be a big chance to take. As it stands, Kloak can more effectively clear space with this second hit, even if his foe dodges the first one.

Forward Air - Dust Buster
Kloak opens up the front of his coat, exposing a cloud of dust and must from his long days haunting the woods. Expecting the exposure of something else? Well, of course...it's now visible how effective Kloak can be at positioning foes in midair. Foes who Kloak catches in his initial cloud take no damage, but are pushed to its perimeter, immobilized. He can also push around Spinies, banana bunches and chests, although he'll likely have to shorthop the move in this case. The dust has low priority, which may make Kloak wary about bringing it out too often...or not.

The size and subsequent uses of the cloud vary depending on the time Kloak goes without using it, like Wario Unremix's waft. Initially, the cloud is slightly smaller than Kirby, but after ten seconds, the accumulated dust boosts it up to slightly larger than Bowser's size. If he's impatient, Kloak will find himself pushing around a foe multiple times with a small cloud, while if he bides his time right, he can clear large areas of foes and his stage elements.


Back Air - Surprise
With no warning, Kloak flashes invisible for two and a half seconds before reappearing. Yeah, the apparent lack of a hitbox ought to clue you in to its point-blank nature; Kloak only renders himself vulnerable unless a foe is on his level, a character width behind him. In this case, Kloak vanishes for the two and a half seconds before reappearing behind his victim, wherever they are, and wailing.

This deals a jolting high priority 12% and vertical knockback KOing around 180%: high enough for Kloak to boost foes a fair distance over the stage without knocking them completely out of reach. At any time during the period of invisibility, the player can tap A for Kloak to reappear early. If the victim tries moving into a trap of their own to force Kloak into a bad spot, he can escape this way, or simply throw off the timing of his foe's dodge.


Up Air - Buttin' Up
Kloak lifts both arms up in a haunted manner, performing a very quick motion to boost foes into the air a short distance. With little priority and a payoff of only 3%, Kloak might not seem to have much use for the move. That is, of course, if he's trying to engage in combat. If he's simply trying to repeatedly juggle a foe into the air, taking advantage of their hitstun to bring them higher and higher over a field of sharp Spiny quills, the move gets the job done with needle-sharp efficiency. Use discretion to decide when to bring the foe down for the count, though; although the satisfaction of dropping foes onto Spinies from a tall height for extra damage is undeniable, knockback so close to the blast zone may be the final nail in the coffin for Kloak.

Down Air - Cover Up
The underside of Kloak's jacket expands slightly, becoming a noticeable black area under him for half a second. He is able to maneuver around during this time, in pursuit of a nearby aerialist. If his jacket bottom comes in contact with a foe under Kloak, he'll land on them, covering their upper body for half a second while hovering in place. If Kloak is dealt 15% during this time, he'll release his victim, suffering the knockback. Otherwise, he'll use ghostly power to blast them toward the ground, dealing 8% in the process. You can probably envision the look on the victim's face when they see a woodland menagerie planted below them (or no stage at all, of course). Depending on their damage levels, Kloak or his foe can move side to side during the half second startup, potentially altering their fate for better or for worse.

F i n a l S m a s h

Final Smash - Gusty Gulch
Kloak lets out the echoing wail you'd expect him to during a super attack, raising his arms to take full possession of the wind onstage. As Kloak floats in a stationary position, invulnerable, the player can direct the control stick left or right to unleash winds at a powerful rate. These deal 1% to foes per second, pushing them around with triple the force of Dedede's Inhale. While foes can fight back by running against the wind, Spinies sure cannot; Kloak retains access to Specials during the super attack's twelve seconds. Throw a crowd of Spinies into the storm, and you've got a whole blend of trouble floating around erratically at high speeds, forcing foes to air dodge and lose traction or get spiked. A stray porcupine will occasionally float in from the side of the screen, biding Kloak more time to direct the wind itself. Score KOs through either Spiny quills or standard gimps to your liking, but be sure to limit your blowing toward the end of the attack to retain a few Spinies onstage to continue the battle with a better hand.

P l a y s t y l e

Kloak's idea of fear might be more comically twisted than that of a horrible monster, but it's certainly just as effective at overwhelming foes as a plethora of shadowy illusions. Spinies can induce a horrible sense of claustrophobia if Kloak continues filling the stage with them as he floats around, while his wind trails hinder his opponent's path to freedom even further. With Kloak's light weight, he'll have to play a highly evasive game, taking full advantage of his aerial maneuverability and summons to avoid being KOed early in the match. Fortunately, his sneaky tactics can be used to his benefit, in addition to his foe's disadvantage.

In a way, Kloak is a momentum character totally distant from those who pick up speed around the stage like madmen. Once Kloak has tossed a few Spinies onto the stage for his foes to deal with, he can start flying around, continuing to unleash minions to his liking while his foes are left to defend against those left below. While throwing the critters out is no chore, Kloak will have to do so consistently, as individual Spinies can be KOed from the front with as little as one attack, and vanish eventually anyways. The potentially limitless number of Spinies meandering around the stage do not hinder Kloak at all. His float allows him to pass over them smoothly, possibly even floating above a large body of animals to avoid enemy attacks or bait them into jumping over their quills.

Spiny quills will be Kloak's primary method for damage-dealing, without a doubt. Having a larger target onto which Kloak can drop foes onto is much of what makes crowds of Spinies as preferable as they are. With his ability to manually grab an opponent and carry them to a danger zone or repeatedly jab them side to side and skyward with aerials, Kloak's midair dominance speaks for itself. Moves such as U-Throw and D-Air can sink foes at high speeds for extra damage, while in most other cases, Kloak is able to push them down with most others, intercepting the foe as they are bounced off the Spinies' backs. His methods for manipulating both individual and large hordes of Spinies are brilliantly bountiful. Wind trails can be used to rush Spinies forward at foes, one by one, in addition to pushing them up into the air. Banana bunches can draw a whole crowd of Spinies closer together, pressuring foes into running for cover as they charge forward.

In combination, wind and bananas can be terrifically awesome: Kloak creates the trail before throwing in a banana, causing a crowd of Spinies to rush into the trail behind him and follow him hungrily. Spinies can also be caged between two chests to preserve a small population temporarily, hidden within D-Throw dust, or spun in merry circles with D-Smash vortexes. They can be dropped from above with U-Throw, pushed forward with F-Air or suspended in midair with U-Tilt after knocking them for a loop with a Side Special barrel. There should be no doubt about the maniacal extent of Kloak's Spiny management skills.

Of course, throughout all this madness, Kloak must be quite careful to avoid being caught in a combat situation for more than a few seconds. These become inevitable as Kloak must touch down between uses of Up Special, so he must plan ahead of time to prevent a devastating KO. Wind and barrels don't stay onstage long, but can create a web of obstacles foes must weave through before attacking Kloak. F-Smash is also an excellent tactic, giving Kloak means to stay in control to some degree as he flickers erratically around, battering his foe with the same attack multiple times, or throwing out additional Spinies with the safety of vanishing in his grasp. Last but not least, hovering over a crowd of Spinies offers no physical barrier in front of Kloak, but can make getting close to him a real hazard. Plus, above Spinies, Kloak is in a prime position to send them careening toward an opponent with F-Tilt or a banana. If they carry the foe offstage, all the better: the lemming-esque rodents will either finish off their mobbed victim themselves, or put the foe in a position where Kloak can gimp them with a thrown barrel or chest.

Master Kloak's control over his beloved props for both offensive and defensive purposes, and your foe will be in foe one -hell- of an acupuncture treatment.


E x t r a s

Up Taunt - Haunted Laughter
Kloak performs the obligatory taunting cackle you've come to know and possibly love.

Side Taunt - Headless H...Man
Kloak reaches up to where his head should be and feels around the hole, to no avail..

Down Taunt - Leaf It Be
A small gust of leaves circles Kloak's body before vanishing into the underside of his coat.

Entrance - There's No 'I' In Team...
...but there certainly are a pair of red ones fading onto the stage! With a dark laugh, Kloak materializes high in the air, before floating down to his starting position.

Victory Pose #1 - Fanatical Flickering
Kloak flickers around the stage, reappearing in random positions while laughing evilly. His laughter stops for the brief periods he is invisible, making it sound oddly disjointed.

Victory Pose #2 - Spiny Shepherd
Kloak is seen behind a crowd of Spinies, floating after them while raising his arms to scare them around the victory stage at high speeds.

Victory Pose #3 - Chest Scare
A wooden chest, akin to those from Kloak's jab appears. It appears ordinary for a short time, but after shaking briefly, Kloak suddenly pops out, laughing at his mischief.

Victory Theme - Forest Failure
Kloak's victory theme begins at 0:41, being the death theme from the forest levels he frequently haunts.

Loss Pose - Inanimate Object
Kloak lies in a bundled heap on the ground, not clapping but occasionally allowing his eyes to light up, revealing his consciousness.
 
D

Deleted member

Guest


Cyrus is a wizard, originating in independent game 'Wizorb.' He's a silent protagonist - not having much of a personality besides his memorable laugh, generic magic and ability to turn into a giant ball. The game revolves around the Kingdom of Gorudo, where an evil bunch of monsters have captured the King and the four "sacred children," bringing everything into disharmony. Coming from a far away land, Cyrus is said to be an expert in black and white magic, fending off the monsters from the starting point of Tarot Village and slowly driving the monsters from the land altogether. Each level is marked by a location or "world" - for example, a forest - infected by a specific type of monster (like a wolfman or slime), with twelve traditional levels and a boss fight in each world. At the end of each world Cyrus has to defeat the big bad of those monsters and purge them from that location. The game revolves around the rebuilding of Gorudo, as you donate gold you collect in levels to various projects around places like Tarot Village, slowly helping to reconstruct what the monstrous horde had destroyed.

What I've alluded to and what is going to make this set more than just Cyrus flinging around bland spells is the unique ability Cyrus has, which the game is centred around during its actual levels. Cyrus has the ability to transform himself into a ball and wand: the game is a Break-Out clone, apparently being in the Block Breaker sub-genre. In a nutshell, this means that Wizorb centres around the player simply positioning their "wand" - a big horizontal stick that travels in a straight line across the bottom of the stage - so that it keeps on hitting a ball back into play, hitting blocks and enemies in the section of the level above Cyrus. If the ball reaches below him, he loses a life and you will get a game over if you deplete them all. The meshing of RPG elements and a twist with enemies and boss fights makes this a difficult ordeal sometimes, to say the least, but Cyrus' use of magic enables him to "cheat" somewhat, giving him some control over his ball. If that's all a bit confusing, watching this video should help to fill in some of the blanks.​


WEIGHT: 5
SIZE: 5
GROUND SPEED: 3
AIR SPEED: 4
FALL SPEED: 5​
Cyrus is an old man, if you hadn't noticed - he uses his staff as a walking stick, walking being his preferred mode of transport, as his traction is greatly reduced by dashing. His aerial movement is not great, but he gains some buoyancy in the air due to his fluttering cape [nothing silly like a glide here, mind you]. Cyrus' statistics are hardly imposing, necessitating mediation rather than rushing into any mode of attack.​


NEUTRAL SPECIAL: WIZARD ORB​


Cyrus murmurs an incantation, causing him to turn into an orb a little smaller than Kirby, and his staff to turn into a large stick the horizontal length of a Ganondorf and as tall as Mr. Saturn, this taking 1.2 seconds. Cyrus will always be facing downward toward the stage, from the top blast zone - if on the ground when he uses the move, Cyrus teleports two Ganondorfs above the stage during the move. The controls for Cyrus are now far more limiting - he can move left and right at Captain Falcon's dashing speed, albeit with perfect traction. He can no longer take vertical knockback, but he still carries the same percentage bar and takes horizontal knockback as if he were in his regular human form. He cannot be KO'd - he is stopped as soon as he hits the side boundary created by the camera [not the blastzone].

Transforming back into human form is a more difficult affair, taking 2.0 seconds, but recovering Cyrus' aerial recovery options as if he had landed on the stage. Not launching your orb within 5.0 seconds results in Cyrus being forced to revert out of this form, with the same degree of lag. Cyrus can only use this move once in the air before having to refresh it by hitting the ground. Cyrus can only use his up and side specials while in this form, but gains access to a couple of choice inputs if the orb is attached to his stick:


These represent inputs that can be used if the orb becomes attached to the stick again. The first, Start-Up, is accessed by pressing the special input, causing an arrow to pop up below Cyrus that indicates what direction he will fire the orb. Cyrus is forced to use this move before he can do anything else, but it can be instantly used by double-tapping the special input, this merely releasing the ball straight downward. The orb starts off at Mario's walking speed and ricochets off of any surface - including your stick and the opponent, but not your projectiles - being redirected at an angle opposite to that which it hit the surface. Your stick is unique in this regard, though - the ball will bounce off of it at an angle dependant on what part of the stick it hit [like in Wizorb and Break-Out], so hitting the centre of the stick causes the ball to be redirected straight down, while hitting the very tip of the stick causes it to fly off at an extreme angle. Every time it ricochets, however, the orb speeds up slightly, and can become insanely buffed if trapped in a confined area for even a short amount of time, matching Super Sonic's insane speeds at its fastest.

The ball deals a wide variety of damage and knockback depending on how fast it is going, dealing between 10-30% damage and KOing as early as 60%, but most reliably KOing around 100%. The catch to this move is that Cyrus is himself the orb - he will ricochet off the side of the screen just fine [using the side boundary created by the camera rather than the blast zone], but if he goes off the top blast zone, you lose a stock in the traditional sense, forcing you to protect the ball at all costs. The opponent can, like anything else, re-direct the ball with their attacks, adding to your woes. The opponent also gains sole control over the camera, and can stretch out the boundaries, though not close them in. You cannot transform back until you have the orb back in your possession, which is a task in of itself as it's a direct interaction.

The second input, Ball Control, cannot be used when you first go into the form, but only if you re-attach the orb to your stick. This move is accessed through pressing the standard button input, giving Cyrus 5.0 seconds to merely place the ball wherever he wants, it hovering in front of the battlefield so that is invulnerable - effectively stalling the match for this amount of time, but you earned it. When the orb is released, it defaults to going downward, but can be forced to start off going in any direction with player input.​

SIDE SPECIAL: FIREBALL​


Cyrus fires a fireball from his staff (or the centre of his stick when in Wizorb form), being twice as big as Mario's and dealing 8% damage if hitting an opponent, and a full second of flinching as well. What makes this a game changer is its slowness, travelling at Ganondorf's dashing speed. The fireball will, however, continue until it hits a blastzone, dissipating if it hits the stage or a platform. You can only have up to three of these on-screen at a time, after that, Cyrus starts to fire fireballs that are half the size and that have the same damage and knockback as Mario's, but are far more spammable. By holding the input, Cyrus channels a fiery aura around his staff, causing all fireballs on screen to be redirected to where he was when he used the move, but not home in on him. Indicatively, not a move to use right off, but especially useful when in orb form.​

UP SPECIAL: WIND​


Cyrus summons a gust of wind to appear directly beneath him, or directly above him if on the ground. Cyrus gains access to the wind through the directional inputs and can use it to pull himself around at a high speed for the next three seconds before the wind dissipates, as well as any projectiles hanging around in the air. This is a good recovery, but also a way of repositioning your projectiles and pushing them into a more advantageous position. When moving around, the wind becomes stretched out to as long as Ganondorf, this length representing the sheer amount of projectiles you can actually carry around at a time, as they fill up physical space on in the gust of wind. Your orb can be influenced by the gust of wind, slightly changing its direction, but cannot be picked up by it. Unless very heavy, an opponent is affected by the wind enough that they will be pushed away by it mildly. If an opponent is heavy enough, though [and no one in Brawl is], the wind will pass right through an opponent, with any projectiles it was carrying damaging the opponent as they connect with them.​

DOWN SPECIAL: TERRAFORM​


Cyrus plants his staff firmly beneath him, creating a block as shown above in its place, of varying colours. These blocks can be created in the air and used as standard platforms, but Cyrus can only create three of these per trip to the air. On the ground, the blocks replace the stage entirely. These blocks not only vary in colour, but also in size - Cyrus can hold the input for longer, increasing the size of the block he's created from the size of Kirby, to the size of Bowser if he keeps on holding the input for 1.1 seconds. These blocks can be destroyed by opponents, having 10-20HP depending on their size.

The blocks are destroyed by one hit from your side special fireballs [two hits if they are the smaller fireballs], and one-two hits from your orb, depending on how big the block is rather than the speed of the orb. The blocks serve other purposes, but even just destroying them leaves you at somewhat of an advantage, as they remove the part of the stage they replaced, leaving a nice, useful square hole that can easily be used to get your ball up to speed with a little wizardry. By using this move on a block, Cyrus will instead use the space directly below that block, allowing you to pressure the opponent into destroying large parts of the stage.​


CURSES

As a highly-skilled Wizard, Cyrus has access to the curses that seem to randomly inhabit some blocks in Gorudo. These curses all leave undesirable effects on the opponent, but can also be stored away by Cyrus if he forces them into his blocks, merely by making them touch a block. The curse will then "haunt" that block until it is destroyed, being released, and if by an opponent, inflicting them with the curse's effects. If one of Cyrus' attacks breaks the block, however, the curse will be released and maintain whatever path it was on before being sealed away in the block. You can't have more than one curse in any given block, but if there are any empty blocks next to a full one, a curse will opt to inhabit whichever one is closest. The effects of different curses can stack on an opponent together. Getting hit multiple times by the same curse will stack its effects onto the opponent.​

DOWN SMASH: BAT CURSE​
Cyrus charges up a fuchsia-coloured aura around his staff and murmurs an enchantment, taking 1.2-2.0 seconds to charge. Once finished, Cyrus pounds the ground with his staff, causing two light-pink bats the size of Meta Knight to fly out from either side of him. If used on the stage, the bats patrol it at Mario's dashing speed, turning around if they hit an edge. These bats cause 14-20% damage on impact with an opponent, homing in on them if they come within a Bowser of them. The bats do not cause knockback, but pull the opponent in their direction for the next 2-4 seconds depending on how much they were charged, not forcing the opponent in a particular direction, but more than halving their movement if they try to move away from the bat. Multiple bats can pull at an opponent at one time, making it far harder for them to move, or forcefully pulling them in one direction. The bats last for 10-15 seconds depending on charge time.

FORWARD SMASH: SHIELD CURSE​
In a similar, but slightly altered animation to his down smash, Cyrus charges his staff for 1.4-2.2 seconds. Cyrus then holds his staff triumphantly in front of him, releasing a wave of light-pink energy that's as high as Luigi, to double that depending on charge time. The wave travels at Fox's dashing speed, travelling for the distance of final destination before dissipating. The wave causes 14-20% and no knockback, but halves the effectiveness of the foe's shield and covers it in that ominous fuchsia-coloured hue for the next 10-15 seconds, again depending on charge time.

UP SMASH: SIZE CURSE​
Again mirroring his other inputs, Cyrus charges his staff for 1.0-2.0 seconds before releasing a bright orb of fuchsia energy into the sky above him, it being the size of Kirby-Bowser depending on charge and staying in place a Ganondorf above the stage before falling back down at a slow speed, 5-10 seconds later depending on charge time, dissipating if it hits the ground [or haunting a block]. Contact with the curse deals 14-20% as usual, but also greatly increases the size of the opponent, having the same effect as a mushroom item, lasting for the same amount of time. However, their increased strength wouldn't do them any favours against you in your stick form, and certainly won't help them evade your orb, especially when their giant form makes the camera boundaries super cramped. Plus, your up special wind will now have no problem blowing right through them without pushing the opponent back at all, forcing them to bare the brunt of any projectiles that are on the wind's tail.​


GRAB GAME: FLUTTER BALL​


This move has two versions, accessed through tapping or holding the input. By tapping the input, Cyrus stabs forward with his staff, creating a small spark of energy at its tip. Anything that comes into contact with his staff or the spark is held in place, be it the opponent themselves, or a projectile, or one of your blocks. From here, Cyrus can use his pummel or a directional throw. His pummel causes whatever it was to spin wildly in place, being dealt 3% a second. A projectile will cause its usual damage, while a block will break if it comes into contact with anything while spinning, releasing its curse if it has one. If the block hits an opponent while spinning, it breaks, and deals them 4-8% damage depending on the block's size, imparting its curse upon the foe if it had one. An opponent who mashes out at this point or is released from the throw is sent off at high speeds in a random direction, starting to KO at 140%. By throwing, Cyrus merely moves the object around at a moderate speed. This enables him to use his projectiles and blocks as shields, or merely to push an opponent into a bunch of projectiles.

Holding the input causes Cyrus to spawn another orb, mimicking the one in his neutral special. This orb, however, has temporary wings, as Cyrus can fly it around the battlefield as if it had free flight, until he releases the grab or is stunned out of the move. The orb will cause damage of just 3% on contact while being dragged around like this and only minimal flinching knockback, as the force of dragging the ball along stops it from having any real momentum, merely bouncing off of surfaces and objects instead of ricocheting off them. Releasing the ball is the same as it is in your neutral special, except that it maintains a small amount of momentum if released while still moving it, rather than after holding it in place. The orb loses its wings once you lose control of it and becomes indistinguishable from your own orb.

These orbs will dissipate if Cyrus dies... and they may be a contributing factor to that, as they effect Cyrus just as much as the opponent. Having them out on the field also makes for some sweet mindgames, as Cyrus' orb is an exact copy of the rest, meaning that you have to keep an eye on which one is yours, as well as the opponent. The other orbs will bounce off of the top camera boundary, unlike yours. Yours will not always be the slowest one either, as you can always trap your own ball in a crevice or other tight area to buff its speed over the rest.​


JAB: RICOCHET​


Cyrus desperately swings his staff from side-to-side in front of him, dealing disjointed hits of 4% damage each time, though this is hard to combo. This will also stun shielding opponents and push them away a platform before they can deactivate their shield, being a good combination alongside your shield curse. Hitting projectiles with this move causes them to be flung in the opposite direction at twice their normal speed for up to two platforms depending on their size [orbs will maintain this speed permanently, however]. If nothing else, a good way to get rid of orbs that are dangerously close to you.

DASH ATTACK: SPINNING STAFF​
Holding out his staff more in front of him during his dash, Cyrus spins it clumsily like a bo, causing constant hits of 3% and flinching to opponents hit by it, pulling them along with you. This move has remarkably little start lag, allowing you to get the drop on opponents and follow up by hitting them with an unleashed orb, or a curse, as you push them along the stage. Like your jab, this move pushes your projectiles around - however, this time just pushing them a Bowser up in the air above Cyrus as he passes over them, allowing you to reposition traps like your bat curse on the ground up into the air.

FORWARD TILT: STAB​
Cyrus stabs forward with his grab in a similar motion to his grab [mindgames!], spinning and jabbing it in place and causing multiple hits of 4%. As with the two previous moves, this is a good way of positioning the foe in a very basic way, this move better for simply keeping a foe in place, or reacting to a foe who is wildly coming at you with little defence. If you perform this in front of a cursed block, Cyrus will murmur a short enchantment, causing his staff to go partially-transparent. With some slight end lag, Cyrus extracts the curse, causing his staff to glow the same light-pink as his curses. The next time Cyrus makes contact with an opponent through his staff, they will be dealt the effects of the curse on top of the damage of the staff's attack. By stabbing a regular block while your staff is cursed, you transfer the curse over to that block and your staff returns to normal.

UP TILT: BURNING SWING​
Chanting for a moment, Cyrus causes the top half of his staff to take on a fiery aura again, this time actually becoming a flaming hitbox for the duration of the move. He swings the staff overhead so that he hits the floor at the end of the move, causing 5% but also constant damage of 1% damage and flinching knockback once per second for the next five seconds, the foe taking on a burning aura. Any other opponents who stand next to that foe will take double that damage for every second they stand next to them, this also going for your blocks, allowing you to pressure the opponent around them. This is especially useful on enlarged foes. Once the move is over, the staff's flames disperse and it returns to normal.

DOWN TILT: PROD​
Cyrus uses his staff to stab the ground in front of him in a forward motion, causing any opponents standing in front of him to trip [not giant ones, of course], with fairly little lag on either ends, causing 6% damage and forcing the opponent into prone. This moves functions just as your forward tilt does if it hits a cursed block - Cyrus temporarily making the staff ethereal and using it to extract the curse. Similarly as well, you can place curses into another block, allowing you to place curses more easily locked away in aerial blocks [such as your up smash] into blocks on the ground.​


NEUTRAL AERIAL: MAGNETISM​
Cyrus stops his momentum in the air and faces toward the screen, holding his staff high above his head. Instantly, his staff creates a yellow energy shield comprised of static energy around Cyrus, as big as Bowser, that deals 2% twice a second. The move lasts for 1.0 second at default - Cyrus can prolong the move for another 1.5 seconds by holding the input, but this forces him into free fall at the end of the move, falling twice as fast as normal until he hits a platform of some kind. If an orb comes into contact with the energy shield, it will be magnetised. This means that if it comes within a Kirby of your stick [which should not be hard given that you control the stick], it will attach to the stick and you can finally use that amazing Ball Control to place it wherever you like. If a magnetised orb collides with a non-magnetised orb, the effect passes over, allowing you to magnetise your own ball and return to human form given good time for preparation.

DOWN AERIAL: ENERGY WAVE​
Cyrus points his staff downward in mid-air and after slight start lag, sends down a platform-wide beam of light blue energy that deals 5% on contact, but continues at Fox's dashing speed for a platform in length before dissipating. The wave only deals low knockback, but can be used above the edge for some disgustingly good edge pressuring. If it hits solid ground, the wave hovers above it for 10.0 seconds until it dissipates. This does not act as a platform you can stand on, but your orbs will treat it as solid, allowing you to easily trap an orb in the stage and build up its speed more easily.

BACK AERIAL: COPY​
Cyrus chants a short incantation - causing a sheen to wipe over the gem on his staff- then stabs the staff behind him, causing his projectiles and mid-air blocks within a Bowser of Cyrus to become symmetrical on both sides. This is done by duplicating them so that each side of Cyrus mirrors the other. The staff itself has transcendent priority and deals 10%, KOing reliably at 120%, though this move is very situational if not used for its copying abilities. Cursed blocks that are duplicated create a cursed block, and vice versa.

FORWARD AERIAL: THUNDER​
Cyrus charges his staff with static energy, similar in appearance to that in his neutral aerial, before dispelling in it a line of electrical energy that stretches out in front of him for a platform. The electricity deals 10% damage and knockback that can KO reliably at 150%, however, Cyrus suffers considerable end lag, making it a risky move. By using this move on an orb, Cyrus causes it to take on a spherical aura of static electricity, dealing 2% and flinching knockback to foes twice a second as well as pulverising shields, the electrical shield doubling the size of the orb's hitbox and dissipating after 10 seconds.

UP AERIAL: TORNADO​
Brewing up a tornado, are we? Cyrus takes on a similar stance to his neutral aerial, facing the screen and spinning his staff in both hands above him, summoning a tornado of sorts that surrounds Cyrus, being as wide as Bowser and as tall as Ganondorf. The tornado starts off violent and deals damage to opponents who are merely standing within it, causing 8% damage and causing the opponent to be spun off in a random direction with moderate knockback. After 1.2 seconds, the tornado calms down and slowly descends at Jigglypuff's fall speed. Any projectiles or Cyrus himself [not the orbs] that come into contact with the tornado are launched two-three platforms up into the air, depending on how high up they touched the tornado [going in lower increases how high it boosts you up], allowing you to get higher in the air more easily to prepare for your neutral special. The tornado will last for another 10 seconds in this non-damage dealing form before dissipating.​


PLAYSTYLE: MASTER OF MAGIC​
Cyrus' appearance is outwardly a frail old man, and it is an appearance that has some truth to it. Without his magic and the know-how to outsmart an opponent, Cyrus is outpaced by even Brawl's most lame ducks. Obviously you need to have a good understanding of how his orbs work, but also how to properly build up your blocks, and get your curses out without the opponent interrupting you. It's basic stuff and you have the tools to pull it off - there is versatility within the projectiles you have at your disposal, and within the tools you have to manipulate them, to keep an opponent at bay long enough to start making something actually threatening. It's simple stuff - throw out a fireball, or an orb - and pressure the opponent into dealing with it. Considering how vulnerable your grab game makes you, however, and that you have a limit on fireballs, you can't camp like this forever, and will eventually be forced to leave this mode of play, if you don't leave it voluntarily. So it's inevitable that you will have to set-up - perhaps just while fighting off the opponent initially if you're good enough, but making time for it works as well.

Making time for it is usually a matter of using your orbs smartly, and carrying around your projectiles and disjointed hitboxes enough, building up pressure in what areas of the stage you do control so that you can create time to pull off something worthy of a world-class wizard. By fooling the opponent into destroying the stage through their own attacks, or by using your fireballs smartly, you can start making the stage into an arena that naturally builds up the tempo of your orbs to the point that they aren't an issue. Once you have plenty of orbs flying around at the level of speed that becomes threatening, then you can use the time to start using moves like your back aerial, your neutral aerial and your curses more frequently, but not in a chaotic way. The opponent is bound to keep the pressure up on you at the same time, necessitating smart choices and, more key, preparation for what comes next. Just having a bunch of orbs flying around is a hazard, an once again, you will be forced out of this stage of your playstyle if it gets too hot - remember that Cyrus is as vulnerable to his grab orbs as any opponent is.

Then we reach the end of Cyrus' playstyle in a sense - his becoming a stick and orb, and being able to bat away orbs without qualms. The opponent should be in a mode of chaos at this point if you've played well, allowing you to simply mop up their remains and bloody the arena as they futilely attempt to get orbs past the top blast zone, but instead trigger a hive of traps and other such bad karma. This is the essence of Wizorb, and of Cyrus - management, intelligent play and making use of the opponent's offensiveness to turn their perceived advantage against them. This is especially true when dealing with an enlarged foe, making the match into a replica of David and Goliath. An important detail is how the camera effects your orbs' area of effect, meaning the opponent is forced to space out if you even pretend you want to use your neutral special, otherwise they are forced to retreat and widen the camera while simultaneously dodging your attacks. By attacking you and not your traps, they run the risk of allowing you to set up too well, but attacking your traps... well, it's obvious why that is bad. Play this to your advantage and wins will flow easily.

FINAL SMASH: THE FOUR SACRED CHILDREN​


Cyrus summons the four Sacred Children that he saves in Wizorb, them each representing a different element of magic. The girls fly around each other to form a circle in mid-air, shooting a light blue energy beam that spans the entire vertical length of the stage with damage and knockback similar to Lucario's final smash, this beam being as wide as Bowser. The girls will home in on opponents, but can also be controlled by holding the special input. However, the girls only hang around for 10 seconds, meaning you will have to be efficient in using them to get a KO.​
 
Last edited by a moderator:
Top Bottom