• Welcome to Smashboards, the world's largest Super Smash Brothers community! Over 250,000 Smash Bros. fans from around the world have come to discuss these great games in over 19 million posts!

    You are currently viewing our boards as a visitor. Click here to sign up right now and start on your path in the Smash community!

Make Your Move 11 - It's Over, Duder!

ForwardArrow

Smash Ace
Joined
Aug 17, 2011
Messages
503
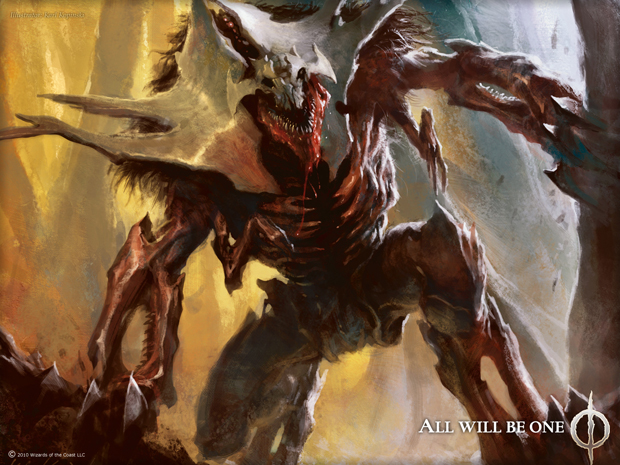
Jin-Gitaxias, Core Augur


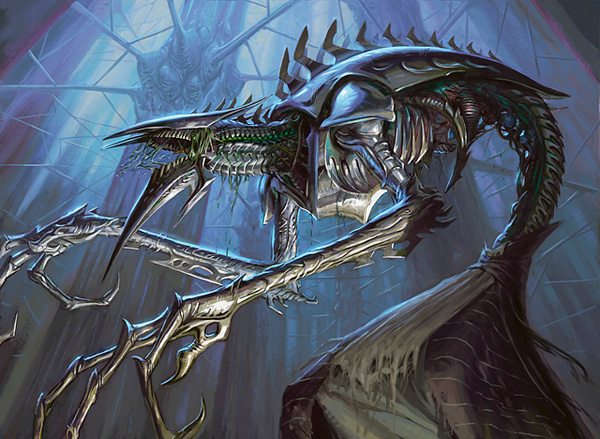
Jin-Gitaxias is the second of the five Praetors of Phyrexia, the leader of the blue faction. He is something of a mad scientist and a perfectionist, his objective being the perfection of all life. He intends to convert all lifeforms to the Phyrexian view of perfection, by means of experimenting on them. As expected of Phyrexia, he's a rather terrifying sort of abomination, with his ribs and spinal cord flexing and pulsing in disturbing ways. In game, his card is the most powerful of the Praetors, basically destroying the opponent's entire hand and preventing them from ever recovering while giving you access to obscene card draw. Unfortunately, he's so expensive he is rather impractical to play without some sort of trick.

Stats
Size: 14
Fall Speed: 10
Weight: 9
Traction: 9
Aerial Movement: 2
Movement Speed: 2

Jin-Gitaxias is absolutely huge, being slightly taller than Bowser and 1.5X his width, though unfortunately he's not any heavier than Bowser. He also has rather terrible movement speed in both the air and on the ground, as he lumbers around. Fortunately, he's not very likely to trip as a rule. He also falls extremely fast, he cannot stay in the air for an extended period of time. Combined with his jumps he has an absolutely atrocious recovery, not taking his Up Special into account. That said, at least he doesn't trip or slip much, and his weight is not that miserable.

Specials

Side Special

Jin-Gitaxias pulls out a small syringe before injecting himself with it, taking a small amount of lag. This does not initially do anything of note... until 2 seconds pass, at which point two additional arms will grow out of Jin and crash down in front of him. These arms further increase your body size to a whopping 17/10, and are not actually covered by your shield. This makes your shield close to useless except against opponent's attacking from above or behind, as the arms will hang out and just get struck whether or not you shield.

So now that we've talked about the downsides of extra arms, let's talk about the benefits. With an extra set of arms, Jin can carry 2 items at once, him using the first one he grabbed or produced first. Pressing Side Special with two items on on hand will switch which item he is currently holding with minimal lag. In addition, when Jin-Gitaxias dashes with an additional pair of arms, he uses them to move himself forwards, doubling his dash speed. In addition, they serve as constant hitboxes during a dash that deal 7% and small horizontal knockback. That said, the problems may outweigh the benefits here, it depends on the situation.


Up Special

Jin-Gitaxias takes out the same syringe as before, injecting himself in the spine. After another 2 seconds, his spine bloats in size, forming a huge air pouch in the middle of his body. This might sound a bit whimsical, but the pouch is made of his flesh, having black corroded splotches while the rest is red pulsating tissue. This decreases your weight to 7/10 and your fall speed to a slow 2.5/10. To compensate, you're aerial movement is increased to 8/10 and you gain an additional 4 jumps in a similar manner to Kirby. This also increases the size of your hitbox, in combination with the Side Special it makes you into hilariously easy combo food, though at least now you are actually fairly mobile.

Down Special

Jin-Gitaxias takes out a small vial of a purple liquid, which he proceeds to pour down his throat. If you look you can actually see it leak out of his spine at a couple points as it goes through his digestive system. After a brief bit of lag his body begins to appear a bit more... unstable, with purple ooze coming out of various cracks. This causes Jin to take 1.2X damage for the remainder of the stock, as well as increased hitstun. Because clearly Jin needs to be even worse combo food than he already is.

This obviously has a positive side as well, in that when the opponent hits Jin it causes a purple liquid to squirt out of him in an incredibly low priority hitbox that deals 4% and a flinch. This can actually make him into less of combo food as well... so long as the foe is within the short range of this or doesn't have a hitbox out that overpowers it, which is almost any of them. So how good this particular transformation is will depend on who you are fighting.


Neutral Special

Jin-Gitaxias pulls out a small, empty beaker which he puts up to his mouth. This has incredibly little lag to start-up, but to actually get an effect out of this move you are going to need a little bit of time to yourself. You see, when you use this, all the mutations Jin-Gitaxias currently have will glow slightly, with a red dot on the most recently created one. You can press back on the control stick to move the red dot to the next most recently created one or forwards to go to a more recent one(if you have the dot on the most recent one, this goes to the oldest mutation).

After holding down the input for 0.5 seconds, Jin-Gitaxias. will spit a small amount of a strange fluid into the jar, and the mutation will disappear. Then you will switch to another mutation, the next most recent from the one you currently removed. You can continue to do this to remove all of your mutations, or you can press B to cancel out if you want to keep a few or get back to fighting the foe. This will also leave you with a beaker in your hand which you can press A to drink, regaining all the various mutations you put in there. Yes, using Side Special allows you to carry 2 Beakers at once, in case you would want to keep on hand two different sets of mutations. That said, if an opponent deals you knockback equivalent to Mario's Forward Smash at 50%, the attack will knock the potion all over you, giving you the mutations of the held potion. Potions held by your extra arms cannot be spilled, though they will spill on the person holding them automatically if they lose the extra arms somehow.

Of course that's not all you can do with these potions, however. You can throw them as throwing items, which on contact with a foe will deal them 5% for each mutation put into the potion. After that the opponent will shriek out in pain, as the same mutations that Jin put into the potion are given to them. Arms will sprout out of their shoulders if you gave them the Side Special mutation, they will develop a large fleshy air bladder on their stomach if you gave the Up Special and the Down Special causes them to develop acid spewing gashes on their skin. It is indeed very gruesome on a whole, though the foe can still take advantage of the various benefits the mutations give them. The mutations you give to the foe will last for 15 seconds. That said, certain mutations have major advantages over the others. For example, the Side Special arms are a constant hitbox that will ignore the Down Special acid when you dash at a foe. Aside from that, Jin is perfectly capable of chaining several hits on the foe, comboing them if you will, and pretty much all of the mutations make that easier.

If the potion does not hit the foe but rather the floor, it will create a puddle the width of Bowser that will deal the same effect to the foe that they would have suffered from had the beaker hit them if they come into contact with it. Unfortunately, the puddle will only last for 5 seconds before evaporating, though throwing a couple of them around the stage can make it fairly easy to force mutations on the foe if several puddles with different mutations the foe doesn't want are littered about.


Grab Game

Grab

Jin reaches forwards with both arms in a surprisingly fast grab with good range. It's not quite Dedede's grab, especially considering he has no real ability to chain grab.


Pummel

Jin-Gitaxias drags one of his fingers across the foes neck, dealing them 3% in a relatively slow pummel. The overall damage output ends up being pretty good though.

If you are holding a potion at this time(and not in your extra arms), Jin-Gitaxias will put it to the foes mouth and attempt to force them to drink it. This pummels at the same rate and only deals 2%, but if you can get off 3 or more pummels they will be forced to drink the potion and transform.


Forward Throw
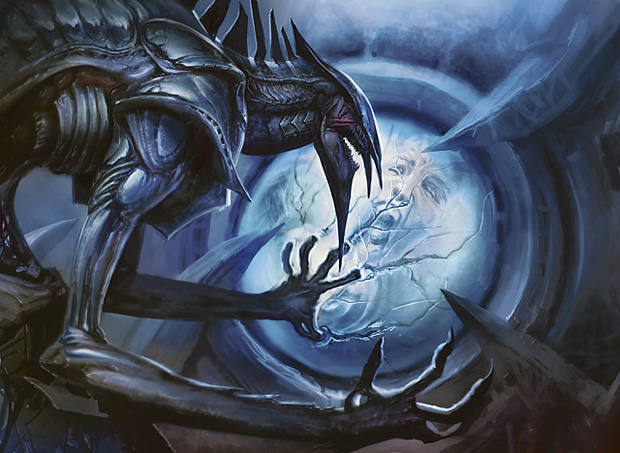

Jin sinks his claws into the opponents face as he begins using his powers of mental manipulation on the victim. He forces his views of perfection on the foe, kind of like a certain SOMEONE in Make Your Move. This also tosses them away with huge knockback and 12% damage. The knockback grows really slowly though, so it will only KO at 180%.

So what does this "forcing his ideas of perfection on the foe thing" actually do? Well, foes will now want to be hit by Jin's mutations, and if they hit the foe with a non-projectile attack that will knock the potion out of Jin's hand, they instead knock it on themselves, transforming them instead of you.


Back Throw

This attack will depend a bit on whether or not the foe has a mutation or not. If they don't, he will merely bite into the foe, digging into them with the various points on his face. He will then release them, dealing 12% and causing them to stagger backwards a battlefield platform length. They will appear to be heavily bleeding from several gashes, but this is merely an appearance change that lasts for 5 seconds. The real use for this is forcing opponents to stagger into a mutation puddle...

If the opponent already has a mutation, then in the same way as with the neutral special a red dot will appear over the most recently given one (if they were given in a group, the one Jin-Gitaxias gave himself first). You can then cycle through them the same way you do with the neutral special, along with the foe's throat, which if you release on he will merely perform the same attack as usual. If you select any of the mutations with this, Jin will bite down on that particular mutation, tearing it off in a rather gory manner that deals 16% and causes the foe to stagger in the same manner as before. If you're wondering how he removes the Down Special mutation, he tears the opponent's skin off, though since this is Brawl and they can survive stuff like this they will just have another layer of skin underneath.

You are given about 3/4 a second to make a choice with this move, after which Jin will automatically tear off the mutation of choice. You can press A, B, Grab, or Shield to have him bite down early, which comes in handy if you've made your selection and your in a Free For All or the opponent has minions or something of that nature. Either way, this is basically for when the foe has a mutation that you no longer want them to have.


Up Throw

Jin-Gitaxias takes out a small vial full of Phyrexian oil, and pours it onto the opponent. This will deal the foe 10%, but they will attempt to shake some of the oil off, getting it on Jin as well and dealing him 5%. Afterwards, both players will be covered in Phyrexian oil, dealing 2% per second to the foe while Jin will not take damage or ill effects due to largely being used to the stuff. The oil will stick around for 5 seconds before disappearing.

However, there is a way to prolong the opponent's exposure to the oil. If the liquid from the Down Special gets onto an opponent covered in oil, it will increase the time the oil sticks around for 1 second. This will also occur if the foe suffers from the mutation and is hit, making this excellent if both you or the foe have that particular mutation. Keep in mind that if the acid is outprioritized this won't be refreshed.


Down Throw


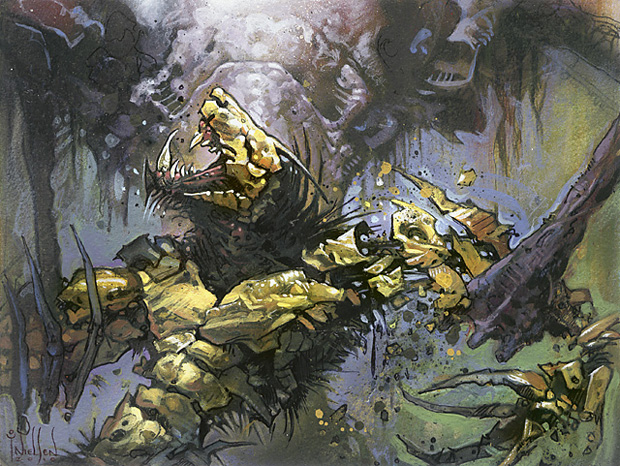
Jin-Gitaxias reaches down and plucks from the ground the bug like thing shown above before placing it on the foes head. It's actually rather tiny, being as thick as a Pikmin and the 2/3rds Bowser's length. It will attach to the foe for 4 seconds, and once every second it will poke the foe for 2% and a flinch. The foe can also shake it off by idling for 0.5 seconds. You can only attach one of these things to a foe at a time, though if there are multiple foes you can attach one to each. This can allow you to set up longer combos or ones that deal more damage, taking advantage of the brief flinch the insect like creature will provide.

Standards

Jab

Jin-Gitaxias pokes forward with one finger, dealing 2% and no hitstun, though it is ridiculously fast. That said, you might want to use this during periods where the opponent is flinching/stunned if you still have time to perform another combo move. This also has great range due to the length of Jin's arms.

Dash Attack

Jin swipes forwards out of his dash, slowing to a halt and dealing 8% and mild horizontal knockback. This is actually reasonably fast to start up and has shockingly low cool-down lag for a dash attack. It's the one redeeming grace to Jin's otherwise mediocre dash.

With a pair of extra arms, this attack becomes a bit different. Instead, before the attack starts he will rear up the extra set of arms, giving it some additional start-up. He will then slash as usual, and follow up by slamming down the arms on the foe, dealing 13% and upwards knockback that KOs at 190%. While this does not increase the end lag of the move, it does increase the duration, which still means it's far more punishable. There are certainly times when you would prefer to have the other dash attack, at any rate.


Forward Tilt

Jin-Gitaxias swipes forwards with one of his hands, clawing the foe. This deals 7% and flinching knockback at lower percents, but has rapidly growing knockback that will eventually KO at 160%. At lower percents this is your bread and butter combo move, but eventually it becomes rather impractical for this, despite being fairly fast. It's also not exactly very good against foes with the Down Special afflicting them, since you'll just get squirted afterward and won't be able to follow through.


Up Tilt

Jin-Gitaxias takes out a small syringe from his robe/lab coat/pants/whatever and stabs into his back, in a process that takes surprisingly little time. The spikes on Jin's back will then stand up and grow to a Kirby height each while Jin is forced to hunch even lower to the ground. This increases your weight slightly and your fall speed by a considerable amount in addition to creating the spikes, and decreases your movement speed on the ground and in the air by quite a bit. It also creates a constant hitbox on your back that deals 6% and light upwards knockback to foes that land on top of it.

You can also mix this into a mutation potion, which when it hits a foe will cause them to shriek out in pain as usual as their spine forms into spikes that protrude out of their back. This will as usual give them the same effect. The spikes are quite good against the hands from the Side Special as a rule as they will just land on the spikes when they try to run you over. However, it's rather terrible against the Down Special because after you hit the foe with the spikes you will get hit in return, which can get rather annoying. On the other hand, if someone with the Up Special afflicting them comes into contact with the spikes, it will pop the air sack for 3 seconds, removing the status effect during that time and dealing an additional 10%.

Using Up Tilt with spikes already out will have Jin-Gitaxias strike out upwards with his back, dealing 10% and average knockback. This isn't necessarily the best at comboing but it's a nice way to get aerial foes off you. It will also pop air sacs in the same way the static hitbox will, albeit for twice as long.


Down Tilt

Jin-Gitaxias swipes one hand low to the ground in a rather fast motion that deals 4% and a flinch. Disappointingly, this has a fair bit of landing lag, so it's not exactly easy to follow up with another move.

Unless of course, you hit the button again, which will have Jin swipe at the ground again in a follow up that deals 6% and pushes the foe half a Bowser length away. This is also a bit difficult to follow up since it will often push the foe out of reach, but with the arms from the Side Special attached to the foe, this can chain 2 hits in a row. Or of course the Probe could flinch them as well, among various other things.


Smashes

Forward Smash

Jin takes out another syringe, and injects himself at the base of his spine. After another second, a large blue tentacle the length of Bowser will burst out of Jin-Gitaxias' chest, wrapping around the nearest foe and constricting them. This prevents them from moving or attacking while they try to escape with grab difficulty, though they can still shield or dodge. This has a bit of lag to execute and then a fair bit of delay as the tentacle lashes out, plus additional lag if it whiffs.

Once a tentacle has a foe grabbed, you can continue to use your regular attacks on them, and they will still be dealt knockback. However, they will take less due to the knockback being required to pull your weight and theirs at the same time. This also means that it will dragged along after the foe if they are dealt knockback. On the surface, this seems like a rather bad thing, but this will allow you to chase the foe into the air more easily and follow up with various aerials, because as they are sent flying Jin will be dragged with them, ready to hit them again.

While this attack is obviously very powerful, if you whiff or they get free you are stuck with the tentacle as a mutation, which is something of a blessing but has major downsides. You can use the attack again to attempt to grab with the tentacle as it would normally grab, but this has a rather large amount of lag on both ends, though the results can be quite impressive if you do land it. Unfortunately, the tentacle also deals you 3% per second as long as the mutation is around. That, and the tentacle is an extension of your hurtbox, that while difficult to damage due to hanging low on the ground, is still something the foe can easily hit with a down tilt most of the time. That and it drags behind you and may end up landing in puddles...

Now, if you use this on the foe you can give them the tentacle as well, which can serve as a massive damage racking source and also a way to increase the foes chances of ending up in a puddle. Also, keep in mind the Down Tilt will in fact hit the tentacle, and that's one of your better moves for comboing the foe with. That said the tentacle is a bit smaller on foes that are smaller, being proportional to their body size.


Up Smash

Jin-Gitaxias pulls out two small needles from his coat and injects them into his arms, taking a fair bit of time to do so and making this attack rather risky. Afterwards, huge claw like protrusions will come out of Jin-Gitaxias' hands, extending far beyond the length of his fingers. He then slices overhead with them, dealing 14%-19% and upwards knockback that KOs at 140%-95%. Sadly, this is Jin-Gitaxias' absolute strongest KO move and the lag is rather frustrating, but it does leave behind a permanent mutation.

This gives Jin a set of claws on his hands, which serve as extensions to his claw based attacks. Regardless of the attack they will deal 9% and knockback that KOs at 180%. Unfortunately, the claws suffer the problem of being fragile, being easy to break off. The claws will have 20-45 stamina, and once broken Jin-Gitaxias is dealt 1.5 seconds of solid stun. The good news is at least this particular attack is no longer laggy, actually coming out rather fast, but it ends up being rather risky move on a whole. That said with an ideal set up it can serve as an excellent combo finisher or KO move.

You can also give this to an opponent by adding this mutation to a potion like any other. This will give them a huge set of claws that function as they would if you did not charge this move, meaning that they are rather easy to break off, after which you can potentially set up for and land a huge combo. While it may be the most negative status affliction in Jin-Gitaxias' batch, it is somewhat effective against the spikes due to giving you or the foe a range advantage and is only a more temporary affliction than the others.


Down Smash

Jin-Gitaxias takes out yet another syringe, this one full of a red liquid... and for once does not inject himself with it. Instead, he carries it around like a throwing item. It actually takes a fair bit of time to use this, taking 0.7 seconds total. You can in fact carry a syringe in each hand, and while they cannot be used as Melee weapons you can throw them as a projectile.

So what do they do when thrown? Well, the first time they will dig into the foes flesh and release the red liquid into them, dealing 7%-24% based on charge and some nasty stun. This is impossible to infinite with, but with syringes do allow for some rather impressive combos. In particular, throwing one one up into the air will allow you to entirely restart the combo once it lands, and can serve as a quick way of extending one if thrown in the middle. Certainly allows for plenty more complex tricks if you know how to use them, but pulling out one is laggy. That said, this gives a more important use to the extra arms from the Side Special, allowing you to hold two at once for even more cruelty.


Aerials

Neutral Aerial

Jin-Gitaxias slices forwards twice with his claws, doing 2 hits of 3%. The last hit knocks foes away a short distance, which Jin can follow up on with another aerial at lower percents. That said, for every attack that has been landed on Jin for the last 4 seconds, he loses his composure in this attack more, appearing more frenzied and striking out an additional time. This is the one real way you have of discouraging foes from comboing you, since it makes this attack far more powerful. That said after using this attack it resets the count, Jin regaining his composure after getting out his anger on the foe.

Forward Aerial

Jin-Gitaxias slams his head into the foe, biting into them and dealing 11% and average horizontal knockback. This isn't nearly as good at comboing as your ground moves, though it will still do it's job in combination with the Forward Smash and at earlier percents. It's a fairly fast move, but the range is not exactly exceptional.

Back Aerial

Jin-Gitaxias strikes out behind him with one of his claws, dealing 7% and mild knockback that actually pulls foes towards him. While this might seem like a move that could combo into itself really easily and make for some frustrating situations, it's not quite fast enough to repeatedly chain into itself. However, if you have the spikes on your back from the Up Tilt, since Jin turns his back on the foe after the move is over they will be hit by the spikes as well.

Up Aerial

Jin-Gitaxias stretches both arms upwards and slams them together above him, dealing 11% and upwards knockback that while fixed is pretty darn high. At very high percents, you chain some hits with this after a Forward Smash to repeatedly launch the foe upwards until they go off the top blast zone.

If the foe has the Down Special mutation applied to them, Jin will sink his claws deep into the foe, dealing them 22% and creating a large spray of acid around them. This will deal anyone in range 10% and average knockback, including yourself. While this may seem dangerous, you actually do have a way to escape it, by hitting the foe with another attack before the explosion. The Up Aerial is not fast enough to pull this off... perhaps you could throw an item upwards to interrupt them out of this.


Down Aerial

Jin-Gitaxias swipes towards the ground with a single claw, dealing 8% and a relatively weak spike to foes. This attack starts up pretty fast but has some moderate end lag attached, though it can be useful for positioning the foe downwards in the air after a Forward Smash. It also has some pretty nice range due to the huge length of Jin-Gitaxias' arms.

If this hits the ground, it will cause Jin to scrape off some fragments of the stage, forming into a powder in his hand. He can use this as a throwing item like the beakers or the Down Smash syringes. When thrown, it creates a cloud of dust 1.5x larger than you are, which deal flinching hits that add up to 6% that gives you just enough time to follow up with another fast attack. The cloud of dust will also make the area it was thrown at impossible to see for the next 4 seconds. Obviously you can stand in it for some-pseudo invisibility as the foe won't be able to tell what attack you are about to use. Lastly, this is an item you can obviously carry it around alongside a beaker or a syringe, or perhaps even another pile of dust. Just something to keep in mind.


Final Smash

Jin-Gitaxias laughs maniacally as various large cutting implements rise out of the ground. If a foe is standing in the area which they rise up, which is about twice the width of Bowser, this will trigger a brief cinematic of the blades beginning to cut into them, before the screen blacks out and screaming is heard for about 3 seconds. This will only hit one foe, and whichever one happens to be the closest to Jin-Gitaxias when he uses this.

After the 3 seconds are up, the screen becomes visible again. Blood is all over the area of the stage where the attack occured, with some bits of gore spotted here and there. Jin-Gitaxias now has some new parts attached to his body, which appear to be bits and pieces of the foe. This allows him to use all of the foes attacks by double tapping the selected input, giving him access to both characters movesets for the remainder of the stock. The foe... was not nearly as lucky. They are still alive, but appear as a shambling bloody mess that barely resembles their former self. They move and attack at a fraction of their normal speed, are pathetic lightweight, and lose access to all moves besides their jab, neutral aerial, and tilts. To top it off they have an additional 50%. This is definently going to be the end of that particular foes stocks bar a complete miracle, whereas you are now far more versatile than ever before.


Playstyle

So if it wasn't obvious to you, Jin-Gitaxias' basic gameplan is to combo the foe. He largely does this using his tilts and aerials, which are fast enough to capitalize on the ending lag of his attacks until you start reaching higher percentages, where the foe is knocked out of reach. That said, your combo game is not merely that basic. You can create more complex combos with the various throwing items in the set, such as the Down Smash syringes and the Dair sand. Throwing these at the foe can effectively restart a combo, and since they are throwing items you can use them both quickly and from a distance, making comboing at higher percentages easier. Aside from that, grabbing the foe and attaching a probe to them allows for some rather nifty tricks as well, especially if you can get the timing right, though mostly likely the foe won't let you get the optimal combos that the probe allows.

That said, if you really want to play Jin-Gitaxias well you are going to want to take advantage of his mutations. These things allow you a significant leg up on foes in some ways, though at the same time they come with their share of drawbacks, mostly in making you more and more of combo food with each one you attach to yourself. That said, they do have impressive utility, the Side Special allowing you to carry multiple throwing items for even more elaborate combos and the Up Special allowing you to pursue foes high into the air. The Side Smash in particular is incredibly powerful if you can land it, basically turning the foe into a total punching bag for you to wail on, though your gonna have to work to hit with that thing as it's very predictable and horribly punishable if you whiff with it.

This is all without getting into giving mutations to the foes, which has immense benefits in it's own right. With mutations stacked on, the foes have a much larger hurtbox that is easier to chain hits on. Along with that, it often neuters the foes defenses, and some mutations have built in advantages over the others. For example, the Up Smash's increased range allows you to completely ignore the acid from the Down Special... until the stamina of the nails runs out. Which mutations you give the foe will often depend on which ones you are taking advantage of yourself, as well as what the foe wants to do. Weighing down an aerial foe with Up Tilt spikes certainly can ruin their game-plan, or giving a foe that wants to stick to the ground an air bladder.

On a whole, Jin is an incredibly versatile character, with tons of ways to build damage on and afflict the foe. That said, he's not without his share of weaknesses, between the fact that he's a rather lacking in terms of KO potential and ways to KO and that his own mutations can very easily be turned on him. That said, if you manage to outsmart your foe, Jin has nigh endless ways to keep himself at an advantage over those poor saps who try to interfere with his experiments. Not to mention, he can be quite a bit of fun in a Free for All. Giving various foes legs up over one another can make for some interesting little political fights, perhaps kind of the hill for a puddle of a particularly ideal combination could be fun. Or perhaps you could use the Forward Smash as a goofy means of transportation to chase foes around in the air by bludgeoning another one of them, that is always fun.
 

ForwardArrow

Smash Ace
Joined
Aug 17, 2011
Messages
503
Sheoldred, Whispering One

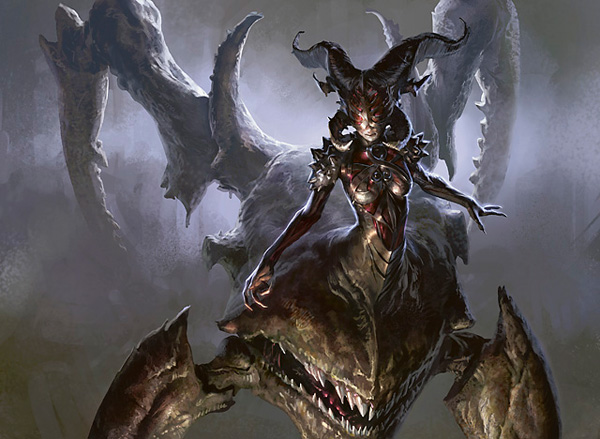
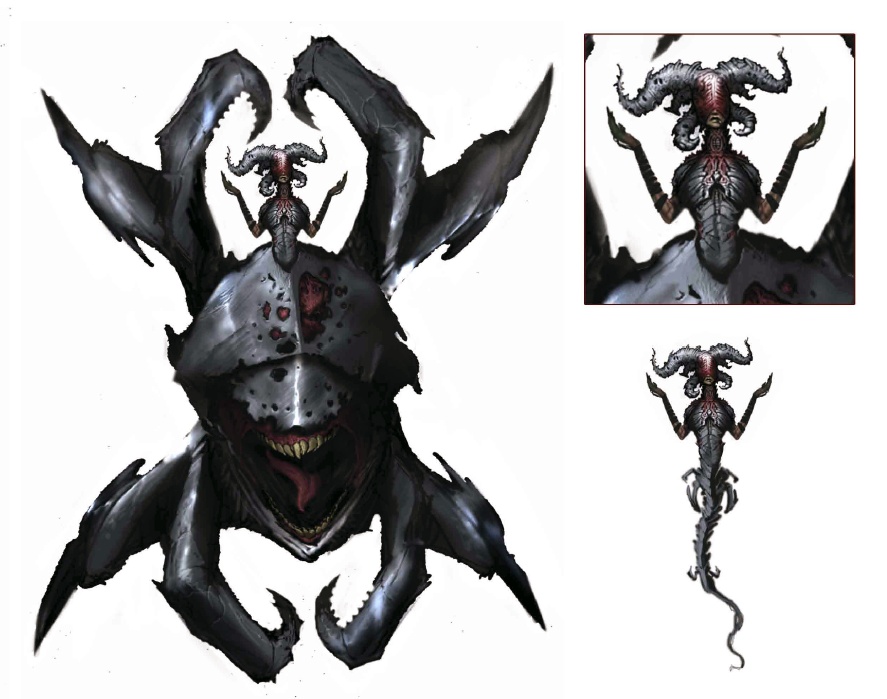
Sheoldred is the black Praetor of Phyrexia, one of the Seven Steel Thanes fighting for control over Phyrexia's black aligned faction. She fights in subtler methods than the other Praetors, instead spying to collect information as well as using politics to control her enemies. She intends to control all of Phyrexia for herself. In addition, Sheoldred is capable of shedding the massive predatory body shown in the picture, to skitter off to a new home if need be. In game, Sheoldred will constantly kill creatures of your opponents while reviving your own creatures, as well as sneaking through swamps to attack the foe directly.


Stats
Weight- N/A
Size- 25
Fall Speed- 10
Traction- 8
Movement Speed- 5
Aerial Speed- 2

Sheoldred is completely enormous, being three times Bowser's width and 1.5X the height of Ganondorf. She actually comes in at the largest of all the Praetors, and to top it off she can't even be budged. You cannot grab her main body, and she does not take hitstun while she is already trapped in it. The worst part though, is that it does not take knockback at all, making Sheoldred completely invulnerable.

Or at least, she would be, if it weren't for the fact that she can be severed from the main body by dealing 60% to her actual body. This decreases by 10% for each time she has been knocked off to a minimum of 30%. This severing has her body take half normal knockback when it is separated. Really, on the surface the cord doesn't serve a purpose at all. Sheoldred's torso has it's own set of stats, and you control it while separated while the body will stand in place. Both parts of the body share the same damage bar, and she is only KOed if the torso is KOed.

One last thing to note about the body is it's jump. Sheoldred has only one jump, but it can be charged by holding down the input for as long as you want. She will jump twice Ganondorf's height for each second the input was held down, allowing her to lunge as far into the air as she wants. Then you can bombard the foe with spells as you fall down. Just make sure that you don't charge it TOO much, otherwise you'll fly off the top blast zone and die.

[COLLAPSE="Page Stretching Image"]


Sheoldred's torso disattaches from the main body as shown above.[/COLLAPSE]

Aerial Speed- 9
Size- 6
Movement Speed- 4
Traction- 3
Weight- 3
Fall Speed- 2

Sheoldred's torso is about the height of Marth, and fairly easy to knock around with her relatively low weight. Especially considering you probably already have huge damage from the foe repeatedly smashing your main body. She also scuttles along the ground at a disappointingly slow pace due to her tiny legs. The good news is that you have a float, which lasts twice as long as Peach's. That, and if you come into contact with your main body you will fuse back with it, forcing the foe to detach you again. So in general you can survive for quite a long time if you are careful, but if the foe gets in a lucky hit you are usually done for.

Note that certain attacks are used by Sheoldred's mouth and some by her body. When they are separated they will each use the attacks separately. Also, you can detach Sheoldred from her torso manually by pressing Shield and Special, with fairly little lag.


Specials

Neutral Special

Sheoldred points forwards as a black blob begins oozing out of the ground in front of her. The move can be charged by holding B, which will have the blob rapidly increase in size from that of Kirby to the size of Giga Bowser. It takes about 3 seconds to fully charge this move. After you release, the blob will explode, creating a large area of oil twice the width of the original blob and slightly less tall than Kirby. The oil can only cover a maximum of 70% of the stage, and the attack has mild start-up and end lag. Standing next to the blob when it explodes deals 5%-21% and knockback that will never KO in any reasonable time frame-knockback that KOs at 80%.

So what does the oil do when it litters the stage? Well, any foes stepping in it take 3% per second and cannot jump, though they can walk or dash at their normal speed. If, for whatever reason the foe is entirely submerged in it, they will instead take 7% per second. In addition, if the foe reaches 125% while standing in the oil, they will start to look a bit ill, and once they hit 200% they appear to be in downright agony. This is just a visual effect for the most part... but once the foe hits 250% standing in the oil will cause it to seep into them as they collapse to the ground, and slowly have their body transformed into a more Phyrexian version of itself. It will then disappear from the stage and the foe will lose a stock.

The oil is not a permanent addition to the stage, and will disappear at the rate of the oldest Kirby size worth of oil every 3 seconds.


Side Special

Sheoldred's lower half roars and begins charging forwards, snapping it's jaw as it runs. The bite deals 8% and flinching knockback. The beast charges at Mario's dash speed until it reaches a ledge or you press backwards, which will have it slow to a halt over a short distance. This has minor start-up lag, but rather large end lag. The good news is however, Sheoldred's torso can actually attack while the body is dashing. This can also be used to position the body while you are separated from it.

Up Special

Sheoldred puts her hands together, creating a large black magic ring around them which quickly grows to the size of Wario. Sheoldred then tosses it forwards a short distance. You can charge this move for up to 2 seconds before firing it off. If a foe is caught in it, they take 5% and are lifted up two Ganondorf heights to five Ganondorf heights inside the ring, after which it stops moving. Foes who go inside the ring can move through it at their normal air speed, but cannot move down inside the ring or jump out, being suspended in the air.

This can also levitate the oil inside the rings, allowing you to place some of it in the air. This still counts towards the total amount allowed on the stage, so you'll have to be intelligent distributing it between the ground and the air. The rings will disappear after 15 seconds, and will drop whatever is inside them to the ground. Aside from that, while the rings aren't quite powerful enough to support the massive bulk of your body, you can have your torso move through them as though it were on the ground.


Down Special

Sheoldred fades to a black color before disappearing over the course of half a second. Unfortunately, this will only make your torso invisible, so don't expect it to hide your monstrous body, though it will make the cord invisible. That said, it does allow you to hide when you are in fact separated from your body. Sheoldred can remain invisible for up to 6 seconds, after which she needs to reattach to the main body to be able to go invisible again. While attached to the main body you can go invisible as long as you want, but the only benefit that comes from that is hiding your attack animations. And if you are hit while invisible, Sheoldred takes 1.4X as much damage and knockback, so it may not be worth it most of the time.

So, if you are wondering what the random invisibility is useful for beyond mindgames, keep in mind Sheoldred kind of wants to get back to her body as a rule. If the opponent can't find you, they will probably have more difficulty preventing you from returning to your body. That and if you give them a few hints, you might be able to lead them towards particularly hazardous areas of the stage in pursuit of you.


Standards

Jab
Sheoldred begins chanting and holds both arms out in front of her, as a small wave of black energy crosses the ground at the rate of Ganondorf's walk. The wave deals 5% and knocks the foe back slightly. It leaves behind a trail of black spikes about the height of a pokeball, and are incredibly thin. They are still pretty tightly packed, so it's not like the foe can just jump between them. Anyway, these spikes will impale the feet of anyone who steps on them, dealing 7% and forcing them to escape with grab difficulty, after which the patch of spikes impaling them will disappear. You can only cover 2 Bowser widths worth of the stage with these though, after which the oldest ones will disappear.

This obviously is unexciting on the surface, but keep in mind a foe impaled on these will still take damage from the oil. That and foes cannot actually see spikes which are covered up by oil... though maybe you'd want to use it to cover parts of the stage that aren't coated in oil to force the opponent into it. If a foe happens to land on the spikes in prone, they will be stuck in prone and take double damage from the oil. Lastly if you are in one of your Up Special bubbles, you can layer them with spikes as well.


Dash Attack
Sheoldred puts both hands together and creates a small blast of black mana below her. This deals 7% and average fixed upwards knockback, and stops your dash. This has fairly little start up and end lag, so it will actually chain into your Up Tilt quite nicely. That said the range isn't very impressive, though it reaches much higher up if you are attached to your mouth, though it loses it's ability to hit some crouching foes.

Forward Tilt
Sheoldred's maw roars and lunges forwards, dealing 12% and shaking the foe, before tossing them away with fixed high horizontal knockback. This has a bunch of lag on both ends, but Sheoldred jumps her whole body length with this, giving it obscene range. You could also, theoretically, suicide the foe with the body and live on as a torso until the foe manages to take you down, if you are so crazy as to try that.

Up Tilt
Sheoldred reaches one arm forwards, causing a geyser of black mana to fire up in front of her. This deals 8% and average upwards knockback, and has good upwards range but very little horizontally. If this is used on top of a blob of oil, this will instead create a geyser of oil, which deals 4 hits of 3% and drags the foe upwards 3 Ganondorf heights. Though they will end up getting stuck in one of your Up Special rings if it drags them into one of those.

If you double tap the input, the stream of black mana will instead come down from above, dealing the same damage and knockback. If there happens to be an ring filled with oil above you, the stream will pull the opponent out of the bubble and down to the ground. Take note that this move will remove an opponent from a patch of spikes as well, causing the spikes to disappear.


Down Tilt
Sheoldred's torso reaches it's arms forward, attempting to grab at the opponent. If she successfully grabs them, she will toss them to the ground, putting them into prone and completely submerged in the oil so they take additional damage until they get up. This will also set them up nicely for a Down Smash or Forward Tilt, though you'll have to successfully predict whether the foe decides to roll or not.

If Sheoldred is detached from her main body, this attack will become something different. She will instead grip the foe and drag them along the ground with her feet, dealing them rapid flinching hits of 1% that add up to 12% and moving them 2 Bowser lengths forwards. Obviously you can use this to move yourself back towards your main body, but you can also use it to move your opponent onto some spikes to trap them in the oil or something. It also plants the opponent on the ground so they will take doubled damage from the oil during this time.


Smashes


Forward Smash
Sheoldred puts both hands together, and 3-7 black spines appear, floating in the air pointing forwards. If there is a foe within a Battlefield platform of Sheoldred, the needles will fly around them and circle them. They then serve as static hitboxes that deal 6% with flinching knockback and have 10 stamina, making them fairly easy to destroy. One of them will also poke in every half second, dealing foes 7% and briefly stunning them in place. The problem with this attack is that it has a whopping 1.5 seconds of lag, so your going to be taking quite a bit of damage while using it, and possibly get knocked off your monstrous body.

If you use this attack while the foe is already surrounded by the needles, the needles will move in the direction you selected at Ganondorf's walk speed. In this state they deal light fixed knockback that keeps the foe in the center of the needles if they attempt to escape the circle. Obviously this is useful for dropping a foe off in a pile of spikes or near Sheoldred's mouth when they are separated, or just sending them slowly trekking through some oil. You can change the direction by pressing the opposite direction.


Up Smash
Sheoldred's body growls and lunges upwards 2-4 Ganondorf heights based on charge, attempting to bite down on foes above it. The mouth functions as a grab hitbox that will continue both as the body jumps into the air and when it crashes back down into the ground. When the foe is slammed into the ground they take 24%-30% and are left in prone. This attack is definently powerful damage-wise, but it's rather slow and unlike most characters you can't kill with your slow attacks. Fortunately the invulnerable nature of the body makes this a bit more practical, since they can't interrupt it.

Down Smash
Sheoldred's mouth lets out a loud roar and bites down on the stage below it, dealing foes around the mouth 26%-40% and stunning them for 3-6 seconds. Note that hitting them with this again during the duration of their stun will not refresh it, but this move is very laggy and is close ranged. The attack also has massive end lag, which isn't THAT punishable because of the super armor but is still a notable problem.

That said, this will rip out a chunk of the stage the size of Bowser below you, which will fill up with oil if there was oil above it. The increased depth of the oil in this location will make it so that foes will be taking additional damage from the oil coming up over their head unless they are freakishly tall. Obviously you can make this location even more hellish by placing some spikes in there, and then using it as a hidout for your torso while calling your body back towards you.


Aerials

Neutral Aerial
Sheoldred generates a large orb of black energy in her hands, which she will then fire forwards. The orb flies at Pikachu's dash speed and deals 8% and mild stun to the foe. It will travel forwards half the length of Final Destination before disappearing. You can also press any one of the eight cardinal directions during the start-up lag to instead fire the orb in that direction. Also, the orb cannot be seen when traveling through oil, so the attack isn't necessarily a location give away when you are invisible.

Forward Aerial
Sheoldred's mouth roars and chomps diagonally down in front of it. dealing 16% and a strong spike. If used on a grounded foe, it will instead put them into prone. This attack is fairly slow, but due to their sheer size of the mouth the range is perfectly good. If your body is on the ground at this time, it will instead use the Forward Tilt.

Back Aerial
Sheoldred turns around and stretches out both arms, small sparks of black mana on both hands. A whoosh of wind is the heard and anything directly behind her is pushed back 1 Battlefield platform. This includes your bubbles, or if your body and torso are separated, your body. This can also be angled up and down to move the object diagonally down or upwards. Obviously this is useful for positioning the magic rings, but also for possibly nudging your maw off a ledge with an opponent in it's jaw.

Up Aerial
Sheoldred raises her arms as a large geyser of black mana rises out of the ground to meet her in the air, dealing 10% and mild fixed horizontal knockback. The geyser lasts for a second and will stay under Sheoldred as she moves through the air, though it will disappear when she touches the ground. Unfortunately the geyser will disappear if Sheoldred uses another attack, and it has a lot of lag attached to bring it out. That and it will reveal your location if you are invisible. That said, this does allow you to take advantage of that massive jump of yours and position the wall-like hitbox.

Down Aerial
Sheoldred waves her arm, and the stage below her cracks. This widens into a gap about Kirby's width that serves as a pitfall trap, which deals 8% if a foe falls into it. This has a fair bit of lag, though it allows you to pester the opponent from above alongside the Up Aerial after lunging high into the air. That, and you can surprise the foe by hiding a pitfall trap inside the oil where the foe cannot see it or use this to cave out the ground from under the foe while you are invisible and they can't see it coming. You can only have one of these at a time, and they disappear after 8 seconds.

Grab Game

Grab
Sheoldred's mouth bites forwards, attempting to grab the foe in it's jaws. This has decent range for a grab, and the speed isn't particularly bad either. While the foe is grabbed like this your torso is still free to move around and attack, and you throw by pressing Z and a direction. The pummel is used by pressing grab again. Lastly, all the grabs and throws are used by the mouth, so you don't need Sheoldred attached for any of them, and if Sheoldred attacks a grabbed opponent it will not actually hit them, so it's better to use this time for set-up if anything.

Pummel
Sheoldred's body bites the opponent, dealing them 2% in a fairly fast pummel. It may not seem like much but in combination with the oil effect it can build damage rather fast, which leads to a longer grab time... suffice to say things can get rather ugly in combination with the oil.

Forward/Back Throw
Sheoldred's body begins walking slowly forwards or backwards depending on which direction you pressed. It will continue walking in that direction until you either press a different direction or the foe escapes the grab. The mouth will also hold the foe low to the ground, dragging them through any oil with their whole body submerged. If they are dragged across spikes, they will merely take an additional 4% per second as long as they are being dragged across them as opposed to being impaled on the spikes.

Up Throw
Sheoldred's body rears back, before tossing the opponent upwards twice the height of Ganondorf... exactly high enough to go into one of those magic rings you've created. That and it also deals 8%.

Down Throw
Sheoldred slams the foe down onto the ground in front of it, dealing 11% and putting the foe in prone.

Final Smash

Sheoldred snaps her fingers, and all the oil on stage bursts into an explosion of black mana. This deals 30% and upwards knockback that KOs at 55%. Afterwards, it leaves behind a black mist in it's place that deals twice as much damage as the oil as the foe inhales it. The mist disappears after 5 seconds.

Playstyle

Sheoldred is a rather tricky sort of character to play as. She has absolutely no KO moves whatsoever, but at the same time has obscene durability (let's face it, sneaking back to the body is not particularly hard) and is capable of constantly building the foes damage with the oil. To top it off, the basic set-up phase you have is actually incredibly easy, since creating a large blob of oil takes all of 2 seconds and you have constant super armor until the foe has dealt you a fair bit of damage. That said, once the oil is out your only going to be able to win if you manage to stall and impede the foe the entire time. Fortunately, you have a fair few tricks for this purpose.

For one, Sheoldred has a rather impressive slew of mindgames at her disposal. When you are detached from your body, you can very easily hide Nair projectiles inside the sea of oil, to pelt and frustrate the foe while you sneak back to your body. Or perhaps you could hide some spikes in the oil, which will hold the foe still as their damage builds and the your monstrous maw moves towards them to damage rack them further. Heck, maybe you could separate from your body and float over into a particularly hazardous zone(perhaps an indentation in the stage layered with spikes), giving the foe a dangerous but tempting sort of opportunity.

Really, your not exactly a complicated character to play. Your goal is pretty much to zone the opponent into the oil with things like the Up Aerial, and when the foe disjoints you from your body try to reattach yourself by hiding from them. That said, you do have a few weaknesses to take note of. For one, the fact is you are going to take a lot of damage due the sheer size of your body, and even if you are taking half knockback you still are far from invulnerable. That, and your attacks are generally either incredibly weak or very laggy. Don't let that stop you though, if you take advantage of your invisibility and various methods to delay a foe, they will soon find their wills corroded and will fall to the might of Phyrexia.
 

ForwardArrow

Smash Ace
Joined
Aug 17, 2011
Messages
503
Urabrask the Hidden


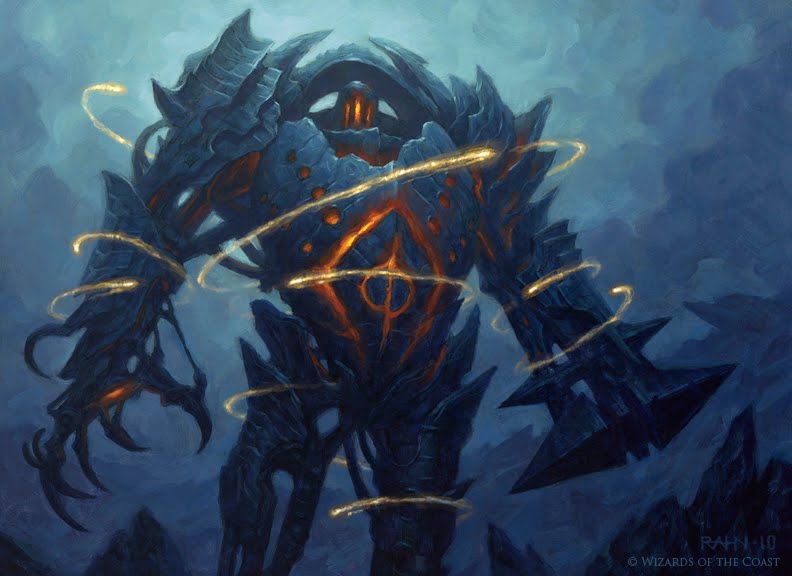
Urabrask is the red Praetor of Phyrexia, who manages the Quiet Furnace. He is relatively isolated from the rest of Phyrexia, mostly just building them supplies in his forge. He tends to be prone to random acts of violence, causing other Phyrexians even amongst his own to stay away from him. In a rare case, he's actually not opposed to the Mirran survivors hanging out around the forge, which irritates the other leaders of Phyrexia. On a whole, he's really not nearly as villainous as the rest of the group.

Stats

Traction: 10
Size: 10
Fall Speed: 10
Weight: 10
Movement Speed: 7
Aerial Movement: 5


As you can see Urabrask is a bit of an extreme character in a lot of aspects. He falls fast, he's the size of Bowser, he's as heavy as Dedede, and is fairly fast moving. His dash is rather impressive, and he's not exactly slow in the air, either. Urabrask is lean muscle and metal, his main weakness statistics-wise being his fall speed and size.

Specials

Neutral Special
Urabrask lets out a mechanical roar as his mouth begins to glow a very bright red. If an opponent comes into contact with Urabrask during the start-up up of this attack, they take 10% and knockback that KOs at 180%. You can also move around during the attacks start-up lag. All this is kind of a necessary benefit though, as the start-up lag is a whopping 2 seconds, so it's going to take some sort of defensive measures to pull it off. That said, Urabrask's head only becomes a hitbox after 0.5 seconds worth of charging, so this is far from an unpunishable move.

Once Urabrask has charged for the full period, he will release an enormous blast of heated gas from his mouth. This creates a hitbox as large as Urabrask himself in front of him, dealing 25% and knockback that KOs at 55%. The gas will fan out after this, the hitbox expanding and the damage decreasing for the next 3 seconds before no damage or knockback is dealt at all. By the end, it expands to the size of Giga Bowser but only deals 6% and a flinch. Urabrask is completely unphased by the heated gas, capable of moving right through it. If a foe is grabbed by Urabrask and moved into the gas, they will start taking 4%-15% per second, depending on how much the area has cooled.

This attack can also be angled up or down. Angling the attack upwards causes a much larger area to be covered, at the cost of leaving a small crawl space along the ground for most of the duration, making it somewhat easier to avoid. Angling it down however, will cause him to blast the gas into the stage itself, melting it out from underneath Urabrask, creating a pool of lava twice the width of Bowser. Urabrask can swim in this pool just like you would water, except he cannot drown in the lava. Opponents on the other hand, take 16% and knockback that KOs at 120% when they come into contact with it. The lava cools back into regular stage material after 25 seconds, and you can only have 2 lava pits out at a time.

This move will actually have a different effect if used on an already existing lava pit. Instead, of just resetting the timer, though it does that too, it causes 6 lava bubbles the size of Kirby to fly out of the pit. These bubbles will pop on contact with the foe, dealing the same damage and knockback as the gas when it initially comes out. They float upwards at about Ganondorf's dash speed, solidifying into rocks after 4 seconds can crashing back into the stage, dealing 7% and stunning the foe for a brief period of time. Normally, the bubbles will just float upwards... but we have ways to change that if need be.


Side Special
Urabrask's hand charges with electricity, before he releases a small blast of lightning from his hand. The lightning is about the length of Bowser and flies forwards at Captain Falcon's dash speed. On contact it deals 12% and no knockback, but a large amount of stun. This attack has a large amount of start-up lag, but you can delay the attack by a quarter second by pressing A during the start-up lag, making it harder to dodge. This attack also doesn't have a lot of end lag, so if you whiff your not going to get punished that badly. You can also angle the attack up or down, which will cause the bolt to curve it's path in that direction, allowing you to hit aerial opponents or small crouching foes.

That's not all there is too this move. When it hits, it releases a large amount of electricity into the foes body, giving them a positive charge. This can also be used on your lava pits and bubbles, or even the stage. So what does charging them do? Well if you haven't read another moveset with magnetism, the same charges repel each other at about Ganondorf's dash speed if the objects are within 2 Bowser lengths of each other. Even the lava pits will creep through the stage, though at half the speed of other objects. Bits of the stage that were charged will not move but will push the opponent away at that speed. So for example if you charge two bubbles, they will repel each other away, potentially allowing them to fall far away from the original pit. You can also use this to move around lava pits by charging both the foe and a pit... though why would you want to do that? The foe is meant to fall into the lava pits not push them around. The charge will last for a total of 7 seconds on foes and forever on objects, and is not refreshed by a second hit.

Well if you input this attack in the opposite direction you are facing, it doesn't fire the blast backwards over your shoulder or turn you around. Rather, it switches the charge to negative, which causes objects to pull each other together at Ganondorf's Dash Speed. If you hit a foe that already has a positive charge with a negatively charged bolt or vice versa, twice as much damage is dealt and the charge is switched. This also allows you to have lava bubbles home in on the foe, which can certainly be quite scary for the foe considering how powerful the bubbles are.


Up Special
Urabrask twitches for a brief moment before releasing a burst of electricity from his body. This deals 11% and knockback that KOs at 200%... but does not function as a recovery move at all. Awkward. If there's one weakness you have, it's that once you are off a ledge your pretty much good as dead, because your jumps are pretty average. The attack fortunately is at least fast, though it's got very short range and you basically have to be overlapping the foe to hit with it.

Now, obviously I'm not just going to leave this move without a purpose. After using it, Urabrask actually charges himself in the same way the Side Special does everything else. Given your incredible mobility you should be able to resist charges that pull against you, and this allows you an enormous degree of ability to manipulate the various stage hazards you have, as well as the foe's location. Using this while you have a positive charge swaps to negative and vice versa. Maybe it's not the best attack in terms of power and range, but it serves an incredible degree of utility.


Down Special
Urabrask opens his mouth, creating a small stream of molten metal from it that arcs towards the ground and deals 8% and average knockback. You can hold this down as long as you want, but it takes a bit to start-up and end. The molten metal solidifies half Bowser's length in front of you into a metal cube which grows in size as you hold down the input. The cube remains hot and as such a hitbox for 2 seconds that deals the same damage and knockback as the main attack. The cube will grow for the size of a Pokeball to being the width of Bowser and as high as it is wide. The cube can be destroyed, but has 20-100 stamina based on it's size so it's going to take quite a bit of effort from the foe to eliminate it.

Now, while the metal is glowing hot from just solidifying, it is also far more malleable, and Urabrask can change it's shape. By pressing forwards against it, the block will be made into a pillar, at max 3x the height and a third the width of the original block. Standing on it has a similar effect, changing it into a block a third the height and 3x the width of the original block. This takes a very short period of time, so it's fairly easy to reshape your blocks while not taking your eyes of the opponent. These blocks can be picked up by you and moved around like an item, though opponents are not able to carry them. In addition, they cannot be thrown, and are rather set down. You can use this to build metal structures all about the stage, if you so desire. If the support of a block structure is removed or destroyed, the metal blocks above it will fall, dealing damage and knockback based on their size. This caps out at 26% and knockback that KOs at 40% if the block was max size and fell six Ganondorf heights.

Now, we have far more we can do with these blocks than just what has been mentioned so far. You can, in fact, charge the blocks with electricity, causing them to attract and repel like a charged foe or bubble or lava pit. Note that if two blocks are magnetized together and collide on a foe they deal 12% and knockback that KOs at 180% to 40% and knockback that KOs at 10% depending on the size of the blocks, though it's rather unlikely you'll be able to pull this off as it's fairly predictable and requires the foe to basically stand still. If an opponent is sandwiched between 2 blocks with another on top, this will knock off the top block. That said, you can certainly magnetize some blocks to yourself to use as a shield, or magnetize them to a foe to ruin their attempts at attacking you. Or you could use them as repulsing objects around the stage to position the foe. You're call really.

It's not just the electricity we've interacting with here, there are also some tricks with the gas and the blocks. When a cloud of superheated gas travels over and covers an entire block, it will return the block to it's malleable state until the gas dissipates, which allows you some ability to shift the shape of already molded blocks. In addition, you can contain gas within a group of blocks by breathing it out inside a structure. This causes the gas to keep it's power until you release it, at which point it rushes out and can potentially be lethal to opponents. If you magnetize two blocks together with gas in the middle, gas pressure will build up inside until it blows the roof block off, sending the block on top flying into the air and releasing the gas as well.

Aside from that, metal blocks do a few minor other tasks. A block placed above lava bubbles will not pop them but rather hold them underneath it, allowing you to store large quantities of them if you would like. Aside from that, blocks can be placed in lava but will slowly sink into it, serving as temporary platforms. You can pick up blocks out of the lava, at which point they will have any segment that was submerged covered in lava. This causes them to do the same damage and knockback as the lava itself on contact with the foe, although after it is removed from the lava the damage and knockback dealt decreases over the next 8 seconds. None-the-less, it's the closest you can get to flipping a lava pool on it's side.


Standards

Jab
Urabrask fires a small orb of molten metal the size of a pokeball forwards a Bowser length in an arc the height of Kirby. The metal orb will deal 4% and knockback that builds surprisingly quickly and will KO at 250%. After that it will lie on the ground for 2 seconds, dealing the same damage and knockback as it did while it flew to anyone who comes into contact with it. Unfortunately, this thing cannot really be magnetically charged, though you could set up to drag the opponent into it repeatedly at lower percents.

You can also hold down A to charge this attack, which will cause it to fire further, up to a maximum of the length of Battlefield. This will also increase the damage somewhat to 9% and knockback that KOs at 150% while it flies, though the static hitbox deals the same as it would uncharged. You can potentially litter the stage with these things to help push the opponent where you want them, or keep them boxed in a bit better.


Dash Attack
In mid dash, Urabrask sprints in a circle, creating a small spark of electricity in the center the same charge as he is. The spark deals 8% and a flinch, and will last for 3 seconds. The spark has the normal amount of pull for any sort of magnetized object. Rather unexciting, but if you need something repositioned or something to hold the foe down, it might do the trick, as it's probably the fastest way to create a charge on the stage that isn't attached to Urabrask himself.

Now, after doing one circle you can press A again, which will cause him to loop around again, increasing the power of the magnetism as well as the damage done by the spark for each loop. This caps out at the spark dealing 30% and a whopping 2 seconds of stun, as well as having triple the pull of a normal magnetised object. This means it will pull in characters and objects of the opposite charge with three times the normal speed and from thrice as far, as well as repelling with the same force. Unfortunately, it takes 6 full loops to make it this powerful, which is rather impractical to pull off unless Urabrask has a ton of passive defenses set up.


Forward Tilt
Urabrask opens his mouth and releases a thin stream of fire that deals 12% and knockback that KOs at 150%. This has a fair bit of lag, especially ending lag, but also has the rather large range of 1.5x Bowser's length. You can also angle this up or down, though angling it down really reduces the range of this move. The attack isn't really that effective on it's own, but it does have a use in conjunction with the metal blocks. You see, the fire stream will melt through the block and come out the other side, completely unimpeded by the metal block. You can probably figure out the implications of this.

Now, the holes this bores in the blocks serve another purpose as well. You see, if you try to breath the superheated gas through the hole, it will go through, melting it shut but coming out the other end. This makes it much easier to fill one of your block structures with gas for later use. Boring another hole into a gas structure will cause the gas to escape the structure through the hole. You can also position a bunch of blocks next to each other to transport the super-heated gas to a different location, if you so desire.


Up Tilt
Urabrask bucks his head, dealing foes above him 9% and knockback that KOs at 160%. This has fairly low lag on either end, but it's not quite fast enough to be spammed. If you hit a block with this, if the block is taller than it is wide, it will knock it on it's side. If the block is wider than it is tall, it will stand it up. The block does not deal any damage when it is flipped, but it will push the opponent up into the air if stood up and will push the foe forwards if knocked down. Obviously the main application of this is modifying your blocks for structures, but it also can push foes around in times of need.

Down Tilt
Urabrask opens his mouth and fires a burning stream low to the ground, dealing 9%. This reaches forwards the length of Bowser, giving it excellent range, if being somewhat slow. This will also weld the opponent's feet to the floor, making it impossible for them to move for 2 seconds. They can still shield however, and welding them again will not refresh the timer. That said, it will hold them still for a bit as the lava pit closes in below them, or the two blocks come together to smash over them. This can also weld a block to the ground, making them entirely immobile, perhaps a good thing if you want to use them to repel opponents with magnetism.

A trick that can be done with this attack is that Urabrask can in fact weld blocks together. This will combine their stamina and have them function as one unit, magnetised together. If they have opposite charges when welded together, take note that this will neutralize them and cause them to lose their charges. You can use this to create a metal fortress around yourself, which you could perhaps drill little holes in with the Forward Tilt to attack through and move it around from the inside with magnetism. Perhaps you can leak gas into the outside world, or just keep it in there to make it far scarier to break open the cage. Either way, this welding together a small fortress is, while an awesome technique, somewhat impractical, though if you can pull it off it will swing the match heavily in your favour.


Smashes

Forward Smash
Urabrask charges up electricity in hand, before firing out an 5-8 small bolts of electricity based on charge. Each of these deals 2% when it hits the foe and a small amount of stun, and will travel forwards forever at Mario's dash speed. This has a fair bit of start-up lag, and the hits will all chain in to each other. Unfortunately, this move has quite a bit of start-up lag, and you can't fire one out while another is already on screen.

The electricity you fire out has polarity like the objects you have on screen. This comes into play if it reaches an object with the same polarity as it, which will cause it to deflect in the opposite direction. It will also curve towards objects with the opposite charge, allowing you some control over the projectile. However, the real fun begins when you realize pressing Forward Smash again will reverse the projectiles polarity, causing it to turn around. You can even use this as the projectile has already lost parts of itself colliding with the foe.

If the projectile collides with an object of the opposite charge, it will cling to that object, going inside of it. The bolts will stick inside the object until you reverse the charge again, at which point they will fire out the same side they entered it in the opposite direction. Maybe you could move said object around a bit and fire it from a different angle. Either way, this is a highly manipulatable projectile, and the stun may come in handy with dragging foes into your various stage hazards...


Up Smash
Urabrask tilts his head back as he builds up a massive amount of heat in his head for 1.2 seconds. Afterwards, he fires out a stream of a white, glowing hot metal from his mouth for the next 1-3 seconds above him. The stream deals 19%-27% and knockback that KOs at 100%-45%, fires out 3 Ganondorf's above you, and can be moved back and forth with the control stick at the rate of Mario's dash speed. The further you move it back and forth the lower the height of the molten metal stream however. The move in general has massive range and power to compensate for it's heavy lag.

This move has a few additional properties, most notably that it can go through metal blocks, the stage, and just about anything else. It will melt through the object in question, temporarily turning the area it pierced through into a hitbox that deals the same damage and knockback, though it only remains like this for 2 seconds. This allows you to attack a foe through the metal blocks in more ways the one, or perhaps temporarily cut off a massive section of the stage.

The other thing about this attack is what happens when the white hot metal comes into contact with lava. You see, the metal here is a different type from the metal used elsewhere in the moveset, and is rather... reactive. When it comes into contact with lava, it will cause the lava pit to violently explode, dealing 30% and knockback that KOs at 50% to anyone within 1 Bowser width to the side of the lava, or within 2 Ganondorf's above it. This will do the same thing to lava coated blocks of metal, which will also explode, destroying the block and dealing the same damage and knockback as this move would with a lava pit over an area twice the size of the block.


Down Smash
Urabrask lets out another mechanical roar as he discharges a massive amount of electricity into the ground. This is a very laggy move, but it has enormous range of 2 and a half Bowser's on each side of you. The electricity deals 15%-22% and knockback that KOs at 150%-90%. Aside from that, this removes any charge you currently have given yourself with the Up Special, so if you don't want an electric charge you can get rid of it with this move.

The other benefit to this move is that the released charge causes a massive pull or push, based on which charge you have and which charge the objects above you have. Everything above you that has the opposite charge is dragged down 2 Ganondorf heights, possibly into the attack itself as the hitbox lasts long enough to hit with this after it pulls them down into it. If the object has the same charge, it is instead pushed up into the air 2 Ganondorf heights. This is tacked on to vertical knockback on foes, allowing this to KO earlier. If there is lava in range with the same charge, the lava launches up in a geyser that deals 20% and knockback that KOs at 90%. This can serve an incredible number of purposes, such as releasing gas clouds from structures, dragging foes into various hitboxes, or simply manipulating lava bubbles.


Aerials

Neutral Aerial
Urabrask creates a spark on his body, dealing 9% and some minor stun. This has minor lag but also incredibly small range, making it rather unexciting on a whole. However, this will also swap the charge of anything hit by this, which allows you to selectively change around the charges of your various stage hazards or the foe at will.

Forward Aerial
Mechanical noises come from Urabrask's mouth as he superheats his head, before slamming forwards with it, dealing 16% and horizontal knockback that KOs at 110%. This has about the lag of Ganondorf's Forward Aerial, so it's rather hard to actually connect with. Fortunately he lunges forwards a pretty good distance, so at least it has solid range.

When this move is used against a metal block, it will actually melt through the block, allowing Urabrask to travel freely through it. The block will mend behind you, and this allows you to go through those walls if you want. In addition, if you slam into the stage with this Urabrask will melt through the stage and hide himself inside it. He will erupt out after 3 seconds, during which time he acts as a magnet and is impossible to attack. He can move back and forth in this state at Ganondorf's walk speed as well.


Back Aerial
Urabrask forms a small blob of molten metal in his mouth before crushing it in his jaw. This creates a large number of metal shards that fly out of around Urabrask's head, dealing hits that total up to 14% and knockback based on the amount of hits, being able to KO at 130% if every single hit connects. This has moderate lag, but is fast enough that you can still hit foes using their slower attacks. It also has some excellent range, being able to hit in an area the size of DeDeDe around Urabrask's head.

After Urabrask crunches down on the block the metal shards will fall onto the floor, dealing 3% and a flinch to people who come into contact with them. The area covered is about the width of Kirby and the shards disappear after 7 seconds. You can only create one pile of metal shards at a time. You can in fact magnetize the shards as well by having a Side Special bolt pass over them. The bolt will continue travelling ignoring the shards presence, so you can charge a pile of metal shards as well as anything else at the same time.

So what happens if the shards are pulled up to a foe? Instead of damaging them, they will instead stick to them, dealing mass flinching hits that add up to 8% and sticking to them for the rest of their existence. The shards sticking to the foe is a real problem for them, because it slows down their ground movement and doubles their fall speed. This makes it much more feasible to drag the foe into a lava pit with magnetism, alongside a large number of your other stage hazards.


Up Aerial
Urabrask begins spinning in midair, dealing 10% and upwards knockback that KOs at 150% to any foes that come into contact with him. During the spinning he appears to be strongly concentrating on something, with a slight orange glow emanating from him. This has a bit of start-up lag, and Urabrask continues spinning until you press B or land on the ground. Your fall speed is decreased dramatically while in this state, to the point you just levitate over patches of ground with the same charge as you. You aerial speed is still high, which allows you to strongly control where you move with this attack. This can be used rather effectively as an aerial approach, if you so desire.

The other thing about this attack, though, is that foe the duration the strength of Urabrask's magnetic push and pull is dramatically increased. This will push or pull around foes and objects at a twice Ganondorf's dash speed if they have an opposite charge, which would make it a wonderful gimping move aside from the fact that you cannot really go off the stage any good distance without dying. It also attracts and repels at twice the normal distance. If the object or foe happens to be on the ground or below you, this will defy gravity and pull them upwards right next to you. This will actually hit foes before pulling them back in again, and this will continue until the foe manages to hit you through this attack or they are knocked out of the magnetic field.

Since the foe can still attack just fine while they are being dragged around by your magnetism, you'd thing they'd be able to hit you out of your attack very easily, right? Well, you would actually be wrong. First of all this attack will pull up bits of charged lava, which form into blobs as they circle around you. When a foe comes into contact with a blob, they take 13% and knockback that KOs at 140%, and one blob is dragged up every half second you are in range, dispersing after it comes into contact with a foe. This, in combination with metal blocks for shielding can make it rather infuriating for the foe to actually knock you out of this move.

Lastly, you can use any of your aerials out of this move, which will end the spinning. The exception is the Neutral Aerial, which will keep him spinning, allowing you to pick up objects and throw them around all over the stage. It's like a makeshift PK Starstorm. The first object you pick up will be the closest to Urabrask when magnetised like this, and will be flung off as such. Note that when you fling one of the lava blobs it deals the same damage and knockback as if the foe came into contact with it. If he hides inside the stage out of this move with the Forward Aerial, the objects will all be pulled along with him, returning to their normal state after he goes underground.


Down Aerial
Urabrask dives downwards in a generic stall-then-fall, dealing 13% and horizontal knockback that KOs at 140% if he collides with the foe. This has a fair bit of start-up lag and also a bunch of end lag if Urabrask collides with the ground. If this hits a pool of lava however, it will create a splash that covers an area a Ganondorf height above the entire pool, dealing 10% and knockback that KOs at 160%. The splash doubles in size if you are the opposite charge of the lava, hitting off somewhat to the sides of the pool as well as further above him.

If you dive and collide with a metal block in a pool of lava, Urabrask will flip the block, covering the entire thing in lava. This launches foes standing on the block upwards for 14% and upwards knockback that KOs at 110%. This will also cover the entire block in lava, turning it into a rather effective weapon without the possibility of losing the block or nearly the amount of time required. This will leave Urabrask in the lava afterwards.


Grab Game

Grab
Urabrask reaches forwards with one hand, producing a strong magnetic pull from it the same polarity as his own. This will pull the nearest object with the same charge towards him at Mario's dash speed, though pressing A will swap to the next nearest. This counts opponents as well, which will allow him to pull them towards him for a grab if they reach his hand, which will have Urabrask hold them up by their throat if they have one, or by the most head-like part of their body if they don't. This has mild start up lag but high end lag. If Urabrask has no polarity he will instead swipe forwards in a grab with average range that is fast on both ends.

If Urabrask pulls one of his various magnetized objects close enough to him, he will pull it up above him, levitating it over his head. He can even pull up the lava, it forming into a large ball over his head. The lava ball will leave behind a regular chunk of stage where it was removed from, and will turn the piece of the stage you throw it at into a lava pit with the same charge as before. Urabrask can then use his throws to toss and manipulate the bubbles/blocks/shrapnel from the bair/lava ball however he pleases. The throws/pummel are indeed the same for both foes and the various objects you can pick up with this.


Pummel
Urabrask's hand glow orange and a small amount of electricity is pulled out of the foe/object he is currently carrying. This deals foes 2% and regardless of what he's holding will remove any charge it has. There are plenty of situations where it is not advantageous for the foe/object to be charged, and this is the easiest way to remove it.

Forward Throw
Urabrask charges up electricity in his hand as he holds the foe/object until you press the A button or the foe escapes the grab. When you release, the object in question will fly forwards as a projectile 2 Bowser lengths for each second of charge, dealing the same damage and knockback they would if they were just standing in place. The metal blocks deal none unless they are heated or covered in lava, but will none-the-less push the foe along like one of Isaac's hands. If it's the foe, they take 4% for each Bowser length they traveled when they land and are put into prone, or just regain control if they are in the air.

Now, the object or foe can actually be redirected if there are other magnetized objects on the stage. Like the Forward Smash they will curve towards a positive charge, and be repelled in the opposite direction by a negative one. In addition, this has some pretty impressive FFA application, as the foe will deal damage and knockback when thrown. The amount depends on weight, 8% and knockback that KOs at 250% for Jigglypuff to 22% and knockback that KOs at 75% for Bowser.


Back Throw
Urabrask tosses the object or foe he is holding over his shoulder, dealing foes 8% and sending them into the air. They will quickly be able to react, but this moves them a fair distance away from you. It will also launch objects 2 Bowser lengths behind you, serving as projectiles in the case of the ones that deal damage. This is not nearly as powerful as the Forward Throw, but it serves it's purpose as a way to place objects behind you.


Up Throw
In a sudden burst of Violence, Urabrask lunges up into the air, holding onto the object he's magnetized or the foe and smashing into the ground 2 Bowser lengths in front of him. This deals foes 12% and upwards knockback that KOs at 150%. If used on an object, the object in question becomes a hitbox. Bubbles and lava balls work just as they would when they are static hitboxes, bubbles popping on contact. Metal blocks deal 7%-22% and knockback that KOs at 150%-70% based on their size.

There are a few neat things Urabrask can do with this move when used on a foe. If he uses it on a foe and slams them into a lava pit, he will submerge them into the lava pit. This will cause them to launch out afterwards with even more damage and knockback that usual, about 1.5X as much as if they just came into contact with the lava pit. In addition, crashing into a heated metal block with this will push the opponent through the block, dealing them 20% and a large amount of stun. Urabrask will remain on the other side of the block afterwards so it doesn't work as an infinite, but it deals huge damage and can potentially push a foe inside a group of metal blocks. Which is a very advantageous position for Urabrask, indeed.


Down Throw
Urabrask places his hand on the object/foe he currently has grabbed and releases a charge of energy through them, dealing 8% and upwards knockback that KOs at 225%. This also refreshes the timer on their magnetism, but more importantly, it doubles the strength of the magnetism as well. Again, this pulls objects and foes around at double the normal speed and from twice as long a range. Having a lava pit with such a strong pull behind it can make a rather terrifying weapon, although the super charge wears off after 5 seconds.

Final Smash


Urabrask will let out a mechanical roar and point one of his claws upwards as a massive forge rises up in the background, lava pouring out of various holes. Urabrask says a brief phrase in Phyrexian, and the forge bursts open, revealing the monstrosity shown above, also known as the Blightsteel Colossus. It stands at 6X Ganondorf's height and 2.5X Bowser's width, and is impossible to budge. The monstrous machine has 4 attacks that you can utilize via Special Smashes, while Urabrask can still fight separately. It does not move on it's own, but if you magnetize it the colossus will slowly walk towards the nearest object of the same charge. The colossus disappears after 20 seconds, but we're going to have a lot of fun in those 2 seconds...

[COLLAPSE="Attacks"]
Special Forward Smash
The Colossus rears back it's hammerlike arm before slamming it into the ground, dealing 46% and knockback that will KO Bowser at 5%, making it pretty much an OHKO. The move has a fair bit of lag, but afterwards as the colossus lifts it's arm the arm is still solid, locking the opponent underneath it until it lifts it up completely. This has 1.5 seconds of lag on both ends, making it incredibly slow and predictable, though Urabrask has plenty of ways to impede the foe enough that you can hit them with it.


Special Backwards Smash
The Colossus makes a noise of screeching metal and a large cloud of firey sparks fly out of it's chest. This deals mass flinching hits that add up to 30% if the foe is in the air in front of it at the time, though less damage as the sparks descend towards the ground. This attack has a lot of lag to start, but fairly little end lag, giving you time to take advantage of all the flinching your opponent will be doing.

Special Up Smash
The Colossus slams it's clawed hand into the ground, dealing 23% and knockback that KOs at 80% to anyone hit by the claws. More importantly, it will leave the hand in place until it uses another attack... and the hand is entirely solid. There is still an open area for foes to move around in underneath it twice the width of Bowser and 1.5X Ganondorf's height, but it's still a very scary place for the opponent to be, especially if a lava pit is taking up a large portion of that space...

Special Down Smash
The Colossus stomps down with one foot, dealing 33% and upwards knockback that KOs at 50% to foes standing underneath it in the relatively short range that it has. It will also shake the entire rest of the platform, dealing 16% and upwards knockback that KOs at 100%. This is a bit faster than the colossus' other attacks, but doesn't have quite AS much power and certainly not as much range on the main attack.
[/COLLAPSE]

Playstyle
So if you haven't noticed, Urabrask's objective in matches is to keep the foe where he wants them. No he's not really doing this to hide so much as he is to aggressively force them into all of his static hitboxes. The most direct way to zone your foes is the magnetism, which can glue the opponent to an object or repel them from certain points on the stage. Welded down metal blocks in particular serve as excellent ways to keep an opponent off a particular segment of stage. That and Urabrask's massive range can also be taken advantage of, forcing opponents to either stay out of a very large area of the stage or come right up to Urabrask, and in either location Urabrask can set up some nasty traps for the opponent.

One of the main things you should know when playing Urabrask is that you are capable of preoccupying foes for a very long period of time by slowing them down in various ways, such as magnetizing them to a lava pit and throwing the shards from the back aerial at them to make it harder for them to escape. That and Urabrask is capable of very elaborate set-ups that are extremely difficult to survive, such as welding a metal cube around himself which he can use as a sort of mobile fortress, moving it around by pushing up against the sides with an opposite magnetic charge and attacking through it with Forward Tilts and Up Smashes, or just crashing it on top of the foe. Or merely littering the stage with bubbles and lava pits and heated/charged metal blocks, which will become a huge problem once you create a makeshift PK Starstorm with your Up Aerial, and the fact of the matter is you can perfectly well repair what damage you did to your set up with your grab.

That is not to say Urabrask is without his share of weaknesses though. He has absolutely no recovery whatsoever, and once he's off a stage Urabrask is effectively doomed. That, and he's not very fast, so once a foe does manage to get in close if Urabrask does not have some sort of defensive set up he's basically dead. If the foe manages to break through all this chaos you are causing, Urabrask's game will fall apart. So keep throwing things at the foe and never let them think they have an open shot at you.

Ultimately, there are far too many ways for Urabrask to utilize his magnetism and various stage hazards to really talk about here. You want to magnetize a metal block to a foe to use as a shield while you poke holes in it with the Forward Tilt? Go right ahead. Wanna play straight up camper and build a defensive fort from which you throw balls of lava out of? Go ahead. When it comes down to it, this is your forge, and you get to decide what you are gonna make to scorch your foes with.
 

ForwardArrow

Smash Ace
Joined
Aug 17, 2011
Messages
503
Vorinclex, Voice of Hunger​

Vorinclex is the final Praetor, the Green one. He is a large awe-inspiring monster who leads the Vicious Swarm. His body was an artificial creation of Phyrexia, an attempt to replicate and perfect the ferocity of nature. His objective is to weed out the weaknesses in Phyrexia by killing and devouring them, creating perfection through natural selection. In game, his card is incredibly powerful, being able to neuter your opponents source of mana and reasources while doubling your own. Unfortunately, he's not competitively viable because he's incredibly expensive, to the point that when he comes down doubling your mana is far from necessary.

Stats​

Size: 18
Weight: 16
Fall Speed: 10
Movement Speed: 8
Traction: 7
Aerial Movement: 6

Vorinclex is absolutely enormous, at 1.8X Ganondorf's height and nearly twice the width of Bowser. Fortunately, the space between Vorinclex's arms is not a part of his hitbox, though his ribcage and legs are. His weight is also ungodly heavy, taking until around 250% to launch off the blast zone. He's shockingly fast moving as well, dashing around at Sheik's dash speed.

Vorinclex's main downside is his abominable recovery. He has a huge first jump that he can use only on the ground that launches his twice his own height into the air. Unfortunately, his second jump is the only one he can use in the air, and it's fairly small. That's not the worst of it though, because if Vorinclex is hit in the mouth, he take 1.5X as much damage and knockback. So despite his imposing figure, he's not nearly as durable as he might look, being horrific combo food in addition to these other weaknesses.


Specials​

Neutral Special
Vorinclex plunges his arms into the ground, sinking them into the stage. You can charge this move to dig your arms deeper into the stage, from Kirby's height to twice Ganondorf's height. This will unfortunately put your mouth down closer to the ground, making it easier for the foe to hit. Using another attack removes your arms from the ground with little lag, and plunging them in takes fairly little lag either. It takes a full second to fully charge this move.

While your arms are in the ground, you can move forwards to scrape away that portion of the ground, decreasing the depth of the stage by how far your arms are dug into the stage. As a matter of fact, the stage is treated in a similar manner to the Halberd or Delfino's main platform if it is thinner than half a Ganondorf height, allowing players to move through it with ease. That part of the stage will be ground up into chunks and pushed up into a mountain, which is the same total height as how much earth you have dug up and the width of Bowser. You move forwards in this state at Ganondorf's dash speed, and the mountain deals rapid flinching hits of 1% as the foe comes into contact with it while it is being moved like this.

The mountain created by this move is left behind after you dig it up. You can actually create multiple mountains of varying heights around the stage. Moving two mountains into each other will combine them into one mountain with their total size. If a foe is sandwiched between 2 Mountains, they take 9% per second and are pushed out between the two at a rather rapid rate. While Vorinclex dashes down a mountain-side he dashes at 1.5X his normal dash speed, and is a constant hitbox that deals 16% and knockback that KOs at 135%. This isn't just on Vorinclex's mountains though, any slope will suffice. Foes also climb mountains much more slowly than they do regular terrain, at about half their normal dash speed. Lastly, pushing a mountain over emptied terrain with this will return the ground to it's normal state.

Lastly, if you use this attack and you go all the way through the stage with your arms, Vorinclex will shake the entire stage, dealing foes 8% and putting them into prone if they are on the ground. While this does allow Vorinclex to disrupt the foe from afar, I would not exactly call it an effective camping measure, though it can be used to frustrate long distance opponents with a thin enough stage. Lastly, you can use this move in mid-dash, for reasons that will become important later.

Grimlock's dino form's dash attack doesn't work on Vorinclex's mountains. **** you HR.


Down Special
Vorinclex roars and begins slobbering a black oily substance along the ground. The initial roar deals 10% and a half second stun, after which Vorinclex goes completely feral. While in his feral state, Vorinclex begins dashing and is not able to stop until one of a few conditions are met. The good news is that while Vorinclex is feral, he does not take hitstun from attacks, just knockback. So while he becomes more predictable and loses access to some inputs, at least he's no longer total combo fodder, enhancing his durability massively.

So how do you stop dashing anyway? Well, the Up Smash and Down Throw are both capable of stopping a dash, but we'll get to that later. In addition, using this attack in mid dash will cause Vorinclex to roar, having the same effect it does when you start the rampage. Vorinclex also has a 5 dash attacks, one in each direction during a dash, as well as being able to perform a dashing Up Smash/Grab or a standard dash attack by pressing A. This is to make up for the fact that you cannot use the remainder of your standard inputs out of a dash.


Up Special
Vorinclex swings his arm upwards, jumping about his body height into the air with his claw out in front of him. This deals 12% and knockback that KOs at 165%, and afterwards Vorinclex will go into helpless. Terrible recovery move for the most part, but it does have one key use. Vorinclex can use this to cling to the underside of the stage, which he can move along at his regular dash speed. He can also use all of his grounded attacks, and jump off at any point, though his jumps are not refreshed until you land back on solid ground. He can grip on for up to 6 seconds, and recovers it when not attached to the bottom of the stage at the rate of half a second of grip time per second not gripping to the bottom of the stage. During a rampage, this move recharges at twice it's normal rate, so you can spend as much time clinging to the bottom of the stage as you spend on the top.


Side Special
Vorinclex growls and rears back before spitting a stream of black oil forwards, the stream pushing foes back like the various water sprays in Brawl twice Bowser's length but also dealing 12% to the foe. This also does not have particularly much lag, but it's rather difficult to gimp with since you have such an atrocious air games. This also leaves a trail of oil on the ground, which works as a generic tripping trap that trips foes who run on top of it. Not very useful or relevant on the surface, but when the foe is trying to attack you from below it makes it awkward for them to move around if your standing on the oil.

If you use this on one of those mountains, it will fill the cracks in the stage chunks with oil. This does little aside from causing foes to slowly sink into the mountain when they stand on it, which slows down their movement considerably. They can sink up to their waist, afterwards not sinking any further. That said, this can sink them up to their head if they are pitfalled in the stage, which will cause them to take 7% a second as long as they are submerged.

The real benefit to an oil covered mountain is what happens when you spread it back over the with the Neutral Special. This causes the section of the stage that you tore out and placed back in covered in oil to make foes sink at a rate of a Kirby height person as long as they stand in it. Players cannot jump as long as they are standing in this oil, thought they can climb out once they reach the edge of it. They also trudge through at half their normal movement speed and take longer to dodge and roll. They also take 7% per second if they sink below head level. The one character who is unaffected by this is Vorinclex himself, who merely has his movement speed decreased to 3/4 in the oily terrain and suffers no other ill affects. The stage returns to normal after 12 seconds.


Standards​

Jab

Vorinclex uses one of the two small arms on his side to poke swipe underneath his torso, dealing 4% and slight horizontal knockback. This is fairly fast, and one of Vorinclex's few ways of hitting foes clever enough to sneak underneath him. It won't hit foes near his arms or legs, but you have ways to deal with foes in those locations.


Forward Tilt
Vorinclex slams his hands down in front of him, dealing 15% and pitfalling the opponent. This isn't a very fast attack, but it's not especially slow either and has huge range due to the size of Vorinclex's arms. Unfortunately, it can't hit an opponent who snuck underneath Vorinclex's torso, giving it a major blind spot.

Vorinclex, however, loves a pitfalled opponent quite a bit. If the stage is thin enough that they stick out of the bottom, you can very well attack them while climbing underneath the stage. Using this attack on a pitfalled victim on the underside of the stage launches them upwards with vertical knockback that KOs at 90% and the same damage as usual. This also makes it a bit easier to submerge the opponent in the oil from the Side Special due to their decreased height. Also if you grab a foe who is trapped in a pitfall, not only do you successfully grab them but now they must escape both your grab and the pitfall.

Oh, and the fact that you can terraform the terrain with your Neutral Special does in fact interact with a foe embedded in the ground. While you are dragging around a mountain, a pitfalled foe will be moved along with the mountain. If a pitfalled foe is moved in between two mountains, they will become trapped inside the mountain, and have to button mash out with grab difficulty and take 5% per second... after which they enter a pitfall state on top of the Mountain. Suffice to say, if you had some way to take advantage of all this time you might really be able to abuse a foe trapped in a mountain.


Up Tilt
Vorinclex turns his head towards the sky and bites down, dealing 18% and knockback that KOs at 70%. This attack is also incredibly fast, having incredibly little lag on either end. This sounds broken, but keep in mind the hitbox is rather small and so high above the ground you will never hit with it normally. This is mostly just to protect you from aerial opponents.

Down Tilt
Vorinclex tears at the ground with his huge claws, dealing 5 hits of 4% and knockback that KOs at 95% at the end. This move is far from slow and covers a Bowser-sized area. Part of that area is below Vorinclex, which makes it slightly awkward to stand near his hands if you're trying to hide underneath his mass. As amazing as this move sounds on the surface, you can really only use it when you're not in the Down Special state, and in that case you are in just as much danger as the foe since they can combo you to hell and back. This will also scrape out a small pit in the stage half as tall as Ganondorf and the width of Bowser, which lasts for 7 seconds. You can have up to 3 of these on the stage a time.

If you use this when the stage is thinner than half Ganondorf's height, it will instead create a hole in the stage. The hole allows you easy access to the underside of the stage. In addition, if the stage is still in chunks because of the oil it will fall out slowly through the hole, dragging foes down with it if they are standing on that area of the stage. This might not seem all that effective since they can jump out once it falls through the stage, but then you could spike them with a Forward Tilt as they try to recover or possibly just stand over the hole and pester them with the jab or another Down Tilt. In addition, you can push mountains into these holes, which will cause them to fall through in a rock slide that deals rapid flinching hits of 3% that drag foes with it. This will, however, remove that bit of the stage's height and the mountain permanently until you respawn and the stage resets back normal, so you could potentially run out of mountains to abuse if you keep doing this. That said if a foe is trapped inside a mountain, you can push them down with it to their doom.


Dash Attacks​
As I mentioned earlier, Vorinclex has 5 dash attacks, though the forward dash attack can only be used in the midst of the Down Special frenzy because you can't input forwards when you're already dashing in that direction. Also, the attacks are somewhat buffed in a frenzy to compensate for the loss of your tilts and smashes.

Neutral Dash
Vorinclex slams forwards with one of his shoulders, dealing 16% and horizontal knockback that KOs at 125%. This has average start-up lag and end lag, and will stop Vorinclex's dash if he is not currently in the Down Special state. This is the most powerful of your dash attacks, but it's fairly easy for foes to see coming and the hitbox can be crouched under by most.

If Vorinclex is dashing down a mountain-side, the power of this move is increased to 25% with knockback that KOs at 70%. In addition, if you crash into the stage like this, that part of the stage will indent or break open as if you had torn into it with the Down Tilt. This will count towards the maximum number of indents you can make in the stage, and is the main way to make them during a frenzy, although you can only do it on the edges of a mountain sadly.


Forward Dash
Vorinclex roars and chomps forwards, dealing foes 13% and knockback that KOs at 150% if it connects. If you hit the ground with this, Vorinclex will instead bite into a mouthful of dirt. This will stop Vorinclex for half a second as he spits the mound of dirt out. You can choose to have Vorinclex toss it forwards by pressing A during this time, which turns it into a projectile that deals 11% and knockback that KOs at 175%. You can press any direction to choose in what direction Vorinclex flings it, so if the foe decided to just roll or jump behind Vorinclex they won't necessarily get off easy.

Back Dash
Vorinclex spontaneously lunges in the opposite direction he was facing, launching backwards 2 Bowser lengths and dealing 14% and knockback that KOs at 135%. This will stop your dash if you are not in the frenzy state and give you some rather hideous end lag in that case. Past that it allows you to turn around in a frenzy or attack a foe directly behind you without being nearly as predictable as you are in the Forward Dash.

Up Dash
Vorinclex swings one arm overhead, dragging opponent's towards the ground and slamming them into the stage. This deals 13% and leaves them in prone in front of you, which chains into the hitbox created by dashing down a mountainside. This has fairly little lag to start up and good range, but only really hits above you.

Down Dash
Vorinclex slams one of his hands down in front of him, dealing 12% and pitfalling foes in front of him. This is not a very fast attack but it doesn't stop your dash even outside frenzy mode, and serves as your main way to pitfall foes when you are in that state. If used on a foe from underground it deals upwards knockback that KOs at 170%.

Smashes​

Forward Smash
Vorinclex rears one of his arms back before swinging it forwards in a massive punch that deals 33%-57% and knockback that KOs Bowser at 10%-knockback that will KO monstrosities like Valozarg at about 50%. This has about as much lag as Dedede's Forward Smash, and is even more obscenely powerful. Now you might think "can you just hit pitfalled foes with this when they come out"? Well actually no, because the punch is at eye level for Vorinclex, which means it will not hit any normal foe standing on the ground. In general, it's highly impractical as an attack move against most characters but it serves as a rather effective deterrent.

If you hit a mountain with this, it will cause the mountain to slide across the stage, dealing 10%-28% and knockback that KOs at 180%-75% based on the size of the mountain and on charge. The mountain travels at Mario's dash speed-Captain Falcon's dash speed a total of 2-5 Bowser lengths. This obviously gives you control over the locations of your mountains and can gimp a foe inside of one. While you can not actually camp with this very effectively due to needing to get behind the mountain to use it. However, it's a very dangerous projectile since it cannot be rolled around or dodged, deals huge shield damage and is obviously difficult to jump over. That and it's very possible to use this to launch a foe inside a mountain off an edge, which while it repairs the stage can gimp the foe ridiculously easily.


Up Smash
Vorinclex stands up and slams his hands together above his head, dealing foes above him 25%-33% and knockback that KOs at 60%-35%. While this has enormous reach above you and not particularly much lag, it's a bit of an awkward hitbox to land due to how far it is above Vorinclex. That said, this assists in making aerial approaches on Vorinclex rather hellish. If you use this out of a dash, any foes between his arms during the start up will be pulled with him as he slides, trapped between his arms.

Afterwards, Vorinclex can return to his normal position immediately afterwards, or you can press forwards or backwards. This will cause Vorinclex to slam his side down into the stage, elbowing the ground as well. This deals 24%-30% and knockback that KOs at 70%-45%, and has a fair bit of lag. This is an effective way to chase away foes trying to hide under you, though it's predictable enough that the foe will likely dodge it pretty easily. If used on a mountain he will slide all the way to the bottom of the mountain in this state, massively extending the range of this move. Lastly, using the follow up attack out a dash will stop Vorinclex's forward momentum and leave him standing still until he moves again, after which he will continue to dash again.

If this move is used underneath the stage, Vorinclex obviously cannot use both arms this, and will instead tear a hole open in the stage which he pulls his upper body through. From here, you can lunge your body length in any direction by pressing the control stick that way, him being a hitbox that deals 20%-28% and knockback that KOs at 85%-50%. If the stage is thick this takes a large amount of time, but on a thin stage this attack is shockingly fast, and since it can be used out of a dash this may be your best KO move in Frenzy Mode.


Down Smash
Vorinclex smashes his hands down into the ground in front of him, dealing 25%-33% and knockback that KOs at 75%-40%. This has average start-up lag and hits largely only directly in front of you, with fairly little range forwards and backwards. The end lag depends on the type of terrain it is used on. If this is used on a thin piece of the stage, he pulls his fist out of the ground with relatively little difficulty and lag. If the ground he uses it on is deeper than 3/4 Ganondorf's height, however, his arm will get lodged in the ground for much heavier lag as he pulls it out.

There's a benefit to using this attack on deeper ground though. Vorinclex's fists will be covered in a large chunk of the stage about the size of Bowser. From here you can follow up the attack with A and any direction to have Vorinclex toss the block forwards in the chosen direction. This deals 23% and knockback that KOs at 80%, and serves as another way for Vorinclex to attack from a range. It's still not exactly an effective way to camp due to the amount of lag involved in creating the projectile, but you can delay the launching of the projectile until you use the follow up and in conjunction with the stage shaking and the mountains it does make it somewhat annoying for foes to approach you.

Due to the fact that it would require him to utilize both his hands and as such makes it impossible to cling to the stage, Vorinclex's Down Smash is somewhat different when underneath the stage. Instead of he will let his body hang loose for half a second and then will all his might slam into the stage. To anyone standing directly above where you were this deals 30%-38% and vertical knockback that KOs at 50%-15%, as well as the same amount of damage to opponents who somehow are directly hit by this attack. This is fairly predictable and on a whole easy to avoid simply by moving out of the way, but it's a way to direct foes towards where you want them on the stage without having to stay up there with them.

Aside from that, this also creates an earthquake throughout the stage in an area of 1.5 Bowser widths on each side-4 Bowser widths on each side. The earthquake deals damage and knockback based on the thickness of the stage above it, maxing out at 13%-18% and upwards knockback that KOs at 150%-110%. With a stage thicker than a Ganondorf height this does nothing past the main hitbox however. The main benefit though is any mountains within that range will have a small avalanche, which will drag foes to the bottom of the mountain and deal mass flinching hits of 2%. Maybe you could get them to fall towards a hole which you that you can attack them through, or perhaps position them away from you to build up the mountain even more.


Aerials​

Neutral Aerial
Vorinclex slams both hands above him, dealing 20% and upwards knockback that KOs at 100%. This has a fair bit of lag and most of the time you aren't going to be able to hit foes above you anyway. That said the range is at least pretty nice. However, if this attack is used against the stage above him, it will push the stage up about a Ganondorf height. You can move it down a maximum of 2 Ganondorf heights, and it will return to it's normal position after 10 seconds. If this is not used on the main platform it will push that platform down the same distance. Mostly this is useful for pushing a mountain towards the top blast zone, combined with a large mountain this can make it very possible to gimp the foe off the top at ridiculously low percentages.

After using this you can follow up by pressing the input again, which will have Vorinclex slam his legs below him. This deals 20% and a strong spike with moderate lag. This will also push the stage down a Ganondorf height. This has the same properties as the stage shifting from the Up Aerial. This makes it somewhat easier to gimp the foe through a hole in the stage. Unfortunately this will also increase the end lag of the move somewhat, so while the repositioning of the stage may be more useful here it's a good bit riskier


Forward Aerial
Vorinclex makes a pose as though he is flexing his muscles before slamming his arm down and forwards. This deals 26% and knockback that KOs at 70%, though it has quite a bit of lag. The range on this attack is still pretty solid though, mostly because of the sheer size of Vorinclex's arms.

Now this has a bit of an interesting effect when used on a Mountain. It will cause the mountain to split apart into 2 mountains half the height of the original one. The mountains sliding apart deals 8% and small knockback to foes standing on them. The implications of this are obvious in that it will allow you to sandwich the foe between the two mountains, which is especially nice if you can pitfall them.


Back Aerial
Vorinclex slams one of his feet backwards, dealing 18% and diagonally downwards knockback that will KO off the side at 75%. Unfortunately the trajectory of the knockback means that it will likely not actually KO them, though the range is fair and the attack is not especially slow. If this hits a grounded foe it will pitfall them and slide them a Bowser length. If it hits a foe who is already pitfalled it will also knock them a Bowser length, making it a decent way to position a pitfalled foe. If it hits a mountain it will also move THAT the same distance as it would a pitfalled or grounded foe.

Up Aerial
Vorinclex swings one arm overhead, dealing 10% and average upwards knockback. This is actually very fast to the point it combos into itself at lower percents and has quite large range, but it's rather rare an opponent will actually be above Vorinclex in the air. Maybe if he's jumping out of a hole in the stage...

Down Aerial
Vorinclex slams both fists down below him, dealing 30% and a ridiculously powerful spike that makes Ganondorf's look puny. If used on a grounded foe this deals upwards knockback that KOs at 50%, but it's awkward to hit due to having more lag than Ganondorf's Dair. The good news is that the spike is actually so strong that if you know the opponent into the stage with it they are pitfalled into the stage. This does have quite a bit of range below you, but the downside here is that it cancels if it hits the stage, instead causing an area of ground the size of Vorinclex to shake when hit, launching foes on the ground into the air twice Ganondorf's height.

Grab Game​

Grab
Vorinclex reaches one arm forwards, attempting to grab the opponent. This has huge range, on par with a tether grab, but suffers from being somewhat slow, though not as slow your usual tether grab. This can also grab foes in a pitfall state, which will actually leave them in the pitfall, which they have to escape before escaping the grab, stacking their timers. If you have a mountain with a foe trapped inside and Vorinclex uses his grab on it, he will actually did his hand into the mountain, creating a little tunnel to them and stacking that timer as well. While that is rather hard to set up it can lead to the foe being grabbed for a very long time. If a foe is pitfalled or in a mountain you can grab them from underneath the stage, albeit he will pull them out into a regular length grab. Unfortunately you can only use this if a foe is inside a mountain or in an area of the stage thin enough for the foe to move through. Lastly, if used out a dash this is far slower than normal unless you are in a frenzy, in which case it comes out at the regular speed.

Pummel
Vorinclex jabs one of his smaller arms into the foe, dealing them 2% in a fairly quick pummel.

Forward Throw
Vorinclex slams the foe into the ground in front of him, dealing them 13% and a strong spike if they are over a hole in the stage. If not they take vertical knockback that will KO at about 180%. This has some minor end lag for Vorinclex, though not enough that most foes could ever punish him for it. If throws the foe from below the stage through this instead deals upwards knockback that KOs at 125%, and will send the foe up through the bottom of the stage.

Back Throw
Vorinclex twists the opponent's spine a little bit before tossing them over his shoulder, dealing 6% and a flinch. Or rather, it is just a flinch at 0%, but as the foes damage goes higher this turns into a longer and longer period of stun. At 120% this caps out at a full second of stun, which makes it very easy for Vorinclex to follow up with a KO move. You might think you'd be able to chain grab with this forever at around 50% or so, but if used within 3 seconds of another the foe does not take the additional hitstun beyond the flinch. If used on a foe under the stage it will send them into helpless for the same amount of time, potentially gimping them.

Up Throw
Vorinclex tosses the foe upwards, dealing 15% and fixed knockback 3 Ganondorf heights into the air. While this might seem really uninteresting, it puts them within range of the Up Smash, which gives you a lot of ability to pressure the foe where you want them from here.

Down Throw
Vorinclex will grasp the foe and attempt to force them into his mouth, trying to devour them raw. This will take a variable amount of time based on the size and weight of the foe, and if he succeeds the opponent will lose a stock. This takes out of the grab timer though, and the amount of time required usually is pretty darn huge... but if they are pitfalled in the mountain or buried this becomes much more managable. If Vorinclex does successfully eat them, he will heal 50% and if he was in his frenzy state from the Down Special he will return to normal.

[COLLAPSE="Example Times"]
Kyubey: 1/2 second
Hoppip: 3 seconds
Homura: 6 seconds
Kyoko: 6 seconds
Gamzee: 7 seconds
Sheoldred(disattached): 8 seconds
Fruity Yummy Mummy: 9 seconds
Co***rigus: 10 seconds
Gatstaf Shepherd: 10 seconds
Elesh Norn: 13 seconds
Urabrask: 14 seconds
Jin-Gitaxias: 17 seconds
Another Vorinclex: 20 seconds
Vol Opt: 20 seconds
Wailord: Not gonna happen
[/COLLAPSE]

Final Smash​

Vorinclex stands on his back legs and roars towards the sky, and suddenly vines begin sprouting throughout the stage below him and traveling through the stage. These vines will attempt to lash out at any opponents on the stage or up to 3 stage builder blocks above it. If they grab the foe, they will hold them in place, for Vorinclex to storm over and finish them off with one of his massively powerful attacks. They cannot escape until the 8 second period this attack lasts for is over, so potentially you may even be able to eat them with the Down Throw. That and the vines will bind foes in pitfalls/inside a mountain, halting their escape until the final smash is over. The vines will continue attempting to grab at the foe until the final smash is over. Even if they do successfully dodge the vines, Vorinclex is free to move about and attack during this time, and can perfectly well overwhelm the opponent in combination with them.


Playstyle​

Vorinclex is a rather terrifying character at a glance. His attacks all deal enormous damage and knockback, he's really not particularly slow, and he's incredibly heavy. To top it off he can wreck the stage and has huge reach because of the massive size of his arms. Except that that he suffers from a few key problems. His survivability isn't as impressive when you discover his weakpoint, which can easily be used to knock him off the stage as early as any other character. He is incredible combo food which means he won't be keeping a low percent for long, and to top it off his recovery is borderline atrocious. To top it off various parts of his body are relatively vulnerable to attack, most foes can sneak underneath him and combo him while he only really has his jab for defense if he's not on a slope.

That's not to say there are not other uses for your raw strength that you can use to overwhelm the opponents. Your main object is to get yourself a thinner stage to play with, since a lot of your attacks and your underground game become much better once you set that up. If the stage is already thin enough, you don't get access to your mountains which is a bit of a shame, but at the same time you don't have to really do any work. That said, if you do have mountains to work with, you may not want to just pile it all into one mountain. If you can manage to pitfall a foe between two mountains, they are pretty much dead from your grab at higher percents or by pushing them into a gap in the stage at lower percents.

So in the mean time, how do you defend yourself when making a mountain. You actually have a surprising amount of ways to keep foes off you. While yes, foes can easily dart around you and combo the heck out of you, your attacks serve as wonderful deterrents of sorts. You can force them to dodge with Up Smash, make it uncomfortable for foes to get underneath you with the Down Tilt, or ward off aerial approaches with the Forward Smash. It gets even better when your on one of your mountain slopes, since you can merely dash and you become a powerful hitbox. You can also apply some pressure to slow down foes with your Down Smash/Neutral Special, or duck through the stage in places that are already thin enough and terrorize foes from below.

So once you have the stage set up to your advantage, you will probably want to go on a rampage. That said, the problem with being on a rampage is you become fairly predictable on a whole since you are constantly dashing, even if you are no longer all that easy to build damage on. It's probably best to use the rampage mode if you have some oil filled ground to go through, since that makes the foes slow enough that they can't really stop you, plus makes it easier for you to casually kill them or damage rack them by pitfalling them or having them dragged through a hole in the floor. Mind you, merely having the foe at a high percentage is usually reason enough to go into rampage mode, since even if your attacks there aren't quite as powerful all you need to do is land one hit.

This is all without getting into your under the stage game, which is an excellent alternative to a rampage if you don't have mountains to take advantage of. Pitfalling the foe and pulling them under the stage to do battle with you has a high risk attached in that the foe could quite easily gimp you from where you stand, but once they are under all you really need is one hit and they are dead. It also gives you a sort of melee ranged camping, as you can use your jab on the foe or tear the stage out from underneath them with the Down Tilt without a lot of ways for them to really respond. That and it gives you some variation in your rampage, though again it's mostly only useful if you have a few holes in the stage beforehand.

When it comes down to it, Vorinclex is one of the most intimidating characters in the game to play against, due to both his raw power and the sheer amount of options at his disposal. He can use pretty much every single move in his arsenal as a KO method, making games with him very dangerous for opponents. But it's not just them, either, since they can run around you like the annoying little bugs they are and poke at your vulnerable points if you aren't careful. Matches with Vorinclex tend to be very tense, and can often end very quickly.
 

MasterWarlord

Smash Champion
Joined
Aug 24, 2008
Messages
2,911
http://www.youtube.com/watch?v=T3e6Wy19jbo

CRAWDAUNT

Crawdaunt is a Pokemon introduced in the 3rd gen. He’s more of a lobster/crab merge than an outright generic crab like Kingler – they were only originally going to call this Pokemon Lobstar for cryin’ out loud. Crawdaunt is a very brutal Pokemon, hence where the dark part of his water/dark typing comes from, ruthlessly hunting anything that dares to intrude on his territory. Crawdaunt’s bloodlust goes beyond simple self defense, though, into the point that he will actively seek out enemies to challenge him if he gets bored enough.

Statwise, Crawdaunt is a bit shorter and wider than Marth, while being fairly heavy thanks to his durable shell. His speed suffers because of this hefty shell, though, especially in the air.

SPECIALS

Down Special - Harden: The move title seems quite misleading at first, as Crawdaunt is seen molting out of his shell to expose his fleshy interior as he uses this move. This takes an awkward bit of lag to complete, but isn’t unbearable. Once the shell is off, Crawdaunt is left very vulnerable, taking 1.5x the regular damage from attacks and is only half as heavy. Granted, Crawdaunt’s movement capabilities are doubled to help him survive, but when he’s so slow doubling his movement does little to help.

Crawdaunt will harden a new shell over his body after 10 seconds. The pay-off for getting a new shell? 7 glorious seconds of superarmor as Crawdaunt’s shell glistens brilliantly. Crawdaunt cannot use Down Special again until after the superarmor wears off.

Side Special - Bubble: Crawdaunt looks utterly infuriated before he. . .shoots out a single bubble from his mouth. Let that be a warning to you! These bubbles deal no damage or knockback, simply pushing foes away as they move forward at Mario’s dash speed. The bubbles last until they touch something solid or are attacked. Attempting to DI against the bubbles will prove futile, forcing foes to pop the bubbles by attacking them. Bubbles create a tiny hitbox that flinches when they pop, though, so foes would be best off avoiding them all-together – shielding won’t cause the bubble to pop. If used on a foe at melee range, this can work as somewhat of a counter.

Up Special - Bubblebeam: Crawdaunt seemingly froths at the mouth as if he had rabies, but he’s actually generating a stream of bubbles from it, trying desperately to make said bubbles seem at least –somewhat- menacing. These bubbles pop on contact with foes due to being shot out more forcefully, dealing 1% and flinching. Crawdaunt fires 14 bubbles in a single beam, and they travel at Meta Knight’s dash speed.

In the air, Crawdaunt fires the beam downwards and propels himself 2 Ganons into the air with this and enters helpless. On the ground, Crawdaunt shoots the beam forwards and propels himself 4 Ganons heights backwards. Crawdaunt can, in fact, use attacks while he has MOMENTUM. Dear lord! Indeed, considering how slow Crawdaunt is, he wants you to know you can’t so easily get away from him. Note that Crawdaunt is only being propelled back remotely fast during the first 2 Ganons of his slide, and is more sliding to a stop during the other 2 Ganons.

Neutral Special - Crabhammer: Crawdaunt opens up one of his claws fully as he holds it slightly behind himself, it reaching the height of Mario with how wide open it is. . .Aaaaand Crawdaunt just keeps his claw open in that menacing pose. Upon inputting B a second time, Crawdaunt clamps his claw shut to deal 20% and knockback that KOs at 105%. It takes 1.7 seconds to open up Crawdaunt’s claw fully (He’s quite the dramatic type), but Crawdaunt can use any attacks that don’t use both of his claws during that time (If he attempts to, he’ll automatically use Crabhammer) and while he’s holding his claw open afterwards. Closing Crawdaunt’s claw for the Crabhammer is quite fast, but if Crawdaunt –ever- flinches he’ll be forced to close his claw.

Note that when Crawdaunt’s claw fully opens, it’s solid. This is most useful for preventing foes from rolling behind you and thus telegraphing their rolls more significantly, as well as to carry foes along with you while sliding. If charged enough to become solid, the attack cannot be dodged (Try dodging a crushing ceiling in SSE). Crawdaunt can also clamp down with Crabhammer without full charge, but the power is very weak, only reaching 12% with knockback that KOs at 145% with 1.6 seconds of charge.

STANDARDS

Neutral Attack: Crawdaunt clamps down with his claw, dealing an unimpressive 5% and weak knockback. The jab is quite spammable, though, giving Crawdaunt an easy option to catch foes who are spot-dodging.

Forward Tilt: Crawdaunt throws one of his claws out forward in a swing, not actually clamping it in a rare display of restraint for him. This deals 6% and deals weak knockback that won’t KO, but has a minimum knockback of a platform to make it serve a decent purpose for either GTFO or to push the foe towards the edge. While it has a bit of end lag to make up for how quickly it comes out, it combos out of the jab.

Up Tilt: Crawdaunt swipes overhead in yet another impressively fast move. This deals 6% andvery weak upwards knockback, to the point that foes will be falling back on top of you shortly after you “launched” them. Aside from simply discouraging aerial approaches, if they want to anyway this lets you hit them with utilt, then back away so they fall down on the ground in front of you. This move –does- hit in front of Crawdaunt, in the event you’d like to just barely launch your enemy.

Down Tilt: Crawdaunt clamps his superarmored claw down quickly at where the foe’s legs presumably are, causing them to take 7% and trip. This is laggier than his other standards considering the better reward, but it does have a bit of range on it as Crawdaunt extends out his claw. This range means foes who were hit at the far end of the range who attempt to get up in place or roll towards Crawdaunt can be effortlessly tech chased, making the easy way out to roll away.

The move is perhaps easiest to hit with when you predict where somebody is going to land. Somebody launched who fears another utilt may go and waste their jumps, telegraphing where they’ll land. If they go for the edge, you’ll be pleased to find out this move spikes aerial foes.

Dashing Attack: Crawdaunt bends over as he runs so as to “headbutt” foes with the star on his head, taking advantage of what little momentum he could muster from his dash. If Crawdaunt misses with the move, he’ll slide a Bowser width during the end lag. If he hits, he’ll deal 13% and knockback that KOs at 135%.

A trick to make this simplistic approach more threatening is to take advantage of your charging Crabhammer claw. Pass the foe just before it goes solid, and bam, you have a free wall behind you afterwards to protect you. Alternatively, with superarmor you can just have an already solid Crabhammer claw out and scoop the foe up to bring them closer to the edge, uncaring of what they do.

SMASHES

Forward Smash: Crawdaunt makes his superarmored claw horizontal before lowering it to the ground, then clamps it, dealing 20-35% and knockback that KOs at 115-70%. This has bad starting lag, but the hitbox lingers long enough to beat out dodges and the move automatically breaks shields. More importantly, during the lingering portion of the hitbox (What would otherwise be the “end lag”), Crawdaunt is free to use any attacks that don’t make use of both of his claws, though he’s not allowed to move. Force the enemy to jump, then smack them back down into the claw.

This and all other claw attacks where the claw is superarmored have only the claw be superarmored - not Crawdaunt's entire body.

Up Smash: Crawdaunt does a very exaggerated and somewhat laggy swing of his claws over his head. This has much more launch power than his utilt, dealing 18-27% and knockback that KOs at 140-90%. The range of this move is very exaggerated as Crawdaunt fully reaches out with his claws and they enlarge very slightly, meaning foes don’t have to be right up against you to be hit from the front and can hit enemies in front of you reliably. The hitbox doesn’t give out as Crawdaunt finishes his swing like most of these sorts of usmashes, meaning his claws are still a hitbox as he swings behind himself. Slide past the foe or use this as a DACUS to attempt to hit a foe you’re going past twice. Mix this up with the dashing attack and Crabhammer to successfully catch foes who are attempting to roll past you, or use this as a second “wall” in tandem with Crabhammer to trap foes in the closest of close quarters combat imaginable.

Down Smash: Crawdaunt jumps up about a Mario and stomps down, a hitbox dealing 20-30% and knockback that kills at 130-90% as he comes down. This stomp works wonders when the foe is trapped in the super close combat situation described above, evading their attack then stomping down on top of them. It works similarly as an approach when you have momentum, as most foes will use an attack that doesn’t defend themselves from above for you to punish.

AERIALS

Neutral Aerial: Crawdaunt turns to face the camera and sweeps up his claws on both sides of himself, rapidly pinching them to deal 15 hits of 1% on each side of him. Even the largest foes can –easily- DI to avoid being hit by both hitboxes, and it’s rare to take more than 8% from this attack. Still, the aerial still has very impressive range and covers Crawdaunt from both sides. In combination with low lag, the move makes good GTFO to use when waiting for a new shell to harden. Otherwise, Crawdaunt can DI through the enemy and attempt to hit them with the hitbox on his opposite side as they attempt to DI away with him to try to pull them towards the edge/blast zone. If they start predicting this and begin DIing towards you, then you can start DIing away to get easy damage.

Forward Aerial: Crawdaunt extends out his claw in an attempt to grab the foe. If successful, he’ll deal 8% and a flinch to them, but they’re still perfectly capable of moving. Crawdaunt will then proceed to swing around to the opposite side of the foe, only loosely hanging onto them. At any time here he can release A to let go of the foe and fling himself away at Ganon’s dash speed, taking about 1.2 seconds to return to his normal aerial speed (Yes, it does boost his momentum if he has any, though getting ahead of the foe without any way to stop is rather stupid outside of FFA). If he continues to hold down A, though, Crawdaunt tightens his grip, dealing 2% and another flinch, before swinging the enemy around to his front and releasing his grip, throwing them with knockback that KOs at 100% and far sooner off-stage.

The enemy can attack you during the move, and getting hit with anything that deals knockback will cause Crawdaunt to let go of the foe. In an off-stage situation, this becomes more awkward for the foe as they’ll end up hitting you back to the stage if they hit you at certain points based off which side you hit them with this move. The foe is also left almost helpless if a bubble is involved, as they’ll just pop the bubble and flinch themselves while Crawdaunt does as he pleases.

Back Aerial: Crawdaunt suddenly turns into a blur and goes backwards 1.5 platforms at Meta Knight’s dash speed, leaving a trail of very brief after images behind him for effect. This deals no damage or direct knockback, but rather a wind effect to anybody Crawdaunt passed that pushes them to 1.5 platforms behind where Crawdaunt originally was at Mario’s dash speed with a wind hitbox as tall as Crawdaunt. It’s most notable off-stage due to not flinching the foe, and it also means aborting the fair when you’ve reached the foe’s opposite side isn’t an entirely lost cause. Using this multiple times in the air without touching ground will half the distance and strength of the push each time, and even then the move has some awkward ending lag as Crawdaunt tires from his display of speed. It shouldn’t be a problem if Crawdaunt exerts one final burst of speed to finish the hunt, though.

If you must know, this is an interpretation of “Swift”. Makes more sense than unavoidable claw that wouldn't be solid, much less random stars.

Up Aerial: Crawdaunt reaches up to grab the foe with one claw in drag them down uair you’re all too familiar with, with the slower falling of Crawdaunt and the foe gaining the falling speed of the other character. The claw is a grab hitbox, and the initial hit deals 10% and a flinch. The foe is free to attack, and hitting Crawdaunt with any attack that does knockback will cause him to release the foe. However, Crawdaunt is free to attack with any other claw attacks that don’t use both claws (Using one will cause him to release the foe, or inputting this again). While the foe is grabbed, they take 1% every half second. If they remain grabbed for 2 seconds, they’ll enter helpless from Crawdaunt putting so much strain on their legs as Crawdaunt automatically lets go. You’ll rarely if ever get them into helpless, but you can predict their attacks and do something like, say, let go and bair off, letting them fall down into the wind hitbox during their attack. Crawdaunt will automatically let go of the foe if he touches ground.

Down Aerial: Crawdaunt slashes down with both of his claws in a powerful spike, dealing 14%. This is an obvious gimper once you’ve brought the foe to the edge, and can be good to ground the foe when they’re desperately trying to run away from you when you’re superarmored.

GRAB-GAME

Grab: Crawdaunt extends out a superarmored claw a bit away from him and opens it slightly, making all of the claw but the open portion solid. This has a bit of lag, but anybody who stupidly runs into it, or anybody Crawdaunt outruns thanks to momentum, will get scooped up by it as Crawdaunt closes it. Like Crabhammer, this can’t be dodged for the same reasons.

Pummel: 2% per pinch.

Forward Throw: Crawdaunt crunches his claw together painfully as the foe takes many hits of 1%, totaling to 6%, before an audible crack is heard as the foe gets shot out of his claw for another 5% and knockback that KOs at 140%. Crawdaunt then squints, quite pleased with himself. This gives a status effect to the foe that makes it harder for them to dash and jump – there’s a 25% chance that whenever they attempt to dash, jump, or land from a jump, they will trip. This lasts 20 seconds, and hitting them with this throw will not only refresh the timer but make the effect stack.

Back Throw: Crawdaunt turns around with the foe in his grasp, then batters them with very weak snips that deal 2% and push the foe back. If the foe gets hit by all 10 snips, they’ll be dealt 20%, and Crawdaunt moves half of Battlefield during this attack. Foes can DI out of this taking as little as 14%, but they’ll still be moving in one set direction, and god help them if Crawdaunt does this against the edge (Crawdaunt will stop snipping if he reaches said edge).

Up Throw: Crawdaunt throws the foe onto the star on his head , hosting it up as he does to to deal an immediate 5% from the force. He then proceeds to snip at the foe 10 more times for 10%, the final one dealing weak vertical knockback in a similar manner to the utilt. Aside from just barely launching the foe, this throw animation is long and useful for stalling purposes when waiting for your shell to harden.

Down Throw: Crawdaunt throws the foe to the ground, dealing 8% and putting them into prone. He then goes and jumps on top of the foe, dealing an additional 5%. Putting the foe into prone has obvious enough uses with luring the foe to the edge and Crawdaunt’s solid Crabhammer claw, but if you grab a foe as you slide off the edge the stomp turns into a spike as powerful as Rob’s dair.

FINAL SMASH

Guillotine: Crawdaunt grabs the foe with a grab on par with Dedede’s. He then proceeds to do a dramatic guillotine motion with his other claw, during which time the foe must attempt to escape the grab and Crawdaunt is invulnerable to outside foes. If they fail to escape, Crawdaunt OHKOs them with Guillotine on the spot, dealing 50% and knockback that KOs at 0%. Crawdaunt can attempt to button mash against the foe to prevent them from escaping the grab, and if they’re at an equal percentage it’s slightly rigged in Crawdaunt’s favor, much less if Crawdaunt is in the lead.

PLAYSTYLE SUMMARY

Playing Crawdaunt is always a game of playing cat and mouse thanks to Harden, but the roles are swapped about on a regular basis throughout the match. When waiting for a new shall to spawn, Crawdaunt can play a coward, using Bubblebeam to propel himself away, Bubble to push the foe away and as a counter, and taking advantage of his makeshift wall in Crabhammer for defensive purposes rather than to keep the foe from fleeing. His moveset can function as more defensive if need be with his more ranged attacks like dtilt and the grab to slaughter approaches. The dtilt becomes only more competent when juggling the foe en mass with utilt serves as a good method of stalling, making the foe predict utilt spam a mile away. Stalling with uthrow and GTFO nair are other obvious measures, but Crawdaunt can use his momentum to play hit and run with the foe rather than directly fleeing – there’s only so much stage Crawdaunt has to make use of, mind you. Usmash, Dsmash, and Dash Attack are all obvious to use for this sort of thing. He can also attempt to bring the foe to the edge anyway during this phase, and they’ll be more likely to come most of the way themselves due to wanting to pray upon your vulnerability. When pushing them off the stage, it’s less a matter of KOing them then just preventing them from getting to the stage for as long as possible to stall. Crawdaunt can also simply fire a bubble or two and use this time to make his way to the opposite end of the stage.

The meat of Crawdaunt’s playstyle is more there either when Crawdaunt is superarmored or he’s not being bothered to use Harden at all, though. Having a wall constantly behind you immediately locks out a gigantic portion of the stage to the foe, as accessing that portion of the stage means making it past you. You’ll want to approach and knock the foe to the edge to begin gimping them, possibly with a bit of prone abuse, or simply trapping them between Crabhammer and fsmash. All of those momentum hit and run tactics bring forth a new meaning when Crawdaunt has a wall behind him as well, as when you would normally slide “past” the foe, the Crabhammer wall will scoop the foe along with you as they get hit by the portion of your Usmash that hits behind you. Perhaps the best way to start this up if you find yourself in the middle of the stage with the foe, especially without Crabhammer set up, is to use Bubble. Bubble pushes the foe towards the edge fast, yes, but Bubblebeam will push you faster. If you can manage to get to the foe before the bubble pops, attempting to counter-attack you will just flinch them as they get dragged along with you and are left at your mercy.

Why bother throwing Harden into the mix at all? What’s so important about superarmor? Well, due to Crawdaunt leaving the foe so few options to run, the general response is to fight back against him as he constantly shoves himself into their faces. Superarmor leaves the foe almost helpless to resist and makes Crawdaunt’s methods of blocking off escapes far more relevant. Bubble can sometimes substitute for this in individual instances, but requires very precise spacing for you to Bubblebeam yourself to the foe in time so they just don’t just instantly pop it. With all of this talk of the foe wanting to run, do you think discouraging them from running or taking to the air with fthrow would be handy? Hrm. . .

Off-stage, Crawdaunt’s gimping game obviously has the dair spike, but his fair and uair largely revolve around his bair. Once Crawdaunt gets the foe off-stage, he’ll typically be between them and the stage. . .How most gimping characters want it, but not Crawdaunt. Crawdaunt wants the foe in-between the stage and him to properly get off his bair. With his poor aerial movement, Crawdaunt will struggle to get past the foe normally. Instead, he can swing to the foe’s opposite side with his fair, try to get the foe to DI downwards into a bair wind stream with uair, or attempt to DI past the foe with nair. All three can potentially set up the bair, which serves as an excellent finisher and can net you many early kills. The bair is also quite important because it serves as Crawdaunt’s main method of actually getting back to the stage afterwards, as the Up Special is a strictly vertical recovery, so Crawdaunt would prefer to get it off sooner than later, making off-stage games quite frantically paced. If Crawdaunt is lucky enough to have superarmor here, he can casually DI through the foe without fear to use his bair. Better yet, his uair becomes a terror as the foe becomes unable to knock him off, though Crawdaunt will have to launch the foe very high into the air to not get KO’d himself due to how fast he and the foe fall. However, Crawdaunt can simply make the foe enter helpless above the stage – it doesn’t matter where they enter it, as once they do Crawdaunt can use a bubble and/or a bair to direct them off-stage to their death.
 
Last edited:

ForwardArrow

Smash Ace
Joined
Aug 17, 2011
Messages
503
Slaking

Slaking is a Normal Type Pokemon from Ruby/Sapphire/Emerald. It was a very lazy pokemon, but also incredibly powerful. The problem comes from the fact that it's too lazy to use it's power. And like Slaking, I'm too lazy to write any more description.

Stats
Size: 10
Weight: 10
Ground Movement: 1-9
Fall Speed: 8
Aerial Movement: 0.5-6
Traction: 5


Slaking is pretty much just the size and weight of Bowser, as well as being relatively fast falling through the air. His recovery isn't really anything to get excited over, nor is his traction.

So you might be asking, FA, what about those variables? I'm too lazy to explain them.

Specials

Neutral Special
Slaking lays down and falls asleep for as long as you hold the B button, or at least until an opponent attacks you. He takes a small amount of time to go to sleep, but a fair bit to get back up. While Slaking is asleep, he starts healing 3% per second. It's a nice method of baiting foes without projectiles, and just useful if you can get some space.

Side Special
Slaking stands up and slams forwards with his fists, dealing 20% and knockback that KOs at 70%. Ouch, that's pretty powerful, and on such a fast attack too. If the attack doesn't connect with a foe, it will still hit the stage, which will cause it to tip in that direction. How far, it depends on how close you are to the edge and the size of the stage. I could give you exact statistics, but I'm far too lazy for that.

Up Special
Slaking lets out a loud yawn, and a small white puff flies out of his mouth. This white puff is the size of Kirby and slowly drifts forwards at the rate of Ganondorf's dash and upwards at the rate of his walk. You can hold this input down to have him let out a bigger yawn, increasing the size of the puff to up to twice it's normal size, as well as halving it's movement speed. If a foe comes into contact with one of these puffs, they will become sleepy, stumbling around for the next 2 seconds at two-thirds their normal movement, and attack speed, before lying down and taking a nap themselves. They will also fall twice as fast while they are groggy, not really having the stamina to stay in the air. This can also be used while you are asleep from the Neutral Special.

Down Special
Slaking stands up and raises his arms on both sides of him, before slamming them down. This deals 26% and knockback that KOs at 45% to foes standing on either side of him, but also causes the stage to shake for the next 3 seconds. The shaking stage is rather dangerous for opponents, causing them to get launched back up into the air 1.5X Ganondorf's height if they land on the stage with 8%. This isn't actually knockback, as they don't take any hitstun from it, and it doesn't scale with percent.

Standards

Jab
Slaking punches forwards in a similar manner to that Ganondorf fellow's, except his deals 15% and knockback that KOs at 120%. Same lag and slightly larger range, otherwise. You can also use this while asleep, which will have slaking roll forwards, dealing 7% and moving him forwards Bowser's width. The one used when asleep is unfortunately pretty slow, though.

Dash Attack
Slaking falls down on his face, dealing 28% and knockback that KOs at 50%. This is kind of obscene as I think you can tell, but this also has the lag of Dedede's Dash Attack, so it's not all THAT easy to land.

Forward Tilt
Slaking claps his hands out in front of him, dealing 18% and knockback that KOs at 90%. This attack is also pretty darn fast, and has huge range. Gosh, it must be good to be Slaking.

Up Tilt
Slaking reaches upwards in a grab hitbox that reaches up 1.5X Ganondorf's height. If he can in fact grab a foe, he will slam them against the ground for 17% and a ton of hitstun, enough for you to follow up really easily given how fast the attack is. If used on foes during an earthquake, they basically can't get out until the earthquake is over as you keep grabbing them and slamming them against the ground, very easily building up 100+% on them.

Down Tilt
Slaking takes a deep breath, before releasing a stream of air from his mouth. This is actually a fairly powerful wind hitbox, that will push foes about 2 Bowser lengths away. Oh, and it can be used while you are asleep too, and will push around sleeping foes without waking them up. Nifty.

Smashes

Forward Smash
Slaking smashes forwards with his shoulder in a manner akin to Wario, dealing 24%-33% and knockback that KOs at 65%-20%. This is disturbingly fast on the start-up, though this has a fair bit of cool down lag. This has short range, but if the stage is slopped from the Side Special he will slide down a further distance depending on how much the stage is sloped. I'm still not giving you the numbers for this, go make them up yourself.

Up Smash
Slaking rips up a large boulder out of the stage and thrusts it over his head, dealing 22%-28% and knockback that KOs at 80%-40%. He then sets the boulder down next to him in the cool down lag. The boulder will remain in place after this, serving as a solid wall and being about twice the size of Kirby. If there is currently a slope on the stage, the boulder will roll down the slope, serving as a projectile that deals 12% and knockback that KOs at 160%. The boulders will not roll past Slaking, though if your asleep and have a boulder or 3 behind you just jab and the boulder will roll right over you as you yourself roll over. That's two roll overs in one sentence. Clearly, I should have used a synonym, but I'm too lazy to do that.

Oh yeah, and a couple other things. You can only have 3 boulders on stage at a time, and they cannot stack on top of each other. Boulders will also bounce up and down during an earthquake, not dealing damage but rising up 1.5X Kirby's height into the air. They fall really fast, so this effectively just turns them into taller walls.

Down Smash
Slaking digs a small hole in the stage, which serves as a pitfall trap that sticks around for 5-15 seconds depending on charge. The pitfall trap will not disappear after an opponent lands in it, and if a boulder rolls into a pitfall trap it will become stuck in place. The only way it can be budged from there is by rolling another boulder at it, which will push out the old one as the new one takes it's place. There is a limit on the number of pitfall traps you can put on the stage, but I don't FEEL like telling you what that is.

Aerials

Neutral Aerial

Slaking reaches forwards in a grab hitbox in front of him. If he can grab the foe successfully, he will shake them, dealing them 13% and leaving them disoriented. This disorientation prevents them from attacking or DIing in the air until they either land on the ground or take additional knockback or hitstun. Note that landing on ground that is shaking will knock them back into the air, still disoriented.

Forward Aerial
Slaking punches in front of him, dealing 16% and knockback that KOs at 135%. This is pretty fast, and honestly there's nothing more to talk about here so let's move on.

Back Aerial
Slaking reaches back behind him and attempts to grab the foe. If he does grab them, he will put them in front of him. Slaking is too lazy to turn around and attack, so instead he just puts the foe where he can hit them.

Up Aerial
Slaking claps over his head 3 times, dealing 3 hits of 6% and upwards knockback that KOs at 120% on the last. This attack is pretty fast, as per usual for Slaking. Kind of weird that such a lazy pokemon is so fast, but all these Pokemon sites tell he his base speed is 100 so we're just gonna go with that.

Down Aerial
Slaking does a belly flop in mid air, and if an opponent is underneath him they are carried with him down to the ground or off a blast zone. If Slaking and the foe land on the ground, the foe takes 6%-20% and 1-3.5 seconds worth of stun based on how far Slaking fell. I know DM you hate those more damage the longer you fall attacks, but I'm far too lazy to try to please you right now. Obviously, this is a good time for a nap. As a matter of fact, if you are a particularly lazy set reader like all of you have been for the past couple weeks you may want to take a nap right now.

Grab Game

Grab
Slaking's grab has pretty much the exact same properties as Dedede's grab, though he just reaches forwards. Aside from that, you can grab the foe while asleep, though this particular maneuver is slow to come out and even slower with the end lag, not to mention you can't actually pummel or throw the foe until you wake up.

Pummel
Slaking headbutts the foe for 4% in a surprisingly quick pummel.

Forward Throw
Slaking slams the opponent into the ground in front of him, dealing them 13% and upwards knockback that KOs at 140%. If you use this over a pitfall, Slaking will slam the into it, lodging them into the pitfall with much more force and making it twice as difficult to escape. And giving you twice as much time to sleep.

Back Throw
Slaking tosses the foe behind him before clubbing them away with one of his arms, dealing them 16% and knockback that KOs at 120%.

Up Throw
Slaking tosses the opponent overhead, dealing them 10% and fairly high hitstun, enough to guarantee an aerial follow-up.

Down Throw
Slaking slams the foe into the ground, and they slide off to the side in manner similar to Dedede's Down Throw. Only this deals 7% with even more stun. There are very few characters in the game this isn't an infinite on, come to think of it.

And there you have it, that's Slaking. What do you want me to tell you more. Nah, I'd rather recline in my chair and leech the chat... oh wait, you mean to say that I HAVE to explain that stuff with the variable movement speed? Okay, fine fine there's a bit of a twist to Slaking, if you are wondering. Let's get right to that.

The Twist
So you see, Slaking is really lazy, and is not really going to want to fight the opponent most of the time. You see, at first Slaking will perform with the ridiculous degree of power and agility he does in the moveset... but as time goes on he stops trying. Over the course of 15 seconds, Slaking will tons of attack speed and movement speed... and to top it off, every time you use an attack, he will get lazier by 1 second worth of time. After 15 seconds worth has been used up, Slaking will just collapse where he stands and not DO anything. The only thing he can do is use the Neutral Special to sleep...

Which is exactly how he recovers to get back up and fight again. You see, Slaking recovers two seconds worth of fighting time for every second you sleep, and this can go over the cap, allowing you to perform at peak performance for extended periods of time. So if you spend an extensive amount of time sleeping, you might really get to pull off an extensive Down Throw chain grab, as opposed to it becoming too slow to use. Mind you, you'll need to find time to sleep, and that's where the rest of your set comes in. You've got plenty of ways to keep yourself asleep. You should be fine.

Aside from that, whenever Slaking takes damage, he recovers 0.5 seconds worth of combat time. Make sure every hit you land on Slaking counts. And with all that said now, I'm not gonna give you a playstyle summary for Slaking. It should all be pretty obvious to you by now, and I'm too lazy to write one up anyway.

Final Smash
Slaking got the Smash Ball, oh no! Now Slaking actually feels motivated to fight, and will not suffer from his mechanic at all. GIGA SLAKING RAWWWWWWR
 

Holder of the Heel

Fiat justitia, pereat mundus
Joined
Dec 3, 2011
Messages
8,850
Location
Alabama
NNID
Roarfang
3DS FC
1332-7720-7283
Switch FC
6734-2078-8990
To give a rather fitting lazy review of Slaking (I have only seen the Magic the Gathering sets, which are really cool, I used to be obsessed with that game until I began obsessing with not being broke), I'd have to say that the mechanic he runs on is so fitting and interestingly paired with the move rest, so much so that having a healing move is obviously justifiable (not to mention his big size). The only thing I can really complain about is the lack of interesting Special Moves which play as just added Standard Moves, save for Rest and Yawn. The same goes for the Final Smash, which although may be good to others, to me in a way seems thoughtless and could be used better.

I'll possibly look over your more luxurious appearing sets from before at some point.
 

ProfPeanut

Smash Ace
Joined
Oct 1, 2008
Messages
727
Moveset to come soon, reviews to come later

1647426967196.png

Lyra Heartstrings
[My Little Pony: Friendship is Magic]
[Sound] Attack +9
Increases the damage of soundwave/music attacks (ex. Octavia, Cutie Mark Crusaders)


1647427041042.png

Tribalman's Shiv
[Team Fortress 2]
[Bleed] Damage +5
Adds a damage-per-second function similar to Lip's Stick to bleed effects inflicted by the character. If one already exists, stacks with that effect instead. (ex. Sweeney Todd, Princess Kraehe)

1647427326586.png

Space Core
[Portal 2]
Fall Speed -30
Alters falling speed (ex. a fall speed of 4 becomes 1, 7.5 becomes 4.5)

1647436001992.png

Imp
[Zero Punctuation]
[Minion] Attack +8
Increases damage dealt by minions made by the character (ex. The Penguin, Elspeth)


1647436612198.png

Clockwork
[Danny Phantom]
[Time Warp] Duration +90
Increases duration of time-altering fields/effects made by the character (ex. Teferi, Akemi Homura)
(Duration increase is measured in frames. Smash Bros. runs at 60 frames-per-second, so do the math.)

{{"For me, this would have extended the duration of both time threads and Entropic charge! Such a shame that Stickers no longer exist in the future." -Timekeeper Cookie, time-travelling graffitist}}


1647436903472.png

Probe
[Starcraft]
[Construction] Health +10
Increases the health of all destructible props/vehicles made by the character (ex. Box Man, Vol Opt)

1647437247866.png

Oathkeeper and Oblivion
[Kingdom Hearts 2]
[Light, Dark] Attack +60
Increases damage of all light and darkness based attacks.
 
Last edited:

KingK.Rool

Smash Lord
Joined
Nov 26, 2005
Messages
1,810

As you continue trekking through the desert, you see a cactus immobile in the distance. Shade at last! But when you get closer, you notice its empty eyes... and that sinister grin... why would anybody bother setting up a scarecrow here? You sit in its shade for a little while, absent-mindedly pluck a thorn from it. At last, totally creeped out, you carry on your way. The desert sun is harsh, and now you've forgotten all about the cactus... but it hasn't forgotten about you.

And soon night will fall.
 

darth meanie

Smash Journeyman
Joined
Jun 6, 2008
Messages
452
A Random PokeSet Movement? Am I Doing It Right?

With Credit to LegendOfLink for a very old dropped joint moveset
Buizel


Buizel is the Sea Weasel Pokemon (though you only ever find him in freshwater rivers) from Sinnoh, and one of the earliest available Water-type Pokemon found near Floararoma Town. Their notable traits are their twin tails, which they spin like propellers to travel against fast flowing rivers, and the flotation ring around their necks, which they can inflate to drift downstream.


Stats


Buizel is a small Pokemon; taller than Pikachu by a significant margin but much lankier, and therefore just about as light. Buizel walks at a slightly above average pace, but drops down to all fours for his dash, which is barely below average in speed. Buizel gets down on all fours for his crouch and crawl as well, and is very difficult to hit in this state without an attack that strikes the ground.

Buizel has surprisingly good aerial mobility combined with above average jumps. If you hold up on the control stick while Buizel is in the air, he will puff open his floatation ring, slowing his momentum considerably and decreasing his fallspeed from average to about Kirby's. The floatation ring deflates automatically after a second, if he fastfalls, or if he attacks.

Buizel's traction is very poor, if not quite as bad as Luigi's; he tends to slip around when he's walking.


Specials


Neutral Special O Water Sport

Buizel tilts his head back and sprays a thin stream of water directly above him, splashing out to both sides. He can hold this out for up to two seconds, and it has a weak push effect on enemies struck by it, about the strength of Mario's minimum charged F.L.U.D.D.

If Buizel is standing on the ground, a pool of water collects at his feet. The water evaporates after about twelve seconds, but all players who stand in it have nearly no traction whatsoever.

For a swift swimmer like Buizel though, this slick terrain is his home. Buizel can't trip in water, unlike opponents who will find their trip rate greatly increased, and his dash completely changes. He now stands and leans forward, building up speed until he is sliding slightly faster than Captain Falcon's dash, leaving a trail of water behind him.

Buizel can roll while sliding, changing the direction he faces and moving him the same distance his normal roll does without changing his momentum as long as there is a continuous puddle of water.

Side Special O SonicBoom

Buizel pivots and slaps his tails together, firing a thin burst of wind that travels the distance of Wolf's Side Special. It does 8% that doesn't decay and set knockback about two battlefield platforms away.

Because he has to pivot in order to perform this move whether he faces the opponent or not, this attack is actually faster if Buizel starts it facing away from the opponent rather than towards them, because then he only has to turn a half circle rather than a full rotation to perform the move.

However, if you tap the opposite direction after starting this move, Buizel will pivot again after firing it, giving him some momentum away from the opponent, especially if he's sliding on a path of water.

Down Special O Whirlpool

Buizel has to lean back and stand on one paw in order to get his tails up to perform this move. While balancing on one paw his tails sweep off from the ground into the air and begin to turn like a propeller, generating water into a whirlpool. After about two thirds of a second, Buizel flips backwards and kicks it away. The Whirlpool is slightly smaller than Meta Knight's Mach Tornado and comes to rest half a battlefield platform in front of Buizel, where it spins around before petering out five seconds later.

Buizel can also generate these in the air. When performed in the air, the move has slightly less start-up time and the whirlpool is kicked forward at the angle of Pikachu's Thunder Jolt, giving it a bit of extra forward momentum when it hits the ground.

Buizel's Whirlpool will also slide along water pools, traveling at Mario's run speed forward, though they don't last any longer or do more damage when doing so. The whirlpools can travel off the edge.

The whirlpool has a strong suction effect that is stronger the higher the opponent's damage is, but otherwise deals repeated hits of 1% damage to opponents, but not nearly as quickly as Meta Knight's Mach Tornado.

Opponents will find it almost impossible to push out of the sides of the whirlpool; the only way out is to push upwards and jump as soon as you leave or risk getting sucked back in again. If the whirlpool is falling through the air, it becomes even easier to push to the top and escape.

Up Special O Aqua Jet

Buizel quickly spins his tails again, streaming water from his body as he moves in a manner identical to Lucario's ExtremeSpeed, but with slightly more start lag. Enemies struck by Buizel take 7% damage and moderate knockback.

Buizel normally ends this attack helpless, but if he hits an opponent he will bounce off and flip about his jump height backwards, and will be able to perform all moves again except his recovery.


So what do we know about Buizel so far? Well, he's a low-level Pokemon only found in early routes, and most of his attacks are pretty weak. Buizel can't zone enemies out with his projectiles, but he can control some important areas of space with SonicBoom and Whirlpool, especially with opposing movement already hampered while standing in water. He's also quite slippery; able to slide along the stage quickly, if he gets a chance to set up some, change his momentum around and bounce off opponents with his attacks.


Standards


O Jab

Buizel does a cute, short punch in front of him. It's very fast, and deals 2% damage. He'll perform the same jab again if you repeat it, but press it a third time and he'll turn around and sweep his twin tails at the opponent for another 5% damage and weak knockback.

Much like with Buizel's SonicBoom, when he turns around you can hold the direction he's facing to give himself a boost away from the opponent.

O Forward Tilt

Buizel leans forward, drops on his front paws and spins around to slap opponents with his tails. This attack is slightly faster than the animation might suggest, although it has a fair bit of ending lag. This deals two hits of 4% damage and stronger knockback.

This move has a lot of forward range, and you can make it effectively even more so by sliding towards your opponent when you use it. And you can even dash away immediately after starting the attack.

O Down Tilt

Buizel claps his hands, much like Diddy Kong's Down Tilt, except Buizel is even lower to the ground than Diddy. This deals 8% damage, and like most Down Tilts is very fast.

Although the range of this attack is nothing to write home about, if you crouch while Buizel is sliding forward on water he can belly slide and keep his momentum while become difficult to hit for most moves that don't hit low to the ground, allowing you to treat this move like one of them slide kicks you see top tier characters in traditional fighting games use.

O Up Tilt

Buizel bends down a bit and looks back, and his tails both slap at anything above him, one after another. It deals 5% and weak knockback, but it's repeatable and can juggle enemies at very low percentages. It also hits both in front of him and behind him. As far as anti-air goes though, he's better off jumping back and using SonicBoom.

O Dash Attack

Buizel springs forward and curls up into a ball, bounding ahead before knocking into the opponent for 11% damage and surprising knockback, KOing around 105%.

Although the move doesn't get any stronger if Buizel is moving faster, obviously the faster he is moving when he starts the attack the further he travels when he jumps. At his normal dash he moves half a battlefield platform forward, and almost two battlefield platforms when he has a full dash ahead.

If he lands without hitting anyone, he tumbles forward for minor flinching hits of 3% damage and is mostly vulnerable to a counterattack.


The puzzle should be getting clearer now; Buizel is a Pokemon that specializes at quickly slipping in and out, and at unusual angles as well. Buizel's not afraid to admit when he's fighting something stronger than him and slip away to fight another day, but when he does determine to attack, he is very quick and difficult to shake off.


Smashes


O Forward Smash

Buizel has a bit of a unique Forward Smash; once you finish charging, he rolls forward first and then immediately releases an overhead punch to his enemy. The punch deals 11-17% damage and is does decent knockback, around the same as his dash attack.

While normally it's a bit dull and predictable, Buizel can pivot before the attack releases to change which direction he rolls. While that would normally be a bit of a lame mix-up, when he's sliding on water it becomes a much more potent threat as the opponent has to determine whether you're trying to get behind them, or if it's safe to rush in only for you to roll back and punch them.

He can also continue sliding in the new direction he's facing, if there's water continuously where he's standing.

O Up Smash

Buizel performs his best imitation of a Shoryuken, using water instead of fire for the power of the attack. As you might imagine, this move has a very fast start-up, but has pretty punishable end lag, if not as bad as Luigi's Super Jump Punch.

There are two hitboxes; Biuzel's fist, which deals 12-18% damage with knockback that kills as low as 90%, and the blast of water, which deals 3-4% damage, but has a much larger hitbox and upwards pushback.

Buizel can make up for the pathetic range of the actual punch by dashing in with this move, but he cannot cancel his dash attack into it like other characters can, as he is in the air when he starts his dash attack.

The move also works as wonderful anti-air if he needs it.

O Down Smash

Buizel crouches slightly, but doesn't drop on all fours, and slaps his tails at the ground in front of him five times for about 4-6% damage per hit. It's a quick Down Smash and has okay range, but only hits in front of him. Enemies can DI out of it, but it's not easy.

This sweeping attack doesn't actually turn Buizel around, but it has so little end lag that you can dash away immediately afterwards if you're so inclined.

You can hit enemies trapped in a whirlpool with this move too, making it even harder to escape in any direction.


Buizel's smashes aren't all that unlike his tilts; fairly fast attacks that he can use to attack enemies that give him a bit of unpredictability. His Down Smash is the exception; a solid attack that gives him power to hit low when he's not sliding in with his Down Tilt, while his Forward Smash and Up Smash make it impossible to be safe when Buizel is sliding along from any direction, above or even behind.


Aerials


O Neutral Aerial

Buziel spins into a ball and rolls in midair, seemingly identical to Pikachu's Nair, attacking with both tails extended in opposite directions. The attack doesn't have as much killer damage and knocback, but hits twice for 6% damage and pulls opponents inwards before knocking them away.

O Forward Aerial

Buizel actually dives at a slightly downward angle for this attack, falling forward to hit enemies with his body for 7% damage and knockback in his direction. This move is best for diving into enemies standing on-stage or maneuvering about midair. If he lands while performing it, he simply goes into his crouch.

O Up Aerial

Buizel straightens himself in midair and spins his propeller tails beneath him, propelling himself upwards his entire height, before immediately falling back down the same distance.

His head and his tails both deal several hits of 3-4% damage, and weak knockback. Buizel can also cancel this attack into his floatation ring hover to maintain the distance he has traveled upwards and effectively manipulate his midair position.

O Back Aerial

Buizel's tails spin as quick as they can, trapping enemies as he moves forwards or backwards in the direction you tap, dealing seven hits of 2% damage each. He can use this as an approaching tool with a pivoted jump or as a general air combat attack, and with its decent range and duration it makes a strong move all around. Get some momentum while sliding before jumping to make it even more dangerous. Hit an opponent on the ground with this, and they're likely to trip, especially if they're standing in water.

O Down Aerial

Buizel pauses for a moment before slamming down with one foot, almost identically to Ness's Down Aerial. This deals 13% damage and spikes, and is especially strong as a follow up to opponents escaping a Whirlpool, bouncing off an opponent, or out of a double jump to get above someone. It can spike offstage, or play into a bit of a combo game at lower damage.

Attacks that send opponents into prone from the air leave them sliding along the direction they were knocked in water, so moves like Buizel's Down Aerial and Neutral Aerial can be good for this.


Here is where it should all start to come together. Buizel can extend his effective operating range greatly by using his slippery patches on the stage to build up speed to jump into his aerial game. His aerials give him a lot of room to maneuver his positioning in the air and finally gives him the full range of attack angles he needs. Jump over an opponent and make them second guess whether you'll use a Neutral Aerial, Down Aerial, or go backwards in midair with a Back Aerial. Maneuver around attacks, stall briefly with the floatation ring to make enemies second guess their moves. Buizel is slippery, and in the air the opponent can't quite tell what he's going to do.


Grab-Game

O Grab

Buizel has a short ranged grab, and you really shouldn't need me to tell you that he can slide forward towards opponents to increase the range and keep sliding even after he grabs them. Pummel is a simple kick for a little less than 2% damage. If they slide off the edge together, Buizel automatically performs his Down Throw.

If sliding, you can also pivot immediately during the grab to slip around while you grab them so you face the other way.

O Forward Throw

Buizel holds onto the opponent and flips forward, tossing them away for 9% damage and decent knockback away.

O Down Throw

Buizel pushes the opponent down and jumps down on top of them. It's not too terribly impressive in damage, but he leaps off, dealing 6% damage and footstooling them. In the air, this footstool them and can be used to lead into a gimp. If you turn around after grabbing an enemy and slide off the stage, you can use this to trap them under the lip of Final Destination.

O Up Throw

Buizel shows a surprising amount of strength and tosses the opponent over his head, then backflips to kick them with both tails, dealing two hits of 5% each. Buizel's best throw for damage, but not good for much else.

O Back Throw

Buizel spins around tosses the opponent away behind him for 6% damage, and they slide away prone if they land in water.

Buizel may have a simple grab-game, but don't confuse it for a useless one. A Whirlpool can easily set him up to land a grab, or he can dash in and grab them when they expect to shield another attack. Buizel can go for a Forward Throw to get a kill or use his Down Throw and Back Throw to get excellent set-ups, while his Up Throw helps him build up some damage and he can jump into a Water Sport to push the opponent up higher and spread some water around.


Final Smash


Final Smash O Hyper Aqua Jet

Buizel crouches slightly as power courses through him, generating a shell of water around him. He then bursts forth in whatever direction you point him, traveling at the speed of Captain Falcon's dash through the air, hitting opponents and trapping them along with him for the ride before finally exploding the shell of water off several seconds later. You can control his direction, but it takes him a bit to turn, similar to controlling Ness's PK Thunder.


Playstyle


Buizel is small yet slippery. Most wild Buizel generally avoid combat and have moves focused on discouraging combat like Water Sport and Growl early on, and only have SonicBoom as an attack to do damage regardless of their own personal strength. Buizel is a species that cannot simply play to its own natural strength to fight and has to get creative to find success.

He doesn't have any powerful attacks, he's easily launched around, yet he makes himself difficult to kill, difficult to hit, and difficult to guess where he's coming from. A healthy mix of aerial and ground based approaches, combined with regular retreats and proper spacing so he can get some speed up and spread water around with Water Sport is key to success with Buizel. Start one off, then slide along as you spray water to start covering the stage.

Ward off enemy approaches and try to establish some respect for a few zones early on; slightly above and in front of you with SonicBoom (or the zone where almost every jump-in approach comes from) and in front and beneath you in the air with Whirlpool. If you spread a pool of water between yourself and your opponent those two moves can easily keep opponents from approaching you from the ground.

Buizel can't camp though, and simply does not have the big hitting moves or large hitboxes to deal with an incoming attack. So instead you must find a balance between runaway and rushdown, and try to keep your opponent guessing as to which one it is. Regular retreats to pester enemies with SonicBoom can be an effective way to start building up damage.

On the approach, getting in while avoiding attacks is the main premise, which is where nifty moves like the Forward Aerial, Back Aerial, Down Tilt, Forward Tilt, Up Aerial, and floatation ring can all come into play. And those are just the ones with the obvious uses. Mix-ups involving fancy use of SonicBoom and Back Aerial can be pretty effective used properly.

Whirlpool is a fantastic move for setting up tricky stuff, busting shields, or setting up for a gimp if you have a body of water to kick it towards, and you can outrun it to make some nasty tricks. While it can't gimp on its own, a follow up Down Aerial or even an Aqua Jet if you're feeling like gambling can finish enemies off.

For more traditional kills, the Forward Smash, Dash Attack, Forward Throw, and Up Smash are your primary tools. Buizels kill moves are all a bit awkward, but fortunately none of them are slow. It's just a matter of making them unpredictable with some good footwork to keep the opponent on their toes.

And of course, Buizel isn't defenseless out of water. His Up Smash and Down Smash are pretty decent moves that let him handle both attacks from the ground and anti-air. And although his air game is best with a running start, the lightweight, speedy Pokemon can be plenty effective without a pool of water to work with in the air.

While to most trainers, Buizel is just the cutesy stepping stone on the way to the much more dangerous Floatzel, Buizel is perfectly capable of using his own existing tools even at low levels to be a capable fighter.


Author's Notes

I sorta wanted to do something in order to stall from studying for my Crim Final, and I saw that you guys were doing this, and I can't say no to one-day PokeSets. Bet no one expected this! Clicked random Pokemon, a few repeats from the past two contests showed up, and then Buizel did. LoL and I were at one point considering a Buizel moveset but that shriveled and died a long time ago, and even back then I thought that Buizel's early level-up moves made a very distinctive impact on the Pokemon's character. So here I am, trying my best to avoid the usual tropes of Pokesets that I fall for again and again and apply what Junahu said in his excellent recent article and try to put it to use.


ottobot

Smash Cadet
Joined
Dec 19, 2011
Messages
30
O.K. here it goes, my first post and first moveset. it's of Steve?, the main character of the game Minecraft.


Steve?

Emblem: minecraft dirt block logo.

Notes:
A couple things to mention about this set before we start. 1
1. Any time a block is mentioned, assume it is a cube about half of Steve?’s height
2. Can switch his weapons instantly, with no animation. This means that his attacks are incredibly fast.
3. When I refer to “ a little lag” that means a little lag in terms of Steve?, which is not much lag at all.
4. And yes, that is Steve? with a question mark.

Stats
Size: 8/10-
Ground Speed: 5/10-
Weight: 6/10-
Air Speed: 4/10
Fall Speed: 8/10-
Traction: 9.5/10-

A attacks

A: Jab. Steve? quickly jabs the opponent with his right hand. The attack is very quick but has a small amount of staring and ending lag. However, the special property of this move, along with many other of Steve?’s melee attacks is that while his hand only extends about the length of Mario’s body, the actual hitbox is almost 4 times that size, extending past the arm. The attack knocks the opponent a few degrees above the horizontal, with medium-low knockback, and does 5% damage.

AAA: Uppercut. If Steve? uses his standard A attack 3 times in quick succession, the third attack will be an uppercut. This has the same amount of damage and knockback as his standard A, but launches the opponent almost directly upwards, making it useful as one of Steve?’s few moves that launch vertically. However, unlike the standard A, this move lacks the property of having a longer hitbox than it appears to, has a little more starting lag than the standard A, and is a little slower overall.

Side Tilt: Diamond Sword Slash. Steve? swings his Diamond sword like he does in his game, with an outward and slightly downward slash. Like his standard A, it has a longer hitbox than one would expect, again about 4 times lager than the animation would suggest. As he is using a diamond sword, Minecraft’s most powerful weapon, the attack does 13% damage, which is pretty high for a non-comboing A attack. However, it still does the same exact knockback as his standard A.

Up Tilt: Upward Slash. Steve? looks up and slashes his sword. The attack has quite a bit of starting lag, as he rather slowly turns his head all the way upwards before attacking. The actual attack animation and hitbox is the same as his side tilt, just rotated 90˚ counter-clockwise. Also like his side tilt, it does 13% damage, but it has very low knockback, meaning that it’s pretty much useless as a finisher. It also has some ending lag, but this is balanced out by the fact that if one uses this move again before Steve? looks down, it will cancel the ending lag and shorten the starting lag, with the length of the starting lag depending on how far down Steve? has turned his head.

Down Tilt: Mining. Steve switches his weapon to a diamond pick and stabs the ground in front of him with it. It normally only does 4% damage, but if you can hit with the sweet spot on the exact tip of the pickaxe, this will increase to 7%. However, because of the odd shape of the hitbox, it is hard to connect with this attack at all. It does a set, very small, knockback, but has a slight chance (~7%) to bury the opponent. However, the most useful thing about it is that if he uses it against a person who is in midair, (this is generally if they are just below a ledge that Steve? is standing on) it will launch them straight downwards with a very high knockback. This makes it a good attack for edge guarding with.

Dash Attack: Dashing Critical. Steve quickly swings sword while running and, if it hits, the critical hit particle effect from Minecraft appears. However, if it misses, Steve? will experience some ending lag in the form of a stumbling animation. The attack is pretty powerful, doing 17% Damage, and has quite a bit of horizontal knockback. Also, while he will stop dashing it he misses, a hit with this attack won’t slow him down a bit.

Aerial attacks

Neutral Air: Midair Slash. This attack works similarly to the uppercut mentioned above, with the exception of the fact that this has and extra long hitbox. It is also more powerful, doing 13% damage, and has a lot more knockback, about medium-high level. Also it will launch him upwards abut a capsule width, however the starting and ending lag means that he will have a downwards net distance while using it, so it is not very useful for recovery.

Forward Air: Midair Jab. Steve? punches forwards in the exact same way as his standard A, but only does 2% damage. This doesn’t mean it’s useless though, as it has a more knockback than the neutral jab, and absolutely no lag.

Up Air: Helicopter Pickaxe. For Steve?’s only comboing move, he spins his pickaxe above his head for about a second. It does only 4% damage, and has low knockback, but it can combo for up to 5 hits. It also has a secondary ability of slowing down his descent to about half its normal speed for the entire duration of the move.

Back Air: Steve? Flip. Steve? quickly front flips in a nearly complete circle. It does 7% damage, but has high knockback. The hit box is only in the feet, and the knockback is tangential to Steve?’s motion. He only travels about 4/5 of a complete circle, but if one times it correctly, it can be a powerful downward finisher. Like his up aerial, it also slows his decent for its duration, however it is much quicker that the up air, so one is better of using that move for that purpose.

Down: Falling Critical. Steve? suddenly starts falling at a normal rate while swinging his sword in a manner similar to his side tilt. It has a longer hitbox that the animation would suggest, but for this attack, the blade does a full 17% damage, while the rest of the hitbox does only 13% damage. If it collides with the, the critical hit particle effect will appear.

Smashes:

Up smash: Choppin’ Wood. Steve? switches tools to a diamond axe, as a small wood block appears a few feet above his head. In one quick hit, he breaks the wood block, causing it to turn into its item form and fall. The Axe, which has a very low range, does 10% damage, with medium knockback. If the block of wood appears on top of opponent, they will take 5% damage with low knockback, and if the opponent is hit with the falling wood, they will take 3% Damage, with very low knockback. However, it’s very slow, and it leaves him open to attack from the sides or below. While it can be used to combo, this is hard, because the attack that’s most likely to hit also has a large bit of knockback.

Side smash: Throw Away. Steve? tosses his sword, which moves about one stage builder block away from him, although this can change if he throws it at a wall or of a ledge. Getting hit by the sword does a mere 1% damage with absolutely no knockback. He then very quickly runs to it with his fist extended and picks it up. The fist does 6% damage with medium-high knockback. However, the move’s real duty is that if the sword is thrown of a ledge, his can quickly travel to it. Just be careful to not throw it of the blast lines, as this will result in him killing himself trying to get back to it.

Down Smash: Shovel Smash. Steve? quickly hits the ground with his diamond shovel. If hit with the handle, the opponent will take 2% damage, with no knockback. However, if hit by the head of the shovel, they will take 6% damage and bury the opponent. The attack is somewhat slow and hard to sweet spot, though.

Specials

Neutral Special: Bow. Steve? shoots his bow. The bow does between 6 and 18% damage depending on how charged it is, and the charging also affects the range. It takes about 1.5 second to fully charge the bow, at which point a critical hit particle effect will appear around the arrowhead. Arrow can be held in the bow indefinitely. If fully charged, the critical hit effect will trail after the arrow when it is shot. The attack has low to medium knockback, again depending on the charge level.

Side: Flint and Steel. Steve? lights opponents on fire with his flint and steel. The flint and steel has short rage, and does about 9% damage, and will light the opponent on fire, causing 1-3% damage hits, which occur at a rate of one per second for 5 seconds or until the opponent touches a body of water or a water based attack. Fire lasts about 5 seconds and can be put out by touching water. It has low knockback.

Up: Sand Stack. Steve? places a pillar five sand blocks below him while jumping, similar to the common minecraft tactic to get to high places by placing blocks below you at the height of a jump. If used in midair, Steve? Will get slightly higher, than if its used on the ground and the sand blocks will fall under gravity. If the fall and hit the ground they will explode in a cloud of dust, which does 5% damage with almost no knock back. If used on the ground the sand blocks will explode if attacked or after 1 second after being placed. Falling blocks do 10% damage with high downward knockback. The attack has about a 7% chance to be gravel instead of sand, which does 12% damage for the falling blocks and 6% damage for the explosions, but is the same in every other way.

Down: TNT: Steve? places a TNT block and lights it with a Redstone torch. The TNT takes a about a second to explode and will fall if used in midair. It has large blast range, about 2 stage builder blocks in either direction, and up to 33% damage at center of explosion, decreasing exponentially from the center. However, it is also one of Steve?’s most dangerous attacks, as it can damage the user as well. It has Medium to high knockback depending on how close one is to the center.

Grabs:

Grab: Steve?’s grab is a Fishing rod that can reach up to 1 stage builder block away and can be used as a tether recovery. Steve? can then punch the grabbed opponent for 3-5% damage per hit.

Forward Throw: Steve? tosses his opponent, who moves at slow speed with a set knockback of about 2 stage builder blocks away on a flat surface. The attack is rather easy to D.I. against, and if the opponent can manage to stay in are in the air for more than a second it will no damage him. The attack does 15% damage upon the opponent colliding with an object or platform.

Back Throw: Steve?’s Back throw is similar to forward throw, but behind him. However, there are some differences. The attack is faster, and cannot be D.I.ed against very easily. Also, the negation of damage if the opponent stays in the air long enough does not apply. It does 6% damage upon hitting an object or surface.

Up Throw: Steve? holds the opponent above his head, with the opponent unable to break free during this time. Steve? then stabs strait up at the opponent, doing 14% damage, with high knockback. The stabbing part of this throw will also cause Steve? to lift up into the air about a Pikmin’s high.

Down Throw: Steve? tosses the opponent onto the ground, which does 2% damage and stuns them. The stunning lasts just long enough for Steve? to automatically jump up about Mario height and stomp down on them, doing 17% damage with medium downwards knockback.

Final Smash
Creative Mode: after grabbing the Smash Ball, Steve? enters creative mode. The background turns to night, and Steve? quickly flies to the top of the stage holding his sword straight up above his head. He then proceeds to randomly fly back and forth across the screen, placing monster spawners in midair. The spawners will spawn Zombies, Skeletons, or Cave Spiders. The zombies are the same size as Steve?, and chase after the opponents and if they touch them will do 10% damage with medium-low knockback. The Skeletons are also the size of Steve?, and try always be about 2 stage builder blocks away from the nearest opponent while constantly shooting arrows at the m with pinpoint accuracy. The Skeleton arrows do 20% damage and have low knockback. Finally, the Cave Spiders are the same width as Steve? and about a quarter of his height. They act like zombies, but are faster and do just 3% damage with medium knockback. However, if a Cave Spider hits an opponent, they will be poisoned for the remainder of the final smash. While poisoned they will take 3% damage and flinch once per second. Steve, meanwhile flies across the top of the stage and will attack anyone who tries to escape the monsters by jumping up there. Getting hit by Steve?’s sword either when he flies to the top of the stage or while he is patrolling the top of the stage does 35% damage with very high knockback that kills at 25%.

Playstyle:
Steve?'s Playstyle is full of fast and poweful attacks. most of his attacks have nearly no lag, and have high knockback and/or damage. however, do to his tall size and slow speed, it's not hard to give him a beating if he doesn't watch out. he's also slow on his feet and a fast faller, so the only way he'll be able to take his opponent out is to use is aerial abilities and bow to ether draw the opponent in or quickly make it to the opponent

Other Stuff
Wall jump: No
Wall Cling: No
Tether: Yes.
Crawl: No
Multi-jump: No
Entry animation: a downsized nether portal appears, and Steve? Walks out of it before the portal disappears.
Wiimote Sound: The mining stone sound effect from Minecraft.
Hanging Animation: holding onto edge with one hand, which will be empty, no matter what attack he just did.
Victory music: plays a clip of the in-game record song “Chirp”.
Victory poses:
1. Holds up a diamond.
2. Strikes a pose as if he were running, with one arm forward and the other arm back.
3. Rides in on a pig.
Lose Pose: Looks down, while slowly clapping.
Kirby Copy: Kirby becomes all cubeified.
Taunts:
1. Throws out his diamond sword, which disappears, then pull out a new one.
2. A creeper appears in front of him, which he kills with his sword.
3. Spins in a circle with his pickaxe out while the mining stone sound plays.

Alternate Colors:
default Steve? skin
zombie skin (used for green team)
zombie pigman skin
pigman skin (used for red team)
Notch skin
also, if Steve? is on the blue team, he will have a bluer version of the default costume
 

Junahu

Smash Ace
Joined
Nov 15, 2005
Messages
899
Location
Shropshire Slasher
Agility Spammer


Dragonite is the eventual final form in the Dratini line, and the first "Pseudo-Legendary" Pokemon ever. Her rotund appearance belies the stupendous power and speed that Dragonite harbors. Capable of round-the-world flights in under a day, and living on isolated islands far from civilisation, Dragonite is as benevolent as she is ellusive.
Dragonite is slow to anger, but once tensions rise, it's nearly impossible to stop the ensueing outrage.
A gentle giant, I guess. But this is Brawl, and reason has little in common with winning...

Overview//


  • Dragonite is one big glass of water. At over 7 feet tall, Dragonite towers above lesser Pokemon, equalling Ganondorf in many ways.
  • Her girth cannot be ignored, it's pretty wide, with her sagging tail offering up an even bigger target for enemy attacks.
  • Weight wise, Dragonite tanks more or less anything you throw her way. This is a Dragon Knight after all...
  • When moving around normally, Dragonite is pretty docile, which is a nice way of saying Ganondorf can outrun the lass.
  • In the air, she fairs much better. If you want to go on the offense, rather than defense, Dragonite wants to be airborne.
  • Dragonite gets five wing jumps in mid-air, all of which are pretty heavy, but decently high. She can outperform a fair few winged characters in this regard.
  • Traction is fine. Don't worry about it. A tub of lard like Dragonite isn't going to slip and slide anywhere, even if Bunny Hooded.
  • Dragonite's attacks pay respect to her infamy as a powerhouse. While occasionally delayed, attacks Dragonite wields are surprisingly safe, and pack the neccessary whollop to KO at 60% or less.

Abilities//
Big Body:
You know how, when you try to stand in the same place as the opponent, both of you are pushed away? Dragonite ignores this law. Only she can occupy a given space, and other foes will be pushed away instead. In fact, she could just walk right into the foe and drag them across the stage.
This is different from just being a solid wall, as opponents can still walk, run or jump past her without trouble. It's only if they idiotically stand still that Dragonite can barge em about.
Actually, speaking of "wall characters", Dragonite's power allows her to push even these braggart foes around pretty well (at about half Dragonite's normal movement speed). But, again, this is only if they remain motionless. Once they get on the move, even Dragonite will need to give way...

Momentum Character:
Dragonite looks like a big lug, but she's actually a lightning bruiser just waiting for a chance to shine. Don't mock her! Dragonite is a sensitive Pokemon! Oh look, now you made her cry!
Dragonite increases her movement stats by, obviously enough, moving a lot. The lardy Pokemon gets incremently faster. Rather than accelerating, Dragonite "switches gears" after moving around enough, suddenly becoming faster, on land, sea and air.
You could level this up from Dragonite's base 80 speed, up to a dizzying 145 speed (almost doubly fast!). And that takes about 13 seconds of constant motion to pull off.
There is a problem with this however; if you let Dragonite stop still, you will rapidly lose the extra speed she had gained, returning to her docile ways in a matter of seconds. If you want to be the fastest Dragon, you gotta keep on truckin'! Don't stop the rock, and plough on through any obstacles in your way!

Multiscales:
Dragonite is one tough cookie! Her robust hide deflects 3% off of every strike that hits it. If the attack dealt 3% to begin with, it clanks off of Dragonite's bouncy belly, rendering them vulnerable to attack.
Unfortunately, this astounding power only works when the Pokemon is standing completely motionless. When moving, Dragonite's ability to deflect pain quickly drains to zero, rendering her just as vulnerable as any other tub o lard. Its effectiveness drains at a rate of 1% per half second, so after 1.5 seconds, you'll need to stop still again to get her Multiscales back.
Just like with Dragonite's "Momentum" ability, Multiscales will grow stronger, the longer you spend motionless. 7 seconds is the magic number this time, and it'll bring your ability to deflect attacks up to a super 6%, which is a lot.
Oh, but we can do better still.
Dragonite's multiscales also have an inverse relationship to Dragonite's shield; when her shield is close to breaking, or even already broken, her multiscales add another 3% armor onto her bulk. Naturally, once the shield grows back, her multiscales similarly decrease back to their natural strength.
So, all in all, Dragonite could shave 9% damage off of every attack she recieves, completely nullifying anything that deals less. Grabs are still a pain though, watch out for those.

As a side note, the following things count as 'moving'; walking/dashing, rolling, jumping, fastfalling, climbing up a ladder or ledge, moving left/right in midair.
And the follow do not count as 'moving'; movement via using an Attack/Special/Throw, being knocked away, being grabbed/thrown, being forcefully moved via a trap or mind control, moving while offscreen.

As a secondary note, moving via any of the above does not count as 'standing still', for the purposes of Dragonite's Momentum mechanic. Her momentum won't increase while moving via these means, but it won't decrease either, and that's important.
Animations//
Idling: Dragonite stands with a somewhat lax posture. Perhaps she'll scratch her belly, or give a majestic yawn. Dragonite might even silently fart... not that you'd ever notice.

Walking: One foot goes up, another comes down. It's a jovial, relaxed sort of stroll. When walking faster, Dragonite's wings begin to shudder. Is this the wind? Is it calling to Dragonite?

Running: Despite the wings, Dragonite still uses her legs to do the leg work, albeit now stomping forth in a less than pleasant manner. Her gaze is fixed in front of her, and Dragonite's shoulders swing side to side as she approaches the intimidated opponent. Her wings are now 'flapping' (falling back due to air resistance, before being recinded into their original position abruptly). All in all, the kid gloves are coming off when Dragonite is running.
Running (Speed >110): Once travelling at a significant belt, Dragonite no longer needs feet to travel, and her wings propel it forth. Just imagine Metaknight 'dashing', except about 4 times as big... and orange too.

Jumping: Hyup! Dragonite squats and then lifts. It's no secret, that's how everyone jumps. Dragonite's is a bit more exaggerated, but no slower. There is actually a frame of quasi super-armor in there, wherin Dragonite still takes the knockback, but jumps into the air too, like she was originally planning to.

Mid Air Jumping: Wings! Wings make jumping better, especially for a tubby like Dragonite. Dragonite also swings her arms through the air as if she were doing the breast-stroke. It seems to be more a force of habit than anything else, given that her home is out in the ocean.

Crouching: Dragonite bends over, but only barely, as if the very act of reducing her height is a burden to her. I'll tell you right now, this animation can make some particularly twitchy foes think she's using her forward tilt. It increases Dragonite's Multiscales ability by 1%, but only when holding crouch for more than 0.3 seconds.

Sleeping: Dragonite curls up on the floor for a snooze, her tail wagging back and forth across her face. Aww, so cute, let's leave Dragonite to rest ok?

Taunt#1: Dragonite gives a little wave to all the folks at home. Hi Dragonite!
Taunt#2: Our Draconic pokemon holds her head up, and gives a beautiful (?) cry. It's almost like a whale's song.
Taunt#1: Dragonite Stands tall and tense, body turned away from her foe and ready to fight. Her excited antennae dance with electricity.

Victory#1: Dragonite hovers above the ground, playfully jabbing at the camera with her pudgey fists.
Victory#2: Shh, she's curled up and sleeping. Do not disturb.
Taunt#1: Dragonite flies past the screen a few times at super sonic speed, then makes a quick landing from the top of the screen... and then ruins the coolness by waving like a dork.

Loss Pose: She, lost? The poor girl begins walking away into the background, never so much as looking back.

Aerials//

Forward Air: Thunder 'Punch'
Charged with electric claws, Dragonite jabs thrice in front of herself, dealing a total of 14% damage. The final right hook, obviously enough, knocks the foe away. It also stuns the foe slightly, potentially allowing for immediate follow up. Or at least it would, except the knockback knocks the foe too far away for Dragonite to catch up... normally at least. Even without follow up, this attack makes for an okay aerial based wall of pain. The start lag means you need a slightly higher jump to use it, so using it to try pressuring a grounded foe is just asking for trouble.
Incidentally, if you combo this into itself, the foe's staticy state renders them immune to the stun. So no infiniting the foe against the wall, ok?

Downward Air: Dragon Tail
Dragonite flips head over heels in midair, bringing her tail crashing down on the foe's head. This hits both in front of and below Dragonite, deals 17% in damage, and spikes the foe pretty hard. It's not exactly the safest of moves, struggling under some unfortunate eng lag, and a ton of landing lag too.
But if you can catch up the foe after a Foward Air, then you might be able to combo into this, provided the foe doesn't dodge at the last moment. Of course, if the foe is that twitchy, then just delay your use of Down Air a little bit.

Neutral Air: Fly
Jolly old Dragonite performs an aileron roll in mid-air, using her entire form to shunt foes out of her way. Don't forget, she's a pretty big lady.
What makes this a fun attack to use, however, is that during the roll, she continues to move in the direction she was headed before the attack was used, yet moves 1.5x as fast. So if you were falling, you start falling faster, but if you were jumping, Dragonite propels herself skyward.
And this 'momentum' is added to the knockback of the attack too. Since the knockback is usually fairly typical of a Neutral Air, adding some extra bite via momentum can be quite helpful. Damage remains the same though; 7%
It feels like you're launching a Dragonite missile at the foe. What fun!

Backward Air: Seismic Toss
Look out below! Our fatty dragon type twists her body and falls backward onto the foe, snatching them in a headlock and smushing them with her weight. This attack works something like a grab, dragging foes down with her until they break free.
If you press A a second time, Dragonite stops herself midfall, before hurling the foe down into the abyss (or the ground, whatever). It's not great knockback by any means, but it's better than commiting suicide, right?
If you land while still holding the foe, Dragonite crushes the foe, dealing 12% damage and squeezing them out with moderate horizontal knockback

Up Aerial: Roar
Dragonite unleashes a bellowing shout, directly upwards. It manifests itself as a brief, conical, blast of air, which propels foes upward, while also stunning them slightly. It covers a fair range, with part of the windbox even protecting Dragonite's sides. But it's rather short, and rather short-lived too.
You can angle this attack slightly, in order to blast them horizontally as well as vertically, though doing so slightly reduces its effectiveness.

Glide Attack: Wing Attack
Dragonite's wings flap, somehow knocking nearby foes downard. This attack does not take her out of a Glide, but doesn't actually damage the foe either. There is a very slight wind effect as Dragonite flaps, which could be used to help supress the foe's attempts to reach you (or a ledge) in the air. Remember to angle yourself correctly in the air, in order to make best use of the wind's effect.
Other than that... it's a glide attack, nothing more.


Ground Attacks//


Jab Attack: Cut
A basic one-two slash with her claws. Hey, Dragonite, Bowser called... he wants his jab attack back.

Forward Tilt: Dragon Rage
Dragonite lets a little of her inner dragon get the best of her. She bends down, thrusts her neck forwards, then issues a blast of blue dragon breath. This, close/mid-range Dragon breath deals 11% damage and some rather explosive knockback, that KOs from 100%.
The act of thrusting herself out into this pose is an attack itself too, but has notably less damage and knockback. It also deals a comparitively large amount of shield push, taking the foe out of range of Dragonite's breath. Basically, outside of exceptional circumstances or low damage percents, you cannot connect with the breath, if you hit with the initial stage of the attack.


Down Tilt: Thunder Wave
Mimicking a Pikachu for some reason, Dragonite tenses up. Electricity arcs from her antennae, and dances across her body. How shocking.
Every tap of the A button is its own seperate pulse of electric pain, dealing 4% damage and jab like stun/knockback to anyone who touches her.


Up Tilt: Fire Punch
A cheeky, burning, uppercut. It, knocks foes into the air, as you would expect, and deals 8% damage. It also has a lingering hitbox, that flinches the foe, should they attempt to punish you. The lingering embers pull double duty, in that they also chew through shields.

Dash Attack: Aqua Tail
Dragonite brings her meaty tail around, sweeping the area in front of her, in a slow but savagely powerful attack, which can KO naked from 70%.
But that's not all, Dragonite also somehow (magic?) sweeps up a miniature wave of water off the ground, sending it crashing forth. It sweeps foes back 1.4 stagebuilder units, making the whole attack rather hard to punish.

Forward Smash: Dragon Rush
Dragonite builds up a tremendous power within. She then forgets what attack she was supposed to do, and just barges the foe away with her expansive stomach. Boing! It deals between 15% and 34% damage, and can KO from 60% (85% uncharged)
The hitbox pretty much covers Dragonite completely, and even lingers a bit. So, like many of Dragonite's moves, it's relatively safe to use. Dragonite also leaps forward a tiny distance during the move, a distance that increases based on how long the smash was charged for. This, by the way, does not count as 'moving', so it won't mess with Dragonite's Multiscales.

Upward Smash: Thunderbolt
A sudden blast of electricity surges from Dragonite's antennae, hurling foes into the air with 20-30% damage and knockback that could KO from 70%. It's a fairly close ranged attack, and is similar in many respects to Lucas' Up-Smash.
If you charge this attack beyond half-way, the electricity spreads to protect Dragonite's body too.

Downward Smash: Giga Impact
Our leading lardy lady laggily leaps up and hovers above the ground while you charge the attack. Like you'd expect, she comes crashing down with a mighty posterior slam once you release the smash.
Should you come down directly onto a foe, Dragonite's monstrous mass buries them into the floor. If your aim isn't quite spot on, she deals mid-high knockback that clears the area around her (it can KO from 80%). Either way, the damage you deal is between 23% and 28%. At higher levels of charge, the width of the hitbox increases, becoming somewhat safer at full charge.
Dragonite can abuse the fact that she's airborne during the charging period, in order to avoid ground assaults or whatnot.


Grab/Throws//


Grab:
Dragonite envelops the foe in a great big meaty hug, lifting them off the floor in the process. This is relatively slow as a grab, but don't you forget about Dragonite's Multiscales ability.
As a Pummel, Dragonite grinds her head against the foe she's cuddling, agressively nuzzling them. Each pummel deals 4% damage, which sources tell me is a lot.

Forward Throw: Strength
Dragonite steps forwards twice, then hurls the foe down into the ground, or off-stage, if you were close enough to the edge. If not near an edge, this bounces the foe off the floor relatively high, dealing 9% damage in the process.


Backward Throw: Back to the Ocean
Becoming somewhat defensive all of a sudden, Dragonite begins walking backwards, taking her cuddly foe with her. You can stop and use another throw at any time. But if you input Back Throw a second time, Dragonite pitches the foe forwards 3 stagebuilder units, making them into something of a projectile. If the foe crashes into someone, they both take 13% damage and fly away from one another with moderate knockback.


Up Throw: Twister
With her diminuitive wings, Dragonite raises up off the floor and flies 3 stagebuilder blocks into the air, with the foe in tow. She then slams, head-first, back down to the ground, spinning constantly like a drill all the while. This deals 4 hits of 2% damage, before knocking the foe upwards with another 4% damage.
This throw can be somewhat useful, if used below a platform you want to get onto.

Down Throw: Body Slam
Don't tell anyone, but Dragonite secretly likes Bowser. I guess it's just something about bad boys, am I right girls?


Specials//


Neutral Special: Hyper Beam
Use HYPER BEAM Dragonite! Blaaaaaargh!
I'm pretty sure you know what Hyper Beam does, right? It's a beam, it's hyper. It travels the full length of the screen and even shunts Dragonite backwards a little from the sheer force of it. It's your short and cheap KO move that doubles as a way to get the foe to bugger off for a bit. It even ravishes shields, though rarely breaks one. The beam travels relatively slow for a laser, though that really just means it lasts longer.
You can use it in midair if you like, but Dragonite will fall helplessly to the ground afterwards.

It takes 60 seconds to recharge to full strength after use, but just 30 will get you a short range blast with the same properties. The start lag of either version of the attack is slightly above that of ROB using his Neutral B laser.

Up Special
: Hurricane
Let's go straight up! Dragonite propels herself directly upward, like a (fat) speeding bullet. It's almost instantaneous, and travels 2 stagebuilder units vertically, before automatically putting Dragonite into her glide. If Dragonite connects with a foe at the peak of this recovery, they take 14% damage and nasty vertical knockback that could KO from 65%. At any other point though, it's just 5% and a flinch. Lame
But that's just half the attack. As our dragon friend darts upward, a billowing twister of wind forms around where the Pokemon used to be. This funnel of gusts, as tall as Dragonite yet twice as wide, blows foes upward, right into Dragonite's eager clutches. It dissipates in short order,so you need good timing, but it's a fun way to get both you and an eager foe into the air together.

Forward Special: Outrage
You've really gone and done it this time, you've released the
Krakendragon!
Everyone's favourite corpulent pseudo-legendary manages to work herself into an enraged fit, and thrashes about while stomping forth (moving at her normal walking speed). All of Dragonite's considerable bulk is the hitbox here, no part of her is safe to touch, and she deals 6% damage and repellent knockback to those who think otherwise.
If you keep walking forwards, Dragonite will soon begin seething with a crimson aura, increasing the damage dealt up to 12%, and expanding the hitbox out from Dragonite, making it disjointed. And if you continue to hold it out for a whole 5 seconds, Dragonite explodes with rage, sending a shockwave outwards from her, which covers an area the size of a smart bomb blast and knocks foes flying with knockback that KOs from 50%.
The problem with Outrage, as you may have already guessed at, is that afterwards, Dragonite laggily calms herself down. And this takes longer, the longer you held out Outrage (up to 2 seconds of end lag, ouch).

Downward Special: Dragon Dance
Dragonite performs an absolutely embarrassing dance, on the ground or in the air. She glows with an orange hue during her graceless ballet, and she won't stop until you release B (or until struck/grabbed)
On the ground, this dancing increases Dragonite's Multiscales ability by a whopping 10%, rendering herself all but invulnerable to many many attacks.
In midair, her dancing is one of a more active nature, as the player can still move and jump during it. In fact, the dance increases her movement speed by 1.5x.
Once you end either version of this status buffing move, the buffs Dragonite was enjoying quickly drain away, leaving her at her usual status within 2 seconds. That's still enough time to take advantage of the buff though.


Final Smash//


"I want to be friends"
No, no she doesn't, Bill.
Mist billows into the stage, shrouding everything in a deep fog. Dragonite herself shoots off the top of the screen.
Then, suddenly, a massive 'Dragonite shaped silhouette' comes wandering in from the background. shhuuuuuuuuwaaaaaaaah.
Aww, it wants to be friends, I think. Use the analogue stick to move her head around if you want.

Well tough! This is Brawl, and things fight in Brawl! A rocket comes out of nowhere and strikes the
Silhouette, angering it to such an extent, that it engulfs the stage in one massive Hyper Beam aimed towards the foreground. This gargantuan beam, covers an area the size of the whole of Battlefield, and can indeed be angled to hit other areas instead (i.e. it fires in the direction the Silhouette's head was facing). You can't change your mind once the beam is out, obviously, but so long as you hit the foe at all, the beam will KO from 50%.
After this wrathful display, the Silhouette wanders back into the mists, and Dragonite herself flies back to her original position.

Where WERE you, Dragonite? A massive dragon like thing attacked us while you were gone!


Playstyle//


Agility/Barrier
Dragonite is kind of a slowbuilder. I'm assuming you can gather as much. It should also be apparant, that the key to success is to build up a buff. You can be a mighty glacier, taking attacks without a care in the world, or you can be a lighting bruiser, dashing about with speed, bulk and power.

Standing still for your defense boost might sound suicidal in a high paced, kinetic game like Brawl, but Dragonite has a couple of tools to help her get about, without losing her buff in the process. Outrage for horizontal movement, Hurricane for jumping. It's predictable, but functional, especially considering that Dragonite will be ignoring most of the opponent's poking and punishing attacks, even as she moves.
By that same token, most projectiles aren't a problem for Dragonite, and multihit/combo moves are just opportunities for Dragonite to counterattack and KO. If you think you can get away with it, consider deliberately draining your own shield in order to bolster your defense buff even further. Of course, you don't want to be caught with your figurative pants down, as no one likes being shield broken.
With a defensive Dragonite, you're locked into a very restriction-based battle; you can't move much, and half the foe's moveset won't work. The foe will be watching you like a hawk, ducking and weaving around, hoping to bait out an opportunity to get a few big attacks off. If they can, they will STILL use projectiles, not to damage, but to keep you on the defensive. Their goal is to push you offstage, which will force you to abandon your defense buffs in order to recover. And with no investment in agility, Dragonite will find recovering to be a tricky deal.
If you think you've found a perfect opportunity in order to push an offensive, don't just stand there and let it pass. Your buff may drain fast, but it'll still help out as you suddenly bum rush the foe.
Grabs are a problem for Dragonite in general, but they are particularly nasty when clamming up. Thankfully, many attacks Dragonite uses, protect her entire body, most notably Outrage and Thunder Wave

Ok, so that's a slow defensive Dragonite. How about a fast one instead. Constant motion isn't as easy as it sounds. For one, it's just predictable, since you simply aren't going to stop, for fear of losing the speed you've gained. With glides and multiple jumps in the equation, Dragonite can eventually dance circles around the foe, but actually building up that kind of speed takes time. If the foe is particularly good at suppressing your movements, you'll probably want to intermittantly begin using Dragon Dance, or even outright switching to a defensive 'nite'.
Once you've got the speed, Dragonite is all about pressure, repulsion and chasing. With enough speed going, you can catch up the foe after hitting them with Thunder Punch, allowing you to keep up the pressure, and maybe even follow up with a spike (or even a close ranged Hyper Beam). Fly is capable of some sudden, unexpected movements (though you are committed to the attack, and could easily be punished for it), and Roar can force the foe into some very stupid decisions. Dragonite's DACUS isn't too great, unless you Dragon Dance it before hand, in which case it becomes quite savage. And Aqua Tail is useful when switching back to the defensive Dragonite again. You could also build up a speed buff, and then use Outrage, in order to maintain that boost while you build up on defense.

Yes, while individually marvelous, being able to switch from one style to another, or even being able to try a mixture of both at once, is where the real fun can start. It's difficult, as you'll be constantly building up, never quite becoming a juggernaut or a steel fortress. But Dragonite will become all the less predictable for it, capable of dropping one playstyle for another without batting an eyelid.


SirKibble

Smash Champion
Joined
May 2, 2008
Messages
2,400
Jumpluff mini yeah!!!

A NEW ITEM HAS ENTERED THE BRAWL

TM J-01

That's right--Jumpluff didn't like any of the existing TMs, so it freaking made its own!! I'd like to see your Pokemon do that! Jumpluff has graced your measly squabble with the presence of this TM, so that you may bask in its glory, if only for a few short moments.

What is the TM, you ask? Well, it's none other than COTTON SPORE, the most intense move in the universe!


That fool's speed harshly fell! Yeah!

Even the fastest Speed-form Deoxys can't hold up under this pressure! Jumpluff laughs at the foe's pathetic attempts to move. When you grab this item, you'll automatically use it, just like a food item. Yeah, that's right, devour Jumpluff's radiant epicness like it was a tasty morsel, and feel the power surge through you. Oh, snap, Mario! You already know four moves. You're gonna have to ditch one for this TM. The next Special Move you try to use will be replaced with COTTON SPORE, Jumpluff's signature crippler! Jumpluff recommends that dumb Fireball of yours, but he won't shove it down your throat--take your pick.

COTTON SPORE will replace that Special for the next ten seconds! Jumpluff is being generous about holding his awesome power for so long, but he just likes watching others attempt to use it that much! Use the move to release a burst of powerful spores around you in an area the size of that bumbling idiot Bowser! Ha! Hit an opponent with these spores to cut their speed in half! Yeah! Writhe in agony as Jumpluff's techniques ruin everything about you, Sonic! Did I mention this effect can stack up to three times! That's one-eighth your opponents normal speed! But when Jumpluff retracts his power from you, the effect goes with it, so use it fast and take advantage of this opportunity to experience a taste of Jumpluff's immense power! Bahahahaha!​
 

smashbot226

Smash Master
Joined
Sep 1, 2007
Messages
3,027
Location
Waiting for you to slip up.
Smashbot, the Lazy F*cker Part 2

Even if I actually followed through with last week's recap, there would still be this doozy of a week to cover.


Don't forget about ForwardArrow's moveset heap!
Why're you calling it a heap?
I didn't want to insult dumps worldwide by calling it such.
DOHOHOHOHOHOHOHOHOHO!

I'm sure there's been work put into all those sets. So let's see what these last two weeks have wrought.

A heavy sigh leaves my lips as I soon look upon Elspeth more as a memory than a set. I think that's a bad sign that I waited for WAY too long to actually comment. So I was surprised when Elspeth turned out to be a minion character, simply basing it off the picture you provide us. Still, she seems more like a one-trick pony than a versatile commander. One-trick as in she can do one trick at a one time effectively; if she tries to balance powering her soldiers up at the same time she powers herself up, it's for naught. Yes, you can potentially balance it out via some unknown technology, but even after all that focus on the soldiers, the playstyle section roughly caresses that notion with the following:

In the end, though, it is unlikely that the soldiers will be able to take your opponent on on their own, even with your buffs, so it will come down to you to finish the job
So this part of the playstyle section renders... well, basically the entire unique mechanic of the set pointless. You summon soldiers and let them buff the hell out of you while they remain open, but you can always summon more. While there were still some ideas I DID like, I found the majority of the set rather straightforward and, dare I say, predictable. 2/5


I find this moveset to be out of character.
How come?
She lacks a kitchen-related special move.
DOHOHOHOHOHOHOHOHOHO!

Yukon Cornelius is the other set I look upon with a certain sense of ambivalence. Especially after feeling like I've read 3/4ths of the set before, in this contest no less. What we have here, in my opinion, is a Seth. In other words, someone who borrows a lot from other characters. Here, we have K. Rool's boomerang crown shenanigans, except replace crown with pickaxe, Iggy's chariot, though with Cornelius' sleigh in place, and MasterWarlord's ever present pitfall traps. Hell, the only originality I found with Cornelius is the boulder stuff and quickfire system with Jack Frost, though I'll give you credit for the boulders and a brief nod of "Okay, I guess that's kinda neat," for Jack Frost. And even then, it all fuses to create a rather unfocused moveset that emphasizes... well, I'll be honest. I have no goddamn idea what Cornelius is trying to accomplish. It seems like he wants to do a lot of damage in order to kill someone and has several ways of doing it. Which is the primitive basis for Super smash Brothers, not just Make Your Move. The character choice cannot excuse this arguably messy thing. 2/5


Woah, why is THIS picture so big?!?
Well Statler, I don't really know. What I want to know is why Smashbot chose to comment on K. Rool again!
Wait, this was K. Rool? I thought it was Iggy!
Maybe it was both. I kinda saw some Mouse Man in there too.
You see Mouse Man everywhere you crazy codger!
Hey, it could be worse, y'know!
Oh please, how could reading that startling god tier of a set not be the most unsettling thing ever?
It could have used momentum.
Or been Battleheart.

I can't help but grumble a little every time I see Ghirahim. Or Peppermint Kisses, as some of the kinder critics label him, because his name is far too obvious for use in gay jokes. I'll be honest and admit I dislike the character, even before going into this set, and having played through Skyward Sword did not change my opinion a little bit. So if you allow a minor gripe that mainly stems from me disliking this guy... your move names could be shorter. Or at least less voluminous to speak out loud. As for the set itself, sometimes the writing can get a little awkward. It might just be me but UTilt is nigh indecipherable. However, in terms of content, you seem to have the basics down. These specials are kinda neat, though I'd appreciate a playstyle section in order to figure out what exactly Ghirahim wants to do. I'll assume he wants to pressure his foe mainly by activating sword projectiles, then rushing in while using the projectiles as cover. Once they're gone, he uses his king of tager DSpec in order to counter any possible attack the foe might have. It's simple enough. 2.5/5, and this is without any personal bias.


(Assume Fozzy is Heel for a moment)
Keep walking.

Invidia- nice spoiler by the way, FA, even if I wasn't planning on watching it- is the one FA moveset this recap that is not a part of his... I don't even know where they're from. But we'll get to those guys later. So according to the intro section, Invidia has explosive blood. A trait which apparently isn't revealed until she's close to defeat... and the way you implement it is fairly standard. So it's natural to expect her aerial control to be balls-to-the-wall good. Everything else revolves around sticking the foe like a pig with her armblade or getting blood everywhere. But like FA before me mentioned, I feel like putting your foe into a specific sweetspot while balancing the blood seems contradictory. I'm already accepting that it's a last minute mention from a principal antagonist, but that only a handful of moves actually spread the blood around? Oh well. I can look past that; Invidia is a refreshing set, with a gameplan revolving around raining hell down onto the battlefield and Hemingway-style phallic imagery. You sure you and FA don't make heavy use of private chat? 3.5/5


I think I dropped my hearing aid.
No, that was the hopes and dreams of Mega Man fans and the pants of Capcom fans when they say, "We're releasing MVC3 again."
DOHOHOHOHOHOHOHOHOHO!

Amaterasu is a set that settles itself as a far cry from your previous set Ghirahim, in more ways than one. For instance, I think Okami is the best LoZ game since Link to the Past and love the character herself, as well as the game. The characterization is pretty much a necessity, which you capture... well, let's just say no two fans see eye to eye on Issun equally. But dear God, man, it's like you looked at one of the leadership's movesets, got a basic idea of what you want to do with Ammy, and then made it. While I greatly question the flow of the moveset and how everything wraps up, you make this set so in-character that I can't help but literally shiver with delight. Of course, there's the obvious flaw that everyone else will likely point out regardless of whether or not they played the game/know the character: organization. I made this a point for Dark Star and I will not budge in my opinion this time; the organization needs some serious work. While I get that you wanted to follow a dialogue that transitioned from natural mechanics/specials to her weapons/normals, it doesn't work out as well as it should. But goddamn it, you improved. Greatly, in my opinion. 3.5/5


What is this garbage and why does Smashbot like it so much?!?
I believe you answered your own question.
DOHOHOHOHOHOHOHOHO!

Oh God, now for the Praetors. I'm half inclined to read the first half and then skedaddle for a snooze. Unfortunately, that will lead to further procrastination. So on we go.

Norn's kinda... wait, just one moment:

. It is also a very religious faction, with the lower beings in the Machine Orthodoxy viewing Norn as some sort of Profit.
Nyuck nyuck. With that out of the way, I could tell just by reading the set that you already knew what you wanted to do with Norn the minute you laid eyes on her. Hell, I could too. And while I don't entirely approve of promoting the tome lackey solely as a steed/meat shield, Norn makes a more specialized use of minions in relation to Elspeth. Funny enough, I find the singular focus on supporting your minions BETTER than Elspeth's ways to buff herself as well as her minions. Here, you know what to do; summon those Toiletwarriors and get them out there and fighting. Sometimes on a tome lackey, though I was let down once I got to the playstyle, only to realize him writing whatever Norn says in the tome... means nothing. Ah well, I can still appreciate one thing: unlike Elspeth, Norn isn't limited in how she can support her soldiers, from assuming direct control to using the BP DSmash to armor them up. And as always, the grab game fits in very well and is actually interesting enough to be elaborated upon in a separate moveset dedicated entirely for said wall. Who knows, maybe there will be a Minecraft set that feels like a Minecraft set. I digress, however: 3.5/5 for the heavily improved utilization of minions in tandem with Norn's abilities, though I am convinced that she also feels restricted. Likely because you had THREE OTHER SETS ALONGSIDE IT TO WORK ON. Like there's even more potential than Norn is given due, though I guess I should get to the other sets first, aye?


...Okay, what's with the sign?
It's how many damns I'm about to give these four sets before I nod off. Where's yours?
Don't need one. I don't give a damn now and I certainly won't give a damn then!
DOHOHOHOHOHOHOHO!

Jin is someone who looks cool. Ergo, I am somewhat excited to read about him. Before I go into the set, however:

you're aerial movement
I'm going to make a nasty habit out of this, aren't I? Well... Jin is goddamn terrifying in two ways: just reading the description on his moves is unsettling and the gameplan he wants to achieve. Like any maniacal scientist, he experiments on the foe with the same mutations he uses to gain an advantage, then removes said mutations from either character's body when he sees fit, though I fail to see why you would EVER want to remove a tentacle from the foe's body. I'm also unsure if Jin's plan is to actually COMBO the foe. The whole time you make it seem like you want to mutate the foe as madly as possible so you can use those negatives to your advantage, depending on the situation and who you're mutating. I'm not going to argue with the set creator on how one should play said set, however. I CAN argue that regardless of whether or not Jin can actually do any of this in MTG, either as an inherent ability that affects the field or as something else, the set reeks of a specific kind of magic syndrome. You make heavy use of convenient syringes that give random effects that just so happen to mutate Jin and whoever else he decides to mutate. While I can't deny you were creative with these mutations and their flow, it seems very excessive and by the time you got to DAir, I somewhat felt you were scraping the bottom of the barrel for ideas. But other than that, you certainly had one for Jin and pulled it off rather well. 4/5, but chances are you hate this set already.


Smashbot, you're a fool for thinking you can get all of these comments done in one night.
Who is the fool? You're reading them!
Waldorf, we already used that joke!
And? You know how many gimmicks some of the people here recycle?
Eh, good point. Nice dig at MasterWarlord by the way.
I'd dare say ForwardArrow got some of the mutation ideas from 'im!
DOHOHOHOHOHOHOHOHO!

I was worried Sheoldred would play like a more mobile Norn but in all honesty? I'm happy those expectations weren't met in the slightest. And no typos this time! I say we've made some progress here, FA. You contradict yourself in the playstyle section, though the second observation may have just been a retrospective comment, about how the character is tricky to play as but then go on to claim she isn't complicated. Huh. So while Sheoldred is weak, probably weaker than every other Praetor, she makes up for it in mindgames. The oil is a very inventive way for foes to remain wary at all times, to cover all possible routes, only to leave open the most obvious one for Ms. Torso to slip through. Although there are some problems with the set that I feel should be addressed. Similar to Jin, I think that after mentioning how Sheoldred just makes stuff randomly happen because MAJIK SNORT SNORT. More so because you made this Praetor out to be a manipulator, not a sneaky skirmisher. I suppose it caught me off guard and for the most part, Mr. Body covers that base nicely. So 3.5/5


Why do they call it "Magic: The Gathering" anyway?
Well, I think it has to do with the gathering of so many basement-dwelling, sweaty, stay-at-home sons that gather together and accumulate enough acne to ma-
All right, all right! Jeez, I didn't ask for your opinion on the SSB4 thread!!
DOHOHOHOHOHOHOHOHO!

Urabrask- uh, one moment.

so if you whiff your not going to get punished
There we are. Anyway, Urabrask is a bit of an odd man out by the way you describe him. Unlike everyone else I've read up to this point, he has MOVEMENT to speak of. Not just movement, but GOOD movement, and fast fall speed isn't exactly a disadvantage; just look at Fox or Falco. His only flaws seem to be his size and lack of recovery, though if you play Urabrask right you'll never have to leave the stage. However, his gameplan seems contrary to his stats; he can build forts, pits, and magnetic charges. In other words- and I have no idea how long you've been working on this- it feels similarly to Yukon Cornelius in that you have several ideas deviated from sets this contest. Unlike Yukon, however, Urabrask has a cohesive plan with all of these possibilities, something you also agree with in the playstyle section: bully the foe to your heart's desire. Much of this guy's moves take advantage of what he CAN do, from connecting the structures, utilizing polarity to create elaborate traps, combining gas with said structures, etc. And while obviously expected, the grab compliments Urabrask's goal quite well. I haven't read Vorinclex yet, but I would easily say this is my favorite moveset of the group, with my only problem being the statistical madness and somewhat redundant nature of some of the moves. I mainly speak of the mass amount of polarity-flipping moves but otherwise? 4/5


Did you hear? Smashbot found a set this recap he's actually fond of!
Did you hear? Kim Jong Il died!
Did you hear? Osama died!
Michael Jackson died!
Elvis died!
Jesus died!
Plorf loves horses!
Well come on, that one's older than the Garden of Eden.
DOHOHOHOHOHOHOHOHO!

Last but not least, Vorinclex. No typos here either, from what I can tell. However, I do think he has the least amount of mechanics at his disposal; pitfalls and mountains. He seems less like a number-thinner and more like... well, what Nabrask is canonically. A builder. Shouldn't he be more concerned with actually murdering the foe instead of building mountains/slopes to use? The fact that there was SOME momentum involved probably means you did happen to run out of ideas for Vorinclex during the development process. Not to say he's not a terrible set, bit compared to the other ones? Other than Sheol, I'm not too sure if he's as developed as he could be. I like the mass interaction between your pitfalls/holes as well as how important you make mountains in this set. To the point where it isn't really redundancy because he has so many ways to make use of these mountains. 3.5/5


Well, that's the last of them.
Yeah, reading all these sets starved me. Sort of like Vorinclex.
But he builds mountains! How the hell does his Darwinian philosophy translate into this at all?
Uh, well... I don't know.
Seems like baloney, I'm going to bed!
But we still have the Pokemon to cover...
WHAT?!? OH COME ON, WHO'S BEHIND THIS?!?
Probably Phatcat. Apparently he's the greatest mastermind and carbonated beverage ever made.
DOHOHOHOHOHOHOHOHO!

Crawdaunt is a blatant Kingler knockoff. No, really. As much as MW would like to think otherwise, though he probably doesn't, Crawdaunt is Kingler with extra weaknesses. Revolving his entire gameplan around one move is in-character for Crawdaunt, since in the games he's basically relegated to being Kingler with less defense and five more points of HP. I'm also unsure of your characterization of Crawdaunt. You claim he's a brutal animal but you make him out to be a slightly more than over-dramatic showman who happens to have claws. That sounds more like Kingler's forte, since he'e want to compensate for being unable to move that big claw of his easily. But this is just my analysis and for the most part, Crawdaunt has a simple yet effective gameplan around Harden. There's also some Grievous-like dual claw system that doesn't leave Harden on its lonesome. Otherwise, most of his gameplan revolves around... using his moves for their ideal utilities. Kind of basic but there's not much else of a way to make super armor granting specials any more flowy. 3.5/5


Well this is a change of pace. From monsters to monsters.
Yeah, they really know how to switch things up.
Maybe MW will make a set about pitfalls. Shocking!
Junahu creates another female set! Astounding!
Nick remains unseen! Unseen!
DOHOHOHOHOHOHOHOHO!

Slaking is strangely in-character. Just reading it makes me feel sluggish and uninspired. Jokes aside, Slaking is a personal favorite Pokemon of mine. His Pokemon mechanic transitions rather well into the Smash environment. I don't feel like writing anything else for some reason... 3/5


Looks like they got tired out from all these sets. I'll finish up later.
 

ProfPeanut

Smash Ace
Joined
Oct 1, 2008
Messages
727
Legend tells of a legendary warrior whose kung fu skills were the stuff of legend...


It was prophesized long ago that there would come one known as the Dragon Warrior, destined to defeat evil with the secret of the Dragon Scroll. When the time came to choose who would be bestowed this title, the honor fell upon Po - an insecure nonathletic noodle-cooking panda. But as his story progressed, he overcame his weaknesses and found both the true secret of kung fu and his own inner peace. Now, after traveling the land and kicking much posterior, he has come to the Brawl in search of worthy foes.

And it will be awesome.

Stats
Size: 9
Weight: 10
Ground Speed: 3
Air Speed: 4
Traction: 6
Jump Height: 2
Fall Speed: 7


Everybody’s Kung Fu Fighting

Do you know what it means to be a kung fu master? It means being completely awesome. Why? Because kung fu is the most awesome style of fighting there is. Weapons and other long range attacks may be practical, but they’re not as awesome as kung fu. In fact, the gap in awesomeness is so great that all of Po’s attacks have transcendent priority against disjointed hitboxes. In case you don't know what that means, transcendent attack hitboxes are impossible to parry and uninterruptible (ex. Wario's Forward Smash,Meta Knight's ground attacks). That’s right, only other kung fu (or jointed hitboxes) stand a chance of parrying off Po’s kung fu. It goes without saying that this level of kung fu awesomeness also allows Po to clash off aerial attacks with any of his ground attacks as well.


Special Techniques

Neutral Special - Food of Feasting

Hang on, first, a bite to eat! Po brings out a bowl of food - dumplings, noodle soup, bean buns, take your pick - and chows down over 5 seconds, healing 3% every second. During this state, Po can’t use any of his jumps, dodges, specials, grabs and other ground attacks, and moves pretty slowly too. If the opponent lands an attack, the bowl will be sent flying out of your grasp like a 0.1 weight object while you take the brunt of the attack as well. But surely you’ll remember to press A when an attack comes so that Po can toss the bowl straight upwards while he counters off the incoming attack, right?

Po will catch the bowl automatically if he comes in contact with it on the way down, and will continue his meal if he’s landed. Alternatively, the opponent can catch it automatically as well, and eat the food immediately for 10% health once on the ground, but the bowl will still be thrown out of their grasp if they get hit. They could also just try to stop Po from reaching it; why? Because if Po does finish eating the meal, he’ll gain a boost to all his attacks for 5 seconds: specifically, 1-2% extra damage and increased attack speed, not to mention a doubled horizontal movement speed! Po’s attacks are actually decently quick, but the energy from a finished meal turns his kung fu into lightning-fast strikes! Once the food’s gone, this move can’t be used for another 15 seconds, so use the time well to lay the beatdown on your opponents!

Wait, what? You didn’t catch the bowl, and it crashed onto the stage/was eaten by your opponent/fell into the abyss? That’s, like, completely uncool! Kung fu would never allow you to not catch it! In fact, it’s so not awesome that Po will instead suffer increased start-up lag on all his attacks for 5 seconds ins tea!. As if there wasn’t enough motivation for your foes to try and stop Po from chowing down. But hey, you've got kung fu! You wouldn't use this move if you weren't prepared to fight your foes for a good meal, right?


Side Special - Dummy of Training


Po whips out another essential item: a round training dummy! He’ll bump it forward a Battlefield platform with his body, letting it briefly fly through the air knocking foes upwards until it lands and sticks to the ground. It’ll take an attack coming from below the dummy to knock it out of place again; to all else, it’ll absorb hits and bounce them back like a Wobbuffet, though it can’t reflect projectiles. Since you can only have one out at a time, you'll need to either throw it off stage, use the input again next to it, or hit it from below if you want to reposition it.

Any foes that end up flying or dashing into the dummy will be bounced the opposite direction while suffering a second or so of hitstun as well. With some good old kung fu, you can turn the match into a tennis game between you and the dummy, with your enemies as the ball! Alternatively, you could just throw it out as a surprise projectile to knock foes into the air, or you can time it such that it catches the food bowl on its head without letting it drop for you to pick up.

Up Special - Leap of Legends


Po readies himself, stalling himself in the air if he must, then makes a giant jump straight upwards! The leap covers two and a half Battlefield platforms and flies in a straight path, which is much more impressive than his usual hops. Hey, he can’t always be leaping around, with that much weight. Tilting the direction stick anywhere right after input will change the direction of that leap to wherever you want, downwards even. And of course you can use any aerials you want while leaping, duh. It's more awesome that way.

Down Special - Pose of Inner Peace


Po changes his body stance to the classic yet awesome ‘bring it’ fighting pose. And the foe better bring it: any projectiles that get flung Po’s way will be deftly caught and thrown in a random or inputted direction. How does he do that? Watch Kung Fu Panda 2.

Po holds this pose for up to a whole second, but the real use lies in inputting A the moment an opponent comes close. Po will then swiftly deflect any attack or grab that may come his way before grabbing the foe and immediately using a throw! If you don’t tilt in the desired direction, you’ll end up with a random throw inputted instead. Po doesn't need to deflect an attack to do this, but you'd better be prepared to follow up once the foe gets thrown away.


Kung Fu Attacks


Jab - Dance of Evasion

Po readies himself into a different battle stance, looking primed to dish out some kung fu skills. He'll keep this pose for a quarter second, during which he'll dodge any attack that comes his way. Then he'll ready himself to dodge the next attack for about a fifth of a second. If two attacks don't come his way, Po will suffer a quarter second of end lag, open for a hit.

If he DOES dodge two attacks, he'll then counter back with a swift punch (7%) that deals respectable knockback. If yet another hitbox quickly comes his way before he can punch, though, he'll dodge that one too before hitting back! And the next one! And the next one! So long as the attacks keep on coming, Po won't tire from parrying and dodging them all, meanwhile adding 1% damage to his counterpunch for every attack past the first two that he dodges in this state! Po will wait a fifth of a second after each dodge for any more hitboxes before landing the final blow. If you'd rather get back to fighting someone else, you can always press A while Po's in the zone to have him immediately punch the foe away, even if that foe's still attacking. Let's see Meta Knight spam his tornado now!

Forward Tilt - Beatdown of Honor


It's time to bring on the fury! Po makes a fast punch ahead, slightly moving himself forward. If you tilt up or down as well, Po will instead perform either a high rightwards palm swipe or a low foot sweep. These deal the same damage and decent knockback, but will be key in combating other jointed attacks or aerials.

However, inputting this move again quickly will let Po follow up his attack with a different kung fu move! There are three more sets of attacks that Po can string into a combo after the first hit simply by tilting in that direction again at least a half second after the previous attack! "Wait, isn't that just like Dancing Blade then?" you may be asking. Well, not exactly; if you parry off an attack, you'll get to follow up with something more effective instead of going back to square one. Also, tilting in the opposite direction will turn Po around to pull off the next combo attack, allowing him to fight off foes who press in from both sides! Of course, landing the full combo on someone will mean you'll need to get close enough, but you'll get to deal a metric ton of damage in total if you do. Naturally, all these attacks have decent knockback and inch Po forward slightly, but until the fourth attack, Po won't slow down his combo so that he can follow up with the next attack before the foe can fly away. Enough talk, let's see the rest of the combo:


First Second Third Fourth
Up High Palm Swipe ( 7% ) Uppercut ( 9% ) Double Air Kick ( 4%, 4% ) Backflip Kick ( 12% )
Neutral Fast Punch ( 7% ) Follow-up Punch ( 8% ) Roundhouse Kick ( 10% ) Body Bounce ( 14% )
Down Foot Sweep ( 7% ) Flip Stomp ( 9% ) Double Low Kick ( 5%, 3% ) Double Arm Slam ( 13% )


Upwards Tilt - Fists of Justice

Po slides his foot forward, then flips anything above it upwards (2%). Any foe will find themselves tumbling just above the ground, but then they'll find themselves pummeled by a barrage of lightning-fast punches, dealing 20% over a second and a half. Well, so long as your remember to press A again after the first attack. The punch barrage has small range, but the kick is meant to toss foes straight into it, and the barrage is near impossible to DI out of, and pummels through shields like no one's business. Once that's done, one more A input will perform a kick (5%) that'll send foes flying! Due to the nature of the first attack, Po can use this to toss a dummy upwards. He'll skip to the kick if he does, giving him a good technique for repositioning it. But for most other situations, it'll do something about those uncool shielders! This is a fighting game, guys!


Downwards Tilt - Quake of Quickness


Everybody, get off! Po hops and falls on his back as he throws his entire weight into the ground. This results in a shockwave (3%) around him that knocks any and all foes nearby away with okay knockback. Unlike his other attacks, this move is purely transcendent priority, so Po can't get flinched out of performing it. It'll also put him in prone, however, but at least he can attack out of it after a few moments. Since your other tilts are much better for dishing out the pain, this is more of an escape option than anything if the opponents are crowding way too close for you to handle.


Dashing Attack - Roll of Righteousness


Po tucks into a ball as he starts rolling straight ahead! He'll move a bit faster than his dash, staying at that speed while knocking foes (14%) upwards like pins. If he runs into the dummy, he'll be bounced and roll the other way; if he comes in contact with the food bowl, he'll untuck himself to stop and catch it. To manually cancel out of it, just tap in the opposite direction so that Po can stop himself and stand on his feet, though this takes a few moments. Alternatively, pressing jump will make Po jump up and ready to throw out some aerials as he keeps his rolling momentum for a while. Barge straight into the fray, or zip across the stage to keep up with the enemy!


Grasp of Justice


Po's grab has some pretty good reach, but it starts out sort of slowly, y'know, not as lightning fast as most other grabs. Well, unless you have the buff from your Neutral Special. Of course, you should probably be using the Down Special instead if you want to use a throw and counter any attack the foe may use to stop you. If you want to hold onto the foe for a while instead, at least you'll have a fast headbutt (6%) for a pummel.


Forward Throw - Bounce of Epicness


Holding the foe up, Po lets go of the opponent before quickly shoving his weight at the foe (13%), sending the foe flying straight ahead! It's useful for knocking aside any other enemies in front of you, and it can also be used to toss foes into the training dummy, just to bounce them back and keep the pain coming!


Upwards Throw - Slam of Strength


Taste some dirt, pal! Po flings the foe straight at the ground (6%), then follows up with a piledriver (10%), leaving the foe in prone once the throw ends. Not only that, but Po ends up bouncing up into the air about a stage builder block in distance, allowing him to pull off an aerial before landing. Wha-pow!


Downwards Throw - Seat of Defeating


Bending back, Po slams the foe into the ground behind him (8%), knocking away any other opponents who may have been sneaking up from behind. Then comes a backflip from Po, dodging any attacks before landing…right on top of the opponent (10%). The foe will also be left in prone after the throw's done, so be ready to follow up or maybe put some distance between you and your enemies if you need it.


Backwards Throw - Backhand of Truth


Po spins around twice, flinging the foe away in the opposite direction he was facing (8%). Aside from doing the reverse of the Forward Throw, this throw will also catch and fling any other opponents that may run into Po while he's spinning. And the faster they're running, the further they'll be flung! Of course, against non-momentum-based fighters, you could just catch an opponent bounced back by the dummy with your Down Special!


Kung Fu Aerial Assault


Neutral Aerial - Kick of Attractiveness

Po extends out a foot in a classic kung-fu attack! He'll hold out this kick for about a half-second, the hitbox lingeringg the whole time (11%) and knocking foes away a bit. It's a classic attack for both kung fu and Smash, but if you want effectiveness, partner this with the Up Special to send that kick straight at the foe!


Upwards Aerial - Feet of Fury


Po will suddenly re-angle himself as he unleashes a flurry of lightning-fast kicks above him! He'll dish out twelve kicks (10% each) over one and a half seconds, though each kick is strong enough to knock any foe out of experiencing the rest. Unlike the Neutral Air, it's much better for juggling or sending foes flying, and not to mention that the Up Special will change the direction of these kicks to wherever Po's leaping towards!


Backwards Aerial - Grapple of Greatness


Po reaches out behind him with his left arm; if there's an unlucky enemy behind him, he'll catch (5%) and armlock that foe! The opponent will have to escape from Po's grasp with 1.5x grab difficulty, though he shouldn't worry about being suicide-KO'd. Po can then still catch a food bowl or use his Neutral or Up Aerials while holding onto an opponent, but as for the other aerials...


Forward Aerial - Palms of Power


Po prepares a strong double palm attack, kind of like those fighters who like to shoot energy balls from their hands. But truly awesome kung fu needs no projectiles! Po will then thrust his palms forward (18%), also propelling himself a stage builder block in that direction. If you've got an enemy in armlock, Po will shove that enemy forward instead (18%); the flung foe is convenient for clearing the area in front of you as you land. Tilting will also let you angle the attack up or down, so let 'em have it!


Downwards Aerial - Ground Pound of Myths


Stall n' fall time! Po flips in the air to re-angle himself belly-down, stopping any aerial movement or slowing any launch knockback he may have had. Then, POW! He plummets down at the speed of Bowser's Down Special, walloping any and all foes away (20%). When he lands, a mini-shockwave surrounds him; he'll spend a bit of time getting back up, but at least all your opponents are too far away to take advantage of that, right? Of course, if you've got an opponent coming along for the ride, Po will move that opponent right below him before slamming down, making that foe take the brunt of the attack (27%) and pitfalling him to boot! Just don't think about suiciding with this, as that's not awesome at all; Po will cancel out of the start-up without even slowing any momentum he has if he sees an endless void below him, understandably freaked out by having to plummet down there. And you'll be open to attack too! On another hand, why not use this midway through your Up Special just to halt it and bluff your foes?


Smashes of Success


Forward Smash - Charge of Destiny

Po begins to charge up, spinning his arms like he's winding up punches. On release, Po barrels forward at his dash speed, spinning his arms the other way as he knocks opponents skywards! (12%-24%) Each arm works as its own hitbox, which is important considering that if Po catches a food bowl in the middle of this, he'll have to hold onto it without eating it while the other arm spins on its lonesome. Po will dash onwards for as long as you like stopping once the opposite direction is inputted. If Po runs into the dummy, Po will jump and land on it, backflip, and continue his charge in the opposite direction!


Upwards Smash - Rebound of Rage


If you've watched the first Kung Fu Panda, you'll know what this is. Po leans forwards as he prepares the most epic belly bounce in his arsenal, shoving his entire weight straight ahead! (20%-30%) This has some pretty strong knockback, as you'd expect, but against anyone speeding straight at you with, I dunno, Sonic-speed running or momentum, it's pretty much a one-hit KO as they're launched up into the sky! The dummy can help you out with that too, but you'll have to utilize your usual knockback instead - hang on, this move's got transcendent priority too?! That is awesome.


Downwards Smash - Spin of Victory


When charging, Po looks like he's gonna pull off a spinning technique. On release, Po will flip to land on his back before spinning, extending his feet to kick at foes (2%) every tenth of a second. Catch an enemy with one kick, and that enemy will be pretty much stuck along for the ride, so this can make for some awesome damage racking. More charge increases the spinning time for one second to up to three, and not to mention tilting can move Po left or right at a slow pace too! If you catch a food bowl, it'll be juggled by Po's feet until he ends the move by flipping back up and catching it with his hand. Sure, the starting and end lag isn't so awesome, but the last kick will knock foes far enough that you won't have to worry about that if you can hit them. The dummy will cancel Po out of this move if he hits it, though, but you won't end up ruining such an awesome technique that way, right?


Final Kung Fu Technique - Pandamonium


1647438157421.png

The entire arena and everyone in it suddenly takes on a 2D look like the picture above, with awesome background lighting and battle music in tow. It seems the Smash Ball has fully realized Po's dreams, turning him into the garbed warrior you see in the picture. Po takes on maxed movement stats and the ability to hover as he lays down unrivaled kung fu, his attacks sped up and buffed as well. Not to mention that any foes that spend a total of three seconds looking at his direction unimpeded by the stage will go blind from overexposure to PURE AWESOMENESS, dizzying and becoming helpless at the face of such epic kung fu. Your enemies have no choice but to run away, if they can manage to do so for the whole 12 second duration of this Final Smash. SKADOOSH!!!


Playstyle


Alright, ready to play someone awesome? Po can lay down a lot of damage in a short time frame, which is good, considering most foes will be knocked out of his reach after one attack or so. But do you really need to chain attacks when you've already thrown their percentages past 100% by the first half minute?

The fight will become much easier for you if you can force your foe on the offensive - ah, but you can, with your Neutral Special! Your foes can't afford to let you finish your meal, as otherwise you can easily bring the fight straight to them and wail on without pause. Unless they can afford to spam projectiles, they'll need to come in close quarters to stop Po from getting the buff or snatch the food for themselves.

Of course, if you can fight off your foe while never letting the food bowl drop, then you've got match advantage for sure. And you've got more than enough heavy-hitting attacks in your arsenal to keep that up, right? You won't have to worry too much about getting out-prioritized, as you can hit faster or hit just as hard to keep the brawl going. Pfft, disjointed hitboxes; though you'll still take damage, you won't suffer flinching or knockback from them if you can throw out an attack at the same time. Save your Up Special for when you really need to cover air distance quickly, and don't forget to set up your Side Special for an extra nuisance. Forward Tilt makes for both an awesome-looking and practical attack, and your Up Smash stops approaches straight in their tracks.

Po hits fast and hard once he gets close, and with enough skill moves like a super-speed Ganondorf. There's nothing complex about him except good reflexes and constant pressure - in other words, the makings of awesome kung fu battles. But what else would you expect from the legendary Dragon Warrior?


"There is no charge for awesomeness...or attractiveness."
 
Last edited:

MasterWarlord

Smash Champion
Joined
Aug 24, 2008
Messages
2,911
DIDDY KONG

So, Ludwig, remember the last time we went out and made our commentary, and then Rool was so butthurt over it he made comments more venomous and blatant than I could’ve ever hoped to?

How could I ever forget, father?

Well, it’s time to kick it up a notch! Bwa ha ha! Unfortunately there’s no Rool set to comment due to him failing to meet the deadline for the random Pokeset movement that he set in the first place, but DM has become far more contrarian than Rool has lately anyway.

More controversial than Rool? Wow, dad. Maybe I should read this set, heh heh. . .

It’s not just this set that’s done that. He’s claimed that no set ever made in MYM can compare to the likes of Diddy Kong. It makes me legitimately wonder if I should ever bother to read and comment his sets at all at this point, especially considering how terrible this one was. Not like he wants my input on anything anyway. . .In which case he won’t ever get any comments, because nobody but people who agree with me ever comment! He hates MYM any way, why would he want feedback on his “masterpieces” from it? He should just keep that crap on his hard drive. Our eyes are not worthy.

Well, dad, considering what a limited scope of versatility and practicality you have, as well as how much you label as generic, I wouldn’t say that’s a bad thing.

Oh shut up. Go play Brawl if you love those sets so much. Oh wait, you never touch it, because I’m the only one in the entirety of MYM who plays it on a remotely regular basis. The meat of MYM hates Brawl and is all about those Marvel Vs Capcom games and what-not.

ON THE TOPIC OF THE ACTUAL MOVESET. . .I didn’t actually read it considering how these other Pokesets have been, so would you mind summarizing it for me?

It’s a cool In-Smash set with lots of different options for approaches, both from the air and the ground. It makes use of Buizel sliding along water to attack while in motion and-

Ah, momentum. That explains father’s opinion of the set entirely.

It’s not momentum! It’s just attacking while in motion! They’re entirely different things! DM has said he’s going to make an article to explain the difference between them for you simpletons!

It doesn’t matter if he has to actually build the momentum or not. What matters is the gimmick of attacking while in motion is a blatant crutch, and very few people do things with it that haven’t been done before. Warlord jumped the gun a bit calling it out in such a hostile fashion on Rainbow Dash, but now, dear god, now. . .We’re flooded with these sets. The rushed nature of the Pokesets is a good way to find concepts that are easy to slap onto a moveset. Do you wanna know how many of the 5 posted Pokesets have it? All of them but Slaking, and lord knows FA isn’t stupid enough to make his Slaking –that- OOC.

You don’t need something flashy to take advantage of “momentum” as you call it, father. If you hadn’t noticed, Diddy Kong manages to have an entirely unique playstyle of-

M. Trinity is just blatantly better Diddy Kong. Your definition of unique is so blanketing at this point that you may as well never even use it as something to praise a set for again. What concepts are even in this set that DM could feel necessary to credit to Legendoflink?

Well, father, I’d assume that people would like to come into a MYM where all sets are praised rather than hated. . .

That would imply that you make positive comments. You can’t stop bashing most of the sets MYM’s been posting.

ON TOPIC, here’s a complaint that I think you might find relevant, Roy. Been skimming this as you’ve been slinging mud at each other. . .

Slinging mud indeed.

NOT TO GET SIDETRACKED, Whirlpool has some of the most utterly stupid physics I’ve ever seen in the entirety of MYM.

Can’t be as terrible as the limo’s physics from Pussycat Puss.

Oh but it is. . .You see, Buizel makes a Whirlpool that magically spins about in the air for 5 seconds, long after Buizel is gone.

. . .And? It’s a Pokemon move.

I wasn’t finished! This magical whirlpool that is levitating above the ground can somehow pick up momentum by sliding along puddles.

. . .

Probably just leftover from Legendoflink’s involvement in the set. He respected his vision too much to remove it.

Rightright, he has to do that after he told Warlord he should’ve been more liberal with Vlad.

It’s more a matter of trying to appear like a gentleman after Kupa utterly shat upon his contributions to Bowser.

Because those contributions were so meaningful, wah ha ha ha! Does that mean FA has to put Warlord in the credits of Vorinclex, too? The less DM the better! DM has already shat upon literally the ENTIRETY of MYM with that Diddy Kong comment of his.

Why am I even debating with someboy who only wants to hear himself talk again? I really don’t care what you think, pops.

Alright alright, to give DM –some- credit, the moveset at least has something besides Buizel’s motion by sliding the foe along the ground by putting them into prone. . .Something that we’ve already seen this contest done better by Chocula, who was done better 2 contests before it by Antonidas.

Hey, Ludwig! Guess we can’t do any more punching or kicking, that’s been done. No pits, no momentum, final destination! Oh wait, Warlord just so happens to like pits, so those are still allowed. That and grabbing. You don’t make a set Warlord’s way, you get outta his MYM!

Well, Roy, with your previous gigantic blanket statements, this is just another thing to add to our permanent record of you. . .

I told you I don’t care what ya think! I’m gonna go blow this joint and get laid!

Kamek?

Yes, sire?

Ban Roy’s access to the Koopa Harem for a month.

DRAG KNIGHT

So before I say anything, I’d just like to say that I almost want Dragonite to be the universal Pokemon movement Pokemon now, just because this moveset is THAT terrible.

My my, father. Aren’t we a little trigger happy today? You should probably explain WHY this set is so terrible rather than just telling everybody the set is terrible to spread your venomous propaganda.

I was getting to that! Do you ever give your old man one second to talk without butting in?!?

Well, I’m much too busy studying to become a more successful Koopa than you rather than participating in this dreadful contest, so I do have to make my voice audible during the time I’m here.

Audible indeed, bwa ha ha. . .So anyway, what I hate about this set is the versatility-

You and that versatility hatred of yours. Do you just want everybody to play the same way ev-

Of course not! But people are confusing genericness and versatility. You want true versatility, you have Brio and Baron, but you hate those sets for no particular reason, hypocrite that you are. But anyway, if you wouldn’t keep INTERRUPTING ME, it’s not just versatility. Nonono, this is much worse. This has 2 painfully contrasting playstyles of standing still for as long as possible and momentum. And no, this isn’t motion either, this is true blue momentum. 13 seconds to build it all up to the max, good god.

Number crunching. In any case, what’s so bad about having multiple playstyles?

I recall that you said in the past that you don’t like sets focused around two different concepts and that they need a single core, as far back as Dingodile with his suicide KOs and crystals. . .But that’s not the point. Ignoring how much these playstyles contrast, Junahu is implying that you can transition between them!

Did. . .Did you just say a character who takes 13 seconds to build up momentum is supposed to transition to standing still in an instant?

That I did, Junior! BWAHAHAHHAHAHAHAHAH!

HEHEHEHEHEHEHEHEHEHEHEHEHEHEHEHEHEEHE!

BWAHAHHAHAHAH-

Are you quite-

DON’T INTERRUPT! BWAHAHAHAHAHAHAHA. . .Hahahahahahaha. . . Aha. Okay. I’m good.

Did you not just entirely ignore all of the things that Dragonite can do while still building up multiscales? Movement attacks don’t count!

Oh yes, because using movement attacks that force me to go to a specific location are going to be so helpful in building up momentum, am I right?

Well not like I’d know. You’re the one who makes these sets, not me. I’m too busy with more sophisticated things like smokescreens and duplicates.

In any case, there is some very basic generic defensive flow in his standing still playstyle, awkward though it may be. . .

Yeah! He can stand still for his mechanic, because movement attacks don’t count as moving! So tacky for Junahu. You’d think he wouldn’t do stuff like that just for playstyle convenience!

And there’s almost no benefit to really going fast in the first place, nor any way to turn around or anything like that. Dare I say, the momentum aspect of the moveset is more bare bones than Buizel.

Yeah, all these stupid Pokesets are garbage! People are too busy paying attention to them over those great sets posted by FA on the last page!

Those –unreadable- sets posted on the last page. . .

Yes, Iggy, we know you haven’t learned how to read yet. . .

And you can’t infer anything without tons of hand holding in a moves-

That’s Ludwig, not me! I’ve supported sets that had craptastic playstyle summaries before! What you’re referring to with crap like Crustle and other mediocre DM sets is just a matter of direct movesetting taste. Hell, DM even admitted that you pulled most of the stuff for Crustle outta your ass!

That just makes it all the more fun!

I know, right? It’s almost as if you were making a moveset! I love doing that!

Exactly! NOW you understand!

If I wanted to make a moveset I’d make a moveset, not try desperately to patch up somebody else’s rapidly deflating set.

Suppose I was wrong. . .You give too much credit to effort, father. It really doesn’t matter at all what the creator did or intended, so long as you enjoy it!

And I’m fine with your precious philosophical belief of that. Just two things. One, stop trying to pin my dislike of sets like Buizel and Crustle as that. Two, stop saying that those sets are “well designed”. If they happen to be good despite a lack of intelligent design, sure, you can call it a good moveset, but just slapping on the term well designed is idiotic.

I’ll consider it if you stop ranking movesets.

Oh, guys guys, look at the moveset! It has all sorts of hilarious Pokemon syndrome! Aqua tail! Fire Punch! Thunder Wave! Thunderbolt! Thunder Punch! Thunder Kick!

Now now, I’m sure Junahu could come up with a justification for-

That’s one thing that I thought too when I was reading the set, Jr, but actually looking at Dragonite’s movelist it does indeed get aqua tail and thunder wave. . .Aqua tail makes the most sense because he lives under the sea, at least as a Dratini. Thunder Wave is a bit weird, though. . .

Nevermind the punches and thunderbolt!

Come on, Serebii, load already. . .Ah! It says here that Dragonite learns Fire Punch and Thunder Punch by level up! You lose, sirs!

At level 1. Which means they’re just easter eggs to be taught via move relearner.

Well. . .He learns Thunder Wave by level up, so he can use thunderbolt and punch!

That’s something I’m not sure Junahu would approve of, and that still doesn’t exclude Fire Punch. Fire Punch in particular is bad because Dragonite’s supposed to live underwater.

And it barely contributes anything to the moveset anyway! What’s worse for Junahu is how there’s no indication of this superarmor thing from standing still! And that semi solid wall thing is unsmash and inconsistent too!

And the player is totally supposed to know that movement attacks don’t count for this incredibly specific armor buff, as well as to actively damage their shield. . .

These are pretty hypocritical complaints, coming from you.

Maybe they are, but I’m trying to look at the moveset from Junahu’s perspective. Because honestly, even looking at it with his view of movesetting it fails. I just don’t see what audience there is that this moveset could possibly appeal to. Junahu’s not some monster, he can be reasoned with.

Yeah! Junahu’s not like DM!

If you’re expecting me to defend it from Junahu’s perspective then, you’re sorely mistaken. I’m all about concepts. Junahu is shooting for something far above the rest of us that not even I can comprehend, so I’ll leave it to him to defend his moveset.

Because Crustle had such amazing concepts!

Oh but it did! Switching from turtling about with traps to become the aggressor once he breaks his shell, it’s truly br-

I’ve got way too many sets to comment. I’m not getting into ANOTHER debate over Crustle. . .

CHARACTER IS LAZY SO MOVESET CAN BE TERRIBLE OLOL

So there’s Slaking. Just finished it. It has some nice simplistic attacks, and the writing style does a good job of showing off the character.

Character? What character? Wahahahahahahahahahaha!

. . .His entire character is laziness, and FA did a good job of showing it off with a fairly unobtrusive mechanic. He also captured how he plays with the RPG mechanics rather well, lunging out in a sudden burst of speed before lazing down on the ground. He’s strong and fast, just lazy.

So he’s lazy? He has less character than those Duck Twacy villians! Lazy is something thrown onto a character as a trait, not as the only trait that’s there! You people are nuts for making sets for these stupid things, much less role playing them! We need more good sets for good characters, like me, Wario!

WAAAAAAAAAAA-hahahahahahahahhahahaahahah!

. . .Role playing, I’ll give you. . .

Yes, Wario, we understand. You hate Pokemon. Can we talk about the set please? This set is a massive waste of Slaking’s potential filled with lazy filler and-

An execution fitting of Slaking! Besides, think of this moveset from Slaking’s perspective – he’s not going to be doing any complex playstyle. He’s too lazy to think of something. He just wants to smack them so he can go back to lazing about.

True, true. But that’s just the thing. The only non generic attacks FA puts into this moveset are ones that would give it potential Warlordian execution with boulders and earthquakes feel very OOC for Slaking. What do you think of those moves?

A way to attack the foe from a range. Slaking is too lazy to chase after all of those speedy momentum types.

But do you really think he’s intelligent enough to do bloody TERRAFORMING?!?

I –do- loathe terraforming. . .

Can we move onto the next moveset yet? This was made by 2 hours after FA was exhausted from making many actually good movesets. He hates this movement as much as I do!

Thank you, Wario. . .

That means he was in the PERFECT mentality to write this moveset!

Do you really think that all of these incredibly patronizing statements from FA about how lazy he is would show up in-game? They wouldn’t. A moveset with some actual design behind it could convey it much better. Like, say, I don’t know. . .How about Sloth, huh? Rool said it was empirically the best moveset ever made! Bwahahahahaha!

In MYM 6! Wahahahahahahahahhaha!

……Anyway, Wendy, don’t tell me you didn’t find the constant statements about laziness just a little forced or annoying. . .If he wanted to capture that lazy feel, he should’ve just not explained various things he didn’t do by leaving it blank. It doesn’t have that noob feel that your beloved caterpie has, y’know?

But he wasn’t going for a noob feel! He was going for a lazy feel!

All this on a character that had so much potential. . .

Pokemon? Potential? Pick one, Bowser.

3RD WORST EEVEELUTION

WAAAAAAAAA! MOMENTUM!

And on a Pokeset! See how desperate these people are getting to give these generic characters SOMETHING to do?

Well hey now. It was a randomly chosen Pokemon, and n88 actually stood up to the challenge to make it in a day. . .

He should’ve done a random Mario enemy or something! Doesn’t he love those?

Yeah! He’s good at those! And then he wouldn’t have got a character he was so lost on he was forced to resort to momentum!

Is it really that momentum-y. . .? There’s no building of it, but yeah, I guess you’re right that there’s a lot of slip sliding fun on ice. He’s really vague about how it behaves. . .As far as Glaceon himself, you’re just supposed to take advantage of low traction, which is doing a good job of straying from the truly generic motion we’re used to.

Under-elaborated on? Then that means we get to interpret it how we want! That means it’s. . .MOMENTUM!

Even then, this is more one of those sets that sends the foe slip sliding over the stage than one that uses momentum for itself. . .

Did he say momentum, Wario? I heard momentum!

I didn’t hear momentum. . .I heard cop-out!

WAAAAAAAAAAAA-HAHAHHAHAHAHAHAHAHAHAHHAHAHAHAH!

He didn’t even change how the ice worked from Brawl at all! That’s how lazy he was with this stupid rushed Pokeset!

He did that to appeal to Jun and DM’s anal stance that anything that’s in Brawl must function exactly as it is in Brawl. . .In which case if we’re designing things directly for Brawl, we can just treat all enemies as generic rushdown characters and make our sets as defensive and assuming of the foe as we want.

Well, more campers is better than more momentum characters for sure.

Yeah, but this is coming from them! Camping is no fun! Super boring! Remember?

Yeah, I want to go so fast that I zip off the stage and suicide!

Before we move on, one last thing I wanna say. . .You can technically make slopes in this set and I like the hiding inside snow, I just wish it had a bit more focus beyond the general spacing seen throughout most of the set. The one thing I truly feel it’s missing, though, is something from Rool’s MYM 6 Glaceon – snowballs to send down Glaceon’s slip’n’slide path.

So the character is so desperate you want him to make it exactly like Chocula? Wahahahahahahha!

Glaceon doing this is more justified than Chocula. Which is more slippery – ice or chocolate?

Well, I’ve dealt a lot with chocolate, y’know. You’d be surprised.

. . .

EED SOLDIER

Alright, this is a pretty cool set. Stacking multiple things for the foe to escape, making slopes to run down faster. Running fast to get superarmor rather than for the sake of approaching, and of course all of the beautiful things you can do under the stage. Hell, you can make a hole in the stage and bring the foe under with you, maybe even cause an avalanche to drag them down? So many good concepts, such excellent ex-

It’s just another generic terraforming set. They’re all the same. Next.

Because all of those generic combo sets with infinites you make them play so different! Especially Grovyle with his momentum!

They play plenty different in an actual game. Try playing one some time.

In said games there aren’t any terraforming characters, so you just have massive bias for the characters that exist in the real world that you can play.

That’s because terraforming characters are unprogrammable.

No, that’s because they think their fanbases are idiots and wouldn’t be able to figure out to play them. That and laziness. Take your pick. Especially in a real fighting game with 100% generic stages, this crap would be easy as hell to implement. In Smash. . .Only button mashing monkies on crack play on stages like Hanenbrow, and even then, there are very few exclusively terraforming based characters on the market in MYM today, Vorinclex among them – they can work fine with very little ground to make use of. Take note of Vorinclex’s Up B stage clinging game.

I still believe there’s no way it could possibly work. It’d break the engine.

Do you have any proof whatsoever of this?

. . .

It’s just as possible as all of these fetishes you people have for invisibility and what-not. Terraforming just turns you all off for no apparent reason.

Well I don’t know about you, but I like to actually fight my damn enemies, not make love to the stage.

Vorinclex is plenty offensive, constantly trying to drag enemies into his traps or off-stage. FA makes a big point of not giving Vorinclex any good ranged options. We’re long past the days of MYM where characters were truly defensive – everybody is actually fighting nowadays.

Well I personally loathe all of these attacks that very specifically do things. Like, you can only make a hole through the stage with dtilt but not Down B, and there’s only that one aerial that specifically moves mountains of dirt.

And there I would agree with you. FA seemed a bit desperate there due to having four more inputs than a regular set thanks to the extra dashing attacks.

And FA thinks you can press back while dashing. That’s rich!

Yeah, it bugged me too. Honestly, FA should’ve probably ditched the dashing attacks and just let him use his regular moveset in the dash mode. Just maybe make a change here or there where it was needed. With four less inputs, he could’ve made things like moving the mountain feel a lot more natural.

Two final complaints. One, the stage he destroys never comes back until he dies. What happens with multiple Vorinclexes? Two, there’s a surprisingly small amount of gluttony in the set and far too much generic terraforming in it to appease your endless appetite for over-creativity.

The first thing is too nitpicky for me to even bother commenting on. The second is another good point, but even then, he has a bloody pummel KO where he devours them that flows brilliantly with the rest of his game. That’s more than enough for me.

Pummel KO?!? Gah! Get me outta here!

So Larry, did PTA die yet?

Not yet, but it will soon if people don’t start loving the characters I make. Seriously, what’s not to love about people who kill everyone they see and/or put you into bondage?

This is why I quit.

BOULDERS

The boulders! The utterly disgusting boulders! It’s more terraforming!

Larry, does the stage actually change at all from what Yukon does?

No, but him grabbing boulders out of the ground is the most disgustingly illogical thing I have ever seen!

So, he carves out this tiny little boulder the size of Kirby, then impales his pickaxe into the ground and rips it out. This KIRBY SIZED rock, with that specific process. No seriously, are you just retartded? You may as well bash DK’s Down B for being unrealistic, much less other far worse things in MYM.

Not like he needs to. The way the engine is coded, you can’t be hit while in the background. You’re invulnerable. Those 3D pitfalls are the most idiotic thing I’ve ever heard.

I thought it was generally assumed that we are not hacking our sets directly into Brawl, for the love of god. It’s a 2 second change to make background hitting attacks work. Hell, if I remember correctly, it’s already in Brawl – Tabuu does it with several of his attacks for crap’s sake. Weakest argument ever.

Either way, so many pitfalls! It’s broken! Brokenbrokenbroken!

He’s left vulnerable while making the pitfalls, and in some of his moves like the tackle he becomes vulnerable to the pitfalls himself even after they’re already made.

But look at this move! He impales the foe on his pickaxe! A character from a children’s Christmas cartoon! How utterly repulsive!

Yeah, that’s pretty bad. There are worse things to complain about that show that both of you haven’t read the set, though. Mostly him grabbing the foe on his sled and them magically being unable to move and having to grab escape.

But the boulders, dad! THE BOULDERS! GOD HELP ME I WILL QUIT PTA IF HE DOES NOT REMOVE THE BOULDERS.

How is this bad again?

. . .! Well still, even if you’re going to excuse the MONSTROSITY that is those boulders, them picking up snow is the most unrealistic thing ever!

They’re simply gathering more snow around them. They boulders themselves are not actually becoming bigger, for crap’s sake. Come now, Roy. You should at least be more reasonable than Larry over here. This moveset is really offensive as you bring foes into your traps. I’d think you’d like it.

It has too much tackiness in it for me to care about the good overall playstyle. Impaling things and 3D hitboxes instantly break the set. I stopped reading after that terrible impaling move.

Why does anybody take you seriously again? Bwahahahahaha!

Besides, the set is much too focused and intertwined, which makes it play exactly the same way every game, unlike Buizel.

Buizel, who runs from the foe like Yukon for his set-up and then forces the foe into his static disjointed hitbox like Yukon.

Buizel has more to him than that!

Yes, Buizel can play as a generic Brawl character. Exactly like Yukon. But worse in every imaginable way.

TOKEN KHOLD LOL SET SV

So Elspeth. You both already commented this set and thought quite negatively of it. Would you tell me why?

Too simple. Too generic. Lack of focus.

Jr pretty much hit the nail on the head. The moveset is filled with really bland sword attacks for the meat of it, and there just wasn’t much to catch my interest, even in the playstyle summary. I almost fell asleep reading it out of boredom.

I did that during Buizel, so I can’t blame ya, heh heh. . .Daydreaming of reading better sets. But this set does have some merit to it, I think. Mostly it comes with that sort of cage match thing we saw in Rool’s Kamek back in MYM 7. Trap a minion inside with the foe as you go set more crap up, or better yet, swap positions with the minion in mid-fight to catch ‘em off-guard. For being so generic, this set has a lot of -legitimate- versatility with the counters and being able to seamlessly transition between making either Elspeth herself the star or her minions.

It seems to me that the playstyle you’re seeing would be largely killed off by the fact that Elspeth would always be trying to use her minions as meat shields to prepare her ultimate buff. Potentially for her minions to stall for even more time.

This is MYM Brawl we’re talking though. You aren’t always gonna have all the time in the world to go and do exactly what you please. She’ll play differently against different characters. You really think she can afford to do that when Nappa’s threatening to go Great Ape?

No, but it’s Nappa. Nobody beats him.

True, true. . .Bad example. Fine then, does she really want Cairne’s Reincarnation timer to keep ticking down?

Reincarnation was tacked on. That Astaroth clone was better.

You just really love your inferior Vorinclex clones, don’t ya?

No, that makes Vorinclex a Cairne clone. Because Cairne came first, Vorinclex is now terrible.

Did you even read Cairne? Whatever. Yes, Elsepth’s actual attacks used to go against the enemy are really bland, and she’s largely a Brawl character without minions. LoL’s a middle of the road MYMer, though, and with these sorts of sets he tries to leave room for practicality and be actually unique at the same time. I can very much respect this set, even if I do think it could be improved upon.

So it’s sorta like Chaos 0?

It’s got that same sorta appeal, but it’s not nearly as strong.

Hmm. . .I sorta see it now. . .I really like this moveset now!

Thatta boy! Gwahahahahaha!

(This is why he’s your favorite son. . .)

22/10 DASH SPEED

MOMENTUUUUUUUMMMMM!!!!

Thank you for your contribution, Waluigi. . .

Any time, Bowser. When do I get paid?

Who said anything about pay? Gwahahahahaha!

Wah?!?

You really don’t give momentum anywhere near enough credit. There’s plenty of things to be explored in the so-called “genre”, if you ask me.

Maybe there are, but Sonic explores nothing. The moveset is largely just the Brawl set with an arbitrary boost mechanic tacked on.

Indeed, how dare it muddle with Sakurai’s brilliant set just to add in an obtrusive meter!

Sonic doesn’t have to build up his speed, but building up an ammo bank to use for one move is something we haven’t seen since what, Bald Bull? It’s pretty painfully flowcharty and generic.

Yeah, a flowchart where he zips right off the stage every time to his death! Wahahahahahahahaha!

It’s definitely not a flowchart. There was too much brilliance left from the Brawl set for it to play in a set way every match like the sets that you normally praise.

In your dreams. There was mostly just some generic comboing added to help boost up the generic meter. Hell, I can honestly say I probably prefer the Brawl set to this trash.

So let me get this straight, Bowser. Aside from that one generic boost move to start the momentum, he didn’t add anything to take advantage of the momentum? Just comboing?

Pretty much! He has that one aerial that magically reverses his momentum against all logic, but yeah. The only thing 22/10 dash speed is good for is suiciding. There’s no in-between with Sonic, it’s faster or fastest.

Which makes it more in-character!

Because Sonic is such an emo guy who you’d expect to off himself any day now, right?

He’s not making a moveset for Shadow, Wendy.

DOHOHOHOHOHOHOHOHOHOHOHOH!

Aren’t you at least going to comment that organization?!?

Yes, it’s the best organization I’ve ever seen. How he split up the playlist in particular seamlessly was absolutely brilliant. However; we’re not in the E-card business, to bring back an old catch-phrase of mine. . .If that was the case, freaking –VIOLA- would be the best moveset ever made.

Isn’t it?

. . .!
 

Hyper_Ridley

Smash Champion
Joined
Dec 21, 2007
Messages
2,298
Location
Hippo Island
ROB REMIX


If ROB is holding a Gyro when he uses his Down Special, he will place the gyro on the stand and start to rev/charge it back up. In games with multiple ROBs, this only applies to that player's own Gyro.

He also gets all of the tweaks/buffs seen in his Balanced Brawl incarnation

DONE

This is actually a half-serious moveset. As someone who mained ROB for a while (even played him at the only Brawl tourney I've entered!) this is essentially all I want to see changed in Smash 4.
 

LegendofLink

Smash Apprentice
Joined
Feb 17, 2008
Messages
164
Location
Pennsylvania
Not made in one day, but who cares?

Cubone​


Cubone is the Lonely Pokemon, and is probably one of the most puzzling and depressing pokemon to think about. It is said to wear the skull of its dead mother, and whenever it misses her, it cries in such a way that the skull rattles. It also wields a bone as a club and boomerang, and is quite skilled in their use. How does it acquire its mother's skull and a bone at birth? Nobody knows, but that doesn't stop Cubone from giving its all and joining the Brawl (or whatever game we're playing at this point).

Size: 4
Weight: 6
Ground Speed: 3
Traction: 9
Jump Height: 4
Air Speed: 3
Air Control: 5
Fall Speed: 7​

Mechanic: Rock Head​
Cubone wears the skull of it's dead mother on its head, and no matter how much of a beating it takes, it never breaks. While Cubone is using any of it's attacks that involve some variation of a headbutt (there are a quite a few of them) the area of Cubone's hurtbox covering its head gains super armor.

Specials

Neutral Special: Bonemerang
After a short bit of startup, Cubone tosses it's trust bone out like a boomerang, throwing it in whatever direction you point the control stick during the startup of the move, defaulting to forward. The bone travels a distance of two battlefield platforms at Mario's dash speed before turning around and returning to Cubone without fail. By tilting the control stick in a direction perpendicular to the direction you threw the bone in immediately after executing the move, you can alter the trajectory somewhat, similar to Pit's arrows, but not nearly as precise. You won't have the bone doing loops in midair, but you can alter it's course enough to have it return at a 45˚ angle to the angle it was first thrown from. The bone also ricochets off of solid surfaces at realistic angles on it's way out, allowing for bankshots and such. It will pass through solid objects to return to Cubone, though.

Opponents's hit by the boomerang are dealt 7% damage, with the knockback carrying depending on the direction the boomerang was thrown in and whether the projectile is moving away or coming back to Cubone. As it is moving away from Cubone, the attack pops opponents straight up a short distance, regardless of which direction it was thrown in. On the way back, however the the boomerang knocks them in whichever direction it is moving, pulling them back towards Cubone. With proper spacing, timing , and angling, it is quite possible to hit with both the outgoing and returning hits. Cubone can move freely after throwing its bone, though it won't be able to use any attacks that make use of the bone until it returns. Some attacks will change if Cubone isn't holding the bone, but not many.


Side Special: Bone Rush
If this move is used while Cubone is holding its bone, Cubone dashes froward 1.5 battlefield platforms, rapidly striking any opponent it comes in contact with for multiple hits of 1% damage each, carrying them along for the whole attack. At the end of the dash, Cubone performs one last strike with its bone club, this time dealing 5% damage with good horizontal knockback, KO-ing around 150%.

If Cubone is not holding its bone at the time it instead launches itself in whichever direction the bone is, traveling up to twice the distance as if the move was used normally. If Cubone comes into contact with the bone during this time, it transitions into the normal version of the attack for the remainder of the dash, though it keeps the trajectory from the initial dash. Opponents hit by Cubone as it launches itself at the bone are dealt 5% damage and are knocked a good distance in whichever direction Cubone is moving, likely knocking them right into the bone.


Down Special: Retaliate
Cubone crouches in a defensive position for as long as you hold the B button, gaining super armor while it does so. If it is struck in this position, it lets out a bone chilling wail, dealing 5% damage and stunning opponents within two battlefield platforms of Cubone for an amount of time relative to how much damage Cubone was dealt: 1 second for every 7%. There is some hefty end lag exiting this stance without being hit, so don't abuse it.


Up Special: Orbital Toss
Cubone tosses out its bone in a manner very similar to the Neutral Special, but instead of throwing it straight forward, it throws it such that it loops around Cubone itself, orbiting Cubone once before returning. The toss can be angled in any direction the same way as the neutral special, and the damage properties are identical to the normal thrown bone. This is a great way to set up long distance Bone rushes, or to deal with opponents in your face.


Standard Attacks​

Jab: Bone Club
A two part jab, the first hit consists of a swift downward strike by Cubone, dealing 3% damage with simple flinching. Pressing A a second time has Cubone follow the attack up with an upward swing, dealing 4% damage with good forward knock bak for a jab, and a lot of shield push against blocking opponents, getting them out of your face.

Up Tilt: Iron Head
Cubone performs a short hopping headbutt, similar to Squirtle's. This deals 4% damage with light upward knockback, making it ideas for low damage juggling, and the super armor from Rock Head makes it an excellent anti-air option for when you're caught without your bone.

Forward Tilt: Quickrang
Cubone tosses its bone out similarly to the neutral special, except that it will only travel one battlefield platform before returning. it can be angled up or down at a 45˚ angle and can its trajectory can be still be slightly manipulated at the beginning of it's flight, allowing for it to still cover a wide array of angles.

Down Tilt: Bone Plant
Cubone jams its bone into the ground in front of it, dealing 6% damage and spiking opponents right in front of him, meaning they the pop up into the air a short ways if they're on the ground. This leaves the bone stuck in the ground where the attack was used. It's pretty harmless on it's own, though opponents will trip over it if they try to dash past it. If it is hit by an attack with enough knockback to move a character around a bit, though, it will be knocked out of the ground in the direction of the knockback, traveling one battlefield platform as if it were thrown by Cubone before returning to Cubone the same way, all the while retaining its normal projectile hitboxes. Cubone can pick up the bone again by pressing A in front of it or using Bone Rush through it, as cubone will still dash toward the bone if it's stuck in the ground.

Dash Attack: Running Headbutt
Cubone lowers it's head and increases it's dash speed to equal Mario's, charging forward head first for as long as you hold down the A button. Opponents struck by Cubone's head are dealt 10% damage and knocked straight up into the air, KO-ing around 180%. There is some hefty ending lag as you let go of the button, though there won't be any if Cubone runs of a platform (and off stage is pretty much the last place Cubone wants to be.


Smash Attacks​

Up Smash: Bone Twirl
Cubone spins its bone above its head, dealing rapid hits totaling 14-23% damage depending on the charge, with the last hit dealing upward knockback that KO's around 140%. This attack can be canceled your neutral special at any time, allowing for some interesting combos.

Froward Smash: Skull Bash
While charging this attack, Cubone crouches down, gaining super armor while doing so. When the attack is released, Cubone launches itself forward, head first, traveling anywhere from one to two battlefield platforms depending on the charge. Opponents struck by cubone are dealt 15-28% damage, depending on the charge, with forward knockback that KOs around 120-70%. This is Cubone's go-to KO move, and with practice can be set up from a well placed Bonemerang. It is very punishable if you miss and the opponent can get to you, so as usual it is not so be spammed.

Down Smash: Spinning Sweep
In a typical catch-all sweeping move, Cubone performs a quick spin, sweeping its bone along the ground as it does so, dealing 13-20% damage with horizontal knockback away from Cubone, KOing around 160-100%.


Aerial Attacks​

Neutral Aerial: Thrash
Cubone swings its club about in the air, attacking on both sides of itself. Opponents hit by this attack are dealt 8% damage with horizontal knockback away from Cubone. If Cubone does not have its bone at the moment, it will still flail about, but it will only deal half the amount of damage and knockback as normal, and with reduced range.

Forward Aerial: Skull Slam
Cubone performs a front flip in the air, smashing anything in front of it (and right below it) with its skull. This deals 12% damage with knockback they varies from forward at the beginning of the attack, to spiking knockback near the end. Thanks to the armor from Cubone's skull, this is a great aerial approach, but the it has noticeable startup that makes it easy to see coming if used poorly.

Down Aerial: Double Stomp
Cubone stomps down hard with both of its feet, dealing 9% damage and spiking opponents hit by the attack. This attack is very quick, both in startup and end lag, and can easily combo with a returning bone.

Back Aerial: Backwards Toss
Cubone throws its bone behind it, and it travels out a short half battlefield platform before returning. Instead of catching it right away though, Cubone will wait until the bone passes in front of it before doing so, allowing it to catch opponents who are close buy or just in front of Cubone with the attack. The damage and knockback are the same as the other bone tosses.

Up Aerial: Upward Swipe
Cubone swings its club above it in a wide arc, dealing 8% damage and knocking opponents hit straight up. A simple move, but like the down aerial it is very fast on both ends, making it an great tool of juggling or combos.


Grab:​
Cubone's grab is fairly typical of a smallish creature, fast, but with abysmal range. Cubone holds the opponent with both hands, and can still grab while not holding its bone. For a pummel, Cubone simple bashes them with its head for 3% damage at a rather slow rate.

Forward Throw: Head Smash
Cubone slams its head into the opponent and enter a state similar to its dash attack, with the main difference being that the opponent is carries along with Cubone as it runs, escaping at normal grab difficulty (which carries over from the initial grab). If Cubone runs off a ledge, it suffers no end lag as normal, but the opponent goes into a tumble, giving Cubone the advantage. This throw deals 10% damage at the beginning of the throw, and anything else hit by cubone while it is charging acts like it was hit by its dash attack. Cubone can exit this throw, flinging the opponent forward a short distance, by pressing the A button.

Down Throw: Hammerhead
Cubone jumps up to the opponent's height and delivers a mighty headbutt right on top of their own head (or head equivalent). This deals 12% damage and pitfalls opponents right in front of Cubone, who is free to follow up.

Back Throw: Fling
Cubone spins and throw the opponent behind it a decent distance, dealing 6% damage in the process. A simple bare bones throw (no pun intended), but remember that the opponent can be thrown into a bone, both flying and embedded in the ground.

Up Throw: Iron Head Redux
Cubone performs a hopping headbutt similar to its up tilt, dealing 6% damage and knocking opponents straight upwards. Again, simple, but effective if you plan ahead.


Final Smash: Ultimate Bonemerang​
Empowered by the smash ball, Cubone hurls it's bone with incredible force, right off the side of the screen at the speed of Fox's lasers! Opponents hit but the boomerang are dealt 25% damage with knockback KOing around 40%. That's not the end though, as the bone will make a return trip right across the screen right in line with the nearest opponent. Afterwards it will make one last shot across the screen back to Cubone. the bone deals the same amount of damage each trip.

Playstyle:​
Short and sweet and to the point:

-The Neutral special is incredibly versatile, and is your main way of dealing damage and setting up KOs.

-Make sure to properly utilize the forward tilt, back aerial and up special as well for more bone throwing options.

-Super armor on the headbutting moves allows you to defend yourself while the bone is away.

-Try to combo the opponent back into a returning bone for plenty of damage.

-Embedding the bone in set ground can set up a lot of things. For example, using your dash attack into the bone can cover jumping opponents, as well as have the bone following you for the remainder of the attack, making you hard to dodge and punish. It can also add some extra punch and reach to attacks if you fight near it.

-Forward Special allows Cubone to be very mobile. Use it to catch opponents off guard and to get out of tight spots. It also works great as a combo finisher after or just before catching your bone.

-Defensive-minded players should make use of the up and down specials, the armor on headbutting moves to counter the opponents approaches, as well as basic spacing to keep foes at bay.

-Try to stay off stage unless you are sure of a gimp with your forward throw. Cubone's recovery is very obvious due to its reliance on the bone for Side Special, making it very easy to disrupt and intercept.

In Summation: Always plan ahead in your attacks, as Cubone requires commitment for each toss of the bone. Correct guessing an planning though can easily result in victory.
 

Junahu

Smash Ace
Joined
Nov 15, 2005
Messages
899
Location
Shropshire Slasher
Dragonite comment reply:
I've gotten into a horrible habit of waiting until after the set is posted and hated before trying to explain what it's trying to do. After years of making sets, the process has become too subconcious for me, and I forget how to write stuff that actually explains itself properly (like Doppelori).

Dragonite isn't meant to be versatile in the least. It can do a lot of stuff, but it's definitely henpecked into a specific style. I wanted Dragonite to be about building momentum, but in a way that doesn't instantly result in Dragonite losing if she ever loses the momentum. In this case, she wants to build up her movement speed so that her aerial assaults can lead into genuine pressure games. 13 seconds is nothing at all in this case, because Brawl by its very nature is kinetic and constant motion is outright encouraged. Losing the option to stop does make Dragonite more predictable, but the foe can't really force you to stop, only punish the fact you don't want to.
But a lot of foes are great at zoning, and can lock Dragonite down into a situation where it would be suicidal not to stop, situations where momentum loss is inevitable. And that's where the defensive half of Dragonite's game shines. Dragonite's ground attacks are (supposed to be) very safe to use, and powerful enough to scare the foe off. Combined with the ever increasing immunity to damage while motionless, and the ability to burn a shield in order to buff it further, Dragonite becomes exceedingly difficult to attack. And the she can pick and choose her moment before heading back into her rush down momentum stuff, using her limited mobility moves to position herself more favourably. Since the damage mitigation ticks down at a rate of 2% per second, Dragonite will be well protected for a few seconds after starting to move, which is the key moment where you want to catch the foe offguard and begin your pressure.
As for using both buffs together. That's an alternate option, a speed dating approach to going back and forth between speed and defense. You move in bursts of about 5 seconds, then stand still and burn your shield, before moving for another 5 seconds. You get to keep a little speed, and a little defense this way, and can, at the drop of a hat, dedicate yourself to one style or the other. It's not likely the main way to play Dragonite, so I apologise if the moveset made it sound like that was the case.

and now specific replies;

You mention not being able to turn around. I think you might have mistaken Dragonite's 'momentum' mechanic for one of acceleration and decceleration. Dragonite simply becomes a faster character, not careening out of control with inertia, but quite in control of herself. Turning is just fine for Dragonite, she does have multiple air jumps for that. That's what makes even a conservative speed boost so monstrous for Dragonite.

For all of Dragonite's Pokemon Syndrome, this is one of the reasons I did not want to make Dragonite to begin with. Part of Dragonite's mythos is that it IS a mystical, magical pokemon, and for some reason can discharge electricity. Firepunch is a little egregious, but it can just as easily be redesigned into some dragon attack (just colour the flames blue). The electric attacks stem from some of Dragonite's implied physiology, and can just as easily be made Dragony.
Nowadays, I just use move names as a naming convention for the attacks. I don't honestly think Seismic Toss looks anything like how I make Dragonite do it, but no one gets to see what each attack is called in-game.

Draining your shield is kind of a natural action when you're being defensive. Though I should have included a visual indicator of Dragonite's current buff, so players can explore the specifics of it more easily.
 

flyinfilipino

Smash Master
Joined
Sep 11, 2007
Messages
4,319
Location
North Carolina
@Po: I was totally ready to make a Po moveset after watching Kung Fu Panda 2 over the summer...but then I got lazy, and yeah.

Crushed dreams aside, you've made a pretty faithful representation of the panda protagonist here, ProfPeanut, from the belly bouncing to the Feet of Fury. Most of his moves are kung fu physicality - as they should be. Po's prop-ish moves are reserved for his Specials; that eating Neutral Special suits his character, as well as serves as a good incentive for foes to come at him. Side Special is a nice touch and does a bunch of neat things; I like it. Down Special is nifty and pretty much sums up the entire second movie. Up Special is probably the least-exciting Special, but it has its uses. The Jab not really being a direct attack is kind of odd, but it's still kind of cool. Po's Forward Tilt rather similar to the Forward Tilt of a character I've done before (that I'm sure no one remembers), but it fits him pretty well and expands his kung fu arsenal.

The rest of Po's moves are pretty straightforward, with a few interactions with the food bowl and dummy here and there, but that's not to say they're bland, and I hope no one berates you for it. There's not an OOC move in here, and your writing style is clear, concise, and just perfect for the moveset. Overall, Po just feels right, and sounds like he'd be awesome to play as. I'm glad someone stepped up and made a moveset for him. Good job, ProfPeanut! :bee:
 

BKupa666

Barnacled Boss
Moderator
Joined
Aug 12, 2008
Messages
7,788
Location
Toxic Tower
CRAWDAUNT
Back into the commenting, here we go. Clawdaunt's offensive and defensive styles, tied together by Harden, create a refreshing take on versatility. He becomes a melee-range stalling machine after molting, before going on the offensive after he gains his superarmor. This latter phase seems a bit reactive to be all that amazing, with Clawdaunt mainly using his anti-airs to keep his foe pushed around with him as they attempt to jump free. His claw wall would seem an afterthought in this scenario, despite its brilliant nature in pretty much every other scenario. Speaking of which, him pushing his foe offstage to divert their focus from attacking his fleshy self, before juggling them with bubbles until his armor returns was a Kabutops-esque flowing gem in the set. Clawdaunt's simplicities fit snugly into his playstyle, making them seem more at home in the set, without them being shoe-horned in with the excuse of this being a Pokeset.

URABRASK
I asked you to recommend me your best set to read and comment last night, and you followed through. Not that I’ve read the others just yet, but I have doubts they’ll be able to top this behemoth of a set. The fairly basic base items of Urabrask’s lava and blocks are brought together quite well with his magnetic moves. In a magnetism set, one would expect quite a bit of flow between all characters and onstage elements, and Urabrask pulls this off quite well. Homing projectiles and interfering shards are more icing on the cake. At times, it does feel as though several moves serve similar purposes, specifically those set aside to regulating static charges. Yes, it does give Urabrask more options, but it does seem a bit superfluous. Regardless, much as Urabrask pokes through his blocks, I can see this poking quite high into the Top 50 in the near future. What’s the deal with great sets having magnets, eh?
 

ForwardArrow

Smash Ace
Joined
Aug 17, 2011
Messages
503
The Grinch
Okay yes, yes I will get to commenting the Pokesets, but I'm not quite up to it right now. I'll see if I can get them out by the end of the day though.

Anyway, Grinch here has some reasonably cool stuff at points with his sack and the various ways to manipulate it, by putting it on the sled's rope and setting on fire or poking the holes in it with the Forward Tilt. I will give you that there are a few clever ideas in here. Now that the positive is done with, on to being the Grinch for the rest of the comment. This set is extraordinarily tacky throughout, particularly in the aerials with stuff like the Back Aerial and Down Aerial. LL's already told you his opinion on things like the Back Aerial and I have to agree, and the Dair... why is it a GRAB HITBOX? That makes no sense at all, honestly. It's not like these moves serve some particularly unique purposes either, there is a TON of redundancy in this set. Most notably in all those moves that space the foe or the sack, there's an unbelievably large number when you need only 2 or 3. Not to mention they all seem remarkably effective at their job, forcing the foe into the sack by pushing them like 2 platforms in several cases... so they take a bunch of damage and knockback based on the amount of stuff inside for god knows what reason. I do not see what logic you have that could possibly excuse the ridiculousness of how the sack kills people, it makes absolutely no sense in any universe.

So after all this tackiness and redundancy, we better at least be getting a fairly unique playstyle right? Well... I can't say we are. When it comes down to it Grinch's playstyle comes down to pressuring the opponent into a static hitbox. Can't say we haven't seen that done before and a heck of a lot better elsewhere. The set honestly feels like watered down Yukon Cornelius at a lot of points, and I'm not a huge fan of Yukon to begin with. While you don't have the ridiculously extended grab period, at least Yukon has the boulder game, which is a heck of a lot more fun than any of the Grinches other gameplans (which amount to more lolpressurethemintotraps). Oh yeah, and one other thing, that godawful pummel is one of the worst moves I have seen in any set. What about characters who don't USE PROPS OR WEAPONS? Quite a few of those if I remember right, IE 2/3rds of Brawl's cast and a large portion of MYM sets? Not to mention the subgame it makes is mostly just obnoxious and only contributes to Grinches playstyle in the basic sense of them having worse attacks so you can pressure them better.

But yes, I really do not like Grinch at all. I would go so far as to say it's your worst set since Sandman. Sorry for being so harsh, but this set is just a mess.

Edit: I dunno what was up with me this morning, this set's a fair bit better than I said here, honestly. I certainly don't like it for the reasons I described above, but the games he can play with the sack and train track are actually pretty interesting. Yes it's flawed, but on a second glance there's a lot more depth here than I initially gave it credit for.

Edit2: Oh that wacky Warlord and his posting Dave sets.
 

n88

Smash Lord
Joined
Oct 10, 2008
Messages
1,547
The Grinch
[COLLAPSE="MasterWarlord"]Unlike FA, I actually quite like this set. It has plenty of charming little touches, like the way you use the language from the book ("You can use your crawl to slither and slunk. . ."), and I think you do a good job of capturing the feel of that crazy rush down the mountain from the cartoon, with the way the sled works. It does have its tackiness problems, but the sack at least makes for a decent justification of props, which would likely be in abundance for any reasonable Grinch set. And even with the focus on storing props and weapons (The Grinch is clearly designed for the environment of SSBMYM, not Brawl), I think he'd still have a decent amount to do in a fight against someone like Donkey Kong/Ike/Most of the Brawl cast who doesn't give him anything to work with. No, my real gripe with the set is that the Grinch feels a bit too sadistic - the lighting things on fire kinda pushed it too far for me. But this is still a neat little package that I prefer to your big zany works like Gangreen Gang and Beezwax, even if you discount my opinion forever because of it.[/COLLAPSE]
 

MasterWarlord

Smash Champion
Joined
Aug 24, 2008
Messages
2,911
FORCED SET FOR COOL CHAR

This set goes on entirely new levels of tacky even for you, with you managing to make things like generic butt slams and such manage to be awkward. I had a move like that pummel in one of my movesets in my career. . .It was MYM 5 Gluttony. While still very tacky, I actually somewhat like said move, considering he's far from reliant on it. It's not all that hard for the foe to just get their prop back so it doesn't really screw them over that badly, and it gives the Grinch a way to actually get something from the foe without relying on them to supply it.

It's still largely a generic trap character with moves to force the foe into his spacers, though. In the least it has the stuff with the sack which I like, as the foe can't let the Grinch dillydally about if they're too stubborn in resisting the Grinch's spacers. It feels like it'd be a very functional set in MYM Brawl as n88 put it, and I'm becoming increasingly a fan of those sorts of sets (The Grinch does it far better than Kraehe). The one thing that just feels really out of place in the playstyle is the sled - yes, you can whip the foe to make them run into traps, but if they're on the sled itself they'll be shielded from all of the traps. The Grinch already discourages foes from using traps enough to really need protection from them with the sled, leaving the sled to just be some sort of weird hit and run thing. Then again, I guess that isn't all bad, David.
 

n88

Smash Lord
Joined
Oct 10, 2008
Messages
1,547
Well, it seems to me that MW posted a Dave set as his own, just for the heck of it. That wacky Warlord
 

Junahu

Smash Ace
Joined
Nov 15, 2005
Messages
899
Location
Shropshire Slasher

Pyoro
A cute little bird, whose mission is to, do something. Usually Pyoro solves problems of a destructive nature by eating it. Failing that, Pyoro spits at it.
Those are the two things it does.

Pyoro is half Wario's size, half Wario's weight and half Wario's speed. It has a stronger shield than normal.
Neutral Special: Seed bomber
Pyoro closes its eyes in deep thought, as little angels drop explosive seeds from the sky. The seeds float to the ground at a steady pace (which increases, the closer the match is to ending) and explode on contact with anything but Pyoro itself. You get one seed for every tap of B, up to 7 on-screen at once (12 for large stages). Upon exploding, hapless foes who are struck, take 8% damage and upward knockback that KOs from 85%. This knockback, increases the closer the match is to ending.

The problem here is simple though, those angels are mischievous little rotters, and you don't get to control WHERE those seed bombs fall. They just appear at a random position from the top of the screen. So there's no guarantee you'll get seeds where you actually need em.


Down + Special: Seed bomber
Pyoro closes its eyes in deep thought, as little angels drop explosive seeds. Identical to Down Special, but these seeds fall a little faster, and deal a little more knockback.


Up Special: Flap
Pyoro flaps its wings, and in the process flies up a little. It can do this 5 times before needing to come down to rest.
Functionally and aesthetically identical to Pyoro's 5 mid-air jumps, there are only two differences between the two;
1) As an Up-B recovery, Pyoro will regain use of Flap, if struck in mid-air
2) Flap can be used whilst in the middle of an attack, but attacks cannot be used while in the middle of Flap. The reverse is true for its mid-air jumps.

Side + Special: Pyoro Missile
Pyoro launches itself across the screen, in the same nonsensical manner that Luigi manages to do it. As an attack, Pyoro Missile is a bit flimsy, dealing somewhat less damage or knockback than Luigi's equivilent, but Pyoro can cancel out of Pyoro Missile by using Flap.


All A Attacks: Stretch Tongue/Seed Spit
Pyoro does what it does best; stretch its tongue out in any of 8 directions while you hold A. There are no limits to how far this tongue can go, and it can slurp right through fall-through-platforms, but it aint all that fast, so take care! When you release A, the tongue snaps back into Pyoro's mouth. Even this isn't a lagless act, so again, pick your moments with care.

If something is snagged by the sticky end of Pyoro's tongue, Pyoro instantly retracts its tongue, dragging the foe/object right into its mouth! Pyoro doesn't like the taste of living things, so it'll spit foes back out relatively quickly, leaving the two of them in a neutral situation. You don't want that, so press A while tilting a direction to spit the foe out in that direction. The foe will fly in your chosen direction for 0.8 seconds before regaining control.

If a foe touches any part of the tongue, other than the sticky end, they take 4% damage and flinch. If they're still touching it while the tongue retracts, the foe takes a further 5% damage and light knockback towards Pyoro.
Please note that, objects/items/projectiles and such ignore anything but the tip of Pyoro's tongue. So don't worry about any rogue seeds exploding on your tongue.

Anywho, if you snagged an object (like a seed, for example), Pyoro stores it in its mouth, waiting for the next A button attack you use. Once you do that, Pyoro will spit the object out in your chosen direction, with the object flying in a straight line until it leaves the screen. For enemy projectiles, they'll gain the ability to hurt the foe.

BTW, if you snag an item, Pyoro will wield it, instead of eating/spitting it out.

All Mid-Air A Attacks: Stretch Tongue/Seed Spit
Pyoro does what it does best; stretch its tongue out in any of 8 directions while you hold A.
Identical to using its tongue on the ground, but with one important difference; instead of dragging foes/objects/seeds to Pyoro, Pyoro is dragged to them! Pyoro is a hitbox while being dragged, dealing 7% damage and sharp knockback in the direction its currently travelling. This attack supercede's Pyoro's desire to eat the foe. Sorry, Pyoro, no suicide KOs for you!

Incidentally, both variants of Pyoro's A button attacks can grab onto solid ground, in which case Pyoro will be dragged over to that spot.

Quarter Circle + A Attack: Tongue Whip
Rotate your control stick at least 90 degrees and press A to make Pyoro whip at the foe with its tongue. The tongue reaches out 1.4 stagebuilder units, and swings around 90 degrees before snapping back to Pyoro. The exact area Pyoro covers, depends on the kind of quarter circle input you made. So if you tilted the stick up, then rotated it 90 degrees clockwise, Pyoro will whip the area above-in front of it. This attack can be performed on the ground or in the air. In fact, you're allowed to make the quarter circle motion while on the ground, then jump and press A to perform the whipping attack in midair.

Touching any part of Pyoro's whipping attack deals 7% damage and knocks the foe back a decent distance. This is Pyoro's only "normal attack", so be sure to practice it.


Grab: Sticky end
Pyoro's tongue flies out of its mouth, travelling straight forward like a tether grab. While a tiny bit laggy to start up, and only travelling as far as Samus' beam Grab, the tongue travels faster than using a regular attack.
Once the sticky sticky tongue hits a foe or object, Pyoro will hold them in place until the foe escapes, or Pyoro uses a throw


Pummel: Reel in
Pyoro begins slowly retracting its tongue, dragging the foe in towards Pyoro with every Pummel you make.

Special Pummel: Reel out
Defying all logic in the universe, Pyoro extends its tongue, little by little, pushing the caught foe away from Pyoro. This pummel cannot push a foe off a ledge, so don't even try.

Throws: Light Toss
Pyoro's tongue snaps back into his mouth, knocking the foe gently in the direction of the throw (up throw knocks them up, for example). Try tossing them into a seed bomb.

Aerial Grab: Sticky end
Pyoro's tongue flies out of its mouth, this time at a 30 degree downward angle. If it snags onto an object, Pyoro uses its tongue like a rope, and swings back and forth, using the stuck object as a pivot. Use left/right to swing harder and faster, and press any button to unsnag the object and fly off using the momentum built up while swinging.
While caught in this grab, foes/objects are suspended impossibly in mid-air, free from the effects of gravity and knockback.

If Pyoro strikes a foe whilst swinging, they could take up to 18% damage and 3 stagebuilder units of knockback (obviously less if Pyoro wasn't swinging particularly fast)

Final Smash: More Seeds
You guessed it; a butt ton of exploding seeds start falling to earth. Pyoro also gains a little more speed, and the ability to continue stretching its tongue out even AFTER having snagged something.


High Score: 0033500


smashbot226

Smash Master
Joined
Sep 1, 2007
Messages
3,027
Location
Waiting for you to slip up.
Happy Holidays

Because even those of us who consist of less than 0.5% of the world's population should be politically correct too.

Glaceon is someone, I'll admit, that I put off reading until yesterday. Prior to that, I've heard mixed opinions of the set. Good, bad, ambivalence, and everything in between. First off, not sure why you decided to put all of the mechanics at the bottom of the set, since before I finished the set proper, I had assumed that Glaceon only marginally took advantage of her own obstacles as input-specific moves. And for some parts, I remained correct, at least with moves such as DThrow. But for the most part, Glaceon is a fairly charming set that, while a bit on the bland side, introduces a rarely seen theme among characters of her kind: something that encourages her poor traction yet has several quick moves that keep her on the go. 3/5


Ugh, I don't even want to say momentum.
Why is that?
After seeing Warlord's godawful imitation of us in his comment block, I can't bear the thought that he'll outright take our jokes now!
Well it's not our fault that he doesn't bother opening up to new creative fiction! There's more comedic pairs than the Wario Brothers!
They're brothers?
I don't know, they probably share the same mother with different fathers.
Ah, I see. He can relate to them.
DOHOHOHOHOHOHOHOHO!

Hearing Buizel called the new Crustle was a bit shocking for me, as I could hardly believe Warlord found a Pokemon set he despised more than Crustle.
Buizel's Whirlpool will also slide along water pools
Physics **** much? That and Buizel's primary mechanic, that is to say how he slides along water, is rather ho-hum and never really expanded upon. C'mon, you can't even USE attacks while sliding? The only one wherein you specifically MENTION using attacks out of a dash is the USmash. Talk about under-elaborated potential, even if said potential is a cop-out, just as a certain fat plumber mentioned. The rest of it is simply... boring! Something that is never a good sign in a moveset. The aerials, sans UAir, are uninspired and the throws even less so. While I'd like to say I can find some good in this set, it's hard to without sounding like I'm full of bullspit. 1.5/5, the half for making this in a day.

[COLLAPSE=Warning: Screen-stretching image alert]


OH GOD WHAT IS THIS
IT'S THE CLOWN'S FAULT, HE WAS HERE FIVE MINUTES AGO
KUUUUUUPAAAAAAAA[/COLLAPSE]

I've gotta admit, Junahu, some of the stuff you say in Dragonite literally make me go "what?" Take, for example:

Dragonite is one big glass of water
While your writing style can best be described as "eccentric", there is a point where what you say becomes expository. Not saying this detracts from the overall experience nor was it as much of a problem as it was in Copycat but jeez, you can get somewhat to proofread (By which I mean tone it down) a bit. As for the set itself, well, the two contrasting mechanics seem... forced. I understand Multiscales is Dragonite's best in-game ability and her Pokedex entry offers the only useful piece of info for a feasible Dragonite set. But the way you try and mix the two together in an effort to make the playstyle versatile is bad. The significant lack of pseudo movement moves, during which Dragonite moves DURING the attack while considered stationary for Multiscale, is there. It's not much of a choice here and if that was your goal, I can't say you succeeded with flying colors. 2/5


Say, why didn't you guys comment on Steve?
What Minecraft character? All I see is a generic, Smash-Grade character with nothing interesting to offer.
Not that I expect newcomers to wow us, but come on. Minecraft moveset gone to waste in my opinion.
Why isn't Smashbot commenting on it?
Beats me. Smartest decision he's ever made in his life though.
Yup. Can't say the same for everyone else who read it.
DOHOHOHOHOHOHOHO!

Olimaremix is a Brawl-based fellow I have much trouble with in the game. Either because I main Donkey Kong and that match-up is awful, not entirely sure, or because I don't particularly care for the character I'm fighting against in this case. So I naturally had to ask the nearest Olimar main about these changes and his response was mostly positive. So I'm going to instantly assume this remix is garbage and be on my way. Jokes aside, I'm not sure why you've elected to completely oust the Purple/White Pikmin, considering they were in the vastly superior sequel. You sort of made up for it by actually differentiating the remaining three and adding a bomb rock mechanic into the mix. That Olimar can finally stockpile Pikmin into the background is an additional grace that definitely adds some interesting stuff for Olimar. While I may argue that the NSpec change adds unnecessary complexity, you've made some interesting changes to Olimar. 3.5/5


I don't particularly care for this muppet.
What in God's name are you talking about? This is an already existing character!
I meant Dave.
DOHOHOHOHOHOHOHO!

Po, at first, seemed overpowered due to that transcendent hitbox garbage on his attacks. But good God, you captured this character perfectly. And I MEAN perfectly; the food bowl, the back-and-forth games you can play with the training dummy, and how he clumsily throws himself around for attacks is emulated, almost imitated. But no, you go even further than with the specials, with stuff like Jab, FTilt... hell, all of his ground moves feel like specials that went here. My only real problems are the relatively unsubstantial aerial attacks and grab game, but overall? You picked a character with some potential, drained it of all its worth, and gave us a truly quality set. 4.5/5


Well, Smashbot has pretty much proven himself to be a massive furry.
Could be worse, though.
How?
He could've made Bouffalant.
I was actually looking forward to that...
It's not April Fools yet you dolt!
I just want this day to be over...

Cubone is one of my personal favorites in the 649 or so Pokemon, so please please PLEASE don't feel bad if I judge harshly. My first problem is the USpec: it's... not even a recovery move? It's described more like a Smash attack. Same with NSpec to an extent, even if the sole differentiation is the specialized mechanic necessary for a bone projectile. There's just not a lot SPECIAL about Cubone's special moves; the DSpec is a fancily reworded counter attack and the SSpec is a DASHING ATTACK. I hadn't much hope for the rest of Cubone at this point and while the ground game felt like a letdown for the most part, the aerials was a letdown period. The BAir is a bone toss but not the FAir? At this point I was surprised that you didn't think of doing that, but then the BAir might've been the FAir and you needed an idea for BAir. I'm sorry, LoL. I like your sets, I really do. And while you had a mere day to finish this set, I cannot say I think positively of this set. 1/5


Zzzzzzzzzzzz...
Poor guy... just got done reading Cubone...
Do... zzz... ho... zzz... ho... zzz...

The Grinch is a set made by Dave but posted by MW. Yeah, I don't know what the hell is going on, but I can instantly suspect automatic SV'ing by either of them. But my goodness, Grinch already reads like a blatant appeal to MW right now between the Iggy-like sled, the pitfalling DAir, and the Warlordian flow between the sack and... well, most everything else. Not to say that's a bad thing- I have my suspicions of who is trying to butter me up with sexy grab games- but there are still problems I will address. Stuff like BAir and UTilt make little sense and, while I'm aware this is a set based on a Christmas cartoon character, there is a limit to how much I am willing to suspend belief. Second, the grab game is just confusing the HELL out of me, even now. The pummel's effect seems tacked on and the rest of the grab game continue to bash the whole rope/fire playstyle that's already been explained time and time again. I agree with FA in saying it feels like a watered-down Yukon, sans the Seth factor. 3/5


Let me get this straight, Dave posted a set with momentum, pitfalling, AND sledding?
Yes, he did. Do I need to write it out for you?
Oh no, not at all! But... THIS IS JUST SUCH BLATANT PANDERING!
Some say MW's crotch grew three sizes that day.
DOHOHOHOHOHOHOHO!

Pyoro is a character from WarioWare, directly adapted from his mini-game in... wait... direct adaptations?


BKupa666

Barnacled Boss
Moderator
Joined
Aug 12, 2008
Messages
7,788
Location
Toxic Tower
BURGERMEISTER MEISTERBURGER


Burgermeister Meisterburger is the memorably-named mayor of Somber Town and the main antagonist of the stop-motion classic Santa Claus is Comin' to Town. Early on, Meisterburger outlaws the possession of toys, deeming them a distraction from the local children's daily chores. Naturally, when a young Kris Kringle unknowingly violates the law, Meisterburger gives him a frosty reception. As Kringle continues undermining his control, Meisterburger cracks down harder and harder, searching houses and eventually setting a trap. Although he is able to imprison the devilish rogue temporarily, his legacy eventually diminishes into nothing, while Kringle's continues expanding...

...until Meisterburger got a moveset, that is. Now that he's immortalized in MYM, he's certainly not going anywhere.


STATISTICS

Weight: 7.5
Traction: 7
Fall Speed: 6
Size: 6
Aerial Movement: 5
Jumps: 4
Movement: 3


Many comparisons can be drawn between Meisterburger and Wario, although the former is significantly less over-the-top with his control scheme, particularly in the air. His human stats are aided slightly by a decent weight, which can give him some staying power in matches, as well as hindered by his sluggish movement, which is reminiscent of his stop-action source material.

SPECIALS

Neutral Special - Punishable By Law
As a necessary precursor to the move, when Meisterburger enters the fray, he's not alone. Four spear-wielding soldiers accompany their mayor, patrolling directly behind opponents in the background to keep an eye on them. When Meisterburger is KOed, they vanish, Nana-style, before respawning in the background. Although they do very little yet, their interactions with Meisterburger are integral in landing opponents where he wants them...in the dungeon!

For the actual move, Meisterburger very quickly whips out a scroll of parchment before scribbling furiously with a quill. As he writes in place, the player can tap the input for any move to 'outlaw' it as soon as he ends the move. Outlawed moves are still usable, mind you, but will trigger a punishment, regardless of whether or not it hits Meisterburger. He'll laglessly point at the perpetrator, ordering the nearest soldier to charge behind them in the background and deliver an undodgeable, shield-piercing stab. This deals 15% and terrific vertical knockback KOing around 85%. Soldiers will wait as long as necessary to land a stab, and will do so each time a move is violated.

Even one stab has nasty consequences, so you can probably imagine how easily soldiers can devastate mindless spammers. Foes have no visual indicator as to which moves Meisterburger is outlawing, which can create quite an atmosphere of oppression. Moves remain outlawed for the entirety of Meisterburger's stock, limiting opponents' options against him...unless there are items onstage to chuck at him, of course.

One move can be banned per half second. To ban aerials or throws, the player can input a jump or grab before the desired move. Meisterburger can ban grabs as well, although he is unable to do so with jumps, dodges, rolls or shields. If he tries, he'll simply exit the move with a bit of cooldown.


Up Special - Search the Premises!
Meisterburger yells the move name, causing his soldiers to abandon their marching and begin fiddling around, turning their backs to the stage. After seven seconds, each of the four soldiers tosses two random throwing item toys onto the stage carelessly. Should Meisterburger pick up a toy, he'll pocket the contraband in anger, intending to destroy it later. There is no limit to the number of toys Meisterburger can summon, which can come in handy later...read on. If a foe gets their hands on a toy, however, Meisterburger becomes much more sinister, now that his number one law is in shambles. He yells for the four guards to "Arrest them!", causing them to leave the background and actively pursue the violator.

Guards are Marth-sized, but travel at a poor Ganondorf's walk speed, marching slowly in their stop-motion style. If a soldier is dealt 30%, he retreats into the background, while if he meets an obstacle, he'll march in place until it vanishes. However, if a soldier comes into contact with a foe, they immediately handcuff the poor sap, dragging them into the background for an instant KO. No opponent in their right mind would venture near a toy with this as a consequence, so why not eliminate all their other options with some laws and other sneaky moves? Once soldiers are in pursuit, they ignore opponents using outlawed moves, intending to arrest the foe anyways; Meisterburger's game isn't over just because he's duped his foe into breaking the law. If his foe can KO him before being captured, his soldiers will vanish, respawning in the background as their master descends.

The match also changes slightly during the seven seconds soldiers are searching for toys. Foes can freely use outlawed moves while the soldiers' backs are turned, but Meisterburger gains access to a different set of standards as well, all of which make use of a yo-yo. He can't be seen breaking his own law, but he sure doesn't mind stooping to this level.


Side Special - Nothing But Drying Stockings...
Meisterburger extracts a dull wool stocking and stretches it a Kirby open in front of him quickly. He is able to hold this pose as long as he wishes, angling the stocking up or down to absorb all projectiles that enter the stocking. Of note, all Up Special toys Meisterburger collects are placed into this stocking; in a twisted way, these become gifts for Meisterburger down the road.

Meisterburger cancels the move by releasing the input; if he taps the input while his stocking is out, however, he'll dump all the stocking's contents onto the stage, creating a pile of toys mixed in with everday rubbish. The size of his pile depends on how many projectiles he absorbed; it takes three projectiles to create a Bowser-sized pile, with each additional item adding a Kirby to its size. There is no limit to how many projectiles Meisterburger can collect for a pile, giving him incentive to collect the toys his soldiers discover to increase its size. After collecting more than five items, however, Meisterburger's movement stats begin decreasing. He can dump multiple stockings worth of items into one pile to avoid this, although this opens the possibility of the pile being destroyed while he's occupied.

Piles act as semi-solid objects, starting with 30 HP, which increases by 10 HP for each additional projectile added. Attacking the mound from the side causes it to topple slightly, gaining more width in place of height, while attacking it from above divides the mound into two, half-sized piles. Regardless of a pile's size, Meisterburger can take advantage of its semi-solid state to attack opponents down into its depths, with them suffering from half moves' regular knockback as they are buried. Opponents suffer 1% per second for each projectile in the stack, although they are not held down at all; they can rapidly attack or throw items from the pile to escape. Of course, if moves are banned, they'll be helplessly impaled multiple times by soldiers. Throwing any toys in the pile will trigger a soldier chase, which foes will at least have a chance of escaping. Because of the latter option's KO potential, Meisterburger should always aim to have at least a toy or three to throw from each of his piles, if possible.

In midair, Meisterburger can use his stocking as a platform-length tether recovery. A bland recovery, nothing out of the orindary...as is proper! His tether stays out for an increasingly shorter time the more projectiles it contains. Meisterburger might have to dump out everything he painstakingly collected to make it safely back, which can provide him with a difficult choice, seeing as how he retains his collected items after being KOed.


Down Special - Chicken Dinner
Meisterburger whips out a large chicken leg and begins chowing down over .75 second. Chicken, it's what's for dinner! He can hobble around slowly while eating, healing 1% per half second. Each chicken leg can heal a maximum of 10%; once this limit is reached, or once Meisterburger cancels the move, he stows the leg, with it counting as a projectile in his stocking. This can serve as a secondary, albeit more laggy, method for filling Meisterburger's stocking for pile creation.

If attacked while eating, however, Meisterburger will gag forth a platform-length stream of wind. This deals no damage to foes, but pushes them back with moderate force and a slight stun. While not an ideal strategy, Meisterburger can mockingly heal himself in his foe's face, pushing them around if they retaliate...or continuing to heal if they don't for whatever reason, such as outlawed moves.


STANDARDS

Meisterburger's regular standards are standard, low priority pressure or spacing attacks most foes won't have a problem dealing with, unless preoccupied by soldiers in the background. When soldiers are facing away collecting toys, however, Meisterburger gains access to a different, ranged set of moves, all of which use a yo-yo he's keeping in secret. These feature disjointed priority that can defend Meisterburger from the nasty attacks he'll likely be facing when soldiers are not there to deter them.

Jab - Outburst
His eyebrows furrowing in anger, Meisterburger yells out a random catchphrase over .55 second. Outrageous! How -dare- you! Get out of here! Whatever he yells, he creates a Kirby-sized sound bubble, which stuns foes while pushing them back a platform. By walking forward and having multiple outbursts, Meisterburger can bully foes across the stage. His bubble lacks priority, however, giving opponents an opening if he whiffs the move.

Dash Attack - March
Meisterburger swings his arms left and right while marching forward, calling out, "Hup! Hup! Hup!" as he goes. His constant movement deals 4% per half second to opponents, allowing him to keep on truckin' against an opponent for damage. Although dropping the input cancels the move, tapping it a second time causes Meisterburger to march in place, retaining the hitbox and allowing him to punish dodging foes. Tapping the control stick while stationary resumes his forward movement.

Forward Tilt - You Will Feel My Boot!
Meisterburger performs a powerful punt a short distance in front of him, booting foes in his path up with 6% and decent vertical knockback. Landing the move comes with the setback of Meisterburger hopping around for .8 second, holding his foot in anguish. Nevertheless, its ability to put distance between the foe and Burgermeister can prove invaluable in a pinch.

Down Tilt - Fist Pound
Lifting his fist, Meisterburger slams it down a Kirby in front of him over .3 second, dealing 5% and stunning foes. This is a fast move that can be used multiple times to rack damage on foes. If Meisterburger pounds a foe three times within a second, his vigorous angst will bury the foe in a pitfall effect. No more of your rebellious tripe, outlaw! The move can also be used to spike offstage foes with a bit of force (good luck getting them off the stage...), as well as to hammer them into a pile of toys and projectiles.

Up Tilt - Intimidate
Meisterburger stands on his tiptoes, raising his fists above his head and glaring threateningly down at foes. The motion itself has quick startup, but quite a bit of cooldown, making it somewhat situational. Opponents a character width in front of Meisterburger as he initiates the move become startled by his imposing figure, collapsing into prone in front of him. Meisterburger is no pro at prone abuse, but he can still land a follow up hit, or flee while his soldiers take care of business. He can also dump a pile of toys onto a prone foe, burying them without even having to worry about knocking them into the garbage. Because Meisterburger is unable to outlaw get-up attacks, however, he'll have to make a larger pile in this case, so the buried foe is still forced to toss toys to escape.

Hidden Jab - In and Out
How dare you suggest that someone named 'she' said the move title?! Meisterburger casts a blue yo-yo a platform in front of him over .4 second before starting to spin it. The initial cast deals 4% and a bit of stun, while the spinning deals rapid trapping hits of 1%. While holding the input, the player can move the control stick in and out, causing Meisterburger to react accordingly with his yo-yo. Although spinning it for an extended period of time close to his body is punishable, Meisterburger can catch foes at close range before pushing them away. From a range, he can also pull foes away from their traps (which, even if outlawed, they may use while the soldiers are facing away), before following up with a melee move.

Hidden Dash Attack - Spiral Shield
Meisterburger quickly begins spinning his yo-yo around him in a Party Ball-sized circle as he walks forward. His yo-yo's disjointed priority covers a large portion of his hitbox, dealing 8% and average horizontal knockback to foes who attempt to penetrate it. While it does not cover Meisterburger's entire body, he can angle the yo-yo hitbox around slightly to modify its area of coverage. He can keep on truckin' as long as he wishes, although for each second past three he moves, there is a 25 percent chance he will conk himself with his yo-yo, suffering from .8 second of end lag.

Hidden Forward Tilt - Spring String
Meisterburger quickly grabs both ends of his yo-yo, holding it in front of him to create a small arc of string over .55 second. He is able to hold this pose out to counter enemy attacks he faces at close range. If an attack deals less than 15%, the string will bounce the opponent back a platform, dealing half their attack's damage. Should their attack deal more, the string will break; while this removes Meisterburger's ability to use his yo-yo for the remainder of the soldiers' seven second search, the string absorbs the entirely of the attack, potentially saving Meisterburger if he has accumulated damage.

Hidden Down Tilt - Spin Roll
Meisterburger allows his yo-yo to drop quickly to the ground a short distance in front of him. The range of this initial hit is poor, but pays off well if it connects. Opponents are dealt 5% and knocked into prone, allowing the player to hold down the input so Meisterburger continues spinning his yo-yo against their body. The multiple hits of 1% can stun the foe quite handily, and when the foe attempts to get up, Meisterburger can try predicting their movement before retaliating with a second D-Tilt. As opposed to his other, more defensive yo-yo moves, this is a superior punisher with the ability to stall foes until the soldiers finish their mission.

Hidden Up Tilt - Round and Round
Abandoning all yo-yo technique, Meisterburger begins whirling his yo-yo around above his head in a quick, horizontal circle. He is able to hold this pose as long as he wishes, although he must account for the .45 second lag on both ends of the move while doing so. Opponents caught in Meisterburger's circle are spun wildly around, suffering 5% from the initial hit. Meisterburger can release the pose when his foe is facing to the left or right in their rotation to toss them in that direction with moderate force, dealing an additional 5% in the process. This is a more controllable method for knocking Meisterburger's opponent away from him, or into a pile if necessary.

SMASHES

All of Meisterburger's smashes involve him using a mob-style torch to scorch opponents. Here comes the interaction you saw coming like Santa to town...if any of Meisterburger's fire hitboxes come into contact with a pile of toys, they'll flare up instantly. The fire lasts for two seconds for each item in the pile, dealing multiple trapping hits of 2% for each item in the pile. Foes cannot be buried in flaming piles due to this hitbox, but Meisterburger can light a pile while a foe is trapped to start up this hitbox, which, when combined with the one crushing the foe, provides additional incentive for them to escape.

Forward Smash - Torch Toss
Extracting a lit torch, Meisterburger lobs it a platform in the direction of his choice over .45 second. On impact with a foe, his torch deals anywhere from 12-16%, with knockback KOing from 150-135%. Upon landing, the torch will flare up a Ganondorf for a second before subsiding, retaining the hitbox of the thrown torch. Although Meisterburger must beware being damaged by his own flame, he can conveniently hide behind one to safely outlaw some enemy attacks. He can also light piles of toys aflame from a distance, with little lag to boot.

Down Smash - Ring of Fire
Meisterburger takes his torch and spins around, creating a ring of fire; he steps away before closing the ring, not being so stupid as to surround himself with flame. Depending on the charge time, this ring of fire lasts from five to nine seconds, dealing 9-13% and vertical knockback KOing from 160-145%. Its height can also range from one to two Ganondorfs, becoming quite menacing as obstacles. These rings are great traps to set in opponents' paths as they attempt to flee from soldiers, who will not attempt to pass through the flames, but can catch foes reluctant to do so. And reluctant they very well may be: the towering flames can prove difficult to jump over, and opponents are flat out unable to dodge, due to the fire's background hitbox.

Up Smash - Extinguish
Meisterburger hoists his torch above his head powerfully, before blowing it out, creating a platform-length wisp of smoke above his head. The initial thrust of the move deals 13-16%, boosting foes up with knockback KOing from 210-195%. While a poor KO option, the move creates a fair deal of vertical space between the foe and Meisterburger, allowing them to fall back down...into his smoke. The murky cloud puts characters into a footstool effect, likely resulting in them faceplanting into prone on the ground. The space-creating and stunning purposes of the move can be put to wide use throughout the course of Meisterburger's game.

AERIALS

Neutral Air - Furious Flapping
Meisterburger flaps both hands to either side stupidly, as if participating in a stop-motion musical number. His hands deal multiple rapid hits of 3%, making them a nifty damage-racker at close range, albeit a low priority one. In midair, Meisterburger's flapping also halves both his aerial and fall speeds, allowing him to save himself from a possible KO blow or pass over a flaming toy pile while chasing around foes.

Forward Air - Away With You!
Yelling the move title, Meisterburger swipes his forearm at the nearest opponent, three times in quick succession. These aren't those oh-so-prevalent trapping hits, but they do deal a nice 5% each, with decent horizontal knockback. The landing lag may provide the occasional issue, but Meisterburger can strongarm foes either direction in the air by continually pounding away at them. If shorthopped, Meisterburer's blows can also be used to level out toy piles handily.

Back Air - Sitting On A Problem
Meisterburger sits down in midair, falling at 1.5 times his regular fall speed for a second before regaining his posture. Foes caught under him are dragged down, not entering a grab hitbox, but being pulled down and having to DI to safety. Upon landing, Meisterburger deals 8% to those unable to escape, dropping them into prone in the process. If Meisterburger sits down on a toy pile, flaming or not, he'll yell out and spring a Ganondorf and a half into the air, holding his rear in pain. Although Meisterburger suffers damage if the pile was indeed flaming, by sitting on a pile, he is able to enter the air with a jump to spare, able to take advantage of the rest of his aerials.

Up Air - Stop! STOP!
Meisterburger stretches a hand upward, yelling "Stop!" to deter foes from escaping above his reach. This is a rapid, juggling move, capable of dealing a constant 5% to opponents. As with N-Air, Meisterburger's low priority can work against him, but if he makes contact, he can boost a foe slightly up, before they begin falling clumsily back toward earth. Set them free? Never!

Down Air - Portly Pound
Meisterbuger clutches his feet, curling slightly into a ball and allowing gravity to do the rest. He doesn't plummet typically, enabling him to DI side to side while falling to target opponents in the vicinity. He'll exit the move if he hits an opponent or the ground; in the former scenario, he deals 9% and spikes the foe with moderate force. To avoid being punished after landing onstage, Meisterburger has the option to land in a toy pile, dividing it down the middle into two smaller piles with which to create more havoc.

GRAB-GAME

Grab - Seize the Rebel
Meisterbuger whistles, signalling two of the four soldiers in the background to leap into the foreground, pausing for half a second before seizing one foe from both sides. Although they follow characters around directly, soldiers do not grab characters instantly, opening up a window for them to escape. Meisterburger might have to directly shut down this option, which thankfully is not too arduous, considering he must be in the vicinity to give the orders for the remainder of the grab-game anyways. The soldier can throw the foe rather powerfully, to make up for Meisterburger only receiving half the regular amount of toys upon using Up Special with soldiers onstage (he cannot summon them if they are already searching). Soldiers return to the background after throwing the foe, or if they mash free, which takes twice as much effort due to the combined soldier efforts.

Pummel - Stomp
To give the order for pummel and throws, Meisterburger must stand within a character width of the soldiers from either side. Inputting directions on the control stick during this time triggers throws; to leave the soldiers simply standing around, detaining the foe, Meisterburger can roll away. Here, he laughs pompously, stomping on his foe's foot and grinding it against the earth. This deals 2% and takes .4 second to complete; if Meisterburger stomps a foe three times in one grab, he'll injure their foot, halving their jump height for the next nine seconds. When foes desperately need to leap over toy piles when soldiers are in pursuit, this can be a major hindrance.

Forward Throw - To the Dungeon
Meisterburger points forward, causing the soldiers to grip the foe tightly by their arms, before dashing forward, dragging them along the ground. This deals a light 1% per second, as the soldiers travel at Ganondorf's dash speed, before throwing the foe upon reaching an edge or obstacle. The toss deals 3%, but fair set horizontal knockback, stalling foes as they recover offstage or burying them into a toy pile. At any time during the mad dash, the foe is able to attack free, causing the soldiers to return to the background.

Of course, if the attack used was outlawed, both soldiers will take two back-to-back stabs at the foe, both of which have the usual powerful 15% hitbox. Although these can be dodged, due to being in the foreground this time, the soldiers attack with random timing; unless the opponent has lightning reflexes, they are likely to get punished by at least one hit.


Back Throw - Overhead Slam
The soldiers swing the foe over their heads by their hands, slamming them facefirst into the ground behind them. Their comical movement pitfalls the foe headfirst into the ground (a mere visual change), dealing 6% in the process. Against damaged foes, Meisterburger can summon the soldiers for a second grab as his foe struggles to escape, catching them like a sitting duck. He is also able to deposit a pile of toys on them; in a way, this is more convenient than taking making a dump on them while prone, as they can't use a get-up attack to escape their pitfalled state.

Down Throw - Guard
The soldiers toss the foe to the ground into prone, with one stabbing them to deal 5% and keep them in place for a second. During this second, the soldiers stand a character width to either side of the victim; the player can now angle the soldiers' spears to face any direction. The soldiers move their spears simultaneously, pointing them at the same angles on either side. Once opponents regain control, they become vulnerable to these spears, which to 7% and average vertical knockback on impact. Depending on which angle the soldiers hold their spears at, they won't directly damage the foe. However, in most scenarios, they will eliminate an escape option with their weapons, whether it be rolling free (if the spears are pointing horizontally in) or jumping up and out (if the spears are angled diagonally inward). Meisterburger now has an easier time reading and reacting to the foe as they escape another way. After the foe makes their move, the soldiers return to the background.

Up Throw - Spear Prod
Hoisting the foe up a bit, both soldiers toss their victim into the air with their spears, dealing one solid hit of 10%. However, they do not return to the background just yet; as long as the foe remains in the air over the stage (read: not offstage, or, less obviously, over an obstacle), the soldiers will stay onstage, ready to prod them back up with a 5% poke. Needless to say, unless the foe DIs quickly, they're in for quite a series of surprises. Meisterburger, who will be in the vicinity after giving the throw order, can order soldiers to march left or right under the foe at Ganondorf's dash speed, which they do when the control stick is tapped during this time. Don't let them get away...or only let them get away once they're where you want them!

FINAL SMASH

Final Smash - Toy Land Town
Meisterbuger's jaw drops as a "Ho, ho, ho!" is heard echoing over the stage. Santa flies overhead at a slow pace, the bottom of his sleigh visible across the stage (deals no damage). Angered by another raid, Meisterburger steps into the background, yelling at his soldiers to "Stop the prowler!" He has two different choices at this point: by doing nothing, he waits until the sled is flying over the center of the stage, before snapping his fingers, causing his soldiers to throw their spears at the sleigh's bag of toys. The toys all plummet to the stage in mass, creating a Giga Bowser-sized pile for Meisterburger to use to his advantage. Foes crushed by this take an initial 30%, as well as 6% per second. Yeah...they'll be pretty battered up in no time at all unless they attempt to escape.

If the player taps A before the sled reaches center stage, Meisterburger will order his soldiers to throw their spears individually. This causes the bag to rip rather than outright topple, creating smaller piles of toys spread throughout the stage. These deal significantly less damage, but provide Meisterburger with the same benefits (albeit to a lesser extent) as one large pile. Santa's sleigh zooms away after Meisterburger attacks either way, leaving his stash for the grumpy mayor to use when toying with foes. The toys generated by this super attack vanish after thirty seconds, forcing Meisterburger to start pulling his own weight again.


PLAYSTYLE

Although the lifestyle Meisterburger promotes is anything but exciting, players would never be able to tell from his matches. From the get-go, Meisterburger will be taking over the stage in a domineering, yet comical manner, extending his regime into the world of Smash. He brings along four elite soldiers to serve as his enforcers, keeping foes in line and wiping them clean off the map as soon as they step out of said line. He'll need to establish a solid hold over his opponents before he can guarantee victory, however, and opponents are more than happy to rebel against his harsh ways.

Early on, Meisterburger will want to order his soldiers to collect all the toys they can find in the background, tossing them onto the stage for him to have his way with. He'll have little problem confiscating all toys in his path into a stocking, as foes who pick up so much as one satantic squeak toy become doggedly pursued by the Meisterburger soldiers. Of course, Meisterburger won't have had time to outlaw many moves yet, or, if he has, have them enforced by soldiers as they busy themselves toy-hunting. Using those hidden yo-yo standards, Meisterburger will have to fend off foes on his own, using its disjointed ranged awesomeness to both defend himself and give him space to outlaw moves. Once the soldiers toss the toys back to the stage, they'll start enforcing the laws, and foes will start to wonder...just which moves did that dusty old bastard screw me out of? Although foes may feel perfectly free to continue violating the law at first, they'll soon find the soldiers standing right behind them in the background have zero tolerance for any slip-ups, and are more than capable of turning them into holiday shish-kabob.

Once soldiers have thrown a load or two of satan's spawn onto the stage, Meisterburger can begin the process of confiscation, pulling all the toys into his stocking for not-so-safe keeping. Although he may have to fight off a foe here or there, collecting toys is hardly a difficult process, considering only the most suicidal of foes would choose to throw toys at Meisterburger or off the stage. He can also collect enemy projectiles, traps and even his own roast chicken legs to speed this phase right along. Once he's ready to dump his crap out into piles, however, Meisterburger must exert a bit more effort. Order your soldiers to detain foes with a grab or punt them a fair distance away, before depositing the toys and assorted projectiles into scrambled mounds on the stage. These can serve both offensive or defensive purposes throughout a match, creating giant flaming hitboxes to surround foes or solid walls behind which to make laws and eat chicken. If Meisterburger is feeling particularly aggressive, he can personally detain foes, putting them into pitfalls or prone before burying them in one fell swoop. Considering he can pressure them in later, however, this is not particularly mandatory, and may even be a bad choice against violent opponents.

KOs come rather naturally once Meisterburger has both layed down some oppressive laws and successfully buried his foe in a mound, where attacking free is the ideal option. Of course, when threatened with soldier stabs and being set aflame while buried, foes will most likely opt to throw toys from the pile to escape. This, of course, triggers a soldier onslaught. However, hope is not lost for foes who violate the cardinal sin of 'playing'; the foe can still KO Meisterburger while soldiers are in pursuit, and, therefore, not punishing them for using outlawed moves. Because soldiers cannot pass through obstacles, Meisterburger will almost always have to put himself on the warpath, keeping foes busy with moves like Neutral Special and jab until the soldiers have them in chains. To obstruct his fleeing foe, Meisterburger can attack portions off of large piles to block his foe's escape route, using aerials to navigate the wreckage while creating rings of fire to further seal their fate. He will not have a moment's peace until the fugitives are captured! Bwa ha ha!

If he can keep his foes and the stage under lockdown, Meisterburger can turn matches into somber, yet satisfying dictatorships. This is easier said than done, of course; Meisterburger can cut off foes' options quite handily, but foes have multiple telegraphed periods where Meisterburger can be KOed without a second thought, such as before Meisterburger creates sufficient laws to threaten them, while soldiers are searching for toys, or during periods of pursuit. Fortunately, it's going to take more than a wooden duck to put the Burgermeister out of commission this time around. Non-conformists, beware!


EXTRAS

Up Taunt - Clamor for Captivity
Meisterbuger is sick of his foe evading his clutches. He yells out, "Arrest him!" twice, pointing at the nearest foe. Unfortunately, his soldiers do not respond, yet.

Side Taunt - End of the Royal Line
Stomping in place once, Meisterburger declares, "There'll be no more toymakers to the king!"

Down Taunt - Guilty Pleasure
Meisterbuger falls to the ground, kicking his legs wildly while playing with his yo-yo and laughing. He eventually comes to terms with his surroundings and stows his yo-yo hastily, before a soldier can intervene.

Entrance - Military Escort
Meisterburger leads his four soldiers, marching in from the background while calling out, "Hup! Hup! Hup!" He enters the stage and makes a menacing face, while his soldiers remain in the background, with one moving behind each foe as they enter the fight to monitor them.

Victory Pose #1 - Burning the Competition
Meisterburger yells out, "Children of Somber Town! You will never, never play again!", before torching the enormous pile of toys sitting behind him.

Victory Pose #2 - Choking the Chicken
Meisterburger tauntingly eats a chicken leg while facing his foes, chuckling slightly to himself at how pathetic they were. Naturally, he ends up laughing heartily enough to start gagging on his food, spitting up a spray of his food before catching his breath and panting heavily.

Victory Pose #3 - Somber Status Quo
Marching in front of his soldiers, Meisterburger comments to himself, "Aaah, everyone is good and glum." He lets out a chuckle, standing large and in charge when he reaches center stage, with his soldiers flanking him on either side.

Victory Theme - The Year Santa Didn't Come
The Burgermeister celebrates his dominant rule to a darker version of the main Santa Claus is Comin' to Town theme.

Loss Pose - Wounded Pride
Meisterburger sits on the ground, a shocked look on his face, massaging his rump with one hand.


Davidreamcatcha

Smash Ace
Joined
Feb 9, 2011
Messages
629
THE GRINCH

448F017F-BC7F-4C38-85E9-7B1653047999.png

The Grinch lives in a cave atop Mount Crumpet, hating Christmas due to all the blasted noise that everyone makes around that time. It is for this reason that he makes a Santa Claus suit and a cruddy sleigh. Once he does this, he forces his dog to pull the sleigh around Whoville so he can steal all of their Christmas presents. Once he steals all their presents, the Grinch reforms and gives back all the presents upon seeing how happy they are without them. Of course, this is just an overly commercialized ending that was forced upon Dr. Suess. The Grinch obviously pushed over the presents without a second thought, but we can't make Christmas Cards out of that.

STATS

Size: 7
Aerial Control: 7
Aerial Speed: 6
Jumps: 6
Falling Speed: 5
Ground Movement: 4
Weight: 4
Traction: 3.5

In terms of stature, the character that the Grinch can be compared to the most is Marth. The Grinch stands around the same size as Marth, his Santa hat giving him some extra height, and is about the same width. The Grinch's walking and dashing poses, which have him hunch over greatly increase his hitbox, and considering his horrible traction, moving on foot can be quite dangerous for the Grinch. You can use your crawl to slither and slunk, avoiding the terribad walking animation. However, the Grinch can only move at a speed slightly faster than Ganondorf's walk in this state, meaning you're better off to take the risk of walking. The other notable thing here is the Grinch's horrid weight. Most of the Grinch's weight comes from the stolen toys in the sack constantly slung over his shoulder, as he is rather skin-and-bones otherwise. These two traits force the Grinch to have to play dirty in order to win the battle - something he doesn't mind doing that much.

SPECIALS

70069638-DE26-4292-8D4C-7DC9A6E80A00.jpeg

Neutral Special – SANTA'S SLAY

A ramshackle sled as wide as Ganon is tall with a small Kirby-sized hump on the front of the sleigh appears alongside the Grinch. The sled simply acts identically to a rolling crate, being able to be picked up and tossed around by both the Grinch and foes. As is to be expected, the sled deals damage based on how fast it was going at the time, dealing 5-10% upon ramming into a character. More interesting than the barrel ripoff is the sled's properties as a platform; any character can stand atop it as it moves about, or simply just stand on it as it stands still. Unlike many other sets involving the use of sleds, the weight of the character on the sled actually matters. The heavier you are, basically, the longer it takes for the sled to build speed. Both characters will likely want control of the sled, thanks to the fact that it can drive over any trap hitboxes smaller than itself without taking any sort of damage. This causes the sled to be one of the Grinch's main forms of movement, considering he can stand still on it and avoid not only his terrible walk, but traps as well.

One of the more interesting properties of the sled is the platform-long rope that constantly dangles off the front of it. The rope starts on the front of the sled by default, but it should be noted that the rope will go underneath the sled and dangle from the back while the sled is in motion. The Grinch can grab the rope and toss it in any direction, it going out the full Battlefield Platform before being reeled back in. Should the foe come in contact with the loose end of the rope, they will be caught onto it and become tethered to the sled. To escape, they will need to deal 20% damage to part of the rope that they are bound to. The Grinch enjoys having his foes tethered to the sled, so you'll obviously want to set up a bit while they're connected or pressure them as they're connected.

Side Special – THE SACK

The Grinch quickly grabs the sack slung over his shoulder and holds it out besides him, widening the entrance of the sack to be as tall as Bowser. By holding the button, the Grinch can hold out the sack indefinitely and angle the entrance. Should a projectile or a trap come into contact with the sack's entrance, it will be absorbed into the sack, along with the various other stolen goodies in the bag. Cosmetically, this simply enhances the size of the sack. In terms of actual use, the Grinch's weight increases by 1 for every projectile/trap absorbed into the sack, at the cost of slightly slower movement speed for every projectile and trap absorbed and faster falling speed. This is well worth the price of admission when you learn that as he holds the sack besides him, the Grinch can tap the Standards input to launch the last absorbed thing out at a fast speed, removing the buffs/debuffs that he gained previously and putting the projectile/trap back into play.

By pushing the analog stick downwards as he holds out the sack, the Grinch lowers the sack to the ground. It lies on it's side in this state, with the entrance still being as tall as Bowser. The rest starts out the size of a typical Battlefield Platform, though it will obviously get more huge once more things are put into it; there is no upper limit to this, meaning it can become ridiculously gigantic.


Anyone who enters the sack is dealt damage for everything that was absorbed into it, before every absorbed thing in the sack disappears and the character is knocked out. This great KO move comes with a price: the Grinch's proppy moves are unable to be used, instead being replaced by generic physical moves. The attacks that the Grinch cannot perform while he does not have the sack will be designated with an * in their name. To regain the sack, the Grinch must press the special input next to it, hoisting it over his shoulder shortly afterwards.

While it's onstage, the sack can be knocked across the ground if enough effort is put behind the blow, though it is excruciatingly hard to do such while the sack has a lot of weight behind it. One of your smarter uses of this is while the foe is connected to your rope - you can cover the part they need to damage with the sack, forcing them to knock it away before they can do anything. It isn't like they can move very far while the sack is holding the sled down, anyway. This gives them even less breathing room, allowing the Grinch to pressure them from a safe distance away.

Down Special – MAX


The Grinch whistles in place causing his dog, Max, to run from the background to join by his side. Max is as tall as a crouching Squirtle and as wide as Bowser and constantly walks in front of the Grinch while he is out, though a second press of the input will cause Max to start walking behind the Grinch. Max acts as a simple damage-soaker for the Grinch, taking a lot of low-hitting attacks for him. Thankfully for you, Max is smart enough to weave into the foreground past things like traps, meaning he won't be KOed by a lingering hitbox onstage.Max has about 15% stamina that needs to be depleted before Max runs away, not being able to be summoned until about 7 seconds later.

One of Max's more notable uses outside taking some low-hitting attacks for his master is his ability to be caught on the rope should Max get caught or have it tossed at him. This seems to have no purpose until we reach the obvious interactions...

Up Special – THE WHIP

The Grinch extracts his whip, slightly longer than a battlefield platform, and whip the area in front of himself. This is a horribly laggy motion, taking slightly longer than a Falcon Punch to pull off the whole thing. The end lag here isn't too kind either as the Grinch stows away his whip. So, what does the Grinch get when he pulls off this? Should the Grinch hit someone with the whip, they will let out a pained cry, taking 3% damage, and run 3 Battlefield Platforms away from the Grinch. They're not stupid enough to run off the stage, of course, but it is rather good if you want to space them into your sack or something.

Should the Grinch whip a foe tethered to the sled, they will pull the sled along as they run. You can strain a tethered foe by putting heavier things on the sled, as they are pulling on the sled, they will take an extra 2% damage as they attempt to pull something heavier along. Max responds to this attack as well, but will take no damage from it. The fact that he won't resist makes it a lot easier to hit him with this, causing him to pull your sled around as you fire off the contents of your sack at the foe.

The whip will act as a generic tether in midair, pulling the Grinch to any ledge that it hits. I should mention that if you hit the top of the sack with this, you will pulled to it, allowing the Grinch to get a good vantage point easily.

STANDARDS

Neutral Attack – NERVOUSLY DRUMMING

The Grinch holds his arm out in front of him, drumming his fingers so long as you hold the input. This acts just like those terribly generic Brawl neutral attacks, dealing constant hits of 2% damage and holding the foe until they DI out. Thanks to the Grinch's relatively long fingers, the range here is a bit more surprising than what you'd expect. Your primary use of this move is damaging your foes as they are up against your sack or sled, as it is significantly harder to DI out of this attack when the foe is backed up against a wall.

Dashing Attack – *SACK SPIN*

The Grinch takes his sack and spins around with it for about .70 seconds, looking like a ******** penguin as he does so. After this, he grinds to a halt to suffer end lag. The size of the hitbox depends on the amount of items in the sack. By default, it will only flip foes around, but it will start to deal 5% for everything absorbed into it. This means that this is generally going to be one of your main KO options once you have the sack loaded with goodies.

Without a sack, The Grinch swipes his hand in such a way that it deals 5% and pushes them backwards past him, which is useful if you're defending your sack.

Forward Tilt – GRINCH FINGERS

The Grinch strikes out his arm a small distance, dealing about 3% and some -very- slight pushback to anyone hit by it. After pulling this move off, the Grinch steps forward a bit - enough to close the space that the foe was pushed back. The Grinch now has the option to follow up the initial strike with repeated strikes, which can be angled upward, forward or downward. Each of these strikes have the same properties as the initial strike, though the 4 strike will always deal actual knockback. This attack gives the Grinch a way to push foes around the stage into his various traps or into the rope. It is advised that you don't use it to shove foes into your sack, however, as it is likely you can get caught in it if you're not careful.

If the Grinch uses this move to strike an onstage sack, he will rip his hand into it and create a large hole. 2 seconds later, everything inside will fall out of the sack in a large stream. This allows the Grinch to get rid of all the projectiles in one fell swoop, as well as turning the individual absorbed things into a decent killer. It should be noted that they will only fall out if it makes sense for them too - they won't fall off if you make a hole on, say, the top of the sack. This allows you to carve multiple entrances of which to send the foe into.

Once everything has fallen out of the sack, the sack will deflate and fall to the ground before disappearing. The Grinch will pull out a new sack the next time you use the side special.

Up Tilt – WONDERFUL AWFUL IDEA

The Grinch's face curls into a maniacal expression, just as it does when he gets his idea in the special. The Grinch holds this pose for about 1 seconds before exiting it with some terrible end lag. Well, you'll never know what this move does unless the Grinch is hit with an attack. Should he be hit, the Grinch responds with a swipe of his grinch fingers, dealing 12% damage and some good knockback that can kill at around 140% if he hits the foe. This is one of your better ways to counter attacks that the foe makes on you, as well as giving you the ability to soak projectiles as you perform some maniacal approaches on your sled.

Down Tilt – *CHRISTMAS LIGHTS*

The Grinch extracts a strand of Christmas lights 1 Platform long and swipes them across the ground in front of himself. If the Grinch hits someone with the lights, they take 4% fire damage as the lights burn out, causing the Grinch to just leave them on the ground (they disappear in 2 seconds and can't be interacted with, The Grinch pulls out a new one every time he uses this move).

Without the lights, this is a swipe that also deals 4% damage, but has much less range. He's moved forward every time he uses either dtilt, which is potentially useful spacing-wise as you can move them into your sack this way.


SMASHES

8E9F2EAD-65DE-473D-B214-FFDF688FB635.jpeg

Forward Smash – *SUESSIAN SOLDIERS*

The Grinch grabs his sack and pulls out a toy resembling a generic Suessian creature, winding it up before he lets it loose. These toys stand at the height of the typical pikmin, and walk forward at Bowser's walk speed, turning around if they come into a solid object. The toy is stupidly fragile - it will be destroyed by any attack, and will even stupidly suicide off the stage if need be. Should the toy run into the foe, they will take 8-15% and decent knockback as the toy is shattered. The Grinch can use this to close off an area of the stage, if he wants to get the foes closer to him, and can also have them pester a foe trying to push your sack around. While it's fragile, there is no limit to the amount of soldiers that the Grinch can wind up - and this is a quick move, meaning he can throw down as many as he wants for some quick stagecontrol.

If you hit the toy with the light, the toy becomes set on fire as it marches forward. This makes the hitbox that of the flame's in addition to the normal hitbox, but it will burn out after 6 seconds. It leaves no trace behind, not leaving the trap it normally leaves behind.

Once the toy is shattered, a pile of assorted junk from the toy's insides will lie across the ground. This pile is excruciatingly small - barely noticeable unless you're specifically looking for the damn thing. What this does as act as a generic trap that has them get launched into the air, being dealt 7% damage, being yet more fodder for the foe to run into. These traps only last for 4 seconds, though, so the Grinch has to be quick to utilize it.

It should be noted that the soldiers can walk into an onstage sack to become stored, allowing the Grinch to launch them as projectiles that move at Fox's dash speed and shatter on contact with anything, the primary use of which is to more directly control where the generic tripping trap is placed. If a burning toy enters the sack, it will set the entire sack aflame.

Down Smash – *TRAIN TRACKS*

The Grinch turns backwards and places a small train track as long as a Battlefield Platform behind him. The fact that he places it behind him allows him to spread train tracks about the stage as he rides on his sled, and it allows him to place it next to the stage with his back turned. The track has no real effect outside covering the ground below itself, avoiding status effects the ground has in the process. One of your more important factors here is that the Grinch can place tracks in the air as long as he is on the ground, giving him some space to ride on his sled.

At a medium charge, the Grinch will pull out a different type of track - the looping track. This track is the same size as the normal track, but has the property of looping back to the main tracks. This essentially creates an "end" to a chain of train tracks, not allowing you to place any more next to the looping track. You can, however, create looping tracks at both ends of your main tracks.

At full charge, the Grinch will extract an actual -train-, as wide as Ganon and as tall as a crouching Bowser. The Grinch places the train down in front of himself, which chugs forward at Ganon's dash speed until it crashes after moving along for 3 seconds due to the unsteady ground. During the time the train is out, it simply acts as a solid wall which can be stood upon. This is one of your much more straightforward ways to drag foes about, but they can just attack you.

As you might expect, the train can stay out indefinitely as long as it is moving along track. It will also move into background on the looping track, before turning around to go back along the other side. Should it move off the track, it will instantaneously crash and disappear. One thing that should be mentioned here is the ability to connect the train with the rope on your sled, which can pull your sled around at a steady dash speed. While not very useful in pursuing the foe, it can help you pester them as the train pushes them towards the sack. The foe can retaliate by depleting the 15% the train has, but keeping close by allows you to pressure them to keep them from doing that. You can also always set the train on fire, causing it to deplete 1% per second but become a hitbox that deals multiple hits, allowing you to move the foe forward without constantly pressuring them.

Up Smash – *ORNAMENT*

The Grinch plucks an extremely small ornament from his sack and tosses it in an upwards arc. The ornament rises about 2 Ganons upwards before falling back to the ground, shattering on the ground. Should the ornament hit someone during it's rise upwards, it will shatter and deal 8-16% and knockback that can kill rather well at high percents. This works extremely well as an anti-aerial move, but the obvious purpose of this move is to have the ornament shatter on the ground. As you can probably guess, the shattered remains form a generic trap that deal 2-5% and momentary stun, but no knockback, to anyone who walks into it. Ornaments already lingering onstage can be beneficial once the Grinch has someone tied onto his sled. In this situation, he can not only force the foe to run into an ornament, but allow the ornament to stun them so the sled can hit them, dealing actual knockback for a change. The ornaments lay on the ground for 8 seconds after they've been shattered, giving you plenty of time for you to guide foes into them.

AERIALS

Forward Aerial – CLAWING

The Grinch swipes his grinch fingers in front of himself in a motion that you'd expect to see in a Sakurai set, this actually looks quite a bit like Wolf's. The one difference here is that it is a bit slower than the typical Brawl fair, taking about .57 seconds for the whole move to happen. Should the Grinch hit an enemy with his fingers, they take 6% and are dragged with the fingers as he moves them downwards, before suffering a light footstool effect. This certainly helps with forcing the foes back onto the trap-littered ground, of course, though you can always simply move them downward into an open hole in your sack directly.

Neutral Aerial – CARTWHEEL

The Grinch grabs his hands and knees, balling himself up and spinning. The cartwheel performs multiple hits of 2%, with the token knockback being dealt only on the final hit of the cartwheel. Seeing how the air is where the Grinch will be wanting to do much of his offense, as his smashes and standards are largely devoted to your sack game, this is your bread-and-butter pressuring move. Seeing how the Grinch can move during this move, he can advance on foes as he cartwheels to deal some damage, as well as drag them forward as he cartwheels. The damage this can do to shields is quite good as well, meaning this is going to be one of your most-used moves overall.

Back Aerial – CLAWED

The Grinch turns himself backwards (and remaining this way after this move ends), swiping backwards for a generic hitbox that deals 6% damage and minor knockback. You can move backwards as you do this, dragging the foe with you as you DI. This obviously has it's use as a simplistic spacer, though one of your primary uses here is to space them backwards into a sled on the move or simply into an open hole in your sack. This completely ignores shields as well, meaning the Grinch can easily tear down a good defense with this.

Up Aerial – WASN'T SCREWED ON JUST RIGHT

The Grinch grasps his head with both hands to give this move the starting lag it needs, before he lets it loose as it begins spinning wildly! The Grinch's headspinning is so strong, in fact, it causes a suction effect to take place around his head. This has the obvious effect of dragging foes towards your head, where they'll be juggled about in a manner similar to the Luigi Cyclone, dealing 1% per second. In fact, by mashing the A Button, the Grinch can rise a bit just like the Luigi Cyclone. This is hardly any actual distance, but it does help the Grinch can his foes offguard and makes it far easier to force them to his head.

Down Aerial – BUTT BOUNCE

The Grinch sits down as he begins to fall extremely fast for a second or two, letting his rotund keester be the main hitbox of this move. Should the foe be hit by the Grinch's bottom, they will plummet downward as the Grinch deals 6% and bounces back up off them. This gives the Grinch the opportunity to keep pressuring a foe who thinks they can knock him to the ground to keep him away, as well as allowing him to bring them back downwards into his toys or a sack with the top ripped open.

If the Grinch hits a foe offstage, he's essentially rewarded with a recovery to get him back to the stage in the form of the bounce, which makes jumping off your sled and gimping them extremely rewarding.

GRAB-GAME

Grab - GRINCHY GRAB

Yes, the Grinch does get a generic physical grab. Take note, however, of how quick the grab is. This allows the Grinch to get up and close in the enemy's face and grab them without a second thought, though he can easily be smashed in the face if he whiffs this, thanks to the less than average endlag. The only other thing to say about this is the extremely short range of the thing.

If the Grinch presses the grab input while on his sled, however, he will grab the rope on the sled. He can throw and pummel the part of rope he grabs as though it were a foe, and any foe attached will face the harsh effects.

Pummel - SHAKEN UP

The Grinch rapidly shakes his foe, before the last prop/weapon that the foe used drops out of hammerspace before the Grinch stores it in his hammerspace. Should the foe escape from their grab, they'll find that the thing they used is gone from their movepool, with all attacks involving it replaced by generic punches and kicks that deal 5% or so. The foe must deal 10% to the Grinch, which causes him to drop the item at the foe's feet.

Of course, the foe is on something of a timelimit here. Once the Grinch uses the side special after stealing something, he will stuff the item into the sack, forcing the foe to knock the sack around for a bit before the item finally pops out. Of course, the Grinch can always launch it straight at the foe if he so desires. Still, this can be immensely good in forcing the foe to approach, as well as making your pressure game much easier by removing key moves.

If the Grinch uses this on the rope, he will shake the rope. This causes anything past the part of the rope the Grinch is shaking to shake also, only dealing some light flinch to the foe. If a sack is sitting on top of the rope, however, this will cause it to move forward a bit.

Forward Throw - HURL

The Grinch holds the foe in one hand before hurling them forward into the air, giving good knockback and 6% to them. This is one of your more obvious moves for advancing them near a sack, though you can also use the actual knockback. This is your prime killing throw, likely the only one you'll want to use at higher percentages.

If the Grinch is grabbing the rope, he will hurl the rope upwards, which causes it to hang a Ganon above where it was for a second before dropping back downwards. If any foes are on here, they'll be tossed upwards with the rope, giving them a chance to be hit by a convenient midair projectile or fall into a conveniently placed hole in your sack. This functions as one of your better ways to catch midair foes, as this is the only time your rope will hang in the air. Of course, you can always throw Max upwards to use him as a meatshield if you don't want the extra weight in your sack.

Back Throw – BACK TOSS

The Grinch holds the foe out in front of him, walking backwards half a stage builder block before tossing them backwards for 9% and good knockback. This is one of your better ways of shoving the foe backward if you need to move them towards train tracks or simply make some space off the sled.

If the Grinch is holding the rope, he will walk the same distance with the rope to his side before tossing it backwards. If the foe dashes into the rope as the Grinch is walking with it, they will trip and fall into prone, allowing the Grinch to follow up. Your obvious purpose here is to counter foes who attempt to attack the Grinch from behind, this move not only lets the Grinch retaliate - but give him a chance to catch foes on the rope.

Up Throw – *IMPROPERLY PACKAGED*

The Grinch extracts some colorful wrapping paper from his sack and quick wraps the foe, only leaving their head exposed. In this state, they act like barrels, knockback forces them to roll along the ground and whatnot. They have no control over their movement until they button-mash out, which is about average grab difficulty. The Grinch can burn the wrapping paper with his Christmas lights, creating a fiery prison around them being one of your best ways to rack damage. They are unable to be wrapped up again for 6 seconds after they button mash out.

Down Throw – *TANGLED LIGHTS*

The Grinch extracts the Christmas lights again, tying the foe's legs together with them before releasing them. This has effects you've come to expect from moves like these: the lights halve their moving speed and reduce their jump height. To get rid of the lights on their legs, the foe must move 3 Battlefield Platforms, which causes them to fall off and cause an down tilt fire at the spot they fell off.

If the Grinch uses it on the rope, he will tie the Christmas lights onto the segment of rope he was grabbing. Now, if the Christmas lights are at all attacked while they're on the rope, they will start an down tilt fire right on the rope, lighting anything flammable it comes in contact with aflame as well. It won't burn the rope, however. Naturally, you'll want the foe attacking these, so you have some nifty little interactions to make them do so. In the fthrow, the lights will slide down as close to the sled as possible after he tosses them upwards. In the pummel, the lights will be shaken forward to the end of the rope. This allows you to space the lights about in situations where the foe might not be comfortable with it, like say...getting rid of the sack on top of your rope?

FINAL SMASH
F325969E-62FB-431F-A604-658C52ABD729.jpeg

The Grinch dives forward on his sled, in a catching final smash similar to K. Ridley’s. If this hits, the opponent is seen on Mt. Crumpet, being attacked by The Grinch’s minions (who are rendered as toys). These include Mach Rider, Shadow, Banjo, Ken, Geno, the Chorus Kids and Isaac. He deals a final blow with a never before seen render of his back, dealing 47% in total.

If playing against Eric Bricard, The Grinch hands him a pink slip instead, causing an instant KO.


EXTRAS

Up Taunt – 2 SIZES 2 SMALL
A small meter appears over the Grinch's heart, showing his heart is 2 sizes smaller than the normal heart. If you use this as the tidal wave of presents from your final smash are going, the meter will show the Grinch's heart growing until it breaks the meter.

Side Taunt – NOISE, NOISE, NOISE!
The Grinch screams the name of this taunt as he closes his eyes, miniature drumsticks beating against his head.

Down Taunt – SHOES WERE TOO TIGHT
The Grinch lifts his leg up and pulls the back up, checking to see if his shoes are too tight.

Victory Pose 1 – STUFFED THE TREE UP
A generic Christmas tree stands tall in the middle of the screen, the Grinch runs to it and unfolds it as though it were an umbrella, before folding it again and running offscreen with it.

Victory Pose 2 – VILE ONE
The Grinch holds a mirror in one hand as he adjusts his hat, before flashing his pearly whites.

Victory Pose 3 – POO-POO TO THE WHOS
The Grinch leans forward, letting out a mocking cry of "Booooo Hoooo!" to the losers.
 
Last edited:

ForwardArrow

Smash Ace
Joined
Aug 17, 2011
Messages
503
Po
For a set based entirely around Kung-Fu, you still manage to come up with quite a few fun and creative inputs. I feel the training dummy is a little bit proppy, but I also feel it's where the vast majority of the set's flow comes from, being able to bounce the foe off the training dummy or boost them into your stomach bounce. The main problem here is... well, I don't really feel any sense of flow with this set. Aside from the training dummy and some basic baiting abilities with the Neutral Special, the set really isn't cohesive at all. Mind you, the set's as good as a set with minimal playstyle is going to get, being fun to read and envision not to mention full of clever ideas, and all on a character who really doesn't do much besides punch or kick. Certainly a solid effort from you Prof, just try for a little more cohesion next time.

Crawdaunt
This set is surprisingly difficult to complain about, since all of the "generic" attacks are given explicit uses and flow into a fairly cool hit and run playstyle. Most of the moves do serve purposes in his pressure game once you take into consideration how he can make a constant wall to move them around with. I don't feel it really has the same degree of depth that a lot of your sets have, but that doesn't mean it's bad. Especially considering you made it in 3 hours and the general quality of the other sets produced for this movement.

Cubone
LL, allow me to start this off by saying that you are, in fact, a good designer. Don't get me wrong on that. But I really am not liking the approach you have been taking lately, with handing us a concept that's cool and not really capitalizing it on any real way other than saying "generic attacks work well with this idea". Yes, it was fine in Chaos 0, but Elspeth and Farfetch'd did not reach close to their full potential. That said this isn't just me being Rool and analyzing you as an MYMer, because every problem I have with your sets demonstrates itself in Cubone. Cubone has a decent core with his Bonemerang, although the attack isn't interesting on it's own. I figured you'd find ways to make it fun...

And then you never do. You have some attacks that work reasonably well off the boomerang, but the set really doesn't amount to having much flow at all, with a huge number of moves being complete filler and when you do take advantage of it you only do so in the most simplistic and uninteresting manner possible. We have a random counter in the specials of all things for example, which I guess let's you set up fancier Bonemerang tricks... although you really aren't giving us a lot of fancy ways to play off the Boomerang, so it amounts to pretty much being more filler. The worst part of this is it seems like you had some idea of what you could have done with this that might have actually been interesting, but you never ever capitalize on it. So you have a set that amounts to a fairly thin and flimsy playstyle with extremely generic attacks that don't provide any sort of exciting concepts. Oh, but it's simple and feasible while having a playstyle at all so that's enough to make it good right? Yeah, clearly that's all you value anymore LL, simplicity and feasibility and not making sets that are remotely enjoyable to envision or think up strategies for. I guess this comment ended up more of a rant than an actual comment, but come on dude. You have quite a bit of talent and stuff like this does not capitalize on it at all.

Pyoro
I would probably say this is the best set in it's genre of "sets that are direct translations of games that aren't fighters to begin with", but that really is not saying much. Yes, technically you have 20 inputs in here, but due to 16 of them just being the same 2 inputs in different directions he comes across as fairly predictable. Mind you, there is some depth here I suppose, but really I can't help but think that this character would come across as hilariously predictable due to the nature of the set. That and I find it kind of tacky that the tongue functions differently in the air, but that might just be me. Either way, direct game translations really aren't a good idea, and this set is just another example of that.
 

Rychu

Thane of Smashville
Joined
Jul 5, 2010
Messages
817
3DS FC
1908-0105-4965
Margaret Moonlight


Margaret is the 4th ranked assassin in No More Heroes: Desperate Struggle. Her entire motif is the Angel of Death, singing her song to those she kills, though is quite polite and intelligent based on her rather limited dialogue. Her weapons are two scythes (fitting her angel of death theme), outfitted with a sniper/assault riffle, which she calls Le Croissant du ange (literaly translated as Angel of the Ascending). She's one of the most memorable/frustrating/awesome bosses of the game, mostly due to her killer tune "Philistine".

Here's her playlist

Stats:
Size: 5
Weight: 4
Speed: 6
Jump: 5
Aerial Speed: 4
Fall Speed: 4

Margaret is a very average character stat-wise, seeing as she's a (seemingly) normal human. As a rule, almost all of her melee attacks are pretty darn fast, though not -too- many of them hit very hard. Due to the nature of her weapons, she also has decieving amount of range.

Specials

Neutral Special: Clash
Clashing is an essential part of No More Heroes gameplay, and it's luckilly a natural fit into Brawl. Margaret swings her blades forward, crossing them into an X shape. Opponents who just happen to come into contact with this are dealt a rather meek 7% damage and flinching knockback. However, Margargaret's main use for this is, of course, to clash with an opponent's melee attack. If two meet, Margaret and the opponent enter into a button mashing competition, which Margaret has a slight advantage in. If Margart wins the clash, the opponent is thrown back slightly, as Margaret spins and cuts at the opponent, dealing 15% damage and a rather small amount of knockback, enough to KO Mario in the center of Final Destination at 250%. It does, however, guarentee that opponents are stunned for a brief moment after their flight, allowing Margaret to follow up or escape.

Side Special: Long Shot
Margaret looks down the scope of her scythe, a red beam coming out. Margaret can aim where the beam points, much like with Pit's bow. Once the special button is released, Margaret fires a shot, which follows the exact line of the beam. It travels fast, being almost undodgeable across Final Destination. The round deals 12% damage and decent knockback, comparable to Snake's missiles. The ending lag is near non-existent, leaving Margaret to line up another shot, or chase the oppenet down, or do whatever she needs to do quickly.

Up Special: Dark Angel Ascending
Margaret holds Le Croissant du ange out to her sides, giving the appearence of Angel wings. She then begins to spin in place, her blades dealing a relatively respectable 9% damage and knockback that will push opponents back a decent amount. If Margaret uses this in the air, she rapidly rises as far as Luigi's Super Jump Punch, still spinning. She continues spinning even after she reaches her highest point, stopping when she hits the ground. Releasing this in the air will not put Margaret into helpless, allowing her to use aerials, though being hit from the top or bottom will. If this attack is used on the ground, she controls like Meta Knight's tornado. It can be held for up to 3 seconds, though she will exit if she's hit from above or by a projectile.

Down Special: Into Death's Shadow
Margaret laughs a shy chuckle, before silently disappearing into the night with no big effect, merely fading out of existence. She reappears, fading back in, a moment later, 5 SBBs away from her previous location, facing the opposite direction she was when she used the move. The only catch is that she must use this when opponents are less than 2 SBBs away from her, not working if she's alone within that space. There is pretty heavy start lag, and Margaret will pop back into the fray if she's hit before she fully disappears. There is very little end lag, allowing Margaret to fight, but there is a 7 second cooldown in between when she can use it.

Grab Game

Grab: Reaper, Reaper
Margaret's grab is fairly long-ranged, as she uses her scythe to to hook and pull opponents close to her. Her pummel involves her hitting foes over the head with the butt of her scythe, dealing 2% damage.

Backward Throw: Rolling Kick
Margaret extends her arms, releasing the foe in the process. She then backflips, kicking her foe, stunning them. Margaret moves backwards, still backflipping, away from the foe up to 3 SBBs if such a distance is possible. This deals 7% damage and spaces Margaret effectively. Useful in short-range combat.

Upwards Throw: Journey into the Beyond
Margaret jams the butt of her scythe into her opponent's stomach, raising them above her head. Pulling the trigger, she launches foes into the air, dealing 5%, before shooting both guns alternately for 3 shots each, dealing 1% for each shot and 6% total, in addition to juggling foes in the air. Margaret can continue to mash the A button for continued hit, but after 3 they stop dealing stun and allow opponents to move away.

Forward Throw: Perish!
Margaret does a pirouette in place, before cutting into the foe with crossed blades, with a shout of "Perish!". The slash deals 10% and knocks foes back a considerable distance, although only laterally, which puts them on their backs in a prone position. Margaret is really free to do anything now, though opponents tend to get up rather quickly.

Down Throw: Vanquished!
Margaret grabs her foe with her free hand, and whispers something into their ear. They get a shocked expression on their face as she throws them to the ground, jumps above them, and points her gun down, firing away. She deals 12% damage and makes herself rise upwards as she shoots, pinning the foe in place as she unleashes her barrage of bullets.

Smash Attacks​

Up Smash: Leg Lift
Margaret places one foot back, leaning forward slightly, and begins to glow. Upon release, she delivers a fierce backflip kick, dealing 13% damage and decent knockback at full charge. The knockback is dealt in the angle that opponents where approaching Margaret from, meaning Margaret literally sends them flying back the way they came. This can be useful in juggling foes or just sending them away to be sniped. Unlike her Backward Throw, it is the opponent who gets sent away, meaning Margaret will have to chase after them...or not.

Side Smash: Crackshot
Margaret holds both guns at her side as she begins to glow pink. After her charge period, she unleashes 2 shots ath the same time, which deal a combined damage of 20%. The longer you hold the charge, the farther the bullets travel, going from a mere 1.5 SBB to 6. The bullets deal fairly huge knockback, as Margaret...wills her power into the gun. This is a great move to use after your Up Smash or Throws, once opponents are stunned and you can get a good shot.


Down Smash: Pay Heed to the Reaper
While kneeling, Margaret begins to glow red. She crosses her arms, holding one scythe in each hand. Upon release, she uncrossed her arms, swinging the scythes in front of her, attacking opponent's legs. This reaches out pretty far along the ground, and deals 14% damage and decent angled knockback upwards.

Standard Attacks

Jab: It Means "A Pearl"
For her jab, Margaret simply swings her scythe forward, holding it at the midway point of the neck, not giving it too much range. Opponents are dealt 3% damage and an ever so light push backwards. Mashing the A button will quickly deteriorate the damage to 1% per hit, but opponents are usually pushed out of the way by two or three hits, meaning you have to follow them a bit if you wish to coninue your assault.

Forward Tilt: God Damn Philistine
Margaret brings both of her scythes together, swinging them in a low obtuse upward arc. This deals 4% damage and light knockback in an upwards angle away from Margaret. Like her jab, she holds the scythes at the midway point of the neck, not giving herself too much range, opting instead for speedy hits.

Upwards Tilt: Requiem Eternal
Margaret grabs the ends of her scythes and does a short spin, slashing at opponents at an angle abover her. As she uses the full length of her weapon, this has quite a bit of a reach, easilly beating out her other tilts. This attack doesn't hit directly above Margaret, it's target is actually slightly above and in front of her, at a sharp angle. The hits deal a combined 6% (3% for each hit, though it's so fast that they both hit very close together), and puch foes back in the same angle the attack hit. Margaret's going to have to follow them into the air if she wants to continue the assault.

Downwards Tilt: Another Hero?
From a kneel (her crouch), Margaret swings her scythes in a high upwards angle, standing up in the process and hitting directly in front of her. The hit deals 5% damage and has a fairly large hitbox, hitting the entirety of Margaret's frontside and slightly above her. The knockback is pretty much lateral, pushing foes back a good distance but not launching them.

Dash Attack: Reaper's Come, Sinner!
Still running, Margaret performs a twirl before sweeping her scythes upwards, hitting anything ahead of her. She doesn't heep running, but she does deal a nice 5% damage and pretty good lateral knockback to anyone unlucky enough to be in the reaper's path.

Aerial Attacks​

Neutral Aerial: Otaku Cannot Resist

Margaret swipes in front of her, hitting foes with her scythe and dealing 5% damage. She also deals slight knockback, but only barely enough to put the foe out of her reach...except the move also propels Margaret forward a short distance. This is a great move for starting up combos.

Downwards Aerial: First Strike
Margaret stalls in the air for a moment, allowing the player to reposition her downwards facing angle. After this short startup period, Margaret quickly launches herself in the same angle. She hits either as soon as the comes into contact with an opponent of when she hits the ground, but the result is the same for both: Margaret delivers two fierce slashes with her scythes, dealing a total 7% damage and fairly decent knockback. Margaret suffers far less lag than you might think, allowing her to chase after her victim as she sees fit.

Up Aerial: Watch Your Back, Sinner!
Margaret propells herself upward, placing herself a full SBB up from where she started, and delivers a slash to any opponent on-level or above her. She can only use this upwards movement once per time in the air. This pushes foes back at a slight downwards angle, putting them slightly below or on-level with Margaret depending on their starting position. Of course, it also deals damage, a rather meek 4%, but hey, it's a positioning move.

Forward Aerial: Riveting Tune, Is It Not?
Margaret swings her scythes forward in a long reaching swipes, dealing 6% damage and horizontal knockback just far enough to put the foe out of Margaret's reach. However, the swing pushes Margaret forward a bit, though not close enough to the foe to hit with any of her aerials.

Backward Aerial: Come, Sinner!
This is a fairly simple Margaret simply turns around in the air, slashing her scythes as she turns. This deals 6% damage, and like many of her other moves, deals slight knockback that puts the foe JUST out of her reach, forcing her to follow them through the air IF she wants to follow up.

Final Smash: Philistine
Margaret has grabbed the Smash Ball! Are you ready, sinners? Margaret whistles the first few bars of her song, in a hauntingly beautiful way. She performs her normal Neutral Special, hoping to clash with an opponent's attack. If she does, a special cinematic comes up, showing Margaret parrying the opponent's attack, spinning in place, and then promptly cutting the opponent's head off. As per usual, blood spurts out their neck, as the body falls to the ground. The match then restarts as usual.

Playing As Margaret​
Margaret is a character that can be defined with that all-hated word: versatility. Or, more accurately: adaptability. Margaret players pride themselves on their ability to not only read opponents, but counter their attempts at victory. As a master assassin, she has to know her opponent's moves before they do. That said, she can switch between offensive comboing, defensive camping, and the middle of the road hit-and-run approach as often as her opponents can vary their approach. Of course, her combos aren't exactly easy fodder, as she has to constantly follow her opponents to actually, you know, combo, or else she's just setting them up to camp her to death. Margaret's combos aren't mindless, actually requiring -gasp- skill and practice to learn what works against different opponents, not to mention almost all of her basic, aerial, and throw attacks can follow up on each other well.
Camping with Margaret is limited to her ability to space herself from the foe with her throws, up smash, or down special, again which is largely dependent on the foe. For the most part, she's going to be playing a sort of hit-and-run combination of combos and camping, doing as much damage as she can before throwing the foe away to snipe at, or blast away to their doom. Either way, Margaret can usually adapt to the situation she's handed, and can make for one hell of a hard time for opponents. Keep up with the foe, predict moves, clash, camp, combo, space, and blast at the right times, and you'll be getting your kill in no time.


Katapultar

Smash Lord
Joined
Nov 24, 2008
Messages
1,284
Location
Australia
Burgermeister, who unfortunately has absolutely nothing to do with hamburgers, is more than deserving of a comment at this point, and is probably the first actual take-on of a Police Officer moveset (aside from a certain someone else). Characterization dictates him as being quite the a-hole, both in terms of gameplay and as an actual person himself; he does remind me of Inspector Lunge in that he can KO enemies by arresting them and just plain screwing around with them via the law he brought with him, but in quite a different manner. He seems like the character who would be able to control any match, be it 1v1 or FFAs, though this is all made up by his lack of recovery and the fact that Burgermeister himself is not really the one who's holding all the power.

While Burgermeister obviously doesn't play fair, not even one bit, it does seem just a little bit on the extreme side that foes are given no indication as to which moves have been outlawed... though based on a figment of the backstory where it states that "a young Kris Kringle unknowingly violates the law", I'd probably say that the Burgermeister never actually told anyone about his law in the first place...never seen the film so I don't really know. Then again you probably had this secrecy put in place partially because placing all of the outlawed inputs on the screen would be just downright awkward, and having them flash on the screen for a second to remind foes would be rather unfair. I've no real problem with how you've done things here, mind you, just debating. Also, I'll just say here that it isn't really elaborated on whether toys can be thrown to inflict damage, though it is hinted quite well in the Neutral Special to the point where I'd say it's official seeing as how Burgermeister kinda wants to outlaw all his enemy's options so he can force them to use a toy as a weapon against him; with that in mind, I'm kinda guessing that the toys do a little less damage than a thrown item capsule.

But yeah, those are just little bouts at the set which do little to nothing to hinder it's great little sense of characterization and gameplay, which are quite reminiscent to your Edgar set from last contest but obviously in a wholly different way. And in my books it's quite impressive that you kept trademark Kupa "enemy characterization" seen in previous sets to a minimum, but then again you are kinda trying to force the foe to do...or in this case, not do something. Quite nice.
________________________________________________________________________________


Nice to see another set from you in the form of Margaret Moonlight, Geto, with a rather interesting character choice from NMH. For this round, you seem to favor simplicity+versatility over traps and technicalities, which prevents it from being tacky in any way or form. Bringing the Clash from NMH is most certainly interesting to the point where it'd probably be even more interesting if it applied to all of Margaret's attacks, as only doing so for the Neutral Special makes it a rather simple attacking counter at best. I realize that Margaret did combine long range and close range in her actual battle, which is most likely what you were trying to accomplish here; perhaps the Down Special teleportation could have had versatility and use to it in tandem with all this.

What you were trying to do was and is respectable on its own, I'm going to go out on a limb and say that I (still) like Pachirisu quite a lot better than Margaret. I'd say here that Margaret has a bit of a formal stance here that does kind of take over any charm it could have had in terms of writing, characterization and what not which Pachi succeeded in doing. Then again, if you made this set just to increase thread activity then that's perfectly alright. And I realize that I'm probably not giving you as much credit for Margaret's playstyle than it deserves, though that's not really my forte and I apologize in advance for such. Still, you'll get more comments for this little set of yours regarding that area of the set in no time, right? Now that you've re-tread the path of simplicity perhaps you might want to take a different one for your next set? You've made some rather cool sets in the past, so don't be afraid to play around in different areas.
________________________________________________________________________________
 
Top Bottom