
Darth Destro
Smash Cadet
Toon Link + BowserIntroduction
Hello! It´s my pleasure to introduce to you the Toon Link team battles thread! This thread is dedicated for the discussion about Toon Link and his partners in 2 vs 2 battles. It was born because there´s been some demand for the doubles tactics and partners thread lately.
Now that the boring introductions are over it´s time for... boring explanations! Here´s some basic knowledge about 2v2 battles. Since they are highly complicated things with many different variables (stages, enemy teams, experience vs or with some characters etc. etc.) it would be impossible just to list the best and worst teammates for Toon Link. This is why this thread will work as a place for discussions about Toon Link teamed up with various characters. Discussion is open, but here are some questions that can be used as a basis when thinking about teams tactics:
What kind of team is Toon Link + ____?
This means talking about how the team combination usually works best AKA how it usually should be played. In many cases there´s more than one way of playing the team, all with their own advantages. The main three playstyles in teams are:
Aggressive (both characters are attack oriented and tend charge in for attacks, trying to add pressure on the enemy)
Passive (both characters play defensive and do their best to force enemies to approach first)
Semi-passive/semi-aggressive (one half of the team rushes in for close quarters combat while the other is left back to support with projectiles, protect from attacks and so on).
If necessary, it´s possible to make and use more accurate descriptions, but usually these three are enough to give to basic idea of the team structure.
What roles two the two have in the team?
The basic thing to consider in 2v2 battles is what role every character has. Possible roles could for example be:
Finisher: A character that specializes into finishing enemies that are already damaged or send flying. This is usually done by hitting them hard enough to send directly out of the screen or by gimping them.
Damage racker: The main damager in the team, this character usually tends to rush directly into fight and causes lots of damage really fast, but has some trouble sealing the deal with KOs.
Supporter: These characters favor the sidelines of battle and try to avoid unnecessary direct combat with enemy while supporting their partner with projectiles and other means.
Stock holder: Well protected character whose main job is to stay alive on the battlefield. The point of this is to keep a stock lead compared to the enemy team, thus forcing them to stay active.
Spacing master: The one who helps creating good situations and positions for the team. This is rarely one´s only job in a team, but some characters perform in this task extremely well.
Multitasker: This means a character that has wide array of options, enabling him/her to work as kind of jack-of-all-trades, always choosing the most beneficial style for the team according to the situation.
This division is not to be taken too strictly as it´s not unusual for the characters to have traits of multiple from these play styles, but they work as a nice directory.
What can the two do to support each other?
How well does Toon Link work with the characters in question? Do they rule out each other´s weaknesses or share the same ones? Are there some specific tactics they can use together? All things like this are a important part of every doubles team and should be well discussed. This part of the discussion is probably going to be the most time-consuming of them all, but it´s also the most important one.
What problems does the team have?
There´s no such thing as the perfect team: there´re always some weak spots here and there. Finding and identifying those weak spots is also a part of the reason this thread was made, as knowing them makes it easier to prevent them from being exploited.
Is there something special that should be noted about the team?
Does the team have serious disadvantage on certain stages or get completely ruined by certain characters? Or vice versa: does the team absolutely dominate in certain situations? There are many things that can completely tore apart normally very well working team or give a huge advantage in battle. They´re usually rare, but can turn the battle upside down. If you know things like make sure to share them with others. We´re all working together here!
Ending words
I have listed all of the characters in SSBB. If you have any info on how they work with TL, please post it and I shall add itunderneath their picture. I'll sometimes list some very basic information about him/her concerning the team. This is only to save some time and effort. Everything more accurate and important will be left for the discussion. I´ll also try to create summaries about the discussed teams, but they might not get done at the same rate as we´re moving on.
This is probably going to become quite large thread and take some serious time to finish(If you want to find a specific character then just ctrl+f it's name.). It also needs contribution from many people to work. But now it is finally time to get to the fun part: the actual discussions! If you want to find a specific character then just ctrl+f it's name.
The format for this guide lovingly ripped from the Zelda / Dedede boards.
For the most part please reply in the aforementioned format by answering the questions listed above as it makes the thread easier to organise
(Note: Everything I write will be in Green and everything by other contributors will be in blue.

Thanks to Alfa for that very informative article!Note: Since my only Toon Link experience is against Ocean(<3) and Corpsecreate (won the Australian national brawl singles with Tink), most of this will be theorycraft (and logic).
The main idea: The idea behind this team is 'The Wall', a situation where the field is split into two with each team together. In this position, Toon link is behind Bowser, supporting him, while Bowser walls opponents with his attacks. In this position, the two should move forward to cut down on the other team's space and push them closer to the edge of the stage, making killing/gimping easier.
General stuff on the team:
Most of this stuff is done with FD in mind, most of this will be applicable to other stages with some modification though, although some stages may require you to change your stratergies (eg. Norfair, RC).
Also note that some of this won't work against certain teams, Double MK's will be able to seperate the two to pick off Tink, and double DDD will have one wall Tink with Bairs while the other grabs Bowser, although this is much more avoidable than the MK/MK situation.
Due to the way doubles works, it is harder for Bowser to grab release characters, as it is easily interuptable, so Bowser should only attempt it in situations where Toon Link can keep the other player away (eg. the surrounded playstyle/situation).
Koopa Klaw should be used wisely, as it can split up the team and cause problems.
Bowser: Bowser is currently the top of D tier in the SBR-B tier list. Bowser is more of a defensive character, being able to wall characters with Jab, Ftilt, Fair, and UpBOOS. Bowser has a number of things he can do from a grab release to almost every character, the only acceptions being DK when Ground Released, and Fox, Wolf, and Lucario when Air released (List of all grab releases for Bowser and Bowser grab release chaingrabs).
Playstyles/Situations:
The Wall:
In theory, the best way this team would opperate would be to have the other team on one side of the field, then have Bowser in a position between them and Toon Link. From this position, Bowser can walk forward slowly (shielding any projectiles), with Toon Link behind him. When the two teams get close, Bowser begins to throw out Ftilts/Jabs, while Toon Link jumps and chucks bombs/arrows over Bowser, pressuring the other team, and giving Bowser openings for his attacks. If any opponents should attempt to get over/above Bowser, Toon Link should Fair/Zair them away, and keep going with the Bowser/Tink wall. There may also be times where Bowser will shield -> UpBOOS an attack, in which case the Bowser will be retreating in the UpB state, whilst the Toon Link jumps backwards and chucks bombs/arrows forwards, effectively covering their retreat. Boomerangs should not be used however, as on the return, they will also hit Bowser, unless they are being throw at the peak of the jump, or upwards, so as to deter aerial attackers/spammers (recommended against Mario/Spamus to stop return fireballs/homing missiles interfering, otherwise used sparingly).
Surrounded:
This is what happens when Toon Link and Bowser are in the middle of the stage, and the opponents are on each side. In this situation, whether or not you want to stay like this really depends on the other characters, most of the time there are no problems created by this, but if either player can't handle either character, then you should try to swap back to the wall, or switch who's taking who. However, the need to avoid this situation should rarely come up, as the only 2 matchups Bowser can't handle are DDD and Diddy, and in doubles, the DDD chaingrab is easily interuptable, and Diddy can struggle to get space to start his nana tricks anyway (although due to a superior matchup, Tink should handle Diddy and not Bowser). To play like this, Bowser should be doing his usual 'wall with jab/ftilt' plan, whilst Toon Link can play the camp game with his projectiles, or, failing that, run out and poke at the enemy, then run back. In this position, Tink should also occasionaly throw arrows/bombs over to Bowser's side, in order to pressure the opponent and create openings for Bowser.
Also note, if you should ever get into this position, and you really want to get out of it, then it is possible for Bowser to Koopa Klaw Tink and take him to either side of the stage, although there are two situations that arrise from this based on which way Bowser is facing:
Towards the centre: In this position, Bowser will bounce back afterwards onto the edge, not the best place for Bowser, and it seperates Tink from him and places him in the centre of the stage, only attempt this on low-mid percents where Toon Link won't get knocked too far away, and in situations where Bowser will come out of this still with a little bit of space to work with, and not right on the edge.
Away from the centre: This leaves Bowser to bounce backwards a bit and leave himself open for punishment more so then the previous version, and places Toon Link offstage at a diagonal angle. This should be attempted at either low percents, or high percents, not mid, as Tink doesn't have enough time to make it back to the stage with a bomb in hand like at high percents, or make it back quick enough like at low percents. There are two main situations that could arise from this:
1. Bowser is punished: This means that Toon Link is able to be edgeguarded, but he will have either gotten back fast enough (low percents), or gotten a bomb ready to prevent edgeguarding (high percents). If Toon link is at mid percents when this happens, he can be edgeguarded.
2. Bowser is not punished: This means Bowser should be able to prevent Toon link from being edgeguarded, although what happens when Toon link is coming back relies on how much space is available; at low percents with not much space, Toon link can get on the edge, then ledge jump and attack/spam to create space, and get the wall working again; at low pecents with space, you can get the wall running again easily; at high percents without much space, Toon link can spam as he falls down, giving Bowser opportunities to create space, and thus the wall; at high percents with a lot of space, Tink can start charging his bow, so with a bit of coordination, Bowser can jump at the right time so he doesn't get hit, or Tink can shoot over his head to deter aerial attackers and buy some time to get started again with the wall.
Split up:
This is when the field is in an X_Y_X_Y formation, who is in the middle and who is on the side doesn't matter, as whoever is in the middle needs to get out, as Bowser and Toon link can't support each other properly.
If Bowser is on the side, then he needs to approach the character between him and Tink, a quick grab -> back throw can work to create a more favorable condition, and if the back throw should miss or Bowser is knocked away, then Tink can use the opportunity to get a hit on whoever just dodged/hit Bowser, and hopefully knock him away and created the 'surrounded' situation again. Also, instead of trying to get the enemy out of the way, if Toon link is against characters who won't be able to reach him, he can jump over them and get behind Bowser, creating the wall again.
If Bowser is in the middle, then Toon link's only real option is to get in there himself, Bowser doesn't have any good attacks that can hit both sides, thus the only real options presented are that Toon link jumps in, Bowser (somehow) jumps out, or Bowser Koopa Klaws someone and moves into a different position, any onf which would probably be more favorable.
Encasing:
Pretty much the reverse of surrounded, the opposing team is in the middle, and Bowser and Tink are on seperate sides, this situation is pretty neutral. If the two opponents stay in the middle, then Toon link can camp them while Bowser does his typical wall with ftilt/jab thing, unless the opponent is DDD Bowser shouldn't have much trouble, whilst this is happening, Toon link can camp the opponent, and when/if they approach, he can either knock them back to the middle, or if they are somewhat slow, or you have a boomerang/bomb out for already, you can make a mad dash to Bowser, and probably get through, as Bowser will already be dealing with one opponent, and the other is either slow, or hampered by projectiles. This sets up the wall again, and as such, is a pretty good option.
If two opponents rush you (seperately), it is possible with air dodging/shielding that you can get through and meet in the middle, or just have one person dash (Tink) while the other attacks.
If two opponents attempt to gang up on one, than there are a few ways to deal with this.
If they rush Bowser, his attacks can be used to handle multiple opponents without much difficulty from this position (probably a sh/fh fair, maybe retreated), whilst this happens, Toon link can either target one enemy and attack them while Bowser deals with the other, placing them in the same position as they were at the start of this section, except with less space, or Tink can use this to get over and behind Bowser (if there is enough room) and then start the wall again.
If they rush Tink, it's the same situation as before, Bowser stays back(so it's still the two opponents in the middle), keeping it the same but with less space for them, or Toon link can jump into the **** through them (airdodging probably) and reset the wall, if this latter option happens and is successful, then not only do you have the wall, you also have space too.
Edgeguarding:
If either opponent is offstage, the position of the other opponent has an effect on what is happening, if you were walling them and one opponent got knocked away, you should just push further and restrict their space, allowing this to happen more often; if you were surrounded and one was knocked away, if possible, begin to wall, otherwise, Toon link can either spam/gimp them if he thinks he can kill them while Bowser deals with the one left over, or they can both begin to rack up damage on the one left over.
Knocked away:
Simplest part, regroup and begin again, if you can't do this, one character has to hold their own while the other returns, and then goes into one of the other situations. If possible, Toon link can throw projectiles to deter Bowser's edgeguarder if Bowser is being edgeguarded, and if Tink is being edgeguarded, Bowser can attack the edgeguarder if they stay on stage, but if they go off, it is probably best to stay on stage.
Killing:
Due to the amount of walling going on, the best ways of killing will probably be a ftilt from Bowser, or a surprise fresh dtilt from him. There may be situations however where a fair from either character will be used to kill.
Stages:
FD is probably best due to the ease of walling, in general though, flat stages should be used for the walling advantage. Should you get a stage that's split up and all over the place (like RC and Norfair, not Japes, you can Wall in the middle while Tink fires of projectiles), splitting up would probably be the best idea, as you'll just get in each others way, thus counterpicks against this team will usually be (should be) Norfair and RC. Counterpicks for this stage would probably be FD/Japes (smashville against DDD, or spammy characters like falco) due to the ability to wall easily. Small stages can also give trouble, so when neutrals are considered, strike towards FD/Smashville, and way from yoshi's island.
Weaknesses:
The best teams against this are probably usually MK with someone to keep Bowser busy while MK owns Tink (another MK?), or DDD with someone to keep Tink busy while DDD owns Bowser (another DDD?). Should either of these characters play you, a cahracter switch would be wise.
Should a team without MK/DDD on them be playing this team, then the best way of playing would be to split the team up, primarily with back throws or attacks with hitboxes that knock people in seperate directions (a lot of nairs).
Overall:
Overall, this team can be a fairly strong team, it doesn't have many major weakness, and is pretty even with most teams (like Bowser), any matchup aside from ones with DDD and MK should be winnable at a high level of play.
Toon Link + Captain Falcon

Thanks to Psychcoace!hitstun from tl's projectiles can set falcon up for some ko moves as falcon can get from one side of the stage to the other quickly. So as far as spacing goes I would say they could adapt to either style (wall or spread apart) fairly well, though I wouldn't suggest wall. Both of them will probably be battling in the air so that could cause some conflict, I would suggest platform stages to be the best with this team paring. Toon link seems to be great at getting the opponent of the stage so that can set up for captain falcon to come in for the finish or gimp. However, problems I could see in this team is falcon becoming encumbered by either projectiles or simply the two opponents. Toon link has projectiles to help the situation, but they can only go so far.
synopsis: They have the damage racking and killing power, along with adaptability and gimping. Though with TL doing the brunt (damaging) of the work i'm not sure how this team would fair given that you have two opponents to worry about. Counter pick platform stages.
Toon Link + Diddy Kong

Toon Link + Donkey Kong

Toon Link + Falco
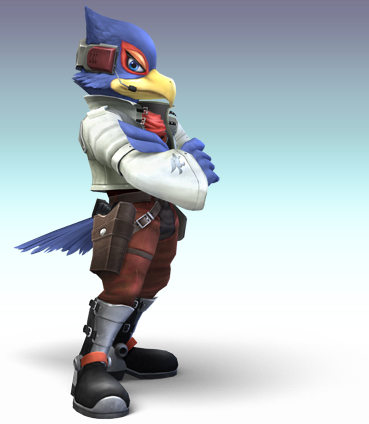
Toon Link + Fox

Toon Link + Game & Watch

Thanks to Alfa again!First off a few things to get out of the way. This won't be as long as my Bowser post, as a do not main G&W, however, I get several hours of practice against one a week, and my state, Victoria, is considered the G&W state, as ~1/8 of the people use him here, so I have quite a bit off practice. My Toon Link experience covers Ocean (<3), and Corpsecreate (won Rocky SSBB singles, the Australian National Tournament), so quite a bit of this will be theorycraft.
In general: G&W and Toon Link would make a fairly good team in theory, G&W's 2 biggest problems are Marth and Snake, due in large part to them outranging him, however, with Toon Link on his team, Tink can use his projectiles to outrange them, and then G&W can combo/kill them with the openings provided. Another problem for the team is Olimar, however, with the added pressure of a second character in doubles, if played well, enough pressure can be applied to Olimar to prevent him from plucking enough pikmin, and grabbing properly, making it very hard for him.
With all this considered, you'd think they would make a good team, probably only loosing to combinations of Marth, Snake, and Olimar if the players were even, well this is true, until you throw META KNIGHT into the picture.
META KNIGHT has a 70:30 matchup with Toon Link, and a 60:40 with G&W, meaning he can screw this team over easily. A team with META KNIGHT on it will cause huge problems for G&W and Tink, and he is the sole reason that this team will be unable to win tournaments. Due to the **** provided by META KNIGHT, the following discussion will not include him, all you need to know is this team loses to him, end of story.
Playstyle(s):
The most effective stratergy for this team is simply 2 1V1's. All that needs to be done is G&W needs to keep a bit of distance between the two matches so Tink has the space he needs to use his projectiles effectively. Obviously, who each character takes will depend on matchups/experience, although some swapping may be done so G&W can get a kill, as he kills much faster than Toon Link. When it is time to kill, it is also a good idea for Tink to throw the odd projectile G&W's way, so as to create openings and make it easier. This team is overall pretty simple.
Stages:
Pretty simple, two great G&W stages are Norfair and Rainbow Cruise, I would imagine that these would also be good for Toon Link. Rainbow Cruise is a great counterpick stage, it deals with Snake and Olimar, and isn't a particually good Marth stage. I would not recommend Norfair against Olimar, just due to the number of ledges it has though, Battlefield/FD/Smashville would probably be better.
When considering neutrals, avoid Yoshi's due to it's small spaces, other than that, FD/Smashville/Battlefield would be fine, and for other neutrals, just use common sense. When being counterpicked, avoid small stages, like Yoshi's and Brinstar or other really good, character specific stages.
As a sidenote, be careful when choosing RC, as META KNIGHT ***** here, so make sure that te other team aren't capable of gaying it up with META KNIGHT.
Overall:
Overall, Toon Link and G&W is a pretty good team, at tournaments were META KNIGHT is banned, other than those kinds of tournaments, expect to be ***** by META KNIGHT and lose.
Toon Link + Ganondorf

Toon Link + Ice Climbers

Toon Link + Ike

Toon Link + Jigglypuff

Toon Link + King Dedede

Thanks to CRASHiC for this.I'm just recently becoming more accustomed to singles play but if there's anything I know it's doubles. King Dedede can be a serious threat in doubles if played correctly. In doubles there are usually two types of players: the dominant player, who goes for all the kills and likes to take people 1-on-1, and the support player, who distracts the other teammate while their partner is getting mercilessly edge guarded or follows their own teammate's movements in order to set up team combos. King Dedede is in my mind one of the top support doubles characters in the game. His grabs are easy set ups for team combos and also get your opponent's teammate out of the way when you want a chance to edge guard or team combo more effectively.
Here's some rules to live by:
1. You should always chaingrab in doubles if given the chance.
King Dedede's chaingrab is his best asset. Instead of not using it as much, adapt to the chaos doubles breeds and use it to your advantage. Chaingrab right into your teammate who can then hit them for you allowing you to follow up making a devastating team combo. Don't forget that the F Throw and B Throw are extremely fast and hit everyone in the radius of your hammer. If you are chaingrabbing someone and their teammate comes to save the day, throw their own partner at them. Chances are they'll get hit by the throw animation, their own teammate, or both.
2. D Throw is the best move in the game for setting up team combos.
If you didn't know before reading this, King Dedede's U Tilt has invincibility frames on it. This allows you to do amazing things with your partner to rack up damage as well as get early kills. All you need to do is D Throw, have your partner space enough away and time an attack that sends the opponent right back at you. When the opponent is shot back, use the U Tilt. If timed correctly you will have successfully chained three moves together, all powerful, racking up a ton of damage sending them sky high, usually to their deaths. My favorite set up is a D Throw into a Metaknight D Smash right back into an U Tilt of your own. It is not only cool looking but so fast that you can perform it regularly during your match! Try it for yourself!
3. You are big so stay out of giant cluster ****s or you will be eating a ton of damage.
King Dedede plays the support card really well. However, he can become a burden if up against a Metaknight who really likes to edge guard. Try to team with someone who can prevent you from getting mercilessly team comboed which King Dedede is subject to due to his large size. Teams at a high level is just organized chaos. Try to play the tank role and just stay alive throwing your opponents into fully charged smashes.
I hope I've taught you something new about the applications of the D Throw in doubles, especially the D Throw to Smash to U Tilt combo. When performed in a match, nothing feels sweeter in this game. NOTHING.
Toon Link + Kirby

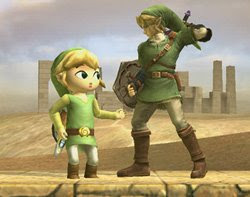
Toon Link + Link *GASP*
Toon Link + Lucario

Lucario is a great matchup for TL. He can kill at very low percents and is a decent camper.
It is advised that you let Lucario lead and you hang back and spam projectiles. Don't stray too far though, as then one of the enemy can attack you while the other distracts Lucario. If they both gang up on Luc, though, you need to run in and Zair to get them off his back. Just work together and above all else, don't make your plan "I'll take this one, you take that one. Good Luck." You also don't have to worry too much about aiming projectiles, because they will only make him stronger if he gets hit. Thanks to Near952 for the info.
Toon Link + Lucas

Toon Link + Luigi

Toon Link + Mario

Toon Link + Marth

Toon Link + Meta Knight

Toon Link + Ness

Toon Link + Olimar

Toon Link + Peach

Thanks to Gangsta Inc!From experience I can definitely say that this is an intresting pair.
Peach in teams is heavily support based, in teams Marth becomes less of a problem for both if they stick together. As far as KO's go it's split both ways to a degree. (TL)Bomb -> (Peach) dair is a neat way to rack up damage. bomb MK's tornado and we'll set up for more damage.
Cons of this team?
We light.REAL light kills, are an issue, and we may find it more difficult split up than together.
Things to look out for?
Setups,Setups,Setups
we love our crowns, set us up for fairs.
let us hold a few bombs we have great glide tossing.
If we grab and pummle and you're around? Help us out with an upsmash, or dair.
The little things help as well don't forget to moves as a team, not two individuals with the same goal.
Toon Link + Pikachu

Toon Link + Pit

Thanks to Ryos4They probably work best as a semi aggressive/passive. But can also work as defensive.
Finisher: Toon Link mostly, he has better kill options for the most part.
Damage Racker: It would probably be a mixture of the 2 of them. Though Pits better at it.
Supporter: They both do well in long range support.
Stock Holder: Pit with his recovery and what not everyone mention. Though Toon Links recovery is pretty decent too.
Spacing Master: Would be Toon Link, while his sword range isnt all that great. His zair and a multitude of projectiles makes him a great mid range fighter.
Multi-Tasker: Both characters multi task well.
Toon Link + Pokemon Trainer

Toon Link + R.O.B

Toon Link + Samus

Toon Link + Sheik

Toon Link + Snake
Thanks to RATED for this!1. projectiles( duh) if they know how to use them accordingly without hurting each other they are really good
2. they can protect each other from grabs and gimps( MK gimps LOL) by throwing a projectile and continue fighting normally.
3. TL racks quick dmg, Snake too and also he kills quickly.
4. Snake can cover the floor, TL can fight in the air.
5. Edgeguard greatness, mixing up their projectiles.
6. Snake can also tank.
7. Stages they can play together in most stages.
8. TL can help Snake against D3 CG and Snake can help TL against MK's tornado( I know that TL breaks nado with bombs)
9. snake dthrow or Fthrow to good follow ups.
Toon Link + Sonic

Toon Link + Toon Link

Toon Link + Wario

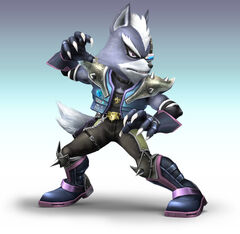
Toon Link + Wolf
Toon Link + Yoshi

Toon Link + Zelda

Toon Link + Zero Suit Samus

 . Snake's got the killing power. Both can camp and even do grenade to bomb combos lol. Seriously, its too ****.
") post here too , after all we are partners in doubles.
post here too , after all we are partners in doubles.