
cutter
Smash Champion
The Down Throw
Basic Overview
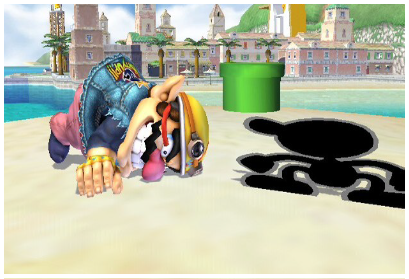
As we know, G&W's Dthrow is a very useful throw because of its unique properties. It throws your foe straight to the ground slamming them there.What makes the Dthrow such a good throw is that it gives your opponent few options on what they do afterwards. This opens the door for predicting your opponent and punishing them. The victim's weight determines how fast G&W will juggle his foe before slamming them onto the ground.
Your opponent has these options when you execute a Dthrow:
- Tech the throw. This requires timing that's different for each character and if you're anticipating the tech you can techchase into something else like a Dash attack or a regrab.
- Roll left or right. This allows more techchasing. Each character has a different roll length, which is important to keep in mind. If you successfully predict which way your opponent rolls, they're wide open for an attack of your choosing, or a regrab.
- Use a get-up attack. If you anticipate this and shield it, you can easily punish your opponent with an attack or a regrab.
- Normally get up. This is by far the worst option for your opponent and you'll hardly see this.
Following up a Down Throw
Here are the most common combos following a Dthrow:
- Jab. This is usually the safest follow-up from a Dthrow. It will immediately get your opponent as they get slammed down afterwards. What's even weird about G&W's jab is that is also hits behind him, which can also catch opponents that DI behind you from the Dthrow. The jab will force your foe back up and you can regrab them and do it all again if your opponent isn't ready for it. This gives G&W a pseudo-chaingrab that will lay waste to players that don't know too much about DIing the Dthrow or teching it.
- Dtilt. Another safe follow-up that I personally like. Dtilt's 5 frame startup time will quickly push your foe back. If they're at low percentages, you could possibly regrab them or hit them with a dash attack. It won't work though if the opponent DIs behind you.
- Dash attack. This can be another great option that your foe can't do too much about unless they DI behind you.
- SH Dair. Most won't expect this too often, and you can usually hit your opponent with both attacks to pile on an easy 18-20%.
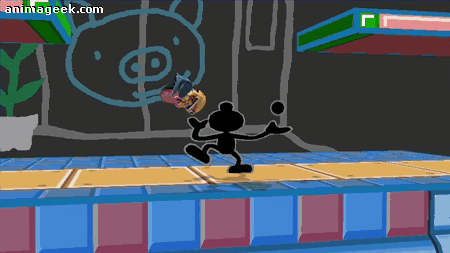
- Oil Panic. It has nearly instant startup time to result in an excellent way to unleash the strongest attack in the game. Be careful though because if your opponent DIs away from the throw and you immediately release the bucket, you'll waste it! It is probably better just to techchase IMO since the bucket has a massive hitbox along with its very fast startup time.
- Crouch. Self-explanatory.
- Dsmash. By far the most common follow-up to the Dthrow which can be devastating despite the Dsmash's "sourspot" hit. Lightweight characters will get caught in this combo every time unless they tech the throw. Some lightweight/midweight characters will always get caught in Dthrow+Dsmash if they're at certain percentages and are able to roll out at higher percentages. As for mid-heavy/heavyweights, they can roll out every time as long as they time the roll.
Here is a good list of characters that can be hit by Dthrow+Dsmash. Credit goes to Mr. Escalator for constructing this:
Red Characters - you can't hit them with your down smash as they can hold left or right while being thrown to escape
Orange Characters - you can only hit them if they do a get up attack from the ground, they can buffer rolls to escape
Green Characters - these characters can buffer a roll to escape your down smash but if they try to time the roll, you will likely hit them
Blue Characters - even if they buffer a roll you can hit them before they move.
Heavy Characters:
Bowser
Dedede
DK
Ganondorf
Ike (is orange for the first throw)
Snake
Charizard
Samus
Link
ROB
Medium Characters:
Lucario
Luigi
Ivysaur
Yoshi
Wario
Captain Falcon
Wolf
Mario (60-70% he turns red)
Sonic
Light Characters:
Peach
Pit
Diddy Kong
Toon Link (40-50% he turns red)
Ice Climbers
Lucas
Ness
Zelda
Olimar
Sheik
Very Light Characters:
Marth
Pikachu
Zero Suit Samus
Kirby
Meta Knight
Fox
Falco
Squirtle
Game and Watch
Jigglypuff
Targeting your prey: Techchasing

So if your opponent is escaping you and avoiding your combos and getting away, this is when you resort to techchasing. In case you don't know what it means, techchasing is simply predicting where your opponent rolls to so you can punish him. In higher levels of play, mastering techchasing becomes very essential especially when opponents will be able to get around most Dthrow combos.
In tournament play, especially against good players, I would be ready for them to tech the Dthrow and have a follow-up waiting for them. Personally, no one knows how to tech G&W's Dthrow well, so I just chase rolls. Remember, you don't have to roll when you tech; you can tech in place!
Techchasing can be devastating on small platforms like the floating ones on Battlefield. They give your opponent little room to roll so you can easily follow up with something of your choosing. Generally, the smaller the platform, the better for your Dthrow, even if they tech it. Characters also have different rolls; some like ROB and G&W himself have very slow and short rolls that will allow you to easily techchase and destroy, while characters like Snake and Lucario have pretty good rolls which means you'll have to hustle to acheive a techchase follow-up.
Stuff to do out of techchasing
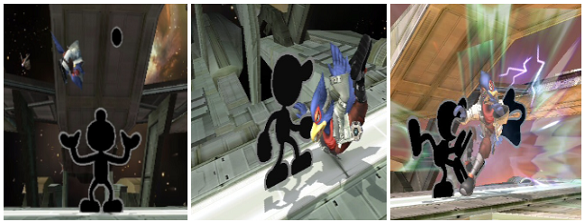
- Up Smash (hyphen smash). Absoultely brutal if it connects. G&W's Usmash is perfect for techchasing due to its sheer strength.
- Regrab. Another great choice to start the Dthrow fun all over again.
- Dash attack. Solid and reliable.
- SH Dair. Most won't expect this too often, and you can usually hit your opponent with both attacks to pile on an easy 18-20%.
- Judgment. If you're feeling lucky and your opponent isn't at a very high percentage, going for a 9 can be a viable choice. Even if you don't get a 9, something like a 6, 7, or 8 isn't too bad either.
- Oil Panic. The best way of getting a surefire bucket unloaded on your opponent. Anticipate their roll, chase, Down B, and let the oil's massive hitbox do the rest.
Spiking
Although very situational, the Downthrow can spike because it throws your opponent straight into the ground. Its applications are very limited however, but it is very nice to know when you can spike with the Dthrow.
When the Down Throw will spike
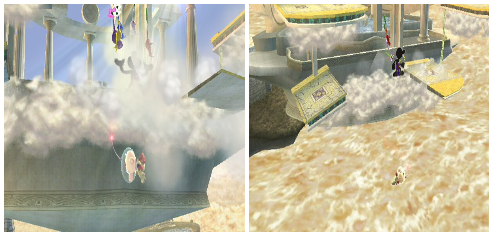
- On the stage Skyworld, on the bottom platform, and when the real platform is destroyed only leaving a cloud. For some characters they can quickly do their double jump and then Up B through the clouds back onto the stage (ie Pit), but against characters that have tether recoveries (Olimar, ZSS, Ivysaur), they're screwed 99% of the time. Skyworld is a banned stage though in most tournaments, which is a bummer.
- You're facing the edge, your foe is right on it as you grab them. This isn't a sure spike since sometimes your opponent will just graze the edge. If they DI wrong (ie away from the center of the stage) they'll probably be spiked.
Conditioning your victim
Study your opponents' patterns. Do they roll to one side a lot, do they like to use get-up attacks, or do they don't seem to do anything until they're provoked? Get a feel for how your opponent will react after a Dthrow. There really isn't too much harm if you guess wrong on what they'll do. If you guess right, you'll have a golden opportunity to do something like a regrab or a Usmash to obliterate them.
Again, always expect your opponent to tech the throw. A good general rule about G&W's Dthrow... the shorter the platform the better the throw will be. With shorter room to roll, you can set up easy techchase traps. How does conditioning factor into this? Well if you get a throw off on the main platform and you see you opponent react in whatever way, it is best to try another throw attempt on a small platform to maximize the reward you get. This is *really* important if you want to Oil Panic hits after the throw.
And even though this is a guide all about the Dthrow, use other throws as well because Dthrow works well on some characters like ROB because of his poor roll and bad on others. A character like Snake has a huge roll and will easily be able to avoid techchasing opportunities. It is best to use a Uthrow on Snake to force him into the air instead of just getting a measly 6% on him.
Here is a list showing normal roll distances and techroll distances. All credit goes to omegablackmage for constructing this chart.
...............roll...............techomegablackmage said:I've also found that when the tech roll length goes past 1.6, it becomes difficult to tech chase in my opinion (mk's length).
gw..........1.5...............1.1
lucario...1.95............1.2
ganon....1.75............1.4
rob.........1.75............1.4
jiggz.......1.3..............1.45
kirby......1.5..............1.5
pikachu.1.2..............1.5
ness.......2.................1.5
sonic......1.75............1.5
bowser..1.1..............1.5
wario.....1.65............1.5
olimar...1.5...............1.5
icies.......1.65............1.55
lucas......2.................1.55
diddy.....2..................1.6
meta k..1.75............1.6
t link......1.7..............1.7
mario....2..................1.75
samus...1.85............1.75
zss.........2..................1.75
sheik.....1.75............1.75
lizardon.1.4.............1.75
captain..1.85...........1.75
pit...........1.5.............1.8
snake....2.4..............1.8
dk...........1.75...........1.85
fox.........1.9..............1.85
luigi........2.5.............1.9
ike..........2.1.............1.9
marth....2.1.............1.95
yoshi......1.7.............1.95
ddd.........1.7.............1.95
falco.......1.95...........2
ivysaur..2.25...........2
peach.....2................2
wolf........1.9..............2
link.........2.1..............2.1
zelda.....2.25............2.25
squirtle.1.75............2.25
tl;dr version: Techchasing takes a lot of practice and experience to get good with it. The more matches you can play against real-life players, the better you'll get.
Videos
Throwing animation causes a spike on Frigate flip. (1:45)")

