• Welcome to Smashboards, the world's largest Super Smash Brothers community! Over 250,000 Smash Bros. fans from around the world have come to discuss these great games in over 19 million posts!

    You are currently viewing our boards as a visitor. Click here to sign up right now and start on your path in the Smash community!

Make Your Move X - Congratulations winners! MYMXI start date OCTOBER 10TH!

Status
Not open for further replies.
D

Deleted member

Guest
User Rankings #1

Welcome to the User Rankings! Every Monday, I'll be compiling the entire of the last week's activity in the thread and showing off, just who is the most active member? The point of this exercise is to recognise the most dedicated among us – those make your movers who are currently pushing the boundaries, as well as highlighting all movesets made by them.

To get on this list, you need to have made a moveset in this or a previous Make Your Move, as well as having posted in the Make Your Move 10 thread. The cut-off point for tallying is 5PM on Monday EST, 3PM PMT or 10PM GMT; other removals or changes are at my own discretion. The breakdown of points is as follows:


30 points for a Moveset
5 points for a Comment
4 points for a Secondary Submission
2 points for a Secondary Submission Comment
1 point for a Regular Post
+Regular Posts do not stack
+Secondary Submissions are MYminis, Joke Movesets and other miscellaneous submissions

This week was one that we can be proud of as a community. We once again bested Make Your Move 8's opener, doing in a week what we couldn't do in three in that contest. Of course, it's not the fiery opener we may have wanted, but we've also gotten a lot more commenting at this early stage, as well as some sustained mini popularity. It's not a bad result at all.

In terms of the rankings, I'm doing a full overhaul of it. I would have done it for this first update, but I really just wanted to get the data up before I went to bed. Expect the big change, as well as some sort of video to accompany it, tomorrow. Of what you can see right now, I just messed around with the numbers mostly - the biggest changes being the moveset point increase and switching of comments and projects in point value. What this translates to is basically just less discounting of minis in the long-run.

The people, now. It's pretty fascinating how a newcomer was able to snatch up top trumps in this all-important first week, catching the rest of Make Your Move with their proverbial pants down. Chaos was able to post both Ashley and Viewtiful Joe, and that wasn't all either. Not only appearing in the chat, he also egged on some basic discussion in the thread! Remarkable. In second was, well, me. I posted eight-or-so comments along with my one-day Pokemon moveset, Garbodor, which hopefully isn't received too negatively. What am I saying, it's garbage. Last, but by no means least was Junahu, posting a slew of comments, minis and finishing the week on a high with Victini. I say that, but it's one of the few sets I haven't read yet - his quality standard speaks for itself, mind you.

Good show, everyone.

Remember to check out the stadium to find all of the sets mentioned.


Points: 70, Movesets: Ashley, Viewtiful Joe

Points: 67, Movesets: Garbodor

Points: 56, Movesets: Victini

Points: 55, Movesets: Spider-Man

Points: 52, Movesets: Sir Weston

Points: 45

Points: 35, Movesets: Meowth

Points: 34, Movesets: Dry Bowser

Points: 32, Movesets: Gon

Points: 30, Movesets: Enrico Pucci

Points: 30, Movesets: Storm

Points: 29

Points: 24

Points: 10

Points: 10

Points: 6

Points: 5

Points: 5

Points: 5

Points: 4

Points: 4

Points: 2

Points: 1​
 

kitsuneko345

Smash Ace
Joined
Dec 20, 2007
Messages
562
Location
*sending Sundance lots of apple pies on Pi Day, as
Event 55: Dog Eat Dog?

How Many?: 1-2
Play As: Anyone
Stage: Cohdopian Embassy SPOILER edition (link)

When this event starts, the character selected to play will start on the right side of the extinguished Secretariat's Office in a mini mushroom mode with a certain percentage (more on that in the next paragraph). There is only one major change that has happened to the office: the floor is covered in Babhalese Ink, making the floor both as slippery as ice and flammable enough to create an explosion with only one fire/electric/ laser move hitting the floor. Since there was already a mention about explosions occuring in this room in the original post, reading about this part of the stage in said post would suffice.

The percentage that you start in this stage is dependent on what difficulty is chosen: an EASY difficulty gives 100% to the player, MEDIUM displays 200%, and HARD shows 300% to the player. The goal for this stage is to recover all the way back to 0% without getting KOed. When playing this with two players, the percentage will stay the same for both characters to add up the difficulty. You were forewarned!

Of course, unless a Heart Container, Maxim Tomato, or regular food somehow appears on the stage (see: never), there is only one place to find healing items: the Ambassador's office on the other side of the stage. Over there is an unlimited amount of hot dogs; however, because the dogs are out of their containers, they will heal 10% damage instead of the usual 25% on the stage (strange that cardboard is healthier for you, huh?). However, there is one major obstacle in your way: Missile the dog. Whenever your character eat one of the hot dogs, Missile will run towards that character and try to bite his head off for stealing teh dogs. Of course, because the player is little in this stage, Missile will deal 25% with high knockback instead of the usual 10%. To reiterate, any KO will end the event, so it's advised to dodge the bites as much as possible. Interesting tidbit: Missile will not bite anybody that is knocked down. Hmmm...

And now for something completely different!

THE USUAL MEAN STANDARDS

This nifty idea that I came up with can be considered an equivalent to Achievements for the XBOX 360 and MYM 9 (therefore make this something just for fun). For every event that allows you to choose any character, there is a UMS attached to the event (like a time or number of KO's). Anyone that passes this standard via better times or KO's will receive one UMS label attached to the character used to complete this event (for co-op events, there will be UMS's given to characters that didn't get one for that event). For every ten UMS labels you get on a certain event, you get a sticker pertaining to the event. Completing this event with all 35 characters on the 3 difficulties will give the player a special trophy that relates to the event completed. For example, on Event 41: The FINAL, Final Battle, getting 10 UMS labels will give out a SEGA logo Sticker, 20 UMS labels will give out a KONAMI logo sticker, and etc. When the 105th UMS label is acquired, the player will receive a trophy of Super Mario.

With that in set, let's move on to how the UMS works for this event:

UMS for Event 55: Dog Eat Dog?:
Beat this event in less than 20 seconds per character per difficulty.

Stickers and Trophy:

10 - Miles Edgeworth (Arm +7)
20 - Detective Gumshoe (Head +7)
30 - Franziska von Karma (Weapon +7)
40 - Kay Faraday (Weapon +7)
50 - Shi-Long Lang (Bite +7)
60 - Tyrell Badd (Flinch Resistance +7)
70 - Shih-Na (Shield Resistance +7)
80 - Calisto Yew (Specials: Direct Attack +7)
90 - Yatagarasu Symbol (Carry Item +7)
100 - Quercus Alba (Specials: Indirect Attack +7)
105 - Cohdopian Embassy Stage Trophy


Suggestions on how to beat the UMS time:
*If you get off the Ambassador's section of the stage after you eat, Missile will not try chasing you.
*If you are a risk taker, try a fire/electric/laser move inside the starting point to launch you into the room; however, this will only work if you DI correctly.
*Make sure you are towards the left of Missile often so that you stay on the course. *Knock yourself down and Eat While Reclining
 

Zook

Perpetual Lazy Bum
Joined
Jul 30, 2005
Messages
5,178
Location
Stamping your library books.
MEOWTH

This set is a lot like your rendition of Pay Day, to be honest: a few gold coins, with a Magikarp here and there. I appreciate the very traditional approach to tackling this moveset; I never thought I'd say this, but traditional sets have become just as interesting as "unsmash" sets, seeing as how rare they are nowadays. You have a few very interesting moves that would still fit in perfectly well in Brawl; I especially like that down special.

Unfortunately, you include those things that make traditional movesets generally uninteresting: pulling moves out of that pool of generic, bland Smash Bros. moves that so many characters have. A flip Uair? A sex kick? Yawn. You also fail to elaborate on how certain moves work. How do I use that jab? Is it like Mario's, a punch-punch-kick? Or is it move like Meta Knight's, where I would hold down the button to make him punch and let go to kick? My biggest peeve, however, has to be Substitute. Why on Earth did you make Substitute, a move with so many possibilities, into a ripoff of Sonic's spring?

I noticed that you introduced Meowth as a weak character, yet he has the strongest Fsmash in the game, and his Usmash can deal 30%. There isn't a problem with him having such strong moves, but you should at least mention that he has a few tricks up his sleeve or somehting. I dunno, I'm probably just being nitpicky here.

The extras were all fun, and I enjoyed the little Easter eggs you tossed in. I don't understand why it became uncool to make extras, as long as you put them where they belong (at the end of the set) they're just fine, and perfectly ignorable if you hate them.
 

darth meanie

Smash Journeyman
Joined
Jun 6, 2008
Messages
452
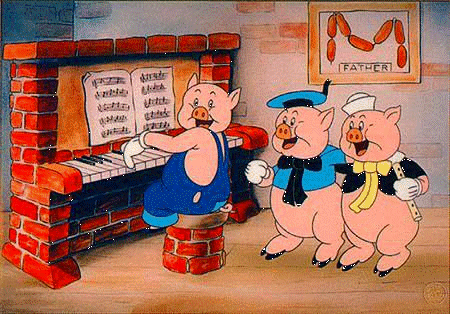
Who's Afraid of the Big Bad Wolf?


Event Name:
Who's Afraid of The Big Bad Wolf?
Stage: Smashville
Character: Wolf
Description: Blow down the little pigs' houses for Tom Nook's insurance scam!


Tom Nook has set up a nice little deal with the Three Little Pigs. You see, they're not particularly inclined to upgrade their house and stay in an endless cycle of debt like all the other critters in Smashville. So instead, he's set up a deal with them to build a new house for them if theirs ever blows down, with increased sturdiness to prevent future disasters.

That's where you come in.

Your job is to destroy the little pigs' house so that they have to upgrade and stay in Tom Nook's cycle of debt that he uses to enslave the population of Smashville. Tom Nook will send you his orders in a 'Resetti' style balloon box explaining exactly what you need to do.


At the start of the match, there will be a straw house in the center of the stage, with three pigs standing around. There is a speech balloon at the top of the screen where Tom Nook says: "Go ahead and tear this house down, before they can pay it off!" At the top of the screen is a countdown timer that keeps track of the money they owe. It starts at $10,000 and goes down by $500 every second, giving you 20 seconds to destroy the building.

It has a pitiful 50 stamina, and will begin to tatter and collapse as the pigs look on in horror. If you destroy it in time, another $25,000 gets added on to the timer as a house made of stick rises up, quickly being built.


This time though, it's not so simple. "This time you have to make it look like an accident, make sure to burn it down." The house has 200 stamina, and while you can deal damage to it through other moves, you ultimately have to kill it with fire. Fortunately, this time around, items start spawning, including explosive crates, smart bombs, superspicy curry, and fire flowers.

When the house catches fire, it starts to take 2% damage a second. The house has to burn down on its own, but you can deal damage with other attacks, as long as you're only using fire items to do the deed. Once it burns down, the pigs shell out another $50,000 for a brick and mortar house this time.


This house has a whopping 500% stamina, but Tom Nook has a special plan in mind for you. "The pigs are getting suspicious, but I need the insurance money. Rough the place up, but don't destroy it this time, leave once you've done enough damage." Your challenge is to leave the house with somewhere between 70% and 50% stamina left, which is only vaguely indicated visually as it changes in appearance. You also can't deal damage too quickly either; if you deal over 150% damage in fifteen seconds, it fails again, as the pigs realize they're being scammed.

Once you're done, jump off the stage and suicide. If you left it just damaged enough, the pigs will pay for the repairs and you get your cut of the profits. The pigs get to keep their house, the big bad wolf is gone, but who really won here?
 

Dark Paladin X

Smash Journeyman
Joined
Feb 22, 2008
Messages
277
Marona from Phantom Brave

Haven't visited this forums for a very long time, so...

Marona


Description

Game of Origin: Phantom Brave

Bio: A young 13 year old girl in Ivoire who have the ability to talk to phantoms. Her parents were killed when she was 5 years old. Ever since her parents' death, her phantom guardian, Ash, looks over her.

Due to her ability to see and talk to phantoms and her status as a Chroma (mercenary), she is treated as an outcast in society, calling her "Possessed" and even taking advantage on her. Despite the harsh treatment from the locals, she maintains her cheerful, kind, and forgiving personality towards everyone and is willing to help people while at the same time not asking much. She hopes someday, others will treat her with kindness due to her helpful nature.


Stats​

Offense: 4/10
Defense: 2/10
Projectile: 5/10
Weight: 2/10
Speed: 5/10
Falling Speed: 1/10
Recovery: 8/10
Throwing Ability: 3/10
Final Smash: 7/10
Size: 3.5/10

Home Stage: Phantom Isle


Overall/gameplay​

Marona is considered to be a "squishy wizard". She has a few powerful magical attacks, but most of her physical attacks aren't that strong nor can they do powerful knockbacks. She has the ability to confine items to summon phantoms to help her in battle. She also has a few buffing special attacks to help aid herself and her allies in stage. But across from that, she isn't very durable due to her low weight and falling speed, making her easily K'Oed in lower percentages as well as vulnerability to air juggles.

She won't be very useful if the items are disabled or if she is in a free-for-all brawl.


Specials​

Up Special: Wind Blast

Marona places both of her palms below her and shoots a giant wind blast below her that brings herself upward. The recovery height is roughly about 1.6x that of Sonic's Spring Jump. Puts her into the helpless state. Capable of a powerful meteor smash around low to medium percentages if the foe is directly below her.

Standard Special: Chartreuse Heal

By quickly pressing the special button, Marona takes her staff and can heal herself for about 18% health. If there are nearby allies around her, the healing is distributed equally among her allies. For example, if there is one ally near her, she and that ally will be healed 9% health. If there are two allies near her, she and both of her allies will be healed 6% health instead. Summoned allies like her phantoms, assist trophies, summoned Pokemon, or King Dedede's Waddle Dees, will get a small boost on their attacks instead.

Keep in note that for balance purposes, Marona can only use her Chartreuse Heal only once every 45 seconds.

Down Special: Confine

Marona confines one nearby item. The item near her disappears and a phantom will be summoned. The summoned phantom can either be a Putty (90%) or a bottlemail (10%). The summoned Putty walks around in the stage and will randomly strike the opponent for a small damage and knockback. The bottlemail does the same thing, but the bottlemail can also steal an item from the opponent and gives the item to Marona (providing that she isn't wielding an item at the first place). The bottlemail can also steal the Final Smash from the opponent as well which is transfered into Marona. Marona can also use her confine ability on the Smash Ball, but it will take three uses of confine before the phantom is summon and at the same time grab the Smash Ball.

Only two phantoms can be summoned at a time and the phantom lasts for 20 seconds (15 second for the bottlemail). The summoned Putty/bottlemail phantom can be attacked and knocked off the stage.

Side Special: Chartreuse Orb

By holding the side special button, Marona takes her staff and charges up a projectile attack. This attack can be held about 7 seconds maximum which at that point, Marona releases a lightning orb projectile towards her opponent. However you can release the projectile early by letting go the special button. The projectile speed and strength of the attack is based on how long the special button is held. The projectile will move slower and inflict more damage and knockback if the button is held longer. This attack cannot be spammed and Marona needs to wait 3 seconds for each use. A fully charged Chartreuse Orb is capable of KO'ing someone around 90% damage.


Attacks​

Normal/Tilt attacks:
  • Dash attack: Marona hops forward and body slams.
  • Normal attack: Marona takes out a dagger and does her AAA natural combo, slashes, stab, and a qucik forward kick. Does small damage and knockback.
  • Side attack: Marona takes out a giant weed plant and does an overhead swing attack with it.
  • Down attack: Marona does two small low kicks and a repeating rapid flurry of weak crouching kicks that deals little damage.
  • Up attack: Marona takes out a giant weed plant and whacks upward.

Smash attacks:
  • Side Smash: Marona takes out a pine tree and does an overhead swing attack with it. This side smash cover a large range in front of her and is quick, but doesn't deal a lot of knockback or damage.
  • Down Smash: Marona holds staff horizontally behind her back and does a 360 spin. Hits both sides simultaneously. Does small damage and knockback.
  • Up smash: Marona takes out a giant rock and throws it upward like a projectile. Charging the attack will not increase the damage, but it will allow Marona to throw the rock higher. Has a very slow start-up lag but little ending lag. This attack can only attack opponents in front of her or airborne opponents. The rock falling down can also deal damage and knockback until it hits the ground. Almost similar to Snake's up smash attack.

Aerials
  • Neutral: Marona does two quick slashes with her dagger that deals VERY small amount of damage.
  • Forward: A flying kick. The first few frames of the attack by her foot sparks out ice, pauses the opponent a place, and freezes the opponent in ice for two seconds, which will also deal heavy knockback and damage. If used after the initial sweetspot attack, this attacks deals very small damage and no knockback. Smilar to Zelda's forward aerial, but much harder to land.
  • Back: Does a back kick which is similar to the forward aerial. Except the sweetspot shoots out burning flames and does not freeze or pause the opponent at place. Like the forward aerial, the attack does very small damage and no knockback after the sweetspot.
  • Down: Marona takes out a giant tumbleweed and smacks the opponent below her. Is capable of meteor smashing, but the meteor smash is so weak that it wouldn't be an effective KO until around 120% damage.
  • Upward: Moves her hand upward in an arc where small gusts of wind pop out that deals moderate amount of damage and knockback.

Grab/throw:
  • Range: Grab range is not that good.
  • Pummel: Knees the opponent.
  • Forward: Shoots a spark of light into the opponent pushes the opponent away.
  • Down: Hugs the opponent with forgiveness. While the initial hug does not deal any damage nor does the down throw does any knockback, it does give the opponent a flower on the head that deals 5-7% damage.
  • Back: Kicks the opponent away.
  • Up: Slaps the opponent twice and kicks the opponent upward.

Final Smash: Chartreuse Gale

When she calls in her Final Smash, Marona will yell out her catchphrase: "Valiant phantoms, aid me in battle. Chartreuse Gale!!" At that point, a glowing green aura appears around her and numerous Putties and bottlemails summon around the stage for 12 seconds. The Putties and bottlemails moves around the stage very quickly and damaging and attacking opponents on their way. Their attacks deals a bit more damage and knockback than the phantoms that are summoned by confine. The bottlemails will also take away any items that appear on stage. During the Final Smash, Marona cannot be attacked.

Taunts​

  • Up: Twirls in place.
  • Side: Face towards the viewer and waves at the viewer with her right arm.
  • Down: Mocha (A Putty that Marona befriended) appears in front of her. Marona sits down, smiles, and hugs Mocha while Marona awes at Mocha.

Will add more details a bit later on and will also make Ash's moveset (also from Phantom Brave).
 

Zook

Perpetual Lazy Bum
Joined
Jul 30, 2005
Messages
5,178
Location
Stamping your library books.
VICTINI

Victini is powerful. I think that's the best description for this set: Victini is POWERFUL. When you combine moves that let him divvy up 20% per second with moves that KO before 100%, you know that there are some balance issues.

Creatively, the moveset is great. It really sucked me in, and I was always interested to see what you would come up with next. Using knockback against himself is genius, and the general "blaze your way to victory, no matter how grim the situation" feel of the set really suits the character. The grab is also wonderful, being completely different than any other grab but still believable. I'm not really sure what the point of Victory Star is, though; I like it as a mechanic, but it feels a little tacked on to this set.

He is still too powerful, though. I can't enjoy Victini because he would make Meta Knight look like Link if he were actually in Brawl. (Exaggeration.) I'm sure that most sets here are very imbalanced compared to actual Brawl characters, but not quite to Victini's level. It's sets like these that make me think about what I value most in movesets, and brings up a few questions over creativity versus realism.

Should we try our best to work within the bounds of realism for Smash in terms of how good a character is? Smash has always been an unbalanced game. Some characters will always be better than others. Working within the boundaries of Smash, I think most would agree on, limits creativity. However, I believe that it's a far more difficult challenge to work within these boundaries of balance. I believe it's a lot harder to implement a mechanic on a character and try to make it balanced than to just let your creativity run wild.

Of course, that's just me, and my view is definitely the minority view.

Basically what I'm getting at is this (and this isn't directed towards Junahu, by the way): When making a moveset, step back every now and then and ask yourself, "Is this move too good?"

...But, uh, yeah. I can't enjoy Victini because it's just too good. I don't think your intention with this character was to be balanced, though, so it was very creative and interesting to read. Good job with that.

Liked Diglett more though. :050:
 

Chaos Swordsman

Smash Apprentice
Joined
Sep 15, 2008
Messages
174
Location
In your closet.
He serves...a higher authority. Geno has joined the Brawl!


Geno is a being from the stars whose true name is near-impossible to pronounce in English. After Smithy invaded Mario's world and destroyed the Star Road in the process, Geno came down to the planet and possessed the wooden doll of a young child. He went into a nearby forest to try and recover a Star Piece, one of seven, and joined Mario's party soon after in his quest to repair the Star Road, which conveniently coincided with Mario's own quest to defeat Smithy.

Stats

Size:4/10. Geno is about as tall as Toon Link, but a bit...wider, if you know what I mean. Being made of wood, and hollow, he's rather light, so it isn't hard to send him flying.

Walk Speed:6/10. Geno's legs are rather light, so just walking can get him places relatively quickly.

Run Speed:8/10. In SMRPG, Geno's natural speed was the highest, so he's very fast in Brawl as well, just above Fox's speed.

Aerial Movement:5.5/10. He's not bad in the air, but he's not really good either. Though despite having a wooden body, he's actually rather floaty.

Traction:7/10. With the combination of Geno's speed and his light frame, he doesn't have the best traction, but it's nothing necessarily crippling.

Jump:6/10. Despite not being that good in the air, Geno actually has a slightly above average jump. His second jump isn't half bad either.

Specials

Neutral B:Geno Beam.

Geno's very first in-game special attack, the Geno Beam is your not-so-basic chargeable projectile. Pressing the B button causes Geno to point an arm forward, then his hand retreats into his arm and is replaced with a small black rod with a white tip. The entire animation takes 3/4th of a second, so be sure the opponent isn't in your face before using this. An instant later, a bright blue beam half the width of Lucario's Aura Storm shoots out in a straight line, reaching all the way to whichever edge barrier Geno is facing and dealing a single, strong hit. This beam can't be angled, but feel free to use it while you're falling; doing so will shoot Geno back a bit.. Uncharged, this move does 11% damage with low knockback. Fully charged, however, it can deal 22% damage and high knockback. While it's charging, Geno will pump an arm and place his hand on it, eyes closed and head bowed. When it's charged, Geno's cloak and hat will glow bright blue and wave a little bit, so when you see that, make sure you're not in front of him.

Side B:Geno Whirl.

Any Geno fan worth his SNES will know this move. Geno holds both hands above his head, creating a disk of orange energy, then he throws his arms forward, shooting the ring in a straight line that flies at Sonic's run speed, though it can be angled up or down slightly. This move does 9% damage, low knockback, and disappears on contact with a character. However, something unique about this move is that it bounces off walls, flying around the stage for 8 seconds until disappearing, or going past an edge barrier. Geno can have up to three of these rings out at any time. Also, Geno doesn't take damage from these rings, so he can go as crazy as he wants with them. A special trait is that it has a 1 in 100 chance to do 99% damage on contact. A little more incentive to stay the heck away from it, huh?

Down B:Item Hat.

What's that? You were expecting Geno Blast? Ha! I'm more original than that! Pressing Down B will cause Geno to reach into his hat with a hand and start fumbling through it for an item. The item's value will depend on how long Geno searches for it, and he can search for a maximum of 5 seconds. Geno will be left defenseless while searching for the item, so make sure to have some space before using this.

1 Second=Random Food
2 Seconds=Green Shell
3 Seconds=Bob-Omb
4 Seconds=Super Mushroom
5 Seconds=Starman

You may think those last two are overpowered, but let's be honest. 5 seconds can be a long time in the middle of a fast paced match. Also, something to note is that Geno only has one of each of the four latter items, so don't think you can keep using the Starman to make yourself invincible the entire match. After the main items are used, Geno will just keep pulling food out of his hat, so it can serve as a (somewhat unreliable) healing move. However, another thing about this move is that if Geno is already holding an item and has already used one of his own, he can put the item in his hat to be used for later. How does Geno keep so much stuff on his person? I dunno. Ask Link.

Up B:Geno Boost.

An odd spin on the original Geno Boost. Red arrows will pop up and disappear around Geno as the Up-B input is held. This move works just like Diddy's Rocket Barrels in that his fall speed will be reduced dramatically while charging before he shoots into the air, his angle depending on whatever direction you hold the control stick. However, just like in SMRPG, this move will boost Geno's attack power by 1.5 until he takes 20% damage. If he manages to fully charge this move, his defense will also be boosted. Also, if someone is within the arrows when he finishes the move, they'll recieve the same boost. Finally, Geno will only get the boost when the B button is released and he goes flying. The boosts can't be stacked and the move leaves Geno in freefall, so don't think you can spam it.

Facts about Specials:You can make the Geno Whirl move stronger by hitting it with Geno Beam, increasing it's damage by 1% to 8% depending on the charge. Any Geno Whirl affected by Geno Beam will have a blue tint around it. You can also make it stronger by using Geno Boost first, then firing Geno Beam at the disks. Assuming you use Geno Boost, then fully charge a Geno Beam, fire off a Geno Whirl, then hit the whirl with a beam, the Geno Whirl can do a whopping 25%! But as you can see, this takes quite alot of setup. If you manage to pull this off in a real fight, then congratulations. You're completely awesome.

Smashes

Many of Geno's attacks are gun-like moves. His smash attacks will be no exception.

Forward Smash:Double Punch.

Geno pulls both arms back, then throws them forward, his arms shooting off and going the distance of 1.3x a SBB, dealing 14% to 19% with great knockback. This move has some ending lag while Geno's arms return, so be wary.

Up Smash:Shotgun.

Geno points an arm straight up, his hand retreating into it and replaced by a small rod like the Geno Beam's. He then fires a powerful spread of small bullets that reach Pichu's height, and spread to 3/4 the length of a Battlefield Platform, which deals 15% to 21% with high knockback. This move has bad ending lag, so make sure you don't miss.

Down Smash:Elbow Cannon.

Geno will point his arm at the ground in front of him, then bend his arm to revealing an opening. After which, he'll fire a single cannon ball from his elbow, doing 14% to 20% with high knockback, but noticable.

Normal Attacks

Not all of Geno's attacks involve long range, but he certainly has a lot of them.

Jab:Finger Shot.

Geno points his arm forward, fingers outstretched. He then begins firing bullets from his fingers at a very rapid speed, dealing 1% damage per shot, but no knockback. The bullets travel the distance of Sheik's needles.

Dash Attack:puppet Tackle.

In a rather ungraceful display, Geno simply throws himself forward a distance, dealing 6% damage and measly knockback.

F-Tilt:Rocket Punch.

Geno's arm shoots forward the distance of a stage builder block before returning back to him, dealing 7% damage. Has good range for a tilt, but some ending lag.

U-Tilt:Star Gun.

Geno's most powerful weapon, reduced to a measly tilt. Sigh. Geno will point both arms up in slightly different directions, firing three small stars from each arm that travel Geno's own height, dealing 1% a hit. Best used to stop an approach from directly above.

D-Tilt:Rainbow Pillar.

This is also a very crucial move. Geno will hold his hands up and gather energy before bringing them to the ground, causing a giant, multicolored pillar fo energy the width of Lucario's Aura Storm to drop down from the top barrier. This pillar will reach all the way to the top barrier, stays there for 15 seconds, and Geno can make two of these at any given time. These pillars can't do any damage and anyone can pass through them, so what good is it?

Simplicity itself, my dear Wattson. This move is meant to be used in tangent with your Geno Whirls to keep them onstage for as long as possible, instead of simply letting them fly through the edge barriers.

Get Up Attack:Spinning Star.

Geno will spin around as he stands, a small star closely resembling his real form spinning around him. This attack deals 6% damage.

Ledge Attack(weak):Sweep Kick.

Oddly, this move can actually trip, as Geno swiftly sweeps his leg across the ground before standing up, dealing 4% damage.

Ledge Attack(Strong):Rising Star.

Geno pulls himself to his feet with one hand while his other arm is pointed forward and fires 3 star shots, each doing 2% damage.

Aerials

Oddly enough, much of Geno's air game is very defensive.

Nair:Lucky Star.

Geno will actually fly out of the doll, then fly around it once before repossesing it. This does 7% damage. Get it? 7? Lucky Star? I got a million of 'em.

Fair:Hand Gun.

Geno simply points an arm forward and fires a single, strong shot that travels a SBB, dealing 8% damage to whoever it hits.

Bair:Sky Beam.

Geno points an arm back and fires a thin version of his Geno Beam that travels Ganondorf's height, doing 8% damage to anyone caught in it. Like many bairs, this is a retreating move.

Uair:Flare Gun.

Geno quickly shoots up a fireball twice the size of Mario's, which actually travels the height of said plumber, dealing 9% damage.

Dair:Meteor Shower.

Geno swings his arm towards the ground below, releasing a flurry of small stars that go the distance of his shot gun move, each star dealing 1% damage for a maximum of 8%. This is a more a defensive move to prevent attacks from below.

Grab and Throws

You can probably tell by now, but Geno's throws also involve his many gun-like attacks.

Grab:puppet Master.

This is actually a tether. Geno fingers shoot off his hands on strings and travel the distance of Samus' grapple beam before returning to him with the same ending lag.

Pummel:puppet Pummel.

Geno simply punches the opponents in the gut, dealing 3% damage a hit. It's as slow as Mario's pummel.

F-Throw:Shotgun Blast.

A much weaker version of his Up Smash, Geno jams his arm into the opponents stomach before blasting them at point blank, dealing 11% damage and high knockback.

B-Throw:Shoulder Sniper.

Geno tosses his opponent into the air behind him, dealing 5% damage. Then, in a moment of sheer coolness, points two fingers over his shoulder and fires a single strong shot like a sniper rifle that deals 6% for a maximum of 11% damage.

D-Throw:Bullet Barrage.

Geno's throws his opponent to the ground to deal 5% and fires three finger shots, each dealing 1% damage.

U-Throw:Rising Stars.

Geno will throw his enemy above his head to do 4% and then fire a few shots from his Star Gun, each dealing 2% damage for a maximum of 10%.

Final Smash

Geno Blast/Geno Flash

That's right, Geno's so awesome, he has 2 Final Smashes to choose from! Upon pressing the B button, so long as the control stick isn't touched for a second, Geno will begin a Geno Blast, taking the same pose as Zelda's fireball taunt. During this time, a red star will appear over Geno's head, and said doll is invincible. When the star appears, you have to hold the B button. After a second, another star will appear from the first, and after another second, a third one appears. You have to release the B button the INSTANT that third star appears. Geno will then hold his hands up, and a thin white beam will shoot up and disappear into the top barrier. When this happens, your opponents better start rolling around like crazy people, because a second after the first beam is gone, Geno will bring his arms down, and giant, multicolored beams the size of Lucario's Aura Storm will start raining down on the stage at random. Each beam will deal 15% damage with medium knockback, and the attack, depending on how well it was charged, will last a set time.

1 Star = 5 seconds

2 Stars = 10 Seconds

3 Stars = 15 Seconds

Each beam only lasts for 3/4 of a second, but they're almost impossible to predict. The beams will continuously fire down on the stage, one after the other, with 4 beams being on screen at any given time. Of course, Geno is completely immune to these beams, but he can't move while bringing them down. He's also invincible, so all the opponent can do is dodge. Needless to say, it's a powerful, though random, attack, but if you overcharge it, the attack will backfire and only last for 5 seconds, so be careful.

As for Geno Flash, simply move the control stick after activating the move and Geno will go into his cannon form. The same charging rule as Geno Blast applies to this move as well, however, you'll be charging the move's strength instead of it's time. While charging, a small, blue reticle will appear in the center of the screen, with Geno pointing straight at it. While charging, you can point this reticle wherever you want on-screen, but be careful, as you'll have to keep an eye on both the red stars and the reticle; no easy feat. Once you've released the B button, Geno will fire a small, red flame that will travel towards the last spot the reticle had been in at the speed of Wolf's lasers, dealing 10% damage to anyone it touches. Once it reaches it's destination, the fire ball will become a glowing red circle with what appears to be six triangles spinning around it. (If you pause the game, you'll find that it's actually just three triangles going really friggin' fast.)

The sphere will grow to twice the size of a Supernova bomb at the same rate, then a small face will appear in it for a second. Afterwards, the face will scrunch itself up and the sphere will explode without expanding any further. Anyone caught in the sphere while it's growing will take the same damage as they would from a Supernova bomb, but it will last twice as long. The power of the final explosion obviously depends on how many stars have been charged.

1 Star = 15%

2 Stars = 30%

3 Stars = 45%

Believe it or not, this actually isn't as overpowered as you'd think, as the person controlling the move will have to keep an eye on both the red stars and the reticle, so if they mess up on either end, the attack will be weaker, or won't be at the place the person wanted it to be. Geno is invicible before firing this move, but once the fireball starts moving, Geno is free to move around to try and knock the opponent into the attack.

Extras

So, now that we're done with the actual moveset, let's show some more of Geno's epicness.

Idle Pose 1:Geno crosses his arms and bows his head, eyes closed.

Idle Pose 2:Geno holds his arm up as his gun replaces his hand. He inspects the weapon for a moment before returning his hand to normal.

Up Taunt:De-possession.

Geno's body collapses as his real form floats around for a moment, then quickly flies back in, standing up again.

Side Taunt:The Exorcist.

Geno's head will spin around slowly in a very eerie fashion. He's a possessed doll, after all.

Down Taunt:Epic Nod.

Geno faces the screen, crosses his arms, and nods once.

Symbol:A Star.

Entrance:

Geno's body is sitting motionless on the ground, then Geno himself shoots down from the heavens in a beam of light to inhabit the doll, which quickly stands up.

Victory Pose 1:passive Doll.

Geno simply stands there with his arms crossed, staring at the screen, unblinking.

Victory Pose 2:Return to the Heavens.

Geno exits the doll and flies over each of the losers before ascending into the sky, the camera following before going back to the doll's lifeless form.

Victory Pose 3:Hotshot Mage.

Geno is standing sideways to the camera with his gun pointed at it, then he fires off three shots, his cape flowing in the wind.

Victory Theme:

The tune that plays when you win a battle in SMRPG.

Loss Pose:

Geno simply claps for the winner, an unreadable expression on his wooden face.

Kirby Hat:Quite obviously, Kirby will get Geno's hat.

Role in SSE:In the ruins of Dedede's castle, the odd badges on Luigi and Ness' trophies begin to glow, and suddenly, the two are alive again. Heads spinning, the two sit up and look around, then Ness notices the badge on Luigi's nose. He quickly yanks the badge off the green plumber's snoz, then looks at it in confusion. He then glances up to see Dedede's trophy lying there. Putting two and two together, Ness realizes that Dedede was the one who had saved them. Returning the act of kindness, Ness frees the self-proclaimed King of Dreamland, who hops to his feet before looking around in confusion. Realizing the two had freed him, Dedede smiles widely and pats them on the shoulders. He picks up his hammer and looks at his two new allies for a moment before dramatically pointing to the exit, only to realize he had no idea where to go.

Looking sheepish, he asks the two if they knew where to go. Ness facepalms while Luigi sighs, rubbing his head. It's then that the trio hears wooden footsteps from the doorway, then they turn their heads to see Geno standing there, arms crossed as the wind blows through his cape. The three, not knowing if he was friendly or not, brace themselves for a fight, only for Geno to motion for them to follow, saying that he knew where the other fighters were. They hesitantly follow the possessed doll, and Geno leads them to the part of Subspace where everyone was.

Snake's Codec

Snake:Colonel, I'm fighting a wooden man in blue clothes. Any ideas who he is?

Colonel:That's Geno, Snake. Geno is a being from beyond the stars, and a guardian of the Star Road.

Snake:Seriously? He looks like a life-sized toy to me.

Colonel:That's because he is. What you're seeing is only Geno's physical body, a doll that the true Geno possessed.

Snake:Okay. Now, that's creepy. You know, this guy's got more long range gear than me. I can barely get anywhere near him.

Colonel:That's his specialty, Snake. But remember, it's yours, too. Don't let him beat you at your own game.

Snake:Never crossed my mind.


Playstyle Section

Geno's playstyle is so obvious it's ridiculous. He's a pure long range fighter, having many, MANY projectiles to keep his opponents out of his face. When you're playing as Geno, you'll almost ALWAYS be retreating, constantly firing off attacks at your opponent to keep them at bay. And you'll have good reasons to do so.

You'll want to use Geno Whirl often to keep your opponents on their toes (you'll use it alot). While they're dodging around like their getting shot at (which will usually be the case, considering who you're playing as), feel free to charge your Geno Beam or get an item when you get the chance; or even go for a Geno Boost.

Always make sure to keep your distance from your enemies, because if they get in your face, well, that would be bad. Whenever the opponent gets too close for comfort, get on the defensive by taking to the air and using your aerials. Your opponent will have a very hard time approaching when you're throwing out projectiles like candy. The reverse holds true as well. When you're on the offensive and/or pressuring your opponent, try to stay on the ground. With Geno's great ground speed and range (and maybe a Geno Boost for good measure), there's little chance your opponent will get away unscathed. Make sure to use the Rainbow Pillars as well to keep your Geno Whirls on the field.

As for the Item Hat, you'll only want to use it when you're struggling. If you use it too early, you may find yourself lacking an item you could desperately need later. Again, make sure to use Geno Whirl to keep your opponents busy while you're getting the item you need. The ways you can use items vary. You can use the Green Shell as a third recovery option (over Geno Boost and the Puppet Master tether) by throwing it down and short hopping to bounce off of it, (though I'm not entirely sure you can do that or not) or you can use it as yet another projectile in your arsenal. If you're having trouble getting a K.O, whip out your Bob-Omb and hurl it at the opponents to send them flying, or you could use it to clear out a group. Only use the Super Mushroom when you're behind a stock, and only use the Starman in the most dire of situations.

Put simply, make sure to space your attacks properly, be smart with your items, and you'll show everyone just how awesome Geno can be.
 

MasterWarlord

Smash Champion
Joined
Aug 24, 2008
Messages
2,911
Pictures! Pictures of SPIDER MAN!


Player Character: Spider Man (2 Stock)
Stage: Scaffold Scuffle
Enemies: Donna (1 Stock), Anne (1 Stock), Venom (2 Stock)
Description: JJJ has sent out the paparazzi again! Defeat Venom before you're framed as his partner!


Thankfully Venom is unallied to JJJ's reporters, but he will go out of his way to attack you specifically on a regular basis - though he's not quite as blatant about it as Brawl Computers ganging up on you in a FFA. Donna and Anne have terrible AI for the most part, but they spam their picture taking moves extensively and specifically on you. If they get 5 pictures of you doing -anything-, you instantly lose. If they manage to get 2 pictures of you in the same frame as Venom without you attacking each other, you instantly lose. If one of the reporters manages to snatch a picture of you attacking the other reporter, you instantly lose. This makes it near impossible to eliminate them from the match unless Venom kills one of them for you/they stupidly suicide, in which case the other one will be fairly helpless. Being essentially entirely unable to attack them is quite an annoyance for Spiderman specifically, as many of his webbing attacks have a gigantic area of effect, and with the terrible AI of the reporters they'll likely get caught in some of them somewhere along the line.

A picture of you attacking the balloons on the stage is an instant loss, as well as attacking any attackable items (Including summoned characters). If they manage to get a picture of you using any form of gun item at all, you also lose. Last but certainly not least, one of the three Spider Man villians that can spawn on this stage will -always- spawn, and much like Venom, if the reporters get two pictures of the two of you in the same frame without you attacking each other, you lose. The other Spider Man villians aren't as mindless as Venom and have bigger ambitions than to attack the paparazzi, so don't get hopeful about them killing off Donna and Anne for you either.
 

Rychu

Thane of Smashville
Joined
Jul 5, 2010
Messages
817
3DS FC
1908-0105-4965
Ohoho, It counts because of spiders (HIPPO)
 

Chaos Swordsman

Smash Apprentice
Joined
Sep 15, 2008
Messages
174
Location
In your closet.

That's right. The Duck Hunt Dog has made his way to the Brawl in the form of an event! And trust me, you're going to hate this one.

This event will take place on Battlefield, where a long patch of 18-bit grass will appear in the background, and where the dog can be seen. The dog will start running about, sending waves of the infamous ducks flying onto the stage. Each duck will hang around for about 4 seconds before flying off, and there will be 3 waves of ducks with 3, 4, and 5 fowls respectively. Each duck only takes a single hit to bring down, much like the Fly Guys of Yoshi's Story, but if you miss just one duck, you lose. And instead of hearing the usual FAILURE, you'll hear the dog do that irritating laugh...for 10 freaking seconds. Try not to lose.
 

MarthTrinity

Smash Lord
Joined
Aug 9, 2007
Messages
1,954
Location
The Cosmos Beneath Rosalina's Skirt
<3~Surprise!~<3

Another Event Match? Joy! Oddly enough, this Event Match is pretty straight forward; it's just an all out Brawl!

Player Character: M.Trinity (3 Stock)
Stage: Pirate Ship
Enemies: XP-Tan (3 Stock), Hitagi Senjougahara (3 Stock), Yuzu (3 Stock)
Description: It's an all-out female fight out at sea! Defeat your opponents...with sexy results.

More or less, this is a straight up four-way battle. None of the opponents are on a team meaning they'll be perfectly willing to fight one another making your chances of winning this slightly improved over a 3-on-1 match. The downside to this event match? All of your attacks do half damage and half knockback! With nine CPU stock to remove from your female foes, you're gonna be in for a long fight!

But wait...this Event has to be animal related, doesn't it? Right...right. You don't think I'd forget that, do you? After all...I did pick Pirate Ship for a very specific reason...


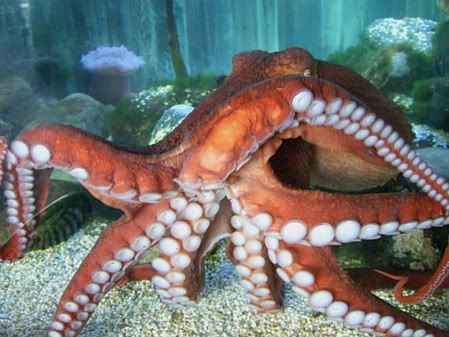
GIANT PACIFIC OCTOPUS

The Giant North Pacific Octopus is a massive octopus that can, obviously, be found in the North Pacific. Generally considered the largest of all octopus species, these guys are typically around 33lbs and have an arm span of 14 feet. That said, there have been reports of giant octopuses (yeah, I guess it -ISN'T- octopi) with arm spans of 30+ feet. Crazy huh? Anyway, as you may or may not know, an octopus has considerable gripping power due to its eight sucker coated arms. Each of these suction cups have the ability to actually taste whatever the octopus is grabbing. It's generally believed that an octopus' arms have a mind of their own in a sense, generally acting on their own behavior under the influence of only a few brief messages from the brain.

Oh and yeah. Tentacle raep.

-THESE- suckers (pun kind of intended) are going to be acting as your main KO method! Throughout the battle, large octopus tentacles will begin reaching out of the water in an attempt to snatch up the characters on board the ship! These tentacles can and will reach all the way up to the top of the mast in an attempt to grab you and the other players, so stay well out of their way! Do note that if you -DO- attack an arm, it will snatch you up almost immediately, potentially dooming yourself to a lost stock (and much worse/better). Basically what you want to do is knock your opponents into the octopuses' waiting arms and let them do the work!

If you'll notice...all of the characters in this Event Match are wearing ridiculously short skirts. Yeah, you get where I'm going with this. If you get grabbed, your character/your opponent will be brutally and graphically *** repeatedly as the octopus' arms *** the living *** out of your *** *** *** ***. After about ten seconds of this, the grabbed character lets out a moan and takes high upward knockback that KO's at around 50%. This whole process also will deal around 30% to the character meaning you'll have to damage the character some before the octopus will actually KO.

Do note however, the longer this Event goes on, the more octopuses show up! Wait too long and there will be a gauntlet of octopus arms you'll be forced to dodge; fortunately, you're smarter than the CPU is...right?

As an easter egg, each time a character is KO'd they return on the revival platform with their clothes torn slightly, getting progressively more torn the more they get KO'd again with nothing left after the last stock. However! This can be used as a clever strategy! When a character loses all three stock, their character will land back on the stage...however, they can still be grabbed by the tentacles allowing you to use your fallen foes as sexy meat shields! Defeat all three opponents and this Event Match is done!

Beating this Event Match on Hard will also net you a bonus CD! Octopus (Game & Watch Gallery 4)

This is also a perfect opportunity for taking Snapshots...

<3~Tentacles!~<3
 
D

Deleted member

Guest
Onward with the commenting, and I had my first bulwark with Viewtiful Joe. Not to say it's a bad set, but it felt almost superfluous to comment, as many of my problems were present in Ashley. Certainly, you have improved in the short time since making that moveset – you have a little more emphasis on flow by incorporating your “gimmick,” and you've definitely upped the quality of the organisation by losing the constant blinding text colour. And aside from those rather superficial elements, you definitely seem to have a greater ability to sell the character to the reader, which was a big flaw in Ashley – Viewtiful Joe's character is definitely put forward better here due to you paying more attention to how he's portrayed, alongside a small, but noticeable improvement in your writing style. What's persisting in being a nuisance with your sets is that there are still just lots of under-detailed inputs which seem like filler, and don't add to the set as a whole. They're no less out-of-character or unrealistic than in Ashley, but that's part of the problem – you need to be able to let go and be more imaginative with your move-sets to move forward. What illustrates this best is the mechanic or gimmick, which while incorporated greater into the play-style than Ashley's red, is still fundamentally underpowered and simplistic. Don't be afraid to go nuts with your ideas – the crazier the better.

Victini is a set which ably surmises what it means to be greater than the sums of its parts. You will not find a move-set with more indignantly in-smash inputs, yet constantly re-affirming that this is all flowing into a roundabout play-style... the question is, how roundabout can a flowchart truly be. This is where Victini fumbles – there's no fourth dimension to how his constant pestering attack patterns, self-endangering approaches or chancing assaults work together, other than them simply leading to the knock out. It's no real fault against you, as you obviously made the set you wanted to and it's pulled off remarkably well, but it leaves the set feeling less meaningful because it doesn't feel particularly fresh. By now, we've had many approach-focused play-styles – as such, much of what is done in Victini – and done very well, mind you – has been seen before. For example, Emolga shares a lot in common with Victini's being an irritant to the opponent, as well as having an aerial affinity; the major difference between the two, the enduring and electrical projectile turnaround on the opponent is certainly more a point to Emolga, though.

It's not bad at all, don't get me wrong. As I've already said, the play-style is put together well and stands up to scrutiny more than most due to the equally strong inputs, each fitting into a correctly proportioned flowchart that shows off just how good you are at planning these submissions out. Similarly, the organisation of the set is just gorgeous, as per usual, and the extras, while irrelevant to the move-set, are welcome as an enjoyable read due to how rare they are now. Your writing style too is a positive – it's hard to misunderstand, as you're so clear and concise, but you do dawdle a few too many times on a move's weaknesses: I see the point, and it's good characterisation, but it gets to be a little too much. It's really your typical Junahu post-MYM6 set: you put on a clinic in terms of showing just how creative you can be with such generic tools, but here you re-tread too much familiar ground without carving out enough unique traits for Victini to really stand on its own like Diglett or Emolga.

Onto Meowth, then, and from lordvaati, who I vaguely remember making Masked Man years ago. Despite all that time, I can't say that you've improved too much. It's not like I expected you to – you haven't even been part of the contest in all that time, but what was bad in Make Your Move 4 is even worse in this contest. What has to be said first is, practically all the moves in this move-set are generic. They are certainly fine for Meowth to perform in terms of being realistic, but considering you're using the Team Rocket Meowth, you could have played with the inputs to make them more fun – many are just bland scratches, punches and kicks. It's also kind of random – not so much for this Meowth, but even for Pokémon in general – to be pulling out items like bombs. The logic is also kind of lost when in Pay Day – the best move in the set by far – you're throwing coins... which are actually bottle caps... which are actually buckets.

I'm sorry if that all sounded mean-spirited, I didn't mean to be: what I recommend is reading some of the other sets present in the contest to get a taste for how to make a really good move-set. What you do have is a basic understand that play-style matters; build upon that and if you do choose to stay with us, build your move-sets around that.

Marona is somewhat promising as far as new users posting sets go – it has some redeeming factors, mostly in how it actually takes the character into account, basing the specials off of that first description of a squishy wizard. What doesn't work is the specials really not doing anything particularly to help Marona stand out, just being very much reactive to how the match is currently progressing. She can heal herself and others: she can influence items: she can shoot a projectile: she can boost herself up into the air... the real challenge for you in progressing is actually combining these by letting them flow together into a natural combination of inputs. It's for you to figure out how to let them flow like that, by being thoughtful about how the inputs are constructed, but you have at least the very basics down. As most newcomers sets make the mistake of doing, pretty much all of your moves after the specials are pretty much redundant. That's a pretty common mistake and one you can be forgiven for in your first set.

Coming to Geno, there's less improvement between here and Joe than was between that set and Ashley – you're really pushing out sets now, though, which is a reasonable explanation. This is your first set without a “gimmick” or special mechanic, and it honestly feels like your best because you're starting to make some weak links between the specials – you're starting to get how flow works! This is really significant. Though I have to say, when you set up the wall-bouncing in your side special, I was on the edge of my seat waiting for you to introduce walling moves... a las, that was far too complex for you to understand just a week into your Make Your Move career. As with Ashley and Joe, a lot of the other moves felt kind of pointless in comparison: many weren't bad, but still don't serve much of a point. But it's not like I can genuinely criticise your sets when you have barely been in the contest and show so much improvement: you definitely seem to have a bright future ahead of you.
 

Davidreamcatcha

Smash Ace
Joined
Feb 9, 2011
Messages
629
Adios, MAFIA!


Player Characters: Donna or Anne (2 Stocks)
Enemies: Bald Bull (Infinite Stocks), Jafar (Infinite Stocks), 3 Dev Adam Spider-Man
Description: All this time, JJJ was right! Take down "the Spider's Gang" and prove that Spider-Man's a menace to the city!
Music: Prince Ali (Remix)


For those of you who will likely be confused by this mini; It would benefit you if you clicked on "3 Dev Adam Spider-Man" up there, go on, just do it: It'll greatly increase your enjoyment of this mini. In addition: you may be asking yourself: 3 Dev Adam Spider-Man? When was there a set made for him? There hasn't been, he's a mini-boss that works alongside Jafar and Bald Bull. He doesn't attack much on his own, happy to have his minions fighting for him.

This fight takes place on a large grounded desert area roughly the size of Smashville, located somewhere in Turkey. 2 wooden teepees the size of Ganondorf can be seen in the background. A boat lays on the right side of the stage, which can be stood on by any of the fighters, providing something of a defensive platform as well as a good spot to set up pictures with.

Anyway, the win conditions here mirror the loss conditions in PICTURES! PICTURES OF SPIDER-MAN! The goal here is to take 6 pictures of 3 Dev Adam Spider-Man; Jafar and Bald Bull attempting to hinder you all the while. While you CAN kill Jafar and Bald Bull, the one you KOed will respawn 30 seconds later. Your goal can be made easier if you are to KO them, as Spider-Man has several attacks that benefit from Bald Bull or Jafar being around. Of the two, you'll want to bring down Jafar first. His smoke obscures Spider-Man as well as him. You're unable to take pictures of Jafar's Red Smoke, meaning Turkish Spider-Man is easily able to hide from inside his smoke.

Oh, before we get into his attacks, for those of you who are wondering: Spider-Man is roughly the size of Snake and moves around at Fox's speed, never wanting to stand still. Upon beating this event match, he is unlocked as a Fiend, Jafar and Bald Bull replaced by two greasy and hairy Turkish men. The Turkish men each have 25%, and clone Jafar and Bald Bull's sets. Spider-Man himself has 150% stamina, and upon his death, the Turkish Men disappear as well.

3 DEV ADAM SPIDER-MAN'S ATTACKS​


Guinea Pigs

I feel this attack must be stressed.

Guinea Pigs were Spider-Man's main method for torturing prisoners in 3 Dev Adam, as a boss, he uses them as a projectile weapon! Spidey pulls out a small Guinea Pig and angrily hurls it forward in an arc, the Guinea Pig biting at the air rapidly as it goes. Upon making contact with the foe, the Guinea Pig will begin gnawing on them for 4% damage a second. The Guinea Pig will lumber towards the foe at Bowser's walking speed if it lands on the ground before gnawing on them. In addition, if anyone is to get hit by the Guinea Pig, they will start to suffer an increase in lag on both ends, the effect stacking if multiple Guinea Pigs are on the foe. Guinea Pigs have 18% stamina each, and can be KOed on the ground or while they're on the character in a similar manner to Pikmin.

Teleport

Spider-Man chuckles evilly, teleporting to a different part of the stage. This was added in when I realized I didn't actually write a teleporting move. Derp.

Clone Barrage
In the final fight of 3 Dev Adam, Spider-Man suddenly gains the ability to clone himself as well. Obviously, he's going to put that into use here. Spider-Man disappears with a laugh, having the same startup animation as Teleportation. He reappears half a second later with a clone of himself. The cloned Spidey will stick around, performing all the attacks you would expect (With the exception of this move.) The only way to get rid of him? Upon taking a picture of the Cloned Spider-Man, he will turn to dust and disappear. This is excellent for mindgames, as a good part of the time, the real Spidey will reappear in Jafar's Smoke, where he'll be able to throw guinea pigs without interruption. But is it the real Spider-Man? The fake Spider-Man can reappear in the smoke as well, creating even more potential for mindgames. The only way to defeat this is by taking a photo...but it's not like they'll let you.

Teepee Building
Spider-Man whistles, causing Bald Bull to stop what he's doing and make his way into the background, grabbing some wood lying about in the background. Bald Bull lingers in the background for 3 seconds building a wooden Teepee, identical to the ones in the background. Bald Bull exits the background with mild end lag. Spider-Man chuckles before teleporting into one of the three Teepees. From here, Spider-Man can do one of two things: use his clone attack, teleport back onto the playing field or teleport into one of the other teepees. Like Jafar's Smoke, he can mindgame this with his clones.

If you walk in front of the Teepee Spider-Man is in, Spider-Man will leap out of it and back to the foreground, breaking the Tepee in the process. Unless you roll or somehow dodge this, Spider-Man will grab your character, slashing a knife into their back. This deals 20% damage with high knockback. If Spidey successfully lands a kill with this, he will pull out his knife and cry "ADIOS, MAFIA!" This can be one of Spider-Man's riskiest attacks, if he misses the grab, he has a long period of end lag. More then enough time to take a picture or two. ...Of course, Jafar can always throw down his vial of smoke in front of Bald Bull's to attempt to negate it. Obviously, Spider-Man can't use this attack if Bald Bull is not around.

Propeller Blast
Spider-Man motions to the boat lingering at the right side of the screen, causing Jafar to immediately stop what he's doing and run over to the boat. After turning on the Propeller, knocking anything on top of the boat off in the process, Jafar runs across the screen, attempting to drag the boat through the desert sand. Jafar is not very fast here, but he's certainly faster then when he is "walking smoothly, leaning over slightly in his haste." Getting hit with this move is essentially asking to die, as the propeller deals a good 13% damage and pitfalls you, leaving plenty of time for Spidey and his gang to set up. Likewise, it will smash any sort of cameras if you have them lying around. As soon as Jafar is finished running to the left side of the screen, he leaves the boat there. Of course, the next time this move is used, he'll start at the left side and head to the right. As you might expect, he can't use this without Jafar around.
 
D

Deleted member

Guest
Apologies, but my big user rankings overhaul thing-a-ma-jig will have to wait until tomorrow. Not that anyone was anxious about that, but just to confirm it is happening.
 

Junahu

Smash Ace
Joined
Nov 15, 2005
Messages
899
Location
Shropshire Slasher
Moar Minis for all

Event Name: "Test of Sight"
Blurb: "One of these girls is not like the others. Eliminate them"

Event Stage: SmashVille
Event Music: Tanuko's Destiny


Character's you can use in this Event;
In Co-op, Player 2 will be a carbon copy of the character that Player 1 chooses

  1. Peach
  2. Zelda
  3. Samus
  4. Zero Suit Samus
  5. Donna Levmen
  6. Viola
  7. Cutesy Beau
  8. Clefable
  9. Cloud of Darkness
  10. Anne N Elmtod
  11. Arche
  12. Doppelori
  13. Nurse Joy
  14. The Item Tree
  15. Etna
  16. Blaze the Cat
  17. Penny Gadget
  18. XP Tan
  19. Blaze Fielding (Mona & Lisa in Co-op event mode)
  20. Yoko Belnades
  21. Cirno
Event Rules:
You begin this event all alone. However, soon a new challenger appears, a carbon copy of your character, whoever she is (on Normal and Hard difficulties, two new players appear, both of whom are identical to your character). The new player(s) falls down to the stage, and innocently begins strolling back and forth across it. No one in this event will fight back, but they will do their best to avoid getting hurt.
Very soon, another new character appears; that cute, big bollocked Tanooki you see in the image up top. He's a mischievous sort, and instantly transforms into yet another carbon copy of your own character, before mimmicking the other pacifist players.
The aim of this event then, is to KO the Tanooki, but NOT any other player. This is easier said than done, as it can be easy to lose track of who your target really is. KOing the wrong target results in FAILURE.
You can potentially save yourself a whole lot of hassle by immediately grabbing the Tanooki player, then throwing them up and onto SmashVille's moving platform. Then you can jump up there yourself and beat the snot of them without the others getting in your way.

Event Items:
Assist Trophy (Nintendog, Devil, Tom Nook), Pokeball (Togepi using Night Shade, Manaphy), Smoke Ball, Smash Ball.

The other players in this match WILL use items if they can, though they refuse to throw them at anyone else, perferring instead to just cast them down at their own feet. Something to seriously watch out for, is Manaphy. If Manaphy swaps the Tanooki with someone else, you need to KO the Tanooki's new body. And of course, once they switch back, you go back to KOing the original body.
Also be aware that the Tanooki WILL take full advantage of any moment in the match where your vision is impaired, using the time to dash right up to the nearest other player, in order to confuse you


Event Name: Hamsterz! Dood!
Blurb: "Pursue the art of the Prinnysplosion dood!"

Event Stage: Battlefield
Event Music: The LAST BATTLE [Toy Version] (Before losing first stock)
The LAST BATTLE!
(After losing first stock)


Character's you can use in this Event;


  1. Prinny

Event Rules:
It's 500 Prinnies Vs 2 Hamsterz (1 on Easy, and 4 if playing Co-op), If you die as Prinny, another one simply spawns right in to replace it. And with 500 lives, who could possibly mess this one up?
Unfortunately, it seems as though these Hamsters are the strongest beings in all the cosmos. They are blindingly fast, absolutely tiny, have an array of quick slashing attacks that recall the feats of one "Meta-Knight". And, oh yeah, ANY attack whatsoever from a Hamster will OHKO a Prinny.
They're also pretty heavy buggers, and it pays to bear in mind that Prinnies do not have very many ways to KO. Beyond pathetic A button slashes and Down air hip drops, the only thing Prinnies can do that causes knockback, is Explode (by pressing B). And, naturally, Hamsterz will not just walk blindly into Explosion after explosion until they die. In fact, they tend to specifically take advantage of the fact that their attacks have a greater range than your explosions. So you need to either get in close yourself, or avoid the Hamster for so long that they decide to draw in closer to kill you.


Event Items:
Baseball bat, Smash Ball

Fair warning to you, Prinnies cannot use items. So all those Baseball bats? They're just there to give the Hamsterz a throwing projectile to KO you with. They can destroy Smash Balls though, so absolutely go after every Smash Ball you see. Using a Final Smash turns that Prinny into Hero Prinny, who has far more durability, and can even survive multiple attacks from a Hamster.
Incidentally, Hamsterz do have a Final Smash too; it's a simple cinematic cutscene of thousands of hamsters trampling the Prinny. It's an unavoidable KO basically.

 
D

Deleted member

Guest
So remember what I said in my last post about the thing-a-ma-jig? That won't be happening for a while. In case you didn't know, I'm going to be implementing a rating system, like the one I pioneered in Make Your Move 8, within the user rankings, and also on its own [it won't affect points, don't worry]. It's a sizeable, but manageable project... however, as it stands, we're still too early in the contest to take advantage of this kind of rating system. Once we get further into the contest and I feel we have enough movesets - keeping in mind I don't rate newcomers until they're good enough - I'll do it. Until then, look at an example of what I'm doing.

Multi-coloured stars? Have you gone insane, Smady?!
 

BKupa666

Barnacled Boss
Moderator
Joined
Aug 12, 2008
Messages
7,788
Location
Toxic Tower
GARBADOR
I actually remember being suggested this guy for a set, due to my inexperience with the franchise. He looked pretty cool at the time, so I was glad to see your interpretation of the character. I have to say, I am quite pleased by this guy; coming from the guy who wrote Potato Head, I adore the interaction between his grab and his head, as he sucks his head (no pun intended) across the stage to make up for poor mobility. While I'm questioning the originality of just trapping the opponent, attacking them and launching them while they're helpless, I am fond of how Garbador sets himself apart by being able to split into pieces and hide himself in the trash.

As you say in the (nicely-written) playstyle, he is able to constantly keep opponents on toes; in my opinion, a lot of the set's originality comes from Garbador's ability to play offensively after setting up (a bit Jr. esque, but not too much so), rather than simply waiting for an opponent to slip up and get bogged down. Although I believe Jeice to be a better overall set (insert quote apologizing about comparing sets), Garbador is a much, much better start to MYMX than Muk was last contest. Nice job (and I'm glad you chose to keep matchups alive), hope your future works are as entertaining a read as this guy.

VICTINI
As with Garbador, I had actually heard of Victini before you posted his set, this time in the SSB4 thread, where he was being discussed as the next flavor-of-the-month to become playable. I can say right off the bat, as I'm reading through the set, I am pleased to see my statement that you were "framed" for creating pretty sets has more supporting evidence. I'm lukewarm about splitting the attacks into categories based on their purpose; while one could argue it allows for a clearer vision of Victini's playstyle, it also arguably breaks up the flow of a set divided by simple inputs. In terms of balance, I remember cringing a bit throughout the set. Victini has quite an array of devastating attacks for a lightweight, and certainly has no shortage of damage-racking or spacing moves either (nice subliminal way to point out the limited move genres we currently abuse, by the way).

While you seem to imply his floatiness and light weight levels his many strengths out, I find it rather irrelevant to balance when plenty of good characters (that one knight guy with the mask?) share these traits. Don't think I dislike the set at all, though; balance is low on my list of priorities with which to judge a set, as it reflects much less planning and creativity and other aspects of the set from the author (speaking of creativity, the AGD is the quintessential, simple mechanic I've been waiting for for a while now). As opposed to Smady's Pokemon openers from MYM9 and X, I find Diglett to be the superior set, but Victini is far and away in the upper tier of what we've received so far, and I anticipate he will remain there for some time to come.
 

Junahu

Smash Ace
Joined
Nov 15, 2005
Messages
899
Location
Shropshire Slasher
Garbodor:
You certainly, definitely, understand what Garbodor is and what elements of his character you needed to bring into Brawl. From the start, you show a great deal of comprehension of this Pokemon's quirks, and the symbolism behind his foul form. So let it not be said that I don't appreciate this moveset the way it is. Out of the movesets I have currently read in MYMX, this is my current favourite.

That said, I will have to rattle off a list of suggestions about how to better drive the set along;
  1. Critically missing, is a "Swallow the opponent" move, on Neutral-B. Just by looking at the Pokemon, I can tell it's supposed to have a vorocious appetite.
  2. The move you do have on Neutral-B... there doesn't really seem to be any reasoning behind having it as a move at all. It really seems to be something of a passive mechanic, "when you stand still, a cloud of poisonous smog coalates around Garbodor". I simply don't understand why it needs to be manually activated, other than for the inconvenience of having to press a button to make it happen. Also, Back-air somehow manages to do a better job than Neutral special.
  3. The ideas behind trash condenser are great, but I think it would be more tactile, if Garbodor vomitted up a random article of trash (broken bottle, fishbones etc) rather than having it create a triangle of miscellaneous goop from the piping of its left arm
  4. The trash left behind during Un-stitch is far too tall. Ideally, it should just be a sandwich thin layer of the stuff, with any traps from Side-special simply becoming invisible when 'covered'. I'm also against not letting the foe jump. At most, it should reduce how high characters can jump with their first jumps. A Layer of trash should also be retrievable by running over its surface repeatedly
  5. Garbodor's crouch should be a relatively low one, with his trashy gut oozing outwards either side of him. This could double as a makeshift pile of trash, similar to that laid out by Un-Sitch.
  6. If you want to have an input which performs the grab in midair, may I suggest, perhaps, the Z-air?


Things I liked;
  1. I really liked how you allude to the three "tubes" on his right hand being syringes.
  2. Garbodor is one of the few Pokemon that can legitimately use Toxic Spikes in a moveset without looking silly.
  3. The idea of littering the stage, "litterally" (:awesome:) with your own body, is entirely awesome, and perfectly suited for the Landfill Pokemon.
  4. Your writing continues to improve in leaps and bounds. Well, beyond the occasional awkward repetition ("As is tradition with" for example) and a few sentences that go on for one clause too many. Either my ability to read is getting better, or Garbodor is many many times easier to read than something like, Weezing.
  5. I'm surprised you resisted the urge to have Garbodor dive under the surface of his trash pile in order to travel incognito, or launch a surprise attack from the trash(Like how every MYM set treats the move DIVE). And yeah, I liked the fact you DIDN'T do this.


Bowser; Dry edition:
While I would have to agree with the common critique that Dry Bowser doesn't feel like Bowser, I'm still more than receptive of what the set aims to do. Seeing the great king resort to outlandish ideas such as comboing, camping, and all manner of lightfaggery, does not put me off nearly as much as it otherwise should.
In fact, I think there is a creepy, horrifying air about the whole thing. It's the same brand of horror that would be felt by fighting against Longchu. We're used to seeing Bowser fight and act a particular way, which makes his actions in this set all the more terrifying to behold.

However, as far as I'm concerned, Dry Bowser is meant to represent the core elements of Bowser, stripped of flesh and context. He should ostensibly play the same, regardless of whether he's a skeleton or not.
Also, Dry enemies are supposed to be invulnerable. That should translate to Dry Bowser being more durable than his fleshy counterpart, not less.


Still, that's not to say I don't like this set. Your reframing the Koopa king, as an intelligent but vulnerable creature, is exceptionally unique.
And your organisation style, remains a pleasant, functional consistancy that is impossible to criticise.
 
D

Deleted member

Guest
GARBADOR
I actually remember being suggested this guy for a set, due to my inexperience with the franchise. He looked pretty cool at the time, so I was glad to see your interpretation of the character. I have to say, I am quite pleased by this guy; coming from the guy who wrote Potato Head, I adore the interaction between his grab and his head, as he sucks his head (no pun intended) across the stage to make up for poor mobility. While I'm questioning the originality of just trapping the opponent, attacking them and launching them while they're helpless, I am fond of how Garbador sets himself apart by being able to split into pieces and hide himself in the trash.

As you say in the (nicely-written) playstyle, he is able to constantly keep opponents on toes; in my opinion, a lot of the set's originality comes from Garbador's ability to play offensively after setting up (a bit Jr. esque, but not too much so), rather than simply waiting for an opponent to slip up and get bogged down. Although I believe Jeice to be a better overall set (insert quote apologizing about comparing sets), Garbador is a much, much better start to MYMX than Muk was last contest. Nice job (and I'm glad you chose to keep matchups alive), hope your future works are as entertaining a read as this guy.
Thanks for the comment, Kupa. I was actually worried about just how similar the set would be to Potato Head after thinking of the separation idea - I figured that the trash would be sufficient to balance things out. Even if it were sub-conscious, though, I definitely took inspiration from sets like Potato Head and Skeleton.

Garbodor:
You certainly, definitely, understand what Garbodor is and what elements of his character you needed to bring into Brawl. From the start, you show a great deal of comprehension of this Pokemon's quirks, and the symbolism behind his foul form. So let it not be said that I don't appreciate this moveset the way it is. Out of the movesets I have currently read in MYMX, this is my current favourite.

That said, I will have to rattle off a list of suggestions about how to better drive the set along;
  1. Critically missing, is a "Swallow the opponent" move, on Neutral-B. Just by looking at the Pokemon, I can tell it's supposed to have a vorocious appetite.
  2. The move you do have on Neutral-B... there doesn't really seem to be any reasoning behind having it as a move at all. It really seems to be something of a passive mechanic, "when you stand still, a cloud of poisonous smog coalates around Garbodor". I simply don't understand why it needs to be manually activated, other than for the inconvenience of having to press a button to make it happen. Also, Back-air somehow manages to do a better job than Neutral special.
  3. The ideas behind trash condenser are great, but I think it would be more tactile, if Garbodor vomitted up a random article of trash (broken bottle, fishbones etc) rather than having it create a triangle of miscellaneous goop from the piping of its left arm
  4. The trash left behind during Un-stitch is far too tall. Ideally, it should just be a sandwich thin layer of the stuff, with any traps from Side-special simply becoming invisible when 'covered'. I'm also against not letting the foe jump. At most, it should reduce how high characters can jump with their first jumps. A Layer of trash should also be retrievable by running over its surface repeatedly
  5. Garbodor's crouch should be a relatively low one, with his trashy gut oozing outwards either side of him. This could double as a makeshift pile of trash, similar to that laid out by Un-Sitch.
  6. If you want to have an input which performs the grab in midair, may I suggest, perhaps, the Z-air?


Things I liked;
  1. I really liked how you allude to the three "tubes" on his right hand being syringes.
  2. Garbodor is one of the few Pokemon that can legitimately use Toxic Spikes in a moveset without looking silly.
  3. The idea of littering the stage, "litterally" (:awesome:) with your own body, is entirely awesome, and perfectly suited for the Landfill Pokemon.
  4. Your writing continues to improve in leaps and bounds. Well, beyond the occasional awkward repetition ("As is tradition with" for example) and a few sentences that go on for one clause too many. Either my ability to read is getting better, or Garbodor is many many times easier to read than something like, Weezing.
  5. I'm surprised you resisted the urge to have Garbodor dive under the surface of his trash pile in order to travel incognito, or launch a surprise attack from the trash(Like how every MYM set treats the move DIVE). And yeah, I liked the fact you DIDN'T do this.
Thanks for the comment, Junahu. Oh, why do you have to list things like that? It makes it so tempting to make a list of replies in identical fashion. :bee:

Actually, the neutral special is significant. The description says that Garbodor breathes a particularly foul attack out of his mouth once he pulls foes in with his left arm. The move also works mostly because of its lingering effects, especially when you can split up your body parts and do fun things like attach the loose arm to an opponent. The reason I made the trash so tall is to balance out Garbodor's bad movement when setting it up, though perhaps it is too much of a compromise. And yeah, the neutral aerial is pretty much for convenience as an input, far from my best work.

I'm glad you liked my improvement in writing - this was actually written in about four hours marathon-style. Given I actually had good ideas, but that was less time than I spent on Jack The Ripper, so I'm glad it seems to be getting a better reception than Muk did.
 

Chaos Swordsman

Smash Apprentice
Joined
Sep 15, 2008
Messages
174
Location
In your closet.
C-can't stand it! The hunger-the HUNGER! Belome has joined the Brawl!


Belome is a boss from Super Mario RPG, and one of the lesser known ones at that. There's not much to say about this big ol'...whatever the heck he is. Belome has an unending appetite nearly equal to Kirby's; that gigantic tongue of his isn't just for show. Belome also has a plethora of unique abilities, from turning his enemies into scarecrows to making clones of them! Not to mention he has quite a few different attacks, spells, and even items from his debut game that he never had before. Be careful when fighting Belome (and try not to look delicious).

Stats

As you can very clearly tell just by looking at him, Belome is a heavyweight through and through. Though he's a bit different from most.

Size:10/10. Believe it or not, Belome's actually a bit bigger than Bowser, and has the weight to match.

Walk Speed:2/10. Belome is by no stretch of the imagination fast.

Run Speed:2/10. Again, Belome is incredibly slow, equal to Ganondorf in terms of speed.

Traction:5/10. Oddly, despite not being that fast, Belome has a tough time of it turning around.

Aerial Movement:1/10. Due to his fa-err, stage presence, Belome has the aerial capability of a bag of bricks, though his fall speed is a bit slower than one would expect.

Jump:3/10. In case I haven't made it abundantly clear by now:Belome. Is. Not. Agile.

Specials

Neutral B:Cloning Gulp

As previously stated, Belome has the power to make clones of his enemies. How does he do this? Simple:He EATS them. Using this move will cause Belome to stretch his tongue in front of him the distance of a SBB. Anyone caught by this will be pulled into Belome's stomach. This doesn't do any damage, but interestingly, a text bubble will appear above his head resembling the ones from SMRPG, which will have different sentences depending on who eats that will describe how they taste. Anyway, after he's done speaking, Belome will spit the opponent out. Then, in a puff of white smoke from his rear (I kid you not), a clone of the eaten character will appear. This clone will be a Level 7 Cpu with 80 HP and will attack Belome's enemies, and Belome can create two of these clones at any given time. If you use this input when there are already two clones on the field, Belome will stick his tongue out again, and the clones will drop whatever they're doing and come over to Belome to attack anyone near him. Another thing is that by eating these clones, Belome will be able to heal them by 20% when they come out of...uh, don't think about it too hard.

Side B:S'crow Funk

Using this move will cause Belome to release a long, triangular spray of multicolored bits that reaches the distance of a Battlefield platform. Anyone caught in this spray will be transformed into a simple scarecrow their main color, rooted to where they stand and unable to move from their spot. The effect will last for 10 seconds before the opponent returns to normal. During this time, the opponent can only sheild or use their specials, except for the ones that move them. If this hits an opponent in midair, they can still use a recovery move, so don't think this is an automatic death sentence for opponents off the stage. You wouldn't want to use this move in the air anyway with Belome's lack of aerial grace.

Up B:Explosive Launch

This chargeable move has three stages, Blast, Fire Bomb, and Big Bang. With Blast, Belome will ignite a series of 5 small, yellow explosions where he stands that send him flying up one Ganondorf. The explosions take place in the course of a second, and each explosion deals 8% damage with medium knockback. Charging this move for a second will cause Belome to drop a black orb with a red fire in it, which explodes an instant later to half the size of a Supernova Bomb explosion, which deals 14% damage to anyone caught in it, but it doesn't damage Belome himself. This will instead send Belome flying up the distance of Sonic's spring, relevant to his size, of course. The final stage is achieved by holding the B button down for 2.5 seconds, which will cause a gigantic red explosion a bit bigger than that of a Supernova Bomb's. This will deal a whopping 20% to whoever it hits, but it will also deal Belome 10% damage as it sends him flying up 2/3 the distance of the Bridge of Eldin. This is best used as a "GTFO" move when things get too crowded, but it leaves Belome in free-fall, so be wary.

Down B:Sleep Spells.

Yes, you read that right. Spells, plural. This is also a chargeable move. Depending on how long you charge the move for, Belome will perform one of three different attacks (only one of which does damage). The first is Sleep Sauce, which, oddly, isn't actually a sauce. Pressing the B button will cause Belome to hock a pale green bubble the distance of two Battlefield platforms ahead of him with relative ending lag. Anyone hit by this will be put to sleep with the normal difficulty it takes to wake up. The second spell is Light Beam, which is also weird, because it's not an actual beam. Holding the button for a second and releasing it will cause Belome to release a giant bubble of light nearly the size of Giga Bowser. (Don't ask how. This is Smash Bros, after all) This bubble will travel a third of FD before popping. Anyone caught in it before that or during said popping will be put to sleep, with 1.5x the difficulty to wake up. The final spell is Aurora Flash, which is used by holding the button for two seconds. When the charging is finished, beams of blue light will come down from the top barrier within a Battlefield platform around either side of Belome, and anyone caught in the area will be dealt 13% damage and be put to sleep at double the wake up difficulty (with no knockback, obviously).

Facts about Specials:As I've typed, Belome will have something different to say about every character when he eats them. Let's take a look, shall we?

Quick note:the colors each character's text will be in is the color they'll become when they're turned into a scarecrow.

Mario:Ack! Sour!
Luigi:Yum! Tastes like jelly!
Peach:Mmm, tastes peachy...
Bowser:YUCK! How repulsive!
DK:Ooh, banana flavored.
Diddy:I love peanut butter!
Yoshi:Eggs are a great breakfast food!
Wario:Eww, I hate garlic.
Link:Ooh, nice and chewy.
Zelda:YES! THIS is YUMMY!
Ganondorf:Yeesh, this is so bitter...
Toon Link:Huh, seafood's not that bad.
Samus:Bitter, but not bad...
Pit:Tastes heavenly!
Ice Climbers:ACK! BRAIN FREEZE!
R.O.B:Ugh, this is so bland...
Kirby:Marshmallow-y goodness!
Meta Knight:Yummy! Tastes like blueberries!
Dedede:Mmm, tastes like chicken! (You had to see that coming)
Olimar:Who doesn't love bite-sized food?
Fox:Eh, fox stew's not that good.
Falco:Could use some gravy.
Wolf:Mmm! The other red meat!
Captain Falcon:Ooh, rock candy!
Pikachu:Yowch! Shock candy!
Squirtle:A hard outer layer, but a nice and gummy center!
Ivysaur:Eww! I hate veggies!
Charizard:Wow, that's some spicy stuff!
Lucario:A healthy dose of iron!
Jigglypuff:I love gum!
Marth:This is good for foreign food.
Ike:Hmm, needs more sugar.
Ness:Yum, brain food!
Lucas:Urgh, this is all stringy.
Game and Watch:BLECH! Tastes like paper-mache`!
Snake:Now, there's some explosive taste!
Sonic:Gotta love fast food!

Smashes

Obviously, Belome's smashes are going to be pretty powerful, but laggy, too.

F-Smash:Body Slam

As the name implies, Belome will lunge forward in a tackle the distance of Dedede's dash attack (with the same ending lag), dealing 15% to 23% with high knockback.

U-Smash:Mega Drain

The name is rather misleading, as this move doesn't actually drain damage to heal Belome. Belome will fire up a pink beam 1/3 the length of BoE, which waves back back and forth for a second, half the distance of FD, and deals 14% to 22% damage to anyone it hits before disappearing. The attack has basically no lag, but Belome is helpless during the animation, so be careful.

D-Smash:Ice Rocks

Two clouds of icy mist will appear on either side and slightly above Belome, then large boulders of ice the size of Party Balls will drop down from both of them, dealing 14% to 22% damage with high knockback. Powerful, but obviously rather laggy.

Normal Attacks

As stated before, Belome has learned many different attacks and, more importantly, spells. He's going to be different from your average heavyweight.

Jab:Tongue Smack.

Belome will swing his giant tongue back and forth once, dealing two hits of 5% damage each that reaches 1.3x the distance of a SBB. This has ridiculous range for a jab, but it's pretty slow.

F-Tilt:Crystal

Belome will spit out three chunks of ice the size of Charizard's boulders that cross the the distance of 1.5 Battlefield platforms, each dealing 5% damage. Great range, but bad lag. You'll want to use this to keep the opponent at a safe distance.

U-Tilt:Flame Wall

With this move, Belome will unleash a wall of fire straight upwards that goes his own height and spreads to 1.3 Battlefield platforms and deals 10% damage. Best used to stop approaches from above.

D-Tilt:Boulder

This time, it's not my fault the name is uncreative. Belome will pluck out a boulder the size of Charizard's, then shove it forward with his tongue. The boulder will roll at the the speed of a moving barrel and will 10% damage to anyone it hits, even when it's falling off a ledge. Oh, and if it hits a wall, it harmlessly smashes apart.

Get Up Attack:Diamond Saw

As Belome gets to his feet, two icy blue buzz saws of energy will spin around him, dealing 8% damage each.

Ledge Attack (weak):Trip Tackle

As I said before, Belome doesn't exactly have much grace. While he's pulling himself up, Belome will trip forward, dealing 5% damage with decent knockback before he stands back up.

Ledge Attack (strong):Tongue Swipe

Simple enough. Belome will swing his tongue forward, dealing 8% damage and above average knockback. (That's right. His tongue can do more damage than he can. Sad, isn't it?)

Aerials

This is where Belome's attacks get interesting, in that they're not actual attacks, but area of effect spells. They all cover the same area of double Belome's own size, last for 7 seconds, and you can only have one of each at any given time on the stage.

N-Air:Static-E!

Belome's body will crackle with electricity before releasing a blue cloud of static. Anyone caught in this other than Belome himself will be dealt massive hitstun every other second, but no damage.

F-Air:Blizzard

With this move, Belome will create a white blizzard that will constantly blow in the direction Belome was facing when he used the move, meaning it will blow away anyone caught in it (but not Belome) with a bit more force than Wispy Woods, but does no damage.

B-Air:poison Gas

Belome will release a cloud of green gas from his rear (seriously) that deals gradual, yet rapid damage to anyone within it, again, excluding Belome. This poison effect will last for 3 seconds after leaving the gas cloud.

U-Air:Endobubble

This is a bit different from Belome's other aerials, as this is a giant, pitch-black bubble, rather than a cloud. Anyone caught in this will have their attack power halved for 5 seconds after leaving it, once more, excluding Belome.

D-Air:Sandstorm

With this move, a cloud of sand (duh) will form around Belome. This move does no damage, but anyone in it has their speed and jump halved until they get out; except for...oh, you know already.

Grab and Throws​

Grab:Tongue Wrap

Belome's throws are just like his attacks: strong, laggy, and weird.

Unlike Yoshi's grab, Belome will simply curl his tongue in front of himself. Good range, given his size, but laggy all the same.

Pummel:OMNOMNOM

Belome pulls the opponent and chews on them, dealing 5% each time. Pretty strong, but also pretty slow.

F-Throw:Flick of the Tongue.

Belome whips his tongue back before flicking it forward, tossing the opponent forward, dealing 10% damage.

B-Throw:p-tooie!

Belome turns around and spits the opponent away, dealing 11% damage.

U-Throw:Hock-a-Loogie.

Belome will lean back and spit the opponent straight up, dealing 11% damage.

D-Throw:Tongue Lashing

Belome spits his enemy to the ground before slamming his tongue into them

Final Smash

Beware the Flood!

When Belome activates the Smash Ball, he'll jump up to the top barrier, then water will flood 3/4 of the stage for 10 seconds and three pipes will be on the surface of the water. The water will be constantly flowing to the right, and will carry away anyone who doesn't get onto a pipe in time. Afterwards, the water (and pipes) will recede, and Belome will drop back onto where he was standing.

Extras

Belome's not exactly stylish, but he's still rather unique.

Idle Pose 1:Belome will scratch himself with a claw.

Idle Pose2:Belome will cross all four eyes for a moment before looking forward again.

Up Taunt:Belome will jump up and down twice, shaking the ground.

Side Taunt:Belome will give a raspberry.

Down Taunt:Belome's stomach will growl, then he'll hold it and whine.

Symbol:A tongue

Entrance:Belome will jump onto the stage from off screen, shaking the ground.

Victory Pose 1:This Belome's only victory pose. (i.e. I couldn't think of anything else.) The big guy will begin chasing the losers of the match around in an attempt to devour them.

Victory Theme:The tune that plays when you win a battle in SMRPG.

Loss Pose:Belome will be sitting on his rump, holding his rumbling stomach.

Kirby Hat:Kirby will gain a hat resembling the top of Belome's head, including his two top eyes. Something to note is that he can only make one clone.

Role in SSE:N/A.

Snake's Codec

Snake:Colonel, what the heck is this giant, four-eyed dog thing?

Colonel:That's Belome, Snake. Belome's specialty is in putting his enemies to sleep, and even cloning them.

Snake:Okay, how exactly does he do that?

Colonel:Belome has three different spells that can knock a person out instantly.

Snake:I meant the cloning thing.

Colonel:Uhh, well, see that big tongue of his?

Snake:It's kind of hard to miss. What of it?

Colonel:Use your imagination, Snake.

Snake:...Oh, jeez.

Playstyle Section​

As you can probably tell, Belome is rather reliant on his clones. But instead of his clones supporting him, it's pretty much the other way around. Since Belome is about as speedy as a stone, he'll have to use his clones to harass the opponents while Belome himself will use his projectiles, area and status affecting moves, and his killing power to keep them on their toes and earn the kills.

You'll want to be careful about where you place your aerials, as they can affect your clones just as well as your enemies. This also applies to your actual attacks, as you and your clones can hit each other. Your clones will focus on your enemies, but be careful anyway.

There are different ways you can use your aerials. The neutral air is best used in tangent with your powerful moves to K.O them while they're stunned. The forward air is best used as a gimping tool. The back air is pretty much your only way to rack damage short of the clones, which aren't entirely reliable. The Up air is a move best used defensively, since it DOES halve your opponents attack power, while the down air is great for simply slowing them down. Oh, yeah, and you can combine all the different clouds to make a super cloud to just straight up screw your opponents over..

Most of the time, you're going to be earning the K.Os with your powerful and long range attacks while your clones will rack up the damage. But make sure to keep your clones close by so your opponent doesn't overwhelm you with faster attacks.

In conclusion, control the stage with your aerials, use your clones wisely, and get the kills.
 

MarthTrinity

Smash Lord
Joined
Aug 9, 2007
Messages
1,954
Location
The Cosmos Beneath Rosalina's Skirt
Belome

Okay, so I'm gonna try and be as non-bias as possible considering I know how I would've done Belome personally (and if you'd like to see please click HERE) but I'm going to comment this with an open mind.

Well, the Specials really aren't that hard to comment considering it's kinda obvious I like them (they're very similar to the ones I had in mind after all) and I do like what you did with the chargeable Up Special. I apologize for not getting back to your PM about Up Special ideas but not only do I see that you did just fine without my input...but my Up Special wasn't so much a recovery as it was another move and my Belome's recovery was more built into his clones which would be kinda confusing to explain. But yeah, you did just fine without my advice so blarg. I -AM- a little bit iffy about Sleepy Sauce/Light Beam/Aurora Flash all being crammed into one Special (giving him two chargeable Specials)...I could've easily seen Aurora Flash being a Smash attack with the way it is which would've added some meat to your standards.

Which brings me, gasp, to the standards! So for our Smash attacks, they're all fai-...*adjusts non-existent glasses* Mega Drain fires upwards the length of 1/3rd of Bridge of Eldin -AND- has no lag? -AND- deals solid damage? Does this attack deal no knockback/stun to make up for it? Belome being vulnerable to attack during it isn't much of a downside when it pretty much provides an aerial nuke capable of making a wall of death above him. I mean, I'm trying not to complain about balance stuff as much anymore but Bridge of Eldin is huuuuuuuuuuge. You may want to nerf that a bit or just keep it in mind.

Moving right along...as I'm going through the moves I start to notice that a majority of them are spells which, while it isn't bad, can be a bit magic syndrome-y at times. Making all of his aerials be spells and a majority of his standards spells as well seems a tad off when you have this giant brute of a monster who could really throw his weight around. It also would've been nice to see some more interactions with the created clones or at least some ways to aid them. Throwing all of the status effect moves into the aerials (and literally having his aerials -ONLY- for status effect/non-damaging moves) strikes me as a bit odd as well. Yeah, I know Belome doesn't seem the type to be gracefully soaring through the sky or anything but he could probably throw his weight around here a bit more instead of casting spells.

The extras are all great and the fact that you included what everyone tastes like made me smile. Overall? You've got some kickass ideas going on in the Specials but it tends to drain out a bit when it comes to the standard attacks and you sure are having -FUN- with these which is really what it's all about. I like you; you know what you like and you go for it. You've got a good idea of where your playstyles are going but the standards kind of hold it back when it comes down to it. Keep at it though, there's nowhere to go but up.

And seriously. Stop reading my mind ;P

http://chiefmendez.wordpress.com/2011/05/19/mts-moveset-graveyard-revival-1/ For those of you who didn't see by the way, I've revived the Moveset Graveyard so make sure to send your dead sets in to me and I'll post some of 'em up next Thursday!
 

Chaos Swordsman

Smash Apprentice
Joined
Sep 15, 2008
Messages
174
Location
In your closet.
Belome

Okay, so I'm gonna try and be as non-bias as possible considering I know how I would've done Belome personally (and if you'd like to see please click HERE) but I'm going to comment this with an open mind.

Well, the Specials really aren't that hard to comment considering it's kinda obvious I like them (they're very similar to the ones I had in mind after all) and I do like what you did with the chargeable Up Special. I apologize for not getting back to your PM about Up Special ideas but not only do I see that you did just fine without my input...but my Up Special wasn't so much a recovery as it was another move and my Belome's recovery was more built into his clones which would be kinda confusing to explain. But yeah, you did just fine without my advice so blarg. I -AM- a little bit iffy about Sleepy Sauce/Light Beam/Aurora Flash all being crammed into one Special (giving him two chargeable Specials)...I could've easily seen Aurora Flash being a Smash attack with the way it is which would've added some meat to your standards.

Which brings me, gasp, to the standards! So for our Smash attacks, they're all fai-...*adjusts non-existent glasses* Mega Drain fires upwards the length of 1/3rd of Bridge of Eldin -AND- has no lag? -AND- deals solid damage? Does this attack deal no knockback/stun to make up for it? Belome being vulnerable to attack during it isn't much of a downside when it pretty much provides an aerial nuke capable of making a wall of death above him. I mean, I'm trying not to complain about balance stuff as much anymore but Bridge of Eldin is huuuuuuuuuuge. You may want to nerf that a bit or just keep it in mind.

Moving right along...as I'm going through the moves I start to notice that a majority of them are spells which, while it isn't bad, can be a bit magic syndrome-y at times. Making all of his aerials be spells and a majority of his standards spells as well seems a tad off when you have this giant brute of a monster who could really throw his weight around. It also would've been nice to see some more interactions with the created clones or at least some ways to aid them. Throwing all of the status effect moves into the aerials (and literally having his aerials -ONLY- for status effect/non-damaging moves) strikes me as a bit odd as well. Yeah, I know Belome doesn't seem the type to be gracefully soaring through the sky or anything but he could probably throw his weight around here a bit more instead of casting spells.

The extras are all great and the fact that you included what everyone tastes like made me smile. Overall? You've got some kickass ideas going on in the Specials but it tends to drain out a bit when it comes to the standard attacks and you sure are having -FUN- with these which is really what it's all about. I like you; you know what you like and you go for it. You've got a good idea of where your playstyles are going but the standards kind of hold it back when it comes down to it. Keep at it though, there's nowhere to go but up.

And seriously. Stop reading my mind ;P

http://chiefmendez.wordpress.com/2011/05/19/mts-moveset-graveyard-revival-1/ For those of you who didn't see by the way, I've revived the Moveset Graveyard so make sure to send your dead sets in to me and I'll post some of 'em up next Thursday!
Wow, got done reading your set about 5 minutes ago. Maybe next time we could make a joint moveset. You had better ideas than I did.
 

Katapultar

Smash Lord
Joined
Nov 24, 2008
Messages
1,284
Location
Australia
Dog eat Dog


What happens when a Belome tries to copy another Belome? Pure madness! For those of you craving the fun to be had when insanity collides, this Event Match is for you! The set-up is simple: you play as Belome against another Belome...but this isn't just a simple mirror match. Remember how MT was going to do a set for Belome but he was beaten to it by Chaos Swordsman? Well, your opponent is in fact, MT's Belome! How will 2 different sets made for the same character collide in this maniacal match-up!?

The fight takes place on Brawl Stage Bridge of Eldin ;) with each player having 2 Stock. Your goal is very simple, and that's to KO the enemy Belome. Oh, and one more important rule: both sides create 2 clones with one use of their Neutral Special, and can have as many clones as they like...I have a feeling this match is going to go out of control...

The match may seem even, but if you've read both Belome sets you'll know there's a MASSIVE power difference: your Belome is FAR MORE POWERFUL than the enemy Belome! Seriously, compare their stats and moves and you'll see you've got the winning card. Especially considering that enemy Belome can only use the moves mentioned on the Moveset Graveyard (fun fact: MT Belome only has ONE KO move outside the use of clones, while CS Belome has like, lots)

If you know Belome you know he can clone, with both sets being able to make clones of their enemies using their Neutral Special. (guess who's got the more powerful move ;)) This is the one thing that in fact BALANCES the match. While you're controlling the far more broken character, enemy Belome is perfectly capable of creating clones of that broken character and using them against you. Opposite with your Belome, making clones of the enemy Belome seems rather useless considering how weak he is.

And now here's the FUN part: clones can make their own clones! When you do the math, letting enemy Belome make clones of yourself for you to make clones of is a pretty good tactic that allows you to acquire more manpower.................yeah, let's not get too into that.

One more thing: even if you finish off enemy Belome, you won't clear the event match unless all the clones are dead. On the other hand, you lose if your original Belome is dead.


And that's all. Have fun in a never-ending dogfight to the death.
 

darth meanie

Smash Journeyman
Joined
Jun 6, 2008
Messages
452
Now To Steal Kat's Mini With A Set!

DarkMega


The corrupting power of the DarkChips is insurmountable. Even MegaMan.EXE was not immune to its corrupting influence. After using a DarkChip for the first time in Mega Man Battle Network 4, he gave birth to his own Dark Soul, an evil version of him with unimaginable power. DarkChips are the evil in humans heart given digital form; when used by a Navi with a human soul, they created the perfect enemy. The more powerful MegaMan.EXE is, the more powerful DarkMega himself becomes. Combined with his use of DarkChips, he can be one of the most powerful enemies in the entire game.


STATS


Power: 10
Move Speed: 10
Air Speed:10
Fall Speed: 10
Jump Height: 8
Attack Speed: 6
Weight: 4

No doubt, from a purely statistical standpoint, DarkMega is a terror to behold. Dizzyingly quick and horrifyingly strong, he is truly a lightning bruiser.


DARKCHIPS


DarkChips are some of the most powerful moves in the entire Battle Network series, completely turning the tide of battle with the power of darkness. This power does not come without a cost though; using DarkChips permanently weaken those who succumb to their power, and cause them to become riddled with *bugs*

Whenever DarkMega uses one of his DarkChips, he glows purple with dark energy as the DarkChip hovers in front of him for a fifth of a second. An icon above him signifies which DarkChip he's about to use. After that, he immediately uses it.

If he is struck during this initial phase though, he takes extra hitstun from the attack, but the DarkChip hovers in place where he was last left standing. Either player can pick up and use the chip by grabbing it like any other item. Regardless of who picks up the chip though, the user will be inflicted with the bug that the DarkChip afflicts on them.

If the enemy is one of those 'good guys' who refuse to 'succumb to the power of darkness', they can destroy a DarkChip with any attack. For all the evil they contain, they're sure flimsy.


SPECIALS

UP SPECIAL - DARKRECOVER


DarkMega activates this DarkChip and shines with light. Less than a tenth of a second after the initial animation, he recovers his health. All of it. Yes, even if he used this at 999% damage, he's back down to 0%.

BUG: Upon using this DarkChip, DarkMega begins to take 5% damage a second, every second. This stacks for each subsequent use of this chip.

DOWN SPECIAL - DARKINVS


DarkMega's body changes in color, from deep blue and shadowy to absolutely pitch black. He is completely invulnerable now, and saturated in pure darkness. As a result, as long as you stay in this state, DarkMega has his movement, attack, air, and fall speed all doubled, making him essentially a black blur of movement.

In addition, DarkChips no longer have additional start-up lag from activating the chips, but still have all of the bugs they usually do, and have to complete their animations.

DarkMega's Up Special is also replaced with a near instant, omnidirectional teleport two battlefield platforms in the direction you point. He can use this as much as he wants while in the air.

You can leave this state by pressing Down Special again, which causes him to stagger back for half a second of ending lag. Leaving DarkInvis in the air leaves him helpless as well.

BUG: Upon using this DarkChip, DarkMega take 100% damage each second he uses DarkInvis. If DarkMega reaches 999% damage, he is instantly kicked out of DarkInvis.

NEUTRAL
SPECIAL - HOLE


DarkMega points at the ground in front of him, and a small portal opens up, a tiny slit in the ground. This is a portal to Murkland, the poorly established digital realm of evil.

The Hole creates a link between the battlefield and the world of darkness; allowing DarkMega to channel the power of Evil Chips through them. Evil Chips are unique attacks that can only be used by those tainted by darkness, but don't have the corrupting influence of a true DarkChip. It takes the hole about eight seconds to 'open up' after being summoned, allowing it to channel dark energy to DarkMega. Before it opens up, it is completely useless.

DarkMega also gets a boost when using a DarkChip while standing on a hole; the dark flames around him become a large, powerful hitbox that deals 12% damage and strong set knockback away from him, and when if it is an attack, it charges twice as fast as normal. If he is attacked while preparing a DarkChip in this way though, the Hole seals and DarkMega takes half a second of hitstun for his insolence. Only one Hole can be active at a time, summoning a new one destroys the old one.

SIDE SPECIAL - DARKCANNON


DarkMega activates this DarkChip, and fuses both of his hands together into a single cannon. He can hold down this input to charge it up, but unlike Smash moves, this charge can be stored by pressing shield as long as he doesn't activate any other DarkChips before firing it. Hold down the Side Special again to resume charging.

When released, he fires a single reddish-black beam of destruction that deals anywhere from 18-36% damage in multiple hits of 3% that eats shields alive. The blast lasts for up to two seconds long, and you can redirect the beam as it fires, allowing you to destroy any attempts to shield or dodge the attack unless the opponent has truly ridiculous mobility. This beam also pushes foes back, making it a strong killing option, with strong pushback the more damage the opponent has taken and the higher the attack is charged.

BUG: After DarkMega fires the DarkCannon, for every projectile he fires again for the rest of the stock, there is a 20% chance it will be a dud. This includes the DarkCannon itself. This can stack up to four times, maxing out at a 75% failure rate for projectiles.


SMASHES


SIDE SMASH - DARKSWORD


The DarkSword is one of the most powerful battlechips in existence, all the strength of the incredible LifeSword Program Advance recreated in a single DarkChip. After summoning the sword, DarkMega instantly slashes forward, hitting almost instantly after he summons the sword for a whopping 25% damage and powerful knockback. It can be charged up even further, maxing out at 40% damage.

The sword has an absolutely massive hitbox, slicing an area as tall as Ganondorf and as distant as a battlefield platform in front of him. By double tapping A when he releases the attack, he can instead fire it as a double sonic boom, firing two projectiles of the same size that deal half the damage and knockback, but continue on to the edge of the screen.

BUG: DarkMega now automatically slides forward at about half the speed of Jigglypuff's dash. For each time he swings this sword, his slide speed increases. He'll slide even while he's attacking, in the air, shielding, and dodging, his glitched body continuously moving forward. He'll even slide right off the stage! This won't ever make him go faster than his maximum speed though; it increases the speed he's going up to that point.


UP
SMASH - DARKTORNADO


DarkMega points his arm downwards, which morphs into a giant turbine. He triggers a massive tornado around himself, which reaches up to two Ganondorf heights above him and a battlefield platform around him, lasting for two seconds and knocking opponents around for up to thirty hits of 1% damage. The tornado also blocks all projectiles.

DarkMega can cancel the attack with a jump, which causes himself and the tornado to lift up off of the ground; he can then float across the stage, dragging opponents into the tornado and carrying them around with him. He can then either remain in the tornado or fastfall out of it, the tornado floating in place with the opponent in it.

BUG: Whenever DarkMega lands on the ground, there is a 1/3 chance the area he landed on will glow noxiously purple, what is called 'swamp terrain'. For the next 20 seconds, anyone who lands on the area, including DarkMega when he first lands there, grows a flower on their head as if they were affected by a Lip's Stick item, taking poison damage. This can stack to up to a 100% chance.

DOWN SMASH
- DARKTHUNDER


DarkMega crackles with electric energy as he generates a giant purple ball of lightning around him, about the size of a Bumper item. When released, it will home in on opponents for the next eight seconds, traveling at about the speed of Luigi's fireballs. The DarkThunder is incredibly hard to destroy or shake off, as it is not in fact a single projectile. When it hits, it deals 18% damage in individual hits of 1%, each one unraveling like a shell around the previous one. This lets it eat away at shields, dodges, and makes it a general nuisance. When it does strike an opponent, they glow yellow as if paralyzed, and cannot move for a while, longer the higher their damage percentage is. Charging this move up increases the number of individual strikes the projectile does and the speed at which it travels, maxing out at the speed of Wolf's Blaster.

BUG: DarkMega's shield regenerates more slowly and drains much more quickly whenever he holds it out. It also automatically loses some of its strength whenever he puts it out, even if he powershields. The more he uses this attack, the weaker and weaker his shield gets.


GRAB-GAME


GRAB - BUGCURSE


DarkMega grasps forward with his hand, and creates a chain of corrupted data in front of him. This chain is made out of each individual bug that DarkMega is currently afflicted with; without any bugs, a puff of dark smoke blasts out of his body with no effect. The more bugs that DarkMega is afflicted with, the longer the chain; each individual piece of glitched data increases the length of the chain by about the length of a Pikmin.

This chain essentially functions as a tether grab, and is about as laggy as one; without a few bugs the range is even shorter than most tethers. If DarkMega strikes an opponent with it, they are trapped by the chains and suspended in mid-air, helpless.

DarkMega raises both of his hands in the air and shouts, glowing with purple dark energy over a two second long animation before releasing the opponent. The enemy is now afflicted with a random status effect that Dark Mega is currently afflicted with!

This move has a different effect if the opponent has used a DarkChip before. You see, when you use a DarkChip, you create your own DarkSoul, a shadowy version of yourself that hides within the deep gaps of your mind. DarkMega simply draws it out.

This time, the opponent writes as DarkMega grabs the center of their chest and pulls out a pulsating dark purple orb, the essence of their DarkSoul. He crushes it in his hand, and the entire screen glows dark. He opens his hand back up to reveal a new battlechip in his hand, and starts glowing as if he had broken a Smash Ball.

Press B, and time will stop temporarily, and DarkMega smashes the battlechip, a DS version of his own enemy! He is then replaced by a shadowy version of the player that he created the chip from. You then immediately perform that player's own Final Smash against them!


STANDARDS​


JAB - VULCAN BUSTER

DarkMega points his right hand forward, which instantly morphs into a rapid-fire machine gun. DarkMega's buster fires four 1% damage projectiles straight forward every second, traveling at about the same speed as Sheik's Needles. They're pretty easy to DI out of, and he can't aim this attack up or down, but it is very good at pegging enemies from afar.


FORWARD TILT - STATIC

DarkMega points his right arm forward, which converts into a powerful electrical conductor. About two thirds of a battlefield platform in front of him, he triggers an explosion of electrical energy the size of a bumper that deals 8 hits of .5% damage each.

This move is one of those Evil Chips though, that is powered by darkness. If there is a Hole on the stage as well, a second, identical explosion will occur there.

This move also deals an extra .5% damage per hit, and increases slightly in size, for every bug that DarkMega is currently afflicted with, the bugs presumably causing more static in his system. The damage maxes out at 2.5% with an explosion the size of those triggered by explosive crates and a total damage output around 20%.

This doesn't do a lot of knockback, but has powerful hitstun and an electrical effect.

UP TILT - ELEMENT DARK

Another Evil Chip, DarkMega pulls out what appears to be a pitch black 'genie' style lamp, which fires flames of pure a Ganondorf tall straight above him, dealing 11% damage and fair knockback with a darkness effect. If DarkMega is standing on swamp terrain created from his DarkTornado bug, the attack deals double damage and knockback.

If there is a Hole on the stage, the Hole will fires a second version of the same attack.

DOWN TILT - SERPENT FIRE

This is another one of those Evil moves; DarkMega releases a stream of purple fire directly from Murkland, a portal opening up directly behind him and streaming a chain of fireballs that deal 2% damage each with a fire effect and pushing knockback to another portal about a battlefield platform in front of him.

If there is a Hole on the stage, the blast of fire will stretch all the way from the portal behind him to the Hole, allowing it to carry enemies further away; they can usually DI out around 10% damage though.

DASH ATTACK - SHADOW STRIKE

DarkMega's dash is incredibly fast, right around the same speed as Captain Falcon's. For his dash attack, he instantly stops, but a shadowy version of himself charges forward and slashes with his DarkSword for 12% damage and moderate knockback. The end lag on this attack is minimal, but it does have a slight bit of start-up, and won't hit at close range.


STANDARDS


NEUTRAL AERIAL
- VULCAN BUSTER AIR

DarkMega points his right hand at a slightly downward angle, which instantly morphs into a rapid-fire machine gun. DarkMega's buster fires four 1% damage projectiles diagonally down at the same angle of Ness's PK Fire every second, traveling at about the same speed as Sheik's Needles. They're pretty easy to DI out of, and he can't change the aim of this attack, but it is very good at pegging enemies from afar.

FORWARD AERIAL - SHADOW BLADE

DarkMega turns his arm into a sword again, a flimsy recreation of the DarkSword that has less power, but can be generated more quickly and lacks the permanent glitches the DarkSword has. He swings the sword overhead downwards, the long blade dealing 11% damage and knockback relative to the angle of the sword, allowing it to spike against enemies relatively beneath him and knock other enemies further away. It has a bit of lag on both ends, but great range.

DOWN AERIAL - MURAMASA

The last of DarkMega's Evil Chips, this twisted longsword grows in strength as its master grows closer to death. After performing a spiking style attack similar to Ike's Down Air, the sword deals 10% damage plus 1/10th of DarkMega's current damage percentage, up to a maximum of 30% damage.

BACK
AERIAL - BLACK SHOTGUN

DarkMega turns around in midair, points his buster forward, and fires a powerful shotgun blast. This deals a single projectile that does 11% damage and strong knockback, but is rather inaccurate, especially at longer range. It's also his laggiest aerial.

UP
AERIAL - REWARP

DarkMega disappears in black shadows, then reappears in a burst of dark energy about a Ganondorf height above himself. Once he disappears, you can DI the angle at which he reappears in any direction. When he reappears, he has dark energy around him that has very short range, but deals 9% damage and strong set knockback. He also has limited invincibility during this teleport.


FINAL SMASH


DARKLOID GIGA CHIP - BUG CHARGE


DarkMega glows with immense power, harnessing the same energy as Gospel, the Multibug Organism, the ultimate glitch. His arms fuse together to create a recreation of Gospel's mouth (shown above). He then fires several fireballs forward, each one dealing 20% damage. He'll only fire one fireball if he has no bugs currently, but for every bug he has, he fires an extra shot.

Every time an opponent is struck by a fireball, they take a fair bit of knockback, damage, but are also inflicted with one of DarkMega's bugs.

At the end of the attack, DarkMega sighs in blissful relief, dark energy peeling off of him as he is cured of every bug he suffered.


PLAYSTYLE


CONTROL THE TIDE OF BATTLE

DarkMega is a camper. There's no point in pretending otherwise. His ranged combat options are powerful, his stage control is excellent, and his most powerful attacks leave him most vulnerable up close.

The Vulcan Buster is his most basic method of pestering enemies from afar; while it can only attack from two different angles, the sheer speed at which it pelts enemies with annoying projectiles makes it valuable in making any enemy set up attempts moot.

With a Hole active, DarkMega's stage control gets a lot stronger, allowing him to generate walls of dark fire, bursts of lightning, or send serpents of flame to carry opponents away. You generally want to keep the Hole between DarkMega and the opponent, in the center of the stage so he can easily transition between using it for stage control and to power up his Dark Chips.

Like other projectile focused character, he has projectile 'combos' in which he simply floods the stage with so many attacks at once there's no way to adequately deal with them. DarkThunder will chase opponents across the stage for eight seconds, DarkTornado can lock up huge areas of the stage, and DarkCannon lasts for at least two seconds and effectively cuts access to the stage in two, not to mention some of his other projectile attacks, like the two Sonic Booms from his DarkSword.

Keeping space is pretty important for DarkMega, who lacks many truly effective close range options; Down Tilt and Forward Tilt work better at ranged, Up Tilt is more of an anti-air attack, his jab is a projectile, and his Smashes all give enemies a free shot to grab one of his DarkChips if he fires them up at point blank. If DarkMega has to fight opponents up close, he's far better off doing that in the air. His Forward Aerial and Up Aerial are pretty good at forcing enemies away if need be, and on the ground, the wall of fire summoned by a DarkChip used on top of a Hole will knock away anyone who's sticking too close. Just be careful not to telegraph it; they shield and your DarkChip is toast.

HARNESS THE POWER OF DARKCHIPS

DarkChips are undoubtedly the most important part of DarkMega's game to master. Each one is an attack or ability that can absolutely crack open the game, used properly. There are consequences to throwing them out that you have to consider though; each one has an ironic twist to the end.

DarkCannon is your fastest and most powerful way to deal accurate, difficult to avoid devastation across the entire screen. The attack unfortunately has the attribute of making itself unreliable. Use your buster as your primary source of ranged combat, and try to have your DarkCannon fully charged up when you do use it, to maximize your damage output.

Fortunately, the Vulcan Buster only loses a few shots when you use DarkCannon rather than completely failing like some other attacks do, so you can still interrupt enemies with quick shots using your Buster after having fired your DarkCannon once or twice.

The DarkSword is next, and its bug may barely seem like an inconvenience; if anything it makes it easier to get in close for a sword swing. For a character as focused on distant fighting and attacking as DarkMega though, it's a pretty major problem, as it makes it impossible for him to attack without approaching.

The DarkSword has massive range for a sword attack, which is what you'll have to focus on to pull it off; the start up for the DarkChip leaves you open for punishment you don't want to take. If the opponent decides to get out of the way instead of rush you down to counter you, instead fire the attack as a double sonic boom.

DarkThunder is laggy but effective stage control, and forces opponents to back off or open themselves up to punishment. The drawback is pretty hefty though, and kills a lot of DarkMega's defense. Ironically, DarkMega will always have his shield broken by DarkThunder after using it himself just once!

DarkTornado is a more technical DarkChip to use, but it can work as mid-range getaway, making it impossible for approaching characters to touch him, and letting you move an interesting hazard around the stage. The bug can even be used in your favor, creating a part of the stage that is dangerous for both players, but gives you a boost to your anti-air, anti-air you will be using if the opponent avoids that area. It also means damage percentages for both players will be rising more quickly, which you can solve for yourself with the DarkRecover, which your opponent will certainly want for themselves as well.

CORRUPT YOUR OPPONENTS

Now we get to the crux of DarkMega's gameplay, what makes him different than any other camper, any other stage-controller, any other abuser of ridiculous moves.

His moves can be used against him.


There's no telling whether exactly a player will fall for the temptation to abuse one of your own DarkChips. Some will find the glitches they afflict upon their user too risky. We call these people weak.

Each character has different incentives to use DarkChips. Other projectile heavy characters are less likely to use DarkCannon than melee-only characters, who see it as a free, no-strings attached projectile. Interestingly, heavyweights have the most incentive to use DarkRecover, as the advantage lasts longer for them if they're at high damage. Little surprise those characters often have a high affinity for evil.

To be clear, you don't want them using DarkChips... at least not against you. But you certainly wouldn't mind corrupting the opponent just enough to take advantage of their bugs and using their own DarkSoul against them.

The best way to get even the most pure-minded players to consider using a DarkChip is through corrupting them with your grab, meaning you've already use a few DarkChips yourself. Share a bug, and they might be less likely to resist when they're already suffering.

When the opponent is bugged, it's time to take advantage of their bugs against them. DarkRecover and DarkTornado obviously encourage stallish play on your part. Use DarkThunder or other long range attacks to keep them away while their damage builds up. DarkSword may seem problematic, but good spacing with your Hole can force them into tricky situations and attacks they don't want to get in with. DarkCannon depends on the opponent's playstyle; projectile characters who use it become that much easier to space out, while melee characters are more vulnerable to the attack, but also have less to lose by using it. DarkThunder means it's time to smash their shields with DarkCannon and your own DarkThunder. If they use DarkInvis... you're in a bit of trouble. Consider using your own DarkInvis and trying to draw a stalemate, and heal back as soon as possible.

If you get a chance, get them into stun with Static or DarkThunder, and go in for the BugCurse. Nothing will make them regret their choice to succumb to darkness more than being blown away by their own DarkSoul.

GO BERSERK

When push comes to shove, DarkMega starts to get desperate. With his low weight, high fallspeed, and poor vertical recovery, he's going to be vulnerable to kills around 80% damage. That said, once you use DarkRecover, it's 16 seconds at best before you're at that damage level again. You want to hold off on it as long as possible.

Once you do use DarkRecover, make sure to make some space between yourself and the enemy; nothing is more embarrassing than getting killed and having your own recovery chip stolen from you. Regardless, the auto-damage puts you on a ticking time bomb, especially if your defenses and camping options have been shot by your other glitches. You can use it again, but your damage will shoot up even higher.

This is the time to get aggressive. DarkSword's glitch means you're going to be moving forward, so take advantage of it; this means you keep moving after your Dash Attack, making it much easier to follow up, or to get in while charging DarkSword.

DarkInvis was made for this moment, when you've got nothing to lose and an opponent looking to get killed. DarkSword is especially dangerous in this state, as without the start-up lag of DarkChips you can throw it out quickly. Throw a DarkThunder down too for extra confusion. You're pretty much guaranteed dead unless you can manage to kill the opponent with it; if you manage to, exit, DarkRecover when they respawn, and hope to get in some more damage with DarkInvis again.

DarkMega's ability to shift into sudden rushdown and hyper-aggression when he's on his last leg with DarkInvis ensures that the match is never over with him. The power of darkness does not go out quietly.


MATCH-UP


VS VICTINI: HUMILIATING

Victini is a laundry list of what DarkMega doesn't want in an opponent. Granted, the first issue is the most important, Victini's rushdown is simply ridiculous. Vicitni's ability to transition immediately from air to ground approach, moves that automatically let him chase opponents, and mindgaming quick attacks means that he'll never let DarkMega get off a single DarkChip before getting headbutted, burned, or otherwise thrashed.

On top of that, Victini is good at abusing some of the weaknesses in DarkMega's glitches. He can avoid the ground from DarkTornado easily, take advantage of a single whiffed projectile, and has excellent shield damage that makes it untenable for DarkMega to ever perform DarkThunder without getting his shield repeatedly broken. Ironically, DarkSword is actually a huge advantage in one way; it gives him an automatic advantage in the awkward push and shove of Victini's grab.

As for use of his DarkChips, Victini has little interest in them save for DarkSword, which he can approach with easily, and would absolutely love to have the glitch from. DarkThunder is tempting as well, and makes Victini's approach even worse. Victini is also well known for desperation struggles, and with his rushdown, if he gets his hand on DarkInvis he will humiliate DarkMega. If DarkMega manages to get Fusion Flare as his DS Chip though, Victini is certain to regret abusing the darkness. Unfortunately, there's only a 1-in-3 chance of that actually happening.


ASSIST TROPHY


ShadeMan.EXE


ShadeMan.EXE is the leader of the Darkloids, a NetNavi with no operator who is one of the main conspirators in the creation of the DarkChips. Only those who have absorbed the dark power themselves can harm him, which allowed him to force MegaMan.EXE to use the DarkSword to destroy him, creating DarkMega.

ShadeMan.EXE drifts down, but this time he is not here to fight. He simply opens his wing and reveals a single DarkChip for the summoner to use. What a pleasant surprise and selfless gift, that could not possibly have any negative consequences!

Which DarkChip he summons depends on the current situation of the battle, but he never summons one if the glitch would be positive or have no effect, like giving the DarkCannon to a melee character. He's especially fond of giving away DarkRecover and DarkInvis. Are you willing to use that power?


FIEND


Nebula Grey is the final boss of MegaMan Battle Network 5. A monstrous program created out of pure darkness, he would corrupt the entire planet into pure evil by using SoulNet to implant darkness directly into human hearts.

Nebula Grey himself is only the blue orb you see, which slowly revolves around the main body, which is a construct of darkness and completely immortal. Nebula Grey takes about five seconds to make a complete revolution; when the blue flame is immediately in front of the body, it performs an extra powerful attack. The blue flame has 250% stamina in a normal brawl.

Death Fire

Nebula Grey fires an attack identical to DarkMega's Serpant Fire, except dealing 5% damage a hit. The flame is summoned randomly from either behind or in front of a player. He performs this attack constantly, regardless of any other attacks.

Relentless Flame

Nebula Grey shoots a dark purple flame at the ground, which chases the opponents relentlessly at Captain Falcon's dashing speed, dealing 17% damage and strong knockback. It lasts for four seconds.

Serpent's Face

This attack can only be performed when the blue flame hovers in front of Dark Nebula's face. Dark Nebula's body transforms into that of a massive snake, and crashes into the stage ahead, dealing 28% damage and massive knockback.

Thousand Grasping Hands

Dark Nebula grows several more arms, which all immediately start throwing themselves rapidly to the ground in front of him; each deals 8% damage, grabs the opponent, and pulls them in for another one, bringing them very close nearby at the end. This can only be performed when the blue flame floats in front of Nebula Grey.

The Dark Soul

The blue flame glows with power in front of Nebula Grey, releasing a DarkChip. DarkMega appears, grasping it, and performs the attack; either DarkCannon, DarkSword, or DarkThunder.


EVENT


NEBULA ATTACKS

For this event, you play on Final Destination, with Nebula Grey floating ominously offstage. His health has been tripled to 750%, and he has an ally with him; DarkMega, who has infinite stocks and a level 8 CPU. You have three stocks of your own for this match, and may pick any character.

The goal is to defeat Nebula Grey, DarkMega doesn't matter, but will constantly harass you. Since DarkMega is already out, Nebula Grey won't summon him for any of his attacks.

DarkMega does give you one advantage though; he will spam DarkChips, even close up, as if he wants you to use them. You can use DarkChips yourself against Nebula Grey, and the extra damage output can certainly make your life easier.

Beware though, if DarkMega hits you with BugCurse after you've used a DarkChip, he releases your DarkSoul completely, for an instant game over. Is the Dark Power worth it?


Hyper_Ridley

Smash Champion
Joined
Dec 21, 2007
Messages
2,299
Location
Hippo Island
DarkMega

This guy reminds me of Oni Akuma from Super Street Fighter 4, in that he's canonically Godlike in power, and his gameplay even reflects that, but he still manages to find ways to be balanced. Here's a guy who can fill the stage with POWERFUL projectiles and traps, eat away at shields, amazing KO moves, can fully heal himself, can become completely invincible...and yet the price he pays if he abuses this power can easily cost him the match. It almost gets across Spiderman's themes better than an actual Spiderman moveset!

The bugs and glitches really went a long way in turning moves that would normally be generically overpowerd and actually making them interesting. I think my favorite use of the bugs, though, were in the moves that actually became better when DarkMega had bugs in his system. It adds a lot of tension to playing the character, and establishes that at the end of the day the darkness only makes him stronger.

I'm kinda confused on Hole's description. It sounds like you need one active to use any of the EvilChip moves, but then in those moves it sounds like it provides buffs to them. I assume the latter cause it'd really go against his gameplay to have to go through such set-up to access tilts of all things. Also, while I know matchups are extras and all that, it really doesn't look good when right after you describe how amazing this guy's playstyle is you have a matchup where he basically auto-loses. Especially when the flavor of the character is being a broken God.
 

Nicholas1024

Smash Lord
Joined
Mar 14, 2009
Messages
1,075
I've got a bit of catch-up to do, so here's a couple of scattered comments in the meantime.

Edit 1: NEW COMMENT ADDED

Viewtiful Joke:
I hate this guy from MvC3. So annoying. Oh yeah, the set. Anyway, this has a few interesting ideas with the specials and the VFX gimmick, but I was a bit disappointed with it ended up. I'll just give a rough list here...

1) The civillian mode seemed kind of... pointless. Once you're in it, you're basically dead, so why include it at all? At least give him some half-decent method of fighting back.
2) A lot of your attacks are still generic. Still, you made more of an effort to make the individual attacks unique than in ashley, so points for that.
3) There doesn't seem to be a lot of rhyme or reason as to how some of your moves are powered up in zoom-in mode.

Still, the set demonstrates improvement as a MYM'er, as you're starting to work with more complex mechanics and integrate them into a playstyle. Just keep at it, and you'll end up with a breakout set.

Meowth:
Well, this really feels like a newbie set to me, and since youi've been away for 4 MYM's or so, that's understandable. The biggest problem is that except for Pay day, the attacks are painfully generic. With a normal meowth I can understand this, but for crying out loud, this is Team Rocket's Meowth! Couldn't you have had it pull out a crazy Pikachu-capturing gizmo or something? Additionally, the playstyle is best summed up by "What playstyle?". However, Pay day itself is an interesting move with plenty of nice quirks, and I enjoy the detail and effort you put into the extras. All you need to do is take the detail from your neutral special, and spread it into the other moves, while keeping an eye towards an overarching playstyle for the entire moveset. Keep at it.

Dark Megaman:
Hey, it's a Battle network set! (Whatever happened to that Drillman.exe set anyway?) Well, first off, the whole concept of the darkchips is just ingenious. Despite being borderline-final smash powerful, they manage to stay balanced via the use of bugs, AND stay completely IC! The idea of tempting the opponent to dark chips and then punishing them for it via the grab is also unique and quite interesting. Also, the evil chips and such that draw power from your own bugs is quite nice, and adds more depth to his playstyle. The downside of this set is that I felt the playstyle is OOC for the character. Not as bad as my own Megaman.exe set from last MYM, but still somewhat so. Think about it. Dark Megaman should be rushing down the opponent and obliterating them with several dark chips in quick succession, not hanging back and winning a war of attrition! I feel it should have been more focused on the last stand darkinvis style rushdown (Which was really cool, really IC, and just plain fun) rather than the normal campy style you gave him. However, don't get me wrong, I still really enjoyed the set, and look forward to seeing more from you, DM.
 

Davidreamcatcha

Smash Ace
Joined
Feb 9, 2011
Messages
629
GARLIC HEAVEN​


WHY HELLO THEIR LITTLE MOVESET MAKERS TO MAKE YOUR WARIO. YOU SEE: GREAT OVERLORD WARIO HAS TAKEN OVER MAKE YOUR MOVE WHILE YOU WERE FAPPING TO DRAGON BALL Z. WARIO READ ALL ABOUT YOUR LITTLE INFINITE SAKURAIS AND DECIDED THAT YOU ALL ARE GAY. THEREFORE. WARIO WILL DEMONSTRATE HIS SKILLS IN THE ART OF MAKING YOUR WARIO BY MAKING A STAGE OF WHAT YOU WILL SEE IN THE AFTERLIFE IF YOU FOLLOW WARIO-WARIOISM: GARLIC HEAVEN. YOU SEE LITTLE BOYS AND SLASH OR GIRLS, IF YOU ACT LIKE WAAARRRRRRRIIIOOOO DURING LIFE, YOU WILL BE AWARDED WITH GARLIC HEAVEN.

GARLIC HEAVEN IS A LARGE, AERIAL STAGE THAT IS ABOUT SEVEN LITTLE STAGE BUILDER BLOCKS LONG. THE TOP OF THE STAGE SLOPES UP 3 STAGE BUILDER BLOCKS LONG, GIVING THE STAGE A HILL SHAPE. OVERLORD WARIO WILL BE IN THE BACKGROUND AT THE TOP OF THE STAGE WITH AN AWESOME GRIN ON WARIO'S FACE. AT THE START OF THE MATCH, WARIO WILL PULL OUT WARIO'S ACCORDION AND BEGIN PLAYING THIS SONG. IT IS BEAUTIFUL MUSIC, YOU CHOSE TO COME TO GARLIC HEAVEN, YOU LIKE THIS MUSIC.

THE BIG THING ABOUT THIS STAGE? IT IS MADE OF GARLIC. YOU CAN SEE MANY HUMOROUS GARLIC-RELATED THINGS ON THE STAGE AND IN THE BACKGROUND, SUCH AS THE GIANT GARLIC-SHAPED SUN. AS THE STAGE IS MADE OF GARLIC, YOU CAN EAT IT. CROUCHING AND PRESSING A ON TOP OF ANY CLOVE OF GARLIC WILL ALLOW YOU TO EAT IT FOR 4% RESTORED HEALTH. HOWEVER, GARLIC DOES NOT REGENERATE, IT'S GARLIC YOU IDIOT ONCE IT IS EATEN IT IS EATEN! EATING A CLOVE OF GARLIC WILL TAKE AWAY AROUND 1 STAGE BUILDER BLOCK FROM THE STAGE.

EAT ALL THE GARLIC AND YOU WILL START FLOATING IN PLACE AND WARIO WILL SCREAM "WHAT HAVE YOU DONE TO GARLIC HEAVEN IT HAS NO MORE GARLIC" AND THEN WARIO WILL KICK YOU ALL OUT OF GARLIC HEAVEN AND TELL YOU TO HAVE A ROTTEN DAY AND YOU WILL FALL INTO...

WALUIGI PRISON​

WARIO HAS SENT YOU DOWN TO A MISERABLE PLACE CALLED WALUIGI PRISON. THERE IS NO GETTING BACK INTO GARLIC HEAVEN. EVER. YOU ATE ALL THE GARLIC IT IS NO LONGER GARLIC HEAVEN SO YOU CAN'T COME BACK. WARIO MUST PUKE OUT ALL HIS SPARE GARLIC SO HE CAN REBUILD GARLIC HEAVEN.

ANYWAY, WALUIGI PRISON IS A STUPID PURPLE PRISON WHERE WALUIGI RULES. EXCEPT WALUIGI DOESN'T RULE BECAUSE HE SUCKS AND WARIO IS NUMBER ONE. YOU FIGHT INSIDE OF THE PRISON, IT BEING A FLAT, GROUNDED STAGE 12 STAGE BUILDER BLOCKS LONG, YOU CAN SEE 6 JAIL CELLS IN THE BACKGROUND. OF PARTICULAR NOTICE IS THE CELL LABELED "LUIGI". THIS CELL HAS NO TOILET. POOR GREEN MAN.

THIS STAGE WOULD BE FAIRLY STRAIGHTFORWARD, IF NOT FOR THE WALUIGI GUARDS. WALUIGI GUARDS ARE PURPLE PRISON GUARDS WITH WALUIGI'S STUPID NOSE. IF THEY CATCH YOU OUTSIDE OF A CELL, THEY WILL RUN AT YOU AT CAPTAIN FALCON SPEED, GRAB YOU AND TOSS YOU INTO A CELL. YOU CAN DAMAGE THE BARS OF THE CELL, THEM HAVING 50% DAMAGE. ONCE THEY ARE DESTROYED, YOU CAN SPOTDODGE TO GET IN AND OUT OF THE CELL. DESPITE THIS, WALUIGI GUARDS WILL STILL PATROL.

WALUIGI GUARDS ARE INVINCIBLE AND CAN ONLY BE KILLED BY ONE THING: FLYING PURPLE PEOPLE EATERS. RANDOMLY IN THE MATCH, A FLYING PURPLE PEOPLE EATER THE SIZE OF GIGA BOWSER WILL FLY IN FROM THE RIGHT SIDE OF THE STAGE AND EAT THE WALUIGI GUARDS BEFORE FLYING TO THE LEFT SIDE. ANYONE HIT BY THE PURPLE PEOPLE EATER WHILE IT'S ON THE MOVE WILL BE DRAGGED TO THE OTHER SIDE OF THE SCREEN, SO IT COULD BE A GOOD TIME TO GO INTO YOUR LITTLE CAGES. TWENTY SECONDS AFTER THE PURPLE PEOPLE EATER GOES, WALUIGI WILL COME IN AND CALL TWO MORE WALUIGI GUARDS BEFORE LEAVING. THAT SISSY.


The views here are not mine. Anyone who follows Wario-Warioism is probably an idiot.
 

half_silver28

Smash Ace
Joined
Apr 25, 2008
Messages
862
Location
MYM, Ohio
so many random cows...


Cow Tipping Jack


Player Character: Jack Frost (1 Stock)
Stage: Original stage slightly wider than Bridge of Eldin, a flat green pasture with walk-off edges
Enemies: Tauros (Infinite Stocks)
Description: Tip over all the cows... but don't get trampled by the angry bull!
Music: Conker's Bad Fur Day: Windy (Farm)


Basically you're just Jack Frost trying to cause a bit of mischief, at the cost of some poor cows who'll have a hard time getting back up. There are 15 cows in total that you'll have to deal 25% damage to in order to tip them over and beat the event. However, Tauros, another random cow, doesn't take very kindly to your antics. He'll start from the opposite side of the stage from you and immediately charge towards you at full speed, jumping over and dodging around cows in order to get to you. You'll probably be able to tip over the first few cows before he reaches you, but you're definitely be in for a fight when he gets to you. Additionally, whenever you manage to tip over a cow, Tauros instantly turns red with rage, getting all the effects of his down special without the negative side effects. Tauros don't approve of you and your bs (crs).

The best way to avoid Tauros is to remain airborne for as long as possible, abusing Jack's snowflakes for extra jumps. You'll also want to freeze the ground around you so Tauros just slides past you. Jack doesn't have the most damaging attacks ever, so you'll have your work cut out for you. Moooooooo.
 

darth meanie

Smash Journeyman
Joined
Jun 6, 2008
Messages
452
Who Wants a Fresh Comment Wall?

Wow. Lot's of movesets I've been needing to catch up on, no? I've been busy lately though, I just moved out of my dorm for my -last semseter- of college; I just finished my Commencement today!

And, as an extra big surprise, I got taken off of my waitlist at UC Hastings, which means in three months, I'll be heading to law school.


That comes with some bad news though; law school is a big investment of time and money, and it's going to eat up the lion's share of my attention for the next three years. No, this isn't 'B'AWWWWWWWWWWWWW, DM IS LEAVING' quite yet, but my days of commenting every set, spending hours in the chat, and pumping out eight sets a contest are probably over.

That said, that doesn't begin until summer ends. How about we enjoy this while it lasts; it's nearing my second year straight of being a part of this contest! And why don't you read some comments too, I had them baked especially for you!


Victini

Victini is a moveset that embodies a playful, inventive, powerful character, with a personality that makes its unrelenting style seem charming. I find it interesting, and a little awkward just how many different mechanics you've juxtaposed on to him; Victory Star, his unique dash, his third aerial jump, and his Specials are pretty complicated too. Maybe it's just me, but I don't get quite the 'trickster' vibe from Victini that this moveset seems to put forth.

I'm also not sure how I feel about the grab; it's very different for Cairne to have a grab of struggling and grappling with the opponent, but for Vicitni it just looks a little silly. It's also far more complicated than it needed to be; button mashing extends the length of the grab... but also helps the opponent push back?

Also, and this is just me going off on a random tangent, and isn't specific to your set, but I'd hope you of all people could forgive me for this -- I can't help but feel that some moves landed on here not because they made particular sense for Victini, but because he had those moves, and transitioning the mechanics of, say, Zen Headbutt, Endure, and other moves like that made some of the inputs awkward. I think this is something that all Pokemon Movesets tend to have, but it was something I'd been thinking about for a while, and thought I'd mention.

Overall, I do like the presentation of Victini's style, and his aerial competance is nice. I'm not sure how I feel about a back aerial that doesn't hit behind him, but he is designed to be always heading headfirst towards opponents, no? I didn't really feel the concepts flowing together as well as I would have liked though, as if his momentum, chasing, unrelenting style has more to do with your presentation than the actual content of the set. I disagree with Smady, who seems to imply this is something we've seen too much of, I think this is a genre that still needs some exploring, and you prove there is room to explore aerial chases.

Meowth

Believe it or not, I actually DO remember the Masked Man way back when; unfortunately, I think I actually liked that set more than Meowth here. Meowth feels very much like a set from a retro Make Your Move, and the organization makes it a real blast from the past.

Meowth's standard moves entertained me slightly; they're not just generic, they're some of the most generic, standard moves that exist in Brawl! A sex kick nair, a tripping dtilt, a flipkick uair, a spiking fair, it's quite literally the standard move list for any Brawl character.

Now, admittedly, Meowth is a character with very little combat ability outside of the rare use of Fury Swipes, so him having a generic move list is actually somewhat fitting... but it doesn't really fit into any concept of how he should play.

Pay Day also, unfortunately, goes past being simply funny and is just completely random in what it can pull out. It feels sort of like a sad joke from my perspective; I would have preferred just tossing bottle caps than randomly pulling out a Magikarp.

To be more precise, he should have had a greater variety of actual in-game, useful items, and had moves that could work well with those items; that sort of pragmatic fighting would have fit a lot better as I see it.

Garbodor

Garbodor is a very fitting moveset from you; I'm referring to your tendency towards the most noxious of Poison-types, not your personality of course. Your writing is still a little stuffy and awkward, but it's better than Recoome at least.

I do find the idea of Garbodor being able to separate himself from the trash and literally spread himself about the stage to be an interesting way to take his character, and mechanically it's much more savory than Muk's passive coating of the stage. I'm not so hot on how he can completely remove his arms and still function perfectly well, but I'll suspend my disbelief for the sake of giving the set a fair shot.

The way he covers the stage in garbage and hidden traps is slick, although I can't help but feel the fact that he starts losing weight immediately from it is a bit too much punishment for a move that's hardly unbalancing the game. Some of the effects on a few of his moves feel a bit tacked on, and I can't help but wonder why a move called 'lethal' injection just slows them down a bit. Overall though, not an insufferable moveset.

Meowth

The first question I have to ask about Marona, as a person who's never played the game, is why a character who is a 'squishy wizard' is throwing around elm trees as a Smash? I figure it must be in character for her to be using such a random item, but the descriptions you have are so barebones it left me bewildered.

Overall, this seems like some other 'squishy wizard' archetype sets we've seen before; recharging specials, a limited healing move. It loses all of its momentum after the Specials though, many moves don't even have any damage percents attached to them.

My reccomendation for improving with future sets would be to simply try to get the standard moves to fit into the archetype you want the set as a whole to fit into.

Geno

Ah, Geno. Here come the SSBB Truthers. I kid, I kid. I've never actually played Super Mario RPG, shows what kind of horrible person I am.

Anyways, I don't like Geno as much as I liked Viewtiful Joe; ultimately, I felt that Joe's mechanic was more interesting, and while some of Geno's individual moves have more creativity in how they use guns, cannons, and rocket punches (suddenly I feel like I'm reviewing a humongous mecha) they don't really fit into the playstyle as well as Joe's simple moves did when modified through VFX.

Geno has some elements of camping down, yes, but there's far more room to explore in that genre than some ranged standards and a few long distance specials.

Belome

Well, there's no doubt that you're absolutely pumping these movesets out at this rate. Belome is probably the most interesting moveset you've approached yet at a conceptual standpoint and in individual moves; you're really showing a greater understanding of intricacies of a moveset when you point out how Belome is assisting his clones, not the other way around.

I do agree with MarthTrinity about the awkwardness in the aerials; while I certainly appreciate trying to make inputs easier to keep track of by putting a pattern of where they go, giving him all spells for aerials means he has to jump up every time he wants to activate those moves, which seems awkward, and keeps him from 'throwing his weight around' in the air.

Still though, this moveset seems rushed, and it shows in the organization and in some of the more trite moves. I really think that you've got a lot of spirit and potential, and would like to see what a set that you really focus on, putting a lot of effort into how each move fits into the playstyle. You're beginning to get it, now I want to see what you're capable of.


D

Deleted member

Guest
Onto Belome, who is the fourth of Chaos Swordsman's sets in Make Your Move 9. I do see a step-up in the presentation and execution of the specials: they're far more appropriate and transparent as far as significance or playstyle go, unlike Ashley's comparably confused specials. You have a simplistic, if obvious interpretation of the character within the specials, which certainly work for Belome. You need to be more reckless in your moveset making, though – a lot of the time, your sets feel too comfortable in their simplicity. Some of the inputs are much more than generic inputs – you are coming to understand how a moveset works a lot better now, with you being able to describe how each move works into the playstyle quite well. There are even some instances of minor flow between the clones and regular inputs – but it's too rare to really call this a breakthrough set. Not only that, but it doesn't feel like you've spent enough time on each individual input yet to make them entirely relevant to the playstyle. You have come a long way in the short time you've spent with us: just keep on improving little by little and eventually you'll be making quality movesets.

Our first DM set of the contest, DarkMega [or Dark MegaMan.EXE] is one that ramps up the thrills of play, but in the end it didn't particularly appeal to me with its playstyle. The premise is nifty – create a collection of smashes and specials which, on the outset, seem broken; you curse each of these moves with an appropriate bug, where I felt the set was at its strongest. Considering DarkMega is such an obsessive camper, this aspect of his game gives him real potential to come out of defence and go on the offensive. It's not the most compelling solution to a camping playstyle, however, as DarkMega is constantly dragging himself down every time he uses a move. Eventually, this just leads to a character who loves to stand in one corner of the stage and spam his projectiles, being very reactionary. Of course, this would change depending on the opponent, but I'm not even sure if you really thought about this, with that one match-up which doesn't tell us anything.

What DarkMega also does well is his style. The writing in this isn't your best work, but it outlines moves well while missing out details which are mostly easily overlooked. There are a couple of instances where you are not descriptive enough, but it's uncommon. HR already stated what I wanted to say about the Hole, for example. The dark styling and combination of the organisation along with the presence of dark chips everywhere helps in creating a sense of this evil alter-ego. Onto those dark chips, though... that mechanic is really wanting. This is the worst time to be unspecific, as it seems like Dark Mega wants his opponent to hit his dark chip he's summoning over his head... but only sometimes, and they have to do this by hitting him out of summoning them. You don't specify how long they stay out, but also this goes against his defensive nature by wanting opponents to attack him. Considering these moves are broken, at what point would an opponent want to get close to him when he's using them? Not only does he have no way to influence this in any concrete way, but it's awkwardly meta in interpreting DarkMega's chips as being physically pulled out over his head. The punishment for using a dark chip is also enough that no one would ever want to steal one from DarkMega, if their final smash is at all competent, and when they can easily avoid taking one too.

What really disappoints me, though, is that the playstyle doesn't come together all that well in the end. That section is overly long, mostly re-stating that individual moves can help in ways that only differentiate them from each other, but don't seem to flow well. When you get to the juicy parts, it's all about bugging the opponent. And I have to say, it's clever in using your own afflictions to infect your opponent – still, I would have liked to see more connections between the different kind of bugs. It seems more like he could be giving them any old bug and it'd benefit him just as much. Which kind of links into my main problem with this guy – his bugs really only make his reliance on broken moves even more profound, as his camping playstyle totally works against it. He wants to be able to play defensively - much to the chagrin of his bugs, which usually punish him most when he's not being offensive. Calling him a berserker in this state would be an understatement. It means that he's dependant on his brokenness and plays more like a gambling powerhouse than the infective virus he should be. And I did want to like this set, honestly – the whole style of the set is enticing, the basic premise is bordering on brilliance and the character is interesting, but I find it quite flawed.

darth meanie said:
Meowth

Garbodor is a very fitting moveset from you; I'm referring to your tendency towards the most noxious of Poison-types, not your personality of course. Your writing is still a little stuffy and awkward, but it's better than Recoome at least.

I do find the idea of Garbodor being able to separate himself from the trash and literally spread himself about the stage to be an interesting way to take his character, and mechanically it's much more savory than Muk's passive coating of the stage. I'm not so hot on how he can completely remove his arms and still function perfectly well, but I'll suspend my disbelief for the sake of giving the set a fair shot.

The way he covers the stage in garbage and hidden traps is slick, although I can't help but feel the fact that he starts losing weight immediately from it is a bit too much punishment for a move that's hardly unbalancing the game. Some of the effects on a few of his moves feel a bit tacked on, and I can't help but wonder why a move called 'lethal' injection just slows them down a bit. Overall though, not an insufferable moveset.
Despite this being for Meowth, I think I can respond to this on behalf of lordvaati. Thanks for the comment, DM. The separating of the arms was something I pontificated on when first imagining the set in class - it seemed far more intuitive to have his arms down there, rather than trying to pull off something where he's blowing up his entire body. It's not entirely illogical - his arms are loosely-connected compared to his feet and lump of a main body.

The losing weight coincides with his movement bonus - seeing as he's actually losing his own garbage, though, it only felt right to make him lose weight as well. With the lethal injection, I did have it as an actual injection at first... but it felt like I was moving away from what the character is, so I made it more passive. I was a bit apprehensive about some of his lingering effects, but I feel it turned out good in the end.
 

darth meanie

Smash Journeyman
Joined
Jun 6, 2008
Messages
452
Our first DM set of the contest, DarkMega [or Dark MegaMan.EXE] is one that ramps up the thrills of play, but in the end it didn't particularly appeal to me with its playstyle. The premise is nifty – create a collection of smashes and specials which, on the outset, seem broken; you curse each of these moves with an appropriate bug, where I felt the set was at its strongest. Considering DarkMega is such an obsessive camper, this aspect of his game gives him real potential to come out of defence and go on the offensive. It's not the most compelling solution to a camping playstyle, however, as DarkMega is constantly dragging himself down every time he uses a move. Eventually, this just leads to a character who loves to stand in one corner of the stage and spam his projectiles, being very reactionary. Of course, this would change depending on the opponent, but I'm not even sure if you really thought about this, with that one match-up which doesn't tell us anything.

What DarkMega also does well is his style. The writing in this isn't your best work, but it outlines moves well while missing out details which are mostly easily overlooked. There are a couple of instances where you are not descriptive enough, but it's uncommon. HR already stated what I wanted to say about the Hole, for example. The dark styling and combination of the organisation along with the presence of dark chips everywhere helps in creating a sense of this evil alter-ego. Onto those dark chips, though... that mechanic is really wanting. This is the worst time to be unspecific, as it seems like Dark Mega wants his opponent to hit his dark chip he's summoning over his head... but only sometimes, and they have to do this by hitting him out of summoning them. You don't specify how long they stay out, but also this goes against his defensive nature by wanting opponents to attack him. Considering these moves are broken, at what point would an opponent want to get close to him when he's using them? Not only does he have no way to influence this in any concrete way, but it's awkwardly meta in interpreting DarkMega's chips as being physically pulled out over his head. The punishment for using a dark chip is also enough that no one would ever want to steal one from DarkMega, if their final smash is at all competent, and when they can easily avoid taking one too.

What really disappoints me, though, is that the playstyle doesn't come together all that well in the end. That section is overly long, mostly re-stating that individual moves can help in ways that only differentiate them from each other, but don't seem to flow well. When you get to the juicy parts, it's all about bugging the opponent. And I have to say, it's clever in using your own afflictions to infect your opponent – still, I would have liked to see more connections between the different kind of bugs. It seems more like he could be giving them any old bug and it'd benefit him just as much. Which kind of links into my main problem with this guy – his bugs really only make his reliance on broken moves even more profound, as his camping playstyle totally works against it. He wants to be able to play defensively - much to the chagrin of his bugs, which usually punish him most when he's not being offensive. Calling him a berserker in this state would be an understatement. It means that he's dependant on his brokenness and plays more like a gambling powerhouse than the infective virus he should be. And I did want to like this set, honestly – the whole style of the set is enticing, the basic premise is bordering on brilliance and the character is interesting, but I find it quite flawed.
I do feel the need to respond to this, because I can't help but feel that you missed some of the point of DarkMega, and a few of the sections. Most of the questions you had about DarkChips are answered in the big section at the top of the moveset called 'DarkChips', explaining how he summons them and how long they last.

Also, you mention something about DarkMega standing on a corner and camping; well, because of the nature of DarkMega's bugs, he's forced to move out and become more aggressive as he attacks more; his projectiles become less effective, he takes automatic damage, which means that in a stall situation he's losing, and he's constantly forced to move forward.

As for when to take a Dark Chip; the mechanic isn't simply DarkMega running up and taking a Dark Chip, it's the opponent countering him when he's trying to use a powerful move. DarkMega -doesn't- want to be attacked this way, thus his natural inclination towards spacing and camping, but when it -does- happen, he wants to be able to capitalize on the weaknesses using a DarkChip gives the opponent. The raw damage output or ability to instantly recover all health, especially near the end of the match, should be more than enough to make an opponent consider using a Dark Chip. Not everyone will, which closes off the corruption aspect of DarkMega's game, but also closes off some of their ability to deal with DarkMega's offensive.

As for the lack of difference in how much each bug the opponent has benefits DarkMega, that's not exactly true. Some characters would actually like to have a constantly moving forward, or would be utterly unaffected by losing projectile effectiveness, while others would find that devastating. I simply listed off some of the ways he can abuse it.

You complain that his bugs work against his natural tendency for spacing, but that is, again, kind of the point. When he's constantly moving forward and doesn't have reliable projectiles, he has to go in with moves like DarkSword, his forward aerial and his dash attack as close-range rushdown moves; they're even more effective like that when he's constantly moving forward. The 'berserker' aspect comes into play when he's in DarkInvis of course, as there's little incentive to make such a huge sacrifice of damage until DarkMega is really getting desperate.
 
D

Deleted member

Guest
I do feel the need to respond to this, because I can't help but feel that you missed some of the point of DarkMega, and a few of the sections. Most of the questions you had about DarkChips are answered in the big section at the top of the moveset called 'DarkChips', explaining how he summons them and how long they last.

Also, you mention something about DarkMega standing on a corner and camping; well, because of the nature of DarkMega's bugs, he's forced to move out and become more aggressive as he attacks more; his projectiles become less effective, he takes automatic damage, which means that in a stall situation he's losing, and he's constantly forced to move forward.

As for when to take a Dark Chip; the mechanic isn't simply DarkMega running up and taking a Dark Chip, it's the opponent countering him when he's trying to use a powerful move. DarkMega -doesn't- want to be attacked this way, thus his natural inclination towards spacing and camping, but when it -does- happen, he wants to be able to capitalize on the weaknesses using a DarkChip gives the opponent. The raw damage output or ability to instantly recover all health, especially near the end of the match, should be more than enough to make an opponent consider using a Dark Chip. Not everyone will, which closes off the corruption aspect of DarkMega's game, but also closes off some of their ability to deal with DarkMega's offensive.

As for the lack of difference in how much each bug the opponent has benefits DarkMega, that's not exactly true. Some characters would actually like to have a constantly moving forward, or would be utterly unaffected by losing projectile effectiveness, while others would find that devastating. I simply listed off some of the ways he can abuse it.

You complain that his bugs work against his natural tendency for spacing, but that is, again, kind of the point. When he's constantly moving forward and doesn't have reliable projectiles, he has to go in with moves like DarkSword, his forward aerial and his dash attack as close-range rushdown moves; they're even more effective like that when he's constantly moving forward. The 'berserker' aspect comes into play when he's in DarkInvis of course, as there's little incentive to make such a huge sacrifice of damage until DarkMega is really getting desperate.
One thing I thought you were right on was my knowledge of the amount of time the dark chip was out... however, that's a fifth of a second... what you didn't state was how long a dark chip stays out if DarkMega is attacked while summoning it. It's a minor detail, and so I didn't say much about it - one can assume it lasts as long as an item.

The rest of it purely comes down to DarkMega feeling far too circumstantial. Opponents aren't going to be coming out of the woodwork to attack him precisely when he's using a dark chip - at a fifth of a second, it's far too short a time to be able to tell what bug attack you're getting. So you simply have to attack DarkMega whenever he's attacking with one and hope you don't get punished for it, or that the chip he drops is one you don't want. If you actually want your opponent to get a certain bug, you risk using the move yourself and taking the effects of the bug. DarkMega has no way to make an opponent want to attack him.

Not taking into account that a lot of his moves don't use dark chips, so much of the time he can just use those if he doesn't want the opponent to get one. You say he may have to take advantage of their weakness once they take a dark chip... I don't see how they could, unless DarkMega was playing really stupidly. Most of the dark chip moves can be used from a great distance anyway.
 

Rychu

Thane of Smashville
Joined
Jul 5, 2010
Messages
817
3DS FC
1908-0105-4965
Enrico Putti and Whitesnake:star::star::star::star::star::star:
LoL, you are certainly on a roll from MYM9, giving us another fairly strong set. I like Enrico and Whitesnake because of the way you tackled the concept: move-stealing is a difficult area to work with and you pull it off quite well. Enrico's command disks are an intersting concept as well. The best of the set is where Whitenake is involved, the relationship between the two is expressed pretty well within the set.
On the negetive side of things, while the approach was good, the outcome of the set feels generally weaker than previous entries from you like Klink and Sarkhan. There feels like there is a lot of potential yet to be exploited from this character, this concept, and from the set in general. That's not a knock on you, but overall this feels like a weaker entry from you than you're previous contributions.

Gon:star::star::star::star:
Gon is a very strong first set from you, koolerkid. I like the concept of the Nen points, and how you handled the regaining of them, as well as the two seperate styles that regulate them. The specials are all plenty of fun, and definitly show off the character's strong attributes.
Some pointers, though:
If a move feels generic, or like it doesn't do much, try to think it out and see if it can have an effect on any other part of the set. There doesn't have to be a ton of uses for every move, but it's always nice to see some meat put on a move and be surprised when we see the usefullness of the move. Also, the Nen points could have been used on every move, instead of just the couple you chose.
In all, a strong debute in MYM, good luck in the future.
 

Dark Paladin X

Smash Journeyman
Joined
Feb 22, 2008
Messages
277
Meowth

The first question I have to ask about Marona, as a person who's never played the game, is why a character who is a 'squishy wizard' is throwing around elm trees as a Smash? I figure it must be in character for her to be using such a random item, but the descriptions you have are so barebones it left me bewildered.

Overall, this seems like some other 'squishy wizard' archetype sets we've seen before; recharging specials, a limited healing move. It loses all of its momentum after the Specials though, many moves don't even have any damage percents attached to them.

My reccomendation for improving with future sets would be to simply try to get the standard moves to fit into the archetype you want the set as a whole to fit into.

Well for starters, in Phantom Brave, any item can be used as a weapon, not just the traditional RPG weapons like swords, daggers, axes, spears, and staves. Rocks, trees, flowers, bushes, and even using other characters can be used to beat up your opponents. However, most of the gameplay involves "confining" items to summon a phantom character into battle. Statistically wise in Phantom Brave, Marona is a "squishy wizard" because of her low health, physical attack, and defense stats, but very high magic based stats. However, it is possible to make Marona an effective powerhouse, it just involves a lot of weapon customization. Also, in Phantom Brave, speed is the most important stat since having high speed allows you solo any map in the game.
 

MasterWarlord

Smash Champion
Joined
Aug 24, 2008
Messages
2,911
DARKIER AND EDGIER MEGAMAN

DarkMega looks like it’s a jokeset at the start and progressively shows you that is in fact a legitimate moveset (And not a god-awful one) as you read through it until it finally gets to the playstyle, where the largely negative experience finally pays off – and oh is it worth it. While the aspect of getting the foe to give in to the dark
side
chips is rather underplayed, if it was built into the set any more it’d of felt tacky, and as is it serves as something good in the background to help properly balance this broken monstrosity. Aside from managing to make a mechanic where a character can take 100% per second then heal it all in an instant not feel like a joke or blatantly forced creativity, you actually pull off that “choice” aspect of risk and reward with the dark chips that Raiden attempted to do and blatantly failed at. I’m also really digging the shift from defensive campyness to a more offensive playstyle despite there being a lot of room for interpretation of how he plays – the fact that he’ll be taking so much constant damage eventually means that he won’t have time to camp later on.

I think you may’ve saved too much for the playstyle summary at the end, as left to one’s own devices there’s not much to really pull out from what seems like a mess of set. Only in the playstyle summary do you reveal half the interactions, let alone DarkMega’s actual goals, and it’s quite honestly too much to take at once when we begin skimming the moveset later on out of an assumption it’s going to be bad. Aside from the fillerish nature of some of the inputs with some really obscure interactions, one of the main things that prevents me from liking the set as much as I could is that it feels like it would have extremely biased match-ups regardless of whether or not it’d technically be “balanced” – either for or against him. I still do very much like the set, mind you, and it’s a pretty harsh criticism to put on the moveset when it’s so hard to balance the concept in any form.

GARBAGE DAY

Garbodor has some good stuff going on with hiding pitfall trash in a mountain of other trash, and the ways of spreading it are more varied than those in Weezing despite it being compressed into just but a few moves. I particularly like the potential for hiding your arms once you’ve exploded inside of trash, and you’ve given Garbodor sufficient spacing tools to play with foes competently in the junk yard he makes of the stage, most notably his two versions of the grab and dumping people out of his body once he’s absorbed them into it.

While that’s all the makings of a great moveset, Garbodor is bogged down by a large amount of filler and a shoddily written rushed playstyle summary that makes the moveset look like it has even less playstyle then it has – an awesome start can only go so far when it’s essentially only 5 moves, and from there on out the filler is atrocious with things like that nair which should’ve blatantly just been a zair. The writing style also comes off as very awkward in the few moves that actually do need explanation, and is only easy to get through because of the large quantities of filler that don’t need much explanation and the shoddy playstyle summary.

PSYCHIC! PSYCHIC! VICTINI WANTS YOU TO KNOW IT HAS PSYCHIC MOVES TOO!

Victini’s pursuit game with his Side Special is really the most interesting part about him, causing things to start going somewhat downhill as I read through the rest of the moveset. True, the Warlordian approach is specials first, but it’s very rare Warlordian specials are all that interesting by themselves and they rely on interactions later in the set to build up to a climax. In this moveset. . .It just sort of peters out into nothing. The other element you have in Victini’s game, survivability and never letting up until the end, feels very irrelevant to the rest of set, nevermind OOC for Victini. More awkwardly irrelevant is the equally OOC and incredibly overpowered grab-game which he needs for spacing for whatever reason. The playstyle summary does little to remedy it and emphasizes the more boring and awkward parts of his game. . .And I only bother mentioning this because you actually care about Final Smashes – why do you have four different ones? It’s not particularly bad, it just seems incredibly random.

If nothing else, let it be said that I very much like the ordering of the moves with this moveset and would love to see more of it – putting the relevant moves together with a brief quip is much better than trying to find an arbitrary order to sort the standard move categories in.
 

Junahu

Smash Ace
Joined
Nov 15, 2005
Messages
899
Location
Shropshire Slasher
Comment replies :D

Thanks for the comments for Victini everyone. It seems to be one of my less popular sets, and I can understand why.
Still, I'm going to try to feebly explain away some criticisms anyway


Zook said:
I'm not really sure what the point of Victory Star is, though; I like it as a mechanic, but it feels a little tacked on to this set.
Victory Star is meant to be more of an invisible mechanic, it encourages you to use speedy approaches and discourages the foe from doing the same. Players are not supposed to be conciously aware of the mechanic being in play, they're simply supposed to get the "feeling" that moving quickly is good for Victini.

Zook said:
...But, uh, yeah. I can't enjoy Victini because it's just too good. I don't think your intention with this character was to be balanced, though, so it was very creative and interesting to read.
True, as a legendary pokemon, I did want Victini to be somewhat powerful, though I am aware of various balancing issues here and am slowly modifying the set to rectify them. I would like to hear which specific moves you feel are too strong.

Bkupa said:
While you seem to imply his floatiness and light weight levels his many strengths out, I find it rather irrelevant to balance when plenty of good characters (that one knight guy with the mask?) share these traits.
Something I think may have been lost in the writing of Victini, is that most of its lynchpin moves are somewhat slow, and meant to be used as counters, absorbing a hit then hitting the foe right back. And since Victini is a lightweight, it cannot afford to mess up even a single counter. It's a system where Victini needs to risk being KO'd in order to KO; Metaknight never puts himself in any such risk


darthmeanie said:
Maybe it's just me, but I don't get quite the 'trickster' vibe from Victini that this moveset seems to put forth
It's just you. Victini is not a trickster.

darthmeanie said:
I'm also not sure how I feel about the grab; it's very different for Cairne to have a grab of struggling and grappling with the opponent, but for Vicitni it just looks a little silly. It's also far more complicated than it needed to be; button mashing extends the length of the grab... but also helps the opponent push back?
I did not describe Victini's grab at all well, so everyone seems to be assuming Victini is grappling the foe like some heavyweight sumo. This is not the case at all, the grab looks a bit more like this... kinda

Victini flies into the foe, and tries to push them back through sheer force of will, still flying all the while. I personally think this grab works well from a visual and gameplay perspective, especially in conjunction with the rest of his moveset, which outright demands constant movement from Victini.
Also, button mashing no longer lengthens the grab. I changed that.


darthmeanie said:
I can't help but feel that some moves landed on here not because they made particular sense for Victini, but because he had those moves, and transitioning the mechanics of, say, Zen Headbutt, Endure, and other moves like that made some of the inputs awkward
While I cannot speak for anyone else's understanding of the term "Pokemon Syndrome" I myself believe all of Victini's attacks here are perfectly in context. Zen Headbutt, and ESPECIALLY Endure are fairly important moves for exploring Victini's character. When looking at a move for a Pokemon, I always ask myself what that move tells me about that Pokemon, and I use THAT as the basis of the attack.
For example, I saw Zen Headbutt as an illusion based mix-up on the normal Headbutt, a smarter version of Headbutt if you will. Hence why Zen Headbutt in the set is very similar to headbutt, and intended to psyche out the opponent.

I will admit however, that Energy Ball does nothing to explore Victini's character, and is kind of Pokemon Syndrome-eske.


MasterWarlord said:
The other element you have in Victini’s game, survivability and never letting up until the end, feels very irrelevant to the rest of set, nevermind OOC for Victini. More awkwardly irrelevant is the equally OOC and incredibly overpowered grab-game which he needs for spacing for whatever reason.
The whole point of Victini as a pokemon is that it brings victory no matter the foe. It's a pokemon based around the heroic ideals of Japanese super heroes, or more particularly, Tokusatsu such as the Super Sentai series. And a big part of these is that they would even risk their lives, survive impossible odds, for the chance to turn things around at the last possible moment.
I'll grant you the rest of the criticisms you made, as I did a terrible job of explaining how Victini works, and what it all amounts to is not terribly interesting to read. But I won't broach accusations of Victini being out-of-character
 

Junahu

Smash Ace
Joined
Nov 15, 2005
Messages
899
Location
Shropshire Slasher
This post marks the end of week 2's MYmini, so, it's time for people to vote on their favourite entries. You can find all of this week's entries, and the voting procedure, [HERE].

Be sure to send your votes in, before the end of Sunday. You have 3 votes (2 normal votes and 1 "Macro" vote), and you should PM your votes to MarthTrinity


Anyway, here's the next MYmini to sink your brains into, good luck!

MYmini Week #3 (22nd-28th May)
Rapture!:

Did you hear? Yesterday was the Rapture. So, for everyone left behind, let's make the most of it, with a mini!
Your aim this week is to design a cool boss for all our Brawlers to fight, but the twist is that this mini needs to be at least tenuously connected to something theological. It could be a real religion (keep things tasteful though) a made up one, or it could even just be about the idea of theology as a whole. You don't even neccessarily need the boss itself to be religious. For example, perhaps you're fighting alongside Hercules to calm a raging Gyarados...
 
Status
Not open for further replies.
Top Bottom