• Welcome to Smashboards, the world's largest Super Smash Brothers community! Over 250,000 Smash Bros. fans from around the world have come to discuss these great games in over 19 million posts!

    You are currently viewing our boards as a visitor. Click here to sign up right now and start on your path in the Smash community!

Make Your Move X - Congratulations winners! MYMXI start date OCTOBER 10TH!

Status
Not open for further replies.

MasterWarlord

Smash Champion
Joined
Aug 24, 2008
Messages
2,911
BURTER

Incredibly fast moving character with massive flight capabilities who kills primarily by using said aerial capabilities to slaughter the foe once they’re taken off-stage. Sound familiar? They can even both use their momentum to grab a foe and carry them along with themselves, keeping their momentum in-tact. Sure, Burter didn’t have the clouds, but he had his own manipulatble trap in his tornado, so even there there’s at least –some- sort of comparison.

A lightweight spin-off really isn’t all that much to earn my admiration, much less when the main differences in the actual offensive playstyle are generic mix-ups and the main additions feel like they’d be more at home in a campier set. Just why –does- she need obscuring clouds when she wants to keep constantly moving? The foe would benefit from them more, if anything, and she really doesn’t seem to have all that much time to go back and use the ranged attacks of the clouds. They have some practical uses off-stage when they double for recovery, but that’s about it. Most of the momentum based moves just take advantage of the fact that Rainbow Dash is moving at all rather than the fact she’s moving obscenely fast, making a lot of them hard to picture using them the way you intended when you’re just going to whoosh past the foe half the time. While there is the bair, better ways to control/take advantage of this momentum would’ve been more practical over some tacky status effects in the ftilt, uthrow, and the cloud superarmor (Which you could’ve given to her just via momentum) that are just there to make her seem less blatantly like a DBZ moveset would’ve been appreciated.

S TIER
Dr. Gero

A TIER
King Cold
Frieza
Cooler

B TIER
Cell
Vegeta
Zarbon
Nappa
Piccolo
Dodoria
Android 18
Burter
Nail
Gohan
Cui
Raditz
Super Buu
Jeice
Tien

C TIER
Android 17
Captain Ginyu
Yajirobe
Guldo
Krillin

F TIER
Yamcha
Chiaotzu
Goku
Fat Buu
Recoome
 

Hyper_Ridley

Smash Champion
Joined
Dec 21, 2007
Messages
2,298
Location
Hippo Island
Too many Pony sets. Here's an HR set


WUKONG
THE MONKEY KING


The Monkey King is one of the most well-known Chinese mythological beings ever, if not THE most famous. This particular incarnation of him is from that online game HR is so obsessed with, AKA League of Legends. He spends much of his time finding challenges to overcome, particularly those that will make him a better warrior. While he’s dead serious with his ambitions to improve, he’s mischievous at heart and loves a good prank every now and then. Lucky for him his peers consider him friendly and hard-working as opposed to an elitist ****.

Wukong’s most iconic tools are his staff, which can change its size to extreme ranges, and his cloud-like “Nimbus”, which he uses as a means of transportation. He is also known to create…duplicates of himself. :troll:

STATS​

Ground Movement: He’s a monkey, of course it’s going to be above average
Traction: Good
First Jump: Great
Midair Jump: First thing here that’s below average
Air Control: He’s a Chinese martial artist folklore character who is most commonly known for being the basis of Goku in DBZ. Can you say “Wario-tier” air control?
Fall Speed: Average
Size: He’s actually around human size, a little shorter than Marth. His armor does make him a touch wider though. As for his staff, it’s slightly taller than Wukong himself, but he tends to hold it in the middle.
Weight: Wukong’s what you would call a “glass cannon”, having weight near the bottom of the list.

SPECIALS

Neutral Special: Decoy
Let’s get this part out of the way, shall we? Upon pressing this input, Wukong creates an exact copy of himself in the exact same position he is in and he simultaneously turns invisible. Yes, this set is calling upon invisibility too, I won’t blame you if you stop reading here. 3 seconds later, the duplicate explodes into a cloud of magical air twice the size of Kirby, dealing 6% and flinching knockback, and the real Wukong reappears (along with him chuckling if you were hit by the clone’s explosion). There is no lag at all to forming a clone but you have to wait 9 seconds in between uses of this move, indicated by a bit of that same magical air flowing around Wukong’s staff. The timer counts down the instant you start the move so you effectively have 6 seconds between each round of invisibility.

The alternative way to creating a clone is to hold the Special Move button while performing any of Wukong’s attacks besides specials or grabs. This will cause Wukong to turn invisible for the duration of the move while a copy performs the attack instead! There’s no extra lag involved for this either, with the only indication that a copy performed the attack being that all copy-attacks deal 6% and flinching knockback (or less is the attack itself deals less), and that upon the attack ending Wukong reappears, only this time the clone stays where it was formed.

Any clones Wukong creates in this manner will stay on-screen until they are struck by a non-projectile attack. If you perform any non-special move input during any of Wukong’s moves the oldest decoy will perform that move, and if you perform a particularly slow move that allows you to have Wukong and duplicates in the middle of an attack animation, it will be the next oldest and so-forth. If you want to perform aerial attacks, pressing the jump button will cause the decoy to jump like normal, though you can’t actually move them around in the air nor can you perform a midair jump or fastfall with them. Just like the initial attack they performed on their creation, all copy attacks deal at most 6% and flinching knockback.

Now, let’s start discussing something OTHER than clones or invisibility okay? *Queue epic music*

Side Special: Nimbus Strike
With no lag, Wukong hops up a short distance and underneath him appears Nimbus, half the height of Kirby! Wukong dashes forwards on Nimbus for 1/2 of battlefield at a fast speed, and during the dash you can perform any of Wukong’s non-special ground attacks (this takes priority over having a decoy perform a move). Wukong enters his air-game, however brief it may be, upon the dash ending, even canceling out his attack’s animation if he was performing one.

If there are multiple enemies near the location Wukong’s dash ends, then any available decoys will also dash on their own Nimbus clouds towards the place Wukong’s dash ends, 1 decoy for each additional enemy. If there are no extra enemies there you can still order decoys to meet-up with you by pressing the Special Move Button for each one you want, again calling the oldest first. What’s really nice about this is that the Nimbus used by the decoys is actually a hitbox of that magical air which deals…6% and flinching knockback. Notice a trend here? This effectively gives you a projectile to work with while simultaneously approaching but don’t tell your decoys to fly right into an enemy attack!

Up Special: Pole Vault
With above average startup lag Wukong hold his staff above his head, charging the move as long as you hold the Special Move Button. Upon releasing the button, he sticks his staff into the ground and holds onto the top as it rapidly extends, the distance ranging from twice Ganon’s height to 5x that depending on charge time (max charge time is 2 seconds). Upon reaching the apex of the move Wukong them propels himself off the top of the staff while holding onto it, effectively performing his first jump on top of the height he gained from the move itself. Besides going into his air game from this his staff doesn’t completely shrink to normal size afterwards, instead retaining 1.4x its regular length until Wukong touches the ground. This range buff applies to moves that increase its size as well. If you create a decoy with the staff in this state, the decoy will keep the extra-long staff until it is destroyed!

If this move is performed in the air, in addition to the upwards extension, Wukong’s staff will also rapidly extend downwards to hit the ground, even going to the blast zone if performed off-stage. Being struck by Wukong’s staff in either version of the move deals 10% and moderate knockback in the direction the staff is growing. Also in either version of the move you cannot use this again till you touch the ground.

Most importantly, I was able to write a move about a Monkey King enlarging his staff and not tell a SINGLE Pingas joke, only this counts as a joke so sadface.

Down Special: Crane Stance
Wukong balances on one leg in a pose similar to the one in the pic at the top of the moveset, only his hand not holding his staff is held outwards with an open palm. There is low lag to enter this stance and he can hold this pose forever if need be. If performed in the air Wukong will summon Nimbus to maintain his current elevation. From this stance, you have the following options:

  • Pressing the Attack Button has Wukong Wukong perform a front-flip across ¼ of Battlefield, swinging his staff horizontally when he is completely upside down. This deals 11% and KOs at 145%. After swinging his staff Wukong is vulnerable until he lands, though he suffers no additional lag upon landing.
  • Pressing the Shield Button has Wukong swing his staff in front of himself in a parrying motion. If he hits an opponent it deals 5% and pushes them back 1/3 of Battlefield, but if he clashes with an attack he pushes them back twice as far. This has low startup lag and above average end lag. This is the only option that doesn’t take Wukong out of the stance.
  • Pressing the Special Move Button will have Wukong close his eyes and concentrate in a meditative trance. As he does this, mystical wind-like energy starts to pick up from the ground and swirl around him. Uh oh, his power level’s increasing! Quick, stop him before Vegeta has to break a scouter! It takes a full second for Wukong to finish charging his Chi/Aura/Potatoe, and he cannot cancel the process, but if he’s struck at this time he can DI the hit with triple strength thanks to attuning his senses, and he can always control a copy while charging to protect himself. If Wukong does complete the charging he’ll have a red-colored aura of power radiate from his body, which lasts for 15 seconds or until he creates a decoy. During this time, he has tripled DI from every hit he endures. If he creates a trap-style decoy, its explosion deals 13% and will instantly break the opponent’s shield if they try to defend against it. If Wukong creates a controllable decoy, then the extra energy used to create it will allow its attacks to deal the same damage and knockback as if performed by Wukong himself!

STANDARDS

Jab: Punishing Strikes
Wukong’s staff shrinks to fit entirely in his hand as he delivers a left-right punch combo, dealing 3% each. Wukong finishes this combo with a knee-strike that deals 4% and sends the enemy flying back ¼ of Battlefield. Low startup lag and moderate end lag. While you’re in the middle of performing this, if you’re a special snowflake you’ll manage to incorporate decoy attacks in-between each hit to deliver more BS pressure shenanigans; there’s a small window where Wukong holds his pose in preparation of the next hit for you to input an attack for clone before resuming the jab. Due to the way jab inputs work you can’t have a decoy performing a jab at the same time as Wukong, but feel free to mix-and-match who’s performing the jab stuff and who’s doing other attacks.

Forward Tilt: Advancing Strike
Wukong faces the screen and performs a side-flip while holding out his staff. This moves him forwards 1/4 of Battlefield and his staff is a hitbox that deals 9% and KOs at 190%. This has low startup lag and moderate end lag, but it deals enough shieldstun to not be terribly punishable. Besides using it to close the gap, you can jump right over many low attacks and the staff covers a semi-circle above Wukong across the move’s duration, giving it some great anti-air potential as well.

Up Tilt: Chuck Norris Kick
Wukong does a quick 360 spin to gain momentum before delivering an epic upwards kick, stretching distances that shouldn’t be possible for a guy. This delivers a nice, square, 12%, and vertically KOs at 140%. It does have above average lag on both ends, but as long as you connect with the move at all, hit or shielded, you can cancel the end lag with a jump! Of course, feel free to have a clone perform a move to help you follow-up before chasing your opponent into the air.

Down Tilt: Low Swipe
With above average startup lag Wukong sweeps his staff along the ground. This deals 7% and trips, and has low end lag so you can easily follow-up with it or even combo it into your jab and such if you land it at close range. Of course, good luck landing it at close range without a decoy to cover you, but you can always throw this out at longer ranges for a low-hitting poke, and the fee trip will allow you to at least start pressuring your opponent with other moves.

Dash Attack: Human Staircase
Wukong hops a short distance into the air while sticking out one of his feet. If he connects, this deals 11% as Wukong quickly uses his momentum to propel himself off his opponent, resulting in a footstool jump. This has below average startup lag and moderate end lag should Wukong miss. If the attack is shielded, Wukong will back-flip off his opponent, landing a short distance away as both combatants recover simultaneously. The animation as Wukong “runs” up his opponent before jumping off them gives you an extra moment to direct a clone so you can set-up some nasty follow-ups to the footstool.

Since Wukong’s copies can’t actually move beyond your first jump when they are controlled, the only way to have a copy perform this attack is when they use it during their creation. This is actually a pretty useful to make a clone with too, as if they land it you have a nice window to combo off it, and since Wukong doesn’t go into any animation when creating decoys you can continue dashing while you create the clone!

SMASHES

Forward Smash: Crushing Blow
Wukong grabs his staff with both hands at the end and holds it behind his head as it extends to an enormous size, easily ½ of Battlefield in length! With the lag of Dedede’s FSmash Wukong then slams his staff onto the ground the ground before him, dealing 14-32% and KOing at 90-65%. There is then moderate end lag as Wukong’s staff returns to its normal size and Wukong returns to his normal pose.

The main utility of this move comes into play when combined with Wukong’s copies, and I don’t mean for them to cover Wukong’s startup lag either; I mean for the clone to perform the attack and Wukong covers them! While the attack only deals a shadow of its real power despite the same mighty startup, the sheer area this attack covers effectively gives Wukong the freedom to do whatever the heck he wants until the attack finishes. For the ultimate troll effect, use this move when CREATING a decoy, adding Wukong’s temporary invisibility to the equation!

Up Smash: SHORYUKEN (Chinese version)
Wukong performs exactly what I just stated in the name, going as high as twice his own height. This deals 11-25% and KOs horizontally at 145-105%. It also has moderate startup lag making it the worst Shoryuken ever, especially when it still has punishable end lag as Wukong falls… at least until you realize you can cancel it into his midair jump at the apex of the move. Of course, if you’d prefer to remain on the ground, you have every other part of the attack to have a clone help you out. There’s a 5% chance Wukong will yell out the attack’s name during it, and there’s a 33% chance when THAT happens that he’ll continue afterwards and say “now everyone will call me a shoto…”

Down Smash: Cyclone
Gripping his staff ¾ the way down with both hands and holding it horizontally, Wukong proceeds to spin like a top. The attacks lasts for 2 seconds, but like Wario’s DSmash it can only hit each target once, dealing 11-28% and KOing at 120-85%. This has moderate lag on both ends. During the startup/charging period you can hold left or right for him to move that way at a moderate speed for the duration of the damage-dealing period, stopping automatically at platform edges. This is mainly useful when a copy does this to help them get around the stage while providing a lingering hitbox.

AERIALS

Neutral Aerial: Palm Strike
Effectively a sex kick, only not a kick. Wukong thrusts forwards one open palm, aimed slightly downwards. It deals 11% and flinching knockback with high hit-stun when it starts but afterwards deals 6% and barely any stun. It has low startup and below average landing lag so you can definitely combo off it if you land it close enough to the ground, and if you don’t land it has moderate end lag.

Forward Aerial: Double-strike
Gripping shoves his staff out in front of him, holding it vertically. This deals 7% and set knockback as far as ¼ of Battlefield (that seems to be a popular distance in this moveset). After this attack, Wukong quickly flicks his staff sideways, dealing 9% and KOing at 170%. Both ends of the move have below average lag, but this is a rare multi-hit attack where the first hit does not auto-combo into the second! Still, it’s got nice range and speed, making it a great poke or pressure move for your aerial battles.

Back Aerial: Elbow Blow
With a cheeky smile on his face, Wukong dashes backwards ¼ of Battlefield with his elbow pointed behind his head. This deals 11% and KOs at 160%. His aerial momentum stops for the duration of the attack. This has low startup lag but above average end lag. If the move clashes with another non-projectile attack, Wukong will appear behind his assailant with low lag in a puff of smoke, perfect for setting-up a counter attack. This is also another potential option for controlling the positions of your decoys.

Up Aerial: Helicopter Strike
Wukong holds his staff at 30 degree angle, covering an area above/in-front of him as he rapidly spins his staff for .6 seconds. This deals 6 hits of 2% and the last hit deals horizontal knockback which KOs at 160%. This has below average startup lag and moderate end lag, but Wukong’s fall speed is halved while performing the attack thanks to the wonders of gyroscopic forces. This makes for a great pressure tool or defensive maneuver. It can also help with recovery slightly but don’t think that you can actually perform a Peach-style float with it; that’s the job of the characters from the exaggerated version of Wukong’s tale.

Down Aerial: High Ground
With moderate startup lag Wukong thrusts his staff downwards while holding onto it by the end. This deals 12% and horizontal knockback which KOs at 170%. This has moderate end lag normally, but if you hit the ground with it, Wukong keeps the staff firmly implanted into the soil as he hops on top, balancing both feet upon it with his arms crossed and his eyes closed. Wukong maintains his pose until he is struck or he cancels it with a jump (counts as his first jump). While in this pose his staff functions as a solid wall, and enemy attacks will automatically be treated as though they are clashing with a hitbox.

The obvious point to this attack is to have the decoy use and maintain this stance to function as a make-shift wall, but it’s still a great move for the real Monkey King for being his most damaging aerial and for the ability to start his next round of aerial attacks from a higher position. Additionally, while posing on his staff you can direct copies since you are technically in the middle of an “attack”. You can’t make them jump, though, as that’ll naturally perform the jump-cancel of this move.

THROWS

Grab:
Standard one-arm grab with moderate range and speed. If a clone grabs someone, then you will have to order them to throw during your normal opportunities to direct a copy. Still, you could always have the clone hold them there while you catch up.

Pummel: Wukong knees his opponent like Captain Falcon, dealing 2% in the process.

Forward Throw: Gut Thrust
Wukong headbutts his opponent as they bend over dazed. His staff shrinks to a tiny size as he places it right at his enemy’s stomach, and then it rapidly extends to twice its normal size in the direction of Wukong’s foe, dealing 10% and purely horizontal knockback that KOs at 135%. Humiliating for your enemy, hilarious for you.


Back Throw: A Little to the Left

Wukong jumps backwards ¼ of Battlefield while pulling his enemy along with him, traveling a shorter distance if he would jump off platform he’s on. This deals no damage but is pretty useful for bringing your enemy to a decoy only for said decoy to deal damage for you. The first time you use this throw your opponent cannot escape it, but if you use it again in the same grab your opponent is capable of breaking free in the middle of it to prevent stalling.

Up Throw: Uplifting Strike
Wukong uppercuts his opponent in the chin, sending them flying upwards with 8% and being star KO’d at 135%. Wukong crouches down in a jump-ready pose after the punch for half a second, during which time you can order a decoy as well actually jump into the air to pursue your foe!

Down Throw: Power Slam
Wukong lets go of his opponent briefly before whacking them over the head with his staff, dealing 8% and a knockdown. Unfortunately, his opponent can tech the knockdown, and Wukong spends a full half-second preparing the swing giving them plenty of time to react, but like you’ve heard throughout the set, this only gives Wukong the chance to have a clone cut-off the enemy’s escape route, OR Wukong can wait till the last moment before issuing an order to a decoy in order to try and predict which way the opponent will roll and catch them!

FINAL SMASH – 100 MONKEY SALUTE

Wukong meditates as an intense whirlwind of mystical air gather around him. After doing this, he strikes a combat-ready pose as 5 duplicates leap away from his being and form a line behind him. For the next 16 seconds, these decoys will follow Wukong’s every movement and attack in a slightly delayed fashion like the Ice Climbers! As the decoys attack in succession of each other it’s very easy for Wukong to be performing something new by the time the last clone is performing the first move, allowing you to utterly crush anything who finds themselves too close to the center of the group. The only thing the decoys can’t do is create more decoys, but they will turn invisible whenever Wukong does! 6x invisible FSmash FTW!

PLAYSTYLE

Herp derp, Wukong creates copies and turns invisible! It’s the most cliché moveset ever! No playstyle at all!

Wukong’s totally all about confusing the opponent with invisibility and mass clones. Nevermind the part where his invisibility is short-term and has to recharge, he just wants to make himself just as confused on his position as the enemy! Sure, the moment he reappears the enemy instantly knows which is the real one, but his clones are still just there for generic mindgames! They definitely don’t work like controllable projectiles to keep Wukong’s attacks safe and to give his attacks even more range. And even if they did (which they don’t), that just means that this supposed legendary martial artist is a defensive camper who has to rely on his clones to attack at all, cause all those jump-cancels and naturally safe moves aren’t safe enough, really.

Wukong definitely has no pressure game. He has no ability to strike out with a ground attack, then link it into a jump to continue pressuring in the air with his great aerial movement and stuff like auto-canceling NAir. He has WAYYYYY to much lag for that, it’s not like the slower moves have built-in cancels, or are naturally safe if you properly space them, or simply can help you lock-down the opponent when a decoy is nearby to continue the attack for you. And besides, if he had all these supposed cancels, then what’s the point of the lag to begin with, he can’t use it to input an attack for a decoy and THEN perform the cancel, no sir, not at all. His Nimbus Strike, Dash Attack, aerial movement, and invisibility bursts don’t give him great approaching options anyway, so who cares if he had some theoretical aggression.

If you couldn’t tell, the above was sarcasm and incredibly simplified description of Wukong’s gameplay. If you could tell, then you are K.Rool.

A WORD FROM THE AUTHOR

Welp, here’s my actual 2nd set of MYMX, just in time for the end! Partially because I had such a short time frame to finish this sucker (I actually attempted to make it a 1-day set at first), I decided to try and see just how far I could take simplicity while still feeling like I had created a coherent playstyle. I was also trying to get the acrobatic feel of all those old martial arts movies, hence the aerial emphasis. As for the MYMX clichés, I loved making them into temporary benefits rather than the entire emphasis of his playstyle. Not to mention that placing them on the same attack is the most amazingly trollish thing ever. I don’t expect it to be some super popular set (I would probably say I prefer Yorick overall), but I enjoyed making it and I think it’s still among the top half of my personal catalogue.

As for MYM11, well, I still have my blasted Ridley movset that’s been a WIP since MYMX started, as well as another League of Legends character (tipsy). If I feel up to it maybe I’ll post my rendition of Dormammu now that N88’s has had time in the spotlight (It’s even an HR set with tons of special quirks in the A moves!) I also have plans to finish a certain moveset that has become legendary in its WIP-ness…
 

mentholcase

Smash Cadet
Joined
Sep 2, 2011
Messages
56
Location
Northern California
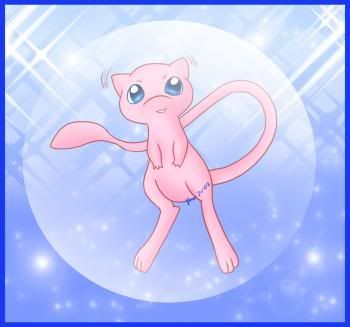
* * * * it's Mew! * * * *


"Believe it or not, this is a different shade of pink than that of the one found in the moveset of my good friend, Dixie" - Mew


--UNLOCK--

Use Zelda in SSE on the level w/ the grass after the bridge. When you reach the grass, use Farore's Wind to escape the enemy residing there IMMEDIATELY after you grab its attention. Defeat the Slowpoke across the way. Return to grass. BAM. A fight w/ Mew ensues. Something about manipulating the numbers in the game's memory. Alternatively, Mew challenges you after appearing from a Pokeball 151 times. Easy peasy​

--INTRO +STATS--

Mew is special in the Pokemon games as being one of the few Pokemon that can learn any TM/HM move. Here in Smash, w/ the exception of some Specials, Mew can use any attack, including all Final Smashes (say what?? we'll get to that soon, I promise. HEY! I SAW THAT! STOP PEEKING) Mew's ground speed is equal to Meta Knight. Despite the small stature, Mew plays like a slightly taller fighter, never actually touching ground, always hovering just above ground in that orb (very much the opposite of Wolf, a taller fighter that plays low). As a result of this, there are some Dtilts that actually completely miss Mew! That orb is also where Mew's Unique Ability comes into play. Being lighter than Jigglypuff, you would think quick KOs on Mew would be easy to come by. Perhaps, if it weren't for Light Screen
Unique Ability - Light Screen
In Smash Bros, that orb that Mew flies in is its Light Screen. It is impossible to break, but enemy attacks do pass through it. However, instead of blocking, it reduces the damage of attacks. As Mew's damage increases, the Light Screen's effect grows stronger. This is seen visually as the thin & transparent edge grows thicker & more opaque. The Light Screen has no effect on knockback (if it did, Mew would never get KO'ed!) After 75%, attacks get reduced by a quarter. After 150%, attacks get halved. After 225%, attacks get quartered. After 300%, all damaging attacks cause Mew 1% damage​
Mew's air speed is the same as Yoshi's, & both jumps go 9/10th the height of Yoshi's double jump. When Mew double jumps, there is no actual jumping. Mew simply rises up. Mew has the absolute slowest fall, at half the speed of Jigglypuff's. Mew's shield has a unique animation, just like Yoshi's. The Light Screen becomes Barrier, a solid sphere, completely encapsulating Mew. Air dodging, sidestepping, & rolling all cause Mew to disappear completely​

--SPECIALS--

Neutral Special - Metronome
Executes a random Special Move from a random fighter, excluding Up B moves, & limited to moves where Mew has at least the option of staying relatively stationary (e.g., most of Samus's Specials are eligible to be copied. only ineligible Neutral B move is Rollout). If copied move is a charge move, then move is used instantly for aproximately half the damage of the fully charged move. Handles Olimar's Specials exactly as Olimar does (if Mew copies Olimar's Neutral B, the Pikmin will be useless until, if lucky, the Side B is copied. alternatively, if Mew has not copied Olimar's Neutral B, then copying his Side B will result in pure vulnerability) Also handles Kirby's Neutral B exactly as Kirby does (Mew can use it to semi-permanently copy a Neutral B of another fighter in play, taunting to rid itself of the copied attack)

Side Special - Softboiled
Mew smiles like this (^_^) while gently using both arms to underhand toss a small egg straight up, about 1/2 the height of the lightning bolt of Pikachu's Down B. Mew is also self-damaged by 50%. Egg seems to defy gravity, as it falls even slower than Mew's fall speed. Mew is immobilized as it watches the egg rise & fall, as if completely mesmerized by it (it would be wise to use this only after an enemy is KO'ed or at least knocked back far off stage). If egg lands on Mew, 100% damage is healed, effectively 50% before the start of the move. A teammate can jump into the egg to heal 50%. Does absoulutely nothing to enemies, breaking into nothingness upon contact. To prevent unfair "fasthealing", egg passes through all non-damaging barriers (damaging barriers destroy it). Lastly, attempting to use this move more than once in 40 seconds will just cause Mew to giggle, as if being tickled

Up Special - Teleport
Same animation as Mewtwo's Teleport, but travels 95% the distance of Farore's Wind. Non-damaging. Relatively short starting delay & ending lag for a triple jump. Oh, & travels exactly where the player's directional input is pointing

Down Special - Transform
The target of Transform is the last enemy that has made any kind of contact w/ Mew, including w/ shields. Mew enters an animation similar to ZSS's FS, but much shorter. Exits animation as a carbon copy of the target, but still surrounded by Light Screen, which may have adjusted in size to accommodate Mew's new form. ALL moves of the target, except for Specials, replace Mew's moves. One setback: The Stale Moves Negation on a transformed Mew's non-special attacks is 1.5x stronger (in the Pokemon games, after using Transform, each copied move can only be used five times each). Using Down B after transformation reverts Mew back to original form. This is useful if a Mew player has broken a Smash Ball & wishes to use Mew's Final Smash, instead of the copied Final Smash. Getting knocked out also resets Mew's form. Move still goes into animation if last enemy contact was another Mew, or no enemy contact at all, but this results in no change after move end​

--"NATURAL" NORMAL ATTACKS--

In the Pokemon games, Mew's natural learnset leaves a lot to be desired (1st gen had 5 moves, 2nd & 3rd had 6, 4th had 12, & 5th has 13), quickly prompting players to reach into their TM bags. In Smash Bros, Mew is exactly the same. Its "natural" moveset is a bit lackluster, leaving all but the most challenge-seeking players wanting to "teach" it new moves as soon as safely possible (though, all non-smashes are somewhat speedy)

-GROUND-

Neutral - Spark (similar to Mewtwo's Nair, except infinite) [first hit 3% damage, then 2, 1, 1, 1...]​

All Tilts identical in animation to Mewtwo's Tilts
Ftilt - Tail Slap [8]

Utilt - Tail Flip [6]

Dtilt - Tail Sweep [7]

Dash - Tackle (similar movement to Wario's Fsmash) [8]​

-AERIAL-

Nair - Reflect
Mew's Light Screen suddenly becomes damaging (also does something to oncoming enemy projectiles, but i'm not too sure I remember what) [6]

Fair - Mega Kick
like Mario's kick from his jab combo [13]

Bair - Turnaround Pound
spins 180 & pounds like Jigglypuff, but does not cause Mew to float [9]

Dair - Stomp
kicks downward, similar animation to Lucario's Dair, but w/o the long duration [11]​

-SMASH-

Animation of Mew, startup delay, & ending lag of all Smashes are the same. On startup delay, Mew collapses into a fetal position & holds itself tightly. Charging animation is Mew holding itself tighter & tighter. Damaging frames, starting from frame 16 on an uncharged Smash, are Mew unleashing itself from this position. All smashes are incredibly disjointed

Fsmash - Psybeam
Blasts a beam of energy w/ a range of 1.5 Final Destinations. Passes through enemies. Gets weaker & weaker after two Stage Editor squares [within two squares: 13 / fully charged 19] [after a distance of one Final Destination: 1 / fully charged 2]

Dsmash - Swift
Both sides of Mew shoot out a small star, reaching as far as four squares [10 / fc 16]

Usmash - Pyschic
The area directly above Mew, up to two squares, becomes warped & distorted (functionally a faster, weaker, & bigger hitbox version of Lucas's Usmash) [17 / fc 22]​

--GRABGAME--

Grab - Telekinesis
Mew's grab range is exactly one square. When Mew grabs an enemy, there is no direct contact. Mew points both hands at the enemy & (s)he goes into his/her grabbed animation. During all throwing animations, Mew points its hands to direct the enemy where it wants to throw him/her

Pummel - Psywave
Mew crosses hands & emits small damaging waves towards the enemy [2]

Fthrow
Enemy is reared back before launched fowards (similar to Donkey Kong's Fthrow) [10]

Bthrow
Enemy is treated like Ness's yo-yo on Dsmash, causing damage to others, before finally being tossed behind Mew at a very flat angle [9 / "yo-yo" causes 14 & relatively high knockback]

Uthrow
Enemy goes into an animation similar to being thrown by Kirby's or Meta Knight's Uthrow. However, Mew is grounded the entire time [12]

Dthrow
Mew rises as enemy is pulled in. After enemy is directly under Mew, (s)he is slammed [8]​

--SMASH BALL--

Final Smash - Hidden Power

After a similar animation to its Down B, Mew becomes invulnerable. Its Light Screen sparkles & continuously rotates between several colors. Its Specials change to the following
Neutral - first use, a fully charged Giant Punch, afterwards, Falcon Punch

Side - Rock Smash

Up - Super Dedede Jump

Down - first use, a fully charged Wario Waft, afterwards, Thunder​
After 15 seconds, Mew's natural Down B is automatically executed to transform Mew back to its normal state​

--PLAYSTYLE--

Oh my goodness, what can be said here? Mew's "natural" form could probably do a decent job racking up damage at low percentages, especially w/ aerial attacks, taking advantage of that extreme floatiness & respectable speed of both attacks & air movement. Players w/ excellent shield game may also take advantage of Mew's fast tilts. As for Mew's Smashes, they might considered less as finishing moves & more as mindgame moves that actually deal decent damage. Most Mew players will want to transform sooner than later, though. If you can get by w/o using Transform, then more power to you. However, transforming, more often than not, is the way to go. Okay, so you lose the copied fighter's special attacks & suffer from increased Stale Moves Negation, but what do you get in return? Damage reducing Light Screen. Self-healing Softboiled (which also means you get to see everyone look like this ^_^ </mini Easter Egg>). Oh, & that Teleport isn't exactly the worst recovery option (you know you want to use Transform on Yoshi at least once. a nearly invulnerable double jump that can now be followed up w/ a "Junior Farore's Wind" of sorts? yes, please). Does "Anything you can do, I can do better" strike a chord? Even if the enemy you are facing is a fighter you are not quite comfortable using, perhaps you can find comfort in the fact that you are using a seriously defensively buffed, even if somewhat offensively nerfed, version of that fighter​

* * * * it's Extras Galore! * * * *


"Hey, you lazy MYM designer! Why do I only get one extra??" - Mew

"Shhhhh!! You have like, a thousand moves -even if not all at once. I would've thought that only one extra wouldn't be that big a deal.
Besides, Unlock, Intro, Stats, & Playstyle are technically extras to begin with. Plus, BKupa666 has assured me, we don't actually need any of those fancy schmancy Snake codecs, win-loss poses, SSE roles, & the like. They're called *extras* for a reason, ya know?
"
- mentholcase


"Oh, well if BKupa666 said so, then I guess it's okay then" - Mew


--TAUNTS--

Up Taunt
Mew appears to split into four*, & each one quickly floats in its own compass direction outwards, passing through all non-damaging barriers. Just before reaching their respective blast lines, that incarnation disappears, & once all have disappeared, the true Mew returns to its original spot. If any of the incarnations are attacked, the true Mew will become visible & suffer from the attack exactly as if it were attacked before the taunt was initiated

*when in fact they are all the same, just Mew moving so fast, it appears as four, which explains why any of the four can be attacked

Side Taunt
Light Screen becomes invisible & Mew's body becomes transparent, glowing intensely (in the first season of the anime, the first two seconds of the intro made me think Mew was made out of neon)

Down Taunt
Copies a random taunt from a random fighter, not limited to Down Taunts

title picture of Mew from dragoart dot com/artist/dawn
 

mentholcase

Smash Cadet
Joined
Sep 2, 2011
Messages
56
Location
Northern California
@WUKONG THE MONKEY KING

Monkeys are awesome. Your moveset is quite awesome. That dash attack sounds like it would be fun to use. Unfortunately, I feel absolutely compelled to point out a colossal error in your post. However, it was probably just a misunderstanding; I'm sure it wasn't intentional.

Up Tilt: Chuck Norris Kick
Wukong does a quick 360 spin to gain momentum before delivering an epic upwards kick, stretching distances that shouldn’t be possible for a guy. This delivers a nice, square, 12%, and vertically KOs at 140%. It does have above average lag on both ends, but as long as you connect with the move at all, hit or shielded, you can cancel the end lag with a jump! Of course, feel free to have a clone perform a move to help you follow-up before chasing your opponent into the air.
Up Tilt: Chuck Norris Kick
Chuck Norris Kick
You forgot about the part where his foots breaks through the screen of the television, flying towards your opponent's face. Literally, the guy with the other controller gets kicked in the face
 

ForwardArrow

Smash Ace
Joined
Aug 17, 2011
Messages
503
Fluttershy
I'm not really sure if you could call Flutteshy a minion character to be honest. Sure, she has 3 animals who are helping her fight, but she's more cooperating with them then bossing them around and forcing them into ugly situations. Largely because they really don't like that, and you really do need them around because Fluttershy isn't exactly hard to beat otherwise. I admit those 3 don't do anything unique or interesting on their own, but it creates a rather different dynamic than I've seen with "minion characters" before. No, I'd rather call this a friendship character, as stupid as that sounds. Which seems fitting enough. Not bad here Junahu, not bad.

Wukong
Ridiculous innuendo on that Forward Throw, there.

Wukong is rather different from the other duplicate sets, in he's not really trying to set up a long term mindgame, but rather a bunch of short term ones. It's not really the main focus of his playstyle though, though they do serve as important extensions to his range and give him a nice way to mix his game up. That said, the rest of his game is a lot less interesting though, with him mostly just being a generic aerial offensive character. We don't really get a lot of those nowadays because they're "not cool enough" or something, but Wukong doesn't really do a lot to differentiate himself from the other ones. Don't get me wrong there is some stuff I like with the Nimbus and Duplicates being used differently than it has in a lot of other movesets, but I agree it's not as good as Yorick. It's not bad though, I'd say more average, and I appreciate that it doesn't pretend to be more creative than it is.
 

wolfgang92

Smash Rookie
Joined
Sep 9, 2011
Messages
22
Location
Sky Valley, NC
Black Ops


Name: Black Ops
Series: Call of Duty
Logo: COD letters
Home stage: Nuketown

Stats
Size: Tall
Weight: Heavyt
Speed: Slow
Range: Long
Attack: Strong

Special


Neutral special: L96A1
Its a bolt action sniper rilfe if you didn't know. A crosshair is on the screen and you move it where you want like Solid Snakes final smash. headshots deal very powerful knockback to the enemy but not instant kill, but bodyshots are weak.


Forward special: Crossbow
The crossbow fires Explosive bolts that have a good damage and explosion size. really slow to use tho.]


Up Special: Helicopter
A helicopter drops a ladder for you to ride up to the stage. It's like snake's recovery. SDon't abuse it.

http://images4.wikia.nocookie.net/__cb20100721145443/callofduty/images/4/44/C4iwi.png
Down Special: C4
This is like Snake's down special but it deals more damage but it has a longer priming time (you can't use it right away). The blast explosion is the same size.

Standard


Neutral attack: CZ75
The pistol is like the needles Shiek has: it's semi automatic, tho, so you have to keep pressing the A button.


Fprward Tilt: Tomahawk
He throws a Tomahawk with good damage. If you miss you have to go and retrieve it to use it again


Up Tilt: Olympia
He shoots the shotgun up at thwe sky. It spreads like a real shotgun too. good damage.


Down tilt: Claymore
He places a claymore on the ground that explodes when someone walks in front of it like a bom bomb (the ones that walk). You have to be close to it when you walk in front of it.

Dash attack: prone
I don't have a picture sorry but he jumps to the ground and lies in crouching position until you move again. You have more accuracty like this (example you can shoot the enemy better while laying down with the pistol).

Smash

Forward Smash: STONER63
It's a machine gun that deals good rapid damage and is better ranged than the pistol. You have to reload after shooting it, tho.


Up Smash: China Lake
Like Snake's grenade launcher but faster. He shoots it up farther too.


Down Smash: Rolling thunder
He takes out a radio and yells in it. Then a bomb drops at his location like Pikachu's lighting. Very high damage.

Aerial


Neutral air: Semtex
He throws a semtex grenade that is like a sticky bomb but weaker.


Forward air: Frag
Standard frag grenade (think snake's).


Back Air: Willy Pete
A smokescreen (like smoke ball) grenade that also does weak damage


Up Air: Nova Gas
Nova Gas will damage anyone and slow them down: even you if you don't have the gas mask perk. High risk high reward


Down Air: Concussion
Concussion grenades are like the Dooku Nuts (they stun enemies). low damage.

Throws


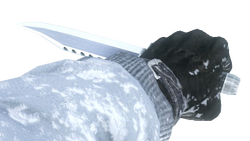
Grab attack: Combat Knife
The knife is really powerful in quick so it's pretty great

Forward Throw: Shove
He shoves them forward like ordering them to go forward and they don't want to

Up Throw: Toss
He tosses them upward with great strength. He is in the military after all

Down Throw: Sleeper hold
Our favorite snake throw is back, and he can do it too.

Final Smash


My favorite killstreak, he calls in the hounds to rip foes apart. The kill in one hit and are hard to eleminate.

I almost forgot, if you choose different teams you have different camo: like blue team is Arcitic Camo and Green Team is Forest.

In conclusion he's what Solid Snake should have been but didnt. I hope Nintendo does more of this for Snake or a COD soldier in Smash 4.
 

mentholcase

Smash Cadet
Joined
Sep 2, 2011
Messages
56
Location
Northern California
@Black Ops

Pretty cool, but you need to change one thing, because the Neutral Special is broken (too strong)

Neutral special: L96A1
Its a bolt action sniper rilfe if you didn't know. A crosshair is on the screen and you move it where you want like Solid Snakes final smash. headshots instantly kill the enemy, but bodyshots kind of suck
Instead of head "instant kill" (OHKO), I would change it to "headshots deliver the highest knockback" or in your own words or mine, doesn't matter. unless maybe you add in an element that makes it very hard (read: rare) to get a headshot
 

mentholcase

Smash Cadet
Joined
Sep 2, 2011
Messages
56
Location
Northern California
yup, & not to sound offensive but i'm sure there are a LOT of changes & additions needed that will soon be pointed out to you, but i like i said, i'm just a fellow "newbie" at this so i'm sure someone will will (hopefully) nicely help you out

the thing i suggested was what stuck out for me the most. ya, i guess i'm weird like that
 

BKupa666

Barnacled Boss
Moderator
Joined
Aug 12, 2008
Messages
7,788
Location
Toxic Tower
EDGAR​

Edgar is the primary antagonist of the 1970 Disney film The Aristocats. Despite serving as a loyal and hard-working butler for a wealthy widow, he is rewarded for his troubles by the elderly woman leaving her massive fortune to her four cats instead. Edgar decides to kidnap the cutesy felines and abandon them in the countryside to inherit the fortune in their place, because each cat would outlive him with their nine lives otherwise. Despite being heralded as one of Disney's most incompetent villains, Edgar contributes some much-needed comedy to the film, and actually becomes somewhat menacing as each of his schemes to keep the cats from returning blows up in his face.

STATISTICS​

Size: 8
Fall Speed: 6
Weight: 6
Movement: 5
Jumps: 4
Traction: 3
Aerial Movement:
2

Edgar has nothing to really boost him above the pack statistically, being a simple butler, although he does have plenty to hinder him. His height and large belly make him a large target, but his lack of real mass prevents him from surviving off of weight alone. His movement capabilities are average at best, but are flat out bad in some areas, with Edgar having difficulty maneuvering through the air and sliding around constantly on the ground. If he's not careful, he'll be gone! But if he plays a smart tactical game, countering his weaknesses while hindering his opponent to the point where he can fend them off, -they'll- be gone!

SPECIAL TRAIT - PRONE PREVENTION​

As a butler, Edgar understands how to take a licking and keep on ticking...or at least stay upright and professional as possible at all times. If Edgar gets hit by any attack that will put him in prone, he gains the ability to bounce right up from the ground with a tap of A. Just time the input correctly, and Edgar will use his large belly to propel himself to his feet, not entering prone and falling victim to whatever characters may have in store for him down there. If you ever fail to bounce upright, which is not difficult, due to Edgar's belly holding him slightly off the ground before he truly becomes prone, his get-up attack can still give him the upper hand over opponents. He'll quickly kick his lanky legs out to either side, dealing 5% and tripping opponents he hits as he rises, towering over them and ready to serve up some pain.

SPECIALS​

Neutral Special - Cream Soup
Edgar takes out a cooking pot and begins stirring it with a spoon, humming to himself as he does so. With a second input of B, he pours some soup into an Olimar helmet-sized bowl and places it at his feet with a bow, over .45 second. If any character (including Edgar) walks in front of the soup, they can crouch to enter a prone position, albeit a kneeling one where they sip up the soup. Edgar's soup heals 1% per half second an opponent sips it, for a maximum of 20% healed before the soup runs out and the bowl vanishes. If an opponent is put into prone next to a bowl of soup, they fall face-first into it, drinking it automatically for as long as they stay down.


Now, what's the purpose of holding out the move if the potential damage healed cannot be raised? Well, by tapping A, Edgar tosses a few sleeping pills into the mix over .5 second, stirring them into the soup. Depending on how many pills he throws in, opponents who drink the mixture are impacted with a different effect, for one second every half second they spent drinking. While they still heal damage, one dose of pills causes the opponent to act drowsily; this state halves the character's dash speed and causes them to yawn before every other move they perform, interrupting it. Two doses puts the opponent in a drunk, staggering state for their dash, replacing them yawning every other attack with the character clumsily tripping into their prone state. Three or more doses puts the character into Brawl's sleeping state, although this variation is much stronger...opponents won't wake up from any attacks you use on them during their catnap, although they -will- wake up if pushed off an edge, Inception-style.

Edgar can place up to four bowls onstage at a time, with each having 10 HP that can be attacked to spill the soup onto the stage, with it creating a puddle for ten seconds. Characters including Edgar who try dashing over this soup trip into their prone state, although they cannot heal from a puddle. Edgar can heal himself or his teammate by cooking regular soup, simply make regular soup quickly to spill for a trap, or create sleeping soup, forcing opponents to enter a state he can take advantage of in various ways. Now, all he has to do is get his opponent to actually drink his soup. Regular bowls of soup and drugged bowls are identical in appearance; if Edgar wishes to heal himself during a match, he must keep track of his bowls to ensure he doesn't become drugged himself.


Side Special - Motorcycle
With a few clicks and pops, Edgar's motorcycle appears under him, as he begins chugging along at Mario's dash speed. Edgar's motorcycle can be controlled similarly to Wario's bike, with it remaining onstage after Edgar stops riding or is attacked off, continuing to cruise along at the same speed. Edgar's motorcycle does not produce parts if its 25 HP is diminished, however, and falls more quickly in the air, not providing Edgar with much of a great recovery. Edgar must be dealt 20% to be knocked off his bike, although he can fall off early by turning around too quickly or frequently.

Instead of plowing over opponents in his path, however, Edgar gently scoops them into a small sidecar in the foreground without slowing down. In the sidecar, opponents cannot move, but can use any attack to separate the sidecar from the motorcycle, releasing them while Edgar crashes clumsily into prone. Although Edgar can generally move opponents around a short distance this way, it can often become quite punishable. To remedy his woes, Edgar can scoop up sleeping opponents, giving him freedom to carry them wherever he wishes without being attacked. Should Edgar ride his motorcycle over spilled soup, you'll find that his wheels are not only immune to it, but spread the soup in a trail as he rides, quickly creating a problem for any opponent hoping to dash much at all.


Down Special - The Sack
With a flourish, Edgar extracts an empty sack and quickly brings it down in front of him. If Edgar catches an opponent, he'll tie up the sack and leave it on the ground in a Bowser-sized lump, while if he misses, he stows the sack for .6 second end lag. Captured opponents are able to break free of the sack by dealing 15% to it, and are able to attack anything outside the sack with moves that stretch the sack for half damage. Although Edgar can scoop up sacked opponents with his motorcycle, they can still detach from him, leaving him to crash. Of course, they are unable to do so if sacked while sleeping.

If Edgar brings his sack down on a bowl of soup, he stores it in his sack, trapping opponents with it next time he uses the move, forcing them to drink it and suffer its effects. Should Edgar miss an opponent on the second input, he'll shatter the soup on the ground where he brought the sack down, allowing him to position spill traps. He can also give sleeping opponents a motorcycle lift offstage before hopping off the bike and leaving them falling to their doom (the soothing motorcycle noises keep them asleep in this case). An opponent who wakes up beneath the ledge and must break out of the sack before recovering is unlikely to do so and live to tell the tale.

In the air, Edgar releases his sack beneath him, with it sharing Mario's fall speed. If you let this fall on your head, you'll be forced to break free or fast-fall out to escape, lest you be pulled down to the abyss. Opponents who fail to do so and hit the ground become tied in the sack as usual. Edgar can have one sack out for each opponent onstage.


Up Special - Umbrella
Edgar extracts his black umbrella and opens it, holding it above his head to slowly float upward at Ganondorf's walk speed, dealing light hits of 3%. The umbrella provides Edgar with seven seconds of terrific aerial movement before folding in on itself and causing its owner to fall, at half his regular fall speed with the same DI. Edgar is able to use his aerials and specials while rising and falling, giving him fair defense against the glaring vulnerability weakness of this otherwise awesome recovery. You don't want to get knocked under the ledge while rising back to safety, do you? Onstage, he can even float up high while cooking soup, preventing opponents from interrupting him as easily. Air dodging removes him from his umbrella, which he cannot summon again until he reaches solid ground.

If he uses the move next to an opponent, Edgar attaches an umbrella to them over .55 second; unlike Edgar, opponents cannot dodge to escape, and must fast-fall for a second to escape (entirely possible, if they're awake). The umbrella lasts for seven seconds, pulling the opponent up as fast as it does when held by Edgar. This enables Edgar to attack from below for some quick damage, which is necessary to his game, as more damage results in longer periods of stun on opponents. By holding down the input as he attaches the umbrella, Edgar folds it in, doing nothing to opponents on the ground. On the other hand, once they're airborne, it halves their fall speed, possibly helping them out if they have decent aerial capabilities, which they -are- able to use. He can push sleeping opponents offstage into their floaty fall which won't wake them up, before jumping after them and pulling out an umbrella of his own, using his aerials while rising to prevent his opponent from doing the same back to the stage. One umbrella can exist per each character in a match.


STANDARDS​

Jab - Struggle
Edgar begins flailing his arms around and kicking out his legs crazily, attempting to throw off any characters in his path. His wild movements cover a circular area as large as half a Smart Bomb blast, dealing multiple hits of 3-4% to opponents. If an opponent attempts to grab Edgar during this time, however, they grab one of his flailing limbs and are hurled off in a random direction from Edgar's momentum, suffering 7% in the process. The minimal lag on both ends of the move enables Edgar to start flailing at close range, interrupting enemy attacks and grabs for some offensive defense. Should Edgar flail for over two seconds, he'll become winded and lag for a second, preventing him from spamming it for too long.

Dash Attack - Push and Pull
Edgar dashes forward, arms outstretched, hoping to grab onto something as he keeps on truckin' around. If he comes into contact with an opponent moving toward him, he'll begin pushing against them with all his might, while if he catches an opponent moving away, he'll pull at them from behind. Not being the most solid fellow in the world, Edgar is pushed or pulled in the direction his opponent is moving at half their speed. That is, unless he mashes A to show them who's boss and push back!

If you simply tap A, Edgar won't be pushed or pulled, while if A is mashed, he'll be the one controlling where his opponent is moved to. One and a half second of either character pushing the other around results in the loser suffering from a second of stun, while the other is free to attack. A stalemate stuns both Edgar and his opponent. Heavier characters are a bit more difficult to move around than lighter ones. Because opponents can't attack Edgar while he's pushing or pulling, he can attempt to move them to a convenient, soup-coated portion of stage, possibly stunning them for more damage. Edgar can easily win one of these mini-battles by pushing a prone or sleeping opponent, resulting in more useful stun in the latter case, as well as being able to push them offstage with an umbrella.


Forward Tilt - Stomp
Edgar lifts a long leg and stomps it down a character width in front of him, with a small bit of lag on both ends. Meeting his foot results in falling face-first into prone and being dealt a light 6%. Edgar can stomp multiple times in a row to keep an opponent falling into prone as they try to stand up, or in prone, as they lay on the ground. This definitely comes in handy when forcing opponents to drink large quantities of drugged soup, and Edgar's long leg creates a nice large hitbox to use in combat anyways. His frail limb won't stand up to most other melee attacks, but can still come in handy at times.

Down Tilt - Joyful Dance
Tiptoeing his feet up and down comically, Edgar dances comically for a second, rubbing his hands together greedily. His feet are a sizable close-range hitbox dealing multiple hits of 5% and some stun to opponents. Prone opponents danced upon are not hit back upright, giving Edgar means with which to rack damage on them. If the control stick is held to the side immediately after inputting the move, Edgar dances a platform and a half in the chosen direction at his dash speed. The move's moving hitbox creates a slight offensive barrier against opponents approaching Edgar. His tiptoeing dance also enables him to cross spilled soup faster without having to sacrifice damage by bringing out his motorcycle.

Up Tilt - Headbutt
Edgar throws his head up into the air with quite a bit of force, dealing 9% and low set vertical knockback. Although the move is fairly quick, Edgar holds his head in pain for a second after attacking. He can headbutt multiple times in a row to prevent the end lag from occurring, but when it comes, the opponent Edgar was trying to juggle will easily come down and charge a Smash. To rack damage with this move and escape unscathed, Edgar can put his opponent to sleep and attach an umbrella, floating them into perfect range for such a move. Headbutt them multiple times and suffer the end lag before they wake up. Next time you do attempt this, the additional damage you've added will give you even longer to headbutt your foe. The end lag also becomes less of a problem if a drowsy opponent is forced to yawn instead of counterattacking.

SMASHES​

Forward Smash - Cartoon Trick
Edgar extracts a platform length pitchfork and places it on the ground sneakily, chuckling to himself over .55 second. Should an opponent walk overtop the pitchfork end of the weapon, the wooden end will come up and smack them in the face, dealing 9-14% and knocking them into prone. If they walk over the wooden end, the character gets jabbed by the head of the pitchfork, suffering 18-22% and horizontal knockback KOing from 180-165%. Both effects also occur if the opponent falls into prone on top of the pitchfork.

Edgar can limit the opponent's movement along with his spilled soup by placing his pitchfork onstage; although opponents cannot move it around, Edgar cannot use his Smashes again until he picks it back up by touching it. If Edgar wants to hit with a particular end of the pitchfork, he can use dash attack to push or pull them onto it.


Down Smash - Prong Stab
Edgar lifts his pitchfork for half a second, before tossing it down to the ground a platform in front of him. If an opponent is hit by the pitchfork, they are not brutally impaled to the stage, but are rather trapped between the tines of the pitchfork in their prone state, as it sticks into the ground. They are also dealt 12-16% by the impact into the ground, but are held in prone until the pitchfork is dealt one to three get-up attacks, depending on charge time. Naturally, sleeping opponents can't do this until they wake up, allowing Edgar to pummel them while they're down, or scoop them up with his motorcycle. This is also useful for holding opponents with their face in drugged soup. As with F-Smash, Edgar cannot use another Smash until he reclaims his pitchfork. If an opponent is sacked while impaled, they must break free of the pitchfork before they can escape from the sack.

Up Smash - Rear Poke
Edgar lifts the head of his pitchfork into the air and pumps it upward a platform, with slightly more lag than Marth's U-Smash. The unfortunate opponent who lands on the pitchfork must endure 10-14%, as they are launched a Ganondorf upward before falling in helpless, jumping upward from the pain. The range and disjointed nature of the pitchfork provides Edgar with some nice aerial defense, although he doesn't hit opponents up into the pitchfork from the ground, leaving him vulnerable down below. The move's damaging capabilities are magnified when opponents fast-fall onto the pitchfork, in which case they suffer 5% extra for each fall speed statistic unit they were falling at. Needless to say, this is a great way to punish opponents forced to fast-fall away from an umbrella or sack in midair.

AERIALS​

Neutral Air - Soup's On
Edgar takes out his Neutral Special pan, clanging it together with his spoon to create an awful din, shown as a soundwave around him half the size of a Smart Bomb blast. He starts the move with little lag, and can hold it out as long as he wishes. Opponents inside the wave suffer 2% per half second and are quickly pushed toward the perimeter of the wave. If a character is inside the wave's range as Edgar begins the move, the opponent is turned to face the opposite direction, either turning to see what's all the damn noise, or turning away to escape it. Edgar can turn around opponents attempting to recover back to the stage while floating up on his umbrella, or simply push them away for some convenient defense.

Forward Air - Belly Bump
Edgar leans back slightly for .45 second, before thrusting out his protruding gut. This deals 9% and some nice horizontal knockback to opponents. While opponents can interrupt Edgar during the startup lag, if they hit his stomach with an attack dealing 15% or less, his belly will absorb the attack before thrusting back with 1.5 times the regular force of the move. Naturally, this is a great move to use offstage, pushing opponents further from the edge while turning their recoveries against them by absorbing and bumping them back.

Back Air - Mule Kick
Edgar pulls his legs in tight as long as you hold the input, before thrusting them back with all his might. He suffers from a fair bit of ending lag following through on his kick, although he only has to worry about this if he misses an opponent. If Edgar kicks an opponent, he'll knock them away while pushing off of them to spring in the opposite direction, using his long legs for this extra force. Opponents suffer from 7-12% from Edgar's kick after a second of charging, while both characters are pushed from one to three platforms away from each other. Once Edgar has buffeted his opponent around offstage and is ready to finish the job, he can kick them off the blast zone, propelling him back to the stage in the process to continue his mischief.

Up Air - Bald Drill
Edgar spins around three times rapidly in midair, pointing his head directly up to catch opponents in multiple hits of 3-4%, with slight knockback on the last hit. While spinning, Edgar travels up a Mario with his momentum, greeting opponents falling down on him. His head has great priority (he's crashed through a brick windmill unscathed, after all), but Edgar still suffers from .4 second end lag, holding his head dizzily. This prevents him from using multiple U-Airs to recover, although if Edgar spins while holding an umbrella, he'll be propelled up three Marios with the umbrella's boost. Edgar cannot repeat this until he lands, however; any successive umbrella spins will act identically to regular spins.

Down Air - Sitting on a Problem
Edgar leans his rear end toward the ground, not outright plummeting but falling at 1.5 times his regular fall speed. He can hold out this animation as long as he wishes; be sure to cancel the move before he lands, or you'll deal with a second of Edgar rubbing his behind in pain. If Edgar lands on an opponent, he'll sit on their head comically, combining the fall speed of the two characters. To get Edgar off, opponents must launch him with an upward attack. Being launched back to the stage can help Edgar as a last-ditch recovery attempt, although at that point, his opponent may wish to simply suicide KO. He cannot jump off of an opponent he's sitting on, because in ideal situations, he won't want to. An opponent with Edgar sitting on them as they hit the ground deals 10% and places them in their prone position.

Naturally, this move becomes a great way to put opponents in prone when Edgar has little to no damage. If Edgar sits on a prone opponent, the victim suffers 1% per half second and must use their get-up attack to push him off before rising. If the opponent is sacked, their attack will hit Edgar's behind rather than the sack, increasing its longevity a bit. Using this move while floating upward holding an umbrella brings Edgar back down slightly, allowing him to sink down to hit opponents below the edge. He resumes his float once the move is canceled...be sure to cancel with enough float time left!


GRAB-GAME​

Grab - Coddle
Edgar reaches down a Ganondorf with minimal startup lag, having poor traditional grab range but great vertical range; Edgar can reach down from a most stage platform to grab opponents. Once he has them in his clutches, he coddles them in his arms like a baby, looking down on them and grinning.

Pummel - Rock
Edgar rocks his opponent gently back and forth for half a second, dealing absolutely no damage. Regular opponents aren't even affected by this, and can mash free from Edgar with ease. However, a second of rocking will put drowsy or stumbling opponents into a sleeping state, while rocking sleeping opponents resets their sleep timer.

Forward Throw - Dinner is Served
Edgar extracts a silver platter and places his opponent onto it, carrying them forward in front of him at his walking speed. This obviously moves sleeping opponents around rather well, but can be used to move regular opponents as well. Although they have the ability to jump off and punish Edgar, a large number of food items are scattered on the platter, meaning a regular opponent can simply mash A to heal themselves leaving Edgar to walk around harmlessly. Whenever the input is released, Edgar trips in place, spilling his opponent onto the floor in a prone position. This throw can easily backfire on Edgar, as his schemes are wont to do, but used well, can place opponents into a nice drugged soup, allowing Edgar to rack up the damage they healed as if they never did so.

Back Throw - Classic Trip
Edgar releases his opponent behind him thoughtlessly, extending a foot to trip them as they walk away. This trip is no ordinary trip, however; the victim tumbles three times their roll distance, suffering 8% over two seconds. The opponent cannot cancel their momentum, only stopping when they fall off the ledge (they sure don't -stop-...), or into a soup bowl or F-Smash pitchfork. The former causes the opponent to land in prone, face in the soup, allowing Edgar to play a nice little round of bowling if he's grabbed his opponent on the same level as a bowl. Edgar simply rolls snoozing opponents along, not bothering to trip them due to them not being awake.

Down Throw - Heave-Ho
Edgar begins swinging his opponent back and forth as long as you hold the input. Upon release, Edgar tosses his opponent carelessly, dealing 7% and knockback depending on where he released his opponent during the course of his swinging. For example, if he releases his opponent once he's swung a victim forward a good distance, he'll throw them several platforms away, while if he throws them as he's pulling them close, the throw will be much weaker. Toss opponents like garbage sacks into your motorcycle as it drives away without you, or into an F-Smash trap, for certain chaos.

Up Throw - Tied Up
Edgar reaches down and ties the laces together on his foe's (possibly nonexistent) shoes, taking away their ability to dash without falling into prone until they grab and pummel to untie their laces. This forces the victim to move by rolling or short-hopping, giving Edgar time to either escape and cook up some soup for the opponent to possibly fall into, should they fail to hop around like a fool, or punish their aerial antics by setting up some close range traps on the ground. Surprisingly, this doesn't really help Edgar against sleeping opponents until they wake up, although it sure adds to the troubles of drowsy or stumbling ones.

FINAL SMASH​

Final Smash - Dog Chase
Edgar pulls out his motorcycle and laughs cleverly, but quickly lets out a gasp of horror as Napoleon and Lafayette, two hostile farm dogs, appear on the stage, barking loudly, eager to chase him around. Edgar places a haystack as tall a Ganondorf and a wide as Bowser over his vehicle to conceal himself, before starting his engine. Edgar's motorcycle now moves at Sonic's dash speed at all times, with the new ability to jump up a Ganondorf into the air. It now takes 40% to knock Edgar from his bike with the additional haystack protection, with the stack weighing the bike down from riding off while Edgar hops off. Napoleon and Lafayette target the nearest opponent, invincible and moving at Pikachu's dash speed, chomping anything they catch; if Edgar is off his bike, they automatically target him, however, although he can subdue a dog for three seconds with Down Special sacks. Getting chomped deals 5% per second, as the opponent gets shaken around on the floor in prone position for three seconds by the dog that bit them. To escape, opponents must use their get-up attack on the dogs, which knocks them a set distance away.


If they get knocked into Edgar's haystack, however, Edgar jumps out in horror as the haystack vanishes. The dogs now control the motorcycle, pursuing Edgar around onstage (this also happens if they chase Edgar past the motorcycle). This is high time for Edgar to flee into the air with Up Special to avoid the dogs, although he can play strategically during this time by cooking up soup. If he places soup onstage and spills it, his or the dogs' insane driving will spread the puddle around like nothing else.

By tapping down while riding, Edgar peeks out of the haystack, causing the dogs to pursue him instead of his opponent. He can direct them onto another portion of stage before popping back in, causing them to chase opponents around over there (this is safer than leaving the bike in most cases). Napoleon and Lafayette last for twenty seconds before vanishing; they do a great job at putting opponents in their path into prone, and can aid Edgar in spreading soup traps around with his high speed. Edgar will mainly be attempting to have the dogs put opponents into prone over soup, then use the motorcycle's insane movement to ride over a ledge and hop off for a very certain KO. He may summon as many high-speed motorcycles as he wishes throughout the duration of the Final Smash.


PLAYSTYLE​

Edgar has great control over his opponent's state. For starters, he is loaded with ways to put opponents into prone, bringing them down to the level of a lowly butler, as well as avoid being put into prone himself; just bounce right back to your feet to maintain some degree of professionalism. He also has a number of ways to transport opponents around the stage, either escorting them around directly, or pushing them away from him, or vice versa. Even without an opponent in tow, Edgar has great aerial abilities, as he uses his umbrella to cruise around while rising to the skies. However, all these abilities take a back seat to Edgar's stunners at the start of a match. If he has no time to cook up some soup for opponents, he can't have nearly as much fun with all his other delicious options, now can he?

Once Edgar has his opponent stunned with moves such as Down Special or D-Smash, or is floating high above the stage with his umbrella, Edgar can get to work forcing his opponent to eat his concoction by putting them in prone next to a bowl of soup. He can do so primarily through a mix of prone abuse and traps. By spilling a few bowls of soup, then riding over them with his motorcycle to spread it, Edgar prevents opponents from dashing over large portions of the stage; he can also toss out his pitchfork with F-Smash or restrict his opponents to rolls and jumps with U-Throw, forcing them inconveniently close to Edgar's soup. Now that he has a guest for dinner, Edgar can use any combination of F-Tilt, F-Smash, D-Smash, D-Air, F-Throw and B-Throw to force-feed them his cream. Opponents will have to be quite diligent in destroying Edgar's soup bowls to prevent this, although in doing so, they'll just be creating more of a mess for themselves to deal with, as Edgar simply cooks up more soup to replace the ruined bowl.

With an opponent drinking his soup, Edgar's gameplay largely transitions into date-****** his opponent while they are incapacitated, ultimately KOing them while they're lost in dreamland. With an opponent yawning every other attack, Edgar can anticipate his opponent's movements before timing a stronger, laggier attack to hit them as their sleepiness interrupts their own attack. As an opponent stumbles around and falls into prone, Edgar can rack even more damage with prone abuse attacks. But the most options (and the -really- cool ones) stem from Edgar putting his opponent all the way to sleep, past the point of them waking up anytime soon (made worse for them, better for Edgar with pummel). Of course, he can flee, set up traps and heal himself with his own soup, but he wouldn't be making the most of the opponent's state for the most part.

For extra damage, and therefore extra stun on future attacks, Edgar can attach an umbrella to opponents, letting them drift upward before pursuing them with U-Tilt, U-Smash and U-Air. He can also coat an opponent peacefully in a sack, before pummeling the crap out of them. When he's ready for the KO, Edgar is no slouch at the oh-so-prevalent gimping game, although he can't simply push opponents offstage and let them fall, as they'll wake up from the sensation. By scooping a sleeping opponent onto his motorcycle, Edgar can drive them right off the stage before hopping off, leaving the motorcycle and opponent to fall to their doom. This strategy is less effective against HMAs than lightweights, however; even if Edgar coats the opponent in a sack, the bulky beast will shred through the sack quickly before detaching from the bike, while lightweights merely poke at the fabric as they fall. For heavyweights, Edgar can instead attach a folded-in umbrella and push the opponent offstage with attacks like dash attack or D-Throw, before hopping off and riding his own umbrella up while pummeling the floaty foe closer to the blast zone. Every aerial can come in handy here, depending on where Edgar and his opponent are located. Edgar has seven seconds of rising, which, when combined with U-Air, should bide him plenty of time to KO his opponent and return to the safe stage.

Edgar can become quite dangerous once his opponent has consumed his soup, although he'll have to fight to survive to that point in the match. His large frame, combined with clumsy movement and slow attacks open up many opportunities for fatal slip-ups. Edgar must fend off attacks with moves like jab and D-Tilt, before fleeing to a safe portion of the stage to continue his cooking. Once he's slipped his opponent a roof...sleeping pill, however, he's at the top, man! There's nothing he can't do!


EXTRAS​

Up Taunt - Greedy Butler
Edgar gets a dazed smile on his face, as his eyes turn to dollar signs and multi-colored dollar signs flow from them, fluttering around his head slightly before he nods them away.

Side Taunt - A Few...Adjustments
Edgar looks down, notices a spot on his vest, and wipes it away with a cloth. He must look in tip-top shape for his job!

Down Taunt - Plotting
Edgar puts his fingers together and drums them up and down, chuckling quietly to himself. Bwa ha ha!

Entrance - Motorcycle Mayhem
Edgar rides his motorcycle in from the background, spinning it into his starting position, where it falls to the ground and creates a cloud of dust. This causes Edgar to cough comically before the fight begins.

Victory Pose #1 - $$$
Edgar holds a fist full of bills, counting them greedily and telling the losers, "I've got...moneeehh!"

Victory Pose #2 - Self-Praise
Edgar stirs a bowl of piping hot soup, plopping in a few pills and muttering happily to himself, "Oh, Edgar, you sly old fox!"

Victory Pose #3 - Take a Bow
Edgar bows to the background twice, saying, "Thank you, thank you!", before realizing his error and turning to face the screen, waving stupidly.

Loss Pose - Dignified Respect
Edgar claps, but appears annoyed over his loss. It's just not fair!
 

SirKibble

Smash Champion
Joined
May 2, 2008
Messages
2,400
~ Jenna ~


~ Basic Information ~

Jenna is a main character and Mars adept (someone who uses fire magic) from the Golden Sun series. She appears in Golden Sun as a guest playable character for a short time near the beginning of the game before being captured, after which she assumes a pretty typical “damsel in distress” role for the remainder of the game. In Golden Sun: The Lost Age, she is one of the four main playable characters, alongside her brother Felix, and in Golden Sun: Dark Dawn, she is the mother of the main character, Matthew. Her husband and Matthew’s father is Isaac, the main character of the original Golden Sun.

As a Mars adept, Jenna’s default psynergy (Golden Sun’s variant on magic) type is that of fire, but she is unique among Mars adepts for the fact that she is a mage-type character and not a fighter-type. As such, she has her own class, “Flame User,” that no other character can achieve. The Flame User class and its subsequent advancements (“Witch,” “Hex,” “Fire Master,” and “Justice”) are strictly Mars-based, and do not have any other psynergy types mixed in. It is considered one of the best single-psynergy classes in the game, having access both to powerful fire attacks and a few strong status-inducing and healing moves.

Jenna can wield both “Light Blade” and “Staff” type weapons, wielding a Staff by default. In this moveset, she also wields a Staff, one known as the “Salamander Rod.” The Salamander Rod has an Unleash effect (a special type of critical hit some weapons have in Golden Sun) called “Fire Dance” that replaces Jenna’s standard strike with a volley on undulating flames.

Jenna also has four Mars Djinn (creatures that can be set—or equipped—to an adept to grant them additional abilities and statistical increases) set to her for this moveset. They are, by name: Spark, Shine, Coal, and Reflux. While set to an adept, Djinn reside somewhere within the adept’s soul, and as such, are not visible except briefly when their abilities are used. Djinn also grant adepts the ability to summon mythical beings and powerful spells, but this is draining to the Djinn and will result in it becoming unusable for a time.

~ Mechanic: Djinn ~

Jenna’s four Djinn play a large factor in her moveset. Each Djinn has three different states that it can be in, which are outlined here:

SET – Each of her four Djinn is “set” to Jenna by default. In this mode, they’ll buff her attacks and stats, and their abilities are available for use. The four Djinn’s abilities are set to her four Special Attacks, and are accessed via those inputs.

STANDBY – After use of its ability, a Djinni enters “standby” mode. While in this mode, the Djinni is ready to be used for a Summon attack, performed by holding down the Neutral Special input. However, the Djinni provides no statistical benefits in this state, and its ability cannot be used. Djinn may be set again, however, by pressing their respective input. This takes about three-fourths of a second to do.

RECOVERY – After being used for a summon, Djinn enter “recovery” mode. They are virtually useless like this, and one must simply wait until they become set again. Every two seconds, if you have Djinn in recovery, one of them will be automatically set to Jenna. You can determine which one by pressing the desired input. Otherwise, it will be random.

~ Statistics ~

Size – 6/10
Weight – 6/10*
Ground Speed – 6/10*
Air Speed – 5/10*
Falling Speed – 4/10


Jenna is, as you can see, a rather average character, statistically speaking. However, the stats with a * next to them are buffed by her Djinn while they are set. Each one adds 0.5 to the stats in question, so as they are put into standby she will lose these bonuses, and vice versa.

~ Special Attacks ~

As mentioned, each of Jenna’s Special Attack inputs has a Djinni assigned to it. The following characteristics apply to all these attacks:

  • Press the input while the Djinni is set to use its ability. Abilities themselves vary, but always have a short startup lag where a Mars Djinni will appear superimposed over Jenna.
  • Press the input while the Djinni is on standby to set it again. This takes three-quarters of a second for each Djinni, as mentioned in the “Djinn” section above.
  • While in recovery, a Djinni’s input will position it as the next Djinni in line to be set.

Neutral Special ((Spark)) or (Summon))

The Neutral Special has two moves assigned to it, though they don’t function on the exact same input. Simply pressing the button will do whatever is related to Spark—using his ability, setting him from standby, or positioning him next to be set from recovery. In order to use your Summon instead, you must hold the button down for half a second. While holding the button down, Jenna will brace herself in place, indicating that you are charging for a summon.


Spark’s ability is rather basic, but vital to Jenna’s game. When used, Spark will engulf Jenna in a soft red aura for about two seconds, removing one-fourth of her current damage from her. The damage recovery happens in about a second, and Jenna is free to move around and use other attacks once its finished, but Spark cannot be set again or used for a summon until the full two seconds are up and the aura has faded.


For the Summon version of this ability, Jenna’s staff will glow faintly, and she will tilt it forward as her hair blows wildly. This has virtually no lag, though the half second you spend inputting the summon is notable. Depending on the number of Mars Djinn on standby, the summon is different, as follows:

1 Djinni – Mars

Mars looks like a semi-transparent, ghostly form of a Mars Djinni. He’s about half Jenna’s size. He appears directly in front of Jenna and immediately plunges to the ground a short distance in front of her (about a Battlefield platform’s length), exploding as he hits. The explosion lasts a little longer than one from a Bob-omb or Blast Box, being about mid-way between them in size, and dealing 15% damage and decent upward knockback to anyone hit. This is pretty quick on both the front and back ends.

2 Djinn – Kirin

Kirin, the mystical two-headed dog-type beast, quickly materializes and leaps forward from just behind Jenna. He’s slightly larger than Bowser. Leaping forward, he’ll deal 10% damage and very weak forward knockback with lots of hitstun. Upon striking the ground roughly a Battlefield platform in front of Jenna, he’ll disappear, but his work isn’t done. A wall of flames follows him, and travels the same distance very rapidly. This wall deals an additional 12% damage and moderate horizontal knockback. This has considerable ending lag.

3 Djinn – Tiamat

Tiamat is the fabled “Queen of Dragons.” She appears directly in front of Jenna. This takes a fair amount of time to perform, roughly like Ike’s Forward Smash uncharged. Regardless, she’s nearly twice the size of Bowser, though longer than tall, and touching her during the two seconds she’s there will deal 8% damage and weak diagonal knockback. She appears in a burst of flame (it only covers her normal hitbox) which deals 17% damage and moderate diagonal knockback. Almost immediately upon appearing, Tiamat breathes a stream of fire as large as she is in front of her. She does this for a full second, dealing multi-hit damage up to 18%, with a final blow as the flames vanish that deals high diagonal knockback. End lag is moderate for Jenna.

4 Djinn – Meteor

A slow summon to be sure, Meteor takes about as long as a Warlock Punch on start lag. The name of this summon is no disguise for some fierce, ancient being—Jenna literally calls a meteor out of the sky. It will start directly above her, at the top of the screen, and aim for the area a short distance in front of her. It will go through pass-through platforms, but solid platforms overhead will obstruct it. It careens down as fast as a PK Starstorm star, though it’s slightly larger, crashing to the ground and exploding in a burst of flames almost as big as Giga Bowser. On the way down, it deals 10% damage and strong downward knockback to anyone hit. The violent explosion on impact lasts for about half a second, and deals 30% damage and very strong diagonal knockback to anyone it hits. The blast just barely engulfs Jenna, so opponents will have a hard time punishing her during it, if they managed to escape. However, she is vulnerable during some significant end lag after the move as well.

Side Special ((Shine))

After Shine shows himself briefly, Jenna holds her staff across her body while charging this move. She glows a brighter shade of red the longer you charge, and it doesn't auto-release when it fully charges, which takes about as long as a typical Smash Attack.

Upon release, Jenna swings her staff forward with little lag. The swing itself deals 7% damage and weak horizontal knockback, but as Jenna's staff reaches the straight-forward position, it sets off an explosion about a Battlefield platform's length in front of her. The size and power of the explosion depend on your charge. At weakest, it is a little smaller than Kirby and deals 10% damage with okay diagonal knockback. At strongest, it's a little larger than Bowser and deals 30% damage with very strong diagonal knockback. Jenna suffers noticeable, but not overly painful end lag as this move concludes.

There’s more to this move after Jenna finishes it, though. If you reached at least 75% of full charge, the explosion will go off again a second later. And if you reach full charge, you’ll get a third one a second after that. Inattentive opponents are prone to not notice how much you’re charging, so while they may see and avoid your first explosion, the subsequent ones can catch them by surprise.

Up Special ((Coal))

Flames engulf Jenna as she stalls in place for about half a second. She is vulnerable to strong projectiles, but the flames will protect her from weaker ones or from physical attacks. They deal no damage, just weak knockback to anyone who touches them. After this, Jenna will rush whatever direction you're tilting the control stick (or up by default), moving about as fast as Pikachu's dash. As she does so, she has superarmor and will deal 12% damage and decent upward knockback to anyone she hits. She moves roughly half the distance of Final Destination, and can turn in mid-rush. She enters freefall when this finishes.

You may cancel out of the full rush early in one of two ways. First, you may press the shield button to simply stop and enter freefall immediately. You can also press the Special button, however, to abruptly end your rush and make Jenna swing her staff forward, hurling the flames surrounding her forward in whatever direction you were traveling. The initial swing and launch deals 18% damage and good diagonal knockback to anyone right in front of Jenna, and the launched fireball has the same damaging properties as Jenna did while moving inside the flames. This method has some end lag before you enter freefall.

Down Special ((Reflux))

As Reflux disappears from his superimposition, a deep red aura encompasses Jenna. This happens quickly, with virtually no lag. It remains for a full second. If Jenna takes a non-projectile hit during this time, the aura will vanish and flames will leap from it onto the perpetrator. These flames will deal damage at a rate of 1% per tenth of a second, until they deal damage equal to the hit Jenna took. Note that unlike typical "counter" attacks, this does not prevent any damage to Jenna, but retaliates and buys you time afterward. Reflux can be reset or used in summons after the aura vanishes, even during the flaming rebuttal.

~ Standard and Smash Attacks ~

I know you might be a little confused. Yes, these go together for a reason. You see, Jenna’s Tilts and Smashes are actually the same move, as are the Neutral Attack and the Dash Attack. Allow me to explain.

Jenna’s, uh, “tilt-smashes,” let’s call them, function differently depending on three things: how many Djinn you have currently set, whether or not you “smash” the control stick, and how long you charge. There are three levels of power for each of these, and an invisible 1 to 10 scale determines which you’ll use. Each Djinni you have set contributes 1 point to the scale, “smashing” contributes 4, and charging contributes 0-2, depending on how long you hold the charge (at least half for 1, full for 2). 0-4 points on this scale will earn you the lowest level attack, 5-8 will earn you the intermediate one, and 9-10 will cause you to use the ultimate version. The Neutral Attack / Dash Attack functions slightly differently, and is explained in its section below.

Forward Tilt-Smash ((Beam) or (Cycle Beam) or (Searing Beam))

Jenna straightens her staff in front of her, firing a thin, orange beam of light. This laser-like attack quickly spans half the length of Final Destination before disappearing.

In its basic form, simply called Beam, this attack has little start or end lag, and the thin beam does only 5% damage and flinching knockback.

The secondary version of this attack, the Cycle Beam, has a tad bit more end lag, but a swirling flame surrounds the beam as it travels. This slightly increases the vertical range, but more importantly, boosts the damage to 8% and knockback to moderate in a horizontal direction.

The Searing Beam you achieve at full power increases the size of both the actual beam and the flames around it, which are now in total about Mario's height from the ground. This variation has significant start lag, and the beam is a bit slower as well. Connection with the beam deals 23% and pretty good horizontal knockback. Jenna suffers significant end lag after firing the Searing Beam.

Up Tilt-Smash ((Fume) or (Serpent Fume) or (Dragon Fume))

Jenna thrusts her staff upward into the sky. In terms of both speed and aesthetics, this is comparable to Marth's Up Smash (though she's not quite as forceful about the thrust). This thrust deals a measly 5% damage and flinching knockback if it hits anyone, but more importantly, Jenna conjures an explosive spell roughly her own height above her in the air.

The basic Fume creates a small burst of heat at the said location, which is about the size of a Party Ball. It's brief and deals 8% damage with flinching knockback. Worthy of note, however, is this move's long hitstun.

The secondary version, Serpent Fume, begins much the same way. The burst is more explosive now and deals 16% damage and okay upward knockback. This time, however, as the explosion occurs, two snake-like flames will hiss out from the sides. They shoot out directly horizontal and travel as fast as a PK Thunder. They're about as long, too. However, the distance they can travel is much shorter--only about one-third the length if Final Destination. They do have weak homing abilities toward opponents (they won't quite make it halfway to the ground before disappearing, if that's where your opponent is), and will explode on contact for 13% and okay diagonal knockback.

The ultimate Dragon Fume starts a little differently. As Jenna points her staff upward, two similar snake-like flames rush out from either side of her. They're about twice the size of the ones in the Serpent Fume. Instead of homing, however, they’ll curve around in a somewhat wide arc (they go out about a Battlefield platform’s length to the side of her before turning to come back) to hit each other in the spot where the other explosions occurred. Once again, they move at PK Thunder speed. As they travel, contact with them deals 7% damage and weak knockback toward the coming collision. The violent collision of the two flame dragons produces an explosion about the side of those from a Blast Box, which deals 26% damage and strong upward knockback. It also shoots out a single fire serpent like the previous version, which shoots out directly upward and has stronger homing abilities, and also travels just a little farther and faster than Serpent Fume's. Its damage and knockback properties remain the same. Jenna stops using this spell when the explosion occurs, so you're free to move around and assist your dragon if you like.

Down Tilt-Smash ((Flare) or (Flare Wall) or (Flare Storm))

Jenna lifts her staff above her head while charging, then slams it to the ground when released. The swing does 5% and weak downward knockback.

Lag is very small for Flare, the basic version of this attack. A small pillar of flame leaps up directly in front of her. It deals multi-hit damage up to 5%, lasting only briefly. The range isn't great--if they're close enough to get hit with this, they're taking the staff swing, too.

Flare Wall is slightly slower, but covers a wider area. A sweeping wall of flames about Ganondorf's height appears 1.5 Battlefield platforms in front of Jenna, and then rushes toward her until it gets half a Battlefield platform away. It does this over about half a second, and deals 15% and moderate backward diagonal knockback to anyone hit. Jenna suffers little end lag, but the move itself does take some time.

The powerful Flare Storm no longer worries about hitting anywhere close to Jenna, and is very much a ranged attack. Two Battlefield platforms in front of Jenna, a swirling maelstrom of flames just larger than Bowser appears. It lasts for a second and a half, deals multi-hit damage up to 26%, and concludes with a very strong diagonal knockback hit. Jenna is very vulnerable if you miss, however, and even suffers considerable end lag after the storm subsides.

Neutral and Dash Attack ((Smack) or (Fire Dance))

Depending on the number of Djinn you have set, this move also functions differently. The system is not the same as it is for the above moves, but is dependent only on the number of Djinn you have set and, in some cases, whether you are dashing or not when you use it.

With 3 or 4 Djinn set, Jenna will do the same thing regardless of whether you are dashing or not. She will leap forward about three-quarters the distance of a Battlefield platform, staff overhead. She will deal weak forward knockback but no damage to anyone she hits while doing this. As she hits the ground, she will swing downward with her staff for 6% damage and weak forward knockback. A ball of flames will emit from her staff as she swings it, and will jump forward along a similar path as she did. It deals 6% damage and weak forward knockback as well, but when it hits, it creates a small explosion that deals 8% damage and moderate diagonal knockback. Start lag is practically negligible, but there is some end lag to this move.

If you have 1 or 2 Djinn set, the function of this move will depend on whether you are dashing or standing still. While standing still, Jenna will perform the second part of the aforementioned attack, from the staff swing on. This has moderate start and end lag.

Dashing with 1 or 2 Djinn will cause Jenna to leap forward like she did in her full-power version of this attack, but the staff swing will not be accompanied by a fireball. Instead, it deals a little more knockback than it did there, albeit with no damage increase.

With no Djinn, this move consists only of a moderate-speed staff swing which deals 6% damage and okay forward knockback.

~ Aerial Attacks ~

Neutral Aerial ((Ring of Fire))

Jenna twirls her staff around in her hand, and a ring of flames appears briefly around her. It’s slightly bigger than Bowser, and quite thin, so it won’t hit opponents who are directly next to you. Connection with the ring deals 10% damage and weak diagonal knockback. Jenna suffers small amounts of lag on either end of this move.

Forward Aerial ((Comet Sling))

Jenna swings her staff to launch a small fireball forward. It curves downward slightly to begin, then loops around after going out about a Battlefield platform’s length, and returns to Jenna. This takes a bit of time to perform, but the lag on either end is minimal. On the way forward, the fireball deals 6% damage and weak forward knockback, but on the return, it deals 14% and moderately strong backward diagonal knockback.

Back Aerial ((Fireball Reversal))

Similar to the Forward Aerial, Jenna swings her staff forward. However, she now launches two fireballs, one with an upward arc and one with a downward one. They’ll curve sharply and converge directly behind Jenna, creating a small explosion as they do. They move fast, but trying to hit an opponent behind you still takes proper timing. The fireballs themselves deal 5% damage and weak knockback toward the forthcoming explosion, and the explosion deals 13% and moderate upward knockback. This has almost no start lag, but some end lag after the explosion.

Up Aerial ((Heat Rod))

Jenna holds her staff skyward, and a swarm of flames appear from out of thin air a short distance away and rush into the staff. This has some start lag, but little end lag. The flames are similar to what a Superspicy Curry might look like if shown in reverse, in an upward direction. They last for half a second, and deal multi-hit damage that can total about 8% at max. At the conclusion of the barrage, a final hit of moderate downward knockback is dealt to any opponent still caught in the flames' region.

Down Aerial ((Fire Rain))

Jenna stalls in mid-air like a typical stall-then-fall attack, but instead raises her staff above her head as a ball of flame materializes on the end of it. She then swings the staff down to release the ball, which travels as fast as Jigglypuff's fall speed. By default, she fires straight down, but you can opt for a 30 degree alteration with the control stick. The fireball deals 11% with weak knockback and disappears on impact. This move has somewhat long startup and ending lag for Jenna. Too frequent use will nullify the "stall" effect.

~ Grab and Throws ~

Jenna’s grab is standard. She grabs with her free hand. Quick and simple.

Pummel ((Impair) or (Debilitate))

Jenna has two levels of power to her Pummel, depending on the number of Djinn set to her. Either way, she will smack her foe over the head with her staff as it glows red briefly for 4% damage, and this is a very slow Pummel.

The weaker version of this move, Impair, which Jenna will perform if you have fewer than 3 Djinn set, slightly confuses the foe after they've been thrown. For the next second, they will be unable to dash or dodge.

The more powerful version, known as Debilitate, adds to this effect an additional second, and a reversal of horizontal movement controls. Right is left, and left is right, essentially. Remember, Jenna will use this if you have at least 3 Djinn set.

Forward Throw ((Combust))

A swing of her staff sends Jenna's opponent flying forward, with 4% damage and set knockback covering a short distance. Sometime between one and two seconds after the execution of this throw, that opponent will burst into flames that deal 3 quick hits of 2% each, both to that opponent and anyone especially close to them. Knockback is flinching, so it's only real purpose is to ensure your opponent is interrupted. They can shield or dodge to prevent the damage, but the timing is random, so they'll be stuck guessing or just holding their shield up.

Back Throw ((Burn Past))

Jenna holds her staff behind her, as if about to swing it, then suddenly appears about a Battlefield platform's length forward, staff in a follow-through position, briefly surrounded in flames. At this same moment, the opponent takes set knockback backward the same distance. 7% damage accompanies the hit, which is primarily to establish distance between Jenna and her opponent. Little start and some end lag.

Up Throw ((Volcano))

Jenna slams the bottom end of her staff to the ground, and an eruption of flames from beneath pushes her opponent into the air. This is a relatively fast throw, and can also hit very close bystanders. The brief eruption deals 10% damage and set upward knockback just a little higher than the height of Battlefield's high platform.

Down Throw ((Inferno))

Jenna raises her staff to conjure four hovering fireballs over her head. Every quarter second, one fireball will dart toward your opponent at high speed, dealing 3% damage and weak random-direction knockback. This is a little slow on the startup, but has little end lag. Stun time from each fireball is great enough not to allow a dodge if the coming one, so this will basically just push your opponent around for a second, without any guarantee where exactly they'll end up.

~ Final Smash ~

Final Smash ((Blaze))

Jenna grips her staff tightly as her hair blows around her for a moment. Suddenly, a giant flame engulfs the area where she is on the stage. It's about the size of Olimar's rocket. The flame hangs around for 15 seconds, dealing 12% damage and good upward knockback to any opponent who touches it. Jenna, of course, can walk straight through the fire.

More importantly, though, she can manipulate and spread the fire around. Whenever Jenna uses an attack, if her hurtbox is touching part of the flame, all hitboxes associated with that move will also create a similar flame. This, unfortunately, does not apply to summons, but all other moves in Jenna's arsenal can help her spread the blaze. She remains vulnerable during this Final Smash, though she will be protected, for the most part, by remaining in the flames. After 15 seconds have passed, the flames vanish and the game returns to normal.

~ Playstyle Summary ~

Jenna's unusual range and the power shift that comes from properly utilizing her Djinn are the two things you need to be most aware of while playing her. She's an aggressive spacing character who has to keep her opponents a short distance away from her to succeed. She has only one viable projectile (which will waste your recovery if used) and few effective up-close attacks, so that distance is vital to maintain throughout the match. Fortunately, you have a multitude of options for doing this. Your secondary ground attacks, which are essentially your tilts at the beginning of the game, are all attacks with good range and knockback, though they won't rack up damage very quickly for you. If you're scoring those hits well, start smashing for the slower, higher damage alternatives. If you're not comfortable with that, that's fine, it will just make things take a little longer.

Toward the beginning of the match, you want to be as independent of your Djinn as possible. You can use one of them without much drawback, and in all likelihood, it's going to be Spark. If you're getting your butt handed to you, you'll probably need to use Coal instead, and if you're positively whomping, Shine is always a good choice to finish off your opponent, but against a typical player, Spark will be your high-traffic Djinni. Of course, using Djinn means you need them set again, either by summoning and waiting the time, or just resetting them for instant reuse. You can buy the time for a summon (and simultaneously increase its power) by using Reflux, particularly against heavy hitters. If you want to set your Djinn yourself—if you don’t feel you can pull off a summon without being dodged and punished, for instance—you’re probably going to do it the same way you should already be playing, by controlling the distance between you and your opponent so you have the time for lengthier moves.

Your aerial attacks serve roughly the same purpose as those "tilts" you're using, save that they help you stay mobile and evasive at the same time, though their knockback is generally not quite as effective for the spacing aspect. Still, the last thing you can afford to have is an opponent who outmoves you, so you'll need an occasional aerial to keep the advantage. Beyond that, they're generally faster than your ground attacks, and easier to pull off in a pinch. The N-Air comes particularly recommended in that aspect. Jenna is mainly a ground fighter, though, so your aerials will take a bit of a backseat to other attacks, at least toward the beginning of the game. As things progress and you use more Djinn, you’ll rely on your aerials more and more, as they don’t lose power while your ground attacks do.

Likewise your throws are kind of a fallback in case your opponent closes in too close for you. Alongside your basic Neutral Attack, they're really your only super-close combat options for not remaining that way. Jenna’s throws are generally just there to clear space for her. The B-Throw in particular does this well, while the F-Throw and U-Throw can help you set up a stronger hit.

As the battle progresses, you'll start depending on your Djinn more and more, mostly because your summons are your earliest KO options. The Tiamat and Meteor summons are both very effective at this, which means you need at least three Djinn on standby. Saving Reflux for last before the summon is preferred, because of the interruption to your opponent. In tough games, holding onto Coal is smart--you don't want to lose your recovery, and as stated, Tiamat is an effective summon for scoring KOs. Your opponent will be looking for this, though, so a few alternatives for KOing include Shine and all your ultimate ground attacks. You need three Djinn set for these attacks, so consider them early on your way to summoning. You may spare yourself the need to even bother with the summon if you play well. If your summon misses, you'll probably want to get back Coal first (if you used him), as you're prime punishing material now, then Shine or Spark (depending on your need), then the other, then Reflux. Repeat the cycle, more or less, until you KO, then use that time to reset your Djinn and heal as much as you can with Spark.
 

ForwardArrow

Smash Ace
Joined
Aug 17, 2011
Messages
503
One day set is made in one day

-Gamzee-

Gamzee is from Homestuck, a ridiculously long webcomic made Andrew Hussie. Gamzee is one of the 12 trolls, a group of characters introduced a while into the story. They are effectively a bunch of incredibly violent aliens who are playing the same game that the stories protagonists are. Gamzee in particular acts like a clown, and for the large part of the story was mostly a harmless ally. However, in a fairly recent update, he flew off the hook and became a murderous psychopath, mostly because he was no longer perpetually drunk. Gamzee's fighting ability comes partially from his nature as a mimic, though he also has the ability to create clown dolls wherever he so pleases.

He also frequently honks a clown horn wherever he goes. For the sake of this moveset, he will usually just honk it once every 5 seconds for aesthetic effect and nothing more.

-Stats-

Jump Height: 10
Aerial Movement: 8
Size: 6
Ground Movement: 5
Traction: 3
Weight: 1
Fall Speed: 1​

Gamzee is actually very capable of moving through the air, having some downright insane jumps that go up the height of Yoshi's second one both times within a much shorter time frame. He's about the size of Luigi, and moves about as fast. That said, he has poor traction, and is really frigging light. Your size/weight combination is not really doing you any favors, truth be told.


-Specials-

Neutral Special
Clown Puppet


Gamzee snaps his fingers, creating a harlequin as shown above. The harlequin is about the size of Marth and only needs 0.3 seconds to create. These things don't actually do anything on their own, just sitting there until someone takes out their 20 stamina. Gamzee can attack his own Harlequins and you can have as many as you want. You can also pick them up and throw them at the foe as a throwing projectile, though that only deals 4% and not even a flinch. So I suppose you could use them to camp or something? Also, you can only create up to 4 in the air before you need to land again.

Up Special
Teleport
Gamzee phases when you press the imput, along with the nearest Harlequin doll. If you press B at any point during this, it switches to the next nearest Harlequin Doll with no lag. Gamzee will then swap places with the Harlequin, with a little bit of end lag on the end. This means that effectively where there is a Harlequin Doll, Gamzee is there too. Unfortunately, if the foe destroys the Harlequin doll you try to teleport too during this attack, you will appear where it was... and take 30% and knockback that will KO you at 40%. So while this move is powerful, you have to be very careful with it, less you get yourself killed. This does have some start up lag too, so the foe has a chance to interrupt it.

Side Special
Mimicry
With a half second of lag before hand, Gamzee proceeds to speed through the foe in a manner similar to Fox Illusion. During this time, you can press any input on the controller. when Gamzee hits the foe, they take 2% and a brief stun, but it's really not worth the start-up lag. Unlike Fox Illusion though, this has almost no end lag and doesn't send you into helpless, so it does help your aerial mobility.

Now here's the trick with this attack. If you landed this on the foe, you can double tap this attack to instead use the move you input you chose when you input this attack. If you happened to steal an A move, it becomes the corresponding aerial when used in the air (bairs can be stolen by pressing A and backwards). If you steal a grab, all that characters throws can be used. If you use the input to steal another move from the foe, then that one replaces the one you previously selected. So what's the point of this? Well, first of all Gamzee needs the foes KO moves to kill with since he has none of his own, and it also has the side effect of letting you abuse their spammiest attack.

Down Special
Disappear
Gamzee honks his horn twice before disappearing in a flash. No, he did not just turn invisible, he just left the stage. This does nothing for the most part, other than make it so the foe can't really attack Gamzee... until the opponent destroys all your harlequins, in which case you will return and take full damage and knockback from that attack. This obviously can't be used if you don't have any Harlequins out. You may actually spend a fair amount of time like this, hiding were nobody can see you before lashing out. Mainly because there are some moves you can still use in this state. You can return to the fray by teleporting, in which case it will select the closest Harlequin to where you last were, though you can choose from there.


-Standards-

Neutral A
Honk
Gamzee honks one of his signature clown horns a single time, creating a Kirby sized sound wave that deals 3% and stuns foes for a brief instant. This has more lag than most jabs, but the stun is rather nice. Using this on the foe while they are stunned breaks them out of the stun and deals them light horizontal knockback.

This is one of the moves you can use while you've disappeared as well. The effect is somewhat different, instead covering the entire screen in a hitbox that stuns all opponents for a brief moment and deals 3%. This seems extremely powerful, but you can only use it once every 5 seconds. Otherwise, it will either deal 1% and a flinch (the second time), or no damage or effect at all (the third time and onwards). That said, this is a nice way to briefly stun a foe before an assassination attempt or something.

Forward Tilt
Enjoy the Pain


Gamzee grabs the opponent, and forces them to attack him by whatever means necessary. However, Gamzee mostly just laughs whatever it is off as shown above, healing 4% instead of taking damage. Then he throws the opponent to the floor, dealing them 7% and leaving them in prone. This attack doubles in effectiveness if the foe is attacking him, as he interrupts their attack and heals 8% instead, before dealing them 14% throwing them to the ground and leaving them stunned for a half second. Suddenly destroying his Harlequins is a bit scarier than it was before.

Up Tilt
Battering Sweep
Gamzee pulls out a small multi-colored juggling stick, which he swings above him dealing 5% and low knockback. This attack is rather fast, and doesn't really do anything special if your curious. It's just a decent close range option.

Down Tilt
Possess Harlequin
Gamzee grabs a Harlequin if there is one in range, before setting it back down. The Harlequin then stands up, where you can control it until either Gamzee is hit or it ends up destroyed. The Harlequin moves at Mario's dash speed and has can press A to punch the foe for 12% and high set forwards knockback. This attack is actually pretty fast and surprisingly frustrating. It can also jump once in the air about a Ganondorf height, and dodge/shield like a normal character. You can press Down Tilt at any point to stop controlling the Harlequin, as well as teleport while your controlling it.

Now naturally, this is one of those moves you can use while you've disappeared. If so, you control the nearest Harlequin and can switch the same way you would with the Up Special. Obviously, this is how you fight while you've disappeared, and it seems rather predictable...except you can always teleport into the Harlequins place to surprise the foe, or even the place of another Harlequin you laid out that's behind them or something.


-Smashes-

Forward Smash
MiRaClEs
Gamzee grins and whispers "miracles", causing the stage to shake slightly. If an opponent is shielding during this time, their shield will instantly break. If they are not shielding, their shield becomes it's minimum size before breaking and starts regenerating at a quarter the speed. This is not a fast attack to be fair, but it has it's uses. Also, if the attack is fully charged, it will instead cause them to go into shield break stance regardless of whether or not they were shielding, and then their shield is disabled for the next 7 seconds.

This is another one of those attacks you can use while disappeared. This means the foe basically cannot shield while your off screen, making it at least somewhat challenging for them to fight your Harlequins. And if they do get hit with this because they shield, you can go for the kill.

Up Smash
Throwing Baton
Gamzee takes out the the juggling stick from his Up Tilt, preparing to throw it. While you charge this move, you can angle the baton. When you release, it deals between 8%-14% and knockback that KOs at 260%-200%. He throws the Baton between 2 and 5 stage builder blocks at an angle depending on how you aimed the move. This is a fairly quick move, and it allows Gamzee to camp by teleporting from Harlequin to Harlequin.

Down Smash
Lil Cal
Gamzee disappears for a brief instant, appearing as a shadow as he dashes forwards twice Bowser's length-2/3rds the length of Battlefield at Sheik's dash speed-Sonic's dash speed. If the foe happens to touch Gamzee during this attack, this happens to them. That doll there is Lil Cal, who deals the foe 10% before they throw him off, taking half a second to do so. Just enough time to steal a KO move from them if your interested. This attack has a rather small amount of starting lag, but even still it's not that hard to avoid if your careful.

If you use this move while you're disappeared, Gamzee will swoop across the screen as a shadow directly at where the foe is. If they are too busy fighting a harlequin, they may be unable to avoid this. This allows you to attack them while your still disappeared and help your Harlequin get in some hits... and also help you surprise them with a KO move.


-Aerials-

Neutral Aerial
Club
Gamzee takes out his juggling stick again and slams it in front of him, dealing 12% and above average set forwards knockback. This doesn't seem like much, but Gamzee is actually pretty good at pursuing foes off stage and gimping them, which this move can help with near an edge.


Forward Aerial
Harlequin Shield
Gamzee grabs a short distance in front of him. If he grabs a foe with this he holds on to them until you press the imput again, or until they escape with grab difficulty. This also helps you drag the foe towards the edge so that you can potentially drop them to their doom while you recover with your insane recovery abilities. You can also grab a Harlequin with this and use it as a shield if you want, giving you some protection while you try to gimp the foe.


Back Aerial
Trickster Club
Gamzee holds out one of the juggling pins behind him, before flinging it upwards, dealing 12% and upwards knockback that KOs at 220%. This is a somewhat slower attack, but it can also launch your Harlequins off into the air. In fact, it launches them off the top blast zone before they fall back down afterwards. This allows you to transport yourself up to the top of the screen if you feel like gimping the foe off the top.


Up Aerial
Crush Club
Gamzee takes out two juggling pins and slams them together over his head, dealing 14% and knockback that KOs at 180%. This is your best KO move if your opponent doesn't have any KO moves, and it also serves as a solid way to help your gimping game. Unfortunately, it's also your laggiest aerial, so you'll want to careful with it.


Down Aerial
Club Slam
Gamzee slams downwards with one of his juggling pins, dealing 11% and a spike that can kill at 80% if the foe happens to be off stage with you. This is not a fast move or an easy one to land, but you can surprise a foe by throwing a Harlequin off stage before using this on them. Also, if used on a grounded foe, it deals fixed high upwards knockback, so this can only be used for spikes.


-Grab Game-


Grab
Bow Tie


Gamzee takes out a wooden bow in his hands, before snapping it in half. This bow mostly just stays their for aesthetic effect until you input the grab again. Then Gamzee will put the bow string behind their head before wrapping it around their throat, as shown above. They now have to escape with double the grab difficulty. In addition, you can break your bow while you've disappeared, albeit it takes 3 seconds and you can't do anything during this time. It still takes 0.6 seconds to break it on the main plane though, so this is a rather risky grab. After throwing the foe, Gamzee discards the broken bow, so he has to do this again.


Pummel
Strangle

Gamzee tugs on both ends of the bow, dealing the foe a whopping 4% per pummel at a rather fast rate. Truth be told, your throws really aren't that spectacular for killing, but even still, you can get a LOT of damage out of a grab if you land it.


Forward Throw
Savagely Beat
Gamzee grabs his juggling pin and approaches the weakened foe before repeatedly bashing them with it. This deals 3 hits of 5%, with the last hit dealing knockback that KOs at 250%. As an aesthetic bonus, the foe coughs up blood if you use this on them at 100% or higher.


Back Throw
Attach Harlequin
Gamzee will leave the foe still while he grabs the nearest Harlequin and attaches it to the foe. The opponent can escape from the grab during this time, so use it while you still have grab time yet. Anyway, the Harlequin is attached to the foes back and they cannot get it off, but as usual it does nothing. That said, if you possess it, the Harlequin can beat on the foe for 4% per hit at a rather fast rate, though this allows the foe to shake it off with grab difficulty. This also allows you to teleport up right behind the foe with your Up Special, and there's no way they can escape it.


Up Throw
Embed
Gamzee, the foe still being strangled by the bow, embeds the bows ends into the ground. This leave them trapped on the ground while Gamzee is free to roam about. They can continue to try to escape the grab at this point, but it also allows Gamzee to attack them from outside now, as well as set up his Harlequins for some kind of epic maneuver.


Down Throw
Leave Tied
Gamzee ties the bowstring in a knot, leaving the foe choking and taking 2% per second as they are released from the throw. This makes the foe attack somewhat slower and also take random flinching once every 2 seconds. This lasts for 5 seconds, after which the knot comes undone and the foe is free to move around again. The unfortunate news though, is that Gamzee can grab them again without snapping a new bow. Which suffice to say, is pretty scary for your foe.


-Final Smash-
Subjuggulate


This final smash is actually does nothing if you just use it. No really, you just waste your final smash. Rather, if the opponent attacks you, Gamzee will somehow, depending on the character, prevent them from performing that attack using that characters weapon of choice. He then forces them to the floor, taking out the same weapon and repeatedly beating them down in the most brutal way possible with it. Much blood will be shed and the foe will inevitably die. Since it's a little different for every character, I -COULD- make a big long list of what this does to every character made this MYM. But since I'm making this on the last day, I'll leave it up to your imagination, and maybe put it in after the end of the contest. But you probably don't care, since most people don't like that kind of overly huge Final Smash anyway.


-Playstyle-

Gamzee is a bit of a weird character. He can literally disappear from the battlefield entirely, and with a little set up he's basically everywhere at once. Really though, he's not as hard to play as he might look. First thing you do is lay out some Harlequins. Since you can throw them around, you probably then want to put them in spaces you find advantageous. In the meanwhile, try to keep the foe off you with your tilts and such, maybe shutting off their shield or breaking your bow to make them shy away a little bit.

Once you have a few Harlequins set up, the game starts to heat up. Now Gamzee can constantly move in and out of the foes range, smacking them with the occasional attack to scare them away from your Harlequins and camping with your Up Smash. If the foe decides to get reckless, you can sneak in for a grab or two. You want to constantly phase in and out, attacking the foe when you have the chance and hiding in the corner when you don't. Just make sure you keep some Harlequins to get in the foes face with, as if you run out there's no way they aren't going to just flat out destroy you up close.

Now you have to go for the KO. When doing this, look for a prime time to use the Side Special to steal your opponent's KO move. Or make time for it with your Down Smash. Either way, now you want to land one of your stunning moves before smacking them with your all newly stolen tool for murder. Alternatively, you could go for the gimp KO. While your very light so going near the blast zones is rather dangerous, your harlequins give you godlike recovery and an incredibly unpredictable air game as you toss them around.

If you are forced on the defensive (ie, your at a very high percent and don't wanna die), you can always Disappear. Then take control of a Harlequin and pester the foe with your Down Smash/Standard A/Forward Smash. The foe has to destroy all your Harlequins before they kill you, and who knows this might let you steal their KO move in time for you to land the finishing blow. That said though, when you run out of a Harlequins, expect game over, so if you're clever you may want to leave one around and try to escape and make more, continually frustrating the foe and putting them further and further behind...


Oh, so you tried to team up on Gamzee did you. 3 vs 1 I assume? That's too bad, because Gamzee is perfectly capable of taking you all on. In case you haven't noticed, Gamzee experiences some changes in 3 vs 1 mode, or if another boss character is picked to fight him. He experiences some very large buffs in his moveset, as well as changes to his stature.

Stat Buffs:
*Gamzee's weight goes from ultra-lightweight to a whopping 20/10, which is still very light for a boss
*Gamzee takes three times as much work to kill with an instant KO mechanic than a normal character.
*Gamzee escapes grabs at twice the normal speed
*Your dash speed is now on par with Sonic's, you have perfect traction, and fall even slower though you can fast fall quicker than you did before
*Gamzee takes no hitstun from attacks that deal under 20%. He can still attack while taking knockback from such attacks.

Moveset Buffs:
*Harlequins have 50 stamina now, and deal 15% and knockback that KOs at 130% when thrown
*Teleport is now near instantaneous, and you can use it during any of your other attacks
*Mimicry is now very fast, deals 8% and quite a bit of stun, and gives you a much more powerful version of the stolen move
*When Gamzee disappears, he creates a puppet Shadow Gamzee which fights like the normal moveset (non-3 vs 1) in his place. When he returns to the stage, the shadow version disappears. To use one of your attacks during this time, double tap the chosen input.
*Honk creates a hitbox larger than Bowser that stuns for a whole second and deals 7%. The one during disappear remains the same, except you can use it recovers its effect once every 3 seconds
*Forward Tilt now heals you 10%(normal) or 20%(counter) and stuns the foe for considerably longer
*Up Tilt now deals 12% and is INSANELY fast
*Possessed Harlequins now attack extrordinarily quickly, and gain a B button attack that is an uppercut, dealing 24% and upwards knockback that KOs at 85%
*Up Smash has considerably improved range, deals double damage and KOs between 120%-65% based on charge.
*Cal now takes 2 whole seconds to chase off, you move twice as fast and as far, and the move deals 18%.
*MiRaClEs now takes very little time to perform
*The Nair is now as powerful as Ganon's FSmash and is faster than before
*The foe now escapes the Fair with double grab difficulty.
*The Bair deals double damage and knockback
*The Uair deals 30% and knockback that KOs at 70%, and has a powerful suction effect attached
*The Dair pitfalls opponents that land on the stage due to the blow, and spikes at 0%.
*Gamzee always has a broken bow on hand
*If you pummel a foe for 3 solid seconds, they are suffocated to death and lose a stock. It also deals a whopping 10% per second now.
*The Forward Throw now considerably decreases the foes attack and movement speed for 5 seconds afterwards, and deals double damage and knockback
*The Back Throw remains unchanged
*The Up Throw deals the foe a constant 4% per second, and a teammate must destroy the bow in order for them to escape. The bow has 35 stamina
*The Down Throw is now replaced by blasting the foe with a huge burst of dark magic, dealing them 25% and knockback that KOs at 70%.

honk...honk...honk
 
D

Deleted member

Guest
Just a reminder that you have just over 3 hours remaining until the contest is over. If you're working on a last second set like I am, it's time to really start dumping into that. There will be another notice when the contest actually does end.

:o)
 

KingK.Rool

Smash Lord
Joined
Nov 26, 2005
Messages
1,810
Stop that. Stop making movesets.

Updated my comment zone, including all the ponies. Dave, I thought it was impossible, but you sure did prove me wrong. I guess nothing is impossible in MYM, eh? EH???


n88

Smash Lord
Joined
Oct 10, 2008
Messages
1,547
Hippopotas


Background

|Hippopotas (Official slogan: Like a hippopotamus, but with less mu) is another one of those lazy, fat-arse pokemon that sleeps a lot, and looks an awful lot like an actual hippo. But it's unique, because it has something to do with sand.

Statistics


Move Speed | 3
Size | 5
Priority | 5
Fall Speed | 7
Traction | 7
Weight | 7
Crouch | 10


|Nothing too unusual here, with the exception of Hippopotas' crouch. When Hippopotas goes into a crouch, he quickly buries himself in the stage, leaving only his eyes and nostrils poking above the surface. Hippopotas can now move back and forth under the surface of the stage at about Ganondorf's dash speed, which is very fun, I assure you. Hippopotas is also free to use any of his ground attacks while in this state.


|You may want to note that this can't be used on drop-through platforms, and that Hippopotas only crouches when the analog is tapped downward, as in a Smash attack. Simply moving the stick downward won't quite do it. In order to exit your crouch, simply tap upward or press jump. Going in and out of a crouch is very fast, but it's not totally lagless. There are a couple frames where you're left open for attack.

Special Mechanic | Sand Stream
|At the start of the battle, a sandstorm (Which is pretty much a brown/tan tornado) spawns in the middle of the stage. The sandstorm is about as wide as Bowser at its base and with an extra two stage builder blocks of width nearer the top, and is 1.1x Ganondorf's height. The sandstorm cannot be defeated or destroyed, and remains on the battlefield until Hippopotas is KO'd. Hippopotas can alter his sandstorm in a few ways, but those changes are undone when he respawns, as the sandstorm respawns (in its default state) along with him.

|The sandstorm has a slight suction effect; any foe standing within a Battlefield platform on either side will, when standing still, slide towards it at Ganondorf's walk speed. This is easily negated by moving in the other direction, but it does make for quite the annoyance. Any foe who makes contact with the sandstorm is sucked in and swirled around in the upper part of the storm, dealing 5% a second until they escape, which is doable by button-mashing, at normal grab difficulty.

Special Attacks

Neutral Special | Raging Storm
|For as long as the Hippopotas player holds the Special input, the sandstorm created by Sand Stream will home in on a single opponent (If there is more than one opposing player, the target will be the closest to the sandstorm). At first, it will move extremely slowly, at roughly Bowser's walk speed. Over the next eight seconds, however, it will gradually speed up to the rate of Sheik's dash, becoming a truly formidable force. The sandstorm always takes the shortest path available to an opponent, but cannot move through the stage. The sandstorm can be thrown off by sudden turns, as it doesn't corner well, or by the opponent putting another foe inbetween themselves and the sandstorm, as the sandstorm will then start hounding the other opponent. When the sandstorm makes contact with the opponent, the effects are just as described above in the Sand Stream section, and the sandstorm stops moving.

|Perhaps the most important aspect of this attack is that Hippopotas is free to move about while the sandstorm is doing its thing. Just hold down on that Special button, and you're free to walk, dash jump, attack, or whatever your heart desires. Unless of course you want to use another Special attack, which would necessitate letting go of the button, which results in about a quarter-second of lag for Hippopotas. Not too shabby.

Forward Special | Sand Attack
|Hippo blinks cutely as a small jet of sand spurts out of his nose and travels forward in an arcing motion which has a maximum height of about one Mario height, and a maximum range of four Ganondorf-heights forward. The sand deals 7% damage and flinching knockback on contact, but that's not really the highlight of this move. What comes in handy here is that if that bit of sand should strike your sandstorm, then it will increase its size by 5% of its original size! This has doesn't have much endlag, so you can spam it to grow your storm rapidly. Mind you, it's not Fox's blaster, but you can still get a couple shots off in a second. There is no max size to Hippopotas's sandstorm, so keep plugging away at it!

Up Special | Sandstorm
|Sand begins to swirl underneath Hippopotas, and his fall slows to a complete halt as the sand forms into a sandstorm (completely independent of the sandstorm that is summoned through Sand Stream) beneath him. The newly formed Sandstorm will continue to grow for as long as you hold Up Special, maxing out at the current size of your Sandstream. Once the attack is released, it will launch Hippopotas upwards two Ganondorf-height for every Ganondorf-height of the sandstorm. Yes, you can kill yourself by overcharging this. This doesn't put Hippopotas into helpless, but you can't use it again until you hit the ground. Even if you get hit out of it while charging.

|There's a reason your new sandstorm maxes out at the size of your Sand Stream. Hippopotas doesn't create sand for this one, he's just pulling it away from the Sand Stream to form a new sandstorm underneath him; you can actually see sand flying awayfrom the Sand Stream and towards your new sandstorm in little wisps, if you look carefully. As you charge up this attack for a bigger recovery, your Sandstream diminishes proportionately. Once you've been launched, the new sandstorm will act just like the Sand Stream, but shrinks at a rate that always has it dwindle completely after 8 seconds, regardless of size. And of course, the Sand Stream regains its lost sand as this shrinks back down.

Down Special | Roving Storm
|Much like the Neutral Special, this is an attack you're going to need to hold. After the initial Down Special input, simply hold the Special button and move the analog around as you wish to maneuver your sandstream about freely. This will always move at the top speed reachable by your Neutral Special in addition to granting you more control than Neutral Special does, but on the flipside of the coin, Hippopotas is incapable of moving around and attacking like he can with Neutral Special, due to the nature of the input. Hey, stuff like this requires his full concentration. The effect when the sandstorm makes contact is normal, as described in its own little section, and the sandstorm, as in Neutral Special, cannot be moved through the stage. Also, might I take a moment to mention that Hippopotas uses Rest when Idling, which he will do if his Sandstream is left in control for long enough? He'll heal at a rate of 8% per second while idle.

Standard Attacks

Neutral Attack | Tackle
|Hippopotas lunges forward three Kirby-widths, his entire body acting as a hitbox that deals 9% and drags foes along Hippo's trajectory. If they fail to DI out before Hippo hits the ground, then he'll land right on top of them, pinning them to the ground and forcing them to escape at twice normal grab difficulty. Meanwhile, Hippopotas will use Rest! He falls asleep right on top of the foe, allowing him to regain health at a rate of 6% per second while the foe struggles to escape from underneath Hippopotas and avoid the sandstorm that is almost certainly bearing down on them.

Forward Tilt | Bite
|Hippopotas leans forward and unleashes a powerful chomp. Well, maybe not too powerful. . . it only deals 11% damage and fairly low knockback. This is one of Hippopotas's few attacks without frills. It can be thrown out pretty qquickly to defend yourself or push foes into a sand stream, but it's not anything too fancy.

Up Tilt | Sand Geyser
|Hippopotas crouches down and squints his eyes shut briefly, and a geyser of sand bursts out of the ground directly in front of him! It's about as wide and tall as Ganondorf, although it's slightly wider on top, due to the sand spreading outward and falling down, just like a geyser of water would. The initial burst of sand will deal 7% damage and flinching knockback, but after that, the sand deals no damage, but will push foes who touch it up to the top of the geyser for the rest of the geyser's duration. Foes cannot DI out of this or escape it on the way up, but that's a fairly short journey of 0.2 seconds, and it's fairly easy to just jump off the top of the geyser. The geyser disappears after ten seconds, and Hippopotas is immune to its effects. If Hippopotas stands atop a geyser, it won't push him upward, but stop spouting sand completely, only to kick up again when Hippopotas moves off of it. And its timer doesn't count down while Hippopotas is blocking it.

|Hippopotas has a pretty nifty multi-use tool here. Not only are sand geysers a fun stage manipulation trick (which makes it easier to catch foes with Sand Stream), but they can also be used as a defensive counter-type move by Hippopotas. He just has to make one and camp on top of it, and the person who knocks him off s prevented from following up or perhaps even caught in the sand itself. Camping on top of one also allows him to abandon it whenever he wishes to unleash the geyser on a foe who may be unexpecting. And thirdly, this attack will increase the size of your Sand Stream at a rate of 5% for every five seconds the Sand Stream is in contact with the geyser.

Down Tilt | Protect
|Hippopotas hunkers down, and while the input is held, a dome of sand appears around him. The dome basically acts as free superarmor, absorbing 20% damage before it breaks (dealing minor hitstun to Hippopotas), allowing foes to get at the hippo himself. This can be used to stall foes while a sand stream rages outside.

Dash Attack | Sandscoop
|Hippopotas keeps on trucking as he reachs his lower jaw down into the ground and scoops up a mouthful of sand, which he hurls over his shoulder. This is a simple projectile that deals 8% and flinching. Use it to flee opponents (while you bring your Sand Stream closer to them). It disappears on contact with the ground, and adds 0.5% to the size of the Sand Stream if absorbed.

Smash Attacks

Forward Smash | Rock Throw
|Hippopotas squints fierecely, and a boulder about the size of Kirby erupts from the stage in front of him and flies forward a distance ranging from one Kirby-width to three times that. This is perhaps Hippopotas's most powerful move, as it deals 25% damage and powerful knockback that can KO around 150% or so. This is slightly offset by high lag on both ends, but if you're using your Sand Stream properly, the foe will be kept busy anyway, right?

|Speaking of which, if this makes contact with a Sand Stream (or Sandstorm created by your Up Special), then it will be caught in the storm and whirl around at the same altitude that it entered the storm at. Foes who run into it while they're trapped in the sandstorm will take 15% a pop. Additionally, using Forward Smash while a rock is inside the Sand Stream will cause the rock to fire out of the Sandstream in the indicated direction, with all of its usual properties.

Up Smash | Sand Launch
|Hippo snorts (sort of mightily), and a burst of sand the size of Ganondorf is ejected from the top of the sand stream. It flies straight upward two Battlefield platform-lengths, then crashes back down into the sand stream (if the sand stream has moved, then it will have an altered, not-straight-up-and-down trajectory, to make sure it lands back in the sand stream). If it hits anyone, it'll deal 9% and drag them down into the raging storm.

Down Smash | Earthquake
|Hippo stomps his feet and unleashes a powerful earthquake! Ringing in at a solid 0.5 on the Richter scale, this causes all fighters on the same platform as Hippopotas to take 3-6% and trip. Mighty-ish. Does set them up for a sand stream pretty well, though.

Aerial Attacks

Neutral Aerial | Desert Shield
|Hippo encases himself in a sandy orb in a fashion similar to Ness' PSI Magnet. This only lasts as long as Wolf's Reflector does however (assuming you don't hold that down). Anyone caught in the flash of the shield will take 5% damage and a set knockback of 1 1/2 Stage Builder Blocks away. If a projectile hits the shield during that short moment, it will be reflected back at double speed and 1.5x the damage that normally would've been done to Hippo.


Forward Aerial | Erosion
|Hippo sneezes out a puff of sand from his nostrils to about 3/4 the length of Bowser's Fire Breath. This move doesn't actually do damage, but can potentially push the foe two Bowser sizes away by usage at point-blank range. At most other ranges, the puff will have dwindled and the opponent will only get pushed back a little (similar to the end of the FLUDD's stream). This attack takes a moderate amount of time to start, but has almost no ending/landing lag.


Backward Aerial | Weathering
|Here, Hippo will quickly turn around to let out a narrow stream of sand that deals 3 hits of 4% each, with moderate knockback on the last hit. The stream is about the size of Olimar and reaches back two Ganondorf widths. This attack has very little lag on both ends, and lasts even shorter than Ike's Backward Aerial. After the attack is over, the sand drops down (deals no damage or knockback). If the sand goes into the sandstream, it will add to the sandstream's size by 5%.


Up Aerial | Crunch
|Hippo's head awkwardly gets larger and bites upwards for 13% and high knockback that'll kill around 120%. Pretty simple. The bite has the range of about a Smash Ball above Hippopotas. There is a moderate amount of start-up that prevents regular usage, and a high amount of landing lag. This is probably best used as a finisher for foes in the sandstream.

Down Aerial | Sand Dive
|Stall-then-fall, anyone? Hippo stalls for a moment mid-air... then dives down as far as Toon Link's stall-then-fall (and slightly faster too). Collision with Hippo deals 15% and high knockback (kills at 140%). Collision also has Hippo release sand and if the sandstream is in Smart Bomb radius, the sand will travel over there and increase the sandstream by 10%. If Hippo reaches the ground, he will be sent into crouch. If Hippo reaches a passable platform... then you better hope the ground's somewhere underneath.


Grabgame
Grab | Sand Tomb
|Hippopotas seemingly does nothing as a massive pile of sand roughly twice the size of Bowser is dumped from nowhere off the top blast zone and lands on the nearest opponent. If the foe is in the air, the sand will simply sift around them on its journey to the bottom blast zone and have no real effect other than obscuring vision for a moment. However, should the sand hit the stage, it forms a giant dune. And if anyone happened to be standing on that portion of the stage when the sand hit, then they become trapped in the sand, with their movement speed reduced to 0.1x the usual as they struggle to escape. Your Sand Stream can also pick up the sand dune, which will neatly increase the size of your Sand Stream by nearly 50% when it's at its default level. If there's no-one trapped inside it, then the sand dune will quickly filter off the back side of the stage, disappearing within a second. It can be used as a platform during that time, but it really doesn't last long enough to have much impact on the match.

|This is immensely useful, but extremely slow and telegraphed, making it easy to interrupt. But it does a marvellous job of bogging down opponents and giving your Sand Stream a chance to close in.


Final Smash
Fissure
|Hippopotas expels sand from his nostrils, and suddenly, the stage tears apart, opening a gap so wide that crossing to the other side is practically impossible, even for characters like Meta Knight and ROB. The blast zones move outward to accomodate this. If you're smart, you'll use this to separate Hippopotas from the enemy, as you can hunt them down with a sandstorm in absolute safety. The effects last for twenty seconds.

Playstyle
|Hippopotas is lazy and lets his sand stream fight for him. He'll start out doing a lot of fighting, but as the sand storm gains momentum, he'll just let it do his job for him. What, you were expecting something more in-depth? Too bad, hippo time.
 

GibbytheCreator

Smash Cadet
Joined
Sep 3, 2011
Messages
49
Location
a walking paradox
I hope i make the deadline :cool:


JULIUS ROCK​

thats right boys n girls chris rocks dad joins the brawl! Julius is the dad character from the hit show Everybody Hates Chris. if you havent seen the show then you might not understand this moveset too well. if feel bad for you cause this show was amazing lol. in the show he was badmother hubbard! he was shown to be a real tough guy and you can tell from just look at him. his job was a newspaper delivery and a security gaurd. he will make sure no one gets in here lol! he is known to have belt for different punishments to savagely beat beat his kids. another funny thing In the show is that Julius is really cheap, and by that I mean REAL CHEAP. like this one time in an episode he took a picture of the inside of the fridge just so his wife wouldnt have to open it so much to look inside. why? because electricty bill was high!there was another time Chris wanted to sleep and Julius told him to turn his alarm clock off. Chris then asked him how will he know when to wake up. julius said, "Boy you can't tell time when you're asleep and its 2 cents an hour!" lol. oh, Julius has the magic power to instantanously add up the value of anything to the exact number. what does he think your life is worth? NOTHING HAHAHA

__STATS__
Size: 7
Fall Speed: 5
Weight: 7
Movement: 8
Jumps: 7
Traction:9
Aerial Movement: 6
Strength: 8

as you can see, Julius is a pretty good character which is not surprising. he is a pretty tall man who falls pretty averagely. he can manuver really good about the stage since hes quit in shape. his jumps are a tiny bit above average because strong powerful legs. His work boots make sure to keep him from sliding everywhere since its a safety hazard lol. His aerial movement is a little bit better than normal. why? because he's g like that. Julius is also very strong! just look at him he's a body builder from moving all those boxes and fighting people

__SPECIAL MOVES__

__NEUTRAL SPECIAL: SPECIAL DELIVERY__
Now i know that Julius was never really delivered packages, but it seems sense to think that package are delivered. when the imput is pressed, Julius reaches into his uniform and takes out his big brown package. Julius then screams SPECIAL DELIVERY except angry. When he takes it out he throws it immediately. Surprise! package is bomb! there are two types of packages he can throw. a brown package with red string is an immediate bomb that explodes when it hits somethnig. a package with blue string acts like sticky bomb and sticks to people. both packages deal 15% damage with good knockback. Dang it Julius! you're supposed to be stopping terrorist mail, not sending it!

__SIDE SPECIAL: TRUCK HIT__
Julius yells out TIME TO ROLL or TIME FOR WORK and he immediatley gets in his special delivery truck. the truck is pretty big and is a huge hit box. Once in his trusty machine Julius scream YEE, LETS GET IT and starts driving. the truck moves faster than wario's bike but not too fast. Julius can control truck so good that you belive truck was the character. he has driving experience lol. getting hit by the truck deals 20% with huge knockback. sometimes the character wont get sent flying but instead with be RUN OVER by the truck dealing 35% but with no knockback it stuns instead. Julius you old son of a gun! youll get fired at this rate! who will feed chris now?

__UP SPECIAL: TRAMPOLINE__
ok, ok, this move was really hard to think of for Julius so i had to do something wierd like this hope yall dont mind. so when Julius does this move he scream CHRIS IF YOU DONT GIVE ME A TRAMPOLINE IM GOING TO BEAT YOU! Chris does. A huge trampoline appears you know the kind a huge red and white one that kinda looks like the target logo. once this appears Julius says THATS MORE LIKE IT! and jumps onto it. as he rockets upward like sonic, Julius does five somersaults in midair that deal 8% with ok knockback. once he lands Julius puts his hands on his hips and says a random quote from the show including my favorite THATS 49 CENT OF SPILT MILK DRIPPIN' ALL OVER THE TABLE. SOMEBODY GON' DRINK THIS MILK!"

__DOWN SPECIAL: TONYA__
Tonya is Julius youngest child and some might say his favorite kid. Tonya is always getting what she want and julius tries his hardest to help make that possible. there was this one time where julius bought tonya this really expensive makeup kit even though her mom said no. she maniupulates him. its now time for Julius to use her! when you use this move Julius screams TONYA, GET YO BUTT OUT HERE to stage background. after like half a second you see tonya come out into the field. she stands wherever Julius first called her. when she comes out Julius screams TONYA YOU STAY RIGHT THERE! from that point on Tonya stand on the stage with her arms cross and looking mad like she does in show. now she isn't useless though! whenever an opponent hits Tonya she cries and squealss DADDY HE HIT ME! now whenever Julius hears that he howls rabidly WHO HURT MY TONYA? as foam comes out of his mouth. now he immediatly teleports and hits the enemy with an unblockable hit for 23% with great knockback. the reason this is balanced is cuz tonyas pretty big and therefore easily avoid. pic related its Tonya


__NORMAL MOVES__

__NEUTRAL A: SUPER PUNCH__
Julius hits forward with his fist for a big 5% with little knockback

__FORWARD TILT:TIRE IRON__
Julius reaches into his uniform and pulls out trusty tire iron! he sings that baby forward for a good 7%!

__UP TILT:TOASTER ATTACK__
Julius pulls out TOASTER and hold it above his head! toaster then starts working and toast comes out. the toast is small and doesnt go very far deals 5% with little knockback. Julius then screams THAT'S 2 DOLLARS WORTH TOAST RIGHT THERE! WHY YOU WASTING IT?

__DOWN TILT:LEG SWEEP __
Julies sweeps his big leg forward real fast for 4% damages

__SMASHES__

__SIDE SMASH: BELT__
When you first imput this move Julius reaches into his uniform and pulls out his favorite belt and screams I AM GOING TO BEAT SOME SENSE INTO YOU WITH MY BELT BOY! as you charge. when you release it he screams TASTE THE FURY OF MY BELT SON! and whips forward with it. the belt itself deals 18% fully charged with the tip of the belt being a 22% sweetspot with high knockback. if not then very good knockback.

__UP SMASH:TRASHCAN THROW__
Julius is now angry! very angry! hes so angry that he flexes and yells ARRGH!! as his eyes go wide open. he will kill next thing he sees. Suddenly a trashcan appears infront of Julius and he yells GRRAH! and tosses it up into the air. The thrash can gets tossed up very high and deals 20% damage with good knockback. is Julius a garbage man now lol? the trashcan deals damage because it is sharp and can cut you.

__DOWN SMASH:THE YOUNG AND THE RESTLESS TAPES__
Julius is a big fan of the show the young and the restless. for those who dont know the young and the restless is some soap opera the used to play in the 80s about young people sleeping around or smething lol. Julius wants to watch this show as much as he can but he has two jobs to work (even though he watch a lot of it when he had gout and was home sick) so he tapes them. he has so many young and restless tapes that they stack super high. ok for this move he pulls out this stack of tapes and screams YOULL BE THE YOUNG AND THE DEAD IF YOU MESS WITH MY TAPES!. After you release the imput he drops all these tapes forward and they come crashing down on enemy. this is a weak attack and deals 18% with ok knockback pretty bad move IMO.

__AIR ATTACKS__

__NEUTRAL AIR ATTACK: SPIN ATTACK__
Julius spins furiously for about a second like kirby screaming LOL WUT AM I DONG this deals 10%

__FORWARD AIR ATTACK: OLD SPICE__
Now i know this is not Julius that does old spice commercials but it is the same real life guy. plus this is very funny so i guess ill reference it now for laughs. Julius reaches into his uniform and pulls out a can of old spice for men body deodorant. He sprays forward and yells SMELL LIKE A MAN YOU IDIOT! you see the old spice hurts them because it gets into opponents eyes and burns like pepper spray

__BACK AIR ATTACK: KICK__
Julius screams GET OUT OF MY FACE and does a back kick that is exactly like sonics except stronger 15%

__DOWN AIR ATTACK: HOME REMEDY __
in one of the episodes the family except chris got sick. it was shown that julius has tons of home remedys that can cure almost everything except blindness lol. anyways, when you use this move Julius reaches into his uniform to pull out a smoked catfish and some grape jelly. he furiously begins mixing the two and creates a weird concoction (even tho it cures nausea in the show). He then yells TAKE YOUR MEDICINE! and drops the mix down. this mixture is so nasty that if it hits you while in mid air you go into helpless mode and die. otherwise it does 14$ with ok knockback.

__GRABS__

__GRAB __
Julius takes out his trusty belt and whips it forward for a ranged grab as he does this he screams COME GET SOME THEN! if the opponent is grabbed the belt ties around their wrist and Julius pulls them in

__FRONT THROW: GUN
__
Julius reaches into his uniform and pulls out his gun from the security guard job and takes it out. because this is a game it looks just like sams gun from sam and max, so its big. Julius then shoots the opponent in the heart for a hefty 20% damage but with no knockback. instead they fall into their ground helpless state (like when you get hit with a powerful attack and land on the ground on ur back). Julius screams TAKE THIS!

__BACK THROW: JUDO THROW
__
Julius does some judo throw he learned from his security training that deals 14% with good knockback.

__DOWN THROW: BEAT DOWN
__
Julius scream OH THATS IT NOW YOU GONNA GET IT! as he tackles them to the floor. once they are on the floor, he pins them with his body and whips them with his belt. TAKE IT! he screams as he whips. this deald 17% damage with good knockback.

__
FINAL SMASH: DELIVERY GONE WILD​
__
Julius gets in his armored car from security and starts driving around. you controll the truck with perfect accuracy. if opponents get hit, they suffer 30% damage with high knockback. also all the packages from his neutral special randomly fall out of his truck for 25% damage with huge knockback.
 

smashbot226

Smash Master
Joined
Sep 1, 2007
Messages
3,027
Location
Waiting for you to slip up.
BARE MINIMUM MAN


Backstory: He's a barely naked man.

All stats: 3/5
Glide/Crawl/Wall Cling/Wall Jump: No

NORMAL ATTACKS
A: One Two Punch
A>: Scratch
A^: Uppercut
Av: Floor claw swipe
Forward Smash: Tackle
Up Smash: Double claw swipe (like Shiek's up smash)
Down Smash: Earthquake
Dash attack: Running claw swipe

Nair: Spin
Fair: Claw Swipe
Bair: Reverse claw swipe
Dair: Downwards claw swipe
Uair: Upwards claw swipe

Throws:
Pummel: Claw swipe
Forward Throw: Toss forward
Back throw: Toss backward
Up throw: Toss upward
Down throw: Toss downward

Special Moves:

B: Bite
He bites at the enemy. Does a single hit with decent knockback, and can eat projectiles and items.

B>: Bare Charge
He charges at the enemy. Powerful attack.

B^: Bare Flip
He does a flip in the air, that helps him recover

Bv: Bare Spin
He spins around. Gives slight vertical height if rapidly tapped

Final Smash: Manly Landmaster

OTHER INFO
Taunts:
Bare minimum man does a thumbs up
Bare minimum man flips the bird
Bare minimum man raises his pinky

Victory Poses:
Same as taunts

Snake Codec:
Snake: What sort of enemy am I fighting?
Colonel: Bare minimum
Snake: Anything else?
Colonel: He's a bare man
Snake: What should I do?
Colonel: Don't get hit

Stage: Manly Man Forest
Just a flat bed of grass, with walk off edges. There's a forest in the background, but that's irrelevant.
 

darth meanie

Smash Journeyman
Joined
Jun 6, 2008
Messages
452
St-Stupid Make Your Move, It's Not Like I Like You Or Anything...

Two-Face


"You believe in the justice system, don't you…? You didn't spend all those years in Law School for nothing, right? Then you know, justice has two sides. Innocent or guilty. Like this coin. One side clean. The other side scarred."

Two-Face, or Harvey Dent, is one of the greatest villains in Batman. While other villains are able to threaten Gotham City or even the world on a larger scale, Harvey’s psychosis and schizophrenia is a constant reminder to Batman that even those he trusts, that even those with the greatest of ideals can become monsters. Once the promising and handsome District Attorney in Gotham, after a chemical accident half his body was badly burned. He was driven to a life of crime, becoming convinced that the justice he fought for was a fabrication. Instead, he developed an obsession with all things binary, and settled all of his important decisions by the flip of a two-headed coin with a scarred side. If the coin turns favorably, his victim lives. If the coin doesn’t though… there’s no mercy.


Special-Moves

Neutral Special Flip of a Coin

Harvey pulls out his coin and flicks it into the air, immediately snatching it out of the air in three quarters of a second. He looks at the result, and then shouts out either “Heads,” or “Tails,”

If he calls out heads, the move does nothing. If he calls tails though, his next attack has massively increased knockback.

Down Special Clever Feint

Harvey pulls out his coin and flicks it into the air, immediately snatching it out of the air in three quarters of a second. He looks at the result, and then shrugs and laughs.

When Two-Face uses this move, he’s only trying to lure the opponent into attacking him; he’s not interested in the coin flip. He can therefore immediately cancel this attack into any other non-special move. When Harvey is actually making a decision though, his obsession with chance is too strong for him to defend himself, even if he’s about to be attacked.

Side Special Submachine Gun Fire

Two-Face loads a drum into his SMG and fires out 20 bullets that do .2% damage each in the course of a second, aiming whatever angle he points. Due to the speed of fire, low damage, and lack of accuracy, he can’t attack at range with this move effectively, but at close range, it’ll push opponents far back, giving him some space if he needs it.

Up Special Bat Grapple

Looks like Two-Face stole one of Batman’s grappling hooks! The move works like most tether moves, with a range of three Bowser lengths, but grabs opponents, so it hits against shields. If he successfully hits an opponent, it brings them up in front of him and deals 3% damage and light hitstun, leaving them free for a mix-up. If used in the air, he fires it at the nearest ledge, the nearest opponent, or in a generally upward angle, in that order. When he hits a ledge with it, he’ll quickly slide to grab the ledge, but he can automatically perform any moves out of ledge before he grabs it, letting him instantly roll on stage, jump off, or ledge attack. He cannot drop from the ledge and immediately regrab though. If he hits an opponent, he brings himself closer to them, and kicks them away for 6% damage.

Normal-Moves

Jab Combo

Two-Face punches twice. The first punch is a fast, short ranged punch that’s a free hit whenever he’s in a situation with frame advantage, but only deals 3% damage. The second punch is a stronger punch to the gut that deals 9% damage, but doesn’t link up properly. It does however always hit if the opponent spot dodged the first punch. It does medium knockback usually, but if Two-Face just won a coin flip, it’ll kill at average damage percents.

Forward Tilt

Two-Face slams his knee into the opponent’s gut, dealing 8% damage and a good amount of hitstun. It can’t chain into itself unlike a certain other forward tilt, but is relatively fast, if not as quick as his jab, and keeps the opponent close up. Better yet, because he’s trying to hurt the opponent, not kill them, he can pop this move out freely to try to catch the opponent and get in a better situation for a killing blow. If you follow this move up, Two-Face will slam his elbow down for a brutal one-two that drops the enemy to the ground and deals 5% damage.

Down Tilt

Two-Face crouches down and pulls a pair of knives out of his boots and slashes in front of him, then immediately behind him, but he can cancel it after the first swing. The knife swing deals 7% damage. Two-Face can punish rolls with this fairly easily, slashing in front of him if they move towards him, and slashing behind if they roll behind him. If he just got a boost from a coin flip, he’ll make stabbing motions instead, giving both strikes far more horizontal knockback than they have any right having, easily killing most opponents at a decent damage percent unlucky enough to have their feet on the ground.

Up Tilt

Two-Face throws a punch straight up reminiscent of Ryu's crouching fierce punch from Street Fighter. It's neither particularly fast nor slow, deals 7% damage and mild upwards knockback. It's got better range than you would think, making it a decent anti-air technique.

Press the attack again, and Two-Face follows his uppercut with a swinging piledriver with the other arm. It only lands if the first hit is meaty, but deals another 7% damage and decent forward knockback. If he's boosted by a coin toss, it works as a decent killing move, and spikes opponents if he's near the ledge when he lands it, killing around 60% or lower if they don't have an excellent meteor cancel or incredible recovery.

Dash Attack

Two-Face uses his momentum to deliver a powerful haymaker that deals 12% damage and knockback that doesn't kill until high percentages. If he's been boosted by a coin flip though, he can easily rush in and use this to kill around 70%, as the range and speed lets him combo it out of the first hit of his jab and forward tilt at higher percentages, both moves which don't expend his chance to land a killing blow. This can also punish back rolls during a wake-up game.

Neutral Aerial

Two-Face does three midair spinning kicks, each dealing 6% damage. They don't link up properly like other moves, say, Snake's Neutral Air and can be easily dodged out of.

After the first hit though, Two-Face can cancel it by pressing A again, delivering a final roundhouse for 12% damage. This kick won't combo out of previous kicks, but is amazing if Two-Face baits an enemy air dodge and lets him punish with a powerful kick that can easily kill after he's won a coin toss.

Forward Aerial

Two-Face shouts and swings his arm down for a spike, which has about the same start-up as an air dodge. The move deals 10% damage but doesn't spike as well as most similar punches, dealing more horizontal knockback than vertical. If he's gained a kill boost, this works as a great kill move. If he hits with this and knocks the opponent into the ground, they'll usually be knocked prone; since this move has no frames of landing lag you can almost instantly transfer into a wake-up game.

Up Aerial

Two-Face flips backwards, kicking up at any enemies near him. Like all flip kicks, this is your classic aerial 'get outta my face' move, with fast start up and a wide hitbox. It deals 8% damage and upwards knockback, but isn't improved from a successful coin toss.

Down Aerial

Two-Face kicks downward with a flying kick. This move doesn't have him stall in the air, but it does deal surprising horizontal knockback and 11% damage. He can't cancel this move once he starts it until he lands, but the obtuse angle of the kick makes it a good air-ground move if attacking from above rather than approaching with a jump.

If he has a boost from his coin flip, if he lands he'll turn around and perform a spinning kick for another 11% damage with good horizontal knockback.

Back Aerial

Two-Face slams his elbow down behind him in a move with a small, tricky hitbox, but it deals 8% damage and an incredible amount of hitstun and some downward knockback. The real trick to it is for when opponents try to dodge past Two-Face, he can use this to hit them just as they come back, and it sets up for a follow-up very well if performed out of a shorthop.

Forward Smash

Two-Face makes a big step forward and delivers a powerful, straight-arm punch with surprising range and strength, dealing around 16% damage. Although it's not particularly fast, Two-Face has super-armor for this move after the first few frames of start-up until the attack lands, giving him even better armor than Wario's Forward Smash. After a successful coin flip, this is also Two-Face's best kill move, and if charged up or near the edge can kill around 50%.

This move is so good all-around that it's tempting to spam it, but because of move decay, it can't be used as a counter attack, damage builder, and kill move all at the same time. If Two-Face wants to punch out his enemy, he needs to use other moves to help relieve pressure on him.

Down Smash

Two-Face very quickly whips out a double-barreled shotgun and fires it at his feet, around the same angle and hitbox that Lucas does with his Down Smash, simply upscaled. It deals 12% damage and okay knockback. After firing once, he holds his shotgun out for half a second. During this, he can fire the other barrel, tripping up opponents who shield the attack as to when they can let down their guard.

If Two-Face's coin has landed scar side up, he'll fire both barrels at once at a shallower angle, dealing 24% damage and making an excellent kill move.

Up Smash

Two-Face pulls out a .22 semiautomatic pistol and fires it at a diagonally upwards angle. This deals 7% damage and moderate knockback, but doesn't kill. It's extremely quick and amazing anti-air as it has great range and can be angled.

If Two-Face has his kill boost active and lands this attack, he laughs and pulls out a second pistol and fires it, this time automatically locking on to the opponent. This one fires an armor-piercing bullet, dealing 10% damage and enough knockback to kill, especially at high damage percentages and against enemies who are high up or near the blast zone. If he misses though, he doesn't expend his killing aura.

Grab-Game

There’s nothing particularly interesting about Two-Face’s grab, but there is something interesting about his grab release on the ground; Harvey gets a very slight frame advantage that most other players don’t get, giving him just enough time to land an immediate jab. Going for a forward tilt or grab however takes the exact amount of time for the opponent to either shield or immediately spot dodge, but puts him in a much more advantageous position.

Neutral Special Double or Nothing

Harvey pulls out his coin and flicks it with one hand, managing to still grab onto his opponent somehow. If the coin lands “Heads,” he releases the player in his regular grab release, but if it lands “Tails,” he growls, increasing the strength of his next throw. The opponent cannot button mash out while he does this, but he can only perform it once in a throw.

Pummel

Two-Face slams his knee into the enemy's gut for 3% damage. This does 5% damage if he won a game of double or nothing, but he has less time to perform the pummel.

Down Throw

Two-Face delivers a piledriver punch to the opponent, knocking them to the ground and stepping on them, dealing 6% damage and leaving them in a prone position for a wake-up game. If he won a toss of double or nothing, before letting his foot up, he shoots the enemy in the face for another 10% damage, guaranteed.

Forward Throw

Two-Face pushes the opponent forward, and then delivers two punches in a row, staggering the opponent as he steps forward for the combo. Each punch deals 4% damage. If Two-Face won the toss-up during the grab though, the damage of the throw doubles, and the second hit gains killing knockback.

Up Throw

Two-Face puts a gun underneath the enemy's chin and fires, dealing 9% damage. If he won the toss-up, he'll fire a second time immediately afterwards for another 9% damage. This throw has no immediate follow-ups though.

Back Throw

Two-Face tosses the opponent over his back with one hand and pulls out his double barreled shotgun with the other,firing once for 12% damage. If he won the toss-up, he fires both barrels for a whopping 24% damage and a great kill move. The end of the move also leaves him in the state of holding his shotgun if he didn't win the coin toss, so he can fire again immediately afterwards, but except at very low percents enemies are knocked too far away to hit them with it.

Play-Style

Two-Face's style may not be immediately obvious. He relies on luck to ever be able to land kills, opponents can clearly tell when he's in a position to threaten them with a killing move, and few of his moves seem to be really threatening on their own without relying on a 50:50 chance to work.

Two-Face is ultimately a close quarters fighter. Very few of his moves have strong knockback unless he's decided to go for the kill after flipping his coin. When he does get up close, he wants to get an advantage and then force the opponent to guess for a mix-up. After a hit from his grapple or being released from his grab, they have a 50:50 chance to either dodge or shield, and if they guess wrong, they're taking a hit from Two-Face. Similarly, his wake-up game makes the opponent have to take chances of whether they can roll behind him and get hit by his Down Tilt, back for his Dash Attack, or stand up and get shotgunned or shieldgrabbed.

Two-Face is a bit slow, and has some trouble approaching; he relies on forcing the opponent to approach from scattered fire from his Submachine Gun and the occasional pistol shot. Of course, the way that Two-Face really makes the opponent want to get into his face is with his Coin Flip. He's laughably vulnerable, and if luck's on his side, he'll become very dangerous very quickly; he can kill at hilariously low percentages played right. This becomes more interesting with his ability to cancel a feint coin flip; flip when the opponent still has a chance of hitting you, and then deliver a super-armored Forward Smash into their face. And if they're too scared to approach? You've got free coin flips whenever you want.

When he does have to approach, like most character's he'll want to do it from the air, using his relatively quick up aerial or multi-hitting neutral aerial to get a quick hit in or punish a shield. And if they try to get behind him, that's what the back air is for.

Two-Face's grab game is incredibly powerful, not only for its ability to mess with enemy shield and dodge timing, but because with double or nothing he can do the most obscene damage of any character when it comes to throws. That said, he'll usually prefer to do Double or Nothing when the enemy is at a high percentage and the stakes are higher; his back throw does plenty of damage at lower percentages. If you're doing well playing wake-up, his Down Throw is what you'll prefer, while his Forward Throw is a great kill option. And if you happen to lose Double or Nothing? If they don't dodge right away, you can just play again! And if they do, there's a jab in the face!

And what do you do when going for the kill? Isn't the opponent going to shield and dodge like crazy trying to get you to blow your boost on nothing? It's important to note how moves like his Up Tilt, Jab, Up Smash and Neutral Aerial let him essentially test the waters with the first hit and play with the opponent, waiting for them to get jumpy and dodge or shield at the wrong time. Once they're vulnerable, then you punish. You're not getting baited... you're baiting them, and fishing for a chance to use that follow up that will land a kill. And if they're quick on the shield? Grab and play Double or Nothing.

Two-Face wins by taking chances and making the opponent take guesses. Get in their head, and make them slip up so you can land your killing blow.
 

Plorf

Smash Apprentice
Joined
Jan 28, 2009
Messages
124
Location
Silver Spring, MD
>DRILLDOZER


click for playlist

>INFORMATION

Drilldozer was once a mining robot on the planet of Tallos 5. At some point in his life, Hero Factory scientists gave the local mining bots augments in their fingers which could absorb fuel cells rather than having to constantly recharge. This adjustment was flawed, however, as Drilldozer could absorb more fuel than his body could handle. He eventually gained an addiction to fuel and became corrupt. He, along with several other fuel-addicting bots, left the planet in search of that fuel. Their travels eventually led them to Tanker Station 22, where they started siphoning all of the fuel. Drilldozer has since committed crimes of breaking and entering, robbery, assault, and sabotage.

>STATISTICS

SIZE > 10/10
Drilldozer is a little bit bigger than Bowser, as the biggest character in the game. However, as tall as he is, his posture is more hunched over, so don't expect him to be that easy to hit.

WEIGHT > 12/10
Drilldozer is about as big as Bowser hunched over, but he's still a humungous metal robot. He doesn't go down until absolutely ridiculous percents, being a real juggernaut.

POWER > 10/10
Drilldozer can KO as early as the toughest heavyweights out there, but has plenty of damaging, multi-hit moves thanks to his hefty drill.

GROUND SPEED > 1/10
Walking and dashing speeds are abysmal, being similar to Ganondorf's, but Drilldozer stops for no one.

AIR SPEED > 2/10
Oddly enough, Drilldozer is not quite as handicapped in the air, but still must rely on certain attacks for bursts of mobility.

FALLING SPEED > 10/10
I can't stress how heavy and bulky that much metal is.

ATTACK SPEED > 1/10
You're going to find a lot of similarities with Ganondorf here, but Drilldozer doesn't have any sort of Warlock-Punch style move.

RANGE > 9/10
Drilldozer has two very large tools on his hands that act as disjointed hitboxes, and huge ones at that. His Lava Sphere Shooter proves to be a useful projectile as well.

PRIORITY > 9/10
When you're dealing with a gigantic drill, nothing is going to out-prioritize it. Some of his other moves, maybe, but that drill is untouchable.

FIRST JUMP > 2/10
It could be worse, but Drilldozer is called Drilldozer for a reason. He's just not an air kind of guy. Still, he has strong legs.

SECOND JUMP > 1/10
With no ground to push off of, Drilldozer's immense strength is useless. At least it's something.

CROUCH > 1/10
You're not going to avoid anything with it, but at least you can crouch. Drilldozer can't crawl, though.

RECOVERY > 4/10
Drilldozer has a couple of tricks up his sleeve; that's why he's avoided capture for this long. That aside, he's still a hulking metal brute, so don't expect to see anything too crazy.

>SPECIAL ATTACKS

NEUTRAL SPECIAL > TURBINE DRILL
Drilldozer's most obvious defining feature is the massive drill attached to his right arm. The Turbine Drill can drill through any material. Its core is of neutronium, surrounded by uranium teeth - making it dangerously radioactive. It is very heavy, loud, and hard to control. Of course, being the giant he is, Drilldozer has few problems controlling the thing.

Anyway, when you hold down B, Drilldozer revs up his drill in front of him. Sounds simple enough, but what this does is essentially keep the drill spinning for future use. Remember, this is a very bulky drill, and in most moves, the drill doesn't have enough time to rev up before the attack is over. This move doesn't make Drilldozer's attacks any less laggy, but it does allow his drill to be spinning at full speed when attacking. The defining feature of Turbine Drill, though, is that it can be used during any other attack, making the drill a passive hitbox that deals 5% per hit-- and the faster it spins, the easier it is to be trapped by it. You have to hold down the button for a second to get the full effect, but after the drill is already spun up, it doesn't matter if you keep holding it; it will never spin faster or do more damage, but you can still hold it out forever. You can perform only one or maybe two attacks in a row before you have to spin-up again, so keep that in mind.

Think of it this way: Other moves like this would probably be used as an individual attack, but this tactic is ineffective. While Turbine Drill can be used as a standalone attack, it's best used between moves to prepare for an upcoming drill attack, or even a non-drill-attack: it keeps the drill spun-up and ready to go. This is an important move; Drilldozer should always have his drill spinning.


SIDE SPECIAL > LAVA LAUNCHER
Remember, try to envision the Brawl version of Drilldozer to look less like a Lego set and more like an actual earthmover robot. So, that two-piece flimsy looking launcher that you'd normally squeeze to fire a little ball is actually a formidable cannon that fires spheres of lava with red-hot outer shells. With a lot of lag for a projectile, Drilldozer's launcher shoots out a glowing orb of molten lava in a slight arc, hitting the ground slightly less than a Battlefield away. It explodes on contact with anything, dealing 12% and moderate knockback (with the fire damage effect, of course). The launcher overheats after firing, however, with a cooldown of about 1.5 seconds. Cooldown does not mean ending lag, though, so you're free to attack pretty soon after the lava fires.

That's not all, though. If the lava hits the ground, it remains as a Bowser-wide pool of lava for ten seconds, gradually cooling and hardening until it has no effect. While it's out, though, it deals 9% and fixed upward knockback, and also has the added effect of making any downward drill attack that enters the pool have minimal ending lag, thanks to the molten magma. Be careful, though, because if the pool hardens when your drill is still in the ground, you'll experience some additional lag as Drilldozer pulls out his drill. Drilldozer can walk over his own lava pools.


UP SPECIAL > DRILL UPPERCUT
With about as much lag as Ganon's forward smash, Drilldozer begins to spin up his drill as it shoots fire out of the back end. There are a few frames of super-armor at the start of the attack. On the ground, Drilldozer will dash forward with his drill a bit less than a platform length before performing a huge uppercut, launching himself a Wario Corkscrew in the air vertically. Drilldozer's drill hitbox is always consistent; it deals 5% per hit while rotating, DPS varying dependent on how fast the drill is spinning. However, in this move, Drilldozer himself is a hitbox that deals 14% contact damage, with a damage bonus of 5% if they touch the red, molten spikes glowing around his body. This attack has fairly high knockback, but there's moderate lag at the end as Drilldozer recuperates-- as well as landing lag if you don't airdodge/do something else before you land.

In the air, the move has less startup lag, and Drilldozer goes straight to the vertical recovery, but there's slightly less horizontal distance covered than the ground-based version. Drilldozer doesn't have a helpless state, but this move can only be used once in the air until he's hit again-- and since he falls so fast anyway, there's not much he can do if he misses. Similar to many other recovery moves, Drilldozer can aim this a little more to the left or right, aiding in horizontal recovery. Keep in mind, though, that since he's using a drill to blast upwards, Drilldozer will not grab the ledge until the attack is complete, potentially botching up your recovery.

However, for that same reason of using the drill, he can also tunnel directly through the stage if the drill is spinning fast enough, and provided you keep holding B. This can be a lifesaver, considering that you can just bore through the underside of stages like Battlefield in a few seconds, bursting out of the surface with your drill. There's some lag as Drilldozer pulls himself up through the stage, but it's generally worth it to drill through anyway-- the ground that is blasted away at the surface is a small hitbox that deals 7% and tilt-like knockback. Drilldozer cannot stall underground, and will keep moving up no matter what you do, although holding down B will propel you faster. The tunnel that you bore is an actual hole; any character can fall through it, but it seals itself within ten seconds.


DOWN SPECIAL > CLAW BLADE
First of all, I'd like you to get it through your head that yes, this next move is based on OFFICIAL CANON. With unmissable startup lag, Drilldozer points his claw towards the ground as it charges up siphoned energy. After this, a blast is released directly at the stage, creating a large blue-tinged explosion with about the radius of a Blast Box, originating at ground level. This explosion will deal between 15-20% and rather high knockback, similar to Ike's Eruption. When the dust settles, though, you'll find a gaping crater in the stage over a Bowser-width wide. It's not terribly deep, only a Mario-height or so in the ground, but it's large enough that the hole is impossible to ignore-- you can even trip over the edges of it.

Why doesn't Drilldozer just fire that beam of energy directly at the opponents, then? Well, he would have if he thought of the idea. Drilldozer is not exactly the brightest bulb. Anyhow, in the air, this move is very similar, but the bolt of energy is instead fired diagonally downwards, not unlike Ness' PK Fire. There's less lag on either end, but only slightly-- I would not recommend using this over a pit. From their air, damage and knockback is also slightly reduced, giving this move less punch but the same overall effect-- blasting the stage to pieces. The crater, like Drilldozer's other stage alterations, remains for ten seconds, and discourages foes from entering Drilldozer's domain.

>STANDARD ATTACKS

NEUTRAL ATTACK > POWER DRILL
It should not come as a surprise that Drilldozer's standard attack is a (relatively) simple one. Holding up his drill in front of him, Drilldozer revs it up as it grinds away at whoever is unlucky enough to be standing within its range. The drill can be angled 45° up or down, so it can bore slightly into the ground (expanding existing holes). The attack has no starting lag but a bit of end lag-- lack of starting lag is justified by the time it takes for the drill to spin up. One more cool feature: Drilldozer can slowly walk backwards and forwards while the drill is spinning, allowing him to keep up the pressure and make DIing more difficult.

Now, since this move is fairly straightforward, I'll explain a few things about how the drill itself works: damage is a constant; it's always 5% per hit for every attack that uses it (barring exceptions), but depending on how fast the drill is rotating, your damage per second may vary wildly. Another thing: Your drill has transcendent priority, meaning nothing will ever out-prioritize it. It also happens to be able to deflect any projectiles that run into it, a trait unique to Drilldozer. These properties make Drilldozer's drill the weapon of choice, as it has the same unbeatable characteristics in each move that features it, and can even work passively thanks to his neutral special.


FORWARD TILT > HOOK SWIPE
With a bit of windup lag, Drilldozer swipes his Claw Blade forward in a left hook, so that the blade curves in towards the background. The move normally deals 10% and okay knockback, but it has a sweetspot right at the tip of the blade, going into the background layer. The sweetspot deals 14% and impressive knockback for a tilt, but keep in mind it's not easy to land. Something else interesting about this attack is that the sweetspot is also very handy at breaking shields; one successful hit will almost completely diminish your enemy's shield. Also, the way Drilldozer swipes makes the sweetspot hitbox about one character length away, and high enough to hit Mario's head. There's relatively low end lag on this attack.

UPWARD TILT > HEADBUTT
You may not have noticed until just now, but Drilldozer has a massive cranium. It's also covered in metal. You can see where I'm going with this. With slightly more lag than Dedede's UTilt, Drilldozer crouches down and jumps in the air (not high, obviously), his head enlarging like Wario's for the sake of hitboxes. The attack deals 13% and high knockback and can punish spot-dodgers with its duration, but there's more ending lag than Dedede's UTilt. As an added bonus, though, when Drilldozer lands, his weight causes a small tremor in the stage below his feet, tripping anyone on the ground within a platform's distance and giving them 6% damage. You may have noticed a theme here in Drilldozer making everyone stumble around.

DOWNWARD TILT > STAB STAB STAB
Drilldozer's crouch animation has him leaning on his drill for support, so that's not going to be useful for attacking-- but remember, it can still be revved up with Turbine Drill. Anyway, Drilldozer raises his arm and, with his Claw Blade, swipes down powerfully in an arch shape. There's not a whole lot of lag on either end, but it's Drilldozer we're talking about, so this is slower than many other DTilts-- though there are a couple of super armor frames at the beginning. The attack has a long hitbox that does 9% and fairly low knockback, but like the FTilt, also has a sweetspot that deals 13% and powerful downwards knockback. Normally, the knockback bounces enemies off the floor, but over an edge, suddenly Drilldozer has a Meteor Smash at his disposal.

DASH ATTACK > DRILL BORE
Drilldozer, while chugging along, will lower his drill and spin it up, flame and smoke spewing out of the back. With the drill to boost him along, Drilldozer bores into the ground while running, tearing apart the earth in front of him. He goes about a platform's length before stopping and pulling his drill out of the ground, having some end lag. The chunks of stage flying out has he drills each deal 6% and moderate knockback, and obviously his drill is still a multi-hit hitbox during the attack as well.

That's all fine and dandy, but the aftermath of this attack is what you really notice. There's a Kirby-deep well about a platform long, with harsh edges rather than a smooth indentation in the landscape. That's obviously going to mess with your opponents at least a little bit, for ten seconds, like every other one of Drilldozer's burrows. By the way, have you ever tried to fill your burrows with lava?

>SMASH ATTACKS

FORWARD SMASH > SCREW CRUSHER
With massive startup lag, Drilldozer rears his drill back and, with super-armor frames, thrusts it forward for 25-33% and huge knockback. As with many of Drilldozer's moves, there is a sweetspot at the tip of the drill that deals the most knockback (enough to KO at VERY early percents), but the rest of the large drill hitbox is still quite powerful. There's a good bit of end lag, too, but since this move launches Drilldozer forward with the sheer force of the drill, it often doesn't matter. Now, using your Neutral Special with this may or may not be a good idea-- the spinning drill can protect you during the startup lag and add extra damage, but it guarantees that you will not hit with the sweetspot-- which could cost you a KO. Other than that, the move is very straightforward-- and scary.

UPWARD SMASH > PIERCE THE HEAVENS
Drilldozer heaves his drill over his head and revs it up, ignoring the standard drill-based damage formula in favor of four increasingly powerful hits (3%-4%-5%-9%, 5%-6%-7%-11% when charged) with the drill, ending with quite a bit of knockback. There's a good deal of lag on either end of this move, but it can be helped by revving up your drill during the attack to ward of enemies. Be wary, though, because in any of Drilldozer's laggier attacks, spinning up your drill allows your foes to DI out of the spinning drill before your attack even begins.

The hitbox is very large and faces diagonally upward, and it certainly doesn't hurt that there's smoke and fire blasting out behind the drill, this being purely visual except for the fact that fire and smoke deal 4% damage-per-second without any hitstun, this being consistent for all of Drilldozer's moves where his drill emits exhaust.


DOWNWARD SMASH > DRILL THE LAND
Drilldozer shoves his drill down in front of him, this alone doing 9% and moderate knockback on its sourspot-- this is just the startup animation, though. Instead of charging, Drilldozer holds his drill down in the ground as it bores straight down, sending rock chunks flying around him for 5% and relatively low knockback each-- you can do this indefinitely, with some end lag once you let go. However, if, during the startup animation, you hit with tip of the drill, Drilldozer will pin his foe underground and drill them down-- this deals standard drill-based damage and is very difficult to escape. However, if the enemy does escape, Drilldozer is in a bad place as he has to deal with the end lag.

>AERIAL ATTACKS

NEUTRAL AERIAL > REVERSE SPINUP
Drilldozer pulls his drill close in front of him and , with a brief delay, revs it up very quickly in the opposite direction of the default rotation. This'll do five immediate hits of 3% and sex-kick-like horizontal knockback. The fact that the drill reverses is important, though, because if you've spun up beforehand, the sudden change in direction will catch anyone currently being combo'd by the drill, launching them forward with extra knockback. In those cases, this move is a very potent KO move with relatively low lag on either end-- however, take caution as your drill's previous rotation will be completely negated when you use this attack.

FORWARD AERIAL > GUARD BREAKER
With about as much start lag as Ganon's FAir, Drilldozer rears back his huge drill as he lunges forward, smoke and sparks spewing out the back of the drill. There are a few frames of super-armor at the beginning of the move, but the bulk of the attack has Drilldozer rushing forward about 2/3 of a platform's width with his drill outstretched, dealing standard rotational damage. The knockback is not so bad either: this is a good aerial combo move, and at higher percents a kill move. There is, however, end lag as Drilldozer counteracts his momentum and pulls his drill back. Notably, though, if you land while the drill is still out, Drilldozer will retain his massive forward momentum and be able to use a dash attack, forward roll dodge, or Neutral Special without suffering the end lag. However, those options remain quite predictable. This attack is going to be very useful, with its large hitbox and forward momentum properties-- it can even be use as a makeshift recovery, and eats up shields.

BACKWARD AERIAL > DEATHCLAW
Reacting faster than usual, Drilldozer whips around with his blade outstretched and shreds whoever was unlucky enough to jump behind him-- this does 14% with completely horizontal knockback, and while the knockback could be higher, the attack's high hitstun and knockback direction make this hard to recover from, and therefore counter. As a sidenote, this move also turns Drilldozer around as in Marth's BAir, so this can be used to be a little more flexible in the air, which is absolutely not Drilldozer's comfort zone: there's plenty of ending lag here. Remember, keep your drill spun up. It helps.

UPWARD AERIAL > DESCENT
Drilldozer musters up strength and reaches high above him with his claw, this taking a while to start up. The payoff, though, is when he sharply brings the blade down, it's a meteor smash that violently pulls any opponents above Drilldozer down to the lower blast zone with 16-22% depending on sweetspot (tip of blade), and there's also great knockback growth. However, the move is awkward because of the lag on either end, including moderate landing lag. If you can pull it off, though, it's excellent at getting your foe on the ground (where you want them), or off the stage entirely-- even as a last-ditch suicide KO near a ledge.

DOWNWARD AERIAL > HELL CRUSHER
Drilldozer swings his drill down, revving it up for a massive attack-- it's not a stall-then-fall, but it might as well be considering Drilldozer's fast falling speed. The robot plunges down, drill spinning (dealing standard drill damage), but it does at least look awesome, with smoke and fire everywhere. The drill's a transcendent hitbox, as mentioned before, so this is actually quite hard to counter-- though there is some lag on either end. Anyway, if Drilldozer slams into the ground before the move is over, or if you keep holding A/B during the attack, the hulking 'bot will impact the ground with a ton of force, dealing 19% damage and pretty high diagonal knockback away, as well as sending chunks or rock flying for minor knockback and damage. The impact also forms a gigantic crater, about the same size as the one formed with the Down Special, so there's quite a bit of ending lag with a few super armor frames as Drilldozer unsticks himself from the ground-- at the bottom of the crash site, of course.

>GRAB AND THROWS

GRAB > HOSTAGE
Drilldozer leans forward, extending his claw blade out pretty far to ensnare foes-- this has the second-highest non-tether grab range in the game. However, it can be awkward to land with lag and such. Drilldozer holds foes between his blade and his drill in front of him.

PUMMEL > GRIND
Pressing A (or B, for that matter) is just like the neutral special Turbine Drill-- hold the button for constant, increasing damage and drill speed. There's a twist, though, in that the pummel itself has slight lag, making it riskier than usual to go for a pummel and a throw.

FORWARD THROW > SPIN LAUNCHER
Drilldozer hoists the unlucky opponent onto the tip of his drill, simultaneously revving it up(this does a moment's worth of standard drill damage). He then proceeds to thrust the drill forward with great force-- an action that sends the foe spiraling away with 10% extra damage and nice knockback. An interesting thing, though, is that this attack will always deal "spinning" knockback, no matter what % the other player was at.

BACKWARD THROW > CLAW BURST
Drilldozer spins around, the other character held in his claw, and crouches while aiming behind him-- all the while his blade building up a bright bluish glow. After a brief pause, Drilldozer fires a huge blast of energy from his claw, as in his Down Special, launching his foe for 9% and high knockback and very low hitstun, though the knockback doesn't scale very well.

UPWARD THROW > WEIGHTED BLOW
Drilldozer tosses the enemy up in the air and whacks them out of the sky with the blunt side of his drill casing-- this is much more painful than it sounds, and the character goes flying down, taking 12% in the process. The end result of this is your foe lying on the ground, and Drilldozer left with a touch of end lag: there are definitely options to pursue here. As a side note, enemy players may notice a slight increase in their tripping rate for the next few seconds as they recuperate from that blow.

DOWNWARD THROW > BONECRUSHER
With all the grace of a mountain gorilla, Drilldozer grabs his opponent by the shoulders using his claw and drill (awkward, right?), and twists his foe in all the wrong directions, maybe throwing in a couple of knee bashes. When he's done with this brutality, Drilldozer casually tosses the foe behind him with 15% added to their stock. This throw is rather damaging, but it's also slow. Try not to use it in free-for-alls.

>FINALE

FINAL SMASH > GIGA DRILL BREAKER

Drilldozer demolished the Smash Ball! When he activates his Final Smash, Drilldozer's body crackles with excess energy, as his drill unit explodes in size, pointing straight upwards-- it becomes absolutely massive, rivaling Mario's Finale. At any rate, the now-gigantic drill revs up and faces horizontally, trapping anyone caught near it in an inescapable vacuum of hits: this thing will deal 10% per hit very quickly, until any enemies trapped now have 100% more damage. The top it off, the drill then launches from Drilldozer's arm in an enormous flurry of billowing smoke and flame, delivering foes directly to the blast line. Drilldozer takes a moment to recover, the Smash Ball's energy providing him a new drill to use. This Final Smash lasts about ten seconds, total.

>PLAYSTYLE

Drilldozer is the definition of a heavyweight. That much is obvious, his presence on the battlefield is almost always one of the most domineering. With plenty of super-armor frames and some of the slowest and most powerful attacks in the game, he's a force to be reckoned with. However, if you look more closely, Drilldozer has a lot of interesting things going on.

First off, you've got the massive drill-thing that is unsurprisingly a critical part of Drilldozer's metagame. If you keep this drill spun up, most of your attacks are affected in interesting ways. For instance, if you use Turbine Drill and crouch for a DTilt while spinning up, your drill will combo foes directly into your claw blade. Things like that show off how useful it can be to stay revved up constantly-- it also helps your survival, since Drilldozer is going to take a hell of a beating with his abysmally slow attacks, and one of the only things standing in the way of that is your ever-spinning drill. Don't knock the transcendent priority, either, since if used properly, many of your drill-based attacks can actually block foes from harming you in any way.

Drilldozer is, when it comes down to it, a ground-based moveset. His movement and jump stats are simply too bad to running around all over the place. As such, your Up Special and FAir, while good attacks, put you at a disadvantage to your opponent, since they rely moving around and being in the air. Only use moves like this when you need to. Otherwise, it's smart to stay constantly attacking instead of constantly moving. Your Lava Launcher helps put pressure on opponents, as well as zoning them in away from the lava pools. Drilldozer is actually not terrible at zoning, since he possesses several moves that tear up the ground around him, making the stage just one big collateral damage area. If the players you're facing aren't up to the challenge, holes in the stage can be pretty annoying.

When it comes to damage and knockback, Drilldozer has both in heaps. With relentless drill-based damage, you can get KOs that much earlier just because of your sheer damage output. Your Smash Attacks are all devastating-- Forward Smash is the brute force approach, Up Smash is the all-rounder, and Down Smash is king in terms of damage. Speaking of damage, though, you will be taking loads of damage on your campaign to demolish your enemies, so try and leave your opponents incapacitated. Your grab-game should ease some of the pressure with that, as you have a long-ranged grab and damaging, lengthy throws that leave foes reeling.

Drilldozer makes a big impact in every Brawl he's in, just in how long he lasts and how much damage he dishes out before he'll finally go down. He's not without weakness-- fast falling speed and lag everywhere make it easy to land hits on him, and his recovery can be very predictable, and therefore punishable. However, with tricks such as drill-comboing and stage-destroying, as well as passive smoke and fire damage present in many of the more violent drill moves, Drilldozer absolutely won't go down without a huge fight.


>EXTRAS

UP TAUNT > RAGE
Drilldozer makes a strongman pose, holding out his drill and claw menacingly, while bellowing a slightly mechanical roar.

SIDE TAUNT > LOCK AND LOAD
Drilldozer stands up tall as his Lava Launcher ***** back and makes a high-tech pumping noise-- primed for fire.

DOWN TAUNT > STRETCH
Drilldozer lifts his shoulders and shakes out his loose joints. He's been in a tough fight.

UP VICTORY POSE > HAVOK
Stomping into the victory screen, Drilldozer roars triumphantly while spinning his drill.

SIDE VICTORY POSE > MINING OPERATION
With fire and smoke everywhere, Drilldozer simply stands there, hunched over, glowering at the screen.

DOWN VICTORY POSE > CRASH

Drilldozer comes bursting through the ground, stopping halfway to raise his arms at his recent victory.

LOSS POSE > DEFEATED
Shuddering, and with his equipment and drill sparking and failing to rev up, Drilldozer looks totally beat.

ENTRANCE ANIMATION > BREAKOUT
Drilldozer burrows out of the stage with chunks of rock flying everywhere, arriving from some sort of shady operation.

KIRBY HAT > POWER DRILL
Kirby receives a spiffy silver robot helmet, complete with horns, and acquires his Power Drill copy ability from Kirby 64-- the combination of Stone and Cutter. When he uses his Special, Kirby is dragged forward by a huge drill at an average speed, dealing standard drill damage to anyone in its path. When he lets go, the drill keeps going on its own, flying off the stage. Kirby can only use this again when the extra drill is offscreen.

 
D

Deleted member

Guest
Jointed by Smash Daddy and Nicholas1024

MR.MIME


Mr. Mime is a one-shot character from The PowerPuff Girls, starring in a single episode - Mime For a Change - where he plays the villain. His role in the story is a symbolic one, starting off as an innocent entertainer, Rainbow the Clown, before being transformed into the nefarious Mr. Mime by an accidental spillage of bleach. The substance washes away all of his colours and simultaneously takes away his zeal for life, using his newly-found super power of draining colour from his surroundings to bleach all of Townsville monochrome. This goes for its people too, leaving everyone he touches a husk of their previous selves - including two of the three PowerPuff Girls. In typical PPG fashion, though, the girls [Bubbles] find a way to reverse the effects of his evil scheme, through a good old fashioned rock-off. Though if you're like me, you'll enjoy imagining that this was just a lucid dream of Bubbles' while being reaped of her obnoxious baby blue by Mr. Mime, like every other male who watched the cartoon.

As you'd expect, Mr. Mime has a very simplistic method of spreading his chosen blandness all across the stage. It's sort of like Muk! ... Wait, turn back around, it's better than Muk! Mr. Mime thrives in his created world of black and white, using his moves to desaturate the stage like he's pulling the meter back on the saturation bar in Photoshop - making every stage into Flat Zone given the opportunity. This isn't the only thing he can desaturate, though - opponents can also be be robbed of their colour and left looking disgruntled and lifeless with Mr. Mime's power. This isn't done naturally like Muk, though, so Mr. Mime's going to have to work to gain his little spot of paradise, but he has some interesting ways to use it to pressure foes in his favour. Mr. Mime is also a victim in his own way, though - it's not just a choice, but rather a necessity to get his desaturation out. Don't worry, this is still the intoduction, I'm not early MYM10 Smashbot: but Mr. Mime is definitely not a character who is alien to the clown-y concepts found in Make Your Move Brawl.

STATIISTICS

Weight: 5 [Mario]
Size: 6 [Link]
Ground Speed: 6 [G&W]
Air Speed: 8 [G&W]
Fall Speed: 3 [G&W]

Mr. Mime shares his various movement speeds with Mr. Game & Watch. Their movement also looks very similar in terms of animation - Mr. Mime moving with frenetic and awkward poses rather than fluid movement, as you'd expect from a mime. His size, comparable to Link, is more-or-less that of a regular human man, with the only slight difference being his cartoon-y legs that bend out half a Kirby on either side of him and extend his hurtbox slightly.

One interesting alteration from the norm for Mr. Mime is his shield - it takes on a translucent visage, being semi-transparent. The only actual difference is that Mr. Mime can take his shield out twice as fast, but it has double as much end lag to compensate.

Keep in mind that all of Mr. Mime's various weapons in his moveset are invisible, just like a real mime.

SPECIALS

Side Special: Desaturation


Mr. Mime reaches out with both hands with short starting lag, turning anything he touches immediately into a black-and-white version of itself. When used on any kind of projectile or item, its trajectory is halted and it stands in place for its duration. With opponents, they will now have a change of appearance more than anything else - having slightly reduced movement and are a quarter more likely to trip. The one notable change comes when they use their shield - it now causing them damage of 4% a second when they have it out, as its colourful, or at least profound appearance doesn't mesh well with their depressed state.


Mr. Mime can also use the move on a shielding opponent, turning their shield semi-transparent like this, as well as the opponent themselves with the previously stated effects - bar taking damage from their newly-bleached shield. However, their shield now takes half the damage it usually does to be broken and loses start lag while gaining end lag, like Mr. Mime's. If Mr. Mime uses his shield next to an opponent who also has a translucent shield from being hit by this move, the two shields bubble into one, releasing Mr. Mime, but forcing the opponent into awkward ending lag as they wait for Mime's bubble to fall into place with theirs, taking half-a-second. This is on top of the already difficult end lag from Mr. Mime's special shield.

Neutral Special: Bleach the World

Mr. Mime puts his foot down on the ground, causing a wave of desaturation to progressively cover the stage, doing so at a rate of one big stage building block every half-a-second. After 5 seconds of being of being on-stage, it starts to recede back to where it started at half this speed. As long as Mr. Mime is standing on this part of the stage, he recovers 4% damage every second, but at the cost of desaturated opponents gaining back their movement and traction nerf. What a conundrum. Opponents unaffected by your side special, however, are dealt damage of 3% a second and flinching as long as they stand on the transformed parts of the stage. Depending on how Mr. Mime chooses to play it, an opponent will love, or hate your areas of desaturation! Using the move in the air has Mr. Mime do the same, but in aerial space - healing and damaging for the same amounts and spreading at the same speed.

There's one cure for this darkness, though - shields, those wonderful, colourful shields. A shielding opponent [though not one with a translucent shield] will repel the darkness, returning colour to any darkened part of the stage at the same rate it's spread out. Of course, this is pretty much the perfect time to hit their shield, but it certainly beats taking constant damage when the entire stage is covered in bleach. Using your neutral special from within a bleached area will cause it to expand naturally from its outermost reaches, allowing you to remain somewhat incognito as long as you're within a big area of it - the opposite goes for foes saturating the stage with their shield, spreading their colour much like Mr. Mime would with his neutral special, across the bleached area. When these two forces meet, there is a standstill, with the bleached area not moving at all.

Up Special: Black Stripes

Putting both hands onto the ground with short start lag, Mr. Mime causes the stripes on his costume to descend onto the stage, either being bunch up in an area the size of Bowser or expanding out to have as much as a Kirby of space between each other, each of the four bars being as thick as an Earthbound boy and moving as fast as Captain Falcon's dash. If used in the air, Mr. Mime enters a standard stall-and-fall, dealing 8% to opponents and downward knockback, but spreading his bars across the ground if the input is held when he hits the ground. These bars are similar to your bleached areas, causing constant damage to opponents of 5% a second if stood on [not stacking with other damage], but do not heal Mr. Mime.

In mid-air and with bars already out, pressing the input causes Mr. Mime to walk down an invisible staircase like you'd see in a bad parlour trick, taking 0.4 seconds and immediately jumping out of the centre-point of the bars on-stage, working as a halfway recovery, but being good if your opponent is trying to work on de-bleaching the stage. This allows for him to, on demand, know where he is by teleporting to this location and if you put the bars out in the bleached world and whilst invisible, only you may ever know. This not only gives you far more ease-of-use in terms of keeping track of Mr. Mime, but also presents another reason for the opponent to get shielding to find those potentially hidden bars.

Pressing this input again while standing on the bars causes them to detract at double their previous speed - opponents standing on, or next to bars are dealt knockback that can KO at 130% by this movement. However, what's more useful is shielding opponents, who are dealt hitstun and kept in their shielding state, being dragged inward along with the rest of the bars. Thus standing at the centre of the bars, and in a bleached area, is exactly where you'd want to be as Mr. Mime -- beware, though, that pulling the bars while they occupy a Kirby of space or less while Mr. Mime is on top of them, will cause them to re-escalate up his costume and be deleted from the stage until next use of the move. You can only have one sets of bars out at a single time and they do not affect the bleaching from your neutral special, but are obscured by it if occupying space on the stage afflicted by desaturation, making it far more viable.

Down Special: Pulling Back the Curtains

Mr. Mime turns to the camera in 0.5 seconds and pulls on an invisible pair of curtains in front of him, causing them to come together and cover him over, making him invisible too. Like any invisibility, this has its own rules to it: Mr. Mime's actual moveset is still perfectly visible... though he largely makes use of invisible props, so... Along with Mr. Mime himself, the percentage bar is also invisible now, only displaying when he is taking damage by showing Mr. Mime's avatar being battered as it usually does, but not showing exactly how much damage he's taking. This allows you to fool your opponent into falsely believing you're somewhere you're not, or simply recover in your own little corner of the stage without drawing attention to yourself. If attacked, your invisible curtains will be destroyed by any opponent's attack, leaving Mr. Mime momentarily stunned. You can also choose to use the input again yourself to pull the curtains apart without any such end lag. Similarly, being attacked yourself while invisible will pull you out of it and destroy your curtains, but using your moveset outside of your down special will not affect your invisibility, allowing you to do... whatever a mime would want to do.

Shield Special: Pinning the Blame

Mime pulls out of hammerspace an invisible pin, clenching it between his pointing finger and thumb as he slowly rears it overhead and pricks it forward in a near-comical fashion. Used on regular opponents, this isn't a grab at all, simply dealing 7% damage and small knockback. However, against shielding opponents, this move will automatically break any shield it comes into contact with [barring translucent ones]. Unlike most shield specials, this is actually used whilst still in your shield, meaning that you pop your own shield as well – but in this situation, Mr. Mime reacts only by chortling and can then immediately use his shield afterwards, being good for resetting a low-health shield.. This is a real essential in Mr. Mime's game, especially if the opponent is on your desaturated stage and already taking constant damage regardless, but is difficult to hit with due to its low range and slow start-up. When translucent shields affected by your desaturation are hit by your pin, they start to deflate and seize up around the opponent, suffocating them as they struggle to get out [having to mash to get out, like in a regular grab]. Due to the overhead trajectory of the pin, it's very viable to cause your shield to combine with another translucent shield, causing your opponent to suffer the end lag and giving you an opportunity to squash them within your two shields.

GRAB GAME

Grab and Pummel: Mime Box

Classic mime. Mr. Mime pads his hands out around him in 0.3 seconds, being dumbfounded and chuckling as he realises he's boxed in... along with any opponent next to him [within a Kirby on either side] or who tried to roll past him in this time, being useful against those being pulled in toward him, such as shielding opponents being pulled in by his bars. Obviously, foes inside the box can't roll out of it. Mr. Mime is immediately free to walk out of the invisible box, while the opponent is trapped inside, having to deal 13% damage to the box before it shatters mysteriously. They are unable to turn around, being reduced to their grounded moveset and only being able to use directional moves like their forward tilt, in their current direction forward, as the mime box seems compact to the size of their body rather magically. This should be enough time for Mr. Mime to prepare another attack, or simply allow Mr. Mime to build damage up if he was standing on a bleached part of the stage. Either way, he's also able to break the glass himself with his own attacks, meaning you can break through to your opponent and have plenty of moves in which to do so. Using the move in the air bears similar results: having a slightly extended hitbox, however. Opponents caught in this box are limited to their ground moveset, apparently standing on the invisible glass. Additionally, to use Mr. Mime's pummels or throws, you have to hold down the grab button while the opponent is still trapped in the box, else you'll simply use his normal move set. So you can potentially jump on top of the box yourself and then initiate your other moves. Once you use a throw, you can still interact with the mime box with another throw or indeed a pummel, but you can only have one active mime box on stage at a time.

By pummeling, Mr. Mime causes the box to levitate off the ground with his magic mime powers, travelling at Ganondorf's running speed in any direction. Move your opponent into damaging zones, or simply off-stage: combine with the bag from your shield special and you have quite the sinister magic trick going on here. Letting go of the standard input without a directional input will simply leave it in place until the foe escapes, keeping the grab state going nonetheless. By letting go of the standard input while holding in a direction, Mr. Mime flings the box in that direction at twice its speed, causing it to smash into whatever it hits. Opponents take 8% damage and can be thrown to their deaths for a reliable KO with a bagged opponent, but this is more useful for positioning the shattered glass (glass shards), which has its own effects – causing 2% damage to anyone who steps on it, as it remains on-stage for Mr. Mime's current stock and covers a battlefield platform. In combination with your invisibility, you can really mess with your opponent's head in terms of hiding your whereabouts and making them think you're somewhere you're not.

Special Pummel: Taking a Closer Look

By pressing the special input you initiate Mr. Mime's special pummel, but only while still having the mime box under your control - so if you throw it away with your pummel, you can't use this move. Onto the actual move and Mr. Mime seems to pull out an invisible magnifying glass, holding it close to his face and squinting with one eye, staring in the mime box's direction. Depending on Mr. Mime's current location, two effects can happen.

If in a normal area [not desaturated], the box becomes enveloped by light, as the magnifying glass causes it to illuminate with light. If the opponent is currently desaturated, they take 4% damage every half-a-second, with it having the proficiency of a normal pummel. If held for more than 2.0 seconds, the pummel causes the mime box to shatter, shedding glas shards all over the stage in a battlefield platform-sized area, but also getting rid of the desaturation effect on a foe if they have one, allowing you to take advantage of your bleached areas more later in the match.

If Mr. Mime is standing within one of his bleached areas, the darkness shrouds the mime box, making it become visible, but also damaging foes for 4% every half-a-second like the former pummel if they are not desaturated. A similar effect happens if held for more than 2.0 seconds too - the box becomes uncontrollable, falling downward and shattering if it hits solid ground on the way down. It also becomes far more difficult to escape, as the foe now has to deal two consecutive hits of 13% to shatter it. If it does shatter, it deals the usual damage to a foe, but also leaves its glass shards visible. This allows for more generic mindgames as the foe avoids, or ignores these shards at their own peril, compared to the invisible ones.

Up Throw: Coffin of a Clown

Mr. Mime holds something to his chest solemnly - a rose - closing his eyes in mock sadness, before tossing it toward the mime box. If an opponent escapes it before the rose can hit them - it travelling at Sonic's dashing speed - they take a moment of flinching knockback and 2% damage. If they're still inside the box, a little 'tap' sound can be heart as the rose hits the side of the delicate glass, causing the entire mime box to full on its side. The side it falls on is largely unimportant, depending on which side the rose hits and it will not capsize if the rose hits its bottom. If on the ground, this just results in the mime box shattering as usual and the opponent having to get up from prone. However, in the air, this is disorientating for the foe, causing them to fall into prone when the mime box falls on its side. Their get-up attack will now automatically break the mime box, but they also have end lag on top of that as they reorientate themselves in mid-air. This is mostly just good for mix-up - catch the mime box as you're throwing it off-stage, or when the opponent is just about to break it with a regular attack.

Side Throw: Reel 'Em In

Spinning his hand around and having a small portion of his arm rendered invisible as a rope seems to pass over it if he's visible, hinting at Mr. Mime using a parlour trick in a lasso. Without further delay, he throws his arm, and the invisible rope forward, automatically grabbing the mime box with it [wherever it is] and pulling it in his direction. This can continue for up to a battlefield in length, as the mime box is pulled at Captain Falcon's dash speed. After that length, or when the input is pressed again, Mime then throws his arm forward again, this time releasing the mime box and sending it spinning away in the opposite direction. This spinning lasts for 1.5-3.0 seconds, depending on how far back you let the mime box be pulled at the start. Opponents inside the box have a lame old attack speed nerf, but also suffer dizziness and damage of 2% every half-a-second from the severe spinning and hitting against the glass. If they do escape the glass box, they still continue spinning like this until they use another move, or after a short time, determined by how long they were spinning inside the box, leaving them disorientated and with a tough time recovering.

Down Throw: Trap Door

Covering his eyes [with a peeping hole between his fingers], Mr. Mime pulls down on a lever next to him with some big lag on both ends, causing the bottom and top of the mime box to dissipate and the opponent to drop down. An opponent spinning from your side throw is sent spinning out of the mime box early, while a prone opponent from your down up throw is forced into a temporary free fall. Mr. Mime himself can be affected by this too, if he was standing on top of the mime box - falling, along with the opponent, through the mime box and below, possibly to force them into some unwitting aerial combat. After the opponent (and Mr. Mime if he passes through it) fall past the mime box, it also dissipates immediately like its trap doors. This move is best used in situations where you don't want any more glass shards or the opponent would benefit from riding out the rest of the mime box, but also lets you dump them off stage or into an area of desaturation which benefits you.

STANDARDS

Down Tilt: Invisible Vacuum
Mr. Mime pretends to vaccuum the ground in front of him which does actually remove the color from about a bowser's worth of stage in front of him - this is the most sinister vacuum cleaning ever! As an attack it's fairly basic, doing 3% damage and tripping. However, if you hold down the input you move around at Mario's walk speed, vacuuming the stage. In addition to removing color and being a weak hitbox (there's a noticeable vacuuming noise, the opponent will know what you're doing), it will vacuum up your invisible glass shards and the invisible curtain (which the opponent has to attack to make you visible again), as well as comically pulling in your stripes all at once (varying in lag from short to severe depending on their distance apart). If you've vacuumed up the curtain the opponent has to attack you to make you appear again. However, you can reposition those lovely curtains / glass shards with another move, this giving you yet another motive to desaturate the stage.

Jab: Household Chores
Mr. Mime this time brings out a leaf blower of sort, holding an invisible bag in one arm and a circular nozzle in the other arm's hand. Opponents within a battlefield platform are blown back regardless of shielding or dodging, enabling some mindgames with your bars. If you've sucked up the curtains or glass shards or your stripes, Mr. Mime will shoot them out Luigi's Mansion style, in the order they were sucked. Glass shards can be directed by the control stick, and fly out at Ganon's run speed (subject to gravity as per usual). The glass shards are a hitbox of 5% per second (it lasts for 1 second per bowser's length of glass shards vacuumed up, you can exit early by releasing the A button), but if the opponent is currently using a desaturated shield, they'll puncture the shield, causing damage and deflating it like your shield special. The curtains on the other hand are not a hitbox of any sort, but are merely shot out in a cartoon-ish fashion, being apparently bigger than the vacuum cleaner possibly could be as it comes out and sticks into place like a picture frame, before going invisible again. Your stripes simply spawn in front of you on the floor, again taking short to severe lag to do so depending on their size.

Dash Attack: Oh The Wind!
In typical mime fashion, Mr. Mime starts to act as if he's walking against a gust of wind - reaching out while being seemingly pulled back and making only walking speed distance as the input is held. During the move, no flinching or small knockback to Mr. Mime will count, though he will take the damage. If Mr. Mime is able to get up to an opponent, he will also starts to push them along with him and the move can be cancelled into any of his other standards, allowing for some more generic approaching mindgames. What actually makes this viable compared to other similar approaches is that you can walk over your glass shards without taking damage from them, as Mr. Mime takes careful steps, allowing you to forego that if needs be and you actually are taking a direct route where the opponent knows to be shards.

Forward Tilt: Practical Joker
Mr. Mime pulls the rug out from under the opponent, dealing 5% damage and tripping with okay range. However, if you're standing on or right next to your up special stripes, Mr. Mime will pull them (this halves the length of the stripes however, as they bunch up next to you), giving this move a huge hitbox (the entire area of the stripes), and even better, if the opponent has a desaturated shield, they'll trip inside their shield. This means the opponent now is limited to only getting up regularly or attacking, not being able to roll out out of their own shield - though as soon as they do stand up, they automatically de-shield. Given how quick Mr. Mime's shield comes out, you can run up to them and shield while they're getting up to stick them with even more lag, and set up for a shield special. End lag is low as well.

Up Tilt: Mime Slap
Mr. Mime slaps the air in front of him, doing 2% and turning the opponent around Cape style. This is really a fairly simple attack to get some cheap damage in on an opponent trying to hit you, but simply pushes opponents away if they are shielding. Due to its highly spammable nature, you can effectively push opponents around who are shielding to a place more advantageous, or, again, simply make them think they're standing on your stripes when they actually are not. Just used on regular opponents, though, it is also a good way to set up for your grab game, positioning them so they're facing away from you in the mime box.

SMASHES

Forward Smash: It's Hammer Time!
Mr. Mime pulls out... good grief, it's the golden hammer item! (With the actual hammer music, no hiding when this move is occurring.) He can move around just as if he was using the actual item, so run! If he catches you... too late! Squeak squeak squeak squeak. Mr. Mime seems to be building up some tension as he reels it back, getting more and more extreme in expression while he's hoisting it behind him, taking from 0.5-2.0 seconds to charge.

That's right, it was actually a modified SQUEAKY golden hammer. If you get caught in it it deals rapid hits of 2% and flinching, much like a fan item. However, on shields it just bounces right off, in fact shields do not take damage from this move, though you can still push them around somewhat. The move lasts for one second plus double the charge time, for up to 4.0 seconds of further usage. Obviously the main purpose of this move is as a damage racker, as you can get plenty of damage and herd the opponent to whatever part of the stage you want, but it also doubles as a huge incentive for the opponent to shield (due to the disjointedness it's tricky to beat out once it starts, and isn't too hard to punish on shield).

Down Smash: Bleach Bomb
Mr. Mime... mimes (with a quite lengthy and visible startup lag... assuming Mr. Mime is visible), priming up to throw something in a hand held overhead as he shows a look of malevolence, this taking 0.5-1.2 seconds, the weight of the bomb seemingly getting greater with charge time. After some angling, Mr. Mime seems to throw something, it having the trajectory of a thrown proximity mine. If you manage to hit an opponent, they take 10-20% damage, instead bleaching the opponent entirely. Depending on the size of the bleach bomb, it will also now desaturate the area around them for the next 1.0-1.5 seconds. Once thrown and actually hitting a part of the stage, it will start bleaching the area it hit just like Mr. Mime's neutral special for the amount of time you charged the smash.

The applications for this are obvious when combined with the invisibility game, make the opponent have to second guess whether that's you causing the bleach at a certain spot, or if it's a bomb you threw. If they guess wrong, it's either easy bleaching for you, or you get to attack them / do your own stuff while they're distracted. While not as useful if not already invisible, it still allows you to create a distraction for the opponent, and advance in parts of the stage defended by campers or defensive opponents. If falling off-stage, the bleach bomb has no effect.

Up Smash: Covetous Mime
Mr. Mime strikes a devilish pose, wrenching his arms into place above him at awkward angles and bending his head back out of view, as he starts to glow with a black energy, doing this for 1.4-2.4 seconds. Once charged, an area of desaturation surrounds Mr. Mime, in the natural area it would have if he had used his neutral special in that spot, but at double the distance to what he would have gotten normally. The area is also only temporarily bleached, as it quickly recedes right back into Mr. Mime after being out momentarily, hitting opponent within it for 20-30% damage and KOing at 120-90%. If used while in a desaturated zone already, Mr. Mime draws the energy from the area, allowing him to charge 1.5x as fast. The area simply recedes like it normally would after five seconds of being untouched, being a good disguise in what seems like Mime abandoning his post in the bleached world to chase his opponent, when he's actually right beside them. The hitbox is now extended to the current bleached area, meaning you'll sacrifice some parts of the hitbox for power, but this is made up for by how you can use gigantic areas you've already built up. After using the move, if you were invisible, you no longer are, as the blotches you absorbed purge you, destroying the curtains wherever they were.


AERIALS


Forward Air: Everyone Loves a Balloon
Mr. Mime shields in midair, squeezing it so that it bubbles out in front of him - blowing into it until it inflates to Kirby-Bowser's size, depending on how big it was beforehand [how much his shield was attacked]. Though the smaller one covers a tighter area, it comes out on extremely fast in comparison to the bigger one. He'll continue holding out his balloon shield as long as you hold down the button, and if an opponent hits it (with a physical attack, not a projectile), it pops, causing the opponent 8% damage and high horizontal knockback. This doubles as another way to connect your bleached shield to another, and with a smaller shield, you can far more easily do so. This has a subtle sound effect of him blowing it up during the startup lag, and it's great for punishing an opponent just throwing out attacks randomly while you're invisible.

Down Air: Clowning around
Mr. Mime starts rolling forwards like a... well, a clown, much like Yoshi's egg roll in Melee. This is a rather simple attack of 7% with a kirby-sized hitbox, but you'll continue rolling on contact with the ground, and if you roll over your bars, you'll pick them up as you go along, growing your hitbox up to Bowser's size (kinda like a snowball). Additionally, if you hit a shielding opponent, Mr. Mime will just bounce off... if the shield is normal, if it's desaturated then he'll actually roll right over it, flattening the shield (That is, the next time the opponent shields, it will be at minimum health, and can be broken by just about ANYTHING.) Finally, if Mr. Mime rolls over his glass, he'll take 5% damage (because that really HURTS) and pick it up with him, doubling the damage and knock back of this attack. This comes out fast and is hard to punish.

Neutral Air: That Statue is Mime!
As the name suggests, Mr. Mime freezes, becoming like a statue in midair with a sinister, slash goofy pose. This lasts as long as you hold down the button, and in this form you take no damage and only half knock back (invisibility mind games there), and if you happen to fall on an opponent they take a hefty 15% and good knock back. Of note is that you can hold this after hitting the ground, but you have a 1.0 second time limit, and lag isn't that good. If you use this on top of your mime box after your down throw, you will generally be able to gimp an opponent quite easily off-stage.

Back Air: Mind Block
Mr. Mime mimes placing a panel of glass behind him, approximately two Marios high. As you might have guessed, this acts as a barrier to opponents, but it's also capable of reflecting projectiles (from either side!). Additionally, reflected projectiles can still hit Mr. Mime as well as the opponent, so a strategic camper can use this to their advantage, this is meant to shut down the random idiot spamming Falco's laser. A couple more notes: This can be broken by any physical attack, creating glass shards like the mime box. Only one of these can exist at a time, placing a new one removes the old one and this move has no sound effect. Have fun messing with the opponent! Lag is ok.

Up Air: Parlour Trick
Mr. Prop mimes pulling on a rope connected to his waist. If this connects, then Mr. Mime will tie it around his waist, and for the next 10.0 seconds you and the opponent will be connected by an invisible battlefield platform long rope. This greatly increases the effectiveness of your shield breaking game since the opponent can't run away, and can help your invisibility as well as you can keep the opponent away from your curtains. If you and the opponent try to move beyond the one battlefield platform limit, you'll pull the other player with you, and which player wins in a tug of war is decided by weight, speed, and percentage. (Note: In a free for all you could lasso multiple opponents for some really crazy fun. This also prevents you from being KO'd unless the opponent cares to suicide.) Startup lag is bad, end lag is okay. By the way, this lasso does not work on shields, and there's not much of a sound effect, making another motive for the paranoid opponent to stay in his shield. No matter the tug-of-war however, Mr. Mime can use the input again to pull on the rope and force the opponent to come a Bowser toward him in one push, in true mime fashion.


PLAYSTYLE


Graffiti the World: Blame Someone Else
Mr. Mime works unlike most of the invisibility sets in Make Your Move do, in that his set is already entirely invisible anyway, so he'll be working completely in the unknown... besides the odd soundbite to keep the opponent company. With this kind of play comes a need for experienced play to make full use of it, as a beginner would simply be tripping over themselves in attempting to pull together a playstyle when they can't see what they're doing. You need to know the signs to effectively make use of down special, bottom line and that's the one big hurdle to learning the character. If you can effectively and knowledgeably space yourself without seeing where you are, then the rest is pretty natural to come by. Throwing out your bleached zones and contaminating the opponent leads into, indeed, quite obvious expansions, as you have too many spacing options to count. They each have a little divergence when used without invisibility, but really start to shine for their unique mix-up and rushdown potential when used along with your curtains.

Your influence with the bleaching on your opponent and your surroundings as well are of particular importance and you'll want to remain in control of that element of the match. You can effectively do so: simply grabbing your opponent while invisible isn't too great of a task, especially when you're constantly shoving them around and they won't always be on-guard to you being next to them. Your stripes represent your best way to move around the stage completely incognito while you let your other various spacing moves take effect, allowing you access to your bleached areas and yet more ways to keep your opponent guessing. However, Mr. Mime's playstyle is more than just making your opponent guess, it's also about shield-breaking... or rather just plain old manipulation. Mr. Mime considers the shield like a representation of the foe's very soul. Under the effects of bleaching, it's his to control and without, it can be used against them, if the shield rejects the body.

How the bleached areas play out in accordance with your opponent is largely down to how successful you are. Getting the opponent and only the opponent bleached first off is always a good idea, allowing you to double up shield-damage and regular damage on the opponent - moves like your forward smash and other moves with low start lag, that are easily spammed, become a lot more useful when the opponent doesn't want to shield. Similarly, if the isn't desaturated, you'll want to move on to actually trying to bring them into your desaturated areas for the KO. Thus it is intelligent to contaminate the foe, then get them in your mime box and purge them of it, allowing you more of an advantage as you start to regain health. The opponent will be obligated to try and shield to stop you, but if you're using invisibility liberally, they won't know whether it's safe or not.

Your grab game in of itself is usually always useful when going for the KO, or simply building towards one, giving you versatile options whether the opponent is contaminated or not by your desaturation. If they are, you can simply bring them into a bleached area and try to hit them with your up smash, also making it harder for them to escape due to the flinching knockback. Being able to shatter the glass visibly creates another layer of depth to his mindgame potential, as the opponent is conscious of their existence, but doesn't want to act too coy. This is similar to his mindgames when it comes to shielding, as the opponent has plenty of times when they'll want to stop an attack, but will need to be on the lookout for your shield-breaking, or combining, shenanigans.

As far as making your opponent shielding goes, making use of your forward smash is a good start in dragging them into shielding, pushing them back onto bars, then lagging them into one of your more potent shield moves. From within your bleached areas, an opponent is either going to be trying to escape into the clear if they're desaturated, or trying to colour it back up with their shield... from here, you can try to push them back in, or just go for the attack. Unlike other shield-centric playstyles, Mr. Mime's opponents have plenty of reason to shield, in trying to reveal all of his machinations from within his bleached world, or simply defending themselves against his onslaught of combo-tastic moves.

Mainly, though, the fun with Mr. Mime comes with your knack for producing the unexpected, but by pure tactical movements, not by any element of randomness. Mr. Mime has plenty of fake-outs, feints and moves purely designed to bewitch in ways similar to others - whether it's purely opponents in a certain direction, or reminding them of a past beating to make them dance to your tune, Mr. Mime has the right kind of pressure to keep them on their toes. More with mimes than clowns, there's always a sense of fear and wonderment; am I a part of the act, or am I just a spectator? Forcing the opponent's role on them -- through his unique shield-centric pressure -- is the way to excel at Mr. Mime.
 
D

Deleted member

Guest
Superboy, Away~


Cosmic Spacehead originates in the adventure / platforming game of the same name, starring the young would-be superhero as he travels across the alien planet of Linoleum, trying to gather the resources necessary to return to Earth and use a camera to prove its existence. This is because, prior to the game, Cosmic actually does succeed in discovering Earth - a legend on Linoleum - but no one believes him due to being a little kid. Throughout his adventures, Cosmic gathers together all sorts of miscellaneous crap like a joke book, a bath plug and a trampoline - only one of those actually appearing in the moveset. The game is an interesting combination of an adventure and platformer, whereby you progress through the game's areas in the adventure game format of gathering items and using them to solve puzzles, while the platforming sections act as barriers between different levels. And like all good games, it was developed by the British.

The game holds a special place in my heart as one of the few memorable games I ever remember playing on the terrible Game Gear handheld, which was purely a port of the 8-bit Master System game. There's also a nightmare-inducing Genesis version which I pretend doesn't exist, but thankfully it's basically just a graphical upgrade to the game [losing all charm in the process] so can be ignored. Cosmic himself is your typical adventure game protagonist with a slight twist - inquisitive, but also full of resolve and determination in trying to prove that he's not just crying wolf. The game never explains what the deal is with the way he dresses or exactly what the Linoleums are - presumably Cosmic is just pretending to be a super hero, many times in the game having him mocked by other characters for how stupid he looks. It's a great character for inducing a sense of empathy in its younger players and still doesn't lose that self-referential adventure game humour poking fun at the player for doing things like, say, trying to "use" an enquiries officer, to which the game says they are, "incorruptible." So Cosmic joins the Brawl and has something to prove!​


Fall Speed: 1
Air Speed: 10
Ground Speed: 6
Size: 2
Weight: 4


Cosmic is your typical aerial-affinity character, sharing traits with the Earthbound boys in terms of size and weight - being a little shorter than Lucas, though weighing as much as Toon Link. His fall speed and aerial movement in particular require a little explanation. If Cosmic is rising in the air, his air speed is actually fairly average and when he is just falling straight down, he actually also is below average in terms of how fast he falls. Only when he moves back or forward during his falling animation - where his cape is fluttering behind him - does his gain his excellent aerial control, using his cape to initiate a glide at the speed of Fox's dash and falling at half of Jigglypuff's fall speed. This allows him great aerial mobility... though only on his way down, meaning he'll need to get up in the air first to make use of it. The glide lasts for six seconds, ending with Cosmic entering his regular fall once it's over and not putting him into free fall; appearing to lose confidence in his flying abilities. At any point, Cosmic is free to use his aerials or other moves in the air. Like your jumps, your glide will only be recovered once you hit solid ground.​


NEUTRAL SPECIAL: USE... SNAPPERMAN DELUXE HANDY HOLIDAY CAMERA ON... STAGE


Cosmic gets out the camera pictured above, holding down the capture button, releasing it and letting out a flash of light from the camera after 0.5-1.0 seconds, being chargeable. Foes within one to three Bowsers of Cosmic are blinded by the flash - the more charge, the more powerful it is - for 1.1-2.2 seconds. Opponents hit in the air are sent into a free-fall for that long instead. Immediately after, a photograph is distributed out of the bottom of the camera - a polaroid, as shown in Cosmic's header. The photograph works mostly like a sticker - falling at double the speed and being half as wide, appearing to just be horizontal pieces of paper like stickers. The photo can be picked up by any character like a regular items, opponents instantly ripping it up if they pick it up.

Cosmic obviously wants to get his hands on that photograph, as it's living proof that he, as obscure as he is, has entered the Brawl! Unfortunately, the nature of a polaroid means the photograph will take 8.0-6.0 seconds to develop, depending on the charge time of the initial flash. If Cosmic picks it up before it has developed, he simply waves it anxiously, speeding up the process so that it takes 0.75x as long as it normally would. However, at the same time, he's completely vulnerable and his moveset is reduced to just running away as he does it. This is all true in the air as well, though obviously also being far easier to avoid opponents during it with your glide. Just keep in mind that photos fall twice as fast as stickers, thus you're going to need to trigger your crappy fall out of a glide [which you'll use to take the photo] so you can actually catch it.

When Cosmic does get his hands on a fully-developed photograph, he seems extremely happy about it, storing it away in his invisible adventure game inventory thereafter. In fact, he remains happy like this, gaining enough self-confidence that he no longer botches his glide after 6.0 seconds - being extended by a further 10.00 seconds. That is, if the developed picture is of the stage: you need to actually be facing it when taking the picture to make it have any effect at all, otherwise it's just a picture of the blastzone [which isn't proof whatsoever]. Likewise, taking a picture of your opponent (meaning that they're stunned by the flash) causes a longer period of confidence - hey, you just confirmed a character for Brawl! This solid proof extends your glide by 15.00 seconds. Knowing this, your opponent will do all they can to try and grab those photos and destroy them - but keep in mind, you can make multiple photographs to disguise which is which, just make sure you know which is the valuable one. Photographs also bring Cosmic out of helpless as he makes one last desperate grab at fame, allowing you to go full throttle on your opponent and even then, snagging a photograph to overcome the downfall.

The effects of the photographs do stack if used during the grace period of the extended glide, potentially letting you gain a Meta Knight-quality aerial game if you can snag multiple good photographs. By tapping the neutral special input where it is possible to pick up more than one photograph, Cosmic will look around for 0.2 seconds before grabbing the one which is the most developed.​

UP SPECIAL: USE... HELIUM BALLOON ON... COSMIC

Cosmic takes out a balloon. As pictured, it seems like they build them a lot stronger on Linoleum - being that it can pick up a two-tonne monster [and eventually carry it into space], perhaps solving the mystery of Pennywise's original planet. The balloon's effect on Cosmic is rather obvious, it carries him up at Captain Falcon's running speed, but also impairs his moveset so that any move involving both his hands forces him to release the balloon. The balloon will also continue to ascend above the top blastzone, making a great suicide move until you press the up special input, releasing the balloon. In the air, you can influence the sway of the balloon easily by pulling to either side, controlling like you're on the ground minus the floor part - thus giving you access to your ground moveset in the air for as long as you're holding onto the balloon. You can then access your aerials by cancelling out of the balloon in mid-air. When swaying full to the left or right, Cosmic will move in that direction at Sonic's dashing speed. When the balloon is released, it will simply continue travelling up without Cosmic. By pressing up special in the air next to a balloon, Cosmic will grab onto it. The foe or Cosmic attacking the balloon at any point will cause it to pop, dropping anything it's currently carrying. Cosmic can only use the balloon once per trip in the air.

USE... HELIUM BALLOON ON... PHOTOGRAPH

By pressing the input with a photograph in hand, Cosmic will attach the photograph to the balloon and then release it, ascending at its normal speed. The photograph will continue to develop even when in the air like this and likewise can be plucked from the air by Cosmic or the opponent and ripped up. The photograph itself obviously has no effect on the balloon's sway like Cosmic does, but it can be easily swayed itself - though it is exclusively affected by Cosmic's own moves, which will be later on in the moveset. Though your main concern should probably be in trying to actually recover the photograph before it just flies off the top blast zone, you can create multiple balloons, giving yourself a back up in case one of them doesn't work out in your favour.​

SIDE SPECIAL: USE... TRAMPOLINE ON... COSMIC


Cosmic spawns his trampoline - half-a-platform wide and as tall as Kirby - retrieved from Spacestation #59-C, instantly jumping on it and sending him up two Ganondorfs at Sonic's dashing speed, leaving the trampoline in place. The jump itself is actually forced upward momentum - you can't move left or right until you reach the top of the jump, but this isn't too bad for Cosmic considering his glide and is a great way to catch up to a drifting photograph on a balloon. However, once you've used the trampoline, it lingers on the stage and can be used by opponents - reversing their momentum in the opposite direction. If hit any side of the trampoline but the top, it simply acts like a wall. When used, the trampoline refreshes Cosmic's jumps, but not the opponent's.

By using your up special next to the trampoline, you attach it to that side - causing that side to start to lift off the ground, becoming fully sideways after 2.0 seconds, after that actually rising off the ground at Ganondorf's running speed. This has the obvious function of acting like a barrier to opponents trying to recover, but is also useful for Cosmic given his aerial capabilities, allowing him to attack his opponent off-stage, then use the trampoline to further ensure their doom far away from the main platform while picking a photograph up along the way. Being hit by the bottom of the trampoline as it falls causes 8% damage and high downward knockback.​

DOWN SPECIAL: USE... LINOVILLE TELEKEY ON... TELEPORT MACHINE


During Cosmic's entrance at the start of the match, he is shown to divide up into tiny stars and be drawn into the teleport machine, materialising. The teleport machine stays in this same location for the duration of the match, in the background. By pressing down special, you instantly de-materialise into those tiny stream of stars again over 0.3 seconds, stopping all momentum if mid-air. This tiny stream of stars, half a yellow Pikmin in width and a platform long, travels at twice Sonic's dashing speed and directly toward the teleporter. The player has control over the trajectory of the stars - however, by hitting solid ground [which the AI will automatically avoid] or staying in the stars form for longer than five seconds will send Cosmic into a free fall. Opponents hit by it are dragged along too - being dealt constant damage of 3% when hit and dragged along, being very difficult to DI out of. When you reach the teleport machine, its door rises open and Cosmic walks out unharmed. Hitting a balloon while in your star form will pop it, as you'd expect, making this effective when wanting to pop a balloon and beat your opponent back down to the stage to retrieve it.​

USE... ^GT$^46%h ON... $DU767%G$^yu


When will they fix that Linoville teleport machine. The one catch to using this otherwise rather broken recovery move is that when you exit the machine, you now flash in and out of existence, every 2.0 seconds flashing out of sight for a further 1.0 seconds before re-appearing - this lasting for 12.00 seconds before Cosmic returns to his normal self. While this is going on, however, you can't use your down special again. Phased out of existence, your moveset works as normal, though you are unable to deal or take knockback or damage, you do retain any knockback suffered before phasing out. You can actually play this little glitch to your favour, though, as you are able to move around your various photographs incognito. You do drops items if you phase out while holding them, though, meaning you can't grab a photograph and camp with it. It does also mean that you phase through your opponent and can't be grabbed while phased out, allowing you to avoid close contact with your opponent while still playing your old hit-and-run game.​


STANDARD ATTACK: USE... SUPER HERO TWIRL ON... OPPONENT

Cosmic does a little bit of a twirl, turning around in 0.2 seconds and hitting any foes right next to him with the combination of a held out clenched fist and his body, holding them in place at first before hitting them away with a last hit for small knockback, doing 3% with every attack. If any photographs are on the floor within a Kirby, they will be picked up by the wind effect created by his swooping cape, being drawn toward him and being whisked behind him at the end of the attack - ending up a little bit above him at the end of the move before falling back down. The same thing happens in the air [if you're on a platform or your balloon], also pulling in photographs attached to ballons and causing them to sway in your direction. Due to spinning around your balloon in mid-air, pulling another balloon in front of you with the move will cause you to turnstile it behind you, along with anything it's holding. Due to the speed of the move and how much range it has, this is a great move to pull your photographs away from the opponent or generally around the stage to comfortable places.​

DASH ATTACK: PICK UP... THE PACE

Cosmic takes a running start, upping his dash speed as long as you're holding the input, reaching a maximum speed on the ground of Sonic's dashing speed after 0.5 seconds - at this point becoming a hitbox himself that deals 10% damage and medium horizontal knockback. While using your dash attack, any photographs on the ground where you run over will be pulled into the air by the back-draft of your cape, staying up a Luigi high in the air for 2.0 second before falling. By pressing the jump input at any point during your dash attack, you automatically enter your glide, only with the previous momentum carrying on, allowing you to build up more speed, but to continue the effect of picking up photographs on the ground into the air as you fly over and giving some more kick to your aerials. Opponents hit by you during your glide will receive the same damage and knockback as when you were dashing, though this all only lasts for as long as your glide does.​

FORWARD TILT: USE... HEAD BARGE

Charging forward half a platform at twice Sonic's dashing speed, Cosmic puts his massive head to good use - using it to barge anyone he comes into contact with. If the opponent is facing away from Cosmic or low in the air and is hit, they are simply dealt 10% damage and high horizontal knockback, leaving Cosmic with some mild end lag as he recovers. If hitting an opponent who is facing Cosmic, however, he squarely lands in the opponent stomach, causing him and the opponent to be launched for the same knockback in that direction, only now with the foe forced into a backwards grab, where they are trying to remove Cosmic's head from their stomach. This is achieved through button-mashing at half grab difficulty, after of which leaving them and Cosmic on the same horizontal plane, but Cosmic with the same bad end lag. As long as Cosmic is "grabbing" the opponent like this, they continue to plummet after the move's knockback at the opponent's fall speed. Mixed in with your down special's phasing out, you can potentially hit an opponent off-stage like this, and then disappear without being forced into this disadvantageous situation, also leaving you a good distance above the opponent.​

DOWN TILT: USE... TAIL SPIN ATTACK

Taking a page out of Mega Man's book, Cosmic slides along the floor for a platform, pushing along any photographs on the floor until the ledge - stopping if he comes to the edge of the platform, but causing any photographs that he pulled this far to fall off the side of the stage. Opponents are also slid to the ledge like this, falling onto the ledge if pushed that far and tripping if pushed over any photographs on the floor, leaving the photo in front of you and the foe behind it in their tripped position. If holding onto a balloon, Cosmic instead uses the slide to pull it down a Ganondorf in height, holding it down for the full platform in distance before it starts to pull him back up again. Hitting the ground causes the move to end. If an opponent is hit while descending, they take 5% damage, but small downward knockback, just in case they're chasing you from below. More useful is that you can pretend to chase a photograph into the air, then immediately swoop down and snatch a photograph laying on the ground. Using this move more than three times in one air trip causes Cosmic to let go of it automatically, though this can be refreshed by simply touching the ground.​

UP TILT: USE... SWOOPING CRESCENT KICK

Cosmic takes flight backward and upward in a crescent shape, floating a Ganondorf higher than the ground and a Bowser back from his original position, his cape causing any photographs around him during this animation to be sent into the air above him. Quickly, Cosmic makes a crescent-shaped kick as he swoops down, then forward into the place where he started the move, kicking any opponents that he comes into contact with horizontally for 10% damage, but in an arc that leaves them falling down after only a Bowser of horizontal knockback. If falling off-stage, the opponent is sent into a free fall for 0.5 seconds as they spin uncontrollably due to the top-heavy momentum of the kick. If a trampoline is in range, Cosmic can kick an opponent forward then onto it, bouncing them higher into the air and being in prime position for a photograph as they fall back down. Or, more easily, you can move your photographs behind you and get your foe as far away from them as possible.​


GRAB: PICK UP... OPPONENT

Cosmic lunges forwards with both arms for an extended grab, giving him little range. However, you can use this grab in mid-air - during your glide - allowing for a huge advantage due to being able to build up momentum with your dash attack and potentially having absurdly long range. Once grabbed, Cosmic holds them up from below the opponent's arms, even going behind them if grabbing them from the foe's front and pulling them along automatically in mid-air at his current speed. The opponent will, however, weigh Cosmic down, pulling both Cosmic and the opponent down at both characters' combined fall speed. On-stage, though, this means that Cosmic will be slowed down, as if the opponent touches ground, they use it to stop Cosmic's momentum and hold him still, making escaping the grab half as difficult. If the opponent is caught during a free fall - such as from your neutral special - they will be unable to fight against Cosmic at all until they recover from said free fall. Using what would typically be your back throw instead causes Cosmic to swerve around while holding the opponent, losing no momentum in doing so.

Though you may want to let the opponent's mass weigh them down, as pulling your opponent off-stage and nearer to the blast zone is definitely to Cosmic's favour. Releasing the grab has Cosmic release the opponent, them carrying your momentum now as Cosmic stops at a halt. With your aerials, you can now initiate a bit of chasing, or simply defend the stage from the opponent's imminent recovery attempt. If the foe escapes first, however, they struggle and pull Cosmic to a halt before being dropped - losing their momentum, but still giving Cosmic the benefit here as he is still above them in the air. Just make sure you have enough self-belief with your photographs to carry you through this bit of adversity.​

PUMMEL: USE... FULL NELSON

Pulling on their arms, Cosmic forces the opponent to squirm slightly and struggle, causing 3% a second, but slightly reducing the amount of time he can hold them in the grab for as long as he does it. However, in their squirming, he also causes the opponent to kick their legs, meaning that they can't drag them on the floor if he's passing over hard ground. The amount of time reduced from your grab is less than the amount they'd be reducing it by dragging their feet like this, making it smart to use when you're flying them off the stage. Of course, you may also simply want to make the time go faster in the air too, what with your photographs developing around you.​

UP THROW: USE... GLITCHING BEHAVIOUR

Cosmic, along with his opponent, go into his starry form from his down special, but now at half of the speed due to the more heavy demand on that teleporter technology, with half of the time you'd usually have available to you. If you actually pull the opponent to the teleporter, you enter it, but they collapse outside of it and are dealt 8% damage, being left in a dizzy state as Cosmic walks out of the teleporter with an advantage. If you run out of time or purposefully run into the side of the stage or something like that - taking advantage of the the mode to get under the stage, for example - both you and the foe enter helpless (Cosmic permanently, while the foe's time in helpless depends on their percentage). This is bad for your opponent pretty much always, not so much for you if you have a spare photograph lying around and just built up glide time from previous escapades.​

FORWARD THROW: GIVE... BALLOON


Drawing on his apparently infinite ammunition, Cosmic attaches a balloon to the opponent before automatically releasing them from the grab, letting them drift off with any built up momentum. The opponent now has to attack the balloon, but depending on percentage and weight, this may prove difficult, as the balloon can also carry them upward at the same time, meaning they're fighting against the upward momentum. That, and attacking a foe attached to a balloon causes them to be knocked back, but this is reduced by the balloon's small, but as always significant weight itself, allowing you to combo more effectively against them at high percentages. Cosmic himself can pop the balloon, letting you assault them for damage, then kill the balloon and attempt to do the same to the opponent.​

DOWN THROW: USE... BARREL ROLL

Taking tips from Peppy, Cosmic and the foe perform a perfect ten barrel roll, pulling towards them any photographs in the air and past them if they're within a Kirby. The move also causes the pair to speed up to 1.25x their current speed, allowing for you to reach even higher speeds and get your opponent and you into even further danger... which you can survive, of course. You can also slightly angle the move, allowing you to go at a forty-degree angle down or up as well. If you hit part of the stage, you barrel roll into the foreground or background, allowing you to travel over it and reach safety, or death. Either way, you and your opponent are in it together. However, finishing the move while still in contact with solid ground causes Cosmic to crash the opponent into it for 10-15% damage and KOs at 170-130% depending on momentum. After 0.6 seconds, the barrel roll is over, though and you automatically release the foe from your grab.​


DOWN SMASH: LOOK AT... SNAPPERMAN DELUXE HANDY HOLIDAY CAMERA

Cosmic inspects his camera, seeming to be trying to fix a broken connection or pull something stuck in the back of it, taking 0.6-1.0 seconds. This doesn't seem to help, though - causing a flood of five photographs to come out of the picture slot at the bottom of the camera, falling down at the same rate of regular photographs. These fall in a line in mid-air, coming out of the slot every 0.1-0.3 seconds depending on charge time. You can still use your neutral special - the photograph coming out before the next fake would - the exact timing depends on how fast blanks are exiting the slot, being far easier to hide among the closer-together versions as otherwise you can potentially create an awkward space between a real and fake one in mid-air. If the photographs reach the stage and aren't further manipulated by Cosmic's cape, they form a clump, but this is by no means a permanent effect. From this point on, you can start mixing them in with your real photographs and blowing them around to far more effectively fool your opponent.

By just a tap of the neutral special input, you can find the real value in a cloud or pile or photographs, while the opponent is left wading through them - choosing the actually developed at all ones over fakes. Create plenty of fake photographs amongst the real ones all over the stage - or in the air - to keep your opponent in the dark room. When you pick up a fake photograph, you can still attach it to a balloon and will indeed shake it, though to no effect - simply being a nice mindgame to keep your opponent detached. This is a good strategy to use in combination with the phasing in and out of your down special, allowing you to pick up a fake photograph and lead an opponent toward you before darting behind them to pick up the genuine article.​

UP SMASH: USE... BLATANTLY FORCED GENERIC TORNADO ATTACK

Cosmic starts to fly around in a circle, it getting as wide as a battlefield platform, to one-and-a-half times that over 1.0-15 seconds, enveloping the area in a quasi-tornado, blue in colour, as the move's charge time finishes. Opponents caught in the move are pulled around in the tornado, caused to go into helpless and can be buffeted by the circling Cosmic, who is keeping the tornado going by continuing to fly. Collisions with the opponent are dependant on their percentage - at low percentages, an opponent will travel slowly, allowing you to rack up more damage, at 8% a piece. A higher percentage foe will travel around faster, making it harder to catch up with them.

After charging, goes on for 0.8-1.2 seconds depending on charge time, the tornado effect lasting for another 0.2 seconds after, giving Cosmic a minor advantage over foes, who end up on their faces in prone. Aside from just being a good damage racker at low percents, the tornado also picks up your layabout photographs, carrying them around along with any opponents. During the move, you can cancel out of the tornado early by pressing the special input when Cosmic is circling alongside one of the photographs, as he grabs it and yanks on the brakes as he hits the ground, checking its authenticity for some minor end lag and thus getting rid of your advantage, but potentially adding to your glide time as well, without your opponent being able to respond or punish too well.​

FORWARD SMASH: USE... RUNNING CRASH

Getting into that atypical body back, head ducked position, Cosmic seems to ready his stance for a long run, getting tenser and tenser over 0.8-1.3 seconds. He races off, at Captain Falcon's dash speed to twice that depending on charge, behind him, photographs on the floor fly up to his full height in distance as he runs past them, falling after a further 2.5 seconds. If Cosmic can get a full battlefield platform - or half that at full charge - of runway, he can immediately go into his dash attack if that input is pressed, or just continue running if not. However, running into an opponent is just as good - dealing 14-20% damage and KOing at 140-110%, with Cosmic being forced backward after the collision into some awkward end lag. If you do collide with an opponent, any photographs around the point of collision - including one in the opponents hands - are thrown up into the air a Ganondorf in distance, allowing you to pressure opponents away from a valuable pile of photographs. The move can also be cancelled out of at any time by jumping, meaning you simply enter the air with the built up momentum.​


NEUTRAL AERIAL: USE... LOOP DE LOOP

Copying the momentum characters even more blatantly, Cosmic performs one big swooping loop de loop vertically, heading up and away from the screen before swooping down and back toward the screen to leave him where he started, taking 0.4 seconds. The move can be used to cause flinching knockback and 6% damage on foes you catch during the starting and ending phases of the move. The real purpose of the move is to move your photographs along with you - any photographs you circle in the air in the loop de loop are carried even further up, to the height of the loop [a Ganondorf above Cosmic] and staying suspended up there for a further 1.4 seconds before falling. You can also use this on the bottom of a stage if underneath it to cause photographs to shake off the side of the stage and fall below to greet you, as long as they're on the ground and directly below that part of the stage.​

GLIDE ATTACK: USE... CORK SCREW ATTACK

This move is brought into use in place of your neutral aerial when gliding. Cosmic performs a move you may be familiar with from Roller Coaster Tycoon - the corkscrew, zigzagging in and out of the background and foreground for the next 0.6 seconds and dealing opponents 2% damage constantly as they're pulled along, being shoved off for set knockback depending on momentum. Any photographs you pull in behind you continue forward, along with the opponent, but dodging and weaving as if still in the corkscrew as it does so, becoming a bit of a hassle for the opponent to grab as the photographs become impossible to grab when entering the foreground or background, not to mention they may not have the time to waste doing so.​

FORWARD AERIAL: USE... REBOUNDING CRASH

Just to prove he won't give up, Cosmic seemingly explodes forward with his head as a hitbox, doubling his current speed in mid-air and keeping this up, homing in on the nearest opponent. Depending on his speed, they'll take 8-14% damage and medium knockback [mostly not capable of KOing]. The cost of this is that Cosmic can't control himself after using the move and can't cancel out of it, meaning the opponent can just play with you if they dodge you and wait it out, as Cosmic enters a dizzied state with bad end lag after failing to hit anything for the length of final destination. By pressing the input again, however, you can perform a quasi-air dodge, enabling you to purposefully miss the opponent - having recoil on the end of that of at least a battlefield platform, or more depending on your momentum. With this, you can angle yourself to hit a trampoline directly behind the opponent, refreshing your aerial capabilities and allowing you to cancel out of the move naturally. You can also mindgame the opponent out with this as they try to block you, then making them take the hit and be rebounded further off-stage as punishment.​

UP AERIAL: USE... RACING SKILLS

Cosmic gets into stance then darts in any direction given by the directional input and travelling one half of, to a full battlefield platform in length with each bound, though with end lag as even Cosmic is slightly surprised by his speed. Any photographs in your path are pulled along and dumped all in one place behind you as you finish the move, allowing you perhaps the best way of organising them. Opponents aren't dealt knockback, but instead take constant hits of 1% and flinching as you pass over them. This is best used on opponents trying to jump up and pop balloons set on them by your forward throw. Using the move on the bouncy side of the trampoline allows the move to continue, but changes your trajectory by ninety-degrees, meaning approaching it at an upward diagonal angle will have you finish the move further up and travelling in the opposite direction horizontally. Cosmic is limited to only a few uses of the move in the air, to not just have infinite recovery.​

BACK AERIAL: USE... DEFENSIVE MANOEUVRE ALPHA

Similar to his forward smash, Cosmic rears back in mid-air, travelling in the opposite direction to the foe [curving around to stay on-target if he needs to] for up to a battlefield platform over 0.3-0.9, before performing one big vault forward to a little in front of where he was originally. If you hit an opponent [but not an attack], they are dealt 8-16% damage and enter a sort of clump with Cosmic in mid-air, falling at a combined speed. Both players have to escape by mashing at half grab difficulty. However, at the same time, either player can also sway the two's momentum one way or another, not being able to do both at once. Whoever mashes their way out first wins with a nominal frame advantage, but Cosmic can potentially carry over momentum from the start of the move, the clump being pulled more if you charged more and then perhaps making your opponent a little more wary of keeping the clump on-screen, as Cosmic may have more in the tank. This is especially useful if the foe is attached to a balloon, as a sway from the initial charge is prolonged and pushing against it is made twice as difficult.​

DOWN AERIAL: USE... PERFECT TEN POINT LANDING

Looking to add salt to the wounds, Cosmic actually slows down in mid-air as he homes in on the opponent, latching on to them by standing on them in mid-air and allowing him access to his ground moveset. It can be an opponent, or their balloon, or anything else solid like your trampoline - refreshing your regular jumps and letting you catch a nice photograph of your opponent, sending them, perhaps, to their dooms when you take the snap with the flash photography. The obvious downside to this move is that opponent can easily force you out of it, but it is interesting mix-up when otherwise you're just batting your opponent away or halting their offensive.​


PLAYSTYLE: USE... SELF-DETERMINATION

Cosmic Spacehead is your typical kid wanting to be a superhero... to the untrained eye. He requires a hell of a lot of set-up, of which the opponent can simply tear through and tarnish his self-belief with a really harsh put down. However, what they don't know can and will hurt them, as you have a plethora of different ways to pull them around to your liking and take your photographs along with you, eventually turning the match in your favour as you turn the stage into your own personal den of misconduct. Cover the fortress walls in trampolines so that you can return to the inevitable mid-air fight, or scatter photographs so that they're just about to fall off the bottom blast zone, barely allowing yourself time to save them, but doing it anyway.

The first thing you may want to do is set up for some basic photographs. You can stack pictures of your opponent without necessarily even taking to the air until you need a KO, allowing you to simply take some snaps of them before that and then use your standards and divvying the photos up with your balloons to keep them guessing. Your down smash is very much essential in all of its tacky glory too, being that you can swamp the stage in fake photographs quite easily and your opponent will be none the wiser once you start throwing them up in your tornado or piling them all into one - only you have the persistent, annoying, little boy's belief to find the gold amongst the crap. Keep in mind that your down special allows you to turn your homing moves against your foe, allowing you to whiz past them or feint them out by pretending to go after one photograph, but then going for another when the opponent follows up their lead.

Once you're happy with your stockpile, you have plenty of moves to bring you to your destination [wherever the photos are]. Using your grab is generally a good idea here and using moves like your dash attack and forward smash to build up momentum also helps in moving around photographs, serving a double purpose in separating photos in general. If you want to get your opponent off-stage without your grab, though, it's easy to just use something like your forward tilt, or a mix-up like your down tilt and forward tilt to force your opponent back, in the least. If you want them to go up, allowing you perhaps to descend down later, you can attach a balloon to them or use your aerials to keep on hitting them up over and over. Going below the stage is also easily accessed via your barrel roll. Of course, you'll meet resistance, but Cosmic works good enough as just a pure counter character with his moves and his camera provides enough of a cover for himself to make lots of shifting the opponent around viable.

Depending on where you throw your actually valuable resources, the match can play out in various ways, though it will almost always have to end in one of two ways. Either you willl e defending the stage from the opponent - against bitter odds, but making use of the photographs stored throughout the stage. These techniques play just as well into your defending of your photographs, of course, making these skills viable for middle right through to the end of a typical match. The other way things can go is if you are able to fully dominate your opponent and build up so much self-belief through photographs that you actually can just run them off the stage with your grab and completely shut them down, without risking too much your own life. This is actually the safer option, but requires more set-up to build momentum.

At his core, Cosmic is actually quite aided by his small stature - or rather, he can put it to his advantage, as many moves make use of his speed without necessarily having to be set up through moves specifically designed to boost momentum. Cosmic ends up being rather a cockroach when the opponent tries to KO him, as he has plenty of ways to recover too and if he can get past them, he can then defend against them - the foe is forced into a corner and has to focus on simply keeping Cosmic in place, when he has the tools necessary to push past them. Moves can be used in a far more straightforward purpose, like your up aerial or forward aerial, to simply make good distance and get back to the stage while avoiding your opponent. In the end, they may want to follow you as close to the blast zone as they can... but few can go as far as Cosmic and come back.

And that's really where you'll have the most success with Cosmic, in those life-or-death situations close to the blast zone, whether you've manipulated the situation to be so or not. Though the glide time gained from your photographs is largely static, by being conservative and inventive with how you move around the stage, you can trip up even the most attentive opponent and drag them to their doom, before making your own dignified trip back to the stage. This kind of play is then underlined by covering these possible arenas for battle with your photos, allowing you that final bit of evidence to prove to yourself that you can achieve the impossible. Flying around the bottom of final destination is for sissies.​
 

MasterWarlord

Smash Champion
Joined
Aug 24, 2008
Messages
2,911
CLAYFACE


Clayface is not so much a character as it is an entity in that countless humans have gained the powers of Clayface and donned the title as they committed various crimes, but it’s rather rare for these various Clayfaces to exist in the same Batman continuity, being more of a way DC has remixed the character over the years. The Clayface represented in this moveset is Matt Hagen of the Batman Animated Series, considering nobody actually reads comics (Because they’re not available for free on the internet like Manga) and wouldn’t even know who Batman was if not for Television.

Matt Hagen’s primary goals are simply to revert to his human form and to get revenge on the man who turned him into what he is, and later Batman for preventing him from doing so. While his shapeshifting powers enable him to turn into a complete replica of someone, even his original self, this random human who had chemicals spilled on him had an actual side effect to his powers – he can only stay transformed for so long before he starts melting back into his default form. While at first Hagen simply wants his old life back, he is literally forced to continue stealing material to develop a cure, as his body slowly starts melting into nothing. . .

STATS


Size: 16
Weight: 13
Falling Speed: 8
Jumps: 4.5
Aerial Control: 4
Traction: 3
Aerial Speed: 2
Ground Movement: 1

Clayface is an extreme heavyweight, complete with actually laggy attacks to top it all off. What lets him be viable is the fact that only his head takes any form of hitstun, though if they –do- manage to hit Clayface’s head, he takes 25% extra hitstun. Clayface’s height of 1.5 Ganondorfs becomes massively beneficial here as it forces foes to use upward aimed attacks/jump up to hit his head. As far as grabs go, Clayface takes not histun from throws/grab releases, if that wasn’t obvious enough. Clayface gains an additional stance to his crouch to help protect his head – if back is held on the control stick, Clayface will lean back, which significantly moves the hurtbox of his head considering how tall he is. Clayface can also walk backwards from this stance, useful considering he has no crawl.

GRAB-GAME


GRAB - ENVELOP


While Clayface still has a full set of throws, Clayface doesn’t grab foes by pressing Z. You see, if Clayface and another foe attempt to pass through each other like any other character on the brawl cast, the other character will be blocked. However; they’ll still start going slightly towards the direction they intended to go, as Clayface isn’t solid. . .However, foes are slowed down by 85% of their movement speed when attempting to pass through Clayface – this counts if even so much as part of the foe is stuck in Clayface. No matter how the foe is attempting to pass through Clayface – even if they were knocked into him by another attack – they will still travel through him 85% slower, the foe’s momentum more likely than not dying down inside of him. No, Clayface –cannot- be grabbed from the inside.

While Clayface can still use his pummel and throws at any time (Inputting Z + a direction for throws), they are completely useless against foes not inside his body at least partially. Once foes enter his body, they’ll still have to be doing their best to DI out of Clayface’s body. If the foe gets too deep, the main way they’ll have to get out of Clayface’s body is to simply attack him to deal enough knockback to him so that he’s not overlapping him anymore. Because of this “grab”, foes will have to be very cautious damage racking Clayface with common combo fodder that deals small knockback such as multi-hit moves, as if they don’t deal knockback they’ll start getting enveloped during the middle of the attack.

Even without performing any form of pummel or throw, enveloping half of the foe’s body or more will cause them to get covered in clay, having it constantly drip from their bodies so that their movement speed is halved and falling speed is doubled/brought up to a 6/10, whichever is higher, though 12/10 is the max. This means that once Clayface finally catches a defensive foe, they won’t be able to keep running away so easily. This status effect lasts for 10 seconds.

PUMMEL - SUFFOCATE


This move requires the foe’s head/face to be submerged into Clayface’s body for the primary effect, though it’ll do 1% to the foe regardless. This pummel is incredibly fast as Clayface constricts himself slightly very briefly, with the actual suffocation taking place inside Clayface. Use your imagination.

If the foe’s face is indeed submerged, they’ll begin getting suffocated. 20 uses of the move without the foe’s face ever getting free will net you a old fashioned pummel KO, but considering you need all the units of this pummel KO at once it’s rather impractical, considering it takes 4 seconds of constant pummeling to pull it off. Sure, you can take a break to keep the foe from breaking out, but if the foe’s face ever gets free even briefly you have to start over.

However; there’s a consolation prize for suffocating the foe if you can’t manage to finish them outright – when the foe first escapes Clayface’s mass, they’ll start gasping desperately to breathe in some air. How much they do so varies based off how much you pummeled them, with 19 uses of the pummel making them have to catch their breath for a lengthy 1.2 seconds. If they’re just attempting to DI out of your body, you can re-absorb them into your body with minimal effort, but if they’re knocking you away you’ll be too slow to make it back to the foe to re-absorb them before the suffocation time is over. Of course, that doesn’t mean you can’t do a bit of set-up during that time or attack them from a range, or simply re-approach them.

FORWARD THROW – GRAB


Clayface reaches into his stomach with his hand. If the foe isn’t in that part of his body, all you’ve done is give yourself some lag, but if you can grab them Clayface will pull them out of his body and hold them in his hand. From here, Clayface is treated as if he grabbed a foe with a traditional Brawl grab, with the foe having to button mash out and Clayface being unable to move until the foe escapes/he throws the foe. His throws from this grab are all generic, deal 8% to the foe, and KO the foe at 120%, while his pummel deals 5% over a long laggy period. His dthrow makes the foe enter prone, and his fthrow and bthrow are actually angled diagonally downward, causing the foe to take the remainder of their knockback once they hit the ground by sliding along it.

BACK THROW – CONSTRICT


Clayface constricts his torso a good bit, causing the foe inside of him to swap the direction they’re facing, dealing a token 1% to them. Aside from mindscrewing the foe if they were attempting to escape out of Clayface horizontally, this also will cause any upward momentum to turn into downward momentum and visa versa, flipping the foe over. Any foe who was currently doing an Up Special will start going down for the remainder of the duration, though stall then fall dairs still work normally because of, y’know, logic.

The reason this has mindgame potential is because of the move’s animation – the pummel has a 25% chance of performing this animation instead of the usual one. Pulling this out at random will typically tip the foe off, though if you follow it with a bunch of pummels they won’t know the difference.

And just to be clear if it’s not already, none of the grab-game deals any form of hitstun to the foe outside the fthrow, them able to proceed escaping as you manipulate your body around.

UP THROW – CLAY LAUNCHER


Clayface makes a push to send foes upwards out of his body at Ganon’s dash speed, dealing vertical knockback that KOs at 130% once they get knocked through his head. Considering you can’t actually see the foe inside of you if they’re totally enveloped, they actually have decent mindgame potential in how they escape. If they’re intending to launch a counter offensive, they’ll more likely than not be heading to your head. If you predict they’re going up, the foe’s upward momentum getting boosted by this throw can cause them to get launched into the air too quickly and cause them to do their attack intended for your head at the open air. This follows splendidly into a utilt for a potential regrab.

DOWN THROW – AT HIS MERCY


Clayface makes a massive push inside his body that brings foes down to his bottom at Mario’s falling speed before knocking them downwards with knockback as powerful as Mario’s fsmash, dealing 6% immediately and another 10% and putting the foe in prone if thy make contact with the ground. An obvious KO option if Clayface can manage to bring the foe to the edge, otherwise a good damage racker/way to disable the foe.

SPECIALS


NEUTRAL SPECIAL – SHAPESHIFT


Clayface turns into a perfect replica of the nearest foe within a platform of him. Unfortunately, he can only stay in this form for 10 seconds and exits the form with a fair share of lag, even if he comes out of the form at will early by double tapping Down B. While in the form of the foe, he is constantly melting back into his former self. . .Having the exact appearance of a foe covered in clay from Clayface’s “grab”. Clayface gets the penalty to movement/falling speed to match the foe. . .But the foe can blatantly see Clayface transform! Where’s the mindgame potential in that, regardless of whether or not Clayface and the foe look the same?!? He even takes 1% every other second while using the foe’s form!

Regardless of mindgame potential, this move is a very practical one just so you can get some actual movement speed. Even if it is half the foe’s, it’s a hell of a lot better than Clayface’s –ONE- out of ten in ground movement, this being his main way to approach defensive/aerial foes (As most of them have some sort of great Up Special/Hover that would let Clayface bypass his increased fall speed).

DOWN SPECIAL – DUMP


Clayface extends out his arm in front of himself as he starts dumping out his mass, able to do so for as long as you hold the button. The puddle of clay in front of yourself is 1.5x as wide as Bowser, and Clayface can keep dumping to make it taller and taller, potentially reaching 90% of his height. . .At which point Clayface himself will be scrunched up into 10% of his regular size and weight. Not a fun proposition. If you become too small, you’ll have less space to contain foes inside of your body and it’ll become too easy for foes to reach your head and annihilate you like they would a traditional fighting game heavyweight. If you want to re-absorb clay, input the move as a smash and Clayface will absorb any clay on the ground next to him in the same fashion, 3x as fast as he can shoot it out which is already quite fast. If a foe is standing on the clay you’re absorbing, it’s also quite easy to absorb them as well.

What the clay does on the stage is the exact same thing the clay does on your body – if the foe is in contact with it they’ll move through it 85% slower. With just a tiny little bit of it on the ground, it’ll only have any effect if foes are attempting to dash/walk over it. Even with just this little bit, though, it still has uses in that if a foe is covered in clay, coming into contact with a puddle on the ground –at all- will renew the status effect’s timer. If there isn’t enough clay on the ground to cover 50% of the foe’s body, you can still apply the status effect to them using the puddle. . .If the foe enters prone/tripped while standing on it they’ll become covered in the stuff. While the puddle does not have a magnetic pull on foe’s buttockses to force them to trip on contact, if a foe attempts to turn around while dashing so that their traction comes into play while on a puddle, they’ll trip. If Clayface grabs a foe with his fthrow then uses his fthrow/bthrow to slide the foe against the ground past a puddle, they’ll also get covered in clay. Contact with these puddles also gives Clayface himself enough clay to enable himself to stay in the form of a foe for another 10 seconds.

When Clayface is shapeshifted into the foe, he gains two unique attack inputs by Special Fsmash and Special Dsmash. Special Fsmash is a diving tackle with a grab hitbox, dealing 12% to the foe on contact with the ground. While if he misses Clayface enters prone, he slides forward a platform to defend himself if nothing else. If he grabs a foe, they’ll slide along with him a platform forward with both him and the foe in prone, but the foe will still be in the grab. From here, Clayface can perform his get-up attack on the foe for a guaranteed hit as a “throw”, or force the foe to roll with him in the input direction, him able to roll with the foe as much as he likes until they escape the grab. The point of this is obviously to get the foe covered in clay/renew the effect, and when the laggy grab release comes Clayface will be the one to choose which side he shows up on. Mindgame potential abounds far more-so if you have pillars of clay tall enough to completely obscure you in the foe’s form, and if you’re using the foe’s form you’re perfectly free to dump out the majority of your mass.

Special Dsmash has Clayface do a seemingly generic kick upwards, but it’s capable of flinging around clay from puddles. The clay that gets shot up deals 12 hits of 1% and flinching and goes up a Ganon high, is thick enough to completely obscure foes inside of it, and covers the foe in clay, giving Clayface another chance at a reset in the match, though not as blatantly so as in the Special Fsmash.

SIDE SPECIAL – CLAY BALL


Clayface turns one of his hands into a Bowser sized spiked clay ball of death, then slams it down onto the ground in front of himself, dealing 20% and pitfalling foes. While the move –can- end here, if Clayface holds down B he’ll release the spiked ball from his arm after slamming it onto the ground, causing it to travel forward Battlefield’s length at Ganon’s dash speed. If anybody gets hit by the spiked ball, they’ll get impaled on the spikes for 10%, then take 5% per second as they follow the ball around for the ride, able to escape at grab difficulty. Once the ball travels the full distance, it will collapse into a puddle of clay as if Clayface dumped 15% of his mass (And yes, it actually takes up that much of his mass to make the ball). If a foe was impaled on the spikes when the ball deforms into a puddle, they’ll enter prone.

This can be potentially used to kill foes off-stage by rolling it off, though if they escape you’ll of permanantely lost 15% of your mass for nothing. The clay ball will also absorb any clay puddles it comes across, adding them to its size and speed, which obviously also increases the duration of the clay ball.

UP SPECIAL – EXPLODE


Clayface turns to face the camera and pulses laggily before exploding. The only hitbox is at his center, which deals mass freeze frame style hits, more of them hitting based off deep inside Clayface there are. At his dead center, this can do as much as 42%, with the final hit dealing vertical knockback that kills at 100%.

This causes Clayface to launch most of his mass in the input direction – if you input directly up/down, a lot of it will spread out to his sides regardless. Clayface’s head will be at the center of where the clay was shot, and the rest of the clay will be spread out as such to cover 3 platforms of width, their height varying on how much of his mass Clayface had at the time. Clayface will automatically reform in the center with a mere 25% of the mass he had, having to go re-absorb the rest of his mass with Down Special. There are tiny clay free spots in-between the puddles, so unfortunately you’ll have to use Down Special in three separate locations to regain all your mass. Of course, this makes a good and quick set-up for your shapeshifting game/it provides a decent back-up plan if you can’t absorb enough clay back into yourself in time.

STANDARDS


NEUTRAL ATTACK – IMPALE


On the first press of A, Clayface extends out a clay spike from his stomach directly at a diagonal upward angle as far as Luigi is tall, then one below that directly forwards on the second press, and finally one below that going diagonally downwards on the third press. These spikes “impale” foes, dealing 8% to them as the tips go through their body, but it doesn’t put them into any random grab hitbox. Rather, the tips just go right past them as they get stuck in Clayface’s mass. As Clayface goes to retract his spikes, the foe will get pushed into Clayface’s mass if they haven’t DI’d out otherwise yet.

DASHING ATTACK – COLLAPSE


Clayface collapses forwards, his front dealing 12% and spiking knockback that makes foes enter prone on contact with the ground, though the move also leaves Clayface himself in prone. If Clayface collapses into a a clay puddle, he’ll automatically absorb it back into his body, making it a great way to sandwich a foe between yourself and a puddle. Aside from this, the move is also useful if a foe is escaping your mass from the front to immediately re-absorb them.

FORWARD TILT/BACK TILT – CLAY ARCH


For the ftilt, Clayface does the same animation as his dashing attack, but right before he’s about to fall over he catches himself with his hands, his hands a hitbox that deal 8% and knockback that kills at 150%. From here, he stays in the position for as long as you hold the button – if a foe attempted to shorthop and spot-dodge over the “collapse”, they’ll be trapped in a little clay cage, them –having- to go through some part of Clayface to get out. Clayface can either finish the collapse by releasing A, or hold up while holding down A to go back to standing up.

While the mirrored btilt doesn’t have mindgame potential with the dashing attack, the fact Clayface has a leaning back stance means that he can start up the move a good deal faster and from a rather strategic position.

UP TILT – CHOMP


Clayface chomps with the one part of his body that randomly isn’t made of clay – his teeth. The hitbox is very specific and it’s almost impossible to use the move offensively because of Clayface’s height unless you use up a good deal of his mass, but upon contact foes will be spiked as powerfully as Ganon’s dair and be dealt 16%. This spike will obviously send foes into Clayface’s body, providing both excellent defense against foes attempting to hit Clayface’s head and foes attempting to escape his body.

DOWN TILT – HEADBUTT


Clayface headbutts downward in front of himself, not quite hitting the ground unless a large amount of his mass is missing but still hitting quite low none the less. This deals 11% and knockback that KOs at 130%, but in the ending lag of the move Clayface actually bends the arc of the headbutt to headbutt himself in the stomach, potentially knocking a foe inside of him if they’re caught in-between. While Clayface will go to retract his head into position in a generic animation if he hits someone, if he headbutts himself he’ll absorb his head into his stomach before pushing it up through his body back into place, meaning he’s mostly immune to hitstun during the move’s end lag.

If the move is used from Clayface’s leaning back stance, he’ll specifically headbutt the ground with 20% extra power, along with very minimal start-up lag. The ending lag, of course, leaves a lot more room for improvement in this version.

SMASHES


FORWARD SMASH – CLAY HOOK


Clayface turns his hand into a hook before throwing it out 1.5-3 platforms based on charge. The hook is a grab hitbox that deals 18% to foes, and if Clayface successfully hooks someone he’ll drag them back to himself and into his body, dealing 2% per second to them as he drags them. They can escape from the grab as he drags them, though, meaning that the range of the move can actually be a disadvantage. If nothing else you can drag them through a clay puddle to cover them in clay before they escape.

Considering the reward isn’t all that high for hitting with such a specific hitbox, you don’t really have to hit with it. If Clayface’s hook just hits the ground, he’ll reel himself in to the hook, pulling himself at 1.25x Ganon’s dash speed (Which, believe it or not, is a massive improvement for him movement wise), enabling him to potentially envelop foes in-between him and the hook. If Clayface outruns a clayball by pulling himself in to it, he’ll absorb it and any foe it’s impaled into his mass.

Clayface can also grab the clay ball directly with the hook, at which point he’ll start reeling it back in by default at 1.25x Ganon’s dash speed, attempting to bring it back into his mass. If any button is pressed as Clayface does this, he’ll just fling it off the hook in the direction you input, the Clay Ball acting as if it was launched from that point, Clayface just retracting his hook afterwards.

UP SMASH – TIDAL CLAY WAVE


Clayface deforms into a tidal wave rather than outright exploding, it being 1.5x as tall as he is but half as wide with his head at the top of the wave. Clayface travels at Ganon’s dash speed in this form, leaving behind minimum height clay puddles behind him as he goes, losing 10% of his mass per second. Clayface deals constant hits of 1% and dragging knockback as he goes, dealing roughly 7-14% a second to foes based on charge. Clayface can crash the wave down by inputting any button, causing foes to take an additional 11-20% and forward knockback that KOs at 140-100%.

If you somehow manage to set up a clay ball at the opposite end of the stage coming towards you, you can not only drag the foe into the ball, but leave behind a massive trail of clay behind you for the ball to immediately re-absorb.

Once Clayface crashes down into a tidal wave/runs out of mass, he doesn’t instantly reform. Rather, you gain the ability to move Clayface’s head around the puddle you’re currently on at Meta Knight’s dashing speed. Clayface’s head –can- be attacked here and it’s as light as Jigglypuff, but Clayface would have to be incredibly stupid here to not reform before then. When you get to the area you want to reform at and press any button, Clayface will instantly begin absorbing all the clay in the puddle into himself, gaining superarmor until he absorbs enough clay to become a minimum size version of himself with an actual playable moveset. From there, Clayface can keep increasing in size to form directly on top of the foe, considering how fast it is. If Clayface gets knocked off his puddle, his movement goes down to Ganon’s dash speed, so you should try to let the foe run into you as you form rather than coming on top of them if you have a survival instinct of any kind.

DOWN SMASH – VILLIANOUS STOMP


Clayface stomps forward, causing a quake effect to occur on the ground a platform in front of him that deals 18-32% and vertical knockback that kills at 115-70%. The main purpose of this is that the knockback can be dealt to any trap-like objects laying on the stage unless they’re stuck to it like N. Brio’s goo or something. This of course effects Clayface’s clay puddles and his clay ball, enabling Clayface to snatch foes who are attempting to jump over them. Clay will be dealt more knockback if there’s less of it, a minimum height puddle weighing as much as Jigglypuff at 50% while a minimum size Clay Ball as much as Bowser at 20%. Getting a foe to overlap with clay even briefly in the air can give you all the time you need, so launching a small puddle can sometimes be optimal here. If the puddle is actually tall, though, it may be able to actually drag the foe down to the ground.

Clayface’s foot is of course also a hitbox, dealing 20-35% and knockback that kills at 110-65%. In true Warlordian fashion, his foot can grab prone foes as they get pinned underneath it, at which point Clayface is free to pummel them if he properly stomped down on their face.

AERIALS


NEUTRAL AERIAL – WRECKING BALL


Clayface bends down as if he were going to touch his toes before grabbing his feet and ripping off his bottom half by his legs. He then proceeds to swing his bottom half around his upper half all of the slime in his lower half constantly pushing towards the center of it at Ganon’s dash speed as he swings it around without it being a hitbox. If you hold the input, Clayface will just re-attach his lower half to his upper half once he swings it all the way around, but if you let go of the input at any point Clayface will let go of his lower half, letting it soar in the desired direction at Mario’s dash speed. While the insides of it still push foes towards the middle, the outside of the lower half is now a hitbox, dealing 15% and knockback that kills at 100% in the way it’s going. The lower half will of course form a clay puddle on contact with the ground, and Clayface will use up some of the mass in his upper half to generate a new lower half. Of course, if Clayface ever comes into contact with the ground during this move, his upper half will splatter as if he exploded and he’ll automatically let go of his lower half.

An obvious way to snatch foes into your body, most notably off-stage where the landing lag won’t come into play. On-stage it can still provide some use with a second projectile of sorts, and if the foe is in your lower half it provides another way to position them exactly where you want, considering you can choose whether Clayface swings his lower half around himself clockwise or counter clockwise at the start of the move.

FORWARD AERIAL – SMACK DOWN


Clayface reels his hand over his head before he smacks directly downwards with his fist in front of himself, spiking foes for 18% damage and doing it even more powerfully than Ganon’s dair, making them enter prone on contact with the ground. If you hit a grounded foe with this (They’ll automatically enter prone on contact with your fist), you’ll pin them in a grab hitbox with your fist temporarily before your entire arm deforms into a clay puddle, using up 15% of your mass. Clayface generates a new arm automatically over 2 seconds, able to do other attacks as it regenerates. Virtually none of his moves use –both- of his arms, and those that do can generally be performed just fine with only one arm anyway.

That’s all there is to the move if you hold A for the move’s whole duration, but otherwise Clayface will just let his arm drop downwards while the hand is still a fist. The hand is capable of doing everything it can when normally attached to Clayface, and Clayface can either go to envelop the foe while they’re stuck or simply re-absorb his arm with Down B while the foe can do nothing to prevent you.

BACK AERIAL – SWEEPING PUNCH


Clayface makes his hand into a fist as he smack downwards in front of him, then drags it in an arc at his feet to go behind him, turning around as he does so, before ending the arc at his chest level behind where he was originally facing. His fist deals 10% and knockback that kills at 140% the entire time, leaving the most as a fairly unremarkable aerial.

The move continues when used on the ground with no form of landing lag, though. If Clayface drags his fist across clay puddles, he’ll cause the clay to get splashed up, working much like how it does when it gets knocked upwards by his dsmash, but it’ll get flung at a more diagonal angle in this move. The move also has obvious applications for tech chasing, as if you predict the foe’s rolling it doesn’t really matter which way they’re rolling, what with the gigantic range of this move.

UP AERIAL – TETHER


Clayface extends his arms upwards up to 2 platforms. If a foe comes in contact with his hands, he’ll pull them down to him as if he grabbed them with his fthrow, though the foe can start to escape the grab the moment Clayface initially grabs them with the uair. The hand still stays open as a grab hitbox even as Clayface retracts it, not just as he reaches out.

If the landing lag from this is triggered (Largely guaranteed if used over the stage), Clayface will collapse as if he used his Up Special Explosion on contact with the ground. Notably, his arm/hand will stay in-tact from the explosion and will be rooted to the puddle in the middle, the hand still a grab hitbox and performing the rest of the move uninterrupted. The arm will wait for Clayface to be formed enough to use any pummels/throws if it grabs a foe, patiently keeping the foe grabbed until that point. Clayface’s significantly lowered height from having exploded makes it significantly easier to grab a foe from this, and the fact you’ll have clay puddles on either side of you makes a fthrow/bthrow an easy way to immediately cover the foe in clay.

The move’s primary purpose is a recovery for Clayface to make it back to the stage all in one piece, as his Up Special recovery can often cause portions of his body to not make it back to the stage. As a trade-off, this move is far more gimpable, considering it’s a tether. This would be a good a time as any to tell you that Clayface deserves to be edge-hogged, though, considering just how much of a asshole he is about edge hogging himself. If Clayface just sits on the ledge after he knocks a foe off, they have little choice but to approach into his body and let him envelop them, and Clayface has full access to his grab-game while hanging on ledges.

DOWN AERIAL – BELLY FLOP


Clayface extends out all his limbs and leans forwards as he goes to plop down onto the stage at Captain Falcon’s dash speed. His body isn’t a hitbox during this move in any form unless he’s squishing a foe against the stage, in which case he deals a meaty 22% and puts the foe into prone. Rather, this is just an incredibly simple way to coat a foe in clay as he passes through them at lightspeed. This puts Clayface into prone most of the time, but if he fell 2 Ganondorf heights then he’ll splash apart as if he’d exploded with his Up Special on contact with the ground.

Clayface is still allowed to use his pummel and throws as he falls to the ground, so it’s still possible to drag a foe down with you for a suicide KO (Which he actually attempts on Batman in the animated series) – if you have perfect timing you can grab them with fthrow as you pass by, though an easier way is to just gimp them with dthrow so you can fall back into them again and do it again, but the least reliable. If you can take them down far enough, you can use bthrow to screw over their recovery as you pass by them the final time, though you’ll obviously die first.

Why would Clayface attempt a suicide KO over any other heavyweight male antagonist? The general idea is he’s following up what a spiked ball that dragged the foe off-stage failed to do. If he’s already lost a good chunk of his mass, it’d be a shame to let it go to waste.

FINAL SMASH – STEALING THE SPOTLIGHT


Clayface transforms into the nearest foe if he hasn’t already, then proceeds to use their own Final Smash against them. Clearly only the real thing could use a Final Smash, Clayface must be the genuine article while the foe is the imposter! But seriously, this is what you get for putting on crap like Mecha Giga Bowser and Gigaskhan on your Final Smashes – now they’re getting turned against you.

MASTURBATORY SELF GLORIFICATION TO MAKE MOVESET LOOK LONGER WHERE YOU RE-READ THINGS I’VE ALREADY TOLD YOU


The title of this section should tell you why you’re not getting a playstyle summary. While most people simply suck at writing playstyle summaries or rush their movesets out without one included if they don’t have one, it’s a perfectly respectable decision to not include a playstyle summary if you’re telling people how to play the character anyway and how various moves interact in the main set. If you prefer on saving a good chunk of these details for the summary so the main set is more skimmable, meaning you’re Rool or Hyper Ridley, so be it. If you’re going to tell the reader how to play the character in both the summary – and – the main moveset, though, these playstyle summaries are largely pointless and are mostly just here just for show and tradition. I’m obviously perfectly willing to include a section here, but I completely feel it’d be a waste of your time, and if –MasterWarlord- does this with a playstyle summary, then other people can actually do this without getting mocked. Granted, don’t think I won’t blatantly call you out when it’s obvious the moveset was just rushed. Speaking of which, no, this summary is not a cop out. At the time of this writing, I still have almost 5 hours to write this summary if I wanted to.


VS. RAINBOW DASH – 60/40, SMOOZE’S FAVOR


Rainbow Dash loathes the fact that it’s so difficult for her to bulldoze past the smooze, though being covered in smooze can actually be a benefit for her considering a lot of her moves take advantage of just the fact she’s moving, not the fact that she’s moving at mach 2, making it easier for her to not suicide with her excessive speed. Regardless of Rainbow Dash’s stellar aerial prowess, her vertical recovery isn’t as godly as those of her follow DBZ movesets, meaning she is indeed gimpable by rolling her off-stage in a clay ball. Rainbow Dash will be relying on her clouds and ranged rainbows for damage racking on the smooze, as the fact the smooze is so tall means that he’ll automatically be hit by a lot of the rain. Considering the smooze will want as much smooze as possible out to slow Rainbow Dash regardless of where she goes, though, the smooze can reduce his size to avoid this being an issue. Considering her main KO method in her grab ignores the smooze’s weight, this isn’t that much of a problem for the smooze, much less considering he keeps all of his power in-tact regardless of size.

While the smooze will still require –some- damage racking to be taken off-stage, his massive weight won’t come into play as much, meaning he’ll be forced to recover far earlier than he’d like. The main thing that lets everything still work out fine for the smooze is he can just transform into Rainbow Dash and follow her back to the stage. Considering the smooze is generally encouraged to lay out as much smooze on the stage as possible in this match-up, he’ll be taking on Rainbow Dash’s form on a regular basis anyway.

VS. APPLEJACK – 85/15, SMOOZE’S FAVOR


Applejack is a rushdown character with the ability to heal herself given time to herself, and considering she’s so light healing herself really isn’t all that beneficial to her against somebody with power like that of the smooze. Of course, if she can keep her percentage at the absolute minimum, it can be somewhat annoying to kill her, considering she’ll instantly escape from clay balls and the like, though perhaps the most annoying thing for the smooze is Applejack’s ranged grab hitbox, which she can use to reposition the smooze when she otherwise blatantly couldn’t what with his massive weight. If the smooze is ever in that bad of danger of becoming too bloated to move, he can just turn into Applejack and generate apples on demand to devour. Applejack will pretty much have to use her grab to bring the smooze off-stage for a KO realistically, but considering she can’t drag the smooze around with the grab she’ll have to grab him right next to the edge – considering it’s really the only way the smooze can lose, he’ll be intelligent enough to avoid it, what with how nothing can stop the smooze. If Applejack spams healing too much for the smooze to be able to finish off Applejack, the smooze can again take on Applejack’s form and not only use her generic rushdown against her for damage racking, but also steal her apples away with Up Special to prevent her from healing before reverting to smooze form to finish her.

VS. PINKIE PIE – 60/40, SMOOZE’S FAVOR


Pinkie Pie’s ability to pass by the smooze either by jumping over him or just continuous momentum makes matters a good deal more complicated for him to envelop her properly. Things would go smoothly if I were just Smady and said that all various forms of ooze could co-exist, but I’m not. The general rule I use is that if goo is placed on top of other goo, the new goo destroys the older one. In the smooze’s case, though, if he makes his smooze puddles higher than minimum height, then Pinkie Pie can’t place her various goo in those locations. The smooze actually enjoys having a balloon to an extent, as it means he’ll never have to face all of his various landing lag, making nair beastly, and while he can pop the balloon on demand with uair he can also just drop like a rock to the ground with dair to largely negate the effects of the balloon without putting himself in helpless.

Pinkie Pie still has her main advantage outside dodging around the smooze’s main body and his smooze puddles, but is unable to really do all that much, as without her goo she has minimal methods of damage racking, considering it’s very difficult to force the Smooze to approach into a very specific portion of the stage when it’s so obvious what she’s doing. Pinkie will have to use her dsmash to grab the goo on her tail and apply it to the smooze directly, at which point she can actually get a remote amount of damage on the smooze. This requires awkward set-up, though, and Pinkie Pie will have to hurry with it before the smooze covers the entire stage in smooze. If Pinkie does manage to get sufficient damage on the smooze, her shamelessly stolen grab from Rainbow Dash which was demoted to a throw gives her an easy time KOing the Smooze, considering Pinkie is rather good at gimping once the Smooze is finally brought a decent ways off-stage, and turning into Pinkie won’t do all that much to help him recover if Pinkie was intelligent enough to hiccup herself above him.

VS. RARITY – 80/20, SMOOZE’S FAVOR


Aside from Rarity absolutely loathing what the smooze does to the point she’s more embarrassed than the smooze with a full makeover, the smooze is perfectly capable of knocking parts of his girly get-up off. If the smooze separates a body part from the rest of his body, most obviously in his nair where he literally splits in half, he’ll throw away all the girly accessories on that part of his body, only regaining them if he re-absorbs that specific smooze. Rarity can be played as generic rushdown, but she’s not particularly good at it, and much like how the smooze can’t be grabbed from the inside accessories cannot be applied to him from the inside either, and Rarity will be far too predictable if she somehow ever does get down to that last accessory or two she needs to apply to the smooze anyway. The main point Rarity is in her favor is that her recovery is randomly actually good, though that means the smooze will gain access to the recovery as well. Seeing Rarity will inevitably be covered in smooze, her recovery will be weighed down some anyway, considering it’s not an immediate burst up and just some simple free flight.
 

MasterWarlord

Smash Champion
Joined
Aug 24, 2008
Messages
2,911
MYM 10 MOVESET SUBMISSION PERIOD IS NOW OVER


Any movesets posted in the thread from this point on will not be eligible to be voted upon for the top 50. If you want them to be, you’ll have to wait for the next thread, MYM 11. We’ll announce the start date for MYM 11 at the end of the advertising week.

Just what is this advertising period you ask? In order to vote for the movesets on the top 50, you must have posted at least one moveset in MYM 10 and post three advertisements for movesets that you did not make in the thread during the advertisement period – tell us what’s good about the sets, why they should read/vote them, what have you. The advertisement period lasts for a week, and if you don’t make your advertisements then, too bad, so sad, you can’t vote. Details on how to vote will be posted when it’s time, though it’s highly doubtful anything will have changed from previous contests.

Oh, and just to get in a few rules that nobody ever seems to be sure about:

  • You are allowed to advertise a moveset that has been advertised already, it’s just rather rare for it to happen.
  • You may edit in/edit existing extras of movesets in MYM 10 while having them still be eligible for voting.
  • Playstyle summary and stats do not count as extras
  • Match-ups and Final Smash DO count as extras
 

KingK.Rool

Smash Lord
Joined
Nov 26, 2005
Messages
1,810
MINIMUM BEAR


Backstory: He's a manly naked bear.

All stats: 3/5
Glide/Crawl/Wall Cling/Wall Jump: No

NORMAL ATTACKS
A: One Two Punch
A>: Scratch
A^: Uppercut
Av: Floor claw swipe
Forward Smash: Tackle
Up Smash: Double claw swipe (like Shiek's up smash)
Down Smash: Earthquake
Dash attack: Running claw swipe

Nair: Spin
Fair: Claw Swipe
Bair: Reverse claw swipe
Dair: Downwards claw swipe
Uair: Upwards claw swipe

Throws:
Pummel: Claw swipe
Forward Throw: Toss forward
Back throw: Toss backward
Up throw: Toss upward
Down throw: Toss downward

Special Moves:

B: Bite
He bites at the enemy. Does a single hit with decent knockback, and can eat projectiles and items.

B>: Bear Charge
He charges at the enemy. Powerful attack.

B^: Bear Flip
He does a flip in the air, that helps him recover

Bv: Bare Spin
He spins around. Gives slight vertical height if rapidly tapped

Final Smash: Master of Land

OTHER INFO
Taunts:
Minimum bear looks up
Minimum bear eats a bird
Minimum bear raises a pinky

Victory Poses:
Same as taunts

Snake Codec:
Snake: What sort of enemy am I fighting?
Colonel: Minimum bear
Snake: Anything else?
Colonel: He's a bear, man
Snake: What should I do?
Colonel: Don't get hit

Stage: Bear Forest
Just a flat bed of grass, with walk off edges. There's a forest in the background, but that's irrelevant.[/QUOTE]
 

flyinfilipino

Smash Master
Joined
Sep 11, 2007
Messages
4,319
Location
North Carolina
l Conkeldurr l


Conkeldurr is a Fighting-type Pokemon introduced in Pokemon Black and White. It evolves from Gurdurr through trading, and is the final form of Timburr. It carries concrete pillars in its massive arms, and is often seen helping around construction sites. It is also believed to have taught humans how to make concrete more than 2,000 years ago. Nifty!

l Stats l

As stated earlier, Conkeldurr carries around these huge concrete pillars. They're really heavy! But as you'll see a bit later, sometimes he loses one, or both of his pillars through various methods. Naturally, this changes his weight. So, for future reference, Conkeldurr is as big as Bowser, and while holding both his pillars, he weighs just a bit more than the big turtle and has King Dedede's fall speed. When Conkeldurr is only holding one pillar, he weighs about as much as Snake and falls as fast as Falco. When Conkeldurr isn't holding any pillars, he weighs about as much as Wario and falls as fast as Donkey Kong. Conkeldurr is a bit of the slouch in the air, so his jumps are only about as good as Bowser's (and get progressively higher the fewer pillars he has, naturally), and he doesn't have much control over his aerial movement.

When Conkeldurr runs (if you can call it that) with a top speed only as high as Ganondorf's, he uses his pillars as walking sticks, pounding them both into the ground with each step as he shuffles along. He does this with enough force that any character he happens to come into contact with while running is automatically pitfalled and takes 2% damage. However, if Conkeldurr only has one pillar, however, he is a considerably slower, walks like an old man with a cane, and doesn't pitfall foes when he runs. Lastly, when Conkeldurr doesn't have either of his pillars, he is downright sluggish at full speed (comparable to most character's walking speed), dragging his arms on the ground with no effect.

Oh, and by the way, Conkeldurr can't wall jump, wall cling, crawl, glide, or any of that fun stuff.

l Special Moves l

Side Special - Stone Edge

Pokemon Syndrome! Nah, not really. Conkeldurr lifts one of his pillars, rears back, and hurls it head-on, straight forward like a missile. It travels a total distance of 2 Battlefield platforms and initially follows a straight path for most of that before being affected by gravity and falling towards the ground. As you can imagine, a concrete pillar to the face is going to hurt. If it hits an opponent, it deals 25% damage and high, mostly horizontal knockback that can probably KO rather early. Even to shielded foes, contact with a pillar will cause high shield damage and push them back a bit. It'll deal a bit less damage (20%) and knockback if a foe makes contact with it while it's on its way down, however (such as off-stage). Thanks to Conkeldurr's strength, these fly at the speed of a regular item when thrown. Scary!

Oh yeah, the catch. Conkeldurr only carries two pillars at a time at most, so you really only have two shots at this. So make it worth it! If your pillar finds itself just lying on the stage, you can walk over and pick it up to recover it. Of course, there might be other ways to recover your pillar faster. A foe can pick up a pillar as well, but if they're not a Conkeldurr, they'll have about as much difficulty picking it up as they would a crate, and they won't do as much damage if it's thrown. If Conkeldurr loses a pillar offstage, he's out of luck for the rest of the stock, and lastly, Side Special obviously doesn't do anything if he's not holding a pillar.

Neutral Special - Concrete Block

If Conkeldurr isn't holding any pillars when you press B, he'll just stand there looking derpy. If he's holding one pillar, he'll quickly move it in front of himself in the way of an oncoming attack. If a foe's physical attack hits the pillar, it will clash, Conkeldurr won't take damage, and the opponent will flinch. This gives you an opening to follow up with something else. Opposing projectiles are also blocked, but not reflected. Also, Conkeldurr can slowly walk forward while holding B, using his pillar as a mobile shield. Furthermore, Conkeldurr can do certain moves straight out of a block, so pay attention!

Something different happens when a foe's physical attack hits Conkeldurr's pillar while he's holding another one, though. While the opponent flinches, Conkeldurr reaches over and sandwiches the foe between the two pillars, which automatically puts them in double pillar grab state, which will be described later on in the grab section.

Up Special - Unburden

As stated earlier, Conkeldurr's not much of an aerial character, so he doesn't have some big fancy recovery to help himself back on stage if he somehow ends up off it. When you input Up B, Conkeldurr simply uses his arm to give a mighty push off one of his pillars, letting it fall to the ground (or blast zone). This nets him some vertical height (about the same as Wario's Corkscrew), but also causes him to lose a pillar, which makes him sad. Contact with a falling pillar will deal 15% damage and mostly downward high knockback to a foe. Conkeldurr doesn't go into helpless when he uses this move, so feel free to combine this with your (now higher) midair jump to try to get as much airtime as possible. You can even get rid of your other pillar if you have one, although that will leave you rather defenseless.

Down Special - Steamroller

No relation to the Bug-type move. Conkeldurr bends down, sets one of his pillars (if he has one) on its side on the ground, then gives a great shove to send it rolling. It travels a bit faster than a thrown pillar (as fast as one of Falco's Blaster shots) for the same distance (2 Battlefield platforms) before rolling to a stop. Contact with one deals deals 15% damage and above average, mostly horizontal knockback. Of course, this results in a misplaced pillar. If only there was a faster way to get them back!

l Standard Attacks l

Standard Combo - Sledgehammer

With each press of A, Conkeldurr will take one of his two pillars (if he has them) and bring them down on the foe's head with a distinct 'clunk' (which is the sound all his pillar attacks make). If he has two pillars, he will hit the foe once with each of them, dealing 6% damage per blow. The second hit will also pitfall the foe. With a third hit of A, Conkeldurr will perform a quick horizontal swing with one pillar on the (hopefully) pitfalled opponent, and hit a little behind him as well. This swing deals 10% damage with above average horizontal knockback (5% damage/moderate knockback if you hit a foe behind you). If you only have one pillar, Conkeldurr will hit the foe only once before the big swing, and if you have no pillars, he will do the full combo with just his hands but significantly less range and half the power.

Forward Tilt - Demolition

Here's another attack that differs depending on how many pillars you have (well, this applies to all of Conkeldurr's moves). If you have just one pillar, Conkeldurr reaches forward and pokes the foe with a pillar. A poke with a concrete pillar is still pretty strong, though. This has more range than your Standard Combo (comparable to Dedede's Forward Tilt) and deals 8% damage and moderate knockback. If you have two pillars, Conkeldurr instead claps them both together in front of him, dealing 13% damage and high knockback. Remember Concrete Block, the Neutral Special? You can use this move straight out of a block, as Conkeldurr can poke forward with one pillar while the foe clashes with the other. And lastly, if you have no pillars, Conkeldurr just does a lame punch for 5% damage and low knockback.

Down Tilt - Bulldoze

Taking one of his pillars, Conkeldurr lifts it up in a vertical position in front of him, then slams it into the ground with a slight tremor. This attack has less range than his other standard attacks, but if you hit a non-pitfalled foe, you'll deal 8% damage and pitfall them. If you hit a pitfalled foe, or the ground in close proximity to them, you'll pop them into the air with 5% damage and moderate vertical knockback. If you have two pillars, Conkeldurr turns to face the screen and does this on both sides of him! If you have no pillars, Conkeldurr just slams his fist into the ground for 5% damage, low knockback and no other effect.

Up Tilt - Rapid Drill

Once again just taking one pillar, Conkeldurr lifts points it straight upward and above his head, then spins it rapidly in his hand. Contact with the rather tall pillar hitbox deals a maximum of 9% damage in multiple hits. Oh hey, Conkeldurr can do this with both his pillars if he has two of them for more hitbox. And finally, if he has none, Conkeldurr just does a really boring upward punch for the same damage and knockback as usual.

Dash Attack - Battering Ram

While dashing and holding one pillar, Conkeldurr will lift it in his arms horizontally, then thrust it forward with great force. This'll deal a good 9% damage and above average knockback. Naturally, Conkeldurr will do this with both pillars if he has them, dealing 18% damage and high knockback, though you'll miss a foe that you pitfalled by running into them. Also, against shielding foes, this attack will deal a lot of shield damage and push them back about a Battlefield platform. Lastly, with no pillars, Conkeldurr just does another lame punch.

l Smash Attacks l

Side Smash - Pillars of Strength

Conkeldurr takes a big swing forward with his one of his concrete canes, with range similar to Ike's Forward Smash. Being hit with one of these suckers deals 18% damage and high knockback. Also, like Link's Forward Smash, you can follow up with a second hit by pressing A if you have two pillars. This is also another one of those attacks that you can use straight out of Concrete Block. While the foe clashes with one pillar, clonk them with the other! And of course, without any pillars, Conkeldurr just swings his arms for 10% damage.

Up Smash - Heavy Lifting

This attack only uses one pillar. Yep, just one. Conkeldurr heaves the one pillar straight up into the air, where it reaches a height of about 1.5 Ganondorfs, then drops back down so that Conkeldurr can catch it. The pillar spins vertically the whole time, and deals 15% damage and high diagonal upward knockback on the way up, and diagonal downward knockback on the way down. Your foe can hit you out of this move, causing you to lose a pillar...but they'll have to watch out for it as it falls down.

Down Smash - Construction Work

Conkeldurr lifts his arms, then slams them onto the ground in front of him, whether he's holding canes or not. Foes making contact with his arms take 10% damage and above average knockback at a low angle. But the good part is what happens when Conkeldurr hits the ground. From the point where he makes contact with the ground to a point on the ground about 2 Battlefield platforms away, the terrain of the stage will slope up, forming a sort of ramp about 2 Pikachus high at the opposite end. Foes that are standing on this particular location when it pops out of the ground will take 14% damage and above vertical knockback. This little bit of elevated ground lasts about 30 seconds before crumbling back into nothingness, and if you're say, standing on a short platform when you use this move, the ramp will only extend to the end of the platform.

Hey, wanna know some cool tricks? If you create one ramp in front of you, then turn around and make one behind you, you can create a sort of halfpipe out of the ground. Remember your Steamroller Down Special? Well, if you set one of your pillars rolling, it'll go up a ramp, then roll back down and go up the other one! Then it repeats itself! This won't last forever (there's some law of physics that prevents this) (and the ramps only last 30 seconds anyway) and requires a lot of space, but you could have a neat little system going on by standing in the middle of it all, since Conkeldurr's own pillars don't affect him (or each other, so you can roll two around). Of course, this is probably impractical, but it certainly looks cool. Yay interactions!

One last important thing: remember all the references to a faster way to get your pillars back when you misplace them via Side and Down Special? And how they end up 2 Battlefield platforms away, which happens to be the same distance the Down Smash ramps cover? Well if you've put two and two together, you'd realize that using Down Smash on a fallen pillar does something special. The ramp will pop out of the ground and also pop the fallen pillar into the air in a downward arc back to a waiting Conkeldurr, who will automatically catch it. Additionally, the flying pillar does the same damage and knockback as it would during an Up Smash, so have fun with that.

l Grab/Throws l

Grab - What Big Hands You Have

Conkeldurr does have a rather large grab range indeed, though the grab itself isn't too fast. As you might have guessed, Conkeldurr has two different grabs (okay, three), which aren't too different from each other fundamentally. One is the single pillar grab, which naturally only requires a single pillar, and can be done out of Concrete Block as the opponent flinches. Conkeldurr simply reaches out and grabs the foe with his other hand. There's also the double pillar grab, which requires both pillars, is slightly harder to escape from than the single pillar grab, and is also automatically initiated by Concrete Block if you remember. Thirdly is your run-of-the-mill grab using just hands, which comes out when you have no pillars. Just so you know, all of Conkeldurr's throws that come out of this particular grab are basic tosses in that general direction with medium knockback and 7% damage.

Pummel - Knock Knock

If you've got your foe in a single pillar grab, Conkeldurr bashes the foe's head into the pillar for 3% damage per hit. If your foe is stuck between two pillars in the double pillar grab, Conkeldurr instead slaps the sandwiched foe in the face for 2% damage per hit. If you've got your foe in a basic, pillar-less grab, they're simply squeezed with both hands for 1% damage per hit.

Forward Throw - Wrecking Ball / Dynamic Punch

This throw is different depending on the grab your opponent is in. For a single pillar grab, Conkeldurr lightly tosses the foe into the air, then swings his pillar like a bat to smack the foe away for 12% damage and high horizontal knockback at an angle. If your foe's in a double pillar grab, Conkeldurr draws back a fist, aims straight for the trapped foe, then delivers an explosive punch that deals 16% damage and sends the foe shooting out of the pillars horizontally with high knockback.

Back Throw - Laying the Foundation

Out of a single pillar grab, Conkeldurr simply picks up the foe and tosses them over his shoulder so they end up on the ground right behind him. Then, he picks up his pillar, lifts it up over his head in a weightlifter pose...then lets it roll off his shoulders and back to drop directly on the foe behind him. Anticlimactic, huh? The foe is bounced into the air with low knockback and 8% damage, and Conkeldurr turns around to pick up his pillar. With the foe in a double pillar grab, Conkeldurr picks up both pillars with the foe still between them and lifts them high in the air. Then, he falls onto his back in a sort of suplex, slamming the pillars into the ground and popping the foe out with 12% damage and high knockback in an upward diagonal angle.

Up Throw - Skyscraper

With the foe in a single pillar grab, Conkeldurr throws the foe high and straight up into the air, then simply thrusts his pillar upward at them as they come down, sending the foe flyins striaght up even further with above average knockback and 10% damage. If the foe is in a double pillar grab, Conkeldurr lifts the pillars with the foe from the bottom and uses them to hoist the foe straight up into the air. Then, he pops them straight up again with one pillar in one hand, and hits them yet again with the other pillar as he tosses it in the air to land neatly balanced on top of the first pillar. He finishes by prodding the airborne foe one last time with both pillars combined and sends them flying straight up for a total of 16% damage and high vertical knockback. Fancy!

Down Throw - Stone Grinder

No matter which grab the foe is in, Conkeldurr will shove the foe onto the ground, then slam a pillar on top of them, twisting it around cruelly so that the foe is half-buried in the ground and has taken 9% damage. What to do with the now pitfalled foe? I'm sure you can figure something out....

l Aerial Attacks l

Neutral Aerial - Whirling Pillars

Remember how I said Conkeldurr isn't such a great aerial character? Good; don't expect an amazing air game then. Anyhow, Conkeldurr performs a 360 degree spin in much the same manner as Donkey Kong's Neutral Aerial, except he's got his pillars (well, hopefully), so it has better range and power. Contact with the pillars does 8% damage and can give above average knockback on both sides of Conkeldurr.

Up Aerial - Concrete Mixer

Using just one pillar, Conkeldurr lifts it over his head and spins it around horizontally in his open palm. Contact with the pillar deals a maximum of 10% damage in multiple hits and sends foes flying horizontally, kind of like Pit's Up Aerial. And as an added bonus, the pillar will also block projectiles that come flying down from overhead (not that there are many of those). With no pillars, Conkeldurr does an unextraordinary punch upwards for 5% damage.

Down Aerial - Stone Crusher

Conkeldurr turns toward the screen and thrusts one pillar straight down below him in a stall-then-fall. Foes that he hits on the way down with the end of his pillar get dragged along with it until he hits the ground (or the bottom blast zone). And if a foe does hit the ground, they'll take 12% damage and be pitfalled. With no pillars, Conkeldurr just does a downward punch that isn't interesting in the slightest.

Forward Aerial - Hard Labor

With two pillars, Conkeldurr thrusts both forward at a slight upward angle and one at a slight downward angle. If he's got just one pillar, he'll point it at the downward angle. Contact with a pillar deals 9% damage and sends the foe flying with medium knockback in whatever direction the pillar's pointing. This would be a good aerial approach due to the nice range, if only Conkeldurr was any good at that. If he has no pillars, Conkeldurr just punches forward blah, blah, blah.

Back Aerial - Double Elbow Strike

An attack that doesn't use pillars, what? Yeah, Conkeldurr simply thrusts his big elbows backwards and deals 9% damage and sends the foe flying horizontally with above average knockback. This might not have much range, but it's relatively fast, so it's good for protecting your backside.

l Final Smash l

Conkeldurr's grabbed the Smash Ball (somehow)! When you unleash it, any foe within two Battlefield platforms in front of Conkeldurr will suddenly be drenched in concrete that falls from the sky for no apparent reason. It'll then magically harden at super speed, leaving the foe(s) trapped in a concrete block of sorts. It's clobberin' time! Conkeldurr then dashes forward and Mach Punches through any foes in the way, shattering the blocks and sending your opponents flying away at high speed with 35% damage that's sure to KO.


l Playstyle l

Conkeldurr's playstyle? It's pretty simple. Hit HARD. And that's pretty much what most of Conk's attacks do. He may not be very mobile, but he's got ways of making sure foes don't walk all over him. For one thing, Concrete Block (Neutral Special) serves as a pretty good defense, allowing Conk to defy projectile spammers while slowly making his way toward them in relative safety. If anyone gets too close, he's got ways of punishing them by using moves like Forward Tilt and Forward Smash and even a grab right out of Concrete Block. Of course, he's still vulnerable to grabs, but who's gonna risk that? As far as damage-racking goes, just a couple of good hits from Conk is sure to put the hurt on. His Standard Combo is a relatively safe option for guaranteed damage. Just being able to run at the foe (with two pillars, of course) and making contact with them to pitfall them is also a big help, since they'll be helpless against your many strong attacks. Forward Smash is a powerhouse move, Down Smash covers a lot of distance, and Up Smash takes care of foes who try to get at you from the air. And then you have your pillars, which you can toss using Stone Edge (Side Special). These are real killers, and should be saved for when you've got a good shot at the foe. They eat shields very well too, so following a shielded pillar or even a Dash Attack with another pillar (or Dash Attack!) will probably shatter your foes shield, which won't really help their situation either. The pillars also make for good gimping tools if you throw them offstage, but that's sad. Remember to use your Down Smash to recover your pillars faster for more hurt!
 

smashbot226

Smash Master
Joined
Sep 1, 2007
Messages
3,027
Location
Waiting for you to slip up.
Well hello there. I'm smashbot. I've been a part of MYM10 since MYM2. Wait, that doesn't sound right. Anyway, I'd like to talk about how I've evolved in this contest. In MYM2, I got 4th place with one of my sets. Said set revolved around internet memes so obviously, it got fourth. Other sets about Star Fox's Leon Palowski and Shy Guy- yes, that Shy Guy- also got placed.

Then MYM3 came along. I made ten sets. None of them placed. Needless to say, I felt crushed. Demotivated enough to not only distance myself from MYM entirely as well as SWF. Although the latter disappoints me anyhow. But I came back on a whim...

It was hard to change to the new taste of moveset-making. But according to a couple of users, I've improved. There were some ups and downs in this contest but overall, I'll be happy if even one of my sets managed to place in this contest. I want to thank Smaddy, who helped out with several of my sets. Dave, who helped out with Pinkie Pie. And several other users who were there along for the ride.

Thanks to all of you. And I'll see you in MYM11.
 

Davidreamcatcha

Smash Ace
Joined
Feb 9, 2011
Messages
629
First ad gogo!

EDGAR​

BKupa666

What originally started out as something of a joke in the chat has become one of the most intriguing and unique sets this contest. Edgar takes a character of whom was thought to have small potential and milks every ounce of potential out of him. The set takes a simple concept that hasn't been played on much: putting people to sleep, and makes it work brilliantly with the rest of his set. Cream Soup is the centerpiece of Edgar's games, he can use his Umbrella to make it out of the foe's reach, spread trails of it with his motorcycle, lock his foe in a sack in order to forcefeed it to them, all working well with his gameplan. Essentially, Edgar wants to get foes into prone in order to make them drink the soup and Kupa pulls off this wonderfully, as well as addressing the fact Edgar would be stumbling over himself constantly with a mechanic that allows Edgar to avoid prone entirely if used right. Once Edgar has his foes fast asleep, he can take advantage of them in various ways, all leading up to a KO off the stage with an umbrella or his motorbike. All of this flows wonderfully, earning Edgar a well-deserved vote, if not a supervote.

Even if you don't enjoy the set nearly as much as I do, Edgar is worth a look if only as a study of Kupa's improvement. Kupa's last Disney Set, Hades, appeared way back in MYM5. While Hades may not be so fondly remembered now, making comparisons between the two sets really showcases just how much Kupa has evolved as a MYMer. I do hope we see more sets from you, Kupa. Disney or otherwise, I'll always look forward to them.
 

mentholcase

Smash Cadet
Joined
Sep 2, 2011
Messages
56
Location
Northern California
Playstyle summary, Final Smash, and stats do not count as extras
Who is in charge of the wordpress site? The list of requirements over there includes Final Smash, but not stats & playstyle :psycho:

0. A picture of your character. This may seem weird as a requirement, but without it…

1. Four Tilt Attacks (including a neutral A button attack), one Dash Attack, and three Smash Attacks.

2. Five Aerial Attacks.

3. Four Special Moves and one Final Smash.

4. Four Throws, a grab, and a pummel.
 

MarthTrinity

Smash Lord
Joined
Aug 9, 2007
Messages
1,954
Location
The Cosmos Beneath Rosalina's Skirt
Congrats on another MYM well done! As promised, I still said I'd comment everything...so let's keep this comment train goin~<3

Krillin

"How on earth do you breed with an android? And I don't mean the technicalities of that; how do -YOU- breed with an android?!"

Krillin is a goddamn horrible character that everyone hates. With that said, we have Krillin by Junahu. You somehow managed to combine my love of Junahu with my hatred of Krillin in one moveset. Good job. I'll try to comment him without letting my personal bias get in the way of it though...let's see how that goes...

Well it goes pretty well because this set has some pretty awesome stuff to it. Solar Flare jumps out at me immediately for actually playing off of Smash's camera effects (without using the Geass on the Smash Bros cameraman...) and allows Krillin to do what he does best; hide like a ***** and throw **** at people while praying he doesn't get murdered horribly (but he will). Tri Form adds more to this obviously by having the camera follow the version of you that blindly rushes the foe in an AI prompted rage. While an opponent may not fall for that obviously...it's still a pain to have the camera focused on someone you're not really trying to get to. Admittedly...I'd just punt every single one of them that came my way in hopes of finding the actual one.

For a jab, you also made it feel rather interesting...it feels sort of like Dancing Blade but it captures the feel of DBZ quite well, what with its frantic action...and with Krillin running about like a spaz and being terrible. The set very much captures the feel of Krillin's overall terribleness quite well really. I know you're very big (tipsy) on characterization...so the fact that you made the character feel like the bumbling oaf who tries his best that he is quite good. It'd be strange to see him actually succeed at stuff properly...so you sort of found a roundabout way for him to pull off victory.

Joking aside here, Krillin is vastly superior to Victini both in concepts and in execution. While Victini certainly had some good ideas (I recycled one for Rainbow Dashe ven), it felt very loose and disjointed. With Krillin however, everything plays a big part and manages to sound surprisingly fun to mess around with. Simply put, I see why people consider this a frontrunner for you.


Dixie

"More monkeys? Really? Go back to stuffing yourself with that big oaf's bananas...*giggles* Oh man that came out wrong..."

I'm gonna cut right to the chase here, unlike FF, I find this style of writing to be rather difficult to read personally. It feels very...dense. It's a lot of detail to soak in without a lot of actual description of the move itself. Some people (like FF) obviously appreciate this attention to detail and, while I certainly am not against detail...it admittedly makes me feel like I'm missing a whole lot. I have no idea what an 11-stage charge attack is comparable to and I had never even heard of knockback units before your moveset (although it motivated me to look into it and actually, gasp, research). It's rather funny actually...despite the fact that we do so much movesetting, most of us here don't really know the ins and outs of Smash...so to a lot of us, this stuff is rather foreign. Aside from that though, I agree with FF that the captions on the images are a good source of personal voice within a set that's largely facts and details.

Moving along however...the bubble attacks also fall under the situation of being complex when they don't really have to be...although it may just fall under writing style again making the move seem more overly complex. I also find the fact that a juice box acts as a counter (let alone such a powerful counter) is rather weird. That said however...you're making a moveset for Dixie, she doesn't really do a whole terrible lot so with what you were given, you came up with some unique ideas. I'm a fan of grabs that can be used against other players as it's a fun way to add some easy free-for-all fun into the moveset.

All in all, you've certainly got some ideas and some personal voice in this set...it just seems to be limited by the character choice and that the moves portrayed don't particularly make much sense. The standards capture Dixie's speedy monkey movements quite well, as do the Specials (sans the Down Special) and you seem to have a grasp on playstyle which is always nice to see from newcomers. Long story short, with a different character and by toning down the technical jargon a bit, I could see you improving greatly. Just keep at it and don't be afraid to be a bit more adventurous with your standards.


Black Ops

"Must...resist...urge...to make...Call of Booty joke...can't...stop...self...must...make...Black ***** joke...instead..."

Well howdy there and welcome to MYM! There's a bit I have to say about this set but it'll probably be a fairly short moveset comment considering I'm somewhat pressed for time (seeing MYMX is ending soonish). First of all, I'm very glad you changed the headshot being a one hit ko thing. Sure there are characters like Marth who have normal sized heads...but there's also characters like Wario and Bowser who have much larger heads and, in the case of Bowser, would have a much harder time avoiding crosshairs due to his speed. Then there are characters like Jigglypuff who's...well...pretty much 100% head with arms and legs. So yes, glad you edited that. I've actually never played a Call of Duty game for more than a short amount of time but I see that you wanted to represent the game as a whole by using a variety of weapons and such.

The main problem with the set is the opposite of what brought down Dixie commented above; this set has next to no detail. While it does have pictures and such that at least show off the weapons, it doesn't really explain how they're used. For example, his Neutral Aerial. Does he throw the grenade forward, down, up? Does he just drop it? It's very, very vague which makes it hard to imagine the move. Down Smash is another example. Is the bomb dropped immediately? Is there a delay? How big is the bomb's explosion? Up Aerial is yet another big offender of this. Does he throw the grenade upward or what? How is it high risk, high reward when we don't even know the range...or what it does even really.

So in short, this moveset is missing a lot of vital information and is quite hard to actually picture in game. I'd suggest taking a look at some other sets and seeing the details they have. Usually knockback, damage and range will be enough to suffice. Don't be discouraged though, my first set was hardly different that much different than this one.


Tetra

"Why're you such a tomboy if you're secretly a princess? Whoops, I break the 4th wall with spoilers again...?"

Well howdy there...third newcomer in a row that I'm commenting on and welcome to MYM! So we've got a moveset for Tetra without a random transformation into Toon Zelda and without even using her crew. Nifty. I can see you've done your research with this moveset as it has a good amount of detail, attacks are clear, concise and to the point while being easy to picture and the moveset itself looks pretty good organization wise. So good job right off the bat. The cannon Special admittedly took a second read through but it was nothing too difficult to grasp.

Which brings me to, yay, the Specials. The Neutral Special by itself is kinda bland...but coupled with the Side Special and being able to catch and throw the cannonballs into your opponents is kinda cool. I'm questioning the use of the Side Special for "reeling in" opponents though. Assuming Tetra is somewhat lighter than Toon Link (who is absurdly heavy in Smash for no reason according to this weight list...), that's half the roster that Tetra cannot budge in that way...which sorta defeats its purpose of tugging people into the path of your cannon balls if you can't...ya know? Tug em. Down Special is a pretty cool move but I somewhat feel that it may be a bit overpowered as it is...especially since the Forward Smash it looks like happens to allow her to pass through all attacks while using it. I do rather enjoy the disjointed attacks that make use of Tetra's grappling hook and knife to compliment her spacing game. I also enjoy the various minor touches throughout the set such as the angle Tetra is launched from her Up Special directly affecting her Neutral Aerial.

All in all, Tetra is a very nice set. It's clever and it's well presented, both visually and with its ideas. As you readily admit yourself, it's not as "out there" or as adventurous as some of the other movesets this contest...but it's also your first and it's a very solid, enjoyable read. Good work here, I hope to see more from you.


Twilight Sparkle

"Friendship is magic, blah, blah, blah, ponies this, ponies that.....Oh God I love ponies...*sniff*"

For a one day moveset that you rushed out at the last minute because nobody else wanetd to make her...you pulled this one together quite nicely, much better than your previous one day attempt at the very least. She doesn't have exactly the deepest playstyle in the world but it's a very functional one none the less. Setting up forcefields and using magicky attacks against the foe is pretty much the most suitable playstyle you could've come up with for TS and her use of reflecting projectiles between her various barriers is something pretty nifty (much like in Gemini Man but without the awkward method of doing so). It's kinda cool how Twilight also wants to have her foes use her forcefields so that she can shatter them to stun her opponents.

That isn't to say there aren't flaws with the set unfortunately. The signs of this being a rushed moveset are unfortunately there in the form of some filly filler moves here, mostly in the throws which are, appropriately enough, the last moves as well as the most rushed moves of the set. It's surprisingly not that major once again taking into consideration the time you put this together in.

Overall, you should be proud that your first solo set sans Robo Patrick is a success. Again, she's not exactly the most complex or indepth moveset ever, but you could've faired much, much worse considering the fact that it was so rushed. I suppose having the pony with the most potential (sans Rainbow Dash probably) played in your favor. I am vaguely surprised that there isn't even a mention of Spike throughout the moveset considering they're so closely related in the series but that's fine. You took a path that focused more on Twilight Sparkle's own abilities and it turned out quite well. Good job here Dave.


Applejack

"I wish I had a southern accent...then I'd have an excuse to say 'howdy' and wear Daisy Dukes..."

Unlike Rool, I honestly don't believe that you made the set this way to "troll the project from the inside." If you were going to, you just wouldn't have made the sets, period. With that said, there's something very suiting about Applejack being probably the simplest of the ponies considering she's your regular countrypony. Somewhat like Fluttershy after her, Applejack sort of has the feel of "fighting" the opponent by not actually fighting them. Instead, she stuffs them with apple themed treats to get them fat while they're tied up. It would've been nifty if Applejack then wanted to maybe roll the fattened opponent off the edge as her ko method.

That said, like with Twilight Sparkle, there's quite a bit of filler here. Considering you rewrote this all in one day however, from memory no less, this is to be expected. Namely the aerials all feel rather fillerish. Once again though, this feels vaguely suiting to Applejack's character. The unfortunate part however is that Applejack sort of falters when it comes to playstyle. All I really gather from the set is that she wants to forcefeed the opponent her apple treats to immobilize them. It's not really a fleshed out playstyle though which is unfortunate, especially since it's difficult to imagine what she'd want to do while using her.

So overall...I'm very glad you decided to participate in this project and I'm even more glad that you saw it through to the end despite the setbacks you encountered. Applejack may not be super indepth or anything but it'd be somewhat odd if she did have some super deep playstyle, maybe that's just me though...


Pinkie Pie

"I don't know what it is...but for some strange reason, I like you. I never did realize how grudge rhymes with fudge before you said it. And I like fudge!"

Pinkie Pie, you're so random. What a delightfully silly set this is as Rool may say before clearing his throat and promising never to say something like that again. Pinkie's a strange set that takes pride in using an insanely high amount of props and random attacks. It's suiting for the character, yes...but it sacrifices a lot of clarity in the process. Now it may be partly that you have no playstyle section...but I can't really make heads or tails of what the hell Pinkie actually wants to be doing. I get that she wants to tie balloons to her opponent to float them off the stage...but many of her other moves seem rather gimmicky. For example...you say in the jab that Pinkie wants her foe in the air because she's good there, but most of her traps and such are ground based and one of her key moves is a throw. It really makes me wonder what the hell Pinkie Pie actually -WANTS- the opponent to be doing as her Continuous Momentum thing would suggest using the ground...while other aspects say otherwise.

It's actually surprisingly suiting how Pinkie Pie comes across as an absolute cluster**** of random status effects. It gets to be a bit overwhelming admittedly when every single move is sort of a "But it also has this effect!" and strangely reminds me of some of Bkupa's earlier movesets with mass props and "but wait, there's more!" effects added on. Yes, this is suiting for Pinkie Pie and I'll readily admit that you got the feel of Pinkie's personality quite well in the set, intentional or not...it just comes across as far too cluttered for its own good.

Overall...it's a fun read with a lot of energy and spunk to it...but I really didn't get much from it. Maybe I just BLATANTLY missed some stuff but I really just didn't take much from Pinkie Pie other than a fun read. I think a playstyle section may've helped it out a fair bit but, as it stands, I'm just left confused by mass status effects and props. Which I guess is a success for a moveset for Pinkie Pie...


Rarity

"Lame. What's with all this girly make up and dresses and crap? This isn't some kinda fashion sh-oooo...that dress is kinda pretty...I wonder if it's my size...

Alrighty, so we come to the final pony of the batch (I commented Fluttershy below before writing this moveset so rawr), Rarity. Rarity's probably my least favorite pony of the mane six but that's neither here nor there and I probably just angered several of the onlooking bronies out there who found our little thread. Like Applejack, Rarity was also lost to the cruel fiend that is technology, prompting Khold to rewrite the entirety of Rarity and Applejack in a matter of hours. Unlike Applejack whose modest, quaint little moveset fit her quite well...it's somewhat disappointing to see Rarity lacking much playstyle. One would think, given her personality, that Rarity would have a grandiose, over the top, flashy playstyle to suit her. Instead...well, she doesn't seem to have much of one really.

From what I gather, Rarity wants to basically give her opponent a makeover by using her various types of moves to doll the opponent up before putting them under the spotlight. That said, there doesn't seem to be a whole lot of difference between what you use and how it effects the opponents. Sure lipstick may give them smoochin' lips and such...but what does it do? Under this current set-up, it doesn't do much more than applying foundation or mascara. Perhaps if different combinations of make up had different effects on the foe, it'd add a whole other layer of depth to Rarity's playstyle. It unfortunately leads to quite a bit of filler though, seeing as each move of each type more or less works towards the same goal...it just makes some stuff redundant I suppose.

With that said though, Rarity was typed up and finished in only a few hours so it's understandable that there'd be some filler in the moveset. Considering you had to pretty much write up the set from memory, it could've been much worse had you forgotten your concepts and had to make them up on the fly. I suppose it doesn't help much that Rarity (and Applejack for that matter) isn't exactly bursting with moveset potential...so you worked pretty much solely with what you were given.


Wailord

"O-..oh my...that's...the biggest one I've ever seen. M-...maybe if you put it in slow enough...?"

I'm not entirely sure why you're considering this a joke set. Like Rool stated before me, it's an adventurous set that plays off of the main strength of the character; being enormous. A few previous attempts at Wailord have been made...but nobody has actually really followed through with it except for Silver's Wailord stage. With that said, I'm glad you didn't do something like compromise his size or let him scoot around slowly. When you start out, you literally feel like a beached whale, trapped and defenseless. But Wailord isn't your typical whale, no no. He's a whale who fights back, flooding the stage so that he can navigate around with his whaley body. With that said, Wailord instantly strikes me as a character who can be made or broken depending on the stage. Temple for example, while it would take a while to flood, would be an absolute playground for Wailord to swim around in, attacking foes and even being able to run away unlike most stages! Then there's something like...Yoshi's Island. The stage goes to the bottom of the screen...so Wailord can't really travel there...and then there's the problem that the sides are really close. His Side Smash, from what I gather, seems crazy easy to accidentally suicide with.

It's a pretty basic playstyle here but you're making a moveset for a dopey looking whale. Beyond survival (he obviously wants to flood the stage so he can escape his tormentors and return to the sea), Wailord doesn't really have much to focus on sans throwing his hefty frame around, diving in and out of the water to filter his prey out. I won't pretend like it's the best set ever or anything as there's some silly stuff here (Tickle as the Final Smash man? Come now ;P) but it's certainly a good enough moveset that it shouldn't be called a jokeset, even if you do prefer Homura more.

Overall, it's a pleasant risky moveset from a newcomer (which is quite the rare sight surprisingly) that touches on something that few would actually want to; a stage sized character with little to no mobility. It's a fun read for sure and there's certainly stuff to enjoy here. Good work here ForwardArrow. And don't put yourself down over this one, it's got fans too ;P


Julius Rock

"Oh my. Taking out your big brown package in public like that? Lol, what are you 'dong'?"

Made a video for this one. Oooo...overall, Julius has a lot of humor to him which I can certainly appreciate even though I haven't actually seen the series. I'd recommend using spell check while writing the set or having someone proofread it to see if the can spot any typos and such. Overall though, Julius was a fun read that had a lot of good voice and energy to it. Feel free to take a look at the rest of the sets Gibby and you'll see some other things you may want to work at too.


Marina

I...don't get it. What's with all the shaking if you've got nothing to shake? You're flatter than an ironing board, sister..."

First of all, as I said before, this moveset reminds me of Shake~. Anyway, I'm trying to remember what your last moveset actually was...I believe it was Cody, yeah? Probably wrong and if so I apologize. Anyway, I've never played Mischief Makers but I can see from the set that Marina enjoys grabbing and throwing stuff an awful lot and makes use of this in her grab game and her Neutral Special. I do greatly enjoy the idea of catching projectiles and chucking them back at the opponent as it would make the match feel even more about cleverly using certain attacks when you realize your opponent is hurling your own move back in your face. It certainly keeps you from getting overwhelmed by projectiles.

Marina's focus on shield breaking is also pretty cool. I also enjoy the fact that you're not just shattering their shield but grabbing them in their stunned state to act as a ko method. Back in the day, I do remember when shield breaking was popular to base your set around...it's never been a maior thing in MYM but classic sets like Super Macho Man brought it to our attention first really. All this fancypants talk about shield stun and such are starting to make me feel bad about MYM considering I really -SHOULD- know but am too lazy to know/read up on. Either way, Marina has some pretty cool concepts and some interesting potential playing wise in the set. I dunno why but there's something fun about shield-breaking characters in MYM...perhaps it's because it's one of the few times that offensive gameplay is presented over defensive camping forever like most MYM sets.

Now, I remember Cody having the same problem as Smashbot's Haggar moveset (he was directly ported from MvC3 moveset wise) and ended up being rather redundant with a lot of inputs yoinked awkwardly into the chat by the way. Now I've never played Mischief Makers so I'm assuming you made up a majority of the moves from scratch which is always nice. Overall, Marina is a pretty fun set and just the kind of moveset I was waiting for. It's been far too long since we had a proper moveset from you Gcube and, in my opinion, I think you pulled it off quite well good job here! As a note, I'm heading off to bed now. Yay


:025:
 

mentholcase

Smash Cadet
Joined
Sep 2, 2011
Messages
56
Location
Northern California
Dixie

"More monkeys? Really? Go back to stuffing yourself with that big oaf's bananas...*giggles* Oh man that came out wrong..."
LOL

...I have no idea what an 11-stage charge attack is comparable to and I had never even heard of knockback units before your moveset (although it motivated me to look into it and actually, gasp, research). It's rather funny actually...despite the fact that we do so much movesetting, most of us here don't really know the ins and outs of Smash...so to a lot of us, this stuff is rather foreign...
Whoa, I would have never figured that. Honestly, I thought the exact opposite, that you'd all know more than anyone else. WHO ARE YOU PEOPLE?! :138:

Aside from that though, I agree with FF that the captions on the images are a good source of personal voice within a set that's largely facts and details.
Satisfying to know that they are serving good purpose

Moving along however...the bubble attacks also fall under the situation of being complex when they don't really have to be...although it may just fall under writing style again making the move seem more overly complex. I also find the fact that a juice box acts as a counter (let alone such a powerful counter) is rather weird. That said however...you're making a moveset for Dixie, she doesn't really do a whole terrible lot so with what you were given, you came up with some unique ideas. I'm a fan of grabs that can be used against other players as it's a fun way to add some easy free-for-all fun into the moveset.
Exploding juiceboxes ftw, haha... but yeah, I am fully appreciative of the recognition of my moveset not having "a whole terrible lot" to work with

All in all, you've certainly got some ideas and some personal voice in this set...it just seems to be limited by the character choice and that the moves portrayed don't particularly make much sense. The standards capture Dixie's speedy monkey movements quite well, as do the Specials (sans the Down Special) and you seem to have a grasp on playstyle which is always nice to see from newcomers. Long story short, with a different character and by toning down the technical jargon a bit, I could see you improving greatly. Just keep at it and don't be afraid to be a bit more adventurous with your standards
I thank you for the input !

Btw, when I chose Dixie, I knew I would have limited options, but I chose her specifically because...
Websearching and reading Dixie movesets ...uggh, how can I even begin to describe the feeling. I mean, no offense to any of those people that have made a set, it's great their showing her love, but come on. It seems like every Dixie moveset I've come across has her using her hair in damn near all of her attacks. Sure, her ponytail is part of her signature attack, but in Brawl, Diddy's signature cartwheel was used for no more than three attacks (some may count his Usmash), and here, I've managed to make a moveset for Dixie with only two hair spinning attacks. You wouldn't be far from the truth to say that I was compelled to create a SWF account and enter this contest to show the world (or at least the Smash world, ha) that it is possible to create a Dixie Kong moveset without having "spins/flips/shampoos & conditions her hair" in every other freeeeakin' attack :crazy:

Sorry for the rant :urg:
 

Katapultar

Smash Lord
Joined
Nov 24, 2008
Messages
1,284
Location
Australia
Kupa said in the OP that The Top Movesets are compromised of movesets that excel at their craft. But what exactly does that mean? Flow? Great ideas? True, these are what people look for in movesets, and there's absolutely nothing wrong with that in my books. But try looking into those word's meaning deeper; are flow and great ideas the ONLY good things about movesets? Some people structure their movesets around an uncommon goal; this can be to have the humorous or to inform. Because really, we're all writers at heart and we want people to think about things the same way we do. Then we can totally all be friends.


First off, this God-dude that majora_787 made for his fanfiction or so I am informed. Before you go down and skip this and the next advertisements and read one that's not mine, hear me out. But first, you totally have to click on the awesome picture to see the moveset I'm going to talk about...or you could just read what I'm going to say....

Emidius Amarandos is a fan-fiction character; in other words, no matter who you are you can't relate to him. But then you actually read his backstory and realize the concept of his character is pretty simple; he's a balancer dude. Ok.

And then you read further down and realize that he's...

OVERPOWERED​

This fact isn't foreshadowed in his backstory...it's something you discover FOR YURSELF; once you start scrolling down you begin to realize the overpowered concept is actually handled...uniquely. Aside from that strong jab that wasn't strong before Maj edited it in, this guy's just playing with you.

The reading of the set is quite like self-discovery; whether it was intentional or not, Maj did a marvelous job presenting his OC's character; it's clear enough to the point where I don't have to tell you about it but I'm mostly doing that because I don't know how to. The only problem is, like Maj said, that he's totally a troll, and because of that people will be irritated that he's canonically strong and will want to make kickass characters that can kick Emmy's...there's a REASON why 3v1 sets exist...

Whoever thought being overpowered could be GOOD?


I'm sure most of you ignored this set...that's pretty dam stupid of you. This set is a prime example of somebody coming into the thread and making a set for somebody they like...I like that. Julius Rock intrigues me for numerous reasons:

1. The moveset is for once NOT made for a freaking video game character. I totally approve.
2. The moveset is for a character who doesn't fight in his own world. Naturally, this translates to hilarity in an actual fighting game, which truly shines. There's a ton of props, but how the hell do you think he'd be able to fight without them?

I loled at the Specials, especially the Down Special. That's why you should vote this set, or at least read it and never ever have to be sick again. After all, laughter is totally the best medicine.

Also, he looks happy in the picture and is smiling, but is very angry. I wouldn't want to have him as my dad...
 

Junahu

Smash Ace
Joined
Nov 15, 2005
Messages
899
Location
Shropshire Slasher

Top10 Cosplay Movesets: Time to vote


MYMX heralded the start of a new kind of extra, one that involves making a moveset with just 4 inputs. And I think we should totally vote on which of those "cosplay" sets we like the most
You can find a list of MYMX's Cosplays [HERE], so just hop on over and look at em.


To vote, just PM me (Junahu) a list of 7 Cosplay movesets you loved this contest, before the 25th of September. There are no rules regarding who can vote, so go nuts everyone!

MYmini Top30: Time to vote


Like in MYM9, we've received so many MYminis, that it would be a true shame if we didn't have a vote on which were the very best.
You can find a list of MYMX's Mini's [HERE], so go ahead and browse and peruse. And then vote on your favourites.


Don't worry, it's nothing complicated or formal. Like with the Top10 Cosplays, just PM me (Junahu) a list of 20 MYminis you loved this contest, before the 25th of September. That's it, just vote. Though I would suggest that you not vote for any Cosplay minis (Week#9 & Week#18) since you can plainly see we have a Top10 list for those.

Anyone can vote on the minis, and there are no real rules on voting etiquette, so let's just have fun with this, ok? Please?
 
Status
Not open for further replies.
Top Bottom