• Welcome to Smashboards, the world's largest Super Smash Brothers community! Over 250,000 Smash Bros. fans from around the world have come to discuss these great games in over 19 million posts!

    You are currently viewing our boards as a visitor. Click here to sign up right now and start on your path in the Smash community!

Make Your Move 18 - Top Fifty Is Posted!

MasterWarlord

Smash Champion
Joined
Aug 24, 2008
Messages
2,902
Location
Not wasting countless hours on a 10 man community
SPIKED DOG COLLARS


The spiked dog collars are a powerful weapon befitting of a Fist of the North Star lord. Largely all of the evil lords obsess over something that they value over human life, and Galf is the original one whom all the later filler lords like Morgan are based off of. While he uses his dog collars against Kenshiro as weapons, he also uses them as tools to help his dogs and to humiliate his villagers to put them in their place, lower than said dogs. As cruel and bizarre as this is, Galf manages to have some actual real world basis, being inspired by Tokugawa Tsunayoshi, the dog shogun, whom flooded the streets with sick dogs and executed those who harmed them.

Galf can use the dog collars as a tool up close to control melee space and keep the foe at a slight distance where he likes them, and potentially punish foes who hit them by returning some of their damage through the spikes. Considering how many he has on hand for his beloved dogs, he has plenty he can throw at his opponents as well while still keeping some on hand. While the spiked sides of the collar are obviously deadly, if he can play ring toss with the foe and get their head caught in the middle it can potentially be even more oppressive. The dogmaster can use his chains to tether to dog collars and swing them around, putting the foe on a leash to put them in their place. He can also chain up his slaves to use as battering weapons or keep his far more valuable dogs leashed in order to keep them safe from any foe who would do the unthinkable and try to harm them. The collars can also be thrown on their sides to roll along the ground as their spikes embed into the stage as they roll, enabling them to wrap around the stage and other objects.
 

Crystanium

Smash Hero
Joined
Apr 28, 2008
Messages
5,921
Location
California
I was able to figure out the actual damage output from the Scatter Shot and Phazon Tendrils as seen from the Dark Samus Assist Trophy. Total damage from Scatter Shot is 21%, which is interesting, since I made a fully charged Scatter Shot produce 20%. However, I decided I'd just remove the charged version, since Dark Samus never charges her Scatter Shot in the actual games. Also, down tilt is renamed Phazon Tendrils, has no reflective property, but is capable of KO'ing as that can be seen from the Assist Trophy. The attack deals 12% damage. Dark Echoes will only produce a quarter of the actual damage. I removed Screw Ball for the down throw and renamed it Super-charged Slam. I finally added a back air for Dark Samus and decided to change the up tilt to Butterfly Kick. So that should be it for Dark Samus. I apologize for taking so long. Life kind of does that.
 

Slavic

Ask not the sparrow how the eagle soars
Joined
Jun 5, 2013
Messages
757
Location
taco bell, probablyn't
SLAVIC’S MANY SETS LEFT BEHIND COMMENTARY (OOPS)

Wowzers, this onslaught of newcomers / kind of newcomers is great! The kind of rejuvenating energy this contest needed! So, let’s get through it then!

Paper Samus
der Rabe
One of the cooler parts of this set is how you make it feel like Samus but darker, a semi-clone that makes sense in context and yet plays entirely differently. You have a good grasp on how the mechanics in Smash Bros. works, and so you can create this unique character using the subtleties to differentiate Dark Samus from original Samus, with damage, knockback, and properties that don’t make DS *look* too different from Samus but instead play completely differently. These kinds of nuances are good to learn as it can help make a character much more balanced and interesting, as some may have the most elaborate visuals and mechanics but ultimately no concept of balance, and would be bad. As for what to work on to help improve your future sets, the most glaringly obvious thing would be to finish the movesets, as Dark Samus is missing her(?) Back Air and only has a name for her Down Throw. This are fairly important to put in, since they are key moves unlike a Ledge Attack (100%+) or a Get Up Attack. A second thing is that some of the writing can feel cluttered at times, and some of the information you provide isn’t relevant to the set, or seems tangential to the topic. For instance, “It's obviously nothing like Ness' PK Thunder, which can be maneuvered to consistently juggle,” feels out of place and unnecessary, more like something you would say if you were talking about how Ness plays rather than Dark Samus, and can take you out of the immersion of reading. You do this a couple other times through the set, explaining what an in Smash mechanic already does, and while not redundant this information can be distracting. Another point in writing in general would be you should only reference material (i.e. moves) after they’ve already been described. Getting ahead of yourself doesn’t change the moveset itself, of course, but it makes readers go back because they will think they missed an aspect of a move. It’s best to talk about a move in its own section, or one that comes afterwards, but never before. Finally, some of the moves should be better fleshed out. Something like the Dark Echoes is weird without better visualization, especially when you compare it to Megaman’s Leaf Shield, and I just picture ragdolling Dark Samuses rotating around the player’s. While an amusing thought, I don’t think it’s what you had in mind, and so explaining that better would help a lot for the reader. Also, during her Dash Attack, you talk about a blue energy field but never explain what it does or why it’s useful. The details make the set. It’s not a terrible set, it’s maybe just under par, but for a newcomer set this is fairly solid and gives you a good starting building block for your MYM career!

Toph
ManlySpirit

It’s nice to see people coming in with a multitude of projects to share! It instantly makes you feel like more of a permanent member of the community when that happens, and so the effort is dually appreciated. Isaac is, fittingly from what I know about Golden Sun, an elemental terra-forming stage controller, and that kind of thinking will help you fit in to MYM in the long run. The biggest elephant in the room, and I learned this from a wise old meme, is your use of unrelated pictures within the set. There are more clips from Avatar than anything else, and while I know there are limited clips for a game like Golden Sun it’s incredibly derailing from the set when Toph is in 70% of the pictures. No need for a fat shirtless guy eating grapes, you know? As for the set itself, the mechanics of stage control and zoning are well thought out, and the moves are mostly well developed in the Specials, especially for an early set like this one. As with my previous comment, it’s important to remember all of the moves, and this one is missing the Up Air entirely. Many of the other moves are underdeveloped past the Specials as well, and it’s important to not pile all of a set’s interesting features in just the Specials. Also, damage is a big thing to include on all moves, especially if they aren’t contributing to a bigger picture, otherwise it’s hard to justify including the move at all. One of the big good things about this set is the diversity in the Specials, as there are multiple routes you can take with the moves to create a dynamic battlefield. It’s just a shame that that effort wasn’t applied to all the moves in the set. Once again, this is a great starting point, and listening to some of the criticism you get will help to improve your sets over time.

Tactical Drone Strike
Skapokon Roll

This is actually the first of these movesets commented to be fully complete, so there’s a positive already! Chibi-Robo is about what one would expect for a newcomer set, and there’s absolutely nothing wrong with that. Chibi-Robo is especially visually appealing, with consistent images breaking the text up from being a big block of mono-color text, and the images are well representative of what the moves are doing. The biggest direction to go from here is to expand each move to add length and depth to the moves, and there are plenty of examples around to see how this is done (shameless plug here). Just work on developing moves more, making more elaborate playstyles, and keep putting out sets as long as it’s fun! There’s not the most content in a moveset to comment on, unfortunately, so this comment will be a bit shorter than the others.

Warlord Bowser
Brostulip

We don’t see character revamps outside of Muno around here very often, and when we do they are typically a hard revamp. It’s interesting to take this as a soft ‘what if’ revamp of Bowser, and it’s actually fairly enjoyable. For a first set, this does a really good job at fleshing out all of the moves, not just the Specials, and I appreciate the effort put into the Koopa King. The use of unique fire mechanics, though not the most expanded upon, as well as the bouncing of the hammers off of Bowser’s shells, shows good thought into multiple mechanics, usually never seen in newcomer sets. It’s also interesting from a characterization perspective that Bowser is always targeting Mario with his attacks. There’s really not much to complain about it! Hope to see more!

Find the Cryo Pods!
Altais

I’m glad to see Xenoblade Chronicles X getting some love, and I was actually debating doing an Elma set to represent the game at one point. It’s neat how we’ve gone from zero Xenoblade characters to five in just one contest. Now to actually get into the moveset (I am only reading the redone version, hence why the comment is all the way down here). Putting the Down Special first isn’t common, but is absolutely the correct choice when you have a main move like that to explain, and that’s something important to keep in mind when set-writing in general. Supercharge / Overdrive is a common concept for Xenoblade sets, since buffing and auras are such a critical element to those games, but I feel there could have been a better way to go about it. In its current state, it’s very broken, making her excessively strong for a whole twenty seconds. One option would be to bring the duration down lower, maybe even to five seconds (I think the duration should be lowered regardless), and I would make Overdrive change how the Specials work, functioning kind of like Sharla’s Drive Boost, so that there’s a more tactical element behind Overdrive. I might even remove Supercharge in its entirety, as it’s kind of an uninspired effect. Elma’s other Specials feel very natural for Elma, though I would like to see more unique effects on them that contribute to a larger game plan. It could be possible to run with a Special spread that focuses on multiple hits like with Executioner so that she can get her Overdrive charged as fast as possible, and again, adding in secondary effects for when Overdrive is active would help flesh out the set a bit. The Standards have a great balance between blade and bullet attacks which lend themselves well to showing off Elma’s abilities. The use of GIFs through the set are very helpful and well done, as well as making the set visually diverse. This comment might sound really critique heavy but I actually really enjoy the set, and because I enjoyed both the set and the character I want to provide as much criticism as I can so I can see this set to its maximum potential. My biggest suggestion would be to change Overdrive from just a static boost into a gameplay changer. I can’t wait to see more from you in the future!
 

Nu~

Smash Dreamer
Joined
Jun 22, 2012
Messages
4,332
Location
U.S., Maryland (Eastern Time, UTC - 5hrs)
NNID
EquinoXYZ
Hello fellow MYM moveset designers! I come to you with crash bandicoot hype and a wonky moveset filled with shenanigans. Please critique! I want to create the best moveset I can to personify crash in smash.

Without further ado...


image.jpeg
Crash causes a commotion!


Character Physics
High airspeed (8/10)
Good walk speed (7/10)
High run speed (8/10)
Kinda floaty (6/10 DK fall speed)
Good jump height (7/10)
Weight: Slightly lighter than average (6/10)
Height: Taller than Mario, shorter than fox.
Can wall jump and crawl.


Moveset Theme: Insanity!!

I wanted to create a moveset that fully embodies Crash's insane character and the nature of his games overall. Each move is wacky, unique, and scary to challenge. His moveset screams to the opponent that he's a different type of protagonist.
He calls forth his family to help him out in some attacks, and even goes as far as using enemies from the original crash games as weapons!

Crash's highly damaging moves, high speed, wide variety of traps, excellent CQC, and smooth combo game make it so that the opponent wants to stay the hell away from crash at all costs!!
Just like in the crash games :laugh:
However, even in mid range Crash has a few ranged options like his wumpa bazooka and crates to force approaches.

All in all, when Crash draws near, Look Out!!


Specials

B: Spin!
Pressing the move makes Crash perform a normal spin with minimal endlag. (Deals 10% damage)
Does decent knockback, reflects projectiles, and can be used once in the air. You can use it while walking or running and it doesn't slow you down. Excellent approach option and "get off me" tool. Won't kill until about 160% center stage.

However, you can mash B to make it the Death Tornado; a powerful attack that lasts longer, deals more damage (14%) and knockback, has super armor, and has a powerful windbox (50% chance of having a suction windbox, 50% chance of having a random windbox). Kills at about 120% center stage.

What's the downside may you ask? Well, the death tornado has a considerable amount of endlag on the ground and makes you go into a prone state in the air. Spamming it mindlessly is sure to get you punished hard. Use it wisely.


Side B: Mummy Death Hug
Crash hides behind a sarcophagus and a mummy pops out! The mummy dashes forwards and hugs whoever is in its way. (Deals 8% and travels 1/4th of FD)
The hug ignores shields but loses to attacks (the mummy will also absorb non piercing attacks for crash when it's out). Crash can run up and hit the opponent when they are being hugged but the opponent can try to mash out before crash gets to them. The hug is harder to mash out of the higher the opponent's %.


Up B: Bonus Platform
Crash flies upwards on a Bonus Platform from the original Crash games. You can direct the platform wherever you want it to go. You can still perform all of your attacks while riding the platform (even shielding!) but you can't walk or jump off until the platform disappears. It travels pretty far, about as far as snake's Up B did.
To keep it from being absolutely ridiculous, the platform can be destroyed when hit with a strong attack (15% health) Stores your second jump like mega man's rush coil.


Down B: Crate Catastrophe
Crash throws a normal crate to the distance of about 1/3rd of FD. You can hold B to charge this move. Medium charge (hold for 3/4ths a second) makes crash throw a TNT Crate and Full charge (hold for 1 second and a half) makes Crash throw a Nitro Crate. All Crates disappear after 7 seconds and you can only have 2 crates out at a time.

Regular crates
-deal 7% and break when they hit the opponent.
-just obstruct space and cause no harm when touched
- can be destroyed with any attack.
-minimal knockback

TNT Crates
-deal 10% when thrown at an opponent
-deal 10% when destroyed by you or opp (any attack destroys them)
-start a 3 second destruction countdown when touched.
-medium knockback

Nitro Crates
-deal 15% when thrown
-deal 15% when they make any sort of contact with you or opp
-high knockback


Ground Normals

Jab: Spin punch (3% turns opponents around), Spinning Roundhouse Kick (2%) then a triple spinning flip kick (Launches opponents upwards and deals three hits: 1%, 1%, 2%). Comes out fast but won't ever kill.

Dash attack: Crash rides his Nitro Kart into the opponent (10%). Good burst attack that won't kill but deals good diagonal knockback (about 50 degrees)

Utilt: Swings two snakes above his head like nunchucks. Hitbox lasts for a while (15 frames), multi hit (2%, 1%, 1,%, 5%). Won't kill but is a great move for juggling.

Dtilt: Signature slide attack from nearly every crash game. Goes about as far as cloud's dtilt and ducks under projectiles. Knocks opponents into the air at a 90 degree angle for follow up attacks and kill conversions. Has fast startup and low endlag. Moves quickly across the ground. Deals 8% but doesn't deal much knockback (a low BKB/medium KGB kind of move). Won't kill until about 250%.

Ftilt: Crash shoots a wumpa fruit from his bazooka. Can be shot straight or angled upwards/downwards. Deals 7% up close and 5% at max distance (travels the distance of villager's slingshot). Low BKB and medium KBG. Won't be killing medium weights until 130% up close and 160% max distance at the ledge.


image.gif

Usmash: Crash falls to the ground and then his angel flies upwards a short distance while flapping its wings twice. First hit weak flap (3% uncharged, 6% fully charged) carries opponents into the second strong flap (12% uncharged, 15% fully charged). High vertical knockback and decent endlag. Low BKB and high KBG. Kills medium weights in the low 120s.


Fsmash:
Crash swings a large sword in front of him (like the knight lab assistant enemies in crash bandicoot warped) Deals 16% uncharged and 23% fully charged with very high horizontal knockback (high BKB and KBG) Has pretty high endlag. Starts killing medium weights at 90% center stage.


Dsmash:
Crash spins on his head with his legs stretched outwards like a professional break dancer. Deals 12% (16% fully charged) and deals slightly below average knockback horizontally. (Won't kill until 130s at the ledge) Low endlag


Aerials

Nair: Crash spins with all four limbs stretched outwards while a metal sphere cage surrounds him (https://www.youtube.com/shared?ci=UfGPegBPBd8). The cage itself is a disjoint and a hitbox while crash is just a hitbox with no disjoint whatsoever. Deals horizontal knockback with moderate knockback on the first few games of the hitbox, but the remaining frames deal knockback comparable to the last few frames of a sex kick. 8% damage.

However, this move has a special mechanic.

It will autocancel in a short hop, but if used while falling, the cage will begin to roll for a distance that depends on the trajectory and speed at which crash was falling. If crash fast falls straight down, he will roll only about 1/8th of FD and will suffer low end lag. If Crash fastfalls down while moving forwards, (like if he decides to jump forwards at you) he will roll about 1/4th of FD and suffer high end lag (like 22 frames). The roll hitbox's damage output depends on the momentum that crash is moving at. Falling straight down deals 4% and low horizontal knockback no matter how fast you fall, while crash falling diagonally downwards at his maximum air acceleration speed and maximum fast fall speed will make the sphere deal 12% damage and high horizontal knockback (with high cross up ability).


Fair: Crash does a diagonal flying kick. Acts as a sex kick so it lasts for about 25 frames. Deals 9%, sends opponents diagonally upwards, and causes crash to jump upwards if he lands the kick on the opponent's shield or hurtbox. Sends the opponent at a diagonal angle upwards and starts combos. Autocancels in a short hop and has low landing lag.

Bair: Shoutout to my man @TCT~Phantom for this idea. Crash activates his Jet pack from Crash bandicoot 2 which accelerates him forward for a small distance (about 1/6th of FD) The exhaust flames from the jet pack harm the opponent and knock then backwards horizontally. (deals 12%) Kill move.
Doesn't autocancel in a short hop (autocancels from a full hop however) and has a medium amount of landing lag.

Uair: Crash does a flip on his surfboard and knocks opponents upwards at a 90% angle. Does 8%, starts combos, and can kill at later percentages (low BKB, high KBG). Autocancels in a short hop.

Dair: Crash uses his body slam attack to crush enemies. It is a stall-then-fall move that deals 14%, plummets pretty fast (sonic dair fast) spikes on the later frames, and has high vertical knockback on the beginning frames or when landing on an enemy on the ground. High end lag on the ground (30 frames) but you can recover from it if you use it offstage. It lasts about 40 frames until you can jump out of it.


Throws

Grab: Reaches out with two hands and picks the opponent up by their shoulders.

Pummel: Smashes the opponent's head with his fists (deals 2% per hit and is relatively quick)

Fthrow: Crash donkey kicks the opponent forward (8%).
Low BKB and low endlag so it can start some early percent combos. Medium KBG

Bthrow: Crash throws the opponent backwards to Coco who shoots them with a laser. (7%)
Non combo throw. 70 degree knockback angle.

Uthrow: Crunch appears and punches them upwards (10%). Kill throw at high percentages (think Marth's up throw)

Dthrow: Crash slams the opponent on the ground 3 times (2%, 2%, 6%). On the third slam, the opponent isn't sent anywhere, but instead is left buried in the ground. It's harder to escape the burial the higher percentage the opponent is.


Special shield characteristics


When you press the shield button, Crash dons his Aku Aku mask in it's golden form while putting his hands up to guard himself. This creates a strange, shiny, golden barrier around Crash that acts as his sheild but has a few wonky and unique characteristics. The barrier has 1.3% the average sheild health of a normal sheild. Also, crash can even activate his barrier while he's still walking forwards if you hold shield while walking (if you press sheild, you'll roll instead). While this looks incredibly broken at first, there are a few equally crazy downsides. One is the fact that crash explodes on the spot if you manage to break his sheild (like jigglypuff but with an upside to balance it). Also, crash's shield takes twice the damage of moves that hit it when he's walking with it up.


So no, crash won't be the absolute anethema of projectile zoners. But he will have a huge upper hand against them which ties into the fact that Crash wants to force his way in so he can cause sheer chaos. Also, I wanted to incorporate the golden Aku Aku mask without making it his final smash (making for yet another wario-man clone of sorts)

Which brings me to his...


FINAL SMASH: Timeline Turmoil
Crash summons a Crystal, Ankh/time relic, and Gem and has them spin around his head for a second as the camera zooms in on him giggling maniacally in a mini cinematic. After the cinematic has ended, everyone except crash undergoes strange effects like being slowed down (kinda like you were stuck in witch time) sped up by x2 speed, controls are reversed, some characters may even explode randomly, and sometimes characters may be reset to where they were and what move they were using a few seconds ago. Crash is invincible during the entire event. The madness ends after 9 seconds and the time returns to normal.


Taunts and idle animation

Up taunt: Crash sits on a dazed N.Cortex while playing his didgeridoo.

Down taunt: Crash Revs up his motorcycle while wearing his signature biker gear with Aku Aku by his side.


Side taunt: Crash poses with his family


Idle animation: Like sonic's wagging finger or pacman's wink, Crash also has a unique idle animation. Crash will look at the screen like this:
image.jpeg

and move his eyebrows up and down mischievously....ready to f*** s*** up.


Entrance

Crash warps in like he does in crash bandicoot warped.​


Victory Poses!

Victory pose 1: Pulls out a Crystal, Ankh relic, and Gem, then proceeds to gawk at them in a giddy fashion

Victory Pose 2: Crash does his signature victory dance from crash 1-3

Victory Pose 3: Crash celebrates with his family. Crash sits on Crunch's shoulder while Crunch, Coco, and Aku Aku cheer.


Special death/pain animations
When Crash is sent flying off screen, he gets his own special death animation like mega man. His shoes will fly upwards if sent to the bottom blast zone, sideways if sent to the side blast zones, and downwards if sent to the sky blast zone. For Star KOs, Crash flies into the horizon as an angel. For all deaths, Crash says his signature "Woah!". When Crash is hit with a low knockback move at low percentages, X's replace his eyes as he flinches backwards and stiffs up.
 
Last edited:

Davidk92

Smash Cadet
Joined
Aug 28, 2016
Messages
49
After doing some more research, I've redone Laharl's moveset into something that's (hopefully) more in line with what is expected.

I hope it was worth it.

Overlord Laharl Awakens!


"To show my appreciation, I'll only beat them half to death."

Debut: Disgaea: Hour of Darkness (PS2, 2003)
Emblem: A Prinny
Homestage: Overlord's Castle (The Netherworld)
Unlock Message: "He has appeared to reclaim his throne! Laharl the demon prince has joined the battle!"
Boxing Ring Title: Ruler of Demons

At long last he has shown himself, dood! Laharl, Prince of the Netherworld has awakened from his slumber!

Laharl is the main character from Nippon Ichi's hit title, Disgaea: Hour of Darkness for the PS2. Released in 2003, Disgaea chronicles Laharl's attempts to reclaim his title as Overlord alongside his top vassel Etna and the angel Flonne. Though Laharl's story was concluded in that game, he continues to appear as a bonus character in many of Nippon Ichi's later releases, including Disgaea's sequels before receiving a sequel of his own in Disgaea D2: A Brighter Darkness ten years later.

In this game, Laharl is based primarily on his original appearance in the first Disgaea, however that's not to say he has ignored his many skills from future games! With a sword in one hand and flames in the other, this young demon is ready to prove why he and he alone is in charge!

Stats (out of 10) & Playstyle
Offense: ********
Defense: ***
Speed: ******
Recovery: *****
Weight: **


As in his games, Laharl is a very straight forward fighter with few bells and whistles. Discounting his antennae, Laharl stands at roughly the same height as Little Mac. His small size grants him impressive speed and agility, and his demonic powers make him a deadly force to be reckoned with. However, despite his impressive jumps and recovery options, his light build also makes him easy to knock off the stage while his poor defense means he can't afford to tank many attacks. As such, Laharl is the typical example of a Glass Cannon character, one who can dish out lots of damage so long as he is careful about taking as little as possible. As such, aggression is the key to playing as Laharl, giving our opponent little chance to recover as you overwhelming them with hard-hitting moves.

Flavour
Entrance: Lightning strikes the ground and causes a blue rune to form, a pillar of light firing up from it and causing a floating Laharl to appear. The light and rune vanish as Laharl drops to the ground, folding his arms.
Idle Stance: Laharl stands straight and looks ahead with a cocky smirk, arms folded over his chest.
Idle Animations:
-Laharl unfolds his arms, stretching them out and straightening his back. His scarf straightens as well.
-Laharl adjusts his scarf and pats his shorts down before refolding his arms.
-Laharl yawns, stretching his arms above his head and cricking his neck.

Walk Animation: Laharl walks forward with a haughty air, arms still forward.
Run Animation: Laharl unfolds his arms and jogs forward.
Jump/Double Jump Animation: Laharl leaps into the air, arms still folded, before he unfolds them and turns his scarf into wings to leap again.
Edge Hang Animation: Laharl clings to the ledge with one hand, gritting his teeth in frustration.
Guard Animation: Laharl raises one hand idly, as if unconcerned about the opponent's attack.
Sidestep Animation: Laharl leans to the side, unfolding his arms and looking surprised.
Backwards/Forwards Roll Animation: Laharl drops down and rolls forward or backwards.
Air Dodge Animation: Laharl does a small spin in the air, his scarf flowing behind him.

Normal Attacks
AAA: Laharl punches straight in front of him, then summons his sword with his free hand and performs a diagonal slash, followed by a horizontal slash. The initial punch comes out fairly fast, about as fast as Marth's basic A. His sword attacks are substantially slower, more akin to DK's AA, however the hitstun from the initial punch will keep the opponent in place should it land. As such, the initial two strikes do no hitback to keep the opponent still while the final slash does deceptively high knockback for such minor damage. This combo does 1%-2%-4% damage.
Dash A: Laharl summons his sword as he sprints and thrusts it straight forward with both hands, skewering the opponent. Does 13% damage sends the opponent flying back roughly two Bowser-widths.
A>: Laharl pulls his leg back and swings it forward in a soccer kick, keeping his arms folded and dealing minor knockback with 10% damage.
A^: Laharl backflips, kicking straight upwards, keeping his arms folded. His kick is extremely fast, making it a useful anti-air move, though it does minor knockback and 8% damage
Av: Laharl stomps his foot on the ground, sending a small cloud of dust up, keeping his arms folded. Despite doing a minor 5% damage, this cloud of dust does a Ganondorf-width of knockback and hangs in the air for 1.5 seconds, making it useful to gain some breathing room and regain momentum against an aggressive opponent.
Edge A: Laharl quickly pulls himself up and thrusts his head forward, a very quick attack with a simple 7% damage and average knockback.
100% Edge A: Laharl leaps up onto the ledge, summoning his sword and bringing it down in a vertical slash, doing 13% damage and knocking the opponent back a considerable distance.

Aerial Attacks
Air A: Laharl release a small burst of flame from his hands, doing a hefty 15% fire damage to the opponent, the flame hanging for 0.3 seconds.
Air A>: Laharl kicks forward with both feet, striking the opponent for 12% damage with a decent amount of knockback behind it.
Air A<: Laharl swings his arm, making his scarf whip behind him. The scarf only does a minor 5% to anyone it hits but has an impressive reach of 1/4 Final Destination, and Laharl's arm does a very impressive 16% AND can act as a Meteor Smash.
Air A^: Laharl swings his sword above his head in a wide arc, enough to strike opponents both in front and behind him for 7% damage each, with the centre directly above his head having a sweetspot that does 14%.
Air Av: Laharl stomps downwards with his left foot, increasing his drop speed as well as letting him halt the recovery of anyone he hits with a 10% damage.

Smash Attacks
Smash>: Laharl summons his sword above his head and brings it down in a powerful vertical cleave, slicing through the air and delivering heavy knockback with 25%-30% damage.
Smash^: Laharl gathers flames into his fist and suddenly punches upward, letting out an explosion of fire with a hitbox similar to the Falcon Punch above his head. Aside from the obvious fire damage, this attack does 20-28% damage depending on charge and launches the opponent into the air.
Smashv: Laharl stamps his foot on the ground, growling as he sends a shockwave up on either side of him. The shockwave does varying damage depending on where the opponents are in relation to Laharl; those who are on the fringe of the shockwave get hit by a fairly minor 5% damage, those within that range get hit with 15% damage, and whoever is unlucky enough to be close enough to get hit by Laharl's foot take a solid 30% damage. Unlike other Smashes, charging doesn't change the damage range, but instead makes the shockwave bigger and therefore make it easier to hit with the higher attacks; without charging, the shockwave is one Laharl-width on either side, at full-charge it is three.

Grabs
Grab: Laharl lunges forward, grabbing the opponent with both hands. His grab range extends to a full Laharl-width ahead.
Grab A: Laharl stamps down hard on the opponent's foot with each press of the button, doing 4% for each stomp.
Grab>: Laharl lets go, summons his sword and thrusts it at the opponent, sending them flying back with 12% damage.
Grab<: Laharl swings the opponent over his head and slams them into the ground behind him hard enough they bounce. Upon collision with the ground they are hit with 10% damage and enter helpless mode as they fall, but this attack has minor horizontal distance and more vertical distance as a tradeoff.
Grab^: Laharl throws the opponent up, punching them into the air with a flaming fist, doing 13% fire damage and launching them into the air.
Grabv: Laharl throws the opponent down onto the ground for 7% damage, before he kicks them away for a further 8%.

Special Attacks
B: Blazing Knuckle/Overlord's Wrath.
Upon tapping B, Laharl clenches his fist and gathers flames into it, before performing an extremely quick uppercut for 5% fire damage. When struck, the opponent is launched a single jump into the air, regardless of damage; pressing the B button against causes Laharl to appear above them and drop down with a powerful punch to slam them down for a further 7% damage, letting out a short-shockwave of flame when they land to give 2% fire damage to anyone too close but no knockback. Holding the B button down for three seconds, however, causes Laharl to gather more flames into his fist. Once that three second mark is hit, he unleashes the flames into several fireballs in the foreground and background (especially impressive on the 3DS version) before commanding them all to converge on the spot one Bowser-width in front of him with a Bob-omb-esque explosion, dealing a powerful 25% damage. Despite it's power and knockback, Overlord's Wrath is a very obviously telegraphed attack, whereas Blazing Knuckle has less damage but more stopping power, making their best use dependant on the situation. Overlord's Wrath is used imediately upon the charge being complete, and cannot be held like other chargable moves.

Custom 1: Inferno Knuckle.
Laharl loses the ability to use Overlord's Wrath. Instead, Blazing Knuckle becomes more of a Falcon Punch style move; Laharl MUST charge the move the full three seconds in order to do any attack at all, but now his initial uppercut does 10% damage, his second punch does 12%, and the shockwave is twice as large as it was while still doing 2% damage. All knockback scales appropriately.

Custom 2: Blazing Knuckle/Blazing Rush.
Blazing Knuckle is unchanged. However, the charge now requires four seconds rather than three, and upon the charge being complete, Laharl seemingly teleports 1.5 Bowser-widths ahead of where he was. The gap he travelled is immediately lit aflame, lasting for 5-seconds and down 1% fire damage per second the opponent is trapped in them. When Laharl reappears, there is a split-second sweet spot where anyone caught in the same space as him is struck with severe damage and knockback, akin to a Home-Run Bat or Jigglypuff's Rest. There can only ever be one stream of flames on-screen at any one time; using this move again before the 5-second limit is up immediately extinguishes the original.

B>: Prinny Raid.
Borrowing the Prinnies from Etna, Laharl points straight ahead and announces "Go get 'em, Prinny!". While this does no damage on its own and leaves Laharl open for a second to any attack, this causes a Prinny to leap in from off-screen behind Laharl. The Prinny doesn't hesitate and immediately charges forward at a speed matching Fox's, swinging it's dual knives haphazardly. Anyone caught by the charging Prinny takes 1% damage for every frame they are caught in their blades, doing anywhere from 1% to 50% depending on how the opponent is caught. However, the Prinny's blades do zero knockback and do not trap the opponent like many multi-hitting attacks. Laharl cannot summon more than one Prinny at a time; performing this attack while another Prinny is out will cause Laharl to do the animation again, but he will be left a sitting duck. If struck by any attack, whether from Laharl or an opponent, or upon collision with an obstacle, the Prinny will immediately explode and do damage equal to one third of a Bob-omb. There is a 5% chance that at any point in this attack, the Prinny will trip and fall flat on its face, causing it to explode on it's own. These explosions harm Laharl just as easily as they do the opponents.

Custom 1: Hero Prinny.
Rather than summoning an average Prinny, this move summons the Hero Prinny, distinguishable by his bright red scarf. This Prinny does not explode when struck and does not trip, however rather than performing the rapid slashes, this Prinny only performs a single slash for 10% damage before he runs past the opponent, jumping over obstacles until reaches the end of the stage. If he gets trapped, Hero Prinny will make three attempts to correct his path before he simply vanishes.

Custom 2: Slacker Prinny.
Unlike Prinny Raid or Hero Prinny, Slacker Prinny has no interest in working for Laharl. As such, once he is summoned, rather than running forward with his blades, Slacker Prinny simply takes a seat at Laharl's feet. Upon five seconds of being summoned, or upon being struck by an attack, Slacker Prinny explodes with the power and force of half a Bob-omb. Despite his refusal to work, Laharl can force him to work by picking him up and throwing him like a regular item, which causes him to explode upon impact with anything.


B^: Meteor Impact.
Laharl suddenly leaps three Ganondorf-heights straight upwards into the air, leaving a red trail behind him. At the apex of his jump, a large meteor about the size of a regular crate comes flying in from off-screen under Laharl's feet, letting him ride it down. The meteor travels slightly faster than Sonic's running speed, and the angle of flight is dependant on where Laharl is at the apex of his jump. By pressing a button, Laharl can leap from the meteor at any time, though this does him to enter helpless mode. Due to the variable trajectory of the meteor, this is required should the meteor miss the stage; careless use of this special can easily result in a self-destruct. Anyone who collides with the meteor mid-flight takes 3% fire damage, and upon collision with the stage the meteor explodes in a burst of flame equal in size and power to the Smart Bombs initial explosion.

Custom 1: Meteor Flight.
Laharl does not summon a meteor for this move. As a result, Laharl cannot ride the meteor to the stage; instead, he wreathes himself in flames to burn anyone he rams into on the way up for 7% fire damage. To make up for the lsot distance, Laharl can tilt his angle while performing the move slightly rather than flying straight up.

Custom 2: Comet Impact.
Instead of summoning a fiery meteor, Laharl summons an icy comet. The comet moves at Mario's running speed rather than the rapid meteor, but instead anyone hit by the comet takes 4% ice damage and has a 50% chance of freezing on contact.

Bv: Overlord Counter.
Laharl smirks as he unfolds his arms, calmly raising his arm as if to signal "stop" for a second before lowering it. The entire animation takes roughly one and a half seconds. If Laharl is struck at any time during this animation, he will vanish and reappear behind the opponent, as several swords from the Disgaea series appears and suddenly skewers the unlucky opponent from all sides for 25% damage. This attack does no knockback, as the opponent simply collapses to the ground upon being struck.

Custom 1: Prince Counter.
The window for performing the counter is greater than Overlord Counter, being two seconds, however rather than skewering them with a dozen blades, Laharl summons his own personal blade and slashes the opponent off the back for 15% damage, but sends them flying the appropriate distance.

Custom 2: Prinny Counter.
The window is shorter, now being half a second. However, if it succeeds then Laharl forgoes the use of swords completely, and simply drops a Prinny at the opponent's feet. The opponent has half a second to move before the Prinny explodes, with the same explosive power and force of Slacker Prinny.

Final Smash: Overlord Dimension.
Laharl chuckles evilly as the Final Smash begins, swinging his arm up to summon two large black monoliths in front of himself; one directly in front, and one half a Final Destination width away. Anyone struck by these monoliths or caught between them cannot escape until the Final Smash concludes. Instantly, hundreds of swords fire up from the ground rapidly, shooting into the air off-screen (and serving as a threat to anyone foolish enough to try to jump the monoliths that wasn't already caught). The swords do 1% damage each, at a rate of roughly 5% per second for five seconds before Laharl leaps over the monolith and drops down with an extremely powerful Blazing Knuckle, filling the area with a burst of flame and doing a further 30% damage, for 50%-60% damage all in.

Other Info

Kirby hat: Kirby gains tattered red headscarf, Laharl's hair antennae poking through the top. With it, he gains the ability to perform the Blazing Knuckle, and the almighty Overlord's Wrath.

Alternate Colours:
1. Blue hair, red scarf, red/white shorts (http://tinyurl.com/jrbqvud)
2. Pink hair, green scarf, black/green shorts (Aramis)
3. Cyan hair, white scarf, blue/white shorts (Angelic)
4. Brown hair, grey scarf, grey/yellow shorts (Captain Gordon)
5. Purple hair, reddish-pink scarf, black/pink shorts (Mid-Boss/Vyers)
6. Blue hair, red scarf, red jeans (http://tinyurl.com/j28uuc6)
7. Laharl-chan (http://tinyurl.com/hbjt2q3)

Taunts:
1. Laharl chuckles, then lets out his unqiue evil laugh, both arms held out so he can puff his chest out triumphantly.
2. Laharl's eyelids droop and he closes his eyes, a bubble forming as he dozes for a few seconds, only to snap awake.
3. Laharl summons his sword, swinging it a few times idly, before dismissing it.

Victory Theme: A triumphant remix of the first few notes of "Lord Laharl's Hymn" - https://www.youtube.com/watch?v=3tnF_QGXLmo
Winposes:
1. Laharl laughs triumphantly as Etna and Flonne walk past. He notices and yells after them, only to fume and run off-screen after them.
2. Laharl performs a few sword slashes, clenching his free hand and making it burn with his fire magic.
3. Laharl walks on-screen with Etna and Flonne, rubbing his eyes as he climbs into a coffin, snuggling up and going to sleep as Etna and Flonne shrug.
Losepose: Laharl scowls, refusing to clap, and instead kicks a Prinny who happens to be near him before simply sulking.

Assist Trophy: Beauty Queen Etna.
Etna appears with her spear and blows a kiss. She calmly struts across the stage, occasionally stopping to perform an alluring pose and stun any characters that are nearby. If she is hit by an attack, however, she gets anime-style "angry eyes" and stomps in temper, before causing Prinnies to fall randomly from the sky, exploding when ever they hit the stage for 5% damage to anyone unfortunate enough to get caught. Her little temper tantrum stops after four seconds.

Assist Trophy: Fallen Angel Flonne.
Flonne appears and does a cheerful twirl, before she suddenly leaps into the air at the side of the stage. She summons a pink rune in front of her, and fires twenty pink arrows at random characters, including the one who summoned her. Unlike other ATs, her arrows each heal 5% damage. Once she fires all twenty, she giggles and poses before she disappears.

Snake's Codec:
Snake: "Otacon, what's this kid doing on the battlefield."
Captain Gordon: "Aha! That is none other than Overlord Laharl!"
Snake: "What the... who are you?"
Captain Gordon: "Laharl is the prince of the netherworld, having taken the title Overlord after his father passed. And in the demon world, only the strongest can rule! So you should know how powerful Laharl is."
Snake: "No, seriously, who are you and how did you get this frequency?"
Captain Gordon: "Oh, I had my robot, Friday, hack the channel."
Snake: "That doesn't... urgh, never mind."

Palutena's Guidance:
Hades: "Oh, now this should be a show. Little Pitty Pat against Overlord Laharl."
Pit: "You know this guy, Hades?"
Hades: "Know him? Why that young man is none other than the Netherworld's ruler."
Pit: "Netherworld?"
Hades: "A realm of demons, chaos and anarchy. Think of it like an alternate Underworld."
Pit: "Then this guy's evil! I have to stop him before he turns on the human world!"
Hades: "You do that, but let me get some popcorn first. I wouldn't want to miss this!"

Doc's Advice:
"I like chocolate and all, but I don't think even I want to try the Netherworld's devil's food cake. Laharl here's prince of the demons for a reason; don't get caught offguard by his fire attacks and swordplay, and nail him with a Star Punch so hard he'll be seeing angels for weeks!"

Stage: Overlord's Castle (The Netherworld)

This stage is much like Luigi's Mansion or Tomodachi Life, as the main portion of the stage consists of Laharl's throne room indoors (http://tinyurl.com/zpvkmg7), with a large balcony on either side that lead outside (http://tinyurl.com/ha9yv25). A ceiling prevents any Star or Screen KOs, so in order to cause a KO the player must knock opponent's off one of the balconies. This should not be difficult, as the only thing preventing access to each balcony once the match starts is a large window on either side that shatters upon any attack or any character is thrown through it.

At random intervals, one of five monsters may appear on the stage to cause trouble. They are as follow:
-A green Dragon (http://tinyurl.com/jgzgx5y) will fly around the inside of the throne room lazily. Every so often, it will stop to spit a slow-moving fireball at a random opponent; upon contact the fireball does 5% fire damage, and if misses it causes a small Mario-width field of flame to burn on the floor for three seconds.
-A white Golem (http://tinyurl.com/jhrfvuw) will appear at the end of the stage and calmly march across it, its powerful arms causing shockwaves with every slam that can stun anyone hit by them and doing 2% damage to anyone it stomps past.
-A succubus (http://tinyurl.com/zhfm4n8) will appear and she'll randomly flutter from spot to spot on the stage; if she collides with anyone she'll perform a pose, causing a burst of hearts like Peach's Peach Bomber, and do 1% damage per second for 7 seconds.
-A Shadow (http://tinyurl.com/zj552dd) appears and slowly floats down onto the centre of the stage. Once it reaches the ground, it will perform a dance that causes one of three elements to explode from it, doing 10% damage to anyone near it; either fire damage, ice damage or electric damage.
-A Majin (http://tinyurl.com/h4g63dg) who appears at the edge of the stage, gets in a crouching position, and suddenly charges across the stage from one balcony to the next, skidding to a halt. Anyone hit suffers 15% damage and is dragged along, getting launched once the majin stops and potentially being sent flying off the balcony.

In Omega Mode, the castle is gone completely, and the stage consists entirely of the rock platform the castle sits on.

Music List
1. Lord Laharl's Hymn (Orchestral version of: https://www.youtube.com/watch?v=3tnF_QGXLmo)
2. Sinful Rose (Orchestral version of: https://www.youtube.com/watch?v=hjS5c3TRfco)
3. Maritsu Evil Academy (Orchestral version of: https://www.youtube.com/watch?v=ww3ezpqKULI)
4. Last Engage (Orchestral version of: https://www.youtube.com/watch?v=jUru6ThsswQ)
5. Disgaea (https://www.youtube.com/watch?v=zA-svYy15Fs)

6. White Tiger (https://www.youtube.com/watch?v=Q8SnyemvylI)
 

Crystanium

Smash Hero
Joined
Apr 28, 2008
Messages
5,921
Location
California
Paper Samus
der Rabe
One of the cooler parts of this set is how you make it feel like Samus but darker, a semi-clone that makes sense in context and yet plays entirely differently. You have a good grasp on how the mechanics in Smash Bros. works, and so you can create this unique character using the subtleties to differentiate Dark Samus from original Samus, with damage, knockback, and properties that don’t make DS *look* too different from Samus but instead play completely differently. These kinds of nuances are good to learn as it can help make a character much more balanced and interesting, as some may have the most elaborate visuals and mechanics but ultimately no concept of balance, and would be bad. As for what to work on to help improve your future sets, the most glaringly obvious thing would be to finish the movesets, as Dark Samus is missing her(?) Back Air and only has a name for her Down Throw. This are fairly important to put in, since they are key moves unlike a Ledge Attack (100%+) or a Get Up Attack. A second thing is that some of the writing can feel cluttered at times, and some of the information you provide isn’t relevant to the set, or seems tangential to the topic. For instance, “It's obviously nothing like Ness' PK Thunder, which can be maneuvered to consistently juggle,” feels out of place and unnecessary, more like something you would say if you were talking about how Ness plays rather than Dark Samus, and can take you out of the immersion of reading. You do this a couple other times through the set, explaining what an in Smash mechanic already does, and while not redundant this information can be distracting. Another point in writing in general would be you should only reference material (i.e. moves) after they’ve already been described. Getting ahead of yourself doesn’t change the moveset itself, of course, but it makes readers go back because they will think they missed an aspect of a move. It’s best to talk about a move in its own section, or one that comes afterwards, but never before. Finally, some of the moves should be better fleshed out. Something like the Dark Echoes is weird without better visualization, especially when you compare it to Megaman’s Leaf Shield, and I just picture ragdolling Dark Samuses rotating around the player’s. While an amusing thought, I don’t think it’s what you had in mind, and so explaining that better would help a lot for the reader. Also, during her Dash Attack, you talk about a blue energy field but never explain what it does or why it’s useful. The details make the set. It’s not a terrible set, it’s maybe just under par, but for a newcomer set this is fairly solid and gives you a good starting building block for your MYM career!
Thanks for the input. I had finished up Dark Samus' move set earlier today, so you may have had knowledge on previous information. The comparison to Ness' PK Thunder has been long since deleted. Anyway, I did remove the unnecessary information about other characters when it came to move set comparisons. The only comparisons I had was mostly with Samus and very few with Zero Suit Samus. I also explained how Dark Echoes works with Dark Samus so that you don't have the funny idea that there are clones circling around Dark Samus like Mega Man's Leaf Shield. I removed that portion and explained that these clones move in a circuitous manner, which makes a lot more sense. I had already informed the reader of the purpose of the blue energy field, so I didn't edit that area. I stated that this blue energy shield means that if Dark Samus did an early dash attack, she would be safe, since that energy field is what hit her opponent's shield. So there is a space between her and her opponent.

Smady Smady has given me praise regarding Dark Samus and likes my insight about the character and has wondered if I would work on another Metroid character. I'm glad others like my insight about the character as well. I really wanted to maintain the move set to Dark Samus' portrayal in the games and retain a balance. At first, Dark Samus came off as a character who would be perfect for edge-guarding and I saw that she lacked some combo set-ups. This was unintentional. So I tried to introduce some combo set-ups. I didn't want to make her overpowered, although I'd be more than willing to say she's possible stronger than Samus. This would be true to canon as well, since the first scan about Dark Samus mentions her somewhat superiority in terms of abilities.

Before I went ahead to try working on another character, I wanted to make sure I finished up with Dark Samus. I didn't want to come off annoying by announcing what changes I made, but I'm glad the people here were patient with me. I would be more than happy to make another Metroid character, since I have the knowledge about the series. I was thinking about a non-Metroid character as well, and if I decided to do that, I probably would focus on Ninten from the Mother series. I feel that Lucas shares a lot of abilities like that of Ness, and I'm not too happy with the move set that Ness has because he doesn't learn a few of the abilities in the game. So Ninten would definitely be a different character and I would be interested in possibly working on him next if I decided to pursue making another character. But I wouldn't take issue if anyone wanted for me to work on another Metroid character.
 

Katapultar

Smash Lord
Joined
Nov 24, 2008
Messages
1,261
Location
Australia
Swordfish


The swordfish is a generic animal that nobody would ever make a moveset for, but instead makes for a really, really awesome weapon. Seriously, not only does it act like a spear, it also comes with the bonus of being alive! It can bend to attack opponents on unusual angles, block their attacks or even take a bite out of them to add insult to injury. Opponents can’t just take the fish and use it against you either, because otherwise it will struggle to escape - possibly stabbing or biting them in the process - and flop its way back to you! Now that’s one convenient weapon.

You can also bite into the fish, but then it won’t be alive anymore. Instead, it provides you with a healthy dose of omega 3, and if you’re really careful with how you bite in it can be used to make the fish lighter, or make it a shorter weapon. Just watch out: opponents can turn your weapon into a snack too, should they get their dirty, land-dwelling hands on it.

How does one use a swordfish for range? Please, you really need me to explain? Just throw it. Throw it like a spear, or a harpoon. Seriously. Though I guess the swordfish can also be used as a ranged melee weapon, if you hold it by the tail and step forward like you were using it as a rapier. Oh, and being a living animal you can just get the fish to flop towards the opponent and attack them like it’s some kind of minion. It’s not very effective on land, but if you can find a body of water for the fish to inhabit it’ll be much quicker and deadlier when attacking. You’re capable of providing a pit of salt water, right?

By the way, this is an unrealistic depiction of swordfish. But hey, it would be boring if it was too realistic, right? It’s why nobody makes movesets for generic animals like cats or dogs.
 

Slavic

Ask not the sparrow how the eagle soars
Joined
Jun 5, 2013
Messages
757
Location
taco bell, probablyn't
STORM BRINGER


The Storm Bringer is a nautical weapon designed for use against man, animal, and vehicle; an electrified harpoon gun, the Storm Bringer excels at range, able to pierce foes and secure the harpoon into them. This allows the user to channel electricity from the device through the harpoon into the target, and this devastating ability makes this a common weapon for the Navy, sailors, fishermen, and pirates. Let's get more into the mechanics of the Storm Bringer, shall we?

The device attached to the back of the mannequin in the picture is a transformer attached to a miniature lightning rod. The lightning rod draws in static electricity from the air to charge the device passively, though slowly. However, powerful electric events such as lighting will charge up the device much faster. Once the device has sufficient power, electricity will enter the harpoon gun through a few wires that attach the device to the gun. This will electrify the conductive harpoon, which can then be launched to shock any target in its path. As one would expect with a harpoon gun, the wire attached to the harpoon can be reeled back in, allowing the user to bring their target closer to them. Larger targets, for instance whales, are much harder to pull back with just one of these, and so multiple users would need to work together for a large creature or vehicle. The internal winch is powerful, however, so things like sharks, speedboats, or buried treasure are pulled with ease. Of course, a harpoon bears many similarities to a spear, and so the harpoon can be stabbed forward rather than launched for good CQC capabilities, like an electric bayonet. Additionally, those with proper hand protection can simply grab the harpoon from the gun and use it more like a weapon on its own than ammo. Once stabbed, the winch will be taut and will prevent the target from making any distance between them and the user.
 
Last edited:

Plazzap

Smash Rookie
Joined
Aug 24, 2014
Messages
9
Location
The Earth of course
Psychic Daggers
wow plazzap is actually doing a thing


What's that you say, "it's a honedge", use your imagination! Imagine away the scarf and the sheath and make it less cartoony, bam a completely original new weapon. Isn't imagination great?!

In terms of materiel, psychic daggers are literately just ordinary knives with a bizarre eye-motif going on, what make them special is the person wielding them; a psychic capable of some serious multitasking. During battle, this psychic can extract multiple daggers which follow them telepathically wherever they go, for the sake of this being a mere "sketch", ill say up to 6 can be kept at a time. Thing is, if this psychic has multiple daggers on them, they can attack with another dagger even if one of their daggers is experiencing lag, allowing for some pretty sick combos.

Now here's where the "range" comes in, with a special attack you can throw these daggers, groundbreaking I know. However, a thrown dagger is more than just a throwaway projectile: when it reaches it's apex it levitates in place, acting as basically a Luma that responds to your inputs telenetically. Imagine Rosalina embargo-ing the stage with Lumas, but the little things are knives and the character isn't a space waifu. Of course you can always re-equip floating daggers at anytime and use nearby daggers in interactions.

Whoops, i created a playstyle, not a weapon, silly me.

So, will you dominate the stage by placing your inputs everywhere, or keep all your daggers with you to dominate up close? Or maybe a mix of both?
 
Last edited:

Crystanium

Smash Hero
Joined
Apr 28, 2008
Messages
5,921
Location
California

(Image courtesy of Metroid Database by artist Rundash)

X Parasite is part of the Assist Trophy. When the Assist Trophy is used and X Parasite is summoned, it will go straight for the opponent. If there's more than one opponent on the stage, more X parasites will appear from the Assist Trophy. While it is possible to avoid X Parasite for the 10 second duration that it's out, should it attach to its host, it will make a copy of its host depending on the opponent's character. X Parasite by itself cannot be stopped. It must be avoided through evasion, such as rolling, dodging, or air-dodging. Shielding won't work. If it copies its host, it will be granted another 10 seconds to remain on stage. The copy's duration on the stage can be reduced, however. This can be done by attacking the copy. The more damage the copy takes, the more its appearance will become unstable until it returns to an X parasite, at which point it will leave the stage.

When X Parasite has copied its host, it will only be necessary to cause 30% damage. Be aware, however, that the copy will be able to mimic one special, one neutral, one smash, and one aerial. Each attack will have an additional 5% added to its damage output, as well as a slight increase in knock-back. Because X Parasite works off a random number generator, there are at times that Cold X will appear. This one won't mimic the opponent, but will instead instantly freeze the opponent upon direct contact. It is slightly larger than the others and will remain on stage for 10 seconds or until it's froze its opponent. It can be knocked back by projectiles. The more opponents on stage, the more likely a Cold X will appear. Funnily enough, if a Metroid and X Parasite are released by two different Assist Trophies within the same time, the Metroid will go after the X Parasite to absorb it.
 
Last edited by a moderator:

JamietheAuraUser

Smash Lord
Joined
Jan 11, 2010
Messages
1,196
Location
somewhere west of Unova
Davidk92 Davidk92 : A few important details:
Offence and Defence aren't true stats in Smash Bros. aside from with things like Shulk's Monado Arts or custom equipment. Instead of straight-up saying a character has good offensive prowess or bad defensive ability in the form of stats, it's up to the moveset maker to ensure that their moves are good or bad for those purposes. Good defensive moves tend to be ones that quickly cover a wide area for some time and have good knockback, such as the typical sex kick NAir. Horizontal knockback also helps for defensive purposes normally, while vertical knockback is good for offence because vertical movement is typically faster over short distances than horizontal movement and allows more options. An example of a good defensive move that doesn't necessarily fit Laharl's style is his Down Tilt, even though it also has some offensive applications due to being able to cover Laharl's approach. The Hero Prinny is a good offensive tool for Laharl, since it can cover his approach by cutting anyone in its path without risk of exploding Laharl, and allows Laharl to run along behind it.

I quite like the follow-up attack you added to Blazing Knuckle. But here's an idea: What if after using the initial Blazing Knuckle uppercut, the follow-up attack was "stored" until Laharl lands? That would allow you to Blazing Knuckle to start an aerial combo, then finish the combo with the Blazing Knuckle dive punch. Or simply use aerial Blazing Knuckle for positioning, and move about the stage however you want with the threat of the dive punch follow-up.

Also, three seconds of charge time on Overlord's Wrath is way too long. Falcon Punch takes only about a second to come out. What if Overlord's Wrath had almost a second of charge time, about 1/3rd of a second of true startup, and its charge could be both held indefinitely and shield-cancelled? Now you have a somewhat scary offensive tool, in that Laharl can stand near the ledge while the foe recovers and charge it without actually committing to anything if he doesn't get his opening.
 
Last edited:

Crystanium

Smash Hero
Joined
Apr 28, 2008
Messages
5,921
Location
California
Ninten

-Special-
Neutral B - Offense Up
Ninten can increase his specials, tilts, smashes, and aerials for 15 seconds, multiplying damage, knock-back, and range by 150%. This ability also increases Ninten's ranged attacks, making this special an important ability to use often. Of course, there is a caveat. When Ninten decides to activate Offense Up, he will remain stationary for 2 seconds (120 frames) and must allow for his special to complete the duration, or his abilities will not boost. If he is knocked out of this special, he will have to start over again. The pros to this ability may outweigh the cons in the minds of some players. After all, it might be thought that this is best used when the opponent is either off stage, dies from a star KO, or has his/her shield broken.

Up B - Teleport

When Ninten uses Teleport, he will vanish into a blue vortex and then appear out of another blue vortex, leaving somewhat of a fiery path behind, depending on one of the eight directions he's going to choose. Anyone who is hit by Ninten when he's covered in soot will receive damage equal to that of PSI Thunder 2, which is 25%. This means Ninten could possibly KO his opponent at early percents. With Offense Up, Ninten's damage output increases to 37.5%, making Teleport one of his most powerful attacks. With the boost in damage and knock-back, Ninten's range is equally increased as well. Thus, Teleport is Ninten's best recovery.

Forward B - Hypnosis
Ninten will emit a ripple effect from his eyes. As they travel, they'll propagate. However, the range doesn't cover too far of a distance. If Ninten's opponent is facing his direction, his opponent will briefly fall asleep, but with more damage, his opponent will be immobilized longer. On the other hand, if his opponent is facing opposite of him, he/she will not be affected. With Offense Up active, Ninten's beam that emits from his eyes will travel farther and the duration of sleep will last longer. When he does this, he'll be able to follow up with any attack of his choice, including finding ways to set up a combo.

Down B - PowerShield

Rather than having PSI Magnet like Ness and Lucas, both of whom can absorb energy attacks, Ninten's PowerShield reflects any projectile, which bounces back at at his opponent, doubling damage and knock-back as a result. Offense Up affects Ninten's PowerShield as well, tripling both damage and knock-back, making powerful projectiles like Samus' Charge Shot, Mewtwo's Shadow Ball, or Lucario's Aura Sphere especially dangerous to use against him.

====================
Work in progress
 
Last edited by a moderator:

Davidk92

Smash Cadet
Joined
Aug 28, 2016
Messages
49
Davidk92 Davidk92 : A few important details:
Offence and Defence aren't true stats in Smash Bros. aside from with things like Shulk's Monado Arts or custom equipment. Instead of straight-up saying a character has good offensive prowess or bad defensive ability in the form of stats, it's up to the moveset maker to ensure that their moves are good or bad for those purposes. Good defensive moves tend to be ones that quickly cover a wide area for some time and have good knockback, such as the typical sex kick NAir. Horizontal knockback also helps for defensive purposes normally, while vertical knockback is good for offence because vertical movement is typically faster over short distances than horizontal movement and allows more options. An example of a good defensive move that doesn't necessarily fit Laharl's style is his Down Tilt, even though it also has some offensive applications due to being able to cover Laharl's approach. The Hero Prinny is a good offensive tool for Laharl, since it can cover his approach by cutting anyone in its path without risk of exploding Laharl, and allows Laharl to run along behind it.
I fel like you've misunderstood the purpose of the stats, though it doesn't help I misunderstood a fundamental aspect of Smash Bros. itself; the Offense and Defense stats aren't intended to show how well the character's prowess or ability is, but rather indicate how much damage the character gives and takes. I was under the impression that not only did each characters damage vary, but that they would deal more or less damage depending on who they were attacking. It was why I never bothered to include damage % before I entered this topic, as I felt it varied so much it was meaningless. I see now that this isn't the case.

Regardless, the way the stats work (at least as I intend them to), it is entirely possible to have a character with a high Offense stat (due to their attacks doing lots of damage) but a poor offensive style (due to having limited options to take advantage of that). To make this clearer, would it be better if I remained the Offense stat to something like ATK? And I'll replace Defense with something else.

I'm also grateful for the discussion on how Laharl's offensive and defensive attacks work; I don't intend to remake Laharl, but I'll keep it in mind for the next set I do.

I quite like the follow-up attack you added to Blazing Knuckle. But here's an idea: What if after using the initial Blazing Knuckle uppercut, the follow-up attack was "stored" until Laharl lands? That would allow you to Blazing Knuckle to start an aerial combo, then finish the combo with the Blazing Knuckle dive punch. Or simply use aerial Blazing Knuckle for positioning, and move about the stage however you want with the threat of the dive punch follow-up.
I like that idea, it opens up more options. The follow-up was mostly addd just because that's how Laharl performs Blazing Knuckle in his games (though, obvious, a lesser version is used in Smash). But I'm happy to hear it could work so well.

Also, three seconds of charge time on Overlord's Wrath is way too long. Falcon Punch takes only about a second to come out. What if Overlord's Wrath had almost a second of charge time, about 1/3rd of a second of true startup, and its charge could be both held indefinitely and shield-cancelled? Now you have a somewhat scary offensive tool, in that Laharl can stand near the ledge while the foe recovers and charge it without actually committing to anything if he doesn't get his opening.
Hm, I see. I mostly try to avoid things like that as I don't want to risk making any character TOO overpowered, so when I make a strong move I try to come up with some downsides to balance it. I see in this case I must have overcompensated. Can you give any advice for the future on how I know when I'm making a move over or underpowered?

Also, I don't know what "true startup" means. Can you explain?
 

JamietheAuraUser

Smash Lord
Joined
Jan 11, 2010
Messages
1,196
Location
somewhere west of Unova
I fel like you've misunderstood the purpose of the stats, though it doesn't help I misunderstood a fundamental aspect of Smash Bros. itself; the Offense and Defense stats aren't intended to show how well the character's prowess or ability is, but rather indicate how much damage the character gives and takes. I was under the impression that not only did each characters damage vary, but that they would deal more or less damage depending on who they were attacking. It was why I never bothered to include damage % before I entered this topic, as I felt it varied so much it was meaningless. I see now that this isn't the case.

Regardless, the way the stats work (at least as I intend them to), it is entirely possible to have a character with a high Offense stat (due to their attacks doing lots of damage) but a poor offensive style (due to having limited options to take advantage of that). To make this clearer, would it be better if I remained the Offense stat to something like ATK? And I'll replace Defense with something else.

I'm also grateful for the discussion on how Laharl's offensive and defensive attacks work; I don't intend to remake Laharl, but I'll keep it in mind for the next set I do.


I like that idea, it opens up more options. The follow-up was mostly addd just because that's how Laharl performs Blazing Knuckle in his games (though, obvious, a lesser version is used in Smash). But I'm happy to hear it could work so well.


Hm, I see. I mostly try to avoid things like that as I don't want to risk making any character TOO overpowered, so when I make a strong move I try to come up with some downsides to balance it. I see in this case I must have overcompensated. Can you give any advice for the future on how I know when I'm making a move over or underpowered?

Also, I don't know what "true startup" means. Can you explain?
In this case, what I meant by the charge being "held indefinitely" was that you can charge the move and stay in the charging stance for as long as you want even after reaching full charge, like with Bayonetta's Bullet Climax. As for what I meant by "true startup", that was perhaps not the best way to phrase it, but what I meant was that there's startup between releasing the B button to fire off the charged move and the hitbox actually coming out. So even after the charge time, it takes longer than an uncharged Mario FSmash for the attack to actually come out when released (due to the flashy animation with the fireballs converging from the foreground and background), meaning there's still commitment in actually releasing the attack even though you can decide to abandon your charge at any time.

Edit: As for not making moves too underpowered or overpowered, we're generally a little lenient with that in MYM, but what I will say is that most of the top-tier characters in Smash 4 have a single powerful trick that you have to respect, and that allows them to use the rest of their kit effectively by its mere presence even if they aren't actively using the trick in question. Cloud has Limit Charge, which forces the foe to approach and can be cancelled into anything he wants. Bayonetta has Bullet Climax, which leaves her ready to fire off a reasonably powerful projectile at any moment, or abandon it to do something else entirely. And of course, Bayonetta also has Witch Time, effectively the most powerful counter in the game, as well as her Bullet Arts extensions for her aerial attacks, and access to two of the best meteor smashes in the game. Corrin has his/her long-range FSmash, as well as Dragon Lunge which enables all sorts of cool movement tricks. Zero Suit Samus has kill confirms at very low percents off of her tether grab, as well as her Paralyzer. Sheik has her Needle Storm, a projectile that is too fast to react to. Even many lower-tier characters have this design philosophy, such as Ganondorf's aerial Flame Choke meaning that all he has to do is keep an equal-stocks situation and he wins if you hang out near the ledge, or Little Mac's KO Punch, or Samus's devastating Charge Shot.
 
Last edited:

Davidk92

Smash Cadet
Joined
Aug 28, 2016
Messages
49
In this case, what I meant by the charge being "held indefinitely" was that you can charge the move and stay in the charging stance for as long as you want even after reaching full charge, like with Bayonetta's Bullet Climax. As for what I meant by "true startup", that was perhaps not the best way to phrase it, but what I meant was that there's startup between releasing the B button to fire off the charged move and the hitbox actually coming out. So even after the charge time, it takes longer than an uncharged Mario FSmash for the attack to actually come out when released (due to the flashy animation with the fireballs converging from the foreground and background), meaning there's still commitment in actually releasing the attack even though you can decide to abandon your charge at any time.

Edit: As for not making moves too underpowered or overpowered, we're generally a little lenient with that in MYM, but what I will say is that most of the top-tier characters in Smash 4 have a single powerful trick that you have to respect, and that allows them to use the rest of their kit effectively by its mere presence even if they aren't actively using the trick in question. Cloud has Limit Charge, which forces the foe to approach and can be cancelled into anything he wants. Bayonetta has Bullet Climax, which leaves her ready to fire off a reasonably powerful projectile at any moment, or abandon it to do something else entirely. And of course, Bayonetta also has Witch Time, effectively the most powerful counter in the game, as well as her Bullet Arts extensions for her aerial attacks, and access to two of the best meteor smashes in the game. Corrin has his/her long-range FSmash, as well as Dragon Lunge which enables all sorts of cool movement tricks. Zero Suit Samus has kill confirms at very low percents off of her tether grab, as well as her Paralyzer. Sheik has her Needle Storm, a projectile that is too fast to react to. Even many lower-tier characters have this design philosophy, such as Ganondorf's aerial Flame Choke meaning that all he has to do is keep an equal-stocks situation and he wins if you hang out near the ledge, or Little Mac's KO Punch, or Samus's devastating Charge Shot.
I see... okay, I think I understand a bit more. I'll try to keep all this in mind when I make the next set.
 

FrozenRoy

Smash Lord
Joined
Apr 26, 2007
Messages
1,261
Location
Las Vegas, Nevada
Switch FC
SW-1325-2408-7513
Dragonslayer Armour

"The Dragonslayer Armour, controlled by the Pilgrim Butterfly, lost its master long ago, but still remembers their sporting hunts."

The Dragonslayer Armour is a boss in FromSoft's Action RPG, Dark Souls 3. An empty suit of armor of an old dragonslayer, it was animated to life by the Pilgrim Butterflies which fill the sky of Lothric Castle to guard the Grand Archives, presumably with the intent of keeping the player from reaching the Twin Princes. It uses a very large Greataxe that it can infuse with lightning, along with a massive Greatshield which it loves to utilize offensively. Being that it is little more than armour animated, it has little lore signifigance, although the fight is considered pretty high quality.

Notably, the Dragonslayer Armour is NOT Ornstein nor one of his possible Spear-likes or specific armor type, and thus the wording armour is used to differentiate him in the game. This can also be seen by the fact he uses a heavyweight axe style instead of Ornstein's faster spear style.


Statistics

Being a boss made of pure, giant metal armour, it is no surprise this Dragonslayer ranks amongst the heaviest characters in the game, beaten only by Bowser and Donkey Kong in terms of weight. His general body shape can be compared to Ike's, but a bit chunkier due to the giant shield and SIGNIFICANTLY upscaled: He's around Bowser-size in terms of numeric ranking. And while slow, he isn't absurdly sluggish, having the speed of Ike, with solid but unspectacular traction.

Aerially, the Dragonslayer Armour falls quite fast, has below average but not horrific aerial control and has above average but not super fast aerial speed. His first jump is above average, while his second is more average.

The Dragonslayer Armour has special mechanics for its shield, but not enough to be covered in its own seperate section. To be specific, the Dragonslayer Armour's shield will block attacks passively while out in the direction it faces. If the Dragonslayer Armour stands still, all attacks from the front save grabs are blocked and do not move the Dragonslayer Armour. When moving at any speed lower than a dash, the Dragonslayer Armour will not take damage from hits, but they will push the Armour back slightly, making it difficult to approach projectile characters, and can be broken through by strong smashes such as Wario's and Mr. Game & Watches'. While dashing and falling, the Armour will be pushed back more from moves, and the threshold to break through the shield is lowered to more medium-strong attacks, such as stronger tilts like Ike's and Ganondorf's or almost any Smash that isn't super weak. Breaking through the shield does full damage and knockback and the shield offers no protection if it is not facing/physically blocking an attack.

The shield remains active during attacks, even if placed on the Armour's back, but many of the Armour's attacks will change the shield's location, so keep an eye on it during combat!

A few points of clarity on the shield:

- The shield is always inactive during hitstun and for a handful of frames after hitstun ends (which basically exists to prevent random moments where frame 1 of hitstun ends and suddenly the shield works and blocks non-frame-perfect comboing).
- The shield leaves about half a Kirby's size above and below the Armour vulnerable, to give an idea of size. Pretty much all Down Tilts should hit along with most aerials being able to hit above if properly shorthopped.
- Attacks which hit the Armour first are not "negated" by hitting the shield, it must hit the shield first or at the exact same time.


Specials

Down Special: Lightning of Lothric

The Armour raises its greataxe to the sky and calls upon the power of lightning, shooting out a thin bolt of lightning straight up into the sky like a reverse Pikachu Thunder, with 3/4ths the width of said Thunder's bolt. This has slightly less lag to start than Pikachu's and average ending lag, dealing 8% damage and light upwards knockback to anyone it strikes on the way up: At low percentages, enough to potentiall combo someone up.

The lightning will remain in the sky for up to 10 seconds from where it is blasted up, as indicated by the top of the screen over that area appearing stormy, during which at any point the Dragonslayer Armour can press Down Special again to make an indicator with his axe for the lightning to be called down and strike again, gaining power the longer it has been in the sky, and unlike Pikachu's Thunder it will go through the stage and always appears from the very top of the stage. At maximum power, which it reaches after 9 seconds, the lightning bolt will deal 24% damage and a spike 1.33x as strong as Ganondorf's Down Aerial to anyone it strikes, while if released instantly, it will deal the same damage as the bolt when being shot up except now the knockback is down instead of up. If the Armour does not call it down for the full 10 seconds, it simply strikes automatically. Travel time is slightly slower than Pikachu's Thunder. The lightning increases in power every second, not incrementally per frame.

Although it can be tempting to simply let it build up, the Armour has a special ability when struck by its own lightning, similiar to Pikachu it will create a unique hitbox that covers the Armour's body, dealing 12% that KOs at 270% with no charge time, but a whopping 30% that KOs at 85% if you let it go full power, although this is pathetically predictable and has at most a second to even try to get the foe into position for it, so don't expect it to go off all that commonly, although do keep an eye out for the possibility of comboing into it for those sick Dragonslayer montages. More importantly, however, the Dragonslayer Armour's greataxe will be embued with the power of lightning, crackling with it for twice the amount of time that was left on the lightning, meaning a maximum of 20 seconds (it counts when you call the lightning down, not when it lands on you). This lightning does not give any uniform buff, but instead specifically buffs or changes specific parts of the moveset that will be described. The dichotomy, thus, is that while the strength of your lightning grows, the duration of your buff decreases if you go for it: A maximum strength bolt will give but 2 seconds of buff time.

A key component of the Armour's moveset, some of his moves even gain bonus effect based on if the lightning is in the air and able to be primed to strike or not. The Armour's shield is off to the side as he poses to shoot the lightning up, offering him absolutely no protection: You can take this chance to pelt him with a projectile to interrupt. However, calling it down is simply a swift downward swing-motion with the axe, and keeps the shield in front of the Armour in its current state of stability (IE if standing when used, treat as standing, if moving treat as moving).


Side Special: Rubblerouser

This move changes rather drastically depending on if the Dragonslayer Armour's greataxe has been electrified or not. We'll begin with the normal, non-electirifed version, which has the Armour hefting his greataxe barely above his head, gripping the second handle with one hand, before striking it straight down in front of him and hitting anyone struck by this fairly laggy-starting attack for 27% damage that KOs at 95%: Yowch. After slamming it into the ground, however, the Armour will rip it out hard for ending lag, causing rubble to burst forward roughly the length of the Greataxe itself, dealing 9% in multiple hits of damage and pushing enemies to the edge of its range. This is actually quite good setup, with it being minorly frame advantageous for one side depending (the closet to the Armour, the more it is the one with the frame advantage), and covers the ending lag of the move from the front: It can allow the Armour to either use this move as setup or a crushing blow.

If his weapon is charged with electricity, however, he will hold it behind him and take a very balancing pose, before performing a massive, ripping swing in front of him, dust being kicked up around him for a visual effect as his Greataxe rips against the ground. The move ends and most of the swing is with the Armour's axe not on the ground, however, ripping anyone it hits for 21% damage that KOs at 130%, actually weaker than the default version! This is made up for by the fact that he will discharge all of his electrical buff into a wave projectile, centered at about the midpoint of the Armour's hurtbox, which travels forward 1.33 Battlefield Platforms: Not an especially long projectile, mind you, but it is quite strong, starting at 15% that KOs at 180%, but capping at 33% that will knock foes away at 90% depending on how long the Armour had left on the buff! The downside to this is that it will discharge ALL of the remaining buff, causing the Armour to become unbuffed, but the plus side is that he gets a monstrously potentially potent projectile to strike at foes and the fact that while the starting lag is hefty, the ending lag isn't too long, and the projectile is slow enough that the Armour can actually approach behind it!


Neutral Special: Stagger Trap


The Dragonslayer Armour slowly, as if with pained effort, raises his greataxe above his head from a crouching position, before forcefully slamming it down head first into the ground, the hitbox of the Greataxe essentially just covering his body, but dealing 18% damage that KOs at 160%, so it isn't an attack to slouch at despite the high starting lag, especially due to the quick ending lag recovery time. If the Dragonslayer Armour's strike impacts the ground, it will create a less-powerful shockwave-explosion (the GIF explains what it looks like better) that has some decent range to both sides of the Armour and above it, dealing 12% and more "get away" knockback that KOs at 230%. Another note is that the starting lag of this move, along with the first few frames of the move itself, are super armored and can only be interrupted by grabs, although you CAN still damage him and such.

Where this gets really interesting is WHEN you can use this move, as you see, you can actually begin this Neutral Special while you are in hitstun! This is mostly useful early on and wih weaker moves, because you're not immune to knockback or anything, so getting hit far just means you'll epically whiff and end up in ending lag when you'd want to be trying to recover. The same is true if an attack hits the Armour's shield, which isn't too special since you can do that with most any move...except it isn't JUST that you can use it with hitstun but that like a counter, Stagger Trap's gains power based on the strength of the attack that hit the Armour or was blocked, specifically 1/4th the damage and equal knockback to that. This only affects the shockwave, which is rather interesting in terms of how to approach the move, as normally the shockwave is vastly better to get hit by, but is a lot worse if a reasonably move is countered, which can make sticking to the Armour a lot to get hit by the axe instead a madcap offensive strategy. Multiple attacks hitting the Armour are all counted and damage caps at 36% damage that KOs at 65% for something like a Reverse Warlock Punch hitting the Armour.

When electrified, the shockwave-explosion becomes an equally sized vortex of lightning instead, which lingers slightly to cover some of the move's ending lag, increases potential psuedo-counter damage to 1/3rd and will draw very just-out-of-range foes into the vortex slightly when the Armour slams its Greataxe into the ground. This reduces how long that the Armour has the buff by 1 second.


Up Special: Shield Slam

The Dragonslayer Armour crouches behind his shield, his state becoming equal to his idle stance for the shield with the hurtbox above his shield reduced, and charges for a brief period that can be increased by holding down B for up to 3/4ths of a second, before shooting forward in a target direction for range equal to Fire Fox to up to 1.5x Fire Fox's with full charge. This deals 6%-14% damage based on charge and quite low knockback that does not change based on charge, always KOing at about 330% or so and therefor having quite weak knockback. This is rather important as the Armour's Shield Slam has mechanics similiar to Falcon Dive: The Armour will actually bounce off the foe with this move, being knocked ever so slightly back but having the ending lag on this move halved and giving back the Armour's second jump AND a second use of Up Special!

This is, naturally, quite potent: This move does not go especially far and the Armour is not the most adept aerial comboer, but this move is one of the primary ways he can set up aerial play, putting enemies rather close to him while giving him a slight frame advantage and recovery options, and allowing the Armour to potentially come back from a far distance if he can bounce off the opponent. This move's excellent setup options come with downsides, however, as the move is quite punishable! The starting lag is slightly longer than Fire Fox and the ending lag if you miss is rather severe, which is combined with a predictable trajectory and that it only hits from the front can make it rather tricky to land. A tip: Short charging it can catch people off guard and allow you to pop off a combo in exchange for lesser damage!


Smashes

Forward Smash: Crackle


The Armour grips its Greataxe with two hands, placing the shield on its back for this duration, and charges it with crackling electricity as it performs a tremendous swing in front of it, a mighty laggy move that nonetheless deals 25%-32% damage that KOs at 95%-70%: Monstrous, but this lag can be compared to a slower Ike Forward Smash to start up and it has similiarly punishing ending lag, making it a very tricky move to actually land. The crackling lightning serves a similiar purpose to that of King DeDeDe's hammer airshake, providing a secondary hitbox that deals 4%-8% damage based on charge and knocks opponents away slightly, giving it good safety against spot-dodged moves and adding a twinge more range to an already quite range-y move (The Dragonslayer Armour's Greataxe is slightly larger than Ike's sword in length and width). This is combined with the fact that the shield is perfectly functional while on the Armour's back and will count as if he was standing idle, making replies from the back difficulty against the Armour if dodged behind.

If the Armour has been buffed with electricity, this will increase the range of the crackle by a small amount and double the damage it deals to 8%-16% and enough knockback to KO at 265%, turning it from a GTFO safety "bonus" to a much more legitimate threat and hit. More interesting is that if this move is used while Lightning of Lothric fills the sky, it will call upon a crackling bolt of lightning to strike the area the axe hit from the Lightning's current location, meaning if it is up and behind you it will shoot diagonally at you, and as usual go through platforms and so on. This lightning deals 10% damage and lightk nockback in the direction it is travelling and is 3/4ths the size of normal lightning.

This has a few uses to it. Naturally, with proper placement it can be used as a bit of a long range/camper tool, however the extremely large lag of this move and limited duration of the Lightning plus the placement issues means this is more of a niche and very match-up dependant option, though in the correct matchups it can at least force a response to break enemy camping. When used with the lightning behind or above the Armour, it forms an effective defense against the primary short hop punishes of this move, while using it with the Lightning in front of the Armour will often be more aggressive to punish people who try to retreat away from the Armour and tries to corral the opponent in closer. Rarely, it can combo with either of the hits into the lightning, but using it with the main hit is rarely worth it due to cancelling its knockback and it is pretty hard to cmbo with the crackle secondary hit. If you can get it down, though, it IS solid damage (esp. if ALSO buffed, although to be buffed and have Lightning out and have a position to set this up is tricky) and will usually keep foes fairly close to the Armour.


Down Smash: Storm Crack

The Armour stands with its back to the foreground/background, shield on its back and axe raised above its head two-handedly as it fills with electricity, before smashing it down in front of him fo deal 23%-28% damage that KOs at 110%-90% and sends out two shockwaves of lightning, one to each side of him. Although not as strong as Forward Smash, it is noticably less laggy (if still laggier than average on both ends), and the hitbox is rather large, covering the Armour a bit to both sides. The primary side protection comes from the shockwaves, however, which deal 8%-12% damage and light knockback in the direction they are travelling with slightly above average hitstun, travelling at about 4/5ths the speed of a Thunder Jolt. One downside is that due to the position of this move, the Armour's shield fails to give it any coverage for this move, making it a rather riskier option.

When buffed, the shockwaves damage will go up to 12%-16% damage and deal slightly more knockback, but noticably more hitstun, and go the speed of a full Thunder Jolt. However, with Lightning of Lothric out, it will shoot out a bolt of lightning ala the Forward Smash out when the shockwaves reach the end of their range (2/3rds of a Battlefield Platform each), dealing the same damage and knockback as the Forward Smash during travel aimed at the original axe hit spot and causing the shockwaves to converge on the origin position. The nature of the knockback of the bolt will draw opponents towards where the shockwaves converge, and those hit by the lightning's hitbox as it hits the ground will explicitly be knocked towards the middle (the closer they were, the more they get drawn in), which can put opponents in quite of a pickle if they remain in the area too long to punish the Armour. This space control makes an excellent battlefield "reset" or can help cordon off areas to put the foe in close range, tight positions.

When trying to decide between Forward Smash and Down Smash for lightning-making, one key thing to consider is timing: The Forward Smash's lightning comes out the instant the axe lands, making it more of a HIT 'EM NOW deal, while the Down Smash has delayed lightning that is more controlling. Choose wisely or prepare to die.


Up Smash: Aftershock

The Dragonslayer Armour hefts its axe inwards with one hand, before swinging it above him in a huge arc: Think similiar to Ike's Up Smash but with a significantly larger horizontal arc. This is the weakest of the Armour's Smashes, dealing 19%-24% damage and KOing at 135%-110%, but the starting lag is slightly lower than Ike's Up Smash and the ending lag is actually slightly below average, while the shield will be held alongside the axe and follow its trajectory for protectiong equal to what the shield was already giving (Up Smashes can be DACUS'd, providing differing levels of protection!). It has excellent coverage range as well, although the swing itself is somewhat more lumbering than Ike's, and gives it somewhat noticable duration.

While the Armour is buffed, a trail of crackling electricity will be left behind in the axe's wake, which 1 second later bursts in an electric explosion of the same trajectory of the swing itself for half of the damage and knockback of the swing. This has little combo ability with the move itself, but it serves as excellent protection, especially anti-air: An Up SMash into a Forward Smash or Down Smash can be deadly to foes trying to stand their ground if they do not actively interrupt or punish the Up Smash and it can also lead into the Armour's decent short hop game. The fairly long starting lag, moment before activation and primarily vertical range (The Armour is so high and the Greataxe so large most characters will fit under it from the sides or will only have a small area to be hit) range make it so spamming this alone is rather easily punishable. Plus you need buff time for the Aftershock. Combined with Forward Smash and Down Smash, however, it is an electrically charged toolkit!


Standards

Jab: Sweeping Crash


The Armour performs a low, sweeping strike with his Greataxe, followed by a chest-high Greataxe swing, and then brings it over his head one-handedly for a crashing blow! The first hit deals 4% damage, the second one 6% and his last hit deals 8%, for a total of 2% more than Ike's Brawl Jab and 6% more than his Smash 4 Jab. However, while Ike's jab has incredibly quick start-up, Dragonslayer Armour has to deal with what is a laggier startup for his Jab, although after start-up the first swing comes out incredibly fast, the second swing comes out slightly latter after the starting lag. The Armour's jab also has quite large reach for a jab, as the large Greataxe is extended far for it, although this comes with the downside of a sourspot: The handle only deals half damage and hitstun and thus makes it combo incredibly poor at point blank range.

The last hit can be tricky to hit because it has a noticable delay on it similiar to Ike's third hit, slightly longer, which means it can't always combo even when the last hit has killing pressure, which it does at around 160%. One addition the Dragonslayer Armour has is that it can actually move very slightly left or right during the starting lag of the first hit. it is not far, but this very minor adjustment can be the key between hitting with the handle or the axe or between whiffing entirely! A double tap backwards can even cause the Armour to turn around, as the GIF shows, but it will end up giving you no time to adjust left or right, so it is more of a niche tool.

The shield will defend the Armour for the starting lag and duration of both of the first swings, but not during the ending lag and in-between lag of the two hits, giving foes only a small opening to interrupt the combo with their own quick moves. The open-armed swing of the third hit, however, leaves the Armour vulnerable for the entire move.


Forward Tilt: Bash


The Dragonslayer Armour bashes forward with its shield, straightforwardedly and effectively, as can be seen above with a very slight slide forward that very slightly moves the Armour forward ala Marth's Down Tilt. This attack deals 8% damage and knockback that varies based on how close the foe is when they are hit. If you're point-blank then it has good GTFO knockback and can KO at 205%, making it a fairly good space-gainer and can put foes in good spot for Greataxe aggression in distance. If hit near the end, however, the knockback is quite meager, which can be good at times: The ending lag on this move is quite low and allows the Armour a variety of follow-ups.

Another important point of this move is that the shield, as usual, retains its defensive properties, allowing this to be a solid defensively-offensive move, sliding forward to smack foes who try to get close while keeping you safe from counter attacks from the front, although the Armor should be careful of being rolled behind and grabbed, with the closer range hits usually shieldpushing foes a bit far for a shield-and-grab. The low ending lag can give him a window to respond, but it still is generally effective, and it is very difficult to avoid a roll behind and simple jab/quick tilt. The starting lag on this move is also a bit laggier than your average jab, punctuated by the shield withdrawing inwards for a brief moment, and so spamming makes it very telegraphed, especially to deadly shorthops which can just go over the shield.


Up Tilt: Shield Sweep

The Dragonslayer Armour sweeps its shield above its head, covering a decently large swathe above itself with the shield sweep starting from the backside-direction of the Armour. It only deals 7% damage, but it does have low knockback that allows it to be a combo tool at low-mid percentages, and keeps foes fairly close beyond that to keep them from getting away, although the combos become rather limited past lower percentages. Moreso in importance for this move is that it is fairly quick on both ends and gives the Armour standing shield coverage above himself, allowing him to utilize this as a tilt for his defensive, slow-opening style, although he should beware that this move gives him no protectiong except from above (and that changes based on where the shield is!): If he's too obvious with this as a predicted counter, it can be air dodged past and punished.

Down Tilt: Grounded Lightning

The Armour swings his Greataxe on the ground in front of him with his shield held up, dealing varying damage based on if the hilt or the Greataxe is struck. with the hilt dealing 6% damage and that awkward Down Tilt vertical knockback where the foe is hit up too high to combo but not high enough for a GTFO move, the primary use there is to just get a little damage in and keep the foe relatively close. The Axehead itself, however, deals 9% damage and fairly increased hitstun, pulling the foe in close to the Armour. The increased hitstun means that despite this move's rather long ending lag, the Armour comes out with just a small frame advantage if he hits this sweetspot, not enough to really 100% any moves from it, but it does give him tempo in pressing the advantage. Starting lag is faster than average.

When the Dragonslayer Armour is buffed with electricity, there will be a small sweetspot in the middle of the Greataxe (think Zelda's lightning kick or Captain Falcon's knee). Hitting with this will cause strong impact freeze frames, 16% damage and quite strong knockback, KOing at around 125%! Difficult to setup and hit, this is nonetheless a notable addition to the Dragonslayer Armour's KO arsenal, and since the shield protects him for this move makes for his safest KO move, as his strong Smashes also all leave him vulnerable to attacks in one way or another, given only Up Smash provides protection and it is more moving and has non e vs. grounded threats. It also, of course, just provides an extra spot to dodge when trying to avoid this move normally.


Dash Attack: Crashing Thunder / Surging Lightning

This move has two versions, depending on if the Dragonslayer Armour has entered his buffed state or not. We will begin with if the Armour is not buffed.


The Dragonslayer Armour leaps forward with its arms open and to the sides, slamming down in front of itself with its shield after a leap of about half a Battlefield Platform. Grounded enemies hit by it take 13% damage and are knocked into prone, while aerial enemies take the same damage but are instead spiked with moderate strength. This Dash Attack can go past ledges, allowing the Armour an interesting if rather risky gimping option. Your fast fall speed and charge recovery adds a fair deal of risk. But for on stage, this is much more of an approach and set-up option, allowing the Armour to leap at foes and knock them into prime close combat positions.

The starting lag on this move is rather long, and the shield's positioning leaves the Armour punishable, however the ending lag is actually quite short, as the Dragonslayer Armour basically just needs to raise his shield to re-enter his fighting stance. This ends up meaning that Crashing Thunder is an excellent setup move, but a punishable and quite risky one for the Armour to perform. The Armour's shield is not in position to protect him until this move's ending lag is over, but that is fast enough to protect against getup attacks naturally.


While buffed, this move instead becomes Surging Lightning. The Dragonslayer Armour drags its Greataxe on the ground for as long as A is held in a keep-dashing Dash Attack, before ripping it in a crushing and devastating upward blow that deals 16% damage and KOs upwards at 120%, making it quite a strong KO move on a Dash Attack. On top of that, the starting lag on this is actually fairly short aside from the telegraphing of a dash, making it one of the Armour's few KO options that isn't uber predictable. The downside to this is that the move suffers excessive ending lag that makes this move extremely punishable and that unlike many of the Armour's other KO moves it has no shield protection on it at all. It also, of course, requires the Armour to be buffed and so is a bit less able to just be pulled out on a whim.


Grab Game

Grab: Grasp


The Dragonslayer Armour pulls his shield-hand back for a moment, before swiftly trying to grab in front of him. For a brief moment, this leaves the Armour unshielded, but this is a noticably quick grab, although it has low range and very bad ending lag. However, the shield will protect the Armour during this move's ending lag, which can keep the Armour from some of the worst punishments. Sidestep into grab is basically a 100% punish if you can do it fast enough or what have you, though. Having such a fast grab on such a heavyset character is notable overall.

Pummel: Pommel Pummel

The Dragonslayer Armour smacks the foe with the pommel of his Greataxe, dealing 1.5% damage at a rate between a 1% and 2% pummel, slightly more towards the 1% side. If the Dragonslayer Armour is buffed, then electricity will course through the foe, causing them to take double (AKA 3%) damage instead.

Up Throw: Lightning Skewer

The Dragonslayer Armour skewers the opponent on its Greataxe for 7% damage, lifting them straight up into the air, before throwing them forward for solid knockback that KOs at 190%. The knockback is too far away to follow, but isn't really KO long, so it largely serves as a tool for spacing purposes. The key thing about this move is its ability to be stacked with the Armour's buffs: If he has the flatout buff applied, then he will shock the foe with lightning as they dangle from his axe for an extra 7%, before contemptuously tossing them away for normal knockback. If his Lightning of Lothric is out, lightning will strike from above as the opponent is lifted up, dealing 7% damage as well before throwing the foe away.

With just one of these active, it becomes a relatively strong damaging throw that is very safe, but the Armour can have both buff and lightning out at the same time, making this throw deal a rather absurd 21% damage if he gets both out, serving as one of the primary ways he deters people while he is very buffed and a key damaging move when he gets those brief rolling moments of, essentially, double buffs. A very dangerous move that foes need to fear under the correct circumstances.


Forward Throw: Thunder Chop

The Dragonslayer Armour lets go off the foe with a light toss, while his other arm brings his mighty Greataxe forward and, if possible with the foe's model, slams it directly into their midsection, dealing 5% damage and sending foes flying away with enough power to KO at 205%. Not especially effective by itself, although it does allow the Armour some okay follow-up options at low damage percents, this move's true value is unlocked with Lightning of Lothric out, which will cause the Armour's Greataxe to spark and some impact freeze frames to occur ala Wolf's Forward Tilt, along with a practically cosmetic 1% damage, this largely serves as a warning to the foe to know something different is happening.

When the foe reaches the apex of their knockback after and all hitstun has been exhausted, their body will spark for a moment, and a bolt of lightning will be shot from the Lightning of Lothric cloud's location towards the foe, largely following the properties of the lightning as described before, 10% damage, knockback in the lightning's direction and so on. This makes the throw a significantly better pressure throw, as foes must react in some way to the lightning lest they simply take the free hit, and can also serve as a gimp attempt tool, as if you send someone offstage with this it will usually threaten a light spike of some kind.


Down Throw: Crash

The Dragonslayer Armour throws the foe to the ground, dealing 5% damage and placing them into prone. This is pretty weak in terms of damage and has a bit of lag for a throw, so the Armour doesn't get quite as sweet of tech chase chances as someone like Snake, but this is partially made up for by the fact it is a fair deal safer, as the shield will protect the Dragonslayer Armour from any getup attack and thus removes an option.

If the Dragonslayer Armour is buffed, then he may perform an additional strike with this move by pressing A or the shield/grab button. In doing so, the Dragonslayer Armour will plunge its Greataxe down towards the foe, which will smack them upwards (via floorbounce) for 7% damage and somewhat setup knockback if it connects, and send a rippling shockwave of electricity half a Battlefield Platform forward (or back if back on the control stick is held) that deals half the damage and knockback. which allows the Armour a bit of an automatic tech chase or light-if-slow approach option. Since the Armour has to move its shield back to use this move, however, it leaves him vulnerable to interruption via a getup attack.


Back Throw: Reversing Toss

The Armour lifts the opponent up, before strongly throwing them behind him, dealing 9% damage and fairly good knockback, enough to KO at 155% for the best KO throw in the Armour's arsenal. This throw is also one of those rare throws that turns the character around, which is very important when the Armour's shield depends on the direction it faces. This is also the Armour's most damaging throw when he doesn't have anything buffed up and his only reasonable KO throw, although follow-up chances are very limited. It has almost no lag, so the Armour can dash after as a chase or perform a slow retreat anyway.

Aerials

Neutral Aerial: Sky Spin

The Dragonslayer Armour swings its axe forward, before swinging it right behind him, think horizontally over vertically ala Toon Link's Neutral Aerial. Each slash deals 10% damage and knocks foes away a light but non-killing amount, while coming out pretty fast. By default, the move is simply straight horizontal, but an up or down input like angling a tilt will allow the Armour to angle this move, with the front swing being angled lightly towards that direction and the backswing slightly opposite. The ending lag of this move is only slightly higher than normal in the air, but it has tremendously bad landing lag, so one should very much wish to avoid landing during it.

Although simple, this move is very important to the Armour, as it lacks many fast to come out moves to strike efficiently, making this a very strong short-hop move, albeit one requiring precision and thus a bit inflexible: Do it too late and you have to suffer hard ending lag. The shield will not protect the Armour during the first swing or starting lag, but it returns to protection from the front during the second swing and ending lag.


Back Aerial: Backswing

The Armour hefts its axe and performs a wide, strong and sweeping slash behind it, the force of the swing pulling the Armour around and causing it to turn around, which is of course quite important as your only aerial way to turn your way around. That doesn't mean you should ignore the swinging Greataxe, though, as it is a crushing hitbox that deals 16% damage and KOs at 105%. While incredibly strong, this move also has incredible lag on both ends of it, meaning that the Armour has some fair risk involved in going for a killing blow or turning around, especially as this move is only shielded from the front during the starting lag/duration and not at all during the ending lag.

Up Aerial: Shield Sweep

The Dragonslayer Armour performs a swift sweep above itself with its shield, dealing only 7% damage and popping up enemies, but offering the Armour some light juggling or combo potential, and the speed it has on both ends makes it quite safe with the shield covering it from above. It does, however, continue one of the Armour's weaknesses: It has almost no reliable ways to create vertical space, with his vertical moves largely being unreliable or setup, while his shield allows aerial approaches.

Down Aerial: Shield Smash

The Dragonslayer Armour takes its shield, aims it down and performs a quick, downward thrust with it, dealing 9% damage and a somewhat weak spike downwards, still an effective gimping tool but not as amazing as one might expect from a heavyweight. On grounded enemies, they will be smashed against the ground and take 3% additional damage, but only moderate upwards knockback. The starting lag on this is fairly short, which is also nice and effective, but the ending lag takes a while for the Armour to reorient itself in the air, which also keeps the shield from protecting it. The downward aim of the shield means it protects it, of course, potentially allowing the Dragonslayer Armour to counter juggling with a more forceful approach or to perform counter-gimps (especially considering his Up Special's mechanics!).

This move is even extra crushing against proned foes, dealing 3% more damage in addition to the 3% grounded increase, adding freeze frames on it for some extra oomph and dealing strong vertical knockback that KOs at 125%! This means a shorthopped Down Aerial can especially be a good lead-in from some Down Throws or when you snag the Down Tilt trips.


Forward Aerial: Dragon Slasher

The Dragonslayer Armour takes its Greataxe and performs a quick slash with it forward, good startup speed that deals 8% damage and pretty low knockback, with fairly average ending lag, and being a bit lowrange. By pressing A ala a Link Forward Smash, however, the Dragonslayer Armour can perform a second strike, which is a laggier, but strong overheard strike that can be somewhat reminiscient of a Mario or DK Forward Aerial, crashing with the Greataxe's head deals 13% damage and KOs at 120%, while the handle deals a mere 5% and quite little knockback. The first hit has average ending lag, but the follow-up hit's is fairly bad. Landing both hits of this is quite difficult, but the damage is incredibly rewarding and it has some knockback power behind it too: Your Up Smash can be of particular air for backing a foe into the corner with this move, along with predicted air dodges.

Final Smash: Pilgrimage of Butterflies

The Dragonslayer Armour, imbued with the powers of the Smash Ball, raises its Greataxe to the sky and sends out a beam of red energy, calling upon the beings that give the Armour life: Pilgrim Butterflies! These two Butterflies hover in the background, as seen in the second half of the Armour's battle, and the first one will fire a laser of heat that scorches the earth either half a Battlefield in front or behind of the Armour (going foremost for the one with them ost enemies), which will exploded in fiery pillars of damage after 2.5 seconds. The second Pilgrim Butterfly will fire constant fireballs randomly-ish around the stage, dealing 4% and a little flinching when it strikes them, with this barrage lasting 6.6 seconds.

The Dragonslayer Armour is free to move and strike during this, so use it to pressure on!


Playstyle: Slayer of Many
 
Last edited:

JOE!

Smash Hero
Joined
Oct 5, 2008
Messages
8,075
Location
Dedham, MA

WEEK 1 RESULTS
Week one resulted in a healthy crop of 13 entries! To recap, this week was all about coming up with a unique weapon concept that has both Ranged and Melee capabilities, as well as a Perk all it's own. So, lets see what each entry brought tot he table:

Mithril Thorn
U UserShadow7989

Creativity: 10
The Mithril Thorn here is a rapier of sorts that also acts as a magic wand/staff for the user. This alone is a nice bit of melding for fantasy types, but US goes a bit deeper in the description stating that visually there are "grooves" just for magic in the blade, and the guard has personalized runes to indicate the spells used by the thorn. He also mentioned how the red/green aura (mimicking a Rose) is how it got the name, a nice touch for the lore.

Practicality: 10
Week 1 and 2 entries are sort of odd when it comes to the practicality section (more on 2 below) as they focus more on the concept/lore. That said, The Mithril Thorn seems perfectly usable as a weapon and as a great base for added effects and signature moves.

Execution: 10
This entry follows the criteria quite nicely, allowing for Melee combat by being a sword and ranged by having magic, and the perk of having signature spells attached. US also mentions that the Thorn isn't quite "unique" in that it is a known/manufactured weapon in whatever setting he came up with, but made a nice save by noting that each one is personally crafted and is only usable by the maker/intended wielder.

Total: 30
A great start for the week, UserShadow presents a very solid entry to expand upon.


Whip Chain
Rychu Rychu

Creativity: 7
The Whip Chain is an existing weapon from ancient times. It can be used at a variety of ranges, and can even toss out a projectile (usually a dart of some kind) from the tip. The tip is also distinctively weighted, adding a more devastating impact. Unfortunately, that seems to be all to the entry as even though this weapon is very cool, and meets the normal criteria, it still seems to be just a "rare" weapon and not a unique one. I could see multiple people of like, a Monastery or Ninjas using this, unlike how you really only see Roy using the Sword of Seals. If it had a bit more lore associated it would have been a bit better.

Practicality: 10
This weapon can clearly get a lot of mileage out of it given the fact it can ensnare, strike, lash, be used up close quickly, toss out a dart, and so on. I am curious as to what direction this whip will lash.

Execution: 8
The Whip Chain hits all the notes correctly, but unfortunately falls a little flat in terms of being fleshed out. Part of the challenge is coming up with a special weapon after all.

Total: 25
Rychu has a good base this week, but the chain needs a bit more attached to it.


Galaxy's Needles
@Reigaheres

Creativity: 10

Galaxy Needles are a brass knuckle-like device with the ability to emit energy daggers from 4 ports on each weapon. Originally intended for stunning criminals in police work, but it has been stolen and modified by the seedy M.Y.M. organization to become a deadly weapon! This story is pretty fun, and opens the doors for many possible functions on the Needles. The weapon itself is fun too, bladed brass knuckles from space is a fun concept, and of course energy weapons can be reconfigured to a variety of purposes.

Practicality: 10

Essentially a pair of claws, these should be very easy to make a set from. The energy aspect allows for some fun variety too!

Execution: 10

The Galaxy's Needles cover each criteria nicely. An unknown M.Y.M. agent has stolen and manipulated the devices which leads to unique attributes. The original "Stunner" functionality I am sure would be accessible still, and the ability to shoot multiple needles / charge for a big needle sounds interesting.

Total: 30

A good, funny backstory complimented by a solid, interesting weapon.


Rope Kunai
Munomario777 Munomario777

Creativity: 10

The Rope Kunai is a combination of, you guessed it, Rope and Kunai. Both preexisting, relatively common weapons that when put together make something relatively unseen. The addition of hidden electromagnets adds more depth to the weapon and makes the seemingly low-tech innovation a piece of cunning hi-tech equipment. While at first it seemed unwieldy, the efforts put in by Muno to describe the uses showed that this ninja-esque weapon is certainly more than meets the eye! It can detach, ensnare folks, be thrown as a Bolo, stab into a foe then be zipped back to the user via Magnets, block attacks, be used as just the Kunai, a rope, and so on!

Practicality: 8

Unfortunately, at a glance some of the functions seem to be at odds with each other. In particular it seems like there are a ton of functions happening at once and it seems like it would be tough to incorporate them all, but perhaps we are in for a stance-changer? Anyways, at least IMO it seems that the magnet pull would be more useful than the elastic rope as it has more range and similar function (control of the foe's movement). I am a bit skeptical but we will see how this all goes.

Execution: 10

Rope Kunai are certainly something you don't see everyday, and the seemingly "put together" feel of it all combined with the multiple functions and hidden tech all make this fit the "unique" part to a tee.

Total: 28

I wonder what kind of Character Muno has in store for such a multi-use weapon, and if he can even make use of each part?


Bowblade
FrozenRoy FrozenRoy

Creativity: 9

The Bowblade seems to be an existing weapon from Bloodborne, and is fittingly pretty hard core. Like Pit, the Bowblade is a single sword that can split/combine into a bow to fire projectiles. Unlike the angel, the Bowblade is a heavy blade that splits instead of two blades that come together, making for a significant difference in style. As a sword, it has a wicked curved edge to accommodate the bow, and when split as a bow the edges are still razor sharp. It can fire normal arrows when split, as well as a specialized Blade-Arrow that can double as a side arm and horrifying projectile. Like some other entries, it unfortunately loses out on some of the "uniqueness" given that it seems to be a somewhat common tool for Hunters.

Practicality: 10

Bowblades certainly seem effective, if hazardous to the owner as well if they are not careful. I can certainly see a variety of styles used by this obvious stance-changing character.

Execution: 9

The Bowblade is certainly cool and hits every criteria, but is it really a "special" weapon?

Total: 28

Froy has a really interesting base to work with given the weapon's functions, though for characterization it seems that just anybody could use it given the training.


Violin Bow
IvanQuote IvanQuote

Creativity: 10

An entry that makes a weapon out of something you wouldn't think of, The Violin Bow is something I don't think anyone expected! Used as a sword/staff based on whether the sharp point or carbon-fiber shaft strikes, the bow can suddenly double in range with the added string shooting out to reveal another blade, becoming more like a whip. Uniquely, this is also the only entry where there seems to be no mention of a distinct "projectile" mode/use, but the sudden range increase does still count.

Practicality: 10
Acting as both a sword and a whip, I can foresee a concert of elegant attacks from this thing. Sort of like Soul Calibur's Ivy in a way?

Execution: 10
Ivan meets all the criteria here, though on a second reading it leaves me wanting more, in a good way though! I am curious just what he can make out of the unique theme and function of the weapon here.

Total: 30
A great entry for this week, I only hope there is also a Violin included somewhere in the future for a Musical set?


Echo Concussors
JamietheAuraUser JamietheAuraUser


Creativity: 10

Fittingly, after a very melee-heavy weapon comes a pair of pistol-like Echo Concussors! These guns produce white energy in bullet-like blasts in rapid succession, and have two alternate modes: A Melee "Burst" mode which focuses on the firing of more powerful but melee range shots from the barrels, and a Tractor Beam function where the guns can be used to manipulate and control objects. The idea of guns that fire super short range shots for melee attacks is fun to imagine, and the tractor capabilities that only use one of the guns at a time offers a lot of potential as well.

Practicality: 10

Basically dual pistols with 3 modes each, I can see a lot being done with the concept.

Execution: 10

Jamie makes something potentially very deep out of a basic idea. A gun with alternate modes is one thing, but the modes presented here are both fun and inventive as it is hinted that perhaps you do not need both on the same setting at once?

Total: 30

Yet another solid entry, I wonder how far the idea can be pushed with 2 guns swapping modes?


The Monolith
ForwardArrow ForwardArrow

Creativity: 10

A turn for the weird, thew Monolith is obviously a callback to 2001: A Space Odyssey, but could be any number of things from Sci-Fi. In this case, it is a door to a demon dimension where all sorts of nasty energies, tendrils, monsters and what not can pour through and messes things up just by touching it. So, of course, somebody steals it from scientists and uses it to smack people with. The concept here is just plain out there and wonderful as it is another one of those "didn't see that coming!" entries and opens the door to many odd possibilies.

Practicality: 8

While the "exotic" uses of the weapon are certainly there, what with demons and such spewing from it, the Monolith itself seems rather unwieldy. Aside from the obvious "slamming down" of it, it seems most of the moves would be sort of, pointing it a certain way or angling it for a demon claw/etc flailing out?

Execution: 10

While FA does not outright say its uses, he provides more than enough for the imagination with the backstory and description given of what possibilities await.

Total: 28

A scratch on the whole given how the Monolith seems rather awkward to wield, hopefully the magical properties balance that out.


Blitzball
Smady Smady

Creativity: 8

Its a Blitzball! Anyone familiar with Final Fantasy (X) can immediately recognize this iconic weapon and its uses both up close and notably from afar. The ability to enchant it adds a lot to the already unique way to fight with it, but unfortunately like with some other entries the Blitzball is still just a Blitzball. If it were more fleshed out in regards to what is unique about it, like with how Ike's Ragnel is special, it would fit the criteria a bit more.

Practicality: 10

Blitzballs are proven weapons, and a set focusing on close and ranged followups seems assured. The various enchantments that can be placed will also be interesting to see.

Execution: 9

Again, a cool concept with a lot of potential but it is missing a bit on the prompt for the challenge.

Total: 27

Smady can definitely make something cool from a Blitzball. While it may not be a signature weapon, we shall see what he makes out of the user.


Spiked Dog Collars
MasterWarlord MasterWarlord


Creativity: 6

Galf's Dog Collars are certainly interesting. Spiked, metal hoops that can be rolled across the stage and edges, used as punching daggers of sorts, and thrown like a Frisbee certainly sound dangerous. What makes them stand out though is that if you successfully "ring toss" them you gain a degree of control over whoever gets collared! Unfortunately the prompt was to "make" a unique weapon, and this is still the property of a certain character: Galf from Guts.

Practicality: 10

Hollow Frisbees of doom that can exert control over people you snag them with? Sounds good to me!

Execution: 7

This entry hits each criteria though it falters a bit on the unique part. Seeing as they are already attached to an existing character, they were not really "made" for the challenge as much as a regular set.

Total: 23

Warlord certainly has a good base to work with as he even has a character sorted out. However, the prompt was to come up with something rather than just "copy" something else.


Swordfish
Katapultar Katapultar

Creativity: 10

A Swordfish used as a living weapon? This has entered cartoon territory, but is still a very fun concept. As you'd expect, the swordfish is used as a Sword/Spear but also has the perks associated with being a living fish. Firstly, it is flexible so you can attack and bend at odd angles independent of your... owner? Secondly, if you toss it and somebody else picks it up it will actually attack them and struggle to escape before loyally flopping back to you. You can reward this behavior by eating the poor guy. No, really, biting the sword fish will shorten/lighten it as a weapon and (heal you?), at the cost of killing it and making it a more... normal weapon I suppose.

Practicality: 10
The only "minion-ized" weapon so far, I can totally see it having a miniature set of its own as well as hilarious attacks in general.

Execution: 10
Hitting each part of this week's challenge on the nose, Kat's Swordfish is an unorthodox but certainly unique weapon for whoever wields it.

Total: 30
I wonder just who the heck wields a swordfish minion?


Storm Bringer
Slavic Slavic

Creativity: 8

The Storm Bringer is a futuristic Harpoon Gun with an electrical generator attached. The generator connects to the harpoon with long ranged wires, able to electrocute anything it hits on command as well as act like a traditional "Hookshot" type weapon. The generator passively charges from ambient static electricity in the air to power the shock, but can also directly absorb electrical activity, which is a nice touch. In melee range, the Harpoon can be used by the wielder as a Bayonet or even a separate stabbing weapon given the proper hand-protection. However, it is noted that this is a "common" weapon among many folks, not just one group or person.

Practicality: 10
A nice, detailed set up for how this thing operates is nice, and the ability to absorb electricity and note that the shocking mechanic needs to be charged is a fun concept to play with.

Execution: 8
A common ailment again is that the weapon is not billed as being particularly unique for the wielder.

Total: 26
Slavic has an interesting tool on his hands here, but can he make it unique to the character who wields it?


Psychic Daggers
Plazzap Plazzap

Creativity: 9

A simple yet effective idea, the Psychic Daggers are special weapons designed for the Telekinetic wielder. They are totally manipulative and even can be used far away from the user the same way they would be up close. The daggers themselves have an eyeball motif, but there doesn't seem to be anything to them other than that and the psychic connection which also only inferred.

Practicality: 7

The fact that there are 6 daggers at a time that can be independently used strikes a bit of a red flag for me in terms of stage presence/control. It'd be like having 5-6 Lumas out at once or having an attack hit 6 times in quick succession. Hopefully something limits this?

Execution: 9

Despite some bumps here and there, the Psychic Daggers hit every mark along the way but with a bit of questionable background.

Total: 25

Plazzap needs to be careful with the balancing here of having x6 weapon attacks either in a row or across the field, but otherwise this seems pretty cool as an attack style.


Overall it seems we have a plethora of Stance-Changing weapons of sorts, as well as what may have been some confusion in terms of the prompt of "making" a weapon up. Overall though, you all did excellent this week and have me brimming with ideas for each entry. Lets flesh them out further, shall we?


WEEK 2:
THE WIELDER

While a weapon may be unique on it's own, only Marth can really wield his Falchion or Samus operate the Varia Suit. This week it is time to bring the Wielder of your weapon to light!

The wielders should have some Backstory to them for how/why they use their weapons, and a picture if available. Their stats should be included too, alongside 1 Unique Stat such as a movement quirk, unique defense or otherwise unique mechanic to them. And since the ideas have probably been buzzing around since last week, they should include the Special Move best suited as their signature usage for the weapon. The Nspec is usually the defining use for the weapon or at least most iconic, such as the powerful Charge Shot, tactical Shield Breaker, the versatile Monado Arts, and so on, though in many cases the other specials shine through such as Link's Spin Attack Up B, Cloud's Cross Slash Side B, or DDD's Jet hammer Down B. Whichever it is, be sure it shows off just what your weapon can do!
 
Last edited:

UserShadow7989

Smash Journeyman
Joined
Aug 13, 2007
Messages
307
MYMini Week 2 Entry:


Knightly Witch Garnet


(source: http://www.renders-graphiques.fr/galerie/Jeux-video-3-autre/Princess-Etrian-Odys-96975.htm , based off of one of the Sovereign class designs from Etrian Odyssey; ignore the sword and the emblem.)

Though born to a family that can trace its lineage back to nobility, Garnet came in a time where the caste based system of old had long since ceased to be, and never once yearned for the reputation her name used to carry as her grandparents did. Instead, she took to the family business like a fish to water, learning to forge both decorative pieces and practical tools alike.

When they discovered she had been studying fire magic to further hone her skill as a blacksmith, her grandparents cooked up the plan of enrolling her in a prestigious academy of magic as a way to give the family name clout again. Though she and her parents were resistant to the idea, Garnet eventually caved to the demand to prevent her family from fighting, and decided to look at it as a chance to further her talents and learn new things.

Before being allowed to go, she was tutored to act refined and dignified in the presence of others; a facade she's been careful to keep up in public, and one that has given her a reputation for snootiness among other students. Despite some initial hurdles, Garnet has thrown herself into her studies, though with far less aptitude for magic than for working metal.

Garnet's preferred spells revolve around manipulating objects more than elements. Her specialty are spells of calling and motion. She can call her creations to her, and imbue them with magic to control them indirectly, with the aid of runes she has engraved within them. This focused study has limited her in comparison to her classmates, but combined with her excellent craftsmanship and her training, she is able to utilize a variety of tools at once, and with greater precision than her peers.

The pale blue aura her spells generate, and her ability to move inanimate matter with just a gesture, has given her the unwanted title of "The Haunted Witch". As much as she disliked the lifestyle she had been forced to take, she took pride in what progress she made as a witch, just as she took pride in her ability as a blacksmith. To hear her talents indirectly attributed to some sort of ghost possessing her drove her to her wits' end.

To rid herself of the name, she took to adding decorative flair to her work and training with her equipment, even wearing ornate armor when in public. She crafted her wand, the Mithril Thorn, to further this image with its rapier-like appearance and distinctive rose-like appearance when used as a focus. It was all an attempt to spread her preferred title of "The Knightly Witch", and all with limited success.

Her workaholic tendencies and social pressures started to catch up to her. The split in focus between repairing and further increasing her stock of tools, studying magic, and trying to train herself with the equipment, means she has improved little in all three. Things probably would have worsened for her... if not for an incident at the academy right as she was starting to slip, presenting a new opportunity to earn acclaim.


Stats:

Traction - 8 (10)
Weight - 7 (9)
Size - 7 (7)
Gravity - 6 (7)
Jump - 6 (5)
Fall Speed - 5 (6)
Dash Speed - 4 (3)
Air Speed - 4 (3)

Garnet's statistics lean more towards being a middleweight than a heavyweight, but ultimately she sits on the line. In terms of body shape, she is a little taller than Lucina, and a little wider. She has some longevity that contrasts with the stately airs she presents, sharing Samus' resilience, Lucina's fall speed and aerial mobility, and a pair of decent jumps in the vein of Pikachu's.

Her dash speed is also in the same league as Samus', being a bit below par, while her walk speed is far more impressive- just a little slower and more controlled. She moves with short, smooth strides in a fencing stance, matching Peach's dash. As a result, she can re-position herself well in the middle of a melee, excellent in light of her mid-range strategy that lets her attack from far, near, or anywhere in between.

As for the numbers in parenthesis, Garnet has the ability to access a far more proper set of armor than her "casual" wear as needed, described in her Down Special- when wearing the proper full plate, her weight increases to be just shy of DK's, her dash speed is comparable to Peach's with an equal drop in walk speed, her fall speed and aerial mobility worsen to match Corrin's, and her jumps are more like Ike's.

She becomes a hair bigger in each dimension, but on the bright side, the presence of remotely reasonable footwear over her overly 'pretty' armored heels gives her a major improvement to traction, letting her stop on a dime and launch into her dash without a hint of delay.


Special Mechanic: Mithril Thorn

As outlined above, Garnet wields many kinds of weapons, often several at once through the control of her magic runes. However, the most important of them all is her wand, Mithril Thorn.

When holding one of her summoned weapons, she keeps the small weapon sheathed at her side, her off (right) hand on its hilt when not attacking. However, some of her spells produce a lingering effect that require both a magic focus and control runes at hand; while one or more of these spells are active, Garnet waves Mithril Thorn like a conductor would wave their baton, the weapon glowing bright red and green.

These spells 'halt' when Garnet performs an attack with Mithril Thorn, resuming once she recovers from the attack's lag and continues the proper motions where she left off. Duration, timing, and all effects of the spell are essentially paused for this time, and resume exactly where they ended when the attack is over. For the same reasons, they will also halt when Garnet is incapacitated by any form of stun.

With a summoned weapon in hand, she can maintain the effects of those spells while attacking with that summoned weapon, at the cost of increasing that attack's start up lag by 1/4th from multi-tasking. This allows Garnet to adjust the timing of certain effects as she uses her standard inputs to better capitalize. Throwing a weapon does not have increased lag, allowing Garnet to quickly swap between using Mithril Thorn and one of her lesser creations.


Specials:

Side Special - Spectral Fire

Flourishing Mithril Thorn, Garnet conjures a pale, blue, Pokeball-sized flame. Garnet remains in place for the duration of this input, directional controls moving the small flame at Ganondorf's dash speed as she waves her wand. Entering this stance in the air briefly slows her fall to compensate. She can end it at any time with no lag by performing some other input, the ghostly fire left floating in place.

A single attack or a collision with a solid platform disperses the flame without fanfare, causing Garnet to exit her stance as normal. Hitstun also ends the input. When it hits a foe, it will do 4% damage, stuns them briefly, pushes them back slightly, and causes them to drop any item they're holding. Contact with objects conjured by Garnet causes the fire to spread over the entirety of that object instantly, lingering as a hitbox with that object's shape and the projectile's normal effect.

It's the weapons Garnet summons that are the main target for this effect. In addition to the normal effect on an object, a ghostly hand forms within the fire and wraps around the grip of the weapon, pursuing opponents.

The hand's attacks have their lag increased, and their damage, knockback, and hitstun decreased, by roughly 1/6th of the normal amount for each such flame, hand, or burning object created by this Side Special that is currently in play. Being a spell, it is incapable of attacking while Garnet is performing her own inputs or stunned, and will freeze mid-attack and lose its hitbox qualities until her input is finished.

The hand has 20% stamina and moves at Ganondorf's run speed. It is able to attack with any of that weapon's associated inputs. Attacking the hand inflicts no knockback, but stuns it for double the normal length of time, meaning Garnet cannot sit back and let her ghostly spells handle the battle for her. Stunning the hand causes the flames of the weapon to fade until it can move again. Effects that destroy the weapon it holds will also destroy the hand.

Garnet has a hard cap of three effects from this input at a time; she can have three flames floating in place at once, or one flame, one burning object, and one animated weapon, but not three of each. Producing a new flame causes the oldest effect to vanish, and she can choose to dismiss an effect by grabbing it like she would an item (leaving her holding the formerly animated weapon if she removes the effect from one). When Garnet is KOed, like her summoned objects, the flames disappear.


---


I originally conceived of Garnet as a boss fight in a hypothetical game called "Bubble Witch", the same one my MYM 14 set "Bubble Witch Marin" hails from. In fact, she was inspired by the Bubble Armor Down Special of Marin's and initially conceived as a Halloween set (which makes the timing of this MYMini pretty auspicious).

Her fight would revolve around her making use of summoned and animated weapons and armors, will-o-wisp projectiles, and teleporting herself, her creations, and various bits of furniture littering the area and serving as terrain about. She'd spend as much of the fight in the thick of it, using her rapier/wand to burst the player's bubbles, as she would using her animated servants as shields.

Story-wise, she'd see the incident of monsters being released throughout the academy as a chance to make a name for herself, trying to take initiative. Her demeanor and attempts to get Marin to follow her orders would eventually result in the fight, during which the ornate trimmings and details would break off of her personal armor and her various weapons to reveal the more practical work underneath as they took damage.

By the end of her fight, she sheds the false airs and makes peace, revealing her true colors and offering to help instead of trying to take charge of everything.
 
Last edited:

ForwardArrow

Smash Ace
Joined
Aug 17, 2011
Messages
502
Metireon
Metireon is the man responsible for stealing the monolith. He was formerly a high ranking security guard working at Lab 8, the government facility designed to hold and study the monolith. For most of his life, he lived with a good deal of comfort and stability despite his intense training regime, but at one gathering he ended up listening in on a conversation between two government officials. They were discussing the contents of Lab 63, a government lab which was being used in private to perform horrific human experiments in the interest of evolving mankind with science and magic. Metireon was horrified, and ended up ambushing one of the men on their way home and forcing them to show him many more government secrets. This included the newfound use of the monolith, as powerful mages had managed to connect to the world of demons and were forcing them to fight for the entertainment of the wealthy and powerful.

Furious, Metireon went and stole the monolith from the lab, and went into hiding with his wife and child. Soon, he began to hear a being calling from beyond the monolith, an entity known as Yldretch. It claimed itself to be the among the greatest and most powerful of all demons, and it offered him the ability to use the monolith as a weapon by connecting it to both himself and parts of the demon homeworld in the midst of violence. His phyical strength would also be massively enhanced, allowing him to wield the nigh indestructible piece of metal with a greater amount of ease. In exchange, the souls of anyone he killed would be given to Yldretch. Metireon found himself agreeing, as he considered the actions of his enemies so vile that offering their souls to this demon was a fitting punishment.

With his newfound power, Metireon left to find allies to help him destroy the existing government and rebuild from the ground up. He founded an organization on a far off and inhospitable planet of outlaws and people disillusioned with the government. They built a proper base and an army together, and with their help Metireon laid siege to one of the government's secret labs and destroyed it. However, towards the end of the battle he came to realize the cost of making his pact with Yldretch, as the demons were not entirely within his control and ended up killing a good portion of his comrades and feeding their souls to Yldretch. Horrified by his mistake, he chose to never again fight in a situation that would put any of his allies at risk. He left the organization to fight without him, putting his most trusted ally in charge in his place.

He fought his last battle a little while later, when Lab 63 came under siege by an evil cult that had newly risen to power, centered around a robot which had absorbed a large amount of magic and turned into a demonic bird-like monster. The cult's objective was the annihilation of all of mankind, and by stalking them to the lab Metireon determined he would take out two birds with one monolith. He fought his way through many cultists and killed a large portion of the lab staff that the cultists themselves had not, before eventually falling after the lab was already mostly destroyed. Despite his soul being given over to Yldretch, he took satisfaction in his death that he had weakened the cult and helped destroy perhaps the government's most horrific institution. His legacy lived on long after his death, with the foundation he made creating many powerful warriors who would shape the future.

Appearence
While Barbatos here is our basis, Metireon looks a fair bit different from the only man who hates items more than competitive Smash players. Rather than the rather armor/cloak thing Barbatos has, he wears the powered armor he used in his security work. Said armor is very worn from the battles he participated in and Yldretch's presence slowly corroding away at it. Aside from that, his hair is a bit shorter though still quite wild, and more of a grey color. He has a very similar face/build however, you need to be pretty built to wield the monolith as a bludgeon. By default, he holds the Monolith with both hands at his side, ready to swing it like a heavy bludgeon, though he has a strap across his back he can use to carry it outside of combat.

Stats
Weight - 9.5
Size - 9
Traction - 9
Fall Speed - 8
Dash Speed - 7
Air Speed - 4
Jump - 3.5

Metireon clocks in at about Ganondorf's size overall, and actually weighs a bit more than the king of evil. This is due to his heavy metal armor, which does not impede his movement nearly as much as you'd think, as well as the monolith itself. In terms of the air however, Metireon is far less lucky, having underwhelming air speed and a poor set of jumps. His impressive weight is actually less of a boon than it looks, as Metireon's set actually deals him a massive amount of self-damage, and combined with his recovery he's quite a glass cannon. That said, it would be wrong to underestimate him as his raw power can be absolutely incredible. By the way in comparison to his body size, the Monolith is only a little smaller than Metireon himself, making it a huge weapon.

The Monolith's extreme bulk and durability does serve Metireon well in one way, it actually serves as a somewhat effective defense. If an attack would hit Metireon when the Monolith is in the way, be it simply being carried or being used in the wind up for a hitbox, the monolith will partially block the attack, causing it to deal no damage and half the knockback. This will actually serve as a static projectile defense while standing or walking, but the monolith's position is too inconsistent during his run or dash to serve as a reliable defense. Curiously, if the Monolith is hit during the startup of one of Metireon's attacks, he will continue the attack and actually have its damage and knockback boosted by half the damage and knockback of what sent him flying. This is only true if he's not attacking in the opposite direction he was launched, as him slamming the Monolith forward in the opposite direction he was flying would really not make much sense to have gain the power. If he's aiming the attack up or down though, that's fine. Obviously, not very useful on its own, but in the context of some of Metireon's moveset, or just being in an FFA or against a minion/trap user, it can give him immense power.


Neutral Special - Power of Yldretch
Metireon places his hands on the Monolith as an ominous red aura eminates from it briefly, before it begins emanating a violent black energy in front of it, in an area about half as high as the monolith that goes 1.3x the length of Bowser's fire breath. Its actually quite similar to that move, decaying at a similar rate but dealing twice the damage, which is pretty horrific when the hitbox is a fair bit bigger. There is an unfortunate downside, as Metireon actually takes damage from this, as much as if he were in a Bowser fire breath for as long as he held the move out as he looks to clearly be in pain from Yldretch's dark magic. It also recharges at two thirds the rate of said move.

After the Monolith stops emitting the energy, it will become fainter and linger in the air, leaving behind a dark magic cloud that varies in size depending on how long you used the move. At max its nearly the size of a Smart Bomb blast, which is obtained by holding it long enough for it to entirely decay. The cloud will deal 1% per second to Metireon while he's inside it, and 2% per second to enemies. It will lazily drift forward along the stage, not really moving forward more than 1.5 battlefield platforms over its existance before expiring. You can only have up to the amount of 1.3x a max size cloud of it on the stage at a time, otherwise part of the oldest cloud will begin to disappear. Multiple clouds can combine into a larger one if they collide with each other, taking the flight path of the larger of the two.

This has two uses, the first of which is a pretty easy one to understand. Demons can thrive to a degree off dark magic, so if you end up using one to attack while inside a cloud it will actually enhance the power of its attack. This will drain a portion of your cloud, so keep that in mind. The second is more dangerous, but also more powerful. After 10 seconds, Yldretch will detonate the cloud with the intent of killing anyone he can possibly can for their soul, dealing damage and knockback based on the size of the cloud. A really small one of about Mario's size will deal and underwhelming 8% and radial knockback that KOs at 250%, while a max sized one deals 25% and radial knockback that KO at 95%. This gives you a hugely powerful delayed trap, and a nice payoff for all the self damage you took, but there's one catch. If the explosion hits you, you take all the damage and knockback yourself!

That sounds like entirely a bad thing, but there is one thing to keep in mind. Your monolith can potentially block the explosion, be it by having the blast graze the back of the monolith or hit it during the startup of one of your attacks. The later bit is nice, as you can actually use the explosion to boost yourself forward, in a really powerful attack at that. And while just having one out to launch yourself forward in a max power strike is pretty predictable, when you have a couple clouds on different timers, this makes the battlefield a very scary place for opponents.

One last thing, but its not relevant to gameplay. There's a 15% chance that, if you get KO'd by your own cloud, you will hear a loud, demonic, hissing voice say "You disappoint me Metireon". So play smart with it, you wouldn't want to disappoint the greatest among demons.
 
Last edited:

Altais

Smash Champion
Joined
Nov 14, 2007
Messages
2,083
Location
Starbase, where no turtle has gone before.
Revised mine Gunvolt moveset. Hopefully it came out better this time. Any productive criticism is appreciated.

Gunvolt Moveset


♦ Index:
1). Jab & Dash
2). Specials
3). Aerials
4). Tilts
5). Smashes
6). Grabs & Throws
7). Final Smash
8). Author's Notes


Summary

Gunvolt is all about speed and evasion. The focus of his playstyle is building up damage as quickly as possible, then move in for the kill. Gunvolt only has three kill moves (side-b, d-air, and f-throw), though, which require some finesse to land.
As a 14 year old warrior, Gunvolt stands at roughly the same height as Pit. Among Fox, Zero Suit Samus, and himself, Gunvolt is the second-fastest runner. His walking speed is half his running speed. Among Roy, Mega Man, and himself, Gunvolt is the second highest jumper, and second fastest faller. As Gunvolt moves, he leaves behind a trail of blue shadow-Gunvolts. When on the ground, jolts of electricity surge from Gunvolt's feet, and along the ground.
Gunvolt's main gimmick is his Electrical Power (EP) gauge. Some of Gunvolt's actions deplete his EP gauge, and one refills it. Gunvolt has a total of 650 EPs. Taking damage will deplete EP. The amount depleted is the % x 10. So if he takes 3% damage, he'll lose 30 EP, and so on. When Gunvolt is not taking damage and is not expending any EP, after two seconds his EP gauge will automatically start to refill, taking roughly four seconds to refill an empty gauge.
If Gunvolt's EP gauge is completely emptied, he will enter Overheat. During Overheat, his gauge will be red instead of blue, and until it refills he will not be able to use any moves that require EP, and the amount of damage he takes from attacks will be multiplied by 1.5. Furthermore, Gunvolt's normal melee attacks will lose their electric effect, thus dealing less damage.
In a nutshell, Gunvolt can make quick work with his opponents, but he himself can be killed very easily. Ergo, just like in his game, Gunvolt's best defense is to not get hit.​


1). Jab & Dash:

Jab (Naga Bolt): A non-flinch move. Just like Mega Man, Gunvolt shoots instead of melees with his jab. Gunvolt fires a weak electric round from his pistol, Naga, that sticks to the opponent. Up to three rounds can be stuck to a single opponent, and up to five rounds can be stuck in total, after which the last round that was stuck will disappear. So you have the choice whether to stick multiple opponents, or focus on one or two. Just like Olimar's Pikmin, however, the opponent can un-stick the Naga Bolt(s) after enough flailing.
Once an opponent is stickied, Gunvolt can shock them from far away with his Flash Field (see special moves). The radius at which an opponent can be shocked is roughly 3/4 the length of Final Destination.
You can either fire repeatedly by repeatedly pressing the special button, or hold down the attack button for a charge shot. The repeated fire rate is very flexible; ranging from steady to rapid. The Naga Pistol charges very quickly, and once it is fully charged, it will fire as soon as the player lets go of the attack button. The charge shot can go straight through walls, shields, reflectors, and other solid objects, sticking any opponent it touches. It is also much faster than a normal shot.
The normal shot does 1% damage, travels 8/10 the distance of Final Destinaton, and travels roughly the same speed as Ness's PK Fire. The the charged shot deals 3% damage, and travels twice as fast, but the same distance.
The overall move has immediate startup time, and next to no cooldown.


Dash Attack (Naga Bolt): Gunvolt simply fires his Naga pistol whilst sprinting forward. Functions exactly the same as his jab, only he runs whilst shooting or charging. If fired rapidly, Gunvolt will briefly cease fire after six shots.


2). Specials:

Neutral Special (Flash Field): A non-flinch attack. Gunvolt surrounds himself in a forcefield of electricity, the radius of which is half his height multiplied by 3. Gunvolt can still move around and use normal attacks while this move is in effect, and it will stay in effect as long as the special button is held. Any opponent within the Flash Field will recieve 1% at a rapid rate. Anyone with a Naga Bolt stuck on them will rapidly recieve 3% damage per bolt. The Flash Field can also completely block physical projectiles--BUT, it will have no effect on energy projectiles. For instance, it can block Samus's missiles or Link's arrows, but Samus's charge laser and Pit's arrows will go right through it. While used in the air, Gunvolt's fall speed will be halved. Whilst this move is in effect, Gunvolt's EP gauge will slowly deplete. Instant startup. Good for recovery, if knocked high above the stage. Flash Field takes roughly 10 seconds to deplete a full EP gauge. REPEAT: All damage inflicted by this move is non-flinching; so even if an opponent is inside the Flash Field, they can still grab or attack Gunvolt--either of which will stop the move.


Side Special (Spark Calibur): Gunvolt's primary kill move. Gunvolt zaps the opponent(s) with a giant sword made of condensed electricity. The length of the sword is Gunvolt's height times 7, and the base of the sword is his height times 2. This move deals 20% damage, and 1.5 times the knockback of Robin's back air. As a price, however, this move will consume half of Gunvolt's total EP. Futhermore, it has a slow start, and a high cooldown. Even worse, it can be shielded--though the shield will shrink significantly. Thus, this move is best used as a trap or an edgeguarder. If this move is used in the air, Gunvolt's descent will be halted, but he will enter helpless frames soon after. Lastly, to prevent abuse, each consecutive use of this move will multiply its EP consumption by 1.5--and obviously, it will stale.


Upward Special (Joule's Anthem): A non-damage move. Gunvolt's spirit sidekick, Joule, appears behind him and sings a note. Immediately after, a firey, rainbowish aura surrounds Gunvolt. Joule then vanishes, and for three seconds Gunvolt will have unlimited air jumps. He will also have unlimited Air-Dashes (see Aerials). Both during and after this move, Gunvolt can still use his normal attacks and his neutral and side special, and he will not lose EP from attacking or taking damage. Using his side-special, however, will terminate the move. If Gunvolt is in Overheat, his gauge will instantly refill. As time runs out, Gunvolt's aura will flicker on and off. To prevent abuse, each consecutive use of this move will reduce the timer. Recovery aside, this move is best used in cases of emergency.


Downward Special (Recharge): Gunvolt accelerates his cool-down time, refilling his EP gauge in less than a second. During the move, however, Gunvolt is helpless, so use wisely. This move can only be used on the ground, and cannot be used during Overheat.


3). Aerials:

Air Dash: Gunvolt has a unique aerial mechanic from the rest of the Smash cast. If the player inputs the dash command as they would on the ground, Gunvolt will fly forward; roughly the same distance as Ike's uncharged quickdraw. This move does no damage--rather, its sole purpose is for recovery and evasion. Gunvolt can use two air-dashes before landing, and each consumes 90 EP. No EP = No Air Dashes. If Joule's Athem is in effect, this move will consume no EP.

Wall-Climb: Like some other fighters, Gunvolt can wall-jump. But unlike others, Gunvolt can also climb walls by repeatedly kicking off them. This is done by pressing the jump button against a wall, with the control stick tilted toward the wall.

Neutral Aerial (Naga Bolt): Gunvolt shoots his Naga Pistol. Works exactly the same as his jab.

Forward Aerial: A five-hit move. Gunvolt will perform a flurry of electrified, lightning-fast kicks. Similar to Fox's forward air, but slightly longer range, and has an electric effect. The first hit deals 3% damage, the second deals 1.5% damage, the third 1% damage, the fourth 1.2%, and the final hit 4% damage. During overheat, the damage is divided by 1.5. Instant startup.

Backward Aerial: With his gun pointed downward and free arm across his face, Gunvolt swiftly performs a powerful, electrified pushing kick behind him. Similar to Fox's back-air, but slightly longer range. Deals 15% damage. During overheat, the damage is divided by 1.5. Quick startup.

Upward Aerial: Similar to Falco, Gunvolt backflips, kicking any opponent above him in an arc whilst electrocuting them. Deals 13% damage. During overheat, the damage is divided by 1.5. Instant startup. Great way to finish someone? Up-Air, double jump, Up-Air, Lightning Sphere.

Downward Aerial: Gunvolt performs a diagonal axe kick, spiking the opponent at a -45 degree angle. Deals 18% damage. During overheat, the damage is divided by 1.5, and the move WILL NOT spike. Quick startup.


4). Tilts:

Forward Tilt (Naga Bolt): Gunvolt simply walks forward whilst shooting his Naga Pistol. Functions exactly the same as his jab, only he walks whilst shooting or charging. If fired rapidly, Gunvolt will briefly cease fire after six shots.

Upward Tilt: With cat-like speed, Gunvolt back-flips, sending the opponent in the air with an electrified kick. Very similar to Robin's up-air, in terms of range. Deals 10% damage. During Overheat, the damage is divided by 1.5%. Instant startup. Good for escaping rushdown, and juggling.


Downward Tilt: Gunvolt slides forward like a baseball player, his body surrounded by electricity. Gunvolt goes straight through opponents, knocking them upward whilst shocking them. Instant startup. Afterwards, Gunvolt can follow up with up-air. Similar to Mega Man's d-tilt, but travels twice as fast. Good for escaping rushdown.


5). Smashes:

Note: Like Robin's Smash attacks, Gunvolt's Smash attacks are a little slow to start, and thus are best for punishing. The purpose of Gunvolt's Smashes is to paralyse the opponent so he can either combo or finish them off.

Forward Smash: A two-hit move. Gunvolt raises his free hand and swings the back of it toward the opponent, conjuring a ball of electricity that zaps the opponent. The ball is roughly Gunvolt's height, and floats slightly above him. This move doesn't do much knockback, even at higher percentages, but has a paralysing effect. The initial hitbox deals 13% damage whilst paralysing the opponent, while the second hit box deals 9% damage without paralysing. Slightly slow startup. Best used as a trap or punisher.

Upward Smash: Gunvolt flicks his free hand upward, conjuring a bolt of lightning from the ground that zaps the opponent. Covers half the vertical range as Palutena's up-smash. Horizontal range is highest at the bottom, and lowest toward the top. The knockback is also strongest at the bottom, and weakest at the top. At the bottom, this move deals 15% damage. At the very top, it deals 8%. Slightly slow startup.


Downward Smash: Gunvolt punches the ground with his free hand, sending a surge of blue electricity along the ground in both directions. The electricity paralyses opponents, leaving them open for attack. Very similar to Robin's Levin d-smash. The punch deals 14% damage, while the electric surge deals 8% damage. Great for punishing dodge rolls. Slightly slow startup. Best used as a trap or punisher.


6). Grabs & Throws:

Grab: Gunvolt leans forward and quickly thrusts out his free hand. Instant startup, and almost no cooldown. If it connects, he will pull the opponent toward him. Has a slightly longer range than Pit's grab. Dash grab reaches farther, but has a higher cool down. Pivot grab is fastest, but has the shortest range.

Pummel: Gunvolt sends a surge of electricity through his arm, into his opponent. Deals 3% damage. Roughly as fast as Pikachu's pummel.

Forward Throw: Gunvolt sends the opponent flying upwards diagonally with a backflip kick. Deals 10% damage. Can kill near the ledge at higher percentages.

Backward Throw: Similar to Fox, Gunvolt will throw the opponent away and fire three shots at them. Afterwards, the opponent will have three Naga Bolts stuck to them. The throw deals 6% damage, while the shots deal 1% damage each.

Upward Throw: Similar to Fox, Gunvolt will throw the opponent straight up in the air and fire three shots at them. Afterwards, the opponent will have three Naga Bolts stuck to them. The throw deals 4% damage, while the shots deal 1% damage each.

Downward Throw: Similar to Fox, Gunvolt will slam the opponent to the ground and fire three shots into them. After this move, the opponent will have three Naga Bolts stuck to them, and Gunvolt can follow up with up-tilt. The shots deal 1% damage each, and the throw deals 5% damage.


7). Final Smash (Voltaic Chains): Cutting loose with all his power, Gunvolt summons a barrage of electrified chains that lash across the screen, dealing 10% damage to everyone they touch. Once the entire screen is all but covered, the chains explode with a powerful discharge, dealing 40% damage and killing at 50%.


8). Author's Notes:

• Originally, Gunvolt's jab was a traditional 3-hit combo, Naga Bolt was his neutral special, and Flashfield his up-special. In the end, however, I hated this idea, because it didn't give Naga Bolt, Gunvolt's most important weapon, much flexibility. In order to better capture the essense of Gunvolt's game, I pulled a Mega Man and made Naga Bolt his jab, dash, f-tilt, and n-air.

• Originally, Gunvolt's down-air was a stall-then-fall drop kick (similar to Bayonetta), which was inspired by one of the bosses from his game. But I later scrapped that idea for his current down-air.

• In Azure Striker Gunvolt, Spark Calibur does not consume EP. Rather, it consumes Skill Points, which take a LONG time to regenerate. I considered incorporating these skill points, but in the end thought that would handicap Gunvolt, so I had the move consume EP instead.

• In Azure Striker Gunvolt 2, it is called Spark Calibur. But in the first game, it is called Luxcalibur.

• Joule is a major character in both Azure Striker Gunvolt 1&2. She has the ability, bluntly put, to grant others special powers with her singing voice. She mainly behaves as Gunvolt's sidekick. Under certain circumstances, if Gunvolt falls in battle, Joule will revive him with her anthem, and Gunvolt will be granted unlimited EP, enabling him to use Flash Field for as long as he wants, and jump and air-dash as many times as he wants. I decided to base his up-special on this mechanic.

• Gunvolt's up-tilt, up-smash, and down-air were all inspired by Kyosuke Kagami, a playable character in Rival Schools, developed by Capcom.


• Gunvolt's down-tilt was inspired by one of the bosses from his game, Viper, whom bluntly put is a hot-headed pyromancer. The only difference is that Gunvolt uses electricity instead of fire.

• Gunvolt's f-smash is based on a skill he uses in Azure Striker Gunvolt 2, the name of which I don't yet know. It is in the above video, at 6:29.

• Gunvolt's down-smash is based on an attack the true final boss of Azure Striker Gunvolt uses, whose identity I will not reveal due to spoilers.
 
Last edited:

JamietheAuraUser

Smash Lord
Joined
Jan 11, 2010
Messages
1,196
Location
somewhere west of Unova
MYMini Week 2 Entry:

Trace

Trace is a young, up-and-coming bounty hunter. Like most of his type, he recently graduated from the academy (because all anime settings have an academy for whatever the setting's main combat-related profession is, and because I'm unoriginal) and the dual Echo Concussors he wields are of his own design. The guns' tractor beams and melee secondary fire help make up for his own lack of physical strength, with the tractor beams in particular being ideal for restraining targets.

His outfit matches his weapons' colour scheme, tending towards light greens, blues, and yellows. He wears a jacket somewhat reminiscent of that worn by Sora from Kingdom Hearts, but light green instead of edgy black, and beneath it is a long-sleeved shirt of a more intense blue than the rest of his outfit. He also wears a long, flowing scarf of a light green-yellow colour, because you can't have a speedy anime character without a cape or scarf flowing behind them to emphasize their acrobatic movements. Lending a touch of non-fantasy to his outfit is a pair of simple blue jeans, which are also rather light in colour. The whole ensemble contrasts his rather normal, brown hair, though the cut is still a bit anime (think perhaps similar to Kratos Aurion from Tales of Symphonia, or Cloud's Advent Children costume).


Statistics:

Weight: 5/10 (95 points)
Height: Pit
Walking Speed: Mewtwo
Running Speed: Meta Knight
Aerial Speed: Cloud
Ground Traction: Falco
Aerial Control: Falco
Ground Jump Height: Cloud
Midair Jump Height: Cloud
Short Hop Height: Sheik
Fall Speed and Fast-Fall Speed: Zero Suit Samus
Gravity: Ike

Trace has generally quick, but not top-tier movement in all respects, with the exception of his relatively low gravity. This low gravity is beneficial to him, as it allows him more airtime to leap over foes' heads and strike from above. His short hop isn't especially low, but he's adept at striking at low angles from the air regardless so it doesn't much matter to him.

Movement abilities: Wall jump, ZAir

For his ZAir, Trace extends one arm forward and fires the tractor beam from his Echo Concussor in that hand. The tractor beam's reach is only half a stage builder unit, though, so it's not much of a tether. As ZAirs go, Trace's is somewhat unique. Like other tethers in Smash 4 and Brawl, Trace's ZAir will home in on a ledge if there's one within its very short range, in order to not subvert player expectations too much. Unlike other tethers, however, Trace's ZAir will latch onto walls as well and pull Trace towards them, at which point he transitions to a wall cling. Against foes, Trace's ZAir serves as a command grab that deals a token 3% and pulls Trace towards his foe and/or his foe toward him depending on who's grounded/otherwise attached to a surface and who isn't. Trace can activate many of his aerials and Special Moves while maintaining a wall cling, which will be noted on a move-by-move basis. Trace's ZAir is an example of such a move, which when used from a wall cling will pull the foe to him and not the other way around.

Like many other unarmed/dual-wielding characters in Smash 4, Trace's animations mirror between directions instead of him turning fully. All move descriptions thus assume that Trace is facing right.


Special Moves:

Side Special: Echoed Blast

Trace grabs a foe in front with his left-hand Echo Concussor's tractor beam and pulls them close (the grab has a bit of range to it due to the tractor beam, like Lucario's Force Palm grab did in Brawl), then begins charging energy into the gun in his right hand which he also holds up against the foe's midsection. (Complete with a particle effect of white energy gathering to the handgun's barrel.) This energy buildup takes just over 3/4s of a second, during which time you can repeatedly tap/press and hold B to pause the charging in order to rapidly discharge melee blasts into the foe for 2% damage each. If you spend the entire time blasting instead of charging, you can get off 6 blasts. After this charge/hold period ends, Trace quickly switches from tractor beam to melee blast with his left-hand gun and fires a single blast for 3% damage, then discharges the energy gathered into the right-hand gun. The right-hand gun's final blast deals 4% and pathetic Sakurai Angle knockback if no time was spent charging at all, up to 10% damage and KO power from around 120% if the entire hold period was spent charging instead of building damage.

With Echoed Blast, Trace can customize the move for KO power, raw damage, slightly less damage but GTFO knockback, or most anything else. At low percents, Trace likely won't be able to combo off of the uncharged version, so it may be worthwhile to build a bit of charge even at the expense of some raw damage simply to guarantee follow-up opportunities or even prevent yourself from being punished on-hit vs. especially heavy characters such as Bowser. (Because really, 19% damage isn't worth eating 11.5% from Bowser's jab combo in return.) As a counterpoint, you can extend the move's combo potential at higher percents by spending less time charging and more time blasting in order to reduce the knockback and keep the foe nice and close.

In terms of startup, the grab comes out a couple frames later than Lucario's Force Palm, and missing the grab results in a total move duration of just over 5/6ths of a second, so this move is highly punishable to whiff. If the grab succeeds, however, the move has relatively little endlag, but you usually can't combo into another Echoed Blast (or at least, not a grounded one).

When Echoed Blast is activated in the air, the initial tractor beam is angled 45° downward, but covers a somewhat wider range than it looks like it does in order to avoid janky misses. Trace holds the foe directly below him upon grabbing them, and the knockback angle of the final blast changes to a Meteor Smash. Additionally, the duration of the hold is reduced to just under 1/2 a second, and the potential damage is decreased accordingly, with the charged final hit dealing only 8% and having the knockback reduced to match, and Trace only being able to get a maximum of 4 blasts off if he doesn't let the final hit charge at all. If Trace lands during the move, he immediately ends the hold to unleash the final two blasts, and the knockback angle changes to 75° upward and forward. If, instead, Trace lands just as or immediately before the final blast connects, he can Meteor Smash the foe after they touch the ground, which can be great for combo potential if he manages to tune the charge appropriately. (The goal, of course, should be to get the knockback just low enough to not send the foe into tumble and thus not make them bounce or let them tech, so you get extended hitstun like the first hit of Snake's FTilt.)

If Trace activates Echoed Blast from a wall cling, he'll release his grip on the wall to do so, leaving him airborne.

[13–19% on the ground, 11–15% in the air]
 
Last edited:

Slavic

Ask not the sparrow how the eagle soars
Joined
Jun 5, 2013
Messages
757
Location
taco bell, probablyn't
CALLIOPE ROUSSOS


Calliope’s childhood couldn’t be called boring, having grown up impoverished in Greece, running around the streets, stealing, picking fights, and generally causing mischief. Nobody would have assumed Calliope was destined for anything great, never to leave the cracked concrete that contained her childhood. Calliope was determined to prove people wrong, sure she would get her name out, but had no interest in making her mark in a positive way. Calliope ran from home and joined a small gang, staying with them for a few years until she was getting too settled, and ran away once again. A decade of this cycle continued, hopping from gang to gang until Calliope ended up on the coast, and ended up joining a pirate crew in the Mediterranean. She rode with the crew aboard the Squall, terrorizing merchant ships and taking hostages, for years, until a fateful day when the crew learned about the one thing every pirate seeks; treasure. Calliope was ecstatic, riches beyond her dreams, and so gladly embarked with her crewmates to a small island where their tip led them.

Unfortunately for Calliope and her crew, they were destined for doom, and had been led into a trap by a rival gang. They attacked the ship, blasting it into pieces and killing or injuring the whole crew. Calliope was in ruin, having lost and arm and taken shrapnel to her face and torso, as she washed up on the shore of the isle the Squall was heading for. As the sound of the rival gang’s ship approached, Calliope fled into the isle, hiding in a cave where she couldn’t be found. Her plan worked, and even more miraculous to her the tip from the rival gang had been accurate. In front of Calliope was a wooden chest, dusty and cobwebbed, and Calliope trembled as she unveiled the treasure beneath. The thing that Calliope wanted most, but could never have, was finally in her grasp. She remained in the cave, waiting for rescue.

Years later, Calliope was richer than her family had ever been in her life, her body had been repaired with the latest in advancements, and she had paid off all the debts and favors she owed over the years. One thing was still on her mind however, and that was her lost crewmates. Calliope headed the development of a personal weapon for herself, and thus the Storm Bringer was born. Calliope tracked their ship down, using both the Storm Bringer and her mechanized enhancements to take it down on her own. Calliope approached the leader of the gang, and having the upper hand lifted him up and held the Storm Bringer to his body. The leader shivered with fear, tears forming in his eyes, when Calliope had a realization of why she was who she was, the poverty that forced her into a rougher life style. Now she had the privilege of wealth, access to a lifetime of happiness, but was choosing a fairly petty grudge to end lives over. Calliope dropped the leader and headed back home, with a brighter future ahead of her.

Calliope developed further models of the Storm Bringer from her prototype; though her body had energy sources to allow her to power the weapon herself, others could not, and so the lightning rod was developed for others’ usage. Different models were for police and military use, less devestating and more paralyzing, while fisherman had access to more precise, smaller models. Utilitarian versions developed, good for towing boats or rappelling, and of course criminals hardwired their own versions, specifically for lethal usage. Calliope, in addition to running the Storm Bringer company, helped aid police and military to take out crime and national security threats, becoming a national icon in the process. Now, Calliope brings the storm to Smash, ready to shock the competition and reel in her rewards.

STATS
Height - 6
Weight - 8
Walk Speed - 4
Dash Speed - 5
Jump Height - 6
Double Jump Height - 5
Air Speed - 5
Fall Speed - 8
Traction - 8

While not the heaviest, Calliope’s biomechanical parts give her some serious weight, and she is hard to push around. Unfortunately, all of Calliope’s enhancements are in her arm, organs, and eye, so her movement is limited by this weight. Bulky and with a middling speed, Calliope does benefit from her smaller size, making her less of a hitbox as other heavyweights. Additionally, Calliope is going to drop to the ground, and this could help her by comboing her opponents. Unlike many heavyweights, Calliope has many attacks which are quick, and so she can certainly hold her own and dish out fast damage. Additionally, Calliope has her own version of Donkey Kong’s grab, and when she grabs an opponent she will lift them in the air with her mechanical arm, able to pummel them or walk them around the stage. This ties in with some of her other moves as well, such as her Neutral Special, which will be described below. Finally, Calliope suffers normal damage from energy moves, as any other character would, but her mechanisms allow her to gather charge from this energy and convert it into her own. With energy, Calliope’s metabolism increases, allowing her to move faster, increasing her speed by one stage for every 15% energy damage she takes. Additionally, she uses this energy to power up her weapon, and for every 15% energy damage she takes she will deal 1% more damage with the Storm Bringer. Of course, Calliope has her own ways of charging the Storm Bringer, but it’s nice if the opponent can do it for her.

Neutral Special
Storm Bringer
Calliope brings the Storm Bringer up and, as long as this move is held, aims the rifle in the direction held, giving Calliope a 360 degree coverage with this move. She will rotate herself around should she aim behind her for ease. Once released, Calliope will launch the harpoon in that direction, traveling quickly up to three-fourths the length of Battlefield. Unless Calliope spends much time aiming, this move has quick start up, but should she miss there is significant ending lag as she reels the harpoon back in towards herself. On a hit Calliope will have lag too, but it’s decreased and she has the reward of skewering an opponent. Opponents will take 6% damage as they’re skewered, and of course Calliope now has her opponent on a line. This line has now become a tether, as the opponent has a harpoon stuck through them, and the tether at max distance is three fourths the distance of Battlefield (what a coincidence!). The closer the opponent is to Calliope when struck the worse it is for them, as they will struggle to gain more distance from her. While the Storm Bringer is a ranged weapon, once hooked there are very few actual ranged options for Calliope to follow with. If this move is tapped again, Calliope will send a shock through the line into the harpoon. This shock deals 3% nonflinching damage, and can only be used once a second. While it might not seem like much, this damage increases at a greater rate than other moves, with 2% more damage per level of energy. As long as the opponent is tethered, they will be at risk for serious damage output.

How does an opponent escape the Storm Bringer? One way, though opponents won’t appreciate it, is high knockback. If knockback would send an opponent over the Storm Bringer’s range by 50% or greater, the harpoon will detach from opponent, letting them fly. Luckily for opponents, this works both ways, so if they can get in close and launch Calliope that distance, they will be free, giving opponents good reason to get in close. When opponents get closer to Calliope, the line will go slack, meaning opponents are free to back out at their own whim. To really capitalize on the Storm Bringer, Calliope should hold the input, as this will cause her to start reeling in the opponent. This gradually decreases the line’s length at a rate of a third of Battlefield every two seconds. Calliope can move and jump while doing this, but cannot attack so she is vulnerable. This is a good reverse-spacing tool, forcing opponents close to give Calliope a better distance to attack them from, as well as preventing hit-and-run tactics. However, this decreases the Storm Bringer’s range, meaning it is much easier to break the harpoon off, and this is important to keep in mind. This is a great tool on many foes, given Calliope’s relatively heavy weight that means she is hard to knock around, but against opponents heavier than her Calliope will often lose at close range, as they will have a better chance of knocking her away and breaking the tether than the other way around.

---
For JOE's MYMini Challenge Week 2

pls dnt stel k thnx
 

FrozenRoy

Smash Lord
Joined
Apr 26, 2007
Messages
1,261
Location
Las Vegas, Nevada
Switch FC
SW-1325-2408-7513
I've made some notable changes to my Gluth moveset. Those who have read the set, or those who have not and are interested, are invited to check the changes out!

Gluth Changelog:
- Gluth is now able to attack his own Zombie Chow outside of Decimate and his Grab and even break them open for healing. However, his healing without eating them is halved. This should allow Gluth to better play a tug-of-war like game with his Zombie Chow. If this change ends up causing issues/is unpopular I'm more willing to revert it.
- Gluth's Back Throw has been replaced with an entirely new throw, "Bile Bite"!
- Gluth's Forward Smash has had a large and noticable effect added to it.
- Down Tilt has had a smaller effect added to it.
- Dash Attack has a new effect when moving towards injured Zombie Chow.
- Up Aerial has been replaced by a move with similiar function, but a new animation and an additional effect on Zombie Chow.
- Jab and Forward Tilt have had additional text about how they can be used to further your Zombie Chow game.
 

Munomario777

Smash Master
Joined
Nov 18, 2014
Messages
3,253
Location
Charleston, South Carolina
3DS FC
0387-9596-4480
Switch FC
SW-8229-3157-8114
Imagine a world of pure darkness.


Easy, isn’t it.


Far from any world charted by man, a desolate, barren rock with no illumination save for the stars of other, more fortunate planets light-years away. A planet with coves, secrets, and hidden beauty, but tragically, with no light to illuminate it. The humans here adapted to perceive using their other senses and even developed a relatively advanced civilization, but the rich colors and stunning vistas hidden by the shadows went to waste.

One day, however, those from other planets became curious as to what could be lurking on the dark planet of legend. A ship descended from the skies, the first light the planet had seen in centuries – well, that would be the term used if not for the planet’s lack of a sun by which to count the years. The travelers were stunned to find the planet’s natural beauty which is normally shrouded by complete darkness, but the lack of natural light and their dwindling power supply meant that they were only able to capture one picture of their white flag planted in the newly discovered territory, with a lone red dot in the center. Waterfalls, hundred-mile-high cliffsides, and floating rock formations fill the frame. To this day, this sole photograph is the only glimpse that we have of that planet… save for one other souvenir.

The light from the ship’s engines nearly blinded the planet’s inhabitants, but piqued the curiosity of one native. Due to the planet’s darkness, she was able to board the ship undetected. She remained in the shadows, staying completely out of sight until the ship arrived back on the Eastern Islands. Defending herself from the unknown outside the ship with an improvised Rope Kunai and wearing a blindfold to protect her eyes, she was fascinating to all who saw her. Her original name is a mystery – she has never revealed whether she even had one – but upon hearing about the alien and the tale of her homeworld, the residents of the area dubbed her Yomi Mekura.


Yomi, despite being a modern legend and all that, is predictably a bit of an outcast. She was quick to learn human language and adapted somewhat to the presence of light, but despite pretty much being a human, her being an alien is not her most appealing trait. Yomi has never allowed anybody to take her picture – whether this is due to her shyness or the fact that nobody ever turns the flash off, it is not known.

In her free time, Yomi hones her combat skills, in preparation for… something. While Yomi may seem reserved or introverted, and is indeed a mystery to most, the few who get to know her see her true colors. Despite her backstory, she can be surprisingly light-hearted at times, but she is very serious when it comes to defending her new home – or avenging her old one – whenever necessary, and trains hard in preparation for whenever she is needed. …That said, she’ll still lift up her blindfold and take a peek at her opponent in one of her taunts, and isn’t above having a bit of fun in a battle where the stakes aren’t as high.

In combat, Yomi wears a traditional, pitch-black Japanese ninja outfit, complete with mouth-covering scarf, in addition to her signature blindfold. While her eyes have adapted to Earth’s light over time, Yomi is still more comfortable using her other senses. This gives her a unique advantage in battle, as not only do Yomi’s opponents often underestimate her, she can also sense that which others do not, and lurk in the shadows without impairing her perception. By picking up on the opponent’s subtle body movements, Yomi can predict their next move and dodge it with her agility, but this requires her to first become familiar with her opponent.

Yomi’s physical abilities are befitting of a ninja. She is very quick on her feet, can leap great heights, and falls quickly to keep things moving. However, Yomi’s slender frame (similar to that of fellow ninja Sheik) makes her easy to launch, her individual strikes can lack in terms of power, and if caught off guard, she can take quite a few hits before regaining her bearings. Sensing things without sight has its disadvantages… (though it may be more due to her falling speed)

Yomi specializes not in tanking or parrying hits, but rather in sensing or predicting where her opponent is about to strike and then dodging the attacks with great flexibility. Yomi’s crouch is both low to the ground and quick to start and end, and her jump is the perfect height to, when combined with her quick fast-fall, jump right over a foe’s attack and retaliate.

Yomi has access to a wall-jump, wall-cling, and crawl. Additionally, by smashing / flicking a crawl input (diagonally downward on the control stick), Yomi can slide across the ground a short distance while crouching, about a SBB in length. It is a mystery how she performs this technique, and ever since 2001, nobody has ever been able to replicate it without resorting to illegal self-modification. Regardless, the slide allows Yomi to advance whilst dodging under a foe’s attacks, and retaliate. However, this technique should not be spammed, as there is lag, no invincibility frames, and performing another slide before the previous one finishes leads to diminishing returns in terms of distance. Instead, it is best to save this for use as a trump card, to catch the foe off guard or extend combos. It can also be used as a fake-out by dashing at the foe then sliding backward, or as a way to circumvent the skidding animation when you want to perform moves out of a dash.

Performing the slide input in midair causes Yomi to perform a brief air-dash diagonally-downward, like a Melee air-dodge in some respects (except at the end of the dash, Yomi keeps her momentum). This can be used to transition from midair to grounded movement with a slide, like a waveland, acting just like the grounded version. This is also a good mobility tool when in simple open airspace, and leads to confusing movements when combined with platforms. Another use for this air-dash is to punish attacks when combined with a jump, as leaping over an attack and performing an air-dash straight at the foe can give Yomi perfect positioning with good spacing, and is quicker than a fast-fall as it can be used before the peak of the jump.

Yomi’s jump, crouch, and slide, as well as universal techniques such as perfect-pivoting, are all faster than a simple spot-dodge or roll in terms of performing an attack after the dodge. However, since they are just mere hurtbox displacements, they can each be beaten by different types of moves – crouch and slide lose to low attacks, jump is foiled by anti-airs, and perfect-pivoting away can be punished with a long-ranged attack, or simply waiting for Yomi to come back into range. So while they are harder to use due to a lack of invincibility, correct application of these techniques makes them much more powerful tools. Sense attacks, dodge attacks, punish attacks. This is the fighting style of Yomi Mekura.


When Yomi first created her signature weapon, the Rope Kunai, it consisted simply of two blades attached with a rope, MacGyver style. They could be used as traditional kunai, or as a whip-like weapon by gripping one blade’s handle and swinging the other. Now that she has access to better materials (i.e. isn’t just scavenging this thing together), it’s possible to employ some more advanced tactics. Each of the weapon’s three handles has a button, which controls the weapon’s electromagnets. By pressing this button via Neutral Special, in a short animation, she can switch between two combat styles: one where both daggers are attached, and one where the electromagnets are turned off, separating the two kunai from the center handle. (The handle attaches magnetically to Yomi’s belt when the daggers are being wielded separately. Also, to clarify, the ropes wrapped around each kunai stay attached to the blades even in separate-dagger mode; the ropes simply detach from the center handle itself.)

Each of these two modes has a different set of attacks. The separate-daggers style has quick, short-ranged attacks that are excellent for comboing, being simple kunai slices that are swift and deadly. The attached style allows for wider range by swinging the rope and kunai like a whip, with the blade itself acting as a sweetspot while the rope in between deals little damage at all. The attached style is excellent for long-range play and feeling out your opponent’s habits from a safe distance, whereas in CQC, separate daggers are often your best bet for capitalizing on the foe’s quirks.

Switching styles mid-attack can also be beneficial; during one of the attached-kunai style’s wide swings, pressing B will cause the dagger that Yomi is not gripping to detach mid-swing, flying through the air as a projectile! It deals ⅔ of the attack’s damage, and can be caught like one of Diddy’s peanuts. While Side Special can be used to easily throw daggers, this allows for a greater variety of angles depending on the attack, and potentially more damage. While wielding only a single kunai, attacks are similar to the separated style, but with only one kunai and thus with tweaked animations. If Yomi has thrown both of her daggers, she will use the single-kunai attacks but with halved damage as she only has the bladeless center handle to work with. The handle cannot be thrown.

If a kunai hits an opponent or a surface, it will become embedded into that object. A tap of B will activate the electromagnets, pulling the kunai right back to the handle and transitioning into attached mode. Yomi always has the handle on her even if both kunai have been thrown, conveniently. The kunai will act as a hitbox on the way back (6% and knockback similar to Tink’s returning Boomerang), and can even bring an opponent along with it if it’s embedded in the foe! However, a foe can knock a kunai out of their body like a Pikmin to counteract this, and the magnetic pull does not prevent a foe from performing actions. But this goes both ways, allowing Yomi to land an attack on the opponent as they’re pulled in. Alternatively, bait your foe to knock the kunai off with an attack, and punish their choice of attack!

Naturally, two kunai are harder to shake off than a single one is, and they have double the pulling power; however, this limits Yomi’s options in terms of landing a follow-up attack. If an opponent has caught one of Yomi’s kunai – or pulled it out of the ground in a slightly laggy animation – tapping B allows Yomi to retrieve it with ease, and this can also neutralize a kunai that the opponent has thrown at Yomi.

The unique attributes of the Rope Kunai can get a lot of mileage on the battlefield. The wide-arcing swings of the attached style are excellent for covering space and attacking at a distance, but the sweetspot at the blade still requires precise spacing. Meanwhile, the quick, swift strikes of the separated kunai are excellent for getting in quickly and racking up damage by chaining moves into each other. A good tactic is to use the wide-arcing swings of the attached style to feel your opponent out and pick up on patterns and habits, and then use the separated style in order to capitalize on these habits with quicker, slightly stronger attacks and more vicious combos. Yomi’s movement options also mesh nicely with both of these styles, as they can either get her far away enough to hit with the sweetspot of the attached style’s attacks, or bring her into close-quarters for detached kunai strikes.
 

IvanQuote

Smash Ace
Joined
Apr 7, 2014
Messages
853
Location
Looking for those who like Mighty No 9
NNID
ivanquote
3DS FC
1693-3075-2999
Well, the idea behind my weapon was inspired by RWBY, so I might as well go all the way:

Violet Stirling
I can't draw human's that well, so imagine Lindsey Stirling as animated in her "We Are Giants" music video.
Stirling Silver.png

(Ugh... There were no good screens of this video anywhere)
In the world of Remnant, dark creatures known as Grimm have attacked humanity throughout the ages. The society has survived courtesy of hunters and huntresses, who drive back the encroaching Grimm. Violet Stirling is one such huntress. Daughter of a hunter and a musician living in a big city, Violet originally trained under her mother to become a musician. Learning to play a 5-stringed violin-viola hybrid, Violet picked up the complicated instrument and became the talk of her city as a fantastic street musician even as a preteen. During one of her largest performances however, an unexpected Grimm mob broke into the city and wrecked the surrounding area. Violet would have been just another casualty had it not been for her father, Argent, personally protecting her during the outbreak. At that point, young Violet decided that she would also follow in her father's footsteps.

Argent's weapon of choice, at its base, was a rapier. Due to his expertise on the epee fighting style, he taught Violet this form of fencing. It was far more difficult for Violet to pick up fencing, but her father mollified her potential disillusionment by getting her a rapier/whip hybrid that could double as a stringed instrument's bow. Now revitalized with determination to learn the weapon and after years of blood, sweat, and tears, she became good enough to get enrolled into a Hunter Academy at the standard age of 17.

In the academy, Violet honed both her skills as a musician and a hunter. On the battlefield, she plays songs to draw Grimm towards her like a siren. Once she meets a Grimm target, she catches it off guard with a series of swift, rhythmic stabs, thrusts, and whip lashes. The downside of Violet when it comes to fighting is that she much rather enjoys playing music than fighting and can bee focused too much on her music. Similarly, she always relates the flow of her combos to the tune of a song playing in her head. This can make her moves somewhat predictable to the watchful eye, and Violet also has difficulty getting back into rhythm if interrupted. Nevertheless, when she focuses on fighting, she is an important asset on whichever team she is fighting on.


Statistics:
Most of Violet's stats are average. Her weapon is what makes her special after all.

Size: (Luigi) Violet grew up a bit on the shorter side.


Weight: (ZSS) Due to her thin stature, she is rather light.


Fall Speed: (Mii Brawler) Her falling speed is above average.

Jump: (Villager) As is her jump.


Air Speed: (Olimar) Her air speed is rather poor, not that she especially needs it with her incredible range.


Walking Speed: (Cloud) Violet's walking speed is good, but just good.


Running Speed: (Kirby) Her running speed is also about average.

Traction: (Robin) The same goes for her traction.


Gameplay:
As shown in the Violin Bow weapon showcase, the frog of the bow is detachable to make the bow function more like a whip. Therefore, there are two different movesets depending on which form the bow is in. The Rapier Mode is quicker and generally stronger, while the Whip Mode has a huge amount of range, but is generally slower due to covering more ground. Also Whip Mode has more blind spots and sour spots very close to Violet, so that form in particular needs to be spaced really well such that the frog hits. Integrating these sets fluidly together is a bit tricky, but I've figured out something that can work.

When using any standard attack in Rapier Mode, grounded or aerial, pressing the B button during the attack animation will cause Violet to launch the frog out during which time the cooldown would have taken place. This is a second attack, referred to as the "Intermission Mode", has its own moveset, deriving off of the base standard attack used prior. If you input another standard attack, not necessarily in the same direction as the base rapier attack, the cooldown time will be substituted for the indicated attack in Whip Mode. Using this 3 Step Technique, Violet can continue to attack the opponent as they get knocked farther away. The ending lag is compounded the further along you go however, so if Violet gets to step 3 for an aerial attack, chances are the ending lag will prevent her from attacking until she hits the ground. Also this technique does not work in reverse; Whip Mode attacks cannot lead to Intermission Mode attacks.

Specials:
Neutral B: (Frog Launcher/Reattachment) This attack is the way you manually switch back and forth between Whip and Rapier Modes. In Rapier Mode, Violet holds the bow forwards and presses down on the screw, launching the frog forwards like a bullet, reaching. This attack is rather strong (17%), reaches a length very slightly over the length of a Battlefield platform (screw to frog), and may be a good KO move if the 0.5 second start up and ending times are accounted for accordingly. This special can be reversed as well to cover the other direction. In the air, this attack will act as a tether if a ledge is in range, giving Violet multiple recovery options.

In Whip Form, Violet merely reattaches the frog to the shaft of the bow for 1 second, even taking away the tether for this move (in Whip Form, tether is another move in the set). This is also the only way to get back into rapier mode other than losing a stock, so you may end up using this a lot if you perform a lot of 3 Step Techniques.
 

FrozenRoy

Smash Lord
Joined
Apr 26, 2007
Messages
1,261
Location
Las Vegas, Nevada
Switch FC
SW-1325-2408-7513
“You!! You ignored all those very scary warnings... Don't you have the common sense to get scared and run away?! What's wrong with you?!?!

The Remorseless King of the Desert, Tutankoopa

Tutankoopa is a boss from the Nintendo 64 RPG, quite popular so you MAY have heard of it, Paper Mario. He claims to be the spirit of a Pharaoh, but the game sheds much doubt on if it is true...however, considering that his entrance does appear to have his "spirit" forming from nothing but ripped paper and that he uses magic in the battle, he at least seems to have a variety of magical power. He also has collected Chain Chomps as minions, although they don't especially like him, and Chompy will in fact chase Tutankoopa away after he is defeated by the player. It is not known if his magic includes card games.

If he's some ancient spirit, though, then why is he serving Bowser...?


Statistics

The Remorseless King here hardly has remorseless weight and is actually more of a lightweight, equal to Olimar's weight, while not being that large, his size being comparable to Mario. He is somewhat slower than average, but far above fellow spellcaster Zelda, think of it as comparable to Kirby but a bit faster. Above average traction action.

Aerially, Tutankoopa is pretty floaty but also pretty slow in the air with fairly high control, with his fist jump being a tinge above average and his 2nd jump actually being quite good. Tutankoopa has a float which is the same as Peach's, save it lasts for half the time.


Mechanic: Chompy


Tutankoopa does not enter the Smashing fields alone, however, as during his entrance animation he will cackle in an over the top "Bleah heh heh heh heh!" and follow up with "Come forth, Chomp! Chompy!". This will cause Tutankoopa's prized Chain Chomp, Chompy, to spawn on the stage, by default spawning as close to the middle point between Tutankoopa and the furthest foe from Tutankoopa as possible. If this area would be invalid, such as being over a pit, Chompy is placed as close to possible to it on the side closest to enemies.

Tutankoopa may use Chompy as a weapon, but Chompy has no love lost for his "master" and will in fact attack Tutankoopa if he so desires. Chompy will simply mindlessly attempt to attack whoever is closest to Chompy, be it Tutankoopa, Tutankoopa ally or foe, although it will prioritize enemies if they are at equal or near equal distances. Perhaps Tutankoopa has instilled a little loyalty in Chompy after all?

Chompy takes damage, but does not have HP, and is a superheavyweight, being a Chain Chomp made of metalpaper after all. He is noticably harder to knock around than Bowser, but also extremely susceptible to being combo'd...of course, comboing Chompy means you aren't comboing a foe or Tutankoopa or whatnot, and you leave yourself vulnerable to being punished for it since you're comboing Chompy and not the foe. This is still noticable as it means you CAN keep Chompy off you with moves. Furthermore, if Chompy is knocked off stage, he will take 8 seconds before respawning where characters normally respawn, albeit merely from dropping down where the Respawn Platform would be instead of being on a Respawn Platform. However, if Tutankoopa is dead, he will not be able to respawn if he is knocked off stage, which will allow you to remove Chompy from the battlefield once you get rid of the master...together in death once again, just like a Pharaoh and his pet, eh?

Chompy normally simply advances towards the nearest target, mouth gnashing and jumping up and down like Chain Chomps do all the time in things like Paper Mario. Chompy's first move is to simply charge forward, no longer jumping, wildly gnashing its teeth as it travels about a Battlefield Platform, anyone hit by this move will take 8% damage and somewhat weak knockback in the direction Chompy is moving. Especially heavy characters at low percentages can be combo'd into two hits of this move. It has quick start-time, although it is predictable as Chompy will stop jumping right before the move, breaking his identifiable pattern. Ending lag is likewise small, although laggier than the start.

Chompy is not unable to defend itself from aerial assaults, however, as it can also attack by simply leaping into the air, mouth open and ready to strike! Anyone hit by Chompy's body is, well, chomped for 10% damage and moderate upwards knockback that KOs at 195% or so, while the chain-y tail deals a meager 3% damage and very light knockback away. An effective upwards defense and Chompy will be spamming this more if opponents love to hover out of reach, such as say a Jigglypuff. This can be used while in the air.

Another move of Chompy's will have it stand in place, jumping twice faster than normal, before lunging towards the nearest foe, dealing 13% damage and fairly solid knockback, enough to KO at around 180%. Anybody who has played Paper Mario will recognize this attack as their standard one in those games and, likewise, this is Chompy's "standard" attack, his most used and with average lag on both ends. Range is quite good, slightly more than an Ike Forward Tilt.

Chompy's "Smash" attack, so to speak, has Chompy charging in place, growling and chomping is teeth in big bites, before rushing forward 3/4ths of a Battlefield Platform in a powerful, reckless charge! This move's got some real bite to it, though, dealing 21% damage and crushing any foe hit with it to be KO'd at 120%! This is obviously quite powerful for what is, essentially, a minion...which means Tutankoopa should especially beware, given his rather light weight!

For both of Chompy's latter two attacks, he will try and target the nearest foe, which is determined when the attack is released: So you can try and hit your opponent closer to make it target them...or get knocked in and hit by Chompy yourself! Chompy has two jumps and can use his "Standard" attack in any direction while jumping.

Chompy is a dangerous, yet very valuable tool, which both players will wish to exploit to win. Chompy will stay around even after Tutankoopa dies, but obviously cannot count as a "win" for Tutankoopa or anything stupid like that.


Specials

Down Special: The Tomb of Tutankoopa

This move depends on two different factors to see how it will be used: Are you on the ground or in the air, and was the input smashed or was it not. We shall begin with the unsmashed version. Tutankoopa raises his hand and begins to chant a spooky, not to mention entirely made up, chant as squiggly-wiggly drawing lines appear, either one Ganondorf above him on the ground or directly below him in the air. After this rather long starting lag, a sandy-outline platform appears in that position! This platform serves as a pass-through platform, except that it only refreshes jumps the first time it is stood on and Tutankoopa can only make one without returning to non-created ground, preventing any infinite stalling or anything else of that ilk. These platforms can be used by anyone and are the sized of a standard Battlefield Platform. They cannot overlap other Platforms and will move slightly to accomadate this fact if required. Tutankoopa may only have 3 platforms out at any one time and the oldest one will be overwritten if a 4th is attempted to be placed.

While this can serve as a useful recovery to get jumps back, the primary use of this is as a natural camping platform. Each platform lasts a whole 30 second and are destructable but extremely durable at 40 HP. Once destroyed, the platform crumbles into nothing. This is pretty much all there is to it. Although platforms last 30 seconds without anyone on them, but Tutankoopa...mmm...well, lets just say he subcontracts. When standing on the platform, it will begin to fall closer to the ground if it is more than three Stage Builder Blocks above the heighest jumping point of the natural stage (IE it ignores any Tutankoopa constructs) from the position the platform is made (IE it won't count if you can jump higher clear on the other side of the stage where it is pointless) OR if it is off the natural stage at any time. It descends at a moderate fall speed until it is 3 Stage Builder Blocks above that highest point.

Smashing it instead causes Tutankoopa to make a wall about half a Battlefield Platform in front of him of a Ganondorf in height. This wall is, naturally, solid, and has the same amount of HP as platforms and lasts as long, in addition to the same anti-stall properties of the platforms, as the top of walls are super tiny but technically standable. The wall takes damage of attacks that hit foes that are slammed into it as well, preventing it from being used for cheap infinites much, and you can wall tech. Tutankoopa may have 3 walls out and wall maximum does not interact with platform maximum. Midair walls have the same falling anti-stalling stuff as platforms. Walls and platforms must have a minimum of 1/4th of a Battlefield Platform in space between them, which combined makes it impossible to make impossible-to-enter boxes.

Finally, Tutankoopa's walls when made in midair in fact float with spooooooky magic, allowing Tutankoopa some interesting air setups between his walls and platforms. Chompy can jump over walls, but if there is a target that does not require that, he will target them even over other targets beyond the wall, allowing Tutankoopa to cordon off areas and create death arenas between two walls. If no enemies are within range and does not require going over a wall, his behavoir stays the same as normal. Chompy ignores aerial walls for the purposes of AI behavoir.


Neutral Special: Shell Spell

Tutankoopa raises his hands to the sky, not as wide as his Down Special, and chants a different but similiarly entirely made up chant, summoning a blue Buzzy Beetle shell over his head which is drawn in ala the platforms. NOT a Koopa Shell, Tutankoopa CLEARLY uses blue BUZZY BEETLE shells that are the same as the Buzzy Beetles in his level! He'd have to be some mean king to strip his subjects of their shells after all, too!

This move can be held as a non-storable charge, but only for a pretty brief period, a maximum of half of a second. before shooting the Buzzy Beetle shell in the chosen direction (up to 8, as normal) for 1 to 1.5 Battlefield Platforms based on charge, with the damage starting at 5% and increasing over time with small knockback, with no charge increasing to 10% after travelling one Battlefield Platform as it gains spooky momentum with small-medium knockbacl, and then increasing to 15% after reaching the maximum default distance and knockback that KOs at 175%, after which the Buzzy Beetle disappears in a magical POOF. However, similiar to Koopa Shells, these Buzzy Beetle shells will bounce off of objects and continue, and in fact can gather power by doing so! This will "reset" how far they go and thus make them last longer. This continues until they cap out at 25% damage that KOs at 90% after travelling 3 Battlefield Platforms, after which their power is capped but they will continue to bounce if hitting walls.

The most obvious way to use this, naturally, is to bounce them off of your walls, and you can even make two walls to keep bouncing the Buzzy Beetle shell until its maximum duration (12 seconds) is run out. However, there are some other fun methods to do so as well: In particular, you can bounce this off of Chompy, and not only will it hardly damage him (and the knockback is usually pathetic on him), but he won't even flinch until it hits 15%+ damage, allowing you to use him as a bit of a on-stage wall, but more interestingly, you can use it to strike "behind" Chompy while nudging him forward a little and cover people trying to get behind as well. Vertical drops will build the Buzzy Beetle shells power (although upwards will not, you don't gain power by going up! Same if going up a slope) but not count for distance travelled before it goes poof (which counts only horizontal), meaning that dropping it down from platforms is effective as a camping tool, as is the idea of bouncing it off aerial walls, it can even serve as a rather interesting and effective gimping tool!

Note that, much like Chompy, Tutankoopa is perfectly vulnerable to his own Buzzy Beetle shells, a bit of a running theme of incompetence with the fellow really, so beware of creating potent shell games just to mess it up and send yourself flying away, flying away now. Tutankoopa can have up to 3 Buzzy Beetle shells out at any time, making a fourth will cause it to go POOF after it goes the initial 5% damage distance. Buzzy Beetle shells are not items like a koopa shell and cannot be stopped via item grabbing shenanigans or what have you. Starting lag of this move is a bit fast, but the ending lag is a bit long.


Up Special: Spirit of the Elder Koopa


Tutankoopa, with yet another faux-mystical chant (was that something about ice cream?), essentially performs the reverse of the animation you see above, breaking his body into papery chunks which quickly fade and leave only his Pharaoh headdress. This deals 5% damage and light knockback on activation, albeit after fairly long starting lag, after which Tutankoopa begins an intangible presence, nearly unable to be harmed...well, nearly. After a mere second of this seemingly impressive feat, the foe will be able to see an almost light, transparent Tutankoopa in the headdress...is this his true spirit form, or perhaps he was just performing some misdirection before? Regardless, after 1 second, Tutankoopa may be harmed normally, although for the 1 second he can't be. Tutankoopa has free flight during this move's entirity at the speed of R.O.B. during his Up Special. When the move ends, Tutankoopa's pieces reappear and quickly reform.

While you may think this is great, Tutankoopa is unable to perform any attack while intangible, meaning he can't just use this to counter people freely. This is also a big reason why you shouldn't just be trying to stay in this form a lot of the time. Tutankoopa can maintain this form for up to 4 seconds, cancelling at any time with a press of B, but he must recharge equal to the amount of time he spent in this form and must reach full charge (indicated by 2 flashes) before being able to use it again. Tutankoopa can pass through his solid objects in this form, such as walls, and perhaps most importantly Chompy will not target his master while he is intangible, making this an excellent way to get Chompy to chase another bone, and can allow you to "sneak" behind Chompy as Chompy serves as your approach, only to pop out and strike when Chompy does! Ending lag on this move is fairly short. If Tutankoopa would reappear in a solid object, he simply insted reappears at the closest possible spot he could stand on.


Side Special: Entomb

With one more chant of undeniable gibberish, Tutankoopa raises a single hand up in an almost sage-like manner, eyes glowing ethereally as he sends out a chain of ethereal paper, shaped like a chain-link chain, out in front of him. Unsmashed it is sent out one Battlefield Platform, smashed two. The first enemy struck by this chain takes 7% damage and proceeds to be tethered to the location the chain was sent out, with a minimum of half of a Battlefield Platform and by default tethered to the ground, and the maximum distance obviously being the maximum range of the move. Although by default Tutankoopa simply chains them to the ground where this move is used, a press of the B button and a choice of direction allows him to flick the chain that way, tethering the foe to any physical non non-moving part of the stage within half of a Battlefield Platform of that direction (tether length is unchanged).

If a foe would be tethered in the air via a platform or wall, then the tether will expand so that they can move from that point to the ground, preventing any bizarre interactions where the foe would just hang in mid-air. If this move is used without anything solid around to tether to, such as high midair combat, it simply deals its damage and weak knockback. Something which is notable about this move is that Tutankoopa can, in fact, tether Chompy as well! This functions the same as a normal tether, but Tutankoopa can only have a single chain tether out, so he has to decide between the foe or Chompy: Chompy being tethered controls his aggression, turns his running attack into almost a deadly trap-esque move and is significantly more safe, but tethering the foe allows Tutankoopa's camping game to truly shine and can allow Tutankoopa to do impessive kiting tricks with chompy into the foe, not to mention making it a lot more difficult for foes to kite Chompy to Tutankoopa. Chompy, when tethered, will visually have the tether run through his chain chomp, er, chain, but this is purely a fun aesthetic.

As for the exactness of the tether, it disallows enemies from moving outside of the length of the tether, with a maximum duration of 22 seconds, however the tether can be broken significantly earlier by dealing a simple 22 HP worth of damage to the tether. or if the tethered character takes large amounts of knockback. If the ground/wall/whatnot the tether is attached to dies or is expired, the tether breaks. Foes who escape the tether cannot be tethered for 1.5 seconds afterwards, which is helpful to keep any camping cheese down for Tutankoopa's playstyle.


Smashes

Forward Smash: Hot Wind Blowing

Tutankoopa leans his arms back, desert dust and wind swirling around him, before thrusting both arms forward and sending this sandstorm as a gusting hitbox forward. It is not especially strong, dealing 15%-19% and knockback that only KOs at 155%-130%, but it makes up for it with great range, the length of one Battlefield Platform precisely, which you may recall is the size of Tutankoopa's platforms. with a decent but not TOO long duration. While this move is quite weak for KOing, it can serve quite a good purpose as a zoning tool thanks to the large range and as a tool to get people off Tutankoopa's back, which is fairly important to him. The starting lag is pretty average, but the ending lag is quite low, allowing Tutankoopa to build off it swiftly after.

After the attack ends, the wind and sand will continue to billow in place (visually seeable by sand being blown along in the wind), creating a fairly faint wind hitbox that drags people in the direction the attack went, allowing Tutankoopa some impressive stage control. Chompy, being a heavyset chain chomp adapted to the desert, is immune to this wind effect and will go on his merry way regardless, allowing the wind to either be used as an emergency escape method (run with the wind as Chompy chases you from behind to go faster) or a hindrance to keep you there (run against the wind and be slowed essentially). Tutankoopa is also affected by this wind, putting him on even uneven footing with his foe. Both you and the foe should keep in mind the ability to use this movement as a bit of a nudge during moves. The wind hitbox will not blow people off of ledges, lasts 6 second and Tutankoopa can only have one out at a time. Using Forward Smash while one is already out will simply cause it not to make a lingering windbox.


Down Smash: Quicksand

Tutankoopa places his hand on the ground, fingers (TWO FINGERS COUNT) digging into the ground, and causing sand to burst out to both sides of him, the sand appearing line-like before filling in with a true sandy texture, dealing 16%-21% damage and rather weak knockback that KOs at 165%-135%. This is somewhat made up for by the fact it is quick on both ends and has pretty solid range (half a Battlefield Platform to both sides...hmm, I wonder what that combines to?), making it once again much more of a damage racking, zoning type of smash than a KO smash or anything. Note that this move has almost no vertical range, save for a few frames at the start as it splurts out, making jumping (and especially shorthops) effective against a Tutankoopa who mindlessly spams this.

The sand will not disappear once sent to both sides and instead will start to converge on where Tutankoopa released it if possible, forming a quick sand pit! This will drag characters towards the middle of the "pit", which is a decently potent hitbox that deals 12% damage and light upwards knockback to anyone who gets right to the middle. The push and pull of this move gets stronger the closer you are to the pit, with it being quite weak at the edges but strong right near the middle. Unlike the wind, it has no effect on those in the air. Just like the wind, Chompy is immune to this, but Tutankoopa himself is not. Pits last 6 seconds and only one may exist at a time, with Down Smashes during that time not making new pits/permanant sand, same as the wind in that regard. The pit hitbox does not become active for half a second after the ending lag, meaning Tutankoopa is not instantly hit by it during his ending lag. In other words, be careful about getting stuck in the middle of this!

Sand really can't land on the top of walls when used from it, the ledge is far too small, but using it from the top of the wall will cause the sand to fall to both sides, and it will instead slosh and converge towards the wall. This has the same push/pull power as normal but no pit hitbox due to the wall being there, instead the sand grinding into the wall does constant 1% non-flinching damage to anyone who is stuck in it, although it ALSO does that damage to the wall itself, burning through about 24 HP of the wall over the pit's 6 second duration. Tutankoopa may be hit by this too, so be careful!

This move has a noticable effect on Tutankoopa's platforms, due to their airborn and sandstone nature, as the sand will grind into the platform slightly and seep through the bottom, in addition to the normal pit effects. The end result is that for about a Ganondorf below the platform, sand will slowly ebb and flow down it, dealing 2% non-flinching damage every half second that someone stands in it (first tick of damage occurs the moment someone enters). This allows Tutankoopa some quite nice stage control when the pit is also making the platform a danger! Of course, if Tutankoopa is going to came from that platform, he'll need to deal with his own quick sand. He may want to consider making a platform above that and using that as a camping platform, while opponents need to get throught he sand and platform to reach him: Perhaps add in a floating wall to really angle your shells down for camping? Food for thought.


Up Smash: Drawn to Chomp

Tutankoopa raises his arms above his head, the rainbow-colored outline of a Chain Chomp forming, almost seeming drawn into place. This process gives the move somewhat long ending lag, but once the Chomp drawing is done, it will expand for a brief moment as a hitbox, dealing 18%-23% damage that KOs at 115%-100%, before going back to the normal size (which can be compared to a full rotund Wario). If you're wondering where the animation comes from, it is one of Tutankoopa's attacks in Paper Mario. After some average ending lag, the Chomp outline then remains in the air for 2.5 seconds, not following Tutankoopa as he moves, but seemingly inert. This is one of Tutankoopa's better KO moves, but still hardly a heavyweight one, and its fairly laggy.

When that 2.5 seconds end, though, Chalk Chomp here falls to the ground (just like the Paper Mario attack!) and crushes those beneath him...including Tutankoopa, if he didn't high tail it out of there! This falling hitbox is stronger than the initial hitbox by a fair margin, dealing 22%-31% damage and strong vertical knockback that KOs at 90%-75%! That is one strong trap! Of course, the delay is noticable, so Tutankoopa will need to chase foes into the right spot to actually hit them with this...and make sure not to be hit into it himself! Chompy is particularly useful for chasing after foes here, as are your multiple methods of stage control. Perhaps you could tether a foe around the trap area, or trap the area after tethering? Naturally, they can still dodge, but it does limit space. The Chalk Chomp will fall for as long as possible (IE until it hits the ground, or after 6 seconds to prevent any crazy looping with some dumb old MYM set), falls at a fast speed and does not disappear after hitting someone.

Chalk Chomps will break through Tutankoopa's created platforms and walls as they fall, causing them to burst into rubble. This rubble is a fairly large hitbox that deals 16% (regardless of Chalk Chomp's charge) and KOs at 130% to any foe it hits: Fortunately, this is one thing Tutankoopa doesn't have trouble avoiding! Platforms have more vertical hitboxes when decimated, while walls create more horizontal hitboxes. The Chalk Chomp can destroy any number of these while falling, so if you create a web of platforms and walls you can potentially turn it into a deadly sandstone emporium!

If sand is on the platforms or wall when the Chalk Chomp breaks through them, the sand will explode outwards in quite a large (2/3rds Smart Bomb blast radius) hitbox, dealing 8% damage and very light knockback to anyone hit by it. This uses up the sand, naturally, but the hitbox is very wide and quite fast, making it a pretty simple punish if you can't get people into the much more damaging hitboxes or if you just want to be able to play off any hitbox in a wide radius.

When Chalk Chomps hit sand from Tutankoopa's Down Smash, the sand will fly upwards, becoming a weak hitbox that deals 9% damage and rather weak upwards knockback. Not a lot of damage, but it is a hard punish to people who air dodged the chomp while within a Ganondorf's height of the same when it impacts. The wind from Tutankoopa's Forward Smash will blow the Chalk Chomp in the chosen direction when it falls, allowing Tutankoopa some degree of control after creating the Chalk Chomp. Tutankoopa can only have one Chalk Chomp trap out out, with Up Smash uses while having one out simply not making another as with his other smashes of this type.


Standards

Jab: Pharaoh's Backhand

Tutankoopa performs a quick, simple, scoffing backhand in front of him, dealing 4% damage, very light knockback and a feeling of satisfaction to those who believe themselves high above others, such as...say...someone with a pharaoh complex. This move is quite fast on both ends, so you can spam it for quick damage in some cases, but the range is pretty pathetic and it won't help people actually get off of Tutankoopa really. For the most part, it is just a simple damage racker.

Forward Tilt: Sand Shield

Tutankoopa swings his hand forward, causing a shield of sand to form in front of Tutankoopa, a process that has fairly average lag overall. Getting hit by the sand as it forms or the shield deals 7% damage, light knockback and little hitstun, but it has the Mario cape effect of turning the foe around as the sand essentially bounces them around and away. The knockback has no vertical component due to this, a semi-spike, which can also make it a very nice way to set people up by knocking them off your platforms and in rare cases a KO move. The ending lag on this is quite short, as the sand simply drifts away. Noticably, if the foe is in a move, this will not deal hitstun which allows it to act like Mario's cape in turning foes around and then allowing Tutankoopa chance to punish their ending lag, although Tutankoopa doesn't have super potent follow-up strength even a Forward Smash or Down Smash is still good damage racking.

One of the more notable aspects of this move is that you can use it like a cape to bounce your shells away, as if they hit a wall, and turn Chompy around without interrupting him (it won't deal hitstun), allowing Tutankoopa to potentially turn the table on foes who are using Chompy to approach him! Of course, at the same time, this won't cause Chompy to enter hitstun, so if you're turning him around when he's not in a move...well, he'll probably still be closest to you (unless the foe was really wholehog chasing him) and now you've got a Chompy biting down on you. Exercise some caution.


Up Tilt: Stepping Stone

Tutankoopa points at the ground in front of him, using his mystical and magical mojo to have stone rise up from the earth as a tiny pillar, popping up any foe it hits for 8% damage and weak-moderate knockback, it won't KO until 240% or so to give you an idea. The pillar doesn't last long (until the ending lag, well, ends), but Tutankoopa can perform this move pretty quickly and it does not have a lot of lag to it. The downside, of couse, is low damage and low knockback while Tutankoopa does not have a large ability to combo. If Chompy is running at you, you can pop him up with one of these well timed, but unless Chompy has some damage it won't do much. If Chompy has some damage, though, this can be an effective way to bounce Chompy up to your platforms or over walls.

The pillar will act as a wall for a very brief moment while it is up, which puts Chompy's wall AI into play, so you can use this to very lightly misdirect Chompy in an almost peek-a-boo like manner. Technically, this can reflect your shells too, but the longer duration of Forward Tilt and Up Tilt's very brief period to do so. Since it is technically "terrain" as well, you can pop Buzzy Beetle shells above you, but without good timing you'll still just conk yourself in the head.


Down Tilt: Skipping Stone

Tutankoopa flicks his hand above the ground, as if skipping a stone on a lake, and shoots out a sandy-stone from the ground forward, with the stone starting as the same odd line-magic-art Tutankoopa's magic does as it flies and draws in. This stone flies a solid distance, 1.25 Battlefield Platforms, and deals 6% damage to the first person it hits with rather meager knockback to it. This will go off ledges and is one of Tutankoopa's primary camping tools as it has short lag on both ends and is pretty rapid-firable all things considered, with solid range, if low damage and little ability to push foes off you. If there is wind from Tutankoopa's Forward Smash in the area, it will change the sandy-stone's trajectory slightly: Going with the wind causes it to go half a Battlefield platform longer, but faster and more shallow. Against the wind, it goes half a Battlefield Platform less and lingers slowly in its path, making it a more lingering threat.

This gets a little better if you have sand fromy our Quicksand around you, as some of the sand will be flung along as well, going half of the stone throw's distance as a multi-hitting hitbox that deals a total of 6% damage over it and pushes people to the edge of its hitbox. It makes an excellent GTFO tool, mostly if the pit is dragging you backwards to gain more space, but this is a very predictable method with something that lasts a limited time and all. Just doing it repeatedly to gain space over a pit will also end up with the pit dragging you in. It is also your highest way to deal damage via tilts.

But wait, there's one last thing! The sandy stone will "skip" along the sand as if it was water, and you thought the name was just for show, causing it to travel half the normal distance while remaining a hitbox as it "skips" forward. This continues until it skips 4 times, each time halving the distance it goes, meaning that Tutankoopa can actually get some impressive range from this...and, if the wind pushes against it, you can potentially have a really long, linger-y/trappy hitbox going on here!


Dash Attack: Sliding Tackle

Tutankoopa slides forwards on his belly, arms flailing as he travels about half of a Battlefield Platform in distance, dealing 3 hits of 2% to anyone he hits before popping up for 4% damage and knockback that KOs at 260% to people hit by the final strike. Tutankoopa goes pretty low to the ground for this move, maybe Smash has become a limbo contest?, which can allow him to slide under some attacks pretty nicely, and with timing can actually go under a longer range Chompy "standard" attack. This move's starting lag is somewhat lengthy, but since Tutankoopa popping up is part of the last hit the ending lag is rather light.

On sand, Tutankoopa will slide an extra 0.25 Battlefield Platforms with an extra hit of 2% damage, and cosmetically will appear to flail more wildly from all the sand getting in his face. This will also cause sand to shoot out to both sides of him as he does so, which deals 3% damage in rapid hits with the same timing as the base hit, with the last hit causing sand to bust to both sides for 6% damage that'll KO at 220%. This can't combo with the base hitbox as the sand hitbox pushes away, save for getting a single extra 2% hit in with good timing before it pushes them away, while the back part of the sand attack is more for extra protection (esp. vs. goes who roll behind the laggier parts of the move) and the pop-up has additional range. This can be a solid way to run away from the pit, but do be careful of running headlone INTO the pit.


Grab Game

Grab: Spooky Ghost

Tutankoopa places his hands forwards, as if a grip, and then grabs anyone in front of him via spooky spiritual levitation. Ignore any wires you may or may not be seeing holding the foe up! This has about average range for a grab, maybe a twitch longer, is a touch fast to start but somewhat laggy to end, and is noticably laggy when dash grabbing.

Pummel: Hex

Tutankoopa shocks the foe with sandy colored magic, with a touch of dark effects mixed in. What kind of Egyptian pharaoh spirit doesn't curse those who enter his tomb or, at times, take his slab? A crummy one, that's who! This deals 1% damage per pummel and increases the time of how long Tutankoopa's hexes will last by 0.5 seconds per pummel, up to twice their normal amount. Tutankoopa's eyes will glow with blue etherealness during this move, like it does with Side Special.

Forward Throw: Stone Curse Hex

Tutankoopa raises the foe up, chanting faux-meaningful Koopa Latin phrases as he does so, sand collecting upon their body before it hardens into sandstone as Tutankoopa sends the foe flying away, dealing 8% total damage and knocking them away a moderate amount, enough to be a solid enough spacer throw, but it probably won't be killing anyone any time soon. The foe will appear sandy, kind of like a Metal Box if it was a Sand Box, and increases the foe's weight and fall speed while decreasing their movement speed, making them fairly more combo-able. The increase is not NEARLY as much as the absurd Metal Box's, it is still pretty noticable. The movement speed debuff is noticably smaller than the rest, but still nothing to entirely ignore.

This is a good way to make foe's more combo-able, making use of their increased weight and potentially allowing Chompy's weaker rushing attack to perform combos, but it can also be a nice way to also combo with things like your Forward Smash wind, multi-hit Dash Attack or what have you, and it makes it difficult to scale your camping platforms at times. In addition, a slower foe makes it more difficult to get to you as you pelt them with stones like they sinned against your statue. This throw gets cumulatively less useful, however, as the foe gets closer to where you want to think "knockout" over "damage". A rather cheap spell, this Hex lasts 5 seconds and is reduced by 0.5 seconds every time the foe is hit. Using this when they're already afflicted with it merely resets the timer.


Down Throw: Sand Tomb Hex

Tutankoopa calls upon the spirits of the desert, which he probably is not even in right now, and his ancestors, who may not have been Egyptian Pharaoh Koopa Wizards, to entomb his foe in sand...or, more naturally, he continues spouting some magical Mario-sounding nonsense as he gets the sand to wrap around the foe's feet (lower body if no feet are available or it would be hilariously, memeishly small). The sand then pulls the foe to the ground, dealing 5% damage from the force of it and leaving both Tutankoopa and the foe in frame neutral not too far from each other. The sand hardens and keeps the foe from moving for 5 seconds, although all other options are available (including dodges and the like, which simply are performed in place), but not all is quite so bad for the foes. They can escape early by dealing 15% damage to the sand, causing it to crumble, and break free as soon as they are hit by any move which deals knockback, even pathetically weak knockback, keeping them from being a mere punching bag.

Tutankoopa has a variety of ways to abuse this, the most obvious being his Buzzy Beetle shells: Prepare one for a drive by soon after and let them force the foe either to dodge into your punish or take what is hopefully a powered up hit from the shell. Enemies can be left in place for Chompy to come at them, at the expense that you'll need to stay close for punishes (putting you possibly in range to be Chomped yourself) and that enemies can potentially merely hit you into Chompy. You can go off and setup some stuff, sure, but it doesn't take all that long to break free of this if you don't have SOME kind of pressure on the foe. Since the position is frame neutral, Tutankoopa should also be careful of the foe just trying to strike Tutankoopa down right then and there, although fast attacks like Jab can help (tho Jab actually needs Tutankoopa to move a bit closer...). A solid move, especially for those who're good at getting in the foe's head.


Back Throw: Sand Storm Hex

Tutankoopa raises his hands, as they TREMBLE in POWER or at least in DRAMATIC PRESENTATION, and sand and wind blusters around them, swirling and gathering and then...he has the sand smack them so they go flying behind him for 6% damage and moderate knockback, not too easy to follow-up on but you'd like them a bit further for a GTFO move. So, what gives?

We~ll, the wind and sand will continue to swirl around the foe for 5 seconds afterwards, which will (super)naturally draw entities towards the Hexed foe. Buzzy Beetle shells, Chompy, even Tutankoopa's walls and platforms (Though they move significantly slower)! This draws in all entities within 3/4ths of a Battlefield Platform to each side and 1.25 Ganondorfs above the character who is Hexed. The closer the entity is, the harder it is drawn in: At the fringes, it is difficult to even notice, but when it is very close it will try to stick to you like glue on a horse. This is Tutankoopa's single most direct way to force confrontations between his setup/camping and the foe, so if he wants to DIRECTLY start shifting to a more aggressive style, this is his primary course for recourse.


Up Throw: Dune Dasher

Tutankoopa chants wildly, or at least incoherently, as wind and sand swirls around him and the foe, the sand striking and pelting at the foe for two hits of 3% before one last, strong sand burst combines with a gust of wind to send them flying up for 6% damage that ends up KOing at 200%: Tutankoopa's strongest damage throw at its base, for sure, and his only throw that won't Hex the foe, which is very useful if you do not feel like triyng to Hex them, especially since all the Hexes have their own benefits and trade-offs that are not always desirable to induce.

Tutankoopa will draw upon the power of the enviroment around him to power up his attack, however: Sand from his Quicksand Pits wiill flow upwards and strike the foe, adding two additional strikes of 3% to the first part of the throw, while being inside of wind will cause the wind to rush and whip at the foe for a much stronger upwards push, pushing the KO power to 145%. In addition, Buzzy Beetle shells, Chompy and items will be flung up with the wind rush, allowing Tutankoopa to potentially setup miniature, almost bullet hell-ish scenarios for the foe.

Sand, shells and whatnot need to be within half a Battlefield Platform of Tutankoopa to be used with this throw, otherwise they are out of range. Chompy at least will naturally be chasing someone, but the rest requires good setup: However, with great setup, it does tons of damage and is a solid KO throw, and it can do either of those with half setup, making it a very nice throw.


Aerials

Neutral Aerial: Sand Barrier

Tutankoopa raises his hand, causing a circular barrier of sand to form around him for a brief moment, expanding out and pushing enemies away for 8% damage and actually pretty solid knockback, enough to KO at 195% with a good base. This hits all around Tutankoopa, which is nice, and it comes out fairly fast, but one issue with it is quite high ending lag and extremely short duration, the sand dissipating almost instantly, meaning that while this can cover a lot and come out fast, Tutankoopa must be incredibly precise to hit with it. the landing lag is lower than the ending lag of the move, so Tutankoopa can use this as a shorthop approach if he fast falls to land on the ground quickly, but doing so while getting the attack off and hitting requires tricky timing.

This barrier retains the properties of the Forward Tilt, bouncing away shells and turning Chompy around, meaning that Tutankoopa does not lose access to these vital tools simply for deciding to be in the air. combined with aerial walls, this allows Tutankoopa to do some potentially real fun with them once you realize the Buzzy Beetle shells can be bounced upwards by this, allowing you to do some aerial bumper cars just like the grounded kind. Just be careful since the timing is strict and if you mess it up, you'll get plunked.


Back Aerial: Magic Trick

Tutankoopa swings his arm behind him, one finger pointed out, and releases a blast of his squiggly-line magic at the tip. Getting hit by the arm or most of the magic deals 6% damage and weak knockback away, not something you're looking for, but then it IS a sourspot! The sweetspot is riiiight in the middle of the magical blast, a sweetspot smaller than Captain Falcon's knee, but when it hits it does massive damage, with large freeze frames occuring as the foe's entire body seemingly is outlined in line magic, before having themselves being blasted away by it! This deals 20% damage and KOs at 80% and if you've at all been paying attention to Tutankoopa's KO percentages, you know thats quite a hefty amount for someone who struggles with knockouts!

The issue, of course, is the small size of the sweetspot, making it exceedingly precise and difficult to hit, in addition to starting lag that is slightly above average and pretty bad ending lag, making this a risky move that requires considerable planning to make use of. Do note this also means that Tutankoopa has rather poor back aerial coverage, so you will want to use Neutral Aerial more than you might think to cover that!


Up Aerial: Power Floats

Tutankoopa rises as sand and dark magic sparkles around him, each getting drawn in with his line-y magic as he does so, dealing 4 hits of 3% damage as he does so. Tutankoopa will indeed gain a not-insignifcant amount of air when he uses this move the first time each air trip, with all subsequent hits before landing on solid, non-created terrain simply causing Tutankoopa to use the hitbox while falling at a slower pace than normal. Is Tutankoopa tuckered out from that little exercise of power?

The rising part of this move is pretty nifty, as you can rise just out of Chompy's range more often than you might think, and it actually allows Tutankoopa to get a bit of aerial comboing it, usually when combined with an Up Tilt into a shorthop at lower percentages, and in general is one of Tutankoopa's solid damage racking punishers. Last hit flings foes away with slightly below average knockback, the starting lag is about average and the ending lag is punishable.


Down Aerial: Sand Slice

Tutankoopa holds both of his hands down, open-handed, and causes a blast of sand to be shot down below him, crescent-shaped and about 1/4th of a Battlefield Platform wide while being pretty thin. This hitbox only deals 6% damage and while it does spike, the spike is exceedingly weak, mostly due to the very low hitstun on each hit. Something notable about this move is that it can actually hit foes multiple times and that the low knockback contributes to this: Foes will need to time an air dodge or otherwise move out of the way after being hit, lest they get hit again for more damage and get dragged closer to the blast zone or stage! The "slice" of sand keeps going until it hits stage or goes to the blast zone, so it has a pretty wide range to throw down, especially from higher platforms or walls. This makes it another solid camping tool for Tutankoopa.

Chompy is too stupid to dodge out of this attack and will be dragged to the ground, or offstage, by the repeated hits unless he is at high damage percentages. This is because his superheavyweight status makes it difficult to time and the AI is too dumb. If you want to get Chompy down to the stage and off your back a little or, say, kill him to reset his damage, this is a good option, although he might not enjoy that second idea...I think we might have an idea of why Chompy's so hostile!


Forward Aerial: Duneblast

Tutankoopa thrusts one hand forward, sand energy collecting on it as he does so, making a tiny blast of sand in front of him. This initial strike deals 11% damage and has...okay knockback, its not exactly a KO move, but with 175% KO power it can get kills if Tutankoopa or the foe drag the match on for a while. The sand and arm will stay out for a while afterwards, however, becoming a progressively weaker hitbox, until the end when ti does 4% damage and only the lightest knockback, essentially a sex kick. The starting lag on this is quick enough, but the ending lag is a touch laggy.

By hitting A again during the duration or striking Chompy or a Buzzy Beetle shell, the sand will burst forward as a larger, almost conical blast of sand, which deals 14% damage and KOs at 135%, making it a much more efficient and deadly killing move, although there IS a delay before he fires that makes it a touch predictable. The range is solid, but the ending and landing lag is reeeeeally bad. There's no sex kick properties if you do this either, of course. If Tutankoopa activated this by striking Chompy or a Buzzy Beetle shell, he will be forced back half a Battlefield Platform with a very slight upwards pop (he still loses overall height) while Chompy or the Buzzy Beetle shell are repelled the same distance in the opposite direction (does NOT reset Buzzy Beetle timer). This makes the move a rather interesting shorthop option when those are nearby, although quite risky due to the lag!


Final Smash: The Curse of the Pharaoh

Tutankoopa's entire body glows with FINAL SMASH POOOOOOOWER, the entire stage growing progressively darker as Tutankoopa hisses "Leave my tomb...", an ethereal version of his face seeming to loom in the background, and then, when the screen goes entirely black, he shouts "Or suffer my curse!" and anyone who did not dodge the moment the screen went black takes 50% damage with knockback that KOs at 80%. Anyone who dodged gets off scott free. Anyone who was next to Tutankoopa when he began his monologue is stunned for the actual damage part of the attack, kind of like Ganondorf's Final Smash.

When the Final Smash ends, careful observers might notice a few Paper Mario Koopas scampering into the background, as if they'd just finished some work...hmmm, maybe this so-called curse isn't so magical after all...


Playstyle: The Kurse of King K. Rool

Tutankoopa finds his home in the catacombs of an ancient playstyle: The camper. This all begins with the elephant, or in this case Chain Chomp, in the room: Chompy. Although the distance from which Chompy begins the match means he'll go after opponents first, Tutankoopa should constantly be wary of the fact Chompy will gladly take a bit out of him too if he is not careful! Tutankoopas may begin by really keeping their distance, but as one grows more experienced with him, new risks such as turning Chompy's attacks around to right and smack the foe enter play, and Tutankoopa becomes a high-risk, high-reward character!

Chompy is also important because while Tutankoopa's Buzzy Beetle Shells, Down Tilt and Smashes provide him a solid camping tool, he lacks extremely potent camping power and they are prone to having little effect without proper pressure, pressure that Tutankoopa should be trying to get Chompy to force upon the foe. Likewise, Tutankoopa's primary weakness is sticky characters who love to just stay close and never leave, a position from which he will usually be disadvantaged. If the enemy can get Chompy to keep on Tutankoopa more than the reverse, he can potentially keep Tutankoopa too busy to setup any strong camping situations.

Tutankoopa's smashes become a critical part of his set, along with his crowd control methods in general. Although the foe can get Chompy where they want via knockback, Tutankoopa can create platforms and walls to mold the stage more to his advantage, and he should be especially noteworthy of his walls, which can cordon off areas by either making Chompy focus foes in an area more or keeping enemies from getting into new danger zones where Chompy will target them. Forward Smash and Down Smash in particular are noteworthy of their ability to affect enemy positions in the long term without affecting Chompy, although they also give Tutankoopa an ability to strongly focus on platform play, which is helped by his Neutral Aerial, Down Aerial, Down Tilt and sometimes even Up Tilt! Do remember the tether and choose wisely if you wish to turn Chompy into more of a trap or if you want security from the foe and for chompy to perform more of a slow advance.

Tutankoopa is rather good at damage racking, although he is not amazing, because of his various ways to plink and plunk extra damage and the fact he usually gets a bit more out of Chompy. However, at the same time, Tutankoopa struggles with KOs, usually relying on either Chompy to finish the foe off, the heavily telegraphed trap portion of the Up Smash, or the extremely precise Back Aerial. Buzzy Beetle shells may not KO super fast, but their high utility in placement also makes them an okay KO option, and his most reliable past earlier KO percentages, although they too require setup.

In general, the key thing to be aware of in Tutankoopa is the potential for backfire, as while you can keep everything in check with careful planning, almost all your setup can damage you in some way if you mess up. Be a genius like Ganondorf, not brainless like Bowser.


Boss Mode


Tutankoopa has a 3v1 Boss Mode, which is accessed via the 3v1 Bosses menu in the Boss Battle section for any Smash game that in theory has 3v1 sections. Tutankoopa is the 1, obviously, and has a very large variety of changes to accomadate this new mode...maybe this is where his true Egyptian spiritual power shines? He even gains a new move...

Shield Special: Stone Chomp


Tutankoopa raises his hands as sand seems to colasesce in front of him, forming the visage that inspires fear in Tutankoopa's enemies: A Chain Chomp! This (Sand)Stone Chomp is the same size as Chompy, but much less durable, being only Donkey Kong's weight and having 60 HP. but being that it is a recreation of a Chain Chomp (a power he only seems to be able to access in the souped up world of 3v1 Bosses: Perhaps he is being empowered by Master Hand?) it is much more loyal to Tutankoopa. Although its attacks will still hurt Tutankoopa, Stone Chomps will chase after the nearest foe when summoned that does not have a Stone Chomp chasing after them. For example, when you summon the first Stone Chomp, it'll chase after who is closest to you, let us call them Foe 1. If you summon a second Stone Chomp and Foe 1 is the closest (and the first Stone Chomp is still alive), it will chase after the nearest person that is NOT Foe 1.

Stone Chomps are loyal to Tutankoopa, but they have their own will and Tutankoopa's hitting a bit above his weight, so...they're only loyal to a point. After taking half their HP in damage, the Stone Chomps will get angry, and revert to the normal Chompy AI patterns, meaning that it will be perfectly willing to go after any foe or Tutankoopa himself! The only thing they won't go after is each other or Chompy, keeping them from just looping upon each other.

Stone Chomps have the same moveset as Chompy, however, when Chomps of any time collide during both of them attacking, there is a rather loud CLANG and a massively powerful hitbox is made in the middle of the two Chomps, dealing 32% damage and KOing at a ludicrous 60%! This is stupidly potent, but Tutankoopa can be hit by it, and more importantly it is also stupidly difficult to pull off...if you can, though, Tutankoopa gains a massive advantage compared to normal.


Now then, onto the Boss Mode changes:

- Tutankoopa's statistics remain largely the same, however, Tutankoopa will gather spiritual energy (...or more paper) during the fight, and thus his weight increases with time. After one minute, Tutankoopa reaches his maximum weight of Donkey Kong. This means that Tutankoopa is not as combo-able as most bosses are early, but he is not squishy late...although it DOES leave him vulnerable to early aggression. Is this Dunban's time to shine?

- Tutankoopa escapes from grabs twice as fast. In addition, when Tutankoopa is grabbed, he will curse the foe who grabbed him. Tutankoopa then cannot be grabbed by opponents aside from the one he cursed for 5 seconds, preventing easy infinites on him. Tutankoopa also takes increasingly less hitstun from consecutive attacks in quick succession, within about 1.25 seconds of each other (refreshed with each hit), and takes no hitstun for 2 seconds after 4 hits, preventing him from being easily combo'd. Tutankoopa cannot be footstooled by opponents for 2 seconds after being footstooled.

- Chompy is even more durable now, most notably, he takes 1/3rd damage from enemies who hit him (still full from Tutankoopa) and no hitstun, making him a real pain to crowd control. The flipside is that there are now 3 opponents, meaning that it is a lot easier to get one person to try and keep him busy...although that is a lot difficult with no hitstun.

- Chompy, and the Stone Chomps when under half HP, now have a new Berserk move! If Chompy takes knockback 3 times consecutively, as if in a combo, then Chompy will go on a complete rampage, moving and attacking 50% faster while now passively dealing 12% damage and medium knockback to anyone he hits. He will ruthlessly track whatever character, Tutankoopa included, sent him into a Rampage, although he will gladly damage anyone who gets in his way. If he reaches the foe who made him Berserk, he will bite down on them for 25% damage that KOs at 80%: Paintful! Chompy's Berserk ends after 6 seconds or he hits the foe who Berserked him and he cannot be Berserked while Berserking.

Tutankoopa may even at times wish to intentionally trigger Berserk and try to hardcore kite Chompy: Extremely dangerous, but Chompy's passive hitbox and quick speed during the Berserk state is extremely helpful to Tutankoopa, especially if he turns around Chompy's attacks with a well timed F-Tilt or NAir to strike at foes!

- Tutankoopa's Down Special walls and platforms now have 70 HP and 50% reduced starting lag.

- Tutankoopa's Buzzy Beetle shell now gains power 50% faster and has the ability to go to 30% damage and 80% Ko power, then 35% damage and 70% KO power as the new cap. Remember, you can still be smacked by your own Buzzy Beetle shells!

- Tutankoopa now remains unhittable during the entire Up Special.

- Tutankoopa may now tether two enemies at once with Side Special and may chain character entities together, such as two foes or, more interestingly, a foe and a Chomp. The faster character decides where the tether goes if they are player controlled, but the Chomp always controls the direction if tethered. If two Chomps are tethered, Chompy has priority. If two Stone Chomps are tethered, the highest HP Stone Chomp has priority.

- Tutankoopa's tether now has 44 HP.

- Forward Smash now deals 21%-27% damage and KOs at 140%-115%. The wind effect now lasts 12 seconds and is noticably stronger...but Tutankoopa only is blown around as if the normal set version was blowing him around! Tutankoopa can also now have two sandstorms out at once: If they overlap, they cancel each other out or increase the the push/pull power by 1.3x depending on if they face the opposite or same way. Dastardly.

- Down Smash now deals 18%-24% damage and KOs at 150%-120%. The sand effect now lasts 12 seconds and is noticably stronger...but, just like the wind, Tutankoopa only feels the normal effects! Tutankoopa can also now have two Quicksand Pits out at once: If they overlap, they cancel each other out or increase the push/pull power by 1.3x. If their middle pits overall, the damage is increased to 18% that KOs at 200%. Diabolical.

- The first few frames of Up Smash now use the trap hitbox of the move, giving Tutankoopa a sweetspot timed move to send foes flying away. The Chalk Chomp now stays on the ground for 2 seconds after falling: Hitting it with a strong hitbox sends it flying as if hit by it, hitting anyone in the way with its original, powerful hitbox!

- The Up Smash, when crushing walls and platforms, now has 1.25x damage burst range. In addition, the flakes of the platform/walls will slowly fall to the ground, dealing 1% flinching damage in multiple chunks (max 5%-15% damage based on height and thus time to fall) to all foes hit by it before falling to the ground and dissipating.

- Tutankoopa's Jab stuns Stone Chomps for half a second, as they think about what they've done in the corner. Chompy is immune to this.

- Forward Tilt now deals 10% damage, comes out significantly faster and reflects all projectiles that deal 10% or less damage in addition to the usual reflection properties. Neutral Aerial's reflection also has this change.

- Tutankoopa's Up Tilt now has massive IASA frames on the ending lag into itself, allowing Tutankoopa to lower and raise the small pillar very quickly and play very fast/small Peek-a-boo games with it.

- Down Tilt now can skip 6 times on sand and skips twice on normal stage, following the same rules. Skipping the stone on sand, however, now icreases the damage it deals, adding 1.5% damage on each skip.

- Dash Attack deals 1% extra one each hit in the first hitbox and 2% more on each hit on the sand hitbox.

- Grab can now grab multiple people at once, throwing in order of closest to furthest, has 1.25x the range and has 3/4ths the ending lag.

- Pummel deals 2% damage and adds 1 second to each Hex.

- Down Throw now takes 30% damage to break.

- Back Throw can now cause characters to be drawn to each other, making it a lot harder to keep seperated for things like Chompy or shell games!

- Tutankoopa's Up Throw has increased range to 3/4ths of a Battlefield Platform to both sides and he will also throw ungrabbed foes at the foe when launching them up. If they collide, they take 8% damage and above average hitstun. The ability to throw multiple chomps thanks to Stone Chomps make this throw even more deadly to boot.

- Back Aerial now has a bit more range on the sweetspot, but most noticably the move has 3/4ths the lag on both ends to make up for the harsh requirements of spacing it properly vs. 3 foes and being interrupted.

- Down Aerial now travels noticably faster, requiring near perfect air dodges to not be hit multiple times. However, it slows down with each hit, preventing ti from being too casual of a damage racker or KO option or what have you, making it progressively easier to air dodge until 3 hits where it reaches normal speeds.

- The second hit of Forward Aerial now serves as a calling tool for Chain Chomps. Chain Chomps which are in range to do so will lunge their Standard Attack at the middlemost spot of the Forward Aerial, seeking to strike it, and will damage anyone along the way as normal. This is a particularly potent way to get the double-clanking strike with the Chain Chomps specifically, as he can set them up to both attack the same spot at the same time. The downside is that since Tutankoopa himself is in that position, he must be extremely cautious about when to utilize this move, as if the Chomps are at the wrong angle then they will crash into Tutankoopa and hurt him! This adds a lot more deadliness to the move and keeping track of Chompy and the Stone Chomps, but can also backfire tremendously. The move is otherwise unchanged.
 
Last edited:

Altais

Smash Champion
Joined
Nov 14, 2007
Messages
2,083
Location
Starbase, where no turtle has gone before.
Changed Elma's neutral special. Before, it was Executioner, but now it is Hundred Shells. Since it's just one move, I didn't repost the whole set. The whole set is on page-5.

Neutral Special (Hundred Shells): A looping move. Elma slashes her sword, and a red blade beam shoots forth. If the player either holds or repeatedly presses the special button, Elma will follow up with another blade beam, and another. Each blade knocks the opponent backward a little, and goes through opponents. At the end of the combo, Elma will do a cross-slash, sending two blade beams in an "X" formation; this will send the opponent flying backward at a slight rising diagonal angle. If the player waits too long, however, the opponent will be out of range, and the final blow won't connect unless they walk into it.
Each blade beam deals 3% damage, and the final cross slash deals 7% damage. The range of this move is roughly 1/3 the length of Final Destination. If Supercharge is in effect, the final hit will kill at higher percentages near the ledge.
Lastly, this move can be cancelled before the final hit by either shielding, crouching, or moving forward--after which Elma can follow up with Shadow Strike, Sliding Slinger (see Jab & Dash), or a dash-grab.
Instant startup, and if the final blow is executed, a very slight cooldown.
 

WeirdChillFever

Smash Hero
Joined
Jun 10, 2014
Messages
6,496
Location
Somewhere Out There
Toot Toot
An all round amazing set, with many, many tools to do many different things.
The set provides an obvious play-style, but it still gives enough depth to make different playstyles work.
Chompy works really well as a mechanic, and the rest of the set gives it enough to interact with.

Though I can't help but think that it's too much.
Having Chompy roam the stage is fine
Being able to summon three platforms is fine

However, the set keeps on adding stuff like walls, shells and even another type of Chomp.
This does not make the set less deep or worse, but I simply think it can get a bit too crowded, especially on smaller stages.
Plus, while these tools are meant to put up a balanced Rube-Goldberg Killer Machine, who says I won't take these walls and platforms and put myself in a sandy sacrofag, Forward Throwing anybody that gets close? That invalidates an hefty portion of the cast.

I think the set is great, with a new twist on the camper style (As a Pac-Main, this set is my wet dream) but it's on the edge of being too much.

But that's just my opeenion.

(And it also gives me room to readd mechanics I deemed to powerful or outrageous to my own WIP set.)
 

Smady

Smash Master
Joined
Apr 29, 2007
Messages
3,307
Location
K Rool Avenue
I've got tons of sets I could be commenting but as Tutankoopa was made in a day, I felt obliged to give a quick comment for when you get up. This is obviously an homage to the very old Rool set and does away with most of the bad stuff in that set, like the non-damaging attacks and complete inability to fight the foe. This set isn't that competent either, but it doesn't take it to the same extreme and makes sense for the character... to a point. The set does lack any real KO methods outside of the somewhat weak forward smash and two smash traps, as well as the shell from neutral special. Obviously he doesn't have any throws that can KO and his aerials are mostly defensive besides the back aerial's sweetspot and the spike down aerial. Largely this set revolves around trying to get Chompy to help you net KOs as was the case in the original moveset and it certainly does a far better job of that, but doesn't focus on it that much considering how important it is for the playstyle. You have the ftilt and nair for turning it around, the shell to bounce off it, some platform "peekaboo" and stuff like fsmash or dsmash that helps because it doesn't affect Chompy, but for how important he is you'd think he'd come up in a few more places, particularly the specials.

I feel like the specials have some problems, notably the up and down special. The neutral special is plenty good and I like how it flows off the making of walls, platforms and Chompy to extend its duration and power up to build up into a powerful hitbox. This is fun but honestly not the most unique gimmick, and probably could've been referenced more than in the down special, ftilt and nair (that share same effects) and dthrow. The side special is a perfectly okay tether and you really can't go wrong with a tether in most sets, although it's again not mentioned a whole lot beyond the special. It could have a big impact on the spacing of the bair or the wind hitbox of the fsmash for example, but it's easy enough to imagine on your own. I have serious problems with the down and up special because it takes a Rool camper and turns it into a Wizzerd staller. The down special lets you camp in the air for 10 seconds, and the up special adds on an extra 4 seconds for a total of 14 seconds of stalling at a time. You forgot to even say how the up special works as a recovery so it currently just reads as an outright stalling move like the Ocon/Wizzerd Paper Mario. I assume the headdress is meant to be movable during the animation. Given the right set up such as being hit high into the air, you may even be able to stall for up to 34 seconds, depending on what you mean by off stage. Suffice to say I hate the 14 second stall and this needs to be fixed or I find it hard to not dislike the set.

The grab game also had some stuff I found a bit awkward. The throws seem fairly hit-or-miss, personally I found the "Sand Box" throw to be fun and reminded me of my Ladja set in a good way, but the other 3 all had their own issues. The down throw seems very OP for locking the foe in place for 5 seconds and forcing them to deal 22% to their feet in order to break free. Tutankoopa is free to move at frame neutral and has plenty of long range moves to hit them during this time, reminding me of equally ancient Warlord sets albeit not as poorly balanced. The back throw is fairly tacky. The set very amusingly suggests Tutankoopa is a fraud, now he's making the foe age? I guess it DOES fit the whole Rool moniker well. Finally the up throw that you were worried about... it's alright, I do see why you were concerned. I do think the aging throw on this character is just as tacky, though is the better throw. The input placement for up throw is also weird, and the move seems to detract heavily from the style you were going for in the rest of the set. I haven't gone over the aerials and standards much, I do think the fair and jab are pretty terribly generic, but those aside I liked those sections fine. The dash attack reference was a nice touch, and moves like down tilt and some neat tricks on the uair, dair and bair. Overall though this set needs some reworking mostly in the specials, and maybe in the throws before I can approve of its reincarnation.
 
Last edited:

WeirdChillFever

Smash Hero
Joined
Jun 10, 2014
Messages
6,496
Location
Somewhere Out There
Ghost Gang
image.jpg

The Ghost Gang is a team of the main antagonists of the arcade games in the Pac-Man series, frequently appearing in later installments as well, be it as secondary baddies or as allies to Pac-Man.

In this moveset they take most of their moves, behavior and quirks from the original Pac-Man arcade, though like with Pac-Man himself, they use a 3D-model and take a few cues from their Pac-Land incarnation as well.

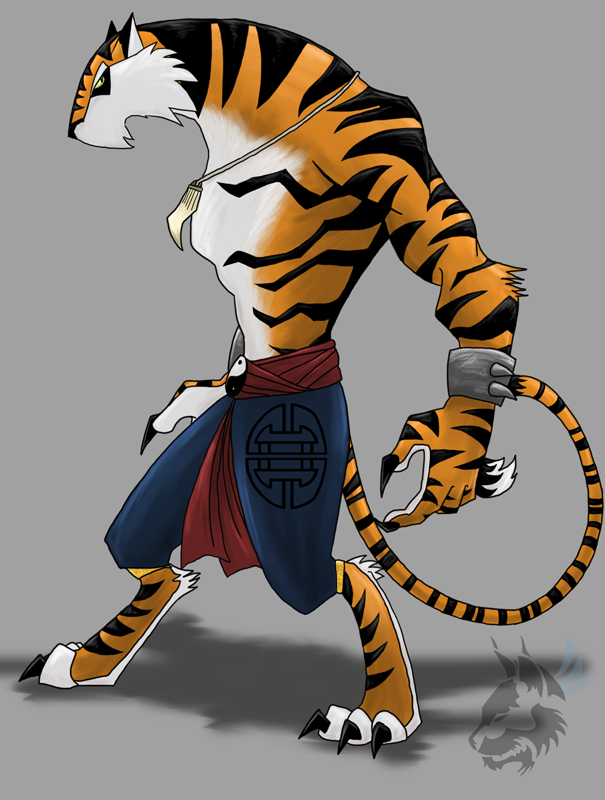
The Ghost Gang is a four-way tag team, with its default mode being a square, as seen above
Blinky is the leader, losing him means losing the stock whereas the others act more like Nana, following behind for assistance.

The team consists of Blinky, Inky, Pinky and Clyde, each serving different purposes in the team:

Blinky:
The leader of the team, if he is killed, the stock is lost. However, the other ghosts keep going on and even though his respawn time is instantaneous, the trip from the respawn platform to the other ghosts might be enough for the opponent to kill his teammates.

Inky:
As Blinky's right hand ghost, a lot of two-way attacks involve him, which makes him neccesary for completing moves. His respawn time is the second longest, being fourteen seconds.

Pinky:
Pinky is the strategist of the team often taking routes other than headfirst into battle which is reflected in her moves, being the pinnacle of the gang's anti-air and juggling capabilities as well as the source of the team's powerful finishers. She has the second shortest respawn time, being eight seconds.

Clyde:
While Clyde doesn't do a lot for the team, he has an extremely long respawn time at a whopping twenty-four seconds, so he needs to be protected as much as the rest.

Ghostly Mechanics:
The Ghosts are a four-way tag team, but some of the ghosts can't do everything a normal character can and the opponent can't do everything to the Ghosts that one can do to other characters.
Let's break down what the ghosts can and cannot do:

Grab:
As the leader of the team, only Blinky can grab opponents.
The ghosts cooperate with the throws
The opponent can grab every ghost and ghosts cannot attack the grabbing opponent.

Status effects:
Every ghost can suffer from status effects.

HP:
Unlike Luma and more akin to Ice Climbers, the Ghosts do not have an HP bar, instead being KO'd like every other character.
They even come down from the respawn platform when their respawn timer is over.

Shield:
The defensive behemoths that they are, every Ghost is covered by the shield, all sharing one shield.
The Ghosts also all have an air dodge, although it's very laggy.

The team has a below average mobility, having a dash speed reminiscent of Ness's and Pac-Man's air speed.
Despite being ghosts, their fall speed is average as well, though the fact that they are ghosts does reflect in their weight, with each ghosts having Luma's weight, though unlike Luma, they're fairly big, with one ghosts being twice as wide as Mario and reaching up to his nose in lenght

If they're in the default cube mode, they move as one team, with Blinky floating right above Inky and Pinky always floating above Clyde.

If a Ghost is missing during a move, the move continues at the same speed/pace, most probably leaving a blindspot.
When the Ghost missing would execute a move alone, there's just a small animation of the other Ghosts looking confused.

Specials:
Neutral B: Spectral Scatter

The Ghosts scatter in a bigger version of the default square mode by flying diagonally, expanding the room between the ghosts.

After a while, the player only controls Blinky, and the other ghosts go into chase mode being controlled by the AI.

However, the Ghosts follow the same pattern as they did in the original Pac-Man and as you can see later these patterns are all influenced by Blinky's or the opponent's position, which the player can bait out by controlling Blinky.

Inky:
Inky's goal is to reach a spot twice the distance from Blinky to two spaces in front of the opponent, in the direction from Blinky to the opponent. Because of this, Inky's movements will seem a lot more random the farther away Blinky is from the opponent. If Blinky is far away the opponent, Inky will often be wandering off somewhere far ahead of the opponent. But if Blinky is closely following behind it, Inky will usually seem to be following Blinky.

Pinky:
Pinky's movement is very strategic. By following the opponent's direction (approximately four ghosts ahead of wherever the opponent is headed) rather than the opponent himself, Pinky usually ends up taking a roundabout path to them.

Clyde:
Although his behavior might seem random, Clyde actually does chase the opponent (exactly the way Blinky does) most of the time. But when Clyde gets within an eight-ghost radius of the opponent, he starts to retreat to the lower-left corner of the stage.

As you can see, by controlling Blinky alone, one can easily bait the opponent to move into the AI's traps.

For example, one can keep the opponent away from Clyde so that the latter adds pressure onto the former.

During this move, the Ghosts can not only perform every aerial attack and air dodge (Including Specials, although tilts are cut out since they are floating all the time) but they can also perform an extra attack by pressing the button for the Smash attack , where they intract their arms and turn into a 3D-version of their 8-Bit sprite, growing to twice their size.
This attack deals 12% and kills Mario at center stage FD at 110%

If they perform an aerial attack, only the Ghost that attacks in the default move attacks in this version of the move as well.
Every move can be cancelled into this one (though you cannot cancel endlag with it), and one can cancel this move by pressing the B-button, after which the ghosts can act freely again, though they'll try to get into their default positions immediately after the move is over.
This makes it so that you can very easily lock up opponents in between aerials, especially since the aerials also involve the ghosts splitting up.

Side B: Poltergeist Plane
The Ghosts each summon a plane as seen in Pac-Land and in a puff of smoke immediately form a horizontal row of planes, with Blinky in front,
The player can then control the ghosts with a few moves:

The ghosts can go upwards (press upwards on the control stick) or downwards (press down).

On top of that, by pressing A, the ghosts drop one Ghost Bomb each, a Kirby-sized projectile that looks like the original ghost-sprite and that slowly falls and when it touches the ground, it activates and it starts acting like the Ghost Gang when in "Chase Mode".
This means that Blinky's Ghost Bomb chases the opponents headfirst, Inky's decides its route based of off the location of Blinky and the opponent etc.

When the Ghost Bomb touches an opponent, it explodes in 8-Bit fashion (with the color of said "sprite explosion" denoting the "owner" of the bomb, dealing 7% damage and slight upwards knockback.
The Ghosts are not affected by this explosion.

However, since it only starts chasing once it has touched the ground, opponents can destroy the bombs by attacking it.

The move can be cancelled by pressing B, doing so won't affect the bombs.

When the bomb has taken 4% damage, it explodes as well, but this time the explosion won't hurt the opponent, but the ghosts instead

If this move is performed while in Spectral Scatter, the Ghosts don't line up, but just don the planes.

This move is one of the main methods to trap opponents.

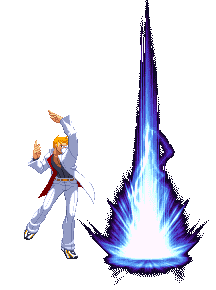
Up B: Banshee Bacura:
Inky and Clyde summon a Bacura from Xevious that's slightly wider than their own bodies under them, using their telekinesis to lift them up at the speed of Duck Hunt's recovery to use it as a recovery.
The player can then control the Ghosts slightly, again, akin to Duck Hunt's Duck Jump
The Bacura rotate dealing 10% damage and spike opponents hit
The Bacura also reflect projectiles, though due to the place of the Bacura being under the ghosts themselves and the fact the Bacura are essentially flat, this is more of a fun easter egg than a real threat.

The recovery lasts as long as Duck Hunt's, because the ghosts' telekinesis doesn't last forever.
After a while or when the A-button is pressed while recovering, they throw the Bacura at the closest opponent, acting like Auto-Recticle, with their last bit of telekinesis at the speed of Pac-Man's key, though the projectile has a small start-up speed, similar to Samus's missile.
This deals 15% damage and leaves the Ghosts helpless.

The move can be performed in Spectral Scatter and when Inky and Clyde are missing, in which case the ghosts left each summon a Bacura under them.

When either Inky or Clyde is missing, the recovery speed and distance is lessened,
and the move leaves a nasty blindspot.

Down B: TURN-TO-BLUE:
The ghosts turn into their 8-Bit blue version for a couple frames
When the ghosts are attacked during this time, they turn into 8-Bit eyes and become invincible for a short while

Like many counter moves, there's a decay with each time to move is used.
Damage is also a factor: The lower the damage that would've been received, the shorter the invincibility.

This way, the opponent can bait the move out only to jab the Ghosts and punish the endlag of the counter!

On top of that, the current damage also factors into the move's invincibility:
The higher the Ghosts' damage, the longer the invincibility is, although the decay from using it gets heavier.

So just like in the original arcade game, a good Ghost Gang only counters when it's a threat to the Ghost Gang and although using it badly can cost you stocks, it can still be a game-changing move by using it correctly

Final Smash: Maze Craze
Blinky summons the ghosts "spawn box" from Pac-Man and lifts it up swiftly with his telekinesis.
Opponents trapped are then part of a small cutscene, where all four ghosts repeatedly slam opponents into the walls of the spawn box, dealing up to 90% damage.

The opponent is then launched as the box dematerialises in blue pixels.

Ground Moves:
Jab:

Blinky leans slightly forward, delivering a straight punch with the right hand, followed by Inky doing the same. These hits do 2% each and deal no knockback.
After that, they jump up a bit, allowing for Clyde and Pinky to slide under the two ghosts similar to Rosalina's Dash Attack, with Clyde at the bottom, for a third hit, while Blinky and Inky slide with their undersides from left to right (akin to Rosalina's Forward Tilt) to "kick" with their undersides, dealing 4% damage


The stack that appears is as tall as Ganondorf, so it's a great walling tool.

Forward Tilt:
Blinky puts his arms parallel to his body and floats horizontally, smashing forward for a headbutt, dealing 4% damage and moderate knockback, followed by Inky doing the same for a two-hit combo dealing 8% in total and being a kill move at the ledge, killing there around 120%

The move, like Jab, requires Inky to complete so the player has to make sure Inky's present as the move is a good stock cap at higher percents.

Up Tilt:
Pinky looks up delivers a swift uppercut with her right arm, swinging it upwards, dealing 6% damage.
Blinky does the same, but with his left arm, dealing 2%
This move deals very little knockback, allowing it to combo into itself and other moves at low percents.

The move's range gets bigger when Inky and Clyde are still in the game, as they hold the other ghosts like a kite during this move, increasing the move's range with fifty percent.

Down Tilt:
Clyde finally gets his solo debut! As Inky jumps next to Blinky, Clyde slides under his brethren, headbutting everybody in his range for 6% damage. After that, he makes a U-Turn back to his original position.

Though Clyde travels a fairly good lenght, the lack of disjoints makes it easy to swat Clyde away.

Dash Attack:
Blinky slightly tilts his body at a 45* angle so that his right side is facing slightly upwards (left if Blinky's facing left in this move)
Inky swiftly turns upside down clock-wise, eventually turning him so that his right (left side if facing left) is turned downwards a bit

Now that they've taken their new positions, wait...
that's not just any position.
That's Pac-Man's famous pizza slice form!

Anyway, when they've taken their nemesis' natural form, all ghosts keep running forward, while Blinky and Inky tilt their bodies so that it's like Pac-Man's chomping.
This goes on for five quick cycles, dealing 2% damage in each of the first four chomps, with the final chomp dealing 5% damage and medium horizontal knockback.

The chomps are slower compared to Pac-Man's, making them unsafer on shield.
However, the final hit deals both more damage and knockback and the middle hits have very small knockback, not allowing for any escapes.

Like Pac-Man's Dash Attack, this move is fairly bread and butter for the ghosts as it is both quick and strong, dealing a lot of damage and putting opponents off-stage even at low percents, due to the horizontal knockback.
This pure horizontal knockback also makes it a strong kill move at the ledge, killing Mario at 90% at the ledge.

Smashes
Forward Smash:

Pinky grabs Blinky before using him as a sword for a horizontal slice, dealing 5% damage, but no knockback.
Instead, Clyde, startled for missing his intial cue, quickly grabs Inky for a stab, dealing 7% damage and heavy knockback, killing Mario at the centre of FD at 100%
Though strong, the move needs all of the ghosts to be effective, as without Clyde or Pinky, the move considerably lessens in range, only hitting the opponent at point blank range.
When Inky is missing, the move can't finish itself, as only Blinky's hit is left

Up Smash:
Pinky flies upwards before crashing down, the trail having Marth's Up Air's range (although Pinky flies straight up)
Opponents hit get caught in the flight path, so that Pinky can take them with her in her crash.
The Ghost deals 4% if she manages to hit the opponent.
However, to make the crash landing safer, Clyde, Inky and Blinky (who joins Inky to the left for a line) duck before springing upwards when Pinky lands on them (Or, when she's absent, when she would land)
The opponents caught in the flight path of Pinky will also crash in Clyde, Blinky and Inky, dealing 8% damage and heavy knockback. (Although its short range without Pinky and overall long duration makes up for it)

Down Smash:
Clyde and Inky glide to the side over the ground, headbutting the opponent, dealing 6% damage and a small amount of knockback.
However, the main draw of the move is not the slide of the ghosts at the underside, but what Blinky and Pinky do with the room left by the other ghosts.
Pinky and Blinky namely fly up at a small angle, crossing eachothers paths, do a small looping and crash down straight down headfirst.
This attack deals 8% damage and high diagonal knockback, killing Mario at 130% at the center of FD.

Aerials:
Neutral Air:

The Ghosts propel themselves to the corners by flying to them diagonally (So if they're facing right, Blinky flies to the upper right corner)
This deals 4% damage and light knockback.
However, they then propel themselves back to their original position, dealing 5% damage and medium knockback.


Forward Air:
Blinky flies up at a slight angle before falling down again, flying in a slight arc pattern, like Marth's sword in his Forward Aerial, dealing 7% damage and medium forwards knockback
Inky at the same time flies down before flying up again dealing 6% damage and slight upwards knockback, meeting Blinky in his flight pattern, making a circle pattern because of their similtanious flights.
Clyde and Pinky then quickly fly forwards to adapt to Blinky and Inky's new positions. This flying deals 3% damage and light backwards knockback
The move has the range and speed of Shulk's Forward Air.

Up Air:
Pinky flies, wait, what is she doing? Why is she flying sideways?
She's flying to the side in an up air!
Anyway, she flies to the side before making a U-Turn, bashing into any opponents that happen to be above the ghost gang.
When she touches an opponent she stands up like the end of Rosalina's Dash Attack, bashing opponents up in the air, dealing 8% damage and killing pretty early for an aerial this fast.

Back Air:
Clyde flies backwards headfirst for a short distance, where he stops for a while, flying horizontally around in one spot while deciding if he should go in more or should get back to his friends. Opponents that get hit by his erratic movement are stuck for 6% damage (like Mega Man's Back Air)
Eventually he headbutts once for an additional 4% damage and medium knockback before he calls quits and goes back to his friends (who have fallen down a bit during the move)

Down Air:
Inky uses Clyde as a trapeze, as he grabs onto Clyde's left arm. Blinky in his tirn grabs onto Inky, creating a line of "acrobats" They then swing in a half circle towards Pinky, who puts them back into their original position.
Opponents that hit one of the ghosts get 6% damage and are knocked sideways

Grab:
A Bacura appears and flips around.
Opponents hit are then automatically in Blinky's telekinesis.
A fairly laggy grab.

Pummel:
Blinky headbutts the opponent for 2% damage

Forward Throw:
Blinky thinks hard and throws them away, dealing 4% damage and light knockback.

Up Throw:
Blinky throws the opponent up, dealing 2% damage.
Inky then throws Blinky upwards for an extra hit for another 4% damage, though the knockback is still very light.

Back Throw:
Blinky throws the opponent backwards, dealing 6% damage
Clyde then kicks the opponent for an additional 3% damage.

Down Throw:
Blinky hits the opponent with his tentacle-thingies, while Inky is getting ready in position.
Blinky then throws the opponent to Inky who gives an additional headbutt,
This deals 7% damage and light knockback.

Playstyle
The Ghost Gang is essentially a combination of Rosalina and Luma and Ryu.
On steroids.
Using Spectral Scatter at the right time, one can create devastating comboes, like Ryu.
The aerials lend themselves well for long strings and with the right placement of Ghosts, one can really lay down a beating making it really hard to escape.
On top of that, their floaty nature, Spectral Scatter, Poltergeist Plane and TURN-TO-BLUE can make it seem like the Ghosts have no disadvantage state which makes it really hard to combo them.

However, they also combine Rosalina and Luma's and Ryu's weaknesses.
Specifically, their low range and low mobility make them prone to getting camped or walled out.
Like in the source game, the best way to deal with the Ghost Gang is to stay away, before striking when the time is right!
Their low weight makes it so that a good hit can kill them pretty easily, so punishing, chipping and staying away is the way to go!
The fact that the recovery is extremely gimpable makes matters even worse when the Ghosts are caught.

On the flip side, the Ghosts' goal is to close the distance between opponent and gang, using Spectral Scatter and Poltergeist Plane to trap the opponent in a nasty situation!
Many aerials can lock opponents between the four ghosts, such as Forward Air and Neutral Air.
 
Last edited:

FrozenRoy

Smash Lord
Joined
Apr 26, 2007
Messages
1,261
Location
Las Vegas, Nevada
Switch FC
SW-1325-2408-7513
I edited Tutankoopa in response to the commentary on the set.

Tutankoopa Changelog:
- Chompy no longer eternally respawns once Tutankoopa is out of battle. Small oversight there!
- Up Special no longer accidentally forgets to mention that Tutankoopa moves during it. Tutankoopa has free flight at R.O.B. Up Special speed.
- Up Special no longer makes Tutankoopa immune during the entirity, instead only during the first second. What a cheap trick.
- Tutankoopa's walls and platforms now have 40 HP instead of 55 HP.
- Tutankoopa's walls and platforms now begin to fall down towards the ground if they are over a certain height, keeping Tutankoopa from mindlessly stalling from the top of the stage.
- Tutankoopa's walls and platforms have a small minimum distance added to their placement between each other, which prevents boxing.
- Up Smash has an additional interaction when smashing through platforms and walls with sand on them.
- Down Tilt now is able to skip along sand!
- Down Throw can now be broken out of with only 15% damage.
- Back Throw, Up throw and Forward Aerial have been completely replaced!
- Playstyle section now properly calls it a kurse.
- Tutankoopa now has a rather expansive 3v1 Boss Mode! I encourage anyone reading the set to check it out!
 

Plazzap

Smash Rookie
Joined
Aug 24, 2014
Messages
9
Location
The Earth of course
MYM Mini Entry
Laplace
Once Laplace was a rather simple man, a traveler who explored every nook and cranny of the world to make discoveries and occasionally find treasure, which would pay to fuel his nomadic lifestyle. Before he could see everything his world had to offer however, Laplace was murdered by some thieves bearing cold, deadly daggers; they wanted Laplace's treasure for themselves of course and all Laplace could feel was pure hatred and remorse during his death. Even after death Laplace's hatred remained, he started by taking revenge on the thieves with their own daggers, which would become his primary weapons of choice, the Psychic Daggers

Laplace's whereabouts are always unknown, but if one thing's for sure he's not in our world anymore and probably resides in some dimensional subspace. He is entirely motivated by the hatred of the world he looks down on, it's often that if somebody truly hates another Laplace will assassinate them for their soul, collecting these souls slowly allows Laplace to regain existence as well, but it will be quite awhile of murder and hatred until that happens.

In terms of assassination Laplace is quite skilled , using the knowledge of his past travels to spy on his targets with his All-Seeing Eyes before ending them when the time is right by manifesting his "eyes" in the forme of the Psychic Daggers. Laplace's supernatural psychic is strong, allowing him to deal with multiple targets at once or focus his condensed power on a single target.


Statistics
Size - 7
Weight - 3
Ground Speed - 2
Traction - 4
Jump - 8
Air Speed - 8
Fall Speed- 2

It's quite clear to see that Laplace isn' t exactly a mobile character, doing best in the air looking down on his opponent. His tall and lanky size combined with his ghostly weight make him a large target that can't take hits. He's also quite prone to juggling as well, shame. Laplace's saving grace however is his Jump and Air Speed, which allows him to get in the air and place his Psychic Daggers in unique locations. Speaking of those daggers...

Neutral Special - Psychic Daggers
This is Laplace's most important move, it manages all of his Psychic Daggers in one input, but first let's go over the most basic input: a simple tap of B. Upon doing this, Laplace will extract a single dagger from his cloak before suspending it above him with effortless psychic energy, this is quite laggy in terms of startup but once Laplace has a dagger out he won't experience any endlag, the dagger now trailing him telekinetically wherever he goes. Laplace can have 4 psychic daggers out at a time and it's likely they'll need to be replaced as they only have 20 HP apiece. With one psychic dagger Laplace can use his fast yet endlag heavy ground moves, which are very punishable on their own, but with multiple daggers Laplace can use a second, third or fourth attack while his last dagger is in lag, which is excellent for racking up damage and comboes.

By holding B, Laplace will draw one of his existing daggers from midair and with the flick of a wrist, throw it forth. The the short time being, daggers become breakneck pace projectiles that deal a sharp 15% damage when it hits as well as having trancendent priority to everything. Depending on how long you charged and what cardinal trajectory you inputted, a Psychic Dagger will end up possibly 1-3 SBBs away from you and linger telepathically in that location. Lingering Daggers, like Lumas, will respond to your inputs and use their ground moves no matter where you are or what state your currently in, making them excellent spacing tools for distant combat and freeing Laplace from things like comboes and juggles.

Balancing whether you want your inputs spread or condensed or a bit of both is essential to playing Laplace, keep in mind however, even if lingering daggers can defend themselves with your inputs, they are still very vulnerable and prone to being destroyed, so be prepared to constantly create daggers.


By the way, to "requip" a dagger to follow Laplace as another asset for combat, one must simply tap B in midair and the nearest dagger will be recollected.


Last edited:

FrozenRoy

Smash Lord
Joined
Apr 26, 2007
Messages
1,261
Location
Las Vegas, Nevada
Switch FC
SW-1325-2408-7513
Togekissed @Reigaheres

Togekiss certainly tackles some genres that are iffy in Make Your Move, most noticably Serene Grace and the resulting luck-basis on that. While it doesn't blow me away, I find myself able to be satisfied with Togekiss' luck mechanics largely because it avoided two pitfalls that most luck sets fall into.

First off, there are no pure duds in the set that make you look like a fool for even using the move, nor are there any absolutely critical moves in Togekiss' moveset that might just not work: Togekiss' luck comes from buffs or extra effects that Togekiss can take advantage of and Togekiss can even make some of them a 100% deal with Serene Grace. Togekiss' primary playstyle, the Wish/Serene Grace zones + ground-to-air combat and air-to-ground combat, can work without HAVING to get lucky.

Secondly, Togekiss' luck effects for the most part aren't huge swings. Togekiss isn't going to just go critfishing for huge effects that will win the game or lose because she didn't get them, instead many of Togekiss' luck "swings" are more modest additions to the battle that Togekiss can use to its advantage, but can also live without.

The core idea of the Wish and Serene Grace zones is pretty cool and probably the strongest core idea in the set, it's a pretty nice way to get healing in and I like the idea that Togekiss can make some luck-based moves 100% in the Serene Grace zone and so on, adding some consistancy and zone control to Togekiss. Probably the biggest downside in the Specials is Ancientpower: The way the move works is actually pretty cool, in that you summon projectiles you can use later, but the control scheme is just awful! This randomly replaces Togekiss' NAir and Jab when it could just be fired off with Down Special again! You arguably lose the charged/smashed version, but that doesn't play a ton into the set anyway...and since it is only via smash and charge, you could just have it so that it fires one if you tap and all if you charge! This is honestly something really simple and I am surprised it was missed. They are also destroyed pathetically easy which makes the move incredibly difficult to lose and I almost feel like it could have been fun to have some sweetspot or something to potentially increase the odds of buffs. In some ways, this feels more like Tri Attack than Ancient Power to me.

The big plus for this moveset comes from the strong ground-to-air and air-to-ground game and strong standards, stuff like Jab, Dash Attack, Down Tilt are all very fun to me, a strong ability to fly to and fro in short little ways, like controlled shorthopping attacks, small transitional attacks, it all feels very fitting for Togekiss to me, and the Forward Tilt/Up Tilt with Fairy Wind games leads to a bit of fun additional gameplay. I particularly like Up Smash as a continuation of this and Down Smash is fairly fun now that Togekiss is not suddenly an earthshaker. The aerials continue this kind of soft yet nice aerial transition gameplay and I am pretty fond of that slick Forward Aerial, it has one of the slicker Ancient Power boosts too...although you really should add a line break between each buff.

The grab game feels pretty odd to me, though, I can get using Extrasensory/Psychic stuff for a grab when Togekiss' body is so awkward for it, but the effects just feel kind of weird and I don't feel I would have added more psychic stuff in the throws, stuff like Dazzling Gleam feels odd although that has good gameplay value. Air Slash is also potentially problematic to me with how it flinches to me.

Overall, though, I feel Togekiss' good outweighs its bad, but that it is very much a tale of two movesets and suffers from some execution issues for things like Ancient Power. I hope we see another set from you soon, Reiga, as it has been a while. :)

---

Dark Spamus @der Rabe

The first thing to take note of with Dark Samus is, quite simply, that all sets should have a stats section, even if it just says "Dark Samus' stats are the same as Samus". Many clones and semi-clones in Smash Brothers have different stats from the original, such as weight, falling speed and what have you, so Dark Samus needs to specify if they are the same or if she is heavier, lighter or whatnot. Stuff like this is generally very important information as one cannot make a judgement on the characters stats/balance of them/whatever without knowing what they are.

This set does a lot better in giving information than some of the other newcomer sets, which is nice, but I would really like to see is some idea of lag on Dark Samus' Neutral Special, as the attack feels quite strong and I am worried about its power level if it is a faster attack OR not very punishable. Also, I would either try to cut the tentacle attack from the GIF or mention it is not in this attack, as I spent too long trying to figure out where it happened in the move. I would probably make Dark samus' Up Special come out a bit faster, but remove the invincibility, perhaps make it just super armor instead I feel. And for the Phazon Missiles, I feel like the non-freezing version's damage should be swapped with the Freezing version, which not only makes more sense with the KO power bit, but fits with the idea that the Phazon Missiles' freezing allows higher damage chance by striking the frozen foe vs. the gaurenteed damage of the normal Missile hitting.

Down Special feels very broken to me unless it is very laggy, because the defense it provides is really good, even if the 12 HP is not excessive, largely because merely touching them deals damage AND they block attacks to boot AND they can use some of Dark Samus moves, most notably the Neutral Special sounds possibly crazy with three out. I would change this move to either be more strictly defensive, removing the move-using part and giving it some kind of attack if you input Down Special again or removing the defensive part and making it a pure clone move, maybe something like making a 20-30 HP clone who follows you around and copies your attacks on, IDK, a 2 second delay or so? As-is the move feels very safe for its power. It also needs to have damage listed for what the Dark Samus clones can do, very important information. The animation for the Dark Samuses swirling around the main Dark Samus also sounds really awkward.

The standards feel, for the most part, pretty solid, although I feel I should note that priority is not really determined by frames, but by damage, so the stuff about that in Dark Samus' jab doesn't make much sense. Down Tilt also feels much more like a Down Smash and would probably fit more than the Boost Ball being Down Smash, and I'd like to see a mention of how much it Kos at. It would be nice if we had some idea of what Up Smash looked like without the video, as not everyone can watch them at all times, and the wording on it is somewhat confusing. It really should be a hitbox, presumably when the pillar first comes out. Forward Smash isn't bad but I am not sure why the logic for the burn damage doing 5% in 1 second is what it is, although actually doing the damage that way is not bad.

Neutral Aerial should list damage, if it is intended to do no damage than it should do damage. Up Aerial also needs damage numbers. Down Aerial needs more info, especially since not everyone has Samus' Down Aerial damage and such memorized. Please note that a 1 frame pummel is insanely Op as you can simply alternate A/Z to mash opponent for super speed damage. Every throw needs damage percentages and a bit more information on their uses, to be entirely honest. More information on how Dark Samus grabs should be added given most people will think it is a Samus style tether grab and this is very easy to miss: Most movesets give grabs their own input and I recommend doing the same.

Overall though, Dark Samus has a bit more of a sense of playstyle and numbers than many other newcomer sets, but it still has some rather severe numerical issues and the playstyle feel here is rather weak: I would like to see a larger expansion of how her general melee game is meant to play into her overall game. This does make me want to see more from you though, der Rabe, and perhaps see your thoughts on a set or two you may read. Hope to see more soon!

Sandslasher Films JOE! JOE!

Its pretty nice to see you posting so many sets this contest, JOE, up to 4 now and I'm guessing we'll see another before its all over, right? Sandslash, certainly, is a nice addition to the strong group of sets you've put out this contest, but its got a pretty big flaw.

Lets just get right to it: I don't like the tunnels in this moveset! My almost memetic dislike of pitfall traps is well known and I feel making two full strength pitfall traps on the stage is pretty cheap, boring gameplay, and the only thing that fits about it is the fun of Magnitude hitting ones dug deep like in the games. The bigger sticking point is that the way that Sandslash can move through the tunnels is incredibly awkward, what the hell is up with this tunnel travelling on a throw and crap when its normally a pitfall trap?! If you want to give him pitfall interactions, make it a single move and do away with the double traps. Side Special's burying feels much more palatable.

Not only that, though, but just making Sandslash and the foe able to travel through tunnels, perhaps by holding crouch?, would be way more insanely cool and playstyle relevant. Imagine the battles between Sandslash and the foe over control of the tunnel openings and the ability to traverse the stage quickly by popping into one. Sandlsash's Magnitude could hit foes inside of tunnels, not only mirroring the pitfall effect and effect in the game but giving Sandslash a scary punish, daring foes to use his tunnels against him when his Magnitude is ready. It would also fit really nicely into how Sandslash's melee plays out. Something like this over the pitfall trap version right now would significantly improve my opinion of the moveset.

Now that we've got the worst of Sandslash out of the way, lets get to the better points. Magnitude is pretty cool as a DK Punch charge kind of move, not anything super spectacularly unique but it plays quite well which is important, especially when he has some fairly fun ways to make use of the hitbox, the shorthop spike to hit seems like a good risk-reward option. Dig is actually pretty fun, in my opinion, as a general approach tool and the fact he can use the Sand Attack as this combination setup and combo starter, but I do question if it is a bit too strong. I would consider, IDK, diminishing returns on digging repeatedly within a quick time frame, otherwise it could at the least be very obnoxious if not OP. I will admit that the somewhat long starting lag might make this less of an issue, but he DOES have some coverage too, so. The variety of ways for Sandslash to pop out have some pretty good mixup potential, too.

Speaking of Side Special again, that's a pretty cool move, "Trample Priority" is a rather interesting twist on normal priority that nonetheless works within it (similiar to some moves in Sm4sh already, actually!), and I like the idea of using it, Dig and the future Dash Attack as this strong triumverate of different yet powerful approaching tools that all have their own weaknesses. It is a very strong base for a set's melee game, which is only helped by my favorite Special: Sand Storm! The setup on the Up Special is rather natural with how it works as a recovery and many of the users of it are pretty neat, in particular I like the Bulldoze creating Sand-Attack hitbox, the way Magnitude interacts with the sand (simple, effective, classic) and the clean sand slice interaction and suction on the Forward Smash. As usual, the tunnel is a bit of an issue: The suction into pitfall isn't exactly fun, even if it is solid flow.

I find the strength of the set largely comes from the Standards and Smashes, however, Crush Claw has a fun hitbox and as mentioned the Sandstorm interactions are lovely, nice and soft. Down Smash is fairly fun, although I find the buried use somewhat questionable (can't you do better stuff with a pitfalled foe?), Dash Attack as mentioned I quite like, it works wonderfully into his melee game with cross-ups and the ability to use it and Side Special as dual approach tools, while being pretty simple in how it does so. Forward Tilt isn't anything especially, well, special, but I do quite like how it does its Marth job well.

On the aerials, I have little to say, they seem as if they fit their job but left little lasting impression to me, not bad but I do feel that the moveset treats them as better than they are in some ways and that it doesn't have quite as much of the shorthop appeal you desired. The grab game is bad, with the tacky tunnel-entering-only-on-throws that don't have much other relevance, the admittedly not bad Up Throw (although why isn't it Down Throw?) and the basically just there Down Throw. Along with the tunnels, this is the biggest issue in the set, with great room for improvement.

Overall, Sandslash I feel is a set with good potential, but it suffers from the rather bad tunnel implementation, some iffy balance and a low end grab game. I still like it a little, but it feels like a set dragged down, and I feel like fixing a few issues could cause it to shoot up quite a bit. I can't put it above 5 star while the tunnel traps exist. Regardless, JOE, it is a good addition to your good contest!

---

Riki Tiki Tacky Slavic Slavic

Despite the title, Riki doesn't seem especially tacky...well, okay, maybe a few spots, but a good wordplay can't be helped, right?

Riki's biggest issue and one that makes it hard to comment is that a huge amount of the moves do not exist for the playstyle of combat, but just for moving your pollens. Yes, I know they're hitboxes, but they don't play into any defined playstyle, the whiplash from going to a set like Dunban to this is probably enough to put cracks in your neck. It is hard to even discuss much because of the way so many of the problems boil down to "every move exists just to move the pollen around".

Lets talk about the pollens for a moment, though. The pollens essentially all are on-shield effects that amount to poison damage or variations on it without any actual regard for trying to perform an anti-shielding playstyle and honestly the foe is probably more slightly annoyed if anything when so much of Riki is about moving the pollens instead of actually trying to fight the foe and get them to shield. This is a severe issue for stuff like, say, Burninate: Why is the foe really trying to shield you all that much? Say Sorry is a good KO move but one move alone is not going to put the fear of god into them. It is also incredibly awkward how Riki's pollens are on NSpec (natural), the 3 Smashes (also pretty natural) and...Neutral...Aerial? Huh?? NAir is also the only one with a non-shield effect, but I question why Riki gives any care about the foe's jumps and fall speeds. To put them into the pollen generically more, I guess, because the moves sure don't take advantage of it.

The grab game is just terrible. If there is a part where the "Tacky" of the comment title applies, its this. The Up Throw has powerups to the pollen that range from tacky to semi-mirrored and frankly feels like it should be a Special, allowing you to convert pollen into projectiles. If the set revolved around converting pollen to things, that might be cool. But it doesn't. Down Throw basically exists for Riki to steal items, as his Back Throw KOs sooner even when the foe has no items out, deals a whole 1% damage less and allows Riki to get to his pollen better. I also question what Back Throw and Forward Throw are both doing in the same set, as they seem very similiar, and the Back Throw animation feels rather hilarious quite often. Pretty much the entire Standards section is a good example of what I mean by this set's lack of non-pollen playstyle, as Down Tilt basically is going "this move is pretty bad but he can coat himself in pollen" and the other two tilts + Jab essentially devote all their importance to moving the pollen in different directions.

Ultimately, Riki is a supremely boring set due to essentially repeating itself many times (in some ways it reminds me of my The Six Samurai - Kamon, but slightly less one note in exchange for less playstyle), the fact the pollen themselves are not good (which is what puts it in 3 over 4-5 ultimately) and some tack. This one actually had me yawning, folks. Sharla may have been bad, but she did try new things and attempt to make an interesting playstyle. I know you can do better Slavic, this contest alone has shown it, so I really hope we see more sets from you after this! There's still time! Unleash the Heropon inside your heart and write those moves! (Or some comments!)
 
Last edited:

JOE!

Smash Hero
Joined
Oct 5, 2008
Messages
8,075
Location
Dedham, MA
Just an update for everyone participating in the Challenge MYMini:

Each week from now on, entries will be due by Tuesday Night, entries posted on Wednesday will not count!

Review and the next prompt will be posted the following Wednesday morning. You still have 48~ hrs left to post!
 

Nu~

Smash Dreamer
Joined
Jun 22, 2012
Messages
4,332
Location
U.S., Maryland (Eastern Time, UTC - 5hrs)
NNID
EquinoXYZ
Hello fellow MYM moveset designers! I come to you with crash bandicoot hype and a wonky moveset filled with shenanigans. Please critique! I want to create the best moveset I can to personify crash in smash.

Without further ado...
Crash causes a commotion!


Character Physics
High airspeed (8/10)
Good walk speed (7/10)
High run speed (8/10)
Kinda floaty (6/10 DK fall speed)
Good jump height (7/10)
Weight: Slightly lighter than average (6/10)
Height: Taller than Mario, shorter than fox.
Can wall jump and crawl.


Moveset Theme: Insanity!!

I wanted to create a moveset that fully embodies Crash's insane character and the nature of his games overall. Each move is wacky, unique, and scary to challenge. His moveset screams to the opponent that he's a different type of protagonist.
He calls forth his family to help him out in some attacks, and even goes as far as using enemies from the original crash games as weapons!

Crash's highly damaging moves, high speed, wide variety of traps, excellent CQC, and smooth combo game make it so that the opponent wants to stay the hell away from crash at all costs!!
Just like in the crash games :laugh:
However, even in mid range Crash has a few ranged options like his wumpa bazooka and crates to force approaches.

All in all, when Crash draws near, Look Out!!


Specials

B: Spin!
Pressing the move makes Crash perform a normal spin with minimal endlag. (Deals 10% damage)
Does decent knockback, reflects projectiles, and can be used once in the air. You can use it while walking or running and it doesn't slow you down. Excellent approach option and "get off me" tool. Won't kill until about 160% center stage.

However, you can mash B to make it the Death Tornado; a powerful attack that lasts longer, deals more damage (14%) and knockback, has super armor, and has a powerful windbox (50% chance of having a suction windbox, 50% chance of having a random windbox). Kills at about 120% center stage.

What's the downside may you ask? Well, the death tornado has a considerable amount of endlag on the ground and makes you go into a prone state in the air. Spamming it mindlessly is sure to get you punished hard. Use it wisely.


Side B: Mummy Death Hug
Crash hides behind a sarcophagus and a mummy pops out! The mummy dashes forwards and hugs whoever is in its way. (Deals 8% and travels 1/4th of FD)
The hug ignores shields but loses to attacks (the mummy will also absorb non piercing attacks for crash when it's out). Crash can run up and hit the opponent when they are being hugged but the opponent can try to mash out before crash gets to them. The hug is harder to mash out of the higher the opponent's %.


Up B: Bonus Platform
Crash flies upwards on a Bonus Platform from the original Crash games. You can direct the platform wherever you want it to go. You can still perform all of your attacks while riding the platform (even shielding!) but you can't walk or jump off until the platform disappears. It travels pretty far, about as far as snake's Up B did.
To keep it from being absolutely ridiculous, the platform can be destroyed when hit with a strong attack (15% health) Stores your second jump like mega man's rush coil.


Down B: Crate Catastrophe
Crash throws a normal crate to the distance of about 1/3rd of FD. You can hold B to charge this move. Medium charge (hold for 3/4ths a second) makes crash throw a TNT Crate and Full charge (hold for 1 second and a half) makes Crash throw a Nitro Crate. All Crates disappear after 7 seconds and you can only have 2 crates out at a time.

Regular crates
-deal 7% and break when they hit the opponent.
-just obstruct space and cause no harm when touched
- can be destroyed with any attack.
-minimal knockback

TNT Crates
-deal 10% when thrown at an opponent
-deal 10% when destroyed by you or opp (any attack destroys them)
-start a 3 second destruction countdown when touched.
-medium knockback

Nitro Crates
-deal 15% when thrown
-deal 15% when they make any sort of contact with you or opp
-high knockback


Ground Normals

Jab: Spin punch (3% turns opponents around), Spinning Roundhouse Kick (2%) then a triple spinning flip kick (Launches opponents upwards and deals three hits: 1%, 1%, 2%). Comes out fast but won't ever kill.

Dash attack: Crash rides his Nitro Kart into the opponent (10%). Good burst attack that won't kill but deals good diagonal knockback (about 50 degrees)

Utilt: Swings two snakes above his head like nunchucks. Hitbox lasts for a while (15 frames), multi hit (2%, 1%, 1,%, 5%). Won't kill but is a great move for juggling.

Dtilt: Signature slide attack from nearly every crash game. Goes about as far as cloud's dtilt and ducks under projectiles. Knocks opponents into the air at a 90 degree angle for follow up attacks and kill conversions. Has fast startup and low endlag. Moves quickly across the ground. Deals 8% but doesn't deal much knockback (a low BKB/medium KGB kind of move). Won't kill until about 250%.

Ftilt: Crash shoots a wumpa fruit from his bazooka. Can be shot straight or angled upwards/downwards. Deals 7% up close and 5% at max distance (travels the distance of villager's slingshot). Low BKB and medium KBG. Won't be killing medium weights until 130% up close and 160% max distance at the ledge.


View attachment 116936
Usmash: Crash falls to the ground and then his angel flies upwards a short distance while flapping its wings twice. First hit weak flap (3% uncharged, 6% fully charged) carries opponents into the second strong flap (12% uncharged, 15% fully charged). High vertical knockback and decent endlag. Low BKB and high KBG. Kills medium weights in the low 120s.


Fsmash:
Crash swings a large sword in front of him (like the knight lab assistant enemies in crash bandicoot warped) Deals 16% uncharged and 23% fully charged with very high horizontal knockback (high BKB and KBG) Has pretty high endlag. Starts killing medium weights at 90% center stage.


Dsmash:
Crash spins on his head with his legs stretched outwards like a professional break dancer. Deals 12% (16% fully charged) and deals slightly below average knockback horizontally. (Won't kill until 130s at the ledge) Low endlag


Aerials

Nair: Crash spins with all four limbs stretched outwards while a metal sphere cage surrounds him (https://www.youtube.com/shared?ci=UfGPegBPBd8). The cave itself is a disjoint and a hitbox while crash is just a hitbox with no disjoint whatsoever. Deals horizontal knockback with moderate knockback on the first few games of the hitbox, but the remaining frames deal knockback comparable to the last few frames of a sex kick. 8% damage.

However, this move has a special mechanic.

It will autocancel in a short hop, but if used while falling, the cage will begin to roll for a distance that depends on the trajectory and speed at which crash was falling. If crash fast falls straight down, he will roll only about 1/8th of FD and will suffer low end lag. If Crash fastfalls down while moving forwards, (like if he decides to jump forwards at you) he will roll about 1/4th of FD and suffer high end lag (like 22 frames). The roll hitbox's damage output depends on the momentum that crash is moving at. Falling straight down deals 4% and low horizontal knockback no matter how fast you fall, while crash falling diagonally downwards at his maximum air acceleration speed and maximum fast fall speed will make the sphere deal 12% damage and high horizontal knockback (with high cross up ability).


Fair: Crash does a diagonal flying kick. Acts as a sex kick so it lasts for about 25 frames. Deals 9%, sends opponents diagonally upwards, and causes crash to jump upwards if he lands the kick on the opponent's shield or hurtbox. Sends the opponent at a diagonal angle upwards and starts combos. Autocancels in a short hop and has low landing lag.

Bair: Shoutout to my man @TCT~Phantom for this idea. Crash activates his Jet pack from Crash bandicoot 2 which accelerates him forward for a small distance (about 1/6th of FD) The exhaust flames from the jet pack harm the opponent and knock then backwards horizontally. (deals 12%) Kill move.
Doesn't autocancel in a short hop (autocancels from a full hop however) and has a medium amount of landing lag.

Uair: Crash does a flip on his surfboard and knocks opponents upwards at a 90% angle. Does 8%, starts combos, and can kill at later percentages (low BKB, high KBG). Autocancels in a short hop.

Dair: Crash uses his body slam attack to crush enemies. It is a stall-then-fall move that deals 14%, plummets pretty fast (sonic dair fast) spikes on the later frames, and has high vertical knockback on the beginning frames or when landing on an enemy on the ground. High end lag on the ground (30 frames) but you can recover from it if you use it offstage. It lasts about 40 frames until you can jump out of it.


Throws

Grab: Reaches out with two hands and picks the opponent up by their shoulders.

Pummel: Smashes the opponent's head with his fists (deals 2% per hit and is relatively quick)

Fthrow: Crash donkey kicks the opponent forward (8%).
Low BKB and low endlag so it can start some early percent combos. Medium KBG

Bthrow: Crash throws the opponent backwards to Coco who shoots them with a laser. (7%)
Non combo throw. 70 degree knockback angle.

Uthrow: Crunch appears and punches them upwards (10%). Kill throw at high percentages (think Marth's up throw)

Dthrow: Crash slams the opponent on the ground 3 times (2%, 2%, 6%). On the third slam, the opponent isn't sent anywhere, but instead is left buried in the ground. It's harder to escape the burial the higher percentage the opponent is.


Special shield characteristics


When you press the shield button, Crash dons his Aku Aku mask in it's golden form while putting his hands up to guard himself. This creates a strange, shiny, golden barrier around Crash that acts as his sheild but has a few wonky and unique characteristics. The barrier has 1.3% the average sheild health of a normal sheild. Also, crash can even activate his barrier while he's still walking forwards if you hold shield while walking (if you press sheild, you'll roll instead). While this looks incredibly broken at first, there are a few equally crazy downsides. One is the fact that crash explodes on the spot if you manage to break his sheild (like jigglypuff but with an upside to balance it). Also, crash's shield takes twice the damage of moves that hit it when he's walking with it up.


So no, crash won't be the absolute anethema of projectile zoners. But he will have a huge upper hand against them which ties into the fact that Crash wants to force his way in so he can cause sheer chaos. Also, I wanted to incorporate the golden Aku Aku mask without making it his final smash (making for yet another wario-man clone of sorts)

Which brings me to his...


FINAL SMASH: Timeline Turmoil
Crash summons a Crystal, Ankh/time relic, and Gem and has them spin around his head for a second as the camera zooms in on him giggling maniacally in a mini cinematic. After the cinematic has ended, everyone except crash undergoes strange effects like being slowed down (kinda like you were stuck in witch time) sped up by x2 speed, controls are reversed, some characters may even explode randomly, and sometimes characters may be reset to where they were and what move they were using a few seconds ago. Crash is invincible during the entire event. The madness ends after 9 seconds and the time returns to normal.


Taunts and idle animation

Up taunt: Crash sits on a dazed N.Cortex while playing his didgeridoo.

Down taunt: Crash Revs up his motorcycle while wearing his signature biker gear with Aku Aku by his side.


Side taunt: Crash poses with his family


Idle animation: Like sonic's wagging finger or pacman's wink, Crash also has a unique idle animation. Crash will look at the screen like this:View attachment 116938
and move his eyebrows up and down mischievously....ready to f*** s*** up.


Entrance

Crash warps in like he does in crash bandicoot warped.​


Victory Poses!

Victory pose 1: Pulls out a Crystal, Ankh relic, and Gem, then proceeds to gawk at them in a giddy fashion

Victory Pose 2: Crash does his signature victory dance from crash 1-3

Victory Pose 3: Crash celebrates with his family. Crash sits on Crunch's shoulder while Crunch, Coco, and Aku Aku cheer.


Special death/pain animations
When Crash is sent flying off screen, he gets his own special death animation like mega man. His shoes will fly upwards if sent to the bottom blast zone, sideways if sent to the side blast zones, and downwards if sent to the sky blast zone. For Star KOs, Crash flies into the horizon as an angel. For all deaths, Crash says his signature "Woah!". When Crash is hit with a low knockback move at low percentages, X's replace his eyes as he flinches backwards and stiffs up.
UPDATE:
- A complete overhaul has been done on Crash's Nair!
-Most of his moves are now explained in a tad bit more detail!
-Final smash added!!
- A new, interesting shield mechanic has been integrated!!!
 
Last edited:

ForwardArrow

Smash Ace
Joined
Aug 17, 2011
Messages
502
Altais Altais I read the new version of Gunvolt, and I respect your attempt to fix my previous issue with it in that the air dashes and Up Special felt kind of unintuitive and easy to have blow up in your face. The problem is as worded, the Up Special is basically god mode with no real restrictions to it. You no longer lose EP, you have infinite recovery, and you basically just have to use another move as worded to reset it to full power. This gives Gunvolt the potential to infinitely stall, which is obviously something I'm sure you didn't intend. Even ignoring that I feel the Up Special gives a bit too much in the way of free benefits, it should probably have a lot of recharge period and/or do less things than it currently does. You did a nice job of fixing Side Special and not making me worried about the raw camping power of Naga Bolts. That said, I still think Naga Bolt shouldn't be on three separate inputs, with him having something separate for at the very least his Jab. I also noticed on rereading the set only really has one KO move, and said move takes up half his EP meter to even use and has more drawbacks on top of that. It would be nice if you gave him a couple more ways to actually kill people.

Davidk92 Davidk92 The new Laharl is vastly easier for me to comment than the old one, and I appreciate your willingness to go back and add a lot more detail to the attacks. I may have been a little harsh on the initial posting as its not like there was no effort there, you had a pretty nice load of extras, but I'm more experienced with commenting the actual moveset than providing feedback on things like assist trophies and whatnot that most MYM people don't bother with. The actual set seems like a pretty functional implementation of Laharl, with a few somewhat cool moves in there. I particularly liked the Prinny move, it seemed like something that would be pretty interesting to try and play around for both parties, but it would probably be a lot better if you removed the random chance element from it to just explode whenever. Makes it a lot less skill based than it could be. I will say I'd like it if you were willing to experiment a tiny bit more on standards(more in the sense of trying different effects than different animations), though you at least tried something pretty unique with the Down Smash. Also, putting Specials first would be a good idea, as it allows you to center the moveset a bit more around those moves to create a stronger sense of flow and playstyle, as I assume you made the moves pretty much in the order they were presented in the set. Also while its a small thing, I greatly appreciated you using Hades in the Palutena's Guidance conversation. I wanted to see him used in one in the actual game so bad, he's much more fun than Viridi for this kind of thing.

Also for both of you, you mind just editting the original post and linking it to us to say you've updated it? That clutters the thread a bit less than your current message, with how many images we have to load per page nowadays.

Crash Bandicoot
Nu~ Nu~ Its fun to see someone get so experimental early in their career with stuff like the unique shield mechanic and rather wacky attacks like Nair. I think however that you pushed the envelop a little too much with a lot of the animations in this set. I'm not opposed to using props, there's definitely a time and a place for them. However it has to be said this set goes too far with them, using some very random things that really feel out of place with him randomly summoning them. The aforementioned Nair brings out something that is basically just used as a level gimmick, which feels about as awkward as having Mario summon one of those bubbles from those annoying Mario Galaxy levels to ride around in. Though it has to be said, there are far more extreme examples of this in the set. Summoning a random mummy enemy from the game or using the knight's sword attack is pretty ridiculous, as is having Crash just straight up die to attack with his ghost. Crunch being summoned in the Up Throw for the sole purpose of doing a stronger punch than Crash could've done himself is probably the worst of it. There's a few things that seem very questionable gameplay-wise too. Neutral Special creating a randomized wind hitbox is just going to make for frustrating gameplay a lot of the time as there's no real way for the Crash player or opponent to play around it properly. And while I don't think the shield mechanic is inherently a terrible idea, I really hope you meant its 1.3x as durable as a shield rather than having 1.3% health when it has that downside. In any case, you have some interesting ideas but I think you're going to need to refine them a lot if you want to become more competitive.

Ghost Gang
WeirdChillFever WeirdChillFever To be honest I found this set rather confusing to read at points, because envisioning how the ghosts move and interact at any given point can be very weird. You say they're in a box formation, which would require two of them to be floating in the air at any given time, which is a pretty bizarre start. It continues to be kind of vague as the set goes on too how certain moves will work. If a ghost is missing, will the entire move just fail if they participated at all? Is their part of the move cut out? The latter case is weird as some animations require a certain ghost to do something to start, and the first is worse gameplay. I also don't really feel the Neutral Special is all that effective a move when it sets them into AI patterns and only has one usable attack for its duration. I'm also not really sure the Ghost Gang should be summoning Bacura, who is not even from the same game as them. It strikes me as the result of ambition without experience, four Ice Climbers at once is a very hard thing to juggle from a gameplay balance and detail perspective.

Excitebiker
I found this set a bit more to my taste than Piplup, due to being another attacking in motion set but with generally better characterized mechanics. The overheat mechanic, while maybe making him a little awkward to play with the amount of self damage it brings in, is a fun start and has a pretty unique mechanic involving jumping off the bike to use it as an explosive. The oil slick is also a decent trap to put the opponent into a state of poor control over their motion for Excitebike to abuse while not coming across as especially annoying to play against and having some okay interactions with the fire. That said, I feel this set runs out of excitement rather fast. Most of the standards are just desperately trying to use the bike to make attacks, with a lot of him popping wheelies or occasionally doing something quite a bit weirder(Fair sticks out). There is one move I did enjoy quite a bit in the later sections, though mostly for the animation. The Forward Smash causing the ramp to explode while you're overheating is genuinely hilarious, and I wish you picked characters that allowed for more characterization moments like that sometimes. Sadly at the end of the day, the set feels like it boils down to just attacking in motion, which really isn't enough to do it for me these days, as it really does nothing especially new with it aside from the overheat mechanic, which isn't terribly well supported at the end of the day.

Melia
It honestly took a moment of introspection after reading this set for me to fully realize this, but this is pretty much a good old fashion weapon switch set. You have your five elements that shift around your stats, can be used as a projectile which is admittedly a unique addition, and then a few moves that vary based off which type you have out. Said moves pretty much repeat the same effects over and over with a little variety here and there, but never enough to make any variation likeable as they're all pretty boring on account of Slavic having to write five of them. There are some status effects and special results like increased shield damage and damage over time, but they generally flow into nothing, just like how all these elements fail to really contribute anything to each other. I've seen enough Katapultar sets based around juggling multiple elements that this kind of approach is extremely disappointing, having them interact with each other could do a lot of fun and exciting things but all the set really does is just modify its own attacks mildly in ways that really don't give it much depth. Its not like the set's designed with hitboxes that give it potential for much in the way of interesting comboing or pressuring stuff either. The worst part though, is that three of the special slots are pretty much wasted. After the elementals, you have a poke that feels boring by Smash 4 Forward Tilt specials, let alone for a specialized variant of an Up Special, a tripping kick, and a stun-like effect which doesn't really feel relevant to the set at all outside of setting up her playstyle which amounts to, past all the flashy weapon switch stuff which means nothing, very boring spacing. And Down Special is such an automatic way to space it ruins any challenge of that part of the playstyle anyway.

Garithos
I feel fairly bad to have turned around on this set as much as I did. I actually think Duel is a pretty fun concept, and Garithos himself has a lot of ways to make the actual dueling process far more than a simple DPS test. The grab game presents some fun ideas and characterization for Garithos with the taxation as an alternate and more realistic way to promote your minions. I enjoy the elf abuse in the set a good deal and at least with the buff to the promoted priest there is at least some reason to upgrade one of them despite how expensive it is. I also think you find some small but fun things to play off as the set goes along, like the Fair utiltizing the various ways of creating burn damage on an opponent throughout the moveset for a situational but very powerful blast that scales better than normal with duels. If nothing else, I still respect all that stuff.

Where the set falls short to me is really how the minions are used. There never really feels like a proper payoff, with them mostly being used as distractions in duels or in the grab game to get coins. The coins are used for promoted minions who, while powerful, don't really contribute much in particular to the set flow-wise, with the most flow being that the promoted soldiers provide a backup horse. It also feels like not enough focus is given to Garithos dueling or what he does with said dueling, the moves dedicated to it are nice but it gets abandoned pretty fast in the grab and aerial game. Even some of the ground game just feels less than optimally utilized for it(Down Tilt's effect is okay in duels but the animation is so weird and its not as good as some of the other effects in that regard), and it has to be said that the horse is another weird gameplay element added in that mostly just feels like it takes up space and makes Garithos both clunkier to play as and against. I still enjoy this set for the concepts and characterization provided, but its not one that has sat well with me at all sadly.

Dragonslayer Armor
I felt this set started off on a pretty strong note with the way the lightning buff works. Creating a gradually more powerful hitbox in the sky to use for a buff if it strikes you is a fun mechanic to play around. Said lightning gives the Armor a fair bit more to work with as the set goes on, with the Smashes in particular doing some fun things like using the lightning in the sky as well to create extra hitboxes to work with. Between that and the Neutral Special, it sets up this character who feels incredibly slow to feel like a competent fighter in spite of that, abusing his extraneous lightning hitboxes and ability to attack out of hitstun, as well as his huge shield to make him very competent offensively and defensively. I do think the shield is probably a bit much in terms of how it works, its extremely strong at shutting down attacks from the front to the point I'm worried as to how other slow characters are going to get around him a lot of the time. The mechanic does at least give a bit more substance to the later attacks in the moveset though, as the positioning of the shield adds a bit of subtle depth to it, but it overall feels a bit too powerful. The set also is pretty bland as it goes along, the Smashes and Standards are fine but the aerials and grab game just feel like they're grasping at straws past a certain point. I did like the set though at the end of the day, the shield being strong doesn't prevent it from being a fun take on the sword and shield user.

Tutankoopa
This is the second time you've remixed a Rool set, with the last one being MYM13 Headless Horseman. Unlike that set I feel it actually makes significant strides over the original. The interactions with Chompy maintain the fact that using Chompy to his greatest potential is a threat to Tutankoopa, while adding more to his stage control game. The Smashes, Walls, and Platforms provide him with some fun material to work off and while I don't find any of the individual elements especially interesting, I like that it creates a sort of generalist playground that can sometimes backfire on Tutankoopa if he's not careful. This kind of follows up on the themes provided with how he handles Chompy, giving him some fun characterization as an incompetent fraud. I do think that in general nothing in the set really impressed me all that much, as aside from Chompy he has fairly little to distinguish him from a million other campy MYM sets who have done similar things with more fun/deep interactions. I will give it to you though that the boss mode is pretty nice and adds a bunch of fun new mechanics to the set, and I like how it deals with the backfiring material by making it as weak to Tutankoopa as in 1v1, but much scarier to enemies. All the same, the boss set feels very weak to me, with the buffs not being nearly enough to make him competent enough to fight three opponents at once.

Shadow Teddie
I'm very sorry about how long it took me to comment this set Smady, because I do really like it but there's been a lot of things that have been somewhat more urgent. The set goes back to one of the most interesting aspects of your previous MYM11 winner by creating portals that were a bit more versatile than the old style MYM fair, letting you put all your hitboxes through them and creating a lot more options than just looping projectiles. Where this set takes it a step beyond death is making the TVs influence-able themselves, letting you knock them up into the air makes for a great deal more depth than a simple static object would by comparison. The projectile part is fortunately quite fun too, the set makes some interesting uses of the Nihil Hand fireball.

While Death made a point to allow non-projectile hitboxes through portals, Shadow Teddie does a hell of a lot more with that, like the Forward Tilt's ways of influencing momentum or the more in depth combo/rushdown game that he has. He can also do things like store up a delayed claw attack out of the portals, or even freeze them to influence how projectiles come out of the portals. I'll admit that come the aerial game it feels like you're a bit low on ideas, mostly repeating concepts from earlier again or adding really niche interactions with the Specials. The set never really does anything that wowed me either, but I could've seen it get a pretty high 8 star if it was able to hold together for just a little longer. As is, this is still a very solid entry and probably the best portal set I can think of off the top of my head, blowing your previous entry in the genre out of the water.

Edit: I may or may not have forgotten something

Pyrus
God this is the first set of yours in how long? Its been like 3 years I'm guessing. Anyway, Pyrus is a pretty basic set at the end of the day, revolving around explosives, fire, and oil to stack up into the biggest and most powerful explosion hitbox possible. There are some decent opportunities for chain reactions here, and the reward can be pretty huge to create near stage covering hitboxes with obscene power on oiled opponents. Its not all perfect for Pyrus as all this has potential to backfire. Now I'll admit that at points I wish there was a bit more substance to the actual hitboxes of these moves and the numbers can be a bit crazy(the multiplier from oil is too high when the baseline is already pretty strong), but there's actually a half decent sense of flow here. I will say that some stuff feels more like variations on the his theme than actually expanding the playstyle, and some stuff just feels like awkward filler(the blinding oil splash for example doesn't really contribute much other than giving Pyrus a small advantage in close range combat that could be achieved through more interesting means). Probably the worst of it is the grab game, where the same effect of having worse recovery time on oil was repeated several times over, I don't even think that's a particularly good effect even if it technically ties into the playstyle. Forward Smash also could afford to be a proper hitbox coming out rather than an odd damage over time, it makes him pretty awkward in comparison to characters with more traditional hitboxes on that input. All the same, for how long you've been out of MYM and how much this wasn't intended to be a competitive entry, I actually think it achieves a lot of what it set out to do and the basis, while hardly revolutionary, is decent enough. If you ever feel like posting something else that'd be great, as this was hardly a worthless contribution.
 
Last edited:

WeirdChillFever

Smash Hero
Joined
Jun 10, 2014
Messages
6,496
Location
Somewhere Out There
Ghost Gang change log:

-To boost Spectral Scatter's effectiveness, the Ghosts can now perform aerials, airdodge and Specials while in Scatter mode.
-More detailed mechanics (It was still very WIP in that sense, still working on it)

The Bacura are staying because Sakurai sees Pac-Man as Namco-rep, so the Ghosts reflect a part of Namco villainy as well (Plus their affiliation for bomber planes, the fact they play like an army unit and the fact that Bacura are no stranger to cameos)

I hope this helps.
 

Rychu

Thane of Smashville
Joined
Jul 5, 2010
Messages
810
3DS FC
1908-0105-4965
MYMini Entry

Shabeel


In ancient China, two villages had been locked in a seemingly endless, century-long war thanks to the rival monarch families' hatred of one another. One, Ohu, was a village of Tigers, was ruled by a family of White Tigers. The other, Long, the village of Dragons, was under a family of Black Dragons. While the dragons relied on their brute strength and elemental abilities in battle, the weaker Tigers relied on their agility.

Shabeel was welcome in neither because of his mixed heritage: his father was a poison-wielding dragon from Long and his mother a nurse from Ohu. When his father was killed and his mother imprisoned, Shabeel took a single tooth from his father and escaped, forging his weapon, the Dragon Whip, using the magically poisonous fang. He was found by a group of bandits, lead by Wukon, the infamous Monkey King, who trained him in the art of stealth, where he found his penchant for not only using his poison-tipped whip, but using it as a sling to launch a plethora of other projectiles.

Eventually, he learned of corruption among both villages - the White Tigers and Black Dragons hadn't been at war, instead using the rivalry as an excuse to prevent either's citizens from rising against each other and staging a coup, allowing both families to collect taxes and increase their own wealth while villagers died by the hundreds. Shabeel gathered a small army of outsiders and warriors from both villages and overthrew both after several epic battles. The warriors integrated the villages and established a working government before leaving to explore the world.

STATS

Size - 7
Weight - 6
Speed - 8
Jump - 8
Aerial Speed - 7
Fall Speed - 4
Traction - 10

Special Movement - Quadroped
Shabeel is an anthropomorphic tiger, and is as such able to switch between running on two legs and four. If Shabeel begins dashing out of a crouch, he actually runs on all fours, bounding at a terrifyingly fast speed - almost matching Sonic's stride. As he's so low, he naturally ducks beneath most standard projectiles, indicating his stealthy training. The trade-off for speed is a much, much shorter jump out of his dash, cut almost in half, as well as incredibly poor traction. Shabeel also cannot use his whip while dashing in this manner, instead needing to rely on his hand-to-hand combat.

SPECIALS
Neutral Special - Dragon Fang
With a tap of the special button, Shabeel unfurls his chain whip, striking it outward. The Whip has a longer range than Zero Suit Samus' by a decent margin, and can be extended out in any of the 8 cardinal directions. The tip of the whip is the hardest-hitting point, dealing 15% damage with very good knockback in the direction the whip hit from, and inflicting the opponent with poison, which deals a constant 2% damage every 2 seconds for the next 10 seconds. Any attack with the whip has this poison sweet spot, with the poison able to stack up to 5 times. The middle of the whip deals 10% damage and decent knockback away from Shabeel, with the damage getting gradually lower as it gets closer to Shabeel's whip, bottoming out out at 2% damage at his hand.

If Shabeel taps B just as the Dragon Fang tip hits the opponent, he yanks on it, pulling the opponent in towards him while still dealing the same damage and poison. Shabeel's up-close game is strong, but somewhat laggy to get started, making this spacing-specific pull very important against faster foes. Of course, Shabeel's awesome and stealthy run should be able to get him at the right range.
 
Last edited:

Smady

Smash Master
Joined
Apr 29, 2007
Messages
3,307
Location
K Rool Avenue


Jecht is a major character in Final Fantasy X, at times a protagonist and others a humongous world-destroying whale, this set will focus on the human side of Jecht. In relation to FFX, he's the missing father of main character Tidus and his story is told gradually through flashbacks and from those who knew him in the past. Jecht ruined Tidus' childhood by disappearing and before that bullying his son because he was an alcoholic and egomaniac. He was a wildly successful blitzball player, a sport played in a giant floating water sphere, this made him incredibly famous in Zanarkand but most of his relation to the game's story comes when he accidentally ends up in the whole different world of Spira.

Jecht's story truly begins when he goes out to sea and encounters the monster Sin, this causes him to be transported to the world of Spira. This is 10 years and 3 months ago from the events of FFX. After a few unfortunate events that landed him in jail, Jecht was approached by High Summoner Braska, currently on a pilgrimage to destroy Sin. Braska takes pity on Jecht and humbly requests that he work for him as a Guardian. Jecht takes up this role of bodyguard to get out of jail and because there's nothing else for him in Spira and thinks this huge journey may lead him back to Zanarkand to live the high life again. Auron is against Jecht joining the group from the beginning and until much later on has a strong hated of Jecht because of his incompetence and alcoholism.

Tidus would later embark on the very same pilgrimage 10 years and 3 months later and at first can't stop telling everyone about his hatred for his abandoning father Jecht, who is somehow just as famous in Spira as he was at home. Tidus does eventually come to learn that his father was actually a good man who loved his son and made the ultimate sacrifice for the good of Spira. It wasn't just the fame and fortune of Zanarkand he missed, but also his family. The father and son do get a moment of reconciliation, and at the end of the game share a friendly high five before passing on with Auron to the next life. Jecht isn't shown in the game besides at the end, but it can be easily assumed, especially after his Dissidia moveset, that Jecht largely had a similar stock of abilities and so on as his son Tidus that are displayed over the course of FFX if you follow Tidus' sphere grid. What part of the grid he would go to after he finished the Tidus part, or how far Jecht got in the sphere grid (or what the sphere grid is in reality) is up to interpretation.


Jecht is around the size and weight of Snake, though a little shorter and lighter. Jecht's movement on the ground is comparable to Little Mac - he's fast! This is nothing compared to Jecht's air speed that challenges Yoshi for the top spot because of his experience playing a sport suspended in midair. Jecht's fall speed is very high, as presumably they never taught him how to fall when he's used to floating in midair, among the highest in the game. Again due to Jecht's chosen sport, his jumps and traction are excellent, his first jump greater than Falco's in height and his second jump isn't bad either, comparable to one of Snake's 'clunky' looking jumps. Jecht overall has great statistics, only let down by high falling speed that makes his tall frame vulnerable to combos and he's piled on some pounds over the years, his weight not helping him in that respect.

Jecht has one special quality to his movement that comes whenever he touches a non-hitbox body of water. Jecht will never drown in water and on top of that, has an actual swimming animation. This isn't the dorky breaststroke every NPC has in FFX but a cool free style that shows off Jecht's experience in the pool. It lets Jecht retain his amazing aerial movement in water and lets him refresh his jumps and recovery whenever he enters water to boot! At any time he can jump out of the water with his amazing jumps, which can now be DI'd effectively due to the lowered gravity so he can weave around the water as easily as if he became a giant whale. On top of this, Jecht can use any of his aerials or specials in the water. Of course all this means for now is that Jecht is a hell of a match up on Delfino Plaza and Pirate Ship, but he also has some ways to create his own water that we'll get to later in the set.


Neutral Special: Blitzball

Jecht near laglessly takes out a blitzball, roughly the size of a football. He then tosses it forward! This all takes about the same time to do as Link shooting an arrow. The blitzball thrown can be charged up like a smash and will travel from two battlefield platforms up to Final Destination's width in distance if it doesn't hit anything before stopping and doing a turnaround before heading back in Jecht's direction. At all times other than when it's turning around, the blitzball is an active hitbox that deals 10-14% damage and knockback that can KO at 200-175%, surprisingly powerful for a ball! The blitzball will deal the same damage and knockback on the return path as well, making it doubly dangerous as a combo tool as well as it can hit the foe into Jecht's attacks, when it's first thrown it instead acts as a zoning tool, giving it quite a bit of use just form the throw.

Jecht can alter the ball's trajectory similarly to how Pit's arrows work. As Jecht goes to throw, the blitzball can be angled up or down to give it a curve, which can vary from slight to severe, and this affects the blitzball's path when it comes time for it to return to Jecht. An overhead ball may hit the foe into the ground for a stage spike or rebound them into the air, or hit them from below to pop them up and away or towards Jecht, whose able body can move around the returning blitzball to get any desired effect. A blitzball can get stuck on its way, such as if it hits a foe while returning to Jecht or hits a wall on the way back and dissipates as fast as an item does when it sits doing nothing for a while. A foe can attack the blitzball out of the air, taking knockback like Jigglypuff at 50%, but it will never damage Jecht and so long as it's in motion, it won't dissipate. Jecht can also always create a new one fairly quickly so it's best for the foe to not feed the beast and hit the blitzball out of play.

When the ball returns to Jecht he'll quickly catch it like any good blitzball player would and it dissipates, basically giving Jecht a tiny bit of lag instead of doing any damage. Jecht can press neutral special during this lag to very quickly throw the blitzball at the same speed he received it in the opposite direction, foregoing the usual charge and start up time! So foes really don't want to launch the blitzball back at Jecht if he has remotely good reaction time. Jecht can hit blitzball already on the stage with newer blitzballs and this works as you'd expect, knocking the other blitzball as if it was a football in the opposite direction and cancelling the knockback of the thrown blitzball. This has a surprising effect, the blitzball that was knocked away will turn around and home back in on Jecht as if he threw it! This can lead to all types of mix ups. As a side note, Jecht can dodge or roll to cover the lag of catching the blitzball, working into his animations naturally and letting him avoid any punishment at all by the foe, but is obviously very telegraphed.
 
Last edited:

JOE!

Smash Hero
Joined
Oct 5, 2008
Messages
8,075
Location
Dedham, MA
(Example entry for fun)

Ranger - M


Ranger - (Morrison) is an imperial ranger stationed on Jupiter's moon Europa in the year 2356. Europa has proven to be quite like home with its vast inner ocean and various sea life resembling a mix between fish and crustaceans, as well as an atmosphere with Oxygen just like the United Empire's home planet, Earth. A number of settlements have been constructed on the more stable ice "continents", some being mainly on the surface for terraforming, while others delve deep into the icy crust where the waters are surprisingly warm thanks to Jupiter's constant tugging and shifting of the moon's core.

The Ranger division of the Defense Force are more or less the trailblazers, being the first ones to explore and gather intel at any new locations and are highly trained professionals. Dealing with threats, both Human and Extraterrestrial, across the UE's various Solar Settlements. However, a new threat has begun to spread across the Solar System in the form of the mysterious Nictus. A parasitic race that feed off of energy and living things alike, little is known about them other than that they have acquired the ability to become a being comprised mostly of energy and are ruthless predators. After consuming a life form, they often bond with the body and take on it's attributes, even able to change shape at will in some instances. If Europa's "Krakens" were fearsome before, just wait until a Nictus morphs into one that can walk on land!

Morrison and his squad have been tracking down and attempting to neutralize this threat for some time, and hopefully his new equipment can finally tear these inky monsters a new one!


STATS / EQUIPMENT

Ranger-M carries a small arsenal into combat comprised of the best field gadgets and armor the UE can offer, as well as the new and experimental Laser Assault Rifle. His armor weights him down much like Smash's Samus Aran, yet his gravity is similar to that of Mario, the advanced tech that allows for normalized gravity betraying his launch resistance and Ike-esque build. His boots afford good, but not amazing jump stats as well as air control, as well as decent but again not amazing ground speed. Morrison can crawl military-style very low to the ground when the need arises, allowing him to take cover vs many projectiles temporarily, but when all else fails he has his Holo-Shield to fall back on!

Slower to produce than a normal shield, this magnetic energy-barrier creates a cylinder around Morrison as seen above which absorbs damage for him as long as he maintains the field. It has 100% HP before it breaks, and automatically recedes when he takes any sort of action other than pressing or holding (Shield). Once receded, the battery will very slowly repair the Holo-Shield at a rate of 1% a second. If the HP of the shield is put to 0%, it overloads and cannot be used again for 3 seconds and delivers a feedback effect to Morrison that stuns him briefly. After the 3 seconds, the shield will boot back up to a base of 25% hp and begin charging again. If the shield is at full health, the gauntlets on RM's armor will have a feint Red glow as an indicator, though this will change based on his team colors as well as the shield's overall color.

Being a "tower" that reaches as high as a battlefield platform, this can easily protect teammates behind Ranger-M as it cannot be pushed, but otherwise follows the same rules as any other shield in terms of hit lag, shield stun, and the ability to grab the defender. The difference here is that while it takes a good deal longer to summon at 6 frames (normal shields are frame 1!), it is essentially disjointed from the user where normal characters have to maintain a "block". This means that once up, Morrison can instantly cancel it into pretty much anything much like you can cancel normal shields into Grabs, Jumps or Rolls. So with a little prediction, you can place a shield and block an attack to instantly retaliate with your own. Luckily the shield will stay in place for 12 frames if you do not do anything, allowing you to act quickly with whatever would be right for the situation. Holding Shield again will start another 6 frame animation (unless you kept holding shield since putting it up) that can be held indefinitely as you manage a display on the side of the LAR that begins recharging the shield at a rate of 2% a second, but comes with another 6 frame animation when released. This means that while he can maintain the barrier for an extended time, he himself becomes an easy target for a grab or the like.

While he may be a bit better compared to the average human, Morrison is still a man underneath all that equipment. To fight the new threats in the solar system, he will need to keep his wits about him and master his robust Laser Assault Rifle.


Neutral Special: Change Tactics


A press of B will have Ranger-M swap the LAR between the default Compact State and the long range Extended State. Easier identified as "Blade" and "Beam" modes due to the primary offensive functions in each state, the change takes nearly no time at all to perform at a swift 6 frames total, and alters his moveset entirely.

His standard actions all involve the Blade Mode and will include CQC using the powerful Laser Blade, alongside the useful functions of the LAR's built-in computer. In Beam Mode all attacks will be different methods and angles of firing the deadly laser beam at foes, though adjustments made in Blade Mode may affect the beam significantly. In general, the Blade Mode is riskier as you need set up time and close space, yet yields much more launching power, while Beam Mode offers range, safety and a lot of damage while at the same time not too much in the way of stopping power. The changes effect his specials as well, including Change Tactics as a held version in either mode will yield different results!

Holding B instead of tapping it will have an alternate function to simply changing modes. By default, holding B while in Blade Mode will bring up a holographic display and scan forwards briefly before entering Beam Mode. The closest within an area 1 platform tall by 2 platforms wide in front of the LAR will become Marked with a holographic targeting reticle above their head for the next 12 seconds that mimics his default glow (red or other team colors). While Marked, foes will slightly attract any energy-based projectiles with a weak homing effect, bending sort of like when captured by Rosalina's Down B. This greatly increases the Laser's accuracy and even range as a foe just outside the projectile's range can still drag it along for some distance until it veers away or hits. You can mark as many foes as you like, and keep refreshing the same mark over and over again but keep in mind it has the same lag as your average tilt while having 0 hitboxes to it.

In Beam Mode, holding B will have Morrison take a moment to eject the spent Battery from the LAR before compacting the gun to Blade Mode and placing a new one in from his belt. Again, taking about as long as a tilt the Battery is ejected out and onto the floor below and is now a throw-able item that resembles a glowing, see-through capsule. The Battery is very volatile and essentially acts as a Grenade that will explode when smashed by an attack or thrown into a surface/enemy in a Bowser-sized detonation of energy. Foes affected will be dealt 6% damage and light-medium upwards knockback as the haze and sparks clear from the detonation, but not from them! The powerful energies contained in that battery have affected their particles and afflicted them with the Disintegration status. For the following 3 seconds, they will have a pulsing, (red) aura with bits of sparks and vapor trailing off of them as indication of the hazardous aftermath as well as take 1% per second. Every LAR Blade or LAR Beam attack that connects while the foe is Disintegrating will not only refresh the effect's timer, but also deal bonus damage based on their current HP. This damage is equal to 0.5% * (1+Foe %), so at 50% you will add an additional (0.5*1.5) = 0.75% per hit and at 100% deal an additional (0.5+2) = 1% per hit, and so on. This adds up quickly as the natural DoT from Disintegration is also effected and any and all healing is nullified while Disintegrating. A common tactic to get heavy damage vs your enemies would be to expel a battery, hold it and then swap back to Beam Mode in order to shoot it when thrown, maximizing your laser barrage from a safe distance. The Battery can just as easily detonate on Ranger-M if he isn't careful, but luckily he is the only one with an LAR.

 
Last edited:
Top Bottom