• Welcome to Smashboards, the world's largest Super Smash Brothers community! Over 250,000 Smash Bros. fans from around the world have come to discuss these great games in over 19 million posts!

    You are currently viewing our boards as a visitor. Click here to sign up right now and start on your path in the Smash community!

Make Your Move 15: Top 50 up! Make Your Move 16 starts August 25th!

Smady

Smash Master
Joined
Apr 29, 2007
Messages
3,306
Location
K Rool Avenue
Another reminder that MYM15 ends on the 14th of July.

Sorry, I've made two of these posts now, but here's some comments. And obviously I'm going to comment other big stuff I've missed out like Jodie on the last page, but I wanted to snipe the first post with a reminder.

Chill Man’s a simple moveset and hasn’t got all that many flaws, but when the set isn’t that explorative, a few mistakes can pile up. There’s a degree of redundancy even in the specials, as it feels as though Chill Man could easily do all of this stuff - creating glaciers, ice puddles and trying to freeze the opponent – on one or two inputs, plus the recovery isn’t particularly inspired. The problem later in the set comes from “ten different ways to do x”. You stack stun or slow, or throw in an ice projectile… but none of it especially works into what is set up in the specials. Saying that, the game set up in the specials with the glacier and ice puddles had the potential to be good, and you get a little bit of fun out of it. It’s a decent idea and once you get over the hump of fairly short and rudimentary later inputs, I think your movesets will greatly improve. The writing style here was also really amusing, although I’m generally pro-pun.

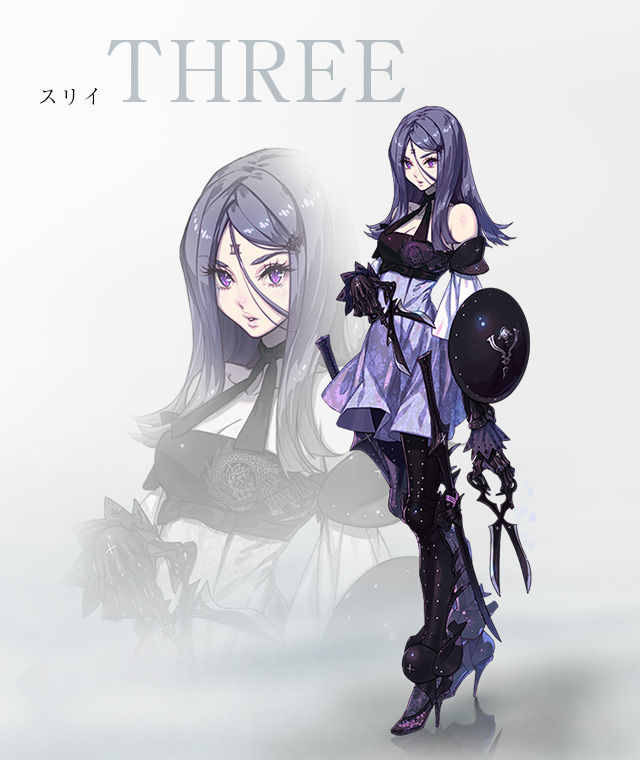
I can’t help but see Charlotte as trying to appeal to a very specific non-MYM audience, basically the handful of people involved in your role play sessions. This is evident in the way the set references things that completely alienate a casual reader, which could be said of most moves but is demonstrated best in the forward smash and wire bird transformation. In a set like this for an original character, you should give some idea of who the character is in the introduction, or everything random seems just that. Aside from the role play I get the sense you’re also referencing a bunch of other fighting games, and fairly obscure ones. All the self-referential material makes it painful to read and assumes a cosmic level of knowledge from anyone not in your RP session.

Once you get past that, I’d find it hard to put it better than FA and Warlord. The move variations lack the necessary consistency, the weapon switch basically swapping two largely similar movesets in terms of playstyle. Individual moves can wildly vary, but despite the use of massive props and a JoJo stand the set fails to create much of anything interesting. This is because the moves, flashy or not, don’t work into any cohesive playstyle. The character doesn’t feel well-characterised and the way the stand works is very confusing, as the set would suggest Charlotte is a competent fighter all on her own. There are a few moments in JoJo where a stand isn’t needed but it’s usually played for laughs (Alessi beaten up by kid Jotaro, for example), so it’s pretty weird to see a stand mostly used for show.

Zant deserves a good set, it’s strange we had to wait this long for one. This set hits all of the key points. Here, Zant’s an accurate combination of his boss fight, the Twili Palace (his dungeon) and other miscellaneous, but fitting aspects of Twilight Princess. The biggest outlier here is the Shadow Beasts, however the way you utilize them is particularly smart, building up the wall concept in a way that’s respectful to the source and mechanically fresh. It’s not just a wall to rebound off, but physically based off the game, forcing a foe to fight any minions you set up. It’s a nice pace for Zant to fight at, representing his dual-sided personality far better than the Rool set that treated the twili as a gas that makes Zant go insane.

To bring in the Zant heads and size shifting largely works into a fun and deep playstyle. Its greatest accomplishment as a playstyle is that, while it’s a wall-based set, it never falls into the trap of not directly fighting the foe for too long. Zant never does anything to negate the whole point of the concept either, such as destroying the wall or using it in some big huge interaction. The moves that were made at the end of production are weaker, and I’m not a fan of the grab game, but it doesn’t terribly bring down the quality of the set. Add to that some awesome interactions like the bug projectile, relevant earthshaking and good use of the melee; it’s a pretty strong set, although the tone/atmosphere of the set struck me the most. Zant’s largely pathetic and trying to stay in control but failing, very fitting characterisation. It is a shame it doesn’t remain wholly consistent, but I’m satisfied in this set’s portrayal of Zant, which was always what I wanted coming to read this set.

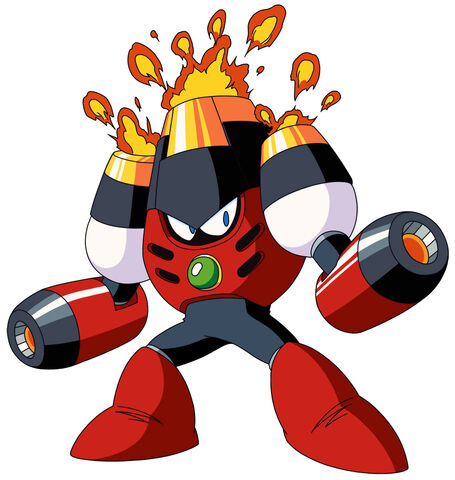
Mr. Dark has quite a few problems. First of all, I don’t know if the fire should’ve comprised the entire set. This is a case where most of what he can do to fight is actually pretty boring (i.e. the fireballs and so on) but the cloning of the opponent and status effects would’ve been a far better base than putting them on throws, where they’re awkward for the inputs. Throws should throw, but these are all largely status effects. The playstyle is very basic trap set-up and camping with traps and projectiles. It’s nothing too bad, aside from the fire wall/cage and its balance, but there’s too much redundancy in all the projectiles. For example, the fire/lightning traps, different types of fireballs and pillars on side special and down smash. These wouldn’t be as bad if the set didn’t actively say the point of the set is largely buying time for set-up. Imagining a player set up similar projectiles and traps just seems monotonous and pretty shallow. Traps can be more than secondary concepts, but they have to be very well done, and this is sadly not the case with this set.

Sideshow Bob is apparently a product of you wanting to remove props. However, some characters require it, this is one of them. Smash Bros is no longer averse to props now we have Villager, a character based around prop use on every input. Bob never fights so you could say it’s fair game for him to just use a knife for the entire set, but basically all of them have these odd movements tacked on. While it’s not a bad concept to move during attacks, this set has no reason for all of the mobility options, plus it flows against his rakes as his movement makes him more vulnerable to stumble into his own self-damaging trap. When you remove these effects, the moves remain fairly random, like swinging the knife like a bat or spinning the knife like Link’s master sword. Bob is also ridiculously violent when he’s meant to be a likable character. You suggest to imagine the moves used on Bart, when they include piggybacking on the foe and stabbing them in the face. When I think of Bob I think of his over-the-top plans and failed mastermind personality, not the implications of him being a psychopath. And honestly, those implications are largely part of jokes, as Bob is never shown to physically harm anyone in the show.

I know you didn’t want me to read Argent Commander, but I did, and well, you were right. It’s a bad moveset. The problems are very obvious, mostly in the balance. It’s extremely lopsided between having no recovery and high fall speed, versus having absolutely ridiculous stacking buffs that let you KO at extremely early percentages. It may as well be Ganondorf with a chain grab on half the cast, as I imagine that’s how many of his match-ups would turn out, depending on if the foe can simply out-range or camp him until he’s off-stage. The effects in this set can also be extremely forced, like refreshing the cooldown on all your specials in two smash projectiles. In fact most of the functionality in this set, from cooldowns to effects to damage percents, feels artificial, as if ripped directly from Hearthstone without much idea how to implement them in Smash Bros. There are a couple of neat ideas, though, like a trap that deters short-hopping, but they generally don’t add much to the playstyle aside from generally wanting the foe on the ground.

I had typed up a Weavel comment already until DM came along and said everything. You went back and fixed up most of the problems, and I commend you for that. My only remaining problems are simply that after all is said and done, comparing Weavel to Samus, his one more interesting facet is his body separating mechanic. This is a big step-up from the original, but it would be very much improved if the set worked in ways for the halfturret and the normal moveset to work together. This could be as simple as bridging a gap between a laggy start-up and attack by using the slow turret projectile to disrupt the foe’s defence. The set relies on him using his weapon, the scythe, when the character is capable of using futuristic weapons or other things inspired by Metroid Prime. The balance of interesting functional moves using the scythe for melee, and those that make use of these aspects, such as the grenade and missile, is heavily skewed in favour of the former.

The set would also benefit if the special projectiles and recovery up special were further differentiated from their inspirational moves. While Samus’ missiles and Snake’s grenades are fun moves that totally can be reused in a new moveset, these characters are far deeper than just those two moves, whereas Weavel relies heavily on them as only a follow-up projectile. It’s just not all that interesting when he’s meant to be a space pirate of sorts, there isn’t any personality coming through. A good example to look at is Samus, with moves like her down tilt, forward aerial, up smash and grab game in general, where she’s always using her cool gadgets.

Randy Cunningham's another archetype well covered by you, Kiwi, utilizing invisibility and a weapon reminiscent of Sheik's chain (which is a common theme in sets). The former is not done very well, though, as when you use this sort of mechanic, you should have a very good knowledge of how exactly it works into all of your moves. It's just too essential and key a mechanic to ignore, like Lucario's aura or Ice Climbers' tag team set up. I don't feel it's taken into account here in the rest of the set, and I'd say the same of his buff and tripping balls. It's especially unfortunate because he does have flashy moves like the giant elemental fists in the smashes, but it doesn't really play into his game. There are moves that take advantage of the reduced lag, but that largely comes down to finding time to activate the buff, then using improved moves in the same way. It would've been a lot better had it worked in the invisibility and other special aspects, to make it feel strongly interconnected. Keep at it, though, because your sets are still enjoyable and well written in spite of the technical blemishes.

The problems are simple with Reimu and have already been addressed ad nauseum so I'll just highlight what I feel is important. Reimu is a heavy set-up character, who requires a long time of batting her orb back-and-forth. The opponent's not going to let her build up the orb's score, and she lacks the most basic defence required to attain her set-up. Without a grab, her already sparse collection of actual attacks are going to get shielded forever, and that's also time she's not devoting to moving around her orb. On top of that, even when she has all the set-up in her score the throw effects hardly make up for all the time sacrificed. This is a large part of why her being hit by her own orb is bad, because she's already got this terrifying uphill struggle against the foe while building up her orb's momentum and score, and she has few moves that both help in fighting the foe as well as batting away the orb. It can be very awkward, like her bumpers that don't affect the foe in any way. All in all, Reimu is highly predictable and not very fun to play as or against competitively. As Roy said, mirrored inputs are the opposite of functionality. The best hope is using the stock/score dependant down special, largely not requiring any skill in fighting the opponent to land, due to its massive hitbox/KO potential.

I'm totally new to Burrito Bison as a character, but I do know my wrestling, so there was anything to appreciate in this set. The number one thing is the simple and straightforward application of wrestling moves and a sort of momentum. This actually doesn't come up as often as I'd like, because the kind of directional, limited momentum that Bison can build up and his ability to switch blastzones with side special is real fun. Later on the set continues with fun, if simplistic brawler type moves, but nothing to get excited over in terms of playstyle. Early on though, notably in the aerials, the set has a lot of fun options out of the momentum despite having to use what you'd expect to be awkward heavyweight aerial wrestling attacks. I realise you couldn't adapt the momentum to the ground, but I still feel it could've been more seamless. The set does succeed at what it aims to do from the beginning, making an aerial heavyweight who isn't held back by his low speed or cumbersome aerials. It's not the most complex playstyle, obviously, but it is strangely fitting in its simplicity for a flash game character. Your sets tend to have a grace and knowledge of the engine that makes it hard for me to disagree with them, and I think this set is a great example of that in its later inputs.

Sheep Mage is one of your best, Bio, and that's not putting you down as you seem to think, as it's actually not a bad minion set. The key difference in batting around a fish and bossing around sheep is that sheep are far more interesting, whereas the fish, although I remember a couple of varieties, don't allow for much variety in how they work. It's basically just that minions are more interesting than projectiles in a basic playstyle. The minion manipulation here is fun if simplistic, herding them around, having a few magical attacks to make them "evil" or turn them into hitboxes, or able to create hitboxes. It's nothing out of the ordinary, but it fits Sheep Mage, and we don't get a lot of these kinds of sets. Like Swap Force, the application fits Skylanders' style to a tee, where every character is defined by their stereotypical powers. I do still feel that even with improved throws, the transformation and spell that warps the foe into a sheep could be implemented better, but it's fairly solid just for the minion aspects.

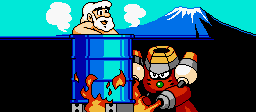
I didn't expect a Twilt set this contest, and the Terminator character's a nice surprise too. The set's organisation, 'Easter Eggs' and everything surrounding the set is very well done. It's reminiscent of Jason Voorhees in its dedication to how it portrays the character, although not quite that good, the set would have to be made in MS Paint for that to be true. The set itself is unfortunately very imbalanced, to the point that Terminator feels awkwardly powerful even for Terminator. It's not the right kind of OP and it's not what you were aiming for, as demonstrated in the MUs and playstyle section (which largely doesn't seem to pin down Terminator as anything specific). From his entire myriad of absurdly powerful projectiles like the neutral, down special, the final destination-tier range on his many guns and his mechanic combined with his anti-aerial grab and explosives, Terminator is unbeatable if he plays a defensive camping game. He can aim his weapons in largely any direction the foe is coming from, and if they do get in close, he's got the mechanic to make sure the foe can't pepper him, but has to go in for a riskier, stronger attack to even deal stun. Terminator to me should be an aggressive character who prioritizes the target over everything else and doesn't use a gun until he knows he can terminate his target. Many of them are pretty redundant because of how many there are, for example you could've easily included the iconic motorcycle on side special and you'd not lose much in the dual wielding rifle. I can see why you went for a more overarching, gun-heavy approach, but it's not what I had wanted in a Terminator set.

The new Negi is decent enough compared to the original, although I do feel it borrows fairly heavily from the original. This is notably in the up special, and how the set's makeshift but controlled playstyle works. For a character that is meant to be a super-powered 'evil' version of a protagonist, he's largely very reserved like the original Negi too. A large part of the set comes down to storing your spells to wait for the opportune moment. I can hardly complain the set isn't versatile, as it has two transformations, the moves usually have several functions, but at times it seems to be repeating itself. The set has a couple of mirrored inputs, like the forward tilt/smash and some of the throws are basically the moves that came before them in the same input section. Add to that how some of the moves are really basic punches, throws and so on, I don't get the sense Negi is a whole lot different in functionality compared to his original set, being more of an update. It has the same positives I said of the original when it came out, but there was room for improvement too, especially taking it in a wackier direction, that largely doesn't have any effect on the set's playstyle, instead just changing a few of the road bumps on the way.

Frank Underwood goes downhill very quickly after the specials, which largely build up a base to expand upon. That is a generic politician. It's a bit on the nose but not a bad idea for a set, although I get no sense from this character's gameplay who he is or his series. The grab game gets very finicky about certain effects and team status. I do not like how this set approaches FFAs, as besides the vaguely defined minions and their interactions, Underwood's playstyle comes down to cancelling out other movesets in a particularly tacky way. He can absorb projectiles into his G-Man briefcase, summon a wall, and with some obtuse grab game effects force a KO move counter to a grab. Not to mention blowing harmful cigar smoke around, a super armoured punch (I really don't know what to call that smash), and a body slam on an aerial. But the relevant point of the cancelling out in FFAs is that this set would largely revolve around finding the most broken way of abusing his quasi-immunities to make him invulnerable to attacks, either by allying himself or using his briefcase/counter/wall. I don't find a FFA focus inexcusable, but considering this may as well be an OC with how little it has specifically from the character and the liberal use of minions, it has no excuse for so little playstyle in 1v1.
 
Last edited:

MasterWarlord

Smash Champion
Joined
Aug 24, 2008
Messages
2,902
Location
Not wasting countless hours on a 10 man community
David said:
"My group"? Even without that weird bit of tastelessness (I'm designing this set for me, I would enjoy playing this character), I find it odd that a set designed to be useful in an environment that exists in Smash is less accepted than numerous movesets designed for an environment that exists only under very specific conditions.
3v1 movesets are not designing around luck based environments. Regardless, I am simply stating my opinion, I already directly implied there are people that do like them over bosses. The biggest fan of FFA specifically would be Junahu.

David said:
Would you prefer I tl;dr you with a list of boring attacks, link you to a set full of boring attacks that detracts from Frank's set or handwave it by saying "They borrow standards from Falcon or Snake or or Zelda or Ganondorf or [insert character here]"? Your choice.
I have a scrapped moveset that assigned them Brawl character moves, so yes. I agree that actually listing out an extensive amount of boring attacks is pointless, but it’s still better than what’s there now and there’s always the collapse tag.

David said:
"This gun deals different damage and knockback compared to my other gun!" (I may as well mention that I added knockback to the end of the gun, by the way, since you complained about an infinite)
Less of an issue than what’s there if you ask me. Regardless, you could make it a shotgun or a tazer or something.

I thank you for fixing the infinite as well as changing anything in general.

David said:
Pushing someone causes damage?
It does before pointing at them does, that’s for certain. If you’re concerned about making it damage minions, it doesn’t have to do damage to them too. In any case, we have become much more strict recently about making moves be hitboxes. I think the reaction to Tirk’s Reimu is enough indication.

David said:
Assume other substances similar to dtilt smoke can't be absorbed. Never mind that I've never read Gluttony due to not being able to access the Whiteboard (you pastebinned me Kudgel and a comment on Sonic 06 Robotnik then never pastebinned me Gluttony). Regardless, I like how the fact I didn't keep your movesets in mind when I wrote a jab is a point against me. Also reread the jab - I'm assuming the Gluttony beam has some special property, but it only absorbs the damage and the knockback before unleashing them in a melee attack. And it doesn't completely invalidate enemy projectiles due to him needing to get rid of previously stored projectiles before he can use it again.
It doesn’t invalidate enemy projectiles, fine.

I just used Gluttony as an example of a very powerful projectile in gameplay and canon, as well as one that’s absurdly large and could not fit in the briefcase. While it has special properties, that was not the point, it was the largest projectile I could immediately think of is all. Kudgel and Gluttony have also since been put up on Smash World Forums a few weeks ago and are linked on the moveset list now.

All I am terribly asking you to do is to make a cap on the size of projectiles stored. It’s an easy change.

David said:
Please tell me the exact inputs so I can address them/correct them specifically, rather then being vague so your snarking look better.
“Missing throughout the moveset”. There are no KO percentages in this moveset, maybe one or two I missed on a quick skim. The move that made me realize it was uthrow, when the main property it has is “KO throw”.

David said:
Except they die automatically if shot in the head.
Fine, if they are shot in the chest. The point is more how hilarious the fact that it’s ten dollars is. Yes, I know it is easily edited, but. . .I just pointed it out last comment.

David said:
I figured abilities like that were accepted on characters without them, especially by you. Von Karma's moveset has him handcuffed to corpses and using them as projectiles and it made top 5.
Silly, yes, but not a superpower. It’s something he can technically do. Manfred’s only real “superpower” is representation of money as healing on dthrow.

Now that it’s not 5 AM, I will list Frank’s superpowers:

  • He has blackmail on every character imaginable, including unintelligent ones. As usual, Brawl already presents enough characters for this sort of thing.
  • Is able to use the power of the citizens’ souls to boost his recovery.
  • In FFA, can make himself immune to all attacks of a character besides the grab, which is met with a knee to the crotch for 20%.
  • Can knee Peach and Rob in the crotch for 20%.
  • Can increase HP of ordinary humans to an infinitely high amount by giving them money. Yes, Manfred did it (Though only healed), but this list is exhaustive.
  • The moveset makes Pikachu have money on his person.
  • Can spawn walls.
  • Can store any projectile with G Man’s briefcase, no matter how strong.
  • Can make any human agree with him in exchange for $10.

David said:
I will, thanks. Now go read Terminator. I like that set infinitely more than this one and you've ignored it.
I apologize for reading your moveset on the holiday it was posted for. Of course I’m still going to read Terminator, it is not “ignored”. I have much more prolific movesets than that further in my backlog, such as the Night’s End Sorcerer I only just recently commented.
 

darth meanie

Smash Journeyman
Joined
Jun 6, 2008
Messages
452
Edited Burrito Bison:

Side Special now allows him to continue rolling forward when he lands on the ground, slowly losing speed as he travels. He can cancel this roll into any ground attack, including his grab. He continues to roll forward if he grabs an enemy, potentially rolling offstage.

Some standards, smashes and throws have been edited to take into account this new movement option and how it affects his options. Forward Smash, Up Smash and Down Smash maintain his momentum when used, Down Throw, Back Throw and Forward Throw have new offstage kill potential.
 

Tongen

Smash Rookie
Joined
Jul 7, 2014
Messages
1
can I still reserve? oh by the way, can I have the stats for Samus and zero suit Samus? I'll need it for my moveset...
 

Katapultar

Smash Lord
Joined
Nov 24, 2008
Messages
1,251
Location
Australia
can I still reserve? oh by the way, can I have the stats for Samus and zero suit Samus? I'll need it for my moveset...
There's no rule against reserving a post and editing a set into it later (The latest user to post a set did just that), but if more posts are made by others later on you'll probably want to just post the set as-is or link people to it.

From memory, I believe Samus has a size stat of 8, a weight stat of 7.5-8, a ground speed of 5, a surprisingly floaty fall speed of 1 and I think average air speed (roughly 5). Zero Suit, I believe, is size 7, weight 2-4, ground speed 8, air speed 7 and fall speed 7. These are just from memory, but there are in fact threads and posts on SWF that give you all the statistical data you could want on each character. JOE! actually compiled such a list for MYM back in MYM9 with data on smash characters' size, weight, ground movement, air speed and fall speed and compared them to numbers given by a MYM set, which is how I know these numbers for Samus in the first place. There's a link to this article on The Bunker (link there via OP) if you go to the History section of that site.
 

ForwardArrow

Smash Ace
Joined
Aug 17, 2011
Messages
502
Terminator
This set starts off on a slightly unpleasant note with the mechanic, which aside from shutting down camping almost entirely, more importantly just gives him a ridiculously powerful projectile once he hits 120%. Yes it can hit him and with proper pressure the foe might, just might, get it to backfire, but that is a lot less likely when his mechanic and massive potential for camping himself exists. Nevermind that, god forbid the opponent succeeds in pressuring him, they go down with him unless they are outside the hilariously huge blast radius.

Aside from that he's an insane camper with an assault rifle that's admittedly got the horrid reload time, but you can still stack it onto another projectile when you absolutely need one to hit, and aside from that, huge range massively powerful projectiles on several inputs, the most horrific one being the mini gun, which can be angled and deals 6 hits of 4% and flinching per second with enormous range and low start up. He has rather little in regards to actual melee game too despite being a large robot bruiser and in several movie scenes fights with melee, he undoubtedly needs more of it than he has here, as an overpowered MYM6 camper is far less than this character deserves. As an aside, the font used for the set is pretty hard to read.

Burrito Bison
Honestly I've never liked momentum sets much, but for all its worth there's not much else the character can be, and you do some interesting stuff here. Being able to loop the blast zones to ignore the suicide problems a typical momentum character has, as well as the incentives to boost as high/far as possible and the gummy bear balloons to bounce off of, at least give the set enough interesting/strategic features to distinguish it from a lot of the particularly mediocre stuff in the genre. While the aerials are very simple, they're a good practical use of his aerial movement, and with the edits the Smashes/Down Tilt make some decent use of it as well. I don't feel it fixes the grab game much though, it ultimately still feels uninspired and like it would lead to cheap gimps, and once you get past the specials there isn't that much too how the set uses momentum, the ways to capitalize on it honestly feel rather redundant after a while. Its not a bad set at all, but after the very likeable set of specials I was hoping there would be a little more too it than there is.

Argent Commander
Honestly, I actually think the idea of stacking buffs like this set does has any merit to it, as well the end result for gameplay is imbalanced and kind of shallow, it does feel satisfying to get such an extreme amount of power on one of your attacks. If things like the Down Tilt/Up Special buff were more contained than they are in terms of use and put on a character who isn't stupidly easy to just poke off the edge, maybe this set could've gone over remotely well. That said, it is very magic syndrome-y, a complaint that could arguably be leveled against Night's End Sorcerer too but its more apparent here when he seems like a character who would use a lot of blunt force melee, rather than some of the more bizarre stuff here like the random consecrated land that deals damage specifically on repeated touches, or having the hammers refresh cooldowns entirely for playstyle convenience. Regardless, I think the ideas here could certainly be recycled and put to better use in the future, so its hardly a wasted effort and I don't think its as bad as you think it is.

PC-98 Reimu
Reimu on a fundamental level is a misuse of the Smash Brothers engine. It has a pretty obtrusive mechanic with plastering the entire screen in stickers, and picks out the inputs it wants to actually put attacks on at pretty much random. You compare the set to Olimar, and Olimar has the decency to use his Pikmin for actual attacks rather than just doing awkward manipulations of them that go well outside what is meant to be done on Smash/Aerial/grab inputs. No, you can't just pick inputs to put these things on at random, Smash Attacks and aerials are meant to be actual attacking hitboxes or a character won't be able to properly defend themselves. Grab hitboxes are meant to be used out of shield, and frankly a big part of why Ganondorf is garbage tier is because his grab is so bad at that with its hilarious range. Yes this is a mistake that has been made by plenty of people, including myself, in the past, but its still fairly regrettable to do at this point, especially on a character who already is under fire by her own construct which she starts the match with.

Aside from that, the balance in the set is honestly conceptual with the way you made the orb, as honestly if you did fix it to make her powerful enough to properly use that thing, it would be rather horrific. That thing just casually ignores dodges and shields, taking away the only real methods the player has of defending themselves from it, never goes away, and on top of it Reimu has a bomb that KOs with ridiculous ease that is also hilariously easy to land. She can't capitalize on it properly when it also hurts her and her actual fighting ability is so ridiculously bad, but if you actually did let her she'd be monstrously imbalanced in the opposite direction. If you did somehow achieve the perfect numbers for this set, it would still be broken in a different way, as it would still have the hideous looking mechanic, unintuitive control scheme, and the balance would be hilariously lopsided in such a way that all games would be a landslide one way or the other because of the orb murdering defenses but Reimu herself being so bad. Its pretty rare a set needs to be remade from the ground up to be anything other than completely putrid, but I think this is an actual example of that.

Frank Underwood
There's fairly little for me to say here that Smady and Warlord haven't said better, but the set honestly may be worse as a purely free for all set, as forcing people to work with Frank Underwood is not a good concept. It just makes him pretty much a shoe-in for the victor on the results screen when if the character wants to win without his presense they have to awkwardly run around and grab him, then get magically knee'd in their often non-existant crotch to take a ludicrous amount of damage and knockback. His team support tactics are honestly pretty boring too, just healing a player or giving them a gun. Non-FFA oriented sets make the mode far more interesting than any sort of support tactics Frank can give, and they make any more than 2 player match with Frank in it revolve around him in a very unhealthy manner. While he's obviously very bad as a single player set when he's busy summoning random walls and using G-Man's briefcase on the standards, saying he's meant to be judged off FFAs actually makes him worse, as that's the mode where the terrible aspects of this set truly shine through in forcing alliances in the bluntest and most obnoxious way possible.

Heat Man
I do admit the grab game in this set is kind of bad, but there's fairly little else to complain about here from where I'm standing. The set plays off fire traps in some surprisingly interesting ways with how his various interactions/buffs play off expending them and using them for spacing. It doesn't get particularly redundant, although occasionally the buffs feel like he may be a bit too strong with them active, as its not like he needs this terribly extensive set up to acquire them, especially when with all 3 he can keep it around for a full 15 seconds. He's not really particularly weak without them considering his giant range either. Regardless, being a bit overpowered isn't too big a strike against the set when it both has plenty of interesting ways to play around with the fire traps, as well as a pretty strong awareness of Smash, so the simpler aspects of said moves are also utilized well. Solid job on this one Froy.

Sheep Mage
Trying to flow off a stun heavily is a bad idea, period, as Sheep Mage demonstrates rather strongly with his sheep polymorphing mechanic, which ultimately is just a flashy gimping tool with fairly little strategy too it when combined with his other moves, or a way to annoy the opponent. That said, the set is stronger than Pompy regardless, as what you're interacting with has a lot more too it than some random projectile, with the minions having actual AI, and a few of the ways you play off them are legitimately fun, such as the Down Smash. Its not super redundant too, the moves mostly just space the sheep but there's any variety as to how. I just wish the Specials section was a bit better given the Down Special transformation feels very weak and awkward as is too, as if that was the case and a couple more moves were dedicated to something other than just sheep placement, I honestly could've liked this set. As is, it is a pretty significant improvement on your part Bio, and I hope you can learn a couple lessons from this set's flaws to make even better sets in the future.

Jodie Reynolds
Honestly I'm pretty impressed with this set US, as it avoids a lot of potential pitfalls a set like this could've had. There's enough fodder for interesting things that the garments can actually do, as well as a very effective balance between conserving and utilizing garments. The set is never redundant with effects and always comes up with clever new ones, like the time bomb-esque effect, being able to attach almost any hitbox in the moveset to a projectile, the various buffs that can be applied at the cost of temporarily expending garments, etc. The set also feels very Jojo-esque in incredibly large amount of versatile and creative things she can do when these techniques she has are combined, allowing her to fight well even in fights that seem lopsided against her at first glance. At the same time, its never terribly broken because you have just enough restraint to keep her from creating any kind of horrific blender of hitboxes, and have a decent awareness of the Smash Bros mechanics that would take place around her set up.

There isn't really a lot for me to complain about here, so I'll just make a few suggestions for minor improvements or things you could do to top this set. While unlike Marin the actual hitboxes on this set are utilized nicely and they at least have some variety to them, I do wish they were a tad more interesting than they are sometimes, as there's a bit of a limit to how much fun can really be had with her attacks when the most creative thing a placed garment can do is act as a tether. There are arguably a couple fillerish inputs, I recognize why the Up Aerial is there but it doesn't feel like it adds that much to the set, just making it easier to utilize the fact that her garments are grounded. Lastly I don't get too much of an overall goal from the set, while its nice to have her be as playgroundy as she is at times it feels like the flow is actually a touch lacking because there's nothing too specific she's working towards. Obviously I appreciate the lack of bottlenecks, but maybe some kind of big thing to plan for would be warranted in the set, probably not given too much focus as its just an optional plan, but it could make it a little more exciting to play. Probably impossible to fit into this particular set as I know you're still editting it, if anything I just want Uair changed to something better(and its a fairly hard input, can't fault you for not having much better on it), but moreso something to consider for the future.
 
Last edited:

FrozenRoy

Smash Lord
Joined
Apr 26, 2007
Messages
1,260
Location
Las Vegas, Nevada
Switch FC
SW-1325-2408-7513
Argent Commander
Honestly, I actually think the idea of stacking buffs like this set does has any merit to it, as well the end result for gameplay is imbalanced and kind of shallow, it does feel satisfying to get such an extreme amount of power on one of your attacks. If things like the Down Tilt/Up Special buff were more contained than they are in terms of use and put on a character who isn't stupidly easy to just poke off the edge, maybe this set could've gone over remotely well. That said, it is very magic syndrome-y, a complaint that could arguably be leveled against Night's End Sorcerer too but its more apparent here when he seems like a character who would use a lot of blunt force melee, rather than some of the more bizarre stuff here like the random consecrated land that deals damage specifically on repeated touches, or having the hammers refresh cooldowns entirely for playstyle convenience. Regardless, I think the ideas here could certainly be recycled and put to better use in the future, so its hardly a wasted effort and I don't think its as bad as you think it is.
I don't even like this set much but I did want to point out on the Magic Syndrome thing it's not exactly illogical for a lot of this stuff to happen: For example, the way a lot of his stuff works is taken from or inspired by how the WoW Paladin's abilities, often with the same name, work, or logical extrapolations. For example Hammer of Wrath/Righteousness grants a holy charge in the game and has you draw a card in HS, so I characterized that as halving your cooldown as both are meant to make your stuff go faster, and Consecration actually works as a damage over time ability (Albeit more like normal poison damage, but I thought this way was more logical in Smash as you will not be on the ground all the time + adds some playstyle fun) in the game.

Thanks for the comment either way, but that was a point I wanted to bring up.
 

ForwardArrow

Smash Ace
Joined
Aug 17, 2011
Messages
502

Metroid Prime
Metroid Prime is the main antagonist of the, conveniently named, Metroid Prime series. Originally a Metroid, it was heavily mutated by phazon, a chemical that is either lethal or causes horrific mutations to those it touches, to the point it was capable of infecting the planet with said material. For a while it was captured by the space pirates, until it broke out while assimilating several tanks of their phazon and some of their weapons systems along the way. It was eventually fought by Samus in the core of the planet, where it initially had a massive exeskeleton which was capable of switching it's defenses against the various beam types Samus employed, before eventually revealing it's brain-like form, which was only vulnerable to attacks embued with Phazon. Conveniently it left phazon pools around the battlefield which allowed Samus to kill it... or at least, temporarily. Later on it came back after assimilating Samus' phazon suit in the subsequent two games of the series as Dark Samus, but that's not the form it appears in during the moveset. If n88 wants to go and make that set it'd make me happy but that's besides the point.

Statistics
Traction = Flawless
Aerial Speed = 9
Jumps = 7
Weight = 7
Movement Speed = 6
Size = 6
Fall Speed = 2


Metroid Prime floats slightly above the surface of the stage while on the ground, he does not trip while floating and has pretty much perfect control of his movements. It helps, of course, that his movements aren't even slow, he has both fast aerial speed and decent ground speed, though his aerial speed and slow falling rate are less of a boon than you'd expect. The reason for this is Metroid Prime, while capable of floating, does want to be close too or on the ground for a lot of his attacks, so getting juggled is the bane of his existence, as otherwise he can't get close to his beloved phazon. For the most part though he otherwise has a very fortunate set of statistics, being only barely bigger than Wario as his tentacles don't count as part of his hurtbox.

Specials
Neutral Special = Phazon Pool
Metroid Prime stretches a single tentacle down, causing a blob of a blue liquid-like substance to materialize before spreading out over a Bowser width area of the stage. This is not a particularly slow move, but since it deals no damage or knockback on it's own, only some minor pushback, it isn't exactly safe to spam. The phazon will simply linger there for 20 seconds after you create the initial puddle, although if you cover more than half the stage in phazon than the oldest phazon will start fading much faster.

So what exact purpose does phazon even serve? Well first of all when foes stand on it, they take 1% every second... except that increases by 1% for every second they remain in phazon, and the effect will continue for one more second once they leave a phazon pool, so casually jumping from puddle to puddle is not a safe way to diminish the effect. Metroid Prime, meanwhile, can charge attacks three times faster while in a puddle of phazon. Which sounds like a fairly minor buff, until you consider that not only do you have Specials which can be charged for a very long time to abuse this on, Metroid Prime has smash attacks that can be charged indefinently for very powerful results, making this a very useful way to prepare viciously powerful attacks.

So with all that and the fact that you can cover such a large portion of the stage in phazon, there has to be a downside right. Unfortunately there is... you see in game, Metroid Prime's phazon pools actually supercharged Samus and allowed her to hurt him, and here the same applies, as foes under the poison effects of phazon get a glowing blue aura effect and deal 1.5x their normal damage and knockback. Spamming phazon and pressuring foes into it alone will probably just end up backfiring horrifically if you don't take into account the negative effects, but if foes want to keep pressuring you with phazon, they risk the possibility of the poison damage racking up and eventually sending their damage through the roof.

Over an existing phazon pool, Metroid Prime can still use this move, in which case he performs a slightly laggier gesture as he turns all the phazon in that particular pool into red phazon. This particular type of phazon only really shows up around Metroid Prime itself in the series, never being seen elsewhere, and is especially corossive, dealing the same kind of damage as the blue phazon, but once every half a second. On top of that, if they perform an attack while on red phazon, it adds a second to the corrosion damage timer before the blue phazon they're standing on or the effect wears off entirely, making it a lot more dangerous to try to pressure Metroid Prime while he's on red phazon. You might think you would want to turn all your phazon into this, and while you'd usually be right, you can only fill one Bowser width of the stage with red phazon, and if you try to change more of the stage to red phazon the old patch will simply turn back to the much less dangerous blue variety. Aside from that, while on Red Phazon the foe gets an even bigger buff to attack power, boosting their damage and knockback to 1.8x the normal amount, so there's some added risk here.

Down Special = Camouflage
One of Metroid Prime's main techniques within his boss battle was to camouflage himself, forcing Samus to switch visors in order to see him. Here, Metroid Prime's visibility flickers a bit while you charge the move, upon release vanishing from sight for 4 seconds for each second the move was charged. While this is pretty weak as far as invisibility goes, there's obviously the ability to charge it over phazon, and a 1 second charge to 12 seconds of invisibility ratio is pretty nice. Don't worry about player tags and whatnot, Metroid Prime's disappears when he goes invisible too. Pressing Down B again allows him to return to visibility.

The obvious benefit to invisibility for Metroid Prime is to hide from foes while they're supercharged by phazon, as well as abuse the ability to supercharge attacks with phazon without worrying about them finding you. Of course most Brawl stages aren't big enough that you can hide extremely effectively, but considering how fast your attacks get charged up on phazon you don't need to be out of the foes sight for too long. The one problem is, if they do find you while your invisible and manage to hit you out of it, you entirely lose your invisibility.

One thing to keep in mind with this move is that there is an interesting dynamic with it and the red phazon, in that this would be the natural best place for Metroid Prime to go too while it is invisible. While this much is true, that also makes it a fairly obvious place for the foe to check for Metroid Prime at and protect. Of course, the risk of him going to the red phazon and being in his best possible position is the obvious route, but if he doesn't go there and just charges up an attack on Blue Phazon, or the opponent spends so long checking that AND the blue phazon that he just gets off a big attack on standard ground, the opponent is going to enormously regret their decision.

Side Special = Metroid Spawns
One of the more annoying things Metroid Prime does in his boss fight is spawn smaller Metroid to chase the player, providing a distraction as he hides and camps with shockwaves. It's an ability he brings with him to Smash as well, as with lag a fair bit more than a Waddle Dee toss, he can spawn Metroids to assist him in battle. What type? Well in the same fashion as your camoflague, charging the move gives you more powerful varieties of Metroid. Upon release, a Metroid will appear from within Prime's tentacles and float forwards.


With no charge, you get the standard breed of Metroid, which has 30 stamina and is slightly smaller than Kirby. They also take knockback like Kirby at 50%, though if they fly off a blast zone they'll just zip right back towards the stage. It flies around the same Battlefield Platform width area of stage it was summoned on, patrolling it unless a foe enters that area or it gets knocked out of the area, in the later case returning to it's original position. At which point it will rush towards them at Mario's dash speed until it comes into contact with them, at which point will latch on like a Pikmin. It deals a flinch and 6% when it initially latches on, as well as 4% per second. Multiple metroids can pile onto the foe if they want too, and each Metroid decreases the foe's movement speeds other than fall speed, which they increase, as well as decreasing the victim's jump height.

As an aside that is true for both this Metroid and all other varieties, the Metroid heals half as much damage as it deals to the foe while latched onto them. What's rather nice though, is it leeches phazon out of the foe too, healing as much damage itself as the foe is taking from phazon, and temporarily disabling their phazon buff while they are attached. Metroids can potentially heal over their max health if the foe does not prevent that. It takes 20% to knock this particular brand of Metroid off the foe, after which it will be stunned for half a second.


Hunter Metroids are the next step up from regular Metroids, created after a second of charge. They are relatively similar to standard Metroids in terms of how they function, with the same weighing down effect, phazon absorbtion, leeching ability. However for the extra second of charge you do get 45 stamina instead of 30, and it deals 6% per second while latched on rather than 4.

The main differences lie in their AI and clawed tentacles. Hunter Metroids will always chase the nearest opponent no matter how far away they are at the same speed regular Metroids move, no matter how far away they go, and even when knocked off a foe after taking 20%, they're only out of comission for .2 seconds before they continue the chase. Second of all, the clawed tendrils can be used to impale the foe, it swinging them at foes that come into range in a fairly fast motion that deals 8% and starts reeling the foe towards the Metroid, as well as flinching them. This lashing motion has nearly the range of Dedede's FTilt, and if the Hunter Metroid is detatched from a foe the tendrils will remain hooked onto them, tethering them to the Hunter Metroid. Not only does it slow the foe down if the foe tries to move past the limits of the tether, it also makes the Hunter Metroid much harder to properly escape.


Charging for 2 seconds results in the creation of a Fission Metroid, the most powerful type available to summon with this move. It loses the Hunter Metroid's tendrils, but makes up for it by increasing to 60 stamina, not getting knocked off the foe until it takes 40%, and dealing 8% per second. It also takes knockback like Bowser at 50%, and the same stun as a Hunter Metroid when detached. They do keep the standard Metroid AI pattern, but patrol an area 1.5x as large, and move at Fox's dash speed rather than Mario's.

There are two differences between Fission Metroids and the other varieties. One, they vastly prefer an environment with red phazon, and if there is Red Phazon within it's range of movement, if there isn't a foe within that area, settle down in the red phazon and start healing itself 6% per second off the red phazon. In addition if a patch of Red Phazon is moved, the Fission Metroids will move their range to center on it if it's still within their range, giving you some actual control over their movements, and allowing them to defend you more effectively.

The other difference is, when a Fission Metroid dies, it splits into 2 Metroids which are similar to the first variety, but half the size. The difference being, they have stamina equal to the total amount of health the Fission Metroid healed while it was alive each, whether that health came from the foe or from consuming Red Phazon. The baby Fission Metroids also, like in the game, have an additional feature that makes them annoying to deal with, they're only vulnerable to specific types of attacks. What types you may ask? Well, any attacks that weren't used to kill their father. This means if a Fission Metroid can stick around for a while, it can produce some horrifically powerful offspring.

Charging this move past 2 seconds will cause, after an additional half second, the move to spawn an additional normal Metroid, another second past that producing a Hunter Metroid in addition rather than a regular Metroid, 4.5 seconds producing 2 Fission Metroids, and so on. This is one of the biggest incentives to use your invisibility, to sneak off to some part of the stage the foe's not expecting you to be, and then summon up a small Metroid army.

Up Special = Failsafe
Metroid Prime's internal brain structure courses with electricity, an action which will indicate his position even while invisible, before jetting off in a manner similar to Lucario's extremespeed. He moves a fair bit slower than in said move, but also goes a larger distance. On contact he deals 8% and a fairly brief stun, only lasting a quarter of a second. This has a fair amount of end lag even if you land during the move, though if you hit the foe during your flight it shouldn't be too bad. It's actually a decent fleeing tool if you're invisible but the foe has found your position.

If Metroid Prime lands in phazon, the electricity in his body will flow through it as a shockwave, dealing 8% and the same brief stun as the main move, providing some cover if he lands in Phazon at the cost of visibility. This actually travels fairly slowly, going at a speed about 1.5x that of Ganondorf's walk. If Phazon is moved via means we'll get too later in the set, the projectile will be carried with it, only disappearing when it reaches the end of said phazon. While travelling through red phazon, it speeds up to Sonic's dash speed, moving through it near instantly, and deals 16% and knockback that KOs at 120%. Not nearly as useful for defense upon landing as the other version, however, this does make a shockwave near red phazon rather scary for the foe. As an aside, in the odd situation two bolts collide, they'll deal twice as much damage and knockback/stun during the collision before passing each other, depending on which variation it is. The version of this in red Phazon is a terrifyingly powerful KO move, but very very situational to hit with.

Smashes

Metroid Prime can charge his Smashes as much as he likes, which wouldn't be too relevant in a regular Smash match, but given his phazon allows him to charge three times as fast, he may as well make the most of it.

Forward Smash = Mental Burst
Metroid Prime concentrates for about as long as the start-up of Ike's Forward Smash, before releasing a huge burst of mental energy that deals 18% and knockback that KOs at 125%. This has nearly a battlefield platform of range, and for each additional second of charge he adds on half a battlefield platform to this, KOs 10% earlier, and deals 2% more. The power of this move is not exactly spectacular, but the range, especially with charge, makes the move a lot more worthwhile, and given Metroid Prime can get foes to high percents fairly fast, the KO percentage doesn't really have to be too low for this to be a very good KO move.

This sends phazon flying as projectiles, in fairly oddly shaped blobs that are about the size of Kirby each, one for every 2/3rds a battlefield worth of phazon caught in the move. They travel a decent distance of 1.75 battlefield platforms, dealing the twice the damage that they would take in phazon damage per second on contact, as well as proportional knockback. If they land on the ground they'll turn back into puddles. Lightning bolts inside the blobs will spin around within them while they fly through the air, which means if timed right means you can trap a lightning bolt inside a flying blob of red phazon, which will deal the lightning hit from the red phazon if the actual projectile doesn't have that much effect on the foe. At higher charges this will probably expend some of your phazon, although the fact that it's not hard to make will soften the blow a bit.

Metroid minions will go flying from this too, being launched as projectiles that function differently depending on the type of Metroid. Regular Metroids deal 12% and knockback that KOs at 180% while latching onto the foe when launched, and travel at a fairly fast speed. Hunter Metroids travel at the same speed and deal 15% and knockback that KOs at 145%, but will home in on the foe lightly during their flight. Fission Metroids will not attempt to latch onto the foe, but charge their bodies with energy as they fly, travelling at twice the speed of the other two types and dealing 22% and knockback that KOs at 80%, allowing for some potential bullet hell. Due to their floaty nature, Metroids will be fine floating around off stage even if they get launched off, returning to their normal AI patterns.

Up Smash = Levitation Pulse
Metroid Prime curls his tentacles in for a second, before releasing a huge burst of energy of a slightly blue-ish color above him, dealing 17% and upwards knockback that KOs at 100% at the very center of the hitbox, while dealing less and less damage and knockback the further you get from the center. Charging this attack increases the size of the hitbox, from that of Lucas' Up Smash at the start to one much much bigger over time, and while the damage at the edge of the hitbox remains low the max output raises by 4% per second of charge and KOs 20% earlier. The hitbox lingers very briefly after the hit, but any lingering is enough to make this a very strong anti-air, something Metroid Prime quite values when most of his game is based on goop placed on the ground. It's also fairly nice against the short-hopping aerial approach given the attack is strongest at very close range with Metroid Prime.

This leaves behind a field of the energy that covers the area of the hitbox for 2.5 seconds per second worth of charge put into the move(7.5 per second when charged over Phazon, obviously), which causes a slight levitation effect over it. Fall speeds are reduced by 10%-90% of their speed(the 90% cap happens after 6 seconds of charge, even over phazon not terribly easy to accomplish), 1.1x as much upwards knockback is dealt per second spent charging, and recoveries go up to twice as far(maxing at 2 times charge, a lot more feasible). Now you might wonder why Metroid Prime would want that, aside from to make subsequent Up Smashes even more powerful, given it keeps them out of range of phazon. Note that you can't stack levitation fields within levitation fields, the strongest one always takes priority.

If a phazon projectile from Forward Smash flies over this area, and is currently at the point in it's flight arc where it starts falling, it will be caught and suspended in the levitation field for the remainder of its existence. This allows Metroid Prime to have aerial phazon, which actually does warrant the amount of time required to set it up. The air is the foe's main escape from phazon if they want to stop the poison damage from stacking, and having Phazon traps in the air makes it so you can suddenly get the foe's phazon damage very, very high. Aside from that, if you have electric projectiles from Up Special inside the aerial phazon traps, they'll continue rotating around inside them until the traps inevitably fall to the ground. This is already pretty good for giving Metroid Prime much more dangerous traps in the air, but the real prize if you have phazon with 2 shockwaves that were travelling in opposite directions in the same blob of phazon. That will mean that it frequently makes hitboxes inside the blob with double the normal power, making it have potential to serve as a decently strong stun or scarier yet, a lingering hitbox that deals 32% and KOs at 60%. Mind you, getting phazon traps floating is already going to take a fair bit of set up, and getting phazon traps with lightning inside them is even harder, so you're going to have to make very liberal use of your invisibility/minions/camping if you want to get this kind of insanity going.

Metroids will actually ride up levitation fields to snare aerial opponents if they come within their line of sight, travelling at a faster speed than normal as they boost themselves upwards. Hunters in particular are relentless about this, going as high as they need too in order to grab foes, while Fission Metroids can be left in the air as is by baiting them with red phazon.

Down Smash = Shockwave
Metroid Prime raises it's tendrils above itself before slamming them into the ground below it, releasing a shockwave of fire going in both directions that deals 13% and knockback that KOs at 180%, which travels until it reaches the edges of the platform it is on. This is one of Prime's signature moves in its own boss fight, and probably its actual best projectile for camping. The wave travels fairly fast, around Fox's dash speed. Actually being hit by Metroid Prime's tentacles as he slams them into the ground deals 15% and knockback that KOs at 135%, plus 2% and KOing 5% earlier for each second of charge.

The real prize to charging this move is not an increase in the power of the initial slam, but it means every second afterwards, another wave is released, one wave for each second of charge. What is rather nice about this is the fact that the foe doesn't know exactly how many waves are even going to be released if you were invisible while you charged this, and on top of that, it serves as bullet hell in conjunction with the Forward Tilt projectile and the electric pulses in your phazon. Its also fairly nice in that it doesn't need to travel over your phazon, giving you a way to control ground that isn't covered in it in any form, while making phazon covered ground extremely dangerous. A fairly solid projectile uncharged, and an amazing move if you get time to prepare a big one.

Standards
Jab = Electric Pulse
Metroid Prime's whole body begins to pulse with electricity as he extends his tentacles outwards from himself, dealing rapid hits of 1% that extends a little past his body. Due to the extended tentacles this attack actually does have some decent range, though it also reveals you in invisibility. That said with how rapid the hits are, its actually a bit hard to DI out of. Whenever you stop mashing A, Prime releases a bigger pulse of electricity that deals 6% and some acceptable knockback.

If used over phazon, it will in fact extend the range of the hitbox through the phazon, but only about an extra third of a Battlefield platform, though it still boosts the attack range from "above average" to "huge". This goes further and becomes a legitimate camping tool on Red Phazon, who this attack extends through the entirety of. Electric projectiles from Up Special that come into contact with you become added to the hitbox of this move, increasing the range, which stacks with the phazon, as well as the damage of each hit by 1%, for a total of 8 hits worth of this move. This doesn't count the extra hitbox on the phazon however, it has to be touching Prime itself.

Forward Tilt = Phazon Wave
Metroid Prime pulls back its tentacles before slamming them into the ground in front of it. This has huge range, on par with Dedede's Forward Tilt, and deals 8% and diagonal knockback that KOs at 170%. For that matter, it has the same power across the entire range, allowing you to do some melee range camping from your invisibility, with the foe not really knowing if you're quite within their range or not, making it rather scary to just throw out attacks when they could whiff and get punished. The downside is that the lag is actually really bad for a tilt on the start up, hardly unusable and with low end lag it is rather good if the opponent isn't aware of what range you're in and sets themselves up for punishment, but regardless out of invisibility its use is a bit more limited.

If this misses an opponent/shield, it will hit the ground and, on contact with phazon, create a wave of phazon about a Kirby height that travels at Mario's dash speed. It is simply a ripple in the phazon, not actually moving around red phazon to a different location within the pool or what have you, but it does deal damage and knockback based on how much phazon damage the opponent has taken, twice as much damage as they'd take per second and knockback proportional to that damage, similar to the Forward Smash projectiles but a bit less distruptive of phazon. Naturally this is more effective when the foe is heavily poisoned with phazon, but it at least has a secondary purpose in the case of electricity flowing through phazon, as inside the wave the electricity will rotate around and reverse its trajectory. Just keep in mind if you use this move over Phazon while invisible and you whiff the opponent, this will actually reveal your position, so be careful.

Down Tilt = Absorb
Metroid Prime stabs its tentacles into the ground in front of it in a quick close range move, dealing 6% and a flinch. Metroid Prime prefers to fight his foes at a range, so some very close range oriented stuff like this is useful to him, albeit the initial hit only deals a flinch. However, you can get more mileage out of it than that by using the follow up, which causes his tentacles to pulsate and deal another 6% and upwards knockback that KOs at 225%. The first hit combos into the second in a true combo.

The second hit has a rather interesting property on phazon, as it will actually pull it half a battlefield platform towards Metroid Prime, with him absorbing the half battlefield platform worth he's currently on. He will then spew it back out, causing the phazon pool to return to its normal size. What's the point of this? Well if the foe is standing on phazon, they'll get thrown off balance a bit, which, while not dealing true hitstun, can at least interrupt them out of attacks, giving you a tool to fight campers by interrupting their projectiles. At over 100% though, they'll trip from this instead of just getting their attack interrupted, which can potentially lead into electric projectiles and the Down Smash. Aside from that, it will pull electricity and red phazon along, both giving control of your Fission Metroids by baiting them towards the foe with this, and allowing you to mess with the foes ability to avoid your projectiles a bit.

If you absorb electricity or red phazon with this, you'll get an interesting effect. The electricity will cause an electric hitbox to briefly appear over prime, dealing 8 hits of 1% and flinch that expands a fair bit beyond his body, and combined with the move's speed it serves as a solid defense that can be achieved with minimal effort. Red phazon will temporarily energize Prime, causing his next attack to deal 1.15x damage and knockback, though this can't be stacked.

As a final note, if used while invisible, the nice thing about this move is that it only gives away that Prime is on phazon and what direction he's facing, making this a nice way to give foes trouble from afar while continuing to keep up your invisibility.

Up Tilt = Anti-Air Technique
Metroid Prime pokes his tentacles upwards, as well as pointing two down below him that aren't hitboxes. The upwards poke deals 8% and has decently large range, but isn't terribly fast by the standards of Up Tilts. The main incentive to use this is that this will actually fire phazon into the air as a projectile, dissipating after it travels up a Ganondorf height past the range of this move. This is largely useful for continuing the phazon effect, though the speed of the move prevents it from being too effective at this job. Invisibility will mask the starting lag and make this much easier to hit with, but it does give away your position and being invisible is not a free thing for Metroid Prime.

This will fire any grounded projectiles up with the phazon, allowing you to launch electric projectiles, and more importantly, your Down Smash projectiles, into the air. They'll travel as far as the phazon itself would before disappearing. In a levitation field, the shot will add the length of the levitation field to the distance it flies, and Down Smash projectiles will slow down in blobs of phazon, giving you a somewhat delayed projectile. In red phazon, they also become more powerful, dealing 20% and upwards knockback that KOs at 100%. Electric projectiles will not merge into the blob, simply traveling to the of the blob as though it wasn't there. You actually have to work if you want to get those super powerful electric traps.

Dash Attack = Tentacle Slam
Metroid Prime slams its tentacles into the ground in front of it rather forcefully, dealing 15% and upwards knockback that KOs at 140%. A fairly slow dash attack on both the start up and end lag, moreso than Dedede's, but it at least has a decent amount of power to it.

Aerials
Neutral Aerial = Retaliation
Metroid Prime's entire body pulses violently red before it releases a burst of fire in front of it, similar in appearence to the Down Smash shockwave, but more circular in shape. This deals 3%, but knockback that KOs at 150%. This attack is rather telegraphed and will reveal you if you were invisible, but that's for a good reason. The front end of this attack has a decent amount of super armor, and if Metroid Prime is hit during this attack, he adds half the damage and knockback of that attack to this. This is especially scary if the foe has a phazon buff, meaning they have to be rather wary of just striking out haphazardly at the air. Naturally however, the front end of the lag isn't totally covered with super armor, having specific parts of the lag that are and aren't(specifically the very start, and right before the attack, with the sweetspot being in the middle of the start lag). Its a rather bad move to use as a non-counter too, as the end lag is pretty big and the damage is miniscule, though its still a functional spacer and at the very least, the foe is likely taking some hefty damage from phazon regardless.

Back Aerial = Phazon Injection
Metroid Prime stabs backwards with a single tentacle, with the tip of it pulsing with red phazon. This attack deals 10% and horizontal knockback that KOs at 260%, and while the start up lag isn't astoundingly fast the end lag is very small. Plus the range is about as good as it gets for Bairs, making it a very useful melee move for Metroid Prime in general.

If the tip of the hitbox is landed, Metroid Prime injects the small amount of red phazon into the foe, which won't come up until the foe takes 7 seconds worth of phazon damage. At that point, the red phazon flashes quite brightly inside the foe and they take another 10%, as well as upwards knockback that KOs at 150%. If you particularly want too, you can stack this red phazon to increase the damage by 3% and decrease the KO percentage by 20% for each time it was stacked, which is more possible than it sounds as if you want you can just try to keep the foe out of phazon(or clear the stage of it with Forward Smash, which is at times worth it regardless to avoid the buff to opponents). Phazon projectiles, like the waves in Forward Tilt and the balls of phazon in Forward Smash, also shave 2 seconds worth of damage off the timer, so that much is worth keeping in mind if you want to control the timing of the "time bomb" hitbox a little more. Just keep in mind this hitbox is extremely precise, and can in fact be dodged/shielded.

Now there are ways to make this a bit easier to land to, with the existance of your Metroids as a distraction, you could reasonably Bair into a whole mess of them swarming the opponent. Invisibility also removes the foe's ability to predict your spacing, and for that matter any hit with the Bair makes them fear the time bomb effect, as they don't know if you hit with the sweetspot or not. Getting the foe to play defensive is a bit of a boon in general, as Prime loves being able to set up and space himself properly.

Forward Aerial = Escape Manuever
Metroid Prime loosely immitates an octopus, spraying a jet of phazon out of his body that functions similarly to the projectiles on Forward Tilt/Forward Smash, dealing 1.5x as much damage as the foe would take in phazon damage that second and proportional knockback, though this is added on top of a base 5% and weak horizontal knockback. Prime can actually angle this move to influence the angle of knockback of this attack, but during the move Prime, again somewhat like an Octopus, jets away .7 battlefield platforms at the opposite angle of the attack. If the move is particularly weak, the opponent won't be able to predict what direction Prime escaped in when he bolted away with this if he's invisible, and if it's strong enough for them to tell you got some extra space/damage anyway.

Down Aerial = Tentacle Poke
Metroid Prime simply pokes one of his tentacles downwards in a quick move that deals 6% and a flinch, having very nice range and speed but severely lacking in real power. What makes this is useful is it serves a rather unique purpose among down aerials as a poking tool, being able to poke at the top of the opponent's hitbox when they shield in a manner similar to how Marth's Down Tilt might hit the lowest part of an opponent's hitbox in shield. This technique is vastly more effective if there's a Metroid on their head, and serves as one of Prime's main ways to keep the phazon damage building. While its vastly less effective at air to air combat, in the incredibly slow falling field of a levitation zone being able to have what is most likely a massive leg up over most Uairs in terms of range is hardly a bad thing.

Up Aerial = Triple Stab
Metroid Prime stabs a total of 3 times above himself with his tentacles, first the ones on the left side, then the right, then the ones in the center. This deals 6% on each hit and light upwards knockback, except at the very center, which deals 15% and upwards knockback that KOs at 115%. This actually does combo between hits, but the opponent has enough control of their DI that they can probably avoid the center fine... if of course, they know what direction the center is from themselves. They can't really tell where exactly Metroid Prime is while he's invisible, making this into a much scarier kill move, if of course, you have the invisibility active.


Grab Game
Grab = Tentacle Grip
Metroid Prime lashes its tentacles forwards, attempting to ensnare the foe. This actually does function as a tether grab, having a tiny bit more reach than Link's grab. It does have less end lag than most tethers, but still more than a normal grab, giving Prime one of the best grabs in the game, though still worse than someone like Dedede or Olimar.

Pummel = Phazon Infusion
Small amounts of phazon course through prime and into the foe, adding 1 second worth of phazon damage to their counter in an admittedly slow pummel. Regardless, it pushes the foe deeper into the effects of phazon, which is pretty scary if they're already taking damage rapidly.

Down Throw = Power Drain
Metroid Prime wraps the opponent more tightly in his tentacles and sucks all the phazon out of their body, dealing them 12% and upwards knockback that KOs at 165%. If the foe has no phazon infused into them, all that they suffer is the deathgrip hitbox, but if they did have phazon in them, it removes the poison effect. While that may seem bad, it serves as a way to remove the buff in case of emergency, though you'll have to start over again in regards to building up phazon damage on the foe.

Aside from that, this will temporarily supercharge Metroid Prime, increasing his movement speed, aerial speed, and aerial control a fair amount(making him the fastest character aerially in the game, and one of the faster grounded ones), and more importantly, cut his attack lag to 2/3rds of its normal value. This includes cutting charge time to 2/3rds its normal length, and this stacks with the phazon buff to charging moves, This effect lasts 1.5x as long as the opponent had waited out in poison damage, so if they were taking 4% per second, Metroid Prime gets this buff for 6 seconds. That said, even with just the effects of the pummel, this may be enough to get in a little early set up to get the rest of your game rolling.

Forward Throw = Calling All Metroids
Metroid Prime's brain pulses with electricity and changes to a slightly different color, depending on how you angle the move. It then tosses the foe, either angled up, forwards, or downwards depending on the angle you pick when tossing them, defaulting to forwards. At this point, all Metroids on stage will follow Prime's signal and swarm around the foe in a formation depending on the angle chosen. Regardless of angle it deals 9% and knockback that KOs at 250%.

Upwards: Prime's brain will turn a lighter pinkish color when you use this, and the Metroids will all form an upwards barracade above the foe, about a Ganondorf height above them. They will then start to swoop down individually to attempt to grab onto the foe on the ground, continuing to try to all above them to the best of their ability. The upwards wall will break up once the foe moves out from under it, which is made a little more difficult as the Metroids will deliberately try to keep the edges in check by swooping towards them.

Forwards: Prime's brain will turn a darkish purple color as the Metroids go for probably the most basic tactic of the lot and just attempt to dogpile the opponent one at a time, each taking its turn to grab at them. This variation is pretty simple to avoid, but it puts a lot of pressure on the foe if they try to deal with Prime at the same time, and Hunter Metroids add to their woes if one of them manages to tether the foe during that time.

Downwards: Prime's brain pulses a lighter purple color and the Metroids will all swarm towards Prime itself, attempting to protect Prime from the opponent. They'll form into a barrier that will only scatter back to their normal patterns once the foe manages to kill one of them, giving Prime a bit of room to start camping behind them with its various projectiles.

Back Throw = Overcharge
Metroid Prime supercharges the foe with electrical energy, before slamming them into the ground behind him with his tendrils, putting them in prone about half a battlefield platform behind Prime with 10%. If they land on phazon, the electricity in their body will disperse out into it, creating 2 electric projectiles identical to the ones in Up Special. Aside from just making it a bit hard for them to get out of prone because they can't just roll into the projectile with how slow it travels, this is a nice way to actually get out said projectiles without having to awkwardly use your recovery to do so, though it does require Prime to go on the offensive if he actually wants to use this. As an aside, if they land on the ground and not phazon, the electric hitbox will hit them for an extra 6%, which brings the throw up to the power of Dedede's Back Throw. However, without the electric projectiles, this isn't nearly as advantageous a position as said almighty BThrow.

Up Throw = Energy Blast
Metroid Prime unleashes a burst of electrical/telekinetic energy on the foe that blasts them upwards, dealing 13% and knockback that KOs at 145%. While generally, throwing the foe upwards is not super ideal for Prime, this throw comes into obvious use as his token KO throw when the foe has taken a horrific amount of phazon damage.

Final Smash
Metroid Prime stretches its tentacles as far as it can and raises them to the sky, as a wave similar to the one on Norfair rolls towards the stage. The wave is made entirely of phazon, and will hit the stage with about 1.5x the strength of the Norfair wave, before covering the entire stage in the stuff for 15 seconds. Aside from that, phazon will start pouring out of the side blast zones the whole time, reaching out 2 battlefield platforms from said blast zones in total and dealing 3x the damage the foe is currently taking from phazon every second and proportional knockback on contact. Lastly, the wave seems to have been full of Metroids, as you will get 3 free regular Metroids, 2 Hunters, and 1 Fission out of the deal. A pretty strong final smash, but one that has to be played off properly to get a maximal amount of value.
 
Last edited:

JOE!

Smash Hero
Joined
Oct 5, 2008
Messages
8,075
Location
Dedham, MA

Hydromb, the Atomic Pokemon, is a stand-alone legendary from the Zelend region of my own design. A Steel/Poison type, Hydromb is a man-made Pokemon made specifically as a weapon of war by Team DUSK as their ultimate "Modified Pokemon". Their agenda is mysterious even to the adventurers of the Zelend region, but one thing is certain: Team DUSK wants to take battling to the next level, at any cost.

In Smash Bros, Hydromb carries that same philosophy to battle with it's high risk, suicidal playstyle that values winning even over it's own well being.


☢☢☢☢☢ STATISTICS☢☢☢☢☢
SIZE /// ☢☢☢☢☢☢☢
WEIGHT /// ☢☢☢☢☢☢☢☢
GROUND /// ☢☢☢☢☢☢☢☢
AIR /// ☢☢☢☢☢☢☢☢☢☢
FALL /// ☢☢☢☢☢☢☢☢☢☢
TRACTION /// ☢☢
Hydromb is by no means a small fighter, being about the size of DK is he were missing the lower half of his body. Its metal frame adds to it's weight to be similar to Snake, and nuclear engines allow it to accelerate very quickly as well as hover just about a capsule height above the ground. However, it's poor traction as a result of the levitation result in poor turning once committed to a dash as well as general slipperiness. It also carries average jumps and poor air mobility despite it's incredible air speed, unable to drift back and forth very easily.


☢☢☢☢☢ SPECIALS☢☢☢☢☢

N-SPEC ☢☢☢ MELTDOWN
With a press of the B Button, Hydromb faces the camera and begins building up Radioactive Power thanks to Work-Up. As its power builds, the glow from its palms, eyes, mouth and rocket intensify up to a peak point of which after the lights dim and steam fizzes from it's hands and mouth in a moment of end lag. The key here is to manually release the move prior to that over-exertion, ideally at the very peak of the glow (just after 2 seconds)!

Once acquired, meltdown will increase the damage of all Hydromb's attacks by 1.1x to 2x the normal damage when peaked for as long as it remains in meltdown. However, this increase in damage comes at the price of dealing 1/4 the damage you deal to yourself as well as an escalating DoT on yourself the more radioactivity you Work-Up. This self inflicted DoT starts at a mere 1% every 10 seconds at the minimal amount, quickly becoming 1% every second at the peak.

Camping really is not an option while in meltdown, nor is defensive play as your increased offense demands aggressive tactics to keep ahead of the opposition. That said, if you wish to go to normal a second press of the B button will have the Work-Up sequence occur in reverse in a radial, multi-hitting leak of radioactive energy around Hydromb that lowers the amount of meltdown by 10% per 1/5th of a second (the same rate as it is boosted) for about a total hit of 20% from a maximum charge. Useful as a defensive measure as it will relieve yourself of any pressure from an ill attempted offensive rush when timed correctly, this release also allows you to stop the harmful process recoil damage if you wish to survive instead of merely destroy.


S-SPEC ☢☢☢ ATOMIC BEAM
Sticking an arm forward then opening it's claws outward, Hydromb fires one of the new moves found among some Zelend poison types: Atomic Beam! "AB" is a poison type special attack that never misses, similarly to Swift and the like, due to the ability of the beam to pierce through any cover the foe may be trying to hide behind.

In Smash, AB is similarly unique in that it has perfect priority in that nothing will stop it until it reaches it's maximum range of about 1.25 Final Destinations. This means it will continue through characters shields, traps, barriers and even the stage itself! Once it hits a target it will merely deal 6% damage with no hit-stun however, but it will leave those it hits with an odd aura similar to that found around Hydromb's hands for about 9 seconds.

The Atomic Pokemon has a certain affinity for it's unique elemental pairing, and bombarding enemies with radiation allows it to abuse it with an effect known as Fusion. While the foe has radiation placed upon them, any of Hydromb's attacks that connect with another radioactive effect (most hand attacks for example) will cause a reaction between the two that results in an explosion that scales in damage with Meltdown. With 0 meltdown in play, it will only deal an additional 6% with radial KB to the foe, whereas a full powered Meltdown strike will add 12%, adding a good deal of extra power to those attacks!

The fusion reaction strips the effect from the foe immediately, and additional AB's will not trigger nor refresh/stack these charges (though a more powerful AB will replace an old one). While the beam can be blocked easily given it has lag akin to Mario's Fsmash, tagging foes from afar is a great asset and the added radioactive bonus is just icing on the cake for when you go decide to really lay the pressure on.


U-SPEC ☢☢☢ EMP FLIGHT
The vents on it's rocket and hands glow blue momentarily as increased energy is output towards them, allowing Hydromb to use the move Fly! While in flight, you get a large momentum boost in the direction you choose similarly to Lucario's Extreme Speed that you can perform an aerial during or jump out of (if used from the ground), with the limitation being only one use per airtime unless hit. Conveniently, you can make sure a foe "hits back" with a well aimed Side B...

The launch can be angled anywhere within 180* in front of you, allowing straight up, straight down, straight ahead and everywhere in between. With lag and distance similar to Wolf's Up B, the flight has very little end lag once you touch a surface unless you use an aerial (a fun tactic is to go straight ahead and do a ground-level aerial) and suffer it's landing lag.


Similarly to Wolf/Fox/Falco, the beginning wind-up to the move has it's own property relating to the Blue Radiation: an EMP. The Electro-Magnetic-Pulse is a byproduct to powerful surges of atomic activity, able to scramble electrons and electrical activity. In smash, this translates into a nasty shield-damaging pulse of blue radiation around yourself before you burst forward. Foes hit by this pulse get cloaked in a feint blue aura, but take no damage. Instead, the EMP has disrupted their shield regeneration until the aura fades off after 9 seconds. While it may seem odd to take advantage of, a down angled path will cancel the move early so you can keep close to your EMP'd enemy if need be. Meltdown makes this easier as it increases the pulse's range from pretty much touch-range to about its own arm's length worth of disjoint all around it, at the cost of dealing 0.5-5% to itself.

Of special note, a foe with the Fusion effect from Atomic Beam and the EMP effect from this move will have a Blue atomic aura instead of a green one. During this time, the explosion from Fusion will become 50% stronger to deal 9-18% bonus damage! In general, the more radioactive effects Hydromb can stack onto the enemy, the more advantageous the situation becomes for it.


D-SPEC ☢☢☢ IRRADIATE
Its signature move, Irradiate is a field-clearing Poison type special attack on par with Self Destruct in terms of raw power. In smash, it is an outlet for it's ability "Fallout" first and foremost as it spreads deadly toxic radiation in a haze around himself. To start, Hydromb faces the camera and spreads its arms down to the sides much like DK's down smash as it lets out a metallic sounding roar.A pulse of green then emerges from it much like the outer layer of smart bomb with the interior being filled with volatile looking green haze that reaches a platform's radius around Hydromb within a fraction of a second. It's torso flashes green with a small explosion as it does this, with those who touch it taking 18% and respectable KB that can kill normally at high percentages, and can easily cover up for the end lag of about 3/4 of a second as various small vents and such close on Hydromb after the release.

The resulting Fallout from Irradiate will linger on the field for 16 seconds and deal 1% every second to any foes within it. Foes who are under the effects of Fission will take 1% every half second, and those that have been EMP'd will take the damage even if they shield or dodge inside the Fallout cloud. Additionally, the ability Fallout can be triggered in normal gameplay when Hydromb takes what'd be considered "Killer" knockback. Along with the red flash of lightning, Hydromb will flash green and release the "basic" Fallout cloud from it's location in a last-ditch effort before being sent flying, allowing it to come back with a small leg up on the foe.


Speaking of "basic", Irradiate changes drastically when Meltdown is thrown into the mix. Being it's signature move, Hydromb pours excess amounts of energy into it and as such takes bonus self damage for each level of Meltdown, essentially doubling the recoil in exchange for increasing the radius of the fallout cloud by about 20% per level. It goes all-out with a max meltdown however in a tremendously powerful Self-Destruct variant. With a maximum amount of power, Hydromb's inner hitbox actually becomes the size of a Platform itself and deals a whopping 36% and tremendous KB to anything it touches, at the cost of destroying Hydromb itself and thus it's current stock. However, the expenditure also leaves the entire screen covered in Fallout for a whole 32 seconds, which when used correctly can allow an incredible % lead for when you return to the fight even if the initial explosion did not kill.

Irradiate is a move not to be taken lightly by either Hydromb or it's opposition. The DoT is causes is impressive by itself when combined with Meltdown's normal boosts to your attacks, but the self harm and eventual self destruction can be equally taxing on Hydromb is the foes manage to avoid the powerful sweet-spot. Luckily foe foes, Fallout cannot "stack" in damage, but can be expanded so to speak as coverage will overlap. Performing it again inside a fallout cloud will expand it based on your position, etc, but be wary as nearly any disjoint will punish you hard up-front unless you suicide with it, and after the initial pulse you are very open to attack if they expect you to use it.


☢☢☢☢☢ STANDARDS☢☢☢☢☢

N-ATTACK ☢☢☢ POISON JAB
With a tap of A, Hydromb will perform an open-palm jab with one of it's claws to produce a small jet of radioactive energy forward with similar reach to Mario's Fsmash. Dealing 5% and horizontal knockback that pretty much "shoves" opponents forward and won't really kill except for a very well timed, stylish gimp at an edge at high % on some recoveries.

In addition the palm strike will push Hydromb back as well as it hovers above the ground, about 2/3 it's own length backwards once the jet comes out. Given the jab is about as fast as DK's own 1-2 punch as you can rapidly mash A to alternate palms for quick retreats while facing forward. A basic move, but a great option for getting out of a situation with some offense to cover yourself, space an attack that moves you forward/ranged attack, or even get off an edge quickly from behind.

S-TILT ☢☢☢ IRON HEAD
Hydromb boosts forward head-first over a short distance, ramming foes like a rocket as it tucks in it's arms to look the part. Traveling a total distance of a platform over the run of the move, the hitboxes are a bit deceptive despite the range. At the start of the move, Hydromb swiftly tucks in it's arms for a bit of start-up before having pretty much it's jab hitbox appear behind itself at it's rocket, with a split-second later having a very powerful radial hitbox appear on it's head as the boost begins for 9% and fairly strong knockback (with little KB growth, making it KO much later than it would appear). The boost portion of the move (about 1/2 a platform distance) then has a radial hitbox on its body for 5% and mediocre KB, with the last 1/3 of a platform's distance being end lag as it goes back to a neutral pose.

With punishable end lag, it may seem difficult to get a clean hit in neutral. This is where angles come into play! Iron head can be angled Up and Down with differing effects than the standard forward version. Up angled Iron head will travel about 1/2 a platform further in a short arc, having more ending lag in exchange for a much longer weak hitbox. Down Angled Iron head will only have the strong hit as you crash into the ground, having little end lag but causing yourself to take an additional 5% recoil in exchange for speed (as well as having very little range). Given it's semi predictability, Ftilt is a great conversion tool after you get a bit of momentum or space going for you, but can be tricky to use successfully in a neutral situation without some sort of punishment.

U-TILT ☢☢☢ CROSS POISON
Turning upwards, Hydromb's claws close into sharp points as radiation jets through them in violent green flames as it pokes both upwards and then drags to the sides in one fluid motion. The initial poke is a little telegraphed, but is still fairly fast for the range of the move (able to just poke through most every platform easily) as the two claws deal 6% and medial upward knockback as a sort of "sweetspot". As the atomic flames spew, each arm arcs downward to deal multiple dragging hits adding up to 10% with the final hit dealing low upwards knockback as they reach the floor.

Probably it's best option in neutral aside from a Jab to back off a foe, Cross Poison is a great combo, poke and anti-air tool. With little start up or end lag, the punishable portion comes from the duration of the animation as the multi-hit property makes it easy to beat out if foes are to challenge it. Given hoe you face forward/away from the standard pose during the move, an added bonus is that you can choose the direction you face with a press of left/right mid animation as the move ends. This can be a subtle yet effective mixup when combined with your boosting Ftilt and Jabs to space your moves properly given your volatile nature. You should worry about safety on occasion after all!

D-TILT ☢☢☢ METAL CLAW
Reaching back with it's camera-facing claw, the claw begins to spin like a buzzsaw for a bit of start up before swiftly slashing forward in a scooping motion, causing sparks along the floor before flying upwards in a vicious arc just in front of Hydromb. Dealing a solid 12%, Metal Claw has strong diagonal knockback and a great hitbox with low endlag, but the start-up leaves much to be desired.

Like his other standards, Metal Claw has a little quirk to it beyond being a decent "normal" as it has on-hit-cancel frames. What this means is that after the sparks fly, hitting with the spinning claws can be cancelled into any other action, including another Dtilt with the other arm (though you still start the end lag). Something like Dtilt->Up Andlged Ftilt can work nicely, Dtilt->Jab to make space vs a shield, or even just Dtilt->Jump and a falling Atomic Ray to cover their DI are all possibilities.

DASH-ATTACK ☢☢☢ POISON FANG
Rushing forward with claws and mouth open wide and burning with atomic power, Hydromb drags opponents forward for multiple hits before biting down for a final "pop up" hit. A very quick move, dealing about 11% overall as you travel about 1.5 platforms distance with a little end lag as it "cools down", it takes considerable commitment like with Utilt and can similarly be out prioritized. A decent move for crossing up a foe's defenses, it is also a nice approach for a foe under the effects of Fission as they will be dragged during the explosive hit. This can also be used for an offstage rush much like Ftilt, but each have their uses given Ftilt's solid hit and Dash Attack's multihit.


☢☢☢☢☢ GRAPPLE☢☢☢☢☢

GRAB+PUMMEL ☢☢☢ CRUSH CLAW
Hydromb's grab is fairly standard as it lashes out with a single claw with range and speed much like Snake's, and with a tap of A will viciously bite into foes for 3% with it's metal maw. While that and it's pivot grab are both fairly ordinary, its Dash Grab follows the normal style of high risk high reward like the rest of Hydromb's moves.

As you initiate dash grab, Hydromb billows atomic flames and travels the same distance as Dash Attack, the two moves looking nearly identical aside from how Hydromb's mouth is closed! Behaving just the same, Hydromb will boost forward 1.5 platforms and even off a ledge as it attempts to snag a foe, doing so automatically if they make contact with it's front or if it hits a shield, etc. If Hydromb catches a foe off-stage, it will hover in place mid air with its prey but with 1/2 the grab force to allow a much easier escape for foes. Missing a grab results in a spinning "whiff" animation as Hydromb slashes forward and does a 180* as it stops its momentum, which unfortunately takes about 1/3 of a second that may be spent at a high fall speed offstage...

Mixing up Dash Attack and Dash grab can really throw foes for a loop as you rocket back and forth onstage, but it should be noted that an evaded grab is incredibly punishable just like Dash Attack is very easy to intercept. However, the prize of getting a floating grab off an edge is fantastic for the Atomic Pokemon's unique grab game...

F-THROW ☢☢☢ ROCKET RUSH
Pressing forward will have Hydromb grab it's foe with two hands and boost forward a platform's length (with a 5% backwards hitting rocket hitbox to boot) before tossing them forward for 8% and low, set knockback of about 1/2 a platform away from itself. As Hydromb boosts forward, any other foes will take 8% and radial knockback if they are hit by the one in Hydromb's clutches, with the grabbed victim taking 2% as well. All in all a decent throw with great utility when getting foes off-stage, as well as barging through other enemies and objects on it.

A special thing occurs when you hold your pummel and perform this throw, or any of your throws for that matter. Extending the throw's start up as it charges for a solid 2 seconds, Hydromb will perform a Super Throw!

Super Throws do pretty much what they say on the can, as they pretty much extend the "grab duration" for up to 2 seconds before use (the same as smash attacks), during which time opponents are still free to mash out as if they have not been thrown yet, and can even continue to mash at 1.25x difficulty during the throw itself and leave Hydromb in a precarious situation. Meltdown can halve the time needed to charge a throw, but it will deal an extra tick of DoT while charging.

For Rocket Rush, a charged Fthrow increases the range to a whopping 3 platforms while taking the same amount of time, bashing right past anything in their way and destroying any sorts of walls/traps with the foe taking the brunt of the damage! This can easily send both parties far offstage, leaving the thrown victim prone to a gimp situation. If mashed out of, the grabbed foe will be popped up and behind Hydromb as Hydromb tumbles for a brief moment, possibly to it's own death with it's high fall speed and vengeful foe behind it. On stage this can still be used for spacing purposes and ramming through more foes, but in general is incredibly unsafe unless you use it for launching the both of you off a ledge.

B-THROW ☢☢☢ SHUTTLE LOOP
Grabbing the foe with both claws and leaning upwards, Hydromb creates a blast with it's rocket as it performs a suplex backwards with the foe that slams them into the ground about half a platform behind where it started the throw. The slam deals 9% and pops the foe up and backwards slightly, leaving both in a neutral state as the suplex is a bit laggy to recover from for Hydromb. If done facing away from a ledge, the open air allows Hydromb to do a better "loop", swooping in and hitting the ground at an angle that pops the foe offstage at a sharper diagonal and leaves Hydromb clinging to the edge.

A charged Shuttle Loop will fly up twice as high and move back twice as far, with the kicker being that you continue if you do the loop off an edge. Normally, this will slam a foe off the side of the stage and pop them out sideways behind you for an additional 6%, but with ideal spacing (and if the stage has no infinite wall or column like with Pokemon Stadium) Hydromb will actually fly under a stage! While doing so, it will flip over upside down to drag it's victim along the bottom of the stage to deal damage equivalent to Fox's laser until it reaches below the opposite edge where it flips over again and finishes the suplex for the standard 9% and diagonal KB, making for an incredibly potent damaging throw.

If a foe breaks free, Hydromb will fall as they get popped up and toward the stage. Hydromb could make it back, but he is a pretty fast faller naturally and it'd be in a very bad spot, especially if they decide to break free when under a stage as their knockback sends them toward an edge while Hydromb flails beneath.


U-THROW ☢☢☢ ATOMIC DROP
Similarly to Bthrow, Atomic drop has Hydromb lean upward, but this time orienting itself totally vertically with some start up before launching skyward about 2x it's height, dealing 3 hits of 2% to the foe before slamming them down to the ground for another 2%, for a total of 8%. The toss downward can be teched, leading to an aerial tech chase or a grounded one thanks to Hydromb's fast fall, but if missed will actually pop the foe off the ground to meet Hydromb who can intercept with whatever it wants.

A charged Atomic Drop takes the rocket portion to new heights as it flies upward about 10 Ganondorfs! Once at that height, it will then flip forward and do a spinning nose-dive to the ground and ending in a crash for 6% that pops both Hydromb and it's foe into the air, the Atomic Pokemon having significantly less hitstun however. It should be noted that on the ascent and decent the hits of 2% keep coming, making a standard trip on say, FD, deal a total of 16% worth of multihit alone!


While not as dynamic as the Shuttle Loop, Platforms and other vertical parts of the arena can offer their own use to the Super Atomic Drop. For instance, Uthrowing onto a high platform can net earlier KOs as you get the foe higher to the top blastzone, making for an easier star KO. Or simply because it looks cool and can potentially out-damage Bthrow on certain stages if you don't need to try and gimp with the horizontal KB of the stage-slam.

D-THROW ☢☢☢ ATOMIC VENT
Slamming it's foe to the ground, Hydromb opens up various panels on it's body and releases a burst of radioactive energy while they have a similar pose to Bowser's Dthrow. The burst deals 10% and diagonally upward knockback that does decent KB but won't really kill unless you have it dealing 20% via meltdown and having them at rather high %. Afterwards, Hydromb steams a moment as it closes the panels giving the throw punishable lag.

Charged Atomic vent will straight up kill Hydromb in exchange for possibly KO'ing the foe. Dealing 14%, the knockback radically increases to that of a Bob-omb's and can be incredibly effective with meltdown. Overall it's potentially most guaranteed throw power-wise, you do straight up remove your stock in exchange (triggering Fallout mind you), but an opponent that mashes out experiences 0 lag and can easily just shield grab, hit it, or run away to leave Hydromb to die for trying the throw.


☢☢☢☢☢ AERIALS☢☢☢☢☢

N-AERIAL ☢☢☢ NUCLEUS
Opening it's vents and glowing brightly with green energy, 3 small orbs of radiation about the size of Peach's turnips emerge and orbit Hydromb in much the same way as an atom. Each of the orbs will orbit around twice at much the same speed as that Gif, dealing multihit to those they touch that on average deals about 5% as it drags across the foe, but the potential for higher damage is there as they get hit by multiple orbs.

Given it's low end lag as the orbs dissipate and medial start-up, it makes for an excellent conversion tool given the unique range/orbit of it. Falling down into it from say, Uthrow or for general returns to the floor can be wonderful, as well as just following up on launchers for offensive pressure. Like with many of his multihits, it is possible to smack through the orbs and hit Hydromb, if not snipe a gab between orbits, so it is not all safe.

F-AERIAL ☢☢☢ BUZZSAW SLICE
While Nucleus is great for a general "aerial" spacer, Fair is a much more concentrated blow. The Buzzsaw motion from metal claw returns as Hydromb swings an arm forward, pulling it to the side for just a brief moment to get it revving, and slices at foes for multiple hits as it travels in front of Hydromb in a turning motion before it rights itself midair for a smidge of end lag. All in all taking about the same time as Mario's Fair.

Dealing a total of 14% over 7 hits, each hit actually deals light knockback as opposed to normal multi-hit moves, making it actually push foes away at higher %. The lingering nature allows Hydromb to use it as a sort of wall of pain, or even a killer vs a shielding foe given a grounded Up B approach to slice into a defending opponent.

B-AERIAL ☢☢☢ ATOMIC SLASH
Flipping around swiftly, Hydromb stabs a hand behind itself then creates a jet of atomic flames much like with Up Tilt, before quickly regaining control while facing the new direction. Like with Jab, the burst of energy will also send Hydromb backwards in much the same manner, dealing 6% with the stab and then 5% with the burst for a possible 11% total, and much higher KB on the jet (Low - Mid).

A bit more precise than Fair due to the short duration, it can excel at pushing foes back a bit easier (though the burst is radial, so it can send foes upward with good DI). One of the main uses is to control your momentum mid-air thanks to the backwards push and although it turns you around, a Breversed Atomic Ray or even Meltdown can turn you back for another push to get some space covered for your Up B.

U-AERIAL ☢☢☢ TOXIC BARRAGE
Opening it's mouth as it glows with atomic energy, Hydromb whips it's head back while turning to face the camera, spraying a jet of atomic flame the whole time before reorienting itself back to a neutral position for some end lag. The spray of flames is the size of Toon Link's sword and covers a 120* arc as it deals 9% and medial directional KB. This means that foes are sent in the direction the spray is shooting out so at the first hit it will send foes diagonally forward, the middle directly up, and the latter diagonally behind Hydromb.

A good "scoop" from an Up B, Toxic Barrage is an amazing juggle tool all around thanks to the dynamic knockback and great disjointed arc. However, it is your most punishable aerial due to the limited hitbox above you as well as the end lag, making a whiff easily capitalized upon.

D-AERIAL ☢☢☢ ROCKET BARRAGE
Turning to face the camera yet again, Hydromb leans its body down and puts its hands to either side as it blasts atomic energy from both palms and its rocket! The rocket is a sweetspot here as touching the actual vent itself is a meteor hitbox for 10% that only lasts 1 frame, while the small jet is just a radial one for 8% (the meteor will out-prioritize the jet so they wont both hit).

The palms deal 7% and diagonally-away knockback, which can be useful for popping foes off the ground or in aerial battles (low % can lead to a Uair or Double Jump Nair). While generally useful as a means to get foes into the air from the air yourself, Rocket barrage also serves as a rare KO option, though with very tricky timing due to the start up and then subsequent end lags fare exceeding the time the hitboxes are out.

Dair also alters momentum like with Bair, actually halting your fall speed for a moment as the hitboxes appear. This can be useful as a recovery or just offensive mixup as you can stall out to follow an opponent on the ground, escape a followup yourself, or simply extend your airtime offstage. Be warned however, that each consecutive use of Dair has diminishing returns, meaning the stall is reduced by about 1/3 each time until the 4th use offers no momentum bonuses at all.


☢☢☢☢☢ SMASHES☢☢☢☢☢

S-SMASH ☢☢☢ PROTON VOLLEY
Creating an "atom" in each of it's hands as it charges, Hydromb will bring one hand back while the other stays out in front of it (all the while being a hitbox much the same as the orbs from Nair) before violently slamming the atoms into each other to send out a shockwave of Protons!

A smash attack not unlike Snake's brawl one in speed, the initial explosion of the collision is about the size of Hydromb's head that deals 10-14% and medium radial knockback that can KO by itself at late %'s such as 170+ (though with a meltdown boost...). After the explosion, 2 - 6 Protons will shoot off haphazardly outward based on the charge, resembling the small orbs around its hands in the picture at the top of the set. These protons do 2% each and hitstun to those they hit, and only travel about a platform's distance away before fading into nothingness.

This is unless they are in a Fallout Cloud. Protons will exist until they leave the cloud (or hit an opponent) once made, and will eventually begin to wander around randomly within it (sometimes floating out of it and destroying themselves) once the momentum from Fsmash leaves them. Interestingly, Protons will home in on EMP'd foes, which allows you to circumvent their random patterns after being shot out. Furthermore, foes under the Fusion effect will create a new proton that fires off randomly once a proton hits them, setting off the Fission Explosion. Protons also will encircle Hydromb as it performs the charge up or release of Meltdown, offering a bit of cover before wandering off again all around it.


While the close range hit of Fsmash (with the charge hitbox trapping a foe potentially!) can be neat, the real highlight to the move is Proton creation. Ideally used from a distance for this purpose, due to the overall lag, Proton Volley still has a tons of uses based on your spacing and situation, and should be a great experimental move for many Hydromb mains.

D-SMASH ☢☢☢ ELECTRON HAZE
Opening vents on its arms as it charges, Hydromb then sprays jets of atomic flame to either side of itself to coat the floor! Hydromb's quickest smash, Electron haze coats an area the size of 1 platform in sickly radiation for 2-4 seconds based on charge. Foes who touch the irradiated flames get popped upward for 8-12% and medial knockback. In all, the smash takes about as long as DK's, but you cannot ignite another area until the first fizzles out with the hands simply being the hitbox to pop foes up if you try this again.

Like with Fsmash, Dsmash also interacts with Hydromb's specials. Fallout clouds actually deal 2% per hit near the flames, up to about a Ganon's height above them. EMP'd foes actually will be attracted to the flames instead of popped up, and will take the damage once per second but no hitstun, making for an incredible ground pressure situation. Foes with Fusion will have the fusion effect enhanced once they touch the flames, the aura becoming brighter for the duration and dealing 1.5x more damage once detonated! Meltdown in the meantime will increase the range up to a max area of 2 platforms based on the amount, allowing more leeway.

While not really a killer, Electron Haze follows the general gameplan of dishing out obscene damage to your foes. But be careful in it's use, as while it is it's quickest smash attack, that isn't saying much when it is still laggy compared to most any other smash in the game and being punished is extra harmful to Hydromb due to it's tendency to wrack damage on itself as well.

U-SMASH ☢☢☢ ATOM BOMB
Facing the camera, Hydromb's palms and mouth glow as it raises it's hands together above its mouth and begins to create a large Atom similar to Fsmash. The atom will multihit foes as you charge like usual, but once released will float in the air and become a volatile bomb for all intents and purposes, dealing 9-13% and radial knockback. Taking as long as it's Fsmash, the move has similar properties though much less mobile/ranged than it's proton-spewing counterpart.

To start, it shares the homing property of Protons vs EMP'd foes, but unlike their Jigglypuff air speed, the atom bomb only travels at about Jiggly's walk. Due to the energy involved, the Atom can only exist within Fallout, otherwise it merely explodes above Hydromb's head! Not to say this is a bad thing as in general you would have some on the stage to work with, and it can always be useful to detonate a hitbox directly above you. Fusion and the Atom Bomb have an interesting reaction where the Atom Bomb is infused within the Fusion effect on the foe. This adds the damage and half the knockback to the eventual fusion explosion from the bomb, and can be downright devastating after a Dsmash has invigorated the aura, and hard to avoid when Protons can set off the explosion the foe was trying to avoid. Finally, Meltdown can increase the size and damage of the Atom by 1.5x , going from the size of Olimar to a Party ball, but damaging you 1.5x as much for making it.

Combined, your smashes can make for devastating stage presence with your specials and general combo game, but are all highly punishable with notable start up. Atom Bomb is best used as hard-read material for a foe coming in from above, or from afar within a Fallout cloud to create a sort of trap. Only 1 atom can be out at a time, with another input of Usmash manually detonating the 1st to create the next. Creative play is recommended here as simply having one of these out along with protons can really put the atomic scare into your foe's heads!


☢☢☢☢☢ FINAL SMASH☢☢☢☢☢

FINAL-SMASH ☢☢☢ LIVING WEAPON
All of Hydromb's vents open up as it puts its hands together, the Nuclear aura from Nair surrounding it as it unleashes a Super-Atomic-Ray! After the initial Bowser-width blast for 2x the normal damage, Hydromb is free to fly around and tap either attack button to shoot out more souped-up Atomic Rays, all the while being covered in it's Nair, producing a Fallout stream wherever it travels, and even EMP'ing those who touch its body. After 10 seconds however, Living Weapon wears off and it is able to be knocked back again.


☢☢☢☢☢ PLAYSTYLE☢☢☢☢☢
Hydromb is a character of extremes if there ever was one. Between volatile weight and fall speed stats for being pressured, extreme movement capabilities, extreme damage on both foes and itself, and even multiple suicide options to hammer in a lead, Hydromb takes a special kind of player to master.

Everything starts with it's Nspec: Meltdown. That move alone dictates the pace of the match as a Hydromb that forgoes it will have a mush safer yet slower paced game vs the opponent, whereas one that keeps the nuclear furnace burning will be able to kill like no other, but just as easily destroyed. From there, it's other specials all have key interactions with one another, and especially the smash attacks which can all combine to some serious kill power or damage. An EMP'd, Dsmashed, full Meltdown, Atom Bombed Fusion effect will deal an incredible 43.5%! The trick however is to get the opponent into such a situation without being punished yourself, luckily you have momentum moves on your side to get the edge.

While the main plan is to deal as much damage as possible to your opponents (with the downside of hurting yourself in the process), a side-game to Hydromb is how it is a rocket too! Multiple moves alter its spacing on the battlefield, which can throw off a foe hellbent on destroying you before you destroy them. Dair's stall in particular can buy some precious time to get a Meltdown if high in the air, for example. From there, it is all a matter of lining up everything to get the most out of your moves. Fusion in particular will only activate when an atomic attack (that isn't a smash) hits them, meaning the 1st hit of Utilt, Dtilt, Ftilt, Fair, the 1st hit of Bair, and all your throws will not set it off. This is valuable because it allows you to pick and choose how to manipulate your foe, do you peg them with Atomic Ray every once in a while and avoid atomic moves for a bit till the time is right to use it as a potent finisher? Or go for it right away to keep the damage pouring in? It's all up to you as a player. In either event, all of its standards and aerials play nicely together to make a solid combo and spacing game with itself, able to get crazy momentum going off of a hit thanks to sheer damage output, but it must be careful not to go too hard else one wrong read leads to itself being the victim of a combo!

It's throw game is of special note given the ability to perform Super Throws. It is not always beneficial to perform one after all, as the quicker standard throws usually have different properties and generally do not matter on the stage choice, whereas the laggier supers at times rely entirely on the stage or even what's on it (Fthrow's "plowing" effect). But, as with most of Hydromb's gameplan it is up to the player to decide how much risk they want to take with their options. A Super throw is not as safe as a normal by any means, but when done just right it can really turn a situation in your favor.

One must essentially be fearless and able to instill fear into your foes in order to keep a lead with all the crazy risks associated with probably the most unwieldy character on the roster. Kills come and go frequently in each one of it's matchups, but it is all a matter of securing them in your end that counts. Nothing else matters to Hydromb but pushing an advantage, and it certainly has all the tools to do so, even if it kills it!
 
Last edited:

ChaosKiwi

Smash Apprentice
Joined
Feb 1, 2014
Messages
104
NNID
ChaosKiwi
TYRANNOSAURUS REX
The Tyrant Lizard King


The Tyrannosaurus Rex, perhaps the most well known of all dinosaurs, was one of the world's most dangerous creatures. The T. Rex was a bipedal carnivorous dinosaur, the apex predator of its environment, and one of the last non-avian dinosaurs to evolve before the Great Extinction Event. The T. Rex is theorized to be an opportunistic predator, and Smash may be the greatest opportunity ever. There is quite a lot of Prey for her to hunt on the battlefield.

STATISTICS
Size- 12
Weight- 10
Ground Speed- 6
Jumps- 3
Aerial Speed- 5
Falling Speed- 8
Traction- 8


SPECIALS
Neutral Special- Apex Predator
The T. Rex was at the top of the food chain for a reason.

This Special is can be charged. While charging, T. Rex reels back and growls. T. Rex can walk around with the charge stored, but will lose it if she flinches.

Upon release of the input, T. Rex leans forward releases her attack: A powerful roar. The roar has a range 1 SBB forward, and lasts a half second. However, with more charge, it extends to 1.5 SBBs and .75 seconds. The roar does 6% and high pushback (it does not cause flinching), no matter the charge.

So, what is the big draw of this attack? Well, when an unfortunate foe is caught in the roar, they are marked as Prey for fifteen seconds, indicated by a small icon above their head. What are the effects of being Prey. Well, that varies from attack to attack, so you'll have to read on, true believer.

Only one foe can be marked as Prey at a time, and if multiple foes are hit by the roar, then whoever is closest to the T. Rex/Hit first is the Prey. After the fifteen seconds are up, a foe cannot be marked again for 10 seconds.

Side Special- An Impeccable Hunter
Lowering her head and snorting, T. Rex starts charging straight forward, faster than her running speed. Normally, this attack acts as a sort of ramming move, good for horizontal recovery. Anybody T. Rex hits headfirst takes 15% and high horizontal knockback. Seems simple, yeah?

Well, if the foe hit is Prey, T. Rex will instead catch them in her mouth, dealing them 15% via, you know, biting them. She'll then follow this up with a throw of the foe, aimed in whichever direction the player angles the stick after catching the foe, with the same knockback hitting them normally would have done.

The knockback can KO at 170%. T. Rex will not stop running until she runs to an edge, hits a wall, runs into a foe, or runs four and a half SBBs.

While running, her head has super armor, and if the attack hitting her originates from Prey, her upper back shares this armor. She's still vulnerable from behind and below, however.

Up Special- Nothing Can Escape
Growling, T. Rex crouches where she is. Looking up, she waits for a brief period of time. Should anybody pass above her within a radius of one stage builder block, she will pounce! Unless the foe has very good air dodging skills, they will be caught in her maw. Quickly, she twists her body, throwing the foe downward. All in all, the foe takes 12% from the bite, should they be thrown onto the ground, an additional 4%.

If used in air, T. Rex will instead perform a slight airjump upwards, biting above herself regardless of whether or not there is a foe there. If a foe is within her reach, the move acts the same as when used on ground: The foe is tossed downwards at high speed.

Should an enemy be marked as Prey, they can be detected by this attack within 2 SBBs, not just 1. Not a big difference, admittedly, but it could be just what you need!

Down Special- Walk The Dinosaur
Open the door, get on the floor... you know the rest. T. Rex gives what can be described only as a reptilian smile, before stomping hard on the ground (or air) below her. The more you press this input in quick succession, the more you stomp, similar to Donkey Kong's Hand Slap. Now, depending on where the foe is this does different things. Should they (for whatever reason) be directly below her foot when it comes down, they take 16%.

On the ground, however, the foe can be affected without being directly under the stomp. If they are within one SBB of T. Rex, behind or ahead of her, they are dealt 6% and flung into the air! This seems pretty powerful, yeah?

The main downsides are A) If this attack is used in air, T. Rex will merely paddle her feet uselessly, and B) T. Rex cannot move while using this attack.

Should the foe be Prey, you can, immediately after hitting them into the air with this attack, press A (or whatever you've set the input for Standard Moves to) to headbutt them, sending them flying horizontally with enough knockback to KO at 160%.
STANDARDS
Jab- Just a Pinch
Not a literal pinch, mind you. More of a bite. And since the T. Rex has seven inch serrated teeth, this little nibble hurts like Hell, dealing 5% per "pinch"

This attack has no added effect on Prey, aside from doing slightly lower knockback to allow T. Rex to easily follow it up with another Jab.

Side Tilt- Tail Swipe
What did you expect? Little known fact: The T. Rex can only turn 45 degrees in a full second. This T. Rex, however, is much... more agile, I suppose, capable of doing a full 360 in a fraction of the time. She does a spin, whipping her tail around herself to deal 12% damage. This can KO at 250%, but if the foe is Prey, then it can KO at 220%.
Up Tilt- A Bite Above the Rest
Heh, puns. As you can tell, T. Rex takes a small hop before biting above herself at a forty-five degree angle. This has less range than her Up Special, and deals 11% damage. Simple, eh?

Well, if the foe is Prey, then T. Rex's bite does additional hitstun before the foe is knocked back. What is this good for? Perhaps comboing quickly into her Up Special, or something? It's up to you. I'm just making suggestions.

Down Tilt- A Feeble Attack
Most likely her most useless move... conditionally. Crouching slightly, T. Rex swipes her claws in front of herself repeatedly, dealing 10% over five hits, with little knockback (though it's good for keeping foes at bay). Very little range. If you wanna KO with this, make sure your foe is at 300% or more, baby!

If the hit foe is Prey, however, watch out! T. Rex will grab her foe after the first 2% hit! Yes, those arms may be small, but their still connected to 9 tons of raw muscle. So, T. Rex, holding her foe by the feet or closest applicable appendage, smashes them face (or closest applicable whatever) first into the ground, twice, before chucking them aside. It's a sort of command grab, dealing a total (with the initial hit) 14% and KOing at 190%.

Dash Attack- You Will Be Caught
Without missing a beat, T. Rex pulls a scene directly from Jurassic Park, leaning down and roaring, her open mouth becoming a hitbox as she runs. People caught in it are sent flying with 13% damage. Her mouth remains open for almost a second, during which time she cannot use other attacks or stop running, though she can be hit out of it.

To Prey, this attack is especially dangerous, as it causes T. Rex to quickly swipe her head upwards upon the initial hit, dealing an additonial 3% and getting them in the perfect position for a followup aerial or Up Special, or maybe an Up Tilt?
SMASHES
Side Smash- Feeble Smash
Another attack utilizing T. Rex's absurdly strong feeble arms, then? Right-o. Performing a small hop forwards, T. Rex reaches with her claws for her foe. Should she hit them with this, they are caught in her clutches! Don't worry, though, because immediately afterwards she grabs one end of the foe with each arm and, like a rubber band, flings them upwards at a 40 degree angle. This all happens in about a quarter of a second, and deals 22% with knockback that KOs at 140% at full charge.

To Prey, however, T. Rex will throw the enemy at completely vertical angle upwards, before headbutting them at the same angle as before, dealing an additional 3%. This effect only happens if the smash is fully charged.

Up Smash- Skull Smash
Starting with her head near the ground, T. Rex whips her head back with such finesse a hair model would cry. The hitbox of this attack is an arc, reaching from the ground directly in front of her to straight above her. Knockback is in whichever direction you'd expect based on the angle her head hit the enemy.

Oh! And damage. Well, you see, the damage depends on where in the arc the foe was hit. The nearer to the bottom, the less the damage. The bottom is 19% at the weakest, but with the most knockback, while the top of the arc is the inverse, dealing 24% and relatively know knockback. The bottom of the arc can KO at 130%, while the top needs 180%.

This smash has no added effects on Prey aside from the knockback KOing 10% earlier at every point in the arc.

Down Smash- Tail Smash
T. Rex turns, facing her back to the camera. She then whips her tail from side to side, dealing 20% on contact with an enemy. Pretty simple, all things considered. The knockback from this move can KO at 150%.

Should the foe hit be Prey, however, things get marginally more complicated! She turns in whichever direction was the one the foe was hit in, and, before they are sent flying, bites them, slamming them into the ground and bringing the damage total to 25%.
AERIALS
Neutral Aerial- Spinning Tail Strike of Great Justice!
Similar to her Side Tilt, T. Rex does a 360, this time in air. This one is slightly angle, however, hitting at a 45 degree angle upwards behind her and a 45 degree angle downwards in front of her. This does 13%, and, to Prey, spikes foes downwards if hit in front, or does a very high knockback smash upwards if hit by the back swipe.

Forward Aerial- Air Bite Thing
There is a slight delay, as T. Rex leans forwards (doing so with such force that she is actually pulled in that direction!) with her mouth open, before snapping it shut like a bear trap! With legs! And other T. Rex body parts! In doing so, she deals the foe 14%, and high horizontal knockback. Due to the small delay being a sort of stall, you can easily shorthop this move. Rad!

This attack does 16% to Prey, but otherwise has no added effect. What a ripoff!

Down Aerial- Air Stomper
A classic maneuver, my friends. Hastening her fall slightly, T. Rex performs three stomps midair. They deal 4%, each, though if you hit with one they are all sure to hit. The third kick has a sweet spot in the exact middle of the foot, meteor smashing any unlucky victims. If any of these kicks hit the ground, they create a small shockwave, half an SBB on either side of T. Rex, which deals 7%. If this happens, that kick will not be followed up by any others.

Upon striking a Prey foe, T. Rex will, instead of ending on the third kick, perform another, 3% dealing fourth kick. This kick inherits the properties of the traditional third one, meteor smashing anybody in the middle of the foot.

Skilled foes can, after being hit by two kicks (because the way one kick hits means that the unfortunate soul will ALWAYS be hit with a followup), air dodge to avoid any followup kicks, so be wary of that!
Back Aerial- You Think You're Safe?
Well, you aren't! Doing a move that... really defies physics, now that I really consider it, T. Rex pushes herself back (like an inverse of her FAir), using her own back as a large bludgeon of sorts. This is a good means of recovering a short distance, again similar to T. Rex's FAir.

It does 13% and moderate knockback, KOing at 200%. However, if the foe is Prey, then T. Rex will, immediately after hitting, turn downwards slightly, altering the trajectory of the knockback to a 30 degree downward angle, and dealing a total 16% instead of 13%.
Up Aerial- Feeble Uppercut!
Just kidding, ha. T. Rex isn't dumb enough to try to use her feeble arms in an uppercut attack, especially not in the air! She may have a peanut brain, but she's not... a peabrain. I guess. In reality, her Up Air move is an upwards swipe of her tail, with such force that foes are blasted in whatever direction T. Rex is facing, taking 12% damage. The hitbox of this is the best of all her aerials, extending her tail's length upwards (and that tail is a good portion of her body size).

This move has no added effects on Prey. Lame.
GRABS & THROWS
Grab- The Strongest Biting Force of Any Terrestrial Predator
It's true, you know. The name of this grab. The T. Rex had the strongest jaw of any creature to ever walk the Earth. Pretty rad, right? Well, she makes good use of this trait, biting in front of herself to grab foes. Additionally, foes immediately take 4% if this grab connects, if they're prey.
Pummel- What Else Could This Be?
She... tightens her grip on her foe, via biting down on them. Somewhat obvious, I'd say. 4% per hit.
Up Throw- You're The Pteranodons' Problem Now
A simple throw, specifically a directional throw, the kind that FA hates. T. Rex shakes the foe around a bit, dealing 12% over four hits, before flinging them straight upwards. Now, what's the benefit of this move? Well, it's simply a directional throw, you silly goose.

Unless, of course, the foe flung is Prey. Then, they're simply thrown a bit lower than normal. What's the benefit of this, you ask? How could being thrown lower possibly help? Well, you see, them being prey throws them a bit lower... within
one point five SBB's, in fact. And it, coincidentally, eliminates the ending lag from this throw, allowing T. Rex to immediately combo into her up special, allowing for a move that does even higher knockback that the vanilla throw would have done! How's that grab ya?

Down Throw- Like a Fossil
T. Rex spits her foe to the ground, head first, dealing an initial 5%. Afterwards, she gives them a very powerful kick, sending them flying horizontally forwards with a slight downward trajectory and with an additional 10% damage. Now, where does the name of this attack come from?

Well, you see, when the foe this is performed on is in Prey Mode, they are, instead of kicked, stomped on, repeatedly. This does 12$ additional damage as opposed to 10%.

Forward Throw- Just Try to Break Free!
This "throw" is similar in many ways to T. Rex's side special. She, with the foe still in her mouth, runs forward, dealing 4% for every SBB she runs. Should she reach an edge, she will stop short, the foe flying free of her mouth and being sent straight ahead.

Now, the foe can escape from this, to avoid taking insane amounts of damage. They escape from this move as they would any grab, by essentially button mashing. However, escaping this grip is much tougher than escaping your average grab, so try your best, you unlucky captives!

This throw does not have any added effect when the captive is Prey.

Back Throw- The Things I Do to Provide for my Family
Golly, I didn't know T. Rex was a mommy! But yes, she has a litter of T. Rex pups. Tossing the foe behind her back, a pair of baby Tyrannosauruses appear, pouncing on their latest meal. This deals 4% every second, and, similar to her previous throw, must be manually escaped by her foe. What makes this move different, however, is that the captive is kept in place, allowing T. Rex to go off and do other things while her kiddies rack up some damage. Want that item before your foe gets it? Ok! Wanna set up some sort of trap? You got it! Don't worry about your kids, they're big, they can take care of themselves.

Once the foe escapes, the babies scatter.

If the foe is Prey, then a third child appears, the runt of the litter. This makes the grab slightly more difficult to escape, and causes it to do 5% per second instead of 4%.
FINAL SMASH
Mass Extinction


T. Rex senses something, and quickly bolts off-screen. An instant later, a huge (about four SBBs across) meteor strikes her previous location, creating a massive explosion! The explosion does more damage to those who are closer to the impact point, maxing at 45%. The knockback is tremendous if you're right there when it happens, so watch out! Afterwards, the sky (should this stage have one) turns red for the next thirty seconds or so, but this is purely cosmetic. Once the smoke clears, T. Rex and her trio of kids return to the stage, somehow unharmed, the kids scattering when mommy returns to combat.

PLAYSTYLE
Terrestrial Terror.
The T. Rex is not a very combo oriented character. She fights relying mainly on her brute strength and the fact that, on the ground, she has some very powerful attacks. Just... keep her out of the air.


Your best bet is to get a foe into Prey Mode as soon as possible, and then wail on them in the twenty seconds of intense power you have. After that, it's mostly following that up with using the damage you gave them to KO them easier.
 
Last edited:

ForwardArrow

Smash Ace
Joined
Aug 17, 2011
Messages
502
Hydromb
I'm not gonna lie JOE you're probably the single best MYMer right now when it comes to organization. Love those nuclear symbols dude.

The set is definitely my kind of thing to start with when the whole thing has a bit of a "suicide bomber" playstyle, where he can become insanely powerful through use of Meltdown, but at a price of survivability. The other specials create a rather fun playstyle of building up a super powerful explosive effect on the foe(which really comes to light in the Smashes), as well as the Down Special which has some very fun high risk high reward elements to it. The Standards and Aerials aren't terribly flashy, but they have a lot of little nuances to make them interesting, and naturally become even moreso when you consider the strengths and weaknesses of them in the context of the specials. Its "just" rushdown arguably, but with the specific nature of some of the hitboxes it actually has a lot of depth in the context of Meltdown, and there's reason to focus on certain moves over another if you want to start further building up the radiation explosion. The grab game is actually good now that its no longer suicide focused, giving Hydromb yet more high risk/high reward material to work with and while it can still occasionally work into suicides, there's at least more to it now, even if arguably pulling off a 2 second charge for a throw is somewhat impractical and the rewards could be argued as not worth it.

The Smashes were what really sold me on the set though, as all 3 are amazingly creative and have some pretty great interactions with the specials. I particularly like the super powerful explosive you can basically build on the foe via the Down/Up Smashes and the Specials, as well as the insanely varied uses of the protons in Forward Smash. It builds on his playstyle a lot and gives him tons of room to get creative. The main complaints I can really level against the set is its occasionally a tad boring, I dislike the Dash Attack/Dash Grab animation fake out because its an unnecessary mindgame that doesn't feel fitting, and it sometimes feels a little too powerful or too weak on specific attacks or effects(the Fallout boost on Down Smash is rather weak for example, while the suicide Down Special giving 32 seconds of screen covering Fallout may be too much). But you know, with the grab game fixed it doesn't have terribly many flaws, and I actually think this is your best JOE.

T-Rex
I probably should get around to commenting Randy before the contest ends, but I'd say this set is a bit of a step back from him, albeit justified because this is a much harder character. T-Rex's concept of marking foes for pray is a remotely interesting one, I think an attack that is fairly weak but when landed gives a buff is pretty fun... albeit the balance is out of whack. I think the changes to attacks should be more dramatic/powerful than they are, but T-Rex shouldn't have nearly as much time to abuse it, it'd make the playstyle a bit more complex(in a good way really) and fun than it is right now. As is, it just comes down to landing a move once in a while to make sure you stay extra strong, and really the difference is rarely interesting or powerful enough to make the mechanic worthwhile. Aside from that, there really isn't much in the way of flow aside from comboing into Up Special and I find the arm attacks and T-Rex babies on DThrow awkward, though the set doesn't really commit any particularly large mistakes and the concept feels a lot more tangible than a 1/10 movement speed debuff.
 

JOE!

Smash Hero
Joined
Oct 5, 2008
Messages
8,075
Location
Dedham, MA
(the Fallout boost on Down Smash is rather weak for example, while the suicide Down Special giving 32 seconds of screen covering Fallout may be too much)
Dthrow does not do this, only Dspec does. Dthrow simply kills you, but has the same risk/reward type of deal as Down B. The difference here is that with the insane damage racking that Hydromb can actually manage to snag a foe for that long as they try to escape! Dthrow in return offers a "safer" version of Down B where you can do massive damage, but still not as much as a down B that also covers everythign the light touches with toxic radiation ;)
 

ForwardArrow

Smash Ace
Joined
Aug 17, 2011
Messages
502

Vector
Vector is one of the seven Barian Emperors from Yugioh ZEXAL who... under very technical terms work for Don Thousand, although its really out of respect for each other and a sense of duty rather than loyalty to Thousand himself for most of them. Vector is not at all like the rest, though, being incredibly cruel even to his fellow emperors and regularly mocking them, and deciding to work extremely directly with Don Thousand in order to assimilate the world of humans and the other emperors and then destroy the Astral World. He does most of the work in manipulating the villains of the first series, and when they inevitably fail, proceeds to disguise himself as a normal human boy to play with the trust of the series idiotic protagonist.

By Yugioh character standards, he's a rare example of legitimate competence in the series, at one point outright killing one of his fellow emperors without bothering to duel to them to get their energy and attempting the same on the protagonist, and aside from that upon losing to Nasch, the leader of the Barian Emperors, he just tries to kill him and the protagonist out of battle anyway. And after his inevitable tragic backstory is revealed because we can't have Yugioh villains being entirely evil, he apologizes for everything he did and tries to get Nasch to kill him while appealing to everyone's sympathy, even giving Nasch what looked like a way to immediately defeat him... only to immediately revert back to his old sadistic and evil personality, appear to outright kill Don Thousand, and attempted to turn said win against Nasch into one for him, entirely faking his redemption. He inevitably does get redeemed later because Yugioh is completely stupid.


Stats
Recovery 10
Aerial Speed 8
Aerial Control 7
Size 7
Ground Speed 5
Weight 4
Traction 2


Vector's recovery is completely insane, lets get that out of the way. He has 6 jumps and a glide, and unlike a lot of 6 jumps characters, while his later 5 jumps are just the standard flying jump(albeit good quality ones), he has Falco's first jump. His other recovery options are even good too, which make up for the fact that his weight is pretty bad, as his hurtbox is overall somewhat bigger than Marth's but he weighs the same amount. The air will definitely be Vector's preferred method of transportation when his ground speed isn't all that great and he's actually a bit slippery to control.

Specials

Neutral Special C105: Umbral Horror Masquerade


Vector snaps his fingers as his signature monster, Umbral Horror Masquerade, materializes behind him, being about Ganondorf's height. From here, this attack will differ depending on whether you tap, double tap, or hold B.

If you tap B, Masquerade will charge his staff with energy briefly, and if the foe strikes Vector, he will counter for Vector with a blast of chaotic red energy, dealing 0.8x the damage and knockback of their attack. If he's hit by a projectile, he will absorb it into the staff instead of countering, with some mild end lag with one of Vector's projectiles but a fair bit more with one of the opponent's. All in all this is a fairly weak counter, but the timing is actually slightly easier than Marth's counter. However, there's a fair bit more to this move than that. If you counter another attack, the multiplier for damage and knockback increases by another .2x, to the same power of their attack, and then 1.2x/1.4x/so on. This also retaliates based off the strength of the strongest attack you countered, rather than the current one, allowing you to effectively store a counter of a powerful attack.

If you double tap B, Masquerade will instead launch his absorbed projectiles angled at the foe, before teleporting to their position and using the same attack they did to counter. This gives them some bullet hell to dodge, and deals the same damage as a stored counter, or if nothing is stored, a weak hit that deals 5% and minimal knockback. This is fairly laggy to start up but it actually does build up the strength of your counter if you hit with this. One thing you should keep in mind though, is that with this and the counter variation, if Masquerade whiffs the attack, he loses one level worth of power, and loses all his power if he whiffs three times in a row. Take caution in spamming this.

If you hold B, Masquerade will instead float into the background place and summon up a large red energy bubble around himself, having a diameter slightly less than Vector's height. It also reflects all projectiles at an angle based off where they hit it(from the front horizontally, from the top vertically, diagonally between the top and front, etc), and with charge, it will actually make them more powerful upon reflection, multiplying their damage and knockback by 1.15x for each level of charge. This does not stack cumulatively, so it becomes 1.3x/1.45x/1.6x at 2/3/4 levels of charge. Vector has plenty of projectiles of his own to reflect off this, and for that matter, he can absorb his own projectiles through the counter, which this can set up. Tapping B or, as you'll see later, using Vector's Smashes, will recall Masquerade back to Vector with some amount of lag.


The barrier is not invincible, having 40 stamina, and even when it reflects the opponent's projectiles it takes damage from them. Once its broken it cannot be used for 5 seconds, and Vector loses one unit worth of charge, and if there's no charge lost he cannot use a barrier for 10 seconds instead.

Side Special Great Sword of the Heavens


Vector raises up the above card which causes the blade displayed on said card to materialize above Vector's head, before he launches it forwards, the blade flying fairly fast and dealing 13% and knockback that KOs at 140%. This move has infinite range, and a ton of powerful properties to it that we're about to get too, but to warn you there's a full Falcon Punch worth of lag to summoning it and more end lag than said move, and if the blade is hit by an attack that deals 13% or more, it will dissipate. It also breaks upon colliding with the stage.

Now to get into the first of its properties, this thing will, after going off a blast zone, turn around and come back 2 seconds later. If Vector uses Side Special again during this time, it will return to him and be thrown out again from his position with about half normal lag. If Vector uses Side Special while the blade is out, it will halt in place, and you can then change its direction by tapping in another direction. This manuever has fairly little lag on your part, but a fair bit on the blade's, so it is a bit predictable.

If the blade hits a shield, it will just straight up pop it, no questions asked, and even go through and deal its own damage and knockback. While that is arguably less powerful than the Side Effect of a shield break, no questions asked shield breaking is amazing for Vector, who likes to play a rather bullet hellish game with his opponents. In addition, if this move hits a foe in the midst of bullet hell and is followed up by subsequent bullets, it will add its knockback to theirs, making hitting the foe with another powerful projectile during that time absolutely monstrous as a kill move.


As an aside, if stored via any means, this projectile loses its ability to be controlled, but that does mean you can throw out another one.

Up Special Tentacle Tether
Vector fires a single tentacle from his hand, which reaches about as far as Olimar's Pikmin chain with 5 Pikmin. If he comes into contact with a ledge, this will tether him to the ledge, and he can hang from it and use aerials for up to 3 seconds, or until the tentacle is broken by dealing it 25%. If he uses this on a foe, whether they're on the ledge themselves or not, the tentacle wraps around them, constricting them for 8% and tethering Vector to them. If you want to get really crazy, you can even tether to a flying sword for fast travel across the stage in that direction, though you had best let go before you go flying off the blast zone with it.

The tether does apply standard tether rules to the opponent, if one player moves in the opposite direction of the other and has a better speed/weight combination, they can drag the other along, so Jigglypuff is going nowhere but Captain Falcon can easily drag you around, and Wario is going to be taking you places in the air. This does serve as a half decent method to restrict their movement regardless, but the more important point is to tether to them so you can happily tag along back to the stage with them should they try to gimp or ledgehog you. Players tethered together actually take knockback together based on their combined weight, something that is quite useful as an additional recovery method or for plenty of other tricks. While you can only use this once per air trip, during the time you're attached to something you can press Up Special again to attempt to grapple to a new target, if you'd rather ride a different foe/projectiles' coattails back to the stage, just keep in mind it keeps drawing from the same pool of hang time.

Down Special Trick Buster

Vector holds up another card and sends out 3 glowing dark colored orbs, each about the size of a bomb-omb. They'll float along forwards and very slightly upwards over time at Jigglypuff's dash speed, and deal no damage or knockback on contact. However, upon taking 10% worth of damage, they explode in a Kirby sized hitbox, dealing 10% and knockback that KOs at 180%. This makes it a fairly powerful defensive move, and they work fairly well into an oncoming sword because the sword will explode them, and the foe can't break the sword by attacking it like they would normally want too, though at the same time they don't provide as effective of bullet hell with it by not being actual hitboxes.

Reflecting these off the Neutral Special barrier unfortunately does not make them more powerful, but really, it does allow you to keep them around longer. Just keep in mind that these projectiles don't discriminate, if they blow up near Vector, they'll hit him too, making these less amazing a defense than they would otherwise seem. This also means Vector himself can blow these up though with his other projectiles, and there's plenty of fun to be had in creating clouds of these across the stage. They also, in conjunction with the Side Special, set up for a hit with the offensive variation of the Neutral Special quite well.

As an aside, you can tether onto these like with the swords, turning the already good Up Special recovery into an absolutely insane one, and its also a decent position to traverse the stage from as well.


Standards
Jab Telekinesis
Vector puts his hand forwards and releases a blast of red energy, dealing 5% and moderate but set horizontal knockback in a move about as fast as the first hit of DK's jab, making it fairly spammable. This move also shoves back projectiles a battlefield platform, not changing their trajectory, which allows for some decent tricks when you take the way projectiles can get angled off the barrier into account. The knockback will send the foe to exactly the end of the tether, and while Vector does benefit from being tethered to a foe in some regards, he actually does not terribly love close range, so this gives him about as much breathing room as he could possibly demand in the context of said move.

Forward Tilt Barian Ray
Vector conjures a ball of red energy in his hand before throwing it forwards, travelling at a slightly faster speed than Wolf's blaster shot and dealing 8% and knockback that KOs at 240%. This can be angled up to 45 degrees, and bounces off the ground/obviously your Neutral Special barrier, and also pierces through enemies and other things that are not the stage, such as Down Special orbs. This has a fair amount of lag to start but little on the end and travels the length of battlefield before disappearing.

The only particularly special property this move has is that it speeds up when it reflects, allowing you to modify the speed of it a bit by bouncing it off the ground or your barrier, but for the most part, this is just your bread and butter projectile for storage/bullet hell.


Down Tilt Radiation Wave
Vector, from his crouch, releases a low travelling wave of red energy that deals 6% and low upwards knockback, and unlike the Forward Tilt this isn't a true projectile, as Vector stays paused for the entire animation of the move. It does however, bounce off your Neutral Special barrier, and the duration is actually pretty fast, making this a good close range combo move if your near one of your barriers. This has about the same range as Marth's Shield Breaker, but it becomes halved when used off a barrier in exchange for much more power.

This leaves behind a patch of radiation that deals 2% per second, and can be stacked while lasting for up to 6 seconds. The radiation will actually stack even within one move if you bounce it off a Neutral Special barrier, though the area will become much smaller. If a projectile travels through an area of radiation, it will spread it along its path for about a quarter of a second, actually giving a use to the reflection speed up on the Forward Tilt as it will allow you to paint more of the stage in radiation. With moves like your jab and tether, as well as general bullet you actually have a decent amount of control of your opponent's position, so if you can make a decent sized cloud with this its possible to net a ton of damage from it. Aside from that, your Down Special orbs actually do take damage from the radiation, making them into time bombs while they're inside it, of varying duration based on the density of the field.

Up Tilt Telekinetic Spin
Vector raises his hand over his head as red energy pulses out of it, and if the opponent is caught within the range they will be briefly spun in a circle before getting launched up for 8% and upwards knockback that KOs at 235%. A projectile that is caught in the hitbox will similarly be spun around and launched upwards. This is a fairly quick move although the duration is a tad longer than most due to the spinning motion.

You can cancel this move early by pressing any button, which is useful as the foe/projectile will still be launched out of the spin in the chosen direction, giving you a great deal of control over where the target is launched. Not a terribly complex move, but Vector actually does really want a bit more control over his projectiles given his main option for reflecting them about is a single barrier. This move gives you that, as well as a way to position foes and potentially yourself with the tether.


Dash Attack Slide Kick
Vector slides forwards with one foot forwards, covered in energy. This deals 11% and deals straight horizontal knockback that KOs foes at 155%. While a fairly simple attack, it can send you and the foe both into an immediate offstage bout if you're tethered to them, which given Vector's recovery is frequently advantageous for him. Aside from that, its sends him far enough to be a decent DACUS, and given Vector's Up Smash he definitely wants a good DACUS.

Smashes
A thing to note about Vector's Smashes is that they all utilize the projectiles stored by Masquerade, as well as the charge, dropping Vector of a level worth of power when used as well as expending all absorbed projectiles. They're certainly powerful for your efforts however, if of course you bother to properly stock them up. Masquerade also has to stop his activities of holding up a Neutral Special barrier if he wants to use these.

Up Smash Great Chaos Orb
Masquerade lifts his staff over his head and begins channeling a massive red orb, which grows to the size of Wario over the attack's obscene 2 seconds of start lag. He then fires it upwards, dealing 17%-25% and knockback that KOs at 100%-65%. It will go all the way to the top of the screen and then fall back down again at the same speed as Snake's Up Smash mortars, although it will stay off the top of the screen for up to 5 seconds if charged. This is a very powerful projectile, but it naturally does suffer from the absolutely ridiculous start up lag.

If you have projectiles stored, they'll start orbiting Vector and Masquerade during the start up lag, dealing their usual hitbox while out, serving during the start up. It gets better too, as the Down Special orbs will actually orbit far enough away from Vector that he won't get hit by them when they explode, giving some even more effective protection. It doesn't protect from the top, but that's where the projectile is coming from anyway... albeit 2 seconds later, so you should be careful throwing this out. At any point during the start up, you can cancel this into another attack, if you just want to use the projectile orbitting and nothing else, and this will actually not even expend the projectiles, or if your planned Up Smash was going poorly.

The projectiles will all merge into Up Smash when he fires it off, which doesn't increase the power of said projectiles, but as soon as the Up Smash projectile hits the ground or an opponent, it will bust open, sending all the projectiles stored in it flying out at various angles. You can do this to potentially store a set of projectiles inside of an orb and then keep it bouncing off a Neutral Special barrier to release whenever. As an aside, Forward Tilt projectiles can actually pop open an Up Smash. While its admittedly impractical, yes you can store this orb with Masquerade and in fact, store multiple Up Smash orbs inside each other and go completely crazy.

The charges from Down Special will add their own projectile to the defensive part of this attack, a small slow moving but violently crackling wisp of red energy, that explodes on contact with opponents for 15%-21% and knockback that KOs at the same percentage as the giant orb that created it. One is created for this attack for each level of charge, and they travel 3/4ths of a battlefield platform before vanishing.


Down Smash Energy Glyph
Vector has Masquerade turn towards the screen and slam his staff into the ground, creating a burst of red energy that deals 15%-22% and knockback that KOs at 145%-100%. This leaves behind a large glyph of red energy the size of Kirby where the attack was used that deals 3% with no knockback or flinch and lasts for 8 seconds. This damage is dealt whenever the foe comes into contact with it, rather than repeatedly over time, making it a fairly weak trap. However, it can be improved via your stored projectiles. If you don't particularly want to use them however, you can not charge the Down Smash at all, while any amount of charge, in a unique case for a Smash Attack, will produce the glyph, though the uncharged version will also not use up your projectiles/charge in case you want to keep them.

Invested projectiles that aren't Vector's don't have much effect on this, but they do increase the duration of the glyph by 2 seconds each. The first real buff is a simple damage boost caused by the Forward Tilt lasers. All this does is boost the damage by 2% per stored laser, not terribly worth talking about. The Side Special sword however, gives a much bigger boost, it causes the glyph to appear much more vibrant and a bit sharper around the edges. This means its now a real trap, dealing double the damage of the previous variation and actually causing it to deal knockback, weak knockback that KOs at 300% but it does scale with damage buffs to the glyph. Additional swords will make the base knockback on this a fair bit nicer with each sword.

The Down Special orbs will cause the glyph to react whenever its hit by an attack, with its reaction to being hit by a melee move being a burst of energy identical to the Down Special ones but larger in size. The response to a projectile however, is much more interesting, it will spit out a copy of that projectile identical in all ways except dealing half damage and knockback. Naturally this is quite fun for Vector who can start mass duplicating his fired projectiles through it, and the opponent's ones will be allied to Vector so they just give him more stuff to store rather than being a threat to him. Increasing the number of orbs will raise how close the damage and knockback becomes to the original's, as well as increasing the power and size of the explosion when hit by a melee hitbox by 1.2x per orb.

The Up Smash increases the power of the glyph by 5%, a fairly substantial boost, but nothing too amazing. However, it has a more important effect of, once the glyph expires, having it expel all the stored projectiles within said Up Smash, so you do in fact keep them when the Up Smash is planted in this glyph. The small projectiles spawned from the main orb boost it by 5% as well, but do not have any other effects.

Now the actual units of charge are what makes this attack get super crazy. If you have 1 unit of charge, it will increase the size of the glyph 1.5x, giving you a bigger, meaner trap. 2 units of charge, however, and it will produce a second small sized glyph half Ganondorf's height above the first one. 3 units of charge grows the upper glyph, and then this pattern repeats indefinently. This can allow you to create some absolutely insane trap and projectile set ups, though again you won't get anything especially amazing out of this in your everyday match, but at worst its a nice lingering hitbox and at best an insane projectile replicator.


Forward Smash Barian's Force
Vector has Masquerade briefly charge his staff with energy, before swinging it forwards in a similar manner to Marth's Forward Smash. This deals 12%-17% and knockback that KOs at 180%-150%, and has similar lag and slightly better range than said Forward Smash. The decrease in power makes this move overall fairly bad, but like with Vector's other Smashes, stored projectiles will improve it. You can just go for the swinging motion if you leave the attack with absolutely no charge, in the same manner as the Down Smash.

Projectiles from the opponent give the whole attack an additional 1% and lets it KO 5% earlier. The lasers give this attack some useful changes, as the jewel at the end of the staff becomes infused with energy from the lasers, causing it to become a sweetspot that deals 3% additional damage and KOs 15% earlier for each laser invested into the attack, making it into a slightly more extreme version of Marth's FSmash with more power in the sweetspot and less in the body with a few lasers, though the sweetspot is also enlarged in size. Laser investment also gives this attack the ability to reflect projectiles, and in fact for each laser invested into the move past the first it duplicates the projectile once, so if you an Up Smash orb with this and 5 lasers invested, it will reflect back 5 copies of the orb. The offshot projectiles from Up Smash provide the same effect as the laser, but increase the power of reflected projectiles with this move by 1.2x each.

The sword makes this attack a bit better against defensive measures, causing it to deal double shield damge, first and foremost. Second of all, it adds a follow up hit that deals 1.2x(+.1x for each additional sword invested) the damage and knockback of the first one where Masquerade jumps slightly back and swings, adding a small sword made of chaos energy to the end of the hitbox to increase the size of the sweetspot should there be lasers invested as well. At very low percentages, both hits will combo together, and will wreck havoc on shields.

The Down Special orbs will cause, during the end lag, Masquerade to gain super armor, and when struck he'll produce a burst of red energy that deals 18% and knockback that KOs at 120%, dealing an extra 2% and KOing 10% earlier for each invested orb. This makes the move a lot harder to punish should you whiff with it, though it'll only cover early in the end lag with one orb invested, but with 3 or more it will cover almost the entirety of it.

The Up Smash orb provides a final boost to this, creating an red vortex on the ground where the attack hits that starts spewing out all the projectiles invested in the orb at a rate of 3 per second, creating a much more controlled way of releasing them than the simple all at once bursts of the Up Smash and Down Smash. Aside from that, it serves a secondary way to cover up this attack's end lag or lead into follow ups. The vortex itself actually deals 5% and pops opponent's up while its out if the opponent comes into contact with it but not a projectile. It closes and vanishes after its done spewing projectiles, and should multiple overlap they'll simply both start firing projectiles at once in a denser cloud.

The Neutral Specials' charge has an interesting effect on this attack, as it causes the move to leave behind an afterimage of Masquerade 3 seconds later which performs the same strike. This is repeated for each unit of charge, making this a repeated hitbox that you can play of in several ways. Throw projectiles at it so they get duplicated, pressure the opponent into it with bullet hell, use it as cover to prepare another Smash Attack. Probably the best Smash Attack to use in the early game before you have a ton of projectiles stored for the last reason, as early on Vector can certainly use the cover.

Aerials
Neutral Aerial Shockwaves
Vector releases 3 pulses of red energy that cover his entire body, in fairly quick succession. Each wave deals 10% and radial knockback that KOs at 185%. The move has decently long end lag, but its still a strong aerial defense measure as a hitbox alone, especially as due to the duration its rather hard to dodge. If you're tethered to a mobile sword during this attack, this serves as a fairly effective mobile hitbox as well due to the duration.

The shockwaves have a somewhat interesting effect on projectiles, the simplest being that it bounces away Down Special projectiles briefly before they explode from the damage, making it safe to detonate them with it. If a laser hits the barrier, it will burst into a brief lingering explosion with the same power as the laser itself, and the same applies to the Up Smash projectile(or offshot projectiles) while it releases all the projectiles inside. If you actually stay near an Up Smash projectile for the duration of this whole attack, you can blow up the projectiles inside too to create a massive explosion with several hitboxes that rack up a massive damage total, though the foe will be smart enough to probably not get caught in the blast. Probably.

Tethering to a sword makes this aspect of the move much more useful, as you can fly through a bunch of your projectiles bouncing along the stage and explode them all in rapid succession, creating a trail of lingering hitboxes in your wake across the stage. This will simply burst an Up Smash orb rather than causing all the projectiles inside to explode as well, which has its advantages and disadvantages over the other variation.


Forward Aerial Barian Emperor's Lash
Vector spawns a few tentacles out of himself and strikes forwards with them, in a move that actually has really large range, as long as your Up Special goes though angled forwards. It deals only 3% and a flinch however, not all that good for the lag attached, but at the tip of the tentacles is a sweetspot that deals 15% and knockback that KOs at 120%. This is a very small hitbox, and one that's rather hard to land properly. However, the existence of your barrier proves incredibly useful to this move, as you can actually bounce it off the barrier like with Down Tilt. This gives you a much wider range of where you can have the sweetspot of this move end up via the variety of angles it can be reflected at, making it much more practical to land. It also gives the move a power boost to make it an even more powerful, if slightly difficult to land attack.

Aside from that, the fact that this attack has the same range as your tether is rather nice, as if you are traveling through the air of knockback the opponent took that was horizontal, they are likely at the end of the tether and in a prime position for this attack to hit with. Just keep in mind there's enough start up lag that the opponent can probably still dodge, but with how many projectiles Vector has flying through the air as well as the fact that the foe is likely coming out of hitstun, its possible to set up kills with this regardless.


Up Aerial Chaos Explosive
Vector points his left hand above him and fires out a tiny little wisp of red energy around a crystal. This deals 5% and weak upwards knockback, and causes the crystal to stick to the opponent. It will explode after 3 seconds, dealing 3% and a flinch. This is a fair bit better in the midst of bullet hell as the opponent does not want to be dealing with this kind of lingering hitbox, though aside from that this attack is fairly weak, aside from being another disjointed hitbox that can be reflected off barriers even if it isn't a true projectile.

If attached to a Down Special orb or a Forward Tilt laser, these explosives will actually cause the move to explode with 1.5x the normal damage and knockback on contact, and you can in fact boost this further in multiples(though it stacks like 1.5x/2x/2.5x, nothing scarier). Its admittedly fairly hard to properly collect these explosives onto anything, but they'll also stick to a sword from Side Special, so if you're tagging along on one of those, you can attach these to it. If so, Forward Tilt lasers will pick up the explosive and carry it along should they move past the sword. Note that Down Special orbs can't really be stacked more than once with this, as otherwise they'll just explode, but you can potentially get something much greater on a Forward Tilt laser.

Back Aerial Chaos Static
Vector puts one hand behind him and creates a large cloud of red static behind him, dealing 6 flinching hits of 1%. The hits aren't very dense so the foe will have strong control over their DI over the course of the attack, and it also gives it a fair amount of duration if the attack whiffs the foe can probably punish you fine for it. Still, it can serve a similar function to Game and Watch's turtle as a very hard to beat out attack behind you.

This attack actually assists your bullet hell quite nicely, as projectiles that travel through the static will briefly acquire a coating of it, only for about one battlefield platform worth of travel distance, but it basically surrounds the projectile in this attack's hitbox. This makes it harder for opponents to get out of the way when there's a "shell" around the projectile which makes the hitbox bigger and harder to dodge. Adding to your bullet hell at such a close range may not sound too great, but when a bunch of projectiles are flying at the foe with you tethered to them, this move becomes very scary, especially when you continue its use once the opponent takes knockback from it.

Down Aerial Energy Crash

Vector reaches back as his hand charges with chaos energy, before slamming it down, dealing 10% and a moderately powerful spike, but not nearly on par with the strongest ones in Brawl. If he reaches back and touches a projectile during this attack, he will grab it and slam it into the foe, adding its power to this move, making this a potentially much more powerful attack. Given Vector’s recovery, spiking someone he’s tethered to isn’t the end of the world, though you may end up getting enough momentum from the knockback that you end up spiking yourself to your death anyway, so you’d probably be better off finding something else to tether to before attempting to kill with this offstage.

If Vector hits the ground with a projectile imbued into this, it will burst the projectile on the ground, creating a pseudo earthshaking hitbox that deals the same damage and knockback as the projectile, angled upwards. If an Up Smash orb is smashed this way, naturally it will also release all the projectiles inside. As an aside, being tethered to a sword will have you fly over much more terrain during the start up, making it easier to grab a projectile.


Grab Game
Grab C43: High Manipulator of Chaos

For Vector's grab he raises his hand as the monster shown, High Manipulator of Chaos, above appears behind him, being about the height of Ganondorf and a fair bit wider. It then shoots forwards its laser like threads in a tether grab with absolutely gargantuan range, making Olimar's grab look pathetic by comparison. It has about standard tether grab end lag, maybe a little more, but given the range are you seriously complaining about that? High Manipulator will linger around for 3 seconds until being unsummoned after attempting a grab, during which he can attempt one again.

The lingering is actually a bad thing, as if High Manipulator is hit with an attack that deals more than 18% or takes a total of 40%, he will shatter and Vector will go into a shield break stun. Vector's shield will at least cover the front of him so its not a bad out of shield option, but it makes grabs as Vector a fair bit more risky. At the same time though, encouraging the opponent to attack isn't as bad as it sounds. Lets you get that Neutral Special buff going, after all.

Pummel Stretch and Tear
The High Manipulator pulls on his strings in an attempt to rip the opponent apart, dealing 4% in a pummel that is admittedly below average in terms of speed, but still fast enough to be one of the best pummels in the game due to the damage. Vector will laugh mockingly at the foe during this move, adding to their suffering.

Forward Throw Chaos Flame
The strings the High Manipulator has on the foe blaze violently with red energy as it flows into the foe, dealing them 8% and horizontal knockback that KOs at 200%, while covering their whole body in a slight burning aura. This deals them 1% per second for the next 3 seconds, not really all that terribly impressive. However, the aura actually deals rapid hits of 1% to outside sources, such as your Down Special orbs, making them easier to detonate, and its such a small hitbox that Vector will rarely get hit by it as it basically is a rest hitbox.

For that matter, you can make this effect a lot stronger if you want too. A Forward Tilt laser hitting the foe will increase the damage per second by 1%, as well as the strength of the aura so it shreds through orbs faster. An orb exploding on the foe will increase the duration by 1 second. An Up Smash orb has a more powerful version of the Forward Tilt's effect, increasing the damage per second by 3%, nevermind that it probably sprayed lasers and orbs everywhere that will raise the damage and duration even further. The side projectiles of Up Smash also increase the damage by 3% each. Throwing the foe with this again will reset the timer to 3 seconds if it is at less than 3 seconds. In Down Tilt radiation, the timer stops ticking down and the foe continues to take damage.

Now that tiny rest hitbox aura on their body can damage Vector, so why don't we put that to use. If you want to get really crazy, Vector can attempt to overlap the foe and counter the aura, which is a bit of a hard thing to pull off when it requires Vector to play rushdown, something he's not exactly amazing at. Still, another way to build it up doesn't hurt, as a foe trying to keep Vector from overlapping them for this may end up triggering the counter anyway with one of their attacks.

Back Throw Amusement
The High Manipulator throws the opponent out to the max length of the strings, then starts swinging them around it in a rather lengthy throw before slamming them behind it for 12% and diagonal knockback that KOs at 185%. While swinging them around, the strings will actually absorb projectiles from Forward Tilt and Up Smash, increasing the damage by 2% and having the knockback KO 10% earlier in the case of a laser and a twice as strong buff in the case of an Up Smash orb(which releases all projectiles inside, so it can easily get more). Vector seems to enjoy getting to watch the opponent get flung around while the throw takes place.

This move has a very useful interaction with your Side Special sword, which will in fact cut the string, ending the throw early and sending the foe flying with no damage... but knockback that KOs about 90% earlier than the move normally would. This turns it into an insanely good KO throw, but keep in mind it does cost you the damage if you can't kill them with this and requires a fairly specific set up, but if you do being able to KO this early off a long ranged grab is quite nice. This is your best KO throw even without any buffs or swords applied though, Vector's grab game is not very good at KOing opponents if you haven't set up for this throw specifically.

Up Throw Imbue

Throwing the foe over its head, the High Manipulator then proceeds to stretch its strings to suspend the opponent in the air above it, in a move that can be charged like Wario's Project M FThrow by holding down Z. This increases the power from its minimum of 5% to a maximum of 11% after a full second, though the knockback remains the same set high upwards knockback, which can of course end in Vector following the foe into the air if he's tethered to them as a bonus.

If a projectile that isn't the sword hits the strings during the charge time, it will fuse into the string and fly into the opponent, not dealing them damage but imbuing them with the projectile. 5 seconds after the throw, all projectiles that were imbued into the foe this way will be shot out of them, allowing Vector to start reflecting or playing around with them in mass with moves like the Up Tilt/Barrier/Jab/Nair. Its another useful way to mess with projectiles, and one that will guaruntee they're close to the foe, even if they don't immediately nail them you can still play off the fact that they're nearby regardless.

If the sword hits the string during this move, the foe will be launched upwards with twice as much upwards knockback but no damage as the string is cut, and all projectiles will be launched out of the string, sending them flying up after the foe, creating a nice panic situation where they have a whole storm of projectiles flying at them, though be careful as this prevents you from using the storage part of the move.


Down Throw Barian Emperor's Rage
Vector orders High Manipulator to slam the foe into the ground repeatedly, which has him slam the foe into the ground 3 times over the course of 0.6 seconds, dealing 4% each time and the last hit leaving the foe in prone. This is a decent damage dealer, but if the string is hit by a Forward Tilt laser or an Up Smash projectile, the rate at which High Manipulator slams the foe into the stage will considerably increase, especially so in the case of Up Smash. You can sometimes get in 7-10 hits with this, making it a really powerful damage dealing throw. If the sword cuts the string like in the Up/Back Throws, the foe will be slammed into the ground extra hard as Masquerade is not immediately starting to swing them back into the air, taking 8%-18% and leaving them in prone, depending on how fast Masquerade was flailing them about. As the Back Throw is your strongest KO throw and the Up Throw is your best set up throw, this is your best damage racking throw.

Final Smash

Vector summons his most powerful monster, Number C5: Chaos Chimera Dragon, which is so large it coils around the entire stage. Its head stays in the background, but once every 3 seconds, it will fire a huge laser of red energy that it sweeps across the stage, dealing the same damage and knockback as Lucario's Final Smash would if he was at 50%, but being a fair bit thinner and sweeping across the stage much faster. Vector can actually taunt during the attack to power it up, pulling out a card which will disintegrate into thin air as the beam charges up to a much more powerful state, now having the power of Lucario's Final Smash at 150%. The beam reflects off your Neutral Special barrier, giving you some options to play with its trajectory.

The summon functions as something of a miniboss, and actually has to be defeated rather than expiring over a specific timeframe. It has 120 stamina and can only be damaged while its head is on screen, so if the opponent avoided the laser they'll get a few decent hits in, though hitting him during the start up lag is very risky. Vector can boost its stamina by 5 by feeding it a projectile while its preparing its attack, giving him a means of preserving his fairly powerful summon. Just keep in mind as far as Final Smashes go, it doesn't protect Vector that much and is rather predictable, even if it is quite powerful if used right.


Playstyle

Vector's playstyle shouldn't be that hard to figure out. He's a bullet hell character who can create potentially insane set ups through his Smashes and capacity to store projectiles. You have lingering slower mines, a faster laser, a shield smashing sword, and an Up Smash which can store up projectiles to some very powerful effect. There's a ton of room to get creative, just one thing to keep in mind is that if you really invest in a set up, unlike a lot of heavy set up characters you can easily blow it all in one shot if you're not careful, which means opponents always have a chance to come back. So don't get TOO confident in your victory, that will be your undoing.

The counter bit of the playstyle is where Vector's real sadism comes in, and there's some fairly obvious synergy there with the tether, as it requires the foe to break it and keeps the opponent at constant close range, making their position in relation to you a lot more controlled. It actually does make lining up particularly scary parts of your bullet hell a bit easier, and naturally if the opponent tries to interrupt you in the middle of that, you can catch them off guard. Another thing that can force the foe to pressure you is close proximity to a barrier, as Vector's melee game is much stronger near one and if the foe doesn't successfully force you away from it, they're in for a world of hurt.

The grab game is a rather nice way to coax opponents into attacking you alongside the tether, as it gives them some potentially huge upside if they can smash your grab summon. Sometimes they will, and that will severely cost you, but the incentive is powerful given how strong Vector's grab is if the foe does nothing about it, and how rewarding it can be to not only stun Vector, but potentially ruin his set up due to how temporary it is. As such, maybe going for a grab happy phase may work into some high risk high reward gameplay in the context of a set up that can easily vanish if Vector isn't taking care of it. Aside from that, the grab game can potentially be much more powerful with proper sword positioning. On a whole though, you play a game of potentially elaborate plans, and when the foe tries to ruin them you can unleash your truly sadistic side by using your counter to only make it worse.
 
Last edited:

FrozenRoy

Smash Lord
Joined
Apr 26, 2007
Messages
1,260
Location
Las Vegas, Nevada
Switch FC
SW-1325-2408-7513
"How do you prove that you exist...? Maybe we don't exist..."

Vivi​

Vivi is a character from Final Fantasy IX, specifically, a Black Mage. In IX, Black Mages are artifical constructs created from Mist, meant to be soulless magical soldiers. Black Mages, however, possess the ability to become sentient. Vivi, a prototype Black Mage, is one of these sentient Black Mages.

Vivi himself is not your typical Black Mage archetype in personality: Shy and early on gullible, lacking in self-confidence and afraid to use his magic to save his friends, thinking himself incapable. Over the game, however, he becomes more confident and brave, though his questioning of his own existance remains through the game.

Vivi is powerful in battle, with a variety of strong magical attacks, along with his "Focus" ability that lets him raise the power of his spells. His Trance mode, Trance being like a Limit Break, is "Double Black": an ability that allows him to cast two spells in succession or simultanously.


Statistics


Vivi is a small character with little weight, standing taller than Olimar due to his hat and weighing about as much as the small captain as well. This issue is not made up with blazing speed, either: Vivi's speed tops out at roughly Pit level. He does have above average traction, at least.

Vivi doesn't get noticably better aerially speaking, either. He is fairly floaty and slow in the air, but with good control. The floatiness makes him easier to kill over the top, though. He has no special functions such as floating, crawling and so on and so forth. So, overall, Vivi is not that good statistically, with poor weight, meh speed and meh-to-below average aerial functions. Vivi makes up for these issues with raw destructive power.


Specials

Neutral Special: Focus / Double Black

Vivi pulls his staff back and focuses. This continues until you stop holding down B, at which point Vivi stops focusing. Focus is quick to enter, but there is a moment of punishable helplessness as Vivi exits Focus, so you need to plan accordingly. Focus doesn't do anything as an attack but instead, just like in the games, is a way to buff Vivi's magic up. Vivi's Focus takes about 20 seconds to reach 100%, but you'll keep any Focus you had if you leave Focus (IE if you were somehow alone for 10 seconds and exited Focus, you'd have 50%: 5 seconds, 25%, etc) and be able to build on that by Focusing more later. For every 25% of Focus Vivi has, his magic attacks gain 2% damage and KO 5% faster: in addition, many of his attacks become stronger or change (IE Fire becomes Fira: you'll see later). Vivi will start to lose focus if he does not enter this stance periodically, however: after 3 seconds of not using Focus, Vivi will lose his focus at an equal rate to his gaining of focus until Focus is used again. Really, it's all quite simple.

A real gem of this, however, is when you use this with 100% focus, which can be shown by Vivi gaining the light white flashing characters with charged attacks do (IE Look at Samus w/ a fully charged Charge Shot). Doing this will cause Vivi to enter his Trance state and thus gain the ability of Double Black, an ability of great power, arguably on par with a smaller Final Smash. For the next 10 seconds, Vivi may use any attack at any time during another attack, but only one (IE use SSpec, you can use SSPec again right during the starting lag, but you can't use a third SSpec: In other words, you can only dualcast, not cast more than two total). This allows Vivi to launch multiple attacks at once, mix and match hitboxes to his hearts content, cover lag and so on and so forth, as you will see. The move uses the starting lag of whichever move is used first, coming out instantly if the starting lag is over, and whichever move's ending lag and duration is the highest. You can dualcast at any point during a spell, be it the very start of the starting lag or end of the ending lag. You cannot use use Double Black to dualcast a non-magical move. The one downside of Double Black is that it drains Vivi's Focus down to 0 and cannot be exited manually, only by death or running out of Focus, so you go back to the start of your power after this...but on the other hand, 10 seconds of BONE CRUSHING POWER.​

Side Special: Fire

Vivi waves his staff around, before swinging it forward and casting a fireball from it. Being hit by the staff does pathetic knockback and 3% damage, but the fireball is a nice bread and butter projectile, travelling the same speed as Wolf's blaster for the same amount of time but about the size of a Mario fireball, exploding when it reaches the end of it's distance or if it hits the foe for 10% damage and fairly weak knockback. The explosion is about the same size as the fireball. This takes a moment to cast, but it has little in the way of end lag, so it is hard to punish Vivi for using this. Vivi doesn't like foes in his face, so a good projectile like this is necessary.

When Vivi reaches 33% Focus, Fire becomes Fira. While it's lag, how far it goes and speed remain the same, it's other properties have increased: It deals 13% damage, KOs at 220%, is now twice as large as before and, most importantly, the explosion when it has run it's course or hits a foe is different: the explosion is now roughly the size of Bowser, giving it an excellent ability to hit foes it misses, hit multiple foes, making it harder to roll around it and overall making it much better, as foes now have to worry about it until it explodes.

But when Vivi reaches 66% Focus, Fira itself evolves to become Firaga. Firaga has a bit more ending lag, though only a touch noticable, but much improved power: It is now 3x the size of Mario's fireball, deals 16% damage and KOs at 175%, goes for 1.25x the distance it did before and the explosion at the end is massive, a total of 1.25 of a Battlefield platform in addition to 1.5 Ganondorfs high at the center and 1 Ganondorf high at the edges, making it impossible to roll around and a deadly delayed attack for people trying to attack Vivi, not to mention a wonderful tool against multiple foes. It has a lot of applications in Vivi's playstyle. At 100% Focus, the starting and ending lag is cut by to 3/4ths of what it was during a normal Firaga.

While Vivi is in Trance and Double Black is active, Vivi's Firaga undergoes it's last transformation and becomes the deadly Flare. Flare does a grand amount of damage, 22% before factoring in Focus bonuses that KOs at 130%, and is 4x the size of Mario's fireball. At the end of it's trajectory, it explodes magnificantly, dealing it's hitbox in a Smart Bomb sized and shaped explosion. This is, needless to say, positively devastating, even ignoring that you can use Double Black to dualcast...but it has one downside, which is that it's starting and ending lag is massively increased, making it quite the slow and punishable attack. You'll likely want or need to dualcast to cover it. This is also bad because it wastes more of your 10 seconds. Try to cast one before Double Black runs out, at least.​

Down Special: Thunder

Vivi sticks his staff into the ground or, if in the air, jabs it straight down while casting. The amount of time Vivi takes to cast this is very small and there is very little ending lag, so it can be spammed greatly. When it is cast, a single lightning bolt will rain down from the sky somewhere random, be it on or off the stage. This bolt is fairly strong, 12% and good spiking knockback, and comes out at 1.25x the speed of Pikachu's Thunder. Unfortunately, where it appears is random, and Vivi cannot move until the bolt hits or, if it appears over no stage, when it reaches an equal level with Vivi, at which point the nearly non-existant end lag starts. So it's not the best of moves to begin with.

This attack is one of your more notable ones that gets better with Focus, evolving from Thunder to Thundara after 25% Focus. Thundara doesn't increase damage or knockback from Thunder, but what it does do is increase the number, from one randomly striking bolt to three randomly striking bolts. This lets you spam hitboxes along the field much more effectively. The lightning bolts also now move at 1.5x the speed of Pikachu's Thunder. In addition, the odds of them striking closer to the foe is made higher compared to the odds of striking away, albeit only some. While Thunder isn't all that useful, Thundara is actually pretty good, putting out a large amount of unpredictable and strong hitboxes.

This attack is also able to evolve again, turning from Thundara to Thundaga at 75% Focus. Thundaga adds two more bolts of lightning to Thundara's three to make five, in addition to upping the power to 15% damage and a fairly strong spike. In addition, the odds of a bolt landing near the foe gains a sharp rise: It is almost certain at least one will strike near or on top of the foe with Thundaga. In addition, the bolt now falls down at Sonic's dash speed. While THunder isn't too good and Thundara is okay, Thundaga is amazing, as you can throw out five very powerful (Don't forget Focus' own buffs!) hitboxes with a high rate of striking at the foe and a great deal of unpredictability. It is also an amazing spike.

At 100%, the lightning bolts will create a small grounded shockwave (of shock!) when it hits solid ground, allowing it to hit foes just outside of it's striking distance for 2% (Before Focus boosts!) and a trip. This makes a good consolation prize, especially since it can buy Vivi time to launch more spells and you shoot 5 bolts at once, so you cover a lot of ground at once. When you enter Double Black though, this move changes a fair deal in how it's lag works: It now has slower, but still fairly fast, lag on both ends, but in exchange Vivi can walk around while the bolts fall, giving him a ton of mobility while casting down bolts from on high, not to mention combining it with OTHER spells for some big carnage! Finally, one bolt is 100% certain to strike on or near a foe, making it a guaranteed move. Shooting out two Double Black Thundagas at once can be devastating.​

Up Special: Magic Trick

Vivi swings up with his staff while jumping, utilizing some of his magic to propel him upwards for a decent recovery move. He goes as high as Marth's Dolphin Slash while his staff hits for 8% damage and weak knockback. It is, however, quite quick in both starting and ending lag. So while a fairly basic recovery move, it is actually pretty good.

At 33%, Vivi's attack changes slightly: Instead of a single hit of 8%, Vivi's staff will strike twice, each time for 5% damage, on the way up. The knockback on these two strikes will "lead" the foe along Vivi's trajectory: At the apex of his jump, he will slam down his staff for 5% more damage and a weak-ish, perhaps weak-moderately, strong spike. Vivi can use this to spike foes trying to stop his recovery or as a spike in general. It's pretty useful.

At 66%, the move goes 1.5x the distance of Dolphin Slash, giving it much better recovery properties. I should also note at this point that, since Vivi uses his magic to help propel his jump, you can use it to lead to or from a magical attack during Double Black: Using it as the first attack will even allow you to use spells in the air that you normally could not! Very useful.

During Double Black, Vivi will not go into helpless until he has used this move in the air twice, so he can actually chain two of these together to give him some insane recovery: Vivi during Double Black pretty much needs to be knocked off the blast zone or edgeguarded heavily to die.​

Standards

Jab: Staff

Vivi makes a quick swing of his staff in front of him. This attack deals a weak 5% damage and set knockback of 1.25 of a Battlefield platform, making it an excellent GTFO move but a poor damage racker. On the plus side, it has pretty good disjointed range and is quick like your usual jab. Vivi likes to keep foes at a mid to long range to make the best use of his spells, so this set knockback move is a staple of his arsenal, keeping foes away from him so he can use Focus, positioning foes for moves such as Fire and being his general bread-and-butter melee move. Use it often. Do note though that, since it is non-magical, it cannot be chained to a magic move with Double Black, nor does it gain any bonuses from Focus.

Forward Tilt: Poison

Vivi pulls his staff back while casting, before swinging it forward and releasing a cloud of poison that travels about one Battlefield platform ahead. Those hit by the staff while it swings take 5% and light knockback, those hit by the cloud before it stops take 7% damage and some weak upwards knockback. After a Battlefield platform of travel, the cloud stops and remains there for 2 seconds before dissipating. The cloud deals no damage during this time, but it WILL poison foes: Getting hit by it before it stops also poisons the foe. Poisoned foes take 2% non-flinching damage per second for the next 5 seconds, for a total of 10% damage. This move has fairly average startup and slightly laggy ending lag. The poison cloud is about the size of a bob-omb explosion and travels slowly. Vivi is NOT immune to his own poison, so be careful when trying to knock foes into it. Your jab, which hits on a fairly low trajectory, is excellent for knocking foes into the poison.

At 33% Focus, the poison deals 3% per second instead of 2%, and the poison cloud will last 3 seconds instead of 2. At 50%, the side of the poison cloud is doubled. At 66%, the poison deals 4% per second instead of 2% and the cloud lasts 4 seconds. But at 100% is when it gets really dangerous: 5% per second damage, a 5 second long poison cloud and it is now 3x the size of a bob-omb explosion! Vivi always gets dangerous the further it goes on, but Poison especially so. Remember that you aren't immune, though, so the risk gets more and more intense as it goes on!

While Double Black is active, however, Vivi becomes immune to his own poison, making this a much less risky move. Double Black doesn't explicitly boost this attack, but the ability to combine a slow and poisonous projectile with the rest of Vivi's magic efficiently makes this a more frightening pressure tool, as you can create some no win-ish scenarios with moves like Thundaga and Flare.​

Down Tilt: Sleep

Vivi casts as his staff impacts the ground, releasing a gentle wave of circular energy around him: it goes a bit further out from his body, but is still very much a close range attack. Being hit by this attack deals a paltry 4% damage and no knockback. Instead, the foe is put to sleep or, in the air, acts as if they have been footstooled. This attack has decently long start-up lag, but the ending lag is quite miniscule, giving it much more value compared to, say, Sing because Vivi is given time to follow up on the sleeping status. Vivi can easily use this sleeping time to either get in a strike, either quick or heavy depending on the foe's damage %, or get in some Focus time or position himself, giving this a wide range of uses. The sleep is about as long as Sing in duration, a tad less really. A simple yet effective move.

Unfortunately, Sleep does not benefit from Focus much. AFor every 25% of Focus you have, Sleep leaves the attack going for half of a second after you finish it: So at 100%, the hitbox stays out 2 seconds after the attack ends! You can't keep more than one Sleep attack around like this, though. Sleep gains no other special boosts from Focus or Double Black, although it of course gets the normal Focus attack boost. It is also a lot better during Double Black, as you can put someone to sleep and instantly fire off an attack to sizzle them!​

Up Tilt: Spin

Vivi raises his staff and spins it horizontally above him, hitting with good range to both sides of him and above him for 11% damage and some actually pretty good upwards knockback, it KOs at 220%. This is all very quick as well, giving Vivi an excellent way to pop foes into the air or keep them from crashing down on him: Popping foes into an incoming Thunder is particularly fun and Vivi's aerials are one of the more physical areas of his set, so Vivi popping foes into the air is a good way to do some easy damage racking...even if he isn't really a juggler. As a non-magical move, this gains no change from Focus.

Dash Attack: Cast

Vivi dashes forward and continues to dash while swinging his staff as if he is casting, but with much more force, dealing 4 hits of 4% over a good amount of distance. This is a fairly quick attack and, while it can be DI'd out of, provides an excellent sweeping movement attack. This means that, yes, this move brings with it a great DACUS: While it's no Snake DACUS, it sends Vivi quite a way, and has one very important difference: Vivi can DACUS into ANY of his spells! That's why the animation is important: Use your DACUS (Though since it works with any spell, it'd be a DACSA...) and Vivi will switch from attack-swinging to spell-casting kind, allowing him to move and cast in one go!

This is quite the amazing use. Sleep becomes much more deadly when you can approach with it, Poison can send trails forward while approaching or leave behind a trap as you reposition, and so on and so forth! This gets even more deadly when we get to Vivi's Smashes, but suffice to say that this is an amazing ability. Note that while this move itself gains nothing from Focus, the fact it cancels into Spells means Focus is still quite important to it, and it is absolutely CRAZY when combined with Double Black: Double spellcasting + high-level DACUS movement anyone?


Smashes

Forward Smash: Comet

Vivi draws his staff back while gathering magical energy before swinging his staff forward, gathering the energy to summon a fairly large rock or, more specifically, a coment! It floats about one Ganondorf above Vivi's head, travelling up to a Ganondorf in height as it charges with Vivi able to choose to put it higher or lower by moving the control stick up/down during charge defaulting to up, and is fired at a forward and somewhat sharply down angle to strike foe's at a good mid to long range from Vivi, and deals 23%-29% damage while KOing at 110%-90%, which means it is a pretty good killer as Vivi gathers more focus. In addition, the comet is usually delayed, hanging in place for 2 seconds before firing itself forward, though Vivi can doubletap A to fire the comet instantly and use it as a pure projectile rather than a delayed one. It is also an attack with pretty average starting lag and only slightly longer than normal ending lag, which is pretty nice. The comet is the size of a slightly smaller and lumpier Pikachu.

At 25% Focus, Vivi gains the ability to charge this attack at 3/4th of his normal speed, making it more practical to reach higher powers of charge and to better place it into the air. In addition, the attack is now delayed by 3 seconds, giving it more delay, though Vivi may doubletap to fire it off quicker as usual.

At 50%, the comet gains a fiery hitbox as it is summoned and while it lingers, which deals 4% damage and weak knockback in the direction the foe was coming from if they hit it. Vivi can utilize this tool fairly well due to its delayed nature, which is increased to a 4 second delay, as Vivi can smack foes into it and have them bounce right off it to continue an assault, preferably from a safer, longer range. In addition, this move now charges twice as fast.

At 75%, the comet will embed itself into the ground for 5 seconds if it hits the ground, keeping the same fiery hitbox it had before being shot off while it is stuck there and allowing Vivi to play with it as a grounded trap to go with an aerial trap, particularly useful being a jab into it at the edge of the jab's range. This move also now delays itself for 5 seconds and charges 3x as fast. At 100%, this move always has the damage of a max charge and charging may be done for an infinite amount of time, allowing Vivi to put the comet as high as he so desires.

However, during Double Black, the comet is upgraded from, well, Comet to Meteor, which is a good deal bigger in size, about as big as Bowser himself. It's passive hitbox deals double damage, though little more knockback, and while rocketing forward it deals 34%-46% damage and KOs at 70%-50%. This is one of Vivi's more dangerous Double Black tools, note it is delayed for 5 seconds like 100%, but it also gains significant lag on both ends, and Vivi must be more careful than usual as he is actually vulnerable to the meteor while it is using it's active hitbox. The meteor will remain embedded into the stage for it's passive hitbox for 5 seconds as well. Meteor, unlike Comet, cannot be launched early, but it does have a lot more protection when you dualcast it.​

Down Smash: Slow

Vivi waves his staff as a purple energy swirls about, coalescing into a purple clock face with chains about it after some moments and releasing a burst of energy when it does so, dealing 18%-23% damage and okay knockback that KOs at 180%-165%: Not the best killing move, but it gets space well and it has quite nice range all around Vivi, with the chains serving to add range but only dealing 3/4ths the damage and knockback as a bit of a sourspot. The energy slowly fades over time, about 8 seconds, and during that time anyone except for Vivi who enters it is slowed while entering it, suffering a very small reduction in movement speed. Starting lag isn't too bad and ending lag is decently short.

Vivi's projectiles are also slowed slightly by this, well, slowing field. The effect is not exactly crazy noticable, but it does allow Vivi a good chance to vary his projectile's speeds more easily and can have some interesting interactions, like artifically prolonging a poison cloud's life by making it take longer to become a lingering cloud or slowing the bottom half of a Thunder+ move to keep it lingering for a bit. Vivi may have 2 of these out: More than one replaces the oldest one.

For every 25% of Focus you have, the slowing effect of the field is increased by a small amount, more noticably on your own projectiles than on the foe. Even at 100%, though, the slow on the foe goes up to them being reduced to 3/4th of their normal movement speed at most, and they still have normal attack speeds, shield speeds and so on and so forth. However, you can do some pretty neat tricks with, say, turning the bottom half of your Thunder moves into damaging little walls or delaying Fira+ explosions and so on.

However, at 100% Focus and during Double Black Slow evolves into Stop, punctuated by the clock's energy going monochrome and the clock face stopping when the attack itself ends. While it retains Slow's property of slowing foes down, projectiles themselves become totally stopped, becoming lingering, trap-ish hitboxes that deal damage equal to their usual amount, though with fairly reduced knockback due to the loss of things like inertia (It throws you back a lot more to, say, be slammed in the face by a moving meteor than a stationary giant flaming rock). This is a very potent tool to throw out as it allows Vivi a lot of options, like to stop a Fira-esque move right at the edge of it's range so it explodes when Stop ends or to capture just part of an explosion from it, Thunder-esque moves turning into scary, wall-like traps and so on. Stop lasts for as long as Slow, deals as much damage, has the same size and so on. Especially scary in Double Black when you can either use it as your first cast to instantly freeze a projectile or the second part of your dualcast to freeze one you just shot off, perhaps catching spotdodgers off guard.​


Up Smash: Blizzard

Vivi raises his staff above his head and releases a chilling blast of icy energy that swirls from the top of the staff, dealing 22%-27% damage of disjointed knockback, with a sweetspot on the tip of the staff that deals 24%-31% damage. The attack KOs at 145%-110%, but the sweetspot has significantly better KO power, 120%-105%. Foes hit by most of this little blizzard will be frozen for the briefest of moments, think the Ice Climber's Down Special, which can slightly mess with DI, while foes hit by the sweetspot are frozen until just about the end of their knockback and thus have vastly reduced momentum cancelling options and cannot DI as effectively, allowing the move to KO earlier than the listed %s. It is Vivi's laggiest smash on both ends, though not absurdly laggy, but it has nice range and potency.

At 33% Focus, this move gets a fairly nice range increase and the IC-timed freeze lasts just a pinch longer. It should be noted the little "pop" after freezing is nice to combo with your comet/meteor delayed hitboxes by having them pop lightly into it. This move's sweetspot size is increased.

At 66% Focus, Blizzard becomes Blizzara, which deals 25%-32% damage (27%-35% sweetspotted) and has a bit larger hitbox, but most notably covers foes who are hit by it in a biting chill, causing them to suffer slightly more lag on the starting and ending lag of their moves as they must fight through the chill to use their moves. It is a fairly small debuff, lasts 6 seconds, but it can be stacked some at least.

At 100% Focus and during Double Black, Blizzara further evolves into Blizzaga. Blizzaga keeps the same power as Blizzara, but leaves a potent chill where the attack was for 4 seconds, giving anyone who touches it the chilled effect for the usual 6 seconds, in addition to dealing 1% damage per second to foes inside of it. Foes who enter this chilling mist repeatedly do not get it stacked, but it does refresh the timer on all stacks they have, so it is a pretty potent defensive measure.​

Grab Game

Grab: Grab Mage

Vivi grabs in front of him for a fairly standard, somewhat short ranged and quick grab.

Pummel: Stave

Vivi smacks the foe with his staff for 2%, pretty average pummel.

Forward Throw: Osmose

Vivi takes his staff and slams it into the foe, blue-ish energy being sucked from them as they are sent flying for 10% and only okay knockback, enough to get some space but that is about it. This energy works by stealing magical juice, like stealing MP in the game, and in this case works by giving Vivi some Focus upon hit, specifically 6% Focus + 1% Focus more for every 25% of Focus Vivi has, meaning it feeds into itself quite nicely. During Double Black, Vivi can even instantly follow-up with a spell from this due to dualcasting!

At 50% Focus, before the drain, the top of Vivi's staff will glow with flame, adding 1% damage to the strike and in addition 1% per second for 4 seconds after, turning this into a fairly high damage if somewhat simple burning throw. Vivi can also reset the timer by hitting the foe into anything on fire, such as higher end comets/meteors, Fira-esque moves and whatnot, so you can turn this into a nice and long slow burn.​

Back Throw: Drain

Vivi tosses the foe behind him and jams the handle of the staff into them, dealing 10% damage and fairly good knockback, not really KO worthy but a definite way to get room and combined with Forward Throw means you're never without a spacer when you grab a foe. This move also performs a drain on the foe, but in this case it serves as an HP drain over a magic one, healing Vivi 6% + 1% more for every 25% Focus he has, so this can be a pretty potent healer and a good reward for Vivi, plus a nice way for him to come back if he slips too far behind. Since it counts as a spell, magic and all that, you can follow-up immediately in Double Black as well.

At 50% Focus, a secondary magical element is added to this move in the form of an icy strike as the handle of the staff glows a cool blue. This adds a mere 1% non-draining damage to the move, but it covers the foe in a thin layer of ice as they are sent flying, which can then be shattered by any physical attack, adding 5% damage and some knockback to the assault. It is minor, but this damage and knockback is added to the actual attack's, so it can help nudge an early KO or gain some extra space or whatnot, and in general adds in damage racking potential with this high damage throw anyway. The ice will melt off after 6 seconds.​

Up Throw: Toss

Vivi grips the foe tightly before throwing them upwards strongly for 12%. This throw has some decent knockback, but it can serve as a setup throw, especially at smaller percentages, and it is your best throw for actually leading into melee, since Vivi does a lot of shorthopped close range combat and closer ranged aerial combat. It also provides a nice setup for your projectiles, most notably to swing a foe into range of your comet/meteor as it fires off or onto a downcoming Thunder move. Fairly useful overall.

At 50% Focus, an electrical effect is added to the mix. This deals no extra damage, but it does cause a modified extended version of hitstun, where foes can do anything but attack until just a moment after they hit the apex of their knockback. Since Vivi doesn't have much ending lag on the throw, he can use this time to get into a nice position to set-up on the foe, or to start on his projectiles/get more Focus time. It also causes this move to be considered a "magic" move, due to the magic involved and all, allowing you to Dualcast once the foe is out of your grip, so that can be pretty deadly.​

Down Throw: Staff Smash

Vivi lightly tosses the foe to the ground as he raises his staff high before slamming it down onto the foe for 11% damage, leaving the foe in prone. Vivi isn't the best at tech chasing physically, but moves like Fira can serve pretty well as a projectile chase, and a proned foe combined with delayed comets, poison clouds, crashed coments/meteors, your chilled blizzard remnants and so on. Overall, a nice enough move. This move gains no bonus at later Focus levels.

Aerials

Neutral Aerial: Bio

Vivi spins his staff around him, green energy with some red in the middle expanding out arond him as he does so. The staff itself is fairly weak, 4% damage and weak knockback, but it is hard to get hit with that and not the odd energy that flows outwards from Vivi and covers his body before dissipating, which deals 13% and good but not amazing knockback, it can KO at 190% so it can be a fine edgeguarding move. This move's starting lag is fast, but it has somewhat long ending lag, provides good coverage for him.

At 33% Focus, Bio gains a new ability, as bits of the odd energy will stick onto the foe like slime, and then proceed to fall off as the foe dashes on the ground or drip off as they move through the air. Moving on the ground, or when the drips hit the ground, causes it to remain there as a sort of puddle/trail, from which your various moves interact: Your ice moves will cause the trail to freeze, creating a slippery surface ala Brawl ice. Electric moves will run their current through it like a shockwave, the hitbox being half the power of the electric hitbox but travelling quite quickly on top of the trail. Fire causes the trail to evaporate and become a sticky green steam, which travels up 2-5 Ganondorfs depending on the power of the fire hitbox and deals 5% damage on contact, in addition to "dragging" the foe with it for a brief moment even without hitstun/knockback, keeping them stuck to it. Slow will slow down the slime energy's timer to allow you to use it a bit more, or any of it's interactive parts, while Stop will cause it to be frozen like any projectile. No other elemental stuff Vivi has will interact with it. The foe being energized like this lasts 6 seconds, with the slime lasting that long when placed and ergo essentially getting it's time "reset". Drips hitting the ground makes a puddle about the width of Jigglypuff.

At 66%, it lasts 8 seconds on both ends. And at 100%, it lasts for 10 seconds and this move has a minor range buff.​

Forward Aerial: Shock Strike

Vivi swings his staff forward after some long starting lag of winding up, giving him one of his more powerful staff strikes. This move deals 12% damage and can KO at 160% with most of the staff, but the tip of it is a sweetspot that ups it to 16% damage and KOing at 100%, making it one of Vivi's better KO options. With his ability to control space via slow/stop, delayed comets/meteors and so on, Vivi can do a good job getting foes into his sweetspot range, and it isn't too bad to hit with the sourspot. While the starting lag on this move is long, Vivi has little ending lag as he recovers from the strike quickly, so it isn't too horrible in that regard.

At 50% Focus, the sweetspot of this move adds an electrical element to it, causing freeze frames similiar to a sweetspotted Captain Falcon Knee or Wolf's F-Tilt. The ending lag of this move matches very nicely with the freeze frames, allowing Vivi to start right at a foe as they get sent flying, while also allowing Vivi to, for the briefest of moments, get the foe in a prime position for comet/meteor, thunder-y moves and the like...if you sweetspot, anyway. Vivi can also dualcast with this move, rather scary with the freeze frames but most of his non-quick moves aren't 100% off the freeze frames...but it sure lets you put the pressure on!

If Vivi hits Bio trails with this, it'll send electricity through it like normal, and Vivi can even hit Bio as it drips down with this to charge it with electricity and then have it sent the electric hitbox through when the drip hits the ground!​

Down Aerial: Coldsnap Strike

Vivi readies his staff high before making a sweeping strike under him, once again fairly laggy to start up. It is a pretty nice strike, though, dealing 15% and a spike slightly less strong than R.O.B.'s Down Aerial, making it a pretty valuable edgeguarding tool for Vivi if he properly predicts them or just can clobber them with the starting lag. Ending lag is about average, maybe a bit quick. It is also very useful for just plain slamming foes into your comet paths, lingering poison/comets, Bio trails and what have you.

At 50% Focus, Vivi gains a sweetspot on the tip of this move that ups the damage to 18% and makes the strike a bit longer than R.O.B.'s DAir. In addition, the tip will cause the foe to freeze for just a brief moment (not interrupting the knockback), which prevents any possibility of a Meteor Cancel and turns it into a true spike. Vivi can also use this move to freeze Bio energy, like any ice attack.​

Back Aerial: Fiery Fury

Vivi once again performs a swing of his staff, but in this case opts for a bit of a quicker option, dealing 10% damage and some good knockback, enough to KO at 150% or so, but putting a good amount of power into a quick to start strike leaves Vivi with a lot of ending lag. Probably one of your better general aerial strikes.

At 50% Focus, Vivi can hit A during the swing to launch off a fiery wave-like projectile at any point. It only goes half a Platform, so it isn't exactly used for camping, but instead as a bit of a hitbox extension, dealing 6% damage and light knockback. It can also catch air dodgers, but Vivi has to properly time it to do so: The sooner a foe air dodges, the sooner Vivi has to launch it out. It can be aimed slightly up/down by tilting the stick like a lot of Forward Tilts while firing, causing it to slightly curve in that direction.​

Up Aerial: Vivithopter

Vivi twirls his staff above his head, similiar to Pit's up aerial, dealing multiple hits of 3% that add up to 15% overall and like Pit's hit back and forth "towards" the staff, making DI difficult but not impossible. Overall, though, this creates a sort of "dragging" knockback that makes it pretty nice for repositioning foes. Vivi also slows his descent some during this move and gains increased aerial DI, allowing him to get some better air control with it, and helping to drag foes towards your projectiles and the like. The last hit pops foes up lightly. It is very quick on both ends, which makes it very useful in pure air-to-air combat. This does not do anything special Focus-wise.

Final Smash: Doomsday

If Vivi is not in Double Black, he will automatically enter it and be given 100% Focus as he casts his Final Smash, an absolutely HUGE asteroid appearing over the stage...and then more and more comets and meteors fly in and crash into it, adding onto it's size even more and more. The asteroid then slowly drops onto the stage, large enough to easily cover most of New Pork City or Temple. As it drops onto the stage on top of Vivi, glowing red hot as it does so, it will crash into the stage and basically explode, the screen flashing white for a brief moment as what appears to be shards of the stage fly out, though the stage itself is fine. Being hit by the meteor directly deals 150% damage and KOs at 60% and it instantly breaks shields, in addition to causing a 100% damaging, 90% KOing earthshaking hitbox on the ENTIRE stage. The only way to dodge it is to VERY precisely spot dodge/roll or to hit Vivi before he can get it off. Vivi himself takes 50% damage from this, but with how much damage it does...

Playstyle: Black Mage


Vivi's playstyle is based on a concept almost as old as Final Fantasy itself: Stay back and whack the foes with your projectiles. Vivi is helped by the fact that, while he may not be the strongest character to begin with, his unique Focus ability to buff his attacks and Double Black ability to dualcast gives him incredibly potent destructive potential, throwing out hugely damaging hitboxes without a care in the world...as long as he gets the time. Vivi excels most of all at long range, where his mix of projectiles allows him to control the battlefield effectively and buy time to power up. However, Vivi is also fairly competent at close range, with a decent number of his moves working well at that combined with strong and simple physical spacers such as your Jab, Up Tilt and shorthopped Back Aerials and NAirs, even some FAirs.

Vivi's true problem stems from foes who can best play excellent at midrange and outperform Vivi's spacing: Vivi tends to want the foes specifically either close or far and struggles when having to deal with a foe who is good at staying in-between. Some of the best ways to handle this are with comets, Forward Tilt, Down Smash and your NAir energy trails to make certain areas undesirable to be in and, thus, better able to remove the midrange from where you are. As you gain more Focus, it becomes easier to do this with your other moves, such as higher levels of Side Special and Down Special.

But of course...the most important thing to remember about Vivi? Unleash RAW DESTRUCTIVE POWER and crush your enemies, that's the goal!
 
Last edited:

MasterWarlord

Smash Champion
Joined
Aug 24, 2008
Messages
2,902
Location
Not wasting countless hours on a 10 man community
NATURE’S PROPHET


Nature’s Prophet was originally Furion/Malfurion from Warcraft, but was changed by Gaben’s legal team to avoid copyright issues. Nobody liked Furion being an elitist about using demon artifacts in Warcraft 3 or for being off in some imaginary dream realm for the entirety of WoW anyway. Regardless, he is oftentimes still called “Furion” out of habit, and because his remaining name is a bit long to type in a competitive setting. Alternatively he is sometimes simply called “Nature”, which can end up quite hilarious.

Nature’s playstyle in the game largely consists of killing monsters in the “jungle” to farm gold in the early game, surprisingly fitting for his personality, before “backdooring” in the late game to push lanes. This consists of abusing his infinite range teleport to go into the lane that no enemy heroes are in, summoning minions and pushing the lane to try to destroy towers, before going to another lane that they’re not in. He can help in any fight going on in the game due to his teleport, but oftentimes it’s better to just continue taking towers while enemies are occupied. His characterization otherwise largely just consists of being a protector of nature and wanting to kill those who defile it.

STATISTICS

Traction: 9
Size: 8
Weight: 7
Aerial Control: 6.5
Jumps: 6
Falling Speed: 5
Aerial Speed: 5
Ground Movement: 2.5

SPECIALS

DOWN SPECIAL – SPROUT/NATURE’S CALL

Nature channels by holding his staff above his head and shaking it as a paper thin Wario width blue cursor appears on the ground in front of him. You can move the cursor a bit faster than Captain Falcon’s dashing speed by holding left or right, wrapping around the stage or other solid objects. On release, a solid tree pops out of the location you chose. It has a minimum height of Mario with 20 HP, though with up to 1.5 seconds of staying in the cursor “mode”, the tree will reach up to double Ganon’s height with 65 HP. Nature personally has as much lag as placing a Snake Down Special mine for this, though the tree will take additional time to form, up to a second with full charge. It has HP proportionate to the current size, so foes can potentially kill strong trees while still growing.

If this is used in the air, the cursor will spawn on the ground underneath Nature. If used off-stage, it will spawn on the nearest ledge by default. If a tree is created out of a ledge so that it’s pointing out horizontally, the end of it will become a grabbable ledge instead of the actual ledge, enabling Nature to potentially “expand” the stage by up to 1.5x Ganon’s height on either side. He can also sprout trees under the stage upside down, though that has minimal purpose at this point in the moveset.

The cursor will by default ignore trees rather than wrapping around them, but you can press “up” when you reach a tree’s base to wrap around it like the stage. If you do so, you can cause a branch to come out of the tree. The branch will be half as tall as a tree you would make with the charge, with half of the HP. Attacking the branch does not damage the main tree, and branches function as drop through platforms.


If you attempt to use this move at the base of a tree, it will animate into a treant with the same size and HP as the tree. Treants mindlessly approach foes at Ganon-Mario’s dash speed based off size with a single average jump, and have a single generic very short ranged attack with their “arms” that deals 5-15% and knockback that KOs at 250-180%. Their attack comes out fast, though has long ending lag to ensure they can be punished. Trees take knockback comparable to Jigglypuff-Bowser at 30%, not enough to easily kill them, especially if other trees are in the way of knocking them off the stage, but enabling foes to get them away.

If the tree has branches before becoming a treant, the branches will become the “arms” of the treant. Up to one branch on either side will simply extend the arms of the treant to be as long as the branches, while giving multiple branches on either side will give the treant multiple arms. The range increase gives treants a much more increased presence and can even enable them to attack “through” solid trees via clipping, while multiple branches will give the treant access to multiple attacks. The treant attacks with both arms, though, so the extra attack will only be half power unless there is an extra arm on both sides. Treants will only use one attack at a time, and will prioritize the strongest, shortest range attack that can currently hit the foe. They will make use of their extra arms when their prioritized arms are in ending lag cooldown.

UP SPECIAL – TELEPORTATION

Nature gains a cursor identical to the one from the Down Special. Upon release, he will teleport to the targeted destination. This makes a decent mindgame in foes chasing after the cursor to try to hit you when you show up there with lag on par with Zelda’s Up B (With no hitbox!), when instead you can just spawn a tree at that position. Nature takes half a second to teleport to his target destination, though the lag will start ticking down while you select where you want to appear. On release, roots pop up out of the ground at the target point and Nature spawns in that position with a flash. He can potentially hide in taller trees to avoid the foe, or go under the stage by landing on a branch of a tree down there.

It was not especially worth going over before, but some small roots will pop up under the stage for trees placed there, and vice versa. These roots can be attacked to damage the tree normally, enabling foes to attack trees under the stage from the top of the stage to stop Nature from stalling. These roots do absolutely nothing to impede foes, and still must be hit by attacks aimed at the ground, though, so it’s more of a nuisance for foes to go out of the way to destroy rather than trees directly impeding their way. Trees under the stage serve more as camping platforms for Nature, as well as extra places to retreat to.

SIDE SPECIAL – ENTANGLING ROOTS

A third special with the same channeling cursor animation as the others has him summon entangling roots up out of the ground at the target point, or vines if he has them come out of a tree. The length of the roots/vines is a platform’s length up to double that with up to a half second of charge, with 15-35 HP. When the appendage first sprouts out of the ground, you can choose what direction it shoots out in, attempting to latch it onto something else. If it fails to latch onto anything, you can press Side Special over the root again to laglessly make it lurch out in any direction again, though the root itself has some ending lag to keep it from being spammable. Smashing the input will have all available roots immediately attempt to grab the nearest foe if any are out, skipping the lengthy selection process and enabling multiples to attack at once.

If a root is attached to a tree and it becomes a treant, it will still drag the tether around and any foe who is tethered to it. Slower and smaller treants struggle to move most foes anywhere, but faster, heavier ones can pull all but foes who are both heavy and fast. Treants will automatically attempt to tether foes to them once every 5 seconds if they have a root growing out of themselves not attached to anything.

NEUTRAL SPECIAL – WRATH OF NATURE

Nature spawns a green blob of a projectile in front of himself the size of Kirby which shoots in the chosen direction at Sonic’s dashing speed. The projectile has transcendant priority, ignoring everything and not expiring on contact with things it damages. The projectile will go through solid objects like they’re nothing, clipping through them without a care. When it reaches a blast zone, it will bounce back in the direction it came from and head to the other blast zone before expiring. Nature cannot use the move again until the existing projectile has expired.

The power of the projectile increases the further it has currently traveled. It deals 1% and knockback that KOs at 300% at base, but for every Marth it travels it KOs 10% earlier and deals an additional 1%. This projectile can travel massive distances in the blink of an eye and can boomerang back to have this scale massively, though it caps at 24% and knockback that KOs at 70% after having traveled 23 Marths. The move comes out with .3 seconds of lag. It doesn’t really “linger” that long due to how fast it goes, but it will cover such a wide space that it can become a big goal to try to keep the foe in that space, such as if you just have the projectile go along the ground of the stage.

SMASHES

DOWN SMASH – FUNGUS

The prophet points his staff at the ground in front of him as a mushroom forms up out of it. It is as large as the mushroom item at minimum size, but with charge can become as big as Wario over time. The mushroom has 5-25 HP, and can be picked up as a weak throwing item if charged less than a quarter of the way. If larger, the mushroom cannot be picked up, but acts as a bouncy “spring” characters can jump on that will boost them Mario-double Ganondorf’s height. If an enemy character bounces on the mushroom spring, they will damage it for 5 HP. To use this as an actual attack, simply double tap the move as if it were a “two part” attack, and the mushroom will explode after being created, releasing venomous spores in a radius 1.5x the size of it. These spores deal 15-35% in a mass of flinching hits, with the final hit KOing at 220-160%, and are extremely difficult to DI out of. If the mushroom is destroyed by having HP depleted, it will explode in the same way.

This can help you to get over your trees, though can do the same for foes. If they use it too liberally or it gets in the way of something, though, they will pay the price for it. If you use it in such a way the foe has to use it to catch up, they’ll be bound to destroy it with their weight sooner or later and get hit (Damage is dealt to the mushroom before it boosts them, so they will most definitely get hit). As far as the item version, simply throwing it in the way of their attacks meant for trees can be nasty, and even if they don’t it is still a simple weak throwing item.

Treants can pick up items, and will pick up any mushrooms that come in their way automatically and laglessly. They only need one arm to hold the mushroom, so even with no additional arms they can have a weaker basic attack in exchange for holding onto it to help defend themselves. They will only throw the mushroom if it will combo into something, whether it be from them or something else. Larger treants will uproot larger mushrooms (Max size treants for max size mushrooms) and carry them with two arms, and simply hold the mushroom in front of himself at all times as it attempts to ram the foe with them. The treant will prefer to hold onto the mushroom with the smallest arms it has to defend itself, using any longer arms it has to reach beyond the mushroom and attack them. If you want the mushrooms to reach out from the treant, you can place the mushroom on the branches of the treant when it’s still a tree to have it permanently stuck there, though then it will be aimed upwards and be slightly less useful.

UP SMASH – TRANQUILITY

The prophet looks upwards as he raises his staff high into the air, holding onto it by the bottom, for a sudden downpour to rain down from the heavens. This does not actually spawn from the top blast zone, but instead spawns a set distance above Nature’s current position as a rain cloud, an identical amount to Pikachu’s Down Special to be specific. From this cloud, a Wario width stream of rain will come down for a solid half second as far as it can go, dealing 17-32 hits of 1% and flinching with the final hit killing at 200-140%. This is laggier than Pikachu’s Thunder, but Nature can still move out of the way of the rain before the end to make a small “wall” to hide behind.

All of these hits will heal any of your constructs in your moveset that can be damaged for the same amount they damage foes, and is the main thing making this attack worth the lag. You unfortunately cannot heal yourself, but this can go a long way in maintaining a competent set-up, especially when this move actually doubles as an attack. If the water hits the ground, it will still heal any trees within half a platform of that ground as the water gets absorbed into their roots, enabling you to more easily heal multiple things. If something healed is tethered to something else that can be healed, it will also be healed, enabling you to make a pretty good ecosystem with this move.

As far as actually using this against enemies, one of the most obvious ways is just using the large vertical range of it to hit foes attempting to climb over a tree. It’s surprisingly potent under the stage, though, in that when you’re so low the “raincloud” on top of the stage can be brought very close to the ground to hit foes more quickly, giving you a rather unique way to “camp” at them while simultaneously healing your trees.

FORWARD SMASH – NATURAL DISASTER

Nature’s Prophet puts his staff on the ground as he holds onto it with both hands and closes his eyes for charging, with the tip of his staff under his hands glowing blue. A tornado is then spawned in front of him, with size varying from Mario’s height to double Ganondorf’s based on charge. The tornado will travel the 3/4ths the length of Battlefield at the speed of Mario’s dash, and this move has surprisingly little lag – Nature can spam this attack as quickly as Wolf can spam his blaster, though all of the lag is put at the front with none of it at the end to make this have some degree of start-up.

The tornado does no damage, but if foes get caught inside of it they will take constant flinching hits for no damage (20 per second) and get dragged along with it. They can DI out, but it’s fairly difficult and will take them quite some time. The tornado goes through the background and foreground, swirling around, and while this doesn’t matter outside of aesthetics, it means that the tornado is able to pass through solid objects. It will drag characters “through” these objects with the aesthetic of spinning them around the object, in the case of Nature, trees. As far as coding, enemy characters are just allowed to clip through solid constructs while inside the tornado. This enables you to attack foes on the other side of a tree, but also directly enables you to push them back behind one.

If this passes through a tree, several leaves from the tree will get absorbed into it and spin around inside of it, causing the flinching hits the tornado deals to now do 1%. Trees have enough leaves for 1-3 tornados to absorb leaves from them based off size, though they will regrow one tornado’s worth of leaves every 15 seconds. If the tornado goes through multiple trees, this will stack.

Nature’s projectiles can be absorbed inside of a tornado, at which point they will briefly spin around inside and hit any foe inside of them guaranteed before getting shot out of the top with their trajectory reset to be aimed upwards. This can be a good way to “catch” a Neutral Special projectile after it has come back from a long trip and is very powerful – all you have to do is get the foe in there. This will also renew the duration of your projectiles, again most relevant in the case of the Neutral Special due to the fact it will “bounce” off the top blast zone and come down again, as well as enabling it to travel further for more power in the event it’s not maxed on power yet.

AERIALS

NEUTRAL AERIAL – CIRCLE OF LIFE

The orb on Nature’s staff again glows blue as he starts spinning around, creating a tornado around himself. . .In fact, it’s Mach Tornado, with just as broken of disjointed priority, though it’s more possible to poke Nature out of the attack due to his increased height while the hitbox size is still the same. Unfortunately, much like the fsmash, this attack does no damage, but it still is a very obnoxious move to casually throw out due to all of the flinching, and it is a good way to “stun” the foe for your minions or Neutral Special to hit them. Nature’s version does not put him in helpless in the air, but he can only gain height with it once per air trip.

This attack has all of the properties of the fsmash, enabling Nature to casually pass through his own solid trees when a foe is hot on his heels, as well as grab leaves for the hitboxes from trees. If you want to hit the foe but don’t want them on the same side as you, keep in mind the last hit still does knockback like Mach Tornado even if there’s no damage, so you can blast the foe out to one side before DIing over to the other. Using this attack will only take up half as many leaves as the fsmash does from a tree, enabling you to get the actual Mach Tornado at your disposal when this is used next to a tree.

Your projectiles will behave the same way as the fsmash, as you expect, but they will specifically stay in the tornado for the entire duration of the move, only getting shot upwards at the end. This lets you grab a Neutral Special projectile and hold it for a while as you attempt to get the foe inside the tornado, or just simply more specifically choose where to redirect the projectile. The usmash also counts as a “projectile” and while also usable with the fsmash, is much easier to use with this faster attack. While it’s predictable on foes, you can catch the water and DI through trees to heal them. If you really want to catch the same water over and over, though, know that even if it is “renewed”, it can only heal something once.

If you pass an fsmash tornado while in the nair, you will donate any of your projectiles/leaves you have gathered to the fsmash tornado at the end of the nair, or vice versa if the fsmash expires first.

FORWARD AERIAL – BRANCH OUT

Nature swings his staff forwards for a very simplistic physical attack, though the end of it glows green. The size of the staff is slightly exaggerated to give the move very good range, though the problem is there’s only a small sweetspot at the end of the staff that has a good sweetspot. Most of the staff just deals 5% and knockback that KOs at 200%, while the end deals 14% and knockback that KOs at 125%. The move is quite fast and makes for one of Nature’s better spacers, though this can also make the KO move portion stale from hitting with the sourspot multiple times.

To actually use the sweetspot, aside from simply staying at a range as much as possible, the best way is to hit foes through trees with it. By having the staff clip through the tree, you can eliminate most of the hitbox and attempt to hit the foe with nothing but the end of it. This is a good technique on foes attempting to climb trees to reach you, but an even better one against foes just hacking away at your tree in a futile attempt to chop it down, during which time they have little choice but to be humping it.

BACK AERIAL – SHIFTING WINDS

A small whirl of wind spins occurs in an area 1.5x Nature’s size after a fair bit of starting lag, though it is centered on his back rather than directly on him. Foes will be pushed to the end of this wind hitbox as powerfully as Dedede’s inhale, and will also be hit with a Mario cape effect 3 times if they stay in the hitbox for the whole .4 second duration. Nature is free to move after .2 seconds, though he cannot use this attack again until the entire duration is up. While this does not truly stun the foe, it forces them out of this specific area by jumping or falling down, and can save you or a construct from an attack with the first time the foe is turned around. Nature can of course also can hit foes on the opposite side of a tree due to the nature of the attack, though much of the hitbox will be wasted “inside of” the tree. Regardless, it’s a decent mix-up with the fair, and even without trees can help you get the spacing you need. Alternatively, just use the attack to obnoxiously impede foes and leave.

UP AERIAL – DRYAD HORNS

Nature makes use of his horns when he is tasked with attacking above himself, headbutting foes as turning to face the fore/background. This is a spammable melee attack that deals 8% and vertical knockback that KOs at 165%, making it a respectable anti-air to hit and even juggle foes as they descend the opposite side of a tree after having climbed up it to reach you.

DOWN AERIAL – STAFF OF SMASHING

Nature holds onto his staff with all four of his limbs before doing a stall then fall, fairly comparable to Toon Link’s in speed, though with 0.8x the power. On contact with something, a green explosion appears at the end of his staff to propel him back upwards slightly. While he will still bounce off of characters/shields he lands on, he will not suffer any lag for it and be able to immediately act again. He also bounces off the ground, and if he bounces multiple times without touching the ground, his height will increase by a Ganondorf height each time, stackable up to 4 times.

This makes a rather easy way to go over trees without just teleporting past, mainly if there are branches on the tree. If they are spaced out in a rather specific fashion, you can quickly jump from one to the next with the extra gained height each time, possibly making a bigger jump if there’s a mushroom placed to give some extra height. You can also mimic Sonic by rapidly spamming your dair on a mushroom in place, but unlike Sonic this serves actual purpose as it will get you your full dair momentum immediately as well as adding on any height gained from the mushroom itself.

STANDARDS

JAB – OLD MASTER

Nature spins his staff in front of him, doing 25 hits of 1% and flinching per second in an infinite jab, which is quite abusable against solid trees. The difference with this from other similar jab is that every half a second Nature will swap the staff into his other hand with surprising agility and place it behind himself, or above himself with an input of “up” at this time. This can catch foes attempting to DI out into the selected direction, but if foes just sit in front of you and take it you will still be forced to move the hitbox somewhere else. If you want to avoid this, you can simply stop holding down the infinite jab and start it up again to keep it in front of you, though the foe will then be given a good 6 frames to react.

Nature can also start the jab by spinning the staff above or behind him, making the move decent for anti-air if making a bad trade-off with aerials given they have no system for priority.

DASHING ATTACK – FOREST’S ENERGY

Nature’s Prophet points his staff at a 45 degree angle downwards in front of himself as he charges up an attack, continuing to dash at his regular speed whether or not you hold down the control stick. The prophet can also place the staff on the ground behind himself similar to how Captain Falcon and Ganondorf can reverse their Neutral Specials, with similar added lag. Nature will continue running for as a green energy charges at the end of the staff, up to .4 seconds, then unleash it at the end of earlier if A is pressed.

This energy blast deals 4-13% and knockback that KOs at 250-160%, and will also propel Nature in the opposite direction a Kirby width-a platform’s width. This attack can make approaching actually be a decent way to “flee” from the enemy, as even if you miss you’ll be set-up to continue running. You can also simply place it behind yourself as a more direct booster to fleeing, and you’ll be pleased to find this attack has no ending lag.

This attack can be used more offensively when next to a tree or tether, as it will negate your pushback with your back to it and potentially enable you to act quickly enough to follow-up with something, even if it is just a projectile. This can also be used as a more traditional melee down tilt in place of your projectile down tilt when on a drop through platform, as said platform will just allow you to dash in place during the charging. In fact, this attack actually does downwards knockback, good to knock foes down approaching up a tree, but you’ll only realize it in such situations due to it translating to upwards knockback on foes.

FORWARD TILT – NATURE’S FEROCITY

Nature swings his staff forwards to create a single generic red spammable projectile that does 4% and flinching, half the size of a Pokeball. He can fire this as quickly as Falco’s laser given it’s his generic right click attack from the game, but this has a range cap of Final Destination and is less threatening when the projectile isn’t as huge as Falco’s laser, and he can’t shorthop it due to it not being a special. Regardless, he is very happy to have an actual spammable projectile.

UP TILT – SUNBEAM

The Prophet raises the top of his staff above his head as a yellow beam the size of Peach comes up from his staff, redirecting sunrays from it. This can be angled up to 20 degrees to the left or right, and deals 16 hits of 1% and flinching over two thirds of a second, with the last hit killing at 135%. This is a fairly laggy attack to commit to when it leaves Nature completely vulnerable to enemies not above him, but is good anti-air.

The beam will reflect off of solid objects and other surfaces like drop through platforms, also enabling you to use it to cover a more wide space by standing under a tree branch/next to a tree and actually defend your hurtbox with it, somewhat similar to a Rob laser but much longer lasting.

This attack will cause trees, treants, and mushrooms to grow up by up to 16% of their maximum charging if all of the hits connect, as the sun’s rays cause the plant to grow. This can make it more worthwhile to plant minimum charge trees as you can still get them to grow bigger later, and the reflection element can enable you to hit more things at once. This is particularly interesting in the case of a minimum charge mushroom, as you can throw it above yourself before hitting it with this attack to cause it to grow into a spring mushroom in mid-air before it falls back down. While this has interesting offensive use, it lets you place the spring more liberally without you having to be there, and enables you to get some potential attacks off while setting something up.

DOWN TILT – SACRED GROVE

Nature places his staff on the ground as he creates another projectile comparable to the forward tilt, though it is a bit bigger and deals 6% and actual knockback that KOs at 225%. This is 1.6x as laggy to produce as a ftilt projectile, but the property this one has is that it travels around stages like (more functional) Hotheads. They travel at Jigglypuff’s dashing speed and and can around the entirety of Final Destination before expiring, though they do expire upon hitting something they can damage, unlike Hotheads. This is mostly useful in tandem with your trees, and due to how long they will take to go around branches can give them a possible second pass at a foe. If standing on a tree under the stage, this is also a way to very slowly camp at the foe, or to simply create some projectiles to take advantage of a while later when you actually meet up with the foe.

GRAB-GAME

GRAB – THORNS

Nature points his staff to the ground to cause some thorns to sprout out from it, then moves his staff around to angle the thorns as they continue to extend out wherever he wants. The end of the thorns are a grab hitbox, though they extend at the rather painfully slow rate of Jigglypuff’s dash. The rest of the thorns stay out and deal 3% as the foe passes through them with no stun or knockback, though attacking them will deal foes 0.5x the damage of their own attack (Again, no stun or knockback), 5% minimum. Thorns have 10 HP, with the amount of thorns getting destroyed being the size of the hitbox. Thorns can pass around branches, tether roots, and trees, but will instead wrap around them, causing foes who attack it to damage themselves with the thorns the next time they do so.

It takes as much lag as the ending lag of Ivysaur’s tether grab to exit this stance, and still has more lag than usual for a grab to enter. The “end” of the thorns Nature controls must constantly keep moving, and they can never overlap with other thorns, meaning Nature can’t just hold the grab hitbox on top of himself. The key to using the added thorns effect well is to actually try to grab the foe while using the move, perhaps wrapping around a tree as you go up after it to grab them or going around a tether they’re caught on while closing in. If not used to directly defend something, your intent would more be to make the foe go through it as many times as possible.

PUMMEL – GROW

The thorns continue to grow for as long as you hold Z, carrying the foe with them. This enables you to better position the foe as you like and can help with the bthrow, but given how slow it moves you won’t get much mileage out of this until higher percentages.

FORWARD THROW – PARASITE

The end of Nature’s staff glows, causing the thorns that have the foe in their grasp to glow green. The thorns then toss the foe out of their grasp at a bad diagonal angle, KOing at 200% with 7% damage. As the foe is thrown, a mushroom identical to a minimum charge dsmash will sprout out of the top of the foe’s head. They cannot hit outside of attacks that make this part of their body or their entire body a hitbox, but this is largely a good thing, as doing so will make it explode on them to deal 15% as usual. Nature can destroy this mushroom himself by attacking it with the pitiful 5 HP, though foes can attempt to intentionally let the mushroom on their heads be “shield poked” due to the convenient location of where it has been spawned to shield the explosion.

BACK THROW – SLAM

The thorns slam behind themselves as far as their length will allow, dealing the foe 13% as they slam them against the ground. At that point, the thorns will specifically release the foe, causing them to bounce off of the ground they slammed against and take vertical knockback off of it. The thorn can potentially slam the foe under the stage if long enough to deal downward knockback, or more commonly against a tree to deal horizontal knockback. This knockback KOs at 200% normally, though can be a much bigger threat.

The foe can act during this, but have no control over their movement. They cannot dodge being slammed against the ground, but they can destroy the portion of the thorns that have them grabbed before then. Doing so, though, will cause them to take knockback based off where they were being flung, and the knockback can KO as soon as 130% in this way, and they will take damage from attacking the thorns as usual. Nature is also free to act during this throw, and can potentially punish them. Unfortunately, though, he cannot use the grab again until after the throw finishes.

UP THROW – STICKER BUSH

The thorns move to impale the foe’s feet or whatever they walk along the ground with, embedding as many thorns inside of the foe’s feet as possible, causing the foe to be launched upwards with knockback that KOs at 150% along with 9% damage. This is a purely vertical kill throw, so none of your trees will get in the way. In fact, it’s possible for Nature to get the foe higher than usual, making this one of his most obvious KO moves.

This applies a status effect to the foe that lasts for 7 seconds – whenever they land on the ground, the thorns in their feet will damage them for 3%, and every Wario they walk will damage them for 1%. If the foe lands on a branch covered in thorns, the effect’s duration will be increased by 3 seconds. This directly penalizes the foe for chasing you around, and will make foes prefer to mindlessly hack down trees in front of them so they don’t have to move.

DOWN THROW – CONSTRICT

The thorns constrict the foe, dealing 1% per eigth of a second until the foe escapes the grab. Upon release, the foe will become footstooled for the regular amount of time if in the air, or enter untechable prone if on the ground. Nature is free to act as soon as the throw is input, making this the best way to stall for time if you have some percentage already on the foe to easily attain further set-up. Nature may not use the grab again until the foe is released.

Even at low percentages, putting the foe in prone can help with stalling, as they will get damaged by their own get-up attack if they do so within the thorns. Assuming the thorns are between you and the foe, they will typically roll up away from you to minimize thorn damage. Regardless, more percentage rewards the prophet with more set-up time, giving you more incentive to actually damage them instead of running away.

FINAL SMASH – GOD OF NATURE

The prophet teleports off the stage. This has the lag of his normal teleport, and if stopped will prevent him from using his Final Smash. If he succeeds, the prophet gains control of a constant cursor he can move around like in his Specials that aren’t the Neutral Special. From here, the Prophet can input all of his moves outside of his aerials, Up Special, jab, and dashing attack, and it will spawn from the cursor’s position. All attacks have halved lag, and trees will grow to full height with zero charge. Nature is obviously invulnerable during this time, and can stay in this state for 12 seconds. While the cursor is bound to the stage, enabling foes to evade most attacks by going to the air, this enables him to do plenty of set-up for when he comes back.
 
Last edited:

Junahu

Smash Ace
Joined
Nov 15, 2005
Messages
899
Location
Shropshire Slasher


Arklay Mountains: Spencer Mansion July 23 1998
A string of bizarre cannibal murders had occured in the Arklay Mountains, a region in Midwestern America located near Racoon City. Roads leading into the mountains were closed, and the City's elite S.T.A.R.S team was dispatched to investigate. Not much is known of the incident, but the surviving S.T.A.R.S members report that an isolated mansion in the mountains was the source of the murders. The Mansion was destroyed utterly, making further investigation of what happened impossible

Arklay Mountains: Raccoon City September 29 1998
A severe biohazardous outbreak occurred within Raccoon City. Despite the best efforts of its law enforcement and military groups, only a handful of the population could be evacuated. It has been revealed that two civilians entered the city after its barricades faltered; Leon S Kennedy, and Claire Redfield. Leon Kennedy managed to escape the city, along with Sherry Birkin. The small girl, related to the scientists who had triggered the outbreak, had been infected with and later vaccinated against a vicious new strain of virus. She has been quarantined so that the virus can be investigated.

Arklay Mountains: Raccoon City September 22-30 1998
Members of Umbrella Security Service were sent into one of Umbrella's laboratories that had fell silent. They were tasked with retrieving samples of the lab's research. The mission went catastrophically awry, and a biohazardous virus was exposed in the sewers beneath Raccoon City. Infected rats quickly spread the virus to humans, and over a period of 4 days the city descended into chaos. Various Umbrella related enforcement groups, such as the UBCS were sent into the city under the pretense of evacuating survivors. In reality, their task was to eradicate any evidence of Umbrella's involvement in the incident. Additionally, Umbrella deployed new Bio Organic Weapons into the city, taking advantage of the chaos in order to conduct field tests of its secret Biological weapons.

Spain: Salazar Estate January 11 2005
A terrorist group located in rural spain had abducted the American president's daughter, holding her to ransom. A newly assigned special agent, Leon S Kennedy was tasked with her rescue. In his report of the mission, it was revealed that the cult responsible was using parasitic "Plaga" to control the populace of a nearby mining village. The parasites are social, meaning that they communicate and follow commands from dominant plaga. This gave the infected persons an autonomy and seeming intelligence that was completely different to any previous biohazardous incident on record.

West Africa: Kijuju Autonomous Zone March 5 2009
Bio Organic Weapon smuggling had been occurring in the Kijuju Autonomous Zone. The BSAA, a Biohazard investigation force formed after the plaga incident in Spain, dispatched its teams into Africa in order to assess the situation. In addition to the plagas strains that were being distributed, a new virus had been developed in the area by TRICELL Inc. This infectious pathogen was noted for its rapid development, killing any host in a matter of seconds and consuming their corpse into a writhing mass of flesh. The BSAA agents managed to secure the virus and prevent it from being deployed against the entire world.

 
Last edited:

Smady

Smash Master
Joined
Apr 29, 2007
Messages
3,306
Location
K Rool Avenue
BEHOLD, THE ULTIMATE LIFE FORM,


TYRANT!
10 WEIGHT
10 SIZE


Tyrant is a giant by Brawl standards, almost one and a half times the size of Ganondorf and due to his incredible physique, as wide as Donkey Kong: a true Adonis. His fantastic weight, slightly heavier than Bowser, means that Tyrant is no stranger to the two-hundreds of percentage. Tyrant’s jumps are more leaps, their height comparable to Falco’s first jump.

However, there are considerable fallbacks to these seemingly insurmountable statistics.


1 WALK SPEED
3 AIR SPEED
10 FALL SPEED


This failure is your saviour?

Tyrant’s movement is easily comparable to Ganondorf – he’s slow, painfully slow, and awkward in the air to the nth degree. He almost directly shares the walking and running (not dashing) speed of the Gerudo King. The simple act of turning around is a laborious process, leaving it open for punishment. This monster has one deadly trick up his sleeve, however, that takes advantage of his size and strength: permanent super armour. This armour negates any knockback or stun taken from moves that deal up to 13%. There is, however, one more statistic to consider:

10 DASH SPEED

This dash speed rivals Captain Falcon and would be the second fastest in Brawl. The one problem with this and Tyrant in general is that his super armour doesn’t carry over to when he’s attacking, dashing or in the air. This means the player will not always favour a dash to approach their opponent, especially one who can lead into a long combo against a massive, fast-falling tank of a character. This influences Tyrant into choosing his approaches carefully and playing a defensive, slow game until that point.

SPECIALS
SIDE SPECIAL: BIOHAZARD

Tyrant pulls back his claw arm, then unleashes a straight slash comparable to Marth’s shieldbreaker in terms of start lag, appearance, range and how it can move it forward in midair for a limited recovery option. The end lag is comparable to Warlock Punch in terms of its lag, specifically end lag which is 55 frames or nearly a second long, turning Tyrant into a damage sponge if he whiffs the move. The attack does 33-37% damage on ground and 40-43% damage in the air, more if the foe is closer, and can KO light characters from 0%, all very comparable to Warlock Punch. The move also shares other properties of Marth’s shieldbreaker, in that it does equal damage to shields, leaving the foe at an incredibly vulnerable position if they do shield the move. It does surprisingly low shield push but high shield stun, leaving the foe open for a shatter attempt or quick grab. The end lag is thankfully a great deal less punishing, meaning you can follow up immediately if you do hit a shield.

The incredible strength of Tyrant combined with it putting all of his power into his claw gives it super armour against all knockback or stun for the duration of the move. A quirk of the move is that by hitting Tyrant during its long starting lag, the power of the move can be reduced respective to the move(s) used – at a minimum of 25-29% damage and instead knockback comparable to a Ganondorf forward smash. This is still a viable KO move but also a good compromise for if the foe is low on shield, enough for it to be shattered, or doesn’t want the follow-up even if they successfully shield all the way. This is especially true early in the match, when Tyrant doesn’t have to worry as much about his percentage, as a foe will recover from the stun slower if their shield is shattered. All of this makes it a good opener to encourage a trade-off and whittle down the foe’s percentage with big damage, at the cost of resetting his approach, not a huge cost when Tyrant has the super armoured walk and fantastic dash speed.

NEUTRAL SPECIAL: RELOAD


Tyrant takes a strongman pose, kneeling on the floor and charging up red energy in an aura around itself, the same as that which surrounds his powerful attacks in the last phase of his Resident Evil 1 boss fight. The lag on this move is low on both ends, although it’s also interruptible. This has a dual function. Firstly, it recovers Tyrant’s shield at double its usual rate and enhances it to 1.5x its max at most. Tyrant’s shield doesn’t increase in size, but does maintain its max size for longer until it is attacked enough to wear it down to normal. The second use of the move is more direct: Tyrant’s moves all now leave behind a red trail or “after-image,” creating a delayed hitbox that has the same effects as the move that was used. That doesn’t include any grabbing hitbox. The duration of this effect is three times the length of time Tyrant spent charging the move, maxing out at 9 seconds, whereas the duration of the after-image itself is 1 second. It’s enough of a lasting impression to dissuade a dodging foe, and also set up easy combos that normally couldn’t work. As this move can be interrupted, it’s best used as a way to force an approach from the foe, as otherwise just using this with the side special is very dangerous and covers all of the end lag.

UP SPECIAL: CRITICAL CHARGE

Designed to run at 43-miles-per-hour, Tyrant rushes forward at an incredibly, almost instantaneous speed, covering a battlefield in distance on the ground or in the air, performing a shoulder charge at the same time. The move defaults to up in the air and forward on the ground, but can be angled either direction or backward during start-up. This deals 15% damage and high knockback, comparable to the most powerful dash attack in Brawl. The move’s lag on both ends is low. The effects are similar to Ganondorf’s dash attack, in that it pulls along a shielding foe, but due to Tyrant’s super armour this isn’t as much a problem. It’s therefore the most straightforward way to force the foe into a corner. Normally the move wouldn’t have a great effect beyond a good recovery and pressure, but due to the neutral special, can leave behind an insanely powerful trail reminiscent of Fox Illusion. The grounded version of the move can be cancelled out of early with any of Tyrant’s standards, including his jab and three tilts, giving them a greater degree of versatility, and creating a DACUS-like effect.

DOWN SPECIAL: EXPERIMENT

Tyrant brings up one leg and charges it, bringing it down forcefully to deal 14-19% damage and high vertical knockback. This move has low start lag but the charge is what you want, and charges as much as a normal smash attack. as in front of Tyrant a part of the ground is raised by it stomping the ground with his unbelievable strength. This piece of ground is not immediately in front of it, as it is elevated by the part of the ground he stomped down, becoming a wedge. As this elevation is formed, it is a hitbox that deals 10-14% damage and equal knockback to the attack, which can KO around 150% at highest. The elevated ground is only as wide as an item crate but sticks around for 5-10 seconds depending on charge before it fades back to normal. The ground varies in height, from a Pokeball to Kirby. The elevated ground will be reset if Tyrant uses the move on the same place, acting as if it didn’t exist before. The side that wasn’t stomped is actually a slope down to the ground on the other side, gradually getting shorter toward that end.

The elevation is actually not for the sake of terraforming the stage, but simply to give Tyrant an upper hand. From the lower point, Tyrant’s long-range move can be more easily used un-interrupted and his aerials can be used to more effect on ground, as well as vertical KO moves. The high point is not outright useful to Tyrant’s moveset, but the fact it can allow for a moment to charge his neutral special and disrupt the opponent’s combos against it is of equal value. The elevated ground can be attacked for 25-40% damage to force it down to collapse early back into place, Tyrant’s own attacks do not, usually because of how tall he is, but an obvious exception is his down tilt. In the air, this acts as a good KO move against foes, the charge making it a quasi-stall and fall aerial.

SMASHES
FORWARD SMASH: IMPALE


Tyrant pulls back his claw arm and holds it in place as he charges the move, then lunges it towards the ground, and likely a shorter foe as well. If a foe is caught by the move, Tyrant will seemingly impale them on his claw, resulting in a freeze frame like Wolf’s forward tilt. The claw is pulled out of the opponent, causing high knockback that can KO at 90-65%. The attack deals damage twice, once at the start of the move, where it deals 7-11% damage and once more when Tyrant pulls out his claw, dealing 25-30%. The start-up has some lag for a forward smash, but the move does stay out a few frames longer than expected, making it easy to land if predictable. The after image effect on this move is only for the latter amount of damage and knockback, but does cause the foe to take the freeze frames, leaving Tyrant free to follow up. Used on a shield, this attack has the same animation, dealing considerable shield damage and pulling the foe in at the end toward Tyrant when they’re low on shield health.

This move can be used on an elevated piece of ground from the down special, which is easily done as Tyrant will simply imbed his claw into the top of even the lowest elevated ground. The player has to input the standard button again during this for the interaction to follow, otherwise Tyrant simply pulls his claw arm out of the ground for a very limited amount of punishable end lag. By pressing the standard input, Tyrant swipes upward in an uppercut, destroying the terraformed ground made in the down special and causing it to erupt around it in projectile chunks. The size of the chunks depends on the size of the elevated ground, ranging from Pokeball to Mr. Saturn-sized, and there can be up to 10, although they only stick around for 3 seconds before they dissipate. These travel away from Tyrant at a varying speed dependant on the forward smash’s charge, and deal 10-15% damage when they hit a foe, as well as knockback that can KO at 150-130%. These chunks are one of Tyrant’s few natural projectiles and cover a wide range, going in a radial pattern in front of Tyrant. This is a great way to gimp from on-stage if you took the time to set up from the sides, or can be a great approach. The uppercut part of the attack is usually not an attack, but under the circumstances of the neutral special can be an after image. It deals 20-28% damage and can KO at 100% at earliest, but mostly is great because it directly combos into the chunks as the foe at high percentages easily catches up to them in midair.

DOWN SMASH: STOMP

Tyrant raises one leg as if mimicking Ganondorf’s up tilt, and charging it there. When he brings it down, it deals 30-39% damage and can KO at 90%, although the immediate range of the kick is limited. The wide vertical range and after image makes it a great move to use as a quasi-barrier to attack, if the foe is content to walk into it in hopes of landing an attack or through a misplaced approach. Aside from the leg coming down, Tyrant’s leg doesn’t explode like Ganondorf’s, but it does cause a brief quake on the ground immediately around it. This is about the range of a platform, but becomes weaker the further out it is – universally dealing enough vertical knockback just to pop a foe into the air, but 5-10% damage which depends on the foe’s proximity to Tyrant. The tremor doesn’t stick around as an after-image, but does easily combo into another set-up as a foe is put into the air and Tyrant is free to follow up, the low knockback becoming an advantage.

If used on elevated ground, Tyrant destroys it, but in its place creates two pillars of ground to pop up on either side, as tall as Luigi-Marth, but very thin and pointed outwards. These are not around for long, just enough time to hit a close-by opponent. The pillars deal 12-25% damage each and high vertical knockback and can KO at 120-95%. The power of the pillars depends on both the charge and size of the elevated ground they were used on. These not only cover the end lag of the move, which is pretty low, but acts as a great defensive move, even if they only last for 2 seconds. For all of that time, they remain a constant and powerful hitbox. They act as a wall for this time, and can be destroyed if dealt 25% damage, but this is generally unreasonable for a foe to deal in 2 seconds. This is a great way to build a fortress around Tyrant so he can charge his neutral special, or transition into other moves as the pillars dissipate. If Tyrant manages to land another down smash or forward smash on the pillars while active, they’ll be destroyed and create ground chunk projectiles, their size and power dependant on their size as they are in Tyrant’s forward smash.

UP SMASH: SHATTER


Taking a pose similar to his neutral special’s charge, as he kneels down, Tyrant then swipes his claw and other arm overhead in a powerful attack. This deals 30-42% damage, at the cost of more start lag, and can KO at ridiculously early percentages as low as 60-30%. This is made more ridiculous on platforms or elevated ground where the distance to the ceiling is shortened. Of course the range of the move, covering all of Tyrant’s overhead in both directions, is huge and the after image makes this a powerful lasting hitbox that is very nasty if it lands. This is offset by the fact that the end lag is also quite bad for a smash, making it overall quite a slow move, a risk-reward option on its own. On shields, the front side of the move, or wherever the claw is striking, deals considerable shield damage, whereas the back side, where the regular arm is used, only deals slight damage and more shield push.

Tyrant has a unique interaction with his own shield if he presses the input during the start-up of the move, not its charge though. This has Tyrant summon his shield and shatter it with his own attack. The shield will shatter as if glass, sending shards of it in a radial pattern around Tyrant, but for a much longer distance than his ground chunks, by comparison. The shards will travel a distance and then start falling, lasting a good 5 seconds before they dissipate. The shards deals 1-5% damage and are tiny projectiles, ranging from a few pixels to slightly smaller than a Pokeball. The catch here, however, is that the size and power of the shards depends on the power of Tyrant’s own shield. At max, or super max power, his shield will produce those relatively large Pokeball-sized shards, the charge of the move simply affecting their speed. At low charge, the shards cover an area directly around Tyrant and basically cause an instant shower, whereas at max charge they travel up to two platforms away from it and can effectively zone out the foe.

The knockback on these shards is not good for a KO as the chunks are, but cause hitstun and push the opponent slightly in the direction the shard is going. The amount of shards is vast, in the dozens, but these do dissipate if they hit a foe or solid object, and can be attacked and destroyed in one hit, causing a “clank” with the foe’s own hitbox. They’re also easily dodged in midair, unless the move was uncharged or only charged little, though the range on the move is limited in that case. This can lead to multiple hits on the opponent as multiple shards go in their direction, and is especially useful next to the ledge as part of a gimp attempt or simply to dissuade ledge hogs. After this move, Tyrant’s shield has to recover from minimum health, although can be recovered through the neutral special too.

STANDARDS
JAB: SLICE

Tyrant extends his body forward by bending his knee sharply forward and swats up to three times with his claw, having great range and relative speedy start up. Each attack deals 4% damage and light hitstun, as well as decent horizontal knockback on the final, third hit. The move has limited end lag too, making it a good all purpose move. It does extend Tyrant’s hurtbox further than usual, but due to his super armour, he can afford a little vulnerability when it’s faster than usual. On shields, this move demonstrates one of the best anti-shield elements of the after-image. It not only bridges the slight gap between the multiple hits of the attacks, but prolongs the foe being stuck in shield on a move that already has above-average shield stun. This move can act as a great counter, if Tyrant correctly reads the foe and uses this when the foe hits them with a close-medium range melee move, which hits his super armour and replies with this surprisingly long-range move. This is a great move to use against foes on a higher ground like that created by the down special, as it still has decent height on it as well as range.

FORWARD TILT: OPEN PALM


A decisive use of his regular arm, Tyrant rears it back quickly and forces a clunky under-arm open palm forward. This deals 12% damage but has bad start-up for a tilt, on par with Ike's forward tilt. As the attack hits a foe, it creates an impressive thudding sound and they're sent flying back. The knockback is set in a sense, as it is at minimum a platform, but at higher percentages can be greater to constitute a KO gimp if the foe has a bad recovery. On shields, the move creates a unique visual effect, as the sheer force of the move causes the shield to 'crack' on one side. This lasts for 6 seconds, and all damage dealt to that side of the shield is now doubled, making it exceptionally easy to shatter. This is mostly useful for dissuading the foe using certain approaches, such as using back airs off stage to gimp Tyrant, if they can't land and reliably shield on stage when they recover afterward. It deals enough shield push for the foe to also naturally want to play defensively and wait it out, which can be manipulated to work to Tyrant's advantage.

UP TILT: CRUMBLING DOWN

Tyrant brings his claw overhead, making his hurtbox about as tall as a small character on battlefield's platforms to the ground. This is actually very fast to start up. It then crashes it down to the ground, catching any foe in the way, causing them to be rebounded off the floor with strong vertical, diagonal knockback. The first part of the move deals 5% damage, whereas being hit by the end of the move deals 10% damage. Knockback varies depending on where the move ends, and it can actually vary depending on where the foe was and the layout of the stage. While the move normally has dreadful end lag as Tyrant has to pick himself up, if he hits something physical first, the move ends early. This can make it safer to use in front of the elevated ground from down special. The main interesting part of this comes with platforms; however, as this move is so long-ranged vertically it can hit foes on platforms and rebound them off the very same platform. The move also works great as a shield poke, as it can easily hit the bottom of a foe exposed from their shield. Whereas a foe hit by the full move will be sent high into the air, and KO'd above 200%, on higher platforms they're simply put in prone or put lower into the air. At low percentages, this can be used to follow up if they aren't too far above Tyrant, in the best circumstance they may be just in front of it now. Used next to the ledge, this move can also be used as a weak gimp, as Tyrant essentially throws the foe off stage, but they no longer are hit by the second part of the move.

DOWN TILT: LEG SWEEP

The move name is a bit too coordinated for a monster like Tyrant to pull off, but the animation is close enough, as Tyrant uses his huge leg to kick out below him, going a sizable distance, this deals 11% damage. The lag on both ends is rather short, although it has the fallbacks you’d expect out of this kind of move, in that it’s easily shielded (Tyrant’s leg is too big to reliably shield poke) and only deals slight upward knockback if hit for the majority of the move’s hitbox. There is a sweetspot at the end of the attack, comparable to a tipper, whereby the move deals 15% damage and high knockback that can KO at 100%. This is less safe than Marth’s down tilt and highly comparable at the same time, due to its incredible range making it a good on-off stage gimper for recovering opponents. The after image makes it very easy to land, ensuring an easy gimp, even if Tyrant’s not prepared to follow the opponent off-stage. On the other hand, nearer Tyrant’s side of the hitbox, there is a sourspot that deals very little pushing knockback and only 8% damage.

Earlier it was touched on that Tyrant can destroy his down special with this move. This is not completely straightforward: depending on how he decides to whittle down the health of the ground chunk, by alternating between the normal move and its sour or sweetspot, dealing increments of 8%, 11% and 15%. Of course it will come down after multiple hits with any of the types, but this does matter for space control around the ground chunk. This is true in the obvious way, of the foe knowing how much time they have to dedicate to destroying it themselves if Tyrant leaves it intact, but also important as when the ground chunk falls, it stuns any character on top for a moment as it dissipates, leaving them open for an easy follow up. If one of Tyrant’s opponents is caught unshielded on top of it, they’ll inevitably fall into his down tilt, or simply stuck in shield momentarily as they fall to the lower ground. In all this helps Tyrant to dissuade characters who’d like to keep him spaced out at a particular distance, generally to abuse his size and weight through specifically spaced combinations or other strategies.

DASH ATTACK: SLASH


Rushing forward during the move (DACUS) Tyrant swipes his claw upward in a powerful vertical move, this can KO around 85% and deals 12%. Tyrant’s claw leaves a longer trail than usual in terms of after image, and makes it a fantastic defensive and offensive option. Normally though, this attack is simply a great attack to use as a follow-up and fast too, which it needs to be when Tyrant is vulnerable out of a dash. When this move is used from within the pillars created in down smash, despite its low damage, it will destroy the pillars. There is no real situation you’d want to use the dash attack within those confides anyway, and makes this an amazing offensive option, as the pillar covers your front for the initial part of the move. If you run to a ledge or into an obstruction (down special) Tyrant will end the move early, creating the option of an insanely fast and powerful attack on uneven stages or on foes trying to get back on-stage. The move is a bit risky though, as it doesn’t do much to shields aside a little push, leaving Tyrant open for a counter-attack. This is therefore a move best used on the offensive, but does have a few defensive utilities under certain situations.

AERIALS
NEUTRAL AERIAL: RIP

Taking a pose in midair where it’s holding its arms close to its chest, Tyrant unleashes his claw arm across his body, in a wide range that covers his hurtbox from side to side – that’s a large distance. This deals 14% damage and high knockback in front of Tyrant. This can either be used to gimp or force a foe off-stage back on stage. The wide hitbox sitting around makes it safe to throw out as a pure after image and take the weight off Tyrant’s recovery, as it’s guaranteed to hit most foes without an extremely good air game if put in the right place. On stage, it’s a good move to short hop, as it’s wide range gives it strong defence as Tyrant remains vulnerable out of super armour. It deals a small amount of shield damage, mostly useful for pressuring a foe out of shield than outright shattering it, and this can be useful to leave around with after image also for that reason.

FORWARD AIR: CLAW DRILL

Tyrant leans forward in midair and extends his upper body forward, striking both arms, but prominently his claw forward into a pointed hitbox, constituting a sweetspot. This deals 17% damage, an exceptionally strong aerial, and is a powerful meteor smash akin to Donkey Kong or Mario. It does take a bit longer to start up than those comparable meteor smashes. However, unlike those two, this one isn’t immediately in front of Tyrant, and that creates a couple of problems. If the foe is hit right next to Tyrant, they’re dealt a lesser 14% damage and strong knockback, but more of a gimp off-stage than enough to KO from right next to it on most characters. It goes for shields too, which are dealt little over half their health by the sweetspot, but only around a quarter otherwise, requiring Tyrant to lead into the move. This is offset by the after image, as within the move’s own parameters, it then combos into itself, the foe being struck from the “sourspot” to the sweetspot. If not under those circumstances, this move may be greater used by hitting shields in a short hop (although it doesn’t ground cancel and has bad end lag if landed).

UP AERIAL: RAFTER SHAFTER

The claw first is taken under-arm by Tyrant, and then extends upward creating a shine/sheen on the end of his claws, signifying the hitbox of the move. This is a powerful 18% sweetspot that can KO at very low percentages, practically the beginning of the match on small ceilings, but requires great reads. This is made easier by an after image, but even then, it’s predictable, mostly a scare tactic to keep the foe in tow, and not spamming down aerials on a vulnerable aerial Tyrant. This is the end of Tyrant’s claw, although the rest of his claw is a weaker hitbox that deals 10% and low vertical knockback. This is the version used in most on-stage scenarios, due to just how long-range it is and how naturally tall Tyrant unfortunately is for this move, a negative in this instance. The comical move name is for good reason; the range on this move makes it an insane star KO move. Tyrant’s fall speed means you’ll have to get it out quickly before he starts his descent, his recovery not really building into any natural set-up. The move has decent start lag but bad end lag, and as with the forward air has lag upon landing, but isn’t much use on stage besides poking (or getting a KO) off foes from high platforms. There is probably a utility if you use down special on a lower platform to practically make it a taller one too, but that is again more of a scare tactic to keep the foe camping on it and making a mockery of Tyrant.

BACK AERIAL: BACKHAND


Tyrant uses its regular hand to punch behind itself, dealing 14% damage and good knockback – it shares the name of Ganondorf’s back aerial and it’s strongly similar. However, unlike Ganondorf’s this does knockback horizontally, making it a very useful gimp. The knockback is about as high as Ganondorf’s too, a powerful gimp if you don’t want to approach from the front toward a foe. This move has surprising range too – Tyrant’s still a giant human, meaning his normal arm alone has great reach. This can be ground cancelled by hitting a floor during the move, reducing its punishability and letting Tyrant get back into his defensive ground mode easily, while possibly scaring off any potential counter move by the foe. It’s a decent poke as well against shielded, grounded foes, and can be used to bat the foe away without committing to a claw attack, but it’s a fairly ordinary option and there’s little potential to follow-up, working more out of the confides of Tyrant’s playstyle as just a regular option than anything extraordinary.

DOWN AERIAL: HEAVEN SHAKE

As it already has a stall and fall in the aerial down special, Tyrant instead elects to use a good old spike, emulating Ganondorf. This is a good deal similar in animation too, only having greater range, but not bad end lag. The damage dealt is 23%, the same as Ganondorf, and the knockback is not much different. Where the move differs is when it hits a foe on stage, who is shielding, as the great impact creates the same effect as the forward tilt, a ‘crack’ that lasts for 6 seconds. If this is used on an old crack, the foe’s shield will be automatically brought to nearly shattering, making it important for a foe to both avoid being predictable in their spacing around Tyrant and being very wary of Tyrant’s aerial approach after a forward tilt – pressure he desperately needs when he’s otherwise combo fodder in the air. Suffice to say, leaving an after image of even Ganondorf’s thunder stomp is rather frightening.

On the ground, the move won’t be cancelled, but as Tyrant suffers end lag, will create an earthshaking hitbox on the platform it was used, for a platform on either side of the landing. This deals 5-10% damage depending on the distance from Tyrant, and knockback vertically if next to Tyrant, or a brief moment of hitstun if further away. Used on elevated ground, Tyrant will destroy it if it has 23% health or less, one of his only moves capable of doing it. This will cause another, larger quake around the area, dealing 10-16% damage and similar knockback, only to a greater degree. Again, it’s a great spacing tool in a general sense, but also gives a terrifying approach option. A foe isn’t going to want to hang around those areas with a ground chunk poking out of the ground, allowing for the space to be controlled effectively by Tyrant even if chooses to camp out his neutral special’s charge.

GRAB GAME
GRAB: OFF HAND

Shockingly, Tyrant does not try to grapple the foe with his claw arm, but instead tries to grab with his human hand. This is nonetheless a great ranged grab, as Tyrant’s arm is far longer than any of the Brawl humans, making it as long ranged as King Dedede’s, and not much slower either. Tyrant can possibly use this to grab throws on elevated ground or just on high platforms in general as it has an ambiguously tall grab hitbox for that very purpose. This isn’t always possible, but definitely is on stages like Yoshi’s Island or a stage like Melee’s Fountain of Dreams, where the platforms have varying heights. This is also an instance where using the elevated ground is an obvious plus for Tyrant itself. If the foe is grabbed on a different heighted part of stage than Tyrant, he’ll hold them in place there, and the throws do take this into account. On the same ground, the grab still works as well as any other grab.

PUMMEL: BASH MASTER

The pummel has three fairly generic variations depending on the height of the foe compared to the ground. The normal one is a longer pummel where Tyrant bashes the foe’s body against the ground over and over; dealing 3%, but only can be landed a few times in a typical grab session. If the foe is a crouching Jigglypuff off the ground, Tyrant will grab them by their head or upper body and crash that quicker against the floor, still dealing 3% but at a much faster pace, and is a particularly violent looking pummel. A non-crouching Jigglypuff or greater off the ground, Tyrant pulls them down to his level, dealing 10% damage as they smack against the ground, but are re-grabbed. This does not overwrite the grab session, however, the foe doesn’t have to mash any more than before, but the foe being at such a height may make the throws too situational to be useful. This is only usable once, but can be cancelled out of mid-pummel by grab releasing, if the player doesn’t want to pull them down, essentially just wasting grab time as the foe can still escape.

FORWARD THROW: CRUSH

Tyrant uses both hands to grip the foe’s body and collapse it against the ground, dealing 16% damage and sending them into the air. Used next to elevated ground the knockback and angle can be varied, depending on what part of it was hit against the foe. On a foe on an elevated platform at the start, the damage and knockback is simply heightened to 17-20% and the knockback gets the foe high enough that Tyrant can possibly follow up into his great up aerial KO move. Otherwise, the foe can be sent at a more horizontal angle from elevated ground that leaves into follow ups from Tyrant's smashes or standards.

DOWN THROW: SKEWER

Tyrant tosses the foe to the ground and uses his claw to slice at them from above, stabbing them and dealing 16% damage, as well as causing them to take knockback away from Tyrant in prone. If the foe is to high to put on the floor like this, Tyrant instead stabs them from below, which again can cause unique variable knockback depending on position, and even KO from certain positions when uninhibited by the ground. On a very heightened foe, the throw can KO from 100%. On elevated ground, the foe is stuck in place at the end of the move, causing them to have to get up in prone right beside Tyrant. This deals a bit of shield damage that isn't physically shown, just by injuring the foe physically.

UP THROW: SHOULDER TACKLE

Tossing up the foe, Tyrant charges at them from the ground in a typical shoulder tackle, dealing 15% damage and high knockback. This can be again useful to work into the powerful up aerial. On higher opponents who are on a platform, Tyrant will ridiculously enough jump through the platform, creating an awesome visual effect of debris flying everywhere, and sending the foe off at 1.25x the normal knockback for a powerful KO throw. This mimics what Tyrant does to in the first game, bursting through the ceiling of Spencer Mansion.

BACK THROW: THROW AWAY

Tyrant uses his normal arm to drag the opponent down from where they were, dealing 5-15% damage depending on how far they were dragged, before swiping at them with his claw to send them flying away, which can KO at 120%. This is the only throw that can be worked into the neutral special, leaving behind a trace so that, at low percentages, the foe has to back away from Tyrant. This works into giving him a little space of his own after the grab, and lets him further charge his neutral special. If next to elevated ground, Tyrant will stand on it, giving his claw a slight angle to better star KO or bury the opponent toward the lower blastzone.

 
Last edited:

Smady

Smash Master
Joined
Apr 29, 2007
Messages
3,306
Location
K Rool Avenue


Albert Wesker is the de facto main antagonist of the entire Resident Evil franchise. To start a head of the protagonist’s squad in the first game, he develops into a Machiavellian villain over the process of many games. If he’s not directly involved in the plot of a game, he is undoubtedly working behind the scenes, as he controls legions of minions around the globe in his bid for world power. His ambitions start off ambiguous to the player, as he would seem to simply want power, but in later games it’s made clear that Wesker’s intentions are deeply egotistical, but also insane. His plan in the last game he appeared in was turning the entire world into wild monsters through the Uroboros virus. From there, a small number would be able to attain superhuman abilities, but only a tiny percentage, the rest of the world’s population being turned into freakish and violent abominations.

Wesker is not always such a typical villain, however, starting off as a lowly scientist, although in later games a deeper plot is discovered that places him at the centre of a diabolical plan even to him unknown. As a scientist, Wesker closely works alongside others both in the biohazard industry and Umbrella corporate heads who largely become villains later in the series. This extends to William Birkin, Albert Spencer and random one-off villain Jack Krauser. Basically, if anything bad happens in the world of Resident Evil, Wesker is probably to blame. In the beginning he’s only a normal human being, later on, through the injection of different substances, Wesker ascends to become a ridiculously powerful superhuman. Unlike previous bosses in the series, he retains his intelligence and this makes him a particularly dangerous opponent. In the end, though, even Albert Wesker can’t escape the inevitable monster transformation. This is followed by his defeat at the hands of long-standing rival Chris Redfield.


Ground Speed: 10
Air Speed: 8
Size: 7
Weight: 7
Fall Speed: 6


Wesker is fast, and doesn’t slouch in any category. Taller than the average human, he’s slightly bulkier than one would surmise from a man in a trench coat, due to his enhancements. He can run as fast as any character in Brawl sans maybe Sonic, and exists in the middle ground between floaty and fast faller, where his good air speed gives him a great amount of control. Wesker has a number of the quirks other specialist characters have in Brawl, able to wall cling and wall climb, but I’ll get to those later in the moveset.


Neutral Special: Samurai Edge


In spite of his viruses and physical abilities, Wesker never detached himself from his trusty Samurai Edge handgun, using it throughout even his Resident Evil 5 boss fights.

Wesker takes out the semi-automatic handgun and shoots it, up to two times in instant succession if the player keeps pressing the special input. Wesker has to take half a second of pause before firing again. The bullets are shot across an infinite space at an incredible speed, although the projectile bullet is visible, so it’s not as fast as a real gun would fire. About 1.25x the speed of Fox’s laser. The bullets deal 5% damage and light knockback, this stacks if a foe is hit by multiple, but largely cannot be followed up on easily. Wesker has to go through a second second reload lag animation if he fires the weapon’s thirteen round cartridge, or thirteen bullets from the chamber.

The gun can be aimed in any direction, including behind Wesker, but once fired cannot be re-aimed, whether or not a second shot is fired. This means Wesker largely has to pick his shots, and a recovery foe usually isn’t too hard-pressed for recovery, as they can utilize an air dodge or work around where Wesker has fired. The handgun has a laser sight that extends a battlefield platform in front of the gun, both making it easier to aim and telegraphed. In the air, Wesker fires the gun just as ably as on the ground, and to this end it may be a better move for discouraging the opponent’s gimp attempts.

Side Special: Superhuman Speed

In a matter of frames, Wesker disappears from sight, and re-appears somewhere else on or off stage. Where he re-appears is chosen by pushing the control stick in any direction and it is not always the same distance. Quickly double-tapping the stick in one direction has Wesker travel two battlefield platforms, whereas normally it only travels one platform. If one direction is tapped then another, Wesker re-appears one platform in both directions. This is made complicated when you take into mind how any direction can be pressed, and allows Wesker free roam of the entire stage. If no direction is pressed, it defaults to forwards one platform. The lag on this move is tiny, but it can only be used once per air trip, working much the same as Pikachu’s up special as a recovery.

If a bullet is in play on the field, Wesker can teleport to it instantaneously by the player instead pressing the neutral special input instead of a direction. This is risky and takes a great deal of skill, as the bullet travels too fast for a beginner to do it without either self-destructing or uselessly teleporting as close as a normal teleport. This makes control over the teleport far greater, as it not only potentially vastly increases the distance that can be covered, it gives another option to keep foes pressured from ignoring a seemingly not very useful projectile. The ‘once per air trip’ rule here stands, but this is not used up by using the teleport from on-stage to off-stage. This means you can fire a bullet far off-stage, to say, gimp, and return to the stage by the same method. Multiple bullets in play can be chosen specifically by multiple taps of the neutral special input, one tap resulting in a teleport to bullet one and two taps to bullet two and so on. There is no limit to how many bullets can be on-stage at once.

There may seem to be an easy way of circumventing this recovery for a foe, that is getting hit by the bullet itself and tanking the measly 5%, but that only makes things worse. As long as the input is pressed within one second of the foe being shot, Wesker can teleport to the foe, treating them as if they were the bullet in all other respects. There is one more catch to this special teleport, however – by pressing a direction after the neutral special input; Wesker can appear above, below or to the direct left or right of the foe. There’s no direct attack in this move, but this has many applications besides obviously gimping, but also screwing up certain recoveries or to build pressure on the foe if the timing is right. The safest way to deal with the move is destroying the bullet with an attack, though it is difficult when it’s so fast and tiny. Wesker is also not immune to damage or knockback when using the move, but likely too fast to hit with conventional attacks.

Down Special: Injection

Wesker takes out a vial containing a virus that has a syringe on its end, and in a quick 1 second motion, injects it into his neck. This can be interrupted, but Wesker does have an infinite amount of vials just as he has infinite ammunition for his gun. The effects are spectacular at first, halving every instance of lag on Wesker’s moveset and doubling the range of his side special, enabling him to teleport up to four platforms. It increases the amount of damage and knockback on all his moves by 1.5x their usual capacity. It also increases Wesker’s air speed and his ground speed is now greater than Sonic’s in Brawl. Wesker can do this in the air as well as the ground, but it takes a quarter of a second longer. The effect lasts for 10 seconds.

The upsides of this are obvious, but the downside is arguably as bad. After the 10 seconds have elapsed, Wesker’s abilities will start to wane over time. Lag, power and speed are all gradually reduced so that in ten seconds, they are 1.35x weaker than before he took the injection. Another 10 seconds later, they hit their bottom cap of 1.7x worse. There is only one remedy to this, taking another injection, but even this has exaggerated lag, at its worse taking nearly two seconds, a longer time than it would take to perform two Falcon Punches. It may seem an easy way out to shoot the Samurai Edge off-stage and teleport to it, but even firing the gun takes longer and adds to its telegraphed nature.

Wesker can’t inject himself at a random time as later on it will work against him, meaning he’s forced to either buffer his approach to make time for an injection, or go all out and hope it doesn’t matter. If the foe is KO’d he easily can find a second or two, after all. If the foe catches him out, though, the ramifications can be severe as he has to not only retreat but do it as he’s getting ever weaker. The move in general isn’t completely necessary to win, but without it Wesker’s repertoire of moves cannot truly shine.

Up Special: Overtake

The sunglasses come off for a brief moment of start lag as Wesker analyses his surrounding closely, then turns into a barely visible blur of mass as he darts from the nearest solid ground to the next. The direction he goes is determined by the control stick, but is limited by the amount of solid ground in that general direction. If there is only a wall, Wesker can only jump off of it once, and only if it is within two platforms of his current location. If two walls are next to each other, Wesker will bounce from one to another. For example, if there is the side of the stage and an opponent next to it, Wesker will jump to whichever is closest first, then the opponent, and then back to the stage before jumping toward the general direction the player chose at the start of the move. This final leap goes one platform. If used on a foe like this, it deals them 7% damage and 5 frames of hitstun.

This move can only be used once per air trip. Under the effects of the injection in down special, the distance and speed of the move is doubled. Wesker can now reliably use his own bullets as objects to rebound off, due to how he can travel up to four platforms in one leap at the start of the move. As long as they’re in range at the start, Wesker can leap to them. This does become gimpable however, if the foe intercepts the bullet. However, this is not only an amazing recovery from below the stage and a good reprieve from gimps, but can be used to close the distance with a foe in midair. If a foe simply dodges a bullet, it is an active danger if another is fired immediately after, creating a chain of potential obstructions for Wesker to jump off. This move can be used on enemy projectiles too, but if they deal knockback Wesker will be hit out of the recovery and take the hit, not refreshing his recoveries.

If the direction is held toward a specific wall, Wesker activates his wall cling, acting much the same as Brawl wall clings, having the same 5 second lapse as Sheik and Lucario. Tapping up or down has Wesker seem to walk up or down the wall and in this brief 5 seconds use any of his grounded moveset. If he jumps off the wall, he recalibrates in midair, but can for a moment use his aerials from an odd decentralised angle. By double tapping up or down, Wesker can run up walls, or likely the side of the stage at his normal dashing speed for another good recovery option, although it’s only useful if you have a wall to use in the first place. This wastes the up special’s one use per air trip, but of course doesn’t take his side special out of play.


Grab: Choke


Wesker grabs the foe by the throat, in a relatively average grab. This is transformed into one the fastest grabs by an injection or one of the worst if Wesker goes too long without a re-injection. Wesker can grab opponents during a wall climb, where he walks or dashes along a wall in the up special. The grab game acts as normal besides anything mentioned in the throws: a foe grabbed above Wesker will look as if in a normal on-stage grab against the wall, whereas a foe below will dangle as if in their fall animation. If the wall cling timer runs out, Wesker will fall underneath or over the foe depending on their vertical position, potentially leading into its own follow up. This can be preceded by first grab releasing the foe to mix up the options.

Pummel: Dominate

Whereas moves do not typically get affected in terms of actual speed by the injection, this is one of the exceptions. Wesker simply punches the foe in the stomach or body, dealing 3% damage each pummel. This isn’t a fast pummel, but can be made into one. He rapidly punches the foe at the apex of his down special, actually being twice as fast as normal. This is a decent enough way to rack damage under the effects of an injection, the damage into a throw is a great way of transitioning into a refresh of the down special as the opponent is thrown too far to react.

Forward Throw: Slide Filter


The foe is pushed to the ground, not taken out of the choke, and pushed against the floor as Wesker scrapes them across it. The foe is dealt constant 1% damage, stacking up to 12% normally but 18% if Wesker is under the effects of his injection. After one platform (or two under the effects of the injection), Wesker tosses the foe up and away for weak knockback and 4% damage. The negative of this move is that it essentially isn’t a throw, in that it takes away any immunity Wesker has to his injection timer running out, and the foe can escape during it. If the foe manages to escape, they are forced to perform a prone attack, dodge or prone. This actually is not so bad for Wesker to follow up a tech chase, but if whiffed, leaves him open. The speed of this move is what makes it truly useful, as Wesker travels fast enough while grating the foe against the ground to catch up to his own bullets, though only under the effects of his injection. He won’t completely catch up, but is close enough that a foe that is thrown off stage can be easily teleported to, whether they overtake the bullet or not, or hit it. At worst, they’ll be forced to intercept the bullet, wasting time and a move, especially bad for a character who has a poor recovery.

Back Throw: Discard

Wesker takes the foe in hand and tosses them backward at a sharp angle, being a potential KO if in a wall cling grab. This deals 12% damage, but can be easily followed up on by using side special in conjunction with the down special. It’s actually possible if the grab is precise and quick to throw an opponent into a bullet at a high enough percentage, which is a very good way to follow up into a gimp through quick teleport. Aside from generically throwing the foe off-stage or into a projectile, this is de facto the best way to space away the foe at Wesker’s disposal and easily can be followed into his other moves due to its angled, but not straight knockback. This is because they can be thrown below the stage from positions on stage, or shot with the Samurai Edge because of its versatile aim.

Up Throw: Reign

After a casual throw of the opponent into the air that deals 5% damage, Wesker’s player can choose to press the standard input a second time to follow them up there, or use the time to refresh the down special if the foe is at a reliably high percentage. By pressing the standard input a second time, Wesker teleports to the foe and punches them further into the air for 7% damage. If there is a platform or bullet within four platforms of the foe, the player can choose to press the standard input to teleport to it and then perform the same move on the foe, dashing at them in midair and hitting them from the opposing direction. This is practically immediate, and can go on for several hits as long as there is a new platform or bullet to do it off. This allows the player to build up a unique knockback on the foe, potentially barraging them from multiple directions to get them off-stage or go for a star KO. It’s basically impossible to use two bullets in this move, but one can be useful to get it going, hitting a foe from above by teleporting to the bullet, and then rebounding off of any spare platforms. Each hit deteriorates by 1% damage and does slightly less knockback than the one before, but it can still build into a KO easily given the right set up.

Down Throw: Chokehold

Wesker brings the foe lower in his chokehold and is given the ability to move again. This is largely similar to the way Donkey Kong moves during his forward throw, but Wesker can move faster and is arguably far more dangerous for that fact. Off a wall, his fall speed is too slow to reliably KO anything but a truly pathetic foe by simply dashing to the blast zone, and if he reaches the ledge he has to jump off, ending the cling and grab. On stage grabs do not apply to this rule, however, as Wesker can freely jump off stage holding a foe in this way. If the throw input is pressed again, Wesker casually tosses the foe forward (default) or backward for 10% damage and low knockback. It may be preferable for Wesker to actually throw the foe back at the stage and use them on his way to recover.

In the process of the chokehold, Wesker can use his side special to teleport, potentially off stage. This can be an easy KO but is a difficult, if straightforward set up. First you fire the Samurai Edge, once or twice, to use as a teleport. Then Wesker grabs the foe and quickly teleports to the bullet, but there is a limit of two platforms in terms of how far he can teleport. If there are multiple, the nearest is chosen. Once Wesker has brought the two characters to this new location, the foe is released from the grab in midair, and neither player has a frame advantage. However, during the teleport by pressing a direction Wesker can choose to teleport above, below or to the left or right of the foe, similarly to his side special, immediately building into his air game. If a second bullet was fired, Wesker can reliably recover by using his up special if not too far from stage. It requires a good deal of knowledge about the stage and good reads on the foe to land the grab in time, to not simply KO both players. Again, it may seem almost a guaranteed KO, but the foe only has to stay away from Wesker for half a second before the bullet’s too far gone to be useful.


Neutral Aerial: Double Shot

Wesker kicks out one leg, then the other in quick succession, both hitting for 7%, but unless under the effects of down special, not easily combining into a single attack. This sends the foe a good distance in terms of knockback, but not a guaranteed KO by any means, simply a very good build-up into an aerial gimp combo. This is the building block of Wesker’s aerial game, simply being a fast and long reach move to kick about the opponent. It’s a good combo starter and very good under the influence of down special, as both hits basically come out at once, making it almost impossible to dodge. As the move has straight horizontal knockback, it’s a good way to delay a foe into being hit by a bullet you fired later at the same place as it catches up, further helping build into an aerial flurry.

Down Aerial: Industrial Drill

A midair spin from Wesker creates a hitbox at the bottom of his hurtbox from his feet, similar to Fox’s down air, although about as useful as a spike and about as good for range. This deals 10% damage and constant hits of hitstun for its duration. This is a good bully tactic on the foe to keep them in midair or add damage on stage as Wesker vaults over them to safety. The move has good all-around defence due to it lessening the size of Wesker’s hitbox. On the wall, this move can be effectively used to block recoveries, although this is only slightly more useful just because Wesker has got the five seconds of wall cling to specifically position for it. The fastness of this move under the effects of the down special make it even more safe, giving Wesker an incredibly vertical control but more easily transition into another aerial.

Up Aerial: Fist of Injustice

Wesker clenches a fist and punches upward in an uppercut motion, dealing 14% damage and high knockback, although it does have a sweet and sourspot. This works much the same way as Falcon’s knee, only the results are very different. The sour spot, comprising the frames in the latter part of the move’s duration and the area around the fist, deals 11% damage, and knockback diagonally up and forward. The sweetspot, which is the immediate fist area at the start of the move, deals knockback up and behind Wesker. This may seem odd, but it actually can be very useful if used in conjunction with the side special, as Wesker easily may end up behind a foe. This puts the foe in a prime position to get KO’d in those circumstances, or can be used for the sour spot for much the same reason. The foe has to keep in mind that Wesker can switch up the version of the move on the fly, meaning they have to be ready to adjust their DI accordingly, giving a good mindgame.

If used on a bullet, as in imagining Wesker would attack his own bullets, Wesker catches it. This isn’t so far fetched, considering that Wesker catches a rocket at one point and constantly dodges gunfire. The bullet is a normal throwing item that isn’t too extraordinary, it can be smash thrown or thrown down, everything you’d expect, and deals only light hitstun and 1-2% damage on hit. The point of this is to create another entity in the air to teleport off or simply to use as an impromptu bridge into a combo or gimp off-stage. As the speed of the bullet can vary, Wesker can build very unique set ups out of it, and it doesn’t take up a spot in his essential specials to do it. It also gives a good reason for the foe to approach you and take away the item. It is possible to do this a much easier way, by simply shooting the Samurai Edge into the ground and picking up the bullet, but this is hilariously useless compared to just shooting an opponent.

Forward Aerial: Dismantle

Hand being held back, Wesker karate chops the air in a similar animation to Luigi's forward air, though not quite as comical from a so-called martial arts expert. This deals 12% damage and low knockback that goes diagonally forward and down, at a right angle to Wesker. This is a very fast move in terms of both start and end lag, making it the go-to fast aerial, very easy to spam under the influence of down special. The right angle knockback is especially helpful in Wesker's ledge game, where he can rebound the foe into the side of the stage, either forcing them back into range or forcing them to tech the wall and potentially fall to their deaths or into another follow-up if correctly read by Wesker. For example, by using this move's bullet interaction; Wesker uses the flat side of his palm to redirect a bullet, without stopping it, in the same direction he would a foe. If the foe is too defensive to successfully shoot at and gain a teleport, you can shoot above them and use another bullet as a redirect to hit them from above. In general, you can also use this redirection to fire a bullet and immediately cover another area with one that you had fired previously to your current location, without having to waste a bullet, also helping to briefly keep an extra projectile in play.

Back Aerial: Shoo

Wesker elbows forcefully behind himself, at a pitiful range but rather fast and dealing 9% damage. This can be easily buffed to be an absolutely insane wall of pain and gimper, as though it only deals a small amount of knockback, the speed you can get on it under the effects of Injection are ridiculous, without any chance of reproach from the foe. Normally the move has its uses though, especially below the ledge, where the foe can be hit away from the stage by being hit into the stage, working into his up special, or simply used to approach on stage as it has minimal ending or landing lag. From the wall, this move can be used to hit the foe above or below Wesker into an easy follow up, although it’s obviously highly situational.


Forward Smash: Hemorrhage


Wesker rears back his arm in the charge and lunges it forward, as if trying to grab something with his open hand. This attack is highly predictable due to bad start lag and punishable under normal circumstances. The move deals 25-35% damage and high horizontal knockback, but also has other properties due to the sheer power behind the attack. It has a strong outward wind hitbox that pushes foes away out of its range, acting as a good resistance during Wesker’s down time, but its end lag means it can’t be spammed for this purpose. The range isn’t stupidly big, about the strength of Ganondorf’s up tilt vacuum in reverse, but it’s enough for close-range when it’s in all directions. Against a shielding foe, the move will do considerable damage to the shield, and push the foe away, another reason why it’s a good defensive move to buy time. If you somehow manage to hit a bullet with this move, say by shooting it back at the stage and getting there first, it will lose its momentum and fall to the ground as an item.

Used on a close range foe, the move has a completely different effect: this is Rest range, so it’s only usable on either a foe that has been very ably spaced or during the effects of down special. Wesker lunges his open hand into the foe’s body causing a ‘crack’ sound, although no blood. The foe is then dealt the normal damage and knockback. For 7-12 seconds, the foe now has the debilitating effects of Wesker’s own down special, at the level where it degrades their statistics by 1.3x normal. This move can even the playing field, or simply help build into a simplistic match up. It is very good near the end of the positive side of the injection, considering it puts the foe just as much on the defensive. It can be used off of a wall climb too, where the foe may be forced to walk into Wesker, although it’s not advised as it’s heavily telegraphed and predictable.

Down Smash: Counter Act

Wesker stands in place in a new idle pose, hunched over and giving an intense stare. This move is a counter smash if it's uncharged or only charged for up to a second, beyond that becoming an attack. If he is hit during the counter phase, the attack will be treated as a normal counter would treat it, absorbing the attack as Wesker disappears in place and re-appears to use a powerful overhead strike reminiscent of Ganondorf's forward aerial. This deals damage and power equivalent to the attack countered, the counter deals the same multiplier as Lucario's double team, the strongest counter in Brawl. Wesker won't attack if the countered move was performed by a minion or was a projectile, instead being given a free side special, a good escape from the ledge if wall clinging, or if the foe is the kind of character to flood the stage with projectiles. As in the side special, any direction can be chosen to teleport, not taking bullets into account. If the smash is held and Wesker is hit by multiple attacks but still within the time constraints of the counter, he will ignore the first attack and counter the second.

If the move is charged for longer than a second, it becomes an attack of its own. Instead of waiting for the foe to attack, Wesker simply tracks where any nearby foe is, and teleports behind them to perform the attack, dealing 24-35% damage and can KO at 140-120%. The foe has to be within half a platform of Wesker, and if multiple foes are present can be chosen through directional input or defaults to the nearest. By charging the move longer, the range of the move increases from half to one platform. If used under the effects of down special, Wesker's range improves by a platform, reaching two platforms at its greatest distance. This move can be used on ledge grabbing foes, but generally only is good in forcing them to use their invincibility early, and Wesker has more than enough of those kinds of options already. The move's real buff under down special is that the counter phase of the move now extends to its entire duration, regardless of charge. Whereas the first half of the move is generally where the foe has to avoid Wesker, they now have to keep track of his movements to make sure they don't accidentally trigger his counter by accident. This makes this an incredible defensive option for aggressive foes, whether or not they decide to attack you, as from close range they can hardly run away. If no foe is in range, Wesker laglessly ends the move not doing anything, but if you manage to scare the foes off successfully that has its own advantages. A foe can easily predict and dodge, shield or counter-attack themselves if they see Wesker coming early, but if they whiff the dodge or counter-attack too quickly (meaning Wesker will teleport to behind them again if they turned around to do it, for example), it's a great starter, and definitely one of the better initiators for a skirmish.

Up Smash: Air Cutter

After taking a low pose near the ground, in a quasi-crouch, Wesker jumps up into the air while performing an uppercut, bringing up any foe that was caught within a close range. This deals several hits of 4-7%, at highest raking up 20-35% damage on an opponent. The end of this puts Wesker in the air and if the faster version is used, this can be very good as a way to not use up any jumps but get in the air to try and start on the foe. Of course the attack itself is a good way of doing that too, and can KO at 120% or so. The speed that Wesker travels is either Fire Fox or twice that if he has used down special, making it an effective way to chase foes or your own projectiles into the air. Starting in the air isn’t just good for combos, Wesker can effectively camp the foe pretty well from this position with the Samurai Edge, or go in with a teleport.

The most useful and interesting application of the move comes from using it off wall, as for the next 5 seconds, Wesker retains his angled aerial positioning and can use his aerial or specials from it. This for example opens up the possibility that he can treat a ledge-grabbed foe as if they’re off-stage, using his down or back air to bully them from their defensive position. He can use his neutral or forward air to position the foe down the stage or in adjacent directions. It’s also useful defensively, as Wesker can jump to avoid a foe good in the air, and not have to even attempt recovering traditionally. Wesker won’t retain an awkwardly wooden angle in the air, though, and will turn himself slightly more back or forward depending on the momentum of each move he uses, which can build into a very unique angle to harass the foe. It’s not a very long lasting effect, however, but it can make a real impact from off-stage.


Jab: Rapid Punches

Wesker delivers two to three punches one after another, the first two more quickly than the third, both dealing 4% damage and always being a combo at low percentages, although small horizontal knockback means the first will send the foe too far away when they've taken a good chunk of damage. The third punch can KO at 175%, but is slower, think Ike's jab only more lopsided where the last hit has slightly greater lag. This slowness means the move is generally not to be used, but is useful if the foe is forced to come in close to you, such as if they're recovering on the ledge and Wesker is clinging to the wall. If you manage to shoot at the stage and get back in time, a well-placed bullet can combo the foe back into the third punch if shot horizontally, letting you combo them into a bullet and a KO option all in one move. The down special always makes a combo of the first two punches and likely the third, unless the foe is at a super high percentage. Wesker's first two hits gain enough knockback from the injection that it's a viable gimp off a wall cling, or enough to harass the foe just slightly off stage to lead into a gimp too, whereas the third hit becomes a great early KO option. Wesker's generally going to be on the move, but this move does give him a good counter to foes who can keep him grounded.

Forward Tilt: Deal With It


Wesker tosses his sunglasses forward two platforms, dealing only 4% damage before they would land on the ground, but this can be weakly angled slightly up or down. This deals a frame of hitstun to the foe, but the glasses mainly act as another solid object to teleport to and mess around with, and remain forever on stage. If Wesker teleports to his glasses, he will immediately pick them up and put them on later if he is in an idle animation. If they’re on the floor, they’re treated as any other item that can be picked up and thrown. As with everything else, the strength of the glasses and the length they can be thrown is amplified by the injection and deal a little bit of knockback when thrown in this state. It's not enough to win all on its own, but is a satisfying and hilarious way to get that last hit on the foe who is near a blast zone or just barely can't recover. If he doesn't have his glasses, he performs a roundhouse kick that deals 12% damage and high knockback, enough to KO at 145%. This has decent start lag, but bad end lag, making it a risk to throw out but actually one of Wesker’s most powerful KO moves. He does have to toss his glasses away first, but that may not be such a negative when they’re useful as an item. The range is good vertically too, being a useful gimp on foe that can recover slightly above Wesker while he clings to the wall, meaning he doesn't always have to jump off it for certain opponents.

Up Tilt: Umbrella Uppercut

After a few frames more start lag than most of Wesker's other standards, he performs a powerful uppercut, sending the foe into the air, although not a KO move until over 200%. The beginning of the move is actually good defensively, as he crouches down first, evading some aerials moves before he attacks. Its main use is obvious, getting the foe into the air, but the start up has other uses as Wesker ducks to the ground. This lets him dodge some aerial attacks that would try to pepper him, or simply dodge a high ground attack. The start up of the move is naturally cut down significantly used in tandem with down special, but also gives an additional improvement to the move, as the start-up now gives Wesker 10% super armour. This turns the move into a somewhat weak counter, enough to outright cancel out jabs or other attempts to interrupt Wesker and build into something powerful. This is a helpful addition as Wesker can use this against foes he's wary can jab him forever (Falcon, Fox) and can offset foes trying to keep it a ground game. The downside in this scenario is the move has enough lag to generally be a waste of time if not reactionary. Although this bonus is lost if Wesker loses his other down special bonuses, it can be regained by using down special again. This move can be used to catch bullets, like a grounded version of the up aerial.

Down Tilt: Stamp

Wesker extends his knee out and stamps his leg forcefully against the ground, dealing 13% damage and good vertical knockback. This can be used to tech chase effectively on foes put into it from the forward throw, as it has great range and coverage to use on prone opponents, popping them into the air for a possible follow-up. On items left on the floor, like Wesker’s sunglasses or stray bullets, it can shuffle one into the air slightly, enough for Wesker to grab it, as items that small tend to be hard to pick out against a generic stage, or simply not viable under the pressure of a match. Against foes in the air, it will cause them to be put into prone and slide away a varying distance which depends on their percentage. This is highly useful as at high percentages, it pushes them toward the side of the stage simply or off-stage, sends them a set, small distance back toward their impending doom. At lower percentages, it can lead into an easy tech chase, even a potential down tilt again if the foe stays on the ground too long. This move isn't particularly laggy but does become an amazing tech chase option during an injection and pushes them far enough early to easily build into a gimp, as on most stages it will push them to the ledge. Generally it's not the best option to stay on stage against a recovering foe as Wesker has many options to gimp, but this move becomes powerful enough to outright gimp some characters if he positions himself very well, as the hitbox that goes off-stage is small. But given the reduced end lag it's not too big a risk.

Dash Attack: Phantom Rush

Out of nowhere, Wesker disappears in a blur and reappears a platform ahead of where he was, any opponent caught in-between deal 10% damage and knocked into the air twice the height of Wesker, a set distance. The end lag of this move is bad enough to be punishable if whiffed, and a foe can shield the move to stop Wesker right in front of them. The move can be useful as a recovery, Wesker clinging onto the bottom of a stage's wall then using this move to sprint up it, in which case hitting an opponent's counter attack is better than death. As it is an attack unlike side special, it is the preferable defensive option where applicable. This move will turn around bullets going in the opposite direction if Wesker dashes through them, which can easily happen if a foe dodges them or they were not used well the first time they were fired through the space. The down special makes Wesker invulnerable for the duration of the blur part, which again doesn't carry over if he goes into the downfall. The move will stop on shielding foes, but the reduced end lag almost makes it a zero frame advantage for the foe. By double tapping or holding the standard input, Wesker can opt to go off-stage with this move. This is a brilliant way to safely get off-stage and start up a gimp or aerial battle with the foe, as well as gimp foes directly under Wesker. They are dealt vertical knockback down, and Wesker can easily capitalize now that he hasn't wasted any jumps or recoveries, and is a perfect distance to simply drop then go to town on the unsuspecting foe.

Final Smash: Missile Barrage


Wesker chuckles as a rocket flies in from off stage, he casually grabs holds of it as it continues to thrust forward into his hand. The missile shoots fire out of its exhaust for 5 hits of 2% to any near foes, guaranteeing the rest of the final smash hits. Wesker then leaps into the air and tosses the rocket at the ground in front of him, creating an explosion the size of Bowser that deals 10% and high upward knockback. Five more missiles are fired from off stage and caught by Wesker who then tosses them downwards, all guaranteed to hit the foe for 3% less than the last dealt dealing at lowest 5%, KOing at 20% if all hits land from the beginning, able to KO from 60% if only one rocket lands. Wesker drops to the stage at the end and readjusts his sunglasses or puts on a new pair if he already used his ftilt.
 
Last edited:

darth meanie

Smash Journeyman
Joined
Jun 6, 2008
Messages
452
Misaka Mikoto


Misaka Mikoto is a major character from the series A Certain Magical Index and the main character of her own spin-off, A Certain Scientific Railgun. Misaka Mikoto is the Railgun, the third strongest psychic in all of Academy CIty, one of only seven Level 5 espers. Her power, Electromaster, gives her the ability to generate incredible amounts of electricity and manipulate magnetic fields.

A stubborn and hot-headed young girl, over the course of the story she gets involved in everything from street fights to stopping heinous science experiments, even committing acts of terrorism in an effort to stop a conspiracy using her clones in battle exercises.

In Brawl, she has fairly standard statistics. She's a lightweight, with a slightly slow fall speed and decent jumps, a bit slower on the ground than one might expect but fast enough when in the air. Adding to her maneuverability though is her ability to wall cling and wall run by using static electricity. While wall clinging, she can hurl bolts of lightning down on enemies, or dash straight up and down surfaces for short periods of time, especially useful on stages like Yoshi's Island. Misaka also has two different wall jumps she can use from a wall cling. She can kick off and upwards, like most standard characters can, but she can also perform a magnetically charged jump, by holding away from the wall with the control stick while tapping jump, This causes her to burst off the wall with electricity, giving her a horizontal boost along the lines of Wolf's Side Special.


Neutral Special - Electric Barrier

Electricity crackles in a spherical barrier around Misaka, creating a shield that protects her from harm. Enemies within a short distance of her take 5% damage with significant hitstun and weak set knockback away from her, making it a surprisingly good offensive move as well, with range similar to Wolf's Reflector. Attacks that strike the barrier are instantly parried, and projectiles are reflected off of it. However, instead of taking knockback from attacks, Misaka's weight is considered to be decreased, and she takes an amount of pushback based on the knockback the attack would have dealt. Electric Barrier will still save her from KO moves until sudden death percentages, and she takes a fair bit of pushback even from light attacks, making this move great at getting her back into a neutral position as well.

Side Special - Lightning Spear


A spark from Misaka's forehead knocks her bangs away, a brief tell before a bolt of lightning bursts directly from her forehead out directly forward, a thin bolt that reaches out a length slightly further than Lucas's PK Fire, dealing 8% damage and a fair bit of horizontal knockback and hitstun. Reversing this in the air causes Misaka to wavebounce, significantly changing her momentum and propelling her away from the direction she fired. The effect is magnified greatly if followed by an Electric Barrier. If she fires a bolt of lightning at a solid part of the stage (a wall, or just below the ledge) she will instead magnetically lunge herself towards it, slamming into the wall. She can wall cling from there or do whatever she likes.

Up Special - Scrap Ball

Misaka throws her right hand out, pulling up a pile of scrap metal, girders, and other stuff out from just in front of her, forming it into a ball about the size of a bumper. Players in the way take 3% damage and flinching knockback, pushing them on the other side of the ball of scrap. When used on the ground, it floats in the air at about eye level in front of her, forming a solid obstacle until she throws it by tapping on the control stick. It has 16 HP and can be bashed apart in two or three blows.

Misaka can throw it by tapping the control stick, flinging it in a range of arcs similar to Yoshi's Egg Toss, but with only half the range. Hitting someone with a pile of scrap deals 6% damage and some downwards knockback, but can be pretty easily deflected by most attacks, dodged, or shielded. If the opponent is hit from above however, the attack footstools them, alongside damage and knockback. Tapping the special button has her launch it forward with a blast of lightning from her forehead, making a longer ranged forward blast that deals 9% damage and has electrical stun on hit.


Also, by tapping down while controlling a ball of scrap, she embeds it into the stage, creating a wall a little over half her height. The wall segment created has 24 HP, 50% more than the standard scrap ball. A single wall is enough for her to avoid any attacks by crouching behind it, allowing her to retaliate. She can pile up balls of scrap on top of each other, two being enough for her to wall cling to, or wall zip to from a Side Special. She can stack them up to about halfway between the lower and upper battlefield platforms, creating a powerful tool for mobility and defense.

Neither scrap balls nor scrap walls can withstand a bolt from her railgun, however. If any of these obstacles are in the way of her shot, they are melted away instantly into slag, dealing half damage and knockback to anyone around them.

Finally, if used in the air, the scrap ball rises up underneath her feet, giving her a brief platform to jump off of to aid in her recovery. Landing on a scrap ball mid-air refreshes her double jump, but obviously does not allow her to use this move in the air again.

Down Special - Iron Sand Storm


Misaka's stance shifts, almost sinking closer in to the earth, as she focuses her energy. Black dust appears to rise up in a circle around her, shifting and pulsating with electromagnetic energy. What she is in fact controlling is iron-rich sand, and it creates a defensive barrier around her, grinding enemies that near Misaka apart with rapid hits similar to Mach Tornado, but without nearly as strong an inward pull of knockback. The storm lingers for two seconds after Misaka uses it, making up for its long lag by creating a persistent barrier she can use for attack and defense.


Jab - Elbow Drop

Misaka slams her elbow out into her opponent's ribcage (or equivalent place on their body) for 7% damage and decent hitstun. It's a slow jab to start, but it staggers the opponent without knockback, making it good for following into other attacks, such as a forward tilt or down tilt, or even a point blank Side Special.

Forward Tilt - Roundhouse Kick


Normally reserved for a faulty vending machine that refuses to dispense drinks or change (possibly due to receiving of too many roundhouse kicks), Misaka lashes out with a high spinning kick. While it's certainly not one of the fastest tilts, it's pretty quick and has surprising range, as Misaka's leg expands just slightly in a cartoony smash fashion. The kick deals 7% damage and decent knockback, enough to put the opponent in a more neutral position where Misaka thrives.

Down Tilt - Drop Kick / Iron Sand Spray

Misaka kicks out below her, tripping opponents for 6% damage with knockback at the dreaded Sakurai angle. Unlike an ordinary drop kick though, this utilizes the iron sand in the ground where she kicks out, spraying it forward to increase the range of the attack and hit opponents for multiple flinching hits of 1% damage.

Up Tilt - Faraday Cage

Misaka stands with her arms folded, looking mighty pissed off as a single spark flies from her forehead. This spark then jumps up into four bolts, which travel up just above her head, then arc back down, encircling her in a cage of lightning. Opponents above her and to either side are zapped, taking 6% damage, launching them up slightly for knockback that will never KO. Like most electric moves though, it has very strong hitstun, allowing Misaka to follow up with another attack easily.

Dash Attack - Taser Punch


Misaka has a fast enough dash, but for her dash attack she kicks off, sparks flying from her feet as she gets a little boost of speed for an overhead swinging piledriver. She stops, balancing on one foot as she follows through. Grounded opponents are knocked away for 9% damage, while aerial opponents are bounced into the ground for the same damage. Either hit deals a fair amount of hitstun and knockback.

Wall Cling Attack - Shock Arm

Misaka holds herself to the wall with her feet and left hand, then holds her right hand out in front and below her. She flashes a brief smile before firing a bolt of lightning that travels from her arm diagonally down in front of her. The attack has enough range to only really be stopped by hitting an obstacle, like the stage. It deals 8% damage and knockback perpendicular upwards from the bolt of lightning, with significant hitstun.


Forward Smash - Iron Sand Chainsword


Misaka lowers her right hand towards the ground as iron sand particles coalesce into a blade in her hands, which she wields identically to a beam sword. Much like a beam sword, the blade extends out when attacking in her jab, forward tilt, and especially her forward smash, becoming whip-like as it strikes out at the opponent. When performed, Misaka automatically uses it in a unique attack similar to her forward tilt while wielding the blade, dealing 11-16% damage and decent knockback.


When thrown away, it extends in a whip-like manner towards the opponent it was thrown at, dealing an impressive 15% damage and powerful knockback if it sweetspots as it slightly homes in on opponents, but can be shielded without too much difficulty. Obviously, this can't be grabbed out of the air like other thrown projectiles. Misaka loses her chainsword after throwing it, of course.

Up Smash - Lightning Strike

Misaka's temper burns, and she gestures forward. A cloud appears high above the battlefield, and strikes down a blast of lightning onto the stage in front of her, in a manner similar to Pikachu's Thunder attack. The attack has a long duration, the bolt of lightning lasting about a second before dissipating, dealing 18-25% damage to any opponents caught by the blast, as well as powerful hitstun and vertical knockback.

Down Smash - Electro Storm

Misaka bends down and places her hand on the ground, and feeds electricity into the floor she stands on. A moment later, a blast of electricity shoots out of the floor, and travels forward in a wave a distance of two battlefield platforms, pulsing opponents away for 16-22% damage and strong upwards knockback with significant hitstun. It's a great move with a long duration that allows her to control space excellently, lasting for about a second and a half before dissipating and giving her plenty of time to play around with other zoning or approaching options when used from a distance.


Neutral Aerial - Spark Shine

Misaka's entire body fills with electrical energy, much like Lucas or Mewtwo's Neutral Aerials, turning her entire body into a long lasting hitbox that deals very rapid hits of 1% damage and strong stun to opponents who touch her. Great defensive option that can combo into a Neutral Aerial to push opponents away for increased damage, or out of a Neutral Aerial to give her aerial momentum as she moves into opponents with this attack.

Forward Aerial - Lightning Snap

Misaka throws her middling weight forward and snaps her fingers out in front of her, releasing a bolt of lightning in a slightly downward angle that stretches out slightly longer than the length of Ike's sword. This deals 11% damage and powerful upwards and horizontal knockback, although there is a sweetspot which spikes opponents struck by the bottom of the attack as well.

Back Aerial - Snap Kick

Misaka kicks out with her leg in a relatively powerful back kick for 8% damage. While normally unimpressive, out of a wavebounced Lightning Spear it can make for a pretty devastating approaching option.

Up Aerial - Flip Kick

Misaka flips overhead and kicks above her, dealing 9% damage and decent juggling knockback. It's a good all-round aerial for hitting opponents close to her and giving her some breathing room.

Down Aerial - Drop Kick

Misaka kicks out below her at a nearly vertical angle, extending her leg and footstooling any opponent below her for 10% damage and spiking knockback. It's a fast, good attack that has almost no landing lag, making it great out of a shorthop as well and can combo into another attack.


Grab & Pummel - Does Misaka Have to Choke A *****

Misaka reaches out with both arms and pulls the opponent in so they are in a sleeper hold like in Snake's Down Throw, a relatively middle-of-the-road grab with decent range and a notable period of starting lag. For her pummel, she repeatedly chokes the opponent with her arm for 1%, holding the opponent in tightly.

Down Throw - Drop Slam

Misaka kicks the opponents' legs out from under them, then shoulder tackles them to the ground for 9% damage. It deals very little knockback, but leaves Misaka and her opponent both in a prone position so neither can easily follow-up, essentially setting a neutral position.

Up Throw - Lightning Zap

Misaka lifts the opponent over her and strikes herself and the opponent she's grabbed with lightning, dealing a whopping 15% damage and powerful vertical knockback to her opponent, making this her best killing throw from the center of the stage.

Back Throw - Choker Suplex

Misaka flips backwards and slams the opponent away, dealing 11% damage and good horizontal knockback, making this her best killing throw near the edge.

Forward Throw - Zap Toss

Misaka punches the opponent with a fist charged with electricity and knocks them away, dealing 10% damage and decent knockback, as well as good hitstun. Her best throw for follow-up opportunities, and can be comboed into a lightning spear if buffered and enemy DI is predicted (whether to shorthop out of it or not).

All Level 5 Espers have a special name after their abilities, and Misaka's is Railgun. With an electrical charge released from a flick of her fingers, she creates an electromagnetic field that turns projectiles into beams of molten metal that break the sound barrier three times over.


Misaka fishes for an arcade token from her pocket, pulling it out then flipping it into the air. She holds her hand out to aim, waiting for the right moment before flicking her finger, turning it into a thin golden beam the length of Final Destination. It takes her almost two seconds just to fire the attack, during which a cutscene plays, but the payoff when it hits is well worth it. The attack deals 32% damage, blasting opponents away diagonally for powerful knockback. More than just that, the beam lasts for about three quarters of a second, making dodging past it nearly impossible and eating up any attempt to just shield it. If she performs it while in the air, Misaka flips upside down in midair before firing, presumably just for the pure cool factor.

Misaka is a character who thrives in a neutral zone of play, using her Lightning Spears to build up most of her damage. She can zone opponents out with tossed Junk Heaps and walls created from her junk balls as well as moves like her long-ranged smashes to keep opponents out. This factors in well with her mobility options, allowing her to build walls and then jump off of them to space herself or to give opponents an attack with one of her aerials. Neutral Aerial and Back Aerial are especially good out of a power wall jump. When it comes to defense, she has it in spades with her neutral aerial for the air and up tilt for the ground, as well as her down special to use in both.
 

allison

She who makes bad posts
Joined
Jan 25, 2014
Messages
5,138
Location
Maple Valley, WA
NNID
crazyal02
3DS FC
0216-1055-4584
And now it's time for...
crazyal02's Set Retrospective!
Thought I'd try something new! In subsequent MYMs, I'll probably do this in a reserved post on the first page, but I didn't have the foresight to do that so it's here instead. Basically, it's a collection of thoughts on each of the sets I've made in the contest, so without further ado, let's begin!

CommanderVideo:
Let's not mince words: this set is terrible. However, I feel this had more to do with my mindset than anything else. I figured that I couldn't learn much just from reading good sets (although that's of course very important); in order to become good, the most important thing was practice. Ultimately, Unstoppable Mr. Video here served as a stepping stone (in hindsight, it may not have been best to choose one of my favorite characters for this, though I could always do a redux later on). There are indeed some mechanics that could be great if reworked into a redux: the Modes are interesting, but only really serve to depower CV when he takes damage, so perhaps some kind of system where landing hits increases your mode would be good. That uthrow is probably one of my best moves, giving CV actual combo potential in Brawl of all games. This is also the only set where I did specials last, and what a difference it makes! There wasn't a direction to focus on when I made standards and aerials, and so when I did get to the specials they ended up a bit pointless. Hey, at least the Final Smash is cool...

Batman:
To clarify: this is a set specifically for the incarnation of Batman seen in the Arkham games. This set is miles ahead of CommanderVideo thanks to careful criticism both from myself and other MYMers, but it's also where my "fatal flaw" becomes really noticeable: misplaced moves. Take a look at that side aerial! Yes "side" aerial. It's a mirrored move that just screams "I need to be a special", being based off of the Line Launcher. The dsmash and dtilt also needed to be a single move. I also made some big slip-ups when it comes to how Batman's arsenal would actually work in Smash: the aforementioned Line Launcher can't hook onto blast zones, making it utterly useless on pretty much any stage that isn't Shadow Moses Island. Ultimately, these and other problems with the set point to a dangerous workflow: simply jamming as many of the character's moves as possible, even if it doesn't really work.

Ratchet & Clank:
This set was, in a word, rushed. Exactly how rushed was it? When I first posted it, there wasn't a grab game. No pummels or throws to be found! After realizing my mistake, I quickly threw together a crappy grab game based around weapons already in the set (although I at least worked the Tractor Beam in there). Although none of the other elements were this pronounced, it's still a running theme for basically no good reason at all. I guess I just really wanted to get my ideas out there, even if they weren't polished enough. As for the set itself: We have another central mechanic. What is its purpose? Why, encouraging spamming of course! Yeah... Although that sort of thing is character-accurate, it's an awkward fit in Smash (at least when implemented in this way), similar to Batman above.

Samurai Jack and Missingno.:
What's this!? Before I hit upon Ridley, I bounced a couple other ideas around. Missingno. had some neat stuff, but didn't feel focused enough. Jack, on the other hand, could be done well with some KO methods other than Nspec, so I might pick him back up on a later date. Hard to say at the moment... Also, random trivia: If Jack had been finished, he'd have been my only non-videogame set. That's not just a coincidence: Video games, even if they play nothing like Smash, have a set of abilities all neatly layed out. Other mediums, however, usually don't, so making a set for them is trickier. I suspect this problem is why Pokémon Syndrome is so common.

Ridley:
That's right, folks! He's big, he's purple, and he's... uh... a third thing! Ridley is probably my most "in-smash" set, even with that crazy grab. This moveset invents quite a few moves that generally fit Ridley's character, rather than desperately searching for existing ones like the two sets before it. It also has much more logical inputs, which is certainly a step in the right direction. It also uses Kat's moveset template, averting the Ratchet & Clank fiasco; I used the template for the next two sets as well, and most likely will in the future too. That grab was interesting to be sure: swooping in a parabola, snatching unexpected enemies in its wake! The only trouble was how difficult it was to explain; the mechanics are so weird, and the enemy's position is so crucial. It isn't a full-on classic Warlordian game though, since the pummel and throws are pretty basic.

Gomez:
Oh, right, this guy. I had this idea in my head since CV was made, but didn't make it until now. Ultimately, I wonder if this was really a good idea to begin with; it ended up seeming a little forced. I did at least do some editing afterwards though; originally he could rotate the stage like in the original game, which ended up being pointless and confusing in Smash. I do have a soft spot for that Uspec though; so simple, but so cute!

Weavel:
And finally, my best set so far. I'm glad I could end the contest on a high note after the letdown Gomez was. I also ran into a tricky dilemma. Weavel can basically create a "minion" with Halfturret, albeit a very simple one. Smash Daddy criticized the set's lack of hard interactions with the turret, but I'm on the fence about this sort of thing. On one hand, having crazy interactions for the sake of it doesn't add much to the set, even detracting from it. On the other hand, no interactions can make a move pointless if handled badly. Ultimately, I use Brawl sets as a reference for this; Snake, for instance, has no particularly special interaction with his landmines, yet they are a core aspect of his playstyle due to their versatility. I feel that the lack of interactions may have worked better if the Halfturret was better integrated, even if such integration would be beneath the apparent surface of the set. Regardless, it's still my best set of the contest, so I'd encourage anyone reading this to give it a read if they haven't already.

Now that you've been crushed by my wall of text, I hope you enjoyed the read. I tried to focus on the development and thought processes behind the sets, rather than just the content itself. Read some sets, maybe send off a vote to one or two of these, don't do drugs, and stay in school. BYE
 

Katapultar

Smash Lord
Joined
Nov 24, 2008
Messages
1,251
Location
Australia


Jörmungandr is a very easygoing and simple-minded dragon girl who was adopted by a small group of male miners, along with 3 younger sisters. She's quite skilled when it comes to chores and would never hesitate to help someone out, though she's not the most intelligent person, especially when it comes to remembering people's names. Unlike Leviathan and Bahamut, Jörmungandr can't use magic but instead possesses super strength, her weapon of choice being a spiked, double-sided axe she wields and tosses around in a carefree manner. Peculiarly enough, Jorm's axe actually grows to massive proportions when she transforms, giving her gargantuan attack range in Smash as the powerhouse of Aquafall Defense.


Height: 145cm
Weight: 5
Ground Speed: 5
Jump: 7
Air Speed: 7
Fall Speed: 1-10
Traction: 5

Jörmungandr is a breath of fresh air from her squishy mage counterparts, and probably the strangest of all in terms of stats. See, while Jorm doesn't have wings, she's still capable of hovering in the anime, making her very floaty by default... but she has an incredibly effective fastfall because of her armor as she stops "hovering", making her insanely good at vertical momentum-cancelling! This also extends to Jorm's jumping abilities: her first jump is a solid leap off the ground that comes close to rivaling Falco's, whereas her second jump is a slow hover that grants her good airtime but doesn't give her much height, similar to Peach's second jump. Jorm is also capable of carrying heavy items in the same way Donkey Kong can thanks to her super strength, holding the item above her head in the same way she did when carrying Bahamut's luggage during the group's travels.


Neutral Special - Rubble Rupture
Jörmungandr raises her axe behind her, causing her body to gradually flow with green spiritual energy before she hastily swings her weapon down upon release. This is a charge-and-store move that can be charged for as long as Roy's Flare Blade, only the charge dies down at a-third the rate you spent doing so when unused/not charging another attack and Jorm suffers a bit more pre-charge lag and ending lag than said attack, so you'll want to be careful. It is also worth noting that Jorm's axe hits a slight distance ahead of her, as you can probably tell by the picture, and that slender (most realistically-proportioned humanoid) opponents can outright avoid getting hit by being right in front of Jorm, a rule that applies to nearly all her axe-based attacks. On the other hand, the attack reaches out quite far, especially so with this attack due to Jorm throwing the upper-half of her body forward, as can be seen in the picture.


If Jorm slams her axe into the ground, she'll damage the ground in front of her and spit up a certain amount of rubble based off the intensity of her attack. With the slightest charge, you get a small rock that deals 9% and decent knockback that KOs at 200% when smash-thrown, but instantly breaks upon hitting something. With a quarter charge, Jorm instead gets a Kirby-sized boulder that deals 16% and high knockback that KOs at 130% when smash-thrown, breakable in the same manner as a crate while acting as a unique "semi-heavy item": normal characters can carry and throw the boulder in the same way they'd carry a cracker launcher whereas strong characters like Jorm and DK can handle them like normal throwing items. Charged halfway, Jorm gets a Bowser-sized rubble wall that breaks upon taking 20% or an attack that deals high knockback, hitting enemies next to the opposite side of it for half the damage and knockback of the attack that destroyed it before collapsing into 1 boulder and 1 rock. Charged all the way, the wall becomes twice as tall, making for a reasonably good way to cover the attack's end lag as foes are pushed up to the top of the rubble. Jorm obviously can't make rubble by standing atop of existing rubble, but she can destroy it to mine for rocks, and if items are turned on she'll have a slight chance of discovering something whenever she breaks the ground or destroys rubble, having an incredibly slim chance of discovering a summon sphere if the Smash Ball is turned on. On an unrelated note, Jorm can bash foes with a boulder she's holding if she's missing her axe because of her Side Special, but it only deals 0.7x as much damage/knockback and breaks upon hitting something or hitting the ground once.

Finally, if Jorm hits the ground using any of her axe-based attacks with at least 1/5th charge, she'll throw up a certain amount of rubble correspondent to the attack's power and the level of charge she attained, irregardless of whether it died down over time. Standards, Aerials and Throws usually never produce more a simple boulder, uncharged Smashes can create rubble while fully-charged Smashes can create tall rubble. Just be aware that Jorm goes through a bit of hitlag when smashing the ground, giving foes a bit more time to punish her.

Side Special - Axe Toss
Jörmungandr loves tossing her axe around - so much in fact, it's gotten her into some troubles over the course of her adventures! Using this will see Jorm bring her axe back in an exaggerated animation that can be charged and held for up to 1.5 seconds, and once released, she'll toss it forward with the slightest delay. The axe then becomes a huge (Bowser-sized!) projectile that spins across the stage at insanely high speeds that range from Sonic's dashing speed to several times that while dealing anywhere between 16-28% plus very high knockback on a 30 degree angle that can KO anywhere between 106-72%, along with some nasty shield damage.

Once Jorm tosses her axe away, she loses access to her axe-based attacks, but she'll continue to use those attacks as though she never lost it in the first place, being as clueless as she is. If the axe hits a surface on its way out, it'll remain stuck in there until Jorm retrieves it automatically by touching it, but if it goes off-screen it'll automatically fly back towards her from the opposite side of the screen! It takes 4-1 second(s) for the axe to return depending on how long the move was charged for and it flies back in as a hitbox 0.7-0.85x slower and weaker than before due to having lost some momentum, but it's still very dangerous due to being a huge and fast static hitbox. It's fun to use this move just to try and hit foes with the axe as it comes back to you, though you have to be careful not to try too hard since Jorm is unable to use the majority of her moveset without her axe. On another note, Jorm will not have her animation interrupted when she gets her axe back, letting you have some fun with her various axe-based attacks as they suddenly get their hitboxes back mid-animation.

Jorm can still charge her Neutral Special even without her axe due to specifically charging spiritual power in her body. The walls that move create can also be put to interesting use with this move, as when the axe hits a wall it'll pause in midair for a split-second due to the hitlag of doing so, possibly catching the foe off-guard over the unusual timing.

Up Special - Dragonfall
Although Leviathan is the main character, Jörmungandr is often the one who deals the finishing blow by coming down on the enemy with a powerful attack. Here, Jorm performs an powerful leap that sees her cover 6-4 SBBs (depending on whether she was grounded or not) with good DI'ing capabilities before she raises her axe and plummets straight down with it for a devastatingly powerful attack that inflicts 34% and excellent vertical knockback that can KO as early as 60% - and that's just against grounded opponents. This does not come without a degree of high risk however, as once Jorm hits the ground she'll be forced to pull her axe out of the ground for massive end lag that leaves her open to attack, though that's still better than falling to your death offstage. If Jorm doesn't want to plummet down with her axe, you can press B during the apex of her jump to cancel that phase and put her into a non-helpless state.

If Jorm lands atop a rubble wall, she'll destroy it and have her horrid end lag canceled, a useful little tip to keep in mind.

Down Special - Jornado
Jörmungandr readies her axe like a baseball bat before spinning it around her for the same duration as Link's Up Special, or however long you keep tapping B for, able to move back and forth at a slow pace all the while. Jorm's spinning draws in objects within 4 SBBs next to her at a somewhat slow pace, items and foes alike, and her axe (and her feet) becomes a high-priority hitbox that inflicts 4 hits of 9% which each launch foes on a low angle for solid knockback that can KO them as early as 120%... yet the combined damage from each hit is catastrophic against shields, something foes must be incredibly wary of. If anything, Jorm suffers from a lot of start-up lag and is completely vulnerable to vertical attacks, but almost no ending lag, which is key in this move since it lets her capitalize on her opponent's new position as they're dragged towards her.


If you specifically mash B to maintain the spinning, Jorm will spin around even more intensely and create a tornado around her like in the above picture as a result, the funny shape coming from her extended axe. This tornado draws in objects from twice as far and twice as effectively if they were within 4 SBBs of Jorm, actually very slowly drawing in makeshift structures that are not rooted to the ground such as your rubble. This tornado comes at the cost of Jorm suffering actual end lag and cannot be canceled into a lesser spin once initiated, but items drawn towards her act as strong-thrown hitboxes that can cover for her, functioning marvelously with all your rocks and boulders. When an items meets with the tornado around Jorm, it'll be spun around like a toy before being shot up either upwards or just about at random once she stops spinning, traveling a distance between that of a strong-thrown item or 3x that of a smash-thrown item depending on how long the item spent being spun around. Regardless of the trajectory and distance items are spat out at, they almost always land within 6 SBBs of where spun around and with great variation between the time they fall, but none receive any kind of power bonus that could make them unreasonably powerful.

If Jorm doesn't have her axe, she'll use her tail as a substitute for her axe (even if she's holding a boulder), but at the cost of the pull and overall strength of the attack being almost halved, not to mention she has significantly less priority due to the main hitbox being a hurtbox. The animation for this is also weird, as Jorm spins around on her tippy-toes like a ballerina, making it look like some kind of ominous rain-summoning ritual. While weak, Jorm's spinning does draw her axe in at higher speeds if it's within range of the pull.


Jab - Roughhouse
Jörmungandr shows off her strength by throwing out a straight for 2%, which is then followed by a hook for 3% and then a quick but deadly swing of her axe for 7% and very good radial knockback that can KO as early as 125%. The first two punches are a bit lengthy and lack range, but Jörmungandr takes a step forward with each hit, the final hit making for a very intimidating attack with its insane range. This move is compatible with the NSpec charge.

Dash Attack - Dragon Rush
Jörmungandr tucks her shoulder out and raises her axe upright behind her before lunging forth for a fierce barging attack that covers a SBB worth of ground. Foes ahead of Jorm when she first barges suffer 12% and strong mostly-horizontal knockback behind her that can KO at 135% while those ahead of her take 10% and decent mostly-horizontal knockback capable of KO'ing at 180%. Though it starts off with a bit of delay, Jorm gets super armor as she rushes forth and suffers almost no cooldown, so getting punished for it is rarely an issue. You can use this move to push foes around where you see fit, as Jorm benefits from having foes in front of or behind her depending on whether she has her axe or not.

F-tilt - Horizontal Cleave
Jörmungandr holds her axe to the side before swinging it out sideways for a basic heavyweight laggy, yet powerful blow that can be angled by up to 45 degrees. The head of the axe is a sweetspot that deals 16% and high knockback that can KO at 105%, along with some very good shield damage, while the tip is a sourspot that deals 8% and low knockback in the angled direction that'll KO at 210%. You also get some solid range as Jorm steps forward during the attack, making it useful for prodding enemies from a distance as further means of compensating for the lag. Angled upwards, the tip -can- hit enemies standing on platforms like rubble, while angled downwards you can actually send opponents sliding back in prone for a bit of tech-chasing despite the end lag. You can also use this move together with the NSpec charge by angling Jorm's axe, tearing up the ground for either a boulder or a rubble wall depending on whether you hit with the sourspot or the sweetspot, the former making this attack an exception among the Standard attacks usually not being able to throw up anything more than a boulder.

U-tilt - Axe Raise
Jörmungandr prods her axe above her as though she were using it to poke at something, one of her few attacks that doesn't demand excessive physical force. This results in an understandably weak attack that deals 10% and solid upwards knockback at the tip (KO'ing at 185%), 8% and pretty good diagonal knockback that won't KO until 225% at the spikes and 6% with okay horizontal knockback that KOs at 300% at the lower part of the axe. The attack has some heavyweight start-up and only hits above Jorm in a short motion that can easily be dodged, but for very good reason: Jorm's axe has absolutely ridiculous range and coverage, far more than you should ever get on an U-tilt, making this a marvelous on-demand anti-air. Despite the move's range, Jorm actually has little reason to keep foes directly above her when most of her Specials work better when they're horizontal-ish to her, so you'll usually be hitting with the spikes on the axe to see that through. It helps that the spiked-tip sweetspot is surprisingly small, and that the range on this attack can leave it incredibly predictable if you try using it to juggle.

With NSpec charge, this can be used to dig a boulder/small rock out of a platform above Jorm depending on whether you hit with the sweetspot or sourspot, though there are better ways to utilize the charge.

D-tilt - Tail Sweep
Crouching on one knee, Jörmungandr twists her body and sweeps her tail ahead of her, dealing 11-5% and good-low knockback on a 70 degree angle that'll KO between 145-300% depending on whether you hit foes at the start or near the end. This has a bit of lag, but it's fairly long duration and great range make it a solid defensive move, especially when you don't have your axe. It's also good for poking underneath an enemy's shield if they tried to block your flying axe given many of Jorm's more powerful moves are good at damaging shields.


F-Smash - Earth-Shaker
Jörmungandr raises her axe back before swinging it down in front of her as forcefully as possible, a tremendously powerful attack that deals 28-35% plus huge radial knockback that'll KO between 55-25% at the center of the axe and 22-29% that KOs between 70-40% near the edges. Jörmungandr suffers a good deal of pre-charge lag as she raises her axe behind her slowly, but not too much start-up lag as she swings her axe down almost instantly, making this nice for charging as your axe is about to come back to you. The force behind the attack also sends a fin-shaped shockwave projectile blitzing 2-4 SBBs ahead of Jorm, dealing anywhere between 11-19% with good knockback that can KO between 120-90% as a means of giving this tremendously telegraphed attack more pay-off. Just... be very careful of the incredibly bad end lag as Jorm takes a moment to pull her axe out of the ground. If there's no ground ahead of Jorm, she'll suffer significantly less end lag, but she'll get no shockwave out of the deal.

Using this attack with NSpec charge yields some interesting results as the shockwave extends the area affected by Jorm's sheer destructive power, letting her make and line-up as many as 2-4 rubble walls at once while providing even more means of covering her terrible end lag. It goes without saying that you can have quite a bit of fun with this, gathering some time to charge your Neutral Special or even throw your axe through all the walls to get tons of throwing items to make use of. Of course, you do have to go through quite a bit to get such a set-up, so be sure to make the most of it.

U-Smash - Sky Cleave
Jörmungandr swings her axe above her for a hefty and laggy blow that resembles Ike's U-Smash. This deals 20-27% and high-very high knockback that'll KO between 90-60%, backwards knockback on a high angle if you hit from the sides and upwards knockback if you hit near the top. What's especially good about this move is that Jorm's axe hits the ground twice when using it, both at the start and finish, allowing her to make 2 rubble walls at the same time as opposed to one if she had NSpec charge. Alternatively, you might be able to use the attack's coverage to hit a foe rolling behind you to avoid your incoming axe if you've got good timing.

D-Smash - Stamping Destruction
Jörmungandr crouches down before suddenly leaping off the ground and plunging her axe directly into the earth, creating a reasonably-sized earthquake around her that deals 19-26% with high upwards knockback that KOs between 100-70% up-close and 16-22% with solid diagonal knockback that KOs between 115-85% from far away. The move comes out surprisingly fast despite how it sounds, but it suffers from sparse attack frames and some end lag afterwards, so timing is critical. On another note, this is Jorm's only axe-based attack she can use without her axe as she instead stomps down with both feet to create an earthquake using her super strength, but only at 0.8x the attack's usual power.

Because of the way this attack works, using it with NSpec charge will create rubble/tall rubble beneath Jorm as it takes her up into the air. This makes for a particularly good follow-up method if you managed to hit foes up-close, but also serves as a way to change your position for your incoming axe since this move can be used without it. This is actually a good move to use atop of rubble or any kind of wall since destroying it will cancel out the nasty end lag, letting Jorm transition into her floaty air game.


N-air - Axe Slap
Jörmungandr tries something different by swinging the side of her axe sideways for a blunt attack, keeping a grip near the head of the axe to keep the hitbox close to her. This comes out reasonably fast and normally deals 10% with decent mostly-horizontal knockback that'll KO at 200%, but if you barely scrape a foe they'll instead take 5% and decent hitstun. The move naturally has good range and coverage in front of Jorm that makes it good for poking and simple set-up spacer, having no blind spot directly in front of her, but it suffers from a bit of ending lag... unless you cancel it with the minimal landing lag, however. Certainly not bad for short-hopping or when you're about to hit the ground, or maybe to tech an item. Also, this move doesn't get an NSpec charge bonus due to the fact that it doesn't involve cutting.

F-air - Mighty Blow
In a maneuver most predictable for her predicament, Jörmungandr slowly raises her axe behind her before forcefully swinging it down, suffering as much lag as DK on his F-air but dealing 22% with very high spiking knockback that can KO as early as 90%, or 17% with high knockback ahead of/behind Jorm if they're hit at the edge, capable of KO'ing at 115%. This attack does indeed have huge range to make landing it easier, but what makes it particularly viable in Jorm's hands is the fact that she's floaty, meaning she rarely has to worry about untimely landings that would invoke the attack's rough landing lag. Jorm also gets super-armor at the front roughly one-thirds of the way into the starting lag, and once her swing ends she keeps her axe out on a low angle as a brief hitbox that can deal as many as 4 hits that each inflict 6% and good knockback that can KO at 190%, being a good way to pressure shields or catch foes off-guard as you scoop them up for further aerial assaults.

B-air - Dragon Tail
Jörmungandr looks behind her while smiling nonchalantly before swishing her tail 4 times in a row, each hit dealing 4% before the final one deals good knockback that'll KO between 160%, the knockback trajectory varying based on where foes were hit: horizontal at the tip of the tail, mostly-upwards at the midsection and inwards close to Jorm. The move suffers from a bit of lag on both ends, but makes up for that with it's excellent range and lack of landing lag, giving it a similar application to Leviathan's B-air - pressure, defense, weaving through enemies horizontally. In Jorm's case, this is arguably the most obvious move to use as her axe returns to her since it can not only trap opponents but also be used to get past them if you want the axe to hit them. On the other hand, this is Jorm's only aerial that doesn't involve her axe, so it'll end up being quite predictable when she doesn't have her axe.

U-air - Steel Whirlwind
Jörmungandr raises her axe like a sign above her and, with a bit of starting lag, begins spinning it around for nearly a second, dishing out as many as 18 hits of 1% in the process. The axe is capable of trapping and dragging foes along if Jorm was moving slowly, after which the final hit inflicts decent knockback that can KO them at 180%, usually vertical but sometimes mostly-horizontal if they were caught near the sides of the axe. Regardless, this is a not only a terrifying juggler but also an excellent defensive aerial thanks to its long duration and the size of the hitbox, not to mention it Jorm suffers no landing lag out of it. The sheer control Jorm has over her vertical movement only adds to the move's versatility, as she can jump/fall quickly to rip through enemies or use her second jump/fall to drag them along for some good old-fashioned jugglng. However you use this move, you'll always end up blocking off quite a bit of space with the huge hitbox, something heavyweights foes will learn to fear.

D-air - Landslide
Jörmungandr swings her axe sideways on a very low angle, covering significantly less area than a normal axe swing in exchange for being a fast attack. The head of the axe functions as a sweetspot that deals 15% and solid knockback on a 35 degree angle that can KO at 145%, being great for launching opponents into the air, while the tip of the axe is a sourspot that deals 9% and good horizontal knockback that'll KO at 195%, which is still quite good. The attack also kills Jorm's momentum temporarily via her magical dragon levitation powers, serving as a very good brake for her jump or fast-fall, and this also means she'll never suffer landing lag when using it. The high range and awkward angle this attack comes out on make it ideal for poking at grounded opponents, the sweetspot being a good launcher whereas the sourspot is good for spacing, like following into an axe toss. You can also use this together with a rubble wall, maybe to intercept opponents trying to jump over one, or simply destroy one from the sides or above just for the sake of such... or to damage opponents next to one.


Jörmungandr reaches out with one hand for a decent-ranged grab, singlehandedly lifting her opponent off the ground by an article of their clothing with her super strength. Her Pummel is a hasty headbutt that deals a solid 3% per hit.

Jorm can also grab boulders and rubble, because why not?

F-throw - Dragon Force
Jörmungandr drags the foe behind her before tossing them forward as hard as she can! This results in 12% and high knockback on a low angle that'll KO at 120%, positioning foes where Jorm wants them for her powerful ranged attacks in a nice, satisfying animation... it does drag out a bit though, giving foes a bit of leeway to DI. Just a bit.

Boulders will go flying twice as far and deal 1.35x more damage than if smash-thrown normally, letting you use them as a higher-ranged projectile at the cost of being telegraphed and predictable. Rubble walls get flung a SBB distance into the air and land a platform ahead of Jorm, dealing the same damage as boulders and actually allowing you stack a wall atop another in the event where you have multiples lined up, like from the F-Smash. You can then grab this stack to make an even taller stack by throwing it atop of another wall or use it to get a bigger hitbox. Be aware that if a wall is destroyed, walls stacked atop of it will also be destroyed, so you're not exactly getting "more HP" out of the deal.

B-throw - Tail Whip
Jörmungandr deposits the foe behind her before smacking them with her tail 3 times for 3% apiece before the foe is pushed away for low set horizontal knockback. This is the opposite of the F-throw in that it keeps foes relatively close to Jorm, enough so that she can barely hit them with her high-ranged axe attacks and follow-up in all sorts of ways if she needs to. The throw also has a rather long duration, a blatant staller that enables your axe to hit foes if it comes back from behind you.

Using this on a boulder or rubble wall results in a mirror of the F-throw.

U-throw - Sky Target
Jörmungandr flings her opponent into the air! This comes with 4% and high set knockback in a very quick motion, and if you continue to hold the input Jorm will follow-up by tossing her axe upwards, which deals the same damage as an uncharged Neutral Special before coming back down towards Jorm 1.5 seconds later, though it can easily be dodged by the foe when it goes up. If Jorm doesn't have her axe on her, she'll instead toss a boulder within close proximity to her.

D-throw - Woodcutter
Jörmungandr tosses the foe against the floor before quickly bringing her axe down on them for 12%, in turn delivering some surprisingly negligible diagonal downwards knockback that scales well enough to start KO'ing at around 160%. This starts tech-chases at lower percentages, spaces at higher percentages and can send foes off the stage for a gimp. This is also compatible with the NSpec charge and will net you a degree of debris based on the level of charge you managed to attain, from anywhere between a rock or even a tall rubble wall, coming with the bonus of being a throw that knocks enemies down. If you get a rubble wall, the foe will stay knocked down atop of it at very low percentages, whereas at higher percentages they'll slide off, possibly hitting the ground and be knocked into prone against if they don't tech. Overall however, excellent for damaging the ground without being punished for it, given most of Jorm's attacks are quite laggy.

If Jorm doesn't have her axe, the throw will simply result in the foe knocked into prone without any damage, but you can still take advantage of the situation despite Jorm still going through the axe swing regardless given how quick it is. If you use this throw on a boulder, Jorm will simply roll it along the ground like a bowling ball, which doesn't really do much except maybe interact with slopes. If you use this throw on a rubble wall however, Jorm will punch it, instantly destroying the structure while dealing half the damage and knockback of the throw to any foe making contact with any part of it.


Yurlungur
Bahamut and Jörmungandr never acquired the means to evolve further, but that doesn't mean they can't bring the pain with their Final Smashes. You see, the girls helped and made contracts with gigantic dragons during their adventures, being allowed the call on their help by breaking open a shiny, elusive, one-use "summon sphere". One of these summon spheres appears before Jorm, much to her surprise, which then becomes a harmless throwing item that replaces whatever she was holding before. Once thrown against a surface, a blueish portal will open up, summoning the massive swamp dragon Yurlungur as Jorm cheerfully calls out "Master of the Swamp!", not remembering his actual name. Once released, Yurlungur flies up to the top of the screen in a somewhat short-lived rampage, twice as big as Rayquaza while dealing some impressive damage to any foe who touches him. Yurlungur also acts as a massive wall while out, and any foe in his way when he flies out will get swallowed up, only to be spat out for an instant star KO once he leaves the screen. A powerful Final Smash, just so long as you don't accidentally toss the summon sphere offstage or something.
 

ChaosKiwi

Smash Apprentice
Joined
Feb 1, 2014
Messages
104
NNID
ChaosKiwi
So hey I'll add puns and playstyle and edit the formatting a bit tomorrow but FINAL SET OF THE CONTEST GO!

MAGMA MAN


DLN-071, Magma Man, was built in order to regulate and oversee safety regulations. He can generate flames and magma of his own, and, obviously, withstand high temperatures. He was recruited by Dr. Wily upon learning that he was to be discarded. He loves hot springs.

STATISTICS

Size- 6
Weight- 7
Ground Speed- 5
Jumps- 5
Falling Speed- 6
Aerial Speed- 6

SPECIALS


Down Special- Magma Pit

Magma Man readies his dual buster arm, pointing them downward while steam pours out. After a quick delay, Magma Man starts pouring, what else, magma out of them, which pools in front of him in a one SBB wide pool. Not a pit, as the name implies. So sorry.


Magma Pits last until Magma Man is KO'd, or until he attempts to create more than two (That is to say, he can only have two out at a time, and trying to create a third will make the first fizzle out), or until 20 seconds are up, after which they evaporate.


What do Magma Pits do? I'm glad you asked. They mostly act as hitboxes, as anybody who stands in them takes 3% for every second of contact (and less than a second of contact still gives the toucher the initial 3%). Somewhat weak, eh? Well, there's a second effect.


Once you touch a Magma Pit, you're set on fire. When you're on fire, you take 1% per second. You remain on fire for ten seconds, though an air based attack from somebody else can put it out right quick.


Additionally, by standing in a Magma Pit, Magma Man can restore 1% to himself every second, so that's a plus!

Neutral Special- Magma Bazooka

Magma Man holds his twin buster arms in front of himself, and fires three shots of magma from them, in a spread. One traveling straight, and the other two traveling at 45 degrees downward and upward. You can charge the shots to make them travel farther quicker and make them slightly larger, allowing them to cover more area. Pretty cool!


Each Magma Bazooka blast does 4% damage. However, if you hit somebody who is on fire with this attack, the Magma Bazooka blasts do 6% instead!

Up Special- Magma Plume

Pointing his busters straight down, releasing two high pressure blasts of, you guessed it, magma!


Initially, Magma Man is carried 2 SBBs into the air. As long as the player holds the input, he'll maintain that height but be unable to attack. You can also move horizontally in this time, but only if there is ground two SBBs under you or less. After two seconds, however, the proverbial well will run dry, and Magma Man will fall, the streams becoming thinner as time goes on.


The streams, should an enemy be hit with them, deal an initial 8% and then 4% for every second they are caught in the stream.


Additionally, if you stand in a Magma Pit when initiating this special, you'll travel an additional SBB in height, and get to stay airborne for .5 seconds longer, at the cost of the puddle being dissipated.

Side Special- Lava Flow

Leaning over, Magma Man pours out of the top of his head a stream of, you guessed it, mag- lava. Lava, this time. The lava travels slowly, about a bit slower than Magma Man's walk speed, and travels a total of three SBBs before dissipating. The lava deals 12% to anybody it hits, and can set people on fire, just like a Magma Pit.


Since it's so slow and hard to get a hit with, the main draw of the Lava Flow is that you can use it to extend the time limit on Magma Pits by 5 seconds for every Lava Flow you throw at them, up to a 15 second boost.


Additionally, if a foe touches the lava flow while they are on fire, three seconds are added to the timer for how long they are ablaze. Neat-o!


STANDARDS


Jab- Thermal Vent

Magma Man thrusts one of his busters forward (which one is thrust alternates), unleashing a quick puff of superheated air. This deals 5%.

Side Tilt- Blaze It

The lava- er, magma based Robot Master throws his buster hand forward, releasing a short stream of flame from it. The flame does 12% damage. Though it has short range, it's good for keeping foes away as, for as long as you hold the input, the stream of flame will continue on, until you either release it or Magma Man flinches.
Up Tilt- Fire When Ready

Straightening his stance, Magma Man's head flame extends upwards one SBB. This deals 11%, and can be used even while Magma Man is performing another action, as long as it doesn't involve his head flame area in any way.


Additionally, this move adds two seconds to the flame timer of any flaming foes it hits, so make good use of it, buddy! It's a pretty hot commodity!
Down Tilt- Hot Stuff

Facing the camera, Magma Man crouches and aims his busters at the ground at forty five degree angles. Firing a blast of magma from each, he creates a small splash of the stuff on either side of himself, dealing 13% to any saps unlucky enough to be caught in it. After all, magma really hurts. So if you get hit with it, you're kind of a sap.
Dash Attack- Woah, Where's the Fire?

Jumping and spinning, Magma Man turns himself into a sort of flaming wheel, using his head fire thing (really, what was that even built into him for, Dr. Light?) as the edge of the wheel. He doesn't lose any momentum during this, and deals 13% to anybody he hits. This is actually very powerful for a dash attack, able to KO unlucky comers at as little as 180%.

SMASHES


Side Smash- Fight Fire with Fire

Like some sort of literal fire hose, Magma Man holds out both busters, firing a thick ol' stream of magma and flame mixed together for a brief moment. This is fairly straightforward, dealing 24% to anybody who thought getting close to somebody named "Magma Man" was a good idea. This, like several other moves, can add to the flame timer of any flaming foes, adding three seconds, specifically. You can KO at 140% with this.

Up Smash- Blow Your Top!

Magma Man is just a simple robot, meant to work near volcanoes. Thus, he emulates them with this attack. He points his buster arms upwards, and, with his middle head fire thing, fires three side-by-side streams of magma into the air. The streams altogether deal 21%, and extend one and a half SBBS up, and the same distance wide. You can KO at 150% with this.
Down Smash- Blaze of Glory

Magma Man sticks his busters into the ground, and looks around while charging the smash. When the smash is released, he pumps piping hot, what else, magma into the earth below him, causing two steady streams of the stuff to violently erupt on either side of the Robot Master. The streams do 23% and can KO at a mere 130% if you time it right.


If used while Magma Man stands in a Magma Pit, the streams will actually extend 1.5x higher up, as they're drawing on the excess magma of the pit. The magma pit. In which Magma Man is standing.


AERIALS

Neutral Air- Hot Rain
Firing a quick blast of magma upwards, Magma Man is showered with the stuff, creating a sort of hot bubble around him that burns foes with 12% fire damage and can spike any enemies hit with the initial burst. All in all, a simple Neutral Aerial attack, able to KO at 200%. Unless you're spiked by the initial burst, as I said.

Forward Air- Jetfire

Magma Man aims his busters behind himself and fires a blast of, well, fire, propelling himself forward like a rocket. His head fire thing and the two streams become hitboxes while he moves forward, each dealing 12% and high horizontal knockback in the opposite direction.
Back Air- Down Down Down In To the Ring of Fiiiire

Spinning in place, Magma Man creates a ring of fire around his own waste, before stopping, sending it flying in the direction opposite the one he was just facing. It travels two SBBs before disappearing, and does 14% to anyone it hits, while meteor smashing them at the same time.
Up Air- Flame War

Magma Man ups the power on his head flame thing, creating a plume of fire that, while hurting those above him with 12%, also propels his own metal body downwards at an alarming rate, his feet becoming a hitbox that deals 10% to anybody he lands on and meteor smashing them.

The flame plume adds 4 seconds to the timer on somebody's on-fireness.

Down Air- Warm Bodies

Magma Man points his busters downwards and fires a single, large glob of magma. This magma glob, about as wide as Magma Man himself, falls slightly quicker than him, and deals a hefty 11% to anybody it lands on. Whoops! Sucks for them, haha!

Plus, if it hits a flaming foe, it deals an additional 4%, racking the total damage up to 15% instead of that measly 11%!


GRAB GAME


Grab- Too Hot To Handle

Magma Man doesn't have any hands but who cares he grabs you. It's literally 4 am right now, his grab animation is literally not important to me.
Pummel- Air Head

A blast of hot air to the face, 4% damage.

Forward Throw- Heat Wave

Magma Man throws his foe forwards, followed by a stream of magma, sort of hosing them down with the stuff and dealing 15%. A simple directional throw.

Down Throw- Hot Head

Throwing his foe to the dirt, Magma Man flips over them, dousing them with his head flame thing while he does so. This not only deals 14%, but can, also, either extend somebody's flame timer by five seconds or, if they aren't already, set them on fire.

Up Throw- This Girl Robot Master's on Fire

By sticking his enemy into his head fire thing, Magma Man boils them alive, dealing 15%! What a guy! This also adds 3 seconds to their flame counter. Afterwards, the unlucky foe is ejected straight upwards.

Back Throw- Hot as Hell

Magma Man creates a puddle of magma behind himself, then rubs his enemies stupid not-magma face in it, literally, for 14% and high upward knockback. If used in front of an actual magma pit, the pit will have 4 seconds added to its life timer. So useful!

FINAL SMASH

LAVA EVERYWHERE
Read the name. Lava fills the stage, everyone who touches it takes 20% and high upward knockback that KOs at 140%. Watch your step!

PLAYSTYLE

The focal point of Magma Man's moveset is setting his foes on fire and utilizing his Magma Pits. His pits have a lot of uses, so keeping them around is important.

 
Last edited:

FrozenRoy

Smash Lord
Joined
Apr 26, 2007
Messages
1,260
Location
Las Vegas, Nevada
Switch FC
SW-1325-2408-7513
Made a lot of moveset changes! Note that some of these were made a while ago and I just now posting that I changed them. Here are some:

Lucemon Changelog:
- Forward Aerial changed completely.
- Up Aerial changed completely.
- Forward Tilt functionality with spear added.
- Down Aerial slightly tuned up.
- Jab has had a large amount added to it.
- Back Throw has had a good deal of functionality added to it.
- Up Tilt has had a lot added to it.
- Final Smash added.
- Move order changed to help the moveset be understood due to above changes.

Night's End Sorcerer Remix Changelog:
- Lag on Side special absorbing enemy projectiles increased.

RWBY Changes In Gnereral:
Added some spaces between some particularly run-on paragraphs to make reading easier.

Blake Belladonna Changelog:
- Shadow Clones no longer have a time limit and have 20 HP.
- Minor typo changes

Weiss Schnee Changelog:
- Back Throw altered a lot.
- Up Tilt now has some added functionality.
- Up Aerial also has some increased functionality.

Shadow Naoto Changelog:
- Shadow Naoto's pummel no longer has the Dekaja effect.

Heat Man Changelog:
- Up Throw basically redone.
- Forward Throw has added functionality.
- Down Throw changed a fair deal.

Tenshi Hinanawi:
- Very minor edit: Horizontal pillars no longer magically float on and off each other with an aerial.

Kaguya Houraisan:
- B-Throw pretty changed.
 

FrozenRoy

Smash Lord
Joined
Apr 26, 2007
Messages
1,260
Location
Las Vegas, Nevada
Switch FC
SW-1325-2408-7513
MYM15 Submission Period is OVAAAAAAAH!

Or it's Submission Period is, anyway! Next up is Advertising Period, where you advertise at least three sets to become eligible for voting! Advertisements aren't hard: A picture and some words describing why you're ading it and you are good to go! Advertising Period lasts for one week!

We'll also be allowing edits during this Advertising Period, but not new moves: Just feel free to tweak your set! You will most definitely not be allowed to do so when voting starts, since that creates very odd voting scenarios, so be aware of that! And have fun advertising!
 

allison

She who makes bad posts
Joined
Jan 25, 2014
Messages
5,138
Location
Maple Valley, WA
NNID
crazyal02
3DS FC
0216-1055-4584
NIGHT'S END SORCERER
http://smashboards.com/threads/make...ent-period-begins.345878/page-9#post-16949339


This set has quite an interesting mechanic at work. The Wisps don't seem to do anything at first, but the oddly initialed NES can do quite a few things with them, from flinging them at opponents to using them at points to teleport to. In this way, he's similar to Olimar, but the fact that the Wisps are immaterial and don't usually try to follow him leads to some very interesting ideas. There's a feeling of controlling the uncontrollable in this set, of utilizing the free spirits of the Wisps. Even moves like Fsmash only slightly affect their flight path, and yet the Wisps can do incredible things when utilized well.
SLOTH
http://smashboards.com/threads/make...rtisement-period-begins.345878/#post-16201577


I could type up an elaborate description for this guy, but why even bother?

Just kidding. This set has a lot of risk-versus-reward going on, given that the Nspec gives him quite a boost but leaves him vulnerable afterwards. The entire set, befitting his character, is rather simple, but everything fits together. Nothing seems glaring or forced in, every move has a purpose, and the set overall feels very polished. Despite a lack of suitable projectiles, Sloth wants the opponent to approach him so that he can space them with his chains. This set is very character-fitting, and works well mechanically too.

Intoner Three
http://smashboards.com/threads/make...ent-period-begins.345878/page-7#post-16829686


Possibly the best set of the contest, Three's minion charging mechanic is simple yet elegant, and the entire set (although light on the hard interactions, but I find those are often unnecessary anyway) is structured with the minions in mind. The minions themselves, however, aren't really something we haven't seen before; the most interesting mechanic at work in this set is Intoner Mode. You see, whenever she damages someone with her A-button moves, blood (or oil with robotic characters) is spilt. This blood can then be used by Three to power herself up. The most interesting part of this, though, is how it ties into her minions. When she damages a minion, they will spill blood too-- but also take damage of course. This little detail is enough to cause endless strategizing, since minions are both offensively and defensively useful, but Intoner Mode can deal huge amounts of damage! The quality of this set doesn't end with the Specials, though, as all of her other moves are effective, fitting, and help with the Intoner Mode mechanic. Although there isn't much in the way of interactions with the minions, the set doesn't need it; ForwardArrow does a fantastic job at making sure every move had a purpose in the set, even if it wasn't immediately apparent. The mechanics in the Specials were ever-present without cheap interactions everywhere, and because of that, I would highly recommend this set above all others in the contest.

It's the first set of advertisements! Let me know if I made a mistake anywhere
 
Last edited:

Smady

Smash Master
Joined
Apr 29, 2007
Messages
3,306
Location
K Rool Avenue
Quick note on the User Rankings, I'm leaving them open for comments until Advertisement Period ends, at the suggestion of some people in the chat. Get in your comments now if you want them to count.

That aside, good job everyone. I'll be catching up on everything and doing my own comments soon.
 
Last edited:

Katapultar

Smash Lord
Joined
Nov 24, 2008
Messages
1,251
Location
Australia
DON THOUSAND
There's always been something about FA's sets that give them a tense, invoking atmosphere that pulls you into a dark world. Something that makes them an exciting read that sets them apart from most other works....

Such is Don Thousand, the sole boss set of MYM15.

Boss sets have naturally become less common due to the modern MYM having much more insight and appreciation for in-smash compared to the last few contests, but that's not to say they're entirely extinct outside of set extras, nor scorned - a fact this set's popularity can vouch for.

Some MYM'ers really love the character and the series they represent and try to show it, but FA makes it immediately known that Don Thousand's specific source material is less than stellar and overall not worth representing... rather, he just wants to invite you to know the Don. This is a different kind of character love that cuts the character away from their source material, making them their own character. This is made obvious by the lack of quotes or any sort of Youtube links, and then in the set itself where... there's a complete lack of trading cards! Don Thousand is no longer playing a children's card game, but rather just here to kill his 3 opponents with brute force like a proper smasher would, using his array of generic god supernatural abilities. Clearly the yugioh series is at its best when the characters -aren't- playing card games with each other.

Anyways, I digress. Don Thousand is all about getting his opponent(s) to -destroy- a gate that, when destroyed, summons his ultimate kickass monster that puts every other boss to shame (and yugioh monster - this thing has 10,000 ATK!) with its 1500HP and stock-clearingness. To this end, the Don shows his manipulative side by trying to get his opponents to destroy the gate (taking advantage of the 3v1 situation), using simple stuff like a dragging teleport and manipulation counter but also some very clever damage-redirecting. Plenty is provided by the Side Special crystals and summon smashes, almost overwhelming, for the general sake of damage redirection towards the gate and overall atmosphere, especially with the absolutely delicious pummel and cool Barian Empower transformation. What's also nice about Don is that, despite being a 3v1, he gets no buffs himself and -could- fit into 1v1 with some degree of number crunching, his attacks themselves not being overwhelmingly powerful either. Finally, the set finishes with a super-ultra-mega-awesome Final Smash where the Don summons his "buddies" to help him, and they all get sets based on existing characters and have their souls absorbed into the Don when they're KO'ed, an intense atmosphere provider.

Overall, Don Thousand rocks.


ARGENT COMMANDER
And now, Argent Commander commands my votelist for some different reasons. A bit of a throwback to my liking of sets that most others don't like, something about this set really caught my attention when I first laid eyes upon it. You see, I really, really like it when the functions of certain attacks are consistent among inputs... like how all the Specials have a cooldown after using them, and how 2 of the Smashes provide the same stats effect. All the Specials are relatively interesting, particularly the Side Special projectile that emulates the damage dealt by your last attack, and the fact that all those Specials have a cooldown effect and none of them really help your recovery turn the commander into someone who really needs strategy to be utilized properly. The cooldown and status effects especially help with the MMORPG feel of the character.


ISABELLE
Though he has plenty of room for improvement, Kiwi stands out as a prominent newcomer (alongside Crazy) for his array of submissions and overall as a MYM'ers for his unique reads. You see, Kiwi is very laid-back with his writing - his sets always feel fun to read because it always feels like he's having fun when making them. This makes even his most simple sets an entertaining read, a trait he never lost since his first set.

Borth-Majar and Chill Man could be considered Kiwi's best, and Randy possibly the character whom currently embodies his style the most, but Isabelle has a unique charm that makes it a very nice read and surprisingly likeable for me. The set easily has the best presentation of all Kiwi sets and possibly -the- best writing style. It's also very tame with a nice n' simple mechanic reminiscent to Little Mac's, so there's little room for conceptual brokenness. Taking on the spirit of the Villager, Isabelle is a fun read no matter who you are.
 

ForwardArrow

Smash Ace
Joined
Aug 17, 2011
Messages
502
Nature Prophet

Posted on the last day of the contest amidst a large amount of other sets, Nature Prophet has thus far been very overlooked, especially next to Warlord's much more popular Bashmaster and Sloth. Which is a shame, this set is up to par with those two with its very interesting use of trees, which have a bit of a bad rap in MYM for being used as nothing more than chaingrabs and mobility. This set goes several steps beyond, by allowing you to customize them with branches and structures planted on the trees such as mushrooms, tethers, and thorns, and better yet animate them into minions. These minions are fairly smart, playing around with the constructs he can attach to them for an incredible deal of customization. They're still useful in their inanimate state, what with the hothead projectiles that he can send travelling around them. Add to that the very interesting rain/sun moves that can benefit from tethering trees together, and you have a very fun set to mess around with.

The set is a lot more purely campy than Warlord's other sets this contest for sure, a genre that has gotten flack in the past but honestly, nobody really makes pure campers anymore. Prophet is not dull in how it handles it, even if it doesn't want to fight the foe to their face. Its ranged game, as well as how it navigates around with its own structures and defends itself to make itself viable but not broken in this context is what makes the set actually interesting to envision. Nevermind that in game, Nature Prophet is a complete and utter coward with his playstyle, fighting to take down the enemy base with absolute minimum possible risk to himself, making this set very true to character. In the midst of this last day mess, this is one set you absolutely should not miss.
 
Last edited:

Bionichute

Smash Champion
Joined
Jun 30, 2012
Messages
2,151


BEATEN BY A SLOT MACHINE:

Don Thousand is by far the best set of the contest. It manages to be incredibly detailed, but also very understandable and memorable. The set really feels like a Yu-Gi-Oh set, but with the card game aspects turned down a lot in favor of the character’s specific powers. Don being able to turn his opponents into Barians is a very interesting idea, and is done very well, with lots of thought and detail put into it. Another good thing are the gates, which have a nice risk reward type deal to them, and most of them flow well into the crystals and other moves. About the only thing I really don’t like about the set is the decision to put Numerronius at the end of the first special, as there are a lot of things there that are only explained later in the set.


COCA COLA POLAR BEAR:

Bashmaster is another one of the best sets of the contest, mainly because of the ice and hammer effects, which have a lot of thought and interconnectivity to them, with the ice being movable, and the hammer effects being unique for each move that it’s used on, which makes it a good, fun read. I’d arguably say it’s one of Warlord’s “simpler” sets, but not as simple as K. Rool. The real surprise is the boss mode, which has tons of changes to make the set even more like the boss fight, and it all comes out as fun, especially with the Final Smash.


FIESTA DE LOS MUERTOS:

Obligatory Rayman joke! But yeah, Burrito Bison is probably one of the more unique sets of the contest, and also by far one of the quickest reads. Despite being rather short, the set manages to get everything it wants to say and do out, and a heavyweight aerial momentum character is by far one of the more interesting concepts I’ve seen. This set also seems very “In-Smash”, as it mainly focuses on a singular gimmick, while also having a few “Generic” moves that seem to pad out the set, but actually have a lot more to do in the set than you’d think. It may not be the best set of the contest, but it is a good one, especially after Reimu.
 

Rychu

Thane of Smashville
Joined
Jul 5, 2010
Messages
810
3DS FC
1908-0105-4965
Zant
Zant is probably my favorite Warlord set of this contest, though one that seemingly wasn't as remembered as Sloth, for whatever reason. It's an incredibly active minion set that uses the character's powers and mechanics of the game he's from to it's advantage, spawning shadow beasts, barriers, changing sizes and shooting dark projectiles. The minions are somewhat brutal to the foe, as having more than one onstage will resurrect the dead ones, while the barriers make the match into a sort of cage fight, with the foe fighting not only the shadow beasts, but also Zant's own projectiles. It's a cool concept that's done very well, executed in an active way rather than just infinite minion summons. Zant is definitely very high on my vote list.
 

FrozenRoy

Smash Lord
Joined
Apr 26, 2007
Messages
1,260
Location
Las Vegas, Nevada
Switch FC
SW-1325-2408-7513
Advertisement Period has been extended to the end of the month AKA July 31st!

Tweaking is also still allowed until then, but when voting starts will be gone. URs for comments and so on will also continue then. Happy days!
 

Rychu

Thane of Smashville
Joined
Jul 5, 2010
Messages
810
3DS FC
1908-0105-4965
Weiss Schnee

A Set of Ice and Fire
I don't think I'm alone in saying that Weiss was by far the best of the RWBY project done by Froy this contest, for quite a number of reasons. The most impressive part of Weiss is that the set makes the Ice Character archetype, a style that's been done to death, seem fresh and new. Utilizing gravity, fire, and icy terrains mixed with a bit of projectile camping and active physical fighting, it stands above the other RWBYs by making all of it fun to imagine both playing as and against. One particularly cool part of the set, ironically having little to do with ice, is the Down Special, a fire-able counter attack, which, let's be honest here, is just cool as hell. Since it was posted, Weiss has been frozen atop my imagined vote list.
 

Rychu

Thane of Smashville
Joined
Jul 5, 2010
Messages
810
3DS FC
1908-0105-4965
Geto's MYM 16 Challenge
/moveset idea generator
Pokemon Fusions


Sup

I'm no stranger to the internet, so Pokemon fusion is nothing new to me. I knew about it, though it was a cute idea, and moved on with my life. However, that all changed when I saw some awesome artwork featuring the creations, as well as an entire blog dedicated to making a Dex about the strange creations, including one for Marochan up there.


Sup
So here's the deal: if you're so inclined to do so, head on over to the Pokemon Fusion website, and click that there "random" button. Once you happen upon a combination that you like, I'd suggest trying to find some art of it, as there is a lot of this stuff out there, or even making your own for the artistically inclined.

Pictured: not my art
If not, the sprite should work just fine. You can then head on over to Bulbapedia and knock yourself out learning about both Pokemon, and even come up with a Dex entry yourself if none exists.
Points for Consideration
  • You can use any attack from either of the two Pokemon's movesets
  • Use any and all abilities associated with both Pokemon
  • Yeah, we have Quad-typed Pokemon with this, knock yourself out
  • Add a personality! Rhyzard up there looks like a Warrior Knight, while Marochan looks like tough-as-nails fighter.
  • Have fun!
Now, I'm not issuing any rewards for doing this, but I AM calling this a personal challenge to MYM: how creative can you get?​
 

ChaosKiwi

Smash Apprentice
Joined
Feb 1, 2014
Messages
104
NNID
ChaosKiwi
POMPY

Pompy is probably the best set Bionichute has made, and I feel it's the best one for showing all of his potential. It's also one of my favorites from the Tropical Freeze movement, and considering that was all veteran set makers + Bion, that's saying something. The organization is good, the writing style is good, and the set holds together very well. All in all, it's pretty flip flappin rad.

LUCEMON


Lucemon is an awesome set, plain and simple. Ignoring my love of Digimon in general, it's prety rad, and shows off FRoy's skills. I love the planets mechanic, it's neat, and an original representation of Lucemon's signature attack, I'd say. What FrozenRoy fif was take a neat villain and make him into an awesome set, one of my absolute favorites this contest. The moves flow well, the playstyle is clear and complex, and the character choice is just right for our little OP.

METROID PRIME


Metroid Prime is in my top 10 for this contest, no... contest. I guess. Does that work, like, grammatically? Regardless, it's great. I love the use of Metroids in different attacks, along with thier different stages and versions and whatnot. The highlight is the throws section, though I'm sure you already knew that. Throws are your thing, man, look at Don Thousand. You excel at throws. Point is, vote Metroid Prime 2014.​
 
Top Bottom