• Welcome to Smashboards, the world's largest Super Smash Brothers community! Over 250,000 Smash Bros. fans from around the world have come to discuss these great games in over 19 million posts!

    You are currently viewing our boards as a visitor. Click here to sign up right now and start on your path in the Smash community!

Make Your Move 11 - It's Over, Duder!

Davidreamcatcha

Smash Ace
Joined
Feb 9, 2011
Messages
629
More to come (TIPSY)

[COLLAPSE="J. Jonah Jameson"]Being the whole originator of the JJJ fetish MYM has, I may as well comment this. You and I had a lot of the same ideas for the character, the pictures summoning cops is something I thought of that I was surprised to see in both your MYM Survivor entry and here.

Onto the actual set, JJJ is perfectly in-character here, and the writing style is one of the best I've seen in a while. On that note, there are a few things I have issues with; the lack of explanation for a lot of things is something I warned you about when I previewed this, and while you added more explanations, there still isn't as much explanation as I would've liked. Some of the things are incredibly tacky, such as him wrapping the foe in a newspaper or the briefcase releasing random on-fire papers and what not. The biggest problem for me is the phone: why does it ring whenever JJJ smashes? Regardless, my issues here are minor ones. JJJ is still a fine moveset and easily your best this contest.[/COLLAPSE]

[COLLAPSE="The Penguin"]The Penguin is certainly one of the harder Batman rogues to make, as he doesn't seem to have something that easily translates into the world of MYM like, say, Joker's gas. You took a route that makes sense for the character; a crooked businessman who orders hired guns around, but will betray them at the drop of an eye. Herein lies the first problem: why would Penguin want to hit his minions? Obviously, he can put an injured minion out of their misery and regain the cash, but there's really no other reason for him to attack. Something that would've fixed this are moves that give him more advantages if he attacks his minions; a puff of air that can launch them as active hitboxes, and can also serve as a spacer when he betrays them? On that note; I would've liked to see him get an actual grab-game, especially one where he could gain the ability to grab thugs.

Being able to make a decent set for the Penguin is astounding by itself, but making such a good set for such a hard-to-make character is wonderful. I wouldn't say it's as good as Batman, but you've definitely got some great ideas here; I just would've liked to see a better execution.[/collapse]
 

Zook

Perpetual Lazy Bum
Joined
Jul 30, 2005
Messages
5,178
Location
Stamping your library books.
GARRICK

Oooh, an OC! You're a true BAMF, Majora.

The way you introduce Garrick is a bit confusing. You mention how he was previously named Ramses, but evolved into a different character in your new version of the story. Why even bother introducing the old version? They seem like two completely different characters. I also wish you gave us a bit more information about Garrick. You say he's a wandering spirit and he dragged some dude across coals, but you don't tell us what kind of abilities he possesses or anything important like that. I was expecting to see a ghastly knight; needless to say, I was a bit surprised to see that he's not much like a knight at all, and is actually a pyromancer. Judging by what I read in your intro, that's pretty... Out of character. An OOC OC? Let's find out.

The lava mechanic is a bland, typical "spread this gunk around the stage and force the opponent into it to cause passive damage" thing, and his ways of spreading it around are bland, typical "do an attack involving said gunk and it leaves some behind" way. It's also very overpowered. I don't remember any limit to how much lava you can have on stage at a time, it acts like water that deals damage, and can be easily reheated with a single move. That's too good.

The sword aerials are confusing. You make it sound like Garrick has an infinite number of swords at first, and then later say that he has to make new swords. I find it strange that a knight would want to let go of his sword as much as possible...

The whole set comes off as extremely rushed. The move descriptions are either bare bone or over worded, and a few are missing damage output. I really can't find anything good to say about it. I'm positive you rushed getting this set out, and it shows.
 

MasterWarlord

Smash Champion
Joined
Aug 24, 2008
Messages
2,911
COMBO CHARACTER THAT IS NOT GALLADE, FACILIER, OR KING HIPPO

The main attempt of this moveset to be a unique combo character is inward knockback. Lots and lots of inward knockback. So much inward knockback that it long outstays its’ welcome, and having so much redundancy in a combo based playstyle immediately raises red flags. Most of the time the inward knockback feels very forced, with moves just happening to knock foes towards Bass because it’s convenient for the playstyle. It wouldn’t be as much of an issue, but with Gospel’s DarkMega glitches (Which were indeed improved upon to not screw him over, but still feel like forced creativity) and that Up B it’s hard to not ignore the tackiness, something you’re normally very good at avoiding. In any case, with all of this inward knockback and stun I’m really not convinced that there wouldn’t be just a few handfuls of 100% combos that are the absolute best to use.

To give you some actual credit, I like the glass cannon approach of the moveset with the lack of recovery and the new self-damage from Gospel, and it actually does a good job of balancing how obnoxiously OP this guy is. I have particular doubts about combos ending with all his inward knockback and move that instantly shoot him personally forwards in tandem (With hitboxes on them) to chase after them if they –do- get away.

THE COUNT

Chocula’s one of those sets that works with the foe’s momentum by putting X slippery substance on the stage, which I will say has more potential for variance than your own momentum. . .It’s not used that well here. Having made several of these sets, I found it quite stupid that foes lose their momentum if they jump into the air, and it seemed basically just like a way to get a free relevant Usmash. I like that you actually put stuff on the stage for Chocula to crash enemies into/objects to roll along the path, though the spiked ball dealing static knockback regardless of the foe’s speed is weird.

When he’s not playing with this aspect of his playstyle, Chocula generally fails with a bland air game who’s primary purpose is generically grounding the foe, and that god forsaken grab which not only cheats away the throws, but completely and utterly breaks him. I would say the comparison between Burter and RD to this moveset is about as relevant as a comparison between Antonidas and this one, as most of what Chocula does well Antonidas has done with more substance to it, and whenever Chocula attempts to deviate he doesn’t accomplish much of anything.

WE ALREADY HAVE FRANKENBERRY AND BOOBERRY SO WOLFBERRY SOUNDED TOO GENERIC

Yes, Fruit Brute turning people into werewolves is pretty bad characterization IMO. That said, what you do with it probably provides for your most interesting moveset so far, as once you turn them into a werewolf you’re able to manipulate them with your moves in somewhat interesting ways. That said, you mostly are just playing around with doing it for the sake of random creativity – it becomes particularly apparent when you have counteractive things like the fair werewolf breath and the pummel which don’t work on werewolves, when he has no reason to not turn foes into one. Fruit Brute cereal is largely pointless, but I do like that you let him bury the cereal with a throw so as he doesn’t need to buy time to do it instead of generically burying it on dtilt or something. It does a good job of going with his more aggressive style.

TEAM FORTRESS 2

I still haven’t gotten to Rapunzel because of how pointless it would be to comment it at this point, especially with this out, but I don’t believe anybody else has commented this yet so what the hell.

When you go out of your way in the early Specials and moves that the smaller hats are always weaker, having them randomly be stronger and go faster in certain attacks comes across incredibly awkward. I don’t know how you manage to make the first two Specials sound so complicated when they’re so simple, but if you got the obvious out of the way first – that the first Special creates smaller duplicates and that the second Special make two columns of hats around the main one, either horizontally or vertically, you’d be saving yourself a lot of trouble. As is, you’re referring to awkward terms from the first two Specials that are very hard to catch throughout the rest of the set.

As for the attacks themselves, they are very simplistic fodder for obvious reasons when Dorris has over 9000 clones to perform the attacks for her and so don’t really need to be complicated. Even then, though, I’m very conflicted, as with combined standards/aerials and a one input grab-game it’s hard to not have some expectations.

Balance wise, Dorris gets the set-up time she needs by floating out of the foe’s clutches for disturbingly long periods of time in a first 15 or so seconds that is very boring for both parties. It also makes me wish she just started with all of her hats already out. You do a good job of making it so the attacks of the individual hats are spaced out far enough and not allowing them to have other commands while doing stuff, but it feels like the epitome of high risk high reward – pretty much everything that’s wrong about comboing. Either you get the initial hit and pass the foe down a gigantic line of hats to be hit every time, or you miss and they’re all stuck in gigantic end lag. So much is determined by that initial hit it’s sickening.

PHATCAT

Pussycat manages to give some actual purpose to his various props to justify them, unlike both Flat Top and Double Header, and you make much better choices with what to give Pussycat than either of said movesets with the TNT and actual proper use of an oversized hammer – it actually feels like a Looney Tunes character, something none of these other gangsters can say. There’s some cool stuff you can do with the minions, car, and TNT, particularly when you bury them or use the glare. . .I’m willing to forgive the tackiness of said glare for the most part, but the car magically keeping momentum and generically getting more powerful with momentum as the logic regardless of what it’s doing is pretty bad. The aerials also are very oddly specific and have no reason to be the only moves to do what they do, especially based off animation, and when the aerials aren’t doing that they’re the package set ground the foe air game. Still, this moveset has some nice takes on minion manipulation and provides for a campy trap character with actual variety – I particularly like standing on cat gangsters on top of a car.

AN –INTENTIONALLY- PROPPY KUPA MOVESET

Yes, it’s a Looney Tunes character. Yes, I realize you were –intentionally- putting in all these props based off puns. It doesn’t work and would make the writers of those original cartoons cringe, and the pay-off is it just amounts to Double Header being a bland trap character with an incredibly awkward aerial game that somehow manages to be worse than “ground the foe”, with him randomly inflating himself.

The good thing in this moveset is something I could very much so see DH doing – stretching his two halves apart, and the mindgame potential with fsmash is delicious. Tossing baseballs to Batman, while obvious, is also quite good. This here feels like such a strong basis for what could’ve easily been the perfect projectile tennis set and dwarfed Wakka as he dwarfed Strike Man, what with how you have -3- positions to attack from (Counting Batman) to play projectile tennis with yourself. Nevermind the characterization, it would’ve been a much more in-character way to go than this crap.

VIDEOMAN.EXE

I can actually see the benefit of slowing down the record, but you have so very few moves to capitalize on it that it feels like the use would be minimal. Nair is the very obvious one, and I think he could’ve used more generic attacks like that with long durations to give a point to slowing down the record. With speeding up being the primary benefit, it feels like nothing more than a straight buff.

This set also finally brings to light what was essentially Rool’s scrapped Rick Astley concept from the graveyard – getting bonuses for attacking in tandem with the song. Rool said it’d be predictable, HR said if he went for it every time he’s be predictable and it’d present mindgame opportunities. I feel Jukebox really could have used a fake out attack or two to properly do that. It’s very good conceptually, and it could be done with generic attacks like Kabutops. There doesn’t seem to be much purpose behind them though, particularly when what’s supposed to keep my attention is an utterly useless dair and a projectile fsmash which just change the record order.
 

kitsuneko345

Smash Ace
Joined
Dec 20, 2007
Messages
562
Location
*sending Sundance lots of apple pies on Pi Day, as
I still haven’t gotten to Rapunzel because of how pointless it would be to comment it at this point, especially with this out, but I don’t believe anybody else has commented this yet so what the hell.
Understood on both accounts, especially on the second part. I would like your input on Rapunzel, but that would probably be best for the chat if you are willing to.

When you go out of your way in the early Specials and moves that the smaller hats are always weaker, having them randomly be stronger and go faster in certain attacks comes across incredibly awkward. I don’t know how you manage to make the first two Specials sound so complicated when they’re so simple, but if you got the obvious out of the way first – that the first Special creates smaller duplicates and that the second Special make two columns of hats around the main one, either horizontally or vertically, you’d be saving yourself a lot of trouble. As is, you’re referring to awkward terms from the first two Specials that are very hard to catch throughout the rest of the set.
And I have changed that line to rectify that complaint. However, there seems to be a problem with the two moves you are commenting on. Yes, the first special does make miniature clones, but those clones will get bigger when they are out long enough which I believe is the main aspect of the attack. The obvious in this case would be to make an almost exact replica of herself over time in this case. As for the other move... what? Did you even look at the charts provided? Those charts were probably the best way to describe what happens. Not looking at them at all is the only way someone in my personal opinion would not understand those moves. Enough nitpicking, though.

As for the attacks themselves, they are very simplistic fodder for obvious reasons when Dorris has over 9000 clones to perform the attacks for her and so don’t really need to be complicated. Even then, though, I’m very conflicted, as with combined standards/aerials and a one input grab-game it’s hard to not have some expectations.
Trust me when I was contemplating on whether I should include a few more attacks like directional dash attacks, diagonal moves, and even a back smash. Although good ideas for someone with the hovering mechanic, it felt a bit awkward just thinking about how the attacks would work. In the end, I took a chance with not making those moves because I felt that they would be too situational in the long run.

Balance wise, Dorris gets the set-up time she needs by floating out of the foe’s clutches for disturbingly long periods of time in a first 15 or so seconds that is very boring for both parties. It also makes me wish she just started with all of her hats already out. You do a good job of making it so the attacks of the individual hats are spaced out far enough and not allowing them to have other commands while doing stuff, but it feels like the epitome of high risk high reward – pretty much everything that’s wrong about comboing. Either you get the initial hit and pass the foe down a gigantic line of hats to be hit every time, or you miss and they’re all stuck in gigantic end lag. So much is determined by that initial hit it’s sickening.
I'll add a limit with how Doris can't go off the camera or else she'll go through her fuel at twice the rate or something. As for the "all the hats out" idea, I'll probably make it so that she'll have 15 of the weakest full grown clones out at the beginning at the end of the first special. As for the next sentence, this idea was not what I intended. Best I actually mention the end lags for all the moves now... again will be in my moveset soon right now.
 

SirKibble

Smash Champion
Joined
May 2, 2008
Messages
2,400
Yay comments!

Firebrand
Disguised as a demon, this troll is. So Firebrand is a very pestering (or "poking") character who essentially annoys his foe incessantly until it's time to KO them--no, even as he KO's them and things continue into the next stock. I enjoyed the read, but to be honest, something felt a little lacking by the end. I think there were definitely strong points in the Specials and several other moves, but in particular I wasn't as impressed by the Aerials as I'd hoped to be. There was a lot of build-up to a stellar air game, and I was hoping for a little more. In short, I only liked what I was hoping to love. This was certainly good work, you just left me wanting a little more. (VAMP)

Fright Knight
Well, this was interesting. Despite getting the bulk of the playstyle at the beginning with the Ecto Storm, I didn't really piece it together until the end of the moveset when you actually gave the playstyle summary. Maybe that's because I'm still a bit of a n00b to this playstyle thing, but nevertheless, I really liked that. It gave me a reason to really read the Playstyle section.

Outside that, I found the subtle interactions throughout the moves all very good, and none of them felt forced or awkward. One thing, though--his Side Special feels rather un-special to me, and doesn't feel like it has much of a part to play in the full set. But eh, that minor gripe aside, this was really enjoyable. Great work, DM!

Copycat
Your writing is unbelievably entertaining to read here, Jun. Rather captivating, if I do say so myself. So, this moveset is pretty quirky, and naturally, you've chosen not to elaborate on the playstyle. The pieces seem to be there, you just choose not to fully put them together for us, which is fine, but it makes Kibble get confused sometimes. First person writing has its limitations, usually in the way of expressing detail, and there are a few instances of that here, but you've given appropriate detail through the majority of the set. There were just a couple instances where something was hazy for me.

I don't feel the moveset is really hurt by the various more generic attacks, even where the bulk of Copycat's moves are stolen from the foe as punches and kicks. In fact, that centerpiece move is what I feel this set's best contribution is to your recent teamwork kick. You basically start the match with only Clefairy having a real moveset, and she can be used to distract the foe while you copy their moveset. After that, the roles can switch and you pester the foe while Clefairy uses her more exciting moves. But at the same time, her more clever moves are usually just debilitating, so in the end, she's helping you.

Like I said, my only major gripe with this moveset is that I found it sometimes confusing. Heck, everything I said above could be a gross misinterpretation of what you actually made, which, knowing you, I think you could actually enjoy. I don't really know. (WARY)
 

majora_787

Smash Hero
Joined
Jun 23, 2007
Messages
6,122
Location
Texas
Several moves aren't missing damage percentages as much as they're...just not attacks that do damage.

But yeah, I can see why it would be OP that Garrick can just have infinite sword projectiles and lava on the stage. It would get to the point where the entire stage can be molten at one time. :|
 

ForwardArrow

Smash Ace
Joined
Aug 17, 2011
Messages
503
Mummy Men
I honestly quite enjoyed the concepts of this set. The building of the pyramid is a lot of fun, especially in how they can make little tunnels in it and such to move around. Not to mention there is a fair bit of interaction with the pyramid, what with the ability to slam the foe against it and heal them and such. There are some other clever little interactions here, too, and the set is on a whole pretty awesome. There are a few problems though. I don't really see the point of the other Mummy, other than as a random shield and a way to make Mummy Man slightly better. Honestly he's a perfectly capable fighter without the other Mummy, and the other one has no real important use or method of interacting with it. That and yeah there are some moves in here that don't do anything notable to the playstyle, but it's still overall a very good set. Good work Jun.

________

You know, I don't really think this set was aimed at me in particular. There isn't really a lot of playstyle flow here if you ask me, and the whole thing is fairly simplistic. On the other hand, there's a very boss-like feel to the set, and there is definitely a playstyle here with his ability to space the foe and such. Either way this set is certainly interesting and I respect it... but I wouldn't really say it's my kind of set, honestly.

Dr. Facilier
I think it's already been complained about that the grab game is not nearly taken advantage of enough. It's a huge part of Facilier's character, and it just comes off as fairly irrelevant. That and I feel canceling into the cards is playstyle relevant, but I sort of think it removes the problem of having lag on his attacks. That said, I'm mostly just nitpicking here, because this set really caught me off guard. It's exceptional, and really blows everything else you've made out of the water. The combos actually feel like they will constantly change up, and their execution is creative and opens room for a lot of skill and creativity. Not to mention the mindgame stuff is enjoyable as well. Really, this is all good stuff and I'm impressed, good work here Smashbot. You really have been impressing me this contest, what with commenting EVERYTHING (admittedly with far too little advice, but still) as well as making this shockingly high quality set.
 

Zook

Perpetual Lazy Bum
Joined
Jul 30, 2005
Messages
5,178
Location
Stamping your library books.
Several moves aren't missing damage percentages as much as they're...just not attacks that do damage.
Oh, okay. I just assumed that throwing lava at someone would do damage. I'm not trying to sound fresh or sarcastic here, that was just my thought process. lol

But yeah, I can see why it would be OP that Garrick can just have infinite sword projectiles and lava on the stage. It would get to the point where the entire stage can be molten at one time. :|
Yeah. You could probably set an arbitrary limit to how much of each he could have on screen at a time which would balance it out nicely.
 

majora_787

Smash Hero
Joined
Jun 23, 2007
Messages
6,122
Location
Texas
Oh, okay. I just assumed that throwing lava at someone would do damage. I'm not trying to sound fresh or sarcastic here, that was just my thought process. lol


Yeah. You could probably set an arbitrary limit to how much of each he could have on screen at a time which would balance it out nicely.
There were attacks that created lava that JUST to standard lava damage, which was established to be 3% per second of contact with the surface. :p That's why. And SOME of them really don't do anything in the way of attacking.

I could set a limit of 5 swords or so, but lava is really important to his playstyle. I dunno how I would limit that.

EDIT: Fixed. The standard lava damage is restated and bolded, AND he has a new limit on swords.

EDIT 2: He has a limit to the amount of the stage he can coat in lava.
 

smashbot226

Smash Master
Joined
Sep 1, 2007
Messages
3,027
Location
Waiting for you to slip up.
I'm pissed. Because I had ratings from Yummy Mummy all the way to Gerrick. But Crashboards had to be Crashboards. So instead, I leave you with these very unfortunately brief ratings.

Yummy Mummy gets 1/5 because even FA hates it.

Count Chocula gets 2/5 because of shoddy balancing.

Jack Skellington gets 3.5/5 for a well-written and well executed playstyle that slightly outweighs the abuse of magic syndrome.

Jukebox Jaw gets 3.5/5 for coming up with a genuinely interesting mechanic and then doesn't bother adding flow to it.

Doris gets 3.5/5 because of multifaceted playstle and oft-seen use of clones.

Gatstaf Shepard gets 1.5/5 because of a blatant lack of balance between human and wolf form.

Lucio Fulci gets 1.5/5 for a cringeworthy use of magic syndrome and props.

Piggybank gets 2/5 because it's a momentum set with some sort of money mechanic that sort of cleverly disguises that fact.

New Destroyman gets 1/5 because even Majora hated it.

Chaos 0 gets 4/5 for neat mechanics, movesets, and flow. Although a little more creativity would've been nice.

Gerrick gets a 3.5/5 because while I have the sneaking suspicion you tried finishing this up ASAP, there's still some good, if not unfocused, flow between lava, explosions, and the sword.

And now is the part where I actually give two damns in a hand basket. (hippo)

Fruit Bruit has garnered mixed reception from what I can tell. Average in all stats? A generic buff for an NSpec? A SSpec that can potentially cripple the entire opponent's game? And the rest of the perks gained by turning your foe into a werewolf seems to be random status effects. And you mentioned foes stay as a werewolf until they lose their stock? Combined with his average stats, this just sounds... not THAT fun, to be honest. Hell, you seem to acknowledge this set was rushed to make ends meet. 1/5, dude. 1/5.

Mouse Man is someone who really should've been passed on for someone else. Yep, gonna say it out loud. I JUST DID, NOW WHAT? While his normals leave much to be desired, the specials are intuitive if a bit random and OOC even for someone as unknown as Mouse Man. Basketball? Really? Anyway, Leaning Tower really lends the set some much-needed depth, considering Mousehole is basically the simplest way of making a combo character outside of rapidly tapping buttons. 2.5/5

88 Teeth, made by Na- wait, what do you mean Nate didn't make it?!? 0/10! WE'RE DONE HERE. And... he uses a gun? I'm not saying you don't have a lot of options here, Dave, but the man can spit piano keys out of his mouth. If ammo is really a problem, I think your set has consistency issues. But at the very least, 88 Teeth is undoubtedly the most in-character set out of all the Twacy villains. I mean, I still appreciate Jukebox Jaw's well-made time control mechanic but 88 Teeth just froths at the mouth with detail. 3.5/5

JJJ... like MW said, I previewed this guy prior to his release. I thought it was funny then and I still think it's funny now. That being said, there are still a couple of problems with it. Despite the writing style being top notch, it does leave the reader with a bit of confusion regarding what exactly each move does. What I can understand clearly is that one of his gameplans sounds like you're trying to land one big smash attack. Take a picture of foe in a crime. Call police. They try and kill the foe. It's overabundant flow at its finest and not momentum, but in the long run? Not sure if the set is as memorable as the style. 3.5/5

*****cat **** takes out a tommy gun for a special move. I can already tell where this is going. Random car and gangster summons as well as a supernatural glare special? At least it's not momentum, I suppose. The grab mechanics are rather interesting in that while you require gangsters to be out on the field, they'll perform their own thing if you manage to land the grab. You've also got another major factor going for you like 88 Teeth has: *****cat actually FEELS and PLAYS like a cartoon character, what with the exaggerated smoke, almost appropriate proppiness, and ridiculous manner in which you implement your gangsters into other moves. 3.5/5

My favorite part about Double Header is, funny enough, Bat Man. Which is strange because I firmly believe that if freaking 88 Teeth can have his own moveset, Bat Man can. Still, you manage to give this not-so-throwaway addition a purpose; savior, air striker, and basic assist. Don't get me wrong, the NSpec is also interesting. But if you manage to move both Headers to either side and surround the opponent with SSpec... well, wouldn't that put them into an infinite loop that results in them running away from each Header indefinitely? I digress; you obviously make the biggest point of your moveset the amount of things Double Header can have onscreen at once. My only real problem is the random addition of the cannon... for a baseball player. Regardless of how punny the moveset is, which is enough to almost beat Mr. Freeze, it's still a moveset of respectable quality. 4/5
 

phatcat203

Smash Apprentice
Joined
Dec 12, 2008
Messages
160
Location
I've been everywhere, man.
Fright Knight

Yes I know this is late as hell, but I actually wrote this out way back, but didn't post it cause DM had already left. If you're still around though, HEY HERE'S ANOTHER COMMENT. Now, to the moveset. I love the special mechanic, though, as others have said, it's a lot like King Ramses'. Still, it's not bad enough to hamper the set. The fact that Fright Knight actually has moves that he can use without the Soul Shredder is nice, but they're all fairly plain. The Up Special seems...well, proppy I guess. Is that how he summons Nightmare in the show? I've never watched it, but it just seems odd, if creative. Also, I feel the Down Special needs more interactions; it's only really referenced in a couple of other moves. I like how the Forward Tilt teleports the OPPONENT, and aside from being a cool idea, it really helps the Knight defend his sword. The Up Tilt is varied and somewhat unique, but it kind of seems like you just tacked on the later effects. I like the idea of the Ecto Storm, but it seems a little...underused. It mostly acts as a sort of passive ability, I guess. It enhances his aerial game, but other than that he doesn't really do much with it. Speaking of the aerial game, I like it, though again, Nightmare's summoning seems a little iffy. It can get very overpowered, as well, but I think that's this guy's deal. The Grab Game seems very rushed, with some moves being just one sentence. Though I guess if you can explain the move that easily, go ahead. Also, you reference killing the opponent with the Down Throw, but you never mention the knockback in the actual move.

Overall, I really do like this set, though I think it has some problems. My main complaints are that it underuses its own great concepts, has quite a few generic and/or almost useless attacks, and suffers from more than a few typos/grammar errors, though it's not unreadable at all. Still, it seems like a very fun moveset to play, and the way the moves work together is solid. I pretty much agree with Warlord's ranking of it.
 

Zook

Perpetual Lazy Bum
Joined
Jul 30, 2005
Messages
5,178
Location
Stamping your library books.
FIRE SNAKE


Fire Snakes are a rare enemy found in the Mario series. They were first found in Super Mario 3, where they hopped around a few desert levels. Since then, they have made the occasional appearance in the Mario Kart series, both New Super Mario Bros. games, and even as a mini boss in Yoshi's Safari.

As far as Mario enemies go, Fire Snakes are fairly dangerous; they can't be jumped on, are immune to fireballs, and pursue Mario relentlessly, even being able to jump up and down platforms. Slaps from raccoon tails, ice balls, and Starmen can hurt them. They're probably one of the more obscure Mario enemies.


SOME THINGS TO NOTE


An important part of Fire Snake's character is his method of locomotion. Fire Snake moves with a very distinct hop, and his ground speed is based on this. (Anyone who has ever played SM3 probably remembers what I'm talking about; if you forget or if you live under a rock, watch this video and fast forward to around 5:50) Every second, he makes one hop, traveling up as high as Luigi is tall. Fire Snake moves along the ground like this instead of walking or dashing. His 'walk' speed sends him forward a battlefield platform, while his dash speed flings him 2 battlefield platforms. Not pressing anything has him hop in place. You can make him land pretty much anywhere between his starting position and 2 battlefield platforms with careful motions of the control stick. Be warned; he can only cancel this movement by jumping; otherwise, he is locked into the distance you choose. While hopping, Fire Snake isn't considered to be in the air, and can still use his ground moves mid hop. While jumping or after receiving knockback, he is controlled like a normal character.

Fire Snake is composed of 5 segments: a head at the lead flame, followed by 4 other flames. All of these segments can occupy the same space, and do so when he isn't moving. He moves lead flame first, and each segment of his body mimics his movement exactly, though slightly delayed. Each segment moves a fifth of a second after his head. Each segment that isn't the lead and isn't his head doesn't receive knockback, but instead has a stamina of 10, and vanishes upon being KO'd. To make Fire Snake lose a stock, his head must be KO'd the usual way. Any attack to the lead flame deals knockback, but only attacks to his face deal damage towards Fire Snake.

Several of his attacks use things called 'fire points.' If Fire Snake has no points and uses an attack that requires one, he instead uses the last segment of his body, losing a segment in the process. If he has no points or segments left, he gets a cute little frowny face.

Every now and then, I may use an abbreviation, like BFP or SBB. BFP stands for Battlefield Platform, whilst SBB is Stage Builder block. Both are pretty standard measurements for MYM.

Finally, each segment of Fire Snake is a constant hurtbox that deals 2% and flinching upon contact, and has low priority. It's hard for opponents to DI out of at low percents, meaning you can normally hit an opponent with your entire body if you jump at them at the start of the match.

STATS


Size: .5/10

Weight: .5/10
Jump: 7/10
Air Speed: 7/10
Fall Speed: 5/10


Fire Snake's segments are tiny: they're as big as the item Freezie. His jump is similar to his standard form of movement, but sends him upwards much higher, and is comparable to Falco's. He is also extremely light, being KO'd even earlier than Jigglypuff.

Instead of crouching, holding down on the control stick pauses his hop timer until you release it. He can also move along the ground very, very slowly in this state, all of his segments occupy the same space.


SPECIALS


Neutral Special: Multiply

As time goes on, Fire Snake gains the ability to increase the length of his body. For every 3 seconds that pass, he gains a fire point, an invisible stat. By using this attack, you can spend a point to add another segment to the end of your body. This new segment acts exactly like other segments, and follows your movement a fifth of a second later than the last. This move is handy in recovering lost segments, and also in increasing Fire Snake's overall length. Points also carry over between stocks, so you could save up all your points to make one super big Fire Snake if you really wanted to.


If you use this move while you have no points remaining, Fire Snake instead splits into two seperate Fire Snakes of equal length. (If there are an odd number of segments, the one you control gets the extra one.) This new Fire Snake looks identical to you, but will never use any actual attacks... except for Multiply. Every 4 seconds, the new Fire Snake gains a point and immediately spends it, adding a segment to its body. Also, unlike you, the new Fire Snake's head has 15 stamina, and vanishes when his head is KO'd.


Finally, if the middle segment of any Fire Snake is destroyed, the Fire Snake seperates into two Fire Snakes.


Side Special: Flame Toss


Fire Snake shoots a segment out from his mouth, which floats forward in a straight line until at Ganondorf's walk speed until it comes in contact with something. This attack can be aimed up to 45 degrees up or down. Opponents hit by this floating segment take 8% and light knockback.


Up Special: Fire Pokey


Fire Snake draws his segments into his body, then stacks them one atop another, his head on top. In this state, his segments bond a bit, their stamina increasing to 20 and his head becoming heavier, proportionate to how many segments long he is. (With 5 segments, he is about as heavy as Ness; at 20, he's heavy as Bowser.) His movement changes, too; rather than hopping around, he can move forward slowly, at about Ganondorf's walk speed. Jumping has Fire Snake make a normal jump from the top of the stack, while pressing the up special again collapses the stack.


Obviously, this technique gives Fire Snake a bit more survivability, but it can also be used to give him extra height to jump off of, make him tall enough to grab ledges, and generally help him recover.


Down Special: Change Flame


Upon using this move, Fire Snake's face moves back one segment. You still control the lead segment, but his head (and thusly, his hurtbox) is moved further down the line. By holding this input, you can tilt the control stick forwards to move his head back towards the lead flame, or backwards to move it further back.


This is a great way to allow yourself to safely throw your body at opponents, but it also makes you more likely to lose segments. Be careful; a single flame is easily extinguished.


GROUND ATTACKS


Jab: Expand, Contract (And gather, too)


As the name implies, Fire Snake's lead segment quickly becomes a bit larger, then shrinks back to normal. Opponents hit by this lead segment take 4% and weak horizontal knockback. Also, this move has pretty good priority. Use this when you want to keep foes away from you, rather than hit them with his entire body. It happens pretty much instantaneously, making it a good GTFO move.


In addition, using this attack on a stray flame will reconnect it to the end of Fire Snake's body.


Dash: Reverse Order


Fire Snake completely reverses his segment order. For example, if his head was in the lead flame, it would move to the last flame. This move is a good way to quickly move his head to a different end of his body.


Forward Tilt: Running Flame


By spending a fire point (or using his last segment), Fire Snake sends forth a flame which slides along the ground at Jigglypuff's run speed. Any opponent who comes in contact with this flame takes 6% and light upwards knockback. After traveling 2 BFPs or hitting an opponent, the flame will hop along the ground at the same speed in an attempt to reconnect to the end of Fire Snake, still dealing the same damage and knockback as before. It will chase Fire Snake until it reaches the end of him (in which it binds itself back to his body) or is KO'd.


Up Tilt: Fire Bounce


Fire Snake adds a bit of height to his current hop, or starts a new one if he's on the ground. The lead segment hops up as high as a segment is tall, and the rest follow his lead. You can use this to extend the duration of your hops, allowing you to cover a longer area before returning to the ground. Make sure you don't end up flying off the stage.


Down Tilt: Drop Flame


Flame Snake spends a fire point and leaves a segment where he currently is. The segment still has 10 stamina and is a hurtbox, but remains stationary until it is destroyed. By using this attack multiple times in one area, you can combine flames to make one larger flame. You can add up to 5 flames together, and the number of flames changes the properties of the dropped segment.


If a single flame is dropped, it has the same stamina and deals the same damage as a normal flame.


If 2 flames are combined together, the flame grows a bit larger, has 15 stamina, and deals 6% on contact and noticeable (but still light) knockback.


If 3 flames are combined together, it becomes as large as a party ball. Its base stamina doubles to 30, and touching it inflicts 10% and moderate upwards knockback, KOing at 160%.


Once you combine 4 flames, they stay the same size as a party ball, but the fire turns blue. Its stamina is reduced to 10, but its priority becomes medium, deals 15% and inflicts strong upwards knockback, KOing at 140%. Because the flame burns so hot, it burns itself out after 5 seconds, destroying the other segments in the process.


Finally, if you combine 5 flames, they turn blue, but then shake violently. Its stamina is reduced to a pitiful 7 and deals 7% and flinch upon contact, but, 4 seconds after being created, it creates an explosion as large as a Bob-Omb explosion, dishing out a hefty 17% and upwards knockback that KOs at 120%!


SMASH ATTACKS


Forward Smash: Inferno Rush


Fire Snake gets cute lil' angry eyes on his face, and stays still for a third of a second, shaking slightly. If his face isn't the lead flame, it becomes it. After this short charging period, he performs a superfast version of his normal hop, covering a full BFP in under a quarter of a second! His segments follow him 4 times as fast, too. Each segment he hits with deals 3% and a bit of hitstun, with the final segment dealing knockback that KOs at 130-110%. Charging this attack increases the distance Fire Snake travels (1.5 BFPs fully charged) and the knockback the final segment inflicts, but doesn't increase the damage each segment does.
Though fast, the startup lag is easy to notice.

Up Smash: Podoboo


Podoboo is a kind of enemy from the Mario universe. You remember those jumping fireball things that lived in the lava in Bowser's castle? Yeah, they're those guys. Anyways, you probably see where this attack is going: Fire Snake spends a point to summon a new segment, then shoots it upwards (or uses his end segment, if he has no points). This segment flies up as high as 3 Ganondorfs and then returns to the end of Fire Snake, move horizontally in accordance to its place on the line. The whole attack, from start to finish, takes a second. The flying segment deals 12-18%, KOing at 135-110% upwards and becoming a meteor smash on the way down.
Aside from letting his body cover more area, the move can also be used to smack airborne opponents down into his main body.

Down Smash: Flare Up


Fire Snake closes his eyes, shutters for a half second, then dramatically increases in size, becoming as large as crouching Charizard for a brief moment before shrinking back to his normal size. Though the hitbox last only a brief moment, it takes up a huge area, deals 13-20% and KOs at 150-120%, making it one of Fire Snake's best KO options. It has noticable startup lag, though, making it difficult to land.


AERIAL ATTACKS


Neutral Aerial: Twisty Snake


Holding down his Nair causes the lead segment of Fire Snake to move up and down in a zigzag pattern. He moves his lead flame up as high as Freezie, then down the same height before returning to normal. His other segments will follow this pattern. Though simple, it allows him to cover a wider area with his body.


Forward
Aerial: Snake Whip

Fire Snake whips his behind forwards, striking the foe for 9% and moderate knockback. The whole animation is very fast, and there is a sweetspot on the final segment as it reaches its maximum distance which deals completely horizontal knockback, KOing at 140% from the center of the stage. Obviously, this knockback becomes more treacherous closer to the edge
. Alternatively, you could use the horizontal knockback to send foes into stray flames and other Fire Snakes.

Backward
Aerial: Spinny Segment

Fire Snake looks behind him as his segments begin to spin around each other. Every even numbered segment (2nd segment, 4th segment, etc.) spins around the odd numbered segment before it for a quarter second, dealing 8% and surprisingly strong knockback, KOing at 150%. This attack also has excellent priority.


Up
Aerial: Chain Trap

Remember those spinning chain traps from Mario? The ones in Bowser's Castle? Yeah, those things. Turns out they're made of Fire Snakes. His body becomes straight and rigid, and he begins to slowly rotate his body in a counter-clockwise direction (if you're facing left; clockwise if right). It takes him a quarter of a second for his segments to reach noon, a half second to reach 9 o'clock, etc. Opponents hit by this chain take 6% and light knockback in the direction the chain was traveling. It can cover a HUGE area as Fire Snake grows, but it is easy to air dodge, and the segments can still be attacked and destroyed.


Down
Aerial: Naplam Strike

Fire Snake spends a fire point (I think you know what happens if he can't spend one by now) and drops a flame from his lead segment, which slowly floats to the ground. Foes hit by this flame take 6% and light knockback. The flame stays on the stage once it reaches it, and will remain there until it is destroyed or Fire Snake picks it back up.


GRAB GAME


Grab: Glomp


For his grab, Fire Snake pops his lead flame out a bit, then pulls it back in. It has very short range, but it is quite fast. If he connects with an opponent, the lead flame attaches itself to their side, and the other flames surround the opponent.


Pummel: Singe


Every other segment simultaneously tackles the grappled foe, buring them. This deals 1% for every non-lead segment Fire Snake has. It is pretty slow for a pummel, but can deal massive damage in a very short time frame.


Forward Throw: Rushdown


After releasing the opponent, Fire Snake begins to dash forward at Jigglypuff's run speed, hitting the opponent every quarter second for 2%. The opponent can DI out of this throw to avoid damage. Fire Snake keeps up the throw until he misses the opponent with a hit or reaches the edge of the stage.


Backward Throw: Ride the Wave


Fire Snake puts the opponent on his lead flame and rolls them along the length of his body, dealing 2% for every segment they pass before flicking them off at the end. The more segments he has, the less force he has over the throw; with less than 3 segments, it can work as a KO move at around 145%, but otherwise won't get you a KO until way later than you want.


Up Throw: Fire Snake Party


Fire Snake lets his opponent free and gets cute lil' happy eyes as all of his segments hop off in random directions. Every segment he has becomes its own Fire Snake, hopping around like a level 1 CPU. Unlike the other CPU Fire Snakes, these ones will never attempt any attack, and just jump around the stage randomly. This inundates the stage with hitboxes, though none of them are particularly threatening.


Down Throw: Minisplosion


Fire Snake's lead segment swells up, then bursts in a fiery explosion. The burst deals 14% and strong upwards knockback, KOing at 125%. The swelling animation takes a full second, and the opponent can still attempt to escape before he explodes. The segment is blacked to a crisp afterwards, a suffers a half second of endlag as he shakes it off.

FINAL SMASH: GIANT-HEADED FIRE SNAKE


Oh wow, Fire Snake had quite the noggin in NSMB. Fire Snake's head grows to a very large size, about half as large as Giga Bowser.His incredible cranium is still a constant hitbox, but deals 20% and very strong knockback to anyone who touches it, KOing at 100%! This state lasts for 10 seconds, and he is still controlled normally.

PLAYSTYLE


Fire Snake's main goal is to use his unique body to catch foes in a train of hitboxes, trapping them as he spreads fire throughout the stage and grows in power. He usually does this by punishing laggy attacks or by valiantly tossing himself at foes, but can also use his lingering hitboxes of still flames to open up opportunities for himself. What is the purpose of littering the stage with stationary flames? Well, if an opponent touches one, the hitstun they receive sets them up to be burned by Fire Snake's movement. Characters with a lot of projectiles can easily hamper his approach, making it wise to start off the match by moving his head down a few segments, giving him a bit of a buffer. Speaking of segments, they die fairly easily. They can take a hit or two from most projectiles and weak attacks, but otherwise vanish quickly, making it vital to manage your fire points. For an approach with more priority, his Backward Aerial is quite handy, eating through most attacks, though it doesn't hit in front of him.

As has been said, stray flames are good ways to force your opponent to get punished. If they accidentally touch one, they are set up to get rammed, and if they attack and destroy one, they also open up a window of opportunity. His Side Special and Up Smash are good ways to send floating flames around the air, whilst your Forward and Downward Tilts and Downward Air help you spread hitboxes around the stage. If you can afford it, the Up Throw is a terrific way to spread a ton of flames around.

Usually, the opponent will be trying to go for the main segment. This means that most of the time you want to keep his main head hidden behind a segment or two, creating a buffer from attacks. However, keep in mind that only his head can use several attacks, such as his Forward and Downward Smashes, making it tricky to land them if he isn't the lead flame. Your Dash Attack quickly swaps Fire Snake's face's location, allowing you to make a quick getaway or ready a Smash attack.

Fire Snake's KO moves don't have much range, but are pretty effective. As with his hop attack, it is generally best to try to catch the opponent while they are suffering hitstun from a stray flame. Creating CPU Fire Snakes create more opportunities for the opponent to enter hitstun, though cost a lot of fire points and die easily.
 

Nicholas1024

Smash Lord
Joined
Mar 14, 2009
Messages
1,075
Fire Snake is about to get a comment from me! Surprise! (Yes, I know I've been borderline inactive, but that should hopefully change, I've got a move set half-done and it's shaping up to be one of my better ones.) Now, onto the actual comment.

Fire Snake's main draw here is the unique way he uses his body as a hitbox, and you get 20 imaginary cool points just for the idea of growing up to ridiculous lengths and basically covering the entire stage in mobile flames. Seriously, imagine the damage a short hopped back air could do with 20 segments or so. :awesome: However, there's one big flaw and a couple smaller ones with the way you pulled it off. First off, the whole imaginary fire points thing is a bad idea, because there's not much way you can gauge how many you have until you accidentally burn a segment using one of your attacks. It'd be much better just to have the multiply thing work automatically, with you getting a new segment every so often. Also, I think it'd have been nicer to see a second aspect to the play style beyond "grow really big and cover the stage with fire". For example, Fire Snake doesn't really have much focus in the way of killing or gimping the opponent, beyond "This move can kill at X%." It's a bit of a pity, since down tilt could have given the perfect focus in that regard, once you get large enough, start creating an enormous inferno in one spot, and try to ferry the foe into it. The grab game is probably the weakest part of the set, since none of the options are that interesting, aside from up throw, which really doesn't fit as a throw. That's the primary reason I tend to use rather unconventional grab games, it's really difficult to come up with 4 useful unique options for a character when they have the opponent in helpless.

Still, on the whole the set was a nice read, as the main concept was really pretty cool, and you got some nice mileage out of a character without too much potential, so nice job here, and I hope to see more sets from you.
 

Akiak

Smash Ace
Joined
Jul 28, 2007
Messages
820
Location
In my secret laboratory.
Been really busy with school, and now I've got around twenty molests to read. Yay.

Pachirisu
Some of the moves are really interesting like Sweet Kiss, Berry or Discharge (25 secs is a lot though), and the grab game is cool too. The rest of the moves are a bit generic (albeit overflowing in cute-ness) and there are too many Pikachu moves in there, but I still liked the set for it's simplicity, for the cute layout and for being in-character.

Fright Knight
I've never watched Danny Phantom, but you did a great job implementing whatever mechanics he had in the cartoon, especially the Soul Shredder. The advantages the sword gives to it's holder, along with some awesome moves make for a very unique and interesting playstyle which was a lot of fun to read.

DOR-15
This moveset is great. I pretty much expected it to be after your preview of the clone mechanic, which I loved from the start. The idea of changing shapes and positions and how they affect the rest of the moveset is great, I especially love how different shapes can lock the foe into god-like combos. The grab game is awesome too, mostly because you managed to make a mind-control move actually useful by having the clones do the damage. To be honest the Final Smash is pretty generic, you can definitely come up with something better, although I doubt anyone cares about those anyway. Also, the specials sound overly complicated when they really aren't. I suggest re-reading your sets in detail to avoid this sort of stuff. This isn't as good as Rapunzel but you still did a great job, so keep up the awesome work.
 

flyinfilipino

Smash Master
Joined
Sep 11, 2007
Messages
4,319
Location
North Carolina
Been really busy with school, and now I've got around twenty molests to read. Yay.
I'm sorry, twenty what? ;)

Anyway,

@Fire Snake: Ah, the next Mario enemy to get his own moveset! I remember these things; they always managed to kill me somehow in SMB3. Fittingly, you kept his signature hop intact, but of course fleshed him out with some neat tricks.

First of all, I agree with Nick: the invisible "fire point" mechanic isn't the best idea. I also agree with the notion that adding another segment should probably just happen automatically every couple of seconds, with the Multiply move's primary effect being to split Fire Snake in half. Speaking of Multiply, it's not very clear what the newly spawned Fire Snake does; does it hop around the stage in a set pattern, or is it CPU-controlled? There could potentially be an awesome number of Fire Snakes on the stage, but I'm sure you've got a set limit in mind. Other than that, Fire Snake's attacks feel pretty natural and suit him rather well. Well, other than the Up Throw, which feels rather random...as a throw. I really like the idea of the character in general and the way you went about giving him a distinct fighting method. Combine this with your nice, clear writing style, and we have a pretty good moveset. Good job, Zook! :bee:
 

Nicholas1024

Smash Lord
Joined
Mar 14, 2009
Messages
1,075
Heh, I hate the auto spell check sometimes. It'll try to change hitboxes to hatboxes, and other silly stuff.
 

Junahu

Smash Ace
Joined
Nov 15, 2005
Messages
899
Location
Shropshire Slasher
New MYmini

First of all, go [Here] and vote on the poll for which Halloween moveset(s) you thought were the best

Second of all...


MYM11: Week #5

Generic comment week.


[31st October - 12th November]
Alright, we’ve had our fun and engorged ourselves on far too many tasty movesets to count. Now it’s time to hit the books and comment ‘em. As you can tell from the dates of this MYmini, it’s retroactive, so any comments made from Halloween, up until the 12th of November, count.


Week 4's MYminis were predictably scarce, mostly consisting of Piggybank robbers that weren't lucky enough to get movesets. Getocoolaid's stage The Orca stands out from the crowd for not being a Daffy Duck villain stand in. Oh, it's also a cool reminder of an awesome film and a downright fine stage in its own right.
 

Illusive

Smash Apprentice
Joined
Dec 20, 2007
Messages
119
ZWEILOUS


The two headed dark hydra joins the brawl, ready to fight with others and itself. For you see, these two heads are free thinking and don't always get along. This has some interesting consequences; one head (the head on the right when you face forward) is controlled by you, while the other head doesn't want to help you. While the head you control will be focused on attacking, the other head will bite at the air and snarl. In a team battle, if your team mate gets ko'd, the other head will laugh. It only helps out in peculiar ways.

Attributes:
Walking Speed: Very slow
Running Speed: Average
Jump height: Average first jump, 4 flaps of its wings that while individually very weak, give it an above average 2nd jump
Weight: Heavy


Normal Moves (NB: Zweilous refers to the right head):
A: Zweilous shakes its head in front of it in a flurry, like any other multi hit move.
ftilt: Zweilous stretches its neck and does a bite. Long range and decent damage and knockback
utilt: Zweilous moves it head up and bites above hit. Hits twice; good for comboing.
dtilt: Zweilous spins around. As soon as you execute the move, the other head conspicuously lifts up to avoid helping.
fsmash: Zweilous lifts itself up and stomps down while facing the enemy while the other head looks away in disgust. A powerful KO move
usmash: Zweilous tucks its head in then unleashes an upward arcing spin. By momentum alone the other head is forced to hit, but for low, fixed knockback. Then while continuing the spin the 2nd head hits for good knockback.
dsmash: Zweilous faces towards the screen and smashes its head forward to the ground in an circular arc. It bounces off the ground, rebounds and hits the other head, which then goes down in the same arc. Stronger in the front than in the back.

nair: Zweilous does a spin in midair with a darkness effect
fair: Zweilous spins and hits with it's head. A fair bit of delay (because the 2nd head tucks in) but when it hits it's fairly powerful
bair: Zweilous spins around and bites behind it
dair: Zweilous stomps below it. Short range but an incredibly strong spike.
uair: The head spins in front of zweilous a few times, hitting upwards. The exact kind of move that would be a lot stronger if the 2nd head cooperated.

Special Moves:
B: Dragonbreath - Both heads launch greenish flames in opposite directions, with a paralysing effect. The flame doesn't dwindle.
B->: Dark Pulse - Zweilous launches an energy ball forward that expands in size the further it goes (until it vanishes). The further away it hits, the stronger it is, but the earlier hits are effective
B^: Dragon Rush: Zweilous' head starts glowing as it launches upwards. If done from the ground, only one head lights up and it doesn't go up too far. If done from the air however, if and only if zweilous is not above the stage, the other head's survival instinct kicks in and both heads do the work, leading the whole body to glow and a much stronger move (but a very risky one)
Bv: Hyper Voice - Zweilous lets out a loud shriek that does different things depending on how close they are. If very close, it does a lot of damage and stuns. This includes aerial opponents, so the move can KO at low percents, but it's difficult to line up. If a few character lengths away, the does moderate damage and the character spontaneously starts running away from zweilous (if it's on the ground). If they're somewhat far it does minor damage with an extremely short stun and wakes the opponent up if they're asleep.

Final Smash: Outrage - Zweilous just starts fighting with itself and jumping around the stage in a frenzy. However it's a very fast frenzy, and one that surprisingly seems to target the other opponents. Anyone caught in it gets attacked several times and then knocked away.

Throws:
Grab: Zweilous bites onto the enemy
Pummel: The other head starts headbutting the enemy (as if to sabotage Zweilous' grasp)
Forward throw: A powerful headbutt forward from the other head
Back throw: THe other head bites the enemy, tears it out of Zweilous' grasp and throws it backwards.
Up Throw: The other head gets below zweilous and launches dragon breath upwards
Down Throw: Zweilous jumps up and down several times. The first jump lets loose zweilous' grasp, but the other jumps do damage to the enemy. The best throw for KOing.

Other info: Items are held in the other head's mouth. All attacks are rather comical animations of Zweilous tricking it into attacking with momentum.

Taunt: Zweilous Laughs, then the other head hits it to stop it
 

smashbot226

Smash Master
Joined
Sep 1, 2007
Messages
3,027
Location
Waiting for you to slip up.
What reeks of minimalism, heavy alcohol use, and used tissues?

THAT'S RIGHT, SMASHBOT'S COMMENT CORNER.​

Wolf Man is a momentum character, further solidifying the stereotype that momentum mechanics can be applied to almost literally ANYONE. It does seem like you thought of a mechanic that would work easily with a wolf- IE running into and after opponents- and basically revolve it around that entire mechanic. Even if there is flow, it's applying to one of the easiest and arguably the biggest cop out mechanics of MYM. 2/5

As usual, Junahu comes with another unusual set, Copycat, someone who is so unknown because it's essentially an OC, regardless of the little hint at the end. And while I'm all for writing styles that involve the reader with WHO they're reading about... this just comes off as forced. "I'm just a normal trainer person? I'mma moveset maker person now?" I'm aware the character is a kid but I prefer Sakurai's posts to this ****. I can ignore that, however, in favor of what you do with the set. Surprisingly, I don't find the specials nearly as interesting as the normals, including Jab and Dash Attack, even if a little under half of them either have quirks slapped onto them or are run of the mill. I absolutely adore the grab game, but then again I love grab games in general. Still, Substitute is delicious. Overall, I do think that the duality of Copycat is limited to Brawl- then again, I believe every set is sort of like that- and I'm reminded more of Banette than an original set, for more than the surprise at the ending. 2/5

Hammerhead is the Twacy set I swear MW withdrew from but oh well. I like how you acknowledge the blatant futility of making a moveset for someone who appears for a cartoon for two seconds and then rip on Octavia for being the EXACT. SAME. THING. And your pitfall sounds like a bad version of pitfall, which brings into question why the hell you would even have moves that push them further into the hole unless it has super armor or extraordinarily low beginning and ending lags. And with your entire playstyle section, it seems that SSpec just seems irrelevant in relation to his goal to pitfall the hell out of the stage. Perhaps in the long scheme of things, you'll want to flat out crush through your opponent's shield to pitfall them. I still remain skeptical of how Hammerhead DOES offer anything new. 3/5

Giant Bat is someone I feel to have... well, little potential to be anything too original. While the multibat mechanics are certainly interesting, much of the set feels like "Generic Flying Antagonist", namely Ridley. But Ridley is so big, he was a boss THREE times in SSBB. Luckily, Giant Bat DOES do something I haven't seen this contest, which is to establish an aerial combo character of sorts. Or at least a set with a very nice aerial focus. I really like how you manage to take a character that even its creators dislike and make a competent moveset out of it. 4/5

Medusa apparently lacks a recovery option. And starts with aerials first. For a character with a seeming focus on pursuing your opponent to the ends of the earth, that seems silly. Sure, some of them actually transition into your grab but still. Yet you seem to blend offensive and defensive aspects into a single character with an emphasis on staying on the foe's arse. I suppose the big point of your set is the collection of special moves; they all serve a purpose for either forcing your opponents to stay on the move, which is what Medusa wants, or for coming toward you, which puts them at great risk. It's a lovely set that combines several neat mechanics into a single package. 4/5

I admit I skipped to Death because I heard it might be the best set of the current contest- which is obvious propaganda printed by the Mendezian Party. It's fairly good and a lot of the set has flow. Between the several normals that drag the foe into either Death's range or the portals- whether or not they're directly FROM The portals- is a nice touch for someone who already has tons of ways to be written. I do believe that writing off the scythe as a disadvantage for Death is akin to Jason wanting to get rid of his trademark machete; why? Granted, Death doesn't fully hand it over, but still, there's not much sense in wanting Death to keep the scythe out of his hands as much as possible. I still really enjoyed reading through the set despite these flaws. 4.5/5

I was a little worried about reading Mummy Men after reading Death because I've heard little commentary about this set. I fully agree that Mummy Man's main draw, the A.I. controlled partner, is fairly pointless. While you carry out the goal of the set in a neat way which is perfectly in-character for the set you've made, I also commend you for even ADDING a QCF motion attack. May God have mercy on your soul, because MW sure won't. Although I'll say that your gameplan would be far more effective if your A.I. partner didn't seem to come off as a moron. Or at least that's how I read it. Not to say you're intentionally gimping your own set, just, well, it could use some help in trying to do what it's supposed to do. 3.5/5

Finally, Monster. Screw you, I'm calling him Monster. Because ________ is not a name. He basically feels like Victor from Darkstalkers in SSB format, which certainly isn't a bad thing. Monster feels like the epitome of HMA grappler and... YOU KNOW ME. But it's not that every other input is a grab, no. It's how you link these grabs together in your bigger plan to cause as much damage to the opponent in the smallest amount of time as possible. My only complaint is making a character that is apparently stronger than DEATH. I mean, I'm all for Monster and Frankenstein getting more recognition but still, DEATH is weaker. Oh well, I still enjoyed it. 4/5

That's about i... wait, what? Flat Top? Just when I thought these guys couldn't find enough low-potential characters to spam momentum wi- Oh, he's a camper? Well this is a nice change of pace. And not the typical camper either, since he doesn't really have much control over his projectiles. So no dependence on his jets either, so he'll have to be played smart. But you also make use of projectiles in your grab game in a way I haven't quite seen yet; while your jets bully foes around, Flat Top is free to fill however much lead into his sorry victim as he pleases. I'll admit this is easily my favorite Twacy set due to the rather unusual yet innovative "camping" style Flat Top introduces. 4.5/5

Finally, do- Fire Snake. Lemme guess, Boom Boom with fire effects? Benefit of the doubt, smashbot, benefit of the doubt. Looking it over, he has an invisible ammo bank which might not have been the smartest idea. You might be too busy keeping track of your fire points and I'm not sure how Wario players keep track of their Waft. Or if they do at all. Anyway, I do appreciate how you preserved his classic hop and implemented it in probably the best way possible. For that, you get a swarthy commendation on my part. Whatever swarthy means. 4.5/5
 

Hyper_Ridley

Smash Champion
Joined
Dec 21, 2007
Messages
2,297
Location
Hippo Island
ZWEILOUS

First of all, welcome to MYM! I approve of your character choice too, but you ought to find a picture to include at the top, I didn't recognize the guy on name alone.

Onto the set itself. I like the concept of having just one head as the primary attacker and the other one only helping in select situations, but it feels like there's only 2 moves or so where this concept is actually utilized outside of animations. I feel like all of the specials would have benefited from having conditions to use the second head similarly to the clever Up-Special.

The other thing I would suggest to work on is attack detail. The animations are fun to read, but it's hard to picture how the moveset would function when many of them don't state how fast/strong they are. Doesn't have to be that fancy, usually a single sentence for those things will suffice.

You're perhaps the first guy to ever even mention item attacks. +20 HR cool points for that.
Good God I have not used that phrase in so long

You seem to have some fun ideas, so I hope you stick around and make some more movesets! :bee:
 

BKupa666

Barnacled Boss
Moderator
Joined
Aug 12, 2008
Messages
7,788
Location
Toxic Tower
Might as well post this, considering the set behind it is dead.

Underwater Physics


  • Characters move .25 times slower than usual.
  • Characters have infinite jumps underwater.
  • Characters do not enter their helpless states from moves that would otherwise trigger it.
  • Characters float on the surface of the water, swimming around just like in Brawl. To descend into the water, the player must tap down on the control stick.
  • While characters never drown, if a player remains underwater for longer than ten seconds, the character begins suffering 1% per half second.

Bikini Atoll


Hailing straight from the intro of Spongebob Squarepants, Bikini Atoll becomes a playable stage in MYM Brawl! Its layout is quite similar to the island phase of Delfino Plaza, with the bottom of the island extending down off the bottom blast zone, albeit slightly resized. The screen is extended a good twelve Ganondorfs down, creating additional room for underwater battles, while an additional three platforms of space is added to either side of the water surrounding the island. Although there are no hazards on this stage, David Hasselhoff occasionally swims in on either side of the main island like the Yoshi's Island Support Ghost, serving as a temporary platform-sized...platform for ten seconds before swimming away.

Music:
Spongebob Metal Theme
Goofy Goober Rock
Sweet Victory
The F.U.N. Song
The Campfire Song Song
The Best Day Ever
 

Davidreamcatcha

Smash Ace
Joined
Feb 9, 2011
Messages
629
PRINCESS KRAEHE


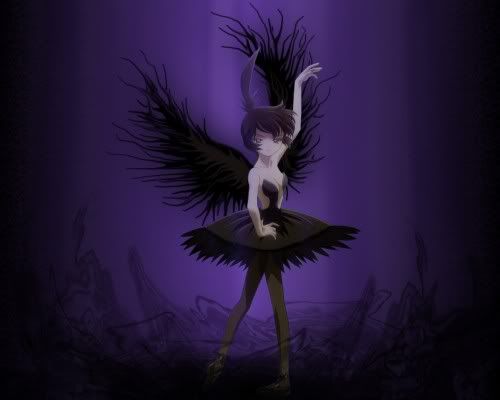
Princess Kraehe is an antagonist from the obscure anime, Princess Tutu, playing second fiddle to only her father, "The Raven" and chaotic neutral storyteller Drosselmeyer. As an infant, she was kidnapped by the Raven (who, might I add, is a GIANT RAVEN) and raised as his own. Kraehe believed she had been cursed with an "ugly human body" and was actually a raven. After an incident in which she was saved by the Raven's archenemy, Mytho, she and her "father" plan to make him her prince. To do so, The Raven instructs her to assume the psudeoname of "Rue" and join Golden Crown Academy, a private ballet school Mytho had joined. While in the academy, she constantly attempts to seduce and steal the hearts of others, as The Raven had been wounded by Mytho to the point where he could only live by eating hearts. She is often foiled by the alterego of rival student Ahiru: Princess Tutu. Despite Tutu's interference, she later manages to corrupt Mytho by injecting him with Raven Blood. Kraehe is played as a sympathetic character for the rest of the series, eventually, she turns against the Raven and goes to live with Mytho forever and ever. The End.

...Now, why is Dave making a set for this? Since his old RPing Partner caused him to watch the show, in exchange, she watched Darkwing Duck. After egging me on about it in chat, FA said if I made a set for a character from the show he would make Patrick Star. Then we changed his character to Mr. Cat, then he just plain dropped out. So...yeah.

STATS​

Traction: 12
Aerial Movement: 8
Size: 8
Jumps: 7
Ground Movement: 5
Falling Speed: 4
Weight: 3

Rue is one of the greatest ballet dancers in Golden Crown Academy, if not the greatest. Naturally, this transitions over to Kraehe. Kraehe has what is essentially the best traction in Brawl. She is able to stop on a dime and turn around instantly, never tripping unless coming into contact with a generic tripping trap.

SPECIALS​

UP SPECIAL – DARK WINDSTORM


Kraehe stands on her tiptoes, spreading her arms to her sides in a traditional ballet position. Upon entering this pose, she quickly swipes an arm forward, causing a vortex as tall as Kirby and as thin as a Pikmin to hover in the air in front of herself. Kraehe begins spinning as the vortex lets out an she begins spinning at an extremely fast speed. As she spins, the vortex begins to expel a thick purplish-black smoke. The smoke is about as tall as 2.5 Ganons and spreads forward at Ganon's dash speed, with Kraehe able to influence the direction it travels ever so slightly. The smoke is extremely thick, nothing being able to be seen through it, including Kraehe. Kraehe can stop her smoke's travel by pressing any button or by being hit, causing the vortex to disappear and Kraehe to exit the pose with minimal lag. The smoke will last for 20 seconds no matter how it's placed.

In the air, Kraehe drops the vortex and begins spinning upwards as in the second part of her move. The spinning has a containing hitbox similar to Meta Knight's Mach Tornado, except with very weak priority as compared to the Mach Tornado's. This deals 2% per second and lets Kraehe move 3 Ganons upwards before entering helpless. Kraehe does have both a decent horizantal and vertical recovery from this, somewhat making up for her poor weight. This is at the cost of being extremely gimpable, as her head can still be attacked.

SIDE SPECIAL – COME TO ME!

Kraehe begins performing a ballet dance in place, this is a lagless motion on both ends, at the cost of being unable to use this in midair. As Kraehe dances, an invisible hitbox the size of Mario appears in front of her. The hitbox begins extending forward at Mario's dash speed and is able to be angled by Kraehe in any direction, but she cannot turn it around. The hitbox passes through any and all obstacles in its' path, including the stage itself. If Kraehe is hit or exits by pressing any button, the hitbox will stop in place, but still linger on stage.

Should Kraehe use this in the air, she will fall downward as she creates the path, but it can potentially let her set up the path in the air.

If Kraehe uses this while already having a hitbox set up, she will spread out her wings dramatically as the silhouette of her "father", the Raven, lingers above her. Upon entering this pose, she lets out a cry of "Come to me!" This is has some decent lag, but is nowhere near as bad as it sounds. Kraehe exits the pose with bad end lag after performing this.

Now, lets get to the interesting part. The exact moment you press that input, anything that is touching the path you made, including traps and projectiles, will stop in place. Once Kraehe announces "Come to me!", they will be forced to travel the path to the position where Kraehe first used the move at Mario's dash speed. If nothing is touching your path when you press the input, it will disappear and Kraehe will exit the original pose with lag equivalent to the duration of a Warlock Punch.

As a humorous animation, foes who are forced to travel the path are forced to ballet dance to the spot, defying gravity to do. They can button mash out with 2.5x normal grab difficulty. If anything on your path comes into a solid object, it will stop and the path will no longer be in effect. Pressing the side special while something is traveling the path will cause the path to cancel out, dropping anything that was on it downwards and allowing Kraehe to build a new path next time she uses this special. Foes regain all their jumps and recovery if they are dropped offstage so it isn't hillariously broken.

NEUTRAL SPECIAL – RAVEN FEATHER

Kraehe quickly procures a sharp raven feather, before hunching slightly and tossing it forward, suffering some very small end lag at the end of the toss. During the quick startup, you can angle the direction that Kraehe will toss the feather in: diagonally upward, diagonally downward or forward, allowing Kraehe to attack from all angles. The feather itself is the height and width of a Pikmin lying on its' side, traveling forward at Fox's dash speed,. The feather disappears either after hitting something or moving the entire distance of Final Destination. If a feather actually hits the foe, they will find that it's been sharpened, as they take 4% and begin bleeding. Bleeding causes the foe to move twice as slow, as well as taking 1% damage every 2 seconds. In addition, bleeding causes blood to spill out of them, coating the ground in blood as they walk. The blood on the ground acts as a trap, everyone who walks over it has their traction worsen, as well as being 75% more likely to trip. Kraehe will not have her traction worsen on the blood, but can still trip on it. Foes stop bleeding after 5 seconds and blood disappears 6 seconds after originally coating the ground.

DOWN SPECIAL – RAVEN BLOOD

Raven Blood is blood shed by Kraehe's "father", The Raven. Within the anime, The Raven's blood is so dark and impure that it has been known to corrupt people if it enters their bloodstream, as well as corrupting objects and things into a dark black form.

In this move, Kraehe raises her arm up a bit in a dramatic pose. Suddenly, a Bowser-sized wave of pure black blood spawns from behind her, sweeping across the stage! The wave will push foes who come into contact with it with flinching hits that deal no damage, Piplup-style. The blood covers the distance of a Battlefield Platform at Wario's dash speed, coating the stage as it does so. The blood disappears once it finishes its' travel. This has bad end lag for Kraehe, but a quick startup. This means Kraehe can use it as a counter of sorts against approaching foes.

Raven Blood on the ground is almost identical to regular blood, but with a few differences. For one: Kraehe cannot trip on it, nor will her traction worsen. Raven Blood will only coat the ground for 5 seconds, but the pros far outweigh the cons. If Raven Blood touches any sort of trap hitbox not made by Kraehe, the trap will turn a dark black color after 3 seconds. The trap is now loyal to only Kraehe, meaning the foe is now vulnerable to their own trap and can't destroy it with attacks exclusively intended for destroying it. Kraehe is immune to the trap unless the original owner isn't immune to it (think Pennywise's balloons). This can be used in combination with your side special to position the trap, while your up special can create a wall of shadow smoke to prevent your foes from seeing it. Neutral Special also helps in this endeavor, as slowing down them down can give you a large opportunity to convert their traps.

If the initial wave of Raven Blood hits a bleeding foe, they have their blood converted to Raven Blood. This means that the bleeding timer refreshes, and the foe begins spilling out Raven Blood instead of normal blood. This is beneficial to you, as you can easily force the foe to convert their own traps to the service of your master.

Lets talk about foes who have had their blood converted. Their blood stays as Raven Blood as long as they keep bleeding, giving Kraehe some encouragement to perform a bit of rushdown so you can toss feathers at them. While their blood is converted, the foe takes on a slightly darker hinge. Their animations become much more puppet-like as well, and their taunts are replaced by generic "evil" taunts, such as their up taunt becoming an incredibly deranged laugh.

GRAB-GAME​

GRAB - COVERED

Kraehe points forward, with an overdramatic flourish. This has some terrible ending lag if whiffed, around 3 seconds worth. If anyone is on the ground 3 Battlefield Platforms in front of Kraehe when she points, black vines sprout of the ground and travel onto them, completely constricting them. They can move about while constricted by the vines, but their attacks will come out twice as slow and their jump height is slightly reduced. They can escape by standing still for 1 full second. On an important note, this can grab foes who have tripped or are in prone.

While this is not a physical grab, if Kraehe stands next to them during this time, she will grab them, causing the vines to recede back into the ground. Her grab has normal grab escape difficulty, but the foe will hop 1 Battlefield Platform backward once they have escape, possibly into converted traps. Of note: if the foe has been afflicted with Raven Blood, the grab difficulty is multiplied by 2.

PUMMEL - KISS OF DEATH

Kraehe leans forward and locks lips with the foe, the foe looking quite shocked at this. They can button mash out of the kiss at anytime, causing them to exit the grab. If Kraehe is able to kiss them for 5 whole seconds, the foe will stop resisting and begin returning the kiss. However, they fail to notice Kraehe lifting up a sharp dagger...she dives the dagger downwards, digging into the foe's skin. The foe takes 30% and high vertical knockback. They also release a Bowser-sized pool of blood below them, acting the same as normal blood. It will be Raven Blood, of course, if they have been affected by it prior to the grab.

STANDARDS​

JAB – BALLERINA

Kraehe stands on her tiptoes and begins spinning, doing such for 1.25 seconds before exiting with .20 seconds of end lag. As she spins, she can move in any direction at her regular walking speed and has her body turned into a hitbox dealing 4% damage and a slight bit of stun. This doesn't have a containing hitbox like you'd expect from a David set, instead being able to be used by Kraehe as a decent escape tool. A potential mindgame is also possible with the damage percentage, as you can think your foe think they've been hit by a raven feather.

If Kraehe presses the shield input as she spins, she will laglessly spin into the background. She is able to spin and move around here and can return to the foreground by pressing the shield input again. However, .15 seconds of end lag are added for everytime she spins. She will also gain an additional .15 seconds if she is in the background when the move ends, having to transition into the foreground. While this can add a new depth to Kraehe's evasive options, she has to be careful not to misuse this.

DASH ATTACK – FALSE PRIMA DONNA

With some beginning lag, Kraehe spreads her legs and dashes forward a bit, performing a graceful leap into the air, 1.5 Ganons upwards to be precise. She holds this pose as she travels through the air; her body becomes a hitbox dealing 4% and good knockback to anyone hit by it. This has insanely low priority, however, as Kraehe can be hit out of it by any attack. As Kraehe leaps, she moves forward at Fox's dash speed; far superior to her typically average movement. Kraehe moves only the length of Battlefield before falling to the ground with some bad ending lag. However, the button can be held for Kraehe to flap her "wings" during the leap, meaning she will continue to leap forward as long as the button is held. This makes it an excellent source of movement for Kraehe, as well as allowing her to evade traps placed by the foe.

FORWARD TILT – GRACEFUL STOMP

Kraehe stretches out one leg and stomps the ground 1 Bowser in front of her, dealing 5% and a nice bit of knockback to anyone hit by it, being a nice GTFO move for Kraehe. This has relatively little lag on either end of the move. By performing the forward tilt backwards, Kraehe will stretch out a different leg and stomp the ground 1 Bowser behind her.

Once Kraehe has used this, she keeps her leg in the stomping position, unable to attack. By pressing the A input again, she moves either 1 Bowser in front or behind her, depending on whether or not she inputed it as an ftilt or a btilt.

While this sounds like a meager spacing tool, this has an interesting interaction. If Kraehe stomps on any trap that has been converted by raven blood, it will disappear in a puff of black smoke. This allows Kraehe to mindgame foes in her smoke, making them fear traps that aren't really there. This also allows her to rid herself of traps she would find more of a burder to herself.

UP TILT – AGONY OF THE RAVEN

Kraehe swipes her arm forward, holding it out for a second or so. This deals 5% and some light stun if it actually hits. As soon as she thrusts her arm forward, a raven materializes in front of her, simply being an illusion. The raven flies forward as Kraehe stands this, controlling it. The raven moves at Bowser's dash speed, Kraehe has the ability to control the raven's flight up or down. If it hits the foe, it will deal light hits of 1% and drag them along with it, allowing Kraehe to bring them down to her level or guide them into a smoke-filled area or what have you.

Ravens are only controllable for about 4 seconds, after which they disappear. Kraehe can make them disappear early by performing any attack. On that note, if a raven brings a foe offstage, the foe will regain all their jumps and recovery, making it very dismal as a killer.

DOWN TILT – FEATHERS OF THE RAVEN

Kraehe dramatically waves her hands towards the ground and holds it there for about a second, as a plume of raven feathers fly 2 Battlefield Platforms forward. The feathers deal multiple hits of 3% to foes hit, as well as pushing them with a wind effect. After traveling the 2 Battlefield Platforms, the raven feathers fall to the ground in a neat little Bowser-width pile. The feathers act as a trap, but seem to have no real purpose upon first usage. Still, they can be manipulated around like any other trap, I suppose...the feathers last about 5 seconds.

If the foe uses an attack on the feathers, things get interesting. The feathers rise up from the ground, spinning, before they reveal a shadowy silhouette. The dark silhouette resembles the silhouette of Prince Mytho, it constantly stays idle for the time it is on-stage. Once every second, however, the silhouette of the Prince performs the attack the foe was using when they were on the feathers. This has the exact same properties, so if it was slowed down by your grab or whatever, it will be slowed down here too. The silhouette will still attack while being manipulated about by your specials.

A little tidbit since I'm sure this will be asked about; if the foe placed down a trap on the feathers, the silhouette will lay down copies of that trap as well. However, they last for half the time and deal half the damage. The silhouette, as well as any traps it may create, will be allied to the person who attacked while on the feathers. Really though, who says it will be allied to them for long? Cutting back on all this elaborate nonsense, the silhouette will last for about 10 seconds.

SMASHES​

DOWN SMASH - RAVEN KNIGHT

Princess Kraehe swipes her arm out in front of her, dealing no damage, but pushed forward along the ground with set knockback: a Battlefield Platform in front of her, to be precise. Naturally, this is a particularly good setup for her grab. .20 seconds after Kraehe swipes her arm, a black ooze appears a battlefield platform in front of her, remaining there for the remainder of your charge time. Anyone being hit by the ooze is dealt 2% per second and is contained much like Bowser's neutral special. Once the charging time is complete, the ooze rises into a Ganon-sized blob, knocking foes being contained by it away with 10% damage and decent knockback. Kraehe exits the smash with minimal lag at this point.


.20 seconds after rising, the blob shapes itself into the form of a Raven Knight. The Raven Knight is the size of Ike and has 10% to 25% HP based on charging. The Knight constantly pursues the foe at Mario's dashing speed. The Raven Knight will jump 3 Ganons over any obstacles in its' path. If the object is bigger than this, the Knight will transform into a Capsule-sized Raven with decent lag and fly over the object before transforming back with the same lagtime. While in Raven form, the Knight can be killed by any attack, giving foes an opportunity to undo Kraehe's work. However, Kraehe can easily relocate the obstacle with her up special, giving her a decent counter.

Once it is within a Battlefield Platform of a foe, the Raven Knight will swing its' sword towards the foe, dealing 7% damage or 15% if they have an open wound from Kraehe's neutral special. However, this deals no knockback, only causing the Raven Knight to impale the foe on its' sword. Being impaled causes the foe to enter a grabbed state, having to button mash out with 2.5x the normal grab difficulty. Upon exiting the impalement, the Knight will continue his attempts at attacking the foe. However, the sword strike deals knockback rather than impalement, meaning Kraehe must be quick to regrab the foe while the Knight has them impaled. Kraehe can have 2 Knights out at a time, making this quicker than you would think.

Kraehe has several interactions with her Raven Knights. For one, sending out an nspec feather will cause all Knights to run/leap towards the feather until it disappears, resuming their normal pattern after it ends. Raven Knights are immune to both Raven Blood and regular blood. They can be positioned by your side special as well; Notably, if Kraehe uses her side special while the foe is impaled on the sword, the Raven Knight will release the foe, letting them be subjected to it. Lastly, Kraehe can grab them and use her throws on them, alebit with no damage. Kraehe can use her pummel on the Raven Knight to instantly KO it, but will heal 10% damage by doing so.

UP SMASH – FEATHER DEFENSE

As the charging takes place, Kraehe raises one hand above her. Once charging is complete, Kraehe waves her hand above her, creating a pokeball-sized wave of raven feathers that cover a Battlefield Platform's distance above Kraehe. The feathers float in the air for 4-9 seconds (depending on charging) after Kraehe performs the move. If foes make contact with these, they are dealt multiple hits of 1% damage as they are moved along the path of feathers at Ganon's walking speed. This is a good aerial defense option for Kraehe as raven feathers can shield her against projectiles and aerial attacks, as well as allowing her to move unsuspecting aerial attackers into things such as your Knights or Smoke.

FORWARD SMASH - RAVEN HILL


Kraehe gains a look of desperation on her face as the move charges. Upon finishing the charge, Kraehe points at the ground, causing a plethora of ravens (constantly making the same pose you see in this picture) erupt from it! The ravens erupt from the ground exactly one Battlefield Platform away from Kraehe, are as long as Bowser, and the height of the Raven Hill varies from 1 Bowser to 2 Ganondorfs, depending on the charge time. The ravens function as a solid wall with 10-20% HP (depending on charge, of course). At first glance, this seems good only to form a wall for Kraehe to hide behind. While this is true, the wall is easily destroyable and Kraehe can only have two out at a time. One of Kraehe's many uses for this wall is to cage foes into her smoke, with another being to lift up traps she has converted as an effective anti-aerial.

If foes are standing on the spot where the raven hill will erupt, they trip on top of it. Kraehe can either directly space the foe to her using her side special, as well as simply spacing the raven hill to her (the raven hill will not leave the ground under any circumstances, however)

AERIALS​

NEUTRAL AERIAL - RAVEN WINGS

The size of Kraehe's "wings" expand slightly and begin something of a graceful flap, causing Kraehe to stall her falling. In this state, she can attack and float back and forth at her normal dash speed for 3 seconds before entering helplessness, though any attack will knock her out of this state.

One of the primary purposes of this move is to begin an aerial assault, floating back and forth while firing off Raven Feathers can be a key tool for Kraehe. She can also stall in mid-air to start setting up a side special.

FORWARD AERIAL – RAVEN'S GRASP

Kraehe wraps her arms in front of her, grabbing foes within range in a tender embrace. The foe can button mash out with average difficulty, causing Kraehe to slip into helplessness. She can pummel them while in this stance, though it will be a bit easier to escape from than normal. If this is used as a suicide KO, Kraehe will always die first. More importantly, Kraehe can use the foe as a meatshield, as they remain vulnerable against anything on stage. They also can be hit by any minions they have out during this time.

If Kraehe suicides with this, she will die first.

BACK AERIAL – BIRDS OF A FEATHER

Kraehe leans backwards, letting her "wings" be the main focus of this attack. After .30 seconds, Kraehe flaps the wings, causing the wings to push the foes towards her. This can allow her to set up for a forward aerial, or simply push them into something.

UP AERIAL – MAGNIFICENT GRACE

Kraehe halts her movement, before cupping her hands and falling downwards at about half her normal fall speed. She spins as she does this, holding the foe close with rapid hits of 1%. Kraehe can cancel this into any of her other attacks or simply cancel out by dodging. If Kraehe uses this for at least 4 seconds, she falls into helplessness.

DOWN AERIAL – PIERCING DRILL

A dark aura surronds Kraehe for a split second, before she begins spinning at a speed far more rapid than that of her up aerial. She falls downwards at 2x her falling speed, dealing hits of 2% to anyone around her during this time, dragging them downward to the ground. She can cancel this into any attack, and will enter helplessness after 3 seconds of use. Foes regain their jumps and recovery if she cancels out or they DI, meaning it isn't exactly useful as a gimper. Rather, this is useful for getting foes back onto the ground, or into a wayward path.

FINAL SMASH​


(tipsy)​

ASSIST TROPHY​

FEMIO​


Femio appears as a one-shot character in Princess Tutu, appearing for only one episode. He is an overly dramatic prettyboy who claims to love all and that all love him, thinking of himself as a "true prince". He attempts to seduce both Ahiru and Rue, as well as other girls at the Academy. Later in the episode, Kraehe attempts to steal his heart, but fails to do so. To make any sense of this mini, you might want to watch this video.

As soon as the assist trophy is broken open, Femio's butler appears. The butler pulls out a red carpet and begins dragging it across the stage at Wario's dash speed, covering up any traps or other intrusions if they are present. Femio spawns after the carpet is laid, riding a bull. With a cry of "Ole!", the bull charges forward at Captain Falcon's dash speed, dealing 18% and causing any foes hit to be dragged along with it. The bull only disappears upon hitting a wall or leaping off the blast zone with the foe. Once the bull charges, Femio jumps off and begins running along the red carpet. If there is a foe on the carpet, he will run towards them, taking priority on females or feminine looking males over males. Once within a Battlefield Platform of the foe, they stand still as Femio begins the same monologue seen in the video, with the foe performing all the corresponding parts. As Femio does so, his butler runs about, spreading hundreds of petals the size of G&W's sausages, dealing flinching and 5% to any foes who are hit by them.

The foe stands completely still and can be hit by anyone. If the foe gets hit out of it, this will cause Femio to run towards the nearest foe and start performing the monologue to them. Once Femio performs or attempts the monologue on every foe in the match, he disappears, along with any traces of him (petals and the like).
 

Junahu

Smash Ace
Joined
Nov 15, 2005
Messages
899
Location
Shropshire Slasher
Might as well post this, considering the set behind it is dead.

Underwater Physics
I'd like to offer my own input on this, since it's something that would affect Brawl as a whole, and may end up becoming an "MYM standard" (in the same vein as the more nonsensical "goop physics" and "poison status")

Rather than damage over time when the player "drowns". I think they should simply sink (unable to use their jumps, but still able to attack) until they touch the ground, which refreshes their swim timer. And this should apply even if they're swimming on the surface (i.e. 10 seconds in the water at all). This way it can work as an extension of Brawl's water, rather than an outright replacement.
I also think that recoveries should still trigger the helpless state, unless the recovery takes them above the surface of the water, in which case hitting the surface reinitiates the water physics and takes the player out of helpless.

Perhaps you should also add how water reacts to various kinds of attacks (such as fire, or electricity, or wind, or oily goop that is lieing on the surface of the stage), or how water resistance reduces knockback.

We should all probably get together sometime and establish a clear set of MYM physics that movesets can use (CAN use)
 

Zook

Perpetual Lazy Bum
Joined
Jul 30, 2005
Messages
5,178
Location
Stamping your library books.
ZWEILOUS

I completely forgot this Pokemon existed until I read this set. Anyways, Zweilous's method of attacking (making an attack with one head while the other does its own thing, not wanting to help at all) is clever and suits his character perfectly.

As Hyper Ridley said, it would be helpful to know how much damage each attack does, and how fast they are. I get the impression that Zweilous is a slow, powerful character from his attacks, but I'm not sure how long his attacks take.

His Special attacks have some creative ideas behind him. I like how both heads work together to save themselves in the Up Special, and his Side Special launching a projectile that has a sort of snowball effect is something I don't think I've seen before, so kudos for that.

I was planning on commenting on some more sets after work tonight, but then I remembered that MW3 is coming out. See you all in a week! :awesome:
 

BKupa666

Barnacled Boss
Moderator
Joined
Aug 12, 2008
Messages
7,788
Location
Toxic Tower
FIRE SNAKE
While it's not a definitive centerpiece, due to being spread throughout several moves, I enjoy the -concept- of spreading fire all over the stage to slowly diminish the opponent's playing field. The creation of multiple hitboxes not only gives FS some control over his foe, but also diminishes the problem his weak structure causes. I feel that giving so much of FS' body such a small amount of stamina that can be lowered to reduce him to a mere ball is a bit excessive, and gives the little guy little ground with which to start a match. When he's got the momentum going with a field full of fire, he can find the time to regenerate himself, but otherwise, it seems like getting overwhelmed and destroyed early on would be a regular occurrence. The mindgames with shifting his head around and altering his basic movement at times were a great fit with the mechanic, although it seems as though they would take a bit of a back seat, due to FS' segments having just ten HP (yes, adding segments can help, but when the segments are so small, it seems like small comfort). Really, the set is pretty nice aside from this quip, with his duplicates taking a good deal of the focus off of FS while he makes the stage go up in flames.
 
D

Deleted member

Guest
MYM11 User Rankings #4

Welcome to the User Rankings! Every Monday, I'll be compiling the entire of the last week's activity in the thread and showing off, just who is the most active member? The point of this exercise is to recognise the most dedicated among us – those make your movers who are currently pushing the boundaries, as well as highlighting all movesets made by them.

To get on this list, you need to have made a moveset in this or a previous Make Your Move, as well as having posted in the Make Your Move 10 thread. The cut-off point for tallying is 3:59PM on Monday EST, 5:59PM PMT or 11:59PM GMT; other removals or changes are at my own discretion. The breakdown of points is as follows:
30 points for a Moveset
5 points for a Comment
4 points for a Secondary Submission
2 points for a Secondary Submission Comment
1 point for a Regular Post
+Regular Posts do not stack
+Secondary Submissions are MYminis, Joke Movesets and other miscellaneous submissions
People said the first week after Halloween would be dead... largely it was [aside from numerous controversies and my own confession amongst that]. The kings of the week were those who, predictably, commented the sets from Halloween, with a lot of the new sets simply being the direct aftermath of that fabled day in Make Your Move history. In lieu of that, our newly-established combo king, Smashbot, reigned supreme with a crazy amount of comments, even when some of them weren't counted for being super short. Well done, Smashbot. Warlord followed with a not much less impressive showing of comments, both of them devouring Halloween sets like ravenous children on a sugar rush. Of the top three, Majora was the only one to post sets - posting both a set for New Destroyman and one for an original character, Garrick. Neither of these sets have much commentary behind them, so go check them out.

Remember to check out the stadium to find all of the sets mentioned.

Overall User Rankings


Points: 80, Movesets: Dr. Facilier

Points: 66, Movesets: Gangreen Gang, Le'Quack, Hammerhead, JJJ

Points: 63, Movesets: Majora's Sceptile, Leviathan, Deviljho, Jinouga, New Destroyman, Garrick

Points: 50, Movesets: Marvin the Martian, Freaky Fred, Pussycat Puss, Count Chocula, Princess Kraehe

Points: 45, Movesets: Vol Opt, Kyubey, Fruit Yummy Mummy, Gatsaf

Points: 41, Movesets: Kobold Clan, Fire Snake

Points: 40, Movesets: Farfetch'd, Chaos 0

Points: 30, Movesets: Fright Knight

Points: 25, Movesets: Mouse Man, Wolf Man, Flat Top, Lucio Fulci

Points: 16, Movesets: Box Man

Points: 15

Points: 11, Movesets: Sweeney Todd

Points: 6, Movesets: Fefnir, Harpuia, Phantom, Leviathan

Points: 6, Movesets: King K. Rool, Double Header

Points: 5, Movesets: Bass.EXE, Grovyle

Points: 5, Movesets: Firebrand

Points: 3, Movesets: Linebeck, Mask DeMasque, Gruntilda, Copycat, Giant Bat, Medusa, Mummy Men, The Creature, Piggybank

Points: 1, Movesets: Swalot, Death

Points: 1, Movesets: Rapunzel, DOR-15
 

LegendofLink

Smash Apprentice
Joined
Feb 17, 2008
Messages
164
Location
Pennsylvania
Princess Kraehe
Well, I'm not entirely sure what this set wants to do. I mean, it has a definite anti-trap theme, but that can't be something to base a set around as not every set uses traps. Not to mention the fact that the word "trap" is incredibly vague and broad. Past that, this set trips quite a few pet peeves of mine. The first is bleeding effects. There are plenty of characters that don't even have blood, and even for those who do, nobody has enough to just dump out all over the floor to create generic goop. Second is the generic concealing smoke. You mention a mind game to make them fear a trap that isn't really there, but why would you want to destroy one of your converted traps in the first place? I'd rather have them fear something that can and will hurt them rather than something that might. Past that, the smoke serves no purpose, as it's pretty easy to tell if something is converted as the blood wave (which kind of comes out of nowhere and may be magic syndrome, but I'm not familiar enough with the character) is really big and obvious in the area it covers. Combined with the obvious cop-outs in the aerials and grab game, the set ends up really random and lacking. Definitely not your best work, that's for sure.
 

Davidreamcatcha

Smash Ace
Joined
Feb 9, 2011
Messages
629
Princess Kraehe
Well, I'm not entirely sure what this set wants to do. I mean, it has a definite anti-trap theme, but that can't be something to base a set around as not every set uses traps. Not to mention the fact that the word "trap" is incredibly vague and broad. Past that, this set trips quite a few pet peeves of mine. The first is bleeding effects. There are plenty of characters that don't even have blood, and even for those who do, nobody has enough to just dump out all over the floor to create generic goop. Second is the generic concealing smoke. You mention a mind game to make them fear a trap that isn't really there, but why would you want to destroy one of your converted traps in the first place? I'd rather have them fear something that can and will hurt them rather than something that might. Past that, the smoke serves no purpose, as it's pretty easy to tell if something is converted as the blood wave (which kind of comes out of nowhere and may be magic syndrome, but I'm not familiar enough with the character) is really big and obvious in the area it covers. Combined with the obvious cop-outs in the aerials and grab game, the set ends up really random and lacking. Definitely not your best work, that's for sure.
1. The problem with her being forced to fight against non-trap characters did have a solution in dtilt, where she creates traps for the foe, essentially.

2. The term "trap" in this set refers to traps that are actually on-field and would be physically possible to move; she would move random props like Freaky Fred's hair, but can't move stuff that can't be moved like Hammerhead's pits for example.

3. How would you like me to explain bleeding on non-organic foes? It was definitely a cop out, but I could just say oil for characters like ROB. (TIPSY)

4. Destroying a converted set would work wonders against certain sets, especially if Kraehe would rather have the trap gone. Why not destroy the Doomsday Device and have Strangelove think it's still there?

5. Smoke allows Kraehe to obscure an area filled with traps, converted or non-converted, as well as allowing mindgames with her grab, jab and whatnot.On that note, the blood wave is not magic syndrome, though it is a bit more subtle in the show, rather than a giant wave of blood.

6. The Grab Game is not a cop-out, but the aerials definitely are. I had this set laying around for about a month, and I wanted to rush it out. Wrote them up in about 30 minutes and sent them off.
 

SirKibble

Smash Champion
Joined
May 2, 2008
Messages
2,400
The following moveset may contain spoilers

Sayaka Miki
Sayaka Miki is a character from the anime Puella Magi Madoka Magica. She lives in Mitakihara Town and is an eighth grader at Mitakihara Middle School. She’s a very normal girl. Or at least, she was. After she and her friend Madoka met a strange being named Kyubey and were offered to have one wish granted in exchange for becoming Puella Magi (or Magical Girls), Sayaka accepted the offer, though not without some hesitation. She wished for her crush--a very talented violinist who paralyzed his hand in an accident--to be healed, and lo and behold, it happened right away! Of course, she also became a Puella Magi. Here, let me get you a new picture:


There we go. Sayaka is now a Puella Magi. That means she has to fight witches and use the Grief Seeds they leave behind when defeated in order to keep her new Soul Gem pure. Her soul is contained within that Gem, and if she doesn’t keep it pure, something bad might happen. Sayaka formed the contract with Kyubey not knowing all these details, and considered it worthwhile to be able to fight evil in exchange for a wish. Seems like kind of a win-win deal if you look at it that way. She’s fierce in her devotion to justice, but can also be irrational and headstrong. Beneath that facade, though, she’s a tender girl whose feelings are surprisingly fragile.

But enough about personality and feelings and things. You don’t really care about all that, right? You want to know how she fights. Sayaka’s weapon of choice is a cutlass (in case I lost you there, or you already forgot what the above picture looked like, a cutlass is a kind of short sword), which she can even produce multiples of in the heat of battle. Because her wish was related to healing, she also has remarkable regenerative powers. She can take hits like you wouldn’t believe before really going down for the count.

Well, I think you know all you need to. Let’s dive into some moveset stuff!​


Statistics

SIZE: SEMI-TALL. She’s almost the same height as Link. She’s significantly thinner, though.
WEIGHT: ABOVE AVERAGE. Sayaka may not actually weigh much, but her defensive powers keep her on her feet pretty well.
GROUND CONTROL: GREAT. She moves quickly along the ground, thanks to her athletic build and the powers of the Puella Magi. She also has good traction.
AIR CONTROL: GOOD. Sayaka has comparatively good air movement, and falls at an average speed. Her first jump is also rather high.


Sayaka’s pretty agile, as you can see. She doesn’t struggle to move around the stage, whether on the ground or in the air. All in all, she seems to have a lot going for her here. But you know, you can never totally trust stats. Let’s get on to what you really want to hear.​

Special Attacks

Neutral Special ~ Sword Circle

Sayaka pulls her cape around her, and it magically grows to fully envelop her. She appears to be spinning inside there for as long as you hold the control stick, after which she’ll throw her cape back behind her, revealing a circle of swords about the width of Bowser that appear stuck into the ground around her. This move is unusable from the air. This can be held for a period of time similar to charging the average Smash Attack, and doing so will form 10 blades around Sayaka. Holding it for a lesser amount of time will spawn a smaller number of swords, which appear in increments of two. Using this when 10 swords are already in place on the stage will take two at a time from the oldest location the swords had been spawned at. In other words, you can spread your swords around the battlefield to give you easier access to them at the cost of having fewer in a single location.

These short swords can be grabbed by either Sayaka or an opponent and used as a standard battering item—at least for the opponent. Sayaka can’t perform typical item attacks with the swords, as they’re busy enhancing her existing moves. Anyway, as a battering item, they deal small amounts of damage, roughly half that of a beam sword, but are a very quick item to swing. If thrown or dropped, they will disappear upon hitting the ground. Additionally, swords in a character’s hand still count toward the maximum of 10 that can be present on the stage.

Forward Special ~ Blade Spin

Sayaka charges this move in a similar way to Ike’s Forward Special, and can hold it at full charge the same way. Upon release of the charge, she’ll rush forward a short distance (about half a Battlefield platform’s length, and slash her sword, dealing 6% damage and weak forward knockback. Depending on the charge, she will perform this action anywhere from one to five times, each subsequent time spinning around quickly and rushing forward into another slash. This causes this attack to combo almost perfectly into itself. If you’re holding another sword, she’ll slash at twice her normal frequency, but travel half the distance with each slash. She can complete all five slashes (or ten, if you have another sword) in about the time it takes a Warlock Punch to execute, and suffers minimal end lag. If you finish the slashes in the air, you will lose access to both this move and your Up Special until you land on the ground again, but you can continue using any Aerials you like.

If Sayaka is on the ground and within an arm’s reach of any swords when she slashes (even a slash in the middle of the attack, if you reach the swords with your earlier slashes), she will not rush forward, but will instead grab one of the swords, spin around, and throw it forward as a fast-moving projectile. It moves directly horizontal, unaffected by gravity, and will travel indefinitely, slicing straight through any opponents it hits and giving them 7% damage. She can’t repeat this quite as fast as the normal slashes, but it’s still quick. This version of the attack can’t be used if you’re holding another sword, or any item, for that matter. If this attack is possible and you want to dash forward instead of throwing the swords, you can hit the Special button again to force Sayaka to use the dashing version of this attack.

Down Special ~ Regenerate

Sayaka kneels down and clutches her soul gem for a second, healing 20% damage as she then stands back up. This move can only be used on the ground. If you are interrupted, you won’t recover the damage, but pressing the Special button again as you take the hit will cause Sayaka to brace herself against the hit, adjusting the knockback so that she will instead slide backwards along the ground. The stronger the attack, the more precise your timing has to be to redirect the knockback this way, although the slide will be longer for more powerful attacks. You will slide a distance equal to the knockback you would have taken, and will continue past edges. However, if you can use a move that changes your momentum, you can slow your skid or even negate it entirely.

In addition to all that, using this while within a circle of swords (any number will do) will add a counter-attack to a well-timed block. Sayaka will swing her free arm forward as she slides back, and two of the swords will jump up and flip around backwards, slicing the opponent for two successive hits each equal to half the damage dealt to Sayaka by the foe’s attack. If you’ve only got one sword there because someone plucked up all the rest, you’ll only score half the damage back on your foe. These slashes deal only flinching knockback.

Up Special ~ Rebound Jump

Sayaka quickly leaps straight up into the air, travelling upward for about the distance that Lucario does with his Up Special, at about the same speed. She suffers considerably less lag than Lucario, though. She then flips over so her head is pointed toward the ground below, and pushes off an invisible wall to propel herself downward. Hit the Special button before she reaches the full height of this move to stop prematurely and automatically move on to this part. This is the only slower part of the move, and takes almost as long as Fire Fox does to execute. By default, she shoots down at a 45 degree angle in the direction she’s facing, but you can tilt the control stick to alter the angle by 30 degrees in either direction. While shooting down at the same speed she moved in the earlier part of this attack, she holds her sword in front of her, and will slash at anyone she contacts, dealing 10% damage and fairly strong knockback in the opposite direction than the one she’s travelling in. She will travel indefinitely unless you hit the Special or Shield button to cancel her movement, which you can only do after she’s travelled at least equal distance to whatever she travelled upward at the beginning of the attack. Cancelling in any fashion will result in Sayaka going into helpless. If you let her strike the ground, she suffers moderate end lag.

The most notable use for this move, aside from recovery, is to control your momentum after using the block from your Down Special. Use this as you start sliding backward to make Sayaka jump up, stop the upward movement quickly, then rush either forward to try and intercept your opponent if they’re coming in for another hit, or straight down if you just want to get your footing again. Sayaka’s priority during the rush is very high, so you can often beat out opponents who rush at you in this way.


Standard Attacks

Neutral Attack ~ Quick Slash

In an extremely fast motion, Sayaka slashes her sword vertically, covering a decent range and dealing 2% damage and flinching knockback. She then suffers some ending lag. That’s it…

…unless, of course, you’re standing near any of your swords. In that case, you can repeat this as many times as you have swords to do it with. Sayaka will grab a sword each time you use the attack, as if you were just picking up the item, and immediately perform the slash. She’ll then toss the sword behind her if you choose to grab another one. This can go through all your swords pretty quick, but you can also rack up quite a bit of damage if you use them all. After the final slash—when you run out of swords or whenever you decide to stop—Sayaka will hold onto the last sword used, so you’ve still effectively picked up a sword, though the others used will all have vanished from the battlefield.

Down Tilt ~ Interruption

A quick slice low to the ground deals 7% damage and trips opponents who are close to Sayaka. This is a lower-range attack than most of Sayaka’s sword swings, but has very good priority, and will outdo most attacks it collides with. If you’re carrying a second sword, you can continue the attack with the same button input to cause Sayaka to take a step forward and bash her opponent over the head with the hilt of the other sword for 4% and weak knockback straight down. Of course, normally that’ll just put them on their back, but if you can handle the ledges right, it’s a decent help for scoring a KO.

Forward Tilt ~ Sweeping Slash

Sayaka steps forward and swings her sword upward in a large arc. This deals 5% damage and weak upward and backward knockback. If you have two swords, you can use this in rapid succession for as long as you like, and the attack combos into itself easily if the opponent is at lower percentages. Be aware of your limitations, though, as once you they’re out of those lower percentages, they’ll be knocked directly over your head, so if you’re not ready for that, they’ll punish you easily.

Up Tilt ~ Skyward Stab

A swift upward stab similar to Marth’s Up Smash deals 11% damage and good upward knockback. A second sword allows you a second part to this move that involves Sayaka leaping up a short distance and giving an overhead slash with the other sword. This deals another 8% and good upward knockback again. This will only be able to connect at lower percentages or on heavy characters, but is a good way to push them further into the air to force aerial combat, since the attack also leaves Sayaka in the air.

Now, a note concerning all three of these tilts. You can chain the first hit of all of them together like Marth’s Dancing Blade, obliterating the already-low end lag they have to allow you to combo rather effectively. Whenever you use the second portion of any of these attacks, you lose the ability to continue to chain them together, though the two hits of the Forward Tilt be used repeatedly for as long as you like. For the most part, you’ll use the Down Tilt to outprioritize opponents’ attacks, then the Forward Tilt to knock them into the Up Tilt, and begin aerial combat from there.

Dash Attack ~ Rushing Strike

Upon pressing this input, Sayaka will begin dashing at nearly Sonic’s dash speed. She will do this for as long as you hold the button, or until she’s travelled half the length of Final Destination, then immediately slash wildly in all directions around her. She performs 3-5 swings, each dealing a random amount of damage between 4% and 8%, with flinching knockback. You’re unlikely to hit with all of them, but you should be able to hit with at least a couple if you stop the dash near an opponent. After performing all the slashes, Sayaka will finish with a forward lunge that deals 10% damage and decent upward knockback, and moves her forward a short distance. This attack primarily serves to close gaps between you and your opponent quickly, since you aren’t really much of a distance fighter.


Berserk

”You’re right! If I do it this way…it doesn’t hurt at all!”

By now, you’ve perhaps noticed that Sayaka is pretty good at piecing together combos. A lot of her moves naturally chain together or at least set up very well for another move. That’s only the tip of the iceberg, though. You just wait until she gets going. By scoring a lot of hits, Sayaka enters a sort of berserker mode. This happens faster the closer the hits are together, the more of them you score without getting hit, and the higher Sayaka’s damage percentage is. In fact, your damage percentage is central to this. At 0%, Sayaka cannot enter berserk mode, while if she gets over 200%, it will happen after only two quick, consecutive hits. At lower percentages, this can take a fair measure of skill to pull off, but by the time you take some damage, Sayaka is ready to show her opponent who’s really the top fighter here. When this berserk mode kicks in, Sayaka will have a faint red-black aura around her (she will also have a faint red-only one around when she’s a single hit away from entering berserk, to let you know to get that next hit in quick), and will move at 1.5x her normal movement speed. In addition, start and end lag on all her attacks is almost completely nullified, allowing you to combo with even more ease. Knockback and damage for all attacks are increased by a small amount (3-5%) as well. And opponents’ attacks? They’ll deal one-fifth their normal damage and knockback. Yep, you read it right; Sayaka’s a beast once this activates. Just combo, combo, combo, and you’re on your way to tilting the fight way in your favor. By the way, using your Down Special while in berserk mode will pull you out of it rather than heal you, but…why would you want to do that? You’re so much more powerful this way! Using the Down Special before getting there in order to heal will also cancel any progress you’ve made toward going berserk, so be aware of your healings.​


Smash Attacks

Forward Smash ~ Lightning Slash

Sayaka charges with her sword held behind her, then rushes forward at blinding speed for a distance determined by your charge. She can move as short a distance as one Battlefield platform, or as long as half of Final Destination. She moves at almost Sonic’s dash speed during this attack, and will slash quickly at anyone or anything she crosses paths with along the way, dealing 10-20% damage and strong diagonal knockback. This becomes a potent KO move starting at around 100% damage. She can slash through any number of obstacles, and will always travel the full distance, even if it means going over a ledge. If she does so, she’ll automatically start falling when the move is over, but if she’s on the ground, she suffers some end lag. Continue holding the control stick forward, however, and you’ll considerably reduce that end lag and move quickly into a dash instead.

If Sayaka crosses a spot where she has swords while travelling, she’ll grab one and throw it up at roughly a 45 degree angle, before immediately continuing forward. The animation is almost impossible to notice—it’s so blindingly fast—but the sword is certainly hard to ignore, since the angle it’s thrown at corresponds to the area opponents are getting knocked into. The flying sword deals 15% damage and decent diagonal knockback. This won’t combo for high-damage or lightweight opponents, but you can rush past your swords anyway to throw them into the air in an attempt to hit them, even if you don’t connect with the main part of this attack.

Up Smash ~ Rising Thrust

After charging, Sayaka performs an upward thrust similar to that of her Up Tilt, though at a slightly forward angle. She jumps at the same time, quickly rising about twice her own height into the air. Anyone her blade comes in contact with during this time suffers 12-26% damage and strong diagonal knockback. This is Sayaka’s most powerful KO option, and starts becoming dangerous for the foe at around 80%. Unfortunately, it’s also a bit hard to aim because of the forward angle she jumps at combined with the fact that she’s not swinging the sword around. This move has some start lag, but quite a bit less end lag as Sayaka starts falling, allowing you to possibly follow up a miss quickly with an aerial instead.

If you’re having trouble landing this attack, you can try charging it from within range of your swords. During the charge, Sayaka will repeatedly grab swords and throw them into the air at angles slightly off from the one she’s going to charge upward at. She can throw a maximum of four swords, each of which deals 8% damage and weak knockback. By doing this, you can often force your opponent to either get hit by the swords, or by Sayaka’s powerful thrust.

Down Smash ~ Twister Attack

Sayaka charges up, then spins around rapidly with her sword outstretched three time. This covers a decent amount of area, and deals multi-hit damage that can reach up to 12%. As she comes around to the finish, she’ll pause briefly before a powerful final swing completes her rotation. This swing deals 10-17% damage and strong diagonal knockback. This, of course, will only hit opponents in front of Sayaka, but the earlier part of the attack can be used to damage foes behind her as well. This is an okay KO option, but not as much so as either of your other Smash Attacks, only becoming a real threat at around 125%.


Aerial Attacks

Neutral Aerial ~ Continuous Slash

Sayaka slashes her sword forward horizontally, covering very little vertical distance but good horizontal range. This deals 7% damage and flinching knockback. If you hold the button down, she’ll continue to repeat the action with little lag. The slashes after the first can also be angled in any direction by tilting the control stick. She’ll perform two slashes per second, and they all deal the same damage and knockback.

If you’ve got two swords in your possession, the rate of slashing is doubled. No other changes are made to the attack, but this leads to easy mid-air damage-racking, and scoring lots of successive hits like that will certainly help you enter berserk mode faster.

Forward Aerial ~ Air Rush

Sayaka performs a quick, short-ranged slash which deals only 4% damage and flinching knockback. Due to the fast nature of this attack, you can spam it pretty well against opponents with similar falling speeds to rack up damage and hits. However, if you’re carrying a second sword, Sayaka will follow the slash by rushing forward through the air a Battlefield platform’s length with that sword in front of her, dealing an additional 10% damage and flinching knockback to anyone she hits. She suffers very little end lag on this, so it can be used in recovery to punish potential gimpers.

Backward Aerial ~ Reverse Air Rush

This is precisely what it sounds like: a mirrored version of the Forward Aerial. No, seriously, it’s exactly the same, but Sayaka slashes behind her, then rushes backward if you have a second sword. Of course, that makes for some brutal aerial comboing against foes who fall at similar speeds to you, and a way to avoid permanently moving in a direction you don’t want to by going back with a second hit. She’ll flip around and face the same way she was before after rushing back, so you’ll be using the Forward Aerial to hit your opponent after this attack.

Using either of these moves repeatedly in a single aerial session will cause the distance they travel to decrease with each use, further promoting switching between the two and limiting the recovery potential of the moves, though they are still helpful for recovery and aerial approaches.

Up Aerial ~ Blade Twirl

Sayaka tosses her sword a short distance into the air, where it spins around rapidly a few times before falling back into her hands. She continues falling, albeit at a slightly slower rate than normal, during the spin, so the drop is a little further than the upward throw was. The spinning sword deals multi-hit damage that can reach as high as 16%. This is one of Sayaka’s slower moves, if only for the waiting time while the sword is spinning.

You can negate that with a second sword, though! Sayaka will instead throw the spare up, then swing her personal sword in an upward arc, rocketing the spare upward at high speed. Since she’s no longer waiting to catch a sword, Sayaka becomes controllable immediately after doing this. The sword flies up at high speed, and does 11% damage and weak knockback to anyone it hits, travelling straight through them as it does. Naturally, you lose your other sword by doing this, but it can be helpful if one of your set-up attacks knocks your opponent too high for you to reach.

Down Aerial ~ Power Drop

After a very brief stall, Sayaka drops straight down at twice her normal fall speed. If she lands on anyone on the way down, she’ll jump off their head, dealing 4% damage and weak downward knockback. If she hits the ground, she’ll immediately spin in a full circle with her sword outstretched, dealing 11% damage and pretty good diagonal knockback to anyone she hits.

If you rush down into the center of some swords you’ve placed, the landing attack is a bit more powerful. As she spins, Sayaka will knock each sword from its place, sending them flying a moderate distance as projectiles. Each sword deals 7% damage (you’re likely to hit with at least a couple, though) and decent upward knockback. This is perfect for forcing opponents back into the air after some good aerial combat ends.


Grab Game

Grab Attack ~ Beat Down

After grabbing (Sayaka’s grab is very normal), hitting the grab button again will cause Sayaka to let go of her opponent as she slams the blunt end of her sword over their head. This deals 4% damage and can be repeated at a rather fast rate. However, unlike typical grab attacks, you are unable to throw after using this attack. Just keep hacking at your opponent until they break your grip. Although they’re out of your hands and lying on the ground, they still break the grip of your grab as they normally would, which will cause them to roll backward away from you. This is a great way to score multiple hits and activate your berserk mode.

Forward Throw ~ Huge Slash

Sayaka raises her sword above her head, then brings it down through the foe’s body with incredible force. This deals 10% damage and good forward knockback, but is enhanced even more if you’re in a circle of swords. All the swords near Sayaka will lean forward to bash the opponent with their hilts at the same time she slashes. Each one adds 2% damage and no knockback to the hit. It’s very difficult to hit with all the swords, but one shouldn’t have much trouble hitting with half of them or so, for an extra 10% damage, and several hits. This is a great way to switch into berserk mode easily, or even to score KOs at high percentages. The swords will tilt upright again automatically a couple seconds later. Until then, they can still be grabbed and/or used for every attack except this one.

Backward Throw ~ Backstabber

Sayaka tosses her opponent behind her for a measly 5% damage. If you’re not standing near any of your swords, that’ll be all. If you are standing near them, directly following the toss, two swords will raise up out of the ground and shoot backward in a stabbing motion, each striking the opponent for an additional 4% damage and weak backward knockback. The sword attack functions independent of your grab, so Sayaka is free to move while the opponent is being pushed back. This can be useful if you’re one of those people who likes to play fair and wants to keep space in between you and your opponent so you can use your Down Special and heal instead of just going all-out so you can win the fight. On the other hand, since this does score three hits, it can be useful for berserk players, too.

Up Throw ~ Overhead Set

Sayaka tosses her opponent upward for 7% damage. If you’re near any swords after that, two of them will shoot upward quickly, homing in on the opponent and stabbing them for an additional 3% damage each, with flinching knockback. Although this sets up perfectly to pull off your Up Smash as a finishing blow, higher damage opponents may end up too high up for you to reach, so figuring out your KO margin against different characters is important if you plan on using this finishing combo.

Down Throw ~ Slam

Sayaka slams her opponent to the ground for 8% damage. At lower percentages, players can chaingrab with this attack, but after that, it doesn’t serve a whole lot of use unless you’re just trying to keep your opponent close to you for further attacks. That, and if you’re not near your swords, this is more damaging than any throw except the Forward Throw.


Final Smash

Final Smash ~ Relentless Rush

Sayaka glows a bright blue, then starts dashing madly around the screen. She moves at Sonic’s dash speed, and can turn on a dime—just tap the control stick the direction you want her to go. She’ll slash her sword upon contact with anything for 20% damage and very good knockback. She’s invincible for the duration of this Final Smash, which lasts 10 seconds.


Playstyle

”This is easy once you know the trick! I don’t think I’ll ever lose this way!”

It’s really not that hard; I’m sure you can figure it out. You’ve got tons of moves that chain into each other, knocking opponents into the perfect area for your next attack. You can set up your sword circle in a single place on smaller stages, since you don’t have trouble with mobility and forcing your opponents close to it. Spread things out a little more on larger stages, obviously. You’ll probably find a balance of air-based combat and quick ground-based combat most effective, due to how many of your ground attacks knock opponents into the air and how gravity has a tendency to bring you back down again. The bottom line is, the faster you activate berserk mode, the better, since that’ll seriously reduce how much you have to worry about getting hit amidst all that comboing. What? You want more playstyle? Sheesh… Well, it’s kind of like this video, in which the audio is slightly off for some reason.


. . .


Oh, my… Something seems wrong… Are you all right, Sayaka?​

Grief

”I’ve been such a fool.”

Hmm… It seems you’ve pushed Sayaka beyond her limits. I warned you she was a very emotional girl, didn’t I? She masks it pretty well, but it’s hard when you basically sold your soul for the boy you love, then watching one of your best friends come and take him from right under your nose. It gets her a bit frustrated, especially when she’s losing a fight. I mean, she can still fight for justice and all, and just try to get over the boy, but when she starts getting hit, she just starts to feel a little desperate, you know? And despair is a very bad feeling for a Puella Magi to feel. Unfortunately for you, it’s the very thing causing Sayaka to enter her berserk mode.

Next to your damage percentage is a small meter with a number 100 below it. That’s Sayaka’s Soul Gem power. The 100 is essentially the Gem’s health. Now, while you’re in berserk mode, the Gem will take 2 damage per second. But so what? I know you’re doing the math and noticing that still means you can spend almost a minute in berserk mode and be okay. You’ll just use that Down Special to get out of it when you don’t need it anymore, right? Well, it’s not all that simple. Remember how you take one-fifth of your opponents’ attacks’ damage when in berserk mode? Guess where the other four-fifths go? Yep, straight to your Soul Gem. And what’s more, once the Gem is below 50 HP, you can’t exit berserk mode. The grief in Sayaka’s soul is irreversible at this point, so all that’s left to do is fight your hardest till the gem runs dry.

When that happens, the second you touch solid ground, Sayaka will collapse, falling into the background where no one can hit her. An animation lasting about a second shows her body dissipate into a dark cloud, which then rushes at the nearest blast zone, KOing Sayaka. Your Soul Gem is re-purified at the start of each new stock.​


Real Playstyle

”Don’t act like it’s okay to get hurt just because you can’t feel it!”

Okay. Let’s really get down to business now! Obviously, you can’t blindly rush in there and go ballistic on your opponent like you thought you could. You have what’s essentially a secondary stamina meter to be careful with. Luckily, foes can only touch in when you’re likely to have the upper hand, but the fact that it also whittles itself away makes going berserk far more dangerous. You have to know when to go into berserk mode and how to stay out of it the rest of the time.

This turns Sayaka into more of a hit-and-run character than the up-close supercombo character she’d be otherwise. Early on in the match, you don’t need to worry as much about going into berserk mode by accident, as it will take several hits. In fact, until you take damage, you don’t have to worry about it at all, so the very beginning of the match is when you should really take advantage of all of Sayaka’s most elaborate combos. Use your Dash Attack or Forward Smash to close the distance between you and your opponent, and force them into the air for a repetition of the Forward and Backward Aerials. Sayaka’s grab game is also much better early on, as it provides you several ways to rack damage.

Should you enter berserk mode early in the match, before your opponent is ready to be KO’d, you’ll want to get out of it as soon as possible. Attacks like the Down Smash or a Down Aerial into a sword circle can clear the space around you well and allow you to pull off your Down Special, and you don’t have to worry about the hits you’re scoring, since you’re already losing Soul Gem power. Good setup with your Neutral Special will ensure you have attacks to keep opponents at bay long enough to pull yourself together and stop Sayaka from falling into the trap of her own emotions.

However, you’re much better off to see it coming and prevent berserk mode before you go into it. This will take some practice and getting to know roughly how many hits you can score, but once you do, you can use those same attacks earlier to clear space and then use the Down Special to calm Sayaka down. If you find yourself really pushing the limits of berserk mode, be judicious about whether you want to use those attacks and potentially push yourself over the edge—hopefully only to recover from berserk mode a moment later—or if you’d rather keep your distance another way. The same attacks you use for approaching can help you get away if you know you won’t hit your opponent, and the Up Special can also be useful for making a quick break. Of course, there’s also the option on large enough stages (or at low enough damage) to just use your Down Special where you are, then time a block right and use it again while sliding backward, away from your opponent.

Sayaka’s biggest weakness may be clear by now. Opponents with highly-spammable projectiles can cause her to take early damage and make it difficult to use the Down Special. For these types, moves that continue to push them away are often your best bet when you need the Down Special. The Backward Throw buys a little more time for Sayaka than most moves, assuming you can get close enough to grab, or you can fight projectiles with projectiles. Sayaka’s best projectile, of course, is the Side Special after using the Neutral Special, so this can be difficult to pull off amidst a relentless opponent’s attacks, but hey, you’ve got to do something! Or, y’know, if you’re feeling desperate enough, you could just rush in there like a maniac and hope you kill them before you kill yourself.

As far as scoring KO’s, Sayaka relies primarily on her Smash Attacks. All three are viable KO moves, but the Up Smash will get you KOs the soonest. The Forward Smash, Up Throw, Dash Attack, and Up Tilt (which can be easily preceded by a Forward Tilt), all push opponents into the air while leaving you on the ground, so mix up between these to move into the Up Smash, or you can wait a little longer and just use the Forward Smash—which is much easier to hit with—for a later KO. The Down Smash isn’t as useful as the others, due to not covering as much space and not having as much knockback, but against opponents who like to dance around you, it could be your best option.

Now, sometimes you’re on the defensive/recovering end of a battle. That’s a dangerous place to be with Sayaka, but you’ve got to know how to handle it best. Opponents who are trying to predict your recovery can be frustrated if you’re high enough to pretend to rush toward the opposite end of the stage, then cancel near the edge you’re already near—or don’t if they seem to be hovering near that ledge in anticipation of such a move. The best way to turn a battle in your favor, unfortunately, is to activate berserk mode. Don’t stay in it any longer than you have to, but use it to rack up damage fast and get your opponent to high enough percentages for KO’s. You really want to avoid this, though, since you won’t get back that lost Soul Gem power without losing a stock. If you can get ahead of your opponent enough in the game, you can use the Down Special as a means of healing damage and preserving a stock of yours a bit longer. This is easy to do immediately after scoring a KO, and as mentioned, you have plenty of ways to create space between you and your opponent. Just don’t forget to do it amidst the pleasure of beating on your opponent.​


LegendofLink

Smash Apprentice
Joined
Feb 17, 2008
Messages
164
Location
Pennsylvania
Sayaka Miki
Now, this was certainly a nice bait and switch tactic with the playstyle. As I read through the set, it came of as really overpowered as it is extremely easy to combo the opponent to kingdom come if you have a few swords on hand, and then you are rewarded for said combo by becoming even nigh unstoppable. The reveal at the end of the set really turns things on its head, making extended combos potentially dangerous to you as much as the opponent, which completely turns the original implied playstyle on its head. This also creates an interesting dynamic where Sayaka is most dangerous at two points in a stock, the very beginning, and the very end. In the beginning she can combo the foe with no worries of accidentally KO-ing herself, and at the very end she doesn't have much to lose, so she might as well destroy the opponent in the process. Past that, the sword interactions are really logical and organic, making her combos and attack be much more effective if you do them in the right area, and giving her a sort of roundabout stage control. Aside from perhaps some number tweaks on damage (as even short, safe combos can easily do 20+% damage with the right moves) I really like how this set works, and it's probably one of my favorite sets of the contest so far. You're definitely back in the swing of things, Kibble.
 

Katapultar

Smash Lord
Joined
Nov 24, 2008
Messages
1,284
Location
Australia
It's been a number of days since Pachirisu was posted so I've got to at least say something cus really....this is good stuff right here Get; it's like you've gone through some kind of awesome revelation. The presentation is DEFINITELY something, it being very very simple looking and not to mention expressive in how it goes things; you've got me envying the yellow lines there. I'm not going to go too deep into the playstyle since I can't really be all that bothered to and somebody else'd easily do it for you, but this set definitely marks an substantial improvement for you in terms of visuals and idea presentation, even if the latter's merely designed to suit Pachirisu. Outside of the ideas and conceptual zone (not saying the ideas are bad or weak by any means), Pachirisu is EASILY the best moveset you've made by far should I say so myself (I kinda get that he's supposed to be a bit of an anti-melee character). And while some people like Botty might not like the Pikachu-esque moves nobody said it was a crime to use attacks in Brawl and here it's perfectly alright for a Pokemon that had it's designed based on that certain one. That said, I'm PRETTY sure you're well on your way to the Top 50 what with this showing here so you're very easily getting to where you want.


Showing that you like American cartoons as much as anime, Fright Knight almost proves to be a parody of King Ramses with his mechanic what with that seemingly "tacky" yet hilarious monologue of Danny randomly appearing to take the sword out of the hilt (I feel as if the movement of MYMXI will revolve around item characters...). I must say, making a Halloween set SPECIFICALLY for a character who's deliberately overpowered gives off a sense of fear that's perfect for the movement. Impressive indeed. Much like Vlad, the organisation is strangely fitting for the character, with this being one of (many) the strong points about your movesetting style which I'm sure someone like Rool's probably already told you.

I'm terrible at analyzing moves and making what you're trying to show out of them but I can very safely assume that you definitely know what you're doing what with Fright Knight's uniquely two-sided keep away game with his sword, there being quite a lot of attacking options for him despite his insane tanking ability.

As much as you were probably hoping for it but maybe not from me, I can't really judge this set (especially in comparison to everything else you've ever made), but I can safely say it brings something new to the table in the form of the Soul Shredder mechanic, which for me made the set quite FUN (especially to imagine my favorite characters doing the chant and wondering how the hell they end up knowing it in the first place. Would make an epic Story Mode plot about them trying to find out the chant or else they cannot use it on Fright Knight and have to kill him normally which is probably hard to do maybe). Also EDUCATIONAL because it made me go look on the Super Weight page of TV Tropes in awesomeminity.

Also I love your new pimp avatar. Now FA has to go change his to match yours.


And hopes that that Doctor Felicer set gets made if it's been shown which would be real real cool.


Time seems to have stopped in the land of Male Your Move so far; as far as my works I'm trying to get my work finished. It's been hard. That said, it must be my personal heaven here in this week because there are two anime movesets that have been posted in a row; if I can get mine out in time before anyone else can do anything, which would be quite a possibility, it'll be an anime movement alright.

First off, I am probably just as surprised as anyone else to see you, Davy Boy, of all people, post an anime moveset; then again you like making movesets for cartoon characters and there's nothing wrong with that at all. I haven't seen the anime Princess Kraehe comes from, and I'm a bit too busy to delve into it, but from what I know about it from certain sources it's probably not as obscure as it'd seem.

Despite not having watched the anime I can probably get the gist that Kraehe's supposed to be a "Dark Magical Girl" of sorts as a rival to one of the main characters or something. I don't think you've done THE best job with the character transitioning and all what with you "spoiling" what happens to Kraehe and it not really being necessary for us newbies to know the character (I guess it'd be a completely different case with Western characters where those cartoons have no real continuity to speak of and with everyone knowing about those characters to the point of you not needing to introduce them at all). Speaking of more trivial matters, the organisation is a bit rough on the edges...is it in-character with the Up Special? Your use of purple is mighty fine on the main header though I'd probably suggest a kind-of-black for the attack names and stat numbers.

Princess Kraehe has a rather interesting playstyle about trap conversion and mindgaming the enemy with a smoke cloud, though she seems to be a trap/summon character at best or so I think. I kinda think that the whole bleeding effect, like LOL, is a bit tacky to some degree along with there only being one move to make them bleed in the first place; maybe Princess Tutu has a lot of blood in it, maybe it doesn't. I'm guessing the former. But if anything, the imagining of the kissing is....hilarious when you try to think about another character from MYMXI...someone like Vol Pot.

I....kinda probably know to some degree what you were going through with the whole rushing thing and all. Can't say how this'd do when compared with anything else but it's probably not supposed to be that way. I guess if anything, for me at least, the posting of the set was worthwhile just because making sets for anime characters is an awesome thing.

And I must be a sorry one in advance, because transitioning from receptive point of view from comment to comment is...upsetting, to say the least.


When I saw the character posted, I definitely didn't expect you to be the one who made it, Kibble! Then again, you've made an impressive transitioning of an anime set in the form of Wilhelmina who was a definite example of an "fighting" anime set done right; Sayaka does the exact same thing here if not better. As a fellow fan of the Madoka series (contrary to what you said on that Sayaka review I feel quite a lot of people know about the Madoka series....it's like the new FMA/Death Note of MYM should you remember those days from MYM5) I shall comment this set in such a way to the best of my ability hopefully...

If anything I'm intrigued by your use of Sayaka's sword-summoning ability with you implementing it in such a way where Sayaka can't just use the swords as (blatant camping) projectiles yet allowing them to work in with her set in such a...great way. What with me "trying" to work on a set for my favorite character from the anime Mami Tomoe, I'd no longer to be able to avoid referencing such a move and using it as the base of any kind of summoning Mami would do...but enough of that.

One of the things that impresses me most about your moveset for Sayaka is the excellent characterization you gave her; I can only eye you with envy when you speak so casually like you do, and the ordering of everything fits to an obvious T. This set seems to be on quite a different level compared to your other two from the last contest what with you handling the playstyle section with great control when humorously enough you didn't really like it back with Thor!

Also I envy your photoshop skills and cute little icons. Very awesome.

EDIT: (by the way, in your MYM link-up space thing Jenna's link leads to Thor. Just wanted to let you know)
 

ForwardArrow

Smash Ace
Joined
Aug 17, 2011
Messages
503

Kyoko Sakura

Kyoko is one of the main characters of Puella Magi Madoka Magica. She is a magical girl who serves as an early antagonist in the series, intending to let the antagonists of the series, the witches, prey on humans so she in turn can use their energy to keep herself alive and in top shape. Obviously this is going to cause a bit of a conflict with the justice loving Sayaka, and they end up fighting quite a bit throughout the series. Kyoko is incredibly self-serving, and maybe even somewhat sadistic, though that's not to say she's any sort of inhuman monster. As the series go on, she begins to show nicer shades, and she has a reason for acting how she does.

Aside from that, Kyoko's two trademarks are her weapon and her constant eating. It's rare in series you won't see her carrying around some piece of food to munch on when she's not preoccupied with battle. Her weapon of choice is a metal spear, which can bend to her will as well as extend in size, or even separate into segments attached by a chain.

Stats​
Fall Speed 8
Ground Speed 7
Jump Height 7
Aerial Movement 7
Size 4
Traction 3
Weight 1


As you can see, Kyoko is a very lightweight character, and suffers from the fact that she's only slightly smaller than Marth, which makes her a reasonably easy target to hit. Fortunately, she makes up for this by being fairly fast, being fast moving on the ground and through the air.

Also, while it's entirely aesthetic, Kyoko will sometimes take out some food and start eating in the middle of a fight. She does this if she hasn't attacked or shielded for the past 2 seconds, but will stop immediately if attacking. This doesn't really have any effect on how she plays, it's just that the girl really likes to eat. Oh and yes, if you use an item stealing move of some sort on her while she's getting something out to eat, you can steal it. But that would make you a jerk.

Specials​

Neutral Special <> Modular Spear
Kyoko takes out her trademark weapon, her spear, and points it forwards with half a second of lag. From here, the spear will begin extending at Fox's dash speed towards the nearest foe. This deals 8% and fixed high knockback when it hits the foe. After the attack ends, her spear will return to it's normal state with lag depending on how far it extended, about 0.2 seconds for each Bowser length plus an additional 0.2 seconds to start with.

However, you do not HAVE to retract the spear after in extends outwards. By tapping B, the spear will instead straighten out, but keep the length it had before. The lag to this depends on how many turns the spear took, having about 0.3 seconds for each turn. The good news though, is that your spear remains extended afterward if you do this, giving you a permanent range boost.

So you are probably about to cry overpowered now, what with the fact that it's pretty easy for her to cover the entire stage with her attacks now. Well, fortunately this range extension does not come without drawbacks. As Kyoko's spear extends, she loses massive amounts of movement speed due to barely being able to carry the awkward thing. If it's longer than 3 Bowsers, she's barely able to move at all. In addition, certain attacks have far more lag from this, or less power. In addition, most of your attacks are only effective if you hit with the head of the spear and do fairly little if the shaft hits the opponent, making them rather ineffective if the foe gets past the spear head.

Down Special <> Retract
Kyoko's soul gem glows red, and a red pulse goes through the spear as it returns to it's normal state. Regardless of the size of the spear, this will return it to it's normal range and size, but this will also takes a whole second, potentially leaving you vulnerable to attack. However, you can cancel this out of the end lag of an attack, making it somewhat less difficult to pull off.

Side Special <> Impale
Kyoko goes into a sprint, holding the spear out in front of her. She will dash forwards up to 2 Bowser lengths, less so depending on the size of the spear. If she hits an opponent with this, the foe takes 13% and is impaled on the spear. Ouch. While the foe is impaled on the spear, they have to escape with half grab difficulty while taking 2% per second. Past that, they are carried around on the spear, so you're free to use this to move them around by carrying them over.

Of course, you don't have to necessarily carry them around manually either. You still attack with the foe on your spear, and it will still change shape. Since there's no foe for the spear to home in on with the Neutral Special, pressing it will instead toss the foe off the spear, dealing them no damage. If you were using an attack at the time though, they take the full knockback of the attack in question, in the direction the spear was moving when you released them. This attack in general is obviously one of your best and most direct methods of positioning a foe, though it's unusable when your spear has been extended too much.

Up Special <> Chain Tether
Kyoko's spear suddenly breaks off into segments, each attached to each other by a chain. This considerably increases the length of the spear to about 1.7X it's normal length. Afterward, she swings the blade upwards. If it hits a foe this deals 10% at the tip and spikes them or 4% and a flinch if the body of the spear hits them. This will also hook on to ledges if it hits them, and you go into helpless after using this attack. If it hits a foe on a ledge it will spike them and grab it anyway, no ledge hogging for you.

While the spear is in chain form, you are able to use your smashes somewhat more quickly, as well as your grab game. Using any non-chain attacks will revert it out of chain form to it's regular state. The other thing is as you use attacks in chain form, more and more power will build up in the whip. This will stop the second you use a non-chain attack, hit the foe with the spear head, or go half a second without using one of these attacks. This move in particular builds up 3% and a small amount of knockback, and does not have a lot of end lag when used on the ground.

Standards​

Jab <> Rapid Stab
Kyoko stabs forwards with her spear once, dealing 3% to foes who are hit by the spear head and a slight push forwards to foes in contact with the shaft. This has pretty small lag, but it increases the longer the spear is.

You can hold A after the initial stab to have Kyoko rapidly jab the spear forwards, though the stabs can be angled by pressing up or down. Each stab deals 1% at the spearhead and a flinch, and the stabs are very fast at close range. Unfortunately the spears length decreases the speed of the stabs considerably, making it very easy to DI out of.

Dash Attack <> Spear Drive
Kyoko jumps about twice Ganondorf's height into the air, before swinging her spear down in front of her. This deals 13% and spikes the foe if they are in the air, otherwise dealing high set vertical knockback. If you don't hit with the tip, it deals 5% and knocks the foe behind you with suprisingly high but set knockback. You can actually use this next to a ledge to toss your foe to their doom if you impaled them quite effectively. If this swipes along the ground, this will cause a small amount of debris to be flung up, dealing flinching hits of 1% near where the spear collided with the ground. This has the unfortunate side effect of greatly increasing the attacks duration and making it more punishable however. Kyoko stops moving after using this attack.

Forward Tilt <> Spear Strike
Kyoko stabs forwards with the spear, dealing 9% and average knockback at the tip, 3% and a flinch along the shaft. This attack isn't very exciting at a glance, but it will extend the spear forwards about 2/3rd Bowser's length. It will retract to it's former state afterward unless you press A. This has rather average start up and end lag, though the start lag will increase somewhat if the spear is longer. It's not nearly as bad as with the jab however.

Up Tilt <> Overhead Swing
Kyoko swings her spear overhead, dealing 7% and low knockback at the tip and a flinch and no damage with the rest of the spear. This is actually a pretty fast attack with a short spear, not so much with a longer one. A nice little function of this move is that you can release the foe from impale at any point in the swing, giving you a large range of locations you can place them. Also, tapping A during the start-up will extend the spear half Bowser's length, and it will not retract after the attack is over.

Down Tilt <> Low Stab
Kyoko pokes the ground in front of her with the spear, dealing 5% and knockback that is barely more than a flinch at the tip, and a flinch on the spear shaft. This is fairly fast and degrades in speed surprisingly little as you increase your range. This also will drop off a foe impaled on you spear in a pitfall, though they are not dealt any damage.

Smashes​

Forward Smash <> Chain Whip
Kyoko turns her spear into a chain blade as in the Up Special if it's not already in that state, with about half a second worth of lag. She then swings the spear forwards, dealing 13%-18% and knockback that KOs at 200%-145%. Without building up some power in your spear or launching them from the Side Special in the right direction, this is probably your best KO move. This has a ton of lag, though thanks to being a chain attack it has enormous range. It also will increase the power of your next move by 4% and adds a fair bit of knockback to the attack.

This is not the attacks on purpose though. If you miss with the head of the spear, the chain will actually bump the foe down it with rapid flinching hits of 1% that add up to 8%-13% based on charge. It will also drag the foe forward 2-4 Bowser lengths, based on charge. This makes the move very helpful for positioning foes, though not so much if you want to bring the foe in closer.

Up Smash <> Red Barricade
Kyoko waves her hand as a barrier made of red wires appears in front of her. The barrier looks rather flimsy, but it's actually impressively durable. The wall is 2.5X Ganondorf's height to 6X Ganondorf's height and has 45-80 stamina, making it surprisingly hard to break. Kyoko can walk through the wall as though it wasn't there, but your attacks cannot go through it so no camping behind it. This has fairly little lag, but only one can be out as a time, the last one disappearing when a new one is made.

Down Smash <> Chain Tornado
Kyoko extends the spear into a chain if it's not already, before whipping it around herself. This creates a hitbox which has it's size based on the length of the spear, being about the height of Marth and width of Dedede by default. For each Bowser length of chain added, the height is increased by half Kirby's height and the width by 3/4 his width. The attack itself deals 11%-16%, and has mild lag increase as the range increases. The lag on this attack isn't that high... but it has a duration of a whopping 2-5 seconds based on charge. While this sounds extremely punishable, it's incredibly hard to hit Kyoko through the walls of the tornado. This increases the damage of your next attack by 5% and the knockback by a pretty respectable amount.

During the duration of the attack however, you can actually more the hitbox of this attack. By pressing forward, the spinning segments will only be the ones further down the spear, decreasing the size of the tornado, but moving it down the length of the spear. This allows you to use it as a pseudo projectile with a large enough spear, and maybe an edge-guarding maneuver as well. Pressing backwards will widen the hitbox as you use more of the spear and move it back around Kyoko.

That's not all that's here, though. By holding up, you can increase the width of the hitbox while decreasing the height, spinning lower to the ground. This also creates a hole in the middle of the hitbox that the foe can hide in... though by pressing down it will constrict back together, making hiding in the eye of the storm a rather bad idea. This can also hit the foe off the inside of itself potentially, multiple times if the hitbox is large enough.

Aerials​

Neutral Aerial <> Chain Whirl
Kyoko separates her spear into chain segments, and begins spinning the chain around her self in a circle. The spin unfortunately goes into the back and foreground like Link's spin attack, meaning it does not cover your whole body. This deals 6% at the tip and 2% on the chain. Kyoko will keep swinging around the chain around her until you use another attack or air dodge, or land on the ground. Each revolution builds the power in the spear by 1% and a tiny bit of knockback. The swings become slower as the chain is longer.

The other thing of note about this attack is you can angle it. Pressing forwards with cause the swinging of the chain to tilt, potentially far enough that it becomes a wall in front of you. You can also tilt it backwards by pressing backwards, up to the point she spins the chain completely behind her. This makes the move far more effective at covering you, though the angling process is not as fast as you might hope.

Forward Aerial <> Spear Crash
Kyoko launches herself forwards through the air with her spear out in front of her, dealing 14% and knockback that while very powerful at first grows pretty slowly, KOing around 220%. Kyoko will continue jetting forwards until she crashes into the ground of flies off the blast zone. Make sure you don't accidentally suicide with this. This has a fair bit of start up lag and a ton of end lag as Kyoko recollects herself.

Now, there is another benefit to this move that makes the lag a bit more negligible. After you land, this creates a pit where you land, the size of Bowser by default but increasing in size if you had power built up in your spear beforehand. You can only have one of these out on the stage at a time, the newest one replacing the older one. Pits will last for 10 seconds before the stage returns to normal.

Back Aerial <> Reverse Swing
Kyoko turns around and swings the spear in an arc behind her, dealing 10% and average knockback at the tip, 3% and a flinch through the rest of the spear. This is a fairly fast attack, but this move gets a lot laggier with with a longer spear. At minimum length though, this is actually a very fast attack and can be used to wall of pain certain foes.

Up Aerial <> Reverse Swing
Kyoko once again transforms her spear into it's chain state before swinging it up into the air above her dealing 12% and fairly high upwards knockback at the end of the chain, though it won't be enough to KO until 220% because like the Forward Aerial the knockback scales rather slowly. This builds 3% and a fair bit of knockback in your spear, but suffers from being one of your laggiest moves.

The other thing about this move is what happens if you hit with the chain. It will actually drag the opponent upwards, dealing them rapid flinching hits that add up to 7%-10% in a similar manner to the Forward Smash. It will force them up about 2 Ganondorf heights, and into the tip of the spear if the spear is shorter than that. This allows you to position the foe above yourself, if that is where you want them to be.

Down Aerial <> Spear Vault
Kyoko slams her spear down below her, dealing 9% and a decently powerful spike on the tip, 3% and a flinch on the handle. This attack doesn't get much laggier as you increase it's range, and still works regardless of whether or not the spear is in chain state. That said, the attack does have a good bit of lag, and it's rather hard to connect with the tip considering you have to be pretty far above the opponent most of the time, and you don't exactly have the world's greatest recovery.

That said, this move does have another purpose. If the spear collides with the ground, you can then press left or right. This will cause Kyoko to grab on to the end of the spear and drag it to the ground, dealing foes 4% and some mild stun if they are hit by the shaft. What direction she falls in is based on which input you press. This allows you to escape a nearby foe or move around while providing cover, in case you need it.

Grab Game​
Grab <> Encircle
If the opponent is not in contact with your spear when you press this input, this will do nothing... unless you hold it down. In that case, the spear will reduce in size Bowser's length every .3 seconds you hold the input. This allows you to decrease the size of your spear, to help decrease your lag or fight a foe who is closing in, or land the Side Special. This can also be canceled out of any attack's end lag, making it much easier to adjust the size of your spear this way.

Now, I know you guys all want a grab that actually, you know, GRABS the foe am I right? Well this serves it's purpose as a grab as well. If a foe is in contact with the spear, the spear will instead wrap around them as opposed to retracting. This takes an amount of lag depending on how far from the end of the spear the foe is. The spear will wrap around them from the tip. This still works if the spear is in chain state, in which case the foe can escape with .7x grab difficulty. You can move around with the foe in this grab, albeit half your normal speed and you cannot attack or jump.
Pummel <> Retract
If you pummel while the foe is grabbed, Kyoko will retract her spear as though she was using grab without hitting the foe with it.

Forward Throw <> Spear Slam
Kyoko lifts the spear upwards, before slamming it downwards, dealing 8% and a weak spike that can kill foes if you use this off a ledge at a high percent. You could also use this to toss a foe into one of your Forward Aerial pits, if you so desire.

Back Throw <> Flip and Slam
Kyoko swings the spear over her head and slams it down on the opposite side of her, dealing the foe 8% and a weak spike on the opposite side of where they originally were. This has obvious advantages to the forward throw, but at the same time at close range putting the foe behind you is generally a bad idea.

Up Throw <> Spinal Crush
Kyoko tightens the grip of the spear around the foe, and a loud cracking sound is heard as the foe is launched into the air. This deals 12% and upwards knockback that KOs around 200%, which is the earliest your going to get without gimping or power build-up.

Down Throw <> Shake Through
Instead of throwing the foe, Kyoko instead seems to start concentrating on something. From here, you can press backwards and forwards to move the foe along the spear, backwards moving them towards you and forwards moving them towards the end of the spear. This moves them at about Mario's dash speed, and you can use other throws out of this stance as well.
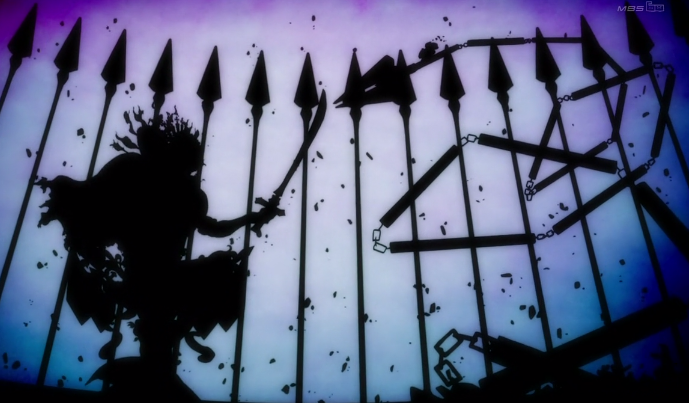
If you use Down Throw out of this stance, Kyoko will shake the spear or chain, releasing the foe and dealing them 6%, as well as popping them about about a Ganondorf height into the air. If the spear is in chain state, this will actually build up 2% worth of power, as well as a bit of extra knockback.

Final Smash​
Kyouko raises one hand above her head as a massive spear as shown above flies out of the ground. It then lashes forwards, dealing 38% and huge knockback that KOs at 45%, with range across the entirety of Final Destination. You can press up before it lashes out to have it spiral around you dealing the same damage and knockback, or press down to have it slam it's tip down in front of you, dealing 45% and knockback that will instantly KO, as well as sending out a shockwave in front of you twice the height of Ganondorf. The shockwave deals 26% and knockback that KOs at 60%, and it moves at Sonic's dash speed. Afterward the spear disappears, Kyoko looking throughly exhausted and being unable to attack for a second.

Playstyle​
So, Kyoko seems at first like she would play kind of like Marth right? I mean, she's got the tip sweetspot on her weapon and is very capable of spacing the foe... except that she has next to no KO potential on any of her attacks. And if you don't happen to sweetspot her attacks, the reward is... not very exciting to say the least. At least she's pretty fast moving, but for her size she's a pretty pathetic lightweight and doesn't have a fantastic recovery to speak of, so you are going to be dying quite early.

Or at least, she would be that bad, if it weren't for her ability to change the size and shape of her spear. This allows her to become immensely more versatile, capable of moving a foe wherever she wants them or hitting them wherever she wants too. Using the Side Special in particular, allows you to transport the foe to an ideal location for you, perhaps extending your spear after them. Just keep in mind this is going to make you a lot less capable of moving while you do this, so make sure to retract the spear when the foe starts closing in.

Kyoko does have a few tricks up her sleeve past her Side Special spacing games as well. She can also use the Forward Smash and Down Smash to hit foes long distance, as well as control their position. What does this mean? Well, those walls and pits you can set up? Those wall the opponent off from escaping those attacks, making it much easier to force the opponent into them. You can very possibly launch a foe into a pit and then toss out your spear over it, the spear functioning as a grab hitbox which they have to spot dodge around, after which you can slide them back in with a Forward Smash or punish them with a Down Smash. Kyoko can create a very unpleasant cage-like scenario for her opponents, allowing you to unleash your sadistic side on them.

When it comes to KOs, you have a few options. Chaining your, well, chain based attacks into each builds up power between them, allowing you to build up to an attack which can KO at a reasonably low percentage. This strategy may appear predictable, but when you have the foe locked where you want them with the pits and walls it is certainly a possibility. Her other KO method, one that you will probably use more and more as you get more skilled with her, is the Side Special. At high enough percents, it's very possible for Kyoko to toss the foe flying downwards with this, and she can follow up with her aerials to make KOs easier if necessary.

Kyoko is a character who doesn't have a ton of power, exactly, but she's an incredibly competent spacer. There are a huge number of ways to force the foe into advantageous positions, and it would take far too much time to go over all of them. For a long range character, she's incredibly agressive, capable of providing constant pressure on her opponents. In the hands of a clever player, the sky's the limit on how you force the foe to their demise.
 

SirKibble

Smash Champion
Joined
May 2, 2008
Messages
2,400
Thanks LoL and Kat (edit: and Nick, below), for the kind comments. :bee: (and thanks Kat for letting me know about that link-up space hiccup)

Now I have some commenting of my own to do:

Garrick
I like the concepts here, Majora, but I feel like you wavered between two foci without tying them together. Garrick is presented as a lava-spreading character, but at a point in the moveset, he seems like he's more about manipulating his swords. Aside from that, there were a couple of moves I felt were a bit awkward, like how the B-Air is basically preliminary to a couple other aerials' use. The ideas in this set, as I said, I like, but I feel like everything wasn't as well tied-together as I'd have liked.

Fire Snake
Well, then. Fire Snake certainly has some interesting things going for him. His movement is quirky, and he can elongate himself with additional segments. This I like. Him being a constant hitbox, I was wary about, and I still am a bit. I mean, against up-close physical characters, this could prove a significant determent. The only big complaint I have with this moveset is that it seems awfully hard to play as Fire Snake. Awkward movements coupled with invisible fire points and not being sure always what moves are going to use them up and which aren't would certainly make him difficult to pick up and play. However, that aside, I do really enjoy what you've done with the set.

Princess Kraehe
Well, Dave, you got me to watch this anime, now 26 episodes later I'm reading Kraehe's moveset. So, that color you used for the font is awfully hard to read. I don't know if you're on a different skin or something than I am, but...yikes. Moving right along, you have this sort of anti-trap idea going on, which is nifty, but of course, not always useful. Luckily, Kraehe does have a slew of more regular attacks, so she doesn't totally rely on that. The moves and things all seem fine, but I wish I felt a little more of Kraehe in the moveset. Since the moveset is for Kraehe exclusively, basically ignoring Rue, I was hoping for some more diabolical tactics. They're basically confined to her specials, which, if they're only going to be in one place, is proper, I just hoped to see more of that insensitive stabbing or something. I don't know. Oh, and this line is golden: "bleeding causes blood to spill out of them." Logical logic is logical. ;)

Kyoko Sakura
Yay for two Madoka characters being posted back-to-back with no coordination on our parts! Anyway, I'll get straight to my feelings on the set. I like what you did with her spear/chain, FA (though when I told you it should be crazy, I meant really crazy!! :psycho:) The whole switch between chain and normal spear is really more of a sidenote, as attacks will switch on their own if they require a different mode, but nonetheless, I'm glad you worked out incorporating both differently as far as how the length can affect her moves. That's really the centerpiece of this moveset, is Kyoko's manipulation of her own range, extending it at the cost of losing up-close options. I admit, I had some preconceived notions from playing Grief Syndrome--in which she's the epitome of a glass cannon character--but I like this better than that idea. Kyoko is a skilled fighter with a complex weapon. In the hands of a novice, said weapon would just be a typical spear. To a novice player, it's basically the same; they'll keep using the spear at lowest length because it's comfortable, and miss Kyoko's real strength--chaotic spacing. Lengthening the spear is risky, but rewarding, and I like that. Anyway, I obviously like going deep on these Madoka characters, but I should stop myself before too much of that. There were a handful of moves I found a little boring, I'll admit, and thought they could have been a little more elegant and elaborate what with Kyoko's weapon of choice (she is a bit of a show-off, after all), but all things considered, I was pleased with how you made her moveset turn out.
 

Nicholas1024

Smash Lord
Joined
Mar 14, 2009
Messages
1,075
Sayaka definitely deserves some points for its writing style, it looks quite like just another rushdown/combo character up until the very end where you introduce the hazards of Berserk mode, adding some much needed depth to the play style. This gives Sayaka some very interesting hazards to avoid, how many characters have situations where they DON'T want to hit the opponent? Still, although this is definitely a new and good take on the combo character, at root the play style is mainly combing with a limit plus some hit and run, which isn't terribly unique in this day and age, and keeps it from being truly exceptional. However, the execution was excellent given what you were aiming for, and on the whole it still felt like a solid set, so good job here.
 

Zook

Perpetual Lazy Bum
Joined
Jul 30, 2005
Messages
5,178
Location
Stamping your library books.
I don't see why people think that keeping track of Fire Snake's fire points would be so difficult. Good Wario players know how charged their Wario waft is before it is completely charged, and because you get a new point once every 3 seconds, you know you have 20 to spend per minute. And his hop takes a second to complete, meaning you get a new point every 3 hops. Even if you do lose track, nothing huge happens; you just lose a segment, which can oftentimes be added back onto your end.

/retorttoperceivednitpicking
 

Katapultar

Smash Lord
Joined
Nov 24, 2008
Messages
1,284
Location
Australia
Incomplete Set #11


Tsukune

Ignore that guy in the middle. He's completely non-existent and doesn't even appear in the anime...I only used this picture cus it's bloody impossible to find anything better...​

Tsukune is the main character of the incredibly obscure 6-part OVA gag series Majokko Tsukune-chan. She is a witch who could be considered literal Walking Magic Syndrome that makes the likes of Ronald McDonald look like a poor person, what with the plethroa of things she can do with magic. Fortunately for us normal folks Tsukune has good intentions with her magic as she goes out into the countryside to help people but she can end up being a bit careless what with the anime being a GAG SERIES and all; those normal fellas don't get treated with much respect...

Tsukune is your typical lightweight with below-average stats in every department what with she being a magical being who's potential lies in what her actual moves can do...


Specials


Down Special - Healing Move

Tsukune points forth with her finger for as long as you hold B; after holding the move for 1.5 seconds Tsukune's hand will radiate a calm light that completely heals the damage of any character 2 SBBs in front of her. This is one of your obviously cheap moves in a Team Match though it takes a wee while to pull off and has obvious but questionable uses in a 1v1, no duh...

Because the healing in fact only lasts for the affected character's stock...the moment they respawn they'll immediately take all 1.5 of the damage and status effects that were healed off! Against enemies you could use this as a kind of method for storing your damage if you inflict more than the neccesary amount required to score a KO.


Neutral Special - Going Back in Time and Stealing from MYMX

Tsukune points forth with her finger, which glows with a mysterious purple before firing off a bolt of magic that travels forward 4 SBBs at Sonic's dash speed. Anyone struck by teh bolt suffers a small amount of hitstun and from MYMX's most prevalent genre: duplication! This causes 4 identical copies of the victim to appear next to the original where there is sufficient space, they having the exact same damage percentage and status effects as the original...

So lemme guess, these copies are controlled by a stupid AI? Nope. You see, the victim's conscious was split by the spell, which causes their moveset to be split amongst the clones much like a Hugo moveset, with one character controlling the Specials, Standards, Smashes, Aerials, Grabs, and so on, with the original character maintaining the Specials and player controlled movement while the clones' movement is AI determined and will work around the best options available at the time if the victim isn't stupid; all 5 characters must be KO'ed in order for that character to lose a stock. Naturally, it'll be incredibly awkward for any non-Hugo player to keep an eye and control all these clones at once.

So basically, you've just split your victim into many copies... unfortunately for them, there's no way for them to revert to their original state until they and their copies are KO'ed, but even more unfortunate for you is that you're now outnumbered and will get gang-***** with extreme ease...that said, what each individual copy of the victim can and will do will be quite predictable and if you KO one copy the victim will lose access to whatever moves that copy had for the rest of their stock. To make sure this move doesn't end up working against you be sure to use it when the victim's got a good amount of damage on them.

And one more thing: if you try to duplicate a copy of a cloned victim you will end up in fact splitting them up again! The victim is once again split, this time into however many copies of how many inputs the spilt character had to use; if used on the clone with the grab input each clone will be able to grab but can only use one of the (up to) 5 designated inputs. Using duplication magic to this extreme has it's obvious benefits and weaknesses, with you being able to predict the enemy's inputs with incredible ease now...providing you can keep track of who's got which move(s), that is...


Up Special - Obligatory Recovery for a Witch

Tsukune's broomstick appears beneath her and gives her typical free flight for 10 seconds that lets her travel at Ganon's run speed with perfect traction. She can use her aerial game while on her broomstick, which allows her to camp offstage and prepare her mandatory spells like a certain cheap wood elf.


Standards


Standard - Bolt of Blots

Tsukune points forth with her finger, which glows with a lightning yellow while sending out magical bolts. This inflicts the standard 2% that traps the victim for a small while before pushing them back; the move covers an impressive range of a SBB in front of Tsukune and can be kept out, though after 3 or so seconds the magic fizzles and Tsukune suffers moderate end lag. This is a fairly fast damage-racking move that pushes enemies back at the same time.


F-tilt - Random Vase

Deciding that magic doesn't solve all the world's problems, Tsukune takes out a random vase and throws it ahead of her like an item capsule, it inflicting a minor 7% that KOs at 250% to anyone struck by it. Despite having some good range that lets you camp with it, this is sadly one of Tsukune's strongest moves and thus you need a lot of damage on the enemy in order to have it work properly.


D-tilt - Not Fair At All

Tsukune holds out the palm of both her hands towards the ground in front of her. If she can do this for 2 seconds without being interrupted the furtherest character from her will be forced to be telepoted in front of her if there is enough space for it to happen. While this can force campy enemies towards you or weed out a clone you want to kill, this move can end up being your doom as the actual teleportation does not interrupt the enemy, meaning they could easily charge a F-Smash in your face and kill you.


Smashes


F-Smash - Completely Random

Are you fighting against Clefable? Then use this move! Tsukune takes out a mallet and swings it overhead, smashing


U-Smash - Magical Thunder Bolt

Tsukune angrily points towards the sky before she forces a thunderbolt to fall down on EVERY ENEMY. Each bolt travels at the speed of Pikachu's Thunder before it causes a SBB-sized explosion; the initial bolt inflicts a mere 2-5% while the explosion inflicts 7-11% with some hitstun. Despite being able to hit enemies from anywhere on the stage the move is still weak, but the explosions have the potential to hit other enemies based on the amount that there are...you'll naturally be able to rack up a lot of damage on the enemy and their clones with this move as they'll usually all be next to each other


D-Smash - Pretending to be a Summon Character

Tsukune raises both hands into the air, causing a yurei (Japanese ghost that looks like a human but with no feet) to appear behind her. This ghost will


Aerials


N-air -


Grab

Tsukune merely points forth, causing any enemy within her line of sight to become held in place via magic. This can be used in the air and has some nice range but is obviously rather laggy to pull off.


U-throw - Dynamic Something Verse

Tsukune points towards the ground her victim's standing on, forcing them down a materialized hole that banishes them from the game for a good 15 seconds. A move with GTFO written all over it, but it can only be used when 30 seconds of the match have passeed...you see, Tsukune sent her victim back in time; once they return they'll return with every copy of them that existed during the last 30 seconds since you used this move! This new copy of the enemy moves with what your original enemy does, and while you may question why you'd ever want to use this move, you'll realize that Tsukune will gain some benefit with there being more copies of the enemy...


D-throw - Joining Forces

Tsukune's points forth with her finger, causing a suction effect on the victim that pulls in every single copy of them before they merge with them before the victim takes 10% and set knockback 1.5 SBBs. This puts the victim and their clones back together (works with the above U-throw too), along with combining their individual damage and status effect timer and effects; naturally, this can be a rather deadly


Playstyle

Tsukune could be considered a rather chaotic character what with she wanting to duplicate her enemy in order to separate their options as her main goal. In addition, a lot of Tsukune's moves have the potential to work against her if used incorrectly, but such is the nature of magic-syndrome users.


Nowdays I have Madolche as a character to fill in for this one, and Etranger already duplicates foes. The character had infinite potential, but it was against my tastes to make something so obscure - pictures were impossible to find for this character. You could also probably tell my lack of passion for making this given the mediocre presentation compared to some of my other incomplete stuff. It's one thing to use a set as a tool for personal gain, as I've come to learn recently.
 

LegendofLink

Smash Apprentice
Joined
Feb 17, 2008
Messages
164
Location
Pennsylvania
Kyoko Sakura
This set reminds me a lot of Khold's Knight Man set earlier this contest in that it is all about modular range. Unfortunately I think Knight Man did it a little bit better. The main problem is that you try to add superfluous complexity to an otherwise simple and straight forward moveset. Controlling the length of the spear could easily have been separated from your attacks, instead of being strewn around several different inputs as a secondary effect (especially the grab, that's really the last place I would put the input to shorten the spear). The chain mode could have easily been better incorporated into the rest f the moves as well, instead of having the spear revert back to normal. If I could make one change to this set, I would make retracting the spear much, much faster, as that would give her motivation to switch back and forth between short and long ranges more often, making for more exciting and fast paced gameplay. Aside from these problems though, I like the way you approach the mechanics of an extending weapon and the drawbacks of having a really long weapon, and the small focus on spacing the opponent without really moving yourself too much with the side special and down smash are also really cool concepts.The little character bit at the beginning is pretty neat too. Overall the set could have used a lot more refinement and simplification (or fixes to the more complex elements to make them relevant), but the core is there, and it's pretty solid.
 

Akiak

Smash Ace
Joined
Jul 28, 2007
Messages
820
Location
In my secret laboratory.
Garrick
The great thing about OCs is that you really have no limits with the moves and mechanics, and I've been mildly hyped for this set since you told me about it in the chat. Now the character comes off as pretty awesome at the start. You've got a cool mechanic (although I still have no idea what layers are), extreme stats and some very neat specials. But after that it becomes really rushed, the moves barely getting more than two lines of text. For some moves it isn't a problem, I still more or less get an idea of how the moves work. But for other moves it becomes a real pain, because you're missing some pretty obvious questions. How much time passes before the lava platforms disappear? What happens to the pools after the sword is called back? What's the point of the back aerial?
Like I said, you had plenty to work with, and you did a good job using all the different mechanics, but the extremely low level of detail, coupled with some pretty vague moves really hurts the set overall. All I can say is just take your time, and try to have some sort of idea of a playstyle before you start the actual set.

Fire Snake
The idea of making a set for this guy was great from the start. You pretty much used everything possible in this set, and it comes out very nicely. All of the mechanics are awesome, the ability to endlessly lengthen his body makes him really threatening and the moves which change his shape, especially the Up Special, are really cool. Maybe you could have used his ability to stick to walls some way or another, maybe as some sort of absurd recovery, which would have been cool, but overall you couldn't have done any better.
 

KingK.Rool

Smash Lord
Joined
Nov 26, 2005
Messages
1,810
Glad you liked Fulci, Katapultar. Actually, your comment is spot-on regarding quite a few things. I can't claim too much credit for the Final Smash, which is my very humble attempt to translate over a really memorable scene in The Beyond (my favourite Fulci film).

I can't say it was deliberate at all, but I love the idea of Lucio Fulci becoming a cult item, with only small pockets of support and enthusiasm. I guess it's only one pocket so far, but then again maybe most people still haven't cracked fully into the Halloween block

And speaking of the Halloween block, have a pair of comments (and yes I am completely doing away with my "comment zone" because I'm apparently too incompetent to keep up with sets as they're posted)

Firebrand attacks while in motion - instant momentum character! Bah momentum is the easiest thing to tack onto any set and not innovate with but seriously it's no more a trope than is a character that likes to stand still, and that applies to everything from trappers to summoners to set-up characters to campers. And especially to Dingodile.

I like to think of your sets as the kind of thing Sakurai would have put in Brawl if he was remotely aware of playstyle, or more specifically of the concept of using the way a character fights to express what that character is like. Firebrand's attacks in a vacuum seem very much like something he might have thought up (with the exception of some really crafty moves you make, like having his shield degenerate more quickly to encourage his more limber style of passive-aggressive defense, or like that NSpec, which is that sort of quietly moveset-defining attack that you're so good at slipping in half-unnoticed), but all taken together they add up to a dynamic playstyle that's at its most expressive when wielded competitively. It's real fighting-game stuff, as opposed to the Warcraft-like memory sprawls that Warlord makes (credit goes to FA for connecting the dots on that one) which would likewise result in some expressive playstyles at high levels of play.

Firebrand as an annoyer is not revolutionary in and of itself, but your knack always lie in taking unrevolutionary or worn-out concepts and marrying them seamlessly to both the character and the platform. As usual, I'm a big fan.

As for Fright Knight, it leaves an odd taste in my mouth. Yes, it's about as well thought-out as this sort of concept has ever been. He's at his best when the sword is planted in the ground, at which point the game is a demented sort of keep-away/manhunt, as the foe's trying to get to the sword rather than bother attempting a KO on the increasingly invulnerable Fright Knight. And once they have a sword, although they're somewhat more equipped to face him (my favourite part of the set, and something I really liked in Kat's Jason back in the day, although it wasn't handled quite as neatly), their priority isn't so much to fight as to dispell this bad dream once and for all.

That's the concept. The rest is your typically polished execution, every attack making this ongoing tussle as interesting and un-flowchart-like as possible. And there's that wicked subtheme again - wicked in both senses of the word - of getting carried away with power that we saw in DarkMega, although it's more subtle.

The effects of the storm strike me as a bit stilted, like a laundry-list of stuff from the source material that needed to be included. And that odd taste is certainly there, in that the set isn't nearly as evocative as it probably should be. Fright Knight himself seems barely there, as though it's actually a moveset for this inanimate sword, around which occasionally orbit foes, skeleton henchmen and this massive hulk of a character. I'm not so sure that's a bad thing.
 
Top Bottom