Burnsy
Smash Lord
Start-Up: How long until hitboxes appear
Active: How long hitboxes last on the screen
Cool-down: How long until Lucas can begin another action after hitboxes disappear. For any moves that have IASA frames*, it's the time until IASA begins.
Air Cool-down: Cool-down for aerials. It is how long until you can preform another action while still in the air.
Land Lag: Specific to aerials, how long until Lucas can act after landing mid-aerial
*included numbers are with L-cancelling
Auto cancel: If you land before or after certain stages of a move (generally at the beginning or end, before hitboxes are out), you will have normal landing lag of 4 frames as if you had done no move at all.
Total: The number of frames where you are committed to the move (can't be cancelled/interrupted normally).
Animation Length: The full length of the moves animation. Useful for comparing the IASA timings of different moves.
*IASA: "Interruptable as soon as". The first frame where it is possible to interrupt the ending part of an animation with any action, rather than waiting for it to finish. Example: Marth d-tilt's IASA avoids a noticeable amount of the end of the animation, shortening the moves cool-down considerably.
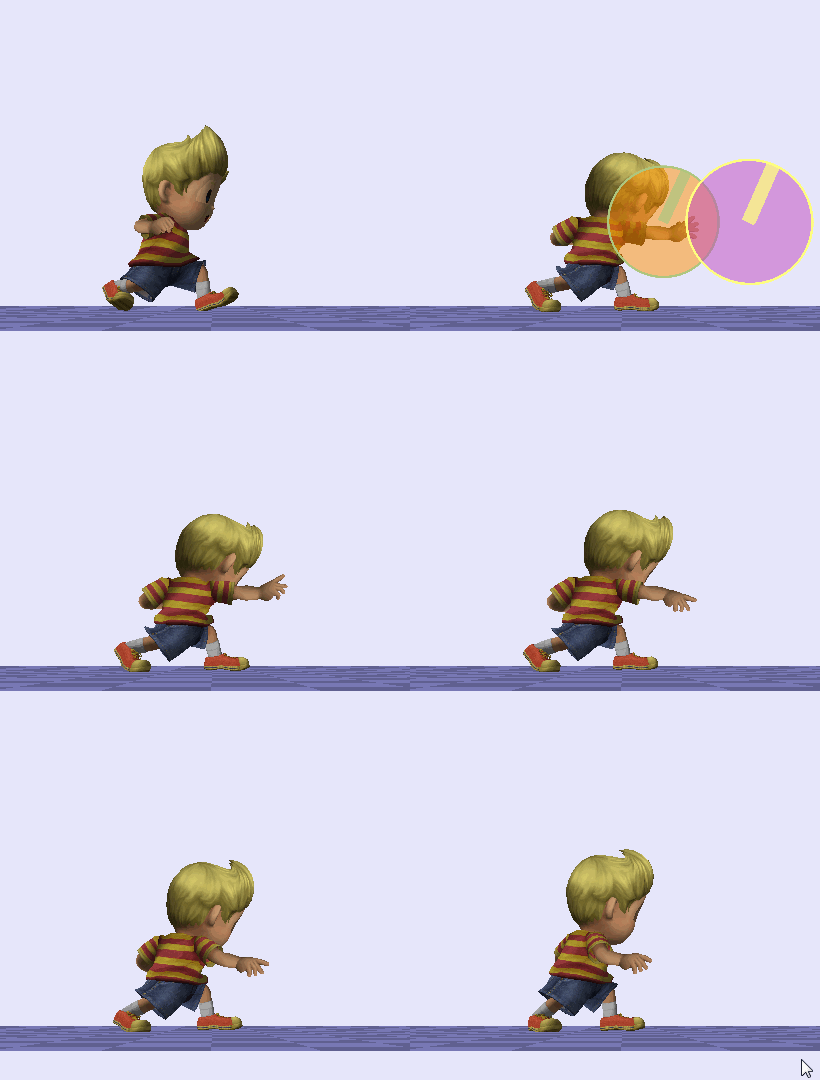
[COLLAPSE="Jab 1"]Start-up: 1 | Active: 3 | Cool-Down: 11 | Total: 15 | Animation Length: 23
Frame Notes: IASA frame 16
Jab2 Interrupt: Frame 5
[COLLAPSE="Hitboxes"]
[/COLLAPSE]
Close and Far Hitboxes: 3 damage, 65 angle, 0 base knockback, 20 weight knockback, knockback scales 100% with damage
[/COLLAPSE]
[COLLAPSE="Jab 2"]Start-up: 7 | Active: 3 | Cool-down: 17 | Total: 27 | Animation Length: 31
Frame notes: IASA frame 28
[COLLAPSE="Hitboxes"]

[/COLLAPSE]
Both Hitboxes: 3 damage, 6 shield damage, 55 angle, 35 base knockback, knockback scales 100% with damage
[/COLLAPSE]
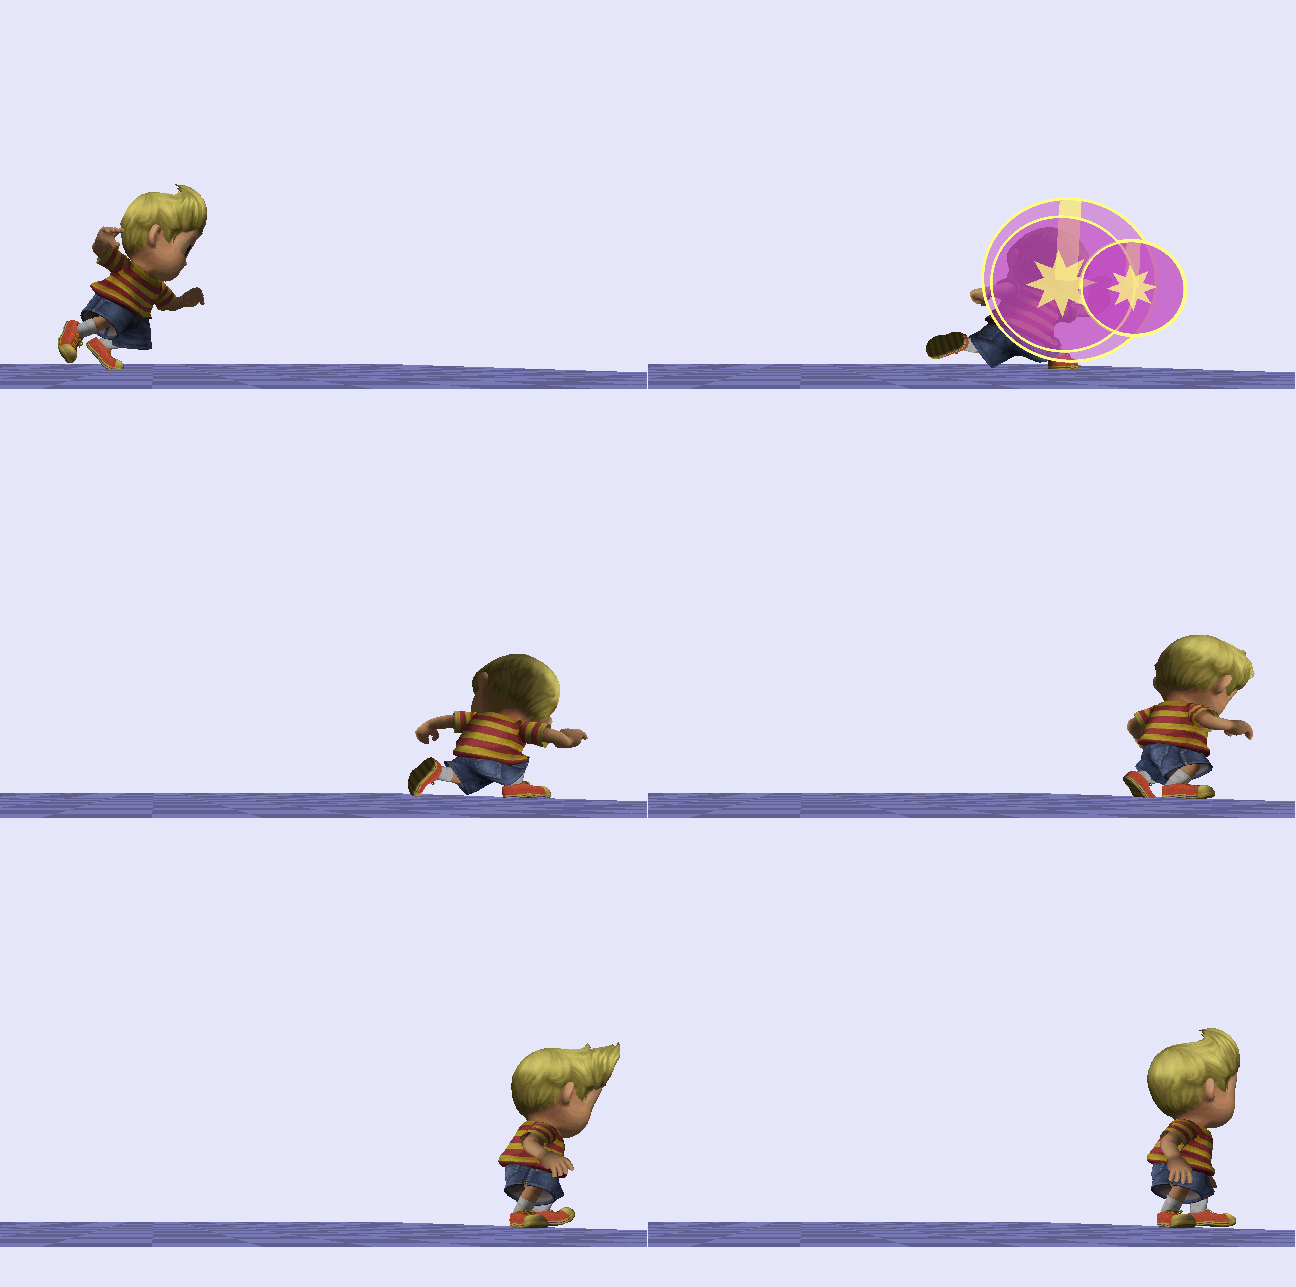
[COLLAPSE="Dash Attack"]Start-up: 5 | Active: 11 | Cool-Down: 22 | Total: 38 | Animation Length: 38
Frame Notes: IASA Frame 39
[COLLAPSE="Hitboxes"]
[/COLLAPSE]
1st small hitbox: 10 damage, 83 angle, base knockback 60, knockback scales 68% with damage
1st large hitbox: 10 damage, 83 angle, base knockback 70, knockback scales 68% with damage
2nd small hitbox: 7 damage, Sakurai angle (361), base knockback 35, knockback scales 90% with damage
2nd large hitbox: 7 damage, Sakurai Angle (361), base knockback 45, knockback scales 90% with damage
[/COLLAPSE]
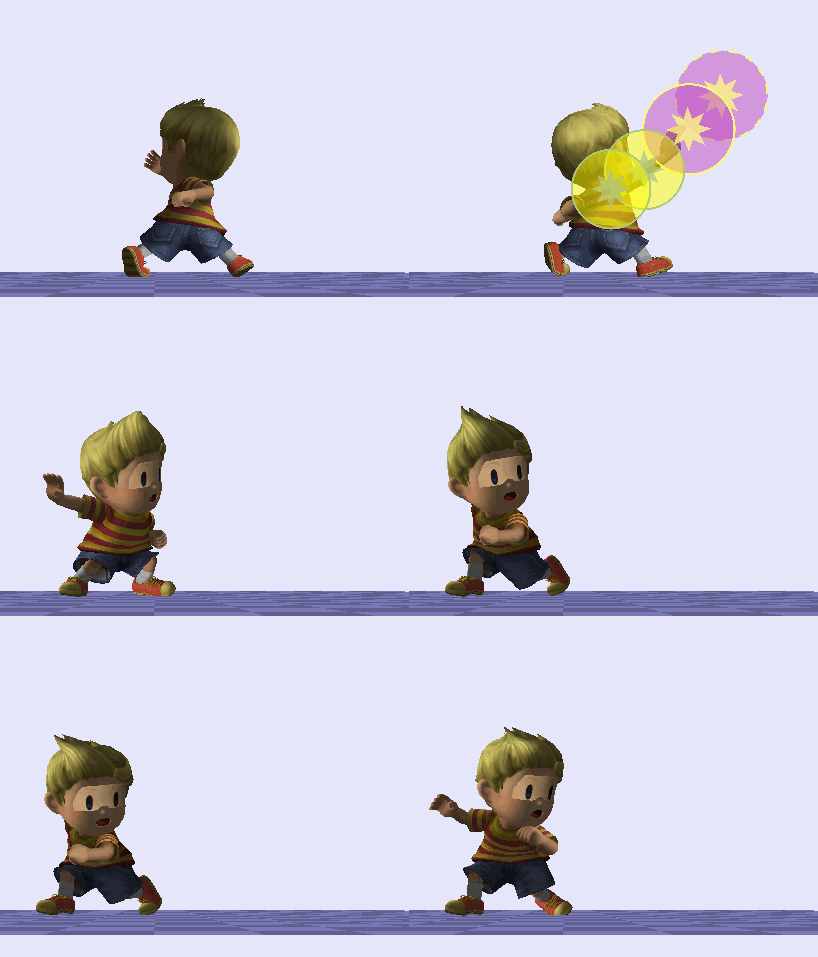
[COLLAPSE="Forward Tilt"]Start-up: 5 | Active: 4 | Cool-down: 19 | Total: 28 | Animation Length: 39
Frame notes: IASA frame 29
[COLLAPSE="Normal Ftilt Hitoxes"]

[/COLLAPSE]
[COLLAPSE="Angled Up Hitboxes"]
[/COLLAPSE]
[COLLAPSE="Angled Down Hitboxes"]

[/COLLAPSE]
2 close hitboxes: 9 damage, Sakurai angle (361), 20 base knockback, knockback scales 100% with damage
2 far hitboxes: 11 damage, Sakurai angle (361), 12 base knockback (16 on the tip), knockback scales 100% with damage[/COLLAPSE]
[COLLAPSE="Up Tilt"]Start-up: 6 | Active: 6| Cool-down: 18| Total: 30 | Animation Length: 35
Frame Notes. IASA frame 31
[COLLAPSE="Hitboxes"]

[/COLLAPSE]
Early hitboxes (frames 7-8): 10 damage, 90/93 angle, base kb 55, knockback grows 100% with damage
Late hitboxes (frames 9-12): 8 damage, 95 angle, base kb 55, knockback grows 100% with damage
[/COLLAPSE]
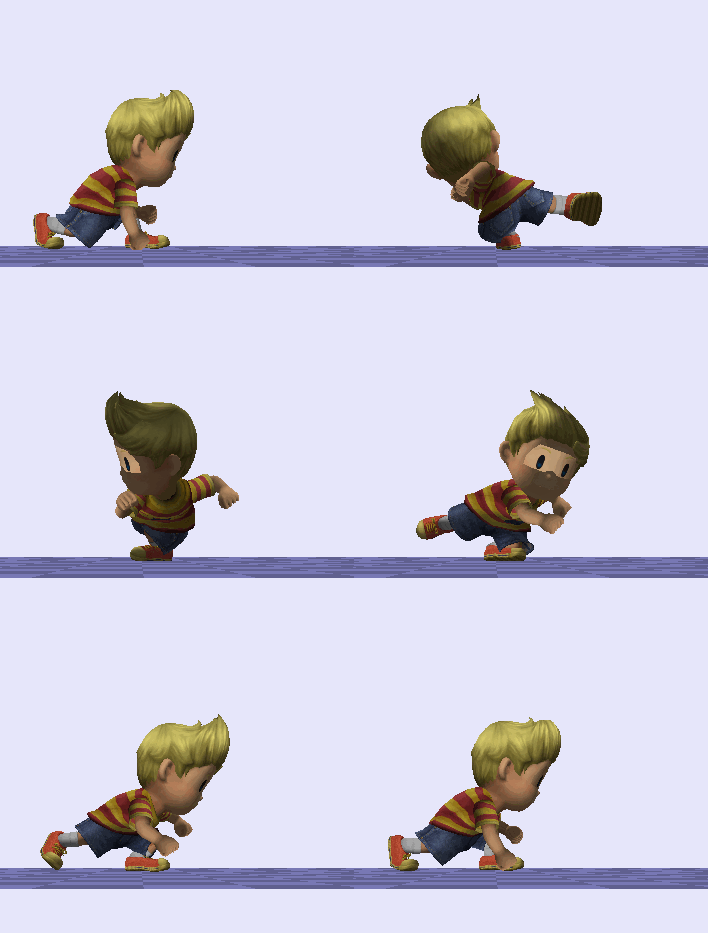
[COLLAPSE="Down Tilt"]Start-up: 2 | Active: 2| Cool-down: 19 | Total: 23 | Animation Length: 29
Frame Notes: IASA frame 24
[COLLAPSE="Hitboxes"]
[/COLLAPSE]
Close hitbox: 7 damage, base kb 30
Far hitbox: 8 damage, base kb 30
KB growth for all hitboxes is varied between 72%-80%
Notes: Like most d-tilts, this move uses air only and ground only hitboxes. This is to ensure that the move behaves how it should (setting low % opponents in standing hitstun and popping them up at higher %s) [/COLLAPSE]
[COLLAPSE="Forward Smash"]Start-up: 14 | Active: 3 | Cool-down: 30| Total: 47 | Animation Length: 60
Frame notes: IASA frame 40
[COLLAPSE="Hitboxes"]
Hitboxes for f-smash do not behave appropriately in brawlbox. Sorry about that.
[/COLLAPSE]
With OU: 24 damage, Sakurai angle (361), 17 shield damage, kb grows only 65% with damage
Without OU: 16 damage, Sakurai angle (361), 0 shield damage, kb grows 90% with damage
Notes: Base knockback increases from 45 to 60 from the base to the tip, for all versions. If you angle up: +1 damage (OU & non-OU), if you angle down: -1 damage, (OU & non-OU)
[/COLLAPSE]
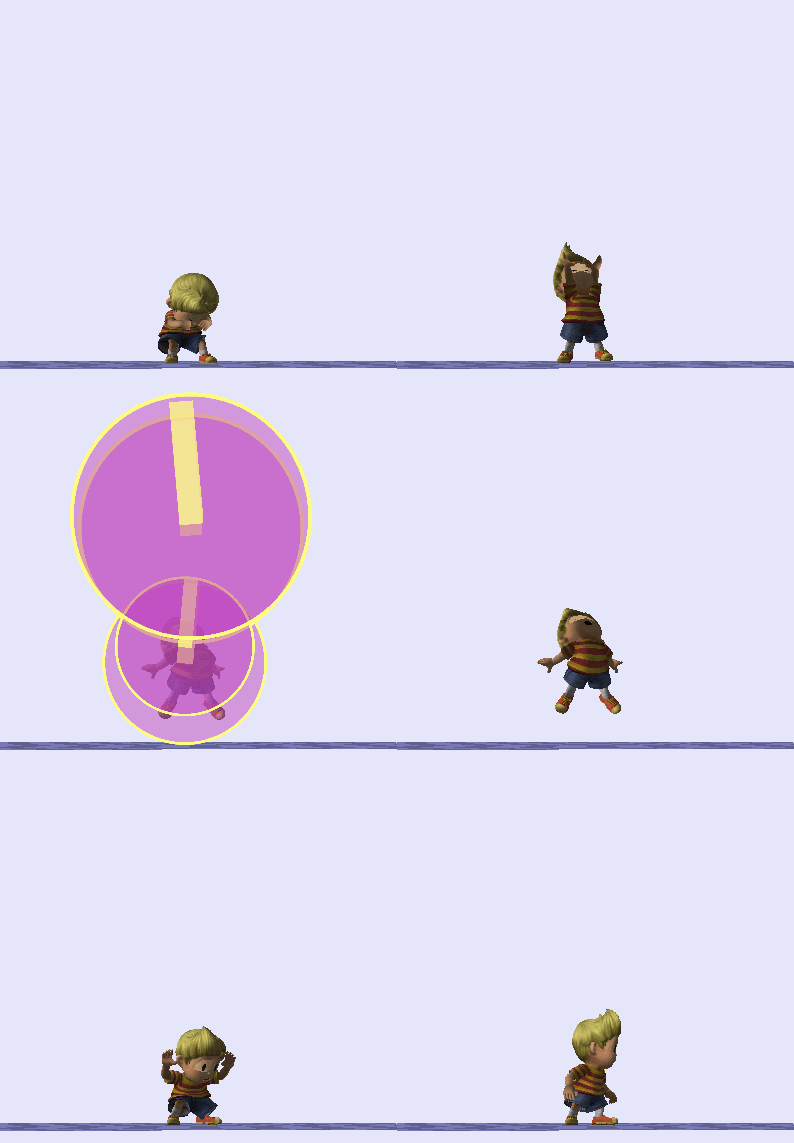
[COLLAPSE="Up Smash"]Start-up: 30 | Active: 12 | Cool-down: 40 | Total: 82 | Animation Length: 82
[COLLAPSE="Hitboxes"]
[/COLLAPSE]
Both initial hitboxes (OU): 32 damage, 15 shield damage, 95 angle, base knockback 50, knockback scales with damage 80%
Both initial hitboxes (normal): 21 damage, 95 angle, base knockback 50, knockback scales with damage 85%
Both late hitboxes (OU): 26 damage, 15 shield damage, 95 angle, base knockback 42 for top hitbox and 48 for bottom, knockback scales with damage 57%
Both late hitboxes (normal): 17 damage, 95 angle, base knockback 48 (top hitbox is 52), knockback scales with damage 57%
Notes: Head is intangible from frame 10 until the first active frame.[/COLLAPSE]
[COLLAPSE="Down Smash"]Start-up: 20 | Active: 6 |Cool-down: 11| Total: Varies
Frame notes: You can input for the 2nd hit after the first is out and before frame 30. IASA frame 33
[COLLAPSE="Hitboxes"]

[/COLLAPSE]
Hit 1 With OU: 26 damage, 15 shield damage, Sakurai angle (361), 40 base knockback, knockback scales with damage 63%.
Hit 1 Without OU: 17 damage, Sakurai angle (361), 40 base knockback, knockback scales with damage 90%
Hit 2 With OU: 21 damage, 15 shield damage, Sakurai angle (361), 30 base knockback, knockback scales with damage 63%
Hit 2 Without OU: 14 damage, Sakurai angle (361), 30 base knockback, knockback scales with damage 90%[/COLLAPSE]
[COLLAPSE="Neutral Air"]
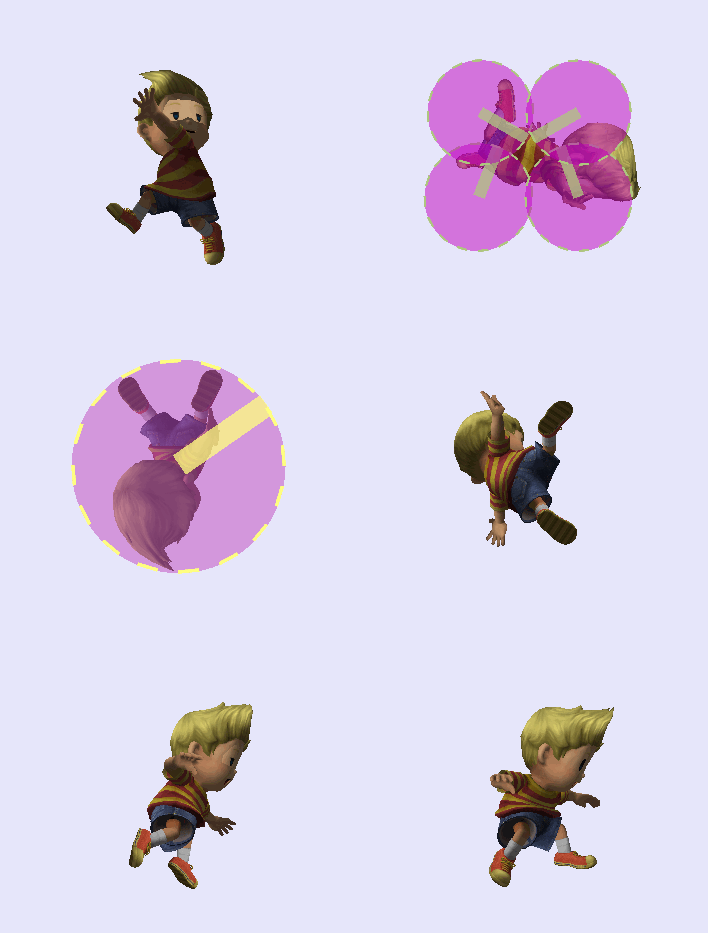
Start-up: 3 | Active: 16 [Loop pattern: (2)1(2)1(2)1(2)1(4)] | Air Cool-down: 24 | Total: 43 |
Landing Lag: 8 | Auto Cancel: <3, >26
Frame Notes: Hitboxes loop 4-16 (Loop: 2 frames active, 1 inactive) sweetspot (17-21). IASA frame 44
[COLLAPSE="Hitboxes"]
[/COLLAPSE]
Bottom repeating hitboxes: 2 damage, 110 angle, 20 weight knockback, knockback scales 130% with damage.
Top repeating hitboxes: 2 damage, 210 angle, 20 weight knockback, knockback scales 100% with damage.
N-air final hit : 6 damage, 35 angle, 10 base knockback, knockback scales 143% with damage.[/COLLAPSE]
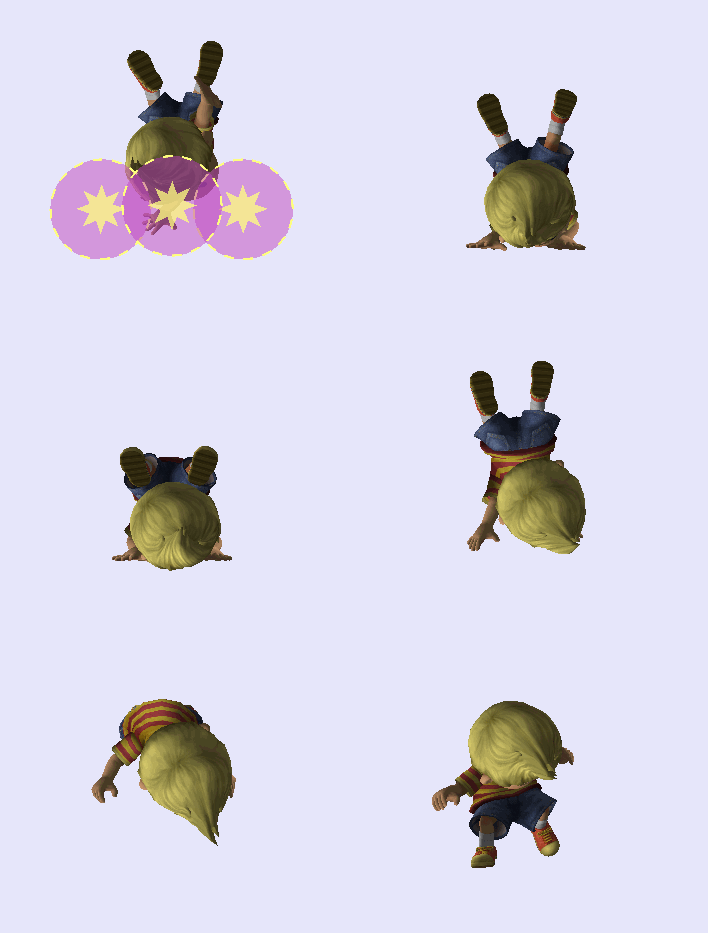
[COLLAPSE="Neutral Air Landing Attack"]Start-up: N/A | Active: 2 | Landing Lag: 8
[COLLAPSE="Hitboxes"]
[/COLLAPSE]
All hitboxes: 4 damage, Sakurai angle (361), base knockback 40, knockback scales 100% with damage
Note: This attack occurs when you land with a neutral air before the move has completed in the air.[/COLLAPSE]
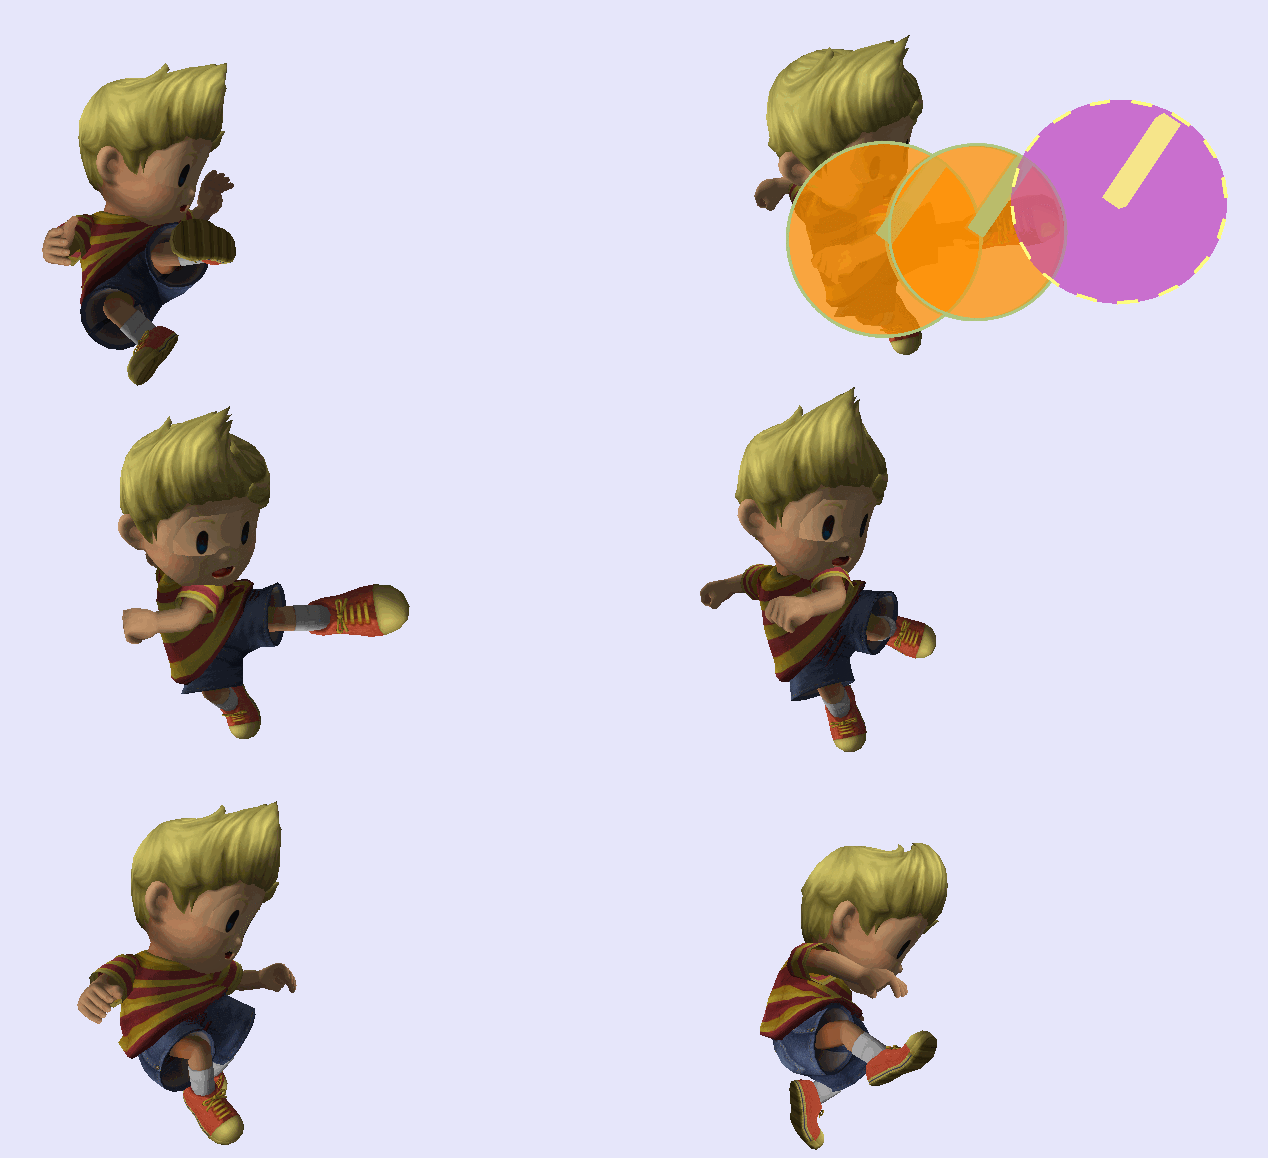
[COLLAPSE="Forward Air"]Start-up: 4 | Active: 6 |Air Cool-down: 22 | Landing Lag: 7
Auto Cancel: <4, >32 | Total: 32 | Animation Length: 48
Frame notes: IASA frame 33
[COLLAPSE="Hitboxes"]
[/COLLAPSE]
Sour spots: 10 damage, 55 angle, base knockback 36, knockback scales 79% with damage.
Sweet Spot: 13 damage, 55 angle, base knockback 36, knockback scales 95% with damage
Late hit differences: Sweet spot damage is decreased to 10, sour spot to 9. Sweet spot knockback scales 79% with damage
[/COLLAPSE]
[COLLAPSE="Back Air"]Start-up: 11 | Active: 5 |Air Cool-down: 22 | Total: 38 | Landing Lag: 10 | Autocancel: <2, >36 | Animation Length: 50
Frame Notes: IASA frame 39, spike is not actually out until frame 13.
[COLLAPSE="Hitboxes"]

[/COLLAPSE]
Sourspot and Sweetspot (non-spike): 15 damage, Sakurai angle, 20 base knockback, knockback scales 100% with damage.
Spike Sweetspot: 15 damage, 300 angle, 20 base knockback, knockback scales 80% with damage.
Spike Sourspot: 15 damage, 310 angle, 10 base knockback, knockback scales 80% with damage.
[/COLLAPSE]
[COLLAPSE="Up Air"]Start-up: 4 | Active: 5 | Air Cool-down: 18 | Land Lag: 7
Total: 27 | Autocancel: <4, >27 | Animation Length: 45
Frame notes: IASA frame 28
[COLLAPSE="Hitboxes"]

[/COLLAPSE]
Small (sweetspot) : 11 damage, 4 shield damage, 70 angle, 26 base knockback, knockback scales 92% with damage
Large (sourspot) : 9 damage, 4 shield damage, 70 angle, 26 base knockback, knockback scales 92% with damage[/COLLAPSE]
[COLLAPSE="Down Air"]
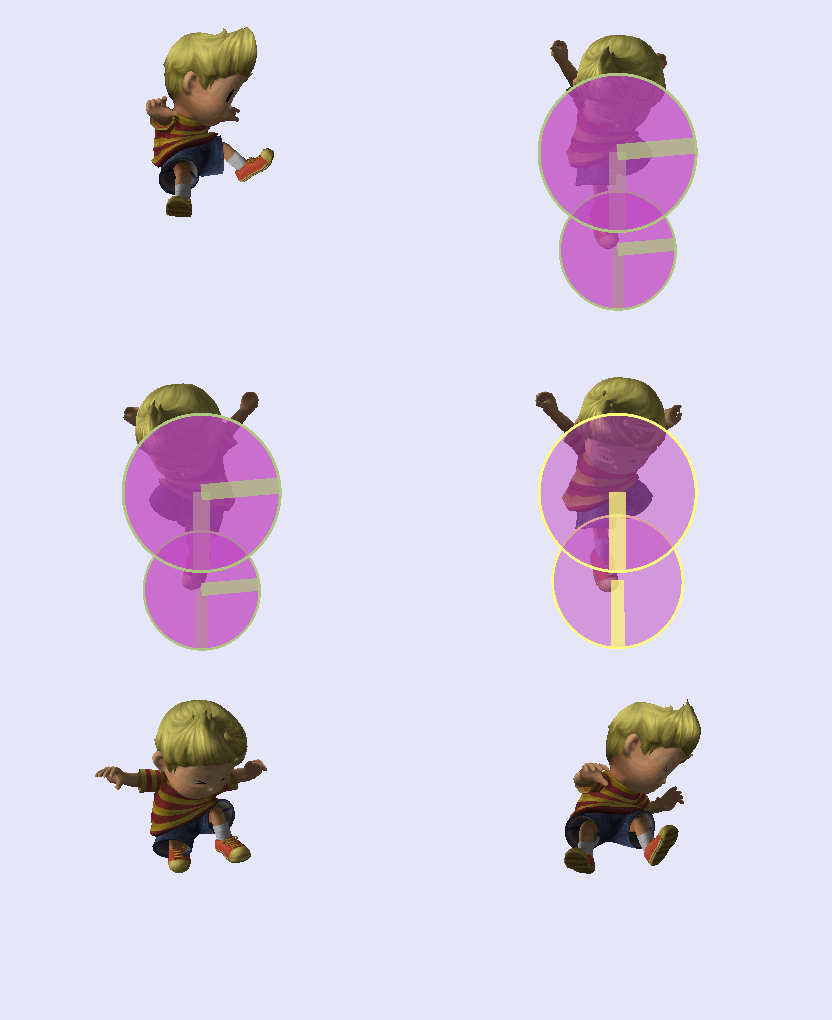
Start-up: 3 | Active: 18 [Loop pattern: (3)4(3)5(3)] | Cool-down: 24| Total: 41| Landing Lag: 9 | Autocancel: <3, >29
Frame notes: IASA on frame 37
[COLLAPSE="Hitboxes"]
[/COLLAPSE]
Hits 1 and 2:
Against Grounded opponents: 5 damage, autolink angle, 0 base knockback, 30 weight knockback, knockback scales 100% with damage
Against Aerial opponents: 5 damage, 270 angle, 50 base knockback, 0 weight knockback, knockback scales 35% with damage
Hit 3:
Both hitboxes: 5 damage, 270 angle, 35 base knockback, 0 weight knockback, knockback scales 150% with damage
[/COLLAPSE]
[COLLAPSE="Rope Snake (Z-air)"]
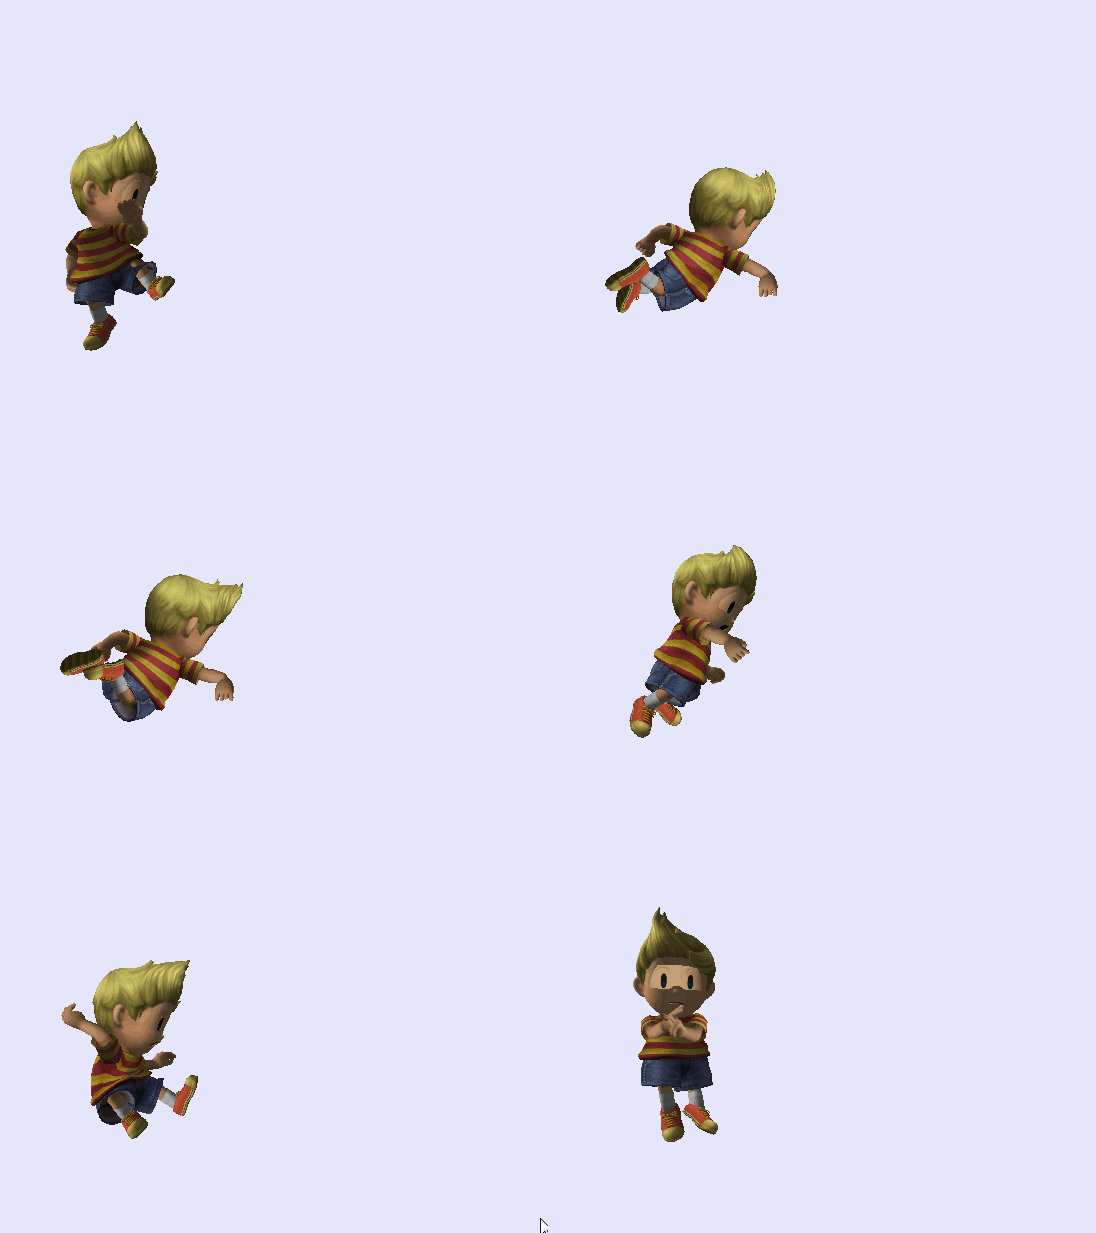
Start-up: 7 | Active: 6 | Air Cool-down: [Will not end in the air, you must land]| Land Lag: 10
Frame notes: "uncovered" area of the arc is actually covered on frame 9 due to interpolation. Lucas' hand is intangible starting when hitboxes come out.
[COLLAPSE="Hitboxes"]
[/COLLAPSE]
Snake head hitbox: 8 damage, 1 shield damage, 30 base knockback, knockback scales 70% with damage.
[/COLLAPSE]
[COLLAPSE="Offense Up Burst (Neutral-B)"]Start-up: 2 | Active: 2 | Cool-down: 33 | Total: 37
[COLLAPSE="Hitboxes"]

[/COLLAPSE]
Hitbox: 10 damage, 60 angle, 50 base knockback, 20 weight knockback, knockback scales 100% with damage
Notes: The blue denotes intangibility, frames 2-3. You must have neutral B charged to use OU burst. Aerial version has the same frame data. On paper, this move seems to have qualities that would make it a decent "combo breaker".[/COLLAPSE]
[COLLAPSE="Windbox on Neutral-B"]
Start-up: 13 | Active (release hitbox): 3 | Cool-down: 40
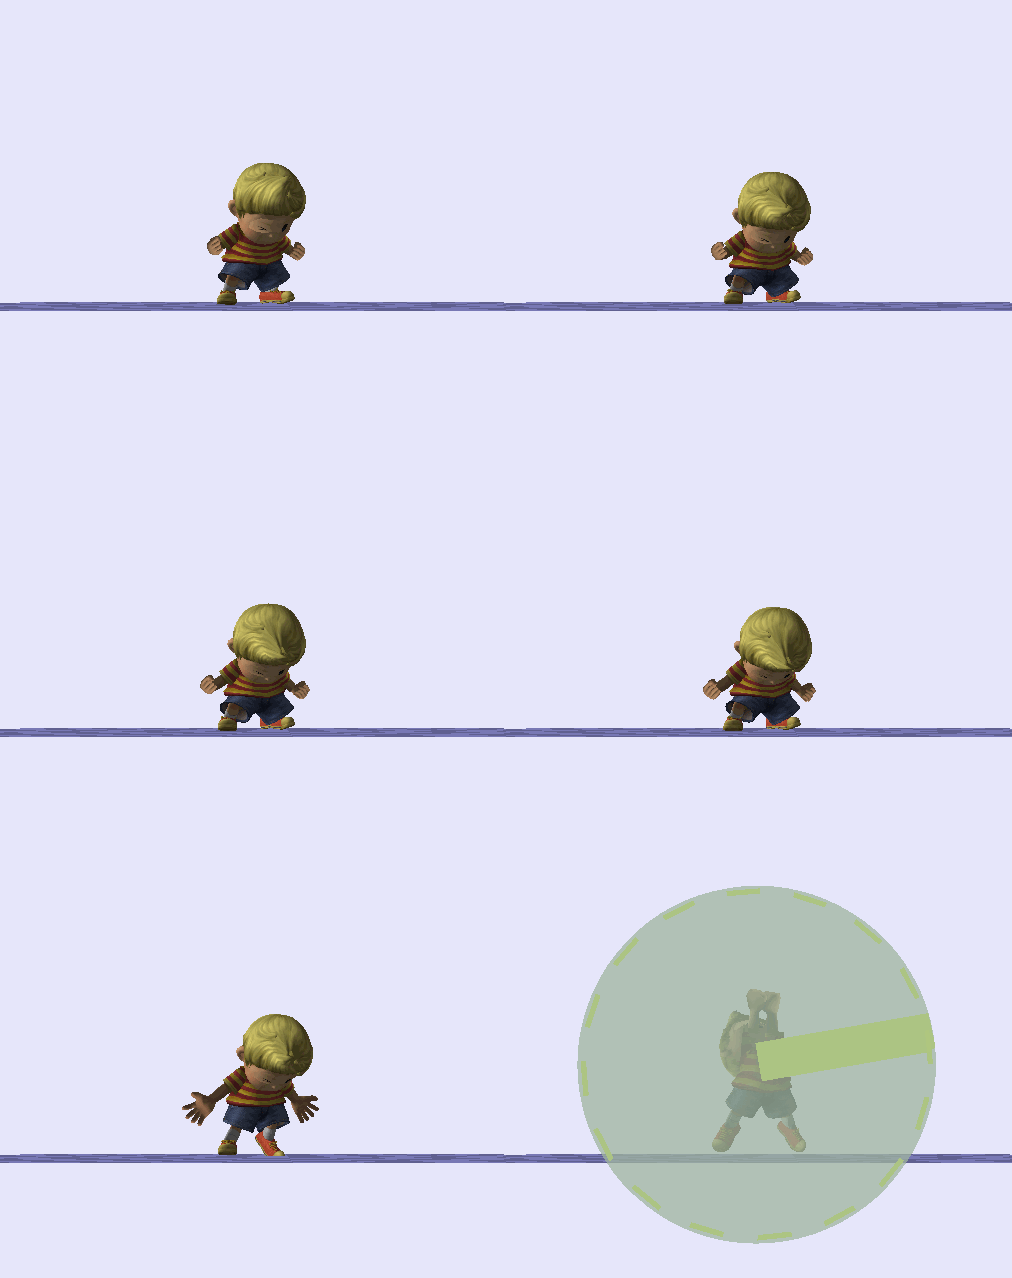
Windbox: 10 angle, 65 bkb againt aerial, 55 bkb against grounded. Knockback does not scale with damage.
[/COLLAPSE]
[COLLAPSE="PK Thunder (Up-B)"]Start-up: 10 (20 if grounded)| Active: Maximum?= Unknown | Cool-down: 30| Total: N/A
Ledge grab allowed during cool-down. No other useful info in BrawlBox (PKT 1 is an article)[/COLLAPSE]
[COLLAPSE="PK Thunder 2 (Up-B Self Hit)"]
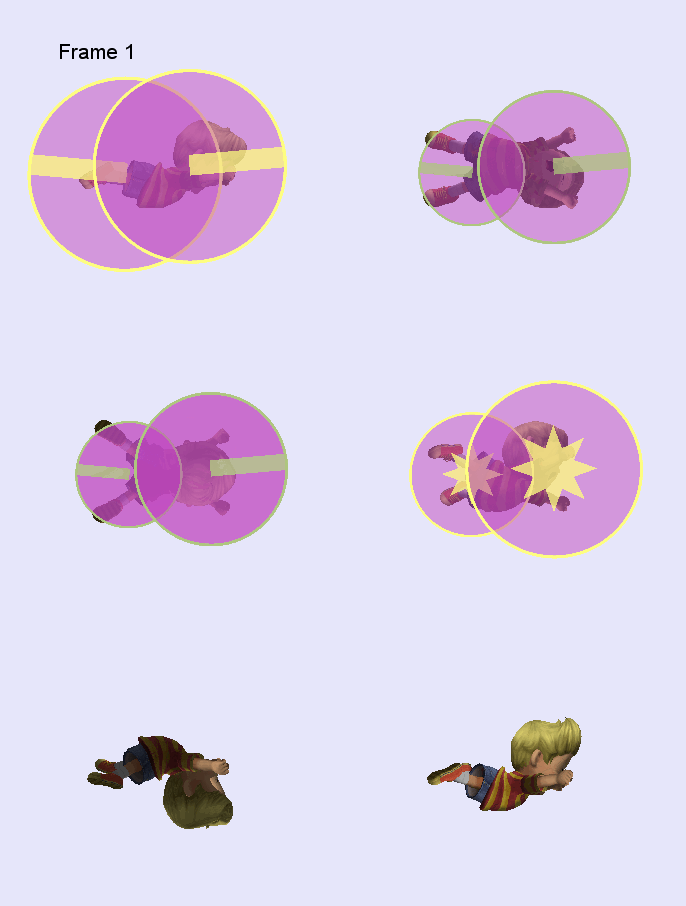
Start-up: N/A | Active: 36 [ | Cool-down: N/A| Total: 38
Move Progression:
Initial strong (active 1 frame, invincible frame 1 and 2)
Autolink hitboxes (active 31 frames)
Final hit (active 2 frames)
[COLLAPSE="Hitboxes"]
[/COLLAPSE]
Both initial hitboxes: 8 damage, autolink angle, 60 base knockback, knockback scales 100% with damage.
Repeating hitbox on head: 3 damage, autolink angle, 0 base knockback, 20 weight knockback, knockback scales 100% with damage
Repeating hitbox on waist: 3 damage, autolink angle, 30 base knockback, 0 weight knockback, knockback scales 50% with damage
Both final hitboxes: 8 damage, Sakurai angle (361), 40 base knockback, knockback scales 135% with damage.
Notes: Lucas is intangible on frames 1 and 2 after hitting himself with PKT.[/COLLAPSE]
[COLLAPSE="PK Freeze (Side-B Grounded)"]Start-up: 25 | Active: ???? | Cool-down: 17
Total: 42 | Animation length: 70
IASA on frame 43
Articles do not display in BB
Notes: Stops Lucas momentum. If you get hit in a way that makes you slide while standing (Wolf and Lucario Up-b come to mind), you can use this to stop yourself. I guess.
Personal note: Every time I see him hunker down to do this laggy move, I expect a much bigger ice ball to come out. He flings aerial freezes like they're snowballs, why is his ground version so slow?
[/COLLAPSE]
[COLLAPSE="Air PK Freeze (Aerial Side-B)"]Start-up: 13 | Projectile active: ???? | Air Cool-down: 20 | Auto Cancel: ???? | Landing Lag: ???? | Total: 37 | Animation Length: 47
Hitbox data not available, PK freeze is an article.
Notes: IASA frame 34.
[/COLLAPSE]
[COLLAPSE="PK Magnet (Down-B)"]
Start-up: 4 | Active (release hitbox): 1 | Cool-down: 20*
Hold hitboxes loop pattern: (2)6(2)6(2)6....repeating
Must hit with at least 1 hold hitbox before release will activate.
[COLLAPSE="Hold Hitboxes (looped)"]

[/COLLAPSE]
[COLLAPSE="Aerial Hold Hitboxes (looped)"]

[/COLLAPSE]
Repeat hitboxes: 2 damage, 5 shield damage, 80 angle, 0 base knockback, 30 weight knockback, knockback scales 80% with damage, low hitlag and there is a 1.25 SDI multiplier.
[COLLAPSE="Release Hitboxes"]

[/COLLAPSE]
Release hitbox: 6 damage, 127 angle, 80 base knockback, knockback scales 60% with damage, low hitlag.
Notes: Release hit is jump cancel-able starting frame 1 after release hitboxes disappear. Has strong momentum modifiers. [/COLLAPSE]
[COLLAPSE="Ledge options"]
[COLLAPSE="Climb <100%"]
Invincibility: 1-30 | Vulnerable: 31-35

[/COLLAPSE]
[COLLAPSE="Ledge attack <100%"]
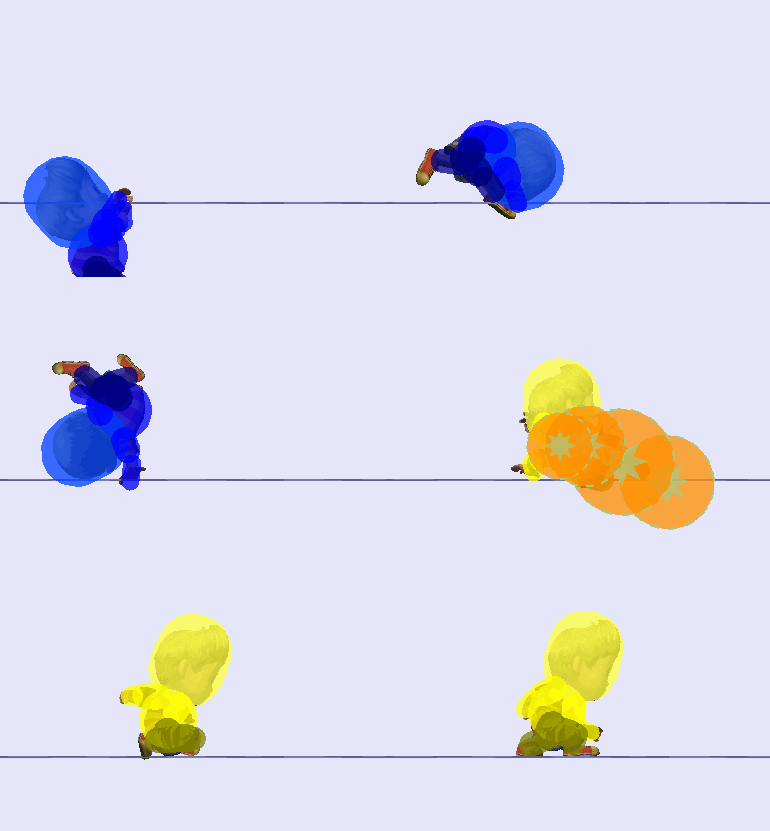
Invincibility: 1-21 | Hitbox: 24-26 | Interrupt-able frame 43
[/COLLAPSE]
[COLLAPSE="Ledge attack >100%"]
Invincibility: 1-36 | Hitbox: 40-44 | Interrupt-able frame 51

[/COLLAPSE]
[COLLAPSE="Ledge Roll <100%"]
Invincibility: 1-26 | Interrupt-able frame 41
[/COLLAPSE]
[COLLAPSE="Ledge Roll >100%"]
Invincibility: 1-57 | Interrupt-able frame 81
[/COLLAPSE]
[COLLAPSE="Ledge Jump <100%"]
Invincibility: 1-15 | Interrupt-able frame 16
[/COLLAPSE]
[COLLAPSE="Ledge Jump >100%"]
Invincibility: 1-19 | Interrupt-able frame 20
[/COLLAPSE]
[/COLLAPSE]
[COLLAPSE="Knocked Down Options"]
[COLLAPSE="Stand Up"]
Invincibility: 1-22 | Interrupt-able frame 31
[/COLLAPSE]
[COLLAPSE="Roll"]
Invincibility: 1-22 | Interrupt-able frame 37
[/COLLAPSE]
[COLLAPSE="Face Down Get-up"]
Invincibility: 1-26 | Active: 19-20, 25-26 | Interrupt-able frame 51

[/COLLAPSE]
[COLLAPSE="Face Up Get-up"]
Invincibility: 1-25 | Hitbox: 20-21, 24-25| Interrupt-able frame 51

[/COLLAPSE]
[/COLLAPSE]
[COLLAPSE="Standing Grab"]Start-up: 10 | Active: 6 | Cool-down: 39
[COLLAPSE="Hitboxes"]

[/COLLAPSE]
[/COLLAPSE]
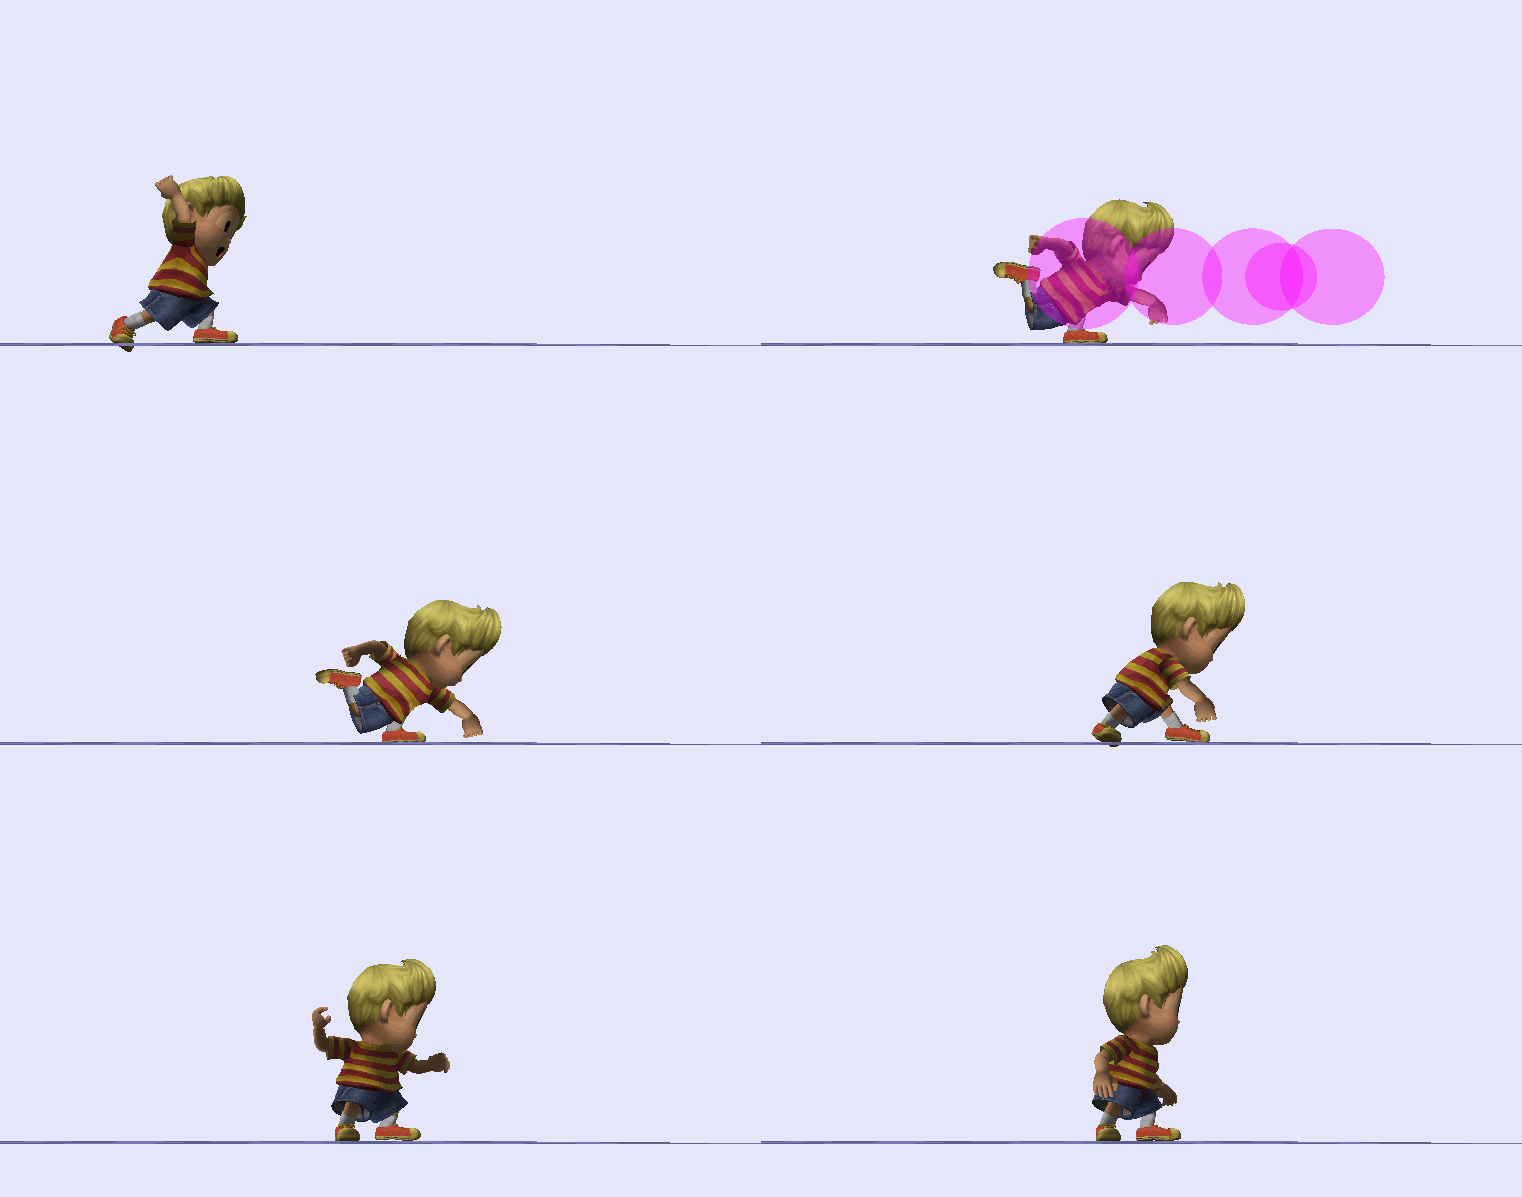
[COLLAPSE="Dash Grab"]Start-up: 14 | Active: 14 | Cool-down: 51
[COLLAPSE="Grab Collision"]
[/COLLAPSE]
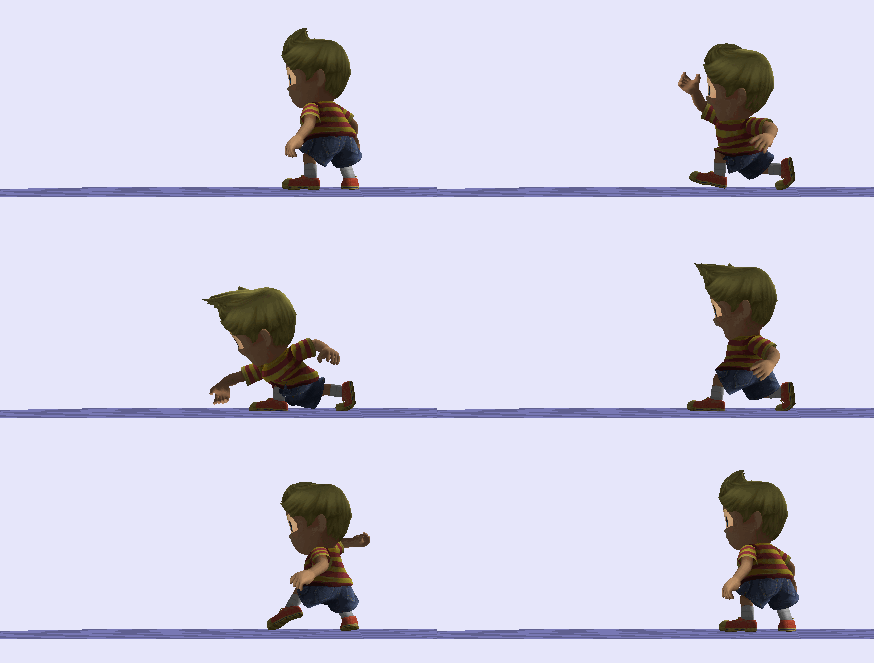
Note: While a running JC grab covers about the same distance and is faster in every way, the long lasting grab boxes on this can be useful against spot dodging and in fast faller chaingrabs.
[/COLLAPSE]
[COLLAPSE="Pivot Grab"]
Start-up: 13 | Active: 5 | Cool-down: 30
[COLLAPSE="Grab Collision"]
[/COLLAPSE]
[/COLLAPSE]
[COLLAPSE="Grab Pummel"]
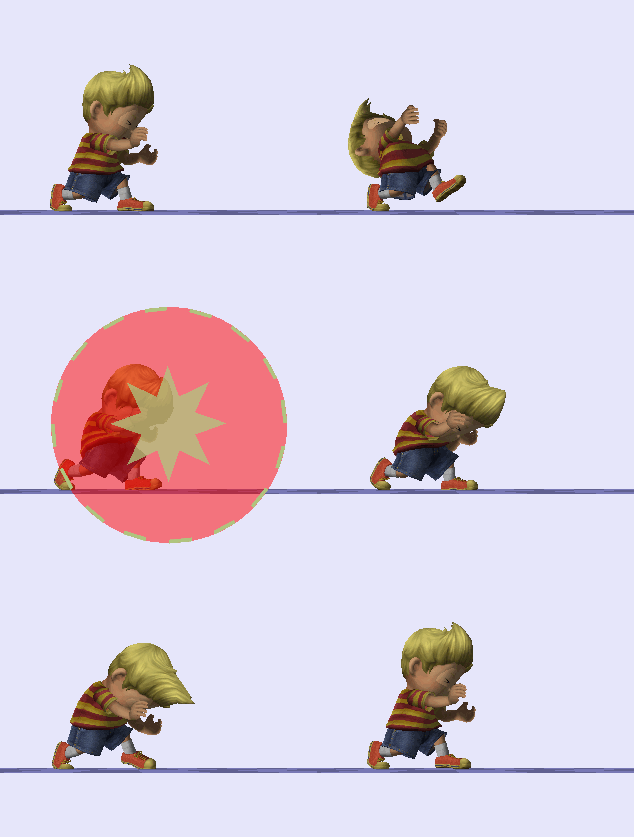
Start-up: 9 | Active: 1 | Cool-down: 14
[COLLAPSE="Hitboxes"]
[/COLLAPSE]
Pummel hitbox: 3 damage, 40 weight knockback, knockback scales 100% with damage
[/COLLAPSE]
[COLLAPSE="Throw Damage and Knockback Values"]
Back Throw: 10 damage, 135 degree angle (same as 45 degree, but behind), base knockback 70, knockback scales 75% with damage, 52 frames
Forward Throw: 10 damage, 45 degree angle, 65 base knockback, knockback scales 50% with damage, 52 frames
Up Throw: 12 damage (total), 90 degree angle, 75 base knockback, knockback scales 120% with damage, 63 frames
Down Throw: 7 damage, 75 degree angle, 82 base knockback, knockback scales 47% with damage, 42 frames
Notes:
On Uthrow, there are 4 small hitboxes that appear above his head active for 1 frame each when holding his opponent up. Not really worthy of an image, only situationally useful in doubles really.
On Dthrow, with the high knockback but easily comboability of this move, I assume there is a low release point.
[/COLLAPSE]
Note that some moves involve frame speed modifiers. The frame data on these should be very close to accurate, but could be off give or take a frame or two due to me being unsure how I should be rounding my calculations. If you have any corrections you would like me to make then by all means let me know what I need to fix.
APPROXIMATE FRAME ADVANTAGE 3.0
These can help in determining how safe certain moves are on a sheil.
At zero, the attacker recovers from his lag and the defender is free of sheild stun on the same frame.
Negative numbers mean the defender recovers first and positive numbers mean the attacker recovers first.
Therefore, larger numbers generally mean a safer move, although your spacing and your opponents options also come into play when determining how safe something is on shield.
Attack Frame (Dis)advantage Total sheild damage
Jab 1 -9 3
Jab 2 -16 9
Dash Attack -27 10
Dash Attack (late) -18 7
Ftilt (Tipper) -15 11
Ftilt -16 9
Utilt -16 10
Dtilt (Tipper) -15 8
Fsmash -23 16
OU Fsmash -25 41
Usmash -40 21
OU Usmash -42 47
Dsmash (1st hit) -7 17
OU Dsmash (1st hit) -9 41
Dsmash (2nd hit) -9 14
OU Dsmash (2nd hit) -11 36
Nair (last hit+ instant landing) -5 6
Nair landing attack -5 4
Fair -1 10
Fair sweetspot 0 13
Fair (late) -1 9
Fair sweetspot (late) -1 10
Bair -2 15
Uair -1 13
Dair (hit 1+2) -4 5
Dair (hit 3) -5 5
Zair -5 9
OU Neutral B -28 10
Aerial OU Neutral B (land cancel spacing) -4 10
Magnet Release (grounded+jumpsquat) 2 6
Magnet Release (aerial+jc) 6 6
Feel free to request anything you'd like to see.
Active: How long hitboxes last on the screen
Cool-down: How long until Lucas can begin another action after hitboxes disappear. For any moves that have IASA frames*, it's the time until IASA begins.
Air Cool-down: Cool-down for aerials. It is how long until you can preform another action while still in the air.
Land Lag: Specific to aerials, how long until Lucas can act after landing mid-aerial
*included numbers are with L-cancelling
Auto cancel: If you land before or after certain stages of a move (generally at the beginning or end, before hitboxes are out), you will have normal landing lag of 4 frames as if you had done no move at all.
Total: The number of frames where you are committed to the move (can't be cancelled/interrupted normally).
Animation Length: The full length of the moves animation. Useful for comparing the IASA timings of different moves.
*IASA: "Interruptable as soon as". The first frame where it is possible to interrupt the ending part of an animation with any action, rather than waiting for it to finish. Example: Marth d-tilt's IASA avoids a noticeable amount of the end of the animation, shortening the moves cool-down considerably.
[COLLAPSE="Jab 1"]Start-up: 1 | Active: 3 | Cool-Down: 11 | Total: 15 | Animation Length: 23
Frame Notes: IASA frame 16
Jab2 Interrupt: Frame 5
[COLLAPSE="Hitboxes"]

[/COLLAPSE]
Close and Far Hitboxes: 3 damage, 65 angle, 0 base knockback, 20 weight knockback, knockback scales 100% with damage
[/COLLAPSE]
[COLLAPSE="Jab 2"]Start-up: 7 | Active: 3 | Cool-down: 17 | Total: 27 | Animation Length: 31
Frame notes: IASA frame 28
[COLLAPSE="Hitboxes"]

[/COLLAPSE]
Both Hitboxes: 3 damage, 6 shield damage, 55 angle, 35 base knockback, knockback scales 100% with damage
[/COLLAPSE]
[COLLAPSE="Dash Attack"]Start-up: 5 | Active: 11 | Cool-Down: 22 | Total: 38 | Animation Length: 38
Frame Notes: IASA Frame 39
[COLLAPSE="Hitboxes"]

[/COLLAPSE]
1st small hitbox: 10 damage, 83 angle, base knockback 60, knockback scales 68% with damage
1st large hitbox: 10 damage, 83 angle, base knockback 70, knockback scales 68% with damage
2nd small hitbox: 7 damage, Sakurai angle (361), base knockback 35, knockback scales 90% with damage
2nd large hitbox: 7 damage, Sakurai Angle (361), base knockback 45, knockback scales 90% with damage
[/COLLAPSE]
[COLLAPSE="Forward Tilt"]Start-up: 5 | Active: 4 | Cool-down: 19 | Total: 28 | Animation Length: 39
Frame notes: IASA frame 29
[COLLAPSE="Normal Ftilt Hitoxes"]

[/COLLAPSE]
[COLLAPSE="Angled Up Hitboxes"]

[/COLLAPSE]
[COLLAPSE="Angled Down Hitboxes"]

[/COLLAPSE]
2 close hitboxes: 9 damage, Sakurai angle (361), 20 base knockback, knockback scales 100% with damage
2 far hitboxes: 11 damage, Sakurai angle (361), 12 base knockback (16 on the tip), knockback scales 100% with damage[/COLLAPSE]
[COLLAPSE="Up Tilt"]Start-up: 6 | Active: 6| Cool-down: 18| Total: 30 | Animation Length: 35
Frame Notes. IASA frame 31
[COLLAPSE="Hitboxes"]

[/COLLAPSE]
Early hitboxes (frames 7-8): 10 damage, 90/93 angle, base kb 55, knockback grows 100% with damage
Late hitboxes (frames 9-12): 8 damage, 95 angle, base kb 55, knockback grows 100% with damage
[/COLLAPSE]
[COLLAPSE="Down Tilt"]Start-up: 2 | Active: 2| Cool-down: 19 | Total: 23 | Animation Length: 29
Frame Notes: IASA frame 24
[COLLAPSE="Hitboxes"]

[/COLLAPSE]
Close hitbox: 7 damage, base kb 30
Far hitbox: 8 damage, base kb 30
KB growth for all hitboxes is varied between 72%-80%
Notes: Like most d-tilts, this move uses air only and ground only hitboxes. This is to ensure that the move behaves how it should (setting low % opponents in standing hitstun and popping them up at higher %s) [/COLLAPSE]
[COLLAPSE="Forward Smash"]Start-up: 14 | Active: 3 | Cool-down: 30| Total: 47 | Animation Length: 60
Frame notes: IASA frame 40
[COLLAPSE="Hitboxes"]
Hitboxes for f-smash do not behave appropriately in brawlbox. Sorry about that.
[/COLLAPSE]
With OU: 24 damage, Sakurai angle (361), 17 shield damage, kb grows only 65% with damage
Without OU: 16 damage, Sakurai angle (361), 0 shield damage, kb grows 90% with damage
Notes: Base knockback increases from 45 to 60 from the base to the tip, for all versions. If you angle up: +1 damage (OU & non-OU), if you angle down: -1 damage, (OU & non-OU)
[/COLLAPSE]
[COLLAPSE="Up Smash"]Start-up: 30 | Active: 12 | Cool-down: 40 | Total: 82 | Animation Length: 82
[COLLAPSE="Hitboxes"]

[/COLLAPSE]
Both initial hitboxes (OU): 32 damage, 15 shield damage, 95 angle, base knockback 50, knockback scales with damage 80%
Both initial hitboxes (normal): 21 damage, 95 angle, base knockback 50, knockback scales with damage 85%
Both late hitboxes (OU): 26 damage, 15 shield damage, 95 angle, base knockback 42 for top hitbox and 48 for bottom, knockback scales with damage 57%
Both late hitboxes (normal): 17 damage, 95 angle, base knockback 48 (top hitbox is 52), knockback scales with damage 57%
Notes: Head is intangible from frame 10 until the first active frame.[/COLLAPSE]
[COLLAPSE="Down Smash"]Start-up: 20 | Active: 6 |Cool-down: 11| Total: Varies
Frame notes: You can input for the 2nd hit after the first is out and before frame 30. IASA frame 33
[COLLAPSE="Hitboxes"]

[/COLLAPSE]
Hit 1 With OU: 26 damage, 15 shield damage, Sakurai angle (361), 40 base knockback, knockback scales with damage 63%.
Hit 1 Without OU: 17 damage, Sakurai angle (361), 40 base knockback, knockback scales with damage 90%
Hit 2 With OU: 21 damage, 15 shield damage, Sakurai angle (361), 30 base knockback, knockback scales with damage 63%
Hit 2 Without OU: 14 damage, Sakurai angle (361), 30 base knockback, knockback scales with damage 90%[/COLLAPSE]
[COLLAPSE="Neutral Air"]
Start-up: 3 | Active: 16 [Loop pattern: (2)1(2)1(2)1(2)1(4)] | Air Cool-down: 24 | Total: 43 |
Landing Lag: 8 | Auto Cancel: <3, >26
Frame Notes: Hitboxes loop 4-16 (Loop: 2 frames active, 1 inactive) sweetspot (17-21). IASA frame 44
[COLLAPSE="Hitboxes"]

[/COLLAPSE]
Bottom repeating hitboxes: 2 damage, 110 angle, 20 weight knockback, knockback scales 130% with damage.
Top repeating hitboxes: 2 damage, 210 angle, 20 weight knockback, knockback scales 100% with damage.
N-air final hit : 6 damage, 35 angle, 10 base knockback, knockback scales 143% with damage.[/COLLAPSE]
[COLLAPSE="Neutral Air Landing Attack"]Start-up: N/A | Active: 2 | Landing Lag: 8
[COLLAPSE="Hitboxes"]

[/COLLAPSE]
All hitboxes: 4 damage, Sakurai angle (361), base knockback 40, knockback scales 100% with damage
Note: This attack occurs when you land with a neutral air before the move has completed in the air.[/COLLAPSE]
[COLLAPSE="Forward Air"]Start-up: 4 | Active: 6 |Air Cool-down: 22 | Landing Lag: 7
Auto Cancel: <4, >32 | Total: 32 | Animation Length: 48
Frame notes: IASA frame 33
[COLLAPSE="Hitboxes"]

[/COLLAPSE]
Sour spots: 10 damage, 55 angle, base knockback 36, knockback scales 79% with damage.
Sweet Spot: 13 damage, 55 angle, base knockback 36, knockback scales 95% with damage
Late hit differences: Sweet spot damage is decreased to 10, sour spot to 9. Sweet spot knockback scales 79% with damage
[/COLLAPSE]
[COLLAPSE="Back Air"]Start-up: 11 | Active: 5 |Air Cool-down: 22 | Total: 38 | Landing Lag: 10 | Autocancel: <2, >36 | Animation Length: 50
Frame Notes: IASA frame 39, spike is not actually out until frame 13.
[COLLAPSE="Hitboxes"]

[/COLLAPSE]
Sourspot and Sweetspot (non-spike): 15 damage, Sakurai angle, 20 base knockback, knockback scales 100% with damage.
Spike Sweetspot: 15 damage, 300 angle, 20 base knockback, knockback scales 80% with damage.
Spike Sourspot: 15 damage, 310 angle, 10 base knockback, knockback scales 80% with damage.
[/COLLAPSE]
[COLLAPSE="Up Air"]Start-up: 4 | Active: 5 | Air Cool-down: 18 | Land Lag: 7
Total: 27 | Autocancel: <4, >27 | Animation Length: 45
Frame notes: IASA frame 28
[COLLAPSE="Hitboxes"]

[/COLLAPSE]
Small (sweetspot) : 11 damage, 4 shield damage, 70 angle, 26 base knockback, knockback scales 92% with damage
Large (sourspot) : 9 damage, 4 shield damage, 70 angle, 26 base knockback, knockback scales 92% with damage[/COLLAPSE]
[COLLAPSE="Down Air"]
Start-up: 3 | Active: 18 [Loop pattern: (3)4(3)5(3)] | Cool-down: 24| Total: 41| Landing Lag: 9 | Autocancel: <3, >29
Frame notes: IASA on frame 37
[COLLAPSE="Hitboxes"]

[/COLLAPSE]
Hits 1 and 2:
Against Grounded opponents: 5 damage, autolink angle, 0 base knockback, 30 weight knockback, knockback scales 100% with damage
Against Aerial opponents: 5 damage, 270 angle, 50 base knockback, 0 weight knockback, knockback scales 35% with damage
Hit 3:
Both hitboxes: 5 damage, 270 angle, 35 base knockback, 0 weight knockback, knockback scales 150% with damage
[/COLLAPSE]
[COLLAPSE="Rope Snake (Z-air)"]
Start-up: 7 | Active: 6 | Air Cool-down: [Will not end in the air, you must land]| Land Lag: 10
Frame notes: "uncovered" area of the arc is actually covered on frame 9 due to interpolation. Lucas' hand is intangible starting when hitboxes come out.
[COLLAPSE="Hitboxes"]

[/COLLAPSE]
Snake head hitbox: 8 damage, 1 shield damage, 30 base knockback, knockback scales 70% with damage.
[/COLLAPSE]
[COLLAPSE="Offense Up Burst (Neutral-B)"]Start-up: 2 | Active: 2 | Cool-down: 33 | Total: 37
[COLLAPSE="Hitboxes"]

[/COLLAPSE]
Hitbox: 10 damage, 60 angle, 50 base knockback, 20 weight knockback, knockback scales 100% with damage
Notes: The blue denotes intangibility, frames 2-3. You must have neutral B charged to use OU burst. Aerial version has the same frame data. On paper, this move seems to have qualities that would make it a decent "combo breaker".[/COLLAPSE]
[COLLAPSE="Windbox on Neutral-B"]
Start-up: 13 | Active (release hitbox): 3 | Cool-down: 40

Windbox: 10 angle, 65 bkb againt aerial, 55 bkb against grounded. Knockback does not scale with damage.
[/COLLAPSE]
[COLLAPSE="PK Thunder (Up-B)"]Start-up: 10 (20 if grounded)| Active: Maximum?= Unknown | Cool-down: 30| Total: N/A
Ledge grab allowed during cool-down. No other useful info in BrawlBox (PKT 1 is an article)[/COLLAPSE]
[COLLAPSE="PK Thunder 2 (Up-B Self Hit)"]
Start-up: N/A | Active: 36 [ | Cool-down: N/A| Total: 38
Move Progression:
Initial strong (active 1 frame, invincible frame 1 and 2)
Autolink hitboxes (active 31 frames)
Final hit (active 2 frames)
[COLLAPSE="Hitboxes"]

[/COLLAPSE]
Both initial hitboxes: 8 damage, autolink angle, 60 base knockback, knockback scales 100% with damage.
Repeating hitbox on head: 3 damage, autolink angle, 0 base knockback, 20 weight knockback, knockback scales 100% with damage
Repeating hitbox on waist: 3 damage, autolink angle, 30 base knockback, 0 weight knockback, knockback scales 50% with damage
Both final hitboxes: 8 damage, Sakurai angle (361), 40 base knockback, knockback scales 135% with damage.
Notes: Lucas is intangible on frames 1 and 2 after hitting himself with PKT.[/COLLAPSE]
[COLLAPSE="PK Freeze (Side-B Grounded)"]Start-up: 25 | Active: ???? | Cool-down: 17
Total: 42 | Animation length: 70
IASA on frame 43
Articles do not display in BB
Notes: Stops Lucas momentum. If you get hit in a way that makes you slide while standing (Wolf and Lucario Up-b come to mind), you can use this to stop yourself. I guess.
Personal note: Every time I see him hunker down to do this laggy move, I expect a much bigger ice ball to come out. He flings aerial freezes like they're snowballs, why is his ground version so slow?
[/COLLAPSE]
[COLLAPSE="Air PK Freeze (Aerial Side-B)"]Start-up: 13 | Projectile active: ???? | Air Cool-down: 20 | Auto Cancel: ???? | Landing Lag: ???? | Total: 37 | Animation Length: 47
Hitbox data not available, PK freeze is an article.
Notes: IASA frame 34.
[/COLLAPSE]
[COLLAPSE="PK Magnet (Down-B)"]
Start-up: 4 | Active (release hitbox): 1 | Cool-down: 20*
Hold hitboxes loop pattern: (2)6(2)6(2)6....repeating
Must hit with at least 1 hold hitbox before release will activate.
[COLLAPSE="Hold Hitboxes (looped)"]

[/COLLAPSE]
[COLLAPSE="Aerial Hold Hitboxes (looped)"]

[/COLLAPSE]
Repeat hitboxes: 2 damage, 5 shield damage, 80 angle, 0 base knockback, 30 weight knockback, knockback scales 80% with damage, low hitlag and there is a 1.25 SDI multiplier.
[COLLAPSE="Release Hitboxes"]

[/COLLAPSE]
Release hitbox: 6 damage, 127 angle, 80 base knockback, knockback scales 60% with damage, low hitlag.
Notes: Release hit is jump cancel-able starting frame 1 after release hitboxes disappear. Has strong momentum modifiers. [/COLLAPSE]
[COLLAPSE="Ledge options"]
[COLLAPSE="Climb <100%"]
Invincibility: 1-30 | Vulnerable: 31-35

[/COLLAPSE]
[COLLAPSE="Ledge attack <100%"]
Invincibility: 1-21 | Hitbox: 24-26 | Interrupt-able frame 43

[/COLLAPSE]
[COLLAPSE="Ledge attack >100%"]
Invincibility: 1-36 | Hitbox: 40-44 | Interrupt-able frame 51

[/COLLAPSE]
[COLLAPSE="Ledge Roll <100%"]
Invincibility: 1-26 | Interrupt-able frame 41
[/COLLAPSE]
[COLLAPSE="Ledge Roll >100%"]
Invincibility: 1-57 | Interrupt-able frame 81
[/COLLAPSE]
[COLLAPSE="Ledge Jump <100%"]
Invincibility: 1-15 | Interrupt-able frame 16
[/COLLAPSE]
[COLLAPSE="Ledge Jump >100%"]
Invincibility: 1-19 | Interrupt-able frame 20
[/COLLAPSE]
[/COLLAPSE]
[COLLAPSE="Knocked Down Options"]
[COLLAPSE="Stand Up"]
Invincibility: 1-22 | Interrupt-able frame 31
[/COLLAPSE]
[COLLAPSE="Roll"]
Invincibility: 1-22 | Interrupt-able frame 37
[/COLLAPSE]
[COLLAPSE="Face Down Get-up"]
Invincibility: 1-26 | Active: 19-20, 25-26 | Interrupt-able frame 51

[/COLLAPSE]
[COLLAPSE="Face Up Get-up"]
Invincibility: 1-25 | Hitbox: 20-21, 24-25| Interrupt-able frame 51

[/COLLAPSE]
[/COLLAPSE]
[COLLAPSE="Standing Grab"]Start-up: 10 | Active: 6 | Cool-down: 39
[COLLAPSE="Hitboxes"]

[/COLLAPSE]
[/COLLAPSE]
[COLLAPSE="Dash Grab"]Start-up: 14 | Active: 14 | Cool-down: 51
[COLLAPSE="Grab Collision"]

[/COLLAPSE]
Note: While a running JC grab covers about the same distance and is faster in every way, the long lasting grab boxes on this can be useful against spot dodging and in fast faller chaingrabs.
[/COLLAPSE]
[COLLAPSE="Pivot Grab"]
Start-up: 13 | Active: 5 | Cool-down: 30
[COLLAPSE="Grab Collision"]

[/COLLAPSE]
[/COLLAPSE]
[COLLAPSE="Grab Pummel"]
Start-up: 9 | Active: 1 | Cool-down: 14
[COLLAPSE="Hitboxes"]

[/COLLAPSE]
Pummel hitbox: 3 damage, 40 weight knockback, knockback scales 100% with damage
[/COLLAPSE]
[COLLAPSE="Throw Damage and Knockback Values"]
Back Throw: 10 damage, 135 degree angle (same as 45 degree, but behind), base knockback 70, knockback scales 75% with damage, 52 frames
Forward Throw: 10 damage, 45 degree angle, 65 base knockback, knockback scales 50% with damage, 52 frames
Up Throw: 12 damage (total), 90 degree angle, 75 base knockback, knockback scales 120% with damage, 63 frames
Down Throw: 7 damage, 75 degree angle, 82 base knockback, knockback scales 47% with damage, 42 frames
Notes:
On Uthrow, there are 4 small hitboxes that appear above his head active for 1 frame each when holding his opponent up. Not really worthy of an image, only situationally useful in doubles really.
On Dthrow, with the high knockback but easily comboability of this move, I assume there is a low release point.
[/COLLAPSE]
Note that some moves involve frame speed modifiers. The frame data on these should be very close to accurate, but could be off give or take a frame or two due to me being unsure how I should be rounding my calculations. If you have any corrections you would like me to make then by all means let me know what I need to fix.
APPROXIMATE FRAME ADVANTAGE 3.0
These can help in determining how safe certain moves are on a sheil.
At zero, the attacker recovers from his lag and the defender is free of sheild stun on the same frame.
Negative numbers mean the defender recovers first and positive numbers mean the attacker recovers first.
Therefore, larger numbers generally mean a safer move, although your spacing and your opponents options also come into play when determining how safe something is on shield.
Attack Frame (Dis)advantage Total sheild damage
Jab 1 -9 3
Jab 2 -16 9
Dash Attack -27 10
Dash Attack (late) -18 7
Ftilt (Tipper) -15 11
Ftilt -16 9
Utilt -16 10
Dtilt (Tipper) -15 8
Fsmash -23 16
OU Fsmash -25 41
Usmash -40 21
OU Usmash -42 47
Dsmash (1st hit) -7 17
OU Dsmash (1st hit) -9 41
Dsmash (2nd hit) -9 14
OU Dsmash (2nd hit) -11 36
Nair (last hit+ instant landing) -5 6
Nair landing attack -5 4
Fair -1 10
Fair sweetspot 0 13
Fair (late) -1 9
Fair sweetspot (late) -1 10
Bair -2 15
Uair -1 13
Dair (hit 1+2) -4 5
Dair (hit 3) -5 5
Zair -5 9
OU Neutral B -28 10
Aerial OU Neutral B (land cancel spacing) -4 10
Magnet Release (grounded+jumpsquat) 2 6
Magnet Release (aerial+jc) 6 6
Feel free to request anything you'd like to see.
Last edited:

