Welcome to R00ki3's Tutorial On Competitive 1 On 1 Super Smash Brothers Melee/Project M and Smash for WiiU/3DS.
NOTE: (This guide is close to being finished. I have quotes and material that aren't mine and aren't sited and vocabulary that new players might not understand. I also have a few grammatically incorrect errors that need to be cleaned up but as far as i'm concerned this guide is almost finished. I just need to explain the rules of counter picks. Later on i'll decide on a table of contents and maybe organize sections by colored text but I'm not quite there yet. For now you have to fight your way through the walls of text and gifs.I do not own ANY of the gifs, pictures or videos. If the many gifs are laggy when playing all together and you want to see one at a time just right click and open image in a new tab or window.)
Hello! Update as of April 8th 2016!.... Unfortunatley it's not really an update! I don't have the time currently since College semester is ending soon and I need my A game... litterally. Al though I have been making content on the side that I havent finished so there is definatley more to come! On top of that I have built a new desktop WITH Melee Netplay! AND a stream setup!! This means that I might be able to make tutorial videos or example videos and demonstrate some of my lectures visually! Hopefully that will be able to be applied soon!
For now! Feel Free to Follow my Twitch: https://www.twitch.tv/hxllxws and please look forward to more stuff in the future!
Hey! Another update as of March 7th 2016 11:16 am! I love how it takes me a month to update this guide and only add on little by litt.e ^- ^; sorry guys. I'm adding another seciton called "SPACING: THE ART OF NEVER GETTING HIT." which will help greatly in analyzing your opponent and undertanding how to take "Don't Get Hit." -Isaih to another level
In this tutorial I want to cover major practice methods and ideas that I have learned through experience, videos, and other guides that are easy to learn for players who want to get better at a fast pace. The most important part of being competitive in Smash is understanding the "Idea of Smash" or "Smash Theory." The "Theory of Smash" has 4 key points: The Neutral, Zoning, Reads and now an extra video also posted under the Rush Hour Smash channel on youtube Edge Guarding. Understanding these can make you a better player than most even without the power of "Techskill" which is the second most important method in smash.
First is understanding the "Neutral" the "Neutral Game." and the "Neutral Position."
DEFINITION of The Neutral: "The positioning in which both players have approximately even stage control vying to convert their advantages into an edge guard."
Watch this aswell to fully understand "The Neutral."
What this means is that when put in a situation considered "Neutral" both players have a somewhat even chance to use their skill and advantage to take control of the stage which often times leads to the stock of the other player. The Neutral Game and The Neutral in general is to be considered in almost all Super Smash Brothers Games.
The Neutral Game is Built by:
-Characters
-Stage Selection
-Match Ups
-Positioning of characters on said stage
-Pressure (Pressure holds a TON of definitions or methods)
-Abnormal or misfortunate happenings.
Characters influence the neutral by viability. If a character is harder to control, doesnt fit your play style, creates lack of focus (sudden needs for style or cruelty) or is unfamiliar lowers your advantages from the beginning. Your character choice for what we call "Match Ups" affects The Neutral Game as a whole.
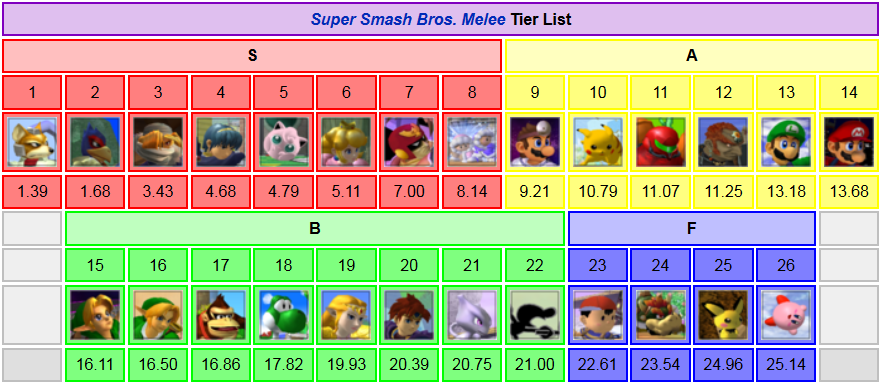
Stage selection is also a big part of The Neutral. It's considered guerrilla warfare for certain characters. Sometimes you'll hear names like "Marth's Story" instead of Yoshi's Story or "Mang0 Land" instead of Dream Land because certain characters and certain players perform better on certain stages. There are also lists of legal and illegal stages, and tiers for each legal stage called picks and counter picks that can be determined differently depending on what event or "house rules" declaire.

Match ups are the before and in game strategies considered when picking certain characters and stages to have given advantages with stats and environment to make considering The Neutral easier by default.

Pressure, abnormal and misfortunate happenings are hand in hand in The Neutral Game. Mental discipline is key to finding a new way out to an unknown play style. When you're in a tight spot or have been outsmarted or even intimidated by a well known player or someone who seems to display good form, your considered to be in a pressured situation and might make repetitive or unsafe decisions. Some may make the right decisions and play better late game. These situations affect The Neutral due to its advantages and disadvantages of the players mental state.
Pro Tip: A way to avoid abnormal and misfortunate happenings through pressure is that mental discipline. Often times if you encounter a play style that you think "Doesn't require a lot of skill" or "spammy" or "cheap" you discard good reasoning and subconsciously insist on bad decisions and your frustration makes you refuse to adjust. It's a difficult task to find ways around a single move being used over and over and over again in the matter of a 2 out of 3 set but taking risks and adapting is what makes a professional.
After the idea of The Neutral Game is set in mind, the second part is being knowledgeable of the "Complicated Rock Paper Scissors." or "Neutral Position" of Super Smash Brothers. This part is the most important to Smash 4 meta but is not to be ignored in any other smash game. it's just far more obvious and easy to apply in Smash 4.
"The way the shield functions is what makes the Neutral Position Neutral." When a player's in or out of shield options become unsafe is when advantages begin to hit home. Applying pressure or shield pressure is important because attacking or poking shields with moves that are difficult to punish is considered the upper hand. "Any way the opponent attempts to attack or defend begins and ends considering the shield." What makes the "Complicated Rock Paper Scissors" important Is knowing that shielding is not safe against grabs. What makes grabs not safe is the ability to attack and attacking is unsafe against shield. These three options are considered "Zoning Options" which will be covered soon. Being able to anticipate these options is the ability to make "Reads".
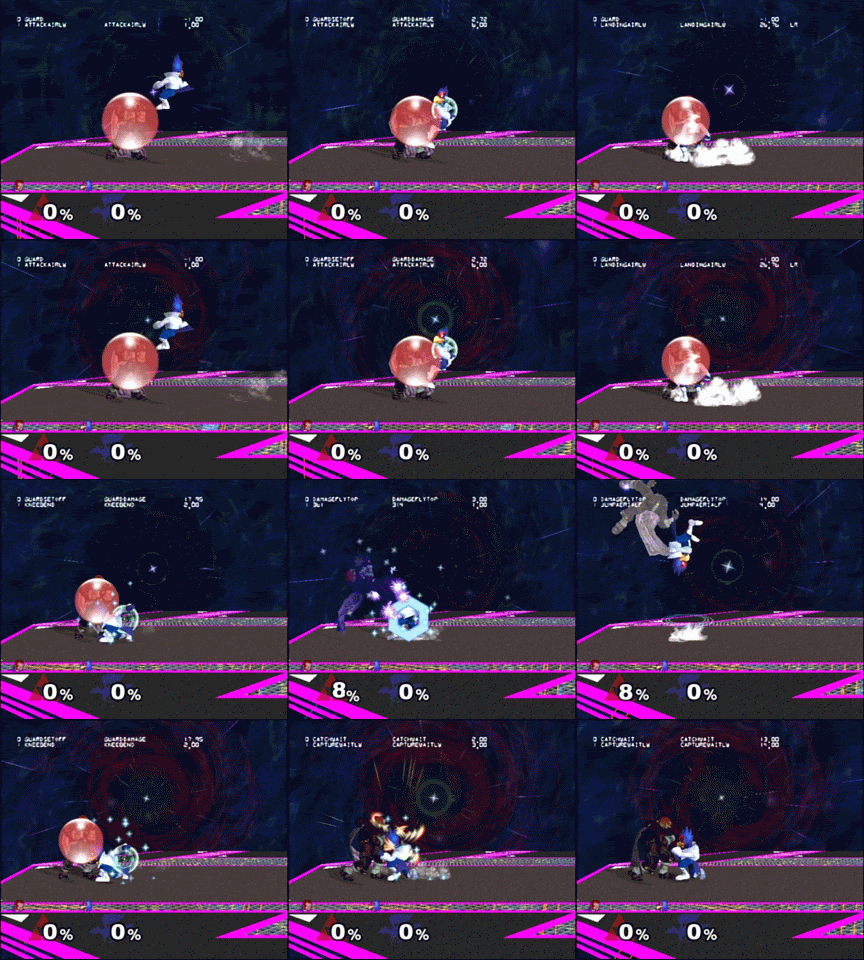
Second is understanding Zoning.
DEFINITION of Zoning: "The utilization of spacing your character. hitboxes and potential hitboxes to limit the options of your opponent to create pressure"
watch this video as well to fully understand Zoning
What Zoning does for a player is create strategy in game to conveniently position your character and hitboxes to your advantage and make positioning the hitboxes for your opponent inconvenient. It's like The Neutral Position but more specific.
The most common method of Zoning is a method called "'Brick Walling.' Which creates Zoning patterns that are relatively safe to most approaches while having the necessary mixups to have better reactions from your opponent." Idealy both players set up Zoning patterns until one player shows a weak spot in their wall for the other player to punish accordingly or to over extend.

Because Zoning is based on reacting to the movement of other players, there are moves designed to beat out the speed of another character to cut them off unexpectedly called Zone breakers. "Most speed based characters are difficult to zone and rely on Zone Breakers to approach their opponent. Meanwhile most ranged based or projectile based characters rely on setting up walls and creating safety."

Some characters hold the options of both Zone Breaking and Brick Walling and are considered both Zone Breakers and Brick Wallers.
Spacing
Spacing is a subsection to Zoning. Idealy the aspect is the same, but the actions and goals are different and more specific. To correctly space yourself from your opponent you are keeping yourself at a distance where you are safe from enemy hitboxes or potential enemy hitboxes by using some form of movement. The goal of spacing is to prevent yourself from being hit as much as possible by creating a fixed distance and at the same time giving yourself an advantage by either anticipating your opponents movements or forcing them to over extend so that you can capitalize with a punish. Theres 2 ways to go about this depending on yoru characters stratedgy. Theres the aggressive and the passive aggressive. Not to be confused with Offensive and defensive, when you are aggressive you use your speed and movement to keep different amounts of safe space between you and your opponent at all times and use zone breakers to covers space for punish if you are un able to to use stronger attacks due to your amount of space. (In Melee) Characters like Fox and Falcon, would weave in and out with a technique called dash dancing. These characters are aggressive because weather they are offensive or defensive they willl use all tachtics possible to pressure their opponent by either cornering them or baiting them. Characters Like Shiek and Marth are passive aggressive using their positioning, zoning and brick walling to prevent actions to from passing by, keeping their opponent in range for their attacks but not close enough to reach them and punish their attacks. Wheather you are offensive or defensive you are able to make sure your opponent is in range with out constantly pressuring them or playing constant mind games. You essentially always keep them in your grasp.
Third is understanding Reads
DEFINITION OF READS: "The psychological strategy used in observing an opponents habitual behavior and patterns, and punishing them."
Watch this video as well to fully understand Reads.
What this is is the advantages gotten out of understanding the patterns of the opponents Zoning and Neutral habits. This is the next step to high level gameplay and knowing this will literally put you a step ahead of your opponent at all times regardless of skill level. Understanding this is nearly impossible without understanding both the Neutral and Zoning or at least understanding your opponents raw habits.

Reading is made easier when taking mental notes of the options the opponent makes considering "Complicated RPS", "Zoning Habits", "Edge Guarding", and "Tech Chasing,"
Edge guarding and Tech rolling(Tech Chasing) being the easiest and most common moments to read will be the ones experienced the most.
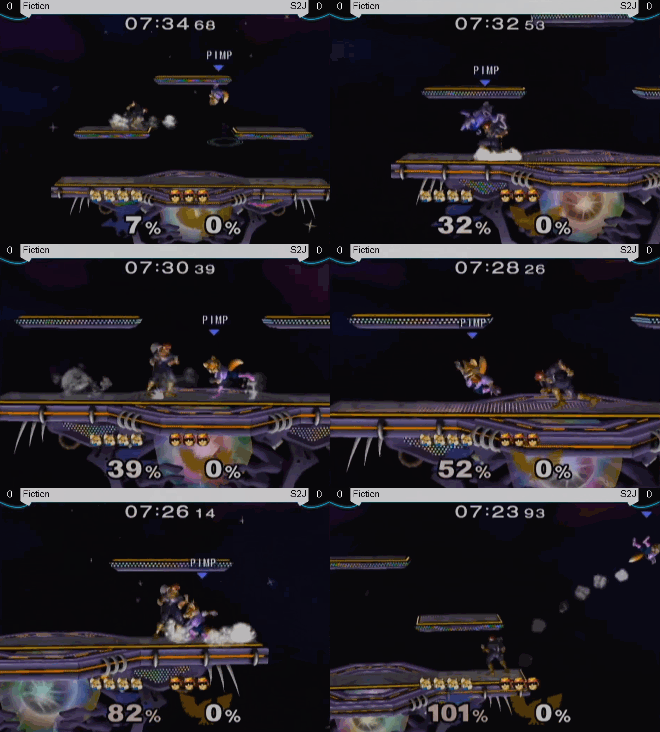
"When an opponent grabs the ledge the lack of shield and threat of a ledge triumph demands a get up option be selected quickly." Regular Get Up, Roll, Jump and Get Up Attack are your main ways of getting on stage when hanging on a ledge. If your opponent reads your 4 options it can be the cost of a stock. When reading these 4 ledge options you can use movement and positioning to cover multiple options. Or commit to just one Read. Tech Chasing is a similar situation (Often abused in Melee and Project M with their heavier gravity and fast paced environment) where your limited options are Regular Get Up, Roll Left or Right or get up attack for Miss-Techs, or tech in place or tech roll left or right for a Successful Tech.
"Baiting is another form of a Read that involves active commitment. It requires that one trick his opponent to put himself in a susceptible position." This is when pressure is applied to push your opponent into a seemingly safe decision that actually is a setup for your next move.
Pro tip: Reads being your biggest mind game tool it's also very easy to fake a read Let's say an opponent misstechs near the ledge say right under the left platform of battlefield. If he/she was on top of the platform the opponent would be in its dead center. so right now the opponent isn't on the platform he/she is below it and is laying down waiting for the 3 options: roll left toward edge, roll right toward center stage, or get up attack/regular get up. You being the chaser you plan to read your opponent so you can punish hard, but you haven't caught on to any bad habits for you to use as a source. So you look at the statistics. if the opponent rolls toward the ledge they are unsafe for two reasons. 1. they are farther from center stage. Your goal is always to be in center stage since that's the hardest place to be K.O.'ed from 2. if you missteched too close to the edge and roll toward the edge, your rolling animation will continue once it hits the ledge and you will be stuck in animation for a enough time for a punish plus you're more likely to be K.O.'ed by a kill move since you're farther away from the center stage. The only upside is that you the chaser might not make it in time to hit before the opponent can shield right out of their roll. If the opponent rolls toward the center stage they have 2 good things. 1 They are closer to the center stage thus harder to K.O. 2. if you the chaser are too hasty, you might blow right PASS the opponent and switch places putting you in the vulnerable position instead. The only problem is that if your opponent is patient.. you gave them a free F-Smash. Next is get up attack. Regular get up is also an option but it's not often recommended. When you get up attack you have to hope that your opponent doesn't bait it out by spacing or shielding because that also gives a free punish away. Ideally this opponent would be screwed, but this is only true if you can read every option. Something you might not be able to do. So what should you do now? You need to read the SAFEST option. The option that takes less of a gamble is roll toward center stage. When making this decision as the chaser you either stay in place cause you're in range, dash a little forward out of a dash dance perhaps, or wavedash back and gain the position. you have a 50-50 chance of actually reading your opponent because all anyone wants to do is roll in because it's the safest option.... but the opponent does not. He rolls toward the edge because he/she knew what you were up to. Fear not! That was the worst of the option, you still have the chance of landing a kill move and even if it is shielded you don't lose much. Worst case scenario is a shield grab. Best case scenario your back in center stage. Wait, say your opponent get up attacks. all you have to do is time the animation or shield it and counter with either an out of shield option or a well timed smash attack/grab and you just faked a read. Some people (like me) consider that a read. Mostly because that's the first step to noticing your opponent's habits. You start being observant without even knowing.
Pro Tip: another great way to open your mind up to reads is to listen to yourself complain. No this isn't another lecture involving rage habits. Well, kinda. Why I say you should do this is becaus sometimes there is a situation when you are locked in combat against a player who's giving you a run for your money and you think "Oh no.. he's gonna do this" and then he does. He does exactly what you thought he was. The exact tactic and everything. What you end up doing is giving up and letting him use what he has been doing to you for a good long while now. Thats normal and sometimes its somehing you cant avoid. Although If you see something comming, instead of giving up you should use your forsight to your advantage and revearse it. For example, earlier today I was playing my friend who was a Falco main. I was fox and latley I haave been focusing on punishing his laser game which is an issue with many people when going up against a falco.I lost two straight stocks to him on dreamland and I was upset because he was dominating. I wondered why until on my second stock he felt pressured, so he dashed back, dash danced then lasered in switching back into offense. Subconsiously I though "That laser is going to hit me... I will be stunned and then He will down air me to set up a pillar oportunity." and that litterally what he did and it wasnt until stock 4 did I stop him in his tracks by shielding the laser spot dodging the down air and the upsmashing. Granted it was dream land and I couldnt take the stock I ended up getting 3 stocked. Moral of the story is pay attention. I doubt you could expect to notice such habits right away but once you realise he has a stratedgey, find the exact inputs to counter it and load up for a large punish because thats what reads are all about.
Try this: A good way to practice raw tech chases is to pick a character who has a long grab range, a fast grab animation, or a fast dash (typically Marth, falcon, or fox in most games) and any other character as a computer or normally a fast faller (fox, falco, C falcon) and go to a big fat stage like bridge of elden, or Final Destination and constantly throw the computer downward using whatever direction throw makes them slam into the ground for a tech chase opportunity and read the computers constantly. 20XX and PM are perfect for this training method because I do believe the computers have built in random tech rolls making your reaction better when practicing. If you do not have those hacks, set the computers on different levels from time to time for different results.
Edgeguarding:
"the process in which one attempts to cover and read their opponents recovery options. When the correct options are covered and/or read, it will usually reward in momentum. Percentage and possibly a stock."
watch this video aswell to fully understand edgeguards.
The concept of edgeguarding as a whole is basically "who can cover more ground?" Both players are fighting for the middle of the stage and the player farthest from the center is the character who covers the least amount of ground. The less ground you cover the more likely you are either to be K.O'ed OR be set up for an edge guard since when a player isn't covering enough ground. They are considered K.O.'ed or edge guarded. When both players are at the center of stage, or when both players are competing for the center of the stage their ground being covered is 50-50 and that is another way of considering them in neutral. One stray hit that lands on a player can send them back farther from the stage toward the edge forcing the situation into a 60-40 in the offenders favor, the defender has just lost stage control. This is where you can desire pressure on your opponent when you are covering more ground. once you are covering 60% of the stage you want to keep it, and depending on what character you are you will brick wall and keep that 60 and inch your advantage farther and farther. Or go aggro and push your ground coverage further and further by applying tons of offensive pressure on your opponent. A 65 - 35 ratio is considered that the defending player is off stage. The reason why the advantage only grows ever so slightly is because the defender still has a second jump and a full-set of recovery to safely return to the stage. (All though differences may apply through different characters AND different games). Not the offender exhausts the defenders second jump will the advantage advance to a 80-20 ratio. At this point your characters only resource is to use a special recovery using the B button.
If you watch the video provided you will learn the character specific resources used to edge guard and to avoid being edge guarded.
That covers most of the idea of 1 on 1 Smash game play. Understanding the 3 main points of the idea will prepare your head for the upcoming mind games applied to competitive Smash.
Next is Tech Skill.
For those who are brand new I will explain the controls of Super Smash Brothers using a Gamecube Controller (Yes that is the most common controller used in the smash community. Seeing a pro controller for smash 4 isn't rare either but I don't know much about it.):
All given actions explained in the "How to Play." Turtorial Videos.
watch this video for a faster recap.
The control stick or analog stick controls the movement of your character. Tilting the analog left and right allows you to walk in said directions as tapping the control stick allows you to dash. tap the control stick up to jump or press
  or
or  to jump. You can also use the same inputs to do a second jump mid air.
Pro Tip: Jumping and Double Jumping is very important in terms of staying on the stage and a safe recovery. When being edge guarded or being pushed off stage your recovery option is your first priority. after you jump or are somehow launched in air you are given an option to jump a second time. Keep in mind that you only get one jump until you are grabbed, hanging on ledge or grounded once again. Your opponents fish for ways to get you to "Lose your Jump" and make recovery almost impossible by doing so. New players by habit use their second jump right away making sealing a stock simple. Also, unless you are frame perfect in melee, it's common to waste your second jump on accident when recovering with an Up B recovery.
Pro Tip: Leaving "Tap jump" off as a control setting limits your tech skill capabilities. Leaving it on and getting used to avoiding accidental jumps with the analog up makes you a better player and prevents you from limiting your tech skill ability.

The button is used for standard attacks. Pressing just the A button is often called Neutral A or "Jab". Some characters have Jab combos. Some longer than others and some more useful. Tilting the analog stick in different directions and pressing the A button create stronger attacks called tilts. Forward Tilt, Down Tilt, and Up Tilt. Finally tapping the analog in different directions create heavey attacks called smashes. Forward Smash, Down Smash, and Up Smash. Smashes are the only standard attacks that can be charged for more knock back, hit stun and damage. pressing the A button when dashing performs a dash attack
Jab
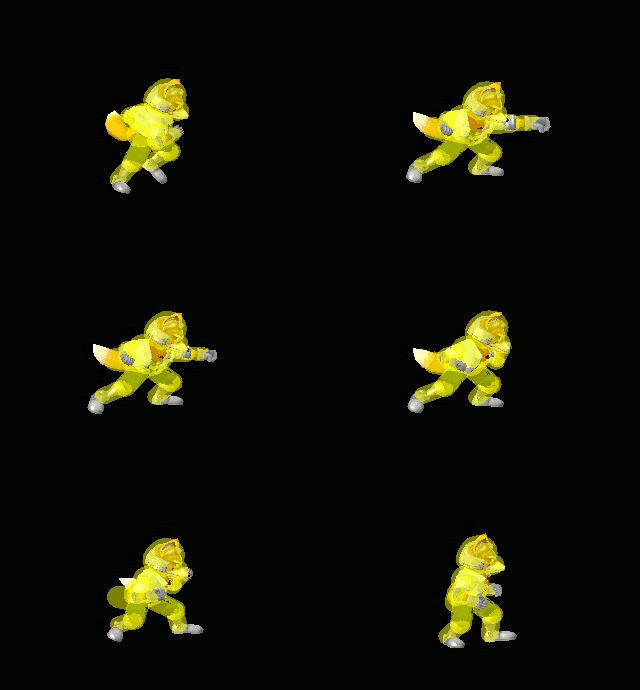
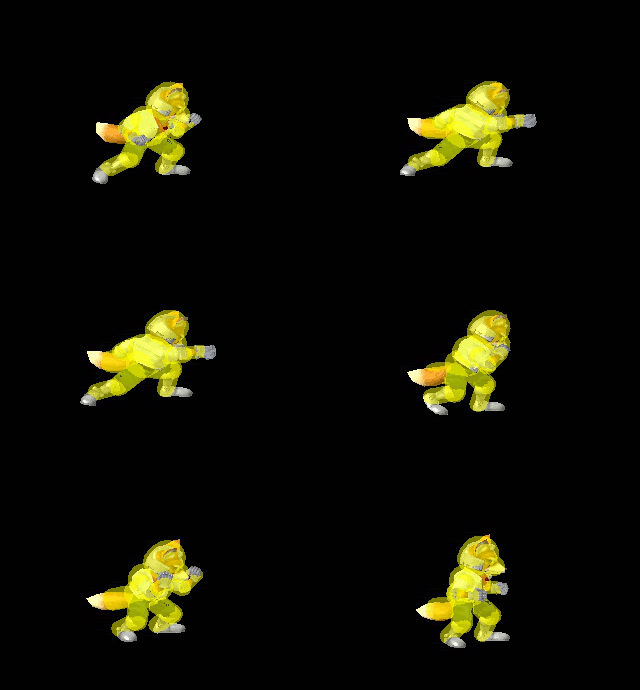
F-tilt
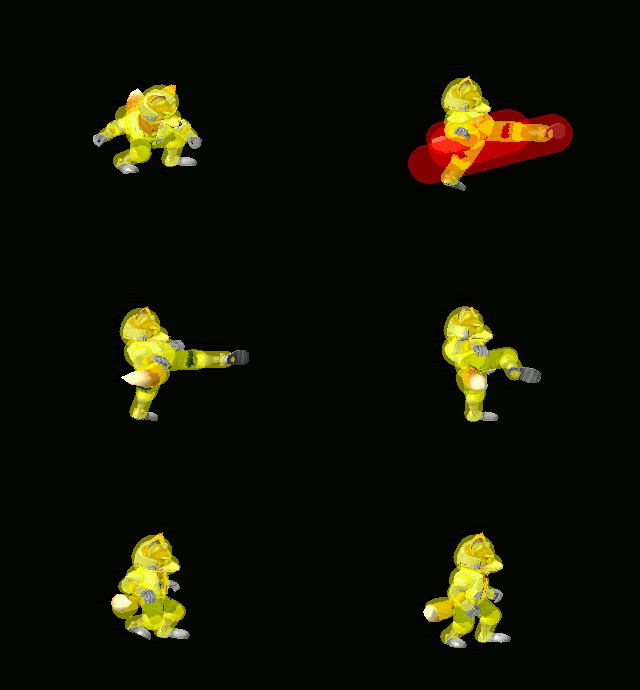
D-tilt
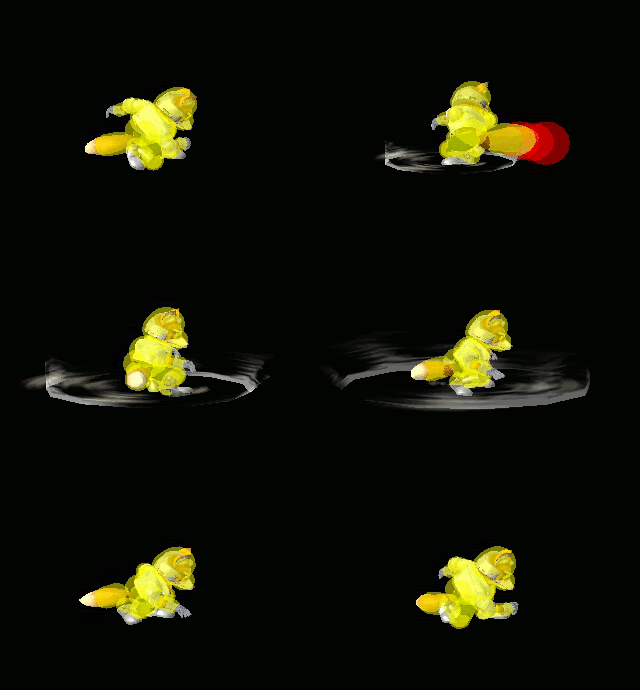
U-tilt
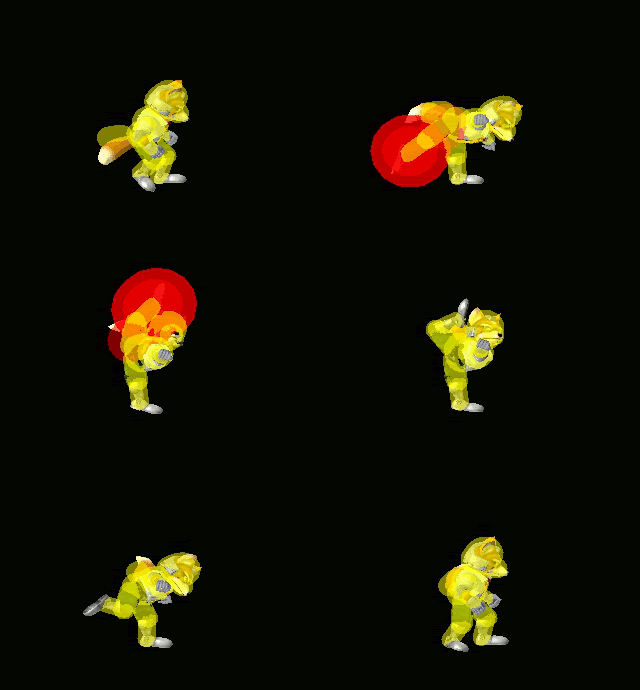
F-smash
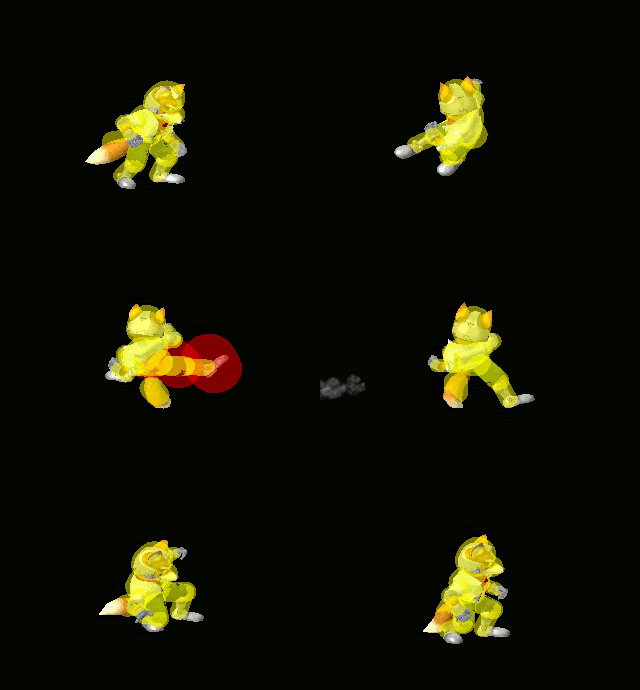
D-smash
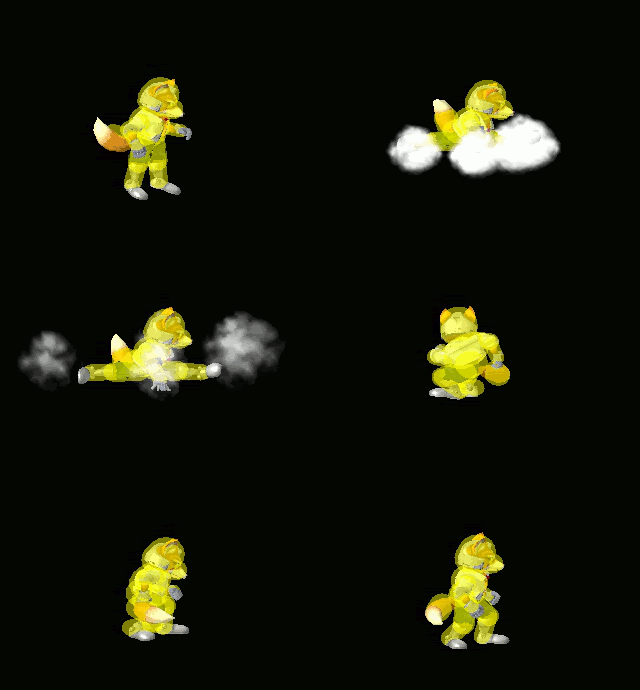
U-smash
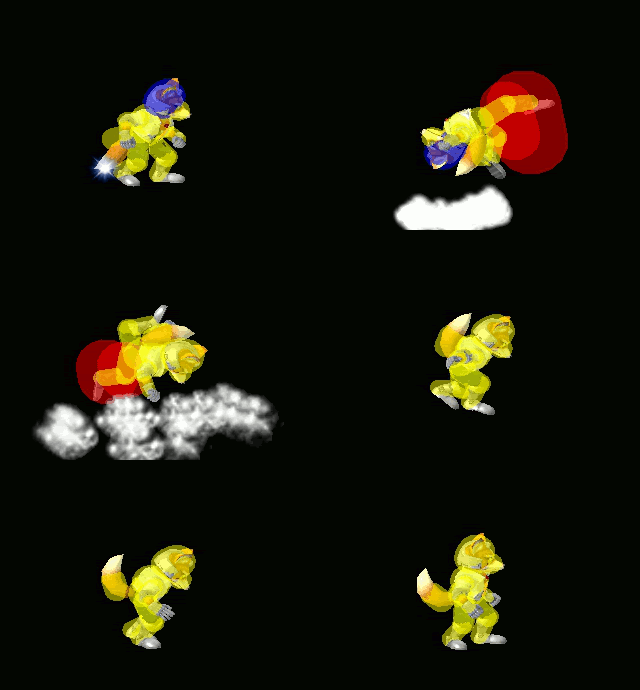
Dash attack

(frame data gifs from:http://smashboards.com/threads/complete-fox-hitboxes-and-frame-data.285177/)
The button is used for special attacks, B attacks in differernt analog directions often are unique to each character and normally has a role beyond dealing damage. Knowing the style of your character helps you understand the idea of special attacks. Normally though Analog up and B or analog left or right B are used for recovery options.
Neutral B

Side B

Up B

The and
and  and some times
  buttons create a bubble like shield. That grows smaller the longer it's held up and the more hits it takes. If the shield gets too small you are either more vulnerable to what is called a "Shield Poke" or to a "Shield Break". A Shield Break results in your character being stunned for a dreadful amount of time leaving you in critical danger of a full charged smash attack.


Tilting the analog stick in different when shielding gives you dodging options. Left and right makes you dodge roll left or right. Down lets you do what's called a "Spot Dodge." which is a dodge in place. Up allows you to instantly jump out of shield which is important knowledge later on (X and Y allows you to do this also).
Pressing both A and any block button allows you to grab (Pressing Z allows you to do this also.[Z= A + R or L]) If you are currently shielding, pressing A during your block allows you to grab out of shield or "Shield Grab" which is great for countering aggressive players.
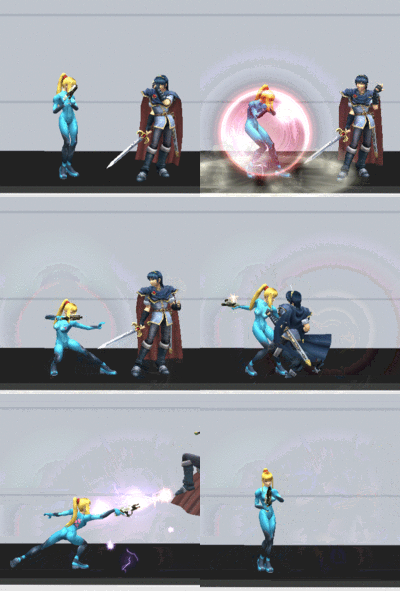
These are the basic controls of Super Smash Brothers and more. Everything else is learned on your own, and through the Meta Game of Tech Skill.
What is Tech Skill? "Technical skill, also referred to as just tech skill, is one's ability to manipulate a controller and produce their desired inputs. Players with greater technical skill are able to more reliably produce their intended inputs, and more efficiently perform maneuvers that require more complicated inputs (such as advanced techniques)."
What are Advanced Techniques? "An advanced technique is a series of actions, typically complex and/or difficult enough to require reasonable tech skill, that results in a benefit to the metagame of a character. Advanced techniques mainly differ from standard techniques in that their presence was not discovered or expected by the game's designers. This often manifests itself in the form of advanced techniques being results of oversights or glitches, such as wavedashing and momentum cancelling."

Tech Skill and Advanced Techniques are most important in Melee and Project M due to their complexity and unlimited ability to find something new with a character. The games that are more set in stone like 64, Brawl and 4 have limited potential and thrive off of smart game play. Learning Tech Skill in any Super Smash Brothers game is important if you want to be competitive. Being adept in every possible outcome makes you ready for the worst and when you are in a pinch you wanna get out the quickest way possible. Being knowledgeable and able to deal with Tech Skill and even utilize it yourself in your own way makes you a handy player and dangerous for those who don't have the hands to fight back. Sooner than later you will learn that it almost could be considered a physical sport since your hands need the physical discipline.
What Tech skills should I learn?
First I will go over the basic stuff that is supposed to be in the game but wasn't covered in the tutorial.
Aerials- Tilting the Analog in different directions using the A button in the air performs an aerial attack. There are 5 different aerials and names for each. Neutral Aerial or Neutral Air or N-air or Nair, Forward Aerial or Forward Air or F-Air or Fair, Upward Aerial or Up Air or U-Air or Uair, Backward Aerial or Back Air or B-air or Bair, Downward Aerial, Down Air, D-air, Dair.
N-air

F-air

B-air

U-air

D-air

gifs from http://smashboards.com/threads/marth-frame-data.356485/)
Tech- Teching or also known as "Breakfall" or breaking your fall is the act of pressing L or R right before coming in contact with the ground, wall, or ceiling of a stage while "Tumbling" or in hitstun. When Teching off walls you can slowly fall down losing almost all momentum allowing you to safely jump out of your Tech, or Tech into a wall jump depending on weather your using your control stick when Teching off walls. Teching off the ground puts you into the position mentioned before when talking about Reads. Teching is a useful strategy. So useful that even Miss-Teching, which is the "accident " of not Teching before hitting the ground is used competitively.

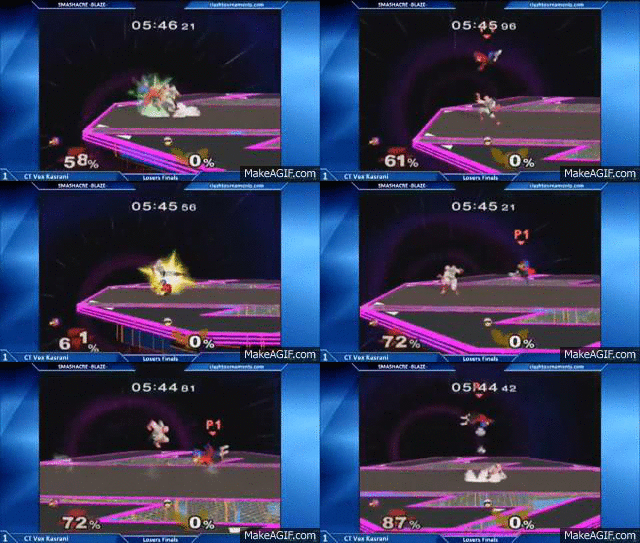
Wall Jump- Wall Jump is the ability to use certain nimble characters to jump toward or along a wall then kick off said wall and jump a ways diagonally in the opposite direction by flicking the control stick in that direction after touching the wall. This has little use in recovery surprisingly and you will mainly see it being used for style, or when Teching. Only certain characters can actually wall jump, but all characters can wall jump out of Tech. Keep that in mind.

Tethering- Tethering is the act of grappling a wall or ledge with a tether like object that certain characters have access to like Link and Samus. Pressing the Z button in mid air with characters with a Tether like grab shoots out their Tether weapon as either an attack or grappling hook called a Z-air or Z Aerial. Teather laws are different from Melee compared to other games cause Melee is the only game that allows Tethers to latch onto any wall like surface if the character is able to hang from it, were as Project M, Brawl, and Smash 4 your Tether and the ledge's Sweet Spots are magnetic and connect almost automatically at the right distance.

Air Dodge- Pressing L or R in Mid Air allows you to dodge in mid air. Air Dodge Laws are different In Melee and Project M compared to Smash 4 since you only get 1 Air Dodge in Melee and Project M before you are in "Free Fall State." and said air dodge stops your momentum and you can even use the analog stick to change your aerial direction when dodging which is important later in this tutorial. In Smash 4 and Brawl you have unlimited Dodges and they do not change your momentum at all.
Pro Tip: in Melee and Project M Air after air dodging you are able to Zair if done before you go into Free Fall State. This is helpful because Tethering is difficult when you are falling. Tethering with an Air dodge stops your momentum making the aim for the Tether much less difficult and provides Invincibility frames to prevent from being edge guarded. When In Tumble Animation you cannot Air dodge or Z-air. Tumble animation is the animation after hitstun when being launched in a direction. To get out of tumble animation without wasting an Up- B or jump you can wiggle the control stick and your character will switch to a normal falling animation and will allow you to both air dodge and Z-air
Fast Fall- The ability to fall faster than your normal falling speed by tapping down on the analog after you've reached the peak of your jump. This is useful for escaping aerial pressure and is also used for other things later explained in the tutorial.
Dash attack- Pressing A when dashing performs a Dash Attack.

C- Stick - The C-Stick tilted in any direction on the ground conducts an auto Smash Attack in that direction. The C-Stick tilted in any direction in the air conducts an auto Aerial Attack in that direction. the utilization of using the C-Stick is super useful and will be explained why later in the tutorial. Using the C-Stick In Smash 4 and Project M Allow you to charge your Smash Attacks and also Dash Attack when flicking the C stick in any direction and dashing at the same time.
Pro Tip: Using the C-Stick when performing aerials is important since there's no direction input being made. That means when you do a Back Aerial with the C-Stick and you are moving forward, your momentum and direction will not change. This opens the doors to discovering new reverse hit boxes for combo heavy characters.
Items/Projectiles- If an item is laying on the floor press A to pick it up. using A with the analog tilted in any direction throws the item/projectile in that direction. tapping the analog in any direction and pressing A performs a Smash Throw in that direction which throws farther and does more damage and knockback on impact (This is also possible with the C-stick). pressing Z in the air with the object drops it. pressing Z in the air catches items, and pressing A on the ground catches items with the correct timing, The timing gets easier if the item is caught multiple times in a row. In Smash 4 (I'm not sure about Project M. ) Pressing A in the Air also catches a thrown item.
Short hopping or as Nintendo calls it "Low Hopping" - Is a method of tapping the X or Y button quickly and releasing the X or Y buttons before you character leaves the grounf making your characters initial jump height shorter. The speed of the button press differs for each character since each characters jump animation differs. In smash 4 and Brawl this is easiest to perform
Grabbing or Sweet Spotting Ledge - this is most of the times automatic. Smash 4 ledges are considered magnetic overall making sweet spotting the ledge and grabbing it to hang on easier. You can even grab the ledge when your character is facing away from it. In Project M and Melee sometimes you have to hold the Analog toward the stage's ledge to confirm the sweet spot and you MUST be facing the ledge. Also in Project M and Melee only, your character must be facing the ledge to grab it. if the character is facing away unless in a special animation you will miss the ledge and fall to your death. In Smash 4 the direction you face does not matter for most characters.
This is basic knowledge learned easily in the first hour of playing Smash. This knowledge is guaranteed to be memorized in seconds especially since the more advanced techniques make everything else seem like common sense. What will actually take time to practice is the advanced techniques.
What advanced techniques should I learn?
This will be a list of advanced techniques and how they should be applied in game and what methods should be used to practice them.
(Unfortunately, you will find that most advanced techniques are exclusive to Melee and Project M. I'll Tag (Ex2M+PM) If so and Tag (Ex2S4) if it's just for Smash 4)
Watch this video for visual demonstrations of most of the techniques listed.
(Ex2M+PM) L Canceling- L Canceling is an advanced technique used to cut the landing animation of standard aerials short for faster movement. Pressing the L or R or even Z buttons with in 7 frames before you land when using an aerial the landing lag is cut down making your aerial take less time to complete.You cannot L cancel Specials or Z-airs.
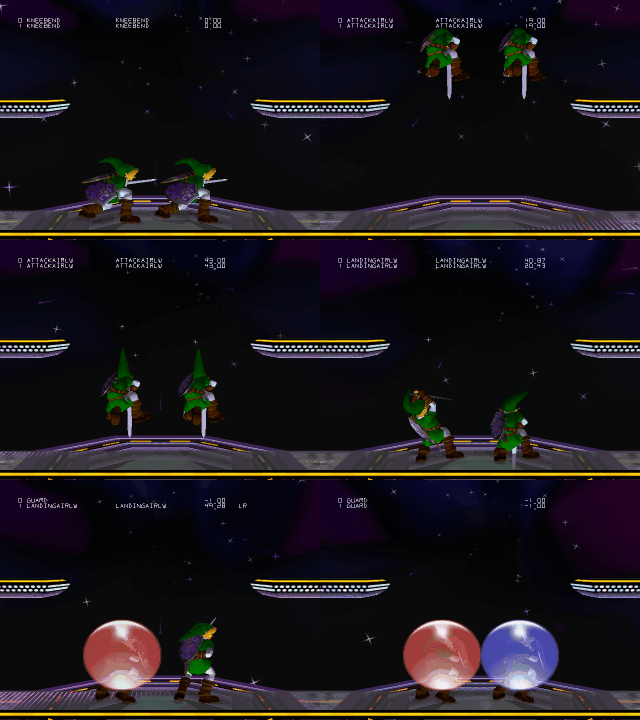
Try this: practice L Canceling simply by getting in the habit of pressing L or R right before I land regardless of if I'm Using an Aerial or not. You'll notice that you will be using L and R for almost any kind of movement and it will be helpful in the long run. For now just think of it like you're teching your Aerial attacks.
SHFFL and SHFF- SHFFLing or Short Hop Fast Fall L canceling is a sequence of advanced techniques used to either space or combo your opponent. This is a very important technique in Project M and Melee because this is the fastest and most common way to combo your opponent. Using any aerial then SHFFLing it makes you almost lagless, difficult to punish and makes you incredibly mobile. Some characters like Pikachu and Falcon require it to hold a steady match-up against certain characters. Learning how to short hop, fastfall AND L cancel your aerials on command is required for this advanced technique which is difficult to get used to, but sooner than later it becomes second nature. SHFF is the same concept but it's for games that you cannot L-cancel in Like Brawl and Smash 4.

Pro Tip: SHFFLing is ten times easier with the C-stick. Performing aerials with the C-stick makes SHFFling less stressful and a ton less of a handful, and you get momentum perks out of it as well. I recommend getting used to aerials with the C-stick more so than the A button, but eventually you will need to be adept with both.
Auto Canceling: Is the even more advanced version of L-canceling. The only thing different is that there's no input besides the original Aerial. Everything else is based on timing. Auto Canceling is using an Aerial and timing the landing during the aerial or after the aerial's animation has finished making the landing lag 100% lagless, so lagless that L-cancelling the Aerial either doesn't work or is slower than the initial auto cancel. This is more effective than L-cancelling but it's much more difficult and sometimes not worth it. If you find a move that's worthy of an auto cancel then I recommend practicing the auto cancel and sticking to it. Remember that L-Canceling is far more consistent than Auto-Canceling.

(Ex2M+PM) Wavedashing: is the ability to slide either a short or long distance left or right which is usually faster than your initial running dash. This is often times replaced with dashing and even dodge rolling because of its abrupt and instant speed. Wavedashing becomes as useful as your control stick and once it becomes second nature you'll be using it every time you move. To wavedash you press L or R to dodge in mid air. Directional Air Dodging as mentioned before was the ability to dodge into a certain direction in the air. The concept of wavedashing is actually Air Dodging right before your jump animation leaves the ground then choosing your Air Dodge direction be diagonally left or right, thus making you slide left or right.
Practicing this is frustrating but the process and idea of this advanced technique is rather simple. It's even harder to explain I'll find a gif that would explain it better than I could.

Try this: practice the timing of pressing the jump button and the dodge button by holding the analog down. If you do full jump/full hop it means your pressing R or L too early. If you air dodge too high or in place in the sky your pressing L or R too late and if you see your shield appear you are either holding down the L or R button for too long after your previous attempt or your pressing X or Y late.
(Ex2M+PM)Wavelanding: Wavelanding is the act of Air Dodging into or onto a platform or the ground usually after a jump. Basically it's a wavedash but instead of starting from the ground you've had a little air time. This is very important because it makes moving through the stage faster than ever. This ability gives you many advantages in stage control if applied correctly. Performing this is very similar to Wavedashing. If you have trouble Wavedashing at first I recommend practicing this more and then you will understand the concept better. Essentially if you're in the air ready to land and you diagonally aerial dodge left or right before landing you will slide left or right sometimes longer and faster than your default wavedash if timed correctly. This is were pressing L or R before you land by habit comes in handy since you will be Teching, L cancelling and wave landing. You'll be pressing it a lot when wavedashing as well so you'll get used to it really quickly. Make sure you don't roll by accident.
 Note: the gif is really laggy. Its not your computer
(Ex2M+PM)Waveshielding: is the ability to hold shield and wave dash out of shield then back into shield again. Essentially, instead of just standing, you have your shield up at all times except when your wavedash is being performed. It's pressing and then holding the L or R buttons during a wavedash. It sounds simple but it's a tad more complicated cause it requires a little discipline to not leave yourself open or dodge roll on accident. You don't want to let go of shield THEN wave dash, you want to jump out of shield like a jump cancel. but before you actually jump you wavedash out of the the shield instead so you never actually dropped shield it just instantly disappeared. If you're holding the L or R buttons before your Wavedash animation is finished your shield will then re-appear as soon as possible.
Protip: I highly recommend getting into the habit of shielding with a different button than the button you wavedash with for this technique especially. for example If you hold the L button to shield you can keep holding the shield if you are able to wavedash with R. So IF you continue to shield before during and after your wavedash , your Waveshielding will be performed perfectly easy as that. What's difficult is the discipline of using 2 shield buttons and keeping their usage separate.
Protip: Get into the habit of light shielding on command. Whats a light shield? A light shield is lightly holding the L or R button or holding the Z button after a grab or animation. Doing this makes your shield bigger! This is very important because when yo light shield you increase the health of your shield and reduce the probability of a shield poke. A shield poke is where a stray hit manages to get passed your shield. Not only does your shields health grow, you also can control the direcion of the shield with the control stick. This is called Shield Directional Influence or Shield DI. Why is shield Di good? Well for one it lets you prevent shield pokes even more, but also since your using your control stick to control your shield you cant roll with the control stick. Thats fantastic! That makes wave shielding so much easier because you have a giant healthy shield that you wont roll with! If you master that your defensive purposes will be unstoppable.
Jump Cancels: Jump Cancels are mainly (Ex2M+PM) but some concepts are technically available in smash 4. Essentially to perform a move you couldn't do originally in the current animation or position by simply jumping and then performing a certain jump cancelable move before the crouching animation ends at the start of the jump. Grabs, Up Smash and Up B are all jump cancelable. Why jump cancel these moves? Most of the time you would jump cancel a move out of dash or out of shield because those are the only animations on the ground where you are limited to certain moves. What can Jump Cancel do? What Jump Canceling can do is interrupt what you're doing with a jump animation but before the jump animation starts, you can do an up smash or a grab or even up B. If you are dashing at your opponent and tap analog up and A ideally you will jump and U-air, but if you jump before you press A and hold it for just a second you will do an Up Smash. I mentioned earlier that you could jump out of shield. When shielding if you jump then tap analog up and A you will instantly change from shielding to an Up Smash. Keep in mind that this technique is simple hard but the button pressing is pretty fast and its difficult to perform. What's also difficult about this advanced technique is remembering that it's an option. Jump cancels usefulness gets too character specific beyond this point. If you play as Fox and you get really good you'll learn how to Up Smash out of Shine or Shine Grab (Something I won't go over.) Jump cancels technically don't exist in Smash 4. Although the concept is still there. I wouldn't recommend attempting to jump before you're dashed upsmash or for an up smash out of shield because it does it automatically now. Although Jump Canceled grabs do not exist.
ProTip: A Jump Cancelled Grab is used often times instead of dash grabs because dash grabs are slower. If you learn how to Jump Cancel grab on command when dashing you're going to perform your standing grab animation which is ten times faster and more effective. I'ts also difficult to punish because of its speed.
Protip: A simple way to perform a jump cancelled up smash is to flick both the analog stick up and the c-stick up basically at the same time. To be precise, you want to flick the analog barely even a moment before you flick the C-stick just to ensure that you are jump cancelling. This requires practice but I find it much simpler than pressing x. Just another reason to leave tap jump on.
(Ex2M+PM)Dash Cancel Grabs: The act of cancelling a dash attack with a grab to do a dash grab that has twice the range of your initial dash grab. This is useful but punishable because the animation is still longer but confirming grabs will be easier cause of its range. Unfortunately performing this is a ton harder than learning how to jump cancel grab, and harder to remember. to perform this is to dash attack but grab before your dash attack animation starts.
(Ex2M+PM)Edge hogging- Edge hogging is a method of edge guard were your motive is to grab the ledge before you opponent. Doing this will make it so that no matter what the opponent does he cannot grab the ledge if another character already has hold of the edge, especially if the ledged player still has invincibility frames. It's possible to be fought for the ledge after the frames of invincibility are over but that's what makes edge hogging difficult. Edge hogging is a simple skill to perform. Mastering it takes tons of practice because simply jumping and grabbing the ledge before your opponent eventually will not cut it. You will later learn methods of grabbing the ledge that are faster and faster and faster and eventually that will become character specific.
Pro tip: If your Wavedash ability is reliable at this point, if you're facing away from the ledge, you can wavedash or wave land that direction and still be facing away from the ledge. when doing this you will slide off the edge but automatically grab the ledge making an instant edge guard often called "Ramen noodling" "Instant ramen" "Instant noodles" "Noodling" or "Uncle Benning."
(Ex2S4)Reverse edge hogging: This is a little something I made up that's an interesting tactic. It's the ability to read when your opponent is about to grab ledge so you find ways to grab ledge right after. After your opponent's invincibility frames are over he/she will be forced off the ledge into a position to be edge guarded accordingly
.
Protip: (Ex2M+PM)If you press R or L when holding the ledge to roll onto the stage, the stage will register that your presence is still holding the ledge until your rolling animation is finished. So if your opponent is attempting to grab ledge before you are finished with your roll he will continue to fall and not grab ledge. Learning to utilize the timing of this technique is super safe because right when your opponent loses a stock from being edge guarded your back on center stage when the opponent spawns which is incredibly important during the neutral.

Protip: If you fast fall from the ledge you automatically let go of the ledge. The speed of letting go of the ledge is extremely abrupt but it's easy to get used to. If you fast fall after grabbing the ledge you technically have not used your second jump. If you fast fall and use your second jump all your falling momentum is gone in an instant and you can grab ledge again.
Protip: fast falling from the edge is also dangerous. It becomes a bad habit if used continuously and its bad because if you mess up just a tad you will fast fall to your death. Players try to get into the habit of tapping the control stick away from the ledge just to let go of it and fall at a normal fall speed. making more room for error. Although somethings that are character specific fastfalling from the ledge to re grab or use an attack is necessary.

Doing this with certain moves that keep you next to the ledge like marth's up b in substitution for a double jump will make you grab ledge again. This is something called ledge stalling or edge hopping.
 This can be performed in all smash games but the uses for them are different. (Ex2M+PM) Use his to correctly time the invincibility frames to correctly edge hog your opponent. (Ex2S4) Use this to correctly time your opponents ledge grab so that you grab the ledge right after during your ledge stall. Keep in mind that ledge stall is super safe and super dangerous at the same time because the slightest mistake or opening will make you lose a stock in no time. It requires a lot of practice to be used comfortably (Note you can also hold away on the analog stick to perform edge stalls. Its safer and rewards mistakes because unlike fast falling if you mess up you can still recover easily.)
(Ex2M+PM)Edge waveland: When Edge Hopping you are exhausting your second jump. Although you can use it for many many other things other than ledge stalling. One is Edge Wavelanding which is the act of edge hopping over the ledge and then wave landing making a smooth slide onto the stage.


Its fast and useful for surprising your opponent, and you still have a decent amount of invincibility frames if air dodged correctly.
(Ex2M+PM)Dash Dancing: We have covered a lot of intense Tech Skill. Now we are going back to a basic advanced technique that is easily misunderstood but also very very important. Dash Dancing is literally the art of dashing back and forth before the startup animation ends of each dash. You literally tilt your control stick back and forth.
 Why is that useful? it's an incredible mind game tool used to weave in and out, through, back and forth and around our opponent and make him/her feel anxious. Most people think dash dancing is a thing that keeps you moving and should just be done when you have space which is only partially true. What its true use is is to use its zoning options to put positional pressure on your opponent. Keep in mind that if your character starts his pivot animation or does their turn around animation they are not dash dancing and your timing for it is screw'd up. Stop the control stick and start again and its most likely that you will get it on your first couple of try's.
You will learn different dash dance patterns that will help you weave in and out of enemy attacks. mastering it is difficult and the utility of different kinds of dash dances are character specific but the more comfortable dash dancing you are with character the easier it is. I would say every dash dance has a "rhythm."

Dash-canceling: Don't worry, this is also a simple task. After the start up animation of your dash, if you hold down and crouch you will stop in place and maybe slide a small distance depending on the speed of your character. Doing this creates mind games of approach and also allows you to do other moves instead of your punishable dash attack. This is most useful for marth players for example. You will see a lot of dash dancers who dash then crouch then down tilt for pokes. You cannot crouch during your start up animation of your dash. This is with in the period for you not to pivot when you dash dance. If you hold down too early after you dash your character will continue the dash animation stop then crouch in place.
Chain throwing/ Chain grabs: The act of throwing and finding a way to catch or combo your enemy into another grab. These are all character specific and can be technically done in each game. The guarantee is 10 times more difficult in smash 4 though. Learning what character can be chain thrown by what character is extremely helpful at early percents. Some characters have such a high garuntee on certain characters that its a "0 to death" combo which literally means you can KO them with this on oing combo from 0% to death percent. If you've heard or ever hear of "Wobbling" you'll know what I mean.

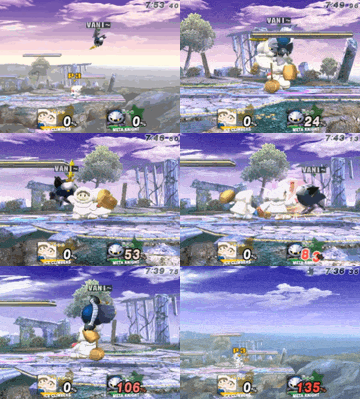
Pro Tip: Learning How to Jump Cancel Grab and Dash Cancel Grab makes Chain grabs easier. So does Reading DI
Directional Influence: Or DI is the art of using the control stick during hit stun to influence the direction of where you are being launched after being hit by an attack.

Some people learned this on their own by nature, but learning it on your own also can create bad habits. DI is all about habit. What makes a really good professional is not only knowing how to DI correctly but, also recognizing a good DI, and also being able to READ a good DI and also being able to PUNISH a bad DI. Idealy when you are being launched horizontally off the right of the stage for example. You would want to DI Up and Left. doing this will send you up to the upper right corner of the screen with a less fatal speed. The blast zones of the screen are literally a Box [ ] so being sent to the corner makes it less likely to hit a Blast Zone. Its also a lot easier to recover from up high because you have the ability to use hang time as an advantage to sort your recovery options. HOWEVER, If being comboed relentlessly perhaps by someone who is SHFFLing or SHFFing you want to DI the direction you are being sent. That way comboing is a lot more difficult for the aggressor. Being able to control your DI habits is important so that your opponent isn't able to abuse your hit stun. Your opponent will also try for what's called a "DI Mixup" which is where the opponent knows what direction you've set up to DI so he uses an unexpected throw or move to send you the direction you're DIing to to take an unexpected stock. For example: I'm playing as Ness and I just grabbed you. Ness has a back throw that kills in all 3 of these smash games. You know that My back throw will kill at the percentage you are at when I send you to the left side of the stage so you prepare to DI to the right. Knowing this I do the "DI Mix up" and use my weaker forward throw instead. In normal circumstances my forward throw is too weak to KO, but because you were DIing to the right and I read that you would I took advantage I took your stock. That is high level game play that's important to be aware of in most situations. Directional Influence in Smash 4 is similar concept in every way shape and form but its applied differently and is actually called Vectoring. You have more ability to influence your direction in smash 4 so you don't have to point yourself to the opposite direction diagonally up. All you have to do is hold the analog toward the stage and you will be more safe. Other than that DI is still similar.
Protip: For attacks with multiple hitboxes you can do something called a smash Di. A smash Di is tapping the the analog in the direction you want to DI for a greater effect. Its easier to be applied during multi hit boxed moves cause then you can repeatedly tap the control stick in said direction makes getting out of it faster and much easier. It's most effective against moves that have a final hitbox that deal critical amounts of damage, or knock back.

(Ex2S4)Perfect Pivot: A perfect pivot is the act of making your character spin backwards like a super fast precise bask step. This was a tech skill discovered to account for the absence of wave dash in smash 4. To perform this you have to tilt the control stick the opposite direction of which your character faces then quickly but ever so slightly tilt the analog back into its neutral position (the way the control stick sits with out being touched. Right in the center from to
to to
to not
not ). Technically you can do this in any smash game but the usefulness isn't as affective.


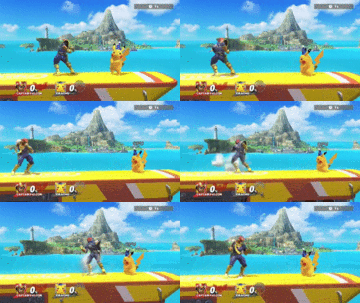

(Ex2M+PM)Crouch Canceling: Is another form of DI but it keeps you from leaving the ground. If hit with a low knock back move with low percent when crouching you won't be sent far. In fact, sometimes it appears that you haven't left your position at all. This is great for absorbing weaker attacks and countering with a stronger attack. Crouch canceling is a risk since you still take the damage absorbed and if your opponent notices, they are able to find ways to abuse your stationary position.

I don't have much knowledge of Smash 4 tech that isn't character specific. It's harder to understand some of the things allowed and not allowed in smash 4 since the rules are so strict regardless of the many holes found in game. Over all this list of advanced techniques are the basics of what you need. If mastered all of these techniques all you need to do is fine tune with more detailed techniques and also figure out your bad habits so that you can either make them good habits, or find ways to cover up those weak spots. What makes Smash 4 a competitive game is that it's less about the tech skill and more about the knowledge of the Smash Theory, were as Melee and Project M's meta game is highly constructed with Tech Skill Leaving the Smash Theory as a thing that just makes it that much more difficult to have a comfortable skill level.
How to Practice?
Everyone of us players as a beginner always wondered. "How do I get better?" Well I just displayed many of the essentials a large amount of skills to learn and recognize. "
Practice makes perfect."
"How do I practice? How do I know I'm getting better? Am I practicing the right way?"
Truth is You'll never know until you see your results in a real match. Preferably someone better than you, or even someone completely unfamiliar. Then you think to yourself..: "I don't have anyone thats willing to play consistently just to get better. At least not for long. They normally get silly in the end or get bored." This is a common problem. This means you have to practice BY YOURSELF.
Your last reasonable thought could easily be "How can I practice by myself when the bots or computers in the game are spammy, unorthodox, predictable and even SD at random times?" That's a tough question. Hopefully I will soon answer that for you.
The mindset needed to practice.:
My number one rule in smash is this: "A bad habit is only a bad habit once it's punished." What that means is, If a link is spamming an arrow at one side of the stage and link's opponent can't seem to get around it. In the end Link wins with ease. Right now Link's habit is considered a GOOD habit. Game 2 starts and your opponent picks falcon against your Link. All you do is spam arrows, but falcon's speed allows him to weave and even jump over said arrows and close in for close combat. In the end Falcon wins with ease due to his ability to avoid being damaged critically by your low damaging arrows. Suddenly your habit has become BAD.
Why did I mention this in the practice section? Simple! You need to make sure you are practicing a GOOD habitual playstyle. Or else someone will expose your greatest weaknesses and gaining a victory will be very difficult for you. You must also keep in mind that a characters weakness is different from a PLAYERS weakness. A character's playstyle has limits making weaknesses a little obvious. That's what makes Match-ups important. For example: Sonic being the fastest character in the game (For smash 4) A good weakness of his is his terrible positioning. For fast characters positioning is difficult because you have to improve on your timing and reaction to stop at the correct time. A player's weakness is not being able to display good timing on a fast character. In result most players would practice the weakness of a character to improve all-around.
That or you later realize that that character isn't for you.
You also have to constantly recap on what you know. Write it on paper if you have to. By now, after reading this guide you should have a vague idea of what The Neutral, Zoning, Reads, and Tech Skill are. Take what you know and simulate it. After you simulate it, you repeat it. That is practice.
Don't worry about what you don't know if you can't find it on the internet. Theres things you can't teach that you have to learn on your own. A "style" if you will. What you don't know can only be developed in a match weather it be constant friendlies or tournament matches.
Drills: My most favorite way to practice is by creating drills. Drills are essentially to do lists listed in reps or repetition. An example of a drill is "For 5 minutes I will only practice wavedashing. After 5 minutes I will practice 5 minutes of jumping out of shine (Fox/falco/wolf exclusive in Melee/PM). After five minutes of practicing jumping out of shine I will practice wave shining (Fox/Falco/Wolf Exclusive in Melee/PM)" That's a drill for practicing tech skill. Essentially, to correctly create a drill you wanna break down the thing you want to practice into segments. Segments that will make performing you want to get better at MUCH easier. Another example: " I lost my last tournament match because I shield grab out of shield pressure too much. I often times see myself get punished for this. To practice my OOSO or my Out Of Shield Options, for 10 minutes i will try shielding a computers attack and then counter attack with an aerial, then shield again to counter attack with an Up B, then shield again to counter with a Grab. After 10 minutes of that I'll fight the computer seriously and see how many times I can do a different out of shield option. Then repeat.
Checking your results: There's no point in practicing with out checking your results. Again, I know its difficult not being able to play against other people but computers CAN be a sad sad substitute. After you feel you've practiced a while, set a computer to level 5 or lower and treat it like a human player and give it respect when necessary. Make notes on things you've improved on weather its good movement and positioning, continuing a combo and reading DI or simply being satisfied by what you see and feel. Make notes on things you haven't improved on weather it's accidently stopping in place and hesitating because your hands no longer know what to do for a moment, not being meeting your expectations on recovery, or missing an easy DI, or simply being dissatisfied with what you see and feel. That's where you go back to the drawing board, write what you know, and simulate.
Imitation: Watching is a form of practice as well. It's very common for players to see what competitive players ranking in top 8 at a national dish out against their respective rivals to move on to the next round. It's also very common for those players to sit down and practice exactly what they saw their favorite players did to win. Something amazing, something stylish, something technical. All those things that appeal to us, that sink us farther and farther into the meta of smash. We imitate that and start using what we saw ourselves. That is a very important thing is being able to notice what is good in high level play, but it's also difficult. For example: Most melee Falco players learn to multi-shine because they see high level players use it and win with it (rarely though) It's such a popular techskill, most Falco mains find it to be a must. Problem is beginning falco mains learn to multishine, but never learn how to APPLY it in a match. What you use a multishine for is to pressure your opponents shield with it until shine hits.
Experience: I've said it before many times, but there is no way to make this any clearer. You HAVE to find someone to play against, if not every day, at least once a week. Again, prefferably somone better than you. When you play this person you have to do everything you can to win and when I say everything, I mean EVERYTHING. Sometimes, that means discarding some of the things you've learned or tried to learn. Sometimes discarding your pride and doing something cheap. Why would you not apply every little thing you learned to win? What's the point of practicing all these different things? The point isnt to apply every inch of tech or speck of knowledge you know. That's being a show off and thats no where near enough to become a good player. What learning all this tech skill and knowledge is for is to make you able to work your way through the worst case scenarios. Some people never learn how or when to wave dash properly because when they are starting out they believe thats the only way to move or turn around because they have replaced it with their rolling habits completely. Not until that becomes a bad habit will you realise when and how you should wavedash. You've known how to produce a wavedash all along but when is what really becomes difficult. That's also something you will not learn without playing someone
KNOWING WHY YOU LOST: This is very important. Possibly THE most important. If you don't know why you lost, then you cannot learn from your experience. You cannot simulate and practice from that game, and you wasted your time losing in a fashion so ridiculous you're probably blaming the other player for winning with the old "Your being really cheap" lines. I always like to say: "There's more than ONE way to play smash. Everyone plays differently." I say this because most people believe there is one way to play smash. Most people dislike playing Jigglypuff and Shiek players in most any game because they are different. They aren't exactly "Aggro"and they don't require tons and tons of techskill. Most player's look down upon that, mainly because they consider it an "Easy way out" and it's not. Unfortunately some players considered certain characters and their respective playstyles "Fraudulent" and refuse to change the way they play against said character and style and wonder why they lose. Most of the time it's obvious. Respect is a very very very good word in smash and it stands for a lot. Learning what respect means in this game makes an outstanding player. When you learn to "Respect" Jigglypuffs Aerials, you learn ways around them, and then you make jigglypuff respect YOU.
This is all I have for you now folks I know I didn't add on much on this update. Actually I shortened it by a few paragraphs cause looking at some of the things now I realize I was babbling, or repeating myself or didn't make much sense at all. I would call this like a directors cut cause its definitely more clean now.
NOTE: (This guide is close to being finished. I have quotes and material that aren't mine and aren't sited and vocabulary that new players might not understand. I also have a few grammatically incorrect errors that need to be cleaned up but as far as i'm concerned this guide is almost finished. I just need to explain the rules of counter picks. Later on i'll decide on a table of contents and maybe organize sections by colored text but I'm not quite there yet. For now you have to fight your way through the walls of text and gifs.I do not own ANY of the gifs, pictures or videos. If the many gifs are laggy when playing all together and you want to see one at a time just right click and open image in a new tab or window.)
Hello! Update as of April 8th 2016!.... Unfortunatley it's not really an update! I don't have the time currently since College semester is ending soon and I need my A game... litterally. Al though I have been making content on the side that I havent finished so there is definatley more to come! On top of that I have built a new desktop WITH Melee Netplay! AND a stream setup!! This means that I might be able to make tutorial videos or example videos and demonstrate some of my lectures visually! Hopefully that will be able to be applied soon!
For now! Feel Free to Follow my Twitch: https://www.twitch.tv/hxllxws and please look forward to more stuff in the future!
Hey! Another update as of March 7th 2016 11:16 am! I love how it takes me a month to update this guide and only add on little by litt.e ^- ^; sorry guys. I'm adding another seciton called "SPACING: THE ART OF NEVER GETTING HIT." which will help greatly in analyzing your opponent and undertanding how to take "Don't Get Hit." -Isaih to another level
In this tutorial I want to cover major practice methods and ideas that I have learned through experience, videos, and other guides that are easy to learn for players who want to get better at a fast pace. The most important part of being competitive in Smash is understanding the "Idea of Smash" or "Smash Theory." The "Theory of Smash" has 4 key points: The Neutral, Zoning, Reads and now an extra video also posted under the Rush Hour Smash channel on youtube Edge Guarding. Understanding these can make you a better player than most even without the power of "Techskill" which is the second most important method in smash.
First is understanding the "Neutral" the "Neutral Game." and the "Neutral Position."
DEFINITION of The Neutral: "The positioning in which both players have approximately even stage control vying to convert their advantages into an edge guard."
What this means is that when put in a situation considered "Neutral" both players have a somewhat even chance to use their skill and advantage to take control of the stage which often times leads to the stock of the other player. The Neutral Game and The Neutral in general is to be considered in almost all Super Smash Brothers Games.
The Neutral Game is Built by:
-Characters
-Stage Selection
-Match Ups
-Positioning of characters on said stage
-Pressure (Pressure holds a TON of definitions or methods)
-Abnormal or misfortunate happenings.
Characters influence the neutral by viability. If a character is harder to control, doesnt fit your play style, creates lack of focus (sudden needs for style or cruelty) or is unfamiliar lowers your advantages from the beginning. Your character choice for what we call "Match Ups" affects The Neutral Game as a whole.

Stage selection is also a big part of The Neutral. It's considered guerrilla warfare for certain characters. Sometimes you'll hear names like "Marth's Story" instead of Yoshi's Story or "Mang0 Land" instead of Dream Land because certain characters and certain players perform better on certain stages. There are also lists of legal and illegal stages, and tiers for each legal stage called picks and counter picks that can be determined differently depending on what event or "house rules" declaire.

Match ups are the before and in game strategies considered when picking certain characters and stages to have given advantages with stats and environment to make considering The Neutral easier by default.

Pressure, abnormal and misfortunate happenings are hand in hand in The Neutral Game. Mental discipline is key to finding a new way out to an unknown play style. When you're in a tight spot or have been outsmarted or even intimidated by a well known player or someone who seems to display good form, your considered to be in a pressured situation and might make repetitive or unsafe decisions. Some may make the right decisions and play better late game. These situations affect The Neutral due to its advantages and disadvantages of the players mental state.
Pro Tip: A way to avoid abnormal and misfortunate happenings through pressure is that mental discipline. Often times if you encounter a play style that you think "Doesn't require a lot of skill" or "spammy" or "cheap" you discard good reasoning and subconsciously insist on bad decisions and your frustration makes you refuse to adjust. It's a difficult task to find ways around a single move being used over and over and over again in the matter of a 2 out of 3 set but taking risks and adapting is what makes a professional.
After the idea of The Neutral Game is set in mind, the second part is being knowledgeable of the "Complicated Rock Paper Scissors." or "Neutral Position" of Super Smash Brothers. This part is the most important to Smash 4 meta but is not to be ignored in any other smash game. it's just far more obvious and easy to apply in Smash 4.
"The way the shield functions is what makes the Neutral Position Neutral." When a player's in or out of shield options become unsafe is when advantages begin to hit home. Applying pressure or shield pressure is important because attacking or poking shields with moves that are difficult to punish is considered the upper hand. "Any way the opponent attempts to attack or defend begins and ends considering the shield." What makes the "Complicated Rock Paper Scissors" important Is knowing that shielding is not safe against grabs. What makes grabs not safe is the ability to attack and attacking is unsafe against shield. These three options are considered "Zoning Options" which will be covered soon. Being able to anticipate these options is the ability to make "Reads".

Second is understanding Zoning.
DEFINITION of Zoning: "The utilization of spacing your character. hitboxes and potential hitboxes to limit the options of your opponent to create pressure"
What Zoning does for a player is create strategy in game to conveniently position your character and hitboxes to your advantage and make positioning the hitboxes for your opponent inconvenient. It's like The Neutral Position but more specific.
The most common method of Zoning is a method called "'Brick Walling.' Which creates Zoning patterns that are relatively safe to most approaches while having the necessary mixups to have better reactions from your opponent." Idealy both players set up Zoning patterns until one player shows a weak spot in their wall for the other player to punish accordingly or to over extend.

Because Zoning is based on reacting to the movement of other players, there are moves designed to beat out the speed of another character to cut them off unexpectedly called Zone breakers. "Most speed based characters are difficult to zone and rely on Zone Breakers to approach their opponent. Meanwhile most ranged based or projectile based characters rely on setting up walls and creating safety."

Some characters hold the options of both Zone Breaking and Brick Walling and are considered both Zone Breakers and Brick Wallers.
Spacing
Spacing is a subsection to Zoning. Idealy the aspect is the same, but the actions and goals are different and more specific. To correctly space yourself from your opponent you are keeping yourself at a distance where you are safe from enemy hitboxes or potential enemy hitboxes by using some form of movement. The goal of spacing is to prevent yourself from being hit as much as possible by creating a fixed distance and at the same time giving yourself an advantage by either anticipating your opponents movements or forcing them to over extend so that you can capitalize with a punish. Theres 2 ways to go about this depending on yoru characters stratedgy. Theres the aggressive and the passive aggressive. Not to be confused with Offensive and defensive, when you are aggressive you use your speed and movement to keep different amounts of safe space between you and your opponent at all times and use zone breakers to covers space for punish if you are un able to to use stronger attacks due to your amount of space. (In Melee) Characters like Fox and Falcon, would weave in and out with a technique called dash dancing. These characters are aggressive because weather they are offensive or defensive they willl use all tachtics possible to pressure their opponent by either cornering them or baiting them. Characters Like Shiek and Marth are passive aggressive using their positioning, zoning and brick walling to prevent actions to from passing by, keeping their opponent in range for their attacks but not close enough to reach them and punish their attacks. Wheather you are offensive or defensive you are able to make sure your opponent is in range with out constantly pressuring them or playing constant mind games. You essentially always keep them in your grasp.
Third is understanding Reads
DEFINITION OF READS: "The psychological strategy used in observing an opponents habitual behavior and patterns, and punishing them."
What this is is the advantages gotten out of understanding the patterns of the opponents Zoning and Neutral habits. This is the next step to high level gameplay and knowing this will literally put you a step ahead of your opponent at all times regardless of skill level. Understanding this is nearly impossible without understanding both the Neutral and Zoning or at least understanding your opponents raw habits.

Reading is made easier when taking mental notes of the options the opponent makes considering "Complicated RPS", "Zoning Habits", "Edge Guarding", and "Tech Chasing,"
Edge guarding and Tech rolling(Tech Chasing) being the easiest and most common moments to read will be the ones experienced the most.

"When an opponent grabs the ledge the lack of shield and threat of a ledge triumph demands a get up option be selected quickly." Regular Get Up, Roll, Jump and Get Up Attack are your main ways of getting on stage when hanging on a ledge. If your opponent reads your 4 options it can be the cost of a stock. When reading these 4 ledge options you can use movement and positioning to cover multiple options. Or commit to just one Read. Tech Chasing is a similar situation (Often abused in Melee and Project M with their heavier gravity and fast paced environment) where your limited options are Regular Get Up, Roll Left or Right or get up attack for Miss-Techs, or tech in place or tech roll left or right for a Successful Tech.
"Baiting is another form of a Read that involves active commitment. It requires that one trick his opponent to put himself in a susceptible position." This is when pressure is applied to push your opponent into a seemingly safe decision that actually is a setup for your next move.
Pro tip: Reads being your biggest mind game tool it's also very easy to fake a read Let's say an opponent misstechs near the ledge say right under the left platform of battlefield. If he/she was on top of the platform the opponent would be in its dead center. so right now the opponent isn't on the platform he/she is below it and is laying down waiting for the 3 options: roll left toward edge, roll right toward center stage, or get up attack/regular get up. You being the chaser you plan to read your opponent so you can punish hard, but you haven't caught on to any bad habits for you to use as a source. So you look at the statistics. if the opponent rolls toward the ledge they are unsafe for two reasons. 1. they are farther from center stage. Your goal is always to be in center stage since that's the hardest place to be K.O.'ed from 2. if you missteched too close to the edge and roll toward the edge, your rolling animation will continue once it hits the ledge and you will be stuck in animation for a enough time for a punish plus you're more likely to be K.O.'ed by a kill move since you're farther away from the center stage. The only upside is that you the chaser might not make it in time to hit before the opponent can shield right out of their roll. If the opponent rolls toward the center stage they have 2 good things. 1 They are closer to the center stage thus harder to K.O. 2. if you the chaser are too hasty, you might blow right PASS the opponent and switch places putting you in the vulnerable position instead. The only problem is that if your opponent is patient.. you gave them a free F-Smash. Next is get up attack. Regular get up is also an option but it's not often recommended. When you get up attack you have to hope that your opponent doesn't bait it out by spacing or shielding because that also gives a free punish away. Ideally this opponent would be screwed, but this is only true if you can read every option. Something you might not be able to do. So what should you do now? You need to read the SAFEST option. The option that takes less of a gamble is roll toward center stage. When making this decision as the chaser you either stay in place cause you're in range, dash a little forward out of a dash dance perhaps, or wavedash back and gain the position. you have a 50-50 chance of actually reading your opponent because all anyone wants to do is roll in because it's the safest option.... but the opponent does not. He rolls toward the edge because he/she knew what you were up to. Fear not! That was the worst of the option, you still have the chance of landing a kill move and even if it is shielded you don't lose much. Worst case scenario is a shield grab. Best case scenario your back in center stage. Wait, say your opponent get up attacks. all you have to do is time the animation or shield it and counter with either an out of shield option or a well timed smash attack/grab and you just faked a read. Some people (like me) consider that a read. Mostly because that's the first step to noticing your opponent's habits. You start being observant without even knowing.
Pro Tip: another great way to open your mind up to reads is to listen to yourself complain. No this isn't another lecture involving rage habits. Well, kinda. Why I say you should do this is becaus sometimes there is a situation when you are locked in combat against a player who's giving you a run for your money and you think "Oh no.. he's gonna do this" and then he does. He does exactly what you thought he was. The exact tactic and everything. What you end up doing is giving up and letting him use what he has been doing to you for a good long while now. Thats normal and sometimes its somehing you cant avoid. Although If you see something comming, instead of giving up you should use your forsight to your advantage and revearse it. For example, earlier today I was playing my friend who was a Falco main. I was fox and latley I haave been focusing on punishing his laser game which is an issue with many people when going up against a falco.I lost two straight stocks to him on dreamland and I was upset because he was dominating. I wondered why until on my second stock he felt pressured, so he dashed back, dash danced then lasered in switching back into offense. Subconsiously I though "That laser is going to hit me... I will be stunned and then He will down air me to set up a pillar oportunity." and that litterally what he did and it wasnt until stock 4 did I stop him in his tracks by shielding the laser spot dodging the down air and the upsmashing. Granted it was dream land and I couldnt take the stock I ended up getting 3 stocked. Moral of the story is pay attention. I doubt you could expect to notice such habits right away but once you realise he has a stratedgey, find the exact inputs to counter it and load up for a large punish because thats what reads are all about.
Try this: A good way to practice raw tech chases is to pick a character who has a long grab range, a fast grab animation, or a fast dash (typically Marth, falcon, or fox in most games) and any other character as a computer or normally a fast faller (fox, falco, C falcon) and go to a big fat stage like bridge of elden, or Final Destination and constantly throw the computer downward using whatever direction throw makes them slam into the ground for a tech chase opportunity and read the computers constantly. 20XX and PM are perfect for this training method because I do believe the computers have built in random tech rolls making your reaction better when practicing. If you do not have those hacks, set the computers on different levels from time to time for different results.
Edgeguarding:
"the process in which one attempts to cover and read their opponents recovery options. When the correct options are covered and/or read, it will usually reward in momentum. Percentage and possibly a stock."
The concept of edgeguarding as a whole is basically "who can cover more ground?" Both players are fighting for the middle of the stage and the player farthest from the center is the character who covers the least amount of ground. The less ground you cover the more likely you are either to be K.O'ed OR be set up for an edge guard since when a player isn't covering enough ground. They are considered K.O.'ed or edge guarded. When both players are at the center of stage, or when both players are competing for the center of the stage their ground being covered is 50-50 and that is another way of considering them in neutral. One stray hit that lands on a player can send them back farther from the stage toward the edge forcing the situation into a 60-40 in the offenders favor, the defender has just lost stage control. This is where you can desire pressure on your opponent when you are covering more ground. once you are covering 60% of the stage you want to keep it, and depending on what character you are you will brick wall and keep that 60 and inch your advantage farther and farther. Or go aggro and push your ground coverage further and further by applying tons of offensive pressure on your opponent. A 65 - 35 ratio is considered that the defending player is off stage. The reason why the advantage only grows ever so slightly is because the defender still has a second jump and a full-set of recovery to safely return to the stage. (All though differences may apply through different characters AND different games). Not the offender exhausts the defenders second jump will the advantage advance to a 80-20 ratio. At this point your characters only resource is to use a special recovery using the B button.
If you watch the video provided you will learn the character specific resources used to edge guard and to avoid being edge guarded.
That covers most of the idea of 1 on 1 Smash game play. Understanding the 3 main points of the idea will prepare your head for the upcoming mind games applied to competitive Smash.
Next is Tech Skill.
For those who are brand new I will explain the controls of Super Smash Brothers using a Gamecube Controller (Yes that is the most common controller used in the smash community. Seeing a pro controller for smash 4 isn't rare either but I don't know much about it.):
All given actions explained in the "How to Play." Turtorial Videos.
The
Pro Tip: Jumping and Double Jumping is very important in terms of staying on the stage and a safe recovery. When being edge guarded or being pushed off stage your recovery option is your first priority. after you jump or are somehow launched in air you are given an option to jump a second time. Keep in mind that you only get one jump until you are grabbed, hanging on ledge or grounded once again. Your opponents fish for ways to get you to "Lose your Jump" and make recovery almost impossible by doing so. New players by habit use their second jump right away making sealing a stock simple. Also, unless you are frame perfect in melee, it's common to waste your second jump on accident when recovering with an Up B recovery.
Pro Tip: Leaving "Tap jump" off as a control setting limits your tech skill capabilities. Leaving it on and getting used to avoiding accidental jumps with the analog up makes you a better player and prevents you from limiting your tech skill ability.

The
Jab


F-tilt

D-tilt

U-tilt

F-smash

D-smash

U-smash

Dash attack

(frame data gifs from:http://smashboards.com/threads/complete-fox-hitboxes-and-frame-data.285177/)
The
Neutral B

Side B

Up B

The


Tilting the analog stick in different when shielding gives you dodging options. Left and right makes you dodge roll left or right. Down lets you do what's called a "Spot Dodge." which is a dodge in place. Up allows you to instantly jump out of shield which is important knowledge later on (X and Y allows you to do this also).
Pressing both A and any block button allows you to grab (Pressing Z allows you to do this also.[Z= A + R or L]) If you are currently shielding, pressing A during your block allows you to grab out of shield or "Shield Grab" which is great for countering aggressive players.

These are the basic controls of Super Smash Brothers and more. Everything else is learned on your own, and through the Meta Game of Tech Skill.
What is Tech Skill? "Technical skill, also referred to as just tech skill, is one's ability to manipulate a controller and produce their desired inputs. Players with greater technical skill are able to more reliably produce their intended inputs, and more efficiently perform maneuvers that require more complicated inputs (such as advanced techniques)."
What are Advanced Techniques? "An advanced technique is a series of actions, typically complex and/or difficult enough to require reasonable tech skill, that results in a benefit to the metagame of a character. Advanced techniques mainly differ from standard techniques in that their presence was not discovered or expected by the game's designers. This often manifests itself in the form of advanced techniques being results of oversights or glitches, such as wavedashing and momentum cancelling."

Tech Skill and Advanced Techniques are most important in Melee and Project M due to their complexity and unlimited ability to find something new with a character. The games that are more set in stone like 64, Brawl and 4 have limited potential and thrive off of smart game play. Learning Tech Skill in any Super Smash Brothers game is important if you want to be competitive. Being adept in every possible outcome makes you ready for the worst and when you are in a pinch you wanna get out the quickest way possible. Being knowledgeable and able to deal with Tech Skill and even utilize it yourself in your own way makes you a handy player and dangerous for those who don't have the hands to fight back. Sooner than later you will learn that it almost could be considered a physical sport since your hands need the physical discipline.
What Tech skills should I learn?
First I will go over the basic stuff that is supposed to be in the game but wasn't covered in the tutorial.
Aerials- Tilting the Analog in different directions using the A button in the air performs an aerial attack. There are 5 different aerials and names for each. Neutral Aerial or Neutral Air or N-air or Nair, Forward Aerial or Forward Air or F-Air or Fair, Upward Aerial or Up Air or U-Air or Uair, Backward Aerial or Back Air or B-air or Bair, Downward Aerial, Down Air, D-air, Dair.
N-air
F-air
B-air
U-air
D-air
gifs from
Tech- Teching or also known as "Breakfall" or breaking your fall is the act of pressing L or R right before coming in contact with the ground, wall, or ceiling of a stage while "Tumbling" or in hitstun. When Teching off walls you can slowly fall down losing almost all momentum allowing you to safely jump out of your Tech, or Tech into a wall jump depending on weather your using your control stick when Teching off walls. Teching off the ground puts you into the position mentioned before when talking about Reads. Teching is a useful strategy. So useful that even Miss-Teching, which is the "accident " of not Teching before hitting the ground is used competitively.


Wall Jump- Wall Jump is the ability to use certain nimble characters to jump toward or along a wall then kick off said wall and jump a ways diagonally in the opposite direction by flicking the control stick in that direction after touching the wall. This has little use in recovery surprisingly and you will mainly see it being used for style, or when Teching. Only certain characters can actually wall jump, but all characters can wall jump out of Tech. Keep that in mind.

Tethering- Tethering is the act of grappling a wall or ledge with a tether like object that certain characters have access to like Link and Samus. Pressing the Z button in mid air with characters with a Tether like grab shoots out their Tether weapon as either an attack or grappling hook called a Z-air or Z Aerial. Teather laws are different from Melee compared to other games cause Melee is the only game that allows Tethers to latch onto any wall like surface if the character is able to hang from it, were as Project M, Brawl, and Smash 4 your Tether and the ledge's Sweet Spots are magnetic and connect almost automatically at the right distance.

Air Dodge- Pressing L or R in Mid Air allows you to dodge in mid air. Air Dodge Laws are different In Melee and Project M compared to Smash 4 since you only get 1 Air Dodge in Melee and Project M before you are in "Free Fall State." and said air dodge stops your momentum and you can even use the analog stick to change your aerial direction when dodging which is important later in this tutorial. In Smash 4 and Brawl you have unlimited Dodges and they do not change your momentum at all.
Pro Tip: in Melee and Project M Air after air dodging you are able to Zair if done before you go into Free Fall State. This is helpful because Tethering is difficult when you are falling. Tethering with an Air dodge stops your momentum making the aim for the Tether much less difficult and provides Invincibility frames to prevent from being edge guarded. When In Tumble Animation you cannot Air dodge or Z-air. Tumble animation is the animation after hitstun when being launched in a direction. To get out of tumble animation without wasting an Up- B or jump you can wiggle the control stick and your character will switch to a normal falling animation and will allow you to both air dodge and Z-air
Fast Fall- The ability to fall faster than your normal falling speed by tapping down on the analog after you've reached the peak of your jump. This is useful for escaping aerial pressure and is also used for other things later explained in the tutorial.
Dash attack- Pressing A when dashing performs a Dash Attack.

C- Stick - The C-Stick tilted in any direction on the ground conducts an auto Smash Attack in that direction. The C-Stick tilted in any direction in the air conducts an auto Aerial Attack in that direction. the utilization of using the C-Stick is super useful and will be explained why later in the tutorial. Using the C-Stick In Smash 4 and Project M Allow you to charge your Smash Attacks and also Dash Attack when flicking the C stick in any direction and dashing at the same time.
Pro Tip: Using the C-Stick when performing aerials is important since there's no direction input being made. That means when you do a Back Aerial with the C-Stick and you are moving forward, your momentum and direction will not change. This opens the doors to discovering new reverse hit boxes for combo heavy characters.
Items/Projectiles- If an item is laying on the floor press A to pick it up. using A with the analog tilted in any direction throws the item/projectile in that direction. tapping the analog in any direction and pressing A performs a Smash Throw in that direction which throws farther and does more damage and knockback on impact (This is also possible with the C-stick). pressing Z in the air with the object drops it. pressing Z in the air catches items, and pressing A on the ground catches items with the correct timing, The timing gets easier if the item is caught multiple times in a row. In Smash 4 (I'm not sure about Project M. ) Pressing A in the Air also catches a thrown item.
Short hopping or as Nintendo calls it "Low Hopping" - Is a method of tapping the X or Y button quickly and releasing the X or Y buttons before you character leaves the grounf making your characters initial jump height shorter. The speed of the button press differs for each character since each characters jump animation differs. In smash 4 and Brawl this is easiest to perform
Grabbing or Sweet Spotting Ledge - this is most of the times automatic. Smash 4 ledges are considered magnetic overall making sweet spotting the ledge and grabbing it to hang on easier. You can even grab the ledge when your character is facing away from it. In Project M and Melee sometimes you have to hold the Analog toward the stage's ledge to confirm the sweet spot and you MUST be facing the ledge. Also in Project M and Melee only, your character must be facing the ledge to grab it. if the character is facing away unless in a special animation you will miss the ledge and fall to your death. In Smash 4 the direction you face does not matter for most characters.
This is basic knowledge learned easily in the first hour of playing Smash. This knowledge is guaranteed to be memorized in seconds especially since the more advanced techniques make everything else seem like common sense. What will actually take time to practice is the advanced techniques.
What advanced techniques should I learn?
This will be a list of advanced techniques and how they should be applied in game and what methods should be used to practice them.
(Unfortunately, you will find that most advanced techniques are exclusive to Melee and Project M. I'll Tag (Ex2M+PM) If so and Tag (Ex2S4) if it's just for Smash 4)
(Ex2M+PM) L Canceling- L Canceling is an advanced technique used to cut the landing animation of standard aerials short for faster movement. Pressing the L or R or even Z buttons with in 7 frames before you land when using an aerial the landing lag is cut down making your aerial take less time to complete.You cannot L cancel Specials or Z-airs.

Try this: practice L Canceling simply by getting in the habit of pressing L or R right before I land regardless of if I'm Using an Aerial or not. You'll notice that you will be using L and R for almost any kind of movement and it will be helpful in the long run. For now just think of it like you're teching your Aerial attacks.
SHFFL and SHFF- SHFFLing or Short Hop Fast Fall L canceling is a sequence of advanced techniques used to either space or combo your opponent. This is a very important technique in Project M and Melee because this is the fastest and most common way to combo your opponent. Using any aerial then SHFFLing it makes you almost lagless, difficult to punish and makes you incredibly mobile. Some characters like Pikachu and Falcon require it to hold a steady match-up against certain characters. Learning how to short hop, fastfall AND L cancel your aerials on command is required for this advanced technique which is difficult to get used to, but sooner than later it becomes second nature. SHFF is the same concept but it's for games that you cannot L-cancel in Like Brawl and Smash 4.

Pro Tip: SHFFLing is ten times easier with the C-stick. Performing aerials with the C-stick makes SHFFling less stressful and a ton less of a handful, and you get momentum perks out of it as well. I recommend getting used to aerials with the C-stick more so than the A button, but eventually you will need to be adept with both.
Auto Canceling: Is the even more advanced version of L-canceling. The only thing different is that there's no input besides the original Aerial. Everything else is based on timing. Auto Canceling is using an Aerial and timing the landing during the aerial or after the aerial's animation has finished making the landing lag 100% lagless, so lagless that L-cancelling the Aerial either doesn't work or is slower than the initial auto cancel. This is more effective than L-cancelling but it's much more difficult and sometimes not worth it. If you find a move that's worthy of an auto cancel then I recommend practicing the auto cancel and sticking to it. Remember that L-Canceling is far more consistent than Auto-Canceling.

(Ex2M+PM) Wavedashing: is the ability to slide either a short or long distance left or right which is usually faster than your initial running dash. This is often times replaced with dashing and even dodge rolling because of its abrupt and instant speed. Wavedashing becomes as useful as your control stick and once it becomes second nature you'll be using it every time you move. To wavedash you press L or R to dodge in mid air. Directional Air Dodging as mentioned before was the ability to dodge into a certain direction in the air. The concept of wavedashing is actually Air Dodging right before your jump animation leaves the ground then choosing your Air Dodge direction be diagonally left or right, thus making you slide left or right.
Practicing this is frustrating but the process and idea of this advanced technique is rather simple. It's even harder to explain I'll find a gif that would explain it better than I could.

Try this: practice the timing of pressing the jump button and the dodge button by holding the analog down. If you do full jump/full hop it means your pressing R or L too early. If you air dodge too high or in place in the sky your pressing L or R too late and if you see your shield appear you are either holding down the L or R button for too long after your previous attempt or your pressing X or Y late.
(Ex2M+PM)Wavelanding: Wavelanding is the act of Air Dodging into or onto a platform or the ground usually after a jump. Basically it's a wavedash but instead of starting from the ground you've had a little air time. This is very important because it makes moving through the stage faster than ever. This ability gives you many advantages in stage control if applied correctly. Performing this is very similar to Wavedashing. If you have trouble Wavedashing at first I recommend practicing this more and then you will understand the concept better. Essentially if you're in the air ready to land and you diagonally aerial dodge left or right before landing you will slide left or right sometimes longer and faster than your default wavedash if timed correctly. This is were pressing L or R before you land by habit comes in handy since you will be Teching, L cancelling and wave landing. You'll be pressing it a lot when wavedashing as well so you'll get used to it really quickly. Make sure you don't roll by accident.

(Ex2M+PM)Waveshielding: is the ability to hold shield and wave dash out of shield then back into shield again. Essentially, instead of just standing, you have your shield up at all times except when your wavedash is being performed. It's pressing and then holding the L or R buttons during a wavedash. It sounds simple but it's a tad more complicated cause it requires a little discipline to not leave yourself open or dodge roll on accident. You don't want to let go of shield THEN wave dash, you want to jump out of shield like a jump cancel. but before you actually jump you wavedash out of the the shield instead so you never actually dropped shield it just instantly disappeared. If you're holding the L or R buttons before your Wavedash animation is finished your shield will then re-appear as soon as possible.
Protip: I highly recommend getting into the habit of shielding with a different button than the button you wavedash with for this technique especially. for example If you hold the L button to shield you can keep holding the shield if you are able to wavedash with R. So IF you continue to shield before during and after your wavedash , your Waveshielding will be performed perfectly easy as that. What's difficult is the discipline of using 2 shield buttons and keeping their usage separate.
Protip: Get into the habit of light shielding on command. Whats a light shield? A light shield is lightly holding the L or R button or holding the Z button after a grab or animation. Doing this makes your shield bigger! This is very important because when yo light shield you increase the health of your shield and reduce the probability of a shield poke. A shield poke is where a stray hit manages to get passed your shield. Not only does your shields health grow, you also can control the direcion of the shield with the control stick. This is called Shield Directional Influence or Shield DI. Why is shield Di good? Well for one it lets you prevent shield pokes even more, but also since your using your control stick to control your shield you cant roll with the control stick. Thats fantastic! That makes wave shielding so much easier because you have a giant healthy shield that you wont roll with! If you master that your defensive purposes will be unstoppable.
Jump Cancels: Jump Cancels are mainly (Ex2M+PM) but some concepts are technically available in smash 4. Essentially to perform a move you couldn't do originally in the current animation or position by simply jumping and then performing a certain jump cancelable move before the crouching animation ends at the start of the jump. Grabs, Up Smash and Up B are all jump cancelable. Why jump cancel these moves? Most of the time you would jump cancel a move out of dash or out of shield because those are the only animations on the ground where you are limited to certain moves. What can Jump Cancel do? What Jump Canceling can do is interrupt what you're doing with a jump animation but before the jump animation starts, you can do an up smash or a grab or even up B. If you are dashing at your opponent and tap analog up and A ideally you will jump and U-air, but if you jump before you press A and hold it for just a second you will do an Up Smash. I mentioned earlier that you could jump out of shield. When shielding if you jump then tap analog up and A you will instantly change from shielding to an Up Smash. Keep in mind that this technique is simple hard but the button pressing is pretty fast and its difficult to perform. What's also difficult about this advanced technique is remembering that it's an option. Jump cancels usefulness gets too character specific beyond this point. If you play as Fox and you get really good you'll learn how to Up Smash out of Shine or Shine Grab (Something I won't go over.) Jump cancels technically don't exist in Smash 4. Although the concept is still there. I wouldn't recommend attempting to jump before you're dashed upsmash or for an up smash out of shield because it does it automatically now. Although Jump Canceled grabs do not exist.
ProTip: A Jump Cancelled Grab is used often times instead of dash grabs because dash grabs are slower. If you learn how to Jump Cancel grab on command when dashing you're going to perform your standing grab animation which is ten times faster and more effective. I'ts also difficult to punish because of its speed.
Protip: A simple way to perform a jump cancelled up smash is to flick both the analog stick up and the c-stick up basically at the same time. To be precise, you want to flick the analog barely even a moment before you flick the C-stick just to ensure that you are jump cancelling. This requires practice but I find it much simpler than pressing x. Just another reason to leave tap jump on.
(Ex2M+PM)Dash Cancel Grabs: The act of cancelling a dash attack with a grab to do a dash grab that has twice the range of your initial dash grab. This is useful but punishable because the animation is still longer but confirming grabs will be easier cause of its range. Unfortunately performing this is a ton harder than learning how to jump cancel grab, and harder to remember. to perform this is to dash attack but grab before your dash attack animation starts.
(Ex2M+PM)Edge hogging- Edge hogging is a method of edge guard were your motive is to grab the ledge before you opponent. Doing this will make it so that no matter what the opponent does he cannot grab the ledge if another character already has hold of the edge, especially if the ledged player still has invincibility frames. It's possible to be fought for the ledge after the frames of invincibility are over but that's what makes edge hogging difficult. Edge hogging is a simple skill to perform. Mastering it takes tons of practice because simply jumping and grabbing the ledge before your opponent eventually will not cut it. You will later learn methods of grabbing the ledge that are faster and faster and faster and eventually that will become character specific.
Pro tip: If your Wavedash ability is reliable at this point, if you're facing away from the ledge, you can wavedash or wave land that direction and still be facing away from the ledge. when doing this you will slide off the edge but automatically grab the ledge making an instant edge guard often called "Ramen noodling" "Instant ramen" "Instant noodles" "Noodling" or "Uncle Benning."
(Ex2S4)Reverse edge hogging: This is a little something I made up that's an interesting tactic. It's the ability to read when your opponent is about to grab ledge so you find ways to grab ledge right after. After your opponent's invincibility frames are over he/she will be forced off the ledge into a position to be edge guarded accordingly
.
Protip: (Ex2M+PM)If you press R or L when holding the ledge to roll onto the stage, the stage will register that your presence is still holding the ledge until your rolling animation is finished. So if your opponent is attempting to grab ledge before you are finished with your roll he will continue to fall and not grab ledge. Learning to utilize the timing of this technique is super safe because right when your opponent loses a stock from being edge guarded your back on center stage when the opponent spawns which is incredibly important during the neutral.

Protip: If you fast fall from the ledge you automatically let go of the ledge. The speed of letting go of the ledge is extremely abrupt but it's easy to get used to. If you fast fall after grabbing the ledge you technically have not used your second jump. If you fast fall and use your second jump all your falling momentum is gone in an instant and you can grab ledge again.
Protip: fast falling from the edge is also dangerous. It becomes a bad habit if used continuously and its bad because if you mess up just a tad you will fast fall to your death. Players try to get into the habit of tapping the control stick away from the ledge just to let go of it and fall at a normal fall speed. making more room for error. Although somethings that are character specific fastfalling from the ledge to re grab or use an attack is necessary.

Doing this with certain moves that keep you next to the ledge like marth's up b in substitution for a double jump will make you grab ledge again. This is something called ledge stalling or edge hopping.

(Ex2M+PM)Edge waveland: When Edge Hopping you are exhausting your second jump. Although you can use it for many many other things other than ledge stalling. One is Edge Wavelanding which is the act of edge hopping over the ledge and then wave landing making a smooth slide onto the stage.


Its fast and useful for surprising your opponent, and you still have a decent amount of invincibility frames if air dodged correctly.
(Ex2M+PM)Dash Dancing: We have covered a lot of intense Tech Skill. Now we are going back to a basic advanced technique that is easily misunderstood but also very very important. Dash Dancing is literally the art of dashing back and forth before the startup animation ends of each dash. You literally tilt your control stick back and forth.

You will learn different dash dance patterns that will help you weave in and out of enemy attacks. mastering it is difficult and the utility of different kinds of dash dances are character specific but the more comfortable dash dancing you are with character the easier it is. I would say every dash dance has a "rhythm."

Dash-canceling: Don't worry, this is also a simple task. After the start up animation of your dash, if you hold down and crouch you will stop in place and maybe slide a small distance depending on the speed of your character. Doing this creates mind games of approach and also allows you to do other moves instead of your punishable dash attack. This is most useful for marth players for example. You will see a lot of dash dancers who dash then crouch then down tilt for pokes. You cannot crouch during your start up animation of your dash. This is with in the period for you not to pivot when you dash dance. If you hold down too early after you dash your character will continue the dash animation stop then crouch in place.
Chain throwing/ Chain grabs: The act of throwing and finding a way to catch or combo your enemy into another grab. These are all character specific and can be technically done in each game. The guarantee is 10 times more difficult in smash 4 though. Learning what character can be chain thrown by what character is extremely helpful at early percents. Some characters have such a high garuntee on certain characters that its a "0 to death" combo which literally means you can KO them with this on oing combo from 0% to death percent. If you've heard or ever hear of "Wobbling" you'll know what I mean.


Pro Tip: Learning How to Jump Cancel Grab and Dash Cancel Grab makes Chain grabs easier. So does Reading DI
Directional Influence: Or DI is the art of using the control stick during hit stun to influence the direction of where you are being launched after being hit by an attack.

Some people learned this on their own by nature, but learning it on your own also can create bad habits. DI is all about habit. What makes a really good professional is not only knowing how to DI correctly but, also recognizing a good DI, and also being able to READ a good DI and also being able to PUNISH a bad DI. Idealy when you are being launched horizontally off the right of the stage for example. You would want to DI Up and Left. doing this will send you up to the upper right corner of the screen with a less fatal speed. The blast zones of the screen are literally a Box [ ] so being sent to the corner makes it less likely to hit a Blast Zone. Its also a lot easier to recover from up high because you have the ability to use hang time as an advantage to sort your recovery options. HOWEVER, If being comboed relentlessly perhaps by someone who is SHFFLing or SHFFing you want to DI the direction you are being sent. That way comboing is a lot more difficult for the aggressor. Being able to control your DI habits is important so that your opponent isn't able to abuse your hit stun. Your opponent will also try for what's called a "DI Mixup" which is where the opponent knows what direction you've set up to DI so he uses an unexpected throw or move to send you the direction you're DIing to to take an unexpected stock. For example: I'm playing as Ness and I just grabbed you. Ness has a back throw that kills in all 3 of these smash games. You know that My back throw will kill at the percentage you are at when I send you to the left side of the stage so you prepare to DI to the right. Knowing this I do the "DI Mix up" and use my weaker forward throw instead. In normal circumstances my forward throw is too weak to KO, but because you were DIing to the right and I read that you would I took advantage I took your stock. That is high level game play that's important to be aware of in most situations. Directional Influence in Smash 4 is similar concept in every way shape and form but its applied differently and is actually called Vectoring. You have more ability to influence your direction in smash 4 so you don't have to point yourself to the opposite direction diagonally up. All you have to do is hold the analog toward the stage and you will be more safe. Other than that DI is still similar.
Protip: For attacks with multiple hitboxes you can do something called a smash Di. A smash Di is tapping the the analog in the direction you want to DI for a greater effect. Its easier to be applied during multi hit boxed moves cause then you can repeatedly tap the control stick in said direction makes getting out of it faster and much easier. It's most effective against moves that have a final hitbox that deal critical amounts of damage, or knock back.

(Ex2S4)Perfect Pivot: A perfect pivot is the act of making your character spin backwards like a super fast precise bask step. This was a tech skill discovered to account for the absence of wave dash in smash 4. To perform this you have to tilt the control stick the opposite direction of which your character faces then quickly but ever so slightly tilt the analog back into its neutral position (the way the control stick sits with out being touched. Right in the center from


(Ex2M+PM)Crouch Canceling: Is another form of DI but it keeps you from leaving the ground. If hit with a low knock back move with low percent when crouching you won't be sent far. In fact, sometimes it appears that you haven't left your position at all. This is great for absorbing weaker attacks and countering with a stronger attack. Crouch canceling is a risk since you still take the damage absorbed and if your opponent notices, they are able to find ways to abuse your stationary position.

I don't have much knowledge of Smash 4 tech that isn't character specific. It's harder to understand some of the things allowed and not allowed in smash 4 since the rules are so strict regardless of the many holes found in game. Over all this list of advanced techniques are the basics of what you need. If mastered all of these techniques all you need to do is fine tune with more detailed techniques and also figure out your bad habits so that you can either make them good habits, or find ways to cover up those weak spots. What makes Smash 4 a competitive game is that it's less about the tech skill and more about the knowledge of the Smash Theory, were as Melee and Project M's meta game is highly constructed with Tech Skill Leaving the Smash Theory as a thing that just makes it that much more difficult to have a comfortable skill level.
How to Practice?
Everyone of us players as a beginner always wondered. "How do I get better?" Well I just displayed many of the essentials a large amount of skills to learn and recognize. "
Practice makes perfect."
"How do I practice? How do I know I'm getting better? Am I practicing the right way?"
Truth is You'll never know until you see your results in a real match. Preferably someone better than you, or even someone completely unfamiliar. Then you think to yourself..: "I don't have anyone thats willing to play consistently just to get better. At least not for long. They normally get silly in the end or get bored." This is a common problem. This means you have to practice BY YOURSELF.
Your last reasonable thought could easily be "How can I practice by myself when the bots or computers in the game are spammy, unorthodox, predictable and even SD at random times?" That's a tough question. Hopefully I will soon answer that for you.
The mindset needed to practice.:
My number one rule in smash is this: "A bad habit is only a bad habit once it's punished." What that means is, If a link is spamming an arrow at one side of the stage and link's opponent can't seem to get around it. In the end Link wins with ease. Right now Link's habit is considered a GOOD habit. Game 2 starts and your opponent picks falcon against your Link. All you do is spam arrows, but falcon's speed allows him to weave and even jump over said arrows and close in for close combat. In the end Falcon wins with ease due to his ability to avoid being damaged critically by your low damaging arrows. Suddenly your habit has become BAD.
Why did I mention this in the practice section? Simple! You need to make sure you are practicing a GOOD habitual playstyle. Or else someone will expose your greatest weaknesses and gaining a victory will be very difficult for you. You must also keep in mind that a characters weakness is different from a PLAYERS weakness. A character's playstyle has limits making weaknesses a little obvious. That's what makes Match-ups important. For example: Sonic being the fastest character in the game (For smash 4) A good weakness of his is his terrible positioning. For fast characters positioning is difficult because you have to improve on your timing and reaction to stop at the correct time. A player's weakness is not being able to display good timing on a fast character. In result most players would practice the weakness of a character to improve all-around.
That or you later realize that that character isn't for you.
You also have to constantly recap on what you know. Write it on paper if you have to. By now, after reading this guide you should have a vague idea of what The Neutral, Zoning, Reads, and Tech Skill are. Take what you know and simulate it. After you simulate it, you repeat it. That is practice.
Don't worry about what you don't know if you can't find it on the internet. Theres things you can't teach that you have to learn on your own. A "style" if you will. What you don't know can only be developed in a match weather it be constant friendlies or tournament matches.
Drills: My most favorite way to practice is by creating drills. Drills are essentially to do lists listed in reps or repetition. An example of a drill is "For 5 minutes I will only practice wavedashing. After 5 minutes I will practice 5 minutes of jumping out of shine (Fox/falco/wolf exclusive in Melee/PM). After five minutes of practicing jumping out of shine I will practice wave shining (Fox/Falco/Wolf Exclusive in Melee/PM)" That's a drill for practicing tech skill. Essentially, to correctly create a drill you wanna break down the thing you want to practice into segments. Segments that will make performing you want to get better at MUCH easier. Another example: " I lost my last tournament match because I shield grab out of shield pressure too much. I often times see myself get punished for this. To practice my OOSO or my Out Of Shield Options, for 10 minutes i will try shielding a computers attack and then counter attack with an aerial, then shield again to counter attack with an Up B, then shield again to counter with a Grab. After 10 minutes of that I'll fight the computer seriously and see how many times I can do a different out of shield option. Then repeat.
Checking your results: There's no point in practicing with out checking your results. Again, I know its difficult not being able to play against other people but computers CAN be a sad sad substitute. After you feel you've practiced a while, set a computer to level 5 or lower and treat it like a human player and give it respect when necessary. Make notes on things you've improved on weather its good movement and positioning, continuing a combo and reading DI or simply being satisfied by what you see and feel. Make notes on things you haven't improved on weather it's accidently stopping in place and hesitating because your hands no longer know what to do for a moment, not being meeting your expectations on recovery, or missing an easy DI, or simply being dissatisfied with what you see and feel. That's where you go back to the drawing board, write what you know, and simulate.
Imitation: Watching is a form of practice as well. It's very common for players to see what competitive players ranking in top 8 at a national dish out against their respective rivals to move on to the next round. It's also very common for those players to sit down and practice exactly what they saw their favorite players did to win. Something amazing, something stylish, something technical. All those things that appeal to us, that sink us farther and farther into the meta of smash. We imitate that and start using what we saw ourselves. That is a very important thing is being able to notice what is good in high level play, but it's also difficult. For example: Most melee Falco players learn to multi-shine because they see high level players use it and win with it (rarely though) It's such a popular techskill, most Falco mains find it to be a must. Problem is beginning falco mains learn to multishine, but never learn how to APPLY it in a match. What you use a multishine for is to pressure your opponents shield with it until shine hits.
Experience: I've said it before many times, but there is no way to make this any clearer. You HAVE to find someone to play against, if not every day, at least once a week. Again, prefferably somone better than you. When you play this person you have to do everything you can to win and when I say everything, I mean EVERYTHING. Sometimes, that means discarding some of the things you've learned or tried to learn. Sometimes discarding your pride and doing something cheap. Why would you not apply every little thing you learned to win? What's the point of practicing all these different things? The point isnt to apply every inch of tech or speck of knowledge you know. That's being a show off and thats no where near enough to become a good player. What learning all this tech skill and knowledge is for is to make you able to work your way through the worst case scenarios. Some people never learn how or when to wave dash properly because when they are starting out they believe thats the only way to move or turn around because they have replaced it with their rolling habits completely. Not until that becomes a bad habit will you realise when and how you should wavedash. You've known how to produce a wavedash all along but when is what really becomes difficult. That's also something you will not learn without playing someone
KNOWING WHY YOU LOST: This is very important. Possibly THE most important. If you don't know why you lost, then you cannot learn from your experience. You cannot simulate and practice from that game, and you wasted your time losing in a fashion so ridiculous you're probably blaming the other player for winning with the old "Your being really cheap" lines. I always like to say: "There's more than ONE way to play smash. Everyone plays differently." I say this because most people believe there is one way to play smash. Most people dislike playing Jigglypuff and Shiek players in most any game because they are different. They aren't exactly "Aggro"and they don't require tons and tons of techskill. Most player's look down upon that, mainly because they consider it an "Easy way out" and it's not. Unfortunately some players considered certain characters and their respective playstyles "Fraudulent" and refuse to change the way they play against said character and style and wonder why they lose. Most of the time it's obvious. Respect is a very very very good word in smash and it stands for a lot. Learning what respect means in this game makes an outstanding player. When you learn to "Respect" Jigglypuffs Aerials, you learn ways around them, and then you make jigglypuff respect YOU.
This is all I have for you now folks I know I didn't add on much on this update. Actually I shortened it by a few paragraphs cause looking at some of the things now I realize I was babbling, or repeating myself or didn't make much sense at all. I would call this like a directors cut cause its definitely more clean now.
- Applicable Games
- Melee, Project M, Smash 3DS, Smash Wii U
