• Welcome to Smashboards, the world's largest Super Smash Brothers community! Over 250,000 Smash Bros. fans from around the world have come to discuss these great games in over 19 million posts!

    You are currently viewing our boards as a visitor. Click here to sign up right now and start on your path in the Smash community!

Make Your Move 18 - Top Fifty Is Posted!

Kholdstare

Nightmare Weaver
Joined
Oct 10, 2008
Messages
1,440
Knight Artorias, the Abysswalker

Some notes:

- In the description, you say "Considering he fights with his main arm (the left arm) broken, no sword and without Sif by his side, one shudders to imagine what Artorias was like in his prime...", when he does fight with a sword in his boss fight. Did you mean to say shield?
- "Corrupted" in every header implies that there are normal attacks and corrupted attacks, and is a little confusing at first. I understand that this is an organization choice, but it could confuse the average reader. I think "Abyssal" would work better for this stylistic choice.
- The presentation is simple and clean, and very attractive. I actually think it would be more fitting for Artorias's character if it was rougher, or grungier. Maybe some darker colors, or use of bold and serif fonts. Criticizing presentation has no bearing on the actual moveset, though, so you can ignore this if you want to.
- I very much like the way you handle Artorias's sludge. It's very fitting and done well, although all of the effects it has on both the foe and Artorias are a lot to get your head around and understand. I wish you would explain what "abyssal dust" is though. You describe the ooze, but I can't really visualize what "dust" is. Does it surround the area like a cloud or just cling to the ground? Is it solid or just a few particles?
- I love that Artorias has a Souls parry in homage to the Souls games. If you could have added in a riposte, I'd love it even more, but following up with another attack is just as fine.
- Steadfast Leap is a great call-back to his boss fight and is clever in interacting with the abyss sludge.
- The rest of the moves interact cleverly with the abyss as well, one of my favorites being down tilt, dash attack, and down aerial.
- I didn't see Artorias's Final Smash coming, but I like it. I'm really glad you mentioned Sif and how you implemented him, but I wish he would have more of a spotlight. Sif is the most memorable part of Dark Souls' story for me, and one of the reasons I loved the DLC.
- You don't have a playstyle section up yet, but from what I inferred from the moveset, Artorias wants to spread the abyss while shifting into an absolute juggernaut. He plays like a disruptive bruiser, which is pretty fun. I'm a fan of the moveset, both the character and what you've done with him. I like it.
 

Rychu

Thane of Smashville
Joined
Jul 5, 2010
Messages
810
3DS FC
1908-0105-4965
3v1
(and no, it's not just a repost)

The Appetizer


He who fights with monsters should look to it that he himself does not become a monster.
When you gaze long into the abyss the abyss also gazes into you.

No one truly knows the origin of the monster. At least, no one knows the details. Perhaps it was made on accident. Perhaps it was created for some nefarious purpose. Perhaps it was inevitable. When the grime and dirt and ugliness of society is pushed down, hidden, forced into the very deepest of depths, what can we expect but for them to mutate. What can we expect but for them to conglomerate, for them to combine, and for them to become larger and more terrifying than they had ever been individually? Is it the fault of the monster that it is simply the excess of all of our fears and insecurities? Is it the fault of the monster that it is terrifying? Or is it our fault for being terrified?

No matter - the monster is here. And it's goopy.
Click here if your eyes can withstand the deeds of this creature.

Statistics and Traits
The Appetizer is large - the size of Bowser, easily, with 1.5 times the weight. However, he's much slower - at his fastest, he saunters at the just below the dashing speed of Jigglypuff. The Appetizer takes knockback interestingly: so long as he himself is completely grounded, he can never actually leave the ground from knockback, instead taking any vertical knockback he's been dealt as horizontal knockback at half the strength it would have been otherwise, on top of any horizontal knockback he may have received. Wherever Appetizer walks, he leaves a trail of goop behind himself, the same color as his body. This goop stays onstage for 20 seconds after it was created, absorbing into the ground once that time is up, though the Appetizer can refresh that timer by either walking over the already-made goop or using a move that naturally spreads it. Unless explicitly stated otherwise, attacks which move the Appetizer leave the trail behind him as well. Opponents who walk inside the goop receive a speed nerf to nearly half of their natural speed, as well as a greatly reduced first jump and a much shorter roll distance. Moves in which the opponent travels along the ground (Fox's Illusion) have their distance halved. Additionally, they are dealt a continuous pattern of 1% damage per second, for as long as they stand on the goop. Appetizer, on the other hand, gets a speed increase to match that of Pikachu while moving atop his goop. The goop can be prematurely destroyed in BFP-sized chunks by being dealt 30%.

The Appetizer can in fact technically jump by flapping the insect-like wings protruding from his back, but so long as he's grounded he never actually leaves the ground, instead stretching the bottom half of his body as he "jumps". His two jumps are absolutely pathetic, combined barely able to get him to the lowest of the battlefield platforms. When he's in this "aerial state", he has the worst aerial speed and control stats in the game, and falls like a brick. Additionally, he can actually take upwards knockback in this state, with exceptionally strong knockback able to break his body away from the ground. Should this happen, or should he be in the air for any reason, such as falling off of a ledge, he does have one mid-air jump, but it's rather pathetic, mostly there to make his offstage game entirely non-existent. Just mostly.

As for that connecting line of filth when he jumps, it's very sticky. Any solid object or item that comes into contact with it is automatically trapped, and any opponent that comes into contact with it are trapped in a weak grab hitbox, about 3/4 the strength of an average grab. When Appetizer's main body comes back down (and it will) it automatically absorbs the trapped items (healing items will heal him but projectiles and the like being deactivated when they get caught. Opponents he comes down on are dealt
10% damage and horizontal knockback, but nothing that would KO until unreasonably high percents. Appetizer's absorption of the non-food items will in fact be addressed later in the moveset.

Special Attacks

Neutral Special - The Main Course
The Appetizer grits it's gnarly teeth, closing his eye, and generally looks angry as he seeps goop out from underneath himself, the goop spreading out to either side of himself. The goop spreads by a Stage Builder unit every second on either side of him, and has the same timer as that of his naturally-spread muck. Mercifully, the timer doesn't start until either the move is stopped or Appetizer is forced to stop. Ending lag on the attack is moderately heavy as the Appetizer regains his composure. Foes within the goop as it spreads are pushed with is slightly, with a slow conveyor-belt like motion that any dash would easily trump, though still be slowed by. The goop has the same properties as that of the naturally made goop, even resetting the timer of goop that has already been spread when it seeps over it, and Appetizer can reset its timer by moving over it.

The goop will run over stage edged, but won't simply fall into the abyss: the goop is sticky, and will simply hang over the stage edge, able to extend down all the way to the bottom blast zone if The Appetizer can spread it for that long. Any character than comes into contact with this hanging goop will get stuck in it, but can actually climb up and down through it and even wall-jump off of it, though they still get damaged for however long they stay within it. The Appetizer can take advantage of this too, and of course can move much more easily through the hanging muck at his dash speed, both up and down, though he can use his standard attacks, as he moves up and down the overflow as though he were on regular land! Having this out can mean life or death for the Appetizer when offstage, and can even be worked to his advantage, should he not get killed by his horrible fall speed, or the goop not disappear or be destroyed while he's hanging off the edge.

The goop can also pile up against walls - against single walls, goop that runs into it slowly forms a slope, becoming about the size of a Stage Builder standard slope over the course of about 1 second, the slope becoming less steep the more meat is added to it. If the wall moves or gets destroyed, the goop then spills over and becomes flat, spreading out a proportionate distance to it's height. When between two walls, the goop fills up the space fairly quickly, becoming essentially a pool of disgusting lunch. If one of those walls is destroyed, the goop spreads out proportionally to become a slope.


Side Special - Meal Time
Mimicking the only documented footage we have of him, the Appetizer roars and rushes forward, his ravenous mouth open and salivating. He rushes forward at his dash speed - his regular one while moving across regular land, and his accelerated one while on top of his goop. If in the air, he gets a short push forward, perhaps enough to save himself to get to his overflowing goop if he's offstage. He can continue his chase for as long as the input is held, and can even turn around by reversing the direction of the input. He can also continue the chase up overflowing goop by pressing upwards when he comes into contact with it, allowing him more freedom to chase opponents up platforms without breaking his stride.

When he comes into contact with a foe, minion, solid projectile, item, or prop, he gobbles it up, continuing his chase. Food items will naturally heal him when he eats them. If he's hit while chasing, he'll be knocked out of the attack. Opponents that he swallows are dealt
14% damage, and are excreted behind him within a ball of the goop, much like Yoshi's eggs, and can escape at a difficulty slightly stronger than said eggs. Obviously, it gets harder to escape the more damage a foe has. As for those other items he swallowed...

Appetizer can input this attack as a Smash to instead spit out a ball of meat, the first item he's swallowed or absorbed serving as the base for it. However, the meatballs always start out the same size (they've been digested!), about that of the soccer ball item. These balls are effected by knockback the same way Appetizer is, rolling along the ground when knocked back. However, they deal damage as they roll. At first it's petite, a mere
3% damage and a bit of upwards knockback, having the wright of Pikachu. Thing is, though, they increase in size as they roll along Appetizer's goop, as well as absorbing grounded items and the like to aid in picking up size.

It takes rolling about the distance of 2 Battlefields (Battlefield is about the length of 4 and a half platforms) to reach their full size, which is around the size of Bowser and nearly 1.5 times the weight. Larger meatballs can indeed absorb smaller meatballs by rolling over them to increase their mass faster. Of course, the goop only lasts for so long before Appetizer has to lay it down again, and meatballs do nothing to reset their timer. Additionally, meatballs do not have a time limit, staying onstage until they're either destroyed or knocked off. Appetizer can directly feed the growth of the meatballs using his Neutral Special near them. When they're first made, they're pretty easy to move around, with most standard attacks and even dashing able to move them fairly easy. Once they get to be about 75% of their max size, only smash attacks will move them. Though meat won't reset the goop timer, it WILL spread new goop over non-goop'd areas.

At their full size, getting hit with these guys is going to deal
23% damage and upwards knockback KOing at around 120%. The balls gain an extra 2% damage for every BFP they pass over. At their smallest, they possess 10 HP. At their largest, they're a beefy 50%, though damage they take does not disappear as they get bigger, so if a meatball takes 5% damage early, the highest HP it will be able to attain going forward would be 55%, and so on. Appetizer starts the match with the ability to make 2 meatballs. Meatballs will stick to the overflow off the edge of the stage, though will roll down it at a pretty rapid speed. This ranges from weak downwards knockback when they're small, to being a full-on meteor smash when they're at full size!

The meatballs are completely solid, allowing players to stand on them, and preventing anything from passing through them. This means, yes, you can indeed create the slopes and pools of meat naturally. Slopes are aid Appetizer quite a bit actually - if he's able to make one, he can camp at the top of the slope and create meatballs, which then roll down the slope with relatively realistic physics so that they naturally pick up meat as they roll. The heavier the meatball, the farther it will roll when going down slopes. By the way, hitting opponents does NOT stop their momentum, only slowing them slightly.

Creating pools of meat is a bit more tricky, but with two larger meatballs made, he can trap the foe within as he makes the meat rise. Foes trapped within the meat are basically in underwater physics, having multiple tiny jumps to try and escape. If they're caught within the meat, they are dealt
3% damage per second they are submerged. Relevant a bit later - crouching on top of the meat pool will cause a character to sink fast into the meat, rather than the somewhat slow sink they will experience if they merely stand on it. Downwards knockback whilst on top of the pool will do the same thing. Pool'd meat operates on the same timer as regular goop, though Appetizer can reset the top layer by moving across it (he doesn't sink into it, obviously).


Down Special - Mystery Meat
The Appetizer seeps down into his meat, with only the human foot he has protruding from his body sticking upwards to indicate where he is. In this state, he can move through any of his previously laid tracks at a speed of 9, including going up and down his overflowing goop. Appetizer does NOT reset the goop's timer in this state. By pressing the special button, the Appetizer pops back out of the goop laglessly, the Appetizer able to move and attack before he even comes all the way back up. Pressing the A button while underneath the goop will have the Appetizer instead forcibly headbutting his way back into the fray, dealing 16% damage and decent vertical knockback, capable at KOing from 100% to anyone he hits.

He can use this while underneath his gigantic meatballs as a way to move them without having to charge a Smash attack. Appetizer can use this attack on top of a pool of meat, with his eyeball as an indication of his whereabouts, to move freely within the pool - in fact, the farther the distance he travels upwards with his headbutt attack, the more damage it does! For the sake of knowing, in a maximum sized meat pool between two maximum sized meatballs, the attack has potential to do
26% damage and even higher knockback than before. The Appetizer will be forced to come out of this state if the foot is attacked directly, and Appetizer will have to deal with some pretty heavy ending lag if this happens. Appetizer can of course use this attack to go down the sides of his overflow, easily able to surprise recovering foes!


Up Special - Wings of an Angel

Appetizer's insect wings flap rapidly, slowly lifting the large creature upwards. The Appetizer is still connected to the ground in the same way as he is with his jumps, with the stretched lower half having the same properties. Appetizer can stretch up to the top platform of Battlefield this way, though he rises incredibly slowly. He has this limited, and slower than his very slow walk speed, "free flight" for about 10 seconds before he comes crashing down to earth, during which time he has access to all of his aerial attacks and such. Appetizer takes knockback normally while doing this, with the same conditions as his jumps. If Appetizer is offstage for whatever reason, unconnected, this basically gives him another one of his terrible midair jumps, barely helping in any way.


Standard Attacks


Jab - Spit

Everyone knows the ocean is a polluted place, and the Appetizer hails from the murky depths. For his jab, Appetizer spits out a piece of garbage from the ocean floor - sometimes it's a boot, sometimes plastic containers, there's a .01% chance you'll get a smart bomb, you get the idea. These tend to be small, though, and the Appetizer spits them out in an arc similar to that of Snake's standard grenade toss. When it hits the opponent, it'll deal 7% damage and some minor knockback. Of course, these items don't just disappear - they fall onto the stage, now as random throwing items. Foes can of course pick these up and throw these at you for 3% damage, but they'll most likely want to clean the stage of them: remember what Appetizer can do with with items?

Yes, this is basically Appetizer's way of generating meatballs, as well as being a decent projectile attack, but also for distracting his opponents with cleaning up his messes so that he can use that time to set up. He can make an infinite amount of these items, though will most likely be unable to convert most of them into meatballs. They disappear after 7 seconds, so Appetizer has a limited amount of time to convert.


Dash Attack - Covered
Appetizer, as he dashes forward, thins his body out for a moment, allowing him to pass over opponents, as well as his own meatballs. If he passes over his foes, they get covered in his goop, and are thus affected by all of the effects minus the jump nerf, when when they're not touching the ground covered in the goop. Throwing items stick to them while they're covered in them too, and if Appetizer eats them with stuck-on items he obviously gets the items as well. Opponents can roll on non-covered ground in order to get the goop off of them, but spread the goop in the process. The timer is the same as all the other goop's. Passing over your meatballs coats them in a new layer of meat, adding on a BFP's rolling worth of size and weight.


Forward Tilt - Chomp
Appetizer bites forward, chomping his nasty teeth down into a powerful bite. This bite can be angled upwards or downwards 45 degrees by tilting the control stick during the minimal starting lag of the attack. Foes caught by the chomp are dealt 14% damage and are knocked in the direction the bite was angled. This is a decently fast attack, one of Appetizer's fastest physical options. This attack is another way for him to gobble up items and the like without using his Side Special, which, while it doesn't have to potential to eat up a lot of items at once like that attack, is a nice quick defense against projectiles and the like.


Down Tilt - Absorb
Appetizer uses his inert connection with his goop to absorb it back into his body. This only skims the top of the layer off, not actually affecting the spread of the goop, but bringing in anything within a BFP of him on either side towards him, including items, meatballs, and opponents. In the case of the latter, the Appetizer headbutts them away, dealing downwards knockback (relevant thanks to his meat pools), and 11% damage. This is another way for Appetizer to move his big meatballs without having to charge up a smash attack, as well as giving him a neat little interaction with the slope - if a meatball happens to be rolling down the hill at the same time as Appetizer uses this move, this actually holds the meatball in place for a brief moment, increasing the size and throwing off opponent's timing in dodging.


Up Tilt - Headbutt

Appetizer swings his head in a large arc upwards, mimicking the hitbox of many-a flipkick throughout the series. This naturally means that the attack hist both above him and in front of him, with a decent range of attack thanks to his absurd size. Opponents hit by this are dealt 12% damage and decent upwards knockback that'll KO from around 130%. This attack comes out pretty quick, and thanks to it's ability to hit in front of Appetizer, has the added benefit of being able to knock around Appetizer's meatballs.


Aerial Attacks


Neutral Air - Aerial Assault
Appetizer looks out to his foes, and spits at them. Normally, Appetizer will just spit out his garbage from the jab, which has the same properties but with a much better range, still dealing that same 9% damage. However, from his aerial domain, Appetizer feels cocky - he'll spit back the consumed items he's taken in and not turned into meatballs yet, starting with the first. These items fly at the same arc as Appetizer's garbage, but instead deal the damage, knockback, or status effects that they would have when the foe launched them. This adds a small element of forethought to Appetizer - he's got to remember what he's eaten to use it the most effectively!


Down Aerial - Dive
Appetizer closes his eye and dives for the ground, following the path of his connecting stretched goop. He's a large hitbox here, dealing a massive hit of 16% damage to anyone he comes into contact with (which, of course, could be an inevitability if the foe is stuck), as well as awesome horizontal knockback that can KO at around 110%. Appetizer will also absorb any of the items that he has stuck along his stretchiness, adding to his arsenal of potential meat and/or projectiles. When he hits the ground, he splatters around, his body spreading out about a BFP around him before it reforms, potentially spreading out that goop.


Up Aerial - Bite
Appetizer looks directly upwards, chomping. This is a nice, quick attack that doesn't have much lag on either end, thankfully, should he miss. If he succeeds, he bites the opponent, dealing them 15%, and then immediately snaps himself downwards, dragging the opponent back down to the ground with him. Opponents will most likely try to stay away from the ground as much as they possibly can - Appetizer needs to bring them back down for the meal.


Forward Aerial - Gnash
Appetizer bites forward. Unlike his Up Aerial, this is exclusively for damage and knockback - this deals 14% damage and comes out pretty quickly as well, dealing downwards diagonal knockback to any foe he's able to sink his teeth into.


Back Aerial - Pull
Appetizer tugs upwards on his connecting goop, absorbing it up into himself. This lets him absorb all of the things stuck onto that tether, allowing him to access those items while not leaving the air, should he be up there thanks to his up special. Appetizer is nothing if not ravenous.


Smash Attacks


Up Smash - Crusher
Appetizer gets a pained expression on his face as he charges this attack. Upon release, he sinks into the ground. For the next second, Appetizer can move back and forth along his goop trails at his Down Special speed, before he erupts. Appetizer comes out of the ground as a giant mouth, crushing anything within a Stage Builder unit of where he erupts from. At full charge, the chomp deals 45% damage and incredibly high upwards knockback, able to KO at as low as 75%. On top of this, Appetizer can crush his meatballs here, too, in case the stage gets too crowded, or he wants to make a slope, or really anything that might require that. This would be a good time to mention that Appetizer can, of course, use this on his overflow'd meat, letting him use this smash offstage!


Forward Smash - Terrifying Roar
The Appetizer opens his mouth, sucking in air for the charging animation. Once the charge is unleashed, the monster closes his eye and releases a huge roar. At no charge, the roar's range (represented by little cartoony sound waves) only reaches a short distance in front of him of him, dealing 16% damage. At full charge, the roar not only shakes the screen, but also reaches 1/3rd of Final Destination ahead of him, and deals 23% damage. Both deal fairly high knockback for their respective damage outputs. The roar continues for about 2 seconds after the charge is released, during most of which Appetizer can actually move around as the hitbox remains out. This is the Appetizer's main way of moving his meatballs around, due to the attack's long range, low lag, and high damage output.


Down Smash - Meat Wave
Appetizer digs himself into his goop, charging his attack. Upon release, Appetizer forces waves of his goop out from himself in both directions, the wave being about as big as a bumper on it's side. The waves travel quickly, up to the speed of Sonic when at full charge, about half that at no charge. The range is however long the The wave steadily deals 25% damage and upwards knockback that KOs around 130%. This also pushes any meatballs it comes in contact with a short distance, but not an incredible distance, as large meatballs will in fact stop the wave. This is a good long-range attack that can hit multiple enemies in a single swoop. This will also refresh your goop, the only attack that will do so.


Grab Game


Grab and Pummel
Appetizer lunges forward, with the best grab range in the game. Of course, he's going straight for the mouth. Appetizer forces his way into the opponent's mouth, attempting to get eaten. This grab is difficult to escape from, twice as much so than a normal grab. For every press of the A button, the Appetizer forces itself farther and farther down the opponent's esophagus, and if the Appetizer succeeds in pummeling 10 times, he successfully forces his way into their stomach. The opponent becomes all bloated and sick-looking, though still manages to get around at Charizard's walk speed and terrible jumps until Appetizer exits. If Appetizer takes longer than 7 seconds to input a throw, the opponent vomits him up, being dealt 15% damage. Any damage dealt to the opponent that is NOT Appetizer's doing, Appetizer takes that damage.

While inside, Appetizer can mess with the opponent's controls, forcing them a certain way or to do a certain move in short intervals, even to crouch into his meat pools or to even move his meatballs around to spread meat to non-goop'd areas of the stage. Additionally, throws for the Appetizer are input as grab button + direction.


Forward Throw - Projectile Vomit
Appetizer is a pretty rank meal, and the opponent isn't taking him too well. When the forward throw is input, the opponent immediately starts dry heaving for 1 full second, during which time the Appetizer can input a direction. After the second, the opponent projectile vomits the Appetizer in whatever direction was input, directly forward being the default. The foe is dealt 14% damage when the vomiting actually happens. Appetizer's goal here is to get vomited directly at another opponent - if he makes contact, he bypasses the grab and goes straight into the opponent's stomach, forcing his way in and starting the process all over again. Opponents are immune to Appetizer's grab for 25 seconds after this move is used, so he can't just jump from opponent to opponent to opponent for forever.


Up Throw - Upset Stomach
The foe begins flashing red, as Wario does when his Wario Waft is particularly bad. The begin to sweat, looking around, still moving, but now a bit faster and more stiff and uncomfortable looking-oh no, it looks like whatever they ate (mainly the Appetizer) is not boding well with their stomach! Alas, with no restroom to be found, the foe accepts their fate, sits down a little, and BOOM, a brownish-greenish explosive gas cloud sends them flying upwards, with enough knockback to kill at 120%. Meanwhile, while the smoke (and stench) clears, the Appetizer can be seen in a neat, curled up little brown pile on the ground before regaining composure a moment later, before control is once again given to the Appetizer. It's a hell of an animation to watch, and an embarrassing move to die to.


Down Throw - Indigestion
The opponent lets out a painful belch that deals 6% damage before throwing the Appetizer up. For every 10% damage the opponent has, they belch again after 2 seconds, this time dealing 2% damage. Opponents will continue this until either they reach the amount of damage equaling their belches, die, kill the Appetizer, or the Appetizer uses a different throw on them. Essentially, at the damage he's going to have to cause opponents to even get into them, this can be a very serious and very useful damage racker to keep the opposing team from getting overwhelming.


Back Throw - Abdominal Pain
This is a simple throw - Appetizer simply causes the foe intense abdominal pain with the press of this attack, interrupting whatever they're currently doing and dealing them 7%. The move takes long enough to recover that he won't be able to do the attack more than 3 times while in a single opponent, but it's a pretty devastating maneuver - Appetizer basically shuts down whatever opponent he's in at the time, while still being able to influence his goop spreading through their actions!


Final Smash


Consume
The Appetizer has grabbed the Smashball!. With the press of the special button, the camera focuses in on him, going all crazy and raving mad. He then lurches forward, attempting to bite anything within reach. If he's successful within 3 bites, he clutched them in his jaws, grinding his teeth, muching them up. Then...he swallows, and the opponent loses a stock.


Happy April Fool's Day, guys!
 
Last edited:

Tocaraca2

Smash Ace
Joined
Feb 22, 2015
Messages
557
Location
Wokingham
What the **** has happened to my profile picture
Sorry for not being active at all for the start of this, but to be honest I really couldn't care less about this contest at the moment. I'm more interested in actually playing games rather than making movesets, but you probably will see a moveset from me in the contest, it just might not be for a while.
I may feel more inspired if somebody was to give feedback on Akullotsoa, but I feel in an awkward situation with that because that set is from last contest. Also I don't want to force any of you to read it and give feedback, especially as I really can't be bothered to read any of the sets on here so far (I don't see any characters I'm interested in or may that I have even heard of at all).
Seriously, how are there so many movesets on this thread already?! At this rate there will be 30 pages of movesets!
 

Slavic

Ask not the sparrow how the eagle soars
Joined
Jun 5, 2013
Messages
757
Location
taco bell, probablyn't
I'm not sure what you mean about the avatar, Toca? If you're referring to your profile, I'm pretty sure that it's mandatory to use a FE character for your avatar on Emblem Boards. I mean, personally I wouldn't have gone with Leonardo, but hey, to each their own. If you're referring to your player avatar dying repeatedly in Fire Emblem Awakening or in Fire Emblem Fates, I would recommend going to the game's respective thread and asking for help there. Remember, though, if your avatar keeps getting killed you can always pair them up with a tougher ally, such as Frederick or Sully. Not only will you keep your avatar safe from damage but you can build up some sexy support too! Win-Win situation.
 
Last edited:

Tocaraca2

Smash Ace
Joined
Feb 22, 2015
Messages
557
Location
Wokingham
I'm not sure what you mean about the avatar, Toca? If you're referring to your profile, I'm pretty sure that it's mandatory to use a FE character for your avatar on Emblem Boards. I mean, personally I wouldn't have gone with Leonardo, but hey, to each their own. If you're referring to your player avatar dying repeatedly in Fire Emblem Awakening or in Fire Emblem Fates, I would recommend going to the game's respective thread and asking for help there. Remember, though, if your avatar keeps getting killed you can always pair them up with a tougher ally, such as Frederick or Sully. Not only will you keep your avatar safe from damage but you can build up some sexy support too! Win-Win situation.
This isn't the emblem boards though... everyones profile picture has changed to a fire emblem character, and I don't even know who the person in mine is.
 

Tocaraca2

Smash Ace
Joined
Feb 22, 2015
Messages
557
Location
Wokingham
Never mind. If this 'emblem boards' change isn't temporary I'm leaving this forum completely.
Also Roy isn't in Brawl but it says my Brawl main is Roy. What the ****.

EDIT: Oh yeah. It's April fools day. xD
 
Last edited:

Munomario777

Smash Master
Joined
Nov 18, 2014
Messages
3,253
Location
Charleston, South Carolina
3DS FC
0387-9596-4480
Switch FC
SW-8229-3157-8114
Guys, we've gotta make some big changes around here. This is a Fire Emblem board, what are we doing making Smash Bros. movesets?! Thus, I've decided to inktroduce:

Make Your Unit!
Because clearly the best person who could begin a contest where we make hypothetical Fire Emblem units and classes, is someone who's never touched the series in his life. And what better way to kick things off than with...


Image Credit

Inkling

The Inkling class is an entirely new class for the Fire Emblem series, a part of Smash Bros. Fire Emblem Edition 2, the first game in this sub series to inklude more than six Fire Emblem characters and to move from the fighting game genre into the world of turn-based RPGs that Fire Emblem is known for. Lore-wise the Inkling is the form that the squids of the sea have adapted to take on in order to preserve their strength and survive in a globally-warmed, near-oceanless world which no longer permits their full inksistence. They have the ability to switch between humanoid and squid form at will, but the squid form is used for utility, not for direct attack. The Inkling's most prominent ability in combat is its colored ink, which it can produce at will and use to aid it in battle.

Abilities

All of the Inkling's abilities are unique to the class, and shared across all Inklings (although it is possible to add additional skills). As an aside, it is impossible for units to change classes to become an Inkling, or for Inkling units to become a different class. They are a species after all~

Ink Trail / Ink Dive:

Inklings leave a trail of ink wherever they go on the battlefield, although you'll have to backtrack to actually be on the ink (it appears as soon as the Inkling leaves a space). The ink lasts for four turns after it was created. Inklings will, when moving on top of ink, turn into squid form, allowing them to move twice as many spaces as they would normally. (In effect, each movement on ink costs only half a "movement point.") Attacks will also place ink on the squares that they affect inkluding the square on which the Inkling stands, as long as they are from the Inkling class's unique ink-based weapons. Ink also slows down enemy units, making each space cost 1.5x as much to travel across. Friendly units are unaffected, and Inklings on the same side share ink, able to swim through their allies' ink trails. Also, ink placed on obstructive terrain such as forests and walls allows the Inkling to traverse them more easily, although it does cost the standard 1 movement point instead of the normal .5 for ink.
Get Inked:
The Inkling's unique weapons have a chance of "inking" the opponent, based of course on the Luck stat. Not only will this deal damage to the affected enemy unit every turn, but it also gives them a one-in-three chance of placing ink on any space they travel across, in the Inkling's color. This makes it easier to pursue a foe. If the inked enemy unit is defeated while inked (even by another, non-Inkling unit), that spot and another adjacent to it will be covered with ink.
Ink Gauge:
The Inkling's unique ink-based weapons share "durability" in the form of the ink gauge. Weapons will not break when the durability is reduced to zero, and the Inkling begins each battle with it at 30 (it has a max of 50). It is possible to add ink to the gauge by traveling through pre-created ink, at the rate of one durability point per two ink spaces travelled through. (This does not inklude brand-new ink; that is, the space must have ink on it before you step foot on it.) As an aside, it is possible to move space-by-space, so moving back and forth in ink in order to refill the ink gauge is not an unviable tactic.
Ink Restore:
In addition to restoring weapon uses, moving through ink also refills the Inkling's HP by one point for each space moved through preexisting ink.
Ink Buff:
Finally, standing inkside of a space with ink on it will buff the Inkling in a few ways: it can dive into the ink mid-battle in order to dodge attacks, inkreasing its Speed stat. The Luck and Skill stats are also raised.

Base Stats

Movement: 4
HP: Low
Strength: Above average
Magic: Low
Skill: Average (High w/ Ink Buff)
Speed: Below average (High w/ Ink Buff)
Luck: Below Average (High w/ Ink Buff)
Defense: Low
Resistance: Average

Generally, Inklings tend to be frail but very effective at strategic maneuvers using their ink. Doubling back on yourself inkstead of advancing is a viable tactic, and there is a choice between advancing further into battle, or staying safer within your ink.


Weapons

Inkbrush (Sword)


The quickest of the Inkling's weapons, and perhaps the most basic. It is a Sword-type weapon, has 1 Reach, takes up 1 Durability to use, and the animation has it swing back and forth horizontally in front of the Inkling.

Splat Roller (Poleax)


A giant paint roller which functions like a Poleax. The Inkling slams it down onto the ground in front of it, making for the slowest attack in the Inkling's arsenal -- as such it can also be dodged more easily -- but also the most powerful. It takes up 2 Durability. The normal range is 1, but it sprays ink out in front of it from the shaking of the roller to deal half damage to foes who are 2 spaces away.

Splat Charger (Crossbow)


This crossbow-type weapon is a rifle which shoots a stream of ink. It has a whopping 3 Reach, takes up 3 Durability, and has middling attack speed. This weapon's Might isn't exceptional, but what is nice is the ability to swim through ink quickly and attack from a distance using the Splat Charger.

Splat Bomb (Special)


Finally, this weapon does not fall into the weapon triangle despite its shape. It is instead a unique trap. When used, the Splat Bomb is placed on the ground, where the Inkling is standing. (If in ink, it's inkvisible to foes!) Two turns later, it explodes to deal a lot of damage to nearby enemy units! This costs 4 Durability to use, so it should not be used lightly, but it affects all eight squares adjacent and diagonal to it (in a 3x3 area). It can be a powerful deterrent to keep your enemy away, and is also good for spreading ink in a new area.


General Tactics

Inkling units are a great class to use for sneaky offense, and have some support abilities too. Laying trails of ink in strategic positions can deter enemy units from taking certain paths to reach your other units, so you can manipulate where they go. (E.g. making a perimeter of ink with a single opening, to funnel the enemy troops in.) The Inkling itself can use the ink for maneuvering too, so it's got multiple uses. The Inkling is also supreme at traversing tricky terrain since it can use ink to make it easier to traverse. Another way they can be used for support is their "Get Inked" skill, which applies constant damage to foes as well as making them place ink on the battlefield! Overall the Inkling is a very unique class, and its abilities bring lots of new tactics and strategies to Fire Emblem. As always feedback is greatly appreciated, and I hope you enjoyed the set! :)
 
Last edited:

FrozenRoy

Smash Lord
Joined
Apr 26, 2007
Messages
1,261
Location
Las Vegas, Nevada
Switch FC
SW-1325-2408-7513
By the way, my rankings are up and will be linked in my Aradia as usual shortly. Take a look, its in the book!

Dark Age of Movesetting

Kristoph's AI ally mechanic is one that would often be loathed, but at the same time often because many issues with it arise from execution, pitfalls which Kristoph avoids: Kristoph is simultanously useful, but not so strong as to make it an unfair 2v1, with his computer ally not being the brightest either, and Kristoph gets surprising use out of little things like the grape juice bottle (a very fun move) and poison on things like nail polish and stamps.

Character-wise, this is a tour de force for Kristoph, an amusing portrayal of both his absurdity and yet in some ways glorifying it, Kristoph is not only a loser who can't get over a poker game, but his repressed inner rage and dark emotions can go as far as to bring knocked out or "dead" allies back to fight once more! Admittedly, this does go a bit far for me at times: The corpses getting up to fight, even if they are flavorfully knocked out, felt quite odd to me, moreso when it went beyond the Up Smash which at least felt like it was a major move and ultimate expression of inner rage. And Kristoph can re-summon them with NSpec too, albeit laggily, so. This was great fun though and a wonderful read.

At the same time, character lies in a major issue with this set, and one I don't think I thought on much until after I'd read the set some, which is that this set can be rather iffy in characterization for the client, with the moveset largely treating them as unaware and brickish, which can be somewhat odd with...say...Ganondorf, especially as Kristoph IS ultimately just a lawyer. The way they carry mail bombs has some fun uses but can be odd for someone like Ganondorf, especially with the goldfish memory, and seem to quite trust a man who paints poisonous nail polish on them and other such things, it feels like perhaps it goes too far into the realm and creates an odd feeling for allies, and that is not even counting things like MYM characters: Imagine Kristoph with Vorinclex as his ally or Artorias or Ladja or something.

Going back to the good, a HUGE amount of the appeal in this set for me is in the AWESOME Black Psyche Locks mechanic: The idea of trading your moves in for passive bonuses is itself a pretty big winner, but Kristoph can then release those moves for powerful and fun effects, and Kristoph can even do this on his allies, allowing ihm to better direct the incompetent AI and set up a number of fascinating scenarios based on the character. These are a huge part of why I like Kristoph and the set would be below fellow AA attorney set L'Belle in enjoyment for me if they were not done as wonderfully as they were. The jab, by the by, was another one of my favorite moves in the set, and I do love the little flavor in who has what spot in the card's order.

I bring up L'Belle because although I did not enjoy L'Belle as much, I did rather enjoy L'Belle's characterization a bit more in a serious context and how it handled interpreting the Ace Attorney series. Kristoph feels a bit like a gig you can only do so much, as he relies rather on the absurdity and meme-ishness of the character for all and stretches it for what it is worth, while L'Belle feels much more coherent while still keeping the feeling of being L'Belle in it. With the sets being from the same series and one contest apart, I do hope you don't mind the comparison Smady, and I do quite enjoy Kristoph regardless.

One thing about Kristoph I did find rather lacking though was the aerials, I especially though Forward Aerial's additional effect felt rather tacky even for the set, and essentially felt like it was tacked on because "well this move wouldn't be interesting enough otherwise!", regardless of if that was why or not. The other aerials feel like they get fairly redundant and try to milk the corpse hitting too far and they do not feel like they help add to Kristoph having a coherent plan, possibly because of the difficulties in working with an unknown allies' air game?

But ultimately Kristoph was enjoyable and my favorite set from opening day, which is rather impressive given how I understand it had a quick developement time. Even one does end up disliking the set, the writing makes it a worthwhile experience.

Chester Cheetah

I always forget if it is Chestnaught or Chesnaught, so apologies if I make a mistake or two in the comment.

Given that the first page had a fair few heavyweights (The Butcher, Roy, Artorias, Atlantis, Lickitung, Sproink etc), it is rather impressive that Chesnaught felt like a breath of fresh air for me. It is rather interesting to me how Chesnaught has some quite defensive and juggernaut-y moves, with a combination projectile and trap that has healing properties, and yet the moveset feels aggressive, like an approaching tank, it is all very nice stuff. I loved Seed Bomb and Spiky Shield myself, the ways that Chesnaught can so naturally places a rather versatile yet simple projectile and trap are great and Spiky Shield is actually one oy my favorite moves on the first page. Flavorful, deep, simple, its all good stuff right there, though something I do question after reading this moveset is if Chesnaught is too clear, or good, at his anti-camper parts, as if matches against somewhat campier characters will be too far in his favor, or that he might destroy characters like Mega Man (who have many projectiles) and Samus (who has one strong and important projectile among some others).

Personally, I think it may have been fun to give Spiky Shield a small amount of HP (20? 25?), just enough that hard hitting projectile attacks can break it, to give characters like Samus and Mega Man a better chance against him him and add a little bit of weakness: his passive shield could perhaps get this too, seeing as it is much superior to Link's, and the Smashes could upgrade it to the current form when attacking. Hammer Arm is good, but I personally find Drain Punch misplaced here, as there are many times I would want the foe to be hit by a normal Hammer Arm, yet the Leech Seed offers a lot and has a LONG duration so you'd often get Drain Punch. I'd rather use it on another move, myself: A punching up tilt, perhaps, or a throw? I do love how Hammer Arm works with Seed Bomb, though. I do wonder if maybe a smaller scale might work with Down Tilt, maybe just knocking them forwards for a bit more precise control and a more aggressive take?

One thing I did not like was Needle Arm: It felt a bit too strong, sometimes confusing (mostly when the grab was mentioned) and it doesn't work as well into the rest of the set as the other Specials, 30 frames feels a bit long to me when he has the on-hit cancel. Balance aside, compared to the other ideas in Chesnaught it simply does not seem especially fun or interesting. On the other hand, I really liked the smashes, heavyweight feels, a good use of super armor and the anti-projectile nature of Chesnaught and some really fun differentiation, Down Smash is particularly fun with the NAir talk and gives Chesnaught a surprisingly diverse air game, something one would not expect from the behemoth grass type.

The standards and aerials continue to be solid with some surprisingly good stuff, I especially love the multiple Forward Tilt uses, the natural way it changes based on angle and the use of the lingering hitbox, for example, and the way Down Tilt works with shields and playing off the shockwave. Neutral Aerial is quite fun, Down Aerial suffers from feeling rather out of place though and is linked to the Needle Arm mechanic in a way I dislike.

The grab starts off great until veering into heavy disappoint. I love the different ways Chesnaught can grab. I love the slight homing on Leech Seeded foes and it working with the ZAir. The animation is good. But all the throws feel too similiar, perhaps due to the 8%/4% thing coming along so often, the animations feel similiar, the playstyle relevance feels redundant, and I dislike the chain grab when Chesnaught has a rather heavy attrition and damage racking focus, it makes the point feel too salient, too much like a cheat, and only the Forward Throw feels any fun. If you want an easy way to make me like the set more, improve the grab game.

Don't get me wrong, I do like Chesnaught, I like it a fair amount anyway even if it isn't a Trevenant for me, and it is a good introduction to what will hopefully be a more active JOE contest, but it is not without fault or issue. I am sure it will have its fans, though...
 

PK-ow!

Smash Lord
Joined
Mar 28, 2008
Messages
1,890
Location
Canada, ON
Twelve contests ago, I announced a moveset with a blown-up image of Square's Geno, and the words "MYM 7, b!tches". However, I was distracted by loftier goals, including a Batman moveset centered on a wholly unique mechanic which was sure to raise me up out of Sakurai syndrome status. Next, I came out of silence by hinting at a Seikken Densetsu moveset. Multiple computer failures later, I return to make good on at least one of the promises.


With respect to the legal owners, SquareEnix,
From the universe of the Mario World,
I present to you,​


Geno

200px-Geno_SMRPG.gif
"I serve... a higher authority."

Geno is a hero from high above Mario World, who saved that world from two distinct catastrophic fates during his one and only visit there. With the help of four courageous denizens who stood with him to defend their world, Geno reversed an abstract-but-surely-woeful disaster, and thwarted a mighty villain who desired to exploit that disaster to recast the world in his grisly image. His purpose complete, Geno almost immediately departed for his own realm, leaving behind one statue commissioned in his likeness, one thankful kingdom of mushroom people, and the recollections of the four denizens who took his side to save their world. Ancillary deeds of heroism and kindness in his wake, of which there were some (but indeed, few), will likely be recorded as acts of Super Mario - the first hero to band with Geno.

This one visit being all that is known about him, his essential character is hard to summarize. The first point to clarify is that his name and his body are borrowed. 'Geno' is the name of an action figure belonging to a youngster on Mario World, and that toy became the body of the hero in question, during the time of trouble told of in Super Mario RPG. His real name is "♡♪!?".

Geno's deeds showed him to be selfless and dutiful, bold, righteous, insightful, and of good humour, a relateable companion from an enigmatic place. This moveset reflects ♡♪!? during the time he was known by the name "Geno".


Geno has two movesets in previous MYMs, you may find one here, in MYM X, http://smashboards.com/threads/make...date-october-10th.303173/page-3#post-12725030 and one here, in MYM 2, http://smashboards.com/threads/make-your-move-3-0-starts-soon.162985/page-3#post-4395760


"Who is Geno?"

Geno is a servant of "a higher authority," somewhere "higher than the sky" above Mario World. The name 'Geno' belongs to an action figure owned by a boy in Rose Town, which is the body that he adopts during his stay in Mario World. The true name of the living Geno is "♡♪!?", and the form in which he arrives to Mario World is a shining point of light.

Alternate bodies were readily available to Geno where he appeared on Mario World. He would state that he chose the 'Geno' doll "because it looked the strongest." From this action figure he took his name, as well as all the physical abilities he displayed during this visit.


Plot Synopsis

Geno is sent to Mario's World to enable the repair of the Star Road - an unseen but tangible existence whose integrity is necessary for the granting of wishes - after its destruction at the outset of Super Mario RPG. An unspecified "authority" dispatches Geno, alone, to the task of recovering the seven wayward fragments of the Star Road, a task which he treats with singular dedication. Geno pursues these "Star Pieces" directly, but comes to be assisted by the adventuring Super Mario, whose help he quickly learns he needs, when the villainous 'Smithy Gang' gets in the way. When Geno informs Mario's party of the Star Road and the importance of his quest, they recognize the consequences to their world immediately, and form an agreement to aid Geno to the utmost conclusion of his task. This vow is later made explicit, as a request from the ruling representative of the Mushroom Kingdom. This quest becomes the ultimate one of Mario's party, and leads to their final confrontation in the alternate world of "The Factory".


How do I recognize him?

c'mon really

Geno is a life-size action figure, fitted with weaponized body parts that shoot either small bullets or detachable limbs. He has a blue "cape," a blue cap with two curly strips of orange material, and plain rag boots. His body has the tone of wood, his mouth is a carved single joint, and his eyes may or may not be painted on. He can swap his hands for thin weapon barrels, shoot bullets from his elbow joints, and transform his body into shapes in the theme of rifling-era weaponry (e.g. a cannon). In Smash Bros., he stands square on the direction he faces, unblinking.

***
The actual moveset will be presented differently from what we are used to.


Important terminology:
  • Stun is not hitstun!
  • Hitstun is the freeze of the target of an attack, before it is knocked back. Hitlag is the freeze of the object delivering an attack. Stun is also triggered by characters put into knockback. In this moveset (and I believe in all Smash) stun always equals knockback, so you are capable of acting at precisely the time the force moving you away is removed (whatever "force" means in the non-Newtonian world of Smash).
  • Starman is the name of the five-pointed star sprite with eyes from Mario games.


Stats overview


Geno is a hard-hitting character, neither floaty nor fast-falling, with strong attacks and fast movement but very light weight. He uses his many projectiles of heightened hitstun to pressure opponents and dial freeform combos. His air game is difficult to mix up, but has high rewards in certain situations and is always good for an air-to-air trade. His tools for attacking directly upwards are extremely limited, forcing Geno to use his speed to stay horizontal with his foe if he wishes to survive.

Geno has principally two abilities. The first is to fire bullets or body parts across short distances, with a strength far above his weight class. The second is to make of his body a kind of lens, focusing his magical ability, releasing pure magic energy in any of increasingly dramatic forms. You will see both of these capabilities leveraged in this moveset. His third characteristic is that his body is temporary, a trait which, too, he may use to his advantage in the Smash arena.

His weaponized attacks have exaggerated hitstun, and also count properly as projectiles, two properties which, in tandem, are central to his playstyle. Geno's lag by the book is generally bad, but he gains back that time from the hitstun of his attacks, while those attacks don't cause Geno any freeze frames. When Geno can move again, the foe has not traveled very far from knockback yet, allowing Geno to chase better than comparable characters.


Metagame elements

The introduction of Geno adds the following elements to the larger Smash context:

A type of damage called "star element". Star element damage causes rainbow flashing. It counts as energy, but nothing resists nor is weak to it except that which is totally immune to energy, or star element specifically. A star element attack of additional types therefore overrides all other considerations of damage. Possible synonyms from other movesets: Cosmic type, Star type​


Stats

A tier system is used below, from G to A, and including S. G is exceptionally bad, like Luigi's traction. S is exceptionally good, like Captain Falcon's speed. The average is positioned at the bottom of C tier.

Size: Mario
Walk: A
Run: B
Traction: B
Jump: C
Air Speed: C
Force of Drift: D
Fall Speed: 60th percentile (60% of characters fall slower than Geno)
Weight: D
Evade: C

For detailed specification, you may refer to the rest of this section.

Size:
Geno is shorter than Mario, with off proportions. Compared to Mario, his legs are longer, but his torso is smaller, and his head is a short spheroid. Geno has a crawl where he gets on hands and knees; it is as fast as Sheik's.

Walk, Run, Traction:
Geno's walk ranks with Zero Suit Samus and Falco. His run is a hair faster than Yoshi. Traction as good as Mario. He runs with his feet alone, merely spreading his arms a few inches.

Jump:
Geno jumps medium fast, to about Lucas or Ice Climbers' jump height. He rotates when he air jumps, like Zelda but 360 degrees. The air jump has average height like Mario or Mr. Game & Watch.

Air Speed, Force of Drift, Fall Speed:
Geno has slow horizontal acceleration. His top Air Speed ranks with Peach and Ike. His Fall Speed is like Lucas or Charizard's.

Weight:
Geno compares to Peach, Marth, and Toon Link for weight.

Evade:
Geno's rolls and the like are average. From the prone state, his wake-up attack is weak and small.


Physics
(I recommend skipping to the moveset for now, until you see a few attacks)

Geno has a crawl, a charge value, and a rather uncommon combination of attributes on his projectile attacks. They are described below. Geno's crawl is described under Stats - Size above.

Geno has an energy charge value, which varies from 0 to 3. This is his 'charge', 'energy charge', or 'Geno power'. Internally, it has fractional values, but when measuring the charge level it is rounded up. Geno starts the match at 3. A number of small red 'starmans' orbit Geno equal to his charge level. The level decays with time, slowly if he is at 3, and faster for lower values.

Geno has many projectiles, some of which are his arms. When Geno shoots his arms, or bullets from them, the projectiles simply disappear at their maximum range, and any detached limbs instantly reappear. These projectiles actually move with Geno's body like disjointed hitboxes, but they are properly projectiles(*1)(*2). Unlike most multihitting moves, each distinct one of the bullets in isolation has power like a normal attack. All the bullets have the same damage and power, small damage amounts that add up thanks to the high hitstun holding the foe in place, and there's no 'critical' one of the hits needed to deliver the knockback.
  1. Specifically, they fall within the class of intangible, specific-range volatile projectiles, which are annihilated when their hitbox acts upon a valid target, whose path cannot be altered by any means. (The -definition- can't be altered, but the path defined by Geno's rules might be a very complex curve.)
  2. The position of a bullet is an offset of his current position, as a function of time (not its previous position). This is relevant to his BAir and FAir.
***

Moveset

Geno was ever equipped with five weapons while on Mario World, and he has them all here. They are the Finger Shot, Hand Gun, Hand Cannon, Double Punch, and Star Gun, and their strength increases in that order. These weapons make Geno capable of shooting his arms, or small bullets from them. Geno is also capable of an unarmed attack, which is hilarious, as it involves him shooting his arms (from the elbow).

He can employ the Finger Shot with his ftilt, the Hand Gun with his FAir, the Hand Cannon with his BAir and DAir, the Double Punch with his dash attack, and the Star Gun with his Side Special. The Finger Shot looses tiny bullets from his finger tips. The Hand Gun shoots larger bullets from a rifle that emerges from his wrist. The Hand Cannon, of course, evolves beyond ammunition to proper shot, about as large as a sticky bomb or other "hand items" from Smash. The Double Punch fires Geno's two arms (from the shoulder). The Star Gun shoots bullets from barrels out of both Geno's wrists, is by far the strongest, and has more than physical effects.

Geno can perform other actions, of course. The inputs that allow you to use them are defined below.

----------------------------------------
Neutral A - Defend

Geno holds his hands in front of him in order to block an attack. The hands will absorb a physical projectile or non-special attack that collides with them, if the attack's power is less than 12%. Such attacks are negated as though by a clash, and Geno is pushed back a step. Transcendent attacks ignore this. The covered area can be slipped under only by a sword-thin attack along the ground, while its upper region shields his head securely.
Range: -
The defense is active from frame 3 to frame 58. There are then 20 frames of recovery.
Animations: Geno looks askance while blocking. When recovering, Geno kneels and touches his head.

----------------------------------------
A, A combo - Unarmed Attack

There is a 5 frame window after frame 6 in which Neutral A - Defend may be interrupted with Unarmed Attack. Geno shoots his forearms 1/2 a SBB forward. 5% damage, with knockback comparable to Roy's jab.
Range: 1/2 SBB infront of Geno.
The hands shoot on the 7th frame after inputting A,A, and Geno recovers 55 frames later. 23 frames hitstun.

----------------------------------------
Forward Tilt - Finger Shot

After Geno outstretches his arm, the tips of his four fingers shoot off, dealing 3.2% each. Knockback like Wario's ftilt. You can angle this, up version 86% as strong, down version 106% (with much less range).
Range: From his fingers, 2/3 a SBB. Sour spot past half that, only 60% as strong.
First finger comes out at frame 9, last one frame 34. Frame 53 IASA. 18 frames hitstun.

Animations: Geno bends his right arm while turning his left foot behind himself, then reaches out to begin shooting.

----------------------------------------
Up Tilt - Geno Power

Geno raises his arms and a translucent figure of a five-pointed star appears around him, with a whistle noise. After 53 frames it fades, and Geno is now in charged=3 status.
At frame 29 the star precisely defines a hitbox of 2% damage with fixed upward knockback and 3 frames of stun. The hit plays a scratch noise and has "star" element type.

Animations (detail): The star is centered where Geno is centered, and its top point is the top of Geno's cap.

----------------------------------------
Crouch Tilt - Incorporeal

Geno abandons the doll, rising up from it on frame 4, when it instantly returns to doll size. In this state, the doll takes damage for Geno but it has super armor. Geno's true form is invincible. After 37 frames, he reenters the doll, and 3 frames later he may move freely. Foes cannot grab the doll but may pick it up as an item. They may throw it as far as the Blaster item, and if Geno returns to the doll before they relinquish it then a grab release animation plays.
(For the sake of fun, if the character in question has no grab defined but is capable of holding items, Geno grabs that character in that situation instead.)

Animations: Geno manifests as a tiny point of light when not in the doll.

----------------------------------------
  • Geno has a strong attack in his Geno Beam. After deploying a barrel from his wrist, he gathers energy, then fires a beam of his signature star element type out to a great range. He can use this attack in Smash like this:
Forward Smash - Geno Beam

From his rifled appendage, a thin ray of light emerges, then widens to the size of Samus' Charge Shot. The effect's area begins at the tip of the weapon barrel, and is as far as 1 SBB. The rest of the beam does nothing. It deals 18% uncharged, B tier knockback.
Range: 1 SBB past the weapon barrel.
Charging begins as fast as Captain Falcon's Fsmash. The attack takes as long from button release as Bowser's Fsmash to come out, which is the time when the light ray becomes a wide beam. This attack is disjointed magical and star element, but it can only clash or be outprioritized by an attack with an elemental property (e.g. flame, electric, dark, star element; but not magic by itself, energy by itself, etc.)

Geno gets the measure of his energy charge as free charge time on the Geno Beam, either 33%, 67%, or 100%. He expends his charge the very instant this happens.

Animations: When the beam widens, this wider pulse is brightest just in front of Geno, and attenuates asymptotically. It is drawn up to a solid wall or the edge of the blast area. The whole beam fades from view in two seconds.

----------------------------------------
  • The first interaction Geno has on Mario World with one of its denizens, is his confrontation of a cruel menace named Bowyer. When Bowyer disregards Geno's commands to cease his mischief, Geno gives his first demonstration of his immense speed.
Down Smash - Stop it! That's enough.

Geno teleports one SBB forward and smacks whoever is in front of him with his hands. His teleport leaves afterimages, but he does not travel through the intervening space. 9% damage, with knockback made large enough that comboing is hard after >70%.
Range: 1 SBB
Speed <8 frames. This is the blink and miss it stuff. Recovery nearly 1 second.

Animations: The force of this strike carries him through a full pirouette on the spot.

----------------------------------------
Up Smash - SO COOL!

Geno rotates while performing a small hop, 360 degrees. This is a multihit move which, most like Zelda in the SSB Melee incarnation using Nair, has no strong hit and is very unreliable to link, but does more or less keep enemies off of you. The attack is Geno's body precisely, four hits of 2.2% each.
Range: 0
Fast startup, like Marth's uptilt.

----------------------------------------
Dash Attack - Double Punch

Geno zeroes his velocity with infinite traction, kneels whilst aiming his two arms forward, and fires them 1 SBB. At that range they lose their 'impetus' and plummet to the ground. The arms are one hitbox, and deal 14% damage with something like Bowser ftilt power.
Range: 1 SBB
Attack on frame 14. This attack has typical hitstun length and Geno recovers around frame 48.

----------------------------------------
Neutral Air - Hostile Poppet

Geno front-flips, similar to the Mario Bros. up-air except in reverse. It has a weak hitbox behind him, like the front box of Mario's flipkick up-air at low percents. In front of Geno the kick knocks just above the horizontal, with just a nudge of power. The end of the attack is a spike, but again only a mediocre push. 10%. All hits very strongly DI-able.

----------------------------------------
Forward Air - Hand Gun

Geno shoots three small bullets from a rifle in his wrist. His posture is static. As mentioned in Physics, the bullets move with Geno. 11%.

----------------------------------------
Up Air - Rock Candy

Geno reaches into his hat and tosses an item which instantly ignites into several coruscating stars that deal extreme bludgeoning damage. Though the damage is great, the power is low, merely giving the foe a surplus of air time to make good his or her escape.
This attack is slightly faster than Zelda's up-air, and covering about the same area. 16%. It has a glacial recovery.

----------------------------------------
  • Geno's Hand Cannon is a significant step up from his bullet attacks. It is good enough that he uses it in two ways.
Back Air - Hand Cannon

Geno turns his right arm behind him, then raises it from the elbow. Three large bullets shoot from the elbow joint, with one hit of 12% damage.


Down Air - Hand Cannon

Geno strafes the region below him from the vertical to 45 degrees toward forward. The cannon shoots three bullets, the second one at 22.5 degrees. 14% damage.


----------------------------------------
Neutral Special - Geno Blast

(useable only on the ground)
Geno sends a ray of light straight up, then is free to move. After 67 frames, a beam shoots down from the upper stage boundary, flashing in every color, aimed at the spot Geno was standing. During those 67 frames, Geno can influence the aim of the beam to a maximum range a bit more than a Warp Star. The influence of earlier frames is stronger than later ones, so that you can co-ordinate free movement with aiming.

If Geno holds the Special button, he draws light into himself before expelling the ray. Doing this causes additional beams to shoot down, up to seven total, which have a scattered pattern around the first one. 11% and then 2% per additional.
Range: A column from the upper boundary, out as far as ~3 SBB, as wide as Geno himself.
Charge up to as long as Shield Breaker. The ray lasts 50 frames. 67 frames later is a beam that persists for

Geno gets the measure of his energy charge as free charge time on the Geno Blast, either 33%, 67%, or 100%. He expends his charge the very instant this happens.

----------------------------------------
Up Special - Geno Boost

First Geno lifts his arms to the sky. Red arrows surround Geno, pointed upward and moving in the same direction. Each one vanishes after an instant and they all come in sequence. If used in the air, the arrows lift Geno upward slowly but surely. Used anywhere, the arrows are a barrage combo like Knuckle Joe. The last hit knocks upward with low scaling growth. Used in the air leaves Geno helpless.
If Geno had Geno Power 3 when he started, he expends it, and the last hit is a semi-spike strongly influenced by DI.

Animations: Geno travels upward 1.2 x his own height, and may shift slightly forward or backward.

----------------------------------------
Side Special - Star Gun

Geno's hands retract and are replaced by two barrels. When Special is released, Geno fires tiny star bits from those barrels, with large hitstun like his other projectiles. While Special is held, Geno may move or drift at his normal walk or drift speed, and can angle his arms (rapidly). He may turn by double-tapping backwards. Except for the shape, the attack works almost like Zelda's Fsmash.
The attack marks the victim with a volatile status condition, which has the effect that shield damage against him or her during the next six seconds is doubled.

----------------------------------------
Down Special - Pick Me Up

Geno reaches up into his hat and rummages for any of three possible objects. He tosses them in an arc in front of himself, and upon landing, they promptly flicker out of existence. The item is either a mushroom, a rock candy, or a pure water. The mushroom restores 4% damage to Geno (just for being flung to the ground). Rock candy deals massive damage but only has a 1 in 13 chance of being picked. Pure water is selected in 4 of 13 trials on average, and it only damages ghostly foes.
(What, you expected Geno Flash? Siddown you Sakurite.)

Animations: The arc starts at horizontal and travels a maximum of three character lengths depending on Geno's altitude.

----------------------------------------
Grab

Geno has terrible grab range and awful frames. His run, being fast though, affords him some degree of threat.

The throws are quite weak with the exception of Dthrow. Upthrow involves a Giant Swing with an upward finish. Bthrow has Geno trot to the opponent's backside and trip him with a feather-touch. Fthrow has Geno run up the opponent's face and then kick off of them, having very little power. To replace it, the Dthrow features his transformation into a cannon, and the launch of the grappled foe forward to the bullseye of the cannon, whose projectile is a mote of Star element energy. On contact, this mote expands to form a starman whose light surpasses ordinary starmans, and its rupture deals a decisively strong blast to KO Geno's grappled foe at a ripe percentage.

----------------------------------------
Uptaunt - Geno folds his arms and nods.
Sidetaunt - Geno falls flat on his face.
Downtaunt - Geno spins his forearms 360 degrees in a T-stance and then shoots, via the tension of a coiled spring, his head off his shoulders.

Idle - Geno performs an Arm Wave, which transitions to a full body maneuver where he detaches each body part in turn.


***

Final Smash - Geno Whirl

In cinematic time, Geno performs Geno Power, and then hurls a yellow discus along a straight line, traveling so fast it leaves afterimages. A splash sound occurs just as the discus leaves the screen. Cinematic time ends, and a series of absurdly strong, horizontal hitboxes appear along the path the Whirl took, knocking everyone intersected by it straight to the blastzone in under a second, unless there is a wall in the way. The Whirl instantly does 86% damage itself, and the later knockback is painless.
If the player presses A when the Whirl is on screen, and it intersected a character, a lightning clap occurs instead of a splash noise, and then blocky text reading "9999" appears over any character it hit. Cinematic time ends and those characters receive 999% damage, with tiny upward knockback. Enjoy finishing them off!


Playstyle - Rock Star Road Warrior

As hinted in the discussion of Geno's physics, the star road sentry's combat centers on his use of exaggerated hitstun to extend his pressure game on hit. With an arguably worse recovery than Captain Falcon, the Geno player is constrained to eke out and dominate the neutral game and stage control. Committing to his heavy hitters is a bad investment due to the punishment he will face, so he has few options. Star Gun can be used as an aerial attack as the most multitudinous variety of approaches contained in one command. Double Punch the dash attack is reasonably safe but not from whiff punishment if it is telegraphed too much. The Hand Cannons are of course well-worn standbys for spacing.

If Geno can set himself up for defensive play, his options open up to include his high risk high reward box of Down Smash, A A combo, and just running to pivot into whiff punishment. Finger Shot neither is too slow not to work well out of shield, but mixing it up with throw will be necessary, which drags down the reward potential.

Lastly, there is Geno's range to consider, which exists for every one of his attacks except Upsmash. The player must create opportunities in uncommon places using this trait, or Geno's power is a waste. This brings us to Geno Blast, a very versatile 'ranged bombardment' command, definitely meant to harass and intimidate the enemy from prudent but oppressive use. Imagine a Din's Fire command, except it could be used to cover an approach, it has a larger hitbox, and can deal more damage. This is Geno Blast, opening up a poke-and-check style or providing the key link from one combo to the start of the next attempt.

In all, Geno is a character who struggles to get things started, but can devour a small advantage easily. If he amounts in sum to a glass cannon with speed to spare, I can wish for no better a simulacrum of his original SMRPG essence.
*
 

FrozenRoy

Smash Lord
Joined
Apr 26, 2007
Messages
1,261
Location
Las Vegas, Nevada
Switch FC
SW-1325-2408-7513
Some notes:

- In the description, you say "Considering he fights with his main arm (the left arm) broken, no sword and without Sif by his side, one shudders to imagine what Artorias was like in his prime...", when he does fight with a sword in his boss fight. Did you mean to say shield?
- "Corrupted" in every header implies that there are normal attacks and corrupted attacks, and is a little confusing at first. I understand that this is an organization choice, but it could confuse the average reader. I think "Abyssal" would work better for this stylistic choice.
- The presentation is simple and clean, and very attractive. I actually think it would be more fitting for Artorias's character if it was rougher, or grungier. Maybe some darker colors, or use of bold and serif fonts. Criticizing presentation has no bearing on the actual moveset, though, so you can ignore this if you want to.
- I very much like the way you handle Artorias's sludge. It's very fitting and done well, although all of the effects it has on both the foe and Artorias are a lot to get your head around and understand. I wish you would explain what "abyssal dust" is though. You describe the ooze, but I can't really visualize what "dust" is. Does it surround the area like a cloud or just cling to the ground? Is it solid or just a few particles?
- I love that Artorias has a Souls parry in homage to the Souls games. If you could have added in a riposte, I'd love it even more, but following up with another attack is just as fine.
- Steadfast Leap is a great call-back to his boss fight and is clever in interacting with the abyss sludge.
- The rest of the moves interact cleverly with the abyss as well, one of my favorites being down tilt, dash attack, and down aerial.
- I didn't see Artorias's Final Smash coming, but I like it. I'm really glad you mentioned Sif and how you implemented him, but I wish he would have more of a spotlight. Sif is the most memorable part of Dark Souls' story for me, and one of the reasons I loved the DLC.
- You don't have a playstyle section up yet, but from what I inferred from the moveset, Artorias wants to spread the abyss while shifting into an absolute juggernaut. He plays like a disruptive bruiser, which is pretty fun. I'm a fan of the moveset, both the character and what you've done with him. I like it.
Thanks for the comment! A little reply.

- Yes, I did. I've fixed this now.

- I probably won't change this, hopefully it won't cause problems for others, but a big theme of the set is corruption and I felt it fit more for Artorias stories.

- I did consider making it go darker, but I felt that 5 tones looked a bit worse and I wasn't sure how to bold in a way I liked in the set, so I decided to go with the clean descent into darkness. Pretty happy with the organization overall, glad that you liked the simple and cleanness.

- The dust looks like his dark clouds in the fight and are mostly a cosmetic effect for the hitbox on his Down Special.

- If Artorias was in his prime, he'd probably have a Riposte, but in this state...well just the parry.

- Artorias' standards were something I very much enjoyed making and DAir I had in mind quite early in the set, glad they were enjoyed.

- I actually have considered expanding his Final Smash into a 1v1 boss mode/fight. In it, Artorias would be shifting between his pure, original form and his corrupted abyssal form. Sif would be an ally for Artorias while he is pure, but would fight against him when he is corrupted, making it a 2v1 for and against Artorias based on the time in the fight. I largely didn't make it already because it would require writing a new or semi-new moveset for "Pure" Artorias and didn't feel like doing it at that moment.

- I'm glad you were a fan! I am hoping to write up a Playstyle and 3 Match-ups at some point.
 

Rychu

Thane of Smashville
Joined
Jul 5, 2010
Messages
810
3DS FC
1908-0105-4965
Never mind. If this 'emblem boards' change isn't temporary I'm leaving this forum completely.
Also Roy isn't in Brawl but it says my Brawl main is Roy. What the ****.

EDIT: Oh yeah. It's April fools day. xD
I legitimately couldn't tell if you were joking or not
 

IvanQuote

Smash Ace
Joined
Apr 7, 2014
Messages
853
Location
Looking for those who like Mighty No 9
NNID
ivanquote
3DS FC
1693-3075-2999
Because I have nothing else to, I'll follow in the footsteps of Munomario777, because I have inspiration. Or determination. Or a lack of creativity. One of the three...

Super Mario

Mario is the plumber that everyone knows and loves, so why not add him to Fire Emblem? Due to being the Ace that he is, he can reclass into an extremely large number of classes. He comes with his own unique class however:

Yoshi Rider:

This class is a unique type of mounted unit. Where as most grounded mounts are of the beast, Yoshi is a Dragon and as such he has weaknesses to the likes of the Falchion, wyrmslayer, and the like.

Base Stats:
HP: 26
Strength: 10
Magic: 5
Skill: 8
Speed: 6
Luck: 4
Defense: 5
Resistance: 5
Movement: 8
Axes: Rank A
Tomes: Rank A


Mario has high HP, but low base stats, making him a questionably reliable tank. While he has some abilities based on his above average luck to mitigate the effect this has on his well-being, it is his major flaw. He has great attacking stats, focusing more so on the physical side and countering armored units to make him a great force to be reckoned with. His movement is also amazing, including both the perks of mounted units and his awesome jumping ability. Feel free to use This character as a luck-based, if not frail grinder and attacker.

Unique Weapons:


Firebrand (Tome):
Rank: A
Might: 7
Hit: 80%
Crit: 20%
Range: 1-2
Effect: Has a chance to steal a gold bar from an enemy when defeated with this weapon equivalent in percent to the user's luck.

This attack is quite useful for raising money and healing (see below). This makes Mario an asset in grinding.

Ultra Hammer (Axe):
Rank: A
Might: 20
Hit: 65%
Crit: 5%
Range: 1
Effect: Effective against armored units, ineffective otherwise. -5 speed

Essentially a more powerful version of the hammer. It can be used to absolutely decimate enemies with its sheer power, at the cost of lessening his dodging capabilities.

Abilities:
Jump: While Mario cannot fly with this class, he can still preform his famous jump. This allows him to bypass water, sky, or an enemy in his way so long as there is land on the other side of the unlandable square that he can hypothetically reach with his remaining movement. While he can only use his jump once a turn, this greatly increases the usefulness of his movement, as it draws inspiration from the gimmick of the knight chess piece being able to jump over an enemy. This makes it much more difficult to trap Mario in a corner.

Monetary Recovery: If Mario receives a Gold Bar in a manner other than trading, he recovers 30% of his HP. This may seem situational with the slim chance to obtain gold bars normally, but it works extremely well alongside his unique weapon, Firebrand.

Jack-of-all-Trades: Mario can use any E-Rank Unforged Weapon even if not proficient (swords, staves, lances, etc), at the cost of double the usage for breakable weapons. Since this character will be running on Fates Logic where not many weapons are breakable, this makes Mario extremely versatile even outside his other class options.

Star Power: Has (Skill/4)% chance to receive x0.25 damage and deal 1.5x damage for the duration of combat. When this skill goes off, it makes Mario a real force to be reckoned with, making him far deadlier than one would imagine.


Done in 2.5 hours! Will it be better than the 13 months I put into Pohatu? Eh, who really cares. It's not as if this counts towards anything anyway for this board.
 

ForwardArrow

Smash Ace
Joined
Aug 17, 2011
Messages
502


MaloMyotismon

Malomyotismon is the final antagonist of Digimon Adventure 02, a series that is considered a bit of a trainwreck even by people who actually like Digimon. Malomyotismon himself is just one part of the absolute trainwreck of an ending the series has, but suffice to say he is not a very well written villain. He's something of a reincaration of the villain Myotismon from the previous villain, his spirit inhabiting the body of a man who really wanted to go to the digital world. Once he got to a dimension that was not actually the digital world and never established before in series, he used the children the man was using to help him get to the digital world as batteries to revive himself in a new body. Now with anatomy so bad it would make Ridley cringe he decided to take on "Malo" at the start of his name, because adding the Spanish word for bad to the start of your name clearly makes you more threatening.

After murdering his host's minions who were still loyal to him for some reason, he attempted to surround the protagonists in illusions to distract them. Very, very ineffectual illusions of the protagonists getting part of what they wanted, including one girl whose siblings disappear but she gets a lot of dessert so obviously this is okay. Once he breaks out of the illusions, the protagonists start abusing the fact that the world they are in grants wishes if you want something hard enough to make a ridiculous number of clones of all their Digimon. They beat Malomyotismon to a pulp without him managing so much as a response other than bragging and shooting off a mist attack that doesn't even hit anyone. Eventually, they hit him so hard they accidentally blast him into the Digital World.

This seems to have been his plan all along given his dialogue afterwards as well as how much stronger he becomes once they get there, managing to easily defeat Digimon that he was previously not able to fight effectively. Now that his hilariously impractical plan somehow worked, he decides that the best thing to do now is to make it kind of dark outside in the human world. After everyone tries to interrupt his massive setup time with different strategies and fails as he's actually quite powerful now, the terrible protagonists start telling the kids to believe in themselves. They talk about opening noodle carts and becoming comic artists, and all this unnecessary positivity literally causes Malomyotismon's body parts to start exploding. He eventually dies after his body is eliminated and the lead Digimon blows up the generic cloud of darkness he turns into out of desperation. This leads into an ending which somehow managed to offend Digimon fans even more than anything I just talked about. Great job Digimon Adventure writers.

Stats
Size 14
Weight 12
Fall Speed 8
Jump Height 6
Dash Speed 5
Air Speed 2
Traction 1


Malomyotismon is very awkwardly bulky, being considerably taller than Ganondorf and as wide as Bowser. His model actually looks a fair bit bigger than his hurtbox on account of that stupid wing piece on his back being mostly in the foreground and background, as well as the tail not being part of his hurtbox except when he's using it for attack animations. He actually has decent mobility for the most part aside from a horrible air speed, but he is actually very slippery to control, on account of his awkward bodyweight distribution. On account of his terrible air speed and control as well as massive size and weight, Malomyotismon is about as vulnerable to combos as it gets, but at least his recovery and weight are high enough that he won't die especially fast.

Specials
Neutral Special - Illusions
Malomyotismon spreads his arms as a white fog surrounds his body for a half second, the first 10 frames of which Malomyotismon is invulnerable, before growing to expand to an area 1.5x Giga Bowser's size. As it expands it pushes the foe away with a moderate strength wind hitbox, shoving foes about half a battlefield platform away. This fog will not actually obscure everything within it, but rather cause the opponent to start seeing things that aren't there. Having grown something resembling a brain since joining Smash, what the opponents will see is an illusion of Malomyotismon himself. It has a Level 4 AI, lower if controlled by a CPU player of below Level 9(to the point it can in fact become far less competent than a Level 1 CPU), and cannot leave the white mist. The illusions attacks deal no damage or knockback, mostly existing for mindgame purposes... rather ineffectual ones admittedly. However, Malomyotismon will become invisible for the animation of this move and can press left or right to determine whether he or the clone appears to the left or to the right of his original position. Either way, it will appear about a Bowser width in the chosen direction, so its pretty impractical to hit both at once. This means that while it will probably only last a short time, you can at least use the deception to get in a free attack, meaning you're already more competent than Malomyotismon was in the show.

The duplicate will actually react to damage and knockback like Malomyotismon usually would, and will vanish if its hit to the edge of the mist or takes a total of 40%. The mist will vanish if no more duplicates exist. If Malomyotismon uses this attack with a duplicate already out, he will create more mist and a second duplicate, and duplicates can cross over into each other's area of the mist. You can have up to 3 duplicates out at once, and any more uses of this move will just create more mist for them to traverse and teleport the nearest duplicate to yourself to perform another fake-out. The duplicate teleported with this will get a nice 20% stamina buff too, to make it a little bit harder to kill. Now don't worry, soon these will be useful for more than ineffectual mindgames, as long as you can keep those damn Digidestined off your back. For the record, your duplicates cannot use this move or your Down Special, but most anything else is fair game.

Down Special - Pandemonium
Malomyotismon lets out a villainous laugh as he raises his hands to the sky, as darkness starts leaking out of them. It will expand to cover an area about 1.35x the size of Malomyotismon himself for each second you hold this move, and kind of like your duplicates does absolutely nothing on its own. It does make the area it covers dark enough that it gets a tiny bit harder to see specifics of what's going on, but unless there's a significant amount of chaos going on it probably won't make much difference. If Malomyotismon uses this move for an extensive period of time, he will begin boasting about how he's unstoppable and how the opponent is powerless to do anything against him and other such generic villain gloating, which is fairly comical to interrupt with say, a jab.

Now you might be thinking after two moves of Malomyotismon doing nothing, he really has to have some plan right? Well yes actually, as while the darkness itself isn't particularly dangerous, its effect on Malomyotismon and his duplicates is. As a larger chunk of the stage is envelopped in darkness, Malomyotismon's attacks and stats will get progressively better. After covering an area about three times his own size in Darkness, he gets a 1.2x damage and knockback boost on all his attacks, his dash speed is boosted to be closer to Marth's, and he gains a slight resistance to hitstun and buff to his weight. This power boost caps out if Malomyotismon can cover an area the width of Final Destination and the height of five Ganondorfs. In that case, he's boosted to having 1.75x damage and knockback on all his attacks, Captain Falcon's dash speed and a solid air speed with actually decent traction, and a whopping 25/10 weight while taking heavily reduced hitstun to make comboing him all but impossible. This is as insane as it sounds, but an area that size will take Malomyotismon standing still for like 25 seconds or something ridiculous to cover, and if Malomyotismon leaves the darkness for any reason all of these buffs go away.

I mentioned your duplicates benefit from this, and now I'm going to explain how that actually works. You see the darkness is an extension of Malomyotismon's influence, and as such he can make his illusions more tangible in there. Tangible enough that their hitboxes actually begin doing damage and knockback. At a seconds charge worth of darkness, nothing will do more than 1% and a flinch and attacks weaker than a moderately powerful tilt will do absolutely nothing. After 4 seconds worth of charge they'll deal 0.25x the damage and significantly less knockback than Malomyotismon, though their smash attacks will serve as tolerable GTFO moves and the hitstun can at least setup for Malomyotismon's own attacks. With maxed out darkness power, the duplicates are just as strong as Malomyotismon himself in every aspect, which is absolutely terrifying. The duplicates will lose all these buffs if they step out of darkness though, which their AI will not do voluntarily unless its to move through a small gap between areas of darkness, or the quantity of darkness is particularly small. Separate, unconnected ones do in fact count both fields of darkness as far as the power boost goes, so you don't necessarily have to build up just one field. Clones can also travel through darkness like they would a mist field. Any attacks that produce darkness will not if used by clones, so keep that in mind.

This makes Malomyotismon exponentially scarier as he gets setup time, given all aspects of his game including his duplicates are buffed by this. However, the amount of time you have to stand still and do nothing to achieve this is as absurd as the results if you pull it off, possibly moreso. The good news is Malomyotismon has ways of expanding already existing darkness that are much more proactive. As an aside, if the foe wants to get rid of darkness, all they have to do is damage Malomyotismon himself, though a small poke will only take away a very small amount of darkness. However, the more consecutive damage he takes without a small amount of time left undamaged, the faster the darkness will recede, taking 100% without a 3/4 second break between sources of damage will remove even the max power field of darkness entirely, though you can expand it beyond that if you want an extra cushion should your plan come crashing down in such a horrible fashion.

Side Special - Dark Orbs
Malomyotismon's shoulder mouths open, revealing orbs of black energy inside them. He then fires out two black orbs half Kirby's size, which deal 10% and knockback that KOs at 300% while travelling at about 1.5x Ganondorf's dash speed. They have very slight homing on opponents within 2/3rds of a battlefield platform, and will travel slowly away from each other as they fly, one going closer to the ground while the other travelling higher into the air. They both disappear on contact with anything, and deal reduced shield damage and shield stun from what you'd expect of a projectile of that power. This has fairly large amounts of lag on both ends, making it far from spammable. A projectile made by clones cannot leave an area with no mist or darkness within it.

This is what happens if you tilt the attack, but smashing it will achieve a slightly different result. Malomyotismon will open his shoulder mouths and begin inhaling with them, pulling in opponents with the speed of Dedede's inhale if they're within a battlefield platform and orbs at the speed of Captain Falcon's dash, regardless of their position on the stage. They still deal the same damage and knockback while you do this, and clone orbs are inhaled just like your own. Your duplicates will not use this variation of the move. Malomyotismon will continue doing this until either all the orbs are drawn in or he cancels out of it, which he can do a third of a second after starting the inhale. Once he stops his jaws will snap shut, dealing 20% and diagonal mostly upwards knockback that KOs at 125% in a rather small hitbox, but one that can potentially be setup by an orb hitting the foe and can get obscenely powerful in a large darkness cloud.

Once he's drawn in the dark orbs, tilting or smashing side special will have a different effect than usual. Tilting it will fire the orbs all back out again, in the order they were drawn in. They deal the same damage and knockback as before, but the starting lag on firing them is greatly decreased at the cost of somewhat higher end lag. Clone orbs don't deal damage and knockback, but there's a rather fun trick you can pull with them. If you press side B in the opposite direction you're facing, you'll fire out the projectiles in reverse order of when you absorbed them, allowing for some ability to confuse the foe as to which orbs they should bother dodging. Of course they can just shield it, which is the correct reaction to this move... though there is one flaw in that plan.

If you smash this move with orbs already absorbed, Malomyotismon instead fires a singular larger orb, its size depending on how many orbs were absorbed and how tangible they were. It will grow to 2/3rds Kirby's size with the initial orbs fires and by an additional 1/6th for each full power orb absorbed on top of that. Illusion orbs count for 1/4th to a full orb, depending on how much darkness you have out, though counting as a full orb only requires the equivalent of 6 seconds of charge to make. This deals 15% and knockback that KOs at 200%, and also travels at 1.3x Sonic's dash speed in rather startling contrast to the previous version of this attack. That damage increases by 3% for each additional orb absorbed, and the knockback also increases accordingly. This can be a very dangerous projectile, especially late in the game when Malomyotismon has lots of tangible duplicates shooting these, especially since they're rather fond of this attack.

What's notable about this variation of the move is that if it collides with a shield, the shield damage and stun is just as weak as a single orb. Really anticlimactic right? Well there is a side effect for the foe, a very unfortunate one in fact. You see, the orb will explode into a darkness, 1/3rd a second of charge of your Side Special for each orb investe, when shielded. That's not too bad on paper, but if it explodes inside pre-existing darkness, it will multiply its size by an additional 0.1x for each orb invested. This maxes out at 10 seconds worth of darkness to prevent creating so much off-screen darkness that Malomyotismon permanently becomes an invincible god should he already have a lot out. Obviously, this can speed up your setup an absurd amount if the opponent shields this, which can prove rather frustrating to opponents because there are many other cases where shielding shuts down Malomyotismon rather well. With enough bullet hell out to make dodges ineffectual, you can make the decision very difficult for the opponent too, get hit by this or give Malomyotismon a huge buffer to his setup phase.

Up Special - Flight of the Bat
The weird bat-like attachment on top of Malomyotismon removes itself from the top of his body and flies beneath him, as he begins to ride it like some kind of edgy surfboard. He can now fly around like ROB's recovery for 1.3x as long after the somewhat laggy startup animation, as the strange... wings propel themselves with a stream of dark energy below them. This actually deals mass flinching hits of 2% that aren't especially fast but can keep opponents below Malomyotismon from effectively messing with his recovery. Sadly, on account of the startup, its not very hard to gimp this, so its not nearly as insane as it sounds on paper, but it does give Malomyotismon a strong method to potentially pressure aerial foes with on top of the huge recovery distance it allows for.

If Malomyotismon is in darkness at the start of the move, the startup lag gains a varying amount of heavy armor based on how much darkness there is, maxing out at 13% with about 8 seconds of darkness on stage. While this isn't a perfect anti-gimp method, it does make it somewhat harder to gimp Malomyotismon if he extends his domain far off stage. While putting the darkness off stage is a bit of an impractical sounding strategy on paper, some of the buffs it provides his aerials actually allows Malomyotismon an insane gimping game if he decides to dedicate some of his resources to that, as you can potentially use this move on the offensive as well.

Smashes
Forward Smash - Shadow Blast
Malomyotismon enters a similar pose to Mewtwo and Lucario charging their Neutral Specials, before summoning an fluctuating mass of swirling shadows nearly as large as Mewtwo's fully charged shadow ball between his hands and throwing it forwards. The mass deals 16%-23% and knockback that KOs at 150%-110%, very strong for a projectile, but underwhelming for the smash attack of a heavyweight. This is only up close however, as the shadow blast will rapidly diminish in size and power as it travels until it disappears after going a battlefield platform. The lag is about on par with Ganondorf's Forward Smash, making this a rather telegraphed move option.

This move gets much, much better when traveling through shadows, not diminishing at all while inside them so it has functionally infinite range until it leaves. In fact, every half battlefield platform-quarter battlefield platform it travels based on charge, it will shed a tiny black projectile off itself that deals 3% and a flinch. It will alternate between travelling upwards and downwards from the orb and travels rather slowly to provide some strong stage control. A duplicate using this in heavy darkness is a a fantastic setup, but not one you can rely on their AI to always make for you even once you get that far. Do note that the shed projectiles do absolutely nothing to shields, just disappearing on contact, and while the main projectile actually deals slightly enhanced shield damage, it does almost no shield stun or push, so you can be punished badly if this attack is shielded on account of the strong lag.

You can also angle this attack up or down. Angling it up just sends at a 45 degree angle above the ground, allowing for a different distribution of offshot projectiles as well. Angling it down has Malomyotismon slam the mass into the ground in front of him, causing it to explode for 19%-26% and knockback that KOs 20% earlier. This is a fairly sizeable explosion, making it a serviceable melee attack on account of its range, and also firing off 3-5 of the mini-projectiles, less than a Forward Smash with a sizeable amount of darkness creates but enough to serve as a nice sourspot to the move. You won't get these outside the darkness however, and the end lag of this version is actually slightly worse than the projectile one.

These offshot projectiles will begin orbitting your Side Special ones if they come into contact with them, functioning as a way to expand their hitbox. If Malomyotismon absorbs a projectile with these orbitting them, they'll remain orbitting when fired back out, whether around the orb they originally were or the combined orb.

Up Smash - Mouth of Madness
Before he manifested his body, Malomyotismon communicated with the protagonists as a giant pair of purple lips, which he summons in this move above himself as he raises his hands into the air. Its about 1.5x Bowser's width but very thin, and exists for about a third of a second before vanishing. Like your Forward Smash, the lag on this is comparable to the equivalent Ganondorf smash. If the opponent comes into contact with the mouth, it will expand and engulf them, along with everything and everyone else in an area 0.75x the size of a Smart Bomb blast. At this point the mouth will chew the opponent and spit them out for 15%-21%, as well as upwards knockback that KOS at 180%-140%. Not only is this weak for a smash, the darkness buff is rather subdued on it, only increasing the damage and knockback by 1.35x even at max darkness.

That's because there's another way to buff this attack's power, as I mentioned it does eat everything right? That includes Malomyotismon's projectiles and duplicates. Projectiles will add one third of their damage to the attack and increase the knockback proportionally. While this is rather nice already, keep in mind that you can potentially get those orbiting mini projectiles with FSmash, normally just a hitbox extension and slight damage boost, involved in this, and suddenly hit with far more than just one or two of them. Duplicates can be heard performing attacks on the foe, shouting "Screaming Darkness" or "Crimson Mist" at the opponent, or just making a loud grunting sound similar to the ones Malomyotismon makes one some of his melee attacks to indicate themselves attacking. This will add 1%-6%, depending on how tangible the duplicate is, 0% if the duplicate is one of the ones not outside the darkness. This can make this a horrifically powerful attack potentially, and one that doesn't even require a lot of darkness to pull off, just some clever setups. However, the lips have the third of a second duration on top of Ganondorf's Up Smash lag so if you miss with them, expect some punishment.

Projectiles used in this attack disappear but clones do not. However there is some compensation for your lost projectiles, as the lips will spit out a small amount of darkness after the attack, about one seconds charge worth if nothing else was absorbed by the attack and it was uncharged. However, for every 3% added on top of the attack's base damage, an additional half second worth of darkness is created. So landing a big Up Smash doesn't just create a really powerful hitbox, it does a lot of setup for you instantaneously. All in all, a very high risk, high reward move. If a clone uses this move, it will just have the hitbox, none of the additional effects.

Down Smash - Screaming Darkness
Malomyotismon loudly declares the attack name as he faces the screen and darkness violently erupts from below his bat-like back mounted object, his shoulder mouths, and from below what can only be described as his crotch spike. This is a very laggy startup animation, actually a bit longer than Dedede's Forward Smash, but the hitbox is huge and covers both sides of him. There's actually a moderately strong wind hitbox even beyond it too. The attack deals 20%-28% and knockback that KOs at 120%-85%, making it one of the best KO moves Malomyotismon has, especially on account of its long duration that allows it to go through dodges. Shields take mildly decreased damage from the attack but enhanced shield push, nearly a battlefield platform worth.

This attack has a couple interactions with darkness, but the first one is that the hitbox gets even bigger in a field of darkness, though the rate at which it does is pretty slow. That being said, when the attack has nearly a battlefield platform of range of both sides at max darkness and the damage is so high even with reduced shield damage it looks scary to shield, yes this attack is absolutely murderous in a large amount of darkness despite its lag. The attack will also expand existing darkness by about 4-7 seconds worth based on charge, which sounds very powerful until you realize this expansion is very temporary. It will recede back to normal over the next 2.5 seconds, giving you a limited time to play off a now much larger field. The duration of the size increase will go higher as you have more darkness, but not by a significant margin, at max power it only lasts 5 seconds. Using the attack again will just expand the darkness out to what the move pushed it to originally, it doesn't stack. Any darkness made by multiplying this with the Side Special is actually permanent however. This allows you to actually do some extensive tricks even with a small amount of darkness... assuming you pull off the lag anyway.

This is also one of your more effective attacks to use in conjunction with duplicates, as they will actually try to knock opponents into it during its long duration. They're also rather fond of the attack themselves, and while they're a fair bit weaker than Malomyotismon unless you've been very successful, this is a strong enough hitbox that throwing the opponent into it is a rather nice reward.

Standards
Jab - Black Barrier
The three small claws on Malomyotismon's hand spread apart as a circular barrier of dark energy surrounds it. He then thrusts it out in front of himself and holds it there, dealing an initial hit of 5% and horizontal knockback that KOs at 280%, followed by repeated hits of 2% and flinching. While he holds this out, Malomyotismon can angle the attack up or down, moving his arm up and down gradually as he does so. This can catch opponents low to the ground or high in the air, or mess with their ability to DI a bit, though ultimately the use is a bit limited in that regard. The end lag is also disappointingly bad for a jab.

This barrier can actually be used to reflect projectiles, as you might expect, though it obviously doesn't cover all of Malomyotismon's body and the angling process is rather slow, so its hardly perfect against enemy projectiles. That said, it does reflect them in a radial fashion, and can be used on your own or duplicate projectiles. Duplicates can reflect with this too and will try to keep Malomyotismon's projectiles in play with this if they aren't otherwise busy, but only if they're tangible enough, about 5 seconds worth of darkness being required to do so. You can also potentially bounce around an opponent's projectile between your clones with this too, if you're feeling like toying with them.

If an opponent is knocked into this attack by another move, they take knockback equal to half of the amount that hit them into this in the opposite direction and damage based on the amount of knockback. With no darkness buff, Malomyotismon's FSmash having its knockback reflected by this would deal 10% to the opponent. This can make it a rather useful way to get extra damage out of a clone's attack. Clones don't try to reflect opponents with this move, so don't think you get to try anything funny with that.

Forward Tilt - Tail Smash

Malomyotismon's tail whips out of the background before slamming down in front of him, dealing 13% and mostly horizontal knockback that KOs at 165%. This attack is fairly fast to start up but has high end lag, though it has a couple surprisingly appealing qualities. For one, it has pretty nice range given the length of the tail, and for two, the tail actually does a lot of shield damage. About twice as much as a normal attack, and more in darkness, up until it reaches a point it can instantly destroy a shield with about 10 seconds worth. When a lot of Malomyotismon's other attacks suffer so much against shields, this move serves as a more direct way to punish them than Side Special.

There is a noticeable downside to this move, in that its even more punishable than it looks. You see, while its being used for this move, the tail becomes a part of Malomyotismon's hurtbox, considerably expanding it. That includes during the sizeable end lag, allowing the opponent to pull of strings of attacks that wouldn't even be possible if you hadn't used this move. I advise being careful with this.

Up Tilt - Reaching Claws
Malomyotismon raises his claws above his head and brings them together, dealing 10% and weak upwards knockback for the majority of the hitbox. The exact point where the claws collide with each other is a sweetspot that deals 17% and upwards knockback that KOs at 200%, mostly because it scales rather poorly as the base knockback is quite nice. Given the base knockback is quite nice and he gets a multiplier on power from darkness, this will scale into a KO move faster than some others in your set with the sweetspot, provided you connect with it. It is rather small though.

As a small aside, this has some fairly long freeze frames when you connect, which is cool visually but not super important on its own. If the duplicate lands the sweetspot though, you can in fact capitalize on those freeze frames, and they will always happen no matter how tangible the duplicate is. A Level 4 AI certainly has its share of trouble landing that, but Malomyotismon has a fair few tools to set them up, its not exactly impossible either.

Down Tilt - Crimson Mist
Malomyotismon fires jets of a red mist at his feet as he announces the attack's name. This deals 14% and mostly vertical knockback that KOs at 135%, but serves as one of the laggiest tilts in the game. It also has pretty huge range though, going nearly as far as Dedede's FTilt. The mist then expands upwards over the next 5 seconds and continues to deal lingering damage. During the first second it will actually flinch the opponent twice and deal 6%, but it will diminish by 1% each second until it vanishes, and the flinching will only happen once per second for the next two seconds before fading altogether. If the opponent shields this attack, not only does it deal slightly reduced shield damage, it also prevent the lingering mist from appearing at all.

This move has a couple additional utilities, but the first one is that darkness will follow the crimson mist. If it extends past the edge of the darkness, then this darkness will ultimately cover the area occupied by the Crimson Mist, a slow but reliable way to expand your darkness. The more notable one however is that this is the one kind of mist in your set that actually will fully obscure things, albeit Malomyotismon will only get obscured after its been rising in height for about 3 seconds, so it only makes for a very temporary form of cover. The mist foe's body will be vaguely visible through the mist so you can actually see where they are and what they're doing, though you'll miss a lot of the details of their animations so its not totally impossible to use this against you, but unlikely in most circumstances. While you can use your own mist to obscure yourself, you can also use it to obscure a clones's or have a clone obscure yourself. Even a completely unbuffed illusion can actually shroud you using this move, making it one of the only uses of a clone not in darkness.

Dash Attack - Onslaught of Shadow
Malomyotismon's charges forward as long as A is held at a rate slightly lower than his dash speed, before lunging forward and smashing in front of him with his left arm. This attack deals 12% and knockback that KOs at 185%, but we can do slightly better than that. You see, the reason he holds down A during this attack is because the bat-like appendage on his back will draw in darkness while you do so, about one second's worth every third of a second you dash. The charge rate is faster as you have more darkness out, on account of having a higher dash speed so he can cover a larger area and draw in more. This will bolster the damage by 2% and decrease the KO percentage by 20% for each third of a second you powered up the move, as well as increase its range, going from having him go forward only .4 battlefield platforms uncharged with no darkness to a full battlefield platform after a second of preparation. It can go higher than that too, but the rate it powers up falls off pretty hard. Its worth noting you should be a tiny bit careful with this as if you just charge across the whole stage and fire this off at the edge, you'll probably die in fairly comical fashion. While that's very in character for Malomyotismon, its not good for you if you're trying to win the match.

This attack will release all the darkness you pulled into it no matter whether or not it hits opponents or completely whiffs. While Malomyotismon has plenty of ways to create darkness, this is his primary way to redistribute it, and its much simpler and easier to pull off than his means of creating more. Plus, a lot of his darkness creation requires or at least heavily encourages having pre-existing darkness, so this is a way to have that where you want without just having to sit still and monologue. One thing to be careful of though is if the opponent hits you out of this attack rather than just dodging or shielding, you lose half the darkness you stored with this move, so there is some risk.

You can actually DACUS out of this move, even after building up power, which is good for a number of reasons. For one, a lingering Up Smash becomes a lot scarier when it moves over an increasingly large area, and if the mouth hits the opponent early in your dash it will move while it expands, allowing it to devour an even larger number of projectiles or clones. Of course, this loses some of the power that the Dash Attack would have and is a fair bit laggier(the regular Dash Attack is actually not too bad, only slightly worse than Ganondorf's dash attack in terms of lag), but it can potentially have a much higher reward. The mouth will spit out the darkness you drew in for this attack at the end, in addition to however much more it would create if it happens to hit the opponent.

Grab Game
Grab - Chokehold
Malomyotismon reaches forward with a grab that is a bit worse than Dedede's, but still quite solid, gripping the opponent in his three claws if he succeeds and lifting them up to eye level. While no character in the Brawl cast is eye level with him on the ground, there are some MYM characters that are, and in that case he will just hold them in place. Malomyotismon can also grab his clones, which he doesn't lift up by the throat and rather just holds in place as he prepares to modify them. The grab will prioritize foes over clones as a rule. Clones will very, very rarely if ever grab, only doing so if the opponent is making very extensive use of their shield in close range to them, and even then it'll only work if you have 9+ seconds worth of darkness out.

Pummel - Torment
Malomyotismon laughs and proclaims he can see what is within the foe's mind, before performing one of several pummel animations. These include chomps with his shoulder mouths, thin blasts of darkness and mist, claw prodding, and tail slaps/stabs. Given Malomyotismon takes a moment to gloat about it and also has to actually look into their mind, this is an insanely slow pummel, but it does deal a whopping 6%. He has a rather specific set of 3-4 animations for each foe, implying that's what would hurt them most or what they'd dread most. By insanely slow though, I do mean insanely slow, at even 35% you'll see opponents break out before you get in a single pummel, and its unlikely you'll get in two until over 100%.

In darkness, he can analyze the opponent's thoughts more quickly, making the animation slightly quicker. Its not by a significant margin, even at maximum darkness its still the slowest pummel in the game, but when the slowest pummel in the game deals 10% that's no laughing matter. With a clone grabbed, Malomyotismon will simply release it and return to fighting as normal.

Down Throw - Fall Into Darkness
Darkness streams out of Malomyotismon's shoulder mouths, surrounding the foe and before he throws them to the ground in prone. This deals 8% and admittedly is not as good a setup for Malomyotismon as most other characters, on account of how slow he is. Its at least okay for leading into your standards though, and Malomyotismon does drop them far enough away from him that get-up attacks probably will not hit him.

The throw does have a nasty side effect afterward, as the opponent's model is significantly tainted by darkness. This takes effect when Malomyotismon uses his Down Special, as an equal amount of darkness will begin spreading from their model. It will also cause Malomyotismon to occasionally throw in a gloat about how the opponent is helping him spread his reign during his monologue. The effect is rather nice, effectively doubling the power of Malomyotismon's Down Special, and meaning any duplicates around the foe are never truly harmless as he can go into Down Special and suddenly make them able to attack him even if no darkness is around. It does require Malomyotismon to sit in his Down Special doing nothing and as much as he seems to love doing that, it generally isn't a good idea in the midst of a serious match to spend much time on that. The opponent will return to normal after seven seconds, and using the throw will reset the timer. Reusing it on an already affected foe will also actually cause the strength of the effect to increase, a doubly tainted opponent will produce a larger amount of darkness than Malomyotismon usually would himself over time and Malomyotismon will actually increase to the amount of darkness production they have as well. If there are multiple opponents out, he can potentially taint all of them, and the amount of darkness pouring out of everyone is equal to the amount of the most tainted opponent. That said the practicality of using Down Special for a good period of time is even lower in FFAs.

Used on a clone, the clone will turn into darkness as the shoulder mouths on Malomyotismon open. The clone will then flow into the mouths, stored away for later use. The clone is actually released attached to Malomyotismon's projectiles, whenever you land a Side Special or Forward Smash the oldest stored clone will be released at the point of impact, immediately ready to attack the opponent. Obviously this is not going to be terribly strong other than a means of getting additional hitstun at lower quantities of darkness, but at higher levels the attacks of the clone Malomyotismon will actually probably add a significant amount of damage. The clones will not be released if three clones are already out on stage, or the projectile connects outside of a mist zone.

Up Throw - Abnormality
Malomyotismon lifts the foe high into the air and sends a small amount of his data into the foe, the data dealing 4 hits of 1% before the last hit launches them upwards with 6% and upwards knockback that KOs at 220%. While this is fairly underwhelming at first with a large amount of darkness the damage actually does become somewhat sizeable, and eventually it even turns into a KO throw. For that matter if your clones have any projectiles flying through the sky, it can actually set up your Up Smash quite nicely, though the follow up potential is a lot worse if that's not the case.

The small amount of data will linger on them as a black spot on their model, shrinking in size when they leave the darkness and growing while they remain in it. It will vanish after three seconds by default, but can at max grow to be large enough it needs ten seconds to vanish. If Malomyotismon's clones hit the target with an attack, this will cause the spot to grow by one second's worth, as long as said clones are at least capable of dealing damage. If Malomyotismon hits the opponent the same effect happens, unless he specifically hits the spot. In that case, it will explode with black and red data particles and flow back into Malomyotismon, dealing 1% for each second it would take to disappear outside of darkness, and adding a proportional increase in knockback. It'll even cause that attack to heal Malomyotismon for half the total damage it dealt. While landing a hit specifically on the black spot is rather hard while its smaller, as it gets bigger it becomes a more likely target for your attacks to actually hit. Note that this damage buff is not simultaneously buffed by darkness, as that would make certain attacks stupidly powerful, even moreso than this already makes them. If this is used in combination with Up Smash, the damage added by this will also contribute to the darkness Up Smash produces.

Used on a clone Malomyotismon will cause the clone to appear to visibly have data particles starting to fall off of them, looking a lot more unstable than before. This allows you to attack your duplicates, at which point they will in fact take damage from the attack. However, as they do the data particles will fly off them, dealing damage and knockback equal to however much damage and knockback they'd do if they used the equivalent attack Malomyotismon did themselves. While this is almost always a sourspot compared to the actual attack, the range increase is huge enough to make it still worth the damage it deals to your clones, given it causes the attacks to cover their entire rather large body. A particularly nice hitbox to transfer with this is Forward Tilt, as the shield breaking properties are still rather effective even in a decresed power clone hitbox and having the clone between you and them means you need to worry about your tail getting hit less.

Back Throw - Black Magic Cannon
Malomyotismon tosses the opponent up to his shoulder mouths which chomp down on the opponent, dealing a brief hit of 3% as they remain in his grab and Malomyotismon can then aim where the opponent is fired like a cracker launcher. Its a rather slow aim admittedly and the opponent can still escape with grab difficulty, but the aim gets faster as you have more darkness on stage. Pressing any button at this point will have Malomyotismon launch them out in the chosen direction, dealing 10% and knockback that KOs at 200%, making it Malomyotismon's strongest throw for both damage and knockback, but lacking any of the additional benefits or particularly strong setup potential, at least at first. However, as it becomes easier to angle this move through either damage or darkness, you can at least put the opponent into the middle of some clones, or possibly into the perfect location to set up darkness with your Down Special, or the worst spot of your bullet hell. A fairly versatile throw, at least under the right circumstances.

If used on a minion, Malomyotismon remembers a common trope of powerful Digimon and decides that his clones would look better with some more cannons on them. Their claws at the end of their arms become cannons, and small cannons are created inside the shoulder mouths, leaving them perpetually open. This removes the ability for that clone to use anything other than projectile moves, turning it into pretty much a walking turret. That said, its a good walking turret, as the lag on all its projectiles is considerably decreased to allow it to spam bullet hell to its heart's content. It also allows the clone to fire Forward Smash projectiles in the air, and also at a downward angle. If you're just looking for bullet hell out of your clones and nothing else, this is a good way to dedicate them more strongly to that purpose, but it makes them rather helpless in combat with an opponent as all those cannons get in the way of getting anything done in melee range.

Forward Throw - Displace
Malomyotismon simply tosses the opponent out of his grip dismissively, dealing 7% and fairly low set horizontal knockback. While this is pretty underwhelming, the range puts them at the perfect distance for Malomyotismon to use his rather long range melee game, including a guaranteed follow up into Forward Tilt. This is also the simplest throw on clones, as he simply sends them through a dark portal before they reappear a distance away from him. This can be angled and either tilted or smashed to determine how far the clone goes, angled down goes 0.5 battlefield platforms tilted and 1.5 smashed, straight forward teleports 1 battlefield platform tilted and 2 smashed, and upward sends them a Ganondorf-2 Ganondorfs into the air the same distance forward as the down angled version. While fairly simple, it lets you control the position of your clones rather nicely.

Aerials
Neutral Aerial - Dark Breath
The two shoulder mouths on Malomyotismon open and shoot a stream of black fire, which has impressive range and slowly goes from being angled 45 degrees above Malomyotismon's shoulders to 45 degrees below. This deals 12% and radial knockback that KOs at 170%, and while the start and end lag are both short the duration is long, making this move very punishable if you miss it. As you cover the stage in a larger amount of darkness however, Malomyotismon will significantly increase the speed he completes the arc, until it only takes 8 frames at 15 seconds of darkness. Given the knockback is radial, this is actually a horrifically strong gimper in that context, as it suddenly becomes much much easier to use horizontal and downwards knockback, AKA pretty much the best possible kind of knockback in the air. The fire stream is not that long though, so this is sadly one of Malomyotismon's shorter ranged options, as otherwise it'd be completely insane at high amounts of darkness as a spammable KO move with very versatile knockback. Without darkness set up, the long duration is hardly as good as the spammability but it can at least be used to wall people off decently well, and as something for clones to knock the opponent into or to assist them in pulling off their attacks.

Forward Aerial - Tail Stab
Malomyotismon quickly stabs his tail forward three times in rapid succession, dealing 3 hits of 4% with the final one doing knockback that KOs at 265%. This is actually quite fast and covers a good area, but it suffers from the problem that at all points during the move it makes Malomyotismon's tail a part of his hurtbox, and quite a sizeable one at that. The landing lag on this move is actually a lot worse than the other forms of lag it gives sadly, so using this move out of a short hop is a little risky if you don't have good timing, especially considering his tail remains vulnerable during the landing lag.

As with your Forward Tilt, this move is very effective on shields. It doesn't start off dealing an especially large amount of damage to them, but like Forward Tilt it has a scaling multiplier to shield damage the more darkness you have out, at full darkness being able to bring even a full shield to only a tiny sliver of health. What's more, this move actually deals very sizeable shield stun, meaning you can follow it up with a Forward Tilt or a large Side Special orb for some maximized profit. That's only if you don't trigger the landing lag, so you actually need some rather specific timing to pull this off, but the reward is quite high for such a fast attack if you do.

Down Aerial - Violent Stomp
Malomyotismon kicks downward with all the force he can manage, dealing 17% and a spike a fair bit weaker than Ganondorf's dair, but still very powerful. And don't worry, if you want the full power of Ganondorf's dair, you don't need much darkness to get there or even surpass it. It should be noted that Malomyotismon takes a bit longer to stomp and suffers from worst ending and landing lag, possibly on account of his awkward body structure. Still, its powerful, and your recovery is far better to abuse this kind of move than Ganondorf's.

If used on a projectile, this move will actually reflect it downwards, and Malomyotismon has slightly better control of projectiles that are closer to the ground, as long as he proceeds to immediately bounce this off a reflector from a clone. He could also, you know, just spike the projectile into a foe beneath him. If Malomyotismon kicks the ground with this move, the landing lag will be awful but he'll create a shockwave hitbox below him that deals 6% and light upwards knockback that won't kill until 400%. The shockwave hitbox gets taller and goes farther with more darkness, starting out going barely to the sides of him and being able to travel nearly 3/4ths of a battlefield platform in both directions while hitting up to a Kirby height above the ground. If he hits a projectile right above the ground with it, that projectile's power is added to the attack and the height of the shockwave is doubled. Clones will never purposefully try to use this move on a projectile, and can't spike it or crush it period until they reach the amount of tangibility required to reflect it with Jab.

Back Aerial - Flare Bat
Malomyotismon's batlike appendage tilts slightly upward before firing out a burst of dark fire from it, dealing 9% and horizontal knockback that KOs at 240%. This has a pretty big blindspot along Malomyotismon's lower back and low range, so it makes for a fairly underwhelming move. However in darkness, the size of the burst of fire will get bigger, up to nearly triple its original size, making this into a very competent wall of pain on account of the sheer range. If he can get his darkness to bleed off the edges, Malomyotismon is not a force to be trifled with off stage. It should be noted that this move has kind of telegraphed starting lag though, giving the opponent a chance to predict it, though on the other hand the end lag is actually miniscule, as is the landing lag.

Up Aerial - Darkblast
Malomyotismon raises his hands above his head and creates an explosion of darkness above him, in a manuever with similar lag to Zelda's Up Aerial. The range is a bit bigger than the already large one Zelda's provides but given Malomyotismon is so tall it can be rather hard to actually hit with regardless. This deals 16% and upwards knockback that KOs at 150%, making it your go to KO aerial. Its also a slightly more practical upward KO move than Up Smash without any conditions attached, though Up Smash can become far more powerful with the right setup.

If a projectile comes into contact with this hitbox, it will explode into one the same size and power, with the exception of 1.5x as much if its your fully charged Forward Smash and half as much so if its one of the tiny offshots also from your Forward Smash. The power is also diminished if it explodes a clone's version to if the clone used this Up Aerial themself. That being said, the power diminishing doesn't change its ability to continue the chain reaction or the power of subsequent explosions. You can potentially make a massive hitbox with this, as long as you're willing to sacrifice your bullet hell to do so.

Final Smash - The World of Dreams

Malomyotismon laughs as the whole screen goes black, before the players involved appear in the world of dreams. Its a small stage about 3/4ths Final Destination's width with a few strange objects serving as platforms, like a really thin tower of blocks, some floating plants, and high above the stage, a block of swiss cheese. In this world, dreams become reality... for everyone except Malomyotismon. Opponents can taunt to create a CPU duplicate of themselves with Level 7 AI, and can make as many of these as they want allied to themselves, a rather terrifying prospect all things considered. However, if Malomyotismon reaches the cheese during the Final Smash's 35 second duration, he will comment that he's starving and take a bite of it.

Its at this point that he realizes his wish made this strange piece of cheese real, and that Malomyotismon too can make wishes. How was he so stupid as to not realize this all along? At this point, he will overpower the opponent's desires and cause all their clones to disappear, and a brief cinematic will show darkness encompassing five different random stages, depending on what's enabled on your random stage select. Malomyotismon laughs and declares that the worlds those stages came from are now his, and the battle will continue with the entire screen enshrouded in an infinite blanket of Malomyotismon's darkness, one that is completely impossible to remove. Since creating darkness is no longer of use to him, his Down Special instead allows him to switch the stage to one of the other five enshrouded in darkness with a second of lag, during which he's completely invincible. Since he loses his ability to monologue via Down Special, he will instead monologue during the entire duration of this darkness effect, for once impossible to interrupt without KOing his 25 weight self.

After the final smash is over, the combatants will return to the original stage, and Malomyotismon will react with disgust and disappointment briefly. He will actually remembe the lesson he learned from the cheese next time he uses the final smash, unless he was KO'd between uses, in which case he has to grab the cheese again. Its not terribly hard admittedly, but there is a brief period where the opposing players are all suddenly scary powerful, and perhaps they can play king of the hill on the cheese to turn Malomyotismon's final smash against him.

Changelog
7/21/16 Version 1.01: Decreased start up lag on Neutral Special, increased size of the fog field. Made the clone appear slightly farther apart and gave some extra resistance on the move as well to make it more usable. Wind hitbox also added to make the move slightly less punishable after it ends.
 
Last edited:

FrozenRoy

Smash Lord
Joined
Apr 26, 2007
Messages
1,261
Location
Las Vegas, Nevada
Switch FC
SW-1325-2408-7513
MemeMyotismon

This is a pretty ridiculous and unexpected choice coming from you, FA, and this is from you, who make many ridiculous characters, though this may be because I am a Digimon fan, and ow the series feels a bit more mainstream compared to, say, Cookie Clicker or PSO (for the West anyway)? And also the fact MaloMyotismon is a rather hated character, thus allowing the Honest and Kristoph writing style. who would dream of it?

MaloMyotismon right off the bat presents some interesting ideas, making sure not to leave the reader in the dark. The Reisen style illusions are a treat to see return and while I do feel MaloMyotismon can at times feel a bit mindgame-y in a way not particularly in my tastes, it generally avoids cheese (aside from the Final Smash, of course). The Darkness is quite fun and I do love MaloMyotismon's desire to monologue the entire time and the way he is generally portrayed as having lost competence from his normal Myotismon self. The Specials are all pretty good and I enjoyed them.

Fun effects continue further in the Smashes as I rather enjoyed them, Forward Smash is particularly fun with the angling giving foes quite a scare, and Up Smash might be a mouthful but I don't think it bit off more than it could chew. I also enjoyed things like the Jab, the Forward Tilt, the Up Tilt surprisingly, and the grab game also surprisingly, the Down Throw is one of the few mechanic boosting throws I've seen recently that didn't melt my blood and Back Throw is actually really fun, especially on clines, although Up Throw can feel a bit odd but is still good. One issue I do have with MaloMyotismon's non-setup game isn't that it doesn't "combo" but that I am not sure how it works together. MaloMyotismon has some gimping, sure, but he's not especially good at getting foes off stage, he has strong attacks, but not necessarily many ways to set them up, and he has setup but not necessarily too much to help him with it, in a way the playstyle fits him but I do feel that at times it lacks cohesion into a fully formed whole, and it is rather standard as well, though some of my favorite moves (Jab, F-Tilt, U-Tilt, NAir) were actually some of the more simple ones. The Darkness mechanic may simply make it quite hard to do too much with that, though.

I also question about how MaloMyotismon needs so much setup and thus viability, though of course MaloMyotismon having huge setup is kind of the point, but he feels perhaps like he has TOO many holes before he gets a duplicate and/or darkness setup going and thus might be a bit weak, but then again he threatens to be monstrously strong with a lot of darkness and real duplicates to send foes screaming. I do like how it, unintentionally, references Young Hunters as well, as if to encompass all the terrible Digimonness into one. At least the high setup requirement makes the various dark moving and so on moves palatable, or moreso anyway.

Certainly more enjoyable than Karthus and good to see after an inert MYM17, but I certainly hope you wish up some more movesets for us to get my ramen cart moving.
 

Slavic

Ask not the sparrow how the eagle soars
Joined
Jun 5, 2013
Messages
757
Location
taco bell, probablyn't
SLAVIC'S NO SET LEFT BEHIND COMMENTARY!*
*Some sets may be left behind.

Spoink Used Scald
Bionichute
Starting on Sproink, the mechanic used to make him a boss set is interesting, though the phrasing is a little weird, and it might work better to put it as “Sproink covers this weak spot unless an attack requires him to expose himself; this is the time to strike” or something along those lines. But that’s just me. Props for making a boss set more than just super big and super heavy, and trying something more innovative. Water Snout (groan) is a pretty fun mechanism for making water, rather than it just pooling up on the ground, though this might be how it works in Yokai, and it makes for a nice stage element, though the recovery portion is weird and putting the Up Special first is weird as you mention a mechanic (the heating of Sproink) which isn’t actually covered until later. Boiling Pig is also a fun move and works with Water Snout (groan) in a way that sets Sproink apart from most other water-based characters, as he boils himself. What a champ. I initially had a complaint regarding the unfair nature of turning the ground into a full on hitbox by boiling the water, but 1) this is a boss set, and 2) it creates a different game dynamic that focuses around the actual water spouts, where it becomes a game of Sproink trying to defend the spouts while the opponents attempt to destroy them, and I find that interesting. However, Boiling Squeal is very anticlimactic, and I feel a more powerful attack is worth taking 4% damage a second for a boss, and is just underwhelming. Pig Dig is a lot of fun, except for the part where he takes damage from being struck via rock on head, and seems like a poor choice for a boss set. Overall, though, this move also leaves a good taste in the mouth, a sort of porky ham taste for some reason. Drop the Soap is, unfortunately, a bad move. I can see what it adds to the set but it’s not much, just adding a little bit of damage when it would be more efficient to just normally attack. If it had a more profound effect on water, such as making it soapy and giving more push, I feel like it could be salvaged, but as it is it’s just a fast projectile to make people trip, but that’s just my take.

The standards, aside from the jab, are fun, using water in a clever (if repetitive) way, and I only wish there was more interaction diversity, as most of it revolves around throwing water out of the bucket (granted how much can really be done with a bucketful of water?). Smashes help bring this set back to being a boss set, with some great usage of the Forward Smash that is believable for a boss, and losing the buckets momentarily adds more depth than simply “fill bucket, throw bucket, repeat”, and the Down Smash can be used if one doesn’t want to use their F-Smash at that moment but still need a good attack for forward facing foes, which is good foresight on your part. Speaking of the D-Smash, it’s a water interaction I was expecting and am glad it was included. I’m not a fan of the Up Smash entering a command grab personally, I think it’s good to try for diversity but it can mess with Sproink if he is going for a kill and instead ends up holding the opponent instead, though one could argue that it’s part of the strategy.

The aerials are in the same vein as the standards, being interesting enough but still lacking something to make them really great or boss worthy. As another note, in the aerials 9% is considered weak for Sproink but 10% is apparently good. The grab itself is actually worse than the Up Smash, which is offputting, and I would find a different sweetspot effect on the Up Smash and just allow Sproink to carry normally grabbed opponents around. It’s also a little sad you can’t do barrel kills, especially since this leaves Sproink helpless and he is a boss, so it would be nice to get those unfair KOs. Down Throw is very… weird, to say the least, but it is what it is. Ultimately this set has a fun mechanic with a handful of clever interactions, and strives for originality and depth, and mostly succeeds in this sense. However, in addition to some weird passages, this has questionable qualities as a boss, with most attacks dealing mundane damage, and it could easily have a few moves be nerfed, the super armor removed, and have it become a regular 1v1 character. It’s certainly not terrible, it is a good set, just not great yet.

All the potato jokes were taken…
IvanQuote
It’s great to see you come back for another set, and hopefully it becomes a trend of sets this contest for you. Now onto Pohatu. I played a Bionicle game on the GBA once.

The stats, we’ll come back to, have a few issues, the biggest one being such an absurdly high fall speed, but by itself it isn’t a terrible issue. Like I said, more on it later. The first three Specials aren’t super intuitive but they aren’t offensive either. The boulder is a fine enough projectile, and it has some uses that you don’t bring up. For instance, the construction of the rock pillars provides a surface to bounce the boulder off of. Unfortunately, the move is set up to make this ineffective, and the fact that it is aimed from a scrolling reticle is, in my opinion, a poor choice when it would be more effective to simply aim via directional input like the majority of moves. Additionally, making the move quicker would help Pohatu as a set substantially; this would open all sorts of combo opportunities by having a projectile which can be aimed in a wide array of directions after launching an opponent upwards. Sonicboom is alright, it makes sense characterwise, but it doesn’t seem to add anything to the character. Pohatu is already moving at top tier speeds, being able to travel fast doesn’t benefit him as a dedicated move, and I think a different move, perhaps with a focus on terraforming instead, would be better suited here. The Rock Climbing is, I think, the best potential for a move out of the specials, and could be the basis of a strong moveset. Unfortunately, this move is underdetailed and doesn’t provide much context. Can Pohatu make pillars while in the air for recovery? Do the pillars stick around after being formed, and for how long? Can they be destroyed? These kinds of questions are the ones to answer to create a solid move, as well as the most important one, how does this play into the character’s strengths and weaknesses?

Speaking of weaknesses, we’ve come to Kakama Overdrive, which I think is in the running for the worst Special in the contest so far. I can see where you are going with the move, trying to play up Pohatu’s strengths even further by making him faster (18 in ground speed??) but this move is very deeply flawed; you are unable to use specials, your attacks effectively cannot kill, and you are likely going to end up off stage without any sort of recovery. There is no particular reason to use this move in any situation, and, if I were to recommend anything, I would suggest putting the pillars in place of the overdrive and make the rock climbing a leap upwards with the climbing picks, allowing him to hook onto the stage or pillars. As it is, this move is simply unusable and adds nothing to Pohatu’s moveset play-wise.

The standards are, well, standard (I’m sure I’ve used that in comments before… multiple times…) but they at least try to salvage a playstyle from the Kakama Overdrive. Smashes are more interesting, even if they aren’t award winning, and are so close from doing something great. You have the whole boulder shattering aspect, and it would play off so much nicer if Pohatu used his Neutral Special boulder in ways aside from kicking, able to, for instance, keep it around (maybe dribbling it while he runs around) and utilize it in attacks like his Smashes seen here. The aerials are a great example of why I believe Kakama Overdrive should be removed; the nerfs are so powerful that you outright state being in the air is useless and do not mention any different effects seen in KOS. The throws are alright, the most interesting one being the FThrow which allows Pohatu to choose his angle, but they aren’t anything great. I do like the ZAir, though, and I think that it is a genuinely interesting idea that you only skip over. In short, I don’t want this comment to discourage you from movesetting, I would love to see more movesets from you, and I just want to point out some things to try and make your future sets even better. One of my biggest comments is that, if there is no reason to, do not give characters wildly hindering weaknesses. Most things should play positively into a character’s style. Every character is going to have inherent weaknesses but that doesn’t mean you should go and add a weakness just for the sake of being in character (as I learned with Sharla). I hope my comment gave you some inspiration on how to build a better set and I hope to see another Toa soon (or in another year).

Mr. Steal Your Girl
Smash Daddy
First off, who knew that animated Lickitung pictures were so hypnotic? The eating mechanic is fascinating, and I love the Natural Gift-esque style of the food; eat it for yourself to the benefits or weaponize it against an opponent. Being able to eat multiple objects at once, though it seemed kind of pointless when introduced first, proves to be crucial to the playstyle. The items themselves are fun for the most part; the fact that Bitter Berry causes foes to fall fast is odd, though I see where it comes from, but it seems like a weird effect for a berry to inflict. “spitting flame not just from his mouth, but from his tongue too”, not a terrible passage to read but amusing to think about fire spitting from a tongue. Wasabi is also a very fun concept, and in general the majority of these foods play excellently in covering Lickitung’s weaknesses, and with so many good effects how could you not just pile them up? Speaking of the pile, it would add to the set if Lickitung had some way to move the food around, rather than leaving it one place while he fights. I can understand how not being able to move the food effects the playstyle, but it could be a fun mechanic as well, hoarding food off to the corner of a stage to protect them. You’ve provided the most logical explanation of Belly Drum’s Attack Boost I’ve ever seen, even if it’s very specific to Lickitung alone in this context. Belly Drum has some fair usage and helps play off the weight nicely, as does Slam, and they are nice ways to round off the Specials.

Wring Out is a great way to punish foes for eating the food that Lickitung pressures them into eating, and is, as mentioned, a great way to inflict negative statuses on the opponents. Only question is if the berries last for the entirety of a foe’s stock, or if the indicator that they ate food wears off at any point. I was wondering where the Up Smash would go, as it is not a tongue move, aside from the general fat = better strength, which it essentially is, but you do utilize size as much as weight for how being larger helps out with Lickitung’s moves. Down Smash, while it seems like a fun move, and would be undoubtedly useful, makes no mention of food, which is a shame considering there could be some fun interactions by, for instance, scattering the food pile around the stage to prevent a foe from eating if Lickitung would like to eat the food still, or swinging berries around to smack opponents. Still a good move, but I wish it had a little more done with it in regards to the rest of the set. The standards are excellent, showing more of the fun interactions I was hoping to see, especially on moves like Belch and Tongue Uppercut, and each one manages to carry something into the set that leaves a very good taste.

The grab was a given, and the pummel plays off it nicely, with an effect that, while not a game-changing effect, gives Lickitung some versatility in how he plays. The rest of the grab game is good, though nothing to write home to my mother about, and is all very fitting for Lickitung, and the most interesting of them being the Back Throw with the weight difference aspect. The aerials are good, the UAir being my favorite of all of them with the ability to lower a fall speed, though this is only situationally useful, it’s still a nice effect for the move. While Lickitung is certainly no Mr. Badd in terms of depth, it’s a fun set for a character I very much enjoy, and was a great read. There are a couple nitpicky things, such as a questionable characterization for the weight changing being used on Lickitung who isn’t typically known for that kind of behavior, but it works well with the eating aspect and doesn’t hurt the set at all. Very solid.

The Spirit of Wrestling
MasterWarlord
In the same comment block we have a second 3v1 (or 5v1) boss set, and it’s yet another who is comparable to an average character’s stats. And hey! We’ve got some water mechanics and blood mechanics on the stage as well, small world. The Water Magnum creates a fun mechanic with the water, and works well with both the Mountain and Black Hole, allowing Atlantis to have multiple venues for drowning the foe if he allows both him, water, and the foe to be sucked up into Black Hole’s face. There’s a little typo in Bloodsucker where it calls the blood water in the second paragraph, and while I can understand the use of Mr. Kamen with regards to the playstyle I can’t help but feel this move could be more than essentially just an alternate move to Water Magnum.

The grab game is the first really powerful feeling part of the set, with the ghosts adding more than just being props to help set up the stage and I really enjoy the concept of it. Mt. Saint Helens Eruption is hilarious when visualized, and is nice to have another reliable method to getting water / blood onto the field to try and drown opponents. The Back Throw is great as a move, and makes for a better boss dynamic; unfortunately, it feels wrongly placed on a throw, and could maybe be put over Bloodsucker. The aerials are fine enough and manage to incorporate the water in all of them, though it doesn’t feel quite as helpful as intended, with my favorites being the Nair and the Dair, and you use Mr. Kamen more, which makes him more viable on the special front, even if I’m still not a huge fan. The smashes are very enjoyable and are the first point in the set that really feels like a boss set. With the FSmash you mention that it probably isn’t favorable to seal a pool to drown an opponent but you do not provide a reason why, as that seems like a valid way to dispose of a foe, so some clarity on that would be nice. Up Smash is one of my favorite moves in the set, and the risk-reward as well as rewarding skilled opponents and rewarding offensive Atlantis players gives a good impression on the move.

The standards are alright, and I believe they have been edited prior to my reading, so I may have missed out on the worst part of the set luckily. The jab makes good use of the ability to utilize the ghosts during Atlantis’ animations, the dash attack is fun to visualize, and the tilts round the set off well enough. The tether is interesting if appearing late in the set, and is another strong use of Mr. Kamen’s Bloodsucker, but it feels like the move wasn’t conceptualized along side the rest of the set. While this set doesn’t necessarily feel like a boss set except on a few of the inputs, especially in the Smashes, the actual move interactions are interesting and work well with both Atlantis and the ghosts. The only issue is that this doesn’t feel as much of an Atlantis set as it does a Devil Chojin set, and a few of the uses of the ghosts feel proppy.
 

FrozenRoy

Smash Lord
Joined
Apr 26, 2007
Messages
1,261
Location
Las Vegas, Nevada
Switch FC
SW-1325-2408-7513
Added a playstyle section to Artorias along with a slew of animations. Should have some Match-ups tomorrow.
 

JOE!

Smash Hero
Joined
Oct 5, 2008
Messages
8,075
Location
Dedham, MA
Chesnaught Patch notes:

Bulletproof
Chesnaught's passive armor now only works while he is crouching, and only once per crouch (making it similar to perfect shielding / etc). Any attacks using the shell retain projectile-immunity for the duration of the move, but being hit by a projectile in other instances will affect him like normal characters.

Spiky Shield
After 5 seconds the shield also will let 1/2 the damage of projectiles through, but still no actual knockback.

Hammer Arm
1/2 knockback on "Drain Punch" removed.

Needle Arm
Made into an arcing swing instead of a punch. Cleaned up the writing and changed the main effect to a "Paralyze" with a needle pallet swap. Shooting the Pin Missile variant is timing dependent as you can "angle" as he swings his arms down. References to Needle Arm in the set reflect this.

Grab Game
Touched up Bthrow (better wording, added Seed Bomb utility). Uthrow and Dthrow are now 3 different throws based on how you grabbed the foe. Fthrow and Bthrow are also affected in terms of speed/damage on which way you grab the foe.
 
Last edited:

ForwardArrow

Smash Ace
Joined
Aug 17, 2011
Messages
502
The Butcher
This is the first of many Roy sets I need to talk about, and this is among my favorites of the ones posted, second only to Zyra. The fresh meat mechanic is straightforward admittedly, but its nuanced enough that gaining power with it isn't so automatic or boring process. Its also used as far more than just a straight damage buff, you provide a bunch of other advantages to stacking up power with this move to make a lot of the later inputs more exciting. That's not to say the other parts of the set's gameplan aren't fun too, the tether is pretty fun as is the great Up Special interaction with it, as is the buildup and explosion of fire especially in conjunction with the blood introduced as the set goes on. Its kind of inevitably a huge snowball effect, but honestly it feels satisfying enough in implementation and at no point in Butcher's gameplan does he become unbeatable. I do feel that there are a couple things worth taking issue with though. While it wouldn't bother me if it was just a couple moves, there's a considerable chunk of the set that exists to get buffed by Fresh Meat and doesn't really have much else in the way of application. I also feel that given the way Fresh Meat is represented visually, it ends up looking a tiny bit tacky how it and the blood puddles on the stage act totally differently. In the grand scheme of things, neither of these complaints weighs that heavily on me though, its a very enjoyable set.

Electivire
I like Electivire's mechanic truth be told, its a unique way to empower himself and the effects you get from powering up are pretty satisfying. You introduce a couple fun additional mechanics on top of that, what with Electivire's projectiles that actually feel like they set up some interesting combos and the Electric Terrain as a fun buffing mechanic. I will say I wish Motor Drive would naturally go away over time, some parts of the set, primarily the Giant Punch clone, feel too strong with it at a large number of stacks and it would add a sense of urgency to his playstyle. Aside from that fairly obvious criticism, I will say that the set operates on the same idea of building up a mechanic that buffs everything like The Butcher and Joe Dimaggio, but is mostly just about attacks that get stronger with the mechanic and, to be honest, not much else. Most moves feel like they solely exist solely to profit off how many stacks he has and not much else, with the most variation he has being some decent setups to a combo game. That's fine, but honestly I don't think its very exciting, and combined with the potential balance problems the set presents and the fact that the set has two very mediocre specials(a really straightforward expenditure of electricity for easy close range kills and the awkwardly balanced Giant Punch clone) holds it back from being anywhere near the Butcher's level for me.

Roy Koopa
The set make a decent attempt to play off the existing Koopa shell mechanics in a few unique ways, primarily being able to stick bombs on them or launch them out of Roy's cannon. I do find it a bit bizarre how the Koopa's minion properties are brought up in the move they're introduced but then they're basically never used for anything other than ammo later on in the set, it does make them more interesting than they would be otherwise but only marginally. Still, at least for a while you manage to keep up some decent interactions, though after the first throw it starts to wear a bit thin honestly. I also honestly don't feel his gameplan is especially interesting when it comes down to it, it mostly just amounts to creating a large number of projectiles and then making them stronger by putting bombs on them. I won't deny there's some added depth with chain reactions here, but it feels like it would only work out a small percentage of the time. Combine that with the fact that given his aerials and rather limited ground to air options, I feel his gameplan transitions really poorly to any situation that isn't just grounded combat. The amount of filler and awkwardness of how he plays in the air ends up holding a lot more weight against the set when I really don't think the koopa shell game is all that great in the first place, but the set at least manages to avoid being boring.

Joe Dimaggio
Given it is a baseball player set, expectations have to be set kind of low here, and while the end result sure isn't impressive its a lot better than it could've been. The baseballs are pretty standard "soccer ball" type projectiles and I feel you didn't come up with too much of a way to play off them, mostly just using bat swings to send them flying at varied angles. The mechanic adds a bit more fun to it though, as you can rack up a hitting streak on the baseballs which you can transition to use on your opponent, and it also gets built up by your own bat strikes. That said, Joe gets punished too hard for losing his hitting streak, while I understand that IRL you lose the whole streak if you miss the ball once, that doesn't transition to particularly fun gameplay, nor does losing a whole 50% of it. It makes Joe way less willing to use his bat attacks on foes and forces him into using the awkward non-bat animations, which play out as much less interesting moves. He feels like he'd come down to camping with baseballs more often than not, or just not be able to use his power boost, as you mentioned the baseball camping is very predictable. I can at least respect it some though, it is a pretty clever idea for how to implement a baseball player and its not exactly an easy character to make a set for, but the mechanic ends up being both the set's biggest source of appeal and simultaneously its downfall.

Artorias
I feel like Artorias probably has my favorite melee game of your sets posted thus far this contest, it feels like it captures the combat of Dark Souls rather well in how you slowly break through for an opening with the rather cool neutral game, before transitioning into some fun power smashes. Fights with Artorias have to be handled very carefully, as any well placed attack can break open the fight for one player or the other. Artorias' "buff mechanic" is very different from your other opening sets in that it actually has an associated cost in most cases; his attacks flow off it and the reduced shields of Artorias and the foe, as well as his parry, in some rather interesting ways. For the most part, the set doesn't even lose too much of the careful pacing in the aerials, the only disappointing section was the grab game which was pretty much just filler with some rather intense, Dark Souls inspired animations. I can take a little pity on it though when grab games for sword wielders are pretty hard though, but when he has the abyssal ooze I wonder if you could've done more with it. I also feel the ooze interactions can get a little dry too, splashing it around as a hitbox is fine but it rarely gets to be much more than just that, which is a little disappointing. Still, its an enjoyable well-written read and it feels very character faithful, so its hard for me to complain too much.

Zyra
I remember I got a preview of this set last contest and honestly wasn't terribly impressed by it back then, it had some neat ideas but I was doubting you would be able to keep up the execution through the aerials and grab game. Bizarrely enough, when you came back to the set recently everything added from that point on is actually stronger than the start of the set. The air game is insanely high quality by your standards, as each plant introduced there feels very fun and feels like it has a higher potential to play off than most of the ground plants. Not that the ground ones are bad, the multiplying Down Smash plants are enjoyable as are the rather awesome dash attack plant insects. It might seem weird to have these placed on the rather odd inputs that they are, but the seed mechanic you introduce is a good way to handle it, and the grab game provides some way to actually get payoff for all this plant setup with the ability to provide modifications to them that have both advantages and disadvantages.

I will say that, and this is especially true of the earlier parts of the set, the actual melee hitboxes don't really feel particularly interesting or important. There are a couple decent ones, some sweetspots and decent uses of Zyra's range here and there, as well as the root on FSmash, but its generally not nearly as fun as the plant game. It wouldn't be a big deal, but Zyra doesn't really get that many seeds and her plants have rather underwhelming stamina, so there are frequently points she's forced to play in a surprisingly boring fashion. I will say that the pollination mechanic at least provides some decent counterbalance to all this as it can give you a very consistent supply of plants, but its not going to work a good portion of the time and leave Zyra in a very awkward state. Her game with plants out is no doubt good though, I just feel that the set ends up inferior to Viktor on account of this, despite arguably having a better concept.

Atlantis
I don't think people realize Atlantis using the Chojin ghosts is pretty much the entire appeal of the character, and its not exactly denying sets to the other ones. Its not as if its just a set for the collective of them though, Atlantis' water game is very clearly made the primary focus and the implementation is among the strongest I've seen for water mechanics. The drowning KO feels tense to play against, but not in an unfun way like previous versions of the mechanic, and moreso the swimming aerials create a lot of extra incentive to make these water pits, or just play off the water/blood streams created by Mr. Kamen and a bleeding foe. Black Hole adds some cool subgames to this too, what with his alternate dimension that he can use as something of an automatic, transportable water pit. With the recent edits, even the standards manage to stay fun and flow off the existing concepts, my favorite being the water tether with all the myriad ways it can be made and abused.

If I had to make a complaint, it wouldn't be about a particular input section(though I immensely dislike Up Smash, I think it contributes absolutely nothing to the playstyle and is just there as a use for the other Chojin that feels tacky for that input), but rather one of the Chojin kind of gets left out. Specifically, I don't really see how Video Casette King plays into the rest of what the set does at all, he exists as more or less a bonus and doesn't really feel connected to the rest of the set in terms of flowing off the water pits. Admittedly, its hard to fit in copied moves with the rest of what Atlantis does and there is some fun to be had with creating a customized fighter like him, but it feels very out of place. That said, I don't think it detracts from Atlantis' gameplay to have Casette King there, he just could be implemented better, so its not really as big of a strike against the set as it could be.

Lickitung
I'm rather thankful for the approach this set takes amongst Pokemon sets, because I've always found Pokemon characters end up really dry in implementation, they're not nearly as interesting to make sets for as other franchises due to the lack of much personality as well as their generally bland powersets. You play off Lickitung as well as you can though, giving him a rather fun food-based playstyle that uses parts of the Pokemon franchise I don't see played off much, the food items. You introduce a huge variety of them with the ability to pile them up to create huge buffs for Lickitung, fattening him up and providing the option to digest them for a sizeable boost in power and speed. The melee moves tend to play off these berries in some interesting ways, though I tended to enjoy the idea of using food to enhance his hitboxes more than alternative ways of consuming it, though those were thankfully not too numerous. I don't really have a lot to complain about here other than sometimes I wish the Wasabi and Giant Food were taken advantage of a little more compared to the blander effects of gaining super armor or attack power. Its not really a big strike against the set though, its a cool take on the Pokemon and makes for one of the best sets we've seen from the franchise.

Kristoph
Its by a rather small margin, but Kristoph here is my favorite set thus far. The client concept is a really fun one with how Kristoph can pick any character for the job, partially because of how abusive it is and partially with how Kristoph's set is designed to take advantage of basically any character. Small fast ones can create some surprisingly powerful and fast hitboxes with the Black Psyche Locks, while big heavy ones make for superior corpses. Set-up heavy ones can be defended and more aggressive ones can be used as something of suicide bombers with the poisonous nailpolish amplifying their damage output at the cost of slowly killing them. Speaking of the Black Psyche Locks, those are also a really great concept, giving Kristoph something of a trump card without a client and a really cool risk-reward element. Its one you can even throw over to the foe as well, forcing them to participate in such a dangerous game.

I can't deny that the characterization is really, really goofy. Kristoph reviving people from the dead is more than a little absurd, and some of the other hitboxes seem like powers that would only feel sensible on a magic syndrome-y character, rather than a straight up lawyer. In a way though, I kind of like it, its an exaggeration of the ridiculousness of the character, and between that and the insanely abusive relationship with the client, the set ends up making Kristoph into a far more likeable character than the source material. The characterization was a unique enough kind of fun it actually inspired me to come out of the woodwork and finally make a set after all this time. Admittedly yes, the absurdity does weigh the set down a little at points, but at the same time you manage to make a surprisingly strong amount of use of the more practical elements, the props Kristoph makes are among the more enjoyable parts of the set and have a good amount of depth to how they're used. I think what tipped the set to being my overall favorite thus far when it was a close competition up until this point was the matchups, which use a number of memetically bad sets and yet still manage to play out in some very interesting ways. Its funny how you use a garbage character to make this set, and now this set can make some surprisingly good use of a terrible pre-existing ones.

Mad Dummy
So I have two obvious complaints with the set, and the first and most important one is the writing style. Undyne was already a hard set to get through, but you seem to have some difficulty describing more complex moves. You do throw in jokes to lighten the mood which does help the reading experience, but in general the rather awkward animations of the Mad Dummy are poorly described and that ended up significantly hurting the reading experience. I also found the grab game to be horribly underwhelming and did really nothing to contribute to the established bullet hell game. On account of these aspects I'm not sure I can say I really prefer the set to Undyne, though the playstyle of bullet hell turrets appeals to me a bit more than basing the set off a rather odd status effect.

The main appealing parts of the set for me were the Aerials and Standards honestly, with the aerials having some decent interactions with the existing projectiles and making good, albeit poorly explained, use of Mad Dummy's bizarre body. The standards aren't too interesting on their own and have some weird animations, but I quite like the combination effects they produce, it feels like perhaps the most satisfying part of Mad Dummy's game would be creating some spectacular hitboxes out of chained explosions. The Smashes are decent, but I was a little underwhelmed by them as they mostly seem to be "this gets better with more dummies out". I feel like they easily could've been more than that, and if they were I'd probably be more inclined to forgive the set's writing problems. Still, this and Undyne show you have a stronger grasp of moveset making than most people do this early in their careers. If you can improve your writing style and combine the strong elements of those two sets, I could see you produce something that really impresses more than just Roy down the line.

Paper Mario
This set's attracted something of a mixed reception, and unfortunately I'm on the side who really did not enjoy it. The copy mechanic delegating lag to another clone is okay, but it doesn't make for interesting combos just by itself I feel, and you introduce nothing past that point to really change my opinion. If anything, it just feels unnecessarily strong, what with how he can generate instant KO hitboxes multiple points in the set by expending a few or creating massively powerful strings of attacks because he has no lag to himself. Yes it takes time to setup, but honestly the set plays out in such a way it feels like it just amounts to "camp with partners until you have enough clones to kill them", which is really dull. The partners also feel rather insulting in how they're implemented, three of them being jammed onto one input as awkward projectiles and nothing more. I'm aware you want to make this set more about Paper Mario than "Paper Mario and friends" but the partners are the most interesting thing about him, the rest of the set ends up just amounting to generic hammer swings with a couple awkward paper animations thrown in. Also, you sometimes ramble for a full paragraph about the copy versions of attacks when literally all that's different is a slight, fixed decrease in power already established with the copies, and you spend a lot of text talking about things that really don't matter on moves as well. This is by far the most needlessly wordy set in the contest even if Mad Dummy is harder to read, as it spends so much time describing absolutely nothing.

Chesnaught
I had a lot more I was going to complain about with the first version of this set, but I was pleasantly surprised by the edits you made. The variety provided in the grab game actually feels more fun and meaningful now, and the set now simply can react to projectiles instead of totally shutting them down. Truth be told though I'm still not a fan of how Seed Bomb plays though, it seems like it gives Chesnaught a pretty insane health advantage for what is honestly a very low investment. What makes it worse is the straight buffs it gives to the needles and Hammer Arm, which honestly feel like very unnatural interactions and make Chesnaught even more obnoxiously bulky than average. Admittedly, the 30% healing is slow enough that its more balanced than it could be, I mostly just don't like the attempts to interact off it. I also, personally speaking, find it weird that you combined Leech Seed and Seed Bomb into the same move, this character doesn't even feel like a natural choice for Leech Seed. The rest of the set is not my style, though there are definitely areas I can see where it would have fans, but the specials are a bit too awkward and strangely balanced for me to approve of this set.

Sproink
What is it with recent boss sets and forgetting that bosses are supposed to be powerful? Sproink's attack power both with and without his setup is honestly really underwhelming, with the most boss-like traits he has being his armor and ability to create some pretty sizeable hitboxes. That said, he hits for less damage than most heavyweights do and his durability is not too great once his armor runs out despite his low power, convincing me he's really not made for fighting three opponents at once, and probably not even that strong in a 1v1. I can respect why you'd play safe with the numbers given some of your mistakes in the past with those but you seem to be really unsure how to balance a boss. I will say I do like the interactions in this set probably the most of any you've done though, there's a bit more variety than usual and some actually interesting ones like FSmash. Plus it has a bit more complexity and depth to it, with how he has to get the water from the spring and can create those pits, which can be abused in their own right on some moves. It'd probably be my favorite set of yours if he didn't feel so weak for his boss status, but it is a strong effort from you Bionichute and I think going in this kind of direction in the future would be a good idea.

Appetizer
I'll admit, I found the dramatic introduction to be kind of hilarious, its a fun way to talk about this character who has a bit of a legacy for you. The item absorption and meat pit mechanics are honestly kind of interesting, albeit I wish they weren't tied into his mere existence the way they are and rather were just part of the Specials. Being able to create slopes and deep pits of meat is a fun setup, but that's about where my compliments for the set end. Like Sproink, its really not balanced at all for a boss set, feeling rather weak and requiring heavy setup, plus not being nearly durable enough. The mechanic is also very bizarre, and Appetizer can get permanently stuck against a wall due to how he takes knockback in a similar manner to Rool Grimer. Which is bad if his meatballs are treated as walls, like you say they are in the set. Yes he can make walls into slopes for himself, but if he doesn't he will be severely, horribly punished for it. The set then gets into some seriously intense redundancy after a while, basically everything being just to draw in projectiles or goop up the opponent again. The exception is the grab game, which was bad back in the day and its even worse now, what with the awkward characterization of every opponent including ones like Gluttony and Kirby who actually would eat the Appetizer, as well as the generally horrifically weak mechanics for a 3v1 that would never be fun to play against. I kind of enjoy seeing you revisit this, but the set is such a mess that I think the revisit was pretty wasted.

Dunban
I'll give Dunban credit where its due, the first two input sections and mechanic are interesting. Its like a deeper, more complex version of Lucario's mechanic that actually gives you a variety of advantages and disadvantages as your percentage climbs, and the Specials take advantage of that in some decent ways. I particularly like the self-damage special as a way of regulating your own percent, the way it plays with the mechanic is honestly kind of fascinating. That said, while I found the effects you provided for the standards fun, the set then seems to pretty much forget its playstyle entirely. Every move past that point is very, very bland and hardly interacts with the previously established mechanics at all, ultimately limiting the exciting part of the set to a total of seven moves. It still seems like it would play out fine barring the abominable Uair which for some reason does not hit above him, so its not exactly bad, but it is very disappointing after a rather promising start.

Sharla
I'm just reiterating the points of others here, but Sharla's "team" playstyle makes one of her specials incredibly awkward and useless in a 1v1, and to be honest the whole team play aspect of the set only really comes down to that special and one or two other moves. This means not only is the set not really made for 1v1's, but there isn't really a big benefit for going to 2v2's either. This could be a little easier to forgive if the 1v1 playstyle was good, but its not, with an awkwardly punishing overheat mechanic and standards that are insanely forgettable. All I really see for playstyle is an insanely bland and straightforward camper, and for all I said about Dunban he's clear evidence you can do a lot more than that.
 

Tocaraca2

Smash Ace
Joined
Feb 22, 2015
Messages
557
Location
Wokingham
Because I have nothing else to, I'll follow in the footsteps of Munomario777, because I have inspiration. Or determination. Or a lack of creativity. One of the three...

Super Mario

Mario is the plumber that everyone knows and loves, so why not add him to Fire Emblem? Due to being the Ace that he is, he can reclass into an extremely large number of classes. He comes with his own unique class however:

Yoshi Rider:

This class is a unique type of mounted unit. Where as most grounded mounts are of the beast, Yoshi is a Dragon and as such he has weaknesses to the likes of the Falchion, wyrmslayer, and the like.

Base Stats:
HP: 26
Strength: 10
Magic: 5
Skill: 8
Speed: 6
Luck: 4
Defense: 5
Resistance: 5
Movement: 8
Axes: Rank A
Tomes: Rank A


Mario has high HP, but low base stats, making him a questionably reliable tank. While he has some abilities based on his above average luck to mitigate the effect this has on his well-being, it is his major flaw. He has great attacking stats, focusing more so on the physical side and countering armored units to make him a great force to be reckoned with. His movement is also amazing, including both the perks of mounted units and his awesome jumping ability. Feel free to use This character as a luck-based, if not frail grinder and attacker.

Unique Weapons:


Firebrand (Tome):
Rank: A
Might: 7
Hit: 80%
Crit: 20%
Range: 1-2
Effect: Has a chance to steal a gold bar from an enemy when defeated with this weapon equivalent in percent to the user's luck.

This attack is quite useful for raising money and healing (see below). This makes Mario an asset in grinding.

Ultra Hammer (Axe):
Rank: A
Might: 20
Hit: 65%
Crit: 5%
Range: 1
Effect: Effective against armored units, ineffective otherwise. -5 speed

Essentially a more powerful version of the hammer. It can be used to absolutely decimate enemies with its sheer power, at the cost of lessening his dodging capabilities.

Abilities:
Jump: While Mario cannot fly with this class, he can still preform his famous jump. This allows him to bypass water, sky, or an enemy in his way so long as there is land on the other side of the unlandable square that he can hypothetically reach with his remaining movement. While he can only use his jump once a turn, this greatly increases the usefulness of his movement, as it draws inspiration from the gimmick of the knight chess piece being able to jump over an enemy. This makes it much more difficult to trap Mario in a corner.

Monetary Recovery: If Mario receives a Gold Bar in a manner other than trading, he recovers 30% of his HP. This may seem situational with the slim chance to obtain gold bars normally, but it works extremely well alongside his unique weapon, Firebrand.

Jack-of-all-Trades: Mario can use any E-Rank Unforged Weapon even if not proficient (swords, staves, lances, etc), at the cost of double the usage for breakable weapons. Since this character will be running on Fates Logic where not many weapons are breakable, this makes Mario extremely versatile even outside his other class options.

Star Power: Has (Skill/4)% chance to receive x0.25 damage and deal 1.5x damage for the duration of combat. When this skill goes off, it makes Mario a real force to be reckoned with, making him far deadlier than one would imagine.


Done in 2.5 hours! Will it be better than the 13 months I put into Pohatu? Eh, who really cares. It's not as if this counts towards anything anyway for this board.
I don't understand... is this a moveset, or..?
Saturday was before April Fools so I can't see why you would make a set for Fire Emblem as this site was only Emblem Boards on April Fools.
 

Munomario777

Smash Master
Joined
Nov 18, 2014
Messages
3,253
Location
Charleston, South Carolina
3DS FC
0387-9596-4480
Switch FC
SW-8229-3157-8114
I don't understand... is this a moveset, or..?
Saturday was before April Fools so I can't see why you would make a set for Fire Emblem as this site was only Emblem Boards on April Fools.
He posted it on Friday (in my timezone at least), which is indeed April Fools.
 

Munomario777

Smash Master
Joined
Nov 18, 2014
Messages
3,253
Location
Charleston, South Carolina
3DS FC
0387-9596-4480
Switch FC
SW-8229-3157-8114


Excitebike! A classic title for the Nintendo Entertainment System, released all the way back in 1985 – the same year as the original Super Mario Bros.! It's an old favorite, and has even spawned a few sequels, ranging from Excitebike 64 to Excite Truck on Wii. The biker was considered for Melee, but rejected in favor of the Ice Climbers for unknown reasons (it was said that "we’d need to make ramps for him to jump, [but] that’s not really the issue"). Probably because the Icies' two-player gimmick was so appealing. Nevertheless, this guy's still not appeared in a Smash game (or MYM for that matter), and he's got quite a bit of potential. So let's explore what he brings to the table in Smash for Wii U, shall we?

STATS

Fittingly enough for a guy who's always on his bike, the Excite Biker is very quick on the ground, his dash speed just about matching Captain Falcon's. Walking speed and traction are also superb. Jump height is not his strength however; even in Melee's development Sakurai had trouble making him jump, so he's about as poor as Mac in this regard. His air acceleration is poor but he has decent air speed. He's also very heavy, weighing a bit more than Samus thanks to the bike, and has a high falling speed. The bike, by the way, is about 1.3 SBB long, from front to back, to give some size reference.

The bike does more than offer weight, speed, and clumsiness however – it also allows him to coast along the ground. When you let go of the stick whilst dashing, you won't stop moving, instead continuing to drive along. While coasting, you can then perform pretty much any attack! Tilts, smashes (although they cannot be charged), specials, and of course grabs, shields, dodges, and whatnot just like a normal dash. If you keep holding the stick and don't coast, you also have access to a dash attack; alternatively, press back + attack or back on the c-stick to perform your dash attack if you're coasting. You also have the unique property of keeping all your momentum when you jump out of a dash, or whilst coasting. To turn around during a coast and dash in the opposite direction, simply smash and hold the control stick backward. (To stop, smash and release it.) Turning around is sort of slow, since he does have all that momentum, but stopping is a much easier feat.

Also, certain moves will have the biker enter a reverse coast; this can also be achieved by landing in midair. It can only have half the speed of a regular coast if activated by a move (landing in midair retains your current speed), but the ability to attack in the opposite direction of your movement may come in handy!

FLAVOR

Standing:

The biker is of course on his bike, putting one foot on the ground to keep it level. His hands are on the bars, and he's ready to get moving!

Walking:
The biker coasts forward slowly on the bike, using his legs to move forward.

Dashing:
The biker leans forward and really gets going! You can just hear that engine purr. This animation is also used for coasting, but the throttle is released, so the engine cannot be heard.

Crouching:
The biker quickly gets off his bike and crouches low to the ground.

Crawling:
The biker crawls slowly, rolling his bike along the ground too.

Jump:
The bike tilts backward 45 degrees during jumps, and balances out after the ascent finishes. Gotta get that clean landing!

Shielding:
The biker brings his hands off of the bars and crosses them in front of his face.

Spot Dodge:
The bike leans 45 degrees to the left, out of the battling plane, as the biker puts his foot out to keep it from falling over completely.

Dodge Roll:
The biker gets a short burst of speed, and he curves into the background. Rolling backwards, it's a quick burst backward. A forward dodge roll on the other hand has him burst forward and then drift, to end up facing the opposite direction (like other forward rolls). If you hold the direction after dodging, you can enter a reverse coast! This can be handy for coming in with a bair, or things like that.

Air Dodge:
The biker releases his left hand and foot from the bike, bringing them over to the right side of the bike and leaning out of the fighting plane.

Prone:
The biker lies on the ground with his bike next to him. He's very quick to get back onto the bike, however, in order to perform a normal get-up, roll, or a get-up attack where he revs the engine as the bike makes a circle, still lying on its side, to hit opponents to either side for 5% and moderate knockback.

Entrance Animation:
The biker lands on the stage, as if after performing a jump, and skids to a stop while striking a bit of a pose.

Up Taunt:
The biker performs a pose not unlike that in his artwork (at the top of the moveset).

Side Taunt:
The biker revs the bike's engine, with a loud revving sound being heard.

Down Taunt:
The biker pulls out a wrench and leans down, tightening a screw on the bike. Glad we fixed that!

Victory Pose:
Straight from the original.

SPECIALS

Neutral Special - Rev
The biker twists the handlebar of his bike, causing the engine to rev once, or twice if you double tap. The move has little lag, and while you can't spam it due to a bit of a cooldown between uses (a couple of seconds), it can be used in the heat of a battle. Quite literally, in fact – this move's purpose is to add to your overheat!

That's the other main gimmick present here. Whenever you use an attack that involves your bike (including this one), it'll overheat like in the NES original. Your bike will get redder and redder, and after you've used seven attacks, it'll be searing red! The bike will also blink when it reaches this point, dealing 1% of self-damage per second. After five seconds of this, the bike will explode, dealing to the biker 10% and recoil knockback similar to Flare Blitz. The explosion however is even more powerful upon hitting a foe, dealing 20% and Warlock Punch knockback! This will also reset your overheat. A good tactic is to overheat, and then try to get the foe with the explosion for a powerful KO.

Of course, you can also cool down your bike, specifically by moving. Every consecutive 1.3 Battlefield platforms you travel without stopping with a velocity at least matching your dash speed, whether it be by getting launched, dashing, or moving through the air, reduces your overheat by one. Once you're at max overheat, though, you need to get your overheat back down to five before you cancel this state. Otherwise, you'll still explode. This full-overheat state has another bonus though, besides KOing with the explosion: your attacks are powered up! They deal extra damage due to the heat (1.5x the norm; this also scales with lower levels of overheat), and some moves even have other effects too. The damage scales with higher overheat levels, but bonus effects tend to only come when you're in the ready-to-explode state.

Anyway, the nspec is useful for tacking on some extra overheat when you don't want to use an actual attack. Simple, but effective. It can also be dash-canceled by tapping the control stick, and the dash will be faster if you do so by .2x the normal dash speed (doubled if you revved twice; this also carries over to coasting if you let go of the stick). However, the overheat will still be added from the rev. You can do this even in midair, but you can only do it forward (although this move can be b-reversed!), and the "dash" is only about half as fast as the grounded version. Still, it's quite effective for comboing in midair, and for general mobility. This move can be used while coasting, and it'll instead act as a speed controller – tap it to go to half speed, and tap it again to go back to full speed. This won't add to your overheat, either. If you're coasting backwards, your speed cannot be changed, so the move is back to the normal version.

Side Special - Turbo Boost
Hold the button to charge this move as the biker leans forward and revs the handlebars, and fire energy seems to gather into the bike's exhaust pipes. The charge is as long as Ike's Quick Draw, both in how long it takes to fully charge and the fact that you can hold it for quite some time afterward. Release, and the bike blasts forward with flames coming out of the exhaust. It travels 3~9 SBB before the hitbox ends depending on the charge, going at a speed halfway between C. Falcon's and Sonic's dash speeds, and it deals 8~17% and upward-forward knockback at a low angle. In midair your falling velocity is reset at the beginning of the move, like Fox's shine, so it helps a lot with recovery. After the move ends you can still coast with the momentum, but the hitbox is gone along with the flaming exhaust. Still, you can hit a foe with this move and then follow up with a coasting attack! Speaking of coasting, this move can be used and charged during a coast, and using it in the opposite direction allows you to turn around easily – although you have to wait for the move's hitbox to end before you can act.

If you're overheated, then not only does the ramming itself deal 1.5x the damage, but you also travel about half a platform farther, and leave a trail of flames along the ground during the move. The flames only reach slightly off the ground and last two seconds, dealing low upwards knockback and 5% on hit. This way, you can hit a foe even if they spot dodge or roll past your ramming attack! Luckily, the rider's flame-retardant suit makes him immune to his own flames. (By the way, this move of course adds to your overheat. Only at the start though – the movement during the rest of the move and the flaming exhaust cancel each other out.) You can use this move right after a nspec rev to instantly get to half charge – two for full charge – but you'll overheat even more due to the revving, which may not be desirable depending on the situation. Or maybe it might.

This move has a variety of uses. You can use it to get around the stage without cooling down if you want to keep your attack power up, combo into other moves, turn around during a coast, or for recovery, as well as even creating a temporary trap in the fire trail if you're overheated. You can even use it to kamikaze into a foe at high speeds with the overheat explosion!

Up Special - Abandon Bike!
The biker superhumanly leaps off of his bike in a similar manner to Bowser Jr., but with only 2/3 of the height. Like the Koopa Kid, he can either attack (in this case a sex kick exactly like Mario's nair) or air dodge during this pseudo-helpless state where he's without his bike. The bike itself falls downward and deals 5% and moderate knockback to whoever it hits. If you use this move while coasting, it acts like the Wario Bike: a pseudo-projectile dealing 10% and moderate knockback. (Although the helpless state makes this strategy questionable at best.) Once you land or get hit, you get a new bike, with reset overheat, and the old one disappears. It doesn't disappear if it hits a surface or anything, and cannot be picked up.

The bike however can still explode from overheat even if you're not actually on it! Try dropping it down from above right when it's about to explode. This strategy can be predictable, but timed right it can be an awesome edgeguard, or anti-juggle KO. Alternatively, jump off of the bike while coasting to send a rolling bomb straight to your opponent! Unlike the normal overheat explosion, the bike will be destroyed by the blast this time, but of course you'll still get a new one upon landing. Not only is this a good recovery move, but it can also be used to reset your overheat (at the cost of being left vulnerable during the fall), or even to get overheat-explosion kills! If you jump off right before it explodes, you avoid taking the damage from the explosion, but the attack also becomes much more predictable.

Down Special - Oil Slick
A small compartment opens up from the bottom bit of the bike, and out comes a bit of oil. Surely the bike doesn't need that to run, right? It'll form a SBB-wide oil slick on the ground, of which there can only be one at a time – this resembles the mud patches from the original Excitebike. If the move is used in midair, the oil will fall and act as a rather weak downward windbox that also deals 10%, becoming an oil slick like normal once it lands. There can only be one out at a time, so the move cannot be used if one isn't present. It will however go away after seven seconds, and can be destroyed by low-reaching attacks (but not projectiles) by depleting its 10HP.

The slick's effect is quite simple, acting as an extreme traction reduction to opponents, pretty much an ice effect. The opponent generally won't be able to stop easily without jumping until getting to the end of the slick, especially since rolls aren't possible whilst dashing on top of oil. Additionally, foes put into prone or a trip state on the oil will automatically do a neutral getup, just like after a jab-lock, which opens up guaranteed follow-ups form the biker. The biker is immune to all these effects, since he chose the right tires for the battle apparently.

Use this move whilst overheating, and the oil will instead fly out of the exhaust pipe! That's... not supposed to happen. Regardless, it'll act as a projectile as it flies through the air in an arc, the windbox being stronger and horizontal and the oil landing about 2 SBB away. Now you can use it to edgeguard more effectively, cover the space behind you, and place your trap a distance away. However, it also loses a bit of utility as a landing tool, and you have to be more careful about trying to place it without it falling off of the ledge. Speaking of overheating, the flame trails made by the overheated sspec will linger here for twice as long – four seconds. It's a much better trap now, although the oil can be destroyed still by foes' attacks, and the fire loses to any attack. Also, after two seconds, the fire will start burning the oil, and drain its HP to stay burning – at the end, it's completely gone. This also means that if your oil has already been attacked by opponents, it won't burn as long.

Use this move while coasting (or while moving at a sufficient air speed), and your movement spreads the oil out over a bigger area: 3 SBB of oil. This makes your trap larger and thus more effective, but it has 1/3 the HP. (In regards to foes' attacks, the slick is broken into three parts, so it's not all destroyed at once.) This also means that it can't keep a fire burning as long from the overheat sspec. But the added space does help with some setups, so this is more of a short-term thing for a single combo or what have you rather than a longer-term trap like a normal dspec is. If you're coasting slowly from, say, nspec's speed control, then the oil is only spread over 2 SBB, a nice middle-ground since the HP is only halved from the original move. (It's also split into halves instead of thirds.)

STANDARDS

Jab - Barspin
The biker pops a wheelie, causing the front of the bike to pop up a bit. The front wheel deals damage for this attack, dealing 6% and normal first-jab-hit knockback / flinching. The second and final hit has him spin the handlebars and front wheel around quickly (a barspin) to deal 4% and moderate high semi-spike knockback. The move comes out quickly and is a good "get off me" option, thanks to its large hitbox that spans the entire front half of the bike. Using the move while coasting also has its benefits, as it is the fastest move to be used out of a coast. If you do this, the first hit knocks the foe forward more than normal to combo properly with the second hit. When you're coasting, the high semi-spike makes it easy to follow up on the move with another moving attack. This scales if you've halved your speed too.

Also, I should probably mention what happens when you coast off of the ledge with an attack. You'll keep your attack going while falling off of the ledge, but you can also jump-cancel the attack after falling about a SBB down below the platform, even if you're still going through the animation. Not only does this prevent unfortunate self-destructs, but it can also be used for comboing and the like with good timing! Speaking of which, the overheat explosion can be comboed into relatively easily with the jab too – the foe is caught in your two-hit jab, giving you an opportunity to explode on 'em!

(By the way, this attack won't actually add to your overheat, but does get the attack power buff.)

Forward Tilt - Leaning Punch
The biker leans forward and delivers a straight punch over the handlebars, having some startup due to the slight awkwardness of punching whilst on a motorcycle, but having nice reach due to the leaning and also having the ability to angle up or down. It's also got some nice power to it, dealing 12% and horizontal knockback that KOs at 120% or so. Gotta have some real strength to ride a motorcycle. Anyway, this move is a nice KO option, especially while coasting since you can roll in with an attack at high speed. Also, if used while walking, this move won't interrupt your momentum, but you won't stop until the move ends. Probably should've used the hand that isn't used to hit the brakes, but oh well.

This move's startup lag may make it hard to land normally, but with coasting, you may be able to combo into it! Generally when comboing, the slow speed of coasting (achievable via nspec) is best at low percents, and the higher speed is better for high percents. Jab to ftilt is a true combo, but only at a couple of percent windows. So it's important to make sure you get the right speed at the right time, but this can be a very potent KO option if you do! (You also need proper stage positioning to make sure you don't run out of room.)

Up Tilt - Handstand Kick
The biker grips the handlebars tightly and leaps off of the seat, kicking upward and performing a very brief handstand before returning to a normal riding position. It's pretty similar to Fox's utilt actually, but being on top of the bike gives it far more reach. It deals 5% and varying knockback. Hit near the start, and it's moderate upward knockback; hit at the end, and it's a semi-spike forward. It doesn't hit in front of you, but it still has a lot of utility. Not only can it cover your back and get foes into the air, but it's also a great way to extend a coasting combo! You are going forward with them after all. You can even begin a combo by catching a midair foe with the move. Again, be sure to use different coasting speeds at different percents.

Down Tilt - Back-Wheel Spin
The biker plants his feet on the ground and revs the engine, causing the rear wheel to spin quickly for a moment at high speeds to send dirt and debris backward at an angle. (While coasting, he doesn't plant his feet on the ground obviously, and just causes the wheels to momentarily turn even quicker without the bike accelerating.) The move has pretty long range, but only hits behind you. The debris deals 7 hits of 1% each, and the last one deals low backward knockback. Like the jab combo, the foe will be knocked forward if you're coasting in order to keep them locked into the move. The move, if used on top of oil, will instead send the oil flying backward, dealing 10% and a decently-powerful windbox. If you're at a full-overheat, the rubble (or oil) will fly even further. This move's damage also scales with overheat, like other bike moves.

The wheel itself acts as a sweetspot that lasts until just before the animation ends. The hitbox puts the foe into prone, deals 12%, and sends them sliding across the ground. It can send them about 6 SBB or so at 100%, depending on weight. Normally the sweetspot is tricky to hit, but if you're coasting you can pretty much run right over foes and get the sweetspot every time! You can also follow up on the prone state if you hit it late into the move, using sspec to turn around and launch right into a pursuit. An oil slick is especially helpful here, since with proper positioning, you can prevent the foe from prone-rolling, opening up some guaranteed follow-ups! Alternatively, knock the foe into a burning oil patch to combo off of the fire's knockback. Perhaps you could, after making an oil slick, perform your overheated sspec across it to light it up, perform a coasting dtilt to knock the foe back into the flames, pursue them with a reversed sspec, and then use the overheat explosion to KO! Pretty insane.

Dash Attack - Wheelie
Excite Biker pops a wheelie, going up on the rear wheel at about a 45* angle. On startup it deals upward moderate knockback and 11%, good for starting a combo especially since this move can be jump-canceled at the very beginning (after the first hitbox though). You'll stay in the wheelie for about half a second, dealing 5% and moderate forward knockback. Then you'll slam back down onto the ground, dealing 11% again and powerful forward knockback that can KO at around 100% or so. This hit is very telegraphed of course, but can KO early in a match with more than two players.

The middle hit is also useful for leading into a coast combo, since after the attack you can either continue to dash by holding forward, coast by letting go of the stick, or stop by holding back. If you're coasting backwards, by the way, the move will play out as normal, except the back wheel will lift instead, and tapping backward on the control stick during the middle portion will have you turn around on the front wheel, entering a forward coast when the move ends. This also moves the final hitbox, since the bike rotates.

This move is generally a pretty good approach tool since it has a tall, lingering hitbox with some power on either end, but don't use it too often, since the move can be blocked and punished if the foe knows it's coming. One of the biker's strengths however is his ability to do almost anything during a dash, which helps in regards to mixing things up and staying unpredictable.

SMASHES

Forward Smash - Ramp Jump
A ramp appears in front of the bike as the biker begins to burnout – that is, keeping the bike still with the front wheel's brakes while spinning the back wheel at high speeds. The rear wheel actually has a hitbox during the charge, dealing 1% and flinching like Lucario's Aura Sphere charge. Once the charge is released, the biker lets go of the brakes and, defying physics but making just about enough sense for Smash Bros., flies off of the ramp at high speeds, varying based on the move's charge. At no charge you go at Meta Knight's dash speed, traveling 4 SBB before landing. When fully charged, you go at a speed slightly above your normal dash speed, landing a whopping 8 SBB away! The jump can be canceled into an aerial, special move, air dodge, jump or whatever after reaching the peak, or traveling about halfway, but it's here that it also loses it hitbox. Specifically, you deal 12~17% and horizontal knockback that KOs from 170~120% at center-stage. You'll also, naturally, jump higher with more speed, able to attack pretty high up at full charge. This move isn't an amazing kill option by any means, but is perhaps more useful as a low-percent combo tool, or as an edgeguard.

If you're fully overheated, your distance will be multiplied by 1.3, and the ramp will be lit on fire due to the heat. Also, it'll explode shortly after you jump off of it, dealing 15% and radial knockback that KOs at around 90% or so.
Used while coasting, smash attacks as mentioned earlier cannot be charged. This means that the ramp just appears in front of you on the ground, and everything is generally halfway between max charge and uncharged: damage, knockback, and distance. (If you're coasting slowly, you'll accelerate in order to use the ramp.) This is a great way to combo while coasting, since after hitting the foe with an attack like ftilt with high horizontal knockback, you can use the ramp to jump up a bit to meet them. Then depending on the percent, you can jump up and combo into an aerial. Nifty, huh? This can also be used to follow up stylishly on a burning oil slick's knockback (especially with an exploding ramp for extra cool points). Heck, maybe even use the backward jump you'll get if you use the move while coasting backward to go even further to the extreme!

Up Smash - 360° Backflip
The biker revs the bike in place, performing a burnout not unlike the fsmash's charge. Once it's released, he pops a wheelie, causing the bike to go upside down at high speed! As this happens, the biker puts one hand on the ground, almost performing a stylish handstand of some sort, as the bike completes the flip and goes back onto the ground. You can hold forward afterward in order to coast straight out of it. The attack deals 14~20% at the very front and start of the attack, KOing vertically at around 110~70%. Hit with the top and deal 12~17% and upward-backward diagonal knockback, which can KO at around 140~110%, although this varies greatly based on the stage. Finally, hit at the very back to deal 10~14% and moderate forward knockback. Hit with the front to KO most easily, the top for anti-air and high-percent KOs, and the back for follow-ups by coasting after the move ends and attacking again.

If you're overheating, the bike's exhaust lets out a sudden burst of flames right when the move starts, causing there to be added momentum. During the flip and the handstand you'll slide across the ground at high speed, sliding about 3 SBB before the flip ends. The normal hitboxes still apply of course, but now you can slide right in with an attack! If used while coasting, the move has the biker hit the gas while moving and perform the wheelie-backflip thing immediately, stopping his horizontal movement during the attack when he does the handstand type thing. Coast backwards, and the move plays out backwards; as in, the bike moves backwards. This can be useful to mix up your movement a bit while attacking. If you're overheated, you'll instead keep sliding, again good for mixing up your momentum and throwing off foes.

Down Smash - Donut
The biker once again performs a burnout, this time leaning noticeably to the side and turning the handlebars a bit. Upon releasing the charge, he'll accelerate but instantly perform a wide drift, turning around immediately and leaving skid marks on the ground. Hitting an opponent during this drift, during which the biker leans into the slide by about 45 degrees, deals 12~17% and moderate upward-forward knockback. The move is pretty quick to start, and is a good get-off-me move. If you hold the opposite direction you were originally facing (if you were facing left, hold right), the move will end here and you'll start coasting (in the aforementioned example, you'll coast to the right), good for retreating after a failed attack. If you don't hold the direction, the move will repeat itself in the opposite direction, and then you'll begin coasting in the original direction (left) to potentially keep the pressure up. The move overall is just a tad slower than Ike's down smash.

If used while overheating, the heat causes the rubber tires to melt slightly, meaning that during this move you'll slide twice as far! You'll still deal the same damage, but the overheat will of course buff damage like with any other move. Also, using this move on top of an oil slick causes oil to splash up, dealing the same damage and windbox as in the dspec itself. Use this move while coasting, and you'll only slide once, turning around and attacking at the same time. You can use the move again to simulate the double-slide type thing of the standing version of the move, but there's significantly more of a delay if you do it like this. Still, nice for weaving in and out with attacks.

AERIALS

Neutral Aerial - Somersault
The biker leans forward, almost becoming flat with the bike (like those crazy-fast motorcycle racers), and makes a quick full somersault with the bike, holding the 45* backward tilt for a moment afterward, serving as brief endlag. The move deals 7% and moderate radial knockback (except it cannot knock foes straight down), with quick startup but a bit of endlag so it's not impossible to punish. The landing lag isn't too bad though, and if you land during an aerial, your momentum can still carry over to a coast if you hold forward. (If you're moving backwards, such as after a RAR, then you hold backward to perform a reverse coast.) This move is pretty simple, a nice get-off-me move with surprising power with some overheat behind it. It can even KO at higher percents and overheat levels! This move also adds to the overheat, so keep that in mind.

Forward Aerial - Tailwhip
The biker jumps up off of the bike, moving his legs and lower body sideways, above the bike and out to the left. By doing this, he sends the bike into a counterclockwise spin, holding onto the handlebars. Once it's made a full rotation, he'll hop back onto the bike. While it's in front of the biker, the bike acts as a hitbox to deal 10% and knockback that KOs at around 150% from center-stage. With some overheat, it can be a pretty potent KO move though! It's not the quickest to start and end, but it has excellent range, so it's a nice move for poking and spacing.

The move has moderate landing lag, but as mentioned in nair, you can still hold the control stick to use your momentum for a coast. For this move specifically, landing during the bike's rotation – while it's facing backwards – you'll be facing backwards when you land, and can of course hold the stick in the direction to perform a reverse coast. So short-hop a forward air during a coast, and you can turn around quickly without losing speed!

Back Aerial - Superman
For this simple but useful attack, the biker grips the handlebars and extends his legs backward, his body parallel to the ground – it's the "Superman" BMX stunt. The feet act as a hitbox, dealing 7% and moderate backwards knockback similar to Mario's bair. The attack is quick, has nice range, and is overall a nice attack to throw out or get foes off of your back. It also won't add to your overheat, so you don't need to worry about it too much, but it doesn't gain power with overheat either, so.

Up Aerial - Standlebars
The biker quickly climbs up onto the handlebars and stands triumphantly on top of them, punching upward with his right fist. Show-off. This move has good speed, but with some endlag in the form of the extended pose. It deals 9% and good upward knockback, similar to Sonic's uair. This quick move has excellent vertical reach since the biker is standing on the handlebars, and can be used for juggles as well, or just general hitting-opponents-above-you purposes. It doesn't tie into the overheat at all, so while it isn't powered up at all, you can use it often without worrying about messing up your overheat.

Down Aerial - Air Wheelie
The biker tilts the bike backward 45 degrees, and at the same time hits the gas to cause the rear wheel to spin rapidly. It lasts a long time, about as long as Yoshi's dair, and deals 15% over 9 hits. It's powered up by overheat, and also adds to it. The move is pretty quick to start, but its long duration means it can be punished if you whiff. It doesn't have landing lag, though; instead, landing during the move has you transition right to the dash attack, complete with the sudden acceleration to dashing speed! You'll of course skip the first hit of that move, getting straight to the extended-wheelie part with its long-lasting hitbox. The multi-hits true combo into the long-lasting hit of the dash attack, but if shielded, it can be punished due to the dash attack's duration and endlag. Still, this can be a great way to mix up your movement and landing options!

GRAB GAME

Grab - Hitching a Ride
The biker reaches over the handlebars with both hands, attempting to grab an opponent. It has nice range, but is a tad slow. If he does succeed in this, the foe is held in front of the bike for the duration of the grab, the pummel being a headbutt with similar speed to Mario's and dealing 3% per hit. Good thing he has a helmet on!

If you use your grab either while dashing or while coasting, you can carry a foe along with the momentum! You will however come to a stop within half of FD's width at maximum coasting speed, with the distance of course scaling with the speed of your coast. You can use throws during the rolling grab, and some of them have different variations based on this. Also, if you roll off of an edge with an opponent grabbed, a grab release will occur, but the biker's momentum and frame advantage allow him to potentially get a follow-up attack!

Down Throw - Run Over
The biker throws the foe down onto the ground and then runs them over with the bike, dealing 8% and moderatee upward knockback. If you hold the button after the throw, you can continue to coast. Using this after a dashing or coasting grab has the biker simply throw the foe onto the ground in front of the bike, and run them over with the current momentum. At a full coasting speed it deals 10% and a bit more knockback, and the damage scales with speed. You can jump out of the coast in order to follow up on the upward knockback, although you may need to use sspec in order to turn around.

Forward Throw - Wheelie Slam
The biker performs a short wheelie, simultaneously throwing the opponent down onto the ground. The biker then slams down onto the foe from the wheelie, dealing 8% and forward knockback that KOs at 180% from center-stage. Normally the knockback is a bit too high to get a follow-up, but if you're coasting, you're already moving forward after the throw ends, so it's much easier of course. If you roll off the ledge right as you slam down, it becomes a weak meteor smash – perhaps use uspec to begin an edgeguard. It's particularly potent if you're about explode from overheat!

Up Throw - Jump Off That Bike!
The biker throws the opponent a set distance upward, about 3 SBB, dealing 4% of damage. He then jumps off the bike and performs an uppercut, dealing 6% and KOing vertically at around 130%. It's a good kill throw, but it has the same effect as using up special; that is, it puts you into helpless, off the bike, and can also turn the bike into a projectile if you're coasting. So be careful not to go off the ledge with your momentum, or you might self-destruct!

Back Throw - Burnout Attack
The biker throws the foe onto the ground while simultaneously popping the bike off the ground, causing it to leap up a bit. The foe slides underneath the rear wheel, which the biker spins upon landing to deal rapid hits that add up to 6%. The opponent is then put into a prone state, sliding backwards; an oil slick can help you capitalize on this, as the slide is extended and the foe cannot get up until they stop sliding. Speaking of, this throw will, on top of oil, do the same thing as dtilt does, what with spraying oil backward and whatnot. If you're coasting, this is just a single hit. If you happen to coast off the ledge during this throw, it has backward knockback instead, possibly causing a stage spike!

MISCELLANEOUS

Final Smash - Excite Truck
The bike, using the power of the Smash Ball, transforms into a giant monster truck! Now we're talkin'! The truck has no proper attacks, but can drive around the stage at high speeds and ram into opponents, working on a bit of momentum physics to deal 20~50% depending on built up speed, KOing at 70~20%. It can also jump, and jump again in midair too, as well as being completely invincible. Pressing A or B activates a turbo boost, where flames come out of the exhaust and accelerate the truck to top speeds instantly. Hold a direction to do it in a different direction, including straight up for a recovery move! However, you cannot stop until the boost ends, so try not to go offstage. If you do, you can just use the boost again. This lasts for 8 seconds before it turns back into a bike, ending the Final Smash.

Stage - Excitebike Arena


The home turf of the Excite Biker is none other than the race track itself! Based on its Mario Kart 8 DLC appearance, it has walk-offs to either side, and is quite a long stage. Its layout is also randomized, with several track elements that change every time you play – just like in Mario Kart 8. These include a variety of hills and ramps, drop-through platforms, flat ground, and mud spots which slow fighters down. Fighting takes place in the two lanes closest to the camera, but Shy Guys on motorcycles make laps around the track in the two background lanes, not affecting the battle at all and merely serving as visual flair. Also, the track features the original music from Mario Kart 8.

PLAYSTYLE

Excite Biker is a fighter that often wants to be on the move, what with the coasting mechanic and the ability to cool down and avoid exploding by moving. However, the overheat mechanic adds an interesting risk-reward dynamic, as while overheating deals damage to the biker, it also powers up attacks, and the explosion can be his most effective finishing move! Thus, the biker's playstyle revolves around managing overheat, and knowing when to heat up and when to cool down. Coasting also plays a big part in how the biker fights, since it allows him to rush in when practically any attack, and gives him a unique way to extend his combos! He can also take his momentum to the air, retaining speed when he jumps, which expands his options from a dash even further and makes him even trickier to predict! The biker's strengths are his mobility options and ability to power up his attacks, but he needs to balance it carefully to stay ahead in a fight, and his somewhat clumsy air mobility can hinder him when recovering (especially the low jump height and low air acceleration). He also has a somewhat poor disadvantage state, as again, his clumsiness in the air can give him some trouble landing, and he lacks a projectile to camp or counteract camping. Nevertheless, the biker's momentum attacks, overheat, and a generally over-the-top, "EXTREME!" style of combat make him more than ready to take on the best that Smash has to offer! As always, feedback is greatly appreciated, and I hope you enjoyed the set! :)

Like what you see? See some more over at my Make Your Move Hub! :D
 
Last edited:

MasterWarlord

Smash Champion
Joined
Aug 24, 2008
Messages
2,902
Location
Not wasting countless hours on a 10 man community
TURNABOUT TRUMP

Being more liberal with Kristoph's character because of it being bad is the obvious way to intrepret this character - irony is the only thing that can really justify superpowers on a non fighting character like this in my opinion. This does a much better job of capturing Kristoph's over the top edgy villain persona than a remotely serious set would do, and with the client/psyche locks it still manages to be a good representative of the Ace Attorney franchise. When you came up with the idea to have a client be a playable character as well, you had plenty enough material to actually make a very substantial set.

The moveset definitely delivers, surprisingly not falling off like a lot of other sets. The psyque locks provide a very interesting dynamic of not using a move for some time in order to power it up, and gets even more interesting when it can be applied to any character in the game as an ally. The infamous levitation dsmash and the grape juice moves in fsmash and nair are other big highlights. Reviving the client's corpse is actually a pretty interesting idea as far as gameplay possibility, and with how much he just interacts off the corpse makes an even more hysterical relationship between him and the client. Having a stupid AI partner with team attack on needs this heavy of manipulation to actually be useful quite honestly, and I actually really like the idea of the counter giving the reward of actually controlling the client for a few precious seconds without worrying about your main hurtbox.

I can't really fault the moveset for not having every last input be super fascinating, I more just wish these other moves weren't so fluffed with detail pretending they were. Aside from that, I think Frozenroy did a good job of making you fix up the characterization where it got just a bit too memetic for the client already. I think you would probably be better off just loudly saying the client is only KO'd right off the bat, as the moveset is already funny enough without leading the reader to believe for a good time that Kristoph revives the client with the power of his demonic hatred. Of course, this is the obligatory last paragraph of any comment that is critique, and there is very little I have to complain about it in this moveset. This was definitely one of your more enjoyable sets and would be an excellent entry into your competitive previous contest.

MEMEMYOTISMON

It honestly seems like you are at your best when making very mockable villains you don't particularly care for - using the writing style from this and Honest could certainly have improved such characters as Doc Scratch and Chakravartin. This is certainly a very enjoyable experience, even if the actual playstyle is (accurately) standard stereotypical villain set-up by MYM standards. I will certainly not deny that the playstyle is most definitely present throughout the set as he has plenty of tools for manipulating his darkness aura and projectiles, and has a couple more enjoyable interactions off of them like the cannons bthrow and the ftilt.

The base is not that strong, though, largely just setting up some basic projectile manipulation, and the more basic moves aren't particularly enjoyable. The section that's the worst is unsurprisingly the aerials, with gimping largely just being an afterthought to give him a more direct melee presence that I don't feel is that relevant to the established playstyle. There's also some redundancy that I dislike with creating gas (dsmash feels a bit superflous), power boosts that cancel out other boosts that makes it a bit weird they're there at all, and fair taking away from ftilt.

The duplicates doing nothing without set-up is a bit of an issue, but Malomyotismon is one of your better sets for actually fighting while producing set-up, something I have long complained about with your movesets, so good job on that. I believe the problem is a bit too much was dedicated to his viability this time around, preventing you from creating as interesting of interactions as some of your better moveset offerings.

UGLY GENWUNNER

Moreso than Kristoph, Lickitung has thick detail as it talks about uses of even more mundane moves to try to meet an arbitrary word count. This can obviously get grating, and some moves can come across a bit redundant even if cool by themselves. It's a wonder you can even talk this long about such a basic Pokemon, but this is largely due to the very strong base you came up with for it. Using the food props feels very in-character and a way to buff up this otherwise bland Pokemon's potential to something that can pass MYM standards, and you come up with pretty interesting effects for all of them, especially the Wasabi which I was interacted off of more. The only effect I didn't like was the giant food becoming a hitbox on Lickitung's tongue which was sadly a rather common thing to interact off of, as I felt it was both weird it was a hitbox and weird Lickitung didn't just eat it from a characterization perspective.

The moveset comes across as surprisingly in-smash despit the base, the weight/size buffs are far from anything extreme, but are still interacted off of in very meaningful and entertaining ways. While there is definitely some redundancy, the grab-game in particular provides a host of fun new interactions to use. Every input section is at least decent with the usual exception of the aerials, though this character being in the air is awkward and it's kind of incompatible with his set-up. While the set definitely isn't perfect, I still enjoy the concepts enough I hold it in fairly high regard.

REVENGE OF JUNAHU

I am impressed you are aware enough of your meme status that you posted on April Fools, PK-Ow! I see you've taken the sole piece of advice given to you about Will and Freedan to heart - that it was far too detailed to the point of unreadability. This set takes the detail in the opposite direction, putting all of the throws into one paragraph and often not even directly stating damage and knockback for moves which makes this very incomplete by MYM standards. You in general seem to have a poor understanding of numbers when the usmash and dsmash do only 9% and are easily outdamaged by tilts.

Specials first is definitely something that would be highly recommended. When you introduce a mechanic in utilt of charging up and reference it throughout the set, that is a very random input to place it and was only done in more ancient terrible movesets. Dtilt is something he can technically do but comes across very tacky, and if you wanted to include it would probably have to be a Special or recovery. The recovery you do have is just awful - just because the animation of Geno Boost has arrows generically pointing up, it boosts him into the air as a recovery? It would be one thing to interpret it that way, but it doesn't reference the buffing aspect of the move from the source material at all. It would be much better to move the utilt's effect here and make the utilt be a normal move. Down Special has Geno take out one of 3 props that has nothing to do with his character, including a fairly high chance of a dud that does nothing.

Obviously, a lot has changed since you were around. If you want more direct advice on how to improve, I'd suggest just reading some other movesets within this context to get a better grasp on things.

HEAVYWEIGHT COMBO KING

I found Electivire's base to be pretty generic and uninteresting, but I actually liked some of the interactions he has once you're past the intro and can get into actual content, being more of a slow burner of a moveset, with my attention having been more caught during the standards, grab-game, and aerials. While some of the interactions are cool, Electivire is very, very overpowered. He definitely needs to lose Motor Drive stacks over time, the way I would suggest it is he loses one after not having received a charge for X seconds.

Aside from that, Neutral Special's damage is just absurd, specifically the uncharged version, along with dsmash, fthrow, and bair. Dsmash is one of Electivire's core set-up moves, but has a massive hitbox. It's one thing to make an objectively superior version of a terrible move in Smash Bros like Sing, but this move is just memetic with how much better it is than DK's dsmash. It's faster and creates a shockwave that goes outwards and back in towards Electivire for great range and defensive coverage. This would already be a great move, but it provides him with one of two very powerful set-up options that are core to his moveset. The bair is one of the more generic final moves in the set, and just passively creating a lingering hitbox in the air on one of the last moves in the set just gives him more of a terrifying presence than he needs. Fthrow is one of the big payoff moves for the reader where actual interactions come into play, but is just such a big buff to all of Electivire's moveset that it makes everything home in on the foe, making it seem like just too much. All of this would be very strong without the superarmor from Motor Drive stacks, and with those the set would be better off as a 3v1 boss character.

FROY KOOPA

I enjoyed the concept of making Roy constantly have out the cannon, it gave him a lot more distinct flavor in his melee moves. That said, the aerials and standards were rather poor regardless, and you were pretty obviously strained when you had to reuse the solid cannon effect. The basic projectile manipulation presented with the grab-game and bob-ombs is interesting enough for the set to have been enjoyable for me, if very forgettable. I do really think the Bullet Bills needed a lot more focus when they're what Roy actually fires out of his cannon in the source, as they're barely mentioned throughout the set in favor of the Koopas and Bob-Ombs, though interacting off of those is definitely the highlight of the set. Regardless, I'm glad this set was at least released, as it is confused enough I could've easily seen it getting dropped.

JOE CALZAGHE

I have little to contribute after what FA said, I think he summarized this set very well. In the least, I am glad you made the decision that Joe only loses half of his stacks upon a miss rather than all of them, though it is definitely still an issue that it seems difficult to get much of a streak going. The main reason this is such a big issue is because the vast majority of moves spend half of their description talking about how it scales with a streak, making the moveset seem like it'd be pretty dry in actual practice. I'm not expecting much from such a character, but you could've handled the mechanic better and probably needed to do more with the projectile tennis with the baseball if you wanted to carry this moveset through to the end.

PUDGE SR.

The Butcher is a very enjoyable set. I just love the basic concept of fighting over the fresh meat that drops and think it would create for very interesting gameplay, and is a great interpretation of the character's mechanic from the source. The tether and furnace explosion are also really fun mechanics, and you interact off of the fresh meat scaling a lot better than in something like Joe obviously. I have very little in the way of criticism beyond saying a couple of the moves were more generic, but I think this is definitely one of your most consistent playstyles and there's not as much value lost as there could be. I think the boiling blood may be interacted off of a bit too much when looking for interactions in the last few inputs, but it's nothing I can't stomach.

WARLORD LITE

FA has already gone over Sproink's mechanic several times, and this set is going to be ranked very low until it's changed. This set is in no way a 3v1 boss, and the existing superarmor mechanic is just very poorly balanced. Ignoring the balance on that, you have a really low level of detail that can't do justice to these kind of concepts. The main thing you're consistent in talking about is talking about the power buffs from the level of heat Sproink has in a really mundane way when you could just as well say each move does X-Y% based off charge level. The moveset has a few basic interactions, but that's not really enough to constitute any actual playstyle for this guy in my opinion.

JOE! STARTER #652

Moreso than Joe Dimaggio, I can do little but echo FA's comment for Chesnaught. I dislike the interactions with Leech Seed and feel the interactions are weird. I personally don't really see the appeal of this moveset at all beyond being generically in-smash, though it doesn't do much of anything offensive. Froy's ranking comment praises it for being an anti-camper, and while the changes obviously make it a lot more fair about doing that, I can't say I enjoy such an archetype and the moveset obviously isn't for me. I still stand by my comment about Pokedex heights being absolute garbage and find this character being this small weird, developers will regularly ignore the "canon" heights to make the characters feel more accurate, such as Machamp in Pokken.
 
Last edited:

FrozenRoy

Smash Lord
Joined
Apr 26, 2007
Messages
1,261
Location
Las Vegas, Nevada
Switch FC
SW-1325-2408-7513
--- World of Froycraft Patch Notes 1.0.2

Electivire

- Electivire now loses a stack of Motor Drive if he does not expend or gain a charge every 7.5 seconds.
- Electivire's Giant thunder Punch now has reduced uncharged damage at every stage of Motor Drive.
- Electivire's Down Smash now deals 18%-24% damage at the fists instead of 20%-26%.
- Back Aerial now begins at 1/5th of a second @ 1 stack and increases to a full second @ 5 stacks.

Joe DiMaggio

- Joe no longer loses half of his hitting streak when he misses, but a more reasonable 4 stacks. If any moves still say he loses half, they're wrong. Though I do not think any do...
 

Munomario777

Smash Master
Joined
Nov 18, 2014
Messages
3,253
Location
Charleston, South Carolina
3DS FC
0387-9596-4480
Switch FC
SW-8229-3157-8114


Link, the Hero of Time! ...And Winds. And Hyrule. And Light. And Twilight. And... trains? Huh.

Anyway. This guy's one of gaming's biggest icons, around since 1986 (over
30 years now!), star of the Zelda series and the "link" between the player and the game as the main playable character. He's been through countless adventures, triumphed over powerful foes, and built up an impressive arsenal of skills, weapons, and items over the years. Each game features a different Link, but they're all pretty similar, and the hero's spirit is passed on throughout the generations.

In Smash Bros., Link is a slow-but-heavy fighter, with an emphasis on projectiles. Unfortunately, his
sluggish speed makes him rather ineffective in higher levels of play, especially when compared to his cel-shaded counterpart. So let's take him back to the drawing board, and give him a complete overhaul to see if we can't give him the edge he needs! And heck, let's give him an updated appearance based on Hyrule Warriors while we're at it, that scarf is pretty fabulous. As always, this moveset is built around Smash for Wii U, and this being a remix set and all, there will naturally be some overlap with Link's kit in the actual game. With all that outta the way, let's get right into this moveset!

STATS

Link's biggest problem used to be his speed and overall mobility – or rather, lack thereof. Now, his dashing speed just about matches Mario's, he has improved air speed and acceleration, and he can jump around as high as DK can. These mobility buffs are a very welcome change to Link, and he's got a wall-jump to top it all off – if not a particularly high one.


Enhanced speed isn't all that Link's dash has gained, however! When you
begin to dash, Link will continue to hold out his shield, able to momentarily reflect projectiles. This only lasts during the first half of the initial dash animation, so fox-trotting everywhere doesn't leave you completely invulnerable to projectiles. This Shield Bash can also clash with other moves, but the normal laws of priority apply. Seeing as how this deals no damage, it can clash with moves which deal 8% or less, which can help in close-combat.

FLAVOR

Note:
Any animations not included in this section are the same as they are in Smash for Wii U.

Dashing:
The animation for the initial dash has been changed to have him perform the Shield Bash. And of course, with a faster dash speed comes a faster running animation.

Crawling:
When Link is crouching, you can make him do the duck walk! He'll hold his shield up still, so you can advance while blocking projectiles.


Cool, huh?

Up Taunt:
This taunt is unchanged; Link still does some fancy sword swings and then sheathes and unsheathes his sword. Now, as a fun little easter egg, by pressing A when Link pulls his sword out, he can perform the Mortal Draw, a devastatingly powerful sword attack which deals 30%, KOs at 50%, has transcendent priority, and ignores shields. In terms of appearance, the attack is somewhat similar to Link's old forward smash, but with only one hit. It's extremely telegraphed, and you're vulnerable during the taunt without the ability to release your attack as well as the slash's endlag, but it's the perfect shield break punish. Mostly, though, it's just a fun little easter egg – a "secret to everybody."

Right Taunt:
This taunt is also the same as the old side taunt, but with a "Hey, listen!" added in for good measure.

Left Taunt:
Link pulls out the Ocarina of Time and plays a song on it, randomly selected from the original game's selection.

Down Taunt:
Also the same as before.

SPECIALS

Neutral Special - Hero's Bow


Link's old neutral special is back: the trusty
Hero's Bow! While it functions the same in terms of basic stuff, it does have some changes. Firstly, tilting the control stick allows you to aim the bow up or down and adjust your aim. The biggest change to this move, however, comes when you charge it!


Charge it 1/3 of the way, and the arrowhead gains a flame – now it's a Fire Arrow! Not only will it deal 9% and a bit more knockback, but it also has another unique property. When it hits the ground or another surface, it sticks in the ground and becomes a hitbox which deals 1% of fire damage and flinching to the opponent, like a Lucario charging its Aura Sphere. It only sticks around for a couple of seconds, but makes for an excellent trap.

Charge it 2/3 of the way, and that fire turns to flames by the power of magic, signifying an
Ice Arrow. It deals the same 9% as the Fire Arrow, but upon hitting a foe, it applies a unique effect. The foe takes knockback like normal, but extra hitstun in the form of a freezing effect (separate from the normal freeze effect from PK Freeze and the like). Additionally, upon hitting a surface, it creates a patch of ice 1 SBB wide, without any lingering hitbox, reducing traction but only lasting for five seconds. (If it hits water, it creates a small platform of ice.)


Finally, when
fully charged, the arrow transforms completely into a divine Light Arrow! Not only does it deal 15% of damage and travel at high speed, but it is also unaffected by gravity, so it can go in a straight line without falling. It has range exceeding the width of FD by a decent margin, so it's excellent for long-range snipes, especially since it can pass through terrain. This arrow also has a unique effect when it hits a foe; specifically, it can stun your opponent for as long as a fully charged Paralyzer. Perfect for a follow-up attack! It's especially useful in team battles, since otherwise the long charging time may prevent Link from landing the blow at a close enough range. However, this move is still very useful for long-ranged attacks!

Side Special - Boomerang


Link's side special move is a blast from the past: the
Boomerang! None of this wind stuff, it's a classic Melee-style boomerang. Hits the foe on the way back and everything. Now, however, there are a few tweaks, aside from the new design. It keeps going upon hitting a foe, so you can deal with multiple opponents with one throw, and even in a one-on-one this is useful for getting a second hit in when the boomerang returns! The boomerang can also pick up items, including Link's bombs. (Oh yeah, those are back too. More on them in a bit.) Once the boomerang returns, whatever item it's holding is put into his hand automatically, or dropped onto the ground if he's already holding one. Hold B throughout the startup, and the boomerang will take whatever item you're already holding. This is especially useful for Link's bombs, which can explode mid-travel if the fuse is cooked enough!

Perhaps the biggest addition to this move, however, is the variety of
throwing angles. You can still throw it at an up or down angle with a diagonal control stick input, but if you hold straight up or down as you throw it, the boomerang will begin to gradually curve up or down, reaching a fully-vertical path at the end of its travel. Alternatively, hold diagonally backwards during the start-up to do the opposite, starting out with a vertical trajectory but curving back to a horizontal one. Combine this with bouncing the boomerang off of surfaces, and you can really confuse your opponents!

Up Special - Spinner


Link performs a short jump up into the air and then pulls out the
Spinner from Twilight Princess, riding atop it. It can go at pretty high speeds, allowing Link to nearly match Jigglypuff in terms of air mobility! In midair it also slows his fall, as he descends very slowly (but a bit faster than Peach's parasol). While it doesn't provide any real upward boost on its own, Link can jump off with the button you'd expect, and the Spinner just keeps going until it goes offscreen or hits a wall or something. It deals 3% and flinching damage on contact, by the by, whether or not you're riding it. After Link jumps off, he cannot make another Spinner until he lands, and it also does not restore his midair jump, but doesn't cause special fall either. Jumping off in midair sends the Spinner straight downward, dealing 10% and moderate knockback on the way down. It's a spike at the very start, which can prove rather deadly! Upon hitting the ground it'll become embedded into the ground, and Link can pull it out again using this move for significantly decreased startup lag. Plan ahead and save your Spinner for when you need it! (It disappears if the move is used elsewhere.)

Jumping off isn't the only thing Link can use the Spinner for; he can also
attack whilst riding it! This allows Link to use grounded attacks in midair, move at high speeds whilst attacking, and that sort of thing. However, pulling out the Spinner has significant lag to it, so it can be reacted to by an opponent if you don't mix things up. Link also cannot dodge or shield while riding the Spinner, so he is vulnerable if he whiffs an attack. The Spinner's hitbox, however, may help protect Link in some cases.

Down Special - Bombs


As mentioned earlier, Link's down special move still has him
pull out a bomb that acts as a throwing item. It's the same as in Smash for Wii U, but with new tweaks and interactions. Firstly, if you soft-throw a bomb (that is, throw it without smashing the control stick), it will not explode when it hits the ground, instead staying there until its fuse runs out. It can be picked up by either Link or opponents, but while it's rolling, it still explodes on impact with a foe. (You can get it to roll by throwing it sideways, or into a slope.)


Oh! Also, if you
hold B, Link will instead pull out a Bombchu. It deals the same damage as a normal bomb, but when it lands it'll travel along the ground similarly to the Smash 4 item (but moving more slowly), exploding on contact or after its fuse runs out. It cannot be thrown as far, and takes a bit longer to pull out, but is a good way to create a sort of mobile trap. Alternatively, use it as a combo tool, timing it right to use the Bombchu to prolong your attack strings! Up to two bombs total can be in play at a time, with both types counting as the same (e.g. you can have one bomb and one Bombchu, but no more).

As for interactions with
other moves, using the uncharged Hero's Bow with a bomb in hand creates a Bomb Arrow from Twilight Princess: an arrow with a bomb on the tip. It deals the damage of both projectiles combined, and while this does not work for Bombchus, it can deal some nice damage. Shooting either a bomb or a Bombchu with any kind of arrow will cause it to explode, so you can potentially get some sharp-shooting setups going! I already mentioned how it can be carried by the Boomerang. Generally, though, the bomb still has the same uses: projectile, recovery extension, trap. Everything Link mains have come to know and love, but with new utility added too, and a Bombchu to give Link even more versatility.

SMASHES

Forward Smash - Magic Rod


Link pulls out his
Magic Rod, a very versatile weapon. It actually has three different attacks, depending on how it's angled. They each have different uses, and are in fact different elemental rods (each having a different color at the tip).


The
Fire Rod is what you have by default, with no angling. Link swings it forward, shooting a small, quick fireball. It deals 9~13%, the fireball growing with charge, and has moderate knockback. It's a good spacing tool, especially when used on the go with the Spinner! Retreat and shoot fireballs at your foes. When fully charged, it becomes a tall cyclone of flames, about the height of an fully-charged Ore Club tornado (roughly 2 SBB) with similar speed and range. It deals three hits of 5%, the final one dealing upward knockback similar in strength to Hyrule Castle's tornadoes (but it scales linearly instead of in 20% increments). It covers a tall vertical area, making it especially a threat in free-for-alls especially since it can hit multiple foes without disappearing – it just keeps on truckin'. It can however be used in one-on-one matches too, although the charge makes it rather telegraphed.


Next up is the
Ice Rod, the upward angled version. Link, for as long as the control stick is aimed upward, holds it up in the air and pointed forwards at an angle, as a chunk of ice appears 1 SBB in front of and above the rod's tip. It acts as a constant hitbox to deal 4% and low radial knockback, and holding the charge keeps it suspended in midair. The chunk will stay put even if Link is moving – say, by using the move when on top of the Spinner – which allows him to use this as a bit of a remote trap. Release the charge, and Link will stop using the rod, causing the chunk to fall straight down. It deals 8~11%, but also freezes opponents while dealing knockback to either side. The move is quick to end after this, so you should be able to get a follow-up attack going! However, the freeze effect is a bit easier to break out of than normal. If it lands on the ground, the ice chunk will turn the area of ground into an ice patch, like an Ice Arrow. The fully-charged Fire Rod will melt the patch, by the way, and a Fire Arrow's lingering hitbox speeds up the melting process a bit.


Finally, we have the
Sand Rod, the downward-angled variant. Link thrusts the rod at a downward angle, creating a pillar of sand right in front of him. It's 1 SBB wide and 2 SBB tall, and when it comes out of the ground it deals low damage, specifically 5% and set knockback up to the top of the pillar; this hitbox also ignores shields. It briefly, for the 1.5 seconds or so it lasts before disappearing, acts as a solid platform, able to be wall-jumped off of too, or be used for wall combos. Also, Bombchus can navigate around it, and the boomerang will bounce off of it. When on top of the Spinner, using this move will (assuming you're facing forward) end up creating a pillar right underneath the Spinner to raise it up, getting you in midair to either attack up high or possibly embed your Spinner in the ground by jumping off! Charge the move to create up to three pillars, all in a row. They hit a foe three times, like Duck Hunt's forward smash, dealing 15% total and upward knockback on the last hit that can KO at around 110%. They have the same properties as normal after the attack, giving Link a bigger temporary platform to work with and blocking foes from further away.

Down Smash - Ball and Chain


Link dons the Silver Gauntlets, a pair of strength-boosting gloves. Normally they'd make Link's hands too bulky and unable to use weapons, so he doesn't wear them normally. They're however necessary to wield the
Ball and Chain! It is pretty heavy after all. He'll swing it around in a wide circle as he himself spins around, the move having incredible reach. It deals 5% and low upward knockback at the chain, while the ball itself deals 17~24 and backward, upward-angled knockback that KOs from center-stage at 90~60%! That's pretty powerful! However, the move's long start-up lag makes it very hard to land, and has long ending lag too as Link catches the ball in his other hand. Still, if you do land this attack... RIP. A Spinner may make this move even deadlier! The good ol' Twilight Princess item combo.

Oh, and this move can also
deflect projectiles, like a powershield. That is, it redirects them at an angle, not changing ownership. In a free-for-all or team battle, this may even hit another opponent! Perhaps not too useful in one-on-ones, but hey, at least you're not getting hit by it.

Up Smash - Skyward Strike


Link thrusts his Master Sword up into the air, activating his
Skyward Strike from Skyward Sword! This attack is quite similar to Marth's up smash, but of course without a tipper. It deals 15~21% and upward knockback that KOs at around 110~70%. It's got moderate lag on both ends, making it a nice KO option since it's easy enough to land and not too punishing to whiff. You may also notice that Link's sword begins to glow when he thrusts it upward. This is no mere visual effect; it stays around even after the move. This glow powers up your next sword attack by adding a sword beam to it! It's like when you have full health in the original games, and the beam deals half the damage of the original move and Blade Beam (Cloud) level knockback. Even if your foe is not KO'd outright by the Skyward Strike itself, the sword beam gives you a nice tool to use in order to perhaps begin a juggle when used in combination with an upward sword attack. Alternatively, use it whenever you have some time on your hands in order to get a nice buff. Also, the Skyward Strike can indeed use up its own beam, but you will not have extra energy afterward. Instead, the new energy "generated" by the attack is put into the beam, having it deal the full damage of the original move, and knockback that can KO if you hit a foe in the air!

STANDARDS

Jab - Sword Slash
Link performs a slash diagonally downward with the Master Sword, dealing 5% of damage and standard first-jab knockback. It's a pretty standard first jab hit, but the animation is very reminiscent of Ocarina of Time.

Second Jab - Sword Thrust
For the second hit of his jab, Link thrusts his sword forward, similar to his second jab hit from SSB4. It deals 5% with moderate knockback and has nice reach to it, as Link steps forward slightly this time around.

There's more to it than that, though. Link's jab and tilts are unique in that
they each have two hits, like jabs such as Jigglypuff's (with two hits). What's more, you can mix and match your tilts with your Second Attacks, such as performing an up tilt and using the Second Forward Attack. This also applies to the jab of course. Generally, Second Attacks tend to "feel" very powerful, with lots of hitlag, satisfying sound and visual effects, and the like. Second Attacks can also be charged by holding A (like performing Ryu's heavy tilts), adding a half-second of wind-up in exchange for more power and special effects. (The charge cannot be released early.) In the case of the Second Jab, the damage of the move is doubled to 10% and it now KOs at 130%, and Link lunges forward to add reach to the move. Charging the Second Attacks obviously adds more damage and whatnot, but it may also give your foe time to avoid the attack. The extra reach granted by charging, however – a common theme – may help mitigate this, if you catch the foe trying to air dodge.

A few more things about Second Attacks. If you've just used the
Skyward Strike, both your First and Second Attacks will fire the beam if used consecutively, so it may be possible to chain them together from afar. The First and Second Jab will fire the beam straight forward, by the way. If you attack right after using a spot dodge or roll, buffering it during the dodge, you will skip straight to the Second Attack! Use this to punish dodged attacks, or roll towards a foe for a surprise hit!

Forward Tilt - Overhead Slice
Link performs an overhead slice with the Master Sword, very similar to his current forward tilt from Smash for Wii U. The attack is faster than it used to be, but now deals a reduced 10% and has significantly less knockback. It scales more slowly with percent, and has less base knockback to begin with. This however means that it can be used to chain into a Second Attack at low-to-mid percents! The move also covers a large area like before, which is nice. This attack's sword beam travels diagonally up, the same going for the Second Forward Attack. Speaking of which...

Second Forward Tilt - Jump Attack
Link performs the iconic Jump Attack, a staple in 3D Zelda games, where he jumps forward and slams his sword down onto the ground. The animation is similar to Link's dash attack in Smash for Wii U, dealing 12% of damage and knockback which KOs at center-stage starting at 100%. It is quicker to start up this time around, but still leaves Link open to attack if it misses. Charging the move raises the damage to 18%, gives it knockback which KOs at 80%, and increases the leap's distance. This, out of all the Second Attacks, is the most powerful, but the leap forward means it may whiff at close-range, so it may be better as a bit of a mid-range attack. The First Forward Tilt's low knockback scaling makes it perfect for leading into this move, since at higher percents they will be knocked further away but not quite out of the range of a charged Second Forward Tilt. If you can catch the opponent's airdodge attempt, you can punish with this move! If they jump away, punish with an aerial, etc etc.

Up Tilt - Arcing Swing
Link performs a wide arcing swing overhead with his sword, from front to back, similar to the version in Smash for Wii U. The move is about the same, with a bit of a slow start and dealing 9%, but like the ftilt, its knockback scaling has been greatly reduced. This allows for more effective follow-ups, especially with the decreased ending lag! The move is also, thanks to its arcing range, an excellent anti-air. Aiding that is the sword beam from Skyward Strike, which in this move travels straight up and is very wide.

Second Up Tilt - Leaping Slice
Link leaps up into the air a short hop's distance, performing an upward sword slice as he leaps, hitting opponents who are in front of and above him. It bears a resemblance to the final hit of Link's old recovery move. The move deals 11% of damage and upward, slightly-forward-angled knockback which KOs at around 130%. It is also possible to reverse the move by holding diagonally up on the stick, to attack behind you. Charging this attack doubles the height of the leap, boosts the damage to 17%, and has it KO at around 100%. The move covers a wide area, and of course hits higher than all of the other Second Attacks, so if a foe tries to jump away after your Jab, you can use this to catch the jump and punish! Charge for best results if they air dodge. This move is good for wall combos using the Sand Rod too, since it hits so high up to account for DI and such. Also, if you played Twilight Princess, you may recognize this as part of the Back Slice; you can recreate that maneuver by rolling behind an opponent and then using this move!

Down Tilt - Crouching Stab
Link, while crouching and blocking with his shield, performs a low stabbing attack with his sword. This maneuver should be familiar to long-time Zelda fans, and to Marth mains. Anyway, the attack is very quick, dealing 5% and very low knockback; perfect for leading into a Second Attack! However, the move's short reach and low hitbox make this a bit tricky to land. Still, if you can read a roll or other such movement option, this move is an excellent punish! The sword beam normally travels horizontally, but at the ledge it goes diagonally downwards: an excellent edgeguard!

Second Down Tilt - Spin Attack
Link performs the classic spinning maneuver known as the Spin Attack! Appearance-wise, it is very similar to the move from Super Smash Bros. Melee – the grounded version, of course. It deals 12~7% of damage (early vs. late hit) and has the nice bonus of attacking to both sides, so it can cover a variety of options, such as a roll for example. It also creates two sword beams, uniquely: one to either side. The knockback on this move also varies depending on when you land it, KOing diagonally at 120% for a clean hit, and dealing only moderate knockback if you hit the opponent later on in the move. It's quite powerful, but its endlag and long duration make it easy to punish.

If the move is
charged, the pose of which should be familiar to veteran Smashers, not only will it become a multi-hit – dealing three hits of 5% each throughout the duration of the move – but Link also moves forward while attacking! He travels about a platform's distance, which is great for covering ground; even the edge of a platform will not stop Link as he hovers briefly in midair! You can also control the direction of the spin by holding diagonally down on the control stick, much like the Second Up Attack. You can also slide after the move if you end up on a patch of ice. Oh, and in the charged version of this attack, the final hit KOs at 100% or so from center-stage. (Since it travels forward, you can move closer to the blast zone!) Overall, the Spin Attack is a great way to cover a large area, especially with a Skyward Strike charge, and charging it may be your best bet if your foe likes to DI away after you use a First Attack.

Dash Attack - Roll
Link performs a quick somersault, a staple technique of the 3D Zelda titles. As should be familiar to Zelda fans, not only can Link keep dashing after the move by holding forward on the control stick, but this also gives you a brief speed boost! It cannot however be spammed, since there is a bit of cooldown to the attack separate from endlag (you can perform other actions quickly after rolling). Additionally, hitting a wall will cause Link to hit his head on the object, putting him into a brief recoil animation, but nothing too major. A benefit to hitting a wall is that nearby surfaces will be hit with the same damage and knockback as the roll, and the Sand Rod can be used to plan around this quirk! Damage is also doubled if your foe is stuck between a roll and a hard place.

Oh, right, the damage. The roll deals 5% and low upward-forward knockback, great for
follow-ups. Rolling off of the edge of a platform causes Link to automatically jump, in a manner which should be familiar to most Zelda veterans; this allows Link to use an aerial attack for a follow-up hit!

Second Dash Attack - Rolling Leap
First I should note how the dash attack works with Second Attacks. If you input a standard attack after Link rolls, he will use that Second Attack, much like Link's dodges. This allows you to combo into Second Attacks with ease! You may, however, have to read and punish your foe's reaction at higher percents, when the combo stops being guaranteed.

The dash attack also has
its own Second Attack, where pressing A during the roll has him leap using his hands, almost as if performing a handstand. This propels him up and forward into the air, dealing 5% and low knockback. It's quick to end, leaving Link in an aerial state, so like the ledge-jump, it can be used to begin aerial combos. It's also, unlike the other Second Attacks, a true combo from the roll at any percent, so at high percents it's easier to pull off but doesn't usually net you a KO.

AERIALS

Neutral Aerial - Spin Attack
Link's classic Spin Attack returns as a neutral air attack! It's very reminiscent of the move from the original Super Smash Bros.here's a Link (har har har) to give you an idea. It lasts about the same time as it did in that game, but of course it doesn't cause you to rise. It deals 10% with a clean hit, and a semi-spike to either side which can KO near the ledge at 90% or so (although due to the nature of semi-spikes, putting the foe in the bottom-corner of the screen, makes it hard to recover if you're not KO'd outright). A late hit deals 6%, and its knockback is significantly weaker, not sending them very far at all. The move has considerable startup lag, but it's very quick to end, whether or not you land. This makes it good for comboing if you get the late hit, but it can be punished due to its long duration. This move is a nice approach tool as well, since its large coverage and long duration make it rather tricky to maneuver around similarly to Bayonetta's extended nair – just make sure to watch your feet! That's the main weak point.

Oh! And I feel the need to point out that Link's aerials don't have
Second Attacks. However, if you land during an aerial, you can buffer a standard attack to use its Second Attack, just like dodges and the dash attack. For the nair, this is particularly useful if you land the late hit. While aerials don't actually have Second Attacks, you can use the grounded ones in conjunction with aerial attacks to achieve a similar effect.

Forward Aerial - Double Slash
Another move that should feel very familiar indeed is Link's forward aerial, still the one-two slash we know and love. There are some tweaks however. The first hit now deals no knockback, instead acting similarly to Toon Link's forward smash. (Or normal Link's, I guess.) It's now guaranteed to lead into the second hit, at any percent. If you land during the move, between the two hits, you can use this to your advantage: while the opponent has time to jump or dodge away before you use a Second Attack, you can predict their evasive maneuvers and punish with the appropriate attack! If they try to hit you, just perform your own dodge or shield. A dodge is preferable, since you can Second Attack out of it, but they can predict that and punish you after the dodge ends. Mindgames, son!

Oh, and if you've powered up with a Skyward Strike, this will of course fire two beams, one with each slice. It's great for covering an area with your beams, and a good way to keep foes at bay. Overall, this move is a nice spacing and comboing tool, especially thanks to slightly reduced landing lag.

Back Aerial - Shield Attack
Link turns around and bashes his Hylian Shield backward, similarly to Palutena's bair. It deals 8~5% (it acts like a sex kick) and low backward knockback, so you can get a follow-up at lower percents if you have some decent momentum going (say, from a RAR). A late hit is especially good for this. The shield can also block attacks, causing the foe to recoil as if they clashed with another move, vulnerable to a follow-up attack. (Aerials are always beaten out, unless they're disjointed, in which case they'll act as if they hit an invincible foe.) Projectiles can also be defended against, and since the shield is held up for a while, this is an effective strategy. The move is fairly quick and has a long-lasting hitbox, but does not have a lot of reach to it, and isn't super powerful or anything either.

Up Aerial - Up Thrust
Link's up air attack, hailing from Zelda II, is mostly unchanged from Smash for Wii U. Still deals 15~13% depending on whether or not it's a clean hit, has a long-lasting hitbox, is a potent kill move, all that stuff. The sword beam for this move is obviously aimed straight up, making it a potent anti-air move. You may even be able to KO a foe who's near the ceiling using this beam!

Down Aerial - Down Thrust
Link's down air is still the iconic Down Thrust from Zelda II. It's mostly unchanged, but there are a few tweaks. Firstly, the move has a variable length depending on how long you hold A. At minimum it's half the length of the original, and you can hold it for up to 1.5x as long as before. This makes it easier to combo out of if you successfully bounce on a foe, especially thanks to a reduction in ending lag. The move can also bounce off of projectiles, including Link's own. Skyward Strike will of course add a beam to this move, going straight down this time around. It can spike early on, but it's not quite as powerful as the sword itself. A later hit deals vertical knockback, to hopefully hit the foe up into your sword! You may have to read their DI though.

GRAB GAME

Grab - Hookshot


Link's grab still utilizes his iconic
Hookshot item. This time around it has a tad more range, and is also a bit quicker to end. The pummel is still the same. Hey, if it ain't broke.

In midair, the move has undergone a few changes. It can now be
aimed in any of the four directions, and doing so prevents it from grabbing the ledge. (So you can use zair to attack offstage more easily.) This gives Link a long-ranged midair attack in any direction! Also, if it hits an opponent while being retracted, it can pull a foe straight to Link. It acts like a grab in that it bypasses shields etc, and while it does not initiate an actual grab state, Link has a significant frame advantage in this situation! Pull a foe straight to you, and hit 'em with an attack.

Link can also use the Hookshot to
grapple to walls, Melee-style! Holding a direction may be beneficial, since otherwise it may snap to a ledge instead. This of course also works with the Sand Rod's pillar, which makes for a nice onstage mobility option. Also, right after throwing a foe, you can immediately use a Second Attack – like the dodges.

Up Throw - Reel It In
Link aims the Hookshot straight up, with the opponent still on it, and then lets it rip! After it reaches its full length, the Hookshot retracts, pulling the foe straight down and dealing 4%. Then the throw ends, the opponent put into prone like Ganon's Flame Choke. You can however use a Second Attack to capitalize on this! If you don't charge it, this is a true combo with most Second Attacks (except the Jump Attack). If you charge it, you lose the guaranteed follow-ups, but gain power; this can be used for tech-chases! A hard read can net you an easy kill. If there's a platform above you, the opponent will land on it in prone, again much like Ganon's Flame Choke. In this situation, try using the Second Up Attack. Also, your projectiles, particularly upward-thrown bombs, may be able to tack on some extra damage during the throw, as the foe hangs at the top for a bit.

Forward Throw - Shield Bash


Link holds his
shield in front of him and slams it into the opponent: the Shield Attack! It deals 7% of damage, as well as low, fixed knockback that will always put the foe in prone a short distance away from Link (unless they tech). This opens up opportunities for a tech chase, thanks to the throw's low endlag. You can also use traps like upward-thrown bombs as well as the Sand Rod's pillar to limit an opponent's options in this scenario, giving Link the true upper hand in this scenario! You can use Second Attacks as long as they don't roll away, in which case you can throw out a projectile to cover that option.

Back Throw - Helm Splitter


Link leaps backward, low to the ground, before jumping clean over the opponent and performing a
somersault slice below him, right in the head! This deals 9% and moderate upward, slightly-backward knockback, and the leap causes Link to bounce upward slightly, as if landing on an opponent with dair. Uniquely, this leaves Link in the air, so while he cannot use Second Attacks after it for obvious reasons, he can follow up with an aerial attack.

Down Throw - Ending Blow


Link leaps into the air, leaving the foe
lying on the ground, and then does a somersault before stabbing his sword into the foe! It's quite similar to the dair actually. This version is very powerful, dealing 10% and semi-spike knockback that kills near the ledge at around 90%. It's low enough to cause the foe to slide along the ground, so it can be teched if you're not near the ledge. If it is teched, though, you can perform a tech-chase using Second Attacks. (Noticing a pattern here?) When looking for a grab, try to get an opponent to shield by using projectiles; returning boomerangs and upward-thrown bombs excel in this regard.

MISCELLANEOUS

Final Smash - Great Spin Attack


Link holds his sword in the air as it glows with a beam of light, and then uses this extra range to perform the Great Spin Attack! It can traverse the entire stage as Link rushes forward, dealing 10% of damage every Battlefield platform traveled and KOing at around 50% or so. Hitting up close when facing away from the ledge is the best way to maximize your damage!

Alternate Costumes - Reborn Through Time


Link's alts are all from
Hyrule Warriors, a couple of them being based on other incarnations of Link (namely Fierce Deity Link from Majora's Mask, the Link from Twilight Princess which is as it appears in SSB4, and the original Zelda for NES). They even come with matching items and voice clips!

PLAYSTYLE

Link's playstyle is quite reminiscent of his home series: there's puzzle and strategy elements, a wide variety of tools to use for different situations, and some good old-fashioned swordfighting. Link has a variety of ways to get some setup going, what with Sand Rod pillars, boomerangs and bombs acting as pseudo-traps, ice patches, fire arrows stuck in the ground, and the Skyward Strike's sword beam property. He generally wants to plan ahead, using his tools to their full potential by thinking up strategies and using them to pressure, predict, and punish his opponent. Link can also play an effective keep-away game with his projectiles, in order to observe his opponent's habits as well as think up a plan.

And once Link gets an opportunity to punish a foe's action, punish it he will – unique sword combos, heavy-hitting attacks, and the ability to effectively cover space make him a force to be reckoned with when he has the upper hand! While his tools serve many purposes, however, escaping pressure is not one of Link's strong points. Lacking a fast, space-covering aerial to escape combos with, Link relies on prior planning and awareness of his surroundings, such as teching off a Sand Rod pillar or throwing a bomb / boomerang beforehand to hit the foe mid-combo. His attacks can also be slow to start, but his basic grounded sword moves are decently quick. Link also has a pretty high learning curve, what with all his interactions, traps, strategies, and whatnot. Overall, though, if you play Link smartly and strategically, his added speed, powerful advantage state, and tricky moves give him a much-needed edge over the best that Smash has to offer!
As always, feedback is greatly appreciated, and I hope you enjoyed the set! :)

Like what you see? See some more over at my Make Your Move Hub! :D
 
Last edited:

ryuu seika

Smash Master
Joined
Jul 21, 2010
Messages
4,743
Location
Amidst the abounding light of heaven!
Down Special - Shroud The World In Daaaarkness
Malomyotismon lets out a villainous laugh as he raises his hands to the sky, as darkness starts leaking out of them. It will expand to cover an area about 1.35x the size of Malomyotismon himself for each second you hold this move, and kind of like your duplicates does absolutely nothing on its own. It does make the area it covers dark enough that it gets a tiny bit harder to see specifics of what's going on, but unless there's a significant amount of chaos going on it probably won't make much difference. If Malomyotismon uses this move for an extensive period of time, he will begin boasting about how he's unstoppable and how the opponent is powerless to do anything against him and other such generic villain gloating, which is fairly comical to interrupt with say, a jab.

Now you might be thinking after two moves of Malomyotismon doing nothing, he really has to have some plan right? Well yes actually, as while the darkness itself isn't particularly dangerous, its effect on Malomyotismon and his duplicates is. As a larger chunk of the stage is envelopped in darkness, Malomyotismon's attacks and stats will get progressively better. After covering an area about three times his own size in Darkness, he gets a 1.2x damage and knockback boost on all his attacks, his dash speed is boosted to be closer to Marth's, and he gains a slight resistance to hitstun and buff to his weight. This power boost caps out if Malomyotismon can cover an area the width of Final Destination and the height of five Ganondorfs. In that case, he's boosted to having 1.75x damage and knockback on all his attacks, Captain Falcon's dash speed and a solid air speed with actually decent traction, and a whopping 25/10 weight while taking heavily reduced hitstun to make comboing him all but impossible. This is as insane as it sounds, but an area that size will take Malomyotismon standing still for like 25 seconds or something ridiculous to cover, and if Malomyotismon leaves the darkness for any reason all of these buffs go away.

I mentioned your duplicates benefit from this, and now I'm going to explain how that actually works. You see the darkness is an extension of Malomyotismon's influence, and as such he can make his illusions more tangible in there. Tangible enough that their hitboxes actually begin doing damage and knockback. At a seconds charge worth of darkness, nothing will do more than 1% and a flinch and attacks weaker than a moderately powerful tilt will do absolutely nothing. After 4 seconds worth of charge they'll deal 0.25x the damage and significantly less knockback than Malomyotismon, though their smash attacks will serve as tolerable GTFO moves and the hitstun can at least setup for Malomyotismon's own attacks. With maxed out darkness power, the duplicates are just as strong as Malomyotismon himself in every aspect, which is absolutely terrifying. The duplicates will lose all these buffs if they step out of darkness though, which their AI will not do voluntarily unless its to move through a small gap between areas of darkness, or the quantity of darkness is particularly small. Separate, unconnected ones do in fact count both fields of darkness as far as the power boost goes, so you don't necessarily have to build up just one field. Clones can also travel through darkness like they would a mist field. Any attacks that produce darkness will not if used by clones, so keep that in mind.

This makes Malomyotismon exponentially scarier as he gets setup time, given all aspects of his game including his duplicates are buffed by this. However, the amount of time you have to stand still and do nothing to achieve this is as absurd as the results if you pull it off, possibly moreso. The good news is Malomyotismon has ways of expanding already existing darkness that are much more proactive. As an aside, if the foe wants to get rid of darkness, all they have to do is damage Malomyotismon himself, though a small poke will only take away a very small amount of darkness. However, the more consecutive damage he takes without a small amount of time left undamaged, the faster the darkness will recede, taking 100% without a 3/4 second break between sources of damage will remove even the max power field of darkness entirely, though you can expand it beyond that if you want an extra cushion should your plan come crashing down in such a horrible fashion.
The official name of this move, coming from Digimon Rumble Arena 2, is "Pandemonium".
I'm quite happy to see MaloMyotismon in this and, even if he is quite controversial, I have no dislike for the guy. Probably because I don't remember any of season 2 past his first appearance. Still, he was fun in RA2
 

FrozenRoy

Smash Lord
Joined
Apr 26, 2007
Messages
1,261
Location
Las Vegas, Nevada
Switch FC
SW-1325-2408-7513
Lonk

Yet another Smash set remix from Munomario777, Link brings a few pretty nice ideas to the table. These mostly come in the form of the standards and I am quite in love with these simple yet intuitive two-strike standards which feels very fitting for Link overall and flows quite well, a natural expansion of the Link Forward Smash technique, and if anything I would have liked to have seen it expanded into the aerials, grab game or both as a larger "gimmick". This appealed to me much more than the more standard, "interact-y" Sand Pillar from the Neutral Special, probably because of the fact that Link does a rather low amount of anything with said pillar despite it being the only real reason the rod special is there in the first place as otherwise the Bow would make a superior special to me. In fact, given it feels like it would hurt his bomb + arrow/boomerang game, boomerang game in general and explicitly messes up your Dash Attack, it has impressive anti-synergy with the set. Ravio, which was from MYM16 if I recall, felt like it did more with the sand rod.

I find the Bombchus on the Down Special to be quite odd, as most Link Remixes tend to fold it into the bomb Down Special (usually with a charge). I personally find that input placement more acceptable, as poor Link here has issues with hitting to both sides of him and this does not fit especially well as a smash in the first place. I would change the Bombchu to the Down Special and make the Spin Attack the Down Smash, which would also help add an element of power swordsplay into the set, which somehow feels lacking despite the strength of some of Link's moves, perhaps due to the standard's finesse? The Bow and Rod also feel like they could practically swap places which feels like it could be better for the Rod anyway to stop oddness like making midair sand pillars, although this does lessen one of the cool parts of the Rod which is the Ice Rod's way of Link moving during its placement.

As mentioned, I would make Down Smash the Spin Attack, and specifically I'd make Link able to move while it charged similiar to the current Down Tilt Spin Attack, and then have him lunge while spinning if released while the control stick is tilted for range, or he can do it in place. It would retain elements like the two-sided sword beam hitting. Down Tilt would become the Multi-Spin Attack, which would be the multiple hits version there and probably shoot out multiple low-power short-ranged sword beams to both side of Link. NAir would be entirely changed, as the Spin Attack really is only in the air in the first place because it needs to be a recovery and it adds very little to Link's gameplay.

The Up Special being the Pegasus Boots seems odd to me. Something I have always wondered is why with tether recoveries existing Link's Up Special isn't just the Hookshot (or Clawshot I guess?), which would work like a Melee tether recovery, and would drag foes to Link for him to smack up (somewhat like the current Zair thing), which would fit with Link's classic camper playstyle much more than the Pegasus Boots while being more iconic.

I dislike things like the FAir Hammer and BAir Ball and Chain, as Link feels less like a Mr. Game & Watch or Villager in how he can utilize his props and make sense, and the FAir hammer essentially exists for a token sand pillar interaction. I would remove it entirely, probably for a sword move (or maybe a bow move). Back Aerial would be another candidate for Down Smash, the Down Smash fits the Ball and Chain animation quite well after all, but donning the powerful gloves for only one move and utilizing such a strong prop on a BACK AERIAL feels horribly off for Link. Down Aerial feels iconic to Link and should be kept and Up Aerial is also fine, though. I was also not much a fan of the Dash Attack, which mostly feels like abusing an iconic animation in an unfitting way and I have no idea why Jab, F-Tilt, D-Tilt and U-Tilt all have the two-hit gimmick...but not the Dash Attack. The Grab Game feels quite uninspired and only one of Forward Throw and Up Throw should probably exist, and stuff like Back Throw mostly make me think the grab game should have natural follow-ups via the A button as well.

Link was a set I just couldn't get into and felt worse for me as I commented it. I can't say I especially enjoy it compared to Smash Link (who less has design issues and more balance ones, largely due to never being given a good recovery and thus not allowing his good weight to be a bonus compared to Toon/Young Link). But the Standards are a winner and I actually feel this could be your strongest set posted if a lot of it was touched up.

Oh, right, and one last thing I personally feel, but is nitpicky: Fierce Deity Link really shouldn't be Link's Final Smash. It only works for, say, Young Link or something, given it is basically "transform into awesome adult Link". It feels out of place as the only notable Majora's Mask element as well. I would change it.

Unexcitebike

Excitebike isn't a bad set, but it largely suffers from not being very special or notable either, although I am personally pretty fond of the coasting mechanic in the set, which feels like a very natural momentum mechanic and I am glad to see a momentum set that isn't all about just going to speeds beyond what you need. The overheat mechanic is not as good, but it is functional, and it is remotely interesting, although something about it naggles that it could have been done better, maybe the fact it seems hard to really manipulate in an actual fight?

Personally, I dislike that Neutral Special mostly exists just to add 1-2 Overheat to your heat, but I do quite love the Side Special interaction with it, which made me think: There should be more things that do stuff after you Rev in the set. The animation is ripe for it and communicates well to the player "do a thing!", it gives the Neutral Special more relevance, it would help the set since you could apply it in problem areas (it can even be done in midair!), I think it could be a big hit if more of the set did something cool/taken up to eleven/what have you if you Revved up first, which could also create some really explosive scenarios if you Rev into full Overheat and then do something big and flashy, which is what Excitebike feels like it is all about (excite is in the name after all!). It would also make it feel like it's more natural to overheat yourself some to me and encourage players to mess with the mechanic more while serving as a natural cap to Rev shenanigans.

Things like Side Special and Down Special are good and the Smashes and Standards are for the most part good, I enjoy things like the way the Forward Tilt combos in different ways based on if you coast or not and the Forward smash, the ramp feels a bit odd but on a character like Excitebike I can excuse delving a little into stuff like a one-time ramp. I do think the way the Down Tilt hitbox works (only hitting behind you) is kinda odd/bad and am surprised that it wasn't, say, a power slide instead, which is oddly missing from the set. And the Donut should really instead go twice as far after a Rev (or maybe even more or something) or while on an Oil Slick, because the reasoning when overheated is quite tacky and I do not feel that people would think "overheat will make this Down Smash animation go forward" as much as "slick oil will make my donuts slide more". (Although I like the Down Smash itself)

The Aerials are largely where the set lost me and stopped having the excitement or flash of the rest of the set, probably because of the lack of coast mechanics (being in the air and all), although I do feel Neutral Aerial and Down Aerial are fairly solid, but I quite disliked NAir's landing idea being repeated on FAir, especially when Down Aerial's Dash Attack gimmick functions similiarly. This is the section which could more use some Rev shenanigans (I would say Rev also fits perfectly with the Smashes, though). The Grab Game is simply supremely uninspired and takes little to no advantage of coast-grabbing and I quite dislike the Up throw, as the Up Special puts you in a pretty large downside and pretty much sets YOU up for the foe! It could possibly be justified if you, say, could combo foes into it for an Overheating bike and bail...except the foe is hit up, the one direction which will surely make it so they can't be hit! If, say, Excitebiker jumped off the bike and kicked them down in front of it, allowing you to kick them into an exploding bike with good timing...something like that would be cool and flashy, like Excitebike wants to be, and more playstyle relevant. A Forward or Down throw perhaps? I would probably only keep one of Down Throw or Forward Throw (probably F-Throw, as the way it combos works moe with Excitebike's gimmick and it is less generic) and rework the other and probably redo Back Throw too or at least tweak it. It feels pretty awkward to use ATM.

Excitebike feels like while a standard momentum set, it has some good potential to it, but the aerials and grab game lose a lot of the flashiness that it could have and as-is Rev feels pretty lame, along with crappy stuff like Up Throw. Similiar to Link, I could see this set being one of your better ones so far...but right now, it is mostly a very average set with some good and some bad.

Da Bird Don

The presentation for this set tickles me and I, personally, quite enjoyed it, even if you were nervous about it. It doesn't get in the way of the set's understanding at all and makes it a more enjoyable read. Brings some nice character to the Pokemon. Things like the ground movement description are, to me, a highlight. I am also quite fond of the way that Honchkrow orders his Murkrow minions around, which not only feels quite in character (bossin' around your birdbrained underlings) but offers some pretty good gameplay which is exploited well in the moveset. The commands are pretty good, though the Shield Command sticks out as a sore thumb to me as something a bit tacky (mostly how it ONLY works when they shield), and I enjoyed the various ways the set played off it, like the grab game. Side Special is probably my biggest gripe with the set, seemingly like essentially a pretty generic stun (although it at least doesn't last an eternity) and having a character-iffy special effect, although I feel it fits with the vast majority of characters to react to this kind of thing and so works okay enough, it feels like it could be easily replaced though, essentially existing just for the Forward Smash interaction.

The aerials are all about what you expect and work nicely, being fairly fun if not especially exceptional, but they create a fun playstyle when you consider Honchkrow has 8 jumps and his Murkronies. The Smashes have a bit of iffy stuff, largely the Down Smash (it needs to ignore invincibility in the foreground/background to hit them DURING the dodge, although it can hit them coming OUT OF it or going INTO it without that), Forward Smash is actually pretty cool though. In fact, in retrospect, it should probably be the Side Special and then have a new Forward Smash to replace it. You lose the Swagger interaction, sure, but you also lose Swagger's stupid stun stuff and Foul Play feels Special-esque anyway, and most characters have something you'd love to Foul Play anyway (an Ike F-Smash, for example!). And yes, Forward Smash "stuns" too, but it is a brief stun and in a way that I can accept (hard to utilize repeatedly, timing intensive, not long). The only sad thing you miss out on is Swagger on your minions: Maybe find another way to do it, in the grab game when you grab the Murkrow perhaps?

Dash Attack might wanna specific, maybe in parenthesis, what "a lot of priority" means (for example, does it clash with attacks with a higher damage range?). I also think you meant hitstun over stun in Up Tilt. The Standards are largely average though, a bit above since I do like the Murkrow standards, I do think F-Tilt and D-tilt overlap a bit much though and you should probably look to change them up (F-Tilt was a late addition, I know, so). The grab game feels like a highlight of the set and I am impressed with what you do with just messing with how you can time the Murkronies' commands, it is pretty slick honestly, stuff like Up Throw and Forward Throw are my personal favorites, there's some really cool stuff you can do with commands and I like how often it involves good trade-offs and natural, flowing, soft interactions. It is good stuff.

Overall, Honchkrow is best described as above average to me, with a lot of stuff that's better than normal, if nothing super exceptional, and a few sore spots that can drag it down some, and it is certainly worth a read at the least and the set is very pretty to look at. A good way to see you returning, Turtles, and hopefully the start of a wonderful contest.
 

Munomario777

Smash Master
Joined
Nov 18, 2014
Messages
3,253
Location
Charleston, South Carolina
3DS FC
0387-9596-4480
Switch FC
SW-8229-3157-8114


Big changes have been made, including (but not limited to):
  • Sailcloth removed.
  • Neutral Special and Forward Smash swapped, with changes to accomodate this.
  • New Up Special: the Spinner.
  • Bair concept moved to Down Smash. Down Smash combined with Down Special.
  • New Fair and Bair.
  • Dash Attack has a Second Attack.
  • Throws tweaked, including the new Second Attack functionality.
  • New Final Smash: the Great Spin Attack.
 

JOE!

Smash Hero
Joined
Oct 5, 2008
Messages
8,075
Location
Dedham, MA

Zer0 is an assassin for hire. According to his wanted poster and his personal ECHO recordings, he performs both political assassinations and common hits. Following a particularly unsatisfying assassination where the target fails to fight back, despite being encouraged by Zer0 to do so, the assassin starts to look for a more challenging environment. He travels to Pandora after hearing of the Vault from a bartender, deeming the hunt as worthy of his skills.


A mysterious assassin from the game Borderlands 2, Zer0 specializes in skillful single-target attacks that do tremendous damage when he plays his cards right. That said, his damage and thus survival are very lackluster unless he keeps on top of things in the heat of battle. Luckily, he can set up his offense or confuse enemies long enough to escape with his action skill: Decepti0n.


Your eyes deceive you / An illusion fools you all / I move for the kill.
Down B activates his "action skill" straight from the games. Upon activation, Zer0 will simultaneously become cloaked just like the invisibility item did for characters in Melee, as well as deploy a Dec0y that continues performing basic actions to distract your enemies. While the faint shimmer of Zer0's outline can notify both players to his whereabouts during the 4 second timer, it can be hard to make out given there is no actual visual cue as to when he enters Decepti0n.


There is a cue for when he can perform it however as a "Warning!" em0te will appear on his visor as seen above briefly. This is transparent but still visible enough to let you know when your action skill is ready, which is approximately 10 seconds after the skill ends. While Decepti0n lasts for a maximum of 4 seconds, it is ended instantly whenever you use a special or land an attack (whiffed attacks do not end Decepti0n but using specials do) and some time may be refunded to the cool-down based on how quickly it was used, with a minimum timer of 7 seconds. If you feel like it, you can hold (Taunt) when entering Decepti0n to speak a Haiku as seen in this section in Red. This obviously alerts players when you are ghosting, but gives you approximately +8 cool points.

And I disappear / A ghost amidst the combat / Preparing to strike.

As for the mechanics of the move, the Dec0y will dash forward and use Zer0's Dash Attack and then a flurry of a couple other moves chosen at random over the duration. In the air it will perform aerials until it touches ground at his fall speed, then transition to grounded moves. The Dec0y is a solid object and can be walked into and struck by attacks but instead will sort of "glitch" when hit instead of taking actual knockback. Hitting the Dec0y is an obvious tell for when Zer0 is cloaked, as would be taking no damage or knockback for when he suddenly starts attacking you but that's besides the point. The illusion is certainly convincing, able to at the very least block an attack or two or cause the foe to take evasive action, both of which you can capitalize on with the offensive perk of Decepti0n.


Once cloaked, you begin to accumulate a damage buff for all attacks based on how long you wait before attacking. Every frame you wait will add a multiplier of 0.0125x to your damage except for the last 10 to max out at a whopping 3x multiplier for damage after 230 frames (240 = 4 seconds), the last 10 boosting slightly more for a skillful finishing blow. As stated prior, attacking early will end Decepti0n immediately but will still incur the bonus, often based on the start-up time as even say, Jabbing will add 3 frames worth of time in Decepti0n. This allows for somewhat slower moves to become astounding given they cannot see you start them for one, and two they get more time to boost/bigger damage. Multi-hit moves will carry the bonus throughout the attack even if the first hit breaks your cover, while grabbing will break cover but automatically throw the opponent in the last direction pressed as you land the grab similarly to when you grab an NPC in single player modes. The bonus is very nice, but whiffing your chance can be quite costly as you just reveal yourself and then have to wait a decent chunk of time to use your action skill once more.

Mastering Decepti0n is critical for Zer0's game play for pretty clear cut reasons. That said it isn't without drawbacks at a human level! Other players can catch on to your patterns if you just toss out a Dec0y every chance you get, and begin looking for the shimmering "real" you, and being hit ends Decepti0n!. Not only did you lose ground, but now you are out of a Down B for 10 seconds regardless of when it was forced to end! You can always attack early for some benefit, but finding the opportunity to dance around your foe to line up a perfect shot is what true assassins live for. But tools alone do not make the warrior, many Skills come into play when it comes to sealing a kill!


STATS AND SKILLS
In Smash, Zer0 is a Hybrid of Zoner and Swordsman, bringing to battle his Digistruct Sword for close range, Actualizer SMG for close-mid range, and Godfinger Sniper Rifle for very long range. He is very tall and skinny, with his stats overall being very similar to a humanoid Mewtwo in terms of weight and height, though his ground and air speeds are both above the Psychic Type's to a degree and his fall speed is just above average instead of floaty. While having a tall frame, his crouch is very low mirroring Sheik in a way, and he can even crawl while crouched though he stands up a bit to do so. He has average jumps for a human-type character, and overall is what you would expect for a person in smash. But like Decetpi0n there is more than meets the eye!


In Borderlands2, half the game is all about customizing the way your character levels in one of the more fun skill tree setups I have seen in games as of late. Every character can put points into skills that grant general buffs like +Damage/Health, modify their game play by providing perks to certain actions like aiming down your sights for an extended time or not aiming at all, or offer powerful game changers that alter your controls and actions wildly. A good starting point to go over Zer0's skills in Smash would be with his gun play:


Neutral B
has Zer0 equip his powerful Godfinger Sniper Rifle, changing stance to position himself as if he were wielding the Cracker Launcher item from Brawl or Gust Bellows from Smash4 where he is locked facing forward, but can walk and jump normally. While Sniping, Zer0 can aim up to a 45* angle by pressing up, jump with the jump buttons, crouch by pressing down and even crawl, and exit Sniping via pressing shield/dodging. Pressing B or A will fire the rifle, dealing damage in a straight line with range as long as Battlefield's main floor (About 4 platforms) as the bullet whips through foes. The Godfinger is unique in that it gets it's title due to the ranged capabilities it offers compared to other snipers in the game. Specifically, it rewards you even more for precise shots as the damage it deals increases with range! Starting off at a measly 3%, each platform's distance covered will add to the damage, making a spread of 3/6/9/12% and 0-45* knockback based on your aim that is weak for 3/4 of the distance and the last leg of the shot having enough to KO at around 180-160%. The shot itself rings with a loud, echoing bang and takes about a whole second to perform between the 20 frames to aim, 1 frame to fire and 39 frames of cool-down as Zer0 recoils and reloads. This makes it not only more practical but simply wise to try and maximize distance between yourself and your target for the sniper shot. You can cancel the reload portion by ending your Sniping stance with shield/roll, but will need to go into a forced 39 frames of lag the next time you enter to reload your shot.


As you can probably gather, this can become pretty ridiculous with Decepti0n. Hiding a certain distance away to line up your shot until the last possible moment can net a clean 36% to your target and KO much, much sooner. Though as a master assassin, your Skills can easily push past that point!

AMBUSH
is one of the first Skills you'd notice playing around with Zer0. Taking advantage of his foe's unawareness, this Skill makes any attack dealt to foes either from behind or after they have attacked another entity deal 1.1x more damage. Attacking from behind is easy to explain, working just like Shulk's Back Slash except for any damaging move Zer0 has. The "non targeting" bit refers to if your enemy has attacked something other than yourself recently, so if they say are wailing on another foe across the stage, running up and slashing them will deal bonus damage, this also works if they attack your Dec0y instead of you. These bonuses do stack, as landing a hit on an unaware enemy's back will deal 1.2x. Skill multipliers apply to damage before Decepti0n's bonus as well, meaning that an attack boosted to 1.2x damage by Ambush would then be boosted by up to 3x again by Decepti0n!


HEADSH0T
does what it says on the can, applying a bonus for hitting the vulnerable head/face for a Critical Hit. Though easiest seen using Sniping, any move can count as long as you only hit the head/face. Landing a critical will deal an additional 1.2x damage and knockback and can stack with Ambush, dealing a total of 1.3-1.4x the normal damage and 1.2x the knockback associated with the new damage numbers. On certain characters this can be tricky due to their body shape, such as Kirby or Jigglypuff since they don't exactly have a "back of the head", instead the normal Headsh0t is a bit easier as you just have to connect with their face. Upon landing a critical hit, "CRITICAL" will appear above the foe's head in red holographic text briefly.


B0RE luckily highlights enemy crit locations with a small, holographic, red hexagon looking similar to Fox's Reflector after about 30 frames (1/2 sec) into Decepti0n. Hitting the critical spot with your rifle will pierce through the foe and continue onward to deal an additional 1.1x damage to the next foe(s) in line, stacking indefinitely if you manage to keep nailing critical hits with the Godfinger and even giving back half a platform of travel time for each B0re. This is especially potent vs Minion characters and in multi-man matches. Hitting the marked B0re spot with non projectile attacks simply deals 1.05x more damage than it would have normally, which is still nice stacked with the Decepti0n and Headsh0t bonuses. It should be noted that B0re activates at 30 frames, making shots that line up at that time stamp have at least a multiplier of 1.375x to begin with.


As you can see here, B0re will nicely highlight the critical area on your foe. As for the other marks with the large "0" and the fancy blue highlights, you can look to his next special: Deathmark.


Side B
has Zer0 perform a fitting Sheik impersonation as he throws a Kunai with similar lag to the Hylian ninja tossing a single needle. The throwing knife has an electrical tint to it and is about the size of the arrowhead of Link's arrow as it travels in a straight line for a little over a platform's distance. On impact the Kunai will deal 1% and no hit stun as it stabs and shocks the foe, creating the holographic 0 as a Deathmark. The mark will last for a total of 8 seconds, during which time the enemy will take an additional 1.25x damage from all sources. The mark will also persist no matter what the enemy does for those 8 seconds, meaning he can track other invisible foes by following the big 0 above their heads to make Zer0 dittoes quite hilarious to behold. Speaking of invisibility, the electrical effects of the Kunai can spark a particular Skill of his:


UNF0RSEEN
is a nasty, shocking trick that Zer0 can perform by throwing a Kunai at his own Dec0y! On impact, the interference causes the Dec0y to glitch wildly and produce a Mewtwo-nair type electrical multi hit that deals 8 hits totaling to 8% at base. This locks foes in place with electric hit stun and is affected by Decepti0n's damage bonus, but unfortunately ends the illusion and reveals Zer0. This is useful as a panic option if a foe is approaching through your Dec0y but it will not mark them. Luckily, hitting a Deathmark while cloaked will not end Decepti0n unless it triggers Unf0rseen.


Aside from letting any source of damage hit the foe harder/trapping them in electricity, Deathmark differs from his similar Skills in that the effect is multiplicative instead of additive. This means that the base damage of a move is effected by the mark before any other multipliers! For example, say you would hit the foe for 6% with an attack, and you get a double Ambush bonus. Normally, this would deal 7.2% with the whole 6 * 1.2 and all and if stacked normally, Deathmark would apply a 1.45 bonus for 8.7% total. With it being a multiplier to the base, that now becomes 6 * 1.25 * 1.2 = 9% total. While marginal in this example, consider his other stacking effects such as getting a Headsh0t ( 6 -> 10.5% vs 10.2% additive) on top of a bonus of lets say x2.0 from Decepti0n (6 -> 18.4% vs 16.2% additive) and you can see where the numbers can keep adding up! Deathmark does not count as a "hit" vs unaware foes, allowing for the perfect setups from Decepti0n. You also cannot stack Deathmark, but rather just refresh it indefinitely as long as you keep landing Kunai within 8 seconds. Kunai are projectiles and can pass through targets if you activate B0re with them, allowing you to mark multiple foes. This also means they can be reflected back at Zer0 and end up with him being Deathmarked instead! Luckily you can shield or clank the Kunai in response.


That is plenty of time to go in and do some damage with your normals as well. Mixing the Deathmark in with his sword moves makes each slice all the more deadly, like his all-encompassing Jab. In neutral, he will take the sword in his left hand and slice from the left all the way to the right and behind him in a split second. This covers a straight line that hits pretty much anything standing next to him on either side for 3% and can be repeated with minimal delay as he sweeps back from behind to in front of him to repeatedly slice foes. This trait is shared by his Nair as he extends the sword out with a bit more reach and performs a 360* horizontal spin for 4%. This is a bit slower than jab, but has virtually no start or end lag as he simply spins with the sword. Both of his neutral attacks are bread and butter hit-confirms that are lightning fast and easily lead to his other normals, able to be canceled halfway through the swing before it reaches behind with jab's case, or on either end with Nair.

Ftilt is a common followup off of either (Nair obviously being after a short hopped approach) as he scoops his sword from the side upwards in an elegant arc for 4% and lag like Marth or Lucina's jabs. This will knock foes off the ground lightly at about an 80* angle which is perfect for continued juggles like Fair. Putting his other hand behind the hilt of the blade, he stabs forward forcefully for a long range linear hitbox dealing 6% and more horizontal knockback at the normal 45* angle with decent knockback. He then lingers with the sword for just a moment as he falls before going back to neutral, slicing foes for 2% before the move ends. His Bair is also a stabbing attack, but more forceful as he takes the sword out in front before stabbing behind himself with both hands for about 1/2 the range but a powerful 8% and medium-high 30* knockback. Unlike Fair he will then quickly put the sword back to a neutral position to forgo the lingering hit. Both options make for great stabbing finishers that are fantastic for getting Headsh0ts. Bair is obviously the go-to but requires more finesse than a Fair, so it is about risk/reward here for an aerial finisher. Nair ties in nicely here as it can be cancelled immediately into Fair, or if you wait until Zer0 turns, you can cancel the hit into Bair or a reverse Fair to hit confirm in either direction.

If you are looking to extend a combo rather than end one, you can follow up with an Utilt. Bringing the sword up over his head, he makes a circular cut in a short area above himself for 2% and just hit stun, and after he turns in place to make that cut he slices down in a crescent that covers overhead and down to his midsection for 4% and 45* knockback weakly away. This can be followed up by a Uair where he holds the sword upside down to do the motion of the crescent-slice in reverse to knock foes up at an 80* angle very weakly for 3% before spinning the sword back to neutral with no additional hitbox. Alternately, you can always try for a Dtilt where he raises the sword and spins slightly to stab out and downward at an angle. The sword is a hitbox for 5% that sends at a 0* semi-spike angle with weak/medium power and has a similar angle to Shulk's downward Fsmash, hitting low but not very. As you could imagine this will get easy headsh0ts on recovering or prone foes, as well as cause tech situations on foes falling down onto the outstretched blade as it lingers slightly longer than his other stabs. To send them falling, a Dair can do the trick as Zer0 looks down and makes a slice from 3'oclock to 7'oclock to cover the diagonal below himself. The move has a normal and reverse hit, with 3-6'oclock hitting for 2% and 0* knockback to cause the foe to merely fall in hitstun and 6-7'oclock hitting for 3% and sending behind himself at a 10* angle with weak knockback that can stuff recoveries. or send a foe behind him on stage. This has a quick start like most of his moves but some end lag as he re-adjusts the sword. Landing before the swing hits 5'oclock will auto-cancel however to make it a safe landing option.


Jab and Nair tie these slashes all together with their lightning fast 3-4 frame activation and cancellation properties. You can essentially add 4-5 frames and a hit of 3-4% to any of his normals as you confirm the slash into another move, even more if the initial hit was a critical! This trait is shared by his Dash Attack which has Zer0 run forward and perform a horizontal slash from right to left, being slower than either option but dealing 5% and still having on-hit cancel. This is why Nair/Dash Attack are also the moves Decepti0n's Dec0y will perform out of the gate, followed by the linked normals and aerials. It is natural to perform these cancels and for the purposes of Decepti0n linking Jab/Nair/Dash Attack will count the following attack as a Multi-hit and apply the bonus to both!

The flash of steel from your Digistruct Sword may be pretty and easy to combine, but you may also feel a little underwhelmed by the damage output. Luckily, that chaotic digital edge opens the world to a nasty Skill!


RISING SH0T
leaves those blue, digital wounds on foes where your Digistruct Sword has struck. Highlighting one hurtbox at a time depending on the first point of contact, the struck area will gain a blue overlay and some numbers here and there that float about to indicate the slice occurred. Further attacks with the sword will deal an additional 1% per hit if they strike the area again, and apply a mark to the next hurtbox in the way of the swing (Such as 1:Hand, 2: Hand-Arm, Etc). This added damage counts as a separate attack and will have other bonuses like Ambush applied simultaneously. After 3 strikes the affected area will become a Critical spot, and will be highlighted by B0re as well as obviously gain the Headsh0t bonuses. Attacks that clip and hit multiple sliced areas at once will apply +1% damage per intersection, making B0re very powerful when aligned correctly as you can stack the 1.1x multipliers! These multipliers will only affect the 1% added hit however, but still become powerful as say your projectiles pierce through multiple spots at once to deal 1*1.1 + 1*1.2 + 1*1.3, and so on, all on top of the Headsh0t and other bonuses. The Melee bonus of 1.05x applies to each target hit during B0re but does not stack. Furthermore, Decepti0n will only apply to the attack that makes or activates the wounds and not the wounds themselves, excluding the 1% hits from the special multiplier.


Unfortunately, these marks fade fast with only a lifetime of about 3 seconds each, and refresh for only 2 seconds with each additional hit. This means you will have to move like the wind in order to get Rising Sh0t's full potential, but it can be very well worth the effort when you combine your other damage focuses skills. Characters like Kirby will most likely never get multiple crit spots, but in exchange it is very easy to keep hitting their body over and over again to keep them under the main effect of Rising Sh0t.


You could alternately BE LIKE WATER and slow down your sword to incorporate his Actualizer SMG. This weapon is what he is seen holding alongside his sword at the top of the page, and is his go-to gun when he does not trade it and his sword for the Godfinger. Activated via Neutral Special, you simply must perform an attack with the Digistruct Sword and then press B to fire the Actualizer at the same angle the sword's attack would have hit. The SMG will fire 5 rounds of 1% damage each with no hit stun unless the foe is touching the barrel in which case it will multi-hit.


Upon a successful hit from the SMG, a red ! hologram will appear over Zer0's helmet, indicating the skill is active. As long as you have BLW running, you will gain a rhythmic bonus as you flow between ranged and melee attacks. Melee attacks will boost your next Ranged Attack by 1.2x damage, and Ranged Attacks will boost your next Melee Attack by 1.3x damage. These bonuses do not stack, but like Deathmark can be maintained as long as the flow is steady between Melee-Range-Melee. If you whiff, or break rhythm with two of the same hits in a row, you will drop BLW and lose the bonus until you land a Strike-SMG again as well as incur a slight time penalty as you quickly reload the Actualizer. Luckily the bullets fan out slightly with distance to give the shots a bit more utility as they travel over 2 platforms in distance, and they can each trigger Rising Sh0t hits though they do not penetrate multiple foes unless they happen to B0re. There is a sizeable window to use the Actualizer after a melee strike, but the Godfinger can be used as well if you delay a bit longer. Your Kunai also count as projectiles don't forget, which brings us to his formidable grab game:


DEATH BL0SS0M is a fitting title for the skill associated with Zer0's Grab. Having a fairly standard grab for human characters, Zer0 will do the usual pummel for 1% a pop as he knees the foe, being essentially his only non weapon move and unaffected by pretty much any skill. His Grab, Pummel and Decepti0n all do not trigger (or end) BLW or Rising Sh0t, but his options once he lands the grab will expand his game plan like an opening Blossom... of Death.


Each throw naturally combos a Digistruct Sword strike into a specialized Elemental Kunai. Starting with Fthrow, Zer0 ups the voltage on the standard knife as he deals a horizontal slice for 2% to knock the foe away into the air a slight distance before spinning around to toss two electrically charged Kunai that deal 1% each and paralyze the foe in place. This effect is identical to ZSS / Corrin Paralyzer blasts but with notable blue electrical auras as the two Kunai act like a taser, complete with a visible electric current between them. This makes for very easy follow ups like a Nair -> SMG to continue the BLW chain, or whatever you feel like. Sometimes you may even line up a Godfinger shot as they struggle to mash out of the stun, or even take advantage and set up Decepti0n as they expect you to run in and attack anyways!


Bthrow has Zer0 leap over his foe and stab them in the back for 4% (4.4 thanks to Ambush)and rip upward to send them a set distance of about 1.5 platforms away at a 40* angle. Following up on this, two fiery Kunai are thrown at the foe's back for a total of 3% (3.3%). After a moment these Kunai will each ignite for additional damage, dealing 3% (3.3%) each and hit-stun after a 30 frames. This throw can be especially effective with many targets surrounding you as with a proper B0re, the Kunai can pierce and attach to others as well! The added hits are nice, but the set distance does leave room to be desired which leads to why Uthrow may be favorable if you are looking for passive damage. Tossing the foe just above himself, Zer0 slashes their belly for 3% to send them directly upwards as underneath he spins and tosses up two corrosive Kunai for 2%. The slash itself sends the foe up for medium power that grows to high at later %s, but wont really kill. On impact, the Kunai embed themselves and begin releasing a corrosive cloud similar to the gas-ball item, only green. Contact with this cloud will deal damage equal to other poison effects in smash of about 3% a second. The Kunai will last 3 seconds, but clouds can linger on for 5 and cover an area the size of DK to poison others. Luckily Zer0's sneaking suit comes with a gas mask to take advantage of the obscuring green cloud with no ill effects of his own...


For the worst effects however, Dthrow is the throw of choice. Sidestepping then stabbing the foe in the back as seen above for 5% (5.5%), Zer0 then uses their back as a springboard to do a cool flip over them (pulling the sword out as he does) and tossing two slag Kunai down at the foe as they stumble forward. The two Kunai deal 1% each and no knockback, and neither does the throw! In fact, the whole thing may as well be an elaborate grab-break animation as both parties are left in a neutral state, except the guy who Zer0 stabbed is 5% closer to death and also now coated in a sickly purple aura. This slag effect will coat the enemy for a total of 8 seconds, just like Deathmark and has a similar effect of causing 1.1x more damage to be taken by the foe from any source. Like with Deathmark, this is additive so it applies before any other multiplier but to top it off it will also add 0.1 to all your other multipliers (except B0re) for the duration. So if you were to Deathmark a target when slagged, then hit them in the back while unaware you would be looking at the following:

Jab = 3 * (1.1 + (0.25+0.1)) = 3 * 1.45 = 4.35
Jab = 4.35 * ((1.1 + 0.1) + (0.1 + 0.1)) = 4.35 * 1.4 = 6.09

Getting nearly double the bang for your buck is incredibly worth the risk of having to start the neutral game over again. This seems to be the pattern for Zer0, as while the damage he can deal is tremendous, landing a finishing blow can be a challenge as he has to line up a critical alongside numerous damage bonuses in order to deal adequate knockback. His last few moves should alleviate this as we come to his Smash Attacks.

Fsmash is a basic yet devastating lunging stab with the Sword. Dealing 9-13% based on charge, the stab pushes Zer0 forward slightly to give it a bit more range overall than Marth and Lucina's Shield Breakers! On impact, foes will take some freeze frames before being sent at a 30* angle with knockback than can kill at around 180-170%. This is his laggiest smash as he draws the sword back and then after the stab does an elaborate spin to go back to neutral, but is also his most powerful and furthest reaching. Like all Digistruct Sword attacks, he can enter BLW and shoot the Actualizer at a 30* angle afterwards.

Usmash is a bit different in that it is more of a combo oriented smash, but can still provide useful power. Slashing upwards in a wide arc, Zer0 will scoop foes up lightly for 3-4%, then spin and stab upwards for 6-8% and decent enough vertical knockback that can KO at around 210-190%. The end lag leaves a bit of room to be desired, but the base damage and start up speed are very nice for his kit especially as the first swing always combo to the stab. BLW will shoot the Actualizer straight upwards. Dsmash is even more combo-oriented as Zer0 will initiate a flurry of swipes similar to Cloud's Side B or Metaknight's Jab to strike foes just in front of himself. This totals to 5 hits of 2-2.8% for a total of 10-14% with the last strike sending foes weakly away at low %, but still not enough to guarantee a direct followup. This can net a BLW strike as the Actualizer fires straight ahead like your Jab/Nair/Dash Attack, or grow enough to KO at around 240-230%. This does a lot of damage when you factor in your other abilities, especially Rising Sh0t. Like Usmash, the multi-hit nature allows you to create a mark and slice it,but it has more end lag as he spins the sword to neutral unless you opt for an Actualizer shot. The odd trade off between least powerful yet most damaging makes Dsmash a go-to when you aren't quite ready for a KO but are looking for a strong punish/combo finish.

Up B
pushes his Smashes even further with his powerful Execute technique! Taking a pose just like you see above in the picture as a brief start-up, Zer0 can then be aimed in any direction before shooting out like Fox's side B complete with after-images in his wake. After zooming about 1.75 platforms distance, Zer0 will perform one of his smash attacks based on the angle he was sent! Picturing a clock, 12-2 will send Zer0 more upwards and perform his Usmash, 2:01-4 will perform Fsmash, and 4:01-6 will perform Dsmash. This is mirrored if you go reverse as well, giving wide areas for U/Dsmash and narrow areas for Fsmash to either side. If done on the ground, Dsmash will slide a maximum of 1.25 platforms instead of the full 1.75 that Fsmash would. Fsmash and Usmash have their angles of knockback (and thus BLW shots) changed slightly based on the angle you travel, with straight horizontal/verticals remaining the same and gaining +/- 15* with angle.


Dsmash does not change angle making it more consistent as it is a bit trickier to manage, but arguably gains some of the most benefit from the Skills associated with Execute!

LIKE THE WIND is what occurs when Zer0 performs a moving Smash Attack via Execute. This skill will actually pre-charge your smash for you based on distance, and also activates if you perform sliding or pivot smashes but to a much smaller degree. As Zer0 moves while activating a smash, or during Execute, he is covered in the same auras when you charge a smash normally and even has the same penalty of taking 1.2x the damage and knockback if struck in this state. Every 0.25th of a platform he moves will charge a smash by 1/8th, so a full Execute distance will be an almost-charged smash upon hit while other options like Pivot, Dash Cancel or DACUS will still do more but notably less. Dsmash gets less from this on the ground, but an air-to-ground approach makes it very powerful as it is one of his few moves to be somewhat safe vs a shield. During Execute you can press B/A to end prematurely and perform the smash when/where you cancel as well for less reward.


RESURGANCE allows you to re-use Execute upon a successful, full-length use as long as you make contact with something. While normally an acceptable but still poor recovery option, if you manage to land a hit (with Dsmash being the easiest to do so with) you will not go into special fall at the end of the attack. Instead you refresh your use of UpB and can attack again. If you hit a wall or ledge from max distance you will also catch yourself and stab the surface, performing a wall jump similar to when you jump off your sword in your throws. From here you can UpB again but cannot snag the wall, though you can still wall jump normally and perform Execute if you hit a target. This can be double-edged as the foe can intercept and hit you hard as this skill only applies to max distance lunges.


KILLING BL0W applies to Smash Attacks that land on a Deathmarked enemy. On impact, the Deathmark will "shatter" to indicate that knockback has been added to the strike. Like Headsh0t, this will apply a 1.1x multiplier to knockback that can stack with Headsh0t as well if you land on a critical spot. the resulting 1.3x knockback on top of higher damage output is sure to send your target packing!


F0LL0WTHR0UGH is Zer0's final Skill, and fittingly enough should be mentioned after his finishers. Activating only upon KO'ing a foe (initiating the Red Lightning Flash), Zer0's face displays his trademark 0 for 8 seconds. During this time Zer0 will move slightly faster on the ground and in the air, receive 3% health for KO'ing the enemy and any other enemies during this time, and even has a 1.05x damage multiplier on all his attacks. Like with Deathmark and Slag, this effect is additive and cannot be stacked, rather refreshed per kill.


Dash Attack -> Bair activating F0ll0wthr0ugh


FINAL SMASH:


MANY MUST FALL is Zer0's final skill and final smash all rolled in one. Upon activation, Zer0 will send out a a wave of various Elemental Kunai and upon landing on the closest enemy target, will swap the match to a first person view of Zer0 as he enters Decepti0n for a spectacular montage of killing blows:


Each strike deals maximum Deception Bonus and you get to watch from Zer0's eyes as Mario and gang get sent flying off to the sunset as he makes his way through each target he hit with a Kunai.


PLAY STYLE

Zer0 is a master assassin and as such excels when taking on a single target. His precise execution tactics accompanied by his toolbox full of multiplying skills makes for quite the glass cannon who is difficult to master but rewarding once you do. That isn't to say he is a liability in free for all or team matches, in fact his ability to Deathmark can let everyone else draw their fire on somebody else... setting up quite the Ambush...

Precision is the name of the game here. You want to make sure every hit is thoughtfully placed and each move planned ahead as if constructing a deadly haiku. As while the damage Zer0 can amass is spectacular, you must come to terms with if you are not ahead of the foe mentally, physically Zer0 is actually very unsafe! His moves outside of smashes and the Godfinger are all pathetic at base, meaning they carry very little priority or shield stun at all making just rushing at foes a fruitless endeavor, and many attacks will simply beat his out head on which leads to an offstage situation. His lightning-fast moves help in swatting at foes, but past a certain distance he is dead meat unless he can lunge at a wall with Execute to activate Resurgence. Luckily once you win neutral you steamroll into damage stacking territory where your lightning fast Digistruct Sword attacks and Actualizer followups can start nailing the foe for 10's and 15's at a time without sacrificing frame data. Putting the foe in a panic may have them lash out only to realize too late that they have hit a Dec0y and then eat a super-boosted Godfinger or Execute lunge!

Zer0 is the thinking man's combo character, having precise, technical but highly rewarding setups and gameplay to lead into spectacular finishers such as a sniper shot to the head from across the screen for a ludicrous 60% or more!

Keep your mind at ease / the weaknesses will appear / and you will succeed.


EXTRA

Zer0 grants Kirby his helmet with a holographic Kirby face once swallowed. Kirby can activate Decepti0n, but instead of a clever rouse he just randomly starts doing his victory dance we all know and love as sort of a dead giveaway on his Dec0y. The rules are the same here for Kirby as they are for Zer0.

Zer0's taunts each come with an Emoticon and Haiku. The Emoticon will stay in place until replaced by another or 10 seconds have passed. Forward Taunt will place a ": )" on his visor as he does a little pose with the sword, saying "A most confused death / Dead before he even knew / Where I had struck from". If in a team match, this will change to a "<3" on his visor and he will say "I thank you for your / Kindness and sincerity. / Now, let's kill some stuff". Down Taunt has Zer0 do some cool swings with the sword as a "OWND" appears on his face, mocking the foe's critical area he says "Critical killing / Is an art unto itself / And I am Rembrandt". Finally, Up Taunt has Zer0 point towards his foe with the Actualizer before spinning it back to his hip and doing a quick sword pose. This places a "" on his visor,the Kanji for Victory as he proclaims "How hilarious / You just set off my trap card / Your death approaches".
Zer0's visor will also display other emotes such as "..." when stunned, "ZZZ" when put to sleep, "$" or "LOL" when earning kills outside smash attacks, and ": (" or "FML" when being hit.


This section is a listing of his damage multipliers and examples of how they interact.


Decepti0n grants up to a x3 multiplier on any attack except Rising Sh0t wounds. This multiplier comes after other skills.


Ambush causes attacks landed on a foe's back to deal 1.1x damage, as well as 1.1x damage to foes who have not targeted you recently / are attacking another entity. These can stack to be 1.2x.


Headsh0t grants a 1.2x multiplier to Damage and Knockback for hitting a critical location.


B0re will highlight critical spots after a moment in Decepti0n, as well as grant piercing bonus based on attack type. Striking a critical area with a projectile will pierce through the spot and deal 1.1x damage to the next target and can stack forever as long as you keep hitting crit spots on it's path. Melee strikes that pierce a crit spot will hit for 1.05x damage. Appearing at the 30 frame mark, the fastest B0re also has a 1.375 multiplier.


Deathmark applies an additive 1.25x multiplier to the base damage of any move that strikes the foe. This applies before other multipliers from skills.


Rising Sh0t applies wounds to the first hurtboxes struck by your sword. This will add an additional 1% bonus damage whenever you strike that hurtbox again for the duration, and further wounds will be applied as your sword passes through again (Hitting a hand will wound the hand, hitting it again will wound the hand and then the arm as well if they intersect). Hitting the same spot 3 times creates a new Critical Spot that is affected by both Headsh0t and B0re. The added 1% hit will be affected by skills just like your normal hits, but slightly differently:

For example, lets say you have 3 critical locations marked on a foe and you strike with Ftilt's arcing swing that will hit all 3. At the base level, you will deal 4% from Ftilt and 3 hits of 1% as each wound activates from the swing for a total of 7% dealt. If you hit the critical spot first however, you will deal 4.8% with Ftilt, and then 1.25% with the 1st wound. The next wounds in line will be affected by B0re and also critical damage, dealing 1.25 and 1.3 damage each. In total, a normally 4% attack now dealt 8.55%, and that's only with 3 wounds! If a projectile lined up in the same way, the hits would add up to 1.2 + 1.3 + 1.4 for 3.9% extra damage, and leave the target with a multiplier of 1.3x for the next hit.
Multi hit moves like Dsmash can only activate a wound once, but they can create new wounds. So if a multi hit strikes the same wound twice, it will only deal the bonus damage the first time unless it makes a new wound then strikes that new wound again.


Be Like Water applies a 1.2x bonus for your next ranged attack after a melee strike, and a 1.3x bonus for your next melee attack after a ranged strike. These stack with other bonuses and are static until you mess up the rhythm.


Dthrow applies Slag. Foes under this affect gain a 1.1x additive multiplier to damage taken that stacks with Deathmark, and all your skills (except B0re) gain a +0.1 to their multipliers for the duration.


Like The Wind applies a maximum of 1.35x multiplier to your smash attack done from Execute after traveling max distance. Charging a smash fully deals 1.4x damage across almost all normal smash characters.


Killing Bl0w applies a 1.1x multiplier to Smash Attack Knockback if an enemy is Deathmarked.


F0ll0wthr0ugh applies an additive 1.05x multiplier to all of Zer0's attacks for the duration.

TOTALS

Additive Multiplier:
([Damage] * (1.25 Deathmark + 0.1 Slag + 0.05 F0ll0wthr0ugh))

= Damage * 1.5

Skill Multiplier (Melee):
([Damage] * (1.1 Ambush + 0.1 Ambush + 0.2 Headsh0t + 0.3 Be Like Water)
= Damage * 1.7


Skill Multiplier (Range):
([Damage] * (1.1 Ambush + 0.1 Ambush + 0.2 Headsh0t + 0.2 Be Like Water)

= Damage * 1.6


Skill Multiplier (Melee + Slag):
(([Damage] * 1.1) * (1.2 Ambush + 0.2 Ambush + 0.3 Headsh0t + 0.4 Be Like Water)
= (Damage * 1.1) * 2.1


Skill Multiplier (Range + Slag):
(([Damage] * 1.1) * (1.2 Ambush + 0.2 Ambush + 0.3 Headsh0t + 0.3 Be Like Water)
= (Damage * 1.1) * 2


Skill Multiplier (Melee + Execute):
= Damage * 2.05
= (Damage * 1.1 Slag) * 2.45


Skill Multiplier (Melee + Fully Charged Smash):
= Damage * 2.1
= (Damage * 1.1 Slag) * 2.5


Skill Multiplier (Melee + Decepti0n):
= (Damage * 1.7) * 3
= ((Damage * 1.1 Slag) * 2.1) * 3


Skill Multiplier (Range + Decepti0n):
= (Damage * 1.6) * 3
= ((Damage * 1.1 Slag) * 2) * 3


Skill Multiplier (Melee + Decepti0n + Execute):
= (Damage * 2.05) * 3
= ((Damage * 1.1 Slag) * 2.45) * 3


Skill Multiplier (Melee + Decepti0n + Fully Charged Smash):
= (Damage * 2.1) * 3
= ((Damage * 1.1 Slag) * 2.5) * 3


B0RE & RISING SH0T
Practical B0re Total (Melee):
Head - Chest - Belly - Thigh - Leg - Foot
1.05 - 1.05 - 1.05 - 1.05 - 1.05 - 1.05


These bonuses only apply for Rising Sh0t wounds, and would have Headsh0t applied as well.
1.25 * 6 = 7.5 bonus damage

Each tick of damage also benefits from your other skills.
1.75 * 6 = 10.5 bonus damage

With Slag, the bonus grows much bigger:

(2.15 * 1.1) * 6 = 14.19 bonus damage
= 19.35 bonus damage with Slag, Deathmark and F0ll0wthr0ugh


Practical B0re Total (Range):
Head - Chest - Belly - Thigh - Leg - Foot
1.0 - 1.1 - 1.2 - 1.3 - 1.4 - 1.5


Each tick of damage also benefits from your other skills.

1.6 + 1.7 + 1.8 + 1.9 + 2.0 + 2.1
= 11.1 bonus damage

With Slag, the bonus grows much bigger:
(2.0 - 2.1 - 2.2 - 2.3 - 2.4 - 2.5) * 1.1 = 14.85 bonus damage
= 20.25 bonus damage with Slag, Deathmark and F0ll0wthr0ugh


This all assumes a perfect storm of circumstances that allow 6 critical spots being marked and sliced through at once don't forget. On average you can maybe maintain 2-3 critical marks.

The projectile in this example will exit this victim to deal 1.5x + any other multipliers on top of 1.375x - 3x damage from Decepti0n, and can continue on forever as long as you keep hitting B0RE spots. In a more controlled setting, lets say you simply enter Decepti0n and trigger a Headsh0t B0re chain against 7 other players who happen to be standing still in a row with the last portion of Godfinger as fast as possible:

12 * 1.2 = 14.4 * 1.375 = 19.8% to victim 1
19.8 * 1.1 = 21.78% to victim 2...
...

By the time it hits victim 7, the bullet will deal a massive 114.162% damage. A full x3 from Decepti0n would amount to an unimaginable 249.08%, and this is without other bonuses! Granted, these scenarios are "see a wild unicorn" unlikely due to how lucky you have to be to stack anything beyond 1-2 B0res, but an assassin can dream can't he?


COMMON NUMBERS
Here are some maxed out stats you can see without super-extra effort.


Godfinger's max hit + Deathmark + BLW + Ambush(Full) + Headsh0t = 22.5% (x3 = 67.5), Slag = 34.8% / 104.4%

Fsmash with full Execute + Deathmark + BLW + Ambush(full) + Headsh0t = 23.06% (x3 = 69.19%), Slag = 31.97% / 95.92%
 
Last edited:

FrozenRoy

Smash Lord
Joined
Apr 26, 2007
Messages
1,261
Location
Las Vegas, Nevada
Switch FC
SW-1325-2408-7513
"They who live by the wand shall die by my blade."

Anti-Mage

The monks of Turstarkuri watched the rugged valleys below their mountain monastery as wave after wave of invaders swept through the lower kingdoms. Ascetic and pragmatic, in their remote monastic eyrie they remained aloof from mundane strife, wrapped in meditation that knew no gods or elements of magic. Then came the Legion of the Dead God, crusaders with a sinister mandate to replace all local worship with their Unliving Lord's poisonous nihilosophy. From a landscape that had known nothing but blood and battle for a thousand years, they tore the souls and bones of countless fallen legions and pitched them against Turstarkuri. The monastery stood scarcely a fortnight against the assault, and the few monks who bothered to surface from their meditations believed the invaders were but demonic visions sent to distract them from meditation. They died where they sat on their silken cushions. Only one youth survived--a pilgrim who had come as an acolyte, seeking wisdom, but had yet to be admitted to the monastery. He watched in horror as the monks to whom he had served tea and nettles were first slaughtered, then raised to join the ranks of the Dead God's priesthood. With nothing but a few of Turstarkuri's prized dogmatic scrolls, he crept away to the comparative safety of other lands, swearing to obliterate not only the Dead God's magic users--but to put an end to magic altogether.

Anti-Mage is a hero from Defense of the Ancients 2, serving as a fast melee Agility Carry: Weak early, strong late, but Anti-Mage is a bit unique in that compared to other carries he spikes in power quicker, but not as hard, meaning that he sits at a bit of a midpoint. His Mana Break passive causes him to burn away the mana of enemies he attacks, dealing damage equal to 60% of the burnt amount. His active W ability, Blink, is a simple blink in the chosen direction, while his Spell Shield passive increases his resistance to magical damage. Finally, his Mana Void briefly stuns a target enemy and then causes a damaging explosion based on the target's missing mana. Simple to use but potentially deadly, Anti-Mage is a reasonable carry.


Anti-Statistics

Anti-Mage is not an especially large character and sits between Mario and Luigi in height, however, Anti-Mage is slightly wider than both and thus has an overall larger size. His speed is good, but not amazing, being a bit slower than Marth in that regard, however Anti-Mage's biggest issue is a rather dismal weight stat, below Zelda (Substitute for low 2 or 3 weight char later), and so Anti-Mage is easily knocked astray. His traction is on the below average side.

Aerially, Anti-Mage has a high aerial control stat, Agility Hero and all, but he also falls rather quickly while having a poor air speed, which puts him in an odd spot for many follow-ups. Both of Anti-Mage's jumps are above average, but nothing especially exciting, and he is lacking in Smash specialities.


Anti-Specials

Up Special: Blink

In his encounter with the Dead Gods, Anti-Mage learned the value of being elusive.

One of Anti-Mage's most important abilities, it is quite simple: In a flash of blue light, Anti-Mage teleports from his current location to whatever direction you choose, similiar to Mewtwo's Teleport, and just like that move Anti-Mage won't be hittable when he's blinking. Although this move only goes 3/4th the distance of Mewtwo's Teleport, it is notable in that it has EXTREMELY low lag on both ends: Anti-Mage can rather seamlessly weave in Blinks with his other attacks, allowing him a wide variety of combos, and with his high natural mobility it allows him a great amount of combo escapability and is his primary way to engage against campers. Anti-Mage does not enter helpless during this move and may use it repeatedly during the air, though there is a hard cap of 12 uses in case of some kind of bizarre system abuse after which Anti-Mage WILL fall into helpless.

All this sounds well and good, but such an insane tool cannot be cast for free, and so Anti-Mage much sacrifice his shield to do so: Every time Anti-Mage uses this ability, 1/5th of his shield's maximum health is consumed (Meaning it deals 1/5th of max as damage, even if you have less) and it is perfectly willing to break Anti-Mage's shield and leave him ripe for an attack. Shield regeneration also stops for one second after Anti-Mage comes out of Blink, keeping him from mitigating it too easily, and Anti-Mage has other moves can depend on his shield strength as well...and some actually get better the LESS shield he has, so this can at times become an advantage. Regardless while Anti-Mage is slippery he is also frail and often sacrifices a huge defensive component to get in assaults, leaving the aggressive warrior rather in puzzlement when he needs to get on the defensive.


Side Special: Mana Break

A modified technique of the Turstarkuri monks' peaceful ways is to turn magical energies on their owner.

Anti-Mage swings one of his two dual-blades forward, blue energy surrounding the tips of the blades and an ethereal blue sword trail following it, yet this rather quick movement doesn't deal but 10% damage and the knockback is below average, which can make the somewhat long ending lag feel disappointing. The fact the opponent is wreathed in an ethereal blue flame as they are sent flying, however, should help alleviate those concerns.

You see, this attack deals 5% damage to the foe's shield (regardless of if they shielded!) as well, and foes will then suffer "Mana Burn": Mana, in Smash, being represented by your shield. This deals 9% damage to the foe's shield over 4.5 seconds, 1% per half second, and them suffering the "Mana Burn" makes them susceptible to some of Anti-Mage's other attacks, which may have different properties if the foe's mana is burning. This move is particularly effective against shields, naturally, and so if the opponent shields the attack, these damage values are doubled to the shield (10% and then 18% over 4.5 seconds)...in addition to the base 10% damage. It can just wreck shields if shielded, is what I am saying. At the same time, this move's low range, average starting lag and somewhat long ending lag doesn't make it the easiest move to land and is predictable to just Blink into: A sidestep can counter this move easily if Anti-Mage overcommits with Blink.

Anti-Mage has other moves which deal shield damage without hitting shields, however usually the foe's shield cannot be broken unless they put it up (always staying at 1 HP). Mana Burn is the exception to this rule, as it WILL burn away the last of the foe's shield if it all they have, and thus this technique is important for pressure and the threat of a shield break.


Neutral Special: Mana Void

After bringing enemies to their knees, Anti-Mage punishes them for their use of the arcane arts.

The ends of both of Anti-Mage's dual-blades glow a bright blue hue, before bringing them forward in a pincer motion, which ultimately gives this move rather long starting lag. Enemies struck by this attack take long freeze frames along with Anti-Mage, ala a Wolf Forward Tilt, before a voiding explosion bursts from them, with the strength of the attack depending on how low the foe's shield is: If the foe has a full shield, this does a pathetic 1% damage and worthless hitstun with no knockback, not even being safe on hit due to the above average ending lag of this move. If the opponent's shield has 1 HP left, this move deals 44% damage and KOs at 60%, making it quite insane, while a more average case of a half dead shield deals 22% and KOs at 105%, making it very strong but not absurdly so. Against a foe in shield break, this is a OHKO on par with a Marth Final Smash and deals 50% damage: But shield breaks are pretty hard to come by...

This blast is 1/3rd the radius of a Smart Bomb explosion and may damage other enemies as well, although the calculations always use the shield of the foe who was hit. The explosion's duration is quite brief. An interesting fact about Mana Void is that since it is supposed to use their lack of mana against them, it is pathetic against shields, with very little shield damage, shieldstun or pushback...or, in other words, shielding is great against it and as such, Anti-Mage may wish to use the threat of it to bait out weak shields. This move has trouble breaking even extremely weak shields as it suffers massive damage reduction against them.

This is just if Anti-Mage taps the input, however. Holding the input causes Anti-Mage to touch himself with his blades, releasing the blast from himself at the cost of additional starting lag, which most importantly allows Anti-Mage to use his own shield to calculate the damage of this move: Blinking around and using your shield for other purposes allows Anti-Mage to power up one of his few KO moves, although it should be noted that the self-inflicted version of this move suffers from severely worse ending lag. This gives Anti-Mage flexibility in a strong KO move and allows him to build up power naturally with his assault, but it is extremely risky and requires Anti-Mage to set himself up by weakening his own defenses, which since he wants to weakens the foe's so much means trying to land the normal version can be better. It's a bit of a trump card, really.


Down Special: Spell Shield

Years of meditation and obsession with revenge have hardened Anti-Mage's skin against mystical opponents.

Anti-Mage closes his eyes in meditation and chants in a low key voice, blue energy surrounding his body, before opening his eyes and returning to a combat stance, content in the wonders of the world. This move has a rather long starting lag, above average ending lag, but there isn't really any "attack": Not yet anyway. After completing this move, however, Anti-Mage's skin will have a blue shine to it, which is only removed after death or another use of Spell Shield.

Upon using Down Special like this, he wlll grin and bring his fists together, causing the blue energy to shoot out close around him like a force field. This has little range, but deals 5% damage and a set Battlefield Platform of knockback: The attacks of foes that hit Anti-Mage and his energy field during this time will find their forces turned against them, taking half of the damage and 3/4ths of the knockback of their attack, essentially acting as a delayed counter, with the counter's long "lag" being taken before the ability can be used, but the usage actually having quick start-up and low ending lag, although the duration is also short. Like most counters, grabs go through it. This also functions as a good GTFO move regardless of countering and is one of Anti-Mage's only defensive options: Blinking into an opponent with a Spell Shield ready can be a very good tactic.

This move, however, does not come without cost: 1/3rd of Anti-Mage's MAXIMUM shield (meaning it can break your shield if you have less than 1/3rd!) is consumed when preparing the Spell Shield and Anti-Mage's shield regeneration is halved until he uses it, making it a risky proposition that enchances your defenses in one way and weakens them in another. Balance in all things, perhaps?


Anti-Smashes

Forward Smash: Manta Strike

Anti-Mage closes his eyes and rears his dual-blades back, before rushing forward and performing a dual slash with them on the first opponent he runs into, dealing 20%-25% damage but not especially great knockback, only KOing at 165%-130% due to a rather poor angle that maximizes DI and fall speed factors. This is fairly long range, about halfway between Wolf's Forward Smash and a Fox Illusion, with starting lag equal to Mario's Forward Smash, but pretty long ending lag: And Anti-Mage will slash even on dodging or shielding foes, of course, so...

When Anti-Mage dashes forward, it is with enough speed to leave an afterimage at the point he started the move. By hitting the A button at any point during this move's duration or ending lag, then Anti-Mage will blink to the afterimage (making it disappear) at the cost of 1/4th of his CURRENT shield (which means it won't break). Anti-Mage will continue any action he was in the middle of so, for example, if you used it halfway through the dash, then you'd continue the other half from the start, allowing you to double dash so to speak. If an opponent tries to block you quickly, then tapping A again can let you essentially stutter-step and catch them off guard, especially valuable for rolls, and Anti-Mage can also use this to space himself away from the foe while taking ending lag if quick enough. Of course, the ending lag is still quite long, and it is not an especially fast or strong move to throw out...


Down Smash: Battle Fury

Anti-Mage grips his dual-blades tightly and performs a circular strike around himself, a blue blur of energy trailing around them as he hits anyone around him for 18%-24% damage that KOs at 155%-120%, and working quite well as a coverage and GTFO move due to hitting all around Anti-Mage and pretty quick starting lag, although it does not have the range you might expect of a dual-blade strike and the ending lag is rather bad and thus it is pretty punishable.

The blue energy of this strike will be left behind as a trap after Anti-Mage uses this attack, albeit at the cost of 1/4th of his CURRENT shield, although it is for the most part harmless, with the width being from one edge of the attack's hitbox to the other, and a duration of 4 seconds. If anyone shields within this area, it will explode as a mana trap, dealing a rather potent 15%-18% and KOing at 180%-150%, and double damage to shields, making it one of Anti-Mage's better moves for actual shield cracking. At the same time, shielding means that one won't take damage, so the trap can also be used as a defensive option: Pull up your shield as someone tries to attack within it and send them flying away at the cost of massive self-shield damage!

Anti-Mage himself can take advantage of this with his own shield...or be pressured into it at inopportune times, of course, but proper Blink usage usually gives him a lot of outs if forced into that proverbial corner. Anti-Mage may have more difficulties if the foe uses it defensively, but Blink also allows Anti-Mage a lot of fakeouts with it, and the foe will often be at lower shield than Anti-Mage even with his costs due to mana burn and the like. A shield break can be worth the damage, since you can get off more than that on them, if they even hit you. Given Anti-Mage usually has advantages over foes with Blink and his anti-shield tools, it is a great trap.


Up Smash: Mana Tempest

Anti-Mage slashes one of his dual-blades up once and swiftly, sending out a purple wave projectile of energy, then does the same with the other right after, and then finally after a brief charge slashes them both above him, sending out a much larger wave of blue energy. Each small wave deals 6% damage and light upwards knockback, while the large blue wave deals 14%-19% damage and KOs at 150%-120%. The blades deal 8% damage and light upwards knockback for the first two hits and 16%-22% damage on the last hit, although only 175%-140% KO power on the knockback. The charging for this move is actually rather odd, as the Up Smash is only charged after the first two slashes, when Anti-Mage is holding both dual blades and has his eyes closed in meditation, and the first two slashes have elevated hitstun with little knockback, allowing Anti-Mage to partially charge the strike (partial charging increases damage incrementally for Anti-Mage).

The first two projectiles are rather thin in width and height, while the last projectile is thin in height (air dodging isn't too hard vs. it) but the width is about 3/4th of a Bowser. Anti-Mage can angle the slashes left or right to hit diagonally after each slash, allowing him a surprising ability to catch people, but since the wave projectiles are created above Anti-Mage it is basically impossible to hit grounded foes with them. This move gains power not only from charging, but from how LOW Anti-Mage's shield is: The less, the better, with the lowest possible shield making the waves deal 12%, have the width of the big wave and great hitstun along with being as wide as the big wave normally is, while the big wave deals 24%-29% damage and kOs at 100%-70% while being 1.15x Bowser's width. A more reasonable amount, say half your shield, has 9% damage on the smaller slashes, more modest width gains and lower hitstun increases, and the last hit just does 19%-24% damage that KOs at 125%-100%. The blades themselves never get powered up, just the projectile.

When combined with the move's fast start-up, this means it can be a shockingly quick KO move, but the ending lag on this move is extremely punishing and as such Anti-Mage cannot afford much to whiff it. Anti-Mage also pays up 1/4th of his CURRENT shield once the move is over in order to use it, like his other smashes. Anti-Mage can actually cancel this move after the first two slashes with a Blink, for as long as Anti-Mage holds his eyes shut and a bit before the hitbox comes out, which allows Anti-Mage to instead use the first two hits as a fun chance to start a combo and allows him to avoid the harsh ending lag in exchange for not having the killing blow and damage on the attack.


Anti-Standards

Jab: Slash Flurry

Anti-Mage's Jab has rather many options, but tapping A always gets you the same start: A very quick slash in front of him, similiar to the first hit of Pit's Jab, which deals 3% damage and almost no knockback. From there, Anti-Mage can either hold or tap A. Holding A will cause Anti-Mage to rapidly spin his dual-blades in front of him Pit style, grinding foes for 1% with good rapidity, and will end with a shove of the double blades upwards as a finisher strike, dealing 5% damage and minor knockback that is surprisingly upwards and thus can actually set up some nice shorthop play.

Tapping A instead has Anti-Mage go into a more traditional 3-hit Jab, with the next hit being a quick slash similiar to the first Jab hit with the other blade which deals 4%, and then finishing with a kick forwards that deals 7% damage and fairly good knockback, albeit knockback that won't kill until the absurd 444%. This is better for getting foes off your back and will generally do more damage than the rapid jab, but it has less combo ability and it doesn't always follow into itself as the foe goes up in damage.

Something interesting about this move is that Anti-Mage can use Blink during the multi-hit portion, or between each hit of the 3-hit Jab, giving Anti-Mage shocking pressure potential, especially off low-mid damage 3-hit Jabs. Anti-Mage will instantly go into the finisher/last hit of either of his jabs if he Blinks into the air, which can also allow a surprisingly fast strike, while otherwise Anti-Mage will be able to continue the multi-hitbox/Jab combo as normally if he stays on the ground or Blinks to a platform. Average land all around on this move.


Forward Tilt: Meditation Strike

Anti-Mage closes his eyes in contemplative meditation, taking a deep breath, and then strikes forward with both of his dual-blades after having focused his inner energy into them. This deals 9% damage and the knockback won't KO until 290%, which is quite disappointing as the move has pretty awkward lag that can be very much compared to Ike's Forward Tilt. The key to this move is the tip of the blades, which is a sweetspot, although this doesn't do anything by itself.

Rather, the sweetspot of this attack adds damage based on how low Anti-Mage's Shield is, with a maximum of 17% damage that KOs at 135% with 1 HP of shield left, potentially an absurdly strong tilt! Of course, that's a bit on the extreme of how low Anti-Mage will get his shield, and a more reasonable half-power shield will do 13% damage and KO at 185% instead, which is still pretty strong when keeping in mind Anti-Mage's mobility (and that Blink will power this move up by eating your shield). A rather odd trait of this move is that the sweetspot deals quite great shield damage the healthier Anti-Mage's shield, but goes down as the damage goes up, and at 1 shield HP this deals basically no damage or shieldstun to shields. So it can be both great and terrible to shield: Powerful versions of this attack are one of the more common ways for Anti-Mage to bait enemies into shielding.


Up Tilt: Crescent Slash

Anti-Mage performs a crescent slash above himself with one of his dual-blades, a move with pretty quick starting lag that deals 10% damage and decent upwards knockback, it is actually enough to KO at roughly 195%, with decently low ending lag. Although it feels like a combo launcher, natural combos are rather difficult to make with it, but Blink offers a lot of options for follow-ups and aggression due to the low ending lag of the move, and Anti-Mage can perform some powerful and deadly combos with a Blink involved, such as with Anti-Mage's Neutral Aerial, though these are rather rarely true combos. Later on, this serves as a decent KO option or way to try and knock opponents up and out due to the low lag and decent tilt-KO power.

Down Tilt: Root Breaker

Anti-Mage deftly slashes one of his dual-blades downwards in front of him, aiming to break his opponent's root and dealing 7% damage. The knockback on most of the blade is a light pop up, but the tip of the blade is a sweetspot that trips foes, and the blade range is just long enough Anti-Mage is rather difficult to hit with getup attacks. The lightning quick start-up of this move can make it quite easy to hit with if foes get within tripping range, especially due to this move being a great shield poke, but this move has pretty bad ending lag. It makes tech chasing rather awkward, since they can start rolling slightly before you can act out of it, so stuff like your Forward Smash or Blink are a lot more appropriate for tech chasing and options are a bit restricted.

Blink into a sweetspotted Down Tilt into a Blink tech chase is a lightning-fast thing Anti-Mage can setup with precise positioning and one of his better ways to gain advantage in the neutral game, but it is quite costly to Anti-Mage and limits his Blink combo game and options for a while as his shield regenerates, so it requires rather large commitment...and is pretty bad if you whiff.


Dash Attack: Leap Strike

Anti-Mage stops in place for a moment, before making a leap forward, slashing his dual-blades under him for 12% damage and backwards knockback that has a very low base but very high scaling, ultimately KOing at 165%. Anti-Mage will turn around as he lands for average ending lag, which means that at low damages he can potentially follow-up with aggression or a combo (up to low-mid percentages with a Blink), while at high damage percents he is well set up for an edge guard situation. The starting lag on this is a bit heavy, though, but Anti-Mage's sudden stop before leaping can be used to stop short and dodge attacks just barely before leaping at foes, which is situationally useful.

Anti-Aerials

Neutral Aerial: Serene Thrust

Anti-Mage thrusts a single dual-blade forward in a stabbing motion forward and slightly below himself, dealing 10% damage on initial strike and rather average knockback, KOing at 225%. This move, however, has sex kick properties to it, and a fairly long duration even for a sex kick, going down ultimately to half the damage and 1/3rd of the knockback by the end of the move. This is rather important, as Anti-Mage can actually Blink during the sex kick portion, allowing him to turn his body into almost a living projectile with how far he can teleport himself, and making it one of Anti-Mage's best combo tools. The starting lag is only a touch slower than average here, but the ending lag is fairly bad...this move does, however, have pretty low LANDING lag, and Anti-Mage can even Blink to the ground to have the hitbox out a moment before landing, allowing him a somewhat unique way to reduce his lag.

This is also a rather important tool in Anti-Mage's box for an important reason, specifically, his shorthop game and the long duration. This not only makes it one of his rare approach options without a Blink and one of his best moves against dodges, which is something Anti-Mage has a rather difficult time with for the most part.


Down Aerial: Half Moon Bow

Anti-Mage takes both of his dual-blades and slices them below him in a crescent-shaped arc, dealing 13% damage and spiking anyone that he hits with it, although the spike is not especially powerful and is more of a modest strength spike, maybe even a little below, so its killing/gimping potential is a bit low (although like most spikes, it can be a good gimp). This move's low ending lag instead makes it a rather interesting tool in Anti-Mage's aggressive, combo-based playstyle, as Anti-Mage can utilize the lower knockback of the spike to Blink after the foe downwards for further aggression, especially if close to the stage where Anti-Mage can either predict a tech-roll or punish failed techs. The starting lag is where this attack suffers weakness, as it is pretty long given the spike's strength.

Forward Aerial: Double Slash

Anti-Mage slashes close and forward with one of his dual-blades, before making a stronger, more hefty slash with the other with a spin. The first slash deals 4% damage and quite weak knockback, while the second slash deals 12% damage and has fairly strong launching power that can KO at 140%. While the two hits string into each other quite well at lower percents, the first hit will start to push foes just out of the range of the second strike, which means losing a lot of power and possibly getting punished by the bad ending lag. Blinking near mid percents also tends to put you a bit too far past the foe, due to the first hit's meager knockback, but when they are at high percents it will then combo into each other with a Blink, as Anti-Mage can Blink between both strikes. This means the ideal times to hit with this move are at low percentages and right about when the move can kill, as too far past that and they'll go too far for you to Blink to and get the killing blow in.

This move can also be a rather bizarre "approach", as Anti-Mage can threaten an approach by shorthopping the first hit of this and threatening to Blink on the foe, while not actually getting close himself. If he fastfalls after a shorthop, he'll land before the second strike comes out and thus take shorter landing lag, though fi the second hit goes off the landing lag is long. Of course, do this too often and you won't illict a reaction, and if you Blink in to get the 1-2 hit and they predict it or you whiff or whatnot, it is laggily punishable. Low starting lag.


Up Aerial: Psyche Strike

Anti-Mage breathes deeply and closes his eyes, before slashing both of his dual-blades upwards with a blue tint around the blade. This deals 9% damage and somewhat low upwards knockback, making it a decent juggling tool, since it has low starting lag and ending lag, although it only hits above Anti-Mage and the range is kinda bad for the him.

This move, however, gains totally new uses if you Blink, because this move has pretty dang good scaling with missing shield, every 1/4th of missing shield for Anti-Mage powers the damage up by 3% and the knockback rather significantly, maxing out at 21% damage and KOing at 90% if Anti-Mage has only 1 HP of shield, although that of course is rather difficult. What this means, though, is that Anti-Mage can often times juggle once or twice into a Blink Up Aerial, which then gains significant power and can lead Anti-Mage to a pretty fun way to KO foes!


Back Aerial: Power Slash

Anti-Mage takes one of his dual-blades and performs a powerful slash behind him, striking away foes for a rather whopping 15% damage and KOing them at 125%, making it a rather strong move and KO option. Anti-Mage naturally pays for this in lag, of course, especially in the quite long ending lag. The starting lag is also pretty long and overall makes this one of the most difficult moves in Anti-Mage's moveset to consistantly hit, although the reward is some of the best consistant power in Anti-Mage's moveset.

As Anti-Mage loses shield, his dual-blade will have a blue hue on it during this move, and it will extend forward as shield is lost, which deals damage and gives this move additional range, up to 1.75x the move's normal range when Anti-Mage's shield is about to break. The addition of range on one of Anti-Mage's lower range moves can help him land it or simply use it as a threat.


Anti-Throws

Grab: Holy Hands

Anti-Mage makes a swift grabbing motion forward with his hands, the movement deft and fluid despite his dual-blades owing to his monk training. This is a pretty fast grab but it has very poor range. Blinking in to try and get a grab on the foe is the best use for it offensively most likely, while a defensive grab can help alleviate range issues. In fact, Anti-Mage's throws gain a bonus if it perfect shielded a non-projectile attack right before the grab. This is usually pretty risky due to Anti-Mage constantly putting his shield low, but it offers more incentive to use one's shield and is a good reward to those with timing.

Pummel: Pressure Point Pound

Anti-Mage grips the foe tighter and exerts painful pressure on a sensitive pressure point in their body, dealing 1% damage at the speed of a somewhat fast 2% pummel. This however will also do 1% damage to the foe's shield, making it a nice bonus to his shield break game. It cannot break shields by itself though and will always leave them at 1 HP.

Forward Throw: Mantis Strike

Anti-Mage releases the foe for a brief moment, using a quick kick to keep them staggered, before stabbing the foe with the tip of both dual-blades for 9% damage and okay knockback that KOs at 200%. The knockback is honestly pretty awkward to follow-up on even with Blink, so this isn't a throw you can expect to aggress the foe with after use all that well. It has decent space gaining properties though, I suppose.

If the opponent is mana burning from Mana Break, then Anti-Mage will hold the tip of the dual-blades in the opponent for a moment and the blue, mana burning energy will coalsece on the foe and blast them off along with the dual-blades, dealing the full damage that the Mana Burn would do to the foe as actual damage and increasing this move's knockback. If you managed to grab someone before even one tick of the Mana Burn had gone, then that would add 9% damage to the move and make it kO at 140%, making it a pretty sweet KO move and the highest damaging (18%) throw in the game. Mana Burned foes will want to pay attention to Anti-Mage trying to land this on them, although the threat level diminishes somewhat quickly due to the fast rate of the Mana Burn, so Anti-Mage will want to be proactive when trying to maximize this move. This, naturally, ends mana burn.

When perfect shielding a move, Anti-Mage will spin the foe instead of kicking them and then stab them while throwing them away, making the momentum of their attack transfer to them, which acts as a sort of psuedo-counter, adding half of the perfect shielded attack's damage and knockback to the attack. This can stack with the Mana Burn effect if the foe is Mana Burning at the same time, potentially making this one of Anti-Mage's most deadly abilities, but not only does it require good setup to pull off, but it is pretty risky with how Anti-Mage will bring his shield low, and he is reliant on the opponent's strong attacks to make this more than a little power boost.


Back Throw: Siphon

Anti-Mage thrusts a single palm into the foe's midsection and pulls them behind him with a burst of strength, slamming them into the ground behind him and sending them flying for 11% damage but rather okay knockback, KOing at 190%. The knockback is fairly low to the ground. The angle can make follow-ups better, but the knockback isn't really ideal for it.

If the foe is mana burning, then Anti-Mage will instead begin to siphon it into himself, ceasing the mana burn effect but taking in triple the remaining damage it would do as "temporary" shield health, meaning a maximum of 27 HP if you Siphoned a foe right after applying the Mana Burn. This temporary shield health does not regenerate and constantly decays with time at the normal rate a shield is held, does not count towards Anti-Mage's shield health for damaging attacks (meaning it won't make them weaker), and is not used as a cost for Anti-Mage's attacks. It is, however, the first part of shield that is used when Anti-Mage shields and will prevent shieldbreaks while it exists. One can tell if Anti-Mage has temporary shield because the outside of the bubble will appear blue, equal to the amount of temporary shield. Temporary shield is always used first when, say, shielding an attack. Just like F-Throw, this ends the Mana Burn.

Similiar to the Forward Throw, when perfect shielding an attack, Anti-Mage will siphon the kinetic energy of the attack off like mana, adding temporary health to his shield equal to twice the damage the attack would do. Combined with a Mana Burn, Anti-Mage can potentially land a significant cushion on his shield that allows him to be significantly more reckless with his Blink and Smashes, as it gives him protection for if he fails, needs to be defensive or what have you. Just like the Forward Throw though, this relies on being aggressive with your Mana Burn or catching strong opponent moves, since doing this to...say...a Jab isn't gonna help you much.


Up Throw: Gravi-Strike

Anti-Mage lifts the opponent upwards and slashes them with one of his dual-blades, similiar to Link's Up Throw in animation, sending opponents up with a strong base but low scaling and 8% damage. The high base makes this pretty crappy for follow-ups, but it does mean that opponents get the heck off of Anti-Mage, and with a Blink you can swiftly make incredible distance if you have too.

Anti-Mage's blade will flash blue if he strikes a foe under Mana Burn, signifying that he's mucked up their mana, causing the energy to radiate out from them and slow their fall, making them fall rather significantly slower. This is useful for if Anti-Mage wishes to follow-up on this move and is particularly useful with the second effect of this move that occurs when Anti-Mage powershields, which is that Anti-Mage will actually lower this move's knockback by half of the knockback of the move that Anti-Mage perfect shields, using it as a stopper for the movement of the normal move. This means that Anti-Mage can actually make this a rather wicked combo throw with some effort and sometimes a Blink due to the nearly non-existant scaling.


Down Throw: Mana Burst

Anti-Mage harshly throws the foe to the ground and raises one of his dual-blades like an executioner, bringing it down on them for 14% damage and knockback that is, by default, upwards and forwards, however it is EXTREMELY DI-able and foes can practically choose the direction they DI. While the knockback is light enough to offer Anti-Mage some decent aggressive options, he generally needs to do some DI reading and prediction to not end up making a fool of himself, especially if he wants to Blink at the earliest he can (which will have the foe having hardly taken any knockback yet). This also stops being such a good tool for such at mid percentages, but remains Anti-Mage's most consistant damage dealing throw.

If the foe is suffering Mana Burn, then the burning blue effect will collect on the area of the foe that Anti-Mage executed (the neck for most human characters and the like), slowly getting darker with time. This signifies that it is getting ready to burst and, at the end of Mana Burn's normal duration, it explodes! The force it explodes with is a bit inverse to some of Anti-Mage's other moves, dealing more damage the healthier the foe's shield is (it feeds off of their mana!): If they have a fully healthy shield, this does a stunning 20% damage and KOs off the top at 110%! If they have, say, 1 HP of shield though, this move deals a mere 1% damage and a flinch. An average, half strength shield will deal 10% and KO at 190%. The shield damage in this move is rather uniquely "fixed", always dealing 1/5th of a shield's maximum health in damage if shielded. Mana Burn, of course, stops during this.

A perfect shield allows Anti-Mage to add the kinetic force of the foe's attack to his own, although it will not add to the explosion's power: Instead, the damage and shieldpush of the attack is added to its fixed shield damage, potentially making it extremely potent to defend by shielding. It should be noted the Mana Burst's duration is whatever is left of the Mana Burn. this means that unlike Forward Throw and Back Throw, you want to do this LATE in the Mana Burn's life. In fact, doing it near the end can make a Mana Burst that requires almost instant reactions to avoid! Pretty slick.
 

Tocaraca2

Smash Ace
Joined
Feb 22, 2015
Messages
557
Location
Wokingham
Great point Dr. Slavic, out of the two mediocre sets I made this contest Hoopa and Mashtooth, one was out of passion and one was because I felt obliged to do it, even if they both sucked the former had alot more feeling and effort put into it while the latter was just rushed so I could have something for the Iron Mymer.

Also if you think of a really cool playstyle but don't know a character who would fit the role, don't deliberately research the internet on a random character from a series you barely know and slap the playstyle on them, It's often best to choose a character you like and shape the moveset around their personality. That's not to say playstyle ideas are awful, if you really like the concept you may eventually be able to apply it someday or if you don't feel like waiting simply make an OC to fit that playstyle, after all it's hard to hate your own creations.

Even if it is simple we need a reminder that it's best we work on what we want, when we want in mym, or else the whole contest is a dull experience for all.
OK I know the quoted post is from MYM 17 (I was on there looking at earlier plans for my mutant creatures sets), but I wanted to reply to it. Why did you rush a set to have something for the Iron MYMer if you weren't enjoying making the set? That kind of contradicts the rest of your comment.
 

FrozenRoy

Smash Lord
Joined
Apr 26, 2007
Messages
1,261
Location
Las Vegas, Nevada
Switch FC
SW-1325-2408-7513
J0E SET

Zer0 is a set I found quite fascinating. The idea of a set with a multitude of smaller mechanics that combine together to make a strong playstyle of simple yet strong attacks around it isn't really something seen often in Make Your Move and is an approach I'd be fascinated to see you utilize again in the future (more Borderlands sets in the future, mayhaps?). The presentation itself is also rather fascinating in that regard, most sets don't go for the paragraphical style that Zer0 presents here and the coloring and font help with the feel (it actually reminds me of what I was hoping to do with Sealsdramon's organization). For the most part, I feel that Zer0's paragraphical style works for the set quite well and feels like it keeps it flowing throughout.

Of course, such a set could not function unless it has strong mechanics in place...which I feel Zer0 accomplishes quite admirably. Be Like Water in particular is a favorite of mine and an idea I've thought of implementing at various times before, where Zer0 gets bonus damage by seamlessly flowing between his ranged and melee attacks, it in many ways reminds me of Majora's Sawtooth and Squarewave set from MYM13. Speaking of MYM13, B0re reminds me of a much more streamlined and better version of Rose Lalonde's luck mechanic from back in the day. Zer0's Decepti0n ability also feels like one of the best uses of invisibility I've seen, with very little in the way of mindgames and more about Zer0 trying to set up the perfect kill and strike from the shadows, and things like the Deathmark interaction with Dec0y are swell as well. The Specials in this set are overall very nice and I was especially impressed with Up Special, from which I expected little due to being saved so late and the general recovery input.

The moveset can be a bit weak until one considers Rising Sh0t, making its appearance feel more impactful as well, although I do wonder if the Godfinger can be potentially too strong, but then again it is also pretty laggy and requires a lot of distance that allows reactions. Sufficient counterplay is, I feel, offered. Zer0's grab feels like one of the better JOE grabs in a while, although I feel that it should be specified F-Throw cannot infinite due to Paralyzer mechanics (+ SSB4 grab mechanics). This set's melee to me is actually fairly nice, the moves flow into each other well and very few inputs are flatout wasted, especially with the changes to BAir/FAir and Jab/NAir to make them more different from each other while retaining the original usage. They are fairly basic, but basic =/= bad, and Zer0's huge amount of mechanics give them rather inherent interest. It is also rather important because it feels like Zer0 has a rather large difficulty curve due to the difficulties in damage racking without knowing all he can do. Too complex of attacks would have ruined it.

I will say I feel you had a bit more complexity points you could use up though, so to speak, and that I would have considered making the Smashes have a bit more complexity to them. My initial thought is perhaps giving them a special bonus if they come out of a Be Like Water multiplier, for example adding an Iajutsu-style draw sweetspot at the start of Forward Smash when it gains the Be Like Water multiplier, which may have added a bit more interactivity. I also feel the set's balance is rather difficult to ascertain with all the math, although the collapse tags at the end of the set helped with this. I don't think I have much about the set to complain about though, honestly.

A final compliment I'll give is that I quite loved the characterization of the set, as I felt like I got Zer0's personality quite a bit despite the fact that many of the move descriptions are to the point. A thinking man's c0mb0 character indeed. Certainly a worthy addition to your collection, J0E, and a contender for my favorite set of yours. I certainly hope you do some non-Pokemon sets in the future like this as well: Your Pokesets are good, but you often seem to come up with something out there when you go outside it (even Axton's turret wasn't exactly a common idea).

Mad Dummy Comment, Mad Dummy Comment! MAD DUMMY COMMENT!!

Mad Dummy's largest issue is one that you have already heard and yet I feel I must echo it: Mad Dummy's writing style is rather poor (although I feel it is not the worst in the contest: That'd be the next set I comment) and makes it a bit of an unenjoyable slog to get through. I feel like what makes it somewhat more tolerable is that you treat Mad Dummy like the joke character that it is and thus add in some humor, which helps distract the reader and lighten the mood. To be most specific with my writing criticism...one, you have a habit of not consistantly describing the dummies and mixing up the terms plus some awkward it uses, which makes it really easy to get lost reading it or otherwise feel off. And two, you struggle to describe Mad Dummy's body type during moves (most prominently aerials), which makes them more confusing or dense than they should be and thus hard to get through.

I will give the writing props on the humor though and say it added to the set. The intro I liked notably.

Once you bite into the set however it is decently nice. The use of projectile platform Dummy minions, which to me feels Alice-esque in a way, creates a fun Bullet Hell scenario that harkens back to the Undertale game engine and has a few little unique quirks about it, with some fun interactions on the standards, some fun with the body shape on the aerials and some fun (if sometimes confusing) Smashes. I will say I felt the standards interactions at times felt a bit hard to utilize to me and dry, but they were good in effect and fun if they do work, the aerials didn't do it for me TOO much but the body stuff is kind of interesting once you understand it. This set's primary weakness is the grab game, which is utterly forgettable to me.

The dummies are fun with how the Magic Missile can be redirected, the Magic Shot works and what have you, and ultimately along with the fun I had in the standards and smashes propels the set to being above average despite the flaws. I do wonder, however, if the set is a bit underpowered, and I don't get a huge sense of playstyle in the aerials + standards. For me at least it is no Undyne, but it is still decently good, and if you can pump out a bunch of Mad Dummys with an Undyne or two then you're well on the track to some good finishes. I don't feel I had much to say on this set not already said, honestly.

Paper MariNO

Yes, I feel Paper Mario is a worse read than Mad Dummy. It might just be because the set is a lot worse, but it feels as dry as the paper it was made with. I had to read this set twice (I had previewed the set when it was essentially finished) and the second time was hard. So hard that Paper Mario was my last ranked set from the first week, as I could not stomache another read of it. Descriptions for many things are overly long, ESPECIALLY when Paper Mario's mechanic uses a set damage reduction, and often for simple and/or niche effects that could be described much more simply or just don't feel relevant. Paper Mario's extreme feast or famine balancing does not sit well with me and while some might say SSB4 being more feast or famine helps excuse it, I disagree. For one, it isn't a design descision I agree with, and for two, it is feast or famine in a much more artifical way than SSB4's. The third reason is because what Paper Mario DOES do is not worth the balance.

This set's primary usage is of paper copies of Paper Mario from Paper Jam, either placing them remotely for combos or keeping them with him to boost his attacks substantially and make him survivable. Paper Mario is extremely weak without his copies and extremely strong without them, and it feels too extreme to the point that Paper Mario's playstyle by default revolves around just running and trying to get copies. The Remote Copy mechanic is not interesting in how it is executed and ultimately comes off as a cheap photocopy of Triforce Heroes' much superior combo game, which had far more nuance, balance and player skill involved. The super attacks from keeping copies with you doesn't often amount to more than a generic strength boost to finish off your foe after combo-ing them. And if you failed to combo them, you have...some horribly generic other moves I guess? I suppose a 2-D set WOULD lack depth...

The way the partners are utilized in this set is sickening, although their idea is the most salvagable of this mess...but not for Paper Mario. Wrong character. The partners here are reduced to mere projectiles, although the Action Commands here (why doesn't Paper Mario have Action Commands...maybe that could have made it, I dunno, interesting?) are nice and I actually like Bombette's use, with Lakilester for some reason on Up Special. The exclusion of roughly half of the original Paper Mario partners is simply baffling, as I don't really see why they couldn't work, and you basically sidestepped all the most popular partners from the first game (Lady Bow, Parakarry and Watt). I assume this is for the TTYD costume swap? Not worth. Parakarry would have even made an excellent Up Special option (he could be Wings of Icarus-like recovery without a hitbox for when you need more recovery). Instead we get Goombario and Kooper, two of the most generic partners in the series who people pretty much don't remember. Considering you've enjoyed Custom Specials before, I am surprised you didn't make Custom Specials with different partners as options (For example a Goombario/Kooper/Bombette loadout, a Parakarry/Sushie/Lady Bow loadout, or even being able to mix and match ANY three partner combo. Up Special could be Lakilester, Parakarry etc). Remote Copy even feels like a perfect Custom Special of Copy.

Paper Mario is known for a few things. Jumping, of course: he IS Mario. Badges, which are not really easily put into a fighter and easy to excuse. Partners, I just went over. And hammering things, which is Mario's attack speciality in most any RPGs and came into prominence with Paper Mario. Despite that, this set needed hammer moves edited in just to look decent and does very little with them, and the bulk of the moveset feels utterly devoid of playstyle aside from "hit them into your lingering copy hitbox" and "SMASH THEM STROGLY". Instead of hammering, Paper Mario frequently instead turns into a Paper OC and begins using his paper physics to attack. While certainly possible for Paper Mario and I doubt that such a set wouldn't have, say, Up Tilt or so, it is too much in the set. This moveset has a lot of "love" put into it in terms of animation and the like, but it does not always think it through, the Superguard feels like a poor idea honestly. Crawl and Down Tilt apparently need to get marriage counselling, because despite Down Tilts being usable during a crawl the animations feel impossible to work together unless the Down Tilt gets added lag or the animation becomes horribly choppy. This moveset honestly feels like it should have jettisoned much of the love and just been Paper Jam Mario.

Paper Mario has had a "mixed reception", which in this case means "Anyone likes it?". Paper Mario is not the worst set in the contest, but it is one I greatly loathe. Moreso than, say, Geno or Isabelle. There is little salvagable in this set: Remote Copies COULD work if done very differently and partners could work if used with much more minor minion "characters". But the set's gameplay is bad, the flavor is bad, the writing is dreadful to go through, and on it goes. Lonk, Piplup and Excitebike all have better ideas and are better sets than Paper Mario.
 

JamietheAuraUser

Smash Lord
Joined
Jan 11, 2010
Messages
1,196
Location
somewhere west of Unova
Advance notes:
1. Unless specified otherwise, KO percents assume the target is Mario standing at the exact centre of Final Destination with Rage as a non-factor. Moves are also assumed to be totally fresh for the purpose of KO percents, but damage values are listed as they would be perceived in Training Mode (thus omitting the 1.05x damage increase for freshness). This naturally means that with ideal conditions these KO percents can be reduced significantly.
2. I'm very insistent on using "from" terminology in regards to KO percents if the target needs to be at the listed percent before the move connects. If a move is listed as KOing "at" a particular percent, assume that the listed percent is post-hit.
3. Any reference to Stage Builder Units (SBU) in this set refers to the Brawl stage builder, rather than SSB4.


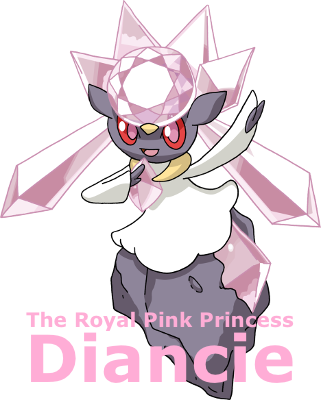
A sudden transformation of Carbink. Its pink, glimmering body is said to be the loveliest sight in the whole world, and its regal appearance has earned it the title "The Royal Pink Princess". It can instantly create many diamonds by compressing the carbon in the air between its hands.
(Before anyone complains, yes, the above is modified slightly from the exact wording in the original sources.)

The Jewel Pokémon Diancie is #719 in the National Pokédex. Despite technically being genderless, Diancie is commonly portrayed as female, including in the Pokémon anime where she is the princess of a hidden underground kingdom known as the Diamond Domain. In the anime, she has the ability to communicate via telepathic speech, despite not being a Psychic-type Pokémon.

Statistics

Weight: 3/10 (80 points)
Height: Mega Man (though she's not as wide due to her stance)
Walking Speed: Kirby
Running Speed: Falco
Aerial Speed: Pikachu
Ground Traction: Ike
Aerial Control: Mega Man
Ground Jump Height: Mega Man
Midair Jump Height: 80% of Ground Jump Height
Short Hop Height: 60% of Ground Jump Height
Fall Speed and Gravity: Mega Man
Fast-Fall Speed: Almost unnoticeably slower than Marth. That is, her fast-fall speed is only 1.4x her normal max fall speed instead of the standard 1.6x, a trait she shares with Ryu.

Movement abilities: None outside the default.

Statistically, Diancie doesn't really do much of anything well. She weighs only as much as Meta Knight, and has a high falling speed with a comparatively slow fast-fall speed, which at face value means she gets comboed forever and killed early while simultaneously having difficulty escaping juggles. Her movement speed is lacking both on the ground and in the air, and she has short jumps with a comparatively-tall short hop. One of the few aspects of this that can be interpreted as a positive is her weak ground traction. This makes pressuring her shield more difficult and increases the potency of her pivot tilts and running Up Smashes, at the cost of weakening her out-of-shield punish game and giving her next to no fox-trotting ability. Another plus to her movement stats is her top-tier aerial traction. Despite her low maximum air speed, she can swerve in the air like a champ, which helps her get some mileage out of going airborne despite how fast she falls.

Movement animations, etc.

For her walk, Diancie hops along the ground, seeing as she doesn't have legs. This means her hurtbox is constantly bouncing up and down as she walks, hardly an ideal situation as far as projectiles are concerned, although it can potentially avoid some low-hitting attacks if the timing works out just right.

Her dash has her hover along the ground in a manner similar to Palutena, though she's nowhere near as fast and thus doesn't lean forward as much. Unlike her walk, she doesn't bounce up and down during this, so there's no chance of her floating over low hitboxes. The way she leans forward actually puts her at about 80% of her standing height, but does leave her a somewhat wider target overall.

Diancie's crouch isn't exactly much to write home about in terms of hurtbox shifting, which is probably to be expected given her build. She just lowers herself to be touching the ground, rather than floating ever-so-slightly above it, and does her best to dip her head low, putting her left arm up in a high block to cover her head defensively. It puts her at about 85% of her standing height, so it's really not great in that regard. It does have a redeeming feature, though. While crouching, Diancie has extremely light armour, about on par with Bowser's passive armour. It won't always do much for her, but it can at least deny Mega Man's lemons and sometimes cause rapid jabs to drop combo against her. And of course, it's in addition to the usual defensive benefits of crouch-cancelling.


Special Moves:


Side Special: Diamond Combination

First Movement: Rock Throw
With the initial input, Diancie holds out her left arm and clenches her hand into a fist, drawing carbon out of the air with a visible distortion effect to form a chunk of refined, but uncut, pink diamond that's about the size of Ryu's Hadouken. She then sharply throws it at high speed with her left hand, either forward on the ground or at a -30° angle forward and downward in the air, though either version can be angled up to ±30° by holding up or down on the Control Stick. If thrown straight forward from the ground, it will travel 2 Battlefield platforms before striking ground thanks to gravity, assuming a level surface. On impact with the ground, the diamond chunk sticks there. If the thrown diamond chunk strikes a foe, it'll deal 6% with weak downward knockback and immediately lose all horizontal momentum, but will not vanish and the hitbox will not end either, instead weakening to a mere 3% with very weak knockback at the Sakurai Angle (despite the change in damage output and knockback, it's still technically the same hitbox and won't hit the same foe twice). It will still stick to the ground if it hits ground after hitting an opponent. If used in the air, Diancie gains a slight amount of vertical momentum, in a manner similar to Brawl Marth's Dancing Blade.
The diamond chunk left stuck to the ground by Rock Throw has 15 HP and will be destroyed if it takes that much total damage, else it will disintegrate harmlessly into sparkling diamond shards after 12 seconds elapse. The diamond chunk behaves like an immovable character in terms of solidity, so it's possible to move through it but horizontal speed will be reduced when doing so. There's more to it than that, but that's for later.

After the initial Rock Throw attack, Diancie has multiple options, similarly to Marth's Dancing Blade. Press the Special button in conjunction with a direction on the Control Stick for different follow-ups, which will generally target the landing point of the Rock Throw diamond (or the position at which the Rock Throw diamond struck a target, if it landed offstage; follow-ups are impossible if the Rock Throw diamond goes offstage and does not hit a target). Exactly what follow-ups are available depends on whether the Rock Throw diamond landed onstage or not. Like the first attack in the sequence, the follow-up attacks give Diancie a slight burst of vertical momentum, making it slightly easier to complete a full Diamond Combination in the air.

Attacks in the Second Movement are, in most circumstances, not quite true combos out of Rock Throw, but they remain useful strings regardless.

Second Movement (Up): Rock Slide
Diancie thrusts her left arm into the air, instantly summoning a multitude of pink diamond chunks (eight of them, to be exact) into existence, accompanied by a heavy distortion effect. Each of the diamonds is about the size of one of a collapsed Unira item. The diamond chunks are lobbed in an arc to land in a 1.5 SBU radius spread around a point slightly behind the Rock Throw diamond's location (or the position at which it hit a target if it fell offstage). The arc is higher if this move is used on the ground than if it's used in the air. The diamonds thrown by this move will stick in the ground just like the one from Rock Throw. On hitting a foe during its arc, a Rock Slide diamond deals 2.5% with weak knockback at the Sakurai Angle, and unlike the Rock Throw projectile does not lose horizontal momentum at all. 20% damage maximum if all hits somehow connect. Including this move in a Diamond Combination shifts the targeted point of the next attack in the sequence back slightly.
Rock Slide diamonds that stick in the ground have 13 HP and are destroyed after taking that much total damage, or disintegrate harmlessly into sparkling diamond shards after 10 seconds elapse. Like the Rock Throw diamond, they behave like immovable characters in terms of solidity.

The long-duration barrage of Rock Slide is ideal for catching foes who think they're smart for trying to sidestep dodge the second hit of the Combination, and its area of effect is even great enough to catch some rolls, though characters with especially long rolls such as Little Mac are likely to escape anyway.

Second Movement (Neutral): Power Gem
Diancie draws her left arm across to the right side of her body as four translucent crystals of faintly-glowing pink energy form above her head. She then swipes her left arm across her body in a dramatic gesture, and the four crystals shoot forward in succession towards a point just past the Rock Throw diamond's location. Upon hitting either a foe or the ground, the energy crystals align themselves to form an inward-curving arc above the struck location. They will hover there for a maximum of 3 seconds before flickering out of existence. A Power Gem crystal deals 3% damage with slight knockback at a 0° angle, whether it is flying at a target or simply hovering in the air.

Power Gem serves as a good way to limit the mobility of a foe who thinks they can simply jump out of a Diamond Combination. The semi-spiking knockback can make it an effective gimping tool against characters with high gravity and/or weak recoveries, especially in combination with the potential to effectively close off a small area using a dome-shaped ceiling.

Second Movement (Down, Onstage Only): Rock Tomb
Diancie makes a sharp upwards gesture with her left arm. A trio of pointed spires of pink diamond extend out of the ground in a ring-like formation just past the Rock Throw diamond's position, all pointed inwards to the centre of the ring. The farthest spire is in the main stage area, with all the others being at least slightly in the foreground or background, so that only the tips are in the same z-axis position as the main stage. The tips of the spires, about 3/4s of a Stage Builder Unit above ground level, serve as one singular grab hitbox as they approach full extension (the centre of the hitbox is actually slightly lower than the tips, enabling Rock Tomb to grab shorter characters even if the spires intersect above their head, though characters like Kirby and Olimar can still crouch under it), impaling the foe for 9% damage and holding them in place (on human characters, the spires pin them at upper chest height). The foe can escape by mashing out with grab difficulty, and will be subject to an aerial grab release should they successfully do so. Integrating Rock Tomb into a Diamond Combination shifts the targeted point of the next attack in the sequence up slightly, for those attacks that can be shifted upwards.

The diamond spires stick around even after the foe mashes out, lingering for 5 seconds before harmlessly disintegrating into a multitude of tiny diamond shards. The spire that's in the main stage area will impede movement like other diamond chunks (but less so since it's thinner), but the other two will not. The spire that's in the main stage area has 10 HP and is destroyed after taking that much total damage.

Rock Tomb is ideal for snatching foes who think they can simply shield a Diamond Combination. It's best used at mid-high percents, however, as a foe who's only lightly damaged is likely to mash out and escape the Diamond Combination's finale.

Attacks in the Third Movement are frequently true combos out of the Second Movement, though it is somewhat percent-dependent as they tend to combo more reliably when Diancie and/or her foe are at higher percents.

Third Movement (Up, Onstage or Power Gem only): Dazzling Gleam
From whatever pose Diancie ended the Second Movement, she clenches her left hand into a fist as a muted pink light shines out from her enclosed palm. All the crystals placed by the current Diamond Combination (including both diamonds stuck in the ground and hovering Power Gem crystals) flash with a harsh pink light for a moment. Anyone within 1/4 of a Stage Builder Unit of one or more of the affected diamonds as they flash takes 12% and is launched straight up with strong base knockback and good knockback growth, possibly being KO'd starting at around 155%.

Dazzling Gleam serves as a solid emergency KO option for Diancie, should she have difficulty landing her other KO moves or simply be disinclined to engage the foe in close quarters at the moment.

Third Movement (Neutral, Onstage or Power Gem Only): Ancient Power
Diancie throws her right arm out to the side, and a barrage of seven diamond chunks fires out in sequence. They have a glowing pink outline and travel in a horizontal arc (through the foreground if facing right, or the background if facing left) towards the target point. They each deal 2% and flinching on hitting a target. Upon arriving at the target point, regardless of whether they hit anything or not, they begin a horizontal orbit with a 1 SBU radius around the target point. They remain an active hitbox while orbiting, and linger for 3.5 seconds before disintegrating harmlessly.

Finishing a Diamond Combination with Ancient Power is an excellent way to limit foes' horizontal movement. In conjunction with a Power Gem, Diancie can significantly limit a foe's movement options for a short time, leaving them vulnerable to follow-up attacks.

Third Movement (Down, Onstage Only): Earth Power
Diancie holds her left arm out, then curls her left hand into a fist and makes a downward slamming gesture. The ground in a 1.5 SBU diameter around the target point erupts with orange-and-brown energy and chunks of earthen debris, covering half an SBU into the air. This serves as a long-lasting hitbox dealing 10% and strong upwards knockback, frequently capable of KOing around 140%. Additionally, any diamond chunks stuck to the ground within the blast are detached from the ground and launched with radial knockback, but do not take damage. Rock Tomb spires are instead shattered, dealing 2% to foes and minions within 1/4 of an SBU of them but not damaging diamond chunks or items.

The Second Movement of Diamond Combination has significant endlag should Diancie choose not to cancel into the Third Movement, as with Marth's Dancing Blade. This makes it usually a better idea for Diancie to complete the full Diamond Combination than to not complete it. Rock Tomb, however, may be able to lead to other follow-ups than a Third Movement at especially high percents. Though, those percents are the same percents that usually lead to a KO if Diancie simply opts for Dazzling Gleam or Earth Power.

Diamond Combination's power is limited against an offstage foe because so many of the follow-ups rely on solid ground, but Rock Throw > Rock Slide or Rock Throw > Power Gem can still serve to gimp a foe.


Neutral Special: Moonblast

Upon this move being input, Diancie leans forward as a pink light grows in the large gem on her forehead. She stays this way, charging, until the input is pressed again or until the charging is cancelled by shielding, jumping, or dodging. The charge is storable with standard storable projectile mechanics, and reaching full charge takes about a second and a half. When the move is released, Diancie leans forward to fire a pink laser blast, similar in shape to a fully-charged Robo Beam and has identical range to it as well. Like the Robo Beam, Moonblast can be angled and will bounce off of a solid surface once if it strikes it at a sufficiently shallow angle. Charging the move does not significantly increase the width of the beam, but does increase its speed, and also increases the length of the beam's tail. It starts only about as long as a Falco laser and grows from there up to the length of an extended Thoron, and its speed scales about the same. The beam lengthens as it travels in a matter similar to a fully-charged Robo Beam until it reaches its maximum length based on its charge level, meaning Diancie doesn't have to channel it in the same way Robin must channel an extended Thoron and is instead free to act fairly quickly after firing. The beam is a piercing projectile dealing 4-14% damage depending on the level of charge and has high hitlag. The beam's damage is multiplied by 0.8x each time it strikes a hurtbox (so the first hit deals normal damage, the second deals 0.8x, the third 0.64x, the fourth 0.512x, etc).

Upon hitting a foe (or other damageable entity that can flinch, such as a cucco, or a minion or Assist Trophy belonging to a foe), a Moonblast beam impales the victim, holding them in place on the first frame of their hitstun animation for as long as the beam remains in contact with them. Because charging the beam increases the length of the beam's tail, it also increases the duration of the impale effect. Also of note is that hitting multiple foes with a single beam will allow the impalement to last longer as the hitlag comes into effect multiple times and stalls the beam's movement. When the beam leaves contact with the impaled foe, they'll be launched weakly at the Sakurai Angle; Moonblast is not a KO move. Moonblast will not impale a foe who is already the victim of an impalement effect, instead launching them immediately on contact. A foe also cannot be impaled by Moonblast for one full second after any other impalement effect they were the subject of has ended. Moonblast can impale a grabbed foe, but the foe will then gain grab immunity for the duration of the impalement effect and an additional one second afterward. Likewise, a foe can be grabbed out of a Moonblast impalement, but they will then gain impalement immunity for the duration of the grab and one second afterward. Moonblast can be blocked by a shield as normal, and will not impale a shielding foe. Only the arrow-shaped head of the beam has an active hitbox (even though the tail counts as part of the beam for purposes of its impalement effect as well as for purposes of reflectors, absorbers, Villager's Pocket, and the like), so it can be sidestep dodged.

Moonblast will also interact with the crystals left by Diamond Combination. Upon hitting a diamond chunk or Power Gem, including the floating diamond chunks left by Ancient Power, a Moonblast beam will experience hitlag as if it had struck a foe. The beam will then refract through the crystal, redirecting toward the nearest crystal it has not yet refracted through. If no such crystal exists within its remaining range, it will instead refract towards the nearest foe within its remaining range. If no such foe exists, it targets the nearest minion within its remaining range that is owned by an opposing player (including Assist Trophy characters and poké ball Pokémon that have hurtboxes or otherwise react to being attacked). If there aren't any minions in range either, it continues in the direction it was moving when it hit the crystal. A Moonblast beam can only interact with each individual crystal once; should its position intersect a crystal it has already interacted with, the beam will pass through as if the crystal was not there at all. Moonblast does not deal damage to crystals belonging to the user.

Obviously, Moonblast can't refract into the foreground or background, so it won't go in a ring all around a lingering Ancient Power. Instead, the beam will frequently end up bouncing back and forth between opposite sides of the ring of Ancient Power diamonds as they enter and exit the foreground until it either hits every diamond chunk in the ring or reaches the end of its range.

Moonblast interacts differently with the spire Rock Tomb leaves in the main stage area, as well. While the beam will still refract towards it like it would any other Diamond Combination crystal, upon striking a Rock Tomb spire the beam is lensed in such a way that it becomes a wide blast like the light of a flashlight, emanating from the Rock Tomb spire at an angle based on the direction the beam hit from (striking the "underside" of the spire causes it to aim at an upward diagonal, while hitting the "top" of the spire releases the blast at a downward diagonal). This blast covers a total distance equal to 1/4 the beam's remaining range, widening as it goes, and deals half the beam's normal damage. Instead of impaling the foe as the beam does, this refracted blast causes a paralysis effect, similar to the likes of Zero Suit Samus's Paralyzer. Its duration is most often quite a bit shorter than the impalement effect would have been, though unlike the beam's impalement this paralysis scales based on the foe's percentage.


Down Special: Style Switch: Stone Edge <> Shining Sword

When Diancie starts a match, her idle pose has her wielding a long, thick blade, made of chunks of unrefined pink diamond held together by pink Fairy-type energy, in her right hand. But with an input of Down Special, Diancie will take a moment to reform her weapon into a lithe, elegant sword of refined and cut pink diamond that glows with an inner light. With this change in weapon comes a change in the entirety of her ground and aerial kits with the exception of her Specials. Which is to say, Diancie has two movesets: a Stone Edge Style moveset, and a Shining Sword Style moveset, and she starts the match using Stone Edge Style. As far as the actual animation goes, Diancie holds her current weapon out in front of her (horizontally with both hands if using Stone Edge Style, or vertically with just her right hand if using Shining Sword Style), and closes her eyes as the air heavily distorts around her weapon and it deconstructs into diamond particles. Then, Diancie strikes a pose, ending in the other Style's startup position as the particles of diamond reform into the appropriate weapon and the distortion effect ends. Finally, Diancie opens her eyes and quickly returns to her idle pose. All in all, the animation takes 0.4 seconds to complete.

As Diancie opens her eyes, her body flashes steel-grey for an instant as she uses Iron Defence. For the short remainder of the animation after that point, as well as for the next 4 seconds after the animation ends, Diancie has a passive 5% Heavy Armour (her body maintains a very slight steel-grey tint while the armour is active, and flickers opaque steel-grey once again as the armour ends). On moves which already have damage-based Heavy Armour, 2.5% is added to the existing Heavy Armour's damage threshold. In addition, any attack which is not strong enough to bypass the Heavy Armour deals 1% less damage (so an attack that would deal 6% instead deals 5%), stacking with any other damage reduction effect present on other moves (as with Ryu's Focus Attack, the Heavy Armour checks against the attack's original damage value, not the modified value post-damage reduction). The Special button can be held during the move to cause Diancie to delay opening her eyes, simply standing in that pose as her whole body gains a steel-grey tint that starts almost transparent and slowly grows in opacity (upon release, the tint flashes to full opacity for an instant before vanishing). For every half second Diancie charges in this way, the duration of the Heavy Armour and accompanying damage reduction extends by 2 seconds, the Heavy Armour's damage threshold increases by 1.5%, and the damage reduction reduces damage by a further .5%, maxing out at one second of charge for 8 seconds of 8% Heavy Armour (moves which already have damage-based Heavy Armour add 4% to their Heavy Armour's damage threshold) with moves that fail to break through the armour dealing 2% less damage. The charge scaling is continuous as opposed to working in stages, which means that every frame of charge will add 4 frames to the duration, 1/20th of a percent to the Heavy Armour's damage threshold, and 1/60th of a percent to the strength of the damage reduction. While Iron Defence's buff is active (regardless of the level of charge), Diancie's knockback-based armour while crouching improves to the point that, generally speaking, a move must be strong enough to KO Diancie outright by launching her all the way over the blast line in order to cause knockback to her at all. The damage reduction also applies to Diancie's armour while she's crouching with this buff (the knockback calculation to determine whether an attack breaks her armour uses the attack's unmodified damage value, as with the percent-based Heavy Armour).

The Iron Defence buff granted by this move does not stack with itself, though using it a second time while the previous buff is still active will override the previous one if the new one is greater in duration than the previous one's remaining duration and is at least equal in armour threshold/damage reduction. The Heavy Armour from Iron Defence is not present while Diancie is asleep, dazed, buried, in hitstun, grabbed, in the process of being thrown, or otherwise incapacitated, though it is present while Diancie is waiting in a tripped or prone state or hanging from a ledge. The buff ends if Diancie is KO'd.

While ordinarily Diancie might be inclined to stick with a single Style for most of a match, the temporary armour and damage reduction upon switching Styles grants an inherent benefit in making the most of both Styles regardless of the matchup or other match conditions. Also unique to Diancie is that the same input counts separately on the Stale Moves queue between Styles; that is, Stone Edge Style FTilt is considered a distinct move from Shining Sword Style FTilt on the Stale Moves queue, and so on through all the other moves that change between Styles (Special Moves are not affected by this, even in those cases where they have different animations between Styles).

Idle animations:

Stone Edge Style:
Diancie's body is twisted to the right, though she remains facing forward. The Stone Edge sword in her right hand drags behind her, its tip touching the ground.
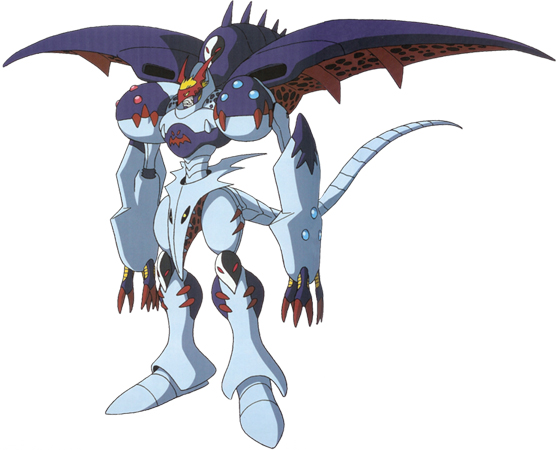
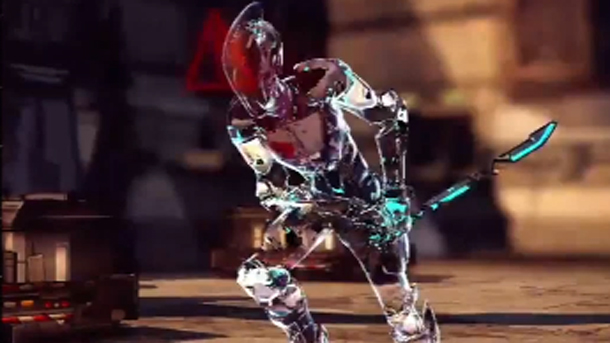
The Stone Edge blade itself is composed of chunks of unrefined pink diamond that aren't actually connected through direct physical contact, instead being held together by glowing pink Fairy-type energy. The blade is about as wide as the Buster Sword and the weapon including the hilt is as long as Diancie is tall. Strikes with the Stone Edge sword connect with a powerful slamming sound, like Ike's Ragnell. The sword somewhat resembles the image above, but recoloured appropriately.


Shining Sword Style:
Diancie's body is twisted to the left, though she remains facing forward. The elegant sword of pink diamond in her right hand is held out in front of her almost as if she's fencing.

The sword itself has a cross-guard, unlike the Stone Edge sword. It's a fair bit shorter than the Stone Edge blade; if Diancie were to hold it out vertically in front of her, the blade of the sword would measure from the very tip-top of Diancie's head to the lowest part of the frilled "shirt" that makes up Diancie's upper body. (Poor Diancie. Even she's not immune to Smash 4's weapon length-nerfing ways.) Strikes with the Shining Sword have a sharp sound to them similar to Meta Knight's Galaxia in Brawl.


Up Special: Diamond Storm

(Grounded)
With a fierce expression and a telepathic "Diamond…", Diancie twirls in place once as the air around her seems to distort heavily. Hold the Control Stick in a direction during this part of the animation to determine where Diancie aims. With a final telepathic cry of "STOOOORM!", Diancie releases the attack. From the end of the twirling animation until the last hitbox of the attack vanishes, Diancie has 18% Heavy Armour and receives 3% less damage from attacks that fail to break through the armour.

Control Stick Neutral/Down:
Diancie sharply raises her left arm (in Stone Edge Style) or spreads her arms upward (in Shining Sword Style), and the distortion in the air coalesces into a mass of pink diamond shards that swirl in a violent whirlwind around her, covering almost a full Stage Builder Unit to either side of her, as well as being slightly greater than Diancie herself in height. Deals a maximum of 9 hits over the course of about a second, with each hit dealing 2% damage. All hits cause very slight upward knockback, including the last hit. For the first eight hits, there's also a windbox at and just beyond the outer reaches of the attack that subtly pulls foes horizontally inward, it's weaker even than the wind effect on Ganondorf's Up Tilt. The final hit is instead accompanied by a windbox over the whole area of the attack that pushes horizontally away from Diancie with slightly greater power. All hits of this attack are technically projectiles, in the same way as Lucario's ranged Force Palm is a projectile: each individual hit can be reflected to change its ownership, causing it to hit Diancie instead, but this won't affect the remaining hits of the attack since Diancie has Heavy Armour during the move, and in all probability won't even damage Diancie due to the Heavy Armour's accompanying damage reduction. Endlag is low enough that the move will always be safe on hit, but not low enough to take advantage of the hitstun.

Control Stick Up:
Diancie sharply raises her left arm (in Stone Edge Style) or spreads her arms upward (in Shining Sword Style), simultaneously turning her gaze upward. The distortion in the air coalesces into a 1 Battlefield platform-wide mass of pink diamond shards around Diancie that then travels 2 Stage Builder Units straight up. Deals a maximum of 9 hits over the course of about a second, with each hit dealing 2% damage. All hits cause very slight upward knockback (though the final hit is marginally stronger), and the attack is accompanied by a windbox over its area of effect that causes a mid-weak upward push that's strongest near the base of the attack. The combined force of the windbox and the knockback can easily be used for various aerial follow-ups depending on the foe's percent, though they're often not guaranteed.

Control Stick Forward/Backward:
Diancie thrusts her left arm forward (in Stone Edge Style) or thrusts both arms forward with her blade braced against her left hand (in Shining Sword Style). If performed in the opposite direction Diancie is facing, she performs an extra half-rotation during the initial spin so that she faces the other direction. The distortion in the air coalesces into a 1 Battlefield platform-tall mass of pink diamond shards around Diancie that then travels 2 Stage Builder Units forward. Deals a maximum of 9 hits over the course of about a second, with each hit dealing 2% damage. All hits cause slight horizontal knockback away from Diancie, and the attack is accompanied by a windbox over its area of effect that causes a weak horizontal push that's strongest closer to Diancie. It serves as a fairly generic spacing tool due to its wide area and low endlag.

All directional variants of grounded Diamond Storm also increase the durability of diamond chunks and Power Gem crystals they hit due to the diamond shards integrating into them. Specifically, diamond chunks gain 1 HP per 1% damage the Diamond Storm would have dealt, and both diamond chunks and Power Gem crystals gain 0.1 seconds of duration per 1% damage the Diamond Storm would have dealt (their timers also do not decrease while they are being hit by Diamond Storm). This can exceed the original max HP and duration of affected diamond chunks/crystals.

(Aerial)

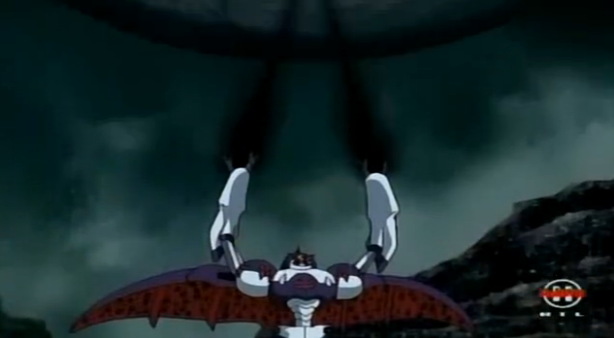
Diancie lets out a sudden telepathic cry of "Diamond STORM!" and holds her free hand out in front of her as she halts in midair completely. The air just in front of her hand distorts heavily as five pink diamond shards emerge and move to hover around Diancie. The point that the diamonds emerge from is a hitbox right as they appear. It deals 6% and weak, set upward knockback. As the diamond shards move into position, Diancie orients her body so that her head is in the direction the Control Stick is held (default: 30° angle forward and up), rather like the gif above. Then Diancie bursts straight in that same direction for 3.5 SBU, blasting through anyone in her path while the ring of diamond shards surrounding her deals 5 rapid hits of 2% damage, the first four of which drag the foe along with Diancie and the last of which weakly launches the foe a short distance in the opposite direction. Puts Diancie in helpless fall if she ends the move in the air. If she aims it downwards, she'll interrupt the move on impact by bouncing off the ground for some lag but no helpless fall. The move can also ledge snap at any point. Diancie has 11% Heavy Armour throughout the dash portion of the move and takes 1% less damage from attacks that fail to break through the armour, so a foe has to either go deep or hit hard in order to block her recovery.

Obvious practical applications for this move include string setups (but very few true combos) and Meteor Smashing your foe as you go for the ledge. Heck, you can even introduce the concept of Pineappling to stages other than Dream Land 64! The knockback isn't particularly powerful on any of the hits though, so you'll have to get crafty to gimp foes with this move.


Smashes and Dash Attacks:


Mechanics:

Diamond Resilience
Diancie's Smash Attacks and Dash Attack are all armoured, in both Stone Edge Style and Shining Sword Style, and this armour comes with accompanying damage reduction against attacks that fail to break through the armour. This percent-based Heavy Armour is strongest when it starts near the beginning of the animation (on the first frame after the charge window) and degrades as the animation progresses, down to half of its starting strength at the lowest, before vanishing completely the exact frame the attack's final hitbox is gone. The accompanying damage reduction's strength behaves similarly. For Smash Attacks, the strength of the Heavy Armour and damage reduction scales with charge, using the same 1.4x scaling as the Smash Attack's damage; this obviously doesn't apply to the Dash Attacks as they can't be charged.

Diamond Smash
Normally, Diancie's attacks can not hit or damage her own diamond chunks, and Smash Attacks and Dash Attacks hold to this. However, if the B button is held during one of her Smash Attacks/Dash Attacks, it gains the ability to hit her diamond chunks and Power Gem crystals, and will also gain a buff to reach and damage output using the shards of the diamond chunk(s)/crystal(s) it just destroyed. As a general rule, all Diamond Smash attacks also shatter Diancie's own weapon on the final hit, causing her to switch Styles. The Stone Edge Style's Diamond Smashes all shave at least a few frames off their endlag compared to their normal counterparts, as well.

The threat of a Diamond Smash forces foes to respect Diancie when she's standing amidst her own diamond chunks. She can use the increased space she controls in neutral to find time to set up an Iron Defence or charge Moonblast, or can hit a foe with a Diamond Smash to switch Styles and launch the foe away so that she can then switch back and gain an Iron Defence in the process.


Stone Edge Style:

FSmash:
Initial Heavy Armour strength: 24%
Initial Damage Reduction: 4%
Full Decay Heavy Armour strength: 12%
Full Decay Damage Reduction: 2%

Diancie braces herself as she leans back slightly, holding that position if she charges the attack, then leaps straight up to the height of her normal jump. She does a single frontflip during the course of the jump, then brings her hefty blade crashing down in front of her. Uncharged, it deals 19% with high base knockback at a 45° angle, and can KO from 95% at centre stage.

When performing this move, Diancie occasionally lets out a telepathic cry of "Va t'en!" (French equivalent of "Go away!" or "Get lost!")

This Smash Attack is slow. That much should be obvious from the description of its animation. In fact, it's almost as slow as Ike's Forward Smash. Unlike Ike's, however, this Smash Attack has very strong Heavy Armour and the leap upward can get Diancie out of the way of attacks, though of course it can also put her in the path of attacks if she isn't careful, leading to her eating extra damage. Though Diancie has plenty of armour and damage reduction to be used and abused, Diancie is still a lightweight with a high falling speed and mediocre recovery and should avoid tanking more hits than necessary.

By holding the B button, this Smash Attack gains the ability to strike diamond chunks, as well as Power Gem crystals even though they don't have HP. If it does so, a Diamond Smash triggers. All diamond chunks and Power Gem crystals it struck are destroyed, and Diancie's own weapon shatters on impact. The shards of the shattered diamonds and shattered weapon blast forth in a 90° spread of shrapnel that adds 0.5 SBU to the attack's horizontal and vertical range. This spread of shrapnel deals a single hit with the unmodified Smash Attack's damage and knockback (that is, 19% and KOing from 95% at centre stage), but deals only 2% damage to foes who are also hit by the sword hitbox. The shrapnel blast's reach increases by 0.1 SBU for each diamond chunk after the first that is used in the Diamond Smash, and its reach also scales with charge using the same scaling as Smash Attack damage output. The endlag animation changes, too: Diancie takes up her Shining Sword Style stance, and the diamond shards gather together to form the aforementioned Style's weapon in her hand.

DSmash:
Initial Heavy Armour strength: 22%
Initial Damage Reduction: 3.5%
Full Decay Heavy Armour strength: 11%
Full Decay Damage Reduction: 1.75%

Diancie turns slightly to the right and tenses her arms during startup and charge, then spins counterclockwise for 2 rotations, dragging the tip of her Stone Edge blade along the ground in a wide circle and causing it to release a shower of sparks. As the second rotation completes, Diancie swings the blade around to her front for the third time, this time lifting it so it becomes a diagonally-upward slash. The result of all this is that the move hits in front of Diancie three times and behind Diancie twice. Animation-wise, it's a little like if Shulk spun the other direction for his Down Smash. The first hit in front of Diancie deals 12% uncharged, the first hit behind Diancie deals 11% uncharged, the second hit in front of or behind Diancie deals 9% uncharged, and the third hit in front of Diancie deals 15% uncharged. The first four hits (two in front, two behind) send foes at the Sakurai Angle with fairly strong base knockback and decent knockback growth, with the first hit in front capable of KOing from around 135% uncharged and the others being proportionately weaker based on damage output, while the final hit in front sends foes at a 55° angle and can KO from around 115% uncharged. Due to the strong knockback, multiple hits will almost never connect against the same foe unless they're shielding or have Heavy/Super Armour.

Incidentally, a foe in front of Diancie who shields the first hit without perfect-shielding will be caught in shieldstun and forced to shield all three hits if they don't slide out due to shield-push and/or shield DI; if Down Smash is fresh and charged for at least 16 frames, this will result in an instant shield break if the foe doesn't have some sort of buff to shield durability (such as that granted by Shulk's Monado Shield).

If the last hit of this attack strikes a shield (whether it breaks the shield or not), Diancie lets out a telepathic cry of "Écrasé!" (French for "Crushed!" The reason for the incorrect grammar is that "Be crushed!" just doesn't have the same ring to it in French, where it translates as either "Aie écrasé!" or "Ayez écrasé!")

The most powerful hit of this Smash Attack is exceedingly difficult to land, as one might expect. While this does cover rolling opponents, the fact that the hits behind Diancie are weaker could be seen as a downside. As with Shulk's Down Smash, a sidestep dodge with perfect timing can allow the foe to evade two hits in a row, but this will almost certainly lead to the final hit smacking them in the face. Though the move has slightly more vertical coverage than Shulk's Down Smash, there's still just enough time between the hits for a foe to potentially dash in and hit Diancie. Not that this is generally a good idea, seeing as Diancie's Heavy Armour will still be very much active.

This Smash Attack's Diamond Smash version behaves somewhat unusually, in that the first two hits to the front and the first hit to the back cannot destroy diamond chunks, always leaving them with at least 1 HP. Each hit that connects with a diamond chunk/Power Gem crystal sucks up diamond shards to form a trail behind the blade. This trail of diamond shards extends 0.25 SBU beyond the reach of the blade itself and covers up to Diancie's waist height, with the range increasing by 0.1 SBU with each time a diamond chunk/Power Gem crystal is hit. It deals multiple slashing hits that pull the foe in, usually totaling a maximum of 4% damage before the next main hit of the attack connects and launches them out. (Though of course the foe can be an idiot and SDI outwards to maximize damage from the multihits while simultaneously ensuring they get hit by the strong third front hit of the attack instead of the weak second front/back hit.) If the third forward hit of the attack connects with a diamond chunk or Power Gem crystal, Diancie's weapon will shatter as will all diamond chunks/Power Gem crystals it connected with (regardless of their remaining HP), launching forward a 45° shrapnel blast of diamond shards covering 0.5 SBU beyond the reach of the actual blade (+0.1 SBU per diamond chunk/Power Gem shattered beyond the first, and then scaling with charge) that deals a single hit with the Smash Attack's unmodified damage and knockback (15% and KOing from 115% uncharged). The attack's normal hitbox also deals 2% more damage and slightly greater knockback, for 17% and KOing from 110% uncharged. The endlag animation changes too, with Diancie spinning backward a "step" and ending in her Shining Sword Style neutral stance as the diamond shards gather and reform into the Shining Sword in her hand. If the final hit does not connect with a diamond chunk or Power Gem crystal, however, the multihitting trail of diamond shards follows it as with the earlier hits instead, and it doesn't cause Diancie to switch Styles.


USmash:
Initial Heavy Armour strength: 20%
Initial Damage Reduction: 3%
Full Decay Heavy Armour strength: 10%
Full Decay Damage Reduction: 1.5%

Diancie braces herself to charge, then hops about her short-hop height upward while moving very slightly forward. As she ascends, she sharply lifts her Stone Edge blade upward in a crescent slash. She then performs a crescent slash overhead as she hits the apex of her jump and starts to descend again, and is then stuck in endlag until shortly after she lands. As one may expect, this covers in front of, above, and slightly behind Diancie and has quite a lot of reach. The first slash deals 7% damage with set knockback that will send foes into the second slash. The second slash deals 10% and knockback dependent on the foe's location relative to Diancie: foes within the first third of the arc are sent upward and can be KO'd from 125% uncharged, while foes within the later portion of the attack are launched diagonally up and behind Diancie and can be KO'd from around 120% near the edge.

The attack's Diamond Smash variant has the first hit (which like the DSmash's first hit cannot destroy diamond chunks, always leaving them with at least 1 HP) lift the diamond chunk(s) and/or Power Gem crystal(s) into the air, with each one serving as an additional hitbox dealing 2% damage and flinching. The second hit then shatters all diamond chunks and Power Gem crystals caught in the attack (regardless of remaining HP) along with the blade itself, launching a spread of shrapnel that covers the first 90° of the attack's arc with 0.5 SBU more range (+0.1 SBU per diamond chunk/Power Gem crystal beyond the first, and scaling with charge) and deals the hit's normal unmodified damage (10% uncharged) and radial knockback typically KOing from 125% uncharged. The attack's normal hitbox also causes an additional 2% damage and KOs 5% sooner. The attack's endlag animation changes too, with Diancie doing a full backflip off of the momentum from the second hit and landing in her Shining Sword Style stance as her weapon once again reforms in her hand.


Dash Attack:
Initial Heavy Armour strength: 22%
Initial Damage Reduction: 3.5%
Full Decay Heavy Armour strength: 11%
Full Decay Damage Reduction: 1.75%

Diancie spins clockwise for two full rotations, at first retaining some forward momentum but slowing down as the move continues. Her sword arm is curled in close to her body for half of the first rotation as the Stone Edge blade's inertia causes it to drag, then she suddenly swings the blade out and holds it out for the rest of the first rotation and all of the second one. The second rotation ends with the blade dipping as Diancie laggily halts its momentum, having to put all her effort into pulling back against the motion. The Stone Edge blade is a hitbox from when Diancie initially swings it out to right before it dips at the end of the second spin, meaning in total there are two hits in front of Diancie and two behind. The first hit to the front deals 6.5% with Autolink Angle knockback, then the first hit to the back deals 12% with solid base knockback and mediocre knockback growth at the Sakurai Angle, then the second hit to the front deals 7.5% with about the same knockback as the prior-mentioned back hit. At the end of the second rotation right before the blade starts to dip lower is a sourspot for 4% and knockback at the Sakurai Angle with just enough base knockback to be safe on hit and almost-nonexistent knockback growth. The two forward hits of this attack are a natural combo for a total of 14% damage.

The attack's Diamond Smash has Diancie's blade shatter on the first impact with one or more diamond chunks or Power Gem crystals, also shattering the aforementioned diamond chunks/crystals. The remainder of the attack is instead made with a storm of diamond shards swirling gradually upwards around Diancie, having 0.5 SBU more horizontal range than normal (+0.1 SBU per diamond chunk/Power Gem crystal beyond the first) and dealing a multitude of slashing hits that totals 9.5% damage (+2% damage per diamond chunk/Power Gem crystal beyond the first) if the Diamond Smash is initiated with the first hit to the front (so the attack's total damage is 16% if the first hit connects), and weak upward knockback that sets up nicely for Shining Sword Style aerials. Diancie does an additional half-rotation to end the move in her Shining Sword Style stance as the storm ends and the diamond shards gather to her hand to form the Shining Sword. This gives the attack significantly less endlag than it normally has.


Shining Sword Style:

FSmash:
Initial Heavy Armour strength: 24%
Initial Damage Reduction: 4%
Full Decay Heavy Armour strength: 12%
Full Decay Damage Reduction: 2%

Diancie holds her sword pointed upward in front of her, close to her body, while charging. Upon release, she draws the sword across to the left side of her body, then strikes with a swift horizontal slash. On hit, the slash deals 17% with decent base knockback and very good knockback growth, capable of KOing from around 130% uncharged. The move is comparable in some ways to Meta Knight's FSmash, though with even longer startup and longer reach. Like Meta Knight's FSmash, the endlag is quite short for a Smash Attack. Also like Meta Knight's FSmash, the hitbox lasts for only a single frame.

This FSmash is rather more useful as a pseudo-counter against mid-power hits than her Stone Edge Style FSmash, due to its less dramatic startup animation. The shorter endlag also effectively means that more of the move is covered by heavy armour, though the slightly shorter startup and significantly shorter hitbox duration also means the heavy armour decays more quickly.

The attack's Diamond Smash is simple: all diamond chunks and/or Power Gem crystals it hits shatter along with the blade itself, forming a 30° spread of shrapnel that travels 0.5 SBU beyond the normal reach of the attack (+0.1 SBU per diamond chunk/Power Gem crystal beyond the first, and scaling with charge) and deal the attack's normal unmodified damage (17% and KOing from 130% uncharged). The attack's normal hitbox also has boosted damage at 19% and KOing from 125% uncharged. The endlag animation changes as well, with Diancie carrying the swing's momentum all the way through to end in her Stone Edge Style stance, as the diamond shards then gather to her hand to reform into the Stone Edge blade.


DSmash:
Initial Heavy Armour strength: 18%
Initial Damage Reduction: 2.5%
Full Decay Heavy Armour strength: 9%
Full Decay Damage Reduction: 1.25%

Diancie points her sword forward, her elbow bent, for the charge animation. (If you look closely, you'll see her eyes are narrowed and her mouth twisted into a frown, her overall expression appearing both fierce and calculating.) Upon release, she pulls her sword in close to her body and then stabs forward. Then she spins to her right, slashing across her body to hit foes both in front of and behind her. The stab in front deals 4% with high hitlag and negligible knockback, then the slash to both sides deals 10% with middling base knockback and high knockback growth at a 30° angle behind Diancie, resulting in a total of 14% damage uncharged and KO potential from around 140% (145% if back hit only due to less damage dealt). The stab forward is followed immediately by the slash across in a single precise motion. The result of the immediate succession of the two hits combined with the first hit's high hitlag is that a foe struck by the stab appears to have been impaled on Diancie's sword and then tossed away behind her, even though no part of the attack is actually a grab at all. This attack leaves Diancie facing the opposite direction. The lag on this attack is incredibly front-loaded, with a third of a second of startup and only a quarter of a second of endlag.

The very short endlag on this attack makes it difficult to punish. Jumping over it and attacking from above is a viable tactic, but the timing to both avoid the heavy armour and not get shielded is not as lenient as a foe might like.

This attack's Diamond Smash can trigger only if the first hit connects with at least one diamond chunk/Power Gem crystal, and the first hit cannot destroy diamond chunks, always leaving them with at least 1 HP. When it does, the second hit shatters both all diamond chunks/Power Gem crystals it hit as well as the Shining Sword, creating a planar wave of diamond shards that reaches out 0.5 SBU (+0.1 SBU per diamond chunk/Power Gem crystal beyond the first, and scaling with charge) beyond the blade's reach on either side and covers a 30° spread. This wave of diamond shards deals a single hit of 10% damage and KOing from 140% (145% if first hit doesn't connect due to less overall damage dealt) uncharged. Meanwhile, the normal hitbox has its damage boosted to 12% and KOing from 135% (140% if first hit doesn't connect due to less overall damage dealt) uncharged.


USmash:
Initial Heavy Armour strength: 20%
Initial Damage Reduction: 3%
Full Decay Heavy Armour strength: 10%
Full Decay Damage Reduction: 1.5%

Diancie looks upward and draws her right arm in close to her body, pointing her sword upward. Then she performs a swift, forceful stab straight up. Unlike Marth's USmash, Diancie doesn't leave her sword held up, instead pulling it back in just as sharply as she stabbed it upward in the first place. The stab upwards deals 8% and strong upward knockback (good base, fairly normal growth), potentially capable of KOing from 135% with no rage from the main platform of Battlefield, and ripping the sword back out deals 9% and upward knockback that has less base knockback but more knockback growth, capable of KOing from around 120%. That is, of course, a total of 17% damage uncharged. Normally, despite the first hit's strong knockback the two hits are close enough together to combo into each other. However, the second hit doesn't cover quite the same area as the first, being the same overall size but very slightly lower, and there's also the (exceedingly rare) possibility that a foe may be launched so fast by the initial hit that the second fails to connect, though in they're guaranteed to be KO'd anyway in a scenario such as this.

The Diamond Smash version of this attack triggers only if the first hit connects with at least one diamond chunk or Power Gem crystal. The first hit cannot destroy a diamond chunk, always leaving it with at least 1 HP, while the second hit will destroy all diamond chunks/Power Gem crystals it hits regardless of their remaining HP, in addition to shattering the Shining Sword. This results in a downward 90° fan of diamond shrapnel starting just above Diancie's hand that travels up to 0.5 SBU (+0.1 SBU per diamond chunk/Power Gem crystal beyond the first, and scaling with charge) below ground level, stopping if it hits a floor or wall. Uncharged, it deals 9% damage and 80° angle knockback up and away from Diancie that can KO from around 125%. The normal hitbox is also boosted to 11% damage and knockback capable of KOing from around 115% uncharged. The endlag animation changes too, as Diancie's movement of ripping the sword out is more dramatic so that she ends in the Stone Edge Style neutral stance as diamond shards gather to her hand to form the Stone Edge blade.


Dash Attack:
Initial Heavy Armour strength: 22%
Initial Damage Reduction: 3.5%
Full Decay Heavy Armour strength: 11%
Full Decay Damage Reduction: 1.75%

Diancie twists to the left, drawing her weapon in, then performs a sharp forward thrust. She retains some amount of forward momentum even while drawing her weapon back, though she slows down almost to a stop as the startup continues, then gains another forward burst as she strikes. As is usual for Diancie, the startup on this move is punishable. Like the Shining Sword Style's Smash Attacks, the endlag is surprisingly low for the move's reach. The hitbox is thin and does not last long before Diancie quickly pulls away. It deals 12% and good base knockback with mediocre knockback growth at an 85° angle. As an armoured launcher, this provides a relatively safe way to start an aerial string or combo.

The Diamond Smash version of this move is relatively simple. The Shining Sword shatters on impact with the diamond chunk(s) and/or Power Gem crystal(s), also destroying the aforementioned diamond chunks/crystals. This produces a 45° spread of diamond shrapnel that travels 0.5 SBU (+0.1 SBU per diamond chunk/Power Gem crystal beyond the first) at a 45° angle upwards and forwards. This shrapnel spread deals the same damage and knockback as the unmodified attack's normal hitbox, while the attack's normal hitbox is boosted to deal 14% damage but retains similar knockback. The endlag animation changes to have Diancie make a sharp lifting motion upward, then follow the motion through until she ends in Stone Edge Style's neutral stance.


Standards:

Stone Edge Style:

Jab: Diancie's jab in Stone Edge Style is a two-hit combo.

A: Diancie swings the Stone Edge blade in a wide slash diagonally up from the lower right. It's a bit laggy for a jab, but has a surprising amount of horizontal and vertical reach. The area covered by the swing is as tall as Diancie herself, in fact. Deals 4% with weak, set knockback to lead into the second hit.

AA: Diancie follows up with a wide, diagonally-upward slash from the lower left. It hits the same area as the first jab, dealing 5% and knocking foes diagonally away with solid base knockback and surprisingly good knockback growth; it can KO from around the 185% range. There's enough of a gap between hits for a foe who shields the first one to shield-grab Diancie before the second one comes out if they're up close and personal with Diancie, but the endlag of the full combo is surprisingly low for a Stone Edge Style attack.


DTilt: Bulldoze
Diancie rapidly slams her pointed lower body against the ground like a jackhammer, creating rapid-fire earthshaking hitboxes around Diancie that hit half a Stage Builder Unit to either side of her. Each shockwave resembles a miniature version of the shockwaves from Donkey Kong's Hand Slap. Diancie "stomps" down 4 times, generating a shockwave each time. The first three shockwaves deal 1.5% with weak set downward knockback to hold the foe in place, then the final shockwave deals 2.5% and sends foes upward with very low base knockback and surprisingly high knockback growth. Total damage is 7%.

Of all of Diancie's attacks in Stone Edge Style, this is the quickest to come out (and it actually is quick, rather than just "quick by comparison") and has the shortest real endlag. However, its long-ish duration, ground-only hit area, and comparatively short reach make it punishable with aerials if the foe jumps over it, and since it's a tilt it lacks the heavy armour of her smashes and dash attacks. Still, its endlag is short enough that at low percents, Diancie can even combo into the Stone Edge Style jab from this move.


FTilt
Diancie performs a strong overhead chop. This arcing slash, visually similar to Link's FTilt, covers a greater area around Diancie than the aforementioned attack as her weapon's exaggerated size comes into play, with its arc covering 130° from above and behind Diancie to the ground in front of her. Its startup is shorter than that of Link's FTilt but its endlag is longer, with Diancie sweeping the blade along the ground to rest behind her as she returns to her neutral stance. It deals 12% regardless of where it hits in its arc, but the knockback is not so uniform. For the first 5° of its arc (realistically just the first frame the hitbox is out, but to my knowledge Smash does count subframes and slow motion is also a possibility), grounded foes will be launched straight up while airborne foes will be launched at a semi-spike angle forward. For the next 55° of its arc, foes will be launched at that same semi-spike angle regardless of whether they're grounded or airborne. For the remaining 70° of its arc, it causes knockback at the Sakurai Angle. The exact strength of the knockback is extremely similar regardless of how it hits, having solid base and enough growth to KO from around 150% with the Sakurai Angle hitbox on a grounded foe.

Though it is on the slow side in endlag, it's still useful due to its power and reach. Its wide area is great for shutting down approaches, but be careful when spacing with it as a narrow miss will get Diancie punished. Combined with Diancie's low traction, its wide arc gives it great utility out of pivot. A short dash into pivot FTilt is a very reasonable response to an aerial approach, especially near the ledge as Diancie can quickly turn the situation to her advantage.


UTilt
Diancie sweeps her Stone Edge blade up in an uppercut slash that covers a 90° arc. Its startup is not as bad as one might expect from Diancie, though its endlag is pretty punishable as Diancie lets gravity do the work in dropping her blade back to her side. It deals 13% and launches straight up with low base knockback and high knockback growth, capable of KOing from around 140% or comboing into a direct hit with Moonblast at low percents.


Shining Sword Style:

Jab: Diancie's jab in Shining Sword Style is a 3-hit combo.

A: Diancie pokes forward with her blade. A subtle twist of the wrist and extension of the arm results in a swift, simple stab. Its range isn't the absolute greatest ever for a swordfighter's jab, but it's still solid. It is by far the fastest option in her entire kit, coming out on frame 2. Deals 3% and flinching to lead into the next hit.

AA: After the initial stab, Diancie twists her arm and flicks her wrist to perform a precise cut upwards. The strike's restrained motion gives it little in the way of actual vertical reach, so it's not going to be serving as anti-air any time soon. Deals 3% and very weak, not-quite-set knockback that's generally upwards-ish but varies based on the foe's position relative to Diancie to ensure it leads into the next hit. Diancie can end the combo here if she wants and go for read-based follow-ups instead, as this attack's endlag isn't too punishing.

AAA: A twist of the wrist and a flick of the arm brings the blade back down in a precise vertical strike. Above the elbow, Diancie's arm barely moves at all. This final strike in the combo again deals 3%. It launches foes on a semi-spike trajectory with pretty decent base knockback, but low knockback growth that won't KO any time soon.


FTilt
Diancie twists backward her own character width, pulling back her blade to her right side. After holding that position for a moment, Diancie "steps" forward to her original position with a sudden stab for 10% and middling Sakurai Angle knockback. Diancie reverts to her normal idle pose almost immediately after landing the attack, only having to bend her arm and straighten her posture slightly to do so. If not overly staled, this attack is safe on shield, unless perfect-shielded or spaced as poorly as possible.

In particular, a fresh FTilt has a 1-frame advantage on shield drop. The consequences of this should be immediately apparent, such as the obvious utility as an amazing poking tool in neutral and ability to get free follow-ups if a foe gets greedy and tries to punish. Notable is that it loses this frame advantage with any amount of staling at all; if it's not fresh, it doesn't have advantage and is merely neutral. If it's staled enough to deal less than 8.75%, it's no longer neutral on shield and instead has a slight disadvantage.

The step back during startup also makes it yet another pseudo-counter in Diancie's arsenal, this one usable against more powerful melee attacks that would pierce the Heavy Armour of her Smashes and Dash Attacks. That same step back adds to this move's utility as a pivot tilt, as well. It's tempting to use this move often, but much of its utility vanishes if you do so.


UTilt
Diancie raises her right arm quickly and, with a flick of her wrist, slices upwards in a small arc that hits almost entirely above her, ending straight up above her. It deals 8% with mid-weak upwards knockback. It has the quickest startup of Diancie's Shining Sword Style tilts, though its endlag isn't quite as insanely short as the other tilts. It can combo into itself once or twice at low percents, especially against foes tall enough to be picked up from the ground by this attack. After that, though, may as well follow up by bouncing a Moonblast off of a diamond chunk to strike the foe. If they air dodge to evade the Moonblast, Diancie can punish with either another Up Tilt or an aerial attack.


DTilt
From her crouch, Diancie pulls her left arm back toward her "hip", twisting her whole body to put the maximum force into a low thrust of her blade. This thrust deals 9% and diagonally upward knockback for most of the blade, which can be useful for repositioning a foe or starting a short combo. The very tip of the blade as the thrust reaches full extension, however, is a sourspot dealing 5% and weak horizontal knockback with a very high chance to trip. It has noticeably more startup and endlag than, say, Marth's DTilt, but it's still a reasonably quick move.


Aerial Attacks:

Stone Edge Style:

NAir
Diancie flips in midair, swinging her blade in a full 360° arc around her starting from behind and slightly above her. It's visually similar to Mii Swordfighter's Neutral Aerial, except that the arc it covers is more similar to Cloud's. Deals 9% and mid-weak Sakurai Angle knockback throughout the whole swing. The attack is legitimately quick to come out, but the swing itself is almost leisurely in its pacing. Has punishable landing lag and less than ideal aerial endlag, but autocancels from a full hop.

This is Diancie's general-purpose, bread-and-butter aerial in Stone Edge Style. Useful for spacing, follow-ups, creating further follow-up opportunities, hitting from odd angles, and general damage output. Diancie doesn't really have the mobility required to create true combos out of NAir, but that doesn't stop it from being useful for strings.


FAir
Diancie swings the blade in an upward arcing slash in front of her. The attack actually hits below Diancie first before arcing up to cover the front. Deals 9% at the bottom of the swing, but 13% at the front. Foes struck at the bottom are launched at a 0° angle with knockback that lacks in direct KO power but is suitable for gimping. Foes in front are launched at a 70° angle with knockback that KOs from 180% at ground level, but can easily KO significantly earlier if Diancie and her foe are both in the air. It has surprisingly reasonable startup, but high endlag and less-than-ideal landing lag, and it won't auto-cancel from a full hop; the minimum height for it to autocancel is a short hop plus a midair jump.

Also notable is that in order to swing perfectly vertically, Diancie has to tilt her whole body slightly. As a result, her lower body and her head are out of the main plane during the attack. (If facing right, her head will be in the foreground and her lower body in the background.)


BAir
Diancie turns and strikes with a diagonally-upward swing behind her. Startup is decidedly average, making it somewhat impressive when taking the move's significant reach into consideration. It deals 13% with diagonally-upward knockback that can KO from around 180%. It also causes Diancie to turn around, letting her follow up with forward-facing attacks, but does have not-insignificant endlag that's just barely short enough for Diancie to midair jump before landing if she uses a rising BAir. It autocancels if used near the peak of a full hop, and also has a significant autocancel window at the beginning of the move which makes landing with BAir a faster way to turn around than actually pivoting on landing.


UAir
Diancie thrusts her right arm, holding her Stone Edge blade, straight up, making for a move similar to a mirrored Cloud UAir. The hitbox covers the upper half of Diancie body along with a small area behind her as it comes out, and by the end of the strike's extension it covers just above her head and a small area to either side. Startup is pretty average, not super quick but enough to look quick when used effectively, again in a manner similar to Cloud's UAir. Drawing further parallels, the hitbox stays out for quite some time. Unlike Cloud's UAir, this has high landing lag and mid-high endlag, enough that it will only end before landing if Diancie uses it from a full double jump. It deals 15% with upward knockback capable of KOing from around 105% as the strike comes out, though this decreases to 9% and KOing from 180% as Diancie holds the blade out.

Diancie's head and upper body are off the central plane during the attack, as otherwise they'd be physically in the way of her attack.


DAir
Diancie flips once in midair to deliver a slow arcing slash below her, hitting a massive 170° arc centred directly below her. This attack has long startup; enough that Diancie typically must initiate it from the start of a full hop in order for the endlag to complete just after the peak of the jump. In exchange, it has shortish endlag (though this boon is made up for by the move's long active duration) and surprisingly short landing lag. It deals a solid 15% damage to anyone it hits. As one might expect, the first half of the arc is a powerful Meteor Smash, capable of gimping foes at absurd percents under the correct circumstances. The majority of the second half of the arc instead sends foes at a 0° angle behind Diancie, again with powerful knockback capable of gimping at crazy percents if used right. At the very tip of the arc's second half is a sourspot of sorts that launches almost straight up with mid-strong knockback that doesn't scale well. With this attack's short landing lag, Diancie can actually combo out of this if she can land it.


Shining Sword Style:

NAir
Diancie slashes upwards in front of her with a flick of her wrist, then spins to strike both sides. The first hit causes knockback that will always lead into the next hit, no matter what direction Diancie is moving. As a result, this can launch foes at fun angles (fun for Diancie, not the opponent!) if the move is interrupted before the second hit comes out. The most obvious application is to fast-fall so that Diancie lands between hits, causing a weak Meteor Smash. The second hit launches foes at a low, almost-horizontal angle, not quite low enough to semi-spike most foes. Deals 3% on the first hit, then 6% on the second. A fairly quick move all around, with Diancie able use it twice in midair off of a full hop despite her high falling speed, though she'll only get to perform the first hit of the second one before landing. 9% damage total.


FAir
Diancie leans forward in midair and stabs forward with her blade only once for just an instant, dealing 6% and weak knockback at a high diagonal. It can KO at Sudden Death percents. It has pretty quick startup, next to no endlag or landing lag, and very good horizontal reach but little vertical coverage. The move is quick enough to be performed twice during a full hop. With Diancie's weak jump and high fall speed, that's rather impressive. At low percents, this move can combo out of Dash Attack.


BAir
After a delay as Diancie readies her blade, holding it braced horizontally in front of her, she suddenly spins and, in a single swift, precise motion, slices horizontally behind her. The attack makes up for its startup and finicky precision by dealing 18% and almost completely horizontal knockback that can KO from 80%. And it looks really cool in the process. The blade when held in front of her is also a defensive hitbox that deals no damage or knockback to foes but will clank with any incoming attack (provided the attack in question isn't transcendent). IN addition, the move autocancels if Diancie lands during its startup while the blade is still held in front of her.


UAir
After a delay, Diancie twists in midair and performs a quick stab above her, similar to Meta Knight's UTilt but with increased startup lag compared to the aforementioned move. This deals a good 13% and upward knockback with high knockback growth capable of KOing from around 125%, but the hitbox doesn't linger long at all. It also has unusually long endlag for a Shining Sword Style move, but its landing lag is far from terrible. Best used as a finisher for Diancie's combos, short as they are, or to close off a stock. At mid-low percents, if Diancie can get close enough to the foe it can actually be used immediately before landing to start a combo, but this requires careful precision and is more than a little risky.


DAir
Diancie flips upside down in midair and spins, holding her sword out to stab below her. Unusually for Diancie, this is a multi-hit move, hitting up to 5 times for 1.2% per hit over the course of 25 frames. The first four hits have autolink angle knockback to keep the foe locked in the move, while the final hit is a weak Meteor Smash, a little stronger than the final hit of Kirby's DAir. This attack also has a landing hitbox for 4% and surprisingly decent knockback at a 45° angle, capable of KOing from around 210%. Unlike most landing hitboxes which have a fairly wide range, this one is pretty specific in its placement, only hitting foes who are both on the ground and directly touching Diancie. This is balanced out by the move having surprisingly low landing lag for one that possesses a landing hit. Additionally, the move will autocancel, skipping the landing hit as well, if Diancie lands more than 6 frames after the multi-hit portion of the move has ended. With her high fall speed, this is unlikely to be the case, but it's still something to note. 10% damage maximum.


Grab

Diancie's grab animation varies depending on which style she's using, but the basic concept is the same with it being a simple grab forward with her free hand. Frame data is perfectly standard for a competent grab, but the reach is a bit short (though not as short as Ganondorf's).

Pummel: Draining Kiss
For her pummel, Diancie… leans in and kisses the grabbed foe. There's a flash of silver energy just as her lips make contact with the foe, and the foe flinches in pain in her grasp. The pummel deals 1.5% per tick and is somewhat below average in speed. How underwhelming. More notable is the fact that with each pummel, Diancie heals herself of 1% damage.

Now here's where things get interesting. Diancie has two sets of throws, one for each of her Styles.

Stone Edge Style:

FThrow
Diancie shoves the opponent away sharply, dealing 1% and leaving them stumbling back, then moves to perform an uppercut slash with the Stone Edge blade so that it grinds against the ground, causing it to come apart into a multitude of diamond fragments. The fragments continue to follow the motion even as they separate from the rest of the weapon. Diancie transitions her uppercut motion into something more akin to a palm strike, and the diamond fragments form into a wall slightly taller than Diancie that continues forward a short distance and slams into the foe for 8% and moderate semi-spike knockback that's unlikely to KO until Sudden Death percents. Afterward, the wall collapses back into diamond fragments that return to Diancie's grasp and reform into the Stone Edge blade.

Oddly for a Stone Edge Style move, the wall's surface seems rather polished, like actual cut diamond instead of a rough uncut diamond. This wall interacts with Moonblast as if it were one of Diancie's diamond chunks from Diamond Combination. By holding forward on the Control Stick, Diancie can extend the end of the throw's animation to hold the wall out longer. She can hold it out for up to a second, in fact.


BThrow
Diancie swings the opponent around behind her, then swings the hefty Stone Edge blade into their side for 5%. Then, she sends a pulse through the energy holding the blade together, causing it to explode into a multitude of diamond fragments and dealing an additional 4% while sending the foe flying at a 50° angle. Then the fragments converge on the foe, dealing a further 5% over multiple hits and lightly spiking the foe. Finally, the fragments loop around back to Diancie and reform into the blade in her hand. Diancie cannot act out of the move until her blade reforms, so this throw has quite a bit of endlag. 13% damage total.

The main purpose of this throw is simply pure damage output, though it can potentially be used to set up a gimp.


UThrow
Diancie tosses the opponent upward lightly, then strikes with an uppercut slash that deals 1.5% and sends the foe higher into the air. The Stone Edge blade shatters on impact into the same multitude of diamond fragments as before. Diancie holds out her right hand in the foe's direction almost as if Flame Choking the air, as the diamond fragments form a swirling vortex around the foe for multiple hits totaling 4% damage. Then, Diancie forcefully closes her right hand into a fist, and the diamond vortex crushes in on the foe for one final hit of 5.5% and strong mostly-vertical knockback, capable of KOing from around 150%. Then the diamond fragments return to Diancie's grasp and form back into a sword as she returns to her idle stance with a flourish. 11% damage total.

This is Stone Edge Style's KO throw. Not a lot else to say about it, although it certainly looks cool.


DThrow
Diancie shoves the foe to the ground and then slams the Stone Edge blade down on them in an overhead strike dealing 2.5%. The blade then breaks apart into fragments once again. The fragments then ascend skyward in a manner similar to the Yellow Devil's movement, piercing through the foe as they do so for multiple hits totaling 1.5% damage, and reform into the Stone Edge blade, pointed downward, about 1.5 SBU up. Then the reformed blade drops out of the air and stabs into the foe for 3.5%. Finally, Diancie hops forward a step and rips the blade out of the ground (and the foe) for a further 2.5% and exceedingly weak horizontal knockback that serves to jab lock the foe. The motion of ripping the blade out causes her to "step" back a character-width. 10% damage total.

This is a combo throw, best suited to mid-range follow-ups as it leaves Diancie with a bit of distance from the foe. She can follow up with such things as jab or pivot FTilt if she just walks or dashes forward slightly, but it also nicely sets up a free Diamond Combination.


Shining Sword Style:

FThrow
Diancie holds her weapon overhead with her right hand as she shoves the foe away with her left. Her sword separates and transforms into five small diamonds. Four of them fly forward and impale into the foe for 1% damage each, suspending them in midair by their arms and legs (at least in the case of humanoid characters). The final diamond hangs in the air in front of Diancie. She snatches it out of the air with her right hand and wields it like a kunai, lunging 1 SBU forward and piercing straight through the foe for 4% and a mid-weak diagonal launch as the other diamonds lose their hold on the foe from the impact. The diamonds that had been pinning the foe fly back to Diancie as soon as they're forced to release their hold, reforming into the sword along with the one in her hand. 8% damage total.

As it sounds, this is a combo throw. At low to mid percents, the foe will end up somewhere just above Diancie's head from the combination of the knockback and Diancie's movement. UTilt or short-hop FAir are good follow-up options. At especially low percents, the foe can end up slightly behind Diancie. Against foes with a large hurtbox and low fall speed, a full hop BAir can be a follow-up option in this situation.


BThrow
Diancie shoves the foe away and moves as if to sling her sword at the foe. It separate into the same five small diamonds as before, which impale into the foe at the chest, both arms, and both legs (or equivalent locations for non-humanoid characters), each dealing 1% and holding the foe in place. Then, Diancie steps off to her right and flings her left arm out to point behind her. Suddenly, the diamond shards rocket off in that direction for 1 SBU, still carrying the pinned foe. The foe receives a further 1% per diamond shard as the diamond shards suddenly halt in midair, leaving the foe to be launched almost straight horizontally from the retained momentum. This throw is unlikely to KO until Sudden Death percents, but is still useful for leaving a foe in a disadvantageous position offstage. 10% damage total.


UThrow
Diancie tosses the foe upward lightly and moves as if to follow up with an uppercut slash. Instead, however, the sword again breaks apart into the five small diamonds, which impale into the foe and pin them just as in the BThrow, each doing 1% in the process. With the foe pinned horizontally in the air by the diamonds, Diancie winds up for a right-handed uppercut. Then, suddenly, the diamonds all drop away, leaving the foe in tumble as if footstooled, and gather to form a massive diamond gauntlet around Diancie's fist as she performs a strong uppercut for 6% and strong vertical knockback capable of KOing from around 150%. Then the gauntlet separates back into the five diamonds, which then reform back into the sword as Diancie returns to idle stance. The animation of the weapon transforming back gives this throw significant endlag. Incidentally, Diancie can hold the ending pose of this throw for up to a second by holding up on the Control Stick, leaving her holding her pink diamond gauntlet overhead. During this time, the diamond gauntlet interacts with Moonblast as if it were a diamond chunk from Rock Throw. 11% damage total.

Shining Sword Style's UThrow combines the KO power of Stone Edge Style's UThrow with the reflection utility of its FThrow. It's truly a potent tool.


DThrow
Diancie tosses the foe to the ground, then "steps" back a character-width and motions as if to sling her sword at the foe. Once again, the sword splits into five small diamonds that pin the foe to the ground, each dealing 1% as they impale into the foe. After holding the foe like that for just a moment, Diancie makes an upwards gesture with her right hand and the diamonds rip back out of the foe for another 1% each and return to Diancie's grasp, reforming into the sword. As the diamonds rip out of the foe, the second-last hit releases the foe from the grab state and drops them into prone, while the last one jab-locks them. Diancie can act out of the move as soon as her sword is back in her hand. 10% damage total.

Like the Stone Edge style DThrow, this is a combo throw suited to mid-range follow-ups. Outside of the obvious Diamond Combination or Moonblast, walk forward to jab works. Short hop fast-fall FAir works too.


Playstyle: Diamond Defence

Diancie as a character is inherently flawed. She's a lightweight, but her primary method of scoring KOs is by using her Heavy Armour to trade. In addition, despite being a lightweight she has highly underwhelming movement abilities both on the ground and in the air.

Making up for these faults are the options provided by her Specials. The Heavy Armour granted by Iron Defence renders Diancie almost impossible to combo for any significant length of time. Neutral Special's pinning effect allows Diancie to approach despite her slow movement, and allows her to put together reflection combos with the right setup. Diamond Combination slows a foe's approach with semi-solid obstacles in addition to dealing good damage from mid-range, and by covering the stage with diamond chunks Diancie can potentially cause a foe to enter hitlag even when they whiff an attack, making them more easily punishable. Diamond Storm on the ground is an effective way for Diancie to force a foe away from her should she require some space.

This seems like a good place to talk about Diancie's two Styles. Stone Edge Style gives her above average damage output and massive arcing hitboxes. Shining Sword Style sacrifices both of those traits for finicky precision, but makes Diancie very difficult to punish. Diancie will have to make the most of both in order to win, especially since Iron Defence is tied into her Style Switch.

Diancie's grab is important. The pummel's minor healing improves her sustainability, helping offset the damage she'll inevitably take when she uses her Heavy Armour to approach and to secure KOs. Down Throw for both Styles lets Diancie use Diamond Combination safely without having to attempt to get some distance from the foe. The two throws that provide temporary diamond chunks for Moonblast to refract off of are great damage-dealing tools with Diamond Combination already in play.

Stay one step ahead of the opponent, and Diancie can survive to ridiculous percents. But diamond is not as tough as it is hard; strike from the correct angle and it can be cut or even shattered. The Diamond Pokémon herself is much the same.


Final Smash

Mega Evolution ~ Spectacular Talent!
"The hearts of the people….
Their wishes are my power!"​
In an animation similar to the start of Lucario's Final Smash, Diancie Mega Evolves! However, as Diancie bursts out of the sphere she's sealed in when Mega Evolving, the shattering sphere is a hitbox dealing a token 4%, and the burst of light as she emerges covers the whole screen, masking the transition to a cinematic.

Royal ☆ Ascension

"Foolish peons, begone from my presence at once. Royal Star Ascension."​
If the initial hitbox connects with a foe, a cinematic similar to the gif above plays. Diancie flies into the night sky to stand in the crescent moon as if it were a throne. The camera transitions to behind her as she flings an arm out and a circular shockwave spreads around her, knocking the stars around her out of the sky and causing them to fall and rain down on the stage. The view reverts back to the normal stage, with the background changed to the starry sky from the cinematic and Diancie standing in the crescent moon (on stages such as Gamer, the starry sky and crescent moon will be visible through the window, while on some other indoor stages there's no visible change at all. On Wii Fit Studio, the scene will actually be in the foreground beyond the camera, and visible in the reflection of the mirror), as all foes the initial hitbox connected with are struck by the barrage of falling stars (on indoor stages with no windows, the stars fall from directly above rather than coming in from the background, while on Wii Fit Studio they fall in from the foreground), which combined deal a total of 40% damage. However, if multiple foes are caught in the move, especially far apart (such as opposite sides of Diancie when the move was initiated), it's entirely possible that they won't all be struck by every star as each star in the barrage targets a pseudo-random foe among those caught in the attack. (The distribution of damage will be relatively even amongst all victims.) The final star in the barrage to strike each foe will send them flying with radial knockback away from Diancie, capable of KOing at 90% (post-hit) depending on direction (obviously you don't want to be Meteor Smashed by this). After the barrage of stars ends, Diancie either flies back down to the stage (if the starry sky background is visible; on Wii Fit Studio she flies in from the foreground above the camera) or teleports back in (if the starry sky background is not present due to it being an entirely indoor stage, such as Pyrosphere).


Roaring Fantasia

"Open your eyes and see
The beauty that lies in power!
Be crushed by the brilliance! ROARING FANTASIA!
"​
If the initial hitbox does not connect with any foes, something altogether different happens. A cinematic like the gif above plays, though the crystal inside of the peak, as well as the shockwave, are pink instead of blue, and the shockwave is intense enough to totally obscure the camera, masking the transition back to the normal stage. Upon transitioning back, the background of outdoor stages (as well as the view out the window on Gamer, and the reflection of the foreground through the mirror on Wii Fit Studio) has changed to a zoomed-out view of the mountain peaks from the cinematic, with the spherical shockwave of pinkish-white light emanating from the far peak in the centre and rapidly approaching the stage. As the shockwave is a sphere it hits the centre of the stage first and very rapidly expands outward from there. Anyone struck by the shockwave takes 20% damage and is launched straight up with knockback that can KO from 70%, but it's easy enough to sidestep/roll/airdodge through it due to how fast it travels and the fact that only the blast front is a hitbox (meaning the hitbox is only ever present in any location for a single frame). It can be shielded, but doing so will break your shield unless perfect-shielded (which is more difficult to accomplish than simply dodging). In the wake of the shockwave, Diancie teleports back to the stage. On indoor stages with no possibility of a background change, Diancie is instead back in her place on the stage the instant the cinematic ends, and the shockwave emanates from her position. The way to avoid being hit by this full-screen attack remains identical, however.

But wait, that's not all! Diancie isn't done yet after Royal ☆ Ascension or Roaring Fantasia. She's still in her Mega Evolved state, free to move and attack. She has a number of statistical changes at this point, but not all are beneficial.
+ Diancie gains 5 points of weight, making her as heavy as Zelda.
+ Diancie's walk, run, and lateral air movement are 1.35x as fast. As a result, her run speed is now between Cloud and Charizard, her walk speed is now ever-so-slightly greater than Diddy Kong's, and her lateral air speed is now between Wario and Roy.
+ Diancie's traction is also greatly increased, making it near perfect.
= Diancie's walk animation changes to resemble her normal dash animation with her floating along the ground, and her dash animation changes to have her lean further forward due to her increased speed.
+ Mega Diancie's initial dash is very long and has very little endlag, making it similar to Cloud's.
= Diancie's jump height and midair jump height are increased, and her natural fall speed decreased. Her gravity is slightly decreased as well. Fast-fall speed remains the same, but the reduced fall speed makes it now match the standard 1.6x multiplier. (This means her new fall speed is very slightly slower than Marth's.)
+ Diancie's short hop is shorter, but the decreased fall speed and gravity make it give the same total air time.
+ Startup and endlag on all of Diancie's attacks is reduced. Moonblast and Iron Defence charge time are similarly affected.
+ Landing lag on all of Diancie's aerials is 2/3rds its normal duration.
+ Autocancel windows on all of Diancie's aerials start earlier. They all autocancel out of a short hop.
+ Moonblast and Rock Throw auto-cancel on a short hop, like Melee Fox's blaster.
= Aerial Diamond Storm's last hit now has the same knockback as the first four hits, and the move does not cause helpless fall (though Mega Diancie can only use it once in midair before having to either land or receive knockback). This makes it a combo tool for Mega Diancie.
+ All of Diancie's attacks deal 1.4x damage.
+ Diancie passively reflects any projectile that deals 15% damage or less, sending it back at its normal speed and power.
= Mega Diancie is significantly taller than normal Diancie. Her weapons are longer to accommodate her increased height, giving her greater reach.
Diancie's passive knockback-based armour while crouching is gone.
All of Diancie's percent-based Heavy Armour effects have their damage thresholds reduced to 2/3rds their normal amounts. The accompanying damage reduction effects have their strength reduced to 2/3rds their normal values, as well.

Diancie remains in her Mega Evolved state for 12 seconds. Make good use of her new, aggressive style!


Misc. animations, voice clips, etc.:

Down Special: As Diancie opens her eyes and returns to her idle stance, she sometimes lets out a telepathic cry of "En garde!" Other times, she'll call out the name of the Style she changed to.

Rolls/Dodges: Diancie's rolls resemble Mewtwo's, with her floating out of the way of attacks. Her sidestep dodge has her hurriedly hop to one side, then back into the main fighting area.

Up Taunt:

Diancie leans forward slightly, a happy smile on her face. "Okie-dokie!"

Side Taunt (Stone Edge Style): Diancie simply gives a slight bow. Diancie alternates between two different quotes with this taunt:
"I promise not to go easy on you."
"Promise me you will not hold back."

Side Taunt (Shining Sword Style): Diancie spins her sword and points it forward with a flourish. Alternates between the same quotes as the Stone Edge Style Side Taunt.

Down Taunt:

Diancie gets a sudden case of the giggles. That last KO was just too funny! She ends up having to pick her sword up off the ground afterwards, since she dropped it to have her giggling fit.

Victory pose #1: Diancie cheerfully hums the first 9 seconds of the gym leader victory theme from Pokémon X & Y. She tapers off at the end and after looking thoughtful for a moment, goes: "…Wait, that wasn't the right song, was it?"

Victory pose #2: Diancie does a polite curtsey towards the camera. "Thank you for the fine match. That was a lot of fun!"

Victory pose #3: Diancie bows formally in the manner expected of royalty, with only a slight dip of her head. "My apologies, but I must be going." Then she walks offscreen, right past the camera. "So with that, I bid you farewell."

A few unprofessional alt colours:

(these weren't created by me)

And this last one is her shiny colouration.

Edit: Changelog:
— Shining Sword Style Down Smash second hit: 9% -> 10%; total damage 13% -> 14%.
— Rock Throw diamond chunk: 10 HP -> 15 HP
— Rock Slide diamond chunk: 5 HP -> 13 HP
— Rock Tomb diamond spike: 5 HP -> 10 HP
— Stone Edge Style BAir totally reworked to be a utility aerial rather than a KO move.
— Stone Edge Style Dash Attack first hit changed to use Autolink Angle.
— Shining Sword Style Down Smash second hit knockback angle: Sakurai Angle -> 30°.
— Shining Sword Style Dash Attack knockback: base increased; growth nerfed; angle: Sakurai Angle -> 85°.
— Focus Attack-like damage reduction added to all of Diancie's Heavy Armour effects. If an attack doesn't bypass the Heavy Armour, it also deals less damage.
— Diamond Smash mechanic implemented. Diancie can now gain increased damage/range and a free weapon switch by hitting a diamond chunk or Power Gem crystal with a smash attack.
— Diamond Storm now increases health and duration of diamond chunks/Power Gem crystals it hits.
— Rock Throw diamond chunk size increased to match Ryu's Hadouken.
— Rock Slide diamond chunks size increased to that of a collapsed Unira item.
— Iron Defence buff nerfed. Initial Heavy Armour threshold: 7% -> 5%. Initial damage reduction: 2% -> 1%. Full charge Heavy Armour threshold: 11% -> 8%. Full charge duration: 10 seconds -> 8 seconds. Full charge damage reduction: 3% -> 2%.
— Grounded Diamond Storm Heavy Armour threshold: 20% -> 18%. Damage reduction: 3.5% -> 3%.
— Aerial Diamond Storm Heavy Armour threshold 12% -> 11%. Damage reduction: 3% -> 1%.
— Smash Attack initial Heavy Armour nerfed by 4% across the board.
— Smash Attack initial damage reduction nerfed by 2% across the board.
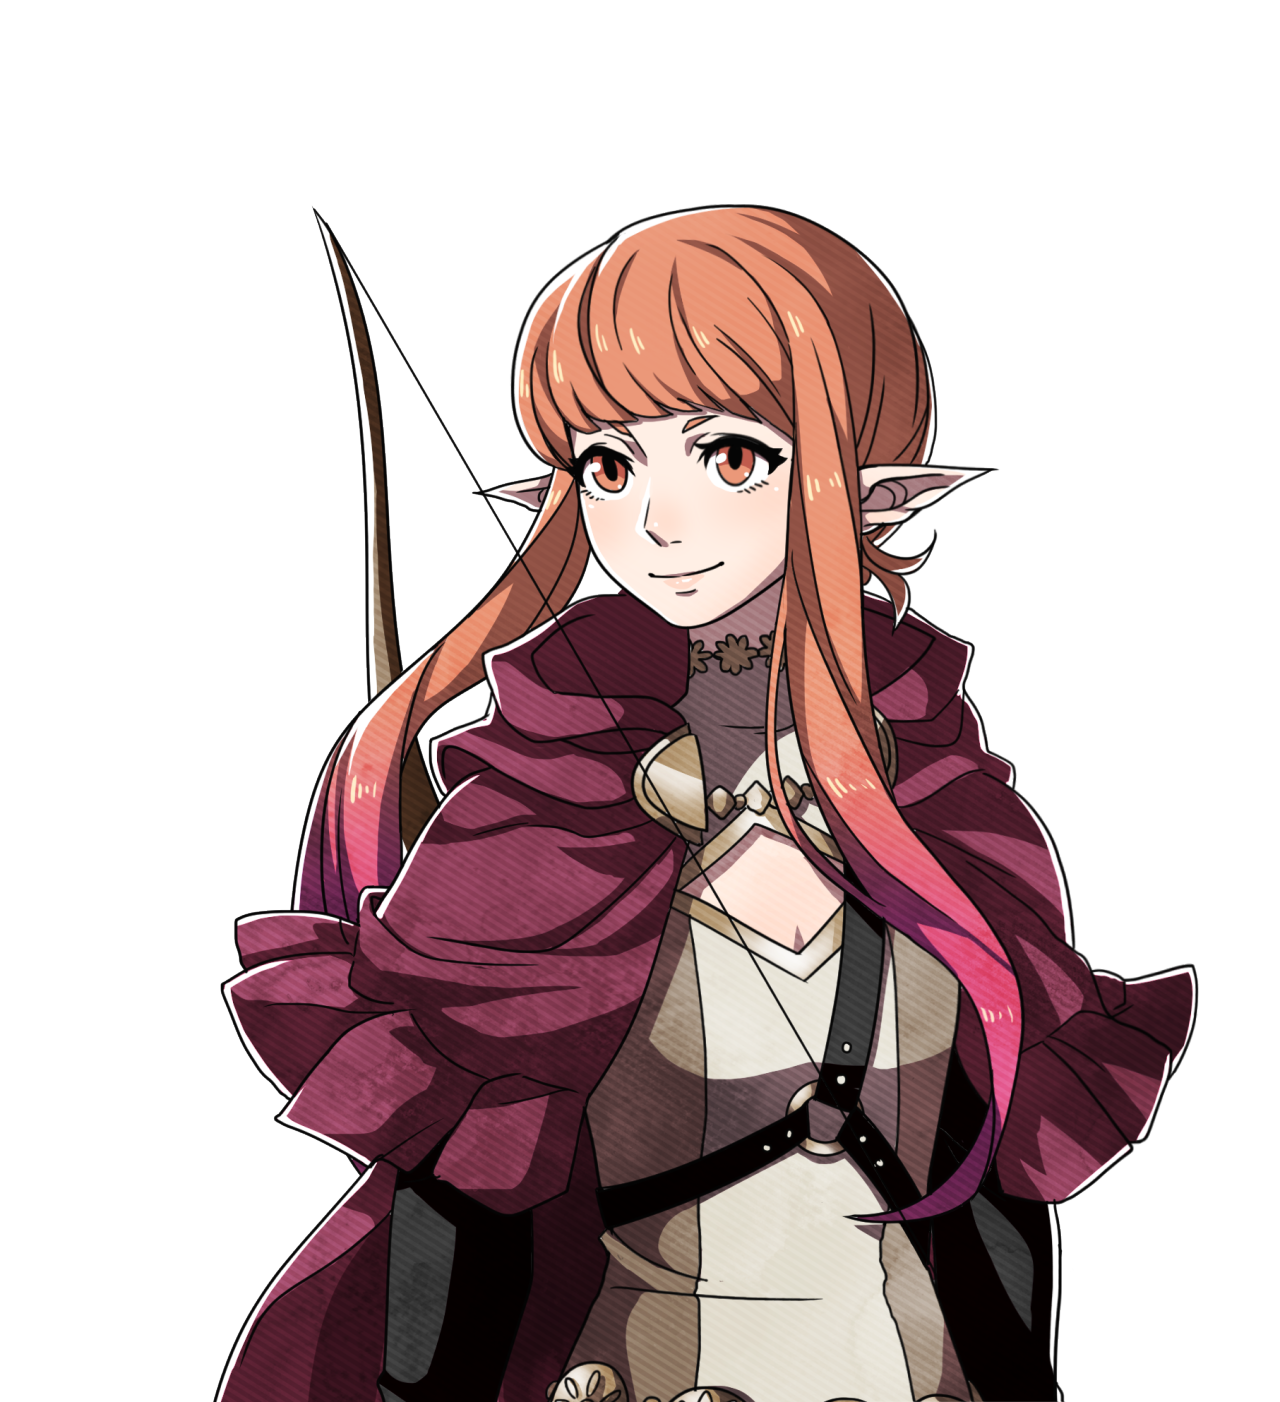
 
Last edited:

ForwardArrow

Smash Ace
Joined
Aug 17, 2011
Messages
502
Link 2.0
Its nice to see you made some edits to remove a lot of the worse moves in the set, primarily the Ball and Chain and the Hammer. Making him a bit more oriented around his primary weapon is the main thing this set needed to feel better than his existing set by a decent margin. Trying to include more elements of Link works a bit better to me than trying to cram in more extraneous stuff for the other remixes you've done, mostly because he actually has a lot of things worth including, like being able to fire the sword beams and a fair few bomb interactions that weren't in the original set. The standards also feel like a nice extension of his existing Forward Smash. That being said, I don't really feel like a very concrete playstyle was reached from these changes, mostly just being an upgrade to Link's set that feels like it'd be more fun to play, so its a bit hard for me to fully endorse it. Still, I feel this set is a fair bit better than your other remixes of existing Smash characters, and bounces back some from how bad Paper Mario was.

Anti-Mage
This is a much better set than I really thought was possible for the character, mostly because of the approach of shields being treated as mana. The set interacts with shields in a surprisingly interesting and fair set of ways, like using the strength of your shield and the opponent's shield as a basis for the strength of attacks, sacrificing Anti-Mage's own shield to create new combo opportunities, and the rather awesome perfect shield mechanic on the grab game which gives incentive to use your own shield even when your mechanics deplete it. It works out into a fun glass cannon rushdown/combo character who has a surprising amount of depth due to how he interacts with shields. That said, most of the set's appeal comes from the inputs that aren't standards and aerials, which are perfectly functional but don't have much to them. For that matter, using Anti-Mage's own shield is made a big part of the set and honestly comprises a lot of the more interesting parts of his game, which bothers me as Anti-Mage never interacts with his own mana in game. I suppose you could argue he could do that, but I think he's more interested in destroying mages than acting more like one himself. Its a fun read, but that questionable bit of characterization combined with some blandness at points weighs it down.

Zer0
I feel Froy gives this set a bit too much credit, because the approach it takes is admittedly kind of flawed. The main obvious thing to complain about is that a lot of the individual inputs don't really have much to them, and while honestly in the context of the half million mechanics their hitboxes are sometimes enough, there are some moves that feel they could do a lot more with the mass of mechanics. The Smashes are a pretty viable suggestion though at least they can work with Up Special, and maybe a few of his aerials/standards that are less structured towards setting up combos could work in some ways more suited to abusing the multipliers. The throws are one of the strongest sections for how they play off Be Like Water as well as the effects they provide, but the Corrosion Kunai doesn't feel nearly as relevant as the other three and generally inferior to the Slag one. The main complaint I have though is that the set does feel very underpowered a lot of the time. It seems like it actually takes him a lot of precision and consecutive hits to match the damage of a regular smash character, and while he can certainly go over that it would be something that I doubt a player making good use of their defensive options would need to deal with a lot of the time. I mean shields seem like they'd absolutely wreck him even when his combo is going, since I don't think all his criticals and pseudo-sweetspots actually work on shields. Nevermind how badly a new player is going to get destroyed on this character, which is true for a lot of MYM sets but this one requires near mastery to actually be able to compete with. I feel a set like Zyra, Kristoph, or Malomyotismon could be played fairly casually even if it seems complex on the surface, the player would just need a couple games to learn the moveset.

With all that said, I actually do like Zer0, and actually think its a pretty strong moveset. Its a rare use of invisibility that feels like its a lot more than just a straightforward guessing game and doesn't soak up the entire playstyle, and I actually find the comboing rather fascinating in how it works. You need a lot of precision to pull it off, but as you can see in the calculations section, the reward can get kind of ludicrous. I really enjoy the rewards for mastery and the almost stupidly big numbers the set can accomplish when it works, I doubt I could ever play it but it seems like it would make for some spectacular matches and combo compilations regardless. There's actually a lot of depth here and things I genuinely really enjoy conceptually, its just I feel the actual practicality of it is actually less present than a lot of setup oriented movesets and the individual moves really could've been a bit better than they turned out to be. Still probably my favorite of yours JOE, despite my complaints.
 

FrozenRoy

Smash Lord
Joined
Apr 26, 2007
Messages
1,261
Location
Las Vegas, Nevada
Switch FC
SW-1325-2408-7513
Diancie Nukem Forever

Boy, this one has eben in the making for a while! It was about time for our requisite Jamie set, right? And another crystal princess, hmmm...

Right off the bat, Diancie starts off with something I'd rather not expect from you Jamie, with a rather large slew of interactions in the Specials thanks to some pretty hard interactions with Diamond Combination and Moonblast that delve into bullet hell and the like, and I felt that Diamond Combination itself was quite strong. The Dancing Blade style of moves are simple and elegant, yet not often seen in MYM. My guess is due to them being rather long to write and sometimes difficult to fill in. Diancie's Diamond Combination is interesting for fitting in a lot of normal attacks, but also adding in elements of stage creation and traps, which gets immediate payoff with Moonlast. I found Moonblast for the most part fine, although the Paralyzer effect on the lens with the Rock Tomb I find very iffy (I am someone who gets very nervous with stun). I also feel I should note that I felt Rock Tomb's animation was overdetailed and actually made it very confusing to visualize when I first imagined it: this could probably be streamlined some.

When you then add in the stance switching between Stone Edge and Shining Sword stance, it ends up packing a lot in there, and I did find the Smashes for the most part enjoyable: Diancie being this fairly lightweight character who nonetheless trades heavily via heavy armor for her smashes is honestly rather unique and gives her an inherent risk-reward factor to her game. I also greatly enjoyed how Diancie has a reward for switching between her two stances, which is how I generally approve of weapon switch sets functioning. The standards and aerials are also fun enough and I do get a general sense of playstyle, though I will say that memes aside I felt that the Sakurai Angle was rather overused in this set. You mentioned it was for when you wanted to keep foes in grounded combat, but Diancie possibly does that too much, and I felt that a little air transition game would have been better, as the air game is a rather critical component of any smash game after all. The aerials were the weakest part of the set to me.

The grab game was pretty fun, though, and I couldn't help but chuckle at some of the...unintended thoughts it gave. But they fit into the game well while being unobstructive and having some very fun animations, although I do wish that the crystals here perhaps could have worked as a focus for the Moonblast's crystal jumps, would have made some fun stuff and brings me to my biggest issue with the set: The diamonds, for all that her making them is pointed out in the intro and all the intricate stuff she does with them in the set, feel like they fall a bit much by the wayside after the Specials. I would have hoped for at least a few cursory interactions in the Smashes, like breaking them apart for extra damage or something. Diancie feels a bit on the lower power end right now to me anywho, so something like that would fit well.

But this is a MUCH better effort from you than Daisy, Jamie, and was quite enjoyable. How much you like your pretty pink princess Pokemon really shines through the diamonds here and it feels rather memorable to me, you have a pretty unique voice when you do actually write movesets. I've seen the quality, now I just hope you speed up the quantity.
 
Top Bottom