• Welcome to Smashboards, the world's largest Super Smash Brothers community! Over 250,000 Smash Bros. fans from around the world have come to discuss these great games in over 19 million posts!

    You are currently viewing our boards as a visitor. Click here to sign up right now and start on your path in the Smash community!

Make Your Move 18 - Top Fifty Is Posted!

D

Deleted member

Guest
Tiers Explanation:
10: Largely this reflects Warlord and FA's 10s as my personal favourite set. It’s unlikely this will happen and I will give some leeway if the set would be in my top 5.
9: Sets I would consider excellent. Examples include Father Cornello, Vector or Judge Nemo.
8: Great sets that are guaranteed to get a super vote if they are in a high enough position.
7: Very good sets go here, while not polished enough to be considered great.
6: Good sets. Here is where the flawed stuff may start to creep in but there’s enough good to make it overall a solid like.
5: This is between good and bad, basically average or sets I’m not sure I like or dislike.
4: Bad outweighs good and I dislike the set.
3: The problems are bad enough it spoils any good qualities.
2: The sets at this point have so many issues that it's irredeemable.
1: At this level, the set is not only terrible on every level, but is uniquely bad either for the lack of effort or sheer awfulness of the concept or execution.

9 STARS
★★★★★★★★


ZOMOM BY MASTERWARLORD
After a short time has passed I grew to realise this set is one of my favourites that Warlord has created over the recent years because of its great ideas and execution. It’s a reflective set that brings together all kinds of Warlordian concepts: food, terraforming, super speed (in a sense) and I love the hilarious shots taken at the Sonic franchise. There’s almost nothing I can point out that I don’t just love in this set and the closest thing are parts Warlord had to add later.

Old Rankcom: Great expansion on the concept of Pac-Man's Fruit becoming food items, getting a ton of mileage out of them as weapons and as buffs. The characterization is top tier, going for a full mockery of Sonic and glorifying the character, a well of comedy that is too deep to run out. Manages to iron out any balance issues with the terraforming it has while keeping the fun elements and has few moves to nitpick. Great fun to read, and the tier list is a tasty dessert.

8 STARS
★★★★★★★


ARTORIAS BY FROZENROY
This is another set that ages well after considering how low potential and well executed it is in the vacuum of Dark Souls. It’s very creative using what little it has and it’s very impressive how it manages to get such a defined duelist playstyle that fits the character this well. It’s not an easy character or playstyle to construct, and it’s clearly thought out.

Old Rankcom: Fun and imaginative set based on trying to duel the foe by limiting their dodging options. Artorias gets in on it himself by buffing and nerfing himself at the same time to go all in, and rewards the player for this risk, giving it a high skill ceiling. The simple animations don't naturally lend themselves to exciting moves, but the playstyle comes out very well, much greater than the sum of its part. It can be a little dull at times. The set's style doesn't allow for a lot of creativity, but makes up for it in cleverness.


ATLANTIS BY MASTERWARLORD
Interesting take on a boss character and the Kinnikuman villains, refreshing when there have been no bosses in a long time. Fun synergy between the various summoned characters and a visceral feeling to how the set is executed, giving very measured spotlight to all the characters without having any that stand out as under or overused. It does have some under-elaborated on concepts in the smash orbs and Black Hole's special and the minion spam is a pretty blunt way to balance a boss.


MARINA BY KATAPULTAR
Experimental projectile manipulation set that has a great base and the right amount of ingenuity choosing what projectiles to use, on the verge of not working due to the sheer scale of these interactions, but kept together by some of Kat's best balancing in recent memory. This has some of Kat’s greatest aerials in recent memory. It’s more than a little chaotic and all, but restrained and milks plenty of fun out of the projectiles.


THE BUTCHER BY FROZENROY
The set is not the most exciting concept and got put artificially high because of a great execution, but has some balance stuff I don’t approve that highly. The infinite stacking of the bleeding still gets to me after this long as I don’t’ get why it’s there other than to be purposefully obtuse. The aerials aren’t the greatest. The way that blood appears I also always found a bit too whimsical as a floating collectible when the set is so hardcore, creating a slight visual disconnect. Great but not perfect.

Old Rankcom: The best example I can think of for a bleeding effect focus in a set and lots of clever little applications of it throughout the set, as well as getting all potential possible out of a fairly generic character. The quality is very consistent throughout the set and there are no moves that I'd say are flawed. Creates a fun mechanic fighting over the meat and is well balanced. The infinitely stacking buffs would get silly in a very long match, but it's not fair to dock too many points when it's not remotely viable.

7 STARS
★★★★★★★


ZYRA BY FROZENROY
A set of two halves: a very dull and perfunctory beginning and a very creative grab and aerials, that don't always mesh together, but when they do it's excellent. Fun balancing concept by limiting the plants that can be summoned, and at least tries to make all the attacks relevant, if not always successful. The grab game raises this set hugely by introducing a bunch of fun concepts to the rest of the plants. A bit questionable if the later sections get too creative, but I still think they're quality moves.


GLUTH BY FROZENROY
It has been said plenty of times already that the Gluth changes are a massive improvement and I can only echo that praise. The zombies are integrated far more naturally into the playstyle and Gluth’s weirder aspects are reduced, besides some specifics like the Decimate. The new additions to forward smash and the new moves are all very welcome additions to the set.

Old Rankcom:The early concept of the zombie chows is fun and putting them in pits is just as fun, but then the set largely focuses on other aspects that just aren't as interesting, with some wacky logic on moves such as decimate. The slopes are an interesting addition on a smash, and are decent, but this is stuff that's been done many times already and feels a bit wasteful along with the way the chows aren't utilized.


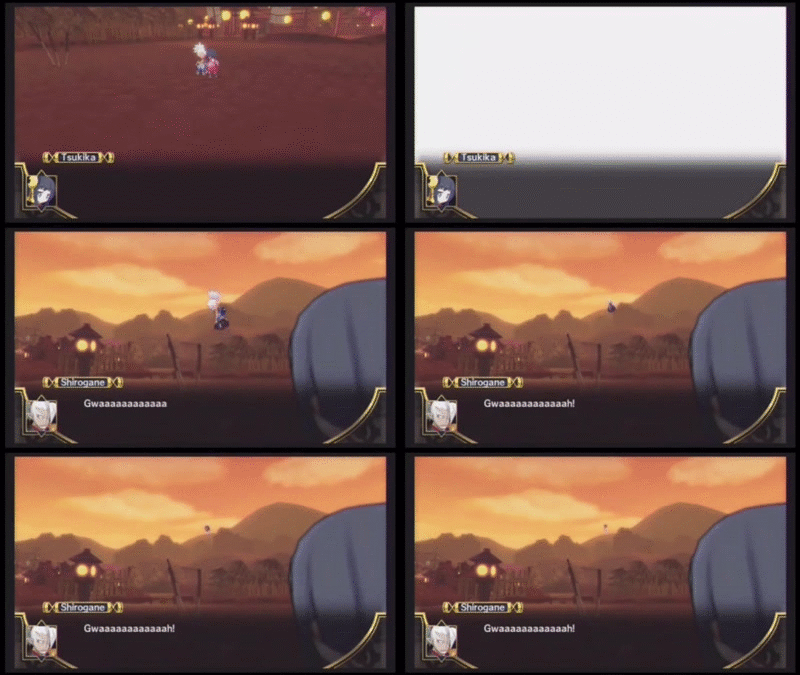
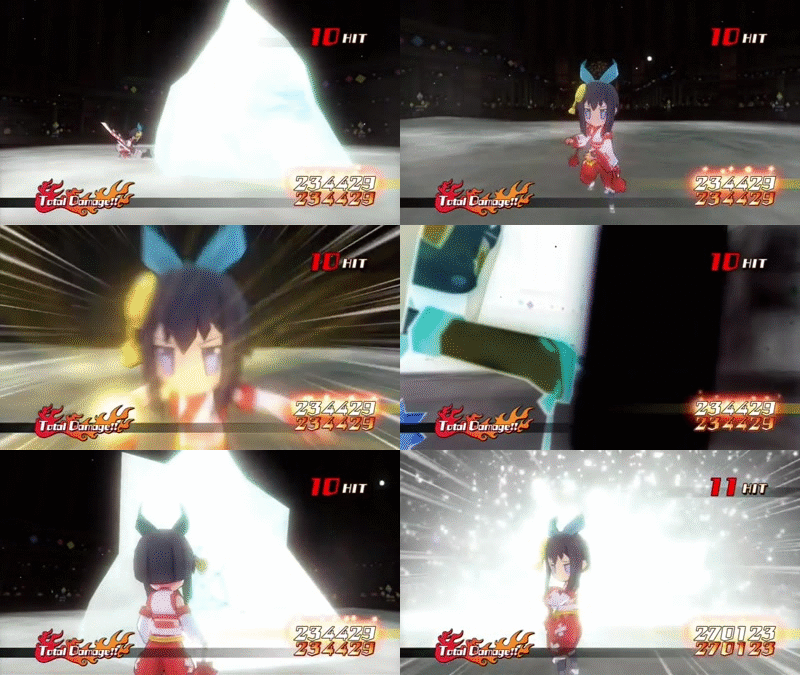
SHIROGANE BY KATAPULTAR
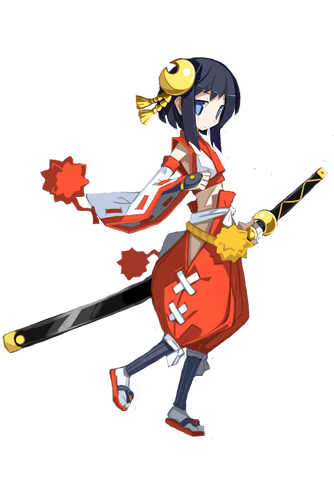
Bold moveset where the character creates a gigantic mountain then focuses the set around that, surprisingly well balanced. Some of the moves feel very desperate to capitalize on the mountain without much regard for their fair amount of redundancy and awkward input placement. While it is very fun, it's probably not as exciting as you'd expect based off the mountain part.


ZER0 BY JOE!
A fresh playstyle idea of using mass multipliers on weaker moves to make them relevant when used in certain situations. This is like a combination of many sets in the past that would focus on one or two of these elements like backstabbing and headshots, which by themselves don't have much potential, but when put together like this create their own playstyle. Some moves are a bit redundant or shallow compared to others, but overall this was a surprisingly fun and original concept.


LINK 2.0 BY MUNOMARIO777
Hard to see a much better remix of Link after all the criticism was taken into account, every move has a fun concept attached to it, and the melee moves are given a fun double hit mechanic. The set never oversteps its boundaries and is a realistic, if exhaustive set for Link that draws from all the right places, a huge improvement over Ganon 2.0 from last contest, as it all manages to feel cohesive. That said, the set is not very exciting from a conceptual standpoint and the playstyle doesn't achieve anything new for Link.


GARITHOS BY MASTERWARLORD
A great mechanic in Duel, fun minions and great characterisation. After the changes, the horse seems fine, but the horse attacks and some of the moves seem superfluous to the playstyle. On the other hand, this set has a great grab game that only further cements the great characterisation with the minions and does a decent job playing into the duels at the same time.


DOPPELGANGER TSUKIKA BY KATAPULTAR
Unique balance that I've not seen much of before, the idea of a character too strong for their own good is not one I've seen before and it's very interesting, the concepts are a fun combination with that playstyle. The animations are all well characterized and fitting, the balancing factor of slowness and awkwardness is also great for both character and balance. There's nothing really holding it together besides these elements, like new concepts, but it's a worthwhile experiment.


ANTI-MAGE BY FROZENROY
Fun take on the idea of teleportation and another duelist in the same vein as Artorias. This set is the best execution I've seen of a MOBA character when it comes to using the buyable items for potential that make sense for the character and has a lot of fun, logical moves making use of the shield's HP. Other moves are not as logical, using up shield HP when other moves in the section don't, just because. You'd have to read up on the character or play him a lot to figure it all out without any visual indicator.

6 STARS
★★★★★★


DIANCIE BY JAMIETHEAURAUSER
I was overly harsh on this set before as you may notice in my old rankcom, it does have a good purpose with the dual-wielding set and it’s actually kind of clever how it doesn’t go for big changes between the two and instead focuses on smaller differences. The edits to the set have improved it in minor ways to help give ease the flux between the sword styles and added some substance to the rock form

Old Rankcom: This set does a good job of selling the character's unique aspects, putting a focus on two styles, once closer to fencing and one using a massive sword for more power but less speed. This is not a necessary mechanic though as a lot of the moves are pretty similar, and the differences aren't very big between the two at times. The set also gets pretty boring by the end as you have to read two movesets past the specials and would've been better served if it was edited down.


MALOMYOTISMON BY FORWARDARROW

As you said you may ever revisit this set I will address all the specific complaints to best of my memory. The special that creates mist requires too much commitment, meaning you spend most of match charging an infinite charge move, and has an annoying mind game attached to boot when summoning dupes. Should be reworked to have summoned dupe create mist and/or not involve a frustrating mindgame in the core move of the set. The throws have plenty of potential to do interesting stuff but I honestly find it fairly confusing exactly what the point is of most of them, could easily be given more purpose. They read as fairly phoned in like the original Kristoph throws awkwardly making the foe carry a letter bomb, obviously in a different way.

The up special where he surfs on his bat wings isn’t brought up ever again and his aerials are fairly filler. The up smash could easily be a special instead and do more unique interactions of its own. The projectile forward smash is fairly redundant after you had a special dedicated to a projectile already. Considering this character you probably have plenty of ideas to just directly add to the set for new moves and that would be a good idea, just make some space because if you go back and reread a lot of what’s here is not the greatest material.

Old Rankcom: Very fun characterization, and with the new fixes to the specials it works fine. The set goes through the usual motions you'd expect in a projectile manipulation set. Far too many moves exist purely for the sake of being buffed from awkward/underpowered to usable/overpowered, especially in the aerials. Others exist for a shallow reason such as having a sweetspot or being another projectile to manipulate. The early game of this character is a massive chore for the player, just so they can not play a bottom tier character.


GAIGE BY JOE!
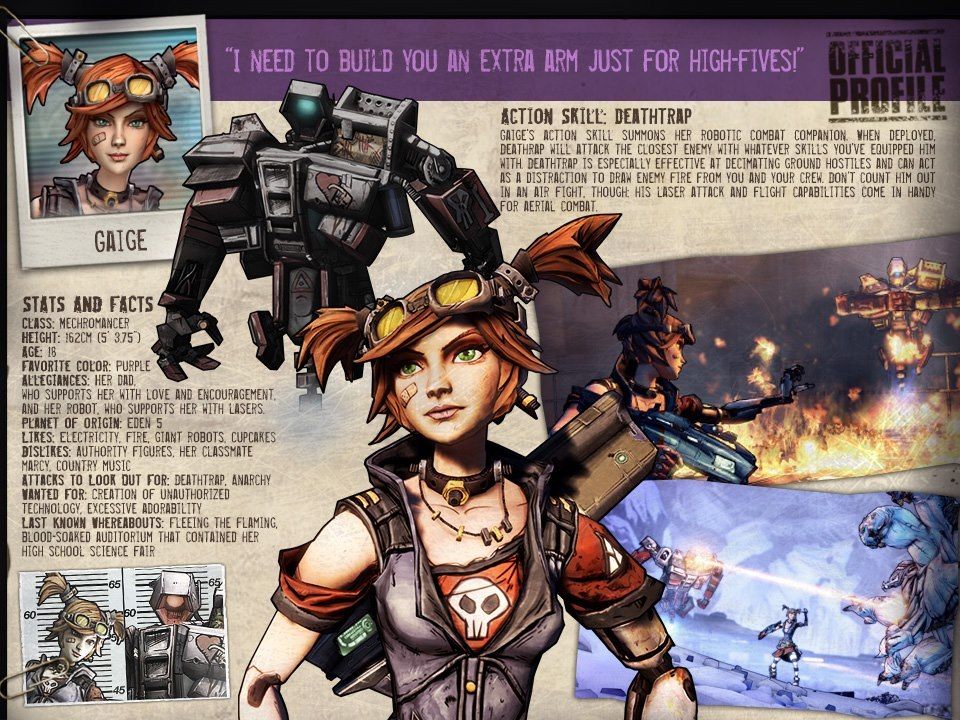
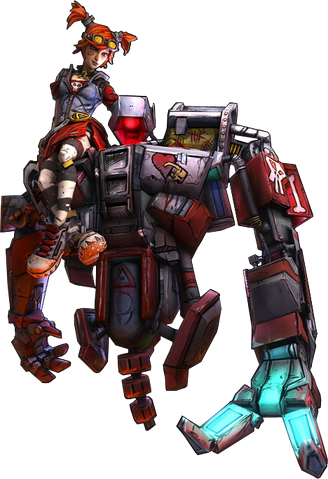
The set's as chock full of effects and depth as Zer0 if not more, every section has a gimmick to it to try and make it interesting and relevant. The set is largely good but runs out of steam at the end after going over many, many effects that come into play earlier in the set. Whereas in Zer0 these were a key element of the balance and playstyle, here they aren't as interconnected. Deathtrap also could've been used outside of the specials.


ELECTIVIRE BY FROZENROY
This was improved from the point it was just memetic with the balance, but still comes off as fairly weirdly balanced. Nonetheless, there's a certain risk-reward here that's fun, linking the playstyle together by forcing the player now to use up their motor drive stacks or lose them over time. There are some pretty OP moves still, such as the disjointed back aerial hitbox and the neutral special is still way too powerful at its max, the DK punch is not a move that's UP enough that you can make it 3x as powerful and it's not broken.


PIPLUP BY MUNOMARIO777
A fun little set based around momentum-based water and ice mechanics. The logic of some of the moves is a bit weird with Piplup stomping to make cracks in ice and the ability to use ice attacks on Piplup isn't a perfect fit. Piplup borrows heavily from Pikachu and doesn't have that much of its own identity when you get down to brass tacks. It's a mish-mash of mechanics and playstyle without much of a character, coming off as fairly Pikachu lite due to the aforementioned borrowed animations.


SANDSLASH BY JOE!
A very simple terraforming set that focuses on ground combat and rushdown, while having some flair with the way sand works as an ammo bank for the smashes. Let down a little bit by the aerials and standards, with a fairly average grab game, but ends up fairly good.


PAPER MARIO BY MUNOMARIO777
This set in no way is Paper Mario with the way it uses partners, and uses them in a ironically fitting way if you see it as a metaphor for how Paper Mario treats the idea of partners in the new games. I did find some fun in the interactions, even if they aren't too well balanced, and I thought the set was not bad if you viewed it as Sticker Star or Paper Jam Mario instead. The set would probably be better if the partners were outright removed to focus more on what the set does well, the interactions and mechanics.


RIKI BY DR.SLAVIC
Archetypal x-spreading playstyle that spreads the different status effect pollens around. The effects themselves are nothing to write home about, but this is one of the best executed of the archetype, detracting little from gameplay as Riki casually moves around the pollen. It's let down by down special and smashes, the former should just be replaced entirely.


WELSH BY KATAPULTAR
Very fun characterisation and concepts of swinging around a tree on a vine. The focus on aerial momentum and mobility off the tree is nice but not as pronounced as it could be in this set. It instead focuses on how the tree can be used to zone or stage control in less exciting ways than Villager's tree. It uproots a massive tree and knocks it into the battle plane with a weak smash that looks about as powerful as Ike's ftilt. The solid/not solid nature of the tree and branches also make no sense.


ROY KOOPA BY FROZENROY
Decent application of the bazooka and redirecting the bullet bills and minions in a very, very straightforward way. There's some odd stuff in the grab game where Roy just picks up stuff and shoves it into his bazooka that is extremely simplistic, picking up Koopas then firing them out and throwing timer bombs into the mix too. It gets extremely redundant later but is at least self aware of this flaw enough that it's not the worst.

5 STARS
★★★★★


EXCITE BIKER BY MUNOMARIO777
Does all you'd expect on an Excite Biker set, revving up, going fast and doing show off type moves on the bike as attacks. It's not all cohesive however and it doesn't have a particularly strong playstyle. The ideas are obviously not very original either, and Excite Biker is not the most exciting conduit, ending up feeling fairly bland, if not doing anything hugely wrong.


MAD DUMMY BY REIGAHERES
This set's a fun minion set but has an incredibly difficult writing style that is pretty unfortunate, making it a hugely stifling read. The way the dummies work with the projectiles is nothing if not fun for the character at least, and while I'd say Undyne is the superior set, this one's almost a complete opposite for concepts and playstyle which is fun to see. It does get redundant later on and that obviously doesn't help with the reading either.


ELKA BY KATAPULTAR
This set has great characterisation, but the balance makes certain moves pretty much unusable. It's a shame as it has a very fun idea with the spears, but this is one case in this movement where the characterization gets too carried away, making the set not viable. Could be worth a revisit to redo the balance and put more focus on the spears, without limiting it as much.


CHESNAUGHT BY JOE!
Good idea focusing on counter-play against projectile users, but ultimately it comes across as more of a hard counter without much else of a focus. Chesnaught comes across pretty unfocused besides that and has an odd focus on punching moves with the lanky body, rather than being defensive, reserving his defensive ire for the projectile characters solely. The set loves to get into the minutia of moves like the punches and I didn't find it particularly interesting or relevant.


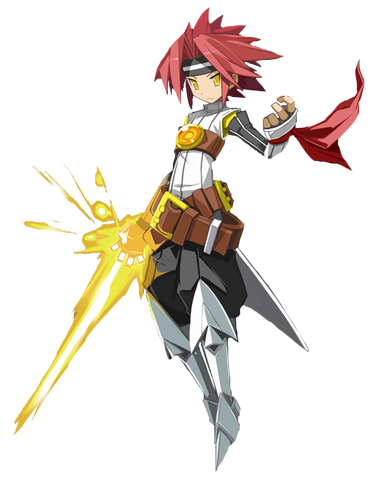
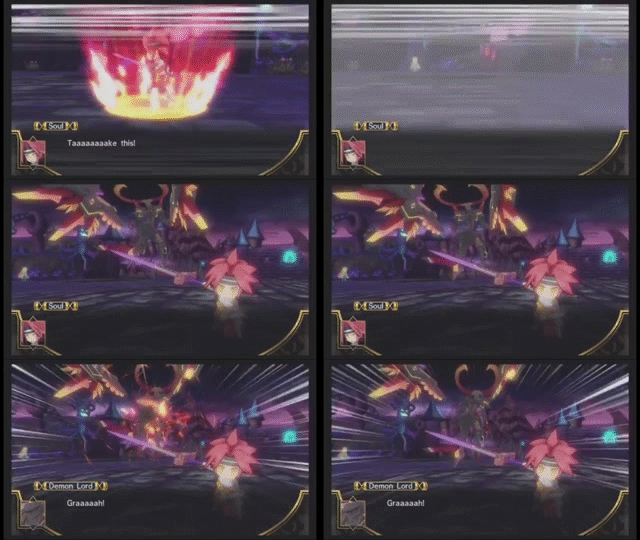
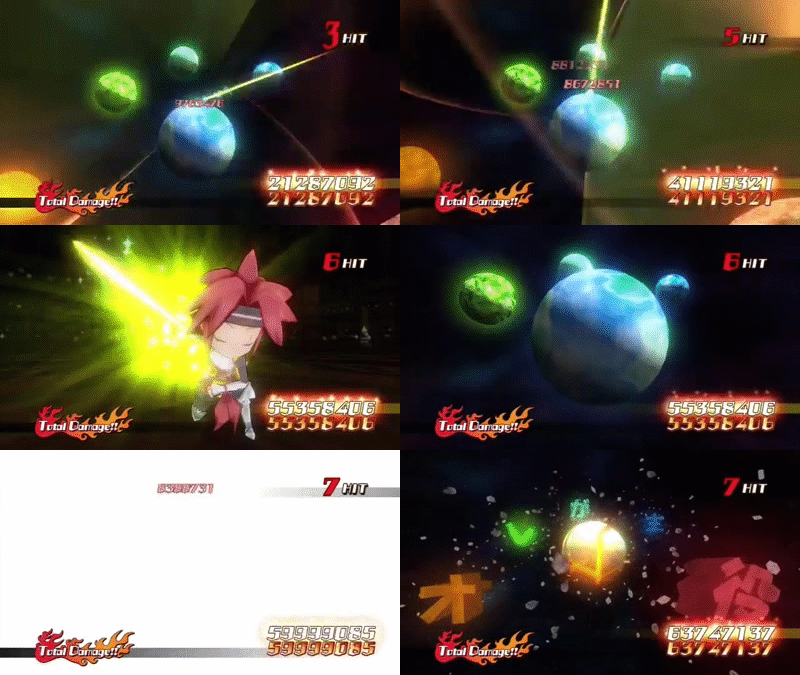
SOUL SKYHEART BY KATAPULTAR
Straightforward set based on very simple concept of a super attack and incredibly simple mechanics. The set is so simple but doesn't get all that much out of some of the concepts, like the idea of a save point for the purposes of suicidal gimps or combos would seem obvious. It also could've done with a look at Cloud's set in Smash 4 and how it handles Limit Break, which is a lot more intuitive.


HONCHKROW BY PROFPEANUT
The minions are fun enough, and the way they're controlled is fairly unique, but a set like this that limits the minions mostly to a single special should do more with them besides changing their position slightly. They're more of a trap than a minion, not a whole lot more complex in application than the Mechakoopa, and may actually be more shallow. Honchkrow himself has some tacky moves in the specials and I wasn't a fan of the writing style, though it was a good attempt.


MELIA BY DR SLAVIC
An ambitious set that has tons of effects and spells included, but gets so boring it's intolerable in some inputs, because the differences are so technical and irrelevant to the playstyle. It's got a fun mechanic in the specials with the way the spells can be applied to Melia's defences, and does have some depth there, but it's way too complex by the time it gets to the grab and there's not enough payoff.

4 STARS
★★★★


COLONEL.EXE BY USERSHADOW7989
The focus on the Rock Cubes is not played out much beyond the neutral special and instead the main concept is some rushdown that doesn't seem particularly cohesive. Big fixes were made to the balance and specials, ultimately it just needs to be more compacted. There are a few good if simple ideas here, they just need to be better executed. Improvements have been made and may ever vote for this set if it grows on me over time.


TOGEKISS BY REIGAHERES
A set with a lot of interesting ideas, I am not completely opposed to chance mechanics when done in this way, and the balance is kept under control for the most part. The way that the main mechanics work seem very OOC, Togekiss is camping in this wish area, while chucking rocks. When this thing is meant to be elegant or otherworldly, he sure acts like a jerk. The way it interprets Wish, Ancient Power and Serene Grace are too direct, the character should be put before the mechanics.


DUNBAN BY DR SLAVIC
The set has fun ideas with the way it works, getting less powerful the more damage you take, but that's pretty much the entire set. There's very little actually done with the concept and the last half of the set is very boring. It has some really bad moves later too that should just be redone, such as the up aerial. The mechanic needs the set less than the set needs the mechanic.


JOE DIMAGGIO BY FROZENROY
Good improvements from the original version, and the way the mechanic works is not as unfun as it was, but still the set lacks in much in the way of fun concepts, mostly resorting to generic bat swings and little else, not focusing much on the sliding or other field actions of a baseball player. The focus on a batter could be better if mixed in with more projectiles, but the baseballs actively disappear sooner. It probably would need to do more projectile counter play for me to like it more.


EKKO BY FROZENROY
The time travel in this set is fairly backwards from what it should be, healing the foe and punishing Ekko so that he can basically reset scenarios where he was the big loser, seeming very frustrating to play against and getting into the dumb kinds of risky for the Ekko player. The payoff is basically two Chronospheres, which is very underwhelming. I did like some of what is done later, almost to the point of it being salvaged, but I can't get over how bad the time travel is and the after image combos seem OP.

3 STARS
★★★


SPROINK BY BIONICHUTE
I can’t be the only one tired of Bionichute’s sets that barely try and recycle the same mechanics of building up the mechanic to buff a move’s power generically without any creativity. This set tries for basically two okay sections then drops off a cliff in quality. The balance issues are only fixed because they took 2 seconds to change the numbers. I assume the other glaring flaws will be left untouched because laziness and chat spam is effortless by comparison. It is long past time for Bio to step up his game.

Old Rankcom: Strong beginning, but it gets into the usual awkwardness of Bio's sets where he goes over the "levels" of each move, and each level generically gets stronger, losing sight of why this is fun or relevant to the playstyle. The beginning of the set really needs images to show what is being talked about when it uses these complex structures. There's also obvious missed potential like combining buckets of lava and water to create steam that jumped out at me when reading, not doing many interactions at all.


SHARLA BY DR SLAVIC
A 2v2 focus isn't an awful idea, but in this case Sharla simply doesn't bring enough to the team to not be outclassed by characters who also work in singles play. The overheating mechanic comes off as just an annoyance and bogs down the set when it's already limited to 2v2s. This could easily work in singles matches if you changed some things, but even then there's nothing that stands out to make the set unique.


ESTY DEE BY KATAPULTAR
Specials are packed with pointless mechanics layered on top of other pointless mechanics when the set is basically a ninja doing rushdown and throwing knives or teleporting around the place. Usually these concepts are presented straightforwardly then create echoes throughout the later inputs, instead everything is frontloaded here and a massive headache to read as well as from a design standpoint.


THE APPETIZER BY RYCHU
I have a soft spot for the set when it released years ago, but it's hard to deny that it's aged badly, especially the unchanged grab game. It's all so tacky and the requirement to get to the grab game is a bad idea. The start of the set though is just as good as it was then, and I always liked this playground of rolling around the meat and so on. It's held back by the later inputs and honestly, after all this time it probably needed more of a strong playstyle too for it to be up to current standards.

2 STARS
★★


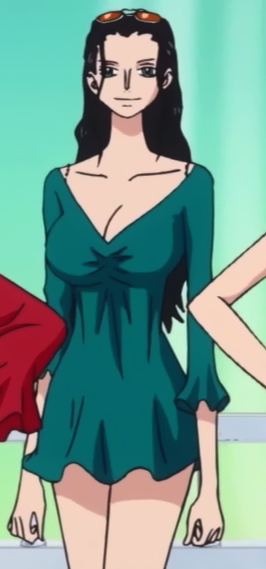
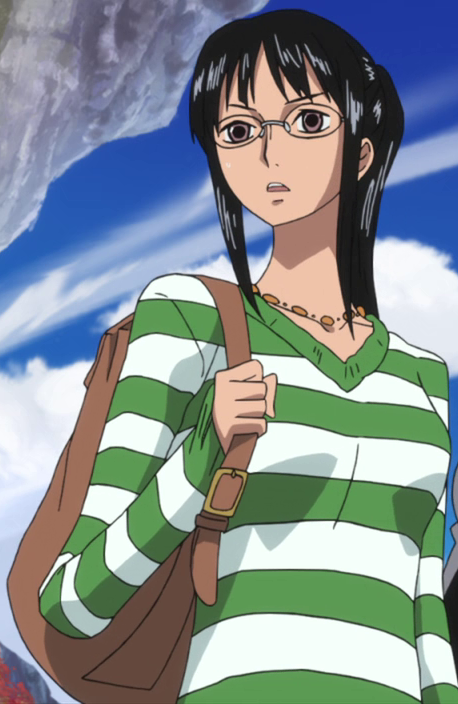
NICO ROBIN BY KIRBY DRAGONS
Overpowered and tacky set that doesn’t seem to understand the character, similar problem to previous set by the creator Jack Atlas where Nico Robin just does whatever she potentially could with her power but doesn’t care about input placement or balance. It’s very incompetent. Get no sense for the character and yes, the drowning mechanic is stupid.


ANUBARAK BY KHOLDSTARE
This set has a lot of effort put into it but has awful balance issues. The side special that cancels into any move is broken, the traps that can be one of three random traps are also broken and the last input section turns into a bit of a joke. It's a shame as the set has some promise in the early going and certainly has plenty of imagination, but this is one of the most overpowered sets in a while.

1 STAR


GENO BY PK-OW!
This set is just an absolute mess from top to bottom. Geno Power, the down tilt, the terrible and bizarre moves and bare minimum detail of many moves, like the stark opposite to Will & Freedan back in the day where everything was explained too much. This is an improvement over that at least, because its short length makes it approachable, and it's really funny. It's worth reading over some of the mediocre sets this contest because of how humorous it is and I am eager to see if PK-ow delivers another set.


PSEUDO VORGIS BY KATAPULTAR
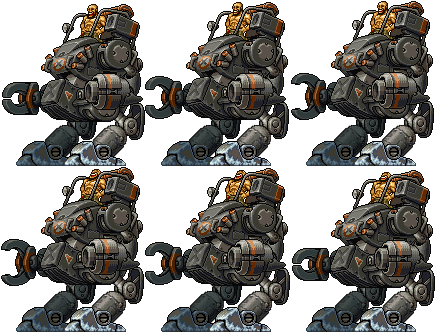
Vorgis runs through all of the stereotypical boss concepts we've seen for years and manages to be one of the most overpowered sets in history for 1v1, without any regard for balance. The minions and their OP balance, with the wacky animations, the ability to store and spit out an insane amount of spiders, it's a quintessential bad set. I do admire the ambition here and I'm glad it was posted. Reminds me a little of good old Jason Voorhees.
 
Last edited by a moderator:

ForwardArrow

Smash Ace
Joined
Aug 17, 2011
Messages
503
10/10-I happen to agree with Warlord on is that this tier should be reserved for my favorite moveset ever made. The title is currently held by Mr. Badd, so that is what you need to beat to get here. I will consider the corner case of having multiple 10 stars if there are multiple sets that insanely good out. 0 Movesets
9/10- These sets are my favorites in the contest and most complaints I have with them are incredibly minor. 1 Moveset
8/10- Unlike the above sets, there are usually some issues here, or the basis simply isn't strong enough to carry it to the higher tiers regardless of execution, but still a great set and a highly recommended read. 7 Movesets
7/10- Sets in this tier are good, but lacking in some aspect or another that brings them down from being great. They still manage to stand out from the crowd, however. 3 Movesets
6/10- The set in question is either somewhat forgettable or suffers from actually very major flaws, but is still overall above average and has most likely secured a spot on my votelist. 7 Movesets
5/10- I no longer like sets in this tier, but they're not necessarily bad either. Their good points are simply not good enough or their bad points drag them down too much to reach a higher tier. 8 Movesets
4/10- These sets are just bad, either failing to do anything remotely interesting or having some absolutely massive problems to counteract what good points they have. Probably still have redeeming qualities though. 1 Moveset
3/10- There's salvageable stuff in these sets, but it exists in very minute quantities. 4 Movesets
2/10- I won't say sets in this tier have no redeeming qualities, as that's not entirely true, but I'd say at this point I really hate the set, or find it too lacking in any substance for me to give it a higher score. 3 Movesets
1/10- Complete abomination of a moveset lacking in any redeeming qualities and likely having something notably bad about it to warrant this tier. 1 Moveset
0/10- I'm experimentally adding a 0 star to my rankings, which is more or less a statement that your set actually did something so unbelievably bad it kind of cemented its place in history as an example of what not to do. If its any comfort, I probably had a lot of fun reading it, but for all the wrong reasons. 0 Movesets


Yangus

9/10

O'Neill

9/10

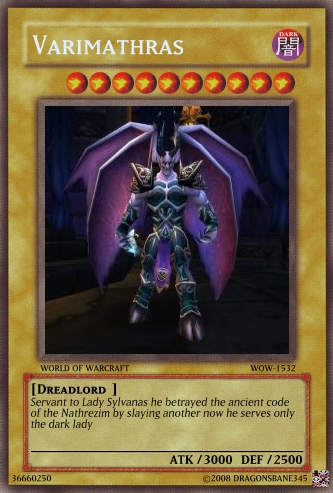
Varimathras

9/10

Grunty

9/10

Zomom

8/10

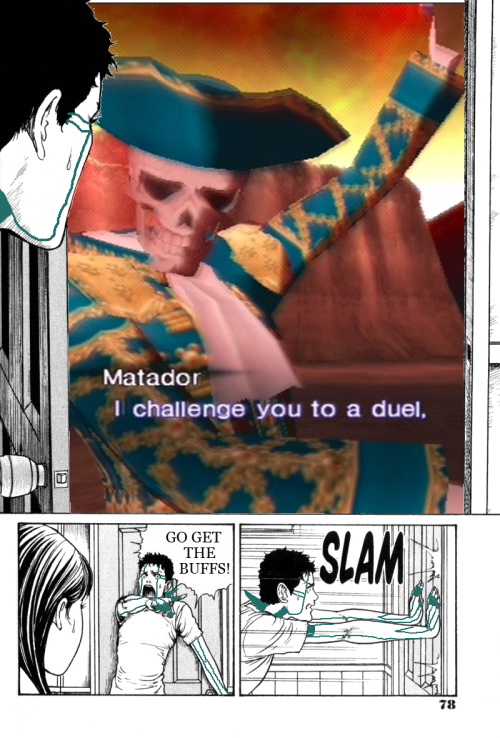
Matador

8/10

Kristoph

8/10

Adel

8/10

Galf

8/10

Baku

8/10

Shadow Teddie

8/10

Artorias

8/10

Goronu

8/10

Gluth

8/10

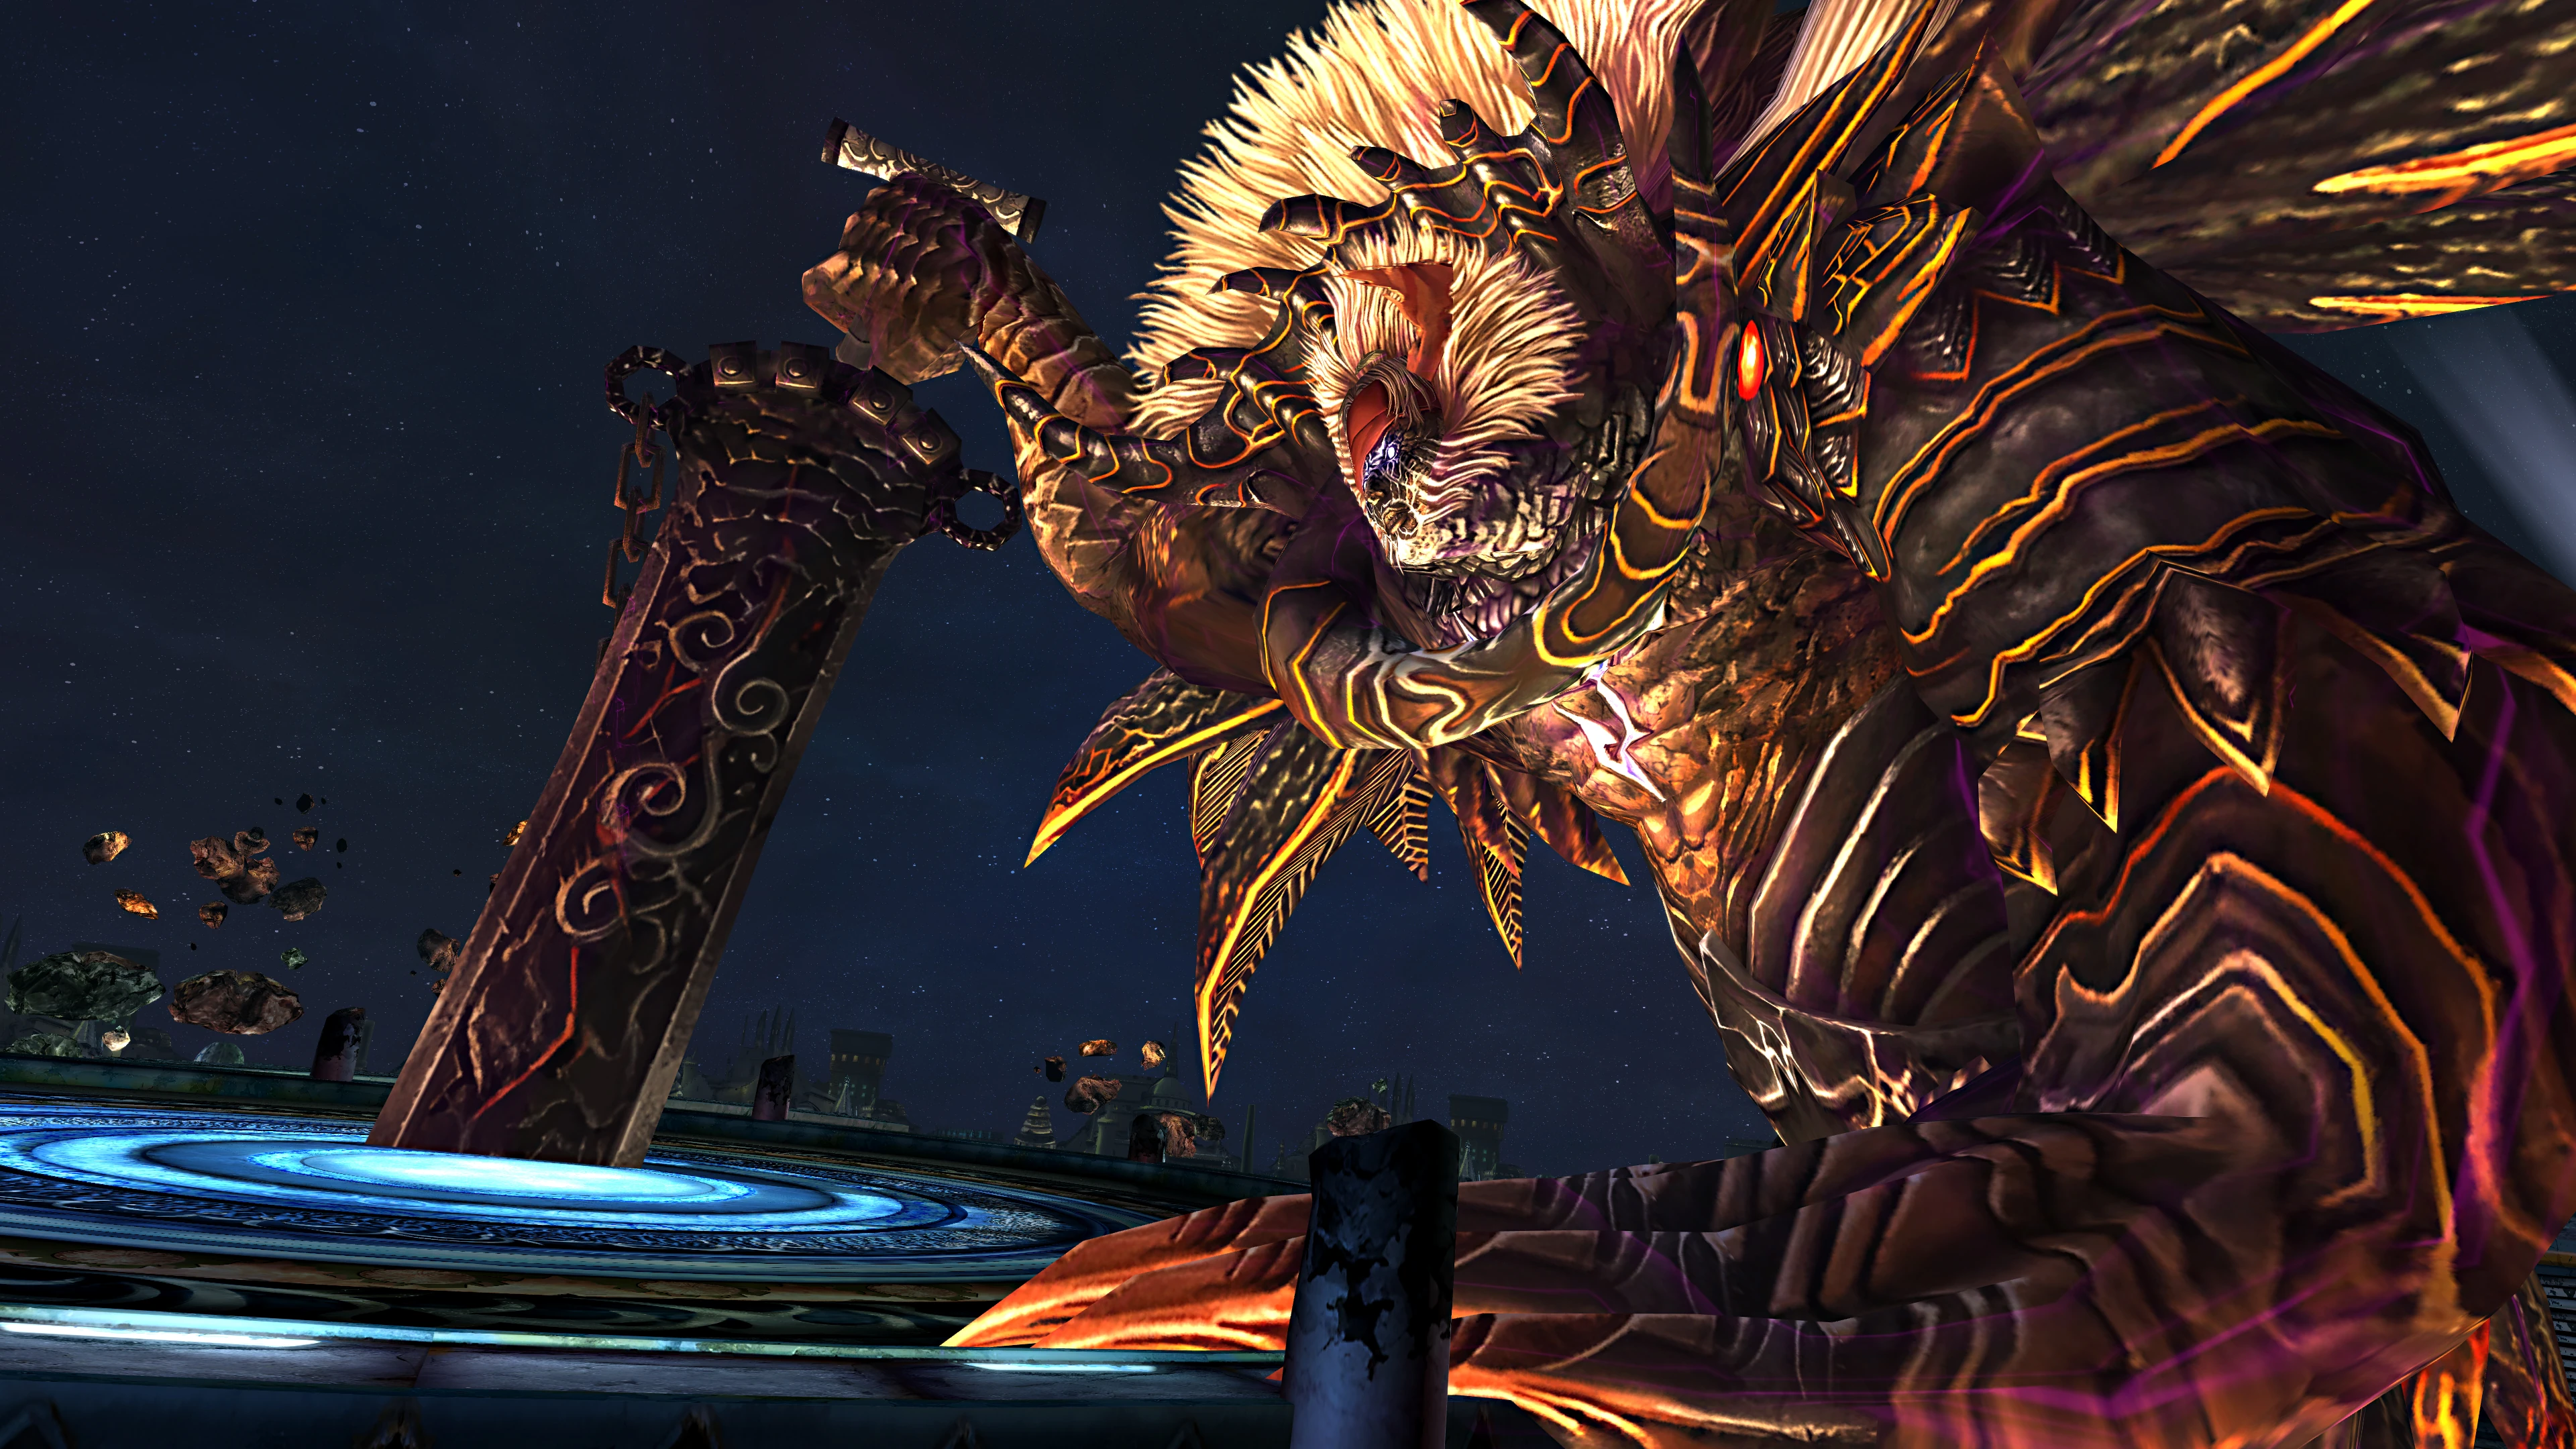
Jecht

8/10

Atlantis

7/10

Marina

7/10

Zyra

7/10

Kappa Tian

7/10

The Butcher

7/10

Lickitung

7/10

Zer0

7/10

Anti-Mage

7/10

Detheroc

7/10

Great Mighty Poo

7/10

Dr. Kripplespac

7/10

Tutankoopa

6/10

Dragonslayer Armor

6/10

Panther King

6/10

Garnet

6/10

Gaige

6/10

Shirogane

6/10

Tsukika

6/10

Experiment

6/10

Mad Dummy

6/10

Electivire

6/10

Yomi

5/10

Ekko

5/10

Diancie

5/10

Welsh

5/10

Roy Koopa

5/10

Link

5/10

Garithos

5/10

Papyrus

5/10

Pyrus

5/10

Excitebike

5/10

Classic Bowser

5/10

Joe Dimaggio

5/10

Soul

5/10

Sproink

5/10

Sandslash

4/10

Chesnaught

4/10

Storyteller

4/10

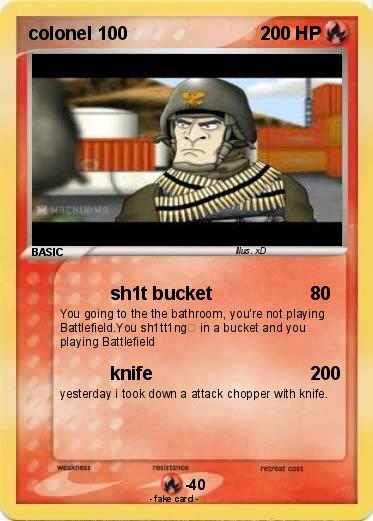
Colonel.EXE

4/10

Leoric

4/10

Ranger-M

4/10

Piplup

4/10

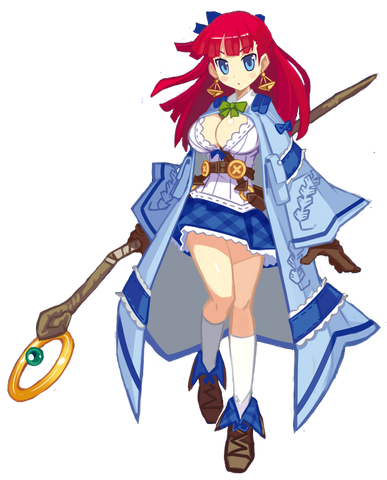
Lapis Lazuli

4/10

Elka

3/10

Azure Striker Gunvolt

3/10

Togekiss

3/10

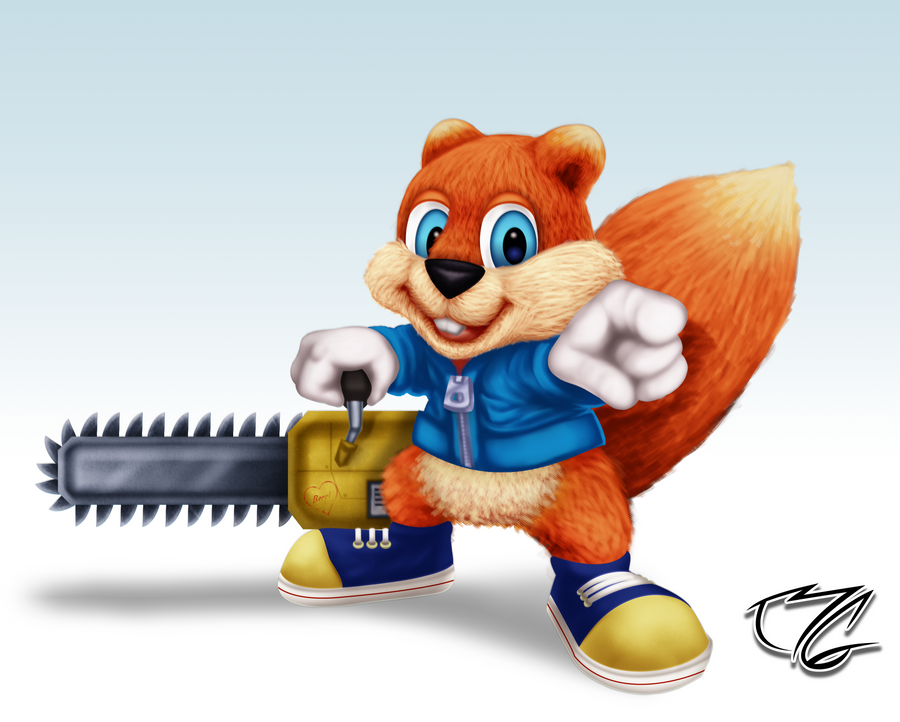
Conker

3/10

Dunban

3/10

Krankcase

3/10

Sharla

3/10

Magneto

3/10

Melia

3/10

Esty Dee

3/10

Hood Sickle

2/10

Paper Mario

2/10

Riki

2/10

Sans

2/10

The Appetizer

2/10

Geno

1/10

Anub'Arak

1
/10

Pseudo-Vorgis

1/10
 
Last edited:

Reiga

He sold diddy for a switch
Joined
Dec 8, 2014
Messages
1,256
Location
White Noise
3DS FC
1461-7646-7368

Togekiss
The Jubilee Pokémon
Number #468 in the National Pokédex, Togekiss is the long awaited evolution for the Johto Pokémon Togetic, who evolves into it in contact with a Shiny Stone. Introduced in the fourth generation, it has become a rare sight which never appear where there is needless strife, also being known to gift with blessings and gifts of kindness to those who avoid such strifle and respect one another's rights.
Once a Normal/Flying type and now a Fairy/Flying type, Togekiss has a variety of move fitting its kind nature, like Wish, Bestow and Baton Pass, while still having access to powerful moves like Sky Attack and ExtremeSpeed, with the power to manifest its aura with Aura Sphere, not to mention a powerful Air Slash, especially with the Serene Grace ability. Togekiss' stat spread is potent and balanced, with high defenses and good Special Attack alongside reasonable speed and HP, making this Pokémon a strong and sturdy fighter, even if hard to get normally.

Stats

Size: R.O.B.
Weight: Wario
Ground Speed: Mario
Aerial Speed: Lucas
Fall Speed: Toon Link


Togekiss has a pretty balanced display of statistics, though also an interesting one to say the least. Togekiss is a pretty big Pokémon, a bit smaller than a Charizard, even getting a bit of a size boost to still be slightly smaller than the dragon. Weight-wise, Togekiss is surprisingly quite light for its size-class, only being a bit lighter than fellow aura user Lucario, which while not stupidly light for its size like Mewtwo, does hinder Togekiss a bit, even if it still has a fair bit of bulk.

When standing or even walking slowly, Togekiss stands in a more natural, bird-like pose with its wings to its sides. Beyond this and some animations like dizziness, Togekiss will mostly move around by flying off a small distance off the ground with its wings outspread in a pose similar to its in-game sprites and most pieces of artwork. As such, Togekiss can cover some respectable distances while dashing but even then, based off its original stat spread, is still only as fast as Mario.

Just as stated in its pre-evolution's Pokédex entry, Togekiss barely has to flap its wings, only doing so when dashing for too long or when using one of its 4 midair jumps. Speaking of jumping, as a flying-type, even with a bulky stature, Togekiss still has pretty good Aerial Speed comparable to Lucas', with respectable mobility and acceleration in the air, not to mention a very slow Fall Speed that makes this bulky pacifist very air oriented.
Even flying around, Togekiss' traction is still only a bit above average, having difficulties at times when turning around.

Specials

Neutral Special: Wish / Serene Grace

"A wish that restores HP. It takes time to work."
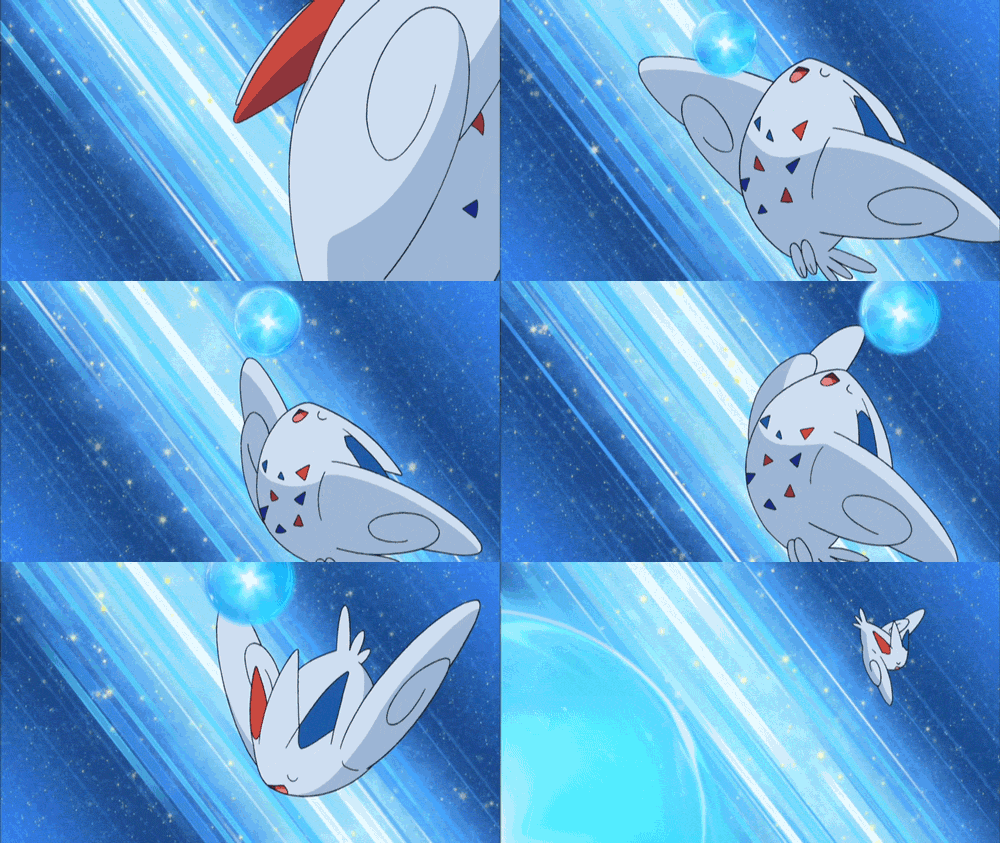
Togekiss floats slightly off the ground if not already and faces forward while spreading its wings in a pose similar to the image in the set intro, but also with a much more concentrated look, with its eyes closed. After the initial and chunky starting lag, a five pointed greenish-yellow cluster of energy is then formed in front of Togekiss' torso, a manifestation of a wish made by Togekiss.
After the star is the size of a Pokéball, Togekiss shuts its arms forward, in a prayer-like pose, shooting the star straight upwards at the speed of Falco's Blaster, going beyond the blast zone but not dealing damage to foes as Togekiss then repositioning its wings to its sides and returning to idle with some rather chunky end lag.

4 seconds after the Wish has been sent, an infinitely tall area that covers half a platform away both sides from where Togekiss made its wish proceeds to gain a slight pinkish-white aura as a sign of the wish coming true soon, with an appearance similar to Palutena's Heavenly Lights custom move. One second after that, the wish star returns from the top blast-zone with double its original size, falling down at the same speed as before towards the spot Togekiss made the wish, though homing towards Togekiss if it enters the range of the aura while the star is still more than a platform's height in the air.

If Togekiss touches, attacks, or even uses a projectile on the now big wish star, Togekiss' Wish will come true, healing 10% health. This can really mess up a lot of the damage the foe has done to the Jubilee Pokémon and as such, the foe will probably want to keep Togekiss from wishing as much as possible, which isn't hard considering the lag behind the move, while Togekiss will want to find the right time to wish. Even after the Wish is made, the foe will want to keep Togekiss as much as possible away from the pink aura reach, as if Togekiss is in such area, not only will the wish be easier to get, but will also home its direction towards it, while Togekiss has to cleverly use its moves to distract or knock the opponent away from the zone to get the Wish.
While hitting a high-speed projectile going to or from the blast-zone is a bit hard, if the foe manages to hit a falling wish star, they will revert it to its smaller size as it then loses its healing properties, the star continuing to fall but disappearing once it touches ground. A rising star can't be destroyed, due to it just a representation of Togekiss's wish. The falling star will also pass through platforms and walls, making matches with Togekiss on stages such as The Great Cave Offensive even more chaotic.

Serene Grace, also known by its Japanese name, Heavenly Blessing, is Togekiss' most notable ability and also its most fitting, though honestly its other abilities, Hustle and Super Luck, aren't exactly great. A Togekiss with this ability will double its chances of getting secondary effects on moves. In Smash, by charging this input, Togekiss will still open its wings as it makes a wish, but in front of its torso the projectile will instead be a Smart Bomb-sized light-blue ball of energy with some similarity to aura, which we already know Togekiss has control over. This energy ball will still be shot over the blast-zone at the same speed as a regular Wish, but will take 5 seconds for the now blueish-white heavenly aura to appear. A second later after the lights have appeared, which has the same reach as a Wish', the energy ball will fall at the same speed as a falling wish, with double its size while homing its direction towards Togekiss if its in range of the blue lights.
If Togekiss makes any kind of contact with the ball of energy, it will gain the effects of the Heavenly Blessing and gain Serene Grace, still restoring 5% for all the work put to getting the Grace.

Under the effects of the Serene Grace, not only will Togekiss gain a light blue aura, but many of its animations, including for certain inputs, will gain more grace to their movement. This newfound grace won't just affect animations, as Togekiss will also gain better traction, higher aerial jumps, faster rolls with better reach, and the best aerial control in the game, beating even Yoshi to it, helping immensely Togekiss' aerial and recovery game.
Just like its original effect in the Pokemon games, under the blessing of Serene Grace, all of the secondary effects to Togekiss' moves have double the chance to happen, with moves in Togekiss' arsenal which have to gamble to get a secondary effect appreciating a buff, especially if the chance is already a 50% chance or higher. This state will last 10 seconds, but with consecutive Serene Grace Wishes can be increased by 10 seconds for every granted Grace Wish (though between the wish being made and being granted, 4-5 seconds of Serene Grace will be lost), meaning that the foe still has to keep Togekiss away from Grace Auras to have them as quickly as possible lose their Serene Grace.

Side Special: Air Slash

"The user attacks with a blade of air that slices even the sky. This may also make the target flinch."
On input, Togekiss sways one of its wings from the front to high into the air, collecting wind in the area with a noticeable blue trail as it then forms a whitish-blue blade of wind shaped in the shape of Cloud's Blade Beam. The wing with the air blade is then slashed back in front of Togekiss, releasing the Air Slash.
The whole acrobatics in the gif above isn't present much in the regular move's animation, but does happen when Togekiss has Serene Grace, even doing a little flip after shooting the Air Slash!. Lag-wise, this move's startup isn't exactly the best due to the animation, taking a bit longer than what it takes for Mario to shoot a Fireball.

This slash in the air itself is as tall as a Bumper and goes directly forward only one platform away from Togekiss a good distance off the ground at the speed of Toon Link's dash before dispersing into the air. If the Air Slash passes through a foe, they will receive a solid 6% damage, but will only receive hitstun, though this move is not exactly a Fox Blaster when it comes to speed and range, so you can't spam this a lot. Instead, there's a 50% chance of them getting stunned for the same period as a ZSS paralyzer blast, with times where such flinch happens being ideal for Togekiss to do a plethora of things, from trying a small combo-chain, trying one of its harder to hit strong attacks, or using the opening to make a wish or try to catch said wish.
Wait, 50% chance? That's right! With a Serene Grace up, this move will always cause flinch, the projectile even going 1.75 platforms now due to Togekiss' newfound grace, now a becoming a truly scary projectile that can open up tons of threatening options for Togekiss, with it easily being the best way for Togekiss to Wish and retain its Serene Grace, though it still has chunky lags on both ends of the spectrum and can still be punished if missed or used at the wrong time.

By charging the input, Togekiss will sway its wing and collect air for the blade, but won't shoot the Air Slash yet, as it sways its wing again, proceeding to gather more wind for the Air Slash and do one more wing sway, now outwards, to shoot away the Air Slash, which now has a circular look like the gif above, though still clearly looking like a bunch of wind. While the startup lag for this move is in the process much chunkier and the end lag is also a bit longer due to the force needed for the move, this Big Air Slash will travel at twice the speed of a regular one for the same distance, damaging foes for a multi-hit attack similar to a Limit Break Blade Beam, dealing first 4 hits of 2% before a final hit for 3%, for a total of 11% damage as the foe is then knocked horizontally for a KO at 140%. This attack also has a 30% chance of stunning or "flinching", with foes being flinched before knockback similar to ZSS's DSmash, with the stun having the same overall duration rate as said DSmash half-charged. While dealing good damage and stun is pretty good, it isn't very common, though with Serene Grace the chances escalate to a 60% chance, which can of course be very scary for the opponent, especially if they predict this as a regular Air Slash by the initial animation or vice-versa, though even after the extended animation starts there's still some time for the foe to react, so keep an eye out!

Down Special: Ancient Power

"An ancient power is used to attack. It may also raise all the user's stats."
Ancient Power surely is a strange move. As the description above states, it's a move based around the user using an "ancient power", such power usually being shown as the user's control over boulders pulled from the ground. While this is a Rock-Type move, besides its spread to Rock-Types, it's generally a semi-common move learned by many types, usually Psychics and Legendaries. Due to the Togepi line being known for its powerful magical powers, this move happens to be learned by the line!
Togekiss' eyes glow blue as it raises both of its wings. The ground below it soon rumbles as three rocks are then telepathically pulled out of the ground, each with an uniquely colored glow around it as the rocks then create a circle around Togekiss, who returns to idle. Togekiss will now will always have the rocks floating around it for its idle, not interfering much other than decreasing Togekiss's ground speed a bit due to concentrating on the rocks, still being able to attack and such.

Each rock is about half the size of a Bumper, and are small enough to not create any holes in the stage or anything like that. Togekiss will always have one rock in front of them and two in the back. These rocks may be used to sponge hits for Togekiss, but they are rather weak and can only take 5% damage until destroyed (they ARE ancient!), not to mention foes can still hit Togekiss from above and below. While still useful at times, making a barrier isn't this move's strong suite, it's what the rocks can do when attacking! Each rock has a different colored aura suspending them in the air, being red, blue and white each, with the blue one always staying in front of Togekiss when brought up, though by tapping the DSpec again, Togekiss' eyes will glow brighter as you can now input left or right to change the main rock, with a left tilt with the blue rock in front causing the white one to move there, while a right tilt will cause the red one to lead.

By inputting what was once the Jab or NAir input, Togekiss' eyes will glow, leaning forward as it shoots the front rock forward, which goes in a straight line at the speed of an uncharged Charge Shot for 1/3 of FD away before the rock crumbles into nothing and the aura holding it disappears into the air, the next rock in the clock-wise line coming in to stay in front of Togekiss, with a repeated use then shooting the other rock forward with the same moderate lag as the first and a third input shooting the last, each rock dealing 5% damage to foes with rather weak horizontal knockback that won't be KOing until 160%.

If five seconds have passed and any of the rocks are still around Togekiss, they will crumple up and disappear, and while not causing any lag to Togekiss, you can't just spawn three more rocks after this, as Togekiss will suffer a three second cooldown and will only be able to use this move again after such time, with the same cooldown happening if Togekiss throws its last rock, though only for 1.5 seconds.

If you instead charge or Smash the original Down Special input, Togekiss' eyes will glow as it shoots forward all of its Ancient Power rocks cluttered together, with a combined purple aura and some starting lag. Such rock will deal more knockback to foes than just one rock, KOing at 120%, but also only dealing 12% damage (8% if used with 2 rocks), while three perfectly hit individually shot rocks still do 15% damage together, with strategic use of separated rocks potentially dealing more damage and KOing sooner while one giant rock will deal one solid hit over one projectile, though ultimately less than with smaller rocks.

Each color around a rock isn't for show, as each represents the stat buff Togekiss may receive if it connect a hit with the rock! Each Ancient Power rock has an around 16.6% chance of boosting Togekiss' stats, and while low on its own, with three successful Ancient Powers, you'll have a 50% chance of having one of your stats boosted! If such effect happens, Togekiss will gain a small aura around it the same color as the connected rock, which will indicate that for the next 5 seconds Togekiss will be under a Monado Arts-like buff based on the rock's color, which while only a third as lasting as the regular Arts don't come with the nerfs to other stats, giving Togekiss 5 seconds to toy around with their new buff. Serene Grace makes of Ancient Power a very threatening projectile, with each rock having a 33.3% chance of causing a stat buff! That means that out of the three rocks, if all connected, there's a 100% chance of you getting a buff! A charged rock will even have a 20% chance of having all the stats buffed, a true boon to Togekiss' side and a true reason for the foe to try to avoid Ancient Power projectiles. Though Togekiss can lose its Grace in the middle of spacing its rock shots, so take note of how much Grace you have left.

Connected Blue energy rocks will boost Togekiss' dash speed by 1.25x, upping it to a a dash speed comparable to Charizard's, while its Aerial Speed will be increased by 1.1x, now equal to Wario's Aerial Speed, which combined with Togekiss' existent bulk can be a real problem to foes, Togekiss now being able to better approach and combo around with.

If a red rock manages to both hit a foe and activate its effect, Togekiss' moves will now deal 1.2x more knockback and KO 10% earlier, though Togekiss will also gain a weaker shield, with only 25 HP. As such, in this state Togekiss will be much better at KOing and will be at its prime to use its Smashes, but now also has a pretty garbage shield that will probably cause you to shield way less during this move's 5 second period, though rolling is still fair game, especially with Serene Grace.

White energy rocks will have a chance of upping Togekiss' shield's HP from 40 HP to 50. Togekiss will also gain a weight increase, now having enough bulk to surpass even King Dedede by a small margin. This will probably be the buff you'll want most at neutral, as it can give Togekiss even more bulk to resist attacks and set up its Wishes and Serene Grace, with a Grace'd Togekiss with this stat boost not only gaining the stronger shield but also Serene Grace's roll buff. Togekiss might even want to get this buff at later percentages, since it can give it the upper hand at surviving at such points.

Shooting rocks individually or combined gives Togekiss some good variety on how to get Ancient Power buffs, as while a single, combined rock will knock more and be an immediate big threat for the foe, if Togekiss is already gambling to get a stat boost it'll gamble even more due to not knowing what stat boost it'll be getting! On the other hand, by shooting three individual rocks, Togekiss can choose which to shoot and hopefully get a stat boost, though still having to land all three rocks so the secondary effect can even reach a 50% overall chance. If Togekiss is at a favorable point where it just wants solid, non-flinch damage, it might just try shooting the foe down with a big rock, with the smaller rocks also being useful due to offering Togekiss 3 chances to shoot a Wish or Serene Grace star.

Up Special: Sky Attack

"The strongest Flying-type attack. Energy is stored in the first turn, then fired the next turn."
Togekiss faces the screen with both its wings outspread as it soon gains a cyan outline signature to Sky Attack, which gets even more prominent with Serene Grace, as it then gives a brief flap of the wings before rocketing upwards at a speed a tad slower than Lucario's Extreme Speed, Togekiss' blue outline almost completely covering it during the flight. Togekiss will fly directly upwards 2/3s a Super Dedede Jump in distance before the aura around it dims out as it returns to aerial idle, unable to use the Up Special again.

Togekiss will be dealing countless hits of very low knockback and 2% damage during the flight to foes who hits its body, which while naturally large will have an even bigger hitbox due to its spread wings. This move's hitbox's nature will also mean that a foe hit by it will probably be hit various times during the flight unless at obscenely high percentages, with a foe hit by this move from the start being able to receive up to around 20% damage, which is especially good if they happen to be hit from the ground. The foe won't be knocked away though, potentially keeping them in your face when this move ends, which while good considering you can still attack with Aerials, can be bad at times.

While the first part of the move won't be knocking away your foe, like with Shulk or Cloud, Togekiss can press the Special input again in this move's apex, shortly doing a short spin in the air before, still with the cyan aura from the rise, rocketing away at a direction below 150* that can be decided with the joypad, though by default Togekiss will fly away at double the speed it rose in a 90 degree angle, for classic Stall-and-Fall lovers out there you can also of course rocket back downwards, since after all it's angled less than 150*.
If Togekiss meets any opponents when rocketing a desired direction, it will deal a solid 10% damage as the foe is then knocked away vertically for a KO at around 120-80% depending on how many previous hits were connected, and while one may think this can do excessive damage to foes, with smart DI you can escape this move with not a lot of damage done to you, with Togekiss obviously wasting a ton of time doing this move if whiffed. And while this move does indeed have Super Armor throughout the majority of it, during its startup and during Togekiss' little spin between segments of the move, the Jubilee Pokémon will receive full damage from attacks, so don't get scared and lay the hurt!

When Togekiss crashes into the ground, it will create a blue circular shockwave around it that'll go 1 SBB away from Togekiss, dealing light 5% damage to foes hit by the shockwave's growing area with a 30% chance of paralyzing foes like with Air Slash, with a Serene Grace boost helping make Togekiss' landing safe.

Recovery-wise, while the vertical boost covers some rad distance, since Togekiss is concentrated in its fiery angelic rocket, it will be unable to grab ledges, meaning that you'll have to go above ledge and then end the move to return to stage, which is of course really risky. By using the secondary attack though, you can cover the landing, both with the powerful hitbox and by the paralyzing shock wave at the end of the move. And while this is indeed a good recovery for a fighter with four aerial jumps, while it has some good vertical reach, when it comes to horizontal it will only be really good up close due to the angling, meaning that the farther Togekiss is launched the worse its recovery will get.

Standards

Jab: Jubilee Jab
Togekiss enters its gliding pose if not already and will do a quick, horizontal clockwise spin in the air, outstretching one of its wings completely during the first half of the spin. This wing will serve as the move's main hitbox, and will deal a nice 3% hitstun damage to foes hit by it as Togekiss turns, being swung around in an arc and with some excellent range due to the wing's bulky size. Lag-wise, as a first hit of a Jab this won't have much endlag, returning Togekiss to idle the moment it finishes its quick spin, now with its wing closer to it. On the other hand, to compensate this Jab's good reach, it has some cruddy startup for a lag.
With another jab, Togekiss will once again spin, this time in an anti-clockwise direction and with much more speed, now outspreading its other wing during the spin's first half. Foes damaged by this speedy wing receive 4% damage with respectable horizontal knockback that can only really KO at 180%, good for spacing foes, following up and also doing general damage.

But wait, that's not all! With Serene Grace, Togekiss' newfound agility will cause it to slow down this Jab's second hit to be on par with the first, still dealing the same damage as before but now with only hitstun, but also now being able to continue the jab combo!
By doing a third jab under Serene Grace, Togekiss will inch both its wings closer to its body as spins its body in place like a graceful drill for an infinite jab, dealing 2% hitstun damage to foes hit by the spinning Fairy-Type. Like all infinite jabs in Smash 4, this third hit of course has a finisher (I mean, it would be kinda lame if an infinite jab was all Serene Grace added), where Togekiss completely folds its wings towards its sides as it then charges 1 SBB forward head-spike first for some awesome 5% damage that'll KO at 150%, though hitting Togekiss' body will only deal some minor 2% damage with light vertical knockback.
Under Serene Grace, Togekiss can also cancel the second or first jab's endlag into a roll or grab due to the move's more graceful animation, making of Togekiss' Jab a real sick and useful move when under Grace, which can especially help kick opponents away from your further Serene Graces, though you still have to connect some laggy hits first to get the possible juicy damage from an enhanced combo, not just making this Jab some overpowered monster attack.

Additionally, all hits besides the infinite jab will inch Togekiss forward a bit, which while not uncommon for jabs, Togekiss has the factor of flying during the jab, meaning that Togekiss will go over the ledge when performing these moves at the same height as said ledge, with fast enough follow-ups continuing the move while going through the air, though by finishing the move for good you'll be put falling in your aerial idle. This can give this jab some interesting edge-guarding tools, though considering Togekiss' higher aerial orientation, isn't one of its only edge-guarding tools.

Dash Attack: ExtremeSpeed


"A blindingly speedy charge attack that always goes before any other."
Or alternatively this.
Togekiss pauses its dash for a moment before suddenly extending its wings even further as it rockets forwards 1.5 Battlefield platforms face first and with both its wings high into the air with a clear blue aura similar to the one present in the above image, moving at an, of course, Extreme Speed. More precisely, a very quick speed a bit faster than even Lucario's ExtremeSpeed, with not a lot of startup lag compared to Togekiss' other moves but some bad end lag due to Togekiss having to stop such a high-speed dash, after all, the higher something's velocity the harder it is to stop it. Like Togekiss' jab this dash will go over ledges as if they weren't even there, and considering Togekiss doesn't get into helpless, doesn't dash a very long distance and isn't a stinking fast-faller like Fox, it will have a much better time recuperating from this move than pre-Brawl Fox Illusions over the ledge.
Opponents hit by the high-speed Togekiss will receive 4% damage with slight vertical knockback if they hit Togekiss' body, though if they're hit by Togekiss' head and where the white aura is centered, they will get knocked vertically by 8% damage for a KO at 140% if hit correctly, making this move prime for Togekiss approaches and for overwhelming foes with your quick speed, though if you whiff or miss this attack don't expect to go unpunished.

Like how ExtremeSpeed is a high priority move in Pokemon, in Smash ExtremeSpeed won't clash with any ground move and will always outdo it and attack the foe, though still thwarted by aerial moves. So even the most powerful of attack will clash with ExtremeSpeed and have the latter win the priority. While this seems a bit unfair, this move's noticeable startup can be used to hit Togekiss. Alongside that, this move's priority will also get lowered alongside the stale move queue, with a second use already causing it to not clash with attacks that deal more than 15% damage and a third or fourth repeated use not having any more higher priority, such being the fate of a spammed move. While a non-stale ExtremeSpeed won't be clashable, this move is still very weak to shields and barely does damage to them, not to mention just jumping over Togekiss can be used as a tactic due to this move's endlag, so try those to escape this attack!

While this input isn't affected by Serene Grace due to Togekiss' graceful agility not really having much impact on an all speed attack, this won't be the last of this move, just remember that...

Down Tilt: Low Flight
Togekiss gracefully flies at a mid-fast speed forward the distance of a crate forward in a slight but noticeable downwards angle that causes Togekiss to almost touch the ground by the time it has gone a crate forward. After reaching the max distance for this move, Togekiss will suddenly do a quick and sharp u-turn back the way it went while now rising back to its original distance off the ground, stopping once it's above its original location, though Togekiss will shortly after fall to the ground into idle, though you ca freely cancel this into a dash instead, since Togekiss is already in the dash position. Foes hit by this rather quick move in Togekiss' arsenal with not a lot of lag especially in the startup will receive 6% if hit by Togekiss during the dash forward but will also receive 8% if hit by Togekiss' wing right during the u-turn, both instances plopping the foe into the air, which can easily follow into other tilts at mid percentages but also has the worst KO power out of Togekiss' tilts, only KOing at 180% while sweetspotted.

Like many other characters, Togekiss' Down Tilt has a chance of tripping foes hit by it, more specifically a 30% chance. While in another set this would probably just be glossed over, the tripping chance in this move is indeed a secondary effect and as such is affected by Serene Grace! With Serene Grace, this tilt will naturally have a 60% chance of tripping, more than even Captain Falcon's 50% tripping Down Tilt! Additionally, with its added agility, Togekiss will go two full crates forward during this move and will now do a small barrel roll-like spin during the u-turn, which'll boost it's sweetspotted damage to 10% and a 100% trip chance! With these tripping capabilities on a quick-going tilt, Togekiss can use its dtilt to create openings for attack follow-ups and to have the foe waste their time if trying to ward off Togekiss from its Wish spot, giving Togekiss a nice opening! You still gotta remember that only the sweetspotted hit will always trip and that as a low-going tilt this can be easily avoided, so don't get cocky!

Forward Tilt: Fairy Wind
"The user stirs up a fairy wind and strikes the target with it."
Togekiss faces its belly and feet forward as it starts flapping its wings intensely, creating a shower of pink and glittery wind that is blown forward by its flapping wings, covering an area about as tall as Togekiss and about as wide as a crate with the sparkling powder.
Foes hit the wind will receive 4% flinch damage and will get pushed by this move's windbox, usually receiving two hits before being blown away. This windbox gets stronger the higher the foe's %, only pushing them right outside the cloud early into the match but at higher percentages pushing them farther, almost like true knockback, being able to KO at 160% with the wind alone.
After Togekiss finishes creating wind and returns to idle with not a lot of lag, the fairy wind will still stay as a cloud of the glittery fairy powder the size of a crate, which while only staying for a third of a second and only able to deal 2% more damage to opponents who enter it with some slight push, still has uses due to its relation with Air Slash.

Since Air Slash is a projectile made of air, if it passes by this dust, it will get picked up and make the slash pink and glittery, not only causing the air slash to then deal 8% damage and 4 hits of 3% if its a Big Air Slash to opponents, but will also cause the slash to inherent the powder's windbox susceptibility and make it so Big Air Slashes KO 10% earlier while Air Slashes now blow away foes hit by it like a windbox, which while not something that can KO, can be nice for spacing, especially away from your Wish area. While you may think you can just combine these moves all the time, not only is it difficult to hit an Air Slash made before a Fairy Wind, but both moves, especially Air Slash, have punishable starting lag. Not to mention Togekiss can be seen using this strategy from a mile away.

Under Serene Grace, this move doesn't change much other than Togekiss being able to now cancel this tilt's endlag halfway-through into a roll, which can help if you want to space away after creating some dust or even Air Slash in another direction.

Up Tilt: Waved Wind
Togekiss, facing belly forward while levitating only a small distance from the ground, gracefully and with not much lag swaying one of its wings upwards at a quick speed, going from in front to past its head before ending the move. Togekiss' chunky wing gives this move some good range, dealing 6% damage to foes while popping them into the air, though with enough knockback to chain into itself once or twice.

Additionally, Togekiss' wing slash will create a windbox once it's passing above Togekiss which while small at the start will later be able to cover the whole area above Togekiss with a windbox that's able to push foes upwards a relatively short distance, which is good for hitting foes who were damaged late into the move or for some nice anti-air potential, which can certainly have an aerial follow-up considering Togekiss' degree of aerial movement.

If Togekiss' wing passes by any leftover fairy dust, the dust will collect around the wing. This dust will get dropped into this move's slashing afterimage common for a move and create a glittery trail that will deal 2% flinching damage to foes, which can create a semi-barrier for Togekiss. Alongside this, the windbox created near the end of the move will shoot out alongside the wind the remaining powder, which will not only increase the windbox's push but also cause it to deal damage, around 4-7% damage along with the push, dealing more damage if Togekiss caught the dust later into the move, since after all there will be more leftover dust. While having the wind do only 1% less damage than the tilt itself is nice, it's hard to get unless the powder was spread atop a platform above Togekiss, though you'll have to also of course line the foe with the powder.

With Serene Grace, Togekiss can input this move after using it a first time to, with some lag to it, slash upwards its other wing, which while unable to interact with fairy dust due to it being used up by the first slash and only being able to deal 4% damage, adds to the knockback behind the move and makes it so it can plop foes into the air and KO them at 160%, making for an interesting and killer anti-air.

Smashes

Forward Smash: Aura Sphere

"The user lets loose a blast of aura power from deep within its body at the target."
Spreading its wings high like in the Wish animation and levitating a small distance from the ground, Togekiss gains a concentrated look as it forms in front of itself a ball of concentrated aura, much similar to Lucario forming a ball of aura in its Neutral Special. The Aura Sphere first appears as a small ball the size of a Pokeball, but during the move's starting lag increases in size, being then shot by Togekiss once the concentrated aura is the size of an X-Bomb, with Togekiss tilting both its wings forward when shooting the ball and doing a small spin after launching the aura, and while this ending lag normally just has Togekiss stand in place, if Togekiss has Serene Grace it can jump during the ending lag animation and dodge moves.
While an uncharged Aura Sphere is only the size of an X-Bomb, by charging the move, Togekiss will continue concentrating into the formed sphere of aura and keep increasing its size, with a fully-charged Aura Sphere getting as big as a regular Hothead.

The Aura Sphere will travel 1 to 1.75 platforms away from Togekiss in a straight line before disappearing, moving at the speed of an uncharged Mega Man FSmash to a fully-charged Lucario Aura Sphere. Foes hit by the projectile will receive 13-18% damage with horizontal knockback that will KO them at 140-100%, making of this move a great projectile to KO foes from a distance, with it especially being good for hitting wish stars while threatening the foe to back away.

While the Aura Sphere itself isn't affected by Serene Grace, it'll get indirectly boosted by it due to its relation with Ancient Power. Since this concentrated ball is part of Togekiss' own aura, it will get directly affected by Togekiss' stat boosts caused by Ancient Power. For example, if Togekiss has a speed boost from a blue rock, the Aura Sphere it creates will have a darker shade of blue and will now go at 1.5x its normal speed, now also growing in size during the charge at a faster rate, growing into its fully-charged size about 3/4s into the move, staying static in said size until the end of move, though during that time the ball will always deal max damage no matter what. While this is good and great, this comes at the cost of the move's knockback, as the Aura Sphere will now only KO at 200-170%, meaning that the move's nature will be less inclined towards a powerful projectile scare and more towards a bugging projectile that's good for snagging Wish stars but worse at killing than something like a Big Air Slash or an Ancient Power rock cluster.

If Togekiss has a knockback boost from a red rock, the Aura Sphere created by it will have a red color and will also be slightly bigger. This Aura Sphere will move at the same speed as normal, but on hit will only deal 10-14% damage and will only go .75 - 1 the length of a battlefield platform. On the other side of the spectrum though, foes hit by this Aura Sphere will be KO'ed at 120 - 80%, making this an excellent KOing move but also one that you'll probably only be able to connect at point blank.

With a white rock boost, the Aura Sphere Togekiss creates will be of a white color and when shot will only move at a third of its normal speed and will take about 20 more frames to fully charge, but at the same time will deal much more damage, dealing 16 - 25% damage to foes hit by it, additionally having better defenses, being unable to be reflected and absorbed. While this makes the projectile obnoxiously hard to hit foes, if it does, it will be able to deal a ton of damage, which is nice if you want to keep the foe's percents on par with yours. This move is also good for creating openings for reflector or absorber savvy foes like Ness or Lucas.

If Togekiss has all of the stat boosts, maybe because it got it from a clustered rock projectile or because it got lucky with the individual rocks, it will get the best of all worlds. Togekiss' Aura Sphere will now gain a whitish-purple color and will go forward at a speed in-between that of the regular and the blue rock versions of the move, now fully-charging 4/5 into the charge and dealing 15 - 21% damage to foes and KOing them at 130 - 90%. A truly powerful projectile that foes will want to stray away from and prevent from being made possible in general by avoiding clustered Ancient Power rocks.

Up Smash: Fly / Double-Edge
"Flies up on the first turn, then strikes the next turn"
"A reckless, life-risking tackle that also hurts the user a little."
Togekiss looks upwards with its wings extended, almost as if in its dashing pose but facing directly upwards and in a pose also similar to its Sky Attack. By charging, Togekiss will slowly extend its wings more and more to its sides, to the point where at full charge both wings will extend half an SBB away from Togekiss.
On release, after some lag, Togekiss shortly flaps its wings before bursting upwards in the same stance it was before, rocketing straight into the skies a distance equal to the height between the lower Battlefield platforms and the ground, though by charging you can have Togekiss go up to double such height.

Foes hit by Togekiss during its flight will receive 13-18% damage with nice vertical knockback that can KO at 140-120%, which is especially nice once Togekiss' wings cover a lot of area. However, Togekiss is punishable if it misses this move, as while during the first initial frames of the move Togekiss has full super-armor, it loses it shortly after "launch-off". With the knockback resistance from a white Ancient Power rock you can probably act more reckless during this move, but you really should watch out for when and where you fly.

While it deals the same damage as the rest of Togekiss' body, Togekiss' spiky crown will have some freeze-frames to it like most of Ryu's moves or The Knee. Not only that, but like Link's FSmash you can press the standard input again (though only after headbutting a foe) to cause Togekiss to pause in the air briefly before spike-first launching itself even more into the air, spinning like Charizard's Fly.
This is indeed a mighty Double-Edge, and even if this Normal-Type move isn't as effective as before for the now Fairy-Type Jubilee Pokemon, it's still very powerful. Foes hit by Togekiss' spiked crown receive an additional 10-14% damage, which counting the original Fly damage can deal 23-32% and KO at 100-70%. While this damage is pretty bonkers, especially with an Ancient Power knockback boost, the life-risking tackle will also deal 12-16% self-damage to Togekiss, really detrimenting its defenses if the foe survives or even in their next stock. To use this properly you'll need to be in a spot where you can still get more Wish stars to try to retrieve your self-damage, which can end up disrupting your Serene Grace due to you needing to do some regular Wishing instead of the Grace-kind.

With Serene Grace, you'll probably want to try to Double-Edge only as a last resort, though it is actually a bit easier to do so with Togekiss' Grace, which'll make Togekiss go a 1.25x higher distance in the Fly section of the move and give the start of the flight longer super-armor alongside a bit near the end, making of this quite a dangerous move in Togekiss' arsenal, though you still have to dawdle with super-armor problems and bad startup lag.


Down Smash: Body Slam
"The user drops onto the target with its full body weight. It may also leave the target with paralysis."
Togekiss jumps into the air in a 70 degree angle, this time getting impulse from its stubby legs like an idle jump, jumping with its wings open at its regular jump speed 1 SBB before doing a small flip if with Serene Grace and proceeding to fall belly-first into the ground with its wings lagging along above the falling Togekiss, who manages to use its own bulk to be able to fall at a decent speed. With Serene Grace Togekiss can more gracefully control itself during its fall, being able to tilt the move left or right to cause Togekiss to incline more towards such direction, like the many FSmashes that you can tilt up or down.

Foes hit below the falling Togekiss will receive the most damage from a vanilla Smash attack, a good 17-23% damage with bouncing knockback to grounded foes and a medium-to-strong spike to aerial foes, KOing foes on the ground at around 120-90%. This move does however have lag on both ends, with Togekiss needing to jump before the fall and also needing to readjust itself after falling down. While you may be thinking about doing some wacky Togecide with this move next to the ledge, the Jubilee Pokemon will only be able to fall one SBB away from the ledge before automatically doing a slight flap of the wings to slow its ascent and fall down another SBB before being put in aerial idle, still potentially being used for some edge-guarding purposes.

Interestingly enough, this move retains its original chance from the Pokemon games of inflicting paralysis onto a foe, though it's upped so there is a 50% chance of paralyzing, a guaranteed chance with Serene Grace. A paralyzed foe will stay in such state for 5 seconds and will have their movement halved during said period, hindering them a lot from trying to ward Togekiss from a wish. This weakness is especially apparent if Togekiss manages to hit a foe while boosted by Ancient Power, as the foe will be more susceptible to combos from a speedy Togekiss, will be killed much easier if you have a knockback-boost, and will be easier to hit with a defense-boosted Togekiss' Aura Sphere. This move is of course very laggy, so you really can't flaunt it around, being best used rarely and at the right time, crippling the foe so you can continue getting Wishes and staying safe.

Aerials

Neutral Aerial: Aura Pulse
Togekiss faces the screen with its wings open prominently to its sides high into the air as it with eyes closed soothingly cries a "Toge!" as from behind it erupts a blue and not very wide wave of aura that grows in size, similar to Greninja's NAir. This pulse of aura will at a mid-fast grow to cover a circumference around Togekiss before dissipating into aura particles like those found in Lucario's attacks. Foes hit by Togekiss' aura will receive 12% damage with nice radial knockback that's really nice for spacing foes away, especially from your general Wish area. On the other hand, like many NAirs, such damage can only be done clean and gets weaker throughout the move so that by the end of it the foe will only be receiving 5% damage. Unlike most of such moves where the hitboxes are static, since the pulse of aura grows in size and range, you'll have to connect at certain sweetspots in the initial animation to hit a clean hit, which is around below Togekiss' wings and also near its tail below it.

Like the FSmash, this move gains some relatively small buffs from Ancient Power buffs. With a knockback boost, the now red wave will be dealing only 9-3% damage, but will also be KOing at 150-170%, making for a great knocking air move that has good range and'll hit on all sides.
Have a speed boost, and not only will the bluer wave be shot earlier and move faster, but the aura will lessen its damage at a slower rate, at the cost of a bit more end lag and the move now only KOing at the upper reaches of 300%, which while good if lead into from another move in a speed-boosted combo, doesn't have much use otherwise.
With a defensive-boost, Togekiss' whitened Aura Pulse will only deal 10-4% damage and will only KO at early 200%s but will also gain much more defensive capabilities, as it won't just be passed through by foes and instead block those hits from hitting Togekiss, being especially nice later into the move when the wave is around Togekiss' hurtbox, with it potentially being better than an air dodge due to better follow-ups from a regular joe-shmoe move.
An all-stat boost will merit Togekiss slight super armor-ish properties to its shield, which will block all attacks that deal 7% damage or less, while also dealing 13-6% damage to foes while KOing them at 160-180%! A powerful jack-of-all trades move for a powered up Togekiss!

Down Aerial: ExtremeSpeed Fall

Togekiss stalls in the air for a moment, doing a small somersault-like spin in the air before plummeting down at the speed of Toon Link's DAir, rocketing down while upside-down and with its wings tucked closely to it in a manner and visual effect very similar to the Dash Attack's Extremespeed. Like your usual stall-and-fall, Togekiss will only stop falling towards the ground once it crashes into the ground or into the blast zone, suffering some noticeable landing lag if you slam into solid ground.

If a foe is hit by Togekiss during its descent, they will receive 13% damage with some vertical knockback that KOs at around 160%, though by sweetspotting below Togekiss and where most of the aura surrounding it gathers, they'll instead be dealt with 15% damagewith a spike that onstage can KO at 140%. If the foe doesn't get hit or can hit you during it, this move can be very risky, though with some high reward if you can land it, potentially kamikazeing from the air, which is Togekiss' strong suite, to KO foes, also potentially using the move to divebomb directly into falling Wish stars that you happened to miss and are below you.

With the added agility from Serene Grace, by pressing the standard button and a left or right direction once you land, you can cancel all the landing lag of the move to instead dash into the input direction with Togekiss' ExtremeSpeed Dash Attack, potentially giving this simple stall-then-fall a Pikachu Quick Attack-like lighting speed two direction attack, which is awesome for quick and easy air to ground shifts alongside the great movement abilities, especially if you're in a rush to get to a Serene Grace Star that has just fallen. Offensively this is also pretty great, as if you can sweetspot the move you can slam foes with you to hit with the Dash Attack to up the damage to 19% or 23% damage depending on if the second hit gets sweetspotted, with the latter damage KOing horizontally at 110%, a very powerful move from the air that sadly can also be a bit too obvious and expected.

Forward Aerial: Aura Tail
Togekiss faces belly forward with its wings also folded to face in front of it as Togekiss, with a touch of lag, gracefully performs a midair backflip in said pose at a moderate yet still fast enough speed. Togekiss' feather-like tail behind it will shortly after the spin start glowing blue with aura as it then acts as a hitbox during the move with a neat slight aura sword-trail to it, arching from slightly below Togekiss to a high upwards angle in front of it, with the aura disappearing after such point. While Togekiss' tail is relatively small, like plenty of attacks in Smash, it'll get slightly bigger, which alongside the radiating aura around it also acting as a hitbox, giving the move some nice range. Foes hit by Togekiss' tail will receive 10% damage with vertical knockback that'll only KO at 180%, which isn't very high and can lead to a -vertical- wall-of-pain, making good use of Togekiss' additional air jumps, though it isn't very easy to get too many hits off considering the move's lag and clunk arc at times.

Like other aura moves, an Ancient Power boost will directly affect this move involving Togekiss' own aura. With a speed boost, not only will Togekiss' flip be slightly quicker, but the aura hitbox will appear sooner into the move, making of this a pretty darn good move to exploit during a speed boost-influenced aerial combo, though the move will now only deal 7% damage, so the overall damage you'll rack up may end up lower than planned if you're not very good with comboing.
Knockback boosts will, well, boost this move's knockback to KO at 130%, making of it a powerful launching tool at higher percentages, though at the cost of more startup lag and a slightly longer spin.
Have a shield boost, and the aura tail will deal 8% damage and only KO at the later parts of 200%, but will also be thicker and serve as a damage sponge, as if a foe hits Togekiss and the aura tail or even its trail hits them, their move's damage and knockback will get halved, making of this a much less risky move with less punishability since Togekiss can shortly come back after taking diminished knockback.

Back Aerial: Celestial Flap
Togekiss faces its whole body forward and its wings outstretched behind it as it then serenely and gracefuly flaps its wings, first swaying them outwards and then pushing them inwards, with some slight fairy dust particles similar to those found in Togekiss' FTilt. This move has lag on all sides of the spectrum, as the outwards sway of the flap won't deal damage and will cause some minor starting lag while there are noticeable chunks of ending and landing lag, the former moreso than the latter.
The inwards sway of Togekiss' wings will complete its graceful flap and also cause Togekiss to fly 1 SBB straight forward in the first use of the move, similar as such to moves like ROB or Corrin's BAir, slightly aiding Togekiss' already good recovery at the cost of the foe potentially taking a jab at you once you're in the midst of ending lag. This move is pretty good if you're needing something to both knock a recovering foe and to also not waste one of your jumps.

Foes hit by Togekiss' wings will receive 12% damage and will be knocked for a KO at 130%, though if the move if hit late will only have the opponent be struck by the fairy powder for 5% flinch damage. By using this move in front of a cloud of fairy dust, it will be shot behind Togekiss 2 SBBs throughout the whole move, damaging foes with repeated flinching hits of 1% as they soon have to scuttle away from the cloud, which'll dissapear a bit before the move does. This potentially gives this move some very nice range if short-hopped, which can be especially nice for recycling some used fairy dust to stall the foe from not letting you snatch a Wish star.

Up Aerial: TogeDrill
Don't think less of Togekiss' spiky crown - The "Toge" featured in the name of every member of the Togepi line means spike in Japanese, so that musn't be for nothing! Togekiss faces upwards, with its head still facing forward and with its crown pointing upwards, folding its wings closer to its body in a pose similar to Pikachu or Falco's FAir but facing upwards as Togekiss then does an aerial twist, spinning in a barrel roll spin two times before ending the move rather quickly be it by landing or in the air, though this move's startup is in comparison way laggier.

Foes hit by the spinning Togekiss will receive up to five hits of 1% before being knocked away by a final 3% hit for a possible total of 8% damage, with vertical knockback that's pretty weak and won't be KOing until 200%, generally not the best option Togekiss has and a pretty weak move, mostly outclassed by an Aura Pulse unless you don't want to rely on early sweetspots or don't want to use your stat boosted aura.
Have the foe be hit by Togekiss' spinning spiky crest and it'll be a different story, as they will instead be dealt 3 hits of 3% preceeding a final hit of 4%, which sums up to a total of 13% damage and a KO at around 115%, making for Togekiss' strongest aerial when it comes to killing but also the hardest to connect, as even hitting the spikes from the sides will activate the sweetspot; you'll have to connect right above Togekiss. The payoff, of course, is pretty great, and this can be used greatly as an aerial combo or juggle finisher, though at times even if connected this move can cause problems. What if the foe survives and a Wish star started falling down? Now they have the upper hand at catching up to the star and destroying it! Yikes!

Grab: Extrasensory

"The user attacks with an odd power."

The Togepi line is well known for its strange and powerful magic and psychic power, which is exactly what Togekiss uses for its grab-game, due to a lack of arms. While the move Extrasensory is only learnt by Togekiss' whose fathering Pokemon was a Noctowl with this move, it's not just another egg-move due to its connection with the Togepi egg in Pokemon Gold and Silver, the first Togepi to be ever shown in the series besides in the anime. In the Generation 2 remakes, this special Togepi is born with Extrasensory, possibly due to its father or maybe because of the egg's mysterious origins, with an answer to this probably not being revealed soon.

For the grab, Togekiss' eyes glow pink as it slightly tilts its body back if flying,though it will only spread its wings slightly if idling. Togekiss then creates a short distance away from it a pink donut-shaped pink circle like the one surrounding Vulpix in the above image, which soon after being created decreases in size, capturing any foe in its wake in an odd psychic field, similarly to Mewtwo or even Greninja's Grab, with some bad startup, but pretty minor ending lag.

For a pummel, Togekiss slightly pushes its wings inwards then outwards, causing the extrasensory field tighten slightly and spread more around the target, dealing 2% damage to the foe at a medium speed, which is quite surprising for the more heavyweight Togekiss, being able to as such deal a good bit of damage before throwing.

Forward Throw: Dazzling Gleam

"The user damages opposing Pokémon by emitting a powerful flash."
Togekiss sways both its wings in front of it as the psychic energy emitted from its eyes shines stronger, causing the extrasensory field around the foe to be quickly pushed towards the Jubilee Pokemon, though it won't take the foe along, only leaving them in an aesthetic ragdoll prone state. Togekiss then starts concentrating on the now ball-like psychic energy in-between its wings as it then swiftly sways its wings outstretched to its sides, causing the psychic ball to be turned into a wide flash of pink light and energy, which extends about 3 SBBs away from Togekiss for a dreaded Dazzling Gleam attack! The crippled foe will be hit by this flash of light for 5 hits of 1% and a final hit of 4%, shooting them away directly forward for a KO at 140%. Other foes will also be damaged by the same amount by the flash of light, and will also be damaged by the knocked foe for 6% damage with some light vertical knockback.

While normally ina 1v1 matchup you won't really care about the launched foe's hitbox, with Togekiss it can actually have its uses. Since the thrown foe counts as one of Togekiss' projectiles, if it hits a Wish star, Togekiss will benefit from the spoils and restore HP or gain Serene Grace, which can lead to some interesting choices, as while this throw might at times get overshadowed by the others since it's not really the most powerful, it can be used to both space the foe away and to try to hit a passing Wish star, which with some strategic planning can be awesomely done, especially considering the move is relatively fas. This can, however, backfire, either by the foe DIing away from the star or even trying to stop right next to the star to destroy it.

Up Throw: Aura Snipe

Togekiss leans its body towards the foe with its wing outstretched in front of them as it then gracefully sways said wing in an arc high into the air, shooting the psychic field and the foe into the sky while angling them in a backwards direction and towards above the Jubilee Pokemon, with the psychic force soon fading away and leaving only the opponent to be launched, damaging them for 4% damage and launching them a fixed distance of 2 SBBs away fro Togekiss.
Togekiss proceeds to then folds its wings in front of its body as it then charges a small, Pokéball-sized Aura Sphere like in the above gif, which it then tosses straight upwards at a quick speed, the ball of aura having a crash-course straight into the passing opponent! The Aura Sphere will be knocked right into the foe to deal an additional 7% damage to bring the throw's total damage up to 11%, while the opponent is also launched into the air by the concentrated aura ball for a KO at 150%, which while by far the lowest KO rate of one of Togekiss' throws, can plop foes into the air for a bit of juggling, with the low-scaling meaning that even at a mid-game 50% a middleweight will usually only be launched 3 SBBs above Togekiss, with the Aura Sphere barely knocking the away from the base 2 SBB height.

Like other aura moves, this input is affected by Togekiss' stat boost, though its position as a throw leaves it as some pretty straight forward damage/knockback buffs. In summary, a speed-boost will have the stronger-blue sphere deal 10% damage but knock foes even less, potentially leaving them a bit too close to Togekiss, also having the projectile move aesthetically much faster. A knockback-boost will cause the bright red Aura Sphere to only deal 4% damage in a trade-off for being able to KO at only 120% now, placing this move a spot in the KO throw list due to its consistent killing in a flat-stage. Finally, a weight-boost will have Togekiss create a white ball that while slightly slower also has a bit of both worlds from the previous aura buffs, dealing 8% damage and KOing at around 135% for a generally consistent throw to better suit your more defensive gameplay.
With an all-stat-boost, Togekiss will now snipe the foe with a purple Aura Sphere that deals 9% damage, KOs at 125% and a weak suction effect, to suck the foe right into it for a faster move overall.

Back Thow: Psychic

"The target is hit by a strong telekinetic force"
Togekiss' eyes glow a bright of a wild psychic aura as it faces its feet and body forward with its tail poping out below it and its wings outspread as it gracefully spins in the air in a glide-like pose, as the field capturing the foe soon gains a more multi-circled look like in the image above as it and the trapped opponent are spun around erratically and in-tune with Togekiss' spin for a full circle and a half as Togekiss, facing backwards, proceeds to push its wing forward to cause the foe to be launched by one final psychic push to throw them away horizontally, in a throw that's pretty similar to what would be a combination between Luigi's and Ness' BThrow.
Despite the animation being similar to one of the strongest throws or attacks in general in the game, opponents psychically thrown by Togekiss will be damaged for 11% damage and will only be KO'ed at around 130%, though even then it still manages to be Togekiss' strongest throw, being pretty great at KOing foes after they've been wittled by your Air Slashes and Ancient Powers or for spacing them the heck away from your wish-zone, though still being a bit weak at times where Togekiss would really appreciate a good throw.

However, that is not the end to this move! Since most moves in Togekiss' throw arsenal use its magic powers instead of its agility and such, only the BThrow out of the list actually gets a Serene Grace boost, though it's a pretty great one to compensate, really. If a GraceKiss does this move, not only will they have a faster, more suave animation during the spin, but Togekiss will also do 2 and a half spins instead of the usual 1.5. By the second spin, the opponent will be spun much faster, with a higher psychic pressure surrounding them and a powerful psychic trail coming from behind the psychic field as they are still thrown after a half-spin, this time for 15% damage and a much more powerful force behind the psychic push to make it comparable to the PSI Powerhouse's Back Throw, a truly dangerous throw to have under Serene Grace but also one that can be fairly difficult to get, since Togekiss' grab isn't really the best and it can be a bit hazardous to just waste Grace time on trying to grab the foe.

Down Throw: Psyshock

"The user materializes an odd psychic wave to attack the target."
Togekiss lifts both its wings high into the air as the psychic energy in its eyes glows stronger, causing the psychic field around the foe to suddenly burst into cloud-like particles which, alongside a couple particles of the electric effect, which here don't do anything much since the foe isn't being knocked away. This will deal a passive 4 hits of 2% to the opponent over the course of about half a second in a way similar to Robin's Nosferatu for a total of 8% damage
After the total damage has been done to the opponent, which can actually be dumbed down to 1% later into the move by button-mashing like you would to escape a grab, potentially diminishing the total damage to only 6% damage, Togekiss proceeds to tilt its whole body upwards to cause half of the psychic clouds ensnaring the foe to rise up above the rest as they are all then merged and clasped together into a single, solid-looking, Pokéball-size ball of energy, as Togekiss closes its wings in front of it as an animation to go alongside this. The materialized psychic ball is then shot down at high speeds at the opponent, who is dealt 3% damage and knocked into the ground before being ricochet'd back into the air for a KO at around 145%, which while not too high can indeed lead into some tech-chases, with the passive damage before the throw being lengthy enough to potentially let the foe soak up a bit of fairy dust left by the FTilt, which can up the damage done by the move, even if the knockback isn't increased by much.

Final Smash: When You Wish Upon a Star...
Togekiss turns to face the screen as it closes both its wings in front of itself in a prayer-like stance, like the one when doing a Wish. The screen goes darker, as it then zooms out the camera all the way and a shooting star is shown passing by, like Wish's original animation found in the gif in said move.

After the fairly big, but only background-present star passes by, the still zoomed-out screen then returns to its normal lighting as it is then showered by a sparkling rain of multiple stars similar to those created with a Wish and the one who just passed by. The moment this happens, Togekiss is gifted a strong white glow with various colored triangles around the aura, which are obviously colored red and blue. This effect not only gives Togekiss unlimited Serene Grace, but also a 1.5x attack power and knockback boost! Meanwhile, the foe is put to sleep when the stars first fall down for the same duration as in Peach's Final Smash, with the same general idea of falling asleep longer the closer they are to Togekiss, giving Togekiss the free chance to use a Smash, Big Air Slash, or even an Ancient Power boost!

Additionally, after the first shower, more stars will come falling down each second in groups of 4, spread evenly throughout the stage itself, which Togekiss can nab for a free Wish HP restore! Since these stars are smaller than usual though, they will only restore 5% to Togekiss. If the foe manages to wake up, they can still hit these stars to cause them to stop healing Togekiss on contact, but the sheer number of stars probably means that they won't be able to hit all of them.

After 5 seconds, Togekiss will end the Final Smash, losing its Grace if it didn't have it before and having it continue its countdown from before the Final Smash if already with Serene Grace, though Ancient Power boosts will continue to be around, so you can still use them a bit before they fade away. Usually, Togekiss will only be able to get 2-3 stars in a batch at a time, for a total heal of 50%-75%, though if lucky enough you can even get a jolly 100% back! This is indeed a hard task though, you'll have to use your projectiles correctly and watch out for potential waking opponents, but the payoff can be grand!

Playstyle
Lucky Strife-Ender


Togekiss is a pretty interesting kind of fighter to play as. It's got enough size and weight to be considered a fighter deep in the heavyweight tier, but still not weighed enough to be comparable to the Super Heavyweights. Togekiss also misses out on the sheer power that comes from many heavyweights, with its usual damage given being usually one expected from a midweight or high-midweight.

Instead, Togekiss focuses a lot on crippling the foe with its many move side-effects, like stunning with its Side Special, stunning with its Down Smash, and even boosting its own stats with Ancient Power. For many pokemon moves, while sheer damage is important, the side-effects from the move can be very important for a match, though such side-effects are usually where Pokemon's more luck-based gameplay shines, due to them usually only happening a certain percentages of times when executing a move, which just as well happens with many of Togekiss' moves, as while they can cause some really nice side-effects, such effects might not even happen, causing an abnormal need of luck when playing Togekiss, moreso than just something like Game and Watch's Judge or the trip chance of a single DTilt.

However, Togekiss' Neutral Special is literally a blessing for the fighter, with the ability to make health restoring wishes being great for both getting health back for the sometimes combo-food fighter, but also creating pressure for the opponent, as they will now have to also dart their attention to the wish star that will soon fall down, creating more opportunities for Togekiss to get damage and status effects on them.

More importantly to Togekiss' whole gameplay is the charged version of the move, Serene Grace, as if its falling star is succesfully caught by Togekiss, it will lose a lot of its gambling nature, not receiving a straight up damage boost, but becoming much more effective due to being able to freely use its crippling status effects, which usually have a half chance of happening, meaning that they will always happen under Serene Grace, besides a couple cases, like Big Air Slashes, DSmash stun, and the DTilt's trip chance. Togekiss also gains better traction and aerial movement in this form, making playing as it way less slippery and more tight, also causing its aerial game to get even better, not to mention better defenses due to farther rolls and such.
Many moves also get direct boosts from Togekiss' added agility with Grace, most notably many of its Tilts and its DAir, which under Serene Grace can transfer into a Dash Attack for an easy air-to-ground transition.

For a quick move tour, Air Slash is Togekiss' main way of stalling the foe to deal damage and/or to start some combo chains, preferably pushing them away from its Wish area. While a relatively simple projectile, it can factor in a lot of Togekiss' Wish game, due to being Togekiss' preferred projectile for sniping Wishes from a distance, and also due to it always stunning under Grace for a paralyzing projectile that's even better than ZSS'. Togekiss can also use this move's bigger, laggier, counterpart, the Big Air Slash, which while hard to execute, can be a prime way to KO foes and get them the heck away, potentially even getting an opening after its samller counterpart stuns the foe, though usually only later in the game due to this version of the move's heightened lag.

Ancient Power is a pretty vital part of Togekiss' game even with the mask of a simple "pull from the ground, then attack" move, mostly due to its versatility as a projectile and its potential stat boosts. While laggy, an input of this move will cause Togekiss to essentially get three pieces of ammo, which it has some pretty good control over, being able to choose whether to throw them all together, or to throw them individually. The individual buffs each of these rocks give can help Togekiss tremendously, as, even with Serene Grace, Togekiss can still have problems with finishing the foe off, moving around, and even with wanting more defense. The Monado Arts-like buffs Togekiss can receive from this move can make it especially dangerous with Serene Grace, as if the opponent ends up hit by them all together, Togekiss is guaranteed to get a buff, though it will always end up being random. Meanwhile, throwing each rock individually can give Togekiss the freedom of choosing what boost to get, though in a much trickier fashion that includes smaller projectiles that won't always hit.
In general though, it is really hard to spam this move, as not only is summoning the rocks laggy, but Togekiss will also suffer some cool down after this move, especially if it stalls too much and doesn't throw them away fast enough.

Sky Attack is a very strong recovery for the Jubilee Pokemon, with the ability to zoom through a ton of distance in the air and even stall-and-fall back to the ground, something that combines with its 4 jumps may make it a pretty overwhelming recovery; but don't be fooled, this move does indeed have its fair share of cons. First off, the way the move is angled, if Togekiss is still below the edge by the time it finishes its aerial ascent, its pretty much impossible for it to get back to said ledge, not to mention that this move can only be angled as straight as 150* degrees downwards, meaning that Togekiss can miss the ledge entirely or not reach it even with its horizontal boost. Speaking of ledges, this recovery has the unique trait of not being able to connect to ledges, forcing Togekiss to have to do a secondary input to not be too vulnerable, which can open up a blindspot in the move in the form of the spin in between the two aerial movements, which alongside this move's startup, can be a bit laggy and doesn't have Super Armor, potentially giving foes some jolly openings for gimps.

The fairy wind created with Togekiss' Side Tilt, for how minimalistic it is, can be very effective, as Togekiss can use it to booby trap a Wish area with a small hitbox that it can control with moves like its BAir and UTilt.

Togekiss' Smashes are obviously its strongest damage-dealing section, and besides the lag, can be pretty potent, with stuns and trips from other moves leading to openings to use these moves. Togekiss' Up Smash can reach pretty high altitudes for a nice anti-air, and while the base damage for the move can be good enough, Togekiss can even risk its own health for a devastating Double-Edge, which while with proper Wish-Work can work out for the Jubilee Pokemon, if just used wily-nily with not a lot of openings for Wish and at higher percents can cause it to end up losing health with no way to restore it back. Down Smash is hard to connect at times, but can cause some sick paralyzing effects on the foe, which can nerf their movement to the point where it can get a lot easier to connect Air Slashes and Ancient Powers, though if whiffed, this move can have tremendous lag. Last, but not least, Aura Sphere is a pretty great killing projectile which can get some good uses even in its vanilla, but with customization with Ancient Power buffs can get really devastating.

As a more aerial-based fighter, of course Togekiss has a pretty good aerial game, with some of its faster inputs like Aura Pulse/Tail being located in this section alongside some deadly moves like the Togespin and the previously mentioned ExtremeSpeed. With two boost-affected inputs, when with an Ancient Power buff, no matter which, Togekiss will probably want to incline more towards the air.

Finally, while a bit below average, Togekiss' grab game cannot be glossed over, as it contains some pretty great moves for the Jubilee Pokemon, like a tech-chase starter with the Dthrow, a juggler with the UThrow, and a devastating move with Serene Grace in the form of the BAir, which is sure to give a Graced Togekiss some thought on grabbing foe for the sick KO.

Overall, Togekiss in its most basic can be a bit hard to mess around with due to its more luck-based approach, but with enough openings for Wishes and Serene Graces, Togekiss can be turned into a very resiliant fighter which can adapt well with its Ancient Power buffs while also whittling and stalling the foe down with stuns, paralyzes and the like.

Miscellaneous
Alternate Costumes:
In a right-to-left, top-to-down view, Togekiss' alts include:

-Regular
-Shiny Alt
-Clefable Based Alt
-Azumarill Based Alt
-Mawile Based Alt
-Mime Jr. Based Alt
-Whimsicott Based Alt
-Diancie Based Alt (Jamie please don't sue)


Up Taunt: Togekiss does a simple aerial backflip in place, with its wings outspread wide in its sides and bright smile to go along with it, crying a "Kiss!" once it finishes the acrobatics.
Side Taunt: Togekiss spreads its wings at its sides as it flaps both to scatter some pretty, but non-damaging, fairy dust around itself accompanied by a gentle "Toge!".
Down Taunt: Togekiss falls to the ground and lays its stomach on the ground, with its wings resting on the battlefield. While this roost won't restore HP like the Pokemon counterpart, Togekiss will face its head forward while layed on top of the ground as it relaxingly bobs it side to side while humming a little tune.

Win Animation 1: Togekiss does a couple of acrobatic flying stunts around the clear screen as it then notices the camera, stopping to land on the ground and to wave at it.
Win Animation 2: Togekiss is shown in the clear screen doing a deep wish in a prayer-like pose, as it then bursts both its wings back to its sides, contentally shooting away a Wish star, which is later on seen passing by like a shooting star in the backgroud.
Win Animation 3: A group of three Togepi and two Togetics are shown a bit worried in the clear screen as Togekiss then swoops in from off-screen to give its pre-evolutions a big hug. I fight for my friends!

Lose Animation: Since it is pretty hard to clap with wings, Togekiss, still wanting to be polite, gives a bright smiles with its wings to its sides. It might not like strife, but Togekiss is still respectable when it comes to an even competition!
Boxing Ring Title: Red and Blue, With a Big White Hue

Kirby Hat: Kirby gains a little adorable crown reminiscent of Togekiss' colored crest, also gaining access to Togekiss' Wish Neutral Special, even being able to get some mini-Serene Grace buffs!

Win Theme: The usual Pokemon Victory Theme, though played on a soothing and fitting harp.
 
Last edited:

Reiga

He sold diddy for a switch
Joined
Dec 8, 2014
Messages
1,256
Location
White Noise
3DS FC
1461-7646-7368
Reiga Comment Goodness
This Edition: Oh jeez I'm late

Nurse Joy
First off Slavic, there are some general stuff present in your sets this contest that I'd think would be best to point out now. First off, these sets would probably be way better off actually listing something like a Smash's scaling damage as "x-to-y%" instead of just "at max y%" as while granted we can just divide that by 1.4 or something to get the base damage, it flows way better to say the base damage and the charged damage, so the reader will be like "oh, so if I just tap this I'll get X, but if I charge it...". I don't even remember this kind of thing happening in your old sets either, unless I was busy looking at the pwetty pwesentation or something.
You should probably seperate your paragraphs more too, as many tilts can get a bit block-of-text-y, with a notable case being Melia, with most of the elemental-boosted moves getting a single paragraph to talk about more than 3 different types of effects.

Onto the Sharla set itself, there's really not much to say about it that everyone hasn't already said, though I do find it funny that you did this kind of set after at around this same period last contest you commented on Steven Universe while crediting Junahu's Nurse Joy for its supportive approach (wait, was it even you who said that? Darn bad memory!), and while I do indeed share other people's thoughts on the supporting style not meshing in well with the offensive part of the set, I would indeed like the set if it had a really big focus on the matter, as at the moment the supporting part of the set isn't at its best and the 1v1 is pretty sucky, with Sharla pretty much having no Side Special unless she enters a sniping state that really isn't my cup of tea. There truly isn't much to explore about this set that hasn't been said before

Wizzerd
Melia is a pretty fun set that explores some cool elemental interactions, and while I don't really like characters where their powers are "durr, all five mystical elements" (no offense, Captain Planet), the set does indeed have some nice stuff with being able to both buff yourself with the elements to do some mini-customization to an otherwise rather boring, statistically speaking, character and also use said elements in attacks to add a bit more flare to your moves, though I do feel more could have been done with the non-elemental moves like Shadow Stitch, with some elemental stuff like wind and ice also getting at times the short end of the staff. I do share my thoughts with Roy that the Grab-Game's elemental grab is a pretty bad use of the elemental mechanic, I also share the idea that some of these elemental buffs could have more to them than just "one does more damage, the other does more knockback etc."

In general, this set is a very fun idea that brings to light a fun way to manage different effects to both customize Melia and her attacks, though it would probably be better with some rethought on some elemental stuff, a better focus on some other non-elemental moves like Shadow Stitch and Starlight Kick, and a better grab game mechanic. Nice set, Slav!

What doesn't Kill me Makes me Weaker. But Hey, At Least I get a Speed Buff!
Like many, I think Dunban is the strongest set in the XenoSlav trio, with a very fun reverse-Aura like mechanic that I'm pretty sure hasn't been done much except for in ancient MYM or something of the like. The idea that Dunban starts the match really strong but gets weaker the more he is damaged is a strong one, especially since Dunban can manually lose his own % with his DSpec and isn't just affected negatively the more he is hit, with the speed boost factoring in very nicely with Dunban's set due to the high number of momentum-y moves. I do however share other people's sentiments that this set gets progressively weaker the more it is delved into, with an excellent Special section to start off, but a pretty meh Grab Game to finish it off.

Dunban's ground-combo based stuff like the SSpec is pretty fun, though I do question if said Special would be better as the Neutral input, considering the description itself says it's more important to Dunban's playstyle than the Tempest Kick. In general, while there are some moves with cool animations, Dunban also has some prett generic sword moves, with certain more different features like bleeding with the UTilt feeling a bit shoehorned in. I'm also not much a fan of the Ether-Based DSmash, which feels very much like something just put in for an ether-based Smash.

Overall, Dunban is a pretty solid set, and while it has some good improvement room, it's genuinely one of the best sets Slavic has blessed us! Good job, Slavicado Boy!


Kirby Dragons

Smash Hero
Joined
Aug 30, 2014
Messages
5,243
Location
Another Dimension
As I see that this contest is more active, I am more driven to create movesets for it. Here's one right now.

Nico Robin blooms into battle!
Nico Robin is a One Piece character, and a part of Monkey D. Luffy's pirate crew, the Straw Hats. Robin was previously the vice president of Baroque Works, known by the name of Miss All Sunday. When Baroque Works fell, Robin decided to join the Straw Hats, as their archaeologist. She ate the Hana Hana no Mi Devil Fruit, known as the Flower-Flower Fruit in English. It is a supernatural fruit that grants her the ability to sprout any body part on any surface. She has the tendency to cross her arms over her chest as she uses this power. Attacking any of the sprouted body parts will cause damage to her body, and this is represented in her moveset: with hitboxes come hurtboxes.
Stats
Height: 6.5/10
Weight: 6/10
Jump: 4/10
Speed (Ground): 6/10
Speed (Air): 3/10
Speed (Fall): 4/10
Water Paralyzation
This is the downside of eating the Hana Hana no Mi. All Devil Fruit eaters are bound to it: water. Robin lacks the ability to swim. If the majority of her body is in a body of water, such as the water in :delfino:, she becomes paralyzed. This paralyzation lasts exactly three seconds, and when it's over, the knockback out of the water allows her to make a necessary recovery. Water part of a character's moveset will never cause this effect, as they are incapable of covering up the body, and are used mainly for sliding or a basic attack.
Standard Special: Dos Fleur: Clutch
Robin crosses her arms over her chest. "Dos Fleur: Clutch!" All of Robin's opponents within a certain range of her will have two arms sprouting out of them, one from each shoulder. The range of the move is four SBBs, in all directions of Robin, though this range is circularly around her. After the arms have sprouted, they bend back the neck of whoever they've sprouted from over the course of 45 frames, dealing them 15% damage, yet leaving them no knockback, although it can still disrupt moves. This is a command grab, yet an odd one, due to its ability to catch multiple foes, and the fact that the vessel used to grab is actually coming from the foe's body.

The arms can sprout on opponents even under the stage. When Robin uses it near the ledge, it becomes a gimping move, disrupting recovery with her out of the way. If arms are sprouted on an aerial opponent, their falling speed becomes equal to 2/10 as their neck is being snapped. Dos Fleur: Clutch has notorious frame data, 22 frames of it. If the target's recovery strikes above the stage, Robin should simply leave it alone before she is knocked out of it. If she does clutch a recovering opponent, it gives her the chance to meteor using a down air or up special.

Dos Fleur: Clutch is a ranged, unblockable attack, and really useful on the ground. It can halt approaches, and create a sort of blocking method for those emerging from the ledge. The opponents are unable to get through it. For a command grab, it can be surprising, as it will affect those hanging from the ledge with ease.
Side Special: Ocho Fleur
Robin holds out her hand. She makes eight arms shoot out of it, as a chain, covering an extremely long distance. The arms shoot out one at a time, and each one will hit individually, although they can all hit the same target one after the other. Robin won't necessarily sprout eight arms with the side special, eight is only her maximum, and she will keep sprouting arms for as long as the input is held. If the input is released, the arms begin to disperse, at about twice the speed they sprouted at. Again using the input cancels the disperse, and makes arms continue to sprout at the speed from before. If uninterrupted, Robin can use these properties to keep the arms out for as long as she wishes, repeatedly resprouting them before they all disperse. After reaching the eighth arm, they'll automatically begin the retraction process. Each arm's hit deals 3%, meaning as much as 24% can be dealt with a single Ocho Fleur combo.

As the sprouting arms can be reacted to, they shouldn't be used in neutral. They can catch landings. When at least four arms are out, it is a good time for some mixups. She can choose to let the arms disperse, alternatively making them appear randomly, confusing the opponent. If they see the arms retracting and are in front of them, they could drop their shield, so a sprouting arm could hit them. If Robin starts sprouting arms, the opponent could think that she plans to sprout several, when she really only sprouts one or two. If she lets one or two arms disperse while they barely avoid being hit by an attack, resprouting the arms will punish the attack. The more Ocho Fleur is used against an opponent, the more you become used to it, and the more tedious and confusing it will become.

While Ocho Fleur has range letting Robin hit from insanely far away, it is also countered with good enough spacing to hit an arm with something. All of the arms are heavily vulnerable to projectiles.
Up Special: Cien Fleur: Wing
Robin crosses her arms over her chest. A complete second of lag passes afterwards. "Cien Fleur: Wing!" Robin sprouts a grand total of one hundred arms. Fifty sprout on each side of her, and they protrude from her back in an organized manner, gathering and forming a large pair of wings. When the wings are fully formed, they flap a single time, raising her five SBBs higher. During the flap, at the very beginning of the wing's drop, they can powerfully meteor smash, just without any damage. The hugeness of the wings leads to a huge hitbox for meteor smashing. However, if Robin's opponent is recovering, they will have plenty of time to get above a desperate Robin and avoid the wings, thus evading the gimp. If Robin actually wants to land a meteor smash, proper timing is essential. After knocking the opponent off the stage, she should jump off immediately and start this move. That timing would be her best chance to edgeguard, and a good application of this move.

Proper timing really applies to all situations. On the ground, Robin would need to get a hard read on the opponent's approach to hit them, and even then, they have time to react to this move. Low air speed means Robin shouldn't get too deep to use this. Her aerials provide far better gimping options. The huge and bulky wings are out for a long period of time, giving the foe a lengthy opportunity to hit Robin with a move of their choice, specifically a meteor of their own. A meteor against her will almost always succeed here.
Down Special: Veinte Fleur: Calendula
Robin quickly sprouts twenty arms, ten out of each of her elbows. The sprouted arms spread around her original pair of arms, which are put out in front of her, and she spins the arms around for exactly 20 frames. The spinning arms will reflect projectiles, with a 1.15 damage multiplier, and a 1.7 speed multiplier. It reflects 40 maximum damage. Really low lag is additionally involved here, so it can be spammed to grant Robin lots of constant protection. It can even be used two to three times before a landing. Foes should really beware of using their powerful projectiles in battles, as Robin is great with her reflection. A read is unnecessary.

Out of all of Nico Robin's moves, this is the only one where the sprouted body parts don't have any hurtboxes in them. It is safe to throw out at all times, and an efficient protector.

Neutral Attack
Robin holds up her arm, bent to form an angle. The arm instantly rises higher, for a hit of 2%. The hitbox for the hit, as well as the other hits, are of an average size. The first hit is stationed in front of the top of Robin's chin. Because of its height, Robin has trouble hitting shorter foes, so they are able to knock her out of it. The next two hits are lower, done by inputting the attack once each hit. From her shoulder comes the second sprouted arm, that hits with the same range as the first, only with a straighter angle. While the first arm barely has any knockback, the second only has knockback below average. Like the first, the second arm deals 2%. The hitbox size is the same too, with the arm being placed in front of Robin's stomach. The final hit is the strongest, with 4%, and average knockback.
Dash Attack
Putting her left arm atop the middle of her right, Robin grabs an opponent, and with a throwing duration of 22 frames, Robin slams them on the ground. To do this, she holds out her right arm, and creates a grabbing arm to sprout from her palm. When thrown, the opponent takes 6% damage, and bounces directly in front of Robin's toes, leading to the impossibility of throwing someone down under the ledge and closer to the blast zones.

Whether or not Robin is successful with the grab, this attack will always have 40 frames of cooldown for her. When combined with heavy diagonal knockback, that trait of high cooldown makes it similar to a heavyweight's attack, slow and strong. Most characters will be KO'd from the dash attack around 135-140%, and what's also notable is that the knockback is difficult to DI. This dash attack resembles a command grab, but it just isn't. It can be shielded. As a matter of fact, it has low shield safety. Robin can run in when she is close and get one in.
Forward Tilt
Robin holds up her arm, and 17 frames later, sprouts three half-arms from it. These arms will then each do a flick one at a time. These "half-arms" are all the bottom half of one of her full arms. The top half-arm receives the first flick, dealing 4%. The bottom half-arm has the last flick, dealing 3%. The middle flick has a bit more range than the bottom half-arm, and the top half-arm, which is longer than the bottom. However, the middle arm only deals 1%. There are ten frames between each flick. All of the hits are weak, but they will all hit the opponent most of the time due to low horizontal knockback. Another strength is how its range is spread out vertically, allowing it to hit high opponents and low opponents. All hits have low priority, being outprioritized by most attacks in the game. Thus, the bottom half-arm makes a lousy edgeguarding attack. It can occasionally combo into Ocho Fleur, though this is overall underwhelming.
Up Tilt
Robin creates a leg in her hand. The hand is pointed at a downwards angle. She swings her arm over her head until it's just barely behind it. The hitbox is only in Robin's foot, but it is also of a decent size. The attack has 7% damage. Since Robin waves the leg around her head, it can hit at most sides. It is hard to avoid during CQC. The direction of the knockback is dependent on where Robin's toes happen to be pointing during the hit; the opponent is launched in that direction.

Close to the end of the tilt, when the sprouted foot's toes are pointed towards the stage, you'll be able to launch people right behind you, creating an opportunity for you to combo into a dash attack.
Down Tilt
1.75 SBBs away, Robin sprouts a quick foot to pop out of the ground, remaining there sixteen frames for a sole lingering hitbox. If the foot hits an opponent, it deals 3% damage, and has an 80% chance to trip. The down tilt actually has eight frames of ending lag, and during this time, Robin gets free movement. When using this attack, Robin can get pretty campy, and grounded opponents will gain something to watch out for. The foot's quickness allows it to be comboed into by a forward tilt, which can launch right around where the foot pops up. Many moves can be done out of a successful trip. It doesn't benefit Robin at all if there is the rare failure to trip the opponent. In that case, the opponent takes a bit of horizontal knockback. However, unless she is careless and keeps spamming it, the foot can be an approach prevention device that you won't expect.
Forward Smash
During the charge, a wall of arms the exact same height as Robin sprouts three SBBs away from her, sprouting from the ground. This wall doesn't do much, but can minorly block enemy approaches just as efficiently as a Phantom Slash phantom that's finished swinging its sword. The wall has hurtboxes on it, so it does make it a lot easier for the foe to forcefully cancel the smash attack. Upon release, Robin will sprout eleven arms onto all opponents between her and the wall of arms, all over their bodies. Two arms come out of their cheeks to grab their forehead. One arm comes out of their chin to grab the top of their head. Two arms sprout from either of the opponent's arms, wrapping around their torso. One arm comes from either hip, gripping their legs, and arms come out of the knees to pick up their feet. Contrary to the move's name, there is a potential for there to be more than eleven arms involved. With two opponents between Robin and the wall, there would be 22 arms sprouted, not counting the actual wall. Eleven is only the essential amount of arms for the attack.

All of the arms work together to slam the opponent into the generated wall for a minimum of 11% damage. "Once Fleur: Slam!" The opponent is then launched diagonally over Robin's head. Uncharged, the smash attack KOs at 100%. It has great range and is designed to affect multiple enemies, though the hurtbox extension makes it risky to use. Though the sprouted arms will grip the opponents, the forward smash is not a command grab, so they can shield when caught in its range, and then punish. It is up to the player to make the right call on usage.
Up Smash
Robin sprouts six arms. The first arm sprouts from her hand, with a second arm coming out of that one to produce a chain. The last four arms come out of the palm of the second arm, spreading in different directions. The hands then curve into the palm, with Robin's elbows sticking out. By doing this, she creates a mace that she swings overhead. She'll swing it once in front of her, once behind her, and once in front of her again. While the mace has the same amount of knockback all the way around, the damage varies. It starts off with 6% uncharged, then it deals 5%. It deals 3% when in front of Robin for the second time. An uncharged up smash KOs at 110%. Like a true metallic chain mace, it has great horizontal reach and priority, beating out many aerials. This in her arsenal makes it very difficult to land near Robin. The multiple hits are mainly used to ensure a hit rather than to rack up damage.
Down Smash
On either side of Robin comes two legs, sprouting up out of the ground. The legs are able to deal a minimum of 5% each, meaning 10% on each side. The legs have a cooldown of 42 frames. Fortunately, the legs remain out during the cooldown, losing all of their hitboxes. During this time, a leg pair can be stood on as if they were a platform. If played strategically, the legs can force an opponent to land early when the hitboxes don't connect with them. The elevated position means Robin usually won't be punished. Knockback occurs straight up, and it KOs uncharged at 115%.
Neutral Aerial
Robin holds out her arm, extended to about 5/7 of its maximum range. From the arm's wrist sprouts an arm extended completely, and it does a downwards slap, that hits when aligned with Robin's knees. The slap will have an outward moving motion, traveling an SBB. It causes 3%. As it hits kind of low, it's usable against the grounded. It hits them during their jump and knocks them in front of Robin. It has frame data that makes trades with it quite common. The neutral aerial can set up for a forward aerial. This is a true combo.
Forward Aerial
Robin sprouts three arms: one under her right arm, and two out of her palms. She hits using all three generated arms. The palm arms hit first, and the arm under her right hits second. Of the three arms, the third is the strongest, 9% and finishing at 130%. The first arm causes 4%, and the second causes 3%. The forward air has notable startup. Robin must be careful with it. The arms reach out far, so it is okay to use sometimes. The attack can be treated like a sword, best at medium range.
Up Aerial
Robin sprouts three arms from her right arm. With these, she waves above her like a ribbon, her arms flying around. The arms hit an amazing, outstanding total of nine times, creating an attack basically impossible to air dodge. If the opponent is airborne, they must be careful, bewaring of this foolproof extra damage. None of the hits cause more than 2% damage. Characters with high speed will have the best time against the storm of arms. Aerials could hit with Robin as she whips them, but only with good placement and timing. It will hit through the stage, only with an often disappointing result due to its weakness. The vulnerability she has as she uses Cien Fleur: Wing can be covered via this up aerial. The opponent will be knocked up far enough to save Robin, with hope that they don't make it down in time to gimp her. A stronger up aerial would be better with fulfilling this purpose.
Back Aerial
Robin crosses her arms over her chest. If there is anyone behind her, twelve legs will sprout on them, spread out onto different parts of the lower half of their body. The combined weight is enough to yank them. The legs' weight lightly meteor smashes the opponent as they get pulled down. The legs remain attached to the opponent for as long as they are meteored. While the back aerial is really easy to land, it only causes 1%. Most of its ease comes from the fact that it reaches three Bowsers behind Robin. On the worst recoveries, it's an easy gimp. When it's over, the legs suddenly disperse.
Down Aerial
Robin crosses her arms over her chest, simultaneously dropping down her leg. A second leg comes down from the first, stomping and meteoring down at the foot. For an aerial meteor, there is some unusual range. This range makes for a good meteor, although it not only isn't particularly powerful. It fails against recoveries with hitboxes; they'll strike Robin via the extended hurtbox and return her back up, possibly even stage spiking. While the down air is more effective, the back air is more efficient. With this in mind, the back air is more commonly used by Robin players. 6% is dealt out by the stomping sprouted foot.
Grab
Robin sprouts three arms from her palm, and she extends all four arms as far as possible in a seriously lengthy tether. It has hurtboxes. Each arm gets a chance to do the grabbing before the next comes in. It is segmented, like :4pacman:'s. It is one of Robin's most punishable moves thanks to the hurtboxes and the standard tether lag. She has to train this grab to perfection should she want to use it, otherwise she can be rejected and knocked away hard each time. Using it for recovery is a better idea than using it as a grab. After grabbing, the opponent is pulled into a six arm hold.
Pummel
All six arms squeeze in, which each individual arm doing half a percent. Yet, as they all squeeze at once, the individual damage is never actually generated, and the 3% total is applied.
Forward Throw
Robin drops the opponent on their back. Eight feet immediately sprout from the back, carrying the opponent further away from Robin. The more damage they have when they are dropped, the further they'll be carried. The legs walk at :4peach:'s dash speed, and while they don't ever walk off of a ledge, they do walk in place for the amount of time they'd continue to walk should the ledge not be there. As the opponent is carried, Robin is capable of moving around and shielding, but no moves. She can get into place for a follow-up, meaning this can combo into several other moves. After the carrying is over, the legs vanish as the opponent drops down, taking 2%, and left in a knocked down position.
Up Throw
Robin pulls the foe above her, and tosses them with the force of six arms. They get tossed high in the sky for 11%. The knockback growth is minimal, so it won't KO until 190-210%. It is a poor combo throw due to its knockback, but it can stall for Nico Robin.
Back Throw
A series of arms appears on the ground behind Robin. She places the foe into the first pair behind her, their feet facing the screen, and they get carried backwards, with more carrying, via a greater amount of arms, the more damage the opponent has. Robin is capable of moving and shielding, but no moves. The arms never carry the opponent past the ledge, so the throw ends there. When the throw ends, the opponent is tossed into the ground for 8%, where they are bounced up. It is at this point where they are given the opportunity to tech the landing.
Down Throw
Robin leans the opponent down, and with the force of six arms, tosses them down for 8%. It is comparable to the up throw, performed by the same six arms. While the up throw KOs from 190-210%, the down throw KOs at 200-220%. The knockback is vertical and ends up slightly lower than the up throw.

Playstyle
Due to the "allergy" to water, the players must do their very best to avoid going to Delfino Plaza, the only legal stage with it.

To fight, Nico Robin sprouts parts of her body. She focuses on arms. She'll sprout multiple on her body and have them spread out to hit on multiple sides. Sprouting multiple arms connected as a chain gives her more range the rest, especially special for a physical fighter. Ocho Fleur can reach across stages. Certain ground moves, such as the down tilt/smash sprout body parts on the ground as opposed to Robin's body. Moves like Dos Fleur: Clutch and the back air are hard to avoid, as Robin sprouts body parts on the opponent, making them difficult to counter. Being able to reach you wherever you go would be better, but because every sprouted body part has hurtboxes, it makes it easier to hurt Robin. For a long range fighter, Robin is punishable on her attacks. Hitting a sprouted body part will destroy the attack, and hit Robin with regular damage and knockback.

Grappling is her style, with a command grab and a tether grab. Cien Fleur: Wing leaves her heavily vulnerable, as long as the opponent is above and not below her. The tether grab is a better recovery option, and low air speed justifies its usage. Using it against an enemy is a challenge because it contains hitboxes. You should know exactly what the grab will and won't do. Once you are grabbed, Robin can do several things to you. She has 3% pummels, and can easily send you to either end of the stage with the carrying forward and back throws. These throws are scary because they leave Robin able to get in a variety of different moves once it's over. Her dash attack and forward smash also heavily resemble grabs. The forward smash will catch hold of anyone within a designated area. It is a KO move, along with the up smash, which hits at least once on either side.

With Dos Fleur: Clutch's great range, it can stop aerial approaches, snapping necks to stop attacks. Dos Fleur: Clutch has a circular field that affects you if you're in it. This can be exploited to force you to the edge, or used against you if you're already there. The neck snapping arms do have hurtboxes, but these are impossible to hit by whoever they've grabbed. It is good when falling to halt recovery. Most aerials will easily hit airborne opponents, and they'll hit the enemies that can't hit Robin back from their location. Up aerial has the easiest time against the airborne. It is really tedious, and attacking is key against it because of difficulty avoiding it. Up air is really good extra damage.

Veinte Fleur: Calendula is her only move without hurtboxes. It should be spammed often for protection. Down tilt is a comparable defensive move.

You can adapt to Robin's moveset by constantly avoiding her attacks and punishing right after. She'll put hurtboxes near you that allow you to do this. You can't do this when the hitbox range is too long. There are many guaranteed times when Robin's supreme range will create a superior force.


Victory
First nine seconds.
  • Robin disperses several arms that were coming out of her.
  • Robin flies down using Cien Fleur: Wing. The arms on her back then disperse.
  • Robin puts on her sunglasses, then glances.
 
Last edited:

JOE!

Smash Hero
Joined
Oct 5, 2008
Messages
8,075
Location
Dedham, MA
Just looking over these comment blocks... it seems that the most common complaint is "aerials and standards are lacking", or some version of that. Aren't they almost always the case aside from some standout moves here and there (like Captain Falcon's Knee) anyways? Standards/Aerials are more like the glue between throws, specials and smashes IMO, and are really interesting in conjunction with the other "anchor" parts of a moveset.
 

FrozenRoy

Smash Lord
Joined
Apr 26, 2007
Messages
1,268
Location
Las Vegas, Nevada
Switch FC
SW-1325-2408-7513
Just looking over these comment blocks... it seems that the most common complaint is "aerials and standards are lacking", or some version of that. Aren't they almost always the case aside from some standout moves here and there (like Captain Falcon's Knee) anyways? Standards/Aerials are more like the glue between throws, specials and smashes IMO, and are really interesting in conjunction with the other "anchor" parts of a moveset.
You can have anchor moves/glue that is better than others, though. For example Artorias' standards are very much glue-y and the aerials too, but they were quite liked because of how they did it. The same is true of Smash, Marth's glue moves are generally high end design-wise for example.
 

JOE!

Smash Hero
Joined
Oct 5, 2008
Messages
8,075
Location
Dedham, MA
ANTI MAGE:
Anti-Mage is a refreshing take on the glass cannon archetype who's cannon part is so strong that it shatters its own glass! The core here is really interesting, sacrificing your shield passively in order to boost offense to the Nth power is done well, with a nice touch being certain sweet spot zones (1hp left) for maximum power, and debuffing the foe's shield as well to bring them to your level. One complaint I have here though is that it is not too clear what exactly happens if you or your target's shields drop below 1 or 0 when not shielding. Do they get stunned then and there or do they insta-shield break on the next shield input? It is especially important for Blink's usage as it affects Anti Mage's offstage game and neutral significantly. I am reading this in bits at work at the moment so forgive me if it was explained, but from my memory at this moment that sort of jumps out at me as something important that wasn't made too clear!

On the whole the concepts in the set are quite fun, and I especially liked the Down B given the context of him not shielding much anyways, rewarding him with the gambit of willingly soaking hits is a nice touch. Blink is also very fun with how you can blink between certain moves, and Nspec is downright scary given he can do it on himself vs a low shield foe where they could risk a shield break... then another Neutral B! That said, it seems the concepts were placed in areas that are a bit haphazard? Don't get me wrong, individually they're cool but then certain moves like Nair or Fair can be blinked halfway through the input while others cannot. Uair grows in power with your shield being down but others do not, and Bair literally grows in range which I found fun but is not mentioned elsewhere. This is sort of nitpicky honestly, but it just lingered in my mind after reading him that it is sort of inconsistent in terms of concepts, though individually they're all great. Perhaps while Spell Shield was active some of these effects could have been placed on him as a slight form switch? I agree with others that, especially on a blade user that signifying which way you swipe is important as well. A Swipe left to right vs down to up is very different coverage in smash!

While this comment is probably overly nitpicky, Anti Mage is still a good set in my eyes. If it had a bit more detail as well as perhaps more focus on a few of the mechanics introduced it would go from good to great!
 
Last edited:

Kholdstare

Nightmare Weaver
Joined
Oct 10, 2008
Messages
1,441
I will be posting a moveset tomorrow (Sunday) at or around 10 PM EST. It would be done sooner, and in an image format, but when one's computer lags and GIMP refuses to work, and you lose hours of progress, there's really nothing you can do about it. It's been a while since I made a moveset, so I may make mistakes. I plan on producing more movesets, and frequently, in the future.

On-topic question: What are your thoughts on matchups and playstyle sections? I notice that a few of the regulars have actually made Final Smashes but no playstyle/matchup sections, which is the opposite of how it was a few contests ago.
 

Katapultar

Smash Lord
Joined
Nov 24, 2008
Messages
1,284
Location
Australia
I will be posting a moveset tomorrow (Sunday) at or around 10 PM EST.
I'd love to see a moveset from you, it's been ages and ages since since you've posted (a moveset) in MYM. If I had to guess, it'd probably be a Dark Souls or Magic: The Gathering moveset, both fit your tastes and the former would be a new for you. Though it would also be fun to see something simple and refreshing like Mikami, that was a nice experience.

As far as playstyle and match-ups go, they are not entirely necessary for movesets these days. These days a moveset's playstyle is obvious enough from reading the set, though that being said adding a playstyle section can make your set look more professional. Personally, I only write playstyle sections when they come to mind for the moveset, to explain how my lengthier, more voluminous movesets work. I've almost never written match-ups in any of my sets, they take a long time to do given sets these days are longer to read. As far as playstyle sections and match-ups go, they don't affect the quality of your moveset so you don't have to worry about not having them in your set.
 

Kholdstare

Nightmare Weaver
Joined
Oct 10, 2008
Messages
1,441
Anub'arak

1693784093179.png


Statistics

Size: Big Guy (For You) ((Bowser-sized))
Weight: Heavweight Male Antagonist ((About Charizard's))
Ground Speed: Negligible, he kind of just skitters along. ((Jigglypuff))
Jumps: Okay ((Ganondorf))
Fall Speed: Mid-High ((Bowser))
Aerial Control: Great ((Peach))

Anub'arak is this giant beetle. You'd think that a beetle would be more suited for flying, but the Traitor King prefers to walk. He's a heavyweight tank with the biggest hurtbox in the game, and not a lot of good movement options outside of actual moves. This makes it awkward for him and he can get damage racked pretty easily.


Neutral Special - Web Wrap
Anub'arak launches a ball of webbing from his belly which will trap the foe in a cocoon if they are hit by it. The web ball is the same size as a Poke Ball throwing item and the same speed and range, too (two Battlefield platforms). If a foe gets hit by the web ball, they take 5% damage and are immediately trapped in a web cocoon about the size of their shield. It's more egg-shaped than spherical, and is tethered to the ground. If the foe gets hit by Anub'arak's web while in the air, they are wrapped in an egg-shaped cocoon that will drop at their falling speed and stick itself to the ground when they land.

While inside the cocoon, it will wriggle about and bulge in odd places, showing the foe struggling to get out. Foes in the cocoon are trapped for 0.5 seconds at first, but it takes them longer to get out the more damage they've taken. For instance, at 50% damage it will take 2.5 seconds, but at 100% damage, it takes a whole 5 seconds to escape, and so on. They can take damage while in the cocoon (but not knockback), but the foe themselves can't attack or use moves in it. Foes can hit the web ball out of the air with an attack, but only if they have a hitbox. If they're charging up a move, the web ball will take priority and stop them. This is functionally a ranged version of Yoshi's Egg Lay move. Please keep in mind that this only works on normal characters. Boss-type characters are immune to the trapping effect (but not the damage).

[IMG]
Custom Neutral Special 1 - Web Net
The first variant on the Neutral Special is called Web Net. Everything about the start of the move is identical to Web Wrap. Same projectile, same speed, same lag. However, when the projectile connects with the foe, they are hit by a different effect! Instead of being wrapped up in a cocoon, the foe is shackled by a sticky net of webbing. Hence, the name. The net doesn't completely immobilize the foe. They can still attack and move... somewhat.

The first noticeable effect the web net has on foes is that they can't jump. Well, they can try. If the foe attempts a jump while affected by a web net, they preform a pitiful little hop that stretches the net before pulling them back down, making them suffer ugly landing lag. Attempting to jump like this can break the net, but it takes more jumps the more damaged the foe is. One jump added for each 25% damage the foe has taken, so four jumps at 100%.

If the foe moves sideways, whether it'll be rolling or running, they have their movement speed halved and the web net will drag them back to its anchored spot like a slingshot again if they stop. It'll break again after so much stress on it... the amount needed depending on how damaged the foe is. At 0% it only takes 0.2 seconds of continuous movement to snap the webbed net, but of course it takes more the foe takes damage, scaling to 3.5 seconds at 100%. When I say "movement" I mean moving away from the spot where the foe got webbed. I should also mention that the web will just disappear normally after a certain amount of time, just like the normal version of the special. The good (bad for your foe) news is it's 0.6 seconds scaling to 6 seconds, which is slightly longer than the normal one if your foe just does nothing.

That's just movement. As for attacking, well, the net is made of stronger stuff than the cocoon. It's toughly-weaved web, you know? The foe can attack while in the net, but attacking won't break it. Even other players' attacks. Foes trapped in the net aren't completely helpless because of this, but you're also making their job harder because foes trapped under the net have a few frames of lag added to the start and ending of their attacks, making them more vulnerable to being punished.

The last thing that should be noted is that the holes in the net are just big enough for little critters to crawl through and possibly attack or return to its prisoner. Like Pikmin, or some manner of small insects, like beetles...

[IMG]
Custom Neutral Special 2 - Webspinner
Anub'arak abandons the projectile format for this move. Time to shake its form up a little! The Neutral Special is now something of a web hose. The Traitor King will just fire a constant stream of web from his spinneret as you hold the input down. If you just tap it, he shoots a few pitiful strings like confetti that stick from one spot on the stage environment to the other, but it's purely aesthetic, so if you want to remodel Luigi's Mansion with spider webs, go ahead.

Now, for a concentrated string that actually does something, you simply hold the input in. Anub'arak will keep firing off his webs in a constant stream that has a reach of a Battlefield platform. You can move while you're doing this at his regular movement speed, so no dashing. Hitting a foe with your stream of sticky white stuff will do nothing for 0.5 seconds but then it starts to immobilize them. They will get wrapped more and more by the web as it grows on their body, forming a cocoon that expands like the Smash shields! (In reverse.)

The foe is not totally helpless while you're doing this. You're slowing them down, sure, like they're suffering the movement and attack-impairing effects of the first custom Neutral Special. They can still jump, but it's not very effective since you're tethering yourself to them. They have a chance to move and attack before it's too late. "Too late" means three seconds of constant gift-wrapping. Then they'll be in a cocoon, like the first Neutral Special! They'll be trapped in a regular Web Wrap's 50% damage strength at 0% damage, which only starts to improve from there! The foe can break free by hitting you with at least two attacks while you're doing this, or moving out of range of your web. However, while you're wrapping them, you're slowly dragging them to you, so they'll have to work fast and hard.

Why would you play this over the other versions? To be an annoyance. You don't have to just hold it down for the cocoon. Short bursts of web will hassle the foe and slow them down, and you can keep building on their web to immobilize them over time while you're attacking them! The web's immobilization build-up decays at only half the speed you're applying it if you stop or are interrupted. Instead of a single "trap", you're using this as an attrition-based status effect of sorts. The custom specials are meant to be mix-and-match tech to suit your preferred playstyle. In fact, with different combinations of custom and regular specials, you can get a completely unique "build" for Anub'arak!

[IMG]
Side Special - Burrow Charge
Anub'arak suddenly burrows into the ground and charges forward, spitting up little chunks of terrain as he digs. Only his shell and crown are visible above the ground and he has an effective hitbox of a normal character's really good crouch, like Kirby. After half of Final Destination's length in distance in charging he bursts back out of the ground with a powerful attack that deals 14% and knocks those around him in a radius of Mario's width away, dealing really good knockback that can KO at 70%. Anub'arak suffers some bad ending lag after, but if he knocked everyone away he should be fine and not be punished. Unless he set off a bomb or something. Oops.

This may just look like a charging mobility move on the surface, but under the surface (heh) there's a special trick Anub'arak can do. Brief history lesson, the nerubians were master burrowers and used guerrilla warfare against the Lich King. That's what we are going to do here. Any time during this move, you can input another move and Anub'arak will immediately emerge and preform that move with no start up lag. It's an ambush! You can even preform the move during the last part of Burrow Charge, where Anub'arak emerges and does the GTFO blast. He will simply do that move in its stead. Most of the Traitor King's attacks can be used during this move, save for the obvious ones, like Aerials and Situationals. Specials, Standards, Smashes, Grab, and Final Smash are all eligible to be used, unless stated otherwise.

This attack is great for mindgames and playing your opponent. Anub'arak's Standards and Smashes can effectively counter a foe's counter to Anub'arak emerging, whether the foe wants to roll out of the way of the attack, run away, try to punish Anub'arak's ending lag, set-up a trap, shield... it's up to the Anub'arak player to decide how to take on their foe. Anub'arak is sort of an attrition-based, disruptive tank, and guerrilla warfare fits in with that strategy.

[IMG]
Custom Side Special 1 - Underking
Anub'arak's first custom Side Special changes Anub'arak's side special a lot. Instead of charging forward, Anub'arak burrows into the stage and you can control his sideways movement. He automatically emerges after three seconds, or until you move half of Final Destination's length in distance in either direction. This isn't better than the normal Side Special due to more control at the same speed, though: Anub'arak loses the burst attack at the end. After the attack ends, he just emerges normally with some punishable lag, shaking the dirt off him. This version of the Side Special more heavily favors ambushing and guerilla warfare, because it offers cooler opportunities for sneak attacks. You're not limited to reappearing along a fixed line or location. It definitely requires more thinking to pull off correctly, but can be quite rewarding.

[IMG]
Custom Side Special 2 - Overlord
Who cares about burrowing and ambushing? What if you just want to chaaaaarge forwaaaaard? Anub'arak doesn't burrow with this custom Side Special, instead he makes a garbled cry and lowers his head, and charges like a siege rhino. This has longer range than the regular version, because Anub'arak can charge the entire length of the stage! Foes hit by the charging Anub'arak are trampled underfoot and take 10% damage... wait, trampled underfoot? Anub'arak actuall pitfalls foes he runs into! It's still burrowing, technically? Just burrowing the foe. With his feet. Forcibly. At the end of the charge, Anub'arak rests, suffering some punishable ending lag. Hope you trampled all of your enemies! If a foe is trapped in a web cocoon or similar trap, this will also pitfall them as Anub'arak just steamrolls right through them. This is a great powerhouse, swingy move, but is easily punishable and not something you want to mess up!

[IMG]
Up Special - Locust Swarm
Anub'arak chitters and a cloud of buzzing locusts fly out from under his shell to orbit him. The locusts are actually the same size as scarab beetles, since they use the same model to save programming costs. Gotta cut corners where you can, you know? The exact amount of locuts varies depending on how much damage Anub'arak has taken. At no damage, he only summons three, but every 25% adds another, maxing out seven at 100%.

The swarm will buzz around Anub'arak's body very close, like a shield, because that's basically what they are. If the foe hits one with an attack (which might not happen since they're constantly moving) the locust takes the blow for its master as a noble sacrifice and absorbs 1-3% of the damage, depending on the strength of the attack. Similarly, it will deal that damage absorbed back to the attacker with a spiteful bite (and flinching), and the act of tearing the foe's chunks of flesh- I mean vampirism- will heal Anub'arak for that amount.

So what if you want to take a more proactive stance with this move? Anub'arak's great at disrupting the foe's moves, so why not send the locusts at them? Inputting the Up Special while on the ground and you already have locusts out circling Anub'arak causes the swarm to pursue the nearest foe. They fly faster than scarab beetles move, which means Mario's dash speed. The scarabs will orbit the foe like they do Anub'arak, but this time they bite the foe, dealing 1% every 0.5 seconds and healing Anub'arak for that amount. The foe can dispatch them with any attack, just like the scarabs. It's a good idea to combine these with the scarabs, as swarming the foe can get in quite a good amount of damage. Also like the beetles, Anub'arak can replenish his locust swarm's fallen comrades by summoning locusts equal to the difference if some have died while he already has some out. Remember, he can only have three at 0%, and a max of seven starting at 100%.

If you want to recover with this move, using it in the air causes Anub'arak to take flight. He's part beetle, after all, and those wings aren't just for show! They're not too terribly effective though, due to Anub'arak's massive weight. They just keep him aloft. Anub'arak will gain what is basically a glide with a minor vertical recovery for three seconds. What I mean by minor is he can only gain a vertical recovery of Ganondorf's height, at best. His horizontal recovery is equal to his dash, but a little faster. This means you can actually move around the stage faster by hopping and using his Up Special. He has some ending lag when landing, so be careful when using this in the air.

Custom Up Special 1 - Hive Master
If you're using this Custom Up Special, then you're displaying your dominance of the swarm. Anub'arak brings out the rage of his swarm and summons assault locusts instead of normal ones. Assault locusts will not linger near him as a shield, no. These angry insects start flying straight for the foes as soon as they're summoned. They're glowing red and visibily aggressive, flying in a jagged pattern that's twice as fast as the normal ones! These scarabs deal 2% upon biting the foe, tearing off Anub'arak's enemies' flesh... er, life force, to replinish their master's for the amount they deal. Tragically, like the noble bee (not the wasp, screw those things), scarabs die when they sting the foe. The good news is, you can just keep summoning more!

This shifts the locust swarm's focus on defense for Anub'arak with offense to help disrupt the foe and stay alive to play the tank role into something of an... aggressive leverage tool? You're perfectly fine getting up in the foe's face with this to swarm them with a barrage of "projectiles" while healing for even more. This, in turn, forces the foe to play more aggressively to chip off the extra health gains. The locusts are still incredibly weak to any form of disjointed hitbox, and those easily spammable multi-hit attacks just clean through them like butter. But... combined with the scarab assault, especially leeching scarabs, you can turn into an absolute tank. Anub'arak has the most staying power, despite his size and weight which allow him to be combo'd easily. Speaking of, this doesn't protect against combos very much at all. He no longer has an absorbing shield! Pick your opponents carefully with this one.

[IMG]

Custom Up Special 2 - Crypt Lord's Wings
All that time spent raising locusts means Anub'arak skipped wing day. That's clear enough, since the other two versions of this are terrible at recovering if actually knocked off the stage, since they use health to prevent being knocked off the stage easily. Not with this move! Anub'arak shows what a crypt lord's true potential is with his wings and actually flies... pretty well! Anub'arak gains free flight like Pit used to do back in Brawl. You don't summon any locusts, but you don't really need them with all this aerial zipping around you're doing. Your opponents might not have prepared for facing a flighty Anub'arak!

Quite a few more important things to note with this move! It's a recovery, yes, but don't be afraid to use it on the stage. Activating this move while standing on solid ground makes Anub'arak switch to hover mode until he's knocked out of it, his wings fluttering at a billion miles per hour. Hover mode lets Anub'arak hover for five seconds, after which he'll go into free-fall. Anub'arak can use his Neutral Special and Side Special while in the air, the latter of which will always be Overlord, but with meteor spiking instead of pitfalling. You can't exactly burrow into the air, right? Since there's no ledge in the air, it only has the range of half Final Destination's width before Anub'arak free-falls. Don't run yourself off the stage with it! Hover mode also has a sideways movement of Anub'arak's dash speed, and an upward movement of jump.

So will you sacrifice your locusts to become a king locust yourself? The alpha locust? Mobility and freedom are great, but you don't have the sustain of the locusts healing you. This is best paired with leeching scarabs then, for some healing at least. It's a great recovery, one that some players might enjoy more than others. The way to build Anub'arak is up to you. That's why I put custom specials in here, for the personal ways to play Anub'arak!

[IMG]
Down Special - Scarab Host // Nerubian King
This special has two distinct parts. See how it has different names? Anub'arak summons either three scarab beetles or a nerubian, depending on whether you didn't charge the move or if you charged it, respectively.

When you summon scarabs, Anub'arak hisses and three of them emerge from the ground underneath him, leaving tiny little holes for their animation. That's cute. Scarab beetles are very tiny. They're actually the size of those little motion-sensor bombs, or Snake's C4 from Brawl. They're glossy little purple beetles that skitter along the ground towards the foe at Mario's walking speed, and when they get close enough (about Mario's width from the foe) they jump and try to latch on to the foe. They cling to the foe for five seconds and bite them in half-second intervals, totalling up to about 14% damage, give or take before falling off and dying. Of course, the foe can just hit them, preform an attack, or roll to shake them off and kill them. Shields also prevent the damage. They die from just about anything, too. So they're basically tiny, crouching Pikmin. How are they useful?

Three of these things latched on will do 3% every 0.5 seconds. That's good damage racking. Of course, they're incredibly weak, but spitting out more of them is effortless as Anub'arak. They're just constant pressure, as they always home in on the nearest foe and are always moving towards them. They dodge most attacks too, since they're so incredibly small. Anub'arak can only have three per foe out at any time (21 in an 8-man Brawl, that's pretty neat.) so if one of them dies but the other two are still active, doing this move only summons one. This move fits in with one of Anub'arak's roles of being a disruptive character. If the foe is wasting their attacks on the scarabs, that's an opportunity the Anub'arak player can abuse. If they don't, then they take constant damage. There's only a few frames where Anub'arak is vulnerable during this move, and that's during the hiss when he summons the scarabs.

[IMG]

If you charge this move, Anub'arak yells, "Come forth!" or "Attack!", calling one of his nerubian subjects to his side. The living nerubians may call him the Traitor King, but his position as a Crypt Lord in the Lich King's army still gives him control over his resurrected servants. The nerubian emerges directly in front of Anub'arak after 0.25 seconds. The nerubian is 3/4ths the size of Anub'arak, due to being of the common nerubian soldier species which are mostly spider rather than spider-beetle hybrid, like the nerubian kings are. The nerubian is quicker, too, and has higher jumps. It will jump automatically when it reaches a platform or ledge that it needs to get to in order to reach the foe. It weighs less than Anub'arak, as well, so basically it has a Bowser Jr. to Bowser relationship with Anub'arak. The nerubian is A.I. controlled, and starts off with roughly a level 3 CPU character's A.I. It scales with Anub'arak's CPU / amiibo level if controlled by a CPU too, so a level 9 Anub'arak will have a level 9 nerubian. It doesn't matter too terribly in that sense, but the higher the damage Anub'arak has taken, the nerubian moves up in levels in terms of A.I. intelligence. If Anub'arak is dangerously close to being KO'd, the nerubian will be a level 9. This gives Anub'arak some staying power to be a tank.

As for the nerubian's actual attacks, it has a limited movepool, which are generic attacks similar to Anub'arak's. They are weaker than Anub'arak's and much more simple. His slash combo, a strong stab with his pointy leg that's actually Anub'arak's dash attack but the nerubian uses it like a tilt, Anub'arak's actual Forward Tilt in which the nerubian drenches the foe in poison, and Anub'arak's Down Tilt, which is a stomp. He's incredibly simple and dull. That's why Anub'arak is big daddy nerubian, the brains of the operation. Oh, and sorry for spoiling some of the moves for you. Read on below!

[IMG]
Custom Down Special 1 - Assault Scarab // Traitor King
Okay, so how are his other two Down Specials different? Anub'arak still pretty heavily relies on his beetles and nerubians, so instead of going wide, let's go big. Instead of multiple scarabs summoned, this move only summons... one. Lame! Or is it? This scarab is special. Meet assault scarab, also known as buff scarab. These bad boys are bigger than the regular ones and have really tough-looking onyx shells and mandibles. They look like they could crush a man's bones in their jaw. The assault scarab has the force of three scarabs combined. This thing is like the purple Pikman compared to the rest of the scrawny Pikmen. Normal scarabs do 1% every 0.5 seconds. This scarab deals 3% every 0.3 seconds, by itself. It can tank three hits before falling off and dying too! You can only summon one at a time, of course, but if you keep applying pressure to the foe with these things summoned every time one falls, you can chip in a lot of damage at a time. Especially if the foe is trapped in a Web Net. Get in there and fight them, maggot! That's the King's orders!

Of course, the nerubians get buffed too. You won't summon the normal nerubian with this attack, no, you can summon a nerubian wearing little mini crypt lord armor. Aww, how cute. Never talk to me or my son ever again. Anub'arak will make sure of it too, because the Nerubian MK II has access to not only the regular nerubian minion's attacks, but weaker versions of Anub'arak's smashes as well. He can go to town with some actual KO moves! Of course, only one of these guys can be alive at a time, and there's a cooldown of one minute on summoning another after this attack is used. Rather than using nerubians as expendable minions, Anub'arak can work together alongside the mini Crypt Lord to gank the foe. It's about power and sustainability, not super aggressiveness.

[IMG]
Custom Down Special 2 - Leeching Scarab // Nerubian Egg
So you like health? You like to keep regenerating life while keeping in the fight? Well this special is for you! Instead of summoning his regular scarab beetles, Anub'arak summons some bright green ones. What are these bugs? Meet the leeching scarab. They were raised by Anub'arak's locusts to do one thing: feed. The leeching scarabs do not put out a lot of damage, in fact they only do about 10% over five seconds per unit, for a total of 30% over 5 seconds if all three get their hits in unimpededed, which is doubtful. However, to compensate for the reduced damage, the scarabs heal Anub'arak... for the same amount of damage they deal. Now instead of going out to fight the foe yourself, you can send your critters to them to scavenge the foe's bone marrow for your own satisfaction. Ahh, healing. It feels like cheating. More characters should be able to do it. Anub'arak is like, the heal king. Weird, since he only craves destruction.

[IMG]

So will Anub'arak summon a nerubian with a chef's hat and a degree in cordon bleu cooking? No, but some saviory delight would be great right now. No, Anub'arak doesn't even summon a nerubian. He grows an egg. What, an egg? He's that hungry? No, no, no, it's not for eating! In this big old, lumpy, slimy, gross, web-logged egg that's the same size as a web cocoon, a nerubian is sleeping and growing into a big healthy boy. The foes shouldn't get too close to it, though. Any foe like a Bowser's width near the egg will have an untimely surprise of a fresh nerubian popping out and attacking them. The egg will burst and ooze green goop like a popped blister, just for aesthetics. This nerubian is a regular one, just like the original. So how is this even better than the original? It's not a surprise if the foe knows there's a nerubian in there!

For one, this is a trap. You know that C4's gonna explode, you know what that little thing on the floor can do. It will still get you if you get near it, so stay away! And two, Anub'arak's eggs don't always have nerubians in them. Sometimes they'll just be filled with sludge. How do you know? Just attack it. The thing will pop and ooze will pour out. This ooze is actually able to heal those it touches. Yeah, even the foe! They think it's delicious. It heals for 5-9% by pressing the attack button on it. Now, this gets more tricky. Sometimes the eggs do have nerubians in them, but they're sleeping. They won't burst open and try to eat the foe for dinner. But, at the same time, if the foe attacks it trying to get that sweet spider yolk, the nerubian will have a rude awakening and immediately retaliate with a powerful attack! So how does one know which is which? You can't, it's random. An even 1/3 chance of either scenario happening each time. Not even Anub'arak knows! However, it's not a disadvantage to him in any case what happens. Ambushes are everywhere, watch your step, foes!

Standards

Jab Combo - Slice and Dice
Slice and dice, shake and bake baby. This is a three part jab combo, and you have to tap it each time. Anub'arak is able to slash three times in front of him in quick succession using his blade-like claws. The first hit will be with his left claw, with Anub'arak leaning forward and slashing across. This deals 3% and flinching, and is the only part of the jab if you just tap the input once. If you follow it up with another quick tap to combo, the second hit will be almost identical, but with his other claw slashing the other way. It still does 3% and flinching. The last hit in the combo is a finishing uppercutting slash with his left claw, which does 6% and some knockback this time. The range on this jab is good, matching sword-users in form and reach, and the speed is quite quick. This adds up to be a 12-13% damage combo, which is good for damage racking on the ground.

Let's go over how it synergizes with the rest of the moveset. Got a foe trapped in your various nefarious traps? Wail on them while they just struggle helplessly. This is one of your easiest ways of racking up some serious damage on the foe to set up a KO move. Your bugs can also do it, but they're so fragile. When you're in control of the King, you are very far from fragile. You're a tank with buzz saws on you, eager to have a go. Take advantage of your poise and your claws that are like disjointed hitboxes. You'll find yourself clashing and trading blows with the likes of Link and the Fire Emblem crew.

This is a great move to pair with a nerubian on the other side of your foe for some sweet 2v1 ganking action. Your nerubian will follow your lead, swinging at the foe until they block or roll out of the way. Or just jump up and hit the both of you with a down or back aerial. Happy birthday! Be wary of when it's good to team up and watch the staling on this. No move can be spammed forever, especially not a jab combo, so don't just rely on mashing A like you're on Jeopardy. Also sadly, this can't be used for an ambush with your side special. He just does his dash attack instead. So keep that in mind in case you wanted to pop out of the ground wailing on the foe with your big bara insect arms.

[IMG]
Forward Tilt - Acid-Drenched Mandibles // Acid Drench
This move actually has two different forms! If the foe is within reach of your normal melee attacks, and if the foe is out of your reach. If they're close enough to smell your disgusting zombie insect breath, Anub'arak will show them what mouth wash he uses. It's not Listerine, its Hydrochloric! He'll attempt to chomp down with that terrifying glowing maw of his, which has really, really poor range but if it connects can deal 12% and inflict a poison status on the foe. What? Poison? Yeah. Well, acid, but same thing really. The foe will drip bright green as the acid eats away at them, inflicting 1% every 0.5 seconds over a total of 4 seconds. That's not the worst part. If they try to shield, the acid will just eat away at their shield, decaying it at 2x the speed! Acid is painful on the flesh but more painful on the armor. Worse than rust, really.

Now, if the foe is out of your reach, you're not going to fret about it! Anub'arak hocks a big ol' acid loogey at them, which deals 15% on contact and the same acid/poison effect. The projectile is a line arc about a Battlefield Platform in range, that curves and hits the ground, leaving an acid puddle. Acid puddle, yep, it's a trap all right. So even if you miss you still don't miss! The acid puddle is the same width as the Crate item. It's bright green, you can't miss it. Don't step in it, foes, or it will disappear and inflict poison on you! If you try to paint the stage in acid like it's Splatoon or something then that won't work, Anub'arak can only have one puddle at a time.

Do I even need to tell you how well this synergizes with the rest of the deck? I mean, look at Locust Swarm and Scarab Beetles. You're basically playing Affliction Warlock here. Dots, dots, and more dots. Anub'arak loves his dots. Your nerubians and scarabs can pass through the puddle unimpeded, so don't worry about them. This is really nasty to pair with a web wrap. It will turn the web green showing you drenched the foe, and their cozy little stay in the web will turn into horror. Same thing with the web net.

This combos pretty well with the jab combo too. Poison them up and wail away? I thought you were a tank, not a damage racker! This works pretty well with burrowing and ambushing too. You might face foes who love to abuse the shield mechanic a lot. Well, instead of popping out with a power attack while they're waiting to block the attack and punish you, come out with an acid bite and automatically apply poison to their shield. Then hit them when they get dizzy. It's not griefing, it's strategy!

Up Tilt - Flycatcher
They say you catch more flies with honey than vinegar. Anub'arak has neither, but he does have sweet webbing. So you burrow forward and instead of doing what a normal character would do, your opponent decides to jump out of the way. Really? We can't have that. Punish their jump by doing an up tilt. Anub'arak normally has some wind-up lag on this, but not with ambush! He instantly uses his spinneret to shoot a fat tether at any airborne (or floating platform-born...) foe directly near him and smash them back down to the ground, dealing 18% and stuns them! They've also got web on their feet, slowing them down for a second to hinder their reaction time. Combo time, baby! Follow this up with an attack before they fat roll away!

Of course, if the foe isn't airborn, Anub'arak just shoots his web up in the air above him as a sort of... intimidation? It fizzled. That's gotta feel bad. Still, I'd rather have a tech option against jump-happy foes than, uh, an attack that might hit like the floating Shy Guys on the Yoshi's Island stage. The air isn't safe around the spider king. I mean, really? Where did you expect to get with that strategy, foe?

One funny interaction is that this can snatch airborn items like the Smash Ball. Which is great, because Anub'arak's jumps are... not.

Down Tilt - Stomp
You see those big legs of his? You think he skipped leg day? No sir. Anub'arak's big-*** spider legs are really powerful. They have to be to support that monster. Anub'arak does a powerful two-part stomp, one with a front leg, one with a back. They deal 13% each, and if hit by both can really put a number on a foe. It does some pretty sweet knockback too. Unfortunately the lag is a little more than you'd expect, because Anub'arak has to lift those big legs. The payoff is that it not only can be pretty powerful, but gets even more amplified by an ambush!

Stomping right out of a burrow charge knocks up actual pieces of the stage with the force of it! Purely animation, not actually terraforming the stage or anything like that. It will stun anyone nearby and touching the same ground as Anub'arak. Like, really good stun. Enough for an immediate smash attack follow up from the Crypt Lord. It even stuns dodging foes! Like, spot dodging. Not rolling, they're the smart ones.

Obviously, this is a great way to punish foes who are spot-dodge heavy. It's also great at shaking up a foe trapped by your web. They're basically pinned to the ground, so they take the full brunt of the attack, and can't even punish your wind-up lag! There's a little tragedy when using this with your scarabs: hit one with Anub'arak's foot, and it will squish and die a sad death. There'll even be a little gut smear left. This only affects the weak beetles, though. Assault scarabs? Nah, they've got plate mail. They're not getting crushed by a big ol spider foot.

Dash Attack - Stab
This is the attack you can use out of your dash and out of your side special with the tap of A. Anub'arak uses one of his bladed claws to slash in front of him in a diagonal cutting motion, dealing 17% and great knockback. It even has a super good hitbox! The slash it leaves behind, the white trace in the air for a brief moment? It's pure hitbox porn. It's really fast, which is unlike Anub'arak's other standard attacks, even without using ambush! This makes it the go-to alternate attack in most normal situations. Nerubians use this move as like a standard attack normally, although it's weaker than their masters. That's how good it is.


Smash Attacks

[IMG]
Forward Smash - Impale
Anub'arak stabs his two claws into the ground in front of him and a line of spikes bursts out of the ground mith a sinister metallic sound, moving forward in the direction you used this in. Until they reach a ledge, a spike about as tall as Mario will shoot out of the ground at intervals spaced as wide as the plumber, then sink back into the ground just as quickly. The line moves quite fast, and only five spikes can be seen at any one time, giving it the effect of "travelling". The spikes do just that, spike, dealing 30% and high upward knockback. This is a premier KO move, but easily dodged. It can hit multiple enemies in a row, and absolutely eats away shields with each consecutive hit. Impale passes through any obstacle and wall until it reaches the ledge. That's the fully charged version. I just wanted to open with that part, because it sounds the coolest. Just c-sticking this bad boy is still pretty sweet, you'll get a couple of spikes that get to a range of about a battlefield platform and do 10% and some good knockback, but still it's pretty sweet.

Impale is like, Anub'arak's signature assault move. It does everything you want to pressure a foe for a KO. It chases them, the spikes jutting out like some sinister underground creature chasing the prey above. Like the movie Tremors. That movie is scary, don't watch it. Anyway, if you position a nerubian or scarab right, you can do a pincer attack with this, raking in some sweet damage. It might hit them multiple times, and will surely KO them at like, 70% fully charged. Remember Flycatcher? Slam them down with the up tilt, then hit them with the Impale before they get away. Guaranteed to bring joy.

Don't run your spikes into a nerubian egg, though. It'll pop it open and just ruin your pinata. The scarabs are smart enough to dodge, sometimes. The assault scarab is tough, but he's a little dumb. If hit by Impale, assault scarabs will be flung up into the air with a metallic "plink" like a freaking Mr. Saturn item and come back down like a meteor. As in, foes hit by it will get meteor spiked. They really deserve it if they manage to get hit by that. It's not even an interaction, really. More like an easter egg.

[IMG]
Up Smash - Spiked Carapace
What's this, more turtling? Crypt Lords are part beetle, and Anub'arak is a tank beast. This guy will bolster all his defenses. Anub'arak's shell flares and he utters a chittering sound. The area in an arc above him will be a hitbox, represented by a white force like a blast of air from his shell. Foes in close proximity to him, about the same range as your average melee attack, will take 4% and light knockback. Anub'arak's shell will also strengthen itself, which will reduce 1% of incoming damage from any attack and reduce knockback by 1/5th for five seconds.

That's just uncharged. Charge this baby up more and jagged spikes to erupt out of Anub'arak's shell with a crunch. The hitbox is a little bigger this time and deals 9% and medium knockback to foes hit by it. For six to ten seconds more (depending on the charge), Anub'arak will reduce incoming damage by from any attack 2% and knockback by 1/5th. That 2% damage is also reflected back onto the attacker, if they hit him with a melee attack. After this buff wears off, Anub'arak reverts back to his original state and you can do it all over again.

This is really, really good with your locusts! Build yourself some proper armor, and then get a shield of bugs going and you'll be unstoppable. Like, tank is a really good description, and not just the trope. Heavy, spiked armor like a medieval mage. Anub'arak goes to no expense for being bulky as heck. Keep in mind mini-Crypt Lords can also use this, and will follow your lead, so after you Spiked Carapace, so will they. Use this to your advantage by acting as like a body wall to back the foe into situations that they don't like. Use your defenses as an offense to control the flow of the battle.

Down Smash - Nerubian Trap
Azjol-Nerub was the nerubian kingdom. The nerubians were famous architect, and constructed many elaborate traps. Now Anub'arak is a high king, but he is well aware of the ingenious designs of his people, so he constructs a stone trap that lasts longer the more you charge it, the same amount that Snake's C4 in Brawl did. This trap isn't just an explody box, though. It has three modes, which one it is is chosen randomly!

Trap #1 is a Stone Dart Trap. Foes that step on the dart trap will find, well, darts shooting them. From off-screen, at their level. Left and right, three darts will fire one after another (a total of six, three in one direction and three in the other, at the same time. Two darts, three times. Got it?). Like plink, plink, plink. If the foe didn't shield or get out of the way, they take 5%, then 5%, then 5% again. Flinching them each time. So basically, it's a 15% damage combo. Easy enough to avoid, just shield or jump out of the way.

Trap #2 is a Freezing Trap. It's exactly what it says, it gives the foe that silly ice block status effect from Smash. No damage, just an annoying amount of stun. This CAN'T be shielded, but it can be avoided by rolling or dodging. You'll want to use this time to do your signature Dot Time Damage Rodeo on the foe to help them break out of the ice quickly, right? Or perhaps use this time to summon a nerubian while the foe can't punish your wind-up lag. It should be noted that burrow charging a frozen foe flings them airborn hilariously, sending them flying. They'll break out and have time to recover if they're not in KO range, but it's funny.

Trap #3 is the Web Trap. Obviously they'd have a web trap, why wouldn't they? They're spiders! The web trap will shoot a web line to the top blast zone if the foe touches the trap. The foe will have a split decision to attack the web, otherwise they're taken for a ride towards the top blast zone when the web wraps around their foot and flings them up! It breaks near the top, just enough for the foe to panic, but if the foe is above 100% it can KO them on stages with high platforms near the blast zone. This is a good way to get the foe into the air, if you want to juggle them with your aerials or hit them with an Up Tilt. Speaking of aerials...

By the way, these traps all look the same. They're little round, stone disks embedded in the ground. Not even Anub'arak knows which trap it could be. Surprise?


Aerial Attacks

Neutral Aerial - Roar
Anub'arak is angry. Really angry. He lets loose a roar fit for the big angry king he is, like a dinosaur. The sound waves actually create a sphere around him that's a hitbox! The sphere is quite large, about twice Anub'arak's size? Like a melee attack, which this basically is. It has really overriding priorty on most attacks, due to not being a jointed hitbox at all. The downside is that, well, it's kind of slow, so you'll have to initiate the attack before the opponent does, attacking into theirs that you predict! The sound waves do 9% and okay knockback.

Keep in mind Anub'arak's hover mode on the custom up special. Use this near the ground hovering, and you can hit a lot of foes by simply just moving and roaring, knocking them on their butt if they're on the ground. No, literally. It works with short-hopping too. They'll trip from being so disorented by the horrific screeching of the beetle monster. Perfect fodder for your beetles and locusts, huh?

Forward Aerial - Stab
This is the aerial your nerubian minions can use like a standard. Anub'arak stabs forward with his claw like a sword, dealing 11% and medium knockback. This is easy to dodge but a nice and simple single attack that has nice range for piercing the foe's defenses or hitting a foe that thinks they're just out of reach. It should be noted that it also hits above Anub'arak, can can catch a foe that somehow managed to float above you. How did that happen? Looking at you, Peach.

Hopping and using this is a pretty great move. You don't have much reach on your standards so this fills in the missing gap quite nicely. It's fun to just hop and poke foes, but aerial foes that want to combo Anub'arak from the side are most affected by this. It's quick and just efficient. Poke, poke, poke, poke, KO. Clean kills are just as good as grindy kills. Of course, there is this thing called a shield... wait... damn. If only you had a way to get rid of shields, huh? That would be a class act.

Back Aerial - Wing Flutter
I'm personally a fan of those multi-hit aerial moves you can hop and spam to rack damage up on the foe. It's why I like Jigglypuff, despite her being quite literally the worst character in Smash Bros 4. Why do I tell you this? Because this is an odd move and Anub'arak already has super amounts of damage racking. This is gratuitous. Anub'arak flutters his wings at a billion trillion miles per hous behind him while looking back and bumping his butt backwards, kind of hopping. The wings create a sizeable round hitbox on the posterior of the spider king. They rack up 3-4% per hit with multiple hits totalling to 12-15%. There's not much set-up lag, which makes this ideal for spamming the ever loving crap out of. But remember kids, spamming doesn't always work. That's why you have at least 5 different moves that do the same thing.

Do I even have to say it? Dots, dots, dots. This isn't a true dot. It's great for comboing with your critters, especially the little fellas. The big fellas like it too, since they stay on the ground mostly. Get a foe between you and a nerubian, hop, back air. Let your friend hit them a few times too, he needs some action. Now as for in a cocoon, this also puts in a lot of work, since they keep taking damage while trapped. So, it's pretty versatile, if punishable due to the awkwardness of it.

Up Aerial - Crown Stab
Anub'arak has a crown, sort of. That big sharp protrusion on his head. That's his crown. It's pointy and it is not where you want lodged in your anus. Anub'arak stabs the sucker up in a fierce attack that deals 14% and heavy upward knockback. This is really good for securing KOs at the top of blast zones, or when it comes to aerial battles. You can juggle a foe up, keep hovering to keep the train going, and with enough coordination and a foe that is dumb enough to not DI, you can secure a cheap and easy KO. No competent foe will let this happen, but after wearing the foe down with so much affliction then you just might have a chance. Keep in mind the hitbox is very narrow, so it can't really protect you from all angles.

Down Aerial - Epicenter
Incoming! Anub'arak spreads his legs and falls quickly, slamming that big mass down in a powerful landing. It'll make cracks in the floor of the stage where you landed! Epicenter has a huge hitbox that is hard to avoid due to how massive Anub'arak is. It has to be spot-dodged or shielded, although shielding will take a chunk of the shield away really quickly against this. Epicenter not only stuns foes hit by the edges of the hitbox, just like in the down tilt, but foes right in the middle of Anub'arak's huge *** will get pitfalled and take the brunt of the damage- 17%. Best use this while hovering, or a jump then down air. It's a little too slow to shorthop, fortunately for your foe.


Grab, Pummel, & Throws

Grab - Spiderking
Anub'arak is a spider. What did you expect but a tether recovery for this guy? Anub'arak spits out a thick rope of web from his spinneret with some decent range, half a Battlefield Platform. The sticky rope of web will wrap around a hapless foe struck by it and reel them in, right up next to Anub'arak's ugly maw. He just stares them in the eyes. He's really terrifying up close. This has lag, of course, but can use to recover if needed.

Pummel - Feed the Swarm
Anub'arak is too dignified to pummel you himself. It's time for his children to feed. Every hit of A will summon a scarab matching your down special of choice to attack the foe. Quick recap, there's normal scarabs that deal 1% per hit, assault scarabs that do 2% per hit, and leeching scarabs that do 0.5% per hit but heal you for the amount damaged. The more hits of A this does obviously increases the damage and possible healing dramatically, so feel free to spam away. After the foe is released from the grab, the scarabs stick around and do their thing. Neat!

Forward Throw - Poison Breath
I told you he has bad breath. I told you man. Anub'arak breathes a toxic cloud of purple mist into the foe's face, which inflicts poison! Woah, didn't see that coming, did ya? Now, I know I referred to the acid effect as poison earlier. That was a mistake. That was acid. This is poison. They're still functionally the same: 1% every 0.5 seconds over five seconds. This is poison, and not acid, so it stacks with acid, which is not poison, but does the same thing as poison, which does the same thing as acid. Got it? I hope so. This can even hit foes not actually being grabbed by Anub'arak if they're close enough. It's like a Bowser's width cloud in front of Anub'arak. After Anub'arak's done asphyxiating the foe, he tosses them forward about a little more than half a battlefield platform.

Back Throw - Body Slam
This is called Body Slam because I didn't want to say "Butt Slam". But that's what it basically is. Anub'arak places the foe down and slams his arachnoid [B]* on them, dealing quite a good bit of damage, 16%, and great backwards knockback. This is ideal for repositioning your foes, if they don't want to run into your traps that you have lying all over the place. Your little bug friends will skitter past your legs to chase the foe, right where they land, so the danger never stops, even after you've had your ribcage crushed by bug *[/B].

Up Throw - Cryptweave
Anub'arak uses his spidery prowess to construct a web like instantly. Woah damn. The web is kind of a background object that stretches into the foreground, creating an ever so thin and nearly indetectible wall of web. Then Anub'arak wraps the foe in a cocoon and hangs them there. Like, hangs them in the air. The cocoon is the exact same as the Neutral Special (default) one, and follows the same properties. While the foe is in the air, exactly right above Anub'arak's height, other characters can walk under them. They can even jump at the foe and attack them, or hit them from underneath. This is a perfect opportunity to set up a trap or ambush on the foe, because when they break out, something's going to activate. It's also a perfect aerial set-up attack. I also just wanted to nail another spider trope, because I love spiders okay.

Down Throw - Venom
Anub'arak bites into the foe, inflicting a toxic- alright no, I'm not going to do that again. This one's worse. Anub'arak bites into the foe, inflicting frostbite onto them. When Anub'arak fell in Azjol'Nerub, The Lich King was like, "Oh hell no, you think death can save you? Get back here, Miles Morales." and resurrected the poor ******* again. But this time he sent him to Iceland, and infused him with frost so he could crash a heroic party. This is a callback to that. Frostbite is a status effect that slows an enemy down, but more importantly, freezes up their joints. Especially their fingers. What I'm getting at is that frostbitten foes can't use their grab for ten seconds. They'll be dark blue, frosty, and shivering, so they know they're frostbitten. If they attempt to grab, they instead do a laggy animation that is easily punished. This is your anti-grab tech against certain characters, like the Ice Climbers... ironic.

Final Smash - Beneath the Grounds
The screen grows dark, and the camera zooms in on Anub'arak, who burrows into the ground... what's happening? Spiders start pouring out of the stage, and if there's any foes on the ground, they'll be slowed down tremendously, trying to shake the creepy crawly critters off of them. After five seconds, nerubians burst out of the stage at random places, shrieking and dealing high upward knockback and 20% to each foe hit by the the bursts of ground and arachnid flesh. After five nerubians burst out, Anub'arak crawls back out, with a massive shriek causing rocks to fall from the ceiling and crush the nerubians. The rocks meteor spike foes hit by them and deal 30% damage, but are randomly dropped from 6-8 rocks as big as Bowser a piece. After the dust settles and the lights return, only Anub'arak remains unharmed by the cave-in, his nerubian people, crushed to death.


Playstyle 1 - Control Warrior

Playing tanky Anub'arak is all about healing, Spiked Carapace, and assault scarabs/Crypt Lord Minions. You're going to want Web Wrap, Overlord, Locust Swarm, and Assault Scarab. Start off the match by using your Up Smash. This will offer you some protection right away. Summon Locusts with your Up Special and get a shield going. Move to the center of the stage and summon Assault Scarabs and Crypt Lord Minions on both sides of you to bolster your defenses and built a fort out of your servants. If the foes attempt to come at you from the side, trample over them with Overlord. If they attempt to come at you from above, use Flycatcher and Crown Pierce to ward them off. As you take damage, continue to heal with your locusts whenever possible and use your Up Smash. If you have multiple foes swarming you, Down Aerial and Down Tilt are great for getting them to back off. Try to mitigate as much damage as possible and you should outlast your opponents, as long as you stay on the ground.

Playstyle 2 - Swell the Swarm

This playstyle is all about summoning a lot of minions. Pick Webspinner or Web Net, Burrow Charge, Hive Master, and Scarab Host. Spam as many minions as you can, and overwhelm your opponent with sheer numbers. Your damage racking is very good here. Use as many debuffs and dots as you can to build up your opponent's damage quickly and finish them off with Impale. If your opponents keep killing your minions, use Burrow Charge to close the gap and keep them busy. Webspinner will slow them down, but Web Net lets your scarabs and locusts get in for a lot of damage easily. Don't underestimate your foe's down tilts, which are easy to clear multiple minions. Keep them occupied and your numbers will win out in the end.

Playstyle 3 - Guerrilla Warfare

Underking, any NSpec, Crypt Lord's Wings, and Leeching Scarab are good for this strategy. You're playing a mindgame/disruptive trap playstyle now. Acid Drench, Nerubian Trap, Nerubian Egg, and your throws are excellent in this playstyle. Use burrowing to surprise your enemy with a grab or with a status effect to stop their shields and counter attacks. Burrow into Grab is ideal here, but your opponent will expect it. Being too obvious is the weakness of this match, and it's completely skill-based. Traps can work really well if you chase your foe into them, either with minions or burrowing. Up Special hovering is also good to chase a foe down, to compensate for the lack of charge on your side special.


Hey guys, thanks for reading my moveset! I wanted to make this because I recently got Smash Bros 4 on the WiiU and I have been playing a lot of Hearthstone recently and opened an Anub'arak card for Rogue. My next moveset will be soon, stay tuned for more! I'd appreciate any feedback and how I can improve, I know I'm a little rusty, haha. Cheers!
 
Last edited:

JOE!

Smash Hero
Joined
Oct 5, 2008
Messages
8,075
Location
Dedham, MA
Anub'arak
Its great to see an old-timer back in the thread! As well as another MOBA set, and for quite an interesting Tank character too. The best parts of this set are definitely the writing style which is nice and promotional with great bits of humor, as well as the addition of custom specials. Its sets like these that make me wish customs were more like MKX where they are a true consideration rather than RNG loot drops. I personally would max out the healing with Leeching Scarabs and Aggro Locusts, keep the standard Web Cocoon to trap foes and leech easily, and then the 2nd ambush side B to mix up the foes more while maximizing evasiveness to heal. Overall a very fun core with thematic, buggy attacks to supplement this. There were some qualms I had however, like it is not mentioned how long the Nerubians stick around for in a clear way, and the Down throw seems kinda...there? It makes sense lore-wise I imagine but in the context of everything else it is puzzling and kind of tacky that foes suddenly just cannot grab. The 3rd Nspec also seems sort of inferior to the others due to their instant rewards but that is more a preference thing. Dsmash is also a clever use of RNG, but I feel the Web version is a little weird to visualize? Every other mention of a web "pulls" foes, this one pushes them upwards instead of like blowing up then auto-Utilting which I found a little odd. Anyways, I really enjoyed this set on the whole despite some grievances, and look forward to more Kholdstare!


Kholdstare

Nightmare Weaver
Joined
Oct 10, 2008
Messages
1,441
Anub'arak
Thanks, JOE! Not fully explaining the nerubian mechanic was an oversight, I need to go back and clarify that. My intention was for the nerubian to act as a normal character that must be KO'd like any other character, but they're weaker so they die easily. The Down Throw was supposed to give Anub'arak a solid answer to foes who have grabs that are difficult to deal with, and for another status effect to go along with his disruptive theme. The web version will probably be changed, because I wanted three different traps: one that attacks from the side, one that attacks from all angles but is close ranged, and one that attacks vertically. The web version was meant to launch a foe into the air. Thanks for the feedback, I'm glad you enjoyed it! The custom specials were definitely my favorite part of writing the moveset, I'm going to include them in my future ones.
 

JOE!

Smash Hero
Joined
Oct 5, 2008
Messages
8,075
Location
Dedham, MA
Thanks, JOE! Not fully explaining the nerubian mechanic was an oversight, I need to go back and clarify that. My intention was for the nerubian to act as a normal character that must be KO'd like any other character, but they're weaker so they die easily. The Down Throw was supposed to give Anub'arak a solid answer to foes who have grabs that are difficult to deal with, and for another status effect to go along with his disruptive theme. The web version will probably be changed, because I wanted three different traps: one that attacks from the side, one that attacks from all angles but is close ranged, and one that attacks vertically. The web version was meant to launch a foe into the air. Thanks for the feedback, I'm glad you enjoyed it! The custom specials were definitely my favorite part of writing the moveset, I'm going to include them in my future ones.
One thing I did notice (as have others) though is that there are quite a few "Stun" moves in the set. Do you mean like actual ZSS/Shield break type stuns or just hit stun? If the former, couldnt he do potentially 0-death type locks?
 

Pippin (Peregrin Took)

Formerly “ItalianBaptist”
Joined
Jan 28, 2014
Messages
949
Switch FC
SW-0542-4021-7641
Hey guys! I've been a lurker for a while but I think I finally got an idea for my own moveset. The thing is, I've never done this before so I don't know what the rules are. I know the character needs to be in one post as opposed to several, but can I start it in one post and edit it later as I go or do I have to post the moveset all at once?
 
D

Deleted member

Guest
Hey guys! I've been a lurker for a while but I think I finally got an idea for my own moveset. The thing is, I've never done this before so I don't know what the rules are. I know the character needs to be in one post as opposed to several, but can I start it in one post and edit it later as I go or do I have to post the moveset all at once?
Welcome! You should post the complete set and at least a header image, though you can edit it as much as you like after the fact.

 
Last edited by a moderator:
D

Deleted member

Guest
ALLEN O’NEILL


Allen O’Neill is a recurring midboss from the Metal Slug series, appearing in the first four games and finally the seventh, although he is paid homage to in the sixth game. Allen O’Neill is a leading figure in the Rebel Army, above the rank and file of the Infantry or other specialized squadrons, his first appearance he fights bare-chested holding a giant machine gun on top of a snowy mountain. He’s always fought in a similar place, with two platforms on both sides of the room and starts off every fight laughing at the player. Throughout every fight, he is the only character in the series to have dialogue:

"YAHAHAHAHA!"
"Come on, Boy!"
"Go home to mommy!"
"You're mincemeat!"
"See you in hell...!"


He’ll even start the match with a hearty “YAHAHAHAHA!” His death cry is the final quote. O’Neill carries a real life weapon, unlike many of the exaggerated weapons found in Metal Slug, an M60 Machine Gun. Allen O’Neill is always fighting on the side of the villainous Rebel Army that aims to bring the world under the control of a military regime led by General Donald Morden. Allen O’Neill is shown to die painfully after every boss fight, but comes back all the same over and over, making it seem as though he’s immortal. His son, Allen O’Neill Jr, later becomes his own midboss largely the same as his father, and Allen O’Neill himself even got to be playable in the mobile spin-offs of Metal Slug as the main character. Metal Slug 4 uniquely has Allen O’Neill come back to life as a cyborg after first being defeated, but he returns as a normal person in Metal Slug 7, manning a giant mech.

STATS


Size: Donkey Kong
Weight: Ganondorf
Ground Speed: Robin
Fall Speed: King Dedede
Air Speed: Ganondorf

For starters, Allen O’Neill’s size is a little misleading, as his body is roughly the same height and width of Ganondorf, only slightly broader in the upper body. A huge part of his model in game is his machine gun that stretches out half a platform in front of O’Neill by default. This is not a part of O’Neill’s own hitbox and only becomes an active one when it’s used in attacks. O’Neill’s overall speed whether in the air, on ground or falling is horrendously useless, but does make him basically impossible to Star KO with a huge weight and absurd falling speed. O’Neill instead gets a set of excellent jumps resembling the ones in his mid boss fights that let him leap across multiple Metal Slug platforms, in Smash this means he has a first jump that has 1.4x the reach of Falco’s and the second jump goes 0.8x the distance, a great recovery on its own. O’Neill’s gravity is in the top fifteen highest in Smash 4 and this further exaggerates his fast falling and lets him survive a little longer.

SPECIALS

NEUTRAL SPECIAL: M60 MACHINE GUN


Allen O’Neill fires his Machine Gun, shooting 5 bullets that travel as fast as Fox's laser and deal 3% each with flinching knockback, all hits landing deals 15% damage and knockback that will KO at 150%. The bullets are the size of a Gooey Bomb and the line of projectiles is half as long as a battlefield platform. The hits will combo into each other at any percent, having a large amount of flinching knockback. This move has a unique cooldown timer: the machine gun takes three seconds to cool down before it can be fired again, severely limiting the amount it can be spammed. O’Neill can angle the gun 45 degrees up and in the air can angle it down to shoot diagonally. The bullets travel the same distance as Falco's blaster in Smash 4 and this move has the same lag as that move, but the end lag is very slow and easy to punish, making it hard to directly follow up on.


The spacing of the bullets can make it difficult to dodge and will deal around half a shield's full health if all five bullets connect and causes a great amount of shield stun, scaling up depending on how many bullets landed. This encourages a foe to specifically roll around the bullets, as even five bullets will travel past the foe if they roll towards them as they dodge past with a roll. The bullets go slow enough that multiple become harder and harder to fully spot or air dodge, eventually becoming impossible at 3 bullets and causing the foe to get hit by half the barrage at 4. Not only for this move, the threat of the Machine Gun in general should encourage the foe to roll far more, especially when this move can be used in the middle of a few other moves using the machine gun, working in the same way as Bayonetta's Bullet Arts. O’Neill can hold the standard or special input during certain moves to fire his gun out after the move is over. This is relevant to the neutral special as this works on the same cooldown timer and adds the same amount of lag to any given move, making it a huge risk and this move is by far the fastest way to fire off some rounds.

There's a small chance whenever he uses this move, O’Neill will say one of his five quotes, for this move there's a preference for him to say "Come on, Boy!"

SIDE SPECIAL: GIANT MISSILE


O’Neill pulls out a heavy bit of machinery, a giant rocket launcher half as tall as he is, and stands on the front end of it using his giant boot to hit the trigger button, firing a giant missile out of the end. This has the same lag as Snake's down smash in Brawl. This missile is the length of a battlefield platform and as tall as a Mr. Saturn, and will deal 20% damage and high knockback if it hits a foe, which can KO at 125%. However, the giant missile is not a hitbox for the first second it comes out, taking all that time to fully come out of the launcher and start being propelled forward. The giant missile is not what it first seems: any character, the foe and O’Neill, can stand on top of it without causing it to explode and ride the missile. Allen O’Neill will naturally be on top of the missile and riding it if he doesn't move, as it comes out under his feet, putting him at the tip of the missile.

The missile will travel the full distance of Final Destination before it speeds up, and travels at the relatively low speed of Ganondorf's dash until it travels that far. Only the front of the missile is a hitbox, but O’Neill or the foe can attack the missile to lower down its 50HP to cause it to explode early, although it will never damage O’Neill. Shooting the missile has 35 frames of start lag, as bad as Dedede's forward smash but surprisingly little end lag, and obviously has a pretty useful way to deny a punish. Once the missile travels a full FD, it will accelerate up to the speed of Sonic's dash over the course of 2 seconds, taking anyone on top of it all the way to the nearest blast zone, or explode on any solid structure or wall. This means if O’Neill just stands on the missile all this time, he's just as likely to kill himself as the foe, but if he manages to grab the foe on top of it, he can score a KO in the same way you could on the platforms of Smashville. When characters jump off the giant missile, there is a short period of about a second where they will either be shunted forward for twice their aerial speed, or upward the same distance, if they were jumping respectively toward the front or back of the missile.

On top of the giant missile, any projectiles created will have the momentum affect how they work when they're first launched, either pulling them back if they're shot in the direction of the giant missile, adding the current speed of the missile to theirs. If shot in the opposite direction, they will instead be slowed down. For example on the machine gun, the bullets instead will speed up very fast for the start up, making it much faster and easier to hit the foe outright without a read or barraging the foe. Or the bullets can be slowed down at first, both giving O’Neill a better chance of following up on the bullets and helping to reduce the time between the cooldown and having the machine gun's bullets on screen. When any character uses moves on top of the giant missiles, they will fall off and stop being carried by it, making it less easy to suicide. Smash attacks are especially important for this, as O’Neill or other characters can essentially choose where to "stop", even falling off and using the smash as they hit the ground. Smashes will be cancelled as O’Neill or anyone else fall in midair for too long, but can be used for a short grace period as they fall off, lasting long enough to immediately use up the charge for the attack.

When the giant missile is initially fired, the giant launcher on the floor is not solid, most of it being behind O’Neill, a platform long to house the platform long missiles. When the missile is fired, the back of the launcher exhumes flames and smoke, creating a hitbox of its own that deals 15% damage and high knockback, able to KO at 140%. The nature of this hitbox is very similar to Snake's forward smash in Brawl in shape, but has a massive size that assures any foe who rolls behind O’Neill or is anywhere near the ground behind him will be hit. This means O’Neill at least has an easy time of keeping the foe in front of him as he fires this, at least forcing them to deal with the giant missile. Of course, he can also use this move like a typical down smash to counter roll happy foes, who would be encouraged to do so by his neutral special. The huge length of the giant missile makes it impossible to dodge but if it does go the full range, can be dodged then.

In the air, this is very hard to use as a recovery as O’Neill falls at his usual speed, making it pretty suicidal unless he already is high or used his jumps to get high in the air. The giant missile will also fall at O’Neill's fall speed until it leaves the launcher, making him fall to his death for 1.5 seconds at first. The missile will also fall slightly depending on what is on top of it, with O’Neill making it fall at an average character's fall speed, and other heavyweights making it fall even faster, making it not viable from far off stage as a recovery, although certainly useful if O’Neill was launched high in the air first. The fact the missile falls in the air though does make it useful for different varieties of attacks used off it. While the missile can be destroyed by such attacks, down aerial or moves dealing downward knockback can make it dip as much as O’Neill's height if say, a Bowser Bomb hits it.

DOWN SPECIAL: DROP SHOT


Allen O’Neill takes out a shoulder-mounted launcher and fires out a spherical mine the size of a Smoke Ball that slowly rolls across the ground at the same speed as the Mecha Koopa, dealing 10% damage as it explodes on contact. Unlike the mecha koopa, the ball-shaped mine will take into account any slopes or other features of the terrain to either speed up or slown down its descent and it won't ignore shields, and can't be picked up. At the end of the full range, the mine will like the Mecha Koopa, begin to flash red before it explodes. Although it can't normally be hit at all easily by the machine gun to cause it to explode early, or if it's hit by any attack, riding on top of a giant missile it is raised to a high enough level to be easily hit and explode. The foe can try to dodge the rolling mine pretty easily, but again is far easier to roll around. On a declining surface, such as O’Neill standing on his missile with it or the Arwings on the StarFox stages, the mine will treat it as a down or upward slope for momentum.


The mine will build up or slow down its momentum naturally from riding a giant missile forward or backward. Going forward with the missile, it will gradually get faster, reaching a cap of Fox's dash speed or going as slowly as Ganondorf's walk when it's rolling towards the back of the missile. Due to the fact it's going faster than the missile for its first final destination, or going much slower, it can roll off the front or back and continue on its path. Once the missile speeds up, it can drag the mine with it, causing it to become the "front" of the giant missile's hitbox. The ball will continue rolling at its old speed after it falls off the missile, or until the missile pushes it off stage, largely useful for letting O’Neill fire it off the back or front to create more unique set ups of projectiles and hitboxes. On top of this, when the mine is first shot out, it will be affected as any other projectile is, either slowing it down to a stop at first firing it towards the back of the giant missile, or speeding it up massively for the first second. Depending on where O’Neill is standing on the giant missile, this can immediately force it off and immediately aggro the foe, or let it linger on the giant missile for a long time to set up for a later offensive.

The Drop Shot can create multiple mines at the same time, useful given that they have no intelligence like the mecha koopa to not roll off stage. This is helpful as when the mines rolls into each other, they can affect each other's momentum. Rolling a mine into another will speed up the one at the front, giving it a double speed boost for one second, while the other will then roll backwards at its normal speed, covering a greater amount of the stage. If a mine instead rolls into another going the opposite direction, both will change direction after briefly coming to a stop, delaying their movement to make for better set ups. These mines are particularly bouncy, and when they fall off a platform, they will bounce once for twice the height they fell. This can be good when Drop Shots are fired in the air with one of O’Neill's massive jumps, or off the top of tall platforms or aerially-launched giant missiles. The bounce effect makes the Drop Shot a perfect way to chain together O’Neill's explosives, as it can easily line up with his machine gun when it falls in line, or get high enough on a bounce to be hit diagonally. It has a high fall speed in the air as well, the same as Fox, making it easy to hit when the machine gun is fired downard in the air.

UP SPECIAL: STICK GRENADE


O’Neill's second signature attack after his machine gun fire, O’Neill tosses a stick grenade in a lobbing arc, having half the range of Yoshi's up special Egg Toss and can be angled in the same way as Yoshi's up special, so can be thrown forward too. The grenade will create a small explosion on contact and deal 8% as well as high knockback, able to KO at 200%, and up to three can be thrown at once. As he tosses the grenade, O’Neill is lifted up in the air a small amount like Yoshi, giving him a weak recovery on top of his great jumps, but a Hail Mary attack as he dies is not bad either, if he can get the grenades on stage. Unlike the eggs, the grenades do not explode in midair and will continue to fall until they hit the blastzone or anything solid, but due to lower range is not the best long range option compared to O’Neill's machine gun because of speed and his mines because of overall range.


The grenades are simply useful because of their huge size, being as big as a Mr. Saturn and falling at a low speed, Jigglypuff's fall speed, making it hard to air dodge and forcing the foe to actively avoid them, especially when they can be spammed all at once. Once he's used up the three grenades, O’Neill won't go into helpless, but inputting the move won't give him the jump either, having to return to the ground to get back the grenades and boosts. On the ground, O’Neill is also limited, only being able to throw a grenade every 3 seconds, 2 grenades every 4 seconds and 3 grenades every 5 seconds.

The grenades gain some of the most when used on top of the giant missiles, as their arc is drastically changed. Thrown in the same direction as a travelling giant missile, the arc will instead be greatly increased horizontally to go twice the distance of Yoshi's Egg Toss. This is hard to make much off, but can be really helpful off stage or in a gimp attempt, as largely O’Neill is relegated to the stage permanently thanks to his horrendous air speed, high fall speed and high gravity. The other change to the arc, when thrown against the direction of the giant missile, instead halves the horizontal range, but boosts it vertically when it's thrown against the momentum's wind. The stick grenade is instead thrown up 1.5x the vertical range of Yoshi's Egg Toss, coming down later too. Due to the nature of the lob, one of O’Neill's best ways to explode his own giant missiles while making use of its range and size is the grenade, as he throws it over or on top of the foe, or any other incoming attacks, and lands right on top of the missile. As in the games, the grenade and its unique qualities as a projectile can help to overwhelm an opponent if used correctly, but can also be wasted.

This is another move where O’Neill may say one of his quotes, this time most often saying “Go home to Mommy!”

SMASHES

FORWARD SMASH: ROCKET LAUNCHER


O’Neill takes out a rocket launcher held on his shoulder, unequipping his Machine Gun with the snapping sound used often in Metal Slug, and charges the move before he fires out a missile largely resembling Samus' Power Missile in speed and shape but slightly bulkier. The missile deals 10% damage and high knockback, the same as Samus' Power missile. The move has long start lag and the missile will have a short delay before it shoots forward, making it very easy to perfect shield at close range due to its predictability, but guaranteeing it combos into itself and still having great range for a smash. Charging the smash fires multiple missiles, 2 at mid-charge and 3 at full charge. The knockback scales up very fast, 2 missiles KO at 175% while 3 missiles landing on a foe will KO at 150%, dealing 20% or 30%. Shooting 2 or 3 missiles will add greatly to the move's duration making it far more punishing as the foe can just shield all the missiles and make it unsafe on hit at a close range. Missiles travel the same distance and speed as Samus' missiles and are far too long and big a hitbox to dodge, but now even rolling is difficult.


The missiles can be shot out of the air by O’Neill by using his neutral special, exploding it as the foe dodges or barely moves out of the way, instead hitting them with the explosion for the same damage, but using up the neutral special to do it. What is made more awkward for the foe is that O’Neill's missiles have the same petering out effect of Samus' when they reach their max range before they explode. When used at a longer distance, O’Neill can mix the very slow speed of the missiles and his machine gun together as this gives him more than enough time to compensate for lag. This acts as a great way to pressure the foe into an approach at very long range, as the combined shield damage will bring a foe's shield down dangerously low, and the barrage covers a massive surface that will be hard to dodge, let alone avoid. At a mid-range, this is not possible, and at close range a foe can simple shield a missile and easily punish.

Used on the giant missile of side special, the missiles will travel extremely fast, adding on top of the speed of the giant missile. Firing in the opposite direction on top of the giant missile will instead make the rocket launcher missiles travel at half their normal speed, becoming much slower projectiles for the first few seconds and giving a whole different functionality, as O’Neill can then approach using them and jump off his giant missile. As with all smashes, as he's charging the move, O’Neill will lose his footing on the giant missile and will stop being pulled along with it, eventually falling off. This means that O’Neill can position himself to send a slow missile or two first, then a final one or two missiles that instead travel at the faster rate, making it harder to react to and bridging his projectiles together more naturally. The back of the rocket launcher will generate a strong wind hitbox from the recoil as it's shot, as strong as a mid-fully charged FLUDD depending on the smash's charge. This isn't as good to punish rolls as the side special, but at least will cover the end lag, and can potentially lead to some gimps if the foe jumps over O'Neill's back near the edge and has a poor recovery.

The rocket launcher can be angled to fire higher, or aim at the ground. Aimed higher, the missile will instead travel at the same 45 degree angle diagonally as O’Neill's machine gun when it's fired upward, making it easy to fire and explode the missile when it's shot at this angle, and creating a solid anti-air option. When fired in this way off the top of the giant missile, this will either stall it in place first, causing it to fire over the top of O’Neill's head if it's used towards the back of the missile. It will boost it half a platform forward before it's launched off, if it's fired towards the front of the missile. O’Neill can choose to charge just to get this boost, or charge longer to fall off the missile and fire the missile normally to create two potential arcs for the missile and pressure for both outcomes. Fired at the ground, this turns the move into a clone of Snake's forward smash in Brawl, dealing the same damage, but lingering for 2 or 3x as long, at the cost of even more punishing lag. This is easily the best way to detonate the giant missile, as well as pushing O’Neill naturally towards the back of the giant missile as he charges, creating a useful dichotomy where O’Neill can move around the giant missile and create a threat of destroying it.

UP SMASH: MORTAR FIRE


Allen O’Neill shoves out a mortar into existence, half carrying it in his arms with his sheer strength, largely resembling the Snake up smash in Brawl in many ways, including the charging animation and lag. After charging it up, O’Neill slams down the mortar, itself a far more powerful hitbox due to who is doing it, dealing 8-10% damage and low knockback, this directly combos into the mortar itself being fired, again largely resembling Snake’s move and dealing 10% damage. The mortar’s height like with Snake’s increases for charge, instead of gaining power and largely follows the same heights for the charges, if slightly higher overall and scaling less harshly until the max charge. The mortar no longer falls at random horizontal ranges, instead being fired in a slight arc forwards.

On a giant missile while it’s moving, the mortar’s horizontality is greatly affected by the current momentum of the giant missile. Going forwards and shot forwards, the mortar will move two platforms forwards before dropping down, making it a fantastic approach move. Moving forwards but shooting backwards, the mortar will not move at all, and instead be raised slightly higher in the air than usual before dropping back down. The beginning of the move, where the mortar is slammed down, will also create a weak groundshaking hitbox similar to DK’s down special in appearance, dealing a token 5% and weak upwards knockback. This is almost directly what the Snake up smash does for its initial hitbox, giving a nice big sourspot of sorts to accomplish simpler juggling with the move.


The input can be pressed again in the small window after charge but before the mortar is fired to instead shoot out a more powerful mortar that is twice as large. This will launch at the same arc as the regular one but with a slight delay after the mortar is slammed down, the mortar itself will now deal 15%. This is able to KO at 150% hitting with the mortar but at the cost of not being able to combo off of the initial slam of the mortar because of the longer delay. The mortar's biggest difference from normal comes when it starts to fall, as it will have a small parachute attached to it that causes it to fall at half the speed and sway in the air back and forth. The mortar works in the same way as a normal mortar, but the parachute can be influenced by any wind hitboxes, including that of O'Neill's forward smash and side special. This is mostly useful when the forward smash is angled downwards, then it can send the mortar back into the air to refresh its usage, giving the potential for multiple big mortars at once. The chute can also be destroyed by any attack, causing it to fall at normal speed.

DOWN SMASH: EXPLOSIVE BARREL


Allen O’Neill holds up a massive red barrel the size of DK with 'DANGER' written on its side, bearhugging it overhead for the charge time. O’Neill then crushes the barrel against the ground top side up, squashing any foe underneath it for 25-30% damage and strong knockback at the Sakurai angle, setting up for the machine gun at low percentages. This has comparable range to Dedede's forward smash, if the handle of the hammer was removed and has similar lag at the start, less at the end. As he charges the move, O’Neill gains super armour, and the barrel has a bulky 30HP making it a good counter-type move. When the barrel crashes down, it will cause any loose items within a fully exploded smart bomb radius of O’Neill to be launched up into the air. How far they go up is dependant on the down smash's charge, launching them a Ganondorf at max charge or half that uncharged. Similarly, the barrel causes a weak shockwave effect when it hits the ground that is identical to Bowser Bomb's shockwave, hitting on both sides of O’Neill.


The explosive barrel can explode too, of course, and it has incredible power. As in the games, the explosive barrel has a surprising amount of strength before it finally explodes. It does require its 30HP is depleted first, and is vulnerable to Allen O’Neill's attacks as well. Once it hits 0HP, the barrel will explode in an impressively huge display of flame and smoke, a hitbox that billows upward to be as tall as Ganondorf and is 1.5x as wide as Bowser, doing the same damage and knockback as a Bob-Omb explosion. O’Neill is not vulnerable to the explosion, but if it explodes while he's in the start lag or charge of the move, he will suffer horrendous end lag lasting for a whole second. This can easily backfire though, as the foe is actually vulnerable to the explosion. The barrel will flash red for a few frames first before it explodes, giving foes enough of a window to dodge, roll or shield. Standing on top of the barrel when it explodes won't damage O'Neill, but will send him very quickly a Ganondorf into the air. Likewise, standing next to it will make him dash forward or backward a platform over half a second, setting up for a good run at the opponent.

The move can be followed up on by O’Neill to use the barrel as an item. Pressing the standard input again, O’Neill will tip the barrel so it sides faces the screen and give it a shove forward, taking another 40 frames in all to do. This will send the barrel on its way, largely identical to how a normal barrel item works. When it hits foes, it will deal half the damage of a normal barrel to foes, but will deal up to the damage of a normal barrel item as it builds momentum going down slopes or other terrain that boosts its speed. The barrel will come to a stop when it hits a wall or foe, but any damage it deals, or would've dealt when it hits a wall, will be subtracted from its HP and enough bumps will cause it to finally explode. O’Neill can easily manipulate it with his machine gun, each bullet will not only damage the barrel but propel it forward, hitting with all 5 bullets will immediately boost it to its max speed. Likewise, just rolling it along a giant missile will eventually have it reach this cap. Rolling it backwards off a giant missile will instead make it maintain a slow speed, dealing half the damage of a barrel item. The barrel remains a constant lingering hitbox in place until the giant missile shoots away and leaves it behind.

The barrel can be incredibly useful to O’Neill, especially on a giant missile as it always acts as a wall. He can now use his other smashes on the giant missile, or another down smash, without being pulled off the back of the giant missile as he does it. O’Neill will be moved down the giant missile as he charges, essentially letting him place it wherever he wants on the missile by releasing the smash. This fundamentally changes the forward and up smash to now instead be shot out from whatever point on the missile it was as it moves forward. It also makes an actual suicide attempt on the giant missile a lot easier, as the foe has to jump over the barrel or destroy it. The huge damage the barrel does won't apply to the giant missile as it's simply put on top of the giant missile, but the explosion will destroy it, making a very easy chain reaction with the explosive barrel or other explosives in O’Neill's arsenal. Spherical mines will also push the rolling barrel forward as if on a slope, or hold it in place if they are going in opposite directions. One mine will only stop an explosive barrel for a second, two will cause it to reverse direction. The grenades also contribute very nicely to the barrel, O’Neill can toss them over it to aim at the foe, while also putting the foe in danger of being hit by the grenades exploding the barrel.

While the barrel is upright, it can be stood on like a platform by O’Neill or any other characters, enabling him to further use grounded moves like his up smash to net a Star KO. Generally a giant missile won't get much vertical distance for this to be abused, but the extra height of a barrel is an even bigger help. A standing barrel won't be pushed as much by Drop Shot mines, but will be pushed at Ganondorf's walk and twice that speed with one or two mines rolling into it, respectively. On top of a barrel, none of the rules of firing projectiles with a speed boost or slowdown apply as they do on a giant missile, but will if the explosive barrel is on top of a giant missile, O’Neill can mix and match for the best results of both these. He can even build a fort of barrels on top of one another, although this will reduce each barrel to under 10HP each time he creates a new barrel, meaning he can only pile up one barrel at a time and leaves himself absurdly open if the foe just destroys the bottom one. This is best done for whatever reason when the foe is KO'd and O’Neill has a spot of time.

STANDARDS


JAB: KNIFE


The last of O’Neill's three moves of doom in his midboss fight, O’Neill takes out his knife and swings it around him very quickly, dealing rapid hits of 2% and a last 5% hit that has the same KO power as Robin's Elwind jab finisher. This has about the same strength of keeping the foe in the jab combo as the Koopalings, so the foe can escape fairly easily at higher percents, but this is very dangerous given the giant missile and other aspects of O’Neill’s set. Simply being able to hold the foe in place, not having to land his grab, sets up for obvious gimps off-stage if he can catch them on his missile, and will even do so if they end up right behind him, making it good pressure against foes trying to roll behind him. Not the strongest of attacks, but in tandem with others it’s pretty deadly to block off more of the stage and force a direct fight. In contrast to all moves up to this point, this move is fast and has a close range, reaching on both sides of O’Neill as far as Elwind if its hitbox was laid evenly on top of O’Neill's model. This is actually one of the fastest jabs in Smash 4 with minimal end lag, making it one of the most useful moves in O’Neill’s arsenal for close range, though has above average length end lag for a jab.

This is the last of O’Neill’s three signature attacks, where he can say any of the quotes, here more likely to say "You're mincemeat!"


Instead of jabbing repeatedly, O’Neill can hold the input from the beginning to hold the knife close to him before throwing it forwards, becoming a throwing item that deals 9% damage and strong knockback, able to KO at 230%. It’s slow and telegraphed, as demonstrated by the Ptolemaic Fanatic, but not quite that slow, taking around 15 frames to perform. The knife is thrown forwards at the same speed as Falco’s blaster shot and if it doesn’t hit anything after travelling a battlefield platform, will fall and embed itself into the ground. It has 15HP that can be depleted by O’Neill or the foe, but for as long as it’s around, it will deal 6% damage and knockback at the Sakurai angle to any foe that touches its blade, although will do no damage if they touch the top of it. This is more useful when it’s thrown at either the giant missile or explosive barrel, as it will damage either, but also stick to them, and given they can travel will produce an even bigger hitbox as it goes across the stage. On a barrel, if it is rolling, the knife will spin around and catch the barrel, stopping it from rolling any further and reversing its direction. This will then act as a good way in of itself to put a limit on how far a barrel can roll, helping to keep it from rolling off stage.

The knife can also get stuck in the Drop Shot mine, the grenade and the missile, although these take even more ridiculous levels of skill to achieve given their various arcs, it’s easier to accomplish using the giant missile to stall them first by shooting them towards the back of it as it’s moving. Each of these will not explode as the knife becomes embedded in them and maintain the knife hitbox, the same as the explosive barrel or the giant missile. The Drop Shot mine acts similarly to the barrel, but rolls back and forth over a very short range as the knife prevents it rolling any further, causing it to take a much shorter patrol before it explodes on its own. The grenade will have the knife spin around like it does, extending the knife’s hitbox and can passively combo the knife hit into the explosive hitbox. The missile will simply carry the knife forward. Once each explode, the knife is shot in the opposite direction from where it was pointing into the mine/grenade/missile, as if it was thrown by O’Neill but going at 1.5x the speed and dealing 10% damage, able to KO at 150%. This can be fairly incidental, but O’Neill definitely can manipulate his explosives enough to make it a useful angle, either by detonating them himself or timing them correctly. O’Neill can throw multiple knives into big enough objects, later on create an explosion of knives in all directions.

DASH ATTACK: STAB


O’Neill grabs his knife and lunges forwards, striking faster than the pictured Rebel Infantrymen, dealing 6% at the tip and strong knockback, and a stronger 10% with a freeze frame at very close range, which can KO at 140%. This sweetspot does more than just act as a powerful KO move. O’Neill will stab the foe powerfully enough to cause blood to spurt out of them, creating a puddle on the floor as wide as he is. This puddle of blood lasts for 10 seconds and will decrease traction for any character who steps on it, reducing their traction to half. This is not just over the area of the blood, but will last for 5 seconds after they step in the puddle no matter where they stand. This can be spread out over a greater distance by the foe moving faster after being struck, expanding the width of the puddle to be as much as double the size. This is accomplished both simply by getting the foe higher in percent and hitting them further away but also works by fighting the foe on the giant missile, where they naturally will be pushed over a further distance if they’re stabbed off the back of a moving giant missile.

Allen can even use this move on his own barrel, stabbing it though without the freeze frame, for a similar effect, but different in the context of the barrel. It will cause the oil from inside the barrel to start pouring out of the hole he forcefully created by stabbing it. This will make a puddle the same size as the one from the foe, but will continue pouring out over 5 seconds, half emptying the barrel. This causes the puddle to stick around for an extra 15 seconds and if the barrel is moved around, it can cover all surfaces the barrel is moved onto. The oil will slowly drain out of the barrel and make its explosive weaker and weaker until it has half the power after 5 seconds of draining out. This also makes the barrel move much faster, and while the explosion is weaker, the barrel as a buffeting item will increase when it’s rolled. A rolling barrel that is stabbed will continuously spill oil only when the hole is not aimed at the ground, and will take roughly 12 seconds to completely drain of oil as a result. Especially using a giant missile, this can lead to ridiculous amounts of oil coverage, but will completely nullify the explosion. Instead of exploding, the barrel will just burst like a normal barrel. Once there’s barely any oil left, this will happen whenever a normal barrel would break, losing the HP. Again, a less filled barrel will accelerate and travel faster, basically becoming a normal barrel.

The oil has plenty of uses with O’Neill’s playstyle, especially with his giant missile and other positioning traits. He can use the lowered traction on the foe to slip them up if they’re carefully avoiding his many projectiles, especially those thrown overhead like his grenade or mortar, thus forcing them into using their shield, roll or dodge to evade, which he can then punish with his machine gun or rockets, depending on the foe’s current distance from O’Neill. In terms of his own moves, this basically lets him have access to his giant missile without having one, which is huge. Instead he simply spills oil on the stage, and without traction, his projectiles will act as if O’Neill is speeding ahead on a giant missile. This effect is weakened considerably however, as O’Neill’s traction even when halved only emulates the giant missile’s effect, causing projectiles such as the mortar and grenade only to linger in the air for half as long. Considering the ease in which a barrel is summoned compared to a giant missile however, just getting a lesser version is definitely worth it in a lot of scenarios.

The oil being flammable will ignite if any kind of fire or explosive hitbox overlaps it, causing the oil to become a trail of fire. This lingers for as long as Ness’ PK Fire, unless a barrel is constantly creating new oil. The oil will spread quickly to any oil next to it, meaning even if there is a barrel, it won’t last long. If fire reaches a barrel that has been stabbed, it will prematurely explode, ignoring the HP. This can end up limiting O’Neill somewhat in how he uses his barrel for particular set ups, but in another way is actually very helpful in giving another depth of options for using his barrel, as he no longer has to care about its HP to time for its explosion, instead just going for a quick stab then shooting it with his machine gun. This is easily predicted though, given you need to stab the barrel first, in a way similar to the way Villager has to first plant his tree before it grows and letting the foe know what you have planned. In the same way, this can help to pressure the foe if O’Neill wants to play more defensively for whatever reason. This has a limited lifespan however, especially on a rolling barrel, as the oil will decrease the power of the barrel, in time either depleting it to half or nothing.

FORWARD TILT: FLAMETHROWER


Allen O’Neill equips the flamethrower for the start lag and aims it forward, having the same start up as Ike's forward tilt, one of O’Neill’s fastest moves, but horrendous end lag as the flamethrower causes recoil like a shotgun. O’Neill shoots out a fireball as large as Bowser, dealing 5 hits of 2% damage over the course of a second. The last hit can KO at around 165%. The fire lingers for the full second after the attack's duration, and used on top of the giant missile, the fire will be spread over a larger width, though this is best taken advantage of by standing at the very tip of the missile, though this is highly telegraphed. The fire hitbox will also be weakened when spread out, instead dealing hits of 1% and much weaker knockback, but will drag the foe along. Timed very well, O’Neill can fall off the back of his giant missile due to the start up, and then hit the foe with the end of the move when it again starts to deal 2% per hit, as he hits solid, unmoving ground again. At max, the fire will be spread out over double the width, two Bowsers. Firing it backwards off a giant missile when it’s moving will instead bunch up the flames, dealing hits of 4% over a quarter of the width, this will instead KO at 125%, but will only hit foes directly in front of O’Neill.

The fire will cause a fire effect on a foe, dealing 1% a second over 5 seconds. The fire effect will damage anyone else in the match except for O’Neill. The fire will damage O’Neill's explosives, mostly important for his giant missile, the foe will now actively damage it just by standing on it, making it more dangerous for them to use it the same way O’Neill does. O’Neill most directly can use this to his advantage by grabbing the foe on top of the giant missile and letting them do it enough damage to the point that he can jump off and destroy it. Another option is to wait for it to get low enough health, that he then can destroy it solely using the little amount of passive damage the foe's fire effect does over time. The fire itself will cause any other explosives in O’Neill's set to explode on contact, which is mostly irrelevant on the foe as most explosives explode on contact anyway, but for O’Neill makes this a good way to say, clear out the up special grenades to use again, or catch the edge of his drop shot or missiles to trigger an early explosion.

Angling the input upwards during the move, O’Neill instead fires the second kind of flame shot available in Metal Slug, firing a thin stream of fire a Ganondorf into the air above at 45 degrees. This deals 5 hits of 2% damage, but only medium-powered knockback at the end able to KO at 200%. This lasts for a much shorter duration than the normal move and has comparable range to Palutena's up smash, but will never hit foes in front of O’Neill. It can also deal far more damage if all hits connect as it also leaves a burning effect on the foe over 5 seconds and is strictly an anti-air move. This can be useful on a giant missile in midair to Star KO foes if they're near the top blastzone, as the foe is pushed to the edge of the hitbox before being dealt knockback. Even if it is as strong as the regular version, this is a better spike just for the range. Through precise timing, O’Neill can create a huge vertical barrier where his lobbed grenades, bouncing drop shots and missiles prevent a foe from recovering high or trying to get behind him. It does leave his front open to punishment, but is another option that encourages the foe to attack him directly.

UP TILT: MACHINE UPPERCUT

O’Neill brings his machine gun into play, using its huge solid body as a weapon to swipe in an uppercut motion, dealing 8% and popping any foes into the air. This has incredible reach, comparing to Ike’s up smash only with slightly more horizontal reach forward and none behind O’Neill, with lag slightly faster. The machine gun will hit the foe upward from wherever it landed, so either in front of O’Neill, or directly above him, as the hitbox becomes a half-crescent shaped hitbox as it swipes through the air. This will never usually KO, although this is the first example of where O’Neill can use his Bullet Art-like mechanic to follow up on a foe. By pressing the standard input during the move, O’Neill will start to figure out of the machine gun independent of where it is currently aimed. This lets him have access to all angles from straight forward to up, giving a nice, Metal Slug-like range of angles to hit with, and can follow up on the foe no matter where the hits landed.

The move has another use on barrels and giant missiles, the upper cut will send them flying in the opposite direction! Barrels simply are lifted up in the air a Ganondorf before slamming back down. An upright barrel will deal half the power of an uncharged down smash as it falls, and send items into the air at half the height. A rolling barrel will be whacked backwards in a lobbing arc, from one to two platforms away, depending on if the barrel was travelling with momentum. A giant missile, with its huge size, will simply be upended and redirected straight up. The missile largely has no great purpose in doing this, as obviously O’Neill can’t ride it, although a stupid player might wall cling it to their doom. What this does that’s useful is “reset” anything on the missile itself, causing foes to fall off, but also any mines that were rolling on top of it, any knives will fall out as it ascends and fall to the ground, becoming a reactivated hitbox. Barrels will fall to the ground. All of this directly in front of O’Neill to newly abuse. The missile itself can be useful too, its hitbox is small, but its huge size essentially walls the foe off in the air, useful in match ups against foes who like to stay in the air or on high platforms for a long time. After sending these objects up, O’Neill can even follow up by shooting them with the machine gun too, detonating them at unique angles in the air.

DOWN TILT: STAB MACHINE

O’Neill takes his machine gun in both hands, again making it solid, then shoves it forward along the ground, dealing 7% damage and strong knockback at the Sakurai angle, only able to KO at 230% or higher. This works great against shielding foes, able to shield poke and resembling Marth’s down tilt or Roy’s dash attack, a useful tool for O’Neill who works well against shielding foes. As in the up tilt, O’Neill can hold the standard input during the move to fire out of his machine gun, which can prove a very powerful way to shield poke or shatter a shield if both the down tilt and five bullets connected. Depending on when the machine gun is fired, the bullets will also come out further or nearer, and either spaced further apart if fired when the gun is first being poked out, or all bunched up if fired at the end of the move. Spaced out bullets make it even harder to roll or dodge, but make it possible to evade, while bunched up bullets guarantee all will land consecutively and delivered at the end of the gun, will definitely land if the down tilt does, creating a combo of the two attacks.

This move has a similar effect to the up tilt, using the solid nature of the machine gun to redirect both the barrel and the giant missile. The standing barrel has a very direct and functional interaction here: using down tilt on it, with the tip touching the ground end of the barrel, will cause it to tip over and becoming a rolling barrel. On a rolling barrel, it will roll up the machine gun partially, and then roll back in the opposite direction. Unlike other ways of doing this, the barrel will then roll back with a little bit of momentum in its favour, not slowing it down too much. Firing the machine gun early will instead push the barrel away with a similar effect but will send it at much weaker momentum if it was coming at any good speed towards O’Neill. Firing the machine gun later will give a great boost to the barrel in the opposite direction, letting it immediately reach its max speed! A giant missile is another simple functionality: the missile will become slanted in the air, travelling at a 45 degree angle upwards. O’Neill and his jumps have no problem getting up there to make use of this, and will cause any explosives or foes on the missile to naturally slide off very slowly. On a rolling item like the barrel or the mine, this will cause the missile to effectively become a slope. This naturally lets items fall off much faster and at a controlled rate for O’Neill, not quite a reset like his up tilt on items, but leads to it over a longer period of time.

AERIALS


NEUTRAL AERIAL: MACHINE SWING

O'Neill swings his massive gun in a circular hitbox, dealing 10% early and 8% late in the hitbox. This can hit over the top of O'Neill's head and slightly behind as well, letting it both juggle and be used as another back aerial hitbox using the wide coverage. The machine gun reaches a huge distance comparable to Cloud's buster sword and like his neutral aerial, auto-cancels when O'Neill hits the ground, making it great from a short hop and especially useful for O'Neill as a fast faller who doesn't want to stay too long in the air. This comes out very fast too, making it a good approach option in the air, though is not as well suited to hitting foes directly in front of O'Neill due to it starting above him. The machine gun is technically solid during the attack and can be used to nullify weak projectiles in the same way as Palutena's neutral aerial, but directly can be used in O'Neill's own set to weakly manipulate his explosives. This can bat around his stick grenades, drop shots, missiles and mortars. This is versatile too, as it can hit them in many different directions: up, forward, down or back depending on the timing and will knock them further if the end of the machine gun was used, but make it fall to the gorund if they hit the base of the hitbox as a sourspot.

This is another move where O'Neill can fire his machine gun by holding the standard button, this time firing at any point in the circular motion of the move. This will move O'Neill weakly in the air, sending him in the opposite direction in which he's shooting, only going at Fox's walk speed. This is boosted however if he's on top of a giant missile or jumping out of the oil, or has another means of boosting his speed and reducing his traction or gravity to manipulate his movement, as this momentum will boost the amount he's pushed back by the move. O'Neill will instead go at Ganondorf's dash speed if he's travelling with the momentum, and only move at Ganondorf's walk speed if he's going against it. O'Neill will mostly stay in the same position if he shoots at the start of the move, due to shooting in all directions roughly the same amount of time, but this can be changed by tapping the input again. Instead of doing the full motion, O'Neill will stop the machine gun wherever it was aimed, giving him consistent pushback in the opposite direction for the duration of the move, still auto-cancelling if he hits ground. This still works if he's used up his machine gun fire, instead just skipping the shooting part and cancelling out of the move early. This is good for the machine gun's solid nature when manipulating O'Neill's explosives as he holds it in place for the normal duration of the move.

FORWARD AERIAL: LUNGE


O'Neill moves forward a short distance as he cuts the air, dealing 13% damage at first, but decaying to 11% later as the move stays out for as long as an average sex kick. The animation is very similar to Ike's side special slash. The initial cutting hitbox has enough power to KO at 135%, one of O'Neill's most powerful KO moves and comes out just a little slower than his neutral aerial for start lag. The move has low end lag and very little landing lag, making it good for all of O'Neill's aerial needs. The initial hit will deal knockback at the Sakurai angle while the later part of the move will deal knockback at a 45 degree angle, this allows for the move when timed correctly to knock the opponent across the stage at low percentages, helping to maintain a more ground-focused battle, but becomes a powerful KO move later when it can KO. The lingering sex kick part of the move will deal considerable damage to shields, while the first part deals greater shield pushback. This becomes an even greater mix-up when using the giant missile, as the foe has to account for their constant movement and O'Neill can even use the leap to catch up to them, forcing them to back off or engage, or he can use his extra speed to catch up to them faster, making it hard to tell if he will hit with the start or end.

O'Neill is moved forward half a platform for the leap, but due to the move's long duration, will fall much further than he travels forward. This is changed slightly if he's just jumped off his giant missile or oil, the momentum will either extend his leap to a full platform or raise him a Bowser height into the air instead. This only only changes the leap, but makes the move deal knockback at a forward or up angle. When the move is used up against an item, including O'Neill's own creations except his giant missile, he will volley it upward in the air. The extent to which O'Neill can launch them ranges from half his second jump's strength to his full first jump height depending on what object he caught. For massive objects like the giant missile or explosive barrel, this has no effect and will actually cause O'Neill to recoil slightly in the air, sending him a short bit back. For a grenade, drop shot, missile or other things that are small, largely gets the largest boost. This also takes a lot of skill to use on the up special stick grenades considering the arc and how fast O'Neill falls, almost impossible if he didn't throw them before he fell, so largely is only useful if he already standing somewhere else to throw the grenade first, working similarly to how Link can use his bombs in midair. The latter part of the hitbox instead launches the items forward, creating another useful mix-up for the foe to react to, and even works to nullify medium strength projectiles, less range and more powerful than the neutral aerial for enemy projectiles.

BACK AERIAL: BELT WHIP

O'Neill takes a page out of his son Allen Jr.'s book, he takes his long ammunition belt and whips it behind him, dealing 10% in a long-range move, turning around in midair to face the other direction. This deal medium knockback and only KOs after 200%, making it a weak KO move compared to the forward aerial. The range is the same as Sheik's Chain in Brawl and is able to effectively gimp a foe who is being pushed off the stage on a giant missile or who O'Neill is trying to wall off, giving him a uniquely great reach behind him. The move has half the range, but is double as fast if O'Neill's neutral special is currently on cooldown, as the ammunition belt is half as long, usually only a visual effect. This version deals more damage, 15%, and will KO at 150% instead making it a prime KO move if the foe is in closer range and it's timed to coincide with the machine gun. This turns the move into more of a KO aerial than a aerial gimp. This is hard to combo off of though, as no moves will leave O'Neill facing to the foe's back that use the machine gun, but does lead nicely off of his neutral aerial to position himself, as he can use that move with his back facing the foe to hit them and move towards them first. The fact the move turns around O'Neill is very important for him given what he can do on his giant missile, O'Neill can use this move to reverse all of the effects of the giant missile after he jumps off it, changing direction in midair after throwing projectiles in the other direction but keeping on the offensive, making it a great follow up. The move does have bad end and ending lag, making it hard to spam on top of turning around O'Neill, meaning it can only really make a pass at the foe once an air trip, but is good at forcing an air dodge out of the foe.

UP AERIAL: SLASH


O'Neill grabs his knife and slashes it upwards in a slow motion, dealing 4 hits of 2% and a final hit of 5% damage to KO at 160%, a decent KO move, but mostly notable for doing great base knockback. This is primarily a juggle move, especially when it has poor end and landing lag making it harder to utilize in O'Neill's playstyle, but can be used to score an unusual off the top using O'Neill's great jumps to catch a foe during their fall, or simply to get the foe out of the way for O'Neill to try again with his explosives if they missed the first time. This will also juggle up any loose explosives, though not the bigger ones like the barrel or giant missile. This move is given even more power when used jumping off the giant missile, the extra boost has a Rage-like effect on the base knockback letting the move KO about 20% earlier, and gives an even better boost. This is even better when used after being boosted off the top of an exploding barrel, able to KO 50% sooner at 110%, one of O'Neill's best KO moves if he can manage to time this. It's fairly difficult to time however, but can be achieved through a simple chain reaction using Drop Shots, Stick Grenades or the machine gun to first pepper the barrel. This and his jumps give O'Neill a great ability to follow the foe into the air to give chase on top of the stage, even if he can't do this well off stage. This is also useful for the small vertical boost to use when jumping off a giant missile, where the foe will likely be above O'Neill, and using his large body and hitbox moving up to create a dividing line on the stage. He will either be thrown back as he performs the move, or forward potentially towards the foe, letting this move become offensive or defensive as he traverses to a higher platform or to try and go for a Star KO or reset the current fight. The move's fairly long duration and keeping the foe hit multiple times makes it another good fit like his jab for delaying and hitting with his explosives using the right timing and holding them in the right place to make sure a falling explosive lands on them.

DOWN AERIAL: STOMP

O'Neill performs a powerful meteor smash stomp with his giant boots by kicking downward, dealing 15% damage and strong downwards knockback, assuredly netting a KO if he gets the foe below him off-stage. This has poor landing lag, but good end lag, making it the go-to move for aerial combat, of course making it more risky to land on a grounded foe for when it whiffs. As with Ganondorf in Smash 4, O'Neill can even KO the foe off the top if he gets them to a high percentage by hitting them off the ground. This is potentially even more powerful when he can use the giant missile as an aerial platform, and even angle it using down or up tilt to make the foe instead get launched at a 45 degree angle. This move does considerable shield damage and the knockback means it does great shield stun too, helping to lead into a shield break off of machine gun or helping to build up to one depending on the order O'Neill lands either move. This will kick down loose explosives very quickly, the same speed as if he smash threw an item, and redirecting them straight downwards has a ton of functionality. This is especially true given the more unorthodox arcs of his stick grenade or his bouncing drop shot. He could even redirect a missile if he manages to catch it in time. A drop shot mine in particular is very nice for this, as instead of just going up double the height of its fall, the drop shot will now go up a set three Ganondorfs from being stomped by O'Neill. This naturally will give a path for O'Neill to use it on the foe in a coordinated way, giving a long day before it hits the stage again and not having to care about launching it high in the air. He can even do this to a grounded mine, working in the same way as a foe meteor smashed using the down aerial.

The real highlight of the move comes when it's used against the giant missile, as previously mentioned any move that does downward knockback on the giant missile, such as Bowser Bomb, will send it a good ways down. This move is no different, bashing the missile a full Bowser down in the air in terms of height, and as it goes, will lift any items on top of it briefly into the air where the missile used to be before falling back down. In that short interval, they will be treated as aerial items, this allows for O'Neill to do things like use his down tilt to shoot under anything that was previously in the way to hit a further off foe, or directly transition into his aerials without the danger of leaving the ground, as he can short hop the move. A slightly different effect happens if O'Neill uses the move on either tip of the missile, as instead of it all shifting downward in the air, it will act like a seesaw. The whole missile will still go down half a Bowser height, but the tip hit will tip the full length there while the other will actually go up in the air, making the missile make a diagonal shape for a second. This will seesaw items on the other end of the missile high into the air, a Ganondorf height before coming back down, and because of the break of being on the missile can let them fall off it or move backwards on it. This can be good for when fighting the foe directly and cover the landing lag, as explosives previously not in place will now move down the missile to land on the foe, as they move closer to them. As the missile is briefly tipped it will also act like a slope as in the up tilt, making items or foes fall off, again helping to cover the landing or end lag if it missed a foe.

GRAB GAME


GRAB: STRONG ARM

O'Neill uses his free arm that isn't holding the M60 to grab forwards, reaching an average range, even if it's not as far as his machine gun's full body. He'll hold the foe close to him like Ganondorf. When grabbed on top of a missile, it will not count for using a move and push a character back, but will once they start doing a throw or when they go for the grab itself. This makes grabs naturally bad when used away from the missile's current direction, as they get pushed back as they perform it, making the range more awkward. This however buffs the opposite, as the character will slide across the missile during their grab. This is even more exaggerated for dash and pivot grabs. O'Neill's pivot grab takes advantage of this too, giving him a great range, also useful when sliding on oil with reduced traction. This makes grabs more of a risky venture when fighting as or against O'Neill as despite the increase in range, sliding forward is also easier to punish and forces a stronger commitment to landing the grab. O'Neill's dash grab isn't as notable as his pivot grab, on normal ground it's pretty bad, about as bad as Ganondorf's because of his dash speed, but gets a great boost on top of the oil or used in the right direction on a giant missile to give extra speed. Again though, this does leave him wide open and can be exploited by other characters too, but gives a good and effective grab usage in the right situations, especially when the foe will be shielding the various explosives in play.

PUMMEL: HEADBUTT

O'Neill finally gets his hands on the foe and wastes no time going for a headbutt, dealing 4% damage, stronger than any pummel in Smash 4, but also the slowest. Apparently bashing his head against the foe isn't too healthy however, as every time he does it, O'Neill's model becomes toned more red each time, stacking up to four times where he then appears pale red. This is the same as when O'Neill takes damage in all his fights, growing more and more raw red as the fight progresses and is purely a visual effect.

FORWARD THROW: BEATDOWN


O'Neill lifts his machine gun high over his head and slams it down on top of the foe, dealing 14% for a high damage throw and launching foes at a steep diagonal angle, mostly horizontal. The machine gun remains solid for the duration of the throw and will hit characters outside the grab animation for the same damage and powerful knockback, as well as doing a weak "shockwave" effect on any explosives or other items, lifting them into the air for a moment. This throw has a long duration, which actually matters for the sake of the giant missile, as O'Neill can easily end up sliding down or off the missile during the move. This can also lead to a couple of different scenarios because of where he and the foe are positioned. The foe can slide off of the back of the missile while O'Neill is standing on it, but due to the machine gun's range (and forced hitboxes) to hit the foe wherever they end up. If the foe is hit by the tip of the machine gun, they will be dealt the same damage, but instead spiked upwards for a potential Star KO. This has the same power as Mewtwo's up throw, making it a reliable tool if scenario plays out, and can also be achieved by grabbing a foe falling next to O'Neill on a platform, or if O'Neill grabs them on top of his upright barrel, or something to that effect.

The other scenario is where O'Neill falls off the giant missile or other higher ground, hitting the foe from below. The machine gun as a solid will snap against the solidness of whatever the foe is standing on. This causes the foe to take weaker damage and knockback, only 6% as it's more like he's stubbing their toe, but will push the back with strong base knockback along the floor. This can be really useful for the most likely situation where this occurs on a travelling missile, when he's grabbed them and is trying to make them take off on it while jumping off himself. On top of a higher platform or barrel where this happens, the foe will instead trip off it as they hit the ground, leading to a big frame advantage and easy follow ups. The long duration of the move in general also makes it a useful throw simply for stalling a short while, less risky than a pummel at least, to allow for moving explosives like the mine or falling explosives, or the rolling barrel, to hit the foe from outside the grab.

UP THROW: GUT UPPERCUT

O'Neill shoves his M60 into the foe's stomach for 5% damage then swings the machine gun up into the air, launching the foe up for another 8% damage, largely working as a launching up throw rather than a KO. The base knockback is much stronger than its scaling knockback, letting it KO early off of high platforms, a high giant missile and similar things. At any point in the throw, O'Neill can cancel out of it early if his neutral special isn't on cooldown to shoot out of it. The foe will be launched lower the earlier the input is pressed, as the uppercut is not completed, the second hit dealing 4-7% instead. This is better for juggling, but the bullets largely won't have much use, being fired off in front of where the foe is launched, although their knockback does get pushed slightly more horizontally the earlier the thrown is cancelled. This is not true for when this is triggered at the end of the throw however, as O'Neill shoots up at the foe. They have enough time to react, forcing them to either break left or right, or try to air dodge some of the hits.

This is good for forcing the foe's approach, and doesn't hurt when the foe is falling for O'Neill's back aerial either, being the most direct transition into making that a viable KO move. This is also good for hitting explosives, for example firing the shots at a barrel on an above non-solid platform as the foe is launched at it. The usage of the throw changes drastically on a giant missile, as after the foe is thrown, the projectiles shot out by the machine gun will have the same changes applied to them as if they're shot out of the grab game. This will work in the same way on the bullets as in up tilt, sending them forward or holding them back in the air. This basically cuts the foe off from trying to land in front of O'Neill at all and forces them to DI back or try to air dodge through the bullets, or avoid them through DI, which is very difficult. The earlier this is cancelled into, the more likely O'Neill will be able to directly hit them if they get too close, but is risky as he himself will regain control at the same time as the foe, at least forcing a trade of blows.

Another big change here is the bullets shot straight up will always travel behind the foe, again forcing them to fall in front of them at first before they choose to DI forward, making it much easier for O'Neill to guess their approach. The other possibility, when the giant missile is moving backwards, has the opposite effect of sending the bullets more forward. This has the opposite effect when shot straight up, forcing the foe to get behind O'Neill instead. The bullets fired earlier on will be sent further forward and be more flat against the ground as a pattern, preventing the foe from returning to the stage further in front of O'Neill. This isn't as useful to directly combo into, but can be used by O'Neill as cover to start bombarding the foe.

BACK THROW: GERMAN SUPLEX

O'Neill turns the foe around and grabs them around the waist, suplexing them with both hands so that their head hits the floor on the other side, dealing 12% damage and high knockback that KOs decently early for a back throw. The German Suplex will turn the foe's own model into an active hitbox, dealing the same 12% to any other characters or explosives such as O'Neill's mines, barrel or even his giant missile. This is the one move that actually damages a giant missile while standing on it and can potentially explode it if the missile is at low enough HP, stringing the back throw directly into the giant missile's explosion. This will leave O'Neill falling off the giant missile wherever it is however, making it a difficult prospect at times. When on a moving missile, this will either make O'Neill move forward or back. Moving forward, this simply allows for him to brush up against other objects on the missile itself. This can either have the purpose of hitting the foe into the explosive, or either to avoid damaging the missile directly, or because the suplex itself wouldn't do enough damage to trigger the missile's explosion on its own. In a way this makes this one of the best chain reactions in the set because it allows for O'Neill to explode say, a mine, which causes the giant missile to explode, which may trigger a barrel, and the foe largely can't avoid this, but it takes immense set up to reach something that complex. Mostly it just works as a way to either save the giant missile or destroy it.

If used on a giant missile while moving backwards, O'Neill can reach the back of it and dunk the opponent off the back of the missile entirely, as this throw prevents O'Neill from falling off any surface. The foe will take a token 5% from being thrown and fall from half a Ganondorf to 1.5 Ganondorf heights downwards, regaining control and being able to DI or tech earlier the lower their percentage is, and taking damage if they hit the ground. The damage they take ranges from 5% if they fell a Ganondorf to 10% if they fell the 1.5 Ganondorf heights, and this will transition over to anything they hit on the ground. This can allow for O'Neill to dunk the foe off the missile either into the abyss, or into something just as nasty like a damaged barrel, other explosives. Simply hitting the ground as in most scenarios pops the foe back into the air again at a varied amount of knockback depending on their percent which can allow for a direct follow up by O'Neill. They will always regain control after hitting the ground though, so no true frame advantage here, just good positioning. This throw works just as well with all these scenarios just thrown off the edge of a drop through platform or the top of a barrel, but won't work off the edge of the stage. Either that or on top of a barrel, if he's close enough to his edge, he can suplex them directly into it to try and blow it up. If that happens, O'Neill won't just launch the foe, but be shot up himself as described in the down smash. This lets him do an immediate aerial follow up without having to use either of his jumps.

DOWN THROW: MINCEMEAT

O'Neill stabs his knife into the foe dealing 5% damage then delivers a boot, looking very similar to Ganondorf's forward tilt, dealing an additional 7% damage, launching them at the Sakurai angle as they fall into prone. At low percents this will cause the foe to be hit into anything on the stage that can be triggered by contact, which is a lot of O'Neill's explosives. They can also be hit off of anything solid, such as O'Neill's barrel which can act as a wall, to do a direct tech chase follow up. This is more appealing when O'Neill has a great pivot grab, and the foe's prone body can slide around more on top of oil, or be dragged in different ways if on top of the giant missile. It will either barely move at all, making the tech chase basically as good as Ganondorf's, or it will move a long distance away, making the foe a perfect range for O'Neill's projectiles like his machine gun, missiles and grenades, depending on how far they go.

The foe could also simply be kicked off the missile entirely, working off the same logic as the back throw this will work on drop through platforms, but not the main stage. The foe will immediately be able to DI and regain control if they fall off, but if kicked off the front, which is actually pretty difficult as O'Neill will slide back on the missile as he does this, are liable to get hit by the front of the missile. This can be DI'd to be avoided normally. The one scenario that it is unavoidable is if it's timed perfectly for when the giant missile takes off at a higher speed, going too fast for the foe to DI out of the way as it does this, but the window for this is very very difficult, and more than worth the huge reward if it's achieved.

When the foe is stabbed with the knife, they are given a bleeding effect like the dash attack. This causes them to not just create a puddle in front of them, but instead on any surface they touch for the next five seconds, bleeding it onto the floor. This is most direct when the foe is sent at the Sakurai angle on the ground, covering it in their blood as they slide across, and meaning if they do bump into anything, they come back much faster as they slide across their own blood. If they don't come back, this makes it easier for O'Neill to follow up by buffing the speed of his mines, himself and his rolling barrel. The foe then has to be careful beyond the point when they get up, as the further they run, the more they cover the stage and make things worse for themselves. This can be optimal for O'Neill to if he doesn't want to directly confront them at that time. Either way, it gives O'Neill a subtle control over how the foe acts and gives him a good degree of pressure against the foe.

FINAL SMASH

REBEL GIGANT


O'Neill leaps into the air, jumping all the way off the top of the screen as he says one of his five quotes and drops back in his mech, the Rebel Gigant, roughly the same size as the Landmaster but with flipped dimensions. This will last for the same amount of time as the Landmaster until the same effect happens where it self-destructs. It has several powerful moves: it can casually fire giant missiles out of its stomach, it can fire up to 5 RPG missiles at once out of its shoulders, and it has a giant claw that grabs across the entire stage. These can all be performed laglessly and independently of one another. When a foe is grabbed, the mech will hold them in place and squeeze them tightly, dealing 5 hits of 5% damage and high knockback, Allen O'Neill takes this time to laugh in the foe's face. It can also charge two platforms forward turning its whole body into a hitbox dealing 20% and powerful knockback to KO at 70%, and this is boosted by the oil, blood or being on top of a giant missile to deal more damage as the mech goes faster and farther. This can passively create giant missiles fast enough, it's possible to have up to 10 on stage at once if that's all O'Neill does in it, which may not be a bad idea for when the final smash ends. At the end of the final smash, instead of just flashing and dissipating, in true Metal Slug fashion the Rebel Gigant will self-destruct in a glorious explosion. This has twice the range of the Rebel Gigant's size, deals 30% damage and KOs at 50%.
 
Last edited by a moderator:
FrozenRoy

Smash Lord
Joined
Apr 26, 2007
Messages
1,268
Location
Las Vegas, Nevada
Switch FC
SW-1325-2408-7513
April's Iron MYMer is now over! Got enough entries, it was pretty fun overall, and now what shall we have for May?

Well, this week, the question is...

Are you a Marvel or are you a DC?

With Dawn of Justice out, Suicide Squad coming out and who knows how many Marvel movies this year, not to mention their success recently, the superhero genre's been heated up lately, popular, and now it's a bit of a competition (or would be if DC put out good movies. Suicide Squad, maybe!). So now it's time to decide: Are you a Marvel...or are you a DC?

The challenge is simple: Make a set for a DC or Marvel character. Characters who only appeared in animated DC or Marvel series are fair game. Things like Neil Gaiman's Sandman would count, being technically in the DC universe, DC related and so on. Cameo characters from other franchises who blatantly only are there due to cameos from another series are discarded. Similiarly, stuff like Mickey Mouse doesn't count just because Marvel is owned by Disney. it has to be of the Marvel branding.

BUT, there's a bonus! Normally, you can only submit one Iron MYMer set, but this time you can submit TWO...one for each side! Not two Marvel sets, ont two DC sets, you can submit up to one Marvel set and one DC set. There's a LOT of options for these two, so I'm sure everyone can find something they like. Ciao!
 

Katapultar

Smash Lord
Joined
Nov 24, 2008
Messages
1,284
Location
Australia
"Heroes are necessary evils. Others have to put up with our questionable actions until we defeat the demon lord. It's...kinda great."


----Soul Skyheart--|--


120 Percent Hero

Soul is the hero of Sun World and the very first hero encountered in Mugen Souls, fitting as his entire character is a personification of various JRPG tropes associated with silent protagonists. You know how it's normal for heroes like Link to break into people's houses and throw their vases against walls to get money from them? Well this guy actually does that stuff, and it made Chou-Chou think he was a criminal until Ryuto pointed out that it was perfectly normal for heroes to do stuff like that. He casually brings up RPG terms like level-grinding and has a bikini fetish, and dreams of gathering a party of women dressed in nothing but bikinis. He is brusque and taciturn, a fitting personality for a "silent" protagonist, but has a low tolerance for evil despite seeming indifferent.

Story-wise, Soul is essentially doing whatever he wants and taking advantage of the fact that he's a hero, but he is forced into action after his beloved bikini model Princess Sandy is kidnapped by the Demon Lord. After confronting his fated nemesis, it is soon revealed that Soul is so much stronger than the Demon Lord due to the sheer amount of level-grinding he had done, as he had been holding off the "final boss battle" due to his belief that he would no longer be a hero after defeating the demon lord. Soul is then made into Chou-Chou's peon by being seduced by C.C Sadist in a bikini and joins the team, but claims that he no longer has access to some of his old powers in a possible reference to the fact that he was "starting a new game" by journeying with Chou-Chou's group.


----Stats--|--

Sadist

Height: 170cm
Weight: 8.5
Ground Speed: 5.5
Jump: 5
Air Speed: 2
Fall Speed: 8.5
Traction: 9


Soul is largely built for ground-based combat (RPG battles take place on the ground, after all), owing to his excellent traction, tanky heavyweight status and surprisingly decent mobility thanks to running from all those unnecessary random encounters. Oh, and he has a fairly good first jump, as modern JRPGs generally require the protagonist to jump in order to reach places. True RPG magic at work.


Similar to his fellow Hero of Time with his Hylian shield, Soul has a unique mechanic of his own: after picking him on the select screen, the Soul player can click on the portrait of another, well-endowed female character to dress them up in a bikini! Children are too young to wear a bikini, so they instead get a swimsuit. The victim character may appear to be blushing at the prospect of showing more skin, but the other player can remove it anytime by clicking on their character, since Soul has a philosophy of not forcing others to wear bikinis (unless their name is Sandy Sunshine!). If Soul wanted to, he could make an entire party of female characters wearing nothing but bikinis, fulfilling one of his lifelong goals. This also happens if he’s fighting a well-proportioned female opponent clad in a bikini.


"Do we at least get -some- experience from this?"


----Specials--|--

SOUL USED LIMITED BREAK!
Neutral Special


"Ever seen a hero go all-out?"
Every JRPG hero has a limit break. Soul's is a generic flashy sword rush with a golden sword after brandishing it, one that covers nearly all of Battlefield and deals 25% and huge that KOs at 95%; launching opponents straight back, straight up or diagonally depending on whether they were hit at the start, middle or end of the rush. This ignores shields, and Soul is invincible during the rush.

Soul must wait 33 seconds before he is allowed to use his limit break, both at the start of the match and after using it. He is allowed to use this move without reaching full charge, but doing so will make it much less effective than usual. To help Soul go all-out more quickly, every attack he lands or receives takes one second off the cooldown timer, and if he KOs an opponent or is KO'ed 4 seconds are taken off. Multi-hitting attacks only count as one move, but pummels and throws count as separate attacks and every 11% the attack did will take off another second. Once Soul has reached full charge, he will burn with a passionate anime-esque aura that fades away if the Limit Break isn't used within 20 seconds, but it carries over between stocks.


SOUL USED AN ELEMENTAL SPELL!
Side Special


"Go, spell that casts a large blazing fireball/electric bolt/whirling vortex/freezing air to scorch/shock/blow/freeze a single enemy!"
Soul enters a generic spell-casting animation to target a foe 2 platforms ahead of him, or else this move does nothing. If Soul targeted a foe, he is allowed to proceed with his attack and charge it like a smash, then swipe his hand to cast one of numerous spells indicated by a wave of colored energy flashing out from both Soul and the target. These spells are quite powerful - they need to be when Soul doesn't have a scantily-clad sorceress on his side - but cycle with each use of the move, even if Soul failed to target an opponent.

Fire
A very large, fast and powerful fireball that quickly loses speed as it travels towards the target, becoming smaller and weaker right up until it disappears after covering nearly all of Battlefield. Up-close, the fireball deals 19% and very high knockback that KOs at 125%, but farther away it only deals 6% and light hitstun. Charging this move drastically reduces the speed the fireball travels at, allowing it to stay out for much longer so Soul can easily capitalize on it.

Electric
A lightning bolt drops down on the target, spiking them strongly for 10-14%. If the bolt hit the ground, it will create a large electrical blast that deals 15-20% and some paralyzer stun followed by upwards knockback that KOs at 140-110%. This is easy to dodge, but can catch foes off-guard.

Wind
A platform-wide vortex of wind appears between Soul and the target, dealing 3% and flinching and destroying enemy projectiles when it first manifests. Afterwards, the vortex slowly draws characters and projectiles towards the center, while cutting up enemies for rapid hits of 2.5-4% per second over the 5 seconds it stays out for. Being at the center makes it easier to combo enemies, and slows down their projectiles so they're easier to intercept.

Ice
A SBB-wide frost cloud appears over the victim. This deals no knockback or hitstun, but slows victims and halves/quarters the power of their attacks due to the chill. The cloud stays around for 1.5 seconds, and deals a total of 15-20% during that time.

Healing
Soul is bathed in a warm light that heals off 25-40% over 5 seconds. This spell doesn't require a target, but if Soul is attacked the rest of his healing will be cut off. Soul appreciates this healing because his recovery is shaky, and if he's clever he can use it to pressure foes into attacking him and counter with ease.

DO YOU WANT TO SAVE YOUR PROGRESS?
Up Special


"Go, spell that magically returns me safely to the checkpoint!"
Soul takes a moment to place a floating blue crystal in midair - a Save Point - to save his progress. If you use this move again, the crystal will shatter as Soul is instantly teleported to its location while experiencing a moment of invincibility. Though powerful, opponents can shatter the crystal by dealing 32% to it, or 25% if it was placed in midair, though thankfully the crystal is immune to grabs and projectiles. As such, Soul may want to save his Limit Break for recovery purposes, or he may find himself OHKO'ed suddenly - not uncommon in JRPGs - should he fail to maintain the crystal.

SOUL USED A BUFF!
Down Special

"Go, spell to raise attack/defense of one ally!"
A thin veil of colored light surrounds Soul as he buffs one of 4 essential stats with a spell, depending on which direction you input during the starting lag:

FORWARD/DEFAULT - ATK: 2x damage and knockback to standard sword-based attacks.

DOWN - DEF: Negate damage, but not knockback or hitstun.
BACK - HIT: Double reach of standard sword-based attacks.
UP - SPD: Doubles speed and jump height; similar to the Bunny Hood.

The buff lasts for 7 seconds, or after 1 "turn" which expires when Soul is struck or after finishing a standard sword-based attack - regardless of whether it hit or missed. Soul can only have 1 buff applied at a time, but he can select up to 3 in quick succession to have them be applied when the previous buff expires. It only takes a few frames for Soul to apply a buff, but afterwards he must wait 5 seconds (10 seconds if multiple buffs were applied) to apply the next buff or else it'll much less effective than usual, or have no effect if applied within 2 seconds.


----Standards--|--

Jab - Gatling Sword
Soul slashes ahead of himself rapidly while you hold A, delivering multiple hits of 3% while pushing opponents back. If opponents are close to Soul when he starts slashing however, they’ll suffer 9% and be launched on a 50 degree angle for some pretty good knockback that’ll KO at around 170%, keeping them out of his face. This makes for a nice multi-purpose Jab that’s primarily for defense, but can also launch enemies to give Soul set-up time if they get too close. Mashing A instead of holding it will cause Soul to extend his blade quite far over a short period of time as he slashes, potentially trapping enemies from further away and pulling those already caught away from him, but he ends the attack prematurely after a moment.

This move will also reflect projectiles with 2.2-1.5x their speed and power depending on whether you caught them in Soul’s blade at the start or let them hit the edge, giving him a way to deter campers when he’s otherwise not so great against them. Any buffs Soul had on him when reflecting a projectile(s) will be passed onto them as they fly back, whether it makes them absurdly strong, increases their priority (infinite with full DEF buff), makes them bigger or way faster than an opponent can react. This prevents a full buff from being wasted just because an enemy tried to hit Soul with a projectile to extinguish his single “turn”, and if that projectile was strong enough it can even be used as a replacement for what you would have spent that buff on.


Dash Attack - Heroic Charge
Soul slides a SBB forward and throws his blade out ahead of him, extending it slightly to apply some impressive range. The attack drags opponents for multiple hits of 10% before ejecting them on a 80 degree angle for average knockback that'll KO at 160%, which is not especially powerful but very easy to spam. What's especially scary about this attack though is that it has transcendent priority, meaning it won't clash with other hitboxes and can effectively pierce through them, which is deadly given there aren't many melee attacks that can beat out its range. This is Soul's primary approaching move and a good way of pushing opponents across the stage, but slight lag and duration make it possible to punish if abused. It can get quite predictable if used too often, but you can mix it up with a fully-charged Neutral Special to deter shielding opponents. You can also use this move with a distant Save Point to do a bit of hit-and-run with its dragging nature.

F-tilt - Light Thrust
Soul brings his blade before stabbing it forward, a far-reaching attack that deals 10% and sharp mostly-horizontal knockback that KOs at 140% close to Soul, or 7% with some decent pushback near the tip of the sword. This has exceptional reach that nearly covers a platform and isn’t all that laggy for such, but there is still some. The move’s key aspect is to poke on demand and invoke shields, serving as a scary mix-up when Soul has his Neutral Special fully-charged, but the knockback from close-up is also very reliable so long as you’re ready to be punished for whiffing it. This move can be angled and thus can intercept aerial approaches.

U-tilt - Flash
Soul takes up a stance for a split second before performing a swift overhead slash, dealing 12% and some impressive knockback on a high angle that'll KO at 135%. This hits all around Soul and has super armor during the starting lag to boot, making it an excellent counter against those on the offensive, and Soul will not lose a “turn” for his buffs if struck. The only downside is that Soul is rather open to attack from the front if he whiffs, so good timing is important. Use this move to garner space for yourself in a pinch, or send enemies flying for some spacing.

D-tilt - Grass Cutter
Remember those times you cut the grass hoping that money would spill out? Soul does. He emulates such motion by using a regular sword to sweep along the ground for 4% and some very low knockback on a high angle, not using his energy blade for once. This is basically designed to poke safely and defensively, and while it doesn’t have a lot of range or power it's actually dangerous in that it can accumulate many hits for Soul’s NSpec charge due to having almost no knockback scaling. It does not use Soul's buff due to not using the energy blade, instead setting the pace for such an attack - it's too weak to make practical use of any buff.


----Smashes--|--

DEF buffs have a unique application with Soul's Smashes in that they give them super armor during the first few frames, or for most of the attack with a 66% buff. With a 99% buff however, the smashes turn into a counter that see Soul retaliate at full charge and with greater speed if he's struck while charging. This gives opponents something to actually worry about if Soul had a 99% DEF buff, because just being able to tank a hit is not a very good incentive to applying the buff at such high capacity when the other stat buffs are obviously more tempting. Even a 33% DEF buff can turn Soul's Smashes into counters if timed well though, and they can be combined with other buffs like ATK or hit HIT to make the impending attack deadlier.

F-Smash - Soul Edge
Soul does a simple, nonchalant rising sweep with his blade for 8-12% and some very simple knockback that pushes enemies back a short distance ahead of him. If you input the move again, Soul will raise his sword behind his head before stepping forth and swinging it down for a hefty blow that covers 1-2 platforms ahead of him while dealing anywhere between 15-30% and powerful mostly-horizontal knockback that'll KO between 130-70%...or 18-35% that KOs at 115-60% against enemies up-close. The damage difference with charging looks extreme, but that's because both parts of the attack can be charged rather than just the first, the highest numbers being what you get when you fully charge both. An ATK buff makes the blow even scarier while DEF buff gives you 2 chances to pull off a counter, whereas HIT actually gives the relatively fast first hit the power of the second hit's sweetspot...which is arguably scarier than a full-blown attack buff and hurts shields quite a bit. You could even just use a 33% HIT buff to give the first hit a powerful sweetspot up-close and then apply an ATK or DEF buff for deadly results. Maybe even all 3 at once. This move also makes for a killer edge-guard if you can plan in advance, though it's especially telegraphed given you have to go through the first attack first.

U-Smash - Shining Ray
Soul brings his blade close to him and retracts it into a shimmer of light before throwing it up, but it fans out into a multi-hitting energy pulse that covers a good area above him, despite not having a lot of reach. This is a fast smash that lingers for quite a bit, dealing rapid hits that can accumulate 18-25% yet has surprisingly low launch power that won’t KO until 200-170%. Foes close to Soul are also knocked into the attack, and anyone caught near the edge of the fanning gets launched down on a 150 degree angle. The purpose of this move isn’t to KO per se, but rather it’s for intercepting opponents and taking advantage of the low knockback to pile damage on them, something the U-tilt can’t really accomplish. It can juggle or bring opponents to the ground, the latter being Soul’s preference if he has his NSpec charge.

D-Smash - Round Circle Zero
Soul crouches down and holds his blade out behind him before performing two spinning slashes along the ground, which hit in front of him 12-16% and knockback behind him on a 40 degree angle that KOs between 150-120% - or 14-18% that KOs at 130-100% if he hits behind him. The twist is that Soul's blade will extend -slightly- and actually functions as a hitbox behind him while you charge the move, dealing 5% with weak set knockback a short distance in front of Soul that automatically follows into the first hit if you release the smash quickly enough. Hitting with the extended blade pre-charge is especially good since it counts for 2 hits for the Neutral Special, but it's also good for intercepting opponents who get behind Soul, say they try to go after his Save Crystal. The move is also an ideal follow-up to a lightning spell given its duration, being a low attack and how it hits on both sides of Soul, especially if you have a slight DEF buff to counter get-up attacks.


----Aerials--|--

N-air - Spinning Slash
Soul takes out a spare sword and quickly spins around a few times with it outstretched to the side, not using his energy blade like with the D-tilt. This turns Soul’s entire body into a hitbox, dealing 11% and good knockback that KOs at 165% up-close or 3 dragging hits of 4% that end with mild pushback near the tip of the sword. It’s basically a defensive move that either frees up space around Soul or keeps enemies close to him depending on your spacing, possibly dragging enemies down to earth at frame-neutral, and doubles as a set-up move since it’s Soul’s only melee attack that doesn’t use his buffs. The move also reflects projectiles just like the Jab, but it cannot utilize the buff to make them stronger.

F-air - Shining Beam
Soul crosses his blade-wielding hand over his chest before using it to throw out a decisive horizontal slash ahead of him, reaching out inhumanly far at a platform’s length. This deals 10% that KOs at 190% close to Soul and only 8% with okay pushback if the blade hits, but the tip is a sweetspot that delivers a weighty 16% with high mostly-horizontal knockback that KOs at 110%. The attack is surprisingly spammable given its range and doesn’t suffer from landing lag, just that it lacks coverage and thus requires both timing and spacing to use effectively. It’s absolutely killer for finishing offstage opponents if Soul has a Save Crystal to return to, or if Soul had a 99% stat buff: ATK means you can kill opponents at frighteningly early percentages, while HIT turns your entire blade into a powerful hitbox to the point where you can deliver nasty shield damage against opponents closer to you and possibly gain a few frames of advantage. By itself, the move is somewhat refreshing for Soul since most of his moves are stronger when opponents are closer to him, and it also makes a good deterrent against edge-guarding opponents who are trying to attack his Save Crystal if he was close enough to the stage. It can also poke at opponents in a wind vortex or cold field through his Side Special spells.

B-air - Light Revolve
Soul spins around and swings his blade behind him on a slight downwards angle, which deals 10% and decent horizontal knockback that KOs at 170% or 12% with average knockback on a 110 degree angle that KOs at 150% closer to Soul. It’s basically your standard intercepting B-air, but it also turns Soul the other way round from the momentum. This makes the move excellent for air-to-ground combat combined with the low angle it hits on, instantly readying Soul for retaliation if enemies put up their shield. On that note, hitting up-close does some unusually mean damage to a shield, making the attack more dangerous to defend against if the sweetspot was extended. While Soul might not have the most remarkable aerial mobility, turning around automatically means he could follow-up with the sweetspot on his F-air or Neutral Special rush if he still had his second jump.

U-air - Pillar
Soul leans back a little and raises his sword skywards, which extends to the length of a platform. The hitbox even lingers a bit, though it's somewhat thin, and deals anywhere between 6-14% with low-high knockback that KOs between 400-135% depending on how close foes were to Soul, suffering upwards knockback for being hit head-on and knockback that bats them down on a 110 degree angle for colliding with the sides of the blade. It has some ridiculous range and crazy killing potential in the right situations, but it's held back by some starting lag and a good deal of end lag that makes it almost suicidal to use offstage without a Save Crystal. Soul's fall speed offsets the move even more, but some of his end lag is cut if he lands while using it, meaning he can use the tip of the blade to poke and juggle at opponents a good distance above him. The attack can be used to wall off opponents trying to go over Soul, say maybe they want to destroy his Save Crystal or he's cornered them, and it becomes an especially deadly aerial finisher with a 99% HIT buff.

D-air - Piercing Ray
Soul points his sword downwards before having it spontaneously extend a SBB beneath him, the sword widening just a little bit. The attack deals 4 quick hits of 3.2% as Soul continues to move downwards, after which it launches opponents a decent ways on a very steep angle, capable of KO’ing at around 160%. If Soul strikes up-close however, he immediately launches opponents on a low angle for strong-average knockback that KOs between 180-140% depending on how soon he struck. Soul can choose to fastfall or even slow his descent by holding the control stick upwards during the move, and if his sword makes contact with the ground it’ll actually split and travel outwards on both sides, dealing its regular damage and knockback to foes struck. This is a good approaching move, means of clearing a path towards the ground and/or bringing foes up into the air, but it suffers from some ending lag. It could be used as a surprise attack against foes trying to reach an aerial Crystal, and it can potentially set-up for the Side Special lightning attack.


----Grab--|--

Soul has a typical swordsman grab as he reaches out and holds opponents with his free hand, which is to say it’s fast but not all that reliable in range. His throws aren’t all that powerful either, but they compensate for their unusual effects and not using his sword, meaning he can save any buffs he has on him for later.

Soul's Pummel involves hitting opponents with a jolt of elemental magic in quick succession: fire deals 3%, electric deals 2%, wind deals 1% and ice deals 2.5%. Healing is skipped, and is instead met with a knee for 1%. If you have time, you can throw out a pummel or 2 before throwing so you can cycle to a desirable spell.


F-throw - Slowga
Soul must be a fan of Square Enix games, because with a cry of "Go!" he blasts his opponent with a weak time magic from his palm, indicated by the faint image of a slowed clock. This only deals 4% and average mostly-horizontal knockback with poor scaling, but it also cuts the victim’s movement speed drastically, which gradually reverts to normal after a few seconds. This adds an interesting twist to a keep-away throw, because unlike those with high launching capabilities Soul is still close enough to the victim to strike them with his melee game. Foes can attack, shield or dodge alright to defend themselves, but if they don’t approach they’ll give Soul some much-needed set-up time. Projectiles are the most effective way to deal with Soul during the predicament, yet he can just reflect them back with ease and they’ll be hard for the opponent to dodge due to their cut movement. The throw is also good for a kill set-up if Soul has buffs applied, as the opponent’s options are reduced quite a bit from weaker movement.

B-throw - Star Break
Soul simply tosses the opponent behind him and blasts them with 2 lengthy, colorful blasts that each deal 4%, followed by launching them far out on a 60 degree angle. This is Soul's most straightforward throw, but it's definitely not useless: outside of obvious spacing, it actually counts for 2 hits and slightly stalls for the Neutral Special, usually positioning opponents for it. It also has an interesting application with Save Crystals in that Soul may have likely thrown his opponent in the direction he set it up, so he can just teleport towards them and continue the assault. B-throws see the most use with those wanting to throw opponents off the stage behind them, but sadly this throw won't kill until around 180% and thus Soul must rely on his edge-guarding game to finish enemies off. It's not all bad though, because Soul take advantage of a foe's recovery attempt to get in a buff.

U-throw - Aeroga
Soul tosses the enemy up into the air lightly before he creates a burst of wind magic that deals 5% and low upwards knockback, though it actually scales well enough to KO at 190%. It also creates a thin, infinitely-tall air current around Soul that greatly lowers gravity for the 2.2 seconds it stays out for, which is to say characters inside it jump much higher but fall much more slowly. Floaty characters are much easier to intercept, and at lower percentages Soul can juggle with his U-Smash for some damage racking while at higher percentages he can use the air current to actually pursue. Soul may also want to use the air current to set-up his buffs or even place a Save Crystal high up in the air so it can't be destroyed easily, and if foes try to pursue him with the current they'll be vulnerable to his D-air due to how thin said current is.

D-throw - Magnera
Soul slams the foe into the ground as his hand pulses with bluish electricity, dealing a paltry 3% and typical low knockback on a high angle that can be capitalized on without too much trouble. This also has something of a magnetizing effect on the now-sparking victim: if they’re close to Soul when he starts up a sword attack, they’ll be pushed back a little, but if they’re farther away (within 2 lengths of the sword attack in question) they’ll be drawn in a reasonable distance. Spells are also affected, fireballs and lightning curving towards nearby targets slightly while wind and ice can manifest at their location if within 3 SBBs of Soul. Magnetism lasts for a reasonable 3 seconds, enough time that Soul can ready it to support his buffed blow or even push enemies away before following with a homing spell.


----Playstyle--|--

Overwhelming RPG

Soul is best described as an opportunistic mid-range fighter, working towards finding the best situation to use his strongest attacks: Neutral Special, Side Special spells and melee attacks buffed by the Down Special. Being a master swordsman means Soul can easily hold his own in melee combat with a good balance between offense and defense, but he doesn’t have consistent enough power, projectiles or mobility to be truly adept at rushdown, combos or natural finishers. Unless you want spend an unnecessarily long time chipping away at opponents like you would a JRPG boss, you’ll want to make use of Soul’s deadly Specials to finish opponents. He doesn’t have a lot of survival ability beyond his high weight stat due to poor aerial ability and not having a conventional recovery, so he may end up being defeated first if a fight is left to drag out for too long.

Like with any challenging JRPG boss, throwing out that little bit of set-up in the beginning is important, if outright vital to Soul’s success. Save Crystals might not serve for a conventional recovery, but you’ll want to get used to putting them down on regular intervals, because if Soul is caught offstage without one he’ll most likely die unless he had a fully-charged Neutral Special. Soul can also use a wind vortex, healing or SPD buff to boost his recovery a little, but they're all extremely situational.

The other thing usually on a Soul player’s mind in regards to set-up is buffing. You get to choose from 4 different stats and 3 different capacities, which is quite a lot, but you’ll probably want to go with a low capacity since you won’t be killing anyone right away and you get more shots at it. ATK seems like the most obvious stat to raise and probably the one most players would go for, but you’d be surprised at how effective the other buffs can be: DEF makes it easier for Soul to shield-grab and grants him armor for his Smashes, HIT makes nearly all of his standard attacks stronger by extending their sweetspots while SPD lets him rush at opponents more easily.

Soul is generally advantaged from any distance, but he needs to be fighting from mid-range or close-up to do any real damage. That's not to say he doesn't have projectile options though, but they're all very situational. He can reflect projectiles back at attackers, deterring them from using them predictably. He can cast a fireball at the beginning of a match, but it won't do much damage from a range outside of giving Soul ease of set-up. He can also use his Neutral Special at full charge, but it needs time and shouldn't be used needlessly due to being a back-up recovery. In any case, Soul can idle from a distance, but he can't consistently threaten others from afar.

Soul can play offensive and defensive equally well due to his well-rounded melee game. He doesn't have a lot of mobility, but he has attack range. One could play defensively with this in mind, but Soul actually functions better if he at least regularly attempts to pursue and close the gap rather than just sit in one place, simply because of how his Up Special recovery works. If he just waits for opponents to come to him, he risks being launched offstage and having his Save Crystal destroyed more easily, but if he sets up the crystal and then runs after opponents it won't be destroyed as easily. Even if the opponent does a reversal on Soul and knocks him away on the opposite side of the stage, if they don't bother to attend to his Crystal he can just escape and get a free recovery, and maybe a buff if there was enough distance between the fighters. What's more, Soul can use a Save Crystal behind him to get space for himself in regards to set-ups and stave off pressure. He doesn't have to teleport himself too far though; even just a little distance can work wonders for high-ranged moves like his F-air.

Once Soul's built up his Neutral Special or has an opponent's percentage high enough to make lethal use of a 99% stat buff, he becomes a lot more threatening and can potentially take foes down in one hit - even at 0% if he combines them both. Just having a fully-charged Neutral Special can deter foes from shielding since the attack ignores them, even dodging if he had a HIT buff, and he can use the move up-close without worry if he had a DEF buff. In regards to stat buffs alone, some players might get picky about what move they spend it on, but they can't really afford to be indecisive when they have a time limit and foes can end it instantly by successfully hitting Soul with a quick projectile. Thankfully, most of Soul's moves benefit from his more offensive-minded buffs like ATK or HIT, though the Dash Attack is ironically not affected by the latter due to not having a sweetspot, which is a shame because it's probably one of his best moves to pull out if he's in a hurry to capitalize on the buff.

Foes have 2 options when Soul reaches max power: either attack him before he can use it or bait him into wasting it. Buffs will go away as Soul is attacked, while knocking him offstage can force him to use his Neutral Special to return. It goes without saying that opponents with spammable projectiles will have a significantly easier time getting rid of Soul's buffs from a distance, as he has to shield against and maneuver past them to preserve what he has, but watch out: even if the projectiles were weak enough that they wouldn't threaten the opponent even if they were reflected with massive power, Soul actually benefits from getting hit by streams of weaker projectiles because they each take a second off the charge time for his Neutral Special. This makes damage from the projectiles a non-issue, especially given Soul is pretty heavy and can pull off an occasional healing spell.

Outside of the obvious Neutral Special and ATK/HIT buffs, Soul can also use his fireball up-close to score a fairly early KO, which you might want to save until then. He can still fight back perfectly fine if he wastes any of his situational moves, but a foe, with enough pressure, can overwhelm him if they see through his moves, knocking him offstage for an early KO. Soul will especially feel the pressure if opponents were assaulting him after he just used a Save Crystal, which is the one time when he's really vulnerable. Just mindlessly attacking the Save Crystal in hopes of nailing Soul when he re-appears won't work since he has invincibility frames and can retaliate with a Jab, U-tilt, Grab or N-air in midair, but you can attack him if he's trying to set-up another crystal right away and pretty much guarantee his demise with enough power. Gimping can work against opponents if they accidentally let Soul's Neutral Special reach full charge, but it's otherwise an effective tactic.

Overall, Soul really needs to read his opponent so he can take action with his numerous options, especially when under pressure. He has lot going for him - high-ranged attacks, powerful attacks, healing, a versatile melee game and an infinite recovery - but it needs to be handled well or else it'll all be wasted. The last thing Soul wants is to recover using his Crystal, immediately rush in with a fully-charged Neutral Special and then get knocked off the stage, only to use his Side Special as a last resort and come out with healing that wasn't utilized due to there not being a time or place to use it.


----EX Skill--|--


Soul burns with a heroic passion, and his energy blade straight up past the horizon! Don't get in its way, or you'll be skewered and carried up for a KO!


"Blade of light, mow down all who stand in my way!"


Once he's finished extending his blade, Soul swings it around like a madman, cutting up neighboring planets in the process! All foes are slashed apart for unavoidable damage, but not KO'ed, while the planets are carved up into kanji that form a mysterious word. Don't worry, the planets will magically be restored via video game logic!

"-This- is the power of a heroic protagonist."


Entrance Animation
"I'll show you the power of a hero!"
A retro battle menu appears beneath Soul, showing the options FIGHT, MAGIC, ITEM and RUN. The cursor cycles between all the options before choosing FIGHT, and Soul comes to life with a cool pose!

Up Taunt
"Shall we return on a horsebird?...oh wait, wrong game."
Soul cycles through his inventory as a number of pixelated items appear in front of him...but he comes to a realization and puts them away.

Side Taunt
"Get out of the way!"
Soul points his blade aggressively.

Down Taunt
"Do I at least get -some- experience from this?"
Soul does a mild fist pump motion, and the words LV UP! appear in front of him. If you KO an opponent before using this, more words will appear.

Death Cry
"I don't wanna return...to my last save."

Win 1
"Be proud that you were defeated by a hero."
Soul replenishes his stamina with potions! A large number goes down by 3 as he does.

Win 2
"At least I got some experience from this."
Soul swings his blade wildly before raising it in triumph.

Win 3
"That wasn't even a challenge."
Soul retracts his light blade before crossing his arms.

Alternate Costumes


Sorantia
A world of swords and sorcery, blessed with the light of the sun.
Sorantia serves as Soul's home stage, being a very large walk-off stage with a lot of space to roam about. The twist is that the stage curves down to the left at the middle-third, leaving roughly a SBB height difference between the right and left parts of the stage. There's also a wide drop-through platform situated 2 SBBs above approximately 2/3rds of the lower left side of the stage, which gives fighters a total of 3 different horizontal planes to fight on. The stage is otherwise very peaceful and has an open feel to it.


The stage's omega form strangely resembles a park. The floor is made up of tiles instead of grass, and bricks are lined up along the rim along with the occasional lantern and bench.
 

Katapultar

Smash Lord
Joined
Nov 24, 2008
Messages
1,284
Location
Australia
"U-Um, did I do that? Maybe I used a bit too much force..."


) Doppelganger Tsukika--


Shrine Maiden Hero

Tsukika is a sweet but shy girl who only recently became aware of her title as hero, so few are aware that one even existed on the peaceful Moon World. One day however, she spoke to a tame monster and discovered that the reason why the world was so peaceful was because the demon lord Shirogane had ordered all of the monsters not to attack humans. Realizing this, little Tsukika developed respect for her world's demon lord and decided to help him, but once she did meet him she got so nervous that she sent him flying with one hit! This happened over and over again right up until the monsters started taking Shirogane for a wimp and ignoring his orders, meaning Tsukika's actions were ironically doing more harm than good. Thankfully Chou-Chou and her merry men came along to conquer Moon World just before the situation could get any worse, where they learned about Tsukika's predicament and eventually helped her make her true intentions known to the demon lord. Thus, Tsukika joined Chou-Chou’s party out of gratitude and without needing to be peoned…as well as to be with her beloved Mister Shirogane.

Tsukika tends to get nervous easily, but she can also be quite astute when the situation demands it. More than that though, she also happens to be incredibly strong - strong enough to lift an entire mountain or even send someone flying halfway across the world with one punch! That being said, Tsukika doesn't exactly like being so strong when it goes against her femininity, and she tends to blow others away by accident when she doesn't keep her strength in check or her emotions get the best of her...like when it comes to Mr. Shirogane. Tsukika also has the ability to tell fortunes because of her Shrine Maiden occupation, be they about finding lost items or love, which are especially popular with the other crew members.

Tsukika may not be the most courageous or experienced hero, but she's definitely one of the strongest! With her strength, she's bound to be one of the most overpowered fighters of all time...


) Stats--

Graceful

Height: 138cm
Weight: 1
Ground Speed: 9
Jump: 8
Air Speed: 4
Fall Speed: 2
Traction: 7
Wall Jump: 9


Wait, you mean Doppelganger Tsukika is both fast AND strong!? That's so unfair! Indeed, she's a swift and graceful Shrine Maiden with deadly power, but poor endurance and floatiness mean that matches involving her tend to resolve themselves rather quickly. Oh, and did I mention that she's got quite the strong-arm? Whether she wants to or not, Doppelganger Tsukika throws items waaaaaaaay further than normal characters - far enough to throw items across the screen and keep them from coming down for a good 7 seconds! She can even handle barrels and crates like regular items, but she still throws them with the same lag as other characters. Items thrown by Doppelganger Tsukika get a 1-2% damage bonus and have their base knockback increased a bit, but otherwise don't travel any faster or get any stronger than if a normal character threw them. It's definitely a useful ability, but it can also be a liability, like if one accidentally throws their item off the stage or something like that.

On a more cosmetic note, Doppelganger Tsukika always keeps her sword sheathed at her side when she's not using it for an attack, just like in the picture. This looks really cool.


"Calm down, Doppelganger Tsukika."


) Specials--

Neutral Special ~ Wild Ogre Throw
The signature super strength attack, Doppelganger Tsukika tears out a massive boulder from the ground and holds it over her head before tossing it -gently- in a surprisingly fast attack. The boulder is an intimidating 1.25 platform wide hitbox that really packs a punch with 26% and powerful radial knockback that can KO at 88%, but it's actually a bit slow (almost unrealistically so) and can be shattered with a nice, solid attack if it doesn't hit anything first. What's more, the boulder travels too far to be a practical projectile - it goes 14 SBBs before hitting the ground! Thankfully you can hold B to charge the attack, in which case Doppelganger Tsukika will gradually restrain her power and toss the boulder with less force, causing it to land a few paces from her after 2 seconds of charge. Charging actually slows the boulder a bit and makes it weaker (dealing 3.5/5ths its original damage at full charge), but it not only makes hitting with it more possible but also lets it crash into the ground and shatter. Doppelganger Tsukika can turn around mid-charge, just in case you're too close to the edge of the stage or foes get behind you.

When a boulder shatters, 3 smaller rocks are left behind - 2 ordinary-looking pebbles and a bigger stone that functions similarly to a crate. The pebbles only deal 5% with minor radial knockback and disappear on contact, but the stone hits for a solid 18% that KOs at 130% and breaks into 3 smaller rocks upon shattering: 2 pebbles and a sharpened rock which deals 10% and good mostly-horizontal knockback (KOs at 180%) while ripping through all in its path. Super strength means Doppelganger Tsukika can hit foes from the opposite side of the screen using these rocks, but she’ll have to earn them first - and make sure foes don’t use them against her! There’s no limit to how many rocks can be out, but it's not easy to produce a lot of them.


Side Special ~ Tornado Rush
Doppelganger Tsukika takes up a stance and performs a telegraphed horizontal slash that hits for 10%, the force of her spin enveloping her entire body in a small tornado! She then rushes 3 SBBs forward at high speeds, the tornado a high-priority hitbox that tears through weaker projectiles and even picks up items along the way, dragging opponents along for up to 15 hits of 1% before launching them on a high angle for great knockback that KOs at 144%. Sadly, Doppelganger Tsukika will enter helpless afterwards if she started the move in midair.

If you hold B near the end of the attack and were still grounded, Doppelganger Tsukika will wave her sword to make the tornado calm down and keep spinning harmlessly for 5 seconds - either in place or while slowly moving across the stage if you held the control stick forward or backwards. If a character steps inside the tornado, they'll be carried along with it for a free ride, and can either dash or jump out to gain a big boost of double speed for 1.3 SBB's distance or double height on the first jump. If the tornado is attacked, it will split apart and push opponents and items inside/next to it back roughly 0.2-1.1 SBBs depending on the attack's power, but pushes airborne opponents upwards. The tornado can also carry items, and will reflect items thrown to the side of it without changing owners - exceptionally useful with Doppelganger Tsukika's throwing ability when she can hit with a sharp rock twice as it pierces through opponents. Tornado Rush is a quick move that's excellent for approaching and setting-up at the same time, the calmed tornado serving as a way for Doppelganger Tsukika to reach opponents she just launched and likely finish them.


Up Special ~ Moon Slash
Doppelganger Tsukika takes up a ready stance before instantly re-appearing 5 SBBs (2.7 SBBs in midair) ahead of your chosen direction, almost as though she just teleported. She then follows up with a single, lightning-fast spinning slash on the same angle she traveled at that scatters cherry blossoms and creates an ice-blue slash trail. The slash utilizes the Shrine Maiden’s magical abilities by inflicting 16% and nasty ice-based damage if it connects, launching on a high angle for knockback that'll KO at 120%, but there’s also a secret sweetspot at the center of Doppelganger Tsukika’s body which deals 33% and overwhelming radial knockback that KOs at 50%! This is very powerful, but you need very specific spacing and precision to pull it off or else you'll be met with some harsh end lag. Worse yet, the attack puts Doppelganger Tsukika into helpless, where she becomes easy to intercept from high-up due to her low fall speed and below-average air speed. Doppelganger Tsukika won't go offstage if she travels along the ground, but she won't produce a hitbox if she doesn't travel the full distance when using this move.

This move also has another effect in that any ground covered by Doppelganger Tsukika will be frozen for a good 20 seconds, or until thawed with a fire attack. The ice may not seem that useful, but Doppelganger Tsukika can put it to amazing use if she throws her rocks with a Glide Toss, increasing the distance she covers while sliding! Seriously, this actually works in Brawl. This gives Doppelganger Tsukika insane ground mobility that is often more useful than her dash or rolls given she can act out of it quicker, which is not only good for her space-reliant Specials but it also benefits her melee game since she can close in on enemies more efficiently to make use of said Specials. Ice also increases the distance Doppelganger Tsukika slides out of her Side Special, but if you don’t want to go far you simply end the move in midair.

If you hold B when using this move on the ground, Doppelganger Tsukika will delay her rush and re-appear normally, only to move back to where she originally was and perform a weaker version of the Moon Slash without a sweetspot. This has less end lag than the regular version and is better for making icy terrain for the sake of it, but if foes catch onto the delay and predict where Doppelganger Tsukika will initially appear they'll be able to punish her.


Down Special ~ Ogre Spark Smash
Doppelganger Tsukika turns away and calmly grips the hilt of her sword, which sparks with electricity in a 1.5-second charge-and-store move. Once released, Doppelganger Tsukika will swing her blade to release a quick burst of electricity that extends 1-2.2 SBBs ahead of her, a simple move which locks enemies in place for 4-9% and some decent frame-neutral hitstun. This is good for disrupting enemies or just as a panic button, but it can also be used to freeze midair opponents in place as you fall during the end lag in order to pace yourself for an attack (your boulder maybe?). Also, you can actually charge this move for up to 3 seconds and store 2 whole units at once, the highest charge always being used first.

If you smash the input to release a full charge and had an item that was thrown/dropped by you still in play, Doppelganger Tsukika will instead point her sword at it, which flashes yellow as a thin beam of lightning drops down from the top of the screen at the item's location. This beam rips through all in its path and, depending on whether foes were close to the top of the screen or just beneath the very center, inflicts 16-8% and excellent-decent spiking knockback that'll usually KO from their location at 140-200%. This allows Doppelganger Tsukika to make further use of a rock she threw up into the air, and serves as an excellent way to force an enemy you launched up into the air back down to earth, if you can align them with the rock. On the subject of items, if Doppelganger Tsukika was holding one when she achieved a full charge it'll become electrified until it's thrown against something, which makes it a tad stronger and gives it electric properties that make it deal more hitstun. This serves to make rocks more useful, but is rather situational.


) Standards--

Jab ~ 3-Piece Disaster
Doppelganger Tsukika unsheathes her blade for a swift yet gentle diagonal slash that deals 4%, which can be followed into a step forward for another slash that deals 6% and impressive mostly-horizontal knockback that KOs at 150%. And then there's a final blow, a hefty one-handed rising slash which deals an incredible 15% and tremendous knockback on a 40 degree angle that can KO at 96%...but it won't hit because the second slash knocks enemies out of the combo! To land the third strike, you'll have to carefully intercept enemies as they approach you or attack them while they're shielding, but otherwise it's a good scare tactic to keep attackers at bay. Just note that the third hit is more punishable than the second hit, which is perfectly viable on its own anyway.

Because of her super strength, all of Doppelganger Tsukika's physical attacks have a tendency to launch enemies quite far even at lower percentages, no matter how hard she tries to restrain herself. On the flip-side, most of Doppelganger Tsukika's melee hitboxes are very short-lived, generally making them ill-suited for defense while forcing the Shrine Maiden to find the best timing to land them. This applies to all the hits on her Jab combo, making that coveted last hit especially difficult to land.


Dash Attack ~ Dynamite Cutter
Doppelganger Tsukika draws her sword for a swift, clean horizontal slash, which is then followed by 2 frantic diagonal slashes as she starts to panic! The attack is fairly fast and takes Doppelganger Tsukika a platform across the stage, her swings becoming more dynamic with each blow. The first slash deals 10% and mostly-horizontal knockback that unfortunately knocks the foe too far to follow into the rest of the hits, usually KO'ing at 170%. The second slash deals 12% and stronger mostly-horizontal knockback behind Doppelganger Tsukika that KOs at 135%, while the final slash deals 14% and extreme upwards knockback that can KO at 108%!

The attack is more rewarding if you space it and try to land the final blow, but it's more predictable and can be punished by a perfect shield that way. You could also try to land the first blow and won't get punished for it if the opponent shields, maybe even land two hits if the first is spaced well enough. Either way, it's a rushdown attack to be feared. It also makes for a good way to pick up a rock as you travel along the ground, which you can then easily throw at an enemy after launching them with any of the 3 hits.


F-tilt ~ Gentle Blow
Doppelganger Tsukika timidly attempts a half-hearted shove in hopes of holding back, but she still hits hard for 15% and nasty mostly-horizontal knockback that KOs at 105%! This even pushes shielding foes back quite the distance unless they powershielded, and if you clash with another hitbox you’ll get a big shockwave (boulder-sized) that throws outsiders back on a diagonal angle. Sadly, the attack’s poor range makes it predictable up-close due to Doppelganger Tsukika’s other attacks having better reach, and it can be punished with a powershield if the foe sees it coming. It’s a great surprise attack though, and can be utilized offensively if you slide into an enemy by using the glide toss.

The clashing shockwave, for what it’s worth, is useful for keep-away in FFA matches or punishing an opponent trying to capitalize on a projectile or static hitbox.


U-tilt ~ Light Hilt
Apparently Doppelganger Tsukika thinks her sword moves are too rough, because now she's only using the sheath to attack! She spins her sheathed sword around her in a half-circle while raising it slightly, causing the sheath itself to hit behind, above and then diagonally above her while the hilt of the sword barely hits those in front of her. The attack deals 8% and unusually low knockback for a Doppelganger Tsukika attack (but still very good) no matter where it hits, but it won't KO until 300% and inflicts minimal hitstun. Hitting from the front with the hilt launches enemies up on a high angle, hitting behind you launches them in front of you diagonally while those hit from above are knocked forward on a 120 degree angle and can be put into prone if they hit ground.

The attack leaves much to be desired when hitting enemies in front of you, but it's excellent for intercepting enemies behind you and scooping them back up in front of you to continue the offensive. You'd be surprised by how frequently enemies will try to land behind you to avoid your carnage.


D-tilt ~ Unearth
Doppelganger Tsukika sits respectfully as though she were in a Tea Ceremony, being the only party member who can maintain the uncomfortable position due to having sat that way her whole life. For her D-tilt though, she digs a few fingers into the ground and throws up a piece of earth! She looks a bit panicked when doing this. This reaches quite far and hits hard, dealing 12% while popping foes really high up into the air - on a 15 degree angle if they were close to Doppelganger Tsukika or a 30 degree angle if they were further away - and will KO at around 118%. The wreck of rocks even reach half of Doppelganger Tsukika's crouching height before shattering completely, but they only deal 7% and significantly less knockback that doesn't scale nearly as well. A powerful move, it is only offset by some starting lag and a very short duration like with most of Doppelganger Tsukika's moves, but it won't be punished easily if you keep your distance when using it. Definitely your to-go move for launching enemies up into the air from the ground, and a good follow-up if you were able to spike them with the Down Special lightning or an item.

If there was no ground ahead of Doppelganger Tsukika when using this move, don't worry! She'll throw her hands up anyway and fling enemies for identical damage and knockback to hitting up-close with the rock wreckage, only trading range for speed. It's hard to pull off given it's situational, but you might be able to nail a foe on the ledge with good timing.


) Smashes--

F-Smash ~ One-Strike Flying Sword
Doppelganger Tsukika clutches her sheathed blade in preparation for a powerful attack, but she can't stop herself from shaking! Is she afraid of the collateral damage she might cause? Nonetheless, she calms herself and takes a stance before rushing forward exactly 1.1 SBBs, stopping early if she reaches a ledge or bumps into an opponent - in which case she'll send them flying far for 10-14% and knockback that KOs at 150-120%! Clumsy Doppelganger Tsukika does it again!

Once Doppelganger Tsukika finishes her rush, she'll proceed to follow up with an absolutely KILLER horizontal slash with enough power to shake the screen and generate an intense orange slash trail in its wake. If you're hit by this, you'll receive a colossal 28-40% and ridiculous knockback that beats out even the strongest F-Smash, not to mention a ton of damage and pushback against shielding opponents who didn't powershield. You'll need some degree of spacing and precision in order to not connect with the bump and knock enemies away from the slash, but if foes shield against the former they'll end up taking a ton of shield damage from the latter. This is excellent for opening up stubborn enemies since it's bad to shield against the rush, but harsh end lag makes it risky if it fails.

Characters actually slide along icy terrain while charging their F-Smash, which makes this attack a lot less predictable as Doppelganger Tsukika can either close in enough for the slash or close in further to hit with the bump, punishing foes who tried to shield against the former.


U-Smash ~ Blazing Hitokage
Doppelganger Tsukika takes a stance and clutches the hilt of her blade, causing bright, mystical flames to envelop the entirety of her weapon. She then performs not one, but two fiery, spinning slashes on a steep angle while fire spirals around her simultaneously for protection on both sides and above. The slash is the real meat of the attack, hitting foes almost above Doppelganger Tsukika for 19-26% and great knockback on the same angle that KOs between 108-77%, but the second slash is even stronger at 24-31% and really high knockback that KOs between 88-56%! The fiery pillar is no slouch either, trapping enemies for multiple hits that accumulate 17-23% before launching them diagonally or upwards, depending on whether they were hit from the sides or upwards, for knockback that'll KO between 115-87%. You can have quite a bit of fun with this move if you DACUS to go sliding across the stage, and you'll go even further if the stage was icy! Sadly, you'll just go through opponents without launching them unless you hit near the end, since you're moving too fast to drag them along with you. You might be able to time the slide so you hit an airborne opponent with one of the slashes, however.

If there were items near Doppelganger Tsukika while she was attacking, they'll also be enveloped in mystic fire! This gives them a slightly bigger hitbox and makes them a bit stronger, enough so that even the smallest and weakest throwing items like pebbles can become remotely threatening. What's more, the thrown item will produce a 0.5-2 SBB wide trail of fire depending on how fast it was moving, which deals 7-11% and decent-good knockback that pushes enemies away from the trail, but any downwards knockback is instead converted into upwards knockback. The fire trail adds a whole new dimension to your throwing items in that you don't necessarily have to hit with the item head-on, but rather just hit with the trail to wall them off or knock them on a unique trajectory to follow-up in ways you originally couldn't. Items stay ablaze for an indefinite time until they disappear or hit a surface, but you can keep catching them to keep the flames on them. You can use DACUS to set alight multiple items across the stage, even burn up a stone to have all the pebbles it produces be on fire. Just try not to overdo it, because foes can use these fiery items against you!


D-Smash ~ Calamity Quake
Suddenly nervous and flustered from all the enemies surrounding her, Doppelganger Tsukika responds by slamming her foot into the ground with tremendous force! What kind of lightweight female protagonist even does that? This creates a shockwave that spreads out around Doppelganger Tsukika and damages the ground for some high-impact visual, dealing 16-22% and good knockback (though surprisingly weak for Doppelganger Tsukika standards) on a 60 degree angle behind Doppelganger Tsukika that'll KO between 125-95%. There's also a hitbox beneath Doppelganger Tsukika's foot that deals a whopping 28-35% plus extremely high spiking knockback that KOs between 65-32%, but that will never hit unless you somehow have a foe in prone underneath you (maybe by using rocks to bring them towards you...) - this will hit rock chunks you're making contact with and glaciers you're standing on however, which will cause the scattering debris to hit on both sides of Doppelganger Tsukika instead of going directly downwards or upwards.

The shockwave travels out further as the move is charged and maxes out at a platform on each side of Doppelganger Tsukika with full charge, enemies only taking uncharged damage if they're hit near the shockwave's apex. Items within range of the shockwave are knocked up as high as either a normal character would throw them or as far as Doppelganger Tsukika would depending on charge, letting you throw up many items at once and even at lower heights normally impossible for Doppelganger Tsukika given her strength. You can even angle the control stick to make items travel on an angle by up to 30 degrees so you have a bit of variety. Makeshift walls are also knocked up if they get within range of the shockwave, but they only travel half as far.


) Aerials--

N-air ~ Large Revolving Cut
Doppelganger Tsukika raises her sword behind her before curling up and rolling forward in midair to perform a lightning-fast 360 degree slash that completely covers her. It's telegraphed, but hits for some serious power at 13-19% and great diagonal knockback ahead of Doppelganger Tsukika that KOs between 155-110%, delivering maximum damage against foes right up-close. The force behind the attack even creates a strong wind that pulls nearby opponents or objects close to Doppelganger Tsukika right after the hitbox subsides, capable of altering the flight path of items while spurring those that are just falling into action. The wind is a double-edged sword however, because if foes see it coming and move out of the attack's range they can easily use it to their advantage to throw out a quick counterattack against Doppelganger Tsukika. You can use the wind for follow-up attacks against foes who dodge or to re-position them if you read well, but otherwise the move is risky to throw out carelessly despite its power and incredible coverage.

F-air ~ Half-Moon Slash
Doppelganger Tsukika performs a swift rising slash launches enemies on a 30 degree angle, the degree of which based on where you hit: the tip nets you an unusually low 9% with surprisingly low knockback (very rare for Doppelganger Tsukika), the base deals 12% and pretty nice knockback that'll KO at 181% while up-close you inflict a lethal 20% and really high knockback that'll KO at 100%. The attack comes out fast and covers a wide area to boot, making it good for offense, but the hitbox only stays out for a split second and leaves Doppelganger Tsukika slightly open afterwards, so timing is critical. It might seem awkward for a F-air to launch enemies upwards, but Doppelganger Tsukika benefits from having enemies diagonally above her so she can nail them with boulders and intercept them with powerful moves. It's also for balance, given the powerful knockback would be deathly offstage if it could knock enemies horizontally. If you're really skilled, you can use the tip of the sword to juggle enemies and then blow them away with the sheer power of the other hitboxes, or follow-up with another aerial.

B-air ~ Eclipse
Doppelganger Tsukika twists the top half of her body around and performs a broad rising slash behind her, followed by another stronger slash after a short delay. The first slash deals an average 14% that KOs at 150%, but the second slash actually has 3 hitboxes that hit for 3% each before the final one delivers 15% and crazy knockback that can potentially KO at 96%. This is a rare attack that provides Doppelganger Tsukika with a competent defense due to being a multi-attack that covers a wide area, as while the first slash barely stays out the second actually lingers for a bit and can destroy opponents who put their shield down too early. The main point of this move is to intercept and/or scare away opponents behind Doppelganger Tsukika using the deadly second hit, especially those trying to escape from being cornered, and Doppelganger Tsukika is floaty enough that she can short-hop the attack to use against grounded opponents.

U-air ~ Overhead Moon
Doppelganger Tsukika performs an overhead slash above her, though it's angled towards the screen and as such it doesn't cover as much horizontal area as you'd expect. The attack deals 13% with some very strong mostly-horizontal knockback that'll KO at 160%, knocking enemies away at whatever side of Doppelganger Tsukika they were on, but there's also a sweetspot above her which deals 18% and hefty diagonal knockback that'll KO at 115%. The move is very similar to the F-air in terms of lag and how it knocks enemies away on an awkward angle, making it ill-suited to juggling but very good for positioning if you don't want enemies above you. What's more, Doppelganger Tsukika's swing creates a powerful wind right above her that reaches out quite far and blows up not only enemies, but also items. It helps that this move has minimal landing lag and that Doppelganger Tsukika can act before items fall down. Use this wind if you want to keep enemies above you or an item, then perhaps intercept them.

D-air ~ Lunar Cycle
Doppelganger Tsukika swings her down sword 3 times on a low angle. The first hit deals 11% and mostly-upwards knockback that KOs at 140%, the second hit deals 13% and backwards knockback that KOs at 125% while the third hit deals 15% and deadly spiking knockback that can KO at 90%. This is one of Doppelganger Tsukika's very few attacks that actually hits multiple times, but its limited coverage combined with the slightly awkward angle the hitbox comes out on make it easy for wary foes to avoid. Doppelganger Tsukika is very prone to being juggled given her light weight, below-average air speed and the fact that this move doesn't hit directly beneath her, but it does do a good job of scaring enemies and ripping through them should you successfully align your blade with them. This attack gives Doppelganger Tsukika an extra means of pressuring opponents, especially if they were shielding since each hit delivers steady damage and pushback.


) Grab--

Flustered, Doppelganger Tsukika performs a meek scooping motion that lacks speed and reach, but it's one of the strongest in the game given who's performing it! Sadly, it's not a very good out-of-shield option, but it's not bad as an offensive move given Doppelganger Tsukika's high dash speed. This makes her easy to shield-pressure, but it bolsters her already good offensive game.

For her Pummel, Doppelganger Tsukika shakes the foe violently for a nice, quick 2%. That's gotta hurt!


F-throw ~ Human Rocket
You saw this coming: Doppelganger Tsukika winces a bit before sending the victim rocketing with a devastating gut punch! This deals a massive 19% and unbelievably high knockback on a high angle that rivals a swing from the homerun bat, always sending opponents past the top of the screen...but it will never KO that way. It can KO foes when the horizontal knockback scales enough however, KO'ing as early as 95% if you throw them off the edge of the stage. You'll have a ton of time to safely set-up for your Specials after you've shot a victim up, and they'll even take a bit of token damage from falling through the magnifying glass! Indeed, this is not only your ultimate spacer but also one of your most visually-satisfying KO moves, and you deserve it if you can land the grab. KO opponents in the way Doppelganger Tsukika intended! (sort of...)

B-throw ~ Wrecking Ball
Panicking, Doppelganger Tsukika grabs the foe by a limb and effortlessly swings them overhead, smashing them into the ground behind her! Ouch. This delivers a nasty 16% and some pretty mean knockback on a low angle that'll KO at 100%, which is a lot more straightforward than the F-throw and also more convenient at times. The throw even comes with the neat bonus of not only hitting outside opponents for big damage, but also shattering the ground hard enough to spew out a free pebble for Doppelganger Tsukika! While not nearly as good as what comes from a boulder, this guarantees damage on the opponent and can be used on demand, being an alternative to the Neutral Special if you're having trouble pulling it off. It's great for when you already have the floor covered in ice so you can glide toss right away!

U-throw ~ Flash
Doppelganger Tsukika uses a gentle flicking motion to toss the foe a wickedly high distance above her, as you’d expect from her. She then performs a lightning-fast slash in the direction of that foe, which hits for 14% and extreme downwards knockback that bounces them off the ground back up a short distance beneath where they were originally thrown. It’s almost as crazy as the F-throw, and scales to KO at around 115%...maybe earlier if the victim bounced off a platform above Doppelganger Tsukika. Foes can actually tech to save themselves from bouncing off the ground given the way the throw works and the animation gives them enough time to react, but doing so gives Doppelganger Tsukika the rare chance to follow-up with another attack or grab. Still, the throw serves as an exceptional KO move and lets Doppelganger Tsukika pelt the foe with throwing items, hit with lightning or maybe even risk an Up Special.

D-throw ~ Ten-Symbol Cut
Doppelganger Tsukika cuts through to the other side of the opponent in a dark sword attack that launches them reasonably far for 8% and set knockback on a 50 degree angle. Nearly 2 seconds later, the victim will flash purple and a dark, transparent kanji will overlap with them before they receive the aftereffects of the attack, resulting in another slash that deals 6% and minimal disruptive hitstun. The delayed hit is obviously good for pressure and forcing foes to back off, however weak it is, but it also kills the foe's momentum upon connecting and can be used to combo with good timing if you cancel their knockback. Doppelganger Tsukika will slide along the ground a little if she used the throw on an icy surface, which brings her a tiny bit closer to the foe for easier pressuring.


) Playstyle--

Overwhelming Strength

Doppelganger Tsukika is ruthlessly powerful, but also very fragile in that she's one of the lightest characters and her recovery options are rather poor, none of which is helped by her lack of conventional projectiles, poor out-of-shield grab and short-lived attacks. Her moves are best used offensively rather than defensively given their general lack of coverage and duration, yet those same weaknesses make it easy for foes to powershield her attacks should she be too reckless or predictable with them. That being said, Doppelganger Tsukika's attacks have a profound impact given their sheer launching power should they connect, most of them sending foes flying far even at 0%.

Despite being a rushdown character, Doppelganger Tsukika actually likes fighting from a distance given most of her Specials work better from afar - which is good, because she -will- put distance between herself and opponents should she land a solid blow on them. Moon Slash can hit foes from halfway across the stage whereas Wild Ogre Throw is much, much more effective the farther your opponent is and/or the higher up they are, being an extremely effective follow-up if you launched your opponent far, yet while both attacks are very powerful they also tend to be very predictable and easily avoided against wary opponents. That’s not to say you can’t use either attack for the sake of setting-up however, just provided you're careful not to get punished for it: Wild Ogre Throw provides Doppelganger Tsukika with a simple projectile whereas Moon Slash covers the stage in ice and helps with some of her approaches such as the F-Smash, but when used together they grant Doppelganger Tsukika a buffed Glide Toss that lets her rush at opponents or retreat to use her Specials on a whim. These 2 Specials are Doppelganger Tsukika's major set-up moves she can transition to after sending an opponent flying, but she doesn't necessarily need the set-up in order to fight at full capacity, they merely being a bonus. She can also use Tornado Rush and Ogre Spark Smash to set-up, the former to create a tornado in order to chase launched opponents and the latter as something resembling a defensive move or for item interaction, provided she has the time and the situation is right. You could say that Doppelganger Tsukika's Specials are all options she can go into after launching an opponent, yet they all assist her in landing a coveted blow on opponents, making them somewhat self-contradictory.

Doppelganger Tsukika has numerous approaching options, mainly her Side Special, Dash Attack and Up Special/F-Smash if you're feeling risky, but you don't necessarily have to rush at the opponent right from the get-go. Rather, you could sit back, set-up and let them come to you, because although that might sound silly for Doppelganger Tsukika, who has no conventional projectiles or means of zoning, she has enough speed to be able to rush in and catch opponents with an attack should an opportunity present itself, meeting their offense with her own.

Doppelganger Tsukika is at her most dangerous when she launches an opponent far and forces them to prioritize recovery over defense, as this prevents them from punishing the Shrine Maiden's attacks easily and opens up various options to her such as hitting with a boulder or finishing with a Moon Slash, not to mention she is fast enough to catch and intercept opponents without too much difficulty. At the same time however, Doppelganger Tsukika finds it difficult to fight back under pressure, as many of her ground-based moves lack reach or coverage like the F-tilt and her poor grab makes it very difficult to shield grab opponents should she be forced into putting her shield. Doppelganger Tsukika also dislikes being launched and pressured in midair, being especially prone to juggling given her awkward-hitting D-air and overall floatiness, and susceptible to being edge-guarded given her 2 recoveries are generally easy to intercept.

Overall, Doppelganger Tsukika is an extremely powerful character who can destroy opponents should she get some momentum going for her, but if she's not careful she can be defeated just as easily, making her the definition of a glass-cannon. If you want power and speed and don't mind fragility, then Doppelganger Tsukika is just the Mugen Souls character for you.


) EX Skill--


Is it a punch? Is it terraforming? No! It's a mystical, cherry blossom-scattering circling attack ahead of Doppelganger Tsukika that magically freezes the enclosed area! With enemies trapped in a glacier, it looks like the perfect time for Doppelganger Tsukika to finish by cutting through them without interruption...but what's this!? She fails to cut through the glacier! How can this be? Is the glacier really -that- sturdy? Because seriously Doppelganger Tsukika can cut through a sink with a kitchen knife so it would make sense that...okay, I give up. This leaves Doppelganger Tsukika shocked as she starts hacking away at the glacier, but to no avail as she just tires herself out...


"Killing fist!"

So instead, Doppelganger Tsukika punches the glacier so hard that it shatters into pieces! Unfortunately, the impact of the punch is never felt by the foe due to the glacier, but if it did hit them it would be a OHKO for sure. This skill represents Doppelganger Tsukika's desire to distance herself from her strength, only to be forced into utilizing it in the end, much to her dismay. It also represents the transition from Autumn to Winter.

"Maybe a more feminine technique would be better..."


Entrance Animation ~
"Uoooo, I'm nervous!"
Tsukika gracefully descends from a passing stream of cherry blossoms and clutches her sheathed blade at the ready. Her words and actions might contradict each other, but if one looks closely enough, she's actually trembling slightly!

Up Taunt ~
"If this is it, I can win!...probably."
Tsukika raises her sword with a confident look on her face!

Side Taunt ~
"U-Uh, I'll do my best!"
Tsukika stutters for a moment, but then tries to put on a strong face while clutching the sheathe of her blade. How cute!

Down Taunt ~
"I'll try to be gentle."
Tsukika clutches her wrist and looks down in anxiety.

Death Cry ~
"Uhhh...I can't take it anymore."

Win 1 ~
"I'm a hero, uh...sort of."
Tsukika turns away and slowly sheathes her sword in a cool manner, holding that position.

Win 2 ~
"Phew, it's finally over."
Tsukika puts her sword away and wipes her brow in relief.

Win 3 ~
"I wonder if I should have gone easier on them."
Tsukika looks down and covers her mouth with her hand as she murmurs to herself in thought.

Alternate Costumes ~


Katapultar

Smash Lord
Joined
Nov 24, 2008
Messages
1,284
Location
Australia
"Oh. I sense a presence. Has...she come again?"


mmm[Doppelganger Shirogane]mmm


Fogey Demon Lord

This old guy is the demon lord of Moon World, albeit a rather poor one who keeps getting blasted away by the hero on a regular basis. For a while, Shirogane was deathly afraid of little Tsukika because he thought she had it in for him, but he eventually learned otherwise from Chou-Chou’s group - that she was actually trying to help him, but was always overcome with nervousness during each of their encounters. See, Shirogane is actually a generous man contrary to his rough appearance and title, as not only did he order the monsters not to attack humans but he he also made a shelter for those who lost everything to monster attacks. Just when things were looking good for Moon World duo however, Belleria, Chou-Chou's peoning rival, came along and made Shirogane go berserk through a failed moe kill attempt, causing him to act like a proper demon lord with sinister, destructive tendencies. Thus, Tsukika was forced to do battle against the Demon Lord she so deeply respected, being the hero of Moon World. Once defeated, Chou-Chou quells Shirogane's madness using moe kill and turns him into one of her many peons.

Having cleared the misunderstanding between one another, Shriogane no longer fears Tsukika and in fact treats her like a daughter, making him completely oblivious to the fact that she has feelings for him (much to her dismay). He comes off as a rough yet reliable guy, but he also happens to be a closet masochist: he owns an establishment where insulting the customers is a part of the waitresses' services (something they do by their own volition) and actually enjoys being blasted away by Tsukika, though he refuses to admit such. Sadly, others tend to see Shirogane as more of a lolicon and give him flak for his tastes rather than see him for the hardworking man he is, but then that's what you get for being a man in a Compile Hearts game. Also, Shriogane is actually 29, but he looks much older than that and sees himself as being an old guy, so everyone treats him like he's 70.


mmm[STATS]mmm

Bipolar
Height: 182cm
Weight: 10
Ground Speed: 5
Jump: 5
Air Speed: 5
Fall Speed: 7
Traction: 8
Wall Jump: 5


Needless to say, Doppelganger Shirogane serves as the big guy of Chou-Chou's group, but he's also known for his uncanny regenerative ability that's allowed him to easily recover from Tsukika's beatdowns. Thus, he automatically heals 1% every second, making him just that little bit harder to KO.


"Shall we?"


mmm[SPECIALS]mmm

[NEUTRAL SPECIAL ]-[ DEMON LORD'S DOMAIN]
Doppelganger Shirogane raises his foot and stomps down hard, causing a rugged mountain to erupt from the earth beneath him that damages foes touching it for 12% and good set upwards knockback. This mountain is entirely solid, sloped terrain that's 0.75-3 SBBs tall and wide depending on how long you spent charging (up to 1.3 seconds), but the whole thing will break apart once either the right or left side of the mountain sustain 10-35% damage. This is where things get interesting, as once the mountain is destroyed it'll erupt into chunks of rock that damage any foe standing on it for 5/6ths of the damage and knockback dealt by the attack that destroyed the mountain, meaning you can not only use it as makeshift stage but also as a way of landing attacks that would otherwise be difficult to connect with given Doppelganger Shirogane's heavyweight status. What's also interesting is that all manner of forward knockback taken as a result of the mountain's destruction will send the victim flying away from the side of the mountain they were hit by or vice-versa if they took backwards knockback, allowing you to follow-up in all sorts of different ways depending on your overall positioning. Just be aware that foes can use the mountain against Doppelganger Shirogane if they destroy it first.

It's generally idea if Doppelganger Shirogane raises a full mountain in one go, but that's not to say he can't resume work on a small mountain. In that case, the new segments won't simply add to the mountain but rather counts as a new layer of mountain that will remain even if the surface is destroyed. A full mountain can be split into as many as 4 layers that each sport the same HP the mountain would have at its height, and while this allows Doppelganger Shirogane to destroy the mountain multiple times it does take longer than simply creating a whole one. You can have up to 2 mountains out at once, but you cannot overlap them or place them on parts of the stage with insufficient area to accommodate their length.

If you use this move atop a fully raised mountain, Doppelganger Shirogane's stomping will cause it to crack through to the bottom and be split vertically, allowing you to destroy one side of the mountain without destroying the other and vice-versa. You can make any number of cracks on the same mountain so long as there's a character-width of space between them, and if you use this move where a crack was made the split halves will move a character width away from each other and Doppelganger Shirogane will fall through unless you quickly tap/hold left or right to have him stay on the respective side of the split mountain. Despite the changes, you can still take mountain damage just from being very close to the walls of a mountain, players taking forward knockback from the side of the wall they were facing regardless of which part of a mountain it was split from. You'll be throwing out this move a hell of a lot just to get this splitting effect, but thankfully the splitting and separation of a mountain have almost no lag on Doppelganger Shirogane's part - he can’t very well tend to a mountain forever when he needs to get to fighting foes.


[SIDE SPECIAL ]-[ CRIMSON WAVE]
Doppelganger Shirogane performs an overhead slash, his sword glowing a bright crimson as he sends out a tall wave of energy in the shape of a fin. This menacing-looking projectile travels along the ground identically to an Ice Shot and deals 8% plus low knockback on a low angle that'll KO at 200%, disappearing upon having traversed 12 SBBs. It's also capable of traveling over surfaces and is influenced by slopes, traveling twice as fast and dealing twice as much damage and knockback when moving down one and vice-versa when moving up one. This makes the Crimson Wave excellent for defense given its size and potential sluggishness, and you can have up to 2 of them onstage at a time.

A crimson wave will go over your mountains without harming them, but if you use this move in midair or smash the input, Doppelganger Shirogane will instead send out a wholly crescent-shaped projectile that travels 5 SBBs across the stage at rather high speeds while dealing 14% and good knockback that'll KO at 150%. This projectile -will- damage your mountains and as such it can either knock enemies further away from you or even towards you for some punishment depending on which side of the mountain they were on.


[UP SPECIAL ]-[ WHIRLING DEMON SLASH]
Doppelganger Shirogane holds his sword behind him before spinning it around him 1-3 times depending on charge (up to 0.8 seconds), each hit dealing 13% and high mostly upwards knockback that KOs at 135%. This isn't necessarily fast, but as Doppelganger Shirogane slashes he creates a transparent, demonic red cyclone from the magatama symbols on his blade that strongly draws in foes standing within 3 SBBs on either side of him (0.8 SBBs per spin), doing a good number on shields while forcing close-combat should foes insist on keeping their distance. In the air, Doppelganger Shirogane will automatically spin 3 times in a row for a similar recovery to Link's, and while that doesn't seem very good in itself it does momentum-cancel, making Doppelganger Shirogane even more difficult to KO than he already is.

If Doppelganger Shirogane uses this attack right next to a mountain, he’ll cut right through to the other side and split it horizontally, and if he cuts at the same spot again he’ll send the top half of the mountain hurtling 1-3 SBBs into the air based on how large it was, able to aim it as low as 45 degrees by holding the control stick appropriately in which case it will go flying out twice as far. The mountain only goes flying away as soon as Doppelganger Shirogane finishes his attack, where beforehand it will shake about violently to deal mass flinching to foes atop of it so they can’t just casually walk off of it and interrupt Doppelganger Shirogane. The mountain normally deals 6-18% and decent-good knockback that KOs at 200-140% on contact with a foe, but if it crushes them against the ground they'll instead pop out on top of it in their prone state. Throwing around a part of your mountain is especially useful for Doppelganger Shirogane since running around to try and fill the stage with them would be extremely tedious given how slow he is, but he’ll need to aim carefully since the mountain cannot be made to land with any part of it not touching ground or else the whole thing will automatically be destroyed. You can just use this move for splitting a mountain horizontally too, though unlike your other methods of splitting destroying the bottom half of a mountain will also result in the top half being destroyed and consequently dealing mountain damage as though it were whole.

[DOWN SPECIAL ]-[ OGRE CRAG SMASH]
Doppelganger Shirogane raises his sword casually and holds it up, charging it up with intense demon aura before thrusting it into the ground to make a pillar of crimson energy shoot up from around him. This move has a very similar feel to Ike's Eruption and even charges the same, but with a number of noticeable differences. For one, it shoots out a pillar of energy above Doppelganger Shirogane that rivals Pikachu's Thunder in terms of range and deals 9-25% with strong-very high spiking knockback that brings foes towards the old guy. Doppelganger Shirogane gets the same super armor frames Ike does when he throws out the attack, but his version fluctuates in terms of damage, ranging from 10-41% and decent knockback that KOs at 200% to a very high amount that will easily KO at 20%, usually a OHKO. Such a laggy move would normally be very impractical and difficult to hit with, but in Doppelganger Shirogane's case he can use his mountain to extend the attack's hitbox, not to mention he can knock enemies towards him with the energy pillar and cancel his end lag by destroying a mountain to hit enemies once they fall towards him. Definitely a dangerous attack if foes let their guard down.


mmm[STANDARDS]mmm

[JAB ]-[ ORIENTAL SHRED]
Doppelganger Shirogane casually spins his sword near his waist so it forms a half-circle hitbox in front of him that deals rapid hits of 1% and radial flinching knockback. This is easily Doppelganger Shirogane's fastest ground move with almost no lag on either end, making it extremely practical for quickly finishing off a mountain or piling up a specific amount of damage on it so that little attack you want to destroy it with gets the job done. This is also a nice way of halting enemy approaches, but it has a hidden offensive side to it: if you mash A instead of holding it like a lazy geezer, Doppelganger Shirogane will step forward and perform a rising diagonal slash that deals 10% and good knockback that KOs at 130% once you stop mashing. This is slightly laggy and can be shielded against even if timed after hitting a foe with the previous attack, but it can deliver a rude awakening to foes who let their guard down because your previous attack wasn't strong.

[DASH ATTACK ]-[ WILD DOWN]
Wanting to show off just how manly he can be, Doppelganger Shirogane performs a shoulder barge 1 SBB ahead of him, dealing 12% and strong upwards knockback that KOs at 130% if you hit a foe when the move comes out and 10% with good mostly-horizontal knockback that KOs at 160% if you run into them. Much like your SSpec projectile, Doppelganger Shirogane covers twice as much distance twice as quickly and does 1.5x more damage when moving down a slope whereas the opposite occurs if he's moving up one. Speaking of slopes, this attack will never connect with your mountain for obvious reasons, but that just makes it good for attacking and setting-up on one: the stronger damage resulting from moving down the mountain can help Doppelganger Shirogane get around and send enemies flying, whereas the weaker damage from moving up the mountain helps push enemies up to the top at lower damage percentages. Even without a mountain, this move is good for approaching since it gives Doppelganger Shirogane super armor providing he's not moving up a slope.

[F-TILT ]-[ DEMON SWING]
Doppelganger Shirogane crosses his right arm over his chest and clutches his sword before swinging it horizontally ahead of him using the side of the blade. This does 11% and average horizontal knockback that KOs at 145%, but also good pushback against shields. You can tilt the control stick to angle Shriogane's slash rather specifically with precise aim, up to 45 degrees either up or down, which is not only good for mountain combat but also causes a struck opponent to be knocked away on that same angle; in addition, a diagonal-upwards slash inflicts a bit more base knockback and shield pushback but KOs later whereas the downwards version does less knockback and more shield damage but KOs a bit earlier. This doesn't have the -best- reach of Doppelganger Shirogane's standards and has a bit of start-up lag, but it's good for positioning and for hitting a specific area of your mountain with the aim-able hitbox.

[U-TILT ]-[ SWEEPING MAW]
Doppelganger Shirogane crouches down and holds his sword against the ground before performing a one-handed rising slash that finishes with a half-arc at the end. This has a bit of start-up lag, but it has quite a bit of duration to it covers a ton of area in front of and above Doppelganger Shirogane, making for a great anti-air that deals 12% and very good mostly-upwards knockback that KOs at around 125%. With your back to a mountain, this is a demonically good defensive move as the blind spot behind you is eliminated by the mountain (even more so with ravaged ground to prevent foes from rolling around you), but this is also good against a mountain as a powerful launcher that benefits from the majority of its duration canceled out by the ground collapse.

[D-TILT ]-[ EARTH SHOVEL]
Doppelganger Shirogane heftily swings his sword on 120 degree angle, inflicting 10% and good knockback on a 80 degree angle behind the old guy that won't KO til around 150%. The knockback is rather useful for getting foes on a mountain behind you or sliding them atop of one, especially since Doppelganger Shirogane can poke at foes from a lower elevation with the low angle the attack comes out on, but it's also useful for pulling foes towards you as you destroy one when they were on the opposite side, in which case you can follow-up quite easily at moderate percentages or if you knock them into a new layer of mountain. The latter can be tech’d by advanced players who have good timing, however, not to mention they need to be very close to the mountain's base or else they'll be sent flying over it.


mmm[SMASHES]mmm

[F-SMASH ]-[ SUPREME DRAGON SLASH]
Doppelganger Shirogane tosses his sword into the air and catches it like a badass, gripping it with both hands and raising it directly over his head to charge for this powerful attack. Once released, Shriogane lets out a battle cry and swings the jagged end of his sword down with the heavyweight force you all know and love, the etched magatama symbols resulting in a couple of red streaks being left behind as foes are hit for a fatal 27-33% that can easily KO between 66-33%. This is obviously very laggy, particularly on the end, but Doppelganger Shirogane's sword toss is actually a hitbox that deals 6 hits of 2% and the slightest mostly upwards knockback, letting him place enemies in a position where it's difficult for most to fight back before letting loose. Regardless, this is one of your attacks made more effective when used to destroy a mountain since you get a much bigger hitbox and not to mention all that end lag will be canceled out when the ground beneath you is destroyed.

[U-SMASH ]-[ EARTHWALL PRESENCE]
Clenching his teeth in exasperation, Doppelganger Shirogane gets down on one knee and raises his fist before smashing it into the ground. Have you gone senile, Doppelganger Shirogane? We're not at the D-Smash yet, and this certainly isn't a Ku...oh wait, he just made a stone wall pop out in front of him. Pretty mighty stuff too, as foes who get hit receive 16-22% and good knockback that KOs between 110-80%, mostly horizontal if they were grounded and mostly upwards if they were in midair. The stone wall stands between 1.1-1.3 SBBs tall but is unfortunately a bit jagged at the top and thus can't be stood on, but it does do a good job of, well, walling off foes, requiring 24-36% before finally breaking down. This has surprisingly low start-up lag, especially compared to Doppelganger Shirogane's previous move, but it has a bit of rough ending lag which shouldn't be too much of a problem since you just created a wall. You can have up to 2 walls on the stage at the same time; using this move a third time will still create a wall hitbox, but it'll break apart once the attack ends.

Using this move on the side of a mountain will cause the wall to form on an angle, turning it into a non fall-through platform that is now apart of the mountain. As such, destroying the part of the mountain the wall sprouted from will in turn destroy it and deal damage to foes making contact with it, whereas simply destroying the wall does not affect the mountain itself. Note you can't create a wall on another wall, since that'd be kinda stupid.

[D-SMASH ]-[ QUAKE]
Turning to face the screen, Doppelganger Shirogane throws his body back and lifts his leg up as high as he can before stomping down with great intensity. This causes a localized shockwave around the Fogey Demon Lord that deals 14-20% and reliable base knockback on a low angle that won't KO until 150-120%, but it has good range, decent speed and pushes shielding foes quite far which overall helps a good area around you given you can't always assume you'll have a mountain to fulfill the same role. The attack also has a secret hitbox at Doppelganger Shirogane's foot that deals 19-25% and high upwards knockback that KOs between 105-70%, but it only ever hits opponents who are right beneath him, like underneath a platform... or if Doppelganger Shirogane uses this on a mountain to deliver a deceptively powerful launcher. The shockwave also pushes makeshift terrain such as your mountains, stone spikes and U-Smash walls 1-3 SBBs across the stage so you have a way of moving them around, though you cannot push any of these offstage. This particularly is good for widening the space between two vertically-separated mountains if you fell through the gap between them.


mmm[AERIALS]mmm

[N-AIR ]-[ WISDOM THRUST]
Doppelganger Shirogane quickly brings his sword back before thrusting it forward in an attack that deals 15-10% and strong-good knockback that KOs between 140-180% depending on whether it hit close to Doppelganger Shirogane or from father away, only dealing 8% and hitstun at the very tip. Additionally, this has sex-kick properties and deals 7% with negligible non-KO'ing upwards knockback that helps keep enemies in midair as you fall through them. Boasting speed and high range, this is your most ideal move for hitting enemies in front of you on demand in the event where you're falling through the air after having destroyed a mountain and a foe is close to you, but it also makes for a good poking move or a means of anti-juggling. You're actually going to be using this quite a lot despite the lack of coverage around Doppelganger Shirogane.

[F-AIR ]-[ OVERHAUL SWING]
Doppelganger Shirogane winds up his sword behind him before swinging it in a rather lengthy rising attack that covers a wide area in front of him. This deals 11-16% and good-strong knockback on a low angle behind or in front of Doppelganger Shirogane depending on whether closer to the tip or the base of his sword, KO'ing between 220-150%, capable of KO'ing between 175-130%. The attack hits as low as 170 degrees to Doppelganger Shirogane and comes out decently fast, but the swing has a long duration that makes the whole thing laggy - one of your generic uses for the move would be to simply hit with the tipped portion of the move to destroy the top of a mountain and knock enemies towards you so they're hit by the rest of the slash, but that's not the most practical way to use a mountain in midair, really depending on the situation you're in. At the very least, this aerial has a good chunk of power going for it should you feel daring when falling towards a foe after having destroyed a mountain, but it's also a reliable way to get enemies behind you and on a mountain from midair if the D-tilt doesn't work for you.

[B-AIR ]-[ OLD GUY KICK]
Doppelganger Shirogane turns around and kicks behind him with one foot in what is one of his faster attacks, dealing 12% and good mostly-horizontal knockback that KOs at 164%. In addition, if you press A again while making contact with a wall, Doppelganger Shirogane will actually kick off it as though he just used his midair jump, a skill that can be used in the stead of a footstool jump (up to 4 times per midair trip). You can use this to kick off a mountain, but it becomes a lot more interesting if you actually destroy the mountain and send a foe on the same side as you flying at the same time since you can simply wall jump towards them and be in range to follow up with another aerial.

[U-AIR ]-[ RISING MOON]
Doppelganger Shirogane holds his sword at his side before swinging it above him in an arc (starting in front of him), dealing 17% and high mostly upwards knockback that can KO as early as 137%. This has a bit of lag on both ends, but it's an absolutely brutal launcher should it connect, making for a good finisher or means of knocking your opponent far enough to do a bit of set-up or charge up a powerful attack to use against your mountain. This can be a bit risky to use on a mountain given you'll land quickly, but if you have part of a mountain resting on a platform or thrown into the air by your Up Special you can use this to deliver some heavy damage to anyone standing on it.

[D-AIR ]-[ DEMON SWORD DRILL]
Doppelganger Shirogane thrusts his sword downwards and begins spinning it like a drill, a moderately-fast attack that reaches quite far beneath the old guy. Doppelganger Shirogane's spinning dishes out 7 hits over a reasonably short duration, dealing 5% apiece and low mostly-horizontal knockback if he hits from the side (KOs between 300%-150 depending on whether you hit near the tip or at the base) and 3% apiece that follows into a final hit that deals 5% and decent high-angled knockback that KOs at 165%. That's not all either; at the start of the move, the upper-third of Doppelganger Shirogane's sword possesses a sweetspot that inflicts a hefty 23% and a very powerful spike on par with Ganon's D-air as the sword bursts with demon energy, and if this hits freeze-frames will occur and the attack will end early, skipping over the drilling motion. Hitting an opponent with the sweetspot might not be the easiest thing in the world, but it's another story with your mountain, a completely stationary target that makes hitting foes a hell of a lot easier - and quite scary, too. Short-hopping this move is your easiest and safest ways to destroy a mountain while dealing satisfying damage since you don't have to worry about being on it if an enemy destroys it before you.

Even without the deadly sweetspot, the sword's spinning is good for walling off foes from the sides and also mowing through them so you can get to your mountain if they're trying to juggle you, not to mention it can pin a grounded foe if you hit them dead-center. Doppelganger Shirogane goes through landing lag if he himself hits the ground while spinning, ending the attack prematurely but also creating a shockwave very close to him that pushes nearby foes back a bit - this lets you follow into a 1v1 ground game with the foe if you time the attack so that Doppelganger Shirogane lands before he finishes his attack.


mmm[GRAB]mmm
Time for Doppelganger Shirogane to get strict! The old guy puts on a stern look as he reaches out with one hand, handling his opponents in different ways depending on their height. If the opponent is at least 152cm tall, Doppelganger Shirogane will hold them by the collar roughly, but if the opponent is shorter than that he'll instead hold them off the ground by the scruff of their neck as he sighs, which is especially hilarious since characters like the Little Missy Chou-Chou will flail their limbs and shout angrily, not wanting to be treated like a little kid. If Doppelganger Shirogane grabs Tsukika however, he'll yell "C'mere!" and forcefully hold her wrist, treating her like a disobedient child! Poor Tsukika.

Doppelganger Shirogane has a slow pummel that deals 3% per hit. Taller characters receive a headbutt, shorter characters are shook violently whereas Tsukika gets a good punch to the face...

Wait, did you just PUNCH Tsukika? You're horrible, Mister Doppelganger Shirogane! I'd have lost all respect for you if Tsukika were not able to handle those punches. Talk about tough love.


[F-THROW ]-[ MOUNTAIN FORCE]
Doppelganger Shirogane rams into his foe for 11% and travels a platform's distance with them before sending them flying for good horizontal knockback that scales well, KO'ing at 115%. If Doppelganger Shirogane runs into anyone along the way, they'll take the same damage and knockback as well, and if he runs into an obstruction his opponent will be shot behind him for an extra 4% but otherwise take the same amount of knockback. Foes sent flying by this move deal 12% and good diagonal knockback that KOs at 130% to whatever they make contact with, including a mountain, and they'll take that damage if the mountain is destroyed as a result. If the throw ends with Doppelganger Shirogane standing on a mountain and facing it, he'll knock his victim into it as soon as they're launched, and while they can tech the throw with very good timing to stop the mountain from being damaged it'll only result in being put into frame-neutral right next to Doppelganger Shirogane, not to mention they already took damage from the throw. Easily your most reliable throw if you want to keep foes horizontally level to you, with one of its more basic uses being to use them to destroy a small mountain from a distance so you can be rid of it and create a new one.

[B-THROW ]-[ ORIENTAL TWISTER]
Doppelganger Shirogane swings the side of his sword into the foe and quickly spins them around 3 times before tossing them away for a solid 12% plus some rather high base knockback on a 40 degree angle that can KO at around 130%. The knockback sends enemies flying high and far enough that you can use the move to generically throw enemies towards a mountain behind you that you've stepped off, say if you've been forced to approach them out of necessity to protect your mountain from their projectiles, they not being able to simply outright dominate it before you reach it due to being thrown up into the air. Additionally, a foe Doppelganger Shirogane swings around functions as a hitbox that deals 5% and good knockback that KOs at 150% to anyone hit while they take 4% each time they hit someone, a trait that can be used to pile up damage on both a mountain and the foe regardless of which side you're facing, potentially destroying the latter. Oddly enough, if you swing a foe into a mountain and it's not destroyed before you throw them into it, they'll be launched right through to the side opposite to Doppelganger Shirogane and take some very low knockback that doesn't KO until 999%. A solid way to position foes on the opposite side of a mountain if you're facing away from it.

[U-THROW ]-[ I’LL BEAT SOME SENSE INTO YA!]
Doppelganger Shirogane swings his foe around once before slamming them into the ground as they bounce off on a high angle for 8%. This doesn't deal much knockback nor does it scale well even at higher percentages, but it's refreshing for a Doppelganger Shirogane attack given most his others knock foes a fair distance from him and as such allows him to follow-up more easily with an attack. In addition, any part of a mountain you slam a foe into takes 10% and will always be left with 1HP if it had 10 or less, making this a useful way to drop a mountain into killing range while simultaneously positioning foes in case you're being pressured by them. All the better if you throw an enemy up a mountain, where they're dangerously close to landing and Doppelganger Shirogane is left facing his mountain to hit with the brunt of his attacks.

[D-THROW ]-[ DIRT DRIVE]
Doppelganger Shirogane gets a somewhat aggravated expression as he holds his foe behind him before violently throwing them against the ground, inflicting 12% and strong diagonal downwards knockback through the dirt that KOs at 200% and leaves victims in prone if they don't slide off the stage. You can score a bit of set-up time with this throw while possibly breaking a mountain foes landed on.


mmm[PLAYSTYLE]mmm

[OVERWHELMING HEAVYWEIGHT]

Doppelganger Shirogane is the heavyweight fighter among Chou-Chou's party, having the high power, stamina, reach and low speed that the big guys are commonly associated with. What makes Doppelganger Shirogane different however is that he's not a heavyweight male antagonist, and has the means to exert stage control that compensates for his lack of speed. His mountains, so to speak.

Mountains are deadly not for what they offer as makeshift terrain, but rather the fact that they serve to extend the hitbox of the attack responsible for destroying them AND cancel a grounded attacker's lag by putting them into the air. This makes some of Doppelganger Shirogane's otherwise slow attacks much safer and easier to use, with his normally impractically slow F-Smash becoming an absolute terror when its hitbox now covers 3 SBBs of ground around him and is unable to be punished. Indeed, facing Doppelganger Shirogane on his own turf is very scary, especially when the ground beneath you can become a powerful hitbox at a moment's notice.

Doppelganger Shirogane's mountain, combined with his lack of mobility, often lends him to play a very defensive game, and he has the means to back this up with his basic Side Special projectile. His mountain even makes it difficult for opponents to pick at him with their projectiles, but that's not to say it's a flawless tactic as said projectiles will just pile damage on the mountain and slowly destroy it - while not necessarily consequential with weaker projectiles, Doppelganger Shirogane should be wary of stronger projectiles that can take advantage of his mountain's damaging properties. Depending on the foe, Doppelganger Shirogane may sometimes have to do some approaching of his own and create a mountain closer to the center of the stage so he can go on the offensive and protect his mountain, with moves like the Jab, Dash Attack, U-Smash N-air, D-air and even Side Special being useful for sponging incoming disjointed attacks.

It could be said that Doppelganger Shirogane's game becomes most interesting when two players engage in combat over a mountain. Player positions mean little when the entire ground can turn into a hitbox at a moment's notice, so defensive maneuvers like rolling are ill-advised when it gives the enemy an opportunity to strike. One should also take a mountain's HP into account too, as while Doppelganger Shirogane has some strong moves that can blow it away quickly, said moves are slow and give the opponent the chance to retaliate. Taking to the air is certainly a safe option that'll prevent you from taking mountain damage and lets you poke at the mountain without risk of taking mountain damage if a foe suddenly destroys it before you, but any player who hangs in there and risks their own hide to destroy the mountain is rewarded by having the end lag on their attack that would otherwise put them at risk cancelled, allowing them to engage their opponent in midair combat immediately. Doppelganger Shirogane, despite being a heavyweight, actually has aerials that work well for intercepting foes with their good range and power, namely his N-air and D-air, while his other moves back quite a bit of punch to compensate for their lag.

While foes can indeed damage Doppelganger Shirogane with his own mountain, they can also choose to ignore it and just knock him off of it instead. This is a rather scary prospect for Doppelganger Shirogane, as foes can now "claim" his mountain as their own territory and use it against him in the same way a Doppelganger Shirogane player would if they resorted to playing a campy defensive game. Doppelganger Shirogane can of course fight back against enemies who decide to use his own defensive tactic against him, using moves like his Dash Attack to approach and Side Special to hit them while they're on the mountain, even knock them towards/away from him if he uses the smash variation. It's easy for any foe with a competent melee game to utilize Doppelganger Shirogane's mountain as well as he can, minus how he can split it with his Specials, with faster foes being able to destroy mountains much more quickly, giving Doppelganger Shirogane a reason to proceed with caution when traversing one. Of course, Doppelganger Shirogane could also just raise another mountain and utilize that, providing he hadn't already created one prior to losing one to the foe. Without a mountain, however, Doppelganger Shirogane can be juggled and knocked around without too much difficulty - his air game has blind spots to it and doesn't fare well against pressure when his N-air and D-air only go out in one direction and are somewhat lengthy, not to mention his recovery is weak enough that he can be gimped fairly easily.

Overall, Doppelganger Shirogane has a lot more presence on the stage than other close-ranged heavyweights, but he runs the risk of having it used against him if he fails to subjugate foes with it. Keep a steady foot on the ground and a sharp eye on the opponent, however, and Doppelganger Shirogane can beast anyone who tries to step into his ring.


Doppelganger Shirogane throws his sword up into the air, and another comes crashing down with it! Dust is thrown up, and Doppelganger Shirogane lets loose a massive wave of demon energy that causes his body to be engulfed in a red aura.


With that, Doppelganger Shirogane leaps towards the foe and slams his swords into the ground, the impact so great that it splits the earth ahead of him! Enemies are thrown up by the force, after which Doppelganger Shirogane leaps up and swings his swords around to create 3 massive vortexes of demon energy, one after the other. With that, Doppelganger Shirogane lands and stands proud, his head held high. Can't have him be outdone by Tsukika, now can we? The man's plenty strong as he is, but unfortunately he will always be overshadowed by the hero when it comes to power...

"Huh, this power is my right."


[ENTRANCE ANIMATION ]-[ ]
"Alright. Let me show you how it's done."
His back facing the screen on an angle, Shirogane exhales a deep breath of smoke from his pipe. He then turns around with a cool look on his face and casually pockets the pipe. Guy's got a pipe collection, ya know?

[UP TAUNT ]-[ ]
"Hey, don't go looking somewhere else."
Slightly annoyed, Shirogane makes a quick gesture to himself to get his opponent's attention. Old people don't like being kept waiting.

[SIDE TAUNT ]-[ ]
"Well now, shall we go all-out?"
Shirogane cracks his neck, winds his shoulders and then cracks his knuckles, before finishing with an almost-scary smile. Don't mess with this old man!

[DOWN TAUNT ]-[ ]
"Combat is a man's stage."
Shirogane raises a clenched fist as he speaks calmly and bluntly.

[Death Cry ]-[ ]
"Dammit...I can't die like a weak fool."

[WIN 1 ]-[ ]
"If you want to pick a fight, you chose the right man."
His sword planted on a slight angle behind him, Shirogane rests on it in a cool pose and takes a lengthy, well-deserved smoke from his pipe. He sure has a "wise" feel to him in this pose, no?

[WIN 2 ]-[ ]
"Get off my lawn."
No, really, he actually says that in the game.

[WIN 3 ]-[ ]
"That was a nice rumble."
Shirogane makes a triumphant, badass pose, his hands crossed and a broad grin across his face. It's, almost...scary.

[WIN AGAINST TSUKIKA ]-[ ]
"Even I can win if I try!"

[LOSE AGAINST TSUKIKA ]-[ ]
"Ohhh noooo! I did it again!"


[ALTERNATE COSTUMES ]-[ ]


Katapultar

Smash Lord
Joined
Nov 24, 2008
Messages
1,284
Location
Australia
"Let us celebrate! You have passed the prerequisites needed to earn my love. Come, let us move on to the next step!"


|Elka~~|


Narcissist Hero

Looking for the hero of Fire World? Looking for someone to love you? Look no further, for the handsomely GORGEOUS Elka has come for you, ladies! He'll talk up a storm, and even come to your aid should your cry reach his ear, but don't expect him to actually be useful in combat. Indeed, it is said that the woman favors the man who shows mercy, but if Elka has to settle the score with fisticuffs he will!... at his own expense.

In short, Elka is a loser of a demon who can't fight to save his own life, and happens to be hated by nearly everyone around him - especially the citizens of his own world - for his narcissism, playboy approach to girls and hostility towards any man yet to put him in his place. There's nothing even remotely heroic about him, quite the opposite as he is a massive wuss who will use any excuse to get out of fighting, but Chou-Chou had to bring him along anyway because he's technically the chosen hero and not doing so wouldn't count as proper subjugation of Fire World in her eyes.

Everyone later learns that Elka is actually a really kickass pilot and mechanic who puts poor Ryuto to even further shame, the only reason he isn't the No.1 loser on G-Castle, and once owned an airship until it was trashed in a tussle with the Undisputed God. Does this mean Elka will fight using machines and small airships in his place? Goodness gracious no! Elka is a gorgeous emissary of love, not some dirty slob who sullies his hands with the blackness of oil! Tinkering with machines would ruin his perfect, handsome image. Ah well, his funeral...

Seriously, he has absolutely no chance of winning. Except against Bubbles and the Keroro Platoon, I guess. Somebody go make a new Top 26 Most Underpowered Sets NOW.


Stats~~|

Ditz
Height: 178cm
Weight: 6
Ground Speed: 5
Jump: 9
Air Speed: 10
Fall Speed: 1
Traction: 1
Gorgeousness: 15

Wanna know more about the daring Elka? Simply know that he's capable of taking in more than you'd expect his slender frame to handle, and his sexy legs can walk-the-walk...like when he needs to run away! Above all however, Elka's aerial ability is a magnificent sight to behold, matched only by the beauty of the women he sets his sights on; one jump covers an average amount of height as Elka strikes an extravagantly flamboyant pose, knees bent and pointing to the stars above, but his somewhat hidden wings allow 2 more jumps of this kind. Throw in top-notch air control and falling grace of a pure miko and you have a gallant man who takes to the skies for anyone! (women only) That's handsome Elka for you.

Also, if you're wondering why he has such low traction, it's because he feels the need to pose and slide across the stage to feel stylish. Just one look at Wegee and you'll know that this is a bad trait rather than a good trait.


"I need to lay low so they don't target me."


|Specials~~|

Neutral Special ~ Spear of Absolute Elegance
Elka turns away and strikes a GORGEOUS pose, one hand held over his face while his other arm is fully stretched above him. He then summons his red-rose spear in the raise hand, before twisting back round suddenly and tossing it straight ahead of him, like the arrow of a cupid! It's magic, it travels 1 platform before dispersing into lovely rose petals and deals 5% to those struck by it...but no flinching!? I see you like leaving yourself open to punishment, Mr. Elka! Maybe you shouldn't have even bothered to use the attack...

But what's this!? The spear, upon hitting a target, remains stuck through the victim's torso afterwards! Now now ladies, no need to look away: there's no blood, because the spear works under anime JRPG logic! Foes may ignore the spear for the time being, but come 5 seconds and they shall pay for their ignorance: they fail to realize the spear blooming like a flower and bursting into a dazzling pink explosion! An opponent can resist this, but should they let their pretty guard down they'll be hit for 7% and be sent flying a little ways in whichever direction you chose when throwing the spear (capable of KO'ing at 200%), making it difficult or even dangerous to DI against when Elka's sting of love has no set wavelength. Elka may imbue as many of his lovely spears into his chosen sweetheart, but if one blast would go off when the victim is in the middle of hitstun it will instead active a moment after they've recovered. Elka may also choose to charge this attack (max: 1 sec), in which case his spear will gain a gorgeous red tint that delays the blast by up to 15 seconds - chain these blasts together, and you'll have a remarkable string of attacks dazzling your foe into submission!


Side Special ~ Entangled Love
Stepping back and crossing his left hand over his chest in style, Elka throws out his left hand gorgeously and sends the thorns wrapped around his arm spiraling in front of him, like the prickly grasp of love! Indeed, the thorns on Elka's arms are not just for show, but are also a grab hitbox that extends a platform forward in hopes of ensnaring a target by their waist, serving as a tether that deals rapid hits of 5% for each second it is maintained - either from the thorn's prickles or the sheer annoyance of being pestered by Elka. Despite being described as a tether, Elka cannot move or attack while maintaining such and is at the mercy of being dragged around by his target until they decide to break the tether by sending him flying past its length. But worry not! Elka has access to a few options during the tether as to ensure that he is not left as helpless as a baby:

Forward: Elka rolls forward and pulls his target a battlefield forward without interrupting them.
Backwards: Elka rolls back and unravels the tether, spinning the foe the other way round for a non-flinching 5% while dragging them a small distance forward. If the opponent was dashing at the time they'll hilariously trip on their backside. Also, despite being a roll, this can be done in midair due to Elka's wings.
Up: Elka bends down and leaps gorgeously into the air as though he performed a footstool jump, dragging the foe into the air with him! This is slightly telegraphed and can be blocked with a power-shield or by simply dodging.
Down: Elka releases the foe early, dealing 7% and flinching as a result of reeling his thorns in harshly.

All the above actions unravel the tether, meaning Elka will rarely get mileage out of the thorn's damaging properties unless he can stall the foe with the delayed blasts from his NSpec... oh, who am I kidding, he's not even supposed to even be able to utilize the thorn damage anyway!

Up Special ~ Last Dance of Grace
Bending down and twisting his body, Elka takes off like a majestic bird in a spiraling rush! This propels Elka with the same speed and grace as that disgusting pig-of-a garlic-munching-fatman's corkscrew, only with few differences to the Narcissistic Hero's name: Elka can only move straight up, though he travels further at 4 SBBs height and drags foes above him (and only directly above him, the rest of his body has no hitbox) for rapid hits that accumulate 14% before knocking them on a 30 degree angle for low knockback that won't KO until 300%. Furthermore, once Elka reaches the peak of his ascent, he'll spread his lovely wings and hover in place as though he were walking on the clouds, able to move back and forth for up to one second before his body gives out-err, gets tired of it, and he enters helpless. The float can be cancelled with a bit of lag if the Up Special is used again however, in which case Elka won't enter helpless, but obviously cannot use this move again until his feet gracefully descend to earth.

Super awesome tip: Elka only spirals up for for as long as you hold B, and if released early he'll knock enemies away prematurely and transition into his float, gaining an extra 0.7 seconds on it for every SBB he would have traveled otherwise. This, combined with Elka's aerial prowess, grant him a surprisingly amazing recovery, though it's not like it'll do him any good if he has crappy attacks. He's better off using that float to stall and be a coward.

Down Special ~ Shining Narcissism
Elka shines! The handsome devil poses extravagantly and throws out a narcissistic line (Something along the likes of "Listen to my lovely voice!", "Have you been hypnotized by my charms?" or "I've been a full-fledged hero since the day I was born."), a brilliant light radiating from his very being for a radius and duration that rival Jigglypuff's Sing... is he actually using his gorgeous looks as a weapon? This deals 10% over some very rapid and inescapable hits that generically keep foes in place before pushing them away for reverse-radial flinching knockback that never KOs. Not the safest move to pull out given Elka has absolutely no defense against projectiles, but if he's not interrupted when using it, he'll get a neat little reward: the light will radiate out of him and expand a lengthy 1.1 platforms around him, continuing to shine around him until his narcissistic streak is broken as a result of being sent flying, or by taunting. This light shines so bright, it obscures everything it covers save for opponents, forcing foes to heed nothing but Elka! The obscurity even extends to projectiles and spears embedded in foes, so if they're too close to Elka they'll lose any visual indication of the latter right up until the spear blooms for forewarning. Elka's narcissism can be blinding to him too however, as it can stop him from seeing enemy traps, projectiles, minions or even an item that just might have spawned near him. And let's not get started on stage hazards, should you be playing on those kinds of stages. Still, the fact that area is obscured wherever Elka goes means he can actually obscure parts of the stage, making it difficult for foes to find their footing near the ledge or on platforms.


|Standards~~|

Jab ~ Teasing Steps
Stepping forward, Elka slaps like the sissy feminist he is, dealing 2% and flinching, followed by backhand with his prickly, thorn-covered left hand for 3% and low knockback on a 70 degree angle that actually scales decently... at higher percentages, KO'ing at 250%. As a bonus, using this move a third time causes Elka to roll behind his foe with superior speed and coverage compared to his norm, rivaling Lucario's, as a means of playing around with a foe and getting behind them. At lower percentages, the foe will still be close to Elka with a slight frame-advantage, but at higher percentages you can pursue them with your back facing them with the option of being able to charge forth with a B-air. This move has pretty good range and does a decent job at being a panic button, or just screwing with the opponent.

Dash Attack ~ Prince of Dance
Elka performs the most graceful of pirouettes that takes him 3 SBBs forward over the course of 1.5 seconds, finishing the action with a gesture not unlike proposing to the love of one's life. The spin has a slight suction effect and deals 15 rapid hits of 0.5% that trap and drag foes along before Elka's final gesture deals an additional 3% and okay knockback ahead of him that'll KO at about... 250%? Landing the attack is very rewarding for Elka since it keeps foes in his thrall for a very long time when you consider the duration behind the hitlag of all his connecting hits, not to mention it drags them where Elka pleases and puts them in a position that makes this move easy to spam. That being said, you'll believe me when I say that THIS ATTACK IS TERRIBLE. It has zero priority; the actual hitbox is near the center of Elka's body, and as the outer perimeter of his body has no hitbox, able to be outclassed by even the weakest and shortest-reaching attacks. Elka doesn't move particularly fast either, so he's basically asking his opponent to charge up a smash attack and hit him square in the face. As such, this move has no approaching potential unlike most Dash attacks. The only feasible way to land this attack on a competent foe is to go right up to their face, and we all know how dangerous that is for poor Elka. Pull it off, however, and you reap the rewards. That's the way Elka rolls.

F-tilt ~ Inviting Roses, a Token of My Love!
Elka spins around and brandishes a rose before chucking it forward as a fast-moving projectile that travels half of Battlefield, only to repeat the same motion twice more! Such generosity. Each rose deals 3% with almost no hitstun on contact with a foe, though the second rose inflicts weak knockback in the direction it was traveling that KOs at 250% while the third does slightly more knockback -towards- Elka, but only KOing at 340%. Worry not! You can angle the toss of a rose by up to 45 degrees as to decide whether a specific one will pierce the enemy's heart or not, and if you throw one against the floor it will act as a special trap that stays out for 1.5 seconds and detonates into a burst of roses on contact with an enemy, dealing a bit more damage (5%) but not much else. Angling a rose, however, makes it travel a shorter distance and caps out at 1/3rd its normal distance on a 45 degree angle, so you can't snipe or gimp aerial foes as well as you'd hope. With the right set-up and level of damage however, you can toss enemies back and forth in your pit of love, teasing them as to whether you'll bombard them all at once or leave something in front of them to look forward to.

U-tilt ~ Hip Motion
Elka performs an elegant flipkick that leaves behind a trail of roses, lengthy enough to rival an U-air flipkick performed at half speed. Elka's legs deal 4% and decent upwards knockback that KOs at 220% while his foot deals 6% and surprisingly good radial knockback that won't KO until 250%. What can I say? Elka at least deserves a little something to launch foes right away, but the move's long duration will come back to bite him in the butt if he fails to connect early on. This can also be used to intercept foes rolling behind you, though given this move has a long duration and Elka sucks that tends to only happen by chance.

D-tilt ~ Have You Fallen For Me?
Elka goes for the low blow by sweeping his leg along the ground, a daring attack that's sure to sweep foes off their feet! Literally too, as it deals 3% and okay horizontal flinching knockback that always trips, but never KOs. The attack's speed and range are sexy, just like Elka, but its power is not.


|Smashes~~|

F-Smash ~ Wild Love
Deciding to show off just how cool he can be, Elka actually summons his spear for once, in his left hand, holding it behind him while crossing one leg over the other as though preparing to bust out a killer dance move. Afterwards, he tosses his spear ahead of him stylishly, only for it to disperse into harmless rose petals upon fully extending from him. Tipped, the spear deals 9-13% and alright knockback on a 120 degree angle that puts victims into prone if they don't slide off the stage, but if it hits closer to Elka it'll instead deal 13-17% and solid mostly-horizontal knockback capable of KO'ing between 220-190% as the spear imbues itself in the victim instead of dispersing. Immediately afterwards, Elka poses, placing a hand over his face and another ahead of him as though politely turning down someone, causing the spear to burst beautifully with identical properties to one from the Neutral Special, right down to being able to choose which direction it sends enemies flying. This gives the move a ton of option, letting Elka knock enemies far away from him, into the air, into prone or even towards him for more melee action, and with no way to tell which direction they'll be sent flying foes will have to be careful when DI'ing or else they might end up helping Elka! A very good move if it hits, but it has a bit of start-up lag, a very short duration and leaves Elka open to attack if it misses.

U-Smash ~ Burning Rotation
Elka gets down on one knee and takes a bow, once again brandishing his spear. This time, however, he stylishly spins his spear in front of him for nearly one second, creating a slight suction effect and dealing 10 hits 1-1.3% before finishing off with a powerful thrust on a high angle that deals 9-12% and good knockback on a low angle capable of KO'ing between 175-145%, or on a high angle if the opponent was trapped at the top of the spear. This has a long duration and only covers the front of Elka, along with an area diagonally above him, but it's good for stalling, is actually fairly powerful for an Elka move and deals a surprisingly high amount of damage against shields. You can also use this to approach a guarding opponent just by using this out of a dash, though Elka will quickly lose his momentum shortly into the attack, or even a DACUS, but he can only cancel out of the start of his Dash Attack and doesn't go that much further. It's remotely possible for Elka to break a shield using this attack by timing it so the delayed hitboxes on his Neutral Special go off while the foe is stuck in it, and when the opponent is stunned Elka will have enough time to throw out 1, 2 or even 3 spears to use for a future attack plan. Also, this attack has high end lag, so try not to miss with it.

D-Smash ~ These Roses Have Thorns!
Elka faces the screen and makes a Jojo pose before spinning around and chucking several rosebuds towards the ground beneath him to form a 0.5 SBB-wide bed of untainted flowers. Step over them, however, and they'll bloom vibrantly for half a second before exploding gorgeously! This deals 12-16% and surprisingly good knockback that KOs between 160-130%, on a 110 degree angle if the victim was at the garden's edge or vertically if they were in the middle - damaging all except the handsome Elka. Elka can place up to 2 of these beauties onstage at any given time, but they crave attention and will disappear after 6 seconds if not cared for, so luring opponents to their resting spot is a must!


|Aerials~~|

N-air ~ Sexy Kick
As the attack name implies, Elka performs a sexy sex kick that sees him spread his body out as though he was an emperor pimp'in on a couch. This attack deals 11% and good radial knockback that KOs at 220% when you hit at the start and 8% with decent knockback later on, making for a fairly versatile, all-around aerial attack that acts differently based on which angle you hit from. Unfortunately, the hitbox does not cover Elka's entire body, only a paper-thin portion of his horizontally-spread hurtbox, making it fairly easy to charge through if he tries to gimp someone by floating over them. The attack also loses a bit of its hitbox near the end and leaves Elka vulnerable to attack with his body spread out, exposing him for the loser he is.

F-air ~ Carnal Desire
Elka curls up before throwing out a dynamic pelvic thrust! It may not look like much, but this is one deadly act, dealing 12% and good mostly-horizontal knockback capable of KO'ing at 140%...but only to females. Against men, animals and monstars, it instead deals 9% and slightly less knockback that'll KO at 180%. This risque act has relatively low start-up lag and rather forgiving end lag, but it requires Elka to get reeeeeeeal close to his enemy to pull off, just the way he wants it. Also, if you land this attack while being as close to the enemy as possible, right at the center of their hitbox, you'll hit them with Elka's inner power! The enemy, no matter who they are, goes through a hefty dose of impact stall accompanied by a *KREEEEEEE* sound-byte, taking 15% and high knockback that'll KO at 120%. If Elka hits a woman with this, he'll look pretty darn satisfied with himself, but if he hits a man he'll get a disgusted look on his face and suffer huge ending lag, even if his attack was shielded...in other words, expect to eat a Falcon Punch to the face for whiffing this. This is the closest thing Elka has to a killer joke move, and perhaps the only reason why he can win at all.

B-air ~ Tthrow It All Out
Elka walks-the-walk with this magnificent combo attack. Spinning around several times, Elka roundhouse kicks behind him with one foot, then does the same with the other foot on the next rotation, followed by pimp slap with his right hand and then a dismissive backhand with his left, prickling enemies with his thorns in the process! This deals 2%, 2%, 3% and 4% respectively before launching foes for decent mostly-horizontal knockback that KOs at 200%, the multiple hits being good for pressure or moving through shielding opponents. Unfortunately, the attack has a very long duration that'll screw over Elka if foes bypass him.

U-air ~ Honeymoon Dive
Wanting to show off how cool he can be with his wings, Elka braces himself before performing a shuttle loop with enough space in the middle for Kirby to fit. Man, Ryuto and Elka must really think that stealing a broken move from a top-tier Brawler will also make them top-tier. But it won't. Elka's body and horns becomes a hitbox for this move: if the former connects, it deals 6% and decent diagonal knockback that KOs at 250%, and if the horns connect they'll deal 8% and sharp upwards knockback that can KO at 200%. Regardless, both hitboxes cause freeze-frames upon connecting, and if the player presses A when that occurs something special will happen: Elka will cancel out of the rest of his flight and position himself where he struck his target! This is more useful than you'd think since the move temporarily kills Elka's momentum until it ends and lets him resume his float if he was in the middle of it, letting him hit foes from a good area above him and juggle them by continuously spamming this move. That being said, it doesn't come out super-fast, the hitboxes are awkward to hit with and if Elka misses he'll be plagued with a bit of ending lag as he regains his composure from his flight, making him an easy target. The angle the sourspot knocks foes away at makes it fairly easy to follow into other aerials upon a successful hit, but it can also be used for spacing if Elka chooses not to cancel his flight, say if he wants to chance aiming an NSpec spear as his opponents falls ahead of him.

This move can also be used as a recovery if Elka has his back towards the stage and can't make it to the ledge as a result of trying to gimp his opponent.

D-air ~ Rain of Roses
Smiling confidently, Elka stylishly brandishes a rose before tossing it down on a 150 degree angle, inviting his beloved to dance among the stars with him! The rose travels at high-speeds, cloaked in a rosy aura that leaves a trail as it goes, when then wears off after traveling 1.5 SBBs before scattering into petals after traveling another 1.5 SBBs. Foes hit by an aura-imbued rose receive 9% and decent 60 degree knockback towards Elka that can KO at 220%, while getting hit without the aura instead deals 6% and okay knockback in the opposite direction the rose flew, only KO'ing at 300%. While not fast, and maybe a bit unsafe on the landing lag, it's a beautiful way to pester grounded foes and bring them into the air with Elka, or to counter juggling opponents and invite them to Elka-topia, a fan-favorite being to follow-up using the B-air. Another hilarious use is to throw a rose at a foe trying to recover and stagespike them, bouncing them off the stage and down into the blast zone!


|Grab~~|

Striking the gorgeous pose seen in the opening image, Elka shows that the thorns wrapped around his left arm are more than just style as he sends them spiraling forth to ensnare his target! Indeed, Elka's terrible traction is of benefit in this type of grab; it comes out with little warning and covers a 2 SBB area in front of the playboy, but should it miss he'll be left hugely open to punishment, not unlike the lovely unmasked Samus's dash grab. Once Elka ensnares someone, he'll reel them towards him and treat them differently based on their gender; men are held indifferently whereas women are held romantically. Regardless foes take 4 hits of 1% every second they're held by Elka, either through the thorns ensnaring them or maybe the sheer annoyance of the one whose holding them.

Spears imbued in grabbed foes do not explode until they're released.

F-throw ~ Majestic Departure
Cowardice-err, pragmatism overcomes Elka, causing him to leap back either 1 or 3 platforms - depending on whether you tapped or smashed the control stick - without doing his lovebird any harm. But what's this? Elka just left a small rose where he was previously standing! This rose detonates within 0.4 seconds or when stepped over and deals 10% with radial knockback that KOs at 200%, hitting foes even if they didn't move an inch. The throw helps Elka space himself and slow enemies down like any normal F-throw, only through less conventional means given our poor man doesn't have a lot of physical strength in his name.

If Elka crashes into a wall while leaping back, he'll receive comical damage of 10% and be stuck in the wall for a moment before flopping out like a fallen poster, leaving him very open to attack if there are attackers nearby.


B-throw ~ Romantic Reversal
Elka grabs the foe by the hand and spins them around twice as though they were his dance partner, only to slam them into the ground for 8% as they're bounced along for good mostly-horizontal knockback that won't KO until 230%. It's a little lacking and simple, but naturally the type of move you're going to use for knocking enemies off the stage in the common situation where your back is to the edge of the stage and you want opponents on the opposite side of you. The victim also acts as a bludgeoning hitbox that deals the same damage and knockback they'll receive to foes on the outside, mainly to assure that Elka is able to have some private time with his chosen and that others do not interfere. Can't have that, now can we?

U-throw ~ Take off to Heaven!
Elka crouches down, then flies up into the air along with his love interest foe and tosses them diagonally above him for 6% and okay knockback that won't KO until 400%. Elka covers a lengthy 4 SBBs with his flight and is not just limited to flying straight up, but in any direction you chose as low as a 80 degree angle. Flying lower causes Elka to cover less distance however, half if he flies as low as possible, but this is still very good for getting foes into the air to start gimping them romantically!

D-throw ~ Dance All Night
Elka spins around with his foe, spinning so fast he actually makes a miniature tornado around his body! This results in a staggering 25% and a massive 3 seconds worth of stalling, all while allowing Elka to move him and his foe across the stage at a very slow pace. Unfortunately, all that spinning makes Elka dizzy in the end and leaves him completely open to being attacked by the victim! Unless you can move foes into a D-Smash trap or have an NSpec spear set off in time, you can bet your roses that 20%, stalling and free positioning are NOT worth leaving yourself open to a Smash attack that will potentially kill you. Don't show off with this move unless you have the means to back your balls.


|Playboystyle~~|

Overwhelming Narcissism ~ Dance All Night
If you couldn't tell already, Elka sucks big-time. Why, you may ask? Well, he's floaty, has poor traction, no conventional projectiles, poor damage output, no safe means of approaching, easily punished and hits like a sissy. Oh, and did I mention that the majority of his attacks aren't disjointed? (Which is really bad in Mugen Souls because most characters fight with weapons, by the way) Heck, Elka's so bad that if he were in Smash he'd probably have his own tier!

That's not to say winning with Elka is outright impossible however, as even Falcon and Ganon can win matches if played well or the opponent is a brain-dead idiot. Elka is all about getting close to enemies and staying close, like he would when going after his next victim-err, lover. Getting too close is dangerous, while not getting close at all bears no fruit - for Elka, he'll want to tease and prod his opponent from a slight distance using moves like his Neutral Special, F-tilt and D-air. The former plays an important role in Elka's moveset simply because it helps put foes on the defense when the delayed hitbox kicks in and gives the Narcissistic Hero a chance to land attacks that would otherwise be too dangerous or difficult to do normally, in turn working together with his need to stay close to an enemy.

Simply attacking the enemy normally won't do for Elka, however, as with his low damage output and lack of KO moves he'll easily fall a stock or two behind his more competent opponents. Rather, Elka will need to get dangerous and take the fight offstage, using his amazing aerial prowess and the delayed hitbox on his spears to gimp opponents. With the right combination of a spiking spear blast, F-air/N-air induced walls-of-pain and overall good timing, Elka can knock enemies away from the stage and down into the blast zone much earlier than he'd normally be able to KO. This always feels incredibly good to pull off, though it does require a lot of commitment from the player, showcasing Elka as someone who needs to work hard for his KOs.

It's also worth noting that Elka is very, very good at stalling, which makes a lot of sense for him character-wise given he talks big and once used it as a "weapon" to buy time for his sweetheart. And also because it's a tactic that makes sense for someone so weak. The stalling comes from many of Elka's attacks that drag out for a long time, like his Down Special, Dash Attack and D-throw, a little from his D-Smash and F-throw but also from his aerial prowess and Up Special that can be used to stall in midair for an excessive amount of time. But who plays timed-matches? And would Elka ever get into a situation where he'll take the lead and can just drag out the clock so he'll win? Sure, you can do that if you're playing Online or a simple 2-minute KO Fest, and people will probably hate you for it. But it also serves a more obvious purpose in Elka's moveset for stalling for the delayed hitboxes on his Neutral Special, if anything, assuring that you'll be at the right time and place to take advantage of their pre-determined knockback. And don't be afraid to use ya Down Special to obscure your spears and roses to lull foes into a false sense of security, if they'll take the bait.

Overall, Elka is very weak, but he does have merits that make him a different experience from the other G-Castle members, like if you just want to pick a character to screw with your opponent for the hell of it. And maybe you'll even win, with enough dedication and persistence.


|EX Skill~~|


Elka, uhhh...somehow got the Smash Ball! His opponents must have been insanely generous to let that happen.


"Elegant Requiem!"

Rushing forward, Elka launches his target up into the air, then warps to their location and starts planting red spears in their body from different directions! With that, he warps back down to earth and harpoons a giant green spear into the suspended victim's body, these spears resembling a rose that explodes gorgeously! A shower of rose petals follow, and Elka finishes by taking on a narcissistic pose. Whether he is actually capable of performing this attack canonically still remains a mystery...

"Yes! I'm strong...and beautiful!"


Entrance Animation ~ D
"Hmhm, you're all able to see my beauty, right?"
Elka walks in like a celebrity, scattering rose petals as he does. It's a bad habit of his on the G-Castle, but I guess it helps hide his fears...for now.

Up Taunt ~ D
"Hmhm, you're all able to see my beauty, right?"
Elka spreads his hands out in an embracing gesture and looks ahead confidently. Sadly, looks never stopped anyone from being beaten up in a fighting game. Why, just look at Pichu for example...

Side Taunt ~ D
"Yeugh, what an ugly mob."
Elka places one hand on his hip and puts on a mildly disgusted look. It's fun to use this when you're sitting on the sidelines in a FFA Match, but anyone who does that will get what's coming to them...

Down Taunt ~ D
"M-My tummy kind of hurts today, so..."
Elka doubles over and clutches his stomach, pretending to have a tummy ache. If you somehow beat an opponent after using this taunt, it'd probably be the biggest insult ever...considering who's doing it.

KO Cry ~ D
"I told you I suck at fighting!"

Win 1 ~ D
"Ugh, I hate physical labor!"
How the hell did this happen!? In any case, a rather annoyed Elka attempts to pat himself down continuously while appearing somewhat tired, seemingly unsatisfied with his victory.

Win 2 ~ D
"Huh, if you fall for me you'll get burned."
Elka makes a flamboyant gesture! He'll usually do this upon winning against a female character, but that's unlikely to happen.

Win 3 ~ D
"This victory was so graceful!"
Elka spins on his heel a couple of times before bowing majestically towards the screen! Your reward, if you can somehow curbstomp an enemy.

Win against Chou-Chou ~ D
"Transform into that beautiful woman! Now!"

Win against Ryuto ~ D
"Hmph. That young man will be stuck in his position until the day he dies."

Win against Soul ~ D
"No hero is as strong or handsome as myself!"

Win against Sandy ~ D
"Perhaps you would like the aid of a guardian knight? One who would attend to your every carnal desire?"

Alternate Costumes ~ D


Margis
Covered with lava and odd plants. Many demons call this world home.
Now this is a dangerous stage. Margis is a medium-sized walk-off enclosed by 2 tall crags peeking out from the horizontal blast zones, the one on the left being 2 SBBs tall while the one on the right is 4 SBBs tall. Both crags have ledges and a bit of walking space on top of them, the left crag having a small horn-shaped platform that helps players reach the top. There's also a 4 SBB-wide, circular stone platform situated off the ground at the center of the stage, a bit higher than the top platform of Battlefield. It has 70HP and will not respawn for 10 seconds once destroyed.

The stage's gimmick comes from the lava that seeps out from a small volcano in the background. This lava usually remains a safe distance from fighters, but every 10-20 seconds the volcano will erupt spontaneously and more lava will pour out, covering 2/3rds of the main enclosed stage in that hot substance for roughly 3-5 seconds before it cools down. Anyone who touches this lava will be shot up for high knockback that'll KO at 140%, similar to Brinstar lava, but this lava also has the effect of destroying any items or makeshift traps it comes across, so make sure you don't leave anything behind. Sometimes lava will even splatter onto either the top of or the side of one of the crags instead, maybe even cover them completely. Every 30-60 minutes, the lava will cover 2 parts of the stage, and every 2 minutes it'll cover 3 parts of the stage, making it very difficult to move around. The floating platform will never be covered in lava, but players can destroy it if they don't want anyone being entirely safe from the lava - or to ruin their set-up if they were doing it there to keep it safe from the lava.


Katapultar

Smash Lord
Joined
Nov 24, 2008
Messages
1,284
Location
Australia
"Oh, that's lovely! This is the first time anyone's wanted to join in on my beloved hobby!"


----/Marina Cannonvale\---(l)


Clumsy Explorer

Marina is the hero of Water World who spends most of her time exploring vast ruins blanketed beneath snow, and welcomes anyone eager to join her - like Chou-Chou's group, for example! Bright, upbeat and very responsible, Marina is a big-sisterly character who seems like a perfect leader, except that she happens to be very, very klutzy. So klutzy, in fact, that she'll get lost when looking at a detailed map and even break the laws of physics! Marina also takes up magic and enjoys experimenting with it, but unfortunately most spells end up blowing up in her face or going awry in some way, thanks to her klutziness.

Marina ultimately joins Chou-Chou's group without needing to be peoned, jumping at the chance to explore other worlds when she had finished exploring her own. She acts as a motherly figure to some of the younger female members with her approachable nature, but she tends to make a mess of simple tasks thanks to her clumsiness - in other words, you shouldn't ask her to cook or handle any of the chores!


----/Stats\---(l)

Ditz
Height: 166cm
Weight: 4
Ground Speed: 1.5
Jump: 4
Air Speed: 2
Fall Speed: 4
Traction: 5


Marina is your typical mage-type character who trades mobility for ranged attacks, though she actually admits to not being very good at running. Also, she wears glasses in battle despite never doing so in cutscenes or artwork, except in the true ending.


"Okay, um, hold on."


----/Specials\---(l)

Neutral Special Y Magic Experiment
Saying "Here goes!" half-confidently, Marina holds her staff upright in focus until you shield, dash or press B again. This doesn't seem to do anything or look flashy, but by inputting any other magic-based attack during the stance Marina will channel power through her staff to create a transparent sphere inside the golden ring at the tip, which quickly fills up with a color associated with the element of the spell in-question. The exact color is always the same as the color of the Y symbol included between the input name and attack name in a move header, with those colored white not contributing anything. To channel an aerial spell, tap the jump button (X or Y) instead of pressing A. It doesn't take long for Marina to fully channel one spell (within 0.05-0.25 seconds depending on whether it was a Standard, Aerial or Special/Smash), and once she's done she can then throw out another input, which in turn fills up the sphere with another color that swirls around with the existing one, right up until the orb is swirling around with several different colors as a result of throwing in all sorts of different spells. You can even throw in the same spell again, which causes its color to take up an appropriate percentage of the orb and glow brighter for visual indication.

Mixing at least 2 attacks together creates a brand new spell that Marina can throw out anytime by holding B. Here, Marina will hold her staff out firmly as the orb on the end shines in its many different colors, a moderately laggy animation - regardless of the spell's contents - that can be charged if the first spell applied was a smash attack. The makeup of this new spell is determined by which spells you threw into the formula as well as which order, the first spell generally being the most important, and Marina is perfectly capable of channeling the same spell multiple times in which case its hitbox will manifest multiple times in quick succession unless otherwise stated. You can hold the control stick up or down when casting a spell to angle it slightly.

Marina is limited to the number of spells she can channel into her staff, which has an invisible threshold of “12”. Each type of spell contributes a numerical portion to the experiment - Standards: 1, Specials/Aerials: 2 and Smashes: 3 - that darkens the orb as it reaches the limit, and if Marina goes over that limit the orb will comically explode in her face! This unfortunately leaves Marina open for a while and wipes her slate clean, but you can do the latter in a more productive manner by using the Down Taunt.


Side Special Y Magic Absorption
Marina holds her staff out confidently in a quick stance that can be exited via jumping, dashing or shielding, the tip of her staff generating a glowing, distorting suction effect. Energy projectiles that get near Marina’s staff are absorbed into it, where they can then be fired out and angled slightly with some basic projectile lag. Marina can absorb her own projectiles using this move, and is able to specifically fire off enemy projectiles by pressing A or her own projectiles by pressing B, able to choose whether to fire off the most recent projectile or the oldest by holding forward or backwards respectively. You can hold the input to charge the projectile like a smash attack in order to make it 1.1-1.4x stronger, and if you mash the input right after firing off a projectile Marina will fire more copies of that projectile if she had them stored up, albeit with a slight delay between each for stronger projectiles. This can be used to flush out many copies of a single projectile.

When Marina absorbs a projectile, her staff gains a faint rainbow outline that thickens slightly with more projectiles, the effect more significant with stronger projectiles. Marina can only have 120% damage’s worth of projectiles stored in her staff, which will start blinking red for danger should she absorb 105% worth - go over the limit, and you’ll get an explosion not unlike that from the Neutral Special! It’s unlikely you’ll go over this limit with enemy projectiles, but it’s more significant with Marina’s experimental spells as the combined damage output of the hitbox and those to come will contribute towards the threshold. Marina can wipe off 60% worth of damage on her stored projectiles by using the Side Taunt, which is a good deal quicker than firing off projectiles just for the sake of doing so.

MAGIC EXPERIMENT:

Yes, Marina can add stored enemy projectiles to her spell! A forward input will add the most recent projectile while a backwards input adds the oldest, the projectile contributing a numerical value based off the input used to create it. Projectiles made in any other ways will contribute 1-3 based off their power.


Up Special Y "Lost Child"
Marina holds her staff upright close to her and closes her eyes before casting teleportation magic that warps her 3 SBBs upwards and anywhere between 0.5-2 platforms horizontally…the latter being decided at complete random! This makes for a risky recovery since it can move Marina away from the stage, but it has almost no lag and doesn’t put her into helpless afterwards. You can charge this move for up to 1.3 seconds to increase the chances of being teleported in a chosen horizontal direction, that being 100% with full charge, but Marina will continue to fall as she does so in midair. You can choose to teleport downwards instead of upwards by flicking the control stick down while charging, good for teleporting sideways along the ground or reaching ground, and Marina will thankfully not go offstage if there was ground beneath her within warping range.

If there were opponents or objects close to Marina when she teleported, they’ll be teleported with her as well! This scrambles everyone most of the time and delivers frame-neutral flinching to opponents, but normally puts them at mid-range in midair or at a distance on the ground where it’s convenient for Marina. Smashing the input will only teleport nearby foes and objects, if any exist.

MAGIC EXPERIMENT:

Channeling this spell first will cause the hitbox that comes after to appear 0.5-4 SBBs ahead of Marina at random - or 1.8 SBBs above/beneath the space ahead of her if you angled the attack. If channeled after a spell with a hitbox, that spell will be split off from the rest to come and become an extra hitbox that appears randomly. This allows Marina to create multiple hitboxes at once upon using the Neutral Special, but these randomly-manifesting hitboxes can be unreliable at times and prevent Marina from doing anything grand with the spell given the cost to the threshold. Still, Marina can cover a good deal of area ahead of her by splitting off as many spells as possible, that being 4 Standard spells, provided she doesn’t mind the lack of longevity.


Down Special Y Magic Stone
Marina takes out a jagged, dark-purple magic stone that acts as a simple throwing item dealing 2% on contact. If this move is used during a magic experiment, Marina will channel the contents of her staff into the magic stone at twice the speed it takes to fill her staff, starting from the earliest spell applied. This allows Marina to empty her staff of unwanted spells, and causes the magic stone to take on the color of the earliest spell transferred to it. The stone now takes on the properties of the spell's hitbox when it hits a surface when thrown or upon traveling 2 platforms, before cycling to the next spell in-line until all the spells have been used up. If this move is used without any spells in the stone, it can be charged like a smash to have Marina transfer magic into the stone to increase its power to deal 14% once. If used again with a spell in the stone, Marina will hold the stone forward and use the current spell in line.


----/Standards\---(l)

Jab Y Starf Out
Marina clutches her staff near the front and juts it out, blinking star magic at the tip delivering 5% with flinching. You can then hold A to have Marina move her staff out further and wave it up and down for an additional 2% per hit, good for walling off opponents, and/or tap A again for a magic-imbued staff poke that deals 7% and good knockback that KOs at 170%. The stars spawned by this attack will reflect any of Marina’s projectiles that make contact with them.

MAGIC EXPERIMENT:

A small star is created directly in front of Marina, which deals 5%, flinching and reflects all projectiles, not just Marina’s. It’s not much, but the star lingers for a moment and can be used to reflect oncoming projectiles and set-up for the next part of the spell, for what it’s worth. You could also make a spell consisting of several blinking stars in a row as a small trap to disrupt nearby foes, if you wanted.


Dash Attack Y Fanservice
By the pervy powers that be, Marina trips face-first into the stage! She then slides a SBB across the ground before rolling back onto her feet in record time, dealing 10% and reliable knockback that KOs at 165% if she falls on top of someone. If she slides into someone, however, she'll knock them down against her massive boobs and drag them along for 7 hits of 1% before they're knocked back weakly on a diagonal angle that leaves them in prone onstage, KO'ing at 250%. This is Marina's only attack that can't be used in a magic experiment, but it’s great for getting some space or knocking enemies ahead of you in order to follow-up with a spell, being a common move to use out of the NSpec or SSpec when enemies get too close.

Though the moment only lasts a split second, you can actually see certain victims react to being crushed against Marina's bazoongas:
Chou-Chou becomes pissed and tries to push Marina's boobs off of her, but to no avail!

Altis turns away and rolls her eyes in annoyance.
Ryuto covers his nose in shock and succumb to a nosebleed when he goes flying.
Soul turns his head away and imagine Marina in a bikini.
Sandy puts on an awkward smile.
Tsukika becomes overly flustered and becomes unable to fight back with her monstrous strength.
Shirogane turns his head away stubbornly, refusing to be caught dead in such a lewd positon.
Elka actually looks proud and makes an arrogant gesture, given he just scored a hot babe.
Alys looks jealous. Somebody else's breasts stand out more than hers!
Marina looks surprised for some reason.
Welsh plays with Marina's boobs!
Sharuru stares with dismay and envy.
Dees facepalms, possibly due to Marina tripping in the first place.
Belleria doesn't seem to care.


F-tilt Y Fireball
Marina shoots a fireball from her staff that can be angled and travels 2 platforms before fizzling out, starting out fast but slowing down a quarter of the way until it moves at a crawl near the end of its lifespan. The fireballs deals 12-6% and good-low knockback that KOs between 160-320% depending on how fast it was moving, making it a decent zoning tool that’s powerful up-close but good at disrupting from farther away.

MAGIC EXPERIMENT:

Once the fireball hits someone or expires, the next spell in-line will manifest from it immediately or after a one-second delay if the fireball struck an opponent, except if clashed or shielded against in which case the entire spell is rendered null. This applies to all projectiles involved in a magic experiment.

The fireball will actually travel backwards if you made a back tilt input when initially applying the spell, making it possible to create a pseudo-trap that moves back and forth. On that note, Marina can only have 3 spell-induced projectiles onscreen at the same time, the oldest one disappearing if she makes any more.


U-tilt Y Rising Storm
Marina raises her staff to have a thin-yet-tall lightning bolt shoot up from the ground in front of her to the height of 2 Ganons, which can be angled slightly. The bolt deals 9% and good knockback on a 30 degree angle that KOs at 180% if it hits head-on or 7% with okay mostly-upwards knockback if it hits at the side, being a relatively fast, long-ranged move that can juggle opponents to some degree. Lightning is another projectile Marina can add to experiment-induced projectile chain, and can be used to manipulate its position beyond moving horizontally.

D-tilt Y Coldfall
A wave along the floor conjures a capsule-sized icicle that pokes victims for 8% and decent upwards knockback that KOs at 200%, the icicle a frail trap that damages foes who land on it. Icicles can be absorbed via the Side Special and sent out as semi-spammable projectiles that cover 2 platforms before disappearing, and can be teleported into the air via the Up Special to reveal that they are actually double-sided hitboxes that also damage foes they hit on their way down. Icicles are destroyed with one attack or upon hitting someone, and stay out for 5 seconds.

MAGIC EXPERIMENT:

Icicles count as falling projectiles that “expire” upon hitting the ground, which combined with the fireball and lightning allow Marina to create a projectile chain capable of moving in one of 4 directions.


----/Smashes\---(l)

F-Smash Y Magic Blast
Marina crosses her staff over her chest and gathers magical energy in front of her, only to swing her staff out forcefully and create a large explosion in front of her! This powerful attack delivers 14-20% and high radial knockback that KOs at 120-90%, but if you hit at the epicenter it’ll instead deal 22-30% and massive knockback capable of KO’ing at 68-36%! That's only natural, given JRPG mages are known for the sheer firepower behind their attacks. The explosion covers a lot of area, but the lag is unforgiving and the hitbox only exists for a split-second, making it important to time your attack.

This attack can be angled upwards to double the blast’s height and halve its width or vice-versa for the opposite effect, which will actually cause Marina to get hit by part of the explosion! She receives 8% and is launched back on a 60 degree angle for knockback that scales to KO past 200%, not only protecting her from punishment but also good for retreating given her preference for ranged combat.

MAGIC EXPERIMENT:

The blast releases all projectiles that come right after it at the same time, sending them out in a slight spread if there were multiple projectiles coming out on the same angle. Applying the blast after a projectile in the formula will make it glow a volatile red and explode on contact for half the usual efficiency of an uncharged blast, the sweetspot normally hitting by default for 11% that KOs at 136%. You can create a custom bullet hell by applying a bunch of projectiles after the blast, even apply another blast later in the formula and then another set of projectiles so the initial projectiles all explode individually and each send out those next projectiles, but you can only do so much when applying one smash attack let alone two leaves little room for other spells.


U-Smash Y Colossify
Marina holds her staff upright next to her and thrusts it upwards forcefully, standing on her tippy-toes for max reach! A quick attack with good reach, anyone hit by the rising staff - above or right in front of Marina - is punted up for 11-15% and respectable base knockback that KOs at 165-135%. The staff releases a greenish pulse at the tip once fully raised, and anyone struck by it becomes giant! This seem bad for you, but it's actually a golden opportunity for juggling and easy projectile hits as foes are put in a difficult position where they will likely suffer extended landing lag if they try to fight back. Better yet, they become easy targets for your D-tilt ice traps! Victims remain giant for 2-4 seconds, and unfortunately you can't reset their timer by hitting them again - instead, doing so will just make them bigger!

MAGIC EXPERIMENT:

This applies increases the size and power of the next hitbox in-line, making it 1.4x bigger and 1.25x stronger. This can stack on any hitbox with multiple U-Smashes, but Marina suffers added end lag to balance out the increased size of the hitbox. The only hitbox that doesn't grow in size is the Jab star's, which instead applies the growth effect to the target as their size slowly increases over 2 seconds before suddenly returning to normal after another 2 seconds. With 3 U-Smashes applied, the target becomes giant immediately.


D-Smash Y Ground Circle Zero
Marina turns towards the screen and points her staff down on an angle, creating a magic circle that bursts into existence around her. This is a fairly powerful attack that comes out rather quickly for 17-23% and solid diagonal backwards knockback that'll KO between 120-90%. Overall, it's a good, solid keep-away move with better range and a much shorter duration than the tornado, not to mention the nature of the knockback makes it very possible to knock an enemy towards hitboxes you may have set-up whilst approaching.

This move can be inputted again to have Marina keep the magic circle out for 3-7 seconds. Magic circles do nothing on their own, but if Marina performs a spell atop of it that spell will be "stored" in the circle, signified by a glowing orb at the center in the same color the spell represented. If a foe steps on the circle, it will glow for one second before releasing the hitbox of that spell, a projectile moving towards a foe's direction. The magic circle then enters a one-second cooldown period, but it can be destroyed by an opponent upon taking 15-20%. Marina can trigger her own magic circles by stepping them on again in which case projectiles get sent in the direction she was moving, or the direction she would be facing if she moved over them by rolling, making for a good defensive maneuver. Despite being grounded, Marina can implant an aerial spell into a circle simply by landing on it during the attack, the specifics of which will be explained during each attack if possible. Marina can create circles in midair anyway using her Down Special or through a custom NSpec spell anyway, letting you have some fun through lining them up vertically so you fall through and set off a bunch of projectile traps at once. Just note that you can only have 3 magic circles out at once and only one spell per circle, extra attempts causing the current spell to be overwritten. Marina can implant a custom NSpec spell into a magic circle, but doing so counts as having that spell out (remember the 3-limit) and only one such hitbox can exist onstage from the same circle at a time. Magic circles with a custom spell implanted in them will show by having the orb alternate in color based on the color of the spells.

Applying a magic circle first in a magic experiment is comparable to implanting the rest of that custom spell into a circle, but serves as a way of saving time, especially if it was placed in midair. Applying a magic circle afterwards keeps it blank and able to be filled up, one possibility being to F-Smash > projectile x 3 > D-Smash to create all 3 magic circles at once. In either case, the circle still gets its hitbox when used in a custom spell, and it should go without saying that you can implant a D-Smash spell into a circle, which will cause the circle to automatically reset its timer whenever stepped on.


----/Aerials\---(l)

N-air Y Makeshift Time
Marina swings her staff around her twice, leaving a trail of neon green magic around her as she does. Up-close, this deals 11% and good upwards knockback that KOs at 165%, but near the end of the staff it instead deals 9% and decent knockback on a 60 degree angle that KOs at 220%. One of Marina's faster attacks and one that covers both sides of her, it serves as a natural response against foes who end up close to her as a result of her teleportation magic or as simple defense in midair.

If you hold A at the end of the attack or when you lag, Marina will create a light greenish, transparent field around her with a radius spanning the area her staff covered on both sides, which lasts for 7 seconds. This field's effect is simple - yet brings smiles to everyone's faces - as it temporarily doubles the speed of all non-players who occupy it, -slightly- increasing the power of projectiles all the while (though barely noticeable at 0.05x). If you held backwards on the control stick when activating this effect however, the field will instead take a darker tone and halve the speed of all non-player occupants while slightly weakening projectiles. Marina can absorb this field using her Side Special and save it for later if there was nothing else to absorb inside of it, naturally being able to apply it to a magic experiment to crazy extent with enough creativity. These areas are capable of stacking their effects if they overlap with one another, but Marina can only create 2 using this move at once.

Applying this spell before projectiles in a magic experiment will of course increase or decrease their base speed accordingly, letting you hit an opponent on demand or take further advantage of their static hitboxes. You can speed up or slow down a projectile(s) to insane extents by stacking this move over and over, or cancel the effects of one spell for projectiles later on by applying the opposite speed. If you really wanted to, you could speed up or slow down 1 or 2 projectile up to 5 times (given the magic limits imposed by the Neutral Special).


F-air Y Gathering Burst
Marina holds her staff out and releases 4 small, pinkish explosions from the ring's center in quick succession, somewhat similar to Samus's F-air, each blast dealing 4.5% before the final one weakly knocks enemies on a low angle, inwards near the edge of the blast or outwards for decent knockback near the center. The knockback on both hitboxes starts off weak, but actually scales quite well, the sourspot KO'ing opponents at 200% while the sweetspot can KO as early as 145%. Having less air speed than Samus (who has a 7) means Marina can't tear through enemies as easily, but it does make connecting all the hits easier, making this good as a defensive aerial or a way to pressure opponents in the midst of all your projectiles. The sweetspot also inflicts unusually good damage against shielding opponents, but nothing incredibly major.

If you're holding A at the end of the attack or when you land, Marina will, with a bit of lag, create a small pink vortex at the tip of her staff that faces outwards on an angle. This serves as a simple creation with 11HP that can be destroyed, but it doesn't really do anything harmful to them: rather, it draws in Marina's projectiles and absorbs them, keeping their speed consistent (in turn preventing fireballs from weakening due to slowing down) while ignoring their distance cap as they're drawn in, which is good for some of Marina's projectiles. This is different from absorbing projectiles with the Side Special in that everything absorbed by the vortex contributes to a single powerful projectile, gradually causing it to darken as it takes on more and more projectiles. Once the vortex has absorbed 40% worth of projectiles, it'll shine for half a second before firing out a thin yet powerful laser across the screen that deals 16% and high knockback that KOs at 120% before the vortex fizzles out. Marina can have no more than 2 vortexes out at the same time, and if one fails to absorb any of her projectiles for 5 seconds it'll fizzle out along with its contents. If Marina fires a projectile while a vortex exists onstage, it'll travel on its usual path for a SBB before having its trajectory altered accordingly, and if a vortex is destroyed while projectiles are being drawn to it they'll return to their normal flight path and have their distance cap applied again.

Outside of being a very powerful KO tool, Marina can have a lot of fun with both vortexes and lasers alike when you take the Side Special into account: she can absorb the laser, absorb the vortex (which always counts as 20% worth of damage), create a vortex to draw in the laser another is going to fire and then absorb it, or even create a vortex to draw in lingering projectiles and absorb them all at once! The nature of this move as a melee attack also means you can use it to create a vortex near opponents so they're hit by your projectiles, creating a bullet hell situation that goes hand-in-hand with the pressure applied by the attack beforehand. Needless to say, there are a lot of possibilities here.

Using this spell in a magic experiment causes every projectile spell applied afterwards to fill up the vortex automatically when it's thrown out, effectively giving you the laser projectile flat-out instead of having to build it up manually if you threw in enough projectiles (usually best to to throw in 4 F-tilt fireballs). If the vortex spell is applied at the end of a projectile chain, it'll appear at the end, and if applied before or after a non-projectile it will appear normally. You can also throw in lasers you've absorbed into a magic experiment for even more fun, though they're not that good put onto the start of a projectile chain given they do not have distance caps, but you're free to place them on at the end without any problem.

Using this spell over a magic circle will cause the circle to temporarily become a vortex for one second upon being stepped on, making for some tricky projectile manipulation. Projectiles can be absorbed this way, resetting the circle's timer each time it gets one, and if it somehow reaches max charge the laser will be triggered when the circle is stepped on.


B-air Y Meteor Crash
Marina twists the upper-half of her body and thrusts her staff behind her, its tip crackling with a strange, magical energy. This comes out fast and reaches out very far, the tip functioning as a sweetspot that deals 16% and holds enemies in place for impact stall before they're shot away for electric damage and relatively high knockback on a 70 degree angle that'll KO at 125%. Sadly, the huge range also means the sweetspot requires very demanding spacing to pull off, and the damage, base knockback and scaling are all inferior to other sweetspotting moves, which is made worse by the fact that it's very easy to DI because of the impact stall. This is more than made up for by the sweetspot's secondary effect, however: when the attack connects, it builds up energy that forms a miniature spacey portal that in turn sends out a Kirby-sized meteor after one second, diagonally downwards by default or diagonally upwards if the control stick was angled in that direction. This meteor travels across the screen at a moderately fast pace and explodes upon colliding with a target or the ground, dealing 12% and good knockback that KOs at 155% plus 4% with flinching in splash damage to others right next to the blast.

Melee-wise, this is one of Marina's most reliable moves for taking advantage of a foe's reaction to her bullet hell, namely because it hits behind her, but also because it packs punch and gives foes something else to worry about with the token projectile. This is also one of Marina's best moves for taking advantage of static hurtboxes -because- of the projectile it creates by connecting with it, even being able to use it on her F-air vortex if she doesn't need it anymore. Of course, if you just want the meteor projectile, you simply need to include the move in a magic experiment, in which case it serves as yet another projectile in Marina's arsenal, giving her something that comes out diagonally for more variety.

Using this spell over a magic circle will create the melee hitbox that can harm foes upon being stepped on.


U-air Y Space Vibe
Marina pokes her staff above her with both hands, generating a miniature galaxy at the tip which deals 10% and decent radial knockback that KOs at 200%. This only hits above Marina and isn't super fast, but it's got good range, no landing lag and a decent duration that make juggling foes fairly easy, making it possible to wall them off if they're trying to escape to one side of you. To top this all off, the miniature galaxy has a weird, unexpected effect on projectiles: it rewinds them, making them replay everything they did before in reverse unless of course something like a vortex interrupts them. It only gets crazier with projectile chains, as once a single projectile is fully reset whatever came before it will play, even non-projectiles like F-Smash blasts! You can then hit that same projectile again to have it play through normally, potentially creating an endless loop so long as you attend to it, which will of course be awkward given the angle this move hits on unless it's in midair. To top this all off, holding A at the end of the attack will have Marina set the galaxy as a trap that rewinds the first projectile that comes into contact with it within 1 second.

Implementing this move first thing in a magic experiment has Marina create the galaxy hitbox ahead of her, which she can keep out as a "trap" by holding B. Implementing it later on in a formula will rewind all the hitboxes you implemented beforehand, effectively letting you cheat the whole magic limit and get double out of your spell. This is an obvious spell to put at the end of a formula, but if you place it between two hitboxes in a chain, like a projectile chain, the one that comes before will be rewinded while the one that comes after will be thrown out as though it had been released by the previous hitbox, allowing you to keep both out at the same time. Rewinding is also good for simple uses, like sending out a fireball or two and rewinding them with such timing that they hit the foe from behind and bring them towards Marina for some punishment.


D-air Y Curve Balls
Marina rotates her staff 90 degrees and thrusts it beneath her forcefully, the tip glowing a bright green as it does. The tip of the staff is a sweetspot dealing 11% and average spiking knockback on a slight angle (KOs at 150%), while the rest of the staff deals 8% and okay mostly-upwards knockback (KO'ing at around 225%). This isn't especially strong compared to other spiking moves, but it does come with a secondary effect: by holding A when Marina thrusts her staff, the tip will glow brighter as Marina focuses and channels magic through the staff, briefly defying gravity. Afterwards, Marina fires off a green Pokeball-sized energy ball that deals 12% that KOs at 160% on contact. Upon being fired, the ball immediately splits into 2 smaller Pokeball-sized energy balls that fly down in a V-formation away from each other, but upon traveling 1.2 Ganons they curve back towards each other and reunite after going another 1.2 Ganons, where they fuse back into their original hitbox for a split-second before disappearing. These smaller balls deal 5%, but little shield stun. By smashing the input, you can make the balls go twice as far. If the energy balls land while moving away from each other, they will bounce up off the ground and immediately attempt to reunite with each other - a chance to absorb them via the SSpec. The projectile portion has some noticeable lag on both ends and is telegraphed given the glow from the staff, but with the right positioning this can be used from high up and potentially deter grounded approaches to give Marina some space. If Marina hits with the sweetspot of her staff and fires off the projectiles, the excess lag is cut and the balls will converge at the point where the victim finished receiving their knockback. If the victim was spiked off the ground, the projectiles will actually be fired upwards, and can make the victim slightly more predictable.

Applying this spell to the NSpec essentially gives you the D-air in horizontal form, hitbox and all except the knockback from the sweetspot is diagonal. Used from the ground, one of the balls travels in a straight line while the other goes in an arch arc, while used in midair they both curve. If this is applied before a single projectile, you get the D-air hitbox and then that projectile is split to curve into 2 smaller projectiles that are only 0.65x the usual strength and size, but if they hit upon converging they deal 1.3x as much damage.


----/Grab\---(l)

Not a rough or violent person, Marina reaches out with her left hand for sub-par grab range and holds the opponent by the shoulder, as though trying to get their attention. Her Pummel is a simple smack over the head with her staff that deals a slow 3%.

Special Pummel Y High Heal
Being a mage and a motherly person, it's only natural for Marina to tend to her allies when they're injured, especially the smaller ones. This heals 4% per tap.

F-throw Y Test Out
Marina brings her staff back before jutting her foe in the gut for 6% and low knockback on an 85 degree angle that won't even KO at 999%, though it at least keeps foes close if you want to assault them more with your ground game. You can have a bit more fun with this throw by holding the control stick forward at the end, which causes Marina to release a stored projectile ahead of her as though she were using her Side Special, only here the projectile is guaranteed to hit the foe providing it's not ludicrously slow or their damage percentage isn't super high. This gives the move a fair bit more option and the potential to become quite threatening depending on what projectile comes out, the most blatant option being the F-air laser which'll cause this throw to deal 22% and high knockback that'll KO at 120%. Your options only increase with chain projectiles that send out more projectiles when they hit an opponent, and you could even just send out a vortex ahead of you to act as a projectile magnet for those still lingering onscreen.

B-throw Y Distort Release
Marina holds the foe in place with a distortion effect similar to the Side Special before turning around and swinging her staff backwards, tossing them behind her for 10% and moderate base knockback that KOs quite well, at around 130%. The knockback is horizontal by default, but you have a bit of time to angle the toss by up to 30 degrees, up slightly increasing the base knockback while down decreases it but puts foes in prone afterwards. By holding the control stick at the end of the throw, like with the F-throw, Marina will aim her staff at the opponent, but instead of firing out a projectile she's stored she'll create a distortion effect behind them at the point where they stop flying. Whenever Marina would fire out a projectile with her Side Special, it'll be fired out from where the distortion is instead, which is quite beneficial since that projectile will travel towards Marina and give her the chance to absorb it again so it can be fired in an endless loop. The distortion disappears if hit by one of Marina's melee attacks or not used for 4 seconds.

U-throw Y Upper-Breeze
Raising her staff vigorously, Marina uses a wind spell to blow her opponent up into the air for 11% and high base knockback but low scaling, only KO'ing at 155%. This does a nice job of getting enemies out of your face and in position for an Up Special teleport (or to have a spell appear from that point if such an effect is applied to it) while still being quick, making this hard to DI against. By holding the control stick up at the end of the throw, Marina will take some time to amplify her wind and create a giant, platform-wide funnel of wind that extends to the top of the screen, creating an intense "low-gravity" setting identical to the wind from SSE The Swamp level - this is very difficult to fall against, and if you lose your momentum for a moment you'll be blown upwards, though thankfully it'll never result in a star KO on its own. The force of the wind also redirects projectiles upwards, in turn making life pretty hard for foes stuck in the wind. If anything, foes can move out of the funnel's path as Marina goes through the lag of creating it, and it only lasts for 4 seconds before disappearing, the old one disappearing if a new one is somehow made by using this throw on another foe before then. Projectiles will still be attracted to a vortex if it still exists onstage, and if Marina places one in a lower area of the funnel those projectiles will be stuck in midair until the wind expires, giving you something of another way to delay those projectiles and use them as pseudo-traps.

D-throw Y Mis-blast
Marina points her staff ahead in an attempt to cast a powerful spell, but she fails, instead being met with an explosion! This deals 10% and good diagonal knockback to foes that KOs at 200% and pushes Marina back slightly, but if she had a magic formula saved or some projectiles stored (at least 40% worth) it'll instead deal as much as 14% and high knockback that KOs at 155%. If you have both however, the move will instead deal as much as 18% and very high knockback that KOs at 110%, making it one of Marina's strongest. The only downside is that this completely wipes away Marina's slate for her Neutral and Side Specials, forcing her to start all over again. That being said, this can be very practical for starting fresh instead of taunting twice, especially when foes are too close for comfort - with all the spacing Marina gets from the knockback, she'll have more than enough time to set-up an entirely new formula and/or intercept stray projectiles to absorb anew.


----/Playstyle\---(l)

Overwhelming Experimentation Y Science of Magic
Most of the fun behind Marina comes from being able to mess around with the many different effects on her magic attacks and discover new combinations, much like how the Clumsy Explorer loves exploring ruins. That being said, it's perfectly possible to use Marina without so much as even touching the Neutral Special, but in doing so she's left with projectiles that are either unimpressive on their own or are awkward to pull off, while the majority of her melee game suffers from being on the slow side. To use Marina to her full potential, one should understand the potency of magic experiments and what each move has to offer in one, along with how the order they're implemented changes the result of the spell. This arguably makes Marina one of the most difficult Mugen Souls characters to master, and maybe a bit difficult to pick up.

It goes without saying that most players would be overwhelmed by the sheer complexity behind a magic experiment, with the choices being near infinite, but not exactly so. A good place to start is with Marina's Standards, as the tilts each fire a projectile in the direction you point the control stick in and thus it's pretty easy to remember what they do, with most the other inputs doing weird things and being very demanding on the memory. Creating a spell out of multiple tilt projectiles is not only the most basic command for the Neutral Special, it's also central to Marina's playstyle, as by themselves these projectiles don't travel out that far, whereas here you can make them go off the screen or even move back and forth as a pseudo trap for stage control. An intermediate Marina player can easily get by only with this level of experimentation.

A rookie mistake when using Marina is to spend the first few seconds of the match creating a fully elaborate spell and then trying to focus solely on landing that one spell, thinking it to be a winning combination. This really makes Marina quite predictable given none of her other Specials can be used to attack, and even if foes couldn't keep track of all the colors on Marina's staff and what spell they represent they'll quickly get used to the attack once they've seen its true nature. It can be especially painful for Marina if the player refuses to let go of their hard-earned spell and now want to try again, which is especially understandable given it takes a good 2 seconds to fill in all those inputs, and that's assuming you're a superhuman who is able to make all the precise commands without stopping to think about the consequences of each input and what would work best in the current situation.

Perhaps what I'm trying to say is that it's often best to play conservatively with Marina. It'd be immensely difficult, if not outright impossible, for a player to take advantage of any one specific situation with a single elaborate spell inputted on the fly, let alone have the time or perfect understanding to do such. You don't have to conduct a magic experiment first thing in a match either - you can fill in the formula bit-by-bit as the match goes on, giving your opponent some sense of expectation, only to fill out the rest when you've got a clear vision for what you want, and the time. For example, you could build up a spell involving several thunderbolts to become dangerous from below, only to throw in an ice spike at the last minute to make your spell less predictable among other things.


----/EX Skill\---(l)


Raising her staff, Marina jumps up and rides on her staff, tracing a massive, squiggly circle in the sky that forms a large glowing circle.


"Huh? Something's wrong...again!?"

The circle flashes, and from it emerges...some weird blow-up sex doll cat that wobbles. No really, I have no idea what it's supposed to be. Anyway, after hanging there for a bit, the cat thing plummets straight down and blows up, causing a large explosion engulfs opponents ahead of her as Marina looks back in confusion. Will she ever get the spell right, I wonder?

"Well, it worked out in the end, right?"


Entrance Animation Y
"Huh? How did I get here?"
Marina holds a map with a puzzled look on her face, then tosses it behind her and draws her weapon.

Up Taunt Y
"Yes, leave it to me!"
Marina raises a fist into the air cheerfully!

Side Taunt Y
"Sorry, but you're the new guinea pig for my magic."
Marina holds her staff ahead of her, which spits out elements based on what she currently has stored on her staff. The last element explodes slightly, which spooks Marina a bit.

Down Taunt Y
"Hey, geez. You sure work people hard."
Marina faces the screen on an angle with a mild, uncharacteristically annoyed look on her face, holding her hands on her hip. Is she breaking the fourth wall? No, she's actually talking about Chou-Chou.

Death Cry Y
"Ooow...that's it for me."

Win 1 Y
"Yeah, I won!"
Marina raises a fist into the air cheerfully! She then brings it down in a fist pump motion, and puts on a cheerful face. I think she's more excited to win than anyone else.

Win 2 Y
"These weren't so bad."
Marina holds her staff upright and looks at the tip, which cycles through a spell combination used to win.

Win 3 Y
"I'm a hero! As it were."
Marina holds her hand over the back of her head and smiles bashfully. She can actually get embarrassed pretty easily.

Lose Against Alys Y
"Pleh, just you watch. Soon, I'll..."

Alternate Costumes Y


Last edited:

Katapultar

Smash Lord
Joined
Nov 24, 2008
Messages
1,284
Location
Australia
"Wowzers! You're all real strong!"


{=Doppelganger Welsh=}


Newbie Hero

Who could this little boy be? It's Welsh , the hero of Tree World! Though she may not look it, Doppelganger Welsh is an aspiring hero who spends every day training with her demon lord sister Sharuru in hopes that one day she may become a true hero, but she doesn't exactly know how to train properly. It was only when Chou-Chou's group arrived that Doppelganger Welsh received the tutoring of her dreams from the likes of Soul, Tsukika and Marina, causing her to undergo radical improvement and become a force to be reckoned with despite her young age, largely because of her own talent.

Doppelganger Welsh is a cute, optimistic bundle of energy who acts her age and likes to give others cute-sounding nicknames (Chouey for Chou-Chou, for example). She's simple-minded, but not stupid - on the contrary, she's dexterous and intelligent enough to pick up skills quickly enough to put poor Ryuto out of any job, whether it's helping with airship maintenance or cleaning the hotsprings. Doppelganger Welsh is also the fastest party member, which might be a superpower or simply a result of playing around in the jungle a lot, but it's also worth noting that her animal ears are actually real and that she might be an animal hybrid creature.


{=Stats=}

Hyper
Height: 124cm
Weight: 2
Ground Speed: 10
Jumps: 5
Air Speed: 10
Fall Speed: 7
Traction: 5
Wall Jump: 7
Crawl: 10

Though she may be young, Doppelganger Welsh is nimble and fully of energy! She also has an absolutely amazing crawl that makes her get low to the ground and skitter around at impressive speeds, which combined with her small size and incredible speed make her rather difficult to hit. Who says playing in the jungle is a waste of time?


"I'll do my best!"


{=Specials=}

Neutral Special -- Tree World
Doppelganger Welsh takes out a small brown seed that can be thrown for 1% or planted on a surface, instantly breaking if attacked by opponents. Nothing happens when the seed is first planted, but let it flourish for 1.3 seconds and it'll become a thin tree that shoots up to stand 4 SBBs tall, carrying players with it while dealing 10% and good set upwards knockback to opponents. The tree is a non-solid with 28HP at the base and 22HP elsewhere, and houses 2 branches that extend to either side to form a platform-wide platform at the top for players to stand on, a small cluster of leaves allowing small items and characters with good crouches to hide from view. What's more, you can plant a seed on the side of a tree to make a branch grow out, which has 15HP and functions exactly like a Battlefield platform. Doppelganger Welsh can have up to 2 trees out at a time and can make one branch grow out from each side of a tree.


This move gets some other uses if you press B while standing over certain parts of your tree. If you press B at the base of a tree, Doppelganger Welsh will crouch down and poke through to discover a small opening that reveals that the tree is actually hollow (no wonder it's frail). Especially small characters like Doppelganger Welsh can enter this opening like a Subspace door (tap up on the control stick) and climb their way up to the top of the tree through another hidden opening, though it's not immediately apparent that they've reached the top given the leaves obscuring them. This allows small characters to scale the tree much faster than other characters, the speed in which they do being determined by a combination of how fast they move through the air, whether they can wall jump but most importantly how small they are. Doppelganger Welsh is able to climb up to the top her tree almost instantly, much quicker than if she just used her jumps.

If Doppelganger Welsh uses this move over a bush (be it a branch or the top of a tree), she'll discover a hidden fruit that was growing inside of it, the likes of which suddenly plops out and is left to hang from an unusually long stem. This fruit acts as a simple throwing item that can be claimed either through a midair tech (air dodge or use an aerial) or by hitting the branch/top of the tree with any attack to make the fruit fall. Alternatively, you can hit any part of the tree with an attack that deals medium knockback or more to make all the fruit fall off. The actual fruit that comes out ranges from a mango, apple, watermelon, chestnut or even a coconut depending on how long Doppelganger Welsh spent searching (up to 0.8 seconds), dealing 2-15% plus weak-high upwards knockback that'll KO beween 500-150% when smash-thrown and 0.6x that much when it hits someone as soon as it starts falling. The first 3 fruits splatter on contact with anything and can be eaten with a tap of A to heal 0.5-2%, whereas the stronger fruits plop off whatever they hit and can be used continuously. Fruit cannot be used to damage a tree or branch (much like how items can't damage breakable terrain in Brawl), and you can only have one fruit growing out of any part of a tree, and one for each side of a tree.

Fruits hves a rather unique function as throwing items in that it becomes deadlier when dropped from greater heights, much like a coconut in real life. Fruits become 0.2x more powerful for every SBB they fall from to the point where they'll deal even more damage they if they were simply thrown upon covering 3 SBBs, which is excellent given you can drop them from incredible heights with a little help from your trees. The damage on a fruit caps at nearly twice the damage it would have dealt from being thrown.

Side Special -- Circus
Doppelganger Welsh throws her hands out for a short-ranged, yet insanely fast grab that doesn't interrupt her momentum, and is in fact automatically angled in whichever direction she was moving. If Doppelganger Welsh gets someone, she'll latch onto them and swing around them as though they were a pole before launching them up into the air for 3% and okay upwards knockback that won't KO until 300%, also launching herself into the air 1.5x father than she sent her foe flying. Extra momentum from dashing, jumping, moving through the air or falling gets transferred into Welsh 's leap and thus allows her to cover some extra distance, so don't worry about not flying far enough just because the foe had a low damage percentage! This is an especially good juggler that can potentially be used to juggle an opponent forever, but you need to be especially close to the opponent to pull it off, so if you're not careful you can easily get punished for it despite the non-existent lag.

If Doppelganger Welsh makes contact with any wall or the side of a tree during this move, she'll cling to it for a moment before leaping off of it! This somewhat acts like a wall jump, except Doppelganger Welsh is able to jump off on almost any angle (between 20-160 degrees) and carries over whatever momentum she had beforehand, making this especially fun to use between two tall trees. Also, if Doppelganger Welsh makes contact with a branch, she'll swing over and perch herself atop of it, OR swing on and use the momentum to propel herself vertically using her remaining momentum if you press up or down with good timing.

Finally, this move can be used to tech items as though it were an aerial attack. This is not only incredibly effective, but it also lets Doppelganger Welsh do so even if she was already holding an item, in which case she'll drop it in favor of the new one. This can lead into all sorts of tricks when you take seeds and the falling physics of fruits into account.

Up Special -- Vine Swing
Doppelganger Welsh takes out a long vine that's 3 SBBs long and whips it diagonally above her. This acts as a simple tether recovery on contact with a ledge, but if the vine makes contact with any thin piece of terrain such as a platform or part of a tree/branch it'll wrap itself around it and hang down by a length equal to the distance there was between it and Welsh , the rest of the vine fully wrapped around the structure. Pressing B right after wrapping a vine around something allows Doppelganger Welsh to swing back and forth on it like a monkey with the momentum provided by gravity kicking in afterwards - this is especially cool since Doppelganger Welsh can do anything she normally could in midair while swinging, though certain moves that require her hands will automatically cause her to let go of the vine, such as the Down Special post-charge. If Doppelganger Welsh lands on any part of a stage during her swing she'll automatically let go of the vine and stop swinging, meaning she has to make sure she isn't too low to the ground when tethering a vine or else her ride will be awkwardly interrupted.

If Doppelganger Welsh does nothing while hanging on the vine, her momentum will gradually be reduced to a standstill, but if you hold the control stick in the same direction Doppelganger Welsh is swinging she'll instead build up momentum, enough so that her swings will eventually cover broad, half-circle areas. Aside from just being plain fun, building up momentum is useful because it can then be transferred to Welsh 's midair jump that she can cancel the swing into, potentially propelling her quadruple as far at high speeds if done out of max momentum and at the peak of Welsh 's swing. You can also perform a fast-fall input at the bottom of a vine to fall off it normally if you don't want to jump, but if Doppelganger Welsh still had some momentum from her swinging she'll be propelled forward as she starts to fall.

There's no limit to how long a vine can stay wrapped around something nor how many can be around a tree, but you can only wrap one around each non-makeshift stage structure. The only way for foes to get rid of a vine is to deal 15-30% to the area it's wrapped around, its HP dependent on how much of the vine is wrapped around the structure. Any character can use a vine by pressing A on contact with it, but they'll have to build up momentum by themselves by swinging on it if they didn't have any beforehand since momentum is automatically transferred to swinging upon doing so - heavier characters have a more difficult time building up momentum if come to a standstill more easily, but otherwise the vine is somehow able to support those whose weight is no greater than a 10 without instantly snapping off and putting the character into pratfall. Thankfully Doppelganger Welsh can very easily build up momentum using her Down Special (instantly maxing out her swinging momentum if she fully charges the move) and can even charge it up again and fire off while swinging to gain a ludicrous speed boost, if somewhat held back by Doppelganger Welsh losing a bit of swinging momentum as a result of charging. The ridiculous horizontal momentum can be put to good use by using the Side Special to jump off trees instead of letting Doppelganger Welsh leap offstage to her death.

Finally, if you use the Neutral Special while hanging onto a vine and are holding an item, Doppelganger Welsh will tie it to a portion of vine beneath her. This turns the item into a momentum-powered hitbox that deals 0.7-1.1x of its usual damage on contact with a foe, continuing to act as a hitbox even when Doppelganger Welsh jumps off the vine! You can also hit non-perishable items like the chestnut or a coconut to have the vine swing back and forth as a means of quickly imbuing it with momentum, but this can be used against you by foes if you're not careful. The tied items can be removed by picking them up, and if Doppelganger Welsh does this through her Side Special while already holding an item she'll tie that item in the place of the old one.

Down Special -- Tiger Ignition
Showing the fruits of her training, Doppelganger Welsh crouches down on all fours and gains a small yet fierce orange aura around her before performing a wild leaping slash that takes her 2-8 SBBs forward depending on how long the move was charged for (up to 1.4 seconds). This is very fast and can be angled by up to 30 degrees using the control stick, the slash hitting right at the start of the move as a short-ranged yet powerful attack that deals 10-25% and good to high mostly-upwards knockback that can KO between 180-100%, leaving behind a large, orange slash trail for some cool visual. The hitbox only comes out at the start, but immediately after that Doppelganger Welsh is allowed to use all her aerials while leaping forth except she can't alter or cancel her momentum until the last quarter of her movement. This is quite a powerful movement/recovery tool, though it's best not abused near the edge of the stage since it can put Doppelganger Welsh in danger. Ideally used in conjunction with the Side Special and Up Special


{=Standards=}

Jab -- Cat Claws
Doppelganger Welsh swipes ahead of her playfully! The attack has virtually no range due to Welsh 's small stature and only deals a flinching 1% per hit, but it's so insanely fast that it comes out on the first frame and is almost impossible to punish unless out-ranged, able to be maintained for as long as you hold A. By tapping A instead however, Welsh 's third swipe will be a horizontal slash that deals 4% and okay knockback that KOs at 200%, giving her a means of knocking foes away if she needs breathing room. This is a nifty move for opening up foes very close to you without fear of being punished for it, and furthermore Doppelganger Welsh will take a small step forward each time she makes a swipe, helping her to close the gap a bit.

Dash Attack -- Wild Sawblade
Hopping into the air, Doppelganger Welsh starts spinning at such high speeds that she becomes a living buzzsaw! This occurs in one quick motion that carries Doppelganger Welsh a platform across the stage in the blink of an eye, dealing 10% and decent diagonal knockback to enemies next to her at the start of the move (KO'ing at 150%) or 6% plus low reverse-radial knockback any other time, only KO'ing at 350%. Scary fast and covers a lot of distance, but it suffers from low-priority and thus isn't the safest Dash Attack. That being said, it's a rather neat set-up move that can knock enemies towards a seed that's about to sprout, knocking enemies to where fruit will fall or simply for reaching fruit in record time. Also, if you use this move while you're making contact with a vine, Doppelganger Welsh will grab onto it and somehow spin at the same time, giving her a bit of a head-start in momentum while allowing her to hit midair enemies with the move's hitbox, either of which follow quite well into a vine-game.

F-tilt -- Acrobat Kick
The classic flipkick in tilt form! This is a nifty little attack that hits in front of and above Welsh , dealing 4% and low knockback if it hits at the tip and 8% plus decent upwards knockback elsewhere, capable of KO'ing at 200%. The move even provides freeze-frames no matter where you hit, and if you tap A during that time Doppelganger Welsh will actually kick off her enemy and propel herself back a platform's distance almost instantly. This is a nice spacer for teasing opponents, but it also helps for gathering a quick burst of momentum to utilize on a vine you just retreated towards. This is made even more helpful by the fact that you can use a tree to activate this effect instead of having to rely on a foe.

U-tilt -- Bone Carnival
Doppelganger Welsh casually tosses her bone upwards and lets it spin above her head for a moment while before it comes back down, dealing 5 hits of 2% followed by some good upwards knockback that KOs at 250%, making for a good anti-air and juggling move. This will also hit enemies very close to Doppelganger Welsh at the start and end of the move for 3% and low knockback that'll KO at 400%, knocking enemies into the main attack if they're hit before it starts. Doppelganger Welsh will also bounce away friendly items in the opposite direction they hit her bone, even if they were tied to a vine, which for what it's worth can be used to knock them away on a different trajectory or to hit foes with them immediately if they're in range.

D-tilt -- Claw Tapper
Doppelganger Welsh thrusts her bone along the ground as far as she can for an attack that deals 8% and decent mostly-upwards knockback that scales well, KO'ing at around 180%, but otherwise only deals 5% and rather weak diagonal knockback at the tip. A good poking and set-up move that makes use of Welsh 's stellar crouch and crawl, not to mention it can serve as a neat little surprise attack when inside of a bush given Welsh 's entire body will be obscured. It's also your most direct way to knock fruit out of a tree and from a branch, providing you don't mind taking off half its health in the process.


{=Smashes=}

F-Smash -- Bone Slam
Doppelganger Welsh raises her bone overhead and slams it down with speed and range comparable to the Icies' F-Smash, dealing 13-19% and rather high base knockback on a 60 degree angle that KOs between 160-125%. Great if you need enemies out of your face to do some set-up, it's also a nice edge-guarding tool atop of a branch and one of Welsh 's few ways of knock enemies horizontally, setting-up nicely for the likes of Tiger Ignition.

If Doppelganger Welsh smacks the base of a tree with her bone, she'll indent the whole thing and cause it to slant back on a 15-45 degree angle, essentially turning it into a giant slope providing you charged the attack at least halfway. The slanted tree functions as a branch for all moves intended to interact with one and provides a nice, big runway for Doppelganger Welsh to make further use of her ground-game together with her aerials. It does, however, block off part of the stage for when Doppelganger Welsh wants to swing on a vine or use Tiger Ignition and thus can be harmful to her, though you can easily destroy the tree given it already took damage from this move in the first place. Slanting a tree should generally be considered a situational tactic for when the downsides of doing so won't bother you.

U-Smash -- Acrobat
Doppelganger Welsh crouches down on all fours before performing a deadly-swift flipkick that makes up for its lack of range with speed and power, dealing 13-21% together with strong mostly-vertical knockback behind Doppelganger Welsh that can KO between 140-115%! This is an ideal move for destroying a tree, knocking a chestnut/coconut tied to a vine or simply launching foes on demand, but that's not all: if Doppelganger Welsh uses this on any drop-through platform like a tree branch or with her back to a ledge, she'll drop through and hang from it as she charges the move before throwing herself up to perform the attack like she usually would. This doesn't seem that useful at first, but it's actually a very, very good counter that lets Doppelganger Welsh easily dodge oncoming attacks and retaliate with deadly power, even being able to scoop up underneath her when she releases the attack. This move also kicks stationary/friendly items upwards as though you strong-smash threw it at the cost of a few telegraphed freeze frames, which is not only good if you've got your hands full with another fruit but also for kicking up fruit hanging from a tree as you hang down from the underside. Finally, this move has DACUS properties where are made more interesting on a branch since Doppelganger Welsh will slide forward as she hangs from the underside, though it's not all that practical what with the lack of space unless you're using it on a slanted tree.

D-Smash -- Bone Drive
Doppelganger Welsh gets down on one knee and eagerly clutches her bone with both hands. Afterwards, she leaps a SBB off the ground, does a flip in midair and then immediately comes back down with her bone thrust beneath her, slamming it into the earth headfirst, all of which comes out much quicker than I described it. The bone is a rather powerful hitbox that deals 16-22% plus good knockback that'll KO enemies between 155-120%, and it also creates a small shockwave around Doppelganger Welsh that deals 6-9% and passable upwards knockback that KOs between 220-190% - while it might sound difficult to hit enemies with the bone, Doppelganger Welsh is able to move horizontally in midair so she can trample on a target that's next to her. Doppelganger Welsh is in fact able to leap off-stage and will do enough damage to branches to destroy them in one hit, making her attack 1.14x more powerful for every SBB she descends from right up until she lands, whereby the shockwaves she emits become pseudo-projectiles that travel out as far as Doppelganger Welsh fell, scaling any actual walls they come across. This essentially makes the attack a stall-then-fall when you use it atop of branches, rewarding tree-climbing and punishing foes who are closer to the ground. If Doppelganger Welsh comes across a platform she can't/doesn't destroy as she's falling, you can hold down on the control stick to make her go through it so they don't get in your way.


{=Aerials=}

N-air -- Wild Fang
Doppelganger Welsh turns halfway towards the screen and performs a fierce cross-slash around her with a rather intense slash visual, coming out instantly and having just a bit of end lag. Unfortunately, it has almost no range or duration either, dealing 5% and rather low reverse-radial knockback that won't KO until 350% in which serves to switch Doppelganger Welsh and her opponent around if you can land it. This does, however, have a sweetspot at the center of Welsh 's body, dealing anywhere between 15-24% with moderately high knockback that scales well enough to KO between 130-80%! More momentum means more damage in what can be one of Welsh 's most powerful attacks, the attack sending foes flying in the direction she was traveling at the cost of drastically cutting any momentum she had for better or worse. You'll have plenty of chances to utilize the sweetspot given Doppelganger Welsh likes to rush past opponents, but it's a bit risky to pull off simply because she can easily be intercepted before she comes into contact. You can also use this move on a tree to easily destroy it and/or cut down your momentum. Furthermore, the move makes for a surprisingly good approach since it gives Doppelganger Welsh 10% heavy armor during the attacking frames, which becomes complete super armor when backed with a lot of momentum. That armor is something Doppelganger Welsh will appreciate for letting her weather attacks that would otherwise break her predictable momentum train.

F-air -- Cat Swipe
Doppelganger Welsh does a cute diagonal swipe ahead of her! This is similar to the Jab in that it has almost no range, but is crazy fast (rivaling Meta Knightey's U-air!) and deals 7% with negligible knockback that KOs at 300%. That sheer speed can be used to keep foes close to Welsh , and if you hit the foe once while swinging forth on a vine you can trap them for several hits and juggle them all the way to the apex of your swing for some neat damage. While not the most powerful move, if Doppelganger Welsh is being propelled forward by some strong momentum, such as from a max charged Tiger Ignition, her swipe will become much more powerful and deal 12% with high knockback that can KO at 145%, capable of finishing enemies earlier than they'd expect. A relatively basic attack, but an important one in the Newbie Hero's arsenal.

B-air -- Two-Fold Kick
Doppelganger Welsh gleefully kicks behind her with both feet! This does 12% and great mostly-horizontal knockback that can KO at 170% if Doppelganger Welsh hits with her feet or 5% plus negligible knockback elsewhere, and while the knockback-scaling is unusually weak for a sweetspot-orientated aerial it's way quicker than most and doesn't suffer from landing lag. Furthermore, if you hold A while in contact with a ledge or any part of a branch, Doppelganger Welsh will wrap her feet around it and hang upside-down. While hanging, Doppelganger Welsh is allowed to slowly shuffle back and forth if there's room for her to do so and is able to use any of her aerial attacks, save for those involving her feet - in the case of this move, Doppelganger Welsh will simply use her F-air in the place of the B-air. Hanging might seem a bit redundant considering Doppelganger Welsh has her vine to swing around on, but camping on the underside of a branch protects the Newbie Hero from airborne attacks while also letting her poke at the enemy with aerial attacks and thrown items, like a more drawn-out version of the U-Smash. You can let go of a branch by fast-falling, jumping or tapping up to climb back up onto the chosen post.

U-air -- Kitty-Cross Departure
Doppelganger Welsh brings out her aerial finisher! This prompts our Newbie Hero to face the screen and perform a swift overhead slash using both hands to deal 10% and some decent knockback that'll KO at 200%, your most basic means of juggling opponents and KO'ing them off the top of the screen. In addition, if Welsh 's hands make contact with a branch she'll swing around it much like she does in the Side Special, only this time with more force as she straightens out her entire body and becomes a hitbox that deals a meaty 10-18% plus good vertical knockback that'll KO between 175-120% based on how much momentum she had before. Doppelganger Welsh then swings around the branch 3-5 more times to kill off her remaining momentum before she lets go of the branch and starts falling normally, a reliable finisher and means of intercepting a falling foe thanks to its decent duration.

Doppelganger Welsh will slash beneath her if she's hanging upside-down using her B-air, yet the move will still deal upwards knockback despite the angle being inverse.

D-air -- Claw Down
Doppelganger Welsh turns upside-down and rapidly swipes beneath her 4 times in succession, a very fast 'screw kick' attack that deals 4% apiece before spiking enemies similarly to how Nessie's D-air works; high base knockback, but poor scaling that prevents the move from KO'ing onstage any earlier than 160%. This can be used for launching grounded enemies if your timing is good, but it's also useful for cutting through midair enemies when you need to return to the ground after using your Side Special and/or going crazy with your momentum, even spiking enemies if you want to follow-up by dropping fruit on them. You can also press A in the middle of the attack when a friendly item is beneath Doppelganger Welsh to have her pick it up, namely if you want to pick up an item while you're swinging along the ground on a vine or take something wrapped on a portion of vine directly beneath you. Speaking of vines, Welsh 's swipes will automatically cut off any portion of vine directly beneath her, which seems useless aside from tied items being dropped at the same time. Cutting off a portion of vine is rarely a hassle for Doppelganger Welsh since she can easily throw out another.


{=Grab=}

Knowing her arms are too short to have practical reach, Doppelganger Welsh hopes forth and attempts to latch onto bigger opponents while grabbing characters her size by the collar, namely anyone who can climb through the hole of a tree. Her Pummel is a headbutt that deals 2%.

F-throw -- Hyper Spinner
Doppelganger Welsh slams her bone into the side of her opponent and spins them around once before sending them flying for 10% and good knockback that tends to KO at around 240%. This launches enemies horizontally by default, but you can angle the control stick up or down to send them flying diagonally, the former producing more base knockback and KO'ing quicker whereas the latter does the opposite. In any case, Welsh 's spinning will hit outside foes that come in contact with her club or the victim, taking a rather painful 16% along with high upwards knockback that'll KO at around 130% - this isn't too relevant outside of FFAs unless you swing the opponent into a chestnut/coconut hanging from a vine in which case it becomes a great set-up into full-throttle momentum, and if you angle the throw just right you can knock them into the swinging fruit to dish out a nasty bit of extra damage. This also damages and can undesirably destroy a tree if you're next to one, really only serving as a way to knock multiple fruits down for a potential chain reaction or if you just want to destroy the tree so you can create another one.

B-throw -- Wrestler Dive
Doppelganger Welsh backflips with her foe and slams them into the ground 2 character spaces where she was before, a blow that deals 7% and a guaranteed knockdown that allows for easy follow-ups. This can be particularly useful for pinning an opponent against ground where a tree is about to grow if they were trying to destroy the seed, but it also has another use: Doppelganger Welsh can and will dive off the stage if there's no ground behind her, and if she hits solid ground her opponent will take an extra 1.5% for every 0.5 SBBs they descended along with strong mostly horizontal knockback starting at 1 SBB which can KO at 200% - the base knockback improves with every SBB's descent and KOs 12% earlier for every 0.5 SBBs, overall maxing out at 19% and rather high knockback that KOs at 128% at 4 SBBs (the maximum height of a tree). This is a neato way to make use of a tree's height against enemies who'd otherwise be difficult to juggle/star KO, and if Doppelganger Welsh has found a hole in a tree she can just use that to instantly get back to the top or go for an off-stage KO.

U-throw -- Jungle Climb
Doppelganger Welsh hurls the enemy 1.5 SBBs into the air with all her might before leaping towards them and dragging them back down to earth in a violent tumble, landing on top of the foe as they crash into the ground for a rather painful 12% plus strong knockback that KOs at 165%. This throw is a lot faster than it sounds and positions Doppelganger Welsh high-up when she uses it, allowing her to scale a tree while simultaneously damaging a foe for some easy positioning. This is particularly useful for getting foes into the air if their damage is low or they're a fast-falling heavyweight, not to mention it sets-up quite nicely for an item you threw above you prior to grabbing the foe should you somehow manage that. Unfortunately, this throw damages any tree you crash into and will destroy a branch that's taken at least 3%, but that just helps for spacing given Welsh 's high falling speed, like in-case she wants to set-up a bit - it's easy enough to snipe at a foe using throwing items as well as replace the destroyed branch, both of which you can do at your own leisure.

D-throw -- Trampoline
Bouncey! Doppelganger Welsh pounces on her opponent and uses them as a springboard to bounce up into the air, dealing 5% and some pretty strong hitstun. Doppelganger Welsh normally leaps as high as her first jump takes her, but if you tap the control stick in any direction she'll jump in that direction, and if you do a smash input she'll perform a footstool jump! This is nice for FFAs or just setting-up how you please, giving Doppelganger Welsh a directional speed boost exclusive to this move. While Doppelganger Welsh normally cannot bounce downwards, she is able to do so on platforms and can use the move as a means of getting down to earth in a heartbeat.


{=Playstyle=}

Overwhelming Vigor

Doppelganger Welsh is a fast-paced, momentum-based juggler of an aerial character, though she's also surprisingly setup-orientated for someone who just wants to get in the action right away. Patience is a virtue however, and Doppelganger Welsh still has a lot of growing up to do!

Doppelganger Welsh stands out among the G-Castle members for her incredible attack speed that trumps all else and rarely leaves her open to attack. Her power and range leave much to be desired however, with the latter trait being the weakest among everyone, not being helped by her shortage of disjointed hitboxes compared to most of the others who typically fight using weapons. You can have all the speed in the world, but it doesn't mean a thing against foes who can out-range and overpower you before you close the gap. Unlike our top-tier friend Meta Knightey, most of Welsh 's hitboxes are apart of her body, have low priority and even then still have worse range, so you can probably imagine that kind of character would have a pretty difficult time safely approaching a foe playing defensively.

That being said, Doppelganger Welsh is not just some generic rushdown character - she has a way to bypass the majority of her weaknesses, and that's through the tending of trees, branches, vines and fruit. Trees create a unique, customizable playground for Doppelganger Welsh to bounce around as she pleases, and by adding some branches she can make a whole bunch of platforms to jump around on for a whole bunch of different reasons, like mining for fruit to use as projectile weapons. It's best not to camp on a branch for too long however, since trees don't have too much HP and are easily destroyed by foes, though at best you'll get some fruit out of it that can damage foes as it falls, then be used as throwing items by you later.

Doppelganger Welsh ideally wants to juggle foes up to the top of the screen in order to earn her KOs, which in turn takes advantage of a tree's height. Doppelganger Welsh has many, many moves in her arsenal that can be used for juggling or launching, with her two best ones arguably being her Side Special, which can launch from any angle, and her fruit that can drag foes up to where she is. Bringing foes up to your branches makes it more difficult for them to outright destroy your tree and lets Doppelganger Welsh utilize her aerial game more effectively, not to mention her deadly U-Smash. With a tree's total height, her fruit and the momentum she can gain from swinging on a vine, Doppelganger Welsh has no trouble juggling foes no matter how high up in the air they are, allowing her to chase foes and finish them off instead of waiting for them to come back down to her, though she can also resort to that as a safer option. Even if the foe is far from Welsh , she can easily chase them through a vine jump or Tiger Ignition before very easily transitioning into a launch or upwards momentum using her trusty Side Special. All that vertical movement Doppelganger Welsh gets from swinging off of foes is made all the better when she can use it to flow into the landing or creation of a new tree branch, where she can discover new fruits one at a time to set-up for the next stock or if foes survive and come back down.


{=EX Skill=}


Taking after the other heroes, Doppelganger Welsh gets a fiery aura around her and squats before suddenly blitzing forward, scraping against the ground and letting sparks fly behind her. After a short moment however, Doppelganger Welsh starts to fly forward at incredible speeds and leaves behind a wide orange slash mark where she goes, darting back and forth across the screen until she's done this 4 times. She then comes to a stop where she started the Skill and makes a slashing gesture, as a massive slash mark cuts across the screen diagonally before Doppelganger Welsh jumps joyously to celebrate her succees. Getting hit by Doppelganger Welsh anytime she rushes results in 10% and being trapped in place for the rest of the attack, the final slash mark dealing 20% and high vertical knockback that KOs at 80%. This doesn't harm Welsh 's trees in any way, but if you're worried about foes using the platforms on one to avoid your attack you can aim the control stick up and down to adjust where Doppelganger Welsh comes from as she blitzes back onscreen, making for a wildly unpredictable attack that's difficult to avoid, but not the most devastating EX Skill in terms of damage or knockback.


Entrance Animation --
"The hero appears!"
Welsh swings down from a vine ands lands triumphantly!

Up Taunt --
"Weeee!"
Welsh jumps up onto her bone and spins on it!

Side Taunt --
"Everyone, let's do our best!"
Welsh takes on a boxer's stance and throws out a few jabs!

Down Taunt --
"Yeah, leave it to me!"
Welsh points to herself, as though boasting!

Death Cry --
"Sharuru, I'm sorry."

Win 1 --
"How was that? Was I hero-like?"
Welsh throws out a few agile backflips before holding her hands behind her back and leaning forward, a big adorable grin plastered across her face. D'awww.

Win 2 --
"We are the champions!"
Crouching down, Welsh throws her hands into the air in an overly-triumphant pose!

Win 3 --
"Yay! I won I won!"
Welsh jumps for joy several times, going higher and higher each time!

Lose Against Soul --
"You've improved significantly."

Lose Against Elka --
"Hmm. Obedient, energetic, talented and you don't despise my very soul. Given the necessary maturation period..."

Alternate Costumes --


Katapultar

Smash Lord
Joined
Nov 24, 2008
Messages
1,284
Location
Australia
"Before indulging in the main dish, I shall whet my appetite on you! How does an undisputed god taste...?"


Belleria's Father

Vorgis is the main antagonist of Mugen Souls. He makes a few offscreen appearances throughout the game, but doesn't appear in the flesh until Chou-Chou and co. make their way to Soil World, where he reveals his true nature as a gargantuan planet-eating monster. Yes, he is apparently the size of a planet despite his in-game character model saying otherwise, but it must be true given he effortlessly sweeped Chou-Chou and her entire party upon first encountering them, before sending the G-Castle hurtling towards the other side of the galaxy. Vorgis then sends countless monsters to the other 6 worlds visited throughout the game in order to "season" them, before falling asleep so his tummy has room for the next world. Sort of like a more evil, monstrous version of Galactus.

Vorgis might appear to be a giant space flea from nowhere, but he's actually quite manipulative and cruel. He was mostly responsible for the circumstances behind Chou-Chou and Belleria's amnesia tens of thousands of years ago, where he then exploited the latter's condition by claiming he was her father to use her as a minion and then sending her off to kill her best friend when she wasn't needed. Vorgis was originally created by Belleria as a pet to fight off her loneliness as being the God of Destruction, but Vorgis wanted his creator's power for himself so he could eat whatever he wanted. He succeded in getting Chou-Chou and Belleria to fight with each other by eating the former's world, and eventually does claim his master's power as his own in the form of a red gem. This power is never used until the final battle with him for some unexplained reason, despite Vorgis having the means to access it throughout the entire story - possibly out of arrogance or being unable to handle it without first feasting to increase his power. The end result sees Belleria merge with his very being with Vorgis in control, turning him into the most sinister-looking butterfly loli with the deepest and manliest voice you'll ever hear on a girl. No seriously, he actually becomes a girl upon becoming the God of Destruction, but that's another story for another moveset. In the meantime, you'll have to make do with a fight against his still-formidable giant over-the-top monster form.


[""Stats""]


Size: 50
Weight: 22
Ground Speed: 0.5
Jump: 10
Air Speed: 0.5
Fall Speed: 0.5
Traction: 10
Float: 10


To put this guy's size into perspective, Pseudo-Vorgis is so unbelievably massive that his eyes would line up with the top platform of Battlefield if he were on the main part of the stage - that isn't even taking his massive wings, thick arms or the ungodly mass of tentacles sprawling out of his back into account, the likes of which count towards his insane size stat despite not being active hurtboxes. That being said, Pseudo-Vorgis's back does have a large lump-like hurtbox in the size of his head that essentially gives him a t-shaped hurtbox, and he can be damaged through his arms when they're used for attacking. If you're having trouble visualizing how Pseudo-Vorgis would fit into Smash, then here's a little something to give you an idea.

Unless you hit him in the head, Pseudo-Vorgis is entirely immune to hitstun and only takes horizontal knockback when grounded when hit anywhere other than his head, and any damage or knockback he receives from behind is cut in half. This gives Pseudo-Vorgis a boss-like status, and because of the unique way this works Pseudo-Vorgis is actually capable of reducing or even outright cancelling knockback he takes by dashing against it, though it's not really all that effective given his incredibly slow movement. Speaking of movement, Pseudo-Vorgis can walk backwards and will turn around only when you smash the control stick backwards, though he suffers from significant turning lag thanks to his ungodly mass. It's also worth mentioning that Pseudo-Vorgis suffers absolutely no delay when using his first jump or landing despite being a heavyweight, allowing him to transition between ground and air attacks with extreme ease.

Pseudo-Vorgis can still be grabbed despite his size, but he won't be held in place and is able to drag you around like nothing and even attack you. Pseudo-Vorgis cannot be tripped or pitfalled, and his shield causes him to curl up a bit and cover his head with his hands as his body darkens, cutting all damage and knockback he'd take down to a quarter while giving him total immunity to status ailments and other special attack effects like a normal shield would. If Pseudo-Vorgis powershields an attack, however, he will not take any damage or knockback from it. Finally, if Pseudo-Vorgis moves or is knocked off the side of the stage he'll automatically use his float, which lets him hover around for a good 5 seconds as his only means of recovery, albeit very slowly - wouldn't want something as trivial as gravity hindering a giant, floating monster, now would we?

Pseudo-Vorgis can be fought 1v1, but he's meant to be a 3v1 boss given his size. Should the latter be invoked, his weight stat will be increased to 50.


"What's on the menu?"


[""Specials""]

(Neutral Special --o-- Devour)
Pseudo-Vorgis opens his maw and keeps it held open until you release B to bite down, where beforehand you can quickly move the giant's head up and down using the control stick. Anything that so much as even comes in contact with Pseudo-Vorgis's mouth gets eaten by him, even if it's bigger than him, but he only bites down once you let go of B and as such can swallow any number of things beforehand. Projectiles and other hitboxes heal Pseudo-Vorgis for half the damage they did whereas minions, ATs, items and makeshift traps heal based off half their current health or 5-20% depending on their size. This is actually quite a fast move too, giving foes a good reason not to aim all their projectiles at Pseudo-Vorgis's head when he can snack on them to heal off his damage meter.

If Pseudo-Vorgis devours a foe, he'll take their power for his own in which case his attacks become 1.2x more powerful and 1.05x faster, and his stats increase by 2/3rds of theirs for as long as they remain inside his stomach, 4 seconds plus 1.5x grab difficulty afterwards. The foe is also digested for 2% every second they stay inside Pseudo-Vorgis, and if their damage percentage reaches 150% they'll be fully consumed for a despair-inducing KO that leaves Pseudo-Vorgis with a satisfied look on his face and the buffs he got from his victim for a full 20 seconds... or for the rest of his stock if the victim just lost their last stock. The stat increase is particularly deadly in 3v1 since it gives Pseudo-Vorgis the means to approach his opponent if he devours a fast character like Welsh, Tsukika or Dees, not to mention it increases the effectiveness of his ability to cancel knockback outside his head by dashing. Perhaps even scarier though, is that Pseudo-Vorgis's devoured victim takes half of whatever damage he does when attacked, giving foes the risk of accidentally raising their trapped ally's damage up to 150% when Pseudo-Vorgis is so heavy. Pseudo-Vorgis can devour as many victims as he likes to become immensely powerful, even consuming secondary characters such as minions to specifically take 1/5ths of their stats should they posses something resembling such, capping out at 100% for that one type of minion.

As an Easter Egg, Pseudo-Vorgis will comment on how his victim tasted once he fully devours them:
Chou-Chou: "Ahhhh, it's like all the flavors of the universe are entering my mouth at once. A shame it only comes in a bite-sized piece."

Altis: "You think you can spice me to death, do you?"

Ryuto: "How utterly bland."
Soul Skyheart: "It's always satisfying to level-grind my teeth on something beefy."
Sandy Sunshine: "A rich, custardy flavor...it's just begging to be punished."
Tsukika Izayoi: "Interesting. Tender on the outside, crunchy on the inside."
Shirogane: "All dried up and chewy. This is going to take forever to eat."
Elka: "BLEGH. DISGUSTING!!!"
Alys Levantine: "This flavor is too sugary and active. It's trying too hard to be the center of attention."
Marina Cannonvale: "Soft and plump, like two marshmallows bouncing around in my mouth."
Welsh Cocott: "Organic food is so small nowadays."
Sharuru Cocott: "What a waste. This should have been tenderized for longer."
Dees Vanguard: "Not bad... for processed food."
Belleria: "You've grown soft. Not even fit for an appetizer."
Pseudo-Vorgis: "It's like tasting everything I've eaten up until now."
(Side Special --o-- Sphere)
The lines on Pseudo-Vorgis's body glow white before a Bowser-sized sphere with several small encryptions orbiting around it materializes level to the purple bulge on his belly, but by angling the control stick sharply it can instead be made to appear next to his head or even at the tip of his tail. Once created, the sphere travels at a pace ranging from Ganon's walk to Sonic's dash based on how long the move was charged beforehand (max 1 second) until it leaves the screen, but if it makes contact with something before then it'll stop moving and engulf its victim, shrinking them down to fit inside a special pocket-dimension - the very same thing that happened to Soil World so it could fit through Pseudo-Vorgis's mouth. This causes the victim to spawn at the corner of a Battlefield-length 'Fly' inside the sphere based on what angle it hit them on, where their only means of escape is to deal 66% to the inside by damaging either its floor or boundaries. Foes closer to the middle of the Fly are released directly where the sphere was upon being destroyed, while those closer to the boundaries are released next to where the sphere was, just a little thing to keep in mind. It's also worth noting that the inside of the sphere has no blast zones and that objects will loop around endlessly if they walk off the sides, whereas those launched upwards will continue to do so until their knockback expires.

Standstill spheres - those containing foes - don't interact with moving spheres nor do they act as solids. Other characters can even move past a standstill sphere without being trapped, but if they're knocked into one they'll be trapped inside with no means of escape until the sphere is destroyed. A moving sphere can be destroyed by any attack of reasonable power before it claims a victim, but Pseudo-Vorgis can also use his spheres to trap a foe's minions or even their makeshift terrain. Pseudo-Vorgis can of course eat any sphere he comes across in which case he'll devour all its contents at once, though it may seem impractical given his initial slow movement and the fact that you can only do this with spheres created at head-height. A way to get around this will make itself present in one of the moves to come, however.

If you press B while creating a sphere, Pseudo-Vorgis will drop a mysterious shining red object from his mouth directly into it, which contains the most recent projectile or minion he ate. If you're wondering how it's possible to press B while charging this move, it's because charging is determined by holding the control stick forward alone, and when you insert something into the sphere it gets rid of the charge you had built up so you're not forced to always fire the sphere at high speeds when slower-moving spheres are arguably more beneficial than faster ones. In any case, a sphere with stuff pre-loaded into it is still capable of trapping a foe in which case all the projectiles/minions immediately become active and spawn in the opposite direction the sphere was moving, both of these falling under Pseudo-Vorgis's control if they belonged to the foe whereas projectiles will loop around the Fly endlessly until they hit an enemy, being sent out one at a time if there were multiples. It's usually in the foe's best interest to defeat all the minions they're trapped alongside with since otherwise they'll end up clustered together with them when they're all set free. Pseudo-Vorgis does not lose any healing or buffs he got from anything he dumped into a sphere, but he won't get them again if he eats them again.

(Up Special --o-- Monstars)
Pseudo-Vorgis charges some energy in his big red rockets before firing it off as a Bowser-wide, vibrant rainbow-colored beam that shoots up to the top of the screen before coming back down a mere moment later in the same way a Warp Star works, only with twice as much horizontal range, dealing 18% and high mostly-upwards knockback that KOs at 164% that makes for an excellent juggler. And that's not all either, because once the beam hits the ground it'll create an explosion and release a minion that fights alongside Pseudo-Vorgis. What minion Pseudo-Vorgis gets depends on how long he charged the move for:


No Charge o Death Spider

HP: 15
Size: 5
Weight: 3
Ground Speed: 8
Jump: 10
Air Speed: 3
Fall Speed: 7
Traction: 7

Death Spiders are very fast and extremely ruthless. They immediately go after the nearest grounded foe and proceed to pounce on them, dealing 6% at point-blank and a mere 2% if they barely scrape. A Death Spider's attacks do not flinch, but they do inflict poison damage of 1% over 10-5 seconds based on where it hit, which can actually add up to deadly numbers if they're allowed to go out-of-control in groups. Speaking of groups, a Death Spider will lay an egg with almost no lag or visual indication every 3 seconds - this egg is easy to break and only has 5HP, but if allowed to remain active for 1.5 seconds it will hatch into another Death Spider, with absolutely no limit on how many you can breed this way. A Death Spider infestation is particularly scary when you consider how fast they are and that if Pseudo-Vorgis eats half a dozen of them he'll become ridiculously fast without having to devour a foe. Indeed, Pseudo-Vorgis can devour his own minions to increase his own stats - they're nothing more than expendable tools to him, after all.


0.3 Seconds o Lustacles

HP: 20
Size: 2
Weight: 5
Ground Speed: 3
Jump: 4
Air Speed: 7
Fall Speed: 7
Traction: 10


This bizarre-looking enemy sits in place and waits for the foe to come to it. Once they do, it'll reach out smooch them for a kiss that drains 10% from them over the course of half a second before flinging them behind it for decent set knockback (spheres, maybe?). Any damage the Lustacles inflicts is added onto its own HP, and once it's had a taste it'll want more, badly enough to start moving towards the victim at a lumbering pace. The Lustacles will only attack the first foe it took a 'liking' to, and for every additional peck it gets it'll drain an extra 5% from the victim that continually stacks. That's not all either, as every kiss increases the Lustacle's weight and movement by 1 and also gives it the ability to eat the any of victim's projectiles that deal no more than 4% per kiss, gaining a creepy, perverse grin on its face whenever it succeeds. Finally, if the Lustacles lands on an opponent (usually as a result of being knocked into the air), it'll latch on from behind in a Pikmin-esque manner, wrapping its tentacles around their waist while putting its head right up to theirs in a creepy manner, like trying to whisper something into their ears. If the latched victim is different to the one the Lustacles originally kissed, it'll get pissed and fling them into the air for 5% and mild upwards knockback that never KOs, but if they were the original victim or its first one it'll stay latched onto them until they shake it off with regular grab difficulty. The Lustacles likes to sexually harass its target - if they're female, it'll grope their boobies, but if they don't have any or are male it'll instead try to remove their top by force, resulting in a rather hilarious animation straight from an echi anime that's prime for a snapshot. Victims of this have a fraction of lag tacked onto the start of their actions as the Lustacles smooches their head for one successful kiss per 0.7 seconds, making it scary when timing your attacks and dodges against Pseudo-Vorgis becomes more difficult.

0.7 Seconds o Pixy

HP: 20
Size: 4
Weight: 5
Ground Speed: 4
Jump: 8
Air Speed: 6
Fall Speed: 1
Traction: 5

The Pixy is different from the other minions in that it's more aerial-orientated and actively - albeit slowly - tries to move away from opponents that get near it. When not fleeing from a foe, the Pixy will go on the offensive by creating a small discus of dark energy in its hands over the course of 1.5 seconds before lobbing it forward as a moderately-fast moving projectile that homes in on the nearest foe. This deals 9% and okay upwards knockback that KOs at 250%, but foes can reflect it by power-shielding in which case it will home back in on the Pixy and go past it, hitting the next friend or foe that it runs into. Unfortunately for foes, the darkness is beneficial for Pseudo-Vorgis and heals him 9%, but with any other relatively weak minion it will see them affected by Pixy magic that transforms them into one in a puff of purple smoke. The minion keeps however much HP it already had and becomes mind-controlled if it belonged to an opponent, though the curse can be undone by hitting the minion with any move. Throwing telegraphed projectiles isn't the Pixy's only forte too; if a Pixy is killed, it will explode into a magical sparking Kirby-sized dust-cloud that manifests a mere moment afterwards, and if anyone except Pseudo-Vorgis touches this cloud they'll suddenly grow as though they ate a Super Mushroom. This can affect projectiles, traps and minions in which case the latter two have their HP doubled, not to mention it can also make foes giant. This can totally work against you since the foe has much easier access to your head and with more powerful attacks, but it also makes them a bigger target for your stray spheres and makes it easier for Pseudo-Vorgis to hit with his melee attacks... not to mention the huge weight boost he'll get if he devours his giant meal. It doesn't stop there either, as the giant effect stacks with multiple Pixy clouds that you'll get if a whole bunch of minions were Pixy'fied (especially if you have Death Spiders to spare), each of these lasting for a decent 3 seconds. You could actually summon a Pixy only to kill it for the dust-cloud it provides, though it may prove too tedious for what little you get out of it. Nothing beats a super-sized meal, especially when you have an appetite as colossal as Pseudo-Vorgis's.


1 Second o Vephar

HP: 37
Size: 10
Weight: 7
Ground Speed: 1
Jump: 10
Air Speed: 10
Fall Speed: 1
Traction: 10

The


1.5 Seconds o Ring Dragon

HP: 50
Size: 12
Weight: 10
Ground Speed: 2
Jump: 10
Air Speed: 1
Fall Speed: 10
Traction: 10

The Ring Dragon is a vicious beast out for blood. It


2.2 Seconds o Abababan

HP: 66
Size: 18
Weight: 15
Ground Speed: 3
Jump: 1
Air Speed: 1
Fall Speed: 10
Traction: 10

This nonsensically-named monster actually resembles a scorpion physically, except for that weird mouth and its 4 long claw-tipped tentacles in the place of pincers, the likes of which do not count towards its hefty size stat. If a foe is within a platform of the Abababan, it will rear one of its tentacles back and scratch them with it for 5% and low horizontal knockback that KOs at 300%, and if the foe is still nearby after the one scratch it will follow-up with 3 more that can serve as a rather annoying blockade. Getting close to the Abababan's mouth is more dangerous however, as it'll attempt to perform a telegraphed bite that devours the victim for 18% while healing itself 10%, trapping the victim inside a tight, see-through space until they deal 33% to the Abababan from the inside to make it spit them out. The Abababan will also attempt a telegraphed strike with its red stinger as a countermeasure against foes above or behind it, this dealing 14% plus moderate knockback that KOs at 160% alongside 10% poison damage over time like with a Death Spider. Finally, if the Abababan ever falls in midair, the bottom of it will become a hitbox that deals similar damage to Super Dedede Jump.


The Abababan is capable of using all its attacks at the same time and as such excels at dealing with multiple foes. It normally stays in place and waits for a victim to come to it, but upon losing half its HP it'll go into a rage and attempt to chase down the foe responsible while attacking anyone other foe that gets in the way - this makes its attacks deadlier given the tentacle sweep now functions as an advancing wall of sorts, and if foes try shielding against that the Abababan will simply devour the opponent. Speaking of devouring, the Abababan will consume any minion smaller than it should they come into contact with its mouth, not only protecting them from damage but also allowing Death Spiders to breed inside of it and Pixys to fire their projectiles through its mouth, which mind you will not Pixy'fy the Abababan if they're reflected towards it and instead heal it. If a foe is devoured while there are minions inside the Abababan, they'll be forced to deal with them all in a very tight space and are sent flying out of the monster's mouth if they sustain knockback. If an enemy minion is eaten by the Abababan, it will be destroyed and heal it the same amount Pseudo-Vorgis would get for devouring one.

3 Seconds o Energy Breaker

HP: 120
Size: 40
Weight: 30
Ground Speed: 0.5
Jump: X
Air Speed: X
Fall Speed: 15
Traction: 10

Pseudo-Vorgis's strongest minion. This thing is so brutally large that its chest stands at the height of Pseudo-Vorgis's head, making for the perfect shield against projectiles - it's also entirely solid save for the space between its legs, though Pseudo-Vorgis and other giant characters can push it around due to rivaling its mass. A moment after being summoned, the Energy Breaker will lumber towards the nearest opponent at laughably slow speeds, but if it steps on you you'll take 15% and be knocked into prone. The Energy Breaker's attack for dealing with grounded foes is to slowly raise its foot and then stomp it down for a very powerful attack that deals 24% and mighty spiking knockback capable of KO'ing at 75%, yet while this is insanely slow - 2 seconds of start-up lag and half that much end lag - it also creates a shockwave around the Energy Breaker's foot that reaches out 2 SBBs ahead of it on each side, this dealing 18% and strong upwards knockback that KOs at 140%. While unlikely to happen given its weight, if the Energy Breaker ever falls from a height greater than 1.5 SBBs it'll get the same hitbox at its feet, making for a deadly counterattack in the event where foes do knock it up too high with their attacks when it's near death. The shockwave does not harm Pseudo-Vorgis or other minions.


The Energy Breaker seems almost ineffective against grounded foes, but it's rather terrifying against airborne foes who get within the height of its chest plate. Should a foe get too close, the Energy Breaker will respond with a surprisingly fast - yet reasonably telegraphed - swipe and hold the the victim in place, crushing them for a painful 12% a second until they escape. This works even if the foe is giant in which case the Energy Breaker holds them in place with both hands, letting Pseudo-Vorgis devour the victim from its hands or even eat the minion alongside the victim if the former is facing away from him.

The Energy Breaker's other chest-height attack, one that it uses against foes from farther away, is to simply bring its arm back and throw out a punch with the lag of a Falcon Punch, this dealing 28% and high knockback that KOs at 65%. Finally, if the Energy Breaker sees a foe high off the ground above it, it will proceed to very slowly spread its arms out before making a fist with both hands and smashing them together in front of it with thunderous force. This is ludicrously telegraphed at 3.5 seconds, but it's insanely powerful, dealing 26% that KOs at 70% if it hits at the arms and 40% that KOs at 15% if it somehow manages to hit at the lands. What's more, the Energy Breaker's arms function as walls for the 2 seconds they stay out and can be exploited by Pseudo-Vorgis if the minion doesn't die first, serving as a way to make moving around very difficult.

Finally, the Energy Breaker, as it name implies, is completely immune to energy-based projectiles and will in fact gain HP instead of taking damage. This makes it very difficult to take down with projectiles at times, some players instead having to go up to the thing and risk their lives against its powerful attacks. Indeed, the Energy Breaker may seem like ineffective with its absurdly slow attacks, yet its high HP and the fact that Pseudo-Vorgis is assaulting foes at the same time can mean trouble if foes overlook one of those big attacks. If an Energy Breaker become too obstructive to Pseudo-Vorgis, he can simply devour it and place it inside a sphere for foes to fight upon trapping them inside.

In case you're wondering, all of these monsters actually fight alongside Pseudo-Vorgis in-game rather than just being randomly picked from the whole Mugen Souls bestiary.

(Down Special --o-- Mass Inhale)
Pseudo-Vorgis opens his mouth as wide as he can and begins inhaling for as long as you hold down B, drawing everything ahead of his head towards him. Foes are drawn in at Ganon's walk-run speed depending on if they're heavy or light, spheres are drawn in at Ganon's dash speed while items and your weaker minions are drawn in at Mario's dashing speed, all these being drawn in 1.35x faster when they get within 4 SBBs of Pseudo-Vorgis and 1.6x faster when they get within 2 SBBs of him - what's more, targets are drawn in twice as quickly if they're airborne. Despite inhaling, Pseudo-Vorgis does not swallow his target when they reach his mouth since he already does that with his Neutral Special, but if a foe makes contact with the space between his mouth he'll laglessly bite down on them for a harsh 18% and sharp horizontal knockback that KOs at 120%, healing himself 10% in the process. Inhaling is actually as lagless as throwing out a reflector despite Dedede's Inhale being the first thing that comes to mind, though it won't work unless your target is level with your head and as such is ineffective against grounded foes...

Which is where your crouch comes into play. Pseudo-Vorgis has a unique crouch where he casually forces his body through the ground at Mario's dashing speed as you smash and hold down the control stick, not being one to care about his surroundings. You can force however much of Pseudo-Vorgis's body through the ground as you like right up until only his head is sticking out, whereby he only takes 0.95-0.7x as much knockback as usual. Pseudo-Vorgis can use any of his attacks with his body submerged, not just his D-tilt, and is able to move around normally and surface by holding the jump button. This crouch has a lot of obvious uses what with how it adjusts the height of Pseudo-Vorgis's head, basically allowing him to draw in objects while grounded in the event where you want a cluster of Death Spiders close to you so you can devour them all. Pseudo-Vorgis's "crouch" makes it possible to devour grounded foes and more ground-based projectiles/traps, but it also makes him much more vulnerable to having his head attacked.

[""Standards""]

(Jab --o-- Seismic Slumber)
Pseudo-Vorgis lets his head droop and starts... sleeping? Seems like he just wants to digest that last big meal he ate, and by meal I mean an entire planet. Pseudo-Vorgis immediately heals 4% after dozing off and continues to heal more and more for every second he stays asleep, starting at 8% and continually increasing by intervals of 4% (12%, 16%, 20% and so on) which make sleeping for longer more rewarding. It's not particularly difficult to stay asleep for long periods of time when you can distract foes with minions, spheres or even simply devour them, the latter of which will keep Pseudo-Vorgis occupied for a good 5 seconds in 1v1 and let him heal off as much as 94%.

Pseudo-Vorgis sleeps for as long as you hold down A, but this isn't just an awkwardly-placed healing move; once Pseudo-Vorgis wakes up, he'll let out a mighty yawn that releases a radial shockwave from his mouth which inflicts 14% and mediocre knockback to everyone except his own minions, KO'ing at 200% and putting a large dent in any shield it makes contact with. This actually comes out quite fast, but the range of the shockwave is entirely detrimental to how long Pseudo-Vorgis slept for, infinitely "expanding" at the same rate a Smart Bomb blast would. Foes can at least tell how far the shockwave will go out since it dims as it gets closer to expiring and as such they don't have to get all paranoid from lack of visual clues, but it'd be pretty hilarious if they got hit by it and died while trying to recover or combat minions.

(Dash Attack --o-- Colossal Crash)
Opening his mouth wide, Pseudo-Vorgis lurches forward before slowly crashing down and bulldozing his head right through the earth before the big guy casually rises back to where he was standing. Anything that makes contact with Pseudo-Vorgis's mouth as he's falling is instantly devoured, but getting hit by any other part of his head or is arguably worse as this results in 22% and sharp mostly-upwards knockback that can KO at around 85%. Getting hit by the "spike" protruding from the top of Pseudo-Vorgis's body results in 17% and fairly strong knockback that'll KO at 110%, while getting hit by Pseudo-Vorgis's body results in 12% and decent horizontal knockback that can sometimes lead into a devour at lower percentages. In addition, anyone who makes contact with the tip of Pseudo-Vorgis's spike gets stabbed for 16% and strong horizontal knockback that can KO at 130%, meaning foes can't just casually run into him to start racking up damage like crazy. Pseudo-Vorgis's head can't be attacked once it's fully submerged and can be kept that way for up to 2 seconds before he gets back up, the rest of his body only suffering half as much knockback from attacks as a result. If there's no ground ahead of where Pseudo-Vorgis's head would land or it's too thin however, his head will still be exposed and he won't get knockback resistance for better or worse - Pseudo-Vorgis will automatically devour anything that that touches his mouth however, and he'll suffer less ending lag due to not having to pull his head out of the ground. Pseudo-Vorgis's minions will retreat so they're not crushed by him as he falls, though Energy Breakers are much to slow for this and instead make Pseudo-Vorgis slide back if a part of his body makes contact with him due to their solid nature.

While slow, this attack is rather terrifying for its sheer reach and the fact that the hitboxes are active as Pseudo-Vorgis falls. It's usually better when used from a distance due to your hitboxes being stronger and having better spacing as you get back up, but it can be deceptively useful out of a knockback-cancelling dash at lower percentages since you'll go sliding back as soon as you use it and potentially hit enemies with the upper-parts of your body if they were trying to wail on you at close-range. This also becomes more useful as a way of bringing the pressure to foes when you've increased your speed stat via mass consumption of Death Spiders, especially if they were close to the edge of the stage in which case they'll likely have no space to roll back and not to mention you can cut your end lag by using the move close enough to the edge of the stage so you don't hit ground. You can also use this to reposition minions, which usually results in them being in a cluster due to the amount of space Pseudo-Vorgis covers with this move - especially good if you can make foes retreat to that part of the stage as well.

(F-tilt --o-- Ogre Shadow Slash)
Pseudo-Vorgis holds an arm out to the side before using it to perform a vicious horizontal slash clad in fiery darkness. This is relatively telegraphed, but it has good reach and deals either 13% and mediocre knockback if you hit with the arm (KO'ing at 180%) or a nasty 24% and high mostly-horizontal knockback that'll KO at 85% if you hit at the claw. You're free to angle this in which case the move deals diagonal upwards knockback, and as Pseudo-Vorgis slashes he'll leave behind a large trail of dark flames which deal as many as 12 rapid hits of 1% before burning out just before the attack's cooldown ends, preventing enemies from rushing in to take advantage of most of the end lag. This gives the attack darkness-based properties which heal your minions 20% of their max HP upon contact and let you fling them across the stage in the event where you want your Lustacles or Abababan to go on the offense. Pseudo-Vorgis can also knock his spheres around, which trap any foe or minion they get knocked into in the event where you have a hard time knocking other foes into one or want to throw a minion into the mix.

(U-tilt --o-- Titan Motion)
Pseudo-Vorgis rears his head back for a split-second before throwing it out and stopping once his spike is on a 45 degree angle. Pseudo-Vorgis's spike deals 11% and and average mostly-upwards knockback that can KO as early as 110% if the monster isn't "crouching" whereas a literal head-on impact deals 15% and solid mostly-horizontal knockback behind him that can KO at 140%, or 10% plus good hitstun if it barely nicks at the chin. This is one of Pseudo-Vorgis's fastest attacks and easily his best retaliation move for throwing out on the fly in the common event where an enemy jumps towards his head, serving as a great pseudo-counter when the monster rears his head back while having virtually no cooldown to boot. Although the knockback from the headbutt doesn't seem to follow into anything, it gives Pseudo-Vorgis a bit of breathing room when most foes have no way of attacking his head from behind, which is especially useful in 3v1, setting-up or to turn the tables on the enemy when your back was to the edge of the stage. The tip of Pseudo-Vorgis's spike is also a hitbox in the middle of the attack that does the same damage as in the Dash Attack, serving as a situational anti-air for what it's worth.

(D-tilt --o-- Earth Pounder)
Pseudo-Vorgis swings a fist down like a hammer, except it doesn't make contact with the ground from his height due to his awkward physique. While not as fast as the Jab/F-tilt, this deals a solid 15% and powerful spiking knockback on par with Ganon's D-air on a 170 degree angle, capable of murder via a well-timed edge-guard attempt, knocking the foe into punishment from your machinations or keeping foes away from your head. It's worth noting that prone opponents pose absolutely no threat to Pseudo-Vorgis since their get-up attack won't hit high enough to reach his head, meaning foes are just essentially leaving themselves open to a powerful attack.

If Pseudo-Vorgis is close enough to the ground that his fist would slam into it, he'll pitfall any grounded foe he hits for the same duration as DK's Headbutt. While generic stun isn't the funnest thing in the world, Pseudo-Vorgis deserves this for exposing his head all the while, especially if he gets a free meal via the Neutral Special from reaching his opponent just in time. Pseudo-Vorgis also creates a small shockwave around his fist when it slams into the ground, which deals 6% and decent hitstun, not to mention he can pitfall his own minions for a different effect. Death Spiders are kept still and safe, allowing them time to hatch 1 or even 2 eggs before they reemerge after 5 seconds. Lustacles become a trap that spring on any foe that walks over them, much like that one kissy-SSE enemy. Pixy are pitfalled halfway into the ground, keeping them in place if you want them to die in a certain place for their dust-cloud. Abababan are also pitfalled halfway into the ground, not prohibiting any of their moves while simply allowing you to leash them and prevent them from taking knockback. Energy Breaker is buried halfway, surprisingly enough, making it easier for its attacks to hit grounded foes in the same way Pseudo-Vorgis's special crouch works. A pitfalled minion will submerge if hit again with this move or if you try pitfalling something else in the same place.

[""Smashes""]

(F-Smash --o-- Bloodcrystal Bloom)
Pseudo-Vorgis fires a beam down on a 150 degree angle and raises his head to sweep the beam across the ground. The beam has infinite range, but doesn't travel any lower than Pseudo-Vorgis's body so opponents beneath the ground Pseudo-Vorgis was on while recovering are safe. The beam deals hits of 15-25% over its lifetime, dragging victims along before finishing with alright upwards knockback that KOs at around 160-130%. The beam is not especially strong or large, but can hit multiple foes and conveninently scoop them up to all be in one place in midair.

(U-Smash --o-- All-Consuming Appendages)
Pseudo-Vorgis hunches forth and droops his wings as two of his tentacles slither around the spike on his back and rest over the top of his neck, pointing ahead in still anticipation. Afterwards, these two tentacles immediately shoot out side-by-side on a diagonal angle at insanely high speeds, going right over Pseudo-Vorgis's head before suddenly declining and rooting themselves into the ground, though they'll simply return to Pseudo-Vorgis if there's none ahead of him. The tentacles normally land 4 SBBs ahead of Pseudo-Vorgis, but by tilting the control stick diagonally backwards they can be made to land anywhere between 3-1 SBBs in front of him while tilting the control stick forward lets them land 5-8 SBBs ahead of him instead. Pseudo-Vorgis's tentacles deal a nasty 27-34% and very high knockback on a high angle that'll KO at 60-30% if they hit an enemy dead-center, whereas barely scraping with them instead deals 18-25% and moderately-high diagonal knockback (KO'ing at 130-100%) either away from or behind the tentacle depending on where it scraped, possibly bringing foes to Pseudo-Vorgis from a distance. Pseudo-Vorgis's tentacle also acts as a wall that completely blocks off movement between it unless dealt 40HP to make it retreat, in turn damaging Pseudo-Vorgis.

(D-Smash --o-- Shockwave)
Pseudo-Vorgis raises his fists against the ground before punching down with them so intensely hard that he causes an earthquake that covers the entire stage, throwing all grounded enemies and minions into the air for very high base knockback that ranges between 3.5-5 SBBs for the average character while dealing 16-22% against enemies and subtle knockback scaling that'll KO them between 190-160% - the knockback is completely vertical by default, but by holding the control stick diagonally it can be angled by up to 30 degrees. This is obscenely fast for a Pseudo-Vorgis move and as such makes for a great counter after being sent sliding back from being hit in the body so long as you don't end up offstage. Function-wise, it's Pseudo-Vorgis's ultimate move for throwing everyone into the air, giving him heaps of breathing room, the chance to devour someone as they're falling towards him, start an aerial pursuit with high enough stats or even knock a foe into an aerial sphere they thought they were safe from. It's also great with minions since most of them pose some sort of danger to foes as they fall towards them should they avoid being thrown up, but they also damage foes as they're sent flying up for damage that varies between 8-22% with low-high knockback that KOs between 200-80%. This move also unearths pitfalled minions without throwing them up, giving you some ammo to use right throwing up a wave of characters.


[""Aerials""]

Pseudo-Vorgis's body is immune to knockback during the starting lag on his aerials. This prevents multiple foes from wrecking the aim on his aerials given some of them are laggy, though they can also take advantage of the situation by using Pseudo-Vorgis's body as a punching bag. If foes want to interrupt Pseudo-Vorgis out of his aerials, they'll have to hit his head, possibly by performing a footstool jump on his tail if he's above them.

(N-air --o-- God Darkness)
Pseudo-Vorgis curls up and slowly pumps out a stream of fiery darkness from his rockets and into his main body over a painfully laggy 1.3 seconds. Afterwards, Pseudo-Vorgis poses dynamically, releasing a massive pillar of spiraling darkness around himself that has infinite vertical range and is wide enough to fully cover the big man's hurtbox. This dreadful attack lingers for slightly longer than a Smart Bomb blast and deals rapid hits that accumulate as much as 42% before sending them flying for decent knockback that'll KO at 135% - much stronger than a Smart Bomb, but also easier for advanced players to DI out of due to there being more hits in the attack. In any case, Pseudo-Vorgis is entirely invincible and resistant to gravity while maintaining the pillar, which possesses high enough priority to destroy most weak projectiles anyway. Pseudo-Vorgis will continue to use this attack even if he lands before or while in the middle of using it.

If you put its telegraphed nature aside, this is an immensely useful move for attacking foes very far above or below you or even blocking off a large portion of the stage for a moment, especially since Pseudo-Vorgis has a float. Your minions know better than to get caught up in this titanic attack and will keep out of the pillar's range, save for Energy Breakers whom greatly appreciate the energy-based meal this attack provides. This also adds HP instead of damage onto any stationary sphere you hit despite the sheer lag and duration of the move making it extremely impractical to use it just for that purpose, but the horizontal range of the dark pillar can scare foes who'd otherwise be close to destroying the sphere into not doing so given they'll be hit by the attack despite the fact that it can damage most of Pseudo-Vorgis's minions.

(F-air --o-- Booming Beast)
A pair of tentacles whip over Pseudo-Vorgis's head and down in front of him, extending further into the attack. They only reach a short distance above Pseudo-Vorgis at first, but by the time they hit beneath him they will have extended 4.5 SBBs. This deals 12% and strong diagonal knockback that KOs at 160%. This comes out very fast for a Pseudo-Vorgis attack and is great for attacking while up in the air, but also has a long duration and keeps you open for a while if it misses. If the tentacles hit the ground, the ground is shattered and this sends rocks out on either side equal to half the length the tentacle had left to extend, dealing half the damage and knockback of being hit by the tentacle. Hitting a minion with the tentacle will cause them to be knocked up to Pseudo-Vorgis's height. If the tentacles hit part of the stage during the attack, the attack ends prematurely. This is particularly useful offstage, and frees up Pseudo-Vorgis to do other things so he is not gimped so easily while trying to recover.

(B-air --o-- Tentacle Reap)
The mass of tentacles on Pseudo-Vorgis's rear back slowly before 3 of them spontaneously shoot out behind him on varying, evenly spread-out: one 60 degrees, one 90 degrees and the other 120 degrees. Each tentacle travels a ludicrous 4-8 SBBs depending on charge (up to 0.75 seconds) and inflict 18-25% plus medium-high radial knockback that KOs at 150-80% depending on whether you're hit from afar or very close-up. In addition, the upper-eigth of a tentacle functions as a grab hitbox that wraps itself around a victim and squeezes them for 20% before reeling them back behind Pseudo-Vorgis, where they're shot away in the opposite direction it lashed out for moderate knockback capable of KO'ing at 300% - in short, dragged all the way to meet Pseudo-Vorgis face-to-face. The insane range and coverage makes this excellent for dealing with multiple foes and functions as a decent follow-up from the U-tilt if there are no other foes ahead of you, removing a huge need for Pseudo-Vorgis to turn around when doing so is a laggy process for him. This is also useful if Pseudo-Vorgis has his back to the stage and wants to reel in foes very far away from him, enough so you could deliberately turn around once the match begins to exploit your increased defenses from behind. This removes many of your other attacking options only available from the front, however.

If you hold the control stick in the direction any one tentacle lashed out upon such, Pseudo-Vorgis will keep it out behind him instead of reeling it in unless he caught a foe at the tip of it. You can keep any number of tentacles out with good fingers or simply smash the input in the first place to keep them all out. These lingering tentacles stay out as non fall-through platforms with 40HP, or if Pseudo-Vorgis manually reels them all by smashing the input, he still being able to use this move with the tentacles he hasn't kept out by tapping the input. Tentacles can be used to keep opponents off the ground and make getting back down there difficult due to how wide they are, and if Pseudo-Vorgis turns around with someone in tow they'll go along for the ride - it's quite possible to move someone into the blast zone this way, though foes have plenty of time to jump off the tentacle should they see this coming. Tentacles can also be used to carry minions and create a makeshift stage to force foes onto, not to mention you can simply retract the tentacles to drop the big guys onto foes for some heavy damage. If Pseudo-Vorgis rolls or dodges, he'll also take his tentacles into the background with him and as such will drop anything standing on them, so if you have a bunch of tentacles out and want to put a minion on one beneath them this is how you'll do it. Minions will do their best to get out of the tentacle's way when Pseudo-Vorgis is about to unleash them, save for Energy Breakers, serving as another way to temporarily reposition them so they can punish foes who try to dodge the attack.

Strangely enough, this move also functions as a B-tilt and B-Smash for Pseudo-Vorgis since he can't turn around casually unlike normal characters, essentially acting as a "5th Special" for him. This lets him use the attack out of his crouch so he can lower his height to make the horizontal tentacle hit grounded foes.

(U-air --o-- Big Red Rocket)
Pseudo-Vorgis sways the side of his body away from the screen before swinging the opposite side of his body towards the screen, swinging his big red rocket above his head if you can imagine that. This is insanely telegraphed, having the ungodly lag of a Warlock Punch, but the hitbox is massive and overwhelmingly powerful, dealing 31% and immense upwards knockback that tends to KO at 55% but will instantly kill a relatively airborne opponent. It sounds rather impractical and would be for a normal heavyweight, but when Pseudo-Vorgis can float and increase his stats by eating others it can actually become rather menacing. To make things worse, Pseudo-Vorgis swings his head before and during the attack, making it impossible to interrupt him, only push him around with knockback. Additionally, Pseudo-Vorgis can keep his big red rocket out for up to 3 seconds afterwards while you hold A, whereby it acts as a damaging hitbox that deals 12% and extremely weak radial knockback that KOs at 180% - this basically gets you an attack for your hard work even if the foe does dodge given the massive hitbox, capable of buying you enough time to set-up into a devour if foes fall towards you to attack your head. In any case, this is one of your best moves for finishing off a foe at early percentages if you've been focusing on setting-up and/or devouring others to gain enough of a speed stat to chase them down, especially when you've got a lot of moves for launching like your D-Smash.

(D-air --o-- Tail of Destruction)
Pseudo-Vorgis puts his tail - the part of his body directly below the purple lump - to good use by raising it behind him before swinging it beneath him like a pendulum. This deals a meaty 19% and decent knockback in whichever direction Pseudo-Vorgis's tail was proportional to the center of his body (KOs at 140%), otherwise knocking foes in the direction of Pseudo-Vorgis's mouth if they were directly beneath him. If Pseudo-Vorgis hits a foe with his tail, however, he'll deal 25% and very sharp horizontal knockback capable of KO'ing at 112% along with a lot of damage to shields. This rivals DK's F-air in terms of lag, which isn't even that laggy for Pseudo-Vorgis, making it a rather brutal countermeasure against foes either directly or diagonally beneath you. You could even use this as a pseudo ground attack given Pseudo-Vorgis suffers no lag when he jumps, making it useful for swatting enemies occupying the center of your body that's a major blindspot.


[""Grab""]

Pseudo-Vorgis has 4 different grabs depending on which direction you hold the control stick, though they all lead into the same pummels and throws. His forward, default grab is a simple swipe and his fastest grab (with lag rivaling a Flame Choke) that works as a good countermeasure against those jumping towards his head. His up grab is an overhead swipe that's slightly slower than the previous grab, while his down grab has him lower his body and scoop enemies off the ground as though casually picking something up, though this is rather slow. Finally, Pseudo-Vorgis's back grab has him wriggle a tentacle on his back before snaking it out in a manner identical to his B-air, except he only sends out one tentacle of your choice and said tentacle moves a bit slower, making this particular grab insanely slow. If Pseudo-Vorgis chooses to send out a tentacle that's already extended behind him, he'll instead lower it before suddenly throwing it into the background and then back out to in an instant to catch all the enemies who were standing on it at once, rolling up his tentacle before chucking victims into one of his arms. This is actually a fairly fast grab that rivals the forward grab, potentially the most threatening of Pseudo-Vorgis's grabs.

Pseudo-Vorgis can grab minions and multiple characters at once with a single grab (up to 3), his grip twice as powerful as a normal character's. Once Pseudo-Vorgis grabs someone, he's free to move about and attack while carrying them, using Z to perform his Pummel and a smash throw to perform his throws. Pseudo-Vorgis can also grab another character using his other hand through a tilt input just in case he wants another victim. Pseudo-Vorgis can grab Energy Breakers, but only with his forward grab, and he cannot move while holding them.

(Pummel --o-- Picky Eater)
Pseudo-Vorgis chews on the opponent to deal 3% per hit.

(Neutral Special --o-- Devour)
Pseudo-Vorgis throws his held victim(s) into his mouth and devours them. To perform this, you have to press B while using the Pummel.

(F-throw --o-- Dark Scrubbing)
Pseudo-Vorgis chucks the foe into his mouth, but this time he keeps them near his mouth and froths, causing a weird blood-red foam to slide from his mouth before be spits his victim out for 17% and decent diagonal knockback that won't KO until 250%. This also scrubs down the victim, leaving with a nasty faint-red tint that reduces all their stats by 3 except for their size - in other words, they become lighter and their movement becomes slower, floatier, and more slippery, weaknesses which make pinning foes down much easier. The effect lasts for 6 seconds and doesn't stack with multiple uses, but if Pseudo-Vorgis had a stat buff(s) of his own his victim will suffer a further de-buff on each of their stats based off half of Pseudo-Vorgis's buffs. You can't drop any of the foe's stats below a 1, however.

If Pseudo-Vorgis scrubs a minion down, he'll deal no damage to it and will instead buff all its stats by 2, but he can only do this once per minion. If you hold the input however, Pseudo-Vorgis's frothing will become more intense and change in coloring in short bursts, the latter being based on the minion your most recent buff came from. After the throw, the buffs and healing Pseudo-Vorgis received from that minion will be transferred to the one he just spat out and will stay on them indefinitely, multiple buffs capable of stacking endlessly if you held the input for long enough. This has a ton of uses to it if you're really creative, with one of your more obvious ones being to give a Death Spider the sheer weight and stamina of an Energy Breaker so it can stay out for longer, being the important breeding livestock it is (the buffs won't transfer over to the babies, sadly). Likewise, you could transfer speed from a Death Spider over to an Energy Breaker so it can actually start chasing foes. Pseudo-Vorgis can devour the minion he gave buffs to if he wants them back, which is more than ideal when they've served their purpose given he'll lose the buffs permanently if the minion dies.

(B-throw --o-- Living Mass)
A tentacle wraps itself around the victim(s) if it wasn't already and drags them along the floor for 1% per 0.3 SBBs they cover at Mario's dashing speed until they escape, reach a ledge or you let go of the control stick, finishing with 5% and mostly-uwwards knockback that KOs at 145%. If the victim hits another foe along the way, they'll be grabbed as well, otherwise ramming them into a minion will cause them to hit them as they travel past them, save for Energy Breakers who are incapable of doing so casually given their size. Ramming the foe into a Pixy deals them 4% and kills the Pixy, causing them to affect them with their magic pixie dust. Only throwing a minion will have Vorgis ram them across the stage to use as a hitbox. If Vorgis uses this throw on a Energy Breaker, he will tether a single tentacle to its chest. By pressing Z when tethered this way, Vorgis will have the Energy Breaker pull on his tentacle to reel him in at Shiek's dashing speed, turning his enture body into a hitbox of similar power to Bowser Bomb with upwards knockback. This grants Vorgis a more effective hit-and-run.

(U-throw --o-- Drain Life)
Pseudo-Vorgis grips his prey tightly as the bright blue parts of his body glow bright green, draining foes for 20% of their health before casually tossing them on up a high angle for moderate knockback that scales poorly enough to only score a KO at around 240%, even considering Pseudo-Vorgis's height. This can be used on minions in which case they'll always be left with 1HP if they'd be killed, allowing Pseudo-Vorgis to utilize them for health while still keeping them active. The only downside to this throw is that it has a fairly long duration and can be interrupted in 3v1 or if you try to casually use it to heal damage from your minions, so it's best used when you know your foe has no chance of attacking you during that time, or in midair. That being said, this throw often puts your thrown minions above thrown foes given they'll be taking a lot of knockback scaling from only being at 1HP, but even being above them can be dangerous like with the heavier Abababan and Energy Breaker.

(D-throw --o-- Savoring)
Deciding to try something different, Pseudo-Vorgis chucks his prey into his mouth and starts crunching and chewing on them until they manage to escape. This deals 3% to the victim every half a second and heals Pseudo-Vorgis the same amount, but if he stays still he'll focus more on chewing and deal an additional 1.5% that contributes to healing. If you use the Down Special while chewing a foe, Pseudo-Vorgis will spit them out as a dark, Kirby-sized fireball that travels as far as the victim would have if they were hit by the bite portion of the Down Special, only with a bit more base knockback and less knockback scaling as the victim becomes a projectile that deals 0.6-1.1x the attack's damage and knockback based on their weight. Minions can be spat out this way, in which case they travel as far and deal the same damage as when shot up through the D-Smash.

[""Playstyle""]
(Overwhelming Gluttony - Eater of Gods )

Pseudo-Vorgis is essentially a hybrid between a playable character and a boss. He's massive and has a unique resistance to hitstun, yet despite this he needs to be KO'ed just like any other character instead of having a stamina bar to deplete. It's hard not to hit Pseudo-Vorgis when he's so huge, though you can't just go nuts on him given he won't flinch from your attacks at all and can easily counterattack despite his own attacks being very slow. On the other hand, going for Pseudo-Vorgis's head is very risky given he wants you there so he can devour you, and that goes for your projectiles as well. Like any old boss battle, fighting Pseudo-Vorgis is all about knowing when it's wise to go all-out and when to put your guard up, when to go for the body and when to go for the head: take too long, and you'll get worn down, but be too reckless and you'll get annihilated by the sheer range and power behind Pseudo-Vorgis's attacks.

Pseudo-Vorgis's biggest setback is his incredibly slow movement.


Pseudo-Vorgis fades out of existence, and as he does the background is slowly replaced with dark purple, hazy one while the stage and all platforms are transformed into gigantic dinner plates. If that wasn't odd enough, two gigantic salt shakers appear near the top of the screen afterwards in a comical puff of smoke, where they begin raining down red peppers on all the players. The peppering is not harmful to opponents, but it sure makes them taste good, enough so to put put all of Pseudo-Vorgis's minions into a frenzy that makes them much stronger, faster and doubles their HP as their bodies gain a bright red tint and their animations become much more ravenous. The mad seasoning also causes 1 minion to appear every 2 seconds and 2 to appear every 5 seconds, the one summoned being decided at complete random - 40% chance for a Death Spider, 25% chance for a Lustacles, 20% chance for a Pixy, 10% chance for an Abababan and 5% chance for an Energy Breaker. This way you don't have to worry about having to madly summon minions to exploit before activating the EX Skill, though it's actually very possible to given Pseudo-Vorgis won't lose the Smash Ball unless he takes stun and that means foes either have to KO him before the Skill activates or hit him in the head.

Once 12 seconds have passed or the player presses B, Pseudo-Vorgis will deem that his appetizers have been spiced thoroughly enough and dig into them, causing a gigantic, simplified version of his face to loom over the entire screen with his mouth wide open before chomping down, resulting in Pseudo-Vorgis draining 100% as he dons a satisfied grin on his face if he succeeds, devouring his opponent whole as though he landed his Neutral Special. The EX Skill effectively and instantly KOs at 50% given foes are Pummel KO'ed if their damage is greater than 150% while inside of Pseudo-Vorgis, having the benefit of being able to hit every foe at once and massively increase Pseudo-Vorgis's stats. It's possible to dodge Pseudo-Vorgis's mouth as he chomps down, but even if they do the minions summoned during the Skill will stay out and keep their frenzied state right up until they're killed.


(Alternate Costumes)


Katapultar

Smash Lord
Joined
Nov 24, 2008
Messages
1,284
Location
Australia
ESTY DEE


Height: 165cm---Weight: 4---Speed: 10--Jump: 9.5---Traction: 5
"Rorona, as your senior in life, let me give you one piece of advice. If a woman looks older than you, don't ask about her age. Ever."

Esty is a character from the Atelier series, featured in the first and third games of the Arland trilogy. She first appears in Atelier Rorona: The Alchemist of Arland, as a friendly, supportive and sometimes playful guild receptionist, seen often as she is the one the player goes to for quests as well as being the announcer for the annual festivals. She expresses a strong desire to get married, and later quits her job to find a man before giving up and committing herself to espionage-related work, as by the time Atelier Meruru: The Apprentice of Arland comes around she is already 40 - contrary to her youthful appearance in the picture shown above. Yes, female adults are largely immune to physical aging in the Atelier series. Regardless, Esty is dissatisfied with the stark reality that she is aging and has yet to get married.

While Esty is indeed a capable fighter, she is not made playable until her second appearance, where she demonstrates proficiency with twin swords and the ability to move in superhuman bursts of speed. This isn't too far-fetched: there is a 14-year gap between the events of Rorona and Meruru, plenty of time for training, with the end result being Esty working as a chaperon for the former of King of Arland...who also happens to be the best swordsman in the world and a rather daring adventurer. Esty is also made playable in the remake Atelier Rorona Plus: The Alchemist of Arland, with her full moveset in-tact... yet for some reason she claims to be wielding a sword and be wearing armor in a few in-game cutscenes when she clearly isn't. It's possible that Esty simply fought this way back when she was receptionist, where she was also a knight for the kingdom in addition to her main job, but the game just recycled her moveset as a shortcut to making her playable.


SPECIALS

Neutral Special ~ Rose Lover

"Can you keep up?"
Esty lowers her torso for an instant before rushing 1.5 platforms forward in the blink of an eye. This is nigh-instant and Esty can act out of it immediately, but she is still vulnerable to attack while rushing, and can be intercepted by foes with a good eye. By performing the rush with a double-tap, Esty is allowed a brief window to perform a single attack before she rushes back to where she started. If you didn't attack out of this, Esty will rush back at the slower speed of Marth's dash, but this can be canceled it into any action. For those who don't want to risk vulnerability, you can hold B when starting this move to have Esty experience some starting lag, but gain invincibility when rushing. Esty will not go offstage when using this move. After using this move, Esty's next rush is slowed down very slightly. This is simply to discourage spamming, as the speed cut will get progressively worse if the move is used immediately in succession, but restores itself at a rate of 0.5 seconds of not attacking or being attacked per rush.

If you mashed B to perform this move or after holding B, Esty will rush back and forth continuously. This is performed so quickly Esty almost appears to be in 2 places at once, and effectively creates a pseudo-duplicate effect as she can cancel the blitz from one of the 2 points she's rushing between. Esty can still be attacked out of her blitz path, but if done out of a slow rush she'll experience 1 second of invincibility while blitzing and can only be struck at one of the 2 points she's rushing between. Esty normally blitzes between the usual fixed 1.5 platform area, but there are ways to shorten the area she covers. For one, you can exploit ledges, or just set the pace yourself by starting the continuous blitz when rushing back slowly by not attacking out of a double-tap rush, in which case Esty will rush between where she first rushed towards and where she started the continuous blitz.

By inputting a direction when starting up a slow rush, you can expand on Esty's options. Inputting forward or backwards will cause Esty to rush forward and turn around at the end or rush backwards, identical to performing a roll, only she slows down somewhat near the end and loses invincibility at that time. An upwards input will have Esty squat before blitzing on a very slight upwards angle, which puts her in midair. Inputting down puts Esty low to the ground, cutting the speed of her rush in half and removing invincibility right at the end, but she will snatch up the first item she comes across if she wasn't holding one. Esty can do her continuous blitz out of any of these options, in which case she will not lose speed during the initial rush. The benefits provided to the blitz are self-explanatory, aside from the up input which has Esty pause in midair for a split-second, then rush back and blitz along the ground as usual.

The longer Esty rushes back and forth, the more she begins to slow down, similarly to the consequences of using another single rush after half a second and further stacking with every further 0.25 seconds the blitz continues for. This might not seem like much, but the speed cut is much worse here because it applies to each rush, and Esty can only really get the pseudo-duplicate effect at top speed among being more vulnerable. Worse yet, the speed cut from this and the regular rush stack and both carry over into one or the other, and just using the continuous rush incurs a slight speed penalty for spamming.

By holding B for longer in a slow rush or just pressing it when blitzing continuously, Esty will stop in front of the nearest foe, or finish her current rush if there was no target. A moment spent crouching down is then followed into a rising slash that takes Esty 1.8 Ganons into the air. This deals 11% and strong mostly-horizontal knockback that KOs at 162% when it first comes out, but can also hit airborne opponents for 6% and mostly-horizontal knockback. If this hits from behind, an extra hit dealing half the damage is added on beforehand, stunning opponents into the main hit to be launched. This is just a damage bonus for the most part, but having an extra hit can be used to trick opponents into dropping their shield early to be hit by the second slash. The starting lag makes this move unsafe when used under normal circumstances, unless Esty sneaked up from behind and this is perfectly possible out of a forward-inputted continuous blitz. That being said, you might be able to connect from the front through the element of surprise, mainly if you did this out of a regular rush that was meant to go past the foe you just stopped in front of. Once Esty finishes her slash, she vanishes and re-appears where she started the move with minor end lag.


If this move was used in midair, Esty will instead flip through the air gracefully before blitzing downwards once, invincible as she does. Esty suffers absolutely no end lag afterwards, not even landing lag, so it's amazing for air-to-ground transitions. The move is limited only by some starting lag, and that speed penalty frames from the grounded version carry over into the blitz and take off some invincibility near the end. By holding B, Esty will perform the rising slash immediately after the blitz, a good KO move near the top of the screen, but unless she did this from the ground she will enter helpless afterwards. Using this move incurs a 1-frame penalty.

Down Special ~ Sunny & Cute
Esty takes out a knife and tosses it on a shallow angle, or diagonally downwards if thrown in midair. This has almost no starting lag but very noticeable end lag when tapping B, whereas holding B reverses the lag to make it a slow start but quick to end. The knife travels 2.3 platforms before disappearing, but if thrown from the ground will land 1.7 platforms ahead of Esty, and embed itself in the ground for 7 seconds or until dealt 5% by an opponent. If the knife was thrown from a crouch, Esty will actually throw it lower to the ground so it lands 0.8 platforms ahead of her, or 0.5 platforms if the control stick was tilted backwards at the time, and experience less of the greater lag to compensate for the general lesser reach. If Esty performed the quick NSpec rush or continuous blitz immediately after using this move and had the knife stick into something, she will specifically blitz towards the knife, making it ideal for specific positioning. While the knife toss is a bit too slow to be used for this practically, if Esty was close to a grounded knife she will use it for the toss and this cuts out the excess lag. This can only be done if Esty was crouching, but it can also be used in midair on airborne knives or even a knife stuck in a platform if you jump or fall through that platform. Of interesting note is that Esty will actually obscure a small knife she crouches over, if anything a useful way to surprise opponents.

On contact with a foe, the knife gets stuck in a certain part of their body, usually their torso but if the knife was thrown low to the ground it will instead get stuck in their leg. This is an aesthetic effect for the most part. The knife deals 5% and light set knockback up-close, 3% and pushback at mid-range and 1% with minor flinching from a distance. Hitting from behind adds on an extra 2% and some hitstun. This is very weak for how slow the projectile is, with very weak shield damage even from up-close and/or behind, but the real danger comes into play while the knife is stuck in the victim. Opponents with a knife in them take 0.5% each time they attack, dodge or shield, as well as when they move towards the side of them the knife was stuck in, and this can stack with multiple knives. The knives can't be attacked and don't go away with time while stuck in a foe either. A foe's only means of removing a knife is by shaking them out by wriggling the control stick with some effort, more so if they got knife'd from up-close, but even then only 1 knife will come out at a time and it falls instead of simply disappearing, embedding itself if there was ground beneath the victim. Knife'd opponents also receive an extra 1% per knife stuck on that side whenever they're sent flying, or 2% per knife if it was from behind. The passive damage that comes with taking action while knife'd might not seem like much, but Esty has no difficulty with baiting opponents and pressuring them so they don't easily get the time to remove the knives to help stack the damage, with moves like the Neutral Special and embedding knives for them to destroy. Shielding and rolling, or shielding, grabbing, pummeling and then throwing help stack up damage in quick succession. Knives will fly through shielding opponents, so even if they're blocked they can still be rewarded to Esty if they have ground to land on.

Knifing an opponent obviously allows Esty to NSpec rush up to them if done immediately after. Assuming Esty didn't suffer excess end lag from the toss, hitting up-close deals enough hitstun to give Esty a frame advantage over the victim, whereas hitting from a distance puts her at a slight frame disadvantage. Knifing an opponent from behind is even better, as the hit will turn them around to face you and Esty will rush from behind, putting her in a more advantageous position. This isn't as difficult to pull off as you'd expect, thanks to the Neutral Special. For one, if Esty uses the Down Special after rushing past a foe, she will turn to throw the knife towards them. This can be used in tandem with a knife that flew past a shielding foe, by rushing towards it and then throwing back towards them with the quicker, to the point where you can repeat this if the knife keeps missing, assuming you don't mind the speed cut that comes with repetitious rushing. You can also just use this move out of a continuous blitz and not interrupt it. This won't influence the path of Esty's blitz, unless you threw the knife with a smash input in which case Esty will pause for a bit after the throw before rushing to the knife instead of where she normally would have, but risks leaving herself open for a bit. Circling a foe can help get multiple knives stuck in their back easily, because if you can somehow knife a foe up-close from behind the stun will be enough for Esty to circle around and guarantee a quick knife toss in their back again. With the right spacing, the second knife can also hit up-close, in which case it will deal an additional 2% and extra knockback on a more upward angle than usual to prevent a potential infinite.

On the subject of knives, using a downwards-inputted slow rush will have Esty pick up any knives along the way and stab them into the first opponent she comes across for 1% apiece. If Esty didn't come across an opponent, she will simply drop the knives at the end of her rush. These knife effects compensate for the down-rush being slower and offering less invincibility compared to other rushes.

If this move was used right in front of a foe with knives stuck in them from that side, Esty will forcefully remove those knives to inflict freeze-frames and 5% per knife removed. Removing 1 knife is the same as knifing up-close, except with more hitstun that guarantees a follow-up with another knife by holding B or tapping B again. Removing 2 knives deals strong knockback that KOs at 160%, and if you can somehow pull out 5 knives the knockback will be strong enough to KO at 90%. Removing the knives from behind adds an extra 2% damage per knife, and results in a more powerful attack that launches diagonally behind Esty and KOs 30% earlier. The spacing for this can be an issue, but the Neutral Special can help. A knife follow-up NSpec rush will put Esty in range to remove the knives, and if Esty can somehow space her NSpec rush to end right behind an opponent she will automatically turn around to remove the knives. If the victim had their back to a ledge, you won't even need to worry about spacing as Esty will automatically end the rush there, making it deadly for them to be there if they had a knife in their back.

Knife-removing comes out on frame 1. This doesn't work on shielding opponents however, and if Esty tries to do it on them she will simply perform the regular knife toss and will almost certainly be punished for it. That being said, Esty can get around this by performing the move from a crouch, which will only remove knives stuck on the victim's leg from that side but can ignore their shield if it was small enough. Even if this doesn't go through the shield, the quicker knife-toss will be less punishing to Esty, especially if she had a knife beneath her to throw. Crouching is a bit slower and more situational than just removing the knife normally, but does come with benefits. Removing one knife puts the victim in prone instead doing minor knockback, positioning them so the side of them the knife was removed from is against the floor. This allows Esty to immediately follow-up with a knife to the opposite side of them, normally to their torso or in their leg instead if the control stick was tilted to the side. The knife being thrown this way stuns the victim briefly, and allows Esty time to get another free knife in if she had one nearby to use, for however many knives she had nearby. This is a great chance to stick many knives in a victim, but if Esty had to take out the knife herself she won't have enough time to tech-chase effectively.

Removing knee-length knives from a victim weakens the knockback they take as opposed to removing them from the torso, but influences the knockback to be more vertical when removing them from the front or more horizontal from behind. If multiple knee-length knives were removed, the knockback will be entirely vertical from the front and on a low angle behind Esty from behind, only dealing around 2/3rds of the knockback but on a much more convenient angle in exchange.

When using the aerial version of the Neutral Special, you can make a down input while holding B to have Esty perform this move afterwards, but in a different manner as she tosses the knife upwards instead of diagonally downwards. The knife won't generally embed itself in victims when thrown on this angle, but instead slices through them for 1% and will come back down after going its usual distance, functioning as a very small static hitbox of sorts. This has the usual lag associated with knife-tossing, but can be sped up by landing over a stray knife to better utilize it quicker, and by inputting the move again while Esty is throwing the knife she'll perform the move again by taking out a knife as usual before throwing it upwards. If there were multiple grounded knives for Esty to utilize upon landing, she is allowed to throw up to 3 in quick succession at the cost of slightly more end lag. If a knife hits a foe being grabbed, launched or in the middle of hitstun, it will not stun them but instead get stuck in their back, encouraging Esty to capitalize on any that come back down.

Side Special ~ Honey Stab
Esty assumes a battle stance, her blades giving off a brief violet flash for telegraph, followed by a good dose of starting lag that rivals Kirby's Brawl hammer. This can be charged like a smash attack to boost the attack slightly, but more importantly this actually splits the starting lag, 70% of which occurs pre-charge while the other 30% occurs post-charge. If Esty was walking, running or dashing when using this move, she will continue doing so until she triggers the second half of the starting lag, but at the cost of the attack becoming less effective instead of more so with charge. Both the pre and post-charge lag are cut by a fraction if this move was performed in midair.


Once released, Esty will actually perform one of 2 different attacks depending on whether or not there was a foe in front of her. If there was a foe, Esty will perform a horizontal slash followed by 2 vaguely-vertical slashes that each deal 2.5%. The slashes deal 3% from behind, and don't turn the victim to face Esty. Every 40% of the way this was charged for adds an extra hit for up to 5 hits total (12.5-15%), but if Esty was moving forward one of the slashes will instead be removed per 33% of the way "charged", to the point where she could be left only doing 1 slash. There's a slight pause between each slash, whereby Esty is invincible as she appears to phase out of existence briefly. The final hit deals solid mostly-upwards knockback that KO at 200-170%, and each slash deals sound shield damage that adds up. Should Esty connect with the final hit, she will quickly vanish and re-appear within one second, or earlier by inputting any action in which case she will perform it with 1-5 frames depending on how long she was waited before re-appearing, with enough pause before re-appearing to allow shielding foes time to move away. If the move was started up elsewhere due to walking, running, dashing or falling during the lag/charge, Esty will automatically re-appear at that location, with her jumps and recovery refreshed if the attack was performed on the ground. Performing the Side Special upon re-appearing will cut out all the pre-charge lag, including if it was done immediately out of an Up Special.

By inputting a direction during the final slash or just before fully vanishing, Esty will proceed to dart in the chosen direction with full invincibility until you let go of the control stick. This rivals the speed of Lucario's Extremespeed, can be curved likewise and can cover the same distance as the max aura Smash 4 variant if done all the way, nearly all of Battlefield, but won't take Esty offstage if done along the ground so there's no risk of killing yourself. Esty can move in any direction, but experiences a split-second delay when attempting to change directions suddenly, which she can do once per-trip and accelerates to double speed when doing so. This doesn't put Esty into helpless, and keeps her facing the same direction as before, even if she was moving in the opposite direction.

Esty experiences no ending lag when exiting the rush from the ground, providing she at least moved around a little, but exiting in midair will provide her with a buff in the form of her blades being electrified until she lands. This isn't completely absurd, as Esty does have an in-game attack that deals lightning damage and it's perfectly possible to give equipment elemental properties in the Atelier games, so they deal extra elemental damage on contact. In addition to adding slight hitstun onto her bladed attacks, this raises the damage output of launching blows by 1% or 2% when they hit from behind. The lightning is also carried over to the knives until they hit something, and if they hit a surface the lightning will be condensed into the knife for a moment before being discharged as a Kirby-sized blast of electricity that deals 5% and radial knockback KO'ing at 220%. If multiple knives hit the same area in quick succession, the electric burst will grow 1.3x bigger, deal an extra 5% and KO 30% earlier per knife, while also getting a slightly longer duration. This is perfectly possible, because Esty will take knives at her feet along with her when she first darts after finishing the slashes, and will also pick up knives overlapping where she stops to suddenly change directions. These knives are then taken up into the air, and when thrown in quick succession Esty will be suspended in midair so they'll all end up hitting the same spot. If Esty doesn't use any of the knives by the time she lands, they'll be planted at her feet to be exploited later.

If you held B when starting the rush, Esty will stop to attack the first opponent she runs into, or automatically go after the victim she struck if B was held but no direction was inputted. This is a pause followed by a quick rolling windmill slash to cover all sides of Esty, and deals 10% that KOs at 200% from the center of the stage but much earlier near the blast zones. The knockback from this is vertical when vertically-adjacent to the victim, on a high angle when diagonally adjacent and diagonal when horizontally-adjacent. The attack is 1.2x stronger when hitting from behind, but 1.5x stronger when you connect with a sweetspot at the center of Esty's hurtbox, by overlapping it with an opponent. This will occur automatically if the victim wasn't launched by the slashes, in which case they need to get out of the way as the attack deals good shield damage, but otherwise it's very rare to pull off against an airborne opponent. This follow-up attack largely serves as a surprise, and can be used to KO opponents off the top of the screen earlier at higher percentages suddenly.


If there was no foe in range, Esty will instead roll through the air on a very low arc that covers 1.5-2.7 platforms. Esty is invincible for the first quarter of the roll, and normally travels at Pit's dashing speed but can move as fast as Sonic with full charge. Esty can perform any attack out of the roll with the starting invincibility and momentum in-fact, aside from the aerial NSpec which will instantly kill her remaining momentum. If Esty uses her Side Special again while rolling forward, she will perform a quick and very powerful-looking cross slash that kills her momentum. This deals 10% that KOs at 180%, with a 1.3x damage multiplier from behind, but gains power when used later into the rush and deals 20% that KOs at 110% when hitting near the end. This also inflicts quite a lot of shield damage, good because Esty doesn't have a lot of moves that are good against shields, and will instantly break a shield if the strongest hit connects with one. The roll can be used as a secondary recovery, but not necessarily an effective one due to Esty's high falling speed and the starting lag. If Esty did the roll out of a walk/run/dash, she will roll back instead of forward, less distance and slower with "charge" to as little as 1 platform at Robin's dashing speed.

This move can be very useful out of a continuous blitz, because if Esty chooses to charge it she will do so while still blitzing, only stopping briefly to go through the first half of the starting lag. With good positioning, you can leave a nearby opponent guessing which of the 2 attacks Esty plans to use more easily as she darts in and out of their respective ranges, or just be far enough for the roll and prepare to use it from 1 of 2 different ranges. The fact that this is a Side Special helps too: if Esty turns to face the opposite direction via the input, she will remain facing that way when blitzing back to where she started the move, without having her direction on the other end of her path influenced.

Up Special ~ Over the Moon
Esty crouches down for a bit before leaping so quickly she appears to teleport, invincible and able to attack immediately after. This normally reaches a height just short of Sonic's spring, but you can input the move like an U-tilt while grounded to have Esty go about 1 Ganon height off the ground instead, in exchange for experiencing zero start-up lag but slight end lag. This can function as a counter, and still allows Esty to hit grounded opponents below her. Neither variant puts Esty into helpless.

After rushing, there is a very small window where Esty remains suspended in midair before falling. If Esty didn't fastfall, air dodge, DI or midair jump (providing she could) out of this, she will remain suspended for one second via bizarre magic that is Atelier battle logic, seen in one of her in-game skills. Esty can attack normally during this pseudo-float, and will even go overtime to finish a move if it goes beyond the one-second duration. If Esty attacked out of this, she will enter helpless with no air momentum, and half the time spent going overtime is added onto the landing lag to make Esty rather open to attack.

This move has no hitbox, but if Esty was overlapping with a knife before leaping or passed through a knife'd victim, she will use/remove the knife and slash through all in her path for 3% and the slightest of upwards knockback. By hitting a foe close beneath Esty's new location, it can potentially set-up for a quick follow-up. The speed of which the rush comes out can be used to scare opponents from being directly above Esty, if they were knife'd or she was standing over a knife stuck in the ground. After rushing with the knife, Esty will continue to hold it for a split-second that allows for a quick knife toss, or else she'll just drop it.

Using the Neutral Special out of this move changes its effect entirely. Instead of rushing downwards, Esty will flash one of her blades and toss it diagonally downwards, straight down or diagonally downwards behind her. This comes out at identical speeds to a quick-thrown knife and travels just as fast, but deals 2 quick hits on contact: 2% on the tip and 5% when the center of the blade impales the victim for strong hitstun. After hitting something, or going 1.3x the distance covered in the recovery, Esty will automatically dart towards her blade and retrieve it after a split-second. Esty then uses both her blades to perform a spinning slash that deals 10% and strong knockback that KOs at 150%, normally diagonal but vertical if Esty threw her blade downwards. The various hits on this move deal good damage against shields, but are still punished against one head-on. That being said, the fact that the blade is thrown identically to a quick knife and hits multiple times means it can trick opponents who drop their shield early in anticipation of a knife toss, especially if Esty brought a knife up with her to utilize a lagless toss. Esty is invincible while the blade is out of her hands.

Esty can throw both her blades in quick succession, but the second blade must be thrown in a different direction from the first. Esty will dart towards the first blade and quickly perform the spinning attack, then towards the second blade and perform a stronger spinning attack using both blades for 16-18% that KOs at 140-120%. This can be used to escape the punishment from the first hit being shielded, or dish out some solid shield damage by using this move close to the ground where both spinning attacks can hit, but leaves Esty open with a lot of end lag after using the second slash. On the other hand, if Esty successfully connects with the first slash, she will not perform the second slash and is instead free to act immediately after retrieving her second blade.

If this move was used out of the aerial Neutral Special, Esty will rush up via the Up Special and remain afloat for a split-second before rushing back down to where she would have. Esty can perform 1 attack while afloat as usual, but will suffer some end lag after rushing down instead of being free to act. If Esty had a knife to use as a hitbox, another hit is added as she rushes down which deals 5% and decent downwards knockback before the knife is planted beneath Esty.


STANDARDS

Jab ~ Steps to Love
Esty starts out with a quick bare-handed chop that deals 1%, but comes out on frame 1 so it's great up-close. This can then be followed by as many as 9 diagonal slashes that deal 1% and very weak mostly-horizontal knockback, but every third slash deals an extra 1% and slightly more knockback as Esty gets into it, as much as 1%, 1%, 1%, 2%, 2%, 3%, 3%, 4%, 4%, and 5% for a grand total of 28%. By mashing A vigorously, Esty will perform all the slashes from a standstill, but otherwise she will step forward each time she slashes. Not all the hits will connect of course, as the knockback from the 5th slash (3%) will knock opponents out of the combo and give them time to react should Esty continue to approach them. The final slash, either the 9th slash by default or any prior slash inputted by holding A, is a finisher that sees Esty rush a very short distance to perform a strong upwards slash that can KO from anywhere between 222-138% depending on how many slashes were performed, with a 18% bonus for hitting from behind. A finisher from the 9th slash can fairly difficult to pull off even when the collective slashes all come out very quickly, but it's impossible if you were clever with the mix-up potential in the option to move or not move during each slash, to catch enemies off-guard. That being said, even the weakest finisher can be useful for follow-ups and Esty suffers less end lag the weaker her finisher was.

Using this move out of the continuous NSpec blitz will not interrupt it, providing the finisher wasn't performed. This can be used to make landing the powerful finisher easier, by carefully pushing the foe along and then suddenly getting behind them, but of course there are plenty of other options as well. The attack can also be used just for setting up by not doing the finisher, as finishing it in the middle of the blitz will influence the new location Esty rushes to if she moved while performing any of the slashes.

Dash Attack ~ Turning Point
With breakneck speeds that surpass the falcon, but still nowhere near the blue hedgehog, Esty is amazingly quick on her feet. When using this move, Esty will use both blades to perform a lopsided spinning slash as she slides 0.7 platforms along the ground. This hits twice on either side of Esty, in quick succession. The first hit deals 8% that KOs at 180% up-close, while the tip deals 2% and stuns foes for the next hit up-close, which deals 6% that KOs at 195% while the tip deals more at 4% but alright knockback on a high angle. Hitting from behind deals 1.3x more knockback, and doing so with the back blade will cause the victim to be knocked on a lower angle to the point where hitting up-close will yield entirely horizontal knockback. It is perfectly possible to connect with this just by dashing through an opponent facing you head-on, and Esty certainly has enough speed to do it quickly, just that there's nothing stopping opponents from hitting her before then and thus this is best used as surprise attack. After using this attack, you can make a backwards input during the end lag to have Esty automatically turn around.

If you held A when using this move, Esty will perform the first spin as usual, but then dart back to where she started dashing from and perform the second spinning slash once you let go of A or when 1.4 seconds pass. This lets the move be used for hit-and-run, and serves as a way to generically gather scattered knives at Esty's feet, but she suffers worse end lag the farther she traveled and the longer she delayed the second slash, if she whiffed with it or struck a shield. That being said, this is rewarding when connecting from behind with the back blade up-close, as foes will be knocked towards Esty and often receive the follow-up attack for even more damage. This follow-up attack deals 1.07x more knockback per platform Esty covered when darting back, as well as per 0.7 seconds she spent delaying the slash. The sweetspot launches foes on a 30 degree angle. Depending on your timing and positioning, you can potentially hit the foe with one of the sweetspots on either side of Esty or keep them close with the sourspots. Hitting with the back when they go flying past you can take them offstage, but just hitting from the front is better for outright KO'ing because the victim will go flying with their back towards you.

F-tilt ~ Heartbreaker
Esty swings both her blades down while holding them in a reverse-grip, dealing 10% and reliable knockback up-close (KOs at 160%) or 5% and half the knockback on a lower angle if you only hit with the tip. This comes out fast, but is very punishable because the hitbox doesn't stay out long. The move also has abnormally high end lag, but that's because Esty stabs the blades behind her after swinging them down. Should this connect, the blades will stab through the victim for 11% and freeze-frames before knocking them away on a low angle, or 7% and half the knockback for hitting with the tip. The hitbox lingers slightly, but otherwise there is no end lag to this: essentially, it can be used as an alternate to the frontal slash that more or less reverses the lag. The move offers Esty a reward for appearing behind an opponent after an NSpec rush, and while the first hit comes out faster, the second knocks foes on a lower, more convenient angle and is easier to act out of. What's more, using it will not interrupt Esty out of a continuous blitz if she doesn't act out of it immediately, giving the back hitbox the potential to knock foes towards where she started the blitz for follow-ups.

U-tilt ~ Head Over Heels
Esty arches back before swinging her legs upwards to perform a grounded backflip. This has a bit of starting lag as Esty arches, but that can be used to dodge high attacks in some situations, and the flip carries Esty a Wario back from where she started it so it can be used to escape the range of most grabs if shielded against. Each of Esty's legs deal 3% on contact, the first kick stunning into the second which deals below-average knockback. This launches foes in front of Esty on a high angle, or directly above her if they were above, effective for juggling if Esty had her back to a ledge to stop her from moving backwards. There is also a hitbox behind Esty as she brings her legs down, which deals 2 hits of 4% and a spike that can KO offstage at 170%, but generally bounces foes off the ground for vertical knockback. This is another option for Esty to perform if she ended up behind a foe via an NSpec rush, but is actually punishable when shielded due to moving through the foe and to the front of them.

This move will kick knives up to 1.4x Esty's height, and send them flying towards her on a high arc so they're as close to her as they were before. The knife deals 4% but no hitstun when shot up this way, but can come as a surprise to opponents it hits and can embed itself in them. If Esty struck a foe and a knife beneath or behind them at the same time, the latter will embed itself in the former's back, making this a pretty effective move for accomplishing that without waiting for their back to show.

D-tilt ~ Sweeper
Esty does a sliding kick along the ground similarly to Cloud, but a bit more slowly before accelerating near the end. This deals 8% and diagonal knockback at the start, 5% with vertical knockback midway or 3% and weak Sakurai knockback from Esty's foot at the very end. The knockback from this largely serves to push opponents around, but the midway hitbox can open up the opportunity for a potential back attack as Esty slides behind the victim. Esty can be intercepted at mid-range if she gets too predictable, but the threat of a knife toss - namely using nearby knives - can serve as a mix-up as they come out more quickly than the kick. The low-lying kick can also poke through shields if they had been weakened beforehand, or a pseudo-dodge against projectile users as a substitute for the NSpec rush.

If Esty slid into a knife or there was one beneath her when starting this attack, it will shot forward on a low arc such a distance that Esty will end up crouched over it at the very end, assuming there was enough ground. This can further catch mid-range opponents off-guard with a hitbox that comes out earlier than expected, especially when Esty obscures knives she crouches over, and can stack with multiple knives.


SMASHES

F-Smash ~ Tough Love
Esty steps back and crosses her blades for a quick pre-charge animation, before darting 1.2 SBBs back and immediately rushing 1.5 SBBs forward while stabbing both her blades ahead of her. After finishing the rush or stabbing her blades into a foe, Esty will finish by slashing her blades apart from each other. This deals 2-2.4% when the tip of the blades connect and a further 5-6.5% if the rest of the blades sink in, followed by 4-10% from the finisher and below-average knockback for a F-Smash that KOs at 180-150%. The ending lag on this is fairly low, but the rush is somewhat telegraphed and can be punished if intercepted, making the attack very predictable if used like a regular F-Smash. This move is best used as a pseudo-counter to punish approaching or rolling opponents, especially when it gives Esty invincibility for anywhere between the first half or even entirety of her rush.

This move actually has a sweetspot when connecting at the very start of the rush, which adds 1.3-2% more to each hitbox, a bit more shield damage and increases the knockback to KO earlier at 150-120%. The damage is also raised to this level if you hit from behind, and if that back attack hit at the start as well it will now KO at 120-95%. The most blatant way to do this is to just turn around when starting this attack near an opponent so Esty rushes at them from behind, but it can also be used with your back to a ledge as a means to artificially buff the attack: with no ground behind Esty, she won't go anywhere when rushing back and will get the full mileage out of the movement attack with a better chance of landing the sweetspot head-on. This can be useful out of a backwards continuous blitz close to the edge.

U-Smash ~ Blooming Thunder
Esty faces the screen with her torso bent towards the ground, squatting slightly and blades held out to either side, before throwing them upwards to 1.3x the height Marth reaches with his U-Smash, perfectly side-by-side. This deals the most damage close to Esty as she throws the blades out, 18-24% with impact stall followed by strong upwards knockback (KOs at 130-100%), but only deal 11-15% that KOs at 170-140% when going up the rest of the way. After reaching their peak, the blades drop back down, still hitboxes, but only deal 7-10%. This has surprisingly little end lag for its reach and duration, but the hitbox is thin and it leaves Esty open from the sides.

If this move is inputted again before the blades come spinning down, this attack becomes different. Once the blades reach their peak, Esty will blitz up and appear over them, catching them and turning upside-down before stabbing downwards and slashing outwards with them, able to reach grounded opponents standing next to where Esty was before. This deals identical damage to the sweetspot, but knockback on a 50 degree angle to victims hit early by the outwards slash or 30 degrees if hit later. This comes out a split-second after Esty catches the blades, so opponents can still attack her if they're quick enough, and can be used to intercept opponents approaching Esty from the side to avoid being struck by the rising blades.

Esty can charge this move in the middle of using the NSpec without interrupting the blitz, increasing her chances of hitting a foe with the very effective yet thin hitbox.

By shielding while charging, Esty will bring one of her blades in towards her, and only use the other blade for the attack. This blade won't be thrown upwards and only deals half as much damage as the sweetspot, but has less of a duration and is easier to juggle with having less end lag. This cannot be canceled once committed to. This serves more of a purpose while blitzing, as Esty will throw one blade up and then blitz to the other end of her path and throw the other up, a bit quicker than usual so both blades reach their peak at the same time. Done normally, Esty will catch the second blade and then blitz back to where she started to catch the first.

If the follow-up was performed for the above situation, Esty will do one of 2 things depending on the distance between the 2 blades. If she was within arm's reach of both blades, she will catch both at the same time and perform an intersecting downwards slash with both, similar to the regular follow-up except it covers the wide area for longer due to being performed differently. If the blades were farther apart however, and this will usually be the case, Esty will instead toss the second blade towards the first as a slow projectile, then blitz towards the first and toss it towards the second at a higher speed, so both are flying towards each other and collide with each other. If one blades hits a foe, it'll deal damage equal to being struck by the regular attack's sweetspot and diagonal knockback and pass through them. If both blades connect at the same time, nearly impossible given the incredibly precise spacing required for it, Esty is rewarded with a very high damage output of 25-40% and massive upwards knockback that can KO at 85-55%. The instant the blades collide, they release a quick electrical burst covering 1.3 Bowsers that deals 15-23% that KOs at 125-95%, but this won't ever hit foes struck by the previous hitbox due to them being launched away from it. It can potentially hit opponents struck by one of Esty's blades when she threw it upwards, but if she was blitzing in the widest area possible the electric burst will miss those who don't move tot he center of where she blitzes. Esty is invincible the moment the first blade is released from her hand, and disappears for a while when the second is released, only re-appearing to catch the colliding blades once they fall together, but with end lag of course.

If there was a knife beneath Esty and she chose to throw just one blade, she will throw the knife in the place of the second blade, dealing 2% and putting the knife in the victim's back due to hitstun being dealt. This can follow into an Up Special.

D-Smash ~ Gorgeous Whirl
Esty crouches down and crosses her blades, then vanishes instantly and takes a moment to circle the area where she was previously standing at impossible speeds. Depending on charge, the circled area can range from 1-3 characters spaces in width. The circling Esty is the hitbox here, a hitbox of transcendent priority that deals 3 quick hits of 3-4% followed by some relatively weak backwards knockback on a low angle that KOs at 182-150%. Esty herself is completely open to attack during the move, not helped by its inability to clash with other hitboxes, but it has very little lag and is not punishable when shielded against, good for creating openings at higher charge. Esty normally returns to where she started after using the move, but if you hit an opponent or a knife head-on you can tilt the control stick in their direction to appear in front of them, on the side Esty struck them from or automatically behind them if they had a knife in their back.

The area where Esty started the move is actually a sweetspot that hacks away at enemies for an extra 4-5% and stronger knockback that KOs at 120-90%. This would normally be impossible to land given you need opponents standing where you started the move, but the NSpec continuous blitz helps with this as Esty will keep blitzing even while charging this move. Charging the move naturally increases the size of the sweetspot, but it only deals knockback that KOs at 150-120%.


AERIALS

N-air ~ Blade Dance
Esty twirls her blades close to her on either side, one angled towards the camera and the other away so it doesn't reach as far out as you'd expect. This is a multi-hitting attack with a surprisingly short duration, dealing 5 hits of 1% (1.3% from behind), flinching and actually turns the enemy around with each hit, serving to disorientate them when the number of hits that connect are never guaranteed. If the final hit connects very close to Esty, the victim will receive weak knockback on a low angle that KOs well past 250%. This is a very fast aerial that's safe to pull out and helps for set-ups by keeping the victim in place as Esty falls past them, with no landing lag if Esty was at least halfway through the attack.

F-air ~ Quick Draw
Esty performs an upwards slash with one blade. At the tip, this deals 4% and weak entirely horizontal knockback, which due to gravity can set-up for an aerial knife toss. Up-close, this deals 9% and knockback on a high angle. This is basically a bread-and-butter aerial move, and deals 1.3x damage and knockback from behind.

B-air ~ Unseen Thorn
Confident in her skills, Esty spontaneously stabs both her blades behind her without even looking, smirking a bit more than usual. Tipped, this just deals 4%, but the rest of the blade is a sweetspot dealing 12% when it first comes out, with impact stall followed by fairly good inwards knockback on a 60 degree towards Esty that can KO at 148%. While not as powerful as other sweetspot-orientated aerials like the Lightning Kick or Knee of Justice, the sweetspot on this is bigger and can be deadly if it puts an enemy offstage given the angle of the knockback, not to mention it leaves a victim's back exposed until they can turn themselves around - something Esty can exploit for a potential follow-up if the foe decides to DI to lessen the knockback given the impact stall easily allows them time to do this.

If this move hits a foe from behind, it deals even more damage - 8% at the sourspot and 18% at the sweetspot, now launching the victim on a 48 degree angle away from Esty and can KO at 110%. The foe can still DI to lessen the knockback, though they have to be cautious when doing this. You see, victims are turned to face Esty no matter which side they were struck from upon impact stall, no longer able to tell which side they'll be launched unless they remembered which side they were facing before. If the victim guesses wrong, they'll DI away from the stage rather than towards and may end KO themselves earlier! That's just a bonus though, as hitting a foe from behind with the sweetspot is still very powerful regardless. It's not necessarily that difficult to achieve without going out of your way for it either: if an enemy goes over you to recover, they'll likely leave their back exposed, whereas recovering low can give Esty a chance to nail them with a knife or two. This can also be used from a Side Special roll as Esty passes an opponent, even if they were grounded.

U-air ~ Footwork
Esty performs a swift flipkick. This deals 6% at the foot or 9% up-close, with okay or decent knockback that varies based on the angle a foe was hit from. This is straightforward for the most part: hitting from above or so launches victims vertically, while hitting from the front deals knockback on a somewhat low angle. Hitting from behind just as Esty brings her legs down will actually spike opponents up-close, but any later than that will knock them inwards while the sourspot has the same effect as hitting with the front. There is also a sweetspot at the start of the move, located on Esty's foot when the hitbox first manifests on a steep angle, that deals 11% and fairly strong mostly-upwards knockback that can KO unusually early for Esty near the top of the screen - or come as a surprise to grounded opponents as Esty lands close to them, but risky because of landing lag and having to be close-up. With numerous hitboxes with various purposes to match Esty's whims - juggling, setting up for a rush close to ground - this serves as a very useful move to throw out casually. There's a reason why so many characters have flipkicks on their U-airs in smash.

Any knives that come in contact with the kicking Esty will be knocked upwards, regardless of which angle they were kicked on. This won't happen too often, but the knives are so small and fly out so quickly they can come as a surprise to opponent, dealing 3% and a bit of upwards knockback to keep them airborne for just that bit longer. This will generally occur when the knives fall out of the victim naturally, or if you go out of your way to put them in the air yourself.

D-air ~ Deep In
Esty turns upside down and crosses her blades before holding them out beneath her and diving down, by seemingly kicking off of nothing. This comes out quickly for a stall-then-fall, but the animation leaves Esty a tall hurtbox and punishable landing lag when her blades get stuck in the ground makes this a high-risk move. That being said, Esty suffers almost no end lag for finishing this move in midair. This move deals 6% and average spiking knockback when hitting at the start, 10% and diagonal knockback that KOs at 165% at mid-range and 14% with some solid mostly-horizontal knockback that's potent offstage.

When Esty connects, she'll slash her blades apart and the move will end there as she briefly stalls in midair for some end lag, unless you were holding A, up or down on the control stick when connecting. By holding A, Esty will bounce back up to the same distance she fell from and continue where she left off. This can surprise shielding opponents or hit spiked opponents against depending on spacing and what not. The attack can only be repeated once this way, as Esty will pass through opponents this time around and now be left open if they shield again, but if you hit when more than halfway into the dive you can potentially have it end before landing again to surprise opponents. In any case, holding up when connecting will have Esty blitz back up similarly to repeating the attack only end it there, while holding down does the opposite as Esty blitzes downwards to experience her usual end lag - or half the usual punishing landing lag for hitting ground early so no true combos.

If Esty was holding knives via the Up Special when using this move, she will let them go right in front of her immediately upon descending. These knives then go through their own brief stall before dropping as a small collective hitbox that deals 2% per knife and very slight downwards knockback with minor flinching. The knives can help cover Esty's nasty end lag by falling on foes right in front of her, and if she chooses to go again after connecting the first time she will take the knives back up with her. On the subject of knives, the D-air can work well out of the Up Special mindgame of crouching to obscure your knives. By waiting long enough for the knives to disappear, or just jumping to avoid taking them up with you, it's possible to bait an air dodge and punish with the delay and speed of the D-air.


GRAB

Esty sheathes one of her blades and uses that hand to perform a quick swipe. This is somewhat slow for a close-ranged grab, partly to balance Esty's incredible NSpec approach, but comes out quickly when done as a dash or pivot grab. Esty will hold victims by an article of their clothing, but if she grabbed them from behind she'll instead put them in a neck-lock and hold her blade against their stomach, with a surprisingly serious look on her face. Grabbing from behind makes escaping slightly more difficult for opponents, and if done very close-up will come out more quickly as Esty doesn't sheathe her blade beforehand. Grabbing from behind also improves Esty's pummel and throws.

Pummel ~ Reception
Esty chops at the victim's neck with her bare hand for 1.5% at an average speed, but becomes a fast pummel from behind as Esty's hand is closer to the victim's neck.

B Pummel ~ Covert Stabbing
Esty uses her free hand to take out a knife and stab the victim for 3-5%, in their torso or leg if you tilted the control stick downwards during the brief starting lag. This is another way to get a knife in, but unless it was done from behind or at a higher percentage (around 70%) the victim is almost always guaranteed to escape before Esty can follow-up with a throw, due to lag.

F-throw ~ Ribbon Lacer
Esty hacks away at the victim with lightning-fast slashes from her blade, dealing 8-10% and some decent base knockback on a low angle, but low knockback scaling. That being said, you can press A during the animation to have Esty remove knives stuck in the victim to deal an extra 2% and KO them earlier. Removing a single knife causes the throw to KO at 160-145%, while each extra knife afterwards lowers the KO percentage by 10-12% to the point of being especially powerful with many knives. The knives removed are then casually tossed behind Esty, a Mario length behind her and each knife a Mario length apart from the last, so they can be reused on opponents as they respawn. Esty will never throw knives offstage, so if she had her back to a ledge they'll be bunched up in one place, all the more convenient if you can KO from a greater distance. Even if you don't have any knives to use with this throw, it's certainly not bad at pushing opponents around and spacing them for a rush follow-up.

B-throw ~ Backstab
Esty casually tosses the foe behind her for 4%. This isn't very powerful for a throw and doesn't provide much follow-up potential either, but keeps the foe facing the other way, similar to a few B-throws in smash like Marth's. You can press A to have Esty toss 2 knives side-by-side towards the foe, which connect for a further 2% apiece to bring the throw up to an alright 8% and now you got 2 knives in the victim for free, in exchange for their hitstun causing them to face you.

If the victim was grabbed from behind, the throw changes as Esty suddenly performs a fatal red slash on them which deals 12% and very high base knockback that KOs at 138%, but you can still perform the knife follow-up if you wish. This now becomes Esty's best throw for KO'ing or just getting some spacing. At higher percentages, this throw will automatically remove all knives stuck in the victim and drop them in front of Esty.

U-throw ~ Kickstart
Esty circles around the victim to build up momentum for a high kick that hits surprisingly hard for 9.5-12% and strong base upwards that can KO from anywhere between 158-135%. The force of the kick loosens any knives stuck on the side the victim was struck from, and causes them all to fall out at the same time just as the victim reaches the peak of their knockback or are star KO'ed. This is primarily a KO move, and it would be a waste to let those knives go off the screen with the victim. By continuing to hold up after using this throw and dislodging at least one knife, Esty will prepare to use her Up Special for more end lag on this throw, but then use it to automatically reach the knives and hold them per usual. This can allow Esty to go higher up than usual, good for finishing opponents close to being KO'ed, and can be delayed to blitz up to a specific point if necessary.

D-throw ~ Speed Dating
Esty rushes back and forth over a 1.3 platform-wide area, cutting the foe and only that foe for 10 hits of 1% before launching them for average diagonal knockback. The rush lasts for nearly one second, Esty invincible while doing so, and if you press A while performing it she will grab hold of any stray knives she runs into - aside from those stuck in other opponents - and stick them in the victim for an extra 2% per knife. Which side of the victim the knives end up in depends on which side of them the knives were on beforehand, but you can press/hold down while doing the deed to have Esty stick them in the victim's legs should you want to do that.


FINAL SMASH

Lovely Shadow
Esty's Final Smash is a speedy rush across the stage, followed by several fatal rushing slashes and finished with a rising slash to launch the victim on a high angle. This is then followed by leaping high up into the air, and down on the victim for a stab that strongly spikes. This deals 45% in total, and the final hit bounces the victim off the ground and up into the air to be KO'ed past 110%, but much earlier - if instantly were they close to the edge, and has Esty jump back to where she started the Final Smash.


If the victim was past 100%, were on their last stock and the were the last enemy remaining, this becomes a flashy match-finisher that follows up on the regular Final Smash. Instead of jumping back to where she started, Esty stays in midair and hits with a barrage of knives, followed by taking out one last knife and kissing it flirtatiously to pierce through the victim for one last, surprisingly fatal attack.
 

FrozenRoy

Smash Lord
Joined
Apr 26, 2007
Messages
1,268
Location
Las Vegas, Nevada
Switch FC
SW-1325-2408-7513
"It's not how much time you have, it's how you use it."

Ekko, the Boy Who Shattered Time


A brilliant, daredevil prodigy livin' on the corrupted streets of Zaun. He is the personal inventor of his unique "Zero Drive" hextech device (after MUCH experimentation), which allows him to go a brief period back in time at will. Resourceful, intelligent and a cocky perfectionist, he's willing to hazard his own health to get things juuust right. He is a heavy believer in the future of Zaun, hoping to help fix its (MANY) problems, and generally quite disliking of its neighboring city-state Piltover, who he sees as generally full of arrogant blowhards. The death of one of his closest friends in his childhood by a Piltover noble probably helped sour him a lot to them too. He has similiarities in appearance to The Kid from Bastion and his hour-hand weapon is similiar to the Transistor from, well, Transistor: both of which are made by Supergiant Games. His voice actor is also the same as Pit and Dark Pit's in Kid Icarus: Uprising.

When it comes to League of Legends, Ekko serves as a rare utility assassin: He doesn't do as much damage as his fellow assassins, but he's got more to help his team outside of doing damage, and he excels in skirmishes due to his ability to dive in and out of battle. His Z-Drive Resonance passive causes his basic attacks and Timewinder to put stacks of Z-Drive on foes he hits: When he hits 3 stacks, he deals additional damage while slowing the foe and speeding himself up, but the passive stops applying on that target for a while. His Q, Timewinder, causes him to throw out a small, sphreical Timewinder device. Upon hitting an enemy or reaching its max range, it bursts into a rectangular shape of energy that deals damage, then returns to Ekko and deals damage on the way back: The first hit slows enemies. His W, Paralell Convergence. causes him to bat a device to a target location, which then expands into a broad sphere of temporal energy that slows enemies inside it. If Ekko enters the sphere, he gains a shield and stuns all enemies inside for a rather lengthy period. His E, Phase Dive, causes him to dash in a target direction and gather energy: His next auto-attack gains bonus range as he blinks to his attack target, dealing bonus damage.

Ekko's signature ultimate, Chronobreak, causes him to be followed by a time-hologram of him that tracks where he was 4 seconds ago. By activating Chronobreka, he uses the Zero Drive to return himself to the past in a burst of temporal energy, healing himself massively based on the damage he took in the last 4 seconds and dealing area of effect damage to enemies around him. Amusingly, this is a bit counter to how his time travel works outside the game: As seen in his trailer and other media, everything EXCEPT Ekko goes back in time, so he keeps his injuries. But just sending everything back 4 seconds would not only be terrible to code but horribly OP, so...


Ekko: Statistics


Ekko, all things considered, is a pretty squishy character more built for damage, having the same weight as Bayonetta. His size however is rather considerably smaller and he can be compared to Mario in that regard, with the mohawk giving added size-appearance but not hurtbox-size and being slightly wider. His ground speed is fairly average, pretty much equal to Pit and Dark Pit in that regard. His traction is slightly slippy-slidey, but not TOO bad.

Aerially, Ekko falls very fast, and has a fast but not as extreme air speed as well, with slightly above average air control. He's all about speed there. His first jump is great while his second jump is merely above average. He has a high wall jump and a fast, fairly low crawl as well. Pretty neat!


Ekko: Zero Drive


Ekko's entrance animation has him pulling the cord of his Zero Drive, revving it up for battle, and one of the things that means is that Ekko isn't quite alone in combat: He has a delayed time-hologram to help him! The hologram only spawns 4 seconds later and mimics every action Ekko does to the letter...four seconds ago, anyway. If you were dashing in the middle of Battlefield 4 seconds ago, that's where he'll be. Attacking? Same there. There's no hurtbox on this guy, so you can't just knock him away, you might just have to deal with him for the whole match as a foe, although he is naturally visibile to everyone. Don't let Ekko's past sneak up on you: Remember what he did before his hologram does it or he might catch you in an unforeseen combo!

As I mentioned, Ekko's time-duplicate will attack as Ekko attacks, and in fact the hologram deals half the damage, knockback, hitstun and so on of Ekko's attacks! A pretty wonderful combo, space control and safety tool that people must constantly be aware of. It won't apply any special effects of your attacks or anything, though, so damage and knockback is all you get. The duplicate is blue and follows a wispy, light blue trail that Ekko himself leaves. Make every second count!


Ekko: Specials


Down Special: Chronobreak


Tying right in with Ekko's Zero Drive mechanic is one of the cores of his gameplay: The Chronobreak! With a pull of his Z-Drive's Cord and a spin of its hourglass-handle, Ekko slams the handle down and reverses time! The events of the last 4 seconds of the map will play back in razor-fast speed, resetting pretty much everything on the battlefield to the way it was then: Ekko and all his enemies are placed in the same spot, traps and minions and so on are reset to the same state they were at the time, stage hazards are as they were and so on, and anything preset (most prominently stage hazards) will even follow the same as it did for the next 4 seconds! Every wondered what you could do if you just knew when and where Norfair's lava would spawn? Now's your chance! Characters even have their damage, although not stocks (Chronobreak can't be used to bring back the dead so easily!), reset to how it was 4 seconds ago...with the exception of Ekko himself. I did mention that, in-universe, he keeps all the damage done to him, right?

Ekko also will reappear in a burst of chrono-energy, dealing 16% damage to any foes nearby, although the knockback is very poor and does not KO until 260%: This isn't strictly a downside, as it can offer Ekko a high-damage tool that usually begins a combo and be hit with shockingly easy (Remember when you got hit by Ike's Forward Smash 4 second ago? Chronobreak back then and smack him for 16!), but you have to remember that any damage Ekko did during that 4 seconds is going to be gone. If you just use it to combo a lot, you're liable to just end up at square one, or worse since YOU don't heal. It is one of the best ways to position yourself advantageously, though, especially if something goes wrong: opponent predicted your approach right? Chronobreak and make them predict again! Messed up your combo? Chronobreak for your second chance to send them flying! This will have more additional uses as the set goes on, but it is big enough to really demand being talked about first.

After Chronobreak is used, it will go on cooldown for 8 seconds. During that time, using the Down Special will simply have Ekko try to time travel and fail with a pathetic whirr for small ending lag. In addition, Ekko's Zero Drive passive is disabled while it is on cooldown, and only starts up again as it starts to go off cooldown (it begins tracking you when the cooldown hits 4 seconds and the duplicate appears the moment that the cooldown is over). The starting lag on this move is average and done faster than you'd think and it has almost no ending lag: Ekko is invulnerable past the starting lag and until the ending lag begins, so combined with the nature of this move he can use it as a dodging and escape tool if need be. He can even use it to Chronobreak back to the stage as a recovery!


Side Special: Timewinder


Ekko reaches into his pockets and pulls out his trusty Timewinder: Originally meant to be a flash bomb, it ended up being more of a damaging tool. Throwing the small, disc-shaped Timewinder forwards (it is about half the size of a Mario Fireball, thin but wide), how far it travels depends on if the attack was smashed or not: Tilted is 0.75 Battlefield Platformss at the speed of Mario's Fireball for spacial control, while Smashed is 1.5 Battlefield Platforms and 1.25x the speed of Luigi's Fireball for a more quick-hitting approach. The disc will transform into a larger (1.5x Mario Fireball size, gaining a lot of height and some width), rectangular energy thing either once hitting near-max range or juuust a touch before it would hit a foe: The actual attack! It's actually, like Link's boomerang, a two-hit attack. The first hit deals 6% damage and enough hitstun that they only have a brief amount of time to deal with the next hit, which deals 8% damage and somewhat low knockback in the direction the Timewinder is returning. The first hit has no knockback. It will return after transforming, either by range or getting close to a foe.

The fact it transforms a moment before hitting the foe means it is pretty much always shieldable, but the fact the second hit lingers for a fairly long while before it returns can mean shielding leads to Ekko getting a free grab or shield pressure, or that they'll just drop the shield and take 8% damage anyway. It boomerangs back to where Ekko quite quickly (About 1.25x the speed of a returning, smashed Link boomerang) and will timeport to Ekko if it misses him or otherwise it prevented from doing so. It is pretty nice to throw out as a lingering hitbox and key for spacial control for Ekko, along with being a projectile of course. Like Link's boomerang, it can't be used again until it returns to Ekko...so no spamming them for free, although this move's long starting lag would make it difficult to spam anyway, although the ending lag is pretty average. Timewinders that Ekko's holograms throw out don't count to "using up" Ekko's Timewinder, so he can have a half-powered one out at the same time for true control, even if the hologram's only does half damage and such.


Ekko's Timewinder, along with Ekko's melee attacks (assume any of Ekko's melee attacks apply one stack of this per hit unless otherwise specified), apply a stack of Z-Drive Resonance, or Resonance for short. Each stack of Resonance only lasts 4 seconds before falling off, with additional hits only adding new Resonance and not refreshing old stacks, but the reward for getting to three Stacks is pretty noteworthy! First off, the attack that deals the third hit will deal 5% damage more, along with bonus hitstun and a smidge of bonus knockback (very small), meaning you'll get some extra damage in and the hitstun can allow some unique combo strings compared to normal. You can see how many stacks are on you by the blue circle of chronoenergy appearing under you, like the images above.

The second and EXTRA noteworthy effect, however, is that Ekko will "steal" some of the foe's time and speed! Enemies who hit three stacks are slowed by 1/3rd of their movement speed, while Ekko gains an equivalent amount of movement speed for the same amount of time: 4 secxonds. It ain't long, but it IS the perfect signal for Ekko to go right on the offensive during that short window. Must be his time! The boost is both ground AND air speed, so it can help get KOs some by making them recover worse (they go through the air slower), and Ekko can do different stuff based on the movement speed of the foe. Z-Drive Resonance has a 6 second cooldown on individual foes: Stacks won't stack up on the same person during this time, although in FFAs and Team Battles Ekko can proc it on multiple foes, potentially making him absurdly fast.

I bring it up on this move because, you see, Timewinder applies a stack both going out and on the way back, making it potentially one of Ekko's few ways to get two Z-Drive Resonance stacks and his only way to do so at range. It won't apply any stacks while your Chronobreak is on cooldown, though, since the Timewinder uses the Zero Drive for energy, and you just expended it all to xPeke time. It's still one of your best ways to apply it and all when up, though. Oh, and as a note, you won't apply stacks by smacking a shield up, so don't even try. And, naturally, Ekko's duplicate won't apply stacks: you gotta do some things yourself, you know?


Neutral Special: Parallel Convergence


Ekko digs through his pants pockets and pulls out a small, blue hextech time device, tossing it up into the air a little and smacking it forward as if it was a baseball. How far and high Ekko bats it depends on how long this move is held: A tap causes it to be hit at a very high angle, almost vertical, and land half a Battlefield Platform two seconds later, while holding it for half of a second (the max charge) will have Ekko hit a line drive and send it 1.25 Battlefield Platforms forward at a shallow angle just above Ekko's head and landing on the ground (assunming there is any, of course) 1.25 seconds later. This projectile's damage is pretty pathetic, though, and only deals 3% damage and a flinch on hit: Lame! Especially considering the longer-than-normal starting lag on this move, although the ending lag is veeeeery low on this, so it is pretty dang safe when you actually get it out.

Where the meat of this projectile comes in is when it hits the ground, where it will burst and expand into a field of temporal energy as seen in the image up there. During this field's 4 second duration, it will deal 1% per second to enemies inside the field from the differing temporal energies, so you can get a cool SEVEN percent damage from this...yeah, not exactly the best damage output. Enemies will want to consider keeping Ekko out of this field, though, because if he enters it...bam! It bursts and blows up as him and the field's temporal energies react! The chain reaction within works with Ekko's Zero Drive and grants him a damage shield for twice as long as the remaining duration on the field. The next 20% damage that is dealt to Ekko is split between Ekko and this shield (IE a 10% damage attack deals 5% damage to Ekko and 5% to his shield), along with halved hitstun, but full knockback (calculated as if the attack did its full damage to Ekko). Furthermore, Ekko gains 8% super armor while the shield holds, meaning that attacks which deal 8% damage or less to him won't even flinch him or make him take knockback (although damage is still done)!

But wait, there's more! Call now and the explosion when Ekko enters the field won't just give him the shield: enemies within take an extra 6% damage and are, oh my, it's a stun in a Froy set! Now, the stun here is reeeeeeeally small, although it does scale with time. If Ekko catches them right as the field has max duration, he can maybe get off one of his smashes if he's spaced right. Most of the time, Ekko can probably get off a single tilt if the foe is hit by this, and when it is about to expire Ekko will be lucky to get off a single jab. It can also be shielded or dodged, naturally, and the foe has to be in the field, so this can be kind of hella predictable. Enemies are also not stunned out of actions, so if Ike is about to start a Forward Smash, he will stay in that part of Forward Smash starting. This can be both a blessing and a curse: It can open the foe up for more damage as they do whatever laggy action they take or during ending lag they'd take when the stun ends, but it also means that they can have a move about to start that'll clobber you if you go slow, and hitboxes they have out will stay out. It can still potentially lead to a free hit, though.

Ekko can't just spam this move to make a bunch of fields, though, only one of the hextech devices can be in the air at any time and only one field can exist at any time, although he CAN have one of each out, and he should be a bit careful when throwing them out. Any attack which deals 3% or more can bat around the attacks for both Ekko and the opponent, which can alter where the field appears...or foes can just bat it off the stage and then Ekko gets nothing. And Ekko has to get into the field first, of course. Opponents can play keepaway with Ekko for both the field's landing AND when it pops up and he can't even make a new device to toss out if they just bat it around.

This move has rather interesting temporal interactions with Chronobreak. The device Ekko tosses out will be rewound just like everything else, of course, and so Ekko can use it as a way to "save" it if the foe knocks it offstage or whatnot, or if Ekko messes it up he can redo, or what have you. BUT, the temporal field is on a whole other energy wavelength, it's own time if you will, so it won't get rewound away! This means Ekko can be pr-etty tricky with his time-dupe, and foes need to not only keep track of where they are now, but where they were four seconds ago, or else Ekko might just rewind himself to the field where they were before for a sick combo starter! The field's device will come back with the field, however, which allows Ekko to potentially double the amount of fields he has out, and if he throws another out? My, my, Ekko can potentially have up to three fields out at once!

This is not quite as scary as you might think, for the most part the fields won't stack, and instead just refresh the duration to the highest duration of all fields Ekko has entered, with the exception of overlapping fields: If the fields are overlapping AND Ekko steps into the overlapping part, they'll stack, including duration! This can potentially give Ekko an extremely potent, long timed shield (the super armor doesn't really stack regardless), and with three it can get truly obscene, but of course this requires an absolute mastery of Ekko's Chronobreak, the timing to get multiples out in the first place, the ability to place them overlapping in the first place when the foe can bat them around AND the fields last a limited time AND Ekko also has to only enter them where they overlap or he'll trigger it early. It's something really, really rare to ever have happen, but it does happen! The timeline was that broken already, honest!

Ekko's time duplicate will toss out a temporal copy of the projectile that follows the path that the normal projectile takes, batted around path and all, and deals the same damage as the normal projectile. It will never explode into the temporal field or anything and can't be batted around itself, though, but it does mean Ekko can even bat around his device to combo off it 4 seconds later! None of this attack applies stacks of Resonance.


Up Special: Phase Dive

Ekko makes a quick leaping dash in the chosen direction, before with a second input blinking (teleporting) in the next chosen diretion! The first part of this attack goes the distance of Pichu's Agility (scaled to Brawl/Sm4sh proportions) and has a very similiar appearance to Lucario's Extremespeed, with no hitbox to it and Ekko free to be hit. The second hit goes only the distance of Pikachu's Quick Attack and has an appearance more like a Mewtwo Teleport: Ekko will deal 3% damage and a light flinch upon reappearing. Ekko does not enter helpless after using this Up Special, but he must either hit the ground or be hit by the opponent to use it again in midair. This move's starting lag is around average, with the ending lag depending on which hit ends: Using just the first part has slightly below average lag, while the second part has even less lag than that. The multiple attacks of this attack use essentially the same mechanics as Pikachu's Quick Attack. The second hit does not apply Resonance.

Ekko's first leap on this may be very vulnerable and gimpable, but the second hit is a very fast teleport, and in fact Ekko can use this to dodge attacks with a little practic. For example, Samus' charge shot is flying at you, you can Up Special AWAY from it with the first part of this move (allowing the Charge Shot to keep moving), and then go TOWARDS it to reappear "behind" it. The second part is a true blink and can even go past walls and such if there is somewhere to go past (he won't just go through all of Final Destination's moddle bottom, for example, but he might be able to pass by the lips), which can offer him a lot of opptions on some stages. Remember that the first part of this move travels further than the second: Important to keep in mind when trying to dodge, disengage or engage with this move!

This can be combined with the fact that Ekko can, in fact, re-appear with an attack! This can be done either by making an attack input of anything valid RIGHT before Ekko reappears or by inputting a direction + A to do an appropriate directional attack: Aerially, this means up is UAir, down is DAir, forward is FAir, back is BAir and diagonals are NAir in that direction, while standards are side for F-Tilt and so on, with diagonals being the appropriately moved, but Ekko can in theory utilize any valid move (can't use smashes in the air, aerials on the ground etc) out of the blink with proper timing, except another Up Special of course. The ending lag of the aerial is combined with half of the second Up Special's ending lag, essentially meaning a small bit laggier, and this cannot be done out of the first Up Special.

This can mean a lot when combined with your Parallel Convergence, most notably the fact you can dip into the field with the first hit, then pop out with the second and an attack, or using this to perform a last minute save on a Parallel Device that the opponent has knocked around unfavorably or what have you. The sudden movements of this attack can also make reacting to Ekko's time dupe on impulse hard and thus emphasizes the fact you gotta keep up with Ekko's past as well. Don't underestimate this as a combo-extending tool or even simply as a unique method of movement around the stage either!


Ekko: Smashes


Forward Smash: Batter Up

Ekko grins and grips his clock-hand tightly, before ripping forward an uneven, baseball-like swing for the fences with it, which leaves him visibly off balance during the ending lag of the move. Ekko DOES use it like a baseball bat in his League of Legends auto attacks, after all! Enemies smashed away from this move aren't sent flying quite like a baseball bat item, however, and in fact the attack might be a bit disappointingly weak: It deals 17%-22% damage and KOs at 170%-140%, not making it an exceptionally strong move, although the fact it is decently fast (a bit faster than a Mario Forward Smash) can let it fit into combos well, although the ending lag isn't all that hot, being rather poor actually. This hits your Parallel Devices at an arc similiar to a larger charged Neutral Special, the same way that most foes are launched.

This move, rather importantly, has a sweetspot in the center of the clock-hand, which will deal 20%-25% damage and KO at 150%-120%, and unlike the non-sweetspotted version will apply a stack of Z-Drive Resonance: If it applies the third stack, then the foe will be launched with a burst of temporal energy from the middle of the clock-hand, making it do an impressive 24%-31% damage that KOs at 110%-70% and is one of Ekko's best KO moves, although this is obviously pretty situational. Ekko's time-dupe can sweetspot this, but it cannot apply Resonance and thus the strongest hit is impossible for it, and do remember that Ekko's time-dupe only basically does half everything. A good Parallel Convergence can set this move up and Phase Dive is also very nice to weave in, smack the foe with this, and then potentially even try to weave right after them with another Up Special at lower percentages, and can be a way to set the sweetspot up. Setting the sweetspot on this move for your Time Dupe can be hard, but it is rather rewarding.


Down Smash: Luden's Ekko

Ekko barges forward shoulder-first a small amount, for...rather disappointing damage and knockback for a smash, really, 4%-7% with almost no knockback, before he blinks away and performs a sweeping strike of his bat across from the other way! This is the real meat of the move, dealing 13%-17% damage for a total of 17%-24% if they combo into each other: Which it usually will, although it will have trouble at very low percentages, and at very high percentages will be unable to combo because the first hit's knockback will have scaled too far. Since this move's second hit KOs at 180%-150%, it will usually kill them before they get to that point, buuuuut some games just go long...

The second hit is a blink and because of that, Ekko can use the first hit of this move as a dodge tactic to appear behind foes due to its quick starting lag and the duration being small of the first hit, which also makes it a good interruptor tool. This is a two way street, though: The second hit is delayed and means that it has long starting lag if you whiff the first hit essentially for a weaker powered move, which can end up leaving Ekko very vu;nerable if he whiffs despite the average ending lag. Ekko ends up slightly behind where he started for this move, by the way, facing the opposite direction that he started. Only the second hit of this move applies Z-Stack Resonance, given that the first hit doesn't involve any of his devices or anything.

Ekko doesn't have to do this though, because he can actually choose the direction he pops out from when he re-appears! Simply tap the control stick in a direction and Ekko will strike that way! For example, tapping "up" would have Ekko re-appear only a bit forward and perform a elaping strike, while "down" has Ekko appear in the air a bit forward and slam down as a spike. These all do the same damage and total knockback of the base move, however the angle of knockback is different along with Ekko's positioning. For example, at mid percentages a "down" Down Smash will usually stage bounce the foe for combo chances, while at lower percentages an "up" Down Smash is a great way to begin low aerial combat. These will also change where Ekko pops out slightly, which can be rather important if you're working with one of your time-dupe's patterns that requires you be a few chronometers to the right. For that matter, the multiple hitboxes, somewhat difficult to remember pattern and unique positioning and knockback abilities make it a great move to work off of four seconds later, such as spiking a foe back down to you or starting an aerial combo with an advantage by starting it off your time dupe or whatnot.


Up Smash: Time Crash

Ekko performs a quick, upward bat with his clock-hand, a simple but fast move that deals 5%-8% damage and knocks foes lightly up, after which Ekko may press A (ala Link's Forward Smash) to utilize a follow-up attack as he blinks up about a Ganondorf into the air and smashes down with his clock-hand for 15%-21% damage, or a total of 20%-29% damage, and fairly strong spiking knockback (technically not quite a true spike: It sends them down and a bit forwards), although the stagebound nature of the move means that this doesn't really score KOs all that well. The second hit of this is optional compared to the Down Smash, allowing Ekko a larger multitude of potential follow-ups, which is important since this move can't combo early and starts to combo more iffily as people get up in damage percentages. The second attack can be done quickly after the first to use the first as just starting lag to make this a pretty slick anti-air with dodging power ala Ekko's Down Smash, but this means it becomes a "laggier" move from the use of the first attack. The ending lag on the first hit is small, the second hit's is larger.

The natural comboing ability of this move makes it a natural fit into Ekko's time-dupe playstyle, and it is one of Ekko's best ways to just dunk a Parallel Device and activate it, and this CAN score spiking KOs near the ledge. In particular, Ekko might use this near the ledge in anticipation of a ledge battle (especially if he just knocked a foe off stage) or an edge guard in the future, allowing him a strong option to "set up" edgeguards before they even occur! Remember that the second hit is a blink: You can use this to slam people coming in hot or predict a stall-than-fall or something and smack them for it. Both of Ekko's hits here will utilize Resonance and this is one of his few two-hit ways to do it, which is pretty slick. Bonk!


Ekko: Standards


Jab: Jab

Ekko performs a quick, well, jab forward with the handle of his clock-hand weapon! This is a blindingly fast jab, but it deals a mere 5% damage, pathetic knockback, and isn't hugely repeatable, being a 1-hit jab. The key thing this move has is blazingly fast start-up and slightly below average ending lag: This is very safe to throw out, a great way to tack on combo damage, and a good panic button. It is also your fastest way to apply drives of Resonance, setting up other moves in the set. The quick speed also means that throwing it out so that your time-dupe can use it is a good strategy and it can form a nice damage racking "trap" behind Ekko, although the duration of the attack is naturally fairly small and the attack is pretty weak for a 1-hit jab. The secret, then, generally relies on fitting it into the rest of your moveset.

Dash Attack: High Speed Slash

Ekko makes a wild leap forward with his bat held up and behind him, swinging wildly below him as he does so, a fairly strong blow which deals 14% damage, but the knockback is rather lower than expected because they stage bounce: It only KOs around 235% or so, making it not a KO option. If Ekko lands this attack, he will pop off the foe lightly via momentum, going slightly forward and up and taking quite low ending lag: It is a pretty natural way to begin an aerial assault, although Ekko will lose his grip and take longer ending lag if he hits a shielding foe, making this actually rather punishable on shield. If Ekko completely fails to hit anyone, then he will land on the ground somewhat roughly, rolling forward aesthetically: This causes Ekko to roll forward about half a Battlefield Platform for safety, but it is also very long and punishable ending lag. No matter how Ekko lands, the starting lag is "slightly laggy".

Ekko has two follow-up-esque attacks, depending on if he hit the foe or not. If he hits the foe, then he may hit A right as he hits a foe to perform a follow-up attack, where he will flip off of the foe and bring them with him by gripping with his feet, adding a token 3% damage but more importantly allowing Ekko to choose what direction to fling the foe: They go the same distance regardless, with the knockback distance being the same, but Ekko has various unique options to follow-up if it is more grounded, straight up, or whatnot: Ekko himself will also "pop" that way for added following up. In particular, this is Ekko's best way to counter people just standing in front of his Parallel Convergence and playing king of the hill with it, although it is of course laggy on whiff...but the fact Ekko rolls forward when whiffing means he can potentially roll into a Parallel Convergence on whiff, granting him the shield to help the resulting punish feel less bad.

The other follow-up option, in fact, can ONLY be used on whiff, where Ekko very quickly slams his feet into the ground and transfers the momentum into an awkward, sloppy slashing motion the opposite direction he was rolling, similiar to his last attack in his teaser trailer: This only deals 8% damage, but the set 1.25 Battlefield Platform knockback and above average hitstun means it is one of Ekko's best ways to reset the battlefield, gain space and what have you. Ekko travels half of a Battlefield Platform from where the follow-up attack started, which is any time Ekko hits A until the last 1/4th of his ending lag, and it has a small delay in starting lag before going. Ekko takes horrible ending lag on whiffing this move, as he falls down from the momentum andm ust get up, so while this can prevent punishes and help with safety, it can also just end up being easily shielded and then you get Ike Forward Smashed in your face.

All of these options work greatly into Ekko's time-dupe, as they will naturally perform the follow-up attack as well, meaning Ekko can manipulate the direction a foe goes with a lot of accuraccy with a hit-follow-up BUT at the same time he has to be in the right place to work off how he flung them around 4 seconds ago. Likewise, the whiff follow-up's set knockback means that it is one of the most consistant ways to hit a foe knockback-wise and it has above average hitstun and range. Ekko can even use the time-dupe's safety with this move to aggress very heavily if foes are nearby, counting on his past self's forward-and-back hitbox to cover him and t he GTFO nature of it to be very protective. The first hit and the whiff hit of this move will apply Resonance, but not the hit-confirm hit since that is basically just Ekko smacking them with his feet. This means the move can only ever apply one stack of Resonance.


Forward Tilt: Phase Slash

Ekko dashes forward, performing a running slash with his clock-hand that looks similiar to a sloppier Marth Dash Attack visually. This does 8% damage, which is pretty weak as far as tilts go, but it does have a bit of extra range than most of Ekko's swings due to his forward movement, and it comes out pretty fast despite the forward movement as well. The ending lag is a touch longer than one might expect from this kinda move, though. Knockback on this move is pretty low and behind Ekko. This move gains additional uses when combined with Ekko's Phase Dive, however, due to the fact that it can cancel into it in various ways!

Ekko cannot cancel during the starting lag, but he can during the move itself, which will cause it to continue going normally at the new location if on the ground, or to instantly get to the slash (and then enter ending lag) if Ekko takes to the air with Phase Dive, which allows Ekko a pretty strong option to extend this move's range and to catch people who just want to casually jump over him, although it should be noted this cancel can only use the first hit of the Phase Dive and not the second. The ending lag of this move is added to the ending lag of the Phase Dive.

The second cancel is a bit different, only able to be done during the ending lag of this move, and instead has Ekko cancel directly into the second hit of the move, which allows Ekko to potentially follow-up with an aerial coming out of the second hit, not to mention the sheer dodging potential of blinking out of the way of someone about to punish your ending lag! The combo potential is also pretty real, especially when combined with the unique backwards knockback of the move. The downside of this tends to be punishability: The remaining ending lag of the forward tilt will be added to the blink's ending lag, in addition to the usual ending lag stacking: Meaning this can potentially be veeeeeeery laggy to do. Spamming it is, generally, a bad idea, and can lead to you being punished even harder!


Down Tilt: Sweep Away

Ekko performs a downwards sweep in front of himself with his clock-hand, the tip glowing a timethereal blue (much like his time-dupe trail, Chronobreak explosion and what have you). This only deals 6% damage and pops foes up lightly in front of Ekko, but the starting lag is rather fast while the ending lag is a bit below average, so it is safe to throw out and an easy chain. The tip is a sweetspot that activates only when hitting 3 Resonance stacks, which doubles the damage to 12% and causes a trip on foes with this, making it a great way to get aggression up with Resonance stacks, and is a particularly good follow-up move to a Timewinder that hits twice.

Smacking them outside this sweetspot for Resonance can actually be pretty good too, though, because it allows Ekko the chance for a follow-up attack with another hit of the A button! This will have Ekko blink behind the foe's location and tackle into them, dealing only 4% damage, but light knockback behind where Ekko started that is pretty shallow and downwards, it'd be pretty good for shorthop shenanigans into Ekko's time-dupe or in reverse and can be a solid damage addition in general.


Up Tilt: Timeplode

Ekko performs an upward, slashing-slam strike with his clock-hand which looks close to a much sloppier Marth Up Tilt, his clock-hand glowing bright for the move. This doesn't deal a lot of damage, 6%, and the coverage is a bit smaller than Marth's Up Tilt while popping foes up with a decent force that KOs at 200%, making it actually Ekko's best KO move tilt-wise. The starting lag on this move is a bit awkward, think like the ending lag on Marth's Up Tilt, but the ending lag is actually qutie low which is nice for this move.

If Ekko applies a third stack of Resonance via this move, it will not instantly apply the damage and other effects, but instead will apply slightly more bonus damage than normal (7% total) as the foe reaches the apex of their knockback, with the timesplosion spiking the foe directly down: Since it applies at the highest height of their knockback and this move has quite low ending lag, Ekko can sometimes even follow it up or potentially catch up to the foe before they get sent flying down! At low percentages, foes will be put into prone if they fail to tech the knockback, while at mid+ percentages they will take a short stage bounce that is perfect for shorthopped aggression from Ekko.


Ekko: Throws


Grab: Ruffian

Ekko tries to grab the foe with an awkward, ruffian swing of his arm, it's a somewhat faster than normal grab with lower range than average, although it experiences a good range increase when dash grabbed. The most unique thing about Ekko's grab, however, is that Ekko can turn back time with the foe grabbed...and bring the foe with him! Yep, the foe time travels with Ekko to 4 seconds ago, subject to the same rules of Ekko in that they do NOT heal, although since Ekko is holding them in place they will not be doing their actions from before, which can lead to all-new followups to the past if Ekko can land a grab at the right time! You can go back in time with a simple push of B before throwing the foe! (NOT during throws)

This isn't all fun and games, your Chronobreak won't damage the foe and the grab difficulty of this grab is halved when the Time Travel finishes, in addition to however much they struggled before the time travel, and of course you need to time things pretty well with the grab to make this work: A single moment could unravel it all! If Ekko goes back in time to being in the air, ekko has a window of chance to use one of his throws in the air quickly, and if not him and the foe enter a quick, frame-neutral aerial release state.


Pummel: Rough 'Em Up

Ekko knees the foe in the stomach for 2% damage at a slightly-faster-than normal pace for a 2% pummel. Does not apply Resonance.

Forward Throw: Chronosmash

Ekko takes his clock-hand, spins it once in his hand and then smashes the foe away like its batting practice, temporal energy surging as they fly away for 10% damage that KOs at 220%: Pretty standard stuff all around, to be honest, it can be a bit of an aggressive tool early and a bit of a GTFO move late, but it isn't especially well suited to any one task. It does have low ending lag! The chrono-energy surrounding the foe, however, is one of the primary reasons to utilize this, as it will cause foes to detonate Ekko's Parallel Convergence fields as if he had entered! Foes don't gain a shield, of course, or anything, but they DO receive the little mini-stun, essentially allowing Ekko to make large danger zones that the foe has to avoid...or, more commonly, tossing the foe right into a Convergence for a sick follow-up!

That is, in part, because this effect normally just lasts until the foe is done taking knockback (although if you can make them take knockback before they finish the throw's knockback, it'll keep on them until used or they stop taking knockback) or until activated, however if Ekko triggers the third hit of his Resonance with this move, this effect will instead last 6 seconds or until activated, making it a lot more difficult for them to defend your fields to keep you from the shield and offering a looooot more options for Ekko to play around with them: Do note, however, that this makes it pretty much impossible to stun the foe in the more traditional way even if it makes it easier for you to do it otherwise, barring a Chronobreak. This effect cannot be applied again for 2 seconds after wearing off or procced.

Like your Parallel Convergence, the energy that the foe is infused with is a bit "off" in terms of normal time, and will follow the foe if they end up going back in time, potentially allowing Ekko to trade in the throw's damage for a higher payoff if he can Chronobreak to the right point while they're full of chrono-energy. Always keep it in mind!


Down Throw: Colossal Climb

The animation of this move changes based on the size of the opponent, although not the damage or knockback. Against larger opponents, Ekko will visually scale them (similiar to his trailer), before leaping off of them like a springboard, while smaller opponents will have Ekko just leap right on top of them and then jump off of them. Regardless, this move deals 6% damage and light downwards knockback, which will just keep foes on the ground if used on the ground without tripping them or anything. Ekko can move pretty quickly after the jump, making it a good way to start air-to-ground combat from the ground and what have you. It also allows Ekko a really easy, wily escape with his Phase Dive or his second jump.

This move gains more fun if used after a Chronobreak back however, if done right, as if used before the grab break, it'll be a midair spike! It isn't too strong, somewhat weaker than a R.O.B. Down Aerial, but the foe is also footstooled for a brief moment after the knockback, while Ekko gains a footstool jump of height by doing this: It is like gimping the foe through time! Foes need to be at a good damage percent to even go back in the past really, though, so keep that in mind!


Up Throw: On the Upswing

Ekko grabs the foe and flips them up a moment, swinging at them with his clock-hand with an underswing as he does so! This only does 9% damage, but it is Ekko's best KO throw...not that that says much, given that it only KOs at 185%. This, however, is significantly better if Ekko gets a shot to rewind time, because he can potentially use this throw from midair if he is clever with his timing: got a time-dupe in midair? Flash back and quickly perform this throw for a sick KO boost...you can potentially even use a juggling attempt from 4 seconds ago as a sudden snap-KO point, especially since taking them back with you this way keeps the damage!

This will proc your Resonance, adding only 3% damage compared to normal, but adding more knockback, enough to KO at 145%! And combined with time travel, it can be even longer: Do remember that this is gonna be hella telegraphed, since your time-dupe can be seen towards the top (and you have to have been up there before), not to mention watching the number of Resonance stacks on them. It'll be tricky to land a grab in the short window your time dupe is there, let me tell you.


Back Throw: Backswing

Ekko grips the foe with one arm, bracing them with his clock-hand, and spins them a few times held close, before swinging his clock-hand open and letting them fly for 6% damage and weak knockback, but both go up the more momentum that Ekko had going into the throw: A full force dash grab into an immediate throw deals 9% damage and still weak knockback, while a Phase Dive into a grab into an instant throw deals 12% and medium knockback, the highest damaging throw in Ekko's arsenal. As you may have guessed, this works pretty well with your Resonance, because it means you will go up with speed and therefor deal more damage with this throw! It's capped at 16% damage that KOs at 200%, however. It is a pretty basic damaging throw with some soft Resonance interaction, essentially.

Ekko: Aerials


Neutral Aerial: Spin On!

Ekko holds his clock-hand out and spins around in classical Neutral Aerial fashion, with two hitboxes based on where the foe is hit: If the foe is hit close to Ekko, around the clock-hand hilt or his body, they take 14% damage and are KO'd at 160%, which is one of the most powerful aerials for Ekko and in his general arsenal really, although the angle is rather poor for KOing which can mean fast falling characters and stage size can make this KO later than the listed percentage a fair deal of time. The outer parts of this move only deal 9% damage and they don't KO until about 265%, but the knockback follows the path that the clock-hand is travelling (Ekko spins clockwise), which allows Ekko to bat foes around at a variety of angles, which is rather important when considering his time-dupe (its like giving you a trap you can potentially use to hit foes all over!) and his Phase Dive's ability to give Ekko a ton of maneveuring. The starting lag on this is fairly quick, but the duration is long with some blindspots as Ekko rotates and the ending lag is fairly long.

Both hitboxes of this move apply Resonance, but only the outer hit applies a special Resonance effect, as Ekko will cause freeze frames and "suck out" some time on the foe, reducing the ending lag of the move by half while putting the foe in freeze frames, sometimes enough to get a second hit in on the foe (it scales with damage, although never getting all THAT high: Nothing more than a fast attack will ever hit). If the foe is hit during these freeze frames, the knockback will "combine" with the second hit in the direction of the second hit, which can allow Ekko to do some pretty odd knockback layering, especially if he manages to freeze frame a foe right as his time-dupe is passing by. This effect will persist during the Parallel Convergence mini-stun if he manages to land them at the same time, which can in turn allow Ekko to chain it together with a higher KO power move and potentially giving him KO power he generally lacks...but this is, as with most of ekko's KO moves, very conditional.


Down Aerial: Time Flies

Ekko lets out an excited cry, slams his clock-hand straight down one-handedly and goes flying down as a stall than fall! It isn't very fast, being kind of Mr. Game & Watch-esque in that regard, but it does hit for a solid 13% damage that smacks foes into the air, albeit not that strongly, with Ekko popping off of the foe ala Tink in that regard, starting lag being slightly long, ending lag being bad if he slams into the ground but actually quite low if he hits a foe and pops off. Ekko has no maximum distance he'll fall with this and he only has two ways to cancel out of this move: Up Special, which actually WILL leave him in helpless at the end of the move (at the end of the move performed at the end of Up Special's second hit if done), or Ekko can rip his Zero Drive with his teeth (ala the trailer) to turn back time WHILE he's falling.

The Phase Dive can, in particular, be quite useful for this move, as the slow speed can make it rather easy to intercept...unless you, say, zip diagonally to the side, come at them from an angle with Up Special and end up smacking them! It can be a rather multi-pronged assault, ultimately. Chronobreaking during this move can be a bit of a panic button, but it can be a good way to catch foes off guard if this attack is being used aggressively. This move can also be used to plummet into foes who are inside of his Parallel Convergence: The low ending lag on hitting a foe with this opens up a lot of follow-up chances. One of the oddest ones, only possible if the foe is in the upper part of the Convergence field, is to hit them with a down aerial while triggering the mini-stun, Up Special under and then on top of them again, then launch into a Down Aerial right as the mini-stun ends, bouncing up at the foe with a double damage hit for a potent damaging move that even offers Ekko the chance to deal more on top! This is pretty specific, but it can still be kept in mind. Ekko plummeting from on high is also generally a pretty useful, if simple time-dupe move to bring out.


Forward Aerial: Clockshatter

Ekko rushes forward in a burst of light blue chrono-energy, slamming his sword in front of him as he does so for 9% damage that has moderate-light knockback that won't KO until 301%. The starting lag on this is pretty low, but the ending lag is pretty bad: Ekko moves forward pretty fast and about half a Battlefield Platform in distance and in fact will help Ekko recover on first use, although later uses will have Ekko actively fall during start-up/duration and make him ultimately lose out on distance, so using the one recovery use of this move can be rather important, especially as an anti-gimping measure. If Ekko still has his second jump, he can cancel out of this move during the duration or ending lag with it, which can be predictable but help retain momentum and recover better.

This move will proc Resonance, with a rather fun effect if it gets the 3rd hit: Refreshing Ekko's jumps and, if used, refreshing his Phase Dive uses as energy flows from the foe into his Zero Drive! Foes with multiple stacks on them need to be deadly careful of this if they want to gimp Ekko and it can be very nice to utilize when Chronobreaking, especially from a Chronobreak Grab Release from the grab-Chronobreak.


Back Aerial: Think Fast!

Ekko takes his clock-hand and performs a very fast, almost panicked swipe of it behind him, a lightning-fast move that only deals 7% and has pretty pathetic knockback, but as suggested it has very low starting and ending lag, making it an ideal panic button, combo-fodder and aerial combat move. In particular, this is actually really nice with Phase Dive shenanigans, as Ekko can potentially blink past someone (avoiding a move) and then throw out this move as a low-damage but low-risk punish, then giving him a decently fast move to fodderize with his time dupe as well (although beware the low duration of the move with that!). It is also a quick and simple way to smack a Z-Drive Resonance stack on the foe. All about the speed, baby.

Up Aerial: Strike Twelve

Ekko performs a long, sweeping smack of his clock-hand above him, which deals 10% damage and knocks foes up just a smidge above "light" in knockback. The starting lag on this is low, however it has a long duration and average ending lag...which means the juggling power on this is actually not that great. It does, however, trip up foes trying to get above Ekko pretty well and in particular allows Ekko to catch air-dodgers a good deal with it, not to mention being a longer duration move to utilize with a time duplicate. It's simple, but it gets the job done in a pinch.

Ekko: Final Smash


Ekko has grabbed the awesome power of the Smash Ball and begins to swing his clock-hand, ready to unleash an AWESOME attack...when an idea strikes his head. Wouldn't it be radical to power the Zero Drive's Chronoenergy with it?! With that, Ekko slams the energy into his wrist-device and...w-wooooooah! Everything just zipped back SUPER FAST! This sends everything back 4 seconds, except for the foes! They get to keep all the damage and positioning as before, while Ekko is healed of all damage he took in the last 4 seconds and put where he was 4 seconds ago as well. It is a true time reversal!

Oh, and the Smash Ball won't appear either and will be gone. Guess they're paradox proofed. Oh well.


Ekko: Playstyle

"People waste a lot of time. Then they wish for more. Want more hours in their days, more days in their years, more years in their lives. As if they had all that extra time, they could fix any mistake. I don't need hours or days or years...I only need seconds.

Ekko might not have the wildest moves everywhere, but despite this he actually has a pretty high skill ceiling, if a decently low skill floor: Ekko's base damages tend to be rather low, he has low KO power, with his best KO moves KOing around 150% or so even on someone like Mario, and while he has mobility tricks his base mobility is only okay on the ground. Ekko needs to make up for these issues with proper use of his extremely powerful Zero Drive passive and his unique and potent Chronobreak abilities. However, getting the maximum out of Ekko's Zero Drive and Chronobreak requires the player not only to play in the present, but off what they did 4 seconds ago and what they'll be doing 4 seconds in the future. It requires a mastery of reading game flow to extract the most out of Ekko's gameplan. Likewise, foes who wish to avoid Ekko's damage need to not be overwhelmed by what he is doing now, but keep track of what he was doing 4 seconds ago, and consider what he might be doing 4 seconds from now.

One of Ekko's prime strengths is in his in combat mobility, primarily aided by his Phase Dive: Ekko wants to weave in and out of combat, utilizing the second striking capability of Phase Dive when possible, alongside moves such as Ekko's Dash Attack and Forward Aerial. Those two moves are especially good for aggressive approaches, something Ekko generally approves of, as his lack of a spammable long range projectile and pressuring abilities means he generally takes a more offensive stance. Ekko's Dash Attack can have a laggy defensive component, however, while Back Aerial and Down tilt are better defensive moves. A particularly fun thing you can pull off with Ekko is to dodge an attack with the second hit of Phase Dive by going behind someone and then smacking them with a Back Aerial: Beware those that predict this and reverse your attacks!

Chronobreak is one of Ekko's most unique and potentially potent abilities, but it can also easily go awry: Just using it to reverse mistakes or get in a bit of damage can ultimately lead Ekko to lose out, since foes heal and Ekko does not. Keep in mind where you and the foe are and the placement of your Parallel Convergence fields, since they will go with you through time and can potentially land your potent mini-stun. If you are in a good place for a combo but can't do it right then or mess up, consider playing defensively for a bit and then rewinding there for a second approach: If you can avoid taking damage, it can potentially lead to strong damage, especially if you manage to dodge an attack at the same time for a large potential percentage swing.

Your Zero Drive Resonance should also be kept in mind, since the status of it can affect many of your combos, and the fact your time duplicate can't apply it is important: Down Tilt, Forward Throw, Neutral Aerial and Up Tilt are in particular moves to keep in mind when you're searching for the third hit, and Ekko's Timewinder should be kept in mind for the potential to extremely enable these moves as the start of an aggression. The fact your duplicate doesn't affect Resonance can be worse for small combos, but it can also mean you can combo Resonant hits in lots of ways you could not if it was messing up your groove.


Here's the thing about time; if you can't make the most out of any given moment, then you don't deserve a single. Extra. Second."
 

FrozenRoy

Smash Lord
Joined
Apr 26, 2007
Messages
1,268
Location
Las Vegas, Nevada
Switch FC
SW-1325-2408-7513
Gluth

"Gluth, the foul plague-dog of Naxxramas, was said to have an appetite so voracious that even the living were not enough to satisfy his hunger. Feugen was said to feed him an army of zombies daily, recycling the remains of undead too weak to use in combat."

The undead plague-dog Gluth sits obediently within Naxxramas, awaiting orders from his masters. No doggie biscuit can satisfy Gluth’s ravenous hunger. It is rumored that Gluth can easily devour an army of undead on a daily basis, which Gluth uses to knit his own decaying flesh back together.

Statistics

There is an achievement for losing to Gluth. I'm pretty sure.

Gluth has the same general body shape as Ivysaur, with the exception of the back bulb obviously, but is somewhat larger than the Pokemon overall and while still quadrupedal he is a bit more bipedal: See his image for example. Weight-wise, Gluth is lighter than Ivysaur but heavier than Mario and speed-wise he moves slightly slower than Yoshi. He has very good traction.

Aerially, Gluth falls at around an average pace, but he moves through the air quickly and with fairly fine control, meaning Gluth is actually okay at aerial combat. Both of his jumps are fairly average, while Gluth has an okay Crawl as well but no other Brawl-based specialities.


Mechanic: Jaws


Gluth eats our leftover zombies. Come to think of it, you would make a pretty good leftover zombie...

Gluth's jaws hunger for zombies! And so we come to Gluth's mechanic, Jaws. As you will see, Gluth has the ability to summon minions named Zombie Chow, and then devour them: That's all you need to know about the Chows right now, just realize he has them and can eat them. Whenever Gluth devours a zombie, Gluth gains a stack of the Jaws buff, which can be stacked up to five times. Gluth must continually munch on Zombie Chow, however, to keep these buffs going: If Gluth does not feed wirhin 12 seconds, he loses a stack of the Jaws buff, continuing for every 12 seconds he fails to eat. In addition to the list of buffs below, various attacks of Gluth's gain new properties depending on how high his Jaws level is. You can tell Gluth's Jaws level by looking at his size, since he grows larger with each buff level, and by looking at Gluth's jaw, which will salivate more green slime as he gets higher Jaws stacks.

Level One: Gluth increases in size slightly, allowing him better reach on many of his attacks. Gluth's weight is increased to Wolf's and his ground speed is increased to Diddy Kong's. Gluth's attacks now deal 10% more damage (IE 10% damage attacks now do 11%, not 20%) and knockback. Gluth gains the ability to dig his claws into the side of the stage as a wall cling.

Level One buffs are fairly basic overall, basically being a general buff of all of Gluth's attacks and giving him a very slight damage and knockback buff. Not much to say about them. The most notable thing is that Gluth gains the ability to wall cling after a mere single zombie.

Level Two: Gluth increases in size yet again, furthering his reach, and Gluth's weight is increased to Ike's. His Ground Speed increases to Charizard's (Yes, Charizard is faster than Diddy) and now his attacks deal 20% more damage/knockback rather than 10% more. Gluth now gains 1% damage reduction, meaning he takes 1% less damage from all attacks (IE 7% becomes 6%), as his bones harden and become tougher, like it was armor. Both of Gluth's two jumps gain a small amount of height.

Level Two buffs largely simply continue the Level One buffs at a higher level, but adds in very minor damage reduction as well. The damage boost becomes much more noticable around now, though. Gluth's jumping ability also increases, unlike before, allowing more survivability and longer air combat.

Level Three: Gluth increases in size even further and his weight increases to Yoshi's, while his ground speed increases to Zero Suit Samus. Gluth's attacks now deal a substantial 30% more damage/knockback, he gains 2% damage reduction on all attacks and constant 3% super armor. Gluth gains a third jump of moderate size and he retains his previous jump boost. Gluth's shield now regenerates 15% faster. Gluth gains the ability to walk during his wall cling for 2 seconds at 1/4th his ground speed, during which time he may use his ground game.

Level Three represents Gluth's first really big level of buff, substantially increasing weight, ground speed and damage (and size) while offering a large damage and knockback boost. The damage reduction is applied after the super armor, so attacks that deal 5% still go through the super armor and are not stopped for example. Regardless, the damage reduction really begins to become noticable now and Gluth's aerial combat becomes much finer due to the presence of a third jump. Gluth's shield regenerates faster as well, allowing him a much better defensive game. Finally, Gluth's wall cling ability now advances to a full on wall walk. Gluth may only wall walk once per air trip and he must recharge his wall walk by staying on normal ground for an amount of time equal to how long he was on the wall.

Level Four: Gluth gains yet more size and weight, he is now as heavy as Charizard and about as large. He now moves at the speed of Fox and his attacks deal 40% more damage/knockback. He has 3% damage reduction and retains his 3% super armor and the height of all three of his jumps is increased: The third jump only slightly, the first two susbstantially. Gluth's shield begins 1.25x as large and regenerates at the same 15% faster speed. Gluth's moves gain a 10% reduction in starting and ending lag, enabling him to attack faster. Gluth's wall walk now lasts 3 seconds and at 1/3rd his ground speed.
Level Four represents the fact you should probably stop Gluth from eating all those Zombie Chows, if you're fighting him. Gluth now hits extremely hard, moves very fast, has very high weight and is even seeing lag reduction, coupled with superior shielding ability and impressive damage reduction, not to mention heightened aerial and recovery ability. It takes a lot to get to level four and stay there, but it is well worth it. Gluth's wall cling abilities are also enhanced.

Level Five: Gluth is now the size of Bowser and weighs almost as much, but moves slightly faster than Captain Falcon though much slower than Sonic. His attacks deal an impressive 50% more damage/knockback or 1.5x. He has 4% damage reduction on all attacks and 6% super armor and escapes grabs 20% faster. Gluth retains all previous jump boosting abilities and may now move along walls that he clings to at half his ground speed, being able to cling to them for 5 seconds and use his ground game. Gluth's shield now begins 50% larger than normal and regenerates at 25% faster speed. Finally, Gluth's moves now have a 20% reduction in starting lag and ending lag.

The ultimate cumulation of Gluth's buffs. After you hit Level Five, eating Zombie Chows only serves to reset the timer before you lose levels. Getting this in any single stock is difficult, your Jaws level resets when you die, but the extreme buffs I just listed are certainly worth it.


Specials

Neutral Special: Zombie Chow

I asked the Zombies if they wanted to eat your brains and they said "I don't eat junk food".

Gluth lets out a horrifyingly haunting howl to the sky, calling a Zombie Chow to rise from the ground in front of him, groaning like zombies often do. This move has slightly less overall lag than Waddle Dee Toss, but shifts large amounts of lag from the ending lag to the starting lag. Because of that, this move has fairly long starting lag but quite little ending lag. Zombie Chow are your only minion and are quite important to your moveset, so trying to find time for this move is fairly key. This move is not reduced by the lag reduction of your Jaws mechanic, presumably because he is waiting on the Zombie Chow rather than himself.


While Zombie Chow are important to your set, they kind of suck as minions in most regards. They're as big as Marth and knocked around like Marth at 50%. They shamble at the super slow pace of Ganondorf's walk speed, so they are easily outrun. The only good thing is their 30 HP is fairly beefy for such a minion, so they're at least kind of hard to kill.

Zombie Chow have a number of attacks, naturally, but most of them are not very good. The first is a slow virulent swipe in front of themselves that has somewhat slow tilt speed, deals 7% and weak knockback. The key thing with this move is that it leaves an "Infected Wounds" effect on the foe, which increases the damage they take by 1% (IE 5% becomes 6%) for each infected wound they have on them and their shields take 1.5x damage (IE 10% becomes 15%). Infected Wounds last a fairly long 7 seconds, but this is helped by the fact that whenever a Zombie Chow hits an opponent with Infected Wounds, it resets the timer of all Infected Wounds on the foe to 7.

Zombie Chow also have a swifter slash of their hands that deals just 2% damage and practically no knockback, having the speed of a slow jab. They have a "strong", more smash-like attack where their put their hands together and try to do an overhead tomahawk on the foe, which has speed around Mario's F-Smash but only does 14% and KOs at 180%...which, hey, for Zombie Chow that's strong! Finally, Zombie Chow can grab onto the foe and bite the foe for 1% non-flinching every half second. To get them off, just deal half their current HP (when they latched on) and they'll fall right off. You can still move around, but you'll fall slightly faster and move slightly slower since you have a zombie latched onto you that you're dragging around, though this is not hugely noticable without multiple zombies (which can happen).

Zombie Chow are rather stupid and will mindlessly pursue the nearest foe. They almost exclusively use their Infected Wounds virulent swipe, only rarely using the other attacks. Every single one of their attacks produces a loud "DAH!" sound effect when they attack. If you don't mind them sticking around, you can even keep them around, as they're fairly easy to kite. And there's a reason you might want to do that!

Specifically, whenever a Zombie Chow dies, whoever killed it gets healed 10% as the life force drains from it and enters the killer! If you're below 10%, you might wanna wait and kill that Zombie Chow later, or if you want to stay at your current damage % some reason, like to avoid a combo against you that you'll be vulnerable to if you heal or you're Lucario or whatnot. Though usually, you just wanna kill the Chow. This does, however, mean that summoning Chow is fairly risky for Gluth, as if he doesn't eat them, his enemies will! Gluth will need to protect his Zombie Chows to keep his opponents from just healing off the damage and getting ahead...well, or just find the time to devour them.

Gluth may attack and kill the Zombie Chow himself, however, he only gains half of the normal healing for killing someone killing them, IE 5%, which is rather pathetic, especially compared to what healing he can get later, and it does not advance his Jaws level as he did not EAT them. Still, Gluth can look to snipe Zombie Chow for some minor healing, and he does have some help since the Zombie Chow won't attack him even if he's willing to stomp them out.


Down Special: Decimate

Decimation is my favorite thing. No, wait, Freezing the blood in your veins is my favorite.


Gluth lets out a loud growl and jumps ever so slightly into the air, crashing into the ground and sending out a red shockwave along the ground that travels 3/4ths of a Battlefield Platform to both sides of Gluth. He doesn't leap enough to even reach a Battlefield Platform from under it, so it is mostly just an animation, though it helps give it long starting lag, while the ending lag is only slightly laggier than average. So, what do these decimating shockwaves do? Depends on the opponent's damage percentage: Specifically, this move deals damage equal to half the amount of damage the foe currently has. So if the opponent has 50% damage, they take a whopping 25% damage! Wow! This means that, while this ability isn't deadly at all early, it is hyper deadly as the game goes on, and it can serve as an especially potent "Trump Card" should your opponent constantly keep you from buffing your Jaws. It deals a set one Battlefield Platform of knockback and thus has no off the stage KO power. Because both the damage and knockback of this move is fixed, it is not affected by your Jaws buff in how much of either it deals. Since the shockwave is entirely ground based, it can not only be dodged by sidesteps and whatnot but simply by not touching the ground.

Gluth's moves may normally be able to hurt Zombie Chow, but this attack in particular will shred them, always setting them at 5 HP if they have 6 or more HP and flatout killing them if at 5 HP or below. Zombie Chow will particularly look more shredded and decayed while at 10 HP or less and will gain a faint red glow if they have been affected by Decimate, so it is a fairly easy task to check your zombies HP and if they've been Decimated or not. Zombie Chows will gain an entirely new minion script once they have been hit by Decimate, moving at Ganondorf's dash speed and mindlessly attempting to reach Gluth so that they can be devoured by him, not attacking enemies unless they need to and attempting to dodge foes as best they can on the way there. DO NOT LET THEM REACH GLUTH unless you can deal with Gluth eating them! You can either try and get Gluth away from them and then deal with them or try and kill them quickly yourself, maybe even pick them off with projectiles, but zombies at low HP are particularly potent for Gluth to eat as you will see, so it is veeeeeery dangerous to let them reach Gluth!

Of course, Decimating your Zombie Chow puts them in prime position to be pummeled by your opponents, cracking them open for the sweet, sweet healing inside, and the healthier the opponent is the weaker this move is! So it is quite risky to Decimate your zombies and should not be taken lightly.


Side Special: Bite

Gluth digs his feet in, braces his body and uses his powerful jaws to deliver a vicious bite in front of him! This move has somewhat long starting lag and only average ending lag, but the 18% damage it deals is worth it and it KOs at 130%. Not too shabby on their own, but those numbers are going to get a lot stronger as your Jaws level advances as well. This move has fairly low range to begin with, but it gains range nicely as you size up and ends up with moderate range at max Jaws level.

While that is all well and good, the notable thing about this move is how it gains certain buffs during the starting lag depending on his Jaws level, specifically relating to damage reduction and super armor. At Level One, Bite grants you 2% damage reduction and 4% super armor. Level Three instead grants 4% damage reduction and 8% super armor and Level Five grants 6% damage reduction and 12% super armor. Just like his normal Jaws DR/armor, the reduction only counts after the armor and thus, say, an 18% attack will not be stopped, but DO note that this damage reduction and armor stacks with your Jaws super armor and damage reduction, meaning that at Level Five you take 10% less damage and have 18% super armor during the start-up lag, making this move extremely difficult to hit Gluth out of and making it a pretty crazy potent close range move. Note that the attack itself and ending lag don't gain Bite's special armor/reduction, so you are safe to smack Gluth around during that time, and certain characters can be just outside of Gluth's biting range and hit him just when the hitbox comes out and the super armor goes down to normal to avoid this, though this is rather rare overall.

If Gluth bites a Zombie Chow with this, he will enter a simple command grab state with the zombie in his mouth, which he can then toss up, down, left or right, going one Battlefield Platform in that direction as a weak projectile that deals 5% and very low knockback, serving primarily as a way to get zombies where Gluth wants. Bite will always prioritize foes over zombies and throwing the zombie is fairly quick, so it isn't too worrisome to bite them, though do note a foe might be able to dodge and have you Bite a zombie and then counter attack. The ending lag on this is the same as normal.


Up Special: Enrage

Gluth rushes forward with a howl, dashing in the chosen direction for 2/3rds the distance of Pikachu's Quick Attack as a hitbox that deals 3% dmaage and practically no knockback. Visually, the attack is quite similiar to Pikachu's Quick Attack, but if Pikachu stayed visible like during Fire Fox, but obviously Gluth's goes a lesser distance and since he doesn't disappear he is much more vulnerable during it, especially since his armor and damage reduction from Jaws cease during this move or while Gluth is in helpless. This move has similiar lag overall to Pikachu's Quick Attack, but is slightly laggier overall, though past Level Three of Jaws it becomes less laggy. This move additionally gains various bonuses as your Jaws level advances. At Level Two, Gluth gains a secondary dash just that is done just like Pikachu's Quick Attack, with all the same properties of a normal Enrage. Level Three gives Gluth an ability to essentially perform a Quick Attack Cancel with some modifications, aptly named "Enrage Cancel"(EC). Finally, Level Four adds an additional dash on top of the other two, giving Gluth three dashes overall and making him extremely difficult to edgeguard due to the sheer amount of ways he can get back to the stage, not to mention a huge recovery.

Oh, right, cancelling. It's kind of like Quick Attack Cancelling.


An example of Quick Attack Cancelling performed by that WRETCHED RODENT.

Quick Attack Cancelling is performed by using a Quick Attack into the ground. Pikachu will lightly "pop" off the ground a moment, during which time you can quickly perform any aerial or special attack from this and cancel the lag at the end of Pikachu's momentum, allowing Pikachu to perform quicker assaults/air game, move around the stage very quickly with repeated Quick Attacks, mindgame the foe by QACing in and out or whatnot and also to combo with the hit of Quick Attack. Enrage Cancel works exactly the same way, excepting that Gluth does not go as far as Pikachu, with the same applications on him as Pikachu. I recommend watching this video to see a video demonstration of Quick Attack Cancelling to get an idea of how this works, especially if the above explanation has confused you.

Gluth is notable in that he performs an Enrage Cancel against something like a slope/otherwise elevated ground, not only does he gain momentum like Pikachu, but it allows him to also use his ground attacks in addition to his aerials since his momentum "carries" him along the ground, allowing Gluth to supplement his powerful aerial cancel game with a potent but more situational ground cancel game. Just remember that while you're doing all this, you are more vulnerable at higher Jaws levels than normal.


Grab Game

Grab: Chow Down

Gluth rears up for a moment and reaches his front legs forward, snagging any foe in front of him and keeping them in place by biting on to them. This has somewhat long starting lag and only slightly better range than normal and slightly longer ending lag than normal, so it isn't quite an amazing grab, but it does have something nice to it, which you probably guessed from the name.

Yep, Gluth eats his Zombie Chow via his grab, which prioritizes foes over Zombie Chows of course. When Gluth hits a Chow with this, though, he will take it to the ground and begin ripping it apart with his powerful jaws, devouring it whole. This process takes longer the more HP the Zombie Chow has: At max HP, it is quite a laggy process. At 5 HP, the lowest it checks, the lag isn't too long, though it is still not "quick" to do. The ending lag on this remains a constant, somewhat average lag. Gluth will, as aforementioned, gain a level of Jaws for eating his Zombie Chow, but he also gains an amount of healing dependant on the health of the Zombie Chow. If the Zombie Chow has full health, Gluth heals a pathetic 1%, while at 10 HP the Zombie Chow will heal Gluth a very impressive 20%, somewhat similiar to how Gluth would Decimate his zombies before munching them in World of Warcraft. Because of this, Gluth wants his zombies to get to low HP before devouring them, and Decimate particularly puts the Zombie Chows at max healing. As obvious, but I should specify anyway, Gluth does not gain the 5% health from killing a Zombie Chow with this move as he is healing off of it anyway.

Of course, getting the Chow to low HP means that enemies can snipe the Zombie Chow from you and steal their healing themselves, while you'll heal less from killing Chows than your foe will if you eat them really early. Gluth should properly balance how much he wants his Chow damaged before eating them due to this. And of course, remember that you have to eat Chows every 12 seconds to keep from losing a Jaws level. Zombie Chows cannot be killed by forces outside Gluth during the eating process, but Gluth can be knocked off the zombie during it, where the Chow will have taken some damage based on how long it was being munched on. Overall, a key move in Gluth's arsenal.


Pummel: Gnaw

Gluth gnaws into the opponent, dealing 3% damage at the rate of a slightly slow 3% damage pummel. At Level Three Jaws, it goes as fast as a 2% pummel. And at Level Five, it goes at the speed of a 1% pummel. Potentially an extremely potent damage dealer!

Down Throw: Mortal Wound

Gluth's teeth loudly crunch into the foe, his green drool oozing into the wound as he shakes them back and forth, before they are send flying from Gluths jaws, taking a total of 13% damage and fairly moderate forwards knockback, KOing only at 235%. The green drool will continue to drip out of the foe's wounds for about 8 seconds, though this doesn't cause any damage or anything, but what it does do is gum the opponent up and reduce their healing by 50%. Most of the itme this isn't important, but with your Zombie Chows involved that means cutting in half the healing they get from them for a while. This is one of the big reasons an opponent would want to wait to kill Zombie Chows: Waiting could theoritically double the amount of healing they get, compared to killing them with this debuff on!

This debuff will also cause the foe to have 10% less shield regeneration for each level of Jaws at the time of using this move, making it increasingly more difficult to block Gluth's increasingly more powerful attacks. The effects of multiple Mortal Wounds will stack (IE two reducing Zombie Chow healing to 2.5%), but they do not refresh each other's timer or anything, so you can't really stack too many of these onto a foe at once. It is still incredibly useful, though, especially if you want to keep foes from killing your Chow.


Forward Throw: Charge Forward!

Gripping the foe tight in his mouth, Gluth charges forward half of a Battlefield Platform and builds up speed, before ripping (somewhat literally: You can see Gluth's flesh ripping and tearing some as he has more Jaws stacks when he does this. Gross!) forward and releasing his grip on the foe, sending them flying for 9% damage that will still KO at 170%, not all that bad for a throw really. However, the damage and knockback of this move can be modified in a few ways, most notably if Gluth is inside of a pit or going up or down a slope (GEE I WONDER IF HE'LL BE ABLE TO MAKE THOSE, SAY, IN THE NEXT MOVE SECTION).

When going down a slope, Gluth will gain more speed and go 3/4ths of a Battlefield Platform instead, dealing an increased 12% damage but more importantly KOing at 140% on the direction of the slope...if Gluth is in a spot where he's not just throwing the foe against a sloped wall, of course, but since this is before Jaws buffs it is pretty dang nice. Going up a slope will have Gluth gain less speed and go only 1/4th of a Battlefield Platform, more weakly dealing 6% damage and pretty light knockback across the slope's path. This obviously has less immediate reward, but it is a pretty good follow-up throw due to the lowered knockback and being more towards the apex of a slope.

Inside of a plain ol' pit, though, Gluth will just slam riiiiiiight into their walls, taking increased ending lag but dealing a whopping 18% (before Jaws buff!!) damage, albeit near-pure vertical knockback that won't KO until 205%. This will usually get foes out of the pit and isn't the best for setup despite the lower knockback, but in return it definitely does the most damage of Gluth's throws and can be monstrous with Jaws buffs.


Up Throw: Slam

Biting the opponent by their lower body, legs if possible for the character's model, Gluth savagely slams them to the left and right of Gluth multiple times, dealing 4 hits of 1% damage before a final hit of 4% damage that sends foes up and somewhat slanted forward, the knockback low enough to follow-up at lower damage percentages, but being more of a space gaining throw once you get past that point.

What's really fun, though, is to combine it with your slopes, which will cause Gluth to slam the foe to the slope's sides, adding an extra 1% damage for each slope slam, meaning either 2% if Gluth is in range of one or 4% if Gluth is nexted to both, an already nice bonus. On top of that, though, Gluth's swinging them away will instead follow the slope, meaning that opponents will be "sliding" up the slope, like you see enemies sometimes do in Smash. This momentum carries them a fair bit, although they can act and try to cancel it beforehand due to the hitstun of the move, and can allow Gluth some decent chase chances up the slope, and can allow Gluth to make a little delivery service to Zombie Chow loitering around at the top of the slope as well. Gluth will release foes off the nearest slope by default, but holding the control stick to one side allows him to choose the slope if he is able to reach both from his current position.

When inside a normal pit, Gluth's slamming against the walls is more damaging, adding 2% for each hit, meaning 4% if he only hits one pit wall and a whopping 8% additional if both, meaning this is potentially a 16% damage throw, with the knockback also increasing but becoming pure vertical: It still won't kO until 195% and so mostly serves to prevent too many combo chances, but it can still be a decent KO throw in your pits and is a good deal of damage as well. One of the primary reasons to use this over the Forward Throw inside of a pit is that Gluth does not take additional ending lag, meaning he can still better utilize the pure vertical knockback, and increased KO power but lowered damage. It also has a longer duration and can allow your Zombie Chow to PIIIIIIIIILE OOOOOOOOOOOOON!


Back Throw: Bile Bite

Gluth sinks his toothy jaws deep into the foe's still-living carcass, vicuous grey-green drool dripping from his vile mouth, ripping them from side-to-side like the deadly dog he is for a pair of 3% damage hits, before flinging the foe behind him for an additional 3% damage and rather weak knockback: Additional Jaws levels can sometimes mess it up, but for the most part it serves as a fairly solid combo enabler.

The bile filth dripping from Gluth's jaws, however, will taint those afflicted by Infected or Mortal Wounds, doubling their effects for the remaining time they are on the foe! This, in essence, means that while the bile is sunk into them, they will take 2% per Infected Wounds stack for example, and perhaps most noticably, Mortal Wounds can be made to completely negate healing: Opponents won't be able to gain your Zombie Chows effects during this time, essentially forcing them to either abandon the healing or, amusingly, protect them FROM Gluth as he tries to go around and gobble them up with less risk from the foe, which itself can work to Gluth's advantage, as the Zombie Chows work more with him and he can use this as an offensive pressure tool. It also makes the shield regeneration be reduced by 20% instead, making an offensive onslaught more difficult to deal with!

This throw cannot double effects more than once and adds an extra second, plus one more extra second per Jaws stack, on each use after the first doubling, to keep the wounds going.


Smashes

Down Smash: Bury Bones

Gluth viciously claws and digs at the ground, like the dog he is. ZOMBIE DOG THAT IS. This move deals four hits of 3%-5% to any foes in front of it extremely rapidly, which makes it very difficult to DI out of simply due to the strict timing involved, with a fifth hit that deals 5%-7% damage and knocks the opponent away, though this is one of those multi-hit smashes that simply doesn't have a lot of knockback behind it for a smash. KOs at 220%-190%. On the plus side, this move starts up very quickly and because of that is an extremely good "punisher" move or panic button and the duration makes it something to catch dodgers with, though the ending lag is somewhat long so spamming this is punishable. The range of this move covers most of Gluth's body and a bit in front of Gluth at the start, but higher levels of Jaws will cause the range in front of Gluth to increase at the cost of body coverage due to the simple physics of having a larger body and longer arms.

While this is a perfectly fine move on its own, it also has the noticable effect of digging out the ground, causing 0.5-1.0 Ganondorfs of ground to be dug out and become a pit based on charge. Pits are roughly the width of Bowser and are created directly in front of Gluth, meaning that at lower percentages a foe who is hit by this attack may end up inside the pit after it is over and thus allowing themselves to possibly be hit: In addition, DIing out might mean you land in the pit right after, so sometimes it is actually better to just take the entire attack if being in a pit would be especially advantageous to Gluth. Gluth may make any number of pits, but each pit may only be up to two Ganondorfs deep, trying to dig deeper just has Gluth make a sad doggy noise at the fact he can't open up the ground any more.

If there is already a pit in front of Gluth, then Gluth will instead dig out a slope that goes towards the pit, which is slightly less deep due to being a slope and not a full pit, and functions like the slopes on Melee Yoshi's Island in that they can be travelled up/down and such, allowing Gluth to effectively enrage cancel with them. Gluth will continue to do this until using this move would make it level with the pit, in which case it just becomes a pit as normal: In addition, double tapping A allows Gluth to make a pit at any time, though Gluth must have a pit to make a slope. If the bottom of a pit or slope would go off the edge, then that bottom becomes a grabbable ledge, so Gluth can't just destroy ledges with this move. In addition, the top sides of the pit are grabbable edges, which Gluth can more effectively use over the foe due to being able to Enrage Cancel into a ledge grab. Aside from all the uses with Gluth's Enrage Cancel, Gluth can also create pits to store his Zombie Chow in for a while, forcing enemies to go inside them to hit them if the pit is deep enough.

A minimum size pit is large enough so that the Zombie requires low hitting attacks to strike for the most part, but their attacks can still "reach" over the top of the pit to hit at the bottom of foes, though Zombie Chow cannot get out of the pit as they cannot jump. Once a pit is 1 Ganondorf or higher, the Zombie Chow will be too far down to be hit by low reaching attacks but in turn cannot hit a foe unless the foe is put into the pit. Pits will fill in over time unless something, be it a character, item, Zombie Chow or whatnot, is inside of the pit. 12 seconds total of nothing inside the pit will fill up half a Ganondorf of height of the Pit. In addition, pits with nothing inside them become filled whenever Gluth dies, though they do NOT get filled up if something is inside them. If Gluth will die soon and wants to keep his pits set up, he may want to risk putting Zombie Chow in them: Bite is especially nice to throw Chow in.

Finally, if this move is used on a shallow platform such on Isle Delfino, Gluth will simply create a hole in it, which if it is within reach of a Zombie Chow the Chow can grab onto and use to pull themselves onto the platform, though this is fairly laggy. And don't forget your ability to move up walls at higher Jaws levels.


Forward Smash: Savagery

Gluth raises a front leg high and lets out a loud roar as he puts his entire body into the swing, dealing 20%-25% damage to anyone hit by this move and getting KO'd at 110%-85%, which considering this move is very laggy on both ends doesn't seem too great at first, but since Gluth is putting all of his body behind the attack (hence the lag!) this move is notable for getting significantly more buffed from your Jaws level, getting double the normal damage and knockback buffs! That means that, at max Jaws level, you're going to be doing 40%-50%, and you'll probably be KOing at around 70%-55% or maybe even a bit earlier, which is pretty amazing! Unfortunately, the sheer effort Gluth puts into this move means he only gets half the Jaws lag reduction he normally would, but that just means it still gets some nice reduction on a bone crushingly powerful move, especially when you can do things like Enrage Cancel on a slope to retain momentum as you strike with this move. In general, you'll be using this or Bite to finish off the foe: Bite is significantly safer due to its speed and extra armor, but Savagery is significantly more powerful and gets more powerful earlier.

If Gluth impacts a foe who has Infected Wounds or Mortal Wounds on them, then a few extra freeze frames will be added upon striking a foe as his claws mutilate them slightly, causing a spray of blood to fly out from them before they are sent flying, creating a pool of blood half Gluth's width where they were hit and causing the foe to bleed. Both of these effects will attract Zombie Chow, causing them to move at 1.25x their normal speed towards the nearest source, be it pool or bleeding foe: Alas, the Zombie Chow are too stupid to just attack the foe for it...or maybe they just want the easy meal? Who knows.

When pursuing foes who are bleeding, they will continue their mindless aggression, but will add in their moves outside the Infected wounds more often, and their bite-grab attack in particular has greatly increased usage and gains more damage, going up to 3% damage per half second with the lightest flinching on every 3rd hit. In addition, the Zombie Chow will heal for each bite on these bleeding foes, up to the cap of its maximum 30 hP. Foes bleed for twice as long as the longest of their Infected Wounds or Mortal Wounds timer and it has no effect outside of those on the Zombie Chow themselves.

The pools of blood remain for the same amount of time and also attract Zombie Chow but, obviously, the Zombie Chow cannot attack a pool of blood, nor are they stupid enough to think it is a person. Instead, Zombie Chow will drink upon it in a pathetic, one might say vein, attempt to recover their own health. Seeing as it is missing critical parts of a zombie's main diet, such as brains and muscle, it only heals them 1.5% HP every 1/3rd of a second, but this is still rather noticable. Only one Zombie Chow will drink from a pool of blood at a time, any other attracted Zombie Chow will sit around the pool and defend the drinking one, or aggressively attack any enemy which gets within half of a Battlefield Platform (one Ganondorf of height max vertical detection range) of the bloody pool. Zombie Chow will drink from the pool until they restore 9% HP, heal to their maximum HP or are hit out of it, whichever comes first.

Blood pools will travel down the slopes of Gluth's pits, attracting Zombie Chow along the way. Because the Zombie Chow aggressively defend the bloods of pool, instead of their more mindless lurching, blood pools are a particularly strong way to guard your pits, with Zombie Chow congregating around the blood pools and aggressively lurching after anyone who is hit inside, making it a more aggressive alternative to simply tossing the Zombie Chow inside to be saved for later.

Finally, if Gluth uses this move to kill a Zombie Chow, then the Zombie Chow's corpse will burst into its own meaty pool of blood. This pool of blood can be differed from other blood pools by being a green-red mix and having fleshy chunks of zombie floating in it. This blood pool lasts half of the Zombie Chow's remaining HP when it died and heals Zombie Chow for a larger amount, since it contains more of a proper Zombie's diet, healing 3% every 1/3rd of a second. Behavoir is otherwise the same, except the maximum a Chow will drink is doubled to 18% just like the healing.

Remember that the healing of the Zombie Chow's means even more than JUST letting them fight for you longer: healing is dependant on how much HP the Zombie Chows have, so if the opponent will gain more than Gluth from healing at a given moment, he may want to try and heal them up to deny the enemy the same healing. Overall, this is the move's primary early use once you get some kind of Wound on the foe.

Up Smash: Terrifying Roar

Gluth raises his decaying head to the sky and lets out an eerie, hallow howl, the initial head-raise being a small hitbox that deals 3%-5% damage and combos into the main hitbox ala Snake's Up Smash, which is a bit above Gluth and the force of his roar, which deals 18%-24% damage that'll KO at around 130%-105% or so. The starting lag on this is actually decently fast, but the ending lag is somewhat long as Gluth will hold the pause for a while after the attack finishes. It's still a pretty nice anti-air that deals good damage and can be even combo'd into lightly, largely when inside of the pits Gluth can create: Gluth can even angle this attack left or right ala many Forward Smashes, which allows him to slopeguard from the bottom of a pit fairly well!

The hollow howling of Gluth's roar puts fear into the not-quite-still-beating hearts of his Zombie Chow, which will cause any Zombie Chow close to Gluth (about half a BFP to both sides and 1 Ganondorf above or below) to scramble away from Gluth in a frenzy, wildly attacking anything in their way as they try to get away from Gluth, travelling a total of one Battlefield Platform, although they will not run off ledges to do so and will instead just run against the ledges for the duration like the mindless zombies that they are. This can be a good way to cause a Zombie Rush of sorts to charge at foes and can be especially good if the foe gets down in a pit full of Zombie Chow to get them damage racked. Do note that Zombie Chow will only attack foes in their path, so if they get behind a Chow...well, easy healing for them! Show a little tact, will ya?!


Standards

Jab: Savage Strikes

Gluth performs a light, inward strike with one of his paw-arms, before performing a second, stronger strike with his other arm in this 1-2 jab! The first hit deals a mere 3% damage and light knockback towards Gluth, essentially serving as a quick set-up move for various parts of Gluth's moveset that will usually combo into the second hit, which deals 6% damage and sends opponents behind Gluth at a downwards-back angle: The knockback isn't amazing or anything, but it IS above average for a jab, and this particular style of knockback serves a very nice use in that if Gluth is facing away from a slope, it will usually knock foes riiiiiiiight down it at almost ground level, setting up a variety of potential Enrage Cancel shenanigans and generally serving as a good way to get foes into your pits from a DEFENSIVE stance over an OFFENSIVE stance. Aside from that, it is a pretty average jab with pretty average lag that serves the function that most jabs do.

This move can be a nice way to nudge Zombie Chow away from foes due to the weak damage but towards-Gluth knockback, bop a Zombie Chow with this when they go to attack it and if they're hitting near the edge of their hitbox, they'll whiff as you knock the Chow towards you! Also an okay way to knock Chow into your pit while still standing guard of it.


Forward Tilt: Claw

Gluth performs a single, straight-ahead jab forward with one of his claw-arms, a pretty simple maneveur which deals 10% damage on quick starting lag, with knockback that is decently average and KOs at 215% or so. This move does have a bit more ending lag than normal, but it isn't HORRIBLY LAGGY or anythin'. This serves as a pretty standard move that takes advantage of many of Gluth's natural Jaws buffs: For example, the quick speed combined with Gluth's super armor allows him to counter some weaker hits, it becomes pretty strong (especially for the speed) as your damage buffs up, and so on. It also noticably deals very impressive shieldstun and shieldpush, making it ideal to push defensive foes into your pits and making it safe on shield.

This move can be angled up or down, which does offer some minute differences in actual damage and whatnot: Up deals 12%, but the knockback is more up and worse for KOing (more influenced by DI and fall speed) and only KOs at 245%, also making it worse for gaining space but better for combos. Down only deals 8%, but the knockback is superior for KOing and it deals a bit more knockback and will KO at 175%, making it more of a reasonable KO option but a much worse damage or combo option, can be good for GTFOing too. The angling is perhaps more important, however, for Gluth's pit gameplay: Up angle goes almost perfectly ground level with a slope from below, while down does the same from above, allowing Gluth to smack away at foes with this move regardless of elevation and giving him a solid base. The angling and moderateness of this move also makes it your go-to option for sniping very low HP Zombie Chow or knocking them away, although do note the slightly-longer-than-average ending lag means you might be punished if you don't also hit the foe.


Up Tilt: Buck

Gluth makes a very small leap upwards in a traditional bucking motion, smacking anyone above him with the back of his body for 9% damage that has okaaaaaay but somewhat low upwards knockback, won't KO until around 260% or so I'd say. It looks kind of like a less violent pre-SSb4 Bowser Up Smash, really. Both the starting and ending lag of this move are somewhat faster than average, but not blazing fast or anything. One of the key things about this move is that as it is tied to Gluth's full body, it gets a pretty substantial range buff as Gluth increases in size, and from Level Two and on will actually hit increasingly to Gluth's sides as well, making it a real all-around body coverage move. This is ESPECIALLY noticably if Gluth is able to Enrage Cancel it into a slope, as Gluth will be practically DACUSing it with a pretty slick hitbox size!

On top of that, this is one of Gluth's more noticably moves in a pit, because as Gluth gets bigger he can take up progressively more space in a pit, making it substantially harder to approach Gluth inside of his pit compared to normal. While Gluth doesn't really just camp in his pit, it does mean he can pressure foes to try and approach him by summoning/tossing Zombie Chow at foes, and his Enrage is a good way to approach foes outside of the pit as well. Noticably, slopes actually make this defensive move harder to pull off as it is much easier to poke at Gluth with down tilts, making it one of Gluth's moves that prefer pits compared to slopes.


Dash Attack: Gluth Glomp

Dashing forward briefly, Gluth leaps forward with his claw-arms at the ready, striking forward with them in a vicious slice for 15% damage that KOs at 165%! A move that's somewhat laggy to start-up and has noticable ending lag, the damage and knockback is nonetheless pretty noticable even before Gluth's Jaws buffs, and Gluth gets noticable frontal super armor on this move based on Jaws stacks: In addition to the Super Armor normally given by Jaws stacks, Gluth gains 1% super armor for each Jaws stack that he has to the front half of his hurtbox, making it a move you more prefer to matador than to deal with head-on.

If Gluth is rushing towards Zombie Chow in range of this move, he will visibly be slobbering during the starting lag and in fact gets a reduction in Starting Lag on this move for each Zombie Chow at 15% or less HP, maxing out on a 50% reduction in starting lag! Considering this move is moderately powerful, making it go fast is valuable...and, perhaps more importantly, combining that with the move's solid range makes this an excellent move for swiping away Zombie Chow from the foe at the last moment and taking their juicy innards for your own!

Unlike most dash attacks, Gluth will go over the edge with this move, being able to cancel out of it after half a Ganondorf of falling and able to fall a maximum of 2 Ganondorfs with the attack out before entering ending lag, which one might note is exactly the distance down your pits: Landing lag, so to speak, of this move is actually pretty low, so Gluth can happily use this to dive down his pits and slopes aggressively and potentially even cancel it on hitting with a jump to keep him from full-on committing. It's also a rather excellent edge guarding move due to this property, giving it some fun multitudes of uses.


Down Tilt: Drag

Extending his claw-arms forward, Gluth plants them claw-first into the ground a decent bit in front of him and scrapes them back towards him, dealing multiple hits of 2% that total 8% but also really pathetic knockback, with foes essentially being delivered in front of Gluth unless they DI out of it: Although the starting lag is rather long, the ending lag is rather short, and it puts foes right into the jaws of the beast, ready to be teared apart and mutilated by the Plague Dog Of Naxxramas at his natural range, meaning it's a somewhat savage move to get hit by. Gluth will reach down slopes with this move, allowing him to drag enemies who wanna camp him from his slopes and pits back up, and in fact if Gluth hits a foe with this on his pits, or even offstage, he will "drag" them to the lag without the foe getting granted mercy invincibility, allowing Gluth to set up for some really mean edgeguarding and pitguarding possibilities.

If Gluth uses this move on a foe with Infected or Mortal Wounds on them, then the claws will dig into the foe for an extra 2% damage on the first hit, and cause a small pool of blood to form at the foe's spot of being hit. This pool is 1/4th the size of Gluth and lasts half the time of the longest lasting Wound currently on the foe, but otherwise behaves like the Forward Smash's blood pools: Essentially, while the Forward Smash is a longer time blood pool for Zombie Chow consumption, the Down Tilt combined with the shorter duration is more a signal to your Zombies that it's GO TIME and an easier setup for temporary blood pools in a pit.


Aerials

Neutral Aerial: Roll Over

Gluth performs a Pikachu-esque roll, bringing all of its limbs in and rolling over his foes for multiple hits of 3% that will usually end up totalling 12% with no real knockback: Good boy! The starting lag is close to Pikachu's Neutral Aerial, with the ending lag being a bit laggy, while the knockback tends to drag people along Gluth's path. Something quite neat about this move, though, is that Gluth will keep rolling down the slopes he can make if he would enter "landing lag" during this move, which can ALSO be used when you Enrage Cancel into it as well, which is particularly fun because Gluth will always roll down slopes and so Gluth can run over a foe, land above them, and then rock on down them with this move. Gluth will roll down until he reaches the bottom, taking his normal ending lag, or until he cancels out of it with a jump.

Gluth gains power as he rolls down his slopes, specifically every 1/4th a Bowser he rolls down, at the start he simply keeps doing his dragging knockback, but at the maximum of 1.5 Bowsers he'll smash into foes for 21% damage and he'll KO mostly upwards a 115%! Yoooooowza! In the middle is around 12% damage and only moderate knockback, however, and getting the full damage requires a pretty strong slope and a lot of time, making it pretty predictable...but it is reeeeally deadly when you pull it off. You can also use the earlier hits to combo into an aerial assault via jump cancel too, of course.


Forward Aerial: Power Slam

Gluth leans his claw-arms back and then gives them a strong, sharp slam downwards in front of him, which will spike foes when he hits them with the bulk of his paws for 15% damage that is fairly strong, but it works like Charizard's Down Aerial spike: It is actually STRONGER when hitting grounded foes than aerial ones, with the spike being able to KO at 135% from the ground but being more Mario Forward Aerial strength in the air, giving it decent gimping power but a lot of grounded potential. This is particularly useful from the top of pits or on slopes: For example, Gluth can Enrage Cancel this on the top of a slope and bounce off it, slamming them to death against the rocky crusts. The starting lag on this is somewhat long, while the ending lag is also slightly long but not thaaaaaaat terrible.

Up Aerial: Swatting Scoop

Gluth growls in annoyance as he dips his paw below him, before performing a strong upwards swat (starting from below him) that deals varying damage depending on location. Getting hit by the meat of the paw only deals 8% damage, but with decent enough upwards knockback, while the claws are a sweetspot that deals 16% damage and KOs at 128%: A true aerial knockout! Although a bit hard to setup, it doesn't start especially fast and it has an awkward starting spot for perfectly sweetspotting aerial foes, it is quite rewarding when pulled off and the ending lag is fairly low. Naturally, Gluth's increased size with more Jaws increases the size of the sweetspot, making this move increasingly more deadly!

Zombie Chow stuck by this move will be swatted upwards, no surprise there, but the sweetspot in particular will send Zombie Chow INCREDIBLY high, seemingly sending them clear off the blast zone! Being almost entirely unable to be hit from that position, Gluth can use this move as a way to temporarily remove Zombie Chow from sticky situations, or perhaps prepare them to fall down a pit or for Gluth to catch them mid-air for some healing. Zombie Chow always take non-sweetspotted damage, keeping this Zombie chow safety move from brutally murdering them at unwanted times.


Back Aerial: Skin Scraper

Gluth swipes behind him with one of his claw-arms, scraping against foes, the ground and anything else that is in his way, dealing 11% damage on a fairly quick move that deals solid but slightly lower than average knockback. Start to finish and with average ending lag, one of the most important things about this move is that it'll scrape against walls and slopes and create green-hot, sickly sparks that deal rapid hits of 1% that total 6%, although the hits can't really combo into each other. It does mean that Gluth can do some really fun tricks with the ledge, either bouncing foes off the stage or severely limiting their getup options with passive hitboxes that'll smack them out of quite a few return options. When you keep in mind that Gluth can make pits with grabbable ledges, this becomes something quuuuite relevant more often than it normally would. A pretty scrape move.

Down Aerial: Tip-Toe-Dog

Gluth makes a serious of 4, quick stabs under him with his claws, each one dealing 2% damage and light downwards knockback, good to string together with low lag on both ends but also ultimately pretty low damage and the knockback is pathetic if you want foes away from you. Gluth won't land during this move, instead having his claws tap against the ground and keep himself just above it before taking his normal ending lag, making it actually a really nice option in Gluth's shorthop game, especially with his aerial speed.

Final Smash: Ravenous Cerberus

Embued with the power of the Smash Ball, Gluth leaps straight forward a MASSIVE distance with his mouth open, chomping at anyone in his way for 40% that KOs at 130%. This might sound weak, but Gluth will heal against any foes he hits by ripping out their flesh, healing 50% minus 1% for each 1% of damage they've taken down to a minimum of 1%, while also eating any Zombie Chow in his path for normal healing. So it can potentially actually be a really large swing!

Playstyle: Play Dead!

HAHAHAHAHA! THERE IS NO ACHIEVEMENT FOR LOSING TO GLUTH!

---

Gluth Patch Notes 1.0.0:
- Gluth is now able to attack his own Zombie Chow outside of Decimate and his Grab and even break them open for healing. However, his healing without eating them is halved. This should allow Gluth to better play a tug-of-war like game with his Zombie Chow. If this change ends up causing issues/is unpopular I'm more willing to revert it.
- Gluth's Back Throw has been replaced with an entirely new throw, "Bile Bite"!
- Gluth's Forward Smash has had a large and noticable effect added to it.
- Down Tilt has had a smaller effect added to it.
- Dash Attack has a new effect when moving towards injured Zombie Chow.
- Up Aerial has been replaced by a move with similiar function, but a new animation and an additional effect on Zombie Chow.
- Jab and Forward Tilt have had additional text about how they can be used to further your Zombie Chow game.
 
Last edited:

JOE!

Smash Hero
Joined
Oct 5, 2008
Messages
8,075
Location
Dedham, MA


Gaige was a high school student from the planet Eden-5. She originally conceived Deathtrap, then called DT, as a science fair project to combat bullying. Her rival, Marcie Holloway, was a contestant in the science fair as well, and used her father's money to buy her way through the competition. Marcie apparently stole Gaige's DT designs and sold them to Eden-5's police force.

On the day of the science fair, Marcie's father bribed the judges, helping win her first place with a defective robot based on Deathtrap's blueprints. Gaige placed third. Marcie then shoved Gaige, causing Deathtrap to identify her as a hostile. Deathtrap attacked with its claws, causing her to explode due to a miscalibration by Gaige. Gaige was escorted to the principal's office, and faced expulsion and arrest for accidentally murdering her rival. She called her father to create a distraction to help her evade arrest, and bought a ticket to Pandora, where she stowed away on a train leading to Windshear Waste.


Gaige brings an element of chaos to Borderlands 2 with her affinity for the electric element and digistruct tampering. This leads to her weaponry all having their own unique quirks, creating wildly erratic gun play that can offer spectacular DPS... if she happens to use her inventions right that is. Being a teenage girl about the size of Luigi, her stats mirror Mario's except for weight which mirrors Pikachu. This gives her good mobility in exchange for being incredibly frail when actually hit! Luckily, she packs a lunchbox full of cyber-punk tech to even the odds against more physically imposing baddies. When those aren't enough though, she adds more chaos to the fray with a physically imposing baddie of her own!

DOWN B: DEATHTRAP


The polar opposite of his creator, Deathtrap is an imposing figure to behold! A floating robot torso the size of Donkey Kong (minus the legs), this robot is here to do some damage. A press of Down + B will summon the metal mangler with a unique animation:

Deathtrap is completely invulnerable until those Digistruct pixels disperse, but still tanks pretty much any attack in front of Gaige during the summon. Once he is up and running, he will float freely around the stage but generally stay near Gaige. If an enemy is close however he will zoom towards them in a bee-line up to a max of Jigglypuff's air speed over a distance and dig into them with his Digistruct Claws!

These swipes can be up or down, but in both cases hit pretty much the same as Marth's Fair for 8% and 45* knockback weakly away. At low % he can chain one or two in succession, but as enemy %'s grow he won't be able to link as well even with the stellar area coverage. Instead, Deathtrap will opt for a long range followup:

Deathtrap's Electrical Eye can zap foes right out of the sky! Hitting multiple times, the electrical bolt will stop at the first foe it hits to shock them for a total of 6%. Like the claws, electricity is non-clankable making for an excellent anti-air. Generally, DT will only use the eye if a foe is above him or more than a platform's distance away with Gaige between him and the foe, otherwise he will opt to approach for claw attacks. If they are outside the Eye's range of 1.5 platforms then he will either be following Gaige around or trying to approach the nearest foe. Both the Eye and the Claws are potent tools for Deathtrap, but have notable lag as he rears his hand back or as he is stuck firing the electricity upon a whiff. Gaige usually has his back, but doesn't need to worry too much thanks to the Skills she programmed into him!

Deathtrap is MADE OF STERNER STUFF, rendering him immune to damage and knockback in the traditional sense! His metal body merely shrugging off hits, with strong moves able to push him backwards but never make him flinch. Instead of health, you will notice that above Deathtrap where a player's name usually is there is a red meter outlined in metallic grey that ticks down while DT is active. This will drain to the end over 15 seconds, during which Deathtrap will despawn in an almost reverse animation of his summoning. He is then put on a 15 second cooldown until he can be used again. You can either figure this out in your head, or watch the bottom left corner of Gaige's character portrait where an icon will appear once he's ready:

UPSHOT ROBOT is what determines if Deathtrap sticks around or is put back to the drawing board. The icon you see here is what appears on Gaige's character portrait when DT is available, and is absent when he is active or on cooldown. As mentioned before, DT doesn't have traditional HP. Instead when he takes damage, his timer is reduced by that %! If he takes 10% for example, the timer goes from 15 seconds to 13.5. 50% damage turns 15 into 7.5, and so on. While he cannot technically die, enemies can reduce his timer to the point where he simply despawns prematurely... if they can get hits in on him that is. Luckily, Upshot Robot can be activated by the duo as they KO enemies! While DT is active, KOing a foe will have him flash your player color as well, and add 3 seconds back onto his timer. To secure those KO's and your pal's longevity, Gaige has installed quite the team move to use:


ONE, TWO, BOOM is a team-attack between Gaige and Deathtrap that is activated by Down B when DT is active, and it looks pretty sweet:


The slow moving, Charge-Shot sized projectile passes through anything and simply deals multiple hits of 1% like the Electric Eye does as it travels outwards towards the edge of the screen. It won't drag foes with it, but will deal about 5-10% as it passes through them on average. As you can see in the video though, Gaige can up the ante by shooting and exploding the electric orb! On detonation, the orb itself is a hitbox for 20% and very high vertically inclined knockback that can KO around 90%. Surrounding that is a shock-wave for 5-1% that just deals hitstun and expands to about 1/2 the radius of a Smart Bomb, dealing less damage with range. Careful planning and fancy mathematics are needed to land this shot, but the rewards for doing so are fantastic! Too bad you can only perform the attack once per Deathtrap summon. At least when you aren't shooting for the 1-2-Boom, you can use your trusty sidearm to lay into your enemies!


Neutral B has her fire the Little Evie pistol. Perfect for a girl genius such as herself, the pistol fires electrical bullets in a straight line with range equal to Fox's blaster (about 2.5 platforms). As long as you hold the B button down she will fire electric lead into the first target in range that hits at a rate of 20 bullets a second. That is insane fire rate for such a little gun! Impact with foes will shower sparks everywhere for aesthetic effect, and spark with each bullet fired, but the bullets themselves are only just barely visible from slight electric trails as they whizz by.


Like Zer0, you can walk, crouch, crawl and jump while shooting, but cannot turn around. And while Sniping he could aim upwards, Gaige instead uses Up B for her aiming purposes. On the ground, this merely allows her to shoot 45-90* upwards, or behind her as she can turn while spraying bullets in an arc to cover the skies. In the air, Gaige points the gun straight down or 45* to either side as the kickback of the gun provides her with what amounts to another double jump. Unlike the ground, angling will angle which way she wants to go rather than which way she shoots. So to shoot to her right on the ground, you will want to angle left!


"Aerial Evie" does not put her into special fall nor consume her double jump, but a second use essentially just halts her momentum, and subsequent uses after that just slow her fall speed a tiny bit. Each use of Up B uses 10 bullets and cannot be sustained like Neutral B, though she can use it fairly frequently. Shooting the Evie midair normally also provides some kickback horizontally for the first 10 bullets with the same rules as Up B, letting Gaige have a nice recovery trick with B-reversals combined with angled Aerial Evie. This is nice for offense, but using the recoil of a gun as your recovery can be lacking at times so Gaige will need to be careful with usage. That is unless Deathtrap is around!


If DT is active, Up B in the air instead will have Gaige whistle. Deathtrap will stop whatever he's doing and come to her rescue and together they form the pose seen a ways above where Gaige saddles up on DT's shoulder. You then gain control of Deathtrap as he flies back to center stage. Well, semi-control as you can influence his drift/path, but he will always want to go towards that spot. Gaige can jump off of DT at any time, and any damage taken will split between the two 50/50, but thankfully not slow them down due to DT's armor. Jumping off of DT will restore Gaige's double jump and allow her to use the Aerial Evie, but she cannot whistle for Deathtrap again until she touches ground. This turns her once bottom tier recovery into something resembling the Villager's with the push of a button! Unfortunately, you can still wail on her to quicken Deathtrap's despawn as well as stack damage on Gaige to make her next recovery attempt that much harder. The ability to use your buddy-bot as a shield is still great though as his homing towards center stage will allow you to make an easy approach!

When Deathtrap is inactive though, Gaige's best defense is a good offense via the Evie. Yet, despite the crazy spray of bullets ripping and whizzing through the air as she strikes a cool pose to fire in every direction, each bullet only does 0.1% damage. Yep, you need to land 10 bullets to deal 1%, and they don't even deal hitstun! Luckily, she has some Skills up her sleeve that can alleviate that little detail...

ANARCHY
is a modification to her gun's barrel that totally changes Gaige's gameplan. As you hit foes with Evie, you'll notice the Anarchy icon next to your character portrait in the top left, right where Shulk's Monado icons goes. Each bullet hit will then place a x2, x3, and so on as stacks of Anarchy build up. Each stack then places a 1.2x multiplier on Evie Damage, permanently! Maxing at 100 stacks, this makes the pitiful 0.1% grow to an impressive 2.1% per bullet, or a DPS of 42! The Little Evie isn't so little anymore, is it? However, her tinkering does have a side effect in that with each stack the Accuracy of the bullets goes down a bit. You will notice it slightly at first, but the bullets will begin traveling in a sine-wave pattern as Anarchy builds. Going from a bit of a wiggle up and down, at max Anarchy the arcs are the same as Dr Mario's pills when bouncing in the air, about a 2 Ganondorf height difference. This makes it harder and harder to actually build Anarchy and damage your foes as you do so given there is a lot less reliability to your shots. Gaige herself changes her pose when firing as well from calm and collected, to holding it sideways like a kill-shot at 50 stacks, and at 75+ she cackles as she sprays wildly in front of her.


Deathtrap also changes appearance based on how much Anarchy is built when you summon him. As you may see in the various Gifs laying around, at 50+ DT becomes bulkier with bigger arms. This does not give him more damage, but the added mechanisms to his arms do seem to grant new functionality!

EXPLOSIVE CLAP is unlocked for DT past 50 Anarchy. A sort of counter-move, he will opt to use it if Gaige/allies are attacked near him or he himself is being attacked.


The clap behaves somewhat like 1-2-Boom with a large sour spot and powerful inner hit. Foes crushed between his explosive hands at close range will take 12% and meaty diagonal knockback that can KO at around 140%, with a wind box that covers a platform's radius that deals a flinch and 6% around that. This is great for clearing space and in general gives a huge opportunity for Gaige to capitalize, though it is very time consuming for Deathtrap. Luckily, he only does the clap once per summon. In order to trigger it though, he does gain another ability that allows Gaige to bait out his explosive rage!

BUCK UP is a skill designed to keep you in the fight that much longer! Another team move between the two, if you Shield or Dodge when adjacent to Deathtrap, he will perform the following animation:

This provides you or an ally a shield similar in use to Ryu's Down B in that it will let you freely tank 1 attack. This lasts until you are hit, and has a 5 second cooldown for DT between uses. This should be done intelligently as it takes away precious time from DT that could be used for other things like, you know, shooting lightning out of his face. At least it will provide you additional cover if somebody makes it past DT and allow you to counter-attack! It's nice to have a tanky buddy bot, ain't it?

Deathtrap
isnt always so buddy-buddy though, I mean part of his name is "Death". At 75+ stacks, his appearance will change yet again as he gains sweet blades across his body as well as more offensive attributes that put the new style to use:

ROBOT RAMPAGE turns Deathtrap into a rotating rotisserie of robotic rage!


Essentially the same as DK's Up B, the blades on DT mixed with his inability to be hit out of this make for one heck of an attack. Activating once per summon, but with the same conditions as his normal Claw attack, Rampage will deal upwards of 24% if a foe is caught in all the hits but otherwise be kept in place afterwards. This is a great disruption as it lingers for quite a while without actually being "laggy" as DT can act the moment it ends.


THE STARE is similar to Rampage in that it is the quintessential upgrade to the Electric Eye:

Instead of electricity, a big, orange, fiery laser is shot out at a foe to incinerate them! Locking onto a single target, the laser will continually push them as well as deal rapid hits adding up to 10% damage, but no actual hit stun. Instead, they are lit on fire! Over the next 2 seconds the foe will take 5%/sec to make the Stare's total come out to 20%. Like the other abilities, he can only perform this once per summon and is triggered the same way his Eye is via distance. However, this can be in any direction. The Stare at certain angles occasionally leads to gimp situations as the beam shoves people to a fiery death, but otherwise it is simply great for damage.

These stacks last forever, but upon dying she will lose every single one. So while she can snowball pretty hard as she gains more and more stacks between herself and Deathtrap, it can all crumble in an instant! Luckily, Anarchy allows Gaige to even the odds with incredible, though risky damage as the Evie still lacks hitstun unless you account for Gaige's special bullet reloads:


SHOCK AND "AAAAGGHHH!"
occurs when Gaige takes out and reloads the Evie with the special Anarchy magazines. The reload will happen automatically every 20 bullets, and only takes about 10 frames of animation to complete before you can spray bullets again. Letting go of B will have her stop firing, but keep the bullet count internally so that if you fired 15 rounds then stopped, the next spray will shoot 5 then force a reload. What S&A does is makes that reload a little more interesting as the electricity surges around her mechanized arm and then to her body. At 0-49 stacks of Anarchy, this merely puts an electrical hitbox on Gaige briefly that deals 5% and knocks the foe a set distance away diagonally about her own height away. You can just let go of B once this happens and follow up at your leisure being they are in electric hit-stun and all, or you can try and push for more stacks! At 50-74, the electrical hitbox grows to be a sphere of electricity the size of Ness' PSI Magnet graphic and deals 10% with the same knockback. Finally, at 75+ the electrical burst remains the same, but Gaige is left sparking with electricity for an additional 10 frames that deals 5% to anyone she makes contact with her after the reload ends. S&A will occur whenever she would have fired her 21st bullet, or a full second of firing. This means that it can happen during any move of hers that uses the gun, but luckily her Up B is flexible enough to allow for extra lag here and there. The hitbox could even be better to stop foes from hitting her! You can best manage this through Neutral B, and its a decent hitbox to set up beforehand by firing a bit, stopping, then firing again to reload. Between all the bullet spraying and electric reloads, you can really send damage everywhere on the screen! However, you may find it pretty difficult to land your damaging shots later on as Anarchy makes the bullets swerve every which way, but don't worry, Gaige has a contingency plan for that!


CLOSE ENOUGH grants each bullet fired a chance to ricochet towards a nearby enemy for 1/2 the damage it would have dealt otherwise upon hitting a surface. Upon a ricochet, the bullet will travel like it had 0 Anarchy and zip in a straight line towards the foe's location for up to 1.5 platforms before fizzing away. The chance of this occurring is equal to 1/2 your current Anarchy, maxing at 50% and is fantastic as with high Anarchy the bullets will naturally hit the floor half the time anyways. This is especially great with Aerial Evie as spraying all the bullets at a surface increases the odds that they will proc Close Enough!. As with most all her skills, this changes slightly at 50 and 75+ stacks. At 50-74, Close Enough gains a chance to proc upon hitting an enemy the same way they do a floor for 1/2 the damage they would have dealt when ricocheted (1/4 normal damage). At 75+ all bullets gain the chance to bounce off of foes and do not drop below 1/2 normal damage. Ricocheted bullets will not build Anarchy on hit, but still benefit greatly from it!


Gaige sees her electric bullets no different than electrons in a circuit. The more juice you pump into it the more they can flow from point to point! Her skills combined allow her to cause absolute mayhem around the battlefield where no area is truly safe from damage, and even more-so when there are multiple targets and a Deathtrap to take cover behind. To hammer in that point, she has cooked up even more trouble thanks to her special grenades!


Side B has Gaige toss out a patented Tesla Grenade! These devices make a small explosion on impact, then generate an electric field on the ground that will continually damage anyone in range, as seen here:


The initial shock deals essentially the same hit as S&A with 5% and set knockback, and will go off on impact with a foe or after hitting a floor/wall. Gaige normally tosses them a platform's distance away, but jumping and tossing can gain more distance as it arcs through the air like an item toss. Upon detonation the grenade creates a Tesla Field as seen above. Covering the area of a platform, electric currents will home in on any foes within it's radius and deal 1%/sec over the course of 8 seconds with no hitstun. There is no limit to how many currents can be generated aside from how many people can fit within the radius, and if they are being evasive Gaige can toss another the moment the current grenade dies out to keep an area of influence.

Just like with the Evie, Gaige has her own tweaks on the Tesla Grenade that come into play with Anarchy! The standard version is only thrown when Gaige has below 50 stacks, beyond that she will do a quick, sparking crank on the grenade with her mechanical hand before tossing it with more lag than the standard toss. Upon detonation this tweaked grenade has a 1.5 platform radius and lasts 10 seconds, but otherwise is the same as the standard version aside from being slower to toss out. At 75+ stacks this gets an extra change as Gaige fiddles around for just a moment more before pulling out at tossing a Stormfront Grenade!

Sporting a whopping 2 platform radius, the Tesla Field here lasts for 12 seconds, and upon detonation releases child grenades, one to each side. These secondary grenades hit the same upon impact, sparking with 5% and set knockback, but do not create new Tesla Fields. Due to the way the shocks work, it is not really possible to be hit by all three, but somebody could be unfortunate enough to DI down into one side to be hit by one of the two child grenades. These grenades expand Gaige's area of influence tremendously when combined with Little Evie. In fact, you could say that they give her entire set more pep!

When she's not shooting, Gaige can put the hurt on her foes with her trusty Hammer. Its no Mjolnir, but it gets the job done for her science projects as well as nailing bad guys in the face. Having little actual combat experience, her standards and aerials are sort of what you'd expect from a teenager flailing a hammer, like her Jab that has her hammer just in front of her up to three times like she was putting a nail into a wall. The first two swings are very quick and deal 2% each, with a final smack that has her reach back further and smash it forward for 5% and actual, though weak, knockback. The hammer in her metal hand gives reach comparable to Toon Link's sword, which isn't much but still nice for a melee attack. You may notice something else going on if you try to nail foes when in a Tesla Field though, as Gaige's inner Evil Enchantress comes out!

Evil Enchantress highlights the electrical affinity Gaige posesses by boosting any of her standards/aerials used in a Tesla Field. To put it simply, the current from the field will travel through her metal arm and hammer to add additional hitboxes to the move. For Jab this adds 1% per hit and a shower of sparks on impact to go from 2/2/5% to 3/3/6%, along with electrical hitstun. The last swing also has a notably bigger hitbox as it charged electricity on the hammerhead which is nice.

Her other tilts benefit as well, such as her Ftilt. A basic hammer swing mirroring her in-game melee attack, Gaige swings out and forward to cover the space in front of her. Foes struck will take 6% and basic knockback for a tilt that is a slight distance away at a 40* angle, which is all in all your basic spacing tool given the decent area coverage. When electrified, the hammer emphasizes spacing by sparking out with electrical tendrils not unlike a Tesla coil! These tendrils shoot straight outward the same distance as her hammer and deal multi-hits adding to a maximum of 4% across the swing. The electricity is transcendent, so you can clank her hammer but not the shock! The added range is best used when touching your Tesla Field instead of being in the middle. As long as an electrical tether touches Gaige, Evil Enchantress will still activate so you can get the most out of spacing this way. You can also opt to just hit with the hammer to stack the electical hitboxes as well for a 10% hit, but this gets less reliable the more damage the foe takes where the hammer hits them away from the shock.

Dtilt is also a close range attack where Gaige crouches, and smacks the hammer on the floor right in front of her after reaching back high for some lag. On impact the hammer slams down for 8% and meteor smashes foes! On the ground this pops them up for great combo opportunities, but on the ledge this hilariously can KO as she slams their fingers and ends them plummeting. When electrified, the hammer produces a shockwave not unlike landing with Pikachu's Dair, dealing 4% and high base knockback at about an 80* angle away from Gaige, though the low damage limits just how far. This adds about 1/2 a platform's area to the attack and can stack with the hammer swing to deal 12% total on impact with electric hitstun.

Utilt is a bit different as Gaige holds the hammer in both hands and makes an outstretched, upwards swing not unlike Peach's Fsmash. The hammer here deals 7% and knocks the foe straight upwards with decent base knockback but low growth, making it a great launcher but poor KO option. That is unless it is electrified! In a Tesla Field, the electricity will charge throughout the swing and then discharge in a straight line above her at the end, looking like He-Man when he transforms. This bolt is as tall as Gaige and deals 12% with very high vertical knockback that can KO around 130% or lower depending on where you hit (the tip hits higher, etc). The hammer swing sends off at an angle, so this should never truly combo unless they DI behind you for whatever reason, so think of the swing as the wind up to the bolt! In a Stormfront Grenade, you can perform this on low platforms for added height but most of the time Tesla Fields do not reach high enough to touch platforms.

Dash Attack puts Gaige in a heroic, "cavalry charge" type of pose as she leads forward with her arm and hammer outstretched! Impact with the hammer as she shoves it forward deals 7% and mainly horizontal knockback that doesn't really KO, and is active for just a moment before she regains her composure. The angle is decent for shoving folks off the stage or towards Deathtrap, and like with Utilt allows her to channel electricity! As she runs and winds up, the hammer charges then discharges a line of electricity as long as she is tall forward that mirrors the main hit. This extends the hitbox greatly, allowing you to shove foes from a good distance away and give her a true disjoint of sorts vs grounded foes.

Gaige's electrical affinity doesn't stop here though! As Deathtrap wanders through a Tesla Field, you might notice he gets a little Blue...

MAKE IT SPARKLE triggers whenever a thread from a Tesla Field attaches to Deathtrap, or if you yourself strike Deathtrap with electricity from any source. Signaled by DT getting a blue hue and sparking everywhere, you now have an elemental robot to back you up! While MIS is active, attacks made by DT will deal an extra 2% and electrical hitstun if they didn't do so already. While only lasting for about a second, this can significantly boost your offense especially since you can always shoot DT with the Evie to keep him sparkling. Better yet, while he is elemental his basic Claw and Eye attacks take on a new feature:


SHOCK STORM procs a hitbox on your target's location whenever Deathtrap lands an elemental stike:


The electricity surging around their body deals 3 hits of 1% to themselves and anyone near them. Additionally, as they are pulsing they are paralyzed for a set 10 frames as they go into a "shocked" animation! Any additional hit that would cause Shock Storm instead deals normal knockback, but you would be hard pressed to stack them together given the speed between DT's normal strikes. Luckily for Gaige, her Aerials cause Shock Storms if she lands with them inside a Tesla Field!

Fair is a good example of this interaction. Essentially a mirror of her Ftilt, she swings the hammer in an arc in front of her that has good coverage, a bit less horizontal range in exchange for vertical and sends them at a 45* angle for 7%. A more or less normal Fair for combos. This changes if she lands it inside a Tesla Field as a tether goes to her hammer, and upon landing creates a large hitbox on the hammer head as it strikes the ground that deals 5% and causes a Shock Storm to those touched! The circular, "splash" of the landing hitbox can catch foes in front of her and can even allow it to hit twice against a shield as the hammer swings then sparks from a short hop. Once paralyzed by Shock Storm, you then have ample frame advantage to lead into an electrified ground attack.

Her aerials only interact with the field upon landing mid-move. This means that in actual air combat she has to rely on their "vanilla" forms. This isn't so bad for Nair though as Gaige grips both hands on her hammer and performs a 360*, horizontal spin! Looking like Toon Link's Up B with similar range and stance, the hammer will bonk foes outwards at a 30* angle for 8% on the first spin, and 6% with notably less knockback at the same angle on the second spin if you don't land. A lengthy move, Nair is actually one of Gaige's KO options as the first spin sends foes out at a really nasty angle with decent enough power to secure KOs at around 120% offstage. The second hit is more or less just for safety, but can be comboed into electrified Ftilt or Dash Attack. Speaking of that, if she lands during this move she will still complete this second spin on the ground! With more end lag as she dizzily steadies herself, the spinning hammer will deal 5% instead and send at a slightly more vertical 40* angle. Unless she is in a Tesla Field in which case the hammer itself causes a Shock Storm to anyone she hits for additional damage as well as making it sorta safe given the lag.

It is recommended you stay near the stage if you are going for Nair's given she may end up spinning down to the bottom blast zone. Her Dair can do that to the foe instead though! Raising her hammer high above her head with both hands, Gaige slams it down after a moment to strike right below and send foes crashing down for a powerful meteor smash! As she turns slightly, this move will only hit right below herself but it still deals a decent (well, for her) 12%. This powerful smack has an equally powerful impact when in a Tesla Field as you'd imagine. The slam sends three shockwaves of electricity splashing up and around her, one straight up and one to either side at about 80* angles that are as tall as her. The burst deals 7% and as always activates Shock Storm. This covers her entire body, making it a strong defensive tool as well similarly to her SaA reloads.

Uair offers a bit more range than Dair as she swings her hammer up in an arc overhead! Bopping enemies for 6% and weak vertical knockback, in many ways this has similar coverage to Bowser Jr's Uair though somewhat faster. If she lands during this quick aerial, Gaige strikes a pose similar to Marth's Usmash that allows electricity to flow from the ground to the hammer! Tendrils of electric energy fan out from the hammer to shock anyone above her, able to coat most of a platform from below. Bair is similarly ranged when it comes to Shock Storm, but more horizontally. Like the Ice Climbers, Gaige will swing her hammer behind herself to cover the lower diagonal space with a hitbox that deals 8% and 45* knockback. This is strong enough to KO at around 125-130% off stage, but isn't as easy to hit as Nair nor sends at a low angle that can cause gimps like that move can. At least it is nearly double the speed so its safer to attempt! On impact with the ground, scraping the hammer behind herself sends a wave of electricity outwards. Covering the area of Kirby from where the hammer hits, the shower deals 3% but is very easy to space and capitalize on with further electric ground moves.

While her hammer does work for her basic attacks, Smashes pull out the stops and have her turn to her Digistruct Mechromancy to get the job done! Using her mechanical know-how, Gaige can summon forth bursts of digital-energy in a similar manner to how she summons Deathtrap in various ways for devastating effect.

Fsmash
is the most basic use as Gaige creates an explosion of Digistruct energy at the end of the Evie's barrel. As she charges the move, you can see her mumbling to herself as she rapidly tinkers with the Evie for maximum potential, before holding it out away from her with two hands to fire the experimental round. The shot exits the barrel and quickly explodes right in front of her like so:


The pixelated "pop" sends those hit at a 45* angle with decent knockback for 7-10% that can KO at around 170% or so. This version is totally not the one you see in the gif above, by the way. That mere 7-10% pop is only about the size of Mario's Fsmash fireball. But then you remember that the bullet is being modified here, and thus is affected by Anarchy! With each stack, the damage, range of the bullet and size of the explosion all increase by about 1%. At 100 stacks, the burst will deal 14-20% and detonate at a max distance of 1/2 a platform away with a Wario-sized Digi-Splosion as seen above. The angle of the move will be affected at random as power increases though, randomly shooting anywhere within a +/- 15* arc, but thankfully the blast made can cover the general area! At the new damage, the burst can KO much sooner at around 120% much like a normal smash. Like a normal projectile this comes with a bit of punishable lag and can be reflected/etc back at Gaige or Deathtrap. Other skills do not apply to this bullet such as Close Enough and so on, but the 1 bullet shot can trigger S&A to reduce the end lag down to 10 frames as she reloads.

Usmash
also takes advantage of S&A by nature of it using multiple bullets! Making her best Samus impersonation, Gaige makes the next few bullets in the mag Digi-Splode upon release as she fires an arc above her head. Unlike the super special Fsmash bullet, these are a bit more expendable and charging adds bullets used from 3-5 to boost the total damage to between 9-12% across the multihit. On detonation, the bursts are smaller than Fsmash only being about 2x the size of the actual bullet which seem less at first until you realize you made an arc of the suckers overhead. As mentioned prior, you will need the amount of bullets required to shoot the full spray else S&A will interrupt. This can be beneficial as Gaige will fire the moment the criteria is met, so say if you have 4 bullets left and begin charging she will fire all 4 and reload without doing a full charge animation automatically. With less than 3 bullets the animation is also much faster but with less damage and coverage obviously, and as always she cancels the end lag to reload. Anarchy affects these bullets as well but to a lesser degree due to augmenting multiple bullets. Each stack will increase the Damage/Range/Size of the bullets by 0.5%, making for a significantly larger arc that deals between 13.5-22.5% total, or at the least 4.5% with a single bullet. In any event, the Digi-Splosions will lock a foe in place until the last one resolves, which will pop them up and away in the direction it was traveling with knockback that can KO between 180-150% based on Anarchy.


Dsmash is where Gaige just says "screw it" and takes out the whole magazine from the Evie to tinker with. After messing with the whole cartridge, she will hop up and slam the thing to the ground causing a powerful Digi-Splosion! The resulting force will knock Gaige back down on her butt sort of like when Charizard lands Flare Blitz, but that is well worth it for the payload she just slammed down. Dealing 2-3% when thrown based on charge, the magazine is not really important here as the bullets within soon all detonate dealing damage based on both the number of bullets you had as well as Anarchy. At base, the explosion is about Kirby-sized at her feet and will deal 2/3% + 0.5% per bullet, maxing out at 12/13% for a full magazine. Charging the move increases the explosion to Wario-sized at the ground to make it easier to land instead of more conventional damage boosting. Each stack of Anarchy will add 0.01% per bullet, maxing out at 1.5% per bullet in the mag. At this point, a fully loaded Dsmash will explode for 32-33% damage and actually have fearsome knockback that sends foes flying at a diagonal to KO at around 80-90%! The size will also grow with Anarchy with a max being a Wario -> Crate Item size variance based on charge. The amount of bullets as well as your stacks determine the lag and thus risk/reward of the move. With 1 bullet and 0 stacks this takes essentially the same amount of time as a reload at 10 frames. With a full magazine and maximum Anarchy the time she spends fumbling with everything adds up to about 35 frames before the toss without charging, and with how it knocks her down you better hope DT is there to cover you! This is obviously her most powerful attack, but it is pretty wildly variable both in timing, damage and purpose. Aside from going for a last-ditch KO effort, this is also useful for simply forcing a reload the next time you were to use Neutral B or any other shooting move to take advantage of S&A. Just make sure you are paying attention to your ammo and your surroundings in preparation for the move. While powerful it only lasts an instant, making the spacing of where foes will be in relation very important else they get a free tech chase on Gaige!


Phew, that is a lot of tools and gadgets huh? Sometimes you need to rely on your bare hands to get the job done though, which is why when it comes to grabbing, Gaige relies on her mechanical, gizmo-infused metal arm!

Grabs with Gaige are initiated by reaching out with her metal,non-gun holding arm. Having average stats, nothing really stands out about it until, of course, she gets a little Anarchy in her system. Like with Deathtrap, Gaige's hand will produce Digistruct Claws to increase her grab range up to 1.5x at max Anarchy. The animations also change slightly to be a bit more hectic as she reaches and lashes out to catch people. Pummeling will stay the same as she bops people with the butt of the Evie, producing sparks everywhere for 2% a pop and actually dealing electrical hitstun to others who touch Gaige or her target while pummeling. This can add some safety as it gives more time for Deathtrap to capitalize. The important thing here though is the throws, which also vary based on Anarchy between simple spacing tactics and hectic claw action!


Fthrow starts things off simple enough. Gaige simply tosses the foe up and out at a 45* angle and then fires 5 shots with the Evie at the same angle for 3% + Bullet damage. This has OK base knockback, but generally will keep the foe around 0.5-2 platforms distance based on low/high %, and is an easy way to get stacks. Like with all shooting moves, this can be interrupted by S&A if you run out of bullets. As Anarchy grows this changes up from a toss and shoot to more of a traditional melee-type throw! At 50+ stacks, Gaige instead sweeps the claw upwards to send the foe at a steeper 55* angle and deals 6% damage before taking 5 shots sorta in that range, so slightly less reliable than the normal one. At 75+, Gaige forgoes the Evie entirely and instead rakes her claw across the foe with a grunt, sending at a 65* angle up and away for 9%, allowing for a much easier aerial followup or a grounded Up B if you want to get more stacks / potential damage!

Bthrow follows suit with Gaige tossing the foe behind at a downward 15* angle for 4% before taking 5 shots at them. Like Fthrow, this doesn't really have much power and sends the foe pretty much behind you on the ground but can send at a decent angle for gimps off a ledge. At 50+ stacks, Gaige will spin once around with the foe before releasing to deal 8% and send them at a 5* angle downwards with a bit more power. Still not enough to kill, she still will attempt to deal more damage by spraying 5 shots in the direction she is facing to peg the foe as they fly off horizontally. Finally at 75+ the foe is spun two times like the Mario Bros before being sent off at an upwards 5* angle and 12% damage with decent power that can KO around 150% at a ledge. Foes hit by the spinning victim take 5% and are sent upwards, but both those guys and the spinning victim are all prime targets for Deathtrap mid-throw as he will slash or shoot them for added damage.

Dthrow drops the victim to the ground for 1% damage, but then Gaige hops up and fires the Evie 5 times straight down onto them before they are able to tech or react. While not spectacular damage, this is the most guaranteed 5 stacks you can gain of your throws and forces a tech chase situation for you or Deathtrap to take advantage of! At 50+ stacks this is a little less guaranteed as Gaige will slam the foe for 2% and make a bigger jump up, about 1/3 her full hop height as she sprays the Evie's 5 shots around the foe. 75+ stacks is the same only with 3% dealt and a 2/3 full jump as she sprays. These higher stack throws will rely more on Close Enough to get the job done, but they do uniquely set Gaige up to tech chase directly with the landing hitboxes of her aerials which can continue the combo with a Shock Storm!


Uthrow continues the pattern, having Gaige toss the foe directly upwards for 5% with a grunt and then lighting them up with 5 shots from below. This has high, set knockback that will put foes at different heights based on Anarchy, but at base it will send the foe about halfway between the middle and side platforms on Battlefield. At 50+ stacks, the clawed hand will launch the foe up for 10% high enough to end up landing on the top platform of Battlefield before spraying 5 bullets in the general area. 75+ deals 15% with a slashing sound and sends them an additional Gaige height above the top platform. Her most damaging direct throw, it isn't really easy to follow up unless you are below 50 stacks, where she can get an aerial or Utilt/Usmash afterwards. At higher stacks, it deals decent damage but sends too far for Gaige to follow except for lighting up the sky with Up B. Luckily, you can always rely on Deathtrap to play catch if he is active!

Things sure do get chaotic the more Anarchy is pumped into Gaige's veins. But, what happens if she wants to calm down? Blow off some steam? Put all that Anarchy towards a productive use? Well, the Smash ball can help with that!


DISCORD activates upon a press of B with the Smash Ball. From here on, Gaige not only spends Anarchy stacks in order to fire her weapon, but she also trades the Evie out for a more... lets say experimental weapon:


The Splasher Blaster is an electrical "shotgun" that shoots big-ass globs of electric plasma instead of your conventional bullet. The shots come out 3 at a time in a tight-knit grouping with each being a plasmaball the size of Mario's fireballs and hitting in an explosion the size of Bowser for 5%... at base. You see, these all work on the Anarchy magazines as well so at 100 stacks you are looking at shots ranging from a ludicrous 105% down to the last shot dealing 5%! Each of these shots takes 3 Anarchy stacks to fire, but Discord is also constantly eating away 3 stacks a second and healing Gaige 0.5% for each stack consumed, notified by a fun aura surrounding her:

So if you don't do anything, her Final Smash will last for 33 seconds and heal Gaige a total of 50%. If you constantly fire the Splasher Blaster as fast as possible, you can get off about 20 shots of absolutely amaze-balls damage and hit-stun with no need to reload until the Final Smash ends after around the 10 seconds it took to unload all that. Unfortunately, if you don't have max stacks going in you won't get as much time in Discord nor power out out the Splasher Blaster. Once you run out of Anarchy stacks, its back to square one and using the Evie. The Splasher Blaster has access to all the same rules and skills as the Evie, and also has a ton of kickback when it comes to recovery so don't be afraid to fire wildly wherever you are!


Gaige is a mad genius in a teenage girl's body. And no, not in that way! Gross. Anyways, her entire gameplan is to introduce controlled chaos into each fight she enters via Tesla Grenades, the Evie and most importantly Deathtrap constantly changing the flow of battle. The more Anarchy she creates the stronger she becomes, but one slip on her part and it is curtains as all her planning and set up falls apart!

There are a couple of playstyle options available for Gaige players, mainly revolving around either being BFF's with Deathtrap, Electrifying Enchantresses, or being a Total Anarchists with your weapons:

BFF's generally like to have DT up as often as possible and work off the 2v1 aspect of the duo. Often hiding behind DT to peg folks with the Evie or setting up smash attacks / 1-2-Boom for KO's and thus more time with Deathtrap.

Enchantresses love spreading Tesla Fields everywhere! The new zoning aspects of her hammer attacks are quite enticing, as are Shock Storms and can have an influence in many match-ups where range or camping is an issue.

Anarchists love the Evie! While a focus of her set as a whole, these guys love getting in the maximum damage when they can, even going point blank to fire the Pistol instead of an actual attack as a followup. Hey, who could blame them when a burst does 20%?

You can also mix and match these styles, but in the end Gaige brings something for everyone. Provided you can handle a bit of crazy!

MADE OF STERNER STUFF, renders Deathtrap immune to conventional damage and knockback. Instead, he is pushed slightly and his timer is reduced by the % instead. (10% hit = 1.5 less seconds active).

UPSHOT ROBOT activates whenever a KO is scored on any enemy entity (players, minions), and adds 3 seconds back to Deathtrap's timer.


ANARCHY
stacks whenever the Evie hits a target, increasing Damage but reducing Accuracy per stack. Stacking up to 100 times, at max the shots from the Evie will swoop around like a Sine Wave making for a larger area but less reliable for hitting a single target. Several moves and abilities change at 50 and 75 stacks gained. All stacks are lost upon death, and are consumed like fuel when she activates her Final Smash: Discord.


Evie Damage will range from 0.1 -> 2.1% based on stacks. Getting to 100 stacks will deal 111.1% damage total, and from that point the gun has a DPS of 42% a second!

SHOCK AND "AAAAGGHHH!"
occurs when 20 bullets are shot by the Evie. Gaige goes into a 10 frame animation where she reloads the gun and gains an electrical hitbox for 5%. At 50 stacks, the hitbox grows bigger and deals 10%. Past 75 stacks, Gaige gains a lingering hitbox for 5% and no knockback for an additional 10 frames, adding to the damage of her next attack to make contact.


CLOSE ENOUGH grants each bullet a chance to ricochet towards enemies when they hit a surface for 1/2 damage. The chance is equal to 1/2 your current Anarchy, maxing at 50%. At 50 stacks, bullets can also ricochet when they hit a foe and go towards another foe for further reduced damage. At 75 stacks, bullets bounced off of foes have the same chance and damage as a normal ricochet.


Evil Enchantress allows Gaige's standard attacks to take on new attributes while inside a Tesla Field.


MAKE IT SPARKLE triggers Deathtrap to become Elemental when he is inside a Tesla Field or stuck by any electrical attack from Gaige. He deals 2% more damage per attacks and can trigger Shock Storms.


SHOCK STORM procs from Sparkling Deathtrap or by landing an aerial attack within a Tesla Field. Foes afflicted are paralyzed by 3 hits of 1% damage and can shock others touching them as well.


EXTRA:
In the event that Gaige is swallowed by Kirby, he gets his own Deathtrap! Well, more specifically a Robobot!
Taking on Gaige's hair and goggles, a press of B will summon the pink robot just like Gaige does, behaving essentially the same as Deathtrap does with no Anarchy. The difference here though is that Kirby only gets one use of the Robobot per swallow. After the 15 seconds is up, the bot crumbles and Kirby loses the copy ability.

Gaige's Taunts are very variable, changing based on whether Deathtrap is active as well as how coo-coo for Anarchy Puffs she currently is!

Up Taunt has Gaige inspect her Evie thoughtfully and spin the barrel, causing some sparks to fly. Normally accompanied by "Numbers, Numbers, math math math.." as she goes over it's specs. With 50+ stacks of Anarchy, she instead will say "Wonder how many stacks I can get?", and at 75+ she states "I have like negative accuracy right now!". If Deathtrap is active, she will say "Robot: One! Uglies: Zerooo!"

Side Taunt has Gaige point forward with he metal hand, making the "finger pistol" motion towards her foes. At no stacks she will say "Boop!", at 50+ "If I hit ya, you're going to feel it." and at 75+ "G-G". With Deathtrap active, she boasts "It`s robot fighting time!".


Down Taunt has Gaige pump up her metal hand into the air with a little, celebratory jump. At 0 stacks, she will say "Friggin yeah!", 50+ stacks "More Anarchy, more!" and at 75+ "I AM THE GOD OF DAMAGE!". With Deathtrap active, she exclaims "I need to build you an extra arm JUST for high-fives!"
 
Last edited:

MasterWarlord

Smash Champion
Joined
Aug 24, 2008
Messages
2,911
ZOMOM


Zomom is a member of the deadly six, a group of demon antagonists introduced in Sonic Lost World. The deadly six were generally disliked for being ugly, which is apparently bad, and not looking like they belonged in the franchise due to not looking like OC hedgehog recolors. Their boss battles where they displayed actual powers and abilities were disliked as "ripoffs" of the Koopalings, who are superior characters because they were done first. Sonic Lost World itself was criticized for taking more after Mario Galaxy instead of staying true to the fantastic main gameplay of the Sonic franchise.

Zomom himself is quite possibly the first canonical character in the Sonic franchise to be obsessed with eating, as the series had finally filled its quota of dark brooding villains and actually allowed some more quirky personalities to fill the antagonist roles in Sonic Lost World. While Zomom is far from a deep character, being a stereotypical dumb brute who struggles to keep focused on actually fighting instead of eating, he and the rest of the deadly six are remotely self aware, unlike every other villain/main character in the franchise who are apparently such amazing characters that hundreds of thousands of people feel the need to roleplay as them.

Zomom and the other members of the deadly six are enslaved by Robotnik due to some annoying conch shell that makes a noise that annoys Zomom at the start of the game. Granted, Zomom specifically could easily be motivated without that by being given sandwiches. To the surprise of nobody, Robotnik loses his generic plot item and the Deadly Six betray Robotnik, as Robotnik may as well have been the character who invented the trope of a mainstay villain being betrayed by a greater power. However, at the end of the game in a more legitimate twist, Robotnik usurps the Deadly Six to be the generic final boss. While the subversion is remotely nice, it is rather disappointing Robotnik chose to usurp the first actual villain -characters- the Sonic franchise has had introduced in years, because final bosses against generic ancient powers that don't speak are cool and serious.

Zomom's actual superpowers are based off of digging and terraforming/earthshaking, and his earthshaking powers are tacky enough that it seems to be an actual power and not just because he's generically fat. Despite his girth, he can dig through the ground as fast as Sonic can run, making it worth consideration how fast he would be if he wasn't fat. In his two sentences of dialogue exchanged with Sonic, the has-been Hedgehog suggests that he go on a diet and get some exercise. Zomom is actually offended at being called fat and when defeated says that his "mother always called him a failure". Zomom does not actually enjoy being fat and just likes to eat, being far too dumb and lazy to help himself, which in of itself is more depth than a sizable portion of the beloved characters in the Sonic cast.

STATISTICS
Weight: 10
Size: 9.5
Jumps: 8
Aerial Control: 7
Falling Speed: 6
Aerial Speed: 5
Traction: 3
Ground Movement: 1

Zomom isn't quite as big or heavy as Bowser, but he's still in contention within the same tier. Most of his statistics are actually quite good with the exception of his ground movement, with him just edging out Robin and Jigglypuff as the slowest character on the ground in the game. By default, Zomom will have to imitate Jigglypuff as an aerial combatant, but his aerial statistics make that a lot harder to pull off.

SPECIALS

NEUTRAL SPECIAL - OMNOM

This is an unstorable charge special that has Zomom takes out one of three food items. All of these are battering items, meaning they can be thrown with the grab button and overwrite Zomom's jab, dashing attack, ftilt, and fsmash. If Zomom is holding one of these items already and inputs Neutral Special again, he will attempt to start eating it. If a character other than Zomom picks up the food, they will have much more generic attacks than Zomom's unique versions. The important thing is foes can still eat the items to heal as much as Zomom would with Neutral Special by inputting jab.

If Zomom is running towards any of his food, at all, his movement speed will greatly increase as his dashing animation changes with his tongue flailing out the side of his mouth like a hungry beast. He will immediately start running at it at a 3/10 dashing speed, and it will increase by another 1/10 for every 10 frames he continues running at it with a cap of Sonic's dashing speed. While Sonic could probably outrun Zomom, this is modern dejected Sonic we're talking about here, while Zomom is far more motivated! Zomom's poor traction can also be abused to enable him to keep the speed a while after he passes said food. Zomom has no problems with his momentum, as his aerial speed entirely ignores this mechanic, enabling him to get rid of the speed at will by jumping.

If Zomom is rushing towards multiple food items, he will gain speed twice as quickly, but they must be different food items. If a foe is in the process of eating Zomom's food, this will add another stack as if there was another food item at that location. When at a 5/10 dashing speed, Zomom gains superarmor to attacks that deal 8% or less, that amount going up by an additional 2% at 6/10, 7/10, etc.

While some of the moves with the food involve using them as projectiles, they can all be thrown normally anyway, enabling Zomom to use them as fantastic approaching options. Zomom can't be as abusive with this as he wants because enemies can pick up his food out of the air since they're items, but if they just throw it off-stage they're only enlarging the range Zomom can run with a speed boost, as it will still be a valid target for Zomom to drool over until it falls off the blast zone.

TURKEY LEG​


At no charge, Zomom takes out a turkey leg on a bone over a mere 6 frames. Tapping B a single time will have Zomom devour the entire thing whole, bone included. This heals Zomom for 6% and causes him to belch laggily afterwards, not being as good of a process as it could have due to wolfing down the meal like a werehog. If B is held down, Zomom will actually start eating the meat off of the bone. This heals Zomom for 7% over the course of 35 frames, taking noticeably longer than eating the whole thing, but Zomom can quickly cancel out of gnawing on the meat rather than commiting to it. Once the bone has no meat left, Zomom can continue gnawing on it anyway if he wants like a dog, healing him of 1% every 17 frames he gnaws on it. If he goes to consume the entire bone, he will heal 2%. Foes cannot devour entire food items at once like Zomom.

The jab with the turkey leg will have Zomom swing the food in front of himself twice for two quick hits of 4% and flinching before transitioning into an infinite jab of Zomom licking in front of himself, dealing damage at the rate of the Koopalings' jab. While licking the turkey leg, Zomom will heal at the rate as if he was gnawing on a bone, which is quite good if the meat was already a bone anyway. The two first hits of the jab are slow by jab standards with a full turkey leg, but it gets faster the more meat has been removed from the bone. If the jab is done with nothing but a bone, the move will be fast enough that the first two hits can be jab canceled into many moves, most prominently Zomom's grab.

For Zomom's dashing attack with the turkey leg, he will spin around while holding it out from him in an animation like Dedede's dsmash while moving. Zomom can hold A/rapidly press A to increase the duration of the dashing attack, but it won't last forever, more resembling Mach Tornado. Zomom can keep the move going for up to 40 frames and can travel up to 1.35 platforms throughout that time. If he goes the full duration, Zomom will be dizzy and have horrible ending lag afterwards. As Zomom spins, he deals 1 hit of 1% and flinching every single frame, but he doesn't drag his enemies with him so it's practically impossible to land all 40 hits. If Zomom releases A at any point before the 40 frames are up, he'll release the turkey leg in the direction he was currently facing, knocking it in that direction as powerfully as if it was smash tossed, dealing 12% and knockback that kills at 135%. Passing by a foe before throwing this at them is the obvious plan, and can also enable you to pick up speed in getting back to them as you run back for your meat.

Zomom's fsmash has him do an overhead swing with the turkey leg as he smashes it onto the ground in front of him. This is a slow and powerful attack with similiar range and speed to Ike's fsmash, Zomom enjoying the disjointed priority, but it is sadly weaker, dealing only 19-24% and knockback that kills at 110-75%. Like with the jab, the move gets faster if there is less meat on the bone to the point it actually can become an legitimately viable kill move, getting as little as 11 frames of starting lag with no meat on the bone! The catch is that Zomom only gets one swing of a meatless bone, as upon smashing it the half that hits the groudn will shatter into nothing, leaving Zomom with only half a bone. If fsmash is used again like this, the move is just as fast, but only deals 13-17% and knockback that kills at 150-115%, very unimpressive by comparison, as well as having a lot less range.

Half bones that are smash thrown, however, are more powerful than regular bones due to the sharp end, dealing a meaty 16% and knockback that kills at 100%. Foes can actually take advantage of this and throw them back at you if they grab them out of the air, but if the bone lands on the ground they will embed themselves in the ground, with the pointy end pointing up. This will turn them into a trap as foes walk over the sharp part, dealing 7% and knockback that kills at 215%. This trap will only last 4 seconds, and once it's a trap it cannot be picked up again, only eaten by Zomom if he presses Neutral Special in front of it (whether or not he "owns" the trap), healing himself of a pathetic 1%. The main appeal of the trap is that even now, it still counts as an item that will boost Zomom's speed, and while it only lasts for 4 seconds foes can't do anything to dispose of it for those 4 seconds. Zomom can get ridiculous mileage out of just one turkey leg, and finds the idea of gulping down chilli dogs without taking the time to appreciate the flavor disgusting.

Zomom's ftilt has him swing the turkey leg in front of himself in a quick, ranged spacer, again giving him disjointed priority. Since it's so good in all other respects, it only deals 6% and knockback that kills at 170%. If the turkey leg has no meat on it, then if it clanks with another move or is out-prioritized, the half of the bone further away from Zomom will be destroyed again like in the fsmash. If the move clanked, he will not have any lag from the clank while the foe still does. With just a bone, this can potentially make the foe go on the defensive. That said, you won't always want to break the bone in half as it strictly nerfs this move by making the range terrible, and you may want to save it for fsmash. In those scenarios, this can actually be the best turkey leg move while meat is still on the bone, where you can spam it to your heart's content. If spammed enough when there's meat on the bone, it can make it easier to catch the foe with a clank if you feel so inclined when they expect you to use another generic ftilt.

MUSTARD​

With 15 frames of charging, Zomom takes out a bottle of mustard. With Zomom's OC do not steal recolors, he will take out a different condiment that matches his color, such as ketchup, whipped cream, pickle relish, or syrup. The mustard is the weakest item when thrown by itself, being comparable to a Mr. Saturn. Like with the turkey leg, pressing B a single time with mustard in his hand will have Zomom throw the entire bottle in his mouth and laggily burp like an idiot, healing himself of 8%. If Zomom holds B instead, he will shoot the mustard out of the bottle into his mouth directly, healing himself of 12% over the course of 20 frames and leave himself with an empty bottle afterwards, which can be eaten to heal a generic 1%, but would be better off thrown for some generic damage/projectile clutter. Sadly, the bottle itself does not count as an object Zomom will want to rush towards, but any mustard shot out by it in the moves will count.

The jab will have Zomom shoot mustard out of the bottle comparably to Bowser's fire breath, dealing just as much damage. The catch is that he only has as much charge as one Bowser fire breath and has no way to recharge a mustard bottle. Any character hit by the mustard will get themselves covered in it, lasting for roughly 24 frames per 1% they took from the attack (4 seconds per 10%). While the foe is covered in mustard, they themselves will obviously count as an object Zomom can rush towards hungrily. This also causes the foe to have terrible traction as if they were on ice. This status effect will be cured early if Zomom hits the foe with any biting based move like his grab, and will also heal Zomom for an amount as if he had eaten that portion of the mustard normally.

The mustard will stick around as goop on the floor for 5 seconds if it doesn't hit a foe. This makes the floor have the "slippery ice" effect, and can also effect Zomom, which can enable him to better make use of his boosted speed from running at the mustard in the first place. If a foe or Zomom runs over the mustard, their feet will get covered in it and cause it to spread over the floor of the stage, though this does not increase the duration of the mustard and simply spreads the mess. If Zomom is spreading it himself by running over it, the mustard will technically be under/behind him, so he will not get any movement speed boost while doing it.

Zomom can cover any other food item with mustard in order to stack the healing of the mustard with the healing from that item, making it even more insanely advantageous to eat a turkey leg and get down to the bone. Putting mustard on another food item will also make it count as 2 food items for Zomom to rush towards, making him more motivated to go grab it and consume it. This obviously leaves Zomom more open to interruption, and any competent foe will make it a priority to dispose of the mustard covered item.

Dashing attack is simply a keep dashing dash attack as Zomom fires the mustard, comparable to something like firing a Ray Gun or Super Scope in Brawl/SSB4. It shoots out the mustard slower than the jab and only in a short arc in front of him the range of half a platform. This has all the same properties as the jab, and while worse for damage racking/covering the foe in mustard, it enables Zomom to fire the mustard in front of him as he moves, enabling him to pick up speed as he rushes towards the raw delicousness. It is harder to catch a foe in this right off the bat, but as Zomom picks up speed the move becomes harder to DI out of as he pushes foes along with him, making the move very feasible to push a foe across the stage to the edge, so long as you have enough mustard. There is enough mustard for Zomom to continue the dashing attack for two thirds the distance of Final Destination with one bottle. While this move has low ending lag making it feasible to follow up on it, Zomom's poor traction that will only be made worse by slipping on the substance in front of him/boosted speed makes it very difficult for him to punish a foe that gets behind him during this attack, making it high risk high reward.

Fsmash has Zomom shake the bottle violently before he takes off the cap and smacks the back end of it to make all of the remaining mustard come out of it at once in a Bowser sized hitbox in front of himself. With a full bottle, this deals great damage through multiple flinching hits that add up to 27-33%, though the ending knockback is unsurprisingly unimpressive, killing at 200-170%. This can cover the foe in mustard like the other attacks, but if it hits the floor it will cover a much smaller area than if it was spread with jab or dashing attack. Because the mustard is so concentrated, though, it will last for 10 seconds instead of just 5, giving you a longer lingering effect. The duration of the mustard on the floor along with the damage and range will progressively decrease with less mustard to shoot out of the bottle, though it will always last at least 5 seconds and deal a minimum of 10-15%, making it the best use of your last bit of mustard if you can spare the time. If the attack's being used, though, it will generally be with a near full bottle, as the attack is still fairly fast to compensate for the ammunition it takes.

Ftilt will have Zomom throw the bottle in a lobbing arch arc, still a pathetic hitbox as it goes that deals 3% and knockback that kills at 260%. The nozzle will be pointed downwards through the arc of the bottle and shoot out mustard as it goes, shooting out half the contents of the bottle as powerfully as in the jab to cover a platform's distance of stage in mustard before the bottle falls to the floor. Because the bottle is in the air, this covers a ridiculous amount of space as the mustard's range is increased beyond its norm due to gravity, making this an absolutely fantastic attack. The move even has minimal lag attached, enabling Zomom to use attacks to followup that don't involve his food items.

The catch is that the mustard can immediately be picked up by enemies once thrown, and it will immediately stop shooting mustard once that happens. If the foe is especially competent and does this before it shoots any mustard at all, you won't even get any bonus from running at the food item, as the bottle by itself doesn't count.

SUB SANDWICH​


If you charge for 30 frames, Zomom will gain access to his favorite food, the gigantic sub sandwich! The sub sandwich is comedically large, reaching forwards the distance of an entire platform. Attempting to eat it will have Zomom slowly diminish it over the course of 40 frames, healing 1.2% every 2 frames for a total of 24%. While Zomom can cancel out of eating this item like anything else, it is very difficult for Zomom to get all that healing, because until the sandwich is at least half eaten, absolutely any attack Zomom is hit by will cause him to drop the gigantic sandwich. Only other characters who weigh at least 8/10 can pick up the sandwich with half its girth or more, and they will still drop it when hit with any attack.

If a character who is a mere appetizer and weighs less than 8/10 attempts to pick up the sandwich, they will take 10 frames to laggily rip off a quarter of it for themselves. If this is done more towards the middle of the sandwich, this can split it up into as many as 3 pieces right off the bat, and there's enough sandwich it can potentially be broken into 4 pieces. If Zomom picks up the sandwich with Neutral Special, he will quickly pick up the entire thing, but if he does it with A he will rip out a chunk of it like the appetizers do, more resembling the infamous boss moveset as opposed to a hedgehog.

While Zomom is strong, he can't really throw such an awkwardly shaped "weapon" to any great effect, nor can foes. The full sandwich will travel a very short distance like a Bonsly while still only being as weak as a Mr. Saturn. If one quarter portion of a sandwich is thrown, it will deal 10% and knockback that kills at 150%, very respectable considering you can have up to 4 of them, enabling you to imitate Samus in Brawl with her suit pieces. The sandwich is the strongest when it's cut in half, dealing 15% and knockback that kills at 135% while still traveling a respectable distance. Having the threat of actually eating the sandwich makes foes likely to try to help you split it up, which makes it difficult for you to not get some sort of boost with all the pieces of it lying about the stage.

Zomom's sandwich jab has him go to the repeating portion of the jab immediately as he spins the sandwich around his body. This deals damage at the rate of the Koopalings' jab while sucking foes in towards Zomom. Zomom spins the sandwich around quickly enough that it is a hitbox on either side of his body at all times, though if the sandwich is small then the range still isn't very good. Zomom's big fat body isn't a hitbox at all and that's where the suction brings in foes, so the amount of potential damage on this move is directly proportionate to the sandwich.

The jab finisher has Zomom abruptly swing the sandwich upwards, which deals 5% and pops foes up lightly with knockback that kills at 200%. The jab finisher's hitbox will cover Zomom, enabling him to hit foes he managed to bring in. The jab finisher would be an amazing anti air move with a big sandwich if it wasn't unfortunately stuck behind the first portion of the jab, but it can still be used defensively in tandem with the main jab, potentially hitting foes who went to jump over the sandwich to reach Zomom. To prevent this from being too powerful of a defensive move, Zomom cannot hold the repeating portion of the jab for longer than 2 seconds, at which point he will become dizzy and have bad lag. Zomom largely has to use the move in actual response to an approach already underway, or to read a roll.

Dashing attack has Zomom lift up the sandwich at a 45 degree angle before jumping up and kicking off of it, ending the move in the air without the sandwich. Zomom's feet deal a generic 9% and knockback that kills at 150%, but the sandwich is stomped down to the ground, becoming a hitbox. The power of this hitbox is based off the "momentum" Zomom had from dashing hungrily towards food, considering this is a dashing attack, making it be smashed into the ground harder. It can deal as little as a pathetic 5% and knockback that kills at 220%, and up to 22% and knockback that kills at 90% at full speed. With a big fat sandwich, this can make a huge very scary hitbox, and the sandwich's size coupled with the fact Zomom leaps back during the attack enables him to continue rushing back in the same direction as he pleases, getting a boost by running back towards the sandwich. Despite leaving Zomom in the air where he can DI around, he has quite hefty ending lag, so the foe will have ample time to react before his next approach.


The fsmash will have Zomom actually swing the sandwich forwards, enabling him to take advantage of the full platform width range. The move's power is stronger the closer to Zomom the foe was hit by the sandwich. At the furthest range, the move only deals 8-12% and knockback that kills at 190-170%, while at point blank it deals a more respectable 16-21% and knockback that kills at 140-100%. If the move hits anything it can damage or even clanks with any hitbox, the sandwich will split apart at the point it was hit. Like with the bone ftilt, clanking will not give Zomom any lag if this happens, and with the raw size of this hitbox it becomes a lot more feasible to accomplish. The portion of the sandwich beyond the part that hit the foe will fly off 1-3 Bowser widths based off charge, giving you some space to hungrily dash at it.

Ftilt is a two part combo like Snake's with two presses of A, with the first hit having Zomom poke the foe with the sandwich for 3% and a flinch, very efficient given the potential range. The second hit of the jab has Zomom thrust the sandwhich upwards, launching foes at a 45 degree angle towards/behind himself for 5% and knockback that kills at 180%. If hit at close range/with a small sandwich, this isn't that notable as the foe will be sent behind Zomom, but if you have a big fat sandwich and hit at long range, this can very feasibly combo as they're knocked directly into him.

DOWN SPECIAL - ONION RINGS


Zomom takes out a doggy bag filled with onion rings from his last visit to his favorite fast food joint. Even Zomom has gotta go fast! He will continue reaching into the bag and tossing onion rings into his mouth for as long as the button is held, successfuly consuming one every 6 frames. Each onion ring heals 0.5% for rather inferior healing to the Neutral Special, but these add to Zomom's already impressive weight, making him visibly fatter in bulk. Zomom by default weighs 126 units, and each onion ring adds 4 units, which adds up very, very fast. After a full second of eating onion rings, Zomom will weigh 166 units compared to Bowser's 130, and Zomom can eat as many as 20 onion rings over 2 seconds to reach a weight value of 206.

If Zomom is hit after having eaten onion rings, he'll vomit them all up as the stock sound effect from the Sonic franchise plays from when Sonic loses his rings. Maybe this is what Sonic would be like if he ate a few more chilli dogs? The onion rings will spread around Zomom randomly up to a platform on either side of himself, obeying gravity if they go off the stage and more likely than not lost. Foes can attack the onion rings to deal knockback them to get rid of them, the onion rings having weight comparable to Jigglypuff at 120%. The onion rings will flash after this happens for 2 seconds before they phase out of existence.

Just like Sonic, Zomom will be given mercy invincibility after being hit and losing his rings, flashing for a single second. This means Zomom can actually use the increased weight from the onion rings to his advantage at all percentages, as it's impossible to follow up on him. While invincible, Zomom cannot collect the onion rings that have been knocked out of his body, having to collect the onion rings in the second phase of their existence, at which point he will automatically consume them on contact with them like Sonic does. While Zomom won't heal from eating the onion rings again, it enables him to get back the lost weight. Since he can't collect the onion rings while invincible anyway, Zomom will want to knock the foe away during this time to protect them. The onion rings count as food Zomom will hungrily run towards, meaning they are still useful while Zomom is invincible.

If Zomom is grabbed, he will not vomit up the rings, but any pummels or throws will cause him to do so. Pummeling is especially useful to cause some of his "invincibility" time to wear out, as said invincibility will not free him from the foe's grab, still enabling him to get thrown normally. This makes grabs a decent workaround for foes against this attack, much like a more normal counter. The pummeling has more limited use if Zomom is at a lower percentage as Zomom can potentially escape the grab before much invincibility time is wasted with pummeling, which gives good incentive for Zomom to stay at a "healthy" percentage with his Neutral Special food.

Zomom will still take hitstun and knockback from the attack that did knock the onion rings out of him, but the knockback will be calculated from his buffed weight. With enough weight, Zomom can potentially barely take any knockback at all, enabling him to potentially punish the foe outright for hitting him or at least gain offensive momentum. At low percentages, Zomom can get this effect with just a single onion ring since he's naturally so heavy anyway, mimicing Sonic's gameplay in the games where he just casually recollects a single ring over and over for effective invincibility. Granted, it is a lot easier for foes to destroy just a couple regurgitated rings, as they're a lot more competent than generic enemies in a Sonic game.

Zomom cannot summon more food while invincible with Neutral Special and Down Special. In addition, Zomom's doggy bag isn't bottomless, and after having eaten 20 onion rings he'll have to order some takeout. Pressing Down Special with an empty doggy bag will have Zomom take out a generic cell phone and order more food over 45 frames. If successfully completed, Zomom will get another 20 onion rings after 10 seconds. If he has so little else to do he inputs Down Special again, he will take out the phone and angrily yell "YOU'RE TOO SLOW!" into it for another 45 frames, causing the delivery guy to hurry up and get him his onion rings 3 seconds faster.

SIDE SPECIAL - DIG


Zomom goes horizontal as he starts spinning around and becomes a drill in a move that greatly resembles Meta Knight's Side Special. This version of the move has the same power and still puts Zomom in helpless if used in the air, and lacks the finishing hit Meta Knight's version has that does actual knockback, making it very easy to punish Zomom.

If Zomom angles this move into the stage, he will burrow into it and speed up to go at Captain Falcon's dashing speed. The move will keep going forever so long as Zomom stays inside the stage, with Zomom unable to cancel out of it until he leaves the stage. As Zomom stays inside the stage, turning becomes harder and harder, and since Zomom has to keep going forwards while tunneling inside the stage, he will eventually be forced to exit. On Final Destination, he could stall for 3 seconds maximum before this would force him to come out of some point on the stage. If Zomom comes out of the side of the stage, he will enter helpless as usual, though it is possible for Zomom to grab the ledge as he pops out of the side of the stage.

When Zomom comes out of the stage, he will burst out of the ground, raising up his arms as debris is shot every which way, becoming a hitbox that deals 11% and radial knockback that kills at 150%, though with bad ending lag as Zomom has to unpitfall himself out of the stage, his legs still stuck (His true pitfall animation has him pitfalled upside down).

If Zomom bursts out of the stage underneath a food item, he will instantly eat the item with only 5 frames of lag as he comes out from underground while still creating the same hitbox with his mouth. This is not quicker than eating the item normally given it takes some time to resurface back on the stage if you entered it through the top, and if you eat mustard/a sandwich you will only eat as much of it as Zomom is wide. Regardless, foes are largely forced to get rid of any food they can as they wait for you to come up. Mustard and embedded bones are the most unremovable food items of course, making them more relevant than they would be otherwise. If the foe is mustard covered/holding a food item, they're still a perfectly viable target for this if they're stupid enough to be standing next to the stage.

Zomom can cancel the lag of popping out by grabbing the ledge in a similar manner to food. Zomom can be edgehogged even within the SSB4 engine, though, as if a foe is on the ledge he will hit that foe before awkwardly entering helpless and dying like when he normally pops out of the side of the stage.

While not particularly relevant otherwise, using mustard attacks next to the ledge can cause some of it to slip off and cover the ledge in it, making this a great way to go casually grab the ledge for free while providing an ominous edgeguard. To use the edgeguard offensively, it requires you to act on the setup very quickly given the mustard doesn't last very long, but can be worth the investment if the foe's at a high percentage. If a foe grabs the mustard covered ledge, they'll get the front side of their body covered in mustard, giving them the "covered in mustard" effect for a single second, which is more than enough if you can time it to get past their ledge invincibility.

Whenever Zomom bursts out of the stage, he will create a single small chunk of debris as part of the hitbox. After a period of roughly 60 frames, the debris will become able to be picked up as a throwing item, dealing 10% and knockback that kills at 160% when smash thrown. This can actually be used to the foes' advantage if Zomom isn't careful as they knock Zomom away before they gain access to the debris item, much more common if he hasn't canceled the ending lag with something. If Zomom ate something on his way up, the debris will function as a decent substitute to throw at the enemy now that the food is gone. If Zomom pops out of the side of the stage, it's very rare anybody will be able to actually grab the item before it falls into the abyss, but is vaguely possible if Zomzom pops out and grabs the ledge before grabbing it and burrowing back into the stage again.

Zomom can eat the small pieces of debris with Neutral Special if he really feels like it, doing the laggy belch process and healing a token 1% for his efforts. While he can eat anything, that doesn't mean he has to like it. Covering the debris with mustard can enable Zomom to get some actual healing off of it, and more importantly will enable Zomom to hungrily pursue it.

UP SPECIAL - SAND TORNADO


While it's already bizarre enough that Zomom is from the Sonic franchise, he takes a second Special move from Meta Knight's playbook of all people, doing his best to get with the times of what's hip with the young people. Zomom extends his arms out to either side and spins, spontaneously generating a tornado of sand around his body. The attack mimics Mach Tornado as Zomom mashes B to go up into the air, ending the move in helpless if he ends it off the ground. Given this is Zomom's primary recovery input, it can last 1.35x as Mach Tornado, enabling him to travel higher into the air, though Zomom's horizontal movement is a good bit less than Meta Knight's. Zomom deals damage at the same rate as Mach Tornado, though can potentially deal more damage since his version lasts longer.

This attack will suck in items quite powerfully from as far as 3 platforms away, though they will be pulled in more strongly if they're closer to Zomom. At max distance, they will only very slowly be sucked in at Ganondorf's walk speed, while at Bowser's width they will come in at Meta Knight's dashing speed. The items are not hitboxes as being sucked in, and can be snatched out of the air by foes as normal.


While in the tornado, items will spin around inside it, boosting the damage by 1.25x per item, turning Zomom into a blender of food. This makes individual sandwich portions and debris from Side Special more relevant as individual items. While the damage will not be boosted if the foe is holding the item, the multiple hits have as much chance to make the foe drop the item as any other attack, making it quite likely to make them drop the item and use it against them in the tornado. After the item has spun around in the tornado, the item will be tossed out of the tornado (not smash thrown) in the direction Zomom was currently DIing at the end of the move, by default upwards, potentially sending an entire wall of projectiles at the foe simultaneously. While foes can grab them out of the air like always, they can only grab one, which obviously won't protect them against all of the others.

Mustard isn't an item, but can still be sucked up at the same speed as items. Mustard is actually a hitbox as it's being sucked in as well as when it's being shot out, half as powerful as when it is laid out on the stage with the jab. This boosts the damage of the tornado a lot more directly as the actual damage of the mustard will be applied rather than generically boosting the damage of the tornado like items do. The mustard can still coat the foe normally as it's moved about during this move, and it will also coat any other items inside of the tornado.

Zomom can suck in onion rings with this attack, but only when he's not invincible will they actually start getting dragged in. This is the main way Zomom can actually reconsume all of them, and as such is quite predictable. This attack has more notable startup lag than Mach Tornado, though the invincibility can cover for that obviously.

SMASHES

FORWARD SMASH - GLUTTON STRENGTH

Zomom reaches down and attempts to rip out a chunk of the ground. The ground chunk Zomom rips out will be quite thin at half Kirby's height, but varies in length greatly based off charge. At near full charge, the ground chunk will be just as long as the sub sandwich! The ground chunk is a battering item that has the same moves as the sub sandwich, with the exception that it obviously doesn't heal Zomom beyond a token 1% when eaten. Unfortunately, the ground chunk is harder to wield and increases the lag of all moves it's involved with by 1.25x (including throwing it), though the power of these moves is increased by a mighty 1.5x. After taking out the ground chunk, Zomom will automatically perform the sandwich fsmash with it, which will smash it into pieces and prevents Zomom from getting to abuse the range of it like he can with the sandwich as much.

If Zomom is interrupted after ripping out the chunk but before he slams it, he can potentially use other moves with the full length version, such as the very powerful jab. While it's generally not worth it to outright try to get hit at this point, if Zomom has eaten onion rings he'll be more inclined to use this attack, as getting interrupted out of it will be far from the worst thing in the world for him.

While this move does not actually terraform the stage, if the ground already had mustard on it, this will of course transfer the mustard onto the ground chunk as it's picked up. This can make the ground chunk into a psuedo sandwich since eating it will actually heal Zomom some now, and forgoes the set-up of specifically putting the mustard onto some other food. Zomom will hungrily chase after the mustard as usual, not the ground chunk itself. This attack can also rip out any bones stuck in the stage as a trap, continuing to be a hitbox while it's part of the item and making it more difficult for foes to pick up.


If the smash is fully charged, then Zomom will instead rip a boulder out of the stage 1.4x Bowser's size and roll it forwards 3 platforms at Mario's dashing speed. The boulder will explode into 4 debris items seen in the Side Special on contact with anything it can damage, dealing 27% and knockback that kills at 90%. This attack is actually fairly fast, with the lag being associated with charging the smash.

Any ground the boulder was created from will have any mustard/embedded bones on it placed on the top of the boulder. As the boulder rolls over mustard, it will stick to it, but if the mustard rolls underneath the boulder it will restick itself to the stage, spreading the mustard around. The mustard is not a hitbox during this attack. If the boulder splits into debris, the debris will be covered in any mustard still on the boulder on that time if there's enough mustard to cover all four pieces of it.

Zomom can dig around inside the boulder with his Side Special. Zomom can dig faster than the boulder moves, so he can potentially dig around inside the stage before entering the boulder from below. Zomom can pop out of the boulder like any other terrain, but he will experience the ending lag of "unpitfalling himself" as the boulder continues to roll, making him move during the ending lag to better protect him. Zomom can still pop out of a portion of the boulder covered with mustard to eat that mustard and skip most of the ending lag, making it a lot more of a potential offensive technique. The boulder can be rolled off-stage, enabling Zomom to make use of his Side Special where he normally couldn't for a very intimidating presence as the foe returns to the stage.

UP SMASH - LEAP


Zomom leaps forwards a Bowser width and goes a Ganondorf into the air, a hitbox that deals 10-14% and knockback that kills at 180-150% as he goes up, and his bottom half dealing 18-23% and knockback that kills at 110-70% on the way down. This attack has decently bad ending lag as Zomom lands, but Zomom will be freed from this lag if he jumps off-stage, regaining normal control once he's lowered down to ground level. While going up into the air, Zomom has superarmor against attacks that deal 10% or less.

Zomom will go up an additional Kirby Height and move forwards an additional 1.2 Bowser widths for every unique food item that he's jumping towards. Zomom can utilize this attack to great effect out of a dash if he was hungry, as if he does so any superarmor from dashing hungrily will stack onto the superarmor at the start of the move as Zomom jumps. While this is great to use as an edgeguard given that skips the ending lag of Zomom landing on his ass, it's still not a terrible idea to just use it generically against a foe standing close to the ledge, as Zomom can still quite easily recover from a miss by burrowing back into the stage with Side Special. Zomom will often throw a food item ahead of him with this attack to jump after, and if Zomom later goes on to burrow into the stage he can potentially come out and devour the item he originally threw. In place of throwing an item, Zomom can also do all of the above after having rolled a boulder at the foe.

DOWN SMASH - EARTHSHAKE


Zomom pounds the ground, creating a hitbox overlapping himself. Two hitboxes are created by the two stomps of this attack, the first one pitfalling foes very weakly and dealing 10-13%, while the second hit always knocks them out of said pitfall anyway for an additional 16-22% and radial knockback that kills at 115-80%. The brief pitfalling effect does have one relevant property in that if that ground was covered in mustard, the foe will become covered in that mustard from being pitfalled into it.

A pair of Earthshaking hitboxes that reach out a 0.9-1.2 Bowsers to either side of Zomom are created by this attack that deal 8-12% and knockback that kills at 200-180%. The knockback of the earthshaking hitboxes is done inwards towards Zomom, generally knocking the foe past Zomom to the opposite side unless they're at an extremely low percentage, though it is possible for foes to get hit by Zomom's second stomp as they are knocked past him.

Items hit by the earthshaking hitboxes will be smash tossed towards Zomom at a 45 degree upward angle, hitting any foe who was hit by an earthshaking hitbox on the opposite side or by the main hitbox. Any mustard hit by the hitbox will be shot in that direction, half as powerful as when initially created in jab. This can turn into a very damaging attack, though this attack requires pretty good potential results to justify its use considering the horrible ending lag.

Zomom can pitfall his items into the stage with the first stomp, with the second stomp not unearthing them. If he wants to get them back, he'll need to use Side Special or Fsmash. If Zomom overlaps the pitfalled food while using Side Special, he'll pop out of the ground and eat it as if it was above ground like normal. If Zomom uproots the ground with the food in it from fsmash, the healing properties of that food will be transferred to the ground chunk, enabling him to eat it like anything else, though foes will not heal from eating it. If a boulder is made from the ground with the food in it, then the four pieces of debris will contain the food and can be eaten to heal Zomom. If there is not enough space within the debris, the remaining portions of the food will just spawn when the boulder is destroyed.

STANDARDS

JAB - BELLY DRUM


Zomom uses a move from Sonic's sister franchise, Pokemon, for his regular jab. The move starts out with a repeating jab as Zomom pounds on his stomach, being one of the most powerful damage racking jabs within SSB4. Unfortunately, this jab has poor range, barely extending out from Zomom's body, though it at least hits on both sides of Zomom.

The jab finisher is a belch that deals 8% and knockback that kills at 225%. The belch can be increased in power by Zomom performing the belly drum for longer to charge the belch. After 2 seconds of charge (the max), the move deals 13% and knockback that kills at 120% with high base knockback, and the belch's hitbox will expand out a good 1.2 Bowser widths in front of Zomom.

If Zomom is within 10 frames of being able to execute the jab finisher or is in the process of doing the belch, then is hit when he has eaten onion rings, this will further improve the power of the belch. If already stacked on with a fully charged belch, this will increase the power to 16% and knockback that kills at 90%, while making the hitbox in front of Zomom be 1.5x Bowser's size.

While the move comes out fast, the duration of the belch is long and the ending lag even after that still isn't generous. You have to be pretty comitted to this move under normal circumstances, making it a decent move to hit foes with on the ledge as they're recovering like the Ganon utilt. At higher levels of "charge", the belch will still hit a foe clinging to the ledge. This move can become much more safe with onion rings, as you can worry a lot less about the heaps of potential punishment you can receive.

DASHING ATTACK - SPIN DASH

As the Sonic series went on, characters were introduced with more unique abilities that Sonic didn't have while still being able to do everything he could anyway - curling up into a ball is a rather generic signature attack. Zomom makes use of his girth to make a much meatier roll for his dashing attack, functioning as a keep dashing dash attack that goes on for as long as he holds A. Zomom will deal 7% and radial knockback that kills at 175%. Out of Zomom's naturally slow dash, this is a rather unimpressive move, as he matches his dashing speed. Zomom speeds up at the same rate as his dash when hungry, though, and transfers any momentum and superarmor from dashing into his dash attack for a deadly approach on the go. This attack isn't boosted by momentum in power and is more of a poke like Sonic's attack - if Zomom wants that, he can look to his sandwich/ground chunk dashing attack.

While Zomom will not pick up speed any faster when using dashing attack, but if he rolls over mustard he will speed up twice as quickly, and will keep that gained speed if he exits the dashing attack and continues dashing. Zomom will go faster/slower if going down/up a slope, though Zomom can't naturally terraform...


What he can do, though, is roll up the side of boulders created by his fully charged fsmash, much like how Sonic goes through loops in his games, though this serves actual gameplay purpose instead of being an uninteractive flashy animation in the games. Zomom must have at least a 5/10 dashing speed to roll up the side of a boulder. If that speed requirement sounds too low to you, it's faster than you need to go in most Sonic games. Zomom can potentially go much faster than boulders roll, and he can still pick up speed by rolling along mustard on the side of a boulder, enabling him to quite easily roll over the top of a boulder and reach the other side before continung on. So long as he keeps holding A, Zomom can circle the boulder even if it's gone off-stage if he wants. If he comes out of dashing attack while rolling on the boulder, he can easily dig inside of it with Side Special if he so pleases. With both of these attacks, boulders function as very versatile tools for Zomom's movement, nevermind their very respectable hitbox.

FORWARD TILT - BELLY FLOP

Zomom does a body slam forwards on top of his opponent, dealing 12% and vertical knockback that kills at 135%. Zomom catches himself with his hands before he hits the ground, then pushes himself off the ground back up into position, becoming a hitbox that deals 7% and knockback behind himself that KOs at 185%. This attack comes out quite quick for its power, and while the duration is long due to the attack having two parts, it can potentially catch a foe who rolled behind you. While this attack extends the width of Zomom's hurtbox a lot, it does it very briefly, potentially enabling you to bait an attack.

If Zomom is at weight value 150 or higher from eating onion rings, he will be unable to push himself up and will actually enter prone on his stomach instead of doing the second half of the attack. This is generally preferable, as entering prone voluntarily gives Zomom varied options with invincibility frames, something he very much wants when he has a big load of onion rings to try to save them for as long as possible. His get-up attack from the stomach, which he now can voluntarily use, has him kick off the ground and charge forwards a Wario width with his stomach jutting out, dealing 10% and knockback that kills at 150%. On hit with the get-up attack, Zomom will be pushed backwards 1.2 Bowser widths, making him much less punishable if the foe shields said get-up attack, which is normally an easy response to them.

While this is a good move to use in defensive contexts with a lot of onion rings, it can also make for an interesting attack when recollecting them. If you can keep track of your general weight value, you can potentially make use of this attack to collapse onto some onion rings before evading a foe's attack in some way and escaping to safety, preventing you from just getting the onion rings knocked out of you again immediately.

UP TILT - SWAT

Zomom does the archetypical utilt seen on Bowser and DK, swatting overhead in an arch shaped arc. Zomom deals 6% radial knockback that kills at 175% in a fairly spammable attack, being a surprisingly good defensive move all around.

Zomom's open hand will automatically catch any items in comes into contact with during this attack, making it a good move to try and snatch any items being contested between the players. If Zomom was already holding an item, he will actually swing that instead of just his open hand, with the exception of a giant sandwich/ground chunk bigger than a quarter portion, in which case he'll use his free hand. If Zomom did swing an item, the range will increase and the item will have disjointed priority like you'd expect, but Zomom can also press A at any time during the attack to release his grip on the item to smash toss it in the current arc of his arm. After having thrown the item, Zomom can still catch items during the remainder of the utilt's duration, making it possible to trade items with a foe if you're quick enough.

If Zomom was holding a giant sandwich/ground chunk, even then it is still possible for him to catch items with this attack. The only difference is that Zomom must throw away the item he just caught before he finishes the utilt, throwing it away at the end of the utilt's arc if A isn't pressed. This can make carrying something heavy advantageous as this move can turn into something of an outright item deflector in that case, though it's nothing foes can't accomplish either since items can be casually grabbed out of the air.

DOWN TILT - LICK

Zomom licks the ground for a hitbox comparable to the Koopalings' dtilt, but he can hold it out like a jab. This attack will enable Zomom to lick up mustard on the ground to attack while eating it, including if the mustard is on another item/foe. Zomom has a crawl at half the speed of his dash, and he can still use the dtilt while crawling. Zomom can still be motivated to chase after food hungrily and increase speed while crawling, though his speed only goes up at half the rate as when dashing. Still, Zomom can transfer momentum between his dash and crawl at will, picking up where he left off, and slowing down a bit can potentially catch a foe off guard. This attack is normally easy to DI out of, but at high speeds Zomom can quite potentially chase a foe a significant distance with this. Zomom has slightly more superarmor while crawling at high speeds rather than dashing, starting at 10% superarmor and going up by increments of 3%, enabling him to cap his superarmor at 25% instead of 18%.

AERIALS

NEUTRAL AERIAL - BARBECUE


Zomom spins about with his arms extended, dealing 24 hits of 0.5% with the final one knocking the foe away with radial knockback that kills at 175%. The duration of this is as long as Yoshi's dair, making the damage output rather unimpressive, but this move at least greatly lowers Zomom's falling speed during its use.

As Zomom spins, 8 fireballs are generated around him that spin around him. Each of the fireballs deals a token 5% and radial knockback that kills at 200%. After the duration is complete, the 8 fireballs are shot outwards a platform's distance at Sonic's dashing speed before vanishing, giving Zomom fantastic coverage if he's able to get past all of the lag involved in the move. It's very difficult to hit with more than 1 or maybe 2 fireballs because they spawn on the outside of Zomom's large frame and knock foes outwards, largely used for range more than damage racking potential. If the move's landing lag is triggered or the move is otherwise interrupted, all of the fireballs will instantly vanish, making the move practically unusable out of shorthop.

If Zomom is holding a sandwich or turkey leg or they are get hit by one of the fireballs, this will light them on fire. This causes them to do a burning effect of 1% per second for 5 seconds with all of their attacks, and prevents foes from eating them. In the case of a turkey leg, this will burn away the meat on the bone over the course of 5 seconds, leaving Zomom with nothing but the bone if he's too busy fighting to actually eat the meat.

With a sandwich, the fire will spread across the sandwich slowly, burning up one quarter portion of it every 4 seconds. Zomom can eat the portion of it that's on fire or break up the sandwich some other way to contain the fire while still conserving the rest of his beloved sandwich.

While the food is too hot for the foe, Zomom prefers his food spicy and will actually heal 1.2x as much from the food if he eats it while it's on fire. Zomom just has to be careful to eat his food before it's overcooked if he's interested in that healing, giving the foe pretty big incentive to pressure him. If Zomom can't actually eat the food, it's not the end of the world as he can still take advantage of it with a bone or making strategic use of a sandwich by breaking it apart with one of the attacks.

FORWARD AERIAL - SHOCKWAVE


Zomom brings both his arms over his head before slamming them down in front of him for a spike on par with DK's fair, dealing 15%. This is quite a laggy attack, a touch laggier than said move even, but if the landing lag of the move is triggered beyond frame 15, Zomom will still create a hitbox that does 10% and radial knockback that kills at 160% as he slams his fists into the ground and creates a shockwave that extends out from himself. This effect can also be triggered by slamming onto the side of the stage, as the shockwave will loop around the stage, traveling Final Destination's length.

The shockwave travels at Ganon's dashing speed across the stage and deals 5% and trips enemies, but also causes any ground it passes over to rumble for 80 frames. This shaking ground causes enemies who travel over it to have their movement speed cut in half for the duration. This effect is short enough it may not look too relevant at a glance, but if Zomom follows after the shockwave it can make for a great approaching mechanism. Zomom can pick up speed by running towards food while the foe is slowed, making their difference in speed even greater and easier to capitalize on. This light earthshaking effect (More of a earth rumbling effect) is not strong enough to knock items off the ground, but will prevent them from being picked up by foes while it's happening on top of an item, making this a great move to use if there's something like a giant sandwich between you and the foe.

BACK AERIAL - WAFT

For his Sonic Lost World DX: Director's Cut edition of his back aerial, Zomom is forced to do the unthinkable to appeal to the lowest common denominator of humor. Having given in to the wishes of the 4Kids executives, Zomom juts out his money maker for this attack behind him, dealing 8% and knockback that kills at 170% by itself in a speedy attack. If Zomom has eaten any kind of food since he's used this attack, though, he'll actually let loose a big one behind himself and pass some gas. The cloud can be as small 0.7x as small as a Pokeball or get up to as big as Bowser if Zomom has healed 40% damage with food, much like how another equally humiliated character in Smash charges his waft. The toxic waste deals 0.6x the amount of damage Zomom has healed, capping at dealing 24% and knockback that kills at 90%. Zomom looks behind himself in disgust afterwards, though in the least if you hit an opponent with this, they can be equally humiliated as you crap on them in the most literal way possible.

This gives Zomom incentive to eat food even if he has little to no damage, though it's rare he'll get more than one shot of this per stock. If you can't eat much or whiff a big one, you can still make some use of this attack, though. While not especially relevant at higher charge levels, the poisonous gas deals extra hitstun to enemies on par with a Zamus dsmash, making it pretty desirable to hit with at low power, but very difficult due to the tiny hitbox. Whether the foe is stunned from the smell or that Zomom would resort to such juvenile tactics, who knows. Regardless, it can be worth it to attempt to get the stun, as the consolation prize of the physical hitbox with Zomom's rump is far from the worst thing in the world. Zomom still has to eat -something- to regain the ability to do small poots, which encourages his playstyle of taking small bites to eat in the middle of combat when possible. This is the main move that can actually make the case for eating pieces of debris as more than just a novelty, as you intentionally heal a small amount to get the minimum charge for the bair to stun the foe without knocking them away, even at high percentages.

UP AERIAL - CHOMP

Zomom bites upwards at the foe, dealing 8% and knockback that kills at 155% off the top in a fast attack. Zomom can eat items with this attack, but it will be treated as if he tried to devour the item whole like in Neutral Special, doing a laggy burp after he eats it. If he attempts to eat a giant sandwich, he will only bite off a quarter portion, and will still do the same awkward belch.

Unlike Neutral Special, Zomom can eat items with this attack even if the foe is holding them. In this scenario, Zomom should be able to hit the foe with the biting hitbox to cover the lag of eating the item, at least if the foe isn't at a super low percentage. Foes have their own counterplay against this attack, though, in that if they predict it, they can throw the item down at Zomom to put him in lag before he can hit them with the bite. While this will give Zomom the healing, this is definitely a negative if it was a weaker healing item or something Zomom could make better use of, most specifically the bone.

This attack has obvious strategic use, but provides the foe with a lot of counterplay that makes Zomom need to actually use his varied options of item manipulation. If a foe is strategic, they can use bones and debris against Zomom to prevent him from having any real anti-air against them, as his uair will put him in lag when they throw the item down at him, requiring Zomom to better control his items with the rest of his expansive arsenal. While this is rather annoying for Zomom, if he falls for it this will at least give him access to a minimum charge bair if he hasn't eaten anything else.

DOWN AERIAL - GROUND POUND


Zomom does the obligatory stall then fall down to the ground, ass first. Zomom is superarmored entirely on the way down, dealing 16% and a powerful spike to anybody in the way. Upon hitting the ground, Zomom will create an earthshaking hitbox across the entirety of the platform he landed on that causes anyone hit to take 5% and trip. The foe tripping is barely enough to cover Zomom's landing lag, and if they're somehow in range to hit him with a tripped attack without having been crushed by the main hitbox, they can hit Zomom with that for free. The earthshaking hitbox will also extend to the sides of platforms to hit ledges, causing foes hanging on them to take 5% and be footstooled.

Unlike many MYM stall then falls that have the character fall instantly, Zomom obeys the stereotype set forth by Bowser and Yoshi, magically floating briefly as he gets into position before plummeting. This functions as starting lag for the move, though all things considered the ending lag for this isn't that terrible, just not low enough to capitalize on a tripped foe. In any case, Zomom can take advantage of the stall by throwing down a food item first at the foe to try to bait a dodge before falling down on them himself.

Any items/mustard on the stage will get briefly knocked up a Mario height, becoming a hitbox very briefly like when they're moved about with the Up Special. A food item thrown down at the foe can even help to cover Zomom's end lag if he somehow whiffs everything, or Zomom can just fall on top of one already lying on the stage for the same effect.

This attack deals good shield damage, stun, and especially great shield push. The shield push part can be useful to try to get the foe's shield hit by multiple items that have been shook up into the air as hitboxes - if 2 of them and Zomom's main hitbox hits a shield, you're looking at a shield break, nevermind the possibility of hitting them with a thrown item at the start.

GRAB-GAME

GRAB - STRONGARM

Zomom casually grabs forwards for a quick grab with bad range, the standard for most of the Smash cast. His dashing grab isn't much better in this regard by default, but the range on the dashing grab directly improves if Zomom is running faster from his mechanic, giving him a fantastic if very predictable grab as he goes to rush you down. At top speed, the grab range surpasses Brawl Dedede's and is as good as some of the weaker tethers.

After grabbing his opponent, Zomom will take some time to come to a stop like when a faster character with poor traction does it in Smash, most directly seen on Captain Falcon in Smash 4, sliding forwards up to an extra 1.5 platforms at top speed compared to Captain Falcon's rough estimate of 1.25. Zomom will not slide off the stage with his opponent, stopping at the edge, still obeying the same rules as such characters with these sorts of grabs.

PUMMEL - POUND

Zomom headbutts the foe forcefully for his pummel with rather impressive speed. The first pummel deals a very high 4% as the strongest pummel in the game, but this move is hurt worse by stale move negation than most moves, dealing 3% on the second pummel, then 2%, 1%, 0.5%, 0.4%, etc.

Zomom's best way around stale move negation is his item based attacks. In SSB4, item based attacks enter the stale move queue, but do not actually get weakened by stale moves, meaning hitting with them is entirely a positive to make regular moves more fresh. This effect helps out with the pummel in general, which will often fill up a lot of the stale move queue.

The pummel is obviously a good move to spam if possible, and the various item attacks can be used to freshen it up. Filling it up with both these attacks will keep Zomom's other moves very fresh, which is important when Zomom's multihit hitboxes suffer greatly from getting stale, most directly his nair, dtilt and Up Special.

FORWARD THROW - SPIN TOSS

Zomom grabs the foe by their feet and spins them around. As Zomom spins, he moves backwards around .75 platforms before releasing the foe forwards with 10% and knockback that kills at 120%. This is a fantastic kill throw, though the fact Zomom moves backwards during it prevents it from killing as early as it would otherwise unless Zomom counteracts the backwards spin with forwards momentum.

As Zomom moves backwards, he will collect any items/mustard he passes on the stage into a little tornado like with Up Special as he spins. After gathering it, he will shoot the food at the foe after he sends them flying. This will not combo automatically unless at very low percents like 30 and under, but will still force out a dodge. If the food is thrown off-stage, you can recover it back by using Up Special, and that may well hit foe on a return pass if they dodged it the first time. This means that this certainly won't kill, but it makes for a fantastic move for a damage racking session by forcing the foe to recover. If you just launched a couple of more unimportant food items off-stage, this is a good context to try following up with a nair.

BACK THROW - GRAPPLE

Zomom embraces the foe in a bear hug before kicking off the ground and spinning in the air in an animation similar to Sonic's bthrow. As Zomom spins through the air with the foe, he curls up into a ball as he holds the foe against himself before he lands on the ground, crushing the foe underneath his weight. If Zomom had no momentum when he input the throw, the throw will end there as the foe takes 8% and knockback behind Zomom that KOs at 200%.

If Zomom had momentum when he input the throw, he will transfer it into momentum to go roll backwards with the foe. Zomom will hold onto the foe the entire time, running them over multiple times. If Zomom was faster, he will be able to travel farther with the throw before he runs out of momentum and comes to a stop. If Zomom was running at top speed, he can travel up to 3 platforms backwards and deal 21% to the foe, though the knockback at the end won't improve. If Zomom runs out of stage to continue running over the foe, the throw will also end early, meaning Zomom needs to bring the foe at least somewhat close to an edge before zipping off with them in the opposite direction.

If Zomom was facing the ledge, he wouldn't want to kill them with the bthrow anyway, so his bthrow is strangely still very useful when facing the ledge as he uses the position to damage rack with his bthrow. Because of this, Zomom is actually unique from most characters in that he doesn't like to be in-between the foe and the ledge, since he doesn't have a traditional bthrow to throw them off to the full effect. This makes Zomom very protective of his position when he's in the one he likes, making walls of hitboxes with his food and doing his best to prevent his foe from passing with moves like nair, Up Special, dair to get out of that spacing situation.

UP THROW - GRILL

Zomom tosses the foe over his head and claps twice quickly. The claps deal a token 1% each and stun the foe in place, but summon a ring of small fireballs similar to those seen in the nair. The fireballs close in on the foe to hit them to deal a total of 8% and knock the foe upwards with vertical knockback that kills at 170%. The throw deals a total of 10% off the bat, but also causes the foe to gain a burning effect for 5 seconds, taking 1% per second after the throw is complete to make them take 15% after all is said and done from this throw. For the record, it is possible to give the foe this burning effect with the nair as well if you hit with at least 5 of the 8 fireballs, but that's almost impossible, only becoming particularly relevant with this move.

Foes with the burning effect will cause any food items they pick up to gain the burning effect, preventing them from picking it up. While they will not apply the effect by simply passing over food, if the food is thrown at them it will damage them before it lights on fire. This is a great move to apply some offensive pressure with food to the foe while potentially healing extra off of some extra spicy food, using the foe as your grill.

DOWN THROW - VORE

Fully aware that he has no route to popularity on Deviantart outside of it, Zomom swallows his foe whole. Upon eating the foe, Zomom will automatically eat any mustard that was on them, as well as any items they were carrying, healing for the same amount as he normally would from eating them.

Eating the foe does not do any damage to them immediately, but enables Zomom to walk around with them like with DK's cargo fthrow. Zomom has 4 extra throws he can use from this stance just like DK, though no extra pummel. All of Zomom's vore throws do a small amount of set knockback in the input direction like DK's cargo throws, meaning they won't be killing by themselves any time soon.

VORE FORWARD THROW - REGURGITATE

Zomom spits the foe out for the weakest throw of the lot, dealing 4%, but spits out any items the foe was carrying after them, smash tossing them into them for an automatic combo. If the foe was holding a turkey leg, Zomom will digest all the meat off the bone before throwing the bone. In the case of the sandwich, Zomom will not instantly devour the entire sandwich the foe is holding upon hitting dthrow and will gradually digest it, healing over the normal duration of him eating it. If this throw is performed, Zomom will spit up the remainder of the sandwhich he hasn't eaten at the foe. If Zomom has enough time to down the majority of the sandwich, this is a better use of the last bit of it, and he can still pick it up again and eat it anyway. In the case of a turkey leg, this throw is entirely positive, raw gravy.

VORE BACK THROW - HEADBUTT

Zomom vomits up the foe behind him for 4% before headbutting them with his spikes for an additional 9% and set knockback behind him. The headbutt also pushes Zomom in the opposite direction the same distance, helping him to recover to make it a decent for gimping, or just to make as much space as possible, stacking on this extra space from the distance slid during a grab.

VORE UP THROW - DROOL

Zomom regurgitates the foe for 9%, then gives them a big lick with his tongue as they come out to fling them upwards with weak knockback. The foe is covered in drool after this attack is complete, giving them a status effect of having a slightly slower dashing speed for 5 seconds, about only 7/10ths their normal. Stacking this with the earthshaking effect from the fair can make them move slow as molasses, which just makes Zomom even hungrier!

VORE DOWN THROW - BELLY DRUM

Zomom performs a fairly short version of his jab, pounding his stomach to deal 7% to the foe inside him before belching to send them out downwards for an additional 7% and the usual set knockback. The pounding on Zomom's stomach can be useful to stall the foe during a portion of the grab where they cannot escape as you fall lower down, then Zomom can casually make his way back up to the stage by burrowing into the side of it with Side Special.

Unfortunately, given the vore throws do such tiny knockback, the foe will be able to interrupt you from going back inside, causing a much more direct combat scenario as you fight each other and refresh each other's recoveries to get back to the stage. The fair is an obvious spike to attempt to use here, if awkwardly laggy, but you can cancel out of the move on demand by slamming your fists into the side of the stage in this context while getting a shockwave out of it for your trouble. This is also a very worthy use of Zomom's onion rings, even if they'll all fall into the abyss because of this high risk attack.

FINAL SMASH

Zomom takes out a pot like Kirby's Brawl Final Smash - since Kirby's Final Smash was changed to be a generic sword, it's no longer a ripoff! Like Kirby, Zomom takes out a spatula and pan before banging them together, causing all items/mustard within 2 platforms and any foes within that range who don't dodge to be sucked into the pot. Zomom stirs the ingredients inside the pot to make a delicious soup, dealing 25% to all foes inside the pot. Instead of donning a chef's hat, Zomom ties a brown bandana around his neck to prepare for his meal like in all those old cartoons. The bandana bears a striking resemblance to the one worn by Sonic in Sonic Boom - he presumably got it by eating him.

After stirring the foes in the pot, Zomom will perform his down throw on all of them to eat them automatically, and they will take 5% a second while in Zomom's stomach. Zomom will heal 15% from the Final Smash soup by itself, but will also heal for any eaten food as normal. Foes must escape at triple grab difficulty here, and will stay in for a minimum of 2 seconds if Zomom grabbed them at a low percentage. Performing Zomom's vore throws will have him spit out one foe at a time, starting with the nearest he ate.

If the Final Smash fails to hit anyone at start, Zomom will clumsily tip the pot over when he goes to drink it, causing the stage to be covered in a platform of the soup. As the soup pours out, it is a hitbox that deals 23% and knockback that kills at 60%, while giving the foe the burning effect seen in uthrow and nair. With nothing in it, the soup functions like mustard, but healing double the amount and counting as a unique food item. If there was any food used up in the soup, it will still count as all of those food items for Zomom to dash hungrily towards it, and will stack on that amount of healing if he eats it. The soup lasts forever until destroyed.

UPDATE HISTORY

May 12th: Posted Moveset.
May 13th: New moves for ftilt, utilt, bair, and uair. Dtilt and Vore Up Throw lose the effect that makes Zomom react to the foe like a food item. Vore Up Throw buffed to compensate for the lost effect. Mentions of old effects removed. Added the deleted moves section to showcase the old versions.

FORWARD TILT - BELLY BUMP

Zomom puffs out his chest and kicks off the ground, traveling forwards a Wario width. Anyone hit by his stomach will take 11% and knockback that kills at 140% with high base knockback. If Zomom hits a target he can damage, he will stop moving forward and bounce backwards a Mario width during the ending lag. This move doesn't have intolerable starting or ending lag, but has enough on both parts of the move to not be casually thrown out.

If a physical projectile like a thrown item is thrown at Zomom's front during this attack, he won't be hit by it. Instead, the item will be briefly lost in Zomom's fat for a half second as Zomom bounces back as if he hit a foe. When the ending lag is finished, the projectile will be catapulted out of Zomom's fat back at the foe, having had its power and speed multipled by 1.2X and now owned by Zomom. This is good to reflect food the foe tries to use against you, but if used as a standard reflector is rather awkward due to the lag involved in the move and the long pause before the projectile actually gets reflected.

If Zomom is hit during the period of lag where the projectile is still in his fat before it's launched, it will boost the power of the projectile from 1.2x the norm to double strength and launch it out immediately. While a foe generally won't be dumb enough to follow up with an additional attack after having thrown a projectile at you, if they were at a distance it makes it very difficult for them to capitalize on your lag and/or approach you. If you can predict the foe is going to launch 2 projectiles in quick succession, this can also work something like a more traditional reflector while giving you the net gain in the damage trade.

This attack also has good synergy with onion rings, and can turn the move into a direct counter. Aside from that, this move is useful to "tank" single projectile hits without losing all your rings, helping to alleviate some pressure when trying to get a bigger collection of them.

UP TILT - EDGY DEMON HORNS

While Zomom's not the smartest of the deadly six, he's still much smarter than the equivalent brute on the good guy team, Knuckles, so he figures it's a good idea to try and use his head for an attack. Zomom stoops down before doing a headbutt for the best get away move he has in his moveset, functioning not only as great anti-air but hitting any foes remotely close to Zomom for 8% and radial, vaguely vertical knockback that kills at 170%.

This attack will enable Zomom to impale items with the horns on his head, causing him to carry them around with him. If used on a big sandwich/ground chunk, Zomom will take one quarter portion of it rather than the whole thing. If Zomom uses utilt again with the item impaled on his noggin, he will thrust it off of his horns, smash tossing it straight upwards. This is obviously a great attack for multitasking, and if there's an abundance of items it will prevent the foe from picking some of them up, most commonly coming up in the context of a sandwich.

DOWN TILT - LICK

(Only second paragraph is deleted)

Zomom licks the ground for a hitbox comparable to the Koopalings' dtilt, but he can hold it out like a jab. This attack will enable Zomom to lick up mustard on the ground to attack while eating it, including if the mustard is on another item/foe. Zomom has a crawl at half the speed of his dash, and he can still use the dtilt while crawling. Zomom can still be motivated to chase after food hungrily and increase speed while crawling, though his speed only goes up at half the rate as when dashing. Still, Zomom can transfer momentum between his dash and crawl at will, picking up where he left off, and slowing down a bit can potentially catch a foe off guard. This attack is normally easy to DI out of, but at high speeds Zomom can quite potentially chase a foe a significant distance with this. Zomom has slightly more superarmor while crawling at high speeds rather than dashing, starting at 10% superarmor and going up by increments of 3%, enabling him to cap his superarmor at 25% instead of 18%.

If this attack hits an opponent, Zomom will decide he likes the taste of the opponent and will want more. This effect lasts for 5 seconds regardless of how long you hit with the dtilt, but hitting with it again will stack on an additional 5 seconds. This causes the foe to count as an item that he can hungrily dash towards, whether or not they have mustard on them. The foe counts as a fully unique food item, letting Zomom have up to 5 different sources he can dash towards. If Zomom really cannot be bothered with set-up, this is the most direct way of using his mechanic.

BACK AERIAL - REV UP


Zomom curls up into a giant yellow ball like in his dashing attack and spins, making a trail of wind behind him as he spins like Sonic does when he revs up a spin dash. With Zomom's body color, you could mistake him for a fat Super Sonic! It would make as much sense as everyone confusing Sonic, Shadow, and Silver anyway.

Zomom's body itself does 7% and generic radial knockback that kills at 180%, but the trail is a very efficient multihit hitbox that deals 17 hits of 1% and flinching over the course of the move. Since this is an aerial, Zomom can generally DI backwards to hit the foe with his body as the "finisher" to use it like a more traditional multihit aerial.

If Zomom triggers the move's landing lag, he has the option of pressing A to instantly begin his dashing attack out of the bair. How fast he goes depends on how much of the bair's duration he allowed it to complete before interrupting it by landing, and it must have been going for at least 10 frames for this to work at all. At the max of 20 frames, this will send Zomom off at a 7/10 dashing speed during his dashing attack right off the bat. Aside from generically picking up speed, this makes it a very good move to run away for set-up if needed, as you can briefly stun the foe with the hitbox behind you before zipping off in the opposite direction.

UP AERIAL - STOMACH TRAMPOLINE

Zomom turns his body to face upward in midair and juts out his stomach again, dealing 8% with vertical knockback that kills at 160% with high base knockback. This attack will push Zomom downwards in the air a Ganondorf height if he hits, and on the way down he's a fairly powerful hitbox that deals 22% and a spike on par with with the SSB4 Ganon dair. This might seem like a nightmare when trying to recover, but in Zomom's case it can actually prove quite beneficial for recovery as it puts him into range to burrow into the stage while getting the foe out of the way. The motion of falling downwards can also be canceled into grabbing the ledge if you want a more direct method of defending yourself on the way back to the stage.

While this move has bad landing lag if Zomom lands before it completes, if Zomom hits the ground after being knocked downwards he will stand up again with considerably less lag. As a matter of fact, if the move hits with Zomom right against the ground, the end lag is shorter than if he used it higher up in the air. While this is high risk since the lag is still bad if he misses, it's actually a very fast move on hit, and would be a great combo option if it wasn't for the problematic high base knockback. The move becomes safer when used next to the ledge, as Zomom can just DI off the edge upon failure.

Like with the ftilt, this move can reflect physical projectiles, but Zomom will always deflect them straight upwards, very rarely hitting the foe outside of the uncommon scenario of the foe sending a projectile downwars from above. Reflecting a projectile will still knock Zomom downwards and create the powerful hitbox on his back as he falls, letting him actually make use of that hitbox outside of scenarios with multiple enemies. While the KO percentage on the falling hitbox is very good, if this was hit on-stage it won't ever kill because at high percentages foes will be knocked into the deflected projectile item sent above Zomom. Off-stage, of course, this is a perfectly viable kill method, though it is still very risky there if the foe hits you down so far not even you can recover.

Good:
Zomom
Master Zik
Robotnik
Zazz

Average:
Zavok
Omega
Chaos
Cubot & Orbot

Mediocre:
Black Doom
Tails
Sonic
Blaze
Big the Cat
Fang the Sniper
Zor
Zeena
Biolizard

Bad:
Rouge
Lyric
Omochao
Vector
Espio
Cream
Charmy
Dark Gaia
Iblis

Horrible:
Chip
Shadow
GUN Commander
Gamma
Metal Sonic
The Black Knight

Meme:
Erazor Djinn
Maria
Amy
Merlina
Silver
Knuckles
Chris Thorndyke
Mephiles
Boom Knuckles
Boom Robotnik
Elise
 
Last edited:

AlRex

Smash Lord
Joined
Sep 12, 2012
Messages
1,193


Intro
Magneto, the master of magnet magnetism, is one of Marvel’s most well-known supervillains, despite arguably not being a villain in the eyes of some fans and writers. He has multiple other names, though a commonly accepted birth name for him is Max Eisenhardt. As a child, he lived in WWII-era Germany as a Jew being held in an Auschwitz Concentration Camp. This was part of what shaped him into a strong activist for mutant rights later in life, having seen the injustices humans could bring upon other humans who were different first hand. Later, he teamed with a young Charles Xavier as a young adult (Xavier later founded Xavier’s School for Gifted Youngsters and the X-Men), though they had a falling out due to differing ideals and approaches to mutants’ rights.

Magneto possesses the ability to control and manipulate metal, as well as anything in the electro-magnetic spectrum, giving him some ability to use energy-based attacks and defensive shielding, as well as some ability to fly. The helmet that he wears protects from mental attacks, which is useful when up against Professor X or any number of psychic/telekinetic members of the X-Men.

Magneto leads (or lead) the Brotherhood of Mutants (formerly the Brotherhood of Evil Mutants), a group of mutants separate, and often opposed to, the X-Men. They’re determined to stop discrimination against mutants and gain rights for mutant-kind by any means necessary, even violent ones. However, he also sometimes teams with the X-Men themselves, becoming a member or even leader of the team when it is necessary.

This is also a heavily revised version of a moveset I did on GameFAQS about…4 years ago? Good lord… Well, I can’t sue myself, but basically nothing except a few of the victory quotes are directly copy-pasted from that post, though both sort of originate from the CAPCOM fighter version of the character, though it’s also not a direct port over from that, either.

Stats
Size:
Captain Falcon (Mostly normal-sized for a muscular human…err, mutant)
Weight: Mewtwo
Walk Speed: Mewtwo
Dash Speed: Zelda
Jumps: 2, but he can float/control his drop.
Aerial Speed: Mewtwo
Aerial Control: Mewtwo
Fall Speed: Peach (He’s a very floaty character, owing to his control of the magnetic fields)
Traction: Captain Falcon

Other Special Traits
Much like he does in the CAPCOM Marvel/X-Men fighters, or like his rip-off Mewtwo sometimes does in Smash itself, Magneto floats around slightly above the platform instead of walking. He can also float straight forward in the air for brief periods of time.

Specials
Neutral Special – Hyper Gravitation
Magneto sends out a purple, electric ball of energy that can be tilted diagonally upwards or downwards. The projectile is 2 times the size of Mario’s Fireball, goes for a Stage Builder block longer amount of distance, and is only half as fast. If it connects, it will stun the opponent and surround them in a glow of purple energy, allowing them to be pulled back to Magneto for the same distance, but backwards. The initial hit of the energy ball causes 8% damage, with 2% of damage added on for every second Magneto still has them in his hold. This move is very useful for setting up for another attack, though you can’t use this move again right after you used it, with a 3 second delay between each usage. Magneto can also use this move to hit and bring certain items closer to himself.

Up Special – Magnetic Flight
Magneto can fly upwards for about 5 seconds, going about as high as three Kirby jumps, but he can’t shield or use any attacks without cancelling out of said flight. This move does no damage, but it adds to his already great recovery. He can also tilt in every direction except downward at the beginning of the special, allowing him to go somewhat diagonally.

Side Special – Electromagnetic Disruptor
Magneto sends out a mid-sized energy projectile, slightly smaller than Mario’s Fireball, straight forward. Quick and easy to use, with no delay and a lot of distance, going for about half of Final Destination before stopping, but it doesn’t do a lot of damage, relatively speaking, with 3% on each hit, and only causes minor flinching. Can be used multiple times in a row, making it an easily spammable move, but it’s small and somewhat easy to avoid, so it’s not a move you’d want to rely on.

Down Special – Magnetic Forcefield
Magneto encases himself in a purple, semi-transparent orb that crackles with electric energy. It’s large enough to encase his whole body, and stretches outward from him for about 1 Stage Builder block on each side. As you may expect, this shield can protect him from projectiles, causing them to immediately dissipate upon impact. The initial appearance of the shield will cause about 5% damage and knockback for anyone who gets near him, and as long as he keeps it going, will continue to do 1% damage, with no flinching, for every second anyone else passes through it. Magneto can keep the shield up for about 10 seconds, or can cancel out of it by pressing Down-B again. He can still use other specials and attacks while using it, but will not be able to use it again for about 5 seconds after he’s stopped using it. This shield is very useful, as Magneto, despite his range and power, is not the best at taking hits.

Normal Moves
Jab Combo – Skill of Magnus
Magneto swats out one hand, then does a quick whip kick forward, then follows through with a slight swipe downward with his other hand. Each hit does about 4% damage each, with a slight one second delay on each hit.

Dash Attack – Thrusting Hand
Magneto thrusts his arm forward, holding his palm outward, and floats forward quickly, with energy pulsing around his hand. Deals some decent knockback and 6% damage.

Upward Tilt – Energized Slice
Magneto smacks upward with one hand, with a trail of crescent shaped purple energy under his hand. Effective for spiking and setting up for other moves, and deals 10% damage.

Forward Tilt – Behold My Mighty Hand
Magneto smacks straight forward and has one hand held outward, with purple energy pulsing around it. Has two seconds of delay between each use, but does a fair amount of damage and knockback, with 6% damage on each hit.

Downward Tilt – Whipping Kick
Magneto holds his leg upward before whipping it downward for a strong roundhouse kick, like Ganondorf’s Down Smash, but faster and a bit weaker. A decently ranged close-quarters move that deals 10% damage.

Smash Attacks
Up Smash – Magnetic Spike
Magneto causes a spike of electric energy, about half as tall and wide as he is, to come up from the ground directly in front of him, spiking any opponent nearby upward. Does 15% damage before drawing itself back down into the ground. There’s a two second delay between each use of this attack, but it’s the fastest of Magneto’s Smash Attacks.

Side Smash – Electromagnetic Pulse
Magneto thrusts his hand outward, with purple energy pulsing around his arm, then generates a short-lived orb of purple energy, floating slightly above his held-out palm, about as big as Samus’s fully charged shot. The initial thrust deals 15% damage and some slight knockback, but if the opponent is hit directly with the energy orb, it will deal 30% damage and even more knockback, likely KO-ing the opponent around 110%. It is somewhat telegraphed and there’s a one second delay both before and after Magneto generates the orb, but despite its trickiness, it is Magneto’s most devastating Smash Attack.

Down Smash – Metal Junk
Magneto floats out a ball of crumpled up metal, the same size as Kirby, directly above and in front of him, and smashes it down onto the ground directly in front of him. Does 25% damage, and can temporarily stun and ground an opponent.

Grabs/Pummel/Throws
Grab – Magneto grabs the opponent with one hand if they’re really up close, or sends out a small spark of purple energy if they’re only sort of close to him, which, if it hits, he can use to drag them to him. Either way, rather than continuing to hold them physically, he will have them floating directly in front of him, with purple energy pulsing around them, before he finally decides on how to dispose of them.

Pummel – Squeezes the opponent with a ring of purple energy that suddenly appears around their midsection. Does 3% damage.

Up Throw – Pulled and Spiked
Magneto simply tosses the opponent upward with his electromagnetic powers, but then follows up by spiking them slightly further upward with a small spark of purple energy. Does 6% damage with the first toss, then an additional 3% damage with the small projectile.

Forward Throw – Magnetic Toss
Magneto pulls the opponent up slightly before sending them flying back down to the ground in front of him. The most simple of his throws, and does 8% damage.

Backward Throw – Magnetic Swing

Magneto swipes both hands downward, pointing to his other side, and swipes his opponent down to the ground behind him. Does 11% damage upon impact.

Downward Throw – Spark Slam
Magneto slams his opponent down into the ground, then hits them with a small spark of purple energy sent downward from one of his hands. Does 8% damage with the initial toss, then an additional 3% damage if the spark hits.

Aerial Attacks
Neutral Aerial – Magnus Spark
Magneto holds his palm outward and releases a small spark of purple energy directly in front of himself, about half the size of the hand itself. Deals slight flinching/stun to the opponent for about 2 seconds and 5% damage. Not one of his stronger moves, but effective for quickly shutting down opponents in mid-air.

Upward Aerial – Energized Uppercut
Magneto smacks upward with one hand, travelling in an arc, with a purple crescent of energy trailing behind his hand. Basically very similar to his Upward Tilt, except that he moves slightly upward along with it, for about half the distance of one of his regular jumps. It’s also not as effective in the air for setting up for other moves, but it’s good for spiking and get opponents off of you until you get back to the ground. Deals 10% damage.

Forward Aerial – Behold My Mighty Foot
Magneto kicks straight forward with one leg, causing him to float forward slightly. Does decent knockback and 10% damage.

Backward Aerial – Energized Backhand
Magneto floats backward while striking with his arm stretched out behind him, hand held outward. Slight burst of energy on the tip of the attack, but that’s mostly aesthetic. Deals some slight knockback and 8% damage.

Downward Aerial – Electromagnetic Slam
Magneto smacks downward with both arms held together, purple energy pulsing around them. The combined physical force and electromagnetic energy results in a devastating downward spike that deals 13% damage, after which Magneto can do whatever else he wants to either fight off other foes or finish the opponent off. However, this move is somewhat tricky to pull off correctly, as the opponent has to be in the right spot for Magneto to hit them. If they’re above or far enough to the side of Magneto, it will probably only effect them slightly, if at all, with the pulsing energy dealing 2% of damage and some mild flinching.

Final Smash
Gravity Squeeze
Magneto lifts one hand straight up in the air, with a purple, semi-transparent orb of energy (about the size of a fully charged Samus shot) appearing in front of him, around the middle of his body, attracting anyone close-by (at least within one Stage Builder block distance). If this doesn’t hit or capture anybody, the orb will immediately fade out and the Final Smash will fail, but if it hits, Magneto will capture and lift the opponent, trapping them in a stronger, crackling field of electromagnetic energy, dealing 10% damage initially, then will expand the orb outward about 4x its regular size, pulsating outward from the captured opponents body, and harming anyone who possibly gets near it, with some minor stun and knockback, as well as 5% damage. The larger orb attracts various random metal objects that fly from multiple directions from off-screen, dealing 3% damage, but no knockback or stun upon hitting non-captured opponents. Magneto then closes his fist, crushing the opponent inside a ball of energy and metal, making it about 2x its original size, and dealing 30% damage, then moves his hand downward and smashes the opponent down onto the stage, dealing another 10% damage to the opponent, and 5% damage to anyone unlucky enough to be caught underneath it. The opponent is then released and sent flying, with the same fate awaiting any opponent crushed under the ball, which disappears shortly afterwards, with a total of 50% damage dealt to them, and a possible 13% damage to any other uncaptured opponents.

Playstyle
Magneto has good distance and power to use on his opponents, and via his magnetism and throws, can manipulate them as well. He has options for both keeping away and drawing in opponents, and can combo well, and with power, in close range. His Electromagnetic Forcefield helps keep reduce the amount of damage other projectile heavy characters, or any close range combatants can inflict upon him, but due to its limited time, and delay between each use, it’s best to use it sparingly. With the delay on some of his attacks, it’s fair to say that Magneto is for those who’d like to “fight smarter, not harder”. While he does have some power behind him, you should think about when using many of his attacks would be best. He’s also incredibly mobile, and has some really good recovery, so use that to your advantage. Use range and the shield to defend yourself, and play around with movement and combos when you draw opponents to you.

Extras
Entrance
Magneto floats down to the stage with a full energy shield surrounding him, with his hands held out. As he lands closer to the stage, he swipes his hands downward and disengages the shield, causing it to disappear.

Taunts
1. Magneto holds his fist slightly upward in front of his chest and balls it up, with purple energy surrounding it. “You shall feel my wrath!”
2. Magneto crosses his arms together in front of him, then swoops them out to his sides. He will say either “You are nothing!” or “Welcome to die!”, depending on what voice option you’ve chosen.
3. Magneto folds his arms and smirks, chuckling slightly to himself.

Victory Poses
1. Magneto floats down, then raises his hand up with energy surrounding it. "You are finished!" (w/voice option: "I kill you! You are dead!")
2. Floats around with his arms raised to his sides. "What hopes did you have against the master of magnetism?" (w/voice option: "I am Magneto, master of magnet!")
3. Floats a metal bar next to himself, then crushes it with his powers. "Hmmph. That was nothing." (w/voice option: "You are dead!")
VS any X-Men except Wolverine:
"The dream is dead." (or "I kill you, X-Chicken!")
VS Wolverine:
"Be grateful I did not rip the adamantium from your very bones!" (will say the other quote if voice option is turned on)
(PS: No, I am not making a Wolverine moveset…there will be a DC moveset, though)


Loss Pose
Magneto simply floats in the background with his arms folded, looking very disappointed.

Palettes/Costumes
Classic Magneto [RED TEAM]
All included in this picture, aside from the silver one, with the turquoise "Pringles" outfit being his [BLUE TEAM] outfit: http://tinyurl.com/hyp8r8d
Doctor Doom palette, with the red and purple being traded for green, silver, and gold in various places. [GREEN TEAM]
X-Men First Class Magneto: http://tinyurl.com/zksouvc

Victory Music
Final notes of the 90’s X-Men theme (0:56 onwards): https://www.youtube.com/watch?v=sAkL2-vh2Sk

(Sorry for dropping off in the last contest. This is done for the time being, though I probably will alter it with some feedback. I’m already thinking that the Final Smash is kind of wonky. But now I’m thinking about what to do for a DC character, as well as maybe completing some movesets I didn’t complete for the last contest.)
 
Last edited:

Tocaraca2

Smash Ace
Joined
Feb 22, 2015
Messages
557
Location
Wokingham
Hold on! There are only 3 pages? What is this sorcery?
Usually MYM threads end up with many pages.

Anyway, I haven't come to this thread lately. A while ago I started making a Mutant Skeleton moveset because I felt like it, but I didn't get far at all, and I ended up just not making it. Sorry I haven't had a set out in a while, but I just don't feel like making movesets at the moment. MYM is that kind of thing where you don't have a weight on your shoulders; there's no pressure to get out a set, and as I can't really be bothered, I'm not going to any time soon unless I suddenly get a burst of inspiration.
Which might happen if someone gives feedback on Akullotsoa and notifies me of it, which I don't think anybody has done yet.
The set is here: Akullotsoa (Ice Wolf)
 

Plazzap

Smash Rookie
Joined
Aug 24, 2014
Messages
9
Location
The Earth of course
Hold on! There are only 3 pages? What is this sorcery?
Usually MYM threads end up with many pages.
I agree, MYM has had a pretty slow start, that's just how it goes sometimes.

You should only make movesets when you feel like it and have the time, don't ever feel forced to make a moveset

Maybe with summer starting up soon, more movesets will happen
 
Last edited:

Tocaraca2

Smash Ace
Joined
Feb 22, 2015
Messages
557
Location
Wokingham
Before I posted my previous message, I actually checked out Akullotsoa and realised that there were actually some detrimental problems that I had to fix, such as having forgotten to provide a description for the aerial version of Up Special. There were spelling errors too, and I found myself actually editing the set before I posted that message.
I feel like Akullotsoa turned out quite well, but of course I'm going to need other people's inputs. I'm not sure whether he's overpowered or underpowered at the moment.
 

FrozenRoy

Smash Lord
Joined
Apr 26, 2007
Messages
1,268
Location
Las Vegas, Nevada
Switch FC
SW-1325-2408-7513
I agree, MYM has had a pretty slow start, that's just how it goes sometimes.

You should only make movesets when you feel like it and have the time, don't ever feel forced to make a moveset

Maybe with summer starting up soon, more movesets will happen
I disagree immensely, MYM has had an extremely fast start. 46 sets and it's only been, what, two months? That's pretty impressive and a lot faster pace than, say, last contest.
 

Tocaraca2

Smash Ace
Joined
Feb 22, 2015
Messages
557
Location
Wokingham
I disagree immensely, MYM has had an extremely fast start. 46 sets and it's only been, what, two months? That's pretty impressive and a lot faster pace than, say, last contest.
Correct, it's been 2 months and 4 days.
Still feels like a while. But I guess Smashboards' pages can have a lot more posts in them than other forums I've seen/
 

iamtrash

Smash Rookie
Joined
Jun 5, 2016
Messages
1
So after lurking here for a while... I've decided to take a bite. Considering it's my first moveset, it's 2/10 level. please don't kill me for this MYM entry. might need tweaking numbers and his stats, knowing my life. my playstyle might also totally go in the opposite direction of what i wanted him to be. Plus, there's also fact that I was reading up on Plaza's measumerent tutorial... which is old.
tl;dr = i am a newbie, this is my first entry, and i have no idea what i am doing

WARNING: The spoilers are off on this one. If you haven't played Undertale, you're going to have a bad time. KO percents are for Mario in middle of FD. Also, this page took forever to load because of all these wall of texts by other people. why you have to be so creative unlike me. ;_;
also there will be some GIFs to accompany the attacks soon, but right now i am having problems with them. and done

Sans
Sans, the small but big-boned skeleton comedian from the indie hit Undertale. He's the older brother of Papyrus, whom he cares about. A lot. He's quite goofy, what's with him being a comedian, among his many other "jobs". He's also kinda lazy. He quite often pops up as, well, comic relief.
He knows way more than he initally shows, though. He one who judges you for your sins. It is suggested that he has a good understanding of quantum physics and spacetime continuum, as he's aware of timeline disturbances. He is also very good at guessing from face. Oh, and he also holds the honor of being the hardest boss in the entire game, what's with him breaking almost every goddamn rule in the game.

“Huh, I've always wondered”
As mentioned, Sans is pretty smart, breaking rules. He's the one to start the fight, with an attack that most likely will screw you over on first attempts, he avoids your attacks when nobody else did so your ATK doesn't really matter, his attacks inflict a poison-like status that ignores whatever DEF you might have, he attacks you while you're browsing the goddamn menus, and in the end, he refuses to end his turn, so you'll be stuck with him forever (since the game is a turn-based RPG)! In Smash incarnation, I am giving him the priority bonus; that is, all of his attacks have better-than-average priority.
CHECK
Size: Mega Lucario.
Weight: Little Mac.
Ground Speed: Lucario.
Traction: R.O.B.
Fall Speed: R.O.B. Bones aren't exactly aerodynamic.
Air Speed: Mega Man.
Jumps: Two. Basic is similar to Bowser's. Midair covers half that.

Special Attacks
Neutral: Stop Signs
Sans throws a high, blue bone as a projectile that travels 3SSB at medium-fast speed, before disappearing. It's high enough that most character won't be able to jump over it. However, this attack has a special property. It will collide only with an enemy that is moving, including falling. Technically it deals only 1% damage, but since its base knockback is mid-high and purely horizontal (with a KO at 195%), it can hit the same target up to 6 times depending on weight and percentage. I won't lie, on flat stages like FD, this attack can potentially be abused to control your opponent, and possibly set up some moves if the attack hits. There's enough starting lag to give a falling opponent without a jump chance to avoid the attack, unless it's a floater. These better hope that it's not an empty, flat stage, that their midair is good enough to avoid it, or that their fall speed was overestimated and the attack undershoots.
Up: Shortcut

This recovery move is your bread and butter - teleportation. Or as some call it in-game; shortcuts, hence the name. It has no start up lag at all, with pretty good range, covering 2.5 SSB with ability to tilt into diagonal directions. The ending lag makes up for no start lag, however. But that's not all! You can charge this move. By holding B instead of just "patting" it, you can increase the range... by an extra SSB! This option is slow enough to leave an opening for a meteor smash from an opponent, however.
Side: Gaster Blaster Caster

Sans summons his little toy, a Gaster Blaster. This skull-shaped cannon fires a beam of white energy that instantly hits on a range of 2/3 Final Destination and is about wide as one third of a Sans. Everyone caught in the blast will be hit for 3%, strongly knocking back at an angle of exactly 30°, with enough force to KO as early as 120%. The catch? The attack is kinda telegraphed, as it takes 0.5s for it to appear and then 0.35s more to fire, meaning a well-timed jump will be enough to avoid due to the fact the beam disappears after 0.1s. You do not want to be in front of him, however. While Gaster Blaster does no damage, it does have collision, and running into it will stun you just long enough to be hit by the actual attack.
Down: Hit-and-Miss

After a bit of start up lag, Sans casually flash-steps backwards for one-and-a-half SSB (during this movement he has super armor), while also throwing a bone in a small arc, with a measly range of one SSB. It deals only 1% damage and has zero knockback, but it makes it up with a good stun of 0.8s. A good play will allow Sans to combo this attack into other moves. If performed in midair, he will simply flash-step backwards, with no super armor or bone throw (in return having way less lag on both sides), making it more effective as horizontal recovery. Although the entire attack is relatively short, it cannot be spammed on ground due to 5 second cooldown.
Regular Attacks
Jab: Can You Ketchup With Me
Sans smacks opponent with a bottle of ketchup on each strike, 2% each, with small base knockback KOing at 290%. There's not much here to say, it's just a jab.
F-Tilt: Tibia Honest
Sans performs a tripping low sweep with his bony feet, dealing 1% damage; no base knockback but some knockback growth allowing for a KO at 285%. Has short range and lag on start, but always trips.
U-Tilt: Everything Sans Puns Here, Mate
A fast attack where Sans throws a narrow column of bones, hitting whomever is above his head, dealing 6% damage. However, this attack has small base knockback and almost no knockback growth. This leads to KO range being at a whooping 360%. This attack has transcendant priority.
D-Tilt: Down To The Bone
A simple move where Sans just whacks opponent with another bone, this time in upward-to-downard motion. Its strength compensates for small range, dealing 9% damage and having mid-low base knockback, KOing at 215%.
Dash Attack: Funny Bone
Sans slaps opponent with a bone in a gag way, for 2% damage, with mid-low base knockback, KOing at 220% and inflicting 0.15s stun. The attack also causes him to end up right behind the opponent. Quick reaction will allow for a grab combo. However, this attack has the worst priority of them all and as such, is way easier to cancel and punish.

Smashing, Isn't It
F-Smash: Trombone
Sans grabs a trombone out of nowhere and attack the opponent by... playing on it, sliding parts of it. Can be DI'd into diagonals. Deals 21% damage with mid-high knocback and good growth, KOing at 135%.
U-Smash: Bonehead
Sans summons a large bone and swings it above his head in back-to-front motion, covering an angle of about 60°. The swing is slow and easy to punish. However, if hit, the attack deals a whooping 30%, with great base knockback and insane growth, KOing at 95%.
D-Smash: Gravity Shove
Sans performes a strong gravitional push both near his left and his right to hit opponents. For a smash, it's rather weak damage-wise, dealing only 7% damage; however it has good knockback and great growth, KOing at 110%.

Aerial Attacks
N-Air: I Dunno Kiddo
While in the air, Sans performs a shrugging motion with a goofy expression on his face. His hands continuosly hit opponent for 2% per hit, usually netting 4-6% damage. Its knockback is fixed and low, so it is impossible to KO with this move.
F-Air: You're Grounded
Sans summons a bone at the height of his head that moves forward at medium-fast speed, for a 1.5SSB. It deals only 3% damage, but has heavy downward knockback, instantly shutting down any flier. The slowest aerial.
B-Air: Backbone
A very quick attack, in appearance similar to No Fun Here, Mate. However, obviously, the attack appears behind Sans and is a row of bones instead. Deals 2% damage and has little knockback; while F-Air is used to outright slam enemies into the ground, this attack can be used to hitstun them for a while, cancelling whatever they were doing. Has lower priority than most of Sans' attacks, but still relatively decent.
U-Air: Water You Eating
In a gaggy way, Sans slaps the opponent above him with a... hotdog (made of "water sausage"). This attack launches the enemy upward for 2.5% damage, and leaves them stunned for 0.05s. Another way to shoo away enemies, although somewhat laggy.
D-Air: Hops And Jumps
Sans uses the enemy below him as a platform to jump off and propel himself upwards. Deals 10% damage with mid-high downward knockback that can be DI'd into left or right. Note that this attack automatically causes fastfalling and removes your midjump (if you haven't used it up yet, that is) if you fail to hit, so it might be risky to use on edges.

The Dunkening
Grab: Blue Mode
Sans uses his telekinetic powers to grab the opponent (as soon as they're hit by a faint beam of blue energy; works similarly to ZSS's grab). This grab has good reach and will cause Sans to hold opponent afloat in front of him, to his disposal.
Pummel: Burn In Hell
Sans repeatedly slams opponent against invisible walls 12 times in random directions, each time dealing 1% damage, after which the opponent is dropped on the floor. The area within which the slams are performed is small, to prevent other players from profiting due to this attack.
B-Throw: Redshift
Sans throws the grabbed opponent backwards and spikes him into ground, dealing 2% damage. This throw has larger range than most throws and stuns for 0.15s, in exchange for larger start and end lag.
F-Throw: Blueshift
Sans throws the grabbed opponent forward and slams hit into the ground, dealing 6% damage.
U-Throw: Get Dunked On
Sans throws opponent into the air and summons a bone out of the ground to hit them for 17%. A good killing move, with decent base knockback and decent growth, being able to KO as early as 145%. However, this throw has a good deal of ending lag, leaving you vulnerable for a while.
D-Throw: Slam Jam
Sans brutally slams the opponent onto the ground, dealing 10% damage.

Final Smash: Gaster Blaster Master
As the name could suggest, this is basically Gaster Blaster Caster. But on drugs. What exactly it does? It causes Sans to float up in the air, and then spam the hell out of Gaster Blasters in a CW and CCW half circles around him for 4 seconds (similar to the way he does in animation above, but outwards rather than inwards). Damage is the same, but the attack now KOs at 60%.The strongest aspect is however that the entire lag of summon-fire process is reduced to 0.2s, effectively making this attack a rapid-fire barrage.
Playstyle???
You can use the Stop Signs to control how opponent moves and, for example, trap him into the Gaster Blaster Caster. Or perhaps try your luck with Hit-And-Miss and try comboing it into a strong move but otherwise unwieldy move, like Bonehead? Even if you miss becaus of its short range, the move still gives you spacing. Funny Bone stuns and puts you behind the opponent, allowing for a grab. Which has decent range. Tibia Honest always trips, possibly leaving an opening for an attack. A bunch of unmentioned attack stun, for a longer or slower period. All of his Aerials, besides Neutral, either send opponent down or stun them, shutting their aerial capability if the attack connects. This guy's about screwing with the enemy, possibly following up with a strong attack.

Flavor
Alternate costumes: Three of his costumes give him a look of different Sans incarnation: Outertale, Underfell and Error!Sans, These change some of the aesthetics of his attacks, as well. Fifth gives him his brother's attire, sixth gives him scientist look. Last two are simple palette swaps of his outfit's color to either purple or red.
Easter Egg: Holding Z before selecting Sans will have him wear sneakers instead of slippers.
Idle: He sways back and forth, like here.
Walking: He simply walks. He's a chill dude like that.
Dashing: He propels himself away with a gravity blast.
Crouching: He does a simple squat. Too lazy for anything fancy.
Crawling: N/A. He can't crawl at all.
Jumping: Propels himself away from the groundwith gravity powers. Midair jump has him summon a platform to have something to propel himself away from.
Shield: Uses a Gaster Blaster as a shield.
Spot Dodge: Sans simply leans back into the background.
Dodge Roll: Flash-steps backwards. Visually is the same as flash-step from Hit-And-Miss. Again too lazy; he didn't come up with a new animation here.
Air Dodge: Flash-steps into background, then comes back.
Up taunt: Drinks a bottle of ketchup. How doesn't it leak out of him? Magic.

Side taunt: Both of his eyes disappear for a while, then the left one faintly glows blue.
Down taunt: Teleports out and in. Works basically the same as Mega Man's, including ability to dodge attacks.
Entrance: Casually walks to the stage from off-screen.
Victory pose: Sleeps while still standing.
Victory theme: This.
 
Last edited:

FrozenRoy

Smash Lord
Joined
Apr 26, 2007
Messages
1,268
Location
Las Vegas, Nevada
Switch FC
SW-1325-2408-7513
Because of REEL LIFE, this month's Iron Memer has been delayed, not that we were getting many entreants anyway. Hopefully this month's theme resonates with your souls and makes something great get born.

Which is good, because this month's not-so-secret theme is...

Soulsborne!

This challenge is quite simple: Anything from the video games Dark Souls, Dark Souls II, Dark Souls III, Demon's Souls or Bloodborne are all fair game, from the most important of bosses to the most minor of NPCs. Think of it like a little celebration of Dark Souls III's relatively recent release.

Similiar to last month, I'm gonna test out a fun way to have multiple entries. Specifically, you can have one from each game. So one Dark Souls character, one Demon's Souls character, one Dark Souls II character etc. How many sets can you finish in a month? :)

Because of the delays caused by REEL LIFE, this Iron Memer will not end until the 7th of next month. The next Iron Memer will begin on the 1st of next month as nornmal.

See you later and Prepare to Set.
 
Top Bottom