• Welcome to Smashboards, the world's largest Super Smash Brothers community! Over 250,000 Smash Bros. fans from around the world have come to discuss these great games in over 19 million posts!

    You are currently viewing our boards as a visitor. Click here to sign up right now and start on your path in the Smash community!

Make Your Move 17: Next contest begins March the 24th; get your Iron MYM'er 1st day sets ready!

D

Deleted member

Guest
Kon’s a comparable set to Zodick because of momentum and a large degree of interpretation for a limited power set. The all-fours stance is very organic and you manage to squeeze all of the potential you can out of combining the momentum and Kon’s basic magic. The barrier is smartly utilized to give him super armour which makes sense for an archetype like this, ultimately giving Kon plenty of options in the ways he can fight. I’m a firm believer after reading the set that Kon is well equipped to match against any kind of character despite all the awkwardness inherent to the genre. The real limitation is the difficult genre, eventually there’s a little redundancy, as you present every balanced idea for a momentum set when there’s not that many. It’s also not the most exciting idea from the start. Obviously that’s not your fault and I’m impressed how good this set is in spite of the approach you chose, in the end it’s clearly the best way to execute this character.

I haven’t read your first Touhou set, but from what I’ve been told, you seemed to go the wrong direction making Seija. This set’s core mechanic is simply not very fun, and it doesn’t help the later inputs to be interesting. Reversing moves mostly ends up feeling pointless and adding a limited extra move, and the core move itself seems to suffer too. You should’ve done something else from the start, such as making her force the foe to fall upwards, I think the way you implemented that was too limited, only lasting half a second. If you could say, hit foes from above who are falling up, that would honestly be a far better central mechanic. I noticed with this and the other Touhou sets that you try to do mechanics that have multiple moves at a time, but this is very difficult and on something like a Touhou, is especially hard, you end up resorting to throwing in all sorts of props to make up for input space. FrozenRoy has made a lot of good Touhou sets over the years and I especially recommend Kaguya as a set that incorporates lots of props but ones that fit the character, bringing them out on suitable inputs, such as using up all the smashes.

Trevenant’s a refreshing set from you Joe, not since the days of Barbaracle have I seen you let loose on a mechanic this creative, and it’s very fun. Aside from the grab game that is really cool, the specials and the feel of the set delivers massively on the characterisation by employing passive hitboxes, shadow duplicates and a weakness/strength dichotomy where Trevenant’s presence is felt all over the stage. It’s done in a very balanced, reserved way as is typical of your style, showcasing your knowledge of the game and getting in some mechanics that are unique but done in a realistic way.

I actually liked Wood Hammer as a core mechanic just for the way it worked, feeling like a better executed Jet Hammer and the buff from Curse also helps. Curse is one of the best implementations I’ve seen of that move, working into both Trevenant’s playstyle and his characterisation. When it comes to the critical side, I would say I wasn’t a fan of the smashes compared to the grab game or specials, they seemed to not get as involved in the playstyle as the throws or even some later aerials and standards. Even allowing them to get unique buffs off of Curse would’ve probably helped. The standards and aerials do all feel like they fit the playstyle though, making use of lingering hitboxes, projectiles and other tools to get the job done.

Sekibanki is unfortunately the same deal as Seija in many ways, at least the part where it tries to add on all these extra moves, adding two moves per input and making it very hard to understand. I couldn’t piece together the playstyle of the set except that she wants to use her head and projectiles together for lockdown. The way the head is used separately to try and combo reminds me of a set called Wang Chan, where the head only came out for a couple moves, partly because of the character but also because just having the head come out to shoot lasers over and over is pretty boring. I felt the same way here about the neck and neck trail moves, it’s used so much it becomes pretty redundant and loses any speciality it originally had, and when you have to make three moves per input I can see why. This was also the case with summoning wisps and shooting projectiles, it gets used so much it becomes pretty tired. These moves themselves aren’t well differentiated and more arbitrary to fill out the moveset’s inputs. I don’t see why considering what she does, you couldn’t at least summon multiple heads in the moveset. It’s awkward when she only does that in throws.

I wasn't too enthusiastic about the first version of Ganon 2.0, but after the changes it does improve massively, getting rid of most of the flaws. The new neutral special and up special are the two best additions, allowing Ganondorf's playstyle to be centred around the dead man's volley, and using the portal to move it around is a very natural way of doing that. The return of flame choke is very welcome and working it into his grab game is remotely interesting, and it's a far better grab game than the old one that awkwardly used the portals. I also like the changes you made to the down special, getting rid of the aerial shockwaves and basing it around the air-to-ground shockwave instead. These moves' writing also improved heavily, as before they were overly dense and trying to do too much at once, but now give the set a nice amount of focus.

I do still have some bones to pick with the rest of the set though, mostly with the way it uses the swords and lightning. The moves these elements show up on are fairly random and arbitrary. Arlong had a similar mechanic where he brought out a huge sword for some attacks, but on inputs that made sense. Here it's overwriting some inputs where it doesn't seem natural, for example three of the aerials, if Ganon has to take out his swords, doing it on the aerials seems like a bad idea when those should be some of his fastest moves. The actual moves that items like this are used on, the forward tilt and forward smash aren't used, although you did get the other two with the jab and dash attack. It'd make more sense if he could equip the swords and had non-sword moves for those inputs, given the amount of potential he has, just an extra four moves isn't asking for much. I remember a Brawl mod that did this with the infamous sword taunt. As for the lightning, I guess that's a HW-only thing because I don't remember it in anything else strictly for Ganondorf. It's a strange inclusion that doesn't add much to the playstyle, unless they're able to go into his portals but that is never mentioned.

This is a massive nitpick but the name of this set kind of irks me considering this is not Ganon, the pig form of Ganondorf from his fights or the earlier Zelda games, nor is it a remix of Ganon which is implied by the 2.0. If it was Ganondorf 2.0 or just Ganon because it's trying to combine all the Ganons that'd be one thing. This set has nothing from the actual Ganon besides the final smash so I don't know why it's called that in the first place outside of you disliking the name Ganondorf.

Chop Chop I read in about 5 minutes and that really says it all. This is a very very simplistic set that doesn't have much of a playstyle, basically just focuses on his shield and sword as weapons to block or attack with and has a mode similar to your Fiesta set, I don't feel like it works here either (although Fiesta is a lot better than this obviously). It's really under-detailed and the character may as well be a generic Roman soldier or something, because it's never utilized in the set. I do appreciate one days sets like this though, even if they aren't good, I can't exactly blame you for getting some inspiration and wanting a set out on actual halloween. It may have been good though if you just made the specials a more interesting base, which would allow you to flow into them later on even if you do have simple moves. Geto/Rychu made a set for a Roman Centurion that was good and had a similar power set to this character, without being an undead. This set was always going to struggle with the time restraint so you may as well have tried something really out there, I think.

It's always awkward commenting a set from your own movement and Chief Mendez I had plenty of time to preivew, where I gawped at how gruesome and in-character the writing was and the great concept. In practice though, this set is very broken and I feel bad for not paying enough attention later on to tell you that. The multiple tethers are very OP when used together and if not OP, annoying for the opponent, it's also simply not good to have so many inputs be tethers rather than attacks. Despite the fact he has this amazing body shape to utilize, you focus more on the fact he's really heavy with the tethers and that does make him fairly intimidating, but in a 1v1 setting it's just not fun to play against. Playing as this character would quickly devolve into trying to score a cheap KO through tethers, the up special and the obscenely powerful KO moves. The way the set works having fewer actual attacks plus the clunkiness of some moves where he's moving around the body in weird ways, it's a very clumsy and predictable set. It's not helped by a pretty vague description for a lot of moves. I can at least understand why this would happen on a character who has an awesome but really difficult body shape when you had another set to make.

Krauser is thankfully a good deal better than Mendez, it's a set that obviously took some inspiration from my Wesker set and does its own thing with the concept, and I would recommend returning to it to fix some of the issues, I could see it become votable for Warlord like Ganon 2.0 (which was right next to it on his rankings). Basically the problems now are that the smashes are just too clunky and the specials should be first. I also moved around my own set, Birkin, to put the specials nearer the start, I totally get why you did this but putting specials first will allow you to go make some really cool changes to the rest of the set. Despite having the tether and the injection as big things to play off... they really aren't played off by a lot of the moves. Just a token mention of them would be enough for some. Another idea I had was changing his close range moves, say using his knife, so that he has a secondary attack with his now revealed blade arms, that scales up as he injects himself more and more. It'd only take say, a paragraph describing another fairly simple additional part to these moves that sorely need it. This way it'd lend more usefulness to the injection outside of just the smashes. I also think that Warlord is right about the balance and numbers used in that section. All in all I don't think it'd take much to improve this to be a good set, I definitely think it's worth returning to for some edits.

Coming to Fiesta it's hard to say much when Warlord already covered everything. I would say I have a slightly more positive perspective on this set, as despite the fact it is running through the motions with the minions, I don't think it's entirely random where the effects happen. You do have some fun with for example the smashes repositioning or exploding the minions, the way you can change their behaviour slightly. The problem is that it doesn't go far enough or have any real strong point to it beyond what Olimar already does in his set. It might be okay if it was consistent through to the end, but the throw effects are very redundant. Basically the set gets out every single interaction it can muster with the minions, but the attacks themselves don't really take advantage of it themselves, even if they have a fitting effect for the input. I think one area that could be easily improved is the down special, as it really is awkward and doesn't really work into any of the rest of the set. Modes in general tend to be bad idea, as it tends to limit the character's moveset and make them very predictable, making them useless in an actual match.

I wasn't sure what to expect out of Daisy, but you surprised me with some ideas I hadn't considered to make it interesting, incorporating Peach's moveset as a formula for the specials, and in other places like the up throw and forward smash as some inspiration. The powers you gave Daisy are surprisingly inventive, such as summoning a giant ridable daisy or the use of crystals, it's not stuff I've ever seen incorporated in such a meaningful way. Generally the moves strike a good chord of making Daisy seem like an energetic tomboy compared to Peach, which is commendable when I don't think Daisy is even a good character, you manage to capture her very well in this set. The amount of material you get out of her is impressive.

I do have some problems with the set though, mostly the playstyle feeling pretty bland. It has elements of being a combo set, but I only really see this strongly in the counter special move and the crystal smash that essentially creates a wall to combo off, which mentions the down tilt as a move you can combo into itself. In spite of all these interesting and in-character props you've imagined, it doesn't get much out of it as a whole. This is in spite of very detailed move descriptions that go over plenty of interesting aspects incorporated from the engine, and I really could cite a dozen examples of stuff in this set where it references pretty obscure parts of the engine. But in the end, it doesn't particularly help the set. The main area this happens is in the specials, where it not only has these massive custom specials that are lavishly detailed, but the default ones are so focused on emphasizing the potential for follow ups or combos, ending up feeling like it's stating the obvious.

What this set probably needed was specials that instead of going into specifics about the follow ups or combo potential, did something more interesting instead, which is not far off when you do include these inventive props. Then later on you could use the actually pretty well executed moves to play off the specials more than just to say "this will combo in this way." It also reads as pretty painful to write on your end, even if it's a fairly easy-going read, as you keep adding to these moves but you could probably have stopped much earlier on. I get the sense there's some anxiety there to stand out, and anyone who's making their first or second set can empathize with that. I think for your style, you might want to look at sets like Trevenant for how to do a set that has plenty of technical details, but also plenty of meaty playstyle too.
 
Last edited by a moderator:

Tocaraca2

Smash Ace
Joined
Feb 22, 2015
Messages
557
Location
Wokingham
JamietheAuraUser JamietheAuraUser
I can't really see anything wrong with your Daisy moveset, just let us know when you add a playstyle section please, I'd really like to see it :)
But one thing I don't like is the fact that Prism Guard is basically just a tweaked version of Peach's toad counter, especially as you made it bounce her upwards in the air, and made it a multi-hit move with the hits being projectiles, like in Peach's.
Also I'm a bit confused with the order you put the moves, I would expect Back Throw to be after Forward Throw and not at the end of the throws list, and I would put Neutral Special at the start since Down Special doesn't really have anything that makes it deserve to be the first move in the moveset. These are just little nitpicky things and I like the set, it seems fitting for Daisy and it would be cool having her in Smash with that moveset, but I can't really imagine the superball on her. Also, well done for making customs, they added nice variety to the set and I can tell you put effort into them.
I'm still confused about the 'Sakurai Angle' though. I searched it upon Google but according to SmashWiki it's just 361*, which translates to 1*.
EDIT: Also, the Down Smash is pretty cool, you came up with nice ideas here. :)
 
Last edited:

Munomario777

Smash Master
Joined
Nov 18, 2014
Messages
3,253
Location
Charleston, South Carolina
3DS FC
0387-9596-4480
Switch FC
SW-8229-3157-8114

HAWLUCHA

"Hawlucha, the Wrestling Pokémon. Possessing an artistic way of executing its moves, Hawlucha takes great pride in its elegance. Although its body is small, its proficient fighting skills enable it to keep up with big bruisers like Machamp and Hariyama. With its wings, it controls its position in the air. It likes to attack from above, a maneuver that is difficult to defend against."

If Hawlucha can't get in Pokkén over a reskin of Pikachu (geez, it's the first game and the series and we're already seeing clones), it can at least get into a theoretical Smash Bros. moveset contest! So yeah, the Wrestling Pokémon, Hawlucha, joins the battle! Like the 'Dex says, Hawlucha likes to stay in the air, being a bird and all. So, keep that in mind.

Like always, this set is made for Smash 4 and all. Now then, let's get right into this moveset!

STATS

Hawlucha's stats are pretty unique as far as Smash Bros. goes. It's about as tall as Kirby, allowing it to evade attacks rather easily especially with a low crowch. Hawlucha has the full five midair jumps, but their height is about 1.5x Jigglypuff's midair jumps if the button is held; tap it instead to use a Jigglypuff-level jump. Its air speed is pretty crazy too, at 1.5x Yoshi's, and its aerial control is super-tight. However, Hawlucha has one glaring flaw as well as stats go: its weight. It weighs about as much as Kirby, to be precise, but a bit less. Hawlucha is also floaty normally, but its fast-fall is extremely quick. In short, Hawlucha is essentially Jigglypuff taken to its logical extreme, plus a rad fast-fall and a tad more weight.

As for performance on the ground, Hawlucha has a decent ground speed -- unlike Charizard, Meta Knight, and other fighters with wings, Hawlucha runs with his feet instead of flying above the ground. Hawlucha does have great traction, however, able to stop or turn on a dime by flapping its wings.

FLAVOR

Standing:

Hawlucha stands on the ground, in a fighting stance. It keeps moving, hopping a tiny bit on its feet, not unlike Little Mac.
Walking:
Hawlucha walks along the ground in a manner somewhat similarly to Captain Falcon. But a lot shorter, and not a realistically-proportioned human.
Dashing:
Hawlucha dashes forwards, its wings held back as it leans forwards. Its tiny feet move very quickly, and its face shows a determined, almost angry expression.
Crouching:
Hawlucha puts one "hand" of claws on the ground as it crouches down, while the other wing covers the bottom half of its face.
Jump:
Hawlucha leaps into the air, its wings held down to its sides. While falling, it extends its wings out to either side.
Midair Jump:
Hawlucha flaps its wings with great force as it spins around, gaining height.
Shielding:
Hawlucha covers its face with its wings.
Entrance Animation:
Hawlucha is released from a Poké Ball and strikes a fighting pose.
Up Taunt:
Hawlucha thrusts its wings down to either side while facing the camera, and lets out a fierce "Caw!"
Side Taunt:
Hawlucha leans forwards and holds its wing in front of it, almost like one of those red blankets that matadors use. It's even got the right color, which is pretty convenient.
Down Taunt:
Hawlucha strikes a pose, holding both wings forwards, and one above its head.

SPECIALS

Neutral Special - Tailwind
"The user whips up a turbulent whirlwind that ups the Speed stat of the user and its allies for four turns."

Hawlucha's first attack is Tailwind. After a half-second wind-up, Hawlucha flaps both wings forwards so that they touch, creating a strong gust of wind in front of it. The wind acts as a powerful, if brief, windbox, and also sends Hawlucha backwards at high speeds, surpassing even its top air speed. Like in the Pokémon games, this increases the speed of the user, as well as others. The move has very little ending lag, but can only be used once per midair session unless Hawlucha is hit. On the ground, Hawlucha doesn't move, but the windbox is stronger.

Tailwind can be used for a variety of purposes. Firstly, it's a great midair mobility tool, excelling at crossing large distances and extending midair combos. B-reversing helps a lot. It can also be used for edgeguarding; on the ground, it's super effective but only works on opponents near the ledge, and in midair, it's less effective but sends Hawlucha back towards the safety of the ledge.

Side Special - Aerial Ace
"The user confounds the target with speed, then slashes. This attack never misses."

After a moderate amount of startup where Hawlucha glows, gathering energy -- similarly to the move Sky Attack -- it flies forwards at blistering speeds. In midair, the distance and speed are similar to the Fox Illusion, although this attack can also be curved up or down -- curved all the way, Hawlucha will go about 1 SBB up or down by the end of the move. When used on the ground, the attack is slower, can't be curved, and doesn't travel as far, but has a bit less startup time. Regardless, upon making contact with an opponent, Hawlucha delivers a series of powerful, rapid spinning wing slashes that deal heavy shield damage, and have a similar animation to Falco's rapid jab, complete with finisher. Total, the attack deals 18% of damage and knockback that KOs horizontally at around 110%. The catch here is that if the attack misses, Hawlucha is left in a helpless state, and suffers heavy ending or landing lag depending on whether or not the move is used in midair.

Aerial Ace has quite a few potential uses. It's a great approach tool, as it beats out shields thanks to its heavy shield damage. However, opponents can also dodge the move by either moving or using a spot dodge or roll. The attack's best use, perhaps, is as a combo finisher after an attack, as the opponent will be in hitstun. Like the description says, in the hands of a skilled and wise enough player, this attack never misses. The move is also good for a quick recovery, as long as you don't miss the ledge!

Up Special - Flying Press
"The user dives down onto the target from the sky. This move is Fighting and Flying type simultaneously."

Hawlucha flies upwards a short distance, about the same as one of its midair jumps, and then enters a skydiving pose, limbs outstretched, diving downwards; the dive cannot be canceled, although Hawlucha can move horizontally during the dive. The trajectory of the travel is similar to Bowser's Flying Slam -- albeit with considerably less distance -- and landing on opponents will deal 13% and heavy shield damage. Grounded opponents are knocked upwards as Hawlucha bounces up with them, great for starting an aerial combo. Midair opponents, meanwhile, are brought down with Hawlucha, and then knocked upwards, damaged, and all that when they land. There's also a command grab at the beginning of the animation, right as Hawlucha takes off -- the effect is similar to Bowser's Flying Slam, but of course, it has the same damage/knockback/etc as before. Also, Hawluchacides are also a very real possibility, if tricky to achieve -- Hawlucha will be victorious in a last-stock situation if it has grabbed an opponent. Just hitting a foe while falling, though, has mixed results.

As the move's description states, Flying Press is good for both Fighting and Flying. When fighting, the move is great for pressuring opponents from above with its heavy shield damage and combo potential. It isn't all that quick, but Hawlucha's heavy influence on horizontal direction -- like Bowser's Flying Slam -- enables Hawlucha to read and chase opponents who try to dodge the move. It can also be a surprise grab option, in line with Hawlucha's wrestler motif. As for flying, the move does aid recovery a fair bit. While it isn't always the best option, it's the only real way for Hawlucha to recover vertically if its jumps somehow run out (except for an up angled Aerial Ace).

Down Special - Bounce
"The user bounces up high, then drops on the target on the second turn. This may also leave the target with paralysis."

Hawlucha rockets downwards at a blistering pace -- on the ground, this is preceded by a jump diagonally upwards like the Bowser Bomb or Yoshi Bomb, and it can be canceled into a jump. If it hits an opponent, Hawlucha will bounce upwards and deal a measly 5% and a bit of flinching. However, after the first bounce -- whether it be off of an opponent, item, surface, anything -- Hawlucha dives down again, this time at an even higher speed. The second hit will deal a good 10% of damage, damage shields nearly to the point of breaking, stun grounded opponents for a second, and spike midair opponents. Hawlucha will then bounce up again, free to combo the opponent. However, Hawlucha cannot use Down Special again until it lands on solid ground.

Bounce is a rather unique attack with a variety of applications. Firstly, note that Hawlucha maintains full aerial mobility and control during all phases of the move except the diving portions -- during which it'll retain momentum, but decelerate rather quickly. This allows it to fly around the stage while starting an attack -- being the bounce itself -- and chase opponents who attempt to escape. This is also a potent edgeguarding tool, albeit one that's tricky to land at the risk of a self-destruct, due to the second bounce's spike effect. Like in the Pokémon games, this attack takes a while to hit and is somewhat avoidable, but is pretty dang powerful if you manage to pull it off.

AERIALS

Neutral Aerial - Wing Attack
"The target is struck with large, imposing wings spread wide to inflict damage."

Hawlucha brings its arms onto its chest before outstretching them and entering a pose similar to the moveset's header image. This acts as a sex kick, with Hawlucha's whole body serving as a hitbox. Like other attacks of this kind, it'll start out strong but get weaker as the attack goes on. It'll last for one second, and deal 8~5% of damage and moderate knockback. The move will launch foes in whichever direction Hawlucha is moving -- mastery of Hawlucha's movement helps. I'll also take this time to point out that all five of
Hawlucha's aerials lack any landing lag at all, which works wonders for extending combos. This nair in particular is helped out by this since you can land during the move, hit someone with it, and then continue the combo! These types of moves normally have low landing lag anyway, but hey, every bit helps!

Forward Aerial - Flying Kick
Hawlucha, twisting to face the screen slightly, kicks forwards with one foot, the attack not having much startup lag. The kick is very quick, and has good reach, dealing 8% of damage with a clean hit and 5% with a late hit, and moderate upwards-forwards knockback either way. The animation is rather similar to Lucas's forward aerial, and if you've got some upwards momentum -- say, from a jump -- you should be able to use it to combo. At higher damage levels, it can KO an opponent, but if not, skilled use of Aerial Ace or Tailwind may be able to catch up with the knockback.

Back Aerial - Dropkick
Hawlucha performs a rather standard dropkick, facing the screen in a similar fashion to Mario's dropkick bair. The attack deals 9~6% of damage depending on whether it's clean or late, and it deals a bit more knockback than the fair, this time in a horizontal direction, although they'll also go down due to gravity. This move is a bit easier to follow up on, since Hawlucha doesn't need upwards momentum to chase the knockback, although horizontal movement is still required. With Hawlucha's mobility, this is no problem, especially with moves like Tailwind to help out at higher damage levels. Hawlucha can even chase foes down to the bottom corner of the blast line by creating a wall of pain, much like Jigglypuff. It's also a great spacing tool thanks to its quick startup and cooldown, plus its good range.

Up Aerial - Flip Kick
Hawlucha backflips and kicks above itself with both feet, making for a standard enough flip kick. It'll deal 5% of damage and a bit of upwards knockback, perfect for juggling. It's pretty quick too, allowing Hawlucha to use it for anti-air purposes. Heck, near the upper blast line, it can even be used to KO! The move's great coverage, like many flip kicks, makes it reliable to land. Fast-fall the move, and you may be able to get foes up into the air, which is a good thing.

Down Aerial - Wing Slash
Hawlucha faces downwards and brings its right wing to its left side and vice-versa, and then brings them back to their regular sides in a swift slash that hits below Hawlucha. It has rather quick startup and hits a decent distance below Hawlucha, and will deal 7% of damage. In the center of the hitbox, it'll spike opponents, but otherwise, it deals a bit of knockback to either side. The spike hitbox is pretty tricky to land, but devastating if it hits! The move is slower than Hawlucha's other aerials, but at the end of an aerial combo, it's a great finisher!

GRAB GAME

Grab - Foot Grip
Hawlucha leans back and begins to flap its wings, gripping opponents with its feet while hovering in midair. The grab has normal range, as well as decent speed (it's quicker than you'd think). Also, Hawlucha can use its grab in midair! It won't flap its wings for this version, instead retaining its aerial momentum, and will latch onto opponents for the grab state in midair or on the ground. It's also a tad quicker in midair than it is when grounded, since Hawlucha doesn't have to flap its wings or leave the ground. On grounded opponents, it acts as you'd expect, with Hawlucha clinging onto the foe. On midair foes, though, Hawlucha will cling onto them as the opponent retains their midair momentum, and the foe will fall at their own falling speed. (Note that the version of the grab depends on whether or not the opponent is in midair, not Hawlucha!) It's kinda sorta like Diddy's Monkey Flip grab.

This unique midair grab can be used to get foes below the stage and then stage spike them with a throw, for example, in addition to other potential tactics! However, it should be mentioned that Hawlucha can only grab a foe once in midair -- it'll have to land in order to regrab. For both versions of the grab, the pummel has Hawlucha swipe at the opponent with its wing claws (alternating left-right-left...) for 1.5% of damage. The pummel is super-fast too, allowing Hawlucha to really bring on the hurt! However, due to its small size, Hawlucha's grab is noticeably easier to break out of. Finally, Hawlucha can grab any foe out of Aerial Ace (sspec) by holding grab during the startup and/or travel -- the animation changes a bit, and there's a distinctive voice clip from Hawlucha. It's effective for getting in from afar (particularly in midair), although it still has the risk in the helpless state on whiff.

Up Throw - Sky Drop
"The user takes the target into the sky, then drops it during the next turn."

This is perhaps Hawlucha's most useful throw. Hawlucha grips the opponent tightly with its feet and flies up with them at high speeds, travelling a total distance of 6 SBB upwards. Then, Hawlucha simply... lets go. The opponent is dropped down, falling in a tumbling state. The throw has pretty much no ending lag, and you know what this means! With its high fast-falling speed, Hawlucha can catch up with the opponent below it in order to lay down the hurt with one of its signature aerial combos! Since it can get so high up to the blastline, it might even be possible to land a KO with an Up Aerial juggle with enough finesse and skill. This is a very powerful tool to be sure, and can even be used as a last-ditch recovery.

Forward Throw - Thrust Kick
Hawlucha bends its legs at the knees and then extends them, thrusting them forwards to effectively drop kick the held opponent. It'll deal 5% of damage and a fair bit of forwards knockback, and this throw has a few uses. Hawlucha's high air speed allows it to chase with an aerial follow-up. The throw is also good for KOs offstage near the blast line or for stage spiking, or just creating some space between you and the opponent.

Down Throw - Tackle
"A physical attack in which the user charges and slams into the target with its whole body."

Hawlucha puts the opponent on the ground below it and then enters a skydiving pose similarly to the dive in its Flying Press move. Hawlucha slams down onto the opponent, tackling them with its body, dealing 6% of damage and moderate upwards knockback. It's a good combo starter, like many down throws, and in midair, it'll instead deal a meteor smash! It's not the most powerful meteor smash, mind you, but it can be useful in quite a few scenarios. If you're a distance below the ledge, it can be a guaranteed KO!

Back Throw - Under and Over
Hawlucha begins spinning around rapidly, performing front flips in quick succession and bringing the opponent along for the ride! Aside from giving them the worst headache ever, the throw also deals 5% of damage when Hawlucha releases the opponent, dealing good backwards-upwards knockback. It won't KO too early onstage, but offstage, it can kill super-early, whether it be by going close to the blast zone or getting a stage spike!

STANDARDS

Jab - Claw Swipe
Hawlucha swipes once with its right wing claws, once with the left, and then spins around rapidly much like Falco's rapid jab before finishing off with a final uppercut swipe. Those deal 3%, 3%, .75%, and 4% respectively, and if the rapid jab is skipped, it'll go right to the finisher. This jab is pretty quick, and deals a decent amount of damage; it's a good, quick option after you, say, use a falling nair to get both yourself and the opponent on the ground. It can also lead into a dair rather effectively, if you knock a foe over the ledge. You'll need to be quick, though!

Forward Tilt - Flying Dropkick
Hawlucha starts flapping its wings and squats its legs, leaning back. It leans backwards 90 degrees, on its back and hovering over the ground, turns to face the camera, and extends its legs to deal a forceful dropkick. The kick deals an impressive 13% of damage, KOs at around 150%, and can be angled up or down. While the kick has quite a bit of startup lag, the attack's power helps make up for it. Hawlucha will also keep moving if the move is used while walking, making for a good approach tool. Hawlucha can even go off of ledges during the move, allowing for some edgeguarding opportunities. It also allows you to follow up near the ledge effectively.

Up Tilt - Rising Spin
Hawlucha leaps into the air, aided by a flap of its wings, spinning around while rising about its own height off the ground. It's a multi-hit move, with three hits of 4% each for a total of 12% all said and done. It'll deal moderate upwards knockback, too. This attack is fairly quick to start up, making it a good option when in a pinch, and when the move ends, Hawlucha is left in the air, allowing it to start an aerial combo -- aided further by the move's quick ending lag. Like the Forward Tilt, this attack can be used while walking for mobility, and go over the ledge too. Try dragging foes offstage to set up an edgeguard, or meteor smash kill!

Down Tilt - Low Kick
"A powerful low kick that makes the target fall over. The heavier the target, the greater the move's power."

Hawlucha leans backwards, sticking its claws into the ground behind it for leverage, and then thrusts one foot forward with great force. While this attack is rather slow for a tilt, it will deal a surprisingly hefty 13% of damage. It won't deal much knockback at all, though; the kick has a varying effect based on the opponent's weight. Heavier foes will, of course, take barely any knockback, being knocked right into a prone state instead. Lighter ones are knocked into the air, but the move has little knockback and thus little hitstun. Like in the Pokémon games, the attack has more power -- through follow-up potential from the prone state -- when used on a heavier opponent. It's still good on lighter ones too, though, decent for starting aerial combos. That prone state can even be activated if you hit a non-heavyweight at low damage.

Dash Attack - Wing Attack
Hawlucha leaps into the air, wings spread like the nair, and slams into opponents. It'll deal 10% of damage, as well as moderate upwards-forwards knockback, although a late hit will only deal 7% and little knockback. After the attack ends, Hawlucha lands gracefully on the ground, although the attack isn't particularly quick to start or to end. This is a good approaching option, and can start an aerial combo to boot -- if you land the attack successfully, it can be canceled with a jump. It can even go over ledges like the Up and Side Tilts!

SMASHES

Forward Smash - High Jump Kick
"The target is attacked with a knee kick from a jump. If it misses, the user is hurt instead."

After kneeling down during the charging sequence, Hawlucha leaps forwards into the air and then performs a powerful knee kick at the apex. A clean hit, right when the knee is extended, will deal a hefty 19~26% of damage and KO at around 100~70%, but a late hit will deal only 15~21% and moderate forwards-upwards knockback. It's great for KOing if landed properly, but it has major ending lag -- Hawlucha kneels on the ground, much like the landing lag for Captain Falcon's knee. So while it's a rather powerful attack and doesn't take long to come out, if it misses, Hawlucha will be hurt big-time by the huge ending lag. Hawlucha can lead into this move effectively from an aerial attack, with some skill.

Up Smash - Fly
"The user soars and then strikes its target on the next turn."

Hawlucha crouches down, facing the camera, and when the charge is released, it flies up into the air at high speeds. The height and damage of this initial rise will vary with charge; uncharged, Hawlucha rises a moderate 3 SBB with the initial hit dealing 5% of damage. Half charge has 5 SBB and 7%, and a full charge has Hawlucha go right off the top of the screen! Oh, and it'll deal 10% of damage. Hawlucha will hover for a moment after reaching the peak, so if it isn't fully charged, Hawlucha can be hit at this point.

After flying upwards, Hawlucha will dive bomb downwards, going through soft platforms if you hold down on the control stick, dealing 15~21% of damage and KOing at 100~70%. What's more, Hawlucha can even move side to side before divebombing back down, similarly to the Warp Star item! It's only concealed if you fully charge the move, but this is still a powerful option nonetheless, if a telegraphed one. It can be good for dodging attacks, acting as a pseudo-counter; alternatively, use it to follow up on moves with vertical knockback. If you don't keep holding down on the control stick, Hawlucha will stop diving when he hits an opponent, which can start a chain of attacks! The initial hitbox can combo into the falling, KOing one, but it's not guaranteed -- the opponent can DI sideways. If they fail to DI, however (the move may be too quick to react to), this is a deadly KO option! There's not even time to airdodge, geez.

Down Smash - U-Turn
"After making its attack, the user rushes back to switch places with a party Pokémon in waiting."

After crouching down during the charge, Hawlucha flies forwards along the ground at blistering speeds, traveling about 1.5 SBB. It then makes a u-turn, and flies right back to where it started. The move will deal a consistent 8~11% of damage. The angle of the knockback will vary; when Hawlucha is flying forwards at the opponent or retreating back to its original spot, it'll deal a rather normal amount of knockback in that direction. However, hitting right when Hawlucha makes the turn will send grounded opponents up into the air, or meteor smash midair opponents! Oh yeah, almost forgot to mention: this move can go over ledges for edgeguarding and such. Combined with the meteor smash, this can be great for keeping foes away from the ledge with proper spacing! On the ground, though, it's good both as a safe poking tool -- being a bit faster than the down tilt, and having great range -- and an aerial combo starter. Its quick startup also makes it effective when used after a low-to-the-ground aerial.

MISCELLANEOUS

Final Smash - Sky Barrage
Hawlucha got the Smash Ball! Hawlucha grabs the opponent -- who must be in front of Hawlucha, or else the move will fail -- and then brings them up to the top center of the screen with Sky Drop. It'll then slash at the opponent with a bunch of wing attacks, kicks, and stuff, dealing 25% of damage in total. Finally, Hawlucha slams down with the opponent underneath itself using Flying Press (only the falling bit), and on contact with the ground, they'll be dealt 10% of additional damage and upwards knockback that'll KO at around 90%. Of course, landing on a platform will make this KO much earlier. It's a great finishing move, and can tack on some damage as well. On a badly designed custom stage, it's a sacrificial KO, which may or may not be good (although the foe will be KO'd first, just like Flying Press itself).

PLAYSTYLE

"Hawlucha, the Wrestling Pokémon. Possessing an artistic way of executing its moves, Hawlucha takes great pride in its elegance. Although its body is small, its proficient fighting skills enable it to keep up with big bruisers like Machamp and Hariyama. With its wings, it controls its position in the air. It likes to attack from above, a maneuver that is difficult to defend against."

Whereas Jigglypuff is classified as a "glass cannon," Hawlucha can be seen as a "paper machine gun." Its attacks come rapid-fire and it has a very aggressive fighting style, but it's perhaps even easier to KO thanks to its extremely light weight and short reach. Hawlucha will always prefer to be in the air, whether it's against a midair opponent or one on the ground. Its midair jumps are higher than Jigglypuff's, encouraging a style that focuses on being above foes. Against grounded opponents, Hawlucha's maneuvers can be very difficult to defend against; Flying Press and Bounce deal huge amounts of shield damage, and it can even grab in midair (both with a normal grab input, or with a special move like Flying Press or Aerial Ace), boosting its midair offensive game even further! Once Hawlucha has gotten the opponent up in the air with an attack, grab, or other means, it can really go to town. Great aerial mobility, quick aerials, and amazing finishers in Dair, Side Special, and throws give Hawlucha the best aerial combo game in the, well, game! Juggles, walls of pain, combos, Hawlucha has it all!

Hawlucha is also very proficient and efficient at edgeguarding. Tailwind is an excellent way to keep opponents away from the ledge, and Hawlucha's various aerials and outstanding recovery allow it to get the deepest of edgeguards with no fear! Grabbing opponents offstage is also a good way to get rid of foes, as Hawlucha can meteor smash, stage spike, or straight up KO foes offstage from a grab. Recovery is also a breeze, with fast movement tools, amazing air stats, and the huge danger of an aerial grab or combo to fend off edgeguarders. Even though Hawlucha's element is certainly the air, though, it can use grounded combat effectively to extend chains of attacks, finish foes off, and perform other neat tricks. The lack of landing lag really drives this home. I mean, you'll need to land eventually to refresh your jumps and Tailwind, so might as well make the best out of it. Stay in the air most of the time, but don't be afraid to go to the ground for mix-ups, combos, and kills.

With that said, Hawlucha is not at all without its weaknesses. The first, major one is most certainly Hawlucha's light weight; while its recovery skills allow it to survive any non-lethal blow, not that many blows will end up being non-lethal. This can be a problem, since Hawlucha thrives on being in the air -- closer to the blast zones. This reliance on being in the air is another weakness of Hawlucha's, thanks to the core mechanics of Smash. It can't shield in the air, use smash attacks, or anything, although it does have an aerial grab, and effectively two command grabs. Again, be sure to land whenever you need to. Hawlucha's small size is a bit of a double-edged sword, since it can dodge attacks more easily, but its attacks also lack reach, so it must get up close and personal to attack -- a risky endeavor for a fighter of Hawlucha's weight.

Overall, Hawlucha is a fighter that excels in the air, possessing an unprecedented aerial combo game, recovery, and edgeguarding prowess, but its short reach and low weight make Hawlucha a very delicate character to play. It can -- and should -- be played with style, and Hawlucha's aerial mobility makes playing as it almost like a form of art, a dance even. Don't let its elegance fool you, though; Hawlucha is more than powerful enough to take on the best that Smash has to offer!
As always, feedback is greatly appreciated, and I hope you enjoyed the set! :)

Like what you see? See some more over at my Make Your Move Hub! :D
 
Last edited:

allison

She who makes bad posts
Joined
Jan 25, 2014
Messages
5,138
Location
Maple Valley, WA
NNID
crazyal02
3DS FC
0216-1055-4584
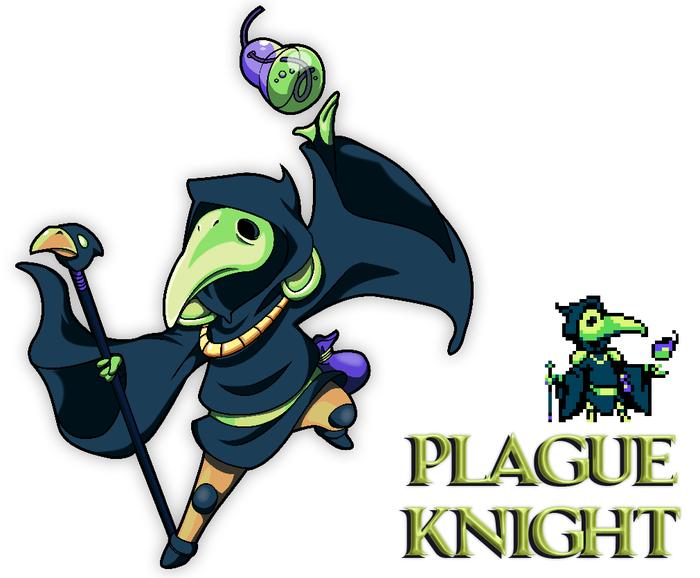
Plague Knight


Engine: Smash 4. Note that Smash 4 Stage Builder Blocks (SBBs) are considerably smaller than Brawl ones. Created for the Halloween Iron MYMer.

The bomb is mightier than the sword! Hailing from Shovel Knight, Plague Knight is the black sheep of the Order of No Quarter. Make no mistake: he may be a master of trickery, but his powerful explosives are no mere trick!


Stats

Size: 5
Weight: 4
Ground Speed: 4
Jump: 6
Air Speed: 7
Fall Speed: 3
Traction: 3


Plague Knight's stats are mostly average, though his low fall speed and traction mean you'll have to be careful about your movements and his weight isn't exactly doing him any favors either.


Specials

Neutral Special – Standard Bounce Black Powder Bomb
Plague Knight lobs a Black Powder Bomb! It bounces along the ground. If thrown while grounded it goes in a shallow arc, and if thrown while in midair it goes diagonally downward. On contact with an enemy, it explodes with a blast 1.5 SBBs in diameter, which deals 9% and KO's at 200%. If it doesn't hit an enemy, it explodes after 1 second. Has 5 frames of startlag and 10 frames of endlag. Plague Knight can have 3 of these out at once.

Side Special – Whirl Remote Cluster Bomb
Similar to Zelda's Side Special. Hold the button and the bomb flies forward for a maximum of 15 SBBs. When you let go of the button (or it reaches the max distance), it explodes, dealing 14%-25% damage and KO'ing at 200%-165% depending on distance.

Up Special – Basic Burst
Works differently from most recoveries. Plague Knight begins charging aura around him. The charge is storeable, similar to Samus' Neutral Special. Once Plague Knight has charged for 1 second, he stops charging and begins flashing. When in this state, if this move is used, an explosion is created around Plague Knight, launching him upwards and forwards! The explosion deals 8% damage and KO's at 175%. Notably, it doesn't put Plague Knight into helplessness when used, but he'll have to recharge to be able to use it again.

Down Special – Vat
Plague Knight places a large (roughly as tall as he is) Vat in front of him. It acts as a solid wall. If the Down Special is used again, the Vat explodes, generating an explosion slightly larger than the Vat itself, dealing 15% damage and KO'ing at 170%. The explosion only harms opponents. Note that triggering the Vat has 15 frames of startlag. This move cannot be used in midair. There are certain other methods of detonating listed below; the explosion in such cases has the same properties listed here unless noted otherwise.

Grounded Attacks

Jab – Staff of Striking
A three hit jab involving quick strikes with a staff. Each hit respectively deals 2%, 1%, and 4%. If used to attack the Vat, said Vat will become cracked. When cracked, the Vat will instantly explode when hit with ANY attack, including attacks from opponents. This explosion behaves the same way as when the Vat is detonated with the Neutral Special, except that it is also capable of dealing damage to Plague Knight rather than just his opponents.

Dash Attack – Fleet Flask
Plague Knight dashes forward 6 SBBs, similar to Fox's Side Special. Deals 3% damage and sends opponents sideways. If used on the Vat, it's launched forward 8 SBBs and explodes.

F-tilt – Staff Swipe
Plague Knight slashes his staff downwards, launching opponents forward. Deals 7% damage.

U-tilt – Staff Stab
Plague Knight thrusts his staff upwards, dealing 10% damage and launch opponents upward. Kills at 200%.

D-tilt – Bait Bomb
Plague Knight places a Bait Bomb on the ground in front of him. It rushes forward and is affected by gravity. When it hits a wall or an enemy, it explodes, dealing 11% damage and flinching. If it hits a Vat, its explosion launches the Vat upwards 8 SBBs, and the Vat explodes in midair.

Smashes

F-Smash – Smoke Bomb
Plague Knight throws a smoke bomb forward 8 SBBs. It erupts into a cloud of smoke 4 SBBs in radius. How long the smoke lasts depends on how long the move is charged; at no charge, it lasts .5 seconds, and at full charge it lasts 2 seconds. Unfortunately, the smoke isn't thick enough to be effective for hiding in, but it deals constant damage at a rate of 4% per second to any opponent foolish enough to dwell inside it! The smoke doesn't harm Plague Knight, so he can exploit it for stage control as he pleases. Note that only one can me onscreen at a time, and if Plague Knight tries to use this when smoke of a smoke bomb is out he instead does a punch that deals 1% and flinching.

U-Smash – Leech Liquid
Plague Knight's staff is magically coated in Leech Liquid and glows red. He swings it upwards in an arc. The attack deals 5%-20% depending on charge and KO's at 140%. Notably, Plague Knight is healed by however much damage the attack dealt to his opponent.

D-Smash – Staff Burst
Plague Knight slams the tip of his staff to the ground, generating a small explosion that deals 13-25% and KO's at 120%. An effective way of ending an opponent.

Aerials

N-air – Spin Burst
Plague Knight spins head over heels, surrounded by energy, dealing 4 hits of 2% damage and flinching followed by a hit that deals 3% damage and KO's at 200%.

F-air – Bullet Burst
Plague Knight creates an energy blast in front of him, with infinite range and the speed of Samus' Charge Shot. Deals 5% damage and flinching.

B-air – Staff Spin
Plague Knight swings his staff behind him, dealing 9% damage and KO'ing at 150%.

U-air – Staff of Surging
Plague Knight stabs his staff upward with a purple aura, dealing 6% damage and KO'ing at 200%.

D-air – Frost Burst
Plague Knight throws an icy projectile straight downwards. It's slightly faster than Samus' Charge Shot, and deals 4% and KO's at 250%.

Grab

Plague Knight's grab is basic; no fancy stuff here. Range is similar to Mario's grab.

Pummel – Whack!
Plague Knight whacks the opponent with his staff, dealing 2%. Inelegant, but effective.

F-throw – Cluster Powder
Creates 3 orbiting bombs around the opponent that explode over time. The first one explodes immediately, dealing 3% damage and knockback that would KO at 150% if uninterrupted. The second bomb explodes 20 frames later, dealing 2% and the same amount of knockback in the opposite direction. 10 frames after that, the third bomb deals 4% damage and KO's at 120%.

B-throw – Sparkler Powder
Electrocutes the enemy, dealing 3 hits of 2% damage and flinching, and one last hit dealing 3% damage and KO'ing at 180%.

U-throw – Sentry Fuse
Plague Knight throws the opponent upward (sending them a foxed distance of roughly 6 SBBs) and creates a magical Sentry that homes on on them. On contact, the Sentry explodes, dealing 8% damage and KO'ing at 150%.

D-throw – Berserker’s Brew
Plague Knight drinks the Berserker's Brew, briefly gaining super strength! He lands a solid punch, dealing 12% and KO'ing at 115%.

Final Smash

Serum Supernus
Plague Knight produces a cauldron, which glows an ominous green color. Suddenly, it generates a massive explosion with a radius of 10 SBBs! The blast only hits once, but cannot be blocked or dodged. It deals 50% damage and KO's at 75%.

Playstyle

When your opponent has low damage at the beginning of a match or stock, it's wise to stay back and attack with explosives. There are countless setups to be had between the two bomb projectiles, the various valuable Vat combinations, and Plague Knights other ranged attacks. String together combos with the distance-based gadgets at your disposal to rack up damage, and use aerials and throws to keep opponents away!

Once the opponent is ripe for KO'ing, it's time to get in close! Use Vats and Smoke Bombs to control the stage and box your opponent in, then close in for the kill with a D-throw or D-smash!

Author's Comments

Jeez, I haven't made one of these since MYM 15! I cumulatively took only a few hours to make this set. It's not as detailed or balanced as I'd like it to be, but I felt it was important to just get a set out so I could get back into the groove, and the Iron MYMer deadline proved to be a useful motivator. I think that feedback from others would be a more useful way to balance and improve the set than my aimless uninformed tinkering, so be sure to comment on this set and let me now how it can (and should) be improved!
 
Last edited:

Tocaraca2

Smash Ace
Joined
Feb 22, 2015
Messages
557
Location
Wokingham
Alica Vassin true combos
Just thought I'd get this out of the way, next I'm going to make customs and then I'll be done with Alica Vassin and will start Akullotsoa.

These combos involving aerial follow-ups will have to be shorthopped at low percents and fullhopped at mid percents.

Up Tilt - Neutral Air (works from 10-50%)

Up Tilt - Up Air (from 15-60%)

Up Tilt - Up Smash (15-35%)

Sweet Down Tilt - Neutral Air (0-20%)

Sweet Down Tilt - Shorthop Forward Air (0-50%)
Only the claw hitbox of F-Air has enough range to be guaranteed after Down Tilt, the somersault hitbox will not, unless you run forward more, which by the time the hitbox comes out it will not be guaranteed.

Sour Down Tilt - Sweet Down Tilt (any%)
Only works on certain characters, like Ganondorf's Flame Choke - Down Tilt combo. Specifically on mid-heavyweights.

Sour Down Tilt - Sweet Down Tilt - Shorthop Neutral Air (0%)

Sour Down Tilt - Sweet Down Tilt - Shorthop Forward Air (0-45%)

Sour Down Tilt - Down Smash (any%)

Sour Down Tilt - Side Smash (any%)
Doesn't work on slim characters. It works on Meta Knight and Wario but not on Wii Fit Trainer or Zero Suit Samus.

Dash Attack (short range) - B-Reversed Fireball Rapids (0-60%)

Dash Attack (medium range) - Turnaround Side Tilt (0-35%)

Dash Attack (medium range) - Turnaround Side Smash (0-40%)

Dash Attack (mid/long range) - Neutral Air (5-70%)

Dash Attack (mid/long range) - Up Air (10-80%)

Dash Attack (long range) - Up Smash (10-45%)
Technically you could get an Up Smash after hitting a mid-range Dash Attack however you would have to dash and then immediately Up Smash, which is quite hard to do quick enough for it to be a true follow-up.

Down Throw - Up Smash (0-15%)

Down Throw - Neutral Air (0-50%)

Down Throw - Up Air (5-60%)

Down Throw - Footstool (0-45%)

Down Throw - Footstool - Down Air (0-45%)

These are a lot of combos, right?
Well, no. At least not compared to other chars. She has an average amount of true combos. While you could argue that having technically 5 combo starters is more than average, Dash Attack is the only really good one. Up Tilt only has 3 follow-ups and you have to act very fast afterwards, and it has significant start lag as well, making the move itself hard to hit with. Sweet Down Tilt only has 1 reliable follow-up and can be very hard to connect with. While Sour Down Tilt can also be a bit hard to connect, it has guaranteed follow-ups at any percent, however the only consistent one is Down Smash, which uses up a lot of Fire Power. The best one after Sour Down Tilt is Side Smash but that doesn't work on lightweights, making her matchup quite a bit worse against them. Dash Attack is definitely the best combo starter however hitting it from close range limits your follow-ups quite a lot, however it does true combo into Fireball Rapids which is very good. Down Throw is OK for combos but doesn't have that much hitstun and notably high knockback scaling, making it useless at higher percents.
Alica Vassin's Up Tilt does not combo into itself, neither does her Up Air. I may have talked about her juggling in the set itself but Up Air does not combo into itself, it only strings.
She does have lots of good mixups though.
Forward Throw - Fireball Rapids is almost guaranteed, but they can shield/dodge afterwards. Shielding is a bad idea of course, and sidestepping can be risky because they will probably get hit by another fireball after the sidestep, same with rolling backwards. Rolling forwards will potentially get you punished. Their best option would be to jump or use a reflector, or play as Link and let the Hylian Shield do the work.
Forward Throw - Flame Waves is a good option too, but it allows quite a lot of time for the opponent to get out of the way, so don't be relying on it too much.
Side Tilt - Dash Attack can catch opponents off-guard, but it is not a true combo and should not be treated as one. Side Tilt has been nerfed in patch 1.1.2 and has more end lag.
Up Tilt - Up Tilt - Up Tilt is actually pretty good, but it's not guaranteed. If the opponent airdodges then they will eat a punish, however they can DI away and jump to escape.
Customs for Alica Vassin are coming next. Thank you for reading, there may be more good strings but I feel like I've done enough here.
 

Tim the Enchanter

Smash Rookie
Joined
Nov 12, 2015
Messages
1
Well, I didn't expect the Spanish Inquisition...

NOBODY EXPECTS THE SPANISH INQUISITION!


From Monty Python's Very own Flying Circus, we have the famed Spanish Inquisition!
This is represented by one red cloaked member, the one wearing the hat, but for some of his specials, he summons other members of the spanish inquisition!

Edit: Added Taunts and a Dash Attack

Size: About as tall as Link, but is a bit taller thanks to his hat, so 6/10.
Weight: He's a little on the average side of weight, so he's a 5.5/10.
Walk Speed: He's a wee bit sluggish, but not as slow as Robin, so a 2.5/10.
Run Speed: But while running, he can be quite quick! 6/10.
Air Speed: He's rather slow in the air, which can be quite a problem. 3/10.
Fall Speed: He also falls quickly. 8/10.
Attack Speed: He can do a lot of punches in a short time, so 7/10.
Attack Power: He is mediocre in terms of power, though. 3.5/10.
Traction: Did the Spanish Inquisition take an unexpected visit to the oil factory? 1/10.

Attacks:
Standing A combo: Does three punches in succession.
Side- Tilt: Thrusts with a rack.
Up Tilt: Does an uppercut with a can of spam spam spam spam baked beans and spam!
Down Tilt: A rather boring kick, but it has decent range.

Dash Attack: Does a jumping attack similar to Link, but with a dead parrot.

Neutral Air: Does a simple punch. Nuff said.
Forward Air: The fish again.
Back Air: Does a kick that goes out almost instantly.
Down Air: Drops a can of spam. It will fall til it hits the ground.
Up Air: Swings a tennis racket upwards.

Side Smash: In preparation, this Spanish Inquisition guy holds a fist in the air like a Scotsman, then punches to let go of the remaining influence of the blacmanges.
Up Smash: Summons two of his fellow members to do additional uppercut punches, one after the other.
Down Smash: Gives the target an initiation of getting hit in the head classes, first in front, then in back.

Now for the special moves:

B-Neutral: FETCH... the CUSHIONS!
He throws a cushion like a projectile. Unlike most other projectiles, this projectile moves fast and obeys gravity. If you hold a direction input as he throws the cushion, you can change the trajectory!
If someone is close to him, he instead hits the unfortunate victim with decent power almost instantly. Also, due to being a physical projectile, it can't be absorbed or reflected by those pesky psi absorbers and reflectors!
Also, it can cancel a single projectile in flight, but it will slow down upon doing so.

Side-B: FETCH... the COMFY CHAIR!
He summons a fellow member of the Spanish Inquisition to bring forth a comfy chair and push it a short distance. This is not only a good way to get rid of any projectiles, but it does great damage if it hits someone, especially if used from the air. The chair also acts as a "wall" of sorts, preventing other characters from passing through.

Up-B: THE LARCH.

A larch tree spontaneously appears, and the guy climbs it for recovery. It springs up and is a very tall tree, allowing for good recovery and decent damage. However, if you don't climb the tree by holding down B, the guy will cut it like a crossdressing lumberjack!

Down-B: We demand..... ANOTHER SHRUBBERY!

Another member of the Spanish Inquisition is summoned and plants a shrubbery in seconds! If another player steps on the shrubbery, he/she/it will continually take damage. However, only 1 shrubbery can exist at once. It also prevents other ground-based specials, like Villager's Tree, from appearing.

Final Smash: The Holy Hand Grenade of Antioch
The guy will summon both of his fellow members of the Spanish Inquisition to prepare the grenade, which is then thrown and deals a ton of damage in a large explosion!!!!

Taunts:

Up Taunt: An old man runs up next to him and says "Its." and then runs away.
Down Taunt: Two of his cronies come and the main guy says "NOBODY EXPECTS THE SPANISH INQUISITION!"
Side Taunt: A man walks up and says one of the following, reading from a Hungarian Phrasebook:
"I will not buy this record. It is scratched!"
"My hovercraft is full of eels."
"I am no longer infected."
"Drop your panties, Sir William, I cannot wait til lunchtime."
 
Last edited:

n88

Smash Lord
Joined
Oct 10, 2008
Messages
1,547
Hawlucha
Beware! This comment represents my (too) lightly edited thoughts as I was reading, not any focused attempt at criticism. Be ready for a rambling, nitpicky comment.

Having never closely looked at Hawlucha's design before... Hawlucha's beak isn't its mouth? Weird.

Anyhow, we're here to talk about the actual moveset. Let's get into it. I've been AWOL as of late, so I don't think I've read many (any?) of your previous works. Is it typical of you to throw in the "Flavor" section before any of the actual moves? I actually kinda like it as a signature thing, but the descriptions of Hawlucha's animations could stand to be a little more robust. There's a little too much "striking a pose" going on here. If you're gonna do a section like this for flavor, gimme a little more flavor, darn it. Especially if you're doing it at the start of the set. Putting it in that position makes it your thesis statement on Hawlucha's behavior and right now it reads a little bland.

Anyhow again, onto the meat of the set. The Specials are refreshingly pragmatic here. I'm a bit of a dinosaur, so I couldn't tell you what's in vogue these days but in the MYMs I remember best, most fighters entered helpless state either after five seconds of free flight or not at all. I did have a couple minor points of confusion in the Specials, though. Can Hawlucha attack during Bounce? I think not, because it's not mentioned elsewhere, but the line "This allows it to fly around the stage while starting an attack" in the second paragraph had me thinking otherwise. Also, how helpful can Tailwind really be with extending aerial combos? Is Hawlucha constantly launching people behind him?

I like Hawlucha's mobility options in the tilts. I also like that in your usage of Pokemon moves, you're willing to abstract some details of the Pokemon move descriptions. For example: Down Tilt's Low Kick being more useful against heavier foes instead of having some weird damage bonus against fatties.

A couple points confused me on the Up Tilt. Can fighters normally up tilt while walking? I didn't think that was really a logistical possibility. Also, is his entire body the hitbox for the attack?

That Up Smash is positively radical here. It might not stand out in a more fantastical set, but Hawlucha has thus far been a pretty restrained vision of Hawlucha in Smash. A Smash that takes you all the way off the screen? Absurd! It really does feel more like a Special. Nice interpretation of Fly, though.

The Aerials surprised me a little bit, here. They're very functional, bread-and-butter type moves, which makes sense. But what with them being held off until so late in the set (on a bird, no less), I guess I was expecting something a little more dynamic.

Up Throw had me thinking about potential exploits, but you did kill those dreams at the end with the disclaimer about how Hawlucha can only grab an enemy once per (their) airtrip. That probably should have been mentioned in the actual grab, though.

In the end, I'm not totally convinced that Hawlucha wants to stay in the air "as much as possible". For certain, that's where it's in its element, but I feel like there's some fun in its ground-to-stage transitions that the playstyle section overlooks.

Hawlucha is fun and functional. I have to admit, it never hooked me like I was hoping it would, but you didn't do bad here. Keep up the good work. (Anything else of yours you'd recommend perusing, by the way? I know you're pretty darn prolific, so if you've got any sets you're really pushing as your big thing, clue me in)

Nano-Nitpicks that didn't even deserve a place in the main comment with all the other nitpicks:
Centering is fine for short blurbs, but it reads a little weird for entire move descriptions.

If you're not going to talk about usage or how it fits into the context of other moves or how it compares to other moves of its type, don't tell me an attack deals decent damage. The Jab already says exactly how much damage it does. By God, I'll decide for myself if that's a decent amount of damage or not.

I was a little disappointed that you didn't try to explain how U-Turn could be used in the same manner as its Pokemon counterpart. I've really been enjoying the little on-the-nose justifications of the gameplay abstractions here, like in "Hawlucha will be hurt big-time by the huge ending lag" and "attack has more power -- through follow-up potential from the prone state -- when used on a heavier opponent". I can only imagine those being read with a little pause for comedic effect. This is more rambling aside than nitpick, but it felt out of place in the comment, so it was banished to the netherworld.

As someone who's fallen victim to this myself, the "no landing lag" wrinkle introduced in the Neutral Aerial feels a bit like an attempt to beef up a "boring" move by introducing a new mechanic for a whole lot of moves. I don't think that's the case, because it's a pretty subtle thing and it's a mechanic that makes thematic sense for Hawlucha. So... no problem here, but the thought did cross my mind, so just consider this a handy PSA for the future.

"Miscellaneous"? I think by definition, a singular thing cannot be miscellaneous. This may be my smallest nit to pick.
 

Munomario777

Smash Master
Joined
Nov 18, 2014
Messages
3,253
Location
Charleston, South Carolina
3DS FC
0387-9596-4480
Switch FC
SW-8229-3157-8114
Hawlucha
Beware! This comment represents my (too) lightly edited thoughts as I was reading, not any focused attempt at criticism. Be ready for a rambling, nitpicky comment.

Having never closely looked at Hawlucha's design before... Hawlucha's beak isn't its mouth? Weird.
That is rather odd, haha.
Anyhow, we're here to talk about the actual moveset. Let's get into it. I've been AWOL as of late, so I don't think I've read many (any?) of your previous works. Is it typical of you to throw in the "Flavor" section before any of the actual moves? I actually kinda like it as a signature thing, but the descriptions of Hawlucha's animations could stand to be a little more robust. There's a little too much "striking a pose" going on here. If you're gonna do a section like this for flavor, gimme a little more flavor, darn it. Especially if you're doing it at the start of the set. Putting it in that position makes it your thesis statement on Hawlucha's behavior and right now it reads a little bland.
Fair enough, I might add a bit more flair there.
Anyhow again, onto the meat of the set. The Specials are refreshingly pragmatic here. I'm a bit of a dinosaur, so I couldn't tell you what's in vogue these days but in the MYMs I remember best, most fighters entered helpless state either after five seconds of free flight or not at all. I did have a couple minor points of confusion in the Specials, though. Can Hawlucha attack during Bounce? I think not, because it's not mentioned elsewhere, but the line "This allows it to fly around the stage while starting an attack" in the second paragraph had me thinking otherwise.
The "attack" here is referring to the dive downwards -- the part of Bounce that serves as an attack.
Also, how helpful can Tailwind really be with extending aerial combos? Is Hawlucha constantly launching people behind him?
Well, that will happen rather often, but it can also be b-reversed. I'll clarify when I go to edit.
I like Hawlucha's mobility options in the tilts. I also like that in your usage of Pokemon moves, you're willing to abstract some details of the Pokemon move descriptions. For example: Down Tilt's Low Kick being more useful against heavier foes instead of having some weird damage bonus against fatties.
Thanks! :)
A couple points confused me on the Up Tilt. Can fighters normally up tilt while walking? I didn't think that was really a logistical possibility. Also, is his entire body the hitbox for the attack?
No (although it can be done with Hawlucha by either setting the c-stick to tilts, or some quick inputs), and yes.
That Up Smash is positively radical here. It might not stand out in a more fantastical set, but Hawlucha has thus far been a pretty restrained vision of Hawlucha in Smash. A Smash that takes you all the way off the screen? Absurd! It really does feel more like a Special. Nice interpretation of Fly, though.

The Aerials surprised me a little bit, here. They're very functional, bread-and-butter type moves, which makes sense. But what with them being held off until so late in the set (on a bird, no less), I guess I was expecting something a little more dynamic.
Hm, true. Perhaps I'll move them to the front of the set, after the specials.
Up Throw had me thinking about potential exploits, but you did kill those dreams at the end with the disclaimer about how Hawlucha can only grab an enemy once per (their) airtrip. That probably should have been mentioned in the actual grab, though.
Excellent point.
In the end, I'm not totally convinced that Hawlucha wants to stay in the air "as much as possible". For certain, that's where it's in its element, but I feel like there's some fun in its ground-to-stage transitions that the playstyle section overlooks.
Very true. I'll see what I can do.
Hawlucha is fun and functional. I have to admit, it never hooked me like I was hoping it would, but you didn't do bad here. Keep up the good work. (Anything else of yours you'd recommend perusing, by the way? I know you're pretty darn prolific, so if you've got any sets you're really pushing as your big thing, clue me in)
Thanks! As for other sets, the ones in the header image of my hub -- which is linked at the bottom of all my movesets -- are pretty decent, I'd recommend those.
Nano-Nitpicks that didn't even deserve a place in the main comment with all the other nitpicks:
Centering is fine for short blurbs, but it reads a little weird for entire move descriptions.

If you're not going to talk about usage or how it fits into the context of other moves or how it compares to other moves of its type, don't tell me an attack deals decent damage. The Jab already says exactly how much damage it does. By God, I'll decide for myself if that's a decent amount of damage or not.

I was a little disappointed that you didn't try to explain how U-Turn could be used in the same manner as its Pokemon counterpart. I've really been enjoying the little on-the-nose justifications of the gameplay abstractions here, like in "Hawlucha will be hurt big-time by the huge ending lag" and "attack has more power -- through follow-up potential from the prone state -- when used on a heavier opponent". I can only imagine those being read with a little pause for comedic effect. This is more rambling aside than nitpick, but it felt out of place in the comment, so it was banished to the netherworld.

As someone who's fallen victim to this myself, the "no landing lag" wrinkle introduced in the Neutral Aerial feels a bit like an attempt to beef up a "boring" move by introducing a new mechanic for a whole lot of moves. I don't think that's the case, because it's a pretty subtle thing and it's a mechanic that makes thematic sense for Hawlucha. So... no problem here, but the thought did cross my mind, so just consider this a handy PSA for the future.

"Miscellaneous"? I think by definition, a singular thing cannot be miscellaneous. This may be my smallest nit to pick.
Haha, these gave me a chuckle. :p U-Turn reflects its use in the games in that it's good for safely poking at a distance, before quickly returning to get away from an attacking foe. It's not exactly the same, but eh, close enough.

Thanks for the comment! :)

-------------------------------------------

T Tim the Enchanter

I "like"d that set for the references alone. With that said, it desperately needs two things in order to be truly good: detail, and a playstyle. Detail is stuff like the damage a move deals, knockback, range, how it can be used, stuff like that -- anything of note really. One-line descriptions are a bit no-no. On that note, the set could do with some better formatting -- a line break in between each move, bolded/underlined inputs ("Up Tilt:"), and a big font size for the section titles ("Specials") would go a long way; as-is, it's hard to tell where moves start and stop. Anyway, playstyle is trickier to explain, but it's essentially how the moves fit together to create a style of play (hence the term "playstyle"). As an example, Toon Link's mobility, projectiles, and quick attacks lead to him being a zoning, keep-away type. He can throw stuff at foes from a distance, use his mobility to evade and stay at a distance, and run in with quick attacks whenever the opportunity shows itself. Stuff like that. If you go into a moveset with a coherent playstyle in mind, it'll go a long way to making it flow and feel connected. You've got some cool ideas here; they just don't play into each other in unique ways. There's quite a bit of potential here, though.

As for criticisms unique to this set, it doesn't use the three members very much. Instead of having, like, five moves make use of the other two, why not have them all out at once, kinda like the Ice Climbers? Then you could really make use of this mechanic, by having multiple attacks at once. The set is also rather prop-heavy, and they don't always make sense on the inputs. The set also assumes that you're familiar with the source material, which is never really a good thing. I've only seen The Holy Grail, so I have no idea what the heck the "blacmanges" are. Finally, that giant tree image is rather jarring. Granted, it is supposed to be a very large tree, but I feel that this is perhaps a bit much. :p
 

Tocaraca2

Smash Ace
Joined
Feb 22, 2015
Messages
557
Location
Wokingham
Nobody likes Alica Vassin any more so I'm scrapping customs and moving onto Muta- Akullotsoa.
I didn't say anything
 

Munomario777

Smash Master
Joined
Nov 18, 2014
Messages
3,253
Location
Charleston, South Carolina
3DS FC
0387-9596-4480
Switch FC
SW-8229-3157-8114

RAYMAN
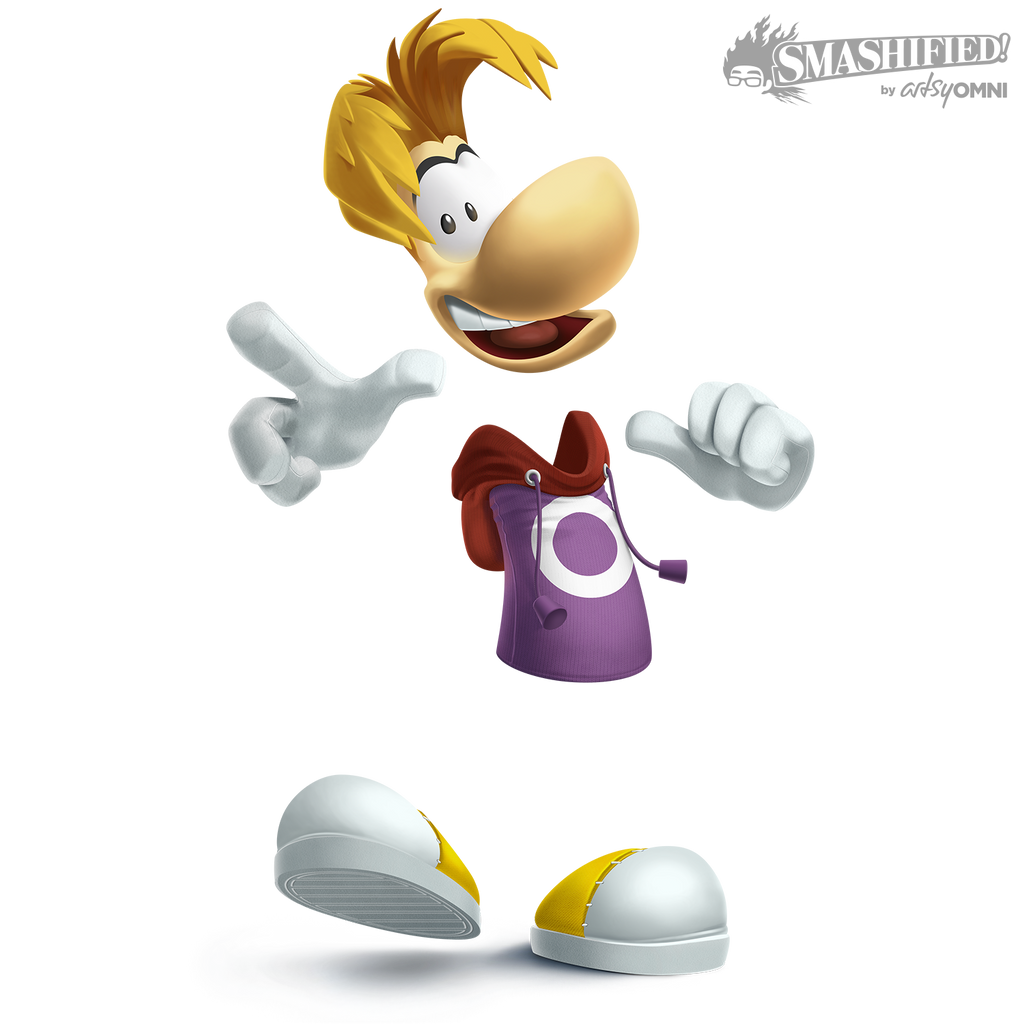
Hero of the Glade of Dreams, Rayman joins the battle! He's got an odd anatomy, but hey, who needs limbs when your hands, body, and head can float inexplicably? It even gives him some pretty unique abilities, as you'll see in a minute. This is, of course, a Smash 4 set. Without further ado, let's get started!

STATS

Overall, Rayman's stats spread is pretty good. He excels in mobility, being able to keep up with fighters like Greninja and Sheik in terms of dashing speed, and he has nice traction too. He's got an above-average jump height -- about as high as Diddy Kong -- and great aerial speed and control to boot. However, his one glaring flaw oughta be apparent from looking at the guy: he's as light as a feather! His weight is just barely above Kirby's, so needless to say, his ability to survive is less than fantastic. He's also super floaty, as you can imagine.

FLAVOR

Standing:


Walking:
Dashing:
Crouching:
Rayman's lack of limbs give him a super-low crouch, as he crouches down, putting his body between his feet and his hands in front of them.
Crawling:

Rayman crawls in the position described above.
Jump:
Rayman leaps up into the air, looking upwards and holding his open hands down to either side.
Midair Jump:
Rayman performs a front flip somersault, like when he bounces off of an enemy in Legends.
Aerial Movement:

(No, I don't know why there's only one foot in that image.)
Shielding:
Rayman holds his hands in front of his face, fists clenched, in a rather standard blocking pose, minus the arms.
Spot Dodge:
Rayman's body, arms, and head move into the background as his feet stay put.
Dodge Roll:
Rayman's body parts fly over to the side separately before re-configuring at the destination.
Air Dodge:
Rayman's body parts scatter into the foreground and background to avoid attacks.
Entrance Animation:
Rayman falls onto the stage from the sky and strikes a pose with his palms extended to either side, like his entrance animation from Legends.
Up Taunt:
Rayman strikes that^ pose while letting out his signature "Yeah-heah!"
Side Taunt:


Down Taunt:

(Just the part where he bounces his body off of the ground like a basketball. Yeah, it's weird.)
Victory Pose:
Pretty much the up taunt, set to this music.

SPECIALS

Neutral Special - Hand Throw
Let's start things off with Rayman's signature move. Hold the button, and Rayman starts spinning his right hand around, similarly to the charge for Sonic's forward smash. During this period, you can aim the fist up, down, forwards, or backwards just like Pit's bow from SSB4 and Brawl, except it can be aimed downwards too. Anyway, the charge lasts for up to one second; after that, you're basically just stalling. Release the button, and Rayman launches his fist forwards at high speeds; it'll travel a whole 3~7 SBB depending on the charge! Talk about throwing a punch!

Anyway, the fist acts as, essentially, a projectile, and it'll deal 9~13% of damage depending on the charge. Not only that, but while the uncharged version (which is pretty quick to launch, by the by) will deal only moderate knockback, fully charged, this becomes a good KO move! Once the hand reaches its destination, it'll go straight back to Rayman at high speeds, not dealing any damage but returning almost instantly.
If the hand is deployed, Rayman can't use the move until it returns. Gotta keep at least one hand on, erm, hand. Anyway, this move is good for spacing, long-range KOing, and more, and as a projectile, it has the unique advantage of being immune to reflectors, so it's essentially a long-ranged physical attack.

Side Special - Spin Punch

Rayman holds his fists out to either side and spins around on the tips of his toes and is propelled forwards, in a manner similar to his dashing attack from the Ubi-Art games. He gets boosted to just over his dashing speed, even in midair, making this great for recovery, and the spin has a duration about the same as Ryu's short hurricane kick. While it won't slow Rayman's falling speed, his vertical momentum is reset at the start of the move, kinda like Fox's shine. Also like a shine (in Melee at least), Rayman can jump out of this to retain the spin's momentum, but he can't act as quickly as a regular jump, and it'll use your midair jump in, well, midair. It'll deal moderate upwards-forwards knockback that can KO starting at about 170% or so, and deal 10% of damage. It's pretty quick to start and end too. As a final little bonus, it'll deflect projectiles much like a powershield, although they won't go back at the opponent. The Spin Punch is great for recovering, approaching, mobility, comboing, and KOing. That's a lot of things! Too bad you can only use it once in midair, even if you're hit.

Up Special - Helicopter Hair

See that hair on Rayman's head? Yeah, it's also a helicopter. For a guy with no limbs, I'm honestly not surprised. Anyway, when you use the Up Special, he'll spin his hair rapidly and ascend at a moderate pace -- about his falling speed -- for 1.75 seconds, retaining full sideways movement. After that, he'll spin the hair more slowly to glide down, descending at half his falling speed and still having full movement. At any point, releasing the special button will cancel the move into a helpless state, and you can use an aerial, even the zair (spoilers!), during the flight, but again, you'll be put into helpless afterwards. During both stages of the move, though, the helicopter hair will deal 4% of damage and moderate upwards knockback. This move is good for recovery. No, it's great for recovery! A bit slow to rise, but still.

On the ground, Rayman stands firmly on the ground and spins the hair in the opposite direction while getting... really happy for some reason. Anyway, this will deal the same damage and knockback as well as creating a decently powerful windbox upwards. This can be aimed just Neutral Special: up or to the sides. It's good for edgeguarding, as well as keeping foes away thanks to its quick starting and ending.

Down Special - Plum Pluck

Here's a bit of a strange one, but hear me out. Rayman pulls out a sprout from the ground, and after a bit of lag, he finally gets it out, revealing a giant plum! It'll be a random color, but that doesn't matter. What does matter is the fact that it flies up into the air in a tall arc -- it travels about 3 SBB upwards but only 1 SBB forwards -- and travels pretty slowly through the air, with that arc taking about 1 and 1/4 seconds to finish before the plum lands.

That's all well and good, but what exactly does this thing do? Well, it does quite a few things. Firstly, the basics. While the plum will explode into a harmless splash of... plum juice (?) upon landing on a surface, if it lands on an opponent, it'll get stuck on their head! Their eyes will poke through the plum kinda like the barrels from the Wrecking Crew stage, and while this deals no direct damage, it does have one possibly fatal side effect; the opponent's falling speed is a lot faster! They'll get Mario's falling speed added to their own, which can be fatal for recovering opponents. The plum will go away once the plum is hit by either Rayman, or the plum-headed foe. (Or someone else in a free-for-all.)

But wait, there's more! Rayman can attack the plum to knock it at foes at high speeds. It'll deal the same damage and knockback as the attack that hit it, which can be pretty powerful if used right! Foes can do this too though, so watch out! Additionally, Rayman can "footstool" off of the plum in any direction. Not only will this send the plum flying as a projectile (dealing 6% of damage and moderate knockback in the plum's direction of travel), but Rayman will be sent at high speeds in whichever direction the control stick is held in; up, down, sideways, diagonally, whatever you want! It's a great approach tool, and only Rayman can do this. Guess the plum just likes him for some reason.

Oh right, the midair version. In midair, rather than pulling a plum upwards, he'll instead grab right below him and toss a foe upwards! It's basically a command grab, and a good comboing tool at that. Unlike many of Rayman's other moves, though, it doesn't reach very far below his body. If you use the aerial version of the move on a plum that you've already pulled out, you'll throw it further upwards, and it'll deal the same damage as a footstooled plum. If you can manage to keep up with the plum, it's possible to bring it up a far distance.

STANDARDS

Jab/Forward Tilt/Neutral Aerial - Standard Combo

Whoa, whoa, whoa. A mirrored move? What blasphemy is this?! Wait, wait, wait, hear me out for a sec.

So, here's the deal. Press the button three times, and Rayman punches, punches again, and then kicks, his hands/feet growing a bit for each attack. The foot grows the most, being about twice-to-thrice its size -- the animation resembles the midair kick attack from Rayman Legends. 3%, 3%, 6% plus decent knockback at a diagonally-upwards angle for the kick. Walk forwards (or backwards!) while doing it with Forward Tilt, and use it in midair with Nair, three hits and all; it's mirrored like the Mega Buster, and landing or jumping or walking off of a ledge won't interrupt the chain. Due to a lack of limbs, the reach on most of Rayman's attacks is very long for physical attacks, outranging some sword weapons!

One of Rayman's other unique properties is the fact that he can cancel his multi-hit moves into any other standard ground or aerial attack! It's kinda like Marth's Dancing Blade; hold the direction when you press the button to perform that tilt/aerial. Seamless! It's a bit tricky to chain all the hits in midair, though, since you'll need to move with the opponent. Luckily, holding the button skips straight to the kick. It can kill at high damage levels, and has good range to boot. The kick is also amazing for controlling space, since the hitbox lingers on for a moment.

Up Tilt - Uppercut

For the first real tilt, we have the up tilt. It's pretty simple really. Rayman does an uppercut like that^ image with his left fist, and it grows in size quite a bit. The move has great reach both upwards and forwards with its large hitbox, and it'll deal 8% of damage. It's pretty quick too, and knocks opponents up into the air for a combo (although Mario's up tilt strings aren't present here due to this move's higher knockback). Chaining into this out of a jab can be pretty potent, and open up potential for aerial combos.

Down Tilt - Low Kick

For another rather standard, well, standard attack, we have the down tilt. Rayman crouches down and kicks his foot forwards, having pretty dang impressive reach thanks to his feet both being detached from his body and growing greatly in size. It's got a pretty fast startup and ending lag, dealing 7% of damage and knocking foes forwards a bit. Of course, this can be chained into from a jab, and it's a good combo starter like the up tilt, although it also gets opponents away from Rayman -- allowing him to prepare an attack with Neutral or Down Special, or chase them -- rather than starting a combo directly like the up tilt does. This move is also fantastic for poking, thanks to its range and speed.

Dash Attack - Slide Dive
While dashing, Rayman hops into the air a rather tiny bit and dives onto the ground, arms -- er, hands -- outstretched in front of him. Kinda like the dive from Super Mario 64, but without limbs. He'll slide along the ground a bit after landing on his belly, and after about half a second of this, he'll "pop" back up, his body parts getting mixed around for a second, before reassembling and going back to a normal standing state, much like the little spin hop up after the move in SM64. The dive itself will deal 6% of damage and knock opponents forwards a tiny bit, in just the right way to chain into the "pop" upwards, which'll deal 4% of additional damage and knock opponents upwards a bit. It's a good approach tool, and while you can't chain it out of a jab, it can be used to follow up on attacks like the down tilt. Since Rayman is low to the ground, it can also be used to go right under projectiles and attack whoever threw them.

SMASHES

Forward Smash - Windupunch

For this move, Rayman, similarly to the Neutral Special, winds up his fist during the charge, similarly to the charge for Sonic's forward smash. When the charge is released, Rayman once again punches by throwing his fist forwards. Here, though, the fist is huge. Like, really huge. Just look at that image! It has much less range than the Neutral Special, though, only reaching a bit farther than the above image due to the fist not being as squished. It's pretty dang powerful though, dealing 15~21% of damage and KOing at 100~70% depending on the charge. While it is rather slow to start up, it can be a good punish move, or a good option if you've got a foe at bay to compensate for the starting lag. What's more, when combined with a plum, you can knock it at foes with this move to carry the smash attack's power into the plum, making for a dangerous long-range kill option! By the way, while you can indeed cancel a jab combo into a smash attack, their slow speed makes chaining into them nearly impossible. It's good for throwing off foes, though. "You're just gonna jab there, then? Okay, I'll just come and attack you afterwa-- OW MY FACE."

Up Smash - Winduppercut
Rayman once again spins his fist around during the charge, while looking upwards this time, and then delivers a powerful uppercut, giant fist and all. It's like the up tilt, but supercharged! The attack is a good bit faster the forward smash, and deals 14~20% of damage. It'll also kill off of the ceiling at around 110~80%, and has even better range than the up tilt. The forward smash still has it beat in terms of horizontal reach, though. Anyway, this move, being a smash attack, can be chained into from a jab combo, although again, it's not likely to connect. Good mixup though. This is also a good KO move, obviously, and while it's more reliable than the forward smash, it has less reach and power. You might try using this after an up tilt, or even in combination with a plum to finish off foes near the top of the stage!

Down Smash - Windupound
Rayman spins his fist around again, this time looking downwards. He'll then punch the ground, this being his quickest smash attack, and the impact creates a shockwave that hits anyone within a .1.5 SBB radius of Rayman. It'll deal 8~11% of damage and pop opponents up into the air for a combo, while the fist acts as a sweetspot that deals 12~17% of damage depending on the charge. The sweetspot is small and hard to hit, but in return, it'll spike opponents on the ledge or pitfall grounded foes! (Albeit for a shorter period of time than normal.) This move is great for catching rolls, starting combos, and stuff like that. It's also great for punishing foes on the ledge.

AERIALS

Forward Aerial - Fist Slammin' Spike
Since I already covered the nair, we can get straight to the forward aerial! Rayman brings both his fists together, like you'd do in volleyball, and brings them up over his head before slamming them down with great force. The motion is somewhat similar to DK's fair, and while it's much quicker to start up, it has quite a bit of ending lag, and much less reach than DK's (Rayman's hands don't grow for this attack), being really tricky to hit. It'll deal 9% of damage and a decently potent meteor smash, but again, its small hitbox makes it hard to hit. However, it can be chained into from a nair combo, which makes it easier to hit if you can manage to keep a midair jab combo going.

Back Aerial - D-D-D-Drop the Kick
...I'm sorry. That move title was bad, and I should feel bad.

Anyway, for this attack, Rayman performs a rather simple, standard dropkick attack, similarly to Mario's back aerial. The attack deals 9% of damage for a clean hit, or 6% for a late hit, and it'll deal moderate backwards knockback as well. It can be chained into from a nair combo, of course, and is good for getting opponents away. If you've gone too far ahead of a foe, this is a good way to save a midair jab combo. Its quickness also makes it a great tool to control space, or even edgeguard foes.

Up Aerial - Upperkick
Rayman extends his right foot up above his head, clenching his fists and closing his eyes for the duration of the kick. His foot becomes huge during this attack (about the size of the fist in the forward smash), giving it great reach. It lingers on a while, dealing 12~7% of damage depending on whether or not it's a clean hit, and it'll deal upwards knockback that KOs at around 100% of damage. A late hit will instead only deal moderate upwards knockback. If you don't hit at the top of the foot, it'll deal knockback away from the foot. This move is decently quick to start up, but it takes a while to end due to its duration, so it can be punished. It is, however, good for juggling, KOing, and as an option out of a nair chain. You might also SHFF this for anti-air and spacing purposes, thanks to its low ending lag characteristic of sex kicks. The wonky side and bottom hitboxes also make it possible to send foes sideways or even meteor them if you land it right!

Down Aerial - Divebomb
Rayman does a half of a front flip -- causing his body to be upside down -- and then dives straight down, this move acting as a stall-then-fall. It'll deal 10% of damage to opponents hit by the move, and acts similarly to Greninja's down aerial -- it'll bounce Rayman up if he hits an opponent, knocking them up a bit too for a follow-up attack. While this can be used out of a nair combo, it's not reliable to chain into. It can be used to lead into a nair chain, though, or any other aerial for that matter. At the very start of the dive, the attack will meteor smash foes, and it'll create a small shockwave upon hitting the ground to deal 5% of damage and pop opponents up, covering the rather laggy landing.

GRAB GAME

Grab - Telescopic Hand
Rayman does about what you'd expect for his grab; he reaches forwards with his right hand (or the left if the right one is out as a projectile), extending it at a great distance. It reaches as long as Samus's Grapple Beam, in fact! While it isn't as fast as conventional grabs, it's also not as slow as most tethers, making for an excellent grab all around! You can even use it as the third hit of a jab combo, making for a deadly grab setup. The pummel has Rayman pull the opponent towards his head while he headbutts them, dealing 1.7% of damage and being pretty quick. In midair, it can be used as a long-ranged attack to deal 4% of damage, and it can be used as the third hit of a jab combo too. It's a great way to extend out-of-reach combos, control space, or to grab the ledge from a distance.

Up Throw - Upperkick
Rayman tosses the opponent upwards before delivering an upwards kick similar to the Up Aerial, dealing a good amount of upwards knockback and 8% of damage. It won't really KO normally, but on a platform, it's a viable option for dispatching foes at higher damage levels. Earlier in a match, it can be used to get foes away from Rayman thanks to its high base knockback.

Forward Throw - Forwards Kick
Rayman tosses the opponent forwards a tiny bit before kicking them with great force, similarly to the final hit of the nair combo. It'll deal 8% of damage and good knockback, enough to KO at about 130% near the edge. At low damage levels, it doesn't launch foes much, good for comboing.

Down Throw - Jumpin' Slam
Rayman jumps into the air, bringing the opponent up with him, and then in a quick frontflip motion, slams them onto the ground! They'll bounce up and be dealt 5% of damage, and the move's low ending lag makes it a good combo throw. Rayman's left in midair afterwards, making this perfect for an aerial follow-up.

Back Throw - Pitch and Release
Rayman holds the opponent in only one hand, closing his fist and containing the opponent inside. He then winds up his fist like in the Neutral Special, and aims it backwards before throwing it back a distance -- the fist travels about 2 SBB at an upwards angle. Before stopping, the hand opens up to release the opponent, sending them flying due to the momentum as well as dealing 5% of damage. The throw can KO at around 100% near the ledge, a great kill throw to be sure. The fist can also damage foes for 5% and moderate knockback in a free-for-all or team battle.

MISCELLANEOUS

Final Smash - Murfy Assist

In Rayman Legends, the player on the Wii U's Gamepad controller could touch the screen to play the role of "Murfy," a little floating frog guy that could move stuff, tickle enemies, and things like that. Here, he'll appear in front of Rayman, and if you catch someone in it, he'll grab the foe, keeping them in place! This is your chance to unleash attacks on the foe, without having to worry about that pesky knockback to interrupt your combos. Rayman can't move during this or use special moves, but he can use any other attack. The foe is released after six seconds -- right before this, Murfy gets a worried look on his face and starts sweating -- so be sure to use your finishing move before then! Oh yeah, pressing the special button initiates a special finisher. He'll wind up his fist, and with a "Yeah-heah!" he'll send it forwards as it grows to great size, for a forceful blow that deals 16% of damage and KOs at around 70%. You'll need a bit of skill to use this one properly.

PLAYSTYLE

All things considered, Rayman is a character focused on keeping foes at a distance. I mean, his light weight, long-ranged attacks, big hitboxes, mobility, and slow killing options give him both the means and the reasons to achieve this. Neutral Special is perhaps the best tool for the job, since it can reach a long distance and KO opponents when charged. It can go in multiple directions too, giving it loads of versatility. Of course, many other attacks are great for this purpose too, thanks to their long reach and/or huge hitboxes. Keeping your foe at a distance, you can rack up damage with long-ranged attacks, keep away with your mobility, and once the time is right, use your slower attacks to finish the opponent off!

Rayman also has an excellent combo game. His long-reach attacks allow him to follow up on more moves in more situations, and the unique jab canceling mechanic builds on this even more! Using plums for mobility and as projectiles also opens up a lot of options, if you've got some room to prepare your tactics. One of Rayman's best mobility tools is the Side Special, as it gives him lots of speed and can be jump canceled. It even deals damage at a favorable knockback angle for comboing, but can only be used once in midair. Rayman's weaknesses are his light weight, slow finishing moves, and somewhat predictable combo game. With that said, Rayman's long reach and ways to compliment, aid, and take advantage of it give him an effective, unique fighting style that's more than capable of taking on the rest of the Smash Bros. cast!
As always, feedback is greatly appreciated, and I hope you enjoyed the set! :)

Like what you see? See some more over at my Make Your Move Hub! :D
 
Last edited:

n88

Smash Lord
Joined
Oct 10, 2008
Messages
1,547
Plague Knight
Those are some honkin' big sprites you got there. Normally images are a welcome way to communicate ideas, but these actually hurt the reading experience a little bit. In part by being so comically large that they make the set hard to read, and in part because they don't always do much to clarify a move. I can't even really tell what some of them are supposed to be. Take the Side Special. Is the bomb that whole cluster of sprites? How big is that?

The rechargeable recovery is an interesting idea, but it feels a little wimpy as-is. Needing a whole second to build up a recovery is a little wimpy. Were I you, I 'd make it so that it always gets him a little burst, but charging up lets him burst higher/father. That way he always has some recovery to fall back on, however minimal.

You've clearly got something of an eye on the bigger picture, with the attempt to use the Vat as a centerpiece for some other moves. Maybe there are in-game reasons for those things, but it comes off as strange that only a handful of moves have special interactions with the Vat, and said interactions aren't particularly intuitive. One kind of bomb interacts with it, others don't. Why? I think you would have benefited from making the Vat's interactions simple and universal.

One last thing to keep in mind: input placement! That Forward Smash Smoke Bomb couldn't be more of a Special if it tried. You could maybe get away with that kind of thing on a Down Smash, but Forward Smashes really ought to be power-moves of some kind.

Congrats on getting back into the game, and good luck on any future MYM endeavors!
 

Munomario777

Smash Master
Joined
Nov 18, 2014
Messages
3,253
Location
Charleston, South Carolina
3DS FC
0387-9596-4480
Switch FC
SW-8229-3157-8114
So, I've made what, fifteen sets this contest? Geez... And I've gone from being terribad to pretty decent over the course of this contest. So it's a bit tricky trying to find the diamonds in the rough, when it comes to reading my sets. Well, fret not, because I've introduced a ranking of my own sets over at...


*click!*


Pretty sweet, right? It's in that spoiler tag near the top of the post, complete with a ranking of all my sets from worst to best, plus an in-depth (by which I mean maybe a paragraph long) commentary on each! See where I fumbled, where I succeeded, where I fumbled again... You get the picture. Just click that^ picture to go right to the hub. Who knows, I might even use this format to rank other people's sets someday? (eh, probably not)
 

ForwardArrow

Smash Ace
Joined
Aug 17, 2011
Messages
503
Kon
We haven't really seen a pure momentum set in a while, and what's nice about Kon is he's significantly evolved from the past ones. Moves like Kon's Up Special give him enough control that he doesn't become as hilariously predictable and linear as a lot of the MYM11 counterparts, and the subtheme of super armor makes his hit and run game a fair bit more effective. None of these aspects are made too strong either, Kon still suffers from some predictable and his super armor is hardly invincible, giving him a good amount of strategic depth. This approach means you don't really go for writing a ton of exciting moves, but the hand of restraint feels kind of necessary here as trying to do something over the top would not really work with either the playstyle or character presented here. If I had to point out a clear flaw, I don't really think the petrification was a good addition to the set. Its handled pretty tastefully considering it more or less has to be stun, but I get the impression its just characterization baggage and it more or less is brought up once and never again. If I had to make some other complaints, I did find a couple of the aerials felt rather forced(the one that has Kon power up his Neutral Special on an aerial being the main one that comes to mind), but its not a terribly flawed set despite my nitpicks. It achieves pretty much everything it set out to do, and I respect that.

King Korol
I swear your style this contest has been much more comedic than usual barring Birkin and honesty, its a very good thing in Korol's case. The writing style and ridiculous animations make this set very enjoyable to read, and I'd probably still have had some fun with the set even if it was pretty bland from a playstyle standpoint. Of course its not, otherwise the set wouldn't be receiving nearly as much praise as it has. While minions and building block based sets have been done before, having the minions make the constructions for you is not something I've really seen done before and it saves the player a lot of work that can be spent on properly defending from the opponent, which is a nice change of pace. The set also plays very strongly off both the building creators and the buildings themselves throughout the set, not ever really reaching a falloff point where interactions start becoming too irrelevant or awkward, though I will say that the quality does drop a little in the Standards and Aerials. I was thinking a bit that defending slavedrivers as they're building constructs was something maybe you could've focused a little more on, but honestly, just having Korol free to do non-setup actions by himself is enough. Focusing on that would be pretty boring to play anyway.

Sonic 2.0
I mentioned in chat that I really did not like this set Muno, and for what its worth I'm glad you at least listened to some of my complaints, decreasing his power and fixing up one of the worst aspects of the set. I still think this set is probably very strong even by Smash 4 standards, and it mostly comes from that projectile/tornado that deals extremely high hitstun. Those kinds of slow projectiles to combo off feel more acceptable in Brawl where the base combo potential is lower, but here it feels rather absurd, especially in the later case where you can bounce them off it 3 times and likely build up something like 80%-100%, pretty much putting them in KO range of the still very strong Up Smash. But moreso than that, I just don't like how you handle the momentum aspect of the character. Letting him turn on a dime pretty much diminishes any strategy to using high speed like that, and the problem is because of how fast he goes at max speed, he pretty much needs to have that or the set stops working. I mean yes, you can knock him out of it, but I really don't think Sonic of all characters should have this kind of absurd amount of control.

The flavor in the set also feels really off in a lot of places, which is probably my biggest problem with it. I mentioned my distaste for Up Special in chat, with no ramp to go off and nothing else propelling him upwards, doing poses like that should not just be able to cause him to spontaneously rise into the air. It really doesn't help that the last pose is apparently able to KO at 60%. That is about as powerful as the Smash Attacks of most heavyweights, Sonic doing a stupid showoff-y pose should not have that kind of KO potential. Up Smash is another bizarre one, the animation doesn't sound very forceful but it still is one of his best KO moves, and I have no idea how he's supposed to run in an air loop like that under any circumstances, let alone starting from standing in place. And yes a throw that uses running in place on an opponent to damage them is fine but having them get sucked into the foot blur looks completely ridiculous and awful. Those are the big standouts, but I could probably dig up more if I wanted too, the sets animations generally feel all wrong.

As a last note, suicide KOs off a throw that are fairly simple to perform compared to something like DK's FThrow are a bug, not a feature. A lot of momentum sets go out of their way to avoid that, it'd be good for you too as well.

Mario 2.0
The difference between this set and Sonic is this one feels better balanced, but by comparison it also feels very lacking in effort. A good number of moves are just ripped from Mario's regular set as opposed to Sonic trying to make new material. I can understand bringing move back, but they often feel out of place compared to the new ones you added, trying to mash together an existing Smash set and new ideas rarely comes out feeling especially cohesive. Like, Mario has his usual punches and kicks but then for whatever reason you have him spontaneously sprout the Tanookie Mario tail and swat people with it. That feels way less forceful than a punch or kick and less practical in combat and also looks pretty out of place compared to the other moves. Probably the worst example in the whole set is the use of the coin block on Up Throw. That's not even a power up, its a level object tangentially related to Mario that spontaneously appears and to be honest I'm not even sure how he gets the foe on top of it from the animation you described.

From a gameplay standpoint, I don't see what this adds to the existing Mario set, if anything the specials feel less diverse with the cape turned into just another projectile and the FLUDD being reverted to the old spin but now on an awkward cooldown based limit. There's no flow or attempt at a cohesive playstyle of any sort, the extra mechanics you add are just kind of there rather than ever getting played off. Hate to say it, but I fail to see how this set isn't just a strict downgrade from the existing Mario set.

Ganon 2.0

Alright so yes I'll tell you to start off with that I do like this better than his existing Smash set. Given its Smash Ganondorf, that's not really a big achievement, but at least its better than your other 2 remixes for that alone. Dead Man's Volley is a pretty well designed move, and I like the changes you've done to his existing Side B, that stuff is all very solid improvement over existing Ganondorf. I don't like the Up Special as much, I don't think portals really work that well into projectile tennis compared to just about any other projectile manipulation you can do, and Down Special is a straight stun which I generally dislike, even if this one is better balanced than usual. Still an improvement over mostly copied Captain Falcon Specials, but my problems arise later on in the set.

You see, I think you did a good job of acknowledging his tennis projectile in the specials, but for the rest of the set it may as well not exist, with it just being a compilation of things Ganondorf does throughout the Zelda series. The ones you choose are fairly random too, there's more of a focus on lightning and swords than there really should be, from what I can tell the only time Ganon actually uses lightning is in Four Swords Adventures. It gets particularly egregious in the throw where he causes the foe to randomly get struck by lightning. My problem with it mostly just amounts too though is the fact that you basically never acknowledge any of the cool material you made in the Specials, with the most being one awkward reference to the portals on Up Smash or the fact that you can do the typical prone throw out of flame choke. So yes, its better than Smash Ganondorf, but I don't think the set is a good use of the character's potential regardless.

As a final aside, reading this set I was really wondering why you kept some moves. Keeping stuff like the Dair and Flame Choke, that's good. Keeping Up Aerial and a couple of his random less popular melee strikes just seems pointless though.

William Birkin
The original version of this set didn't go over that well but I'm just going to throw out there that I still liked it, but the new version is what really brings all the potential it had to the forefront. The evolution concept and use of several different forms is very ambitious and its astonishing how polished it feels now that the edits are complete. All 3 forms actually have unique and noteworthy material now, which is made incredibly exciting in the third form with the ability to pick and choose between the 3 different arm types for both his upper and lower arms. Combine that with the tether and the move copying, Birkin has some absurdly deep combo potential that is pretty much only limited by player imagination, but you manage to balance it with necessary lag and restrictions to keep the set from being broken. Comboing isn't all there is to Birkin either though, you manage to add more with the fairly cool grab game and the 2 items available in the set, the ground chunk and pipe.

I figure its worth mentioning that the set really does have some of my favorite versions of a lot of existing MYM cliches. The tether gets some very heavy mileage out of it while still being balanced, and the move copying becomes actually very important to the set when it serves as a third layer of attacks to throw out. Its also the first set I've seen to take the two attacks at once playstyle and actually flow off it and make great use of it compared to a lot of the old sets that do so. You even have a delayed hitstun throw in there with a lot of originality to how its executed in the FThrow. This set sets a new bar for all those concepts, you can't just have them in your set and expect bonus points, you need to step up your game and use them in great exciting ways like Birkin did.

Dr. Marcus
I'm pretty much with Warlord on this one, this set is pretty much fantastic and I can think of very few things to dislike about it. The whole minion creation process is fine but what really sets it apart for me is the Up and Down Specials. The former makes use of a tentacle construct in a far better way than Jarad could ever dream of, and the latter allows Marcus to fight alongside his minions with a great deal of control rather than having them just kind of deal with the opponent in a desynced way. The minions are also bad enough number-wise that combining with them like this feels necessary, making Marcus feel a lot more involved than almost any other minion character.

The thing that really sold the set to me is that you never really run out of cool ways to play off it later in the set, and I'm not going to list specific examples as that'd just be spoiling it for people. But you flesh out the mechanics introduced in the specials insanely well and manage to design the moves so that the implications of having them on a minion rarely feel too overwhelming or stupid. It never gets redundant and feels surprisingly natural on this character, who I wouldn't really think could have a set at first glance. The most I can say is that a couple of the interactions very late into the set feel a little unnecessary, but if that's the biggest complaint I can bring up you know you have a very strong set. I might even say this is one of my favorites of yours.

Daisy
I actually think this set is half decent surprisingly, and demonstrates you have plenty of actual talent as far as setmaking goes. I'll admit I think you could've made the ball a little more powerful than it is here as honestly the elements you introduce to make it stay out longer and redirect feel a little less impressive when you realize what you're reflecting only deals 4% and is limited to a single copy you can have out. Its not necessarily that bad when you can use that for comboing and have the Side B as another set up tool, but it definently feels like you're being a little too cautious. That said, playing off the Down Smash wall gives the set another core point to mess with that I feel wasn't used that strongly, but at least it exists to give it more substance.

If I had to make one big complaint, its more about your writing style than gameplay. Some of the details you specify feel pretty unnecessary, like the type of element the damage is. I'm sure if you dig around in the engine there's some reason for that but shouldn't it be clear what element it is from what she's using to attack? You tend to ramble on longer about a lot of these moves than necessary too, which makes the set really tedious to read when you have custom specials on top of everything else. When I get past the writing, I don't find myself disliking it, but you need to work on that regardless.
 
Last edited:

Munomario777

Smash Master
Joined
Nov 18, 2014
Messages
3,253
Location
Charleston, South Carolina
3DS FC
0387-9596-4480
Switch FC
SW-8229-3157-8114
Sonic 2.0
I mentioned in chat that I really did not like this set Muno, and for what its worth I'm glad you at least listened to some of my complaints, decreasing his power and fixing up one of the worst aspects of the set. I still think this set is probably very strong even by Smash 4 standards, and it mostly comes from that projectile/tornado that deals extremely high hitstun. Those kinds of slow projectiles to combo off feel more acceptable in Brawl where the base combo potential is lower, but here it feels rather absurd, especially in the later case where you can bounce them off it 3 times and likely build up something like 80%-100%, pretty much putting them in KO range of the still very strong Up Smash.
I'm not sure where you're getting the 80% figure from. The Blue Tornado itself will deal 30% at most, and the majority of Sonic's quick attacks don't deal more than 10%. Not to mention DI, staling, and actually getting the foe in the right place to execute the combo. Am I missing something here?
But moreso than that, I just don't like how you handle the momentum aspect of the character. Letting him turn on a dime pretty much diminishes any strategy to using high speed like that, and the problem is because of how fast he goes at max speed, he pretty much needs to have that or the set stops working. I mean yes, you can knock him out of it, but I really don't think Sonic of all characters should have this kind of absurd amount of control.
Perhaps his control could vary depending on how much momentum he has? In games like Sonic Adventure, he has excellent turning ability even at top speed, which is more like this Sonic's base running speed. I'll probably give him a long initial dash animation too -- that is, the period at the start of the dash where dash-dancing is possible.
The flavor in the set also feels really off in a lot of places, which is probably my biggest problem with it. I mentioned my distaste for Up Special in chat, with no ramp to go off and nothing else propelling him upwards, doing poses like that should not just be able to cause him to spontaneously rise into the air.
That's pretty how it works in games like Sonic Rush -- while you do need to launch off of a spring first, you can still do the tricks even after you've started falling. I guess I could add the ramp or something if it really bothers you that much.
It really doesn't help that the last pose is apparently able to KO at 60%. That is about as powerful as the Smash Attacks of most heavyweights, Sonic doing a stupid showoff-y pose should not have that kind of KO potential.
The 5 or so SBBs of height off of the ground accounts for a lot of that kill power; the knockback itself isn't as powerful as one might think. I don't see how Sonic KOing foes with aerial stunts (which do involve kicking and such for the most part) makes any less sense than Luigi's down taunt being deadly for anyone hanging on the ledge.

Either way, the Trick Actions' KO power is more for gameplay purposes than actually making logical sense (I think it's a fair statement that a lot of Smash's moves use this design philosophy). They're really hard to pull off, since you need to react to a foe's DI in a split-second. This also happens to mirror the move from games like Sonic Unleashed, where quick reactions are required, but you get a massive reward in the form of a much quicker path through the stage.
Up Smash is another bizarre one, the animation doesn't sound very forceful but it still is one of his best KO moves, and I have no idea how he's supposed to run in an air loop like that under any circumstances, let alone starting from standing in place.
It's more of a backflip. My gif-work may not have been superb (it is indeed slower than the animation would be in-game), but it's meant to be somewhat like this. As for how he does it from a standstill, the charging animation (running in place) is pretty much identical to the Super Peel-Out from Sonic CD. It's like a spin dash, but with running instead of spinning.
And yes a throw that uses running in place on an opponent to damage them is fine but having them get sucked into the foot blur looks completely ridiculous and awful.
Fair enough.
Those are the big standouts, but I could probably dig up more if I wanted too, the sets animations generally feel all wrong.

As a last note, suicide KOs off a throw that are fairly simple to perform compared to something like DK's FThrow are a bug, not a feature. A lot of momentum sets go out of their way to avoid that, it'd be good for you too as well.
Good point, I'll see what I can do.
Mario 2.0
The difference between this set and Sonic is this one feels better balanced, but by comparison it also feels very lacking in effort. A good number of moves are just ripped from Mario's regular set as opposed to Sonic trying to make new material. I can understand bringing move back, but they often feel out of place compared to the new ones you added, trying to mash together an existing Smash set and new ideas rarely comes out feeling especially cohesive. Like, Mario has his usual punches and kicks but then for whatever reason you have him spontaneously sprout the Tanookie Mario tail and swat people with it. That feels way less forceful than a punch or kick and less practical in combat and also looks pretty out of place compared to the other moves.
I dunno, it deals a decent job at dispatching enemies in the games. :p On a more serious note, though, the down tilt is designed as a quicker, weaker option, the strength of which comes in how it can hit foes multiple times. Do you think that this may be a good direction to take for the ftilt as well?
Probably the worst example in the whole set is the use of the coin block on Up Throw. That's not even a power up, its a level object tangentially related to Mario that spontaneously appears and to be honest I'm not even sure how he gets the foe on top of it from the animation you described.
In the Mario games, you never know when a hidden block is going to appear when you jump. That's sorta what I was going for -- the logic in the Mario games is that they could potentially be anywhere, and here, "anywhere" happens to be right above Mario. It's a bit proppy, sure, but this isn't the first time that someone's used an aspect of the level design for Smash.

As for how he gets the foe up on top, he throws them straight upwards and then jumps up himself, hitting the hidden block. (In the Mario games, only Mario himself could trigger the hidden blocks; an enemy couldn't hit it to reveal it.)
From a gameplay standpoint, I don't see what this adds to the existing Mario set, if anything the specials feel less diverse with the cape turned into just another projectile and the FLUDD being reverted to the old spin but now on an awkward cooldown based limit.
The old Cape, though, is still present: it's what happens when you mash/tap the new cape input on the ground. It wasn't replaced, just relocated. The cooldown on the spin, though, I'll give you that, it is rather awkward.
There's no flow or attempt at a cohesive playstyle of any sort, the extra mechanics you add are just kind of there rather than ever getting played off. Hate to say it, but I fail to see how this set isn't just a strict downgrade from the existing Mario set.
The style I was going for is one where he uses his projectiles to keep away and approach, and then comes in for the kill with a combo. It's not terribly unique, sure; one may call it "average." But to be fair, Mario himself is the embodiment of "average." That said, I wanted to make a set for him that focuses more on his strengths from his series -- jumping on things, using power-ups (where the projectile storm idea originated), et cetera -- to make him a bit less generic.

(Although I will say that the actual set is better designed than mine, if rather generic.)
Ganon 2.0
Alright so yes I'll tell you to start off with that I do like this better than his existing Smash set. Given its Smash Ganondorf, that's not really a big achievement, but at least its better than your other 2 remixes for that alone. Dead Man's Volley is a pretty well designed move, and I like the changes you've done to his existing Side B, that stuff is all very solid improvement over existing Ganondorf. I don't like the Up Special as much, I don't think portals really work that well into projectile tennis compared to just about any other projectile manipulation you can do, and Down Special is a straight stun which I generally dislike, even if this one is better balanced than usual. Still an improvement over mostly copied Captain Falcon Specials, but my problems arise later on in the set.

You see, I think you did a good job of acknowledging his tennis projectile in the specials, but for the rest of the set it may as well not exist, with it just being a compilation of things Ganondorf does throughout the Zelda series.
Fair point, although I feel like that's a bit obvious to point out. I mentioned in the Volley's description itself that it can be useful to cover his approaches, which sorta applies to most of his moves. Then again, it could do with a bit more mentioning throughout the set.

(Also, I find it ironic how I call the Volley something that "cannot be ignored," and then proceed to not mention it throughout the rest of the set. :p)
The ones you choose are fairly random too, there's more of a focus on lightning and swords than there really should be, from what I can tell the only time Ganon actually uses lightning is in Four Swords Adventures. It gets particularly egregious in the throw where he causes the foe to randomly get struck by lightning.
I recall it being present in Hyrule Warriors as well. Although it is a rather odd effect, I'll probably remove it now that you mention it.
My problem with it mostly just amounts too though is the fact that you basically never acknowledge any of the cool material you made in the Specials, with the most being one awkward reference to the portals on Up Smash or the fact that you can do the typical prone throw out of flame choke. So yes, its better than Smash Ganondorf, but I don't think the set is a good use of the character's potential regardless.
I'll see what I can do to make the specials more integrated with the rest of the set.
As a final aside, reading this set I was really wondering why you kept some moves. Keeping stuff like the Dair and Flame Coke, that's good. Keeping Up Aerial and a couple of his random less popular melee strikes just seems pointless though.
Uair is sort of necessary for Ganon from a gameplay perspective; it serves as his best "get off me" move in the air, when his other aerials are so slow. As for the ftilt and dtilt, they're based on the TP boss fight if I recall.

(Also, isn't flame coke more Franky's thing?)
 

JamietheAuraUser

Smash Lord
Joined
Jan 11, 2010
Messages
1,196
Location
somewhere west of Unova
Daisy
I actually think this set is half decent surprisingly, and demonstrates you have plenty of actual talent as far as setmaking goes. I'll admit I think you could've made the ball a little more powerful than it is here as honestly the elements you introduce to make it stay out longer and redirect feel a little less impressive when you realize what you're reflecting only deals 4% and is limited to a single copy you can have out. Its not necessarily that bad when you can use that for comboing and have the Side B as another set up tool, but it definently feels like you're being a little too cautious. That said, playing off the Down Smash wall gives the set another core point to mess with that I feel wasn't used that strongly, but at least it exists to give it more substance.

If I had to make one big complaint, its more about your writing style than gameplay. Some of the details you specify feel pretty unnecessary, like the type of element the damage is. I'm sure if you dig around in the engine there's some reason for that but shouldn't it be clear what element it is from what she's using to attack? You tend to ramble on longer about a lot of these moves than necessary too, which makes the set really tedious to read when you have custom specials on top of everything else. When I get past the writing, I don't find myself disliking it, but you need to work on that regardless.
I said this in the chat as well, but I just want to point it out here as well, partly because the thread is pretty inactive these days.

While its true that the Superball is lacking in power, that decision was flavour-based: in Super Mario Land, a Superball can actually take multiple hits to kill some kinds of basic foes, something that never happens with the Fire Flower's fireball in any Mario platformer that I know of, so it stands to reason that Daisy's Superball is weaker than Mario's Fireball. While I'm entirely aware that there are times when not every aspect of a move's original implementation needs to be translated into Smash, I felt there wasn't any real harm in it in this case. Another reason for the move's limitations is that Daisy is intended to be a very melee-focused character, and that creative use of the Superball also makes for one of Daisy's few legitimately safe approach options. (The Side Special is another one, albeit a more limited one in terms of ways she can capitalize on it.)

I actually totally agree on the complaints re: writing style. Having basically written up the moves in terms of mechanics, I then remembered a criticism I received on the subject of Victini where I'd described the applications of the moves separately at the end of the set. So I added another paragraph to each move regarding its practical applications, and in many cases it came out as somewhat redundant. And yeah, specifying the element of moves is definitely on the unnecessary side.
 
Last edited:
D

Deleted member

Guest


KOENMA

Koenma is a protagonist from Yu Yu Hakosho. He is one of the first characters introduced in the series due to his importance in the lore as he’s in charge of judging where the dead should go in the afterlife and has a lot of influence as the son of King Enma, the ruler of spirit world. Most of the time Koenma is seen in his baby form, despite being hundreds of years old as a supernatural being and this is used as a running joke throughout the series. Partly to make himself feel better and when things get serious, he has an adult form too, but when he’s doing his job he’s always in his natural form as a baby.

Koenma has legions of ogres working under him in an office-like setting, helping to fill out all the paperwork that he needs to rubber stamp in order to keep a functioning spirit world. There is one ogre named Jorge that gets the brunt of Koenma’s abuse, always trying to get him to do the work and not lazily shirk his duties. Koenma is regularly seen putting his feet up and watching the goings-on of the protagonists from a home theatre in his office, commentating on it alongside Jorge, who acts as the straight man of the two. These sections are largely a gag for the anime watching audience and aren’t present in the manga, where Koenma is less prevalent until later arcs where he takes a remotely serious role in his adult form, but arguably the most memorable sections with Koenma are when he’s a self-aware comic relief character. These videos give a good indication of the character: [Koenma's first appearance] [Koenma and Jorge]

Size: Pichu
Weight: Squirtle
Ground Speed: Lucas
Air Speed: Lucas
Fall Speed: Zelda

Koenma is a tiny character, comparable to Pichu. He's very lightweight, but hovers above the ground making him technically as tall as Marth. This means he will passively dodge low hitting attacks from a long range, but they will still hit from melee range and still activates traps by hovering over them. His jumps are very good, his first jump comparable to Lucas and Ness' second magical flip, but then having a hover too as his second jump that lets Koenma fly around the stage with his arms forward, speeding along at half his already low fall speed for 5 seconds, doubling his aerial speed for the duration. Koenma can exit his hover if he's low enough to enter his normal walking stance without having to properly land. Crouching will have Koenma descend to the ground and walk or dash around at a slightly lower speed, but he will return to the air if he attempts a jump. He can use his full moveset while in his crouch. Koenma typically says a line during his moves that can be interrupted by attacking him, but these have several variants to keep it from becoming too stale.


JORGE

Size: Ganondorf
Weight: Mario
Ground Speed: Wario
Air Speed: King Dedede
Fall Speed: Fox

Following along after Koenma, or trying to, is his assistant Jorge the Ogre. He's a fairly average human in terms of build and doesn't have the same luxuries as Koenma when it comes to his recovery, having two pretty mediocre jumps, and all around is a big target and cumbersome. Thankfully Jorge is not who the player directly controls, but an AI like Nana who tags along behind Koenma and can be given commands through certain inputs. He'll build up his own percentage, but can easily be KO'd if the foe has any time to attack him themselves, working in an identical fashion to Nana. Solo Koenma isn't quite as helpless, but Jorge is more useful than he'd like to admit. Koenma is the one who counts for stocks though, and Jorge dissipates if Koenma is KO'd, seeming mostly upset by Koenma's defeat.


B MOVES/SPECIALS

Neutral B/Neutral Special: Baby Kekkai Barrier


Koenma holds out both hands together, using his magic to create a wall of energy. This wall starts out reaching up to Koenma's height, as big as Marth, but as small as Pichu in his crouch. The move can be charged for as long as a smash, increasing the size and HP of the barrier. The barrier starts as wide as Kirby and as tall as Mario, but can be charged as long as a smash to achieve 1.5x that in height and width. By angling it up or forward, it can reach 1.5x its usual height at the cost of width, by expanding it forward it creates a horizontal barrier flipped 90 degrees, which is also achieved by using this move out of Koenma's crouch. For HP, the barrier starts out at 15HP but caps out at 24HP. Koenma has minimal lag on this move, but it is largely covered by the barrier itself defending him from the front. If the barrier is destroyed during the move, Koenma suffers lag as he says a variety of lines such as "why I never" and "you insubordinate little..."

The barrier's wall mechanics are not as straightforward as they seem, as because of the weaker, baby nature of Koenma's magic, they aren't actually walls. An opponent or Koenma can walk into the wall, stretching the net as they go forward. Once it reaches the max range, half the height of the wall, they will be sprung back at set knockback, turning them into a weak hitbox dealing 8-12% damage that also has super armour to prevent infinites. This gives a limit on how much Koenma can combo his opponents into his walls, but this can work in his favour in some match ups. This mechanics can work on more horizontal nets too given there's enough space beneath or above them, sending the foe upward or downwards. A character can jump at the apex of the net as it bottoms out for a boost to their jump, doubling its usual height. It's very hard to do this upward into a horizontal net, unless someone hits you into it themselves as a gimp, but on top of one heavier opponents or typical down air stall and falls cause the net to fall quicker, before it snaps back up giving the boost.

The barrier has a surprising usage: separating Koenma and Jorge. Koenma can move back first slightly, making the wall immediately nudge Jorge away and will continue to push him further away. This de-syncs Jorge and Koenma, but neverh has Jorge be commanded by Koenma. Only once the barrier is destroyed will Jorge attempt to return to Koenma's side, or if Koenma jumps over it or otherwise get next to Jorge again. This isn't what happens by defualt and adds a small amount of lag to the start due to the movement, but is largely inconsequential. Jorge can be kept de-synced even once he's reunited with Koenma by issuing mass attack commands.

Koenma is limited to two barriers at a time, a third destroying the first on frame 1. This is largely how he gets around ever having them used against him too. Trying to use the move in front of an old barrier will instead push back Koenma and create the wall "backwards," forcing Koenma to hover off-stage if used next to the edge, but will not interfere with the ledge mechanics. This move can be used in the air, creating a longer barrier as he falls, or wider if he lands during the move. This gets rid of any momentum Koenma had, meaning he can use this move like G&W's bucket to prevent a KO, possibly at the cost of one of his barriers. Koenma's so light this will see far more use than it does on G&W, though at a potential cost cost. Similarly for use, it's possible to create a literal safety net for Koenma off-stage.

Lower B/Down Special: Reiki Shield


Koenma bows his head slightly in a thinking position, holding his head, and putting out his other hand surrounded by a magic aura, creating a semi-transparent green energy shield around his hand the same size as Lucas' down special. This can be held out and any foes caught in it are dealt 9% and medium knockback, but has worse end lag than either Ness or Lucas' version to make up for the greater range. If Koenma is hit by an enemy projectile during this, it heals him for the same amount as Lucas, Koenma grading the attack after making a nasal disapproving sound. He will generally give some form of an "upper B" unless a very strong attack was used like a fully charged blaster shot, instead sighing and saying something close to "I guess it's a low A." This move can potentially cover for Jorge too if he's behind Koenma, or be used if Jorge is hit away first then the move goes on to hit a Koenma hiding behind him.

This move has another effect used with his Kekkai Barrier. When used within overlapping distance of a barrier, the barrier will gradually grow a magical green aura. This signifies that it has been given super armour by Koenma, gaining 5% armour against damage for every second that Koenma uses the move next to the barrier. If an enemy projectile was absorbed at the same time, the damage it would have dealt is added to the barrier, and this has no cap. when an attack is used that does below the armour percent, the barrier's net qualities will trigger and it will snap back, then spring back into place, rather than take damage. This will deal 1.1x the damage and knockback of the attack with radial knockback, or a minimum of 5% damage with low set knockback to push the foe away on the ground.

The barrier's attack has a slight delay and while it is in this delay it takes 0.7x damage, meaning the foe can destroy it given some time. This is very useful for Koenma considering his size and how difficult it becomes for the foe to hit him when he's next to one of his barriers, let alone when he's on the ground. Koenma can also edit his barrier shapes, their exact location and when he can have up to two, he can effectively shut down many of a character's approaches. The barriers last much longer with this boost to their durability, giving them more functionality for Koenma without having to dedicate time to defending them.

Upper B/Up Special: Baby On Board


One of Koenma's many female assistants appear before him riding a flying broomstick, carrying him up to two battlefields in any direction. They come in a variety of hair colours but all have the same face, it can even be Botan, a comic relief character from Yu Yu Hakosho. Koenma is better off heading in one direction though, as this recovery has the same momentum-like mechanics of Pit's up special, and the assistant will abandon Koenma after 5 seconds, Koenma saying "useless, useless, useless" under his breath or a variant of that quote. This can only be used once per air trip. Koenma can cancel out of it early by using any move or jumping, no move can be used actually on the broomstick as it will send the assistant off balance. They can maintain balance if Koenma drives into one of his Kekkai Barriers, being a very quick way to trigger the snapback and send Koenma in the other direction at a fast enough speed to recover far off stage.

Jorge can get on the broomstick too, if he is close to Koenma when the move is initiated, but makes it go 0.8x its normal speeds. At any point, Koenma can force off Jorge by pressing the up special again, to force a struggle and topple the ogre to the lower b-lastzone. This is the most reliable way of putting Jorge in the air due to his poor jumps, and he is a hitbox for a second after being pushed off the broomstick that deals 10% damage and low downward knockback, a very weak potential gimp move. Jorge doesn't have any aerials though and is easily air dodged due to his high fall speed.

The broomstick and the assistant point out about a Bowser in front of Koenma as he travels forward and the broomstick acts as a hitbox that deals 10% damage and can KO at around 150%, slightly more if it was going faster at that time. However the broomstick can be hit out of the air by any attack stronger than Fox's laser, forcing Koenma out of his recovery too, and forcing Koenma to wait another 10 seconds before he can activate his up special again. This is still a great way of approaching for Koenma, giving him a way to block an attack when he's extremely vulnerable, but it's hardly foolproof when the assistant is so weak, but can be very strong if weaving between a powerful enough Kekkai Barrier. Koenma will use his aerials out this recovery even if he was close enough to the ground to go into his normal walking stance, giving him an easy way to activate his aerials on the "ground."

When the input is held, Koenma will instead raise his fist in Jorge’s direction to bark an order at his more permanent, not really competent assistant. This allows Koenma to directly command Jorge, allowing him to tell Jorge to go first rather than him in the standards. As soon as a command is given this stance ends, but also ends if Koenma tries to use a smash, special or his grab.

Middle B/Side Special: Spiritual Journey


Koenma casually puts forward one hand causing a bigger, blue hand made up of energy to surge forward, causing Koenma to enter long end lag if it doesn't hit anyone as he angrily snorts and throws a small tantrum. If it does land, it acts as a command grab on the foe, as it pulls out their soul, represented by the foe with a blue tint and semi-transparent body. Their corpse collapses as if it just reached 0HP in a stamina match, and the foe now controls their soul with their normal moveset, but with a few catches. Firstly, their weight has been taken down by 15 units to represent their lack of a physical body, making them easier to KO. On super lightweights who have a weight of 14 or less, this only puts them at 0 weigh units. Their shield also depletes 1.5x as fast as normal. They are still hit by all of Koenma's attacks and take damage as normal, but also have to look out of their real body, as it can be pushed around by Koenma and even KO'd. Their attacks are not affected in any way, they just have to fight Koenma and not let him KO their body. After just 5 seconds they are returned to it, but if they are KO'd in spirit form, they will lose a stock, causing the corpse to dissipate. There's no way to get two stocks out of this for Koenma. Once the five seconds is up, the spirit form dissipates and the foe regains control of their body.

The body does at least not take any damage, but if it is knocked off stage and KO'd, it also counts as a stock. This forces the foe to play defence with it. The foe in spirit form can hit the corpse themselves to keep it away from Koenma. The command grab leaves Koenma and the foe in spirit form at a frame neutral position, but with Koenma closer to their body to abuse it, the foe in front of the corpse. Koenma at this point can make use of Jorge or his other advantages to fight the foe and try to gimp the corpse at the same time. The body can even be hit into his own Baby Kekkai Barrier to use it like a trampoline, bouncing them further away or even off stage if given some horizontal momentum when they bounce off it. when the foe returns to their physical body, they will possibly be in prone and have to deal with a potential follow up by Koenma if he didn't move them or left them floored. In the air, this is no longer a grab and instead a hitbox that deals 12% damage and medium, radial knockback. This can be useful in of itself for hitting the foe in a direction just by landing a certain side of the hand. If it lands on the ledge, it acts as a tether, going past any foe trying to be an edge hog.

SMASHES

Forward Smash: Judgement


Koenma takes out a gavel similar in appearance to his rubber mallet stamp before slamming it down forward in a motion visually similar to G&W's Judge. The attack does 12% damage and medium knockback, but very powerful pushback on shields, as much as a hammer item in Brawl. When charged this can deal up to 20% damage and high knockback that can KO at 140%, but this is very hard to land, the move itself has more similarities to G&W's attack in terms of the size of its hitbox, which is deceptively larger than the animation would suggest. As he's charging the attack, Koenma will say "HMMM" to himself as if he's thinking something over. The move has similar lag to the G&W move too.

If the move lands, Koenma will follow up the actual attack by stating that he has judged the foe and they will go to Heaven, purgatory or Hell. This defaults to purgatory or straight forward, but can be angled up for Heaven or down for Hell. A second after the attack, two ogres will appear on either side of the foe, to carry them upward, forward, back or down, depending on what angle was given, if any, during the start-up. These differ vastly in appearance, the ones taking the foe to "Heaven" are skinny and adorned in comical angel-like costume with a toy halo and tiny wings. The purgatory ogres resemble typical office worker ogres common in the anime, wearing glasses and a grey suit. The "Hell" ogres are very fat, red, almost resembling demons and having very stern expressions.

The ogres will carry the foe in their given direction for two platforms, taking between 3 seconds or 1.5 seconds depending on how long the move was charged. The ogres can be hit off but have differing amounts of HP, the hell ogres having 12HP (but can both be hit at once), the purgatory ogres 8HP and the heaven ogres 5HP, but are spaced farther apart than the hell ones to be harder to kill at once with up aerials. If one one is defeated, it reduces the speed and distance they're carried by half, and obviously if both are defeated, then it ends the move, basically acting as stronger Pikmin. The purgatory ogres are basically rushing the opponent, the heaven ones comically seem to "carry" them, and the hell ones simply grab them by the legs trying to drag them down with their sheer fatness. If Jorge is within a Kirby of the opponent when the effect takes place, he will don the apperance of the respective ogres and buff the speed they move the foe by 1.3x, but is hit off by any move. At the end of the move he retains the silly costume until the end of the stock, or if the move is used again.

As the foe is being physically dragged, they can't DI the knockback and it's unaffected by their weight, making it more powerful early and very dangerous if they were hit by the actual attack portion of the move too, but the same effect happens even if the foe shielded. If they still shield, or are in the middle of any other animation, it will be cancelled as they are dragged, even able to drag foes off the edge who were standing on the stage. This can be used on a foe's corpse if they're in spirit form to forcibly pull it off stage or into an abusable position for when the foe regains control of it. The ogres can drag the foe into Koenma's barrier. The snap of the barrier will force off the ogres, but can even gimp if Koenma manages to rush a foe into a barrier off stage that then springs them backwards, also unaffected by DI. This can also easily lead into combos, as he can have the ogres drag the foe back towards him or into his attacks. Of course it's also a great finisher if he can get them close enough to the blast zone, although he has very little time to actually hit them beyond the initial hitbox, and if the foe is grabbed or otherwise stunned, the effect is cancelled.

Down Smash: Ogre Parade


Koenma starts calling for his ogre assistants to do their work, causing one to appear on either side of him. During the charge where Koenma continues to call for help, he summons a further 2 ogre, one on each side, up to twice, to make up to 3 ogres on either side at max. After finishing the charging, the ogres charge forward in a desperate flailing of their paperwork and other utensils, resembling a stampede. Three ogres go forward, and three go backwards in the opposite direction. Any foe hit by the front of the attack on either side is dragged along and dealt constant hits of 3% until the ogres run out of steam and dissipate. How long this takes depending on the number of ogres, if there is only one the foe is only dragged a platform and dealt up to 21% if all the hits landed, whereas 2 ogres go 1.5 platforms and deal 27% damage, and 3 ogres go 2 platforms and deal up to 33% damage. At the end of the attack, the foe is dealt high horizontal knockback that can KO at as low as 120%, stronger if all the hits landed. A foe can likewise be dragged along on top of the stampede, hit forward by the ogres flailing their arm, but take only 0.7x the damage and knockback.

The ogres are around as big as Marth, and get progressively wider when more are summoned, eventually being as wide as Bowser all bunched together. During the attack, the ogres can be defeated by depleting their 8HP, but this can stack up to 3 times for every ogre used in the attack. Nonetheless, this can act as a pseudo-wall for Koenma in the same way as his barriers, and he can attack at the same time as his ogres are released, albeit with a little lag. If Jorge was next to Koenma at the start of the move, he will jump in line as an extra ogre on whatever side he was to Koenma, adding an additional ogre to top the damage off at 39% and can KO at 100%, but leaving Jorge vulnerable. This is especially true if used next to the ledge, as the ogres will continuing doing their flailing attack off the stage, including Jorge, potentially ending the move early if the foe was dragged that far.

This move is especially useful if Koenma can manage to separate the foe and their body using his side special. He can position himself between the foe and the body then use this move to push the corpse off stage while hitting the foe in the exact opposite direction. Using Jorge, Koenma can prioritize which side he wants to attack or separate the most. The alternative is also to simply hit them in the same direction, as even if the corpse doesn't take damage it means that the foe has to focus on killing off the ogres to save the corpse than fighting Koenma directly, if only for a short time. Depending on where the foe was hit, they can be hit into the Kekkai Barriers, causing them to rebound back towards Koenma for a follow-up at the end of the attack. If the foe is snapped back at by the barrier, they can get rid of all ogres with the hitbox of the move because of dealing at minimum 8% damage and having super armour. This is easily reacted to by Koenma too, potentially making it worse than actually landing the knockback of the move.

Up Smash: Pacifier Seal


Koenma takes out his pacifier and uses his magic to hover it overhead and makes strained noises as he fills it with magic energy for the charging animation. The pacificer then explodes with a bright green energy, creating a symmetrical, circular hitbox around the pacifier and Koenma. The hitbox expands out over time in the same way as an exploding smart bomb, trapping foes hit by it with constant hits of 5% damage and a last hit of 10% and powerful knockback that at no charge, KOs around 150%. If all hits land, this deals 20%. The lag of this move is comparable to Lucas' up smash. With charge, the size of the explosion increases, at first just big enough to cover Koenma if he's hovering in the air and just below him, around as big as Bowser. By charging, this can be up to 1.4x the size and deal up to an extra 2 initial hits for 30% damage overall, as well as KO at 130%.

As the match goes on, energy will passively build up in the pacifier giving it a green hue, at the same rate and maxing out at the same time as Wario Waft. This resets in the same manner too after use and carries over stocks. This is apparently the reason Koenma is always sucking on the pacifier, although the one time he uses the pacifier for this purpose it fails. This increases the size of the explosion further, the no charge version increasing to at max, become the fully charged version, and increasing the size of the fully charged explosion to be 2x the size of Bowser, deal up to 40% damage and KO at 100%. Once Koenma manages to charge the move beyond its normal max, he is free to move at that point in the explosion rather than be stuck in extended end lag, meaning he can follow up directly while the foe is hit by the move. This is very useful to use on a spirit form foe and their corpse, especially if timed to put the foe back into their body during this long animation to actually take all the damage.

Jorge reacts uniquely to the explosion, as apparently Koenma didn't make provisions for the ogre in case he was hit by this move. Koenma actually has plenty of ways to position Jorge away first, but that requires effort. Jorge reacts more comically to it than anything, but is actually dealt knockback by the move in a unique way, comparable to the way Wario moves during his Wario Waft. This is both a blessing and curse for the move, as Jorge can be genuinely a very useful tool as a projectile, but used close to the ledge or on a small stage, makes him vulnerable to gimps, or entirely unable to recover with his weak jumps. Koenma should make sure his sacrifice isn't in vain. Jorge is sent in the opposite direction to where the explosion hit him, for example being hit straight up if he was in the air above Koenma, or diagonally away if hit coming down on the side of the explosion. As he's hit away, Jorge is hit in a straight direction and deals 8-16% damage depending on how powerful the explosion was and becomes a transcendent hitbox, with knockback comparable to Wario when he's launched by the Waft, KOing at 80% at full charge, and 60% with the full passive charge too. The Kekkai Barriers can be used to send Jorge into a number of unique patterns, although this requires some heavy set up.

This move used on the Kekkai Barriers will act as if a character was pushing against it, in the direction of the explosion. For every hit landed on the Kekkai Barrier, it will spring back the Kekkai Barrier, potentially pulling it all the way back. If it’s not pushed all the way back, the barrier will simply spring forward at the end, which can still be useful as a combo directly out of the up smash if the foe was hit into it. But if the up smash manages to fully extend the spring back, it will not immediately spring forward, instead it is imbued with the pacifier’s green magic, and becomes a trap. Now if a foe walks into the barrier, it will spring forward without needing to be attacked, and this works on both sides too, the foe being sent at the opposite angle if they hit the “extended” part behind the barrier. The explosion can even uniquely set the angle of the barrier beyond just the usual one direction, giving a slight or extreme verticality to horizontal barriers, or horizontality to vertical barriers. For example, a straight vertical barrier, if positioned to the top left of Koenma’s explosion, will now have its spring set to hit an opponent down and right, or up and left if they hit the back side of it. Foes who are sprung away like this take between 10-14% damage, more if the explosion landed more hits, and can even KO at around 150%, earlier depending on how Koenma managed to set this all up.

GRAB GAME

Grab: Baby Pen

Koenma puts his hand forward and creates several small Kekkai Barriers, appearing as nets as they do in neutral special, immediately in front of him. This is technically a long range grab but the range is not much different from a regular grab, just having slightly better range, but at the cost of being a little slow. When a foe is hit, the Kekkai Barriers surround them as if caging them in, although this is entirely a visual effect. This will cause any Kekkai Barriers within range, they bend to connect with the smaller ones created by Koenma, ensnaring any foes who were in the way in the grab. In either case this initiates Koenma’s grab game as normal, just positioning the foe slightly away from Koenma. This puts that Kekkai Barrier out of commission while it’s used in the grab and puts it back in place when the grab ends.This is largely only consequential in FFAs, where the committed barrier becomes immune to outside damage due to being in the grab.

A grabbed foe in spirit form will cause a grab release if they reach the end of the five seconds when grabbed. If they are thrown, though, they have to wait until the end of the throw animation to return to their bodies. Likewise, if the foe was grabbed before the effect from the forward smash can take place, it will be delayed until the end of the grab game altogether, not even interrupting the pummelling or grab phase. There is only a second window to do this, but possible given the foe was shielding or the attack was lower charge. This is very powerful when added to the knockback of the throws directly. To prevent any infinites, there's a second after any of Koenma's throw ends where he can't do another grab.

Pummel: Elastic Band

Koenma says “take that!” and “serves you right!” as he causes all the Kekkai Barriers to snap back and twang back at the foe, causing 2% damage in an average speed pummel. If any other Kekkai Barriers were used in the grab, they will be included in the attack, adding an additional 2% for each of the barriers used, which at default means an extra 4% if both of them were managed to be included. This can be increased however by a couple of things, firstly the increase given to the barriers by the down special, giving an extra 1% of damage for every 10% of resistance given to the barrier as it visually seems more taut. The other increase comes from the up smash, if the barrier was pulled back into place by the explosion and left as a trap, when it comes forward it will deal the same damage as it does normally and actually ends the move early. This can be a KO move of its own, but requires heavy set up to be successful.

Forward Throw: Ball Pit

Koenma makes a fist to cause the various barriers to convex into a round ball, the size of the foe, or bottoming out at the size of a sideways crate. Koenma then creates a burst of energy to send the ball forward, causing the foe to take 5% damage and sent at scaling speeds, at low percentages the walk speed of Captain Falcon, but maxing out at his dash speed and lasting for a maximum of two seconds. The foe is treated as if they’re still grabbed and mash out with the difficulty carried over from the grab, meaning it’s easier to escape if more time was spent pummelling the foe, but the damage obviously makes them go further. Any bigger barriers from the grab at this point disconnect and let the foe be on their way. If the foe hits any Kekkai Barriers on the way, they can potentially send them in another direction given the ball has enough momentum from the throw to push it back all the way first. Conversely, if the up smash was used to turn a barrier into a trap, not only is the effect immediate, it brings the foe out of the ball as they take the damage and knockback normally.

As the foe travels in the ball they are a hitbox that deals 5-10% damage depending on the ball’s size and speed, and can KO at around 150% when it’s going around its max speed. This is also useful against the foe’s own corpse in spirit form, although the timing of this is tricky, but redirecting the ball makes this far easier. Koenma is stuck in the animation for the duration of the move, if he’s attacked by outside forces, the throw ends. Jorge can be utilized in this move if he’s in the way of the ball, as Koenma commands him to play ball and volley it back in a given direction, defaulting to back in the direction it came. Koenma can command him to hit it up or forward. Koenma can also command Jorge to go down, which causes him to dodge out of the way as Koenma insults his intelligence for almost ruining his fun match. At any point Koenma can cancel out of the throw by shielding, meaning he doesn’t have to stand in place.

Up Throw: Whipping Boy

Koenma rears back his arm to cause the barriers to revert back to a more basic form, wrapping around the foe as if the net’s rope has come undone, leaving a small trail of it behind the foe. Koenma then throws his hand forward, causing the rope to unravel and whip the foe upwards for 10% damage and knockback that can KO at 200%, on low ceiling stages. As the rope is unravelling, Koenma can angle it slightly to hit more out to the side, boosting the knockback at the end of the move at the cost of angling it slightly left or right. This makes the go almost a platform to either side of Koenma in the air before they’re launched. If the rope manages to hit Kekkai Barriers, it will bounce the rope back and increase the knockback further, typically lowering the KO percent by 10%, this can obviously happen up to twice with very well placed barriers. The exact positioning of these can also alter the knockback angle slightly in the direction the barrier is faced. This is also stronger if the foe was grabbed on a higher area of the stage using the extra Kekkai Barriers.

Koenma can choose to use a Kekkai Barrier he grabbed with to throw the foe by default, causing the foe to take 3% more damage and knockback higher up, or press the standard button to not use it like his forward throw, instead pretty much assuring it can be used during the move to boost the move’s knockback and give it a specific angle to hit. The whipping part of the throw is a hitbox that deals 8% damage to those outside the throw and medium knockback, mainly useful against a corpse. This is mostly different from the forward throw because of the combination of Kekkai Barriers, as Koenma can potentially hit a corpse next to a barrier to cause it to go in one direction, but then cause a whiplash on the actual foe to send them in another direction to make sure they can’t follow up on defending it. Jorge can act as a “barrier” himself if he was in the way, as Koenma whips him as if he was a slave, telling him to “work harder!” Jorge will just send the whip back at a generic more horizontal angle for the knockback at the end of the move, but is mostly useful for making sure that Koenma will actually hit any Kekkai Barriers directly above or behind himself without having serious amounts of set up.

Back Throw: Work, Work


Koenma gestures inwards with his hand to cause the barriers surrounding the foe to dissipate, launching the foe into Koenma's free hand. He takes one look at the foe and decides they're not really worth his time, tossing them behind him for 5% damage and low knockback. As he does this, he uses his magic to separate the foe from their soul, saying "hold on a minute" or a variant of it. Koenma takes out his rubber stamp and twice hits the foe over the head in their spirit form, defaulting to a red stamp, but by using the standard button using a green stamp, or special button to use a yellow stamp, both dealing an extra 1% damage. The shield button will cancel the move early to grab release or hit the foe only once for less lag. Koenma can combine these in any pattern, but each hit takes a second as Koenma pontificates with an audible "HMMM." The spirit form is then immediately dragged away by an ogre represented by the respective stamp. The green represents the heavenly ogres, the red represents hell ogres and yellow represents purgatory ogres. The combined forces of these different ogres will pull the foe inbetween the two, potentially pullng them up and right or left and down, or just holding them in place if two opposing ogres are used, playing tug of the war over the foe's soul.

Due to the lack of charge, the time it takes for the ogres to pull the foe's spirit form across the stage is 1.5 seconds, giving Koenma that much time at most to mess with the foe's body if they don't manage to fight off the ogres quickly, enough time for a fully charged smash attack. Koenma's stamp takes two seconds for both ogres to be used, and if only one is used the move is very easily escaped in time to do something about Koenma's clean up of the foe's remains. Koenma stamping immediately takes off one or two seconds from the five seconds the corpse is detached from the foe, and as the corpse is thrown behind him, the most obvious immediate moves are down or up smash, depending on what the foe's reaction is. Koenma has to be careful though, as if he attacks too quickly, the corpse doesn't take damage and the foe might end up taking none of the damage. He might want to instead time it so the foe is back in the body for the last shot of his down or up smash, or go for a direct tech chase out of their prone when they're more disorientated. If the foe was grabbed before a forward smash effect, and keep in mind the grab delays this effect, the reward is another set of ogres grabbing them at the same time, creating up to four ogres pulling the foe away at once. This doubles the speed and distance they're pulled and the amount of targets the have to hit off.

Koenma can use this move on a foe already in spirit form, instead discarding the foe's spirit form with a harsher throw for 8% damage, due to the foe's weight being reduced and Koenma's innate power over souls. This does medium knockback and can KO at super high percentages, around 250%. This obviously can put Koenma in a great position to follow up on their body by separating the two even further, and is the quickest of his throws to get right to work. Jorge isn't involved directly in the throw, but will join in with the effect of the throw if he's close to Koenma and the standard button is pressed at the end of the throw, Koenma ordering Jorge to do his work. Instead of what he does in forward smash, he simply gives a big push to get the foe on their way to their afterlife, moving them a platform. This will at least move a foe that far if two opposing ogres hold them in place. This can all be very powerful if Koenma managed to get both sets of ogres and Jorge on board, but that is very difficult and Jorge may be better used to fight the foe instead.

Down Throw: Catch of the Day

Koenma claps his hands to cause all the netting of the barriers surrounding the foe to close in on them and surround them like a fish, or squid, caught in a fishing net. This deals 6% and putting the opponent in prone, but also has the foe stuck in a net effect for the next ten seconds, visually just making them be covered in the netting. The prone itself is important as it leads into a direct tech chase for Koenma and the foe has only a second of immunity to a regrab to worry about, as well as potentially spacing away a corpse in prone if it's directly in the way. Considering the grab can be initiated further afield by other barriers, this can potentially hit the foe in midair, resulting instead in them entering 0.5-1 second of free fall based on their percentage. If there were any extra barriers used to grab the foe, they add another 1% each to the grab, but each extend the amount of time the foe is stuck in the net effect by an extra 1 second.

If Jorge is close to the opponent during the move, within his own width of them, the throw will net him and the foe together in essentially a very close range tether, much to Koenma's amusement who actually points and laughs at this in the animation instead, joking that the foe now has to carry Jorge. The foe's air and ground speed is now reduced to half of what it was, but are boosted by Jorge's weight. This can be a double-edged sword though as it makes them easier to combo due to reduced knockback, and when the effect ends they lose the weight as Jorge awkwardly juts away. The same effect can happen using the foe's corpse when they're in spirit form, this means that when they return to normal, any knockback they were taking will carry over to the corpse as it's attached to them. Most of the time you actively want the foe and their corpse separate but at very high percentages, on a lighter foe, this can be a good way to double the foe's hitbox, on heavier foes just turning them into combo food until they separate again and become more easily KO'd.

The foe with the netting effect gets another disadvantage, in that as they're being hit, they become a barrier themselves. The nets spring back out of their bodies on the opposite side of their body to where they were hit, then forward and give the foe a slight bit of knockback, or a lot of knockback if Koenma managed to attack them constantly to fully activate the spring. If a trap barrier from up smash was used in the throw, Koenma only has to hit it with an attack to active it on the foe, who is hit as if they actually activated the trap themselves. However if the foe manages to survive the barrier dissipates, making it a little risky for Koenma. The fact it's on the foe's back means they basically just have to keep facing Koenma, but he has plenty of ways to get around that. The non-trap version makes it even easier for Koenma to combo the foe as they essentially take opposing knockback from his attacks to be thrown back at Koenma after his attack.

At the start of the move, Koenma can press the standard button again to cause a different effect, if Jorge or the foe's corpse is in a platform of the foe. Keonma does a pulling motion with his hand and makes a "HMPH" sound, turning the barriers from the grab into a rope that tethers together the foe and Jorge or their corpse with one platform of length between them. The tether has 10HP, increased by 5HP per any barrier used at the start of the grab, the tethering process dealing the foe a paltry 5%. The foe is now tethered to that object until they destroy the netting tether. This means that unlike in the normal version, Jorge can actually attack the foe, but they can't knock him past the one platform long tether. The foe and their corpse mostly just works if Koenma immediately attacks the foe afterwards, as he can hit the spirit form away, then attack the foe as they return to their corpse they're dragging along behind them for twice the damage. This especially works well with his up special, forward smash and down smash.

STANDARDS

Jab: Pacify

Koenma’s jab has him casually prod forward three times, this causes dark magical sparkles to appear that deal three hits of 2% for a total of 6% as disjointed hitboxes. In all ways this is similar to Zelda, the only real difference being if it’s used from his crouch, either hitting very low or high. This move only deals some light hitstun, and its speed means it’s ever possible to use in conjunction with Jorge’s moves, but has some end lag as Koenma feels the need to admire his twilight magic with a thick “HMM” sound. When the sparkles hit a solid structure, such as Koenma's own barriers, it creates two sparks that travel around the structure at double the Hothead's speed, going in opposite directions. As long as foes overlap with the spark, they are dealt constant 1% damage and flinching, but this effect only lasts for 1 second. Nonetheless, this can be a way to cover Koenma's end lag at worst, or a direct way to follow up if he goes for this directly, if he gets past how it's very telegraphed.

Jorge counts as a solid object in this move to use the spark on, putting him in electrified lag, but passes it on to whatever else he's touching, including the ground, for a second after. When the sparks come out of Jorge, they will use his limbs as the exit points and divide in two from there, potentially coming out of his arms and legs as he strikes a pained jumping jack pose. This can lead to up to four times the amount of hitboxes, at the cost of one second of lag. Jorge also becomes a hitbox that deals constant 1% damage and flinching knockback for a second, dealing up to 15% of the foe is within touching range at the beginning of the attack. This even works with Jorge’s tether from the down throw, travelling through it as a solid structure to hit the foe like a fuse. This forces the foe to spot or air dodge when it reaches them or take a single hit of 10% damage and weak knockback. This damage is dealt to the foe immediately if Koenma hits Jorge while they’re tethered to the back of the foe during the down throw, the version that is not a true tether.

This is the first time Koenma directly commands Jorge. When Koenma is in the middle of any attack, Jorge gets his own set of standards to use while Koenma is attacking, and this move’s long duration makes it an obvious example. For this move, Koenma barks an order for him to beat the crud out of the opponent, causing Jorge to immediately do three awkward hits with his forearm. These come out at a similar speed to Ike’s jab and deals the same damage altogether at 16%. Jorge will do three forearm chops in a row, that do have decent range but are slow and predictable, the last doing knockback that can KO just under 30% later than Ike’s jab. The knockback is at the Sakurai angle, meaning that at lower percents Jorge will keep hitting the foe across the stage instead, far more favourable to combo into his master Koenma. Jorge will do all three hits of the move upon pressing the standard button and at any point on the stage, which can be easily punished by the foe.

Dash Attack: Super Koenma

Koenma puts his arms out to his sides and doubles his dash speed for a moment, turning his body into a hitbox that deals 8% damage and medium knockback. This move can be angled slightly in its duration, to let Koenma to change velocity to travel nearer the ground (as he does out of his crouch) or higher, and delivers different angled knockback as well. Lower angles send the foe at a more harsh diagonal direction, while hitting a foe higher will send them at the Sakurai angle, either along the ground or slightly into the air the higher the percentage. This will only KO after 220% though, so it’s not really a viable KO move. Koenma can make use of the angling and the speed up to launch himself into his barriers as boost pads to make use of his accelerated speed to traverse the stage. It’s also a good way to hit the foe’s corpse at a low angle and when his size has been reduced by flying horizontally, to outrun and avoid the foe’s attacks.


By pressing the standard button again, Koenma will disappear in a puff of smoke, and re-appear a platform further. As Koenma disappears, his pacifier glows and he performs a midair spin, causing 7% damage, but closer to Koenma there is a stronger sweetspot that deals 12% and can KO at 200%. When Koenma re-appears, the same hitbox is created, similar to Farore’s Wind. This not only allows Koenma to go past solid objects like his walls, but lets him attack both the spirit form foe and start to gimp their corpse off stage at the same time. If timed very well, Koenma can even hit the foe with the sourspot, but use the sweetspot to send the corpse further off stage, or vice versa depending on what Koenma wants to do. This move will put Koenma off stage if he uses it near the edge, but doesn’t put him in any form of helpless, a great transitional move into his aerials. It’s also a useful mix up, as Koenma’s dash attack is easily punished.

Forward Tilt: Toy Hammer

Koenma waves his hand to create a huge spirit hammer, semi-transparent and blue in colour, saying a line such as “so much for comic relief!” The hammer hovers in front of him, before he lets it collapse down in a manner similar to Dedede’s forward smash, only 1.5x the size of that move’s hitbox and around half the start lag at 25 frames, and half the end lag too. The catch here is that this is not a real hammer, so only deals 14%, little over half the damage of the famous Dedede move and is much weaker, only can KO at around 100%. An important part of this move is the great range, as the hammer’s massive size makes it easy for Koenma to hit multiple characters at once, including a foe and their corpse. The hammer acts as a physical hitbox, but due to being a spirit hammer, will go through any physical objects as if they don’t exist, possibly hitting on the other side of walls or Koenma’s barriers. The move deals 1.5x the damage and knockback to spirit foes too, not including their lower weight, making it a uniquely powerful KO move on them that can force them to abandon their corpse to ensure they don’t get KO’d.

Jorge is commanded to “hammer em!” as Koenma is fond of puns, as Jorge takes out a massive hammer and holds it out behind him, then lets it go, even more similar to Dedede’s forward smash. This time the hammer is the same size and the move even does the same damage and knockback as Dedede’s uncharged forward smash, dealing 22% damage. The difference is the lag is much worse, taking a full second of start lag and 15 frames of end lag because Jorge is no King Dedede, with no stars shooting out to cover the ending. Of course Jorge is expendable as always, but what makes it less than just a slow move to throw out on a whim is that if Jorge hits one of the barriers in the middle, it will throw back the hammer twice as fast and deal the same damage and knockback in the reverse direction. If there are two barriers, or even a similar object like a bumper in play on the stage in a way, Jorge can be stuck in a loop that resembles the hammer items from Brawl, wildly swinging back and forth. This is around 0.7x the power of that item, but still is very powerful and basically turns Jorge into a trap, but will only last for 5 seconds before Jorge lets go of the hammer.

The reason for the bad end lag is not just because of the heavy duty move itself. When Jorge pulls away the hammer, he reveals that on the ground is a green, gooey stamp showing Koenma giving the thumbs up, although you need to move the camera a bit while paused to see it. This glue-like substance will stick foes to any object it hit until they deal it 5HP. It can even stick corpses on place. This isn’t very strong however, as just moving through it is possible, just limiting that movement by half. For example if a foe returned to a sticky corpse they would be able to roll out of prone but at only half the distance, making them much more predictable. Another use is simply sticking barriers together for whatever nefarious reason Koenma can come up with, allowing him to ping pong opponent on one side to another given the right combo of moves. It lasts for five seconds, but can stick two barriers together permanently.

Down Tilt: Stamp of Approval

Koenma does his usual "HMMM" then summons a rubber stamp hammer and hits the ground (or air), creating a green burst of energy that deals 9% and pops foes into the air. The size of the hitbox is 0.7x the size of Lucas' down smash. Koenma's hammer itself does the same damage and knockback, as it becomes covered in the same magic energy, both parts of the attack KO around 150%. There is smoke left behind that forms into a crude drawing of Koenma giving a thumbs up, a bigger version of one of his special stamps. If performed on the end of the stage, even on top of his own barriers, Koenma will create the same hitbox on the ground if there is any lower solid structure that can be used. You can even land the melee part of the move while hitting another character or a corpse/spirit foe, while hitting another character or corpse/spirit foe in a completely different area.

The seal of approval has its own effect on the barriers. The last barrier where the seal of approval itself was used, or even the smoke made the iconic symbol, will now be marked as an exceptional area for Koenma's ogres. When he uses his down smash, any ogres who run into it stop, pulling out hammers and screwdrivers to crudely repair it, healing it 2% per ogre a second. They will heal it even if it has taken no damage, boosting the barrier's HP by up to 18% before they dissipate. If the barrier reaches that cap through their repairing or is at the max already, they'll stop. The foe can attack them off to stop this process using the normal mechanics. If Koenma goes to use his forward smash or back throw, a new command is available if Koenma instead hits the grab button. A new ogre is summoned to deal with the exceptional foe, wearing thick-rimmed glasses and sporting a bright green skin colour will appear to fly the foe towards that barrier instead. If they reach the barrier, they will dissipate early. These ogres go slightly faster than the usual ones and have a pretty bulky 12 HP despite being the usual size, and push the foe from the opposite angle to their goal.

Koenma commands Jorge to "do something useful" or a variant on that, and before he can finish the sentence, Jorge dives forward. This is similar to Dedede's dash attack, dealing 11% damage, less to reflect that this isn't the king of penguins doing this move. It as a result deals less knockback, KOing around 25% later than King Dedede. As with Koenma, this move has more relevance on higher structures, as if used off a platform of other structure, Jorge will enter a comical free fall and his body becomes a hitbox that deals 14% and downward knockback, working as a gimp but very dangerous for Jorge if he uses it off-stage. He falls at double his usual fall speed, making it possible for the foe to just air dodge him given Brawl's air dodges have just under half a second of invincibility. This is a fairly good move to use in a combo with Koenma's normal down tilt as well, as he hits them into the attack or as they're popped up by his down tilt, depending on the order.

Up Tilt: Baby Carriage

Koenma takes out two of his normal rubber stamps, not the hammer type in this move. He shouts a random expletive like “Squid!” and launches upwards, hitting upward with his stamps in a low range but easily combo’d attack, hitting for 2% up to 6 times, swapping between his left and right stamps. Koenma becomes exhausted after this and enters a kind of free fall, but recovers once he hits his hovering distance above the ground, and this makes the end almost free of lag if used out of a crouch, as he only travels upward a Ganondorf. If he manages to hit the foe, he gives them a visible stamp that can be seen if paused, but is visible enough for the enemy player to notice. The next time Koenma manages to land his side special, the stamps forego the paper work and give him an additional 1 second per stamp on the foe, up to a max of 11 seconds overall, more than enough to file away the foe’s soul for good. The effect wears out one stamp at a time, taking two seconds for each stamp to wear out one after another. Foes already in spirit form don’t have this effect, but instead take 2% a second passively until all the stamps wear out, making it especially useful to use if Koenma landed it on them before he used his side special to prolong the amount of time they take damage.

For this move, Jorge is told to “get my throne”, summoning a baby-sized stool that he holds over his head. The stool is a regal gold with five tassels to reflect the royalty of King Yenma’s lineage. This not only negates the end lag of the move as it causes Koenma to land early, being a great follow up, but Jorge can throw the stool as a throwing item if commanded as he normally is, even if Koenma is standing on it. The stool isn’t a very strong throwing item, dealing 8% damage and weak knockback, comparable in power to a Mr. Saturn. It can be thrown forward, diagonally down or upward using the jab, down tilt and up tilt respectively or smash thrown using the forward tilt to deal 11% and higher knockback at the cost of some start lag, only can KO at 250% so not really viable. Koenma standing on the stool will still use his grounded moves, and can even be thrown at the foe during his attacks, using the stool as a cover. If the stool is thrown upwards with Koenma on it, Jorge will attempt to catch it as it comes back down, but if he is hit out of the way or Koenma gets off it, it will fall to the ground dealing the usual 8% and weak knockback, breaking on any solid structure.

AERIALS

Neutral Aerial: Creepy Soul

Koenma throws up his hands to release a paltry looking soul imbued with magic, saying during the long duration of the move “if you do well I might promote you to upper b!” The soul first circles Koenma dealing 8% damage and medium knockback away from the point it hit, and will then go off on its own way if the input is held, all taking only 0.3 seconds. From here, in all ways this resembles the Lucas and Ness up specials for animation, and the soul itself largely resembles PK Thunder too in appearance, only light blue and semi-transparent, with a tail two-thirds as long. Koenma can control the soul for around two-thirds as long as Lucas or Ness’ up special with the same amount of control. The soul will do similar damage too, the head dealing 10% and medium knockback, and then dissipates to end the move. Koenma can’t use the move to recover and doesn’t enter free fall at the end of the move. The move’s duration is around two-thirds the length of Lucas and Ness’, and Koenma is stuck in the move for the duration, making it extremely risky if it whiffs in the same way as the moves that inspired it. If the spirit fails to land a hit, Koenma will say “NOPE!” in reply to his earlier quote.

When Koenma uses this move on a spirit form foe, the effect is instead changed more to resemble Lucas’ version of the move, where the head deals no knockback and the tail instead deals constant hits of 1% damage as the head passes through. This extends the move’s duration but largely if it lands, like Lucas’ move, it will cover the extra lag due to hitstun. The more important dynamic here is that Koenma can keep the spirit going through the foe to hit their corpse that they might have been trying to protect, while still trapping them in the hitstun. The foe now has to avoid the spirit and its tail and make sure they hit the corpse out of the way of it too, or approach Koenma to directly punish. This is especially effective on a corpse with the head constantly pushing it a little forward. Although the projectile is fairly easy to shield, in spirit form the shield is of course naturally weaker too, so it’s not all bad for Koenma even then. PK Thunder 2 – when Lucas or Ness hit themselves with their up specials – is still available if Koenma hits Jorge with the move, launching him forward the same distance, but as a bigger hitbox due to his size. This deals 15% damage and knockback that can KO at 150%. At higher percentages, this will go further than usual for Jorge, becoming a good way to ping-pong off him off barriers as well as a hitbox. This can also be a situational way to help Jorge recover.

Forward Aerial: Hammer Bros

Koenma takes out his rubber stamping hammer and swings it downwards, this deals 10% damage and is one of his fastest moves. It deals medium knockback, but can start to properly gimp with the move around 155%, but has less range than Ice Climbers' forward aerial. The move has is as short on range as it is on lag, making it low-risk low-reward, scaling hard when the foe is at high percentages. There’s a sweetspot at the end of the hammer for Koenma, dealing 13% and knockback that can KO as early as 130%, at the tip of the hammer. If Koenma hits Jorge over the head with his hammer, it causes Jorge to tumble downwards in a similar hitbox to his down tilt, causing 10% damage as he free falls for up to 2 seconds depending on his percentage, dealing medium knockback. Koenma will say “you deserve it!” if he hits Jorge.

Jorge can be commanded to do the same attack if he was also in the air at the time, instead summoning a hammer around 0.75x the size of the one he summons in forward tilt and slamming it down in half a second, slightly faster than Dedede’s uncharged forward smash. This deals 15% damage and is a meteor smash as strong as DK’s forward aerial, although is obviously highly telegraphed. If Jorge lands during the move, he’ll continue the move through lag to hit it on the ground, but can also hit it on hard surfaces he lands on in midair too. This has more end lag as Jorge hits the ground, and will halt Jorge’s fall speed for a moment. This is a good way to desynchronize Jorge to put him in prime position above Koenma for neutral aerial or even something more creative like a horizontal barrier, to keep Jorge bouncing in midair. This and the earlier way to send Jorge down gives a great mix-up in the air to either keep Jorge above or below Koenma as long as he's in close range to land this attack.

Up Aerial: Spark of Genius

Koenma puts up his finger and waves it back and forth casually, saying his trademark "HMMM," creating bursts of sparkling energy in a similar pattern to Zelda's up smash. This deals 6 hits of 1% damage and fifth, noticeably larger hit that deals 10% and strong vertical knockback, creating in all 7 stars. This is actually more of a combo of Zelda's up smash because of the pattern and Lucas' down aerial, only used upward, as each hit deals slight vertical knockback to make it difficult to combo all the hits unless Koenma had momentum going into this move, but the last hit happens directly above Koenma so can still reliably KO. This is all much more powerful in the context of Koenma's barriers, as he can use them to just block the foe from taking the vertical knockback if he uses them as a wall, or use them to send the opponent with the knockback downwards to turn it into a proper meteor smash like Lucas' down aerial. When the foe is launched, they're also briefly electrified and become a weak hitbox that does weak launching knockback if they hit a foe on the ground, dealing 7% damage, enabling Koenma to launch their corpse into the air. This allows him to follow up easily or try and finish off the corpse.

For the duration of the move, Koenma can instead stop on a different spark of energy by pressing the standard button again, boosting that spark to deal 10% and become the final string in the combo. This ends the move early, at the cost of doing more horizontal knockback to make it a worse KO move in most instances. Koenma can dish out anything from 1-7 hits, but if Koenma presses the input while the last hit is being dealt, Jorge will attempt to perform the same attack if he was in the air. Jorge will perform an animation similar to Lucas' up smash, only taking a half of the start up time, and produces three fairly pathetic sized bursts of energy above himself for his efforts, each about a third as big as in Lucas' attack. This is much weaker but does have greater range around Jorge. He does seem happy about it though, and a quiet, comedic celebration sound plays. All three appear at the same time above Jorge, spaced closed together, and deal 5% damage and strong upwards knockback, around a third of an uncharged Lucas up smash. It's easy to ping-pong a foe off of Koenma's move if he can send them back down, or at any angle to hit Jorge in the air.

Back Aerial: Brainchild

Koenma does a simple headbutt behind him, liked a flipped version of Lucas’ up aerial, dealing 13% and medium knockback. This is more useful on Koenma given his much superior recovery to Lucas and the direction, to use as a gimp, and is one of Koenma’s fastest moves. Koenma will bungee the barriers all the way back if he back airs into them, enabling him to start up again on the offensive if he’s pushed into a corner with a barrier. If Koenma hits Jorge, he will knock him backwards in a painful looking comical back roll, becoming a ball that deals 15% and can KO at 170%, but only runs along the floor for a platform. Koenma will say “oh that silly Jorge” if he stays idle. Just a simple ball hitbox like this rolling across the floor can actually be very useful to try and position the foe’s corpse off stage before they regain control, or re-position it without having to commit Koenma to it. If Jorge rolls off stage, he’ll exit the move and be forced to recover, becoming vulnerable.

Down Aerial: Kuwabara Drop


Koenma poises in midair to halt his momentum for a stall on par with Toon Link's, then descends with his feet together. This resembles Yu Yu Hakosho's segue (that is too short to skip and thus is seen every episode if unedited, Koenma deserves a bronze medal for his persistence). The move has average duration and fall speed for a stall then fall. If he hits a foe, he'll deal 6% damage and boost himself a little in the air too, just his own height. Koenma can get the same boost performed on Jorge, but it will become a footstool. This is dangerous off stage, but actually works as a consistent desyncing tool on stage. This is good as this is not a particularly strong KO move, on par with Diddy Kong's down aerial. If Koenma should hit a barrier with this move, he will pause as he pushes it to the limit, then be launched two Ganondorfs upward. This can be angled slightly at this point in the animation to send Koenma at a direction chosen by the player, although is limited the more Koenma tries to be launched horizontally, there being five directions spaced evenly apart.

The move can be extended by holding the standard button as Koenma hits an opponent, to instead hold the hitbox out as the foe is sent away and have the move more resemble a standard stall then fall. Koenma can hit the foe multiple times as they ricochet off the ground or his barriers. This typically doesn't deal as much damage due to staling and the fact the move is weak to begin with, getting 15% if lucky and only more than that if Jorge throws in an attack too. The standard button can continuously be held by Koenma to try and "land" on the foe's corpse if they're caught in his barriers, and then force it to be released in the same way he's released when the net snaps back into place, essentially stunning them in place for a second too if they re-enter the body at this moment. Koenma can choose an angle at usual, but will kick off the foe too, causing them to be sent in the opposite direction from the barrier. Conversely he may also press nothing to just be sent up, depending on the foe's percentage ending up above them and a varying distance away. The more in-between option has more use and is less risky, but is the most likely to result in nothing.

This move has several special interactions used on Jorge during his attacks. Used on his up tilt stool, Koenma will shout "Hiya!" imitating a nasally-toned karate man, breaking it in two. Against Jorge using his up aerial, he'll seem to "suck" in the energy and use it to boost himself up an extra 1.5x, saying a variant of "don't steal my credit!" If he lands on Jorge's hammer during forward tilt, Jorge will pause in shock for a moment as Keonma tuts away then says "this isn't THAT heavy." Jorge will then angrily slam the hammer, dealing the same damage and knockback as Dedede at the cost of an extra second of lag. Koenma will jump off the hammer at the last moment, unscathed. These are largely for flavour, although even the first puts Jorge in some end lag which is not all bad for bossing him around in specific patterns.

FINAL SMASH

REVENGE OF KING ENMA


The camera zooms in on Koenma as the skies go red, it gets cloudy and lightning starts to strike. "Oh no, my father is angry, last time this happened he killed the dinosaurs!" or some variation. Out of the sky appears a humongous giant, is it King Enma, the ruler of spirit world! As he appears he will come down in a panning camera angle comparable to if you inverted Olimar's final smash, with the camera panning back to the stage as King Enma lands on it, causing a massive shockwave that deals 30% damage and KOs at 60%, causing all surfaces on the stage to tremble. Enma is roughly the size of the Snorlax Pokéball and is invincible to all attacks.

For the next fifteen seconds, King Enma will patrol the stage in a similar way to Ultimate Chimera. If for 1 second of that he is not within two platforms of a foe, he will leap in the nearest one's direction, ignoring any walls or other impediments in his way, and will simply jump back onto the stage if he gets pushed past the blast zone by a scrolling stage. Enma has several moves he can use, a shoulder charge that goes all of final destination that deals 45% and KOs at 40%, a Super Dedede Jump style move that causes the same shockwaves as when he first arrived in the final smash, and picking up a huge boulder from the ground to size of himself that he rolls forward dealing 30% and KOs at 60%.


When King Enma arrives, he brings along his powerful forces! ... Not REALLY. These guys have 5HP each and all can use a laser that deals the same passive damage as Fox's, but at Falco's speed, which can add up. The lasers will even bounce off of Koenma's barriers like ROB's laser. When a foe gets near, they will pull out a space taser that deals 3 hits of 2% damage, and slightly weaker knockback than Zelda's jab. Unfortunately King Enma will block most of the laser shots and they're just as vulnerable to his attacks, and will mostly attempt to stay out of his way using their infinite recovery that resembles Pit's up special. These guys stick around for as long as King Enma, but unlike him can be defeated early by the opponent.

PLAYSTYLE


Playing as Koenma is to understand the weak links between his specials, how Jorge works and to be able to set up effectively while fighting at the same time. Koenma is a super lightweight who needs to use Jorge liberally to survive at later percentages and this isn't too hard, as Jorge is much heavier than Koenma and will naturally survive longer, but this really has to be abused because Koenma is the one who counts for stocks. This means active use of Jorge, putting him in the line of danger, is encouraged. It would be nice if the foe would go easy on him too but realistically he's going to get plenty of abuse. It's also possible to build a strong safety net using the barriers, either walling off the ledge or below it for moves such as forward air or neutral aerial that will send him off-stage. Koenma doesn't need Jorge to function or anything, but he's a big help in staying viable in a match, as by himself Koenma has more limited options.

The Spiritual Journey/middle b/side special is what brings together Koenma's playstyle the strongest, as it takes advantage of his desync with Jorge, his barriers and his powerful, but delayed hitbox to either hit the foe multiple times, or just KO them outright using their corpse or spirit form. Jorge's usually painful, slow moves like his forward tilt, his jab or his up aerial can actually get use when used on a corpse that can't avoid them, to try and gimp them off-stage, forcing the opponent to aggressively move on Koenma to stop him commanding Jorge and focus on them instead. At the same time, this causes Koenma to have to use Jorge for himself rather than trying to KO the corpse, but the foe is naturally weaker in their spirit form, giving Koenma a natural advantage. His barriers can be used aggressively too given Koenma has the confidence to put the foe into spirit form regularly, as unlike say Ganondorf, Koenma can't afford a lot of bad trades if he whiffs. If he can land it, then he can start positioning the barriers to take advantage of it.

The intentional use of the side special outside of just pressure would be to either outright KO the spirit form or corpse, or get the specific timing down to hit the foe as they re-enter the corpse, or use a move like up smash to hit both as the foe goes from one to another to deal the maximum damage and knockback. This requires some very good reads by Koenma as if the foe knocks him out of commanding Jorge, that's one of his main ways to hit the corpse without outright focusing it and being in danger. This means largely sacrificing what follow ups Koenma could do to instead use Jorge to shove the corpse further and further off-stage, or wait for the right timing then set him to do his slow jab or hammer moves. Koenma has plenty of moves that work toward both the goal of fighting the foe and setting up their corpse, but can also at any time transition into going for a KO on the foe themselves if the opportunity arises. There is plenty of high level potential for Koenma, but at a lower level, it's easy to just use Jorge's attacks directly against the foe, and when they get put into spirit form, simply go for the KO, depending on the match up and the player's skill level.

When Jorge is no longer around to help, Koenma's going to become far campier although he doesn't actually have that many great tools for camping outside his neutral aerial and up smash, which is on a timer before it becomes that powerful. His down smash also has great range as a defensive tool and largely doesn't lose much from no Jorge. Koenma is a lot more viable than SoPo anyway, given he still can go for a KO easily after he gets off a side special or if he can land a grab on a foe, and because of these two grabs isn't going to have any problems against shielding opponents. If he does have to run away, the up special and his hover as well as his barriers mean he can stall for time, which is good for his up smash. If it does become a melee battle, he at least can fall back on his stronger KO aerials like his forward aerial, or his forward tilt on a spirit form foe. His attacks that don't have much range at least have very useful effects to make it easier, although no Jorge is definitely more of a burden than Koenma might want to admit.

EXTRAS


Taunts
1. Koenma does a twirl and turns into his adult form until the end of the taunt or he is hit out of it, sure to enrage the fan of this form and nitpickers alike!
2. Koenma sits back and laughs in the opponent's face, even sitting in midair, or maybe Jorge did something funny.
3. Koenma takes out the soul egg, perhaps it's the opponent's, and admires it for a second, sometimes almost dropping and breaking it, and will sometimes make an egg pun.

Win/Loss Poses
Win Pose 1. Koenma and Jorge seem to have put their differences aside for a moment to celebrate this joyous victory.
Win Pose 2. Koenma thanks Jorge but then makes a comment that it was all due to his brilliance and makes this pose toward the camera.
Win Pose 3. Jorge gets jiggy with it listening to the 90s opening of Yu Yu Hakosho to Koenma's visible pain.
Loss Pose. Jorge claps enthusiastically as Koenma looks mortified at his loss and claps much slower.

Kirby Hat
Kirby gains Koenma's distinctive giant hat and gains the power to create two of Koenma's barriers using the same set of rules, this is definitely not a power that gives him much advantage, but can at least disrupt any of Koenma's set up.

Colours/Alts
Koenma gets the usual team colours on top of one resembling King Enma's appearance, and this silly costume that is given to Jorge and Botan/the assistant in up special.
 
Last edited by a moderator:

Tocaraca2

Smash Ace
Joined
Feb 22, 2015
Messages
557
Location
Wokingham
Hey guys, Tocaraca here, and sorry for the long wait for the Mutant Creeper moveset, it will be out soon I promise.
But while I was looking at the set I thought of a playstyle for Akullotsoa that punishes DI.
For example, his Back Throw (which is hit only combo throw) will combo into Back Air easily if the opponent has DI towards Akullotsoa, and it will KO if they DI away, making the move seemingly OP. However if the opponent doesn't DI at all then they cannot be hit by a Back Air and also will die much later.
Just an idea.
 

Katapultar

Smash Lord
Joined
Nov 24, 2008
Messages
1,284
Location
Australia
REGINA CURTIS


Height: 163cm---Weight: 7.5---Speed: 4.5---Jump: 7---Traction: 8
"If you can't reason with your opponent, you'll just have to use your fists. C'om, let's get this over with!"

Regina is a playable character in the JRPG Atelier Ayesha: The Alchemist of Dusk, she being a long-time friend of the protagonist Ayesha and the first ally to join her. She acts as something of a guide to Ayesha for the first part of the game, but otherwise she doesn't really get involved in her journey unless you trigger her events.

Upbeat and big-sisterly, Regina is a prospector by trade, similar to Perches Poxtrot from MYM12, but her strength puts even the brawniest of men to shame (and that's saying a lot given she works with brawny men!), and she's even good at delicate tasks like cooking and sewing from having cared for 4 younger siblings. Thus, it stands to reason that Regina can hold her own in battle despite effectively being a normal person, employing her trusty pickaxe, bombs, surprising raw power, mining sense and other unorthodox tricks that her fun-loving personality brings to the table. Don't underestimate civilian power, or you'll be in for a surprise!


SPECIALS

Neutral Special ~ Timer Blast

"This is my trump card! You're gonna be in for a big surprise!"
Regina takes out a custom-made time bomb and tosses it forward like a basic throwing item that deals 4% and surprisingly good knockback...before bouncing off the victim with enough force to fly past the top of the screen! The bomb won't come back down for a good 5 seconds, and when it does it'll fall towards whomever bounced off, detonating on contact with anyone (including Regina!) or any hitbox for a big blast that sears all within a platform of it for 16% and huge knockback that KOs at 125%. This can be avoided by either letting the bomb land on solid ground or catching it if you're particularly daring, the former not too difficult as the bomb is merely the size of a Deku Nut, but it'll explode on its own anyway as gets a visible 5 second timer the instant it drops down. This timer comes into effect 6 seconds into a bomb's existence if it didn't bounce off a target, and until then it absolutely won't explode under any circumstances and will simply deals 2% with no flinching when thrown.

Only 1 time bomb can be out at a time, and it demands respect for its huge blast radius that can easily engulf the thrower as well if they're not careful. By holding B, Regina is allowed to hold onto the bomb instead of tossing it, but this isn't a fallproof way of keeping it out of enemy hands before it ticks down: not only does the animation take 20 frames as Regina whips out the bomb with a flourish, the bomb itself is also dropped whenever anyone holding it receives a high amount of knockback (at least 2 platforms worth), though this can also be a bad thing for the attacker if the bomb was about to explode.

If you double-tap B while already holding an item, Regina will first throw the item in question before tossing the time bomb. This makes it much easier to actually land the time bomb for the bouncing, as opponents won't be able to catch it because of the first item coming their way. Even if this misses, the speedy time bomb may actually catch up to regular items before they land, and actually use them as a target to bounce off of if that item had a hurtbox like say an Item Capsule or a Urina. This can then allow Regina to artificially make herself the bomb's target by holding that item, even throw it up towards the bomb as it falls so it doesn't get within blast radius among other things. If the targeted item vanishes or is destroyed before the bomb lands, it'll fall wherever it was destroyed.

Side Special ~ Rolling Spike
Regina hops off the ground and flips forward in place before swinging her pickaxe overhead and down into the earth with great force. This has 40 frames of starting lag, but deals 18% with massive spiking knockback that KOs at 90%, and grants Regina 16% heavy armor halfway into the starting lag that becomes full super armor during the attack.

If you held B when Regina hammered into the ground, she'll apply enough extra pressure to make a Ganon-tall earth spike shoot out diagonally from the struck ground - or on a angle ranging between 25-65 degrees if you angled the attack. The spike deals 14% and sharp radial knockback that KOs at 140%, after which it stays out as a non-fall-through, semi-solid slope with 10HP. Once destroyed, debris is sprayed in the opposite direction in a disruptive hitbox similar to Charizard's Rock Smash, and a small rock is left behind, which breaks on contact with anything or when attacked and deals 3%. If the spike is destroyed from the side it was made on however, or fully engulfed in a large hitbox like an explosion, it will instead go flying out like Mario at 60% and deal 0.8-0.2% the damage of the attack that sent it flying depending on how early it hit. This spike can be rode on for some fun, and breaks apart 1 second after colliding with a surface or when attacked in mid-flight or upon landing, yielding a rock item either way. Only 1 spike can be out at a time, and if it was still the target of a to-fall time bomb the rock it sheds will become the new target. If a character is knocked into a spike, they'll take damage equal to its remaining HP and have the remainder of their knockback cut drastically.

Used in midair, this becomes a faster, but weaker stall-then-fall attack that deals 10% and average diagonal knockback to struck opponents, or 17% when landing and colliding with a grounded opponent. If you held B during the starting lag however, Regina will, instead of falling, use her pickaxe to perform a rolling attack to proper herself 2 platforms through the air, but on a slight downwards curve that makes it less practical than most secondary recoveries. This drags opponents along for 8 hits of 1% before finishing for 4% and decent upwards knockback, but you can stop rolling anytime and in fact tap B again to instantly transition into falling attack, which will hit any dragged opponent that was in front of Regina. Otherwise, you can use this move anytime after having performed the roll to go through with the falling attack more quickly than usual. On contact with the ground, Regina may choose to create an earth spike, but with a greater delay due to needing time to apply extra force on par with the grounded version, overall making the aerial process of creating a spike just as, if not laggier than its grounded counterpart. If Regina lands during the rolling attack, she'll collide with the ground and deal the usual extra damage and knockback to dragged foes than if they were released in midair.

The aerial variant lacks the super armor of the ground version, but instead cuts all damage and knockback Regina would take by half, a trade-off that makes detonating a time bomb by force much safer for obvious reasons. Speaking of bombs, the aerial variant actually has a unique function that allows Regina to skewer through any throwing item that was near her at the time using the pick, not unlike using an Aerial to catch an item out of the air only with more reach, then take it along for the ride and have the item's throwing hitbox replace the attack's. You can also double tap B to have Regina use an item she was already holding instead, and do this with the the grounded version as well. Needless to say, this is an idea way to utilize a time bomb, simply catch it when it falls on or is thrown towards Regina and slam it into an opponent full-force, and since this doesn't count as a throwing item it can bypass reflectors and can't be caught in midair. Better yet, this can be done with items, and Regina can even use this attack again on opponents as she's knocked along with them, often launched a shorter distance due to the knockback resistance.

The item will simply drop off after being spun around if Regina performed a midair roll, but if she slammed it into the ground and it had a hurtbox it'll take damage from the collision, assuming it had a hurtbox. If Regina chose to send out an earth spike, however, she'll end up burying the dragged item in the process, which then gets pulled back up and sealed in the spike. The sealed item can be freed by destroying the spike similar to breaking a barrel, but attackers beware as multi-hitting moves or those with long durations run the risk of hitting the bomb afterwards.

Up Special ~ Smoke Bomb

"You're too slow!"
Imitating a ninja, Regina takes a moment to shuffle through her belongings before throwing a smoke bomb at her feet, disappearing under the cover of smoke for a recovery largely comparable to Shiek's. This has noticeably bad starting lag when used on the ground, and limits Regina to moving along the platform it was used on, but lets her act almost immediately upon re-appearing and prevents her from going offstage in exchange, making it great for getting around. What's more, the blast can be used to detonate a nearby bomb safely as Regina disappears the instant the hitbox comes out, or fire off an earth spike to potentially start a chain reaction.

The smoke bomb blast deals 10% and good set radial knockback on contact, but is hard to with directly given its short range. It's rewarding to land though, as by holding B when it connects Regina will automatically appear behind the victim, and by holding A she'll follow that up with a swing that deals an additional 8% and good diagonal knockback that can KO early near the top of the screen. Regina can even choose to appear on top of a spike she sent flying with the blast, and what's more launching the spike with another hitbox triggered by the smoke bomb like a time bomb still counts for this, provided Regina was still within teleport range of the spike and on the same platform as it. Likewise, Regina can choose to appear behind a foe launched by a bomb struck by the smoke blast, but if they were out of range she'll simply appear as close to them as possible without entering helpless.

If Regina was holding an item and you held Z just before she drops the smoke bomb, she'll leave that item behind her just as she disappears and after the blast hitbox wears off, especially scary with a time bomb about to explode. If Regina wasn't holding an item however, she can instead choose to pick up one within range. This can even be used to pick up an item from a container that was destroyed up-close by the smoke bomb blast, which saves Regina the hassle of going back to pick up rocks or sealed items left behind by spikes afterwards.

Down Special ~ Stone Crack

"And round and round and fly away!"
Regina swings her pickaxe into the ground behind her and applies so much pressure that the very earth around her begins to crack, keeping this up for a while before finally tearing her way through with a diagonal-upward swing that sends a massive spray of rocks and lava globs flying out diagonally. This is absurdly laggy in a manner comparable to Ganon's Volcano Kick and has identical lag, but gives Regina 7% heavy armor as she swings her pickaxe down, and super armor 1/3rd of the way into the "charge" up until the attack ends. As Regina brings her pickaxe down, it's a hitbox behind her that deals 10% and decent diagonal knockback in front of her, and when it's slammed down the impact creates a small shockwave dealing half as much damage that can hit opponents right in front of her.

The rock shower goes 1.2 Ganons off the ground and reaches out 2.2 platforms ahead of Regina, or as little as 1.2 platforms if there was less/no ground ahead of her, and strongly launches opponents skywards for either 22% that KOs at 84% or 17% that KOs at 108% depending on whether they were hit while grounded or in midair. Worse yet, Regina's superheated pickaxe is a massively powerful hitbox that deals 32% that KOs at 47% from being flung up suddenly, and the rock shower has a bit of duration to it. Finally, 0.75 platforms of ground on either side of Regina is superheated just before she finishes "charging", dealing a token non-flinching 7% to opponents who stand on it, and the ground uprooted ahead of her stays hot for 1.2 seconds afterwards and deals 5% to opponents who stand on it. The former is killer if used to detonate a time bomb as opponents will be forced to deal with the bomb blast before the rock shower, while the latter can zone opponents who don't want to run the risk of a bomb landing over them and then exploding once it hits the hot floor. It's not impossible to land this move on its own, but it works especially well with a time bomb given the lengthy super armor Regina experiences, providing you get some results out of it as 16% is a steep price to pay.

If Regina launches a spike with the pickaxe slamming and rides on it, she'll have no trouble tearing through it and sending a light shower of rocks 1 platforms ahead of her diagonally downwards, which deals 10% that KOs at 150%. This then cancels the rest of the attack and puts Regina in midair without a platform beneath her.

Used in midair, Regina will go to swing her pickaxe down behind her normally, but with no ground beneath her she instead swings the pickaxe sideways on a steep angle below her, dealing 16% and a powerful spike on par with Ganon's D-air on contact. If this launched a spike and you held B, Regina will dig her pickaxe into the spike and go along for the ride, but once you let go of B she'll tear through the spike and repeat this attack with a bit more speed than usual.


STANDARDS

Jab ~ Firecracker
Regina backhands swiftly to smack opponents for 3%, with a sweetspot right up-close that deals 5% and average mostly-horizontal knockback that KOs past 200%. This can then be followed by another sweep of the hand, only this time Regina brandishes a regular bomb as she does and smacks opponents away with it for identical damage to the sweetspot. Afterwards, Regina holds onto the bomb as a throwing item that with similar function to one of Link's bombs, exploding after 4 seconds while dealing 5% and light upwards knockback on contact with a hitbox or target, but not of it hits the ground. The bomb is useful to have because this move keeps opponents for follow-ups at low-mid percentages, and gives Regina an item to throw alongside her time bomb. It's also a much safer alternative to a time bomb, should you want to utilize it with the Side Special or what not.

The bomb actually starts out unlit, and gets lit from the impact of hitting an opponent when first brandished. An unlit bomb can be held indefinitely and deals a light 3% while bouncing off the target instead of exploding, but will light up upon hitting someone, being hit or when a player taps A while holding it to light it up manually. Keeping the bomb unlit can often prove more effective for set-ups, be it with a dual bomb-toss via the NSpec, hitting it on a spike to launch it when it explodes or just start up the timer whenever you please. Interestingly enough, the bomb actually deals more damage and generates a slightly bigger blast when it explodes on its own, 10% and good base knockback that KOs at 200%, and if it's used to set off another stronger bomb it'll actually add its damage onto that bomb (5%) and increase the size of its blast and knockback dealt by 1.25x. This includes not only time bombs to deadly effect, but also a smoke bomb if Regina chooses to set it off close to the bomb, making that attack a bit easier to land.

Dash Attack ~ Pursuit
Regina leaps forward and knees as she does, dealing 4% and knockback into the next part of the attack: a powerful diagonal-downward swing that deals 11% and very strong backwards knockback that can KO at 128%, but usually later against opponents closer to the ledge. What's scary is that this move is that it's actually really fast and covers a lot of area for how powerful it is, but does have one major weakness that prevents it from being broken: the knee actually has a very short duration, creating a huge gap between the 2 hitboxes that, while not lengthy, will often leave Regina running into an attack if she mis-spaces it. To land this move, you either need to start it right in front of an enemy or be spaced far from them to land the pickaxe swing at the end. The former applies some bonus damage totaling to an impressive 15%, but the latter delivers strong shield damage on contact while pushing them in close to Regina.

As its name implies, this attack can be good for pursuing foes backing away if spaced right, and exposes victims to any bombs or spikes Regina had behind her for extra damage that often borders overkill for a mere Dash Attack. The move is also great for picking up items along the way so long as you're not punished for it, and actually works as a scare tactic with a time bomb: if Regina starts this move in front of a bomb just short of teching range, she'll detonate it with the knee hitbox instead of grabbing it, damaging opponents who would otherwise be able to intercept Regina by standing in her move's blindspot. On the other hand, opponents who go to reflexively shield/dodge out of fear of being blasted miss the chance to punish Regina.

F-tilt ~ Excavate
Regina's a prospector, so of course she's going to have a basic attack that involves it! This is a hard overhead swing into the ground with delay you'd expect from a powerhouse attack. The handle is an inconvenient sourspot comparable to Dedede's F-Smash, but the pick itself deals 16% and great mostly-horizontal knockback that KOs at 120% for all the trouble, and excellent shield damage and pushback. In addition, the impact against the ground creates a small earthshaking hitbox right beneath Regina and the grounded pick and slightly outwards from them that trips opponents. It also launches any nearby items skywards as though someone had just smash thrown them, but they're not hitboxes in midair, just like how items thrown up by an Ore Club's tornado are harmless. This move thankfully has low end lag despite its strength, so Regina can exploit this or an opponent's tripped state without difficulty. The pick can hit a grounded bomb as you'd expect, but the handle won't, and launching a bomb like this is the only way to place it in the air without having it explode by hitting someone.

U-tilt ~ Upheaval
Regina swings her pickaxe over behind her, dealing anywhere between 4-10% and upwards knockback that varies slightly depending on when it hits, earlier = less damage. This is most rewarding when it hits behind Regina as she can act quicker out of it and deals the most damage, knockback scaling consistently between all possible hitboxes to KO past 200%. It's a basic juggler for the most part, and serves obvious purposes with a bomb like damage-racking for the lead and "locking" opponents in place for one that's to fall, but it's also useful for what it doesn't do: hit bombs level to Regina. The hitbox is too high up to damage the small bombs, which combined with the U-tilt being the only Standard input not to automatically pick up items makes this very useful for Regina's melee when she has a bomb lying close to her. It can also hit an earth spike in front of Regina up to 2 times without sending it flying off for what it's worth, should she need to fend off an opponent without launching it.

D-tilt ~ Land Clearer
Regina rummages through her pockets for some lag before tossing 6 miniature dynamite sticks towards the ground ahead of her, each one the size of a Deku Nut. A single dynamite stick deals 2% and light upwards knockback on contact, but the closer the foe was to Regina the more sticks they'll be hit by, which in turn increases the knockback they take to up to 12% that KOs at 118% if they're hit by all the dynamite sticks by being right in front of Regina. That being said, dynamite sticks that land before hitting someone will stay out as traps for 1.5 seconds that explode for non-flinching damage when opponents step over them, making it more rewarding to just hit with the single stick from afar as victims who insist on coming back down on Regina will have to suffer extra damage for it. Of course, you can also set up the sticks prematurely for bonus damage, and they can even act as a hitbox for a time bomb to land on so it explodes. They can also be launched up with the F-tilt's earthshaking hitbox.


SMASHES

F-Smash ~ Relic Cutter
Regina brings her pickaxe behind her in an exaggerated motion, one foot off the ground, before stepping forward and throwing her weapon out like a boomerang! Hey, other characters have thrown swords and even dusters like boomerangs in the Atelier series, so why can't Regina throw her pickaxe like one? The pickaxe flies out at lightning speed when first thrown out and reaches far enough that it'll hit no farther than 1.2-1.8 platforms ahead of Regina, but gradually slows down while traveling but only down to Mario's dashing speed at the very least. Regina has super armor while her pickaxe is flying as she braces herself, but the pickaxe flies too high off the ground to hit time bombs under normal circumstances, generally a good thing for the most part. Also, the pickaxe will actually move up and down slopes like earth spikes, which is good when fighting on uneven ground.

The hitboxes on this move are somewhat strange. When first thrown out, the pickaxe drags victims along for 4 hits of 3.4-5% before launching them hard for knockback that KOs at 115-85% halfway to its destination, while anyone struck by the pickaxe after that is dragged along for up to 15 hits of 1-1.4%, ultimately pulled back in towards Regina before receiving an extra 2% and slight set knockback that keeps them close-by. What this means is that this move can be used like a typical launching F-Smash, but also to pull in mid-ranged opponents if Regina wants to stay where she is, something she greatly appreciates when mid-ranged and close combat are where she is most comfortable at. With good timing, this move can be used to intercept a midair bomb or even drag a mid-ranged opponent into one about to go off just when they thought they were safe, while tanking the blast with the super armor.

U-Smash ~ Rock Blast
Facing the screen, Regina takes out 2 bombs and crouches down before holding them out on either side of her and throwing them directly above her, both traveling side-by-side with a Wario width of space between them. A single bomb will explode for on contact 8-12% and okay mostly-horizontal forward knockback (KOs at 180-150%), but in the rare case where both bombs hit they'll combine their damage output for a powerful 16-24% and strong knockback on a higher angle that KOs between 115-85%. The bombs are thrown on a slight angle towards each other and get closer as they travel, before colliding and exploding in a fairly large blast (0.7 platforms in diameter) upon traveling 1-2.5 Ganons above Regina. If there was only 1 bomb left because the other exploded prematurely, it'll travel about 1.4x farther than it normally would before suddenly exploding on its own. This starts up fast for a projectile Smash and can hit opponents next to Regina without any harm to her as she's holding out the bombs briefly, but has a blind-spot close above Regina that foes can exploit.


If you tap A near the end of the bombs' lifespan and there was at least one left, Regina will leap towards them just as they'd explode, catch them and then throw them downwards perfectly side-by-side. Regina is invincible during the leap, useful for avoiding falling bombs and opponents before retaliating with her own attack by the time they land, but it's not perfect as she suffers end lag afterwards while falling 1 Ganon through the air that's costly if opponents see the leap coming. You can angle the control stick to have Regina throw the bombs further apart so they travel more diagonally outwards and potentially land 2 platforms apart from each other, but this has added starting lag to it. This can also be used to determine which side Regina will throw a single bomb if she only had one left. If Regina hit a foe with a single bomb before throwing the two and you didn't make an input on the control stick, she'll toss the other bomb at their current location.

This move has a somewhat interesting effect if used on a rock spike not angled too low, as one of the bombs will detonate on the spike when Regina holds it out while the other gets thrown as usual. On that note, if Regina moved to a different location between throw her bombs and when she would leap, like with the aforementioned interaction when riding on the spike, she'll automatically jump back to wherever her bombs were and throw them straight down per usual, able to use this to retreat if necessary. On the other hand, hitting with the single bomb thrown up is desirable as opponents hit by it will be knocked towards Regina if she rode on the earth spike.

D-Smash ~ Lava Stream
Regina gets down on one knee and digs her pickaxe deeper and deeper into the ground...maybe a little too far, as post-charge her pickaxe gets blown back by a thin stream of lava! This lava goes over the crouching Regina and behind her and deals 3 hits of 3.3-4.5% followed by fairly weak radial knockback, and if this hits where the lava shot out from the victim will be blown skywards at full-force for 17-24% that KOs at 100-70%. The attack lacks reach at first and requires Regina to be up-close to hit with the big one, but the lava stream spreads out slightly as it goes over her head before crashing down behind her to cover a good Bowser-wide area.

Lava from this move stays out behind Regina as a hazard afterwards, dealing as much as 10% and vertical knockback that KOs at 140% on contact. The lava initially covers 0.7-1.05 platforms behind Regina, but after one second it starts cooling down towards the center until it becomes harmless after 2-3 seconds, and becomes weaker by an appropriate portion to the point where it will no longer cause flinching when it becomes as wide as Wario. The lava can be used to counter and limit opponents going behind Regina if she had some ground behind her, and any earth spike the lava touches will melt into more lava that extends its length by its own and keeps it out for 2 more seconds, but at the slight cost of still counting as the earth spike being out.

Despite being a D-Smash, this can be used to DACUS out of the knee and have Regina spread lava behind her as she travels forward. This doesn't do anything to help the blindspot on the Dash Attack given Smashes are laggy, but substitutes the pickaxe portion of that attack with lava that splatters behind the victim. On a different note, if Regina uses the sweetspot of this move to detonate a bomb, it will have its blast radius increases by 1.1-1.4x and its power increased to that of the sweetspot's if it was a time bomb, but she'll get caught in the blast and this is outright suicidal unless she used the regular weaker bomb instead, which can knock her out of the brunt of this move safely.

AERIALS

N-air ~ Power Vault
Regina raises her pickaxe overhead and brings her legs closer to her body before swinging it around her once in a 2D circle, curled up as she does. This deals 14%, with freeze-frames similar on contact similar to Wolf's F-tilt, and solid radial knockback for the most part, but all instances of downwards and backwards knockback are reversed, no matter how insignificant. This has a lot of starting lag, but Regina has super armor for most of the lag and for the first half of her swing, making it a great counter among other obvious uses.

If Regina swings her pickaxe into the ground before she lands, not easy to time given the pickaxe isn't long, it'll get stuck there and she'll pause in midair for the duration of the freeze-frames that would normally occur when hitting an opponent. If no input is made, Regina will land with minimal lag, but if you made a jump input she'll instead use her pickaxe to do a pole vault mostly upwards, diagonally or horizontally with some delay, leaping twice the height of her first jump while getting 5% heavy armor for what it's worth. This makes landing the attack near ground much more rewarding than in midair where Regina would suffer end lag, as she can then pursue the launched opponent or use it as some form of retreat if they shield against the attack. It can also be used as an approach, and works extremely well with the Side Special as that, being a basic movement attack, lets her stop her momentum or turn around so she doesn't travel too far when reaching an opponent.

F-air ~ Mining Pitch
Having swung her pickaxe down enough times, Regina decides to spice things up by swinging it like a baseball bat! This has a sourspot like with the F-tilt, but a sweetspot around the center of the pick that deals 15% and fairly good knockback for F-air that can KO at around 128%. The hitboxes near the tip of the pick aren't half-bad either, dealing 9% and mostly-upwards knockback if the top pick connects or mostly-horizontal if the bottom one does instead. This comes out fast, making it an ideal bread-and-butter aerial if spaced properly, though you'd better land it Regina suffers some end lag afterwards. You'll find yourself using this move quite a bit when launched alongside a foe via bomb blast, especially if you were in the middle of using the aerial Side Special.

Being a pitching move, Regina's swing has the wonderful effect of reflecting projectiles! Specifically, it sends the projectile rocketing forward at 1.5x its usual speed and 1.3x its usual power. This can be used on falling items/bombs and works well after launching them out of the F-tilt, just so long as you're careful not to send them off the stage from the added range. This isn't as useful for sending a thrown bomb back as you'd expect, because the bomb will rarely hit the thrower directly due to arcing and will have likely been thrown from a distance, but that extra power is deadly if it connects. Side Special is usually the more effective option if you're willing to commit.

If Regina lands during the attack itself, she'll keep her pickaxe held out in front of her for a short moment before continuing with the swing and suffering less end lag. The pickaxe is a hitbox while held out and can reflect projectiles per usual, but it's only half as strong as the main attack.

B-air ~ Twisty Trick
Regina braces before suddenly throwing herself back horizontally on her side, limbs spread out all the way and pickaxe held out as far as possible while being spun like a drill. This gives Regina a slight mobility boost, similar to Snake's F-air. The move essentially functions like a slightly delayed sex kick, but with different results depending on where it hits. Contact with Regina results in 11%, with good diagonal knockback behind her if hit by her legs/feet, decent mostly-upwards knockback for hitting with the arm or if the main body hits, strong upwards knockback that can KO at 150%. Additionally, the center of Regina's pickaxe is a sweetspot as she stabs it behind her which deals 16% that KOs at 140%, but otherwise it simply drags victims along for 4 hits of 2.5% before dealing average knockback that KOs at 180%. Unfortunately, the extended handle is not a hitbox during the move, but the move still covers a lot of area as is, and Regina can DI to move herself or the pickaxe into opponents anyway should they end up in the blind spot. If a victim is dragged and end up grounded along with Regina, they'll be put into prone, but generally too far away to hit her with their get-up attack.

This move covers a lot of horizontal area, making it good for approaching or blocking off enemies, and the varying hitboxes allow Regina some degree of control over where the victim is launched. In addition, any damage Regina receives during the attack is reduced by 5% while also cutting the knockback by an appropriate portion (for example, an attack dealing 10% cut down to 5% would only deal half as much knockback), but this quickly becomes less effective over time. This renders weaker attacks null like a sort of counter for what it's worth, and though less effective at reducing damage from a bomb than the Side Special it can come as more of a surprise.

U-air ~ Ceiling Breaker
Regina raises one hand above her and deftly spins her pickaxe on her index finger as though it were a basketball. This deals 3 dragging hits of 2%, followed by 5% and knockback as Regina yanks the pickaxe back down towards her all of a sudden. This normally deals sound upwards knockback, but actually has 3 sweetspots present at the end of the attack: one right at the center of the pickaxe that deals 7% and enhanced vertical knockback that can KO at 170%, and 2 on each of the pick's tip which deal 4% and below-average spiking knockback. The spike in particular is useful because being located above the space in front of Regina means she won't be in the way of a bomb falling towards the victim compared to if the hitbox was vertical to her, not to mention this can combo into another aerial or the Side Special as she falls towards the victim, but the sweetspot is small and easy to DI out of so you'll need to put a bit of work into landing it. This move's reasonable duration and hitbox being high above Regina make it decent for approaching, and if used near the ground and canceled prematurely it can position a dragged victim high above her for a follow-up from something like the U-tilt.

If Regina teched a small throwing item (not shooting or battering item) by using this move, she'll actually spin it on top of the pick during the attack like she were performing some kind of circus trick, which ends with the sliding down the pick and to the front of Regina before falling ahead of her like an opponent spiked by the attack. The item still functions as a hitbox while being spun, artificially extending this attack's length, and falling in front of Regina serves as good positioning for a bomb as she can do much more with one ahead of her than right beneath her, like fall on it via Side Special among other things. In the extremely rare case where you both catch an item and spike a foe with the hitbox, they'll then have to contend with the item falling on them, where hopefully Regina will be high enough not to get caught in a potential blast.

D-air ~ Tunnel Through
Regina holds her pickaxe close to her, pointed downwards, before thrusting it beneath her and spinning it like a drill. This locks victims for 30 hits of 1% similar to Yoshi's D-air, though with a bit more starting lag to compensate for this attack being a disjointed hitbox and having more range, before launching on a low angle for knockback that KOs at 155%. This can most definitely be used to lock and damage an opponent, especially if they were shielding, but it's also great for actually falling through opponents from high up to avoid having a bomb land on you while still keeping them in place for it, unlike with the Side Special. Unfortunately, Regina suffers a dose of end lag if she finishes this move in midair, so it's not a good idea to start it too high up.

If Regina lands while still spinning her pickaxe, it will drill through the ground slightly and tear up a few rocks that get shot out on either side as a low protective hitbox similar to the stars from Super Dedede Jump, dealing 10% that KOs at 155% initially but getting weaker and shorter-ranged by a % of however much of the drilling Regina had performed beforehand. This even gives Regina super armor the instant the rock hitboxes come out, which goes hand-in-hand with the locking portion of the drill attack and a bomb if she doesn't mind taking damage. You need to hit a grounded bomb with the rock hitbox to exploit the super armor as Regina won't have landed yet if she hits with the main attack.

GRAB

Regina makes a scooping motion to catch opponents by their collar, an excitable grin on her face as she puts her pickaxe away and shuffles through her belongings. What could she be up to?

Pummel ~ Miner's Toughness
Regina headbutts her opponent! This hurts Regina for 0.5%, but hurts opponents even more for 3.5%. It's also pretty fast, and thus great for getting a damage lead if you don't mind taking a bit of damage in the process. Good if your damage was particularly high, but the victim's wasn't.

F-throw ~ Escape Artist
Regina uses a sleight-of-hand trick to brandish a single smoke bomb and slam it into the foe for 3%, before it explodes and generates a massive cloud of smoke. The cloud lasts for but an instant, and once it vanishes it's revealed that Regina has retreated 1.6 platforms backwards, but left 2 small bombs at the victim's feet which explode for an additional 8% and below-average knockback that KOs at 180%. This can be powered by a Jab bomb if there was one next to the victim at the time, but it needs to have been unlit as the smoke bomb slamming into the opponent will light it up.

The Up Special is hardly practical to use up-close, so this move works as something of a substitute in such an event and gives Regina some much-needed spacing. This works especially well if the victim was holding the time bomb: at lower percentages, they won't take enough knockback to drop it as they're launched, but at higher percentages they'll drop it and this becomes Regina's to-go move for when she wants to get a move in just before the bomb explodes without getting caught in it. If the bomb wasn't about to explode, it can instead be used to scare opponents with moves like the Down Special. If there was insufficient behind Regina when using this move, she'll travel a shorter/no distance and lose the one good thing about this move, but then you would obviously use the B-throw instead in such a situation.

B-throw ~ Rough Folk Dance
Regina swings the side of her pick into the foe and spins them around before launching them far! This strongly resembles Mario's B-throw aside from a pickaxe being used, and deals 12% and very powerful mostly-horizontal knockback that KOs at 130%. What's more, you can mash A while spinning to have Regina move back and spin for longer, up to 1 platform and 1.6x longer than usual respectively, but at the cost of launching foes as lesser as half the usual distance and on a much higher angle. On the other hand, this can be used to stall for a bomb, and is easier to follow up on at lower percentages.

Regina and her opponent both have super armor while spinning. Opponents can be swung or thrown into earth spikes, but not bombs even if they were wide, and what's more the spinning actually generates a wind effect that pushes nearby items back by about 1.6 platforms. If the item was close in front of Regina when she swung a victim, it will automatically be pushed behind her. This can be used to move a bomb away from Regina and out of blast range, potentially towards the direction the victim was launched to give them more trouble as they recover, but even if it fell offstage that's better than taking 16%. Having an earth spike for the item to move into can help, as pushed items will not move farther than its underside due to its semi-solid status, and it'll go up slopes more slowly.

If this is used on top of a spike, it'll be launched by the victim being slammed into it, but then destroyed immediately by the fact that they're still a hitbox. Despite both characters being put an inch off the ground from this, this doesn't end the throw prematurely.

U-throw ~ Toss Up
Regina uses her raw physical strength to throw the foe up high above her for 10%. The animation for this is fast, and functions as a generic means of getting the foe above you for falling time bomb or item that Regina just recently threw up. While the knockback doesn't scale much and won't KO before 200%, it most certainly will at mid-percentages if the victim was caught in the blast of a bomb.

D-throw ~ Subdue
Regina swings her opponent around once with her bare hand before slamming them down in front of her, dealing 7% and consistently low diagonal knockback. If the victim was holding an item at the time, it'll be dropped and unlike with plain old strong attacks they'll still be in range for a blast. If the victim was slammed into a bomb however, Regina will continue holding onto them as they both go flying together before she lets go just short of where they would reach the apex of their knockback, ironically putting both characters in the same position as though the D-throw had been pulled off properly. This lets Regina follow the foe into the air effectively even if her percentage is less than theirs, but they only take 3/4s of the knockback they usually would due to added weight from her, and they must take more knockback than Regina from the blast or else the whole thing fails as she goes flying further than they would.


FINAL SMASH
Lady End

"Well let's make this a big one! Blast away! Up into the sky!"
Regina flips forward and brings her pickaxe HARD...hard enough to make a line of fiery earth spikes pop out in front of her! The first victim to this attack is shot up high by an extra-large spike for 30%, which then breaks into a burning chunk of rock that lands next to Regina. With this, Regina uses her pickaxe to launch the fiery rock towards her victim for an extra 25%! This launches the victim horizontally along the top blast zone, and usually KOs at around 70%.


"Maybe it's time to finish this!"


"I'm not done yet! Hiyah! There! And there you go! To round this up...alright! This is...the end!"
If the foe was past 100% when struck by the spike, as well as the only opponent left and on their last stock, this becomes a Special Finisher, a stronger version of a character's strongest skill which, in Atelier, is used to finish off a weakened foe! It looks the same as the normal version at first, but deviates once the spikes pop out: here, they'll break into massive chunks that fly up into the air, and Regina will leap high into the air as she slashes the flying foe with her pickaxe, jumping from rock to rock as she does this several times. Then, finally, Regina will leap high above the foe and stab a massive chunk of rock with her pickaxe, only to bring it down on the foe like a gigantic massive makeshift magma hammer of doom that spikes them to their doom! So awesome you wish it was actually a move in the set! But hey, we gotta save some flashiness for the final smash, don't we?
 
Last edited:

IvanQuote

Smash Ace
Joined
Apr 7, 2014
Messages
853
Location
Looking for those who like Mighty No 9
NNID
ivanquote
3DS FC
1693-3075-2999
Hi there. I'm the guy who did Mega Beedrill and Aban Hawkins sets last contest and Toa Tahu this time. I said I lost interest somewhere in the summer time. Well sporadically since then I've done bits and pieces of the follow up, Toa Pohatu, the speedy guy who is the master of stone. It is nearly done and I feel I can safely say it will be done before Christmas. Looking forward to the criticism I'll get from it!
 
Last edited:

Tocaraca2

Smash Ace
Joined
Feb 22, 2015
Messages
557
Location
Wokingham
Hi there. I'm the guy who did Mega Beedrill and Aban Hawkins sets last contest and Toa Tahu this time. I said I lost interest somewhere in the summer time. Well sporadically since then I've done bits and pieces of the follow up, Toa Pohatu, the speedy guy who is the master of stone. It is nearly done and I feel I can safely say it will be done before Christmas. Looking forward to the criticism I'll get from it!
You made the Toa Tahu moveset?
Can I have your autograph
 

Lunchmanalchemist

Smash Cadet
Joined
Nov 15, 2015
Messages
39
FULLMETAL ALCHEMIST:

Premise - After their mother dies, brothers Edward and Alphonse Elric attempt to bring her back using alchemy but damage their bodies in the process. Now they search for the Philosopher's Stone, hoping to regain their original bodies.

Please watch the series in this order:
1. Fullmetal Alchemist(2003)
2. Conquerer of Shamballa movie
3. Brotherhood reboot

or just read the manga -_-


Edward Elric, the Fullmetal Alchemist!

STATS
Weight : 2
Height : 4
Dash : 8
Air : 8
Fall : 8
Mobility/Traction : 7

NEUTRAL SPECIAL - Transmutation
Action : Edward claps his hands together then transmutes his automail arm into a blade.
Use : Switches speed and mobility for power and range. Equivalent Exchange, remember? Similar to Shulk's Monado Arts, except this increases the range of most of his moves.

UP SPECIAL - The Bigger They Are, The Harder They Fall!
Action : Edward leaps and reaches up to grab the opponent. If he does, he'll jump on them to gain height.
Use : Very similar to Ganondorf's Up special except after grabbing the opponent, it has a spike that hits harder the taller the opponent is(he's very insecure about his height). Short range.

SIDE SPECIAL - Deconstruction
Action : Ed claps his hand while leaping forward then attacks with alchemy. Based on Scar's alchemy.
Use : Very similar to Meta Knight's IDC in Project M. The move only has a hitbox at the very end of the move and is very punishable if whiffed, but it is lightning fast and extremely strong! Has relatively short range. Works very well with Edward's reckless personality. 21% damage and heavy knockback.

DOWN SPECIAL - Reconstruction
Action : Edward claps his hands together, slams them on the ground, and causes a clenched stone fist to come out of the ground then dissapear.
Use : Can be charged to increase distance but its range is limited to the ground. You can see a cursor to help you know where it will hit. It will bounce from the edge of the stage to you and back until you stop holding the specials button. Vertical knockback.

FINAL SMASH - Truth
Action : Edward draws a human transmutation circle on the ground, transmutes his opponent through the Gate of Truth before they are completely deconstructed by Truth.
Use : Short range instant KO final smash like Captain Falcon's.

JAB
Action : Edward does a series of 3 alternating wild, fast swings/slashes before uppercutting the opponent. Based on his final fight with Father
Use : Run of the mill jab combo with decent knockback.

DASH ATTACK
Action : Edward dashes and stabs forward with an alchemically created spear. Based on his "assasination attempt" on the Fuhrer.
Use : Pops opponents up for combos.

DOWN SMASH
Action : Edward claps his hands together, raises his left hand up, and smashes them into the ground, deconstructing with alchemy and sending debris around him.
Use : Very laggy, but a devasting kill move for reads.

FORWARD SMASH
Action : Edward steps back and really nails the opponent with a swing/stab. Also based on his final fight with Father.
Use : Very fast but relatively weak for KOs. Downward knockback to set up edgeguards.

UP SMASH
Action : Edward claps his hands together, slams them on the floor, and creates small stone pillars in front of him that dissapear.
Use : Also weak, but low lag and very useful for juggling.

DOWN TILT
Action : Edward does a downward sweeping kick.
Use : Combos into itself and many other moves.

UP TILT
Action : Looks very similar to Luigi's up tilt minus the cowardliness and unclenched hand.
Use : Fast combo move for punishing airdodges.

FORWARD TILT
Action : Aimable swing/slash.
Use : Spacing mainly.

NAIR
Action/Use : Hero kick for everything you need( like Link's nair, Fox's nair, Mario's nair, etc.).

FAIR
Action : Downward swing/slash.
Use : Decent KO move with a weak spike.

UAIR
Action : Upward swing/slash.
Use : Bread and butter juggling tool.

DAIR
Action : Edward lunges downward fistfirst. Similar to Sheik and Sonic's dair
Use : Not really useful for anything other than mixups.

BAIR
Action : Edward turns around and kicks the opponent.
Use : Extreemely similar to Fox's bair. Kill move..

GRAB
Action : Edward uses alchemy to hold the opponent with stone tendrils.
Use : Incredible range.

PUMMEL
Use : Move refresher and racking up damage.

DOWN THROW
Action : Edward lunges and does a downward swing, popping the opponent into the air.
Use : Incredible for combos.

UP THROW
Action : Edward transmutes a stone fist to come up under the trapped opponent.
Use : High knockback move that sets up juggles.

FORWARD THROW
Action : Edward transmutes several stone pillars to come at the opponent.
Use : Spacing.

BACK THROW
Action : Edward jumps and kicks the back of thw opponent's head.
Use : Sets up edgeguarding.


PLAYSTYLE
True to his personality, Edward Elric is a combo heavy hyperagressive character with all the tools to juggle and KO his opponents. He can rack up percents with down tilt, juggle with his down special and up air, and KO with his side special. However, due to his short recovery, fast fallling speed, and light weight, he is very vulnerable to combos and edgeguarding.

Don't rate this one. It's not finished at all.

Alphonse Elric

NEUTRAL SPECIAL - Alkahestry
Action : Taking a note from his girl May Chang, Alphonse throws alkahestry markers. If the specials button is pushed again while on the floor, Alphonse claps his hands, slams his hands on the floor, and activates the attack, causing a stone hand to rise from the ground and slap the air before disapearing.
Use : A long range defensive version of Edward's Reconstruction. The markers can also be thrown from the air and do a decent amount of damage to opponents before landing. Unlike Edward's Reconstruction, which knocks the opponent up, Alkahestry knocks the opponent to the sides, making it useful for spacing and edgeguarding.

UP SPECIAL - Stone Pillar
Action : Alphonse transmutes a rising stone pillar below him that pushes him up.
Use : Slow high reaching recovery that also spikes characters below him.

SIDE SPECIAL -

FINAL SMASH - The Philosopher's Stone
Action : Alphonse snatches a Philosopher's Stone from the air and goes SUPAH SAYAN! Based on his fight with Pride and Kimblee.
 
Last edited:

Munomario777

Smash Master
Joined
Nov 18, 2014
Messages
3,253
Location
Charleston, South Carolina
3DS FC
0387-9596-4480
Switch FC
SW-8229-3157-8114


Knuckles! He's the coolest echidna around, with spiked fists, super strength, speed, and more! (Granted, there's not a lotta echidnas that can really compete for that title, but still.) He's Sonic's earliest proper rival, and has the raw strength to compete with Sonic's speed. He can burrow through the ground, punch through solid steel with his fists, and do other cool stuff like that. As always, this set is made for Smash 4 in terms of balance and whatnot. Anyway, let's dig into this set!

STATS

While Knuckles may seem similar to Sonic, in actuality, he plays very differently. The first tell of that is his stats spread. He's not quite as fast as Sonic, with a dash a tiny bit faster than Captain Falcon's. He's also quick enough in the air, around Sonic's air speed, but he lacks in control and acceleration ability. Knuckles has a pretty bad jump height, only about as high as Game & Watch's jumps. His traction is a bit better than Sonic's. Knuckles is also a tad heavier than Sonic, but he has a similar size and falling speed.


Knuckles also has a unique ability known as gliding. Don't confuse this with the ability that characters like Pit had in Brawl; this is a rather different mechanic. Hold the jump button (if you tap it, you'll instead use your midair jump) and Knuckles will enter the pose seen above. He'll accelerate quickly to a speed nearly matching that of his dash -- about 5/6 as fast, the speed of Charizard's dash -- and his falling speed is slowed greatly; he'll barely descend at all. During a glide, Knuckles' fists will deal 4% of damage and a bit of set, forwards-upwards knockback. He can turn around during a glide, but this has a rather lengthy animation (the same as some of the longer dash turnarounds), and causes Knuckles to begin to fall more quickly during the turnaround animation before regaining floatiness as he begins to pick up speed.

The glide lasts as long as you hold the jump button; letting go causes it to end with a good bit of lag attached (in the form of Knuckles spinning around as a ball). This lag, however, can be canceled with a midair jump, or if you land during it, a grounded jump. You can stop and start gliding as much as you please in midair, but you can't start a new glide during the previous glide's ending lag. The glide is good for many things: recovery is a big one, since Knuckles' short jumps and poor air control/acceleration hinder him otherwise in this regard. It can also be used as a potent comboing tool, since you can hit a foe upwards with the glide, jump cancel the endlag, and then follow up with an aerial attack! This isn't possible, though, if you've used up your midair jump already.

Knuckles also has the ability to wall jump and wall cling by sticking his fist spikes into the wall, and during a cling, he can scale walls just like in the Sonic games. Unlike those games, though, the wall cling timer still applies -- you can't climb forever. Knuckles can also enter a wall cling from a glide without any extra lag attached, which is pretty convenient for recovering.

FLAVOR

Standing:


Walking:

Dashing:

Crouching:

Jump/Midair Jump:

Shielding:

Spot Dodge:

Dodge Roll:
Pretty much the same as Sonic's.
Air Dodge:
Knuckles performs a half spin and dodges into the background, and then performs the other half whilst returning to the foreground.
Entrance Animation:

Up Taunt:

Knuckles snickers like he does in Sonic 3, whenever he messes with Sonic and Tails. Wait a minute, I thought you said you didn't chuckle!
Side Taunt:

Knuckles casually does some push-ups while saying, "Hmph. I'm just warming up!"
Down Taunt:
Knuckles punches the air a few times as he says, "Outta my way!"
Death Sound:
"Oh no"

Victory Pose:
This.

SPECIAL MOVES

Down Special - Drill Claw

Knuckles turns upside down in the blink of an eye and then starts spinning around rapidly, entering a pose similar to his gliding. He'll immediately start rocketing downwards at blistering speeds in this fall, no-stall attack. It'll deal 7% of damage and moderate sideways knockback, the direction of which depending on which side of Knux the foe is on. The hitbox, though, doesn't come out right away; it takes a moment. During the descent, Knuckles leaves a trail of afterimages to accent the speed of the attack, and he can move left and right during the dive. Let go of the B button to cancel the move; you'll keep your downwards momentum, but with some ending lag attached. Alternatively, press the jump button to instead cancel it into a glide (even during the dive's ending lag)! This glide cancel has no extra lag attached, and you can jump cancel the glide to act again very quickly; use this to follow up on the Drill Claw's horizontal knockback, or to confuse foes with rapid movements.

On the ground, Knuckles leaps up a tiny bit in ball form and begin to dig into the ground. He'll also do that spinball-digging thing if he hits the ground during a Drill Claw dive (the bit I just spent the last paragraph describing). Either way, Knuckles will burrow into the ground for a brief moment, disappearing from sight after an amount of lag. He can damage opponents for 5% of damage and a bit of knockback while he's a ball, to keep foes away, but this has low priority. After he's disappeared, you can hold the analog stick in a direction to control where Knuckles pops out! Tilt the control stick all the way to one side, and he can travel as far as 5 SBB on that same platform; less tilt = less distance. It can be tricky to get the exact distance you want; a Knuckles player must practice this quite a bit. Nevertheless, burrowing is a great mobility tool, especially since when you pop up, Knuckles delivers an uppercut that deals 13% of damage and set upwards knockback, perfect for starting an aerial combo! It isn't very safe on block, though, since it does very little damage, pushback, or stun to shields. Knuckles also travels forwards a bit during the uppercut, so what little pushback there is on shields won't stop Knuckles from getting shieldgrabbed. All that stuff's only possible on solid (like Battlefield's ground) or semi-solid platforms (like Halberd's bottom platform). Land on a soft platform, and you'll just go upwards in spinball form; jump if you used the move whilst grounded, or bounce if you're landing from midair. It'll deal the same 5% as when you're digging.

Going back to the actual burrowing part, if you don't move sideways at all and hold the special button, Knuckles will take longer to pop up, but in return, he'll go flying up into the air with an uppercut! The leap covers 5 SBB of vertical distance, and also has the normal 13% and set upwards knockback from the uppercut, but this will knock foes up high enough to be a bit under Knuckles' peak height, with decreasing knockback as Knuckles gets higher up to maintain that height relative to Knuckles. Then you can follow up on the attack in midair, with either a Drill Claw dive, or a fast-fall aerial attack. If shielded, this "super jump" is cut in half height-wise and given more ending lag (normally you can act out of the move very quickly), making it more punishable with a jump out of shield (depending on the fighter of course). The Drill Claw is a great move to escape sticky situations, act as a pseudo-counter, get Knuckles around the stage quickly, start combos, or give Knuckles some vertical height for follow-up attacks and to perform his myriad of midair movement options!


Neutral Special - Boulder Toss

Knuckles reaches down into the ground with both fists, and with all his might, heaves out a giant boulder! It's about as big as one SBB. After some heavy startup lag, Knuckles throws the boulder forwards with all his might, and it flies forwards in an arc, traveling a fairly far distance for something of its weight. The boulder, upon hitting a foe, deals 18% of damage and upwards-forwards knockback that KOs at around 80%, plus some heavy shield damage. It'll break into pieces upon hitting a surface (but not a foe; it's invulnerable to attacks!) in a manner similar to Charizard's Rock Smash, dealing around 4% of damage over a few hits, trapping foes in place for a moment. Despite its heavy startup lag, Knuckles can act out of the move very quickly, allowing him to attack in conjunction with the boulder for some nasty setups! It's a scary tool indeed. (Those frames where Knuckles gets back into a normal standing pose can be canceled by any other action.)

By hitting the boulder with an attack, Knuckles -- and only Knuckles -- can send the boulder flying. While this doesn't allow the boulder to travel beyond its normal speed, attacking it can affect the angle at which the boulder travels for even more setups and combo opportunities! Of course, this move's main weakness is its startup lag, which is punishable if you don't account for it and keep foes at bay.

In midair, Knuckles will simply materialize a boulder out of thin air... somehow. (Then again, he does summon meteors n stuff in Sonic Battle...) It's quicker to start since the rock doesn't have to be pulled up out of the ground, but has more endlag since Knuckles lacks solid footing, and loses his balance. Only one can boulder be in play at any given time; the move, when there's already a boulder on the battlefield, has Knuckles perform the throwing motion without the actual boulder to throw. If he's near the boulder, however, he can re-throw it to extend its travel distance! You can also toss foes, which while dealing no damage, acts as a handy command grab with decent knockback, and can extend combos or knock a foe into the boulder.

Another neat option is to throw a boulder and then use Drill Claw to pop out right where it lands, knocking it up a fair distance to keep it ready if you ever need it for a setup. Or you could just knock it up there as a trap for when it falls, or as an anti-air option. The Drill Claw is just about fast enough to catch up with the boulder, which is awfully convenient -- especially since the Drill Claw's max distance and the boulder's toss distance just about line up with each other.

Side Special - Spin Dash

Knuckles, like Sonic (and pretty much every other Sonic character) can curl into a ball to attack. In Sonic & Knuckles, he could use the Spin Dash like Sonic, which is a trait that carries over here too. However, here it's a bit different compared to Sonic's version of the move. First of all, Knuckles won't reel back whilst charging the move (like Sonic does), although he does hold the button to charge it like Sonic's side special move. Aside from that, it's much like Sonic's Fire Spin Dash custom move -- it doesn't hop at the beginning, deals more damage, and has a lower jump height from the spin dash. It deals 10% of damage and quite a bit of horizontal, slightly-upwards knockback. While it isn't possible to get a true combo out of this normally, Knuckles does have more options than simply continuing to chase with a spin dash. Hold down on the control stick during the dash, and Knuckles will bury into the ground just like a Drill Claw! You can control where he pops up like normal -- it essentially cancels the spin dash into that attack, although you won't "hop" up before burrowing. Use this to extend your combos from a spin dash! Alternatively, do this during the charge of the spin dash (which you can indeed to) to fake out your opponents. While the tactic is very effective, you'll need to adjust the Drill Claw's distance depending on the opponent's percent, and how far they fly. A spin dash is also a good way to keep the boulder in the air while staying on the offensive -- you can attack with the spin dash and the boulder at once, which is difficult to defend against.

Up Special - Spiral Upper

Knuckles holds his right fist down low for some moderate-to-brief startup lag before thrusting it upwards and spinning around a couple of times as his fist bursts into flames! Knuckles goes up a fair distance with this attack, and has a decent amount of horizontal control too. It'll hit foes three times, each hit with heavy hitlag to emphasize the impact. The first two hits each deal 5% of damage, and the final hit deals 7% and vertical, slightly-forwards knockback that kills at around 100% if you started the move from the ground. Of course, it kills much earlier in the air. This move leaves Knuckles in helpless, however, so it's risky to land, especially with that bit of starting lag. That said, the move's big hitboxes make it a safe recovery option once you get going. Knuckles can also grab the ledge at any point during the animation, so you can ledge-grab cancel the move before the final, launching hit; let go of the ledge to extend your combo!

By the way, here's a cool bit of boulder physics for ya: if you manage to hit the boulder multiple times in quick succession, you can increase its speed: the first hit knocks it at normal speed, with each hit within about half a second or so of the last hit adding an extra half normal speed (so 1, 1.5, 2, 2.5, etc). Why am I bringing this up now? Well, if you chain all the hits of the Spiral Upper together, you can send the boulder flying upwards at double speed for a vicious anti-air option! This takes a good bit of planning to pull off, but if you get someone with a boulder near the ceiling, it can KO at super-early percents!

STANDARD ATTACKS

Jab - Punch Attack

For a jab that I'm sure no one saw coming, we've got a rather basic punch, punch, punch combo. The first two punches are straight jabs, and deal 3% each. The third button press triggers a leaping uppercut that deals 5% of damage and a good bit of upwards knockback that'll KO at around 180%; at lower percents, it'll keep foes close enough to land a follow-up attack. This jab combo has a good damage output, and has a quick startup to boot. The only downside is that on a whiff, Knuckles undergoes a bit of ending lag as he falls back down to the ground. It also doesn't do much to shields, so it can be shieldgrabbed easily, especially since the third hit makes Knuckles leap forwards a bit.

By the way, Knuckles' punches tend to have very high priority, beating out other jointed hitboxes with ease! There's no beating this guy in hand-to-hand combat.


Normally in Smash Bros., two hitboxes within 9% of each other in terms of damage will "clash" and cancel each other out. However, Knuckles' punches can overpower attacks by being more damaging even by a mere 1%; the minimum difference of 9% does not apply to him. Knuckles will also win any "tie;" if Knuckles and the opponent collide with equally damaging hitboxes, Knuckles wins the exchange. But if Knuckles' attack is lower in damage than his opponent's, the normal laws of priority apply. This applies to all of Knuckles' punching attacks, so keep it in mind.

Forward Tilt - Double Punch

Knuckles pulls both of his fists backwards and then thrusts them both forwards at once in a single punch, but with two fists' worth of power. While this attack does have quite a bit of startup lag, it's got much more reach than the jab since Knuckles steps forwards (although the above gif fails to fully convey this range; it's about as far-reaching as Sonic's ftilt), and he leans back a bit during the startup to potentially dodge attacks. The attack can be angled up or down, and it deals 13% of damage and good horizontal knockback, KOing at around 140%. And like Knuckles' other punches, it can beat out other attacks easily with special priority properties; however, it isn't too effective on shields. Nonetheless, it's a great, powerful option to attack foes at a distance, if a rather slow one. Knuckles can act very soon after the punch, though.

Up Tilt - Knuckles Upper

Knuckles reels his hand backwards before delivering a meaty, swift uppercut. The startup for this attack is quicker than the forward tilt, and while it lacks in horizontal reach by comparison, this move covers a good area with its large hitbox. It'll deal 10% of damage and knock foes upwards, KOing at around 200%. At lower damage levels, it'll knock foes up only a short distance, great for extending or starting a combo. At super-high damage levels, it's a decent KO option (if your opponent somehow manages to live that long), and at medium percents, it can act as a setup for moves like the charged Drill Claw jump. Needless to say, this is a very versatile tool. (versatool?)

Down Tilt - Tremor
Knuckles pulls his right fist up, and then slams it down onto the ground in a downwards punch. The punch itself deals 6% of damage and a bit of forwards knockback, but what's more interesting is what happens 3 SBB away. A few bits of rock, dust, etc fly out of the ground, and at that remote spot, opponents will be damaged! It'll deal 6% and a bit more knockback than the fist, KOing at around 180%. This acts as a great mid-range option -- albeit one that lacks vertical reach -- and can prime foes for another attack thanks to the down tilt's low ending lag! It is, however, a tad slow to start. You can chain this into another down tilt at low damage levels to rack up even more damage, and sometimes, the fist will knock the foe into the tremor! Alternatively, use this attack when you've knocked a foe or boulder a bit too far away to follow up on normally. The shockwave, by the way, will beat out any attack, no matter what -- it has transcendent priority.

Dash Attack - Dash Punch

Knuckles, while dashing, leaps into the air a tiny amount and winds up for a massive punch, which is delivered when he lands. This attack has some considerable start-up lag, but if an opponent fails to react, Knuckles can attack right when he lands, and reach a pretty far distance too! It's similar to, say, Link's dash attack (from SSB4). It's also similar in terms of power, dealing an impressive (for a dash attack) 15% and KOing at around 100%. It'll also deal massive damage and pushback to shields. While it certainly packs a punch, Knuckles' dash attack has one flaw: its lag. Indeed, it's slow to start, and nearly as slow to recover from. That said, it can be an excellent finisher to a combo or tech chase if timed properly, or even a decent approach/punish tool with the right reads. If you use the dash attack right as Knuckles reaches a ledge or end of a platform, he'll leap straight off of it and deliver the punch in midair. While this can hit offstage opponents, Knuckles will fall quite a distance due to the move's endlag, making this a risky but rewarding maneuver, and one that can catch foes off guard. The dash attack can also be a good option to hit a boulder towards your opponent from a dash, but you'll leave yourself open.

SMASH ATTACKS

Forward Smash - Deep Impact

Knuckles is surrounded by a cloud of dust coming up from the ground -- showing the immense force of this particular attack -- as he "leaps" forwards (although with one foot on the ground), reeling his fist back with great exaggeration. When the charge is released (doing so makes him step forwards early), he propels said fist forwards with great force as he lands, causing it to ignite the air around him to create an explosion as Knuckles steps forwards and the fist reaches its maximum distance! The attack will deal a whopping 19~27%, and KO at 80~60%. While this attack is super-powerful, it's also pretty slow to start up, and has punishable endlag. So it can be easy to see coming, it's a great punishing option.

Up Smash - Double Upper

Knuckles brings both of his fists together, as if preparing to hit a volleyball. Release the charge, and Knuckles will perform just that sort of motion -- it's like the up tilt, but with two hands. While it is quite a bit slower and heavier feeling than that attack, it makes up for this slowness in terms of power, dealing 16~22% and upwards knockback that can KO around 90~70%. It's not as powerful as the forward smash, but it is quite a bit quicker. It also has the advantage of being able to be used out of a dash, like any other up smash, making for a rather deadly approach option. Alternatively, it's a good anti-air option combined with that boulder you've been juggling. (You have been using the boulder, right?)

Down Smash - Quake Punch
Knuckles crouches down and holds his right fist up in the air, then slams it down onto the ground with immense force, going so far as to send rubble and dust flying up out of the ground 1 SBB to either side of himself! The move is fairly quick, and the shockwave deals 7~10% and a bit of upwards knockback -- enough to keep foes trapped for a moment, but not too much, so you can land a follow-up attack. The attack does lack in damage output, but covers a decent area with only moderate lag on either end. Knuckles' fist acts as a sweetspot that deals 19~27% of damage and pitfalls the foe, which is especially good for setting up Knuckles' slower attacks. The pitfall, though, doesn't last nearly as long as a regular pitfall -- think Wii Fit Trainer's jab. Either way, though, this attack is great for setting up follow-ups, strings, and combos. It can also, like the down tilt, beat out any attack with the shockwave hitbox with its transcendent nature.

AERIAL ATTACKS

Neutral Aerial - Spin Attack

Knuckles' nair is pretty similar to Sonic's: he spins into a ball to deal damage. It deals 8% of damage and moderate, upwards-forwards knockback. This is a good attack to use to get a foe out of your face or continue a combo due to its speed -- its animation is a bit shorter than Sonic's. This makes it stricter to hit with, though, and the attack's priority is also lower than Sonic's version -- attacks will beat it out easily. Even when it collides with an aerial (therefore making priority null and void), it has no disjoint at all, so Knuckles will very likely get hit before his opponent. The angle of the knockback is a semi-spike unlike Sonic's, which makes it good for tech chasing and the like.

Forward Aerial - Knuckles Chop

Knuckles performs a quick forwards swipe with his right fist (despite the above gif's deceptive foot placements, this is indeed a midair attack). The move is fairly quick, with barely any starting lag but a bit of cooldown, and deals 9% of damage and a moderate semi-spike (completely horizontal knockback). It'll send foes downwards a good deal due to gravity, of course. This move is a pretty good approaching option, and a quick option in aerial combat with good range. While it does send foes downwards a good bit to set up an edgeguard, it also isn't too great for combos since it knocks foes rather far away at higher percents. It can, however, KO starting at around 140%, and can also be used to knock the boulder around on the fly.

Back Aerial - Megaton Hook

Knuckles pulls his fist back and then swings it around in a spinning motion, delivering a meaty punch to any unfortunate foes behind him! It'll deal 13% of damage and backwards knockback to KO at around 120%. That said, it's pretty slow to start, and has some cooldown too. But, this is a potent combo finisher if timed right, and can also be a good edgeguarding option! Just make sure you stay mindful of that lag.

Up Aerial - Uppercut

Knuckles' up aerial attack is a pretty simple uppercut, with a similar animation to the one found in the jab combo. It deals 10% of damage and has fairly quick startup and endlag. Its reach isn't too great, making it kinda hard to hit with, but its moderate upwards knockback makes it good for juggling -- both foes and the boulder!

Down Aerial - Meteor Punch

Knuckles' down air, surprisingly, doesn't hit foes below him. Instead, he sends foes in front of him straight down with a powerful, two-handed hammer fist attack! It'll deal 13% of damage on top of the spike, and while it has quite a bit of startup lag, Knuckles recovers from the attack fairly quickly. Its hitbox is decent, but not too big, so landing the attack can be tricky at times. A neat tactic, however, is to toss a boulder, and then send it straight down at an opponent trying to recover! Another nifty thing about this attack is how it gives Knuckles a bit of height when he hits an opponent (or the boulder!), to help him recover from deep edgeguards.

GRAB GAME

Grab - Grab
Knuckles reaches out with one hand -- once he's grabbed someone, he doesn't even need to use both hands thanks to his strength. The grab has good reach, but is rather slow for a non-tether grab, and punishable if whiffed. To pummel an opponent, Knuckles performs an uppercut with his free hand in a similar motion to the up tilt. It'll deal a whole 5% of damage, but at the cost of speed -- you can only get in one, maybe two pummels before your opponent gets the chance to escape. Still, it's great for tacking on some damage before a throw. Knuckles can also grab his boulder instead of an opponent, although an opponent will be grabbed instead of the boulder if both are within grab range. Knuckles can then throw the boulder around, which comes in handy thanks to the throws' utility in combination with the boulder.

Up Throw - Major Eruption
Knuckles burrows into the ground, dragging the held foe down with him. Then he flies up out of the earth, dragging the foe with him as he performs a flaming uppercut akin to the Spiral Upper! Granted, it's not as powerful, dealing two hits of 5% each and KOing at around 120%. Still, it's a decent KO move.

Knuckles can also influence where he and his foe go with this throw by holding sideways on the control stick, just like a regular Drill Claw! You could, ergo, knock a foe up into a boulder wherever it is on the stage, or get a foe onto a platform to follow up on the prone state. Alternatively, hold down on the control stick to trigger the "super jump." At a certain percent range, the super-high leap out of the ground brings Knuckles up to the peak of the foe's knockback for an easy follow-up!
You can also use this throw when grabbing a boulder to reposition it with ease.

Forward Throw - Fire Dunk

Knuckles leaps into the air, still holding the opponent in one hand, winding his fist back. He then throws the foe at a downwards angle with great force, dealing 9% of damage. It won't KO at the ledge until around 180%, sadly. What it can do, though, is put the foe at a disadvantage. On the ground, they'll likely be put into prone unless they tech, in which case you can tech chase with Knuckles' plethora of punishing tools (Knuckles recovers from the animation rather quickly). Near the ledge, you can set up for an edgeguard very effectively with this attack! A boulder is an excellent option to keep a foe at bay after a Fire Dunk. By the way, this move originates from Sonic Heroes, where Knuckles would use his teammates as projectiles. In Smash, the thrown foe can damage other fighters like in that game, dealing 15% of damage and upwards knockback to KO at 100%. When you grab a boulder, this move's low angle can be good for throwing it downward and offstage for edgeguarding.

Down Throw - Forced Burrow
Knuckles holds the opponent up in the air and then slams the foe down into the ground with great force, causing a pitfall state. This, however, is merely for visual effect, just like Lucas' down throw. The pseudo-pitfall deals 8% of damage, and after a brief moment, the foe is sent flying into the air a bit, ripe for an aerial follow-up! Knuckles can act very early after performing the throw, making this an even better follow-up tool. You could also use it to knock the foe up into a boulder, or at higher percents, you may even have time to use a Drill Claw super-jump! If you use this throw on a boulder, it'll stay embedded in the ground for a couple of seconds before getting launched up out of the ground -- the delay can lead to setups and combos into the boulder for a powerful finishing move.

Back Throw - Reverserve
(As in, a reverse serve. Get it?)
Knuckles turns around and tosses the held foe into the air a short distance, as if serving a volleyball. He then leaps into the air, but instead of "slapping" the foe, like one would do to the ball in volleyball, he reels back his fist and delivers a meaty punch! It'll deal 13% of damage and backwards knockback that KOs at around 100% at the ledge. That's pretty impressive! The problem? Knuckles has a really bad pivot grab -- it's as slow as his regular grab, but without its reach. Of course, his regular grab isn't brilliant either, so landing it in the first place is risky and tricky to pull off. But if you do, the rewards can be pretty dang good, as is evident. This doesn't have much use with the boulder outside of generically knocking it in a direction, but even that can still come in handy.

MISCELLANEOUS

Final Smash - Master Emerald Surge


Knuckles jumps into the air a bit (in midair, he'll just stay there) as the Master Emerald appears underneath his feet. The Master Emerald is a giant gemstone with infinite power, which Knuckles watches over as its loyal guardian. Anyway, he'll stand on the M.E.* as it lets out a circular wave of green energy, briefly transforming into his pink super form, Super Knuckles! The surge of energy is 8 SBB in diameter, and deals 30% of damage and knockback that can KO at around 20% (if the foe was at 20% prior to being hit, and was near the center of the stage). This Final Smash is powerful to be sure, but it takes quite a bit of time to start, so it can be avoided easily. (That's kind of a theme in the moveset, if you haven't noticed. ;))

*#subtlereference

PLAYSTYLE

As a fighter, Knuckles is very much a "lightning bruiser." He has the speed and power to lay on the hurt, and do it quickly, with combo ability, fast movement options, and surprise tactics to keep foes on their toes. The Spin Dash is an excellent approach option, since it can set up for combos when combined with a well-timed Drill Claw. The Drill Claw is also an excellent tool in general, for counters, surprise attacks, mobility, and landing from high up. His punching attacks and their special priority give Knuckles the edge in straight-up grounded combat, and his down tilt gives him a great option at a distance. He's got near-Sonic speed, the power of a heavyweight, a quick, long-reaching recovery, good weight, priority, a powerful projectile, crazy movement options... What doesn't he have?!

Well, there's a few things that Knuckles is less than excellent at. Firstly, many of his attacks are pretty slow. While Knuckles does have ways to circumvent that, such as setups, combos, and surprise mobility tools, he can't just rush head-on into battle -- like in his home series, this will often do more harm than good; quite a few of his attacks have little effect on shields, which further compounds this problem. Knuckles often has trouble hitting foes who aren't in front of him -- his nair can be beaten out by attacks, his uair has short range, his bair is slow, his dair doesn't hit below him at all, ftilt and fsmash are slow, you get the idea. So while Knuckles has a fantastic advantage state, when he's at a disadvantage, he has trouble escaping pressure.

The boulder that you can toss with Neutral Special is a great tool with many different uses and potential strategies. You could use it as a slow projectile, sure, but you could also knock it up into the air to act as a trap, or hit foes up into it for an early kill. Knock it down below the stage for an edgeguard, heck, you could even combo with it! Drill Claw has a ton of shenanigans you can pull with it, whether it be teleporting around the stage, dodging and countering attacks, rushing down in midair and stopping with a glide, or launching up into the air!

Knuckles' combo game is also rather extensive. Jab, utilt, nair, fair, dtilt, uair, and dair can be used to great effect during combos, as well as boulders and the Spin Dash. In particular, dtilt's distant hitbox allows Knuckles to extend combos that would otherwise be out of reach, and dair gives him an upwards boost that can help extend combos. Boulders act as a powerful, looming hitbox that can force reactions, and the Spin Dash is one of his most effective combo starters in conjunction with a Drill Claw follow-up. To finish the foe off with a KO, most of the aforementioned attacks will work -- some at higher percents than others -- but usmash, dair, some throws, the boulder, and the Spiral Upper are particularly proficient at closing a stock.

Overall, Knuckles is a quick but powerful fighter who can use his mobility options to outmaneuver and confuse foes. His attacks are unmatched in power and priority, and his combo game is extensive. He has the tools to keep close to his foes, and his attack power allows him to reap the rewards. Like in the Sonic games, though, rushing in headlong is not at all a good idea -- Knuckles' slow attacks give opponents a long time to react to and punish most of his basic options. Indeed, if Knuckles is tricked and an opponent gets crafty, he won't have a good time. Instead, use your mobility to your advantage, with tricky maneuvers, boulder traps, et cetera, and lay down vicious combos and send your opponents straight to the blast zone! With his extensive combo game, outstanding mobility, and raw power, Knuckles is more than ready to take on the best that Smash Bros. has to offer! As always, feedback is greatly appreciated, and I hope you enjoyed the set! :)

Like what you see? See some more over at my Make Your Move Hub! :D
 
Last edited:

MasterWarlord

Smash Champion
Joined
Aug 24, 2008
Messages
2,911
SLON THE ROOK


Slon is a very minor antagonist from Dragon Quest V. He is first seen when he is summoned by Ladja alongside Kon to execute the main character’s father. After chopping and chomping at him several times, he was successful in finishing him. He is not seen again for an extended period of time. While his introduction makes him appear to be a villain duo with Kon, Kon gets promoted to be the head of a castle in 7 years’ time while Slon is given generic guard duty on a chest. Kon has magic, while Slon has nothing but his generic melee attacks. In the least, Slon technically outlives Kon, but his “boss fight” is far from anything to brag about. He largely reappears to generically die so there are no loose ends.

The various translations of the generic monster family that Slon is a member of have their name often translated as either bulldogs or warthogs, being unclear as to what type of animal he’s supposed to be. His sword and shield have also gone through many redesigns throughout various adaptions. His “sword” in particular becomes so warped that in some games it looks like more of an axe, to the point it was eventually entirely replaced with an axe. He probably gets hit the least hard by the terrible translations, simply being given a slight southern accent and snorting in the middle of his dialogue.

STATISTICS
Weight: 10
Size: 10
Traction: 8.5
Falling Speed: 8.5
Aerial Speed: 5
Jumps: 4
Ground Movement: 3
Aerial Control: 2

Slon’s stats are extremely heavyweight, nothing to see here. Snake is the third heaviest character in Brawl for carrying excessive props, and Slon carries plenty of weapons while having a much heavier body than Snake. Slon actually has a couple more weight points than Bowser based off of this logic, but it’s not enough to make him actually be in another tier of weight.

If Slon stands in place on the ground, his shield will block projectiles from the front like Link. In order to not decimate heavy projectile users, this will only work on projectiles that deal 10% or less. If the projectile that could realistically be embedded in Slon’s shield such as Link’s arrows hits the shield, it will stick to the shield afterwards for 10 seconds. This appears to just be a minor aesthetic at a glance.

SPECIALS

SIDE SPECIAL – THROWING BLADES

Slon throws the current weapon he’s wielding, either his longsword or axe. By default, Slon wields his longsword. After he throws his current weapon, he will take out another weapon of the opposite type afterwards.

The longsword can be aimed freely and deals 10% and knockback that kills at 140%. It travels forwards very quickly at the speed of Captain Falcon’s dash. The longsword is affected by gravity and will get embedded in the ground upon contact with it, no longer being a hitbox. The sword can travel up to the distance of Battlefield if Slon throws it upwards at a 45 degree angle, but this will cause it to go in an arc that would miss the majority of opponents in the middle of the stage/slightly in front of him. This is a very fast projectile to come out, but it can’t be spammed due to Slon switching weapons to the axe afterwards.

The axe can only be thrown straight forward or angled 10 degrees up or down. The axe travels much more slowly at the speed of Luigi’s dash, and there’s a considerably larger amount of lag to throw it. The axe only travels 1-1.7 platforms forwards, but will boomerang back to Slon at the end of its arc. The axe deals 7% and radial knockback that kills at 180%. If the move is angled too low, the axe can get embedded into the stage like the sword. The fact the axe lingers out so long makes it a much better tool for stage control and approaching, considering he will actually be able to move around during the axe’s flight path unlike the much quicker sword.

If Slon throws one weapon at another one in midair, they will clash together in midair, creating a hitbox that deals 15% and knockback that kills at 90%. This will cause the two weapons to get shot in opposite directions half Battlefield’s distance, dealing 10% and knockback that kills at 120%. If they come into contact with the stage, they will become embedded in it afterwards.

If Slon inputs Side Special when he is standing over a weapon embedded in the stage, he will throw it regardless of what weapon he’s currently wielding. This also takes off the ending lag of the move where Slon has to take out an extra weapon afterwards, making it nearly instant to throw the projectile in the case of the longsword and enabling Slon to immediately capitalize on his lingering projectile in the case of the axe. While this is scarily powerful, foes can destroy these projectiles embedded in the stage by dealing a meager 6 damage to them. Note that hitting an actual damageable target with the weapon causes it to vanish and not get embedded in the stage. The sole exception is if it hits the foe’s shield, in which case it will fall off of it once the foe drops their shield and embed itself in the ground.

Slon can block his own weapons with his passive shield stance. While his projectiles can’t hurt him, if he stands still when it comes into contact with his shield it will get embedded in the shield. If Slon inputs Side Special with one of his weapons on his shield, he will take it off the shield as if he’d picked it up off the ground. Foes can still destroy your weapons with only 6 HP when they are embedded into the shield. It’s rare to find a situation where throwing it at the foe immediately isn’t useful, so with their low HP it’s better to not be conservative. If you’re doing stupidly well, you can keep them in reserve for combo heavyweight abuse, but it’s a pretty big shame if you don’t get to make use of the weapon.

DOWN SPECIAL – FOCUS STRENGTH


Slon takes a deep breath in order to power up his next attack. This takes 40 frames, and afterwards Slon will keep his mouth shut and get a puffy red angry face instead of his default of constantly breathing heavily, mouth agape. While Slon is charging up this move, he can cancel out of it at any time, but the charge won’t be stored unless he finishes the full charge. If this move is successful, Slon’s next attack is powered up by 1.6X unless stated otherwise, having different effects from move to move. If Slon is hit while he has the buff without having expended it yet, he will lose it, but he will exhale the air to push foes away from him lightly the distance of Wario’s width, potentially saving him from a combo.

The sword and axe get the power boost, but have an additional effect. If they hit the foe, they will impale them, getting stuck on their person and causing a bleeding effect that deals 1% per third of a second. Foes can knock the weapon off of themselves like a Pikmin by dealing 10 damage to it. The last hit that knocks off the weapon will deal knockback to it comparable to a Bowser at 20%, and if it lands on the ground, it will get embedded in the stage where the foe will have to deal 6 more damage to it as usual to get rid of it for good. If foes really want to skip this step, they’ll generally have to jump off the stage when doing the last hit to make it fall off, which is probably even more trouble than it’s worth.

If Slon inputs Side Special next to a foe that has the weapon embedded in their body, he will rip it out of them with a bit of gore as he briefly stuns them, dealing 7% in the case of the sword and 10% in the case of the axe. If Slon ripped the sword out of the foe, he will still throw it immediately as normal, but if he ripped out the axe he will just do a generic chop with the axe afterwards to deal 8% and knockback that kills at 160%, given the axe toss is too laggy to throw at point blank range.

If Slon powers up before ripping the impaled weapon out of the foe, the power up considers ripping the weapon out as the attack that is powered up. Aside from boosting the damage, this will cause the bleeding to continue after the weapon has been removed from the wound, dealing 1% per second for 5 more seconds for a total of 21% in the case of the axe, ignoring the free hit at the end. If you impale the same wound within those 5 seconds, the passive bleeding damage the foe takes with the weapon impaled will be doubled.

UP SPECIAL – STOMP OF FATHER CRUSHING

Slon does a generic kick off of nothing in particular below him, causing him to go up into the air 1.35x Ganondorf’s height for an acceptable but not fantastic recovery. He is a hitbox as he goes up that deals 10% and knockback that kills at 180%, functioning primarily as a defensive hitbox to enable him to recover more safely. The move does not put Slon into helpless, but can only be used once per air trip.

If Slon kicks off of the ground or a foe at the start of the move, the recovery will go 1.6x as high up and be 1.6x as powerful, and he will be able to use the move a second time in the air. If Slon actually kicks off of a foe midair at the start of the move, he will deal them 13% and a weak meteor smash, but still capable of gimping foes.

Slon can kick off of his aerial swords and axes. This will require him to use the axe in some way, as he can’t use them as they’re being thrown out, only on return trips. Unfortunately, It’s too painstakingly long of a process for Slon to actually throw out weapons and expect them to get back to him in time to recover if already off-stage. That said, it can help any attempts to gimp foes significantly, as Slon throws an axe off-stage before following off himself with an extra layer of protection. If Slon has impaled the foe with a weapon and they knock it off of themselves in midair, Slon can also make use of it before it falls off the bottom blast zone.

If Slon powers up with Down Special before using his recovery, it will increase the generic recovery to go as far/be as powerful as the version where he kicks off of something. This is actually feasible to do when knocked off-stage. If the foe doesn’t want to deal with you passively having a half decent recovery, they’re more obligated to come gimp you, in which case the fun can begin. If Slon is powered up and actually kicks off of something other than thin air, the stomp will be as powerful as Ganondorf’s dair and he will ascend into the air 4 Ganondorf heights.

NEUTRAL SPECIAL – BLADESTORM

Slon puts away his shield and takes out the other blade that he wasn’t already wielding before beginning to spin around rapidly. This forms a hitbox similar to Mach Tornado, though with a bit more lag to come out. The hitbox is wider and shorter than Mach Tornado, and deals 13-20 hits of 1% and flinching over the course of the move. Slon can mash B to go higher into the air like Mach Tornado and increase the amount of hits from 13, potentially up to 20. The final hit does knockback that kills at 210%. This move has no godly priority like Mach Tornado, and is considered an aerial move in the priority system. This means it will trade with any move it comes into contact with.

Slon largely wants to trade with this move, because if he ends it in the air he will enter helpless like with Mach Tornado. Even on the ground the ending lag is terrible as Slon is comically dizzy afterwards. More importantly, if Slon is interrupted out of this move, he will release both of his weapons at the end of the move with just as much power as they usually have, with the sword going one direction and the axe going the other direction. Ideally, you’d want the sword to hit the foe and the axe to linger on behind you to use for later. Slon obviously spins a lot slower than Meta Knight, more resembling Bowser’s Whirling Fortress, so it’s actually possible to tell which weapon is facing which direction. If Slon loses his weapons, he will take out the opposite of the main one he was wielding as usual.

The exception to the usual aerial priority is that this move will reflect projectiles such as Slon’s own weapons. This includes enemy projectiles, but considering the move’s ending lag it’s not like a foe’s projectile will have gone completely to waste.

If Slon powers up before using this move, he will be able to keep the move going longer for up to 27 hits, making it more likely that Slon can actually force a foe to trade with him. This will also boost the power of the thrown weapons if Slon is interrupted out of the move in the same way that their power is usually boosted in the Side Special, enabling them to impale foes.

SMASHES

FORWARD SMASH – DECIMATING SMASH

Slon lifts does an overhead slam with his weapon before impaling it into the ground. He deals 20-30%/25-33 and knockback that kills at 140-100/120-80% based off whether he’s wielding a longsword or axe. The axe is more powerful, but the longsword has more range. The chop is laggy, but a majority of the lag is attached at the end, making this more usable than the usual laggy heavyweight fsmash variants, though obviously less safe.

The ending lag comes from Slon getting his weapon stuck in the ground from the force of his slam, having to painstakingly lift it back up out of the ground. If one of Slon’s weapons comes back at him during the ending lag, he will automatically catch it and leave the weapon embedded in the ground for later use. This move puts a lot of pressure on the foe if they’re between you and a projectile coming back at them. Considering you have the option of just catching the weapon with your shield, this isn’t as predictable as it could be otherwise.

If Slon actually hits the opponent, they will get impaled with his weapon and he won’t go through as much ending lag as he simply takes out a replacement. Like in the Side Special, if you hit the foe’s shield it will get embedded in the shield before falling off of it, also giving Slon the shortened ending lag.

If Slon is powered up with Down Special, this attack will create a shockwave upon his blade hitting the ground that will inherently help cover his ending lag. The shockwave travels 1.5 platforms from Slon’s blade, dealing 9% and weak set knockback at a 45 degree angle away from Slon. The shockwave will cause any blades embedded in the ground to get knocked into the air with varying intensity, with them getting knocked up further if they were closer to where Shon performed the slam. At their most powerful they will go up 1.3 Ganondorfs into the air and deal 12% and radial knockback that kills at 150%, and they cannot be destroyed while they are hitboxes.

The weapons are hitboxes on the way up and on the way down, and will re-embed themselves in the stage upon contact with the ground. While these blades are in the air, they will still deflect traditionally thrown weapons as if you threw another weapon at them, creating the clashing hitbox and everything. Given the move comes out quite fast, this can enable you to do some unique projectile set-ups and offers alternate less obvious ways of getting a projectile to bounce back to yourself to give you a new weapon and avoid ending lag. If nothing else, this provides you with another method of getting out potentially long lingering projectiles outside of the boomerang axe, and you have tons of potential to multitask.

UP SMASH – TOWER SHIELD

Slon holds his shield above himself to protect himself from attacks from above. The spikes on the shield are a hitbox that deal 11-15% and briefly stun the foe to have them on the shield. If usmash is only input once, this is the entire attack, but if A is pressed a second time Slon will swing his weapon on top of the shield. This deals 17-24% and knockback that kills at 160-130%. The knockback is actually quite strong, but the fact it’s at a 45 degree angle means it’s not particularly good at killing people. Slon’s weapon will get embedded into his own shield after this attack, making this the most direct method of setting that up. While it’s not as productive as getting a projectile out on the stage, it can be good for multitasking set-up while actually fighting opponents. Slon can also obviously catch his other weapons with his shield during the move, making it an interesting follow-up into the powered up fsmash.

If the second part of the usmash is not performed, Slon will take away his shield as the foe falls down directly into him. Not performing the second hit of the usmash can be a very viable tactic, much like how some characters don’t use the last hits of their jabs in order to end the combo with something more powerful. If the foe was right in the center of the shield, they’ll have less room to DI away from Slon when they fall down, making it easier to read them into a follow up.

If Slon was powered up, the first hit of the attack will have the stun increased further to make it possible to combo into even an fsmash if Slon hits the foe with the middle of the shield so they can’t DI out of range while falling. The longsword version of the fsmash has a lot more leeway on reading the foe due to its range and because of it can potentially even combo without the Down Special power boost if you do it perfectly, but the axe version is still very possible if you’re powered up. The power boost also applies to the first hit, but the second hit isn’t powered up at all so you’re required to get a bit more creative.

DOWN SMASH – WHIRLING CASTLE

If the smash is uncharged, Slon does a simple sweep around himself with his weapon comparably to Dedede’s dsmash. This is even faster than said dsmash, though the range is shorter if you’re using an axe (Longer with a sword though). The spin deals 15%/20% and knockback that kills at 160%/135% with a sword/axe.

If the smash is charged up, Slon will spin around multiple times throughout the attack, up to four times, lag obviously increasing with additional spins. If Slon does at least two full rotations meaning he charged the smash at least a third of the way, he will release his weapon at the end of the move after having winded up. Throughout the move’s duration, Slon can hold up, down, or do no input for Slon to angle his weapon there, also changing where he will release it and throw it after the move’s input is up. At a third of the way charged, the thrown blade will behave identically as if Slon had thrown it normally. At full charge, the weapon can go up to 1.4X as far and be 1.6X as powerful as normal. While Slon can choose the angle he throws the weapon on demand, it will be released based off the point where Slon stops spinning which has to be chosen by charge. If you predict the foe’s going to roll behind you, you can charge the move specifically so that Slon will end up facing behind himself and release the projectile there at the end of the move.

If Slon was powered up, the move’s power won’t be boosted directly but he will automatically charge the smash a third of the way. In addition, Slon now also has the option to press any button at any point during the move before he throws the weapon in order for Slon to take out his other weapon and immediately transition into the Neutral Special as he continues spinning for even longer. If you know where your spin is going to end and the foe will be out of the way of the thrown weapon, you can continue to pursue them even in that scenario. It’s ideal for foes to avoid both the dsmash and the Neutral Special rather than attacking Slon in the middle of them, but when followed up back to back it makes it incredibly difficult for the foe to just run and hide if you’ve done an at all decent job of applying pressure.

AERIALS

DOWN AERIAL – CASTLE CRUSH

Slon throws his shield below himself, then stomps downwards onto the back of the shield. As the shield is first thrown downwards it’s a weak hitbox that deals 7% and knockback that KOs at 200%. As Slon first stomps, he deals 14% and a spike on par with Rob’s dair. Once he’s stomping down on the shield specifically and the hitboxes are combined, the power is boosted to 22% and a spike 1.15x more powerful than Ganon’s dair. The move starts up shockingly quickly for a stall then fall of this power, though the weaker hitboxes at the start of the move will oftentimes knock foes out of the way of the main hitbox.

The force of Slon’s stomp will cause the spikes on the shield to dig into the stage. Slon will not bother painstakingly pulling up the shield out of the ground, and the ending lag instead consists of Slon taking out a new shield (randomly chosen from one of his many shield redesigns). If Slon has weapons impaled into his shield, he will crush them into the ground underneath his shield. This will cause the shield itself to not get impaled, relieving Slon of most of the move’s ending lag as Slon just picks the shield up casually instead of taking out a new one.

The weapons buried into the stage can be brought back into play if Slon uses an empowered fsmash, in which case the shockwave will cause the weapons to shoot back up out of the ground. While they can’t be brought back up to the surface by any other means, it’s a very worthy tradeoff for them being invulnerable to the foe just destroying them during their downtime. While this may sound a bit gimmicky, this is just a bonus more than anything – Slon will primarily be using this move with weapons on his shield just to shorten ending lag. The whole move is very fast with the shortened ending lag, and ideally you can bait the foe into dodging the weaker initial hitbox before crushing them at full power.

If Slon invests his Down Special power up into this move, the start lag will be even quicker as Slon stomps down even more forcefully onto the shield. This causes the shield to be launched downwards through the air as a projectile, just as powerful as it normally is with Slon attached to it with all of the usual effects. Slon has some ending lag as he takes out a new shield, but he stalls in the air during most of it, halting his momentum in midair from kicking off the shield. The main thing this gives Slon is the ability to use the move off-stage, and turns it into a horrifying projectile killer. You only have one shot with it so it’s very predictable, but if you hold onto this it can be quite the looming threat.

NEUTRAL AERIAL – HIPPOBLOCKOMUS

Slon puts away his weapon and takes out an additional shield before smashing the two shields together, trying to crush the foe like a trash compactor, dealing 15% and knockback that kills at 115% with several freeze frames for effect as a satisfying clash sound plays. This comes out relatively quickly, though the ending lag makes it difficult to use on the stage without triggering the bad landing lag (at least you’ll get the hitbox out first though).

Aside from crushing foes, this move can crush Slon’s weapons. The weapon will be smashed into several particles that deal 10 hits of 1% and flinching, covering Slon’s ending lag. The freeze frames on the move’s primary hitboxes last long enough that if a foe was hit, they will still get hit by these particles before they get sent flying as usual, giving you plenty of free damage. If Slon already had a weapon embedded on his primary shield it will of course be crushed during this attack, as well as any weapons impaled into the foe.

This move already deals heavy quite good shield damage, but if Slon crushes any weapons this will enhance the shield damage even further. Slon is still capable of crushing weapons embedded into a foe if they are shielding/weapons embedded into their shields. If Slon crushes 2 weapons with this move, it will instantly shatter any shield, and even with only crushing just 1 weapon it will take out over three quarters of a shield’s health.

It’s possible to just stack a bunch of weapons on the shield to massively power up this move, but that becomes rather awkwardly predictable and supplies you with less other options than if you get them from a variety of sources, and all your set-up will be for nothing with one botched nair. Slon also likes to crush stray boomerang axes that he throws off-stage for gimping sessions – it’s not overly predictable because Slon can also use them to recover with Up Special, and Slon prefers to use this move off-stage where the landing lag isn’t an issue.

If Slon was powered up with Down Special, the move’s power unfortunately will not be directly boosted, but he will impale the foe from either side with his two shields. This will leave the foe bleeding from either side of their body, giving them a pair of status effects that deal 1% per second for 5 seconds – so in other words, they’re dealt 2% per second for 5 seconds for a total of 10% bonus damage. While 10% isn’t a ton of bonus damage compared to what you can find on other moves, it makes it incredibly easy to impale them to lengthen one of the bleeding effects when they’re bleeding from both sides.

FORWARD AERIAL – HACK’N’SLASH

Slon does a generic slash forwards with his weapon, dealing 9% and knockback that kills at 155%. This is a very fast and spammable move that can be used for any basic positioning or defensive needs. The move is fast enough it would make an excellent wall of pain move, though Slon generally needs weapons off-stage to jump off of in order to actually do that and live.

If Slon is powered up with Down Special, the lag on this move is even quicker. While the move isn’t any stronger, Slon is able to almost instantly “cancel” the move into itself. If the move is repeated in such a fashion, subsequent uses of the move will still be just as fast so long as Slon keeps spamming the move. If Slon cancels the move into a move other than fair without waiting, that move will also still be powered up, only if Slon sits through the ending lag of the fair (or another move) will he have actually used his Down Special charge. This enables Slon to chip away at the foe to prepare something impressive like the dair, and makes it so that Slon is capable of throwing out a hitbox without instantly losing his charge.

BACK AERIAL – SHIELD SLAMMER

Slon turns around as grabs ahold onto the bottom of his shield with both hands. Slon then holds out the shield horizontally and shakes it up and down frantically a couple of times, turning it into a constant hitbox that deals 10% and knockback that kills at 165%. This has little technical lag, but the duration is long enough that the move can come across as a bit awkward to use in comparison to Slon’s superb fair, especially when it’s difficult to use on-stage with its fairly bad landing lag. That said, the move has excellent range, and the shield is obviously not part of Slon’s hurtbox.

If a foe hits Slon’s shield during this attack and Slon had any weapons embedded on it, they will just fall off the shield and tumble to the ground as hitboxes rather than getting destroyed, dealing 7/10% and knockback that kills at 180/150% based off whether it’s a sword/axe, getting embedded on the ground once it falls off. Given landing lag is not an issue off-stage, this can make a very obnoxious move to use against recovering opponents who are forced to recover into the shield. Aside from creating extra hitboxes, Slon will be able to use the weapons that fall off the shield to recover without having had to throw a boomerang axe in advance.

If Slon was powered up with Down Special, he will simply swing the shield downwards in a single strike, dealing 17% and a spike on par with Ike’s dair. This is quicker to come out than the dair, and while the primary powerful hitbox isn’t a projectile, if Slon had any projectiles embedded in the shield they will automatically get flung off of the shield with this version at a 45 degree angle towards the ground. The flung swords/axes will deal 12/16% and knockback that kills at 130/95%, enabling you to potentially send out a giant burst of hitboxes attempting to spike the foe in one fell swoop.

UP AERIAL – CHOMP

Slon attacks upwards with the part of his body that’s most natural to, his head. Slon bites upwards for a very swift move, dealing 7% and lightly pecking foes upward with knockback that kills at 225%. This move has low base knockback in addition to taking forever to kill. Like most generic juggling moves of this type, this can combo into itself at some percentages, but those percentages are oddly more middling percentages. The knockback on this move is so weak that if you hit at a very low percentage, they’ll fall more than they take knockback, enabling you to combo this into moves other than the uair. Fair is of course the most obvious move, but if you use this on the stage you can land on the ground and try to combo into grounded moves, the easiest move being the usmash, which is in of itself a set-up move for potential comboing. This move will be a key part of your arsenal for a considerable time into the match, considering after this stops being a combo set-up move it still combos into itself for easy damage.

If Slon is powered up with Down Special, this becomes a grab hitbox as Slon clamps his jaw down on the foe much more forcefully, with the power getting boosted to 11%, the usual 1.6x. After grabbing the foe, Slon will start to descend in a downwards dive much like when Ganondorf grabs an opponent with his Side Special, attempting to slam the foe onto the ground. If Slon successfully slams the foe onto the ground, he will deal an additional 10% before transitioning into his grab-game.

Unlike with Ganondorf’s Side Special, foes can escape Slon’s jaws at grab escape difficulty during his descent, making this much harder to suicide with. This version will see far more use on-stage where Slon can actually use it to grab people, and because Slon will reach the stage much quicker than the bottom blast zone foes will not casually escape the grab with button mashing. Slon can still use this off-stage if he wants to do a crazy gimping attempt, expecting the foe to escape, though he’ll largely be required to jump off the foe’s head with Up Special in that scenario unless he manages to get the foe to shake some blades loose off his shield with bair.

GRAB-GAME

GRAB – CRUNCH TIME


Slon puts his ridiculously large mouth to use by attempting to bite the foe. This is the laggiest grab that’s not a tether, but it has good range and will deal foes 6% from the force of Slon biting the opponent. Slon simply keeps the foe in his mouth once he’s “grabbed” them, given his hands are too occupied with his weapon and shield to restrain them. While this grab is laggy, if Slon uses the powered up uair he gains an alternate much quicker option to grab his opponent.

If Slon is powered up, the grab itself will not be boosted in any way, but his throws will get a boost. While this doesn’t make the grab easier to land like the powered up uair does, the uair does not offer this bonus to the throws. Note that despite the grab not technically being affected itself, it will still use up the Down Special charge if you miss with it.

PUMMEL – GNAW

Slon opens his mouth ever so slightly to gnaw on the foe without releasing them from the grab. This is a slow and awkward pummel and only deals 2% despite this fact. While it’s a mediocre pummel, the fact the grab itself already does damage to the foe kind of makes it reasonable for the pummel to not be all that great.

FORWARD THROW – VORACIOUS FANGS

Slon opens his mouth wide before chomping back down quickly before the foe can escape his jaws, dealing 10% and knockback that kills at 170%. The foe will begin bleeding from this effect, taking 1% per second for 5 seconds, making this Slon’s best throw for direct damage output. If the foe was already bleeding from this throw or having a weapon impaled in them from fsmash/powered up Side Special, this will cause the bleeding damage to double just like any other instance while adding on 5 seconds to the bleeding timer. If Slon actually manages to stack bleeding 3 times, he’s looking at 4% per second for at least 5 seconds, if not more. Bleeding caps at 4% per second in power, though you can still extend the timer as long as you want.

If Slon is powered up, he will not boost the power of the primary throw by 1.6x, but instead boost the bleeding duration/damage by 1.6x, making it last 8 seconds/deal 8%. In addition, Slon will bite off enough of the foe to heal himself, healing an amount equal to the amount of seconds the foe is bleeding, meaning he will heal a minimum of 8% from this move. This makes the throw give Slon a net gain of 26% in and of itself, becoming outright insane if the foe was already bleeding.

BACK THROW – REND AND TEAR

Slon shakes the foe violently in his mouth like a wild beast, ripping into the foe’s flesh as he spins around. The foe is dealt 11 hits of 1% over the course of the move as Slon spins around before he releases the foe from his jaws behind himself in his best generic kill throw, finishing them off at 145%.

In a FFA setting, Slon will be happy to know the foe is a hitbox to outside that deals 16% and knockback that kills at 120% to outside foes during this throw. They’re even superarmored during the throw to ensure that other characters can’t knock the throw victim out of the throw.

The relevancy of the foe’s superarmor to 1v1 is that if a boomerang axe comes back to Slon while he’s performing the throw, it will damage them without interrupting the throw. As an added bonus, Slon will be spinning the foe around from either side very quickly, meaning regardless of which direction the axe is coming from they’ll get hit by it. If the axes is going to go a way past Slon, Slon can potentially time the throw so that it ends as the axe passes by Slon, enabling Slon to hit the foe with the axe once during the throw before throwing them into it afterwards to actually deal stun and knockback in addition to dealing the axe’s damage yet again. If you want to do this full combo, you need an axe already going for this and to move a good way forwards from where you initially threw the axe so its flight path won’t end right where you’re standing, so this is extremely difficult to pull off and can get predictable.

If Slon was powered up, he’ll spin the foe around with more force before releasing them, making the move kill at 95% for a very impressive kill throw. The damage isn’t boosted, but the fact Slon spins the foe around so quickly means that if a boomerang axe passes by him, it can potentially hit the superarmored foe twice during the throw animation. Slon needs to time the throw so they’re facing the axe as it passes by in order to do this. The boosted knockback also makes it a bit easier to potentially combo into the axe for a final time after the foe is actually thrown.

UP THROW – BELLY FLOP

Slon throws the foe to the ground as part of the throw’s animation, dealing them 4%, before belly flopping on top of them for 10% and vertical knockback that kills at 175%. Slon will bounce off of the ground after belly flopping it up 1.7 Ganondorf heights, and the foe will briefly be dazed from the belly flop, entering their footstooled state. At low percentages before the throw will do enough knockback to send foes high above Slon, this can potentially combo into almost any of Slon’s aerials (The weaker early hitbox in the case of the dair). If there happened to be a platform above Slon to enable him to land on the ground after following up after the foe, you can potentially get a full combo of uthrow into uair into usmash into something else at very low percentages with some good reads. As powerful as the potential combos are with this move, most enemies will be out of range of them very early on in percentage.

If Slon is powered up, he will boost the damage of both hits of the move, making it deal 20.4%. The knockback of the move is only very slightly boosted, killing just 10% sooner, but Slon will be boosted up into the air a much higher distance of 3.5 Ganondorfs after belly flopping the stage. Slon’s increased height enables him to do the usual free hit when the foe is at much higher percentages, though the move still requires a rather large amount of technical knowhow to put to use.

DOWN THROW – HELLCLOUD CASTLE

Slon puts away his shield as he takes the foe out of his mouth with one hand, then starts spinning around like in his Neutral Special. Slon has his arms extended out as he spins, foe in one hand, blade in the other. At the end of the throw, Slon releases the foe to send them flying forwards with set knockback, but also releases his weapon straight after them. The weapon has identical power from the Side Special, but it will always combo into them.

Slon will be exhausted during the ending lag of the throw, so exhausted that he will start breathing heavily. This will begin charging Slon’s Down Special immediately, going through the first 2/5ths of the Down Special’s lag during the dthrow’s ending lag. After that point, Slon will attempt to finish the Down Special, though you can still cancel out of it as usual if you want to do something else. This throw can help you with charging the Down Special if a foe is managing to overwhelm Slon, even if the immediate effects on the foe aren’t very impressive. In addition, Slon will of course take out the opposite weapon of the one he was using as usual when he throws it, enabling him to trade weapons without painstakingly using another move to switch.

If Slon was already powered up with Down Special the thrown weapon will have the power boosted like in the Side Special, impaling the foe guaranteed. After the main throw, Slon will keep spinning and enter the Neutral Special immediately after throwing the foe, taking out 2 new weapons instantly. At very low percentages this can combo, and at middling ones it can still be useful to try to quickly get on top of the foe to force them to frantically knock you out of the move so you can release the 2 weapons you’re carrying. If another weapon was coming towards Slon during the throw he can potentially reflect it into the foe with the Neutral Special’s usual reflector properties.

STANDARDS

DASHING ATTACK – ARMORED CHARGE


Slon places his shield in front of himself and begins charging forward for as long as the A button is held in a keep dashing dash attack. As Slon continues charging forwards, he will slowly accelerate, potentially reaching up to a 7/10 dashing speed if he charges across the entirety of Final Destination. When the move first comes out, it’s rather pathetically weak at 5% and knockback that kills at 210%, but can increase to deal up to 25% and knockback that kills at 90%.

Slon’s shield will still protect him as if he was standing still during this move, and it also offers him additional protection against stun and damage. If a foe hits Slon’s shield, he will take the knockback of the foe’s attack but no damage or hitstun, continuing with the move. This hurtbox extends a bit from the shield to the front of Slon’s body to give some leeway, foes having to hit Slon from behind to deal damage and stun as normal. Any knockback Slon is dealt will be directly turned into horizontal knockback that doesn’t lift Slon off the ground, enabling him to continue with the move assuming he isn’t knocked off stage by the knockback.

Running along the ground to build up momentum for this move is hideously predictable, but if you use the move as a counter you can manage to build up the move’s power somewhat. Ideally, the foe will hit you and be stuck in the ending lag of their move as you charge back into them. In this situation, the knockback dealt to you will be beneficial as it will enable you to power up the move as you charge back to hit the foe. Slon’s percentage generally has to be quite low for this to work (He’s extremely thankful for his super heavyweight status here), though at middling percentages this can still enable Slon to throw a sword at the foe for free if he can’t run back to them to reach them in time.

If Slon cancels out of the dashing attack but keeps running forwards, he won’t instantly lose his accelerated dashing speed, slowing down over about the course of a platform. While Slon’s normal DACUS with his usmash is normally too mediocre to be noteworthy, doing it with accelerated speed from this move can get you much better results. The fact Slon is slowing down gives the usmash much more of the “slide” effect you’d want out of a DACUS. The usmash shield still is a hitbox briefly as it’s being brought above Slon’s head, and while the range on that is normally too terrible to hit with reliably, sliding forwards make it a much more viable way to try to stun the opponent. Aside from direct offensive use, it greatly aids using this as an approach as you use it on foes trying to jump over Slon to hit him from behind.

If Slon is powered up with Down Special, he will accelerate with this move much faster, maxing out his speed after traveling only 1.5 platforms. If Slon releases the A button from a powered up dashing attack but doesn’t stop running then uses dashing attack again, he will still keep the bonus. In addition, so long as Slon keeps running after using a powered up dashing attack, his usmash will get the Down Special bonus if it is used (which will use up the charge afterwards as normal).

JAB – SPIKE IMPALE


The spikes on Slon’s shield start to extend out, dealing 6% and knockback that kills at 180%, though with decent base knockback to space foes away. If Slon just taps A, the spikes will barely jut out at all, if he rapidly presses A, the spikes will extend out bit by bit, and if he holds down A they will extend out fully for fantastic range. If the spikes are fully extended, the range directly forwards is as good as Dedede’s Brawl ftilt, along with hitboxes extending upwards and downwards for aerial opponents and to make the move very obnoxious at the ledge.

Slon cannot cancel out of the jab until the spikes retract, though he can press/hold A to extend the spikes out again before they are entirely retracted. Of course, if a foe is already in Slon’s face, the hitboxes will be created too far away from Slon to actually protect him. If a foe rolls past the initial hitbox from a distance and you use the full version, you can expect to be punished quite badly. Strangely, the move is much better offensively than defensively, as it can be used to catch opponents rolling away from you and is great against shields.

The jab actually has 3 separate hitboxes for the top, middle, and bottom portions of the spikes extending out, enabling it to deal 18%. If used as an awkward poke, you will rarely hit with more than a single one, but at melee range they can all hit the foe at once before they extend out. While the move is very fast at point blank range, the range on the move is among the worst in the game if you barely extend the spikes at all, requiring Slon to be offensive enough he doesn’t mind being in the foe’s face. Aside from catching dodges, this move is extremely good if the foe shields at point blank range. If you can predict a shield, you can fully extend the spikes to make the hitboxes puncture the shield from all angles to deal a large amount of shield damage before the top and bottom spikes poke through the top and bottom of the damaged shield, dealing 12%.

Slon can impale any of his weapons on the spikes before they slowly retract back into the shield for normal use (not including weapons impaled on the foe, though including weapons impaled into their shield). This can enable the move to multitask to enable Slon to stay more offensive. Of particular note is this is this move is fast enough to impale a sword you just threw (Obviously it also works with the slower axe), enabling Slon to use the projectile before immediately reclaiming it as ammunition.

If the move has a Down Special power up, the only direct power buff is that the center hitbox will cause bleeding for 5 seconds. The more important thing is Slon will now be able to largely ignore the move’s ending lag for the most part. The spikes will automatically retract into Slon’s shield as he’s able to act normally. If Slon uses the jab again while the spikes are retracting, he will pick back up where he left off as if it was a normal jab. If Slon uses another shield move other than jab during this time, the jab hitbox will become active on the extended spikes in addition to the move’s usual hitbox at the tips of the spikes. If used with the dashing attack, the spikes give foes an obnoxious hitbox in the way to make dodging the charging Slon much harder for an excellent approach, and if he has enough speed he can ideally run up into the foe to hit them again as the spikes finish retracting. If used on dair, Slon will fall quickly enough that he will undoubtedly still crush anybody he hit with the spikes. In used on nair, the spikes usually won’t knock foes out of the hitbox due to there being two shield hitboxes closing inwards.

Using the Down Special bonus on the jab will largely be out of panic seeing as the immediate reward is so weak. It’s better to get this off than nothing else, and the extra range/protection it briefly provides on other shield moves could possibly help you reclaim offensive momentum against an especially obnoxious foe.

FORWARD TILT – WIND-UP SLASH


Slon leans back, standing on only one foot as he winds up his weapon behind his head, then stomps forward and does a mighty slash with his weapon. The main hitbox is the sword/axe, which deals 14/18% and knockback that kills at 130/100% based on the weapon used. Surprisingly, the stomp forwards is also a hitbox, which deals 4% and pops foes up lightly with set knockback to be hit by the primary hitbox.

Obviously, this has considerable start-up for a tilt, and without the stomp or leaning back there would be minimal reason to use this over a smash. The leaning back is actually quite useful to dodge enemy attacks in a similar manner to Brawl Bowser’s fsmash to enhance this laggy move. The main hitbox you’ll actually be trying to hit foes with is the stomp given it comes out first, and it’s quite useful the hitbox for it spawns on the ground, enabling it to shield poke foes from below. If a boomerang axe is coming back at the foe, the “dodge” aspect of the move can be useful to stall the foe long enough for it to come back even if the ftilt doesn’t manage to hit, while the shield poking can be useful for when the foe tries to shield both the axe and the ftilt, since there will be too many hitboxes going on for a simple dodge to cover them all.

If Slon is powered up, after winding up his weapon he will release it forwards after swinging it. This means the usual ftilt hitbox won’t spawn, but he will instead throw the weapon like in his Side Special, getting the usual Down Special bonus applied. This is laggier than throwing the weapon normally, and Slon will always throw the weapon directly towards the foe instead of having control over his aim, so there is still plenty of reason to use the powered up Side Special. That said, this can enable the axe to be thrown at angles it’s not normally able to.

Slon still stomps forwards in this version of the ftilt before throwing the weapon, but the stomp is now much more powerful, dealing 16% and vertical knockback that kills at 120%. If Slon had a sword, he will be able to throw it quickly enough at the foe for it to combo into the stomp. This can potentially kill at very strange percentages around 70%, as the foe will be high in the air before taking even more knockback from the sword. If the foe’s percentage is too high (But not high enough to just be outright killed by the stomp itself), then they’ll be knocked far enough that they’ll be able to dodge the sword.

If Slon throws an axe after the foe, this won’t combo into them, but will create a lingering hitbox in the air and enable him to use his extensive anti-air game in an even more threatening manner than usual with the lingering hitbox there. He can also potentially catch the axe with his usmash, and Slon will be very happy if he manages to perform a uthrow underneath it.

UP TILT – HEADBUTT

Slon does a headbutt, stabbing at his enemies with the horn/spike on top of his head. Unlike Dedede’s utilt, Slon will bend his head down far enough to scoop up opponents in front of him with this attack while still providing a great anti-air. Slon’s head deals 6% and launching knockback that kills at 190% in a good way to start his juggling/anti-air game, aside from being a decent part of it itself. Slon’s tiny horn is a sweetspot, though, that deals a much more impressive 14% and knockback that kills at 115%. This can be a particularly nice move against foes with slightly damaged shields, as you can let the sourspot of Slon’s head intentionally hit the foe’s shield while the horn pokes out the back of the shield. Aside from making the sweetspot easier to hit, you’ll be damaging their shield slightly with the sourspot as a nice bonus.

This move has a small amount of superarmor, preventing Slon from being knocked out of it if the offending move did 9% or less. Having a direct move that gives Slon superarmor is very useful, as the superarmor will also prevent the foe from knocking any weapons embedded on his shield off of it.

The move will get the usual 1.6x power boost with a Down Special boost, along with increasing his superarmor to block attacks that deal 19% or less. As Slon lets outs his rage in the attack, the air he has inhaled will be snorted out of his nose. This create a brief wind hitbox in a half circle in front/above of Slon, with it being created in the same arc as Slon’s headbutt. The windbox will push foes away a perfect distance to get hit by the horn sweetspot if they were on top of Slon. If a foe just dashes at Slon mindlessly while he does this, they’ll be prevented from reaching him and get hit by it. With the superarmor especially, this makes a superb defensive move similar to the jab, letting Slon space the foe on his terms and turn around offensive momentum to really get going with his bleeding effects and weapons.

DOWN TILT – SPIKE GUTTER


Slon raises his shield behind his head before swinging it down in front of him. At the end of the swing, the shield is angled 45 degrees towards the ground and the spikes on the shield extend to impale into the ground, dealing 14% and knockback that kills at 135%. As Slon swings his shield, the spikes start slowly extending out, but most of the extension happens at the end of the move. This is obviously a laggy attack, but Slon is protected during it. Slon’s shield is solid when he raises it above his head like in the usmash, enabling him to catch foes, and there is a weak hitbox as he swings it forward before the spikes are fully extending that does a token 3% and flinching to get foes hit by the main hitbox.

This move will mainly be used as an alternative anti-air to the usmash, regardless of the main hitbox being aimed downwards. If you predict a foe would DI a particular way off of Slon’s usmash shield, you can use dtilt in that direction to more reliably hit them with a good read. While the potential reward isn’t as good, it’s far from anything to complain about.

If Slon has the Down Special bonus, the main hitboxes will not be powered up, but Slon will impale his spikes into the ground so forcefully that he will knock up a large amount of debris that deal 10 hits of 1% and flinching in a giant 1.3x Bowser sized hitbox, covering Slon’s ending lag and lingering on a bit beyond that. A pair of especially sharp pieces of debris will be knocked up that each deal 6% and knockback that kill at 200% in addition to the main debris hitbox, though it’s unlikely a foe will be hit by both of these.

These two pieces of debris will land in the ground with their pointy ends facing downwards and embed themselves in the stage, functioning like weapons. Slon can embed them on his shield if he wishes and use Side Special to throw them at which point they are faster and weaker versions of the sword, still dealing 6% and knockback that kills at 200%. Obviously, Slon can’t wield them as actual weapons or use them in other moves, only taking them off his shield to throw with Side Special, though they do make very swift projectiles to throw in and make it easier to hit with something else. This potential reward of throwing items makes it quite urgent for foes to knock Slon away from the debris, making it more difficult for an overly defensive foe to ignore Slon. If you really want to power up a nair or something you could spam Down Special + Dtilt to get tons of stuff on your shield, but keep in mind that even if you get them, these pieces of debris can be destroyed by dealing 6 damage to them even when they’re on Slon’s shield.

FINAL SMASH – RAMPAGE

Slon dual wields a sword and axe before he begins taking turns throwing them, casually taking out more as he goes, invincible and able to move while throwing them. After throwing 4 swords and 4 axes, Slon will throw a giant axe that deals 30% and knockback that kills at 55%. The giant axe, if it does not hit, can be embedded in the stage like any other weapon, though it cannot be picked up by Slon again. The giant axe has 50 HP, and can weapons can be impaled into the side of the giant axe for later use.
 
Last edited:
D

Deleted member

Guest

Sorry Korol, you're simply not realizable.

LADJA


Ladja is the main antagonist of Dragon Quest V. He is suggested to be the true leader of the villains, initially summoning Kon and Slon as minions and killing off King Korol when he loses to the protagonists. Ladja ruins the main character's life several times, first killing his father and enslaving him for years as a child, then later turning him and his wife to stone for ten more years. He even comes back at the end of the game to murder the main character's mother, who had only just been met after being driven into exile by Ladja when the main character was born. Ladja is fought three times in the game, the first being unwinnable, the second is one of the hardest fights in the game and the third where he gets minimal improvements over the second, which may be intended to symbolize the player's progress and give some closure.

On a scale of competence, Ladja would likely come in first for the Dragon Quest series, considering he kills many of the major characters standing in his way. He is completely merciless when it comes to achieving the goal of world domination for his master, being a huge part of the cult that secretly worships and wishes to revive the demon Nimzo. He succeeds in doing this and only falls in battle to the player just before the final boss, shocked that the player has been able to come so far. Unlike in many RPGs, it's not as if Ladja overlooked the main character's potential, they simply managed to escape from the slavedrivers and later were discovered by other protagonists when turned into stone and revived. Ladja even goes as far as to kill his own minions when they fail, he is seen murdering Korol but it's implied he may have done the same to Kon, who teleports away after he loses as Ladja teleports in, but is never seen again.

STATISTICS

Size: Samus
Weight: Wolf
Ground Speed: G&W
Air Control: Lucas
Fall speed: Zelda

Ladja is an all-rounder type of character, by no means perfect, but lacking a direct weakness in his statistics. His size is a quarter shorter than Samus, but as purely a visual effect he hovers above the ground, meaning he's still almost as tall. Most of his size comes from his massive cloak that always obscures his body. Ladja's weight is deceptively good despite looking squishy, almost enough to qualify as a heavyweight. This does make him more vulnerable to combos, but combined with a decent air control and low fall speed, Ladja fittingly has a high survivability rate. The weakness inherent in this is that Ladja is more easily star KO'd off the top blast zone due to lower gravity. Ladja's weight and large size also makes him slightly worse off escaping combos. His movement is generally good on the ground, a very deliberate hovering type of movement. Ladja's jumps are good, both jumps are identical, giving around 0.7x the height of Falco's first jump, the highest in Brawl, the combined height being one of the greatest recoveries.

SPECIALS

Neutral Special: Death Ball


Ladja points upward to summon a bright red ball of energy that charges up over time at the same rate as Samus’ Charge Shot, the ball starting off at half the max size of Samus’ projectile and growing to potentially double that size. Ladja will launch the projectile straight forward, but can be angled backward or upward, if it hits an opponent it explodes, dealing anywhere from 8-30% depending on how much it was charged and can KO at 110% at max charge, starting to KO at around 160% at half charge and just doing strong but no KO levels of knockback uncharged. The opponent is caught in a flashy explosion; their model is burned and blackened as a visual effect for the next five seconds. The projectile travels at just under two-thirds the speed of the Charge Shot making it harder to land at longer ranges and far more predictable, but has an enormous range of 1.5x final destination’s width uncharged, and 2 final destinations if fully charged, making it very good to work into Ladja’s approach game. The Death Ball will deal great amounts of damage to shields naturally, bringing a full health shield to under half at max. The size of the Death Ball makes it also one of the best ledge guarding moves in the game, forcing the opponent to stop planking or be hit by the very powerful projectile.

The Death Ball can’t be saved for later use. Instead using the neutral special while the Death Ball is out, Ladja is free to change the direction of the Death Ball currently out or hold the input to make it explode. The start up of the Death Ball is somewhat slow compared to similar types of moves because of Ladja dramatically throwing it with a demonic expression on his face for full dramatic effect. This slow animation comes back for the redirection's start up, making it hard to abuse, but instead acts as a way to just keep the projectile in play and make use of its incredible range. The directions it can be redirected are limited to the right, left, up and down.


When it hits a hard surface instead of a foe, it has an elaborate explosion compared to when it this a foe, instead creating a fiery explosion double the ball’s size that deals constant 3% damage, for 15% at minimum and up to 30% damage in total and high vertical knockback that at max can KO at 100%, but is easily shielded. This is no less of a great move to pressure a shielding foe due to far greater shield stun to lead into a grab. This effect can be caused just by holding the input to make the projectile explode in midair, but has Ladja making a fist and causing a flashy effect on the ball for a moment, making it very telegraphed.

When the ball is being held up in the air it acts as a hitbox during charge the same way as Lucario’s Aura Sphere, dealing 5-10% damage depending on its current size, and low-medium knockback hitting the foe into the air. This can combo directly into itself at low percentages, rebounding the foe up before hitting them with the full power of the Death Ball. Important to note is how hard it is to counter with any projectile as you typically would due to its sheer power, overpowering fully-charged Charge Shots or Aura Spheres, although it can be broken down by several and this is very plausible given its slow speed. This means Ladja has to defend the ball in certain match ups, making use of its multiple directions of travel to get around certain opponents who can break it down with several of their own projectiles. Ladja can use his great jumps and aerial control to attack overhead at the same time, or even from in front of the Death Ball, most obvious application being just grabbing the opponent and throwing them into it. One weakness of the move though is when it goes too far off-stage, and if the foe occupies Ladja for a long time, he can’t redirect it to be useful, meaning it’s practically out of use until it goes past the blast zone or Ladja wastes time destroying it. If the Death Ball is reflected, Ladja still can just redirect it to take back ownership.

Side Special: Magic Chain


Ladja throws his open hand forward causing a semi-transparent pink/purple laser to shoot forward a battlefield platform in length, the end of the laser counting as a grab hitbox. As this is not a physical tether, this can’t be used the grab the ledge, and Ladja doesn’t need it anyway. The end of the laser can be dodged or rolled by a foe, and missing will leave Ladja in end lag comparable to Ganondorf’s side special. If it lands, the laser will shock the opponent for three hits of 3% damage, tethering them to Ladja. This does not work like a typical tether does, as if the foe moves out of the tether’s range, their model is highlighted a pink/purple like the Aura effect and their movement is not constricted. Instead, any projectiles that Ladja creates will follow the magic chain, turning even his extremely powerful Death Ball into a homing projectile. If the foe gets within the platform range of the tether for it to become visible, it now can be destroyed and has 20HP. Ladja can get rid of his tether at any point by using his side special again to create an explosive hitbox at the middle of the foe’s model that deals 15% damage and high knockback that can KO at 200% vertically, but this is brief enough it can be air dodged, still destroying the tether. This can also be shielded.

Ladja can use this move on his Death Ball to tether himself to it, following the same rules as it does on foes, only not dealing it any damage. He can dispel the tether for the same explosive hitbox, which will expand out to around the Death Ball at 1.5x its size, allowing potentially two hitboxes on the ball when you include destroying it as well. It's not possible to use the stun from the tether dispel to stun into the ball destruction however, and destroying the ball means destroying the tether. By instead holding down the special input, Ladja will perform the same motion as if destroying it but instead strengthen the Death Ball, causing the two ends of the tether to become visible for as long as he charges it. This charges the ball up at the same rate as the neutral special, potentially buffing it up to over its usual maximum power and dealing 35% damage, which can KO at 90%. The size of the ball grows proportionally too, becoming up to 1.2x its usual max size. This is also useful for buffing smaller Death Balls that weren't charged up originally. The explosion caused by the Death Ball colliding with the ground or another hard surface is also buffed in size and power by 1.2x at the new max, but all of this sacrificing a tether on the foe and forcing Ladja to keep the ball in play or waste all of this set up.

Up Special: Teleport


Ladja is covered in elaborate magic circles and disappears, then re-appears in a chosen direction 1.5 platforms away, surrounded by magic purple energy similar to Mewtwo’s neutral aerial. When he re-appears, he deals 10% damage and high upward knockback that can KO at 150%, being a good unpredictable finisher. This can only be used once per air trip and puts Ladja into helpless. If Ladja has a magic chain on the foe and holds the teleport, Ladja will instead re-appear on beside them, whichever side is closest to them, and this has infinite range as long as the tether is still up, but can't be used again in this way for five seconds. The foe can just shield the attack portion to make this fairly punishable, but it has minimal end lag, so it's mostly safe except against powerful tilts if Ladja is at a high percent. On his Death Ball, Ladja can similarly appear besides it, and this gives him a much greater amount of control on where he will re-appear, for more than simply recovery uses.


Double-tapping the input will not only bring Ladja to his Death Ball's current location, but keep his original teleportation circle active and transport the Death Ball back there, switching places. This is very useful but can also only be used once per five seconds to prevent abuses. The Death Ball's trajectory is not affected by this move, meaning Ladja can switch places with it from all kinds of positions to create follow ups.

Down Special: Petrify


Ladja throws up both hands and conjures a circle immediately in front of him, acting as a slow grab hitbox to anyone in close range, similar to Robin's down special in Smash 4. A foe will be magically held in place and have to mash out at grab difficulty, while circles close in on them and deal a set 4% damage each hit. The foe is released with weak vertical knockback. At low percentages, a foe should be able to escape only being hit by one or two circles, but every circle that lands leaves a status effect on them. Every circle will further petrify the foe, giving them an effect similar to the Metal Box where their body starts to become rock. There are five stages to this, each circle moving the foe a stage forward and taking four seconds each to wear off. Ladja can only at most land 4 hits in one grab if they are at a very high percentage, meaning he at least needs one regrab, most of the time two, to reach the very powerful fifth stage that fully petrifies the foe. The fifth stage completely petrifies the foe into stone, forcing them to mash out at grab difficulty and giving them the same fall speed as Kirby's down special stone form, making it almost guaranteed to KO off stage. The foe is immune to weak knockback in this form but takes full damage and can be knocked off stage with a powerful attack like with a pitfall. When a foe is released from the stone form, they get a second of grab immunity.

The other four stages that will come up far more often will do the same things as the Metal Box to a foe, the fourth form being essentially the same as that status effect and the three previous forms being a quarter, half and three-quarters as powerful. In the fourth stage, the foe's jumps are nerfed to half the height they get usually, doubles their falling speed, reduces their ground speed by half and doesn't give the usual knockback bonus the Metal Box does or the weight bonus. The negative effects at the fourth stage are far worse than the Metal Box usually gives, besides the already powerful falling speed nerf, but even at lower levels works directly into Ladja's projectile game, as the foe will find it much harder to jump over his Death Ball and due to its already great size, power and ability to hit the foe off stage this becomes very dangerous for the foe. As in regular metal matches, Ladja can also much easier just go and throw the foe off stage forcing them to use their up special recovery with their jumps weakened. If he has a magic chain on the foe, he can even force out their air dodge making their recovery even more predictable and easy to punish.

SMASHES

Forward Smash: Grim Reaper


Ladja takes out a scythe and holds it behind him for the charge, then rushes forward and swings it violently, dealing 23-32% damage that can KO at 100% at max charge or 120% uncharged. The end of the scythe is a sweetspot that deals 4% extra damage and can KO 20% earlier, but requires very good spacing and timing to land. The hitbox is fairly big, a crescent shaped hitbox that lingers for a few frames in a similar shape to some flipkicks. The move will move Ladja forward a platform or 1.4x that distance, and has minimal end lag to make it hard to punish, but is stopped by shields. Ladja gets very high priority during the move, similar to Ike's Quick Draw custom Unyielding Blade, allowing him to push past any incoming attacks or projectiles. The move can be angled high to hit slightly behind and above Ladja too, or low to deal 1.1x more damage and knockback at the cost of range.

Ladja can use this move to heavily influence his Death Ball. Ladja will then cut into the projectile itself, dividing it into two projectiles that split into different directions, going at 45 degrees up and down, both projectiles at half the power of the original. When the neutral special is then used, Ladja can command both projectiles to head in any direction he wants together, making it possibly to save the lower projectile before it goes into the ground if he isn’t interrupted. This itself can be enough to save himself from the projectile being destroyed by enemy projectiles, as it narrowly avoids them going at slightly higher or lower angles at the foe rather than straight forward, while retaining very powerful damage and knockback. Angling the move up or down will instead cut the Death Ball more lopsidedly, this leaves the projectiles split 75/25 in terms of size and power, but not affecting the angling.

These projectiles can be combined again if they hit each other and Ladja’s projectile will always have priority over once that was reflected or somehow controlled by the opponent. For example if one of his projectiles are reflected but hits another not reflected going in the opposite direction, both projectiles will combine and head in the latter direction back under Ladja’s control. Even if they aren’t recombined, the two projectiles can easily hit the foe at the same time to deal the same damage and knockback as they would together. Ladja can keep cutting his projectiles to be smaller until they resemble the smallest Charge Shot, dealing 3% damage and flinching knockback. If Ladja had a tether on the Death Ball before he split it up, he can use it to individually buff all of the broken up Death Balls at the same rate as just one, making it potentially a devastating move if the foe lets him go that far. By smashing the directional input, Ladja can teleport to or switch places with any of the individual projectiles, smashing the stick harder to travel to a further away projectile.

Up Smash: Kafrizzle


Ladja raises his cuffed hands overhead and charges up red magic before engulfing his upper body in a ring of fire, dealing 21-29% damage that can KO at around 130% uncharged and 105% fully charged. This has fairly long start up, but makes up for it in pure power and low end lag, this does have weak horizontal range, and the vertical range is comparable to Zelda’s up smash. A foe who has been tethered to with the side special will pull the hitbox slightly in their direction, like a wild flame, this can extend the range by up to 1.5x its usual size in any direction, and even cause it to deal horizontal or diagonal knockback. This can be especially dangerous on foes that’ve been tethered and petrified to any extent who find they are falling towards Ladja with increased fall speeds and worse jumps, providing enough coverage to protect against basically any kind of down aerial or stall then fall.

The move can be held out longer than usual by holding down the input, lingering for up to an extra second, this can be useful for pressuring the foe away if there’s a Death Ball around too and they’re waiting to punish. This has a secondary effect if the tether was instead on Ladja’s Death Ball, the fire effect of the smash now appearing over the Death Ball as another hitbox. This scales proportional to the size and strength of the Death Ball, roughly adding 1.3x the size of the Death Ball in making the ring of fire around it, this deals anything from 10-30% depending on how big it is, and can either do weak, medium or high radial knockback. This is rarely going to KO, but will after 200%. The fact it’s radial, dependant on what part of the projectile landed on the foe, means you can make lots of unique set ups of bouncing the foe around off the Death Ball, into Ladja’s Kafrizzle, or vice versa, or when the forward smash is involved even create a projectile hell of projectiles to pinball the foe around the stage. That is obviously best case scenario, and the longer Ladja stays in this extended animation, the worse the end lag becomes until it’s as bad 40 frames. After hitting once, the fire on a Death Ball also wears out, but this can be a good thing if Ladja manages to use his own attack to hit them back into it, potentially setting up a very powerful KO combo.

Down Smash: Eye Beams


Ladja builds up energy in his eyes, intensely enough that he seems to almost be in pain, then unleashes two beams together, sweeping across the ground in front of him and then turning to shoot them behind him. This deals 12-18% damage and can KO at minimum charge starting at 155% or 120% at max. The range is different from other smashes due to the beam, a cone shaped hitbox around Ladja about 1.5x his width, and hitting foes up close or not far off the ground. The beams are as thick as ROB’s laser at a low charge, and the move has high start up, but is very quick to finally come out, as well as giving protection against low hitting attacks as Ladja hovers up slightly during start up. This attack can even reach beyond the immediate ground next to Ladja, by performing this move on top of platforms or a ledge, Ladja’s lasers can reach a platform diagonally or further, when charged fully two platforms. This is a great gimp, but the start up makes it highly predictable, mostly forcing foes to try recovering over the ledge instead.

Any portion of the ground that Ladja hit with the lasers will erupt into an explosion that reaches up half as tall as Ladja that stretches 1.2x wider than the initial explosion’s surface. The explosion deals 15-25% damage and can KO at minimum charge from 125%, 100% at max charge, but is hard to combo into the first part of the move unless Ladja has set up his Death Ball to combo the foe back. The explosion happens immediately after the laser, but the hitbox lingers for another 20 frames. More likely is that Ladja whiffs the move, but the foe is struck by the explosion as they roll behind him. This part of the attack is much more effective on a foe that has been petrified by down special, as they will fail to move away fast enough to avoid the explosion, and are easy to bash back into harm way after the initial hitbox as well. A foe just over Rest distance of Ladja will even get sucked in to him by the laser as it sweeps inwards behind him, being stuck in hitstun but blocked from being hit away by the laser portion because of Ladja’s model, being guaranteed to get hit by the explosion as the ultimate reward for hitting a foe who just barely failed to punish the starting lag.

Ladja can do a different form of this attack if he has a tether from side special active by angling the move. Instead of hitting the ground, after charge Ladja will turn in the direction of the character/death ball and fire the beam in their current direction. In this form, the laser beam becomes more similar to ROB’s laser, passing through a foe and dealing constant hits of 2% for 10-15% damage that can KO at 170%, but much lower if he can hit them higher on the stage, or off-stage. The laser can travel twice as far as usual in this form, going from 2-4 battlefield platforms in length before dying out and is about one platform in size itself, travelling at Falcon’s dash speed. The laser, like ROB’s, will bounce off at an opposite angle if it hits a hard surface. This includes the Death Ball, potentially setting up a deadly combo if Ladja can trap the foe between himself and his projectile at close range. The foe can DI out, but is also pushed slightly in the laser’s direction when being hit by it and dealt knockback in the same direction once the laser dissipates or moves through them fully. As the laser hits where the foe is and doesn’t home, this is easy to dodge itself, but doesn’t require a recharge like ROB’s laser.

The beams will react different if they hit against smaller sized Death Balls cut into smaller pieces by his forward smash. This is below the size of his minimum charged Death Ball. Instead of reflecting, the laser will instead pass from the projectile into the closest other Death Balls as long as they’re within two platforms. The beam creates an electrical chain between the projectiles that deals constant hits of 3% mostly passive damage, although flinching for a few frames every second. Multiple chains do not deal more damage, all counting as one big hitbox. This forces the foe to jump or move out of the area if they don’t want to rack up lots of damage, even in one second taking 3 hits for 9% damage, and because of the nature of the Death Balls Ladja can set up very difficult to avoid patterns. It’s more-or-less a cage for the foe to sit in with the chains, even if it lacks any physicality besides the projectiles. The chain lasts for 3 seconds, but largely is impossible to hit for all that time and can be easily shielded.

AERIALS

Neutral Aerial: Shining Breath


Ladja turns to face the screen and quickly inhales, then exhales a cluster of ten white stars out of his mouth that fan out in all directions, highly resembling the image. The stars are each about as large as a Pokéball item. Each of the stars deal 3% damage and a small amount of flinching, before launching the foe with weak-medium knockback with 1-5 stars, or high knockback depending on the amount of stars that hit them. Ladja can potentially do a lot of damage if he manages to hit with more than 5 of the stars, at 6 the move can KO at 160%, and every star after that reduces it by a further 10%. At the end of the move, the stars will dissipate, but stay out as hitboxes that deal a tiny amount of flinching for the duration of the move. At a close range, it’s impossible for the attack to completely miss, but as the foe gets further from Ladja, the hitboxes naturally start to space out too far for more than one or two to hit at once. This move has bad ending lag that is best cancelled into slightly faster landing lag instead, the move actively stales to create less powerful stars the more it is on the stale move queue. The damage of the stars is reduced to as little as 1.5%, and it becomes nearly impossible to KO as well as dealing almost no flinching, meaning this can’t be that effectively spammed.

If Ladja has an active magic tether on the foe and they are within a battlefield platform of Ladja at the end of the move, the stars will linger and home in on them. This lasts for an extra 5 seconds at the end of the move, the stars slowly speeding up as they get closer to the foe in the same way as Samus’ missiles. It becomes far harder to dodge them in petrify form of course, specifically forcing foes to try and fall back to the stage or escape around the projectiles instead, to not get completely cut off by them. Another problem for them is what they do to Death balls. If a star hits a Death Ball in this time, they will add to its strength as if Ladja charged it, buffing its power by 3%, but not increasing it past its normal max. Ladja can instead just send the stars after the Death Ball if it’s within range to buff it like this, but depending on the situation, the stars may get absorbed into the Death Ball anyway if it’s also chasing the foe, or vice versa if the foe is trying to approach Ladja, inadvertently buffing one of his core KO moves. A foe can simply get out of the platform range to make a star dissipate once the move ends, or shield them to effectively take no shield damage, but overall this move is great for fighting foes in the air.

Forward Aerial: Slaver Scythe


Ladja takes out the same scythe as in his forward smash and quickly cuts forward dealing 9% damage and medium knockback, in one of his fastest moves. The scythe reaches around the same distance as Marth’s forward aerial. The scythe produces the same crescent-shaped hitbox as in the forward smash, and deals different knockback depending on what part of the hitbox lands. At the middle this is horizontal, then diagonally up or down respectively for hitting with the top or bottom. This move can also be used to break up Ladja’s projectiles, but only if the player holds the standard input at the start of the move, giving it much worse end lag. The move has fairly slow ending lag, but better landing lag too, making it good for air-to-ground combat.

This move may cut up the Death Ball like the forward smash, if Ladja presses the standard button as the hitbox comes into contact with the projectile. Instead of cutting it up into smaller pieces, it creates a thin, saucer-shaped hitbox that is cut out of the Death Ball that travels forwards at the usual speed of the Death Ball. This will deal 5-10% depending on the size of the hitbox, but uniquely will deal much sharper, purely horizontal knockback, being greater as an off-stage finishing move without having to redirect the entire ball. The extra width also makes it just as hard to air dodge in midair, despite the fact it can be pretty weak compared to the overall Death Ball. All in all, this just makes a version of the Death Ball much more suitable to midair contact. The original Death ball and the saucer will reshape into regular ball shapes after 5 seconds, though, not staying in these weird shapes forever.

At the end of the hitbox there’s a sweetspot comparable in size to the Knee of Justice that deals 15% damage and can KO at 145%, positioned slightly too hit to use on non-giant characters on the ground. This creates a sheen effect on the scythe’s hitbox when it lands, and causes a small bit of freeze frame for effect. Ladja has an easier time landing the sweetspot than Falcon in the air purely because of his aerial capabilities, but it’s far more predictable due to his low falling speed meaning he has to hit with it immediately, as the hitbox comes out faster but finishes faster as a result. This means that it’s best to use on foes falling into Ladja instead and combos well into a foe who has been at least partially petrified, who Ladja has launched into the air first. The range of the move is good for mix-ups as well, given that it can potentially hit some foes who try to roll away from Ladja, but this is weakened slightly by the landing lag. There’s also a very small sourspot in the move directly next to Ladja that deals only 5% damage and weak knockback, at non-high percentages being a real problem as the foe may take advantage of the move’s various weaknesses.

Up Aerial: Hot Wind


Ladja inhales then breathes out fire that expands out above Ladja half as far as Lucas’ up smash, dealing many hits of 2-3% for 35% damage and knockback that can KO at 120%. All these hits are unlikely to land due to a wind effect in the move that pushes foes slightly up at around half the power of G&W’s up aerial, but as a constant while the attack is ongoing. This means most of the time the actual KO power of this move rests around 160%. This can actually help to star KO opponents near the top of the stage, but more often results in them changing their path back to the stage to avoid the move. The wind effect is greatly reduced if the foe has been petrified and has their fall speed greatly increased, counter-acting the wind hitbox to take far more damage and a greater chunk of knockback at the end too. The move has a fairly long duration too, making it plausible to land the move while the foe goes from a higher stage of Petrify to a lower one, making the knockback at the end not be impacted as much by the fall speed that made them take more damage.

Down Aerial: Demonic Impact

Ladja points down with both of his cuffed hands, releasing a powerful burst of purple magic that deals 10% and can meteor smash, having the range of Ganondorf's down aerial, but obviously but less powerful. This move actually reaches a fair amount down considering Ganondorf kicks massively downward for the hitbox of his down aerial, and Ladja has no feet, as a floating cloak with two prominent hands displayed at all times. This purple magic is pretty large compared to Ladja's other melee attacks, comparable to Mewtwo's up smash animation. If this hits the ground, it creates a weak shockwave of magic on the ground that is as large as Bowser Bomb's, and deals 6% damage and weak upwards knockback, but this is mostly just a good way to cover the move's awkward landing and end lag. This has more of a point as an actual follow up, as the foe can't actively block the hitbox to prevent it hitting both them and the ground, this can lead into an easy combo of the two hits forcing the foe back into the air, largely preferable for Ladja.

This can be used on one of Ladja's Death Balls, instead of sending a shockwave, a ring of magic from the death ball will be created on the opposite side of the Death Ball going in that direction. This can mean vertical or diagonal and left/right angled rings created, these are as wide as the Death Ball and deal 5-10% damage as well as medium radial knockback. The ring will travel at the fairly slow speed of Ganondorf's dash, but has a range of two battlefield platforms for great range. The strange properties of this ring allow it to do big shield damage, a missing component largely in Ladja's game, but also if the foe is caught within the middle of the ring where the gap is, will deal double the usual hitstun from the knockback, stunning the foe in midair and doing an extra 2% damage. This will force the foe away from certain areas of the stage Ladja doesn't want them, to avoid the part of the hitbox that does more damage and knockback. As with the dash attack, this hitbox can be destroyed by any attack dealing more than its own damage, and largely if that is possible that's the best course of action for the foe.

Back Aerial: Backstab

Ladja takes out his scythe and swings it a short distance behind him, dealing 12% damage and medium radial knockback, producing the same crescent-shaped hitbox it does in other moves. This can KO from around 150%, but is harder to land than his other scythe moves due to it being much shorter range, Ladja holding the scythe nearer the blade. This move, in fitting with Ladja's entire character, will deal more damage if used on the foe's back, dealing 15% damage and KOing at 135%. This might not seem that easy to pull off on Ladja, but is actually an attainable goal given his ability to teleport himself anywhere, keeping the foe on their toes, and also from using their own randomly powerful back aerials on Ladja too, lest they be countered by this one. The range is not that great, but still outreaches most other melee range aerials. This is more useful as a pressure tool and a generic fast move to throw out from time to time, as opposed to some of his slower aerials. It's also a decent wall of pain move due to its wide hitbox, although due to its lack of horizontal range versus the vertical, mostly has to be used defensively reading when the opponent will try to recover, rather than a more useful, offensive style wall of pain.

STANDARDS

Jab: Hands of the Slave Master


Ladja attacks in a frenzy with his hands, thrusting his palms forward rapidly to create seemingly impossible fast hitboxes, especially considering he’s not normally a melee fighter. This is actually a loop of 10 hits that land at different height in front of Ladja, but have exaggerated hitboxes to always land on a foe directly in front. The jab deals constant hits of 1% damage, almost guaranteed to get to around 10% if not staled and the foe was in a close range to Ladja, also helped by the move’s decently fast starting lag. Given the fact the hitboxes happens all over Ladja’s front, the foe is forced to DI back and give up any ideas they had about jumping over Ladja for a punish. This move can even hit foes slightly above Ladja too, albeit just to peck them with 1% damage and a little flinching to stop their advance rather than doing all the potential damage. Given the range, if a foe is already low in shield health, this move can poke them out of their shield, but largely is situational due to the jab pushing them out of range due to shield push and the low amount of damage it does to a shield.

This move gains several buffs if used with a tether; it will instead focus all the hands to whatever area the foe is in comparatively to Ladja. This means instead of random, frenzied attacks with his palms, he’ll lash out above if the foe is there, or in front, or even low on the ground if the foe is very close. This adds a degree of automatic angling to the move that changes it in certain ways, as hitting the foe strictly upwards can potentially juggle them at low percents or with petrify, whereas the low-angled version will deal 1.5% damage and the forward version has 1.2x the range, meaning it can hit for longer before the foe’s DI kicks in. Ladja will even turn around for the move if the foe manages to get behind him, getting rid of any lag from traction.

If the move is used on a Death Ball, and Ladja mashes the standard input, the Death Ball will stop in place and shoot out parts of itself as smaller projectiles, dealing 2% and being as small as Samus’ smallest charge shots. These fans out in three directions, straight forward, and slightly up or down from that, but will always hit a foe dead ahead. They deal the same damage as the smallest charge shots too, only a few frames of flinching, but Ladja can shoot out up to 5 a second. Every time one is shot out, it does reduce the strength of the Death Ball proportional to the 2% that was removed, meaning this isn’t going to last forever. If Ladja’s has a tether on the foe at this point, the small projectiles will home in on their direction automatically for the initial burst out of the Death Ball, but then follow that pattern indefinitely after that. This is the trade off of instead first putting a side special magic chain on the Death Ball, and then immediately being able to command all of the separate little Death balls out of this move. On a very small Death Ball this can completely break it down to nothing, which actually makes the end lag a little better too.

Forward Tilt: Hand Cuff


Ladja puts his hands behind him for the start lag, creating a spark of energy in them, and then brings them forward to hit the foe having about the range of Lucario’s forward tilt. This deals 12% damage and knockback that can KO at 155%, one of his strongest melee hitboxes. The move deals a larger amount of hitstun than normal, comparable to some of Mewtwo’s throws, putting the foe in a slight purple burning effect that means it takes 1.5x as long to gain control of DI. This makes it a good move to use into his other set up, like his Death Ball, or just to hit them off stage when petrified as even that much lack of control is very effective.

The move can be buffed if Ladja has a tether on his Death Ball, and presses the standard button when the flash of magic appears on his hands. The Death Ball will seem to slightly shrink, and Ladja’s hands gain a purple aura comparable to Lucario for the duration of the attack. This buffs the move’s strength by 1% for every smaller sized Death Ball, up to 5% for a max sized one. This move can become ludicrously powerful if Ladja has a lot of smaller Death Balls on stage, capping out at dealing 20% damage if he has 6 or more on the stage at that time. This buffs the knockback to KO at 115%, making it one of his best KO moves period.

The move also changes if Ladja has a tether on the foe. For the start up, Ladja can choose to press the standard button at the same time as the magic spark, and he will pull the foe towards him wherever they are on the stage. This can put them in range to be hit by his forward tilt, but only works if the foe is within two platforms of Ladja. The pull itself is a bit stronger than King Dedede’s inhale. This combined with petrify, and the power to follow the foe using teleport, gives another great offensive option to Ladja to chase down the opponent. The inhale by itself can also of course be useful to mess with the foe’s movement when they’re trying to get around his projectiles on the stage.

Up Tilt: Fire Ball

Ladja holds a single arm up in the air in a pose similar to his neutral special, creating a small orb of fire in his hand the size of a Mario fireball, dealing 9% and weak upwards knockback. This is comparable to his up aerial, a good juggling move especially on petrified foes, and has an upwards wind hitbox too but this only is 0.75x as strong as his up aerial. The start lag of this move is decent, but it has no coverage directly in front of Ladja. This is changed if the move is held out, as Ladja can then choose to throw the fireball directly up, forward or down into the ground. The fireball is again as large as Mario's, and will go as far in the air. If it lands on a foe, it will deal 3 hits of 3% over 5 frames of flinching, a good generic building block to getting to land a Death Ball or one of Ladja's various grab hitboxes. If the fireball is thrown on the ground, it lingers as a flame pillar for 1 second, dealing constant 2%, for a total of 10% damage if the foe stood on it, as it deals passive damage and flinching knockback, but can be DI'd of very easily.

In the air, the fireball deals the same 3 hits of 3%, instead capturing a foe in the air. This move works great in tandem with Ladja other's moves but has too bad of start lag to use exclusively as a projectile, unless he manages to get a magic chain on the foe or his Death Ball. On the foe, the move can now first of home in any direction, and without their shield in the air, the foe is forced to dodge instead. This would be a good idea, only the fireball, with some slight aerial traction, will turn around in midair given it's not near the end of its short range, hitting the foe as they come out of dodge. This forces the foe instead to try and destroy it with their own attack, or simply keep pressuring Ladja to not go through the move's long start up lag when using this version of it. It's not very damaging on its own, but the flinching is what makes it truly devastating in combo with Ladja's other moves. Thrown at his Death Balls with or without the magic chain to help land it, the fire will wrap around and then trail behind the Death Ball wherever it goes, allowing for it to hit the foe if they try to dodge past it, or simply giving it a bigger, if much weaker hitbox. On smaller Death Balls, the fire will overlap the entire projectile due its smaller size, stunning the foe before the actual projectile part hits if the front hits the foe. This effect lasts for five seconds.

Down Tilt: Burning Breath


Ladja inhales then exhales a foul looking breath, in the form of a red fog that hits down as far as Bowser’s flame breath but dies down much faster for the end of the move, this basically resembles that move sped up. The burning breath deals 5 hits of 3% damage, but largely won’t hit with all these hitboxes unless the foe has been petrified a little first or is particularly huge or heavy, or doesn’t DI upward. This is made harder when a foe is petrified and has higher fall speed as well as worse movement in general to get away from it if they see it coming. If the foe has a tether on them, the flames will also rise off the ground slightly to try and follow them, but not persist nearly as long as say the neutral aerial, just enough to force them to properly jump rather than short hop the hitboxes. All hits of the move push the foe slightly away like flame breath, making it an effective defensive and offensive move to push the foe away, or conversely push them into a specific hitbox like forward smash or forward aerial. Like other moves of this type though, it’s easy to shield and has bad ending lag.

To mirror the paralysis effect in game, the move will leave a status effect on the foe after being hit, lasting 2-10 seconds, 2 seconds for every hit of the move that landed. The foe’s model has some lingering flames on it resembling battle damage, this doesn’t do anything by itself, but if an attack is landed on them, the fire will flare up again and deal an extra 1% damage along with that attack, also boosting the knockback at the end of the attack too by a tiny amount. This can get very painful with multi-hit moves such as with the split up Death Ball, up smash, jab or his many other breath moves, stacking up lots of damage, but also works well into his pummel if he can land a bunch of hits. This gives a reason for Ladja to approach rather than be defensive with this move, as the foe can simply wait out the effect, given the short duration. This can be made easier through Ladja’s teleport to get closer to them, both just by using it outright, or teleporting to his Death Balls to give him some degree of support.

Dash Attack: Slave Chaser

Ladja puts out one hand in front of him, creating several dark pulses of magic from his hand, dealing 4% to grounded opponents and 7% to aerial ones, a second hit of 3% then a final hit of 7%, comparable to Ness' dash attack. This is a good juggle move like the up aerial due to the fact the last hit will send the foe slightly into the air, low enough that from a petrified state the foe can be easily followed up on. Unlike Ness' dash attack, this move does poorly against shields due to it coming out slower, despite dealing higher damage and knockback, making it punishable against shields. Due to its strengths against aerial opponents directly, like Ness' dash attacks, it's better to use against a foe coming from air-to-ground as a follow up juggle, being a good move to use into itself if Ladja can position himself and the foe is dumb enough to fall for it. This move can budge around Ladja's Death Balls, just boosting them forward half a platform almost instantly, and hitting any foe in the way.

This move has another use for it though if Ladja had a magic chain up, on the foe or his Death Ball, and holds the move as if he was going for a keep dashing dash attack. The pulses of magic will travel through the tether for one platform, acting as a weak hitbox that deals 4%/7% and then the 2% and 7% ones, far more relevant now with the damage difference when the foe can be airborne and magic tethered. The pulses will travel at the very fast speed of Falcon's dash, causing the tether to materialize as they travel over it. The foe can destroy the pulses with any attacks, in fact if they do hit them, they'll wobble back into the tether and dissipate by shattering, damaging the tether by 5% damage each. This can quickly stack up to outright destroy the tether if the foe hits all the pulses at once which is easy given they're grouped together, necessitating that Ladja uses his side special to attack the foe at infinite range at the same time, giving them no option to air dodge, or move further away to give themselves space. All in all this just makes it more awkward for the foe to run from Ladja. Used on the Death Ball, it will largely do what it does on the ground, only using the tether and his angle to the Death Ball, he can shunt in nearly any direction.

GRAB GAME

Grab: Enslave

Ladja does a low range, slow grab, slightly better than Ganondorf's. If the foe is in close enough range to make a magic chain on them visible (one platform), a tether grab will reach out instead if the input is held. The tether resembles Lucas' in range and gives the danger of two grab hitboxes for the foe to worry about. This means the foe can be conditioned to not roll back out of the initial grab and instead has go for a well timed spot dodge, to avoid the tether, like a tech chase. The throws for both versions of the grab are the same, as the foe is pulled back in by magic to Ladja, the animations holds them in midair similar to Ganondorf's side special. The normal grab is pretty hard to land, but is supplemented by the down and side special giving Ladja a selection of grabs to use on the foe.

Ladja can use this move to a different effect entirely if he's tethered to his death ball. Holding the move even longer than do to his tether, making this very slow, Ladja destroys the Death Ball wherever it is on the stage, and creates a vacuum of energy in its place. This reaches out to around 1.5x the size of the Death Ball as a grabbing hitbox and resembles the MegaMan final smash from Smash 4, only sized down and lasting as long as any grab does (15 frames). If a foe is hit, they are sucked into the vacuum, disappear from their current location and appear in Ladja's grab. This destroys the Death Ball that was used, but allows Ladja to potentially grab the foe from anywhere on the stage, given he's okay with sacrificing his Death Ball. The grab does have a weak suction effect too, like the MegaMan final smash, but this is only effective when it's much larger. This simply won't work Death Balls that deal 10% or less, due to their small size. The lag of this grab is 10 frames longer than a normal tether grab, making it especially easy to punish if it fails. It can be air dodged given good timing, but this is fairly difficult.

Pummel: Flame Breath

Ladja gasps and blows out a fiery breath of hot wind, causing an average 1% damage, a slow pummel but one that has a fast start up, leading to average damage when the foe is already high in percent. This is boosted by the down tilt to be a very damaging pummel, but requires that Ladja grabs the foe right after his down tilt, difficult given the foe may already be playing cautiously to avoid exactly that. Unlike other pummels, the hitbox of the flame breath lingers for an extra second after the grab to deal a passive 1% damage, this stacks to deal up to 5% at max if Ladja landed five pummels. This is more of an incentive for the foe to stay out of the way even more, or to take another hit of damage by sticking around Ladja. They can jump out of the way or shield it, but if they were hit by the petrify effect, it becomes especially difficult to jump or dodge, instead forcing a shield, and Ladja has plenty of other grab hitboxes to use on them if they do that too.

Forward Throw: Death Ball Blitz

Ladja tosses the foe's body into the air for 3% then shoots out five small Death Balls, dealing the foe 2% each as they pass through them, being very similar to Mewtwo's forward throw. This deals a total of 13% damage. As in Mewtwo's throw, the foe is dealt only medium knockback, but the throw has a high base knockback due to them being pushed constantly away by the Death Balls during the animation. Compared to his neutral special these are thrown much faster than Samus' charge shot at two-thirds speed, mirroring Mewtwo's move. Ladja can use his own Death Ball instead by tapping the special input at any point during the move. He will automatically go for any smaller Death Balls on stage, teleporting them into his hand then throwing them at the foe. The foe is stuck in the throw animation as long as the Death Balls don't deal over 4%, hitting the foe too far, but if set up very precisely can lead to a huge amount of damage, potentially up to 23%. This is only achievable if Ladja made 5 perfectly sized Death Balls and the foe let him grab them, although being so small, these are excluded from being used in the long range grab. More likely outcome is he'll get a collection of very small ones that deal 3-4%, and obviously getting the smallest one is the most straightforward for a total of 18% damage.

Ladja can use a bigger Death Ball that deals more than 4% damage, but this will potentially hit the foe out of the throw. As the Death Ball used becomes larger, it also becomes slower and harder to actually land on the foe. For example the largest Death Ball possible, as the sole projectile on the stage, will be too slow to hit the opponent before they exit the move animation and can avoid it. This is not true, however, if Ladja has a magic chain on the foe, as the Death Ball will home in on them after the throw is technically over and cause them to have to DI away in the air to get around it. This may not allow it to actually hit unless the foe makes a mistake, but leads to a lot of natural follow ups. This example works for less powerful Death Balls, but ones in the middle in terms of size tend to at least hit, just guaranteeing that the foe is hit away and Ladja's end lag is safe. Ladja can also just exit the move early by hitting shield, letting out the foe early as well. The best idea in general is to try and combine the weaker Death Balls with a more powerful one, mostly achievable by angling the forward smash. This can at best lead to a scenario where Ladja buffets the foe with damage from the smaller ones, but has the big one at the end to deal a huge chunk of damage and knockback to finish. Though he can't exactly land them, it's also possibly just to use this move to set up a stage of Death Balls homing in on the foe all at once, being a good way to rearrange them and set up in a specific way.

The petrify status effect is very important here, as it will keep the foe from being able to jump away from the bigger Death Balls and force them instead to use their up specials or fall to the stage at the end of the throw. This is especially relevant if Ladja has a magic chain on the Death Ball itself. Instead of summoning the Death Balls to him to throw at the foe, pressing the special input will cause the Death Ball closest to the foe to start homing in on them. This lets Ladja combine the best aspects of his homing tether on the foe with the Death Ball tether, and is very powerful if Ladja can set it up so the foe is thrown near the Death Ball. Ladja can do this multiple times instead of throwing his normal Death Balls to cause up to five of them to home in on the foe instead, sacrificing any potential for damage, but with the right set up this can be a very powerful KO move. Even if the foe gets away, Ladja can always use his up special to swap places with the Death Ball and follow up on them himself. If the foe was petrified, he could even swap himself with a Death Ball moving forward meaning the foe has to duck down towards it on the stage to avoid Ladja directly, or be forced to fight him in the air.

Up Throw: Slave Trail

Ladja holds the foe higher up than usual in his grab animation, conjuring up the same flashy magic symbols used in his up special to teleport them a Ganondorf into the air before dealing strong vertical knockback, dealing 10% damage. The knockback won't KO until 200%, on petrified, lower percent foes this can even leave them plummeting downward still in hitstun from the throw for an easy follow up, limited in abuses by the initial set teleport knockback. This can be augmented slightly if Ladja holds the up input, as he will teleport himself alongside the foe, dealing the same 10% damage, but leaving himself airborne. He can't move until after the foe has been fully thrown, but this does allow for many follows ups, or even potentially for him to use his ground moveset if he teleported on top of a platform. Ladja can hold the input down for longer if he had a magic chain on the foe, instead teleporting two Ganondorfs above his current location to intercept the foe as they're dealt the second bit of knockback for great follow up potential. The foe will still always get out of the move at the same time as Ladja can move, meaning they can always escape with the right strategy, but gives Ladja the opportunity to keep up the pressure.

Ladja can also teleport to other locations with or without the foe, if he has a magic chain active on a Death Ball. Pressing the special input during the start up, Ladja can instead send the foe to that Death Balls location, and swap them with that Death Ball. This is limited though, only being usable on Death Balls within 1.5 battlefield platforms of Ladja, this can be angled to choose different death Balls if there are multiple. The potential for gimps with this are reduced due to the vertical knockback dealt at the end of the move, but again is far more effective on petrified foes who will naturally start to fall faster off stage and have reduced jumps to get back to the stage. More than that, setting up a Death Ball in such a location that it can be used to gimp is especially hard, although if Ladja could somehow put a Death Ball under a lip or a stage like Sky World, gimps can be achieved utilizing the upwards knockback. Like the other version of the throw, Ladja can hold up to teleport with the foe, but this uses his up special if he lands in midair. He still has access to his jumps and side special to recover though, unlike his up special, but does have some inherent danger if the foe has any aerial prowess. This all makes Ladja grab near a ledge very scary if he has a Death Ball anywhere nearby.

Back Throw: Execute


Ladja pulls the foe behind him, with their back to him in an animation similar to Snake's down throw. He then pulls out his scythe, puts it to their neck and slashes it across their throat, dealing 12% damage and high horizontal knockback, strong enough to KO at 175%. This gives another strong KO throw option near the ledge, but far more straightforward than up throw, requiring a higher threshold of damage first. It's also a bit weaker than up throw in general if Ladja can teleport the foe higher using his Death Ball or do other tricks, but is Ladja's strongest basic throw. Due to the high knockback, it's also one of the deadliest moves to use against a petrified foe next to the ledge as they'll find it harder to make it back, even if they're not at a KO percentage, making going near the ledge with Ladja there a terrifying prospect. This pressure helps Ladja's playstyle greatly against those trying to outcamp him from the ledge, or those trying to rushdown and run away, forcing instead a fight at the middle of the stage.

This throw changes if Ladja had an active tether on th efoe. During the long animation, if the special input is pressed, Ladja will materialize the tether in his hand. He then uses magic to pull the foe into the air, before spinning them around him to deal 10% damage before using the scythe to cut the tether, sending the foe away with the same knockback as Mario's back throw. This animation resembles that move and Mewtwo's up throw. This allows Ladja to try hitting the foe into his Death Balls, which will cancel the throw if they deal strong knockback or simply stack on more damage, but also turns the foe into a hitbox to any other opponents. They will deal 5-15% and medium-strong knockback depending on a combination of their size and weight, but will deal an extra 2% for every stage of petrify they were in too. This means a foe at stage four petrify will deal an extra 8%, and turn the move into a powerful KO move. Levels of petrify will also add to the move's own KO power, buffing it to be up to 1.4x as powerful as Mario's back throw at stage four petrify, or 1.1x as stage one. This of course destroys the tether, but this version of the move is optional.

The move changes again if Ladja had a tether to his Death Ball rather than the foe. He materializes the tether again, but instead uses it to wrap around the foe and deal several hits of damage. The amount of damage depends on the Death Ball the tether is connected to dealing, a hit per Death Ball, and dealing a third of its damage when it hit the foe. This depletes the Death Ball's size too, like the forward tilt. This maxes out at dealing 15% damage. The knockback will likewise be a fraction of what the Death Ball would deal if it actually hit the foe, dealing two-thirds the knockback of the Death Ball, or several of them put together, at max this can KO as low as 160%. The length of the tether also changes, the bigger or more Death Balls the longer it is, extending as long as a platform behind Ladja and even extending possibly into midair. This gives the throw a large amount of base knockback in a way as it positions them further away before they're dealt knockback. At the end of dealing damage, Ladja cuts the tether, destroying it and the foe is knocked away. Compared to the forward throw that has a massive ceiling for damage, this move does great damage, but is still by far the best KO throw just having a single strong Death Ball as the tethered object.

Down Throw: Portal to Paradise


Ladja releases a burst of magic dealing 5% that causes the foe to get shot down, resembling the Ganondorf side special. Over the course of this, Ladja opens up a portal beneath himself over the ground and the foe is shot down through this portal. Ladja taunts as seen in the image, the foe is rapidly dealt 1% damage within the portal, until they are shot out, taking 10% overall from the throw. This is faster than it sounds, as the foe is dealt the extra 5% over half a second, but Ladja is prevented from acting until they are thrown. This throw will not KO unless from an absurdly high platform, or from over 250%. Definitely not his strongest KO throw, but on petrified foes, this can be used as a great juggle move due to their higher fall speed, as the throw has almost no base knockback.

At the end of the throw, the portal recedes into the ground, but leaves a small dark spot on the stage. This is just under the width of half of a battlefield platform. From here on out, if Ladja uses the throw again, he can angle it to instead open up the portal at the last area the throw was used, throwing them out of there instead. This can be very useful for setting up KOs with the Death Ball, only limited by where solid ground is on the stage. These portals get destroyed on scrolling stages though and dissipate after twelve seconds. Ladja can even store his Death Balls within the portal while they're active, just by throwing them in there. When he next activates the down throw, the Death Ball will be shot out after the foe is, enabling Ladja to follow up with his forward smash, neutral aerial, forward aerial or other moves manipulating the Death Ball with the foe in close range.

When the portal expires, the Death Balls are immediately shot out upwards, acting as a sort of trap. As the portal gets nearer to expiration, the effect on the ground starts to wear down, giving the opponent a visual indicator for when they shouldn't be standing there. Multiple Death Balls thrown into the portal will form together into a single powerful one, reaching the usual cap, but the one weakness of all this is is still counts as Ladja's one Death Ball meaning he's kept from using his main mechanic for all the time it's in the portal, if he only has the one. It will at least not run down the clock it can be out while inside the portal, however, giving Ladja more time to manipulate it when it comes back out. Ladja can use his up throw to teleport the foe into the portal if he's within 1.5 platforms of the area and had a magic tether on a Death Ball in there. The foe is dealt the same damage, with the Death Ball coming out at the end, but Ladja can also teleport himself down there, taking no damage but being boosted up by a Ganondorf instead. Essentially this application of the throw acts as a way to use Ladja’s up throw off of the ground, but also at any point on the stage.

FINAL SMASH

Bounce


Ladja casts Bounce on himself using the pictured animation. This gives him a much more powerful version of the buff than it exists in the game. It not only reflects projectiles, but also his own and buffs his Death Ball's power by 1.1x each time. This even works if the projectile isn't running into him directly, allowing Ladja to run up behind his Death Ball and bounce it forward until it reaches max power. At the same time, Ladja summons Kon the Knight and Slon the Rook as minions. They use their normal movesets, but take half knockback and their moves do twice the damage. They will stick around for 20 seconds, or until they are hit off the stage. This is incredibly powerful in tandem with the actual effect of Bounce.


The foe could ever do anything about this, but Ladja also gains super armour for the duration of Bounce. This prevents him from taking knockback from attacks that do less than 10% damage, and reduces all attacks' damage by 6%. He also gains a 1.5x weight buff, and mashes out of grabs 1.5x easier, all in all making him resemble a low grade boss. Ladja can also use his tethers to attach himself to Slon or Kon in the same way as a foe, this can also deal them damage or KO them, but Ladja is happy with this if he can KO the foe using it. There's a small chance that instead King Korol will be summoned instead of either Slon or Kon, largely working the same way except having slightly more of a damage and knockback reduction buff. If any of these characters are in the match, Ladja will instead summon a recolor. This basically makes Ladja feel invincible for the 20 seconds the final smash lasts, resembling his first fight in Dragon Quest V.

PLAYSTYLE


Ladja's playstyle centers around his Death Ball, a single projectile that can be split up, tethered to, homed in on the opponent, teleported to and stored away in a portal, among other things. It goes without saying that the Death Ball gives Ladja plenty of options, but an important limitation on it is that Ladja can only have one Death Ball at once, or at least can only create one Death Ball at a time. It's only when he's used magic chain on his Death Ball that he can recharge it later on, but this means not placing it on the foe, which is more important for the match. The Death Ball tether of course has its own big advantages too, but largely having it on the foe is the aggressive option in most cases, whereas the Death Ball one simply allows a greater amount of set up and control. To get pressure on the foe, having a tether on them is best, although some of the best finishers are when tethered to the Death Ball, meaning that to truly get the most potential out of Ladja's set switching between the two is necessary, as well as knowing the capabilities of both.

Ladja's set isn't difficult to play, on the contrary everything in it can be played as a very simple character based around a single projectile, comparable to Mewtwo only without the stupidly low weight. Obviously other influences are thrown in there too. The Death Ball itself can just be used as a very powerful projectile to hit the foe, albeit at a closer range than Aura Sphere, Charge Shot or Shadow Ball. If the foe has any kind of reflector, he's going to have to be redirecting it a lot, and this can really slow down his plans. The main difference between Ladja and other characters is he has a very high ceiling, and this requires some risky choices by the player to get to that point. There's a lot of room in Ladja's set for his set up to back fire, such as the foe just shielding or out-prioritizing his smaller projectiles with those of their own. Ladja also requires good reads for some of his most advanced play, such as the use of his teleport with his Death Ball or the foe, which the foe can just as easily punish him for if they see it coming.The amount of options open to Ladja is great, massively helped by his choice of tethering to his Death Ball or the foe, but the usefulness will vary depending on the exact match. Actually landing the tether is one of the most important aspects, easy on the statically moving Death Ball, but on the foe this can actually be difficult.

On a more complex level than just landing moves and making a basic strategy, Ladja excels at controlling the stage, again given the right reads, conditioning the foe in a similar way to tech chasing using his multiple grab hitboxes and being able to punish the foe if they allow him any kind of specific set up. Ladja can fight the foe at the same time as his set up very naturally, as all of it also act as attacks, such as his smashes, his grab game, and even his teleport is a hitbox. Some of these are pretty unorthodox hitboxes to land but this is helped by Ladja's stage control, such as his down smash cage, or just the delayed hitbox of it, his ability to send his Death Ball anywhere, keeping pressure on the foe with the threat of his universal teleport, his multiple grab hitboxes making them second guess their shield. At the same time Ladja has large amounts of end lag on a lot of his more advanced moves making them even riskier than usual, and many of them require this for the really powerful effect too, meaning that Ladja isn't just spamming lots of hitboxes at once. Petrify mostly comes into play when the foe isn't expecting it, similar to Robin's Nosferatu, due to its low range this is the grab Ladja will least be using but it helps his entire playstyle. The foe becomes unable to get around his Death Ball or other attacks as easy, but also is unable to be as aggressive as they were before and forced to take their own risk with the effect on, or back off and let Ladja set up something even more powerful.

Ladja's aerials and standards largely buff his Death Ball, augment his playstyle to be slightly more aggressive or defensive for a short time, or change the dynamics of the match for a very short period. These are important tools in conditioning the foe into falling into Ladja's trap of setting up his Death Ball further by splitting it up or moving it into a new position. Generally speaking the foe can get through many of Ladja's projectiles through dodging or shielding, but this just wastes time, as the best way to attack Ladja is being direct and going into melee range, where Ladja doesn't have that many defensive options, preferring a mid-range distance with his foe. Long range obviously can work too, but not without at least throwing out a Death Ball first. Without his Death Ball, Ladja also functions perfectly fine, but becomes a far more situational character with many of the moves, although this is helped greatly by his tethering to the foe. This is important for foes who either spam reflectors or can absorb projectiles especially, as Ladja can easily deal with reflectors but has serious issues due to re-using his neutral special to gain control back. His grab game is especially important in this case, due to being able to directly hit the opponent with the projectiles using forward throw, storing them as traps in down throw and the powerful KO back and up throw too. In general Ladja can do some crazy star KOs but is also weak to them himself, again showing his slant towards a high ceiling, but also risk/reward type of playstyle.
 
Last edited by a moderator:

Reiga

He sold diddy for a switch
Joined
Dec 8, 2014
Messages
1,256
Location
White Noise
3DS FC
1461-7646-7368
I'M STILL ALIVE, GUYS

Oversized Sprite Alchemy

I'm sorry, but Plague Knight seems to have many, many flaws holding it back. First off, as the comment's title hints at, many of Plague's moves have extremely oversized sprites, which at first hand are very hard to understand due to their size making them seem like a bunch of pixel; with the move descriptions not helping much due to them being usually very, very small and overlooking details like projectile size and speed, I mean, for the Side-Spec we have a few bomb sprites, but are their designs determined randomly? Do they have different properties? What size are they? Are those even the freaking bombs?
The set itself has some interesting ideas, like the exploding vat that is interactable with attacks, though they are overshadowed by very minute descriptions and a shallow playstyle, with many moves in the set being just fluff with no value attributed towards the moveset, not gathering together to string Plague Knight's gameplay.
Also, an infinite range attack on an aerial is very broken, with Plague punching the opponent for the FSmash and DThrow being kinda weird, especially for an alchemy master that relies on clever alchemy and not brute force.

Where's My Hands?
Let's cut to the chase here: Rayman seems to be a very rushed set with not a lot of coherent playstyle or moves, with some big untapped potencial.
First off, I'll have to point out that having the FTilt be mirrored from the Jab is a very bad idea in the scenario of this attack, as while one may think this can be excusable and use Mega Man as a canon example of this mirror, such fighter can actually benefit by such mirror, as one can use the Jab while moving forward, while on Rayman's case, not only does having a combo look weird on an FTilt, but it is completely uneeded and doesn't add much, if anything, having an actual FTilt that can be followed into may be better. You may notice I don't point out the Jab also being mirrored onto the Nair, though really, the mirrored Nair fits better and can be different enough from the Jab to actually not seem such a carbon copy.
Another thing that while nitpicky, can change a lot the set, is that you rarely describe in moves which hand is used to execute it. Yeah, pretty trivial, right? Well, in the case of this set, were one can lose one hand for a period of time, that may not be as trivial, and can actually open up a bigger prominance of some of the moves that kinda seem like fluff, as, from what I can see, launching your hand to go behind the opponent and have Rayman be closing in onto the opponent alongside the gravitating hand seems like a pretty nice pressure move, and having the playstyle revolve around such multi-tasking would be interesting, with Rayman's stronger moves using the punch hand, while the other, lesser used moves, use his left hand and so can be used for strategies involving using the launched hand. This could help with better setting in onto the set the more generic moves Muno sets usually suffer having, giving them a bigger meaning in the set's big picture.
A few other nitpicks I have with the set include the similarity in animations in moves, with most of the Smashes looking like more powerful tilts and some throws being a bit too similar to Rayman's aerials. The FAir not only uses both of Rayman's hands, but seems kinda out of place in Rayman's set, being a rather random very laggy spike, which doesn't combine well with Rayman's other, much faster moves.
 
Last edited:

Tocaraca2

Smash Ace
Joined
Feb 22, 2015
Messages
557
Location
Wokingham
If anyone was wondering what Alica Vassin's Flame Waves actually look like, take a look at Cloud's Blade Beam, Flame Waves are the same shape.
 

ϟPlazzapϟ

Smash Apprentice
Joined
Nov 30, 2014
Messages
95
Just to prove I'm still alive I guess I'll give some advice concerning Lunchmanalchemist's Edward set which I've put off until now. When you made the set you expected people to go in and watch the entire series of Fullmetal Alchemist so the vast majority of unexplained things were supposed to be understood by only the people who watched the entire 20+ episode anime. Yes if we all sat down and watched that entire anime everything whould make sense, but not everybody has the desire or time to watch all of that especilly so they can understand a very underdetailed moveset. Doing this is a big no-no in make your move and If you plan to make another moveset avoid making the reader to any research.
 

Tocaraca2

Smash Ace
Joined
Feb 22, 2015
Messages
557
Location
Wokingham
I am starting working on Akullotsoa right now. Be prepared. I want him to be out on Christmas Day since he is an ice based character, and Christmas is in winter, and ice comes in winter, so yeah.
 

Munomario777

Smash Master
Joined
Nov 18, 2014
Messages
3,253
Location
Charleston, South Carolina
3DS FC
0387-9596-4480
Switch FC
SW-8229-3157-8114

OCTOLING
-THE 755th ANNUAL MUNOMARIO INKLING SET-

Merry Squidmas Christmas everyone! Here's a little set to get something out for the holidays (even if it's not really related to Christmas). It's a semi-clone of my Inkling set, and I'll assume you've read it -- I'll be referring to it and whatnot -- so go read it if you haven't already, or to refresh your memory. There's a lot of potential in the ink mechanic I used for that set, so I thought it'd be fun to explore a different angle to it!


The Octoling is the natural enemy of the Inkling -- an octopus that can turn inkto a humanoid form at will, and possesses similar ink-laying and ink-swimming abilities. They're the elites of the Octarian forces, the guys that stole the Great Zapfish that powers Inkopolis -- and the army that makes up the baddies of Splatoon's single-player campaign. The Octolings are highly aggressive -- moreso than any other enemy in the game -- and are quick to pull the trigger to splat anyone who dares get in their way. Needless to say, in Smash for Wii U they bring quite an aggressive playstyle to the table.


STATS

The Octoling is more mobile than the Inkling in its humanoid form -- it dashes as fast as Mega Man, has a decent jump height, and a bit more weight to resist being launched. They do seem to be trained military troops, after all. They also fall more quickly than the Inkling, which can help for comboing and the like, although makes them a bit more vulnerable to combos. They also have good traction. Don't be fooled, though -- while the Octoling doesn't need ink to get around quite as much as the Inkling does due to inkcreased mobility outside of it, it's still a very valuable asset.

Oh! I've also omitted the flavor section from this set, but as a general rule, a lot of the Octoling's animations are similar to the Inkling, just with a more "aggressive" feel. They won't, however, hold their last used weapon at all times, being empty-handed most of the time. Also, this is the Octoling's victory theme -- the "mission clear" fanfare from Splatoon's single-player campaign.

UNIQUE MECHANICS

The Octoling shares the ink and squid -- erm, octopus -- form with the Inkling as its core mechanics, but with some changes. As a refresher, you can spray ink onto surfaces with many attacks, and swim through it by turning into an octopus with a crouch/crawl inkput -- you can swim through ink at roughly the speed of Captain Falcon's dash. Opponents who step in it will be "inked" -- they take 1% per half second that they're in the ink, and other attacks can also inkflict this status effect for a certain amount of time.

Ink from an Octoling only lasts two-and-a-half seconds (half the lifespan of the Inkling's ink), and is a different, magenta-ish color. It can withstand as much damage as the Inkling's ink, with a thin trail having 7 stamina, and a thick trail having 12. While the ink does enhance some attacks (namely, kicks splash a bit of ink off the ground and into the air, which inks the foe for one second and goes further than the normal attack, but doesn't cause flinching), smashes can't be overcharged like the Inkling's can.


Naturally, the Inkling's squid form accessed via a crouch/crawl inkput is now the above octopus form when used by an Octoling. It functions the same, though -- this is merely an aesthetic change. You can still dive into your ink to move at Captain Falcon's dash speed and all that. Squid lag canceling is also back, under the name of octopus lag canceling (as you may have deduced).


The Octoling is less focused on maintaining ink than the Inkling is, inkstead creating it for a specific purpose whenever need be. So it can effectively place it down to start a combo, approach, etc, but it doesn't last long, and isn't the easiest thing to maintain for a super-long combo.

SPECIALS

Neutral Special - Octoshot

The Octoshot is perhaps the best example of that mentality. It's sort of like the Inkling's signature Splattershot weapon, but different in the details. It's essentially a Falco laser -- it fires one glob of ink that travels in a straight line, and can't be aimed, with similar lag to the aforementioned move, and a familiar 3% and flinching to foes it hits (plus a second of the foe being inked, which deals 1% of additional damage per half-second, and causes them to place ink for the Octoling wherever they go). It'll also leave a thin trail of ink if used on or close to the ground. While this is a bit too slow to use mid-combo or in close-quarters combat to make an escape without being left open for attack, it is excellent for setting up an approach from a distance! Try swimming through the ink to cover ground quickly, and use it for a combo after you approach with techniques like octopus lag canceling.

Upon contact with a foe or surface, the glob will explode, meaning it can't hit another foe or make a longer trail -- but, it will create a 1-SBB-wide area of thick ink! This means that your foe can't just down tilt and get rid of the ink that easily, since it'll be more durable. The trail of ink that the move creates will start right in front of the Octoling, so it can't use octopus lag canceling on an Octoshot unless there's already a bit of ink below its feet. Short hopping forwards won't work either, since the glob won't be close enough to the ground, and the ink won't be placed.

Side Special - Octobrush

The Octoling's equivalent to the Inkling's Splat Roller is a brush-type weapon, fittingly named the Octobrush. It acts similarly to the Inkling's move, but has different nuances to it. Firstly, it's faster -- the Octoling gets to move at a speed just under its dash, whereas the Inkling's bigger, heavier Splat Roller restricts it to walking speed. However, it lays only a thin ink trail, and combined with the ink's shorter duration, the Octobrush's speed is compensated for by shorter-lasting ink trails. Another nice thing about the Octobrush is the fact that it's a bit quicker to start and end, and knocks foes up into the air rather than dragging them along, dealing 4% of damage and 1.5 seconds of inking (3% of additional damage). It's good for starting a combo, especially since you can jump during the move -- this doesn't cancel it, but you can let go while jumping up and after the brief ending lag, use an aerial to follow up on the move! The Octobrush also has transcendent priority, so it can go straight through any attack and hit the foe -- it's a great approaching tool.

With the Inkling's Splat Roller, you could tap the button for a slow downwards slam with the roller, which would spike the foe and fling a bit of ink forwards. The Octobrush, though, instead has rapid side-to-side swings if you tap the button, dealing 2% and inking the foe for a second per hit (but the effect doesn't stack). You can hit foes a lot of times with this attack, it comes out quickly, and it can even be used during the regular version's ending lag -- you can attack behind yourself too, to cover your back. Perhaps this is an optimal follow-up after hitting a foe upwards. It's also a great, quick attack to throw out from a distance.

Up Special - Super Jump
Like the Inkling, the Octoling uses the Super Jump for its up special move, turning into octopus form and shooting upwards with a downward stream of ink. However, the Octoling doesn't have to charge up before it jumps. Consequently, it can't aim either, so it can only go straight up. Also, the move will end at the peak, with the Octoling either going straight into helpless, or being able to use an aerial attack, and then going into helpless. This recovery has no horizontal movement whatsoever, except for the sideways movement after the fact. The move also deals damage, 5% and upwards knockback to be precise. So you could knock a foe up into the air, use a Super Jump to hit them further up, and then use an aerial attack at the end -- to deal extra damage, or even KO off the top of the screen! The move, however, isn't as good for recovery as the Inkling's -- even if it is harder to inktercept. It won't even sweetspot the ledge until the top of the ascent, when the Octoling turns back into a humanoid form -- so you'll have to recover low, or be left vulnerable.

Down Special - Splat Bomb

Like the Inkling, the Octoling's down special move has it throw out a Splat Bomb. (The one shown in the picture is the Inkling's version; the Octoling has a grey one, with its color of ink inkside.) It's thrown in an arc, sitting on any ground it lands on, and will inksplode after about a half-second of beeping. However, unlike the Inkling, the Octoling cannot detonate this manually; inkstead, it starts to flash after 2.5 seconds (so it explodes after 3 seconds). This makes it harder to hit with, but if you do, it packs a punch, dealing 18% of damage over a 1.5-SBB-wide blast, KOing at 90%, and inking foes for four whole seconds -- 8% of extra damage -- and inking the ground in a thick coat. It's a bit inkpractical to use as a standalone attack, though. A better use for this may be to force a reaction from or threaten your opponent, putting them on the spot, and giving you a chance to punish their reaction. With some forethought, this could also be used to extend a combo -- not by hitting the foe, but rather by inking the ground right when it runs out so that you can take advantage of the squid swim, lag canceling, and other perks that ink provides to continue your combo! Alternatively, try placing it on the ledge right before going offstage -- then you'll have some ink on the wall and stag floor when you get back, so you can swim right up to safety, bypassing the ledge entirely. (Remember, you can swim up walls!) Only one of these can be on the field at any given time, so use it wisely.

STANDARDS

Jab - Punch, Kick, Octoshot
The Octoling has a different head tentacle design than the Inkling, meaning it can't really use that whole "squid fu" thing that the Inkling does with its longer, more flexible head tentacles. Octolings, however, are trained military personnel, meaning they're considerably more adept at punching, kicking, and other such basic combat moves. For the jab combo, then, the Octoling punches with its left arm, and then kicks with its right leg, while pulling out its Octoshot for a close-range blast of ink as a final hit! They'll deal 2%, 3%, and 3% of damage respectively, and the last one inks the opponent for one second (2% of additional damage). The last hit doesn't deal much knockback, so while it isn't very safe on shields due to a lack of pushback and considerable ending lag -- shield grabbing is a viable punish here -- it can be used to combo into another attack, while still dealing good damage on its own. The endlag, though, means that it's best to perform the move in ink and cancel the lag into an octopus dive.

Forward Tilt - Roundhouse
For a fairly straightforward tilt (see what I did there?), the Octoling performs a quick roundhouse kick, in a motion sort of similar to Mario's ftilt. It'll deal 12% of damage, and while it's not as quick as the jab, it does deal more damage, along with moderate forwards knockback that helps create space between you and your opponent -- it can be angled up or down as well, giving it a bit of versatility. Plus, if you're standing in ink, you'll deal 2% of extra damage thanks to the splash of ink, and it can affect foes who are further away too (the damage is dealt by inking the foe).

Up Tilt - Handstand Kick
For this attack, the Octoling performs a handstand, moving forwards a bit, and kicks with both feet on the way up -- it's very similar to Fox's up tilt. It only hits above and behind the Octoling, but it's pretty quick to start, has low knockback that can combo inkto itself, and deals 7% of damage. It's a great combo tool, and has the potential to deal extra damage in ink.

Down Tilt - Octospin
The Inkling's down tilt has it spin around in squid form, hitting foes on the ground with its tentacles. So naturally, the Octoling has a very similar attack to that! It'll deal 6% of damage, and either moderate upwards knockback or tripping (it's a random chance). Both are good for follow-ups, and if you're swimming in your ink, the move can be used with only the tentacles showing -- you'll remain hidden! The move can be used rapidly, but has low priority thanks to its low damage, and cannot beat out any other attack. It's also punishable from above or behind, since it only hits in front.

Dash Attack - Flying Kick
The Octoling's dash attack is a useful tool, but one that isn't inkredibly remarkable. It simply kicks forwards while flying through the air a short distance, in a similar vein to Fox's dash attack. It deals 6~4% of damage (an earlier hit means more damage), and knocks the foe straight up into the air. Octopus lag canceling lets you cancel this attack at any time if you're at least 1/4 of the way through the kick, meaning you can follow up on the upwards knockback quickly by OLCing it, jumping, and using an aerial attack! This is a good approach tool after, say, an Octoshot, and will also be used if you press the attack button during a high-speed ink dive.

SMASHES

Forward Smash - Octosniper Turret

The Inkling, for its forward smash, would pull out a rifle-type weapon called the "Splat Charger." It had a long reach, and dealt good damage while creating a trail of ink. This weapon is sort of similar to that, but with some differences. Firstly, there's something that applies to all of the Octoling's smash attacks -- they all inkvolve something coming up out of the ink on the ground. Thus, if you're not standing in ink, the Octoling shoots some onto the ground using the Octoshot, adding some lag to the start of the move. In ink, though, these smashes are very quick for their amount of power!

Anyway, for the forward smash, an Octosniper's turret comes up out of the ground, and the Octoling stands in it. Octosnipers are enemies from Splatoon's single-player campaign, and they do what they say on the tin. The move is mostly the same as the Inkling's forward smash -- charge it to have a 4~8 SBB-long shot of ink that makes a trail and can be aimed, plus inks the foe for 1~3 seconds -- but it's even more powerful, dealing 10~14% of damage and KOing at around 110~80%. The downside? Well, it's that thing I mentioned earlier -- it requires ink to use, lest you have a lot of startup lag! This slowness makes it inkpractical for making a path, too -- which was a main use of the Inkling's forward smash. You've got the Octoshot for that, though.

Up Smash - Octostamp

Something's coming out of the ink... It's and Octostamp! These little guys are stamp-like enemies -- they'll leap up, and leave ink on the ground where they land, with a stamp-like pattern of their face. In Smash, the same thing happens for the most part -- when the move is inkitiated, they'll leap up into the air. Release the charge, and they come diving back down face-first! They'll travel up .5~3 SBB depending on the level of charge, hitting right in front of the Octoling. The damage, of course, varies depending on the level of charge -- 10~14%. It'll send foes upwards normally, KOing at 100~70%, but hit a foe hanging on the ledge, and it's a powerful spike! The move is very quick and has a good amount of power as well as vertical reach, but it should be used in ink to avoid that pesky extra startup lag. Speaking of ink, it'll also create some upon landing -- 1 SBB of thick ink, plus a little face!

Down Smash - Octoball

This time around, an Octoball comes up out of the ink, and begins to roll forwards at a decent pace, spreading thin ink as it goes! When you release the charge (during which it rolls forwards), it'll inksplode, placing a thick area of ink in the small area and dealing 10~14% of damage and moderate upwards knockback. Before then, it'll deal a measly 3% and flinching by rolling into the foe. But, it is effective for attacking at a distance and spreading ink. You can even walk around while "charging" the move, to position yourself for a follow-up attack! You can't dash, jump, attack, or do much of anything though. And of course, there's that pesky start-up lag to worry about unless you're in ink. In optimal conditions, the Octoling's smash attacks become effective combo starters, finishing moves, and quick long-ranged attacks as long as there's ink nearby. Told you the ink was inkportant!

AERIALS

Neutral Aerial - Linger-ink Kick
The Octoling has a fairly standard nair -- a sex kick, like Mario's, which lingers on with more attack power at the beginning. The pose is similar to Mario's too, and it deals 11~7% of damage -- more than Mario's -- but has quite a bit of landing lag. It'll also knock the foe forwards at a weak semi-spike angle -- great for knocking a foe onto the ground and then striking. You can cancel the landing lag if you land in ink (since octopus lag canceling is practically lagless, this move can be even more effective for follow-ups than that of, say, Mario, which has 10 frames of landing lag). It can also be used to great effect when edgeguarding, sending the foe at a low angle that can be difficult to recover from.

Forward Aerial - Octoshot
The Octoling brandishes its signature weapon, the Octoshot, once again for this attack, firing forwards a quicker shot of ink with less lag at the beginning of the move, but still a sizable amount of ending and landing lag (but y'know, octopus lag canceling). It doesn't travel as much distance, and causes recoil (not damage, just a bit of pushback) to the Octoling, both traits very similar to the Mii Gunner's forward aerial. It deals the same 3% of damage, but knocks the foe forwards a good bit, with a tiny amount of an upwards angle too (although by the end of hitstun, they'll be falling due to gravity). It's a great spacing tool or combo extender, but of course, it's best to use when you can cancel the landing lag with an ink dive (even if you don't land, it still has quite a bit of ending lag). If you use it close enough to the ground or it hits a slope/wall, it can leave some ink for you to use too. The same rules as the nspec apply, but of course, the trail isn't as long.

Back Aerial - Octobrush Spin
The Octoling spins around and whips out its Octobrush, quickly and gracefully swinging it behind itself in a similar motion to Cloud's bair. It has great reach and a disjoint -- for fairly obvious reasons -- and will deal 9% of damage and moderate backwards knockback, plus an extra 3% of damage thanks to 1.5 seconds of inking. It's fairly quick to start and end, but it's even quicker to end if you use octopus lag canceling. SHFFOLC'ing (short-hop-fast-fall-octopus-lag-canceling) this move and other aerials can prove very effective! Near the ledge beginning at around 110%, you can use the Octobrush Spin to KO an opponent. This move will also cause some ink to fly off of the brush a short distance, making a bit of ink, and serving as a hitbox that deals the same 1.5 seconds of inking to foes that are just out of reach.

Up Aerial - Backflip Kick
The Octoling performs a backflip in midair, kicking foes above to deal 7% of damage and moderate upwards knockback -- it can also hit to either side, dealing sideways knockback inkstead. This is a good juggling move, and very quick -- about as fast as Mario's uair. If you hit with the side, you can octopus lag cancel the landing lag, swim through the ink to chase the foe -- they're knocked sideways -- and follow up with another attack!

Down Aerial - Octodive
The Octoling performs a half-front-flip in midair, transitioning into octopus form, before rocketing straight down at high speeds like a downwards Super Jump! It's a stall-then-fall, in other words. It's unique in that it'll deal downwards knockback for the entire duration, but can't be canceled either, so it's rather inkeffective as a KO spike (unless you grab the ledge with precise spacing). Normally there's quite a bit of landing lag, but of course, you can cancel it if you land in ink, then use another attack to capitalize on the downwards knockback the dive inkflicts on the opponent (along with 5% of damage)! Alternatively, the bounce upwards off the ground -- which has more of a delay if they land in ink -- allows you to follow up with an aerial. This is a great landing tool, as well as a comboing move -- if there's ink on the ground, of course.

GRAB GAME

Grab - Grab
The Octoling lacks the long head tentacles of the Inkling, so it can't use them to grab a foe -- thus, it simply uses its hand inkstead. It grabs the foe with only one hand, able to keep them in place thanks to inkredible upper body strength! Pretty inkpressive for a creature without bones. Grabbing a foe is fairly quick, but it isn't particularly long-ranged. The pummel is a straight punch with the other hand, dealing 1% and having great, rapid-fire speed. This normal grab also means that there's no tether recovery or zair, further compounding the recovery issues I mentioned earlier and removing a staple long-ranged midair attack option of the Inkling's (although the fair does that just fine too).

Up Throw - Super Jump Kick
The Octoling transforms into octopus form and grabs the opponent with its tentacles, the inkitiates a Super Jump, bringing the foe up about 5 SBB into the air! Unlike the Inkling's up throw, which functioned much like Kirby's, the Octoling will kick the foe up further at the top of its ascent, dealing 5% of damage and KOing at around 100% (since they're so high up off of the ground). It's an excellent kill throw option, but platforms don't make this a OHKO -- the Octoling will never go less than 2 SBB away from the top of the screen. If the throw doesn't KO, the Octoling can follow up with a midair jump into an aerial, or even a Super Jump to finish the job!

Forward Throw - Dropkick
The Octoling releases the foe, jumps backwards a bit, and performs a dropkick on the foe, propelling itself backwards a bit into the air, and dealing 5% of damage and moderate forwards knockback to the foe. The Octoling is left in the air afterwards, which gives it a few options. Without ink on the ground, it can go for a forward aerial at low percents, or the neutral special version of the Octoshot when the foe gets out of the fair's reach due to percent. After that, it can dive into the ink and keep the pressure coming!

Down Throw - Squidnap
The Octoling turns into octopus form again and grabs the foe, this time diving into any ink that may be below! Then the Octoling is free to move about with the foe in tow, submerged in the ink -- they'll take 1% per half second, the same as if they were inked. However, the Octoling's ink only lasts up to two-point-five seconds -- when either the ink evaporates, the Octoling leaves the ink, or the crawl inkput is released, the foe is released into a prone state, and they'll be inked for the same amount of time that they were submerged (effectively doubling the damage dealt during the throw). The Octoling will also be at a slight frame advantage in this situation, and can tech chase the foe's getup option. It's also an excellent tool for getting a foe right where you want them. Without ink on the ground, the down throw simply puts the foe into prone -- you still have the frame advantage, but it won't deal damage, and the powerful positioning ability of the move is gone.

Back Throw - Octoshot Snipe
The Octoling swings the grabbed foe around its body, tossing them backwards to deal 2% of damage and moderate knockback. It then whips out the Octoshot and shoots a quick blast of ink at the foe, which deals another 3% and knockback that can KO at around 100% if the throw is used near the ledge! It's similar to Falco's back throw, but this will also ink opponents for one second, and 2% of extra damage.

MISCELLANEOUS

Final Smash - Octostriker

The Octoling got the Smash Ball! It summons in the Octostriker, a really fat octopus thing that has a propeller hat but still flaps its wings to fly. It'll come in from the top of the screen as a giant missile falls right in front of the Octoling! This "Octostrike" creates a giant tornado of purple ink that inks the area thickly, and ends up dealing 40% of damage to anyone caught in the blast -- the upwards knockback at the end KOs at around 50%. This super move is very telegraphed, but also inkredibly powerful.

Alternate Costume - Elite Octoling

Some Octolings are more elite than others -- the black-tentacled ones with seaweed on their heads are the elites among the Octolings. In Splatoon they have more health and smarter AI, but in Smash, it's just a cool alternate costume you can choose if you want to. The seaweed doesn't extend your hurtbox or anything, so just pick the one you like.

PLAYSTYLE

The Octoling may seem similar to the Inkling on the surface, but the many different nuances in mechanics and moves lead to a rather different playstyle. Of course, making ink is still a pretty major part of their playstyle, but rather than maintaining a single area like the Inkling does, the Octoling will temporarily seize an area for one play, and then move on -- this is thanks to a more aggressive set of moves, more temporary ink, and the lack of quick, close-combat-safe moves that can effectively make ink in the heat of battle. The Octoling has two main ways of placing ink: the Octo Shot, and Octobrush (the special move versions). The former is great for preparing for an approach, whereas the latter is the way to go if you need to make ink whilst retreating.

Once ink is on the ground, the Octoling can really go to town -- octopus lag canceling, ink swimming, and fast, combo-ready moves. Aggressive combos really are the Octoling's strong suit. Some good comboing moves inklude jab, utilt, dtilt, dash attack, nair, fair-- you get the idea. But you can only continue your combos so far -- your ink will soon dissipate! The Splat Bomb is the only way to keep the pressure up and get some ink on the ground, but that requires some forethought (although it can work as a surprise KO!). The Octoling's other flaws are its recovery, and to a lesser extent, KOing (it lacks somewhat in kill options). But with that said, the Octoling has the pressure tools, aggressive combos, damage-racking ability, and turf control to compete with the best that Smash has to offer!
As always, feedback is greatly appreciated, and I hope you enjoyed the set! :)

Like what you see? See some more over at my Make Your Move Hub! :D

Yeah, I know this isn't super Christmas-y or anything. But hey, whaddaya gonna do? I do, though, have another little holiday treat for those who happen to own Super Mario Maker: a special Christmas-themed course! Check it out, it was a lot of fun to make. Just click that "Bookmark" button, and then it'll be saved for you to play the next time you turn on the game! Nifty, eh?

 
Last edited:

Tocaraca2

Smash Ace
Joined
Feb 22, 2015
Messages
557
Location
Wokingham
Akullotsoa

(Image unavailable)​

He thought that his task was completed. But as time went on and he further roamed the forest, he realised...
That she was still alive.
For weeks he searched for the feline that had messed up his plans. And one day, he found her.
Ice vs fire. The showdown is going to be immense.

If you haven't figured it out already, Akullotsoa was the assassin of one of my other characters, Alica Vassin. However she survived, and Akullotsoa still has to take her out. But it will be harder than he thought, and he may not survive to complete the task...
He's a wolf that was born into a family of Ice Mutants, which technically aren't mutated but were assumed to be for decades, until people found out that spirits had blessed them with frost power, which flows through the body in place of blood. It can be released through the pores in the skin, however wolves have fur so they have to eject it through certain places, such as the palms of their hands, feet, and their mouths. That's right, they can breath out ice to freeze people. Akullotsoa uses this in his moveset.
His personality isn't much to write home about. He doesn't show much emotion except frustration when he accidentally releases frost power; yes he is unstable. He is 20 dog years old, and is more of a bounty hunter than an assassin I guess, because he was given the job to kill Alica by someone else (identity unknown), and was paid for it. When he found out that she was still alive, he killed his boss to prevent him finding out and taking his money away from him, and sought to finish the job. The fact that he killed his boss without hesitation goes to show that he is a worthy assassin, but he needs to be able to control his ice powers.
He is slightly taller than Fox and the same width as Fox also.
BPS = Blocks Per Second
Block = Brawl Stage Builder Block
Statistics
Weight: 6/10 (101)

Size: 5/10

Dash Speed: 4.2 BPS (Akullotsoa also runs like a real dog, on all fours)

Walk Speed: 2.2 BPS

Traction: 3/10
(He has ice on his shoes, what do you expect?).

Air Speed: 2.5 BPS (His Air Speed is a bit faster than his Walk Speed)

Fall Speed: 8/10 (Same as Alica Vassin, he is a fastfaller)

Air Control: 5/10

Crawl Speed: 1.0 MPS

Aerial Jumps: 1

Ground Jump Height: 5/10

Aerial Jump Height: 6/10

Can Wall Jump: Yes

Wall Jump Height: 6/10

Wall Jump Length: 5/10

Can Wall Cling: No

Akullotsoa has a sword. It has many things associated with it, so many in fact that we need to introduce it more dramatically...
initiate drum roll
Akullotsoa's sword
Akullotsoa uses his sword in a lot of his attacks. But the unique thing about this sword is that when it is used in an attack as a hitbox, it also has a hurtbox. If the sword is hit by an opponent's attack, it will be knocked out of Akullotsoa's grip. When this happens, the moves that he uses the sword in to attack will turn into claw swipes instead. The knockback it takes is the same as what Akullotsoa takes since it has the same weight and fall speed as him, and the sword is about the length of Lucina's. He can turn the sword into an item by pressing Down Special, which has some applications. He can change it back by hitting Down Special again.
If the sword is separated from Akullotsoa when he dies, then the sword will disappear and Akullotsoa will respawn with his sword again. However if he was on his last stock when this happens, his sword will stay on the battlefield for other people to pick up and use and throw around and stuff.
The sword acts like Sandbag in the way that it isn't affected by the blast lines. This means that if an opponent hits both Akullotsoa and his sword and KOs Akullotsoa off the top, his sword will still come back down.
When the sword has been knocked off him, it spins once or twice depending on how far it was launched, then when it hits the ground, it lies there on the ground on its side.
Akullotsoa can do a few things once his sword has been knocked off him.
1: He can pick it up like how all characters pick up items, however it will not turn into item form when he picks it up, it will go back into its normal stance in Akullotsoa's moveset.
2: If he presses the grab button within 2 SBBs of the sword, it will automatically come to him, appearing to teleport.
3: If he has a hitbox out and that hitbox touches the sword's hurtbox, he will grab it, but not interrupting the move he was using. If he was using a move that normally uses his sword (which will be a claw swipe instead), and he grabs the sword with that hitbox, then the move will continue, however as he grabbed his sword in amongst using this attack, he will carry on the move but also use his sword! There is an unlikely scenario (when Akullotsoa is not holding on to his sword) that could happen in which he could use an attack which would normally use a sword, hit the opponent with the claw hitbox of that, then happen to grab his sword with that move, if it happens to be in his range at that time; this will then cause the move's hitbox to change into the sword hit, and since the hitbox will have switched, it will hit the opponent as well as the claw swipe before he picked up the sword. Therefore the opponent would get hit by both the claw swipe hitbox, and then the sword hitbox afterwards, resulting in higher damage.
The opponent can only grab the sword like a normal item. They cannot grab it from 2 SBBs away, and they cannot grab it with a hitbox of one of their attacks (hitting the sword will just launch it). However if they grab it, it will immediately turn into item form. It can be knocked off them if they get hit while holding it.
If the sword is in item form, it can be thrown by anyone, and travel at the same speed as a Beam Sword and will deal 11% damage and high hitlag and hitstun, but low knockback, making it good for combos like most of his sword attacks. It is not affected by attacks when it is flying through the air after being thrown, and its fall speed is significantly reduced. It can be caught by an opponent like any item can, though. When it hits an opponent, it will bounce off them, always bouncing upwards, about 2 SBBs.
Unless Akullotsoa throws it, in which upon contact with a foe, the sword will bounce in his direction, allowing him to easily pick it back up again.
When the sword is an item, when it lands on the ground it will stand up like a Beam Sword does. Akullotsoa has to use Down Special after grabbing it to change it back into its normal form in his moveset.
Once the sword is knocked off him, it will never disappear until he respawns after dying. The entity stays there forever otherwise.
Another cool thing is that if he doesn't have his sword anymore, when he picks up a Beam Sword and uses Down Special, he will be able to use the Beam Sword in his moveset in place of his original sword! How cool is that? :D
He also holds his sword in his right hand BTW.

Special Attacks
Neutral Special: Frost Breath
Akullotsoa pulls his head back, then moves it forward while releasing ice from his mouth. This is not solid ice but the type that you see the Thunderman twins breathing out to freeze people. I take it you guys don't watch Nickelodeon shows, so I'll explain it further for you. It's frost breath. Hope that cleared something up for you.
What, you don't know what frost breath looks like?
Sigh when you go outside on a very cold morning and breathe out, you can see your breath. Frost Breath is like that but much thicker and covers a wide area in front of Akullotsoa. The colour is very light blue, and the frost covers an area 1 SBB high and 1.2 SBBs wide, and you can hold out the move for a maximum of 2.5 seconds by holding down the button, and a minimum of 0.75 seconds if you just press the button. The ice will deal 1% damage every 8 frames, and if the opponent takes 15 hits of this with each of the hits connecting within 0.5 seconds of each other, the opponent will be encased in ice, and will be completely motionless and helpless for 4 seconds, no matter how much they mash buttons, or their percentage. And no, this is not like the Freezie item effect. In this they actually get encased in ice, and you will be able to see the outline of their body. They will take 5% damage when they get frozen, and 8% when they break out of the ice, in which they will be in hitstun for a whole second. This move can deal a maximum of 28% damage, and has 22 frames of start lag and 38 frames of end lag. Once you breathe out frost breath for 2.5 seconds, you cannot use the move again for 20 seconds, meaning that you cannot connect an infinite amount of Frost Breaths. This move never KOs, it simply deals a lot of damage and allows for follow ups. Dealing over 20% damage to a frozen opponent will force them to break out of the ice, and they will have 1.5 seconds of hitstun afterwards, and you can punish accordingly, depending on where they DI (when they break out of the ice they will break out at a 45* angle away, but the window of DI is quite big).

Side Special: Major Ice Sphere
Akullotsoa releases an Ice Sphere that is half a SBB in both lengths, which travels 10 SBBs and lasts for 1 second. It deals 10% damage on contact, and additionally it freezes the opponent with the Freezie item effect (unlike Frost Breath). This has horizontal knockback at a 20* angle upwards, and it has 17 frames of start lag and 37 of end lag. Is Akullotsoa's primary spacing tool, and it doesn't really serve as anything else, since it has not much KO power (KOs at around 150% midstage), however it can possibly KO an opponent recovering horizontally, near the blast zones; and it has quite high shield damage too, dealing 26% of shield damage, and adding the attack damage gets you 36%, meaning this Major Ice Sphere deals 36 HP to a shield, which has 50 HP.
It disappears on contact (it can't hurt multiple targets).

Up Special: Base Ejection

Originally as 'Down Special: Slippery slidy icy groundy thingy', this move has been changed to Up Special as a more unique recovery move when used in the air.
When on the ground, Akullotsoa tenses his muscles, then releases a large amount of ice from his feet, into the ground. This ice spreads out across the surface of the ground, about 2 SBBs in each direction, and this ice acts exactly like the ice on Summit in Brawl, and additionally it has a 50% chance of making the opponent trip when they walk/run on it. This trip is like tripping in Brawl, where you slip over forwards rather than falling onto your backside. This ice stays there for 6 seconds.
When in the air, he does the same except that rather than covering the ground with ice, he propels himself upwards about 3.7 SBBs. A hitbox appears close beneath his feet which deals 3% damage on hit and causes low knockback, forwards and at a 10* angle downwards (semi-spike), and has hitstun about the same amount as Ganondorf's Dark Dive. This is not a very safe recovery move.
This move has 18 frames of start lag, both on the ground and in the air, and 55 frames of end lag on the ground and 43 frames for the aerial version.

Down Special: Sword-item Switch
This simply converts his sword into an item form, or it changes it back from item form to normal. The change happens instantly (the move doesn't have any lag) and it can even be used when you are in hitstun, like Shulk's Monado Arts. This allows you combo moves into the sword throw, and since the animation of the switch is hard to see, you can take people by surprise by randomly throwing your sword at them. When he is holding the sword in moveset form, the sword points towards the ground, but in item form, he holds it facing 20* forwards from that. The difference is not particularly easy to tell.

Standard Attacks
Neutral Attack (Jab)
Akullotsoa pushes out with his left hand and releases a small Ice Sphere, which is a mini version of the one found in Side Special: Major Ice Sphere. It travels completely horizontally at 4 BPS and disappears after 0.7 seconds, resulting in it travelling a maximum of 2.8 SBBs. Once the Ice Sphere makes contact with an opponent, it will deal 4% damage and very low knockback, and inflict an ice effect similar to when you get hit by Ice Climbers' Neutral Special (the effect is just an aesthetic thing). Then while the Ice Sphere is still out, Akullotsoa will bring his right hand over to his left, and swing to the right, hitting in front of him with his sword, dealing 10% damage and also low knockback, then he will finally follow up with an outward claw swipe (he will bring his left claw to his right and swipe to the right, hitting in front of him) that deals 6% damage and knockback that KOs at 250%. The Ice Sphere comes out on Frame 5. The move has 16 frames of end lag. It deals 20% damage in total, which is very good for a jab.
However. If Akullotsoa doesn't have his sword, then instead of him using his sword, he will open his hand and use his claws instead, which deals 5%, resulting in the move dealing only 15% in total, which is still good, but not as good.
You can use Jab Cancelling to true combo 2 mini Ice Spheres into each other, then you can hit with another move immediately after that if they don't act fast enough. There are a few mixups that you can perform with this, including immediately using Down Special to turn your sword into an item and then throw it. This is safe on shield due to the fact that the sword will still bounce off, then Akullotsoa will be able to easily regrab it and even throw it again, dealing good shield pressure. You can actually repeat this many times, however the opponent can catch the sword after Akullotsoa throws it, which is not good for him, however if the opponent doesn't act fast enough, you can release another mini Ice Sphere, hitting them and making them drop the sword.
This attack has a couple of uses, which is to quickly deal damage, or to use the mini Ice Sphere to interrupt the opponent from an average distance. Also for mixups. The ice spheres used in this attack are used in some other moves too.

Side Tilt
Funnily enough, this move is better at KOing than Side Smash, however it deals less damage and is slower.
Akullotsoa performs a wide roundhouse kick with his right foot, which if I'm not mistaken is what Captain Falcon does in his Up Smash. The move deals only 3% damage but has great knockback which KOs at 100%, which is not counting rage or the opponent's position on the stage (at the edge of the stage, this move will KO at as low as 70%, and even earlier with rage).
This move is primarily used for KOing, that's its only use, since it deals very low damage. Don't use this often, it leaves you wide open as it has 13 frames of start lag and 34 frames of end lag, however the animation takes longer to end than the lag, if you know what I mean (you can act after the move before the animation finishes, if the end lag has stopped). It is possible to true combo into this using the sword in item form (Z-dropping or throwing the sword up and it falling down, then following up with Side Tilt) however it requires good timing.

Up Tilt

Akullotsoa doesn't even need his sword for this move to be good. Akullotsoa swipes his left claw over him, but instead of bringing it over his head, he brings his left arm over his right shoulder, resulting in the vertical range of the move being quite low, however it does hit above him a bit. This move deals 7% damage and KOs at 200%+, being his quickest ground combo move. It has 8 frames of start lag and 13 frames of end lag, and the hitbox is quite wide but doesn't reach upwards very far. It hits opponents fairly close in front of him, and foes very close behind him. The front hitbox knocks the opponent straight upwards, the small part above his head launches diagonally upwards and behind Akullotsoa at a 20* angle, and the back hit launches them diagonally up and behind him at a 40* angle. This is a combo starter/extender, and is his safest ground move. It can also jab lock on platforms, but this is difficult.

Down Tilt
He throws his sword upwards to about head height; the sword spins once then he brings his hand up and catches it, ending up holding it back-handed, then he smashes it downwards into the ground at a high speed, sticking it into the ground. This move has quite low range but it very rewarding because it can also pin the opponent against the ground (dealing 14%); it traps them into the ground like DK's Side B. However this is only if they are grounded.If they are in the air, then you can actually hit them even if they are above you, since the sword is brought down from just above Akullotsoa's head. This hit is a meteor smash which is hard to tech since it is both unexpected and requires amazing timing to tech it, and if they don't tech then you can follow up with anything, the most rewarding being Up Tilt, for a few reasons.
Akullotsoa does not automatically take his sword out of the ground afterwards. He can pick it up if you really want to, but taking the sword out of the ground takes 26 frames and has 15 frames of end lag after you pull it out of the ground (and you can't summon it from 2 SBBs away, you have to go up to it and press the attack button to pull it out). It's much more rewarding to use a move, probably a grab if you trap them into the ground, or an Up Tilt if you hit them when aerial, since these moves are good even without Akullotsoa holding his sword. After grabbing, since you wouldn't have your sword at that moment, Back Throw wouldn't be a very good option. Forward Throw will get the most damage, and Up Throw will be the most useful underneath a platform at certain percents, but this is situational.
If you don't have your sword, the action is exactly the same except he has his hand open with his claws out, and as he doesn't have the sword, his hand/claws won't touch the ground. It deals 8% here, and is no longer a meteor smash or ground trap, instead is a medium knockback move that KOs at over 150% and deals vertical knockback at a 25* angle forwards.

Dash Attack
He performs a very low jump, and then after coming off the ground, he does a front flip. This increases his momentum, doubling the speed he is travelling for the 0.6 seconds in which he is in the air. After the flip but before landing, he lunges out with his right hand, swinging in in front of him from right to left. He is in a horizontal position after the flip when he does this. If he has his sword, this move will strike them and deal 13% damage. Then he lands, his stomach against the ground, his right arm still in front of him over to his left. This move has incredible range and makes him travel very far, and it is really good at getting his sword back if he loses it, since even if this move doesn't catch the sword, he can press grab at the end of it to grab it. If he successfully grabs it, then instead of staying lying on the floor belly-first, he will perform a forward roll about 1.5 SBBs and end on his feet, with very little lag. If he doesn't catch the sword, he will instead continue sliding on the ground for 0.6 seconds, his momentum quickly decreasing.
He doesn't have to catch his sword after the move to perform the roll at the end though, but he has to at least strike the opponent with the move, even if it's on shield. He can choose whether to roll or not, because you press forwards to perform the roll.
This move has 8 frames of start lag; his body is a hitbox when he is flipping, which can actually hit twice, both for 2%. They hit the opponent forwards a set amount to then be hit by the sword, which KOs at over 175%, and in total the move deals 17% damage. After landing, this move has 49 frames of end lag, but not if the roll is performed.
Without a sword this move doesn't KO at all since the sword hitbox disappears due to the move being used to catch his sword, or punishing from far away if he has the sword.

Aerial Attacks

Neutral Air
A bit similar to Alica Vassin's visually, but not really that similar if you look closer.
Akullotsoa swings his sword to his left, hitting in front of him, then immediately swipes across to his right with his left claw. The sword swing completely guarantees the claw swipe as he swipes with his claw before the sword slash ends, resulting in the move finishing pretty fast and connecting extremely well. The sword slash comes out of Frame 7 and the move has 9 frames of end lag. This doesn't true combo into anything, except that it has absolutely no landing lag, allowing you to either land just after you connect with the sword swipe, or after you get both of the hits, and then follow up with another move. Frame Cancelling this move is especially easy since whenever the sword connects, it has a ton of hitlag. Frame Cancelling with it allows you to combo into even Down Tilt, Side Tilt or Smash Attacks. The second hit has decent knockback, capable of KOing at 140%+.
Also, the move deals 9% on the first hit and 6% on the second hit (15% total), but only if you have the sword. Without it, the first hit is a claw swipe which deals 5% damage, which can still combo if you land after it, but not as easily. The hitboxes of this move don't last for long, so you have to have good timing to hit with it. Can be guaranteed after an Up Tilt or a spiking Down Tilt, meaning that you can do FCFH N-Air>D-Tilt>U-Tilt>N-Air as a 45% true combo. FCFH N-Air=Frame Cancelled First Hit Neutral Air.

Forward Air
This is very similar to Side Tilt, as it is a roundhouse kick, which is another main KO move. But this just follows how his playstyle works, since it allows him to KO while in the air. The animation is that of his Side Tilt except the kick is wider (it starts directly from the right side of his body, and ends at the far left side) and also, he tilts back slightly, resulting in the attack hitbox being slightly diagonal. It is unfortunately slower to start up than Side Tilt, having 19 frames of start lag, however slightly less end lag, being 28 frames. It has 34 frames of landing lag, which is the same as Side Tilt's end lag. Unfortunately this cannot be autocancelled out of a shorthop, but its advantages include being able to KO at 100% from centre stage

Back Air
A single claw swipe, which looks fairly similar to Ike's Back Air except he doesn't swing it round all the way. Akullotsoa swipes out behind him with his left claw, stopping when it is directly behind him. This is a single hit that deals 9%, and the move is very fast, having only 6 frames of start lag and 15 frames of end lag. This is the easiest aerial to combo with, as you can follow up with it after Up Tilt or Back Throw. It has 10 frames of landing lag, and is has less range than his Forward Air with his sword but more range than his Forward Air without his sword. KOs at 170% and over.

Up Air

He swings his sword over his head, starting from behind him, then immediately thrusts his left hand upwards, with his claws out, and releases 2 mini Ice Spheres from it, one every 0.3 seconds. This is a 5 hit move, consisting of a sword hit, 2 claw hits, and the Ice Spheres. The sword hit deals 8%, the 2 claw hits deal 1% and the Ice Spheres once again deal 4% damage, resulting in the move dealing 18% in total, however the move is situational and quite hard to hit due to SDI and hitbox placements. The move doesn't KO until extremely high percents, since as I have mentioned before, Ice Spheres deal minimal knockback and KO after 450%. You can possibly hit an opponent with this move out of a Ledge-Hop, if they are hanging by too close.
Don't try comboing with this, it has 11 frames of start lag, 25 frames of end lag and 34 of landing lag. The sword has a long and wide hitbox in this move, but the claw hits and the Ice Spheres don't, and the Ice Spheres go straight up, and travel the same distance as in the other moves with it (2.45 SBBs) and the same speed. If you can read the opponent's SDI then you can hit them with the full move, but if you don't move to the side at all, they will likely escape. But if they try to SDI to the side, you can still connect all of the hits if you are moving the same direction in the air as they are trying to SDI. The first claw hit comes out on Frame 25, the second on Frame 37, and the Ice Spheres come out of Frame 51 and Frame 69. Sorry for specific frame data, you don't need to read all of this, but I thought it would be useful for some of the people reading who are interested.

Down Air
Is this move a meteor smash?
Why, yes it is!
Woohoo!
But this isn't just an ordinary meteor smash, it requires skill and precision to pull off. Akullotsoa bends his knees and swings both of his hands underneath him, hitting from in front of him to behind him, with a big hitbox. The sword is the easiest to hit because it has more range than his claws, however if you manage to connect with both hitboxes you will inflict 19% damage, 12% from the sword and 7% from his left claws. He turns 90* to his right while doing this, so you can see both his left claws and his sword when they are coming down, like how Ike and Roy turn at an angle, so they are facing directly at/away from the screen.
This move will only meteor smash if you hit with only his left claws. Hitting with the sword will result in the claw hitbox connecting during the hitlag of the sword hit, then the opponent will only take knockback from the sword, which causes vertical knockback at a 10* angle away from the front of him, which KOs at 155%+. The claw hitbox deals completely downwards knockback, which has the ability to KO at 100%, and is a deadly meteor smash which KOs very early. The move has 20 frames of start lag, 30 of end lag and 25 of landing lag. The spike hitbox is on his left, as that's where his claw is.

Smash Attacks

Side Smash
Coincidentally, this move looks similar to Wolf's Side Tilt, both with the animation and the amount of hitlag. It was completely unintentional to be like this, and it has different uses. Akullotsoa moves his hands to opposite sides (his left hand to his right and his right hand to the left, over his left hand) while charging, then when the charge is released, he slashes out in front of him, moving his left hand far over to the right and his right hand far over to his left, being a very strong move capable of dealing 30% damage fully charged, and 21% uncharged, this is with a sword BTW. Without a sword it deals 17% uncharged and 23% charged. The be specific, this move actually has 2 hits but they seem like a single hit at first. The sword hit deals 13% damage and the claws hit for 8% (if uncharged), and when fully charged, the sword hit deals 18.5% and the claw swipe deals 11.5% damage. The fully charged version KOs at 95%+ and the non-charged version KOs at 130%+. Not a very strong KO move, however it deals very high damage, and only has 16 frames of end lag, while having 22 frames of start lag. Without a sword, it KOs at the same percentage.

Up Smash
He sticks his sword up into the air as high as it can go, then he brings his left claws up above his head by the sword, then he swipes them down vigorously, actually meteor smashing the opponent, followed up by a fast downward chop by the sword. There are 4 hits in this move, however the opponent can avoid the last hit by teching the third hit, however due to the low end lag of the Up Smash, if the opponent techs in place, Akullotsoa can punish them, and if they tech roll, he can punish with Side Special: Major Ice Sphere, however they have the option to tech roll and then shield, but they have to do this very quickly, and this will result in their shield being depleted by a lot, ending up with a broken shield if it was already low. If fully charged the first hit deals 11%, the first claw hit deals 3%, the downward claw swipe deals 6% and the downward sword strike deals 9%, coming up to 29% in total. Uncharged it deals 20% in total with the hits dealing 8%, then 2%, 4%, then 7%. It has 16 frames of start lag and 22 frames of end lag (same as Side Smash). I can't be bothered to go into specific frame data so I'm just going to say that the attack takes 36 frames to complete. The meteor smash part of the move would have the power to KO at 85% if fully charged, however this would never happen since the last hit would strike the opponent before they bounced high off the ground. The last hit is a semi-spike (deals knockback at a 30* angle downwards) which KOs at 110% fully charged. This isn't a big KO move, but deals a lot of damage and has a lot of range. The first hit actually brings the opponent down to guarantee the next hits, making it a great anti-air which is impossible to escape until the techable hit. People will fast tech rolls with have an advantage here.

Down Smash
This was originally going to be Down Special but I thought of a different idea for that. Akullotsoa brings both of his claws over to his right by his head while charging, then he smashes them down into the ground, pinning his sword into the ground, then he releases ice into the ground, in front of him. It then springs out of the ground, forming spiky mounds of ice on the surface. I made a mediocre picture of the shape of it:
<insert Akullotsoa picture here>

The Ice Spikes start off big from where Akullotsoa is and get smaller over time. Fully charged, there will be 5 ice mounds, with the closest one to him being 1 SBB high and 0.8 SBBs wide, and the furthest one away from him being 0.6 SBBs high and 0.6 SBBs wide. With minimal charge, there are only 3 of these spikes, the closest one to him being the size of the third one along in the picture that I edited on Paint.NET (it is 0.6 SBBs high and 0.5 SBBs wide). There is a small gap between the ice mounds, resulting in a fully charged Down Smash reaching 4 SBBs in front of him and an uncharged one reaching 2 SBBs in front of him. The front one deals 12% on contact, the next one 10%, then 8%, 6% and 4%. They stay out for 4 seconds, then they shatter, propelling ice shards out horizontally, scattering across the ground, dealing 1% damage each, and if the opponent is touching one of the ice mounds when it shatters, they will take 4% damage and be launched horizontally and up at a 25* angle, with not much KO power (it does well in Sudden Death though). The ice mounds each deal 2% damage if the opponent touches them when they are still up.
If this attack is used on a platform, then the sword will be seen poking through the underside of the platform, and the ice will come out through the platform as cold water, which will travel downwards and forward at a 15* angle, and if it hits a surface it will spread across the ground and freeze. It will cover a 3 metre radius and has the same properties as in a grounded Up Special: Base Ejection, making the opponent trip like in Brawl, 50% of the time when they go on the ice, if they move. This will allow punishes.
The biggest ice spike springing out of the ground will KO at 70%, the next at 78%, then 86%, 94%, and 105%. After smashing his hands into the ground, he pulls them out after 46 frames, and the move has 33 frames of start lag and 9 frames of end lag after pulling his hands out of the ground. He will not take damage from touching the ice mounds, but he can't go through them, and if he tries to jump on top he will just slide off.

Grab Game
Grab
This is a unique grab because it actually hurts the opponent, however only when he has a sword. He swings his sword horizontally from right to left, then pulls it in to his chest. It damages the opponent with 5% and it would have hitlag but it immediately puts the opponent into a grabbed state so it doesn't. If you are wondering why he uses the sword to grab, he basically sticks the sword into the opponent, which would kill them in real life but this is SSB so no. After the grab animation finishes, he sticks his left hand onto his opponent and puts his sword back. This grab comes out on Frame 11, which I believe is a bit slower than most grabs, and it has 23 frames of end lag. This grab has about the same range as Lucas', which I think is the shortest ranged tether grab, being longer than standard grabs but not as long as other tether grabs. This is only with the sword. Without it he just grabs the opponent without dealing any damage.

Pummel

Akullotsoa releases a small Ice Sphere from his left hand, damaging the opponent for 4%, while keeping his hand pinned onto his foe. This is one of the slowest pummels in the game, but it is made up for by the fact that it deals 4% damage which is high for a pummel. If you were to make Akullotsoa grab someone on Town and City and use the force glitch, his pummel would literally release an Ice Sphere identical to the ones in Jab and Dash Attack.

Forward Throw
Akullotsoa thrusts his left hand forward, at the same time kicking out with his right foot. After thrusting out his left hand he releases 2 Ice Spheres. The thrust deals average knockback but that is negligible because the kick (which looks similar to Ganondorf's Sparta Kick) deals quite high knockback, capable of KOing at 135%, in which the Ice Spheres will no longer hit the opponent due to the kick's high knockback. The thrust deals 3%, the kick deals 2% and the Ice Spheres, you know. The attack altogether deals 13% which is good for a throw, and it is mostly used to gather stage control, and it is his most damaging throw, being the most useful at higher percents when Back Throw will not combo anymore.

Back Throw
He swings around 180*, flinging the opponent back at a semi-spike angle 35* downwards, then immediately strikes them with his sword in a diagonal swing from right to left, which also launches at a semi-spike angle. They will hit the ground and bounce up, and the move only has 6 frames of end lag, allowing it to true combo into many things. The throw itself deals 3% and the sword strike deals 8%, however if he doesn't have a sword, the claw strike will deal 5% damage, adding up to 11% with a sword and 8% without, however this throw is not for damage, but for combos, as it guarantees a Side Smash from 0-15%, and Back Air from 15-55%. There are obviously more combos depending on DI as the opponent has a wide window to DI, but Akullotsoa can punish in any scenario. If they DI away, he can most of the time follow up with Side Special: Major Ice Sphere, and if they DI up, he can sometimes connect an Up Air, which deals a lot of damage. If they don't DI, then it is actually slightly harder for Akullotsoa to follow up with a move, but he can connect a Back Air until higher percents.
Without his sword, since the sword strike is replaced with a hit of his claws, the move deals more knockback and it is harder to combo with the attack.
Both of the hits of the attack can be teched. If your foe techs the first hit, then you won't be able to punish them but you can read their actions, but if they only tech after the sword strike, you can punish them with a Major Ice Sphere or maybe a Dash Grab.

Up Throw
Akullotsoa lets go of the opponent then performs a strong uppercut with his sword, dealing 9% damage and average knockback which can KO at 180% and over. With platforms, this is useful because a low percents, if you use it below a platform, the opponent will be in tumble animation and land on it very quickly, which can set up a jab lock with the top of Up Tilt, however this is quite difficult because you need to be in the right place to do it, which is directly below your opponent. Works below the top platform on Battlefield at higher percents too, but is situational. This will obviously KO much earlier on platforms.

Down Throw
You thought that Akullotsoa only had one move where he used his Frost Breath ability? Wrong. He throws the opponent downwards, slamming them onto the ground (with his left hand), then quickly breathes out a spurt of Frost Breath for 1 second, dealing 7% damage in that time, but the slam deals 3%, resulting in the move always dealing 10% damage since it doesn't use a sword and the throw itself has very low knockback scaling. This means that even if the hit would KO at 300%, the opponent would get caught by the Frost Breath and would not get KOd.

Miscellaneous
Ground Attack (The get-up attack)
Akullotsoa lifts his head up and rather than having to get up to actually attack, he starts by using Frost Breath for 0.4 seconds, then he springs up and spins around, connecting Frost Breath on the other side as well, but only for 0.3 seconds. The move has average start lag (17 frames) and very little end lag (10 frames), but has very small range in either direction. If they happen to get hit by it, Akullotsoa can actually true combo into something quick, like a Grab or a Jab. Both parts deal 3% damage. It will not freeze the opponent fully but it will damage them.

Ledge Attack
He keeps his hands on the ledge, but he swings his legs upwards, and once they have moved 90* (his body is completely horizontal) he lets go of the ledge with his hands and continues the flip, then lands of the stage with both feet. This is a very acrobatic move but has considerable end lag. If you're still wondering what this move is, it's basically a somersault like what is done in Falco's Up Air. The attack deals 6% and has 28 frames of end lag. His legs act as a hitbox throughout the whole move, which is active for 0.6 seconds. Will only KO at about 460%.

100% Ledge Attack
This attack also utilises his Frost Breath ability. He pulls himself up from the ledge onto the stage, while breathing out ice for 0.6 seconds. Deals 4% and has much more start lag than the default Ledge Attack but not as much end lag. Has basically no knockback, since Frost Breath doesn't deal knockback, it is supposed to freeze the opponent, but can only do so if it is used for 2.5 seconds.

Ledge Grab Animation

He is quite vulnerable here since his head is above the ledge, as his arms are sprawled over the side, since if he tried to cling onto it he wouldn't be able to hold on for long because of his icy hands. He also has to make sure he doesn't drop his sword, so he holds it on the side by the ledge, and unfortunately it can be taken easily if the opponent hits the sword with an attack when he is on the ledge and not invincible.

Shielding Animation
He holds his sword diagonally in front of his face. I he doesn't have a sword, he just holds his right arm up in front of his face, diagonally upwards.

Spot Dodge (Sidestep)
Akullotsoa performs a quick duck. No, not a duck that lives in the lake; I mean he ducks.

Roll Dodge
Forward Roll:
Just a forward roll across the ground. Is about average in speed.
Back Roll: A backward roll across the ground. Is also about average in speed, being slightly slower than Forward Roll.

Air Dodge
He performs a 180* spin.

Match Entrance
A blanket of light blue fog appears, and he emerges from it. This light blue fog is his Frost Breath.

Idle Animation 1: He tenses his muscles and quickly looks from left to right.
Idle Animation 2: He taps the ground with the tip of his sword, twice.

Up Taunt
He leans forward and makes a growl noise similar to that of Wolf's Down Taunt.

Side Taunt
Suddenly a rush of ice comes out of Akullotsoa's hands, then he clashes them together with a confused expression, shattering the ice. You need to control your ice powers Akullotsoa.

Down Taunt
<insert down taunt here>

Sleeping Animation
A dog sleep :)

Dizzy Animation
Akullotsoa's head swings around randomly.

Helpless Mode Animation
This is very similar to Mega Man's in which he just spins around in the air, performing front flips as he falls down. His Air Speed stays the same, which is good.

Victory Pose 1:
There is a small mountain of ice which goes up above the screen barrier, so you don't see Akullotsoa leap off of the mountain, but you do see him land on the ground after many front flips. He basically just performs Kanine Leap from the mountain and lands from being in helpless fall.

Victory Pose 2:

The ground is covered in ice, and Akullotsoa appears, sliding on it at a high speed, then stops towards the right of the screen, facing the camera, breathing heavily.

Victory Pose 3:

The screen is blocked by light blue fog, and you can hear wind, then it all rushes away to the right to reveal Akullotsoa behind it. You can see his breath, like how you can see your own breath when it is a cold, frosty morning.

Final Smash
Akullotsoa doesn't appear to actually do anything himself in this attack.
Suddenly, an area of the ground 2 SBBs wide crumbles, and leaves a pool of ice cold water that is 1 SBB deep. It appears directly underneath the opponent, and they will fall into it. It deals 1.3% damage and very low spike knockback every 10 frames, and I say 'spike knockback' because each hit brings the opponent slightly downwards further into the water, so it is harder for them to escape and they take more damage. The pools stay there for 4.7 seconds, then they disappear and the original land comes back. This deals 42-44% damage depending on the character's fall speed, since the water fills upwards 5/6 of the pit and not the whole thing, so they have to fall into the water first. This is avoidable if you stay in the air when Akullotsoa uses the attack and stay away from the pit, but you can still be attacked by Akullotsoa.
But what if there are multiple opponents? Then multiple pools will appear, a maximum of 6, even if there are 8 people. Also, on a small stage, only 3 can be created.
But what if the opponent is on a platform? Then where will the pool appear?
Well, a pool will still appear below them, but not on the platform. The platform will turn into ice, and will harm the opponent when they touch it (the same properties as harm from the water) therefore they will be forced to go onto a different platform. This means that on a small stage, with 6+ players, everyone will get hurt. Except Akullotsoa. He can swim in that water just fine, and can walk on the ice platforms with no harm, except he can't phase through them since they become more solid.
What if the opponent is off-stage? Then the pool will appear the closest to them that is possible, which will be at the end of the stage.

Playstyle
Akullotsoa is amazing at nearly everything. His moves are designed to do 1 or 2 jobs really well and nothing else. He has moves for everything except a reflector, and the fact that he uses a sword in a lot of moves gives him disjointed hitboxes, however these are very unsafe disjointed hitboxes because they are pretty much the opposite of what normal disjointed hitboxes are. Normal disjointed hitboxes are used to create a barrier in front of you that can clash with other attacks and make sure you don't get hurt. With Akullotsoa, clashing these sword attacks with the opponent is dangerous to Akullotsoa. This means that he is not only a cool ice-based character, he also has a more defining quality to his playstyle that makes him have to play safe and unable to throw out sword attacks, so when he uses a sword attack it must hit something that is not another attack from the opponent. When he gets these hits off he can rack up high damage and get some combos, then can easily KO with Side Tilt or Forward Air. His playstyle can also revolve around the sword in item form, throwing it for combos and performing all sorts of cool tricks, some being the ones that can be done with all items, like DITCIT and Glide Tossing.
One of his other flaws is his unsafe recovery. Coupled with his vulnerability while grabbing the ledge, it makes going off the stage quite bad for him, however he does have options to defend himself here, such as throwing his sword. When he grabs the ledge, he should use a ledge get-up option quickly to stay safe.

Thank you for reading. Please give feedback, it would be much appreciated. :)
 
Last edited:

WeirdChillFever

Smash Hero
Joined
Jun 10, 2014
Messages
6,600
Location
Somewhere Out There
image.jpg


Captain Toad:

The start of my MYM adventure!

Playstyle:

Captain Toad is slow and cannot jump high at all, and his attack speed is mediocre.
However, he gains his mobility elsewhere, namely through his Specials and Smashes.

His specials are Tracker Contraptions, special contraptions that make him faster, make him jump higher and can give him new attack strategies.
Think of the contraptions as if they're Monado Arts: The best at their job, but bound to a specific situation, or in this case, location

While Captain Toad can't to much on his own, he can traverse the stage very efficiently through the use of his contraptions, perhaps even faster than the other characters!

Now he can attack the opponent like any other character can.

A good Captain would track his way through the stage, setting up his killer apps on the right places, so he can get anywhere.

Statistics:
Weight: Samus
Size: a bit shorter than Mario
Traction: Lucario
Ground Speed: Villager
Jump Height: Little Mac
Air Speed: King Dedede
Fall Speed: Fox

Captain Toad, while having some adjustments made for Smash, is mostly faithful to his appearances in his games. He's heavy due to his backpack, his size is consistent, he has high ground control and traction, he has a decent ground speed (although nothing to boast about), his air speed is abysmal, he falls like a rock, and his jump height is-- wait, Captain Toad can't jump! That's his whole gimmick! Well, Captain Toad is never one to enter an adventure unprepared, so he got some help from his fellow Toad Brigade members and his friends the Lumas (who are rather good at the mechanical side of things), and they outfitted his backpack with a jetpack! He now has two thrusters on the underside of his backpack, and they only reveal themselves when he jumps. It's more of a steady ascension than one boost as a result of the thrusters, somewhat like Mewtwo's double jump. True to his games, though, he does lack a double jump, limiting his options in comparison to the rest of the cast (although he's not too horribly handicapped, due to things you'll see later on).

Flavor
Standing:
Captain Toad stands with the hands to his sides

Walking:
Captain Toad walks forwards calmly, taking in his surroundings.

Running:
Captain Toad walks forwards at a slightly more brisk pace, with a more determined look on his face.

Dashing:
Captain Toad grips the straps of his backpack and dashes forwards, leaning back a bit with a slightly frightened, but still brave, look on his face.

Crouching:
Captain Toad curls up in a ball and shivers, bowing his head down.

Jump:
Captain Toad can't jump in his games, but thanks to the the lighter backpack made by Polarinc. he can get a bit of airtime here. His jump is still pretty bad though, he's still a Toad after all.

Aerial Movement:
Captain Toad swings his arms and legs wildly, with an afraid, but excited look on his face.

Holding an Item:
Clenches to it with both hands.

Shielding:
Captain Toad puts his hands before his eyes and bends himself a bit down.

Spot Dodge:
Captain Toad holds his hands for his eyes and steps backwards

Dodge Roll:
Captain Toad bends forwards/backwards and accidentally trips and rolls over!

Air Dodge:
Captain Toad flaps with his hands rapidly!

Entrance Animation:
A Mystery Box is seen on the battlefield. It then explodes into a puff of smoke and confetti galore, revealing none other than the fearless Captain Toad! He looks to either side, holding his hand above his eyes, to get familiar with his new surroundings, and then preps for battle.

Taunts:
Up Taunt:
Captain Toad picks up a Power Star from his backpack, struggles to catch it, showing it off to the camera and puts it back in his backpack again

Side Taunt:
Captain Toad claps happily.

Down Taunt:
The Jetpack lifts Captain Toad up, making him scared, before he falls down.

Death Sound:
A loud Toad scream: Aaaaaa!

Victory Pose:
Comes crashing down from a Power Star
Falls over from the backpack's weight and smiles.
Climbs on the Star Shroom

Specials:
Neutral Special:
Super Pickaxe


Captain Toad stretches it's arm backwards in its backpack and stretches them out forward again with a Pickaxe in his hands.
The Pickaxe breaks every contraption Captain Toad makes and deals 10% damage om the intial hit with high knockback
If the button is held, Captain Toad keeps swinging the Pickaxe up and down, dealing 5% damage per hit with medium knockback, still breaking any contraption.

This move is key in mastering Captain Toad, as this move is the key to mastering his contraptions.
While opponents can use the contraptions too, Captain Toad can destroy the contraptions and the master plan of the opponents with this move.
Destroy minecarts that are abused by Rushdown character and destroy propellor platforms that opponents use to recover

Aside from foiling plans, the Pickaxe can also be used to adjust your own plans.
Long-ranged Minecarts can be axed from the Battlefield in favor of a short-ranged blockade.
Turnip Turrets that face the wrong way, or stand in a bad place can be axed.
Propellor Platforms not set up properly can be axed too in favor of a working design.


Side Special:
Minecart


Captain Toad takes his backpack and walks while shaking it up and down.
As long as the button is held, little pieces of minecart track fall out, making the Captain surprised.
These pieces of tracks deal 2% damage with no knockback, so you could potentionally combo the opponent
When the button is released, a minecart falls out.
This minecart deals 20% damage and kills at 140%

After the minecart is dropped down, it will drive around on the track on itself at the speed of Charizard like Gogoat.
The minecart acts as a platform and can be rode.

When the Minecart hits an opponent in this state, it deals 5% and hits opponents up slightly.

Only one minecart can be up per time and the move will do nothing when used when an old Minecart is up.
The Minecart is on-stage twice as long as Pac-Man's Hydrant

The Minecart acts as a substitute for Captain Toad's low speed and as an obstacle for the opponent.
The player can choose for a short track that blocks a specific part of the stage, or for a stage-wide steaming hype-train that Captain Toad can enter.

But that's not all, Captain Toad is smart and can decide to use it as a vehicle for his other contraptions.

The Minecart can not be used aerially, instead Captain Toad can use the following special:

Up Special:
Propellor Platform


Captain Toad curls up in a ball all scared, when suddenly a Propellor Platform rises him diagonally upwards or straight up, depending on which way you aim it, as long as Captain Toad presses the B Button, with a cap at the height of Pit's Up B.
The platform travels fairly quicly though, so decide fast.

When the button is released, the propellor platform is set down and can't travel up any further.
Select the height that's comfortable to your playstyle!
Press the button very long for aerial chases, and release the button very soon for having a platform at short hop height.

Speaking about heights, poor Captain is afraid of heights, so he's holding his bag in front of him the whole time.
This "attack" deals medium knockback and 3% damage and can be aimed.

The facing-side of the platform has a hitbox that deals 5% damage and medium knockback.

Two propellor platforms can be up at the same time, with the second one being made and controlled by "smashing" UpB while one platform is on-stage.

The platform will travel back slowly to the intial position if the platform isn't used and can be made rise again at the speed of Toon Link's aerial Hurricane Spin by pressing UpB, repeating the cycle.
If the propellor platform is at its peak, Captain Toad can press UpB to make them speed to their intial position.

The Platforms are on-stage twice as long as Pac-Man's Hydrant.

Captain Toad can use these platforms as a substitute for his bad aerial maneuvrability.
He can jump on them, travel over the opponents and come back at the other side.
He can also jump from one platform to the other, or use the platform to jump into a minecart.
Speaking of the minecart, you can't place platforms on them, but you can plant the next contraption on both!

Down Special:
Turnip Turret:


Captain Toad shakes its backpack up and down, creating a Turnip Turret.
The Turnip Turret shoots turnips every two seconds in spurts of three.
These turnips are shot in a straight line and deal 2% damage and deal low knockback, travelling half of Battlefield.

Sometimes, instead of shooting a spurt of three turnips, the turret shoots one big turnip that deals 10% damage, but travels as slow as Falco's laser.

The Turnip Turret breaks if opponents deal 15% or more damage to it.

When Captain Toad is standing next to the turret, the turret acts more like Auto-Reticle, "homing in" on opponents.

Only one Turnip Turret can be up at the same time and the move will do nothing when a turret is already on the field.
The Turret is on-stage twice as long as Pac-Man's Hydrant.

While the contraption itself is a ordinary turret, combinating it with other contraptions makes it a force to be reckoned with!
Try setting one on a diagonal propellor platform.
When he platform resets to its intial position, it travels pretty slow, giving it maximum coverage for the Turret

The Minecart also can be used to improve the Turnip Turret, as it won't be stationary anymore.

Final Smash:
Star Shroom

Captain Toad calls his Toad Brigade, who come down with their Star Shrooms.
The yellow, lazy one however, falls asleep, causing all Star Shrooms to crash down.
These explosions deal 15% damage each.

Smashes
Forward Smash:

Captain Toad tries to pluck a crop from the ground.
What he doesn't know is that the crop gets bigger the more he charges!
When the player releases the Smash, Captain Toad finally plucks the big turnip, dealing 7% uncharged and light knockback.
Now Captain Toad can walk forwards with his turnip, throwing it forwards with another press off the button.
The bigger the turnip though, the slower the stroll, so be careful!
The throw of the turnip deals 7% damage uncharged and light knockback, though it has the benfit of quickly gaining more knockback as it charges.

Up Smash:

Captain Toad holds his open backpack above him and looks at it.
Too bad for the Captain, a Clear Pipe Cannon comes out and traps Captain Toad
While Captain Toad holds his hands for his eyes, scared for the ride, the clear pipe cannon shoots him straight up.
The Captain spins around while being shot, dealing 15% damage total and kills vertically at 120%.
Captain Toad is shot the length comparable to the lenght Mega Man's uncharged forward smash travels.

Down Smash:

Captain Toad gets dizzy, indicated by the swirls around his head, and spins around four times.
The backpack turns into a hitbox.

There's one strong, intial hit when Captain Toad starts spinning, dealing 10% damage and killing at 130%, after that the move turns weaker.
During this time, the backpack deals 5% damage and the move kills at 140%
After two spins, Captain Toad can move while spinning ariound

Normals
Jab

Captain Toad unties his backpack and shakes it up and down repeatedly.

Forward Tilt
Captain Toad gets very scared of the nearing opponent, and hides behind his backpack as a last reflex, pushing it forward as if it was poisonous.
He doesn't even look at the opponent getting hit!
The move does 6% damage and decent knockback.

Up Tilt
Captain Toad, wait, Captain Toad does nothing with this move!
Instead, a Piranha Plant breaks out of his backpack, biting opponents.
This attack deals 8%, but little knockback, making it eglible for comboes.
Captain Toad then notices something and decides to look back, but then the Piranha already disappeared.

Down Tilt
Suddenly, a crop comes above ground.
Captain Toad decides to pluck it, dealing 3% damage to nearby opponents, but no knockback.
When he has plucked the reward, he dumps it onto opponents, dealing 5% damage and differing knockback
Captain Toad can namely pluck different rewards, all dealing different knockbacks.
The diamond has the highest knockback, killing at 140%, the turnip is somewhat weaker and deals medium knockback and the coin is the weakest with low knockback, but acts as a multihit attack as it spins.

Dash Attack
Captain Toad stumbles, but luckily, a Clear Pipe the lenght of a Battlefield platform forms itself as Captain Toad cruises through it, dealing 7% damage and medium knockback
This Clear Pipe transports Captain Toad through the pipe before Captain Toad falls out.

Aerials
Neutral Aerial

A diamond suddenly appears in Captain Toad's hands, who adores his new treasure.
Too bad for Captain Toad, the weight of the diamond drags Captain Toad along, which causes Captain Toad to spin around.
After two spins, that deals 8% damage each with each spin and medium knockback, Captain Toad drops the Diamond in his backpack.

Forward Aerial
Captain Toad unties his backpack and swings it forwards with both hands.
Deals 10% damage with great knockback.

Back Aerial
Captain Toad unties his backpack and swings it with one hand, dealing 5% damage and light knockback.

Up Aerial
A power star flies out of Captain Toad's backpack, at incredible speed, to make it look like it's summoned.
Luckily for him, he manages to catch the star.
The real star here is the fact that the Captain uses the newfound star to attack opponents, hitting them with the top "spike" while he holds the star at it's bottom "spikes"

This attack deals 9% damage and heavy knockback, potentionally Star KO'ing opponents that are caught very high.

It's Captain Toad's best kill move, but can only be landed with smart use of his contraptions.

Down Aerial
Captain Toad does nothing in this move!
His backpack however, breaks from all the weight.
This causes a Mega Turnip the size of Bowser Jr. to fall out and damage opponents for 9% damage.
The Turnip falls to the ground rather quickly and dissappears when it hits the ground or a shield.
The Turnip also deals medium upwards knockback.

Grab Game
Grab

A Clear Pipe arises from the ground, capturing opponent's inside.
The grab is not the fastest, but makes up for it for the utility of the throws.

Pummel
Captain Toad memorises this Clear Pipe as the Clear Pipe that got him in the Sprixie Kingdom.
He also remembers that Mario and Luigi fixed it with their hammers and comes to the idea to hammer the pipe.
Captain Toad doesn't have a hammer though and instead hits opponents with his Pickaxe.
The animation resembles the intro of 3D World, switching sides of the pipe every hit.

Forward Throw
Captain Toad pushes the Clear Pipe to the direction chosen, causing the pipe to bend and launch the opponent that way.
The throw isn't his strongest, but suffices as a way to get opponents off stage.

Back Throw
The Clear Pipe sprouts a cannon, scaring Captain Toad, and launches the opponent backwards, which causes Captain Toad to clap and jump up and down.
And for a very good reason, since this throw is a very strong KO move, killing at 130%

Up Throw
Captain Toad decides to look down the pipe to see if something is coming upwards.
We as Mario fans know that when there's a pipe, there's a piranha plant.
But Captain Toad doesn't, and gets scared by the Piranha Plant that comes up, damaging opponents for 14% damage in a 4-hit bite combo, before ending with a last bite for decent knockback.

Too bad Captain Toad doesn't look until the move is done.

Down Throw
Somewhat less dangerous than the Piranha Plants are the Fuzzies that inhabit the Clear Pipes.
One of these comes up and hits the opponents.
It doesn't do much damage or knockback and only throws the opponent right in front of Captain Toad, standing behind the pipe.

End of the adventure, special thanks to MunoMario for helping me!​
 
Last edited:

Katapultar

Smash Lord
Joined
Nov 24, 2008
Messages
1,284
Location
Australia


The Seven Sages are the primary antagonist group of Hyperdimension Neptunia Victory. They consist of seven individuals who desire to rid Gamindustri of CPU/Goddess rule in favor of an actual government, and while they are technically the villains, the reasoning behind their actions is strong: you see, the CPUs in question are actually cute girls based off major video companies - Nintendo, Sega, Sony, Microsoft - who largely just play around and occasionally fight each other for control of each other's "Shares" (the citizens' faith that grants them power), so really it's understandable why any sane person would want them off the throne. That being said, the Seven Sages themselves aren't entirely just: on the contrary, the majority of them represent negative aspects of the video game industry, and are largely in the group for the sake of villainy rather than out of genuine belief that the world would be a better place without irresponsible little girls running it.

Yep, that's the Hyperdimension Neptunia series for you: rife with video game references and cute girls. And heavyweight male antagonists too, so there's something for everyone in MYM. Victory in particular is the 3rd installment of the Hyperdimension Neptunia series, and features the main character Neptune being sent to a parallel world - the Ultradimension - where she gets caught up in the whole Seven Sage mess while trying to find a way back to her own world, the Hyperdimension. Of course, this movement isn't about the CPUs - it's about the Seven Sages, because everyone knows that villains are superior to heroes in both style and moveset potential.


LINKS - ENTER THE HYPERDIMENSION

Seven Sages' theme ~ extremely catchy
The Seven Sages' first appearance ~ good for getting to know their characters
Seven Sages' second appearance


Abnes

Abnes might look like a brat, but that's because she is a brat. As the only member of the Seven Sages to appear in public, Abnes takes on a fake idol personality to convince the masses to support a CPU-free world, while spreading her own child-related propaganda. She might be known to the majority of Gamindustri as a little cutie pie, but to us players, the CPUs and the other Sages she's just an annoying little girl who takes up unnecessary screentime with her constant shouting and self-righteous ramblings about children's rights...

Copypaste

Copypaste is a big giant robot that looks like something a kid put together for a science project...maybe. He likes smashing things up, especially games he can't copy, but is very dumb. He doesn't even know what the word demolition means, ha! Um, ahem. He carries a bunch of tools inside a compartment for copying and pasting games illegally, but never uses them in his boss fight or his moveset as a matter of fact, because I guess he's too stupid and they didn't have the budget necessary to give him a proper AI for it. This leaves Copypaste with the misfortune of being a generic giant robot, but that's not actually a bad place to be in MYM...

Mr. Badd

A fat, shady businessman who means business. He is a male human - a very rare and endangered? species in Gamindustri - and the only man in the entire series who is not blocked out by a silhouette. Nobody knows his real name, but I bet you any amount of money it's Masahiro Sakurai...

???

???

???

???
 
Last edited:

Katapultar

Smash Lord
Joined
Nov 24, 2008
Messages
1,284
Location
Australia
"I am the Seven Sages' idol and advertising executive! You may call me... Abnes!"


NABNESN

"Shut up! I'm on a mission to protect every single child in the whole wide world! That means I am in the right. Anyone who opposes me is a pedophile and a gross fetishist!"

Are they now, Abnes? Yup, this little girl is an activist who seeks change for the children, kind of like those overly-protective parents who protest against video games because they think they're a bad influence on children (it's funny because Neptunia is a video game). But what does protecting children have to do with opposing the CPUs' rule, you ask? Well you see, the one CPU known to the Seven Sages at the start of the game is in fact a little girl! Abnes likes to storm her place and bring up how unjust it is to force a child into ruling a nation, but nobody takes her seriously because her arguments have no weight behind them not to mention she can be an immature brat. Which is funny, because according to Anonydeath she's actually -much- older than she looks, a fact that becomes obvious later on as Victory actually takes place over the course of several years and she is sensitive to being called a child. This is a reference to the immaturity of anti-video game parental activists.

Abnes is the very first of the Seven Sages to appear before the protagonists, being the only member known to the public (whom she appeals to LIVE with a fake idol personality), and has by far the easiest boss fight in the game. So easy, in fact, that she doesn't even get a boss fight! That's right, she has zero fighting ability. Despite this, she manages to be a very, very minor threat later on as she attempts to incriminate the CPUs (via recording them) to lower the peoples' faith in them and therefore their Shares, the CPUs' source of energy which comes from the faith people have in them, but this fails to amount to anything meaningful. She later learns of a child-kidnapping plot orchestrated by the other Seven Sages and initially accuses the CPUs of it, but upon realizing the truth she betrays her cohorts to help them save the children. From there on, she stops bothering the CPUs for good, and even supports them by the end of the game.


NSTATSN

Size: 2
Weight: 1
Ground Speed: 7
Jump: 1
Air Speed: 7
Fall Speed: 5
Traction: 5

What were you expecting, sunshine and loli-pops? (get it? loli?) Well, maybe you weren't expecting Abnes to be so freaking fast! But hey, that's what happens when you run back and forth between your own place and someone's Basilicom - you learn how to run like the wind.

Speaking of fast, why don't we get this set over with as quickly as possible? The other Sages don't have all day, y'know?


NSPECIALSN

Neutral Special ~ Protest
Abnes takes out a microphone and starts yelling through it! This functions similarly to using the Gust Bellows, only it can be aimed in any direction by smashing the control stick and obviously doesn't apply a broken push effect. Instead, Abnes's incessant screeching deals 6-12% in several non-flinching hits per second, depending on whether she was farther or closer to the victim. What's more, the screeching actually ignores shields due to being pure sound, and if the victim wasn't shielding the sheer damage to their psyche will cause their shield to shrink as though they were holding it out! A shield can be put down to 1HP this way and then be broken with the slightest touch, but honestly, Abnes will never get that far because it takes too long (5 seconds), and is bound to be smacked for her troubles if she tries. On the other hand, she'd better commit to her protest, because the cooldown she suffers after performing one is darn rough.

Side Special ~ Stranger Danger!
Abnes takes out a whistle and blows on it! This functions just like those whistles Japanese preschoolers carry around to alert the local police when they're in trouble, and summons a slimy blue police officer with the head of a Dogoo (pictured above) in front of Abnes after one second. Silly Abnes, minions are intended for adults!


Unlike most minions, the Dogoo cop won't listen to Abnes. Instead, he'll just stand all irked over being called by her, and will go away on his own after 3 seconds and refuse to answer any more calls for 5 seconds afterwards. Y'know, the boy who cried wolf. If Abnes or the cop are attacked however, the latter will believe the former's claim of a pedophile running lose and go after the attacking opponent! Offenders beware, this cop is mighty aggressive, and he has a build that matches the incredible Shulk. On the other hand, he takes thrice as much damage from enemy attacks (he's defeated like a regular character), and is unable to jump/enter midair, shield, roll or dodge by his own accord. He's easy for any competent opponent to beat, but they'd better beat him fast, because if Abnes takes 15% from enemy attacks while one is out another will show up! This new cop shows up where the first was originally summoned (or on the closest ground if summoned in midair/offstage), forming from a puddle of slime in a one-second animation that leaves him vulnerable for a moment. Up to 3 cops can be summoned this way for a grand total of 4, and they can be summoned without end until they're all defeated.

With a cop out, Abnes' whistling becomes a command: used once, it orders all cops to rush over and guard that area, and used again it reverts them to their usual aggressive selves. You can also hold B when whistling to have the cops guard Abnes, in which case they will follow and overlap with her whenever possible, and experience a 5-frame delay before following her if she moves away from them. Cops can be commanded individually by whistling next to them and smashing the input, and if one is made to follow Abnes this way he will not overlap with her but instead guard her from whichever side of her he was on when commanded.

If multiple cops assemble in front of Abnes or ever overlap with each other, they'll fuse together: this creates a stronger and slightly bigger cop with a darker color scheme. The fused cop gets 0.25x more durability for each cop in the fusion (capping out at taking only half as much damage from attacks with 4 cops), and his attacks get slightly stronger and more reach due to being bigger, becoming slightly bigger than Ganon with 4 Dogoos in the fusion. Fused cops will split apart when struck by an attack that would a very high amount of knockback, which will cause one of the cops to be launched while the other(s) get left behind as a puddle (bubbles in midair) that attempt to reform over a set time based on however much hitstun the attack would have dealt - usually enough time for opponents to attack them before they can react.

Dogoo cops house a unique trait: their slimy bodies are actually elastic, and can stretched back by moving through them as though you were pulling back on a rubber band. This won't take effect if the cop moves through you. The cop's body can be stretched out by up to 1.1 platforms, any father will cause the rest of the Dogoo to be dragged along (but never offstage), and once the character stops moving the stretched body will snap back into place and send them cannonballing back by twice the length the body was stretched out. This turns the character into a super-armored hitbox dealing anywhere between 2-25% and low-high knockback depending on how far the body was stretched back and how much the character weighed, meaning sadly Abnes will only deal 13% at most due to being super light. This is great for hit-and-run, say Abnes moves forward while using her Neutral Special and then stops moving to immediately snap back to avoid being punished, and the threat of the cannonball hitbox makes for good stage control that deters opponents from rolling behind you. What's more, the stretched-out slime actually functions as a coating for the moving character that negates any damage they'd receive (but knockback or hitstun) when the coat itself is struck, but the Dogoo will still take damage from the attack. This damage-negation comes at the slight "cost" of not counting Abnes or the cop being damaged if the latter was not yet functioning as a proper minion, but the on the other hand it does give this move a very useful function even if the cop never becomes a minion. If a character stretching out a slimy body grabs or is grabbed, both characters will be snapped back close to the Dogoo cop with Abnes always overlapping with its body, the cop able to punish grabbing opponents if they dawdle.

It should be noted that you cannot drag a Dogoo cop offstage while stretching its body; doing so will prevent the character from moving forward. This is actually good for Abnes, because she has no reason for her cops to be offstage and this actually enhances her edge-guarding game, making it so she can stretch out the body with both her jumps and then snap back to the stage safely afterwards. What's really scary about this is that the snap-back can be used to hit a foe who leapt over Abnes to reach the stage behind her, giving them even more to worry about than usual.

If Abnes whistles while overlapping with a cop made up of at least 3 cops, he'll bubble up internally and she'll rise off the ground so her shoulders are touching the cop's, before the Dogoo head pops - allowing Abnes an opening for her head so she can breathe. This effectively turns the cop into a suit for Abnes to wear, and comes with a host of benefits. First off, the suit has the same damage-negating properties as the elastic slime body, and because the cop is wider than Abnes he'll often soak up basic projectiles before they even hit her, in which case he'll receive the damage, knockback and hitstun she would have. If the cop suit is launched away from Abnes, the two will split, but if he only receives hitstun the two will remain merged unless you move away from him while he was in hitstun. Cops will not split away from the Dogoo while it's acting as a suit. The other use for the suit is extremely beneficial, as it gives Abnes's melee attacks a huge extension given the taller cop naturally has more reach than her, but that's not to say her own hitboxes are useless as the extra strength provided by the cop turns them into sweetspots dealing 1.4x their usual damage, knockback and hitstun upon connecting, making them much more rewarding to hit with. The suit also gives Abnes's meager jumps a huge boost, making them as powerful as Falco's for what translates to a much better air game. The only real downsides to the suit is that it artificially increases Abnes height (but maybe that's a good thing because everyone will take her more seriously!) and that she can still take damage from being struck on the head. Still, the positives far outweigh the negatives; if Abnes was able to keep 3 cops alive and get the time to round them up while still being able to survive herself from all the damage necessary to summon them, she -deserves- the crazy buffs the suit gives her.

While wearing the Dogoo suit, the hold B command will cause the 4th cop - should Abnes have one out - to stand in place, splitting off from the suit and standing next to it if he was fused with it. If you held B for longer however, the cop will choose to either go after foes aggressively, or if he wasn't apart of the suit melt into a puddle of slime and reemerge over the suit to join with it, or just reemerge over the nearest ground if Abnes was in midair.

Up Special ~ Sliding Door Animation
"GA-THUNK!". Abnes disappears and enters through a sliding door 2.5 platforms towards the nearest opponent or whoever last attacked her, not entering helpless in midair but unable to use this move again until she lands. The intrusion is sudden: so sudden you might run into an enemy attack or be intercepted if you're not careful! Better have a cop on stand-by if that happens! Remember kids, be sure to bring a responsible adult with you when going to a stranger's place: they'll protect you from any rude welcoming. Or you could just barge into an opponent occupied with a cop.

Down Special ~ Incriminate
Abnes whips out a high-quality camera and snaps a photo ahead of her, creating a thin flash with the reach of a platform. This functions similarly to Mewtwo's Disable in that it requires opponents to be facing Abnes for it to work and deals 1%, but induces strong hitstun up-close or mere flinching from a Bowser away. Abnes doesn't just stop at one photo either: she can take as many more as she likes by mashing B afterwards, though none of these flashes deal hitstun, the stun from the first shot only enough to cover for 1-5 extra shots before Abnes leaves herself open to punishment if she gets greedy.

If Abnes got at least one shot of the opponent, even if they were facing away from her, she'll continue to hold her camera as a very weak item that breaks when hitting something or struck, and replaces her Jab and N-air with the ability to take more extra shots with 2 frames of start-up. Meanwhile, using this Special again will have Abnes tinker with her camera and upload the photos to the internet, which takes a full second and will see the camera break if Abnes is hit with an attack dealing at least 5%. If successful, however, the photos will be up for the world to see and people will lose faith in the snapped victim! It doesn't matter what they were doing, even just standing still, because the magic of Photoshop guarantees that even the most famous and beloved opponents can be obscured and vilified.

The sudden hating takes the form of several Youtube/Facebook-esque comments that pop up around the victim, which deal an unavoidable 2% per comment. Comments only deal 1.5% apiece after 10 have been posted, but they can still rack up a decent amount of damage through many photos. Damage isn't the point of incriminating the foe, though: the comments also de-buff opponents, treating them like CPUs who have lost Share power due to losing the citizens' faith, and increase the damage, knockback and hitstun they receive from Abnes by 0.1x per comment. This caps out at a very good double power buff with 10 photos, with any additional photos serving to extend the 15-second timer of the effect by 2 seconds per photo. If Abnes has taken enough photos, this can encourage opponents to use minimal force when punishing her so they don't knock her out of range for her to upload them, but this can also present her with the opportunity to take more photos. Don't underestimate the power of social media!


NSTANDARDSN

Dogoo Attack ~ Bash
Up-close, the Dogoo's basic attack involves brandishing a club and swinging it down with lag similar to Kirby's Hammer swing. This deals 10-15% that KOs at 180-140%, depending on the number of cops he was made out of, and surprisingly good shield damage. The cop will spam this move mindlessly and predictably in close-quarters, making him very easy for opponents to deal with given the attack's lag and how easy it is to perfect shield.

If the cop was approaching an opponent and within 1.5 platforms of them, he will perform a much more effective attack as he takes out a riot shield for some starting lag before performing a shoulder tackle with it held out in front of him. Should this connect, it'll drag victims nearly 1 platform across the stage while dealing 6 hits of 1-2% before pushing them back for one final hit of 2-3.5% and meager set knockback that keeps them close for a follow-up with their club attack, though the victim has a slight frame advantage over the cop. Another useful quirk to this attack is that the cop's shield blocks projectiles dealing 7% or less and melee attacks dealing less than 4%, and he takes half as much damage and knockback from attacks that hit the shield directly, as well as receiving purely horizontal knockback from attacks that would've hit him head-on and launched him on a low angle. That being said, the shield can be rendered null by grabbing the cop.

If Abnes was in the cop's way while he was tackling, his shield will be treated as a semi-solid for her and she'll get pushed along. This is a very powerful method of approaching that allows Abnes to attack while being pushed along; the only real catch is that Abnes can't move through the front of the Dogoo to stretch him out from behind given the shield is blocking her, only push him back, though she can still roll behind him. On the other hand, there's nothing stopping Abnes from running through a ramming Dogoo from behind, in which case he will stop ramming and stand still until his body snaps back, and when doing this Abnes will hold his shield out and get all of its bonuses minus being it a hitbox until she stops dashing.

Dogoos can be made to perform other attacks with Abnes's moves, in which case they will immediately stop using their own attacks.

Jab ~ Sissy Swings!
Faced with physical danger, Abnes panics and does the first thing that comes to mind: flail her hands in front of her! This not only looks pathetic, it does pathetic damage as well, up to 5 hits of 1% before dealing pathetic knockback on a Sakurai angle (horizontal knockback for the most part). This is fast however, and by tapping the A button while attacking Abnes will move forward at the same time, at either her walking or running speed depending on the intensity of the mashing. This can be used to approach slightly, if that's even saying anything given the horrendous reach, but also makes it difficult for foes to DI away from the attack when Abnes can move towards them. Used with a cop in front of you, the flailing will send its body wobbling forward and extend the range of this attack, and if you choose to move through and stretch out its body the snapback can keep Abnes safe from retaliation or even catch opponents trying to DI behind her.

Holding A when using this attack will have Abnes perform a one-handed shove dealing 5% that KOs at 200%, which more than doubles in range when used on a Dogoo to slap its body forward. If you held A after hitting a Dogoo this way, he will condense himself into a small ball of slime upon snapping back that she'll hold as a relatively slow throwing item - albeit with a look of grimace, because the slime is yucky! Despite Abnes's objection, however, the slime ball is effective: upon hitting the foe, the cop will spread out all over their body and cop a perverse feel for 1-2% damage every 0.5 seconds, totally wrong because he -is- meant to enforce the law. The cop is invincible and remains clinging until the victim shakes him off with twice-thrice the difficulty of a Pikmin. The cop is also invincible while flying through in midair except against shields, which he will bounce off, as well as reflectors. Once the cop hits a surface, he'll splatter before he reforms forcefully and becomes a hitbox that launches opponents skywards for 10% that KOs at 195%, or diagonal knockback if he reformed on a wall or ceiling. This can potentially occur the moment the Dogoo drops off an grounded opponent, in which case it can function like something of a delayed hitbox. In any case, the Dogoo ball is useful not just for the damage it can deal, but rather the invincibility that helps protect the cop if really necessary, so that more cops can still be summoned without him having to be killed. Abnes can't get the Dogoo ball in midair, but she can still tech one close to her like a regular item. Finally, a slime ball can be made while wearing a Dogoo suit, but only if that suit was made up of 4 Dogoos in which case one will be used for the slime ball.

Dash Attack ~ Clumsy!
Abnes trips! Abnes is a big girl however, so she pretends it was intentional and plays along with it by sliding a short distance across the floor. Should Abnes fall on someone as she trips, as stupid as that sounds, they'll receive 5% and be launched ahead of her, but otherwise they get popped up on a high angle for 4-2% based on how early she hit. Hit with this early enough and it'll place opponents a short distance above Abnes by the time she's done sliding, but otherwise it keeps them close enough for a follow-up. Yay!

If you tap A while Abnes is sliding, she'll surprise us all by hopping out of it and into a midair roll! This has no hitbox and leaves Abnes open for a moment, that exact time being how much end lag she would have suffered for going through with her Dash Attack all the way to be specific, but otherwise it effective functions as a short-hop that gives her a big boost in horizontal momentum she wouldn't normally get from her first jump. This not only lets Abnes pursue struck opponents more effectively, especially those knocked ahead of her, it also keeps her moving without stopping so she can keep stretching a Dogoo's body out, or else she would be snapped back for performing the move normally. That being said, performing the attack normally and sliding past a shielding opponent allows Abnes to deal extra damage with a snapback.

If Abnes uses this move with a Dogoo suit on, the Dogoo will collapse into a puddle of slime that travels alongside Abnes and sends her slip n' sliding forward much more quickly and farther than usual at 1.25 platforms. This also doubles the power behind the attack, as well as the momentum Abnes gets if she cancels the slide into a roll. This may not sound frightening on its own, but it becomes absolutely frightening when combined with the Down Special in that the tripping, at full power, can deal 20% that KOs at 95%! The only catch is that Abnes receives none of the bonuses of the Dogoo suit for this, and the fact that by the time she's gotten that far she'll have little need to be punished to summon more cops, but this does make the cop invincible during the attack at the very least.

F-tilt ~ Ace Accuser
Abnes imitates a famous lawyer's pointing gesture, intending to her bring opponents down with her own brand of justice! This is surprisingly laggy for a weak F-tilt, but has deceptive range thanks to a random twinkle at the tip of Abnes's finger, and best of all only deals 5% and shoddy Sakurai knockback that won't KO til past 200%! Pointing isn't very powerful when done by a little girl, is it? In all seriousness though, this move does have one very good quality that makes it worthwhile to use: you see, Abnes actually accuses the foe of doing something bad when she scores a direct hit on them, and this will in turn gets the cops on her side as though she had been hit! If the cops were already convinced, this will get Abnes a free cop on her side, which is totally awesome because it spares her having to suffer 15% for one. Despite not being a movement-based attack, Abnes can use this while stretching out a Dogoo without getting snapped back, or at least before she points, making the move safer if it misses.

If this move is used again, Abnes will shout audibly, but this does nothing but act as a taunt unless there was a cop around. If there was, the one closest to Abnes will whip out a raygun and imitate an uncharged version of Zero Suit's Neutral Special, trying to look cool like one of those guys from an action movie. This can be angled, obviously. The shot has icy properties, because it just does, and travels far enough to cover most of the screen while dealing 2 hits of 4-6% that KOs between 200-155%. What's really cool is that Abnes can move almost instantly after the shot is fired (come on, she had to go through her pointing attack first), so if she made the cop fire the shot towards her she can use it to pressure opponents even further.

Just don't get in the shot's way, because it's perfectly capable of hitting Abnes: should this happen, she'll be frozen and go flying off as a human projectile! This deals 14-22% and strong knockback that KOs at 160-110% while giving Abnes super armor and grab immunity, and covers 1.5 platforms before she breaks out and continues flying (1 platform) forward with the remaining momentum that can be used offensively. This is extremely powerful given Abnes can pressure opponents to set it up easily, but it does have one slight weakness in that opponents can attack the frozen flying Abnes with a move dealing at least 8% (or an appropriate amount of knockback) to send her flying back in the opposite direction, and if that attack dealt high knockback it will cause her to go flying even farther than usual - maybe even too far! On the other hand, the damage Abnes receives when being hit this way can contribute to the summoning of another cop, and she'll most likely be sent flying back into the cop who shot her in which case she'll be saved from going too far because he can't be pulled back offstage, and then be sent flying back forward! If Abnes was still frozen, she'll travel faster and deal 1.1-1.4x more damage as well as increasing the damage opponents need to deal to reflect her up to 10-14%, but even if they do she'll just bounce back and this'll just increase the damage she deals to absolutely ludicrous levels. It's even possible to have Abnes bounce between 2 cops instead of relying on the foe, but she won't stay frozen forever and can't just get them to shoot again without stopping because she'll be in midair.

If Abnes uses this move while in a Dogoo suit, she and the cop will perform their attacks in unison instead of one after the other. Abnes will point just before the cop fires, which effectively turns the move into a multi-hitting attack while also covering most of her end lag.

DECIDING ON WHAT HAPPENS WHEN A SHOT HITS ANOTHER COP, OR WHETHER ANYTHING WOULD HAPPEN.

U-tilt ~ Get Fit Kids!
Emulating a host of a kids' TV show, Abnes decides to encourage the kids playing Smash at home by facing the screen and performing a star jump! She smiles while doing this, but it looks so very forced - she's clearly not enjoying this! This apparent lack of enthusiasm carries over as weak damage when she swings her arms up, dealing 4% and extremely unhealthy upwards knockback. Unhealthy for Abnes, that is, because the hitstun from this is so poor that it doesn't prevent opponents from punishing her! That being said, Abnes's hands deal 5% and better knockback when she claps them above her, much better for her because she suffers virtually no end lag from this, making it great for juggling up-close. At higher percentages or with a Dogoo suit on, the swinging hitbox knocks foes far enough/hits from far enough to not be punished.

If this move is used when adjacent to a cop, he'll join in and perform his own star jump! Hey, isn't it part of the police's job to encourage fitness in kids? The police look happier than Abnes while doing their star jump, so they deal 1.5x more damage than her, sporting so much enthusiasm that their arms fall off afterwards! This forces the officer to put his arms back on in the time it would take for Abnes to perform another star jump, preventing him from joining in again! Enemies knocked up by this happy cop will likely go after him as they come down, but if Abnes intervenes she can turn that into a comboing opportunity!

D-tilt ~ Kicking and Screaming
When crouching, Abnes lays on her back and stretches her limbs out in a star shape. This is not only a good position for getting her diapers changed, it's also great for ducking projectiles if need-by, and has a slight interaction with the Down Special in that it changes the angle she takes photos on given she's now facing upwards. Taking pictures is down using the Down Special even if Abnes was holding the camera, because the A button is needed to use the D-tilt...

What is Abnes's D-tilt, you ask? Well it's certainly not an exercise in futility like the last move was (get it? exercise?): instead, it's a full-blown tantrum! Much flailing of the limbs ensues, but only the kicking of the legs is relevant to this attack and deals 3 hits of 2% followed by minuscule radial knockback. Like, really poor. On the other hand, hitting an enemy above you can combo into something like the U-tilt, and if Abnes kicks a foe from a diagonal or horizontal position she'll go sliding back anywhere between 0.2-0.6 platforms depending on whether it was from the former or the latter, a sweetspot at her foot right in front of her that deals an extra 1% and causes her to go sliding back 1 platform length. Talk about getting your own way! This can be used to space safely after hitting a shielding opponent, and has another sort-of interaction with the Down Special in that if Abnes uses it just after kicking someone she'll aim her camera at them directly, usually within range of a shot due to the abysmal knockback of her kicking. This can also be used to slide back into a Dogoo and rebound off it for extra damage, if there was one right behind you.


NSMASHESN

F-Smash ~ Wall of Text
Abnes puffs up her chest and yells loudly, similar to the Neutral Special, but this time a big block of text like the one shown above appears in front of her! Talk about breaking the fourth wall. This block is 1 Bowser tall and 2 Bowsers wide, and prints out one of numerous one-liners Abnes shouts for this move over the course of 1.5 seconds, dealing 15 hits of 1% similarly to the Neutral Special and with similar effects to shields, but with extra zing that causes victims' shields to regenerate only half/quarter as quickly for the next 5 seconds depending on how much of the yelling they were exposed to.

The lack of flinching is terrible and leaves Abnes massively open to punishment when combined with a fair bit of starting lag, but you can actually shorten the duration of Abnes's yelling down to 0.5 seconds by charging the smash without reducing the damage dealt by it. Which is good, because what happens after Abnes yells makes the whole thing worth going through: you see, Abnes says so much while yelling that the text box can't contain it (it can only contain 3 lines worth of characters!), causing it to swell up and shatter like glass for a deadly attack dealing 10% and huge diagonal knockback that can KO as early as 95%! Even deadlier is that this launches victims on a lower trajectory when closer to Abnes to the point where they'll get knocked straight back for a potent semi-spike when right in front of her, and deals massive damage to shields in conjunction with the yelling beforehand. That's not even the worst part either, because this move has extremely low end lag for a smash which in turn lets Abnes wail on anyone still close to her afterwards! She's relentless! If you want to punish her, do it before the text box explodes and not afterwards.

If the text box overlaps with a cop, even if this move was used while overlapping with one/in a Dogoo suit, his body will be stretched out with great force and function as a physical "border" for the box during its existence, dealing 2-5% and a bit of stun to opponents hit by the stretched body along the way. The slime border functions as a drop-through platform for others, but it's not as simple as standing on top of it to avoid going inside the box because the surface of the border damages opponents all the same due to vibrating from the sound. Being inside the box is not much better either, because the slime border functions as a cage that prevents victims from leaving lest the taut surface quickly bounce them back if they try to stretch it, including if they move through the cop. Put the enemy in prison where they belong! The only way out is to either teleport or attack the cop, which will cause his stretched body to break into several stringy bits that snap back to him harmlessly. That being said, opponents may not have time to attack the cop if they weren't in front of him and you fully charged this move and connected with the stretching slime hitbox, forcing them to go on the defensive which is very beneficial to Abnes.

Once the slime border snaps back to the cop, opponents can roll or dodge without being impeded by it while doing so to avoid the text blast, but if they were shielding they'll instead be snapped back and overlapping with the cop. Started close to a cop, the snapback can pull shielding opponents towards Abnes at the risk of her being attacked, but started away from a cop you can make a smaller "cage" from the text box that makes it easier for the cop to land his bashing attack to pressure opponents for the blast, but note that even if opponents are bashed they won't take nearly enough hitstun to be bashed again and are perfectly capable of hitting the cop before he starts up again. In any case, this move is very good for zoning when used correctly, and can punish foes trying to hit on a cop ahead of Abnes as something of an alternative to just going up and hitting them given her weak melee game, or a way to get something out of a cop who's about to die.

If this move is used in a Dogoo suit, his stretching body will deal 7% and even more hitstun along with a bit of set knockback. This hitstun will guarantee that the text blast hits at full charge - but only full charge - making this move extremely damaging and powerful with enough time to do that.

U-Smash ~ Playground Set
What's that, those words got you excited? Well good, because using this move causes Abnes to sit on a random (Bowser-tall) swing that appears around her and play on it - er, I mean test it so it's safe for the kiddies to use! Once released, Abnes will kick off the ground to swing herself back on a 90 degree angle, then use the momentum to swing forward for a playground-powered kick that covers 180 degrees before she just keeps swinging back and forth for a while. Abnes has the time of her life while swinging! But the motions of the swing aren't just for play...

The initial swing back is actually a hitbox that deals 3-6%, and can be used punish opponents who roll behind Abnes or even dodge an attack. The swing forward normally only deals 6-10% and low knockback, but if the first half of the swing was able to hit an opponent - due to they being behind Abnes or where she was when starting the move - it will instead deal 12-16% as she hits with the full force of her momentum with average knockback that can KO between 160-130%, always knocking opponents away in the direction Abnes was facing when she hit them so the exact trajectory can vary greatly. After swinging to her peak, Abnes will hang in midair for a moment before swing back the other way for identical damage, then hang in midair for another moment before repeating the process, albeit with no more pauses but less momentum each time and only dealing 0.7x, and then 0.4x before her swinging no longer qualifies as being harmful.

The pauses in midair are actually the end lag for the attack, meaning Abnes can actually cancel the remainder of the swing into any action, granting her a decent-at-best momentum boost in the direction she was facing/moving towards depending on how much momentum she had left. This will normally put Abnes in midair, or let her cancel into a grounded action if the swing was parallel to the ground, and once Abnes gets off the swing it becomes a hitbox dealing 2% with minor flinching until it swings all the way before the whole thing breaks apart, revealed to be a shoddy construct. Specials are a unique case however, as Abnes will perform them while still swinging on the swing save for the Up Special for obvious reasons, but not a hitbox while swinging. All the Specials receive a benefit from this, even the Up Special as the swing can be used as a surprise attack that can cover most of the starting lag. When using the Side Special, the Dogoo cop is always summoned right in front of where Abnes was when she started swinging; done when Abnes is able to move, she can then swing into the cop and either cancel into a ground-based attack or go for broke by jumping forward or dashing in an offensive attack. If Abnes swings all the way while stretching a cop's body out, she will be snapped back afterwards but quickly swing back in the opposite direction with slightly more momentum than she mustered at the start, now dealing 1.15x more damage and knockback, and continuing to be a hitbox until she stops swinging/uses a Special.


D-Smash ~ Protect the Celebrity!
Apparently someone mistook Abnes for an actual celebrity or a princess, because this move has 2 royal guards appear on either side of her and shove her into the background for safety before standing guard, much to her surprise and annoyance. This doesn't last long however, because a majorly pissed-off Abnes steps in between the 2 guards and shoves them away from her! She doesn't like being treated like a child! This causes the guards to fall over away from Abnes, creating 2 hitboxes on either side of her that hilariously deal 7-10% and knockback that KOs between 200-170%, or 10-14% that KOs at 180-150% up-close. Sadly, the ending lag on this is awful as Abnes has to regain her stern composure, which is a shame because it's such a fun move to watch. All things in moderation, as they say!

As you might have surmised, Abnes is invincible while in the background. The guards can be defeated by being dealt 10%, but this doesn't force Abnes out of the background early: on the contrary, this is actually beneficial to Abnes because cops can be summoned from any damage they receive with excess damage still counting towards this, and there are 2 guards so they're likely to be hit at the same time. That being said, using this to convince a cop on standby can prove ineffective as opponents who see it coming can wait out on the charge and by that time the 3 seconds the cop stays out for will most likely be up. Losing the guards drastically decreases the range on Abnes's attack, who is still hellbent on taking her anger out on someone, her shoving a weak hitbox dealing 9-12% that KOs between 190-160% but the knockback from this is purely horizontal and can result in a semi-spike at higher percentages and/or when near the ledge. Abnes's shove -can- be used as a counter up-close, but lacks the reach to be practical...unless she was wearing a Dogoo suit, in which case the range is drastically increased to be able to hit opponents just beyond the range of the falling guards while also giving the duo super armor during the shove. Also, if there were any cops next to or overlapping with Abnes when she used this attack, she'll take them with her into the background and push them down in the place of her guards if they weren't around anymore; not only good for protecting the guards while Abnes can't act but also for extending this move's range.


NAERIALSN

N-air ~ Cuddle Up Little Baby
Abnes does the most baby-ish thing she could possibly do for an aerial attack: curl up in a fetal position and roll in midair. This resembles Wolf's N-air in animation duration, and aside from making Abnes look like a complete toddler it's also a surprisingly effective attack that deals 5% and light mostly-radial knockback on contact...which is good enough for Abnes, I guess. As a baby bonus, this makes Abnes a smaller target, and on contact with an opponent she'll actually bounce off of them and back in the direction she came from - more so if she connected earlier into the attack, where she can bounce up to the height of her meager first jump and possibly keep bouncing on foes by landing on them...assuming she doesn't knock them too far, but seriously this is Abnes we're talking about so it's not gonna happen. Also, damage dealt to Abnes while she's curled up is cut by 3% and will only deal 3/4s of its usual knockback, probably because opponents were going easy on her because she's acting like a baby. Regardless, you'll want to take advantage of this to minimize damage when trying to get a cop's attention.

The more momentum Abnes had when rolling, the father she will bounce back when hitting an opponent. This is totally relevant to cops, because if Abnes was using this attack when snapped back by a stretched Dogoo body, she'll remain curled for the duration of her cannonballing, and gets to enjoy the super armor from it. If Abnes hits someone along the way, the damage from the cannonballing is added to this attack for even greater effect, and Abnes will bounce off the target, potentially back into the Dogoo which will then snap her back towards the target again! Abnes can continually bounce off a shielding opponent, but that's not to say they can't dodge her as she snaps back to them.

With the Dogoo suit on, the cop's hitbox functions differently to Abnes in that instead of hitting once, it hits 4 times for 1.5-1.8% apiece throughout the entire attack's duration. This locks opponents in place, not only good for hitting with Abnes's hitbox but also for getting around them in midair, putting both characters in frame-neutral if the last Dogoo hit connects. This is especially good for approaching a grounded opponent, because if Abnes uses this move close to the ground the Dogoo sphere will "flatten" slightly and spread out to the sides, able to hit opponents who were just out of range.

F-air ~ Sissy Stomp
Pissed off, Abnes lays back on her side as though she were going to perform a drop kick, but instead stamps forward twice with the power of a little girl! Can't have the children learning anything violent, now can we? These little kicks deal 3% apiece followed by some light knockback, albeit entirely horizontal knockback on a vague downward angle, but only when connecting with the foot or else the second hit will simply induce frame-neutral hitstun. Also, Abnes's outstretched body deals a lesser 2.5% and no knockback on contact, which is totally relevant. This is a very spammable attack, and though it requires some aim and DI'ing for the sweetspot it can be used much more liberally if Abnes was stretching out a Dogoo cop's body, as the sourspot's hitstun can be used to keep opponents in place as you DI past them before suddenly snapping back to deliver a much-deserved 20% or so with the combined hits. If you want solid KO power at higher percentages, this if your move.

Abnes's arms are stretched behind her while she kicks, and while this seems pointless to bring up it is actually totally relevant, because you see if there was a ledge behind Abnes her outstretched hands will allow her grab it from a greater distance than usual. But not too distant, because remember she's just a little girl. This is a useful trait for Abnes because she can't stray far from the stage when gimping due to having terrible jumps and a recovery that'll only take her farther away from the stage when pursuing an offstage opponent, but on the plus side the sweetspot is good for gimping offstage opponents due to being a semi-spike. This gimping game is greatly enhanced when wearing a Dogoo suit, as the cop has much greater reach that allows Abnes to poke from farther away while still being able to grab the ledge, and the sweetspot is so much easier to land because not only are there 2 but you can also use the cop's legs to lock opponents with the first hit before DI'ing towards them with Abnes's foot if you were close enough.

B-air ~ Temper Tantrum
Abnes lays back and throws a temper tantrum in midair! What's especially hilarious is that she rolls in midair while doing this, because otherwise the animation would look identical to the D-tilt. This deals 4 hits of 1.5%, with the final hit launching opponents ahead of Abnes on a slight angle or behind her if connecting with the legs during the last hit, KO'ing at 200%. With a similar duration to Game and Watch's B-air, more speed than said move to compensate for lack of disjointed range and Abnes's high air speed, this can be used to push enemies around wherever she pleases with the low knockback. Someone trying to get behind you? Push them back with this move.

U-air ~ Angry!
Annoyed once again, Abnes throws her balled fists above her! I don't know what she's angry about, but that anger is put to good use in this move as she hits harder than one would expect for 8% and surprisingly strong upwards knockback that can KO past 200%, and despite appearances Abnes's entire body is the hitbox rather than just her fists. This move even has sex kick properties in that the hitbox stays out for a while but deals less damage when it hits later into the move, a minimum of 3% in this case, which is actually good because that lesser knockback is much more suited for juggling and lets Abnes react quicker.

This move can KO foes surprisingly early near the top of the screen; with a Dogoo suit on, this becomes one of Abnes's most powerful attacks as she can better reach foes from higher up, as well as having more attack range and power. You can even use this move as a pseudo-Dair due to the Dogoo's legs extending a short distance below Abnes, giving this move the potential to combo into itself if it hits late enough into the attack. Also, if you were holding A at the end of the attack when wearing the suit, the cop will brings his arms back lift Abnes out of him and over his reformed head! Somebody better call the police, because we have a pervert over here! This makes Abnes very angry, angry enough to stomp on the cop violently! This sends the poor guy tumbling, because hey he deserved it, and has Abnes leap off of him in what amounts to a typical footstool jump with her own stats. Essentially, this functions as a third jump at the expense of shedding the Dogoo suit, because Abnes's Up Special is not completely reliable as a third jump, and can be used for that extra push to finish a juggled opponent or set up the cop for a D-air interaction.

D-air ~ Dependency
Abnes turns upside down and shoves down forcefully, the most amazing thing about this being that her dress remains totally unaffected by gravity all the while given it would be child pornography otherwise and we can't let that slide in a game localized for the West, now can we? The shove is surprisingly powerful coming from Abnes, almost too powerful, as it deals 9% and a competent spike that can KO at 180%, probably because Abnes cheated though I guess that's okay because it's not easy to land. Also, Abnes's upright feet are hitboxes dealing 6% and diagonal knockback, while her body is a sourspot that deals 1%.

If you held A when landing the shove, Abnes will do something most peculiar and nonsensical: she'll cling to the spiked opponent and fall with them! No use in letting a scoop get away! Abnes will remain clinging until you let go of A or the victim recovers from hitstun, but will continue flying to a lesser extent than the opponent if they still had some momentum remaining afterwards. This is very useful onstage for sticking close to opponents where Abnes wants to be, and if used to spike them up off the ground Abnes can potentially follow them high up into the air to finish them off, which would normally be difficult without a Dogoo suit.

If Abnes used this move while a cop was beneath her, he'll morph into a thin tube and shoot up to her, before stopping just short of where she shoved and forcefully expanding into an over-sized head. This creates a brief hitbox roughly the size of Kirby, and deals anywhere between 10-16% and upwards knockback that KOs between 162-138% depending on how many cops were fused with the Dogoo. This hitbox manifests just after Abnes stops shoving, so it effectively extends the range and duration of her own attack, and comes with the bonus of making the Dogoo invulnerable while it's taking the form of a tube. Afterwards, Abnes can choose to cling to the Dogoo head as though it were a victim she spiked, and ride down on it as it plummets for a stall-then-fall not unlike Bowser Bomb in terms of lag. The Dogoo becomes roughly the size of DK for this as it uses its full mass for this tube included, and deals 12-18% that KOs at 150-120% on contact with opponents. Abnes can let go of the Dogoo anytime, but it gets super armor while she's clinging to it, whereas otherwise it just gets 5% heavy armor and is easily dealt with. Once the Dogoo lands, it'll flatten itself halfway in a cartoonish manner, its sides hitboxes that deal 8-11% and mostly-horizontal knockback KO'ing at 180-150% to opponents, before bouncing back up to the height it fell from and doing this continuously until it runs out of momentum, dealing less damage as it loses momentum. If Abnes was clinging to the Dogoo when it landed, she'll be put into prone unless she teched. Abnes can cling to a bouncing Dogoo while close to it, but it won't get super armor from this.


NGRABN

Abnes swipes in front of herself like a proud adult. The range on this sucks like a baby sucking on a pacifier, but that's okay because it's swift and becomes amazing when wearing a Dogoo suit. The dash grab has Abnes throw her hand out straight ahead of extended range at the cost of tripping for lag upon missing, but is especially rewarding to land when stretching out a cop's body because you can then snap the both you back towards the cop. Those guys are handy to have around when holding an opponent, as they beat on them with clubs for a slow 2% that amounts to slightly more damage from a regular pummel, even if they were being worn by Abnes. It's unlikely you'll have 2 cops for this given they fuse together when overlapping, but if you can get one on each side of an opponent then more power to you.


Also, you're probably wondering how someone like Abnes can restrain opponents. Well, you see, she doesn't do any of that, but rather she calls for 2 members of the ESRB/FBI/4Kids to do it for her, 2 tall men fully clothed in suspiciously black clothing. Yup, she'll use extreme force even when dealing with a child opponent, because you see this specific animation actually has slight gameplay relevance in that one man restrains the victim from behind while the other guards Abnes's back, and therefore both of them can be attacked. Having the men be attacked is actually beneficial to Abnes, or at least if she had a cop because they can take damage in her place without having any harm come to her for the sake of summoning more cops, and they're fairly tall targets too with the grab only being interrupted if Abnes or the man restraining the victim is attacked. That being said, this only works in FFA matches or against characters with minions, but is definitely helpful in both situations because Abnes will already be taking enough damage from how easily she gets punished. Why not have a way to avoid being punished for once?

Also, it's probably obvious, but Dogoo cops aren't impeded by the men because they can overlap with other characters. Speaking cops, Abnes can't grab them, but if she would they will perform their own grab after her if she fails and pull victims in towards her, which results in them overlapping with her.

If Abnes would be hit by a cop's F-tilt shot while holding the opponent, she won't be because it'll hit one of her men and send them flying instead! Abnes dodges this in the nick of time with the duration of a sidestep, so she doesn't get hit by her own subordinate(?). This lets Abnes use this powerful projectile attack without using herself as the projectile, with the only cost being that the ice will shatter instead of being reflected if the man is attacked and defeated.

Pummel ~ Naughty Boy!
Abnes gets the man behind her to get on all fours and act as a makeshift seat which she sits on, while the other man restraining the victim goes to lay them on her lap with their bottom facing Abnes. Abnes then, trying to act like a responsible adult, spanks them! Does she really think she's in a position to do that? This deals a slow 1% and only works on children, because spanking someone much bigger than her like Bowser or Ganon would look really stupid and probably be physically impossible, yet while it lacks practical purpose it looks absolutely hilarious to see Ness, the Ice Climbers, Chou-Chou or even Wiz having their bottoms smacked. Abnes may be out to protect children, but even she knows when it's time to trade in the carrot for the stick!

Oh, you're wondering what happens when Abnes pummels a bigger character? Well, what she does is she gets the guy behind her to hand her a bunch of legal documents and then shoves them in the opponent's face.

Special Pummel - Dog Trainer
This isn't actually referring to our dear victim being restrained like a dog, but rather the Dogoo cops themselves. Get it? Specifically, Abnes will take 1 frame to whistle and call any cops that happen to be around, more useful than usual because they will actually sink into the ground and then pop back up behind her her no matter how far away, unless they were being attacked or in the middle of an attack in which case they'll respond as soon as it ends. This also helps set the cops' AI for however you want it after throwing the victim, and allows Abnes to put a Dogoo suit on and off if possible and she was overlapping with one. If Abnes wasn't wearing the suit before, this is easily done by landing the dash grab and having the cop's stretched body snap the both you back towards it, because remember Abnes will end up overlapping with its body.

F-throw ~ Legal Action
Abnes shoves the opponent back a short distance for 2%. This is good for pushing foes around and keeps them close for follow-ups...but not quite! You see, after shoving the foe, Abnes points at them and orders her men to "Get 'em!", prompting them to shoulder tackle side-by-side with a dash speed of 5. This is actually fairly strong..if only because Abnes is not the one performing it, and deals 2 hits of 5% mostly-horizontal knockback that KOs at 150%, but receives no buff from the Down Special or a Dogoo as remember Abnes has to be performing those moves herself for them to be buffed. It's actually possible for foes to act just before the men charge at them, but their attack deals surprisingly good shield damage and pushback, and if they're attacked it will contribute towards the summoning of a cop and count as that attack dealing double damage due to both men being hit at the same time, usually guaranteeing the summoning of a single cop. Also, Abnes can move when the opponent can, so she is free to take advantage of whatever they decide to do. If the men miss their target, they will continue barging forward until they go off the screen, even defying the laws of physics to do so, and will hopefully hit another character or a minion/construct before then.

If Abnes was wearing a Dogoo suit, that cop will behave most peculiarly as he performs his own shoulder tackle alongside the 2 men! He drags Abnes along for this, who wails and struggles inside of him, but to no avail. This buffs the move to 3 hits of 5% finishing with even greater knockback that KOs at 130-118%, and best of all it's actually guaranteed to hit as Abnes's powered shove deals a lot more hitstun. With all the work she put into getting the suit on, Abnes will be wanting raw KO power as reward for her efforts, not ways to summon more cops easily.

B-throw ~ Omit
Abnes slaps the foe towards the man behind her for 1%, then gets the man who was holding the foe to tackle them for 5% to push them and the other man back a set distance (platform) as the latter restrains them. Afterwards, Abnes gestures to have the foe taken away by the 2 men! The foe is dragged across the stage by the 2 men from behind at rather slow speeds; this doesn't prevent them from attacking or even moving, just they kept getting pulled back no matter what, even if they enter midair or are attacked. The only ways for foes to remove the cops is to either shake them off with surprising difficulty or defeat them with an attack, but doing so helps Abnes summon her cops and potentially exposes their back to her. This needs to be done twice too, as one of the cops remains in the background and will only come out if the first is defeated, whereby he drags the victim only half as quickly. If the cops successfully drag the foe to the edge of the stage, a grab hitbox will be triggered as both restrain the foe from the sides for a moment before throwing them back forcefully. This deals 10% with high base knockback on a mostly horizontal angle, but very poor scaling that prevents it from KO'ing until 150%. On the other hand, Abnes can actually attack the foe while they're being restrained pre-throw, to get some damage in or snapshots but not launch or grab because the foe has temporary super armor during this. What's more, the men stay around for one second after throwing the opponent, to be used as footstools. Abnes can also push the men off the ledge by moving into them, and if she does she will actually go down with them and use them as a makeshift platform as they enter a freefall animation. The men normally fall straight down, but if Abnes dashed into them they'll have some forward momentum as they fall. Abnes can use her ground game while standing on her men, but not for long and not really practical - the real point of this is to footstool jump off of the men so Abnes can go farther offstage than she normally could, then use her second jump to recover. This "throw" won't be triggered if the foe was in midair, and if they ignore the men they can potentially carry them around forever.

U-throw ~ Right in the Crotch
Abnes does what any other normal person or little girl would do when faced with a big boy, and that's to kick them square in the crotch! Take that, criminal! This one deals 5% knocks the unfortunate victim skywards, but not as far as you'd expect unless they were at a fairly high percentage and you had a Down Special "buff", or a Dogoo suit on. What's really nuts about this move though (get it? nuts?), is that the 2 men stay out around Abnes and continue to act as meat shields until you attack, move or let 3 seconds pass. These men serve one of 2 useful purposes against the victim, depending on how far they were launched. Launched weakly, they'll be close enough that if they try attacking Abnes they'll likely attack the men as well, which contributes damage to summon more cops if there was one out and lets Abnes shield at the same time, but if launched too far for that the men can instead be used to perform a footstool jump to follow the airborne victim more easily, extremely effective if Abnes was wearing a Dogoo suit. Finally, the men will grab for Abnes in her place if she tries grabbing while they're still out, but they only have the pitiful reach of the Warlock King himself.

D-throw ~ Censoring 4Kids
Abnes takes a moment to inspect her foe, and frowns as she realizes that their character design is not suitable for a younger audience - or could be more suitable. She shouts and points at the foe, ordering her men to brandish all sorts of editing tools and get to work on them in a comical cloud of dust. It certainly doesn't take long for the guys to do their stuff, leaving the foe floored with 6% as Abnes gives her men a nod of approval.

This throw is unique in that it censors the foe, altering their physical appearance. This means that weapons are censored to look less harmless, skin gets covered up and horrible R18+ monstrosities like Birkin get smiley face mask so the kiddies don't get nightmares. Also, no matter the victim, everyone gets a bonnet on their head. This functions like an accessory similar to the Bunny Hood, but doesn't buff or nerf the foe in anyway. Instead, it just makes them look like an adult baby, bringing them down to Abnes's level in a way. Sadly, the bonnet and make-up fall off after 10 seconds.


NPLAYSTYLEN

Incessant Wailing
Come on, do I really need to say it? Abnes is a very offensive character in more ways than one (lol), but she's also totally WEAK, and has to rely on the police to get anything done properly. Y'know, like any other sensible kid. Unlike most summon characters, Abnes actually wants to be in the opponent's face nearly all the time, not just because having them hit her (or one of her various NPCs) is essential to getting the police on her side but also to actually protect them afterwards and get even more damaged to summon more cops. Being a little girl however, Abnes's attacks have terrible range and priority, and all her Specials bar the Side Special are just begging to be punished when used normally, meaning she will almost always be getting the short end of the stick in close combat.

The way cop-summoning works, it can actually give Abnes artificial invincibility if opponents refuse to attack her for the 3 seconds one stays on stand-by. You need to be clever with this though: use it too close to the opponent and Abnes runs the risk of being attacked before the cop arrives, but use it too far away and Abnes will have less time to get hurt for his co-operation. The most idea situation is to have Abnes take advantage of a foe possibly hesitating to attack her by abusing her Neutral, Up and Down Specials that are effective but normally easily punished, and if she does get punished out of them it's a win for her as she gets a free minion. The Neutral Special is good for wearing foes down, but the Down Special in particular can really make getting the cop on your side easy: simply get a bunch of shots of the foe, then summon the cop and attempt the upload. If you're interrupted, you get a the cop, but otherwise you just weakened the foe. If getting damaged isn't to your liking however, Abnes also has safer, less orthodox means of convincing the cops with her F-tilt, D-Smash counter and throws, though none of them are particularly easy to land. Should Abnes fail to get the cop, she'll have a difficult time fighting back without him during the 5-second period where she is unable to summon him again, as her bare melee attacks lack priority but most of all lack range. And even if you do outplay the opponent, Abnes's damage output is weak enough that she'll be winning by death by a thousand paper cuts, a big reason why she wants the big boys on her side.

With a cop on her side, Abnes can spam her punishable Specials much more liberally and find more openings for her low-ranged attacks, as opponents will likely be occupied with the cop once he's out for them - not because he's aggressive, but rather because of how more cops will be summoned if they hurt Abnes. This makes the cop perfect as a distraction and he can even be used for most of the fighting, all the better when it keeps the fragile Abnes safe after having likely been punished to convince him. That being said, this is actually a poor tactic: it takes a few hits at best for foes to defeat a cop, they're not particularly strong and once defeated Abnes will have to go through the whole process of summoning and convincing another one. She will most likely be damaged while doing this, and she really can't afford to take a lot of damage when she's so frail. Thus, when summoning a cop, you really want to make the most out of him; you can't treat him like a dispensable minion.

The key to using cops to their full potential is by ironically keeping up the aggression towards foes even after summoning them, as this not only keeps them from further being harmed but also protects them from being defeated in the first place. You only need 1 cop around to ensure more come as Abnes takes damage, but it's definitely good to have multiples out to get that coveted Dogoo suit. The cops will come automatically with damage, but again Abnes can't afford to take a lot of damage. That being said, with the cops out Abnes can better mix in her various moves for more easily summoning extra cops, like tripping the D-Smash counter to protect a cop under attack.

Another option with the cops is to just abuse their stretchy bodies to play hit-and-run. They can make going offstage safe for Abnes, enhancing her edgeguarding game as after using her 2 jumps they'll snap her back towards the stage where she can potentially hit a foe who moved pass her.

With a Dogoo suit on, Abnes becomes rather terrifying, not due to becoming more powerful but rather the sheer range this adds onto her attacks, which combined with the typical speed her attacks come out becomes downright crazy.


NFINAL SMASHN

Violent Protest!
With the Smash Ball in her hands, Abnes has the world on her side! When used, the screen will zoom out to reveal that the match is being recorded LIVE and viewed on a large monitor by a female audience, where Abnes, gesturing towards her opponents, turns towards the camera and angrily shouts "NO MORE CHILD ABUSE!" or "DOWN WITH THE PEDOPHILES!" or something along those lines. With that, the entire audience is riled up, and are convinced to take up arms and signs!

The entire stage becomes filled with angry female protesters, most of whom are holding signs that vilify the opponent in some way, and will chase after and swarm them if they happen to be on the same platform. The damage dealt by the sign-swinging, bottle-throwing crowd is staggering if left unchecked - 25 non-flinching hits of 1% every second - but the mob can be attacked to send all the individuals flying and cut their damage output by 1% for every 1.5% dealt to them, 37.5% being enough to wipe them out completely. If you attack the crowd however, cops will show up to arrest you! They ain't gonna tolerate violence towards civilians. One cop shows up each time civilians are attacked regardless of the attack's power, and there' no limit to how many that can be summoned during this Final Smash to the point where opponents who resist too much will be absolutely swarmed by them. The whole thing lasts for 8 seconds, and with any luck you'll get at least 100% on every opponent out of it...or maybe more.


"Well, today's broadcast is at an end! I look forward to seeing you all again!

...Phew, that's over. What a pain in the butt. "
 
Last edited:
D

Deleted member

Guest
"I am one of the Seven Sages! The strongest of them all... I am Sir Copypaste!"


COPYPASTE


"I am the strongest of all the Seven Sages! And my name is... COPYPASTE!"

Copypaste is an antagonist in Hyperdimension Neptunia: Victory, the self-proclaimed strongest of the Seven Sages. Copypaste is not only the biggest showboat of the group, he is the most bulky and giant physically, as a giant robot with huge treads and drills on his wheels and shoulders. Copypaste proudly calls himself "Sir Copypaste" in his introduction and which is very flashy and over-the-top, but is easily dispatched by the protagonists. To his credit, Copypaste does come back two more times to fight again as a much tougher opponent, where he uses some more attacks.

Copypaste's personality mostly not seen in his fights where he only gets the same basic magic all enemies do in Neptunia (which are very low budget), instead getting it from the various bits of dialogue he says to the other Seven Sages or random NPCs. After his first defeat, he goes off to join a group of miners to find his life's calling as a digger/excavator, making use of his drills and explosives crafter onto his body. Copypaste is still loyal to the Seven Sages until after the third fight when he is reprogrammed (killed) by the protagonists and turned into a servile robot. One thing of note too is he is by far the most insulting to Rei during the initial Seven Sages introduction, mocking her alongside Mr. Badd for being incompetent and pathetic.

STATISTICS

Size: Bowser
Weight: Bowser
Ground Speed: Ganondorf
Air Control: King Dedede
Fall speed: Bowser


These statistics are actually more extreme than they seem at first glance, as Copypaste is slightly larger and heavier than Bowser. He's 1.4x as wide as Bowser for his treads which are Kirby's height, and then the body is around two-thirds the size of Ganondorf on top of that and 1.5x as bulky, making him a massive model to attack. At the same time, his ground speed is abysmal, and his air control is the lowest in the game. Fall speed is the only stat where he doesn't get an extreme just because most fast falling characters aren't actually heavyweights, and that would make Copypaste practically unplayable. His jumps are comparably tiny like Bowser's too, resembling him heavily in the air, with worse air control, but at least not falling like a rock too.

SPECIALS

DOWN SPECIAL: ROCK


Copypaste swings his set of arms downwards into the ground and tries to lift something out of it for a charge time as long as a smash. When he finishes, he pulls a round chunk of ground up, which ranges in size from one that resembles Charizard's Rock Smash at no charge, but can be as big as Bowser at max charge. The act of pulling the rock out of the ground is a hitbox that deals vertical knockback and 20-28% damage, and can KO at 140-120%. The chunk of rock can be carried around by Copypaste without any further hindrance to his already low speeds, and can be thrown as an item that's comparable in strength to half a crate's power in Brawl. This is only at minimum charge, at max this is up the full strength of a thrown crate, impressively powerful and something the foe's going to want to prevent. As the rock is held, it can be whittled down by foes attacking it, having 10-20HP from the time it's picked up by Copypaste, and reducing in size by shedding rock as it's attacked. Due to his model size however, it will only protect Copypaste's upper body. The move has comparable start lag to Rock Smash. A rock will leave a small sloped area in the ground roughly the size of the rock used cut in half, reforming to normal after Copypaste loses his current stock.

If the rock is dropped or thrown on the ground it doesn't dissipate but instead sticks around, dissipating like an item does if no one decides to touch it after that. Thrown it does damage similar to a crate, but is thrown at half the speed, making it easy to shield but harder to dodge. A foe can try to pick it up, but carries it like an extremely heavy item, scaling with the size of the rock until they are moving at half of Copypaste's speed, even worse than those annoying spiked bugs on Pyrosphere that are completely useless. Instead, Copypaste can make great use of the Rock in his other moves, or even pick it back up again and go to town, or why not pick up a whole slew of rocks? Turn the stage into a quarry so that Copypaste feels right at home.

In the air, Copypaste hasn't got access to the ground, so instead does something entirely different. He enters a stall then fall similar to the Bowser Bomb, dealing 20% damage and a meteor smash, as well as gaining super armour on his treads, which is very useful given it gives coverage for his entire upper body. When Copypaste hits the ground he creates the same shockwave on the ground Bowser does, dealing 8% damage and popping the foe into the air. Unlike Bowser, Copypaste's stall then fall, due to his sheer immensity, will grow in power the further he falls, covering his treads in a fire as if he was entering Earth's atmosphere. This grows in power until at the peak of falling two Ganondorfs, he now deals 35% damage and enough knockback to spike a foe off the stage like Ganondorf's down aerial, from pretty much any percentage, as well as breaking a full health shield. The shockwave at the end even increases in size to be at max, as long as battlefield platform, and deal 15% damage, enough to vertically KO around 180%

If Copypaste lands on one of his rocks, he will break it in two, creating two rocks. By using the down special from a long way in the air, the two rocks will more than simply fall apart, they instead fly away in opposite directions with a high amount of power and at a high angle. They travel from just a small distance to up to a platform away, at a diagonal direction, to cover against foes trying to jump away from the shockwave and punish Copypaste, making it almost completely safe. The rocks deal between 15-22% damage and can KO at around 130% and the speed they travel also increases from an already fast base speed of Falcon's dash, to up to 1.5x that fast. The rocks tend to go at such a high angle that throwing them off stage isn't too problematic, but if they do they will become a weak hitbox dealing 5-10% as they fall, enough to act as a weak gimp. These new, smaller rocks can be much weaker than the huge ones and be used more as general items by the foe, but they may be advised to just throw them off-stage instead.

SIDE SPECIAL: CRUSH

Copypaste revs up his treads then dashes forward with the same start lag as Wario's Bike, going forward at the speed of Wario's bike, his body becoming a hitbox that deals 15% and high knockback, but only enough to KO around 200%. Copypaste gains super armour for this move, but only on his front, not his head or his back and can be grabbed out of it if timed well, the end lag has a long winding down animation making it easy to punish and forcing Copypaste to run out the end of the move to get away if he whiffs it. He can also attempt to grab, cancelling the move early, but resulting in 5 frames more end lag. This can be used as a recovery in the air as well, reducing his fall speed to half for the duration of the move, but leaves him in helpless at the end of the move. It's like a combo of Ganondorf's side special and the Wario Bike. A foe caught by the bottom of Copypaste's hitbox, his treads, is instead crushed under them in a grab hitbox, dealt three hits of 7% and launched diagonally with enough strength to KO at 200%. Copypaste will laugh maniacally while crushing the foe in this way, this is what he wanted to do all along! Copypaste can even tilt up to sacrifice a third of his speed, but increase the size of this hitbox to around double its normal range by leaning backwards. At this point, Copypaste can tilt forward during the attack to instead send the foe behind him by pivoting on their body and collapsing his weight on the other side.

This move can be used on rocks to crush them under Copypaste, making him just as happy, but instead sending out lots of little rocks forward in a cone-shaped hitbox as wide as a platform and as tall as Ganondorf, dealing constant hits of 1-3% and flinching knockback for the duration of the grab, which lasts 1 second. This shoots out around ten rocks, but unless on a huge boss character this is never going to hit that much, and the rock used will gradually get smaller as Copypaste does this to it. These rocks also don't stick around after being used, just being temporary projectiles due to their small size. This is a great way to rack damage and for Copypaste to safely use the move, not having to go through the painful mentality of having to run away if he whiffs - Copypaste is too brave to retreat!

If the foe was carrying a rock, or was next to one, both will get crushed at once, dealing far more damage and knockback as a result! The order doesn't exactly matter, because Copypaste can just pivot on his target to crush the rock in the foe's direction, and if this works he can boost the power of the move by around 15% to a fantastic 36%, that KOs at 150%! This is harder than it sounds though, unless the foolish foe was stupid enough to pick up one of Copypaste's rocks, they need to be very close to one. The easier solution is to pick up rocks all over the stage so the foe can't avoid them! The downside to this is as the rocks get smaller, they actually end up breaking up before they can deal the full damage, for example a minimum sized rock split in half will then only deal about 5% extra damage in the foe, resulting in less carnage, but still boosting the KO power enough to KO at 180%. And this is just what he does by standing on the rocks.

UP SPECIAL: TORNADO


Copypaste starts to spin around with his arms extended out, similar in animation to ROB's down smash and dealing the same amount of damage and knockback as that move uncharged, 4 hits of 2% and a final hit of 5% for 13% damage, dealing enough knockback to KO at 160%. Copypaste can angle the move like ROB's side special, and this works in tandem with his ability to extend the move by pressing the input repeatedly like Luigi's Tornado, adding up to an extra 4 hits of 2% for an overall total of 21% damage, to KO much sooner at 140%. This is how Copypaste recovers using this move, it launches him straight up 2 Ganondorfs, not giving much of any horizontal movement, but that's why the side special exists. In fact in the place Copypaste originally used the move, he creates a Flame Tornado the same size as they are on the SSB64 Hyrule Castle, lasting there for ten seconds! If you used this move to recover, this won't be very relevant, but on the stage it has many uses.

The Tornado has a weak suction effect, pulling in foes who get within a close range of it, about double the range of Rest. Sucked in, a foe is swung around the sides of the tornado, dealt 5 hits of 2% damage then launched with strong base knockback upwards, 2 Ganondorfs, but almost no scaling, so only able to KO at super high percentages. This all happens in the fraction of the time it takes the Hyrule Castle's to do it, just under a second. Copypaste must be saving that pleasure for his personal moves. The angling that Copypaste can do angles the Tornado he creates, making it lopsided if he spins in one direction, the relevance of this is the speed of the things inside it, as it will make things on one side swing around faster to the other, that swings around slower. This is important, because Copypaste himself and his rocks can enter the tornado too! When Copypaste enters his tornadoes by pressing up in it, he becomes a hitbox that deals 15% if he manages to hit a foe, and bashes them out of the tornado for strong horizontal knockback, this is Copypaste's tornado! It's a hitbox as big as he is, with his arms extended out as wide as two Bowsers. He won't go up in the tornado though, as he's too big and heavy, instead having to rely on his up special. The foe may make use of the tornado to recover, but will then take the damage and knockback too.

A rock that is picked up will circle in the tornado for as long as a character, hitting the foe out of it for anything from 3% for the tiniest rock, to 20% for the Bowser sized one, which can KO at 170%. Off stage this can help Copypaste recover, as he's also launched up the 2 Ganondorfs, and can be a great trap if Copypaste manages to set it up, not easy given his statistics. It gives an easy way for Copypaste to get into the air without using his up special, anyway, and puts him in prime positioning for his down special. On stage this is more practical as it lets Copypaste use his side special into aerial rocks, producing the same hitbox as he crushes against the rocks as he does on the ground! However due to the fact he is not crushing it against the ground, instead just against his treads, the amount of rocks is reduced, but because the ground is not in the way hits as far down as it did up, giving it much greater range at the cost of damage, still causing 10 smaller rocks to fly out as projectiles, just over a larger area. Just as with the ground version, this can help to ensure Copypaste's safety using side special, this time in the air. When you work in construction, safety always comes first.

NEUTRAL SPECIAL: DRILL


Copypaste takes a huge drill the size of the drill item in Smash 4 out of his compartments and holds it out as it spins out of control, then lets it tear off across the stage at a straight horizontal angle, dealing constant hits of 1% up to 20%. After travelling around two platforms, the drill explodes, dealing 15% damage that can KO at 160%. This has similar start up lag to Warlock Punch, but the drill is a constant hitbox from the start of the move. Copypaste laughs diabolically as he charges the drill in his hands. The drill usually travels at the slow, slow speed of Ganondorf's dash, but can be made to go faster by charging it as long as a smash, making it go up to twice as fast and twice as far, and exploding much further on, dealing an additional 0.5% to opponents for a potential 30% if they refuse to DI. The drill can be DI'd out of before the explosion within the first ten hits, or jumped over fairly easily to avoid the explosion the slower it's going, but will deal a huge amount of shield stun due to being multi-hit. It's destroyed early by perfect shielding it, largely harmless if the foe can manage that. The drill can easily shield poke if it hits a foe low or high. Copypaste can press the input again to have it explode early, by enthusiastically clenching his fist! If he tries to summon another drill too early, during the explosion, nothing happens and he looks disappointed.

The drill can be angled in three other direction, backwards (as with all neutral specials) dealing 1.2x the damage and knockback at the cost of some extra lag, but also upwards and downwards. Upwards largely just works the same way, but going up. Downwards has Copypaste shoot the drill into the ground. If Copypaste does nothing, the drill will come back up in the same place it was sent into the ground, drilling upwards after 5 seconds of digging around in the stage and go for 1.5x as long as a drill originally set to go up (compensating for Copypaste's own height). Copypaste can spontaneously command the drill despite it being underground, emphatically pointing and commanding on stage! This causes the drill to instead target wherever Copypaste is and come up immediately, even if he's in mid-air, potentially surprising foes waiting to punish or expecting his terrifying down special on the ground. Above ground, the drill can even go through the stage's obstructions to kill those cowardly, annoying campers hiding behind walls or other obstructions Sakurai placed randomly on the stage. It will slow the drill down to half its usual speed as it travels through that area. The drill can explode inside of solid areas, if it's near the surface, the explosion will cause a quake and debris to shoot out of the ground. This causes lots of flinching over half a second and a burst of hitboxes dealing 1% 5-10 times, depending on how close the drill was to the surface, the quake half a platform long and dealing 5% damage and hitting the foe weakly into the air. Sadly this doesn't actually terraform so Copypaste can't demolish stages like 75m or Kalos Pokemon League.

Copypaste can combine his drill and the rock, if he's holding it or manages to puncture the rock with his drill in midair! This carries the rock forward at the drill's normal speed. Instead of drilling the opponent, the rock will now explode into many pieces when it hits the foe. This makes the hitbox much larger, as big as the rock, and deals 10-15% using smaller, broken down rocks, with medium knockback. However, if you get the Bowser sized rock on there, it deals 30% damage and can KO at 100%! This goes down to 22.5% damage at the no charge rock, and can KO at 130%! Copypaste's ability to detonate the rock early comes in handy, as when it explodes the rock will create four equally sized rocks a quarter the size of the original that shoot out in four diagonals, dealing a quarter of the damage and knockback, but in a gigantic hitbox that is near impossible to dodge at remotely close range. The exploding rock here is more useful than in side special, as it leaves these broken down rocks on the stage, these can be carried much easier by the foe though to use against Copypaste. It's even possible with the right timing to hit the foe with the rock then have it immediately explode to pile on the damage and knockback, what awe-inspiring power. The drill is able to catch out foes in Copypaste's tornados and hit the rocks within them too, creating more havoc for the foe to try to dodge.

Copypaste can button mash his neutral special to make it rev up even harder during start up, then aims it at the ground to make it terraform. This does 1.5x the usual damage and knockback, but as the foe is being dug into the ground, the knockback is more of a boon so the foe isn't combo'd immediately out of the pit. This can be straight down, making a pit as deep as a Kirby height, or as low at the stage will allow (this rule applies to all of Copypaste's terraforming). He can also aim the drill at platforms to destroy them in parts. When rev'd up in this way, instead of exploding, Copypaste can press the neutral special to change the direction of the drill as it goes, angling the drill to make a pit that slopes more harshly in the direction that was dug into. This creates unique slope mechanics that can make the foe slip down as fast as Ganondorf's walk at max. Copypaste can ignore this with his side special, riding across the pit at the same speed as always, taking advantage of foes trying to get away going up the slope. If Copypaste uses his down special into any of his currently created pits, he will deepen them by a further 1 Kirby Height, or up to another 3 Kirby Heights at max power. This will naturally help with the terraforming, and make foes fall towards Copypaste in range to help him be aggressive and use the shockwave as an attack.

SMASHES

FORWARD SMASH:
POLISH

Copypaste lurches forward and summons two giant drills on both of his hands, drilling them together nearer the ground in a move similar to the Koopalings' forward smash in Smash 4. The two drills are themselves huge hitboxes as big as the one in his neutral special, dealing 3 hits of 4-7% damage and knockback that KOs at 200%, but the really strong hitbox is the one where the drills meet that deals 3 hits of 10-12% damage, this KOs at 100% uncharged, but 80% fully charged. The start up for the move is 1.3x longer than the Koopalings move in Smash 4, making it slow to start up, but extremely powerful. This move can be used on Copypaste's rocks, this sheds off all the excess rocks and polishes them down to a boulder shape roughly the size they were before they were in the forward smash, then shoots them off. The range they are shot off depends on the original move's charge, but also largely resembles the charge time of the Koopalings neutral special in Smash 4, combining two of his core moves! Copypaste is too efficient for such a useless move having its own input. The boulder as it's shot out will deal 15-22% and KOs from 135% uncharged, or 115% fully charged. This is not much less powerful than the original forward smash, but highly predictable given the start up and the set up necessary to make it work.

The boulder will stick around on stage unless it goes untouched for a long period of time, and can be reused just like a rock! Copypaste can efficiently pick the boulder up just the same as he could in its rock form, and toss it around for largely the same strength as his rock, only reduced to 0.8x its normal strength. The benefit of the boulder is when it's thrown to the ground, it can continue rolling forward as a hitbox that deals 5% damage and medium radial knockback. This is when it's at its weakest, thrown down slopes it will build up momentum, and at higher speeds can do up to 20% damage and KO at 150%! This is not far off from what it does right out of the forward smash. The boulder can also be polished again with the forward smash, this reduces its size to 0.8x what it was before, but shoots it out again in the same way! The hitbox is smaller, but being exposed to the drills again makes the boulder red hot, adding an extra 5% damage to the attack to make up slightly for the smaller hitbox. The forward smash can also be angled to launch the rock forward, up or down, angled down hitting off the stage and bouncing once before it falls back down as a hitbox, potentially hitting off-stage foes, or to pressure into Copypaste's neutral special drill. It can also be launched into Copypaste's tornados to throw it up in the air for the same effect when it comes back down, or to hit the foe within the tornado, where it builds up momentum as it spins around like it does on the ground. On a particularly lopsided tornado, the boulder can even reach its max speed, and will carry this over to when it's shot up into the air.

Copypaste can make the move even more powerful if he manages to combine it with the hitbox of his drill from the neutral special, making the middle hitbox deal an extra 5-10% damage and KO 20% lower, an insane number, but largely hard to make work. This really only works by either getting ahead of the drill and catching it in the forward smash as it moves away from Copypaste, catching it as it comes out of the ground, or using the tornado to keep it in midair, all very predictable for the foe to respond to. An easier way is catching the foe with the neutral special itself, then Copypasta can position himself for them to come towards him, but this isn't easy given Copypaste's slowness. At that point, this extremely powerful combo is basically guaranteed if the foe doesn't have enough time to DI out, but has pretty tough timing. Drilling a neutral special drill at the back, rather than on the sharp end, will instead boost it off 1.5-2x its normal speed and power, plus enable Copypaste the ability to angle it diagonally down into the ground, or at a 45 degree angle diagonally into the air. Angling it diagonally into the ground means if it is summoned back up, it will go in that direction rather than straight up, leading to even more powerful mix ups! Similar to side special, this move's hitbox is big enough to capture both the foe and a rock to send off another hitbox at the same time, smashing them with a boulder if they don't DI right, and the fact this move can be angled can confuse foes about where to DI, on top of having to watch out for the falling boulder and other factors like percentage.

UP SMASH: WHIRL

Copypaste turns to face the screen more and raises his arms into the air, then causes his whole upper torso to spin around, opening out his arms as he does so, this deals 5 hits of 2% damage, then a final hit of 15-20% as Copypaste strikes out at any foe caught by the multi-hit attack, with a powerful uppercut! The last part largely resembles ROB's new Smash 4 side special and can KO from 170-150%. The move can be angled slightly as with most all tornado moves in Smash, and Copypaste's own up special, but angling this move instead moves Copypaste slightly in that direction, at the rate of Ganondorf's walk and can go up to a platform in distance over the course of the move, this turns his hitbox slightly to become more lopsided left or right. This deals slightly more knockback but straight horizontally, rather than at a slight diagonal angle in the regular move, making it impossible to star KO. This can pressure foes around the Copypaste tornado, or even hit them into one!

Bringing along his rock or boulder, when Copypaste swings around, he will not perform the last uppercut but swing those items around instead, dealing 10-20% damage depending on their size, and knockback that KOs at 200-180%. This largely can't be combo'd into itself as the normal move can, unless Copypaste has the foe up against the wall. However by carrying a smaller rock, Copypaste can do slightly more damage and less knockback, for example a quarter of the rock smash sized rock will instead deal 5 hits of 3% damage, adding an additional 5% to the move, and simply pushes the foe slightly further away making it possible for them to DI. What makes up for that possibility is that the rock or boulder acts as a shield for Copypaste, blocking attacks as they come in if they hit him as the object passes over the front of his model. This makes this move a great approaching move along with its movement.

As Copypaste moves forward, he can go inside of his tornados, and he can actually affect their turn rate too! During his up smash, Copypaste becomes resistant to the tornado's normal effects due to his own spinning being used to offset the wind pressure - trust him, he knows all about physics. Depending on what direction he's turning, either he will speed up the tornado even more in its current direction, causing it to spit anything out twice as fast and at 1.5x the knockback, or can turn it the other way, slowly bringing it to a standstill and causing all objects in it to drop. The first is mostly useful for if a foe is already in the tornado or a rock or boulder is, and Copypaste is getting impatient and wants to speed up the process. By bringing a tornado to a stop, Copypaste can instead follow up using the objects in the tornado, or hit the foe with the end of the move itself. Copypaste will also be able to attack with anything he wants if he manages to slow down the tornado in this way, but this can be a disadvantage as being sucked up by the tornado is a good way to guarantee the move is safe if it doesn't land as well.

DOWN SMASH: FLATTEN

Copypaste laughs maniacally as he revs up the engines in his treads, then starts to charge around in a circle very quickly, having surprisingly quick start up. Any foe caught within a Jigglypuff on the ground next to Copypaste is immediately crushed under his treads as he goes around in his circle, then pulled around and dealt up to 10 hits of 1% damage, before Copypaste comes to a stop where he started dealing a last hit of 20-25% damage, this can KO from 110-130%. If a rock was in the way, it will act largely in the same way as side special, shooting out smaller rocks as projectiles on either side of Copypaste to largely cover his end lag. A boulder will simply be kicked out of the way at the start of the move, or if it was very close will be dribbled in front of Copypaste then launched at a high speed at the end in his original forward facing direction, dealing 15-20% depending on charge. The charge determines how fast Copypaste spins, and reduces the duration slightly, which helps in making it less easy to punish.

If the standard input is held down during the move, Copypaste will really get into things, and his treads will turn red from the power he's exerting! This isn't for the sake of the foe though and actually adds 10 frames of end lag to the move. What it does is flatten the stage out around Copypaste, creating a low dipping point at the middle of Copypaste's hitbox that can go down as far as 3 Kirby heights at max, or half that much uncharged. This dipping point will slope up on either side up to a platform far, or half that uncharged, creating a slope in the stage! This can't be lowered any further unfortunately, nor can it flatten stages beyond a certain point where there'd be no stage left. Copypaste definitely wouldn't want to fall through the stage anyway, given his stats. Don't worry about the drill from neutral special having enough room down there though, as it's basically magic.

Creating a slope creates a few obvious immediate advantages for Copypaste: his boulder can now easily build up momentum if pushed down it, he can use it to cover from campy foes and use it as a base to pull more rocks! Now he can use his rock and the slope to fully protect himself from the foe's attacks. Aside from that though, the slope lets him use his side special and make it very hard for the foe to avoid it, as they no longer can simply go over Copypaste so easily. Not only that, but inside of this slope, Copypaste's own normally high knockback can be reduced by hitting the ground first, not letting foes get away so easily. Not to mention with his down special, Copypaste can stall then fall into this pit, and with a rock there, almost literally no space is left for them to run! This allows a fitting dominance over the stage given Copypaste just has a rock there first, let alone what else he can do from that point on! The slope will naturally subside after Copypaste's current stock ends, other areas can be flattened given they don't outright destroy the stage and can link together large areas of ground with the lowest dipping point if allowed to spam the move.

STANDARDS

JAB:
HEAT IT UP!


Copypaste puts out his arms to command the manly furry deity on his stomach to fire out a stream of fire in controlled bursts, resembling Robin's jab in Smash 4, but slower and dealing 2% a hit, at the cost of being only 0.6x as fast. This can be combo'd into for three hits before the foe DIs out, away rather than up, but there is any room to shield in the middle of the move if the foe was grounded at the end. The whipping fire streams will pull the foe into the air within two hits however, meaning the foe only has one opportunity to shield and roll out of the move or be forced to DI. The streams will hit diagonally up and down, but always pull the foe into the air, which is why they're kept airborne if hit twice by the move. If Copypaste tries to hit a fourth time, he will instead initiate a large explosion from the deity's mouth, also comparable to Robin's jab if he has the Elfire tome, but around 3x as large, and dealing 10% damage and knockback that KOs at 250%. Landing this after the jab is comparatively difficult to other jab finishers, but due to the size of the explosion, is a great way to scare off cowardly foes from trying to approach after the move, helping to cover the move's awkward end lag. The explosion does little shield damage, if they can manage to get back to the stage during the start lag, not possible if they were hit multiple times by the fire streams.

Copypaste can use this move on his rocks or boulders to keep them airborne if they fall in front of him, using them as a shield in midair against the enemy's projectiles or attack similarly to King Dedede's Waddle Dees (you know, the viable side special). On the ground, he can do the same things with the rocks and boulders, hitting them forward. If he can keep a rock in midair until the end of the move, he can use the explosion to separate it into four rocks just like in neutral special, although this is very telegraphed it can surprise foes trying to camp Copypaste and the huge hitbox makes it very hard to dodge once Copypaste has those weaklings cornered at the ledge! The boulder won't be exploded into pieces, but instead given a massive boost to its momentum, and given a small amount of delay by Copypaste, he can angle it slightly by hitting from below to send it up slightly, or forward, or down.

This move's usefulness is even better when Copypaste sets it up inside of a slope, as he can smash forward during the move to slide down it together with the foe, but the hitbox of the move makes it very awkward for the foe to DI out of it, except for trying to go up, naturally taking even more damage. This also makes the knockback a bit wonky at the end, usually in Copypaste's own slopes, resulting in the foe getting bounced off the other side. This is why going up a slope has its own advantages too, as the knockback at the end, with the foe having to DI away and up, can KO much sooner through turning into a vertical KO move. At any point Copypaste can choose to not smash the forward direction, bringing Copypaste to a full stop, messing with the foe's DI. This is all but necessary at times when the move is so easy to DI out of normally, but only helpful on sloped areas. It's also just naturally helpful to do against a wall or rock of course, but the benefits are not as obvious.

FORWARD TILT: GIANT ROBOT PUNCH

Copypaste rears back one of his arms then punches it forward, dealing 10% damage that KOs at 230%! Wait, that's weak. This happens if the move is double-tapped very quickly, coming out very fast in only around 5 frames, but if the input is not tapped Copypaste will boastfully laugh as he rears up his arm behind his back, resembling the DK neutral special! This can go on for 0.75x as long as DK's animation, not counting the charging but the long animation of winding up the punch. As the long animation goes on the punch builds up in power, and can get as powerful as dealing 20% damage and can KO at 150% if the full animation plays, taking 20 frames. Not only does this act as a hitbox in front of Copypaste, but if a foe is behind Copypaste when he lets go of the wind up, and within the large range of his arms, they will be thrown forward over Copypaste's body and hit by the front facing hitbox too! The first hitbox deals between 5-10% damage, making the move naturally KO earlier too. One of the best ways to ensure you hit with this is to get a tornado going and throw the foe in it, then nail the timing of hitting them as they swirl around, it's tricky but very flashy and powerful.

Part of this cool combo that Copypaste can do is his throwing items, he can throw his rock or boulder at the end of the punch by pressing the standard button again. At low percentages it's possible to combo the punch into the projectile item being thrown, but more than that gives a lot of pressure to the foe to DI towards Copypaste. If they DI away, they're in danger of hitting the item. This can combo from behind Copypaste with the wind up, or just with the punch itself. Halfway through the wind up, the arm and front half of Copypaste gains super armour against knockback for the several frames when the punch comes out, giving it power on par with the Donkey Kong move! This is great against goes trying to camp the ledge with an attack, forcing them to wait out the move or jump over Copypaste, as they can no longer trade their ledge attack. I won't bother copy pasting from the SSB wiki about the Giant Punch, but suffice to say the end lag is bad and he can't cancel out of it as it's not a special, meaning he's got to commit! The end lag does scale with the wind up too, so at low levels, this is easily one of Copypaste's fastest attacks.

If this move is used in front of one of Copypaste's tornadoes, and the standard input is pressed at the end of the move, Copypaste will use his immense power to shift the tornado into his own projectile! This highly resembles the one custom DK has in Smash 4 where he creates a horizontal hurricane out of his Giant Punch, but scales here depending on the tornado and wind up of the punch. The tornado's size, shape and any objects it picked up will be factored into this interaction, whereas the strength of the Giant Robot Punch itself has an effect on how far and fast the tornado travels. This ranges from one to two battlefield platforms, and this is very powerful, because the foe can still get sucked into the tornado as it travels, buffeted by the objects, then launched horizontally for the ultimate wind hitbox. Not to mention Copypaste's great reach and super armour means he can actually hit the foe, desperately attacking him to stop his rampage, into his tornado behind them and then send both on their merry way to the junkyard.

UP TILT: POWER ATTACK


Copypaste swings both sets of arms forward, dealing 12% damage and variant knockback depending on when the move hit, even hitting at first above and behind Copypaste, this can KO around 180%. This hits the foe to be overhead and in front of Copypaste, perhaps even to combo into itself. The next stage of the attack will hit the foe into the ground and bounce them off, usually not good for a follow up except at low percentages. The next will just hit the foe forward, this is the most common way the move will land, and has the most frames. At the end of the duration, this can pull the foe towards Copypaste used at Rest range, to create an easy, powerful follow up, even a grab. Compared to his other standards, the up tilt is not too slow, coming out in 5 frames, but takes 8 to hit in front of Copypaste, making it a great anti-air, but simply a good melee move by Copypaste's slow standards.

The move can be altered slightly if used immediately after itself, as Copypaste will swing his arms all the way around, only takes 3 frames to restart the move and cancelling the end lag of the move. This deals the same damage and knockback except behind Copypaste, and can be used as a makeshift back aerial, considering how tall Copypaste is, and his arms have great reach for a melee hitbox. Just as important, if Copypaste was holding an item, including his rock or boulder, he can press the standard input at any time during this move to toss it in a direction corresponding to the current position his arms are swinging in. This can roll the boulder like a bowling boulder, or lob the rock into the air, or even throw one of the two behind Copypaste! By using this move over and over, it will deal an extra 2% each time, maxing out at 20% damage that KOs at 140% after 3 repetitions. This power extends to tossing the boulder or rock - buffing the boulder to its maximum momentum whatever direction its thrown, and throwing the rock powerful enough to buff its damage/knockback by up to 1.3x!

The move has a sweetspot at the end of the range of the move, where Copypaste has claws! This deals hits of 3% every time they pass over the foe, and little to no damage, resulting in a few frames of flinching. This gets worse the faster Copypaste spins his arms, creating a higher frequency of claw swipes to flinching on the foe, forcing them to roll away or try, as spot dodging becomes like jump rope. This can make Copypaste into a bit of a hazard all on his own with a buzzsaw like hitbox constantly out. Eventually though, Copypaste will be forced to stop, after doing 5 rotations in quick succession, leading his body to overheat in bad end lag. This isn't all bad though, as for the next second, Copypaste's body becomes red hot and will deal 5% damage to anyone that directly touches it. This is passive, but a little bit of damage never hurt anything. A foe can still do everything they normally can like grab Copypaste, and ultimately if he just spams this to do a measly 5% it's not worth it, but helps to give more of a point if Copypaste does choose to go intensely spam the move. Not to mention, it adds to moves that use his body as a direct hitbox, like his side special.

DOWN TILT: MELD


Copypaste puts out his arms in a slightly different strongman-ish pose to his jab, leaning forward, and causes the earth elemental deity on his stomach to shoot out a flame pillar! This hits the ground directly in front of Copypaste and flares up very quickly, but has a hitbox as large as Ness' pillar for the duration of the move, dealing 15% damage and knockback that KOs at 200%. This is comparable to the flames on the awful 75m stage. The range is surprisingly not as good as could be imagined from the move's appearance, being directly in front of Copypaste and only extended to around half the range that Ness throws the PK Fire. Its vertical range is just as good though. The hitbox lingers for a long move duration similar to other flame pillars, making it a very good counter type move. The attack has very bad start lag, 15 frames, but can be used offensively so long as Copypaste catches out his foolish opponent at the right time, making use of the good range.

This can be used on rocks and will meld them to the ground! Don't question the logic, Copypaste is in construction! The rock can no longer be picked up by the foe, instead its set amount of HP has to be diminished, the same 10-20HP depending on its size, then it will collapse into many smaller rocks and be useless to Copypaste. The side special can still be used on the rock by Copypaste as normal, without launching the rock away, and even can be busted apart as normal by his down special, largely nothing changes for him and he loves a bumpy stage! This move in particular now spawns higher up, protecting more of Copypaste and can KO earlier due to being higher, and it's more room for his drill to move around in. This can be achieved as well by using this part of the move up against the wall, again useful for the side and down special, and even acting as a way to redirect the foe's knockback if they bump into the rock! The boulder largely acts identically to the rock when melded, but can be unstuck by an attack that does over 10-25% too, allowing Copypaste to launch it, or an equally powerful, strong foe. Copypaste won't complain. It's not too impressive on the smaller ones.

The flames can be used in close range to Copypaste's tornado, to turn it into a true flame tornado! This gives the tornado an extra 1% damage on all its hits, dealing 5 hits of 3% instead of 2%, and gives the tornado a stronger suction effect. Imagine King Dedede standing back to back inside the tornado, using his inhale. He sucks more than he does in Smash 4! This not only affects foes, but Copypaste and his rocks, especially his boulders that aren't stuck to the ground. This gives a better reasoning to also stick the rocks to the ground if you don't want to have them sucked into tornadoes, but more than that, makes the tornadoes even more hazardous. Copypaste welcomes being pulled in by the tornado for his own moves that love the forced spacing it brings, either defensively sucking him back in if he whiffs a move or giving him the extra reach he needs by pulling him forward.

DASH ATTACK: ACCELERATE

Copypaste's treads heat up as he bursts forward a distance the same as Ganondorf's dash attack and deals 12% damage, this can KO at 170%. This is one of his fastest attacks and due to his size, this can be used to great effect. Going down slopes, including his own, the distance travelled can be increased to 1.1-1.5x the normal rate, and the hitbox increases by a respective 1-5% too, this KOs 5% earlier for each percent tacked on. Likewise, charging into walls, or rocks/boulders melded into the ground won't stop Copypaste dead in his tracks, unless he's hitting a small boulder and launches it forward using this attack, a good mix up in of itself. If that isn't the case, instead Copypaste will use the force to launch himself slightly into the air, giving an extra, if small jump to use to get into the air! This can be handy for when Copypaste doesn't have a tornado out, or simply doesn't want to go to that much trouble just getting into the air.

This move's momentum carries over for a short period after the end of the move, due to Copypaste's tread wheels not being Ganondorf's slow, slow legs. He will decelerate over a second from his max speed back to normal, able to use his grounded moveset while moving forward. This is largely just a cliffnote on most moves, but most helps the side special as it gives a direct speed boost to it, overall making it go 1.5x its normal speed normally, or up to twice as fast if used going down a slope! This is the best way Copypaste has for getting over hills and similar obstructions Sakurai put in his way, as he uses the acceleration from his dash attack to build up into a super fast side special.

AERIALS

NEUTRAL AERIAL: EXHAUST FIRE

Copypaste puts his arms out on either side in a T pose, slanted forward slightly to resemble the Dedede neutral aerial, and lets out all the fire from inside his body that has been generated from all his powerful machinery overheating. This deals 7% damage to anyone in a close range of Copypaste and medium knockback. The Dedede move has always been practically useless, and this move has a reason to exist outside just the hitbox, which is better here already due to the huge size of Copypaste's body. Once per air trip, Copypaste can use this move to stop his fall speed in midair, similar to how ROB's up special works, but only stalls for half a second. This can be cancelled into any aerial though, making it easier for a clunky, cumbersome character like Copypaste to land his other aerials. The move doesn't move Copypaste at all though, so its use as a recovery move is very limited. After being used once in the air, the move no longer does this, simply producing the hitbox.

The attack portion of the move is buffed depending on how active Copypaste has been over the last ten seconds. For every move that Copypaste has performed, this move's damage is buffed by 1% as the size of the flames increase, letting off more steam from being more active in the match. At max, this can buff the flames to reach out to double the size of King Dedede's neutral aerial, and is massive on Copypaste's frame! The damage at max is also buffed to 17% and can KO at 150%! This is with ten moves used, with one move used, this is around 195%, every move buffing the KO power by 5%. Likewise, the amount of time Copypaste can linger in the air is also increased, from 0.5 seconds to up to 2 seconds, buffing the stalling time by around 0.15 seconds for each move. That is hard to accomplish as such a slow character, but moves that can be charged, such as his smashes and down special, will give more "moves" to the counter, 1 move for the uncharged move, 2 for the midpoint, and 3 moves for the fully charged version. This gives a reward for Copypaste putting in more effort despite the fact his moveset is so slow, and can catch a foe off guard if they were expecting that whimsical and unused Dedede neutral aerial hitbox.

As the move becomes more powerful, it comes out faster and faster, eventually coming out on frame 1 at max power, countering the dread throw into up tilt combos that all heavyweights fear. It also gives Copypaste super armour at the highest levels, ranging from heavy armour at 3 units, to super armour at 6 units, and invincibility at 10. This makes it pretty important for Copypaste to save it for if the foe wants to use their combos prolific in Smash 4 for some reason. The foe may try and delay the throw, but pummeling Copypaste will just make him fly further away and at higher percents the combo is likely not going to work anyway, if they can actually wait enough of the timer out.

FORWARD AERIAL: SMACK AWAY THE COWARDLY WEAKLING

Copypaste holds one of his huge hands up in the air, covering it in flame because he's fire elemental for some reason, and smacks downwards in a motion similar to MegaMan's forward aerial. This propels Copypaste downwards at 1.5x his usual falling speed for the duration of the move, acting as a counterbalance to his neutral aerial in letting him return to the ground he loves. This deals 10% damage at the start of the move and will smack the opponent downwards, however nearer the ground this can KO if the foe ricochets off the ground, this is pretty weak though and only KOs at 200%. This is reduced if the foe hits something in the way, such as one of Copypaste's rocks or boulders he's got laying around. Depending on their height, or where the move manages to hit something in the air generally, this move can turn into a powerful KO move that KOs at 150% on the platforms of battlefield, a rock on one of them reducing the needed percentage to KO by 10-20%. The hitbox changes if the foe is hit late in the animation, instead smacking them at weaker knockback down. This can be helpful too in letting Copypaste get to the ground as well. Used near to the ground in general, this move, like MegaMan's move, allows for Copypaste to follow up with his ground based attacks like his side special by riding into the foe in prone, forcing them to get up early and jump over.

This move can be used on top of Copypaste's drills, the smack so powerful it sends the drill into a downspin as it starts to malfunction. This basically allows for Copypaste to easily redirect it to go diagonally and down, while glitching it out so it doesn't explode on its own anymore, but it also no longer does multihit, instead dealing a solid 15% and knockback that KOs at 165% if it hits anyone on its downward descent. When it goes down, it spirals around making the hitbox larger, but this does allow it to potentially hit the foe multiple times, replacing a multihit attack with one that goes in circles to attack the foe as they are hit diagonally down/forward unless they DI correctly. This is one of Copypaste's best pressure moves if he can actually set it up, especially if this is used off stage on a foe trying to recover. The logistics of that are pretty difficult though, what's easier is just sending it down as a generic bomb to try and hit the foe, and having Copypaste approach at the same time. The speed at which the drill goes down can even be altered slightly by hitting it early or late, sending it down at the speed of Falcon or Sonic's dash respectively. Not to mention that Copypaste can always just detonate it himself early as well, if it does start careening off stage and meaning he can't use his drill for a while. That is the cost of trying this as a gimp move, Copypaste doesn't have time to waste like that!

UP AERIAL: SPIKES

Copypaste shrugs his shoulders together, creating a small electrical sweetspot hitbox where the two meet that deals 16% and strong vertical knockback that KOs at 150%, but is hard to land. The easier part to land is either of the two spikes, which will send the foe up and left or right depending on what spike hit, and a decent 12%, but this only can KO around 230%, pretty underwhelming for Copypaste. This is improved some by the fact this move has very nice range and is easily landed, so long as the opponent is above Copypaste, and unlike some pretenders this move gives enough coverage to Copypaste that those stall then fall from lesser characters, like Smash 4 King Dedede, will not be able to just ignore this hitbox. Plus their big frame will find it harder to dodge the sweetspot. On all other characters, this is one of the fundamental air-to-air attacks Copypaste will be using out of his tornado when he goes to try and get a star KO on an opponent he chased up there. He can position himself with the neutral aerial. He can then use this move when the foe is in position, essentially forcing them to try and approach from another angle, or try and hit Copypaste from his vulnerable sides.

Copypaste can use this move to juggle his foe or his rocks and boulders in the air, or use the sweetspot to send them with a powerful charge straight upward. The foe may choose to avoid hitting the KO part of the move, and instead just be juggled if they can't get around the hitboxes. This is powerful enough that it won't come back down for a good while, acting as a nice pressuring tool for Copypaste to utilize at that point, or just keep juggling in this way to scare the foe away from that area. A rock will uniquely break into three equivalent pieces when exposed to this sweetspot, being thrown straight up and diagonally up and left/right, each retaining a third of the original rock's size, and dealing 5-15% damage and medium-strong knockback. This can be very powerful at close range, and it's very plausible to have the rocks either in juggling or thrown up from the tornado, come down to work as part of this onslaught by Copypaste. The boulders act slightly differently mechanically compared to the rocks, as they can potentially be juggled forward rather than up if they had any horizontal momentum when they hit Copypaste, potentially letting him lob the boulders on top of the foe to crush them.

DOWN AERIAL: STOMP

Copypaste tries to emulate his Smash Bros hero, Ganondorf, by performing a similar move to his down aerial, but it ends up resembling ROB's instead due to Copypaste's body type. Not too bad of a downgrade. This deals 12% and can meteor smash the foe, but has awkward timing given the exact range. Unlike ROB's move, this doesn't necessarily keep Copypaste in the air, though it will if used to cancel out of the neutral aerial. If it isn't, which it won't be most of the time, it does make Copypaste go down as much as Ganondorf. This can like the forward aerial let him get back to the stage quicker, especially useful if he failed to hit the foe as they came back down and doesn't want to end up being combo fodder. This works as a mix up on his down special, as a faster albeit weaker alternative. On a slope, if Copypaste is facing towards the decline side, he can hold forward at the end of the landing lag to use the force of the move to propel himself forward, potentially leading into his dash attack and/or his side special.

Copypaste can come into contact with a boulder to bash it along the slope, rather than just bashing it forward this will send the boulder along the sides of the slope like a pinball and go directly up at the end, before crashing back down. This creates a little loop as it goes to the other side once. This is also good to lead into moves like jab or fsmash that can benefit from an airborne boulder. You could also always use this move in the air to send rocks or boulders down onto the stage, either to hit foes, or just so they get sent higher up by the tornado.

This move is super powerful if used into the drill as it comes out of the ground, like the drill fsmash, the up aerial and other moves, the two hitboxes hitting each other creates a sweetspot, an incredibly powerful one. This is unlike those however in that the sweetspot is fairly sizable, as big as the drill itself, and if the foe finds themselves in this area, they will be dealt 25% and strong horizontal knockback, in whichever direction they found themselves to the drill. The drill will explode at the end of the move, which has a big freeze frame to emphasize the sheer power. If no foe was hit, this move simply has Copypaste bash the drill downwards back into the ground, maybe to try again. He can keep on trying all day if that's what it takes to land this most powerful hitbox.

BACK AERIAL: DOUBLE PUNCH

Copypaste glances behind himself and has his two arms awkwardly punch together behind him, mirroring the appearance of his forward tilt, only backwards and more robotic looking. This deals 15% damage and knockback comparable to Mario and Luigi's back aerial, the arms of Copypaste being so large they easily compare with the power of a dropkick by a plumber, it can KO at around 150%. This is one of Copypaste's fastest and more powerful hitboxes, without any bad start or end lag, but its used are limited. The foe will have to keep this move in mind when they try and go behind Copypaste during his neutral aerial as the range is pretty great, and the power is enough to be a problem if they're at all close to the ledge.

This move is important for Copypaste's playstyle, as it even further makes him specialize as a character who wants to view the stage as a taking off platform from which to KO. The foe can be KO'd behind him near the ledge, but mostly he wants to throw them down or forward to get hit by his barrage of other attacks. Of course it also helps if say, he whiffed his side special, and just wants to smack the foe if they screw up the punish. One awkward part of it is just because of how giant Copypaste is, trying to land this move can be problematic, due to the great height it comes out at. For that reason it's a pretty bad short hop, and makes Copypaste a bit vulnerable from behind, giving more of a real purpose to his forward tilt, up and down smash for hitting in both directions.

GRAB GAME

GRAB: LIFT

Copypaste uses his immensely large reach to grab at the opponent, a very slow grab but one even greater in range than King Dedede's in Brawl. The reach is improved even more as a pivot grab, and can be truly fantastic when Copypaste manages to turn around a lot of momentum at once! This can mean coming out of a pit, by using down aerial into it. Uniquely his down smash also works into a pivot, as if he turns around after all that spinning it will count as if he was running on stage, giving a huge grab if the opponent whiffs a punish to the back of Copypaste. More than that though, just moving really fast into a dashing grab is extremely effective, even as slow as Copypaste is, if he can cancel out of his side special using the rocks or grab out of it, this grab has massive range too. The way Copypaste holds the foe is similar to MegaMan's in Smash 4, holding them overhead like one of his rocks, of course! They're just as valuable to Copypaste, and just as inanimate, especially if they originate from Smash 4! This makes them liable to get hit by falling rocks or boulders coming down from the air, rather than anything in front of Copypaste, they make a handy umbrella to not damage Copypaste's paint job.

PUMMEL: SQUASH

Copypaste uses both hands to crush the foe, dealing 2% in a slow pummel but damaging pummel, fairly average in most regards. It produces a satisfying crunching sound. If the pummel is spammed, this won't improve the damage output or speed of the pummel, but will instead make Copypaste move forward at his walking speed during the grab. This can help to set up to use his rocks on the stage, or even to go down a slope. Pressing the special input will have Copypaste go in reverse at the same speed. This is sped up or slowed down depending on if Copypaste goes down or up a slope, respectively.

FORWARD THROW: ROADKILL

Copypaste revs up his engines and throws the foe forward, dealing 5% damage, then drives directly into them with his entire body as a hitbox. He does a shoulder charge animation resembling his idol, Smash Bros Ganondorf! Copypaste deals constant hits of 1% damage as they're crushed by the forward impact of his body alone, adding up to 14% damage overall. They are are then sent flying at the end of the move at a forward-diagonal up angle, although they can be pushed directly into tornadoes or anything else on the stage. This move acts as a hitbox to outside forces, foe or friendly fire allies, dealing 5-20% damage depending on a combination of the thrown foe's weight and size, the bigger the stronger! If he drives into a hard object like one of his rocks, the foe will get crushed against it, dealing one hit of 10% damage and medium knockback in the opposite direction to their usual knockback from this throw. This makes the throw's knockback more vertical, setting them up for some of Copypaste's anti-air moves, like his tornado or his throwing rocks!

Copypaste's speed and power will be sped up if he goes down a sloped area, slowed down going up one. Speeding up Copypaste boosts the damage of the move by 0.5% per hit, ending up damage the foe for a max of 19% damage if used on a very sharp slope! This buffs the knockback to, now able to KO at 150%, a very powerful KO, but weakened slightly if within one of Copypaste's own slopes due to lowering the stage. On a very high percentage foe, this shouldn't matter. The other way, going up a slope, nerfs the damage of the throw by 0.5% per hit, ending up dealing only 9% overall, but leaving the foe much closer to Copypaste at the end of the move. This turns the throw into a great way to create a follow up, essential if Copypaste finds himself in the wondrous combo land of Smash 4. This can lead to an absurd max of 25% damage, or a low floor of just 7% damage, although leading to respectively a KO throw at 125% or something even Bowser's new Smash 4 up throw wishes it could be as easily combo'd into at low percents. If Copypaste uses the throw out of a slope as it reforms back into the stage, he'll gain the height boost, while the aerial foe won't, again giving him an easy way to follow up.

UP THROW: DISCARD

Copypaste throws the foe away in an awkwardly clunky, robotic motion as seen in MegaMan's up throw in Smash 4. This won't KO until after 250%, but is very reliable at that point due to being a very sharp diagonal, mostly vertical angle, and deals 12%, a solid amount of damage for the throw. The normal throw without the pumeml, the foe and Copypaste will get out of the animation at the same time, but a foe will find themselves in the air, having to DI away or try and attack with their specials and aerials. This may be stupid if the character had great aerials, in which case Copypaste just has to crush the foe into a block. He'll happily oblige.

DOWN THROW: CRUSH PART 2

Copypaste performs a similar function as his side special, throwing the foe to the ground and crushing them under his treads! This deals 3 hits of 4% damage for 12% damage, and send the foe forward at a flat angle, this can KO at 200%, but much lower if Copypaste managed to get the foe closer to the ledge. The foe will be bounced off of any rocks in the way, or the side of a slope if there's one in the way, actually giving an advantage to Copypaste to follow up, although unless in specific set ups this won't lead to that great of a strict frame advantage. This mostly leads in very strongly to his actual side special, if the foe fails to either DI correctly or let themselves get grabbed onto a wall or something. If a foe was crushed next to a rock, Copypaste will crush them against it, dealing an extra 1% damage each hit, resulting in 15% damage, lowering the threshold by 15%. This will instead send the foe at a vertical angle for a star KO.

That is only on sizable rocks, big enough to be melded into the ground. The throws works differently with rocks smaller than half the size of Charizard's rock smash rock. On smaller rocks, Copypaste will instead crush the foe back and forth against the rocks like a rack, dealing constant hits of 1% on top of the move's damage, adding on an extra 3% to the throw's damage for every small rock caught under the foe's body. This can add up to an extra 9% damage, making this the most high damaging throw besides a very set up heavy forward throw, a huge boon for Copypaste to make the stage into a quarry! The foe is then launched the same way as normal, but the rocks will become embedded into them and fall off in the air. They can be struck off like weaker Pikmin, if the foe does a quick neutral aerial, but this makes it easy for Copypaste to reuse them, by simply making a tornado where the foe shed the glorious rocks from their body. The rocks gradually fall off one at a time one second after another.

BACK THROW: PITFALL

Copypaste uses the forbidden art of pitfalling! This is achieved by using his arms to swing himself in midair, then come back down to land on the foe using the full force of his body, sending them into an aesthetic-only pitfall in the ground! Copypaste will pull the foe slightly towards him to impale the foe in the ground at the midpoint between the two characters. The foe is immediately released from it and dealt 10% damage, and medium upward knockback. Don't worry, this is so far no different from many Smash 4 characters, and makes more sense than WFT's Jab doing a pitfall, because Copypaste is a huge robot, not Sakurai doing his morning yoga routine.

This move becomes slightly stronger depending on certain circumstances, for example pitfalling the foe in a rock will pitfall as strongly as WFT's jab in Smash 4, giving that much of an advantage to Copypaste, just enough to use his slowest moves as fast as an average aerial, Copypaste really wants that tiny frame advantage. If the foe was pitfalled in a slope as it reforms into the stage, his can make the pitfall as strong as Mii Brawl's down special in Smash 4 at strongest. If he manages to pitfall the foe through the stage entirely, by terraforming the main stage to be thin enough that the foe pokes through the other side, it's a pitfall as strong as DK's side special. The sharper the slope and the bigger the rock, the stronger the pitfall. This may at this point be enough to actually do something, but more is because Copypaste demanded a true pitfall even if it's on the last input. This throw becomes more powerful if the foe manages to get hit by Copypaste's drill while they're underground. The drill will deal 15% damage and high upwards knockback that KOs at 140%, fitting when this is a fairly ludicrous set up. Copypaste has to either time it perfectly for when the drill comes back up, or use neutral special and immediately grab where he is to do this.

Copypaste can throw backwards, by holding the back input slightly longer during the grab, he will instead swing the foe behind himself further than usual, and stomp onto the ground dealing 12%, and dealing strong horizontal knockback backwards. This will KO around 180%, reliable and simple compared to the forward or down throw. This even produces a shockwave on the ground due to Copypaste's body being that huge, dealing 9% and high knockback at the Sakurai angle, although not enough to KO until 250% or higher. Copypaste isn't doing as intense a fall as his down special in the air, so he won't be able to split the rock, but will cause it to a shockwave of its own, dealing 2% less damage. This extends to other rocks that get hit by that shockwave, progressively dealing 2% less each time the ripple effect continues, but creating a massive hitbox to potentially hit the foe as they come out of the throw on the other side of the stage. Each shockwave reaches half a platform on either side, meaning it's wholly possible to create a huge chain reaction of shockwaves! What a suitably HMA way to end this set for Copypaste.

FINAL SMASH

BOSS MODE: DON'T SIZE ME DOWN!


Copypaste extends his arms out in a taunting pose and laughs at the foes, stating that he's no longer going to be sized down from his correct dimensions! He then starts to grow from all sides over a dramatic transformation period lasting as long as Jigglypuff's one in her final smash, until he reaches the size of Giga Bowser! In this form, Copypaste gains all the resistances you'd expect. He now has double his normal weight, he no longer takes hitstun from moves that deal 10% or less, he escapes from grabs twice as fast, he will gain resistance to all forms of knockback if he's hit 5 times over a 2 second period, making him immune to enemy combos, and his moves all deal twice the damage and knockback! He can even pick up massive rocks in his down special, they now range from the size of Giant Bowser, to half the size of Giga Bowser! That's a massive rock, and now it KOs twice as early, and will go twice as far. This is both terrifying and beautiful. Any shockwave in the set now makes a knockback on all platforms where applicable, and Copypaste's grab can practically grab across the entirety of Final Destination as a pivot, among other glorious little details if you think about it! What a shame it only lasts for 15 seconds.

PLAYSTYLE

MAKE ROCKS:
THROW ROCKS


Copypaste isn't stupid. But he's not smart, and he has to rely on a very simple method of set up to truly excel in the realm of Smash Bros. Given enough time, Copypaste should be plucking the rocks from the ground like turnips, both giving him something to use as a throwing item and a small slope for which he can truly take advantage of. Imagine the slopes in the set as a pit for Ganondorf to abuse in his set, and you won't be wrong in thinking, this can get pretty ridiculous at a certain point. Before Copypaste gets to that point though, he's got to overcome some of his natural weaknesses, like his extreme slowness, being a huge target and the fact all his moves are easily punished besides a handful. Those handful are basically all in the standards and aerials, and will be intermixed with Copypaste's more set up heavy moves to get the maximum effect out of his moveset. There's a few effects that should also always be kept in mind with the forward tilt and neutral aerial's overheating, but these largely are just cliffnotes in the overall playstyle.

What is the playstyle? Rocks, and boulders, and slopes... what else did you expect? Copypaste can naturally create a massive amount of slopes around the stage from using his down special, which then helps into his other specials. The tornado can pick up these objects as buffeting items, which then can lead into a well timed forward tilt to send it off horizontally, or an up smash to further angle to the tornado and make it more dangerous, or the down tilt turning into a blazing inferno. The side special naturally improves from having a pit to attack from above from, or simply to escape from in the other direction with the quickest of speeds Copypaste can handle. The neutral special can use the rock as a further projectile over the top of itself, propelling the rock forward before it explodes into smaller bits. The down special itself in the air can even work into the rock, as it uses it to make its landing lag safe, important on a Bowser Bomb type move. This is just the specials, practically every move benefits from a good old rock or boulder.

Copypaste also loves slopes, as nearly every move also benefits from their presence due to it giving Copypaste a significant upper hand one way or another. Attacking downwards, overwhelm the foe with his super armoured side special and forward tilt, his fairly long range down tilt and his long grab range, attacking upwards limits his usually gigantic target of a body from being such a victim of combo abuse. It also doesn't matter in some moves what kind of land Copypaste is on, such as his angled up smash, his side special and his down smash, all working along the ground and being angled by the player. Attacking upward out of the slope may seem worse at first, but it gives more of a purpose to Copypaste's aerials usually reserved for juggling or gimping, by using them out of the sloped areas, which then act as a block and a place to more safely recover from ending lag. Depending on the type of slope he creates, he only has either 6 of 10-15 seconds to make use of them before they go, so he should have some kind of plan for when that happens, even if it's just creating another slope.

That would all be assuming the foe just ogles at the amount of terraforming that Copypaste is doing to the stage and doesn't attack him, because once he's attacked most of his hopes and dreams are going to come crashing down. He simply doesn't have fast enough moves to interrupt or trade that well, unless he's able to get a bit of room first, and will want to keep coming at the foe for even trades rather than a direct fight with a rushdown-heavy character. Any character who can do a lot of damage to Copypaste because of his weaknesses, will likely also be able to do a lot of damage to his rocks all at once too, making it even worse. On the plus side Copypaste will be able to go toe-to-toe with those using projectiles heavily, due to his rocks and boulders blocking them. Against other slow, heavy characters, it's likely they'll love the match up for giving them the slopes to use as well, but probably not be able to use it as well as Copypaste can. A fight of heavyweight male antagonists is always a joy. As usual, Copypaste will just have to go for good reads and pressure on the lightweight, more combo intensive characters who can rack up lots of damage on him, he may only need a few hits to get them in KO range. If nothing seems to work, just play Copypaste like if Ganondorf summoned a bike for his side special.
 
Last edited by a moderator:
D

Deleted member

Guest
"This is my chance to bury all my opponents and take over the world like a true businessman!"


MISTER BADD

"You are not dismissed. There is one more task for you. You must broadcast my political and socioeconomic agendas as this nation's new leader."


Mister Badd is an antagonist in Hyperdimension Neptunia: Victory, the oldest and most human of the group. Badd is a big manipulator, tricking the leader of Lowee into giving up her nation to him by infiltrating her government as a minister. This all happens in his introduction. He then set up a fight between the CPUs, the four leaders of the major nations representing the game systems, and used their moment of weakness to seize control. He even managed to lock them all in a dungeon he personally created, but unfortunately not for the rest of their days. The CPUs soon escaped and of course they beat Mr. Badd, but not before he fought them in a cool mech!

Mister Badd is one of the strongest personalities of his group, extremely conceited and power-hungry. It's not revealed until way later in the game that he had any good reason to do any of this, and it becomes a running gag just how much he fights the main characters over the course of the game. Alongside Copypaste he insults Rei at the
Seven Sages introduction, pointing out how useless she is as the group's leader. Unlike some other members like Copypaste, Badd gets plenty of fights and any amount of screen time as a villain, always fighting inside his mech and sometimes with his monstrous minions. Their design would make you think they're pathetic, but they are surprisingly tough and make Badd's second fight one of the toughest in his game.

STATISTICS


"I have one last ace up my dry-cleaned sleeve! I diverted some of our national budget into the development of this cool mech!"

Size: Bowser
Weight: Bowser
Ground Speed: Donkey Kong
Air Control: Ganondorf
Fall Speed: Donkey Kong

Mister Badd is a stereotypical heavyweight, right down to the fall speed and huge size making him combo food. This is because of Mister Badd's massive mech that he brings along, scaled down slightly from the game. He's on par with Bowser for weight, but a little wider and a bit taller than Ganondorf for size, making him truly a gigantic target, and a well-rounded one too. He's surprisingly not that slow on the ground due to his mech using thrusters to fly him around, same for all his movement stats. But it's still a pretty bad mix of statistics, the saving grace being that he's not the worst at any particular thing, just very low down the scale. That can be turned around when it comes to weight of course, and he'll have to be making the most of his stocks to get a foothold. His jumps are comparable to Ganondorf's, as clunky as you'd expect out of the model.

SPECIALS

Neutral Special: Nintendo Headquarters

Mr. Badd places a flag on the floor resembling the Mario checkpoint, only with a giant "B" instead of an M and coloured green, the colour of money. This colour changes with teams, or multiple Badds in the match. The flag being placed is a very close-range hitbox that deals 5% and a few frames of flinching. If the flag is destroyed, by any attack dealing 5% or more, nothing happens. Otherwise, wherever the flag is placed, in 1 second a building will pop out of the ground that resembles the Dr. Wright Sim City assist trophy, except more rectangular and normal looking, with the flag placed on the ground originally now being on top of the building. This is the Nintendo/Lowee headquarters. Why Nintendo? Because in his game, Mr. Badd becomes the head of Lowee, representing Nintendo, and he's in Smash Bros. Plus Nintendo is more in line with his kind of business dealings! Mr. Badd can throw the flag down from the air, being a very weak gimp, but if it hits any solid ground it will create the headquarters. He can only have one on stage at a time. As the HQ pops out, it's a hitbox similar to the Dr. Wright assist trophy, dealing 5% damage and medium upwards knockback.


The appearance of the HQ resembles the image in terms of style, very dark, brooding and evil to fit (Mr. Badd's) Nintendo. It resembles an office building with a huge entrance and windows, kind of similar to the drug store in Onett. The Lowee HQ will at first be 1.5x as tall as Ganondorf and as wide as Bowser when it comes out of the ground, but does not technically take up ground. It sits slightly in the background. It can still be hit by attacks, the HQ works like the Castle Siege statues, it can be walked in front of and attacked, and will block some projectiles from outside, but still take damage from them. Initially the HQ has a paltry 20HP and is a massive unmoving target, and doesn't even take up real physical space. However, as soon as the HQ is created, it will show a counter on its front, a number indicating its "stock." It represents the HQ's HP and obviously starts at 20.00, but will grow by 1.1x its current HP every second it exists, every time this happens a quiet ding noise plays. Mr. Badd wants to protect his investment and given enough time, the HQ's interest will get so high it becomes practically indestructible, maxing out at 100HP and 10HP interest every second.

The HQ will grow in size as it gets more HP, growing to be as tall as two Ganondorfs at 100HP, and as wide as two Bowsers. The building won't be sized down when it takes damage, but as it gets lower in health, it will appear more tarnished and run down, like Nintendo, until eventually it puts up a sign that says "bankrupt" and fades away, like Sega. Before that happens, Badd can always relocate his HQ by placing a new flag anywhere on the stage, this causes the HQ to retract and pop out of its new location, the same as it was before! A bigger HQ deals more damage, 0.25x the HP of the building as damage, and starts to KO at 100% at around 25% damage, capping at 30% damage that KOs at 80%. The second delay when the attack comes out makes it very hard to land without hitting the foe into it, but it's mostly good for sending the HQ somewhere safer. The building can be shielded, and the top of the building is the actual hitbox, which can be dodged. This means that no matter how much bigger it gets, the extremely telegraphed hitbox never gets any taller, only wider. On moving stages, the HQ can actually be left behind for once without dissipating, building up its interest all that time it's out of view. The HQ will remain through multiple stocks.

Side Special: Loweebo

Mr. Badd tries to grab with his huge grappling hook mech arms, reaching forward as far as Lucas' tether in a command grab. This can act as a tether recovery. If he grabs a foe, he will crush them in his hand, dealing 5% damage and then a second hit of 10% and strong vertical knockback, comparable to Ganondorf's Flame Wave custom side special, this can KO at around 145%. In the air, the second hit deals 8% damage as Mr. Badd uses his long hook arms to toss the foe downwards, with weak knockback. Suicide is not good business etiquette. This is fairly powerful in of itself, but Mr. Badd can forego the attack and instead press the special button while the foe is grabbed. This causes a bunch of scanners to start examining the foe, all sci-fi like, because Lowee makes lots of money off those grandmas these days! The scanners will do nothing unless Mr. Badd does an input of his own after that, at which point there's a computer-y "confirmation sound. He scans the opponent's standards for the standard input, specials for special input, aerials for jump button, grab for grab button, and a direction for smashes. Otherwise, they will be chosen in that order automatically, releasing the foe like a grab release after that, as laggy as the first version. This move has comparable lag to Ganondorf's side special.


The scan from Mr. Badd will take the information pertaining to the foe's move section that Mr. Badd input, and save it to his mech. Within his super expensive suit, Mr. Badd can then use the side special to send out a brand spanking new, Loweebo, based on the foe! He does this by holding the side special, and thus this has pretty long start lag. He does at least throw it like the Waddle Dee to deal 5-10% and medium knockback, more damage if the foe was bigger and weighed more. This appears like a 8-bit sprite of the foe as a three-dimensional robot, because everyone loves Retro! This minion will be able to use all of the foe's moves that Mr. Badd has stolen, er, been inspired by thus far from the foe. The Loweebo itself is the same size as the foe but has a kid-friendly AI, the same as a level 3 in Smash 4. Mr. Badd can have up to two of these at once on the stage, but they have fairly weak defences, they get 5HP per every move section they learned from the foe, this maxes at 25HP. They can also be knocked off stage, and have an invisible percentage, being one quarter as heavy as the character they copied. They do, at least, have the basic functionality to jump, shield or dodge, but are fairly stupid to the point it's not used at this level. Grab difficulty from a Loweebo grab is always half that of a normal character, and gives a second immunity from grabs to a foe.

The quality of the Loweebo can be improved by further stealing the foe's moves, but also by the Loweebo successfully landing hits on the foe. Every hit they land creates a quiet kerching sound, as investors in the Loweebo send more of their money to Mr. Badd to then invest back into Loweebo development! Every three attacks landed will allow Mr. Badd to create a Loweebo with a higher level of AI, or if that is too difficult, just having the Loweebo survive without getting destroyed for five seconds will do the same, requiring 15 seconds, on a single Loweebo surviving to convince investors to go all in on the level 6. This can snowball pretty fast, but one important note is the time needed to reach the levels is not reduced, and they do not affect Loweebos already out on the field. So even if Mr. Badd releases a level 5 Loweebo, that only makes it easier for him to get to level 6, but he still has to wait 15 seconds.

When Mr. Badd dies, and it's proven money doesn't make you immortal, his mech goes with him and he loses all the data. The only way to avoid losing all that precious data is to go to the front of one of his HQs and idle for 1 second, then press a prompt to go up, causing the front doors to open and take him into the facility. Mr. Badd's information is then analysed for a further second, before he is launched out of the helipad at the top of the HQ. This is only allowed once every fifteen seconds, and is of course very easy to punish, let alone just attack the HQ. This not only lets him save all the info through multiple stocks, and has a bonus. If Badd is down a Loweebo, the HQ will automatically create a new one every 10 seconds that walks out of the front doors at the bottom of the building. This is limited to the Loweebo information Badd had at the time he entered the HQ, but it's still useful and means can focus on using his normal side special as a KO move instead. Don't let those Loweebos get stale though or they won't sell, make sure to update the HQ whenever possible!

Down Special: Creature


A compartment at the... bottom of Mr. Badd flaps open, letting out this ugly creature. Is this how Sakurai makes his movesets? The creature is the same shape as the Goldeen Pokéball but around 1.5x as big, and not much more useful. As they fall, the creatures are a weak hitbox dealing 5% and weak downwards knockback, working as an ineffective gimp because the creatures fall at Jigglypuf's fall speed. When they reach the ground, they hang around as a minion who wanders around at Jigglypuff's walk speed, and have one attack where they slap with their tail, dealing 5%. This is a fairly fast attack, but the creature itself moves very slow.


Mr. Badd can have up to three of these on stage at once and they have infinite HP, but have the weight of Jigglypuff. However, if thrown off stage, they gain access to five pathetic splashes in midair that give them as much height as King Dedede, letting them get back to the stage fairly often because of their low falling speed. Their AI is very aggressive at least, but they will take a second breather of lag every five seconds, because they're very lazy. These are actually Mr. Badd's spoiled daughters! The order in which these minions are dispensed matters, as aside from their tail attack, they have another attack they use when foes are behind or in close range to them. They splash around, dealing 5% damage in a weak shockwave only reaching slightly out around themselves. The visual effect differs for each creature, who is a unique daughter, the first being paralysis/electric and made up of shocks, the second venomous and purple and made up of poison gas, and the last green and a splash of poison liquid. The hitbox is the same, but these effects matter. These are all based on the creatures' venom attack and paralysis attack from their boss fight.

This is because Badd, protective father as well as frugal businessman, can choose to protect his daughters. First he needs to grab them with side special, but once grabbed, he doesn't attack them. If he has any Loweebos he can make, he will then throw it out as normal, but now with his precious daughter, the creature, at the head of the Loweebo. This doesn't affect the model much, besides making the head inordinately big. Mr. Badd can angle the move to put them in the feet of the Loweebo, buffing any foot hitboxes, angle it right to put them in the front, where most characters have their fists or other weapons, or put it in their body or back, for especially good on characters like Bowser or big characters in general. This creates a bulge increasing any hitboxes that come from that area slightly, by about 1.3x the usual range, and buffing the power/damage and knockback by that much too! The creature is kept safe from outside attacks in a small area, visible but protected, but will be forced out if the Loweebo is destroyed. It does increase that Loweebo's overall size, which can be a negative. Badd can side special a Loweebo multiple times and place all three creatures in a single Loweebo, but they must be in different areas.

The element of the creature matters too, as now if that part of the Loweebo lands an attack, it will have its effect altered slightly. The electric creature will cause the hitbox to deal an extra 1.3x the knockback as pure hitstun, letting them combo greater. The venom creature will cause the hitbox to create a lingering gas hitbox for half a second, dealing 1.05x the damage of the attack in the area the hitbox was, but no knockback. The poisonous creature will create small puddles of poison with the attacks from that area, sticking around for 0.5% damage a second for five seconds, the liquid uniquely propelled forward by the attack. If it lands on a foe, it will automatically deal all the poison damage, but this can be challenging given they're also being dealt knockback, most effective on jabs or pummels. It will wear down shields especially fast. All these effective also happens if that part of the foe is attacked by the foe and dealt over 10% damage all at once, the creature performing their second, splash attack within the Loweebo, giving more of a reason for the back/body area.

Up Special: Abandon Hardware!


Mr. Badd turns to make the mech face the screen and punches a huge button in his cockpit, causing him to be ejected upwards 1.5 Ganondorfs. The mech will fall if in the air, dealing 10% and strong downwards knockback. After a second, the mech will explode in a mushroom cloud, dealing 20% and strong radial knockback, enough to KO at 110%. The mech can be knocked around over this second period by the foe, taking knockback at the percentage it was when Badd ejected. All comparable to Koopalings' up special in Smash 4, but on a grander scale. That's what big business is all about! The distance it ejects Badd will mostly get him to the top of his HQ unless they get to the highest amount possible, at which point he has to jump, which is not too big of a price to pay for that. Mr. Badd will lose any information he had on his mech if he has to use this move. Worse than that, he'll have to survive in the air until he reaches the ground, and but it will come back as soon as he reaches the ground or ledge. In the mean time, Badd gains a new set of awkward statistics.

Size: Fat Marth
Weight: Wario
Ground Speed: Ganondorf
Air Control: Ganondorf
Fall Speed: Bowser


Badd without the mech is not competent as a fighter, that is clear, even keen business sense won't save him now, he's in huge danger. Mr. Badd will gain back access to his mech as soon as he hits solid ground though, but will have to fight the foe until them with only a set of mech-less aerials. If he presses the special button, he will take out a small remote control and try to give commands to the mech before it explodes, but this leaves him completely open in the air, and has bad ending lag if he tries to transition into one of his aerials. This allows him to combo into the explosion of the mech in any way though, especially if he can grab the opponent or land a side special to bring them in close. This can be a reason to actually use the up special offensively, rather than as a strict recovery. When Mr. Badd does land to recover his mech, he enters awkwardly long landing lag, the same way as Lucario does in Smash 4 out of his up special, leaving him very open to punishment for his new mech appears.

Neutral Badd Aerial: Power of Money

Mr. Badd swings a briefase around in front and then behind him, a mostly horizontal hitbox that comes out fast but has slow end lag, dealing 5% damage and low knockback. The strength of the move is buffed if Mr. Badd survived for a long time before his mech had to be abandoned, as he stacks all his investor's money in his briefcase, dealing an extra 1% damage for every 10 seconds he was in the mech, to a max of 15% damage that KOs at 130%. When Mr. Badd uses this move, the briefcase loses some of the dollars out of it, as it's stuffed to brim with dollar bills, losing enough dollars to decrease the move's power by 3% every time he uses the move, back down to the minimum of 5%.

This is one of Mr. Badd's most useful moves considering how powerful it can become, almost as powerful as Koopalings' hammer, but every time it's used it weakens the move. It will strength again over time once Mr. Badd is back inside of the mech, but at its weakest, it's pretty useless. As a result, Mr. Badd is going to have to play conservative with his money, and only try to go for the move when he's sure to hit the opponent. He also loses all of the money when he loses a stock, having to go back to the measly 5% and start all over again. That may be why his death cry makes him sound so upset.

Forward Badd Aerial: Money Belt

Badd takes out a stack of money bills stapled together and uses it to whip forward, dealing 5% damage and weak knockback, mostly useful due to its range, around two-thirds as good as Lucas' grab. The money belt will grab onto ledges to let Badd recover, but forces him to hang from the ledge due to how ridiculously weak Badd is physically. He can also grab onto his Loweebos on the stage, or the HQ from his neutral special to pull himself to them, but has to endure this hanging time, lasting for just under a second where he's vulnerable to the foe until he can grab the ledge proper, or just climb on top/over to something not a ledge, and gain back his mech.

The length of the tether increases and the power also does in the same way as the neutral aerial, increasing to be 1.3x as good as Lucas' tether if Badd survives in his current mech for 60 seconds, and dealing an extra 1% for every 10 seconds up to a max of 11%. This does medium knockback, can is mostly useful off stage as a gimping or wall of pain move at that point. This is mostly a bad idea because Badd will then be denied his up special to actually recover if he's off-stage, but is good for higher up where Ladd has a chance to descend back to the stage safely. This is one instance where his average falling speed actually comes in handy, rather than just making him a sitting duck when he recovers. Like the neutral aerial, this decreases the power of the move to 0.8x its old range and by 3% damage until it reaches the original minimum amount, and also of his neutral aerial down by 4% every use, very expensive!

Up Badd Aerial: Celebratory Lowee Fireworks!

Badd pulls out one of the fireworks that always go off at the end of a Mario level for some reason, I guess the corporate executives are the ones who do that. The rocket firework travels vertically up for one Ganondorf and is the size of Ness' bat, it explodes in a Bowser sized explosion for 5% damage, making a "B" symbol out of the explosion instead of a star. It will also detonate if it hits a foe, and deals weak knockback. This move doesn't increase in power like the previous two aerials directly because of money, but does increase in power if Badd keeps using the move out of his mech. The next mech will have an even bigger firework to celebrate that Badd has had mechs in the past, because celebrating past achievements is all Nintendo is about.

Every time Badd gets a new mech and has previously used this move, the next firework will increase by 1.5x and increase the damage by 3%, capping at 20%, where it will KO at 140%. This resets every stock, so Badd has to keep celebrating Lowee's achievements all the time if he wants to get ahead. It's only then that he can get them to pat him on the back harder with the bigger firework, to make sure his opponents knows he means business. Every time the firework increases in power, it also increases in range by 2x, going 2 Ganondorfs at 10% then 3 Ganondorfs at 15%, but at 20% will actually start to come down at the end until it hits the ground, with infinite range. This causes the foe to have to shield against it and gives a good distraction for when he finally gets back into his mech. The problem is this move is mostly self-congratulatory taunting until it's spammed many times to become useful, but Badd doesn't actually get much use out of any type of up aerial in his mech-less form, so why not?

Down Badd Aerial: My More Lavish Briefcase!

Despite the move name, Mr. Badd swings the very same briefcase from his neutral aerial, dealing 5% with the exact same mechanic as in his neutral aerial. The one difference being that whne Mr. Badd uses this form of the move, the money bills will not just dissipate in the air, but float down to the stage like stickers for him to collect potentially. This can be a good way to then go pick up the dollars as items, and restore his money! Aside from that it also makes this move a very powerful gimp, as it carries over the knockback of the neutral aerial when it scales to the top percents, but has a pathetic range that is hard to land. When I say it's the same, it actually loses 1.5x the power neutral aerial does when used due to more money flying out of the gaps in the briefcase, making this a costly maneuver, if one that can at least be recovered. If the foe picks up the money instead of attacks it, it's destroyed forever! That goes against everything Badd believes.

Back Badd Aerial: Shoe Away the Poor Beggars

Badd, in utter desperation if he can't even hit with his neutral aerial behind him, flings a shoe backwards, dealing 7% and medium knockback. It's very easy to spot dodge as it's a very small hitbox, and only travels a platform before descending. It if lands on the stage, Mr. Badd can put on his shoe, and he will need to return to the HQ to get refitted with both shoes eventually, or his back aerial is just him flinging nothing like when Robin runs out of tomes. He can only use this move twice until he returns to the HQ, but it does have significant advantages over the neutral aerial, such as a little range, and early in a match dealing more damage too. When it gets to the point you're throwing your shoes, you know it isn't going too well.

SMASHES

Forward Smash: Laser Technology


Mr. Badd charges the move by thrusting forward his lower body, showing to the camera the circular device on the mech's stomach area. Over the charging period, this will start to build up, an arrow appears that first points down, then rotates clockwise through the various colours, which signify how strong and the colour of the following attack. This is all pretty laggy, taking 30 frames. Once he's done charging, Mr. Badd fires a laser from the circular device while shunting forward, ranging in size the same way as ROB's laser, only able to get much bigger than ROB's max laser, actually getting up to be as big as 2x the size of ROB's at max, around the size of Bowser. This deals rapid hits of 1-2% that rack up to 24-33% damage, at minimum KOing at 120%, at max KOing at 100%, but only if all the hits land, otherwise weakening for every missed hit. The range goes from that of Mii Gunner's forward smash at first, and gradually improves until it goes twice that far at max charge. Each laser is differently coloured depending on where the arrow stopped during charge, going from purple, to blue, to yellow, to orange, to red, below is one of the weaker lasers.


Mr. Badd can shoot this laser into his Loweebos for a variety of effects. A regular Loweebo will be deformed by the laser into multiple pieces while the laser is overlaying it, making it into a bunch of scrap. These parts will rotate around the laser as a ring, getting bigger as the laser gets bigger, and deal multiple hits of 2-4%, hitting the foe away after up to 5 hits if they don't DI away, dealing more damage as the forward smash is charged more ans the stronger laser causes the scrap to circle around it faster. This itself can act as a KOing hitbox when it deals 15-20% with strong lasers, hitting foes trying to escape by jumping over the laser, but KOs only at around 150%. This is a good trade, though, when the original laser also needs to hit many times to deal its strong knockback. Badd can angle the laser up or down, causing the foe, or the scrap, to be pulled left/right on the laser as they're dealt hits, by angling up/down. This can help to trick the opponent into jumping into the scrap ring, even if they thought they were safely jumping over the laser.

At the end of the move, Loweebo fall to the ground and reform into their previous form over a second, and can be attacked to reduce their HP, but can't be interrupted out of the animation. If Mr. Badd can hit multiple Loweebo at once, he can change the reforming process, by angling the scrap rings together, he can force all the rings to reform together, creating a Loweebo XL, or even a Loweebo XXL! This is done by combining 2 or 3 Loweebos in one, largely possibly by angling the laser to send all scrap rings to the end or start of the laser by the move's end. When combined, a Loweebo is up to 1.5/2x larger, their attacks deal 1.25/1.5x the normal damage and knockback, and they combine all learned moves, HP and weight of the Loweebos used too to be a half/two-thirds the weight of their copied character. If after doing this move, Badd returns to his HQ, he can inform them how to make this model. This does make the Loweebo take an extra 5/10 seconds to come out of the HQ, to keep the balance of supply side economics, or something.

Used on the side of a HQ, Mr. Badd can use it for scrap, pulling in some of the building to create an extra scrap ring. The location of this depends on where the side of the building was in relation to Badd, as that is what creates scrap, and can be combined with Loweebo to increase their size another 1.1x. He can do this up to three extra times to make their size truly gigantic, although this only buffs their hitboxes, and makes them a huge target. The scrap will otherwise dissipate after the move ends and the building will repair itself magically, like the economy does, by the next time its stock comes in. It's unfortunately not possible to hit both sides of the building with this at once, but vaguely possible to create multiple rings if a flag from neutral special is placed down with specific timing to have another building pop up in front of Badd during the move.

As well as being combined into a bigger, better Loweebo, the creatures who were compartmentalized away inside of Loweebos are combined into the new XL or XXL Loweebo too. This can also be achieved by simply side special grabbing the new Loweebo. In the laser, depending on what direction they combined in, a creature will take their position above or below the previous creature in the same area, being the only way to stack creature in the same area due to the increased space. Otherwise, they will just go into their regular places. This is very important though, as stacking creatures in the same area is very powerful, not only making the area have that much bigger of an area to produce hitboxes, but stacking all the effects on that area. This means that Bowser's back aerial can now stun more, produce poison gas and a poison liquid all at once! That's some expensive programming the developers have to do to make that work in Badd's moveset, but it's worth it when Badd can examine the foe's set for himself and make it even better than it was before! Pick out the foe's best moves, or just the one OP one, and buff that area with all these effects at once, then unleash your perfect Loweebo on your friends.

Up Smash: Gust


Mr. Badd starts to spin his arms in place during the charging as a sign of things to come, then causes the mech to do a full spin, and generate a magnetic field around it that causes a tornado to appear and shoot upward. The spin of the mech is a very strong hitbox itself but only works at barely above Rest range, dealing 22-30% damage and can KO around 130%, having high end lag. The spin will cause the flag on top of the HQ to spin, becoming a hitbox that deals 1% and flinching knockback for 1 frame, more of an Easter Egg than anything useful. The tornado ranges in height, but the hitbox is always around as big as Lucas' up smash, sized up to Mr. Badd's size, and around 1.3x as wide even then, dealing rapid hits of 2% damage that add up to 36-50% damage, and can KO at 80-45%. This is absurdly powerful, but like moves such as Yoshi's dair, all the hits are bound to not land as the opponent is thrown out of the move after taking around 10-15 hits, depending on the charge and strength of the tornado, KOing around 100% normally. Due to a high start up and end lag this is one of the riskier moves to use as it leaves Badd easy to punish.

Badd can raise himself up in the tornado by mashing the standard input while the move is being performed. The tornado ranges in size from a Mario above Badd, to 1.5x that size at max, and this greatly enhances the knockback it can deal due to hitting the foe away at the end at a greater height. Badd will raise himself up to the full height of the tornado, depending on how much Badd mashes. The higher he goes, the more end lag it results in, eventually getting up to as high as 40 frames of end lag. At the end of the move, Badd is free to move from the air, and this can help to make him less punishable, but at the same time is still vulnerable to foes doing an up air or something, as the tornado is no longer there to protect him during his end lag. This is a good move to use when Badd is in the air out of his up special to create a wall for the opponent to jump over to reach him, and he can even have the mech itself move up it to use the explosive hitbox too, but pretty much guarantee he won't do anything else in the air, meaning he can't directly defend. This can also let him set up into his new mech when it becomes available, natural given his up special ejects him upward.

If there is a HQ from neutral special, a usually irrelevant detail becomes important in this move, as it has the canopies of the Drug Store from Onett. They will flap up if the tornado hits them, buffeting the foe for 10% damage and high upwards knockback, though not enough to KO until 250%. The canopies are the entire width of the HQ and have a giant Lowee/Mr. Badd logo on them. A HQ begins with only one, but as it gets bigger, will gain another canopy for every half a Ganondorf larger it becomes, maxing out at three. A foe can potentially be combo'd into multiple at low percentages, with the help of the tornado slowly moving upwards to match the foe's knockback and hit the canopy at the right moment. Likewise, this move can stall for HQ to pop up in the same area. Badd can throw down his neutral special flag, then stall the foe using the tornado, for the building to spring up and hit them as well, but requires for him to place the flag before he does this move, making it fairly predictable. The canopies will fall back down after 5 seconds, this also a hitbox that deals 10% and high downward knockback. This can ever KO in weird situations, like if the foe was at a super high percentage, enough to be KO'd after rebounding off the stage, or if the HQ is actually partially off-stage due to its size. The canopies cannot be stood on during the match as they fall down immediately if someone tries to jump on them.

Down Smash: Money Ball


Mr. Badd pulls out two huge balls of money on either hand, so condensed they resemble blobs, and charges by holding both arms behind his back. When released, Bad does a clapping motion to combine the two balls of money, creating a hitbox behind him that deals 15-21% damage and KOs at 160% fully charged, and a more powerful hitbox in front that deals 25-35% damage and KOs at 140% uncharged, 120% fully charged. At the end of the attack, the ball of money will roll forward at Ganondorf's walk-dash speed for up to 1-2 platforms, speed and distance depending on charge, dealing 10-15% damage and medium knockback. This move has very long start and end lag, slightly worse than Lucas' up smash in Brawl. The hitbox behind, in front and the projectile in front of Badd really helps to make it safer to use. the ball increases in size with charge from half to the full size of Bowser, and as it travels will lose its money as it sticks to the ground, or can be attacked for its 15-20HP by the foe, causing money to fly out of the ball and dissipate. This means the ball gets progressively weaker until it dwindles to nothing at the end of its max distance, dealing less damage and knockback too.

Badd can change the ball of money at the end by angling the move, unique for a down smash, but actually changing the move very little. Angling up will cause the ball of money to roll slightly more towards the background, having no adverse effects on the move unless it rolls past a HQ's front door. If it does, the front doors will attempt to open and the ball will roll inside. This will buff the HQ's stock by the amount of damage the money ball would've done if it hit a foe. This is the best way for Badd to directly feed his HQs to get more powerful and forces the foe to approach Badd so he doesn't just obnoxiously spam down smash into his HQs. The ball is easy enough to stop, a foe's attack that deals 10% damage or more can rebound the money ball in the opposite direction and it takes half a second for the HQ doors to open where the foe can knock it out of the way. Badd is very easy to punish if he's just throwing the ball away from the foe, he really needs it to be thrown at the foe as a threatening hitbox too, as his back is vulnerable after the move's initial hitbox. This is why he'll want to place his HQ somewhere prominent.

Angling it forward, Badd will create DBZ-like suction effects on the money ball, sucking in money from all the greedy souls of his investors! This is because it detracts from his mech-less aerials' reserve of money, if he doesn't have a HQ up, every 1% used up taken from all his aerials when he uses his up special, forcing him to wait to get it back. This is all moot if Badd had no money to lose in the first place, as it doesn't dip below the minimum. Over the 1.4 seconds of charge this can add up to 10% in all, giving the money ball +10HP and 10% extra damage, now able to KO at 130% when thrown. The initial hitboxes before throwing the ball also gain an extra 1-5% damage, and a little extra knockback. The ball itself grows in size to be up to 1.2x the size of Bowser. If he had a HQ, instead he will suck in 5% of its current stock, ultimately sucking in 20% of its total stock price and adding it to the ball. This can be anywhere from basically nothing, to 20% if he gets a HQ to 100%, adding that much to its HP too. This buffs the ball to do a ridiculous 35-40%, and KOs at 70%, but is pretty well earned at that point. It also makes the ball 1.5x as big as Bowser, scaling downward for lower amounts. As the ball gets that much bigger, the damage an opponent's attack needs to do to rebound it also gets bigger, maxing out at 15% damage, or 1.5x (the same amount the size is buffed by).

Mr. Badd can also speed up the money ball or knock it around in various ways. Using his up smash, the money ball will be lifted in the air but won't have its forwards momentum stopped. This can allow it to fall on the HQ's canopies and cause them to collapse, then fall on the foe's head, or into the HQ front doors if Badd chooses to go that route. It deals 0.7x its usual damage and downwards knockback when falling. A money ball will also be launched into the air by a HQ popping up from neutral special, only if Mr. Badd angled it upwards, springing it higher into the air to use later as a hitbox, giving the best potential to have two on screen at once. The money on the ground will linger for 5 seconds, and can be collected by Badd, but also reused in the down smash again, if money is rolled over the rate at which the money ball breaks down is reduced to half its usual rate. If the money ball hits his minions, it will either roll over them if they're smaller, or be rebounded in the opposite direction if the Loweebo or creature is bigger, allowing for unique set ups. The laser from forward smash can also be used to speed up the money ball, buffing its speed by 1.1-1.4x depending on the charge of the smash. This does wear down the ball just as fast as he is kind of destroying money with his laser, sacrilegious for a Lowee business executive, but this buffs the knockback of the move by the same amount.

STANDARDS

Jab: Thunder Statue


Mr. Badd puts his two mech hands forward and towards the ground, causing electricity to generate between the two and then spawning three bolts of lightning that launch out at 1.5x far as Mewtwo's jab. Each of the eletric bolts deal constant hits of 2% forcing the foe to DI away, fairly average damage for a jab. This has above average start lag for a jab. The jab is surprisingly easy to DI out of, unless the foe was caught close to Badd. The jab will gradually get weaker as it's out, eventually only having half its range, similar to the way Bowser's flame breath weakens. This is one of the best moves for Badd to use when he's jumped out of his mech, if he can land it, given the large amount of stun. Even if the foe can DI away, catching them in the window before the mech's explosion at a very close range should guarantee the explosion lands too.

Badd can continue using the jab indefinitely. Any Loweebos he has out on the stage that are within range of his jab will have the electric current run through their entire body, becoming Super Charged! This gives them a sort of armour if foes touch them for the duration of the jab, forcing the foe to ignore them and attack Badd. This is a great way to help Loweebos at a lower level to survive. This can even travel then from the Loweebo to another Loweebo within the same distance away from them, potentially creating a massive link of electrical hitboxes across the stage.

The electrical current will leave a trail of electricity wherever the Loweebo attacks, lasting for half a second wherever they create hitboxes, similar to his venom creature. At any point, Badd can choose to smash forwards to end the jab, and create a statue of the Loweebo to remain out on stage, with its hitboxes at that point intact, but only dealing half the damage or knockback if a foe walks into them. These last for a second. The rest of their body deals 10% damage and medium radial knockback, also destroying the statue. Badd has very bad end lag if he goes for this, ensuring a punish if he isn't using up significant set up time to do this, but in specific situations this can be very important to take full advantage of a certain hitbox, in tandem with what his creatures can do.

Dash Attack: Market Crash

Mr. Badd does a shoulder charge with his mech, dealing 13% damage and high upwards knockback comparable to Ganondorf's dash attack. This moves forward Mr. Badd as much as Ganondorf's move does, and gives super armour to the front part of Mr. Badd's hitbox, around his mech's shoulder and arm, for the duration of the move. Mr. Badd can use this well when he's ejecting out of his mech, just for the super armour it gives, to stop the foe batting away the mech before it explodes. This shoulder charge will hit away Badd's Loweebos, causing them to be launched forward and have the same damage/knockback as if they were thrown out of side special, but potentially much greater if they were larger. This can deal 5-15% depending on the Loweebo's size and weight, and can even KO at higher levels around 150%. The creatures aren't affected by this move, but due to its leaning forward type hitbox, Badd can use this to attack over the creature as a way to defend them.

A sweetspot is created between Badd and the Loweebo during this interaction that deals an extra 5% and lowers the KO percent by 15%, if the foe was caught between the two. Mr. Badd can use this move on his buildings, causing the entire frame of it to shake for a second. This causes an earthquake beneath the HQ that creates 1-3 shockwaves directly below, depending on the HQ's size. Each shockwave deals 3% damage, some flinching then weak knockback, enough flinching to combo all 2-3 hits if necessary. The shockwaves resemble Bowser Bomb's, but are sized down to be only about half as wide, but occur from both vertical walls of the HQ, giving the same coverage. A foe can shield or dodge all the individual shockwaves that come out fairly slowly, but this acts as a great way to help Loweebos land hits on the foe, or to bide time for Mr. Badd's various money-based mechanics.

Forward Tilt: Power Bash


Mr. Badd's mech hand is exaggerated slightly as it goes to clench in midair, snapping the two fingers together for 6% damage and medium knockback at the range of Luigi's forward smash. Like that move, and most forward tilts, this can be angled up or down too. This creates the pictured effect of creating a small purple field of energy around the hand, itself dealing 5 hits of 1% damage, causing flinching over eight frames. If this lands, the opponent is able to be KO at 170%. The move lingers for fairly long, Mr. Badd has to hit with the last few frames of it for the foe to be held in place for the field to do the damage, essentially turning it into a sweetspot. The end lag of this move is bad, given the effect this is another good move to use out of the mech, and it forces the foe to avoid dealing with Mr. Badd directly, especially if Badd gets the right read with the angle. If he misses, the field at the end that lingers out for a while might hit the foe anyway. By itself this does very little knockback, but at least makes the move hard to punish. The field does act as a projectile so can be perfect shielded immediately to destroy and punish, or just regularly shielded, pushing the foe away slightly but also giving any chance for a punish.

The real pay-off here is when Mr. Badd uses the move on one of his Loweebos, the purple field of energy will come out, but then recede into that part of the Loweboo. This can be a good amount of places, given the move can be angled. On that area of the Loweebo will gain a small, purple blob, similar in appearance to the sticky bomb. It will stay there for another ten seconds, if nothing happens it then dissipates. If the foe his that area, it will create the same hitbox dealing 5 hits of 1% damage, essentially stunning the foe in place. This can be good to either stack with the other effects or to help balance out a Loweebo's strength and weaknesses, as it's a bit of a catch all addition to them. Mr. Badd can only place one of these remote field generators at a time, destroying the previous one if he goes to place a new one. He can even do this on his buildings too, although he doesn't usually accept vandalism in his buildings. This can ever catch the foe off guard if a HQ is summoned in a new area as they go to attack Mr. Badd or his minions, and instead activate the bomb. If a Loweebo or building is destroyed with one on them, it will activate as they die, giving a little bit of control for Badd over that area for pressure.

Up Tilt: Xtreme Appeal


Mr. Badd crouches slightly and leans forward, causing the two sword/wing items on his back to jut forward, both hitboxes that deal 8% and weak knockback. At the middle of the two hitboxes, a foe is struck vertically, both are struck more horizontally either left or right if hit by that part of the hitbox. The damage and knockback is decent, but the range of the move is really what stands out, as it can reach as far as Ike's up smash on either side of Mr. Badd, even if the vertical range is only about half as good. This makes it a good defensive move against goes trying to take advantage of Badd's stocky, round build by coming up on top of him, in front or behind. It also acts as one of those moves where Mr. Badd's own model is reduced in size for a short time, when he goes for the crouch, avoiding high attacks, but also backing away slightly lower down as he leans in, avoiding some low attacks too. This makes it a good counter-ish move to throw out when Mr. Badd is dealing with an overly aggressive foe who doesn't want any of his Loweebos. It's also a much more simple choice of move to try and throw out if the foe is trying to attack the mech before it explodes by poking it high or low.

At this point, the move is one of Badd's fastest to throw out, but the standard input can be tapped twice in quick succession to produce another hitbox. This is the two unidentified objects on Badd's back turning and hitting each other, pointing upwards together. This deals 12% to foes and strong vertical knockback, always in the same upward direction. This isn't that laggy, making for a good follow up generally, but actually changes Badd's model slightly, making it slightly taller. The two objects now act as a wall against projectiles or any type of move, now part of Badd's model, letting him directly protect his minions or himself out of the mech later on. At any time he can reuse up tilt to switch back, and it only gives him another Kirby on top of his current model, largely good just for when a mech has run its use one way or another, or at the start of a match to protect a minion, and when Badd wants the foe to stop destroying his minions. The two wing-type things will also act as a platform for the Loweebo to stand on, although they won't stand on it for long. Badd can even use his up tilt from there to launch them forward or backwards, at or away from the opponent.

Down Tilt: Another Demographic


Mr. Badd raises one leg then crashes it back into the ground, dealing 5% damage just from that, then repeats it again with the other leg, dealing 6% damage and weak knockback. The foe is stunned in place by the first hitbox enough to land the second, if hit together the attack deals strong vertical knockback that can KO from 150%. This can work especially well on ledge hogging foes due to the nature of the hitbox, stomping on top of foes on the ledge and dealing downward knockback. Both stomps are powerful enough to cause small bits of debris to fly off the ground, as well as a small shockwave from each foot, if the stomp itself misses. The shockwaves are both around 0.75x as wide as the ones from Bowser Bomb and deal the opponent 5% damage, as well as stunning them in place for enough time to combo into the second hit if necessary, or just to cover the end lag of the second hit as well. At the end of the stun, the foe is hit into the air with weak knockback, not too far, making for a good combo with his up tilt that hits far horizontally but hasn't got very good vertical range. Thankfully Badd's cool mech is tall enough that isn't so much of an issue.

The stomps are powerful enough to even send the Loweebos into the air, as well as the creatures. The creatures will be sent a full Ganondorf off the ground close to Badd, scaling down to just a Mario height if they are half a battlefield platform away. This can save the creatures from foes trying to attack them, or even give them an easy way to jump over Badd himself. Loweebos are also propelled up by the move. This is a good way of forcing them to use their aerials too, as they will then naturally try and fall towards the foe. The amount a Loweebo is pushed up starts at the same rate as the creatures if they're at their smallest, but scales down if they're larger or heavier. This goes down as low as just raising the Loweebo a Kirby height off the ground. Once they get to the point of rivalling Badd's size, they're barely raised off the ground at all. This can even happen during their attacks to help them dodge the foe's preemptive strike, and then hit with the move. This move is fast to come out and has minimal end lag, but its long duration makes it awkward to use, Badd goes get super armour on his feet for the move, making it good against foes trying to poke his huge model with a down tilt or smash.

GRAB GAME

Grab: Money Grab

Mr. Badd's grab is fairly standard, whereas his side special has his arm stretch out in his actual grab, he simply grabs forward. Due to the size of the mech and its arm though, this is a large ranged grab, comparable to King Dedede's in Brawl. Badd holds the foe up by the head, their feet dragging on the floor if they're super tall, holding their heads like a jar. Badd can grab his own Loweebos in this way. As they aren't normal opponents, Badd can immediately cancel out of grabbing Loweebos at any time by just shielding, rolling or dodging, grab releasing the Loweebo wherever it was, but can't do this to foes. Due to this, Badd is given the ability to grab two Loweebos, or the foe, by pressing the grab button again, to use his other arm to grab out. This is made easier as by pressing the special input instead once a Loweebo is grabbed, Badd will use his side special grab to pull in an opponent or another Loweebo, to make it far easier to actually achieve a double grab.

Once the foe's in the grab, it can't be cancelled through shield inputs and grab release works as normal. When the Loweebo's in the grab, they will never escape. Badd can be hit out of grabbing a Loweebo by any attack that deals medium or stronger knockback, though, and the Loweebo can also be hit out of it by a strong tilt or smash attack to end it too. It's perfectly viable just to use this move as a way to use Loweebos as meat shields. They still take damage during grab and the grab will end if they're destroyed while being grabbed. If you're going to do anything before self-destructing, grabbing a foe may be the best idea, but this is very difficult even with King Dedede's grab range and probably the most obvious, telegraphed move the foe is going to expect Badd to use.

Pummel: Fresh New Ideas

Badd turns his mech hand like a crank on top of the foe's head, dealing 3% in a slow pummel. If Badd has a Loweebo and foe grabbed, he can press the special input after pressing pummel to scan the foe. At this point he can input a move to copy it specifically for the Loweebo to not only learn it, but have its damage and knockback enhanced by 1.25x. This can be performed a second time to speed the move up by 1.3x, and a third time to give the Loweebo heavy armour for the duration of the attack against weak attacks. Every scan performed after a crank will take up as much time as a pummel however, making it easy for the foe to escape quickly. The move can be chosen, but will automatically default to neutral special, and rotate through specials from neutral, side, down and up in that order, then rotate through smashes, standards, grab game and aerials in that order, moving through input sections as moves are completed. Badd can go to a HQ after performing this to save the data for any future created Loweebos, and any further created ones will have the same benefits.

Two Loweebos grabbed at once will instead have Badd crank the first one's head and send a stream of electricity from one hand to the other, the first Loweebo grabbed being the one who is not pummeled. The pummeled Loweebo will transfer any data it has that the other Loweebo doesn't over, and if they are identical, Badd will slowly take the other Loweebo's knowledge of the foe and create a forced update on the other Loweebo. What this accomplishes is upgrading, a move at a time, as he does when grabbing a foe, by forcibly taking it from the Loweebo forcibly and transferring the data to the Loweebo. This can be chosen or cycles through the same order of moves as before. When the moves is forced onto the other Loweebo in this way, it is removed from the first one's memory banks permanently, and as a result it loses 1HP each pummel. This is around as fast as the other pummel if every input is put in individually, but can be spammed to be slightly faster to get more out of it. As the move is removed after one go, he can't do all three upgrades at once however, needing to create another Loweebo to do this process again. The Loweebo will collapse into a heap of metal and dissipate if it loses all its HP from this pummel. A creature will scuttle away from the remains if they were in it at the time.

Forward Throw: New Add-On

Mr. Badd tosses the victim into midair and releases a weak blue laser from his stomach, as seen in his forward smash, dealing 13% in a powerful throw, that deals damage and knockback to outsider. For this reason, this move's lag matters, it's fairly quick to start up but very slow taking into account the rest of the grab to get to it. This more acts as a way to pressure foes going for a very obvious approach from the front when Mr. Badd as a Loweebo grabbed. The throw target and anyone within a platform range will be KO'd at 180%, not particularly good knockback, but much better on this than others because of the straightforward horizontal knockback. A Loweebo and foe grabbed together will have the foe thrown the same way, but the Loweebo is turned into the ring from the forward smash and travels along the laser for the duration of the move. They aren't a hitbox to the foe, as they're already hit away during the start of the move. Mr. Badd can smash the input to put the Loweebo further or closer on the laser as the foe is launched, making the Loweebo be pulled along with them during knockback, but also stunning them as they reform at the same time the foe gains back control. This can potentially put the foe and a Loweebo off stage to hope it goes for a KO, or more likely just gets in the way, but more importantly allows for some specific positioning on the stage. On stage, this results in the Loweebo reforming to the left or right, and at varying distances from the foe.

If Mr. Badd grabbed a Loweebo or two by themselves, this move instead uses the laser to disassemble, then opens up a hatch inside of Mr. Badd full of all kinds of accessories the kids will love. This opens up a small menu on Mr. Badd whereby he can select an add-on to give to his one or two Loweebo. This is a fairly long throw and the prime one to hit Badd out of, taking as long as Mario's back throw to perform. The Loweebo will exit the grab when the new move is installed, performing a fancy show-off of the new tech for the executive's amusement. There are four to choose from, and they all give the Loweebo an additional move the AI can use in certain situations, even giving this to future Loweebo if Mr. Badd returns to the HQ after giving it out. As the AI doesn't have a typical moveset, this is simply added to a list of attacks they perform. If these accessories get annoying for any reason, Badd can always regrab a Loweebo and use the same move again to deactivate the move. There's still an advantage to it, as each move gives just that specific Loweebo an additional 5HP too.

Forward Accessory: Mini Laser

The Loweebo stands up and strikes a manly pose, shoulders back and neck high, then releases a weak purple laser from its midsection, now glowing that colour since the upgrade was made. This has bad lag on both ends, but deals 15% damage and goes as far as MegaMan's forward smash uncharged in Smash 4. This is very important for giving an actual projectile to characters who don't have them, and can even KO under the right circumstances, as it can also be used off stage. The downside is the laser is out for such a small amount of time due to its weakness, the foe can easily air dodge it, and it's very telegraphed. The laser also doesn't create any rings of debris like Badd's does, unfortunately, nor does it manage to activate any of the creatures who may be inside of the Loweebo. Nonetheless, very powerful to just give a projectile to certain copies movesets, even if it's a slow and easily dodged one, it does pressure the opponent.

The real benefit of this move comes when Badd himself uses his laser with a Loweebo capable of performing this move in its range. Now when Badd's laser reaches the Loweebo, they will fire it out the same as Badd's, giving an platform to the range by giving its own power to the beam. This can even size up the beam's power slightly, if the Loweebo was upgraded in size, adding 1-5% on bigger Loweebos and KOing slightly sooner. This not only gives the forward smash more range, but Badd can also re-angle it by smashing a direction when it reaches the Loweebo, if they have a creature in that "direction" of their body. For example, this means Badd can re-angle the laser back at himself if there was a creature in their back, or re-angle it "down" if a creature was placed in the lower area of the Loweebo. This doesn't shoot it straight down, unless the Loweebo was in the air, instead firing it across the ground. Badd can even do this multiple times if he manages to keep two Loweebo around.

Down Accessory: Trophy Stand

This unforgettable bit of Smash Bros memorabilia will attach itself to the bottom of the Loweebo if they so choose, only in the air, and trigger a typical stall then fall using the trophy stand as a temporary weapon. Depending on a combo of size, weight and falling speed for the foe, prioritizing the weight more than the others, the Loweebo will deal 10-16% damage, and potentially meteor smash if they deal 15-16% damage, they've graduated to become a true heavyweight! The trophy stand disappears when the move isn't used, but gives a very useful move if the foe doesn't have this one, every character should have it. Also this gives more of a reason to put a creature in the foe's feet, if the character doesn't usually rely on down angled hitboxes or have gimmicky down aerials. The horizontal size of the hitbox gives it great range too, you can never have too many stall then falls. This will even bounce the Loweebo back up, acting as an okay recovery, hitting them back up 0.5-1 Ganondorf depending on the move's power.

On the ground, the trophy stand is summoned beneath the Loweebo causing a meter to appear over them, which is charged up over time. This forces pressure on Badd's opponent by forcing them to attack the Loweebo, acting like Cloud's limit break in Smash 4, maxing out after 5 seconds of charge. This gives the Loweebo a money aura around their fists like Lucario. This results in adding 1-10% damage to the next move they use and buffing its knockback by 1.1-1.5x, but the effect powers down over time too, doing nothing if they don't attack after 10 seconds. The reward the Loweebo gets for charging it all the way is that the 1.5x effect stays for the full 10 seconds, rather than powering down gradually over time. This add-on can have a profound effect on an AI's behavior in making it more campy and thus is best to give to just one of the Loweebos, or turn on/off periodically, as they will stop helping Badd as directly.

Up Accessory: Clap

Badd knows the kids have to learn their manners and applaud not only their opponents, but those who made the game too! This lets the Loweebo perform a clap, in the air or on the ground, like DK's up smash, and with similar range. If the foe doesn't have the necessary limbs, two mechanical arms will grow out of the Loweebo's metal body. This can be charged on the ground to deal 13-18% damage and KO at 215%, or used in the air to deal 13% and potentially juggle, or KO from very high in the air. A creature was placed in top area of the Loweebo will have its power activated by the clap, giving it the effects of that creature and covering the move's bad end lag. Likewise, any creatures placed in the front area will also be activated a little earlier, resulting in a combo between the two depending on where they're placed. Especially useful for foes trying to just ignore the Loweebos and jumping over them casually, time to give them the Jason Voorhees treatment. Loweebos who are bigger than Badd are can also use this move to "clap" over Badd in midair when he's out of his mech, and release him from the grab when they next hit the stage or Badd uses a shielding move. Loweebo will move into position to do this if they're in close enough range when Badd has used his up special, but Badd will have to go out of his way to start landing near the Loweebo to make them use it.

Back Accessory: Bowser Shell

Especially good to use on "villains" in the match. There is only one true villain, as we all know, and his name is Bowser. This accessory simply lets the Loweebo use Bowser's back spikes move, extending the hitbox behind them and dealing 12% and medium knockback, good as a gimp but also because it keeps them from having to over-extend too much. This isn't an actual shell of course, just jutting out bits of metal from the Loweebo's back, and has vastly more range if the Loweebo was bigger due to its increased back size. This is one of the most important moves to give out if there are creatures placed on a Loweebo's back, and makes this into a great potential wall of pain, only it is slightly lower duration than Bowser's own version and can be air dodged. What's more important is this can be used on the ground, even if the Loweebo doesn't turn around due to being an AI, dealing the same damage and knockback, if the foe is trying to constantly dodge around them too much.

This has a lot of lag to it as it's not a passive hitbox, it's still a move even if the Loweebo barely animates for it, and has lesser range than the aerial version, but has great potential despite being on the back. Badd can take advantage of the Loweebo's new spiked back if he launches a foe into them at high knockback. A Loweebo's spikes will activate automatically, instead of at times awkwardly being bounced back, this can actually lead to a KO. The damage can be buffed by 1-5% depending on how hard the opponent was knocked into the Loweebo, and at max will KO at 150% in the opposite direction. This can actually work to Badd's advantage if he was positioned with his back to the ledge, although it does require the Loweebo to be turned away which is a little awkward. This is remedied a little by both the Loweebo's AI at higher levels, instinctively turning around when Badd is going for a suitable move, especially at level 6, and moves with longer duration that give the Loweebo more time to prepare for it as well.

Up Throw: High Crush


Mr. Badd grabs the target and crushes them with his two giant mechanical hands, dealing 10% damage and straight vertical knockback, enough to KO at 165%. Badd will crush a Loweebo into the foe if he has both grabbed, crushing the Loweebo's skeletal structure around the foe as they exit the throw animation. This leaves the foe with an external shell of the Loweebo wrapped around them in parts, resembling Badd's own mech. The Loweebo will increase the foe's model and size by 1.1-1.3x, depending on the size of the Loweebo used, making them a larger target for attacks and increasing their hitbox sizes but no extra power. Badd can use his forward smash on the foe to turn the Loweebo into a ring as normal, quickly separating them again and ensuring the foe is hit by both the laser and ring portion of that attack. The creature is also put on top of the foe's body in the same place it was on the Loweebo, using the mech as space. If the foe uses a move that activates the creature normally when they were on the Loweebo, they will get hit by that creature's respective effect instead, now nerfing moves that Badd had focused on due to their unique strength on the foe.

The foe can destroy the shell and Loweebo like a Pikmin by attacking around themselves, but will find it has 1.5x the HP of the Loweebo that was used, making it much harder to destroy. As long as the foe uses moves with the Loweebo on it, they will pass on the knowledge to it. If Badd can manage to grab the foe again, with his side special or grab, he will separate the two again and the Loweebo will have gained the knowledge to use any moves the foe used while they were attached. Badd has to go out of his way to grab the foe to reap the benefits. The side special will simply launch the foe with the attack version of the move, then drop the now reformed Loweebo back to the floor as Badd does to a foe after the scan version of the move. The grab will drop any Loweebos grabbed beforehand, and instead grab the foe and Loweebo as two targets, prioritizing the foe as the first grab victim.

When one or two Loweebos are grabbed, Badd will use this move to crush them into parts, or crush two together, then launch them both as a projectile of scrap metal. This ranges in size depending on the Loweebo or character, but is always a ball shape. They will deal anything from 10-20% damage and are launched two platforms vertically, starting to KO around 150%. The Loweebos when combined will be more powerful if they were bigger, meaning this move is best used with straggling outdated Loweebos to reach the powerful KO version that deals 20%. Even with just one Loweebo, Badd has to start using his forward smash on his HQ to artificially increase the size of his Loweebos for this purpose, which is more set up time, unless he can also hit the foe at the same time. At the end of the throw, the Loweebo will reform individually, making this a good move to position them together to fight the foe, even if the projectile itself missed.

Down Throw: Arrest


Badd will simply twist the foe in place with his arms if they're by themselves in his grab, dealing 12% and causing them to fall into prone. The tech chase that follows is a fairly important one for Badd, given all the times he might want to grab the opponent again and get more out of it than just a KO, at first anyway. Later on, the tech chase can lead for a kill and the foe may not even realize it, as Badd's cool mech has surprising power. If a Loweebo was also grabbed, Badd will "arrest" the foe by handcuffing together the two, using a pair of his mechanical hands as the cuffs as a new pair appear out of the mech to replace the old ones. Now the foe is tethered to their Loweebo lookalike, and the tether cannot be destroyed easily either. This is because it's a very close range tether, only leaving a small gap between the two. This has to be stretched out fully to destroy the 20HP cuffs, otherwise hitting the Loweebo itself or missing as the cuffs simply aren't extended enough to be hit by both attacks. The Loweebo even at low levels may not actually be that stupid to just do nothing as the foe casually walks the required small distance to make this happen, if they are Badd can take advantage of their time waste.

This throw lets Badd force the Loweebo and foe to fight, but also holds the opponent down depending on the Loweebo's weight, fall speed and other details taken from the foe. If you thought one Ganondorf was awkward enough, consider Ganondorf being tethered to another Ganondorf. This holds its own advantages too naturally, but offset more than a little by the Loweebo constantly trying to attack the foe. It's made worse by the fact that, while at first the Loweebo is weaker than the foe and pushed around easily, once it gets buffed in size enough it will be able to force the foe around. While it lacks the weight of the foe, once it reaches near max size it will have enough power to start pulling along the opponent wherever it goes. In the end, it may be best for the opponent just to destroy the Loweebo. On two Loweebo, this move instead handcuffs them together, but extends out the cuffs to become a true tether! This is as long as two platforms and essentially buddies up the Loweebos and makes them harder to KO, and leaving one in a good position to attack the foe if the other dies. It even lets one Loweebo grab up to the ledge like Ice Climbers using their up special, teaching all the little Smash Bros good manners and getting that low, low age rating, Badd hopes.

Back Throw: Dark Side

Badd grabs the foe if they're the only ones grabbed, turns around and creates a dark wave of energy seen in this forward tilt, dealing 7% damage and medium knockback backwards. This isn't particularly strong, but within the next few frames an explosion occurs on the foe, made up of the same purple energy, dealing another 5% damage and more backwards knockback. Dealing the knockback in two stages gives the Loweebo or other Badd minions more time to get in position, although it does also leave Badd in awful end lag if the foe had any allies or minions lying around too. They're probably in a worse spot though, given what Badd can to help his Loweebos out. If the foe had any time bombs or other explosives on them that would naturally explode too, such as ones from forward tilt, they will explode with the second hitbox too, adding to the damage of the throw and making it KO at 150% if a forward tilt explosive was specifically present. That is if they aren't on the front of the foe, if they were, they detonate with the first hit and second the foe further then, but basically negate any chance for this to add up to a KO, instead making the more basically have a lot of set knockback.

A single grabbed Loweebo will have the explosion dye into their metal appearance, causing them to become darkened and have an evil aura around them resembling Lucario's, but evil looking. This makes them into a Dark version of the opponent they copied, just insert as a prefix on the front of any name for an original character. From here on, the Loweebo's behaviour is changed to use suicides more often, go for riskier laggy attacks, go for off stage gimps even if they're dangerous, and other behaviour you'd expect out of such a stereotypical alter ego. They'll more generally just chase down the foe harder, instead of being more pro-active and smart at higher levels, although whether that matters really comes down to AI. This makes the Loweebo more easy to punish, even if it's more of a nuisance to the foe. A Dark Loweebo will try, to no effect, to break out of Badd's grab like a normal character. Nothing personal, Badd, he just plays by his own rules.

Two Loweebo changes the dynamics of this move completely. Badd selects the last grabbed Loweebo and makes it the Dark Loweebo, but leaves the other one largely the same. The normal Loweebo will gain a "light" aura instead of the evil one, bright yellow in appearance. Now instead of going after the foe, the Dark and Light Loweebo will take part in a battle to the death instead, leaving Badd to fight the foe by himself. This may be a 1000 year old destined feud reignited, or lazy writing. This will go on until one of the Loweebo dies, leaving the other Loweebo victorious. If Badd goes back to his HQ after this, this new design will become the new design for all future Loweebo, and take its behaviour into account too. The "light" Loweebo is largely the same as normal, only slightly less likely to do what the dark one does than normal. The foe will want to stop the conclusion of this fight, however, as if one manages to KO the other, they will gain a buff to all their currently learned moves as if the pummel was used on all of them. This advances any by another stage that already had one, so the foe should watch out to get involved in this feud once it's nearing its conclusion, which might be soon if they already damaged one of the Loweebo.

This throw can be used repeatedly for the same effect, creating two differently aligned Loweebo to fight, and having the winner level up all their moves if they manage to KO the other one. This even lets them level up by landing attacks on one another. Badd can also play a part in this destined fight, by backstabbing either one of the Loweebo. He could even go so far as to manipulate one off stage after taking a hit or something, as any affect he has on a Loweebo doesn't count towards the KO due to not dealing damage and being allied. He can even use his down throw to tether the two together, making the fight come to a faster conclusion. The foe will have to watch out for the duplicitious Badd in all of this too, who with all his shady deals may soon become not just a minister, but Prime Minister.

AERIALS

Neutral Aerial: Wheel of Fortune

Mr. Badd makes his mech perform a cartwheel in midair, resembling Bowser's new cartwheel neutral aerial in Smash 4. It's a little slower than that move, but deals the same great 6% for 4 hits. This is likewise stopped from being able to do such massive damage because the third and fourth hit occur at the same time, instead at the left and right of Mr. Badd instead of the top or bottom. Badd's "wings" on his back will also act as a hitbox during the move, either dealing 6% during the first two hits of the move, or acting as one powerful hitbox if the wings were combined into one using the up tilt at the end of the move, dealing 10% and stronger knockback that KOs at 170%. The knockback from this move is fairly harmless, only able to KO at over 230%, but can be useful as an off-stage gimp move, and the great coverage makes it a choice selection for when Badd abandons his mech in midair and veers it off-stage toward a recovering foe. Mr. Badd's mech enters awkward ending lag if he hits the ground without hitting anything, but it will be reduced if he hits a foe as he uses it to right himself slightly, and a little if hitting one of his Loweebo or the side of a HQ, being almost completely reduced if he hits an object on either side of him in the air.

Badd can press the standard input again if his feet ever touch over one of his HQs, to use the powers of his cool mech to clamp down on the side of the building, allowing him a unique wall climb on the side of his building. Just like that one Mario Kart track they love to advertise. Badd can stay on the side, or the top of a building for up to 3 seconds, but only on the outside due to physics. In this time he has access to any of his ground moves, but if he jumps he will cancel the move, and still takes knockback normally, as well as everything else. He also can only do this once every ten seconds, to prevent abuses. On top of his HQs, or on the side, he can spawn Loweebo that will have the same ability as him to stick to the sides of a HQ, but can do so permanently, or until they're destroyed. This can be pretty helpful for fighting a foe, not only freeing up space on the ground so the Loweebo don't get in the way of Badd fighting the foe, but so that the other Loweebo doesn't have to keep running into the other one awkwardly. Attack from above and below, especially when it's below everyone's expectations.

Badd will cancel his wall climb if he jumps, but for half a second is free to use any aerial as he corrects himself, giving it a unique angle. This applies perhaps most of all to this neutral aerial with its many hitboxes that come out at once, allowing him to change the direction of the final hit to become a star KO move, or just hit the foe back to the ground. If he has a Loweebo on the building, one of the easier things to do is to use the third and fourth hit, now angled above and below Badd, to spike a foe up or down, while hitting the Loweebo on the other side who is scaling the building to get that sweet no landing lag bonus. There are some other tricks to doing this, such as firing a laser at a Loweebo on a building, who can then fire it straight down or up, turning that into a powerful star KO move similar to Pikachu's down special. Badd could also, on the HQ himself, launch a horizontal tornado to push himself towards a foe horizontally, which keeps his angle intact longer than a jump does to perform angled aerials on stage, or throw a money ball straight down, or up so that it comes back down later as a powerful hitbox. If a HQ is destroyed or re-located by Badd, Badd and his Loweebos will automatically fall off it.

Forward Aerial: Game Flop

Mr. Badd causes his mech to roll up slightly into an almost ball, not entirely possible given the rigid design, and then charges forward and down diagonally for half a platform, dealing 12% to anyone he hits and medium knockback. The move can't be used to recover due to the downwards trajectory, but in some cases this can be used to avoid an incoming attack by dodging under it, and the move gets 5 frames of super armour near the beginning as well. This is a very strong gimp next to the ledge, against recovering foes, but this is largely suicidal given that Badd will propel himself off stage first. It is safe to then jump out using up special, but this is risky if the foe avoided the move and then attacks Badd as he predictably uses his up special. It's safer to jump out of the mech first then use the forward aerial, but this is a lot slower and easier to predict, if a lot safer in the end. Either way, it's a pretty big risk going off stage given Badd's recovery. On stage the move has bad ending lag. As he lands on the ground, Badd generates a small shockwave in close range dealing 5% and weak knockback, comparable to the Super Dedede Jump, only only having half the range, giving some protection. This also happens against walls, such as his HQ, or larger Loweebos big enough to outsize Badd's mech.

If Badd uses this attack against the side of one of his HQs, and holds the standard input at the end, Badd will tear through the windows of the HQ, creating a small explosion and billowing smoke. This is as big as a Bob-Bomb explosion, dealing 15% damage and high knockback in the opposite direction that KOs at 165%, but is very predictable given Badd needs the outside of a HQ to even do this interaction. After a second of delay, Badd will explode out of the other side of the HQ, creating the same hitbox on the opposite side of the HQ. The time it takes increase up to two seconds depending on how big the explosion is, and appears slightly lower on the opposite end, more low if the HQ was wider and took him longer to go across. This acts as a halfway bunker to enemy attacks, a bit strange, but what's not to love? This does have its weaknesses though, first of all this deals 20% damage to the HQ's stock price, 10% each time Badd explodes through a window. If the foe destroys the HQ or it retracts while Badd is travelling through it, he is dealt 25% damage and strong vertical knockback that KOs him at 120%, lower if he was higher in the HQ. For that reason, Badd shouldn't use this move if there's a chance the opponent will be able to destroy it. He's also limited from doing this more than once every ten seconds. That on top of destroying his own HQ, this can't be effectively spammed without Badd screwing himself over, until his HQ is at its strongest.

Badd can send his soon exploding mech into the HQ with the forward aerial, and cause the entire HQ to go down in flames if it explodes within the HQ. This turns the entire HQ, and a half platform distance around it on every side, to become an intensely powerful explosive hitbox that deals 15-25% damage (depending on the HQ's size) and knockback that KOs at 130-100%. The explosion will linger long enough to hit any foes dodging within it or failing to roll far enough out of its range. This is one of Badd's most powerful but risky options, as the explosion can be shielded, the shield damage won't make up for the loss of his HQ, especially if he managed to get it to a good stock price. The next time he makes a HQ it will be back down to 20HP again, but it may be worth it on a final stock, or when it's about to go bankrupt and Badd wants the insurance money.

Up Aerial: Propeller Hat


Mr. Badd extends out his robot arms, using the same flexibility as seen in his side special grab to spin his arms around all the way several times, in a hitbox similar to ROB's side special. If that seems odd, this is something he actually does as part of his finishing move in Neptunia. This deals 7 hits of 2%, ending on a final punch that deals 6% and and medium knockback up at a slight angle, overall dealing 20% damage if all hits land, but this is very difficult if the opponent knows to DI away, What Badd largely will aim to do with this move is hit the foe with it as he's finishing the last few hits and force them into the final 6% hit to also deal the knockback, using the active hitbox of his arms instead to give range and pressure the foe, rather than try and land all the hits at once. Of course it's possible to still land them all at low percentages, or if a minion is above Badd to hit them back into the hitbox near the beginning. The move also acts as a great pressure move generally that pretty much forces the foe to shield if they're on the ground, making it useful from his neutral aerial wall cling.

Badd can angle this move while performing it, angling it to spin slightly more left or right, giving him some extra vertical lift in that direction too. The knockback dealt by the final hit changes to compensate for the angle, hitting the foe more sharply away. This does act as a weak recovery, although only about as good as ROB's side special upwards, and its long duration makes Badd very easy to punish for its duration. This is great to use after going through the Gust in up smash, as Badd will use the momentum to give himself an even bigger lift, giving him about 3x the vertical range, comparable to the Magnet Pull Lucas had in Brawl. From a tilted position on a HQ, this also acts as a great way to tear into a foe from a long range horizontally, even if it is easy to shield it's greater for poking shields when angled. Angling the move does let Badd swoop in and out a little, as he changes the angle during the move to steeply move in, then out to avoid an enemy attack, but if he finishes the move too far from the ledge he might be forced to use his up special. While abandoning the mech and getting it back on the ledge is nice, just losing all data on it is a pretty major loss too.

Back Aerial: Exhaust Flames


Mr. Badd glances behind slightly, not too bother to turn around fully, turning his elbow and upper body to see his back open up slightly and reveal a flamethrower-like weapon, shooting out fire a short distance. This is comparable in range to Lucas' dash attack, a pretty small hitbox right next to Badd that deals 9% damage and weak knockback. Not too impressive compared to Badd's other aerials, but can be devastating as a wall of pain or just a gimp off stage, especially when Badd isn't manning it. He can focus on just getting the mech in place to "suicide" with it while in perfect safety. The foe is forced to try and get around the foe's back, but the move does at least have very bad lag all around to make it a fairly single usage move when attempted as a gimp. Outside of just up special uses, this is similar to the forward aerial in that the top and bottom half of Badd lean inwards, giving a chance to barely dodge incoming attacks that glance past Badd's massive frame. This can be double useful out of the neutral aerial wall cling, where it instead make Badd lean his top and bottom side in, when they're facing horizontally. If the foe just tries to jump into Badd in this stance, he can turn on the flames and make it almost impossible to hit him. This does use up a lot of his 3 seconds of cling time however, due to the lag and long duration.

Down Aerial: Buster


Mr. Badd shoots thrusters upwards for a stall, then uses that momentum to push himself down in a fall, for a slow fall then stall down aerial that goes as fast and far as Link's. He falls at double his usual falling speed for the fall half of the move. The thrusters at the start of the move are actual hitboxes for a very brief few frames, dealing 5% damage and weak knockback to foes in very close range. This can be relevant for Badd if he wants to just get back to the stage and go to his HQ without the foe following him, as just some weak knockback and getting to fall faster to the stage. If he hits a foe, he deals 13% damage and a meteor smash down to the stage, excellent for an off-stage gimp if Badd jumps out of his up special. He does have to set this up a little first, by leaving the mech over the ledge and reading how a foe will recovery to actually land the mech. This move can combo the foe's shield or the foe themselves like Link's down aerial, logically working because of the thrusters shooting down Badd even when the foe pushes him back up. Given the mech's huge size, this can be very powerful. The landing lag of this move is very long and painful, a little worse than Link's due to the mech's clunky build getting up off the ground, and leaves Badd open to punishment.

The standard button can be pressed if Badd hits the top of his HQ, causing him to speed up his thrusters to max as he hits the building and forcing it to partially retract into the ground, by force! This is a hostile takeover, but don't worry, I see the HQ workers have parachutes and moved to the higher floors first. This makes the entire bottom Kirby height of the HQ become a powerful hitbox as it collapses into the ground, dealing 20% damage and strong vertical knockback, this can KO at 145%, but is obviously predictable. If a foe was overlapping the building at all, they will take 10% and medium knockback upwards, not enough to KO, but will send them in Badd's general direction. The HQ will take 20% damage, like the forward aerial, and won't increase in stocks for ten seconds as it does repairs. Badd won't be able to use the HQ to store his Loweebo data for a further twenty seconds as a new front door is made. If he does the move again on the HQ before twenty seconds is up, the next time will be 10 seconds longer. Nonetheless, when Badd is willing to sacrifice his HQ to further his own goals, this move has a massive range, and does great shield damage, plus is basically unavoidable unless the foe jumps or gets out of the massive range of the HQ.

Badd can use this move while he's clinging to the HQ from his neutral aerial to move the HQ slightly left or right, by a platform to half that distance if the HQ was bigger and heavier. This has the same negative effects as doing it on top of the HQ, only without the extra ten seconds for the doors to be rebuilt. The HQ as it moves becomes a hitbox that deals 15% damage and strong knockback that KOs at 175%. The HQ can be dodged or rolled to avoid the hit as it moves, but will force the foe along with it all the way. If the foe was hit by the edge of the HQ, they're dealt 20% and very strong knockback that KOs at 150%, but this is the smallest part of this massive hitbox. The foe can at least very easily avoid this part of the hitbox by rolling into the HQ itself and taking the 15%, or just move away, as the HQ only moves at Ganondorf's dash speed. This does nothing if the HQ was next to a ledge, although it does cause the HQ to shake slightly, having the same effect as Badd's dash attack.

FINAL SMASH

Real Lowee: Badd's Greatest Role Model


Mr. Badd presses many buttons on his mech all at once, causing a portal to appear over the top of the stage and drop a huge, cube-shaped building resembling the image onto the stage. As it falls to the stage, it is a transcendent hitbox that deals 45% damage and a meteor smash, breaking shields, and falling slow enough it's undodgeable. The building is three-thirds the size of FD and two Ganondorfs tall. When it drops, it will stay for 15 seconds, or until its 200HP is diminished by foes. As long as it's out, it will create its own form of Loweebos, except they perfectly resemble the cast of Smash 4! They all have 50HP and are spawned much faster than Badd's minions, once every 3 seconds without any limit, and all their moves are powered up all the way, as well as being the maximum size. This is very powerful and while they do disappear at the end of the move, the havoc they can reap together with Badd is very impressive.

Mr. Badd can use the real-life Lowee HQ in the same way as his HQ, hanging off it in his aerials, or bombing through it with his forward aerial. This doesn't negatively impact it in any way, it just keeps going like it's an automated robot pumping out these soulless Loweebo rip-offs. It will even grant him some bonuses, such as not taking a second to pass through the building on forward aerial, and letting him cling off it for the full 15 seconds it's out on the stage. It also deals more damage than the HQ in any instance where the size increases a move's power, and when it erupts out of the ground it deals 1.5x as much damage and knockback as the biggest HQ does. It also has the Mario flag with the "M" on top of it, but just as a detail, as it can't be re-placed anywhere. This is surely one of Badd's most inspiring moments in his entire life!

PLAYSTYLE

Take Over the World Like a True Businessman!


Mr. Badd's playstyle can develop in several different directions, but primarily what's important early on is getting his foot in the door when it comes to his HQ. He'll want to place it in an area where he can defend it from the foe, who will naturally want to destroy it immediately, compelling Badd to defend it, or move the fight away from it. If he can, he should use the early parts of the match to land a decisive side special or two and start scanning the foe, but the difficulty in this is how much potential damage Badd sacrifices. It can be tempting to just abandon the HQ all together, but the advantages it brings, especially in Badd's aerials, are simply too numerous to ignore. Sure, Badd can play in this way without the HQ, his Loweebos are more important and he has plenty of other KO moves, but the HQ will most help him when it gets to the point it's self-sustaining and creates his Loweebos for him. This is crucial as it lets Badd fight full out without having to use his side special to summon them, instead working around when the HQ summons them instead, as while the Waddle Dee toss is a decent move it's very predictable. Badd can't afford to keep on using that move when he gets into the high percents himself and a foe's just going to roll up to him and outspeed him at close range. Early on though, it's not such a big deal, it's more about just getting the HQ past the phase where a foe destroys it in a few moves. Badd has plenty of pressure, range and critically, defensive moves to get it that far. Badd can hopefully pressure the foe enough they opt to fight Badd outright rather than try and hit two birds with one stone and try to KO him and destroy the HQ at the same time.

Mr. Badd can fight the foe by himself well enough, especially at the point when he can fully rely on the HQ to create his minions. At this point, Badd most resembles King Dedede with a massive structure to play off too, and minions who are useful more as aggressors than meat shields. In fact for many reasons, Badd actually values his Loweebo creations, as the longer they go on and fight the foe, the stronger they become, so actually has to brave the fight as a 2 or 3v1 with idiot level 3 AIs at the start of the match, until they get to the point he doesn't have to do such obvious babysitting. Once it gets to that stage, like with the self-sustaining HQ, Mr. Badd can stop having to burden himself taking care of the Loweebo and focus fully on upgrading them to specifically help him with the match up he's in, and not have to waste time getting his set up on the way. This is one of the nicer things playing as Mr. Badd, that the reward for set up and winning the match reduces the pressure on Badd. He can never just shut off from the fight though, as even at the highest percents, the minions and HQ are more than vulnerable. A level 6 AI is not exactly a genius and the foe can easily exploit the bugs in Smash Bros' AI, plus the fact the HQ has finite health and Mr. Badd will have to start all over again if it's destroyed. Instead, Mr. Badd changes his playstyle to be more aggressive later on, as he can at least rely on his set up to not die immediately if he's not there to protect it.

Mr. Badd's Loweebo are at the core of his moveset and playstyle, and have an incredibly amount of depth to how they can be set up, dependent on the match up largely for how to do it exactly. In some match ups, it's enough to simply copy the foe's best moves and buff them, but if they can adjust to that well, then Mr. Badd has to change up his game and give the Loweebos another focus instead, and deconstructing the Loweebo into something else is a bit harder than creating them in the first place. If the foe can get the Loweebo into a soft spot where they're well upgraded but easy to deal with, they could just ignore them and try to attack Mr. Badd directly at all times. Thankfully Badd has many options to make this more difficult on the foe, mostly in his grab game where he can give the Loweebo extra generic moves to help him out in certain ways, either defensive or offensive, and in his throws where he can fundamentally change the way the Loweebo's AI works. The back throw is perhaps the most notable as it forces Mr. Badd to fight the opponent without both of his Loweebos' help, but the reward is very strong. One of Badd's more attainable goals is to simply steal all moves, then enact his back throw successfully three times to get to his max set up the quickest. This can be impeded by the foe at several stages, even just when Mr. Badd is grabbing his Loweebo, but it's still a lot easier than having to constantly pummel. That would be the best way to get a specific set up, and "banning" inputs by only stealing the best ones can actually be a good idea in certain match ups.

When Mr. Badd gets his HQ up to the high percentages, then he can start taking advantage of some of his weaker seeming moves by manipulating the HQ, most obviously seen in the aerials, but applying as well to the standards. Mr. Badd can use his jab to create awkward-to-dodge connections of hitboxes that make it hard for the foe to approach, or crash into the ground, or even cause the side of the HQ to shake like the ground. Then when Mr. Badd is fully confident in his ability to win, he can start sabotaging all his hard earned set up by outright destroying his HQ in part through is forward and down aerial, creating insanely big hitboxes at the cost of weakening the HQ. It takes a lot of down smashes and time to build it back up, but when Mr. Badd sees he can seize victory, there's no point any longer in keeping up the charade of a businessman, Mr. Badd wants world domination above all else, and Mr. Badd can always rebuild if it's really that bad. Starting all over again is difficult, but then again Badd just being KO'd may be enough for the foe to destroy his KO at even decent HP. Mr. Badd ultimately is all about compromise, knowing when to sacrifice his mech and any data it has to stay alive, making a bold decision about what direction to take his Loweebo and knowing where and when is best to build up his HQ. There's a lot of room for failure and success, so long as Mr. Badd is completely amoral and does whatever helps him to win. That includes going for constant side specials, abusing his giant HQ, stealing very broken imbalanced moves and using his HQ in very annoying ways as much as he can, because in some match ups that's what it will take to be victorious.
 
Last edited by a moderator:

MasterWarlord

Smash Champion
Joined
Aug 24, 2008
Messages
2,911
THE MOUNTAIN


The Mountain is a member of the original seven devil chojin from Kinnikuman. While other devil chojin have to rely on powers such as being able to turn their body into sand or to shapeshift into any kind of reptile, the Mountain has the “power” of being really, really damn heavy, so heavy he makes the arena fall into the abyss. The Mountain puts the heavyweight in heavyweight male antagonist, as basically his entire fighting style is dedicated to falling on top of people and dragging them into pits for suicide kills in his source material. The Mountain doesn’t fear death because the devil chojin have tricks to bring him back as a ghost. While the other devil chojin also make use of this technique, none of them are fearless of death like him, and he also is by far the most competent as a ghost/uses it the most extensively. He does so well his masters even consider promoting him back to life over any of the others, but he of course is defeated shortly afterwards.

This video is recommended viewing for the moveset, showcasing nearly all his screen time as an antagonist as well as his theme.

STATISTICS
Weight: 12
Falling Speed: 10.5
Size: 10
Traction: 10
Jumps: 7
Aerial Speed: 3
Aerial Control: 2
Ground Movement: 1

The Mountain drops like a rock faster than the fastest fast fallers, and with his falling speed he’s nearly impossible to vertically KO. Of course, this makes him a lot more vulnerable to being gimped off the side of the stage, as you’re essentially playing a character who constantly has a metal box on.

While he’s very lost off-stage, on the stage he’s not super vulnerable to combos because the lower third of his hurtbox is passively a hitbox when he’s falling in the air. At minimum, the Mountain deals 5% and radial knockback that kills at 220%. This is considered aerial priority, so if a foe resumes comboing you they will be knocked out of the combo. The further the Mountain falls, the more this gets powered up – each Ganondorf he falls, he’ll deal an additional 2% and KO 20% sooner. If the Mountain uses a move that involves crushing people while falling in the air, the damage from his passive falling will stack and be added to the power of the hitbox, though not the knockback. The Mountain’s weight can still be used against him for extensive comboing with moves that don’t just juggle him, with foes just poking him forwards. That said, the Mountain greatly enjoys the SSB4 engine’s ban on chain grabs.

If the Mountain falls at least 2 Ganondorfs, he will create a Bowser sized hitbox to either side of himself that causes opponents to take 3% and trip. If the Mountain falls 3 Ganondorfs or more, he will create a Kirby sized indent in the stage. This does not create a hole that can be fallen into, but the terrain slopes down into the small pit in the stage, meaning a character can run past it fine without jumping. The Mountain can fall into the same pit to make it deeper, and for each Ganondorf he falls beyond the first 3 he will make the pit 1.5x deeper. If used on a platform with no depth like a Battlefield platform, the Mountain will simply bend the platform.

SPECIALS

NEUTRAL SPECIAL – BLOOD BIND

The Mountain forms an animated ball of blood in his hand before throwing it forwards in an arch arc. The arcs can be angled very comparably to Yoshi’s Egg Toss, but on an input that makes more sense. This has roughly the same range and size of said eggs, but the move is faster and weaker given the Mountain is just hitting them with a liquid, dealing a paltry 3% and knockback that kills at 260%, and that’s without staling the move. While the blood is very weak, having any kind of projectile can be decent to alleviate pressure and not burden the cumbersome Mountain with approaching in every single match-up he faces. The angle of the projectile is also very nice for throwing it up out of a pit at foes standing above you.


This has a reward much greater than dealing 3% - if the Mountain has hit a foe at least once with this move before dying, he will respawn as a ghost without losing a stock. He looks much the same as a ghost, merely with dark blue skin and transparency. As a ghost, the Mountain is as light as Meta Knight (In the series, the evil ghosts besides the Mountain are casually killed in one attack). Once killed as a ghost, the Mountain will actually lose his stock before respawning in his physical form. Each time the Mountain hits the foe with Blood Bind, he will add 1.65 seconds to the amount of time he can spend as a ghost on that stock upon dying. Once the timer runs out, ghost Mountain will instantly be vanquished back to the depths of hell. Given Mountain has very limited time to work with as a ghost, he ignores any respawn invincibility the foe has.


While ghost Mountain obviously has limited time to work with, he enjoys his low weight for the time period he’s out. While he sadly loses his passive falling hitbox, ghost Mountain gains access to a new crouch and crawl where he can phase inside of the stage with only his head poking out. When ghost Mountain uses a move out of this crouch, he will bring up the necessary parts of his body during the move, such as his upper torso and arms. Ghost Mountain will remain in the crouch until you press up to come out, letting him use the majority of his moveset from the crouch.

When the Mountain throws the blood, the trajectory of the blood will last all the way until the blood hits the stage, at which point it will form a puddle for 2 seconds before evaporating. If a foe walks over the puddle they won’t be hurt in any way, but they will add 1.5 seconds to the time Mountain has a ghost for each second they stand in it. If the blood lands on a slope, the blood will trickle down it and not start evaporating until it reaches the bottom. While a foe can shield the blood as it’s being thrown to prevent a puddle from being created, shielding on top of a puddle will still get their feet covered in blood and give Mountain the additional ghost time.

If Mountain inputs Neutral Special as a ghost, he won’t throw the blood given he’s already a ghost. Instead, he will take advantage of the fact that ghosts aren’t supposed to be visible to the living and turn invisible until Neutral Special is input again or he is hit. Given ghost Mountain has a limited lifespan, he can’t use this to stall or be nearly as obnoxious as he would otherwise, but it can enable him to get the drop on his opponent in the most literal sense of the word.

DOWN SPECIAL – MOUNTAIN DROP


In the air, the Mountain instantly does a superarmored body slam to the ground, dealing 20% and a spike that kills at 100% on grounded opponents. The Mountain falls so quickly that this is by far the fastest means of movement in the game, falling so fast it’s practically a teleport to the ground regardless of how high he was. There is no stalling at the start of the move, making this very feasible to hit with. If foes weren’t horrified of his passive falling hitbox, they will be horrified by this move. Of course, this move has horrible, horrible ending lag that makes the Bowser Bomb’s ending lag look short. The Mountain unfortunately can’t break full strength shields with this like Bowser either – it’s the price to pay for the quick start-up and the massive power when boosted by the passive falling hitbox.


Regardless of how far the Mountain fell, he will always create an indent in the stage where he fell at least double Kirby’s size, with the amount of terraforming able to stack with the passive hitbox’s terraforming. The Mountain enjoys deep pits because it enables him to fall further without getting into the air, it makes him even more ridiculous to vertically kill and awkward to knock off the stage from inside a deep pit, and the difference in elevation makes it more difficult to combo Mountain horizontally, which is the only way it’s possible. All of Mountain’s terraforming goes away when he loses a stock.


On the ground or if a Marth height or less off the ground, Mountain stomps, dealing 9% and knockback away that kills at 165%. The stomp creates a Kirby sized pit like those he can create by passively falling. This is a quick move and enables him to terraform without committing to the over the top aerial version.


If ghost Mountain uses this out of his crouch, he will burst his upper torso out of the ground and flings his arms into the air. This creates the same hitbox and amount of terraforming as the regular version, but ghost Mountain will sink back further into the now lower ground after this, leaving him less vulnerable.

UP SPECIAL – MOUNTAIN CLIMBING

Mountain jumps upwards in a very generic recovery as terrible as Little Mac’s, entering helpless afterwards. He is a hitbox on the way up that rams opponents out of the way, dealing 11% and radial knockback that kills at 155%. Given his second life as a ghost, this horrible recovery is kind of necessary, and with the Mountain’s terrible falling speed and aerial movement he’s more terrified of the off-stage than even Little Mac.

If the Mountain uses this on the ground, the move becomes chargeable for up to .3 seconds. The Mountain will jump up a minimum of 2 Ganondorfs, but will jump up an additional Ganondorf for every .1 seconds the move was charged. This does not put the Mountain into helpless, the Mountain being much more competent at jumping when he actually can kick off the ground. The Mountain can jump up super high to perform powerful Mountain Drops – he falls so insanely quickly that being high in the air barely adds any lag to the move at all. This can also enable him to better take advantage of foes he launches, as his juggling game isn’t that strong. If foes dodge the Mountain on the way up, they could very well be in for hell if he hits them coming down as they come out of their dodge.

Ghost Mountain’s grounded version of the move is the same, but the aerial version has ghost Mountain gain free flight for 2 seconds, entering helpless afterwards. Ghost Mountain can use any attack out of this Up Special, but it will end the flight and prevent him from using it again until touching the ground. Ghost Mountain can phase through any and all solid objects during this recovery, including the stage. If the Mountain has create an exceptionally deep pit, this can enable him to safely recover through the bottom of the stage into the pit. Aside from an alternate recovery, this will get the Mountain where he wants in safety rather than the incredibly dangerous position of the ledge.

If the Mountain ends the ghost version inside the stage, he will enter helpless before falling out the bottom and dying. If the Mountain ends the move inside of some kind of wall, he will simply be pushed out the nearest side of it at the end of the move. If the Mountain is sticking out of walkable terrain when the move is finished, he will enter into his ghostly crouch afterwards.

SIDE SPECIAL – MOUNTAIN SLAM

The Mountain lurches out to grab the opponent. If successful, he will curl up into a ball and start spinning with the opponent held tightly against his body as he ascends briefly before falling down to crush the enemy underneath him, dealing 16% and knockback that kills at 120%. The move is incredibly similar to Bowser’s Side Special, right down to the control over DI based on the percentage of the Mountain and the foe. The passive falling hitbox will stack its damage onto the foe when you crash onto the ground, making it potentially much more powerful.

The Mountain is nearly always going to be behind in percentage, making this difficult to suicide kill with, but that’s obviously Mountain’s goal when he has an extra life. Mountain will always win the match on the last stock when using this move to do a suicide kill, even in ghost form. Aside from having two lives, ghost Mountain makes this move much, much scarier because it reset Mountain’s percentage, enabling him to gain control over the DI. In the least, this move can help you recover to the stage when the foe inevitably tries to gimp you.

If there is a portion of the stage that the Mountain has terraformed to be at least 6 Kirby widths deep and he lands on it with the Side Special Mountain Slam, he will crash through the small amount of remaining ground there to perform a suicide kill through the stage. If Mountain is lucky enough to do this in physical form, the destroyed portion of the stage will stay in-tact when Mountain is a ghost, enabling him to potentially do another suicide kill through the gaping hole in the stage, now with a recovery that makes it more difficult to casually poke him into it to his death.

STANDARDS

JAB – PUNCH PUNCH MOUNTAIN DROP

The first two hits of the Mountain’s jab are simple punches that largely stun the foe in place like any other jab that doesn’t repeat, each dealing 3.5%. Mountain can cancel out of the jab before the third hit in order to come into his utilt or dtilt, which enable him to space the foe in front of or behind him. The final hit of jab is more powerful than either of those moves, though, as Mountain finishes the jab the only way he knows how – a spontaneous faceplant. This deals 9% and knockback that kills at 145%, with the drawback of leaving Mountain in prone in place of any kind of ending lag.

At low percentages, Mountain can immediately combo the last hit of the jab into his get-up attack for even more damage, essentially making it a fourth hit of his jab. When that stops working, even then Mountain prefers entering prone to true ending lag at that point, as he will at least be able to move. When Mountain is so pathetically slow anyway, he will actually move farther by doing his get up roll than if this has no ending lag and he was running immediately. Mountain can chase after the opponent if he wishes, or use this attack as a somewhat impressive “get away” spacer by rolling away after the attack is done.

DASHING ATTACK – MOUNTAIN ROLL

Mountain curls up into a ball and begins rolling forwards for as long as A is held. Mountain will slowly build momentum as he goes, starting at 7% and knockback that kills at 180% at Ganondorf’s dashing speed, but after traveling Battlefield’s width will reach his cap at 23% and knockback that kills at 80%. Mountain will stay curled up until any button other than the control stick is used, not a hitbox when he’s not moving. If Mountain rolls down a slope, he will speed up significantly faster, easily reaching his cap by sliding down a slope that’s at least 3 Kirbies deep. He loses speed going up a slope, but this can be used to his advantage to go for a second pass on a foe in his pit, quickly losing speed to turn around and go after them again. When Mountain is 9/10ths of his way to maximum speed, he gains superarmor.

FORWARD TILT– DOMINATE

Mountain extends out his arms to shove his opponent. This deals 5%, knocks the enemy into prone, and deals knockback that slides them along the ground that kills at 190%. Enemies can tech being knocked into prone and negate all of the knockback, but this will cause them to tech in Mountain’s face, meaning Mountain can get off a grab or something if he reads them correctly. If they don’t tech and he knocks them into a slope, it’s possible for Mountain to read a response from prone and follow with Mountain Drop specifically, as Mountain Drop’s super fast movement can enable him to cover a lot more distance than if he would just have to run after them on level ground.


This move is quite slow for the power, but doubles as a counter. If Mountain is hit from the front, he will grab onto the offending hitbox to stop it in its tracks. Mountain will not take the damage of the attack, but he will be attempting to hold back the force of the enemy’s attack. This will cause him to take 3/4ths of the attack’s knockback as he holds onto the foe, them taking it along with him. All of the knockback will be made horizontal to not lift Mountain off the ground as he is pushed back. If the knockback pushes Mountain up or down a slope, he will travel much more slowly/quickly, making him able to negate a good portion of the knockback by having his back to a slope and making it likely he will end inside of a pit if his percentage wasn’t super high. After finishing his taking of the knockback, Mountain will shove the opponent away lightly for 5%, putting him and his opponent in a frame neutral position.

This will still work if Mountain uses the move against a projectile, but he obviously won’t take the foe with him in that case. Still, it can enable Mountain to use the foe’s projectiles against them in a bizarre sort of retreat. Mountain is a hitbox to outside foes during this that deals the offending move’s normal power and knockback, occasionally useful in 1v1 match-ups when enemy projectiles are involved.

It’s possible to try to counter a foe’s move to try to suicide with them, as he will still hold onto them until the knockback is over if he goes off-stage. Mountain will need to survive to stupid percentages if he expects to actually kill most people with this, though, as he will generally need to kill them outright when everyone else is so much better at recovering than him and his weight means he won’t be able to drag foes very far anyway. Ghost Mountain’s low weight can be very useful here to try to be knocked further to drag opponents further, and he obviously doesn’t have anything to lose and is happy to attempt suicide.

UP TILT– THE SUMMIT

Mountain bends over forwards to reduce his height by a decent margin considering a decent chunk of it is his head, then flings his head upwards. Mountain’s head deals 8% and radial knockback that kills at 165% based off the angle he hit you with his head at. The hitbox starts in front of Mountain before being scooped up above him, enabling him to hit foes straight forwards, at varying angles, and straight up, fairly relevant in a slope based environment.

Mountain’s head has superarmor during this attack. Used against an opponent in front of you on level ground, this won’t be particularly helpful. It’s of course useful against enemies approaching from the air, but it can find use against grounded enemies if you’re lower down on a slope than your opponent. Ducking his head down can be useful there to potentially avoid attacks, and his head will typically clip into the slope briefly before it bursts out and strikes opponents.

A crouching ghost Mountain is very enthusiastic about this attack, basically becoming a lurking shark in the water. The utilt will briefly remove his entire hurtbox as he ducks down before bursting up out of the ground. This version adds a bit of power to the hitbox given the “clipping” into the ground is now an actual game mechanic, with the Mountain’s head bursting out of the ground with debris flying in a small radius around Mountain’s head, boosting the power and range by 1.3x. This version isn’t completely superarmored, being beaten out by attacks that deal 11% or more, but that’s more than enough when the attack comes with a period of invulnerability (Save for enemy earthshaking hitboxes).

DOWN TILT– SCRAPE

The Mountain reaches out in front of him with his two hands, digs his fingers into the ground, then rakes them inwards. This deals 6% and knockback that kills at 210% behind Mountain. Many characters would enjoy moves that are supposed to knock their enemies behind them, as it give them an option to knock foes off-stage with their back to the edge besides their bthrow. Mountain can enjoy this without being at the edge thanks to his pits, as if he’s standing at the top of a pit where there’s level ground, foes will be knocked straight behind him, not sliding into the pit, meaning they’ll enter their aerial state in the middle of the pit which can make the opponent awkward and provides excellent opportunities to use Mountain’s own aerial combat. If Mountain uses the move while already standing on a slope, this can knock a foe deeper into or out of a pit, which is also very useful. If you have any kind of set-up, this move can be useful in nearly any context, functioning as everything you’d want out of a generic spacer and more.

SMASHES

FORWARD SMASH – MOUNTAIN PEAK


The Mountain kicks off the ground with great force and goes flying forwards 1.25-2.5 platforms at the speed of Captain Falcon’s dash, largely resembling the E. Honda flying headbutt. The Mountain’s head deals 19-25% and knockback that kills at 160-120% straight in the direction his head is pointing. The move can be angled 30 degrees upwards or downwards to have the Mountain charge into the air, though if he angles it downwards in front of solid ground his trajectory will quickly come to a stop.

This move has bad ending lag and leaves the Mountain in the prone position, lying on the ground on his stomach. If the Mountain hits anything he can damage, even a shield, he will bounce off of them backwards a set distance and curl up into a ball, negating the ending lag an entering his dashing attack after landing on the ground. This will also occur if the Mountain smashes his head into the ground by angling the attack in such a way his head smashes into the ground/use of slopes.

If this is used on a slope, Mountain will be charging down/up the slope if the attack is not angled rather than straight forwards if the attack is unangled. If he angles the attack on a slope, he can potentially do a fsmash to leap from one side of the slope to the other before smashing his head into it and entering a dashing attack. This can provide a unique movement pattern of providing multiple passes on a foe, and makes the Mountain surprisingly mobile and intimidating in his natural habitat of slopes. If it doesn’t appeal to you normally, it certainly will as a ghost.

UP SMASH – ROCKFALL

The Mountain grabs two armfuls of rocks from the ground below him before throwing them above himself in a Bowser sized cluster of a hitbox, dealing 18-23% and radial knockback that kills at 180-150%. The rocks will fall back down on top of the Mountain after he throws them up, still a hitbox just as powerful as they normally are. While the move has a fair amount of start-up, it’s very difficult to punish once the rocks have been thrown, as they can fall back onto the foe if they were rushing him down point blank. That said, foes can still poke him from the side and evade this hitbox normally.

If he was standing on a slope, though, the rocks will slide down the slope a Bowser’s width before vanishing on contact with the ground, still a hitbox, making it very difficult for a foe to safely attack the Mountain from below with this move. If a foe was approaching from above in a slope, throwing up the rocks still provides some defense while providing a killer bonus if the foe was stupid enough to roll behind you.

If Mountain is a ghost, the rocks will phase inside his body as they fall down, levitating in place as hitboxes. This will last for an amount of time identical to when the rocks roll down a slope briefly, around .3 seconds. If Mountain immediately inputs usmash again, the starting lag of the usmash will be made much shorter as he just shoots the rocks out of his body. This can give ghost Mountain a horrifying defensive option, but when he’s going to die by the foe standing around and doing nothing, strong defensive options aren’t that useful. It can still be used for offense, rushing up to the foe to try to get them with the passive hitbox inside your body before actually starting a move as the effect wears off.

DOWN SMASH – AVALANCHE

Mountain enters a constipated pose for charging before jumping into the air Marth’s height, raising his arms into the air as he curls up his hands into fists. He turns to face the back/foreground as he extends out his legs and does a pair of sumo stomps into the ground, which deal 20-26% and vertical knockback that kills at 145-110%. The Mountain is not naturally a hitbox on the way down, but his passive falling hitbox will be activated during his brief aerial presence to help cover what would be otherwise awkward starting lag, though he’s still completely and utterly vulnerable when he’s jumping before he begins falling. The ending lag is actually fairly quick, with most of the lag being at the start.

This move will cause the ground to shake 1-2.5 platforms to either side of the Mountain, dealing 10% and vertical knockback that kills at 200%. The earthshaking lasts 1.5 seconds, and the low ending lag enables Mountain to use it as a supporting hitbox. If a foe is hit by the earthshaking on a slope, the “vertical” knockback will be tiled alongside the slope, resulting in them getting launched at a diagonal angle. If their percentage was low, they’ll largely just getting knocked towards the other side of the slope. If their percentage is very high and they were deep down in a pit, they can potentially be knocked into the other side of the pit while the earthshaking is still going for extra damage, though it’s nearly impossible to get this to combo more than once. The earthshaking cannot occur on the same terrain for half a second after it expires. This can be a decent move to hit a foe outside a pit without leaving it if you’d like an alternative to Blood Bind.

If the earthshaking hitbox reaches either of the top edges of a pit, rocks will spawn at that point and start tumbling down into the pit, dealing 5% and knocking foes towards Mountain with light knockback. As the rocks fall into the bottom of the pit, they will start to fill it up, anywhere from 0.5-1.5 Kirbies based off charge. This can’t actually do anything but undo terraforming you have created, and is generally seen as a negative for Mountain’s playstyle. That said, the rocks and earthshaking hitboxes will all be knocking foes towards Mountain if he uses this at the bottom of a pit, and the raised terrain will enable him to get to his opponents even more quickly for potentially scary follow-ups.

If a foe is standing in the base of the pit as it gets terraformed, they will also get pitfalled with varying strength based off how many layers of ground were regenerated, a WFT jab with 0.5 Kirbies of ground, a Mii Brawler Down B with 1 Kirby of ground, and a DK Side Special with 1.5 Kirbies of ground. If the rocks actually knock the foe into this pitfall hitbox you’re in heavy, though it’s fairly easy for foes to DI out of – they may even intentionally choose to get hit by the earthshaking to avoid the pitfall hitbox. In any case, it’s a very big deal to commit to this move, as it’d be outright broken without requiring and using your valuable set-up.

If ghost Mountain uses this move, he sadly will not be able to cover the starting lag as he no passive falling hitbox. On the upside, if terrain is rebuilt due to this move and Mountain is standing on that terrain, he will laglessly enter his crouch on the new ground without interrupting any move he was in the middle of, enabling him to take advantage of this state even more than regular Mountain. Considering ghost Mountain is inevitably going to die soon anyway, it makes sense to use up his slope before he dies for good in that form. Using the move while invisible can also make the jump at the start of the move more feasibly evade attacks during the starting lag, and will also make it less obvious to the foe which parts of the stage are about to shake if you don’t use it predictably at the bottom of a pit.

AERIALS

NEUTRAL AERIAL – CRUSHING BOULDER

The Mountain curls up into a ball and spins briefly, becoming a hitbox that deals 8% and radial knockback that kills at 175% in a fairly mediocre defensive nair. While it’s not the best to get pressure off of the Mountain the air due to ending lag (You’d be better off with a classic mountain drop), it’s more notable as an air to ground move. If Mountain lands on the ground, he’ll immediately transition into his dashing attack, making it a potent tool on slopes.

If Mountain presses A as he lands on the ground, he will bounce off of it instead of entering his dashing attack. The amount he bounces is half the distance he’s fallen, with a minimum of one Ganondorf height. This move still counts to be boosted by the passive falling hitbox, enabling him to try to fall on somebody again immediately if they dodge, perhaps with a more powerful move than this one again.

While Mountain’s dashing attack provides him an obvious method to go down a slope quickly, this move can actually enable him to traverse up a slope with strange speed. If Mountain bounces off a slope and DIs to climb up the slope, he’ll quickly come into contact with the ground again, enabling him to bounce up the slope. At any time he feels like it, he can instead not press A to begin sliding down the slope, a difficult to dodge mix with a nearby foe.

If ghost Mountain uses this move while clipping partially inside the stage with Up Special, he will bounce up out of the ground, but the bounce will start at the point of the stage he’s inside of. If he’s just barely above ground, this can result in a hitbox basically coming up out of nothing and for Mountain to still be on the ground when the bounce completes. From here, Mountain will immediately trigger the landing lag again, enabling him to bounce again or transition into dashing attack as he pleases.

FORWARD AERIAL – MOUNTAIN SMASH

Mountain raises his hands over his head before doing an overhead smash for a spike, dealing 15% and a spike comparable to DK’s fair. The spike isn’t directly downwards but at a 25 degree angle downwards, enabling it to vaguely send foes down along a slope, though it’s not perfect in that aspect. This move gives Mountain access to a spike that doesn’t involve him potentially dying, which gives him more of a presence in an aerial context.

If the landing lag of the move is triggered at a point when the hitbox is already out, the move will continue as Mountain smashes into the ground, making the move even more powerful. This creates an earthshaking hitbox on the ground that deals 10% and vertical knockback that kills at 200%. If a foe dodged or shielded the main hitbox, the earthshaking will hit them as they come out of their dodge/shield poke them. If the earthshaking hitbox is made on a slope, the vertical knockback will be angled rather than straight up, leading to more potential follow-ups.

If a foe gets hit by this attack in the air and is knocked into the ground while in their stun animation, they will create the earthshaking hitbox where they land for a second as if Mountain had triggered landing lag there. This extra hit will automatically combo, but the foe can tech to avoid it. This still creates a brief trap for you to abuse, and if Mountain is in position to use his nair or something scarier like the almighty Mountain Drop, the followups to the earthshaking hitbox may potentially be the lesser of two evils for the foe.

BACK AERIAL – DRILL

Mountain goes horizontal on his back in mid-air before spinning, using his head like the sharp drill that it is. This is comparable to some similar aerials like Falco’s fair or Wario’s dair, dealing 11 hits of 1% and flinching with the final hit dealing knockback that kills at 175%. This would actually be a good aerial on a character without atrocious falling speed, making it difficult for Mountain to finish the move’s duration without hitting the ground.

This doesn’t directly have any effect when triggering landing lag, but if Mountain’s head is overlapping a wall, debris will get knocked up from it, increasing the size of the hitbox on his head (and his head only) by 1.5x tripling the power of the flinching hits there to deal 2% with each hit. The scenario for this to work is of course on a slope, with Mountain DIing down the side of the slope as he falls while drilling into the side of it with his head. This is already a great way to use this move on grounded opponents, but the bonus certainly helps.

If Mountain is a ghost and phases into the stage with Up Special, this move becomes a lot easier to use on a slope, as he can do nothing but poke his head out from the side of the slope to get the “drilling” effect. If the foe begins DIing away from his head, he can always extend the rest of his body out for good measure, though then he won’t be “drilling” anymore. If he ends the move with nothing but his head phased out of the stage, he will immediately enter his crouch with no ending lag.

UP AERIAL – ELEVATE

Mountain does a headbutt upwards for a simple juggling aerial dealing 7% and vertical knockback that kills at 170%. While it might be weird to picture Mountain doing much juggling, if he does it in a slope the enemy will have less freedom where they DI to avoid being juggled, and Mountain obviously is very difficult to juggle due to his passive falling hitbox.

While the move’s hitbox will see some use, the real appeal of the move is it briefly stalls him in the air, a lot more important on Mountain when he’s such a fast faller. While he can’t DI during the stalling portion to prevent this from helping his recovery in any way, this can be used to try to catch a foe in a dodge before you fall on top of them with Mountain Drop or whatever else suits your fancy, and can also provide some uncertainty for where an invisible ghost Mountain is.

Like with the bair, if just ghost Mountain’s head is clipping out of the stage during his Up Special when he uses this move, he will immediately enter his crouch afterwards. Note that it’s possible to use Up Special out of crouch and start using an aerial immediately, making these moves a lot more potent of threats to spam. Uair will see the most use for this, as it’s the least situational and only Mountain’s head is a hitbox during this move anyway.

DOWN AERIAL – MOUNTAIN CRASH

Regardless of the Mountain Drop being his signature and more useful attack, the Mountain is an expert in stall then falls, he would be highly offended if his dair was anything else regardless of Mountain Drop already being Down Special. For this one, the Mountain simply stomps downwards as he begins another descent rather than a full body slam. The Mountain will spike enemies as strong as Ganon’s dair, dealing 14% with the possibility of stacking with his passive falling hitbox.

The Mountain doesn’t fall nearly as quickly as Mountain Drop with this, and while the landing lag is slightly less long it’s still very painful to whiff. The appeal of this version is if Mountain hits a damageable target with this, he will stall in the air briefly as he pounds them before exiting the move, not continuing to fall. This enables it to kill off-stage enemies without suiciding for your gimping needs, but also enables it to do followups on opponents on-stage at lower to middling percentages. Knocking an opponent into a pit provides all sorts of obvious opportunities with your other aerials and, of course, the actual Mountain Drop.

GRAB-GAME

GRAB – HEAVYWEIGHT GRASP

Mountain bear hugs the foe and holds them up against his massive body for an average grab. His dashing grab still isn’t that special in terms of statistics, but he stoops down lower, enabling him to grab enemies lower than on him on a slope that he wouldn’t be able to do otherwise. Ghost Mountain is able to grab from his crouch as he does nothing but casually stick up his hand above ground to restrain the opponent, making it much safer.

PUMMEL - SUMO

Mountain pushes the foe forwards with his weight and mastery over the art of sumo, dealing a meager 2% in a very slow pummel. While this pummel is terrible for damage output, it can move the foe around slightly, potentially getting them closer to the edge or a pit. If the Mountain uses this to push a foe down a slope, he’ll travel a significantly farther distance with the pummel, enabling him to easily get to the bottom of a pit from a grab if he’s already standing on it and facing down into it.

FORWARD THROW – THROUGH THE MUD

Mountain swings the foe around once before throwing them onto the ground into untechable prone, dealing 12%. This will cause foes to slide along the ground in prone as they take their knockback that kills at 160%.

Foes don’t slide up or down slopes faster like you’d expect in the usual archetype for this kind of move. While this can certainly be used to generically send a foe down into one of your pits, this knockback method is very useful because it can KO horizontally while you are in a pit without awkwardly knocking them into the side of it. If you have multiple pits, it can also potentially send a foe from one pit into another to distance them in the most awkward position away from you as possible, enabling you to do more set-up in the one you were already in.

If Mountain has outright made a gaping hole in the stage with Side Special, this can be a great kill method when Mountain comes back as a ghost. If Mountain fthrows a foe off a sloped surface into the off-stage, they will continue taking knockback at the angle they were going. While Mountain can’t make the edge itself be anything but perfectly straight as it would mess with grabbable ledge mechanics, the actual holes made in the stage do not abide by this rule.

BACK THROW – SUMO SLAPS

The Mountain batters the foe with a series of sumo style karate chops. This causes the Mountain to deal 5 hits of 3%. He pushes the opponent forwards during the slaps, ending the move a platform behind where he originally started. The final slap deals weak knockback that kills at 190%, though the foe will have moved a platform before they take said knockback.

Mountain’s pummel can only push the opponent forwards, and at low percentages he won’t be able to push his enemies very far anyway. The positioning of Mountain’s throws is so important because of slopes changing knockback angles. While sometimes using bthrow may move Mountain onto an elevation of ground you don’t want, you’re free to not use bthrow at such times. More than anything it’s nice to reposition Mountain himself with this for when after the throw is over, and you can also get the foe to walk over some blood before it dries up.

UP THROW – MOUNTAIN TOP

The Mountain throws the foe above himself lazily for 9% and vertical knockback that kills at 200% before jumping up into the air forcefully 2 Ganondorf heights. He jumps quickly enough that he will surpass the foe assuming they don’t take enough knockback to send them flying past Mountain. If the foe was sent flying above Mountain for an extended amount of knockback Mountain will have frame advantage, but otherwise it will probably end up being frame neutral at a low percentage so Mountain can’t casually combo this into Mountain Drop. At low percentages, the threat of an immediate Mountain Drop is obviously there – even if Mountain doesn’t do anything he’s putting pressure on them with his passive falling hitbox!

If Mountain uses this throw on a slope, he will throw the foe at a different angle based off the slope as well as jump as that diagonal angle. This allows the Mountain to jump from one side of a pit sloping inwards to the other like his fsmash. While the new weird angle means Mountain can’t threaten with a Mountain Drop, it means that at higher percentages where the foe would normally go flying past Mountain, they’ll collide into the slope and not go flying as far. If the foe is nearby Mountain, jumping with uthrow into the other side of a slope makes an obvious transition into a grounded nair/dashing attack or bair.

DOWN THROW - FACEPLANT

The Mountain headbutts the foe into the ground 5 times, each headbutt dealing 3%. The first four headbutts terraform a portion of ground in the radius of 0.125 Kirby widths, making them dig out half a Kirby in total. The final headbutt will pitfall the foe’s feet into the ground, preventing them from moving until they mash out at grab escape difficulty, take knockback/stun, or use a leg attack with 1.3x the starting lag. This throw provides set-up while simultaneously addressing the foe, and the pummel can help you choose where to do the set-up so you don’t have to grab the foe at a specific location.

Keeping the foe stuck in one location can lead into a second move, though SSB4 prevents another grab. The main move to look at here is the dsmash, as the earthshaking is unavoidable if the foe doesn’t get their feet free quick enough. If you can somehow pull the move off in the foe’s face without getting interrupted and they aren’t just hit by the stomp outright, they’re sitting ducks to get hit by a true pitfall effect as the rocks cave in on the pit.

If this throw is used in a pit that’s 6 Kirbies deep, Mountain will not terraform the ground deeper, but will instead knock the foe deeper into the ground with each headbutt. The first headbutt pitfalls the foe’s feet as the foe gets more and more pitfalled, ending with a pitfall as strong as DK’s Side Special by the end. This provides an alternative reward to his side special smashing through the ground for a suicide KO, though it means the Mountain can’t liberally use dsmash.
Ghost Mountain is not interested in set-up when he’s not going to live long enough to enjoy it. If ghost Mountain uses this move, he will phase the foe’s feet into the ground in a very quick animation, conscious of his limited lifespan. This deals no damage, but Mountain will enter his crouch if he wasn’t already, and the added lag the foe has added to leg attacks may make it impossible to hit Mountain when he’s nothing but a head without using a laggier move. He can potentially go even lower than his crouch with Up Special, and he will also be pleased to learn that the foe’s pitfalled feet are still hurtboxes he can hit from inside the stage. Invisibility is also a fair bit stronger on an enemy stuck like this, potentially making a foe dodge at random when they’re given so few options.
FINAL SMASH – MOUNTAIN KING


The Kinnikuman Satan, a vague purple gasous figure with evil yellow eyes, appears in the sky in the background. Mountain makes a pact with Satan and is granted a greater chojin power like Buffalo Man canonically did. This causes the Mountain to become giant and gain a metal box as he yells something in Japanese that vaguely sounds like “For Khaz Modan!”, in addition to gaining superarmor to attacks that deal 15% or less. Any terraforming produced by the Mountain during this time will scale with his size. The transformation lasts for 15 seconds.

If Mountain gets the Smash Ball as a ghost, Satan will temporarily restore Mountain to life in his physical form, healing all of his damage. Satan remains in the background observing Mountain during this time for a trial period, leaving if he dies during that time. If Mountain kills an opponent within 15 seconds, Satan will promote Mountain, giving him the normal Final Smash as he leaves, approving the Mountain as a true devil chojin. If Mountain fails to kill an opponent, Satan will spontaneously kill Mountain immediately without him becoming a ghost again. Considering in this version of the Final Smash Mountain was already a ghost, most of the time this will at least be a small extension of his life, though it is still definitely a dud if it fails. If it succeeds, though, the Final Smash is ludicrously powerful as it essentially gives Mountain a fresh stock and the normal Final Smash simultaneously.

PLAYSTYLE SUMMARY

If nothing else dictated it, Mountain’s set-up encourages him to be defensive earlier on in a match. Making use of dthrow can help, but he will probably have to just take a bit of damage in order to get up his pit. Mountain is able to camp much better with his Neutral Special when he has slopes, which is his other reason for being defensive in order to get a nice lifespan as a ghost. Defensive play and heavy preference for staying in a pit also enables him to use his greatest asset, his weight, to the fullest, giving him a nice long life without even taking into account his ghost.

Mountain has plenty of potential for offensive play with follow-ups, but he will rarely initiate it. If at all possible, he prefers foes to approach into his domain and to completely and utterly destroy said approaches. Mountain’s aggression will more be in brief bursts where the foe leaves themselves vulnerable before he goes back to his neutral position. Mountain has several moves to force foes towards slopes like dtilt, Side Special, and fthrow, but then he won’t be racking up blood on the foe or get to use great moves like dsmash, usmash, and utilt on his approaching opponents. If a foe is especially rushdown happy and trying to abuse Mountain’s super heavyweight status, that’s what he enjoys more than anything, able to casually bring such foes into a pit with his ftilt. His shorthopped aerials in pits, along with the iconic Mountain Drop, already speak for themselves. If a foe is constantly knocking Mountain even slightly into the air, they’re doing nothing but setting up the Mountain’s best moves, much less with that horrifying passive falling hitbox in play enabling Mountain to do heavy multitasking with his moves or simply hit like a truck.

Mountain can play offensive once his slopes are up, and is forced to do so against more campy opponents who can aim their projectiles into the pit, like, say, Pikachu. Even against rushdown opponents, one of the big appeals of playing defensive is the final offensive rush you can do as a ghost, finally getting payoff for all of that blood. Ghost mountain is able to play around his disadvantages greatly with his crouch/phasing Up Special, and his suicides are now full kill methods with no drawback. Ghost Mountain has the tools necessary to chase after opponents who are going out of their way to just evade him with the crouch/Up Special. If a foe cowers on the ledge, they’ll find that’s just about the least safe place imaginable when Mountain pops out the side. Upon getting an opponent into a pit, Mountain can chase after them to the depths of hell with fsmash, nair, dashing attack, and Up Special.
 
Last edited:

Slavic

Ask not the sparrow how the eagle soars
Joined
Jun 5, 2013
Messages
761
Location
taco bell, probablyn't

The Rock Peak Pokemon

"Regirock’s body is composed entirely of rocks. Recently, a study made the startling discovery that the rocks were all unearthed from different locations."

"Regirock was sealed away by people long ago. If this Pokemon’s body is damaged in battle, it is said to seek out suitable rocks on its own to repair itself."

"It is entirely composed of rocks with no sign of a brain or heart. It is a mystery even to modern scientists."

Regirock, the 377th Pokemon in the Pokedex, is one of Hoenn’s mysterious legendary golems. Found deep in the desert ruins of Route 111, Regirock is associated with odd braille messages all across the Hoenn region. Regirock is entirely made from stone, and was likely constructed by people in the stone age, before sealing the golem away out of fear after it was brought to life. Regirock would later be succeeded by fellow golems Regice and Registeel, though the original Regirock still remains, even if it is locked away in the desert. Regirock has one of the highest Defense stats of any Pokemon ever, reaching an incredible 200 defense, with other stats that are still decent, making it truly legendary.


Stats
Height - 9
Weight - 10
Walk Speed - 2
Run Speed - 2
Jump Height - 3
Double Jump Height - 2
Air Speed - 4
Fall Speed - 9
Traction - 6

Specials

Neutral Special - Rock Tomb
Regirock leans back as it braces itself for a powerful impact, lifting both arms in a preparatory stance. During this phase, Regirock charges this attack as long as the input is held, for a maximum of one and a half seconds. Once released, Regirock smashes its arm on the ground, smashing opponents for 6% damage and knocking them away from the golem. After the ground has been sufficiently shaken, a dust cloud erupts forward from Regirock, traveling along the ground and going farther based on how long it is charged, between one crate to four crates forward. The tremor is indicated by a cloud of dust and gravel that travels rapidly along the ground, and at the end of the path a large jagged boulder erupts from the ground, approximately the size of Regirock itself. The boulder only pops out a small distance vertically, and opponents struck by the rock will take 9% damage and knocked away from the rock with force to KO at 145%. This rock can be lifted by any character as if it were a crate, and the rock will remain on the stage until it is thrown off the stage or destroyed. After the rock has taken 20% damage, it will split into three smaller rocks, roughly the size of capsules. These rocks can be picked up and thrown like normal items, dealing 7% damage when they strike a fighter and killing opponents at 170% damage. In addition to serving as a convenient projectile for Regirock, the boulder can be used to force opponents closer. Should an opponent evade Regi’s rocky grasp, for instance, it can send a Rock Tomb on the other side of the opponent to pin them between a rock and… well, a rock. This gives Regirock's strategy an element of stage control, as not only does Regirock have access to these throwable stones but parts of Regi's moveset will be able to utilize the boulders more.

Side Special - Rock Wrecker
Regirock lifts both its arms in the air above its body, glowing a dim orange as it charges the attack. With a full charge time of 2 seconds, most of the time Regirock won't see the entirety of this attack used, but that should not deter players from using this move. Without charge, this move will launch after .6 seconds, Regirock slamming its fists on the ground with great strength. While laggy, Regirock gains 15% superarmor to help aid itself while using this attack. Damage from this move ranges between 16% and 22%, depending on charge, and can KO as low as 85% at full charge. While a painfully telegraphed move, should an opponent be trapped in some way, such as buried in the ground, Regirock has a much better chance of hitting them, though they won't take the knockback if they're buried. A second function of this attack activates when Regirock strikes one of its boulders, in which case, it will wreck the rock. The boulder will splinter into three small rocks, all of which launch outwards as if they had been thrown out of a dash, dealing 7% damage each. While not always the reliable choice in battle, it can turn a battle when landed, and pressure opponents, or simply shower the opponent in rocks to deter their playstyle (hopefully).

Up Special - Body Slam
Regirock crouches towards the ground, bracing itself with its arms for balance. Alternatively, if Regirock is already in the air, it will just crouch in the air without putting its arms down. Regirock then springs up into the air with surprising prowess, traveling up five crates of distance in the air with minor horizontal control. After reaching the peak of its leap, Regirock slows down for a moment before accelerating into a powerful-looking fall. During the fall, Regirock gains both super-armor and a hitbox, dealing 8% damage to opponents and knocking them somewhat downward (KOs at 150%). Body Slam gives Regirock a useful recovery, given its poor jumps and aerial speed, though opponents can still nerf the golem during the startup of the move. Careless opponents, however, can be punished on a whiff as Regirock will quickly turn into a living anvil of pain.

Down Special - Superpower
[Rock Throw, Rollout, Ancient Power, Dig, Recycle, Rock Polish]
Regirock’s arm glows a dull orange as it lunges forward a very short difference, swooping its arm in the air in front of it. If Regirock makes contact with a sizable object, such as one of its boulders from Rock Tomb, a crate or barrel, or an opponent, Regi will put them into a command grab, carrying them above its head with one arm. From here, Regirock can enter any of four inputs to perform special throws, as listed here. Using Neutral Special input, Regirock will perform Rock Throw, taking whatever its holding and hurling it forward overhand. Any object Regi throws will travel four crates forward, and should that object be an opponent they will take 7% damage after being thrown. Should Regirock throw one of its boulders or a crate/barrel, they will damage any opponent for 10% damage, and launch opponents backwards with the force to KO at 145%. Should the Forward Special input be used, Regirock will use Rollout, rolling whatever it’s holding along the ground like a bowling ball. Boulders and barrels will roll along the ground at Toon Link’s dash speed, and crates will similarly tumble, until they fall off the edge, continuing on even after hitting an opponent. Opponents struck by one of these objects will take 2% damage and get pushed back very slightly, accompanied by enough flinch to allow the thrown object to continue damaging them, similar to Marill / Piplup when summoned from a Pokeball. Should Regirock use Rollout while holding an opponent, Regirock will attempt to roll them but the opponent will instead hit the ground, taking 5% damage, and get tripped up from being rolled. While Regirock can’t roll the opponent straight off the edge, it will allow Regi to follow up with a stronger charged attack to potentially KO the opponent.

Using the Up Special input will cause Regi to use Ancient Power, and any object it is holding will begin to glow with a dim blue aura while Regirock’s eyes glow a striking red. Afterwards, Regirock pulls its arm away from the object/opponent, leaving them levitating in the air for a brief moment as Regirock points forward. The object or opponent is then launched at high speed downwards at a 60 degree angle. Objects thrown through Ancient Power will strike opponents for 12% damage and a bit of knockback, starting to KO at 165%, and should an opponent be thrown by Ancient Power, they will take 13% damage and be knocked upwards with the same killing potential. Finally, should Regirock use the Down Special input, Regirock will use Dig and attempt to bury whatever it is holding into the ground. While it deals no damage, unlike the other inputs for Superpower, opponents will be shoved into the ground and pitfalled for a moment, dependant on how well they struggle to escape. An object like a boulder or crate, on the other hand, will be fully submerged underground and forgotten for the time being. These objects will lay dormant until Regi uses Rock Tomb, in which case all submerged objects will pop out of the ground along with a new boulder. This can be used to set up traps or store projectiles so only Regirock has access to them.

Additionally, should Regirock use Superpower while holding a fragment of rock from a shattered boulder, Regi will use Pressure, taking the rock and compressing it into its own body. For each rock that is stuck to Regirock’s body, it will heal 5% damage and gain half a point of weight, as well as giving Regirock’s body a more rugged appearance. Regirock can do this a maximum of six times before it is unable to add more rocks to its body. However, Regirock loses speed, and after all six times it will become one of the slowest characters in the game. This can help increase Regi’s longevity on stage and make it very hard to knock off stage, but this comes at the cost of its mobility.

Lastly, if Regirock does not make contact with an opponent or object while using Superpower, it will become Rock Polish, as Regirock frantically smooths its body out, using its arm as sandpaper. Smoothing out takes just under half a second to perform, and doing so will reduce the impact that Recycle has on Regirock, should a player want a 'faster' golem. On top of that, using Rock Polish on a neutral state Regirock will actually increase movement speed at the same rate it loses it from Recycle, allowing it to raise its speed stats to 5 each. Of course, not everything is peachy when you shed chunks of your body off, and Regirock will lose weight inversely to how it gains weight from Recycle.

Standards

Jab - Pound
Regirock lifts one of its arms into the air and drops it forward, pounding any opponent in front of the golem. Said opponent will take 4% when struck and bounced ever so slightly against the ground. Regirock follows up by punching straight forward with its other hand, smacking opponents backwards as they take 3% damage. Finally, Regirock ends this combo by lifting one leg up and sending a mighty kick forward, weakly launching opponents and dealing out another 4% damage, dealing 11% damage when the combo is done and dusted.

Forward Tilt - Block
Regirock lowers its body and bends its arms in front of itself, as if bracing for an impact. Regirock then rushes forward… for one step. This almost flinching motion will hit normally hit opponents for 11% damage and leave Regirock in a somewhat lengthy recovery animation as it stands back up and regains its battle stance. Opponents will be thrown backwards after being struck, starting to KO at 145% damage. This move is useful for blocking an opponent's approach, though still punishable. Additionally, Regirock can push its own boulders around with this move, ramming them into opponents for the same damage and knockback but a much greater range.

Up Tilt - Brick Break
Regirock leans down towards the ground, supporting itself on one arm with the other pulled back. Regirock then pushes off the ground, using the momentum to swing its other arm backwards through the air in a mighty arc. Opponents struck by Regi’s arm take 13% damage and are knocked aside roughly, beginning to KO at 150%. Due to the wide berth of this attack, hitting in almost a full 180 degree arc, this is a versatile move for Regirock and can help should it not be opportune to use the Forward Tilt.

Down Tilt - Earthquake
Regirock crouches down in a less exaggerated manner similar to Body Slam, preparing for a very brief moment before doing a short jump off the ground. Upon landing, a short shockwave, marked by an explosion of dust, radiates from Regi. Should Regi strike an opponent, they will take 11% damage and be knocked away from the 'mon, usually into the shockwave which allows for some short combo damage. Opponents struck by this shockwave, which increases in strength the farther it is from Regirock, does between 11 and 15% damage, and at the very edge of the shockwave opponents are sent skyward, KOing at 135% and higher damage. Any boulders, rocks, or similar large items will be buried by the crumbling earth below, allowing Regirock to bury multiple objects in the immediate vicinity without need for Superpower on each one.

Dash Attack - Rock Smash
While ‘dashing’, as Regirock has an abysmal dash, it leans back and lifts its arms straight into the air. Regirock then drops both of its arms with crushing force, stopping its dash instantly. The force of the smashing will slam opponents for 10% damage, though opponents who shield will find that this move functions similar to Marth and Lucina's Shield Breaker. Shields are not all this move is good for breaking either, as any of Regirock's boulders, as well as any crates, barrels, or explosive boxes, will instantly shatter under the force of the golem's arms. This can help save Regirock the time and trouble of destroying its boulders slowly, should it need access to the smaller rocks for Recycling quickly.

Smashes

Forward Smash - Shock Wave
Regirock crosses its arms as it lifts one of its legs off the ground. Once the move is released Regirock will slam its foot down with brute strength, uncrossing its arms in an x-formation. From Regriock a large shockwave is emitted, marked by erupting waves of dirt and pebbles. This shockwave will travel three crates forward before dissipating, and will damage opponents for 23% damage at full charge. Opponents struck by the shockwave are also sent straight up into the air, launched by the tremor, and will get knocked out as early as 105% damage at full charge. While it’s not the most impressive Smash attack, it serves as a projectile for the sluggish Regirock, and a killing projectile at that. Additionally, any other objects struck by the shockwave, such as Regi’s boulders for instance, will also be launched high up in the sky, traveling up two crates of distance before falling back down. In the air, large objects will strike opponents hard for 10% damage, throwing them back and beginning to KO at 125% damage, and small objects like Regirock’s shattered boulders will deal less, dealing 6% damage and KOing at 155%. The shockwave will also launch up items buried by Dig, as well as pitfalled opponents. When launched from a pitfall, the opponents will travel up a set amount of knockback, though Regirock can follow up with a powerful move to knock them out afterwards.

Up Smash - Stone Edge
Regirock, whilst facing the camera, lifts both its arms into the air above its body, charging the attack. Once released, Regirock smashes both arms on the ground in front of it, towards the camera. After hitting the ground, a sharpened pillar of solid stone erupts out and upwards from the ground, standing upright for a brief third of a second. The pillar will be between two and three crates in height, depending on the charge. This pillar, while it stands, deals up to 19% damage to opponents that touch it depending on charge, and opponents struck by the pillar as it extends from the ground are launched upwards, and will get KO’ed by the move starting at 110%. Opponents who touch the pillar beyond its initial spawning will simply take flinching damage rather than knockback. The pillar also partially obscures Regi, preventing them from being struck by opponents from above. After a moment, the pillar will partially crumble at the base, causing the top portion to fall onto the ground. This rock chunk functions similar to Regirock’s Rock Tomb, but the sharpened, jagged edges will cause the rock to deal 11%, rather than the 9% that Rock Tomb does. Additionally, should Regirock bury one of these rocks in the ground, it will essentially reactivate the Smash attack when struck by Rock Tomb or the Forward Smash, causing it to pop out and stand like a pillar once again.

Down Smash - Hammer Arm
Regirock pulls both arms behind its head once more, charging this Smash attack. Once released, Regirock uses all of its strength to smash the ground directly in front of it, causing it to kneel down in the process. Regi’s arms are sluggish as the move through the air, extending the duration of the hitbox. Opponents struck by Regirock’s move at full charge will take a whopping 27% damage and thrown away from the golem with the force to KO as low as 70% damage. While very powerful, the move is slow and predictable, requiring planning on Regi’s part, and it leaves them very vulnerable to a counterattack after usage, as Regirock must pick itself back off the ground. Opponents underneath the attack will be spiked, so an aggressive Regi player can ledgeguard using the move, though a risky and easily punishable strategy.

Aerials

Neutral Aerial - Stealth Rock
Regirock performs an aerial twist, spinning around one time at a leisurely pace, its arms raised up half way (picture a slowed down Luma Spin from Mario Galaxy). While twisting, Regirock sheds three small, pointed stones from its body, roughly the size of Pokeballs. Each of these stones will drift in the air momentarily before vanishing. Each rock, should they strike an opponent, will deal 8% damage and knock the opponent outward from where Regirock spawned them. If Regirock has used Rock Polish, the rocks will deal less damage, a percent of damage per every two Rock Polishes. In exchange, the streamlined stones will travel farther than the base rocks, and last slightly longer as well. Fully polished, the rocks spread over a radius of a Smart Bomb and last almost a full second as they fall. Conversely, should Regirock have used Recycle, the rocks will be more rugged, and will deal more damage, 1% more for every two uses of Recycle. However, as expected, the rocks lose range, and with six Recycles stacked the stones will barely leave the area around Regirock. The rocks will have increased longevity with Recycle in the same way they do with Rock Polish. A very basic and limited projectile, this move serves to aid Regirock in countering aerial combatants by setting up obstacles to prevent their direct approach to Regirock.

Forward Aerial - Take Down
Regirock brings both arms to its sides outstretched as it leaps forward through the air a short distance. Regi brings its massive arms forward like pillars, smashing any opponent in front of the golem. Opponents will take 14% damage with massive horizontal knockback, and can KO at as low as 95% damage. One of Regi’s best kill moves, this attack is altered by Rock Polish and Recycle as well. Regirock can increase the move’s range and forward motion through Rock Polish, and with a full stack of Rock Polishes applied, the golem will leap forward two crates of distance before striking. However, the range comes at the cost of damage, and the move will lose 2% damage and take 10% more to KO for every two Rock Polishes used, limiting the KO potential of this move. On the flipside, Recycle’s properties will create a more devastating Take Down, as the move will gain 2% damage per Recycle and shave off 5% of the damage required to KO per every two uses of the move. This allows Regirock to demolish opponents, though hitting them becomes harder as Regi loses mobility with this move as a cost. At a full set of six Recycles, Regirock will not travel forward at all, only smashing its arms together in the area where it uses the move.

Up Aerial - Smack Down
Regirock swings one of its mighty arms with surprising speed over its head, slamming its rocky fist in the air. Opponents who are struck by this move will take 8% damage, trading off damage for the unusual speed of the attack. While not the strongest attack in Regi’s moveset, it gains more utility as the golem’s fist becomes a meteor smashing hitbox in addition to the damage. This allows Regirock to effectively combat aerial opponents by bringing them to the ground or even smack them into a pit to their demise. However, striking the opponent with the arm will not smash them, and only knock the opponent a short distance away, allowing for a follow up from opponents to counterattack the behemoth.

Back Aerial - Slash
Regirock leans forward, revealing the jagged stones that adorn its back. The stones glow and increase in size momentarily, the sharp edges slashing at an upward diagonal behind the golem. The slashing will strike opponents for 13% damage and launch them upwards, KOing at 135% damage and higher. Afterwards, the stones on Regi’s back will shrink to normal and cease glowing. This move is a little lengthy, taking the longest time to perform out of all of Regi’s aerials, meaning players should ensure a hit before attempting to use this move. Should Rock Polish be active during this move, the animation will move much faster, scaled to how many Rock Polishes have been used, while the move deals less damage, 1% for every two uses of the move. Meanwhile, Recycle will cause the stones to deal more damage, cranking up 2% for every two uses of Recycle. However, the time the move takes also increases, and with all uses of Recycle piled up, it will take almost a second to complete the entire animation of the move.

Down Aerial - Gravity
Regirock lifts both arms and legs upwards, sprawling in the air as it faces the camera and harnesses the almighty universal power of gravity! A stall-and-fall without the stall, Regirock will immediately plummet to the ground (hopefully) without warning, turning its body into an inert piece of stone. Opponents struck by Regirock’s falling body will take 13% damage and be thrown away from Regirock forcefully, KOing at damage percentages as low as 115%. Should an unlucky opponent be directly under Regirock during this move, they will be smashed straight downward, though not a true meteor smash. While normally opponents could recover from this, most will struggle as Regirock repeatedly hits them and smashes them down repeatedly, as Regi will continue after hitting opponents. While this doesn’t necessarily mean a KO for Regi, as the golem would be required to sacrifice itself for the kill, it does allow Regirock to pressure aerial opponents out of the sky and outright clip their wings.

Grab Game

Grab - Strength
Regirock’s grab is a fast and short-ranged grab, and Regirock brings both its rocky fists together in front of it. Opponents struck by this are held between the Pokemon’s arms during the grab in a kind of sedimental death hug. Regirock’s pummel causes the rock Pokemon to smash its body against the opponent, dealing 5% damage. On an average opponent, Regirock can fit in two pummels, possibly three, before the opponent breaks out of its grip.

Forward Throw - Vital Throw
Regirock takes the opponent in one arm and pulls its arm way up over its head, then proceeds to hurl the opponent forward at an upward angle, as a normal person might do with a baseball. Opponents will take 12% damage as they are thrown, and this move will begin to KO at decent percentages, starting at 90% damage to take opponents out. This move is a simple throw, but is also Regi’s best throw for KOing opponents, and can help Regirock cinch a victory in a pinch should it be able to close in on the opponent.

Up Throw - Seismic Toss
Regirock grips the opponent tightly with both arms and leaps into the air like some sort of crazy mountain-themed wrestler before landing and driving the opponent into the ground. This move deals 10% damage to opponents as they collide with the ground, after which Regirock releases them from its grip. Opponents will then bounce off the ground back into the air, though this move only starts KOing at 200%+ damage by itself. However, as opponents are thrown into the air, Regirock can follow up with any of its useful moves for attacking aerial opponents, especially the Up Smash. By itself, this throw has little KO potential, but is useful for setting opponents up for a much stronger move, possibly a chargeable one like the Up Smash.

Back Throw - Fling
Regirock lifts the opponent up into the air with one arm, preparing to throw them as with the Forward Throw. However, Regirock then whirls around on one foot and, while planting the other foot back on the ground, hurls the opponent at the ground in front of the Pokemon. Another low knockback move, the opponent will take 11% damage upon striking the ground and bounce back up into the air. Similar to the Up Throw, this throw serves to set the opponent up for a powerful attack, though rather than moves like the Forward Smash, Regirock can throw out moves like Rock Tomb and the Forward Smash much easier and allow Regi to hopefully KO the opponent.

Down Throw - Slam
Regirock faces the character and lets the opponent go, causing them to drop on the ground. Regirock lifts both its arms directly up into the air, and promptly falls forward into a body slam. Upon impact with the opponent, Regi will deal 13% damage with its slam and launch the opponent on either side of the golem. Opponents will launch along the ground two crates in distance, though if they reach an edge or strike a surface or object they will stop, meaning this throw is difficult to KO with. However, should Regirock use this throw on a ledge, the opponent can be launched straight off the edge and into the void. Additionally, should an opponent strike an object, for instance, one of Regi’s boulders, they will be momentarily flinched which allows Regi time to get up from the move and follow up with a stronger move. Regirock can even create a sort of boxing ring to use this move in by placed boulders on either side of it, allowing it to combo careless opponents.

Final Smash
Zap Cannon
After obtaining the Smash Ball, the screen goes dark except for Regirock’s eyes. After a short moment of furious blinking, the lights return to the screen and one opponent in front of Regirock will be marked with a glowing red crosshair. Regirock roars and holds its arms in front of its body and a sphere of crackling yellow electricity appears between its hands. This electric orb, Zap Cannon, is launched forward, and moves sluggishly at first, picking up speed as it crosses the stage. As Zap Cannon approaches the marked opponent, it curves vertically towards them, and will speed up until reaching the opponent. After orbiting them one full time the orb flies directly into them, dealing damage and knockback. The opponent, and any opponent struck by the Zap Cannon while moving, will take 40% damage and be thrown after a brief moment of electrical paralysis, KOing at 70% damage and higher. During this move, Regirock is both immobile and untouchable.

Playstyle
Glancing at some of the moves, especially in the specials, Regirock would appear to be a character that relies on stage control for KOs. While Regirock is certainly capable of utilizing the elements of stage control through Rock Tomb, Stone Edge, and Superpower, relying on these moves by themselves doesn’t tap into all of Regirock’s potential. Regirock’s style is naturally slow, lumbering, and powerful, similar to other heavyweight characters like Bowser and Ganondorf. However, in certain instances, it may not be beneficial for Regirock to be as heavy and slow as it is, or perhaps, at higher percentages, Regirock may want extra bulk. Regi’s moveset provides adaptability in how the golem plays, and between the Dash Attack and Recycle Regirock can balance itself statwise to whatever it needs.

In the beginning of a stock, Regirock may want to rely on its Dash Attack, Rock Polish, in order to give it the mobility to chase the opponent around. Many killing moves, such as the Forward Aerial and Back Aerial moves, lose their KO potential through Rock Polish, but when percentages are low KOing isn’t as prioritized as approaching the opponent, allowing this trade-off to not hurt Regirock too much. Additionally, this may be a good time for Regirock to start popping out boulders with Rock Tomb and the Up Smash, preparing for later in the battle when Regirock would like the utility of the rocks.

Indeed, when percentages in the battle are high, Regirock will appreciate the presence of boulders. While Regirock is weaker, charging up Rock Tombs can be hazardous as faster opponents can swoop in to interrupt and attack the golem. The boulders can be hurled through Superpower, allowing Regirock to KO opponents without needing to chase them down and getting within counterattack distance. Additionally, using Recycle as Regirock’s damage increases is worth the loss in mobility, allowing Regirock to not only weigh itself down but to heal up a bit of damage as well. Having rocks around is essential to Regirock’s gameplay, as Rock Polish becomes a hinderance as Regirock takes more damage and Regi can’t risk producing more rocks to reabsorb.

Flavor

Entrance - Regirock is already on the battlefield as the fight opens, however, Regirock appears almost deactivated, sitting motionless in the shadows. At once, its eyes flicker to life and the lumbering giant lifts itself to its battle stance.
Boxing Ring Title - The Golem of Granite
Up Taunt - Regirock faces the camera as its eyes flicker on and off for a few moments before returning to battle.
Side Taunt - Regirock calls out ‘Regi…’ slowly and ominously as it crashes its stone fists together twice.
Down Taunt - Regi shouts ‘Regi!’ and stomps once, then cries ‘Rock!’, stomping with the other foot.
Victory Pose A - Regirock lifts a massive boulder over its head as its eyes blink excitedly.
Victory Pose B - Regirock stomps furiously on the ground several times until the camera fades out.
Victory Pose C - Regirock stands motionless as its eyes slowly turn dark. Regirock then slumps down, looking very deactivated.
Losing Pose - Regirock stands proudly while smashing its arms together in a manner reminiscent of clapping.
Victory Theme - Traditional Pokemon Victory Theme
Character Theme - Battle! Regirock/Regice/Registeel

Home Stage - Route 111


..man, MYM is really starting to

rock

this page
 
Last edited:

ForwardArrow

Smash Ace
Joined
Aug 17, 2011
Messages
503
IMPORTANT ANNOUNCEMENT: THE END DATE OF MYM17 IS JANUARY 30TH.

You need to submit your sets by then or they will not be counted. Now for some comments:

Koenma
I remember this set's design process was incredibly strained and to be honest, it does show a bit from the length and slight lack of cohesion. The set utilizes a group of concepts that were mostly just used in awful sets in the past, with the soul stealing and bumper-esque traps, and modernizes them a fair bit to make it actually a pretty solid effort. I'll admit I've never been huge on either of those concepts(the only time I did Soul Stealing it was handled in a very different fashion than it is here) and the reason why is its really hard to actually flow off them in a substantial and non-broken fashion. Koenma certainly tries, with a lot of unique and somewhat cool ways to split the foe from their soul, and that works rather naturally into the barrier to further desync them and provide some powerful gimping options. I will say that your attempts to flow off both these concepts quickly become pretty strained however, and I can't fault you for that, there's not actually too much you can do with them and Koenma's not exactly loaded with potential.

The main thing differentiating my opinion of the set from Bionichute's is that I actually like Jorge. Yeah he's a bit of a joke and rarely comes across as particularly effective, but he's a complete and utter butt monkey and its not like he's paired up with another butt monkey to make him relevant. He should come across as kind of disposable. His uses do get a little tacky sometimes, but playing off his presence is kind of necessary to give the set depth which I don't think either of the concepts provide enough of on their own, and the set does its fair share of genuinely cool things with them. There's enough fun to be had here that I don't think the time spent on it was wasted, and it looking bad compared to some of your other efforts is more evidence that they're good and than it being anything bad.


Regina
If you've been in chat for more than 5 minutes you know Jamie loves this set and while personally speaking I don't entirely agree with him, it is pretty entertaining. The set primarily makes use of a simple time bomb item and the ability to make spike constructs across the stage, as well as some basic item manipulation to abuse the couple that are created in the set. It doesn't do anything I'd consider standout with this manipulation, but there's enough in the Specials to at least provide a substantial basis for the set to play around with, and moves later in the set have little details that usually make them not especially generic or boring. It still struggles to flow that much after a while with uses feeling pretty niche or "any move on this input could've accomplished that" by the end, but its a better way to execute time bombs than throwing them on one throw to try and create flow.

Slon
Now moreso than Blocks, this is the Warlord frontrunner-tier set I was looking for. Slon introduces some cool projectiles in the specials with the ability to store them on the stage or his shield, and progressively expands on how heavily you can abuse them while they're already out. While there's definently some good material in the Smashes and throws as well, what surprises me is that some of the absolute best moves in the set come fairly late. The Nair, Dash Attack, Forward Tilt, and Jab are all insanely cool and add a ton of depth to his playstyle. Honestly the follow up is much better than I would have expected given the Specials, but the set really shows how much mileage you can get out of the simple ability to empower your attacks and having a couple lingering projectiles, which is quite remarkable.

What makes it a little more impressive is of course, that this character's boss fight consists of two attacks, and then he gets one more move in a spinoff. The attack from the spinoff is very good, but its only so much to work with. You basically got everything out of the character I could really see him doing, and for the most part the set is as good as it really could be, as even the moves that don't flow that heavily into the weapons at least give him something of a unique combo game. The biggest nitpick that's stuck with me though is one that's admittedly a little dumb but worth mentioning: why is Slon size and weight 10? He's smaller than Ladja and every indication I get is that he'd be around Wario's size, not Bowser's. Some moves in the set definitely feel like he's sized up to be this big too so its not just one number, which makes the characterization feel a tiny bit bizarre. I won't deny that's petty but its pretty odd, though I can see why you did it as a small interpretation to make this character have a little more to work off, being average sized is not great when you're already desperately trying to have set potential at all.

Ladja
Now I have to wonder if we'll ever get to Nimzo to round out the group, though as far as actual character choices go Ladja is obviously the most exciting one by far. Seriously that is one impressive list of villainous feats, can't think of a lot of characters who can really match that in one isolated story in terms of competence and cruelty without it just coming across as ridiculous. The actual set gets off to a strong start with the ability to create that giant threatening projectile that can be kept out without needing other inputs, as well as the fairly exciting ability to tether to it. The set goes on to include many fun ways to play off this projectile, the most exciting ones being all the implications of cutting it into multiple projectiles all tethered to Ladja for some potentially insane projectile comboing.

The set stays pretty strong throughout, and one thing I have to admire is how you went out of your way to include a very important part of his character in the petrification and somehow made it far more interesting than a mere stun. The multiple stages it works in to give the foe a chance to fight back and Ladja's ways of abusing the status effect definently add a significant amount of substance. At the same time, this part of the set doesn't feel as connected to the projectile manipulation component as I'd hope, and in a way it still ends being a bit of a point of weakness for the set, as parts dedicated to dealing with the petrification just generally are not as good as the rest of it. I can certainly see why you did, the amount of buffs and effects being stacked on the projectile would probably get out of control to deal with if you added any more. Its a very admirable set and a great representation of a great villain.

Abnes
The main appeal of Abnes is definitely the cop minions, which have a barrier bounce mechanic rather similar to Koenma's in addition to some more straightforward brawler qualities. The real selling point of the cops is the ability to turn them into a suit of armor to enhance all of Abnes' abilities, which felt like a worthwhile and interesting reward for all the effort invested. My problem comes from how the cops were used in the rest of the set really, the interactions all start to feel really arbitrary after their introduction and honestly are just there to try and acknowledge their existence. Its a shame as what you introduced was cool and you tried to interact off it, but it never felt like the interactions meant anything and were just there to remind you the minions exist.

The set does flow, but rather than into the cops and cop armor it just kind of ends up being straight up rushdown most of the time. The idea being that Abnes getting in the foe's face will make them hit her to produce more cops which is okay and you actually flow into it some, but I think you could've done more with the set than just make it rushdown. And some moves just feel poorly designed, the Down Throw animation is hilarious but you overdid it with the bonnet on top of everything else(I understand wanting the reference but sometimes those don't work as well as you'd hope) and the effect is way too powerful. The biggest culprit for me was FSmash, which feels like its either way too powerful or weak when used and there's not too meaningful a way the foe can interact with it. There are definently bits that make the set feel like its more than a straight up rushdown set(that Ftilt is actually quite cool even if its awkwardly incomplete) and I'd probably still like it at all if the 2 moves I mentioned were fixed, but as is the set is kind of underwhelming.

Copypaste
I feel like Copypaste is your weakest effort this contest, but that's not really an insult to it. Its a pretty straightforward boulders and terraforming set that's main problem is that it doesn't really innovate a lot within the genre. You can launch them out of tornadoes, break them into smaller fragments and possibly grind the foe up alongside them for massive damage, and abuse them to make some powerful combos with a burrowing drill. There's also a fair bit more than just that, but point is, a lot of it technically has been done before, the main thing selling it here is that the execution has very few errors, and a lot of the simpler moves have an attention to detail to at least make them more substantial, a trait a lot of sets this contest lack. I kind of wish I had more to say about it, but when it comes down to it the set just doesn't innovate that much or work off an existing concept in a new way. Rather, its just good at what its doing, which feels kind of fitting on this character, I mean his name literally is "Copypaste". When it comes down to it, all I ask is that its fun and functional and the set delivers on that at least.

Mr. Badd
Well it looks like the Fat Buisnessman from Dr. Marcus finally got his own moveset! And kind of like how the Fat Buisnessman is an upgrade over the Perfect Marcus, Mr. Badd is by a pretty good margin superior to the doctor. That should really say a lot about how good this set is, its my favorite set Smady has ever made. Ludicrous amounts of hype aside, you really should try not to raise your expectations too much going into it, you might have a different experience than I did, but I strongly advise absolutely everyone read this if they have the opportunity.

Onto the specifics, you present a cool concept already with the Loweebos, which are created from the opponent's moveset and have a pretty clever system to upgrade themselves, they have to survive and learn to evolve their AI. The set then allows you to customize your Loweebo like many custom minion sets do, but the ways to do so go beyond what you'd expect. Mr. Badd brings a few of his own moves to customize their sets with and each brings something pretty cool to the Loweebo, my favorite being the one that adjusts them to be campy until they reach their power spike from charging up, to provide an alternative to just having the Loweebos fight in their usual style. It also has to be said that this is the first good set to make a point of having minions fight each other, and while that sounds possibly gimmicky the reward is actually powerful enough that it adds another layer to his game rather than just being supremely situational. Once you have your amazing creation of choice, you can go upload it to the HQ and have a new one manufactured every few seconds.

Now with recent commentary that setup sets snowball too hard sometimes, you'd probably get a little worried from the last line of the above paragraph, but believe it or not Mr. Badd actually has several measures in place to avoid that. For one, the HQ he makes is mortal, and he has to expend his mech when he recovers. If he loses those, he loses the data he has on the Loweebos, and therefore his ability to keep the match landsliding in his favor. Loweebos also aren't really the scariest minions ever concieved, their AI is pretty dumb and requires some babysitting(and Badd has plenty of tools to do that while not making the match boring during that period in the least) and once they get going they're still not especially durable. Nevermind that a lot of Badd's more powerful combat options are only available if he damages his own HQ in the shockingly great aerials or sacrifices his mech with the Up Special and sets up the explosion. You have to think like a buisnessman to play Mr. Badd, you have to choose to either keep investing and hope it eventually pays off, or take a risk and sacrifice some of it, and if it goes wrong it'll all come crashing down. But if you get it right, you'll be swimming in fortune and fame.

There's a lot of amazing stuff in here I haven't really mentioned, this is a set that's very hard for me to do justice in a comment but seriously, please read this moveset. I know its long and looks kind of intimidating and Neptunia disgusts you or whatever but this is not something you want to miss reading.

The Mountain
There is some pretty comedic timing with this set and Copypaste both being posted so close to each other, and the Slavic just had to throw Regirock on top of that. Is this sudden compensation for the lack of terraforming and boulders we've had for a while. Although, the Mountain doesn't really have boulders in the traditional sense, his set is more heavy abuse of the pit he creates simply by falling. That's right, he's so HMA he terraforms just by existing. I'll admit I feel like that mechanic might be a little too extreme but its pretty fun and fitting regardless.

A lot of what he does with the pit is fairly standard, building momentum and whatnot, but what sets the set apart from its peers is that it instead makes suicide KOs more exciting with the introduction of the ghost. The ghost gives the Mountain a last chance to bring the foe down with him, or in particularly crazy cases, bring them down with him twice for a massive lead through abuse of the many suicide KOs the set has. This doesn't feel broken because unlike a lot of suicide KOs the Mountain actually has to do his fair share of work to suicide with someone, he's quite slow and clunky. I will say that while the concepts presented are very cool sometimes the execution is almost too straightforward, the main thing that prevents the set from being a fair bit higher on my rankings is he doesn't really have a lot of room for variety in his gameplan, though its at least got its share of depth. This isn't exactly a character who has a ton of things he can do either, so this really is just about the only approach that would've worked.

Regirock
Glad to see you've been able to get back on your feet after Exeggutor, because Regirock is a lot better than your other 2 sets this contest. Its positioning is really poor because its right next to 2 other sets that deal with manipulating the stage and one of them even also creates boulders, but Regirock at least has a couple neat things to himself. The primary cool detail is that he can Recycle rocks he's dug up to make himself bulkier and heal. I wish a little more was done with this honestly, because you do use it to buff the aerials power while slowing them down as a means of making it feel relevant but I wish there was more payoff, as that's the set's main distinguishing quality. It has other cool traits too though, the Forward Smash and Up Smash seem rather fun to play around with. The set even avoids having bad throws like a lot of your other sets. I just wish you did a little more with the rock mechanics past the specials than using them to buff specific moves, there's plenty to do with Recycle(and whatever you plan on improving Rock Polish too) and if it were a little more substantial in that regard I could see this being my favorite of yours. As is, its a little too dull to rise above your better sets.
 

WeirdChillFever

Smash Hero
Joined
Jun 10, 2014
Messages
6,600
Location
Somewhere Out There
Octoling
I've played Splatoon's Octoling levels quite a few times (mostly to see Seeker Rush in action before it was released), so I feel pretty qualified to critique this set.

As for the tilts and aerials, they fit the Octoling and the playstyle to a tee.
Despite the fact that the Octolings don't display much moves in the games, these moves are good for what they are.

However, I can't help but think about the somewhat more flashy moves that could've been used.
The Smashes are perfect examples of what the Octarian army can bring (aside from a not so logical placement for the Octostamp) and I would've liked more Octarian forces in the tilts.

Ex: Octoball Juggle Up Tilt, a reference to Octobot (Giant Fist Up Smash) and the other bosses.

The Specials are again pretty basic, supporting the Octoling's Ink mechanic, with the addition of the second of the two Octoling weapons, the Splat Bomb.

Again, would've liked some more flash, with the Side Special being the Octarian summoning "Eggs", allowing for short guerilla with a fellow Octotrooper. (Or Flooders!)

These are all nitpicks, bu there's one thing that I miss and that is the absolutely crazy, lagless, map-spanning Super Jumps the Octolings have in Splatoon.
There's three things Octolings do in the game and this is one of them.

It'd also fit very well with the small amount of ink Octolings have at the time, they could Super Jump to a far away ink puddle, a far away place on the map to begin a new hideout or they could use it to get behind the opponent.

The current Super Jump actually takes away from canon and potential, probably to declone them from the Inklings
If you want to declone it, it'd suggest to make it a more horizontal version, or that you implement the kettles as Squid Beakons to get a real war strategy going on.

That said, you made a very solid moveset with a very distinct playstyle, with the only non-nitpick being the Super Jump.

You can redeem that mistake by joining me in making a Cap'n Cuttlefish moveset
 

Munomario777

Smash Master
Joined
Nov 18, 2014
Messages
3,253
Location
Charleston, South Carolina
3DS FC
0387-9596-4480
Switch FC
SW-8229-3157-8114
ohai WCF! o/ Small world, huh. Well, welcome to Make Your Move! I'd prefer that you don't call the Captain Toad moveset a "joint project," since it wasn't really formal and I didn't see the set before you posted it and I didn't actually "approve" of it. But you could do something like credit me for ideas and stuff, since we did discuss this in that thread a while back. Anywho.

Octoling
I've played Splatoon's Octoling levels quite a few times (mostly to see Seeker Rush in action before it was released), so I feel pretty qualified to critique this set.

Playing the source material is nowhere near being "qualified" enough to provide accurate criticisms on a set. Knowing how to make a good set is also a big part of it (or rather, knowing what a good moveset is like).
As for the tilts and aerials, they fit the Octoling and the playstyle to a tee.
Despite the fact that the Octolings don't display much moves in the games, these moves are good for what they are.

However, I can't help but think about the somewhat more flashy moves that could've been used.
The Smashes are perfect examples of what the Octarian army can bring (aside from a not so logical placement for the Octostamp) and I would've liked more Octarian forces in the tilts.

Ex: Octoball Juggle Up Tilt, a reference to Octobot (Giant Fist Up Smash) and the other bosses.
The Octostamp is a tad odd, I'll give you that.

But I don't see how juggling giant Octoballs makes any sense when the Octoling has never done that before, let alone on a tilt of all things. The Octolings aren't even present in the final boss fight, the hand never comes out of ink or anything, and it makes more sense for the Octoling to summon generic, low-level troops than what is essentially the Octoling's boss's hand.
The Specials are again pretty basic, supporting the Octoling's Ink mechanic, with the addition of the second of the two Octoling weapons, the Splat Bomb.

Again, would've liked some more flash, with the Side Special being the Octarian summoning "Eggs", allowing for short guerilla with a fellow Octotrooper. (Or Flooders!)
Flash isn't everything. When do we ever see Octarian eggs in Splatoon, let alone the Octolings summoning them, using them to battle, and them performing guerrilla warfare (or how that'd even work in this environment)?

And don't get me started on summoning giant elements of the stage design itself (which flooders effectively are). That'd be proppy and tacky and not go with the playstyle at all. And having ink on the stage at all times (which a flooder would do in spades) is the exact opposite of what the Octoling is about from a playstyle perspective!
These are all nitpicks, bu there's one thing that I miss and that is the absolutely crazy, lagless, map-spanning Super Jumps the Octolings have in Splatoon.
There's three things Octolings do in the game and this is one of them.

It'd also fit very well with the small amount of ink Octolings have at the time, they could Super Jump to a far away ink puddle, a far away place on the map to begin a new hideout or they could use it to get behind the opponent.

The current Super Jump actually takes away from canon and potential, probably to declone them from the Inklings
If you want to declone it, it'd suggest to make it a more horizontal version,
Yeah, because a move with no lag that allows the Octoling to fly to the other side of the stage and that can't be punished totally isn't overpowered. :rolleyes:

The Super Jump is the way it is not only to distinguish the Octoling from the Inkling, but also for actual gameplay stuff that adds to the playstyle and balance. The Octoling is a pretty powerful character; having an amazing recovery like the Inkling's would be a bit much, so I made that one of the weaknesses. A purely vertical recovery with a Super Jump's height isn't terrible, but since it doesn't ledge-snap, they're very vulnerable (see Cloud). At the same time though, it's got barely any start-up lag, and it damages opponents. Meaning, it's safer if you're near an opponent. Not only that, but it can be used more easily for combos and ceiling KOs -- as described in the move's description. I don't see how this is a worse move than the lagless Inkling recovery you mentioned (in terms of design, not how effective the move itself is). 100% accuracy to the source material isn't everything, not even close.
or that you implement the kettles as Squid Beakons to get a real war strategy going on.
Again, stage elements that the Octolings never actually use make no sense in a moveset, and are tacky. (Let alone how effective teleportation wouldn't add anything of value to this particular moveset.)
That said, you made a very solid moveset with a very distinct playstyle, with the only non-nitpick being the Super Jump.
Why thank you.
You can redeem that mistake by joining me in making a Cap'n Cuttlefish moveset
No thanks, I'm good. :p
 
Top Bottom