• Welcome to Smashboards, the world's largest Super Smash Brothers community! Over 250,000 Smash Bros. fans from around the world have come to discuss these great games in over 19 million posts!

    You are currently viewing our boards as a visitor. Click here to sign up right now and start on your path in the Smash community!

Make Your Move 17: Next contest begins March the 24th; get your Iron MYM'er 1st day sets ready!

Junahu

Smash Ace
Joined
Nov 15, 2005
Messages
899
Location
Shropshire Slasher
Hi all,
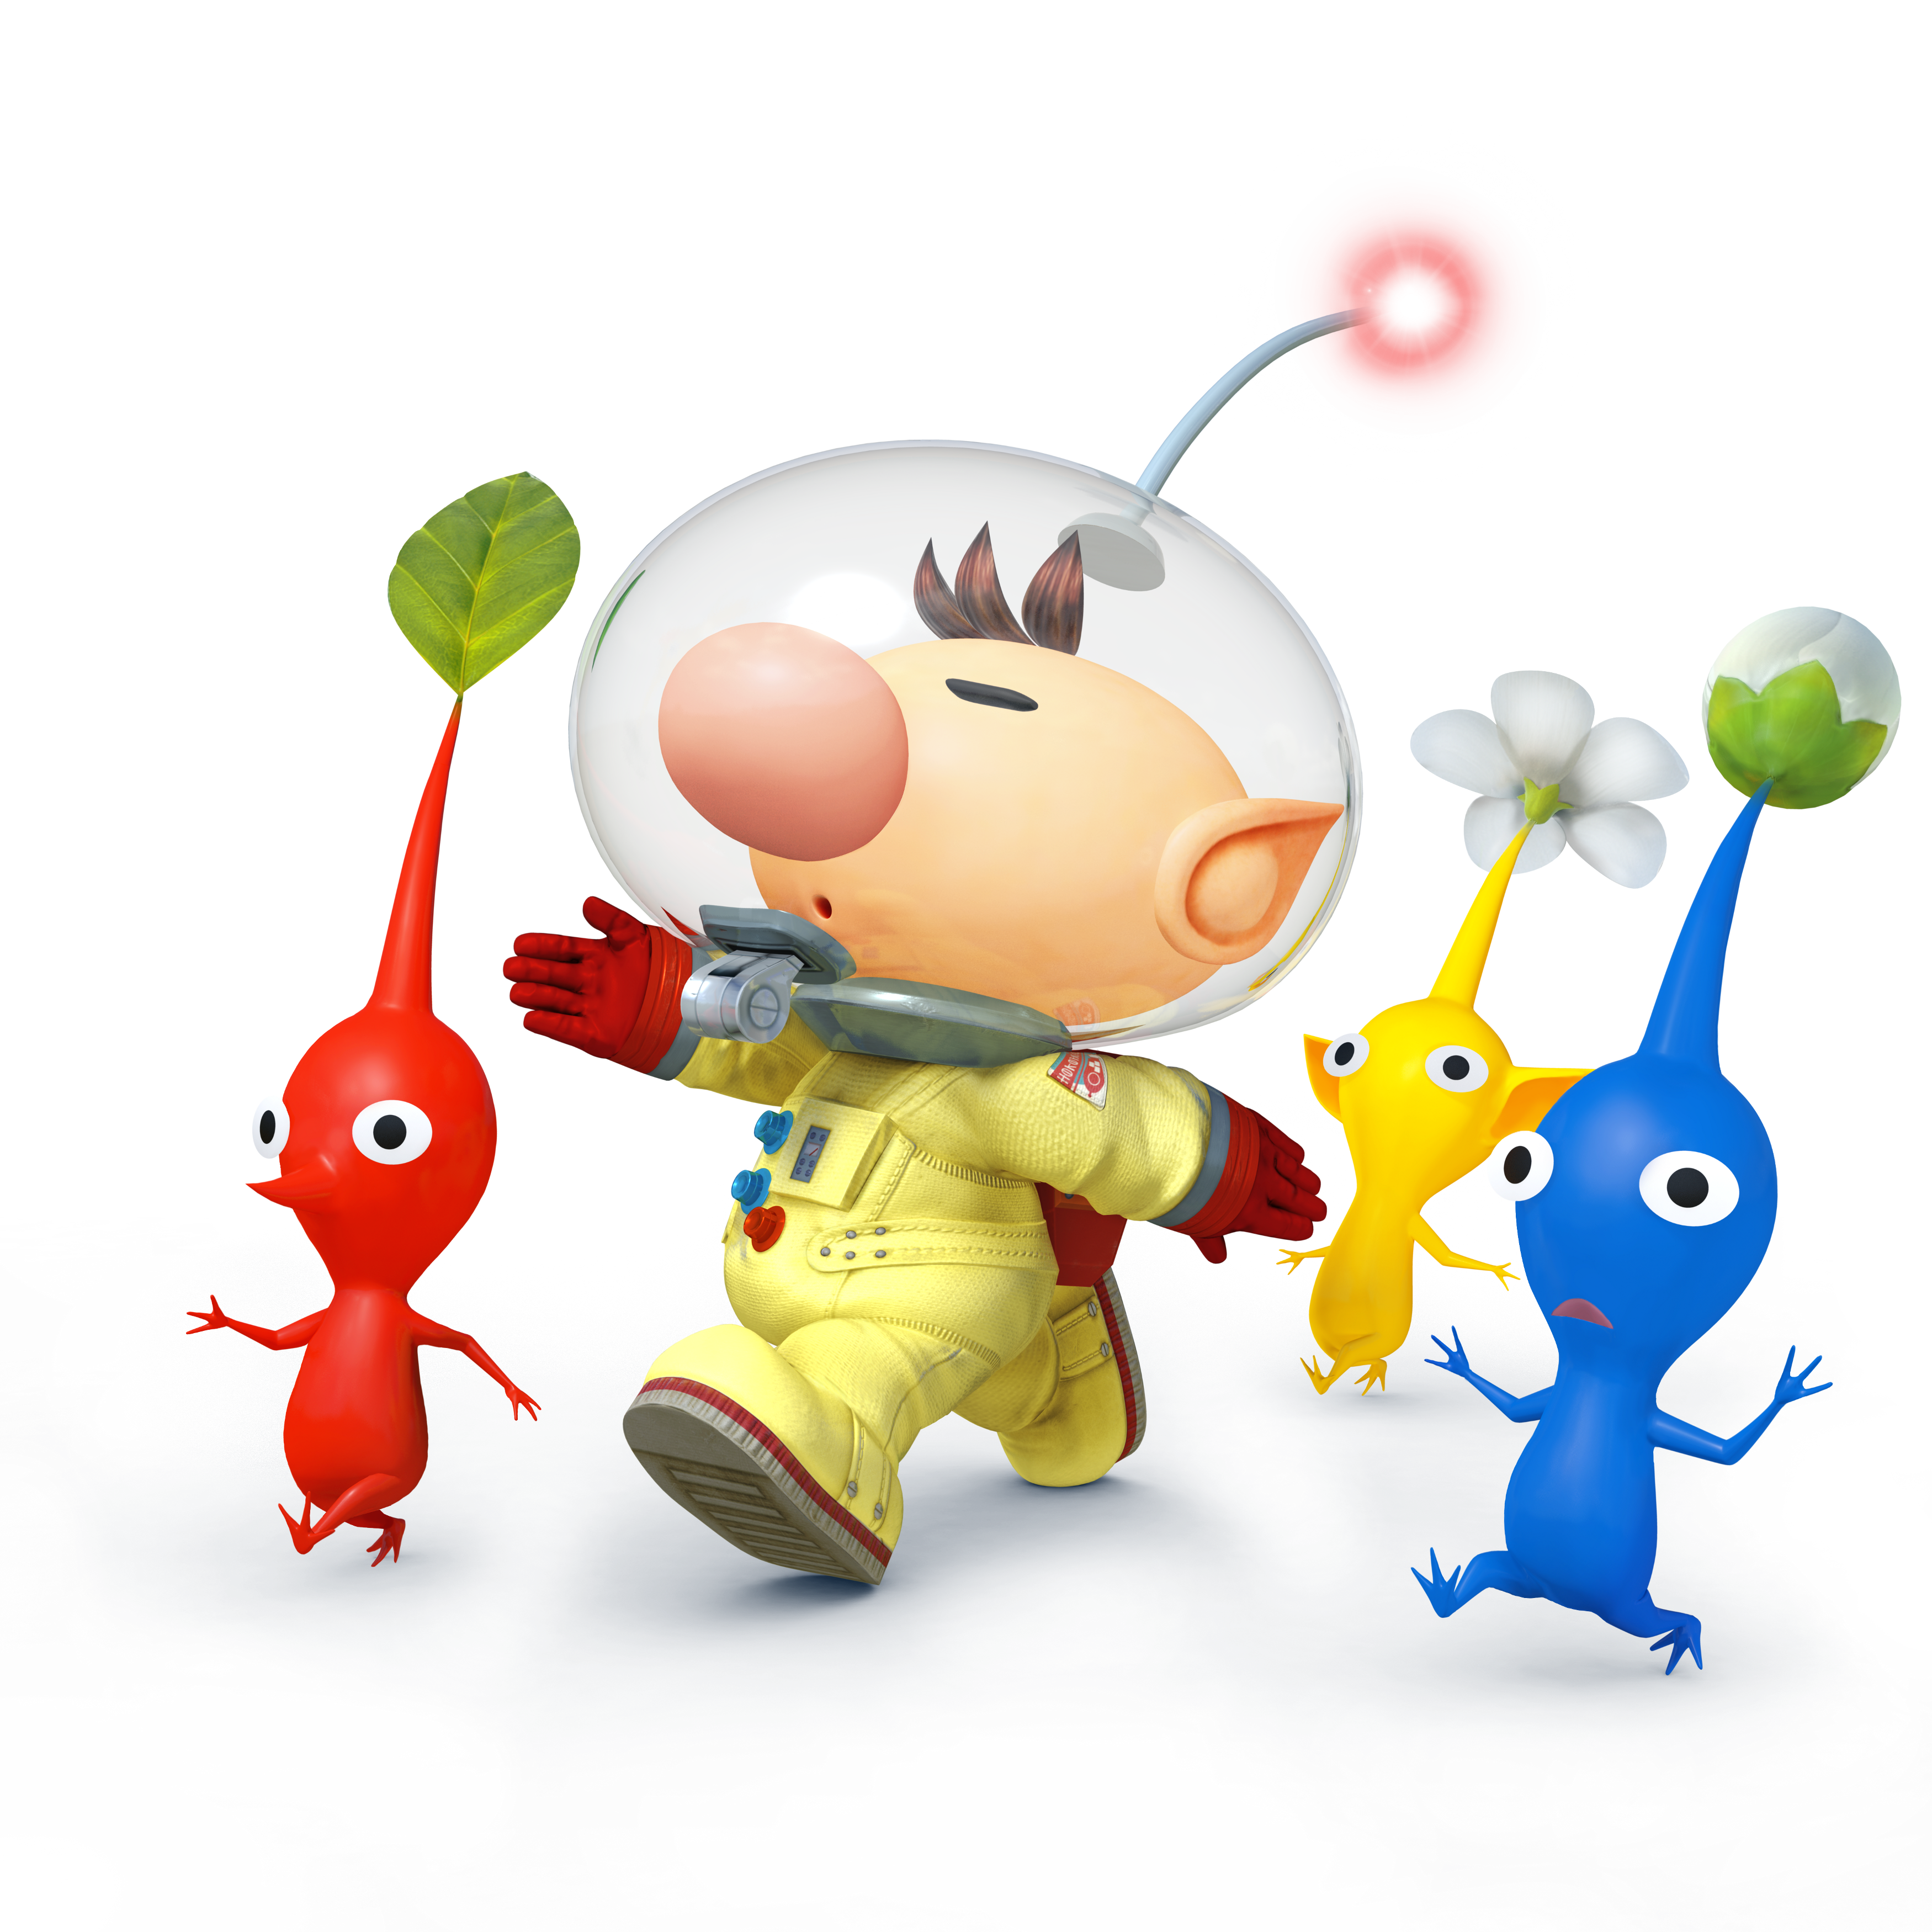
I've been considering doing a revamped moveset for Olimar, one that better respesents the gameplay of the Pikmin series.
I'm aiming for a more strategic playstyle - steady 'needling' attacks that whittle away at the opponent.
Instead of tossing away the Pikmin like cannon-fodder, I want to create a more nurturing playstyle that focuses on cultivation and growth.

I'm definitely not the most skilled at creating playstyle, so I was just wondering if anyone had any thoughts or ideas on how I could implement such a revamp.
You'd be surprised at just how well Olimar's existing moveset captures his game's play-aesthetic, so it's worth looking at smash a little closer in order to see how playstyle informs character. From there, you can tease out newer conceits that support that characterisation. Maybe you can have more Pikmin, maybe you can command one to stop still and guard an area, maybe smash attacks involve your whole squad and are stronger when you have greater numbers. etc.

Sacrificing Pikmin outright is rarely a good idea in smash, but it is still something you can choose to do in order to speed up play, reduce the number of non-useful Pikmin etc.
It is the ability to choose a playstyle that goes against character that allows the natural playstyle to shine through. If you made it so that conservative treatment of the Pikmin is your only option, then you're robbing the player of their agency to express how they see the character.
It also happens to be an important conflict in the Pikmin series; sometimes Pikmin have to die in order for the group to benefit.
 

Reiga

He sold diddy for a switch
Joined
Dec 8, 2014
Messages
1,256
Location
White Noise
3DS FC
1461-7646-7368
The Reigaheres Set
Archive
An index of every moveset Reigaheres has had to offer to the MYM community, be it decent, bad, or ugly.
This index is divided in contests, and to check a set just click the little set image, so it's veeery simple.

MYM 16 - The Dark Ages


MYM 17 - Undyne and the random SU


MYM 18 - Maybe More than Four Sets (NOT)


MYM 19 - Like They Say in Brooklyn, Early to Set Early to Catch the WV. Or was it the RV?


Now, to make your visit to this Index more interesting, here are some statistics:

☆Number of Sets made: 11
☆Rounding of the usual Number of Sets made in a contest: 3,33
☆Shortest Set: Lance, at 1822 words and a reading time expectancy of 7 minutes
☆Longest Set: Mad Dummy, at 14077 words and a reading time expectancy of 52 minutes
☆Series with the most Sets made: Tie between Steven Universe and Pokemon
 
Last edited:

Reiga

He sold diddy for a switch
Joined
Dec 8, 2014
Messages
1,256
Location
White Noise
3DS FC
1461-7646-7368
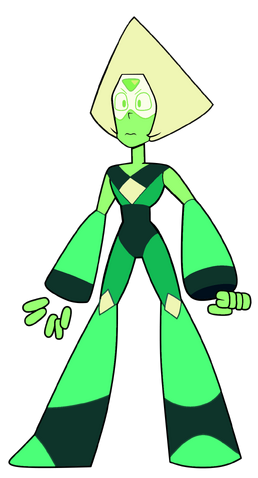
Peridot

"I'm reporting this!"
Peridot is a Gem from the T.V. show Steven Universe, one of the villains of the show, she came to Earth from the Gem Homeworld 5.000 years after war broke loose on our planet. Meaning to check on the "cluster", Peridot had her plans going fine and dandy until her confrontation with the Crystal Gems, the guardians of the Earth, who weren't at all wanting a Homeworld Gem near Earth, especially considering her plans involved the Kindergarten location in some manner. Long story short a buncha stuff happens later, but it's all too spoilery to my taste, so just go ahead and watch the show if you really want to know what happens to her in the story.
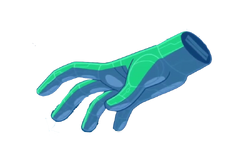
While at first robotic and monotone, Peridot soon evolved during the series to become more hotheaded and way, WAY more goofy. While not really one to engage in combat, being more of a technician or the like, Peridot still has a whole slew of attacks and weapons, including some Homeworld tech and her deatatched fingers, which they themselves grant Peridot a whole slew of attacks, including but not limited to electrokinesis, blasters and even flying (we'll get on that part later, trust me).
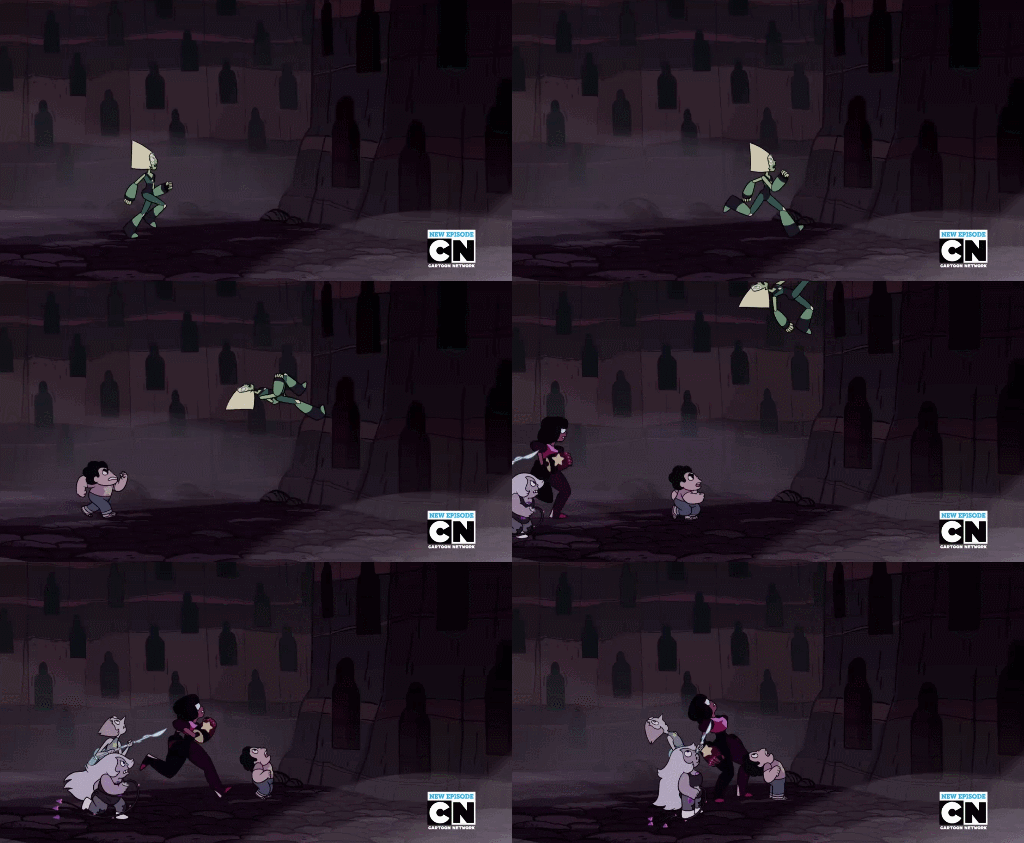
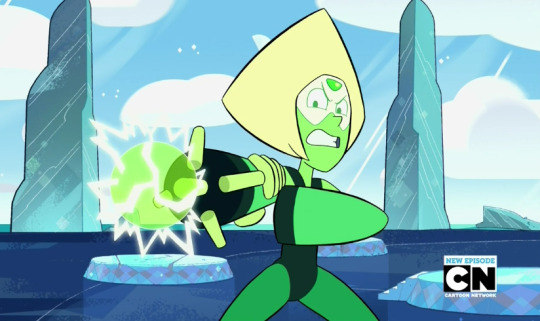
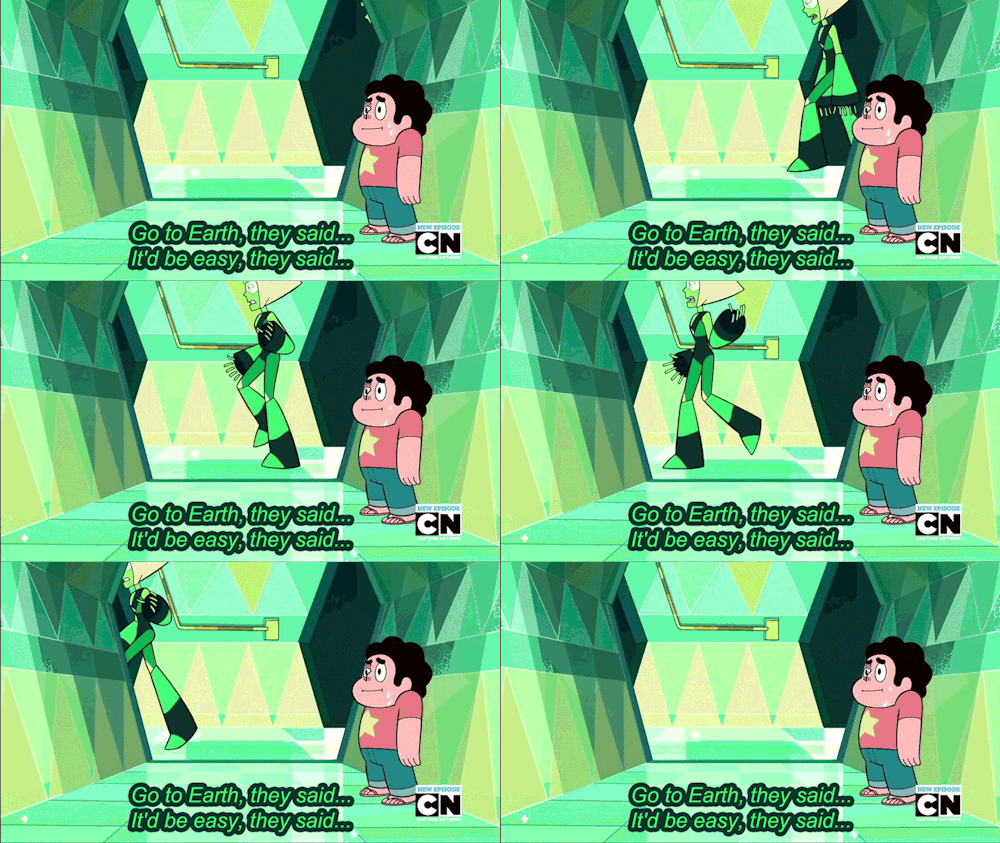
Watcha waiting for, let's get onto the set! Oh, and how about a clip of her first appearance and a nice remix of her theme for you to jam while reading the set!
Now, you clods should pay attention, as the moveset is about to begin!


Stats

Height: 7/10

Weight: 65/120

Ground Speed: 4/10

Dash Speed: 5/10

Air Speed: 4/10

Falling Speed: 7/10

Jumping Height: 3/10


Crawl? No

Wall Jump? No

Wall Cling? No
Stat-wise, Peridot is a light character with a tall yet thin physique, who has pretty mediocre stats all across the board. Peridot's ground speed isn't nothing to amazed about, and her dash speed doesn't accelerate much. In the air Peridot doesn't have a lot going for her, she isn't the best in moving around and has a pretty weak jump (which impacts recovering potencial), her falling speed is at least good enough for her to have some good control over it.
Due to her stat-spread, Peridot works best at a good distance to the opponent, rarely going straight into them, Peridot is also a big-hitbox'd light character, so when you play her you really should be on your toes.
Due to her stat-spread, Peridot's best bet is to stay away from the opponent to not risk being launched and getting off-stage, somebody playing Peridot should keep they're distance from the opponents and also keep an eye out.


Wall-Scaling
Instead of a Wall Jump or Cling, Peridot can do more: she can move herself up and down on the battlefield walls, being able to then straight up walk below stages like FD, either by running towards said ledge or wall, which will still continue her jogging, or by jumping towards a wall, where she will cling for a few frames, during this time, on can input up or down for her to then run along the wall. All of these examples have Peridot run in the wall for 6 seconds before she is forced to free-fall and lose the abillity to do this technique for another 4 seconds. Her directions when on the wall are still the same as when on the ground, meaning that when on a 90 degree wall and facing upwards, inputting to move right makes her go up, which might be hard to adapt for new Peridot players, but can be perfected with practice. Peridot can still stop when on a wall or upside-down, and can also use her moves (though she can't shield or grab at all), though of course, since she can only stay at a wall for 6 seconds, it might be hard to put to good use something like a fully-charged Smash Attack. If Peridot receives any damage during the wall scaling, she will fall off wall and, again, not be able to scale the walls of the stage for 4 seconds, if she jumps off the wall she will return to normal gravity and still have to wait 4 seconds until being able to scale any walls again.
As for the controls for when Wall Walking, if Peridot has entered Wall Clinging by running towards a ledge or wall, if Peridot continues to input the same direction she had when she ran up the wall she will, regardless of gravity changing, continue to go forward with that input, but if she stops, her controls will now be appropreated for the terrain she's on (so if she stops on a 90 degree wall, to go up she will have to input up), and she will again continue to walk at that direction despite gravity and will only appropreate if she stops, unless she returns to normal land, at which point she will regain normal controls after a few frames in.
This mechanic fits in nicely with Peridot's long-distance playstyle, as Peridot can have some nice safety when somewhere like below the stage, where it may be riskier for the opponent to try and go and attack her, Peridot also has a great number of attacks that can utilize her wall-scaling and also a good number of projectile attacks so that even on a wall she can still somehow do damage to opponents. Scaling walls can also be an amazing recovery option for vertical recovery, though due to Peridot's average speed it's possible that if recovering on a wall way below, she may not be able to recover in time, she may also be easily edge-guarded due to not being able to shield, and characters like Bowser Jr. and his Up Special and Peach and her Down Special have projectiles that can hit Peridot when scaling up a wall, which can be a big problem.
If Peridot has made the opponent go offstage, scaling a wall close to the ledge can be a nice edgeguard tactic, as she can then protect the ledge with an attack that hits above her.


Specials
Side Special: Robonoid Deploy

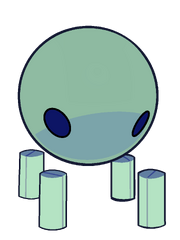
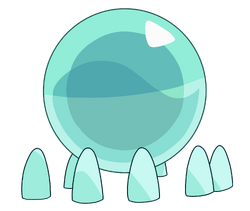
A Flask Robonoid, a blue robot with a main body the size of a Smart Bomb and four deatatched legs, suddenly scurries forward out of Peridot's right side and then in a rather wonky matter walk around the battlefield at the speed of a walking Dedede, or, if deployed in the air, fall down diagonally until hitting the ground, if deployed in regular terrain, it will not fall off ledges, while if deployed while Peridot is Wall Scaling, will be able to climb up or down a ledge for a single time, making it possible to deploy a Robonoid to attack somebody even from the ceiling or from below the stage, that's crazy.
If it bumps into an opponent, it will do a passive 5% damage with no knockback, but also in return receive 2% damage, depleting it's 10% Stamina points, which if completely depleted, makes the Robonoid explode and release a blue toothpaste-like liquid which falls down and creates a puddle directly below where the robonoid exploded, only a bit bigger than the Robonoid in size, which lasts for 5 seconds.
If Peridot touches the liquid, they will recover 1% damage per foot step and absorb the goop, meaning that due to it's small size, it will only recover about 2 to 3% damage to her when walks through it. Up to 3 Flask Robonoids can be deployed, and if one tries to deploy another, none will appear from Peridot's side.
If Peridot uses an attack with an electric effect on one of her Flask Robonoids, they will have they're speed increased, with an 1.10x speed increase for electrical atttacks that do 6% damage or lower, 1.25 for attacks that do damage between 7% and 10% damage, and a 1.40x increase for 11% and higher, with the latter increase also making the Flask Robonoid be crackling with electricity. If a Robonoid is fully electrified, the other possible 2 can only be electrified to the second level. Robonoids can store in electricity and can reach levels by multiple electrical attacks from Peridot. A Robonoid's attack power will scale with each electricity level, starting at 5% damage, they're damage rises to 6%, 7% and 8% for Level 1, 2 and 3 respectively, with it's knockback also increasing a bit with each fase.
This mechanic makes it so that the Robonoids have differing speeds one another, making they're gameplay less predictable and more hectic, causing lot's of trouble to the opponent.
If Peridot holds down the special input on this move when there are no other Robonoids, a Plug Robonoid, a bigger and more translucent Robonoid, shown visually increasing in size as it jumps out of Peridot's side, hops out of her right side and then scuttles forward at the same speed as a Flask Robonoid, except, of course the fact that this Robonoid is almost the size of Peridot herself, it also has increased stamina, 13% to be exact, and cannot be powered up by Peridot's electrical attacks.
Opponents hit by it will receive 10% damage with light knockback, though also doing 4% damage to itself. If destroyed, it will cause an explosion of liquid much like the Flask Robonoid, though since it's bigger, the puddle left is also larger, being about as wide as itself, it still recovers 1% damage per footstep to everyone who steps on it, so by walking through it, one may recover about 5% damage.
After a Plug Robonoid is deployed, no other Robonoid, plug or not, may be released, making it so that having a Plug Robonoid out seem more like a trade of versatility for power and size.


Neutral Special - Arm Cannon
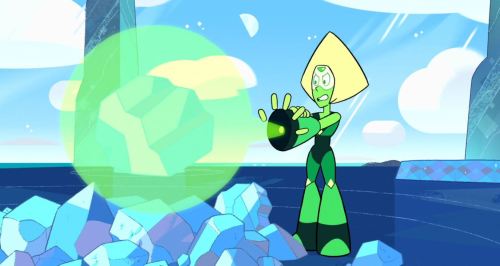
With a tap of the Special button, Peridot positions her right arm forward, with her left arm holding it, while also changing the position of her finger for one to be in the middle, and the other 4 to be surrounding her arm. Peridot then charges up a ball of electricity a bit bigger than a Smart Bomb (shown visually growing when charging) and then releases it, then reconfigurating her fingers and returning to battlestance. If Peridot holds out the button, she will stall out her shooting of the energy ball, and if the firing of the energy ball is prolonged for 2/3 of a second, the ball of energy will from then on have doubled in size for the rest of the held-out attack.
The shot energy blast will travel horizontally in a straight line at quite an impressive velocity, comparable to Fox's dashing speed, though it will only travel the distance of half of Final Destination before dissapearing, while still being quite a fearsome attack due to it's high velocity, doing a nice 8% electrical damage while knocking the opponent back a little, the move can't really be spammed much due to it's startup taking a while, but it be a pretty nice move to attack from a distance without the use of Robonoids, especially in the air, where Robonoids don't do well. A charged up blast will travel at the same speed as before, but will also have they're distance coverage upgraded to 2/3 of Final Destination, doing a great 15% electrical damage to opponents and also knocking them horizontally, being capable to KO at only 120% damage!
As Peridot charges, you can aim upwards to position her arm to shoot above her, or input downwards, making her crouch and make it possible for the shots to hit her Robonoids, which is quite nice considering she can upgrade them from a distance and not risk being beaten up.


Down Special - EMP Bomb
Peridot reaches out towards her gemstone and grabs out of it a small green bomb that's both similar to a Sticky Bomb in appearance and size. She then crouches down to places the bomb in the ground directly in front of her, which then sticks on as she returns to neutral position. Immedietly after being placed, the bomb will flicker bright green for 1 second before bursting into a quick explosion of light about as wide as a Battlefield platform and about as wide as 2 Fox Blaster lasers, with the bomb being destroyed by the blast.
The bomb can be safely destroyed without an explosion by an opponent after recieving 4% damage.
Now, you may think that this is just some trap bomb that does some nice damage to opponents, but the blast from the bomb is actually an electromagnetic pulse, which actually does no damage to the opponents, but affects projectiles!
If an energy-based projectile is affected by the blast, it will simply dissapear, while if a non-energy based projectile is hit by the blast, it will suddenly stop on it's tracks, falling to the ground if midair, and become a throwable item, being throwable in a regular throw arc, doing a measly 2% damage on throw, but also having it's original side-effect (so a Bell from Pac-Man still stuns the opponent), it will also dissapear if kept in the ground for too long just like any other item and also dissapear if it hits the ground after being thrown.
Now, that's fine and dandy, but have notice that the EMP Bomb will also affect Peridot's own Robonoids! If any kind of Robonoid is affected by the blast, they will retreat they're legs into they're body and stay in place, now becoming throwable items, with the Flask kind being thrown like any small object and doing 5% damage to opponents with light knockback, exploding into they're fixing liquid the same size as when normally destroyed if it touches the ground after a throw, receive 10% damage by an enemy if on the ground, or hits the enemy when thrown. Plug Robonoids are carried by fighters like a heavy item and if thrown rolls like a barrel, possibly serving as an obstacle to the opponent, though still exploding if received 13% damage, exploding into a pile of goop just a bit wider than them.
Now, WHY would you want to deactivate such a minion as a Robonoid? Well, deactivating Robonoids makes it possible for you to discard them with a simple throw, being able to throw them offstage to not spread they're liquid onto the stage and heal your opponent and also being able to discard them by throwing them onto your opponents for an additional quick damage. If you have a Plug Robonoid out, EMP bombing it and then rolling it off the stage is a good way to alternate from Plug to Flask, with it rolling off the stage also being a nice and annoying edge-guarding projectile.


Up Special - Pericopter
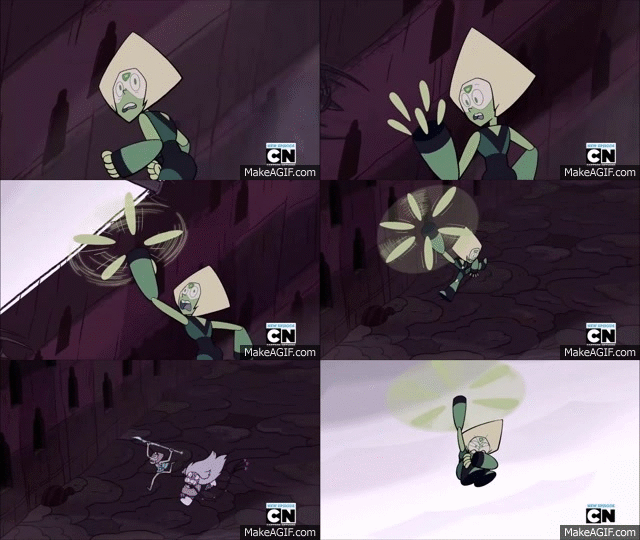
Peridot looks toward her left arm as it's fingers then start to rapidly spin around, then acting like helicoptor rotors and flying upwards and pulling Peridot alongside them, with Peridot having her right arm slanted and both her feet wide open and also having a rather surprised look on her face. With no input, Peridot will just fly directly upward for 2 and a half seconds at the speed of a dashing Bowser before falling to helpless, though there is way more to this recovery, as one can also input any movement direction to move Peridot around in the air with complete aerial movement, still with the 2.5 second time limit and moving at the speed of a dashing Charizard (so even if you just input to go directly upwards it will still go faster than with no input). Have note that after her recovery has started, Peridot cannot Wall Walk, nor can the opposite happen, so one has to really think carefully if going to Wall Scale or helicopter away.
Peridot's whirling fingers also act themselves as hurtboxes, pulling opponents with them and doing a continuous 4% damage to them, capable of hitting them 4 times for 16% damage and KOing at 130% damage, which considering Peridot's weak damage input around her moveset is quite a goodie. If hit at the start of the move, when her fingers are just starting to whirl, the opponent will receive one more dosage of damage and have they're first dosage do 6% damage and overral be able to KO opponents at 110% damage.
Peridot can also press the special button during the move to utilize her Neutral Special midflight, which while still with the same damage output, lag and speed and even the abillity to change it's aim, works nicely with Peridot's recovery, as it helps her defend from enemies when recovering, working to keep edge-guarders at bay and overrall being a great defensive tool.
Considering Peridot's bad mid-air movement and jump height, a recovery like this is quite acceptable for her, making her movement way more fluid and also having her be able to cross some good distances, and while Peridot has a wall scale, neither can be used in conjunction with one another, meaning that one actually has to think about which way to recover they'd pay off better, as even if Peridot can travel from the bottom to the top of the stage with ease with wall scaling, when recovering to stage wall clinging can't really recover horizontally, can it?


Standards
Jab - Finger Shoot
Peridot leans forward a bit with her left arm backed off a bit as she then extends her right arm forward, she then proceeds to shoot forward her ring finger the distance of 1/3 a Battlefield platform at the speed of a dashing Mario, continuing with her arm forward, damaging opponents with a weak 2% damage with an usual weak knockback jabs usually do, Peridot's shot finger will be passable and undamagable towards opponents and stay an SBB away from Peridot for .20 seconds before floating back to Peridot's wrist at double the speed it came at, ending the attack. Though if Peridot has already shot her ring finger, if she inputs a jab again, she will now shoot forward at the same speed as before her middle finger, which will do the same damage as her ring finger and will stop at half a Battlefield platform's size in distance instead, reseting the time until both will return to Peridot's wrist. If both of Peridot's fingers have been launched and she jabs once more, Peridot will now bend her arm upwards as her fingers will now be fired up with electricity, damaging any opponents at least a good distance close to it with 5% electrical damage and good knockback (though it still only would KO at 170 or so percent) as her fingers then return to her wrist at twice the speed they came at.
While this may seem like some conveluted trap, it is actually way more of a jab as one may think, as if an opponent is hit by Peridot's ring finger, they will probably be knocked at middle finger hitting radius, which in turn makes them stay at finger zapping radius, which is actually quite a nice combo considering Peridot is best suited from a distance. Peridot can also use this move to power up her Flask Robonoids, though her energy blasts can serve better, she doesn't have to crouch down for the move to have any effect, so that's a plus! The move can also be used quite nicely for edge-guarding, as Peridot can launch her fingers a bit in front of a ledge for her to then zap her enemies trying to grapple onto the ledge, this also works when in a vertical wall too if you want!
Peridot does however kind of stay vulnerable during the move, as she has to stay with her arm forward controlling her finger(s), though at least at the end of the move her fingers go back to her quickly, so if she simply goes jab-jab-jab the move can end quite quickly, that's nice!
So overrall, the move is a nice long range jab with some trap element spotted into it, it isn't really a killing move or something to do a combo out of, but is good for some overrall damage towards the opponent.

Side Tilt - Gem Destabilizer Strike
Peridot reaches towards her gem with her right arm, similar to the start of her EMP bomb, and takes out of it a Gem Destabilizer, a taser-like self-defense weapon, and bends her arm back as she then strikes directly forward with her arm straight (though the move can also be angled 45 degrees upwards or downwards), with the destabilizer possibly hitting the opponent before she quickly reaches towards her head and phases the destabilizer into her gem, ending the move.
If an opponent is hit by the destabilizer, they will receive 5% damage, which is rather weak for a tilt, though this tilt isn't really about the damage, but the side effect, as being hit by the destabilizer will cause the opponent to be stuck in place and be paralyzed for half a second before reverting to normal, with yellow lines visually being shown travelling they're body during the stun, though it doesn't affect anything.
Now, to some combo-heavy character, this stun-time might be the perfect time to combo up, but for Peridot, it works to grab some time for you to get some distance from the opponent, as she doesn't have any comboable moves really. Though of course, Peridot can still have a nice followup Smash attack during the opponent's stun, as it's possibly the best time for use of those moves, as Peridot has less danger of being hit by some powerful attack, though to input this move in itself might need some clever tricks, as it doesn't really have that good of a startup time, possibly needing some goodly used beam shots and robonoids to attack, though if one is in a hurry and needs to escape the opponent, this might just be the move.
If one of Peridot's Flask Robonoids is hit by a Gem Destabilizer, they will actually have they're speed increases be lowered for 2 seconds before they reactivate, meaning that a 1.40x increase will temporarely become a 1.25x buff, making it easier to use an EMP Bomb on them. If an unelectrefied Flask Robonoid or a Plug Robonoid are affected by a destabilizer, they will instead drop dead on they're tracks, like when affected by an EMP bomb, for 2 seconds before reactivating, making the destabilizer become an alternative to an EMP bomb if used right on the robonoids.

Down Tilt - Stomp
Peridot puts her bent foot forward a small distance in front of her as she then stomps her foot to the ground with a mean face as she then skids her foot back to her and returns to battle stance, the move has quick startup but may have some endlag problems. Opponents hit by the move will receive 6% damage and be knocked back horizontally a short distance, possibly (and by that I mean 30% of the time) tripping when hitting the ground after being launched, which while simple, has quick startup and gives Peridot some distance from the opponent, especially with the possible added trip at the end of the move, which gives even more time for Peridot to either back off or attack the opponent.
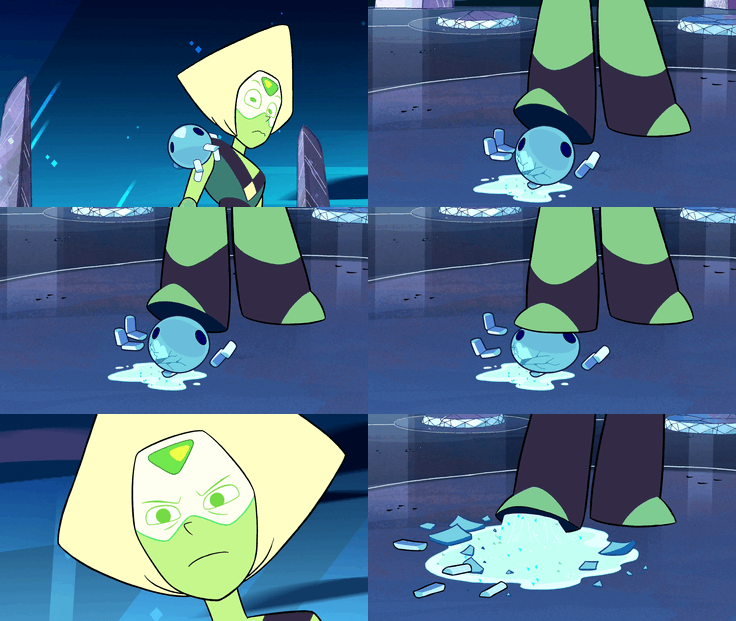
If a Flask Robonoid is oh-so passing by and oh-so happens to be caught in the middle of a stomp, Peridot will then try to squish the poor Robonoid, pressuring her foot onto the Robonoid for a quarter second before it breaks and releases it's healing liquid inside at the same size as if naturally destroyed by an enemy. So why not use this instead of an EMP Bomb? Well, for Peridot to actually hit something as small as a Robonoid as precisely with a stomp might be a bit difficulting, with the move also having a good chunk of endlag, so it's not really something to constantly be inputting just to smash a little blue robot.

Up Tilt - Finger Wave
No, stop reading the title of the move wrong, Peridot doesn't shoot a wave from her fingers, that'd be just weird, you clod.

Peridot faces the screen with both her legs spread out and her right arm facing upwards and her fingers arranged as if with an open hand, which when she lifts her arm also fly directly up one SBB above it's original location at the speed of a dashing Mario, still keeping the open hand like state. Peridot then proceeds to wave her right arm left than right, which in turn commands her finger above to move in unison with her arm left than right, dealing mid-light knockback and 8% damage to opponents, possibly hitting two times due to the move's nature and KOing opponents at 165% damage, after such Peridot proceeds puts her arm back down and returns to normal stance, with her fingers following back to her hand at twice Mario's Dash speed, though since they will gravitate back to Peridot right when the move ends and before the end-lag, Peridot doesn't have to worry about something like her fingers lagging behind her trying to return or anything.
Not only is this an attack a mean move to juggle and keep opponents at bay with good knockback to boot, which can kill aerial opponents from a distance, but can also be combined quite nicely with Peridot's natural Wall-Clinging abillities as a way to hoard off offstage opponents, by clinging right next to the edge of the stage and inputting the move, which due to it's nice range can even hit opponents from a good distance where they themselves cannot damage you with a super-strong aerial, and being so next to normal land is also a boon, as one can easily return to safe ground when Wall-Clinging time is low.


Dash Attack - Electric Slash
From her dashing animation, Peridot has her right arm go behind her as she then sloppily does what could be considered a slash, still going a bit forward, diagonally moving her arm from behind her to directly in front, passing through Peridot's torso, which after use ends Peridot's run in a rather clumsy way, having a bit of ending lag. Peridot's fingers work as the obvious hitbox of the move, while at last frames of the moves it's just an attack from her little green touch-stumps, which do 6% damage to the opponent with weak knockback, the inicial frames of the attack have all of Peridot's fingers engulfed in electricity, which really gives the attack the extra "oomf*, dealing 11% electrical damage to foes (and also powering up Flask Robonoids) and some really nice horizontal knockback, capable of doing a kill at 155% damage.
For a character full of weak and "get-off me" attacks, Peridot's Dash Attack works as a really good high knockback and/or kill move, I mean, with all these attacks that whittle down the opponent one of them should put a nail to your opponent's coffin, and with the right amount of support and timing, one can try to swoop in for some damage with this attack, though it can really become a right risk/high reward, as missing an attack with such end-lag or getting the sourspot in the attack when right next to the opponent can be really bad to Peridot.


Aerials

Neutral Aerial - Finger Circle
Peridot faces the screen with her arms to her sides at hip height and has her fingers from both hands fly off at the speed of a dashing Mario to circle around her, facing outwards and equally distanced, they all stay 1 SBB away from Peridot while she still falls down, as shortly after doing formation they start to spin around at the speed of a dashing Kirby around Peridot, doing a full circle before returning to Peridot's wrists (at twice the speed they came at) as she returns to idle.
Peridot's fingers act as hitboxes during the move, both when they fly off to do formation and when they spin, becoming a nice and sturdy hitbox which last for a good while and deal 6~7% damage to opponents while they are shot away horizontally a rather small distance.
Overral, the move is actually pretty nice for Peridot's self-defense, being a good and lasting hitbox which has a rather big range, it has some unfortunate blind spots, mainly below and above, and also when her fingers aren't spinning, but either way it's a pretty nice attack to use to defend from opponents at the right time and the right place.

Forward Aerial - Fingers of Justice
Peridot leans back her right arm as if going to punch forward, with her finger spread out a bit and also leaning back her torso a bit, causing a bit of startup lag. Peridot then proceeds to do a jab directly in front of her with her right arm, which goes all out forward, and stays out for a bit before she returns her arm back to her side and get's back to her regular stance. Pretty simple right? Well, Peridot has a trick up her non-existant sleeve: right when she's moving her arm for the blow, she reconfigures her finger in the hand so that one finger is in the middle, with the other close to it and around it, she then proceeds to electrocute the tip of her fingers right as the punch reaches it's apex, zapping any enemy which touches it.
During the moves duration, the tip of Peridot's fingers will act as powerful hitboxes, which can hit opponents for an astounding 10~11% electrical damage towards opponents with a nice horizontal knockback, though the rest of her fingers and black part of her arms, close to where her wrist would be also works as a hitbox, doing being sourspotted and only dealing 5~6% damage to opponents and only flinching them.
The move is good to deal a good number to the opponent and keep them at a distance, it's a tipical time-bidding move that excels at what it is, it can also do a good number of damage to opponents for some nice aerial damage, which can knock them away pretty far, though the move does have a good deal of lag, so it can be very punishable, so keep an eye out!
The move also has some supporting uses, it's sweetspot can pretty quickly power up a Robonoid, which makes it a good idea to shorthop this move, both to hit opponents, and to power up Flask Robonoid.

Back Aerial - Back-Propeller
Peridot has both her arms go behind her (though not completely behind) and has her left leg bend a bit with her foot behind her, she then proceeds to have her fingers form a circle formation behind her, with her fingers evenly spaced out and facing outward, with the top finger being at around mid-head hight and the bottom finger reaching up to knee-height, being a pretty big circle.Peridot then proceeds to rapidly spin her fingers behind her, similar to what happens in her USpec, soon enough Peridot's fingers will act as helicopter rotors and will damage opponents. After a couple of frames, in Peridot's fingers slow down as she returns to her aerial posture. During the move's execution, Peridot's whirling fingers will actually propel Peridot a small distance forward, though she still travels at the same angle and speed as in her regular momentum, so you can't do a weird alternative recovery, but it still makes it possible to hit opponents and still try to recover.
Opponents hit by Peridot's fingers while they're spinning around will receive a constant 2 to 3% damage and can be hit up to 6 times, with the last hit being able to spike opponents, making this a nice move to punish opponents trying to hit you midair and overall being one of Peridot's better aerial moves, being a good utensile when really needing to attack somebody midair.


Down Aerial - Frustration
Being rather hot-headed and easily enragable, Peridot in this move releaves all her stress by doing a small fit. On execution Peridot will face the screen with both her arms bent forwards with her fingers positioned as if with closed palms and will close her eyes angrily with an overral angry expression to proceed to grunt and stomp away below her with both her feet, stomping with her right feet, proceeded by her left, and ending by once again stomping below her with her right foot, with a bit more force, all before facing back her original direction and returning to idle. Opponents hit by each of Peridot's angry stomps below will receive 3% damage for the first 2 hits, and 4% for the last one, which can spike the opponents downwards with a small force.
Each stomp from Peridot will make her go a bit downer in the air, with the last stomp pushing Peridot downwards a bigger distance than the other hits, which while not stall-and-fall level of quick, helps Peridot fall down to the ground quicker and GTFO out of the air, which is nice for some quick and easy escapades. The attack itself does some nice damage to opponents and might even be usable to stomp opponents below towards the blast zone, though Peridot doesn't excel much in the air, so that may be hard.


Up Aerial - Gem Destabilizer Stab
Peridot reaches her right arm towards her gem and pulls out of it the same Gem Destabilizer as in her Side-Tilt, which she then proceeds to hold facing upwards in front of her with her right fingers before quickly moving her arm upwards and stabbing the weapon above her while doing a grunt and also leaning a bit upwards. After utilizing the Gem Destabilizer Peridot leans back to normal stance and stores the Gem tech into her gem once again as it fades into it, having a bit of end lag,
Opponents hit by Peridot's Gem Destabilizer will receive a low 5% damage and will also be stunned in midair for a few frames before reverting to normal, being stunned for a longer period of time the higher the opponent's current percentage.
Now, we already have stated that Peridot's Side Tilt is a pretty nice way to escape from opponents, so why WOULDN'T we want to have something like that in the air, where Peridot is most vulnerable? The move has some good reach and can help with escaping from an aerial scruffle by paralysing the opponent, it's a nice way to counter-act spikes and stall-and-falls and overrall give some time so that Peridot can be somewhere better. If Peridot is trying to recover, the attack can also be a good way to counter-act edge-guarders, it's hitbox even goes to the front a bit in the first frames, before her stabbing upwards.
Peridot isn't a combo gal, but you can't deny that when an opponent is as helpless as after a stab from the destabilizer it's a pretty nice moment to follow up with an Up-Special, if offstage it even prompts you to recover, neato!


Smashes

Side Smash - Facet Five Hand
On an uncharged input, Peridot lifts her left arm upwards as a square 2 SBBx2 SBB wide plot of land directly in front of Peridot starts to glow a strong and noticable white as from it, the moment it appears, phazes out a giant green mechanical hand in a closed palm position, facing it's sides and being about as wide as the glowing land and about as big as 2/3s of Peridot, such hand being the type which Peridot used to control Facet Five of the Kindergarten. After completely emerging, the ground in front of Peridot stops glowing, though the Facet Five hand still keeps rising, at the speed of a dashing Meta Knight it rises up to Peridot's chest in height before Peridot drags her left arm back down quickly, slamming the hand down into the ground, damaging opponents with 16% damage if they touch it while it falls down (note: every other frame other than when it's slamming down, the hand is just walk-through), with the opponents being knocked horizontally and being KO'ed at 130% damage. After hitting the floor the hand destroys itself into a pile of green rock, which shortly dissapears.
If Peridot charges the move, the Facet Five hand will go beyond it's original max height and be at around the height where it's bottom is at around Peridot's hair, on release it is still the same, with it smashing into the ground and destroying itself, though it still get's scaled up as usual the more charged, with max charge dealing 22% damage to opponents and KOing them at 105% damage.
While the move is quite laggy, it's a pretty nice kill move for Peridot, being one of her most strongest moves, it is of course best used at late-game when the opponent is already worn-out by other attacks and already being knocked around a bit by Peridot's regular moves,the move is best used when the opponent is vulnerable, as it gives way for Peridot to iniciate the move. The attack is rather situational, but when it's the situation, it's a good move.
If used facing towards a ledge, and they're isn't any space for the ground to glow in front of Peridot, the move instead acts in a reversal, with Peridot still controlling in front, yet the hand coming out instead behind her, which is quite good if you want to catch the opponent by surprise.

Up Smash - Charged Discharge
On charge, Peridot looks above her with her left arm to her side bent upwards, with her fingers in such arm close together and side by side and also charging them with electricity. On release, Peridot quickly stabs above her with her left hand finger-first while doing a big ol' grunt, with her fingers still in the same position and still being electrified, also flying off a bit above her wrist, giving in a bit more range to the move, though not something surprising. After a frames into the move Peridot will have her fingers close in as if with a palm closing and has her arm return to her side, returning to neutral stance.
Opponents hit by Peridot's electrified left fingers will receive a continuous sum of 3% (4% when fully charged) electric damage up to 4 times, which while none of the hits knocks the opponent, right at the end when Peridot "closes" her hand, which all the other hits lead into, the opponent can be hit by it and receives 3% (also 4% when fully charged), which will knock the opponent away vertically and possibly KO them at the 140% damage uncharged and 115% fully charged.
As a pretty quick move, Peridot's Up Smash is a nice attack to try and land a blow on the opponent on an opponent in the air close to the ground, with it's quick use meaning that you won't be punished too much for it's usage, though of course it isn't really the bee's knees or whatever when in comes to damage, but for some nice kill potencial, it's the kind of move.
When combined with her Wall-Scaling, Peridot's Up Smash can be a real mean edge-guarding tool if used when scaling close to a ledge, just zap the opponents who come towards the ledge and see the magic happen!

Down Smash - Electric Tornado
When charging for the move, Peridot faces the screen and bends both her knees a bit, with her arms out to the sides almost touching the ground, as all her fingers from both hands move off from close to her hands at the speed of a dashing Mario to surround Peridot in a circle formation close to the ground, with each fingers facing inwards and evenly spaced out 1.75 SBBs away from Peridot, they then shortly after start to spin around Peridot at Meta Knight's Dash Speed. On release, Peridot immedietly and simultaniously electrocutes all her fingers, which in turn form electrical chains connecting each others from the sides, which creates a twister of sorts of electricity surrounding Peridot as her arms are out open. A few frames after the electrical twister has been created, Peridot recalls her fingers, all of which all at the same time returning to Peridot and stopping the electricity emmiting.
Opponents hit by the wild electricity surrounding Peridot uncharged will receive a continuous flow of 3%, which hits them up to 6 times for 18% damage, with the last hit knocking the opponent away horizontally for a kill at around 135% damage, while opponents hit by a fully charged version can be hit up to 6 times with 4% damage before being knocked away horizontally for a KO at around the 110% mark.
Peridot's Down Smash has a pretty big hitbox field, which stays for a good while and is good to keep opponents away, usually by pressuring them away, the move has some pretty good power to boot, though it does take a good while to execute, so Peridot might be vulnerable during it's use, which decreases it's value as a killing tool. The move is also a big ol' hitbox of juicy electricity, which means that it can help even for something as little as to power up a Flask Robonoid, increasing it's usability during battle.

Grab & Throws
For her grab, Peridot holds her right hand out forward as from the middle of her palm a green tractor beam forms forward at the speed of Link's Hookshot, which has a conical shape (with it starting smaller than it ends, with it ending at about the size of 2 SBBs vertically) and stretches out at about the distance of half a Battlefield platform and stays out for a few frames before dissapearing into green particles and Peridot returns to neutral stance. If an opponent is caught by Peridot's tractor beam, they will be completely frozen in they're usual grabbed state as the beam then forms a sphere around them, Peridot now holds them out frozen, still with her arm out forward. The grab has a nice range and is quite quick and not extremely punishable, it also isn't at all as lenthy time-wise as something like Pac-Man's grab, though as said way before, it cannot be used when wall-clinging.

Pummel - Zap
Peridot has her right index finger fly over to behind her opponent and close to the ground as she then hits it with a light zap for 2% damage, while the first hit has a bit of a laggy start, from that hit on, Peridot's finger will stay close to the opponent, meaning that all pummels after will be executed way faster, probably getting in a few hits if pummeling until the opponent escapes or before a throw. If a Flask Robonoid is about to pass by the opponent and you time it just right, you might be able to also hit the Robonoid with your electrified finger before it hits the opponent and possibly dealing out more damage to them, which is quite nice, since it'll power-up the Robonoid before it hits them.

Forward Throw - Sorry, But You're Going the Wrong Way!
With her opponent now in her grasp, Peridot starts to rather slowly walk in place in a circle at her regular walking pace, still with her arm reached outwards with her opponent in her tractor beam. While in it's first frames it seems rather harmless, right when Peridot is about to finish full circle, she accelerates to her dash speed and quickly flicks her right tractor beam arm to her right side and a bit behind, destroying the tractor beam and launching the opponent away horizontally a good distance, all while during the moves entirety she mutters "Sorry, but you're going the wrong way!", with capitalization of her saying "way" as it's right about when she launches the opponent.
Opponents launched by the attack will receive 9% damage with some pretty nice horizontal knockback to boot, which can be KO'ed due to the launch at around 140% damage, which means that while it's a pretty nice throw, Peridot should best use the move at late-game after the opponent is whittled down by Robonoids and the likes, yet considering Peridot's limited array of KOable moves, it's quite a darn good attack to launch the opponent away.

Down Throw - Rubbing it Off
Peridot moves her right arm downwards in a quick matter, smashing the opponent onto the ground below them but still retaining the tractor beam around them for a nice 4% damage onto them, but that's not all! Peridot then moves her controlling arm side to side, controlling the tractor beam to repeatedly rub the opponent onto the floor for a constant 1% damage (which damages up to 6 times), all while Peridot does a villainous laugh! After enough rubbing down, she moves her arm upwards quickly and disintegrates her tractor beam into green particles as the opponent now get's knocked upwards and you release all your pent up rage onto this humiliation of the opponent!
The throw itself isn't really the best knockback-wise, only knocking upwards a medium-sized distance overral, only possibly KOing at around 160% damage, but works well to keep opponents at bay and at a distance (which distance possibly being offstage!) and also do some good collateral damage.


Up Throw - Throw and Shoot
Peridot holds her right arm with her left arm while it's still out forward and then, with force, flicks her right arm upwards with a bit of help from her left, in the process making her tractor beam grappling the opponent go away and release green particles and also throw the enemy upwards, dealing 5% damage to the opponent and throwing them in a fixed distance of 1 BFP placed vertically above Peridot.
Wait, but there's more to the move! As Peridot, still with her left arm holding her right one adjusts her right arm fingers to the same arm cannon position as in her NSpec and aims her right arm upwards, with her left one holding it for better aim, and shoots a rapid-shot of 3 energy balls just a bit smaller than those found in the uncharged version of her NSpec, hitting the opponent with three hits of 2 to 3% damage to the opponent, with the last hit dealing vertical knockback to the opponent which can kill at 145% damage.
Honestly, Peridot's UThrow is more of a move to use when early/mid-match and with a grabbed opponent, it does some pretty nice damage to whittle the opponent, and while it does some nice knockback with a good-chance to kill at later %s, if one wants the kill they'd really be better off with her FThrow, as it kills sooner and it's knockback style, horizontal, might give Peridot less trouble if the opponent survives the attack, as if an opponent is recovering from a mighty vertical attack Peridot would counterattack with something like an aerial attack, and she isn't really an air fighter, while if an opponent is trying to recover from off the stage from a horizontal beatdown, Peridot has better odds against them, as as seen before she has a nice edge-guarding repetuar due to her Wall-Scaling abillities.


Back Throw - Finger Zap Cloud
Peridot slowly turns back with the opponent in grasp similar to her FThrow, though now she stops when she is facing directly behind her, only turning around. Shortly after doing such, Peridot's fingers from her right arm, which suspend the opponent, fly off at the speed of a dashing Mario towards the opponent to circle around them and the spherical end of the tractor beam a small distance away, spinning at a speed that starts slow but gets progressively faster, with it's apex of speed being a few frames in, being now at the speed of a dashing Meta Knight. The fingers then proceed to electrocute themselves and due to the high spinning create a cluster of electricity similar to a cloud of sorts, which has a center just a bit less wider than the circular area of the tractor beam and has conical endings both above and below. Peridot then proceeds to disable the tractor beam as the electricity field hits the opponent with a constant 1 to 2% electrical damage a total of 6 times before the electrical cloud launches the opponent out forward (though it's behind Peridot's original position, but you get what I mean, right?) a rather mid-ranged distance, not really KOing much and only really killing at around 150% damage, which is low even for Peridot standards, so the move is probably better off used to get opponents off of you, but even then it doesn't really knock back much.
Seems like a pretty sucky move, right? Well, the move can actually be quite nice for some good ol' support to Peridot's Flask Robonoids, as the electrical amalgam that encompasses the opponent can act as a pretty mean way to power up Robonoids who pass by, I mean, it's a solid hitbox which stays long and stays in place, meaning that a Flask Robonoid waddling around can just pass by to get a sick speed boost, which is quite nice considering some electrical moves that could potencionally electrify your Robonoids are quite hard to connect very often, and you can even power them up while frying you're opponent!


Final Smash - Gem Warship
With the power of the Smash Ball, Peridot leaps into the background, shortly afterwards, she flies back up on top of her massive hand-shaped Gem Warship while creating a touch-screen with her fingers, Peridot's warship then flies up to beyond the upper blast line and re-emerges behind the camera, with Peridot's touch-screen now covering the entire camera, it is now that the path splits depending on the player's controller;
If a person is playing the Wii U version with a regular, non gamepad controler, the screen for both players, if online, will be covered by Peridot's touchscreen, and by pressing any attacking button Peridot releases a green beam from the offscreen warship, witht the beam constantly going if the button is holded, the player can also move around the beam while holding it to attack opponents and the likes, dealing 5% damage to the opponent for every quarter second they spend recieving the beam, easily racking up a whole slew of damage onto the opponent, with them being launched away if the button is deholded when they're still in the line-of-fire, also easily being KO'ed. After 5 seconds Peridot's ship will fly away and she will be dropped off from above, like ZSS after her Final Smash.
If the player is playing on a 3DS or using a Gamepad, Peridot's touchscreen will shortly appear on the screen before moving towards your own touchscreen! (if on the Wii U or online on any system, the screen will still appear on screen, but also on the touchscreen) Now you can control with you're stylus the warship's beams! Just clicking on the screen will fire a single beam, but holding will fire a continuous beam, which can still be controlled by moving the stylus along the touchscreen, so flicking you're stylus across the screen will move the beam around that path on the screen! Neato! Oh, and the damage is the same, bleh.


Playstyle
Short-Tempered Dorito Haired Space Rock

So, you wanna play as Peridot, eh? Well, I might as well give you the jists of her playstyle for you to learn:
Peridot statitstically speaking isn't really something to marvel at, she's pretty lightweighted and unfortunatly is also quite a big target, she is also quite slow and is pretty sucky in the air, she also doesn't have a whole lot of moves that do a big number of damage or whatnot, but you shouldn't really just look at Peridot and judge her just by that, with a deeper look onto her playstyle one will truly find her true power.
Peridot has a pretty nice arsenal consisting of moves with some pretty good range, projectiles and minions, all pointing her down as a character that should keep her distance from the opponent and whittle them down until they are at a point where one can actually go and swoop in for a KO. A character of such type like Peridot should definetly try to stay as much as possible out of enemy fire, especially in Peridot's case because of her low weight; while some characters could try to go in the air, though of course, Peridot isn't really good at aerial games, so to compensate that with something that way as well be better, Peridot has the abillity to wall cling, which means she can have even more space in the ground and feel herself in a place much safer than before, as most opponents can have some trouble even trying to go close to Peridot. Wall Scaling is also overrall a pretty big part of Peridot's game, she can use it in various ways, such as to recover, edge-guard, and even command Robonoids.
Speaking of Robonoids, those little guys (or I guess big guy too) can help Peridot's game a lot, they, as minions, work to work to wittle the opponent away with small damage and overrall pressure them by they're constant appearance along the battlefield, which pressures opponents to, well, dodge them.
Due to the 2 types of Robonoids, Peridot has to actually think while battling which minion would work best in a situation, example: choosing to invoke up to 3 Flask Robonoids means opponents have to deal with 3 relatively weak small hurtboxes, all of which need to be dealt with, with they're speeds being able to be diversified, creating unpredictability and confusion towards the opponent; while if you choose to deploy a Plug Robonoid, opponents have to deal with a chunky hitbox waddling around the battlefield, which due to it's size it in itself might make traversing the battlefield hard and also a bit pressured. Either way, Peridot still can rather easily eliminate Robonoids for substitution with her Down-Special or even her Down-Tilt, even being able to hit opponents from afar with disabled minions.
Peridot's Neutral Special is quick and surprising to opponents, wich makes it a pretty darn good, rather spammable, projectile, which coupled with Robonoids can wittle down opponents and also make they're navigation pretty hard.
Peridot's normal attacks are also pretty appropriated for when Peridot wants to come in and attack an opponent, lot's of her attacks have a good range, meaning that she doesn't have to get too close to opponents to actually deal an attack, being overral safer, other attacks are built in for the moment where Peridot needs a quick evacuation, with some like her Side-Tilt downright stopping the opponent in they're tracks so Peridot can have some time to run off. A lot of Peridot's moves also include many small hits which stay out long, meaning that she can come in and do bits of damage to the opponent, which coupled by the big picture which includes her Robonoids and other long-ranged attacks means that over the progression of the battle, the opponent will slowly really be getting quite a wallop.
So, just in case you didn't write it down or whatever, Peridot is a long-distance, rather campy type of character who enjoys to stay at a comfort zone, sometimes coming out to dish out a projectile, but overral only really coming out after the opponent(s) is(are) bewittled by all her moves.


Flavor
Taunts

Up Taunt -
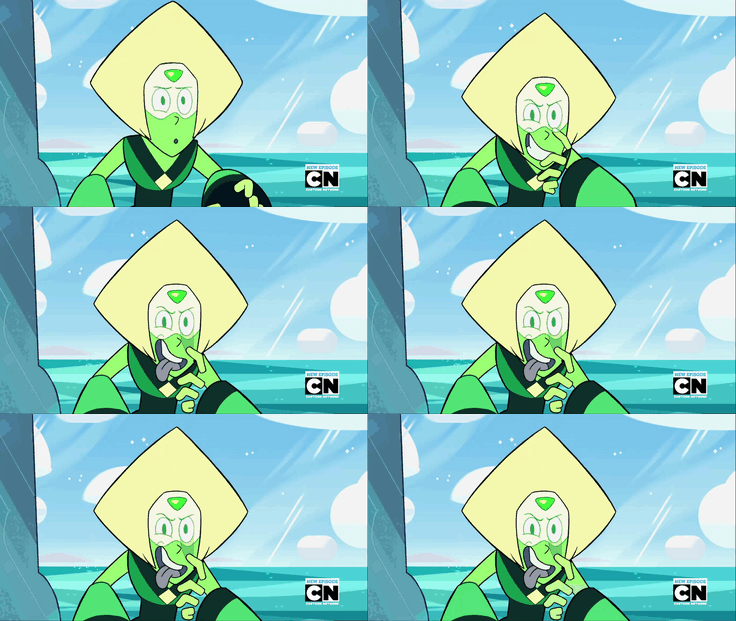
Peridot lowers her lower eyelid and sticks her tougue out, doing a classic Akanbe.


Side-Taunt - Peridot jumps and does a small midair cartwheel, landing on her fingers, she then proceeds to wobble about in place while doing a little laugh.


Down-Taunt - Peridot opens up a touchscreen with her fingers like in her Final Smash, she then proceeds to slide left then up before discarding her touchscreen


Alternate Costumes
Alt 1 - Default
Alt 2 - Color scheme based on Lapis Lazuli
Alt 3 - Color scheme based on Jasper
Alt 4 - Color scheme based on Pearl
Alt 5 - Color scheme based on Amethyst
Alt 6 - Color scheme based on Garnet
Alt 7 - Color scheme based on Malachite
Alt 8 - Color scheme based on Yellow Diamond

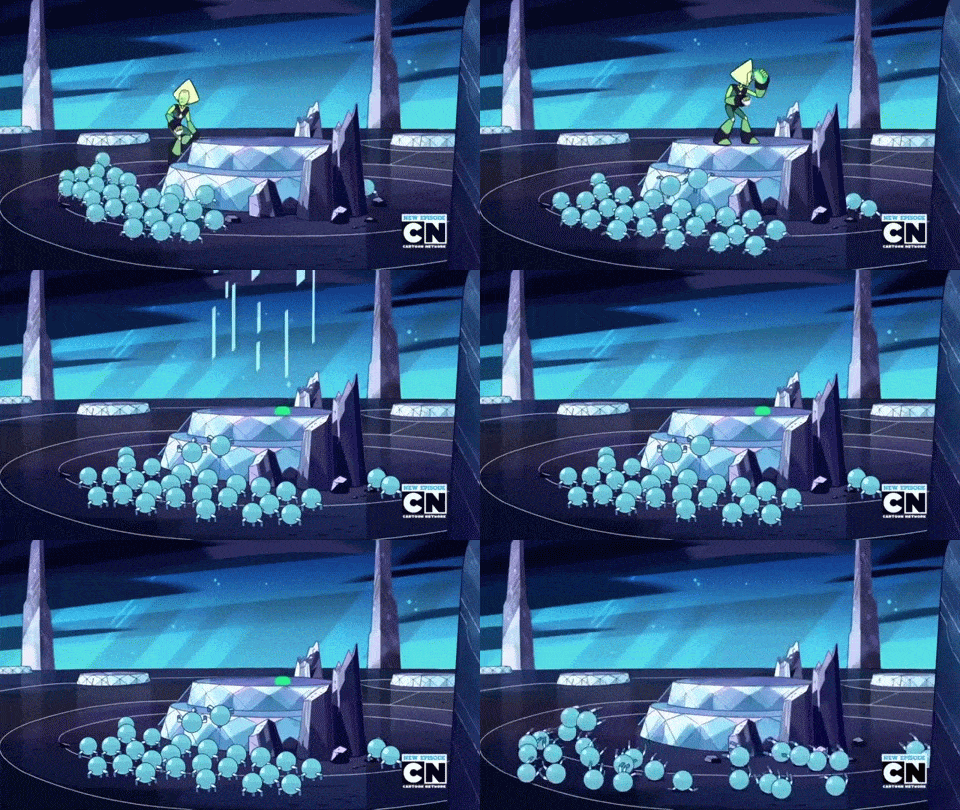
Entrance - 79 Flask Robonoids are seen fixing a broken Warp Pad with they're fixing liquid, Peridot then comes out of the Warp Pad, which then somehow poofs away as the multitude of Robonoids hide behind Peridot's side (so that's where they come from in the Side-Special!).

Losing Animation - Peridot has the face of defeat and humiliation, as she slowly applauds, with her fingers close together, to the winner.

Winning Animation 1 - Peridot is seen accessing her touch-screen close to the screen, the Gem Warship from her FS then appears in the distance as she then deconfigures away her touchscreen and walks towards it.

Winning Animation 2 - Peridot does a few strikes forward with her Gem Destabilizer with a menacing face, but a Flask Robonoid comes out of Peridot's side right at the end and hugs her leg, humiliating her a bit.

Voice Clip for when beating Steven - Just like Robin and Falco, Peridot has a few voice-clips for beating certain characters, such as against my Steven Universe set, at which point she will also mutter "You Steven, of course you didn't alter my plans!" alongside her victory stance.

Voice Clip for when beating Amethyst - "Of course I'd beat a Crystal Clod like you!"

Character Theme: Peridot (Theme)

Victory Theme: A clip from the theme "Return to the Beach"

Home Stage: Kindergarten (just like Amethyst)


So that's all, Ladies and gentleclods, if you like this kind of stuff literally go to the post before this one, it's a link of other sets of mine. If you don't like this kind of stuff, umm.... cool?

Reigaout?
 
Last edited:

ϟPlazzapϟ

Smash Apprentice
Joined
Nov 30, 2014
Messages
95
I accidentily posted this comment unfinished so ignore it until further notice
 
Last edited:

Reiga

He sold diddy for a switch
Joined
Dec 8, 2014
Messages
1,256
Location
White Noise
3DS FC
1461-7646-7368
Owait, sorry, accidently saw the unfinished review, I'll wait for it to be finished so I can actually commentate it
 
Last edited:

ϟPlazzapϟ

Smash Apprentice
Joined
Nov 30, 2014
Messages
95
Peridot
As this set was in development I have been very hyped especially considering the fact that this is your first set where you emphasized a solid playstyle. Gotta say all of your Steven Universe sets show your love of the series, even the ones devoid of playstyle are still fun to read due to your charming ways with the series if that makes any sense. Now past the fluff I reassure you that both your presentation and writing style were both very neat and easy to read, so no worries there, all thats left is the actual moveset.

Wall scaling is balanced well and unlike my expectations the set does not completely rely on it for everything, instead the mechanic is a small but solid peice in a flowing playstyle. The Up Special although a tad generic at first glance is alot more deep, as it forces the player to strategically pick weather or not they want a fast, reckless recovery or a slow controlled one. Of course the mechanic isn't perfect, my major complaint is the control scheme requiring horizontal movement to move vertically, yes I know this was added to create skill but in actuality it prevents players using the mechanic skillfully. What I mean is a player picking Peridot for the very first time will likely know about her cool ability and when they test It on a wall they'll likely get an awkward clunky mess that they won't utilize much of again, this is bad seeing as it's a vital tool in Peridot's arsenal. Speaking of tools each character has thier own tools to net K.O.'s and all of them are quite easy to acsess, but using the move should only be the half of it the real skill requiring the player learning how and when to use it, but when a player has trouble even activating a move it leaves little room for improvement.

Although you stumbled a bit with the wall scaling mechanic the Robonoid minions were done very well and prove to be one of the most important things in the set. Being one of Peridot's main ways of dishing out damage you made the minions very useful by doing things like chainging thier speeds to mix up Peridot's approaches or sacrificing all of them for a larger, stronger minion or turning them all into items to destroy. Automatically destroying them with D Tilt is also clever and hard to hit with, and since it's so hard to hit with it should have alot of payoff, but instead takes a whopping second to crush the damn things which renders the move kinda useless outside of combat. A more minor complaint is the fact that robonoids cannot replenish health by touching the liquid they create, I whould've liked to see it be used as a way Peridot can heal the minions she wants to keep and also a way for opponents to heal the Robotoids she's trying to destroy.

In terms of standard moves you definately kept your focus on a character that must keep thier range from opponents to build up damage, launch themoff the stage and gimp using wall scaling and clever moves such as Up Tilt to accomplish sucsessful gimping. Down Aerial felt very out of place however, you stated multiple times that Peridot is hotheaded but you never really express it much in the set besides this move, which makes it's inclusion a bit awkward.

Lastly the grabs and throws, and although a grab while wall running could be neat, the grab game you have is pretty well done. A tractor beam fits her distanced playstyle but a minor gripe is if feel like the grab should be harder to land challenging a ranged character to get up close, the actual pummels and throws are unique as most of them can boost up the speed of robonoids with the electric property, the back throw especilly.

Overall this set is one of my favorites if not my favorite in the contest so far, it's problems were minor and I could tell you had fun with the set. Sorry for the slightly rushed review, I don't have much time to be on smashboards as I'm packing for a vacation atm and leaving for a week starting tomorrow. I may pop in from time to time though via mobile.
 

Reiga

He sold diddy for a switch
Joined
Dec 8, 2014
Messages
1,256
Location
White Noise
3DS FC
1461-7646-7368
Peridot
As this set was in development I have been very hyped especially considering the fact that this is your first set where you emphasized a solid playstyle. Gotta say all of your Steven Universe sets show your love of the series, even the ones devoid of playstyle are still fun to read due to your charming ways with the series if that makes any sense. Now past the fluff I reassure you that both your presentation and writing style were both very neat and easy to read, so no worries there, all thats left is the actual moveset.

Wall scaling is balanced well and unlike my expectations the set does not completely rely on it for everything, instead the mechanic is a small but solid peice in a flowing playstyle. The Up Special although a tad generic at first glance is alot more deep, as it forces the player to strategically pick weather or not they want a fast, reckless recovery or a slow controlled one. Of course the mechanic isn't perfect, my major complaint is the control scheme requiring horizontal movement to move vertically, yes I know this was added to create skill but in actuality it prevents players using the mechanic skillfully. What I mean is a player picking Peridot for the very first time will likely know about her cool ability and when they test It on a wall they'll likely get an awkward clunky mess that they won't utilize much of again, this is bad seeing as it's a vital tool in Peridot's arsenal. Speaking of tools each character has thier own tools to net K.O.'s and all of them are quite easy to acsess, but using the move should only be the half of it the real skill requiring the player learning how and when to use it, but when a player has trouble even activating a move it leaves little room for improvement.

Although you stumbled a bit with the wall scaling mechanic the Robonoid minions were done very well and prove to be one of the most important things in the set. Being one of Peridot's main ways of dishing out damage you made the minions very useful by doing things like chainging thier speeds to mix up Peridot's approaches or sacrificing all of them for a larger, stronger minion or turning them all into items to destroy. Automatically destroying them with D Tilt is also clever and hard to hit with, and since it's so hard to hit with it should have alot of payoff, but instead takes a whopping second to crush the damn things which renders the move kinda useless outside of combat. A more minor complaint is the fact that robonoids cannot replenish health by touching the liquid they create, I whould've liked to see it be used as a way Peridot can heal the minions she wants to keep and also a way for opponents to heal the Robotoids she's trying to destroy.

In terms of standard moves you definately kept your focus on a character that must keep thier range from opponents to build up damage, launch themoff the stage and gimp using wall scaling and clever moves such as Up Tilt to accomplish sucsessful gimping. Down Aerial felt very out of place however, you stated multiple times that Peridot is hotheaded but you never really express it much in the set besides this move, which makes it's inclusion a bit awkward.

Lastly the grabs and throws, and although a grab while wall running could be neat, the grab game you have is pretty well done. A tractor beam fits her distanced playstyle but a minor gripe is if feel like the grab should be harder to land challenging a ranged character to get up close, the actual pummels and throws are unique as most of them can boost up the speed of robonoids with the electric property, the back throw especilly.

Overall this set is one of my favorites if not my favorite in the contest so far, it's problems were minor and I could tell you had fun with the set. Sorry for the slightly rushed review, I don't have much time to be on smashboards as I'm packing for a vacation atm and leaving for a week starting tomorrow. I may pop in from time to time though via mobile.
Woah, I'm actually a bit startled, as someone who passed most of his MYM career doing rather forgettable and wonky sets to actually have someone who appreciate one of my sets, though I have to admit that the set isn't at all perfect or what not.
I actually read the accidental unfinished review before you editted it out, I took it's advice and I actually editted a bit the controls for the possible better, to be honest it's kinda hard to make a solid Wall Scaling mechanic, but I hope the changes actually make it better.
Well, to be honest I don't really like the idea of Robonoids healing themselves out of other Robonoid's liquid, I kinda wanted the goos interactions to be player strict. I also think that it would kinda downplay a bit Peridot's care for her Robonoids, as they now would just be walking around recovering themselves, while before she'd actually be on the look out for them as to not heal the opponent.
Onto some of you're move gripes, I have taken notice of the Down Tilt's time and have shortened it, while I can understand that the USpec is a bit generic, it was kinda my only option really (before the episode of the show where she flew with helicopter fingers I was just planning for her to enter a random escape pod she used in the show just to recover, though at the time Peridot was also a diferent beast, as she still wasn't shown using energy blasts or even wall cling), tbh the Aerials were kinda the less thought out moves of the set, as they were decided the last, I guess the DAir can be explained as to Peridot not really having anything to attack with in the air and resorting to meaningless sissy attacks.

Also, no Wall Cling Grabs to you can't just Back Throw the opponent down into the Blast Zone :cool:

Either way, I changed the Wall Clinging controls and have changed the time for her Down-Tilt, thanks for the comment, Plazzap! :kirby:

Also,I'm just waiting for someone to note the pattern in my sets' moves descriptions always being Action->Damage->Usefulness to the Playstyle :drshrug:
 
Last edited:

Katapultar

Smash Lord
Joined
Nov 24, 2008
Messages
1,284
Location
Australia
Just a question but what exactly happended to MYMminis?
I think people lost interest in them as setwork became a bit more demanding and time-consuming around MYM13-14. I think it's also due to older members who were around to make the minis disappearing, like MT (more or less the founder of minis back in MYM9 I believe), Dave and Hyper_Ridley among some others, not to mention having to think of minis each week.

It would be pretty cool if minis came back, say somebody had an idea for one, but I'm not sure where I would start if they were left up to me.
 

ϟPlazzapϟ

Smash Apprentice
Joined
Nov 30, 2014
Messages
95
I see, it basically required admins to be fully active all week with fresh ideas, not to mention working on thier own sets and real life
 

ϟPlazzapϟ

Smash Apprentice
Joined
Nov 30, 2014
Messages
95
I know my array of random questions must be getting pretty damn annoying but is this amount of activity in MYM considered normal or inactitve, the forum has been very dry lately imo but it could possibly be the cause of school starting.
 

Reiga

He sold diddy for a switch
Joined
Dec 8, 2014
Messages
1,256
Location
White Noise
3DS FC
1461-7646-7368
I know my array of random questions must be getting pretty damn annoying but is this amount of activity in MYM considered normal or inactitve, the forum has been very dry lately imo but it could possibly be the cause of school starting.
TBH last contest had a lot of set spurts and also a lot of set droughts, I mean, a few days before the constest's end the thread was literally in the second or third page in the forums and had few activity, but right in the last day the place was booming with a truck-load of sets.
 

Munomario777

Smash Master
Joined
Nov 18, 2014
Messages
3,253
Location
Charleston, South Carolina
3DS FC
0387-9596-4480
Switch FC
SW-8229-3157-8114
Over ten days without a new moveset? Guess I'll have to remake one of my own...

Hey guys, I remade Inkling again! New formatting, new writing style, new mechanics, new moves, new balancing, new playstyle, there's so much new stuff! And it's better than the old one too. At least, I hope it is...

So yeah, check it out, even if you've read it already -- it's really different, and I think you'll like it just a bit more. :) And hey, if you haven't read it, there's never been a better time to do so!
 

Muskrat Catcher

Smash Journeyman
Joined
Jan 13, 2015
Messages
486
Location
Aliso Viejo, California
3DS FC
0748-4100-0093
I have a few fun ideas for movesets, but life really got busy during the second half of summer. I'm gonna name them, because they deserve to at least have their potential recognized, and my life doesn't look like its gonna get easier anytime soon. Senior year starts tomorrow, and while most people may just be taking easy senior classes, I'm taking 5 AP classes, and marching band (marching band is the single most demanding class too). So if you wanna make a set, but don't know what, maybe take one of my requests? I want to see these characters in smash:
1. Wreck-it-Ralph - surprised nobody has done this newly iconic gaming character yet
2. More Mii classes - WHY HAS NOBODY DONE THESE YET? They are by far my first choice for more DLC and have literally unlimited potential as far as creativity and playstyle, since you don't need to remain faithful to any single character's abilities and attitude.
a. Mii scientist
b. Mii wizard
c. Mii archer
d. Pretty much any class from MMOs, RPGs, or even real life.
3. Joke sets - they are fun and easy to make, and can include. . .
a. The game grumps
b. Memes. Yes, memes like Doge and Pepe.
c. One of the common participants of this thread. Yes, I mean like a MasterWarlord set, or a FrozenRoy set, or any of these guys. That could be absolutely hilarious!
Or even make one of those a real set. They did it with Wii fit trainer! But that might be difficult.

So those are my ideas, but they kinda turned into requests now. I don't have the time nor dedication to make them a reality.
 
Last edited:

Reiga

He sold diddy for a switch
Joined
Dec 8, 2014
Messages
1,256
Location
White Noise
3DS FC
1461-7646-7368
3. Joke sets
Well, I've got some big plans for April 1st next year on the likes of these sets, not gonna spoil anything, especially since it's only coming in 2016, but it'll be neato.

Oh, and I might even read that Inkling redux, read a random line from the jab and I kinda like the change, maybe I'll read it and rerank it or even comment it, eh?
 

Munomario777

Smash Master
Joined
Nov 18, 2014
Messages
3,253
Location
Charleston, South Carolina
3DS FC
0387-9596-4480
Switch FC
SW-8229-3157-8114
Oh, and I might even read that Inkling redux, read a random line from the jab and I kinda like the change, maybe I'll read it and rerank it or even comment it, eh?
Glad to hear! :) It's a really big improvement over the previous set -- at least, I hope so, haha -- I highly suggest giving it a look. Re-ranks and comments would be greatly appreciated!
 
Last edited:

JamietheAuraUser

Smash Lord
Joined
Jan 11, 2010
Messages
1,196
Location
somewhere west of Unova
I have a few fun ideas for movesets, but life really got busy during the second half of summer. I'm gonna name them, because they deserve to at least have their potential recognized, and my life doesn't look like its gonna get easier anytime soon. Senior year starts tomorrow, and while most people may just be taking easy senior classes, I'm taking 5 AP classes, and marching band (marching band is the single most demanding class too). So if you wanna make a set, but don't know what, maybe take one of my requests? I want to see these characters in smash:
1. Wreck-it-Ralph - surprised nobody has done this newly iconic gaming character yet
2. More Mii classes - WHY HAS NOBODY DONE THESE YET? They are by far my first choice for more DLC and have literally unlimited potential as far as creativity and playstyle, since you don't need to remain faithful to any single character's abilities and attitude.
a. Mii scientist
b. Mii wizard
c. Mii archer
d. Pretty much any class from MMOs, RPGs, or even real life.
3. Joke sets - they are fun and easy to make, and can include. . .
a. The game grumps
b. Memes. Yes, memes like Doge and Pepe.
c. One of the common participants of this thread. Yes, I mean like a MasterWarlord set, or a FrozenRoy set, or any of these guys. That could be absolutely hilarious!
Or even make one of those a real set. They did it with Wii fit trainer! But that might be difficult.

So those are my ideas, but they kinda turned into requests now. I don't have the time nor dedication to make them a reality.
I've been sort of planning more Mii Fighter styles, but running slightly short of ideas for most of them. Ones I had vague ideas for include:
Mii Gunslinger: A Mii Fighter that dual-wields pistols, using them for a wide variety of close- and long-range projectiles in conjunction with acrobatics and fancy footwork. Much of the moveset takes inspiration from the Tales series. Unique features include a counter that reacts to an attack with a burst of rapid fire.

Mii Mage: A Mii Fighter that uses magic spells to attack at mid-range, with an emphasis on charge-storable special moves. One idea I was considering was the ability to combine stored spells to create spells that attack from odd angles, such as funnels of lightning, lasers of water, or waves of fire.

Mii Grenadier/Mii Alchemist: A Mii Fighter that attacks primarily with explosives, be they hand bombs, carpet bombs, mines, etc. If made as an Alchemist, would also have the ability to buff itself via potions of various types.
 

Tocaraca2

Smash Ace
Joined
Feb 22, 2015
Messages
557
Location
Wokingham
Remember when I made that terrible Chrom moveset?
I don't plan on making another complete one.
But I do have ideas that would make him different from the other sword characters.
1: Sweetspot in the middle of his blade. Marth has a tipper, Lucina is balanced, Roy has a gripper, and Chrom has a median.
2: Most of his moves have quite high startup but very little ending lag. This would make it relatively easy to avoid his moves, but very hard to punish them.
3: If Roy's Side Smash is like the first slash of Link's, then why not have Chrom's be like the second slash of Link's?
4: Link's Dash Attack was changed in Sm4sh... Chrom could have Brawl Link's Dash Attack, or at least, something similar.
5: Link's Back Roll was also changed in Sm4sh, so Chrom could have Link's Brawl one.
6: In a cutscene from Fire Emblem Awakening, Chrom battles Masked Marth (Lucina), and it clearly shows he has the ability to flip easily in midair (he leaps upward and plummets down while somersaulting, then strikes Lucina's sword). His Neutral Air could be a nerfed version of Brawl Meta Knight's Neutral Air. It would have startup lag but would have more range than Meta Knight's current Neutral Air.
7: Project M gave Roy a unique Back Air; but Sm4sh didn't. Chrom could have that. It would be like the opposite of Ike's (having quite high startup but hardly any ending lag).
8: He could have a Down Special using the Fire Emblem as a shield. Of course, he wouldn't attack with it, but he could have it out for 5-10 seconds and it would block attacks and possibly reflect projectiles; however it would make him slower, fall faster, and not jump as high. He would still be able to use his sword to attack, however he wouldn't be able to both hands to wield his sword.
9: I don't understand why no sword wielder has an Up Air which hits through the Z and Y axis's rather than the X and Y axis's. Fox and Yoshi have those type of Up Airs (just using their tails), so why not Chrom with his sword too?
10: One thing that I'd love to see implemented in Smash is what was present in the Lucina/Robin trailer when Lucina dashed towards Captain Falcon and scraped her sword against the ground. Chrom could have a Down Smash where he scrapes his sword against the ground on both sides of him.
There, 8 unique sword moves, and a unique playstyle. Come on Sakurai, surely this would make him something else rather than a plain old sword-wielder?
 

Reiga

He sold diddy for a switch
Joined
Dec 8, 2014
Messages
1,256
Location
White Noise
3DS FC
1461-7646-7368
There, 8 unique sword moves
3: If Roy's Side Smash is like the first slash of Link's, then why not have Chrom's be like the second slash of Link's?
4: Link's Dash Attack was changed in Sm4sh... Chrom could have Brawl Link's Dash Attack, or at least, something similar.
5: Link's Back Roll was also changed in Sm4sh, so Chrom could have Link's Brawl one.
6: In a cutscene from Fire Emblem Awakening, Chrom battles Masked Marth (Lucina), and it clearly shows he has the ability to flip easily in midair (he leaps upward and plummets down while somersaulting, then strikes Lucina's sword). His Neutral Air could be a nerfed version of Brawl Meta Knight's Neutral Air. It would have startup lag but would have more range than Meta Knight's current Neutral Air.
7: Project M gave Roy a unique Back Air; but Sm4sh didn't. Chrom could have that. It would be like the opposite of Ike's (having quite high startup but hardly any ending lag).
Hey, I'm no uniqueness expert or anything, but I'm pretty sure those ideas aren't exactly unique. :cool:
Heavily inspiring sets after others is a really bad idea imo, it seems rather weird to try to include not-included moves from past-games to try to make the game more complete or whatever you're trying, it's really best to think of your set as something standalone and unique, and not a move list part of a group of other move lists which you try to implement unused bits from other move lists.
 

PixelPasta

Smash Lord
Joined
Jul 27, 2013
Messages
1,147
Well, I've taken your thoughts and ideas into consideration, and I've come up with a revamped Olimar that I am quite happy with. I think I've struck a fair balance between both accurately and aesthetically representing the gameplay of Pikmin, whilst not limiting players from using the character in the way that suits them personally.

~~~~~~~~~~~~~~~~~~~~~~~~~~~~~~~

Pikmin & Olimar - Revamp

GENERAL MECHANICS

Olimar's stats are unchanged from his current Super Smash Bros for Wii U/3DS appearance.
This revamped moveset will hopefully rework his playstyle to better reflect the Pikmin series: steady, strategic, with a focus on time and resource management.
The number of Pikmin he can have at a time has increased to five.
First I should explain a core mechanic of this moveset: the Onion.


Onions are peculiar bulbous life-forms, which behave as nests for the Pikmin. This moveset specifically utilizes the Master Onion, seen in Pikmin 3 as a universal carrier for all types of Pikmin. At the beginning of the match, the Onion is in flight mode (it's legs retracted, and it's flower spinning like a propeller). It follows close behind Olimar until he places at a location of his choosing, which can be done by using his down special. This Onion will supply Olimar with Pikmin for as long as it remains on the stage. If any of Olimar's five Pikmin die, the Onion will expel the appropriate amount of Pikmin to compensate, for Olimar to pluck when he returns to the Onion. There is a bit of lag after expelling Pikmin that serves as sort of a 'cooldown' to prevent Olimar camping by his onion for an endless supply of Pikmin. If Pikmin perish during the period in which the Onion is currently planting new ones, there will be a period of about five-six seconds before the Onion will expel any more.
The Onion can be destroyed by opponents. It is a hitbox about the height of Bowser that must receive 50% damage before it is destroyed. After it is destroyed, it will return to Olimar after about the time it takes for Rosalina's Luma to respawn. Alternatively, if Olimar is KO'd, the Onion will automatically return by his side, for him to place on the stage once again.
As it is his core supplier of Pikmin, protecting the Onion is paramount. Luckily his Pikmin are happy to help - his moveset, when accompanied with Pikmin, has numerous defensive options.


PIKMIN MECHANICS

As soon as the onion is placed, it will expel five Pikmin seeds, which are quickly planted into the ground within the course of three or four seconds. These Pikmin can be plucked with OIimar's down special. They start off in their beginning stage, as Leaf Pikmin. If they are left un-plucked for 45 seconds, they will become Bulb Pikmin. Another 45 seconds later, they will be in full bloom - Flower Pikmin, which are an overall improvement over regular Leaf Pikmin (their movement speed is increased by 1.5x, and they can take more hits before they are killed). There are five types of Pikmin that can come from the Onion: Red Pikmin, Blue Pikmin, Yellow Pikmin, Purple Pikmin, and White Pikmin. The Onion initially ejects one of each type. All subsequent sprouts will cycle through the colours in that following order: Red, Yellow, Blue, Purple, White. The Pikmin are used in Olimar's smashes, aerials, and special moves.

Each colour has different properties:
-Red Pikmin deal fire-based damage, and are the most well-rounded in terms of both attack and speed. They are immune to fire, but they drown easily.
-Yellow Pikmin have a longer attack range, in exchange for slightly weaker attacks. They exceed in aerial attacks rather than smashes, and deal electric-based damage. They are immune to electricity.
-Blue Pikmin deal water-based damage, and cannot drown. They can swim indefinitely.
-Purple Pikmin deal the greatest knockback, particularly in smash attacks. However, they have the lowest attack range. They are the slowest Pikmin, but have the most health.
-White Pikmin deal poison-based damage. Their attacks are weak, but are much quicker and can be performed rapidly. They have the highest speed, but the lowest health, so they are more easily killed.
At leaf stage, Red, Yellow, and Blue Pikmin take 20% before they die. Purples take 30%, and Whites only take 10%. At flower stage, the amount of damage they can take is increased by 10%!
Much like in the Pikmin series, Pikmin can carry items over to Olimar. If he throws them at an item, they will bring it towards Olimar - but at half their regular walking speed, leaving them vulnerable to attack.


SPECIAL MOVES

Neutral Special: Pikmin Throw
Olimar grabs the first Pikmin in line behind him, and holds it in his hand for as long as the input is held. He can freely move around while holding the Pikmin, so long as the input is not released. When released, he will throw the Pikmin ahead of him. If the Pikmin hit an opponent, they will latch onto them, clinging onto them and attacking constantly. The Pikmin will cling to the opponent until they are whistled away or are knocked off by the opponent.The trajectory of the initial throw, the damage they inflict, and the speed of their attack between colours:
  • Red Pikmin have the most well-rounded toss: a standard trajectory, and moderate attack. They deal 4% per second, and require an attack of over 10% to be knocked off.
  • Yellow Pikmin have the highest trajectory - they travel in a high vertical arc, which is good for latching onto aerial opponents. Their total horizontal distance is also increased. They deal 3% per second, and require an attack of over 8% to be knocked off. Their attacks slightly stun opponents (for about half a second).
  • Blue Pikmin have a standard trajectory, and average attack. They deal 3% per second, and require an attack of over 8% to be knocked off. Their attacks slightly slow down opponents (to about 0.8x their regular speed for about a second).
  • White Pikmin have a standard trajectory, but fly through the air twice as fast as other Pikmin. They attack very fast; dealing 2% every half a second. An attack of only 5% is required to knock off a White Pikmin.
  • Purple Pikmin are unique in that they do not latch onto opponents. Rather, they deal a single, high-knockback attack that deals 12% and can KO at 100%. However, they have the shortest trajectory, travelling only about half the distance of a Red, and achieving almost no vertical coverage. They are quite slow, so there is some endlag in the sense that they take a little longer to return to Olimar's side.
If an opponent is KO'd with a Pikmin on it, the Pikmin will be left holding a blueberry. Yes, just like in the Pikmin series, Olimar can find fruit by killing enemies! The Pikmin carry their treasure back to the Onion (note: the halved walking speed would be in effect), which will promptly vacuum it inside. Each blueberry heals Olimar and his Pikmin 3%. Olimar can gain a blueberry for each Pikmin who is clung to a KO'd opponent.
Note that this means that the more Pikmin there are clinging to the opponent, less Pikmin are left with Olimar - which means less kill options are at hand in order to actually obtain those rewards. So there is an element of risk and reward at play here: if you throw all but one of your Pikmin onto the opponent, it will be harder to actually KO that opponent with only one Pikmin at your disposal, but the prize will be four delicious blueberries to heal Olimar 12%. Or, one could play it safe by having one Pikmin latched onto the opponent, and using their remaining army to reliably knock them out - but winning a smaller reward in return. Players will need to strategize in real time.

Side Special: Pikmin Charge
Olimar quickly honks his horn twice, commanding his Pikmin forth! This move causes every Pikmin currently in Olimar's team to run forward. If they run into an opponent, they will swarm them: they will surround the opponent and attack their feet, causing them to trip. The amount of time that the opponent is in prone state is determined by the number of Pikmin who swarmed them (only a moment or so with one Pikmin; up to 1 second with a fully squad). After swarming the opponent, the Pikmin return to Olimar's side. Once again, the concept of needing to strategize, and calculate risk vs. reward, is an integral part of this move. Putting the opponent into prone state can be extremely worthwhile, as it can intercept opponents who are trying to attack the Onion - but part with only one Pikmin, and they will only be disabled for a single second. Again, sending out more Pikmin - which lets down Olimar's defenses - leads to the greatest rewards. These risky moves should be utilized tactfully, as the number of Pikmin one should send out is very situational.
This move has a second use - setting up physical barricades. If the control stick is pointed diagonally upward, the Pikmin will run one battlefield-platform ahead and begin constructing a wall out of shards of ceramic. The amount of time it takes to complete this task is dependent on how many Pikmin are at work. If only one Pikmin is working away, it will take a sluggish 25 seconds. Each subsequent Pikmin will shave 5 seconds off of the total building time. Meaning, if a full five Pikmin are at work, it will take a mere 5 seconds to construct a fully-sized wall (but again, this leaves Olimar with no Pikmin with which to defend himself during its construction. Noticing a pattern?).
A wall is about the height of one-and-a-half Bowsers. This means that it will block pretty much any projectile, but it can still be jumped over. The wall can take up to 50% damage before it shatters. As you may guess, this can quite effectively protect the Onion from ranged attacks, and provide a diversion for opponents. There can only be a maximum of three barricades on the stage at one time.
Finally, if the control stick is titled diagonally downward, the Pikmin will run one battlefield-platform ahead - and simply stand in place. These Pikmin are standing guard, and well run over and attack any opponents who come within their range (which is a battlefield-platform in diameter around them), dealing 5-10% and tripping them over. They will also automatically grab any items nearby and carry them over to Olimar. Unfortunately, while these little troops are very effective at territorial guarding, Olimar is obviously left with less Pikmin to fight by his side.


Up Special: Winged Pikmin
This move is mostly unchanged from how it is now.
Three pink Winged Pikmin swoop down from above and grab Olimar's antenna, lifting him upward. Olimar carries his current army of Pikmin with him - the more that he has increases his weight, making him harder to lift. He can toss away his Pikmin before he flies to reduce the load, increasing the vertical distance of the recover - or, he can keep all of his Pikmin, but have a poor recovery in return. The best decision ultimately depends on whether the current situation requires a flawless recovery or retaining the maximum amount of Pikmin.


Down Special: Whistle / Pluck
Olimar's down special has two different uses, depending on the situation. When standing on top of a platform in which Pikmin sprouts are planted, this move will allow Olimar to pluck them, as was mentioned earlier. He grabs their stalk, be it leaf or flower, and uproots them from the ground in an animation that lasts one seconds and has a little bit of endlag. When plucked, the Pikmin join Olimar's team - they follow close behind; basically the same way as they do now.
Situated anywhere else, this move allows Olimar to blow his whistle. This emits a shrill toot, and a large ring of light around Olimar, causing Pikmin to return to Olimar's side.
There are two levels of whistle, which we will call light and heavy.
A light whistle can be performed by simply tapping the input. The whistle toots for about half a second, alerting the Pikmin who are latched onto opponents, as well as a few stragglers. Yes, a light whistle only calls Pikmin who are latched onto opponents or those who have strayed away from Olimar. Any Pikmin who are performing a task such as carrying items/fruit or building structures will continue to do their work.
A heavy whistle, on the other hand, is performed when the input is held. The whistle will blow for two seconds long, calling over any Pikmin who are not by Olimar's side. No exceptions; every Pikmin will drop what it is doing and resume following Olimar.
The whistle has an added benefit of stunning nearby opponents, for about 0.5-1 seconds depending on whether it is heavy or light.

BASIC ATTACKS

Jab: Brute Knuckles
Olimar punches the opponent with one hand, deftly swinging his fist down from above his shoulder. Quick and spammable, this attack has very little lag - the entire animation only lasts about half a second. It only deals 2% per hit, and has almost no knockback to speak of - this move could only kill at 300%. Furthermore, Olimar is quite a small person, so the range is less than satisfactory.
Sound weak? Well no, every move has it's applications, even a measly attack such as this! Much like the Pikmin themselves, this move is for quickly racking up damage over time. Pair this rapid, close-quarters attack with a couple Pikmin latched on your foe, and you could whittle your opponent up to 50% in no time.
Furthermore, this move is mirrored to his forward tilt as well, meaning that - similar to Mega Man's mega buster - this move can be used whilst walking, just like in the Pikmin games. This more than compensates for the attack's poor range, as Olimar can move towards the opponent while still rapidly pummeling them. This makes it harder for the opponent to escape, especially if they are a slower, larger character (makes sense, doesn't it? Olimar has a penchant for taking on huge opponents).

Up Tilt: Antenna Whip
Olimar leans backward (half second lag) and then thrusts his helmeted head forward, his antenna cracking like a whip. His head deals 4% and knocks the opponent upward.
The tip of his antenna is a sweetspot - a much tinier hitbox, but it deals 10% with much higher knockback. Hitting the opponent with the antenna stuns them for half a second, before launching them in a high upward arc. It also ignores shields, dealing damage (but not knockback) to shielded players.
This move is decent for knocking opponents away, particularly if the sweetspot hits, allowing Olimar to escape opponent's attacks in a hurry. The stun time can give Olimar the opportunity to back away, to a distance where he can follow up by tossing a Pikmin.
It doesn't have much kill power, however, KOing only around 210-200%.

Down Tilt: Dodge Whistle
With a commanding blow of his whistle, Olimar and the Pikmin by his side drop to the ground and roll about one battlefield platform forward, in a similar manner (and speed) to King Dedede's d-tilt. This hits up to three times, 2% each (6% total), and knocks opponents slightly upward. They can roll through multiple opponents.
During the middle of the roll, Olimar gains a few frames of super-armor, allowing him to shrug off attacks as he is rolling out of the way. Due to its mobile and defensive nature, this is sort of a pseudo-dodgeroll, that also deals some damage.
This move is versatile in that it has a number of situational uses: mainly it will be used for evading enemy attacks; rolling out of the way in order to protect the Pikmin. It's helpful because it puts some distance between Olimar and the opponent, giving Olimar and opening to attack by throwing a Pikmin.
At the same time, this move is perfectly viable as an offensive technique. Due to its unique nature, it can catch opponents off-guard. Olimar will appear to be crouching, but then can suddenly tumble forward out of his crouch to attack, a unique trait for a tilt. That aside, it lacks sufficient knockback to be a kill move.

Dash Attack: Rush Boots
Olimar leaps in the air, mid-dash, with his legs facing forward. Feet outstretched, Olimar will deliver a flying kick into any opponent he collides with. The initial blow deals 8% and inflicts some decent knockback into the opponent, KOing at around 180-170%.
If he does not hit the opponent with the initial leap, he will land on his back and skid one stage builder block ahead, resulting in some notable endlag (about two seconds before he'll stand up again). His feet are a sourspot at this point, dealing only 3% and inflicting little to no knockback.
If it connects, this move is a valuable tool for disrupting aggressive opponents; knocking them away from the Olimar, the Onion or the Pikmin; and with decent kill power to boot. But if it doesn't connect, the endlag is pretty nasty, so this move can be risky.

AERIAL ATTACKS

Neutral Aerial: Pikmin Spin
Olimar spins around, with a Pikmin in each hand. He will use the first two in line, holding them by their stalks - the first in his right hand, and the second in his left. If he only has one Pikmin in his squad at that time, he will simply hold them in his right hand. With no Pikmin at all, he will use his stubby arms, which notably decreases his range.
The amount of damage this move deals is subject to a lot of variance, depending on which types of Pikmin he is using.
3% / 4% / 3% / 2% / 2% / 1% (bare hands)
The above damage values can be dealt in any combination of two, obviously in relation to which two Pikmin he holds. For example, if he has a red and a yellow in his hands, and the move connects with the opponents for both hits, the total damage will be 7% (3% from the red, 4% from the yellow). If he only has one purple Pikmin, it will deal 3% (2% from the purple, 1% from his empty hand). And so on and so forth.
This move delivers practically the same knockback, regardless of the Pikmin. The knockback is decent at flicking away opponents, but it can usually only kill from 250-240%. This move has significantly high priority: in a manner comparable to Ness' n-air, this move can disrupt a majority of opponents' attacks.

Forward Aerial: Pikmin Smack
Olimar holds a Pikmin by the stalk with both hands, above his head, and smacks it downward. He uses the first Pikmin in line. With no Pikmin in his hands, he will simply punch forward, with a drastic decrease in range.
This move is sort of like a sex kick, in that the initial swing of the Pikmin deals the most damage, while a late hit deals the least.
Initial Hit: 7% / 9% / 6% / 8% / 4% / 2% (bare hands)
Late Hit: 3% / 5% / 2% / 4% / 1% / 1% (bare hands)
This attack knocks opponents vertically downward, and would kill at around 210-200%.

Back Aerial: Pikmin Whip
Olimar holds the first Pikmin in line, by the stalk, in his right hand. Swiveling his body clockwise, he extends his arm and whips the Pikmin behind him. With no Pikmin in his squad, he will just perform a short-range slap behind him.
This is a decently powerful move the knocks opponents in a diagonal, downward trajectory.
Damage Values: 9% / 11% / 8% / 10% / 6% / 2% (bare hands)
This move can kill at 190-180%.

Up Aerial: Pikmin Swing
Olimar grabs the first Pikmin in his right hand, and swings it around by the stalk above his head. He twirls them around three times, within the span of 1-2 seconds.
This move comes out quite quick, has decently high priority, and the momentum of his jump is maintained. Combined with the fact that it hits up to three times, it is a great defensive tool for intercepting opponents' attacks that would otherwise place undesirable pressure on Olimar. Short-hopping and using this move (as well as his n-air) can disrupt aggressive players (and also break projectiles fairly effectively). At the same time, he can also make great pressure with this move, directly knocking away opponents who are trying to dispose of his Pikmin. It can kill reasonably well at higher percents, usually KOing from 190%-180%.
Damage Values (per each hit): 3% / 4% / 3% / 3% / 2% / 1% (bare hands)

Down Aerial: Crash Landing
Olimar flips upside down and goes hurtling downward, in a vertical head-first fall. Around two-thirds of the way through his fall, aerodynamic heating kicks in, and he becomes enveloped in flames! Olimar is now a human meteor, quickly slamming into the surface of the stage. He will travel downward until he collides with something solid, be it an opponent or the stage. This move can be cancelled only during the initial frames. When he is alit, it is too late to cancel out of, so one must be careful not to crash land off of the stage.
An initial, non-flaming hit deals 7%. A fiery hit deals 10%, and spikes opponents directly downward! A full-throttle hit can KO at 180-170%.
Unlike most spikes, this move is not as effective at off-stage KOing, due to Olimar's extremely high risk of accidently SDing - it is possible, but the risk is there (and Olimar's playstyle usually does not favour aggressively going for the kill anyway). What this attack is good for, however, is quickly returning to the ground - due to its mobility, and capability to tank through opponent's attacks. Comparably to his d-tilt, which behaves like a dodge roll that deals damage, this attack is like a modified fastfall. This has a number of uses: if knocked upward, for example, this move will swiftly return Olimar back to the ground - where he is more comfortable fighting - shrugging off the grounded opponents' attempts at keeping him up there. So, to illustrate a scenario in which this would be useful, let's say that an opponent throws/hits Olimar upward, to get him and his Pikmin out of the way of the Onion. Olimar can disrupt this attempt with this attack, returning back to the stage to defend the Onion, while also inflicting damage and swapping the pressure onto the opponent.

SMASH ATTACK
Forward Smash: Pikmin Toss
Olimar tosses his first Pikmin ahead. The Pikmin soars forward, spinning, until it finally bodyslams into the foe. Reds, blues, yellows, and whites travel one battlefield platform ahead, while purples, due to their heft, travel only half the regular distance (but in return, they pack quite a punch). With no Pikmin in hand, Olimar simply performs a very short-ranged punch.
Damage Values (no charge -> fully charged): 10->17% / 9->14% / 9->15% / 12->20% / 8->11% / 3->8% (bare hands)
A fully charged purple Pikmin f-smash is Olimar's strongest move, and if it hits during the sweetspot (as soon as it comes out) it can kill at 140-130%, and it is decent at breaking shields (which obviously is beneficial to Olimar, as it provides a window for him to either set up more defenses or go for the kill!). Every other Pikmin kills from 180-170% when fully charged.
Due to the disjointed nature of this hitbox, this move can still be effective even if Olimar is hit during the charging or early attacking frames - the Pikmin will continue to fly out. This is a good way to punish opponents for attacking Olimar. After the final frames of this smash, it takes a few seconds for the Pikmin to get up and return to Olimar's side, so keep that in mind. This endlag is amplified even more when the attack misses - they Pikmin dawdle on the ground for 2 seconds, brushing themselves off, before returning to Olimar's squadron.
A minor - but still useful - trait of this move is the fact that a fully charge toss will instantly destroy Olimar's barricades. This proves useful in situations where Olimar might want to relocate a barricade.

Up Smash: Pikmin Fling
Olimar tosses his first Pikmin in the air above him. The Pikmin soars upwards, spinning, delivering a headbutt into opponents above. Yellows can reach the total height of Bowser, while on the other end of the spectrum, Purples are only thrown one small stage builder block in height. With no Pikmin in his squadron, Olimar throws his empty arms into the air, dealing only a small amount of damage and achieving almost no vertical range.
Damage Values (no charge -> fully charged): 8->12% / 10->17% / 8->12% / 11->15% / 5->9% / 2->7% (bare hands)
Yellows, due to their knack for aerial maneuverability, are actually the strongest Pikmin to use for this move. If the Pikmin hits as soon as it comes out, rather than on the way down, it can kill at 160-150%.
Like his f-smash, this move has a disjointed hitbox that allows Olimar to attack despite being hit during the charging or early frames of the attack, which punishes opponents who attack Olimar. But, as usual, after this smash attack completes, it takes a few seconds for the Pikmin to return to Olimar's squad. This move is good for intercepting opponents who are trying to jump over Olimar (or attack from above) - especially if they are aiming at the Pikmin or the Onion behind him, the opponent can end up seriously punished.

Down Smash: Pikmin Split
Olimar faces the screen, with his legs slightly bent. He sharply blows his whistle and points to either side of him with both hands. Two Pikmin (if present in his squad) will obediently dash about one stage builder block to either side, damaging and tripping up any opponents in their path.
Obviously, this attacks on both side of Olimar, providing some great offensive coverage - but only if there are at least two Pikmin available in Olimar's team. If there is only one Pikmin, it will just dash to his right, leaving Olimar's left side unprotected. And with no Pikmin, Olimar's pointing fingers are the only damage-dealing hitbox - as you may have guessed, they have poor range and damage.
Damage Values (no charge -> fully charged): 8->13% / 8->13% / 8->14% / 10->16% / 6->10% / 2->8% (bare hands)
This attack has very little knockback (except at notably high percents, such as 300%), rather, it has a tripping effect - each time this move is used, the Pikmin have a 2/3 chance of knocking the opponent into prone state for 1.5 seconds. Naturally, this is quite useful, as it can intercept opponents who are trying to attack the Pikmin or the Onion. Additionally, while the Pikmin are dashing, they have a few frames of heavy armour - so this move can cause them to shrug off attacks. If timed right, this move can save a couple Pikmin from an otherwise deadly blow.

GRABS & THROWS

Grab: Captain Grab
Olimar leans forward, quickly reaching out with his right hand, in attempt to grasp an opponent. If he does not grab any opponent, there is a half a second of endlag on this move. If he does successfully grab onto an opponent, he holds them sort of like how he would hold a Pikmin: holding them over his shoulder behind him, by their neck/back region, as he points forward, ready to aim and throw.

Pummel: Pikmin Latch
This pummel is rather different than most - instead of a regular pummel, where the grabber rapidly attacks the grabbed, this move automatically attaches a Pikmin from Olimar's squad to the held opponent. Olimar just holds them steady as the Pikmin does the work! This can be pretty devastating for the opponent, especially if a white Pikmin is used.
If he has no Pikmin in his team, naturally, this pummel will be ineffective.

Forward Throw: Pikpik Toss
Olimar tosses the opponent forward, like a Pikmin. This isn't as strong in terms of damage as it is in distance - it deals only 5%, but launches opponents a whopping two and a half battlefield platforms ahead. It's only natural that Olimar would be good at long-distance throwing!
This throw is great for sending opponents a good distance away. If an opponent is attacking the Onion, this move sends them far enough away to buy Olimar some time to fortify the Onion with Pikmin or walls, for example, or just to toss a few Pikmin onto the opponent to apply some serious pressure. Also, this move has pretty good kill potential when the opponent is at higher percents. As the pummel automatically attaches a Pikmin, KOing opponents with a throw is a good way to gather berries.


Back Throw: Pikpik Discard
Olimar tosses the opponent behind him, over his shoulder, without even looking back. This deals 6%, and launches opponents in a high upwards arc, quite a far distance back (about one and a half battlefield platforms).
This throw, too, is quite good for getting aggressive opponents away from Olimar or the Onion. The arc is pretty predictable, but this is good, as it allows Olimar to strategically place the opponent in a location that sets up for, say, tossing a Pikmin onto them. Or perhaps he could throw them directly into a squad of Pikmin who are standing guard on the stage. Effectively using Pikmin, combined with moving the opponent around with throws, allows Olimar players to use all sorts of set-ups such as these.

Up Throw: Spaceward Toss
Olimar looks upward and leans back, winding up, and tosses the opponent upward with all of his strength. The opponent hurtles upward at high speeds, far away from Olimar's position. This deals only 4%, but the damage is doubled if the thrown opponent collides with another.
Like his other throws, this is great for subverting opponent's pressure and sending them to a location that is more ideal for Olimar. This is a good set-up for juggling, too, if the player decides to take this approach. Really, the applications are quite diverse, depending on the player's strategy of choice.
This has a decent potential to KO the opponent at high percents as well, killing at around 180-170% with ease.

Down Throw: Seed Bury
Olimar slams his opponent at the ground, stuffing them into the soil like a seed. Yes, this throw briefly buries the opponent! (comparable to Lucas' down throw) They remain buried for about a second and a half, at also take 6% in damage.
If the player's strategy is more defensive, this will be valuable time that could be used to evade the opponent. If an opponent is attacking the Pikmin or Onion, or just fighting Olimar in an aggressive or combo-y way, burying the opponent stops them in their tracks and allows Olimar a second or two to run/roll out of the way, or even start some defensive Pikmin set-ups (throw, charge) to retaliate.
This also has it's uses for Olimar players who's strategy is more aggressive. This move is actually quite good for starting some decent combos, as it can link into his u-tilt or n-air, for example (which move is best to use differs from situation to situation, as it depends on both the weight and directional influence of the opponent).
Ultimately, this move - like many others in Olimar's arsenal - is a versatile tool that's usage can vary depending on the strategy. Resourcefulness is a key motif here, and it's moves like these that open up the floodgates for a plethora of different tactics for Olimar to utilize.


PLAYSTYLE

Like in Pikmin, strength comes in numbers -Olimar is strongest when accompanied with his Pikmin. He must manage them well, or else he will be almost entirely useless on the battlefield. Luckily, he has an Onion to supply him with this valuable resource - that is, if the Onion is not destroyed. Since the Onion can be KOd, Pikmin are a finite resource, so Olimar should not be wasteful. Throwing away Pikmin like they are nothing is not the best strategy - if the Onion is destroyed, losing his remaining army could mean certain death for Olimar. That said, Pikmin will indeed need to be sacrificed for the greater good - those dedicated little guys bravely fight (and often perish) in battle in order to protect their comrades, the Onion, and Olimar himself.

Compared to the way he is now, this revamped Olimar is much less random, and more tactical - Olimar can specifically use the Pikmin that best suits the situation. For example, if he needs a reliable kill move (which he otherwise has very few of, as he has overall low knockback growth), a purple is a trusty asset. For quickly racking up damage, latch a white onto your adversary. When using aerial attacks (and unsurprisingly, his up-smash) the aerodynamic yellows work a charm. Or, if one craves an all-rounded, jack-of-all-trades Pikmin, the red is a tried and true soldier.

Because of his strength when accompanied by Pikmin, opponents are most likely to target them - or particularly aggressive players might directly attack the Onion, as it is the source of Olimar's floral soldiers. Thus, protecting these Pikmin and their home is of utmost importance. Olimar can achieve this by commanding his Pikmin wisely - a well-led Pikmin army is a great defensive force. Using them to construct walls, for example, is a useful defensive strategy: these obstacles can buy some valuable time, and bear the brunt of most ranged attacks, if an opponent is targeting the Onion. Olimar has many options that allow him to effectively manage these barricades, such as his f-smash, which instantly disables one (allowing him to place another, elsewhere). Another potential tactic would be placing little squads of Pikmin around the battlefield, by using his side special - this is a good way to take full advantage of the stage. For example, putting some Pikmin near his wall is an effective way to 'fortify' it - opponents who try to take down the wall will be attacked by the Pikmin. Or, he could directly place some Pikmin on guard near the Onion, to give opponents a much harder time when trying to dispose of it. Controlling their surroundings in this manner is something that a good Olimar player must do - resourcefulness and adaptability is key.
Further defensive options include his up or forward tilts, or his aerials - while little in damage, they are great for quickly batting away foes who are too close for comfort. His Pikmin Charge technique, as well as his down smash, have tripping effects, which place the opponent into prone state - a great way to intercept their attacks and buy some time, either to flee or even prepare for a counter-attack. His down tilt, with its lateral mobility and few frames of superarmor, make it comparable to a dodge roll - that also happens to inflict a few percents of damage. This can take him and his Pikmin to safety when opponents are all up in his face. Another highly mobile move, his down air, can actually tank through quite a few attacks, and quickly return him to the ground (where he tends to excel at fighting) if need be.

In terms of actually taking down opponents, Olimar is a strategist. Steadily building up damage by tactfully latching Pikmin onto foes (as well as using the weak-but-rapid 'needling' attacks, like his jab) is a good technique, and is rewarded in the long run. Just like in the Pikmin series, persistence is ultimately what allows Olimar to overcome any obstacle, no matter how large. Olimar players will need to constantly estimate the risk and reward to determine the best course of action. Will one send their full army if Pikmin at full charge to deliver one devastating blow, despite the risk of it leaving Olimar open to other attacks? Or will they only send out a few at a time, ensuring that they always have a few at standby to protect them in a pinch? Without sufficient Pikmin by his side, Olimar's ability to fight and defend himself is drastically impaired (especially in the smash attack department - no Pikmin means almost no valid kill options). Will players allow their Pikmin to remain seeds in the ground, knowing that it will result in them being stronger in the long run - but leaving them Pikmin-less and vulnerable in the meantime? Or will they take a full army of weaker leaf Pikmin to whittle away at the opponent? There are a lot of choices; choosing to play either more defensively or more aggressively each have their own benefits and downsides.

Much like in the gameplay of Pikmin, the most dangerous tasks reap the greatest rewards. Olimar could latch a number of Pikmin onto the opponent and go for a kill - this leaves him with fewer Pikmin to attack with, but yields a reward of fruit to regain some health. Again, players need to be strategic - will the health gained from the fruit compensate for the overall loss? Or will the lack of Pikmin at Olimar's side leave him crippled beyond what any berries could remedy? Will Olimar even be able to go for a kill without his Pikmin to help out? Even his recovery is a balancing act if gains and losses - he can sacrifice a few Pikmin to reduce the load, allowing him to be carried to safety, or, he can leave no Pikmin behind, and deal with a less-than-satisfactory recovery. The choices that require a nurturing, gradual approach are riskier, but eventually lead to a stronger output - for example, keeping Pikmin as sprouts leaves them stronger in the long run.
Ultimately, patience, resourcefulness, and a calculated playstyle is rewarded. His attacks are rather weak, but when applied steadily and strategically, Olimar becomes a force to be reckoned with.

~~~~~~~~~~~~~~~~~~~~~~~~~~~~~~~

Well, that's about it, hopefully I didn't miss any important details. I hope you like my interpretation of Olimar's moveset! It might be imbalanced, so I'd like your feedback - I'm open to tweaking this moveset in any way that could improve it. Once again, thanks for the initial help!
 
Last edited:

ϟPlazzapϟ

Smash Apprentice
Joined
Nov 30, 2014
Messages
95
Expect reviews on Inkling, Sonic 2.0, Aiden Pierce and Olimar soon

Muno you awfully deserve some comments being one of the most active MYMer's on the thread

I may possibly post a new set next week
 
Last edited:

Tocaraca2

Smash Ace
Joined
Feb 22, 2015
Messages
557
Location
Wokingham
Hey, I'm no uniqueness expert or anything, but I'm pretty sure those ideas aren't exactly unique. :cool:
Heavily inspiring sets after others is a really bad idea imo, it seems rather weird to try to include not-included moves from past-games to try to make the game more complete or whatever you're trying, it's really best to think of your set as something standalone and unique, and not a move list part of a group of other move lists which you try to implement unused bits from other move lists.
Maybe unique was the wrong word.
Anyway, IT'S A SWORD CHARACTER, what attacks do you expect? You must really dislike Roy's Side Smash (and the Mii Swordfighters) since it is pretty much the same as Link's Side Smash. Before you criticise other people for making decisions you don't like, look at the decisions Nintendo made.

Everyone, remember Alica Vassin's Up Throw with the Fire Whirl and all of the really confusing text in it?
Well I figured out a way to make it easier to understand.
Go to Page 5 to see the edits I have made to the Up Throw description.
 

Munomario777

Smash Master
Joined
Nov 18, 2014
Messages
3,253
Location
Charleston, South Carolina
3DS FC
0387-9596-4480
Switch FC
SW-8229-3157-8114
Maybe unique was the wrong word.
Anyway, IT'S A SWORD CHARACTER, what attacks do you expect? You must really dislike Roy's Side Smash (and the Mii Swordfighters) since it is pretty much the same as Link's Side Smash. Before you criticise other people for making decisions you don't like, look at the decisions Nintendo made.
"Smash did X" isn't an excuse for doing X. Official Smash movesets aren't inherently perfect, y'know.

There are quite a few unique things a sword user could do. Just get creative. Here's some ideas off the top of my head:
  • Throwing the sword like a boomerang, limiting sword usage but being a potent projectile. Perhaps better on a dual-sword fighter.
  • Using the sword for mobility. Stick it in the ground and swing around it like a pole, performing a sort of spinning kick or just turning around quickly. Stick it in the wall to climb/cling to walls, or just use it as a platform. Could tie into the aforementioned sword throwing; throw the sword at a surface to have better mobility, or keep it in hand to power up your attacks. It'd be a bit of resource management, which could make for an interesting playstyle.
  • Running with the theme of separating the sword from the character, there could be a mechanic where using a sword-based attack when it's away from the character would make the sword swing in that sort of motion, kinda like Luma. So you boomerang throw the sword, and if you attack during that period, the sword attacks while flying through the air. If it hits a surface, it gets stuck and can be used as a platform/etc for you, and perhaps a hazard for others. You then need to go near the sword in order to retrieve it.
And yes, I get that these probably wouldn't work on Chrom all that well. Here's where what I like to call a "golden rule" of MYM comes into play:

If the character doesn't have potential, don't try to make a moveset for them.

It'll just come off as either generic/unoriginal (like the ideas you just provided), or unfaithful to the character (like your original Chrom moveset).
 

ϟPlazzapϟ

Smash Apprentice
Joined
Nov 30, 2014
Messages
95
Just cause your making a sword character doesnt mean thier devoid of having playstyle, you still must be relavent of a focused playstyle. Simple moves are definitely simple but each has a purpose to the playstyle, take jigglypuffs pound for example, a very unspecial move until you consider its extremely high prioridy to help the little puff approach even the most deadly attacks and take out projectiles so it can start comboing.

The character I plan on posting soon is a swordfighter with alot of generic attacks sans the specials, however each of the character's generic sword swings are pretty relevent to the playstyle

Btw muno your idea of seperating the sword and swinging it with psychic powers is genius
 
Last edited:

Reiga

He sold diddy for a switch
Joined
Dec 8, 2014
Messages
1,256
Location
White Noise
3DS FC
1461-7646-7368
The neat thing of swords is that even something as simple as the way it's wielded can matter; Roy sometimes holds his sword by the side hilt, which kinda gives a different angle and range for the move. As an idea, maybe one can have a noticable light and strong move difference, with light, lagless mid-battle sword moves with the sword striked with a single hand, and strong, beefy and laggy finisher attacks which have the sword-wielder using the sword with both hands and more force, for the opponent to be even mroe on they're toes as to how the attack looks?
There are also a lot of interesting (even if not special-snowflake moves) sword techniques created through history, maybe one can have fencing-like techniques and instead of a regular counter have a parry-technique, with feint attack? Maybe some kendo-like assets thrown in too and have attacks do different damage depending on where they hit the opponent? They aren't really flashy laser-sword moves, but offer some neat playstyle options.
 

ϟPlazzapϟ

Smash Apprentice
Joined
Nov 30, 2014
Messages
95
Indeed Reigaheres, swords are a very versatile weapon that are always wielded differently between characters based on thier personalities. Take Ike for example, he's a headstrong tough guy with a heavy sword that may be a bit slow but like him is very strong and able to K.O. at high percents, Meta Knight on the other hand is a quick and cunning swordsman who won't ever let his opponent get away, using his insanely fast sword slices along with blinding moblity to keep opponents on thier toes. Not every sword input is especially unique and they don't have to be, as long as they fit the character's character and playstyle.

One set I whould recommend reading if you're still confused is Sayaka Miki from MYM 11 here: http://smashboards.com/threads/make-your-move-11-its-over-duder.312410/page-9#post-13645027

Each sword slice in this set is generic and combo oriented for a very good reason, and it does it's job making these inputs feel fresh and exciting as well.
 

Munomario777

Smash Master
Joined
Nov 18, 2014
Messages
3,253
Location
Charleston, South Carolina
3DS FC
0387-9596-4480
Switch FC
SW-8229-3157-8114
Ooh, a Shovel Knight amiibo? Time for a one-day set!


Strong! Intelligent! Brave! These are the hallmarks of any true knight. But I'm pretty sure that this guy is the only one that uses a shovel. So yeah, Shovel Knight. With an amiibo just having been
leaked revealed and physical copies of the game on the way, what better time to make a set, amiright? Shovel Knight has been praised by critics and players alike for its sharp gameplay, retro-revival aesthetic, and overall charming design. That kinda game doesn't come around all that often. Where am I going with this?
I dunno.

So yeah, Shovel Knight moveset! It's made for Smash 4, yadda yadda yadda, let's dig into this set! (haha puns)

Oh, and by the way, this isn't that "special occasion" set I've been teasing for a while now; that's still on the way. This is sorta a special occasion too though I guess.

STATS

All things considered, Shovel Knight actually controls pretty similarly to Mega Man. He's a similar size, has a similar ground speed, similar jump height, et cetera. He's just as agile in the air too, although his heavy armor makes him quite a bit slower to dash and a tad heavier. He still falls at a similar speed, however. So yeah, he oughta feel pretty familiar to Mega Man mains and Shovel Knight vets alike.

FLAVOR

Stance:

Shovel Knight holds his trusty Shovel Blade to his side, pointing it forwards. This stance is consistent for his walk, run, jump, midair movement, crouch, and all that, except his legs move and stuff. If you've played or seen Shovel Knight in-game, you'll know exactly how he animates here. Seriously, these are Mega Man levels of source accuracy we're dealing with here!

Holding an Item:
A shovel is a two-handed weapon, don't ya know! There's not much room for items, as a result. However, Shovel Knight makes do by holding items in the triangular "handle" at the end of the Shovel Blade's shaft! He's got pretty... interesting animations for throwing and swinging items, as you can probably imagine.
Ledge Hanging:
Shovel Knight plants his shovel into the side of the ledge and hangs from it. The getup animations also use the shovel as leverage. Handy!
Wall Cling/Jump:
Using his trusty shovel, the Knight thereof can also cling to walls or jump from them! Just like the ledge hang, Shovel Knight pokes his titular tool into the wall, staying in place for a couple of seconds maximum. The wall jump involved Shovel Knight pushing himself away from the wall using his shovel, gaining height in the process.
Shielding:
A shovel is an offensive and a defensive tool. For the defensive side of things, Shovel Knight grips both ends of the shaft and holds it diagonally in front of him, blocking attacks. Well, it's actually the bubble-y Smash Bros. shield that does the blocking. Nice effort though, I guess.
Spot Dodge:
Shovel Knight quickly plants his shovel into the ground, creating a firm anchor point of sorts. He then leans back into the background, gripping the shovel to keep from falling over as he leans backwards.
Dodge Roll:
Shovel Knight once again plants his shovel into the ground, this time doing so a bit in front of him. He then swings around it 180 degrees into the background, resulting in a dodge.
Air Dodge:
Shovel Knight simply dodges into the background as he holds his Shovel Blade vertically in front of him.
Entrance Animation:
Shovel Knight appears on the battlefield and thrusts his shovel into the ground triumphantly, as if claiming the battlefield. He then says, in an 8-bit text blurb, "For shoveltry!" and enters the normal idle pose.
Up Taunt:

Shovel Knight triumphantly thrusts his Shovel Blade into the air, while saying "Steel thy shovel!" in an 8-bit text blurb.

Side Taunt:

Shovel Knight holds his Shovel Blade in front of him in one hand, as if to say, "en garde!"

Down Taunt:

Shovel Knight kneels down, holding his shovel. Maybe he's grieving or something? The file name for that image is "Dead.png" after all. Eh, I dunno. :drshrug:

Victory Music:
A remixed version of this excerpt.

SPECIALS

Neutral Special - Dig

So, Shovel Knight uses a shovel. (Shocking, I know.) Therefore, he digs. You'll see him do so a few times throughout the set, but this variation is by far the most important to his overall playstyle. When you use this move on the ground, Shovel Knight digs into the ground each time you tap the button, like Game & Watch's Chef move but a fair bit faster. Instead of bacon, though, this move produces gems! They're colored to the player color -- P1's are red, P2's are blue, etc -- and they'll travel at a similar, varying trajectory to the aforementioned bacon. They deal 3% of damage and a bit of knockback to opponents, and when they hit the ground, they just stay there. More on that in a sec though.

In the air, Shovel Knight performs the same sort of digging motion as before, but of course, he won't actually dig anything. The move will, however, deal a hefty 17% of damage and KO diagonally upwards starting at around 100%! It's a powerful finishing move to be sure, but has more than its fair share of lag. It's got decent range though.

Oh right, the gems. They just sit on the ground, but after ten seconds, they'll start to flicker, and after one and a half seconds of that, they'll disappear. They won't deal damage lying on the ground -- obviously -- but they can be picked up! Shovel Knight can pick them up by simply touching them. Only the Shovel Knight that dug them up can retrieve the gems via this method, but others can pick them up like throwing items. They'll deal the same damage and knockback as they do normally, and Shovel Knight can't retrieve them when they're being thrown by opponents. This forces Shovel Knight to act quickly, lest he give his foes time to steal the gems! Each dig produces two gems, which each have a 50/50 chance of being either a small or large gem. Small gems are square-shaped, whereas large gems have a more diamond-y shape and count for two small gems. They'll also deal double the damage, weighing in at 6% as opposed to the 3% that the small ones deal.

Hey, guess what? These gems actually do something! Other than being a slow, weak projectile that is. When you pick them up, they'll just turn into sparkles and disappear, like any respectable video game collectible. This will add to an invisible, internal gem counter. Once Shovel Knight has collected five gems -- the big ones count as two, as aforementioned -- his "eye hole" on his helmet will sparkle on the character portrait, just like when you store a charge. Again, there's no on-screen indicator as to how many gems you have, so you'll need to keep track of it mentally, and so will your opponent. Shovel Knight will, sadly, lose all of his gems upon dying. What can these gems be used for, you ask? Well...


Down Special - Gem Bag
This is what they can be used for! When you use this move, Shovel Knight places a burlap sack in front of him, costing and containing five gems -- if he doesn't have five gems, the move will simply fail. Even though Shovel Knight's gem count is unlimited, only three sacks can be out at once. These sacks have an image of a gem on the front and are about as wide and tall as Shovel Knight is tall, and when placed, just sit there. When used in midair, they grow wings, appearing underneath Shovel Knight instead of in front. Either variation disappears after fifteen seconds or so. In the original game, these would appear when Shovel Knight died, and he'd have to go back to that location to get the gems back. Here, they're an investment that can aid him in battle. How, you ask?

Well, firstly, they're a good way to store gems in case you get KO'd. Place a sack down, and while it will take a bit of knockback -- about as much as Metal Mario at medium % -- it won't break from most attacks. So try using attacks to reposition it if need be. However, Shovel Knight's Neutral Special can break it -- and only the Shovel Knight that created it. When the sack is destroyed, it'll burst into a random combination of small and large gems that add up to five gems total, and they'll act just like in the Neutral Special. So if you want a refund, you can just break the sack open. Simple!

That's all well and good, but why do you want to store these gems in the first place? Well, they act as platforms, so you can stand on them for higher ground. You can stack them too, but winged ones will start to descend if weight is put on them. Specifically, they'll descend at the fighter's or object's falling speed, and it's added together if multiple objects are standing on it at once. So yeah, be careful! Shovel Knight can use Neutral Special on top of a sack to destroy it, which is handy. Standing on a winged sack won't restore midair jumps or anything, but it will cure helplessness. That said, this move is absolutely invaluable for recovery, as you'll see in a bit.

If a fighter is knocked into the sack, they'll bounce back with twice the normal force, and they can't tech the impact either. This can be good for comboing, knocking opponents into the sack and hitting them again on the rebound. Y'know, like that annoying kid who keeps bouncing a freakin' basketball on your garage door. They can, of course, DI out of this if Shovel Knight doesn't react properly. The sack will also get pushed back with each bounce, eventually sliding off of ledges. That said, it's still pretty helpful.

Using this while standing on the ledge will create the sack in front of Shovel Knight still, and it can indeed fall off of the ledge! In this case, it'll act as a hitbox that deals 15% of damage -- five gems' worth -- and a potent meteor smash, so try using it for edgeguarding. You can also hold the input instead of tapping it to spend ten gems on a sack that's 1.5x as tall and wide as the regular version! It takes the same amount of knockback, oddly enough, but it does have 1.5x the bounce factor, platform real estate, and damage if dropped off of a ledge. It's a bigger investment, but can really pay off in the long run, especially since this doesn't count as anything extra to the three-sack limit.

I'll get back to this move in a bit, in an entirely different move's section. Why? You'll see.

Side Special - Charge!
Any true knight is always prepared to charge into battle, armed with a spear, sword, or what have you. But only this knight is brave enough to do that with a shovel! When you use this move, Shovel Knight charges up for a brief moment, pulling his Shovel Blade back a bit. He then thrusts it forwards and charges, racing forwards at Captain Falcon's dash speed. The move is pretty dang reminiscent of the Pegasus Boots from the Zelda series, complete with the damaging shovel hitbox that deals 10% of damage and knocks opponents up into the air. The dash is indicated by blue afterimages that follow Shovel Knight. During the dash, Shovel Knight's determination allows him to go right through many projectiles, barring the stronger ones.

From this dash, Shovel Knight can cancel it by pressing either the special or attack buttons to perform a finishing shovel slash, which deals the same damage and knockback as the regular hitbox. A jump will also cancel the dash, and while he won't retain this momentum -- he's slowed down to his normal air speed -- it's still a great way to follow up if you hit with the dash.

If you hit a gem sack with this move, Shovel Knight will rebound a bit, flying backwards and upwards a bit, kinda like hitting a wall with the aforementioned Pegasus Boots. As for the sack itself, it'll actually get knocked horizontally a pretty far distance, and deal 10% of damage as it's sent flying -- or 15% for big sacks. This is good for repositioning sacks, or even an unorthodox projectile option.

In the air, Shovel Knight will halve his falling speed during the startup, and it'll return to normal when the actual dash starts. Otherwise, it functions exactly the same. It's a decent recovery tool; just don't perform the ending slash, or you'll be falling without the ability to act. On the ground, this is great for approaches above all else, and can start an aerial combo to boot. I can dig it.

Up Special - Shovel Copter
For this straightforward recovery move, Shovel Knight holds his shovel up in the air and spins it around like a helicopter blade. That doesn't make any aerodynamic sense, but okay. This isn't a very good recovery move all things considered, slowly rising up only 1.5 SBB and with limited horizontal mobility. C'mon, Shovel Knight! Little Mac is beating you right now!

Or maybe not. I dunno precisely how high his up special goes. But still, this is really bad. At least it deals some decent damage, at 10%, and can knock foes quite a distance at the tips. It will leave you in helpless, though. Might wanna look into some other options for recovering.

Don't worry, there will be other options, I promise! :)

STANDARDS

Jab - Shovel Stab
This jab combo is pretty simple, but effective too. Shovel Knight, barely moving most of his body, simply thrusts his sword forward a short distance. This super-quick jab deals 6% of damage, and while there's no jab combo here to speak of, it does knock opponents a fair distance away. It also has some decent reach thanks to the shovel's size. Use this for getting opponents off of you, and poking in general.

Forward Tilt - Shovel Swing
For the forward tilt, Shovel Knight swings his trusty Shovel Blade in a motion very similar to digging. However, it doesn't make contact with the ground, instead opting to scoop up opponents! It'll deal 10% of damage and knock foes diagonally upwards, and while it's a bit slower than the jab, this attack makes up for that with added damage and range.

Up Tilt - Horn Hop
See those horns on Shovel Knight's helmet? Well, they're good for more than misportraying the Vikings. For this attack, Shovel Knight hops up a bit, poking opponents with said horns. The attack has great range thanks to the height of the hop and the width of the horns, and on top of that, Shovel Knight's head is invincible during this attack! While there is quite a bit of startup lag, the attack deals a hefty 15% of damage and knockback that will start to kill at around 150%. It's a great anti-air attack or late-game kill move, that's for sure.

Down Tilt - Shovel Sweep
From a crouching position, Shovel Knight thrusts his shovel forwards, across the ground. This quick stabbing attack deals 6% of damage and pops opponents up into the air, but sometimes, it'll instead sweep opponents off of their feet, causing a tripping effect instead. Both of these are great for follow-ups, especially since the attack is so quick!

Dash Attack - Shovel Spin
While charging forwards, Shovel Knight spins his shovel like a drill bit to deal damage to foes. Specifically, the move deals 6% of damage and knocks foes forwards a fair bit. This dash attack has a ton of freedom; during the animation, you can stop, retreat, jump, or just keep running! You can't attack, dodge, etc until the animation ends however, which does take a moment. This is still a great approach tool, however, with mix-ups and fake-outs galore!

Ledge Attack - Ram's Horn of Ramming
Darnit, I broke my alliteration streak! Ah well. Anyway, for the ledge attack, Shovel Knight vaults himself up over the ledge, ramming into opponents with his helmet horns to deal 7% of damage and moderate knockback. Nothing too special, but it gets the job done.

SMASHES

Forward Smash - Charge Handle

For the Forward Smash, Shovel Knight uses one of his upgrades from the game, that being the Charge Handle! During the charge, he'll grip the shovel by the triangular handle with both hands. Y'know, how you're actually supposed to use a shovel. Shovel Knight then swings it in the arc you see above, having excellent range. The move will deal 13~20% of damage, KO at 100~70%, and even reflect projectiles! It's a powerful move, but rather slow to start charging. The slice itself is lightning fast, however. While the attack can reflect projectiles no matter the charge, at full charge, it'll actually launch one of its own! It has a similar shape to the arc you see above, and travels at a decent speed. It'll deal the same damage and knockback as the Shovel Blade itself, and disappear after traveling 4 SBB. It's a force to be reckoned with for sure, but it's a rather easy to see coming.

Up Smash - Boulder Excavation
Shovel Knight is pretty strong, and this move is a great demonstration of that strength. Shovel Knight, during the charge, pushes his shovel deeper and deeper into the ground. When this charge is released, he puts all his might into one heavy scoop, lifting up a chunk of the ground in the form of a rock. The rock varies in size depending on the charge, from a moderately-sized stone to a giant boulder as tall as Shovel Knight is! Yeah, I told you that he was strong! The attack is pretty laggy, but the rock travels up a pretty high distance. It'll deal 10~23% of damage and KO at 130~70% depending on the charge, and the bigger the rock, the laggier the attack is. It's a powerful KO option at higher damage levels, and has great range to boot, but the charge and startup time can make it tough to land. Uncharged, though, it's still a good anti-air option, and doesn't have insanely high starting lag.

Down Smash - Double Dig
Nobody likes a double dipper. Double digging, on the other hand, is pretty effective, as the Villager has shown us in the past. So yeah, this is pretty similar to Villager's down smash. Shovel Knight digs to either side, pitfalling opponents and dealing 7~10% of damage. Nice and quick both to start and to end, this attack also leads nicely into...

AERIALS

Down Aerial - Shovel Drop
...the down aerial! Hold down and the A button -- or the c-stick, if that's your thing -- to have Shovel Knight hold his shovel below him, almost riding it like a pogo stick. It serves a similar purpose, bouncing off of opponents, surfaces, items, and even the sacks of gems from the Down Special! It's kinda like Link's down aerial, but with a controllable duration -- hold and release the button -- and without the meteor smash on startup. However, there's a bit more to it than that.

First off, the basics. Hit the floor during this move, and Shovel Knight bounces up at a height about 1.25x his regular full jump. Bounce on an opponent or other destructible item, and you'll deal 5% of damage, knock them up a bit, and bounce up yourself a similar amount. After that, the damage increases for each consecutive hit on a single target without bouncing on anything else or exiting the attack. The second hit deals 8% of damage, and the third hit deals 13%. That third hit also meteor smashes them, dashing any hopes of bouncing again but making for a potent KO option. The bounces also increase in height for each bounce, and the upwards knockback dealt to the opponent will match the distance bounced upwards.

What does this mean? Simple. Bounce on an opponent three times in a row, and each bounce gains more damage, upwards knockback, and bounce height. You'll need to chase the opponent's DI to chain the hits -- which is aided by Shovel Knight's aerial mobility -- and the third hit has a potent meteor smash for finishing off stocks offstage! The non-disjointed hitbox doesn't have a lot of priority, though, and it isn't too big either. The bounce also has quite a bit of hitlag -- AKA freeze frames -- giving the opponent more time to DI.

These properties also, for the most part, apply to bouncing off of gem sacks. Bounce three times, and each bounce increases in height. Specifically, the first bounce gets you about 2 SBB of height, the second is 4 SBB, and the third is a whopping 6 SBB in height! Since you can create sacks below you in midair, this works wonders for recovery. However, since the third hit meteor smashes the sacks, gems will be lost to the lower blast zone! As you may expect, big gem sacks bounce you up 1.5x the normal amount -- 3 SBB, 6 SBB, and then 9 SBB. This is that recovery stuff I was talking about earlier. Neat, eh?

Neutral Aerial - Shovel Spin
For this attack, Shovel Knight performs a simple attack that hits at all angles. He spins it around in a manner similar to Palutena's neutral aerial, but this one only hits once and only has one spin. It deals 9% of damage, and is a nice, quick attack that can cover multiple angles. It does lack in range, but makes up for that in speed. It also keeps opponents pretty close after the attack ends, so try following up with another aerial. This can go for multiple different attacks, but this description is kinda short, so I'll mention it here. Try mixing up options after some Down Aerial bounces, such as bounce > bounce > nair in this case. Keeps opponents on their toes, y'know?

Forward Aerial - Shovel Thrust
This attack is pretty similar to the jab, so I won't dwell on it too much. Shovel Knight simply thrusts his Shovel Blade forwards, dealing 6% of damage and moderate knockback. It has good range, but only hits in front. What did you expect? It is a forward aerial, after all. It's super quick, just like the jab, and is a good option after a Neutral Aerial or Down Aerial. If you can't land another Down Aerial to continue your chain because the opponent DI'd in front of you, why not use a Forward Aerial to get yourself some room to breathe?

Back Aerial - Handle Thrust
This is basically the reverse of the Forward Aerial. Fitting, since back and forward are opposites. Anyway, for this attack, Shovel Knight thrusts his shovel backwards, hitting with the handle instead of the head. This has some more lag to it as Shovel Knight winds up for the thrust, and while it deals the same damage -- 6% -- the added force results in added knockback, now able to KO starting at about 120%! It has some sizable startup lag, but it's still a viable follow-up to a Down Aerial if you can predict your opponent's DI, and it may just seal the stock.

Up Aerial - Shovel Lift
Like how the Down Aerial mimics Link's, so does the Up Aerial. But it's shovelier, so it's fine. :) For this attack, as you can probably deduce, Shovel Knight thrusts his Shovel Blade into the air, the head hitting opponents above him. It'll deal 10% of damage and moderate upwards knockback. It has quite a bit of startup lag, but great range upwards. Try fast falling after a Down Aerial and landing this move, bringing opponents up to the top of the screen with a couple of bounces and then finishing the job with an Up Aerial! It can KO pretty early when you're high up, after all.

GRAB GAME

Grab - Grab
Shovel Knight has a normal grab. Whoo. It has a good range, and is fairly quick, so if you miss, no big deal. The pummel involves smacking people with the flat side of the shovel. Kinda like that scene in Home Alone where the old guy saves the kid with the snow shovel. Anyway, it's rather slow, but deals a decent 2% of damage per hit.

Up Throw - Shovel Dig Swing
Shovel Knight turns his shovel so that the head is horizontal, and scoops the opponent up with it. The shovel is then swung upwards like the follow-through from a digging swing, tossing the opponent up into the air a short distance. This deals 3% of damage, and is great for following up on with an aerial. It's like the down throw of most other characters, basically.

Forward Throw - Swing Batta Batta!
Shovel Knight tosses the opponent up into the air the tiniest bit and holds his shovel behind him, readying for a baseball-style swing. Then, guess what, he performs said swing! This will deal 7% of damage and quite a bit of knockback, KOing near the ledge at about 140%. It's a good kill throw, and can also set up for a Down Aerial combo offstage.

Down Throw - Bury
Usually, Shovel Knight digs things up. However, he can also bury things in the ground. Here, he does just that, using his shovel to pitfall opponents just like in the Down Smash. As such, it has similar uses, such as starting Down Aerial combos. Oh yeah, and it deals 5% of damage too.

Back Throw - Backward Scoop
Shovel Knight scoops the opponent up in his shovel, and then tosses them backwards, over his shoulder. This deals 5% of damage and moderate knockback, and this can potentially start a combo due to its short endlag.

MISCELLANEOUS

Final Smash - War Horn

Shovel Knight, reaching into some pocket of hammerspace behind his back, pulls out the War Horn! This instrument will unleash a large sound wave attack -- he aims it forwards and blows for a Final Smash similar to Samus's Zero Laser. It's a single hit attack, dealing 30% of damage and KOing at around 50% or so. It's very powerful, but can't be aimed, and only lasts for a second or so.

PLAYSTYLE
Everyday I'm shovelin'

Shovel Knight. He's got some pretty cool stuff. Let's start with the basics, though. His Down Aerial is his bread and butter, leading into and out of several combo starters and finishers, and being a KO move itself if you land all three bounces offstage. It's pretty tricky, but rewarding and satisfying to pull off! The Neutral and Down Specials are also pretty important. For instance, use a Down Aerial combo above a gem sack, and the meteor smash of the third dair will just send the opponent right back up to you for more! Gems are also important for recovery -- with a terrible up special, sack bouncing is crucial to recovering vertically. If an opponent tries to edgeguard you, you might be able to bounce off of them instead to get back up to the ledge! It is kinda tricky and situational, though.

Aside from that, in normal combat, Shovel Knight might approach with a Side Special dash, jumping to cancel the dash and using one of his signature Down Aerials! Alternatively, you could try covering yourself with some gems flying through the air to make your approach safer, opening up more options. Side Special is one of the best ways to collect gems, since projectiles won't interrupt the move, and it covers ground like nobody's business! While digging up gems, you might bait opponents over to the gems, as they want to keep you from getting them, and then strike with a surprise attack!

Overall, Shovel Knight is a fighter who wants to mix up-close and far-away playstyles, as he has a great combo game up-close, but needs to make some time to gather gems in order to keep his gem sacks at the ready, since they greatly aid his combo, recovery, and KOing ability -- since bouncing opponents off of sacks increases the knockback. With his shovel-head-sharp skills, vicious combo game, great recovery, and heavy hits, Shovel Knight is more than prepared to show his shoveling skills in battle! As always, feedback is greatly appreciated, and I hope you enjoyed the set! :) I made it in one day, as aforementioned, so I hope it's somewhat decent! :p


Like what you see? See some more over at my Make Your Move Hub! :D
 
Last edited:

Kirby Dragons

Smash Hero
Joined
Aug 30, 2014
Messages
5,240
Location
Another Dimension
I'm back for another moveset, which is at least better than my last one.
AIBO

AIBO partners with the player!
AIBO (short for Artificial Intelligence Robot) is a robotic dog created by Sony, designed to serve as a mechanical pet for young children. AIBO is a loved toy by many, and a great companion. The first AIBO was a consumer model, introduced in May 11 of 1999. Although AIBO was discontinued, he still managed to find his way into Smash.
Stats
  • Height: 1/10​
  • Weight: 4/10​
  • Jump: 2.5/10​
  • Speed (Ground): 3/10​
  • Speed (Air): 7/10​
  • Speed (Fall): 5/10​
Battery
Now comes AIBO's ability. As opposed to the vast majority of other abilities, this ability hinders AIBO. Due to being a device, AIBO has a battery. It appears next to his damage meter. The battery starts at 100%, and depletes by 1% per second. If AIBO is walking, dashing, or jumping, it will add 1% to the amount decreased per second. If AIBO is using a regular attack, it will add 2% to the amount decreased per second. If AIBO is using a special move, it will add 3% to the amount decreased per second.
If that isn't bad enough, it gets much worse. If AIBO's battery is at 15% or lower, his ground speed, jump height, and strength will be reduced. His speed will be decreased by 2. His jump height will be decreased by 1.5. All of his hitboxes will deal 5% less damage, and have reduced knockback. His hitboxes that do 5% damage or less will not occur, and simply won't activate. Attacks with only non-functional hitboxes won't be able to be activated.
The Battery ability leads to AIBO being taken control of rather easily, even if he does have two methods of restoring its percent. The short length of matches in competitive play will ease the downside to AIBO's play, albeit barely. Good AIBO players will even avoid moving, attacking, or using special moves unless it is guaranteed to be a hit, or a benefit in some form.
Standard Special: Charging Time

Without any starting lag, a charging station that's slightly bigger than AIBO is, appears under AIBO, which he becomes attached to. He uses this to charge his battery. The input for this move doesn't have to be held for AIBO to stay on the station, as he automatically remains on it, and only gets off it when hit, or when the move is used once more. For every second that AIBO is on his station, his battery will be increased by 1%. However, AIBO can't do anything except leave the station. Shielding will also work, although the regular shielding properties still apply, and the charger disappears after the shield is broken.
Charging Time is the most important thing that AIBO can do, as it prevents him from losing battery power. It can be seen during about 1/3 of all of AIBO's matches, likely more or less. If AIBO's battery is dead, Charging Time is also the only thing he can do, and AIBO can't do anything else (including leaving the station) until he has at least 1%. It is advised to charge up to 15% if the battery is dead to avoid drops to stats. If drops to stats are avoided, proper spacing and ability to charge can be made through throws. Other moves, such as a forward smash, can make even more spacing and time for charging up.
If Charging Time is used in the air, AIBO's falling speed will decrease to 1/10, more than his down aerial. The obvious downside to Charging Time is that it is likely the most punishable move to the game. It can always be grabbed out of, and AIBO can be struck without difficulty if no shield is up. This property of Charging Time rarely has an impact on anything, but the charger can completely block any attacks, and if the majority of hitboxes from an attack hit the charger, AIBO will be left completely unaffected by the attack.
Charging Time is also used in AIBO's entrance.
Side Special: Energy Consumption
This has ten seconds of both starting and ending lag. AIBO opens his mouth widely, holding it open for as long as desired, determined by how long the move is held. If any absorbable projectiles come into his mouth, AIBO's mouth will be closed for five frames as he absorbs the projectile. He reopens his mouth in another five frames right after absorbing anything. AIBO bites the projectiles as he absorbs them.
AIBO can't absorb any projectiles, unless they go to his mouth. If any part of an energy projectile touches his mouth, it can still be absorbed. Projectiles such as either Bomb, Pikachu's Thunder, or Ness' PK Thunder can still hit AIBO without being absorbed, and will proceed on with ending the move.
When AIBO absorbs a projectile, two things will happen. His battery will gain 10% to its charge, while AIBO himself is healed of 15% damage. Energy Consumption's charging properties make it vital to use for any projectile that it can absorb, as Energy Consumption is less punishable than Charging Time, despite Energy Consumption still being a rather punishable special move. AIBO can still keep fighting more involvedly when Energy Consumption is used as a better substitute for Charging Time. Energy Consumption's healing properties also greatly aid AIBO's match stalling, by making AIBO harder to KO than his small and semi-midweight stats already do.
While technically not absorbing, Energy Consumption is also able to catch non-energy projectiles, for the same effect. Notably, solid projectiles take 25 frames in the mouth, instead of an absorbed projectile's five.
Up Special: Moving Parts
AIBO rises up eight Stage Builder Blocks, while attacking five times, each with a different body part. He starts off by biting, doing 3% damage. AIBO's head, and the area around it, becomes a hitbox for the bite, meaning that it is easier to land than some of AIBO's other bites. Next after the bite is a head attack, where AIBO thrusts his head down forcefully. The face portion of AIBO's head, and the area around that, becomes a hitbox of 12% during the attack. The head attack is strong, and simultaneously hard to land relatively. It can generally be landed if combined with the knockback of the bite, which sets up for it. After the head attack is a short and brief backflip, where AIBO hits by kicking. AIBO's entire foot becomes the hitbox, but not anywhere around it. The kick causes 4%, and is aimed diagonally up. The slight diagonal knockback sets up for AIBO's next attack, the ear swat. AIBO performs an ear swat as his ear rises up, dealing backwards knockback that pushes an opponent back to above AIBO's head. The ear swat has the most range and lasts the longest, but it is also the weakest of the hits. It is a bit weaker than the bite, doing 2% damage. Finishing off the move is AIBO's tail whip. Akin to the kick, AIBO performs a backflip and simultaneously throws out a tail whip. The tail whip has as much range as his back aerial, and does 5% damage.
Overall, Moving Parts is great when building up damage. However despite having strong hits, it lacks any KO potential, and can only kill heavyweights at 200%. It is also decent as a recovery move, and not very unreliable. It can pull through when it's needed.
Down Special: Vibration Sensors
A counterattack, with the same countering properties of that of Marth's Counter. The attack itself is of an average range, with AIBO extending his neck as much as the second bite in his neutral attack, and opening his jaws wide. The attack has enough range to strike about two people that are close to AIBO. When preparing to counter, AIBO will kneel while tilting his head up a tiny bit, his vibration sensors preparing to detect an attack.

Neutral Attack
AIBO bites. This attack only has four hitboxes where the move can connect, and the attack deals damage 3%. If the attack is continued, AIBO will bite again for 8%. However, he will extend outward his neck for more range. The second bite has as many as nine hitboxes where the move can connect. The first bite barely has any knockback, letting it set up for the second bite, which has an average amount of knockback in a horizontal direction. If the second bite isn't used, the attack will have no ending lag, but if it is used, it possesses 27 frames of it. The second bite is additionally an edgeguarding tool, for horizontal recoverers, but is overprioritized by Quick Draw, Green Missile, Skull Bash, and moves of similar or higher damage.
Dash Attack
AIBO skids to a stop, and simultaneously does a bite with the same hitboxes as his first bite in the standard attack. However, this bite is a bit stronger, at 6%. The knockback is increased as well, by about 85%. The entire skid takes an entire two seconds from start to finish, while the attack happens within the first second. Because of its hitboxes, it is advised to use for grounded foes, or foes who are nearly grounded, and will fail against those who are airborne. Foes who aren't standing up are safe from this attack's hitboxes.
Forward Tilt
AIBO extends out his arm and hits. All hitboxes are focused into his hand, and are slightly bigger than AIBO's head. The latter trait makes it better than moves like his neutral/dash attack, both of which being hard to land. Forward tilt can hit aerial characters higher up than who AIBO can usually hit. Rarely, it can even bring a stop to aerial approaches. The stopped approacher is able to easily continue their attack, due to the forward tilt's knockback being on the lower side. The attack deals 5%, and is good for edgeguarding, but only for horizontal recoverers. It has higher priority than AIBO's neutral attack, and can stop recovery moves that possess powerful hitboxes.
Up Tilt
"Bark!" AIBO does a backflip, with averagely sized hitboxes embedded inside his hands and feet. If an aerial approacher is using a weak attack for their approach, this move makes a great defense for it. It has upwards range because of AIBO's jump, enabling adaptation for a few more aerial approaches that other characters might not be able to stop. AIBO's hands deal 6%, while his feet deal 4%. Both his hands and feet will launch straight up a fair distance, making only one of AIBO's limbs able to perform their hit. Even though the hands are typically aimed for because of higher damage, the feet are aimed for because of their ability to stop slower aerial approaches.
Down Tilt
"Woof!" AIBO slides his front paws and hits. 2%. This moves are hitboxes are small and low, making it difficult to hit with. Generally, it is a bad move to use. Players will mainly use this for edgeguarding, courtesy of its ability to reach off the stage and also launch down. Using the attack like this works solely on vertical recoverers. Horizontal recoverers simply recover over his paws the vast majority of the time, but have no chance for a punish, as the down tilt possesses no ending lag. It also possesses little starting lag.
Forward Smash
AIBO draws back his head during the charge. After charging, AIBO will slam his head forward for medium horizontal knockback. The attack does 5% when uncharged and 18% when charged. Unfortunately for AIBO, this isn't an efficient kill move, even at high percents. Uncharged, it will kill a heavyweight at 130%, and a lightweight at 110%. The move is also somewhat easy to DI. Overall, this contributes to AIBO's power to stall the match. While the attack alone isn't good at killing, it can send an opponent off the stage into the air to set up for aerials, possibly for a KO when the right moves and timing is utilized. Upon the ending of the move, AIBO will have traveled one step.
Up Smash
AIBO stands on his hind legs and points his head directly up with his mouth open, for charging. After charging, AIBO bites with a hard bite. The hitboxes are small here, and all vertical from each other, but the very tip of AIBO's mouth is a sweetspot. Because of the hitbox placement, the attack is often used only in certain cases. The attack mainly deals 8% to 18%, with the sweetspot causing 23%. The attack's knockback is rather diagonally up, but high. These qualities can negate AIBO's control over his opponent by giving them a chance to land safely without interference from AIBO's other attacks.
Down Smash
While panting, AIBO dashes in a circle, once for each complete second the attack is charged. The torso of AIBO's body will deal damage rapidly. It has hitboxes of 1-2% uncharged, 7-8% charged. The weaker hitboxes cause virtually no knockback, and the stronger hitboxes punt slightly into the air. This is good, as they pull the opponent back down for more damage. Only hitboxes at the end will launch far, which they do upwards. Generally, 30% total damage can be racked up from one use of the move, and it is considered AIBO's best smash attack, with the most KO potential. The hitboxes combined with the shifting hurtboxes lead to it being ideal for opposing aerial attacks. That is the primary reason for using the move, as it won't really affect anybody to AIBO's left or right.
Neutral Aerial
AIBO rotates midair vertically, his arms and legs shot out, as his body is what contains the attack's hitboxes, with each being relatively small and able to do 3%. All hitboxes can attack alone, leading to a multi-hitting move, with forwards knockback. Neutral aerial ends after a second and a half, with exactly five spins (unless the attack is cancelled with an enemy hit). Negatively, the neutral aerial's focused hitboxes don't allow AIBO to avoid damage, and he is undeniably vulnerable to up aerials, namely long ones. Neutral aerial is a gimping tool, as any of its hits will launch away from the stage.
Forward Aerial
After 45 frames of starting lag where AIBO raises his head, AIBO thrusts his head down forcefully, attacking with a bite. 12%. The attack is somewhat strong, dealing heavy knockback, the direction depending on the spot where the bite strikes. The front side of AIBO's head will launch to the front, and the back side of AIBO's head will launch to the back. This attack can serve as an easy KO if used the right way. When near the blast line at the side, the front of the move can KO by forcing someone past it. When in front of a stage, the back of the move can KO with a strong stage spike. The initial concept of the forward aerial is that of Mario's own forward aerial, even possessing most of the same hitboxes, though AIBO's lacks any meteor smashing capabilities no matter where the move lands.
Up Aerial
After 25 frames of starting lag, where AIBO draws back after the first 9 frames, AIBO raises both hands. What deals damage is the object in his hands, his ball. The ball does a small amount of set/fixed upward knockback, and can do 6% with the singular, large hitbox it has around the ball, which is present in slightly smaller forms directly before and after the major hit. The attack has some priority, able to cancel the attacks and moves used against AIBO, down aerials in particular. After the ball throws out its hits, AIBO instantly flips back to his original position, his ball automatically put away.
Back Aerial
AIBO does dual tail swipes, with both swipes swinging up and then down, allowing them to attack multiple times. When attacking, the tail moves as fast as Jigglypuff's fist during his Pound. The hitboxes are all in AIBO's tail only, but cover all of it. The hitboxes taking place when the tail rises can cause 12% damage, and the hitboxes taking place when the tail falls can cause 4% damage. The obvious quality about this attack is that, since AIBO has a short tail, it has barely any range at all. Hitting is rare, but both damage buildup and stage spiking can result from it. The chance of hitting is increased by around 29%, as AIBO moves somewhat back when he uses his tail swipes.
Down Aerial
AIBO beats with each of his limbs like a drum, beating with each twice, one after the other. His falling speed is lowered to 3/10, for this move only. The decreased falling speed helps him gimp vertical recoverers with great ease, and horizontal recoverers with great difficulty. Each beat deals knockback directly in front of AIBO, although the later ones will deal more. When the down aerial is used to gimp, it doesn't allow for much further gimping, due to its knockback. The first three beats (with his arms and his right leg) do 1% damage each. The next beat (with his left leg) does 2%. The next two beats (the second beat using the arms) cause 4%, while the last two beats (with his legs the second time) cause 5%. Such damage leads to heavy damage racking of a significantly average quality.
Grab
AIBO stands on his hind legs and uses his two arms to grab. His left arm is raised much higher, but has 75% of the range of AIBO's right arm, which drops much lower. Since AIBO's vertically ranged grab can reach opponents in several spots, the grab as a whole breaks AIBO's battle stalling playstyle to an extent.
Pummel
AIBO sticks forward his head and does a small bite of 1%.
Forward Throw
AIBO connects his head to the opponent, which alone causes 2% damage. AIBO's ears spin around six times, hitting the opponent each time, for a total of 10% damage (from the ears), and a total of 12% off of the throw. The move does much horizontal knockback, and is a kill throw. It can kill heavyweights at 130%, midweights at 115%, and lightweights at 100%. Another use is as a way to make distance, possibly to stop AIBO from being controlled, or allow time for charging up.
Up Throw
AIBO slams the front part of his head into the opponent, firing them in an upward diagonal direction for 9% damage. The throw has less knockback than what would be expected, but can create an angle from AIBO that is too awkward for immediate retaliation. The throw gives AIBO a notable chance to make spacing, maybe even get a bit of charging in.
Back Throw
AIBO throws the opponent overhead right behind his legs, and kicks them back. The overhead throw causes 4% damage, whereas the backwards kick causes another 8%. The opponent will take a second of lag during the overhead throw to reach AIBO's legs, an irrelevant attribute because of AIBO's throw unpunishability. The opponent can generally reach AIBO directly after the back throw without too much difficulty, making the other throws better options after a grab, especially when spacing is an issue for AIBO.
Down Throw
AIBO bites and clutches the opponent for 1% damage, tilts his head higher for 6%, and slams the opponent into the ground for a final 7%, launching them at an angle almost identical to the up throw. The entire throw adds up to 14% damage. The down throw's angle is too awkward for immediate reliation, giving AIBO a chance for spacing or charging, but not both. The down throw is a kill throw, and can kill heavyweights at 120%, midweights at 90%, and lightweights at 85%.
Ledge Attack
AIBO performs an angled down bite. 3% damage. The ledge attack is advised to never or rarely be used, since it can be punished too often, especially by airborne opponents that the ledge attack always misses. The ledge attack has a fixed amount of knockback diagonally, barely away from AIBO's head after he raises it from the bite.
Floor Attack
AIBO sweeps in a circle, his whole body having one large hitbox before hopping and popping up, and standing. This deals 7%, and launches diagonally, but backwards. The sheer speed of the move gives the opponent a small frame of time to punish, which is typically never accomplished. AIBO's charging of a couple percents can fit into the time before the opponent is ready to continue the fighting.
Final Smash: Dimensions
Unlike most other Final Smashes, AIBO isn't disabled during the move. He is like Rosalina & Luma's Power Star attack, where he can move as the Final Smash happens, and even launch opponents into the attacks. With Dimensions, AIBO randomly spawns eighteen red dimensional rifts all throughout the stage, each lasting half a second. Each rift causes 22% damage with heavy knockback, able to KO a heavyweight at around 40%, and a lightweight at about 30%. The rifts all appear at random times, with no more rifts appearing after 25 seconds. They all appear at random spots as well. No two rifts will exist at the same time.
Playstyle
AIBO is a semi-odd character. Despite his small size, he is almost a midweight character, due to being made primarily out of metal. This weight status gives him some survivability, inevitably stalling matches. His recovery is only decent, making gimping a common strategy to use against him. Due to lack of sufficient aerials or air stats, AIBO isn't very good an air fighter, leading to several characters being able to take control of him, without actually landing a kill.
In addition, while AIBO has the potential to hit strong, he isn't very good at racking up KOs, a trait that also leads to match stalling. This causes AIBO to adjust his fighting based on the character. To accomplish this, AIBO's great edgeguarding capability can come into play. His edgeguarding is often what helps him win fights, but is just sometimes too unreliable for any usage.
AIBO's small size comes in handy. In a style reminiscent to Kirby, AIBO can easily dodge attacks, just by having few hurtboxes. Ducking can help against most projectiles or physical attacks. Pure evasion is what helps AIBO not lose, and can sometimes be an annoyance to the opponent. AIBO can escape combos, and practically any damage buildup. Problems arise when AIBO has actually taken around 85% damage, which is his kill percent.
AIBO's playstyle suffers due to his unique ability. As he is disabled while charging his battery, opponents can seize the opportunity to strike with heavy hits, without any trouble. AIBO doesn't have an effective counter to these situations, and because of it, he needs to focus on retreating safely when he needs to charge. AIBO's stats decreasing also halts his battle stalling, and turns him basically useless against basically anyone.​


Side Taunt
Kneeling forth, AIBO lets out a quick, "Bark bark!"
Up Taunt
AIBO drops his ball, and chases it as it rolls around him but a single time. He then puts his ball away.
Down Taunt
AIBO perks up, and growls for three seconds. As he is a robot dog, the growl is purely a digital one.
Victory Poses
Victory music plays from 0:15 to 0:21.​
  • "Bark bark! Woof! Bark bark! Woof!" AIBO calls out, and then looks at the screen in a sitting pose.​
  • Kneeling down, AIBO wags his tail four times.​
  • AIBO kicks his legs out to the sides, two times each leg, with both right legs synched, as well as both left legs. He then looks at the screen in a sitting pose.​
Loss Pose
AIBO's battery hits 0%, and he dies, slumping to the ground and not moving anymore.
Entrance
AIBO is on his charger, charging his battery to 100% from 99%. AIBO then jumps off and puts his charger away while saying, "Woof woof!"
Copy Ability
Kirby wears a larger version of AIBO's black glass on his head, with larger versions of AIBO's ears at his sides. Since Kirby doesn't need to charge, he copies Energy Consumption instead of Charging Time.​
 
Last edited:

ϟPlazzapϟ

Smash Apprentice
Joined
Nov 30, 2014
Messages
95
Shovel Knight
Overall this was a pretty nice one day set, yes not perfect hence a one day set but it had a nice simple playstyle to it that wasn't trying to recreate the wheel. I was personally worried the gems whould be a constant tacky ammo bank but they had one solid purpose that allowed you to take shovel's high knockback moves and double thier knockback by launching them face first into said bags. In terms of the said gems and bags thing, I was a bit disasppointed opponents can't pick up the gems at all, that whould've been really fun for both shovel knight and foes creating a throwable item worth fighting over, also I wish you could've held the input when creating a bag to fill it with more gems creating a huge bag that is easy to launch opponents into but also makes it a bigger target for opponents to destroy. Down Airel is obviously one of the most fun moves in this set and I'm glad you made it one of Shovel's main ways to start comboes and rack up damage. Overall this set wasn't very groundbreaking or unique but it's simplicity made it a nice read.
AIBO
I honestly cannot say I really like this set as a whole, it's not extremely bad per say but just rather mediocre. First mistake I noticed was the playstle section was at the beginning of the set, that's a big nono as your readers are unable to fully grasp how a character plays as they don't know any of thier moves, especilly saince you put the battery mechanic right after the playstlye section and mechanics are always big parts of a characters playstyle, leaving the mechanic out of the playstyle section was a bad idea. The actual battery mechanic is nothing new but I will admit it's pretty well done, the fact that taking action lowers the battery more quickly is a neat touch and makes the character more risky to play as. The next mistake I then noticed was that the specials were at the end, specials should always be first as they are the most versatile and important moves in a set, in terms of the specials only the Nutreal and Side are remotely interesting, I feel like side special should've been able to catch solid projectiles like a dog tho. Unfortunately all of the other moves are extremely strike me as bland and uninteresting, almost all of them being bites, a dog can do more than biting especially being a robot dog, not to mention a random ball prop in the up airel. Im not saying generic moves are always boring however, it's just that none of these generic moves had any real purpose to the playstyle such as having consistant high knockback to keep opponents away while charging AIBO. Overall when I saw a robot dog I was immediately excited to see what he could do, but there was honestly nothing special about him other than his mechanic, like I said the set isn't bad, it's just very mediocre and forgettable.
 
Last edited:

Tocaraca2

Smash Ace
Joined
Feb 22, 2015
Messages
557
Location
Wokingham
So you boomerang throw the sword, and if you attack during that period, the sword attacks while flying through the air.
That would only work with someone like Robin who is a sorcerer. He is seen twirling his sword around in the air without even touching it, in one of his taunts.
Otherwise that would be very strange and unrealistic. You may argue that Smash Bros. is unrealistic anyway, but we have to draw the line somewhere, and giving a swordsman the ability to make his sword do stuff like Luma does... doesn't make sense (unless it's Merlin or something).

Oh and soon I will be making a moveset for Akullotsoa. He is another made-up character by me, and he has a sword about the length of Lucina's, and it is used as well as his ice attacks, claw swipes, and kicks. The sword can actually be knocked out of his hand during his attacks that use the sword, if another attack/projectile hits the sword.
Akullotsoa's playstyle is simple, yet unique. He has certain moves that deal high damage, and certain moves that deal high knockback. He has certain moves that setup for combos; and others for air-dodge reads.
I have figured out all of his moves by now, and I'm just going to give you one example. His Jab has him thrust out his left hand, opened, and he releases a small Ice Sphere, which deals 3% damage upon contact. Then he moves his right arm over to his left, sword in hand, and performs a perfectly horizontal slash, which deals 10% damage. Finally, he kicks out with his right leg, similar to in Ganondorf's Side Tilt, dealing 4% damage.
Whoa, what?!
The sword deals 10% DAMAGE in his JAB?!
This is why his sword can be knocked out of his hand. If this happens, he will use his right claws in the sword attacks instead, and his claw swipes aren't really all that powerful.
Without his sword, the attacks that deal lots of damage are his ice attacks. His Neutral Special, Frost Breath, is self-explanatory; and it actually freezes his opponent. No, I don't mean in encases him in a block of ice like the Freezie item does; I mean the Frost Breath is so cold that it literally freezes the opponent, as well as covering them in a sheet of ice. The Frost Breath itself deals damage upon contact, the foe takes damage when they are frozen, and they take a TON of damage when they unfreeze. If the whole thing connects, it deals 25% damage. That's as much as a Falcon Punch.
And also take his Dash Attack. This has him perform a forward roll across the ground, finishing with him standing up with his left hand out and opened, which releases 3 mini Ice Spheres from its palm, one after the other, which each deal 3% damage. If all 3 connect, then the opponent will take the Freezie item effect, which will deal 5% damage to them. That's 14%, and also not including the forward roll, which also deals damage to opponents caught in it.
His Side Tilt is a horizontal kick, which I honestly have no idea what the type of kick it's called, because I'm pretty sure Leg Swipe is incorrect. Captain Falcon uses it in both kicks of his Up Smash.
Anyway, Akullotsoa's Side Tilt only deals 4% damage, but it KOs at around 110%. This is very strong for a tilt attack. But it is pretty much useless at low percents because of its incredibly low damage output, and it has quite a bit of ending lag.
I'm looking for this set to be as realistic as Little Mac's. In real life, 1 sword slice can kill someone, but isn't likely to launch them anywhere; however a kick to the stomach will push the opponent back a considerable amount.
 

Munomario777

Smash Master
Joined
Nov 18, 2014
Messages
3,253
Location
Charleston, South Carolina
3DS FC
0387-9596-4480
Switch FC
SW-8229-3157-8114
That would only work with someone like Robin who is a sorcerer. He is seen twirling his sword around in the air without even touching it, in one of his taunts.
Otherwise that would be very strange and unrealistic. You may argue that Smash Bros. is unrealistic anyway, but we have to draw the line somewhere, and giving a swordsman the ability to make his sword do stuff like Luma does... doesn't make sense (unless it's Merlin or something).
I know. Hence:
And yes, I get that these probably wouldn't work on Chrom all that well. Here's where what I like to call a "golden rule" of MYM comes into play:

If the character doesn't have potential, don't try to make a moveset for them.

It'll just come off as either generic/unoriginal (like the ideas you just provided), or unfaithful to the character (like your original Chrom moveset).
(by the way I have ideas for that remote sword idea, so no one steal it please k thx)

-----------------------

@ ϟPlazzapϟ ϟPlazzapϟ

Thanks for the feedback! I've added that gem throwing mechanic you mentioned, as well as the jumbo sacks. Glad to hear you enjoyed it! :)
 
Last edited:

ϟPlazzapϟ

Smash Apprentice
Joined
Nov 30, 2014
Messages
95
Im interested to see your next oc set Tocaraca, hopefully you learned your lesson on playstyles and such

Btw are you still doing a mutant creeper set
 

Tocaraca2

Smash Ace
Joined
Feb 22, 2015
Messages
557
Location
Wokingham
Im interested to see your next oc set Tocaraca, hopefully you learned your lesson on playstyles and such

Btw are you still doing a mutant creeper set
Yes, I have my Mutant Creeper set saved in Notepad, however I feel a bit uninspired for it now. I may keep on working on it sometime soon.

BTW I made a couple of edits to my Alica Vassin moveset: http://smashboards.com/threads/make...en-pearce-peridot.404766/page-5#post-19499264
Check out the Down Tilt, Down Special, Up Throw, and Playstyle section.
 

Kirby Dragons

Smash Hero
Joined
Aug 30, 2014
Messages
5,240
Location
Another Dimension
AIBO
I honestly cannot say I really like this set as a whole, it's not extremely bad per say but just rather mediocre. First mistake I noticed was the playstle section was at the beginning of the set, that's a big nono as your readers are unable to fully grasp how a character plays as they don't know any of thier moves, especilly saince you put the battery mechanic right after the playstlye section and mechanics are always big parts of a characters playstyle, leaving the mechanic out of the playstyle section was a bad idea. The actual battery mechanic is nothing new but I will admit it's pretty well done, the fact that taking action lowers the battery more quickly is a neat touch and makes the character more risky to play as. The next mistake I then noticed was that the specials were at the end, specials should always be first as they are the most versatile and important moves in a set, in terms of the specials only the Nutreal and Side are remotely interesting, I feel like side special should've been able to catch solid projectiles like a dog tho. Unfortunately all of the other moves are extremely strike me as bland and uninteresting, almost all of them being bites, a dog can do more than biting especially being a robot dog, not to mention a random ball prop in the up airel. Im not saying generic moves are always boring however, it's just that none of these generic moves had any real purpose to the playstyle such as having consistant high knockback to keep opponents away while charging AIBO. Overall when I saw a robot dog I was immediately excited to see what he could do, but there was honestly nothing special about him other than his mechanic, like I said the set isn't bad, it's just very mediocre and forgettable.
I'll have to agree with you on this, AIBO could have used some more interesting moves, something to make him special. I'll fix the placement of his moves and playstyle and add some taunts before I work on my next moveset.
 

ϟPlazzapϟ

Smash Apprentice
Joined
Nov 30, 2014
Messages
95
Expect comments to be updated in this post

Big Massif
Hey nobody even batted an eye at this set which is a real shame, even if it was a little rushed due to time constrains and not especily unique it was filled to the brim with beef puns and fun ideas which gave the set an energetic feel. I hate to start with a nitpick but there was no specifics on the size of the side special pillar, which comes off as really weird having Massif summon an entire pillar from hammerspace. Turning your minions into projectiles with the tilts was really fun though especilly the D tilt where you can turn them into delayed traps of some sort, throwing Hoowraws though with the grab game felt unessasary considering the tilts. Most of the other minion interactions were cool as well without being unplayable, but the random D Smash buff felt a bit off like it should be a specail, even if it were a specail though I feel like it whould counteract with the "weakling" status you hint the Hoorwraws to be. In terms of the airels the standard airel seemed weird at first and it still is a bit but the other airels definately justified it and it seems satisfying to gather up a big bunch of Hoowraws and slam them around. Overall this set wasn't extremely good by any means but like shovel knight it was definately a fun read that most skimmed over.

Sonic 2.0

Fried Ricer

Aiden Pearce

Olimar 2.0

Inkling
 

Reiga

He sold diddy for a switch
Joined
Dec 8, 2014
Messages
1,256
Location
White Noise
3DS FC
1461-7646-7368

What's this? Well, it's the neatly edited crafted little poster for my September set break, yea, print it and hang it in your wall, it's lovely.
Now, why am I going on hiatus? Well, ever since the contest started I worked hard to pump some juicy sets, with the schedule basically being one set a month, but really so many sets to be posted in time can really kill a man, so for the month of september there will be no expected new sets (maybe I'll ramble here and there in the thread), so I'll have a way more relaxed schedule, I'll sink life-stuff right in and sometimes when inspired might write up one of the next sets for the project in October. Hehe, silly project. Wait, what project you may politely ask? Well, there is a planned small one-man movement for October destined to be made by me, which was actually one of the reasons I am on hiatus, as with such free-time I can work better on 3-4 sets, whichwhich before would probably take 3 months to complete, but with the break's neat gap should make me be able to finish it all in a month and a half, so isn't the hiatus wonders? As to what the project is about, I don't really wanna say it, October is too spooky for me to tell.

Now if you excuse me, I'll be on my way to print my new original poster.​
 

ϟPlazzapϟ

Smash Apprentice
Joined
Nov 30, 2014
Messages
95
Oh I see, you probaly accidently posted it before it was finished, happens alot to a MYMer'

Anyways it seems nobody had time/was interested enough to do the iron mymer but I still hope we still do irons
 
Top Bottom