• Welcome to Smashboards, the world's largest Super Smash Brothers community! Over 250,000 Smash Bros. fans from around the world have come to discuss these great games in over 19 million posts!

    You are currently viewing our boards as a visitor. Click here to sign up right now and start on your path in the Smash community!

Make Your Move 16: MYM 17 Starting June 1st

FrozenRoy

Smash Lord
Joined
Apr 26, 2007
Messages
1,260
Location
Las Vegas, Nevada
Switch FC
SW-1325-2408-7513
The Construct Quarter

The Construct Quarter houses various nightmarish abominations stitched together from the once-living. A steady stream of toxic slime flows through this wing of Naxxramas; though it doesn’t pose a threat to the undead constructs that shamble about within, the viscous ooze is deadly to those who still enjoy doing things like breathing and having a pulse.
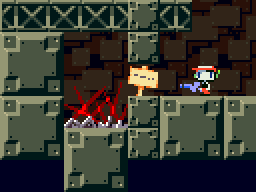


"Patchwerk play!"

"Behold, Patchwerk. When word of his existence first reached the ears of the Brotherhood, none believed the tales of an abomination with such immense speed and strength. Fewer still believed it when he fell the first time…"

Patchwerk is sewn together from adventurers who couldn't defeat Lorewalker Cho.

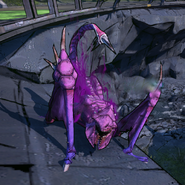
Patchwerk is one of Kel'Thuzad’s most powerful abominations—his strength and speed come as a shock to those that may face him in combat. Far from a sluggish, mindless undead, Patchwerk uses his immense power to pulverize any tiny meat thing that may face him with a flurry of potent, powerful attacks. He just wants to play!

Patchwerk Statistics

Patchwerk is quite large, the width of Bowser combined with the height of Ganondorf, and has weight right between Donkey Kong and Bowser, making him the embodiment of the large heavyweight. What seperates him is surprising speed for his weight class, travelling at the above average speed of Pit with average traction. Patchwerk's large frame, especially due to the third arm on the top of his body, means that Patchwerk's shield is very easily shieldpoked, and the very tip of his third arm on the top of his back can in fact be shieldpoked from full shield health, so he has some trouble defensively in that regard and is pretty reliant on his massive blubber to keep him alive.

Patchwerk falls like a rock, has bad aerial control and moves through the air very swiftly, so he isn't much of an aerial character outside of maybe shorthops, but the fact both of his jumps go extremely high means he has any recovery prowess at all. Patchwerk can actually wall cling thanks to the hook on his third arm, but he can't really do much of anything aside from that Brawl-wise.


Mechanic: Windfury


Patchwerk has a small "mechanic" in that Patchwerk can attack using both his cleaver and his hook at the same time during their respective lags, animations and whatnot, allowing him to essentially double his attack speed/power and whatnot. Starting lags are unchanged: Ending lags chosen for these moves is the longest ending lag of the two with a 1.25x penalty for using the double attacking feature. Patchwerk cannot use his hook or cleaver attacks during moves which do not utilize them, such as attacks with the chain he holds or his grab. Also, obviously, Patchwerk cannot use another attack if an attack requires both his hook and cleaver nor can he use that move if one is in use, such as his Neutral Special.

Finally, if Patchwerk's hook or cleaver are for some reason stolen via a prop stealing move or somehow broken, its deathrattle will activate and cause Patchwerk to instantly be supplied with a new one. Nifty!


Patchwerk Specials

Neutral Special: Hateful Strike

Patchwerk raises his cleaver high while bringing the hook in, shouting "NO MORE PLAY!" in an angry voice as he slashes and smashes both of them in front of him, a move with shockingly little starting lag considering the fact it deals 26% damage and KOs at 75%, though while it is a disjointed move the range is rather pathetic, though the ending lag is surprisingly not super horrible and is more just somewhat worse than average. This move forms one of the most dangerous parts of Patchwerk's dread arsenal, as he can throw out an incredibly powerful move that functions as damager and KO move all in one with astounding quickness. Ah, yes, this move has another drawback, though...

You see, this move has a 10 second cooldown before you can use it again, meaning that Patchwerk should be very careful when using this: Patchwerk is incredibly dangerous when you have to worry about the possibility of a Hateful Strike, but his offense becomes less strong when the opponent doesn't need to worry about it and can be a signal to them to counterstrike. It also means that you want to use this move with a little finesse, as simply spamming it will lead to little. Since this move uses both your cleaver and hook, you can't double it up with another attack. Oh, by the way, this also deals an excessively large amount of shield damage, so I wouldn't recommend trying to just tank it.


Down Special: Frenzy

Patchwerk makes a mix between an angry growl and a gurgle as this move activates, Patchwerk's body appearing to have a red aura around him to signal that he has been drizen into a frenzy! This move has moderate starting and ending lag and no hitbox, but provides a buff as Patchwerk pushes his shambling body to its limits. Patchwerk's movement speed increases by 20%, his jumping height increases by 20%, the starting and ending lag on all of his moves is decreased by 20% and Patchwerk's attacks deal 20% more damage and knockback (IE a 20% attack now deals 24%, not 40%). These combine to a rather potent combination of buffs that are all related to relentless offense, striking for more damage and faster, not to mention the improved movement on your already impressive, given your size/weight, movement speed.

Things aren't all roses and undead bodies, however, as Patchwerk is pushing his body to the limits for this, so after 10 seconds not only does this effect end, but Patchwerk gains debuffs that are the exact opposite of the buffs, IE 20% movement speed debuff and so on. These debuffs last for 10 seconds, so they are a rather intense penalty, which can only be negated with another use of Frenzy...but doing so will simply cause you to return to normal stats for 10 seconds, rather than buffed stats, and will only "pause" the debuff, and once that buffs ends you'll get a double dose of debuff. You could Frenzy again to make it worth only one debuff but, well, you can see where this is going: The only true way to remove the buffs is to wait it out, but multiple Frenzies can give you more time before you have to deal with it in exchange for making the downtime much more severe. YOu can tell if you're tuckered out just by looking at Patchwerk, who will appear visibly strained, as if he is out of breath.

Finally, something to note is the fact that since it increases the height of your jumps, popping a Frenzy while you're recovering can sometimes mean the difference between life and death, even if it means dealing with reduced stats soon. And being debuffed makes you much easier to kill due to lower jumps...


Side Special: Plague Bolt

Patchwerk's body and exposed organs ooze and pulsate, before a vile plague acid shoots out of his stomach about 1.25 Battlefield Platforms like a stream, serving more like an extremely long disjointed attack than a projectile as the move itself ends when ending lag starts. The attack itself does a mere 5% damage and light knockback, which is rather lame given it has fairly long starting lag, but the ending lag is fairly short and thus it can be a bit difficult to punish once it gets going, and since it has weak knockback Patchwerk can even try and rushdown a foe hit by this.

Foes afflicted by a Plague Bolt will also take poison damage at 1% per second for 10 seconds, making this move a much more palatable 15% damaging move: Further Plague Bolts add 10 more seconds and do not refresh. Additionally, some of Patchwerk's later moves can cause the opponent to bleed and while this poison is afflicting a bleeding opponent they suffer even further by being debuffed. They take 20% more damage and knockback from all attacks (20% doing 24%, not 20% doing 40%), they move 20% slower, their attacks have 20% more starting and ending lag and their attacks will deal 20% less damage and knockback, appearing visibly illed from the sickening poison.

So while this move is pretty laggy, it can certainly be well worth it.


Up Special: Chain Link

Patchwerk swings the chain he holds in his hand for a moment, before sending it out one Battlefield Platform diagonally up and forwards like Pikmin Chain, though Patchwerk may aim it in any of the 8 cardinal directions during start-up lag to instead shoot it in that direction. Naturally, this functions as a tether recovery for Patchwerk, albeit one that has a somewhat small distance. Striking an opponent for 8% damage and having the chain wrap around them, tethering them to Patchwerk.

Who leads who in the tether is based around the statistics of weight and movement speed, with the one who has a higher combination of the two being able to push the other one around. Patchwerk has about a 16/20 (10 weight, 6 ground speed), so he can easily push around most of the cast, and he is actually a 17/20 (10 weight, 7 air speed, same as Bowser's) in the air, so Patchwerk should in most cases be able to bully the foe as he pleases. For those times when you need an extra push, though, Patchwerk's movement increase during Frenzy and debuffing the foe with your Plague Bolts will allow you to drag along foes even you normally couldn't! To break this tether, you must deal 30 damage to the chain as it has 30 HP.

Patchwerk only has one chain, so Patchwerk can't cast this move out again if he has tethered a foe. Using the Up Special again instead causes Patchwerk to yank hard on the chain, causing it to come back to him and tripping the opponent, or forcing them to tumble for a Ganondorf if in the air, unless this attack is dodged, with this having somewhat quick starting lag, though someone paying attention will see Patchwerk grab the chain for the starting lag and be able to react, and low ending lag. The actual tethering part of this attack has average start-up lag and it has very low ending lag on hit, but it has very high ending lag if you miss as Patchwerk drags the chain back to him. As for uses? Well, naturally, keeping the foe very close to you is useful when you are an extremely melee oriented character who lacks a projectile, and Patchwerk can also use it to combo a foe by hitting them to the edge of the chain...and having the ability to suddenly trip a foe by using the Up Special again can be a huge boon for Patchwerk, who can punish the foe easily.


Patchwerk Standards

Jab: Swift Smash

Patchwerk takes both his cleaver and hook and makes a sweeping combination of a slash and a smash in front of him, a decently ranged, single hit jab that deals 9% and impressive knockback for a jab that KOs at 190%, especially when combined with the fact this move has very quick start-up for a jab. On the flipside, the ending lag is very poor for a jab and this move is notable for the base knockback meaning foes usually get sent quite a bit away, so it doesn't really help you start an offensive, serving more as a panic button or as a quick way to get foes away when you need it, especially during Frenzy downtimes. Offensively, though, it gets much better if you have chained a foe, as that can help keep foes nice and close for more agony. Remember that since this uses both hook and cleaver, it cannot be used with a second Windfury attack.

Down Tilt: By Hook or By Crook

Patchwerk swings downwards with his hook and hook arm, which ends up going about one Battlefield Platform in front of him, before he drags it back to him with the loud sound of metal scraping on stage, the initial hit dealing 5% damage and no knockback, allowing it to true combo with the second hit of this move, the dragging which deals 3 hits of 2% damage and drags the foe right in front of Patchwerk without knockback, Patchwerk ending up with a slight frame advantage. However, once you've got the hook, you can use the crook, and by crook I mean cleaver, using the second Windfury attack to strike at enemies being dragged closer to Patchwerk, likely sending them away with this 1-2 combo regardless of what cleaver move you use. This forms one of the important cruxes of Patchwerk's moveset, as this is a very high damage move when you combine it with Windfury.

If this is used near a ledge or over a platform, thus that the hook will not be dragged back and just enter neutral position since there is no ground to drag on, the swiftly ending lag on the end of this move will usually allow you to smack the foe, so this can also be a way to hook in people recovering or trying to aerially dominate Patchwerk via platforms.

Of course, it has downsides too. While the ending lag on this is actually very short, the starting lag on this is actually very long, so it requires prescision to hit with and combined with the fact it has a very long duration as he drags the hook back means it is actually quite punishable if you don't hit with it or if you use it at poor times. Finally, as damage %s get higher the dragging gets easier to get out of, so it will get less effective as the match goes on.


Forward Tilt: Cleaving Your Face

Patchwerk horizontally swings his cleaver in front of him, causing Wolf F-Tilt levels of freeze frames for both participants upon striking a foe as he digs into the foe's flesh to open them up and make them bleed, dealing a total of 8% damage along with a "bleed" effect for 6 seconds that causes 1% "poison" damage for 6 seconds. This damage stacks with your Plague Bolt's poison. Knockback is surprisingly minor and will not KO until 220%. Starting lag on this is about average for a Forward tilt, but the ending lag is fairly severe: It is probably your bread and butter combination move with Down Tilt, dealing sizable damage and applying bleed while allowing you to hit with it more consistantly and thus avoid punishment. It also helps because despite being disjointed, the swing is extremely close to Patchwerk and thus has very poor range, while your Down Tilt has amazing range.

Bleeding, in addition to what is mentioned and the aforementioned interaction with Plague Bolt poisoning, has a secondary effect in that it in fact makes all your subsequent bleeding moves better as they dig into and further rend the already wounded flesh, causing the attack to deal 1.25x its normal damage/knockback and re-apply the bleeding for whatever the maximum bleeding time is (IE if you hit with a 6 second bleed from this move, a 1 second bleed move will reset it to 6) and turning it into "Heavy Bleeding", which makes it 2% per second...and another bleeding move will make it 1.50x and 3% per second and so on and so forth. Because of that, opponents will have to be very weary about Patchwerk if they've been opened up, because it can quickly spiral out of control for them. One of the great things about The Patchwerk Offensive is his ability to leave more and more damage even when the foe is not close to him.


Up Tilt: Hookswing

Patchwerk takes his hook and swings it in front and above him, dealing 11% damage and mild upwards knockback that KOs at 200%. This move has a nice little sweetspot at the edge of the hook, which will cause 14% damage and a strong downwards spike. Over the edge, this is naturally a fairly good gimp, but this move is also notable for being great to snag people out of the ground and throw them to the ground because you can combine it with a second ground move to catch them as they fall and it can also be useful to catch people who like to sit around on platforms. The normal hit can be used to start an aerial combo/assault with Patchwerk's first jump and it is a solid damage dealer. Lag is pretty average on both ends.

Dash Attack: Rib Razing

Patchwerk leaps forward belly first, striking anyone who crosses his path with his portruding ribcabe for a potent 16% damage that KOs at 110%, with quite solid range and only average starting lag, though the ending lag is pretty bad and it cannot be combo'd with Windfury since it does not use the hook or cleaver, though you can still cancel your Up Smash with it just fine. It is largely noticable for the fact that it gains distance from Frenzy due to the increase in movement speed, along with the fact it is fairly fast for the power that it wields.

Patchwerk Grab

Grab: Chain

Patchwerk throws his chain forward one Battlefield Platform, ensnaring foes and bringing them to Patchwerk as per a normal tether grab, having around average starting lag and the usual bad tether lag on miss. If Patchwerk has tethered a foe to himself, then he will be unable to cast the chain out since it is being used as a tether, but will instead grab the chain and yank it towards him, allowing him to grab the person he has tethered.

This has noticably more starting lag than using the Up Special trip function, but like any grab it'll go through shields, and of course it allows you to use your variety of throws on the foe. Grabbing a tethered foe like this also means you can grab an enemy in the air, which is nice. Still has high ending lag if you miss: The tether is removed regardless of if you successfully grab the foe or not upon attempting this grab. Patchwerk can only throw and can't use other moves during his throws.


Pummel: Plaything

Patchwerk has two pummels, based on if he hits A or the grab button, which both allow pummels in Brawl. A is a large, slow whack with his cleaver that deals 3% with normal 3% pummel speed, while grab is a very quick slice with his hook that deals 1% as a quick pummel. Combining the two allows you to get in little extra 1-2% damages in throws that characters with only one of the pummels would miss, allowing him to maximize his damage.

Down Throw: Break Toy

Patchwerk takes his hook and cleaver and pierces the foe's torso with them, ripping them in opposite directions for 11% damage and weak forwards knockback that can send them into prone as they fall backwards from the attack, suffering one second of bleed from this...which serves primarily to enhance and rip open new parts of old wounds given how bleeding works. While the foe is put into prone, it functions more like Mr. Game & Watch's Down Throw than Snake's in that this can be teched, which is important since otherwise Patchwerk is in a very advantageous position with the foe in prone and frame neutral when he is a potent close range character. This move does not gain the damage or knockback boost from being a bleeding move, however.

If the opponent has been poisoned, though, the foul acid will noticably spill out from the foe as their flesh is rended, forming a pool of sickly green and blood red under them which has a total width of Bowser. This pool will last an amount of time equal to the amount of time left on the Plague Bolt's poison + the amount of bleed time on the foe, which thanks to this move refreshing bleed will be whatever the highest bleed on the foe is (with a minimum of 1 second since it bleeds for 1 second). This pool lowers the traction of foes on it some, but most noticably messes with dodges and sidesteps, as it will instead cause characters (Including Patchwerk!) to trip when they perform these actions on a pool, though it should be noted characters who roll will still go that distance in their tripped state as they slide along the way.

Combined with the fact this can put the foe in prone and that is a pretty dangerous position, since their rolls will be trip-rolls and can limit their actions to getup attacks or just getting up...of course, if they expect Patchwerk to consider that, they can still roll away and foil him with simple movement. Patchwerk must also consider the fact that this will reduce his own defensive options as well, which is rather a bother when he already has a pretty poor shield and not terribly good defensive game. And, naturally, the fact the opponent has been drained of their poison means they'll no longer be taking poison damage or anything from it, so there is a trade off there.


Forward Throw: Patchwerk Play!

Patchwerk groans excitedly as he slashes the foe with his cleaver, followed by a quick slash with his hook and finally using his chain to slam the foe down in front of him, dealing 4%, 4% and 6% damage respectively and ending with the foe roughly one Battlefield Platform in front of Patchwerk and, notably, still tethered to Patchwerk, allowing Patchwerk a way to "cheat" his grab and keep the foe tethered, while dealing very solid knockback. Technically, the first two hits send the enemy forward and up, while the last hit is a weak spike, so Patchwerk being hit out of this after the first two hits but before the third will deal forwards knockback that KOs at 210% and over al edge it can work as a very weak offstage spike or way to start an offstage game.

But still, it is mostly notable for dealing lots of damage and keeping the foe tethered to Patchwerk, allowing the chance to potentially regrab the foe, though note that Patchwerk has a lot of ending lag on this throw and thus the enemy is given time to react and so it cannot chaingrab, despite his grab being a chain. It also refreshes three moves worth of stale move negation, which is nice.


Up Throw: Upsy-Daisy

Patchwerk takes the foe and tosses them to the air quite strongly, dealing 10% in a move with low base knockback but very high knockback growth, allowing it to KO at an impressive 140%. At low damage percentages, this move sets the foe right around the sweetspot of your Up Tilt and at a decent height for shorthops, while at medium damage percentages it sends the opponent into the sweetspot range for you to use a full jump and try to go after them, and at high damage percents it serves as a KO throw, making it a multi-use throw that is dynamically changing throughout the match, though it relies on Patchwerk's more difficult air game. It is also an extremely quick throw, as a note: It won't come up often, but since Patchwerk's other three throws are generally a bit longer than average it can ocassionally be useful just to get off a foe.

Back Throw: Ring Around The Patchwerk

Patchwerk takes the foe and uses his chain to swirl them around in a manner much like Mario's Back Throw, but with the foe away from Patchwerk as they are swung by his chain, dealing 3%, then 3%, then 6% damage with high base knockback and low knockback growth. Because of the high base knockback and the range before the foe is tossed, this makes a good way to try and steal an early kill via edgeguarding a foe at low %s, though this is dangerous due to Patchwerk's poor recovery. The opponent is also a hitbox that deals 10% damage with light knockback during this time, allowing Patchwerk to batter foes with this.

During a Frenzy, Patchwerk will swing the foe an extra time for 3% more damage, along with increasing the knockback growth of the move, while a Frenzy debuff loses you a 3% swing (The 6% swing always happens) and reduces the base knockback. This move can KO at 180% during a Frenzy, but it can do more near an edge due to the fact the chain makes it ranged.


Patchwerk Smashes

Down Smash: Whirlwind

Patchwerk bellows out as he begins performing a horizontal spinning slash with his his cleaver, think like Link's Up Special, dealing 21%-28% damage to anyone who stands in his path and KOing at 105%-80% while doing so. Patchwerk can actually move around during this move's fairly long duration by tilting left and right, with Patchwerk being able to move roughly half a Battlefield Platform in either direction if he keeps going that way before suffering this move's quite long ending lag, though fortunately the starting lag is only a touch longer than normal, and this move has pretty excellent range even before factoring in the ability to move around during it.

The lower traction of Patchwerk's puddles from Down Throw allow Patchwerk to move better during this move, giving him the ability to travel one Battlefield Platform in either direction and going a bit faster. In addition, Patchwerk will splash out the putrid combination as he whirls around, allowing him to splash a hitbox that extends further than his cleaver with it that deals 4% and no knockback but very light hitstun, which can mean the difference between a successful dodge and being sliced and diced. This also spreads the pool around, allowing Patchwerk to expand the size of his pool, especially if he travels around with this move since it will mean he's travelling over the freshly relocated pools to make more pools.

During a Frenzy, Patchwerk notably gains cancel frames very early into his ending lag that allows him to cancel this move into yet another whirlwind, almost entirely cutting off the ending lag and cutting the starting lag in half, meaning that Patchwerk can really put the grind on foes during a Frenzy by coming at foes with this move and putting their defenses to the test, especially since you can chase foes in this. However, using the cancel frames will cause Patchwerk to take 2.5x as much ending lag as the already high normal ending lag, essentially leaving Patchwerk vulnearable to any move and taking a lot of time off of your Frenzy.

Since this move involves only your cleaver, you can combine it with your hook naturally, but it is especially notable here due to the fact this move allows you to move while doing so, the wide coverage of this move and the fact it has a long duration. Particularly useful as Patchwerk's Up Tilt and Up Smash due to the fact they cover above Patchwerk nicely while the normal move has no upwards coverage at all. Since Patchwerk is constantly spinning during this move, so too will Patchwerk's hook, which can be used to give hook attacks more 360 coverage or to suddenly surprise a foe trying to escape above you.


Forward Smash: Cleaver Crack

Patchwerk raises his cleaver up high and brings it down with a loud crash, visibly cracking the ground it lands on while dealing 26%-35% damage to foes it slams into with enough strength to KO at 85%-65%, which is certainly no slouch when you consider this move is only slightly laggier than average at the start, though it has rather horrendous ending lag. Next to Hateful Strike this is your next best KO move, but it comes out noticably slower and has a lot worse ending lag to it. It has somewhat better range than Hateful Strike, though it is no Marth Forward Smash.

As mentioned, this move leaves a crack on the ground, which lasts for 7 seconds and is boosted to 12 seconds if it is made during a Frenzy. Cracks don't really do much of anything on their own, but various attacks can trigger them by hitting the crack, which causes a shockwave to rumble forwards from the crack based on the damage of the move, though moves which deal less than 12% damage won't even register on the crack as they are not potent enough to create a shockwave. Shockwaves deal 2%-8% damage and trip enemies that they hit and because they travel along the ground have a tendancy to shieldpoke most opponents. Note that foes can make shockwaves as well as Patchwerk, so this isn't all upside. They travel half a Battlefield Platform to a full Battlefield Platform. In addition, this move is notably special because it will create 10% damage shockwaves that travel 1.33 Battlefield Platforms. Must be because it was strong enough to crack the ground in the first place!

This move also deals particularly potent shield damage and will in fact cause shields to crack under the intense strength of Patchwerk's axe, visibly somewhat shattered when being taken out for 8 seconds. Cracked shields take 30% more damage from any attack, making them much easier to break and able to generally be used less defensively, but this effect becomes even more potent under Frenzy, because Frenzy will cause shields to shatter more severely (which can be seen on the shield, compared to normal shattering) and make it so shields fail to even prevent all of the damage taken instead, only blocking 50% of the damage, knockback, hitstun and so on of moves that smash into it, though shielding will still prevent all special effects like bleeding and poison. Because of this, Patchwerk's Forward Smash is generally best avoided with a sidestep or a roll if you can't just move out of the way...unless Patchwerk's got pools ready, which drastically reduces options. You can still do a jump + air dodge, I suppose, though that makes it somewhat harder to punish Patchwerk for this laggy move...


Up Smash: Hook Fury

Patchwerk furiously swings his hook upwards three times, dealing 10%-13% over multiple hits and thus making a total of 30%-39%, making it Patchwerk's most damaging move, though like many multihit moves one must beware the ability to escape it and it doesn't have all that much KO power, the first hits not really doing much knockback and the last KOing at 165%-140%. This move has significantly long starting lag, but the ending lag is over fairly quickly so it isn't as punishable. This is also particularly nice during a Down Smash, since it also has decently long duration and it'll be turning back and forth as Patchwerk spins.

While this move is already a fairly nice anti-air move, during Frenzy the furious slashing of the hook is actually strong enough to create a fairly strong suction effect that will drag opponents above you or caught in the move down a fair deal, making it much harder to escape. A nice and strong little buff to make sure this damages a lot.


Patchwerk Aerials

Neutral Aerial: Cleave

Patchwerk spins in the air with his cleaver out, pulling off a 360 that deals 10% damage and solid knockback to anyone that is cut by the cleaver, but 7% and much weaker knockback if you just get hit by Patchwerk's body. Most notably is the fact that you can combine a nice hook aerial with this and have it go basically anywhere by timing it to specifically come out when Patchwerk is circled in that direction: Fittingly, Patchwerk spins rather slowly with this move, making this more feasible. This move also causes 3 seconds of bleeding, making it a nice way to bridge your bleeding as it goes along.

This move also comes out quite quickly and has fairly nice ending lag, so it is one of your best moves to slot in as a shorthopped attack, especially due to the all around coverage. This is helped by the fact that this move has no landing lag during a Frenzy, allowing it to be chained much better or followed up upon. Beware, however, that this move has significantly more landing lag during the Frenzy debuff time!


Up Aerial: Hookshot

Patchwerk's hook arm lurches upwards, taking a swing above it that deals 10% and okay knockback to those it hits, not enough to juggle yet only KOing at 180% but with great reach to it. Starting lag is slightly long, ending lag isn't too bad, and it has a nice little benefit in that the end of the hook will serve as a ledge sweetspot during this move, allowing Patchwerk to gain a little "boost" to grab the ledge. In addition, grabbing the ledge this way cancels the ending lag of this move since you're now grabbing a ledge, meaning that utilizing this move near ledges can make a very quick air game and that it is a good tool for edgeguarding.

Forward Aerial: Hookslam

Patchwerk's hook suddenly swings down in front of him, a quick starting move that deals 14% damage and is a strong spike, about as 1.2x as strong as a Donkey Kong FAir spike. Particular uses of this move tend to stem from moves like Up Smash and Up Throw that put the opponent in the air at a medium range, as this can be very helpful to force them back to the ground and not into an aerial escape, and naturally you can combine this with stuff like Back Throw or Forward Throw to send an opponent hurtling off stage. Ending lag is fairly long on this move.

Back Aerial: Swift Strike

Patchwerk's hook swings rather suddenly behind him, dealing 15% damage and strong knockback that KOs at 110%, which given the quick starting lag is pretty sweet, moreso when your Neutral Aerial can suddenly have it come from anywhere. The ending lag on this is rather severe, but during a Frenzy it is reduced massively and thus this becomes a move you can really spam, perhaps the placement of the hook arm helps in this regard? Your prime aerial KO move.

Down Aerial: Abominable Plunge

Patchwerk's large girth plunges down to the ground, powerbombing down to the stage and spiking anyone in his way for 12% damage with decent strength leading into a ground hitbox that deals 16% and upwards knockback that KOs at 130%. Starting lag on this is decently swift, but in natural stall than fall fashion the ending lag is rather large, Patchwerk falls quite quick with this move though and that makes it difficult to dodge during his descent.

When falling down onto a crack, this move has slightly special shockwave properties, sending two 8% damage shockwaves out instead of one, sending one out to both sides and each one only going half a Battlefield Platform of distance, creating more all around coverage and allowing Patchwerk to use his crack to hit to both sides of him. This gets even stronger during a Frenzy, increasing to 12% damage and 3/4ths of a Battlefield Platform of range, so a shorthop DAir over a crack is especially useful during a Frenzy.


Final Patchwerk: No More Play?

For Patchwerk's Final Smash, he first slashes his cleaver in front of him to signal catching foes inside of his Final Smash much like Great Aether, the foe crumpling to the ground if they are hit as a short cinematic plays where Patchwerk looks at the downed foe, exclaiming "Patchwerk want to play!" loudly before a brief cutaway, where only the sounds of crunching and cracking bones and rended squishy flesh and organs playing, before returning to the field of play, the enemy a broken and battered bleeding mess in prone. This move deals 40% damage, leaves the enemy in prone and adds a full four stacks of bleeding for 10 seconds. He only want to play...

Patchwerk Playstyle: Play Time Is Over!

I should have sewn him together from better players...
 
Last edited:

FrozenRoy

Smash Lord
Joined
Apr 26, 2007
Messages
1,260
Location
Las Vegas, Nevada
Switch FC
SW-1325-2408-7513
"Grobbulus, the first of what was to be an army of flesh giants. It carried the plague slime of Naxxramas within its body, injecting the living ooze into the bodies of its foe. The recipient of this foul injection would usually flee to his allies, bringing them down with him."

Grobbulus

Grobbulus was the prototype for the Scourge's army of foul flesh giants. One of Grobbulus' hands was removed and replaced with a syringe connected with the constant plague ooze that flows through him, meant to inject his opponents to create an ever growing army of undeath, while his other hand was replaced with a large, orange and metallic one for smashing those who would get in his way with his formidable strength. Terse, it is rare for Grobbulus to say more than a single word to the worms who would fight him. In the raid, Grobbulus drops expanding damage over time traps with "Poison Cloud" and strikes an opponents with the a conical "Slime Spray" from his syringe, which creates a fallout slime if the opponent is hit, Finally, his "Mutating Injection" not only causes an explosive effect if left unchecked, but even does so if it is cleansed and removed, requiring careful timing for removal. In Hearthstone, Grobbulus "Poison Cloud" Hero Power deals damage to minions and summons a Fallout Slime if it kills them, while his special "Mutating Injection" card serves as a cheap way to massively boost his minions' power while giving it taunt while he plays an aggressive plague deck.

Statistics

As expected from a flesh GIANT, Grobbulus is large and heavy: His size is equal to Ganondorf's height and Bowser's width, while he has weight only a smidge below Bowser. His slow speed, equal to King DeDeDe, makes him a fairly stereotypical heavyweight. He also has good traction.

Grobbulus has a very fast falling speed, poor aerial control and goes through the air quickly, so most of his aerial fighting will be done quickly: Either with shorthops or using his impressively high first and second jumps to ascend quickly, strike the foe and fall back down. Grobbulus can use his syringe to wall cling, but that is all he can do Brawl-wise.


Mechanic: Ooze

"Ooze."

The plague ooze of Naxxramas constantly drips from Grobbulus' syringe: While standing idle, this ooze will begin to pool around Grobbulus feet. By standing idle for a solid second, this pool becomes a trap of plague ooze, which lasts for around 7 seconds, dealing 3% (non-flinching) per second for as long as an opponent stands inside of it. In addition, however, while this puddle starts only the width of Link it slowly expands for as long as Grobbulus stands idle, without any upper limit save the edges of whatever part of the stage you are on: Stay idle long enough and, eventually, your slime will cover all of Final Destionation. If the slime would expand while next to an edge, it instead starts to ooze off the sides of the stage, becoming a constant hitbox that deals repeated hits of 2% and a weak downwards push, though no hitstun (Thus you can still rise in it) and making that edge, if it could be grabbed, ungrabbable (This applies to Grobbulus as well, unlike the poison). This even allows Grobbulus to make little "waterfalls" of ooze by having it, say, ooze off the top platform of Battlefield to the lower platforms to the sides of the stage.

In addition, while adding to a pile of poison ooze the timer will not go down to it, though this takes a few moments of idling. After half a second, Grobbulus slime will even ADD to how long the plague ooze lasts, without any upper limit. Note that Grobbulus attacking, jumping or moving at all will interrupt this and making the normal ooze, as will being hit, so don't expect to just jab in place and make a huge pile of ooze: You might not be using a move, adding some flexibility, but you still need some commitment to make this trap.


Specials

Neutral Special: Slime Spray

Foul ooze rushes from shoulder ooze for this chargable move, before being sprayed 3/4ths of a Battlefield Platform to 1.5 Battlefield Platforms (depending on charge) in a constant and foul stream, which can be aimed in any of the 8 directions via control stick. This move's charge cannot be saved, like Eruption, and deals 8%-22% damage to those it hits and weak knockback that KOs at 270%-190%. This move has average starting lag, but the duration is long and the ending lag is also a bit long, so while you won't throw it out often it has good range as either a disjointed attack (without charge) or more of a projectile/camper (with charge). It charges at 1.33x the speed of Eruption.

The key thing, however, is that nailing an opponent with this produces a Fallout Slime minion where they were, falling to the ground quickly if the opponent was hit in the air.


Fallout Slimes are small minions, about the size Pichu would be in Brawl, that move at a glacial pace, about half of Jigglypuff's dash speed, and cannot jump, though they can be knocked off the ground. While they move incredibly slowly, they are not immobile, so it can sneak up on opponents who dismiss it, especially because Fallout Slimes can use any of their attacks and move at the same time, so they're always just a little "on the move". Fallout Slimes are most notable for being quite hardy, starting with a fairly large 35 HP with 5 more maximum HP for every 1/4th of charge Slime Spray had, meaning up to 55 HP on a single slime! Not only that, but they in fact passively are healed inside of your slime puddles, making them quite a mess to deal with. Slimes have fairly simple AI: They will constantly pursue the foe if possible by moving towards them and try to attack them. Slimes have a passive ability, plus three attacks. In addition, Slimes can gain new attacks or abilities via Grobbulus' injections.

Slime Passive: Fallout Slimes constantly exude a plague aura while they exist. Enemies within 3/4ths of a Battlefield Platform and 1.25 Ganondorfs around the Fallout Slime take constant 1% non-flinching damage every half second. Since Fallout Slimes are slow, picking them off with projectiles is a viable way to take care of them, though their size means some shorthopped projectiles (Like Falco's laser) will go over them. You also want to kill Slimes quickly to not take too much damage, in close range.

Slime Smash: The Fallout Slime raises up a little and smashes the top of its slimy body forward, dealing 7% damage and hitting foes a decent distance away. This move is fairly fast and is the Slime's most common attack, though naturally it is a bit weak. This can be used in the air exactly the same, if the slime is hit into the air.

Slime Spin: The Fallout Slime spins its top half around a little, dealing 5% damage but more knockback than Slime Smash mostly due to base knockback. More of a space gaining move, it trades damage for range. This can be used in the air just like normal if the Slime is hit into it. Fast on both ends.

Slime Squish: The Fallout Slime melts down and rapidly expands to both sides of it for its strongest attack. The longest range attack, it hits a total area a bit larger than Bowser is wide, it also deals 13% damage and even has some minor KO power to kill at 170%, well KO power for this itty bitty slime anyway. However, the starting lag is a bit bad and the ending lag is absolutely atrocious as the Slime slowly gathers itself back to normal form: It won't even be knocked out of ending lag if hit, so this is prime time to kill the slime! Fallout Slimes are very careful about using this and thus will mostly use it if the foe is in ending lag or if they are close to dying and thus need the most space gained or to go out big. They will also get more aggressive with this once the opponent is in KO range of the move. If this move is used in the air, it becomes a stall than fall that retains all the same properties of the move as the Fallout Slime rapidly descends to the ground and puddles when it touches the ground.

Fallout Slimes don't do a lot of damage, they aren't fast and they don't provide a lot of special stuff, but enemies that don't deal with them will be swept under a tide of passive damage and little hits from hardy minions. Don't underestimate using Slime Spray to get them out.


Side Special: Injection Infection

Grobbulus stabs his syringe forwards a fair distance, dealing a modest 8% damage with fairly light knockback, though this move has quick start-up and average ending lag. While this only deals 8% damage on hit, the opponent is poisoned for 1% per second for 4 seconds, pushing it up to a nicer 12%. In addition, this little plague effect doesn't have its timer tick down if the opponent is undergoing poison effects like your ooze or your Falleout Slime's passive, so it can be tricky to get rid of. By holding down B during this move, Grobbulus can also steal injections from the opponent: We'll get to hot to PUT those into the opponent soon. Grobbulus can also, if he has mutations on himself, tap B when hitting a foe with this to give them to the foe. In both cases, it steals/gives the first mutation that was put in/out. This forms the solid slimy core of your damage over time along with your ooze and your Fallout Slimes: Your ooze provides the highest octane damage, the Side Special rewards getting the core up and running while the slimes provide the sticky, hard to get rid of stuff that can protect itself.

Down Special: Smash of the Giants

Grobbulus raises his metal fist high and crashes it into the ground below him, the ground shaking as it impacts it. Getting hit by the fist or at the small range groundshaking under and just around Grobbulus means you're taking a strong 23% and KOing at 95%: One of Grobbulus most powerful KO moves. In addition, this move sends out a shockwave to both sides of Grobbulus that deals 9% damage and light upwards knockback. Your plague ooze and Fallout Slime that is hit by this move will go hurtling into the air, serving as projectiles: The more damaging hitbox sends them flying up 2.5 Ganondorfs, while the shockwave sends them up 1.25 Ganondorfs. This move has quite long starting lag, but the ending lag is only somewhat bad.

Fallout Slimes that are thrown into the air are a fairly weak hitbox, dealing 7% and light upwards knockback regardless of which one sends them up, but also retain their ability to attack without issue on the way up, giving them some nice ability to throw up minion-projectiles. Plague ooze, on the other hand, deals 9% damage and decently strong upwards knockback when hit by the strongest while dealing 6% and weak upwards knockback on the way up. In addition, unlike Fallout Slimes that are only hitboxes on the way up, the plague ooze has its usual hitbox over edges on the way down. Both make excellent use of controlling space.

This Down Special becomes a stall-than-fall of quick speed in the air, Grobbulus dropping 5 Ganondorfs while dealing 12% damage and a weak spike on the way down and then the normal hitbox and so on when impacting the ground. The only difference on impact is much longer ending lag, in exchange for the extra falling hitbox.


Up Special: Rising Syringe

Grobbulus leaps up while stabbing his syringe up, dealing 12% and okay knockback, more notable for a higher base knockback than its low knockback growth so it tends to get good space, with this move travelling 4/5ths the distance of Marth's Up Special. This move has quite fast starting lag and okay ending lag, so it is a good way to gain space against close opponents or as a combo ender. This move even has a scant few frames of infinite launch resistance at the start, so this can be used in ways similiar to a Shoryuken. It has some similiar uses to a weaker Dolphin Slash in the sense that it is pretty cool to use close-up and clear space, though it lacks the Dolphin Slash KO power, and it can be a way to jump onto platforms with a quick hitbox.

Grab Game

"Meat."

Grab: Mutating Injection

Grobbulus jabs his syringe forward, stabbing anyone in his way onto it into his grab. It is a fairly quick and long ranged job, similiar in ways to King DeDeDe's. Grobbulus can also grab his Fallout Slimes with this move: This grab always prioritizes enemies over Slimes.

Pummel: Shake

Grobbulus rapidly shakes his syringe arm for a quick 1% pummel. If you have a Fallout Slime grabbed, this wll cause the slime to slosh off of the syringe, releasing it quickly.

Forward Throw: Poison Cloud

Grobbulus injects a spray of sline directly into the foe's body, dealing 8% damage and set knockback of 1.25 Battlefield Platforms forward as the spray shoots the foe off Grobbulus syringe. As a pure throw, this is an excellent way for Grobbulus to reset spacing or to get foes into an area he wants due to his good grab and its predictable knockback, though it is certainly too far away to come close to chaingrabbing.

After five seconds, the ooze will seep out of the enemies body along with a burst of poison cloud, which deals no damage or knockback but the briefest of hitstuns, just enough to interrupt attacks or general be a minor annoyance: The poison cloud lasts a mere 3 seconds, but it does deal 2% per second of non-flinching damage while inside its Bowser radius, while the ooze will fall to the ground and turn into a Fallout Slime with minimum HP...assuming the opponent didn't dodge the initial strike, which will cause it to have too little energy to stick around and just evaporate. This serves as the only other way to get Fallout Slimes aside from Slime Spray and removes the possibility of higher HP slimes for the fact that it can be done from Grobby's awesome grab. It is also Grobbulus' only throws that doesn't mutate an opponent, making it your reliable throw to get damage in with Fallout Slime upside.

If this is used on a Fallout Slime, this deals no damage and instead the slime simply slides off of Grobbulus syringe, seemingly bloated to 1.5x its normal size. After five seconds, each of which it gains 0.1x its size, the Fallout Slime will split into two! The second slime it is split into has the same maximum HP as the original slime, along with the same current HP. This is very useful to create your slimes, though it requires Fallout Slimes to begin with, and to get big HP slimes more consistantly by copying a higher HP slime, but it also makes the slime much easier to hit until the split where it loses the extra mass and the new split slime will have taken whatever damage the original did, so enemies can blitz it down. Most useful when you have a lot of ooze on hand to heal your slimes. Splitting creates a poison cloud just like Forward Throwing a foe.


Down Throw: Fleshy Growth

Grobbulus pins the opponent to the grab and pours a foul plague ooze into the foes body, before pulling out and leaving the foe in prone, dealing 3% damage and then 3 hits of 1% damage. Grobbulus ability to bring ooze around and put Fallout Slimes out can allow him to help guide where an opponent will want to roll to after prone and he enjoys the chance to tech chase a throw into another one with his awesome grab.

While that's all well and good, this move comes with additional upside: After the five seconds needed for the vile injection to finish worming its way into the foe, the slime rises out of the foe and breaks through their skin and its pores, soldifiying into a green, ooze-y mass behind the foe, increasing their hurtbox size by roughly half the height of Ganondorf and 1/3rd the width of Bowser, with different characters having different animations for how this work. For example, Bowser's shell becomes grotesquely raised above the slime-y growth and hardly hanging on to Bowser's back, while someone like Zero Suit Samus might move with more noticable strain or a hunch. While this does increase the size of their hurtbox, it does come with a few additional benefits: The character's weight is increased by a numerical score of 3 (roughly the difference between Wario and Mario's weight), allowing them to better survive (though they open up risk to getting combo'd more/damage racked easier), and the fact that bits of the ooze will splut off whenever the character is hit, creating a small projectile hitbox that deals 4% non-flinching around the foe when they are hit as a way to get damage on foes who damage rack them.

Grobbulus will generally put this onto foes to increase his ability to damage rack or to enter his combo game, though it can also make it quite annoying to dodge smaller things like Fallout Slimes due to the increased hurtbox, with the mutation lasting an impressive 15 seconds, plus one more second for each hit of poison damage he took before the mutation activated. Grobbulus may also, at times, wish to steal this mutation for himself, especially if he increases in damage percentage, using the increased weight to help him recover, along with the fact that the slime doesn't change fall speed. In addition, Grobbulus may enjoy the slime hitbox that this mutation can generate more than the foe unless the foe has similiar range to Grobbulus himself. If you wish to use this throw and not mutate the foe, simply hold down Z.

When used on a Fallout Slime, it causes the slime to expand to 1.75x its normal size, growing small slimy tentacles on its bottom and body, causing it to not only get bigger but also faster and now move at roughly Jigglypuff speed as it drags itself around with its new tentacles. The Fallout Slime gains an additional passive ability, Ooze Obstruction, which is similiar to the ability from the normal injection, dealing 2% non-flinching damage in a small hitbox around itself whenever the Fallout Slime is struck. In addition, the Fallout Slime gains a new attack, Tentacle Strike, which it lashes out with the tentacles on its body in a 1 Battlefield Platform long attack that deals a solid 8% damage, with okay starting lag but bad ending lag and knockback that KOs at 233%. In addition, the Fallout Slime can use this as a tether recovery or to bring itself to specific places by sticking it onto walls, ceilings, floors and so on, giving the Fallout Slime greater mobility and allowing it to not die offstage. This muttation lasts 15 seconds + 1 second for every 5 maximum HP the Fallout Slime has and may be refreshed with another application of Down Throw.


Up Throw: Slimeflight

Grobbulus raises his opponent above his head while ooze fills the opponent's body, sending them flying off the syringe and taking 9% damage with knockback that begins very low, allowing Grobbulus to followup nicely with his strong jumping ability, with large knockback growth that even lets this KO at 160%! Of course, it is at a bit of an awkward place between the two, as it will lack of follow-ups or kill potential at mid percentages. Using the Down Throw mutation can help you to increase how long you can follow this move up.

Just like your Down Throw, this move will cause mutations in the foe after five seconds, sickly, slimy wings bursting out of the foe's back, strands of ooze between each little piece of these wings. While certainly grotesque, these wings are certainly effective for flight, giving its user three extra jumps about on par with Pit's extra jumps. If the character already has wings, this gives them an extra pair and allows them even more extra jumps! Of course, this doesn't come without downsides, as this move reduces the character's weight by 2 (The difference between Mario and Olimar) and thus means that they can recover better but will also be KO'd right off the edge sooner. In addition, the character's hurtbox size is increased as if they had Charizard's wings sewn onto them. In addition, the extra jumps come at the cost of lower aerial control, so it can actually impair some forms of aerial fighting. This mutation lasts 15 seconds + 1 more second for each hit of poison damage they took in the 5 seconds it took to become active. If you do not wish to mutate the foe, hold down Z during the throw.

Grobbulus generally wants to give the opponent this mutation when they are at a high damage % to push the foe into true KO range earlier, but he can also use this to hurt people who use high aerial control like Wario or Jigglypuff: Lighter characters stands to benefit less from the increased jumps as well and Grobbulus can combine this with his Down Throw mutations to greatly increase the size of a character's hurtbox. Finally, this is a nice mutation for Grobbulus to take for himself, allowing him to recover much easier given his high fall speed, perhaps combining it with his Down Throw to keep his weight high...but of course, doing all that will increase his hurtbox, which in turn leaves him more vulnerable to attacks.

When used on a Fallout Slime, it will cause said Fallout Slime to itself gain wings, giving it access to three jumps and allowing it to take the fight to the skies! It has the same air speed as its ground speed and is fairly floaty. The Fallout Slime gains two additional attacks while it has wings: The first, Slime Slice, causes the Slime to slice forward with its wings for 8% on a fairly nicely ranged attack, in addition to creating a downward wind hitbox in front of the wings for a brief moment, which combined with the diagonally forward and slightly down knockback makes it an effective offstage move: The Fallout Slime likes to try and specifically target people near ledges with this if it can. Slime Slice may only be used in the air and has okay starting lag but bad ending lag.. The other, Slime Swirl, causes the Fallout Slime to spin in place, dealing constant hits of 2% for a move with extremely long duration that can deal up to 16% damage with weak knockback on the last hit, though it lacks any suction or anything to k eep foes in it. At the same time, the long duration and, if used in the air, halved fall speed makes it a very effective way to control space. Starting lag is average, ending lag is bad. This lasts for 15 seconds + 1 more second for each 5 maximum health the Fallout Slime has.


Back Throw: Coat of Ooze

Ooze floods the opponent as Grobbulus swings behind him and flings the opponent off his syringe for 12% damage and knockback that KOs at 220%. While this move rarely allows the follow-up options of your other throws, it possesses the best raw damage of any of them and it starts with decently high knockback, which can allow you to try and do something with off stage foes at a bit lower %s than your other throws.

This is your final mutating throw, taking 5 seconds to become active as usual. This will cause slime to ooze out of the subject opponent's body and pores, sticking and seemingly darkening and hardening onto the foe, reducing their movement speed (air and ground) by 25%. In addition, the opponent has the starting and ending lag increased ever so slightly, about 3 frames on each end: Not enough to be a huge deal overall, but enough to certainly be noticable and a bother to some opponents. However, this also comes with a pretty sweet upside, giving 8% super armor for as long as it is active, meaning attacks that do 8% or less will do damage/hitstun but lack knockback nor will they flinch from the hitstun taken, making this an extremely potent tool against lower end attacks...though it can be taken advantage of with some quicker ones. This mutation lasts for 15 seconds + 1 more second for each poison damage hit the foe took and can avoid being put in the foe by holding down Z.

Putting this on a foe to slow them down is very good for a multitude of reasons: Decreased speed means less time to get away from ooze/Fallout Slime's poison damage or to get to Fallout Slimes to kill them, it allows Grobbulus to better catch up to enemies with his slow movement speed and thus is very nice regardless of if he wants to combo or kill them, and the increased lag on attacks reduces how many combos can be done on Grobbulus' big body while allowing him better counterattack options, though on the flipside many of his smaller yet useful attacks won't do as much and his Slime Spray will need to be charged at all to do knockback or flinching against foes like this, so the opponent becomes tankier. Grobbulus may wish to steal this to get through annoying projectiles, such as Falco's lasers, or even as a resistance to some potential annoyances enemies can pull out against Grobbulus' frame, like quick but low powered jabs or attack strings, and it can be really nice when trying to do something like hit with Down Special or charge up a Neutral Special and can help cover up issues from Down Throw or Up Throw...but at the same time, combining this with that will create a bigger hurtbox that is even slower and more clunky to use. Trade-offs!

When used on a Fallout Slime, the Fallout Slime will too gain a hardened coat of armor, which grants the Fallout Slime two new passive abilities. The first, Ooze Armor, functions much like the general mutation, granting the Fallout Slime 4% super armor and making it a bit harder to snipe at with weak projectiles or in some cases swat away, though unlike the version on foes stapling it to a true slime also grants it 4% damage reduction, meaning it takes 4% less from attacks, though super armor only triggers on attacks that originally dealt 4% or less (IE an 8% damage attack that is reduced to 4% gets around the super armor). The other, Ooze Nutrients, allows the Fallout Slime to gather health from the hardened and slimy exterior it exudes around it, siphoning off 1% of healing each second, which stacks for healing in plague ooze and combined with the armor makes the Fallout Slime rather difficult to remove. This mutation lasts 15 seconds and another second for each 5 maximum HP the Fallout Slime has on it.


Smashes

Forward Smash: Slime Shot

Grobbulus lowers his syringe as he charges/starts the move, as if he was planning to suck things up, and indeed creating a small suction effect with about the power of King D3's Inhale, before bringing the syringe higher and shooting a single, Kirby-sized, globular shot of slime forward 1-2 Battlefield Platforms (depending on charge). This projectile deals a solid 22%-31% damage while KOing at 115%-90%, making it a solid KO move but not spectacular until full charge, with solidly average starting lag but very long ending lag. Still, considering the power and range, this is a pretty sweet deal. This move can also be angled up or down some like some smashes/tilts can: Angling it up causes it to fire upward-diagonally and go about 3/4ths as far but a good deal higher, while angling down causes it to burst fairly close to Grobbulus and allows him to fire it diagonally-downward near ledges, which is useful.

During the starting lag of sucking up things, Grobbulus may actually suck up his plague ooze for this move to make charging nearly lagless: Standing inside his vile ooze allows Grobbulus to fire this move off almost instantly fully charged, almost just long enough to confirm it is a charge and not uncharged, making it very strong to throw out and Grobby's primary KO move. At the same time, this lowers the lifespawn of said ooze by 3.5 seconds (As defined in Battlefield Platform chunks), so you're sacrificing a lot of potential future damage for the big burst.

Grobbulus may also suck up his Fallout Slime minions for this move, which will cause them to re-appear at the end of the path when the projectile explodes or when it explodes on contact: The Fallout Slime is free to act only a touch after it explodes out, so sucking in a Fallout Slime can be a great way to protect this move on shield, and you can even use this to fire them where you want, like getting Fallout Slimes in the air or using a winged Fallout Slime + Forward Smash down on a ledge to both fire projectiles at the enemy and give them a Fallout Slime to deal with. You can even suck up multiple Fallout Slimes to get them all to the foe at once! Ka-pow!


Down Smash: Slime Smash

Grobbulus raises his metal fist high to the sky and sends it crashing to the ground with a thunderous noise, creating a short ranged hitbox that deals 21%-29% and KOs at 105%-90% depending on charge, while also sending out a shockwave 3/4ths-1 Battlefield Platform to both sides depending on charge that deals 10%-14% and KOs at 330%-250%. This move has pretty laggy start-up, but while the ending lag is bad it isn't really bad, so it isn't TOO punishable. The short range and lag being at the start tends to make it a poorer KO move than your Forward Smash.

When used on top of plague ooze, it will cause the ooze to ripple outwards like a wave about half a Ganondorf high, expanding to the edge of where the shockwaves go while dealing 10% damage and fairly nice knockback for getting the foe away from you, KOing at 220%: However the angle of the knockback is quite shallow, making it more useful. This allows you to relocate your toxic sludge across the stage and if you send it rolling off the edge you can even create a temporary waterfall of gunk with the normal hitbox! In addition, the wave is tall enough to clash with or eat up a decent amount of projectiles, though enemies can get over this with proper shorthop play. Using this next to slime instead of on top of it, though, will not cause it to split but instead cause the shockwave to pass under the slime, causing all of the slime to rapidly shake with the same hitbox power as the shockwave itself for as long as the shockwave exists, which can be devastating when combined with the ability to cause so much of the stage in your plague ooze.

Fallout Slimes will also tremble and shake under the shockwave for the same effect as the plague ooze, while retaining their ability to attack, and in addition will "ride" the wave and move at its decent speed to wherever the shockwave stops, meaning they can get relocated a bit suddenly outside of sucking them up. Fallout Slimes will continue to shake for three seconds after the shockwave ends, which can make them a rather dangerous little minion, especially if a flight time suddenly takes to the sky or something.

Hitting Fallout Slimes directly with your fist, however, produces a different effect, causing the Fallout Slime to be momentarily "buried" into the ground, or more specifically temporarily absorbed into the ground, protecting it from all attacks for 4 seconds but also leaving it unable to do anything...except for the ability to heal from plague ooze, meaning that if a Fallout Slime gets low on HP you might want to smash it down and heal it, or you can hit a foe and slime with this and then idle on top of the Fallout Slime to heal it! The Fallout Slime is, however, a bit vulnerable to attack while reforming from this, so be careful with it.


Up Smash: Oozing Plague

Grobbulus' syringe is raised towards the sky as plague ooze bubbles into it, before he fires out a single and large blast of the ooze upwards 1.25x the length of Snake's Up Smash (including if charged) for 18%-25% damage and weak upwards KO power that kills at 180%-155%. This move can be angled left or right to lob the ooze ball some in that direction, combining with your Forward Smash to form a moderate length way to lob projectiles at the foe. This move has pretty long start-up, but it does have decently low ending lag, so by lobbing up an ooze ball you can use it as an excellent space controller if you get it off, and depending on the situation you might even be able to 1-2 combo the foe right into the ooze ball!

Getting hit by this ooze doesn't just cause damage and knockback, though! It saturates the foe in plague ooze, so that they drip with it wherever they go, leaving oozing tracks as they do so which stick around for five seconds. This left behind plague ooze allows Grobbulus to take half as long to idle over it to create his plague puddles, leaving the foe in quite a pickle as running away allows Grobbulus to setup but sticking close can let Grobbulus beat on them to kingdom come, especially if they've been mutated properly: And did I mention that the plague ooze saps the strength of the foe when coating them this much, causing them to take 1.25x damage and knockback from non-poison sources? Because it does.

Most strikingly, though, is that the enemy will NOT want to sit in one place: Standing idle for one second will, just like Grobbulus, cause a plague puddle to form around the feet of the foe, which has all the same properties as when Grobbulus does it: In essence, if the foe isn't constantly doing SOMETHING, they'll have to deal with forming the very plague ooze they don't want Grobbulus to form and just as dangerous to them! Take advantage of this and use this moment to strike! This status effect lasts 5-8 seconds, depending on charge.

Fallout Slime gain a nice little buff whenever they strike a foe coated in this vile plague, slurping some up from the foe's body to heal them for 3%, as if they were in a second of plague ooze: Small, certainly, but nifty, and it can make fighting Fallout Slimes a real pain if you've been coated in ooze.


Standards

Jab: Fist Smash

Grobbulus punches his metal fist forward for a fairly long ranged, 7% damage jab, though the knockback on this is extremely low and it is a move that is quite fast on both ends. Your jab serves primarily as a way to start combinations and to add damage in the middle of combos or as a quick move with good range to take advantage of a bloated and mutated opponnet's larger hurtbox. Notably, this move's range allows Grobbulus to avoid the slimy recoil if he strikes an opponent bloated with his Down Throw Fleshy Growths, while this move actually deals small spiking knockback to aerial opponents and can be aimed up/down with quick control stick speed at the start, allowing you a way to bring down opponents who want to use their Up Throw extra jumps to try and wall of pain or shorthop game Grobbulus.

Note, though, that this Jab does still have quite low knockback especially considering it is a single hit jab, so it is quite bad at just plain gaining space and the spiking is only good for grounding opponent's a little and basically useless for gimping and such. If you steal your Back Throw's super armor for yourself, this can be a really useful move for a quick strike back against other weak strikes, while it can get in little hits without interrupting the foe if they have the super armor, which can be both good and enable some attack strings and bad because it means you cannot interrupt an opponent's attack with it.


Forward Tilt: Slam

Grobbulus leans back while preparing a punch with his metal fist before swinging it forward for 8% damage that KOs at 260%: With its Wario Forward Tilt level of starting lag and strong ending lag, you might expect a bit more from this attack, but just like the Wario Forward TIlt it has quite solid range to go with it. This also has the nice fact that upon slamming into a shield, Grobbulus' fist will recoil right back into place, bypassing all of the ending lag of this move and making it a very strong way to apply offensive pressure! The knockback is low enough that smacking an actual foe with this allows follow-ups and attack strings as well, though at times the jab provides a better way to do this.

But perhaps you want something more out of this attack? Try striking a mutation with this: Grobbulus will smash the slimy mutation into the foe with the punch, dealing 16% damage instead of its normal amount and evne KOing at a very solid 130%! This is especially notable because of the fact that the larger fleshy growth mutations, and on some characters the wing mutations, will actually stick out of an opponent's shield and thus be prime targets to hit, though even outside of that they are naturally strong targets to hit and allow Grobbulus to manage a strong KO move, given it only has Wario Forward Tilt lag, or a good combo move by aiming to either hit the foe's normal body or their mutation. But if you want, you can use this on an opponent slimed by your Back Throw and coated in armor...which means their whole body has been mutated, allowing you to throw out this more potent version more freely at the cost of being unable to use the smaller, stringing version at all! This can give you a rather potent move that offers a big boon on shielding...though sidestepping and rolling will still let the foe punish this, so don't just spam it like you have ooze for brains.


Down Tilt: Slime Flip

Grobbulus crouches down and pokes forward with his syringe, a quick move that deals only 5% and very weak knockback: However, this move is quite useful as a shieldpoke, as it'll go under a lot of shields with minimal damage, which in turn makes it a great follow-up to a Forward Tilt against a shield, and it should be noted this move has somewhat low ending lag as well. In addition, this move has a follow-up done by hitting A again (Think Link's Forward Smash), where Grobbulus will flick his syringe upwards, dealing 6% damage and light upwards knockback, with slightly longer but still faster than average ending lag. At low to mid %s, these hits will usually chain into each other, though it varies based on opponents: Fastfallers can be chained better than floaty characters. It is also a nice little aerial launcher to get people in the air, but not far into it.

The second hit also has other uses combined with your plague ooze, as it will cause the ooze to be sloshed forward about half a Battlefield Platform, going up a little as it does so and dealing 3 hits of 3% that combo into each other: With extremely proper spacing, you can hit an opponent with the first hit, into the tip of the second hit while ooze is there which causes them to still be hit by the sloshing ooze. This is also your most precise method of moving around the plague ooze: If you slosh it onto other plague ooze, it will flatten out until the sloshed ooze has essentially made everything go forward the same amount as the ooze is wide, causing small pushback if you stand in it during this time though nothing else special, which can be useful, especially if an opponent is just annoyingly out of range. Finally, this move allows Grobbulus to slosh his Fallout Slime straight up a small amount, which can be useful against enemies who keep shorthopping around.


Dash Attack: Mutation Strike

Grobbulus rushes forward a little while swinging forward with his fist, a move with some laggy start-up that deals 14% damage and KOing at 140%. A solid move when you can get it off, it has surprisingly low ending lag that makes it so the opponent is more likely to interrupt than give it a huge punish. Grobbulus doesn't go very far for this dash attack, so the DACUS isn't really useful even with the useful Up Smash.

Grobbulus has a variety of follow-up attacks done by hitting A: In fact, you can even make it the "primary" attack by double tapping A before the attack fires off, or you can tap A repeatedly after the attack starts to cycle through which of the three follow-up attacks you use, as the follow-up attacks are based on the mutations Grobbulus has on himself. They go in order of first mutation taken = first mutation follow-up attack selected. If Grobbulus has the fleshy growth mutation, the follow-up attack will cause Grobbulus to smash forward and down with the growth on his back, dealing 16% damage that KOs at 110% to anyone with this somewhat laggy attack. In addition, however, the slime growth will flatten out to both ends as he impacts the ground, a hitbox to both sides of Grobbulus with 3/4ths Battlefield Range that deals 9% damage and decent pushback, tending to be a nice way to cover the fact this variation has really bad ending lag.

With the slime wings mutation, Grobbulus will perform a second, rising slash of his wings that goes roughly the same distance as his first jump, dealing 7% and fairly weak knockback, but having low ending lag and being a useful way to not only transition ground-to-air but to control space both under and on platforms, especially good with slimefalls going down platforms. Finally, the slime armor mutation is the only one where you can't use it before the punch, as it is merely an extension of the punch: The slimy armor coalescing into a slimy fist attached to the steel fist that travels one Battlefield Platform, dealing 17% damage that Kos at 105% damage, pretty nice! However, it has a long duration and the armor is removed from Grobbulus until the move is over and during the start of the long ending lag, all of this making it the riskiest of the three attacks. If Grobby is hit, the armor smacks back to him naturally.


Up Tilt: Slime Purge

Grobbulus stabs upwards with his syringe in a swift move, dealing 9% and some light upwards knockback to foes he hits. Thanks to the low ending lag on this move as well, this move can be chained at lower percentages, more notably against fastfallers, in addition ot can chain better if you increase the foe's weight via mutation and actually deals slightly less overall knockback if they have it. Likewise, enemies mutated with the wings take slightly more knockback from them being punctured and get hit up better. Usually, this puts the foe into a prime position to be followed-up by an aerial, either shorthopped or with his large jumps. Both of these methods become somewhat less effective as the enemy takes more damage, though it takes quite a while before they become entirely ineffective. It can be easy to whiff both follow-ups if you don't read the enemy's DI/trajectory right. This move can also be angled slightly left or right.

You can also snag an added effect on this move if you strike a mutated foe, though, by tapping the A button when you hit the foe, which will cause some of the putrid slime that makes up these twisted mutations to be sucked into Grobby's syringe, removing two seconds of duration of the mutation (using the first mutation given if there are multiple mutations on the foe) in exchange for giving Grobbulus a nice boost, which is represented by the slime on his shoulder passively bubbling and bubbling more if this is repeated. Grobbulus can now use this, essentially, slime "charge" he has in a variety of ways: He can utilize his Slime Spray at 1/4th max charge already, allowing him to create bigger slimes easier and to do more damage. He can use it to reduce the starting lag on any of his attacks which shoot slime: You can hold up to 4 "slime charges" from this move at once and they are all used at once, with all 4 the starting lag is reduced by about 1/4th. Slime Spray is never reduced due to the first ability. Each "Slime Charge" reduces the time for your passive Ooze to make a puddle or begin expanding/increasing the time on a puddle by 1/4th, which uses up all charges. With 4 charges, it is reduced by 1/4th each time and not 1/4th total (IE 4 does not equal instant). Finally, you can simply use it on a throw to increase the time of a mutation by 2 seconds per charge, allowing you to re-allocate mutation time if you wish.

All of this combines to make your Up Tilt a solid option in melee combat, good for your combo game and able to add a bunch of little potential boosts to your slime game.


Aerials

Forward Aerial: Ooze Pull

Grobbulus uses his syringe to stab forward, angle-able in ways similiar to many forward tilts, dealing 11% damage and decent knockback, slightly higher and stronger knockback when angled up while the angle is more shallow and weaker when angled down. This move has slightly long ending lag, so while it is quick to throw out it can be punishable and the quick duration makes it somewhat easy to air dodge. Fairly nice range.

When this move strikes a mutation, though, it has a somewhat different effect, as both Grobbulus and the foe enter Wolf F-Tilt-esque Freeze Frames: With the fleshy growth or wing mutations this requires some careful aiming, but with the ooze armor mutation it is simply on any hit. During these freeze frames, Grobbulus may input any direction, which will cause him to fling the foe in that direction, essentially choosing the knockback course! Not only does this let Grobbulus throw enemies into things like his ooze or minions, or especially ooze falling off platforms/edges, but combined with the ability to change the enemy's weight via mutations allows Grobbulus extreme and fine control over where to send the foe and how far he wishes to do so, which can lead to all sorts of things in short-time aerial combat, shorthopping foes and flinging them in the proper direction to then come at them with moves like Dash Attack, Up Tilt or an aggressive Forward Tilt or so on, making it an invaluable little "combo" piece. Beware this being shielded though, as like Wolf's F-Tilt Grobbulus will still take freeze frames while the enemy will not, essentually surrendering a free shield grab or quick strike!


Down Aerial: Smack Down

Grobbulus' mighty steel fist is raised high, before crashing down under him in a fierce blow! This move might have quite a laggy start-up, but it deals a strong 16% damage and is a powerful spike: While not Ganondorf's DAir, it is similiar to Ike's DAir spike. This move also has pretty hefty ending lag, but while it is difficult to hit with it has some very key uses as one of Grobbulus' few ways to kill without a lot of damage racking, along with Down Special and a charged Down Smash, and Grobbulus loves jumping with his high jumps and swatting foes out of the sky with this, his quite fast falling returning him to the ground. Beware using this as a gimp, though, as your quick fall speed and rather predictable recovery can easily cause the tables to be turned there...perhaps it would be more useful if you gave yourself multiple jumps to work with?

Up Aerial: Giant Smash

Grobbulus mightily punches upwards with his steel fist, a surprisingly quick move that slams the foe for 10%, with light knockback at the start due to very low base knockback but it has rapid knockback growth and thus can actually KO at 150%, but of course will KO faster if you get the foe higher into the air: Sometimes, using your large jumps to smash someone flying high with this can be a perfectly valid KO tactic. The ending lag on this move is pretty average.

Thanks to the knockback properties, this move tends to be used as combo fodder/juggling at low damage % and KO fodder at higher %s, notably working much better combo-wise on heavier foes and much better KO-wise on lighter foes, meaning that it is a bit modal with your mutations and can allow you to choose between which you want more, and it should always be considered when you're creating combo strings, especially because the move actually hits in front of Grobbulus at the very start, so this can serve as a shorthop move.


Neutral Aerial: Syringe Stab

Grobbulus stabs forwards and just slightly downwards, but still mostly forwards, almost like a kick, dealing 13% damage that KOs at 135% with standard sex kick properties (sex syringe? Well, I guess he does inject his ooze into your body...), having a long duration with a hitbox that steadily gets weaker until it only deals 6% and very weak knockback. The start of this hit is excellent to send enemies away, while the later hits of this move are solid for comboing or keeping the enemy close, and a shorthopped Neutral Aerial is one of your most effective combo starters while serving as a solid hit if instead hit by the start. The ending lag on this move is short, but the starting lag is slightly longer than average.

Back Aerial: Mighty Swing

Grobbulus takes his metal fist and takes a large swing behind him, a long and sweeping motion with long starting lag that deals 17% and KOs at 90%, with fittingly long ending lag as well with horrid landing lag. Hard to hit with, this is one of Grobbulus' early KO options, but if he gets his setup going he'll usually only throw this out for a surprise. Perhaps if you had some flying Fallout Slimes, this would be easier to hit with...

Final Smash: Oozetoberfest

Grobbulus stabs his syringe forward, requiring a hit for the Final Smash to hit continue, injecting the opponent with globs of ooze, the opponent visibly sickened and decaying as they slide off, unable to move as Grobbulus smashes their body with three hard, metallic sounding strikes that each deal 15%, with the last hit dealing knockback that only KOs at 120%. However, for the next 10 seconds, the opponent takes 1.5x damage, knockback etc from attacks, takes 1% per second and produces twice as many slimes when hit by Slime Spray or Poison Cloud.

Playstyle: Ooze Lord

"No talk."
 

FrozenRoy

Smash Lord
Joined
Apr 26, 2007
Messages
1,260
Location
Las Vegas, Nevada
Switch FC
SW-1325-2408-7513
(NOTE: This moveset was completed in MYM18 and edited in later.)

Gluth

"Gluth, the foul plague-dog of Naxxramas, was said to have an appetite so voracious that even the living were not enough to satisfy his hunger. Feugen was said to feed him an army of zombies daily, recycling the remains of undead too weak to use in combat."

The undead plague-dog Gluth sits obediently within Naxxramas, awaiting orders from his masters. No doggie biscuit can satisfy Gluth’s ravenous hunger. It is rumored that Gluth can easily devour an army of undead on a daily basis, which Gluth uses to knit his own decaying flesh back together.

Statistics

There is an achievement for losing to Gluth. I'm pretty sure.

Gluth has the same general body shape as Ivysaur, with the exception of the back bulb obviously, but is somewhat larger than the Pokemon overall and while still quadrupedal he is a bit more bipedal: See his image for example. Weight-wise, Gluth is lighter than Ivysaur but heavier than Mario and speed-wise he moves slightly slower than Yoshi. He has very good traction.

Aerially, Gluth falls at around an average pace, but he moves through the air quickly and with fairly fine control, meaning Gluth is actually okay at aerial combat. Both of his jumps are fairly average, while Gluth has an okay Crawl as well but no other Brawl-based specialities.


Mechanic: Jaws


Gluth eats our leftover zombies. Come to think of it, you would make a pretty good leftover zombie...

Gluth's jaws hunger for zombies! And so we come to Gluth's mechanic, Jaws. As you will see, Gluth has the ability to summon minions named Zombie Chow, and then devour them: That's all you need to know about the Chows right now, just realize he has them and can eat them. Whenever Gluth devours a zombie, Gluth gains a stack of the Jaws buff, which can be stacked up to five times. Gluth must continually munch on Zombie Chow, however, to keep these buffs going: If Gluth does not feed wirhin 12 seconds, he loses a stack of the Jaws buff, continuing for every 12 seconds he fails to eat. In addition to the list of buffs below, various attacks of Gluth's gain new properties depending on how high his Jaws level is. You can tell Gluth's Jaws level by looking at his size, since he grows larger with each buff level, and by looking at Gluth's jaw, which will salivate more green slime as he gets higher Jaws stacks.

Level One: Gluth increases in size slightly, allowing him better reach on many of his attacks. Gluth's weight is increased to Wolf's and his ground speed is increased to Diddy Kong's. Gluth's attacks now deal 10% more damage (IE 10% damage attacks now do 11%, not 20%) and knockback. Gluth gains the ability to dig his claws into the side of the stage as a wall cling.

Level One buffs are fairly basic overall, basically being a general buff of all of Gluth's attacks and giving him a very slight damage and knockback buff. Not much to say about them. The most notable thing is that Gluth gains the ability to wall cling after a mere single zombie.

Level Two: Gluth increases in size yet again, furthering his reach, and Gluth's weight is increased to Ike's. His Ground Speed increases to Charizard's (Yes, Charizard is faster than Diddy) and now his attacks deal 20% more damage/knockback rather than 10% more. Gluth now gains 1% damage reduction, meaning he takes 1% less damage from all attacks (IE 7% becomes 6%), as his bones harden and become tougher, like it was armor. Both of Gluth's two jumps gain a small amount of height.

Level Two buffs largely simply continue the Level One buffs at a higher level, but adds in very minor damage reduction as well. The damage boost becomes much more noticable around now, though. Gluth's jumping ability also increases, unlike before, allowing more survivability and longer air combat.

Level Three: Gluth increases in size even further and his weight increases to Yoshi's, while his ground speed increases to Zero Suit Samus. Gluth's attacks now deal a substantial 30% more damage/knockback, he gains 2% damage reduction on all attacks and constant 3% super armor. Gluth gains a third jump of moderate size and he retains his previous jump boost. Gluth's shield now regenerates 15% faster. Gluth gains the ability to walk during his wall cling for 2 seconds at 1/4th his ground speed, during which time he may use his ground game.

Level Three represents Gluth's first really big level of buff, substantially increasing weight, ground speed and damage (and size) while offering a large damage and knockback boost. The damage reduction is applied after the super armor, so attacks that deal 5% still go through the super armor and are not stopped for example. Regardless, the damage reduction really begins to become noticable now and Gluth's aerial combat becomes much finer due to the presence of a third jump. Gluth's shield regenerates faster as well, allowing him a much better defensive game. Finally, Gluth's wall cling ability now advances to a full on wall walk. Gluth may only wall walk once per air trip and he must recharge his wall walk by staying on normal ground for an amount of time equal to how long he was on the wall.

Level Four: Gluth gains yet more size and weight, he is now as heavy as Charizard and about as large. He now moves at the speed of Fox and his attacks deal 40% more damage/knockback. He has 3% damage reduction and retains his 3% super armor and the height of all three of his jumps is increased: The third jump only slightly, the first two susbstantially. Gluth's shield begins 1.25x as large and regenerates at the same 15% faster speed. Gluth's moves gain a 10% reduction in starting and ending lag, enabling him to attack faster. Gluth's wall walk now lasts 3 seconds and at 1/3rd his ground speed.

Level Four represents the fact you should probably stop Gluth from eating all those Zombie Chows, if you're fighting him. Gluth now hits extremely hard, moves very fast, has very high weight and is even seeing lag reduction, coupled with superior shielding ability and impressive damage reduction, not to mention heightened aerial and recovery ability. It takes a lot to get to level four and stay there, but it is well worth it. Gluth's wall cling abilities are also enhanced.

Level Five: Gluth is now the size of Bowser and weighs almost as much, but moves slightly faster than Captain Falcon though much slower than Sonic. His attacks deal an impressive 50% more damage/knockback or 1.5x. He has 4% damage reduction on all attacks and 6% super armor and escapes grabs 20% faster. Gluth retains all previous jump boosting abilities and may now move along walls that he clings to at half his ground speed, being able to cling to them for 5 seconds and use his ground game. Gluth's shield now begins 50% larger than normal and regenerates at 25% faster speed. Finally, Gluth's moves now have a 20% reduction in starting lag and ending lag.

The ultimate cumulation of Gluth's buffs. After you hit Level Five, eating Zombie Chows only serves to reset the timer before you lose levels. Getting this in any single stock is difficult, your Jaws level resets when you die, but the extreme buffs I just listed are certainly worth it.


Specials

Neutral Special: Zombie Chow

I asked the Zombies if they wanted to eat your brains and they said "I don't eat junk food".

Gluth lets out a horrifyingly haunting howl to the sky, calling a Zombie Chow to rise from the ground in front of him, groaning like zombies often do. This move has slightly less overall lag than Waddle Dee Toss, but shifts large amounts of lag from the ending lag to the starting lag. Because of that, this move has fairly long starting lag but quite little ending lag. Zombie Chow are your only minion and are quite important to your moveset, so trying to find time for this move is fairly key. This move is not reduced by the lag reduction of your Jaws mechanic, presumably because he is waiting on the Zombie Chow rather than himself.


While Zombie Chow are important to your set, they kind of suck as minions in most regards. They're as big as Marth and knocked around like Marth at 50%. They shamble at the super slow pace of Ganondorf's walk speed, so they are easily outrun. The only good thing is their 30 HP is fairly beefy for such a minion, so they're at least kind of hard to kill.

Zombie Chow have a number of attacks, naturally, but most of them are not very good. The first is a slow virulent swipe in front of themselves that has somewhat slow tilt speed, deals 7% and weak knockback. The key thing with this move is that it leaves an "Infected Wounds" effect on the foe, which increases the damage they take by 1% (IE 5% becomes 6%) for each infected wound they have on them and their shields take 1.5x damage (IE 10% becomes 15%). Infected Wounds last a fairly long 7 seconds, but this is helped by the fact that whenever a Zombie Chow hits an opponent with Infected Wounds, it resets the timer of all Infected Wounds on the foe to 7.

Zombie Chow also have a swifter slash of their hands that deals just 2% damage and practically no knockback, having the speed of a slow jab. They have a "strong", more smash-like attack where their put their hands together and try to do an overhead tomahawk on the foe, which has speed around Mario's F-Smash but only does 14% and KOs at 180%...which, hey, for Zombie Chow that's strong! Finally, Zombie Chow can grab onto the foe and bite the foe for 1% non-flinching every half second. To get them off, just deal half their current HP (when they latched on) and they'll fall right off. You can still move around, but you'll fall slightly faster and move slightly slower since you have a zombie latched onto you that you're dragging around, though this is not hugely noticable without multiple zombies (which can happen).

Zombie Chow are rather stupid and will mindlessly pursue the nearest foe. They almost exclusively use their Infected Wounds virulent swipe, only rarely using the other attacks. Every single one of their attacks produces a loud "DAH!" sound effect when they attack. If you don't mind them sticking around, you can even keep them around, as they're fairly easy to kite. And there's a reason you might want to do that!

Specifically, whenever a Zombie Chow dies, whoever killed it gets healed 10% as the life force drains from it and enters the killer! If you're below 10%, you might wanna wait and kill that Zombie Chow later, or if you want to stay at your current damage % some reason, like to avoid a combo against you that you'll be vulnerable to if you heal or you're Lucario or whatnot. Though usually, you just wanna kill the Chow. This does, however, mean that summoning Chow is fairly risky for Gluth, as if he doesn't eat them, his enemies will! Gluth will need to protect his Zombie Chows to keep his opponents from just healing off the damage and getting ahead...well, or just find the time to devour them.


Down Special: Decimate

Decimation is my favorite thing. No, wait, Freezing the blood in your veins is my favorite.


Gluth lets out a loud growl and jumps ever so slightly into the air, crashing into the ground and sending out a red shockwave along the ground that travels 3/4ths of a Battlefield Platform to both sides of Gluth. He doesn't leap enough to even reach a Battlefield Platform from under it, so it is mostly just an animation, though it helps give it long starting lag, while the ending lag is only slightly laggier than average. So, what do these decimating shockwaves do? Depends on the opponent's damage percentage: Specifically, this move deals damage equal to half the amount of damage the foe currently has. So if the opponent has 50% damage, they take a whopping 25% damage! Wow! This means that, while this ability isn't deadly at all early, it is hyper deadly as the game goes on, and it can serve as an especially potent "Trump Card" should your opponent constantly keep you from buffing your Jaws. It deals a set one Battlefield Platform of knockback and thus has no off the stage KO power. Because both the damage and knockback of this move is fixed, it is not affected by your Jaws buff in how much of either it deals. Since the shockwave is entirely ground based, it can not only be dodged by sidesteps and whatnot but simply by not touching the ground.

Gluth's moves normally cannot hurt his Zombie Chow, but this attack in particular will shred them, always setting them at 5 HP if they have 6 or more HP and flatout killing them if at 5 HP or below. Zombie Chow will particularly look more shredded and decayed while at 10 HP or less and will gain a faint red glow if they have been affected by Decimate, so it is a fairly easy task to check your zombies HP and if they've been Decimated or not. Zombie Chows will gain an entirely new minion script once they have been hit by Decimate, moving at Ganondorf's dash speed and mindlessly attempting to reach Gluth so that they can be devoured by him, not attacking enemies unless they need to and attempting to dodge foes as best they can on the way there. DO NOT LET THEM REACH GLUTH unless you can deal with Gluth eating them! You can either try and get Gluth away from them and then deal with them or try and kill them quickly yourself, maybe even pick them off with projectiles, but zombies at low HP are particularly potent for Gluth to eat as you will see, so it is veeeeeery dangerous to let them reach Gluth!

Of course, Decimating your Zombie Chow puts them in prime position to be pummeled by your opponents, cracking them open for the sweet, sweet healing inside, and the healthier the opponent is the weaker this move is! So it is quite risky to Decimate your zombies and should not be taken lightly.


Side Special: Bite

Gluth digs his feet in, braces his body and uses his powerful jaws to deliver a vicious bite in front of him! This move has somewhat long starting lag and only average ending lag, but the 18% damage it deals is worth it and it KOs at 130%. Not too shabby on their own, but those numbers are going to get a lot stronger as your Jaws level advances as well. This move has fairly low range to begin with, but it gains range nicely as you size up and ends up with moderate range at max Jaws level.

While that is all well and good, the notable thing about this move is how it gains certain buffs during the starting lag depending on his Jaws level, specifically relating to damage reduction and super armor. At Level One, Bite grants you 2% damage reduction and 4% super armor. Level Three instead grants 4% damage reduction and 8% super armor and Level Five grants 6% damage reduction and 12% super armor. Just like his normal Jaws DR/armor, the reduction only counts after the armor and thus, say, an 18% attack will not be stopped, but DO note that this damage reduction and armor stacks with your Jaws super armor and damage reduction, meaning that at Level Five you take 10% less damage and have 18% super armor during the start-up lag, making this move extremely difficult to hit Gluth out of and making it a pretty crazy potent close range move. Note that the attack itself and ending lag don't gain Bite's special armor/reduction, so you are safe to smack Gluth around during that time, and certain characters can be just outside of Gluth's biting range and hit him just when the hitbox comes out and the super armor goes down to normal to avoid this, though this is rather rare overall.

If Gluth bites a Zombie Chow with this, he will enter a simple command grab state with the zombie in his mouth, which he can then toss up, down, left or right, going one Battlefield Platform in that direction as a weak projectile that deals 5% and very low knockback, serving primarily as a way to get zombies where Gluth wants. Bite will always prioritize foes over zombies and throwing the zombie is fairly quick, so it isn't too worrisome to bite them, though do note a foe might be able to dodge and have you Bite a zombie and then counter attack. The ending lag on this is the same as normal.


Up Special: Enrage

Gluth rushes forward with a howl, dashing in the chosen direction for 2/3rds the distance of Pikachu's Quick Attack as a hitbox that deals 3% dmaage and practically no knockback. Visually, the attack is quite similiar to Pikachu's Quick Attack, but if Pikachu stayed visible like during Fire Fox, but obviously Gluth's goes a lesser distance and since he doesn't disappear he is much more vulnerable during it, especially since his armor and damage reduction from Jaws cease during this move or while Gluth is in helpless. This move has similiar lag overall to Pikachu's Quick Attack, but is slightly laggier overall, though past Level Three of Jaws it becomes less laggy. This move additionally gains various bonuses as your Jaws level advances. At Level Two, Gluth gains a secondary dash just that is done just like Pikachu's Quick Attack, with all the same properties of a normal Enrage. Level Three gives Gluth an ability to essentially perform a Quick Attack Cancel with some modifications, aptly named "Enrage Cancel"(EC). Finally, Level Four adds an additional dash on top of the other two, giving Gluth three dashes overall and making him extremely difficult to edgeguard due to the sheer amount of ways he can get back to the stage, not to mention a huge recovery.

Oh, right, cancelling. It's kind of like Quick Attack Cancelling.


An example of Quick Attack Cancelling performed by that WRETCHED RODENT.

Quick Attack Cancelling is performed by using a Quick Attack into the ground. Pikachu will lightly "pop" off the ground a moment, during which time you can quickly perform any aerial or special attack from this and cancel the lag at the end of Pikachu's momentum, allowing Pikachu to perform quicker assaults/air game, move around the stage very quickly with repeated Quick Attacks, mindgame the foe by QACing in and out or whatnot and also to combo with the hit of Quick Attack. Enrage Cancel works exactly the same way, excepting that Gluth does not go as far as Pikachu, with the same applications on him as Pikachu. I recommend watching this video to see a video demonstration of Quick Attack Cancelling to get an idea of how this works, especially if the above explanation has confused you.

Gluth is notable in that he performs an Enrage Cancel against something like a slope/otherwise elevated ground, not only does he gain momentum like Pikachu, but it allows him to also use his ground attacks in addition to his aerials since his momentum "carries" him along the ground, allowing Gluth to supplement his powerful aerial cancel game with a potent but more situational ground cancel game. Just remember that while you're doing all this, you are more vulnerable at higher Jaws levels than normal.


Grab Game

Grab: Chow Down

Gluth rears up for a moment and reaches his front legs forward, snagging any foe in front of him and keeping them in place by biting on to them. This has somewhat long starting lag and only slightly better range than normal and slightly longer ending lag than normal, so it isn't quite an amazing grab, but it does have something nice to it, which you probably guessed from the name.

Yep, Gluth eats his Zombie Chow via his grab, which prioritizes foes over Zombie Chows of course. When Gluth hits a Chow with this, though, he will take it to the ground and begin ripping it apart with his powerful jaws, devouring it whole. This process takes longer the more HP the Zombie Chow has: At max HP, it is quite a laggy process. At 5 HP, the lowest it checks, the lag isn't too long, though it is still not "quick" to do. The ending lag on this remains a constant, somewhat average lag. Gluth will, as aforementioned, gain a level of Jaws for eating his Zombie Chow, but he also gains an amount of healing dependant on the health of the Zombie Chow. If the Zombie Chow has full health, Gluth heals a pathetic 1%, while at 10 HP the Zombie Chow will heal Gluth a very impressive 20%, somewhat similiar to how Gluth would Decimate his zombies before munching them in World of Warcraft. Because of this, Gluth wants his zombies to get to low HP before devouring them, and Decimate particularly puts the Zombie Chows at max healing. As obvious, but I should specify anyway, Gluth does not gain the 10% health from killing a Zombie Chow.

Of course, getting the Chow to low HP means that enemies can snipe the Zombie Chow from you and steal their healing themselves, while you'll heal less from killing Chows than your foe will if you eat them really early. Gluth should properly balance how much he wants his Chow damaged before eating them due to this. And of course, remember that you have to eat Chows every 12 seconds to keep from losing a Jaws level. Zombie Chows cannot be killed by forces outside Gluth during the eating process, but Gluth can be knocked off the zombie during it, where the Chow will have taken some damage based on how long it was being munched on. Overall, a key move in Gluth's arsenal.


Pummel: Gnaw

Gluth gnaws into the opponent, dealing 3% damage at the rate of a slightly slow 3% damage pummel. At Level Three Jaws, it goes as fast as a 2% pummel. And at Level Five, it goes at the speed of a 1% pummel. Potentially an extremely potent damage dealer!

Down Throw: Mortal Wound

Gluth's teeth loudly crunch into the foe, his green drool oozing into the wound as he shakes them back and forth, before they are send flying from Gluths jaws, taking a total of 13% damage and fairly moderate forwards knockback, KOing only at 235%. The green drool will continue to drip out of the foe's wounds for about 8 seconds, though this doesn't cause any damage or anything, but what it does do is gum the opponent up and reduce their healing by 50%. Most of the itme this isn't important, but with your Zombie Chows involved that means cutting in half the healing they get from them for a while. This is one of the big reasons an opponent would want to wait to kill Zombie Chows: Waiting could theoritically double the amount of healing they get, compared to killing them with this debuff on!

This debuff will also cause the foe to have 10% less shield regeneration for each level of Jaws at the time of using this move, making it increasingly more difficult to block Gluth's increasingly more powerful attacks. The effects of multiple Mortal Wounds will stack (IE two reducing Zombie Chow healing to 2.5%), but they do not refresh each other's timer or anything, so you can't really stack too many of these onto a foe at once. It is still incredibly useful, though, especially if you want to keep foes from killing your Chow.


Forward Throw: Charge Forward!

Gripping the foe tight in his mouth, Gluth charges forward half of a Battlefield Platform and builds up speed, before ripping (somewhat literally: You can see Gluth's flesh ripping and tearing some as he has more Jaws stacks when he does this. Gross!) forward and releasing his grip on the foe, sending them flying for 9% damage that will still KO at 170%, not all that bad for a throw really. However, the damage and knockback of this move can be modified in a few ways, most notably if Gluth is inside of a pit or going up or down a slope (GEE I WONDER IF HE'LL BE ABLE TO MAKE THOSE, SAY, IN THE NEXT MOVE SECTION).

When going down a slope, Gluth will gain more speed and go 3/4ths of a Battlefield Platform instead, dealing an increased 12% damage but more importantly KOing at 140% on the direction of the slope...if Gluth is in a spot where he's not just throwing the foe against a sloped wall, of course, but since this is before Jaws buffs it is pretty dang nice. Going up a slope will have Gluth gain less speed and go only 1/4th of a Battlefield Platform, more weakly dealing 6% damage and pretty light knockback across the slope's path. This obviously has less immediate reward, but it is a pretty good follow-up throw due to the lowered knockback and being more towards the apex of a slope.

Inside of a plain ol' pit, though, Gluth will just slam riiiiiiight into their walls, taking increased ending lag but dealing a whopping 18% (before Jaws buff!!) damage, albeit near-pure vertical knockback that won't KO until 205%. This will usually get foes out of the pit and isn't the best for setup despite the lower knockback, but in return it definitely does the most damage of Gluth's throws and can be monstrous with Jaws buffs.


Up Throw: Slam

Biting the opponent by their lower body, legs if possible for the character's model, Gluth savagely slams them to the left and right of Gluth multiple times, dealing 4 hits of 1% damage before a final hit of 4% damage that sends foes up and somewhat slanted forward, the knockback low enough to follow-up at lower damage percentages, but being more of a space gaining throw once you get past that point.

What's really fun, though, is to combine it with your slopes, which will cause Gluth to slam the foe to the slope's sides, adding an extra 1% damage for each slope slam, meaning either 2% if Gluth is in range of one or 4% if Gluth is nexted to both, an already nice bonus. On top of that, though, Gluth's swinging them away will instead follow the slope, meaning that opponents will be "sliding" up the slope, like you see enemies sometimes do in Smash. This momentum carries them a fair bit, although they can act and try to cancel it beforehand due to the hitstun of the move, and can allow Gluth some decent chase chances up the slope, and can allow Gluth to make a little delivery service to Zombie Chow loitering around at the top of the slope as well. Gluth will release foes off the nearest slope by default, but holding the control stick to one side allows him to choose the slope if he is able to reach both from his current position.

When inside a normal pit, Gluth's slamming against the walls is more damaging, adding 2% for each hit, meaning 4% if he only hits one pit wall and a whopping 8% additional if both, meaning this is potentially a 16% damage throw, with the knockback also increasing but becoming pure vertical: It still won't kO until 195% and so mostly serves to prevent too many combo chances, but it can still be a decent KO throw in your pits and is a good deal of damage as well. One of the primary reasons to use this over the Forward Throw inside of a pit is that Gluth does not take additional ending lag, meaning he can still better utilize the pure vertical knockback, and increased KO power but lowered damage. It also has a longer duration and can allow your Zombie Chow to PIIIIIIIIILE OOOOOOOOOOOOON!


Back Throw: Rip

Gluth grabs the foe and rips them back, releasing his iron grip and sending them flying for 11% damage and okay knockback that KOs at 210%. The knockback is rather shallow and because of this, it is reasonably effective to work with your Zombie Chow on stage, but it is less effective in pits and slopes, as it can't send foes high enough to go to slopes above usually. Gluth can get a wall bounce inside of pits with this, potentially leading into an aerial. This can be teched, but of course teching has its own delay, so it is usually good enough for Gluth anyway.

Smashes

Down Smash: Bury Bones

Gluth viciously claws and digs at the ground, like the dog he is. ZOMBIE DOG THAT IS. This move deals four hits of 3%-5% to any foes in front of it extremely rapidly, which makes it very difficult to DI out of simply due to the strict timing involved, with a fifth hit that deals 5%-7% damage and knocks the opponent away, though this is one of those multi-hit smashes that simply doesn't have a lot of knockback behind it for a smash. KOs at 220%-190%. On the plus side, this move starts up very quickly and because of that is an extremely good "punisher" move or panic button and the duration makes it something to catch dodgers with, though the ending lag is somewhat long so spamming this is punishable. The range of this move covers most of Gluth's body and a bit in front of Gluth at the start, but higher levels of Jaws will cause the range in front of Gluth to increase at the cost of body coverage due to the simple physics of having a larger body and longer arms.

While this is a perfectly fine move on its own, it also has the noticable effect of digging out the ground, causing 0.5-1.0 Ganondorfs of ground to be dug out and become a pit based on charge. Pits are roughly the width of Bowser and are created directly in front of Gluth, meaning that at lower percentages a foe who is hit by this attack may end up inside the pit after it is over and thus allowing themselves to possibly be hit: In addition, DIing out might mean you land in the pit right after, so sometimes it is actually better to just take the entire attack if being in a pit would be especially advantageous to Gluth. Gluth may make any number of pits, but each pit may only be up to two Ganondorfs deep, trying to dig deeper just has Gluth make a sad doggy noise at the fact he can't open up the ground any more.

If there is already a pit in front of Gluth, then Gluth will instead dig out a slope that goes towards the pit, which is slightly less deep due to being a slope and not a full pit, and functions like the slopes on Melee Yoshi's Island in that they can be travelled up/down and such, allowing Gluth to effectively enrage cancel with them. Gluth will continue to do this until using this move would make it level with the pit, in which case it just becomes a pit as normal: In addition, double tapping A allows Gluth to make a pit at any time, though Gluth must have a pit to make a slope. If the bottom of a pit or slope would go off the edge, then that bottom becomes a grabbable ledge, so Gluth can't just destroy ledges with this move. In addition, the top sides of the pit are grabbable edges, which Gluth can more effectively use over the foe due to being able to Enrage Cancel into a ledge grab. Aside from all the uses with Gluth's Enrage Cancel, Gluth can also create pits to store his Zombie Chow in for a while, forcing enemies to go inside them to hit them if the pit is deep enough.

A minimum size pit is large enough so that the Zombie requires low hitting attacks to strike for the most part, but their attacks can still "reach" over the top of the pit to hit at the bottom of foes, though Zombie Chow cannot get out of the pit as they cannot jump. Once a pit is 1 Ganondorf or higher, the Zombie Chow will be too far down to be hit by low reaching attacks but in turn cannot hit a foe unless the foe is put into the pit. Pits will fill in over time unless something, be it a character, item, Zombie Chow or whatnot, is inside of the pit. 12 seconds total of nothing inside the pit will fill up half a Ganondorf of height of the Pit. In addition, pits with nothing inside them become filled whenever Gluth dies, though they do NOT get filled up if something is inside them. If Gluth will die soon and wants to keep his pits set up, he may want to risk putting Zombie Chow in them: Bite is especially nice to throw Chow in.

Finally, if this move is used on a shallow platform such on Isle Delfino, Gluth will simply create a hole in it, which if it is within reach of a Zombie Chow the Chow can grab onto and use to pull themselves onto the platform, though this is fairly laggy. And don't forget your ability to move up walls at higher Jaws levels.


Forward Smash: Savagery

Gluth raises a front leg high and lets out a loud roar as he puts his entire body into the swing, dealing 20%-25% damage to anyone hit by this move and getting KO'd at 110%-85%, which considering this move is very laggy on both ends doesn't seem too great at first, but since Gluth is putting all of his body behind the attack (hence the lag!) this move is notable for getting significantly more buffed from your Jaws level, getting double the normal damage and knockback buffs! That means that, at max Jaws level, you're going to be doing 40%-50%, and you'll probably be KOing at around 70%-55% or maybe even a bit earlier, which is pretty amazing! Unfortunately, the sheer effort Gluth puts into this move means he only gets half the Jaws lag reduction he normally would, but that just means it still gets some nice reduction on a bone crushingly powerful move, especially when you can do things like Enrage Cancel on a slope to retain momentum as you strike with this move. In general, you'll be using this or Bite to finish off the foe: Bite is significantly safer due to its speed and extra armor, but Savagery is significantly more powerful and gets more powerful earlier.

Up Smash: Terrifying Roar

Gluth raises his decaying head to the sky and lets out an eerie, hallow howl, the initial head-raise being a small hitbox that deals 3%-5% damage and combos into the main hitbox ala Snake's Up Smash, which is a bit above Gluth and the force of his roar, which deals 18%-24% damage that'll KO at around 130%-105% or so. The starting lag on this is actually decently fast, but the ending lag is somewhat long as Gluth will hold the pause for a while after the attack finishes. It's still a pretty nice anti-air that deals good damage and can be even combo'd into lightly, largely when inside of the pits Gluth can create: Gluth can even angle this attack left or right ala many Forward Smashes, which allows him to slopeguard from the bottom of a pit fairly well!

The hollow howling of Gluth's roar puts fear into the not-quite-still-beating hearts of his Zombie Chow, which will cause any Zombie Chow close to Gluth (about half a BFP to both sides and 1 Ganondorf above or below) to scramble away from Gluth in a frenzy, wildly attacking anything in their way as they try to get away from Gluth, travelling a total of one Battlefield Platform, although they will not run off ledges to do so and will instead just run against the ledges for the duration like the mindless zombies that they are. This can be a good way to cause a Zombie Rush of sorts to charge at foes and can be especially good if the foe gets down in a pit full of Zombie Chow to get them damage racked. Do note that Zombie Chow will only attack foes in their path, so if they get behind a Chow...well, easy healing for them! Show a little tact, will ya?!


Standards

Jab: Savage Strikes

Gluth performs a light, inward strike with one of his paw-arms, before performing a second, stronger strike with his other arm in this 1-2 jab! The first hit deals a mere 3% damage and light knockback towards Gluth, essentially serving as a quick set-up move for various parts of Gluth's moveset that will usually combo into the second hit, which deals 6% damage and sends opponents behind Gluth at a downwards-back angle: The knockback isn't amazing or anything, but it IS above average for a jab, and this particular style of knockback serves a very nice use in that if Gluth is facing away from a slope, it will usually knock foes riiiiiiiight down it at almost ground level, setting up a variety of potential Enrage Cancel shenanigans and generally serving as a good way to get foes into your pits from a DEFENSIVE stance over an OFFENSIVE stance. Aside from that, it is a pretty average jab with pretty average lag that serves the function that most jabs do.

Forward Tilt: Claw

Gluth performs a single, straight-ahead jab forward with one of his claw-arms, a pretty simple maneveur which deals 10% damage on quick starting lag, with knockback that is decently average and KOs at 215% or so. This move does have a bit more ending lag than normal, but it isn't HORRIBLY LAGGY or anythin'. This serves as a pretty standard move that takes advantage of many of Gluth's natural Jaws buffs: For example, the quick speed combined with Gluth's super armor allows him to counter some weaker hits, it becomes pretty strong (especially for the speed) as your damage buffs up, and so on. It also noticably deals very impressive shieldstun and shieldpush, making it ideal to push defensive foes into your pits and making it safe on shield.

This move can be angled up or down, which does offer some minute differences in actual damage and whatnot: Up deals 12%, but the knockback is more up and worse for KOing (more influenced by DI and fall speed) and only KOs at 245%, also making it worse for gaining space but better for combos. Down only deals 8%, but the knockback is superior for KOing and it deals a bit more knockback and will KO at 175%, making it more of a reasonable KO option but a much worse damage or combo option, can be good for GTFOing too. The angling is perhaps more important, however, for Gluth's pit gameplay: Up angle goes almost perfectly ground level with a slope from below, while down does the same from above, allowing Gluth to smack away at foes with this move regardless of elevation and giving him a solid base.


Up Tilt: Buck

Gluth makes a very small leap upwards in a traditional bucking motion, smacking anyone above him with the back of his body for 9% damage that has okaaaaaay but somewhat low upwards knockback, won't KO until around 260% or so I'd say. It looks kind of like a less violent pre-SSb4 Bowser Up Smash, really. Both the starting and ending lag of this move are somewhat faster than average, but not blazing fast or anything. One of the key things about this move is that as it is tied to Gluth's full body, it gets a pretty substantial range buff as Gluth increases in size, and from Level Two and on will actually hit increasingly to Gluth's sides as well, making it a real all-around body coverage move. This is ESPECIALLY noticably if Gluth is able to Enrage Cancel it into a slope, as Gluth will be practically DACUSing it with a pretty slick hitbox size!

On top of that, this is one of Gluth's more noticably moves in a pit, because as Gluth gets bigger he can take up progressively more space in a pit, making it substantially harder to approach Gluth inside of his pit compared to normal. While Gluth doesn't really just camp in his pit, it does mean he can pressure foes to try and approach him by summoning/tossing Zombie Chow at foes, and his Enrage is a good way to approach foes outside of the pit as well. Noticably, slopes actually make this defensive move harder to pull off as it is much easier to poke at Gluth with down tilts, making it one of Gluth's moves that prefer pits compared to slopes.


Dash Attack: Gluth Glomp

Dashing forward briefly, Gluth leaps forward with his claw-arms at the ready, striking forward with them in a vicious slice for 14% damage that KOs at 165%! A move that's somewhat laggy to start-up and has noticable ending lag, the damage and knockback is nonetheless pretty noticable even before Gluth's Jaws buffs, and Gluth gets noticable frontal super armor on this move based on Jaws stacks: In addition to the Super Armor normally given by Jaws stacks, Gluth gains 1% super armor for each Jaws stack that he has to the front half of his hurtbox, making it a move you more prefer to matador than to deal with head-on.

Unlike most dash attacks, Gluth will go over the edge with this move, being able to cancel out of it after half a Ganondorf of falling and able to fall a maximum of 2 Ganondorfs with the attack out before entering ending lag, which one might note is exactly the distance down your pits: Landing lag, so to speak, of this move is actually pretty low, so Gluth can happily use this to dive down his pits and slopes aggressively and potentially even cancel it on hitting with a jump to keep him from full-on committing. It's also a rather excellent edge guarding move due to this property, giving it some fun multitudes of uses.


Down Tilt: Drag

Extending his claw-arms forward, Gluth plants them claw-first into the ground a decent bit in front of him and scrapes them back towards him, dealing multiple hits of 2% that total 8% but also really pathetic knockback, with foes essentially being delivered in front of Gluth unless they DI out of it: Although the starting lag is rather long, the ending lag is rather short, and it puts foes right into the jaws of the beast, ready to be teared apart and mutilated by the Plague Dog Of Naxxramas at his natural range, meaning it's a somewhat savage move to get hit by. Gluth will reach down slopes with this move, allowing him to drag enemies who wanna camp him from his slopes and pits back up, and in fact if Gluth hits a foe with this on his pits, or even offstage, he will "drag" them to the lag without the foe getting granted mercy invincibility, allowing Gluth to set up for some really mean edgeguarding and pitguarding possibilities.

Aerials

Neutral Aerial: Roll Over

Gluth performs a Pikachu-esque roll, bringing all of its limbs in and rolling over his foes for multiple hits of 3% that will usually end up totalling 12% with no real knockback: Good boy! The starting lag is close to Pikachu's Neutral Aerial, with the ending lag being a bit laggy, while the knockback tends to drag people along Gluth's path. Something quite neat about this move, though, is that Gluth will keep rolling down the slopes he can make if he would enter "landing lag" during this move, which can ALSO be used when you Enrage Cancel into it as well, which is particularly fun because Gluth will always roll down slopes and so Gluth can run over a foe, land above them, and then rock on down them with this move. Gluth will roll down until he reaches the bottom, taking his normal ending lag, or until he cancels out of it with a jump.

Gluth gains power as he rolls down his slopes, specifically every 1/4th a Bowser he rolls down, at the start he simply keeps doing his dragging knockback, but at the maximum of 1.5 Bowsers he'll smash into foes for 21% damage and he'll KO mostly upwards a 115%! Yoooooowza! In the middle is around 12% damage and only moderate knockback, however, and getting the full damage requires a pretty strong slope and a lot of time, making it pretty predictable...but it is reeeeally deadly when you pull it off. You can also use the earlier hits to combo into an aerial assault via jump cancel too, of course.


Forward Aerial: Power Slam

Gluth leans his claw-arms back and then gives them a strong, sharp slam downwards in front of him, which will spike foes when he hits them with the bulk of his paws for 15% damage that is fairly strong, but it works like Charizard's Down Aerial spike: It is actually STRONGER when hitting grounded foes than aerial ones, with the spike being able to KO at 135% from the ground but being more Mario Forward Aerial strength in the air, giving it decent gimping power but a lot of grounded potential. This is particularly useful from the top of pits or on slopes: For example, Gluth can Enrage Cancel this on the top of a slope and bounce off it, slamming them to death against the rocky crusts. The starting lag on this is somewhat long, while the ending lag is also slightly long but not thaaaaaaat terrible.

Up Aerial: Chomp

Raising his head to the sky, Gluth performs a biting motion above himself, which consists of a sweetspot and a sourspot: The sweetspot is briefly made when Gluth bites down, dealing 16% damage and KOing at 128%: A true aerial knockout move! But it only exists for a brief moment, and the rest and the edges of the the bite only deal 8% damage and just a little bit of knockback. That stuff is good for juggling, naturally, and both are especially great when it comes to your pit play. The starting lag is kinda long as far as potential juggling moves go, however, but the ending lag is fairly low so that's good too.

The more that Gluth has in Jaws, the longer and wider the sweetspot is, which ultimately means at the max level that Gluth's entire mouth becomes the sweetspot except for the very edges and it lasts most of the mouth's biting, which makes it pretty hard to juggle but it is a really crazy KO move honestly, albeit all as an upwards-only move.


Back Aerial: Skin Scraper

Gluth swipes behind ihm with one of his claw-arms, scraping against foes, the ground and anything else that is in his way, dealing 11% damage on a fairly quick move that deals solid but slightly lower than average knockback. Start to finish and with average ending lag, one of the most important things about this move is that it'll scrape against walls and slopes and create green-hot, sickly sparks that deal rapid hits of 1% that total 6%, although the hits can't really combo into each other. It does mean that Gluth can do some really fun tricks with the ledge, either bouncing foes off the stage or severely limiting their getup options with passive hitboxes that'll smack them out of quite a few return options. When you keep in mind that Gluth can make pits with grabbable ledges, this becomes something quuuuite relevant more often than it normally would. A pretty scrape move.

Down Aerial: Tip-Toe-Dog

Gluth makes a serious of 4, quick stabs under him with his claws, each one dealing 2% damage and light downwards knockback, good to string together with low lag on both ends but also ultimately pretty low damage and the knockback is pathetic if you want foes away from you. Gluth won't land during this move, instead having his claws tap against the ground and keep himself just above it before taking his normal ending lag, making it actually a really nice option in Gluth's shorthop game, especially with his aerial speed.

Final Smash: Ravenous Cerberus

Embued with the power of the Smash Ball, Gluth leaps straight forward a MASSIVE distance with his mouth open, chomping at anyone in his way for 40% that KOs at 130%. This might sound weak, but Gluth will heal against any foes he hits by ripping out their flesh, healing 50% minus 1% for each 1% of damage they've taken down to a minimum of 1%, while also eating any Zombie Chow in his path for normal healing. So it can potentially actually be a really large swing!

Playstyle: Play Dead!

HAHAHAHAHA! THERE IS NO ACHIEVEMENT FOR LOSING TO GLUTH!
 
Last edited:

FrozenRoy

Smash Lord
Joined
Apr 26, 2007
Messages
1,260
Location
Las Vegas, Nevada
Switch FC
SW-1325-2408-7513
"I...MUST...OBEEEEEEEYYYYYYYYY!"

THADDIUS


Your raid cleared out the last group of monsters, and the only thing left are the two gates at the very end of the room. All of a sudden, the mighty gates fly open. A vast laboratory filled with all kinds of strange machinery lies before you, electric discharges and lightning painting the walls with jagged shadows. Even though you know you should be trying to rally your raid you can't help but stare at the monstrosity in the center of the room. At the last second you snap out of it and barely escape a fierce blow by of one of the two gruesome wights that descended from platforms higher up in the room. As your raid forms up and mounts a first organized attack on the creatures, you can't help but wonder what other nightmares lie in wait in the cursed depths of Naxxramas.

You get the feeling you'll find out soon enough.


Stitched together from the sewn flesh of the innocent, Thaddius serves as the final boss of the Construct Quarter in the Naxxramas raid and in the Curse of Naxxramas Adventure Mode In Hearthstone. It is a flesh titan whose creation has bound the souls of those used to make it into itself, leaving them in eternal torment. Thaddius does not appear in the raid until the wights Feugen and Stalagg have been killed: in Hearthstone, this is represented by Feugen and Stalagg's Deathrattles, but Thaddius appears as a normal boss in Curse of Naxxramas. Thaddius' gimmick is his "Polarity Shift": In Naxxramas, this would cause members of the raid to gain a positive or negative polarity charge. People with the same charge standing near each other would increase the damage they do, but standing with the opposite charge would cause damage that will usually cause the raid to wipe. In Hearthstone, this is represented by Thaddius "Polarity Shift" Hero Power, an every turn ability that swaps the attack and health of all creatures on the board. Thaddius mixes powerful heavyweight tactics with electrical potency.

STATISTICS

Thaddius is quite a large and heavy character, fitting into the "super heavyweight" mold: He is larger than Ganondorf in both height and width, enough that he can be comfortably poked from the bottommost Battlefield platforms and only a bit less wide than Bowser, while being significantly heavier than Bowser: If Bowser is the top of weight 10, Thaddius would be the top of weight 11. While Thaddius is slow, however, he is not the most sluggish character ever: He moves faster than Link, but slower than Ike. Thaddius has top notch traction and will rarely trip, nor does he slide far when shielding.

Thaddius aerial stats are about what you would expect: He is an extreme fastfaller with poor aerial control who goes through the air quickly, his fall speed being roughly on par with Falco's. Combined with his extreme weight, his vertical durability can be compared to King DeDeDe, but it makes him die quicker when he is thrown off the edge. Thaddius' first jump sends him very high, a notch below Falco's, while his second jump is also above average, but he lacks other special Brawl characteristics.

Much like in Naxxramas, fights with Thaddius in them will ocasionally have the echoing screams of the souls captured inside of Thaddius crying out in pain or for help, though this is at a fairly low volume. If Thaddius is knocked out before the match ends, these voices also end.


SPECIALS

NEUTRAL SPECIAL: POLARITY SHIFT

Thaddius punches both of his fists forward as a torrent of electricity surges out of his large gloves, shocking any foe up to 1.25 Battlefield Platforms in front of him for 11% damage that deals moderate knockback, giving Thaddius an excellent melee zoning tool but lacking truly large range to camp. Enemies struck by this move become "polarized" for 10 seconds, crackling with electricity during this time. Opponents can either be polarized by a positive charge or a negative charge: By default, you will polarize them with a positive charge (All of Thaddius' moves that use charge default to positive), but tapping B during this move will switch to negative polarity, and repeatedly tapping B will let you switch back and forth. You can tell the charges apart by the lightning's outline: Positively charged lightning has a sharp, light blue outline around it, while negatively charged lightning has a sharp, bright red outline around it, and non-charged electricity has no outline at all. It is very distinctive.

Polarity charges follow the general real life rule of magnetism: Opposites attract, likes repel. So someone who has been positively charged will slowly be repelled from other things that are positively charged and slowly attracted to things that are negatively charged and vice-versa. If two characters with opposite charges touch each other, they will each take 8% damage and fixed knockback of one Battlefield Platform: Thaddius is immune to this, meaning it's a one sided deal when he is involved, so he won't take damage nor be attracted/repelled by other characters or charges, but he can cause those effects in others. Characters do not take damage if touching this way via a grab or if they have a hitbox out (IE Mario will not take damage by punching someone with his jab, but will by running into them). Various projectiles with charges will also have effects, so for example a slow moving oppositely charged projectile will slowly attract you towards it. The attraction is small, but still noticable: Every character can escape it, but it'll still mess up a lot of spacing and it'll allow Thaddius a nice, passive boost to either his approaching or his camping.

Shooting out the lightning has moderately long lag, with moderately long ending lag: It's not spammable, but it also isn't horribly punishable. Hitting a polarized foe with this will add ten seconds to the polarity's time and switch their polarity to whatever was used.

If Thaddius holds down B instead of tapping it, Thaddius will bring his arms in front of him as his entire body pulses with electricity, charging for up to the same amount of time as Ike's Eruption. Upon release, Thaddius will let out a loud yell as he throws his arms to both sides, electricity surging out of his body all around him in a potent close ranged assault with a pretty long duration. This move deals 14%-36% damage and KOs at 130%-70% depending on the charge, and much like Eruption Thaddius gains superarmor for a few frames upon release. While a very powerful mvoe with some charge, remember that Thaddius cannot save his charge just like Eruption, so it can be difficult to do this, though polarizing the foe can help. Speaking of polarizing, this move allows you to polarize Thaddius, defaulting to positive as usual with a press of B during the move allowing you to switch back and forth. Thaddius can use this to get some space, to help approaches or to help break up potential combos/abuses with the potential polarity hitbox by doing this, in addition to other benefits, and this lasts 10 seconds just like polarizing the foe with Tap B.

This variation of the Neutral Special actually comes out quite quick, making it an extremely solid close range option, with variable ending lag: With no charge, it is merely a bit long, while a full charged version has some of the worst ending lag in the game. If you just wanna polarize yourself, just going with an uncharged version is a safe bet.


SIDE SPECIAL: CHAIN LIGHTNING

Thaddius holds out a single gloved palm as his eyes glow an even brighter green, sending out a single bolt of polarized lightning that travels 2.25 Battlefield Platforms. Enemies shocked by this move take 9% damage and qutie light knockback and the projectile travels at a decently fast clip. Combined with a fairly speed start, this move serves as a solid camping projectile for Thaddius, though the long ending lag makes it a punishable move. Opponents struck by this move will have the lightning flow inside of them, running about their body as if completing a circuit. If the opponent has no polarity, it instead just fizzles out upon hit. Tilting this move gives a positively charged bolt, smashing it gives a negatively charged bolt.

If the foe is polarized, however, it will remain in them for five seconds. While it is inside them, it deals a solid 2% per second the whole time, for a total of 10%: After five seconds, Chain Lightning will exit them, and will jump to the nearest character within one Battlefield Platform of them if applicable, fizzling if that character has no polarity. While the electricity courses through them, though, the foe gains a buff to their moves, which causes their moves to do 1.25x their normal damage and knockback, allowing them to thrash people around...though at the same time, it can make combos a fair deal more difficult, something Thaddius appreciates, especially at lower percentages: His heavy weight gives him extra survivability, after all. If a foe dies from Chain Lightning, such as a minion with HP, it will jump when they die.

The lightning can jump inside of Thaddius himself as well, but Thaddius is immune to the damage over time: He ONLY gets the quite useful damage and knockback buff! Because of this, Thaddius will want to manage keeping close to the foe so the buff can jump to him while not getting thrashed by the improved buff, while foes will want to mix running away from the super powered Thaddius while still possibly wanting to get close enough to get the buffs themselves even at the cost of damage.


UP SPECIAL: GARGANTUAN LEAP

Thaddius crouches down as a single current of electricity sparks across his body before he leaps high into the air. Thaddius goes quite far with his leap, about 1.3x the distance of DeDeDe's Super Jump, so it allows him a good deal of recovery ability. This move is a bit stronger than said Super DeDeDe Jump in both power and knockback, but while Thaddius gains superarmor it is more fragile than D3's and lower powered moves will knock him out of it. In addition, this move has more starting and ending lag, so it is more vulnearable. Thaddius can also cancel out of it like D3 and needs to do so to grab ledges, but the timing to not take more lag before hitting the ground is a bit more strict for Thaddius. When Thaddius lands on the ground, he sends a quite short shockwave (Think Yoshi's stars from Yoshi Bomb or slightly further) that deals 8% and fixed knockback of one Battlefield Platform, but since it is completely groundbound opponents can dodge it some with shorthop assaults, making it a bit less protection heavy than, say, D3's recovery. Thaddius will also send this out at the start if he uses this move on the ground, but not if he starts it in the air (due to having no ground for the charge to pass through).

Thaddius creates an electrical charge at the start and end of this move, which is either a positive charge when tilted or a negative charge when smashed, which has an extremely strong pull or push compared to normal polarity: Because of this, Thaddius can pull opponents into his leap or landing, or he can use it to push people away to make his recovery less gimpable OR to add another protective layer to the move aside from the shockwave. Thaddius can flip what polarity the landing will be by pressing B during this move, but before he lands, with a corrosponding electrical animation.


DOWN SPECIAL: FORKED LIGHTNING

Thaddius places a gloved palm to the ground as a storm of electricity pulses down Thaddius' arm and surges into the ground, a move that has a decent amount of starting lag but low ending lag, leaving an electrical trap in place for 5 seconds. Enemies who hit this trap don't take a huge amount of damage, a mere 9% damage and some minor knockback, but this is not a pure trap of a move, as after 5 seconds the trap springs to life, arcing forward in a manner not unlike Pikachu's Thunder Jolt, though this move has longer and slightly higher arcs. While an arcing projectile, it deals 6% and even weaker knockback, but it controls space well, move at about the speed of Pikachu's Thunder Jolt and is excellent to either pressure foes into or use as an escape hatch.

Just like Thunder Jolt, this move will follow stage curves and the like, but it will even leap and "travel" along Thaddius as if he was part of the stage as long as he has a charge, giving him another option as a passive bodily hitbox or a way to better put the arcing lightning where you want, especially since if you jump when it'd normally go back to the ground it will simply circle Thaddius again due to having no ground to arc into. This projectile, too, lasts 5 seconds, though it disappears if it hits a foe or whatnot.

If a foe is polarized, then this move will actually follow the foe if they are roughly within one Battlefield Platform of this at any height, arcing backwards to chase them if need be and whatnot: If the foe is directly above them, it will even delay itself a moment for a better chance to strike at them! This works no matter the foe's polarity, making it a rare polarity move that doesn't care about polarity and thus a bit of an easier use. This move has polarity in trap form, allowing you to push or pull people away from the trap, but the act of making itself arc causes it to expend the polarity and thus the projectile is not polarized. A very solid move for both trapping, camping and helping your close range combat.


SMASHES

FORWARD SMASH: BALL LIGHTNING

A ball of electrical energy surges into existance inside of Thaddius' gloves, Thaddius throwing it forward to create a projectile that deals 18%-24% damage, though it only kOs at 180%-150%. This projectile travels at a fairly slow pace, slightly slower than an uncharged Samus Charge Shot, and can be polarized with positive or negative charges with the usual button swap stuff (Though using A here: Like Link's Forward Smash). Starting lag on this move is fairly average, with ending lag also being fairly average, and the move's slow movement combined with a fairly long range (2.5 Battlefield Platforms) makes it an excellent move at controlling space. In addition, it gives you a nice and mobile way to influence the foe's positioning by using the ball of lightning as a magnet to push or pull the foe. How large the ball of lightning is depends on charge: At minimum, it is a bit larger than a Pokeball. At maximum, it is a bit smaller than Wario.

While the ball of lightning travels, it can be hit by attacks, which will cause it to split in half and take the knockback of the attack without harming the attacker, with each half going at a bit different angles. This will also add some length to the attack, about half of a Battlefield Platform, so you can keep the attack going for a while if you keep batting hte parts around, though after the 3rd split it will simply vanish if hit as it will be too far split to split anymore. It will also stop if it hits a solid object or is perfect shielded, but it'll keep going if it hits a player, so you can get some real mileage out of the move. Thaddius is not weak to the initial projectile, but hitting it will cause the projectile to spark and destabilize when it splits, making Thaddius as vulnearable to it as the foe is: Be careful with all that stuff flying around, given you've got a big hitbox!

If a Forked Lightning projectile would rise and hit a ball lightning, it will pause for a moment and let the ball lightning pass, preveting it from hitting your lightning and messing up the projectile. This also allows you to use your ball lightning to delay your Forked Lightning if you want, which can be a good tactic to mess with timing or if you have more specific move combinations in mind or to hit a foe dodging or hitting the ball lightning.


DOWN SMASH: THUNDER STOMP

Thaddius raises a single mighty foot upwards and then slams it in front of him, a thunderous boom echoing out as a wave of electricity shoots from his foot. The stomp itself is very powerful, 27%-35%, and KOs at 85%-65%, but the start end of this move is very laggy, think something like King D3's F-Smash. The ending lag is a bit smaller than that move, but it still isn't the fastest ending lag. Non-polarized lightning will surge across the ground when Thaddius stomps against it, which travels 3/4ths of a Battlefield Platform to both sides, dealing 8% and minor upwards knockback from hitting the ground, before "surging" back to where the stomp was done, completing its path like a circuit. Aerial foes instead take moderate to low-moderate spiking knockback.

Something nice about this surge is that it follows the path of the stage, allowing you to pull off some cool tricks: For example, a foe who is recovering has to keep in mind the fact Thaddius can throw this out to cause the electricity to flow over the ledge and then double back to cover it again, which can force them to either strictly time their ledgegrab or recover high, which can allow Thaddius to smash them back off. Thaddius can also use this to cover a platform in a travelling wave of electricity, perhaps even while the ground below has forked lightning going about. And, of course, it helps cover Thaddius' lag a lot, much like D3's F-Smash extra hitbox.

Thaddius has some superarmor on this attack against foes who share a polarity with him, attacks from opponents with the same polarity needing to deal 10% or more to knock Thaddius out of the start of this move, which can provide a helpful hedge against the high starting lag. Enemies with an opposite polarity are instead drawn in at 1.5x the normal pull rate, making it more likely for foes normally outside of his range to be crushed under foot.


UP SMASH: NEGATIVE THUNDER

Electricity crackles about Thaddius stitched body as he crouches, just slightly, before bellowing out a loud roar as lightning surges upwards out of his body and into the sky. This lightning, which is about 3/4th the size of Pikachu's thunder, travels upwards and off the screen at 3/4th the speed of Pikachu's thunder, dealing 21%-29% damage to foes it strikes along the way with strong mostly upwards knockback that KOs at 100%-85%. Thaddius body will also spark while he discharges this move, sending out small multi-hit strikes of 3% that add up to 9% around him that helps cover him, though their very low hitstun fails to cover this move's long ending lag, nor will they help protect against this move's slightly longer than normal starting lag.

However, while Thaddius starts this move and while he charges this, he will visibly draw energy from nearby electricity sources, such as his Down Special traps/projectiles or his Ball Lightning. With two electrical sources, this move's size and speed now equals Pikachu's, while five sources lets you top it out at 1.25x Pikachu's size and speed. Thaddius himself will count as an electrical source if he has polarized himself, so that provides an easy way to get at least one source in, so polarizing the foe and whatnot can provide more sources.

Once the lightning leaves the field, it will come crashing down six seconds later, retaining the same hitbox and speed it has before. Where it comes down depends: If there are no foes with an opposite polarity near where it was released, about 3/4th a Battlefield Platform in either direction and at any height, it merely crashes down at the same spot it was first sent out. Otherwise, it will drop on top of the nearest oppositely polarized foe. When the lightning crashes against the ground, regardless of who it hits, it will have a special effect if it was able to draw electrical energy, the boom of the cracking lightning causing the ground to shake half a Battlefield Platform to both sides of where it strikes, dealing 5% and weak upwards knockback with the base of two electrical sources used. For each additional electrical source use, 3% damage is added, a decent amount of knockback is added and it gains duration, maxing out at 7 charges doing 17% damage, a duration lasting the entirity of the lightning strike and a small amount of time after and even managing to KO at 130%! With plenty of electrical charges, this move is a threat indeed. With something solid blocking the path, it won't be able to crash and shake down again, but it will cause a brief and small shake effect equal to its normal groundhitting one where it hit, allowing you to, say, smack a ceiling to hit foes off of. This works the same as when lightning returns to hit the ground.


STANDARDS

JAB: WRATHFUL STRIKE

Thaddius roars as he throws out a single strong punch, followed by a powerful uppercut if the A button is hit again. The first hit deals 7% damage and the second hit deals 8% damage, so it is quite strong for a jab, but the attacks will rarely connect into each other except at low %s: The first hit KOs at 240%, the secod hit KOs at 160%. Foes who are polarized can either be combo'd into the second hit for much longer, if being pulled towards Thaddius, or are launched further away as an even better GTFO move, if being pushed away from Thaddius. The move actually comes out quite quick, but for a jab it has horrendous ending lag, making it punishable, though cancelling it after the first hit reduces lag some. It is a solid move to throw out there and can really throw out some damage, especially early on.

FORWARD TILT: ARC LIGHTNING

After a bit of a long, grunting and swinging windup, Thaddius throws out a fierce punch in front of him that deals 15% and quite solid knockback that KOs at 135%: A bit hard to land, but it serves as a nice threat since it is still tilt long starting lag and not like Ganondorf U-Tilt stuff, and with proper setup it can be a good way to "space out" opponents with push/pull, Down Special Traps or some later moves like Up Smash, plus Thaddius' punch goes fairly far and this move has a bit low ending lag. Noticably, however, Thaddius shoots out a bolt of lightning that travels one Battlefield Platform, so it isn't a great camping tool though it can be good to throw out in camping wars, dealing 9% and okay knockback with some good hitstun. Notably, unless used against an edge the electricity will flow into the ground.

Seven seconds later, the lightning will burst out of that same spot towards where Thaddius is at that moment, "arcing" as it does so based on how high and far Thaddius is: The closer Thaddius is to it, the higher yet shorter the arc will be, while being higher changes the angle of the arc. Being at ground level and one Battlefield Platform away causes it to arc in a pretty Ganondorf high arc. Being a Ganondorf high causes it to arc more flatly/slowly, while being two Ganondorfs high will cause it to go directly diagonal. It continues to do the same knockback and damage and such as before, though with Thaddius potentially free to move this allows more ways to work with it. Notably, this move creates another hitbox if it actually strikes Thaddius, similiar to Pikachu's thunder that deals 18% damage and KOs at 105%. This is particularly hard to hit with, the electricity doesn't follow Thaddius past when it first shoots out and fizzles when it reaches where Thaddius was (Or travels 2.5 Battlefield Platforms), so Thaddius can't really move much or else it'll just dodge him and he won't get that hitbox.

One of the easiest ways to get this hitbox is to just stand right on top of where it'll pop out, but this is uber predictable, though by utilizing Down Special traps and such it can be used to just buy time to get polarity or whatnot or to force opponents where you are for the extra hitbox (Or corrall them into the arcing hitbox) or you can plan to try and hit them there before it activates. Thaddius can only have one arc lightning out at once: Using this move repeatedly does not create another arc lightning and thus no more can be made until the first fires off, though the bolt will still fire out initially. You can also try using stuff like your Up Special or, as you'll see, Dash Attack to make some particularly nasty arcs.


UP TILT: TITANIC SWAT

Thaddius quickly takes a single hand and swats it above him in one fluid motion, a move very quick to come out that deals 7% damage and fairly weak upwards knockback, while also having low ending lag. Thaddius is not a world class aerial combatant, but he appreciates this killer anti-air move due to his large size, especially since it is a great anti-platform mvoe. Swatting ball lightning with this sends it practically straight up, along with a slight angle towards the center of the move, so throwing one of those in can be a great way to force pressure onto a foe as well. It also provides some okay quick ground defense, as the swat starts at ground level, making this an all around solid and quick move.

DOWN TILT: THUNDERCLAP

Thaddius raises a giant hand upwards, announcing his intention to crush the foe as he brings it down! This move has slow start-up, but it is a pretty strong move, dealing 13% damage and smacking the foe against the foe to bounce them up with enough knockback to KO at 165%. The ending lag on this is also long, though not THAT long: It is just a bit longer than normal. When Thaddius raises his hand, though, electricity will surge about his body if he has polarized himself, granting himself 6% super armor, plus 3% for each other electrical effect close by. This can be quite helpful given the long starting lag, requiring larger and larger hits to knock Thaddius out of this move.

With a polarized Thaddius, he will send a jolt of electricity through the ground when his mighty palm slams against the ground, which travels into the ground before springing back up with explosive force 5 seconds later. The explosion itself is spread quite thin over its half a Battlefield in both directions, 1.5 Ganondorf height hitbox, so it only deals 3% and doesn't actually flinch the foe. Instead, however, this move has a VERY strong pushback or pull effect to polarized foes it hits, pulling same polarities and pushing opposite polarities. Foes can still dodge during after being hit and dragged in, but it won't stop them, just let them get invincibility frames. Thaddius himself will be affected by this move too, which gives him a variety of options as he can use it to perform any of his moves while moving by pushing himself forward/back, to prepare to break from the foe at a specific time by pushing him and the foe back or use it to help approach by pulling himself and the foe in. This large push/pull effect doesn't work on unpolarized foes or if Thaddius himself is unpolarized, so you can use it just to pull foes or yourself around as well. Quite versatile!


DASH ATTACK: LONG LEAP

Thaddius makes a long running leap from the ground, not going very high but going very far, about 1.25 Ganondorfs high at the apex of the leap but 1.50 Battlefield Platforms long. How much damage and knockback this move does depends largely on when the attack hits, due to the fact this move has three hitboxes. Being hit at the start of the leap causes 11% damage and fairly good knockback that KOs at 125% or so and has a nice angle for following up should you land on the ground. Being hit while Thaddius is in the air produces a spike of weak to moderate power, the foe being sent down at a downwards and slightly forwards trajectory while taking 9% damage, while being hit when Thaddius lands produces the strongest hitbox, 17% damage that KOs at around 95%. This move doesn't have too bad of starting lag, but the ending lag is quite bad.

However, Thaddius will go off ledges when using this move, and this can be used to remove a large amount of the ending lag, Thaddius entering his aerial state after a short amount of time after he would normally hit the ground with low ending lag. Thaddius is not a world class gimper, but his strong Up Special recovery and this move's spike can make it an efficient way to chase opponents who recover from when you smash them off the field or to gimp: Especially noteworthy is to utilize Up Special's repulsing polarity effect to help get or keep someone down with this move.


GRAB GAME

GRAB: MAGNETIC PULL

Thaddius reaches a large hand out and grips it in front of him, ensnaring any foe in front of him. It is a bit of a long grab to start up or end, but it has good range. By holding down A, Thaddius can keep out his grab for a fair amount of time, his hand glowing with energy if he is polarized: Enemies with the same polarity are pushed away from Thaddius at a decent clip, giving him a bit of an okay extra spacing tool if he misses, while enemies with the opposite polarity are pulled towards him quicker than usual, which he can use to extend his grab's range to the best non-tether grab in the game and up there with some nice tethers.

PUMMEL: CRUSH

Thaddius crushes the foe's body in his grasp, the slowest pummel in the game by a decent margin but dealing a large 4%, making it the strongest pummel in the game (Tied with Olimar utilizing a White Pikmin).

FORWARD THROW: CRACKLING DOOM

Thaddius reels his arm back before tossing the foe away with all his might, producing a powerful throw that can KO at as early as 135%, though it only actually deals 9% damage since most of the force is throwing force. Lightning will crackle from Thaddius' glove as he reels the foe back in his hand and will stay stuck to the foe as they go flying, and indeed for a fair deal of time afterwards, seemingly benign. However, after 5 seconds, the energy explodes out of the enemy and deals 12% damage that KOs at 170%, unless shielded or otherwise dodged. Thaddius enjoys using this as a tool for soft pressure, getting the foe to do stuff without getting nearby, and he can make dodging a pain when you throw in forked lightning or your Down Smash waves.

The energy exploding out also has an additional effect if the foe is polarized, depending on if it is a same or opposite charge. This move's charge is Thaddius' polarity if he has one, defaults to positive otherwise and can be switched by tapping Z. An enemy of an opposite charge will have their movement speed debuffed to 3/4ths of normal, both ground and air, after the explosion occurs, unless the explosion is dodged or shielded. This is very useful for the slow and lumbering Thaddius, allowing him both to chase or retreat from foes more effectively but also to increase the power of his pull/push as the foes are less able to effectively move against it. Enemies with a positive charge take more knockback, KOing at 145%, and leaves residual charges of electricity that deal 1% damage every 2 seconds until the foe's polarity wears off: This might seem weak, but considering that Thaddius can keep recharging their polarity this can add up a lot over time, especially since this can be stacked with multiple throws and the foe is already taking a good deal of damage from the throw.


DOWN THROW: STOMPQUAKE

Thaddius stomps on the foe, smashing them against the ground and causing them to be popped up while taking 12% damage. A simple throw, the knockback of this move isn't too far and generally puts foes right near the edge of Thaddius' melee range, giving him the momentum and initiative to choose between striking at the foe or a tactical retreat. The hitstun on this throw is low, though, so there's no 100% follow-ups to this move, save jabs at low percentages. Utilizing the latent push and pull of your polarity can be helpful here: Generally, you want to pull at higher %s and push at lower %s for the best follow-up range.

UP THROW: LIGHTNING SURGE

Electrical energy surges throughout Thaddius' arms as he grips the opponent and tosses them into the air with enough knockback to KO at 175%: Don't expect to be following up to this throw too often, unless you have an Up Smash primed! This move deals a solid 13% damage along with that and serves as a decent all around throw, especially when considering it comes with secondary effects if Thaddius is polarized. Enemies of opposite polarity take significantly more damage from this move, taking 19%, while enemies with the same polarity have electricity seemingly sucked out of them as they are thrown, causing Thaddius to gain 5 seconds of polarity from the move.

This move doesn't have the follow-ups of Down THrow or the explosive delay of Forward Throw, but it can bring out pure damage or be used to keep your polarity going, so it is useful.


BACK THROW: STORM SPIN

Thaddius grabs the foe and begins swinging them in a circle, like Mario and Luigi, before releasing the foe to take 11% damage that KOs at 195%, though with notably quite low base knockback with good knockback growth. Like Mario and Luigi's throws, Thaddius gets to swing it around, so Thaddius can smack other enemies with their charged body for the charged hitbox, and can even tilt up or down to swing the opponent a bit higher or lower, allowing Thaddius to do things like swing them into his electric traps, Down Smash shockwaves on return or whatnot.

AERIALS

FORWARD AERIAL: POWER SURGE

Thaddius pulls a single fist back before slamming it in front of him in one single harsh motion, crushing the opponent for 18% damage that KOs at 98%, making it a potent KOer for Thaddius to throw out, though it suffers from heavy starting lag and long ending lag. It is hardly impossible to hit with, but don't go just throwing it out without a thought: Drawing an opponent in with a pull might be useful here!

While this move normally has long ending lag, Thaddius can perform an extra bit while striking a foe, the stage or any general solid thing by hitting A when he does so, causing him to discharge any electricity on his person into a large static hitbox around him, in addition to using this to reduce his ending lag by 3/4ths: This means that if the opponent isn't dead, utilizing this technique can allow you to chase them off the edge or to give general chase/retrat at low %s. The static release is also a hitbox that deals a mere 4%, but has set knockback of 1.5 Battlefield Platforms. Since Thaddius can activate this by striking the side of the stage or a ledge, this can be useful as an edgeguarding tool or to help Thaddius himself recover by striking and then leaping. If you want to just release your polarity without changing it, this is also your general go-to move, and this can serve as a strong shorthop approach if you're willing to sacrifice your electricity. Solid all around.


UP AERIAL: STATIC STRIKE

Thaddius flips up and thrusts both of his legs upwards ala Snake's up aerial, a strong strike that deals 15% damage and strong upwards knockback that KOs at 125%: Don't expect to juggle with this bad boy, you're knockin' em right off the top! This move is a bit laggier than Snake's on both ends, though, so it is harder to hit with, but still a solid way to get off the top KOs without excessive trouble. Thaddius can actually angle his kick a fair deal like one angles a tilt by holding the control stick left or right in addition to up, which can be useful for smacking someone just out of range.

If Thaddius strikes a platform or something solid or whatnot and is polarized, he may hit A or move the control stick as if he was preparing a wall cling. By doing so, Thaddius can move on the bottom or sides of the stage or platforms without regard for gravity, giving him an extra recovery ability or wa way to get attacks off, though he will only be able to use about 2-3 attacks before his sticking time is up. This is considerably useful with moves like Down Smash and Down Special which can wrap around the stage, his Up Smash which can crash down directly onto the stage after being fired off by Thaddius, allow him to place his Down Tilt, Down Special and whatnot in different locales and allow him to Dash Attack spike in many different ways, such as dash attacking off a wall onto the stage and smack foes while doing so. Thaddius may only do this once per air trip of normally touching solid ground and cannot do this without being polarized. Being hit, using a move that causes Thaddius to leap, attempting to polarize yourself or your time running out causes you to detach. Jumps are not regained nor are Up Specials refreshed.


NEUTRAL AERIAL: STATIC FIELD

Thaddius entire body sparks with electricity, a quick move that deals four rapid hits of 3% damage with a final hit of 4% damage that sends foes flying away a decent bit, though it lacks KO power and only kills at 240%. The hitbox comes out fast and has a decent duration, so Thaddius can use this as a sort of wall approach since it covers his entire impressively large body and as a quick aerial move. It also has average ending lag and low landing lag. Of course, as a multi-hit move, it can be DI'd out of.

If Thaddius and the foe are polarized, you can get some nice bonus effects from this: If the foe is opposite charged, they'll be suctioned in with each hit, making it impossible to DI out of this move and avoid the last blow. Same charges still allow DI, but the last hit gains substanially more knockback, now able to KO at 150% and making this a potent edgeguarding tool and a more potent air dodge killer. Both of these are quite useful when utilizing this move as a quick aerial option, as well.


DOWN AERIAL: LIGHTNING FALL

Thaddius extends a leg out and drops the Thaddius, making a very short stall before the fall for a potent 19% damage that is a strong spike, coming off a move with long lag on both ends though, though the starting lag is more forgiving and being a stall than fall this is a bit easier to hit with. Thaddius has a long 4 Ganondorfs to go before this move ends if he doesn't hit the ground, so using this as a gimping tool can be unwise, though it can be a good suicide move.

Upon striking the ground with a polarity charge on him, Thaddius can hit A to leap up once more in a burst of electrical energy, which trails behind him as he jumps 1.25x his normal jump height: By default, Thaddius leaps forwards 3/4ths of a Battlefield Platform, but he may also leap straight up or leap backwards 3/4th a Battlefield Platform by moving the control stick. It takes a moment for Thaddius to start the leap, during which he is vulnearable: However, if he is not knocked out of the move then foes nearby will be sucked into the electric trail, which deals rapid hits of 1% (5% total) that heavily brings the foe along Thaddius path. Thaddius ends the leap with a strong discharge of electricity that deals 16% and radial knockback that KOs at 115% and has a slightly long duration: Long enough that someone caught in the trail will probably be smacked into it, but also long enough you can give Thaddius a good whack, especially since this has long ending lag. In addition, the leap takes half of your polarity's time to utilize.


BACK AERIAL: BIG SWING

Thaddius swings his fist in a wide arc behind him, a slow and lumbering motion with a wealth of power behind it, dealing 21% damage and knockback strong enough to KO at 95%. While a vicious KO move, this back aerial has extremely long starting lag, so it takes a lot of prediction to throw it out and not just waste your time, though on the plus side the ending lag is short...unless you land on the ground and trigger the long landing lag. This can be good to throw out if you've got Down Special/Up Smash and whatnot stuff flying about, forcing them to dodge other stuff, but it is more of a move to hold until the right time.

FINAL SMASH: CRUSH YOOOOOOU


A pair of lightning bolts crash down to both sides of Thaddius, dealing 15% and get away knockback to anyone it hits...and revealing that the wights Feugen and Stalagg have entered the battle! Feugen is slightly wider but not as tall, while Stalagg is taller but not as wide. Feugen is about as tall as Bowser, a bit taller, with the same width. Stalagg is a bit taller than Ganondorf and a bit less wide than Bowser. These minions not only have unique attacks, but a good 40 HP, so Thaddius' Final Smash can make it a big pain to fight, especially since they have no duration and Thaddius is free to polarize them and Chain Lightning can jump into them and such! Feugen moves slower than Stalagg, but has higher jumps. Both have the weight of King DeDeDe. Feugen and Stalagg have the following attacks: 3 attacks they share, 3 attacks unique to Feugen and 3 attacks unique to Stalagg.

- Earthshock (Both): Feugen/Stalagg raises its arms and slams them to the ground, causing an electrical shockwave to both sides of them. Feugen's goes a bit further, 1 Battlefield Platform to both sides while Stalagg's only goes 3/4th a Battlefield Platform, but Stalagg's does 23% and upwards knockback that KOs at 100% while Feugen's does 17% and upward knockback that KOs at 160%. Has about the same starting lag as DK's Down Smash, but a good deal longer ending lag.

- Wight Shock (Both): Feugen/Stalagg raise one of their sick, clawed hands forwards, releasing a shortranged blast of electricity that sizzles an odd mix of blue, yellow, white and black, dealing 8% damage and light knockback to the foe. Oddly, this heals Feugen, Stalagg or Thaddius if they are hit with it. Short start-up, moderate ending lag.

- Magnetic Pull (Both): Feugen/Stalagg grabs forwards while crackling energy surges down their arms, causing anyone to be struck by it to take 9% damage with very odd knockback: Specifically, if Stalagg (as Feugen) or Feugen (as Stalagg) are still around, this move will knock them to exactly where they are, though the hitstun variable has it so the enemy always regains control before getting there. Feugen/Stalagg will not use this move if they are alone. Fairly long starting lag, short ending lag.

- Swift Swipes (Stalagg): Stalagg rapidly swipes with his claws in front of him, dealing very rapid hits of 2%: Rapid enough that getting out still deals a good deal of damage. Stalagg can also move backwards or forwards a little during this move, but will always move forwards if he has caught a foe, which means sometimes DIing towards Stalagg will get you out of it faster. Jab-ish start-up lag, but somewhat long ending lag.

- Strong Swipe (Feugen): Feugen performs a single, powerful swipe in front of him. This deals 8% and is very similiar to Ganondorf's jab as a space gainer, but is a bit laggier on both ends. Fairly potent.

- Stalagg Slam (Stalagg): Stalagg raises his arms up and slams them down in front of him in a manner not unlike Donkey Kong's FAir. Deals 14% and can be used in the air or on the ground, dealing spiking knockback either way. On the ground, it smacks them against it and bounces them up to make it more of a set-up move, while the spike is strong enough in the air to serve as a finisher or to strike foes into Thaddius/Feugen/Thaddius' traps. Similiar lag to DK's Forward Aerial, with some of the starting lag moved to the ending lag.

- Feugen Flash (Feugen): Feugen leans both arms back and then slams them in front of him like a much quicker Donkey Kong Forward Smash. Deals only 10%, but has fairly high knockback (moreso base than scaling) that only KOs at 130%. Five seconds after use, the aftershock of the clap occurs in the same spot it was used, duplicating the hitbox in a small electrical boom. This move has fairly small start-up lag, but somewhat long ending lag.

- Crush You! (Stalagg): Stalagg roars and raises both hands up before crushing them down in front of him with a surge of electrical energy. While this move has very long starting lag, it deals a brutal 28% damage and KOs at 80%, making it a real backbreaker. However, against opposite polarized foes it KOs even SOONER, killing at a ludicrous 60%, while same charged opponents gain an odd effect where they do not take any knockback at all, but instead the damage and hitstun in place: While Stalagg's extremely long ending lag on this move means he cannot take advantage of it, Thaddius or Feugen nearby can. Of course, it is super hard to hit with...

- Feed You To Master! (Feugen): Feugen spins rapidly in place while electricity swirls around him, dealing rapid hits of 3% with some suction that totals to a great 35% damage with a very long duration, but it has very high starting and ending lag. This move's suction increases a great deal and makes it totally impossible to escape from against enemies with the same polarity, while having the opposite effect on enemies with opposite polarity, where the pull is turned into an extremely strong push that turns Feugen into a way to temporarily dominate part of the stage. Feugen is totally helpless from the top during this move, without even a hitbox to clash with, so you can knock him out of it that way.

Final Smashes may appear while Stalagg and Feugen are out. If Thaddius gets it again, the lightning will strike and merely increase their HP by 40, while making a new Feugen or Stalagg if only one is dead.


PLAYSTYLE: It's alive!! But you won't be, for long.

"YOU DIE NOW!"

THADDIUS BOSS MODE


That's right, Thaddius has a boss mode too! Simply go to the "Boss Battles" screen and you'll see Thaddius listed among all the other bosses after unlocking his Boss Mode. To unlock Thaddius' Boss Mode, simply collect both his Classic Mode Trophy and All-Star Mode Trophy, which will clear the "All Charged Up" challenge, which unlocks the "Feugen and Stalagg" Trophy and Thaddius' boss mode. Defeating Thaddius' boss mode clears the "Shocking!" challenge, which unlocks the "Construct Quarter" trophy. Finally, the additional challenge "Don't Cross The Streams" is completed by defeating Thaddius while taking less than 100% total damage among all players from Thaddius' Neutral Special passive charge hitting damage stuff. Clearing this challenge awards a Golden Hammer, a Thaddius (Boss) sticker and the "Wailing Soul" Trophy.

Thaddius has a few boss "immunities" added to him during his Boss Mode: His weight is increased to roughly a top of 12, he gains passive super armor and armor of 4%, meaning he takes 4% less from all attacks and cannot take hitstun by attacks that deal 4% or less damage (NOTE: That is before reduction. Something that deals 5% damage and is reduced to 1% damage still hits), he gains a third magnetically influenced jump that goes up a small amount and can still move and attack while grabbed by one person, dragging them around: Two people grabbing Thaddius reduces this to just moving: Three people puts him in a normal grab state.

Thaddius will rise from the ground over his usual spawn area instead of his usual spawning animation, electricity crackling out of his body and striking his enemies, which can be set to be from 1v1 to 3v1. This means each opponent starts the battle with a random polarity, which CANNOT be removed, only changed, which Thaddius may do as normal. In addition, every 30 seconds another burst of electiricty will surge from Thaddius, causing an undodgable reversal of the polarity of all opponents, in addition to any other enemies (such as minions) that are polarized. Opponents will need to carefully manage their polarity through the match, because they are stuck with being polarized, and in turn Thaddius must manage HOW he wants his enemies polarized and how to handle his flips. Note that Thaddius himself does not start polarized.

Polarization's pull and push has also been increased slightly, making it more difficult to escape the two effects, and opposite charge damage has been increased to 12% and fixed knockback of 1.5 Battlefield Platforms. Thaddius remains immune, but he can toss enemies around to strike his other enemies or hit them into each other or whatnot, if he polarizes them oppositely, and enemies must be careful of rushing into each other.

And now, let us go into the larger changelist:

- Thaddius' Neutral Special has halved lag on the first hitbox, while the charging hitbox charges thrice as fast and now has super armor throughout the start-up lag and some of the attack, but retains the huge ending lag at higher charges, though the lag with no charge is now lower. Thaddius may still charge himself with this move and may use it to change the polarity of his opponent's. While Thaddius is charged, his super armor and regular armor is doubled against attacks of the same polarity, while his personal strike against opposite polarity foes for touching him still deals 12% damage but now deals non-fixed knockback that KOs at 125%. Thaddius should take care of which polarity he wants not only for push and pull, but also for which effects he wants from this and on which enemy.

- Thaddius' Side Special now deals 3% per second instead of 2%, deals 12% on hit instead of 9% and is now much harder to get rid of due to the constant polarity of all enemies. It still buffs enemy attacks.

- Thaddius' Up Special now has DeDeDe strength super armor through ascension, at the peak of his jump and for a bit of the descent. The push or pull of this move will now cause a small interruption in animations/actions of a character, but will not deal hitstun or knock them out of attacks or anything, adding in a small niche as a defensive move or an offensive ending lag catcher.

- Thaddius' Down Special trap now deals an extra 2% for each opponent with the same polarity as Thaddius who is within 1 Battlefield Platform to either side of Thaddius, while dealing extra knockback for each enemy of the same polarity, capping at a 220% KO amount that still works for good setup. In addition, for each enemy with any kind of polarity nearby (Within 3/4ths of a Battlefield Platform) the lightning trap will last an additional 5 seconds and send out an additional projectile once those 5 seconds are up. This move has slightly decreased starting lag.

- Thaddius' Forward Smash can now be divided up to 4 times and requires being divided twice to hit Thaddius. Thaddius no longer takes hitstun when struck by this move, but still has to contender with the damage and knockback. This move now also splits if it hits an opponent instead of just when hit and will not count towards a division required to hit Thaddius, adding in more multi-hit ability. This move also has slightly less lag on both ends.

- Thaddius' Down Smash now has slightly reduced lag on both ends, travels one Battlefield Platform instead of 3/4ths and gets more powerful as it travels outwards. It maxes out in power when a full Battlefield Platform away from Thaddius, dealing 16% and upwards knockback that KOs at 145%, while having the base 8% and fixed knockback when at starting length. This also means the hitbox gets weaker when it retracts in, up to its initial strength. The super armor of this move is added to his natural super armor.

- Thaddius' Up Smash now sends out an additional bolt of lightning at four electricity sources and has an additional level at six electricity sources that throws out a third bolt. Each of these bolts will attempt to home in on a different enemy than the first bolt if possible and will come down one second after the first bolt/last bolt sent down.

- Jab now deals additional damage to foes of the opposite polarity, 3% more on each hit, while the stronger pull on same polarity foes means this move's two hits cannot be escaped until unrealistic damage %s, so it'll always combo into itself for the two hits. This move has reduced ending lag.

- Thaddius' Forward Tilt has faster starting lag and can make any number of arc lightning through repeated uses. The starting lag is still a bit slow, though.

- Up Tilt now has additional effects based on if the enemy is opposite or same charged. Enemies of the same charge will receive a strong, wind-esque pushback effect if they are missed by the swat, which will go through shields, dodges and so on, though the actual attack does not. Enemies of the opposite charge will instead receive a good deal of freeze frames when hit by this move, but Thaddius will not, allowing him to potentially add in moves like another Jab or Up Tilt (Freeze frames don't stack) unless a teammate helps out.

- Thaddius' Down Tilt now deals 3% + an additional 2% for each polarized for within half a Battlefield Platform of Thaddius when the move was first used and has slightly reduced starting lag. Down Tilt's super armor stacks.

- Dash Attack can now be canceled into a jump during the leap, allowing Thaddius to abort failed attacks or to use it as an approach that cancels into different moves.

- Thaddius' pummel now has the speed of a 2% pummel, but still deals 4%.

- Forward Throw's crackling doom explosive ability can now be spread to other opponents if the opponent touches them or is otherwise hit into them, causing a charge to be attached to that opponent that explodes 5 seconds after being put on. If the enemy touches a same charged foe, it deals full damage and half knockback, while an opposite charge causes them to take half damage and full knockback. They also still take the additional effects of the ability and can spread it to other enemies.

- Thaddius' Down Theow now has 1 frame of ending lag, giving him some 100% follow-ups and making it a very good emergency throw if you just need control of Thaddius back, and potentially allows Thaddius to quickly grab an enemy opponent. This also means it can now chainthrow a single opponent until about 50% with a pull, 30% otherwise, but considering he will usually be fighting against multiple opponents this is rather impractical.

- Up Throw now deals 21% on opposite charged foes, recharges Thaddius' polarity by 8 seconds on same charged foes, KOs at 155% and allows THaddius to switch the polarity of the foe by holding down Z through the throw, giving Thaddius an easier way to change the polarity of the foe, useful in 3v1, but leaves him a bit open from grabbing and throwing.

- Back Throw can now KO at 175% and can be quickened by holding down Z or slowed down by holding down shield + A and is especially more useful when Thaddius' is meant to fight multiple people, allowing him to clear out a good deal of people at once. It now deals 13% damage and enemies who are struck by the spun opponent (if properly polarized) take double the damage and 1.5x the knockback they'd normally take from being hit by a polarized foes.

- Thaddius' Forward Aerial has slightly reduced lag on both ends, but is otherwise unchanged.

- Thaddius' Up Aerial now allows him to cling for twice as long and KOs at 100%. This move is otherwise unchanged.

- Thaddius' Neutral Aerial comes out even quicker, making it an even better melee move, and now gains even more effects based on the enemy charge. Opposite charged enemies now take two extra hits of 3% damage that increases damage and still cannot be DI'd out of, while positive charged enemies' now take the knockback of the last hit when/if they DI out before that.

- Down Aerial's ability to leap off the ground when impacting it now comes out near instantly and takes only 1/4th of Thaddius' polarity time, in addition the lightning trail left behind by the leap will linger for about 3 seconds and allows Thaddius to make psuedo "lightning walls" by leaping up and down. The trail now has unchangable polarity that is equal to what Thaddius' polarity was when used. Hitting an opponent of the opposite charge causes the amount of time until the wall disappears to be reset, while a same charged opponent who is hit by it causes it to do additional damage and knockback on the next hit.

- Back Aerial now KOs at 75% and doubles Thaddius' armor during start-up, but is otherwise unchanged.

- Thaddius Final Smash may now be used at any time by using the Shield Button + B as a Shield Special, though it takes noticably longer than as a Final Smash and has some good long ending lag. Feugen and Stalagg are summoned as normal with 40 HP. Repeated uses of this move, unlike the Final Smash, does not do anything but allow you to use the lightning strike again, though it can be useful to clear out foes. In addition, Stalagg/Feugen's resurrection from the raid battle is worked into this boss mode: If the other minion is not killed within 5 seconds of the other, they will be revived with full health! So if your team is unprepared, you'll have trouble getting rid of them, and properly downing them is crucial! Thaddius may summon another pair once both dies, but it gets longer each time until Thaddius dies which resets the lag.

- This means Thaddius gets a new Final Smash, Supercharge, which causes an expanding lightning aura to surge out of Thaddius, dealing more damage the further away foes are: Enemies right next to Thaddius take 30% damage but only are KO'd at 120%, but at the edge of its 1 Battlefield long (to both sides) and 2 Ganondorf high radius it deals 60% and KOs at 60%! In addition, Feugen/Stalagg gain 30 HP (Added to maximum HP and filled up) if they are hit by this attack! Useful!


You have no idea what horrors lie ahead. You have seen nothing! The frozen heart of Naxxramas awaits you!
 
Last edited:

FrozenRoy

Smash Lord
Joined
Apr 26, 2007
Messages
1,260
Location
Las Vegas, Nevada
Switch FC
SW-1325-2408-7513
Frostwyrm Lair

At the pinnacle of Naxxramas awaits Kel’Thuzad himself, who is protected by the ancient skeletal frost wyrm Sapphiron.
 

FrozenRoy

Smash Lord
Joined
Apr 26, 2007
Messages
1,260
Location
Las Vegas, Nevada
Switch FC
SW-1325-2408-7513
"I was cast out by my comrades. Exiled. Forced to wander the frozen wastes...but I was not alone. Not entirely. The voice, now my only companion, guided me to my destination. Strange, nightmarish creatures awaited me at the entrance. I felt my blood run cold, as cold as Icecrown itself.


Inside, I bore witness to horrific acts, demonstrations of power, power that could be mine for the asking. Terrified, I ran...but did not get far. All too soon, my choice was made. Too late did I realize that such power does not come...without a price.


Now, the world shall pay a far greater toll, for I have returned.

I am Kel'Thuzad...

Your curiousity will be the death of you."


Once a human mage of the neutral order of mages, the Kirin Tor, Kel'Thuzad was a member of it's Council of Six that made many of it's descisions. He had an insatiable thirst for knowledge and even with the disapproval of the other mages studied the forbidden art of Necromancy. Frustrated with their antiquated precepts, he heeded the vast call of the Lich King Ner'Zhul's mental summons and forsaked his position in the Kirin Tor to answer it and find the great powers he seeked, setting forth to Northrend, his mind prodded by the voice of the Lich King. Travelling alone, he sailed to Northrend and then walked it's icy wastes, past the ruined city of Azjol-Nerub and finding Icecrown, the home of the Lich King.

Boldly approaching Icecrown, he was surprised to find that he was allowed in without worry, as if he was an expected guest. Descending to the bottom of the glacial citadel, he bowed before the Frozen Throne itself and offered his soul to the dark lord. Promised immortality and great power in exchange for his loyalty and obedience, Kel'Thuzad's first mission was to found The Cult of the Damned in The Lich King's name, being allowed to keep his humanity intact for this mission. After three years of the infiltration of the kingdom of Lordaeron via the Cult, the Lich King ordered Kel'Thuzad to spread the plague of undeath across the land via cauldrons, which thanks to the Cult's popularity spread like a wildfire. This led to Prince Arthas investigation of it, and Kel's death, but as Arthas fell to being a Death Knight Kel'Thuzad was in turn raised as a Lich and they would soon become fast allies. After many more events that are not particularly relevant, Kel'Thuzad would be left in charge of the Scourge forces as Arthas and Ner'Zhul's funky sleep fusion occured, leading to the necropolis of Naxxramas as he bided his time.

A strong wizard with a fondness for ice magic and a potent lich, Kel'Thuzad is a deadly foe.


Statistics

Quite tall, about the size of Ganondorf, and about as wide, Kel'Thuzad is a fairly large target. While large, however, Kel'Thuzad is not all that heavy: He sits between Lucario and Wolf on the weight scale, making him only a heavy-middleweight, and is only as fast as Link himself, though his floating nature gives him quite spot turning and allows him to dodge things like brawl ice, though his traction is actually a bit low.

Kel'Thuzad is a very floaty character, on par with Samus, who moves through the air at a decently fast pace and has quite good air control, making him a strong air combatant...but his vertical survivability is a good deal poorer due to this. Both of his jumps go a fairly large distance and Kel'Thuzad has a float that goes 1.25x the length of Peach's, though only due to the fact it goes faster while lasting the same amount of time. Kel doesn't have other special Brawl traits.


Neutral Special: Chains of Kel'Thuzad

The chains of Kel'Thuzad were a set of 7 spiked chains forged and given to Kel'Thuzad by Ner'Zhul, which must be wrapped around the body to be activated. This move is quite laggy on start-up, slightly more than a Falcon Punch, as Kel'Thuzad wraps the seven chains around him, their swirling creating a very weak GTFO hitbox that deals 3% damage as he does so without too long of a duration, and this move has very little ending lag, so it is very hard to punish once Kel'Thuzad gets the time to finish the starting lag.

Once the move is done the chains will be primed, animating and moving lazily around Kel'Thuzad. These slightly increase the width of his hitbox, but comes with a collective passive damage reduction of 3.5%(Each chain reduces by 0.5%), causing hits against Kel'Thuzad to deal 3.5% less damage (Minimum of 1%), though he takes the same hitstun and knockback. In addition, Kel'Thuzad gains a variety of new attack options while he has the chains out. Once all 7 chains have been used up, or otherwise taken off of him, he will need to prime them again with the long starting lag.

While the chains are active, you can hit Neutral Special to cause Kel'Thuzad to extend the chain outwards as an attack, with a 1.5 Battlefield Platform of range. This move is quite quick to start-up, it could be said that Kel paid his lag up front with needing to prime his chains, dealing 8% to those it hits and tethering them to Kel'Thuzad. Tethered foes cannot move further than the tether and Kel'Thuzad always controls where the tether goes, so this is quite useful, especially as the chains have 40 HP and thus are difficult to break, though the chain cannot protect Kel'Thuzad while tethering him and thus lowers his damage reduction by 0.5%. This loss of damage reduction also occurs if the chains are seperated from Kel'Thuzad in other ways. In addition, if Kel'Thuzad is chained to a foe, he can hold down B instead of tapping it to grab onto the chain, then attach it to pretty much anything around him and tether them to that, such as the stage or a minion.

While Kel'Thuzad is chained to a foe, he will also have quite a nice bonus to it, as his chains drain the life from the foe every second, dealing 1% to the foe and healing Kel'Thuzad by 1% himself. This gives Kel perfectly fine reasons to chain a foe multiple times and stack up this draining, giving Kel a steady resource of damage and healing unless the foe breaks the chain. If the chain is made to be chained to a minion, breakable stage or whatnot, it'll heal them too. Finally, this move also functions as a tether recovery, giving Kel'Thuzad a way to recover outside of his Up Special.


Side Special: Mana Detonation

Kel'Thuzad brings his hands together as mana gathers in his hands, before firing it forward, a fairly quick move to perform with slightly longer than normal ending lag. It goes a pretty solid 2.5 Battlefield Platforms, though it only deals 5% damage with a fair deal weaker hitstun than something like Falco's laser. Utilizing this with your chains is a nice deal to keep foes in range of this projectile and it makes a solid way to force approaches and an okay way to try and hurt them, though it is better at the first.

An opponent hit by this projectile will find themselves glowing a faint blue hue from it. After about 6 seconds of this glowing, it explodes in a flair of mana, dealing variable damage based on the strength of the foe's shield at the time: The healthier the shield is, the stronger the attack is, as it "fuels" the mana detonation. This attack deals 8%-25% damage and KOs at 200%-80% damage depending on the power of the shield, with the latter being at full shield power, though this attack can be dodged or itself shielded. However, this move deals a LOT of shield damage...based on the health of the shield. Which is to say that, at max damage, it will break a shield instantly, but if the foe's shield is quite low it will actually deal less shield damage than normal, hardly noticable. because of this, the foe is incentivized to actually take shield damage to decrease the power of this attack. And obviously, Kel'Thuzad can put pressure on the foe to either make them unable to dodge the detonation or take advantage of the predictable dodging.

Multiple Mana Detonations will stack with different detonation times, so Kel'Thuzad can create a chain reaction of mana detonations if he so desires, or in general give the foe a pain to have to dodge and allow him to strike with his own assault. If the foe is for some reason shieldbroken when Mana Detonation goes off, it does nothing as it has nothing to power it and fizzles out.


Down Special: The Scourge

Kel'Thuzad raises his arms to the sky as blue energy courses out of them and his skull, letting out a ghastly cry for Scourge soldiers to come to him, a move that takes a bit less than Waddle Dee Toss, with most of the time reduction coming in starting lag. This is a chargable move and what minion Kel'Thuzad summons will depend on how long he charges. Minions that Kel'Thuzad summons will leave behind a corpse when they die, which functions like the bodies that smashers leave behind in Stamina Mode and can be knocked around or offstage. If Kel'Thuzad uses this move next to or on top of a minion's corpse, he will raise it from the dead to fight again instead of summoning a minion, cutting the overall time this move takes (lag + duration) by about half, so raising your men from the dead tends to be pretty efficient. Kel'Thuzad can summon three minions.

Soldier of the Frozen Wastes

Charge Time: 0-10 frames
HP: 20

Your most basic minion is the Soldier of the Frozen Wastes, a skeletal soldier called to Kel'Thuzad's aid and notable for being fairly easy to summon. Armed with an axe, they move at a somewhat slow speed, are light and their jumps are only okay, and while their AI is hardly suicidal they're no expert either. Soldiers are mindlessly aggressive and will chase after nearby foes relentlessly, utilizing a small assortment of strikes to hit them. The first is a simple and quick swing of their axe for 4% damage, mostly just used to defend itself and get in light damage, with okay disjointed range. The second is a laggier and wider horizontal swing of the axe, akin to Ike's Forward Tilt, that deals 12% and moderate knockback: Don't expect it to KO any sooner than 220%, though. It has nice disjointed range, though. And it's final attack is an extremely laggy, laggier than Ike's Forward Smash, swing of the axe similiar visually to Ike's Forward Smash except a fair deal more strained, which crashes down for 19% damage that KOs at 140%: Not impressive on an actual character, but for a minion that isn't all that difficult to summon it is not all that bad.

The Soldier has a final "attack", but it isn't one it'll intentionally try to hit with: If a foe comes into physical contact with a Soldier of the Frozen Wastes and they are not in an attack, grab or so on (Think dashing or hit into them or something), the Soldier will "grab on" to the foe and attempt to detonate for it's Dark Blast attack, which instantly kills the Soldier but deals 22% damage to the foe and KOs at 90%. Foes must kill the Skeleton within 5 seconds to cause it to detach and not explode, which while not too difficult a task if focused on can be hard to balance with damaging Kel'Thuzad and interrupting him. It can also be shielded or dodged with decent ease and it does pitiful shield damage...though combined with mana Detonation adds and it can be a bother for the foe to deal with. Remember: Your Skeletons can be raised from the dead, but your foe is not as lucky, so it is a good trade-off.

Soul Weaver

Charge Time: 11-20 Frames
HP: 25

Your 2nd minion is the Soul Weaver, which stands at about 3/4ths Kel'Thuzad's height while being quite lightweight and moving even slower than Kel, only a hair faster than Ganondorf, though it has good jumps. While the Soldier is recklessly offensive, the Soul Weaver prefers to hang back and find more choice times to strike, and in general it has a smarter AI. It's most base move is the Wail of Souls, where it lets out a wail as shadow energy appears under the nearest foe up to a Battlefield in front of it, before exploding. This attack is a bit telegraphed and it only deals 8% damage, but it has very strong shield pushback and strong base knockback with low knockback grow (KOs at 260%), making it an excellent way of gaining space and generally bullying the foe around. The Soul Weaver can also fire a fairly basic bolt of shadow energy that travels 1.5 Battlefield Platforms and deals 6% damage: A decent annoyer projectile, though it is a bit laggy on both ends for what it does. It's primary physical assault is to simply perform a spin around itself, dealing 3% damage and weak knockback, primarily simply meant to gain space to run away. This can be done on the air or on the ground.

If a minion dies near the Soul Weaver, it will take a piece of the minion's soul as it does so, causing the Soul Weaver to glow a faint white. The damage and knockback of it's moves increases by 25% and it gains access to two new moves: A short-ranged move where the Soul Weaver lets out a burst of white soul energy from itself, dealing 10% damage and knocking foes away a good deal with a long duration that makes it a solid close range move (works on the ground and in the air), and a "Soulburn" move where it burns off the soul piece it took to fire off a blast of energy with it that travels at the length of Falco's laser while going the speed of Wolf's laser, dealing 15% damage to all who are hit by it and KOing at 180%. Not the strongest projectile, but pretty strong for a minion, and it works well with it's adeptness at simply gaining space.

Unstoppable Abomination

Charge Time: 21+ Frames
HP: 40

Your last and beefiest minion is the Unstoppable Abomination, a Bowser-wide and fairly strong fleshy monstrosity that wields a cleaver along with having a spiked chain-flail attached to it's arm stump. Slow as molasses, though slightly faster than the Soul Weaver on the ground, the Abomination's biggest claim to fame is it's high HP, which can make it a pain to get rid of when Kel'Thuzad can revive it. The Abomination is also aggressive, but less mindlessly so than your soldiers and it is willing to take a back seat. Both of it's jumps are very poor and it is a very heavyweight minion.

The Abomination's first attack is a simple swing of his cleaver for 6% damage at about the speed of Ganondorf's jab and serves as its primary melee move, so you'll be seeing it a lot, though it is mixed up with a laggier horizontal swing that deals 10%, in addition to leaving a wound that festers with a foul infection for 4 seconds, dealing 1% poison damage for that amount of time, in addition to causing healing effects that drain from the foe to heal double and things that heal the foe to have a slight reduction. At mid-ranges, the Abomination will swing it's spiked flail forward for a range a bit longer than Marth's sword, dealing 9% damage with okay knockback that is a bit laggy, and has a second attack with it at longer ranges (slightly longer only) that deals 13% and will cause the chainflail to "wrap" around the foe, dragging the foe to the Abomination quite quickly, though the Abomination is put at a frame disadvantage. Finally, at long ranges, the Abomination will throw it's axe two Battlefield Platforms away at a shallow angle, dealing 12% damage to anyone it hits for knockback that KOs at 145% and it is slow enough to control space well, but the ending lag is immense as the Abomination struggles to pull out a new axe and it is easy to see coming.

The Abomination is all about simply damaging the foe and taking damage back: It has solid disjointed melee, if slightly underwhelming in pure power, can attack at any range and can disrupt the foe by pulling them in close to it or firing off it's axe which controls shorthop space well. It may look underwhelming at first, but it is a minion well worth the time to summon.

If, for some reason, you decide to charge this move for five seconds, Kel'Thuzad will instead summon his adorable cat and companian, Mr. Bigglesworth. Mr. Bigglesworth does not have a hurtbox and is invincible, simply lounging in the background and doing cat-like things like grooming itself, on appropriate stages hunting stray bugs/rodents and so on. Mr. Bigglesworth serves no purpose except to look adorable.


Up Special: No Feet

Kel'Thuzad crackles with blue energy as he enters a free hover that is similiar to R.O.B.'s Up Special, functioning the same as that move but slightly faster and slightly longer in duration. Combine with the possibility of Kel having a tether and his weight and he can survive for a fair amount of time, though he is actuallty a fair deal lighter than R.O.B.. Like R.O.B., Kel'Thuzad can attack out of this and re-enter it as he desires, which combined with his float allows him a pretty potent air and shorthop game. Just remember that Kel himself is not a hitbox unless you use a move. A solid recovery.

Smashes

Forward Smash: Frostbolt

Kel'Thuzad holds one hand out in front of him, palm wide, as icy energy gathers into it, firing it out as a bolt of cold energy that travels 2-4 Battlefield Platforms depending on charge. This move deals only a moderate amount of damage, 14%-19%, and it's knockback only KOs at 160%-140%, but it has a variety of additional effects that make this quite worth it, and it has fairly fast starting lag, though the ending lag is a bit poor. If a foe is struck by this move, they will be covered in a thin layer of ice, which lowers their movement speed from the chill for about 7 seconds. Each movement speed debuff is itself not too large, but Kel'Thuzad may stack his movement speed debuffs with repeated usages, with each additional hit also causing the timer on all other chills to reset to 7: At the maximum of 5, after which additional Frostbolts only reset the timer, a foe's movement speed is cut by almost half. Considering Kel'Thuzad's extreme slowness combined with an awkwardly large size for his weight, snagging foes and taking them down to his movement level is nice.

This move's most interesting effect is probably, however, against shields, as it will cause the shield to be frozen over like a foe for 7 seconds, in addition to dealing decent shieldstun. A shield which is frozen over has it's shield regeneraton slowed to a glacial crawl: it occurs, but takes so long to do so that the foe has to very carefully plan out it's use, though Frostbolt itself fortunately does pitiful shield damage. This creates a tension when combined with your Side Special: Mana Detonation punishes large shields, which means one would want to actually bring their shield down to lower it's damage unless they try to dodge it, but your Forward Smash punishes smaller shields by keeping them small and allowing Kel'Thuzad to use this time to simply break a foe's shield. Further Frostbolts will simply reset the timer without increasing the effect of this shield regen slowing.

This move can be aimed up and down: Aiming it upwards allows Kel'Thuzard to shoot it at a nice 45 degree angle, but aiming it downwards will cause Kel'Thuzad to aim it quite close in front of him and cause it to crash into the floor, freezing a Battlefield Platform's worth of stage under him. Frozen stage simply acts like Brawl ice, which Kel'Thuzad is immune to (The Ice Climbers also have an ice affinity that helps them with this in Brawl), though it's effects on traction and turning speed are a fair deal less extreme than Brawl ice. In addition to giving Kel'Thuzad himself a movement advantage, Kel'Thuzad's Soldier of the Frozen Wastes (It is a soldier meant for frozen warfare after all) and Soul Weaver (it floats) are also immune, though the Abomination is not. Soldiers of the Frozen Waste in particular have a nice day with this, as foes who are flopping around on the ice are far more likely to be latched on by them and have to deal with the detonation. Kel'Thuzad also enjoys the ability to pull foes around chain-wise on the ice, not to mention that foes who are turning against the chains or near the edge on ice are pretty likely to be very easy for Kel'Thuzad to drag where he wants without worrying about them breaking the chain or charging him. This ice lasts forever, unless it's 40 HP is depleted, which is destroyed in Battlefield Platform chunks. Howeber, Kel'Thuzad can use Frostbolt on an ice patch to heal it for 14%-19% HP (Same as the move's damage), and if a foe is chained to the ice the damage/healing they take from it will actually heal the ice, allowing Kel'Thuzad a way to passively heal his ice.

With three aspects of it working into Kel'Thuzad's game, Frostbolt is one of his most notable and deadly tools.


Down Smash: Mana Conflagration

Kel'Thuzad waves his arms as blazing blue mana gathers in them, before releasing the energy in a blasting coldfire explosion around him. This animation takes less time than you might expect, it starts fairly fast actually, and deals a pretty nice, disjointed though not too large explosion of 21%-26% damage that KOs at 105%-90%. The duration of the explosion is fairly long, so it'll catch spot-dodgers and rollers, but it deals quite pathetic shield damage: In fact, if you have "frozen" a shield, it'll HEAL the shield! This might sound like all downside, but it isn't really. If you have the foe waiting on a Mana Detonation, for example, this can be used to make the Detonation "bigger" by healing their shield, allowing you a way to cheat a little on getting the foe's shield right. The other reason is that this gives foes a move they WANT to shield, which gives them more reason to keep their shield in mind and more chances to freeze it or get it either higher or lower for either Detonation or breaking, respectively. This move has quite high ending lag, though.

When used on ice, however, Kel'Thuzad will use the ice itself to help him cast this spell: This allows him to return to action much sooner, lowering this move's ending lag a great deal (To the point Kel'Thuzad regains control before the move's hitbox ends, though barely!) at the cost of 15 of the ice's HP, meaning that it can be used only three times (If the ice has 15 or less HP, it'll simply use up all the ice and destroy it) before destroying the ice...unless you heal it, of course. Because of this, it is a pretty deadly move to use once you've set up some ice with Frostbolt, and while shielding will stop it the timing to punish Kel'Thuzad for doing it with shielding is very strict.

If you hit the A button during this move while the Chains of Kel'Thuzad are primed, Kel'Thuzad will cause the chains to swirl around him as a secondary hitbox that spans the same length of the explosion, which deals 10% damage and some okay knockback, mostly serving it's use against shields, as it will cause a very large pushback effect, about to the end of the chain. This is quite useful for gaining space, but hightens the already quite large ending lag of the move as Kel'Thuzad returns all the chains to him, meaning it isn't safe on hit...unless you have minions out or a Detonation about to explode or something, especially because minions will also be "pushed back" to the edge of the chains, still able to move, which allows him to give them a minion right in the face to deal with. The ending lag of this is not reduced by being on ice, since it utilizes the chains and all.


Up Smash: Icefall

Kel'Thuzad gathers icy energy into his hand before raising it to the sky, shooting out an icicle straight up, which is roughly 3/4ths the height and width of Ganondorf. This icicle goes up 2.5 Ganondorfs as a hitbox that deals 19%-24% damage and KOs at 135%-110% and travels quite fast. Upon the apex of it's ascent, it slows down and then falls back down, becoming a slower hitbox that only deals 14%-19% damage and mediocre spiking knockback. If you charge this move up, though, Kel'Thuzad will instead fire off three icicles, one straight up and one to each side of that at a 45 degree angle, which have the same hitbox and effects. This move is a bit laggy to start up, but Kel'Thuzad doesn't take long to recover from it either, so he is able to play off them fairly well. The icicles crack into bits upon hitting normal floor and actually send out a very small shockwave of cold energy that deals 6% and very weak upwards knockback, however it has such range it is almost impossible to be hit by it and not the icicle.

When the icicle falls down upon ice, however, the shockwave gains a substanial boost in range, and while it still does not go too far it is now able to actually hit people who aren't hit by the icicles. In addition, a charge of the icicle is embedded into the ground as it lands, indicated by blue mana draining from the icicle and into the icy floor as it crumbles. The area that the shockwave hits will be covered in a faint glowing blue hue, indicating the charge. Whenever the ice is hit, the charge is released, sending out the shockwave once more and draining the charge, essentially creating small areas on your ice patches that are unsafe to actually strike at the ice without taking a small amount of damage or, if Kel is nearby, being smacked up at a good angle to be hit by his float game. Kel'Thuzad can also optionally send the charges off early by hitting B when the chain strikes the ice as an attack from Neutral Special, causing all of the ice's shockwave charges to go off and be expended. Of course, if the foe hits the ice and the shockwave isn't nearby, the shockwave won't be too useful...but it can be used to force your opponent into more advantageous spaces.

Having your chains out allows you to utilize a second part of this attack by hitting the A button, causing Kel'Thuzad to shoot out one chain (Three if fully charged for the triple icicles) at lightning speed, which proceed to slam the icicles down at the end of the icicle's journey. The chains rushing to the icicles is a weak 4% hitbox that knocks foes towards the icicles, while the chains themselves slamming down is a sweetspot for the attack that deals 28% (Regardless of charge) and a very strong spike that prones foes that do not tech it, in addition to some landing lag. The icicles are also send down at about double their normal speed, becoming hitboxes that deal 19%-24% damage and a stronger spike. Kel'Thuzad doesn't suffer too much lag doing this either, but he can't do anything until his chains are done slapping the icicles or he is hit away or whatnot. Hitting Kel'Thuzad away before the icicles are slammed simply ends the second part of the attack, the chains beginning to retract to Kel'Thuzad. If the chains are hit before slamming the icicles, this move is also ended early and Kel'Thuzad takes substanially more ending lag. The true downside of this attack, though, is that it takes time for the chains to retract back to Kel'Thuzad after doing this, allowing foes to smack them for damage while they have done little, perhaps even at the same time as hitting Kel'Thuzad. If you don't have 3 chains out and three icicles were shot out, Kel'Thuzad will only do this move on the middle icicle.

On the plus side, though, the icicles slam down very fast now and can be very difficult to avoid, especially if hit by the chains as they extend out. And while very difficult to do, slamming a foe with the chains as they smack the icicles is a big reward, dealing large amounts of damage and forcing the foe into prone and having to react quickly to the rushing down icicles. Of course, they can tech it, but Kel'Thuzad will have control of himself not long after slamming them down, so he can use this as a chance to perform a tech chase or to retreat for space, plus the foe has to deal with shockwaves as the icicles slam down...pretty scary!


Special Grab Game

Special Grab: Chains

If Kel'Thuzad has primed the Chains of Kel'Thuzad via his Neutral Special, he may utilize a special grab by hitting the Shield + B buttons or grab + B buttons, as Kel'Thuzad points a finger forward and fires it out a Battlefield Platform, though by holding down B he may extend it to up to twice that length at tne expensive of up to twice the ending lag. The chain itself comes out quickly, travels slightly slowly and the actual ending lag is short, though the chain will not be fully retracted when Kel'Thuzad regains control and will continue to be reeled in as he does. However, the chain is perfectly attackable during this time, and it's 40 HP may be damaged during this time, though Kel'Thuzad will not take damage from this.

Kel'Thuzad always uses the same chain for this grab if it has not been used elsewhere and he cannot use his Special Grab while he is reeling in the chain, so repeated misses can lead to one dead chain (At which point anther chain becomes the main grab chain). A foe grabbed by the chain will not be reeled in to Kel'Thuzad, but instead will be wrapped and incapacitated where they are, held in midair if they were caught in the air. Kel'Thuzad cannot grab minions or corpses with this.


Special Pummel: Chain Shock

The Special Pummel is simpy a pummel performed when the foe is grabbed by your Special Grab. Kel'Thuzad sends a shock of energy through the chain, which quickly travels through the chain, dealing 1% damage. A rapid pummel, but it takes time to travel to the foe, so it will do less damage the further away the foe was captured.

Special Down Throw: Brain Link

The Chains of Kel'Thuzad are also known to have a mental component, which he utilizes here, causing the Chains of Kel'Thuzad to enter the foe's mind as he raises the chain the foe is grabbed onto up. During this time, Kel'Thuzad may input any input save for grab, with aerials being done by holding the jump button (Tapping the control stick for tapjump, such as on a Wiimote) and shield/grab + direction for throws. If no input is inputted, it will simply be the foe's last input. The Chain of Kel'Thuzad will worm it's way into the foe's head/body/whatnot, using an ear if so applicable, and wrap around the foe as Kel'Thuzad snaps the chain down for 8% damage and weak downwards knockback, which is even weaker if you snag a foe in the air.

While the chain is wrapped around the foe, the selected input cannot be used, allowing Kel'Thuzad to ban particularly pesky moves to his large and slow form. The chain has 40 HP and will not be removed until the foe destroys it, though most of the foe's attacks can hit it, mostly ones that hit around the foe's body. Theoritically, Kel'Thuzad can ban up to 7 inputs with this move by using all 7 chains, but it is likely he would prefer to keep some in reserve. If Kel'Thuzad tethers to a foe who has this happen to them, the tethered chain will link up with the one from this move, causing them to share their effect, meaning that the foe must now also remove the tethering chain to get their move back. While this does not allow Kel'Thuzad to multiply the number of moves banned, it makes it much harder to get any one move back.

While an opponent has their moves locked with this move, Kel'Thuzad gains an addition minion he can summon from his Down Special: The Shade of Naxxramas, which takes 31+ Frames of charge to summon and has no applicable HP. The Shade of Naxxramas is a ghastly apparition in the shape of the foe, which mimics their stats, and has all the moves that the foe has had locked, in addition to a grab (Since you cannot lock the grab) and a simple and basic "throw" that deals 4% and weak knockback, with the animation depending on the character copied, though the Shade will use any throws of the foes that are locked. This means that the more chains you invest into locking the foe up, the better and stronger your Shade of Naxxramas becomes, with up to nine moves (7 locked moves, grab and basic throw) if you invest all of your chains.

While the Shade of Naxxramas takes damage, knockback, hitstun and so on normally, it cannot be killed by average means: Even knocking it offstage will cause it to merely respawn. Instead, the Shadw may only be killed by destroying all chains that bind the foe's moves, at which point the Shade instantly stops in the middle of any animation it was in and fades into nothingness. While this makes the Shade's potentially quite a bugger to deal with, it does mean you'll also kill two birds with one stone by knocking off the chains you have on you, and that Kel'Thuzad must invest more chains to make his Shades more "durable". Since they fade into nothing, they also leave behind no corpse for Kel'Thuzad to manipulate, potentially depriving him of quicker summoning later. The Shades are a commitment to summon, but also quite potentially potent.


Special Back Throw: Soul Pain

Kel'Thuzad yanks his chain back, as if to pull the foe towards him with one single movement...but instead of that happening, the foe merely takes very slight knockback away from Kel'Thuzad as their very soul is ripped out, which takes the form as an ethereal copy of the foe, distinct in coloration and form from the Shades of Naxxramas. Mostly by appearing more "solid" rather than ghastly and having different colorization. The soul is sent flying towards Kel'Thuzad, though the knockback is not strong enough to KO until high damage %s. The knockback isn't ideal for follow-ups, but it serves as a sometimes shortcut to approaches.

The soul shares everything with it's body and can dole out pain the same: Hit the soul, damage the body. The soul hits you? You're damaged. If you hit the soul, then the body won't take knockback or hitstun, but you'll damage it all the same, and the soul starts with the same damage % as the foe, though it is invisible. Status effects you apply to the soul even apply to the foe, as well, so if you freeze a soul's shield or whatnot? You'll be freezing the body's shield as well. And the soul is far more susceptible to the necrotic magics of Kel'Thuzad, causing it to take double the time on status effects that strike it, which transfers to the main body. The foe may merge their body and soul together by grabbing their soul, which causes it to merge into the body in a very brief animation: Grabbing is the only input that causes the body and soul to hit each other. KOing the Soul causes it to return to the body.

With this, Kel'Thuzad can add an extra hurtbox for the foe at the cost of an extra hitbox striking at him, and more ability to abuse status effect with two to hit, using his minions to even the odds. However, this also takes advantage of a lot of other aspects of Kel'Thuzad: Floating to strike one foe while approaching another? Wide, sweeping attacks like Down Smash? You can even tether the foe and soul around, even to each other...play around a little and see what works.


Special Forward Throw: Chain Swing

Kel'Thuzad grips his chain and swings it, and the opponent, around by spinning the chain over his head, causing the opponent to swing around him not entirely unlike a Wario Forward Throw. How much damage and knockback is dealt depends on what range the opponent was grabbed at: Opponents grabbed closer to Kel'Thuzad take more damage, 9%-15% depending on range, due to being spun faster, while enemies further away gain more momentum from the longer swing and thus take more knockback, KOing at 175%-125%. The chain is retracted to Kel after the opponent is swung off the end.

If the chain passes by a minion while it is being swung, you can "carry" your minions with it, by default allowing you to put them the same distance to the other side of you. For example a minion one Battlefield Platform in front of Kel'Thuzad will be carried one Battlefield Platform behind Kel'Thuzad: By holding down Z, you can have the minion carried for as many rotations as you want, allowing you to even put it back at where it started if desired. And by holding down Z the entire time, you can "launch" the minion slightly with the foe, sending them at the same trajectory but with 1/3rd the knockback and no damage done to the minion. If you've got out a bunch of minions, you can try and grab a far away foe, then use this to send your minions raining towards them and hide behind them while you do whatever you please!


Special Up Throw: Cold Echoes

Kel'Thuzad touches a single cold finger to the chain that has captured the foe, frost travelling fast up the chain and chilling the opponent at the end for 6% damage and quite light upwards knockback, which means that it can be an okay throw to keep the foe just in the air, though being a grab it can't really "juggle" per se. The opponent, however, will thrum a light blue after being struck by this move for 8 seconds, indicating that they have been afflicted with this chilly echoes debuff.

Striking an opponent who has this echoes' debuff on them doesn't cause anything noticable at first, but the air will noticably chill over the next four seconds, before a ghostly, cold "echo" of the attack strikes again in the exact samce place of the first attack, with all the same properties such as damage that it had at that time: Essentially, every attack you land gets a second chance four seconds later, which is especially a bother for foes when they have to deal with things like reduced traction sliding into it, and can create some especially potent "traps" along the stage, though they're not really true "traps" given how they work.


Grab Game

Grab: Icy Grip

Kel'Thuzad holds out a single arm and reaches forward with his icy grip. It is a fairly long range grab with okay lag on both ends, so that's pretty nice. Kel'Thuzad can grab his minions and their corpses with this move, though it will always prioritize foes if a foe and a minion overlap.

Pummel: Frost Shock

Kel'Thuzad squeezes the foe as he lets out a shock of icy magic into the foe, letting out a laugh as he does so. Deals 3% damage in a slow pummel. If Kel'Thuzad has captured a minion or corpse., he simply releases it swiftly.

Down Throw: Frost Blast

A chilly magic trails up Kel'Thuzad's arms as he grabs the foe and flings them against the ground for 9% damage, with them bouncing off it and taking forwards knockback. A foe inflicted with Frost Blast will be colored a dark blue (other color stacks will cause it to shift between colors periodically), indicating that after 4 seconds are up, the foe will be frozen while taking 1% damage. The freeze is quite brief: It isn't as brief as the Ice Climber's Down Special freeze, it isn't that much longer. However, since the timer on it is less than his Mana Detonation and other such abilities, one nice use of this is to set it on the foe so that it prevents defensive measures the foe may take by freezing them before the detonation blows, or just plain using it as a way to prevent DI/Momentum Cancelling for a moment or a brief save to get space or whatnot. It can be rolled and shielded, but if you're rolling for this you might come out of it right into a detonation.

When used on a minion, it instead is used to generate an "Frost Armor" effect, as Kel'Thuzad encases his minion in an armor of ice. This armor of ice has 15 HP and essentially "adds" it to the minion's HP, though it is not a true add as it cannot be healed and will need to be re-applied if broken, and also reduces the hitstun the minion will take. This effect can be stacked up to twice on one minion, allowing you to make them quite tanky, further uses of it on a minion that is maxed out will add a blast effect to when the armor is broken, causing ice to fly out for a close ranged 5% and weak flinching, plus 2% more for each additional add of this move. Kel'Thuzad can even apply this to a minion's corpse, which reduces the knockback it takes and allows Kel'Thuzad to pre-armor a minion before raising it from the death.


Forward Throw: Corpse Explosion

Kel'Thuzad rears back with the foe and flings them forward quite far. This throw only deals 6%, but it has very high set knockback, about 2 Battlefield Platforms, so while it is lacking in follow-ups, damage and cannot KO, it is by far Kel'Thuzad's best throw for gaining space for his tricks, which is very useful given his large grab range. If a foe is tethered to him, they will be snapped in place at the end of the chain and take an additional 3% damage.

When used on your minions or corpses, Kel'Thuzad will charge them with a dark energy that seeps into them before releasing them.. Minions will have this energy slowly pour out of them over 7 seconds, before it simply blows up, creating a decently sized explosion that deals 18% and KOs at 90%, at the cost of killing the minion, which will also destroy the corpse and prevent you from raising them again. However, the minion gains a progressively stronger buff to their attacks as the explosion gets closer and closer to going off: 1% damage buff to all moves, 2% quicker KOs and a small buff to attack speed and lower lag on both ends, each going up by one level for each second passed, meaning on the last second before death they deal 7% more damage, KO 14% earlier and have quite a substantial boost to their speed in all aspects of their attack. A pretty powerful effect to give your minions as long as you are willing to sacrifice it, as you can play into it well and killing the minion doesn't even stop the explosion: The corpse will still go off and explode at the given time, though being stationary and knocked-aroundable the foe has an easy enough time avoiding this. This move has an amusing interaction with your Shade of Naxxramas, as the Shade will NOT die when the explosion occurs, since it only "dies" by killing the chains, so the Shade merely loses it's buffs (Since the energy left it). This allows Kel'Thuzad to effectively rebuff a Shade of Naxxramas as much as he wants, as long as it survives, though on the flipside this means that it is the only explosion which can be 100% prevented, as breaking the chains will cause the Shade to dissipate.

When used on a corpse, however, Kel'Thuzad will turn the corpse into a Snake-esque proximity mine with the energy and toss them forward one Battlefield Platform, which deals 15% damage and KOs at 110% on contact, blowing up the corpse and causing it to cease to exist. Like Snake's mine, other things can set it off, though Kel'Thuzad and his minions will not. If a minion is raised from the dead, the effect simply fizzles, so this can be used as a way to protect corpses until you wish to revive them, but takes time, but also just plain serves as a very nice trap for the foe to deal with. By holding down Z during this, Kel'Thuzad can throw the corpse up to two Battlefield Platforms and change the direction to any of the 8 directions.


Up Throw: Dark Ritual

Kel'Thuzad takes the foe and gathers energy through his arm from the foe, draining it, and releases it as he tosses the foe into the air. Exactly how much damage and knockback this does to the foe depends on how much health their shield has, as Kel'Thuzad essentially uses it to "power" the blast he releases as he tosses them, as if it was mana: Dealing 6%-14% damage and ranging from light upwards knockback to KOing at 115% (Minimum shield to full shield). And since it is a throw, Kel'Thuzad has a good chance of landing this with an actually healthy shield, perhaps utilzing this after an on-ice Down Smash. And if their shield is low, Kel'Thuzad has excellent follow-up ability by utilizing his nice air game on a setup throw, though the throw on a foe with a middle of the road shield is fairly mediocre all around.

If used on a minion, however, Kel'Thuzad will simply raise them up and begin draining them of their energy in fairly quick chunks of 3% damage to the minion, healing himself by 1% for each HP removed (If 3% or less HP is taken as the last HP of a minion, he still heals 1%). This continues until Kel'Thuzad either presses an input, at which point he sets the minion down with some lag, or the minion is struck by a move that deals more than extremely minor knockback, at which point it flies out of Kel'Thuzad's hands and Kel'Thuzad takes a fair deal of lag, though Kel'Thuzad himself has the usual armor people get on first grabbing a foe and will not be knocked out of this move if only he is hit. If a Shade of Naxxramas is grabbed, Kel'Thuzad may drain HP from it indefinitely, until he stops or is stopped. A minion who dies from being drained like this will leave behind a corpse, so Kel'Thuzad can drain and then revive for a net "gain" in HP/healing in this regard. It leaves Kel'Thuzad open, especially if he has not set up any, but is well worth it.


Back Throw: Cold Feet

Kel'Thuzad uses magic to lift the foe up, before slamming them behind him, which like some Brawl throws causes the foe to rebound off the surface and take the knockback, 11% damage that KOs at 220%. Outside of icy surfaces, that about ends the throw, making it a nice way to reset the momentum of the match. When it's above an area you've iced up, though, some of that frosty energy will transfer from the ice to the opponent with a wave of Kel'Thuzad's hand, their body gaining a light, icy hue. The next time they touch solid ground, it'll freeze right up! For 3 seconds, the foe will be frozen to whatever their body touched, unable to move or fall or anything, though free to shield, dodge and attack. Kel'Thuzad can use this in plenty of ways, especially since it is quite useful for his moves that deal with shields or dodges, forcing the foe to properly predict to avoid punishment by restricting other options to move away. Especially noteworthy with floating approaches, as Kel'Thuzad can weave in and out of grab range, and he can even cause foes to do things like stick to walls or ledges with this! A foe stuck on a ledge won't even count as having grabbed the ledge, so improper recovery could mean Kel'Thuzad stealing it from right under their nose. And perhaps if you had a way to delay the foe's landing...

If Kel'Thuzad uses this on one of his minions, he'll simply turn the minion to the other side of him. If ice is there, he will then snap his fingers and cause the ice to lurch up, freezing them in place. They're now unable to move, but perfectly capable of attacking, allowing them to serve as more of traps than minions: in addition, however, the minion and the ice will now share their healing. So, for example, when you heal that ice patch with Frostbolt? You're ALSO healing your minion! You can even attach your chain's healing to either of the two to heal both, so they can become higher priority to kill, but of course at the same time they can't pursue the foe. They'll also share attack triggering, which is to say, attacking a minion frozen to your ice causes your stored Up Smash shockwaves to be used, allowing you to set-up a wee bit of a defense for your minions...but watch out for shorthops. This move lasts for much longer than the three seconds of the normal version, lasting 12 seconds.


Standards

Jab: Chain Blast

Kel'Thuzad opens his ghastly palm in front of him and releases a burst of energy from it, exploding in front of him for 6% and okay knockback for a jab. It is a pretty fast Jab overall and it is useful for getting the foe out of his face. With the Chains of Kel'Thuzad primed, though, this move becomes a fair deal more interesting, as you may hit the A button again to essentially turn this into a two part jab, as Kel'Thuzad sends a chain forward about one Battlefield Platform. If it hits a foe, it then drags the foe to Kel'Thuzad while dealing 4% damage, with both of them ending pretty much frame neutral. The chain is not a 100% hit, but it can combo into most players up to 20%-40% depending on the weight and fall speed of the foe, allowing Kel'Thuzad to essentially yo-yo the foe by combining the first and 2nd hits of the jab into each other, though this is not 100% and Kel will want to mix it up with, say, a grab.

Opponents can also get out of this a bit early by DIing: At higher percentages, DIing up and down can cause the chain to miss, but Kel'Thuzad actually can aim the chain up or down by moving the control stick that way while the chain shoots out, allowing him to catch a foe doing this if he properly reads the DI. A foe can also get out of this early by DIing away from Kel'Thuzad, but this means that Kel'Thuzad just gains more space on the foe, and since you need to DI the first hit he will not throw out the chain if he properly reads the foe's DI and thus have some more time to act. Finally, simply hitting A twice will let Kel'Thuzad cast this out regardless of if he hit with the first hit, so it allows him a nice way to snag foes to him should he ever want it and is a pretty nice disjointed, long ranged attack.


Down Tilt: Mana Wave

Kel'Thuzad places his hand to the ground and releases waves of cool energy from his person that go a little over a Marth's Shield Breaker to both sides of him, dealing 6% damage and light upwards knockback to both sides of him. This is not a "true" projectile, as Kel'Thuzad stays casting it during the whole fairly quick animation, but it is fast on both ends and thus serves as a good melee move for Kel, especially because of the fact that the way it pops people up lightly puts them in a great position to follow-up with shorthop float attacks. This wave will also bounce off of ice patches that you have out, cutting their range by roughly half in exchange for more power, as it will combo into it's own hit in this way. If Kel'Thuzad has ice patches to both sides of him and the foe is very close to him, in fact, he can hit with the wave four times, once as they both eminate outwards from him and once on the reflection back. While this is exceedingly unlikely to occur, it is something to keep in mind.

If Kel'Thuzad has primed his chains, he can hit A to embed one into the ground, only the very tip of it sticking out to show foes where it is and adding only a bit of ending lag to the move. This chain will activate whenever a foe steps on it or near it with a range similiar to Snake's down smash mines, wiggling to and fro a bit more frantically to indicate this. If the foe goes more than 1 Battlefield Platform to either side of the chain or 2 Ganondorfs above it, the chain will shoot out at a frighteningly fast speed, dealing 8% and dragging the foe back to where it was. While this sounds quite deadly, it has two weaknesses to keep aware of. One is that, without additional pressure, the foe can simply roll or otherwise dodge it at the edge of it's range, and it'll miss entirely. The other is that the foe can attack the tip of the chain that sticks out and deplete it's 40 HP of stamina to remove it and the chain from existance. Of course, if the foe is dealing with the chain, Kel'Thuzad might start building up his army or making ice patches or even priming a new set of chains if this was the last one, so maybe they should try and dodge it instead...this move uses up the chain, of course.


Forward Tilt: Mana Shatter

Kel'Thuzad swings his arm forward as it gloes with an eerie blue magical energy, his arm appearing almost sharp as it goes through the air due to this, dealing 9% and fairly okay knockback, but not particularly impressive. The low angle of the knockback, however, is fairly nice for hitting foes into your minions, chains and whatnot, keeping them close to the ground, though the knockback is not really good enough to take advantage of any kill potential such an angle might have. This move's lag is probably about on par with Ike's Forward Tilt, with slightly less ending lag. It is another good move to shield and then strike back.

If this move hits a frozen shield, however, it'll cause the shield to have cracks upon it on the side that was struck, in addition to dealing a fair deal of elevated shield damage. In addition, the shield being cracked causes all damage to the shield that hits that side to do more damage, making it a sort of cascade of shield damage that can get out of hand. If Kel'Thuzad manages to land another one of these on a crack already there, then it'll deal an exceptionally huge amount of shield damage, enough that it'll destroy all but the most immaculate of shields. If you hit the non-cracked side, then you've got a shield debuffed on all sides, which is also useful for an offensive assault. The crack effect lasts 7 seconds.


Up Tilt: Cold Spells

Kel'Thuzad raises an open palm above him with a cold chuckle, releasing a blast of chilly energy above him, striking foes for 11% damage and sharp upwards knockback that'll KO at around 175% or so. Enemies struck by this move are frozen until the end of their knockback, preventing DI or momentum cancelling, and the strike hits a bit to both sides of Kel. This also helps with the 2nd part of this move, which is that it'll freeze your minions as well, sending them up about 1.5 Ganondorfs into the air, in addition to varying angles based on how the minion was moving. A minion standing still will be sent straight up, while minions moving away will be shot away and minions moving towards Kel will be shot towards. If a minion is angled, they'll generally be sent more up the closet to Kel they are and more away in their direction if they are further away. While your minions fly, they become projectiles that deal 8% damage and okay knockback, in addition to being unable to do anything.

At the same time, your minions become immune to damage until the 30 HP of the ice is broken, the ice melts after 11 seconds or Kel'Thuzad uses his Jab, Forward Tilt or Down Tilt on it. Using his Down Tilt against it will cause the Down Tilt to bounce off it while breaking the minion out: Minions in the middle of an action, like attacking, will be frozen in the middle of said action, so Kel can unfreeze a minion to attack a foe while striking them with his Down Tilt. While minions do not take damage, they DO take knockback. So while your minions won't die to damage, they can be knocked off just as well. While knocked around, though, they become projectiles once more if hit by more than a tap, being able to be sent flying as projectiles against your foes...or, if the foe hits them, against you. Naturally, you can hit them back at the foe and start a game of minion tennis, until the minion breaks out anyway...and it also means you can smack a minion so it is sent flying towards the foe while being broken out or with a lingering hitbox, such as Up Smash shockwaves or projectiles, to break them out once sent over to the foe.

Your minions won't intentionally play minion tennis with your frozen minions, but they can smack them around just as well and will sometimes do so if the enemy is busy. Your minions are smart enough that, if a frozen minion is knocked off and looking like it'll die, a nearby minion if possible will try and hit it back to the stage. This is both a good and bad thing: It means your minions are more likely to survive while iced up, provided you have sufficient minions, but it also allows your opponents to kite your minions by kicking frozen minions around. This Up Tilt has fairly high starting lag, but low ending lag: At higher %s, Kel can follow-up with an Up Smash quite efficiently, especially if he sends minions into the air and after the foe too.


Dash Attack: Ice Crash

Icy energies swirl around Kel'Thuzad, chilling the very air around him as he rushes forward a small amount and crashes into any foe in his way, dealing 14% damage and knockback that KOs at 170% at a particularly shallow angle, not going very high at all but sending them quite horizontal, which it will also do to your minions frozen by Up Tilt naturally. Starting lag isn't too bad, but the ending lag is poor, though this can be mitigated some if you have the Chains of Kel'Thuzad prepped as this offers a follow-up "attack" by hitting A at any point during the attack or its lag.

Doing this causes the Chain of Kel'Thuzad to shoot out, Kel's palm extending in that direction, about 1.25 Battlefield Platforms, not strong enough to so much as damage the foe, but if it strikes something solid it will pull Kel'Thuzad to wherever it was that he latched onto, which during the starting lag or attack allows you to move yourself, or even press down to pull yourself in place and thus use this attack WITHOUT moving. This can also let you escape the long ending lag of this move, by allowing this to pull yourself out of the way and thus dodge attacks. The chain is not strong enough to damage when being sent out, but when it latches on and pulls taut it deals 1% and a flinch for a brief moment, which can serve as a way to work with the hitbox or perhaps interrupt a strike.

Furthermore, Kel'Thuzad can instead send the chains from this and snag a frozen minion with this, which will instead cause Kel'Thuzad to fling the iced minion to his location as a projectile with more force than normal, enough to do 12% damage and somewhat better than okay knockback, allowing Kel'Thuzad another way to protect the ending lag of this move but also a way for Kel'Thuzad to directly save iced minions and a way to fling them more effectively, especially by tilting the control stick in a direction when it catches the iced minion, allowing Kel'Thuzad to fling them in that direction! Given the angle this hits at, this is especially useful, and Kel'Thuzad can do something like begin this dash attach and send out a chain to snag the iced minion you just sent flying as a projectile, causing the opponent to have to deal with a dash attack, a flinch to dodge and a projectile that is basically being yo-yo'd. Very, very frightening!


Aerials

Neutral Aerial: Lich Spin

Kel'Thuzad spins through the air with his arms outstretched as magic eminates out of it, visually similiar to Lucario's Neutral Aerial or Zelda's Neutral Aerial, dealing 11% damage and some fairly good knockback, though it does not KO until 210%. Lag-wise, this move is pretty similiar to Lucario's Neutral Aerial, though this move has a lot of utility when you add in Kel'Thuzad's float, as like Peach he can do a float close to the ground for a strong aerial assault, as it allows him to perform aerials with much more mobility, and Kel'Thuzad can use this + floating to dance out of retaliatian range from a roll for example.

If Kel hits a shield with this, he'll actually push it towards him with the spin, causing the foe to end up behind Kel'Thuzad and facing away from him, which is a pretty nice bonus, as the shieldstun will mean they're usually able to move around when you can and their options are more limited as Kel'Thuzad will usually not be in grab range unless he floats back towards them. He can also use this as an advancing retreat in this way, floating away from the foe's now-reversed position on shield or roll towards him or advancing towards them if they roll away or are hit by continuing to float forwards. If you've got a shattered shield on the foe, this can also be nice to switch to their shattered side if they try to dodge with their un-shattered side and go to town on the shield, since this is an adequate shield pressure move.

If there is an iced minion near Kel'Thuzad, he will take it with him on his spin and cause it to basically be turned around, and if it was moving it will retain all momentum it had, allowing Kel'Thuzad to seamlessly change direction of minions if need be, especially since this won't hurt the ice of the minion. However, this also can't actually add any distance or whatnot to its path, so it is hardly perfect. But a very useful tool nonetheless!


Down Aerial: Bolt Blast

Kel'Thuzad thrusts his palm downwards, causing an explosion of energy to appear under him, dealing 14% and a fairly strong spike, about the power of R.O.B.'s down aerial. It also takes about as long as said move to start-up, but has longer ending lag, though Kel'Thuzad can cover for this by using this with a float, which allows him to move while doing so. Kel'Thuzad doesn't have a specific gameplan for taking the foe offstage, but with his aerial acumen and his float it is certainly a possible way for him to snag KOs. When used on a grounded foe, they actually don't get knocked off the ground, just taking damage and hitstun, somewhat similiar to what R.O.B.'s DAir can do/seemingly do, so it also allows him a way to strike and keep the foe in range for a continued assault nearby, though it also means it is a bit easier to strike back.

If you hit A while Kel'Thuzad's chains are primed, Kel'Thuzad will shoot one downwards with a point of his outstretched palm's finger downwards at about Sonic's dash speed, and if they hit the ground they will reel Kel'Thuzad to the ground at that same speed, Kel'Thuzad igniting his body with magical energy to become a falling hitbox as he does so, dealing 8% damage that brings foes down with him. When Kel'Thuzad hits the ground with this, he suffers almost no lag, allowing him to use this to initiate air-to-ground assaults much easier, and putting him in a great position to follow-up if he hits a foe with his falling hitbox. It also serves as a great little trick when you're using a low float: Kel'Thuzad can snag people who are too uppity about grabbing him too quickly out of the initial attack with this, hitting them for 8% and knocking them away via the falling hitbox before landing, or he can use it combined with the initial attack and floating backwards to instantly transition into the ground game while the foe has been "spiked" in place. A very versatile move, though it needs primed chains to be truly amazing.


Z-Air: Chain Frost

A Z-Air is something a lot of characters with tether grabs have, done by hitting shield (AKA air dodge) + A in the air. Try it with Link sometime! This move is only available to Kel'Thuzad if he has prepped his chains, otherwise inputting this does nothing unusual. If you do have them prepared, though, Kel'Thuzad will hold a palm forward and send a chain flying forward about 1.25x the length of Link's ZAir, with slightly more lag on both ends than said Link's ZAir. Striking opponents at the start deals 4% damage and very little knockback, but it makes it an excellent setup move for further assault due to a combination of range and the fact that, just like Link's ZAir, this move has no landing lag and thus can be used for shorthops like this. The tip is a sweetspot that deals 6% damage and freezes the opponent in place for a brief moment, dealing no knockback at all.

The freeze is brief enough that the opponent can dodge it before chaining more, but it is still useful for keeping an opponent in place for the briefest of moments, such as right when minions are closing in or Mana Detonation is about to occur or whatnot, and it can also be used with further ZAirs just to pressure the foe with it even if you can't chain the attack, and it is one of Kel'Thuzad's better tools to begin pressuring and get in for his closer range, shield busting moves. All together, this makes Kel'Thuzad's ZAir useful both as an approaching tool and to break opposing approaches given the range, though note that the chain can be attacked by normal by this and of course you need chains prepped. A good reason to keep them up and around you, eh?


Back Aerial: Blizzard

Kel'Thuzad sticks out his hand behimd him, collecting chilling energy in his hands and sucking it from the air, creating a fairly weak suction effect as he does so. Using this near ice, you'll want to shorthop it to use your frozen ground for this, will cause it to suck up some of the ice's coolness and power as well, helping this move. By default, though, it deals 14% damage and KOs at 135%, fairly solid numbers anyway, but collecting ice adds some duration to the move in addition to 1% damage and KOing 5% sooner for each ice structure around, with no theoritical maximum except how much you can fit close to you (Though naturally, there are practical limitations...). With around 5 structures, this attack lingers long enough to have essentially doubled in length, which is especially nice because the increased duration continues during your ending lag and not before and thus can cover this move's very long ending lag, plus things like catching rollers/dodgers or being a real pest to people trying to air dodge or fall from above. Starting lag is average.

Up Aerial: Hailstorm

Kel'Thuzad raises a single hand upwards, mana swirling around it like a hurricane above him, dealing multiple hits of 3% damage, totaling 12% if all the hits connect, but with little knockback since it doesn't really have a burst-y "final" hit, and like most multi-hit attacks directional influence is an issue. This move has slightly long starting lag, but the ending lag is similiarly slightly shorter than normal.

By holding down A during this move, however, it can be extended without Kel'Thuzad even needing to be around, the maelstrom of mana staying in place if it has anything to siphon energy off of: Ice from the ground, minions below it or whatnot, basically anything except your chains which can be made and is below it. The maelstrom will even "pick up" ice it is above, be it from frozen ground or chilled minions, creating small projectiles that deal 1% damage and very weak upwards knockback and very limited hitstun, easy enough to escape but still a bother for foes taking an aerial approach to Kel'Thuzad. The hurricane doesn't last for all that long while above something, only about 3.5 seconds, but during the time it is around it gives Kel'Thuzad a great advantage in the air and thus is a tool to keep in mind. Note that extending it in this way does add a fair deal of ending lag to the move.


Forward Aerial: Bolt From The Blue

Kel'Thuzad brings his arms back as he gathers burst of cold mana in his hands, before thrusting them forward and releasing it as an icy explosion in front of him, dealing 15% damage that can KO at 99%, and it has very nice disjointed range from the explosion, making it a fairly nice KO option for KT to throw out, though he must be weary of the fact that this move has fairly long starting lag and only average ending lag, so it isn't something you can throw out too much, with the exception of during a float which can help by allowing you to weave in and out a bit more. This move can just be completed in the space of one shorthop, so it is still a nice option there as well.

This move is also noticable for having quite strong shield pushback, even if it is only eh for shield damage: There will, of course, be times you can damage a foe's shield but not break it, and this move can serve as a good "finisher" for this shield strings by pushing the foe back and allowing Kel'Thuzad space for his minions and whatnot, in addition to things like increased pushback on Kel'Thuzad's ice due to the decreased traction or pushing a shielding foe into prepared exploding corpses for more torment, making it a surprisingly versatile move for a "mere" kill move.


Final Smash: Cold of the Grave

"Pray for mercy! Scream your dying breath! THE END IS UPON YOU!"

Kel'Thuzad brings a single finger forward in front of him with this low reaching Final Smash, which can affect multiple people if they are all in front of him, cackling coldly upon hitting as his finger pierces their flesh, using his cold magic to freeze the opponent solid from the inside-out, looking like little more than a frozen statue of themselves. The opponent is immobilzed for 3 seconds, during which time Kel'Thuzad can do whatever he pleases: Either attacking the frozen foe or even leaving to set up if he so desires. Opponents break out of the ice upon being hit once, but they take 5x damage and knockback from the attack as their entire body shatters from the inside, so Kel'Thuzad should do massive damage or kill the foe as long as he doesn't do something dumb like use his jab on the frozen foe for some reason. Minions will not attack enemies frozen this way, preventing them from messing up your strategems.

Playstyle: Freeze The Blood In Their Veins

"Minions, servants, soldiers of the cold dark, obey the call...of Kel'Thuzad!"


Boss Mode


The archlich known as Kel’Thuzad sits at the seat of power within Naxxramas, coordinating the normally mindless Scourge into a fighting force for the Lich King. In his mortal days, Kel’Thuzad was once a powerful human mage and high-ranking member of the Kirin Tor, working under the great Archmage Antonidas, leader of the Kirin Tor at the time. The Kirin Tor had a wealth of secrets and knowledge at their disposal, and Kel’Thuzad spent countless hours devouring every bit of knowledge he could get his hands on—even the darkest and most unthinkable of arcane arts, such as necromancy. He became increasingly more reclusive and shunned by his peers the further he delved into forbidden magic.

The Lich King sought out Azeroth’s most powerful and ambitious individuals to bend to his will, sending out a mental summons to those he thought could easily be swayed by the promise of power. Kel’Thuzad was the first to answer the Lich King’s call. He saw the power the Lich King held over the undead and desired such power for his own, so he offered his services as a mage to the Lich King in whatever manner he desired. After a long, tortured journey to the frozen wastes of Northrend, Kel’Thuzad knelt at the feet of the Lich King and offered him not just his loyalty, but his soul as well.

"As my lieutenant, you will gain knowledge and magic to surpass your most ambitious dreams. But in return, living or dead, you will serve me for the rest of your days. If you betray me, I shall make you into one of my mindless ones, and you will serve me still.”

The Lich King’s words were both a threat and a promise. Kel’Thuzad would become his lieutenant, carrying out the Lich King’s whims, but in return he would gain power beyond his wildest dreams. Kel’Thuzad accepted these terms… as if he had much of a choice in the matter.


Unlocking Kel'Thuzad's Boss Mode is a rather simple task, accomplished by beating Classic on Intense OR defeating both Classic Mode and All-Star Mode on Normal difficulty, which will clear the "Just Can't Get Enough" challenge, unlocking the "Kel'Thuzad (Human)" Trophy and Kel'Thuzad's Boss Mode. Kel'Thuzad's Boss Mode is accessed from the Boss Battles screen as usual. Defeating Kel'Thuzad's boss mode unlocks the "Frostwyrm Lair" Trophy and clears the "Kel'Thuzad's Defeat" challenge: Then, if all Naxxramas bosses have been defeated, the "Fall of Naxxramas" challenge is cleared and the "Naxxramas" Stage is unlocked. Defeating Kel'Thuzad's boss mode without dying once clears the "The Undying" challenge, which awards a Golden Hammer, a Kel'Thuzad sticker and the "Shade of Naxxramas" Trophy. Finally, clearing every single Naxxramas boss mode without dying in any of them (Does not need to be one after another) clears the "The Immortal" challenge, unlocks the "Naxxramas" Trophy, another copy of a sticker for each boss and Naxxramas character and the "Frozen Throne" trophy. Kel'Thuzad's boss mode is 3v1.

Kel'Thuzad gains a number of buffs during his Boss Mode: His weight is increased, though only to be slightly heavier than Bowser, his ground speed is buffed to be equal to Ike's and his float now goes 1.5x Peach's distance. When Kel'Thuzad takes large amounts of damage quickly, such as being combo'd for long periods of times by multiple players, he will automatically release a quick 8% damage burst of ice around himself with fixed one Battlefield Platform knockback that cannot be interrupted. Attempting to footstool Kel'Thuzad will deal 5% damage to that foe with fixed upwards knockback equal to how far they'd footstool jump, though KT still feels the footstool's effects. Kel'Thuzad is a multi-phase fight, specifically containing two phases in it.

- During Phase One, Kel'Thuzad has a passive "Frost Thorns" ability, which causes foes to take 3% non-flinching damage whenever they strike Kel'Thuzad, so you'll generally want to knock Kel'Thuzad out of this phase as quickly as possible.

- Kel'Thuzad will enter Phase Two upon losing half of his stocks, rounded up (IE when he is at two stocks if you give him 3 stocks) or at 60% damage if he begins with only one stock. A small cinematic will occur as Kel'Thuzad calls upon The Lich King for aid in destroying the interlopers, like he does in Phase Two of his Naxxramas battle, causing two Guardiands of Icecrown to spawn half a Battlefield Platform to both sides of Kel'Thuzad's respawn platform, Kel'Thuzad himself priming his chains and thus beginning this Phase with his chains ready. Kel'Thuzad will now be able to summon Guardians of Icecrown by himself by charging for 41+ frames, though see below for charge reduction on this move and information on Guardians of Icecrown. If it is activated on damage and not respawn, KT goes invincible for his cinematic and they will spawn half a Battlefield Platform to both sides of him (Closer if there would not be room). Kel'Thuzad loses his "Frost Thorns" ability when Phase Two begins and does not regain it.

- Kel'Thuzad's Neutral Special now has 1/3rd the starting lag, making it much easier to get his chains out, and his chains have 60 HP. Chains now drain 2% and heal 2% per second. Chains now give 1% damage reduction per chain.

- Mana Detonation now pierces foes it hits, allowing you to set up multiple foes for mana detonation with a single usage of it.

- Down Special minion summoning now has 3/4th normal lag at the start and end of the move and minions, including Shades of Naxxramas and Guardians of Icecrown, take half their normal frames of charge to summon. Kel'Thuzad now gains super armor while charging this move equal to twice his current damage reduction (IE 14% super armor with 7 Chains around him for 7% damage reduction), making it more viable to charge this move for longer periods of time.

- Kel'Thuzad can now summon an infinute number of Mr. Bigglesworth.

- Kel'Thuzad can now summon Guardians of Icecrown from Phase Two on and gains two when Phase Two begins.


Guardians of Icecrown are undead Crypt Lords in the service of the Lich King, being roughly the size of Bowser and just as heavy, helped by the fact they have a supremely beefy 60 HP for minions. Guardians of Icecrown have a total of 4 jumps, their backs opening to reveal wings for jumps, but fall quickly. Despite this, it means they are potent both on the ground and in the air. They move on the ground at the same speed as King DeDeDe and have a multitude of abilities.

The most notable ability of Guardians of Icecrown is their Blood Tap ability, which increases the damage and knockback they deal by 10% (As in 1/10th) of their total, in addition to their speed by 10% and even their lag is reduced by 1/10th, though note that when stacking they do 1/10th of the already 1/10th'd value, which means that they actually gain a bit more speed than you'd expect with repeated uses and so on, while the lag returns diminish. This ability has a long 10 second cooldown between when it is used, but the buff is permanant and cannot be dispelled in any way except by knocking the body off the edge to kill it: Even just depleting the Guardians' HP is not enough, as they will keep the buffs if Kel'Thuzad raises them from the dead. Guardians of Icecrown are scripted to use this attack the instant its cooldown stops, even if it is not advisable for them to do so, so smart players can try and take advantage of this by using the Guardians doing this to smack them with strong attacks without fear of reprisal, since this move has relatively long starting lag, though the ending lag is minimal. Blood Tap's lag is not affected by their buffs, their only attack that is not. If Guardians of Icecrown begin to amass Blood Taps, they must be killed with top priority or they will overrun you and you will wipe.

Guardians also have a Sickle Grinder attack, where they reach out their front sickle-claw-things a long distance forwards before dragging them back to the Guardian, dealing rapid and very hard to escape hits of 2% that deposit the foe directly in front of the Guardian with the Guardian having a very slight frame advantage (which will increase with Blood Taps). This move has extremely long range, though the lag is only average on both ends, so it is very dangerous. Their Blood Suck ability, where they strike the foe with their claws and suck some of their blood with their mouths, has almost no range but deals a solid 12% damage while KOing at 145% and healing the Guardian of Icecrown for half the damage dealt, which will scale with Blood Taps causing this move to deal more damage and thus makes them quite difficult to kill if they are allowed to snowball too much. Guardians will frequently try to use Blood Suck right after a Sickle Grinder, but with quick reflexes this can be dodged unless the Guardian has some Blood Taps to reduce lag. Blood Suck may be used in the air, Sickle Grinder cannot.

Guardians can also use Wing Buffet, taking out their wings and blowing a powerful gust of wind with one Battlefield Platform of range in front of them that constantly blows enemies out of its range for as long as the Guardian blows wind, which can be held for up to 5 seconds: Guardians will hold this move longer with more foes nearby or if there are a large mass of allies or ready corpses or whatnot at the edge of it's range and will hold it for less time if there is not. This move may even be used in the air and actually gains added functionality there, being able to be angled diagonally-upwards or diagonally-downwards. Their Sickle Smash attack is quick with lots of ending lag and only moderate range, dealing 9% but good knockback to get the foes away from the Guardian: However, in the air, this move becomes a semi-weak spike, which is pretty dangerous to keep track of all things considered.

Guardians' Ice Spike attack involves them simply leaning down and spiking upwards with their spiky horn, a quick move on both ends that deals 11% damage and knockback that KOs at 165% with decently high base knockback, serving as the Guardians best all-around move and something to use when not going for the combos. It may be used in the air, which can also make it a better killer. Their Icecrown Charge causes them to charge forward with their horn ready to pierce foes, travelling 1.25 Battlefield Platforms via their wings which causes them to rush at the pace of Mario's dash speed, dealing a powerful 22% damage and KOing at 95% and thus serving as their best killer by far and an extremely potent move to beware. However, this move has noticably long starting lag as the Guardian prepares with its wings and very long ending lag...but since it is so long, that means it gains more substanial improvements from Blood Tap, and thus gets very deadly as it becoems a swift move. It may even be used in the air, granting Guardians one of their two recovery moves, but will instantly send them into helpless at the end. Finally, Nerubian Wings is the Guardians primary recovery move, essentially a clone of WIngs of Icarus that travels only 1/3rd the distance, but that's pretty potent on a Bowser weight character, let alone one who is a MINION. It carries all the downsides that Wings of Icarus normally carries.

- Kel'Thuzad's Up Special now lasts 1.75x as long and charges 1.25x as fast.

- Frostbolt has 3/4th the normal lag on both ends, the ice it creates now has 60 HP, the move now deals 17%-23% damage, opponents now have their shield frozen over for 14 seconds, though repeated Frostbolts on a frozen shield still only adds 7 seconds. Chilling the opponent now lasts for 12 seconds and you may have 7 stacks on any one foe. Furthermore, the chill timer now only ticks down at 3/4ths its normal speed while on ice.

- Down Smash no longer heals frozen shields and has 3/4ths its normal ending lag on both variations. Kel'Thuzad now gains 1% super armor for each chain he has when using the chain hit of this move.

- Kel'Thuzad now has 2% super armor for each chain on his person during his Up Smash. Icicle shockwaves are now 1.25x as long both on normal ground and on ice.

- Kel'Thuzad's smashes now charge 2x as fast during his First Phase. They still charge at the normal rate once Phase Two begins.

- Kel'Thuzad now has super armor, natural grab armor etc while he has a foe in his grab or special grab, meaning he can be damaged but not knocked out of his grab once he has grabbed a foe, even during throws. Kel'Thuzad's chain may now be extended infinitely during his Special Grab.

- Kel'Thuzad's Special Down Throw now locks two moves at once instead of one, using the last two (different) moves used if none are inputted during it, allowing Shades to be built up faster and more moves to be banned given he is now facing three foes. In addition, the chain from KT's Special Down Throw may only be damaged by the character it is attached to: Other allies hitting it has no effect. This is also true of any tethers on the foe while it is active.

- Souls from Kel'Thuzad's Special Back Throw now always have Team Attack on, regardless of the setting chosen on the screen, and thus will damage any allies they hit as well. In addition, they deal only 3/4th their normal damage and knockback to Kel'Thuzad, though they still deal full damage to his minions.

- Special Up Throw's echoes debuff now lasts 12 seconds.

- Kel'Thuzad's pummel is now a quick pummel, but still deals 3%.

- Down Throw now freezes opponents for just a touch longer, though it is still very brief. The armor that it incases minions in now is 20 HP worth of armor and comes with 1% damage reduction against all attacks. Stacks after the "max" of two now still add 1% damage reduction as well, up to a maximum of 5% damage reduction.

- Forward Throw's Corpse Explosion on a living minion now lasts 10 seconds, meaning three extra seconds of buff and the buff going up until it explodes. Corpse mines now deal 18% damage and KO at 100%.

- Kel'Thuzad now gains 2% per 3% of health drained from a minion with his Up Throw. Kel'Thuzad now drains half the damage he deals from this move on foes as healing.

- Back Throw on the foe now lasts 4.5 seconds.

- KT's Down Tilt chain now deals 12%.

- The crack effect from Forward Tilt now lasts 13 seconds during Phase One and 11 seconds during Phase Two. Forward Tilt now deals 11% damage. It is slightly faster on both ends.

- Minions frozen over from Up Tilt now have 40 HP. Up Tilt now has substantially reduced starting lag as well. Projectile minions now deal 12% and better knockback, like the base Dash Attack throw of them, by default.

- Dash Attack now causes minions thrown via the chain to do 16% and KO at 130%. The ending lag on this move is slightly reduced and the chain now has a range of 1.5 Battlefield Platforms.

- Kel'Thuzad spinning the foe with Neutral Aerial now actually causes the foe to become a hitbox that deals 3% damage and very light, setup knockback, which means Kel'Thuzad can now actually use a shielding foe to hit other foes with this. Hitting other foes with the spun around foe will also cause the foes hit to have their direction reversed, as if hit by Mario's cape. Iced minions will also deal this damage. It has slightly less ending lag.

- Z-Air now goes 1.5x the distance of Link's ZAir and deals 6%/8% depending on if it isn't sweetspotted or if it is.

- The suction effect on Kel'Thuzad's back aerial is now doubled, making it much more likely to bring foes into it, especially when combined with the Wing Buffet of a Guardian. The buffs it gets from sucking up ice is now doubled, making it potent much faster.

- Up Aerial now lasts 5.5 seconds and the small ice projectiles it generates deal 2% damage. The starting lag has been reduced to average.

- Forward Aerial has slightly faster starting lag.
 
Last edited:

ForwardArrow

Smash Ace
Joined
Aug 17, 2011
Messages
502
Wizzro
I can see why you think this set is your best, because it does function in a more interesting way than your sets normally do, with the hitboxes in the moveset being supposed to work in a fairly heavy trapper/camper-ish fashion, but there being specific points in the range he wants to zone them too to profit off different attacks. It actually is pretty interesting, albeit there's not really enough in the way of tools to get foes to the specific parts of your attacks, if that was more of a focus I could see this set being strong enough conceptually for a vote. The main thing holding it back though, aside from just not flowing well enough, is that the set makes several moves a fair bit too powerful with each individual hitbox dealing as much damage as you'd expect all hits on the given input COMBINED to do. Now admittedly you won't always hit with every component of the attack, but the possibility of a projectile Side Special dealing up to 80% is ridiculous, and a few other moves(Nair and the Down Special come to mind) have similarly ridiculous damage potential. If it wasn't feasible to hit with all the hitboxes at once it wouldn't be a big deal, but given it is the set ends up being very overpowered.

As a last nitpick, I kind of wish you had given us an image for the Spirit Fish. I found it rather unbelievable he could just summon evil fish when I first saw it but if you had some picture evidence it'd be reassuring.

Brandon
What bugs me about this set from the start is that the zombies don't seem to actually hurt the opponent, only gripping onto them, and there's no way to have more than two out. I guess I can see why you'd take that approach to prevent them from being too obtrusive, but I still wish there was a way to increase their numbers and that they had more means of attack than setting them up for Brandon's attacks. That said after the awkward start the set does get a bit better, while it never does anything terribly exciting the moves at least early on are designed to create some interesting spacing situations for zombies, allowing him much more defined control over them than a foe while still not making him invulnerable too them. And while I'm not totally sure making the wasps deal 2 seconds of stun to zombies when they die was the best decision, it feels surprisingly tolerable as a use of stun given how little it will happen in a given match and that it can backfire. Its an improvement from Fulci for sure.

All the same I do think the moves lose the interesting nature of their spacing element later on, in the throws/aerials there's still some aspect of that to foes, but zombies just kind of get left in the dark. It'd be fine if the melee game wasn't really bland without zombies present, though at least there's any depth to it. And I'm going to go out of my way to mention two things. One, swinging a protest sign downwards to boost yourself into the air is a ridiculous way to recover and the animation feels more suited to a Dair, and its rather random for him to just pull out this prop all of a sudden. Two, I'm just going to say now that custom specials are pretty much completely irrelevant to me and I think they were a poor addition to Smash 4, so if that was meant to be a selling point for the set it didn't work, though I will say I was pleasantly surprised that none of the custom specials really felt bad or like they directly outclassed another move.

Steven Chapman
I don't dislike the concept of piling up objects in your cart to use as a weapon, though honestly I think it was a bit of a mistake the way you executed it, not really having any fun things to do with them once they're in the cart and the fact that honestly the cart has a completely ridiculous capacity. 5 zombies would not fit in that thing, and you provide no limit for anything else, so you could potentially pile 7 Bowsers into the thing in 8 player smash along with 5 zombies, 15 Exploding Crates, and insert colossal minions/traps of your choice here. Also given the thing is covered in blades and his main means of attack in the boss fight, it should deal more than 2% on contact. Aside from that, after introducing the zombies you basically give nothing we can put into the cart, and its kind of unfair your opponent is going to do that favor for you as most Brawl characters and several MYM sets don't.

Slappy
I'm going to say that this set isn't a very strong one in terms of concepts, as the core is simply creating fire traps and attacking in motion, both concepts that rarely end up going in productive directions. You get surprising mileage out of both, partially with the fairly simple concept of just setting every prop that shows up in the set on fire and having fun with that. Its not a particularly complex approach, but with the item combining in Down Special and the various ways you can create chain reactions of fire and explosions it ends up a surprisingly deep one, albeit not ever calculated enough to feel out of character for this incredibly manic character. The characterization is pretty fantastic on a whole.

The moves don't have super strong connection at points, some just being based around using the fact that you're in motion while attacking, though you at least find unique niches within that concept that feel a lot better than the ones used back in MYM11, such as the fact that the Down Tilt is most powerful when you're stopping(especially on gasoline) rather than at full speed. It does in a few cases get to being straight up filler, but given the character has that gigantic mask which he absolutely has to use to attack and there's not really much of anything you can do to flow with it, its enough that the attacks have any interesting nuances to them. All in all, its a very solid set and the best of the movement, and its more held down by the character's shallowness than mistakes on the part of the designer.

Sir Leopold
This was a set that really surprised me, because I didn't know how much mileage you could really get out of this character compared to Dhoulmagus. The status effects that serve as both a buff and a debuff and the ability to use them on the wolf minions as well as the foe would be enough to keep the set interesting, but then you can strip away the buffs on the foe via Up Special and play into their newfound debuffs in a variety of interesting ways, such as creating more things the foe has to attack to build up Savage Fury. Of course there's no lack of great aspects to the way the dogs are used too, a lot of interactions with them are very fun such as fighting over the foe in a throw. The real selling point though is the ability to swap bodies between dogs, which start weak but grow over time as you stay in the weaker body, as well as using the status effects you applied to them to keep yourself remotely competent in this gimped form.

The characterization is really fun too, with the way Rhapthorne manipulates this pack of otherwise very dumb animals into a group of proper killing machines, but he has to be careful, as this is the most vulnerable he's ever been with the very mediocre body he's been given. Its emphasized in that despite his giant size, his attacks are rather underwhelming without good use of dogs, buffs, and debuffs, and lends the set to an incredible amount of depth. In all honesty there's very little for me to complain about, there's little to no redundancy and every move barring a couple aerials is fun and adds a lot to his game, and even in the case of said aerials they're hardly bad, just a bit underwhelming compared to the rest of the set. This is easily better than anything you made in MYM15.

Loatheb
First of all, congrats on posting this movement, 5 sets in one go(and bonus Patchwerk today) is pretty impressive. And Loatheb turned out pretty well, though given the potential of the character I wonder if you could do more. The set starts off with the mushroom throwing items and poison and builds up several incentives to keep the opponent close and start slowly annihilating them with large amount of poison, as well as presenting an interesting way to end the match early in the spore clouds, which are somewhat necessary to his setup and create some fun high tension scenarios between players, that Loatheb can win out with his mushrooms and thorns, the later of which really was one of the most exciting parts of the set. A lot of moves are simple but they're rather necessary to allow him to keep the opponent fighting him up close and in the midst of poison, or to get one of your spore explosions from Side B to activate.

Now that said there are a few moves I felt were a bit below par, the Smashes felt a tad redundant with the Neutral Special in some respects and honestly not particularly impressive for Smashes on this character, which sticks out when the Smashes on even Patchwerk are pretty big standouts. And while I can get the need for spacing moves at times, the set has more of them than it really needs when with a character like this you have a lot of room to get creative. Its still a solid set though, and holds up well even when compared to the rest of the movement.

Rivendare
This is the weakest of the non-one day Naxx sets and its likely because conceptually its a bit straightforward. Stack debuffs and profit off the moves that get better with more debuffs, or debuffs that get better with more debuffs. It plays out in a rather straightforward and agressive manner, but there certainly are bits that give it more depth, like the blood parasite, the move stealing counter, and the runes that can be knocked out of opponents. The set also surprisingly manages to avoid any real awkwardness with the horse, aside from the fact that due to him being only slightly bigger than any Brawl character overall resulting in Rivendare himself's model being tiny as a result. Aside from that the set might have a little too much magic and too little swordplay, but my nitpicks aside there's still a lot of fun had with the admittedly straightforward concept to make this set enjoyable.

Grobbulus
This was a very wise addition to have in the movement, as it takes from something that was done a while back and not fully explored in mutations with both upside and downside, and rather than taking a combo-y approach to it takes a slightly more methodical one, given he can bestow the mutations to the oozes as well while not necessarily being as good at chaining hits as the other mutation user. The set keeps a fairly nice balance between the elements too, with the Smashes being more dedicated to slime manipulation, giving him a decent amount of fun stuff to manipulate slime.

The standards and aerials, while not as exciting as the former inputs, are very necessary to the set, as they provide Grobbulus with unique ways to take advantage of the mutations, making them clearly in his favor whether on the foe or him. I particularly like the fact that the Dash Attack creates a unique follow up for each of them, or that you can create a KOing hitbox if you strike any of them with FTilt, but he needs this kind of stuff if he wants to properly abuse the foe's hurtbox extensions and weight variation. Its all solid stuff, though I will say that the aerials are noticeably weaker than the standards in playing off the mutations and at points the minion and mutation aspects of the playstyle feel a touch constrained by each other's existnace, not having enough inputs to fully explore both. Its a fine set though, one of the best in the movement.

Patchwerk
I appreciate the extra addition to the movement a day late, and I assume there's still more to come. Patchwerk is a bit of a step above other sets that try to use multiple attacks at once in that the attacks feel much more dedicated to being used in tandem rather than just an afterthought for combos, and of course there's the rather fun frenzy and bleed mechanics too. The Smashes are a real highlight in that they provide cool ways to utilize all his current material like spreading around the defense limiting goop, creating divets in the stage that can provide extra hitboxes to make him harder to avoid, or serving as an attack that works very well into the hook strikes. The aerials and grab game barring one throw obviously are a bit lacking, but they're not explicitly bad and the rest of the set is fun enough to make it work out overall.

Thaddius
We don't really get sets dealing with magnetism enough anymore, and Thaddius is the first real one in a while that has good fun with it. He can polarize the foe and/or himself, and then create electric charges along the stage that play off both aspects quite nicely. I particularly found the splitting Ball Lightning and the general use of electric sources throughout the set a fun subelement as well. It suffers a similar problem to Loatheb in that it sometimes gets too much into simplistic melee and not as much of the more interesting elements of the set, though I'd say its less prevelant here and that magnetism in general is a better concept and on a whole more versatile. As with all the others, I liked it, though I'm struggling to say as much about it as I want. Though boss Thaddius should weigh way more than 12 holy crap.

Kel'Thuzad
I feel like this was meant to be the real star of the movement and I was a little unsure of it back when I was previewing it, but on a full reread it comes together surprisingly well for a set that introduces so many things. You've got shield damage, chains, minions, ice that can be placed on the stage, and these elements feel at points disjointed, but the overall playstyle becomes clear by the end and its a fairly exciting playground, where Kel messes with the opponents shield, slows them to his level, and then introduces several exciting stage control elements that continue to grow in uses throughout the set. I particularly like all the fun you had with the dual grab games, every throw manages to be interesting and provide a lot of material to expand his gameplan with, and surprisingly even with all these extra inputs the set never really runs dry of inspiration. There are a few mediocre standards and aerials, but its not really enough to drag the set set down. And my god is it open ended, I'm fairly sure people would always be finding new exciting strategies with him. My main complaints are that at points interactions do start to get illogical(freezing minions to ice? Sensible. Freezing minions to ice causing healing the ice to heal the minion? Uh...) and that I do feel the minion game and the shield game, while the rest of the stuff ends up working together quite nicely, are a little bit too distanced from each other for a truly cohesive playstyle. Still, this is one of your best and the highlight of the movement.

Dhoulmagus
So now that this set is edited up with a good last set of moves, I'm very impressed with the final result. Its nice to see a set that uses duplicates with no intention of wasting their potential on mindgames, instead using them to create a powerful spacing game with their desyncronizing and ways of controlling each other's positioning, as well as defending each other or making their deaths not in vain, as the duplicates are extremely flimsy. There is the promise of a very powerful grab game as a reward if you line all these things up, though its not easy especially when your setup has a tendency to set itself on fire.

How exciting his spacing material is tends to vary between moves, its never dull but the real highlights are the Smashes/Jab/Fair(I always wanted wind hitbox moves that changed projectile speed to become a thing, they're a lot more interesting than a straight reflector albeit fairly weak). That said there's a lot of simple appeal in having the duplicates be able to use pseudo counters, or teleport opponents between the group of them. I do feel that some of the moves feel a bit impractical to use for melee at times(DSmash comes to mind, great as it is, as well as the Fair's lack of damage) but the amount of this is a lot less than in the older version and its worth sacrificing what ultimately is a tiny amount of practicality to fulfill the sets vision.
 
Last edited:

MasterWarlord

Smash Champion
Joined
Aug 24, 2008
Messages
2,902
Location
Not wasting countless hours on a 10 man community
CHAINS OF KEL’THUZAD

So starting with characterization immediately, I’m of course immediately very offended by the lack of Death and Decay even on Final Smash. The Frost Armor doesn’t do what it’s supposed to do by slowing people that are protected by it when there are all sorts of random effects thrown around the set. A move not being directly named Frost “Nova” is more acceptable when it really is just the name and it’s named Blast in WoW. Chain Frost really should’ve been in as well considering you have so many things to bounce it off of (And you have him regularly attack his own minions anyway. . .), at least in 3v1.

The chains of Kel’Thuzad seem to have largely devoured the set whole, in more ways than one. They weren’t in Warcraft 3, and in WoW they served as the name of a single mind control based attack. They are described to grapple people, but it seems to all be some obscure lore (After consulting with my friend who actually plays WoW). The Warcraft universe has extensive lore, and with a character as high potential and prolific as this you don’t need to resort to chains from it. The actual use of the chains in WoW, mind control, is instead represented through the abstract means of input banning/soul stealing, which. . .makes duplicates of the foe. I don’t really see how mind control translates to either of those. I’m not saying you need mind control in the set, but if you’re not using it the chains should probably just be ditched entirely.

Beyond this strange reinterpretation of mind control, Kel’Thuzad is seen beating people and grappling with these chains throughout almost the entirety of the moveset. You do have regular attacks on most of the chain inputs, yes, but the vast majority of the time the chain portion of the move is the point. The chains are also handled awkwardly from a gameplay perspective, as while the point of many moves is the chain half, you have to always use the regular move first before you are allowed to use the chain portion of the move. Using the chains like this also gets rid of your overpowered passive damage resistance, so for how difficult it is to use these moves I heavily question their merit. Said damage resistance also seems very out of character – Kel’Thuzad is made to be incredibly tanky in this moveset, with passive damage resistance of up to 7%, constant healing from tethering himself to foes, and a randomly high weight of 7. The Lich has always been an incredibly frail character (Even in WoW, he’s comparatively less durable than other bosses), and picturing him tethering himself to someone is just baffling. If you insist on him using them to grapple the foe, that’s one thing, tethering himself to them is another.

The moveset was generally at its best when playing with minions, but they were heavily downplayed in favor of chains and other things. The Crypt Lords introduced in the boss mode don’t really interact with the moveset in any meaningful way, and also have fairly terrible characterization. They don’t have any of their signature abilities (Which do seem to have carried over into WoW anyway), and most everything you’ve done is made up save for the their first move, involving them flying and creating gusts of wind with their useless wimpy wings. The rest of the boss mode is mostly generic buffs – not inherently bad, but this character didn’t come across as a natural transition to 3v1 anyway outside of the throws that duplicate the foe.

Your love of time bombs throughout the movement culminates here, with them being spammed on inputs regularly, going beyond just the throws this time. Oftentimes there’s no real point to the effect being delayed, it’s just something you feel needs to be regularly applied on moves. Just about any character can benefit from a delayed hitbox to pressure the foe, and after seeing it in your movesets so many times it’s not especially clever anymore, especially seeing it on multiple inputs in the same moveset. I’m not going to lambast you for a single time bomb in a set, but it has definitely grown into a pet peeve over time. This applies to other sets in the movement, most strongly Grobbulus and Rivendare.

RETURN OF HEAVYWEIGHT COMBOING

One of Grobbulus’ biggest foundations is his throws. While the first two throws are acceptable, the fthrow isn’t one of the status effects constantly advertised throughout the set, it’s not part of the foundation. While the dthrow expanding the foe’s hurtbox and making them heavier is fine, the uthrow and bthrow are completely and utterly bizarre. From a gameplay standpoint, the uthrow only helps with KOs, while the bthrow outright helps foes! There is no way you will ever convince me that a quarter of your movement speed in exchange for superarmor against attacks that deal 8% or less is a bad trade. Granted, Grobbulus can steal the status effect, but why doesn’t he just apply this effect to himself directly? Aesthetically these two move are even worse. Grobbulus regularly covers the foe in sludge, but the bthrow sludge serves as protection for some reason. The uthrow slime wings enable characters, and, yes, even Grobbulus himself, to fly. While ignorance can be claimed to many of Kel’Thuzad’s faults, I don’t know what context ever made you think allowing Grobbulus to fly was a good idea.

The meat of the moveset is largely based off of manipulating the status effects, often the terrible wings mentioned earlier. Most commonly it amounts to simply comboing the foe with greater weight, or a move getting some magical buff based off the foe having a status effect that has nothing to do with animation. It shows that you’re used to working with magical characters, as while it is easier to excuse in Kel’Thuzad and Rivendare, there are only so many things a punch can do.

The moveset is at its best when interacting with minions, and there is more that I enjoyed here than in Kel’Thuzad. The manipulation of slime was actually fun, and the interactions with the status effects there work a bit better (Though are still terrible aesthetically). I could like this moveset a good deal sooner than Kel’Thuzad, mostly by just writing new status effects for bthrow and uthrow. If you really wanted to go the extra mile, I’d say the status effects are all rather simplistic and could maybe be combined, giving him access to a better grab-game.

Grobbulus probably should’ve been a super heavyweight alongside Thaddius. He’s a flesh giant, and if he and Thaddius were roughly the same size as they are I’d expect Grobbulus to be heavier.

Your writing style has been getting more and more heavy handed over time, previously seen with how much you could talk about the more simplistic moves in the RWBY movement. At this point, I think I’m more of an “average” level of detail, with people like you and Katapultar at the top. I have no idea why you need so much time to describe the status effects of Grobbulus and Rivendare in the throws. . .Or the majority of Kel’Thuzad’s moveset. Thaddius and Patchwerk, who also happen to be my favorites, are the ones that get off the best with this problem.

MY LITTLE DEATH KNIGHT

I am not going to excuse the tiny size of Rivendare. He’s as tall as Ganondorf while mounted, making him personally shorter than Mario. Using the characters in Brawl as a standard is very awkward when it’s designed with cutesy tiny characters in mind, and he still looks horrifically out of place next to them. Even if you disagree, he at least needs to look consistent with other characters in the movement, who are all very large, with the Ganondorf sized Kel’Thuzad being smallest. Rivendare looks like a baby.

The change to make the mark last only 12 seconds was a good one, as it means he won’t just be stacking on status effects for the entire game. Doing this is still his goal none the less, and the status effects applied are very strange, largely trying to be unique for the sake of it. This is quite the contrast to Grobbulus, who did his best to play off very straightforward and boring status effects. Rivendare’s status effects can seem so pointless at times that it seems like their main purpose is just to get any status effect on the foe at all, as several moves reward you for quantity of them regardless of their purpose. The main status effects that actually do things are the ones that automatically charge smashes, and the payoff there isn’t big enough to sell me on the set. Beyond them, it’s moves that react in magical ways based off how many status effects the foe has, or just generic ones. Some status effects seem to be specialized for “team” play, which means they’re basically more generic moves meant to come into relevance on an unwritten boss mode that requires you to make 3 more movesets. At least Thaddius had the decency to have said boss mode that made those generic moves relevant actually included upon release.

Rivendare could really use some minions – he’s a Death Knight, it’s one of the things he does. He doesn’t have minions in his Hearthstone deck for strictly mechanical reasons, and Hearthstone obviously should not dictate characterization. If it does, his actual card should be taken into consideration – triggering deathrattle twice would be quite fun to abuse with minions.

FEUGEN AND STALAGG

Thaddius is my favorite set of the movement. While he is quite good, I had high expectations and really wanted to like Grobbulus and Kel’Thuzad. The magnetism is used in a very obvious but interesting way, and I’m surprised it hasn’t been more explored before. This one is already the strongest conceptually to me, and he’s one of the better executed. . .In boss mode.

It really feels like you could and should have done more with the grab-game. This character is a giant that can magnetically attract characters to his hand – expectations are high. Dthrow and bthrow are just kept as placeholder generic moves that are made relevant in boss mode only. When you have this guy strangely and uselessly magnetize himself under the stage with uair, I’d think you could come up with more. The two minions would provide him targets to use magnetism on in 1v1 when he only has one foe to interact off of, and while it’s great that they’re added into the boss mode, the playstyle actually demands them more in 1v1 given there’s only one target there. They fight alongside him in the boss, so I really fail to see why you’re so adamant they can’t help him in a “normal” moveset. The minions also should interact with his moveset in some way beyond being just fodder for magnetism. The boss version of the moveset is still great, and I am largely considering it the canonical version. It also seems to be the best balanced amongst them, and I like the way you handled him getting grabbed in it.

INTENTIONALLY BUFFING FOES: GMAN DTHROW, THE MOVESET

Loatheb regularly uses attacks that generate spore clouds that buff whoever is in them by 1.5x. This is necessary in some capacity due to the nature of the character, but it still could have been handled better. If nothing else, the concept is very unique, even though I’m unsure if I like the concept of something that can so heavily be used against Loatheb. This set could still have gone places with it presented how it is, but a lot of the melee is very, very, boring and uninspired. Much more boring than any of the other characters in the movement, who are trying significantly harder.

The thing that kills this moveset is the boss mode. It feels inherently underpowered to start with, but the “buff” clouds that Loatheb generates now directly nerf him for some inexplicable reason – he actively wants to avoid moves that create the clouds, and will even avoid hitting the sweetspot on his bair. The moveset wasn’t very suited for a boss mode to start with, and this one goes against everything the playstyle stands for while causing it to make even less sense. It’s a somewhat similar situation to Thaddius in that I want to focus on 1v1 only for Loatheb, but it’s harder to do when the boss mode usually included to improve a moveset is actively making it worse.

BERSERKER PUDGE

Patchwerk was an enjoyable take on the berserker archetype, and I was surprised you managed to balance these very scary mechanics of using multiple weapons at once in tandem with the powerful speed buffs. This moveset gets the most mileage out of more simplistic melee due to the two weapon mechanic compared to other sets in the movement. It actually managed to make an “anti-dodge” puddle in a way that I liked with some pretty great aesthetics on the dthrow, along with some moves to punish shielding foes to flow into his more offensive playstyle. Quite frankly, Grobbulus should be taking lessons from this guy. There still are some blander moves like the usmash floating around, but some degree of filler largely summarizes the entirety of my complaints with this one, leaving me quite happy with it by comparison.

MEME BOAT

Ignoring balance, Kunkka is a pretty fun moveset with a great interpretation of a passive cleave mechanic, and it’s very impressive you managed to get as much mileage out of it as you did to use as a moveset basis. The specials, smashes, and some of the standards are all pretty great stuff. Moreso than just the aerials, the throws could really do with more than generic spacing when you have both X Marks the Spot and the anchor, as they and the usually better defined melee game should have you more than covered for those sorts of basic needs.

The moveset feels very overpowered to me with it only taking 5 seconds to recharge tidebringer. The numbers on range and knockback are universally very high with it out, and it feels like it’d be very difficult to actually whiff with it in several cases. When Tidebringer also recharges so easily, I also don’t know how much purpose the moves that don’t waste the cooldown are, seeing it will be back very quickly anyway. X Marks the Spot, Torrent, and binding the foe to an anchor in tandem also feels like a bit of overkill and borders on lockdown, and isn’t as easily handwaved as the scarily strong numbers in the moveset.

BLACK FRIDAY

First off, the moveset really needs to put caps on how many foes can be inside Steven’s cart, and to lower the amount of zombies that can fit. The clipping would be insane with 5 zombies, and this is something the moveset wants to feasibly happen. While it’s strange that zombies somehow can’t attack the guy that will never leave the cart, I’ll ignore that since there are bigger problems and the character is pretty hilarious. It’s more strange that Steven gets buffs for having more things in the cart, and basically has super strength to be able to move the cart around with that many things on it in moves like dsmash, dair, and uair. If anything, it should be more difficult to move the cart around in these kinds of moves.

The recovery is a very weak move, and probably should’ve been replaced with the dashing attack on a special. Several attacks seem physically impossible while using the dashing attack, along with others in general like the uair. The primary purpose of zombies appears to be to throw them so you can jump on them with Up B to recover. . .It’ a very awkward moveset badly cobbled together, but it’s awkward in a pretty hilarious way that vaguely works for the character. Just don’t try to pull some of these things off on a more “normal” character.

. . .Then I realized the character doesn’t work if there are multiples of him in the match. Not making the cart be a hurtbox in any form was a strange decision and wasn’t thought about in remote detail. Two Chapmans walking into each other will cause them to just walk against each other forever. With these massive cart “shields” in front of the Chapmans, they will never be able to hit each other without jumping to try to get behind the other guy. Whichever one gets impatient and jumps will be put at an immediate disadvantage, as the other Chapman will undoubtedly catch him. If one somehow gets behind the other one, he can easily just turn around and get the cart “shield” in front of himself again.

Upon catching another Chapman in your cart, he’ll clip out of the cart because he’s so big. . .Right in front of the hitbox at the front of your cart, probably, and if the Chapman who caught the other one moves he’ll hit him with the passive moving hitbox infinitely. Since the Chapman in the cart is technically still “against a wall”, he won’t be able to take knockback and will get infinited. If you bring even more Chapmans into the picture. . .Yeah, just think about it for two seconds. This was a hilarious diversion, but you seem to be best when sticking with simple characters, Geto.

ACCURATE PARODY

The main thing that has to be brought up immediately is that the zombies just grab people, restrain them, then let them go. There is no pummeling, no biting, no nothing from these zombies. Maybe Brandon is right and these zombies really are upstanding people? Even if delicious raw meat is placed on the foe or you send them into a bloodlust, they still won’t take so much as one bite out of the foe. The only instance of biting is in the intro animation, and that turns an NPC into a zombie despite it later being said that the wasps are the actual cause of the zombie plague?

There probably need to be more than two zombies. The point of these things is that there’s so many of them, generally. You’re the first set I’ve seen to feature so heavily fighting alongside such a low number of unnamed zombies. The glass shard is a remotely fun weapon for a low potential character like this, and the dulling/sweetspot mechanic was interesting. Of course, I’d be lying through my teeth if I said I wasn’t very bored throughout the reading of this set. The multiple specials get into self parody territory pretty quickly, what with him flapping a protest sign to recover, a wasp that is cooperative so long as Brandon keeps moving, taking out a gun to use on one alternate special, and superspeed teleportation after trying to prove that Brandon is an average weakling for most of the set (Save for some. . .Rather heavyweight throws). They do provide some much needed variety after the monotony of the main set, and they’re a fun read for the wrong reasons.
 
Last edited:

FrozenRoy

Smash Lord
Joined
Apr 26, 2007
Messages
1,260
Location
Las Vegas, Nevada
Switch FC
SW-1325-2408-7513
Just a very quick reply to MasterWarlord since we debated this more thoroughly in private:

1. Kel'Thuzad does not actually have many time bombs, he only has 1 to maybe 2 on the foe, the Corpse Explosion on his minions and Frozen Feet which barely counts. This is more applicable to Grobbulus and Rivendare as stated in the comment itself (Which makes it bizarre it is in the KT comment. Also, KT is pretty durable in WoW and Hearthstone, so while KT isn't very durable in WC3 there is plenty of precedent for KT to be durable. I would go into more about the chains and stuff but it is 6:25 AM(at time of writing) I'm not going to go into a long spiel here.

2. Grobbulus only actually has 3 moves that are affected by the enemy having super armor and 1 is used to take it away. The other two can be used to damage rack the foe a lot more effectively. So the super armor is much overblown in this comment. Slime wings are a big issue and I will probably replace them. Grobbulus does not really have magic punches, the only mutation interaction punch is on F-Tilt and it is just "hit the mutation really hard to hurt the foe".

3. It's fine to think Thaddius' D-Throw was kept as generic, but I just wanted to say it was actually planned and a move I quite like. Obv. you're still free to dislike it. I discussed why the minions were not used and you mentioned you respected it, which is nice, even if you don't seem to entirely agree.

4. Something to remember on Loatheb's boss mode is that the spores don't do additional gimping as much as he gains additional bonuses outside them.

5. Rivendare actually is noticably smaller than the rest of Naxx and as discussed their sizes are for the most part logical compared to each other.
 

MasterWarlord

Smash Champion
Joined
Aug 24, 2008
Messages
2,902
Location
Not wasting countless hours on a 10 man community
WIZZERD

Wizzro has a more coherent playstyle than your usual fare, though the main reasons seem to be choosing a magical character that can do most anything and doing a simple playstyle of camping. While just camping is a bit boring, the moveset seems even remotely self aware like Pompy was, and I think the individual moves are trying a good bit harder in this one than Pompy. The moves aren’t the same thing over and over, though I wish they were relevant to the playstyle for more reasons than being long range/projectiles. An obvious example of something you could do would be for him to store and release projectiles with portals.

The numbers are a bit off still, but it doesn’t really hurt the moveset for balance at this point and just presents a small bit of awkwardness here and there. Hopefully playing SSB4 should give you some good experience.

I know that the bthrow turning Wizzro into the foe is something he does, but something that big needs to be central to the character’s gameplay. As of now, it could be placed on another moveset and be just as relevant to them (Ignoring aesthetics). A move like this is also kind of strange on a throw, and would sooner be a Special. If you don’t want to make a commitment that big to the shapeshifting (It is very difficult to make a key element in a moveset), Wizzro does a lot of things and it wouldn’t be unheard of to uninclude it in the main moveset – the Final Smash could be a decent place for this if you want to add it in just for the sake of it.

CASHMAN EMPLOYEE

Slappy’s playstyle offers little, though not much can be expected of the character and the individual moves all have some function. I like what you’ve done with his gimping game, as it prioritizes him actually surviving despite poor vertical recovery in an organic way that helps give life to a bland (powers wise) character you’d expect to have dull aerials. Momentum does much the same thing for the grab-game.

I especially like how you handled the “ammo” of the flamethrowers/dumping them for the gasoline inside. It’s obviously not something to get excited about, but the moveset knows it and doesn’t make a big deal out of it. Still, it’s treated as a very self-consistent mechanic that works naturally. That said, I do think 15 seconds without a flamethrower is a bit of a harsh penalty, especially when he needs the flamethrowers in order to actually make use of the gas at all. I would change it so that he gets the flamethrower back before the gas puddle expires (Say, 10 seconds) to enable him to better exploit it. You even suggest him giving up both of his flamethrowers to make a bigger puddle for some reason, when he will have nothing to set it off?

While the character’s simplistic abilities don’t do you any favors, you regularly make use of him to have some good characterization moments. The Down Special doesn’t feel like some competent villain performing set-up – it’s just the guy grabbing props as he skates around his store to burn up. He’s such an idiot he even forgot to bring gasoline to the fight, and has to empty it from his own weapons in order to get any. The props are all contained here instead of being placed throughout the moveset arbitrarily robbing him of attacks. It also enables the guy to not just take out a prop for every single attack and actually primarily fight the way he does in the game, making the few times he does take out props on regular inputs more organic.

SUPERVILLIAN GANT

Nemo is a very strange set. Immediate concerns are brought up against a moveset that appears to be from the forgotten age of MYM 5, with a character who summons minions on absolutely every move. Similar to Reynolds, the minions attack as they are created, though, and he can just pick moves based off the hitboxes/defense rather than the minion spawned. He also has immediate access to regular movesets with the Neutral Special minions that he can take direct control of. The coolest method of direct attack Nemo has, though, is turning his minions into weapons that keep some of the old properties of the minions. There’s so many ways to manipulate the minions with the weapons, combining them, and the professors, that this really is the ultimate “create a minion” moveset in existence, bar none. It still goes out of its way to be a moveset that can fight, though. If anything, the moveset leans towards overpowered, especially when he can just blip out of existence until a certain minion is killed with Up B. I don’t think it’s especially imbalanced, though, when he actually does have to abuse his extensive defensive options to survive due to his massive frailness.

You demonstrated with the Neutral Special that minions can be contained within a single input, and it’s still very awkward having all of these moves dedicated to minions. Doesn’t it seem odd that Nemo has to dash to summon a certain minion, or jump in the air to summon others (Especially when you make a big point of making his grounded jump laggy)? It still works on a basic level due to the attacks being present, but I think you still could have managed a better job mapping this all out. On the other hand, it seems like this may have been the best way to do it for characterization, given he never actually fights. I also find it a bit off that the movesets of the battlearmor and androids don’t exist and that the professor is missing aerials, but again, it’s very easy to ignore given the wealth of content present in the moveset. I would say that you should make those minions only have a handful of attacks like the rest, but I do like that you’ve given Nemo several movesets which he can play from when he actually wants them. While there is awkwardness present, it can all really be justified in one way or another. This is easily my favorite set of yours, Kat.
 
Last edited:

ChaosKiwi

Smash Apprentice
Joined
Feb 1, 2014
Messages
104
NNID
ChaosKiwi
FUNKY KONG


Funky Kong! You know him, you love him, and bruh, now you've got to fight him! Funky is odd amongst his Kong family- He, unlike, say, Donkey, Diddy and Dixie, loathes adventuring, preferring to fix up machines, surf, and sell stuff to DK and the crew to help them out. But that doesn't mean he's above stepping in to help in a fight, as you're about to find out!


STATS

Weight- 10
Size- 9
Jumps- 3
Ground Speed- 8
Aerial Speed- 10
Fall Speed- 9


SPECIALS
Neutral Special- Coconut Shooter
Though the Coconut Shooter is Donkey Kong's signature weapon, he doesn't seem to be using it lately. As such, Funky Kong appropriates it for his Neutral Special. He is the one who sells it, after all. Wouldn't it make sense for him to have extras?

Similar to Diddy's Peanut Popgun, Funky holds the wooden gun in front of himself while the player holds the input. On release, Funky fires a somewhat slow moving coconut. The longer it's charged, the farther the coconut is fired. The coconut, upon contact with a foe, deals 15% and high knockback, but only after charging. Should you just press and release the input, it will only travel a short distance and deal a minimal 8%. Should you, inversely, overcharge, the gun with blow up in Funky's face, dealing him 5% and stunning him.

The fired coconut has no maximum distance, and will shatter on contact with an opponent, solid object or equal/stronger projectile. However, contact with Funky or his attacks will not shatter a coconut. There can be only one coconut on the field at once. Funky can outrun coconuts.

Side Special- Funky Barrel

Funky Kong gets in his Jumbo Barrel, also known as the Funky Barrel. After a short delay for the engines to start, Funky Kong sputters forward in his crazy flying machine. The speed of this is only slightly faster than Funky's running speed, making this better for use in the air when you need to move quickly than when you're on the ground. Flying into an opponent while in the Funky Barrel while knock them upward if they are grounded, and downward if they are airborne. Additionally, they will take 7%.

Hitting an opponent will not cause the Funky Barrel to go away. Instead, one strong attack will. There is no set HP for the FB, however, meaning that it function the same way as most projectiles: Something with higher priority will destroy it. This creates and explosion, and Funky will fall helpless, while also taking 10%.

However, he can avoid this by bailing before the Barrel gets hit, via pressing the down direction. Upon bailing, the Funky Barrel will go out of control in a manner similar to Diddy's Rocketbarrel Pack. It will explode on contact, dealing 13%.

Up Special- Funky Copter

Funky Kong jumps into his newly refurbished gyrocopter, dubbed the Funky Copter. He ascends slowly, but has negligible horizontal control. He'll fly for as long as the input is help, up to 3 seconds, before falling helpless. Overall, he can fly about three Battlefield platforms up in this time, though horizontal movement slightly takes away from how high he can rise. He cannot attack while in the Funky Copter.

The Funky Copter has 10 HP. If destroyed, it will explode and Funky will be spiked, but he himself will not take any actual damage, instead just get covered in a comical layer of soot.

Down Special- Crash Guard

In Donkey Kong Country Tropical Freeze, Funky runs the item shop, Funky's Fly 'n' Buy. Here, he sells various items to help Donkey Kong and friends advance on their quest. As such, it makes sense he'd use an item or two from his stock to help him in Smash! For instance, the Crash Guard. In the DKC games, the Crash Guard functions as a single use item that protects your vehicle, such as a minecart, from a damage one time per item.

Upon input, Funky Kong whips out the blue shield seen above. Though it is comically small compared to his hulking gorilla body, it forms a protective hitbox that completely covers the ape's front half. And, just like in its home game, this shield will protect from exactly one attack, no matter how strong it is. There are exceptions, however. For instance, it will not save you from a Final Smash, and any attacks from behind will be unblockable. Additionally, the shield only remains active for a little bit before disappearing on its own, and has a five second recharge period.

The best utility of the Crash Guard, however, is that Funky Kong can use it during his other specials. That is to say, he can use it to protect his vehicles from harm. Imagine creating a Crash Guard while riding in a Funky Barrel. The shield would appear on the front of the barrel, not Funky, thus allowing the plane to tank an extra hit before going down. Same goes for his Funky Copter, meaning he can avoid the drawbacks of getting his vehicles destroyed for a bit longer, allowing him to recover in safety!


STANDARDS

Jab- Marky Mark and the Funky Punch
Funky gives a quick jab, dealing 4%. All in all, it's your standard standard standard.

Side Tilt- Funky Flex
Funky Kong thrusts his arm forward, then bends it, giving a hardy flex of his bulging bicep. The initial thrust deals 5%, but the whole arm becomes a hitbox during the flex, dealing 8%. The punch deals low knockback, but the flex launches upwards. It's generally difficult to hit with both unless the foe is, say, pitfalled.

Up Tilt- Funky Drill
Funky pulls a Power Drill from behind his back, and holds it above his head, drilling above him. Though it has very limited range, it has high power, dealing 12% over several hits. It is good for juggling.

Down Tilt- Funky Wrench
Funky takes a monkey wrench in his hand and brings it down in front of him. This smacks foes down, and deals them a hard 10% damage. However, this has short range, as only the actual wrench is a hitbox, meaning its best use is for an enemy you know you can hit, such as a stunned or pitfalled one.

Dash Attack- Hang Ten!

Funky Kong spins, his surfboard spontaneously appearing below him as he surfs forward, dealing 13% to any enemies who he inadvertently totally shreds bro into. A good move, as he doesn't lose momentum, however it is possible to surf over and edge, so look out!


SMASHES

Side Smash- Funky Fielder

The coolest Kong holds his surfboard over his shoulder like a baseball bat, swinging it as hard as he can on release of the attack. The surfboard has a tipper, the inside of it dealing 20% and the tip dealing 35%. The tip also does more knockback, KOing at 100%. Meanwhile, the tip can also reflect projectiles, so that's always fun. Essentially, it's a Funky-fied version of Ness's side smash.

You can also use this for other things. For instance, you can use the surf board to hit a runaway Funky Barrel. Upon doing so, its course will straighten into the direction you hold the stick, turning it from an out of control plane into a well guided missile! Additionally, you can smack Coconuts with the board, doubling their speed and changing their direction!

Down Smash- Funky Konga

Funky whips out a pair of bongo drums and plays a sort of funky jam on them. He bangs them three times, creating three quick shockwaves around him. The first one deals 7% and low stun, the second deals 8% and, again, low stun, while the final one deals 9% and high knockback, KOing at 170%.

Up Smash- Funky Flip
Once more on his surfboard, Funky does a totally killer kickflip type move while standing on his heads, bruh. This hits on both sides of and above the Kong, and deals a nice 23% at full charge. It sends foes flying, KOing them at 140%. Additionally, Funky Kong gives a thumbs up and a grin if this move connects.


AERIALS

Neutral Aerial- Funky Fresh!
The Funkmeister does an aerial roll, much as his bro Donkey does when dashing. However, this roll keeps him in place, his entire hunky body becoming a weapon. This spin does 8%, relatively low for a Funky fresh attack such as this I admit, and sends foes downwards.

Up Aerial- Throw Your Hands in the Air

Funky Kong makes the pose above, each heft arm becoming a large hitbox. They both deal 14%, and momentarily stall Funky's vertical momentum, though he'll still move horizontally, making this great for short hops. However, he's quite vulnerable during this move.

Forward Aerial- Do the Monkey
Funky extends both arms forwards, and swings them up and down. This deals 10% over several hits, and can either spike or launch foes based on where they are hit.

Back Aerial- Funky Flier
This hell of a guy does a remarkable backflip, with both his legs and head becoming hitboxes in the process. His head deals 10% and high downward knockback, while his legs deal 9%, and launch upwards. This move also allows him to move backwards a bit, the motion of the flip carrying him a short distance in that direction.

Down Aerial- Funky Feet
Funky rights his body, and thrusts both feet downward with all the force his gorilla body can muster. In fact, this seems to be a bit too much force, as this causes him to fall at double his normal speed! Hitting an enemy with this move deals 9%, but hitting an airborne enemy with it deals 11% and spikes them! However, it's easy to accidentally KO yourself if you miss with this move over the edge, so be careful kids!


GRAB GAME

Grab- Funky's Fishing
Funky Kong whips out a fishing rod, and casts it ahead, for a long range tether grab. However, it will fail to grab those immediately in front of him. After hooking a foe, they'll be reeled in and held in Funky's grip.

Pummel- No I'm Not Adding this Last Minute
Funky pummels the foe. 3% or whatever.

Forward Throw- Biplane Barrel

Bruh, are you ready for the ride of your life? Funky Kong stuffs his captured foe into the cockpit, and gives the plane's propeller a spin, causing it to fly forward at alarming speeds. This does no damage, and can be escaped by the foe with enough button mashing, but if the captive isn't fast enough they run the very real risk of being flown outside the blast zone and getting KO'd! Alternatively, Funky or somebody else can destroy the Biplane, causing the enemy to fall helpless. To do so, they must deal it 7% damage.

Up Throw- Oil Barrel

Funky Kong places a flaming oil drum on the ground, and then leaps into the air with his foe. He throws them into the barrel, causing an explosion! The foe takes 10% and is launched upwards! Additionally, the explosion can hurt others around it, dealing them 12% and high knockback.

Down Throw- Surf's Up!
Funky jumps up, and pulls out his surf board, before surfing on the enemy's limp body! This deals no knockback at all, leaving the enemy prone, but it deals them 16%, so it's totally, like, worth it! Shred, bruh!

Back Throw- Turbo Ski

Funky just never runs out of vehicles, mi amigo! As such, he steps back, then gets in his Turbo Ski, before running over the enemy. After doing so, the ski disappears. The enemy takes 13% and is launched backwards.


FINAL SMASH
THE BOOT

Funky Kong whips out a bazooka, loaded with an unusual ammunition-- A boot! He fires the boot forward, it travelling at blinding speeds in a straight line, through any obstacles in its way. Should it hit an enemy, they are launched upwards with enough force to KO them at 10%, while simultaneously dealing 50%. Don't mess with the Funk, bro!​
 
Last edited:

ChaosKiwi

Smash Apprentice
Joined
Feb 1, 2014
Messages
104
NNID
ChaosKiwi
There is one character in the Donkey Kong franchise who deserves to be in Smash Bros. above all others. He's big. He's got crazy eyes. He's a bipedal crocodile, and the arch foe of everyone's favorite ape.

He's obscene, he's mean, he's gree- Blue?


KLUDGE

Kludge is a member of the Kremling army who has appeared only in Nintendo's magnum opus, Donkey Kong Barrel Blast, as a rival to our favorite ape, Funky Kong. As his rival, many of Kludge's stats are the same as Funky's, but his abilities could not be more different. He's a massive, monstrous Kremling who, once riled up, is rumored to even give King K. Rool trouble. He utilizes various powerups from DKBB, along with his own rocketbongo belt.


STATS

Weight- 10
Size- 9
Jumps- 5
Ground Speed- 7
Aerial Speed- 10
Fall Speed- 9


MOVEMENT FUN STUFF
  • His dash/run is actually him flying just off the ground with his rocketbongo belt.​
  • He can jump three times as opposed to two, but the third is half the height of his other jumps.​
  • He never actually jumps- he merely bangs on his bongos to create a short burst from his belt, lifting him up.​
  • To dodge, Kludge bangs a single bongo a single time, quickly moving him in the direction of that bongo. Purely aesthetic, but a neat translation of DKBB's controls to Smash.​


SPECIALS

Neutral Special- Whirlwind
Kludge swipes his arm forwards, creating a small twister in front of him. The twister advances forward somewhat slowly, while gradually growing larger (its maximum size is the same height as Kludge). The twister does no damage, but enemies caught in it will be carried with it and they will drop any items they are holding. It will also keep airborne foes airborne for the duration of their stun time.

The whirlwind travels three stage builder blocks before dissipating, so watch out. Additionally, the player can angle the stick slightly when throwing whirlwind to slightly change its horizontally trajectory.

Side Special- Wild Move

Seen here demonstrated by THE ENEMY Donkey Kong.

Kludge leans forward, before furiously banging his bongos. This causes him to blast forward, wreathed in flames and whatnot. On contact with an enemy, they will be blasted away with 20% damage. The user can steer this move slightly, about as much as Meta-Knight's side special. The total distance this move covers is 2/3 of Battlefield.

This move seems pretty powerful, doesn't it? Why, there simply has to be some sort of downside to it, or it'd be downright unfair! Well, not so much a downside as a limitation. You see, Kludge has to earn this move. There is a small yellow bar next to his icon, you see, and once this bar is full, he earns a Wild Move. To fill the bar, you must hit enemies. It doesn't matter how much damage you do or how much you get hit. All that matters is that the hits land. Once you've charged up the meter, a small banana appears next to it to indicate a charged Wild Move. You can store up to three charges at a time, but you have to wait two seconds between uses!

Up Special- Rocketbongo Boost

Similar to Diddy Kong's Up Special, one can charge this move. During charging, Kludge plays the bongos on his belt with a constant rhythm. Upon release, he will slam his hands on them, causing him to fly in the direction held at high speed, fist held out. He causes 5% to anybody he hits, and he's able to turn on a dime. Seriously, his control is second to none. At full charge, he travels four Battlefield platforms in distance.

During this move he can use his Aerials, Wild Move and Down Special.

Down Special- Backward Barrel

Kludge drops a smaller-than-usual barrel behind himself, which, after a second, breaks into three even smaller barrels! These barrels act as small land mines, exploding on contact with an enemy and dealing them 8%, though they will explode on their own after a four seconds. They are good for setting up small traps, or for doing a sort of drive-by barreling. You can have two sets of barrel mines out at a time.

Should an enemy be hit by the big barrel before it breaks apart, they take 13% and knockback similar to that of a Bob-Omb!

In addition, you can drop a barrel into a whirlwind! A full barrel will not break until the whirlwind dissipates and will be carried with it, while smaller ones will simply move with it. Should a barrel-whirlwind hit an enemy, the barrel(s) will explode as is usual. Essentially, this is a way to create air mines! Very neat.

It is possible to drop a Backward Barrel during Kludge's Wild Move or Rockebongo Boost.


STANDARDS

Jab- One Two Kludge
Kludge's jab combo has two steps, the first and the second hit. Upon first input, club with punch forward with his hefty left arm. This deals 4%. The followup, which happens upon the second input, is an uppercut with his sexy right arm, dealing 5% in addition to also hitting above him.

Side Tilt- Food
The big guy is known for his voracious crocodilian appetite, so one shouldn't put it past him to try and take a bite out of the competition. So that's exactly what he does in his side tilt! He leans in the direction pressed and takes a huge chomp, dealing 10% but low knockback. He's a simple minded one, that Kludge.

Up Tilt- Kludgercut
Kludge lightly jumps, throwing a fist into the air above him. Almost like he's cutting upwards. Some sort of... uppercut. This hefty punch has quite a bit of startup for a tilt, but is strong as heck. It deals 12%, and can KO at, wait for it, 150%! Pretty good, right?

Down Tilt- Raw Smackdown!
Our favorite Kremling smashes both arms down in front of him, bypassing the bongos and going straight for his foes. This smacks foes down, obviously, and can bounce them off the ground at high percentages. Enemies hit by this attack take 12% damage.

Dash Attack- Bongo Roll
While dashing, Kludge straightens his body and sticks his arms out, doing a quick drill-like spin as he does. Doesn't do much knockback, but it does push foes behind in, in ripe position for a Backward Barell attack. This does 8%.


SMASHES

Up Smash- Chain Krush
Those chain bracelets ain't just for show! Kludge unfurls one of them and whips it up, using it as, well, a whip. The length of the chain extends one Battlefield platform up, and it does 15% at mid charge. However, hitting with the veeeeeerrryyy tip of a chain deals 17% instead, and does very high vertical knockback, KOing at 120%. The rest of the chain, however, only KO's at around 150%.

Should you charge the smash fully, however, something magical happens. If there is a Wild Move stored, it will be used up, boosting the power of this smash in a way you could not imagine! Well, I suppose you could. I mean, I am right now, after all. For this smash, the chain becomes a sort of tether, linking you to your opponent until they can struggle free. Use this to, say, Rocketbongo Boost above them and drop Backward Barrels on them while they fly behind you!

Side Smash- Kludgeoning
Kludge, while charging, raises the fist of the direction that the stick is held. Upon release, he bangs on the relevant bongo, forcefully pushing his entire body in the chosen direction at high speed. This turns his entire left/right half (it depends) into a Kludge-sized hitbox, dealing 23% at mid charge. It can KO at 130%.

This, like the above, has a special effect should you expend a Wild Move by fully charging the smash. If he hits a foe, he'll grab that foe, as he would a heavy item, and spike them, causing them to either bounce off the ground or fall to their death, and take an additional 6%. This is an easy way to get and enemy into the air for followup attacks.

Down Smash- Exhaustion
Kludge grips the ground below him, as his Bongobelt start firing full blast. The exhaust is forced out faster than it should be, the hot air and smoke damaging on both sides of the Kremling. They deal 23% fire damage at full charge, and can KO at 115%. Has unfortunately small range for a smash attack.

The Wild Move Full Charge Boost TM for this smash is a neat one. For ten seconds after use, the Rocketbongo Belt will continue spewing small bits of fire that flare up during movement that uses the Belt (Dashing, Rolling, Jumping, etc.) These bits of fire only affect things behind/under the belt (depending on how they're used), but deal 5% fire damage and hitstun, so they can still be quite useful!

AERIALS

Now, Kludge's aerials function a bit different: They're all based on STYLE, excluding his down aerial. That is to say, he's able to chain them together through cancelling immediately on contact with an enemy, allowing him to chain many aerial attacks together, provided that the first move in the chain is his Neutral Aerial.

Once you hit with that Neutral Aerial, immediately followup with another aerial input. This will cause Kludge to quickly appear on another side of the foe, determined by the input (His Up Aerial will put him under the foe, for instance), allowing him to hit said foe and continue the chain until the foe manages to airdodge out or gets knocked too far away to continue.

For a chain to continue, you cannot use the same move twice in a row. In addition, missing or being hit out of a chain will cause Kludge to fall helpless, so watch out! Chains are, overall, an excellent way to rack up Wild Energy.

Neutral Aerial- KLUDGE POSE ONE

Kludge strikes the pose featured above, his elbows striking to either side of him. Each one is a viable weapon, as they deal 10% and high horizontal knockback in their respective direction. This is a good move to use, as it will fill Kludge's Wild Move bar with 1.5x as much Wild Energy as a normal move!

Forward Aerial- KLUDGE POSE TWO

Kludge delivers a high punch with his forward facing hand. Great! Doing so will miss enemies too low, but enemies high enough to hit will take a good 10%, and high knockback diagonally in that direction! Make sure not to miss, cuz this move has more ending lag than his other aerials! However, making contact with this attack will net you twice as much Wild Energy as his other attacks!

Back Aerial- KLUDGE POSE THREE

Kludge turns quickly, in order to deliver a flying elbow strike! You can see a similar pose in the image above. His elbow deals 9%, and low knockback for one of the Kludge man's aerials, but it's quicker than the rest and easy to hit with, so go nuts already. Contact with this attack nets you 1.5x as much Wild Energy as usual!

Up Aerial- KLUDGE POSE FOUR

Kludge flexes, as above, and the word AWESOME! even appears in front of him! His arms are both hitboxes, dealing 11% and launching upwards on contact with an enemy. And it fills your Wild Move gauge faster, too, as it gets you three regular hits worth of Wild Energy! Must be because of all that style, yeah?

Down Aerial- Kasplat
Kludge abruptly stops the boosters on his Rocketbongo Belt, before curling into a cannonball. I think you know where this is going, kids. He lets out a cry of delight as he speed down like a living bomb, spiking anybody he hits. Should he hit somebody he will, in addition to the aforementioned spiking, bounce back up. Rad! Enemies take 10% damage from impact.


GRAB GAME

Grab- Kludge Klutch
Kludge grabs in front of himself, simple as that. However, that's not all this move is good for. You see, Kludge can grab.... MIDAIR! Oh my god, he's the uberkrem.

Once grabbed, Kludge has two options for his foe: Throw/Pummel them, or Rocketbongo Boost! During the bosot, he carries the foe with him, allowing for better vantage points for throws. That's right, he can also throw enemies in the air! Is there no limit to his many talents?

Pummel- Mini-Zinger

A swarm of miniature Zingers appears around the enemy, with each input of the pummel equating a sting to said opponent's ugly mug. Each sting deals 3%.

Down Throw- Orbital Strike
Kludge blasts off screen at his highest possible speed. After a second, he blasts back down, slamming into his foe at terminal velocity. This launches them upwards, despite being crushed under a heavy as heck crocodile man. Oh well, why question the physics of a game such as this? Enemies who take this throw are dealt a total of 14%, but it's not very good for KOing.

Up Throw- Pineapple Launcher

Kludge chucks his foe into the air, before whipping out a weapon normally associated with Chunky Kong-- The Pineapple Launcher. Regardless of where he acquired this weapon, Kludge makes good use of this. He fires a pineapple at the airborne foe, causing an explosion. They will blast in a completely random direction, and take 15% damage. Make good use of this!

Back Throw- Kludge Krush
Kludge suplexes his enemy, plain and simple! Oh, and he uses his Rocketbongos to boost himself back, flying backwards upside down while shoving his enemy's face into ground. This deals 14% to the enemy.

Forward Throw- Launch Barrel

Kludge places a barrel in front of himself, then shoves the enemy into the barrel. The barrel turns and faces a direction the player chooses by angling the stick. The launch power of the barrel is equal to that of one of Smash's preinstalled launch barrels, and does no damage.


FINAL SMASH
MEGA TNT BARREL

Kludge strikes a pose, and suddenly a large, red barrel appears above the head of each of his enemies. They all instantly explode, dealing 20% and high knockback. Should they survive, the foe will have reversed controls for 4 seconds. Good luck, dorks!​
 
Last edited:

FrozenRoy

Smash Lord
Joined
Apr 26, 2007
Messages
1,260
Location
Las Vegas, Nevada
Switch FC
SW-1325-2408-7513
Patch 1.0.1:
- Patchwerk added to Curse of Naxxramas.

Patch 1.0.2:
- Mark of Rivendare now only lasts for 12 seconds.
- Loatheb can now eat mushrooms to heal for 6% on his grab.
- Kel'Thuzad has had his weight reduced and the damage reduction on his chains halved (NOTE: If I missed halving any mentions of the DR, please tell me.) in his normal mode: Boss Mode retains 7% DR.
- Baron Rivendare has a new Special which summons his Skeleton minions from his Stratholme fight: In addition, all of his throws, in addition to Down Tilt, Up Tilt and Down Aerial have had modifications with these new minions in mind. Dash Attack has been clarified both in some original uses and a variety of new uses due to the minion.
- Baron Rivendare has had some writing and animation edits, to better enrich the feel of the character through the moveset.

And also, an old finished Altis comment I never posted for some reason.

Flonne

Altis has a concept I can dig: Her Neutral Special allows her gun to push her back and combined with her tether gives her a huge amount of spacing options, melee options and a variety of ways to use her projectiles. This is combined with Altis' awesome Down Special bombs: I quite like the ability to shoot either the fuse or the bomb itself. At first I thought this wouldn't work well, but further thought makes me realize it'd be quite simple (The bomb has a hurtbox and then another hurtbox on top attached to the fuse) and would work well as long as the fuse's hurtbox was the right size. Moves like the Up Tilt and Forward Smash take strong advantage of what the Specials offer: I especially like the Forward Smash, which shows a good understanding of the tether and feels like it would create quite a fun gamestate, notably with its reset properties.

The Down Smash adds in more stuff with freezing your Down Tilt fire (which you can then melt with fire! That logic is so silly it blends it seamlessly with the series) and freezing your bombs to store them, which works well with your ability to tether them not to mention the different ways you can explode them. The choice it gives of all that combined with whether you want to slide around more or not and I like how it is a move with far reaching consequences. The Up Smash is also quite neat, it reminds me of the movabble counter on Bellatrix in a way or Don Thousand's gates, and it flows nicely into the game, so it is all around cool.

The aerials are probably the "worst" part of this moveset, though they're not really bad as much as not amazing, they're real workmanship kind of moves. The Down Aerial is a pretty neat way to work into everything, though, and the Neutral Aerial shortening is cool, overall though they're mostly notable for displaying good awareness of Altis' playstyle. The throws are overall pretty neat, Down Throw I thought was especially cool and it works kind of fun into her clouds and her fire traps, the back throw was nice too and I liked the setups offered by Up Throw, though stronger aerials would have helped that move.

This moveset did have some flaws, Up Tilt felt out of place some and I feel there could be a bit more depth outside the tether/NSpec, but overall the set is quite nice, it reminds me a fair deal of Salvatore in your catalogue of sets due to the many projectiles even though they play differently, though it also brings to mind Vector and even a bit of Remilia for me. I found I enjoyed it more than I expected reading it and felt it tied together into a nice package. A strong showing.
 

dimensionsword64

Smash Champion
Joined
Jan 23, 2014
Messages
2,495
3DS FC
3609-1605-6649
Finally finished the Make Your Move that I've been working on!

Zant

The Usurper King of Twilight himself, Zant!

Stats:

Size: 8

Weight: 7
Strength: 6
Speed: 5
Air Speed: 8


Specials:

Standard Special:

Zant shoots a Zant's Hand forward. It flies fairly fast, and has a long range. It it hits a opponent, it will grab them, then carry them back to Zant, and drop them right in front of him. They do about 7% when they grab the opponent. It can be gotten out of, however, by mashing buttons. The lower damage percentage you are, the easier it is to get out. The opponent can also hit it while it's flying forward to destroy it. Also, you can slightly angle it up or down while it's flying. And while it's flying forward, Zant can't move, so he is vulnerable if it's dodged.
Side Special:
Shoots a bunch of small red energy balls forward, one by one. They go about the distance of Wolf's blaster, and come out a lot faster. Each one does about 2% damage and stuns the opponent for about a second. However, like Bowser's Flame Breath, it gets weaker over time. They come out slower, go a shorter distance, do less damage, and stun the opponent for less time.

Up Special:
Almost instantly, Zant starts spinning. He spins for about three seconds, and in those three seconds, he can move around freely in the air. However, if you don't move at all, he will slowly start to move downwards. Any opponents that get hit by this move will get caught and stuck in the whirlwind that is Zant until a) they manage to wiggle out of it, or b) the attack ends. It slightly sucks in opponents, too, which makes it easier to hit with. While caught, opponents rapidly take 1% damage. The opponents take a good amount of knockback after the attack ends. When this attack ends, Zant has an animation that shows him slowly stopping his spinning. The animation takes about a second and Zant is vulnerable in it, so you have to be very careful when using this move.


Down Special:
Zant charges for a second, then puts a massive replica of his mask (even bigger than Zant) out in front of him. If an opponent is standing where Zant puts the mask, they take about 8% damage and small knockback. If Zant then presses Down B again, no matter where he is on the map, he will disappear. Then, a door on the front of the Mask Replica will open, and Zant will walk out. The mask will then disappear. It is very good for recovering. The mask works kinda as an short extra wall that is easy to jump over. However, the mask can be destroyed if an enemy hits it enough. Also, it will disappear after about 30 seconds. It takes a while to make, so the opponent can interrupt you while you're setting down the mask. In short, it's basically like just laying a small wall down that you can teleport to at any moment, but it disappears once you teleport to it.


Jabs:

A:

A left handed swipe with his left scimitar. Does about 2% damage.
AA:
A left handed swipe with his left scimitar, followed by a downward strike with his right scimitar. Both of the slashes do about 2% damage.
AAA:
A left handed swipe with his left scimitar, followed by a downward strike with his right scimitar, ended by three quick slashes, each slash alternating hands. The first two slashes both do 3% damage, and the last three slashes each do 3% and moderate knockback.


Dash Attack:


Zant hops down on the ground and slides forward like a penguin. It has a fairly long range for a dash attack, but it is kinda slow. It does 9% damage and moderate knockback. Also, the knockback shoots the opponent straight up, so it's not a very good KO move on stages with a high top boundary.


Tilts:
Forward Tilt:
Zant very quickly creates a purple, transparent barrier, about the same height as him, but thinner, in front of him. The barrier stays for three seconds and nobody can walk through it. However, projectiles go right through it. It does about 7% damage and practically no knockback at all, but it has very little landing lag. It can be used to set up a barrier really quickly, and then shooting the opponent with Zant's Side B while they can't get to you. Also, you can stun the opponent with your Side B until the barrier runs out, and then quickly run up and start a combo.

Up Tilt:
Zant jumps into the air spinning, then quickly lands. It does three hits. Each hit does 3% damage and low knockback. This move is very fast and doesn't have much lag at all, making it a very safe move to rack up damage with. However, it isn't a very good move for getting kills because even at very high percentages, the opponent can still survive fairly easily.

Down Tilt:
Zant crouches down and quickly jabs once with his right scimitar. It does about 11% damage, and moderate upwards knockback. It starts up very quickly, which makes it seem an appealing move to use often, but it has a large amount of ending lag, making it so you can't just run around spamming it.


Smashes:


Forward Smash:

When used without charging, Zant just does a simple, weak belly flop. It does about 10% and weak knockback, and has lots of starting and ending lag. However, when charged, it can be a devastating attack. While charging, Zant grows in size. When fully charged, he ends up about 1.5 times taller than his normal size, and a little wider. When fully charged, it does about 18% and large knockback. He also has super armor while charging, meaning that you can't interrupt it while it's charging. However, it has quite a bit of ending lag, meaning that if it is dodged, you're left vulnerable for a second.

Down Smash:
When Zant uses this attack without charging, he stomps on the ground three times quickly. The first two stomps do small damage and no knockback, and the third stomp does a little more damage and moderate knockback. Uncharged, the first two stomps do 3% damage, and the third stomp does 4% damage. It has the same charging gimmick as the previous attack does, where Zant grows in size while charging, then does the attack. This attack also has super armor while charging. When fully charged, the first two stomps do 5% damage, and the third stomp does 6%. It also creates small shockwaves around him, increasing the hitbox a little.

Up Smash:
When you use this move without charging, Zant just does two slashes upward with his scimitars. However, it has the same size changing thing as the previous two attacks, where Zant grows in size while charging. When you don't charge this attack, the first slash does 5% damage, and the second slash does 6% damage, and it has moderate knockback. But when you charge this attack, the first slash does 8% damage, and the second slash does 9% damage, and large knockback. And you also still have super armor while charging.


Aerials:


Neutral Aerial:

Eight replicas of Zant's Mask appear around Zant, and quickly spin in a circle around him. After spinning around him one full time, they disappear, each one leaving a small cloud of dark magic that lingers for a second. If an opponent gets hit by one of the mask's while it's spinning, they get stuck and get hit by each mask as it goes around the circle. Each mask does 2% damage, so if you get hit by each one, it does 16% damage! However, that's only if you get hit by each one, which isn't likely, as they only go around Zant one time, and very quickly. Also, it's possible to get out. If they get hit by the small cloud of dark magic that lingers for a second, they take 2% damage, but no knockback.

Forward Aerial:
Zant shoots a small, spinning (horizontally) version of his mask forward. It pushes opponents with it, and if they get caught in the center, they can be sent right off the side of the screen. It works in an extremely similar fashion to the drill arm item, though it is easier to get out of. It does 2% damage for each second in opponent is caught in it.

Back Aerial:
Works exactly like his forward air, but he shoots the spinning helmet backward.

Up Aerial:
Zant shoots a replica of his mask upwards. It goes upwards, unaffected by gravity, and it only disappears if it hits a solid object that isn't a character, like the ceiling. If it does hit a solid object, it disappears into a small cloud of dark magic that does 2% damage and no knockback. If an opponent gets hit by it, however, they will get caught, taking rapid fire damage. They can get out, though. However, if they don't manage to get out in time, they can get sent right off the top of the screen and get K'O'd. Unfortunately, it's fairly easy to get out, but if they're near the top of the screen and they get hit, it's almost a guaranteed K'O. It also comes out pretty quickly, but it leaves you vulnerable if it misses. Also, the mask is pretty small, so they have to be right above you. The damage varies, depending on how long they're caught in it.

Down Aerial:
A large totem pole appears right under Zant and he kicks it downward with both feet. If it hits the ground, it disappears and sends out a small cloud of dark energy that does 2% damage and practically no knockback. If it hits an opponent while in the air, it does about 5% damage and low knockback. However, if an opponent hits the bottom of the totem pole, it is a very powerful meteor smash. It has a large sweet spot for meteor smashing, so it is great for edge guarding. It works sort of like a larger version of Mega Man's down air.


Grab + Throws:


Grab:

A Zant's hand grabs right in front of Zant. Has a long range, but it's slow.

Pummel:
The hand squeezes the opponent. It does 2% damage.

Forward Throw:
The hand lets go of the opponent. They float in the air for a moment, surrounded by dark energy, then the hand punches them forward. Does about 7% damage and very good knockback.

Back Throw:
The hand simply tosses the opponent backwards. It does about 8% damage, and okay knockback.

Up Throw:
The hand throws the enemy over top Zant, who shoots them upwards with three red energy balls. The throw does no damage, but the energy balls do about 7% damage. This leaves the opponent vulnerable in the air as they try to get back to solid ground and safety. It can lead to some neat combos.

Down Throw:
The hand throws the opponent down onto the ground. A replica of Zant's mask appears where the hand throws them with the sharp top facing them. They bounce off the mask for some good upwards knockback. The throw does about 3% damage, and the bounce off the mask does about 6%.


Final Smash:

Zant shoots a blue orb up off the top of the screen. It does no damage or knockback, and passes through anything or anyone it touches. Suddenly, Phantom Zants start shooting from all sides of the screen. Each Phantom Zant does about 13% damage and very good knockback. The attack lasts for about eight seconds. In it, Zant is invincible, but immobile.


Playstyle:

Zant has a somewhat odd playstyle of trying to use all of his unique moves to limit the opponents options, by doing things like creating walls, using helmet drills, and shooting Zant's Hands. A lot of his attacks are somewhat awkward and hard to use correctly, meaning you have to get used to his strange attacks. He isn't that good in the hands of an unexperienced player, but he can be very good in the hands of a player who knows how to use all of his unique tools correctly.

Other:
Intro Animation: Hops in from a portal and laughs wildly.
Taunt 1: Laughs like a maniac.
Taunt 2: Does his weird contortionist pose where he bends backwards and twists his arms around.
Taunt 3: Stomps three times angrily, then spins in the air and lands in a t-shaped position, with his arms stuck out on each side (his mask also opens at the beginning).
Victory animation 1: Doubles over laughing.
Victory animation 2: Jumps up, then flies straight at the camera, stops really close to the camera, then disappears leaving a couple traces of dark magic that quickly fade away.
Victory animation 3: Grows to twice his usual size, and jumps up and down twice.


So, yeah. Here's my Make-Your-Move. Please tell me if I did anything wrong, and have a nice day! :)
 

Katapultar

Smash Lord
Joined
Nov 24, 2008
Messages
1,251
Location
Australia
[collapse=Zant]It's been too long since we had a set, and you just saved the thread from an ongoing drought by keeping your word about the Zant set you said you were going to post. It’s certainly not a bad start, but could use some tweaks, one being that it’s hard to read font that’s completely purple (just making the headers and attack names purple would be alright). And while not glaringly problematic, the numbers can be a bit too high on the Specials, namely spinning for 3 seconds on the Up Special and stunning the foe for one second with the Side Special. The latter isn’t so bad given the move needs to recharge over time however, especially if it has some end lag. I could see Zant getting a few frames advantage over his opponent at the very least, and maybe it would even be rewarding if you hit the opponent up-close.

I like how the moves are nice and easy to understand, not too bogged down in detail, and that you take advantage of the character’s magic potential even after the Specials. I especially like the F-Smash in that it can vary from being a comically bad attack or something devastating if you commit to the charge. I’m a bit mixed on the size-shifting gimmick being used on the other Smashes, though, in that I like the consistency they all have, but at the same time it takes away from the uniqueness initially presented in the F-Smash and makes Zant seem very tanky. I’m also iffy on Zant using his masks for most of his aerials as opposed to spicing things up a bit with his scimitars in a crazy way, which would feel better for the character. Aerials are typically more offensive than ground attacks given you can move around while using them.

There’s a pretty good sense of playstyle here that’s vaguely fitting for Zant, in that he can mix things up by fighting mid-range with his aerial masks or fight up-close with his standards attacks, even knocking enemies away hard by size-shifting. Zant did do just about everything in his boss fight, yes, so it makes sense that you’d want to fit it all into a set, though there might be a bit too much mask and hand reliance and not enough scimitar attacks. Still, I can imagine myself using the Neutral Special to pull enemies in and then charge up a F-Smash to crush enemies up-close, or wall them off via F-tilt and then go through it with the F-Smash and crush them, so it’s a good bit of fun. It is a neat start, for sure. [/collapse]


Sweet, thanks JOE!. I really like the idea of remaking one of my old movesets to further show how much I've changed and can compete. Besides, the original version was SO 12 contests ago. So without further ado, he is a preview of who I plan to remake!


Yusuke Urameshi
The Spirit Detective
I've been meaning to get around to this for quite some time, and while it's probably too late, I'll do it anyway.

Attacks that can only be used a certain number of times per stock aren't really well-received in MYM, but I think it could work with the right balance. It's not just giving the attack a high damage and knockback output however, but also taking lag and the attack's duration into account. For something that can only be used 4 times per stock, you will want to make sure each hit has impact, even if the opponents blocks it. My idea would be for the attack to have minimal lag and a long duration that just barely beats out opponents who try rolling or sidestepping, with said duration also helping you catch opponents in midair. Not to mention there's good shield damage that you can capitalize on for your melee, even if the opponents perfect shields. If the attack was just a straight-up one-hit, no matter its power, the opponent could easily shield or dodge to make you waste all your ammo, but a longer duration gives them something more to fear and a better chance for you to land that blow. Having that limitation actually feels fitting for a Shonen protagonist and I would like to see how you handle it and try to complete the set.

[collapse=Steve Chapman]Others have already addressed the problems with the set and how the cart works, in that it is awkward and unfun to fight against when the enemy constantly has to go around it to attack Steve. Granted, I don't think the cart idea is inherently bad, just the way it was handled in how you make it permanently affixed to the character. Sure, Steve is never seen without his cart in his boss fight, and it's specialized to boot, but it restrains a lot of his potential and forces him to resort to awkward maneuvers like those seen in the set. I really think you could have gotten a lot of mileage out of just having the cart summoned on a Special, where you could keep it out as a disjointed obstacle you could not only ride on to do all your tricks you can only do on your cart, but also use it as a projectile to ram enemies with and what not. Or, you could make Steve have the cart on his person at the start and be able to detach himself with it, summon a new one if it goes offstage. Sets these days are closer to Smash Bros than ever, so we don’t really need gimmicks ruling over them to impress others like in MYM11-12 and what not. Also, being able to jump off things forever with the Up Special is weird for the character, flavor-wise.

For all its problems, there were parts about the set that I found somewhat charming. I enjoyed the humorous headers, for one, and found the animation of the N-air strangely vivid and interesting. No other characters fights while riding on a shopping cart, so there are things that Steve can do that only he can do, even if it’s mostly attacking from behind due to limitations. The set is fine for the movement and even hilarious, but the character definitely has potential and could make for an insanely unique set with how he could take out weapons from his cart and we already know he’s pretty creative given how loaded the cart is to begin with. It would certainly be fun to revisit in the future.[/collapse]
 

Munomario777

Smash Master
Joined
Nov 18, 2014
Messages
3,253
Location
Charleston, South Carolina
3DS FC
0387-9596-4480
Switch FC
SW-8229-3157-8114

SONIC HEROES
"Because we're Sonic Heroes!"
Sonic the Hedgehog is SEGA's mascot and its most recognizable character (and arguably one of the most popular characters in gaming in general), and had been with the company's consoles since the beginning with the SEGA Genesis. However, when the Dreamcast failed to meet expectations, SEGA had no other choice than to go third-party. And with that major change for the company came some major changes for Sonic. The first multi-platform game in the series was one with many radical changes. First off, it was on a Nintendo console, which by itself was rather bizarre. This game, called Sonic Heroes, also boasted twelve playable characters, but they were all split up into teams of three. The main team consists of Sonic, Tails, and Knuckles, and of course, that's who this moveset is for! As always, this moveset is designed from the ground up specifically for Smash Brothers Wii U/3DS for balance, stats, and such. With the introductions done and dusted, let's delve right into this set!

UNIQUE MECHANICS

The most unique attribute of this set is one that was also prominently featured in the game Sonic Heroes, that being the Team mechanic!

So, in Sonic Heroes, you play as three characters at once: a Speed type, a Fly type, and a Power type. You can switch them on the fly, and each one has different moves to bring to the table. This all is reflected in the moveset, of course. Rather than a regular character portrait next to their percentage display, the trio has the above graphic with each character's head in their respective color circle (so Sonic is blue, Tails is yellow, and Knuckles is red). The bottom character in this emblem is the team "leader", or whoever is actively being controlled (the "Popo" of the team). These are cycled through by using the left and right directions on the D-Pad, and they rotate the configuration of the icons to switch the bottom to that character (so hitting left while it looks like the above image switches to Knuckles, for example). This means that each character only has two taunts; a down taunt and an up taunt. Characters can be swapped in midair, but not while in helpless, lag, dizziness, being buried, hitstun, or any other state that prevents action, and midair jumps, shield damage, and such carry over after a swap. However, held items will not carry over, so you can essentially hold three items at once. Neat! Teammates can be KO'd similarly to Nana (and have similar AI control when separated), and if a teammate is KO'd, you cannot switch to them until they respawn (this happens when all three members are KO'd). Teammates will not attack with the leader unless otherwise specified in that move, and when switching, the new leader is teleported to the old one's location. Due to these unique attributes, this moveset will have a different layout than my regular style. Sonic's moves will be in blue, Tails in yellow, and Knuckles in red. Simple! Oh, also, one more little thing. While Sonic and Knuckles have the teammates follow behind them when they're in the lead, when controlling Tails, they will all be stacked on top of one another, with Tails on top, Knuckles in the middle, and Sonic on the bottom. While the other teammates usually don't add to your damage when they're hit, when stacked together, if Sonic or Knuckles is hit, the damage will add to your percentage. A similar thing happens when grabbing the ledge regardless of who's leading, where the leader hangs onto the actual ledge and the teammates hang onto him in a sort of "human ladder" formation. Anyway, let's move on to the rest of the set!

STATS

Weight: Sonic Luigi Captain Falcon
Size: Sonic Sonic Sonic
Ground Speed: Sonic Charizard Olimar
Jump Height: Sonic Jigglypuff (six jumps) Little Mac
Air Speed: Sonic Jigglypuff Little Mac
Fall Speed: Sonic Jigglypuff Captain Falcon


SPECIALS

Neutral Specials: Homing Attack Thunder Shoot Teammate Punch
Damage: 3% 4% 5~20%

Sonic performs the Homing Attack, which is quite a bit different from the Smash 4/Brawl version. First off, the startup is much quicker, with only about a .25 second delay between pressing the button and rocketing forwards at his own dash speed. There's also no more awkward curving. However, the damage is lower as a result, and the knockback is moderate at best. If used without a target in sight, Sonic will dash forwards in midair, and this will still do damage. This can be used .5 seconds after landing a previous Homing Attack, which makes him bounce upwards at a 45 degree angle at a distance of about one Battlefield platform; this acts as a sort of hitstun. The maximum Homing Attack combo is 5; after the fifth hit, Sonic will bounce three times as far, and will thus be out of range. This will also happen if Sonic attempts to hit a shielding opponent with this attack. Since Sonic is still in his spinball form during the rebound, he can still damage opponents while bouncing off of an opponent.

Tails uses the Thunder Shoot, which has him shooting the bottom teammate forwards at opponents in their spinball form, at Sonic's dash speed (so he shoots Sonic first, and then Knuckles). This will home in on opponents, and they will travel up to four Battlefield platforms before returning to Tails. This will deal 4% of damage and moderate knockback. Of course, while a teammate is out being a projectile, they cannot be switched to, and the stack is also lower as a result. This is a good zoning move for keeping opponents at bay, but isn't quite ideal for damage racking or KOing.

Knuckles does the Teammate Punch, which has his teammates curl up into their spinball forms. Knuckles then wears them as boxing gloves. This is a storable charging move, and during the charging period (which lasts up to two seconds), Knuckles puts the teammates on the ground as they rev up Spin Dashes. This is a multi-hit move, with five hits ranging from 1% to 4% per hit depending on the charge. With a maximum charge, this can KO as early as 100%! However, it has somewhat lacking range and serious end lag, so it's rather risky to use. Still, it's useful to have that charge stored when the situation calls for it.

Side Specials: Rocket Accel Airlift Triangle Glide
Damage: 2~8% 1% 3%

Sonic performs the Rocket Accel, which has all three teammates line up (with Sonic in front), enter their spinball forms, and dash forwards at Charizard's dash speed. When this hits an opponent, it only deals 2% of damage. However, this will also bring opponents along for the ride, pushing them forwards and dealing 2% of damage every second or so. This is rather easy to DI out of, though. When the special button is released, the final hit is triggered, which will deal 8% of damage and knockback at a 45 degree upward angle. This can KO around 140%, but at lower percentages it becomes an effective ground-to-air combo starter. This is enhanced by the fact that the team can jump out of this at any time to smoothly transfer to aerial combat while still triggering the extra knockback and damage added by the final hit. In the air, this is useful for recovery, but like Sonic's Spin Dash in Smash 4, cannot be jumped out off if the midair jump has already been used. It can, however, still be cancelled by releasing the special button.

Tails executes the Airlift, which has him grab forward, similarly to, well, a grab. This, however, does something different. If Tails successfully grabs an opponent (which might be tricky due to his height), he flies away from the teammate stack while still holding the opponent. This functions as a sort of midair grab, and Tails can use his remaining midair jumps to transport the grabbed opponent. The grab ends (without the effects I'll get to in a second) once Tails touches the ground or the opponent wiggles out like a normal grab. Once Tails is happy with the placement, he can press the special button again to use a joy buzzer of sorts to electrocute the opponent, which stuns them. Tails then flies back to his teammates almost instantly, with minimal ending lag. This stunning effect lasts as long as Tails was in flight for, and can be great for starting a combo. This deals very little knockback and only 1% of damage on its own, and has a large risk-versus-reward element to it; Tails can fly for longer to allow more freedom for setups and time to get ready, but at the same time, this gives the opponent more time to break free! Decisions, decisions...

Knuckles uses the Triangle Glide, which has the teammates enter, well, a triangle formation, with Knuckles in the back. They then glide through the air, functioning similarly to Peach's Parasol. The move can be ended at any time by releasing the special button, but this will make the trio enter a helpless state, and it cannot be reactivated again after this. If this hits an opponent, it will deal 3% of damage and minor knockback away from the trio. If there are less teammates, the falling speed is increased by 1x the normal falling speed while gliding, up to three times the norm if Knuckles is alone.

Up Specials: Blue Tornado 180 Flip Flaming Uppercut

Damage: 5% 5% 10%

Sonic uses the Blue Tornado, which has him enter his spinball form and run around in circles rapidly to create a cyclone. On the ground, the teammates help out too, and with all three, the tornado has a height of three Battlefield platforms, and a width of one and a half. Each teammate that is absent takes away 1/4 of the tornado's size. So with Sonic alone, the tornado is 1.5 Battlefield platforms tall and 0.75 wide. Anyway, this tornado lasts about one second (during which time the running around is still happening), and this has a few effects. First off, it will carry opponents up to the top of the tornado and hold them at that altitude for a second, even after it disappears, making for some nice combo potential. This will also make opponents drop any held items, and they collect at the bottom of the tornado. Opponents who are shielding will still be sent up into the air by the windbox. In addition, Sonic and any other spinning characters become a hitbox that deals 5% of damage and moderate knockback. This does have some moderate end lag, though, so followups are somewhat limited. In the air, meanwhile, Sonic is the only one spinning around (so the tornado is 1.5 platforms tall and .75 wide), and he spirals up to the top as he spins. Meanwhile, his teammates enter the tornado and are brought upwards to meet up with Sonic at the top! All of the attributes that the grounded version has apply in the air too, although this version puts the team into helpless.

Tails uses the 180 Flip, which has him go into a spinball form and somewhat slowly do half of a somersault. This causes Tails to go upside down, and the teammates to be above him rather than below him. This can deal 5% of damage and moderate forwards knockback to opponents, but it also functions as a sort of tether recovery. If a teammate comes into contact with a ledge, they will grab onto it, and it will function as if that teammate was in the lead when they grabbed the ledge, including using their ledge attack (Tails will still be in the lead afterwards, though). After roughly half a second of being upside down, Tails then completes the somersault, and the teammates come down in front of Tails to their usual bottom position. This will still deal 5% of damage, but also packs a powerful meteor smash! It's a bit tricky to land, but if the timing is right, it can be devastating! This will not initiate a helpless state.

Knuckles uses the Flaming Uppercut, which, as the name implies, is an uppercut that involves fire. Knuckles leaps into the air (with a similar height to one of his midair jumps), with his fist extended upwards, and it catches fire. This will deal10% of damage and great knockback, KOing at around 120%, as well as a flame effect. Knuckles retains a decent amount of horizontal movement during this, and it's a good recovery option when Knuckles is on his own. However, this doesn't quite hold true when the team is all together. See, any teammates Knuckles might have with him hang onto his legs when he uses this, and that weighs him down quite a bit. In fact, each team mate reduces the height gained by this move by .5x its normal amount. So when Knuckles has Sonic and Tails with him, this move won't ascend at all; rather, it will only halt Knuckles's falling! While this might be useful in certain situations, it's certainly not ideal for recovery, so that's best left up to either the Triangle Glide or Sonic and Tails's options.

Down Specials: Super Peel-Out Seeker Plane Drill Claw
Damage: 4% 10% 10%

Sonic uses the Super Peel-Out, which has him run in place for as long as the button is held. This is a charging period that can last for up to a second, and when the charge is full, his feet will turn into a red blur of a mobius strip. When the charge is released, Sonic will dash forwards at high speeds (at minimum, about Captain Falcon's walk speed, and at maximum, 1.3x his own running speed). If the move was charged all the way, Sonic will gain a blue aura around his front as he runs, which will deal 4% of damage and moderate knockback to anyone it hits. The dash speed and the aura will also carry over to the air if Sonic jumps while using this move, making it great for horizontal aerial chases as well as recovery.

Tails puts a Seeker Plane on the ground, which is basically a tiny version of his biplane, the Tornado. This tiny aircraft will spin its propeller, roll forwards, gain speed, and, after travelling about one and a half Battlefield platforms, take off! It then flies through the air, homing in on enemies. It deals 10% of damage and explodes on impact, but is rather slow, and the homing isn't all that great (think Samus's regular Missile). However, Tails can have multiple planes out at once, and they also have the unique function of retrieving items! If a plane comes in contact with an item (which it will home in on if there are no opponents nearby), it will stow the item away and rush back to Tails at a high speed. Tails will then get the item if he's not already holding one (if he is, the plane will simply drop the item in front of Tails). This is a nice spacing option, and is also useful for edgeguarding.

Knuckles performs the Drill Claw, which has him burrow into the ground. Knuckles can then travel underground at his normal dash speed, with a bit of the ground "popping" up above him for an indicator of his location. Upon hitting the special button again, Knuckles will pop out of the ground and perform the Flaming Uppercut, with the same damage values as before. This has a few downsides. First off, Knuckles can be attacked by any attack that hits the ground and he'll be knocked out of the ground, taking the normal knockback and damage. Also, Sonic and Tails are still above ground, and follow Knuckles above ground, so they're very vulnerable to attack. Also note that this cannot be used on pass-through platforms. In the air, this turns into a downwards dive with both of Knuckles's fists stretched out in front of him, which has the same flaming effect and still deals 10% of damage, but now has a powerful meteor smash! This cannot be cancelled, but Knuckles retains his full left and right aerial movement, and he will automatically burrow into the ground upon landing.

STANDARDS

Jabs: Spinny Feet Frenzy Tail Flurry Wind-up Punch
Damage: 3%, 3%, 1% per rapid hit, 4% 4%, 4%, 2% per rapid hit, 5% 5%

Sonic kicks once with his left foot by jabbing it out, once with his right by swinging it in a horizontal swipe, and then puts his hands on the ground and leans all the way back, so that his legs are at the front. He then uses his trademark-restricted-copyright "spinny feet" animation to go into rapid hits, and the finisher is another potent kick with his right foot, this one consisting of an upward swing (similar to Sonic's Forward Throw in Smash). This is a nice, quick jab combo for racking up a bit of quick damage.

Tails spins around and performs a tail attack, spins around again in the opposite direction (once again attacking with his tails), and turns around to face backwards. The rapid hits then involve him spinning his tails so that they become an orange blur (the same method he uses to fly) to damage opponents, and the finisher involves him flying in midair with these spinny tails for a second, still facing backwards, as he kicks behind himself to knock opponents away. This is more powerful than Sonic's jab, but isn't quite as fast, and can be tricky to hit with since Tails is so high up (unless Tails is flying solo).

Knuckles winds up a little bit and delivers a meaty punch with his right fist. While doing the first punch, he winds up the other fist to follow up with another hefty blow. If the button is pressed again during this punch, the cycle continues. For consecutive jabs, the button must be pressed while Knuckles is already punching due to the windup required; otherwise, the starting lag will occur for every punch. Getting the timing just right will allow Knuckles to jab at a decent pace, although it's still not as fast as Sonic's or Tails's, and the timing can be tricky to get right.

Forward Tilts: Spinny Feet Tail Attack Meaty Punch
Damage: 9% 10% 13%

Sonic turns around and gets down on his hands and feet, as if doing a push-up. He then lifts his feet off of the ground and enters the "spinny feet" state, his legs going into a red blur due to their quick movements. This is a multi-hit attack, dealing 3% per hit and 3 hits for a total of 9%. This deals moderate knockback, andcan potentially be used to start or continue a combo thanks to its quick startup and cooldown.

Tails spins around once, attacking opponents on both sides with his tails. This deals 10% of damage and good knockback, KOing at around 140%, but is a bit slower than Sonic's Forward Tilt, and has somewhat short range,

Knuckles winds up for about three quarters of a second and then delivers a nice, meaty punch with his right fist, dealing 13% of damage and great knockback, KOing at around 120%. However, it is rather laggy, and can thus be punished easily by opponents. This can lead into Knuckles's jab combo as described above.

Up Tilts: Handstand Spinny Feet Hover Jumping Headbutt
Damage: 9% 12% 15%

Sonic does a half of a somersault and neatly transitions into a sort of handstand. He then uses the spinny feet to attack above himself while still upside down. This deals 3% of damage per hit and has 3 hits, resulting in 9% of total damage. The moderate knockback makes this a great aerial combo starter, although the start-up is a bit laggy.

Tails flies upwards for a second by spinning his tails rapidly, which damages opponents and increases his upwards range. This deals 4% of damage per hit and has 3 hits, dealing 12% of damage in all. The final hit KOs vertically at around 120% (due to Tails's height),but can be tricky to land (again, due to Tails's height).

Knuckles jumps upwards a little bit, about the height of a short hop. His head acts as a hitbox during this, and headbutting an opponent deals 15% of damage and good vertical knockback, KOing at around 130%. However, this is quite laggy, both at the start and end of the attack.

Down Tilts: Low Spinny Feet Low Tail Sweep Sliding Kick
Damage: 6% 7% 8%

Sonic turns ninety degrees, leans sideways, puts his hand on the ground, and uses his spinny feet near the ground. This deals 3% of damage per hit and has two hits, making for a total of 6%. This will also trip opponents, which could possibly start a combo.

Tails crouches down low to the ground, spins around, and sweeps the ground on either side of him with his tails. This deals 7% of damage and trips opponents, but has a bit of lag to it.

Knuckles crouches down to the ground and does a sliding kick, moving forwards with his feet extended. This deals 8% of damage and trips opponents, but is quite laggy.

Dash Attacks: Roll Tails Cyclone Dashing Fists
Damage: 8% 5% 7%

Sonic enters his spinball form and rolls across the ground a bit, damaging opponents for 8% and moderate knockback. This acts differently from Sonic's Dash Attack in Smash, since it travels further and has a more gradual deceleration. In addition, Sonic can jump out of this at any time to transfer his rolling speed into the air, and can also roll off of the ledge with it.

Tails spins around rapidly while running, attacking with his tails multiple times. This is a multi-hit attack, dealing 5% of damage per hit, and there are 5 hits total, although they won't all hit an opponent, since they each deal moderate knockback. The last hit (which occurs after Tails has travelled about one and a half Battlefield platforms, by the way), however, has great knockback that can KO opponents at 100%! The spacing and timing on this is extremely precise (especially since Tails is so high up), but if performed just right, the results can be amazing!

Knuckles simply keeps running, but he holds his fists out in front of him to deal 7% of damage and good knockback to opponents, KOing at around 120% or so. After this, Knuckles just keeps running, making it easy to chase launched opponents.

Ledge Attacks: Spinball Tail Attack Headbutt
Damage: 5% 7% 10%

Sonic jumps up onto the stage in his spinball form while the other two climb up. This deals 5% of damage and moderate knockback, and is nice and quick.

Tails jumps onto the stage and performs a tail attack while the other two climb up. This deals 7% of damage and moderate knockback, but is a bit slow.

Knuckles leaps forward onto the stage, headbutting opponents while the other two climb up. This deals 10% of damage and decent knockback, KOing at around 150%, but is rather slow.

SMASHES

Side Smashes: Spin Dash Arm Cannon Boulder Throw
Damage: 7~17% 10~20% K%

Sonic does a very short hop, goes into his spinball form, and spins around rapidly. He hits the ground almost instantly, and starts charging a Spin Dash, which can deal 3% of damage and minor knockback to opponents who run into Sonic. When the charge is released, he rolls forward at high speeds, with a range of one Battlefield platform to three of them depending on the charge. This can deal up to 17% of damage, and the knockback can KO at around 120%.

Tails holds up his arm, and his trusty red arm cannon forms around it. He then aims it forward and charges it to draw energy into the front, which will deal 1% of damage to opponents who come in contact with the front. After the charge is released, Tails shoots a yellow energy ball, ranging in size from 1/3 of his own height to his full height, from the arm cannon. This travels at Charizard's dash speed, and deals up to 20% and can KO at around 100%. However, it can be tricky to hit with due to Tails being so high up, but the aiming can help this a bit.

Knuckles crouches down low to the ground, and sticks his fist spikes into the terrain. He then pulls them out, and attached to them is a giant boulder! This large rock is about .75 of a Battlefield platform in diameter. Knuckles then throws this forwards in an arc, and if it hits an opponent, it deals a maximum of 17% depending on how long it was charged. What this smash lacks in damage scaling, it makes up for in range and knockback. The throw distance ranges from one to three Battlefield platforms, and the fully charged knockback can KO as soon as 90%! However, this comes at a cost of heavy lag before and after the charge (although the endlag is surprisingly quick).

Up Smashes: Spin Jump Dummy Ring Bomb Burrow

Damage: 10~14% 6~21% 10~20%

Sonic performs a Spin Jump, which has him charge up on the ground for a second, crouching down. Once this charge is released, Sonic jumps upwards a little bit (with height comparable to that of a short hop) and spins around rapidly in midair. This is a multi-hit attack, dealing 2% of damage per hit over the course of up to 7 hits. This is a nice, quick attack for building up some damage, and also has vertical knockback that can KO at around 130% at maximum charge.

Tails throws up a capsule of his Dummy Ring Bombs about one of his jump heights into the air. Depending on how long the charge lasted, more Ring Bombs are inside the capsule. The capsule explodes on impact, releasing the Ring Bombs inside. Each one deals 3% of damage, and the maximum amount is seven depending on the charge. At maximum charge, this can KO vertically at around 110% due to Tails's height, but is a bit hard to hit with, again due to Tails's height.

Knuckles jumps up a bit, flips upside-down, and burrows into the ground. He then stays down there during the charging period, and this can be moved left or right a bit. After the charge is released, Knuckles jumps up out of the ground, delivering a hefty uppercut to opponents. This lacks the fiery effects of some of his other uppercuts, but his fist has now become rock solid! This can deal up to 20% of damage when fully charged, and the knockback can KO vertically as soon as 100%! However, this has quote a bit of starting lag to it, and the "bulge" indicating his underground position grows right before this attack. This can be used while in the Down Special's burrowing state, but like that move, cannot be used on pass-through platforms.

Down Smashes: Breakdance Sucker Punchers Earthquake Punch
Damage: 8~16% 7~14% 10~20%

Sonic crouches down to the ground and leans about 70 degrees sideways, hand on the ground, during the charging animation. When the charge is released, Sonic starts running in circles in this pose and then transitions into a breakdance! This hits to both sides, as well as above Sonic, dealing up to 16% of damage and knockback that can KO around 130%. The end lag is extremely quick, giving this move potential to turn a read roll into a devastating string of attacks.

Tails uses two Sucker Punchers, which are robotic arms with boxing gloves that extend from the ground. While Tails generally has trouble dealing with grounded opponents, this attack specializes in that area. During the charging period, Tails pulls out a remote control and dials up a knob more and more depending on the charge time. When this charge is released, two Sucker Punchers come up out of the ground to either side of the trio! They extend about one character height, and at maximum charge they come out nearly instantaneously, deal 14% of damage each, and KO vertically around 120%. While the charged version is a good KO move, the uncharged version is potent as well. With its moderate knockback that just so happens to be the same height as Tails more often than not, this gives Tails a great opportunity to use a tilt, smash, aerial, grab, Special move, you name it! This is crucial to Tails's playstyle, and can help give him the edge against grounded opponents.

Knuckles jumps up into the air a bit (with a height comparable to a short hop) and stays there during the charging period, spinning around rapidly with his fist in a punching position. This deals 5% of damage and minor knockback to opponents. When the charge is released, Knuckles stomps to the ground and punches it with his fist, creating a shockwave the size of one Battlefield platform. This can deal up to 20% of damage and knocks opponents up into the air to KO at around 110%, but has heavy start lag, and since Knuckles's fist gets stuck in the ground for a moment, there is some severe end lag, making this punishable if it misses.

AERIALS

Neutral Aerials: Insta-Shield Tail Spin Sonersault Punch
Damage: 9% 9% 12%

Sonic spins around rapidly in mid-air, while in his spinball form. He then suddenly accelerates for a split second, creating a blade of wind around himself called an Insta-Shield to damage opponents. This attack deals 9% of damage and good knockback, KOing at around 140%, and is extremely quick, but requires precise timing to pull off since the blade is so short-lived.

Tails spins around rapidly in midair, attacking to both sides with his tails. This is a multi-hit attack, dealing 3% per hit with three hits for a total of 9%. This is a good damage racker, and the hitbox stays out for a good while, but it's slower than Sonic's attack, and doesn't hit the top or bottom.

Knuckles performs multiple midair somersaults, with his right fist extended to punch opponents. This deals 12% of knockback and KOs at around 130%, but is rather slow at both the start and end of the attack.

Up Aerials: Spinny Feet Flip Tailspin Ascent Screwdriver
Damage: 9% 12% 5~15%

Sonic does a backflip while he performs the "spinny feet" technique. The hitbox starts in front of Sonic and goes above and then behind Sonic, and each of those positions is a separate hit. Each hit deals 3% of damage and brings the opponent into the next hit, and there are three hits total for a total of 9%. Interestingly enough, the last hit will send the opponent downwards for a potent meteor smash! This attack is very quick, but that also means that it's hard to hit with since it's so short-lived.

Tails leans forward about 70 degrees and spins his tails rapidly, as if he was flying. This does raise Tails up a tiny bit, but more importantly, the tails are a multi-hit attack. They deal 4% per hit, and there are 3 hits for a total of 12%. The hitbox lasts for about a second, and the slight ascent extends the range a bit. This can KO at 130% or so, but also has some combo potential at low damage levels.

Knuckles performs the Screwdriver, which has him enter a gliding-like pose, with his legs apart and his hands up in the air. He then spins around rapidly, and while his whole body is a hitbox that deals 5% of damage and minor knockback, the fists at the top are a sweetspot that deals 15% of damage and great vertical knockback, KOing at 110%! This is hard to hit, but if timed and spaced correctly, the results are outstanding. This is a nice, quick attack, which is rather rare for Knuckles.

Down Aerials: Bounce Attack Dummy Ring Bomb Somersault Punch
Damage: 8% 9% 14%

Sonic enters a spinball form in midair, hovering there for a split second before quickly accelerating downwards. The shape of the spinball turns into an oval to fit with this high speed, and soon Sonic is rushing downwards at his own dash speed. This cannot be stopped, so be careful! Anyway, once Sonic hits the ground, he'll bounce up about the height of one of his jumps. This has little end lag, and the bounce leaves Sonic ready to attack. If Sonic hits an opponent, he bounces off of them too and deals 8% of damage, as well as some moderate knockback. This isn't for KOing (unless you take advantage of the meteor smash that occurs if you hit an opponent at the very start), but rather for starting combos, since both you and the opponent are bounced upwards on contact.

Tails throws a Dummy Ring Bomb down in front of him, so that it ends up right in front of Sonic. This takes a second to travel that distance, and won't explode until it reaches the end of its course. If an opponent is hit by the bomb before it explodes, it will only deal 2% of damage and a bit of flinching. However, if the bomb explodes on an opponent, it will deal 9% of damage and a powerful meteor smash. This is an attack that is very precise to hit with, but if pulled off correctly, it can be devastating!

Knuckles does a somersault, holds his fists together as if playing volleyball, and at the end of the flip, slams them down in front of him! This deals 14% of damage and a devastating meteor smash, but has a lot of start lag, and is rather telegraphed. It can be used to great effect in the right situation, though.

Forward Aerials: Spin Kick Tail Spin Glide
Damage: 10% 8% 8%

Sonic holds his right foot out in front of him, while he bends his left leg below him. He then spins around rapidly, kicking with his right foot (which has a red blur to it) to both the front and back. This is a multi-hit attack, consisting of five hits (three in front, two in back) dealing 2% of damage each for a total of 10%. Each hit knocks the opponent into the next, so if the first hit lands, all five are pretty much guaranteed to connect. The final hit will deal diagonal knockback that can KO at around 140%. This is a nice, quick attack with a somewhat short range, but some decent KO potential.

Tails spins around rapidly, attacking twice to either side with his tails. Each hit deals 8% of damage, but they don't lead into each other. Instead, each one deals a good amount of knockback, KOing at around 130%. This has a nice, lasting hitbox, but is a bit slower than Sonic's Forward Aerial with less damage potential.

Knuckles enters a gliding pose (belly down, arms forwards, legs outstretched) and, well, glides! The descent is rather slow (about one Knuckles per second), and it cannot be angled up or down. Knuckles also lacks a glide attack, because his glide is an attack! If Knuckles hits an opponent while gliding, he will deal 8% of damage and moderate forwards knockback to them and bounce up a bit. Knuckles can glide for as long as he wants, but this won't help his teammates recover, so they'll have to fend for themselves. Knuckles can cancel this at any time by pressing the button again, and it can be entered and exited multiple times in midair. Finally, if Knuckles hits a wall during this state, he will cling to it, and can climb on it for up to five seconds and jump off at any time.

Back Aerials: Spinny Feet Spinny Tails Spin Punch
Damage: 9% 8% 10%

Sonic puts his feet up behind him as they start spinning into a red blur, and this red blur can damage opponents. It is a multi-hit attack, with three hits dealing 3% of damage each for a total of 9%. The last hit has great knockback, KOing at around 120%, but this has heavy start lag, making it tricky to land.

Tails sticks out his rear end behind himself and spins his tails rapidly as they become no more than an orange blur. This lasts about .75 seconds, and deals 8% of damage and moderate knockback to opponents. This will also propel the trio forwards a bit, making it useful for recovery.

Knuckles spins around once, holding out his right fist. Halfway through this rotation, he punches opponents behind him to deal 10% of damage and knockback that can KO at around 110%. This is a bit slow at the start and end, and the hitbox is a bit small, but it sure packs a punch! (ba-dum-tish)

GRAB GAME

Unlike most attacks, all three characters share a grab game. Once the opponent is grabbed, all three characters (or less if some are KO'd) hold them sort of like a fire trampoline, and they all pummel at once, each with a unique animation. The throws each use a different character; forwards for Sonic, up for Tails, and down for Knuckles. The back throw utilizes all three characters. If any character involved in a throw is absent, that throw cannot be used. If you use a character besides the leader to throw, you can move around while the throw is happening. Also, the less characters are holding the opponent, the easier it is for them to break out. That said, here's the grab game:

Grabs: Grab Sucker Grab Grab
Damage: 0% 0% 0%

Sonic performs a simple grab, not much to see here. The dash grab is the same as the normal one other than the animation.

Tails uses a Sucker Punch arm that comes out of the ground in front of the trio to grab the opponent while the tower breaks up and they grab the opponent, after which the arm retracts back into the ground.

Knuckles performs a simple grab, not much to see here.

Pummels: Spinny Feet Spinny Tails Headbutt
Damage: 1% 1% 1%

Sonic puts his feet in front of him and spins them briefly, dealing 1% of damage.

Tails uses his spinny tails for a brief moment to damage the grabbed opponent.

Knuckles quickly headbutts the opponent while holding them to deal damage.

Up Throw: Airlift Drop
Damage: 10%

Tails lifts the opponent up into the air, all the way offscreen! He then drops them down to the ground before turning into his spinball form and landing on them to deal damage and knockback that KOs at around 120%. All in all, this deals 10% of damage.

Forward Throw: Running Spin Ambush
Damage: 8%

Sonic backs up to get a running start, and then he runs at top speed towards the opponent! Right before making contact, Sonic enters a spinball form to deal some nice damage to the opponent. This deals 8% of damage, and the knockback can KO horizontally at around 130%.

Down Throw: Maximum Heat Knuckles Attack
Damage: 15%

Knuckles jumps into the air and uses the "Maximum Heat Knuckles Attack", which is basically a spinning, homing glide attack. This engulfs Knuckles in flames and sends him ramming into the opponent at high speeds, dealing 15% of damage and a burning effect, but only moderate knockback.

Back Throws: Spinning Flying Strike
Damage: 15%

Tails starts flying into the air, and picks up Sonic. He in turn grabs Knuckles, and Tails proceeds to fly them into the skies. After ascending a good bit, Tails lets go of Sonic, who then enters his spinball form, causing Knuckles to also spin rapidly. He holds out his fists and, once they hit the ground, punches the opponent backwards, dealing 15% of damage and heavy knockback that can KO at around 110%. This is easily the trio's most potent throw, but requires all three team members to be alive.

MISCELLANEOUS

Final Smash: Sonic Overdrive
Damage: 40%

The two teammates instantly jump back to the leader (or respawn if they have been KO'd), and they all perform the Sonic Overdrive, their Team Blast from Sonic Heroes. (A Team Blast is a screen nuke super attack that can be used after filling a meter by collecting Rings and defeating enemies.) This causes the camera to zoom all the way out and time to freeze, and then the magic happens. First, Tails picks up Sonic and Knuckles in a formation resembling the one that happens when controlling Tails. Then he shoots them both out using Thunder Shoot, and Sonic performs the Light Speed Attack while Knuckles uses his Maximum Heat Knuckles Attack. This causes them both to home in on every onscreen opponent at high speeds, and on contact, they each deal 20% of damage. Every opponent on screen is guaranteed 40% of damage as a result. Then they return to their original position and high fives go all around, and finally, time resumes and every opponent that was hit gets launched, with knockback that can KO as early as 30% (not counting the damage the attack deals)!

Up Taunts:
Sonic wags his finger, smirking and facing the camera.
Tails flies around in a little circle before getting dizzy for a second.
Knuckles faces the camera and punches towards it, as if warming up.

Down Taunts:
Sonic runs in place with his spinny feet, saying "You're too slow!"
Tails enters a sitting pose and spins his tails below him to hover for a moment.
Knuckles burrows into the ground a bit, with his top half still sticking out, and looks to both sides.

Victory Pose:
This.


Miscellaneous:
- Any attacks using a spinball will leave a colored trail that corresponds to the character, like they do in Sonic Heroes.

PLAYSTYLE
Oh boy, where do I start with this playstyle? Well, I guess I should start with each character's general strengths and weaknesses:
Sonic is the fastest of the trio, and is good for rush-down gameplay, controlling space between you and your opponent, combos, and mobility. However, he lacks in KO power, and isn't great at vertical combos.
Tails is the air specialist, especially since he can use more attacks at a height thanks to the character stacking. He's great for recovery, vertical combos, ranged attacks, and aerial fights, although he has trouble dealing with grounded opponents, and some of his attacks are a bit slow.
Knuckles is the powerhouse, with meaty attacks, insane damage outputs, and amazing KO potential. He also has good mobility thanks to his two different glides and the burrowing, but is very slow compared to the others, and has some major lag on the majority of his attacks.
Clearly, we can see that no character is perfect. Like in Sonic Heroes itself, teamwork is the key to victory here, and with the simple D-Pad inputs controlling character switching, changing between leaders is a breeze. Each character has a different place in the playstyle. Need to approach opponents or rack up some quick damage? Switch to Sonic. Is a character like Jigglypuff annoying you with constant aerials, or do you need an aerial follow-up? Switch to Tails. Having trouble KOing an opponent with high damage? Switch to Knuckles. Aside from these more obvious uses, each character also has many different functions. In Sonic's case, the Blue Tornado is the best vertical recovery option and can disarm opponents and position them for a possible combo, while the many spinny feet attacks and the Homing Attack rack up damage quickly. The Up Aerial has a fancy-looking spike, the Rocket Accel is a great combo starter, and the Super Peel-Out is a great mobility tool. Moving onto Tails, the Airlift is great for setting up devastating combos and such, and the Thunder Shoot, Seeker Plane and Forward Smash are great for ranged attacks. Finally, Knuckles has some nice use as well. The Drill Claw can be used to sneak up on opponents and strike from below, while the Forward Aerial and Triangle Glide are the best horizontal recovery options. Overall, this power trio has a ton of different moves, options, and variety that help them adapt to any situation, and while getting teammates KO'd can severely cripple the leader, managing your team should lead to success. As always, feedback is welcome, and I hope you enjoyed the set! :)

Like what you see? See some more over at my Make Your Move Hub! :D
 
Last edited:

allison

She who makes bad posts
Joined
Jan 25, 2014
Messages
5,138
Location
Maple Valley, WA
NNID
crazyal02
3DS FC
0216-1055-4584
So, you've seen Sonic in Smash, but here's a bit of a different idea:

This character(s) consists of Sonic, Tails, and Knuckles. Side, Up, and Down Specials switch which character is the "leader," who you control. Similar to the Ice Climbers, but with even more characters. Each move has a different version for each character, except for the character-specific moves. If one of the characters you're not controlling gets hit, it won't add to your current percentage, but they will still get knocked back according to your current percentage. If a side character is KO'd, you can't use them until you die, similar to the Ice Climbers. When you switch characters, the one you switch to is brought to your current position, and you can't switch while in hitstun or freefall.

(I won't be including all the moves, just the specials, since I don't have much time atm.)

Sonic is the fastest character, with a very hit-and-run focused playstyle. Use him to close or create gaps, as well as racking up percentage, since he has many attacks with multiple hits and great combo potential.

Tails has many midair jumps, and when playing as him, the characters are stacked up, with Sonic on the bottom, Knuckles in the middle, and Tails on top. He's the best for recovery and aerial combat, as well as having a good projectile game. Use him when recovering and for aerial follow-ups.

Knuckles is the powerhouse of the bunch, with many heavy hits and decent combo potential. Use him for getting KOs, as well as for getting up close and personal. He can also use the Triangle Glide if the jump button is held.

Neutral Specials:
Sonic has the Homing Attack. Functions like it does in Sonic's actual Smash character, but with faster startup, less damage, and more combo potential.
Tails has the Thunder Shoot, where he shoots Sonic and then Knuckles in spinball form at opponents, and then they return back to the formation. Homes in on enemies, and is good for keeping opponents at bay.
Knuckles has the Teammate Punch, where he uses Sonic and Tails in their spinball forms as boxing gloves, bashing opponents. This move can be charged, and has a rapid-fire effect when used.

Side Special:
The Side Special puts Sonic in the lead, and pressing it again (or while already using Sonic) will perform the Rocket Accel, which has Sonic, Tails, and Knuckles curl up into their spinball forms and charge at opponents. Can also be used for horizontal recovery.

Up Special:
Tails is put in the lead, and if pressed while playing as Tails, will perform the Triple Spinball. All three team members will turn into spinballs and be propelled upwards, harming any foes that touch them. This serves as the team's main recovery move, and puts them in a helpless state.

Down Special:
Puts Knuckles in the lead, and can perform the Drill Claw. This is a diving attack where Knuckles attacks fists-first, spinning downwards toward the ground. If used on the ground, Knuckles will burrow down into the ground and then rise up again, leaping high into the air and attacking foes with a powerful uppercut.
Sets need to have standard attacks, not just specials. If you don't have enough time to finish it, post it later. You should also include damage percentages, when a move is likely to KO someone, and the stats of each character. Playstyle info is also generally put at the end of the set, since the reader has better context at that point.

With that said, I like the general concept behind the set so far!
 

Munomario777

Smash Master
Joined
Nov 18, 2014
Messages
3,253
Location
Charleston, South Carolina
3DS FC
0387-9596-4480
Switch FC
SW-8229-3157-8114
Sets need to have standard attacks, not just specials. If you don't have enough time to finish it, post it later. You should also include damage percentages, when a move is likely to KO someone, and the stats of each character. Playstyle info is also generally put at the end of the set, since the reader has better context at that point.

With that said, I like the general concept behind the set so far!
Ah, okay. Will do. Also, thanks for the feedback! :)
 

ChaosKiwi

Smash Apprentice
Joined
Feb 1, 2014
Messages
104
NNID
ChaosKiwi
So today, a period in animation history ended. The last episode of The Legend of Korra, sequel to Avatar the Last Airbender, went up, thus ending the Avatar saga. In commemoration for this, Rychu and I have prepared a special treat for today, with more to come in the near future. Enjoy!
 

Rychu

Thane of Smashville
Joined
Jul 5, 2010
Messages
810
3DS FC
1908-0105-4965
"I wasn't there when the Fire Nation attacked my people. I'm gonna make a difference this time."
||||Aang||||

Aang is the legendary Avatar, and protagonist of Avatar: The Last Airbender. Frozen in Ice for a hundred years, Avatar Aang disappeared mysteriously while the Fire Nation slowly but surely took over most of the world, after destroying the rest of the Airbenders. He was discovered by southern Water Tribe siblings Katara and Sokka, who unfroze him and his giant sky bison Appa, setting in motion his journey to restore balance to the four nations.

As the reincarnated Avatar, Aang was destined to master all four elements: Air, Water, Earth, and Fire. Aang is the youngest Avatar to achieve mastery of the four elements, bringing balance back to the world by the time he was 13 years old. Despite the weight hanging on his shoulders, Aang stayed mostly lighthearted and carefree, as typical of any normal 12-year-old boy. Aang was a natural Air and Waterbending prodigy, though struggled with the hard and forceful element of earth and was initially fearful of using the destructive powers of Firebending, owing to his strict pacifistic upbringing and fear of hurting his friends. Aang never took a life, an amazing feat considering his duty as the Avatar. He eventually grew into a world leader, one of the founders of the United Republic of Nations, and father of Tenzin, who would go on to continue the Airbending lineage and become the teacher to Aang's successor, Avatar Korra.

Statistics
Size - 4
Weight -3
Speed - 8
Jump - 10 (with 3 jumps)
Aerial Speed - 10
Falling Speed - 2

\\\\Special Attacks////
Side Special - Air Scooter ////
Aang conjures up a small, spinning ball of air, which he quickly jumps on top of and zooms forward. This scooter moves at a speed of 11, and can turn on a dime: Aang can change directions immediately while riding the Scooter, and Aang can climb up sheer walls while riding it. In the air, the ball has a lot of forward momentum, making it a really good horizontal recovery, at least from high up.

The only downside to the Scooter is that it requires Aang's full concentration to control: he can't use any other attack while he's riding, necessitating he jump off the scooter to use another, or he run the scooter directly into an opponent. Should Aang slam into an opponent, the ball of air knocks the opponent backwards, dealing
10% damage, as well as launching Aang upwards a bit, in perfect position to follow up with one of his aerials!
Up Special - Air Glider ////
Aang gives a shake to his staff, opening it into his glider. Aang grabs on, looking much like he does in that header image, airbending a gust of wind underneath him. Aang is propelled upwards and forward, far enough to where he can glide from one end of Final Destination to the other. He moves quite quickly, too, making that whole trip in under 3 seconds. Aang's glider can be angled upwards and downwards, not losing any speed with either change, and can even turn around quickly with a smash input backwards.

He can use attacks while gliding, though, obviously, the attacks will brig Aang out of his glide, which can only be used once in the air. Aang can continually glide for 5 seconds, and can cancel out of the glide with press of the jump button, and even if he doesn't cancel out, he won't be put into helpless: simply put, Aang is a beast in the air.


Down Special - Earth Wall ////
Aang stomps on the ground, immediately bringing up an Aang-height wall of rock directly in front of him. The rock wall is, well, a wall of rock, which stops any and all attacks that come into contact with it. Aang can hold this wall up for as long as he wants, though if he just holds the wall up, opponents can just attack from anywhere else, as the wall only blocks from the front. Should the move be used in the air, Aang will fastfall to the ground, bringing up two short walls around himself when he lands, protecting himself from the sides when he lands.

The good thing about this attack is that it has almost zero lag on either end, allowing Aang to attack immediately after releasing the wall, but the wall doesn't retract immediately:it stays up for 10 seconds! Aang could very well charge a Smash attack while the wall takes it's short amount of time to retract, protecting Aang while the attack charges. Aang is a master at defensive earthbending!


Neutral Special - Air Ball ////
Aang manipulates a ball of air directly in front of him, able to charge it up in a similar fashion to Lucario's Aura Sphere, taking about as much time to charge fully. Unlike Aura Sphere, Aang cannot save Air Ball, pushing it forward immediately, as soon as the charge of the attack is released in any way. The Air Ball can travel from 1/4 of the length of Final Destination to 3/4, depending on the charge, travelling extremely across the stage.

Should the Air Ball come into contact with opponents, they are launched upwards, weakly or strongly depending on charge and the opponent's weight and damage, though really never enough to KO except at extreme percentages. So what's the deal with this attack then? Well, it puts the opponent, vulnerable, into the air which, if you've been paying attention even thus far, is Aang's forte as an airbender, first and foremost. As an extremely fast aerial character with big wind hitboxes, Aang has about a million ways to follow up on.


\\\\Standard Attacks////
Jab - Staff Helicoptor ////
Aang swings his staff forward, an initial hit dealing 4% damage. After the first hit, Aang begins spinning the staff, not only dealing multiple hits of 2% damage, but also has a suction hitbox, about as strong as Kirby's, which brings opponents into those multiple hits. Once the jab button is released or opponents are caught in the loop of the hits for over a second (yes, this is one of those "infinite" jabs"), Aang jumps up and swings the staff once more, shooting a gust of air, pushing opponents up and away, with knockback that could reasonably KO at around 140%.

Forward Tilt - Water Whip ////
Aang summons a long stream of water, and whips it forward, having an insanely long range for an F-Tilt, about the length of Zero Suit Samus' whip. It doesn't deal much in the way of damage, only around 7% damage, but dealing knockback in the same way that Mario's F.L.U.D.D, pushing them backwards quite a ways. Aang's long range wind hitboxes are a great way to follow up on this!

Down Tilt - Fire Sweep ////
Aang closes his eyes, sweeping his leg in a circle, hitting on both sides of him. This is more than the standard leg sweep, as Aang augments it with a bit of Firebending, which increases the range to a full BFP in either direction, as the fire is a sort of mini projectile, shooting along the ground, dealing 12% damage, though almost no knockback, in stark contrast to the general afflictions of his attacks. It's quite quick - Aang could probably knock a few of these off in the span of a few seconds, though it's somewhat easy to avoid and short ranged. It is, however, much like Aang's other Firebending attacks, one of the few attacks to deal any significant amount of damage.

Up Tilt - Earth Shelter ////
Aang ducks, bringing up two diagonal walls of Earth, surrounding himself with the element, making a tent-like structure. This structure is impenetrable, blocking attacks or opponents from getting inside. Aang can hold these walls around him for up to 2 seconds by holding the attack button, which, after either 2 seconds or when the button is released, Aang will launch them upwards, catching and knocking opponents above him upwards, breaking on impact, dealing 10% damage and knockback KOing at around 120%.

Dash Attack - Earth Surf ////
As he dashes, Aang stomps his feet into the ground, creating a wave of Earth he begins surfing on, traveling a Battlefield platforms worth of length forward. The attack drags opponents along forward, dealing minor hits of 2% damage, pushing opponents away with minor knockback at the very end of the attack.

\\\\Smash Attacks////
Forward Smash - Air Blast ////

Aang holds his hands to his side, doing his best to emulate the famous Kamehameha charging stance, by the looks of it. Upon release, Aang pushing his palms forward, like the above picture, and shoots a blast of powerful wind from his hands. The wind deals no damage, but a devastating amount of knockback, able to KO middleweight opponents at around 90% damage with no charge, bumping that down to 70% when fully charged. Aang has the ability to angle the gust of wind upwards and downwards, changing the direction of the knockback. The lag on this attack is overall very light, owing to Aang's proficiency in airbending, though, much like all of his other Air bending attacks, deals no damage. Damage dealing is a problem for Aang, which he will undoubtedly struggle with throughout the match. Fear not, though - Aang's mobility and aerial prowess may just be the thing to keep him in there long enough to come out on top!

Down Smash - Fire Blast ////
Aang places his hands together, breathing in, and summons all of his energy. Upon release, Aang forces his palm out, aiming it at the ground directly in front of him, causing a massive, Aang-sized ball of fire to erupt in front of him. The size of the fireball is always the same, but the charge of the move affects the intensity of the heat, dealing between 15 and 35% damage, depending on the charge. Either way, the attack doesn't have much in the way of ending lag, despite it's slow start-up: Aang can follow up with a variety of (probably air-based) attacks, since the move also doesn't deal any kind of heavy knockback, instead stunning opponents in the same way that a smart bomb holds opponents in for the short duration it stays on the field.

Up Smash - Geyser ////
Aang, charging the attack, moves his arms fluidly in circular motions, building the attack's energy. Upon release, he quickly brings both of his hands to the ground, then pushes his palms upwards, causing an absolutely massive Geyser of water to erupt around him, reaching from 1.5 to 3 SBUs straight upwards.It's not too terribly damaging, dealing only between 14 and 25% damage, but huge knockback straight upwards, KOing opponents at as low as 110% at the lowest charge. Airborne opponents are the most at risk for this, since it has almost zero horizontal range, but Aang is, of course, a master of the air.
\\\\Aerial Attacks////

Neutral Aerial - Air Expand ////
Aang curls up in a small ball, before throwing his arms and legs spread wide outwards, creating a short-lived and short-reaching burst of wind just in front of Aang that knocks opponents upwards diagonally, dealing no damage. It's an incredibly quick move though, one Aang would do very well to use out of a short hop or out of his glider.

Forward Aerial - Fire Kick ////
Aang does a 360 turn, bringing his leg around with him, kicking a blast of fire forward, dealing 13% damage and minor knockback, though not much. This is a bit laggy for an aerial attack, so using it multiple times is probably not viable, but Aang most definitely has the capability to follow up with his other attacks.

Up Aerial - Twister ////
Aang twists, twisting his staff even faster than he does his body, creating a small twister above himself, which he then launches upwards. The twister shoots upwards 2 SBUs, catching and dragging, then launching opponents upwards, dealing no damage but able to KO from just above the stage at 130%. The higher Aang can juggle his opponents, the more likely he is to KO with this move!

Down Aerial - Suction ////
Aang points his palms downwards, before pulling them up towards his body, creating a suction effect, pulling anything below him upwards. This is especially useful against stonewall heavy opponents hard to launch, as the suction is treated quite equally - the hitbox reaches about a Ganondorf height downwards, and is about as wide as the dark overlord as well. Aang can use this to get those opponents too stubborn to get up into the air with him willingly into his playground!

Back Aerial - Air Push ////
Aang tuns in the air, pushing his hands outwards, blasting air from his palms. Opponents behind Aang are pushed away, upwards and diagonally, a fair bit weaker than some of his other air-based attacks, thanks to Aang not having too great of a base out of the twist, though it still manages to deal enough knockback to KO opponents at as low as 120%.

\\\\Grab Game////
Grab - Rock Tomb ////
Aang stomps his foot on the ground, creating a small fissure just in front of him. Characters within a short distance in front of Aang are immediately snagged in a small mound of Earth, Aang holding them within. Aang's pummel involves Aang tightening the mound around them, dealing 2% damage per squeeze.

Forward Throw - Earth Launch ////
Aang thrusts his hand forward, launching his foe out the back of their stony prison. Opponents are launched upwards and diagonally, dealt 13% damage and knockback KOing at around 100%. Utilizing his Air Scooter and Glider, Aang can easily catch up to his launched foe, making following up on this attack easy, especially against opponents who are low on damage and can't quite yet be KO'd.

Back Throw - Sink ////
Aang sinks the opponents into the ground, pulling them down and around him under the ground. Once they're on the other side, he launches them upwards, dealing 14% damage and minor knockback, not powerful enough to KO until insanely high percents. On fallthrough platforms, Aang merely pushes the opponents downwards hard, dealing no knockback but stacking the damage up to 17% damage.

Up Throw - Eruption ////
Aang closes his eyes, taking a deep breath, and lifts his palm upwards, causing a large eruption of fire from underneath the opponents to launch them upwards. The knockback on this attack actually isn't amazing, only dealing enough knockback to KO opponents at around 145%, it's his most damaging non-smash attack by far, dealing opponents a comparatively large 23% damage, and putting them in perfect position for Aang to follow-up attack on.

Down Throw - Tornado ////
Aang circles his arms, manipulating the air around the foe in fluid motions. He creates a tornado around the foe, engulfing them and the rock tomb surrounding them, causing the chunks of rock and the opponent to be sent swirling violently for just a moment. The opponent is pummeled by these chunks of earth, being dealt 15% damage, and are left twisting on the ground, fazed and dizzy.

||||FINAL SMASH||||
Avatar State ////


Aang's eyes and arrow tattoos glow with power. Aang has unlocked the Avatar State! When the final smash is activated, we're treated to a short cutscene of the four elements making their way around Aang, ending in the awesome image you see there, Aang can then be fully controlled, controlling in a way that's very similar to a slower Supersonic, dealing 20% damage by just knocking into opponents, dealing high, heavy knockback. Aang stays in this state for 8 seconds, before he takes a breath, calming himself down, and exits the Avatar state.
 
Last edited:

ChaosKiwi

Smash Apprentice
Joined
Feb 1, 2014
Messages
104
NNID
ChaosKiwi
►KORRA◄


Korra is the Avatar, and you've gotta deal with it.

Born after the death of Avatar Aang, Korra is his successor. Hailing from the Southern Water Tribe, Korra is a fiery, strong willed bender, proving herself time and again to be a great Avatar. She had mastered three elements by age 17, and moved to Republic City to learn the final, air, from Aang's son Tenzin. There she made many friends and foes, while thwarting the likes of Amon, the man who could remove bending, or Vaatu, the anti-Avatar spirit.

In combat, Korra makes good use of her various mastered bending arts. Her favorite is firebending, though she's not shy to use the others if they suit the situation.

STATS
Size - 5
Weight - 5
Speed - 6
Jump - 7
Aerial Speed - 5
Falling Speed - 5


SPECIALS

►►Neutral- Air Punch

The Avatar reels back her fist, charging up what looks to be an absolutely devastating right straight. And when the input is pressed a second time, that's exactly what she does! She throws her punch, with contact dealing 12% to enemies, no matter how much it was charged.

What does the charge do, then? Well, I'm glad you asked. Once the punch is thrown, a long blast of air is sent from the end of Korra's arm, the size and range of which is dependent on the charge level. This acts as a very powerful pushbox, sending anybody unlucky enough to be caught by it on their way.

The maximum range is 4/5 the length of Battlefield, and charge can be stored by rolling out of it.

►►Side- Water Whip
Korra puts her arms in a sort of Hadoken charging position, as an orb of water swirls between her palms. After this short startup animation, Korra whips one arm forward, causing the water to change into a stream, flying forward through the air in the direction Korra's facing.

The stream, upon contact with an enemy, they will be caught in her stream. From here, there are three things you can do:​
  • If the player presses up, she'll whip them into the air, and they'll take 8% from the whiplash.​
  • If the player pressed the attack button again or forward, a ripple will shoot through the stream, firing the opponent forward and dealing 9% to them.​
  • If the player presses down, the water will flip the foe over, knocking them prone and dealing 7%.​
►►Up- Fire Jet
Korra crouches, and flames start to erupt from the soles of her feet. The force of the flame is enough to make her achieve lift, letting Korra fly around for the duration of the special.

The special acts similarly to R.O.B.'s, letting her fly when the input is held, and fall when the input is released. This move doesn't put her into a helpless state, either, allowing her to attack in the air after using it. There is a set amount of time Korra can fly before running out of bending energy or whatever, and said energy will not recharge until she's been grounded for 2 seconds.

►►Down- Earth Launch
Korra stomps, putting her arms at her side, causing a small section of the ground in front of her to jut upwards quickly, about half a stage builder block in length. If an enemy should be caught by this, they take 8%, and are launched upwards at a 90 degree angle, cancelling any momentum they may have had in the process. This move, despite it's limited range, is excellent for KOing enemies. That is to say, it KOs at 90%!


STANDARDS

►►Jab- Korra Kombo
This move, as the name suggests, is a combo, similar to, say, Ike. The first move is a straight punch, dealing 3%. The second is a downward punch, dealing 4%, and the third and final hit is a two handed punch, where Korra bends small flames out of her fists, dealing 6% and high knockback. Though, the third hit is slow enough that it's harder to land.

►►Side Tilt- Korra Kick
A strong high turning kick, where Korra strikes the heads of her foes! Which is to say, shorter or crouching foes are usually safe. During the wind up for the kick, Korra bends a wreath of flames around her foot, causing this attack to deal fire damage. The attack does 10%, and has abnormally high priority for a tilt move.

►►Up Tilt- Flaretwist
Korra quickly contorts into to a one handed handstand, flinging a blast of fire out of her leg before flipping back into place. The flame ball travels slightly up, acting like a pushbox and a hurtbox, lifting foes into the air above and dealing them 7%. It's good for juggling, and is rather quick despite the somewhat complex animation it has.

►►Down Tilt- Sweep
Korra gets down, and performs a sweeping kick. Seems normal, all things considered, dealing 9% to enemies who get hit by it.

Though she does Korrafy it, you see. At the most outward stretched point in the kick, she sends a small blast of air from her foot, which travels a short distance before dissipating. This air, though not dealing damage and having a very short-term hitbox, is quite useful, as it trips opponents!

►►Dash Attack- Air Wheel
Korra faces the camera, and sticks one arm out behind her and one out in front of her. In an instant, she airbends a wheel around herself, momentarily increasing her speed and plowing through any enemies she hits, dealing 12% and launching upwards.


SMASHES

►►Side Smash- Fire Blast
Korra punches forward with great force, ejecting a fat stream of flame from her fist. It lasts an instant, before disappearing in a puff. The initial punch, should it make contact, deals 8% at all charges, while the fire blast itself, at full charge, deals 20%! What a swell move! However, the knockback of the move isn't so hot. Hehe. Puns.

►►Down Smash- Tidal Kick
Korra does a totally sickass axe kick, her leg acting as a hitbox during the arc, dealing 22% at full charge. Upon contact with the ground, the kick deals 24% and creating a small wave of water, which travels two stage builder blocks and trips up foes, even travelling off of platforms. Should it do so, the airborne wave acts like a pushbox, pushing enemies caught in it down and hampering their recovery.

►►Up Smash- Twister
Korra moves her arms in a circle, quickly creating a tall tornado in front of her, the height of which depends on the charge, with a fully charged Twister reaching twice Korra's height. This actually does remarkable little damage for a smash, only dealing 5%. However, it has great knockback, sending foes directly upward and KOing at 96% at full charge


AERIALS

►►Neutral Aerial- Air Bubble
Korra sticks out her arms, quickly airbending a bubble of, well, air around her body, pushing out from her core to slightly past the tip of her fingers before disappearing. This deals 2%. Kind of a weak move, don't ya think?

You would think that, wouldn't you? But no, the real kick of this move is the knockback. Despite the fact that it has short range and low low low damage, it has absurd knockback for a move in the Neutral Air slot, able to KO people at 100%!

►►Down Aerial- Fire Thrust
Korra does the ever popular Down Aerial maneuver: Thrusting her legs straight downward with great force, in what I like to call a spike-kick. But she adds a little flare (spelling intentional) to it, blasting out a puff of flame from each heel as she does. This, as you may have guessed, acts as a spike, dealing 12% in addition to said spike.

The fire, however, seems to be merely aesthetic.

►►Up Aerial- Bicycle Flame
It's time for everyone's favorite up aerial attack: a bicycle kick! But, as the Avatar, Korra's able to spice it up a little, with firebending! As her kick travels through the air, the path it takes is followed by a stream of flame at the foot! The side of the kick that doesn't have any fire on it deals 10% and knocks foes behind Korra, while the stream of flame, which linges

►►Back Aerial- Drillkick
Korra horizontally rights herself, so that her legs stick out behind her. Making use of airbending, she bends the air around her into a vortex, causing her to spin at high speeds- Like a drill, in fact. The hit box for this move is larger than you'd think it is, extending past her feet into the air beyond, dealing 14% to anybody it hits.

This move is a good followup to the Bicycle Flame, as that move knocks enemies directly into the path of this one.

►►Forward Aerial- Dropkick
Korra, similar to the move above, turns to be horizontally straight. This time, however, she kicks, instead of turning into some sort of cool, human drill thing. This move, all in all, seems fairly straightforward, dealing 9% to enemies who get hit by it.

However, it is not as it seems. There is a sweet spot. At the point of full leg extension, should a foe be hit, they will take 10% instead of the usual 9%. Something of a negligible damage increase, I suppose. But that's because the damage isn't what makes the sweetspot so sweet. Upon sweetspotting an enemy, Korra bends a blast of air out of the heels of her feet, blasting her opponent away at high speeds and KOing at 60%!


GRAB GAME

►►Grab- Grab!
As the name of this grab suggests, Korra's grab is exactly that: A simple, no nonsense, no flair grab with her hand. Instead of holding on to them afterwards, however, she traps their feet by bending the earth below them. Neat trick!

►►Pummel- Gut Punch
A series of boxer-esque jabs, similar to her pro bending matches. However, unlike those matches she uses fire, covering her fists in it to deal 4% per hit.

►►Up Throw- Tornado
Korra starts bending with all her might, whipping up a twister directly around her enemy! This lifts them into the air, and she follows them, carried by her own personal vortex. Once they're three SBB's up, Korra does an aerial spin kick, blasting her enemy in the opposite direction with 12% and radical knockback, but not as much as, say, her forward throw.

►►Down Throw- Fire... Throw
After grabbing her foe by the collar/neck/other applicable area between face and torso, and slams them backfirst in to the ground, setting them prone. After doing so, she stomps on them, before breathing a stream of flame straight into their face or what have you. This, as said, leaves the foe prone once that fire-breathing nonsense is done, and overall deals a total of 12%.

►►Forward Throw- Jettison
Korra stomps, and punches her foe at the same time. The punch deals 1%, and pushes them into the right spot. Right for what, you ask? Well, that stomp causes a section of the Earth, the height of it varying based on the enemy's height, to shoot up under her newly moved foe, blasting them into the air diagonally and dealing 9%!

►►Back Throw- Carousal
Korra bends the Earth under her to quickly carry her to the other side of the enemy, setting her up to blast them away with a quick shot of Airbending powers! That is to say, she blasts them in the back with a powerful gust, causing them to tumble in a direction she decides with a quick angling of the stick as she's positioning herself. It only does 3%, but it has the most knockback of any of her throws, which along with its various possible directions make it very useful.​


FINAL SMASH
AVATAR STATE


Korra's eyes start to glow, and whatever element she's currently in (Earth when grounded, air when airborne, water when swimming) surges out of her in a ring. From this point until 15 seconds from the activation, she's in the Avatar State.

In this form, every one of her specials is powered up to new levels, and all of her bending based attacks deal extra damage as well.

The changes to her specials are:​
  • Her Fire Jet turns from R.O.B. like flight into free flight, allowing her to zoom around at high speeds.
  • Her Air Punch is always fully charged.
  • The Earth Launch has extended range, reaching across whole platforms.
  • The Water Whip now has extended range, and the three different outcomes are powered up: The two that do knockback now KO at 30%, and the one that put foes prone now pitfalls.
 
Last edited:

dimensionsword64

Smash Champion
Joined
Jan 23, 2014
Messages
2,495
3DS FC
3609-1605-6649
[collapse=Zant]It's been too long since we had a set, and you just saved the thread from an ongoing drought by keeping your word about the Zant set you said you were going to post. It’s certainly not a bad start, but could use some tweaks, one being that it’s hard to read font that’s completely purple (just making the headers and attack names purple would be alright). And while not glaringly problematic, the numbers can be a bit too high on the Specials, namely spinning for 3 seconds on the Up Special and stunning the foe for one second with the Side Special. The latter isn’t so bad given the move needs to recharge over time however, especially if it has some end lag. I could see Zant getting a few frames advantage over his opponent at the very least, and maybe it would even be rewarding if you hit the opponent up-close.

I like how the moves are nice and easy to understand, not too bogged down in detail, and that you take advantage of the character’s magic potential even after the Specials. I especially like the F-Smash in that it can vary from being a comically bad attack or something devastating if you commit to the charge. I’m a bit mixed on the size-shifting gimmick being used on the other Smashes, though, in that I like the consistency they all have, but at the same time it takes away from the uniqueness initially presented in the F-Smash and makes Zant seem very tanky. I’m also iffy on Zant using his masks for most of his aerials as opposed to spicing things up a bit with his scimitars in a crazy way, which would feel better for the character. Aerials are typically more offensive than ground attacks given you can move around while using them.

There’s a pretty good sense of playstyle here that’s vaguely fitting for Zant, in that he can mix things up by fighting mid-range with his aerial masks or fight up-close with his standards attacks, even knocking enemies away hard by size-shifting. Zant did do just about everything in his boss fight, yes, so it makes sense that you’d want to fit it all into a set, though there might be a bit too much mask and hand reliance and not enough scimitar attacks. Still, I can imagine myself using the Neutral Special to pull enemies in and then charge up a F-Smash to crush enemies up-close, or wall them off via F-tilt and then go through it with the F-Smash and crush them, so it’s a good bit of fun. It is a neat start, for sure. [/collapse]
Thanks! Yeah, I guess I did use the mask and hands too much, and didn't use enough of Zant's crazy scimitars. Also, I like the idea of Zant's forward Smash being the only one that grows, thus making it very unique compared to some of his other moves. I'll definitely change the purple text, too. What are your thoughts on the down b? Do you think it's reasonable, or unbalanced and gimmicky? Also, after I've made some edits, do I make a post saying I've updated it, or just leave it?
 

Katapultar

Smash Lord
Joined
Nov 24, 2008
Messages
1,251
Location
Australia
I never gave much thought to the Down Special, because I felt it was perfectly fine yet wasn't that significant since you have the NSpec for pulling foes towards you and a F-tilt that functions like a wall anyway. Also that it disappeared upon use.

You can make a post to alert others of edits if you like, because that's the main way you'll get their attention.
 

Lenus Altair

Smash Ace
Joined
Mar 7, 2008
Messages
518
I've been meaning to get around to this for quite some time, and while it's probably too late, I'll do it anyway.

Attacks that can only be used a certain number of times per stock aren't really well-received in MYM, but I think it could work with the right balance. It's not just giving the attack a high damage and knockback output however, but also taking lag and the attack's duration into account. For something that can only be used 4 times per stock, you will want to make sure each hit has impact, even if the opponents blocks it. My idea would be for the attack to have minimal lag and a long duration that just barely beats out opponents who try rolling or sidestepping, with said duration also helping you catch opponents in midair. Not to mention there's good shield damage that you can capitalize on for your melee, even if the opponents perfect shields. If the attack was just a straight-up one-hit, no matter its power, the opponent could easily shield or dodge to make you waste all your ammo, but a longer duration gives them something more to fear and a better chance for you to land that blow. Having that limitation actually feels fitting for a Shonen protagonist and I would like to see how you handle it and try to complete the set.
You'll see that I did address the limitations of Yusuke's Spirit Gun in a couple ways with the rest of his moveset, though not really in the ways you mentioned. However, I think the implementation will prove interesting and make Yusuke a more dynamic character then augmenting his Spirit gun to be a catch all of positive scenarios on an opponent's defenses. You'll just have to wait and see to tell me if you agree ;).
 

Katapultar

Smash Lord
Joined
Nov 24, 2008
Messages
1,251
Location
Australia
You'll see that I did address the limitations of Yusuke's Spirit Gun in a couple ways with the rest of his moveset, though not really in the ways you mentioned. However, I think the implementation will prove interesting and make Yusuke a more dynamic character then augmenting his Spirit gun to be a catch all of positive scenarios on an opponent's defenses. You'll just have to wait and see to tell me if you agree ;).
Interesting. In any case, I'm glad you're still working on the set and look forward to seeing it!
 

FrozenRoy

Smash Lord
Joined
Apr 26, 2007
Messages
1,260
Location
Las Vegas, Nevada
Switch FC
SW-1325-2408-7513
Traxex

The Drow Ranger

Traxex the Drow Ranger is another character hailing from the game DoTA2. A hard carry, designed to be potent late in the game, her Markmanship passive ultimate gives her increased Agility, and thus damage as an Agility-based hero, but only works when she is far enough away from any opponents, necessitating a long ranged approach. Her Frost Arrows slow enemies on hit, helping to facilitate this long range approach, alongside her Gust ability that allows her to blow away nearby enemies and briefly silence them to, say, remove invisibility. Finally, Precision Aura allows her to grant bonus damage to other ranged allies.

Statistics

Befitting a character who wants to stay far from their opponent, Traxex has a fast movement speed, specifically it is on par with Marth. While she is between the sizes of Marth and Samus, she is fairly lightweight and thus roughly weighs as much as Falco. Good traction.

Traxex is a fairly floaty character with solid aerial control and speed, making her a solid aerial combatant, with a strong first jump and an above average second jump. That's about it to say on Brawl stuff.


Passive Ability: Marksmanship


Fittingly for her ultimate, Traxex has a passive Marksmanship mechanic, the basis of which is very simple: The further you are from the opponent, the better you get. If the opponent is within a Battlefield Platform of you, you don't get any bonuses at all and Marksmanship is "off": Given that Traxex is also a poor melee range fighter, keeping up close is the optimal strategy to deal with her, and naturally she wants to get you away from her. At more than one Battlefield Platform of range but less than 2.1 Battlefield Platforms of range (.1 to make it an even BFP of distance between both), Drow Ranger gains some bonuses at Marksmanship 1: Her ground speed increases to Sheik's, her attacks deal 1.5x damage and 1.25x knockback, faster dodges and sidestepping (though with the same # of invincibility frames) and other, move-by-move bonuses. If you must camp Traxex, you generally want to stay in this range.

Being any further than that gives the Drow Ranger even greater increases with Marksmanship 2: She now moves faster than Captain Falcon, though significantly slower than Sonic, her attacks deal 2x damage and 1.5x knockback, her dodges and sidesteps become even faster and thus make camping Traxex a real pain as she can easily dodge projectiles, and further move-by-move bonuses. With this max bonus, Traxex becomes very dangerous indeed.

As a clarifying note, the bonuses are considered for when the attack is released, not when the attack hits: For example, if you shoot an arrow with Marksmanship 2, then the opponent somehow moves close to you and then the attack hits, you still get the 2x damage bonus. Likewise, if you use an attack at close range and then roll into Marksmanship 1 range, your attack won't get any stronger. So you can't "cheat" by moving in close and just weaving out before your attacks hit, but your opponent also can't cancel your attacks extra power post-launching by just moving closer.


Specials

Neutral Special: Frost Arrows


Traxex puts an arrow into her bow and pulls back, the tip glowing a chilling blue as she does so, before firing it off. This shot can be aimed in any of the 8 directions and is pretty fast to shoot out, so it is generally great to hit people with, and the projectile similiarly goes fast as it travels its 3 Battlefield Platforms of distance. This arrow deals a mere 5% and weak knockback, but also applies a frost effect on the foe, which slows down their movement speed by an effective 10%, going to 9% added on the next use etc: At max, which is 7 stacks of frost, the opponent's movement speed is cut by half. Air speed is similiarly cut in this way, though falling speed is not affected. Each Frost Arrow also resets the duration of this frost effect, which lasts 7 seconds, even if you are at max stacks.

While quick to start and fly through the air, this move does have some noticable but not horrendous ending lag, so you don't want to spam this too much. Obviously, frosting the opponent up will make it more difficult for them to follow you and thus allow you to better get and keep your Marksmanship bonuses, but the Drow Ranger also has some ways to interact with the frost effect on the foe. A very important move.


Side Special: Gust


Traxex pulls a free arm back as icy winds gather around it, before jutting an open palm forward and releasing the cold gale in front of her, which travels 2.5 Battlefield Platforms as moderately sized projectile that deals a mere 5% damage, but the wind blows opponents well enough, exactly one Battlefield Platform of set knockback. This move forms one of Traxex's stronger spacing tools, due to travelling somewhat slowly and thus making it rather a pain to avoid, plus the fact it will hit foes just far enough to get from one Marksmanship range to the next. This move has pretty average lag on both ends.

When used in the air, Traxex will fire this projectile at a down and forwards angle, in addition to popping up and back while doing so: the ending lag of this move means she still loses vertical height, but it can be used sort of like Dancing Blade to gain horizontal distance, making it a bit of a recovery tool, though you must remember to aim it behind you for that. It also has impressive momentum cancelling abilities when aimed in the opposite direction of the knockback Traxex is taking, so it has some surprising survival functions.

In addition to the normal hitbox properties, Gust will leave behind some swirling wind around the foe, which doesn't do anything as per normal: However, when the opponent shields, it will stalwardly push them back at decent speeds, making it another way to force enemies back from Traxex, though she must be careful of enemies using this ability to avoid her attacks as well since it allows them to move and shield at the same time. It takes a moment for this effect to turn on, so an opponent can put their shield up and then almost immediately drop it to avoid this effect, ergo to shield the opponent must be very precise. If the opponent has been frosted, this will also deal shield damage, though it will not deal shieldstun: The damage is relatively minor at low levels of frost, but this can eat shields very quickly at higher levels. Gust's "silence" properties last 8 seconds, plus another 3 seconds for each level of Marksmanship Traxex had, and cannot be refreshed or stacked until it ends.


Down Special: Precision Aura


Traxex takes her next arrow and enchants it with a swirling aura of chilly wind, a process that does take a noticable moment to do, and you're pretty vulnerable since this move has no hitbox while you do so. After using this move, the next arrow you shoot (Other projectiles are not affected!) will be pushed along by the power of the wind, guiding itself to its target. That arrow will home in on the foe nearest to it when released, better than Samus' Homing Missiles but not amazingly so. The arrow will slow down a little when adjusting its path to follow the foe, so it isn't all good, but this certainly makes it more difficult to escape in general!

At Marksmanship 1, this not only has the aforementioned effects but will also increase the duration of your arrows by 1.25x, which will in turn increase their distance and such, and at Marksmanship 2 not only is that increased to 1.5x but an additional effect is added on top of that: Every 5th arrow Traxex shoots out will have this buff applied automatically, without needing to use the move! The game "remembers" the count even if you go out of Marksmanship 2 before hitting the 5th arrow, so it is not reset when you leave Marksmanship 2 (IE if you shot 4 arrows, leave Marksmanship 2, then enter it again, your next arrow will have Precision Aura auto-applied). Very nice!

Something to keep in mind is you don't always want your arrows to track the foe: You can't, for example, cut off an opponent's running lanes nearly as effectively when all your arrows want to go right at the foe. You want to properly mix tracking and non-tracking arrows in to make it more difficult for the foe to get in close or escape your projectiles, especially when working in the free use of this from max range.


Up Special: Wind Carry

Traxex's cape and hood billow as the Drow Ranger is surrounded by wind, which carries her for up to the time of R.O.B.'s USpec in whatever direction she goes in as long as she holds down B. There is no damaging hitbox attached to this fairly good recovery, but there is a strong wind hitbox centered around Traxex's body that pushes foes a good distance away from her. Arrows are also carried in the direction Traxex travels, allowing her to suddenly change the trajectory of an arrow by hopping in and out of this for a brief moment, or to carry it forward much faster by simply following its path. The starting lag on this is okay, but the ending lag is slightly bad, so be careful not to be smacked when you stop fluttering about.

Traxex may enter and exit this as much as she wants, for as long as she has time left anyway, and will not enter helpless until she runs out of windtime, she will not recharge until she hits the ground and whatnot just like R.O.B., though she recharges at 1.5x speed during Marksmanship 1 and 2x during Marksmanship 2, so retreating can help you survive in multiple ways! And is also helpful for if you want to frequently windrush your projectiles around.


Standards

Jab: Bow Bash

Traxex leans back and swings her bow forward, overhead, dealing 5% damage and knockback that is fairly strong for a jab, but the damage is weak and while it is quick, being a jab and all, but for a jab itself it really isn't that quick, making it rather poor for damaging: Its primary use is to be a still-quick way to knock opponents away from you in melee range when you don't have many other options.

Forward Tilt: Ranger Shot

Traxex pulls her bow back and fires an arrow from it: The most base of projectile attacks, it moves quite quickly and has long range, about 3.5 Battlefield Platforms, while dealing 10% damage, though the knockback is rather pathetic so it will not KO until 230% or so. The move is also quick on both ends, though not lightning so and it is laggier on the starting end, so it is a solid move to throw out and will be your most standard projectile. It can be aimed up or down during the starting lag: Aiming up fires it at a good angle for hitting shorthoppers and can hit people from under platforms if at the correct distance, while aiming down allows you to shoot from the top of platforms down or off the side of ledges to edgeguard recovering opponents. Not a special move, but one you will use a lot.

Up Tilt: Iceplosion

Traxex aims her bow upwards as the arrow's tip glows a bright blue, then launches it upwards, where it explodes into a shower of quickly-dissapating cool mist after about 3/4ths of a Ganondorf of travel time. The initial firing and travel of the arrow deals 12% and has decent upwards knockback, though it scales poorly and only KOs at 200%, while the icy explosion's damage depends on how close they are to the middle: At the very edge of the fairly large ranged icy mist, about 1/3rd of a Smart Bomb but a bit larger, it is a mere 5% damage and weak knockback with little hitstun. The very middle is a small sweetspot that deals a large 18% damage and KOs very early for a tilt, around 135% while freezing the foe (Though not for very long: You'll basically never get an extra attack off and thus it is almost aesthetic. Perhaps if you had a partner?), though the distance of the explosion from you means barring some kind of exceptional circumstance (Someone teleporting you really far away while the arrow is in the air but before it explodes or something) you can't get the Marksmanship bonus on this.

While normally you cannot hit a foe from the arrow into the explosion, there's certain damage ranges most any character can be hit by this combo with, though it varies quite wildly depending on weight and fall speed and there would be far too many variations that don't matter much to list here: In general, the ranges are not long and thus Traxex should have good awareness of when she can pull it off, since it can be a devastating hit and all (30% damage!). Likewise, enemies will want to be careful during these damage percentages, best done by keeping their distance...which is a catch-22 of sorts, as the Drow Ranger loves being at range.

Of course, you can also just use this as a pretty solid anti-air attack and thus a nice way to keep people from trying to close the distance via platforms. This move can be angled a bit left or right by tilting the control stick, but the amount of difference this makes is much smaller than the F-tilt. Starting lag is about average, ending lag is a bit longer than normal.


Down Tilt: Billow

Traxex juts her palm out diagonally down in front of her, releasing a cold burst of air in front of her feet, which blows away enemies for 10% damage and fairly strong knockback, KOing at 170% or so but having a good base knockback. The force of the wind also pushes Traxex back about half a Battlefield Platform, so it can make for an escape and attack all in one and can gain a lot of space when you get the foe into it! The starting lag is pretty long, though, so it isn't something you can throw out: You'll want to plan out how to use it when the opponent is looking like they'll be able to approach you. The ending lag is also slightly above average, though Traxex will slip off platforms and thus you can "cancel" the lag by pushing yourself off the side of a platform or ledge: Doing that and then hopping back onto the stage while shooting something like an NSpec arrow can be a very solid way to pressure and gain space at the same time!

Dash Attack: Agile Shot

Traxex runs forward, albeit at a somewhat slower pace than normal, with her arrow prepared and ready to fire, continuing to do this until you release the A button and thus fire it. This one deals 12% damage and KOs at 200%, but the addition of the running means that it actually gains power (and velocity) from higher speeds, so starting this with Marksmanship 1 does 15% and KOs at 170% and Marksmanship 2 does 18% and KOs at 140%: In addition, the arrow only flies at a moderate speed normally, but it is somewhat faster at Marksmanship 1 and substantially faster at Marksmanship 2! As mentioned in the mechanic, all that matters is where you started, so you can get close and fire this arrow, which travels 2.25 Battlefield Platforms. Starting lag is quick, ending lag is average.

Traxex has an additional maneuver on this move, performed by hitting the shield button and then, if desired, a direction: You may release A during this time, but unless you want to fire right after performing this modified roll, which goes a bit shorter than a normal roll but has more invincibility frames and will always end with Traxex facing the direction she was running, crouching on one knee and arrow primed. Unless you hold (or go back to holding) the A button after this, Traxex will instantly fire her arrow forwards, though you CAN use the control stick to fire in any of 8 directions. Because she is not moving, these arrows do not get the Marksmanship damage bonus her normal Dash Attack arrows do, but instead she can tap A to fire another arrow instantly after for each Marksmanship level she had at the start of this move.

The first arrow can be held for a brief moment, just enough to maybe catch a dodger, but subsequent arrows cannot be held, which also means you must be very fast aiming if you do not want all the arrows to fire along the same path, which by default the subsequent arrows will follow the first one's path. Finally, the ending lag is substantially higher with the roll version, as Traxex must get to her feet and get back into position and such, making it a rather laggy maneuver, though the starting lag isn't too much higher.


Smashes

Forward Smash: Ice Cold

A chilly light blue coats the tip of Traxex's arrow as she pulls it back further than normal, firing it forward for 18%-24% damage that KOs at 135%-110%. This move is about average lag-wise on both ends for a smash and goes 2 Battlefield Platforms in distance by default, though it gains 1/4th of a Battlefield Platform in distance for each level of Marksmanship. This move can be aimed up or down, as you may have expected, with down causing the arrow to be shot basically right down in front of Traxex (or off a platform), while up will cause it to travel in an arcing pattern that goes further but won't hit straight ahead of you except close to you or when it comes down near the end. No matter how it is fired, it will embed itself into the ground if it doesn't go offstage or something or will embed itself into a wall if it hits the wall.

After one second, embedded arrows will explode in an icy blast for half the damage and knockback they would normally do! The short time means it isn't really much of a trap or bomb, but more like a small delayed hitbox: Something to briefly control space in between your other projectiles and to make approaching a bit more cautious, a bit more deadly, and so you definitely want to mix this in with your other projectiles as it is good at breaking approaches.


Up Smash: Arrow Hail

Traxex aims her bow upwards and fires an arrow up into the air above her, which travels 1.5-3.0 Ganondorfs depending on charge before coming back down, dealing 19%-25% damage with knockback that KOs at 140%-120%. This move has slightly above average starting lag and about average ending lag and this move can be angled left or right, which sends it significantly towards that direction and makes it more of a diagonal shot, though it will lose some upwards height due to this. Still, significant horizontal distance when you consider the arrow comes down too.

For each level of Marksmanship you have, an extra arrow made of wind and icy is added to this move, appearing next to the fired arrow: Marksmanship 1 will have the arrow appear in the direction in front of Drow Ranger, Marksmanship 2 makes it appear behind. When shot straight up, these extra arrows will fall to the sides of Traxex a bit in the direction they were made, while as usual the primary arrow falls straight down. When angled, however, the new arrows take on different paths and trajectories that are close to the original, but different: The one in the direction you face will be "under" the normal arrow, causing to take a more shallow arc that ends earlier, while the one further you is "above" the normal arrow, causing it to take a higher and longer path, each arrow falling roughly 3/4ths of a Battlefield Platform from each other: This is a killer tool to use on people approaching, as while it has obvious blindspots they are fairly predictable AND if you have that many arrows it can help stop people in their tracks as they have to avoid the falling arrow in front of them. The extra arrows deal half damage and knockback.


Down Smash: Crystal Shatter

Traxex pushes her palm to the ground and causes icy wind to bluster all around her, dealing 16%-22% damage with strong launching power for Traxex, KOing at 120%-95% with a high base, with a nice disjointed hitbox around her, though it doesn't have especially noteworthy range. The starting lag on this move is fairly quick, but the ending lag is quite long, so it is a very punishable move.

Smashing an opponent with this move has additional effects if they've been frosted over, though, as the ice will shatter and fall to the ground as a trap: The base of the trap is that it lasts for 3 seconds, deals 4% damage and light upward knockback and has a small hitbox, but each additional level of Frost makes it last for another 1.25 seconds, deal 2% more damage and increase the size of the hitbox, with max size being about the size of Mario. This removes the speed debuff and all and thus makes it harder to camp, especially if the foe was at high frost, but this simple trap opens a lot of options given the various ways Drow Ranger can control the battlefield and the fact the knockback doesn't really grow on it even with more frost means that there's a certain amount of consistancy in how you can play off the foe being hit off it: Finally, the fact the knockback is light means the opponent will need to react with decent speed in some way if they get struck, or else they'll just fall on it again, though it will never do this if the opponent does something as simple as jumping away: Try reading what they'll do and firing off your projectiles!


Grab Game

Grab: Drow Grab

Traxex reaches out and grabs the foe with a single hand, a fairly quick but somewhat shortranged grab, not much to say on it. Traxex's grab and throws serve as one of her primary melee options

Pummel: Arrow Stab

Traxex takes an arrow and stabs it into the foe's gut for 2% damage, with about the speed you'd expect for a 2% pummel. Not much to say: Try to get in pummel damage when you can and whatnot.

Forward Throw: Shatter

Traxex takes her bow and fills it with multiple arrows, which she fires directly into the foes gut, causing the arrows themselves and any ice on the foe to shatter as the foe is sent flying. This initially only deals 4% damage and fairly light knockback with just the arrows, but it gains 2% damage and significant knockback for each level of frost on the foe, at max dealing 18% damage to the foe while KOing at 90%, which is rather absurd on a THROW...but then again, you need the foe frosted up to max for that, and then you need to grab them when you're a character who pretty much always wants to be at range. Still, it is Traxex's strongest KO options, so if the foe is frosty this can itself serve as somewhat of a deterrent to the foe closing in if they're in KO range, which is just as well for Traxex. So in a way, no matter what, she wins.

Up Throw: Sky Toss

Traxex uses all of her might and lifts the foe into the air, tossing them pretty high up and dealing 11% damage, while KOing at 150%: Not nearly as potent as a full Shatter, but still an okay KO throw, and unlike Shatter it has no conditions attached to it. The fact it throws the foe straight-up can set the opponent up for a sweetspotted Up Tilt at some %s, though proper DI as they go on can sometimes dodge the sweetspot and at most %s the opponent will either go out of range or recover too quickly to have this happen, the fact it goes straight up means it can mesh with a pre-fired Arrow Hail though.

Down Throw: Foe Bounce

Traxex takes the foe and throws them against the stage, bouncing them off it for weak upwards knockback, but dealing 13% damage: At low percentages it true combos into the first hit of Up Tilt, though not the sweetspot, and at high damage %s it can lead into an a sweetspotted Up Tilt, but just like Mr. Game & Watch's Down Throw the slam against the stage can be teched, resulting in only taking the damage: This is important if you're late in the game, as otherwise Traxex might be able to just sweetspot the Up Tilt into you from this for big damage and a possible KO.

Back Throw: Enemy Arrow

The Drow Ranger takes the foe and ensnares them into her bow, quickly thrusting it back and sending the foe behind her for 14% damage and strong base knockback, though the knockback growth is pretty much non-existant: This is a pure way to get enemies out of your hair and deal good damage and it doesn't even turn Traxex around, meaning she doesn't have to turn around to run from the foe and get into camping position!

Aerials

Neutral Aerial: Omni-Arrow

Traxex pulls her arrow back and fires it, by default, forward: It's swift moving, deals 9% damage and little knockback and travels 1.5 Battlefield Platforms, but you can press the control stick in any of 8 directions to fire it in that direction and hold down A to delay the shot for a fair amount of time. Traxex will even gracefully land on one knee on the ground if she is holding her shot with this and continue to hold it on the ground, thus allowing it to serve as a very seamlessly air/ground transitioner. Starting and ending lag on this move are both quick, though it becomes noticably longer on the ending part when you go from the air to the ground.

This move also gains noticable range for each level of Marksmanship on Drow Ranger, specifically one Battlefield Platform per level: The arrows knockback follows the direction it was fired, so this can serve as a solid offstage tool or gimping tool, especially since a foe offstage will be far from you: Sometimes you might want to fire a few more straight-away arrows to take advantage of this, then more down and diagonally down arrows as they get close to make a hail of hard to avoid arrows and hinder their efforts to return to the stage!


Up Aerial: Arrow Drop

Traxex aims up and shoots an arrow shortly above her, which then falls below her as a hitbox as well, providing excellent vertical coverage: The arrow itself deals 6% and a light poke upwards, while coming down it deals 8% and a slightly stronger but still weak spike. The arrow only travels about half a Ganondorf up, but then travels a full Ganondorf down, so it ends up half a Ganondorf above and below her original location overall. Since the arrow rises and then falls, though, Traxex will always be "under" it, and in general thise rise and fall makes it difficult to air dodge through, since you might air dodge into it just hitting you from below rather than above.

If Traxex is far enough from the foe for Marksmanship to be on, then wind will hold up the arrow for a brief time: 3 seconds for Marksmanship 1, 6 seconds for Marksmanship 2. The arrow will then drop as normal, but it retains its upwards hitbox while suspended in midair, allowing Traxex to place weak midair traps, which is useful since Marksmanship only looks at width and not height from the foe and all. And the fact they come down eventually is pretty nice in that regard, too.


Forward Aerial: Bow Slam

Traxex takes her bow and sweeps it in front of her quickly, something quick to start up that deals 12% damage and has decent, but not great, knockback, with growth rates that give KOs at 160%. While quick to come out, ending lag is long, though you can still complete it in one shorthop, giving Traxex a decent shorthop option and way to protect herself, though it isn't good for much more than that, making it a sort of niche toolbox option.

Down Aerial: Wind Spike

Traxex pushes her palm down and releases a strong blast of air below her that pops her up like ROB's DAir, dealing 10% damage but strong spiking knockback: Not only a nice overstage spiker, but on the ground it can launch people into the air nicely, especially since you pop up, though like ROB's DAir you don't gain enough height to really gain height or recover or anything. Starting lag is kinda long on this one, but the ending lag isn't too bad, so that is nice.

Back Aerial: Strong Strike

Traxex takes her bow and stabs it behind her strongly, a quite slow move but one of her KO options: 15% damage and KOs at 105%. While a solid unconditional KO option, it is very slow on both ends, so Traxex doesn't want to use it much, especially since it is a close ranged option: The hitbox does linger for a long time, though, which can be pretty useful.

Final Smash: Ice Sculpture

Traxex pulls her bow back and then fires an arrow that glows fully with icy energy and leaves a thin trail of mist behind it, slower to start up and a bit slower in its path than the Light Arrow and thus easier to dodge: However, like the Light Arrow, it is a OHKO as the enemy is frozen solid in one clean hit, then proceeding to respawn. Their previous, frozen body remains on the field for quite a while, and can be blown around by the wind like a heavy projectile and thrown around like a heavy projectile item and thus be quite damaging. Just like the Light Arrow, this can pierce many foes: Destroy them all and then bash them with their frozen corpses!

Playstyle: Cold as Ice
 
Last edited:

FrozenRoy

Smash Lord
Joined
Apr 26, 2007
Messages
1,260
Location
Las Vegas, Nevada
Switch FC
SW-1325-2408-7513
Bellatrix Rabbit

Hey, I should finally try and comment something! With 50+ stuff not commented, I probably won't get 'em all, and for now I'm just gonna do random sets to get into the flow again...

Bellatrix's base concepts are somewhat straightforward or basic, but they work well as a nice base for the set: Bellatrix and her signature Killing Curse ability can get kills early, but the Killing Curse is easily stopped by things such as shields, and ergo Bellatrix also has a focus on shield damage, including a pretty neat pummel. While not a concept that will carry an entire set, it is fairly sharp and good concept that can be played with. And the set does it...okay. The travelling counter idea I had in Weiss makes a return here and seems adequate and the wall Bellatrix can put up seems nice, though I do wish that Bellatrix could do a bit more with it, maybe making it stay out some...maybe a move that deals shield damage and can "shatter" Protego to create a ranged hitbox?

The biggest issue with Bellatrix feels like it is the depth of the set: It has some cool stuff with what it does, like how the pummel and Killing Curse work into each other or how the Down Smash encourages both shielding to eat at shields and fleeing for Bellatrix to snipe them with a Killing Curse or to follow with an Up Special, she feels like she doesn't have much going for her outside the Killin Curse/shield damage and that because of that the meat of the moveset, the various tilts and aerials and such, can feel a bit surface. I would have liked to see Bellatrix have a few other ways to take advantage of low shields, like maybe an attack that deals more the less shield they have or slightly more pressure options or in general a bit more focus aside from the Killin Curse + shield damage. It is a bit difficult to put into words, but it feels like the crux of the set is done well in about 8 moves, and then the rest just kind of exists to exist around it.

I would say the biggest areas that could be improved are the aerials, sans Back Aerial (Which serves an okay purpose to shield damaging) and Up Aerial (Which seems like a fine attack, though I question why Bellatrix wants the foe on the ground), and the Down Throw: The Up Throw also isn't great, but it does okay service of working into the aerials and setting things up, while the Down Throw is just a KO throw and on a set that perhaps does not want such a good KO throw, given her focus on hard to land/precise KO moves as part of her playstyle.

Overall, Bellatrix feels similiar to the Roman Centurion as a somewhat above average set that can get some votes, and is worth a read, especially as it is rather short. Certainly one of your better efforts in recent times, anyway.

Butt Monkey: The Set

You said in your article that Ryuto was designed to be bad to mediocre, which you'd also said way back when you posted him: I thought it was amusing, in a good way, that you would intentionally make a set to be like that. It feels like a very Kat thing to do.

Personally, though, I legitimately enjoy Ryuto as a set: I thought his Power Arms NSpec, for example, was a grear wat to mix in being a butt monkey with some functionality, like how Ryuto running away can be used to "lead" the shot to the foe as long as you do something like super armor tank the hit or shield it, and how there's an element of sacrificing yourself to have the Power Arm deal a bigger hit, with the option to stand in place to just retrieve the gloves normally. So do you use your mobility to pressure the foe and have to deal with the gloves or do you sit there and just use it as a shuttle loop projectile but be safe? I have no idea how much of this is really intentional, but it is interesting nonetheless.

I also really like how the Up Special interacts with the Neutral Special: Not only is the uppercut done in a nice way with the normal hitbox, but I like how it can "combo" with it and, since the glove pushes him forward and all, you can use an NSpec into Up Special into the glove hitting you to recover, which not only fits tonally with the set as his own attempt to recover ends up getting him clobbered (but helping him), but adds an additional interesting element to his recovery. The Down Special is also a fun take on Mr. Game & Watch's Bucket Cancel and, amusingly, is quite similiar to an idea I had for another series' Butt Monkey, Glass Joe. The SSpec isn't as great as the other specials, but I do like how it is risky/rewardy and possibly even that, if he blows himself up with it near a foe, he can catch them in it too, share the pain if you will, and if not the way that he can do stuff like run in front of it (Which protects it from projectiles!) or vary the speeds is nice. Maybe he could even Power Arm, fires one of these off, them send himself hurtling forward along with the SSpec?

The Standards continue with some nice stuff, like I enjoy how the Forward Tilt has a variety of hitboxes that you'd want to use at various times and how the move is safer near the edge, as the opponent will have less space to travel to be KO'd while you will have more, and in a pinch you can even sacrifice your life to get away from something like a shield by headspotting it. The way the Dash Attack's DACUS works is fun with the Forward Smash, which I find to be a refreshing move: Ryuto might be wasting that wall, but he's doing it in a way that services his game plan and has some cool interactions. I wonder, if Ryuto F-Smashes and times it right, can he stop the Power Arm with the wall for a moment?

The Down Smash is not only amusing, but the way that Ryuto can seemingly fire himself any which way via his Power Arm not only adds more versatility to that move, but even without the Power Arm this move helps ensure the other moves work well with non-Power Arm attacks thanks to the trajectory and has some nice little play with movement. The aerials aren't quite as good, but I thought the Down Aerial was a bit neat if somewhat silly and I liked the elements it added to his moveset, plus the difference between the Up Aerial hitboxes was an interesting mix between juggler and potential off-the-top finisher if he can get the foe high enough, especially since his self-damage might help him follow.

The grab game probably has the least interesting stuff here, but I am a big fan of the Forward Throw and Up Throw: The Forward Throw is a fun way to work into moves like NSpec and SSpec while retaining its own uses and it helps enhance the somewhat weak air game when you can go offstage with it: I like how it not only has the obvious flow of hitting the foe but also that Ryuto can desperately rocket forward in a panic as his gloves catch up to him, trying to find out what his best options are, very in character. Up Throw isn't as good of a throw, but I do like how it distills the self-damage into the sky bit and shows how stuff like Up Aerial work into this, as if the foe has more damage Ryuto can blow them both sky-high and then Up Aerial to follow up with a KO off the top. If he has more damage, he can blow them sky high and then try to go right into a Down Aerial, especially since it can pop up from the ground if they try to avoid it by grounding themselves.

I've been overwhelmingly positive here, but part of that is because the flaws in Ryuto are rather apparent and I am accentuating the positives here: The ideas behind the moveset means that there's a good deal of filler moves like Down Throw and Back Throw that serve minimal, though usually not NONE, purposes, and at times the moveset intentionally holds itself back to keep it from being "too good". Half the grab game is super weak and the aerials are not impressive as they do not do all that much in service of the set, outside the aforementioned Up Aerial and Down Aerial, though I do enjoy that Back Aerial has some uses and I would call it "good" myself but not noticably good if that makes sense.

Still, though, the self-damage, risk-reward factor with the Down Special for desperate survival is played well here with some really dynamic and active play on both sides, the visuals are overall good and I did enjoy the writing style, though it could at times be overbearing: I like how he's even a butt monkey due to reusing sound, though. Overall I enjoyed Ryuto more than I thought I would when I first read it, and while I expected a reread to not do well I was pleasantly surprised that rereading it for this comment did not wear at me as I expected. Is it a success or failure if you try to make a set bad/mediocre and someone likes it?

Don't be scared away by this set being "bad": It's worth a read even if it does turn out to be bad to you. Trust me.

El Jefe Gordon

El Jefe has some nice ideas mixed in here: The different modes of the fireballs are interesting and adds a bit to them and I actually like the Up Special as an idea, though I do not feel the moveset properly builds moves around it to take advantage of the shockwave or, say, the way it makes a hitbox above and below him in the air.

The Down Special is both where this set has a cool idea, I like the idea of a Thunder move that can change your moveset if you get hit by it and yet can dodge it, and the moves themselves are actually fairly interesting. However, it has two major problems with it: First off, standards and smashes are banned during it, which just reduces your options too much given the payoff of 3 alternate specials and it is downright bizarre he can still use aerials if you're banning, but they really should be kept anyway because part of what makes the move awesome would be using the new Specials and stuff with standards/smashes. Secondly, this move lasts for a single Special and then goes into a cooldown, which could work with another move similiar to this but the way it is presented in the set and the way it wants to be really would rather have a hard time limit or some other way to deal with it. Especially since it also goes away if El Jefe is hit.

Personally, I would give El Jefe new standards, smashes and aerials (El Jefe oddly keeps his dual sword aerials when he uses the Thunder Sword, despite the fact he can use his aerials) on the move, increase the time limit but make it so it can only be removed by the time limit going out or El Jefe taking out a fairly decently sized amount of damage, with a cooldown still.

Aside from that, El Jefe doesn't have much to him: The rest of the moveset generally consists of short moves that work only into quite a bare playstyle, though I did like the Down Tilt. In general, I feel El Jefe needed more thought put into him, but that he could be a good moveset if the Down Special was properly adjusted and then the rest of the moveset was given more thought into what kind of playstyle would flow from his Specials: My guess would be a quicker striking moveset that can transition into constricting traps and harder hitting moves with his Down Special.

Raviolink

Ravio is a neat little ChaosKiwi set for, well, Ravio, a neat character from A Link Between Worlds.

Ravio is the kind of set where the character pulling out a lot of items makes sense, due to the fact that he is a merchant who sells them, and as can be seen even has neat images of him using the items! The primary crux of this moveset comes from the four Rod items in his Specials: The Sand Rod is probably the one that will stand out most to MYMers, due to the fact it involves terraforming, and while the terraforming is not very intense I am quite okay with that, as Ravio really should not be a huge terraformer and the terraforming here, allowing Ravio to make various vantage points, is pretty nice.

Along with that, Ravio can fire off a delayed chunk of ice with his Ice Rod, and it is neat how it somewhat works into his Sand Rod pillars because Ravio can better play with the ice diamond when it is launched from a higher vantage point, allowing him to play a little king of the sand hill with it. The Fire Rod, meanwhile, creates a slowly advancing inferno that Ravio is fast enough to even outrun and thus play around with, while being able to really take up some place with this slow moving projectile, which can force enemies onto the high ground where he has some moves to smack them or make them want to retreat and cede the high ground he can also use to him. The Tornado Rod is the only really purely boring one here, pretty much just a standard recovery, but it does have a little quirk or two that can work with the Sand Rod pillars. Perhaps it would have been fun if the Tornado Rod could interact with the other Rods, like blowing the icy diamond out in a direction or taking sand up with him? Food for thought. The Tornado Rod does gain some additional use later, though, so it isn't a bad move, just potentially even more there.

Ravio's smashes are also pretty nice: His Up Smash is neat because it goes high enough for Ravio to hit up his pillars, and the arrow goes slightly forward, so Ravio can "snipe" up at foes who want to use his Sand Pillars for himself, not to mention normal uses like edgeguarding or using the delay as the arrow comes down for offensive purposes, especially since the arrow is a bit stronger on the way down. Ravio can also throw a boomerang with his Forward Smash, but he can move while it is in the air much like Link/Young Link and the boomerang will keep flying even if he intentionally dodges it, giving him a nice travelling hitbox to work with: It isn't anything revolutionary, but it is a very solid move that works into his playstyle nicely. It is also fun that, much like the arrow works better on the way down, the boomerang is a bit different on the way back, trading in damage for more raw KO power, so Ravio even has reasons to perhaps want to miss with his boomerang and have it come back to hit the foe, or to launch it seemingly away from himself, then approach the foe so this more powerful boomerang comes flying in while Ravio is dealing with the foe. Finally, Ravio can place a bomb with his Down Smash, which is a fairly standard bomb and again nothing revolutionary, but the way he can blow it around with the Tornado Rod, raise it up with the Sand Rod or use it as a quick getaway from his high perches or whatnot gives it a good deal of playstyle relevance and makes it a fun move.

In general, Ravio stumbles in the areas outside the quite nice Specials and Smashes, though they are usually not bad as much as they are not good or bland: I like the idea of the Sheerow moves and I even find the Up Tilt good, it works into his playstyle well, but I do not feel that many of the Sheerow moves do fit in. The Down Tilt is also a nice move and, while it isn't anything to write home about, it is one of those generally relevant moves you put into a set that plays into his game that plays with air foes. In general, though, the aerials and grab game do not have as much relevance to the set, though I did like how Sheerow can chuck bombs around, it is a nice little touch that can work into the playstyle, though I wonder why Sheerow cannot chuck them up/down as well. The Down Throw is also pretty nice, especially when you realize that since the Sand Rod lets him make pillars he can use this to sort of spike foes on the stage, which can lead to some fun stuff, so it isn't like the grab section is bad or anything, they're just not particularly good.

Ravio feels like one of your better sets overall, Kiwi, it has a more focused playstyle and it has more to work into it, and while it is far from perfect it is a solid set worth taking a look at. I'm hoping you can make more sets like this, not necessarily in how it plays, but in how it has solid flowing to it, especially compared to your other sets.
 

Slavic

Ask not the sparrow how the eagle soars
Joined
Jun 5, 2013
Messages
757
Location
taco bell, probablyn't
After an absurdly long absence (my last post was back in MYM 14, with Spider), I decided to get back in the moveset game. I have no idea why I picked Imakuni, honestly, but I stuck with it and it's... well, something. I think it's alright, but it's definitely no prize winner. I'm just a bit rusty right now, and I just needed to get back in the groove, so I put this together today. Hope it's... acceptable? I think next is either Magcargo from Pokemon or Yomiko from Read or Die.

IMAKUNI
MYSTERIOUS LIFE-FORM


The mysterious creature Imakuni is an amazing musician and illustrator of Pokemon Cards and only the best of Pokemon Cards. Imakuni went unnoticed until his musical career debut in the Pokemon Trading Card Game for the Game Boy Color. In game, Imakuni allows the player to dance and sing along with him when they encounter Imakuni, how generous! Most do not choose to dance, though, and it makes Imakuni sad. Imakuni is also the cutest being in the world, cuter than even Pikachu.

STATS
Imakuni is tall, lean, and agile, like all the greatest dancers in the universe! However, Imakuni dances rather than walk, and so ground speed is hindered in exchange for glorious style points! Imakuni’s limber, luxurious body allows him to soar through the air with ease for beautiful twirls!

Weight - 5
Height - 7
Jump Height - 7
Air Speed - 7
Fall Speed - 4
Ground Speed - 5

DECK
Imakuni’s attacks all revolve around his amazing deck! Unfortunately, Imakuni doesn’t understand how the card game is played, and instead brandishes his deck as a powerful weapon! Imakuni can only have 60 cards in his deck, however, and so his deck has its limits. If Imakuni loses his cards, he cannot find them again! Luckily, Imakuni has the best luck, and can find booster packs at random! If Imakuni has less than 60 cards in his deck, which is counted by his damage counter, he has a chance of remembering his backup booster pack! Imakuni will lift the pack above his head in glee for half a second before 10 more cards are added to his deck! Stupendous! If Imakuni is caught without his deck, he will still fight, though he misses many of the abilities his deck has.


MOVES
STANDARD MOVES

Jab - Imakuni Shuffle! (~2%+)
By tapping the input button, Imakuni strikes a pose with his right arm outstretched in front of him, his hand containing Imakuni’s incredible deck! Simply being struck by such an incredible deck causes the opponent to take ~2% damage! The best is yet to come, however. By repeatedly pressing the input button, Imakuni will begin shuffling the deck! Imakuni is bad at shuffling, however, and each press of the button causes Imakuni to drop a card in exchange for ~2% more damage! Imakuni keeps his deck out for five seconds and puts it away if he doesn’t use it again.

F-Tilt - Can You Do the Imakuni? (~5%)
Imakuni imitates the famous Can-Can dance and kicks high up in front of him, dealing ~5% damage and launching the opponent marginally upwards. With perfect timing, pressing the input button once more allows Imakuni to kick a second time immediately after, juggling the opponent a little and lining Imakuni up for his ultimate combos!

U-Tilt - Y-M-C-Eh? (~4%)
Imakuni lifts his arm in the air in an angle, resembling the letter ‘Y’! Imakuni’s letter deals ~4% damage to opponents directly above the musician. With excellent timing, pressing the input again will cause Imakuni to pull his hands back down to his head, creating an ‘M’ with his body! This stupendous addition knocks opponents downward and deals another ~4% damage! Yet another press of the input and Imakuni curves his arms around in a giant ‘C’ shape that does ~4% damage yet more and knocks opponents off to the side! After the three hits, Imakuni pauses for a second trying to remember the rest of his dance before giving up and returning to the fight. If used within a few seconds of the Imakuni Shuffle, Imakuni forgets his deck in hand and dances with his cards, losing 3 cards per hit but dealing an additional 3% damage per hit.

D-Tilt - Go Bananas Split! (~4%)
Imakuni lifts his arms and immediately goes into the splits, with one leg going directly in front of him and one behind. Imakuni is very good at the splits. If an opponent is struck by either leg during this move, they take ~4% damage and are knocked away from Imakuni. Imakuni has more difficulty getting back up, and it takes him a second to pull his legs together. If used after Imakuni has recently pulled his deck out, his deck will deal ~3% damage above him in addition to his foot hitboxes, and he loses 3 cards from his deck as well.

Dash - Imakuni Punch! (~7%)
Imakuni rushes forward and sticks a power fist straight out in front of him! This punch deals ~7% damage to any opponent who gets struck by his fist! Imakuni stays in this position for a second for cool effect, however, leaving him defenseless. If Imakuni’s deck is out, damage is closer to 10-11%, and Imakuni loses 3 cards from his deck.

SMASH MOVES
F-Smash - Musical Star Imakuni! (~5-15%)
Imakuni opens his mouth and produces beautiful music! His music manifests in the form of physical notes directly in front of him. The longer the input is held, the more Imakuni sings. Default, Imakuni sings ‘La Di Da’, with each note dealing 1-2% damage and slightly stunning the opponent. If held longer, Imakuni adds another ‘La Di Da’ to the song, with the same damage values. If the input is held to the max, Imakuni adds a resounding ‘Hey!’ to punctuate his song, which takes form of the word ‘Hey!’ spelled out. This single word deals ~7% damage and causes any opponents hit to trip.

U-Smash - Rapid Spin (~3-8%)
Imakuni holds his arms up in the air and spins around like nobody else! Being hit by the spinning musical star does 1-2% per hit and pulls the opponent in a vortex that deals weak combo damage before releasing them from the attack. If Imakuni is holding his deck of cards, he sprays them around, losing two cards per rotation, with a maximum of 5 rotations. These cards create a horizontal projectile that deal ~2% damage and stun the opponent, allowing Imakuni to pull them into the rapid spin.

D-Smash - 52 Pick Up! (~15-30%)
Imakuni uses his deck to its ultimate potential… by hurling it at full force at the ground! Imakuni’s attack is high risk, high reward, and involves losing a hefty chunk of cards from his deck. The cards create a ‘shockwave’ burst of cards that does large amounts of damage, dealing 3% damage for every card used up. The attack is powerful, and can, with large amounts of cards thrown, KO at as low as 60%. The longer the smash is held, the more cards are thrown, and the max involves all cards in the deck being thrown. This move cannot be used with an empty deck, much to Imakuni’s dismay.

AERIAL MOVES
N-Aerial - I Got Them Card Blues! (~2%)
Imakuni reaches forward while in the air and releases an almighty, bluesy snap, which creates a small shockwave around his fingers that cause minor damage to opponents. More importantly, every third snap Imakuni uses is larger, dealing twice as much damage with twice the damage radius. Additionally, every third snap provides Imakuni with a new Booster Pack to add to his deck.

F-Aerial - Karaoke Chop! (~4%)
Imakuni brings his hand straight up in the air and swings his arm down in an arc. This attack strikes opponents and knocks them downward, dealing out a little damage. If Imakuni has his deck out, this attack does a few points of additional damage as he loses 2 cards. However, this attack sweetspots at the end of the arc at the very tip of Imakuni’s hand, doubling the damage and spiking the opponent down.

U-Aerial - Painbow (~6%)
Imakuni lifts his hands straight up in the air and creates an arc downward on either side of him. This attack, as well as dealing a bit of damage, pulls the opponent downward along the contour of the arc. If Imakuni is currently holding his deck, he leaves a trail of 5 cards that linger for a second, dealing 2% damage to any opponent that makes contact with the opponent.

B-Aerial - Twerkin’ Hard (~8%)
Imakuni bumps his bodacious behind backwards, bashing opponents behind him. The attack has very little start up or ending lag; however, the attack also has an extremely limited reach, only hitting opponents almost touching Imakuni. When Imakuni is NOT holding his deck, he keeps it (where else?) in his back pocket! He loses 2 cards in exchange for an additional 3% damage if his deck is put away.

D-Aerial - Feet of Fury (~3%)
Imakuni stomps rapidly downward with a furious anger, trampling his foes with his mighty feet! Though the move has a small hitbox, it does a fair amount of damage and hits four times. The fourth kick does not do extra damage; if it hits a sweetspot, however, it serves as a meteor smash, slamming opponents down.

GRABS
Grab - Sing-A-Long! (0%)
Imakuni sings an irresistibly beautiful note that floats directly in front of him. Any opponent who hears this note is instantly captivated, dancing and singing along in front of Imakuni. This catchy tune serves as Imakuni’s ultimate grab move, trapping opponent’s until they break loose.

Pummel - Dissonance (~2%)
As Imakuni sings, the opponent attempts to sing along. However, the opponent lacks the musical expertise Imakuni has, and the notes clash, causing pain throughout the opponent from the offensive sound. Imakuni is a genius who deals with the tone-deaf constantly, and as such is immune to the dissonance.

F-Throw - And… Dip! (~7%)
Imakuni brings the opponent to an embrace for a dance and starts off with the famous dance move, the dip! Imakuni reclines the opponent backwards in front of him. However, Imakuni forgets to support the opponent, and they fall backwards prone onto the ground, taking decent damage.

U-Throw - Free Bird! (~5%)
Imakuni grabs the opponent and hurls them straight in the air with unprecedented strength! This attack does okay damage, but it also launches opponent, and can KO at 85%+ damage.

B-Throw - Two to Tango! (~6%)
Imakuni grabs the opponent and pulls them close. Imakuni then spins around several times rapidly with the opponent, dealing some damage. Imakuni then hurls the opponent away, launching them diagonally, now facing the opposite direction he started the move. This attack launches the opponent similarly to the up-throw.

D-Throw - Playground Bully (~3%)
Imakuni grabs the opponent maliciously and pushes them downward, bouncing them off the ground. Though they aren’t prone, and this attack is relatively weak, Imakuni nabs a Booster Pack for his deck from them! Where does the pack come from? It doesn’t matter!

SPECIALS
Neutral Special - Teeter Dance (~5%)
Imakuni starts a ditzy waltz, twirling around, clapping, and swaying as long as the input button is held. In this state, Imakuni has an ‘aura’ around him, the diameter of one SBB. Opponents that enter the dance-zone are forced to spin around in time with Imakuni. When Imakuni stops, everyone who was dancing falls to the ground, taking some damage. Imakuni is quick to rebound, however, and he is given a moment where he is back up and the opponent is still knocked over. What purpose does this move serve? Imakuni does not know, but he thinks it his great fun. Additionally, should Imakuni be in possession of cards in his deck during this attack, Pokemon will accompany him on either side. If he has a full deck, two Mr. Mime will dance along with him, which increase the radius of the dance 200%. 40-59 cards gives Imakuni a pair of dancing Lilligant that increase the dance radius 150%. 20-39 gives Imakuni two Spinda, whose combined efforts increase the dance radius 100%. If Imakuni has between 1 and 19 cards in his deck, he gets two Whismur, which add 50% radius to the Teeter Dance.

Neutral Special (Alt. 1) - Perfect Form Teeter Dance (0%)
Same function; however, Imakuni does not fall over when he stops dancing. The cost, however, is that opponents take no damage when they fall.

Neutral Special (Alt. 2) - Gravity Altered Teeter Dance (~12%)
Same function; however, foes take much more damage when they fall to the ground. In exchange, Imakuni takes much longer to stand back up, taking as long as the opponents.

Side Special - Dizzy Punch (~10%)
When Imakuni uses his Dizzy Punch, he runs forward with his dash animation. He then lunges forward with his fist, duplicating the animation of his dash attack, the Imakuni Punch. However, in the final frames of the attack, Imakuni spins around and finishes the punch behind him. This allows Imakuni to trick opponents into dodging backwards into a Dizzy Punch. Similarly to the dash move, if Imakuni has his deck out he will lose 3 cards in exchange for 3-4% of extra damage.

Side Special (Alt. 1) - Rapid Dizzy Punch (~10%)
Same function; however, there is no charge up for the attack, making it an instantaneous punch behind Imakuni. This prevents mind games with opponents, however, as an exchange.

Side Special (Alt. 2) - Long Range Dizzy Punch (~10%)
Same function; however, there is a longer charge up to the punch, allowing Imakuni to rush using the move. As a trade-off, the punch loses all close-range use.

Up Special - The Mighty Ducks (0%)
Imakuni summons his Pokemon to either hand and they lift him up into the air slowly. While the attack does no damage, it has excellent horizontal range and vertical reach, making it a useful recovery assuming Imakuni has enough cards to pull it off. With a full deck of 60 cards, Imakuni summons a Swanna in either hand, which lift him up the height of three SBB, and allowing him a Battlefield platform’s worth of horizontal movement. Between 30 and 59 cards and Imakuni gets two Farfetch’d. They aren’t as good of fliers, and they can only take Imakuni two SBB up, with the same horizontal range. If Imakuni has 1 to 29 cards, Imakuni is given two Psyducks, which only boost Imakuni a single SBB, and provide half the horizontal control. With no cards, Imakuni hops up slightly with a shrug and tries flapping his wings for a few seconds with no effect.

Up Special (Alt. 1) - The Swift Ducks (0%)
Same function; the vertical recovery of the move is increased to four SBB, and the Pokemon move much faster. However, the horizontal range is next to nothing.

Up Special (Alt. 2) - Wing Attack (~5%)
Same function; the Pokemon that carry Imakuni (and also his flapping arms without cards) deal damage via their wings, knocking opponents away from Imakuni. However, as a trade off, the move has less recovery potential, with limited vertical and horizontal movement.

Down Special - Pot Smash (~7-25%)
Sometimes Imakuni wonders to himself ‘Why am I low on the trading cards? Because I spent all of my money on luxurious pots, of course!’ he answers to himself. Activating this attack causes Imakuni to pull out a pot or vase and smash it downward on the opponent. The range of the vessel is low, but they can do serious damage and also provide good launch power. While most of Imakuni’s attacks decrease in use as he runs low on cards, this move gets better. With a full deck, Imakuni has a small, nondescript clay pot that does both little damage and knockback to the opponent. 40 cards and up nets Imakuni a porcelain pot, not unlike those that could be seen from Legend of Zelda. These pots deal more damage and knockback than their smaller cousins. When Imakuni is down all the way through to twenty cards, he pulls out a bigger, more extravagant vase that not only does more damage and knockback but meteor smashes aerial opponents. From zero cards to nineteen, Imakuni has the most beautiful, expensive vase of all! The glimmering treasure deals the max amount of damage, and can KO as low as 65% on opponents.

Down Special (Alt. 1) - Replication Pot Smash (~4-17%)
Same function; however, the pots don’t shatter on contact, and can be thrown as a weapon several times before breaking. The pots do less damage and knockback, on the flipside.

Down Special (Alt. 2) - Heavy Pot Smash (~4-17%)
Same function; much greater launch and knockback potential from the pots, able to KO at max damage as low as 55%. However, damage is decreased and there is longer start up lag.

Final Smash - Imakuni? (0%)
Imakuni draws from his deck his signature card, Imakuni?. As he draws the card, the stage gains a purple glow for fifteen seconds. From this point on, Psyduck, Slowpoke, and Drowzee pop up all over the stage. The Pokemon have a small Psychic aura, and opponents who touch the aura are stunned, allowing Imakuni to approach (or flee) from the opponents. Additionally, Imakuni’s attacks are all replaced by him singing, the individual attacks of which deal roughly 7% damage each with a little bit of knockback.

FLAVOR
Entrance - Imakuni spins around in a pirouette out of thin air.
U-Taunt - Imakuni sings ‘You color in the bottom half; Marumine...’ and draws a circle in the air above him.
S-Taunt - Imakuni raises a finger and asks ‘Who is cuter? Pikachu or me?’
D-Taunt - Imakuni poses like a rock star and sings ‘La Di Da La Di Da, Hey!’
Kirby Hat - Kirby wears Imakuni’s black hat. Kirby’s special is then considered to have a maxed deck.
Victory Theme - Totaka’s Song
Character Theme - Imakuni Theme
Home Stage - The Water Club

Palette Swaps -
Palette 1 - Imakuni’s Standard Colors
Palette 2 - Based on the colors of a Spinda
Palette 3 - Based on pop singers, like Lady Gaga and Katy Perry
Palette 4 - Based on the colors of a Mr. Mime
Palette 5 - Based on the colors of a Pikachu


JOE!

Smash Hero
Joined
Oct 5, 2008
Messages
8,075
Location
Dedham, MA


AXTON
the COMMANDO

Axton is the playable Commando class character in Borderlands 2. Originally from Hieronymous, Axton spent ten years with the Dahl military force, reaching the rank of sergeant. After his pursuit of personal glory and disregard for orders led to numerous compromised missions, his wife and commanding officer Sarah simultaneously divorced him and discharged him from the military. Sarah made it a point to highlight that this would lead to his death by firing squad, then ordered him not to flee to any of the numerous border worlds beyond Dahl's reach. Taking her not-so-subtle suggestion, Axton went AWOL, using his skills and turret as a mercenary on other planets.

Axton became aware of the Vault thanks to a radio advertisement orchestrated by Handsome Jack, who had been monitoring the Commando's most recent bounty hunt. Although Axton was turning in more bounties and making far more money than anyone else in Sheriff Youngblood's jurisdiction, he found that it was too easy, and the lure of fame, fortune, and challenging combat drew him to Pandora, and eventually Smash Bros.

Axton is a built, human male and as such shares nearly identical stats with Ike. He has no special abilities such as wall clinging, crawling, and so forth, but he more than makes up for it with his overpowering arsenal of weaponry.


SPECIALS
"Hey, stand in front of this!"


Down B: Sabre Turret
His signature "Action Skill", Axton deploys his trademark Sabre Turret. The actual deployment is followed with a catchphrase such as "Chew em up!", "You fellas meet the missus?" or "Autogun deployed!", and has a small device become lobbed forward in a small arc much like Diddy pulling a banana peel, but in front of him instead of behind. Anyone hit by the device before it touches a surface will take 4% and some hit stun, and anyone touching the Turret as it Digistructs into play will take 10% electrical damage with high hit stun and be knocked weakly away. The Turret can be attached to any surface as long as it has about half a platform's worth of flat surface area to it, this means walls, platforms, ceilings, and even the bottoms of fall-through platforms!

Taking up about the same room as ROB on the field if you stopped at the shoulders, the Turret has 40% worth of HP and has super armor at all times, though you can footstool it and it has normal "character collision". In addition, it deploys a handy Phalanx Shield that has the diameter of the Smashville platform (imagine the picture below with the turret on the center of the platform, the shield would touch either side) that will stop any enemy projectile much like Link's shield for the duration of the Turret. This provides a safe haven for Axton and his friends to fire friendly projectiles from and force approaches, and also just looks neat in general. Be careful however as while the Phalanx Shield does force approaches, it will drop the moment the Turret itself takes damage to leave both of you exposed!


Also in the picture is the Action bar, seen in Black and Yellow. This bar is above Axton's character portrait at all times and shows the Turret's remaining duration and cooldown, with the duration being shown as the bar depleting and in full color, while in cooldown it grows back to full in gray-scale until its full and signals that you can deploy the Turret once more.The Turret has a base duration of 15 seconds before it deconstructs and goes into a cooldown of 25 seconds, of which you can refund up to 15 seconds of by manually deconstructing the Turret with another press of Down B while next to it. If the Turret is destroyed, or if you deploy it off a cliff or something, it instantly goes into the normal cooldown and in the case of the latter feel a great sense of shame. Ideally you want to be pretty tactical of where you place the Turret as while it has a good deal of leeway where it can be placed, the shortest time between recalling it and placing it again is 10 seconds, of which a few were surely spent scurrying around it instead of fighting the enemy!

As for offense, the Sabre Turret comes equipped with a standard Dahl burst Fire cannon, firing every 1.5 seconds for 4 hits of 2% at any enemy within 2 platform's range in a 180* arc from where it is planted. The rounds will cause high hit stun, with the last shot actually carrying a smidge of knockback in the direction fired but it is a set, tiny distance which can be an outstanding tool for camping, combo extension, and general defense as the Turret will have your back to disrupt would be assaults. Providing a literal haven inside the Phalanx Shield, and an offensive range twice as large, the Sabre Turret is the crown jewel of Axton's arsenal.


Neutral B: Shock Shredifier / Slag Shot

Axton is most comfortable wielding Assault Rifles, known for their versatility on the battlefield with good mixes of Power, Fire Rate and Accuracy. He has taken a particular liking to the legendary Vladof Manufactured "Shredifier" however, an incredibly fast-firing minigun. His particular version is a Shock variant, but we will get into the specifics of that in a moment, but for now all you need to know is that by pressing and holding the B button, Axton will whip out and fire the Shredifier and fill the screen in front of him in a storm of blue, sparking bullets!

The stream hits within a distance of 3 platforms, and is a very narrow line that deals an impressive 20% a second if you stand in it. The bullets do not cause any hit stun however, much like Fox's laser and with time the gun's recoil begins to lower the accuracy significantly. As the gun spins, Axton has trouble keeping it steady, causing that precise line to fan out into a wide cone of random spray within about 1.5 seconds! Once it fans out, the Shredifier's damage output drops sharply due to how often bullets now miss, but still offer viable output close to the barrel (which does cause hitstun every 5th bullet, or about 3 times in a second). The Shredifier will need to be put away with a bit of lag by releasing the B Button in order to simmer down and get back to pinpoint accuracy, making for burst fire to be a great tool combined with the Shock Element's tendency to ruin shields. You see, while the bullets do not cause any hit stun and merely damage the foe for a short time, the effect is downright deadly on a shielding opponent as each bullet will deal x2 shield damage! Shielding the Shredifier's shocking shots is a surefire way to end up with a broken shield, and an easy punish from Axton.

When he is adjacent to the Sabre Turret however, pressing B will direct the Turret to fire a Slag Shot. Slag in the Borderlands is an elemental type that coats enemies in Eridium run-off, a highly dangerous alien chemical that long story short causes them to take additional damage from non-slag sources. After Axton sets the Turret up, it's next show will be a slightly slower, purple Slag round that hits once and "splats" on impact for 4% and hit stun, before going back to it's regular burst fire.


Slagged enemies are coated purple with a haze
On impact, the enemy will become "Slagged" for 10 seconds, causing all damage dealt to them to be increased by 1.5x! Additional Slag rounds will not stack, but merely reset the timer, but it is generally a better idea to let the target get slagged once then get to work on the bonus unless in a multi-man situation as the Slag Shot is overall slower and less damaging than the Burst Fire.

Between the Shredifier and Slag, Axton can rack up insane damage rather quickly if left to his own devices. It's important to mention that Slag does not increase the knockback an opponent takes, only the damage. that's not to say it doesn't help!


Side B: Bouncing Betty Grenade / Scorched Earth

With a one liner such as "Tossing a Masher!" or "Catch this!" , Axton chucks forward the signature Dahl grenade: the Bouncing Betty. These grenades are unique in that instead of an explosion that you would normally expect, the grenade instead opens up and begins to bounce in place and shoot bullets wildly in very direction! The BB sits in place, bouncing from just on the ground to about Kirby's height for about 3 seconds as it covers a horizontal area the size of a platform in a shower of bullets that deal 10% a second. These bullets deal no hit stun from afar, but the closer you are to the actual grenade the more hits start to occur with the outskirts interrupting you on occasion, and near the center being like Metaknight's Jab. Once it is out of ammo, the grenade will self destruct in a tiny explosion for 3% and more hit stun after one more "empty" hop. Axton's grenades do not hurt him unless reflected or miraculously caught and thrown back at him (they are considered items until detonation).

Tossing the BB requires some finesse as the angle of the input determines distance and arc. A standard forward angle will toss the BB 1.5 platforms away, a downward angle will toss it half a platform with it detonating nearly immediately, and an upward angle hurls it through the air to land 2.5 platforms away. Any foes struck during the toss will receive 3% and hit stun, then cause the grenade to detonate and begin firing until it hits a floor where it will resume the whole Bouncing thing it's known for. The Bouncing Betty is a great area control tool as it creates a danger zone for a limited time for you to work off of, zoning people away or even trapping them to give you a moment to aim or set up your Sabre Turret. Only 1 Bouncing Betty may be active at a time with another Side B input doing nothing until the previous grenade is destroyed.

Alternately, when adjacent to the Sabre Turret you can activate the Scorched Earth ability and put those missile pods to good use! Taking 3 seconds out of the Turret's duration to perform, Scorched Earth can only be done once per deployment. The limits are well worth it however as it takes aim with a visible red laser at a point where an enemy last was, then fires a barrage of 6 missiles to the spot that each hit for 5% and light-medium knockback upwards and away. This does considerable damage, especially when combined with Slag and a Bouncing Betty on the Field, making for a truly devastating option that coats a platform sized area on the ground as well as anyone in the missile's path to said point. There is a bit of a delay between the aiming and firing so that you can position yourself and the enemy for maximum damage. As an added Easter Egg, if you manage to land all 6 rockets Axton will say "News flash: turrets kill!"

Either way, the BB and Scorched Earth are both powerful space control options that shouldn't be taken lightly by either party. Both require a bit of commitment and can be turned against you with reflection being particularly nasty, if not traditional "you mis-spaced so now you are open" type of scenarios. In that case, Axton does have one other trick up his sleeve...


Up B: Do or Die / Self Destruct

The Nukem Rocket Launcher packs one hell of a wallop, with it's rocket exploding into a classic, miniature mushroom cloud of awesome. Naturally, it is also the most badass way to get people off your face in a last ditch survival effort, because who doesn't like explosions?

Do or Die is one part recovery move, 2 parts crazy. Axton swaps out to his Nukem and aims it straight to the ground while occasionally saying "Nope... not today!" or "I'm ready for ya!" before launching and exploding the round point blank. This naturally causes quite a big boom with the mushroom cloud extending through platforms about Mario's height and causing both Axton and any enemy that was unfortunate enough to try and pressure him at such a time to take 20% and diagonal knockback within the initial sweet-spot of the blast, and the shockwave on the ground / mushroom cloud causing 15% and medium vertical knockback. Axton is fairly bulky and shouldn't mind trading the damage, especially with how much % he can rack up given his other specials he should rarely lose out on the % trade (especially if they are Slagged). The move has predictable start up if you have quick enough reaction to avoid it, so it is best used preemptively when you know somebody will be in range for at least the platform-sized shockwave on the ground or tall mushroom cloud above, if not the killer sweet spot. On the bright side, it technically has no end lag as it is cancelled by hit stun on yourself!

Axton has to improvise in survival situations, and seeing as he has no means of vertical transport, the awesome power of explosions will have to do. Just like how on the ground the Nukem gets him out of a desperate situation, the the air he will fire it straight down before it detonates just a moment later, allowing Axton to ride the mushroom cloud up for 15% and medium vertical knockback to recover like a badass. You can only do this once per air time, or until you are hit by a non-Nukem source, and it does not take your double jump while retaining the power from the grounded version. As a recovery, it is probably bottom of the barrel in terms of both range and safety as at lower % it barely moves you more than a double jump. But at least the more damage you take (which it helps with...), the better it becomes! The aerial Do or Die is a bit more viable as a KO option, but at the same time is much easier to see coming and avoid for the foe as you don't have your grounded defenses covering you as much.

Do or Die is a high risk, high reward maneuver that you must think heavily about with each use. Sure, you can just nuke you and your enemy, but remember you have to keep doing that to yourself to keep onstage! Make sure to keep a healthy percent lead and aim for the epicenter of the Nukem's blast, and with all your zoning and stage control options it should really be on your end that you were sent flying in the first place. But most importantly, remember that using this Up B both on and offstage takes balls of steel.

Alternately, you can place the round on your Turret instead! Activating Up B when touching the turret, just like your other specials, will provide an alternate function. This time, you unload the Nukem and attach the round to your turret, taking the same amount of time as Snake placing a "sticky" on somebody while saying "There we go" or "That ought'a do it" as an audio cue, and the shield becoming disabled as a visual. The rocket is clearly visible on the camera-facing side of the Turret, and has 10% HP that determines when the round will detonate based upon weather you or an enemy (preferably an enemy) hits it, or based on the timer where every second 1% is taken off the HP, and as you would guess once it hits 0% it blows. This cuts your Turret's time down by at least 5 seconds as obviously the Nukem round will destroy it once 10 seconds pass, but the payoff can be well worth it as you are free to Up B once more for the duration of the Turret's life which can allow 2 Nukem detonations at once!

This allows for a great deal of strategy as dropping the shield allows opponents to try and get a shot in at your Turret, but at the same time it also allows you to martyr it as a distraction as you could then play around how they become "aggroed" to it and get in a clean hit or new positioning. Offensively, you now have a bomb on the ground that you or your opponent can set off by dealing damage to it, so by zoning your opponent into it's blast radius and using the Shredifier you can easily have a remote Nukem go off, or just go all out and Nukem your Nukem so you can Nuke 'em for a 2 for one explosion of craziness when they try and approach you and the turret. Its not recommended that you take 40% in one go, but hey desperate times could call for desperate measures. If you manually put away the Turret, the round will drop onto the floor at the current HP it was at and behave just the same, only not attached to your pride and joy anymore. This opens up more mind games but is rather risky as going up to the turret, disabling in it with Down B, and having a live rocket fall to the ground during that whole time isn't the safest option given an enemy projectile can set it off in your face. If you pull it off however, you can potentially have the round active for a Bouncing Betty or Shredifier spray to set off (or one of your smash attacks in a moment), and if kept around even have your Turret back and have a 2nd Nukem round attached to that and make the stage into a crater. Be careful when playing with explosives and you'll be sure to have a blast!


SMASHES
"Boom-Shaka-Laka!"


Fsmash: Critical Kill

Taking out a Bladed Hawk Eye sniper rifle courtesy of Jakobs Munitions, Axton takes aim during the charge period, able to angle just slightly up or down as he does. As you charge, you notice a tiny targeting circle fly out from the barrel of the rifle and quickly move forward to about a max distance of 3 platforms before the charge automatically ends and fires the shot. This indicates the Critical Spot of the sniper shot, hitting with it guarantees huge damage output and power to match, but is incredibly tricky to both time and aim against a moving target as the critical hit must lie within their hurtbox in order to trigger.

If you just fire the sniper normally, a grazing blow will still travel the whole 3 platform length and hit for a mere 4-5% based on charge and hit stun before the very punishable end lag of reloading the bolt-action rifle. Hitting with the Critical however will prove to be much more beneficial, with the space just in front of the rifle at a tap doing an astounding 25% and a max range shot dealing 35% with all charges doing extreme, shallow, diagonally downward knockback! This all but secures an offstage kill, and even onstage offers great utility as the shot doesn't exactly have a "tell" of when you release as the kickback / reload occurs after the rather instantaneous bullet. Foes will be able to see the cross-hairs align near them however and of course are able to dodge appropriately else they get sniped! Distracting foes with your turret or grenade will be vital in getting in that critical hit when you most need it, or if they are busy fighting an ally of yours in a multiplayer match you can offer some ranged support if they aren't paying attention.


Usmash: Flak It

Nothing really beats a good old-fashioned Flak Cannon for anti-air, and The Flakker from Torgue Corporation fits the description perfectly! Aiming up at a sharp diagonal, Axton charges the attack by steadying his sights before unloading the Flakker's shot. Upon release a spray of fire will be seen leaving the barrel as Axton then goes into the end lag of quickly reloading the gun by slamming a new ammo cartridge into the bottom of it.

What is interesting here is that the rounds fired from the gun do not have a hitbox until they reach about two Ganondorfs in height where they then create a "line" of explosions that hit 4 times across an area about the size of a platform. The display will cause a total of 18-25% based on charge with the 1st three hits comboing into the 4th final pop that causes mid-high vertical knockback that can kill around 150-160%ish. During the 3rd hit, Axton is actually free to move as the end lag is over, allowing for a tree of follow up options from following with an aerial, being greedy and going for another Flakker Shot, or simply taking the time to recover lost ground defensively.

Usmash is peculiar in both timing and spacing due to how the shot only actually hits at a certain distance and how it can continue for just a moment while Axton is free to move. However, when you manage to shoot it out it provides astounding anti-air. Just be wary of grounded opponents baiting it out!


Dsmash: Nuke
From a crouched position, Axton takes out his Nukem once again and preps it to fire a long range round during the charge period. Upon release, Axton will brace for just a moment as he fires the rocket anywhere between 1.5-3 platforms away before it arcs down and explodes on the floor (or just arcs down into the abyss offstage). After launch, Axton recoups from the recoil and must go through the process off reloading which is incredibly punishable, taking nearly as long as the wind up to the Falcon Punch!

For the risk involved, the Nukem delivers quite the killing blow as it travels just off the ground. Hitting a foe will cause a hit of 1-2% and hit stun, before detonating for the same explosion as Do or Die at no charge (20% sweet spot at the initial explosion, 15% on the shock wave and Mushroom cloud), while a fully charged rocket will deliver a payload dealing 28/21% and can KO quite early vertically, though not as "guaranteed" as a perfect Snipe from your Critical Hit. The Nukem's extreme end lag is made up for in range, power, and relatively fast activation all things considered, making for a quite punishing option of your own.

The rocket is quite volatile, exploding once it hits pretty much anything. This means anything from opposing missiles to tiny lasers and bullets and set it off before it reaches the max distance. This is both good and bad as it can be used as a sort of anti-camping option (or if they blow it in range to knock you out of your end lag) and how it can be detonated by your Bouncing Betty as well as by hitting your Turret! The former example destroys the grenade, and the latter will actually damage the Turret, but it can allow for some spacing mind games with the rocket as a foe who thought they were clever to jump over the rocket as you fired it at the grenade you placed a click away is in for a nasty surprise!


STANDARDS
"That's right, start runnin'!"


Jab: Tomahawk Combo
Using his trusty melee weapon, a stainless steel Tomahawk, Axton swings up to three times in this multi-stage Jab! The first part of the attack is a basic, left handed swipe from top to bottom just in front of him that deals 4% and hit stun. The next attack has him take a small step as he brings it back up in a reverse of the arc, ending behind his head for 5% and a little bit of knocback, before taking one more step forward and swinging the Tomahawk down hard for 8% and diagonally upward knockback. Covering a wide area in front of him, this is a good overall jab combo if slightly committal as each swing has more end lag than the last.

Ftilt: Rifle Butt
A simple, but effective move, Axton will take the Shredifier and smash the back end of it forward in a swift motion. This deals 8% and rather high set knockback forward and slightly down, just right to space people off your face and into your ranged game once again! Quick to come out, it has a smidge of end lag as you go back to neutral stance. While it has less effective range than your Jab, Ftilt makes for a perfect "GTFO" when timed just right due to the incredible speed of which it comes out.

Utilt: Tomahawk Swing
Holding his melee weapon so that the blade faces upwards, Axton will swing it in an arc from about his knee to just over his head for 8% and surprisingly high base knockback as he pops foes into the air, but never really enough to KO. Your classic "scoop", Utilt pops people up into the air quite nicely and even hits aerial/platform camping foes just above your head, perfect for your turret's target practice. Unlike his other standard moves (sans Jab), Utilt can link into itself once or twice on some heavier/faster falling targets or by taking advantage of the scooping motion for the overhead strike to make for a more offensive ground move as opposed to defensive or opportunistic like the smashes.

Dtilt: Dance!
Pointing the Shredifier to the ground, Axton unloads a quick burst that ignites the floor in a shower of sparks! The electric spray coats an area half the size of a platform before him, causing multiple hits for around 12% total and launching foes diagonally up and away at a shallow angle. The longest of his ground moves, it also has the most range and is more punishable for the duration as he sprays the floor rather than the beginning or end lag as it really only hits right at ground level. Foes holding down when this move is used may be forced into a tripped state, which can lead to a Dsmash or Fsmash chase, as well as the general zoning you acquire from popping them away and into a potential prone state.

Dash: Tackle
Your bread and butter dash attack in nearly every respect, Axton puts his arms out and attempts to tackle the opposition. On impact he will deal 6% and shove any foe directly horizontally with medium knockback as Axton is essentially lagless as he goes to neutral right after hitting. If you miss however, Axton's tackle has nothing to stop his momentum and he will instead hit the dirt and end up in a prone position.

Axton doesn't have the fastest run out there, but that doesn't stop his tackle from being a deceptively potent tool. On hit, you can quickly confirm into any one of your other moves at lower % as your foe will still be right next to you such as a stylish Tackle-Ftilt/Dtilt combo for spacing, Tackle-Grab, Tackle-Utilt/Jab for combos, and so on. The huge frame advantage you gain by stopping your run via your enemy is a great tactical asset, but like nearly every one of Axton's tools must be used with utmost strategy in mind else you find your cover blown!


AERIALS
"Who's next, huh!?"


Nair: Tomahawk Slice
A simple yet effective aerial attack, Axton brings his tomahawk up behind his head and slashes down in a wide arc that ends a little over 180* near his feet before resetting to a neutral pose. Taking about the same time overall as Mario's forward aerial it covers essentially all the space on his front side quite well as a defensive option when timed right as the majority of the move deals 8% and pops foes up diagonally upward and away from him with medium knockback to reset space and even shift momentum. However like Mario's Fair, the Tomahawk's downward hit has a sweet spot just as it reaches the last 1/4 or so of the animation that deals 10% and slightly stronger down and away knockback that is perfect for gimping or attacking a grounded opponent.

This axe-attack is an aerial bread and butter move due to the arc and range, though it does highlight a slight weakness of Axton's in that he appears to be vulnerable from behind unless he has the turret at his side...

Fair: Hawk's Talon
Swapping to his Hawk Eye sniper, Axton puts the blade attachment to use as he swiftly stabs it forward mid-air! The rifle has a good bit of range here, rivaling Marth or Lucina's own blade as it juts forward and even has it's own tipper on the latter half of the blade dealing 16% while the rest of the rifle deals 8%, both hits sending straight forward but the former obviously being a good deal stronger and able to KO at around 120-130% or so.

While the stab is quite meaty, it only lasts an instant as Axton then swaps back to the Shedifier for some end lag to the move. Combined with swapping into the Hawk Eye, his Fair has some tricky timing to get used to for maximum effect. Due to the range and start up, you will ideally want to aim for where the opponent is going to be, rather than where they are. If done correctly Axton can show how a long range weapon can be just as deadly up close!

Bair: Flakker from Behind
Turning around and swapping out to the Flakker simultaneously, Axton fires a quick shot before swapping back to the Shredifier for a bit of end lag, leaving him turned in the new direction before landing. This quick shot is shaky at best, so unlike the focused Usmash the pellets spray randomly behind him in an area the size of Bowser, dealing multiple hits adding up to 14% and generally knocking foes back at a sharp, upwards diagonal for medium power.

Like with the Usmash the perk here is the small delay between the Flakker's explosions and when Axton is free to move. After the shot, swapping out to the Shredifier occurs just when the pellets begin to detonate in the air which allows Axton to move freely as foes are hopefully caught in the explosive display. You may even get to link it into an Usmash if you're quick! However, Bair shares the same weakness with Usmash in that it is quite telegraphed due to the delay between firing and detonation which allows foes to evade it if they aren't being distracted by say, a Turret or Bouncing Betty below them.

Uair: Hawk's Beak
Swapping to the Hawk Eye once more, Axton scoops the blade upwards in front of him for a 6% hit that weakly pops foes up and into the stabbing 10% hit with slightly less range than Fair above himself.The second hit has good reach and high vertical knockback that can kill your average fall-speed character at around 140% or so, give or take 15% based on their degree of gravity and such. It is also an excellent combo tool given the 1-2 hit nature of the move with how it can scoop up foes just in front of you. While not as strong as Fair, it certainly is much more user-friendly if you can manage the spacing just right.

Dair: The Boot
Reaching back with his left foot, Axton delivers a swift kick forward below himself and into the heads of any would-be grounded opponents! Covering 90* below himself, "The Boot" deals 8% on his leg but 10% on is foot as he punts foes in the direction of the kick. While this seems straightforward, it actually has a bit of finesse involved as at each part of the animation the kick will knock at the angle the foot is pointing.

To break it down simply, at the start his foot is facing at a downward diagonal, meaning it will actually semi-spike foes behind and below him. Towards the middle it will send foes straight away, and toward the end it will actually pop foes up and away, with all 3 "zones" of course having tiny variations in between depending on just when you hit. While it doesn't particularly hit hard (the sweet spot on Nair will spike slightly harder than the Boot's spike), it is still a great utility move given how it is overall his fastest aerial and covers a great area below himself to combat juggle attempts.


THROWS
"Wow. Do you work out, or...?"


Grab: Grab
Axton's grab isn't much to write home about, pretty much the standard fare here. His pummel has him grab the foe by their collar and reperepeatedlnch their face for 3% a pop or so. While this is fine and dandy, pummeling is especially effective when you have a bouncing betty or turret active to maximize the free shots!

Fthrow: Left Hook
Reeling his punching hand back, Axton delivers a swift, hard punch to the opponents mug that deals 6% and sends them reeling to the floor. His fastest throw, the diagonally downwards angle sets up a tech chase situation as it can leave a foe prone if they don't tech, as well as toss them at a bad angle to recover from off an edge.

Tech chasing as Axton has great reward due to how you can trap foes once your specials are in play. A turret can pin foes in hit stun, a bouncing betty can limit their tech roll options, Do or Die is an ultimate read if they roll towards you, and there is always just tacking on damage with the Shredifier or a dash attack/regrab.

Bthrow: Roll Toss
Clutching the foe by the collar in both hands, Axton rolls backwards and kicks them for 10% to send them flying into the air at a diagonal. Not particularly powerful nor close enough for easy combos, it is a decent way to make space or get foes offstage and follow their DI with things such as angled Fsmash, Usmash or just a Shredifier spray.

Uthrow: Pull!
Axton forcefully heaves the opponent up into the air with high base knockback but low growth, dealing 6%. This throw seems like an unremarkable, worse version of Bthrow. That is unless your Turret is out!

If the Turret is active, using Uthrow will have Axton say "Chew em' up!", "Go get em' honey!" or "Autogun's chewing them up!" as a signal for the Turret to take aim on that specific enemy and fire a burst. Incredibly useful in multiplayer matches to get the focus on a specific target, the throw also gets to sneak in an extra burst from your Turret beyond the normal pattern once the throw is executed. With the extra damage and stun from the Turret, this becomes a great offensive option though with tricky DI some foes may be able to wiggle away from getting shot mid-air.

Dthrow: Flakker on the Floor
Tossing his opponent to the floor, Axton hops and shoots the Flakker straight down after quickly swapping to it. Impact with the floor causes the rounds to detonate instantly in an area the size of a platform before Axton lands safely, popping the victim up after multiple hits dealing 10-12%. Axton is usually usually at a frame advantage against all but the floaty types as he swaps back to his main assault rifle, making for a decent combo option and a great damage option in multiplayer matches.


FINAL SMASH
"YOU get a bullet! And YOU get a bullet! EVERYBODY gets a bullet!"

DOUBLE THE FUN!
Axton's turret is automatically put away if it's already out, and he then tosses two of them at once onto the field, one on each side of the stage! Upon deployment, their usual electric hit box is replaced with the Nukem's explosion, because reasons, and they alternate between normal rounds and Slag shots automatically, before both end their timers by raining Scorched Earth all across the stage and self destructing, refilling Axton's action meter. All the while, Axton is free to move about and take advantage of all the chaos.


PLAYSTYLE
"Ten years of Dahl military experience at your service."
Axton is a ranger through and through. He has a total of 4 different projectiles, a lingering grenade that shoots even more bullets everywhere, and of course the deadly Sabre Turret at his disposal and it's 2 alternate shots he can command it to fire. The Sabre Turret is of course the highlight of his game plan with how it not only uniquely provides a Phalanx Shield that stops other projectiles dead to allow for a camping zone of his own, but with how it can be deployed. Sticking a turret to the ground is one thing, but with a hop beneath a platform you can have it upside down to cover anyone on the floor below it, or tossing it against the wall of a stage to cover the area of that ledge, and so on, really creates interesting strategies depending on your setting. Luckily the shield is spherical, allowing you to still benefit onstage or above the platform you stick it on to. The turret's actual shots are the next obvious benefit, with every 1.5 seconds dealing a free multi-hit of 8% to somebody within it's generous range. Not only does it pin people down movement wise, it can aid in comboing too when you decide to scrap it up with your standards and aerials (not to mention Bthrow and especially Uthrow). Better yet, against an enemy camper you can sit back and rack up damage with the Shredifier as they are forced to approach and then hit them with a Slag shot to really lay down punishment as they take bonus damage from you and everyone else! Or, you could always send the foe off the stage with something like Bthrow and then activate Scorched Earth and play the waiting game as they will have to come towards the missile barrage. Perhaps you can add one more with a Dsmash their way as well? Time management is key however as you only have 15 seconds of turret time before entering the 25 seconds of cooldown where you must fend for yourself, and with Axton's lack of coverage behind himself or anti air aside from a preemptive Flakker shot, you will be missing the turret if you aren't careful.

Second to the turret is your Bouncing Betty. The lingering hit box makes for great area denial as it scares foes away from that spot as well as can trap those who end up in said spot. Defensively, you would want to use it to corral foes where you want them to be in order to maximize your zoning game. Offensively, you can mix it up to try and toss foes into it, or even toss it at foes for it to activate on them and drag them into the hitbox and get in a safe approach of your own. Unlike the Turret, there is no real cooldown on the Bouncing Betty aside from the limit of one on screen at a time and how the toss is rather telegraphed, and thus somewhat punishable when not in the safety of your bubble shield. Luckily you can repel attackers with your Dtilt, Ftilt, Jab and Nair, or even a reverse Bair, but there is one tool that easily takes the cake in that department.

Do or Die is rather self explanatory from the name alone. It is a huge punish tool and finisher in it's own right, and allows Axton to escape pressure with the ultimate trade. You see, between the Turret, BB, Shredifier, and Slag, Axton will usually be in the % lead, making for an Up B to not really be a big deal to take the damage as you will still be in the lead as your opponent takes the damage too (even more so when slagged!). It even can break juggles in quite a scary way for the opponent as their Up airs and Up B's certainly aren't going to beat out a Nukem round! While it is one of your KO options, it of course always carries that risk of landing you in trouble as well as an evaded Do or Die means you took damage and are now prime for a juggle or combo yourself, or worse yet being tossed too far offstage to recover. Hopefully your onstage game with killer Smash Attacks that can easily net surprise KOs amidst the chaos you create on the field, with Dsmash being more for a read and Fsmash being more for precision sniping, can seal the deal before having to go to your last resort. Or you could just throw caution to the wind and go balls out with the Nukem and hope for the best, your call!

Between his impressive zoning game, versatile special moves, defensive and offensive standards and aerials that weave between close and long range when combined with his excellent dash attack -> throws and whatnot, Axton is the Vault Hunter for the everyman who is sure to get the job done!


Last edited:

Smady

Smash Master
Joined
Apr 29, 2007
Messages
3,306
Location
K Rool Avenue
MYM16 User Rankings - Update 1
Post #1 - Post #189

Raw Data
FAQ


Katapultar

Movesets: Chou-Chou, Shinobu, Altis, Ryuto, Bahamut, Judge Nemo
346


ChaosKiwi

Movesets: Lore, Duck Hunt Dog, Scorpion, Baby Bowser, Fi, Groose, Ravio, Carbink, Funky Kong, Kludge, Korra
341


FrozenRoy

Movesets: Astamon, Kunkka, Loatheb, Rivendare, Patchwerk, Grobbulus, Thaddeus, Kel'Thuzad, Travex
317

Bionichute

Movesets: El Jefe, Sheriff Toothpick, The Grizz, The Black Knight, Ms. Decibel, Kamen Rider Double, Wizzro
215


JOE!

Movesets: Banjo-Kazooie, Venusaur, Charizard, Blastoise, Axton
168

darth meanie

Movesets: Lom Lobon, Gloorx Vloq, Cerebov, Mnoleg, Neku
154


MasterWarlord

Movesets: Wang Chan, Dhoulmagus, Evil Sir Leopold
153


ForwardArrow

131

Getocoolaid

Movesets: Bellatrix, Stephen Chapman, Aang
95


Fframran

Movesets: The War Mage, Ephraim, Hero's Shade
93


PixelPasta

Movesets: Pennybags, Howl
65


BridgesWithTurtles

Movesets: Braixen
51


JamieTheAuraUser

Movesets: Victini
44


Junahu

Movesets: Brandon Whittaker
40


dimensionsword64

Movesets: Zant
32


Lenus Altair

Movesets: Yusuke
32


Smash Daddy

Movesets: Slappy
31


Munomario777

Movesets: Sonic Heroes
31


Dr.Slavic

Movesets: Imakuni
30


n88_2004

22


crazyal02

14

Davidreamcatcha

5

Conren

2

StaffofSmashing

1

Score Breakdown
Moveset - 30 points
Joke Moveset - 10 points
Comment - 5 points
MYmini - 4 points
Post - 1 point

Joint movesets - made by more than one author - are counted towards both users.

Bracketed sets are joke sets.

The point you gain for a post is negated by anything higher - for example a post of one comment is worth five points.

I will not give any points out to posts that have an infraction.

Update 1 Summary

A million apologies for the lateness of this first update of Make Your Move 16. As well as the inaugural data collection, I went and updated the FAQ and, also very late, updated the front page of the Stadium. It's only a shame it took me so long, but if I will use an excuse, I was busy. I don't generally use that one, and I really mean it.

This update is a long, long one, ranging 189 posts, 61 movesets and many comments. We're over the halfway mark already, this is how things look in the battle for first. It's an interestingly close race between Kat and Kiwi at the very top, with Roy not far behind. It's all up to grabs for these three. What I noted counting the data was the amount of comments from Kat in particular, delivering him a tantalizing victory by a mere 5 points.

But the true race is on between myself and FA, to see if I can get out of newcomer zone or he can get out a set first. This one may have to be settled with a children's card game.

A special thank you for your patience and for reading the user rankings.

MYM16 User Rankings - Total Scoreboard
 
Last edited:

FrozenRoy

Smash Lord
Joined
Apr 26, 2007
Messages
1,260
Location
Las Vegas, Nevada
Switch FC
SW-1325-2408-7513
Axton Body Spray

Axton is a set with a pretty neat central concept: He has the ability to set up a turret projectile platform pretty much anywhere, which can last for a certain time, shooting out bullets and giving Axton the ability to be protected against by projectiles. Enemies can take down the turret to force Axton to have it go into cooldown for a long period of time, but Axton can un-deploy it and then re-deploy it later for a reduced cooldown to save it, though this is risky. In addition, Axton has special moves that allow him to have the turret fire off special shots and the like. It is a cool set idea and reminds me of my own Alice Margatroid from MYM12, which I don't know if JOE! ever read.

Right off the bat, I like the Slag Shot ability with the turret, though the Scorched Earth ability is a bit more iffy, not bad but not as good so to speak, though I quite like the Bouncing Betty Grenade itself, and the turret itself is plenty good, though the shield is perhaps iffily strong, but the way it makes people approach and has counters makes it nice. I'd say the weak link here is the Up Special: The effect it has, despite being a rocket launcher, doesn't feel like it measures up as much to the other Specials in its effect and I was disappointed it did not round out the Specials in how it interacts with the turret (IE it doesn't), making it feel out of place: I've heard you're considering putting something that affects the turret there and I heartily approve.

The smashes are also quite nice: I enjoyed Forward Smash the most for its rather unique take on sweetspotting, the precision involved, and how it feeled like it worked well with the rest of the set and the way it controls space. The nuke's hitbox was rather fun and I enjoyed the various ways Axton has to set it off. Once again, the Up input felt the weakest here, as the Flakker Shot was good but not especially noteworthy, though I did enjoy some of the ways you could play off how the shots timed their ending.

I feel the set dropped off dramatically after the smashes and exposed a flaw in the set, which is that while the first seven moves are all good individually, they don't always work together the best: While they do generally play into the playstyle of controlling space, at times it feels a bit esoteric or removed, and things like the nuke's self-damage is a good idea but didn't seem to have much relevance in the set proper. While the standards on had some good moves, I was particularly fond of Down Tilt and Dash Attack, they overall did not feel like they adequately took advantage of the controlling setup provided in the specials and smashes. The grab game felt particularly disappointing and like the area things most could have been improved by: Up Throw also feels like perhaps it should not have been on a throw and while Back Throw has uses, it feels a lot like filler and is presented as such.

Overall, Axton feels like a set with some good ideas at the start, but it stumbles as it goes on and keeps it from being a great set: Regardless, I enjoyed it, and it was good to see another JOE! set. Perhaps you'll give us something else to sink our fangs into?
 

lordvaati

Smash Master
Joined
Jul 7, 2006
Messages
3,148
Location
Seattle, WA
Switch FC
SW-4918-2392-4599
So, I actually have a day off from my work in Alaska due to no boat, so I decided **** it, I'll post a moveset based on this awesome game I've been playing recently!~

Quote Emerges From the Caves!!!

A Soldier Android from the surface, Quote reawakens to discover a land of Rabbit-like creatures called Mimigas enslaved by an insidous Doctor. through many trails and tribulations, and far too many sacrifices, He eventually overcomes, even being reuinited with his partner and closest friend, Curly Brace.

And now, the Silent marksman has come to Smash!!!

and he's not alone...


Curly Brace is Here Too!!!

STATS
Height:5.5/10-roughly the same size as Luigi.
Weight:4/10-Quote is a fairly light character compared to his fellow machines R.O.B. and Mega Man, being able to be sent flying at around 75%.
Movement speed:6/10
1st jump height:7/10
2nd Jump Height:??(more on that below.)


The LEVEL-UP system

In a reference to Cave Story, Quote/Curly have a special bar above their %, which start at Level 1 and can Max out at Level 3....but what does it do, exactly?

why, it evolves the very power of their movesets!the higher the level, the more powerful their moves become...sometimes even evolving into new moves!Of course, rather then getting EXP triangles like in the original, you get them a different way..by beating your opponents silly. HOWEVER, you only gain meter from really strong hitting moves, so moves that do no flinching (like the Lvl 1 Polar Star) give no meter, but stonger stuff like the Smases will.

Careful though-the reverse replies as well! weaker moves like Fox's lasers will take no meter from Quote/Curly, but stonger moves like the Falcon Punch will do serious meter damage, dropping you lower!

One more note: KOing an enemy gets you a free Level up(likewise, getting KOed sends you down one)-can be used to quaite an advantage in free for alls and doubles!


An now, let's check out....

Booster's Jetpack!

Quote/Curly only have One True Jump, but in it's place they gain the booster jetpack. to use it, you simply press the second jump buton like always, but make sure to hold it down to gain additional height for a few moments before falling. the distance and abilities available are dependant of the current LEVEL of Quote/Curly.

LEVEL 1:: Booster 0.8,. gives a little additional height.equivalent to a 4/10 jump.
LEVEL 2: Booster 2.0. Gives much greater height, an 8/10 jump.
LEVEL 3 Booster 2.0+: same as LEVEL 2, but also grants the ability to travel a great distance horizontally by holding forward/back.


Standards/Tilts
Quote/Curly's moveset, much like Mega Man, makes full use of the huge arsenal from Cave Story. also like in Cave Story, they get bonus effects based on their LEVEL.


STANDARD JAB: Quote/Curly does a punch and kick, folled by an attack from the BLADE.

the punch and kick do 2 and 4% but be blade's a bit different,

LEVEL 1: Small blade, does 5% with little knockback.
LEVEL 2: Longer blade, 7% with molderate knockback.
LEVEL3: rather then a slash, the blade will turn ito a jab combo, dealing 1-2: per hit with a 5% finisher with moderate knockback.


Forward/Up Tilt: Fireball


based on the directional input, Quote/Curly will shoot out a fireball attack that travels a small distance before dissapating.
no matter the level, each fieball has low knockback,

LEVLEL 1: 2 short distance Fireballs will travel along the ground, or fall to the groung after being shot up. 2-4% each.
LEVEL 2: up to 3 fireballs that travel silghty farther and faster are fired. 3-5% each.
LEVEL 3: up to 4 fireballs are shot, moving notably fast and going quite far on the ground depending on location. 7% each.

DOWN TILT: Quote/Curly do a sweeping slash with the Blade on the Ground. moderate knockback on each.
LEVEL 1: small, 6% damage.
LEVEL 2: Large, 9% damage.
LEVEL 3: Large, and also will trip the trget on contact. 12% damage.


ALL AERIALS: Snake

An Optional upgrded weapon, This fine weapon shall fire in all 4 directions if Quote/Curly are in the air. each hit has moderate knockback.
LEVEL 1: Fires Squares that travel a short distance but have large hitboxes. 7% damage.
LEVEL 2: shoots out a Sine moving fireball in that direction, travels a great distance. 10% damage
LEVEL 3: travels the best distance, and can even go through solid platforms or walls. 15% damage.

Grabs

Thanks to the wonders of the Tow Cable, Quote/Curly have a tether grab. unlike other moves, there are no benefits from the LEVEL system(y'know, balance and all that jazz.)

Pummel: Quote/curly do a heabutt. 2% each hit.
Forward Throw: Quote/Curly kik the target forward, then shoot them a fwe shots of the machine gun. 7% damage, average knockback.


Back Throw: Quote/Curly turn on the Air Tank Bubble, bouncing them backwards. 6% damage with decent knockback.

Up throw: Leveitating off the ground for a moment with the Booster, Quote/curly then piledrive the traget into the ground. 15% damage with great knockback.

Down Throw: one of those Accused Spikes of Cave story appear under the target, launching them upwards with high knockback but only about 9% damage.....better then the 127 damage they do in th real game.


SERIOUSLY....**** THESE THINGS.


SMASHES

Forward Smash: Super Missile Launcher

Quote/Curly shoot ot a Mille that crosses the screen, dealing explosive damage and heavy knockback if charged.
LEVEL 1: Smaill, single Missile. 5-10% damage.
LEVEL 2: Much bigger, stronger missile. 6-13% damage.
LEVEL 3: TRIPLE MISSLE ASSAULTY!!! 8-22% damage.

Up Smash: Bubbler

A water weapon found in a fire place(...bacause sure, why not?) Quote/Curly fires streams of bubbles upwards at the target. the longer the smash is held, the more bubbles are fired.
LEVEL 1: weak bubbles that travel little distance. 2% each.
LEVEL 2: Stronger, sturdier bubbles that go higher: 4% each.
LEVEL 3: after the charge, all bubbles turn into Water bullets, going completely up. 6% each.

Down Smash: Explosive


Made from Jelly Juice, Charcoal and Gum base, Quote/Curly will drop a Bomb that can deal heavy damnge and knockback. the length of the fuse is determined by how long it is charged.

LEVEL 1: 10% Damage.
LEVEL 2: 20% Damage.
LEVEL 3: 40% Damage.


SPECIALS

Standard B: Polar Star

The first weapon you get in Cave Story, "Borrowed" from a sleeping Gunsmith. it has it's issues, is quite basic, and can be given awy for much better, but it seems like this weapon may have hidden potential....

In Smash, the Polar Star shares properties with many other character's guns, due to it's relatively basic design.At least, up to Level 3....

LEVEL 1: Polar Star is the equivalent of Fox's Lasers-quick, rapid shots that have no flich and do 1% each.
LEVEL 2: now it is much like Falco's Lasers-slower, but do cause flinching, allowing for meter build. 3-6% damage.

LEVEL 3:....


Welp.

The Polar Star evolves, turning into it's true form, the Spur. single shots move at a slow pace, dealing 8-10er hit with flinch, but if the move is fully charaged....Oy. Quote/Curly shoot a Small ranged beam, but the beam's length covers the distance of the stage, and if sweetspotted can deal 25% damage with great knockback. this move can be absolutely devastating to one returning to the stage! Also, it peirces reflectors and counters(still can be blocked normally though.)

Course, you meter has to be maxed out so...heh.

Forward B:King's Blade


For This Move, Quote/Curly summon the Spirit of King, a Miminga who fought valiantly with them against the Doctor, who then dashes forward and attacks the target. Only catch is much like Zelda's Phantoms, a goot hit of a projectile will make king dissapate, so be wary.contact with King's Slashes deal a minimal 2% with no real knockback. contact with King Himself will deal much greater knockback and do 15% damage.

LEVEL 1:King travels a smal distance befor vanishing.
LEVEL 2: King travels a much greater distance, then vanishes.
LEVEL 3: King is Invincible and cannot be interrupted.

UP B:Machine Gun

Quote/Curly fire several Machine Gun blasts towards the ground, elevating them upwards. no true knockback comes from this move.

LEVEL 1: each shot does 1% Damage.
LEVEL 2: Each shot does 2% damage.
LEVEL 3. Each Shot does 3% damage. after a breif pause, a final shot will pop out, and if hit has spiking properties.

Down B: Whimsical Stars


Quote/Curly call forth 3 small stars that circle around them, dealing chip damage to anyone nearby. the amount of hits they do before vanishing is determined by the LEVEL.each star does 2-3% damage. the special cannot be used again until all current stars are gone.

LEVEL 1: vanish after 1 hit each.
LEVEL 2: vanish after 3 hits each.
LEVEL 3: vanish after 5 hits each.


FINAL SMASH: Iron Bond


Th Vow that they will meet again someday becomes a realitty. depnding on who you play, the Other shall emerge to suppoert them in the fight! also while the final Smash is active, the following happens:

-your LEVEL automatically goes to MAX, and cannot be dissipated
-all A moves are replaced with the LEVEL 1 Nemesis, the Gun of the Lightning Goddess. each balst deals god knockback of about 10% damage.
-your Booster is fully upgraded and can be used infinitely.

All these bonuses apply to your partner as well. the Smash lasts for about 30 seconds.

Taunts
Up Taunt: Quote/Curly puts on a Miminga Mask before taking it off afterwards. the miminga face cycles between various characters from Cave Story(Sue, Toroko,Itoh, etc.)


Down Taunt:

the Little Man emerges from Quote/Curly's Hat/Hair and starts pestering them.


Side Taunt: Quote/Curly fire the LEVEL 3 Nemesis....which shoots harmless little chickens across the screen.


Costumes.

Default:Quote(1), and Curly(2).

Reverse: Quote with Curly's Colors(bolnde hair, red shirt) and Curly withQuote's(Blackhair,black Shirt).(3&4)

Baddies: Quote with Balrog Colors(red hair, grey skin) and Curly with Misery colors(Bluehair, Green Shirt)(5&6)

The Sakamotos: Quote has the colors of Kazuma(Green Hair, White Shirt,peach skin), and Curly the colors of Sue(Green Hair, Brown Skin, blue shirt)(7&8)


To Best summarize the playstyle of Quote/Curly, it is all about the LEVEL. their default moves are very weak, but have exceptional range so the main goal is to play a poking game with the opponent to get some substantial meter, then try to finish them off using the Smashses or the almighty Spur.

learning curve wise, they may be around the same rank as Shulk-they are very risk/reward, but once mastered can be devastating.


...And that's it for me. may not repond for a long ass time, but hey, that's what comment history is for. see you guys when next I get a day off.


Katapultar

Smash Lord
Joined
Nov 24, 2008
Messages
1,251
Location
Australia
[collapse=Sonic Heroes]Sonic Heroes is essentially a moveset for a game. It’s certainly not a bad idea if you actually want to play as Sonic, Tails and Knuckles at the same time, but having all 3 out at once means that you’re not giving them the same attention as a single character due to being treated as a group. All 3 characters are perfectly capable and known to function on their own, unlike the Ice Climbers who are always together, but it’s fine here if you want to represent a game rather than the characters themselves. And it’s certainly not as awkward as the harem sets from MYM14 that involved people making sets where you controlled 8 female characters all at once.

I have a few problems with this set. First, it is very cut-and-dry with its majority of Specials that make you go in x-direction and having to read through 3 similar standard attacks repetitively. Second, even though the set is for Sonic Heroes, the game doesn't feel fully represented with the absence potentially-interesting ideas like Knuckles throwing his allies as fireballs (could be an interesting positioning tactic for when you switch) and Sonic spinning around as a tornado - instead, you have just make them charge in the Specials and give Tails a random Mega Man-esque arm cannon that he never used in the game. For that, it's a bit hard to say that this set totally represents Sonic Heroes. Also, reading and commenting this set make the Sonic Heroes theme song play in my head while I do so, but that's what I get for listening to music.

One more thing about this set is that it lacks detail on stats and moves, which hurts it when it mentions interesting ideas like Tails stacking up and Knuckles' Triangle Glide but fails to follow up on them. At the same time however, the lack of detail does "help" the set by shortening its length given you're essentially reading 3 sets, but that doesn't do anything to help with the set's understanding. I feel this set would be improved substantially if you emphasized on the aforementioned mechanics, stats, moves and perhaps altered the Specials: maybe have Sonic do the tornado with his Side Special and Knuckles throw his teammates as fireballs through the Down Special. Mind you, the Specials as of now wouldn't be -completely- boring to use given Mii Brawler exists, just that they're not compelling and don't represent Sonic Heroes at its best. Add emphasis to the set and polish it up, and you'll have something fine on your hands. [/collapse]

[collapse=Aang]I like how each element is specialized (fire = damage, wind = knockback, earth = defense, water = range) in such a way that Aang has a hard time damage-racking but good aerial and KO prowess, fitting his air-bending specialty and mostly-pacifistic nature. I also like his Side Special in how it bounces Aang up into the air after he hits a foe, rather than just let him keep going like I expected when reading the attack.

I find it funny that Aang is aerial-proficient, and wants the foe up in the air with him, yet all but 4 of his aerials are air-bending moves that deal no damage. This essentially means that Aang will accomplish very little in the air outside of general positioning unless he’s bringing a foe up to KO them, and as such he must do his damage-racking on the ground before knocking enemies up. This is easily fixed, mind you, and I don’t even think it’s bad design – on the contrary, I think it’s really interesting, just that it probably wasn’t the way you intended for the set to play. Now, you could use the Side Special and F-air to damage-rack enemies in midair, but hitting with the former might be hard and the latter would be quite predictable especially given its lag. Another thing I noted about the Aerials is that none of them provide Aang with a lot of coverage (no multi-hitting or widespread hitboxes) and thus require a good deal of precision to pull off. The precision might be somewhat in-character from a disciplined point of view, but it does make Aang a bit underpowered in the air when his attacks are easy to get around and not to mention his Mega Man-esque U-air which is awkward enough to use with said character.

Nitpick-wise, I’m not really sure about the idea of earth walls being invulnerable when they’re generally destructible in other sets. Other than character, the Down Special doesn’t seem to serve any noticeable purpose in the set, and while it would probably be okay as a quick defensive move, 10 seconds is too long for a wall to stand up when you mention using it as coverage to charge your Smashes. This, and the U-tilt, are my biggest gripes with the set that don’t have anything to do with damage or knockback, especially the latter that essentially makes you invincible for 2 seconds (and then Aang breaks through the rock by jumping through it despite the foe not being able to damage it).

Aang is held back ever so slightly by a few questionable things, but even so I’d say he’s a respectable yet average set, mostly on the basis that his moves and the way he goes about his goal are a bit ordinary. If he had a tad more to his Specials and perhaps a more convincing air game, he could certainly rise up.[/collapse]

[collapse=Imakuni]Yes, great character choice! I remember you from MYM14 for your Spider even before you mentioned it, so it’s neat that you’ve come back even now. I apologize for not getting to your set earlier, but now I’m here to give you some critique.

Imakuni is a totally humorous set, which is a big plus for him. That being said, he’s a bit underpowered in terms of damage values, only doing an average of 4-6% on attacks when it would be perfectly okay for him to deal 8-10% on his tilts, along with a F-Smash that deals no knockback. More than that though, his deck mechanic is awkwardly implemented in the set; you take the deck out with the Jab input, which lets you get additional effects for your attacks so long as you don’t lose all your cards, but you lose cards for performing certain attacks and have no way to put the deck away except to wait for 5 seconds without using it. You can refill your deck with booster packs with moves like the N-air (which is kind of random) and D-throw, but you also mention that he can get booster packs at complete random and this holds him up for half a second, something that will likely screw you over in the wrong situation (your attack is interrupted or you’re trying to recover). The problem here is that you rely solely on the Jab as a way to handle the mechanic whereas the Neutral or Down Special inputs would make a lot more sense, but the Specials take a backseat in this set and don't do anything for the mechanic since it would be awkward if they suddenly did something for the mechanic given how late they're introduced (but even so, I actually thought they would do something for the mechanic). It is really a simple case of placing the Specials first on the set and using them as a foundation for the rest of the set, something that if done in your next set will give it a lot more to work with. As the set stands, the Specials are a bit on the bland side even if they are amusing to read - I specifically remember Imakuni having his own Pokemon and trainer cards themed around him, and wonder why you didn't incorporate stuff like his Exploud as a summon for a Special. That would have been hilarious. Speaking of hilarious, I found the D-throw's move name hilarious, probably one of the funniest moves this contest.[/collapse]

[collapse=Quote]It’s nice to see an old face return after so long. I’ve never played Cave Story, but I am somewhat familiar with the weapon-leveling mechanic because SirKibble made a Quote moveset back in MYM12. Your Quote feels very influenced from a player’s perspective, especially with stuff like the frustrating D-throw spike hazards (dunno whether I like casually using hazards against your enemy), and you even provide pictures at times. That being said, you tend to get very vague on the move descriptions, almost as though you’re assuming that the reader has played Cave Story and can imagine what the moves do in full detail without having to have them be described with more detail. The vagueness is such, though, that even if I knew all about Cave Story I would still find moves like the D-Smash hard to visualize due to lack of details like blast radius, duration, animation and so on. Also, mirrored inputs don’t make for a fun character from a set or gameplay perspective, just because Mega Man’s Jab, F-tilt and N-air are all the same (except for the latter having a keep-away hitbox on his body) which I don’t think was necessarily the best design choice.

There is one thing I really like about this set though, and that’s the fantastic Final Smash. I really love the idea of being able to summon the alternate character you didn’t pick, enough so that I actually wish it was in Smash! If anything, it is slightly overpowered due to how long it lasts for combined with infinite flight and a deadly projectile, but the whole idea behind the reunion has an emotional impact and is wholesomely in-character. It is one of the better Final Smashes I’ve seen in recent.

Quote could use some more detail and emphasis on playstyle, but I won’t ask too much of you since you tend to come in and out of the contest at your own pace. [/collapse]
 

JOE!

Smash Hero
Joined
Oct 5, 2008
Messages
8,075
Location
Dedham, MA
Just posting to mention that I edited in a turret interaction with Axton's up B. He can place a Nukem Round on it now!
 

Munomario777

Smash Master
Joined
Nov 18, 2014
Messages
3,253
Location
Charleston, South Carolina
3DS FC
0387-9596-4480
Switch FC
SW-8229-3157-8114
Sonic Heroes is essentially a moveset for a game. It’s certainly not a bad idea if you actually want to play as Sonic, Tails and Knuckles at the same time, but having all 3 out at once means that you’re not giving them the same attention as a single character due to being treated as a group. All 3 characters are perfectly capable and known to function on their own, unlike the Ice Climbers who are always together, but it’s fine here if you want to represent a game rather than the characters themselves. And it’s certainly not as awkward as the harem sets from MYM14 that involved people making sets where you controlled 8 female characters all at once.
Yeah, true. I'll start off by saying that I'm not really being competitive with this; just doing it for fun. :) Also, the moveset wasn't really focused on the game itself, but more the characters from the Sonic series as a whole being melded together. The majority of the moves did come from those games, however, if only because of how well they tend to lend themselves to the three-character concept.

I have a few problems with this set. First, it is very cut-and-dry with its majority of Specials that make you go in x-direction and having to read through 3 similar standard attacks repetitively.
Well, Sonic Heroes does often have you going all over the place, so I'd say it kind of fits. :p Also, the three-characters-in-one nature kind of makes the multiple standard attacks necessary.
Second, even though the set is for Sonic Heroes, the game doesn't feel fully represented with the absence potentially-interesting ideas like Knuckles throwing his allies as fireballs (could be an interesting positioning tactic for when you switch) and Sonic spinning around as a tornado - instead, you have just make them charge in the Specials and give Tails a random Mega Man-esque arm cannon that he never used in the game.
I kind of wanted Knuckles to be the up-close-and-personal character of the three, so that's why I gave him those attacks. Plus, Tails's Thunder Shoot is already there as the main projectile, and it serves a similar purpose. The Blue Tornado would be an interesting Neutral Special for Sonic, though; I might have to add that in. The arm cannon is from Tails's appearance in Sonic Battle, by the way.
For that, it's a bit hard to say that this set totally represents Sonic Heroes. Also, reading and commenting this set make the Sonic Heroes theme song play in my head while I do so, but that's what I get for listening to music.
Well, that's not really what I was going for; I'm just trying to represent the characters as a whole. And yeah, that theme is really catchy. :p

One more thing about this set is that it lacks detail on stats and moves, which hurts it when it mentions interesting ideas like Tails stacking up and Knuckles' Triangle Glide but fails to follow up on them.
Well, I don't see how I could go into too much detail with the Tails formation; it's pretty much just them stacking up on top of each other. The Triangle Glide probably could have used some more detail, though.
At the same time however, the lack of detail does "help" the set by shortening its length given you're essentially reading 3 sets, but that doesn't do anything to help with the set's understanding. I feel this set would be improved substantially if you emphasized on the aforementioned mechanics, stats, moves and perhaps altered the Specials: maybe have Sonic do the tornado with his Side Special and Knuckles throw his teammates as fireballs through the Down Special.
Yeah, I think I'll go through and add a bit more detail where it's needed. I think the Blue Tornado would fit best as the Neutral Special, though, since it's his stationary move, and the Rocket Accel would fit better as his Side Special. As for the Down Special, that was explained above; plus, I felt that the burrowing was more unique, rather than just being another projectile.
Mind you, the Specials as of now wouldn't be -completely- boring to use given Mii Brawler exists, just that they're not compelling and don't represent Sonic Heroes at its best. Add emphasis to the set and polish it up, and you'll have something fine on your hands.
Thanks for all the feedback! :) I'll see what I can add/polish.
Replies in the quote.
I'd also like to add that the focus of the moveset wasn't really to represent the game Sonic Heroes, but rather to explore the possibility of having Sonic, Tails, and Knuckles from the Sonic series as a whole in one character, and the playstyles they could each bring to the table. I'll go through the original moveset and see what I can tweak. Thanks for the feedback! :)
 

Reiga

He sold diddy for a switch
Joined
Dec 8, 2014
Messages
1,256
Location
White Noise
3DS FC
1461-7646-7368
Hey guys, this is my first time doing a MYM entry (yay...), this moveset may or may not be really bad, this is my first shot at MYM so here it goes!


~~~~~~Marx~~~~~~
"I made the sun and the moon to fight. I got you into space... it was all according to my perfect little plan!"

Marx was once a cute little creature from Dreamland that made the sun and the moon to fight, he then tricked Kirby into going to the neighbouring planets of Popstar to summon Galactic Nova, a mechanical comet that grants wishes, to end the fight. When Kiry finally summoned Nova he bumped Kirby out of the way and wished for complete control of Popstar, he was defeated by Kirby, but has since always made suprise appearances in games like Kirby's Return to Dreamland back in his original form. He now seems to have returned in Smash Brother's in his powered-up form, itching for another fight!

~~Stats~~

In the original Kirby Super Star Marx always faced the screen and floated, here Marx faces left or right like when using attacks like the beam or arow attack and stands around and walks on his feet at a medium pace. For his sprint, Marx flies around with a major movement improvement that makes him around the speed of Sheik, in the air his movement is also great due to his wings, but he is very slow when falling. Marx's first jump has him do a short jump with his feet, but all 5 of his next jumps are him flapping his wings. Marx does however have his problems, he is light and can be knocked out of the arena at lower percentages than other fighters and he can also be grabbed easily due to his large wing hitbox during certain moves.

Here is Marx after using an attack in the boss battle in Kirby Superstar, he is normally seen facing the screen in Kirby games, but he only faces it during certain moves.
~~Standard Moves~~

Jab: Marx Combo
Marx claws his opponents with his left stubby arms for 2% damage and low knockback, he then does the same with his right arm for the same results then releases a flurry of arrows that continously do 1% damage and low knockback until he finishes off with a kick with both legs, doing 2% with medium knockback.

Side-Tilt: Hatted Headbutt
Marx does a headbutt with his jester hat, hitting the tip of the hat does 8%, while the rest of the hat does 6%, this move doesn't really launch much.

Up-Tilt: Jester Claws
Marx faces the camera and claws upward for 7% damage from each claw with decent knockback, while this does give him 2 hitboxes that do good damage, it does have its flaws, such has the fact that Marhas start-up lag before facing the camera and he becomes wider and more open to hits and grabs.

Down-Tilt: Low Sweep
Marx does a low sweep aimed at tripping opponents, it only does 1% damage but half the time it makes opponents trip, it is also very low, meaning even the tiniest of jumps evades this move.

Dash-Attack: Faceplant
When executed Marx accidently falls head first into the ground, this attack does 8% damage with a bit of knockback and makes Marx move a bit when sliding.

~~Smash Attacks~~
Forward-Smash: Mirror Halves

In a simillar vein to a Mirror Kirby move, Marx faces the screen with his wings folded and splits himself into two simmetrical halves, the half that is in the direction Marx was originally facing distances itself from the original position and hits opponents, it Ko's at 150% uncharged and 130% fully charged. The Marx half that moves distances itself at the same distance as the shots from Duck Hunts Forward-Smash and moves quite fast.

Up-Smash: Shadow Rise
When charging this move Marx becomes half-buried into the ground, when executed Marx quickly enters the ground and then charges upwards hitting all opponents in the way. The move can KO at 140% uncharged and 120% fully charged.

Down-Smash: Bramble Scramble
2 bramble vines sprout out of the ground on both sides of Marx, each one Koes at 140% uncharged and 120% when charged.

~~Aerials~~

Neutral Aerial: Marx Spin
Marx faces the camera and spins aroun horizontaly, being hit by his wings by the sides does 7% and has decent knockback, while being hit by the top or bottom of Marx does the same damage but has higher knockback, becoming a good spike.

Back Aerial and Forward Aerial: Arrow Storm
I'm putting both of these moves in the same template due to they're simillarity, but i'll point out the diffences. Both moves have Marx send out a storm of double tippped arrows, they unlike the move of origin only travel the distace of 2 Marx side by side for the Forward Aerial and 1 for the Back Aerial, for both versions of the move it does 1% damage and medium knockback per arrow, with a total of 6 arrows for the Back Aerial and 12 for the Forward Aerial, the arrows fly off in > formations made of 3 arrows, the Back Aerial also propels Marx forward the direction he faced before using the Back Aerial.

Down Aerial: Falling Kick

Marx quickly falls down facing the screen with his wings folded hitting opponents feet first, this attack does 7% damage and has moderate knockback, it can bounce off enemies and be repeated much like Greninja's Down Aerial but has a bit of startup lag.

Up Aerial: Wing Clap

Marx turns to face the camera and quickly moves his wings upwards to the very top to hit and squash fighters, this move does 9% damage and has great upwards knockback.

~~Grabs~~

For his grab Marx faces the camera and divides into 2 halves, between these halves is a black hole that at a short range can suck up opponents, who are then seen swirling inside the black hole...

Marx doing the Black Hole move in Kirby Superstar, please note that the in Smash Bros the Marx halves are closer to the black hole than here.

Pummel

Marx's 2 halves get a bit closer each time you use the Pummel, by doing so he tightens the black hole and damages the opponent for 2% damage.

Down-Throw

Marx's 2 halves unite again and he reappears with his cheeks comically puffed up with small eyes, he ate the opponent! He then quickly spits out the opponent onto the ground, doing 10% damage and bouncing the opponents onto the ground and into the air.

Up-Throw
A bramble vine appears underneath the black hole and forcefully throws the opponent out, this move does 8~9% damage and launches them high into the air

Forward Throw and Back Throw
Depinding on the throw one of the Marx halves get's out of the way as the other half backs off a little before charging into the black hole, releasing the opponent out of it and doing 8-9% damage with high launch power

~~Special Moves~~

Neutral Special: Marx Laser
Marx shoots out a white thin and thick laser beam that travels quickly at the distance of half FD befor it disapears, it only does 1~2% damage and at best flinches, but can be charged to do damage and do more knockback but move slower. The Marx Laser takes longer to charge fully compared to other chargable projectiles as the fully charged laser is as big as Marx himself and as thick as 4 Marx and can KO at a whopping 110%, but as cons it takes long to charge and can't be stored for later use.

Side-Special: Cutter Boomerangs
Marx shoots 2 cutter blades, one going diagonally upwards and the other one diagonally downwards and then return to him, each do 4~5% damage to enemies with almost no knockback, they can also hit on the way back, no matter which location Marx is.

Up Special: Marx Teleport
Marx starts charging up with his wings unfolded, he is normally looking up, but you can change that direction, after the button is released he teleports to the direction he's facing, going the more distant the more he charged, after charging enough Marx will teleport without input. This attack doesn't do any damage

Down Special: Ice Blob
If Marx uses this move in the air he inflates his cheeks for half a second and then drops down a blob that freezes opponents and does 5% damage on contact, after doing 3 jumps, Marx's ice blob dissapears before even touching the ground, but at max 2 jumps the blob can hit the ground, when hitting the ground it turns into 2 ice balls that travel on the ground at oposite directions and freeze anyone who touches them. When used on the ground Marx only summons the 2 ice balls.

Final Smash: Marx Soul

Galactic Nova appears in the background as Marx fuses with him and transforms in a white glow into Marx Soul! Marx now has incredible speeds and immense launch power, his Marx Beam now takes less time to fully charge and his attacks like the Cutter Boomerangs and the Ice Blob have higher range, not to mention he ow can full on fly like in Yoshi's Final Smash! This Final Smash of epic proportions lasts for 18 seconds before Marx returns to normal in a circle of light.

~~Misc. Info~~
Taunts:

Up: Marx transforms back to his original form and bounces on his multi-colored ball.
Side: Marx faces the camera sticking his tongue out like Marx Soul and doing his signature laugh
Down: Marx divides into 2 horizontal halves, then 2 vertical ones, then 4 diagonal ones.

Victory Animations:
1:
Marx laughs Maniacly, with the sun and the moon fighting on the background.
2: In his original form, Marx bounces on his multi-colored ball then trips and falls off it.
3: Marx tries to imitate the Kirby dance but slips in the last dance move and falls to the floor.

Losing Animation:

Marx appears with a sad face in his original form, with his ball next to him.

Entrance Animation
Marx's original form enters riding on a multi-colored ball, he then abandons the ball and transforms into his monster form just like in Kirby Super Star.


~~Gameplay~~
Marx is a trickster type of guy, he will do everything to wittle opponents to hit them when they're most vulnerable, so he has many moves that make opponents free for attacks, like the tripping from the Low Sweep or the freezing from the Ice Blob, with his high velocity he can truly be the annoyer.
A good Marx player will have a better distance from other fighters due to they're frailty and using long-ranged attacks. Marx isn't a very good damage dealer, but can use many shenanigans to knock opponents off the stage, like freezing opponents midflight or spiking them with a Neutral Aerial.


EDIT: Added losing and entrance animations.
EDITEDIT: Changed the Star Wings into Bramble Scramble, because it fits more with the character and the idea a Smash attack creates hazards just sounds dumbs when you think about it.
EDIT 3: I'm adding images from the games to better exemplify the moves appearances and such.
EDIT 4: Made some changes thanks to a comment made on the moveset.


Last edited:

IvanQuote

Smash Ace
Joined
Apr 7, 2014
Messages
853
Location
Looking for those who like Mighty No 9
NNID
ivanquote
3DS FC
1693-3075-2999
Hi there. This is my first set, so please give my moveset criticism:

Mega Beedrill


Mega Beedrill is a unique mega evolution to a previously outclassed Pokemon. It gains a third pair of wings and gets additional spears on its legs and tail, while the ones on its arms become larger and even more menacing. Because of this, it has an insane amount of attack power and speed, while still keeping middling defenses. Its new ability, adaptability, boosts the power of its poison and bug type attacks to even more ludicrous levels. Its playstyle is to attack hard and attack fast in the air, as it will probably not survive its next hit. Also it looks amazing.

Statistics:

Size: 3.5 (A bit taller than Mario)

Weight: 1 (One of the lightest characters, puts the glass in “glass cannon”)

Fall Speed: 6 (Falls somewhat quickly, around Meta Knight’s speed)

Jump: Average ground jump height (around that of Ness’s) but his “double jump” is actually a semi flight of sorts that can go only a certain distance. It’s like ROB’s recovery, but about half distance. To compensate, if it gains its double jump back when hit from an edgeguarding opponent, it is half the distance of what it normally is (1/4 ROB’s up B.)

Air Speed: 8 (Pretty high. A touch below Diddy’s. It is a bee after all)

Ground Speed: 2 (Clunky on the ground, as its enormous thorax drags along the floor. As a result…)

Traction: 10 (It does not slide at all, even on ice)

Misc: All attacks that involve its tail stinger hitting the enemy produce a dark (poison) effect.
Holds items in mouth.

Standards:

Jab: Plants its tail into the ground and jabs with its 4 appendages in a blindingly quick manner. Similar to Meta Knight’s jab, except it is vulnerable from behind in exchange for a bit more forward range. Has more ending lag than most rapid jabs, as it pulls its tail out of the ground. 1% per bottom limb and 2% per upper limb. No KO power.

S Tilt: (Poison Jab) Plants its leg stingers into the ground and stabs his tail out. Has decent damage (14%) and horizontal knockback, but has bad start up and cooldown.

U Tilt: Does something akin to an uppercut with a forearm (12%). It’s a fast attack with a tiny bit of a startup, not much cooldown, and launches the opponent upwards; perfect for combo starting. Visually has a dark effect on the enemy.

D Tilt: Kicks out along the ground with one of its leg stingers. Has a high chance of tripping the opponent and is quick, but has low damage (7%) and horizontal knockback.


S Smash: Crosses its forearms and slashes them outwards (X-Scissor). Unlike most of its grounded moves, it has minimal cooldown; it is a strong and fast killing move that is its main option for killing on the ground (23% charged).

U Smash: It stabs its forearms into the ground and does a backflip of sorts. If the attack button is pressed again, the momentum of its abdomen during the backflip tears the stingers from the ground as they come up in a half circle. This is a two hit attack that acts like Link’s forward smash in a way. The first hit does set knock back directly upwards (6% charged), while the second launches the opponent upwards (9% charged). If the second hit is done, Mega Beedrill is off the ground and can follow up with air attacks through double jumping. It’s a bit difficult to visualize, so I’ll provide a drawing.

image.jpg


D Smash: It sticks its arms and legs out horizontally and gyrates on its tail, slicing its foes like a blender (kind of like ROB’s, but with an extra pair of limbs). This hits multiple times as one would expect and launches the foe upwards on the final hit (3% on first 4 hits, 7% on final hit, totaling 19%), but leaves Mega Beedrill open if the attack is missed.

Dash: (Drill Run) It lifts its tail stinger up such that its parallel to the floor and contorts itself such that its other stingers’ tips touch the tip of its tail. It then starts spinning forward like a drill. This goes quite a distance (1/4 of FD) and hits multiple times to rack up a lot of damage (21 if all hits connect), yet it has horrible ending lag if the final hit does not connect. Final hit launches the opponent upwards weakly, leading to aerial combos at higher damage.

Aerial:

Nair: Flails its 4 twin needles around itself, striking multiple times (20% if all hits connect). Good at interrupting, but suffers bad landing lag (visually lands in its back spread eagle before propping itself up).

Fair: It does an X-Scissor with its fore stingers (15%). One of its primary killing moves; it is a quick move with near instant start up. One of the most amazing things about it is about as strong as an uncharged forward smash.

Bair: It buzzes its wings out behind it, accompanied by a harsh buzzing sound. This is a multi-hit move that is good for racking up damage (24% if all hits connect) and can push the opponent back to some extent like a weak Fence of Pain. Minimal cooldown, but lasts the longest out of all of its air moves, so it will leave Mega Beedrill open if missed

Uair: It flips its body upwards. The tail stinger tip has a sweet spot at the highest point (16%), making for a powerful upwards KO move. Sour spot is much weaker (7%).

Dair: It stabs its tail downward for a strong meteor smash (20%). Has small ending lag in the air, but has terrible ending lag when landing (2-3 seconds!) as it needs to uproot its tail.

Grabs:

Grab: Deceptively short range; it attempts to hug the opponent with its 4 limbs. Running grab is faster than running speed, lasts around 1 second, and has cooldown of .5 seconds if missed.

Pummel: It bites the opponent. Slow speed and about 3% damage.

F Throw: Crosses its forearms and does an X-Scissor (12%). Knocks the opponent into the air at around 45 degrees.

B Throw: Swivels around on its tail and “punches” the opponent way with its forearm (12%). Does decent horizontal knockback and is good if you have your back to a ledge.

U Throw: While holding the opponent, it unroots its tail, rises by the distance of a short hop, and slices the opponent upwards in a motion similar to its up smash’s second hit (9%). This is one of its best moves, as you are already in the air during this attack’s end, leading to great potential combos.

D Throw: Pins the opponent to the ground and violently sits on him/her with its tail (15%) and launches upwards. Mega Beedrill needs to uproot its tail, so it cannot follow up for a while

Specials:

Neutral: (Poison Sting) Jabs its tail forwards, moving Mega Beedrill forward as well. On contact, the stinger does 8% and launches the opponent upwards at a 45 degree angle. The stinger detaches and remains stuck to the opponent for 8 seconds, doing 2% per second, at which point it falls off and disappears on contact with the ground (ungrabable). In the air, The attack is aimed downwards at 45 degrees, launches the opponent horizontally, and boosts Mega Beedrill up slightly like ROB's dair. Has tiny start up and 0.75 second end where the thorax makes a new stinger.

Side: (U Turn) It rushes forward with its 2 forearms extended about 2 Mario widths when it suddenly flips over and boosts backwards ½ FD in about 1 second. The forward part does 2% damage, but carries the opponent with it. When it flips over, the tail has a sweetspot that does high knockback and around 22% damage. It has invincibility frames when it’s traveling backwards.

Up: (Tailwind) Flutters its wings quickly and white gust lines surround it. No damage and short vertical distance (about 2 Yoshi Up B’s), but horizontal air speed increases further, allowing it to move quickly horizontally all the while (can move twice as quickly). Can attack in this state.

Down: (Infestation) Sends out a dark “cloud” of wasps (similar in appearence to the bee swarm in the Animal Crossing games) that travels slowly and horizontally. It travels a third of battle field in 3 seconds before disappearing. If an opponent comes in contact with it, the cloud surrounds them for 5 seconds and acts as if a pikmin is attached to the opponent, doing 5% per second. They don’t get stunned during the infestation, but if they stand still, they do the animation that happens if they have eaten Superspicy curry (no flames obviously.) Has a small startup and cooldown.

Final Smash (Swarm):

It makes a high pitched buzzing sound and several normal Beedrill fly out from one side of the screen, similar to their Pokeball in SSB64, but it covers the entire vertical range of the screen instead of just a 3 Mario tall range. Lasts for about 11 seconds, each Beedrill does around 9% with small knockback in the direction the Beedrill is moving, and Mega Beedrill’s damage and knockback rise by x1.5. Mega Beedrill is also invincible until it stops glowing.

Palette Swap

(Standard) Yellow and Black, Red Eyes, White wings

(Shiny) Lime Green and Black, Blue Eyes, White wings

(Volcarona) White and Black, Cyan Eyes, Red-orange wings

(Mothim) Black and Orange (reversed), Orange Eyes, Yellow wings

(Venomoth) Lilac and Black, White Eyes, Lilac wings

(Heracross) Blue and Black, Yellow Eyes, Orange wings

(Ledian) Red and Black, Blue Eyes, White Wings

(Vivilion) Magenta and Black, Black Eyes, Black wings


Playstyle: Think of it like a Jigglypuff that falls more quickly. However, due to its double jump, it can give the appearance of being a fast faller or a floater. It is much more mobile in the air than on the ground, so it should spend most of its time there as many ground attacks fall short in comparison to the air ones. Use Up tilt, smash, and throw to put the opponent into the air and attack from there. Its fair and bair can act as a fence of pain, but bair works better, as the fair is really good launching. Its uair is really good at killing and juggling with its wide arc. The dair should NEVER be used near the ground, as it has failed Super Dedede Jump levels of landing lag. B and Down B can easily rack up damage, especially in tandem. Down B and Grab, Pummel, and throw work well as well. Side B is a good getaway tactic.

Taunt:

Taunt 1: Its eyes start glowing and it pokes its abdomen forward in a taunting manner. It’s similar to its Pokémon Stadium entrance.

Taunt 2: It plants all 4 limbs into the ground and buzzes menacingly.

Taunt 3: It rubs its forearms together, as if to sharpen them.

Entrance: The Mega Evolution animation goes off and Mega Beedrill appears.

Victory: The animations are the same as the taunts, except they end in the Mega Evolution animation as it turns back into regular Beedrill.

Also I have ideas for custom moves, but I’ll just put them off to the side:

[collapse=Custom Moves]
B2: (Pin Missile) Shoots lime green needles. Instant start up, fires about as fast as Fox’s blaster, projectiles travel 1/2 speed of Sheik’s needles 1% per needle, but no stun. Has range of ½ final destination, but suffers longer cooldown on the ground. No noticeable landing lag and fires horizontally in air.

B3: (Fell Stinger) Stays in place and has the longest starting lag, but when it thrusts out its thorax, this short ranged attack does a lot of shield damage, 26% and knockback.

Side B2: (Pursuit) It acts as a counter, but not in the traditional sense. It does set damage (16%) and looks just like U Turn up to the backflip.

Side B3: (Aerial Ace) It dashes toward the nearest opponent and does its backflip (7%). Similar to Sonic’s Neutral B3, but a bit slower.

Up B2: (Ominous Wind) Doubles the vertical distance gained, but reduces horizontal momentum. Does 3% damage, minimal knockback, and can attack during descent. Dark purple wind gusts.

Up B3: (Silver Wind) Shiny wind gusts that has same vertical boost as tailwind and no horizontal boost (does not negate horizontal movement), but provides super armor until ledge is grabbed or landed on ground. Does 3% damage, but puts Mega Beedrill into recovery mode.

Down B2: (Giga Drain) Basically Distant Nosferatu, but with bright green energy. Deals 9% and is healed by 6%, regardless of the direction the opponent is facing.

Down B3: (Electroweb) Sparking yellow wad of web (see DKC2's Squitter) that travels ½ Battle field in 2 seconds. Does 4%, but stuns like Zamus’s B Neutral.
[/collapse]

EDITS: Clarified Down B descriptions to be less ambiguous

Changed infestation's color from lime green to dark color

Completely Changed Neutral B attack from a projectile to a physical attack

Added Shield Damage and damage specs to Custom B3

Added miscellaneous section

Added playstyle section

Added entrance/winning animation
 
Last edited:

n88

Smash Lord
Joined
Oct 10, 2008
Messages
1,527
Mega Beedrill's got a decent foundation. You manage to come up with a lot of solid, visually interesting attack animations here. The standards (by which I mean everything but the Specials) all feel very unique to Beedrill. You've really got the character in mind, and that's good. So here are two pieces of advice, one specific to Pokemon movesets and one more general nugget of wisdom.
  1. Think carefully about what to take from a Pokemon's learnset, and how to interpret it into Smash Bros. I think the Specials are kind of a let-down for Beedrill, particularly Poison Sting and Infestation. Take Poison Sting. That's a must-have for Beedrill, but would he really use it in the form of shooting pins at people? It seems fairly intuitive that, regardless of the in-game animation, the move is in Beedrill's learnset to represent a bee sting (or a wasp sting, I suppose, since Beedrill is pretty clearly a wasp and not a bee at all). Your Infestation implementation also feels a little off to me; in the arena of Smash Bros, does it really make sense for Beedrill to be shooting poisonous clouds at people? (This might sound like a harsh criticism, but don't take it that way. Almost everyone in MYM, myself included, has done the same thing at some point or other; back in the day, the phrase "Pokemon Syndrome" even became a shorthand for this kind of problem)
  2. Write a playstyle section! A moveset is more than the sum of its parts, and a little write-up at the end of the moveset about your character's fighting style works wonders. If it helps, next time you write a set (and hopefully there is a next time; I'm interested in seeing where you go from here!) start by writing down a couple quick sentences about how John Doe should fight and keep that goal in mind as you write the set. Then, when you hit the end, just devote a paragraph or two to John Doe's strategy and tactics, or what kind of players might want to give him a shot.
EDIT: I was planning on holding off and trying to do a big catch-up, but I think I've got better odds of making it through going a little bit at a time. So, bombs away. Nate's super-slow catch-up, part one.

El Jefe isn't all bad, but I was a little disappointed in how it kinda petered out. The Specials introduce some concepts that could certainly add up to something, but the set loses momentum afterward ("El Jefe slashes forward with his claws, in a semi-generic Jab attack animation"? You could at least commit to calling it generic!). I like the way the Down Special reduces him to a lumbering brute with only a handful of attacks, though unfortunately the moveset doesn't really capitalize on it. Admittedly, that is a difficult thing to capitalize on in a largely physical fighter like Mr. Jefe, since it cuts off access to most of his attacks.

Jefe's got a few balance hang-ups; why would this guy ever dash anywhere when he's got his Forward Special? And why does he have an attack that does 18% and combos into itself? In fact, those Aerials are dishing out crazy damage across the board. And there are a few weird in-game logic bits like Jefe's lightning going through platforms and Jefe having two "spin around with Thunder swords" moves with completely different effects. (Though that latter may be on the source material, not on you, for all I know) The biggest issue here, to me, is the lack of a larger vision for the character; the set gives Jefe a few fun things to do, but it doesn't really come together for me.

And am I the only one around here who's bothered by a South American tiger? Tigers aren't from South America! Maybe he's an immigrant and I'm animal-racist or whatever.

You know, I think I actually already read Lore back when it was posted, and forgotten about it. He's not a bad re-read, though. The writing style here is light and entertaining, and the moveset is fairly simple with a strong central concept (yes, I've used similar things in the past and may as well be praising myself. Don't judge me). I don't think this is the set people will be talking about in years to come, but it's fun, it works, and it's a solid start to your MYM16.

I think my chief criticism of Lore's implementation is that he feels a bit too limited. His Specials feel particularly underpowered. The general utility of the hands mechanic will make up for it in some measure, but his options still feel a little too restricted to me. A playstyle section would have been nice here, but I suppose it isn't ultimately necessary; Lore is easy enough to envision in motion.

I've already hit the Pandemonium Lords, so on the DM front, I'm all caught up with Neku Sakuraba. I usually like your work, but this isn't quite your typical bundle of tricks. The partners and the light puck made for an interesting set-up, though some of the partners' attacks felt a little underdeveloped at points. (How big is an obstacle? How much bigger is a larger obstacle?) But that list of pins... man that was a slog. I didn't have the heart to do much more than skim through the main playstyle section after making it through all that, and I sure as heck didn't go through all the individual pin-outs and match-ups.

This has the feelings of a really carefully done tribute to the source material, but I'm not familiar with said source material, and it's all a bit lost on me. You get an A for effort, but Neku is so far removed from what a moveset normally is that I can't entirely wrap my head around him, and I'm more inclined to think of him more as some crazy (probably way over-powered?) game mode than an actual fighter. (By the by, can you take two pins that have the same input mechanism? Do both go off simultaneously, if possible? If there was an explanation for that, I missed it)

Astamon's up first in the Froy series, and I'm not going to spend too long on this one. Partially because its age makes it hard to criticize, and partially because I've still got eight more Froy sets to read and comment. There are some good concepts in here, but it does feel a bit rough (and maybe a little over-powered at points). There are also some instances where the moveset seems to be trying a bit too hard; forced creativity is an easy enemy to fall prey to, and it rears its ugly head in a few moves (that Back Throw is the main guilty party here). The knife mechanics also feel a bit strange to me, though I suppose MYM12 gave us worse.

There are some things to like here, though, as I mentioned before. I like the way Astamon really puts the foe to running, and how a canny runner might turn that against him. The homing bullets are a pretty cool centerpiece, and that Final Smash is a super attack after my own heart.

9/64. Progress!
 
Last edited:

FrozenRoy

Smash Lord
Joined
Apr 26, 2007
Messages
1,260
Location
Las Vegas, Nevada
Switch FC
SW-1325-2408-7513
The Comment Corner has been finished and can be found here. The front page also has a post of mine with a link and the Roy in my Signature should also link there (The Aradia links to my rankings and is now correctly updated to link to my MYM16 rankings). Enjoy!
 

FrozenRoy

Smash Lord
Joined
Apr 26, 2007
Messages
1,260
Location
Las Vegas, Nevada
Switch FC
SW-1325-2408-7513
Sheriff Lollipop

The electric trap of Sheriff Toothpick's set is really cool! It'll remind a lot of people of the famous Baron Barrier. He also has a sort-of mode change, but the way it is handled lets it blend in more seamlessly, and while it could have a lot more done with it it feels much better done than in Kamen Rider Double, the mode change being Sheriff Toothpick growing bigger for those who have not read the set. I would have liked a little bit more difference in modes though, probably added effects on giant mode, and the actual attack buff on the Mode Change is really weak, I would have pumped it up...maybe added a reason to not switch between the two modes so much.

The issue this set has is that, after the Specials and Smashes, it doesn't have all that much to it: The Standards and on do not really suggest much of how Toothpick would play or work much into the most obvious route, Toothpick playing a trappy camper with his gun + Electric Trap until he goes big to smash them, in most ways I can see, especially evident on the Aerials and Grab Game. The one thing I really like from then on is the Forward Smash: It could have more, but it works well enough that it'd be a fine move if the rest of the set had more support. Aerials and the grab game in particular need some explanation of their relevance, be it via similiarities or differences or whatnot compared to other options, for them to not fill like they just exist.

Something I will say is rereading the set for this comment, I liked it more than when I first read it, and moved it up to 4 star in ranking: It's got a good idea at the core, but it doesn't adequately support the idea, though the moves are also in general not especially bad.

The Miz

The best of the Le Paradox characters. Nobody can stop DA GRIZZZZZZZZZZZZZZZ

The Grizz suffers from some underdetail compared to El Jefe and Sheriff Toothpick: How do the ice blocks work? Like moving freezies, like solid blocks, something else? The move itself is good but feels like it is missing some critical details in how it works: Him having ice cubes to interact with would certainly be interesting, anyway. The stalacites are also pretty neat and I like them. I will say I agree with Kat here that they can be explained a bit confusingly, though, so that's something to consider.

The moveset is a bit more inventive than the rest of your sets, but naturally this has a good and a bad side, though I feel it was overall a positive here: The smashes in particular were fairly nice. I feel here much like Turtles did on Toothpick, though, in that the aerials and grab game are very lacking, and compared to the rest of the set they feel like you almost gave up on them and that you lost focus there. They don't need to do a bunch of crazy stuff to be good, that is true, but these don't bring anything to the table even in the context of going for simple moves. I also feel like, overall, the moveset could have been more conscious of the effect that things like the blocks and stalacites would have on moves like the melee and would have enjoyed getting a better mental visual of how it all worked together, but the set doesn't much provide that. It is my favorite of this movement, though.
 
Top Bottom