• Welcome to Smashboards, the world's largest Super Smash Brothers community! Over 250,000 Smash Bros. fans from around the world have come to discuss these great games in over 19 million posts!

    You are currently viewing our boards as a visitor. Click here to sign up right now and start on your path in the Smash community!

Make Your Move 16: MYM 17 Starting June 1st

Reiga

He sold diddy for a switch
Joined
Dec 8, 2014
Messages
1,256
Location
White Noise
3DS FC
1461-7646-7368

Nano Shinonome

Nano is a robot built by the 8 year old professor Shinonome made to manage the household doing chores, shopping and such, since she lives alone. Despite the professor's young age and young mindset she's somehow a genius and made a robot that practically is identical to a real human... except for the key on her back... not to mention that the professor constantly upgrades her with useless gadgets, like a roll cake dispenser and a rocket propelled arm, much to Nano's chagrin, since she just wants to be like other people and doesn't want somebody to know she's a robot.
If you do not know the anime where she is from, it's called Nichijou (日常). It is a 26 episode 2011 anime based on a running manga series that depicts in a comedic way the everyday lives of various characters (mainly the trio of the highschool girls Yukko, Mio and Mai and also Nano and the professor), often using really strange situations and making mundane seem awesome, it's a good anime and all and I'd recomend to someone who wants a good chuckle.


Stats:
Height: 6/10
Crouch Height: 4/10
Weight: 6/10
Ground Speed: 6/10
Aerial Speed: 7/10
Fall Speed: 8/10

Wall Jump: No
Wall Cling: No
Crawl: No

Special Moves

Side-Special: Rocket Arm

Nano puts her right arm in front of her and then has her arm flies off, flying horizontally with a small fire spurting from behind it. Anyone hit by Nano's hand will suffer 9~10% damage and overall decent knockback, with the hand then falling to the ground and turning into a throwable item that does 6% with no knockback and dissapears after hitting someone when thrown. Nano's arm will travel two thirds of Final Destination, always lowering a bit until it hits the ground and becomes a throwable item. The item acts as normal to adversaries but when Nano collects it she regains her arm.
If the hand dissappears (either by being thrown or staying in the ground for too long), Nano has a new arm come out and replace it. If Nano's arm falls off the stage her arm will automatically be substituted.
During the time Nano doesn't have her arm she can't use her Side-Special again and some moves are affected either negatively or positively, like...

Neutral-Special: Soybean Gun

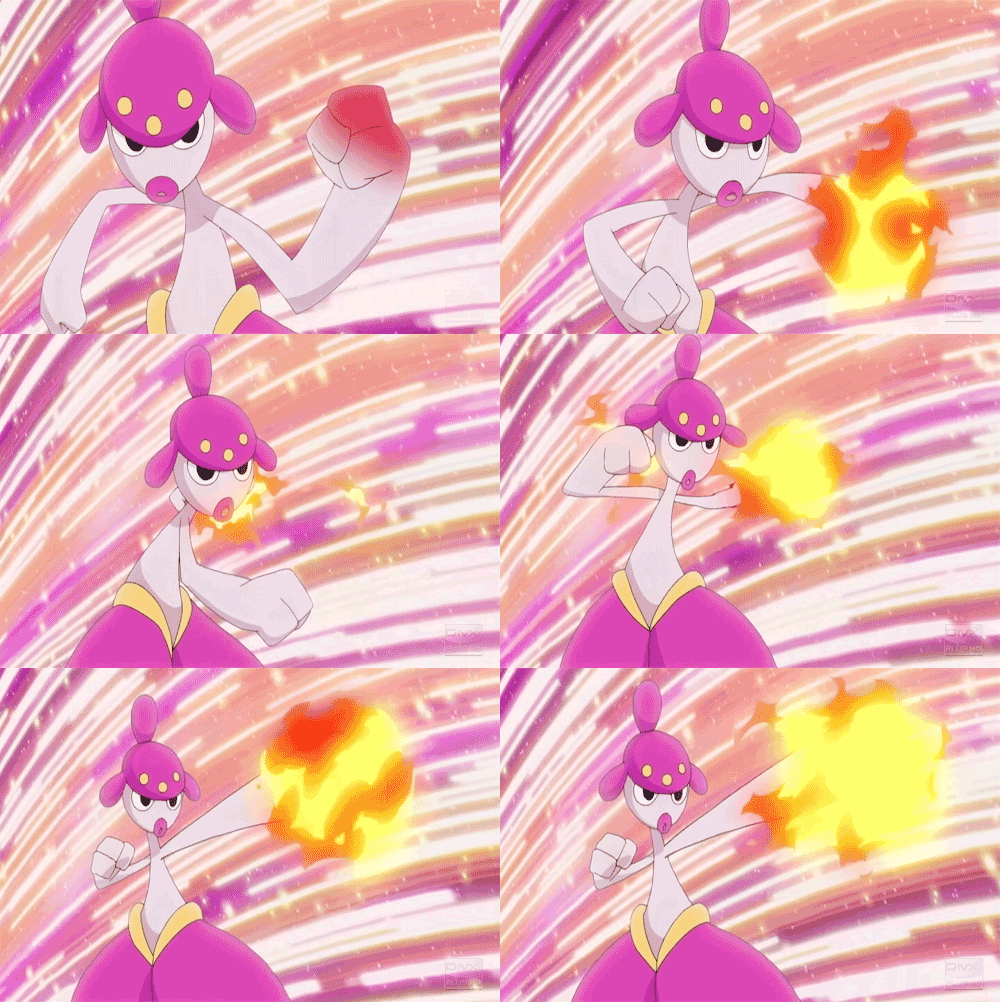
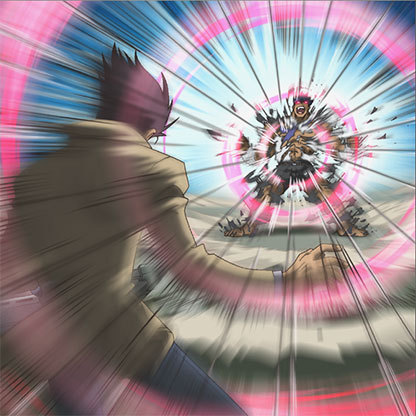
Nano put's her right arm forward and the animation above happens. She can then can fire up to 6 soybean, the first 5 do 2~3% damage with almost no knockback, while the last one does 5~6% and has good knockback, being a bit bigger to distinguish it from others.
Startup and ending wise, the move has a bit of lag. When used when Nano doesn't have her arm it doesn't have lag and she can now shoot up to 8 soybeans, with the last 2 being the more powerful ones.

Down-Special: Food Dispense

This move on input has Nano dispense one of many foodstuff that then become an item consumable to her and adversaries. These food items include:

-Roll Cake: Out of Nano's left arm comes out a roll cake. The start of the move has a lag of one second (that is lowered to half a second when Nano doesn't have her arm). There is a 30% chance of getting a roll cake.
A roll cake heals 15% damage from any character.
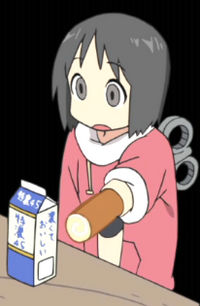

-Sweet Bun: Nano's forehead opens up and a little tray with a sweet bun comes out and the sweet bun falls to the ground with little to no startup lag. There is a 60% chance of getting a sweet bun.
A sweet bun heals 5% damage from any character.


-Fish Cake: In the same way as the roll cake is dispensed, a fish cake comes out with the same startup lag. The fish cake is pretty rare and has a 5% chance of appearing.
The fish cake is a favorite of Nano and can be consumed for a 25% damage heal.

-Loser Popsicle Stick: In the same manner as the roll cake and fish cake a popsicle stick with "loser" written on it comes out. This has a 5% chance of appearing but only makes Nano look at the popsicle with a suprised expression for 2 seconds, being then open for attacks.

Up-Special: It's Flying.
https://www.youtube.com/watch?v=eIA3YKNj_DQ
Nano puts her right arm in the air as it flies off vertically 1 Battlefield platforms with a wire, unlike in the video shown, Nano's hand is open and if it touches a ledge she will be pulled back to her arm.
Right when the arm is being launched off you can move the circle pad any of the vertical diagonal directions to make her arm move that direction.
If Nano doesn't have her right arm the move will have a second of startup lag for a new arm to substitute her old arm, and it's not just for the move as after the move is executed Nano will still have the new arm!

Ground Moves

A Combo: Bag Bash
Nano swipes a shopping bag to the left, then to the right; the combo will continue until the A button is released and Nano finishes the move by swiping upwards the shopping bag. The horizontal swipes do 4~5 damage with very little knockback, while the finisher does 8~9 and good knockback.

Side-Tilt: Flower Slash
Move based on: https://www.youtube.com/watch?v=jgTr4J2aMRw
Nano "slashes" forward with her right arm being substituted randomly by either a single flower, a small bouque of flowers or a big bouque of flowers. The damage given by the move depends on the quantity of flowers, with the lone flower only doing a laughable 1% damage with no knockback but has a 60% chance of appearing, the smaller bouque does 8~9% damage with moderate knockback and has a 30% chance of appearing, the bigger bouque does 11~12% damage with good knockback and a chance of flowering opponents, the move does however only have a 10% chance of spawn.

Side-Smash: Shark Bites
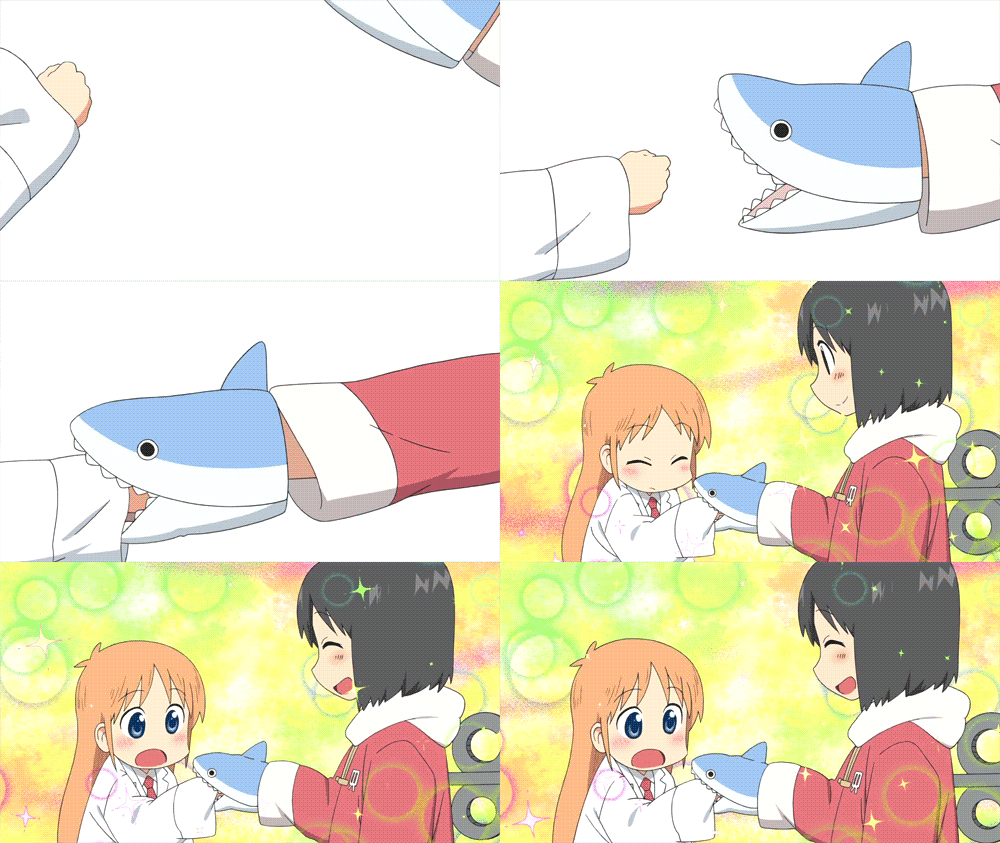
When charging Nano will do a pose as if she is was playing rock, paper, scissors, with a shark mitten covering her right hand. When the move is executed Nano will put her right hand with the mitten forward and do 2 "bites", with the second one dealing the better damage and knockback. The first "chomp" uncharged and fully charged do 15~16% and 20~21 respectively and can KO at around 180% uncharged and 150% fully charged. The second "chomp" uncharged can KO at 170% and does 17~18 damage, fully charged it can KO at 145% and does 23~24%
The move functions completely differently if Nano doesn't have her right hand. First off, the shark mitten is barely visible because it's only occupying what's left of Nano's arm and the jacket is in the way, decreasing the moves range and substituing the "chomps" with a punch with the mitten that does more damage to compensate the range. Uncharged, the attack can KO at 155% and does 20~21, while fully charged can KO at 125%
Just like many smash attacks for other characters, this move can be steered while charging to attack diagonally.

Up-Tilt: Dharma Doll
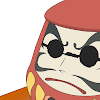
Nano faces the screen and swipes above her horizontally with her Dharma doll (pictured above, with sunglasses painted on by the professor). The attack does 8~9 damage and has pretty good knockback. The move is good for starting a juggle.

Up-Smash: Let's do a good strech...

For the duration of the charge Nano will strech her right arm, with her left arm behind her. When the charge is released Nano's right hand will rocket off and then fall back down and turn into an item when touching the ground.
The distance Nano's arm covers before falling depends on the charge, with the minimal distance being that the size of Kirby. Nano's arm both when ascending and falling does the same damage, uncharged it can KO at 165% and does 14~15 damage, while fully charged it does 20~21% damage and can KO at 130%.
If the move is used while Nano already doesn't have her arm, she will stretch and a new arm appears in it's place, not doing any damage and only giving her another arm.

Down-Tilt: Cuckoo Clock
From her crouch position Nano will have a cuckoo-clock bird come out of her forehead in a way similar to the sweet bun. The cuckoo bird will do 6~7% damage with not a lot of knockback but has almost no lag and has a disjointed hitbox.

Down-Smash: A Terrible Trumpeteer

Nano will get a trumpet and start to play it, music notes with a squiggly effect (you know, those that represent music being played badly in cartoons) will be emmited and she will be moving around like the picture above. Nano will toot it in front of her then toot behind her then again in front of her, each time emmiting 2 music notes that uncharged can KO at 170% and do 12~13% damage, while fully charged they do 16~17% damage with a probabillity of KO around 145%.
If Nano doesn't have her right arm she will play it even worse (try playing a trumpet without fingers). She will now emmit 3 music notes at a time but accidently drops her trumpet when moving back to the front and so won't play it after moving from behind her. This move is basically trading utillity for power.

Dash Attack: Shopping Shower
From her running animation, Nano slows down a bit as she throws one of various shopping items, these include:
Green Onions: does 7~8% damage with not a lot of knockback. Can be picked up and thrown for a mere 4~5% damage.
Shark Chocolate Box: does 9~10% damage with good knockback. Can be picked up and throw to release 3 shark chocolates, each healing 3~4%
Shaved Ice Snowman: a snowman made of shaved ice that does 11~12% damage with great knockback and the abillity to freeze opponents.

Aerial Game

Neutral Aerial: Spinning Shopper
Nano will do a horizontal spin with a shopping bag in her left hand, the move is pretty quick on input and does 7~8% damage with good knockback and a possibility to meteor smash who is hit by the shopping bag.

Forward Aerial: Catch!

Nano will throw a baseball forward with tremendous force, the baseball disappears at the distance of 4 Nanos, has excellent knockback and does 6~7% damage, but has a bit of both startup and ending lag.
If used without Nano's right arm she will instead have the ball stuck on what's left of her arm and then shoot it out, this will do more damage (8~9%) and more knockback but less range (it only moves 2 Nanos forward).

Back-Aerial: Key Spin
Nano suddently becomes more nervous and her key starts to spin rapidly, anyone in contact with the key in her back will suffer a continous 5~6% damage with good knockback, the move does however suffer from a bit of lag in the end of its execution.

Up-Aerial: Dharma Throw
Nano throws above her in a very short distance (about the size of Kirby when croucing) her dharma doll, just like her up-tilt this attack does 8~9% damage with good knockback, what this version has going for it though is that it gives Nano a disjoint hitbox.

Down-Aerial: Shark Chocolate
Nano get's a box of shark chocolate and opens it upside-down, 6 chocolate sharks will then fall down, each doing 3~4% damage and little kncokback, the move does however meteor smash and doesn't have a lot of lag.

Grab Game
https://www.youtube.com/watch?v=dYbMpAp2NSo
For her grab, Nano will have her arm launch forward with a chain, then quickly retract, the distance her arm covers is about the size of Link's Hookshot. Alongside grabbing opponents on it's way the move can tether (compensating the Up-Special only reaching upwards and diagonally), the move can also get items on it's way for Nano to hold. (based on the video above)

If Nano doesn't have her right arm she will instead throw a gardening hose forward to constrict enemies. The move only moves one forth of a Battlefield platform and can't tether or grab items, being more of a downgrade of the other version.

Pummel
Nano slaps the opponent for 3~4% damage, pretty simple move.

Up-Throw
Nano uses her right arm to propel upwards with the opponent still with it, this attack does good vertical knockback and does 6~7%, but at the cost of losing her arm.

If Nano doesn't have her arm she will instead throw the gardening hose upwards with the opponent still entangled inside of it, it does the same damage as the other version of the move.

Front-Throw
Nano puts the opponent on the ground and then fires 2 soybean (each doing 1~2%) and then fires a bigger one that does 6~7% and knocks the opponent horizontally a good distance.

Down-Throw
Nano will place the opponent on the ground then drop her dharma doll on them, the opponent will be launched off and will suffer 8~9% damage.

Back-Throw
Nano drops the opponent on the floor then moves to in front of the opponent, she will then get a baseball bat and swing it at the opponent for 7~8% damage with a high throw distance.

Final Smash: Explosive Trip
https://www.youtube.com/watch?v=ruVnxJXjKJ0 (If you don't want to watch the full video just skip to 1:20)
On activation, Nano will trip and the match will then go on slow motion, when she falls a huge blue explosion will occur and enemies will be pushed with imense force off the stage, not only that as being pushed by the explosion wooden dolls, red toy cows and pieces of salmon will be also pushed by it and will damage opponents for 10~11% damage and amazing knockback.

Misc. Info

Entrance: Nano's right arm will appear in the screen, Nano with her right arm missing will then run up to it and put it back.

Up Taunt: Nano will say "First comes rock, then comes paper..." "you can't throw all of them, rock paper scissors shoot!" and she will throw either rock paper or scissors.

Side-Taunts:
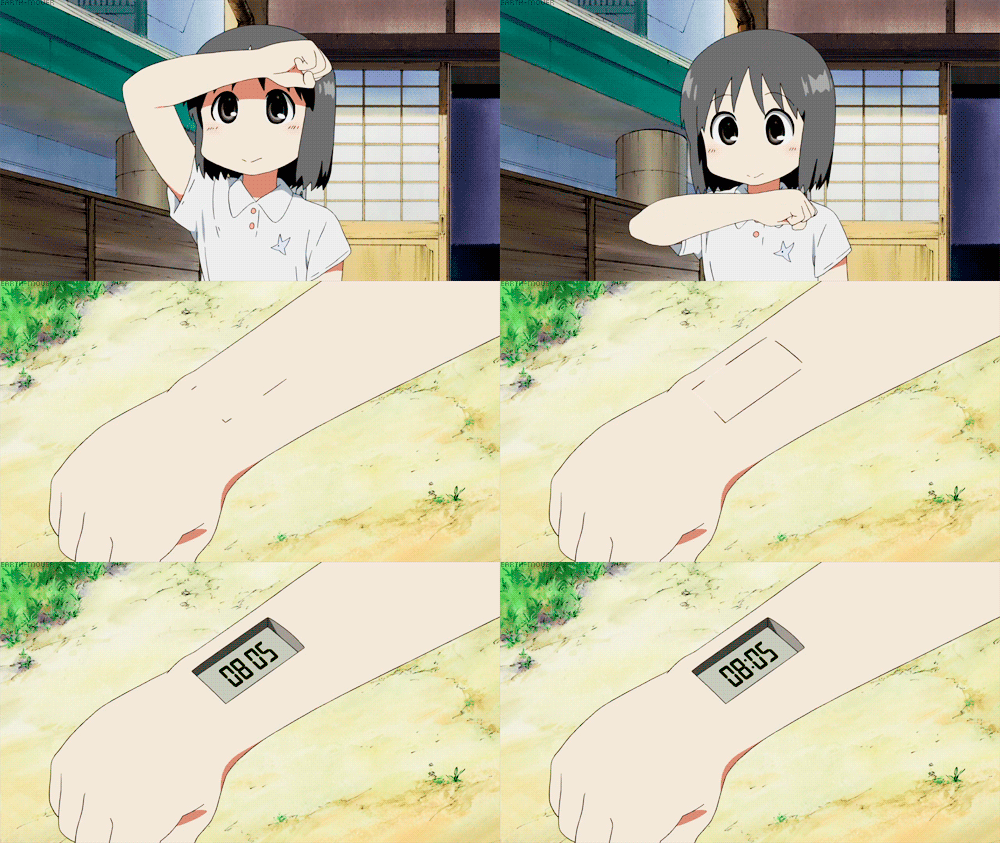
Nano will check a digital watch built into her right arm, if the match is paused and zoomed in one can see that the time is the same as in real life.

Down-Taunt

Nano will do this but without the part where she jumps over the professor.

Victory 1: Nano is seen running trying to get her hand that is rocketing away.

Victory 2: Nano is seen standing, then her arm rockets upwards with the wire from the up-special, she then slowly is pulled to the ceiling.

Alt Costumes:

Main Costume: A red jacket and jeans
Costume 2: A blue jacket and jeans
Costume 3: A red schoolgirl outfit
Costume 4: A blue schoolgirl outfit with a tie
Costume 5: A yellow apron over her red jacket with "kumoma dori" and a yellow bird on it
Costume 6: The yellow apron over a green shirt
Costume 7: A plain shirt with a ghost with a long nose with a yellow bird on it, below it reads "OBK"
Costume 8: Basic white pajamas with a little blue bird on the top right of it.

Playstyle
Nano seems to have pretty average stats at first glance, that seems quite right for her, but what she has going for her seems to compensate that, she has a variety of projectile moves like her rocket arm, soybean gun and even has the disjoint hitbox of her dash attack and up aerial, not to mention a move that spawns items that restore percentage and the abillity of having almost no startup lag on some moves thanks to sometimes not having her right arm. Ms. Shinonome does however suffer from a low weight and only having tether recoveries, so it's not advised to go headfirst into opponents way stronger (which isn't very hard due to said projectiles and disjoint hitbox).
It seems as if with and without her arm Nano's moves have a different style of play. With her arm most of her moves have less power but more practicality (for example the F-Air, since it has less power but more range), while without her arm she seems to have way better power and better speed to execute moves, making it a best option during most of the battle to keep Nano's arm, but take it off if you want to do the finishing blow on the opponent.

~~~~~~
(end of moveset.)

So guys, what do you think? This moveset took a crapton of time to make and I really like how it turned out.
I'm not really one that loves and watches all the time anime, so for me to really like an anime like Nichijou was a suprise so I guess I just had to make a moveset for somebody in the cast, when I thought of Nano I was thinking of just some basic moves, then I rewatched Nichijou and billions of ideas came to my head.
Making movesets for slice of life characters is tough, but sure is tough. When I started this I had 98 posts, I then posted some comment on another thread just so that this can be more special, but that's just me :p.
EDIT: Oh, look, new page!
EDIT2: Did some changes to the moveset thanks to a comment by Kat.
 
Last edited:

TheDarkKnightNoivern

Smash Master
Joined
Jun 24, 2014
Messages
3,641
Location
Croft Manor
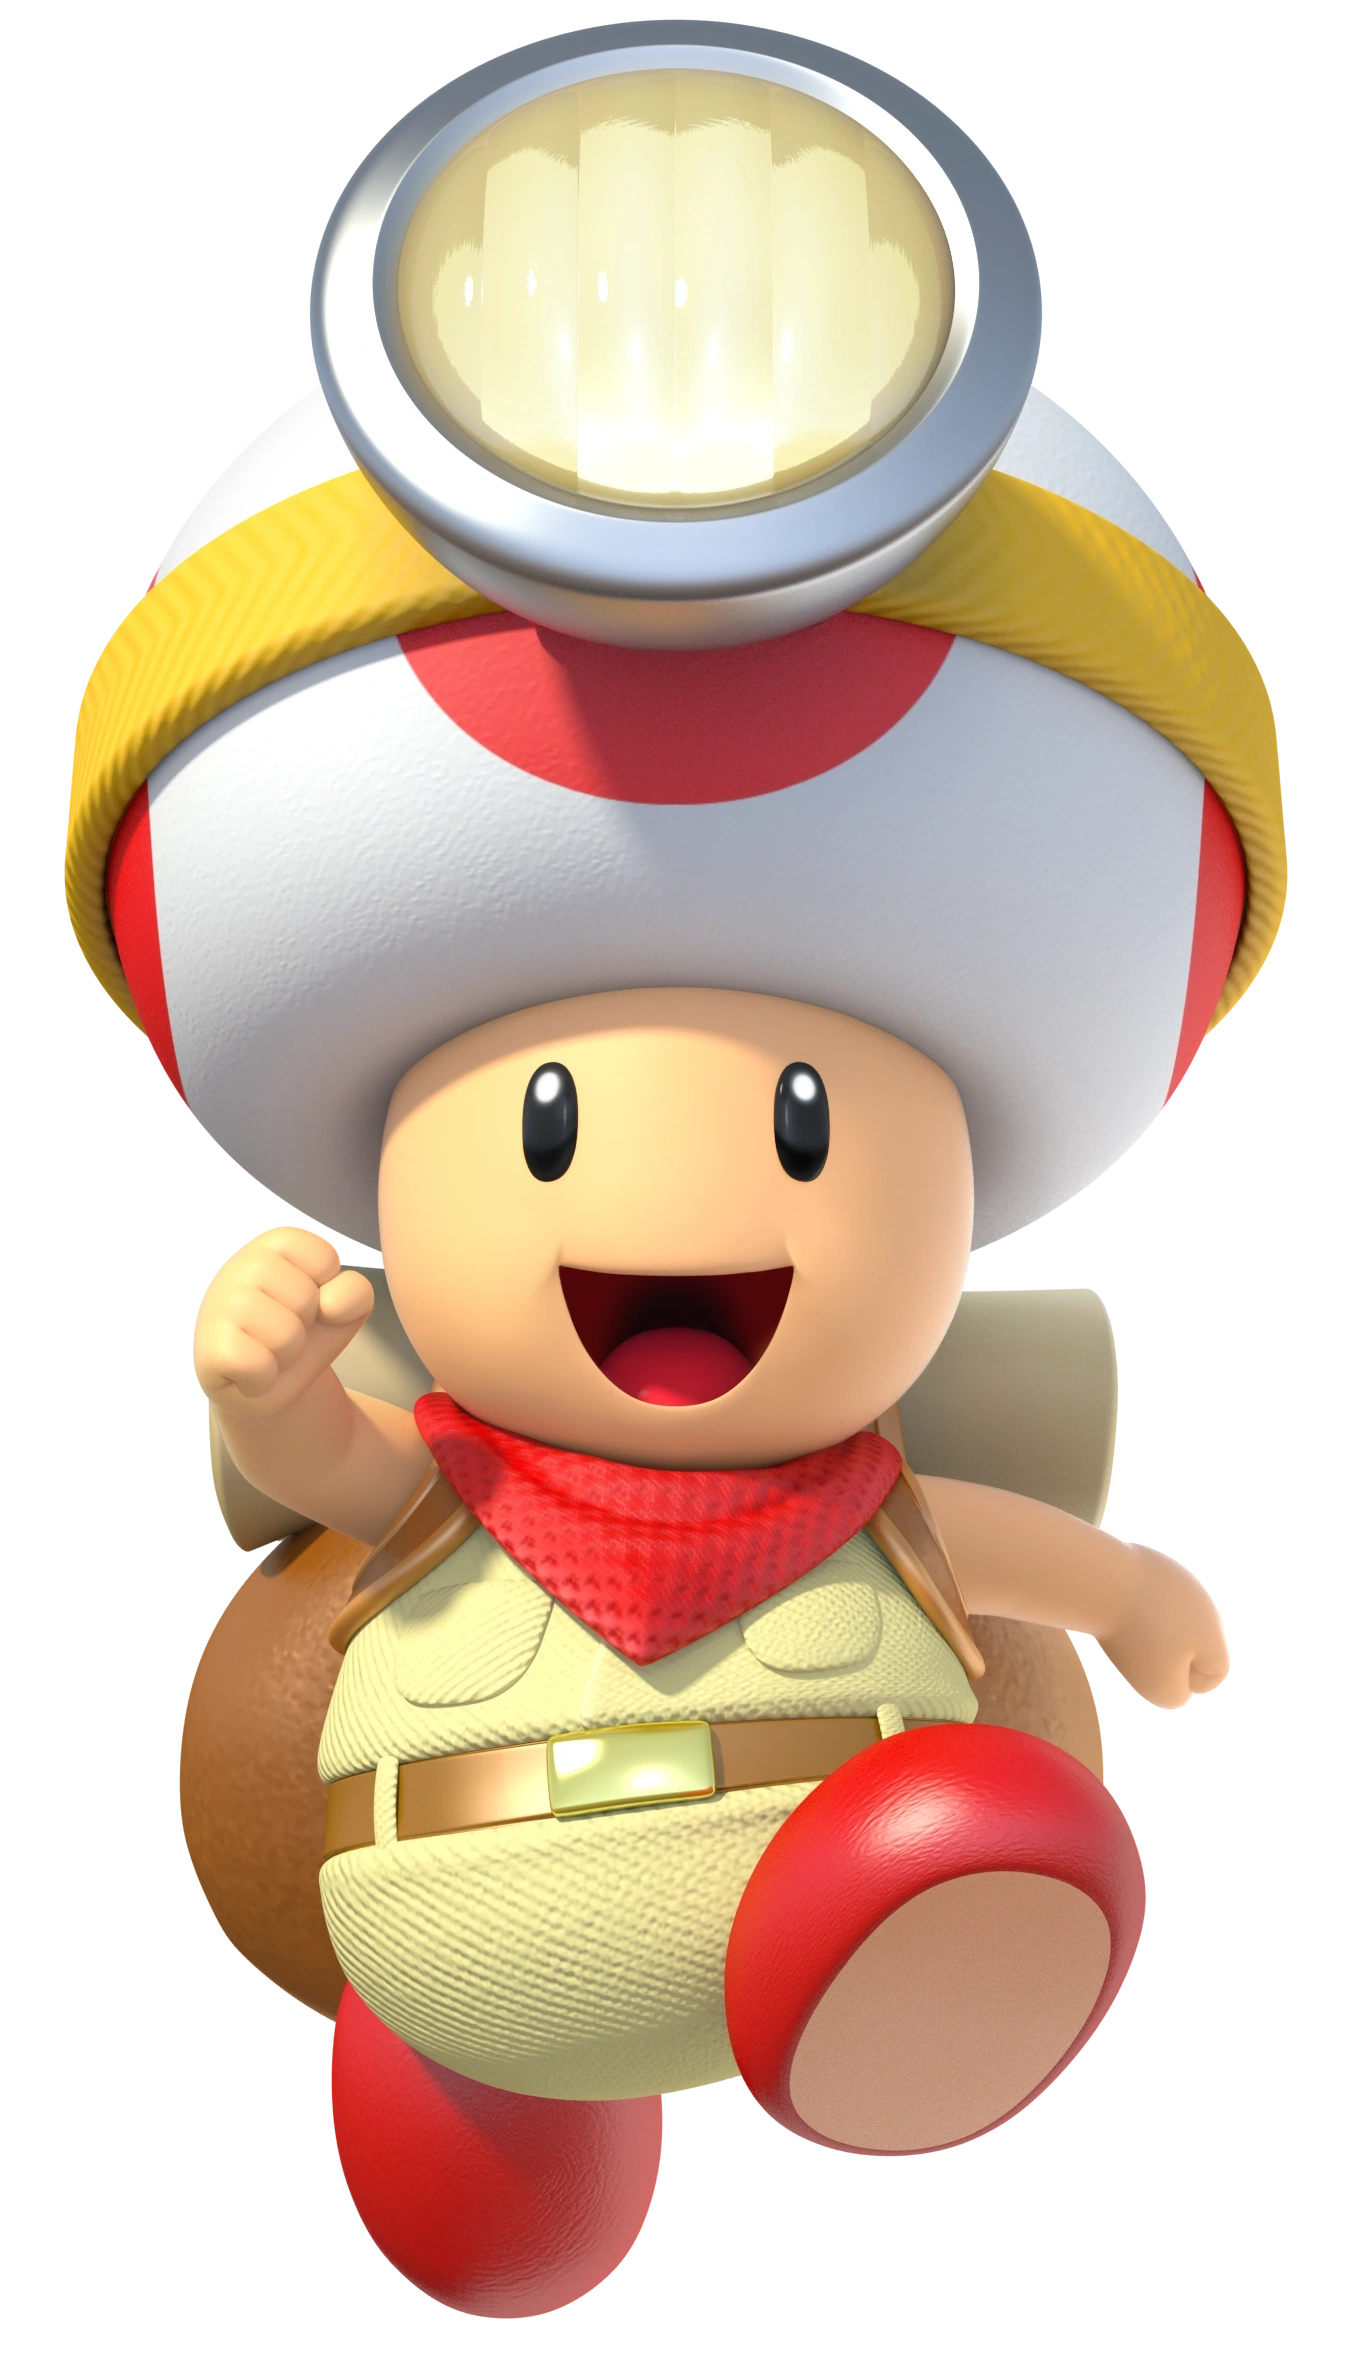
After seeing the captain toad talk I thought I'd give my own interpenetration of what he could be in smash

Captain Toad/Toadette Moveset
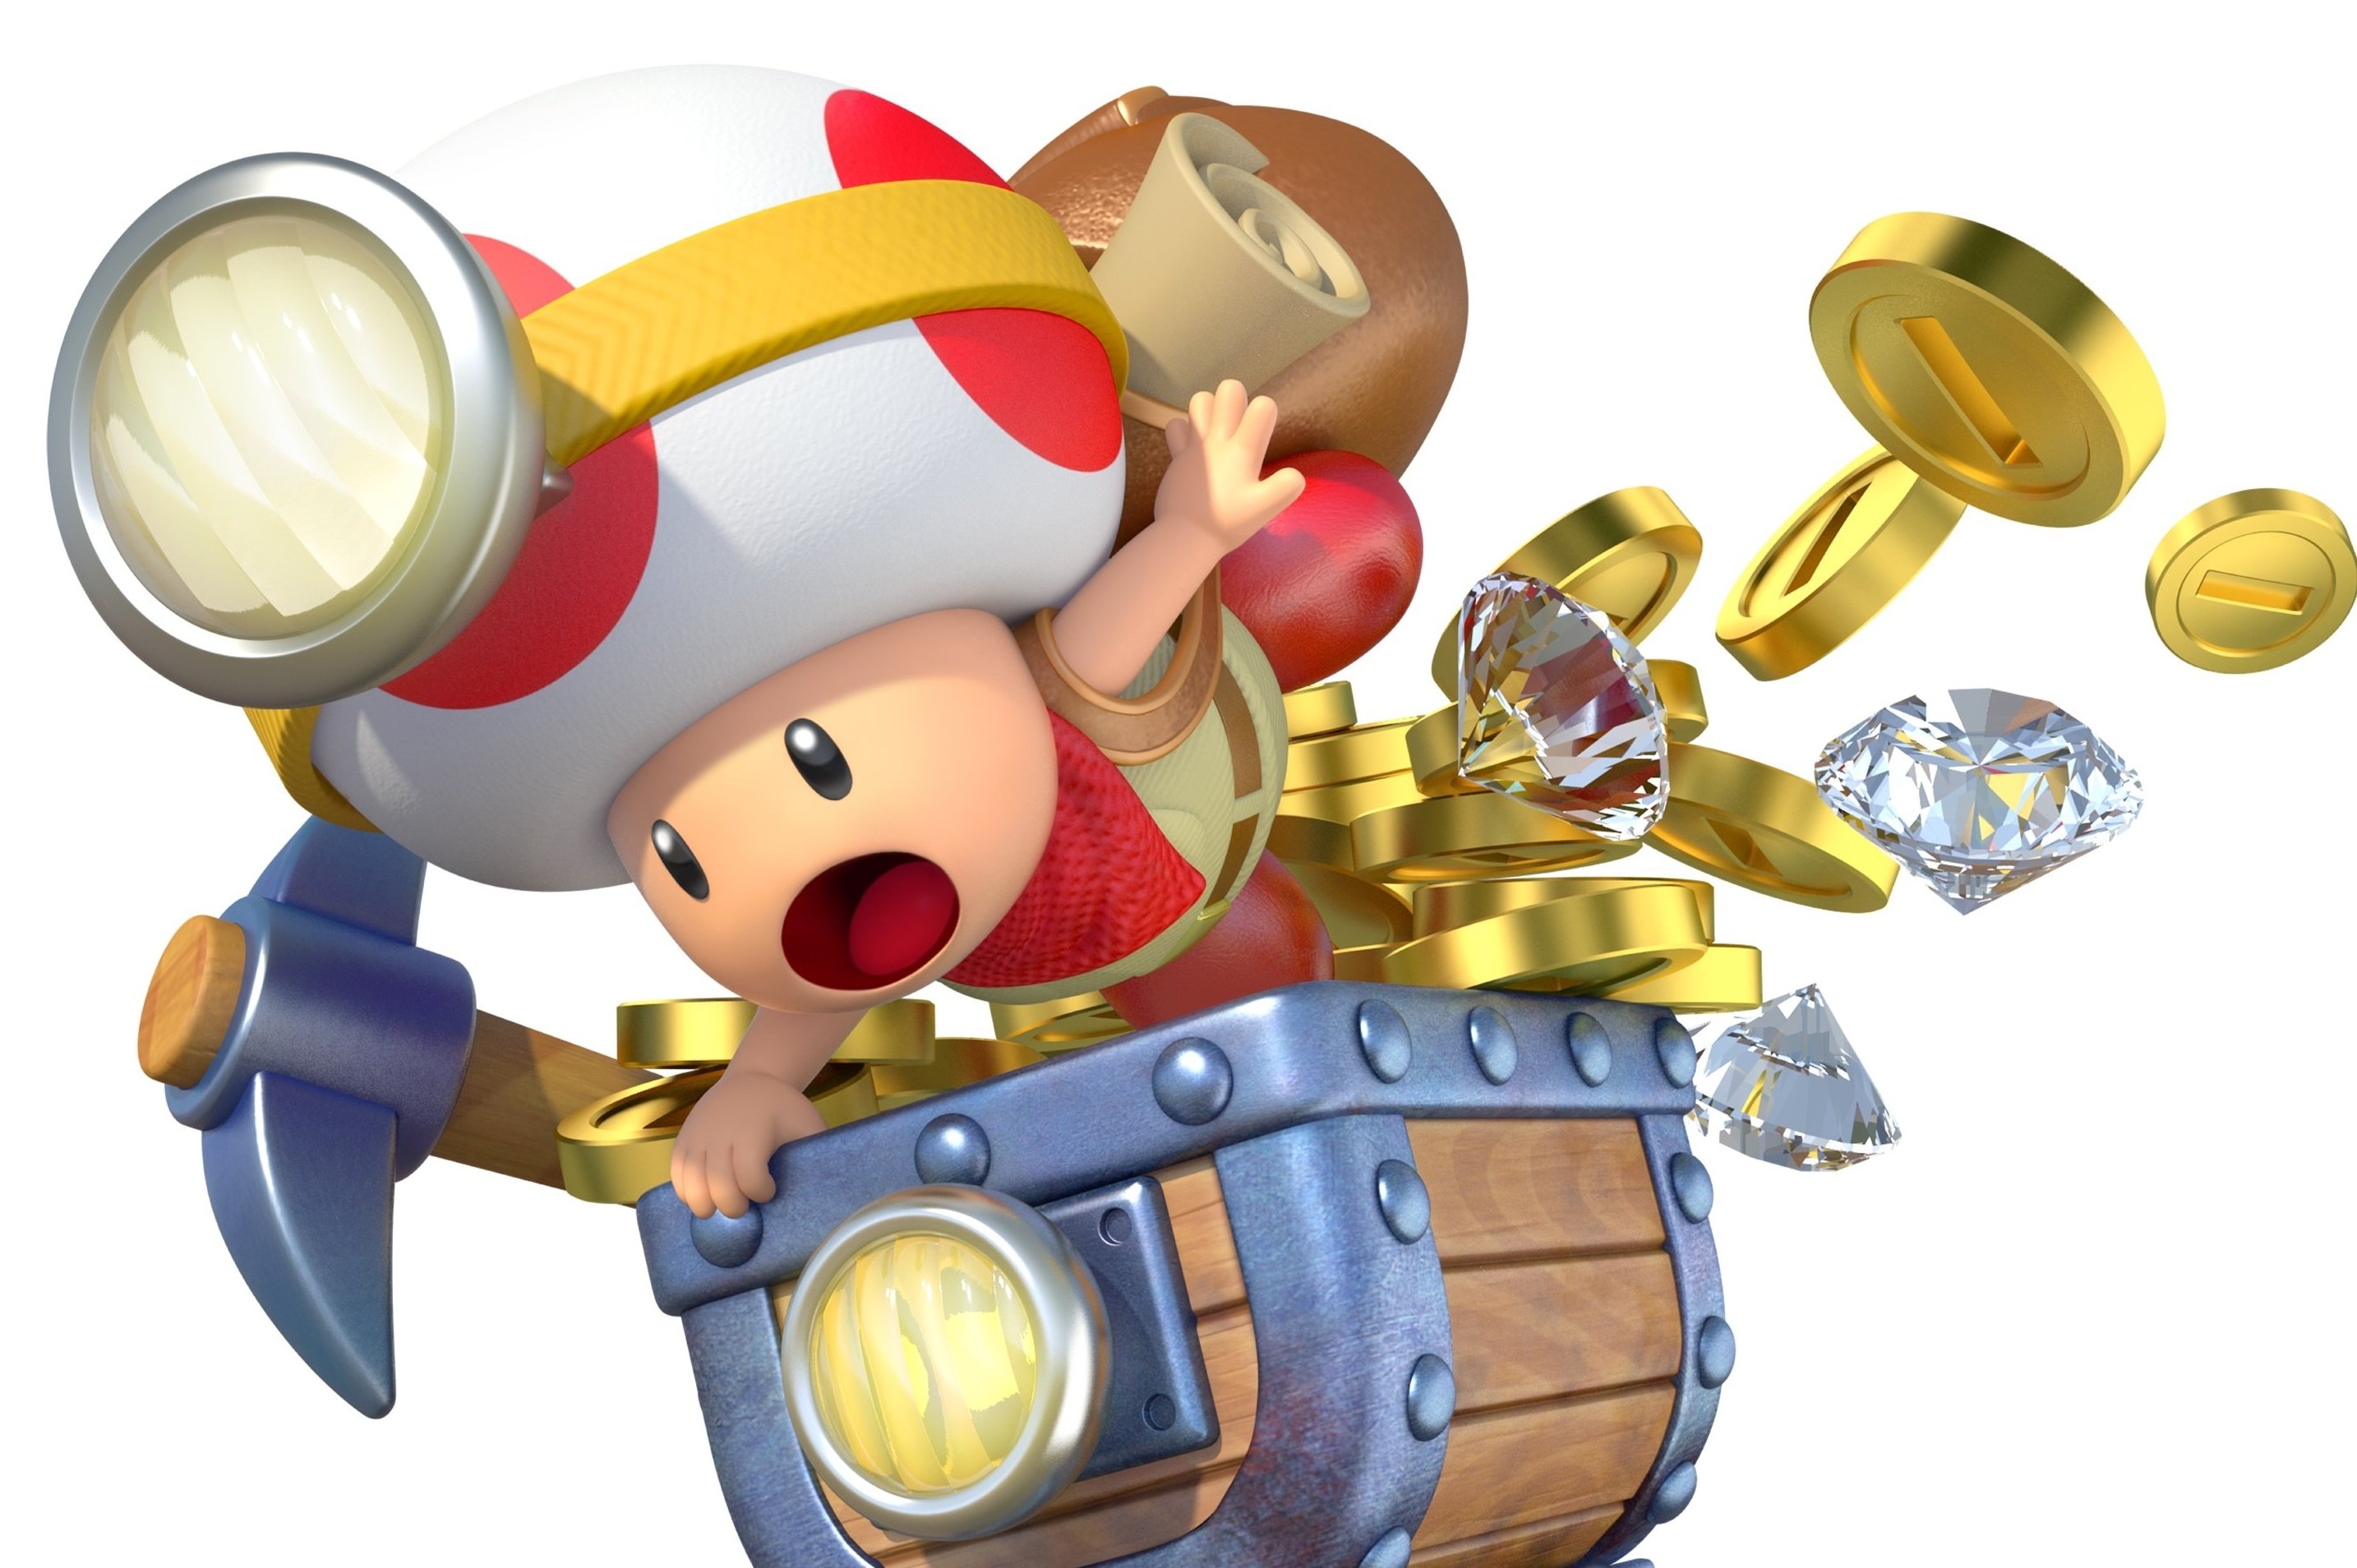
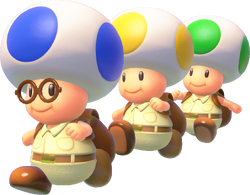
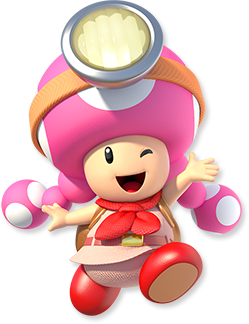
Captain Toad is leader of the Toad Brigade, a group of toads who helped mario on his quest in Super Mario Galaxy. He then went on to star in a series of mini-stages in Super Mario 3D World before getting his own game with Captain Toad: Treasure Tracker which also introduced Captain Toadette

Universe:
Captain Toad

Game of Origin:
Super Mario Galaxy


Playstyle:
Captain Toads playstyle revolves around effectively using his backpack. When using Down B Captain Toad will drop his backpack which will adjust his stats with Defense, Attack Power and Knockback decreasing but Speed, Attack Speed and Jump height increasing. The backpack will then reappear after 20 seconds. Effectively using both styles to your advantage can make this cute, little toad a real force to be reckoned with

Stats:
Ground Speed -

3/10 (With Backback)
7/10 (Without)

Air Speed -
3/10 (With Backback)
7/10 (Without)

Attack Speed -
4/10 (With backpack)
8/10 (Without)

Overall Attack Power -
7/10 (With Backpack)
4/10 (Without)

Jump Height -
2.5/10 (With Backback)
5/10 (Without)

Fall Speed -
6/10 (With Backback)
3/10 (Without)

Weight -
6/10 (With Backback)
3/10 (Without)

Height - 4/10
Captain Toad is slightly shorter than mario, appearing around the same size as the Toad in Super Mario 3D World​

Tilt Attacks:
Jab: A 3-hit combo using his pickaxe, swinging left, then right and straight downwards slamming into the ground
Dash attack: Captain Toad will spin around swinging his pickaxe while moving forwards, It is multi-hit attack
Forward tilt: Captain Toad will thrust his head forward hitting with his headlamp
Up Tilt: Captain Toad will toss a turnip straight upwards
Down Tilt: Captain toad will drop a bunch of coins on the ground which can cause opponents to trip

Smash Attacks:
Forward Smash: Captain Toad will pull out a Super Pickaxe slamming straight into the ground
Up Smash: Captain Toad will pull out a Super Pickaxe and swing it above his head, this will cause him to fall backwards giving the move quite a bit of endlag
Down Smash: Captain Toad will use the double cherry to summon 2 toads at either side of him which will slam Super Pickaxes into the ground

Aerial Attacks:
Neutral Air: Captain Toad will spin around holding a pickaxe at an angle, first swing above and in front of him and then behind and below him
Forward Air: Captain Toad will pull out a power star and Swing it upwards, this move is pretty strong and has considerable knockback but is rather slow similar to Peach's
Back Air: Captain Toad will spin around holding a power star
Up Air: Captain Toad will thrust a gold mushroom above him which will explode into coins
Down Air: Captain Toad will pull out a diamond and throw it straight below him, This move can spike

Grab and Throws:
Grab: Captain Toad will grab opponents with both hands
Pummel: He'll swing his head forward hitting them with his headlamp
Forward Throw: Captain Toad will spin around with the opponent similar to Mario's back throw, afterwards he'll fall due to dizziness causing the move to have quite a bit of endlag
Back Throw: Using the double cherry, another Captain Toad will appear behind the opponent kicking them behind captain Toad
Up Throw: Using the double cherry, Captain Toad will summon 2 other Captain Toads. All three will grab the opponent and throw the opponent straight upwards
Down Throw: Captain Toad will create a pluck patch under the opponents feet, he'll then pluck it causing the opponent to fly upwards

Special Attacks:
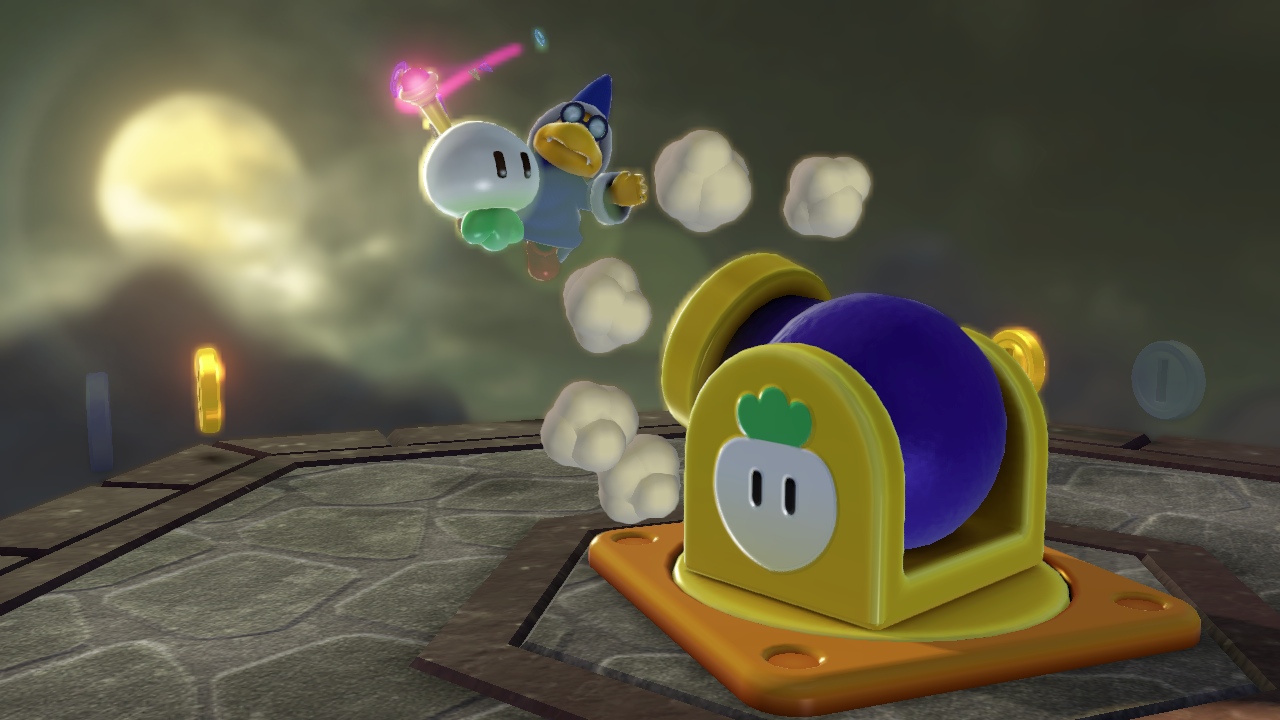
Neutral Special: Turnip Cannon - Captain Toad will spawn a turnip cannon in a puff of smoke and will fire 3 turnips straight forward, the move can be charged as well as angled
Custom Neutral Special 1:

Custom Neutral Special 2:

Forward Special: Minecart Dash - Captain Toad will spawn a minecart, he will then jump into it and ride straight forward. He can also jump out of the cart. The move is similar to Wario's bike except it can't be turned around and after a set amount of time the cart will fall with Captain Toad and damaging gold coins flying out

Custom Side Special 1:

Custom Side Special 2:

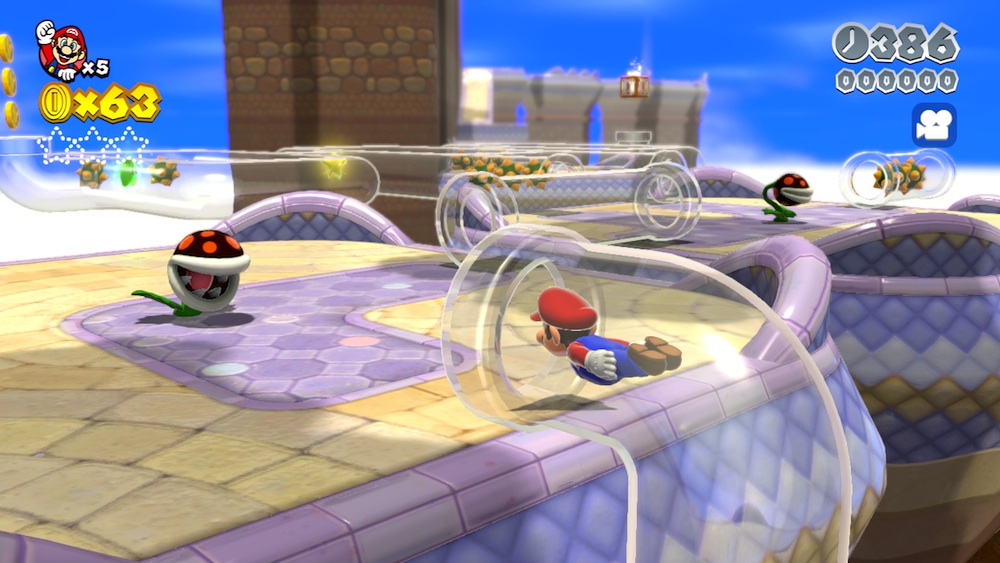
Up Special: Clear Pipe - Captain Toad will ride in a clear pipe that materializes as he goes through it, the direction of the pipe can be changed and the move can be cancelled by jumping or pressing up b again. The move is quite slow but you aren't put in a helpless state allowing you to act out of it


Custom Up Special 1:

Custom Up Special 2:

Down Special: Backpack Drop - Captain Toad will throw his backpack behind him in a similar fashion to how Robin's tomes disappear which will change his stats for 30 seconds. This increases his speed, attack speed and jump height as well as decreasing his defence, attack power and knockback

Custom Down Special 1:

Custom Down Special 2:

Final Smash:
Draggadon - Captain Toad will summon Draggadon, who will appear from behind the stage. He'll then pick up Captain Toad and then move to either side of the stage where he'll attack opponents with blasts of fire

Extras:

Entrance: Wingo from Treasure Tracker will fly past the stage and captain toad who is holding onto the star around his neck will lose his grip and fall before standing up and brushing himself off

Stance: He'll stand with his hands at his sides, gently moving back and forth like in Treasure Tracker

Idle 1: Captain Toad will put his hands above his eyes and look from left to right
Idle 2: Captain Toad will hoist up his backpack

Side Taunt: Captain Toad will run in place like he's getting ready to fight in reference to when the run button is held without moving in Captain Toad: Treasure Tracker

Down Taunt: Captain Toad will lay down and fall asleep for a second like he does in Treasure Tracker
Up Taunt: Captain Toad will Yawn, stretching his arms above his head

Victory Pose 1: Captain Toad will perform the animation he does when a power star is obtained in Captain Toad: Treasure Tracker
Victory Pose 2: Wingo will fly past and Captain Toad, who is holding onto the star around his neck will lose his grip and fall, then proceed to get mad at the bird who's now flying away
Victory Pose 3: A scared captain Toad will ride in atop Draggadon but then proceed to cheer after realizing he's won

Victory Fanfare: The begining part of Captain Toad: Treasure Tracker's main theme

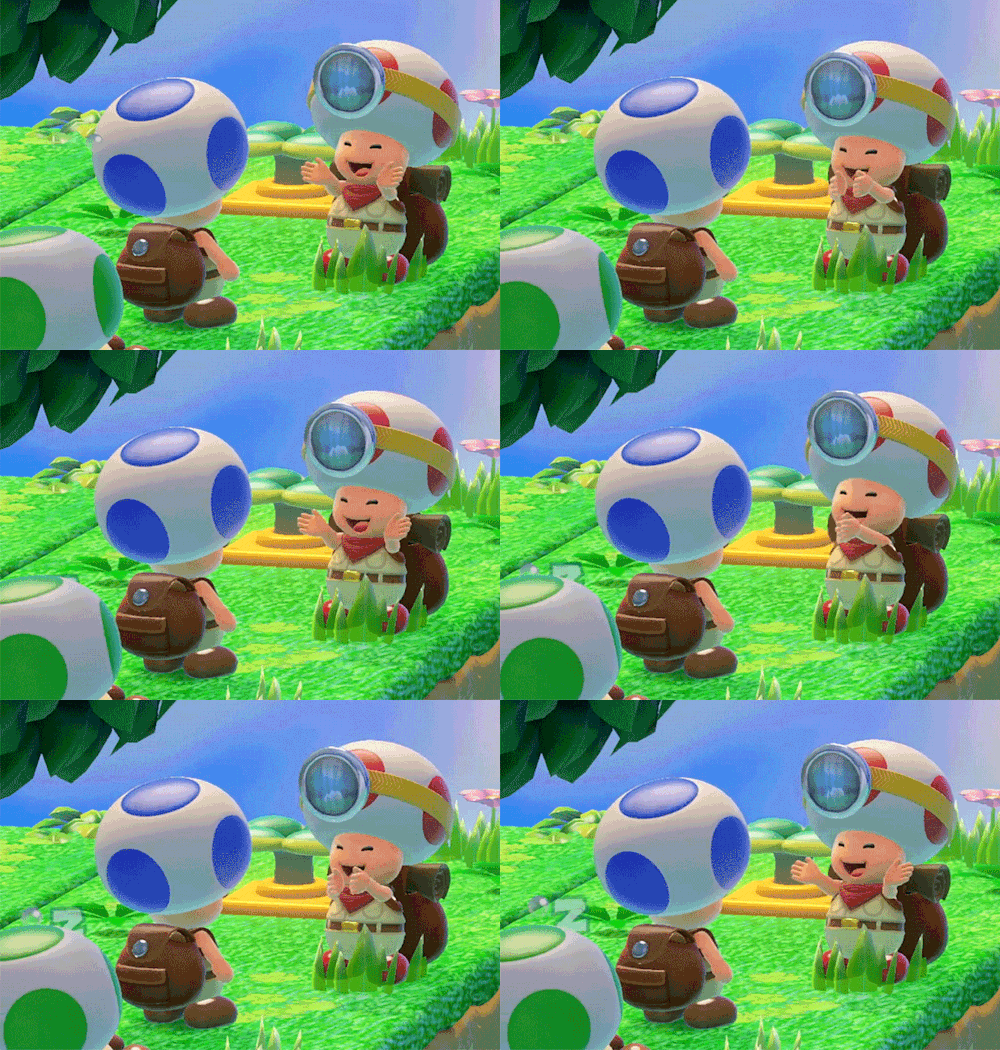
Losing Pose: Captain Toad will clap happily like he does when encountering Blue Toad in Treasure Tracker

Alternate Costumes:
1) Default Captain Toad
2) Blue Captain Toad with glasses
3) Yellow Captain Toad
4) Green Captain Toad
5) Default Captain Toadette
6) Purple Captain Toadette
7) Light Blue Captain Toadette
8) Orange Captain Toadette
 
Last edited:

Mega Bidoof

Smash Hero
Joined
Aug 14, 2013
Messages
8,463
Location
The Drought
NNID
Link46
3DS FC
1160-9840-1542
I recently gained an interest in making movesets, with me making my first full one just the other day, and I remembered seeing something called "Make Your Move" while lurking around the boards, so I figured I'd my debut here!

Hold on to hats/masks for Mega Bidoof's Username's first MYM Moveset.....

YOUNG LINK (MAJORA'S MASK)
I'm sure somebody already did his in the past but I didn't see one recently so whatever.


OVERVIEW

Most people have envisioned a mask-using Young Link as a Pokémon Trainer-esque transformation character. Seeing as transformations were removed from Smash 4, I decided to make this unique Young Link into one character, possessing almost all of Young Link's unique abilities from Majora's Mask.
Instead of having the Kokiri Sword and Kokiri Shield like he did in Melee, he will have the Gilded Sword and Mirror Shield he gains during his adventure in Termina in Majora's Mask.
Young Link uses a mix of his sword and his masks, both his transformation masks and his common masks.

PLAYSTYLE

Young Link would play like Toon Link being pretty balanced on both the ground and in the air. Just like in Majora's Mask, he has a mask for just about every occasion, meaning that if you know your opponent, Young Link will be able to take 'em down with his wide array of abilities.


STATS

Weight - Young Link in Melee
Size - Young Link in Melee
Ground Speed - Young Link in Melee
Jump Height - Young Link in Melee
Air Speed - Young Link in Melee
Fall Speed - Young Link in Melee


STANDARDS

Neutral A - Young Link swings his Gilded Sword forward horizontally
Neutral A Combo - Young Link does the normal "swing, swing, swing" combo from MM, the last swing having some KO potential if the target has pretty high percentage
Dash Attack - Young Link does a moving spin attack with his sword

Forward Tilt - Young Link puts on the Postman's Mask and jabs an envelope forward
Up Tilt - YL puts on the Bunny Hood, takes a tiny hop upward, and does an upward jab with his sword
Down Tilt - YL puts on Kamaro's Mask, and does a quick motion of the dance


SMASHES

Up Smash - Young Link becomes Zora Link and performs a quick hop with his magic barrier activated
Down Smash - Young Link becomes Goron Link and does a strong punch to one side and then the other
Forward Smash - Young Link becomes Deku Link and shoots a snot bubble a short distance forward (the longer it's charged = the bigger, more powerful, and farther it goes)


AERIALS

Neutral air - Young Link puts on the Captain's Mask and swings a bone horizontally in front of him
Up air - Young Link becomes Deku Link and spins with a slight upward movement
Down air - Young Link transforms into Goron Link, curls up, and slams straight down, similar to Bowser's down aerial
Forwards air - Young Link swings his sword as if he jumped off a ledge and swung his sword in MM, except there is no downward movement
Back air - Young Link becomes Zora Link, turns around, and slashes with his boomerang fins (he does not THROW the boomerangs fins, he only slashes)


GRABS & THROWS

Grab - Young Link shoots his Golden Hookshot (as much reach as Young Link's hookshot in Melee)
Grab attack - Young Link wears a random mask (that doesn't already have a move) and headbutts the fighter in his grasp
Up throw - Young Link puts on Don Gero's mask, throws the enemy in the air, then leaps up and kicks him/her
Down throw - Young Link wears his Blast Mask, dives on top of the enemy (with his shield up) and explodes
Forward throw - Young Link puts on the Gibdo Mask, freezes the opponent like a Gibdo would, then kicks them
Back throw - Young Link puts on the Keaton's Mask, and a Keaton appears for a quick moment and knocks the enemy back


SPECIALS

B - Young Link becomes Zora Link and throws his boomerangs fins
Up B - Young Link becomes Deku Link and fires himself up, as if he flew out of a Deku Bud, and floats down with two flowers, similar to peach floating with her parasol
Side B - Young Link becomes Goron Link and does the Goron Roll, which functions like Yoshi and Jigglypuff's Side B, but it gets stronger and faster after rolling longer
Down B - Young Link uses the Mirror Shield as a reflector, which also reduces the damage done by non-projectile attacks


FINAL SMASH

Final Smash - Young Link transforms into Goron Link and throws a powder keg forward a short distance. Anyone caught will be launched straight up in the air together, then Goron Link will become Deku Link, who will plant a Deku Bud and slam them into it, which will cause them to launch back up in the air even higher. Deku Link will now become Zora Link, and will jump into and go past the victims in the magic barrier, and will then transform into Fierce Deity Link, and will deal one final blow to the victims, before landing and become Young Link once more


MISCELLANEOUS

Entrance - Young Link lands on the stage from using the Song of Soaring, which looks like it does in MM, with the egg-shaped feather pod thing

Side Taunt - Tatl comes out and flies around Young Link's head twice, before going back to wherever she stays (there is a 1/10 chance it will be a stray fairy and Young Link will grab it at the end of the taunt, which is just an aesthetic change
Up Taunt - Young Link pulls out a jar of milk, and drinks it (there is a 1/10 chance it will be Chateau Romani, which is merely an aesthetic change)
Down Taunt - Young Link plays the Song of Healing on the Ocarina of Time

Victory Theme - A slowed down version of the Get A Mask jingle

NOTE: Because of Young Link's many forms, he has 5 victory poses, as opposed to the ordinary 3
Victory Animation 1 - Young Link marches around with the Bremen Mask on
Victory Animation 2 - Deku Link shoots out of a bud before drifting down and becoming Young Link and smiling
Victory Animation 3 - Goron Link rolls around in a circle before skidding to a stop and becoming Young Link and smiling
Victory Pose 4 - Zora Link fires his boomerang fins, does a backflip, catches them, and becomes Young Link and smiles
Victory Pose 5 - Fierce Deity Link fiercely slashes his sword before becoming Young Link, who still tries to act strong and fierce

Loss Pose - Young Link claps with a neutral expression​
 

Katapultar

Smash Lord
Joined
Nov 24, 2008
Messages
1,284
Location
Australia
[collapse=Kongo Bongos (Candy Kong)]Welcome to Make Your Move, Chase! Candy certainlty isn't bad for your first set and you know what you want right from the get go, but she could do with some improvement in some areas. For one, the moves and intro are written in such a way that you assume everyone knows the character as well as you do, which makes the set -slightly- alienating for those not completely familiar with the series (like me!) - a little explanation can do wonders, and sometimes even a picture of the object in question can make the set funky, just like in the Funky Kong set posted earlier this contest. If the picture would stand out too much due to being too big, you can link to it instead.

Playstyles are generally written at the end of movesets where readers know all the character's attacks, and Candy Kong certainly has an interesting style: it...seems like she completely revolves around her Save Barrel! As cool of an idea the barrel is, I don't know whether it completely suits having Candy Kong center around it character-wise, and really it's not necessary to talk about the attack before the set when you get to it anyway. A good playstyle section talks about the character's goals and how they work as a whole, strengths and weaknesses and what have you, and it's not like you don't hint to Candy Kong having an actual playstyle - namely in that she is "full of surprises". Why not tell us how her moves accomplish the art of surprising foes? I can tell at the very least that the randomized aspect of her NSpec projectile and being able to appear from a DSpec barrel anytime work well for surprising opponents, but it's good to sum these up among other things. If you can improve on these, you'll take steps to becoming a better movesetter![/collapse]

[collapse=Pikmin Villain]Louie a bad guy? That's news to me, and he even plays like a bad guy in this set! Y'know, summoning monsters to do his bidding and killing people with kitchen appliances like knives. Regardless of whether it's fitting or not, it's certainly a nice departure from Olimar and his Pikmin.

Okay, so I know very little about Pikmin 2, let alone the entire Pikmin series, and that means I have absolutely no idea what any of the monsters he summons look like. This is a similar case with Candy Kong in that you assume readers are familiar with Pikmin and end up alienating them a bit, but here a simple picture and a mite of knowledge on the monsters is very essential to putting readers on the same level as you in terms of understanding. The set is heavily underdetailed as a result, but also because it is very barebones about certain details like knockback and knockback trajectory among individual moves, making them rather boring since you seem to justify the omission of lag by mentioning it for all moves at the start of the set. Also, I greatly dislike the D-Smash that doesn't damage but worse yet it messes with the foe's characterization, not to mention I don't know why foes would run away because I don't know what a Mitite is. A D-Smash with some random gimmick in the place of knockback reminds me of Villager's D-Smash, which I think is the absolute worst move in the entire Smash series. I'm getting a bit negative here when you're just a newcomer, and I apologize for that, because really I don't have anything against the set or the way you've chosen to portray Louie (if anything, I approve of it!); you just need some more detail in the move descriptions and to inform us of the Pikmin monsters, since really that'd be educational for someone like me. If you have any other questions regarding what I've mentioned, don't hesitate to ask, and with that, happy movesetting!

Also, you're one of the rare people from Australia who's posted in MYM, just like me! *high fives*[/collapse]
 

Chase

Smash Ace
Joined
Dec 21, 2013
Messages
529
[collapse=Kongo Bongos (Candy Kong)]Welcome to Make Your Move, Chase! Candy certainlty isn't bad for your first set and you know what you want right from the get go, but she could do with some improvement in some areas. For one, the moves and intro are written in such a way that you assume everyone knows the character as well as you do, which makes the set -slightly- alienating for those not completely familiar with the series (like me!) - a little explanation can do wonders, and sometimes even a picture of the object in question can make the set funky, just like in the Funky Kong set posted earlier this contest. If the picture would stand out too much due to being too big, you can link to it instead.

Playstyles are generally written at the end of movesets where readers know all the character's attacks, and Candy Kong certainly has an interesting style: it...seems like she completely revolves around her Save Barrel! As cool of an idea the barrel is, I don't know whether it completely suits having Candy Kong center around it character-wise, and really it's not necessary to talk about the attack before the set when you get to it anyway. A good playstyle section talks about the character's goals and how they work as a whole, strengths and weaknesses and what have you, and it's not like you don't hint to Candy Kong having an actual playstyle - namely in that she is "full of surprises". Why not tell us how her moves accomplish the art of surprising foes? I can tell at the very least that the randomized aspect of her NSpec projectile and being able to appear from a DSpec barrel anytime work well for surprising opponents, but it's good to sum these up among other things. If you can improve on these, you'll take steps to becoming a better movesetter![/collapse]
Thanks for the feedback! Are we allowed to go back and edit our movesets accordingly to the feedback you give us? I want to make this moveset even better!
 

Chase

Smash Ace
Joined
Dec 21, 2013
Messages
529
My Candy moveset has been edited with pictures for the Specials, and a rewritten Playstyle section!
 

Katapultar

Smash Lord
Joined
Nov 24, 2008
Messages
1,284
Location
Australia

Well, time to change my name.
(btw that's The Stadium)
My bad. I've changed it.

Here's a comment for your set:

[collapse=Nano Shinonome]To think that someone out there other than myself has made a slice of life anime moveset - I actually planned a moveset for Nano all the way back in MYM9-10! My version had the Professor as a background character who could tinker with Nano and give her random properties, but I see here you've chosen to make Nano independent.

Having made slice-of-life sets myself (I've made freaking Lucky Star movesets), the Specials actually do a very good job at representing Nano and the whole random-ish slice-of-life aspect of Nichijou (and anime) in general, with fun little throwing items and food being two traits that are synonymous with an SoL (slice-of-life) set in my opinion. The arm rocket is good characterization for Nano, and the food being chosen at random is a perfect. What's more, the concepts behind the Specials are actually interesting, both the rocket arm that affects some of Nano's moves and the food-ejecting Down Special that can backfire on her if she abuses it too much. Also, you don't need me to tell you that props make sense for Nano, and I was glad to see that there was never a moment in the set where I felt that she got too violent. If anything, I almost think maybe she could afford to be more random in her basic attacks, similar to how Peach's F-Smash cycles to different hitboxes and Villager's turnip attacks are randomized in power - anything can happen as far as Nano is concerned, so it would make more sense to have many randomized hitboxes than make most of them mundane.

Nano is certainly an improvement over Lance in some aspects, but she feels rather plain as a whole, and similar to some other recent sets she doesn't have a complete grasp over what she wants to accomplish in battle given the playstyle section only talks about a few of her features, something I talked about in my Dr. Robotnik comment. For example, what are the positives of keeping Nano's arm on? What are the negatives? Nano has potential in how the lag on her attacks gets altered with/without her arm, but I don't think this is taken advantage of too much. Also, you tend to use commas more times than necessary when describing attacks, and could do with replacing some of those commas with a full stop.

The Specials on your sets contain good ideas at times (Lance's Dragon Dance, for example) and you actually have a good grasp on how to represent your characters, just that you need to channel some of those ideas over to the basic attacks and capitalize on them in order to form a cohesive playstyle. That being said, it was certainly enjoyable to read a slice-of-life anime set for once! Given Silver stopped making movesets a long time ago...[/collapse]

My Candy moveset has been edited with pictures for the Specials, and a rewritten Playstyle section!
That's great! Putting the pictures in a collapse tag is an interesting idea I've never thought of, and the playstyle section is much better than before. If anything, it focuses an awful lot on the Save Barrel without really taking into account what else Candy can do, like her Neutral Special and Side Special, but hopefully you should be able to expand your horizons with a bit of practice and some reading.
 
Last edited:

Reiga

He sold diddy for a switch
Joined
Dec 8, 2014
Messages
1,256
Location
White Noise
3DS FC
1461-7646-7368
[collapse=Nano Shinonome]To think that someone out there other than myself has made a slice of life anime moveset - I actually planned a moveset for Nano all the way back in MYM9-10! My version had the Professor as a background character who could tinker with Nano and give her random properties, but I see here you've chosen to make Nano independent.

Having made slice-of-life sets myself (I've made freaking Lucky Star movesets), the Specials actually do a very good job at representing Nano and the whole random-ish slice-of-life aspect of Nichijou (and anime) in general, with fun little throwing items and food being two traits that are synonymous with an SoL (slice-of-life) set in my opinion. The arm rocket is good characterization for Nano, and the food being chosen at random is a perfect. What's more, the concepts behind the Specials are actually interesting, both the rocket arm that affects some of Nano's moves and the food-ejecting Down Special that can backfire on her if she abuses it too much. Also, you don't need me to tell you that props make sense for Nano, and I was glad to see that there was never a moment in the set where I felt that she got too violent. If anything, I almost think maybe she could afford to be more random in her basic attacks, similar to how Peach's F-Smash cycles to different hitboxes and Villager's turnip attacks are randomized in power - anything can happen as far as Nano is concerned, so it would make more sense to have many randomized hitboxes than make most of them mundane.

Nano is certainly an improvement over Lance in some aspects, but she feels rather plain as a whole, and similar to some other recent sets she doesn't have a complete grasp over what she wants to accomplish in battle given the playstyle section only talks about a few of her features, something I talked about in my Dr. Robotnik comment. For example, what are the positives of keeping Nano's arm on? What are the negatives? Nano has potential in how the lag on her attacks gets altered with/without her arm, but I don't think this is taken advantage of too much. Also, you tend to use commas more times than necessary when describing attacks, and could do with replacing some of those commas with a full stop.

The Specials on your sets contain good ideas at times (Lance's Dragon Dance, for example) and you actually have a good grasp on how to represent your characters, just that you need to channel some of those ideas over to the basic attacks and capitalize on them in order to form a cohesive playstyle. That being said, it was certainly enjoyable to read a slice-of-life anime set for once! Given Silver stopped making movesets a long time ago...[/collapse]
Thanks for the positive feedback on the commentary! ...as for the complaints given, I'll hopefully edit the moveset tomorrow.
I like to search for other movesets for characters done before me and see if the character has already been done and already saw that you planned to make a moveset for Nano and the professor.
 
Last edited:

TheDarkKnightNoivern

Smash Master
Joined
Jun 24, 2014
Messages
3,641
Location
Croft Manor
Impa Moveset:

Impa is a character present throughout the Legend of Zelda Series. Although usually presented as an older woman, in games like Ocarina of Time, Skyward Sword and Hyrule Warriors she is shown as a younger woman with a tall and slender build. Regardless of her appearance, Impa has always been the protector of Princess Zelda and the royal family of Hyrule as a whole.​

Universe:
The Legend of Zelda

Game of Origin:
The Legend of Zelda (Manual)/ The Legend of Zelda: Ocarina of Time​


Playstyle:
Impa's overall playstyle is a mixture of Zelda and Sheik aiming to mix Zelda's magical properties with Sheiks agility and still allowing her to have her own identity as a character. Like her roles in Skyward Sword she is very much a protector allowing her to be used effectively in Defending, offensense and even escape through the use of her side and up b.​

Stats:
Ground Speed -
6/10
Impa's speed is above average lying inbetween Zelda and Sheik

Air Speed - 5/10
Impa's air speed is slightly slower than her ground speed

Attack Speed - 7/10
A lot of Impa's attacks are fairly quick with minimal Startup of endlage

Overall Attack Power - 5/10
Like her speed Impa's lies between Zelda and Sheik

Jump Height - 5/10
Impa's overall Jump height is inbetween Zelda and Sheik

Fall Speed - 6/10
Impa falls pretty quickly, faster than Zelda but Slower than Sheik

Weight - 5/10
Due to her slender figure Impa is a fairly light character

Height - 8/10
Impa is a fairly tall character, standing at about a head higher than Zelda

and when I say "Blue magic" it would look similar to this

Except Blue

Tilt Attacks:
Jab 1: Impa will swing her hand in front of her in a karate chop style motion going from left to right (2%)
Jab 2: Similar to the first hit of jab, instead going right to left (2%)
Jab 3: Impa will kick straight forwards dealing decent damage and knockback (5%)
Dash attack: A sliding kick move in reference to her appearance in Hyrule Warriors where she does the same thing in her regular combo string. It is a multi-hit move with the final hit dealing decent vertical knockback (2%, 2%, 2%, 3%)
Forward Tilt: Impa will lift her leg and swing from left to right straight in front of her, the move is very quick with little endlag or startup time (6%)
Up Tilt: Impa will lift her leg, kicking straight upwards in a similar way to sheik except she doesn't slam her leg downwards instead returning to neutral. The move is decently quick and acts as a good combo starter as it can easily link into an aerial attack due to it's vertical knockback (8%)
Down Tilt: Impa will crouch and perform a sweeping kick, somewhat like Zero Suit Samus. Opponents are knocked upwards so this move is also a great aerial combo starter (8% foot, 6% leg)

Smash Attacks:
Forward Smash: Impa will envelop her hand in blue magic and wave her hand in front of her going in an upwards arc, this move has some decent range and acts as one of her best kill moves (16%)
Up Smash: She'll reach above her head releasing a quick burst of exploding blue magic similarly to that found in Skyward Sword. The move looks similar to mewtwo's but is one blast instead of multiple hits. This is also a rather good kill move but suffers from large amounts of endlag (15%)
Down Smash: Somewhat like sheik, Impa will get down on one hand and perform a ninja-like manoeuvre attacking with her legs out stretched, this move is pretty quick 2-hit move with little endlag however it won't kill until higher percents. It also has pretty good range due to her proportions (4% first hit, 6% second hit)

Aerial Attacks:
Neutral Air: Impa will perform a series of 3 quick aerial kicks with her foot covered in blue magic, similarly to Captain Falcon, except faster and with more range however it lacks in damage and knockback (2% first hit, 4% second hit, 5% third hit)
Forward Air: She'll wave her magic covered hand downwards, this move is quite quick with a lot of range and can easily link in with other attacks due to it's mediocre knockback (7%)
Back Air: With her foot covered in magic, she'll kick backwards similar to Zero Suit Samus. This is another of her great kill moves (11%)
Up Air: Her foot covered in magic, she'll flip upwards and spin in the air, once again similarly to Zero Suit Samus (9%)
Down Air: Impa will stomp her foot downwards similarly to Zelda but with more range, this move can meteor smash (14% sweetspot, 8% sourspot)

Grab and Throws:
Grab: A standard grab, she'll fully reach out with her right hand. Due to Skyward Sword Impa's proportions it has decent range with some endlag
Pummel: Impa will hit them with her left knee similarly to Zero Suit Samus although slightly slower (3%)
Forward Throw: Impa will launch them forwards by kicking them with her left leg straight outwards (9%)
Back Throw: Impa will trip the opponent with her left leg and then proceed to kick them backwards with the heel of her foot (3% first hit, 7% second)
Up Throw: She'll throw the opponent straight upwards, then backflip, landing on her hand where she will kick them even higher with her left foot (11%)
Down Throw: She'll throw the opponent downwards, raise her hand and conjure a ball of blue magic. That ball will be thrown on the floor and at the opponent, knocking them forwards close to the ground (8%)

Special Attacks:
Neutral B: Hylia's Orb
A chargeable projectile. Impa will create a ball of blue magic in the palm of her hand just like that found in Skyward Sword. At minimal Charge the ball will be thrown at a 45 degree angle towards the ground where it will create a small explosion causing minimal damage and knockback, however a direct hit will cause an increase in damage in knockback. At full charge it will be thrown much farther with a larger explosion that can kill at higher percents.
Custom Neutral B 1: After landing on the ground the ball will stay there for a second before exploding, acting more like a trap rather than a projectile, multiple can be on stage at once and they aren't chargeable being about the same damage, power and angle as a medium charge standard orb

Custom Neutral B 2:

Side B: Timeshift Stone
Impa will conjure a timeshift stone about Zelda's fully charged phantom away from her, once created an aura will surround it which will temporarily slow down time for the opponent caught in it allowing Impa to easily hit the enemy. However creating the stone takes time meaning she can be interrupted before it is created and if missed Impa can be severely punished
Custom Side B 1:

Custom Side B 2:

Up B: Gate of Time
Impa will conjure up a smaller version of the gate of time from Skyward Sword which will teleport her to whichever direction is held. While being faster than Zelda's it goes a shorter distance and while being slower than Sheik's it goes farther, creating a balance between the two. The move deals damage and knockback although not much, also being a mix of Zelda and Sheik's. (7% disappearance, 12% reappearance)
Custom Up B 1:

Custom Up B 2:

Down B: Barrier of Hylia
Impa will summon a blue barrier about 2 steps in front of her which will protect her from attacks, reflect projectiles and slightly push opponents away, dealing small damage and knockback upon it's creation. After a small amount of time or if enough damage is sustained the barrier will disintegrate. The move stays out for about the same length as Palutena's reflect and isn't that tall only being about a head or two taller than her.
Custom Down B 1:

Custom Down B 2:

Final Smash:
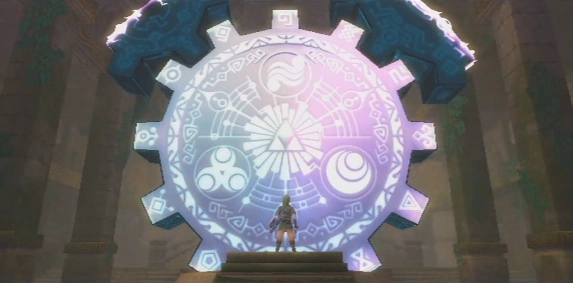
Impa will summon the gate of time behind her which will suck opponents in. She'll then drop a blue ball of magic in front of the gate causing it to close like she did in Skyward Sword using a blue ball of magic, dealing about 40% to opponents and knocking them away with large knockback. The gate is about the size of Luigi's final smash in brawl.

Extras:

Entrance: The gate out time will appear in a flash of light and Impa will proceed to walk through it

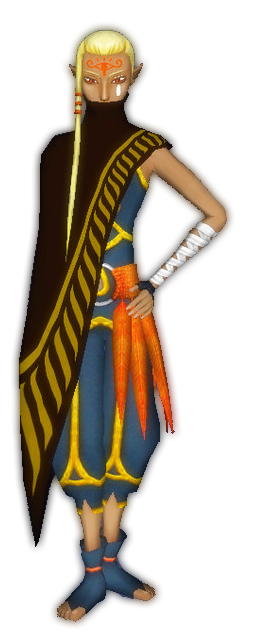
Stance: Impa will stand in the same position she did in Skyward Sword, extremely straight posture with one hand on her hip

Idle 1: She'll fold her arms and look from left to right
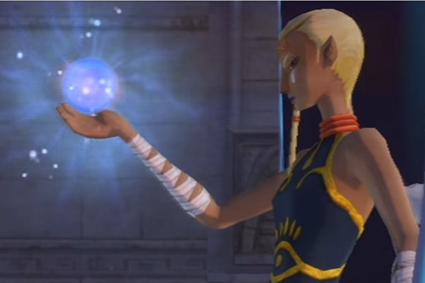
Idle 2: She'll create a ball of blue magic in her hand and look at it before reaching to grab it where it will disappear

Side Taunt: Impa will whistle Zelda's Lullaby in reference to Ocarina of Time
Down Taunt: Impa will sit on the ground and meditate in reference to the Old Woman found in Skyward Sword
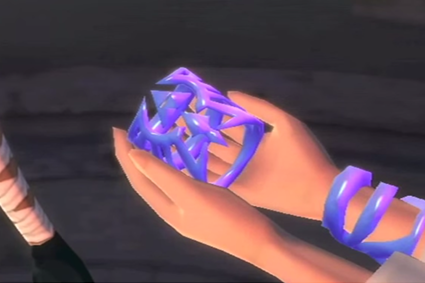
Up Taunt: The bracelet that was gifted to Impa by Zelda in Skyward Sword will materialize on her wrist where she will look down at it and smile before it dematerializes

Victory Pose 1: Impa will conjure up the gate of time and go through it the same way she did in Skyward Sword by dropping a blue ball of magic
Victory Pose 2: Impa will step into the gate of time and reappear as the Old Woman where she will then fade away like at the end of Skyward Sword
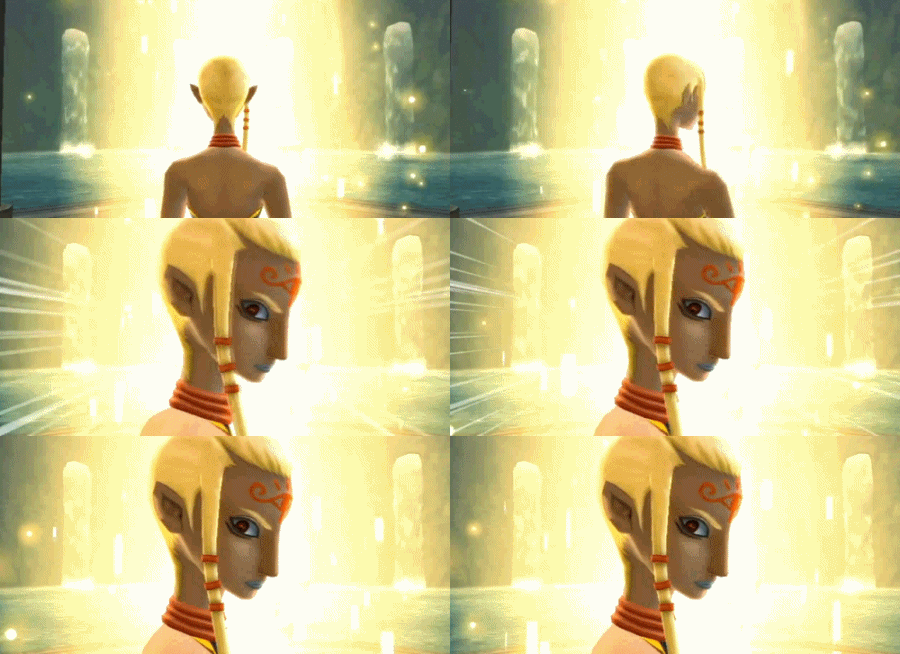
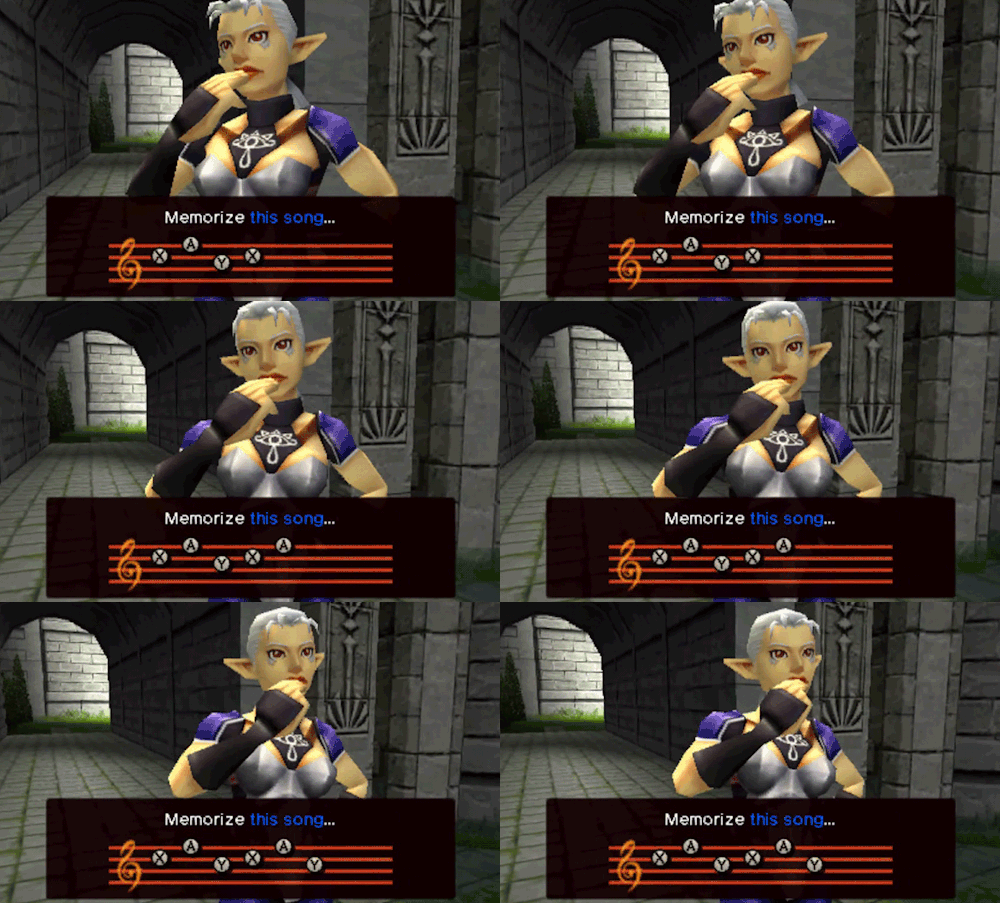
Victory Pose 3: Impa, who is facing away from the camera, will turn around (Like in the gif at the top of the post) and perform a ninja-like pose before whipping her scarf over her and disappearing out of sight

Victory Fanfare: The regular Zelda fanfare which is also shared by Link, Zelda, Sheik, Ganondorf and Toon Link

Losing pose: Impa, like the wise and mentor-like character that she is will clap quite slowly and politely as if feeling proud that they won

Alternate Costumes:
1) Default (Skyward Sword)
Her regular appearance as Young Impa in Skyward Sword


2) Ocarina of Time (Grey hair with Blue, Black and Grey outfit)
Impa's dark blue outfit will change to closer match Ocarina of Time Impa's blue, the yellow will change to silver and the orange feathers and strap on her shoes will change to black. Her hair will also turn a silverish-white.


3) Rauru (Red outfit with White and Orange highlights)
Impa's dark blue outfit will change to an orange, the yellow will change to red and the orange feathers and strap on her shoes will change to white.


4) Saria (Green outfit with Dark Green highlights)
Impa's dark blue outfit will change to a light green, the yellow will change to a slightly darker green and the orange feathers and strap on her shoes will change to a light blue like saria's eyes.


5) Darunia (Brown outfit with light brown and orange highlights)
Impa's dark blue outfit will change to a brownish colour, the yellow will change to orange and the orange feathers and strap on her shoes will stay orange.


6) Ruto (Blue outfit with Purple highlights)
Impa's dark blue outfit will change to aqua blue, the yellow will change to a darker blue and the orange feathers and strap on her shoes will change to purple.


7) Nabooru (Pink outfit with Gold highlights and Red shoes)
Impa's dark blue outfit will change to a light pink, the yellow will change to a more gold colour as will the orange feathers and strap on her shoes. Her shoes will also become red.


8) A Link between worlds (Purple Hair with Red, Blue and Yellow outfit)
Impa's dark blue outfit will change to a brownish-red colour, the yellow will change to a light yellow colour and the orange feathers and strap on her shoes will change to blue. Her hair will also turn a light purple.
 
Last edited:

Slavic

Ask not the sparrow how the eagle soars
Joined
Jun 5, 2013
Messages
763
Location
taco bell, probablyn't
HITMONCHAN
“What’s the plan, Hitmonchan?”


Hitmonchan, number 107 in the Pokedex, is the Fighting-type Punching Pokemon, a monster who dates back to the original games. According to the Pokedex, Hitmonchan is infused with the spirit of a champion boxer and can throw blindingly fast punches which can pulverize concrete. Hitmonchan has a tendency to be rare in the games, appearing with its counterpart, Hitmonlee, only once in the original Red and Blue, and is always male. In Pokemon Gold and Silver, a third counterpart, Hitmontop, was added, and a baby form Tyrogue that could evolve into all three. Named after Jackie Chan, Hitmontop is all about his punches; Focus Punch, Comet Punch, Fire Punch, Ice Punch, Thunder Punch, Mega Punch, and Drain Punch, to name a few. Hitmonchan is also the defensive counterpart to Hitmonlee’s offensive prowess, and a Tyrogue will evolve into Hitmonchan should its Defense stat outweigh its Attack stat. Hitmonchan normally has access to two Abilities; Keen Eye and Iron Fist. Keen Eye prevents opponents from lowering Hitmonchan’s Accuracy, such as from Sand Attack or Smokescreen. Iron Fist is a staple for Hitmonchan, powering up the damage its punching attacks do. Hitmonchan is a killer boxer and powerhouse Pokemon who will knock out the competition in Smash Bros.!


FLAVOR
Entrance - A Pokeball flies on screen and pops open, and Hitmonchan appears. Hitmonchan then jabs forward twice and does a quick uppercut before getting ready to fight.
U-Taunt - Hitmonchan taps its gloves together twice and throws one of its gloved fists in the air, seeming energized for the fight.
S-Taunt -
Hitmonchan closes its eyes and smirks. He puts one fist on his hip and waves the other one in front of himself, as if waggling an invisible finger.
D-Taunt - Hitmonchan grins and waves his two fists in mirrored semicircles, creating a ‘wax on, wax off’ motion in the air in front of him.
Kirby Hat - Kirby gains Hitmonchan’s forehead and Fire Punch move.
Victory Pose A - Hitmonchan becomes a flurry of jabs and uppercuts, continuing to fight until the screen fades out.
Victory Pose B - Hitmonchan holds his arms out with a bruised face as a Clefable runs in from offscreen. The two embrace in a hug until the screen fades.
Victory Pose C - Hitmonchan grins proudly and holds his fists on his hips, gloating about his victory.
Losing Pose - Hitmonchan stands idly, defeated but not dejected, and claps with his fists politely.
Victory Theme - 0:18 - 0:23 of the Wild Pokemon Theme from the Anime
Character Theme - HeartGold and SoulSilver Gym Theme
Home Stage - Saffron City Fighting Dojo

Palette Swaps
01 - Original Colors
02 - Colors of a Makuhita
03 - Colors of Lucario
04 - Colors of a Medicham
05 - Colors of a Shiny Hitmonchan
06 - Colors of a Mienshao

Animations
Neutral - Hitmonchan stands in a boxer’s stance, bouncing from foot to foot with his gloves in front of his face.
Idle - Hitmonchan glances down and scuffs the ground a bit.
Walk - Hitmonchan walks forward, continuing to hop from foot to foot. Hitmonchan leans forward slightly while moving.
Run - Hitmonchan gives up hopping while running, though he keeps his arms in front of his face.
Dash - Hitmonchan leaps forward on each foot, leaning forward almost 45 degrees with his gloves in front of his face.
Jump - Hitmonchan leaps up in a short, sporty way, all while holding his fists in front of his face.
Double Jump - Hitmonchan throws his arms downward to his sides and lifts his head as he kicks upward a second time.
Roll - Hitmonchan pulls his fists in tight and dodges to the side, rolling over and landing back on his feet.
Spot Dodge - Hitmonchan stands in place but throws his body to the side, as if dodging a punch while boxing.
Aerial Dodge - Hitmonchan pulls his gloves close to his body and quickly rotates in midair, like a ballerina(?).
Sleeping - Hitmonchan falls to the ground, sitting with his legs sprawled as he sleeps.
Crouch - Hitmonchan enters an almost kneeling stance with his fists raised higher than normal.

STATS
Despite being another boxing-style character, Hitmonchan does not play the quick offense that Little Mac has. Instead, Hitmonchan trades speed for his weight, which allows him to take hits a lot better than Little Mac can. Hitmonchan’s stats themselves aren’t terribly excellent, but his high gravity can put him back on the ground where he is most comfortable. Though Chan has average speed, he has an arsenal of approach moves that can close the distance to opponents. Hitmonchan has a build similar to Captain Falcon, though his stats are distributed much more different than the Captain.

Weight - 7 (Hitmonchan is identified by his high Defense. In Smash Bros., this manifests as being harder to knock around.)
Height - 5
Jump Height - 4
Double Jump Height - 4
Air Speed - 3
Fall Speed - 7
Walk Speed - 6
Dash Speed - 7
Traction - 6

MECHANIC - IRON FIST
Hitmonchan’s signature ability, Iron Fist powers up the Punching Pokemon’s fist-based moves. As Hitmonchan’s moveset is almost entirely punches, Iron Fist makes itself present as a mechanic for the fighter. In Smash Bros., Iron Fist serves as a buff for Hitmonchan that is charged through time. As Hitmonchan uses his standards (tilts and jab), his gloves begin to change. The more he strikes opponents, the higher Iron Fist is charged. The charge is indicated by the state of Hitmonchan’s gloves, and they grow more metallic as he lands hits. When fully active, after Hitmonchan has done 50% damage with his Standards, Hitmonchan’s gloves are silver and glimmer, appearing as if affected by a Metal Box. In this state, Hitmonchan’s non-standard punching moves (Specials, aerials, smashes, etc.) do 1.5 times more damage and knockback, and many of Hitmonchan’s Specials are altered. When Hitmonchan stops hitting opponents with his standards, Iron Fist will retain its charge for five seconds before it begins to cool down, reverting the gloves to normal. From a full charge, it takes about five seconds for the charge to fully dissipate.

MOVES
SPECIALS

Neutral Special - Fire Punch / Thunder Punch (~7-13%)

Hitmonchan braces himself and pulls his arm back, charging a punch. As he prepares the punch, it takes a red glow and lights on fire! This attack takes about a second and a half to reach full charge, after which it will automatically activate, should it not have been released earlier. Hitmonchan then throws his flaming glove straight forward in front of him. striking opponents for a decent amount of damage and knockback, without taking Iron Fist into consideration. At full charge, Fire Punch deals around 13% damage and can KO opponents around 150%, although it has a chunk of ending lag should he miss an opponent.

However, should Iron Fist be fully in effect, Hitmonchan’s move changes into Thunder Punch! When Hitmonchan uses Thunder Punch, he pulls his fist back in the same manner as Fire Punch. However, bolts of electricity fly into the glove instead of it catching fire. Additionally, there is no charge for this move, though the startup animation causes a moment of lag. Once his fist is electrically charged, he launches it forward at a higher speed than Fire Punch. Damage-wise, Thunder Punch, with the Iron Fist boost, is equal to a fully charged Fire Punch. However, when the opponent is struck, instead of being launched they are stunned as if struck by ZSS’s Paralyzer. This allows Hitmonchan to either escape, follow up with another attack, or launch into a flurry of standards.

Side Special - Mach Punch / Bullet Punch (~4-9%)
Hitmonchan lunges his fist forward in a punch a moment later and flies forward at high speeds without warning. Hitmonchan travels two Battlefield Platforms forward, or until he comes in contact with an opponent or surface. Hitmonchan moves at the speed of Fox Illusion while performing his Mach Punch. Opponents struck by the punch take about 5% damage and are knocked back a bit, KOing at 190%.

With a full Iron Fist, however, Mach Punch turns into Bullet Punch! When using Bullet Punch, Hitmonchan lunges forward in the same manner as Mach Punch, down to distance traveled and how fast the attack happens. However, when Hitmonchan strikes an opponent, he performs an uppercut instead of simply jabbing forward. Bullet Punch deals around twice as much damage as Mach Punch, and has improved killing potential, able to KO at 130%. However, after using Bullet Punch, Hitmonchan has a chunk of ending lag, which can punish him should he overuse it. This move is an important killing move for Hitmonchan, and is also essential for closing the space between him and the opponent. This also serves as a good horizontal recovery move.

Up Special - Sky Uppercut / Meteor Mash (~8-16%)
From the ground, Hitmonchan jabs forward with his fist quickly dealing a small amount of damage. From the jab stance, Chan performs a flying uppercut, pulling the opponent up with him and dealing even more damage. In addition to damaging opponents, Sky Uppercut does a good deal of vertical knockback, and can KO at 150%. When used in midair, Hitmonchan lifts his fist up in the air and spirals upwards at a slight angle for about one and a half Battlefield platforms. Hitmonchan’s punch sweetspots at the peak of the move, which allows Chan to KO opponents at as low as 120%. Hitmonchan then enters his Special Fall. A good finishing move, but not an excellent recovery for Hitmonchan.

With Iron Fist fully active, Sky Uppercut becomes the mighty Meteor Mash! On the ground, Hitmonchan throws out an incredibly powerful jab, dealing good damage to opponents, before Hitmonchan launches them upward with an uppercut. Hitmonchan doesn’t jump into the air with Meteor Mash, and by the end of the attack the opponent takes roughly 16% damage. Opponents are KO’d from this at about 120%. In midair, Hitmonchan leaps upwards at the same height and angle as an aerial Sky Uppercut, but without a hitbox and without spinning. At the top of the jump, Hitmonchan curls up and does a flip in midair before he launches downward, fist first, at high speed at an angle. Opponents struck by Meteor Mash are meteor smashed and take a good chunk of damage, and upon landing, any opponents struck are launched outwards, capable of KOing at 90%. However, this move cannot be canceled, and can lead to self-destructs, and there’s a chunk of ending lag as Hitmonchan picks himself up.

Down Special - Drain Punch (15%)
Hitmonchan takes a step back and begins charging a punch, visually similar to a Falcon Punch, as a green orb manifests around his fist. After a bit of startup lag, Hitmonchan then jabs forward, dealing a good chunk of damage to opponents, a constant 15%. After making contact with an opponent, Hitmonchan heals 10% of his damage, sapped from the opponent. While this move does good damage and is an excellent utility move, it does no knockback as opponents are held in place while Hitmonchan heals, and Hitmonchan simply releases the opponent afterwards. This move’s damage is affected by Iron Fist, but will only ever heal 10%, and Drain Punch never changes into a different move.

STANDARD MOVES
Hitmonchan’s standards have no startup or ending lag and are all able to be rapidly executed, one after another, which allows Hitmonchan to rack up big combos and charge up Iron Fist’s boost. Because of this, Hitmonchan’s standards are rather weak and have no knockback, designed instead to rapidly pummel foes and build up Iron Fist.

Jab - Comet Punch (2%)
Hitmonchan reaches forward impossibly fast and jabs in front of himself. In addition to damage, the opponents flinch enough to get locked into the jab. When pressed repeatedly, Hitmonchan alternates his fists as he jabs at the opponent. Hitmonchan’s jabs slowly push opponents backwards, out of the combo. After four hits, the jab weakens to 1% damage, and after eight hits, the flinching effect disappears, allowing opponents to fight back.

Forward Tilt - Hook (2%)
Hitmonchan throws a blindingly fast hook at the opponent. Opponents struck by the hook take a bit of damage and are pulled back inward towards Hitmonchan, instead of being knocked away. This allows Hitmonchan to continue his assault of standards or follow up with one of his Specials or Smashes. This move, and all of Hitmonchan’s standards, follow the same stale usage formula as the jab.

Up Tilt - Uppercut (4%)
Hitmonchan’s fist becomes a blur as he launches a lightning-quick uppercut. This is Hitmonchan’s strongest jab, damage-wise. Opponents struck by this are knocked upwards slightly as they take damage, which can result in a broken combo for Hitmonchan should he overuse it.

Down Tilt - Gut Punch (2%)
Hitmonchan bends his arm and launches a blistering punch to the opponent’s gut. This is Hitmonchan’s slowest standard (marginally) but deals the most hitstun to opponents, which makes the move ideal for following up with a Special or Smash move. Opponents are also knocked back slightly by this move, which can break Hitmonchan’s combos.

Dash - Quick Guard (2%)
Hitmonchan dashes forward and pulls his fists up in front of his face. Hitmonchan leans forward as he skids to a stop, damaging opponents he rams into and pushing them away. This move, though short range and weak, shields Hitmonchan from damage as he attacks, making this move good for approaching opponents, especially projectile spamming ones. This move also can lead into a flurry of standards, making it a good move for starting combos.

Ledge Attack - Saving Punch (6%)
Hitmonchan grabs the ledge with one fist. Hitmonchan lifts himself up and punches with his free fist, striking out with a haymaker. Hitmonchan then lands on his feet, brushing himself ready for battle.

Ledge Attack (100%+) - Low Kick (2%)
Hitmonchan lifts himself up slowly off the ledge, and throws a kick in front of himself. This is one of the very few non-punching moves in Hitmonchan’s moveset. If Hitmonchan hits an opponent with this, they are tripped, giving Chan the opportunity to recover and return to the fight.

SMASH MOVES
Forward Smash - Special Punch (~11-17%)
Hitmonchan holds his fists at his side as he charges this move, visually similar to one of Captain Falcon’s taunts. After the move is released, Hitmonchan launches a left hook, dealing around 9% damage at full charge and pulling opponents closer to the Punching Pokemon. Hitmonchan then throws out a powerful jab with his right hand straight ahead of himself, dealing the same amount of damage as the hook but launching opponents, KOing around 115%.

Up Smash - Rocket Punch (~12-19%)
Hitmonchan turns to face the camera and pulls his left fist over his face and his right fist by his side, charging the attack. Once released, Hitmonchan’s glove ignites, as if powered by a rocket, and launches his punch upwards at high speed, dealing damage and throwing opponents upwards. During this move, opponents who touch the bottom of Hitmonchan’s glove are burned and take weak damage, around 2%. This move can KO at around 100% damage, and is one of Hitmonchan’s best moves for KOs.

Down Smash - Sucker Punch (~13-21%)
Hitmonchan enters a stance identical to his Forward Smash during the charge phase of this attack. Once released, however, Hitmonchan steps forward and pivots on his front foot, striking out with a single, powerful jab in the area that was behind him at the start of the move. This does good damage, though lower knockback than the other smashes, KOing at 130%, and is very good for playing mind games with opponents, punishing them for a misplaced dodge.

AERIAL MOVES
Neutral Aerial - Feint (~7%)
Hitmonchan moves forward in the air suddenly and performs an uppercut close to his body. While not exceptionally powerful, and there is little knockback to opponents, this move allows Hitmonchan to hit a dodging opponent with his punch, and will deal double damage to said opponent. This move is useful for Hitmonchan countering aerial combatants.

Forward Aerial - Pursuit (~11%)
Hitmonchan suddenly lunges forward through the air, moving forward half a Battlefield Platform. He then jabs forward with his fist, dealing alright damage and some knockback, which can KO opponents starting at 165%.

Up Aerial - Rapid Spin (~9%)
Hitmonchan holds his fists to his sides and begins rotating. He becomes a blur, looking like a top, as he spins around, well, rapidly. Opponents struck by Hitmonchan’s fists in this state take damage and are knocked at a diagonal away from Hitmonchan. This move is capable of KOing at 185%, and the spin lasts for half a second.

Back Aerial - Fake Out (~11%)
Hitmonchan lunges forward, as if performing his Forward Aerial, but at the last minute rotates around, throwing a hook in a reversal of the Forward Aerial. This move can KO opponents at 165%+.

Down Aerial - Rock Smash (~13%)
Hitmonchan leans back as he puts his two fists together above his head. Hitmonchan then brings both fists down hard, slamming opponents and meteor smashing them. This move is important for getting opponents onto the ground, where Hitmonchan can fight better.

GRABS
Grab - Vacuum Wave (0%)
Hitmonchan braces himself and holds one of his fists in front of him. He then quickly rotates his arm in incredibly quick circles, which turns it into a comical whirl. This creates a windbox that reaches forward half a Battlefield Platform, a windbox which pulls opponents towards Hitmonchan, allowing him to hold onto opponents with his fists.

Pummel - Bop It! (~3%)
Hitmonchan takes one fist off the opponent and pulls it back past his head. He then throws his fist forward, punching the opponent in the face with his glove.

Forward Throw - Mega Punch (~12%)
Hitmonchan lets the opponent go and places a fist on their shoulder, stabilizing them. With his other fist, Hitmonchan pulls back and prepares a punch, striking forward with a powerful hit, launching opponents backwards and KOing at 125%.

Up Throw - Knockout Uppercut (~9%)
Hitmonchan lets the opponent go but keeps his fist on his shoulder, holding the opponent still. Hitmonchan pulls his other fist back by his side and strikes out with an uppercut that launches the opponent upwards. This throw starts to KO opponents at 135%.

Back Throw - Clothesline (~15%)
Hitmonchan holds the opponent with one fist and pulls his arm back as if readying a punch. However, Hitmonchan instead sticks his foot out and trips the opponent, and while falling brings his arm to interrupt their fall, dealing damage and causing them to fall to the ground prone. This throw has good damage, but not

Down Throw - Spike (~10%)
Hitmonchan quickly jabs the opponent in the gut, knocking them into the air. Immediately, Hitmonchan leaps up in the air slightly, bringing both his fists above his head. He then swings them downward and spikes the opponent into the ground, causing them to bounce back and launch at a diagonal outwards. This throw can KO at 140% damage and higher.

FINAL SMASH
FOCUS PUNCH
When Hitmonchan breaks the Smash Ball, he lunges forward about half a Battlefield Platform with his fist outstretched. Should he strike an opponent, he will rapidly punch them several times, dealing up to 25% damage with just jabs. Hitmonchan pauses for a moment and the opponent is stunned from the onslaught. Hitmonchan then pulls his fist back and charges up the strongest punch in his arsenal, the Focus Punch! Hitmonchan launches forward and strikes the opponent, launching them at incredibly high speed, almost guaranteeing a KO on the opponent. Should Hitmonchan not hit anyone in the beginning of this, the Final Smash does nothing.

PLAYSTYLE
Hitmonchan’s entire game revolves around keeping the opponent within Hitmonchan’s grasp, allowing him to combo them with his rapid fire Standards in order to build up his Iron Fist bonus. Once he has his metal gloves, Hitmonchan turns to his Specials, Smashes, and Throws to knock opponents out of the stage. Since Hitmonchan needs to deal a lot of damage to KO opponents, he can turn to moves like Thunder Punch which can paralyze opponents, lining up opponents for more Standards that recharge the Iron Fist buff. Opponents in the air can be trouble for Hitmonchan, so his aerials revolve around messing with his airborne foes until he can knock them to the ground. Projectiles also provide a challenge to the Punchy Pokemon, so his dash attack and Mach Punch make up for it, allowing him to close the gap to close in with his close range punches. Those fighting Hitmonchan want to capitalize on his glaring range weakness, fighting from a mid or long range that Hitmonchan can’t compete with, especially projectile users. Lighter characters also make a good check for Hitmonchan, interestingly, as they are easy to knock out of Hitmonchan’s combos, stopping the build up for Iron Fist. All in all, Hitmonchan is a character who is downright dangerous up close, and, if given a chance, will do a lot of damage as his Iron Fist powers him up.
----
8 Page Hype!! I wanted to put this up before I head to bed tonight, since I'm not gonna have a chance tomorrow I don't think. Woohoo, glad to see more new movesets from new people! Great work guys!
 
Last edited:
Joined
Jul 7, 2014
Messages
583
Location
New South Wales, Australia
NNID
AwesomeCauliflwr
3DS FC
0576-6167-0092
[collapse=Kongo Bongos (Candy Kong)]Welcome to Make Your Move, Chase! Candy certainlty isn't bad for your first set and you know what you want right from the get go, but she could do with some improvement in some areas. For one, the moves and intro are written in such a way that you assume everyone knows the character as well as you do, which makes the set -slightly- alienating for those not completely familiar with the series (like me!) - a little explanation can do wonders, and sometimes even a picture of the object in question can make the set funky, just like in the Funky Kong set posted earlier this contest. If the picture would stand out too much due to being too big, you can link to it instead.

Playstyles are generally written at the end of movesets where readers know all the character's attacks, and Candy Kong certainly has an interesting style: it...seems like she completely revolves around her Save Barrel! As cool of an idea the barrel is, I don't know whether it completely suits having Candy Kong center around it character-wise, and really it's not necessary to talk about the attack before the set when you get to it anyway. A good playstyle section talks about the character's goals and how they work as a whole, strengths and weaknesses and what have you, and it's not like you don't hint to Candy Kong having an actual playstyle - namely in that she is "full of surprises". Why not tell us how her moves accomplish the art of surprising foes? I can tell at the very least that the randomized aspect of her NSpec projectile and being able to appear from a DSpec barrel anytime work well for surprising opponents, but it's good to sum these up among other things. If you can improve on these, you'll take steps to becoming a better movesetter![/collapse]

[collapse=Pikmin Villain]Louie a bad guy? That's news to me, and he even plays like a bad guy in this set! Y'know, summoning monsters to do his bidding and killing people with kitchen appliances like knives. Regardless of whether it's fitting or not, it's certainly a nice departure from Olimar and his Pikmin.

Okay, so I know very little about Pikmin 2, let alone the entire Pikmin series, and that means I have absolutely no idea what any of the monsters he summons look like. This is a similar case with Candy Kong in that you assume readers are familiar with Pikmin and end up alienating them a bit, but here a simple picture and a mite of knowledge on the monsters is very essential to putting readers on the same level as you in terms of understanding. The set is heavily underdetailed as a result, but also because it is very barebones about certain details like knockback and knockback trajectory among individual moves, making them rather boring since you seem to justify the omission of lag by mentioning it for all moves at the start of the set. Also, I greatly dislike the D-Smash that doesn't damage but worse yet it messes with the foe's characterization, not to mention I don't know why foes would run away because I don't know what a Mitite is. A D-Smash with some random gimmick in the place of knockback reminds me of Villager's D-Smash, which I think is the absolute worst move in the entire Smash series. I'm getting a bit negative here when you're just a newcomer, and I apologize for that, because really I don't have anything against the set or the way you've chosen to portray Louie (if anything, I approve of it!); you just need some more detail in the move descriptions and to inform us of the Pikmin monsters, since really that'd be educational for someone like me. If you have any other questions regarding what I've mentioned, don't hesitate to ask, and with that, happy movesetting!

Also, you're one of the rare people from Australia who's posted in MYM, just like me! *high fives*[/collapse]
Thank you for the movset feedback, I will fix up all the mistakes when I can and I won't makes my more newcomer mistakes in the future. Louieisn't the villain but i would say he is then closest thing to a bad guy in pikmin. he still isn't that bad if your get what I mean, he is just more inconsiderate than evil
 
Last edited:

Reiga

He sold diddy for a switch
Joined
Dec 8, 2014
Messages
1,256
Location
White Noise
3DS FC
1461-7646-7368
I changed Nano's moveset with a better grasp of her playstyle and added a bit more uniqueness to her basic attacks.
tiem to make comments myself tho, been some time without a reigareview
 
Last edited:

ChaosKiwi

Smash Apprentice
Joined
Feb 1, 2014
Messages
104
NNID
ChaosKiwi
Buncha newbies, showin me up.
I won't allow it!

Stay tuned for a pair of sets you won't be expecting!
 
Last edited:
Joined
Jul 7, 2014
Messages
583
Location
New South Wales, Australia
NNID
AwesomeCauliflwr
3DS FC
0576-6167-0092
[collapse=Kongo Bongos (Candy Kong)]Welcome to Make Your Move, Chase! Candy certainlty isn't bad for your first set and you know what you want right from the get go, but she could do with some improvement in some areas. For one, the moves and intro are written in such a way that you assume everyone knows the character as well as you do, which makes the set -slightly- alienating for those not completely familiar with the series (like me!) - a little explanation can do wonders, and sometimes even a picture of the object in question can make the set funky, just like in the Funky Kong set posted earlier this contest. If the picture would stand out too much due to being too big, you can link to it instead.

Playstyles are generally written at the end of movesets where readers know all the character's attacks, and Candy Kong certainly has an interesting style: it...seems like she completely revolves around her Save Barrel! As cool of an idea the barrel is, I don't know whether it completely suits having Candy Kong center around it character-wise, and really it's not necessary to talk about the attack before the set when you get to it anyway. A good playstyle section talks about the character's goals and how they work as a whole, strengths and weaknesses and what have you, and it's not like you don't hint to Candy Kong having an actual playstyle - namely in that she is "full of surprises". Why not tell us how her moves accomplish the art of surprising foes? I can tell at the very least that the randomized aspect of her NSpec projectile and being able to appear from a DSpec barrel anytime work well for surprising opponents, but it's good to sum these up among other things. If you can improve on these, you'll take steps to becoming a better movesetter![/collapse]

[collapse=Pikmin Villain]Louie a bad guy? That's news to me, and he even plays like a bad guy in this set! Y'know, summoning monsters to do his bidding and killing people with kitchen appliances like knives. Regardless of whether it's fitting or not, it's certainly a nice departure from Olimar and his Pikmin.

Okay, so I know very little about Pikmin 2, let alone the entire Pikmin series, and that means I have absolutely no idea what any of the monsters he summons look like. This is a similar case with Candy Kong in that you assume readers are familiar with Pikmin and end up alienating them a bit, but here a simple picture and a mite of knowledge on the monsters is very essential to putting readers on the same level as you in terms of understanding. The set is heavily underdetailed as a result, but also because it is very barebones about certain details like knockback and knockback trajectory among individual moves, making them rather boring since you seem to justify the omission of lag by mentioning it for all moves at the start of the set. Also, I greatly dislike the D-Smash that doesn't damage but worse yet it messes with the foe's characterization, not to mention I don't know why foes would run away because I don't know what a Mitite is. A D-Smash with some random gimmick in the place of knockback reminds me of Villager's D-Smash, which I think is the absolute worst move in the entire Smash series. I'm getting a bit negative here when you're just a newcomer, and I apologize for that, because really I don't have anything against the set or the way you've chosen to portray Louie (if anything, I approve of it!); you just need some more detail in the move descriptions and to inform us of the Pikmin monsters, since really that'd be educational for someone like me. If you have any other questions regarding what I've mentioned, don't hesitate to ask, and with that, happy movesetting!

Also, you're one of the rare people from Australia who's posted in MYM, just like me! *high fives*[/collapse]
I fixed up my moveset with some added detail on knockback and pictures of all the enemies and a boxing ring alias
 
Last edited:

Munomario777

Smash Master
Joined
Nov 18, 2014
Messages
3,253
Location
Charleston, South Carolina
3DS FC
0387-9596-4480
Switch FC
SW-8229-3157-8114

DOOD
"The Pen is mightier than the sword!"
Hailing from the rather obscure game "Dood's Big Adventure" for the equally obscure uDraw Game Tablet (AKA Wii U Gamepad the cheap version), Dood is a monkey-looking guy with a... questionable fashion sense to say the least. His gameplay revolves around using the pen to draw on the accessory's surface to interact with objects, the environment, and Dood himself depending on the game mode. I still have this game and the uDraw tablet for some reason, so I did some hands-on research for all four game modes just to make this set. As always, this set is designed around Smash 4's engine for balance purposes and such, specifically using a controller with two control sticks (you'll see why later). With the introductions out of the way, let's dive right into this set!

STATS

Weight: Mario
Size: Luigi
Ground Speed: Mario
Jump Height: Mario
Air Speed: Mario
Fall Speed: Luigi

UNIQUE MECHANICS

Dood's main mechanic is based around the main control method in his game, that being the Pen!

When playing as Dood, the right stick, rather than controlling the smashes, controls the Pen! It can move freely across the screen, and moves relative to the stage rather than the camera (so if the camera pans, the pen won't move because of that) at about Mario's dash speed. Depending on the context and what attack Dood is using, the Pen has different functions, which will be expanded on in the attacks section. For now, though, just know that the Pen can be attacked, and if it takes 20% damage, it will retreat back to Dood's position; it will take flinching, but it will not be destroyed or take knockback. The Pen can also perform actions while Dood is attacking/helpless/hitstun/buried/etc., unless otherwise specified.

SPECIALS

Neutral Special: Black Ink
Uses Pen: Yes
Damage: 7~15%

The Pen gains a drop of black ink from the Pen Panic game mode, which grows in size the more the attack is charged (can be charged for up to a second). When the charge is released, the drop of Ink falls downwards from the pen to damage opponents. It delivers a meteor smash, but is only really effective when it's charged. Alternatively, this can be launched in any of the eight directions by holding the right stick in the desired direction during the charge period. This results in the Pen spinning around rapidly, and then releasing the blob of ink to send it flying! The damage and knockback remain unchanged, other than the direction of the knockback. Dood doesn't do anything when the attack is activated, but this also means that he is free to move around or even perform another attack while the drop is being charged.

Side Special: Roly Poly
Uses Pen: Yes
Damage: 8~20%

Dood jumps into a hamster-ball esque sphere from the original game's Roly Poly mode. Dood cannot get the ball rolling himself, but instead must use the Pen, which grows a gloved hand in place of the tip, and can roll the ball by moving the hand across the ball in the direction that Dood wants to roll. (Alternatively, Dood can usethe move on a slope to get the ball rolling.) Once Dood has gotten a jump start, he can roll left and right normally by running inside of the ball like a hamster ball. After rolling for a few seconds, the ball will pick up speed and glow, increasing the damage and knockback, KOing at around 100%. Dood cannot attack from this position, of course, but the Pen can still attack while Dood is rolling to set up some combos.

Up Special: Bubble Trouble
Uses Pen: Yes
Damage: 1~10%

A bubble forms around Dood from the Bubble Trouble game mode, allowing him to float in midair. In order to move around, Dood must use the Pen, which gains a fan on the tip that is perpetually pointed towards Dood. When the Special button is pressed, the fan will blow to propel the bubble and damage enemies for 1% and minor flinching. After either hitting a solid surface/an opponent/a projectile/anything really or three seconds have passed, the bubble will pop, which will put Dood into helpless and end the move, but the pop will also damage enemies for 10% damage and moderate knockback. Getting the Pen too close while the fan is spinning will also pop the bubble, so be careful! Since the Pen plays a pivotal role in this attack, Pen attacks cannot be used while Dood is in the bubble, and of course, Dood cannot attack during this either.

Down Special: Pen Trampoline
Uses Pen: Yes
Damage: 0%

The Pen gains a drop of orange ink from the Pen Panic game mode, and will draw a straight line (similar to the straight line tool from Microsoft Paint) until the button is pressed again, let go of, or after the line gets as long as three Battlefield platforms. This line then turns into a trampoline, which will bounce Dood and his opponents in whichever direction the side is facing (bounce on the top of a horizontal line, get sent up, left of a vertical line, get sent left, etc.). Horizontal trampolines won't bounce fighters downwards, though; they will be jumped through instead, like a soft platform. This won't put Dood into helpless, but the trampoline will disappear either after thirty seconds, one second after someone bounces on it, or when Dood draws a new one. The trampoline will send whoever bounces on it a height equal to the length of the line.

STANDARD ATTACKS

Jab: Pen Punch
Uses Pen: Yes
Damage: 3%, 3%, 2% per rapid hit, 4% finisher

The Pen's tip is replaced by a boxing glove, and it punches two times by thrusting itself forward in the air. The Pen then spins around for a rapid jab attack, and the finisher has the boxing glove grow in size to deal more damage. Dood himself does two weak punches that deal 2% of damage each, but are rather quick, and then does a kick in front of him to deal 4% of damage.

Forward Tilt: Pen Poke
Uses Pen: Yes
Damage: 10%

The Pen's tip is replaced by a sharp spike (that pencil sharpener sure went to work!), and during the rather lengthystarting lag, it "charges up" by going backwards and upwards a bit in a cartoonish manner. The Pen then pokes forward about two Pen lengths to deal damage to opponents. Deals moderate horizontal knockback, but not enough to KO anytime soon. Dood himself does a bit of a spinning kick in front of himself to deal 5% of damage and moderate knockback, and both of these can be angled up or down.

Up Tilt: Pen Torch
Uses Pen: Yes
Damage: 10%

The Pen's tip is replaced by a hand-drawn flame, and it lowers down a bit during the startup, similarly to the Side Tilt. The Pen is thrusted upwards to damage opponents with a burning effect. This has a bit of lag, but the knockback can KO at around 140% (and that's if the Pen is grounded; in the air, it can KO much earlier due to the closer blast line). Dood himself does a jumping headbutt to deal 5% of damage and moderate knockback.

Down Tilt: Pen Stroke
Uses Pen: Yes
Damage: 4% per hit, 3 hits, 12% total

The Pen's tip turns into that of a paint brush, and it strokes left to right to left to right three times below itself, each dealing 4% of damage. This attack doesn't deal much knockback, but is a good option for racking up damage, and it's very quick to boot. Dood himself does a low sweep kick in front of him to deal 5% damage and trip opponents, but his attack has some end lag.

Dash Attack: Headbutt Jump
Uses Pen: No
Damage: 7%

Dood dives into the air headfirst, damaging opponents with a headbutt to deal damage and moderate knockback. While this is one of Dood's stronger attacks, Dood lands on his head, giving the attack some major end lag. Dood can go off of the edge of the stage with this attack, and the Pen is uninvolved in this attack.

Edge Attack: Roll Kick
Uses Pen: No
Damage: 5%

Dood does a cartwheel-esque flip onto the stage, kicking opponents to deal damage and moderate knockback. This is a nice, quick option for getting back onto the stage. The Pen is uninvolved in this attack.

SMASH ATTACKS

While the right stick controls the pen rather than the smashes, they can still be executed by using the attack button and the left stick simultaneously.

Side Smash: Sideways Ink Stream
Uses Pen: Yes
Damage: 7~15%

The Pen gains a drop of black ink, which grows in size during the charging period. When the charge is released, a stream of black ink up to one Battlefield platform long depending on the charge emits forwards from the pen, dealing damage and KOing at around 120% at maximum charge. This won't just damage opponents, however; the stream of black ink will, upon contact with a surface, create a puddle of black ink on that surface! This puddle will deal opponents 3% of damage for every second that they're in the ink, but it will disappear after thirty seconds. This attack can be aimed up or down, and Dood himself won't do anything during this attack, leaving him free to move around and attack.

Down Smash: Downwards Ink Stream
Uses Pen: Yes
Damage: 7~15%

The Pen gains a drop of black ink, which grows in size during the charging period. When the charge is released, a stream of black ink up to one Battlefield platform long depending on the charge emits downwards from the pen, dealing damage and a powerful meteor smash. This won't just damage opponents, however; the stream of black ink will, upon contact with a surface, create a puddle of black ink on that surface! This puddle will deal opponents 3% of damage for every second that they're in the ink, but it will disappear after thirty seconds. Dood himself won't do anything during this attack, leaving him free to move around and attack.

Up Smash: Upwards Ink Stream
Uses Pen: Yes
Damage: 7~15%

The Pen gains a drop of black ink, which grows in size during the charging period. When the charge is released, a stream of black ink up to one Battlefield platform long depending on the charge emits upwards from the pen, dealing damage and KOing at around 120% at maximum charge. This won't just damage opponents, however; the stream of black ink will, upon contact with a surface, create a puddle of black ink on that surface! This puddle will deal opponents 3% of damage for every second that they're in the ink, but it will disappear after thirty seconds. Dood himself won't do anything during this attack, leaving him free to move around and attack.

AERIAL ATTACKS

Neutral Aerial: Cartwheel
Uses Pen: Yes*
Damage: 7%

Dood enters a fetal position and does a midair cartwheel, dealing 7% of damage and moderate knockback with his feet, hands, and head. However, the knockback doesn't send opponents away from Dood; rather, it sends them to the opposite side at which they came in contact with Dood. (For example, if someone hits Dood from above, they are sent downwards.) A nice, quick attack to deal a good bit of damage and catching opponents off guard.

Up Aerial: Headbutt Flip
Uses Pen: Yes*
Damage: 5%

Dood does a headbutt in an arc above him (from above and behind him to above and in front of him) to deal 5% of damage and moderate knockback. This knocks opponents at a 45 degree angle upwards and in front of Dood, and has high hitstun, so it's good for setting up opponents to get hit by the Pen's attacks.

Down Aerial: Downward Kick
Uses Pen: Yes*
Damage: 6%

Dood kicks downward with both feet, thrusting them downward to deal damage and deliver a powerful meteor smash. The attack is a bit laggy, however, and thus is rather risky to use.

Forward Aerial: Spin Kick
Uses Pen: Yes*
Damage: 5% per hit, 3 hits, total of 15%

Dood does a spinning kick with one foot to both sides for a multi-hit attack that hits in front of Dood and then behind him and then in front again. This is one of Dood's best damage-racking moves and is very quick, but lacks in knockback and range due to Dood's short legs.

Back Aerial: Backward Kick
Uses Pen: Yes*
Damage: 6%

Dood kicks backward with both feet, thrusting them backward to damage opponents. This has a surprising amount of knockback for Dood, KOing at around 130%, but it is a bit slow at the end, and the range is lacking due to Dood's short legs.

*For the aerials, the Pen does the same attacks as the respective standard attacks, and both the Forward and Back Aerials have the Pen perform the Side Tilt. If a smash attack input is performed in mid-air, the Pen will perform a smash attack instead.

GRAB GAME

Grab: Grabby Pen
Uses Pen: Yes
Damage: 0%

The Pen's tip is replaced by a gloved hand, and will attempt to grab an opponent. If there is an opponent nearby, the Pen will grab them and bring them back to Dood. This will also reset the Pen's position to near Dood, which can be useful for setting up certain situations. The Pen cannot perform other actions while the opponent is being grabbed/thrown, as it is still holding onto the opponent. Dood, however, rather than a traditional pummel, is free to attack the opponent with any attack! Attacking the opponent will make it easier to escape, though, depending on the power of the attack. The throws are initiated by moving the right stick in a direction, rather than the left stick. This can also be performed if Dood is in the air, unlike most grabs.

Up Throw: Pen Spin
Uses Pen: Yes
Damage: 7%

The Pen spins rapidly with the opponent in tow, dealing 2% per rotation. There are three rotations, and after these, the Pen lets go of the opponent, sending them flying to deal 1% of additional damage and KO at around 120%.

Forward Throw: Black Ink Blast
Uses Pen: Yes
Damage: 10%

The Pen turns back to normal after throwing the victim forwards. The Pen then fires a stream of black ink towards the midair opponent (who is still in hitstun, by the way) to deal 10% of damage and decent knockback, KOing at around 130%.

Down Throw: Moustache Prank
Uses Pen: Yes
Damage: 13%

The Pen turns back to normal while the opponent is levitated below it. Then, the Pen draws a moustache made of black ink on the opponent's face to deal 8% of damage. The opponent slaps their own face to try to get the ink off, which works, but also deals 5% of additional damage. The opponent is then released for minor knockback.

Back Throw: Pen Injection Spin
Uses Pen: Yes
Damage: 1% initially, 3% per second, 5 seconds, 16% total

The Pen turns into its normal form and the tip pierces the opponent, like a syringe needle. It then spins around rapidly, similarly to Mario's Back Throw, but it will only deal 1% of damage, and KOs at around 150%. Now, this might seem like a rather bad throw, right? If that was it, yes it would be, but there's more! While the opponent is spinning around, the Pen injects poisonous black ink into their veins! This will cause them to become, well, poisoned, which means that they take 3% of damage per second for 5 seconds. This means that this throw will deal 15% of poison damage total, which makes up for the average knockback.

MISCELLANEOUS

Final Smash: Customize
Uses Pen: Yes
Damage: 5% per second

When Dood breaks open the Smash Ball, he gains the ability to customize the world like in his game and bend the stage to his advantage! The Pen can draw landscapes in a similar manner to the Stage Builder, and opponents that stand on the landscapes will be damaged for 5% per second. A good strategy for this is to knock opponents off the stage (which is very doable since Dood can still move around during this) and then make walls so high that they can't recover! The drawing period lasts for 15 seconds, and the landscape will disappear after 10 seconds.

Up Taunt:
Dood gives a thumbs-up and the Pen draws one.
Side Taunt:
Dood holds out a gold coin from his game, and the Pen does a loop-de-loop.
Down Taunt:
Dood lies down on the ground, arms folded behind his head as a pillow, and the Pen draws a hammock for itself and lies down on it.

Victory Pose 1:
Dood bounces on a series of trampolines drawn by the Pen and hits the ground head-first, getting stuck and struggling to get out (the Pen pulls on Dood's feet to try to help).
Victory Pose 2:
Dood floats in in a bubble and it pops, sending him falling to the ground. However, the Pen draws a trampoline to break his fall, which Dood continues to bounce on.
Victory Pose 3:
Dood rolls in the hamster ball from his Side Special, and the Pen stops him and keeps him in place as he runs in circles around the inside of the ball.

Victory Music:
0:06 to 0:11 in this video.

Miscellaneous:
- In multiplayer, the Pen and its ink becomes the color of the respective player (P1 is red, P2 is blue, etc.).

PLAYSTYLE

Dood is a very unique character, and this is all thanks to the Pen, with its independent movement and various functions. Many moves require the Pen to be close by, but only the Grab will instantly bring it back automatically, so it's a good idea to have the Pen nearby. At the same time, however, the Pen is also good for dealing damage from a safe distance. Balancing ranged and close-up Pen usage is key to Dood's playstyle. Although the Pen can take damage, it is never destroyed, and the retreating behavior can actually be useful in some instances! The Neutral Special is great for edgeguarding from a distance and approach from above the stage when the Pen and Dood are close together. The Side Special requires the Pen to be close by, but can still be utilized if there is a slope to get Dood rolling. The Up Special is good for recovery and minor damage, but is incredibly gimpable since contact with anything will send Dood into helpless! The Down Special is good for traps as well as recovery, but requires precise spacing, maneuvering, and timing of the Pen. For the standards, the Pen tends to be more powerful than Dood, since it's the main method of attack in the original game. That said, Dood can still fend for himself for a bit while the Pen is coming back to him. The Final Smash requires skill and strategy to use most effectively, but the results can be devastating if used properly. Overall, Dood is a character of balance between close- and long-range with quite the learning curve, but potential to be devastating in skilled hands. As always, feedback is appreciated, and I hope you enjoyed the set! :)

Like what you see? See some more over at my Make Your Move Hub! :D
 
Last edited:

Reiga

He sold diddy for a switch
Joined
Dec 8, 2014
Messages
1,256
Location
White Noise
3DS FC
1461-7646-7368
Reigareview 2: Reigalectric Boogaloo

L33t d00d

dunno why this character reminds me of this game.

I actually never heard of the Wii tablet thing until now, as for the moveset... it really could have been better. The pen idea is interesting (dunno how to move that with the New 3DS's nub tho) but some of these moves at concept should have more thought. First off, this may be considered a nitpick but why does d00d's Up-Special cause damage when helpless? I mean, it isn't normal for somebody in a state of helpless do damage and probably can just be taken off the moveset, I mean, plenty of characters have recovery moves that can't do any damage and I don't think this would affect the moveset too much.
I really don't like d00d's Down-Special, though because while it offers an interesting recovery option it might pass off as a pretty cheap move, imagine this, your in a battle against d00d and he launched you off stage and you are recovering and he then makes a trampoline in your way that bounces you back to the blast zone, to solve this problem maybe you can make it so that only one side is the bouncy part and the other part is pass-throught or some other idea. Giving some sense as to how much height the trampoline gives when jumped on should also be done.
Grab-game wise I'd like to say the Down-Throw is hilarious but the Back-Throw could be touched upon, like what if the move is used next to a ledge? The pen would fly over the ledge, okay. But what about d00d? Would he fly over it? (lol)
So tl;dr: change Down and Up Special and maybe touch up the Back-Throw.


Munomario777

Smash Master
Joined
Nov 18, 2014
Messages
3,253
Location
Charleston, South Carolina
3DS FC
0387-9596-4480
Switch FC
SW-8229-3157-8114
Reigareview 2: Reigalectric Boogaloo

L33t d00d

dunno why this character reminds me of this game.

I actually never heard of the Wii tablet thing until now, as for the moveset... it really could have been better. The pen idea is interesting (dunno how to move that with the New 3DS's nub tho) but some of these moves at concept should have more thought. First off, this may be considered a nitpick but why does d00d's Up-Special cause damage when helpless? I mean, it isn't normal for somebody in a state of helpless do damage and probably can just be taken off the moveset, I mean, plenty of characters have recovery moves that can't do any damage and I don't think this would affect the moveset too much.
I really don't like d00d's Down-Special, though because while it offers an interesting recovery option it might pass off as a pretty cheap move, imagine this, your in a battle against d00d and he launched you off stage and you are recovering and he then makes a trampoline in your way that bounces you back to the blast zone, to solve this problem maybe you can make it so that only one side is the bouncy part and the other part is pass-throught or some other idea. Giving some sense as to how much height the trampoline gives when jumped on should also be done.
Grab-game wise I'd like to say the Down-Throw is hilarious but the Back-Throw could be touched upon, like what if the move is used next to a ledge? The pen would fly over the ledge, okay. But what about d00d? Would he fly over it? (lol)
So tl;dr: change Down and Up Special and maybe touch up the Back-Throw.
Thanks for the feedback! :)
  • 3DS Nub: I haven't used a New 3DS myself, so I'm not sure how it feels, but I imagined it working like normal (imagine it like those old laptop cursor movers the nub bears resemblence to).
  • Up Special: Actually, only the initial "pop" deals damage; after that, Dood falls into a regular helpless state. This is a reference to the attack that Dood can use in the game while in a bubble.
  • Down Special: True. I'll make those changes and clarify the move.
  • Back Throw: I'll clarify that when I go back through the set.
Thanks again for the feedback! :) I'll go through and edit the set.
 

Kirby Dragons

Smash Hero
Joined
Aug 30, 2014
Messages
5,239
Location
Another Dimension
It's about time I made a moveset for this.
Jack Atlas

Jack Atlas is a character from the Yu-Gi-Oh! 5D's. He is a powerful Duelist, and the rival of Yusei. He is a Signer, and his Signer Dragon is Red Dragon Archfiend. His mark of the Crimson Dragon is the wings on his arm.
Stats
  • Ground Speed: 7/10
  • Fall Speed: 3/10
  • Weight: 6/10
  • Jump Height: 8/10
  • Height: 8/10
  • Air Speed: 4/10
Normal Attack
Jack swings his Duel Disk outward like an axe, reaching halfway until it's fully outstretched. This is rather slow, taking about two seconds to conduct. 5%.
Forward Tilt
Jack swings a full hand of cards (6) outward. It is much quicker than his normal attack, but also more powerful. 6%.
Up Tilt
Jack stands on his tiptoes, attacking with his shoulders and his head in a rising attack. His head does 14%, while either of his shoulders will do 7%.
Down Tilt
Jack kicks in a low attack. 14%.
Dash Attack

Monster Baton. Jack shoots out his hand with a ball of light, dealing 13% damage.
Forward Smash

Medium Piece Golem. He swings his arm forward in a punch, doing exactly 16% when fully charged.
Up Smash

Small Piece Golem. Jack throws him up a short distance, and he'll do a spinning arm attack. 11% when charged completely.
Down Smash

Big Piece Golem. Jack will actually turn into him, and slam both his fists downward for 21%. The slams are strong, but have a second of starting lag.
Neutral Aerial
Jack does a punch backward, a low kick forward, and a head attack diagonally up and back. The punch does 7%, the kick does 4%, and the head does 6%.
Forward Aerial
Jack smacks his hand down in front of him. 8%.
Back Aerial

Dread Dragon. He'll face Jack's back while doing two tail swipes, with the first doing 4% and the second doing 11%.
Down Aerial
Jack slams his feet together. This is rather powerful, at 19%.
Grab
Jack grabs the opponent.
Pummel
Jack elbows the opponent. 2%.
Forward Throw

Fiend Cannon. Jack launches the opponent forward. 5%.
Back Throw

Sneak Exploder. Jack uses an explosion to launch his opponent for 15 damage.
Up Throw

Speed Spell - Sonic Buster. Jack launches his opponent up with a sonic boom. 15%.
Down Throw

Burning Strike. This drops down from below Jack, hitting the opponent once for a 9%, and launching backwards diagonally a great distance. A good KO move, able to KO heavyweights at 120%.
Edge Attack
Jack does a very low spinning kick on the floor before standing up. 8%.
Standard Special

Red Dragon Archfiend
Jack's signature monster in the anime. The giant Red Dragon Archfiend, twice the size of Jack, will do a fire breath attack downwards at a 70 degree angle from the ground. The fire breath moves at a rather slow speed. It does 30% damage and breaks shields. After the fire breath, RDA will remain flying next to Jack, able to block any attacks that come his way. After RDA has blocked 20% or more of damage, he becomes intangible and can be walked through, or shot through with projectiles. Eight seconds after the fire breath, RDA will explode, doing heavy knockback to Jack, but no damage. The explosion can KO Jack at 80% damage, and cannot be shielded. Because of this, Red Dragon Archfiend is not a reliable move to use at high damage.
Side Special

Shockwave
Jack traps the opponent in a vortex appearing right in front of him. The initial vortex lacks height and suction, making it hard to trap opponents above or below Jack. If Jack traps someone, three purple beams will fly through both Jack and the opponent, dealing 20% damage to both of them, launching them both in opposite directions afterward. The distance launched is usually half of FD, but if one of the two has 120% or more damage, then the normal knockback effects begin to apply.
Up Special

Exploder Dragonwing
Jack uses Exploder Dragonwing to fly him up a great distance, 1/3 the length of FD. While flying, Jack has minor control over the dragon, being able to shift to the left or right. During any point in the flight, Jack can press A or B to make the dragon explode, doing 20% damage. The explosion lacks range. It will send Jack flying backward at high speeds and distance. He will have the fire effect on him to burn opponents, but he won't deal any damage. He will also be helpless, leading to potential self-destructs.
Down Special

Dimension Switch
Jack enters another dimension, leaving and creating an energy field in his place. He can stay in this dimension for up to six seconds, and he can control the energy field, causing it to move. While Jack is in the other dimension, he cannot be hurt, but he can still be grabbed. The energy field will have different effects, depending on the consecutive length it's been out.​
  • In the first two seconds, it will reflect projectiles.
  • In the next four seconds, it will store one projectile, automatically reverting Jack back, and releasing the projectile the next time this move is used.
  • Once this move is ended (not including when done so by storing a projectile, or when grabbed), Jack will use a suction effect to draw in any people or items near him, reducing walking speed a bit for the next five seconds. It can even draw in Smash Balls. A green field will be placed around Jack, but it doesn't move with him. After ten seconds, Jack can trigger the field by using this move once again by being in it. Doing so will deal 17% damage to anyone that also happens to be in the field, as well as launching them. This entire technique is known as the Dimensional Vortex Bomb. The Dimensional Vortex Bomb can be ended by hitting the field with a reflector or absorber, a technique known as Defuse. Defuse will not actually reflect or absorb this technique. When the Dimensional Vortex Bomb is triggered, Jack will not enter the other dimension. If the DVB is out and Jack uses Dimension Switch, but not in the field, the DVB will disappear. Once the field for DVB has gone away, Dimension Switch can't be used for the next 20 seconds.
Final Smash

Red Nova Dragon
Jack Summons Red Nova Dragon, who remains on the field for the next eight seconds. RND will randomly use five attacks, which are either fire breath, a claw swipe, or a kick. The foot attacks are the most frequent, and do 15 damage. The claw attacks do 25 damage. The fire breath is the rarest attack, and does 35 damage. The RND can also fly to chase opponents.
Playstyle
Jack's special moves are very unique. They benefit him, but most can also hurt him, like his standard special, that will always explode on him. His side special will damage Jack, while the up special can lead to a self-destruct. Jack looks pretty bad at first, but he can get strong benefits from his powerful moves.
Jack is not a character good with combos, often just dealing single hits for power. He can easily launch his opponents too far away for Jack to capitalize on. His slow fall speed is a factor in preventing him from executing combos. Because of this, Jack's air game isn't the best, and he can easily be seized. One of the only ways to prevent this is by using Dimension Switch to gain invincibility. Unfortunately, reaching the ground will allow him to be grabbed.
Dimension Switch should also be noted. As Jack is good at launching, he can send his opponents into the Dimensional Vortex Bomb to launch them. However, characters with a high ground speed can easily avoid this. Most characters can be affected by this powerful strategy, however. The only problem would be overlaunching the opponent past the DVB, allowing them to easily escape. All in all, the DVB works best on heavyweight who cannot run from it or be overlaunched.
Other
Up Taunt
Jack brushes his hair with his hand.
Forward Taunt
Jack points and says, "Check this out!"
Down Taunt
Jack places two cards on his Duel Disk.
Idle Pose
Jack draws a card.
Entrance
Jack shuffles his cards and places them in his Duel Disk, draws five cards, a life point counter appears above him saying "4000", and Jack says, "Let's Duel."
Victory Pose
The last five seconds of the Yu-Gi-Oh! 5D's theme song, Hyper Drive, play.​
  • Red Dragon Archfiend is flying above Jack before landing. Both Jack and RDA direct their hands forward, and Jack says, "You can't deal with my Archfiend!"
  • Jack crosses his arms and says, "Believe in the power of every card in your Deck."
  • Jack rides around in his Duel Runner a bit before jumping out.
Loss Pose
A life point counter goes from 400 to 0, and Jack stoops to the ground.​
 

Slavic

Ask not the sparrow how the eagle soars
Joined
Jun 5, 2013
Messages
763
Location
taco bell, probablyn't
So I decided to go back and read some older Make Your Moves, specifically the first one, and it is so much more different than MYM is now. I see why joke characters were banned for a while, that is like the majority of the first three pages, it's not fun to read through. And I am so glad that we have a higher standard of quality now than back when, people just vomited out sets in like five minutes looking through them. Still some good stuff, but so much bad stuff. Also, it is real weird to read through and not recognize any usernames. I'm glad there's a much more serious tone to the contest now, good work everyone!

/history lesson
/pep talk

EDIT - MYM 2 has 66 pages?? And MYM 3 has *278*??? What happened here??
 
Last edited:

Munomario777

Smash Master
Joined
Nov 18, 2014
Messages
3,253
Location
Charleston, South Carolina
3DS FC
0387-9596-4480
Switch FC
SW-8229-3157-8114
So I decided to go back and read some older Make Your Moves, specifically the first one, and it is so much more different than MYM is now. I see why joke characters were banned for a while, that is like the majority of the first three pages, it's not fun to read through. And I am so glad that we have a higher standard of quality now than back when, people just vomited out sets in like five minutes looking through them. Still some good stuff, but so much bad stuff. Also, it is real weird to read through and not recognize any usernames. I'm glad there's a much more serious tone to the contest now, good work everyone!

/history legend
/pep talk
Yeah, reading the original MYM thread is really weird after seeing the newer ones; the movesets weren't fleshed out at all back then in the beginning.

In other news, I've got a new moveset cooking; stay tuned! :)
 

MapleWooD

Smash Journeyman
Joined
Jan 4, 2015
Messages
441
Location
Montreal, QC
BASS

Attributes: Bass is heavier, falls faster, has slower horizontal air speed, stands taller. Bass hovers slowly and leans over a bit as opposed to walking and leans over more when dashing. Most of Bass's moves are Robot Master abilities derived primarily from Mega Man 5 and Mega Man 10, the 2 games that featured no Robot Master abilities in Mega Man's moveset, as well as Mega Man & Bass.

Neutral Jab/Ftilt/Nair/:
Bass shoots pellets like Mega Man, but can also be angled diagonally (upward, not downward) like in Mega Man & Bass. The shots come out faster than Mega Man's and deal 3% per hit, but the move has more ending lag.

Dash: Bass performs a swift dash like in Megaman x and Mega Man & Bass. Damage remains the same, knocks opponents upward.


Dtilt: Charge Kick from Mega Man 5. Slides a shorter distance, bigger hitbox, deals more damage and knocks opponent's upwards.


Fair: Knight Crusher from Mega Man 6. Bass swings a flail outward in a cone, the chain hits for less damage than the spike-ball.

Bair: Triple Blade from Mega Man 10. Bass fires 3 blades behind him, similar to Mega Man's bair. Has a longer but thinner hitbox, slightly more damage, same knockback, cannot be short-hopped unlike Mega Man's.


Dair: Spread Drill from Mega Man & Bass. Fires a drill downwards similar to Mega Man's hard knuckle, longer startup lag, more powerful meteor smash.


Neutral B: Atomic Fire from Mega Man 2. A charged shot similar to Samus's Neutral B.


Side-B: Commando Bomb from Mega Man 10. Acts like Snake's Side B, larger blast zone than Mega Man's Crash Bomb.


Up-B: Treble Boost from Mega Man & Bass. Allows Bass to fly for a short period of time.


Down-B: Star Crash from Mega Man 5. Same concept as Mega Man's leaf shield, stars orbit around Bass and it can be launched outward. The shield is bigger due to Bass's taller and larger stature, however, there are only 3 stars unlike Mega Man's 4 leaves. Damage is slightly higher, knockback remains the same.


Fsmash: Treble Bite. Bass orders Treble to bite his target.

(Seen in third frame)

Upsmash: Bass Backflip kick. Bass performs a somersault kick similar to Fox and Falco.


Dsmash: Water Wave from Mega Man 5. Bass fires an intense wave of water. Deals more damage and has more knockback than Mega Man's, but is angled diagonally and only hits on the side Bass is facing (similar to ZZS's Dsmash)


Grab: Same as Mega Man
Pummel: Slow pummel, 3% per hit
Throws: All of Bass's throws are based off Rebound Striker from Mega Man 10. Involves Bass winding up his throw, launch direction depends on input.


Final Smash: Bass-Treble Fusion. Bass and Treble combine together, similar to Yoshi, Charizard, Lucario and Diddy Kong's Final Smashes.


Up taunt: Bass crosses his arms laughs
Side Taunt: Bass flexes his buster arm
Down Taunt: Same as Mega Man
 
Last edited:

LeeYawshee

Smash Ace
Joined
Nov 22, 2013
Messages
904
Location
Florida
3DS FC
2621-3044-6895
Is this just a thread about making any moveset we want or do we have to follow super specific rules?
 

Munomario777

Smash Master
Joined
Nov 18, 2014
Messages
3,253
Location
Charleston, South Carolina
3DS FC
0387-9596-4480
Switch FC
SW-8229-3157-8114
Is this just a thread about making any moveset we want or do we have to follow super specific rules?
As long as it's got all of the attacks (and follows the other SWF rules of course), you can submit pretty much any moveset; people have been making anime movesets recently. :p Naturally, the OP is the place to go for details on rules and such.

Also, you're free to edit the moveset as much as you like (and make as many as you like), and constructive criticism is always welcome! :)
 

jaketheknight

Smash Apprentice
Joined
Feb 4, 2015
Messages
94
Location
San Diego
NNID
jaketheknight
3DS FC
4854-6438-8016
I can't write, nor am I well versed enough in the universe, but Scrooge McDuck would be awesome.
 

LeeYawshee

Smash Ace
Joined
Nov 22, 2013
Messages
904
Location
Florida
3DS FC
2621-3044-6895
Alright! Then I want to try making characters for characters that ARE in Smash. It sounds weird and counter-productive but... Is that allowed?
 

Munomario777

Smash Master
Joined
Nov 18, 2014
Messages
3,253
Location
Charleston, South Carolina
3DS FC
0387-9596-4480
Switch FC
SW-8229-3157-8114
UNDER CONSTRUCTION

DAISY
"Hi I'm Daisy!"
Originating from the faraway kingdom of Sarasaland, Daisy is a very sporty princess, appearing in everything from Mario Kart to Mario Golf to Mario Party! She's skilled in everything from board games and kart racing to golf and tennis, and she's ready to use this to take on the world of Smash! As always, this moveset is custom built from the ground up for the latest Smash games on the Wii U and Nintendo 3DS for balance, stats, and the like. With the introductions out of the way, let's swing right into this set!

STATS
Weight: Peach
Size: Peach
Ground Speed: Mario
Jump Height: Mario
Air Speed: Mario
Fall Speed: Peach

SPECIALS

Neutral Special: Dice Block
Damage: varies


Daisy throws a Dice Block from the Mario Party series forward in an arc, travelling up to 3 Battlefield platforms when thrown on the ground. If it hits an opponent, it deals 3% of damage and minor knockback, and it will bounce off of walls and ceilings. However, this isn't the Dice Block's main use; when it hits the ground, it lands on a randomized number from one to six (each one has a one in six chance of appearing), causing all of the sides to turn into that number. Then the Dice Block will disappear, the number selected will appear in its place for a second, and a space from Mario Party will appear on that spot depending on the number. These can all affect either Daisy or the opponent for better or worse, and won't disappear until stepped on. The spaces are as follows:

Rolling a one will place down a Red Space, which will deal 10% of damage and moderate knockback to the first player who walks across it, and then disappear.

Rolling a two will place down a Blue Space, which will heal 10% of damage to the first player who walks across it, and then disappear.

Rolling a three will place down a Bank Space, which will deal 10% of damage and moderate knockback to the first player who walks across it and then heal 10% of damage to the second player who walks across it, and then disappear.

Rolling a four will place down a Mushroom Space, which will give either a Super Mushroom or a Poison Mushroom effect (growing or shrinking) to whoever walks across it first, and then disappear. This is shown by the color of the mushroom icon on the space when the fighter walks on it. Red is a Poison Mushroom, and Green is a Super Mushroom, and they alternate every second.

Rolling a five will place down a Happening Space, which will give whoever steps on it first a random, negative status effect (flower, freeze, sleeping, burying, slow-motion, or dizziness), and then disappear.

Rolling a six will place down a Star Space, which will give a Super Star's invincibility effect to whoever walks across it first at the cost of dealing 10% of damage, and then disappear.

Side Special: Mach Bike
Damage; 5~15%


Daisy hops on her Mach Bike from Mario Kart Wii and drives it forward at Sonic's dash speed. It does a bit of damage and knockback by ramming into opponents, but is best used for recovery and covering long distances quickly. The Mach Bike can perform a wheelie like the Wario Bike can, and has a small sweet spot at the rear wheel which deals 25% of damage and great vertical knockback, KOing at around 110%. This makes using wheelies a great way to get some damage on prone opponents. The move will end when the bike either runs into the wall and explodes (dealing 10% of damage and moderate knockback to Daisy and any opponents within the radius) or is jumped off of by Daisy via the jump button (or when Daisy is knocked off naturally), but it won't stop even when Daisy jumps off or is knocked off, so it can be used as a sort of unconventional projectile.

Up Special: Flower Copter
Damage: 1~3%

Daisy holds a large flower with a long stem like a parasol, which spins around like a helicopter blade. Daisy travels about two Battlefield platforms upwards and up to one sideways (depending on how much the player decides to hold the analog stick to the side), and the spinning flower deals 3% of damage and gives opponents a flower effect. After the ascension is finished, Daisy is left in helpless and the flower's petals fall off, floating in all directions and serving as hitboxes to deal 1% of damage and flinching to any opponent it hits.

Down Special: Tee Off
Damage: 1~15%


Daisy puts a golf ball on the ground and starts to swing her golf club. This cannot be used effectively in the air, for obvious reasons (the golf ball will simply fall and deal 1% of damage and flinching), and the clubs have a small sweet spot at the head. Depending on how long the move is charged (up to three seconds), a different club is used:

The Putter is the default club and rolls the golf ball slowly along the ground to deal 1% of damage and minor flinching to opponents. The sweet spot deals 3% of damage and trips opponents.

The Wedge is the next club after the putter and launches the golf ball at Mario's dash speed, travelling 3 Battlefield platforms high and 3 forward on a flat surface. Deals 5% of damage and moderate knockback, and can catch opponents off guard with its trajectory. The sweet spot deals 8% of damage and good upwards knockback.

The Iron is the third club, and it launches the ball at Charizard's dash speed, travelling one Battlefield platform high and 5 forward on a flat surface. Deals 8% of damage and good knockback. The sweet spot deals 10% of damage and good knockback, KOing at around 130%.

The Driver is the fourth and final club, and it launches the ball (which is now on a tee) at Sonic's dash speed, travelling at a constant 15% upwards angle with no gravity to deal 13% of damage and good knockback, KOing at around 130%. The sweet spot deals 15% of damage and KOs at around 100%.

GROUND ATTACKS

Jab: Crown Smack
Damage: 3%, 3%

Daisy leans forward, with her head at the front. She then reaches up to the top of her head and takes her crown off of the top with her right hand. Then she proceeds to smack the opponent with the crown, first right and then left, for a nice, quick jab combo.

Forward Tilt: Baseball Bat
Damage: 10%


Daisy enters a batting stance and swings a baseball bat in front of her to damage opponents. Deals 10% of damage and good knockback, KOing at around 130%, and has good range.

Up Tilt: Tennis Smacket (:L)
Damage: 11%


Daisy swings her tennis racket above her in an arc, from behind her to above her to in front of her. This attack deals 11% of damage and good diagonal knockback (a 45 degree angle upwards and forwards), KOing at around 120%, but is quite laggy.

Down Tilt: Hockey Stick
Damage: 7%


Ice skates appear underneath Daisy's feet and she skates forward a bit, about half of a Battlefield platform (unless she hits a ledge, in which case she will stop). She also holds a hockey stick low to the ground for a rather small hitbox. This deals 7% of damage and trips opponents, and is a good move for approaching or getting out of pressure.

Dash Attack: Dribble
Damage: 4% per hit, 3 hits, total of 12%


Daisy dribbles a soccer ball as she runs forwards (about one Battlefield platform), with both her feet and the soccer ball hitting three times. The final hit knocks the opponent away for moderate knockback. Deals good damage and knockback, KOing at around 130%, but has very low range.

Edge Attack: Crown Sweep
Damage: 3%

Daisy takes off her crown and swings it across the ground while she gets up to deal damage and trip opponents.

SMASH ATTACKS

Side Smash: Potted Piranha Plant
Damage: 10~20%


Daisy pulls out a pot, holds her head back with an expression on her face as if anticipating fear, and a Potted Piranha Plant from Mario Kart 8 grows out! The longer the charge, the larger the plant and the longer the range. The resulting lunge and bite deals quite a bit of damage and knockback, KOing at around 100% at full charge. However, there is quite a bit of start and end lag to this attack, and if the Potted Piranha Plant is hit during the charging period, it will bite Daisy and deal that charged damage and knockback on her! This can be aimed up and down.

Down Smash: Triple Shells
Damage: 8~20%


Daisy juggles three Green Shells from the Mario Kart series in one hand, ready to throw them. During this charging period, the Shells will change types, growing in power and gaining new attributes. The Green Shells come in threes and orbit around Daisy for a couple of seconds before shattering (they also shatter when they hit an opponent), dealing 8% of damage and moderate knockback. Daisy can move around for the second half of the orbit time, and hitting the attack button during this will have Daisy pick up one of the Green Shells in her hand, after which it will function like a regular Green Shell item. The Red Shells come in twos and Daisy throws them down to either side, allowing them to home in on opponents like the Red Shell item from Melee. Deals 14% of damage and good knockback, KOing at around 140%. Finally, the Spiny Shell (AKA Blue Shell) comes standalone, but makes up for it since Daisy throws it on the ground, causing it to explode! The radius is about one and a half Daisy heights, and this deals extreme damage (20%) and knockback, KOing at around 90%! However, this explosion also damages Daisy for 8% of damage and deals her moderate knockback. This move is also rather laggy, since Daisy has to transition from juggling to throwing the Shells.

Up Smash: Lightning Bolt
Damage: 7~20%


Daisy holds her hand in the air, and a Lightning Bolt from the Mario Kart series appears in her hand. She uses this to create a huge, well, lightning bolt coming down from the skies. The bolt comes down at Sonic's dash speed from the skies to hit the Lightning Bolt in Daisy's hand (it lasts for only a split second, like Palutena's Up Smash), and will still hurt Daisy! The recoil deals 5~10% of damage to Daisy depending on the charge. The attack deals great damage and knockback (KOs at around 100% at full charge) to opponents, but it can be hard to hit, so this is a very risk-versus-reward move.

AERIAL ATTACKS

Neutral Aerial: Ski Jump
Damage: 7~12%


Two skis appear underneath Daisy's feet, and she enters a ski jump pose (seen above) to damage opponents. This attack deals weak downwards knockback, and covers a wide area. She also holds two ski poles pointed behind her, with the tips acting as a sweet spot to deal 12% of damage and great backward knockback, KOing at around 110%.

Up Aerial: Ice Skate Flip Twirl
Damage: 3% per hit, 4 hits, total of 12%


Daisy's shoes turn into ice skates and she flips upside down, twirling rapidly to attack opponents above her with her ice skates for a multi-hit attack. The last hit deals great vertical knockback, KOing at around 110%, but is hard to land due to the small size of the skates.

Down Aerial: Fake Item Box
Damage: 13%


Daisy pulls out a Fake Item Box, does a forward flip, and throws it below her at high speeds to deal 13% of damage and a powerful meteor smash. If it hits the ground, it will stay there until someone hits it (including Daisy!), and still deal the same damage and good knockback. If Daisy hits an opponent with the Fake Item Box during the flip prior to the throw, they will be dealt 3% of damage and minor knockback. The throw is a bit laggy, but it can really pay off if timed correctly.

Forward Aerial: Wheelie
Damage: 2~13%

A normal, pedal-powered bicycle appears underneath Daisy as she, well, pedals it with all her might. She also does a midair wheelie with this bicycle, while still pedaling. The front wheel will only deal 2% of damage and flinching, but the back wheel is a sweetspot that will send opponents backwards with high knockback (enough to KO at around 120%) and 13% of damage. If Daisy hits the ground during this, rather than end lag, she will enter a state similar to her Side Special but with less speed (similar to her regular dash speed) and the same damage values as this attack.

Back Aerial: Snowboard Spin
Damage: 3% per hit, 4 hits, total of 12%

An orange snowboard with flower prints all over appears underneath Daisy's feet in mid-air. She then leans forward 45 degrees (think Luigi's Smash 4 pose, but with the feet higher up) and spins the snowboard rapidly for a multi-hit attack. The last hit sends opponents at a 45 degree downwards/backwards angle for knockback KOing at around 130%.

GRAB GAME

Grab: Flower Lift
Damage: 3% (aerial version)

A large flower appears about one Battlefield platform in front of Daisy. If there is an opponent where the flower appears, the flower will bring them back to Daisy to be pummelled and thrown. This grab has exceptional range, but there is a large dead zone between Daisy and the flower, and has quite a bit of end lag if the grab misses. In the air, Daisy creates a similar flower at a similar distance, but spins it around to deal 3% of damage and minor knockback to opponents.

Pummel: Crown Smack
Damage: 3%

Daisy takes off her crown and uses it to smack the grabbed opponent. Deals 3% of damage, but is rather slow.

Up Throw: Slam Dunk
Damage: 8~15%


Oops, wrong Daisy. :p Anyways, a basketball hoop appears in front of Daisy, and she slam dunks the opponent into it, dealing a powerful meteor smash and bounce to KO at around 120% (or just a meteor smash if used on the edge of the stage). Some foes take quite a bit of effort to cram in there due to their size, but this actually works to Daisy's advantage, since the bigger the foe, the more damage the throw deals!

Forward Throw: Serve
Damage: 13%


Daisy throws the opponent high into the air, jumps up, and serves them like a volleyball, dealing 8% of damage and good knockback, KOing at around 130%.

Down Throw: Trampoline
Damage: 5%, 5%, 7%

Daisy pins the opponent to the ground and bounces on them thrice like a gymnastics trampoline. The last hit deals more damage and moderate upwards knockback. This throw also leaves Daisy one of her jump heights in the air when the animation is finished, making for some nice combo potential.

Back Throw: Fastball
Damage: 8%


Daisy puts on a pitcher's glove and holds the opponent in it, spinning around rapidly to then throw them as a fastball behind her. Deals good damage and great knockback, KOing lighter characters at around 100%. Bigger opponents give Daisy a bit more trouble due to their weight causing centrifugal force, so heavier characters like Bowser cause her to wobble and the knockback is reduced down to KOing at around 130%.

MISCELLANEOUS

Final Smash: Chance Time!
Damage: varies


Daisy throws a special Dice Block, which instead of numbers, has green stars on all six sides. She throws this straight down, so that it is guaranteed to hit the ground below her to create a Miracle Space (thus making her land on it automatically). Then Chance Time occurs, which is basically a Mario Party mini game hosted by Toad, activated by landing on a Miracle Space. In this mini game, the player who landed on the Space hits three blocks; two of them are different players, and one is a specific action; the more blocks you hit, the faster they spin. See the above video for a full playthrough. In Smash, the blocks perform similar functions, with a few tweaks:

The side blocks still show players, but show all players in a match, including Daisy (up to eight), and won't land on the same player as the other side block. In addition, there is also a Toad logo added in, which is how Toad gets his paycheck.

The middle block still handles transfers, but seeing as how Smash doesn't revolve around Stars and Coins, this is tweaked quite a bit:

--Assets to be transferred--
Percentage
Stocks/Points/Coins (dependent on mode)
Items (if turned on)
Status effects i.e. frozen, flower, etc. (if enough players have them)
Any combination of the above assets

--Methods of transfer--
Left to right or right to left (various amounts)
Swap

Up Taunt:
Daisy waves at the screen and says "Hi I'm Daisy!"
Side Taunt:
Daisy does some stretches.
Down Taunt:
Daisy does a handstand.

Victory Pose 1:
Daisy rides in on her Mach Bike, doing a wheelie and holding it at the end.
Victory Pose 2:
Daisy creates a barrier of flowers around her, and as they disappear, she is in her dress.
Victory Pose 3:
Daisy does some flips on the gymnastics bars.

Victory Music:
A short excerpt from this.

Miscellaneous:
- One of Daisy's alternate costumes has Peach's colors, just cause.

PLAYSTYLE

Daisy's playstyle can be summed up in three words: risk and reward. This theme permeates her entire moveset, from the tricky sweetspots on multiple attacks (such as the Mach Bike's rear tire, the crown attacks, and the dribble) and the possibility of many moves hitting Daisy (such as the Smashes, the Down Aerial, and all of the Dice Block's Spaces) to the random nature of the Dice Block. This theme is inspired by Mario Party, which Daisy is a good representative of, introduced in the third entry along with Waluigi. The Dice Block can be a very potent stage control attack if used and placed properly, but it can end up helping the opponent or harming Daisy if she's not careful! The Flower Copter is a decent recovery move, but it's best to use it after using the Mach Bike to get closer to the stage. The Down Special is a potent projectile, but Daisy must be on the ground in order to use it, somewhat limiting its use. The Smashes are hazardous to use, since they can all turn on Daisy at any moment! The grab requires very precise spacing to pull off, but the results can be devastating. The Final Smash is the perfect embodiment of the risk and reward playstyle, since it can help, do nothing to, or even harm Daisy if used improperly! Overall, Daisy is a character that requires skill, precision, and oftentimes dumb luck to win with (kind of like Luigi, now that I think about it, which is actually rather fitting), and she's ready to take on the world of Smash! As always, feedback is greatly appreciated, and I hope you enjoyed the set! :)

P.S. Tenth moveset! :D

Like what you see? See some more over at my Make Your Move Hub! :D
 
Last edited:

Katapultar

Smash Lord
Joined
Nov 24, 2008
Messages
1,284
Location
Australia
MYM 2 has 66 pages?? And MYM 3 has *278*??? What happened here??
There was no chatroom back then, so people just talked in the thread and sometimes got off-topic. It got so bad in MYM4 that a chatroom had to be created, the thread got shut down and people tricked one guy who spammed the thread into getting perma-banned. Thread activity became more strict as a result, but we've rarely had a problem since then aside from the occasional conflicts that pop up for whatever reason.

On a completely different note, I forgot to respond to your query regarding "Deadliest Brawler" back in MYM14. That was fun, but people lost interest for whatever reason, or maybe there weren't enough people who were interested in the first place. I believe I was the only one who wrote a match-up for each set until they stopped altogether, and actually think it would be fun to bring them back given MYM's movesetting ideals are a little different from back then. That being said, I really just want to work on movesets, and that's probably why DB and minis in general have faded from recent contests.
 

jaketheknight

Smash Apprentice
Joined
Feb 4, 2015
Messages
94
Location
San Diego
NNID
jaketheknight
3DS FC
4854-6438-8016
The Daisy kit is awesome! My only problem it the use of the bat on the U-Tilt, not the S-tilt. The swing of the bat as S-Tilt makes much more sense for a baseball bat, and IRC tennis rackets being swung in arcs similar to an U-tilt is a tennis thing, but I don't know much about tennis. Other than that, I love the set based off all the Mario sports/karting games, as those don't get much representation here there than Blue Shell, Lightning, and trophies.
(Do you spend all your time making MYM sets? At least one comes out everyday from you, and yet they all have the same high quality.)
 

Munomario777

Smash Master
Joined
Nov 18, 2014
Messages
3,253
Location
Charleston, South Carolina
3DS FC
0387-9596-4480
Switch FC
SW-8229-3157-8114
The Daisy kit is awesome! My only problem it the use of the bat on the U-Tilt, not the S-tilt. The swing of the bat as S-Tilt makes much more sense for a baseball bat, and IRC tennis rackets being swung in arcs similar to an U-tilt is a tennis thing, but I don't know much about tennis. Other than that, I love the set based off all the Mario sports/karting games, as those don't get much representation here there than Blue Shell, Lightning, and trophies.
(Do you spend all your time making MYM sets? At least one comes out everyday from you, and yet they all have the same high quality.)
Thanks! :) Good thinking with the tilts; I'll change that real quick. I thought that the spin-offs deserved some representation, since they're such a big part of Mario as a whole these days, so I decided to make a set based around them. I debated making Waluigi or Toad instead, but I already made Captain Toad, so I felt it would be sort of redundant, and Waluigi is already an Assist Trophy.
(Of course not; I have school, I play Smash (of course), other games, eat, sleep, go out, etc. I guess I just make them that fast. :p)
 

Munomario777

Smash Master
Joined
Nov 18, 2014
Messages
3,253
Location
Charleston, South Carolina
3DS FC
0387-9596-4480
Switch FC
SW-8229-3157-8114
Why is my n*gg@ Bass not getting any love? :c
I do like the concept of using the weapons that Mega Man doesn't, but the main problem that plagues this moveset is lack of detail. How much damage do these moves deal? How far do they knock opponents back? What is the range? How laggy are they? Also, a playstyle section always helps. These additions are easier said than done, but they're vital to making a great moveset.

Also, a small (or big, as it were) nitpick: the large images do make the set a bit hard to read. I would suggest either finding smaller images (perhaps use the thumbnails from the wiki pages?) or putting them in spoiler tags.
 

TheDarkKnightNoivern

Smash Master
Joined
Jun 24, 2014
Messages
3,641
Location
Croft Manor
I do like the concept of using the weapons that Mega Man doesn't, but the main problem that plagues this moveset is lack of detail. How much damage do these moves deal? How far do they knock opponents back? What is the range? How laggy are they? Also, a playstyle section always helps. These additions are easier said than done, but they're vital to making a great moveset.

Also, a small (or big, as it were) nitpick: the large images do make the set a bit hard to read. I would suggest either finding smaller images (perhaps use the thumbnails from the wiki pages?) or putting them in spoiler tags.
It might just be me but I find it really hard deciding how much damage a move should do so I normally just leave it out, I don't think it's necessary to know how much damage a move deals as long as you get the general idea of the move it isn't that hard to figue out
 

Munomario777

Smash Master
Joined
Nov 18, 2014
Messages
3,253
Location
Charleston, South Carolina
3DS FC
0387-9596-4480
Switch FC
SW-8229-3157-8114
It might just be me but I find it really hard deciding how much damage a move should do so I normally just leave it out, I don't think it's necessary to know how much damage a move deals as long as you get the general idea of the move it isn't that hard to figue out
Well, a move dealing 10% is a lot different than it dealing 25%, and damage affects balance, playstyle (if a move does more damage, it's more prominent in the playstyle), and the set as a whole. A good way to determine how much damage a move should deal is looking at existing movesets and how much damage similar moves deal, and basing your measurements off of that.
 

MapleWooD

Smash Journeyman
Joined
Jan 4, 2015
Messages
441
Location
Montreal, QC
I do like the concept of using the weapons that Mega Man doesn't, but the main problem that plagues this moveset is lack of detail. How much damage do these moves deal? How far do they knock opponents back? What is the range? How laggy are they? Also, a playstyle section always helps. These additions are easier said than done, but they're vital to making a great moveset.

Also, a small (or big, as it were) nitpick: the large images do make the set a bit hard to read. I would suggest either finding smaller images (perhaps use the thumbnails from the wiki pages?) or putting them in spoiler tags.
I'll work on that when I get the chance
 

Katapultar

Smash Lord
Joined
Nov 24, 2008
Messages
1,284
Location
Australia
As a rule of thumb, the more you flesh out your character, attacks, playstyle and presentation to some degree, the better your moveset will be.

Also, great job on getting your 10th moveset out, Muno! Just one more and you'll have the most movesets of everyone in this contest!
 

Munomario777

Smash Master
Joined
Nov 18, 2014
Messages
3,253
Location
Charleston, South Carolina
3DS FC
0387-9596-4480
Switch FC
SW-8229-3157-8114
As a rule of thumb, the more you flesh out your character, attacks, playstyle and presentation to some degree, the better your moveset will be.
Agreed. To me, one of the worst things a set can be is unclear/lacking detail.
Also, great job on getting your 10th moveset out, Muno! Just one more and you'll have the most movesets of everyone in this contest!
Thanks! I think I've improved a lot since my first set, in terms of both presentation and content. It's sort of surprising that no one else has made that many sets in this contest, seeing as how popular it is. :p
 
Top Bottom