• Welcome to Smashboards, the world's largest Super Smash Brothers community! Over 250,000 Smash Bros. fans from around the world have come to discuss these great games in over 19 million posts!

    You are currently viewing our boards as a visitor. Click here to sign up right now and start on your path in the Smash community!

Make Your Move 16: MYM 17 Starting June 1st

TheDarkKnightNoivern

Smash Master
Joined
Jun 24, 2014
Messages
3,641
Location
Croft Manor
Rundas Moveset:

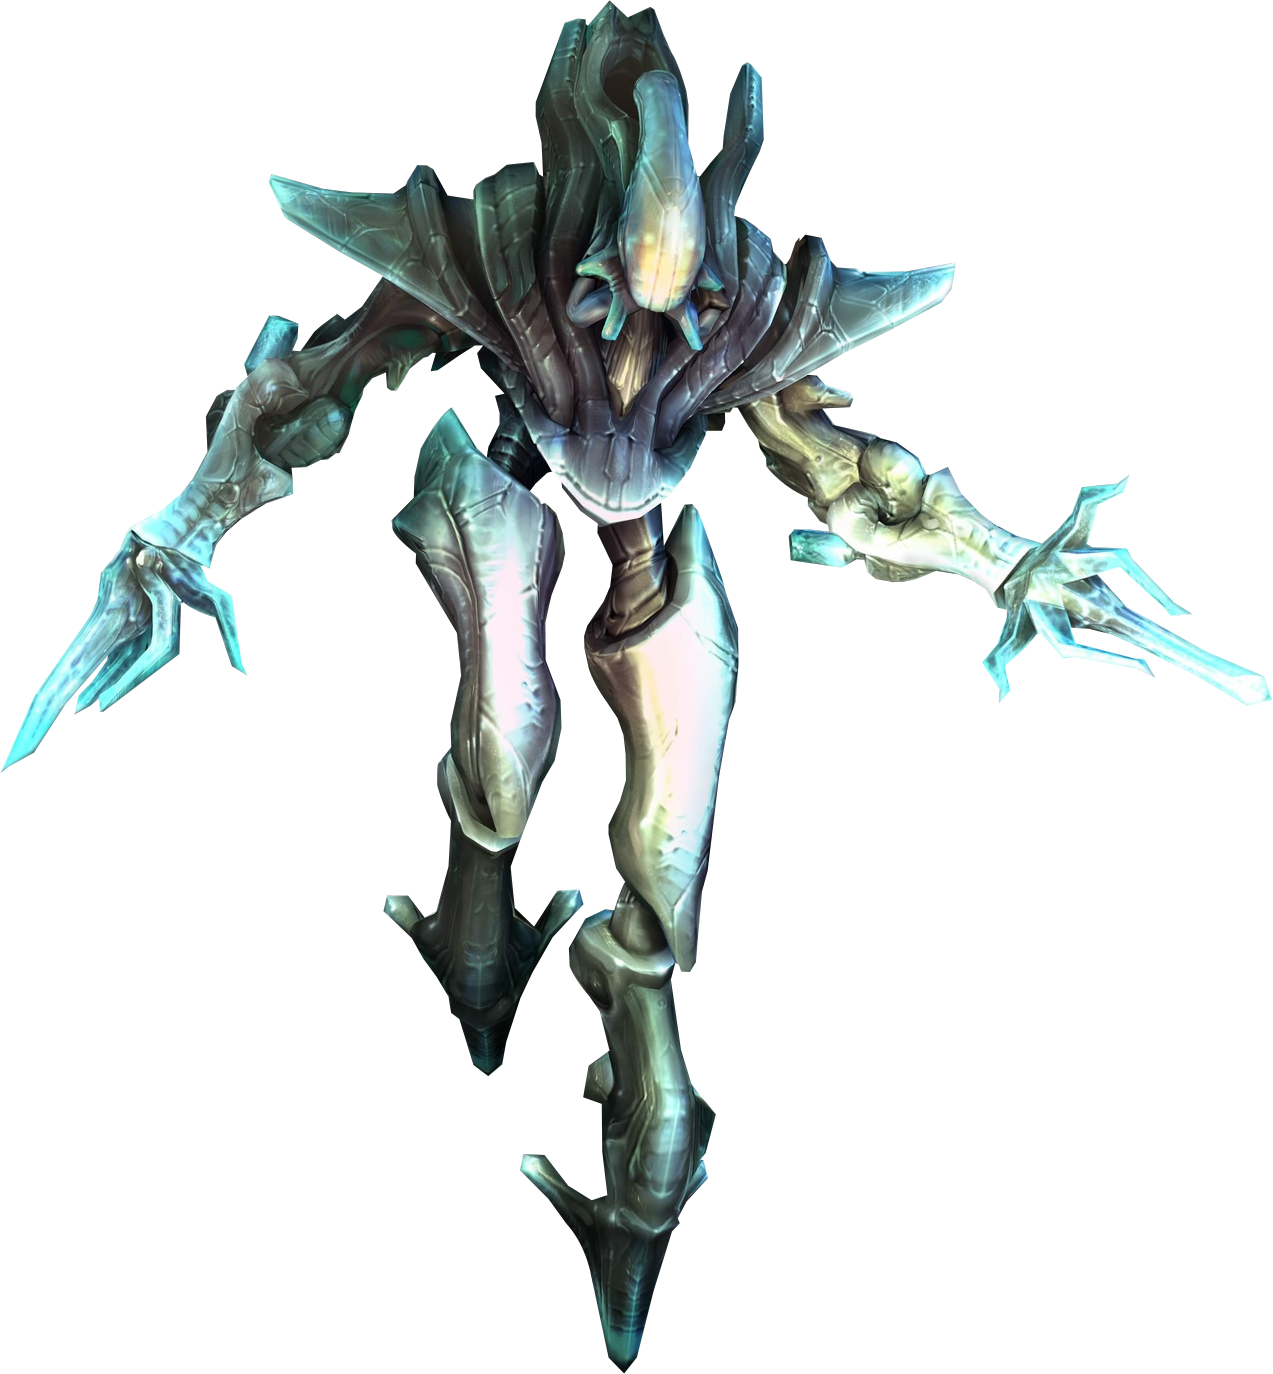
Rundas is an intergalactic bounty hunter much like Samus and As a member of the Phrygisian race, Rundas can generate and manipulate ice, an ability which he uses to his advantage in combat. His personality differs depending on the situation; he can be arrogant in front of others, but is quiet and dutiful in following commands when working alone. Rundas prefers to work by himself, even against large numbers of enemies; however, he remains sensitive to the safety of his allies.​

Universe:
Metroid

Game of Origin:
Metroid Prime 3: Corruption


Playstyle:
Almost every attack Rundas has has a ice effect meaning the have the potential to freeze opponents

Stats:
Ground Speed - /10

Air Speed - /10

Attack Speed -

Overall Attack Power - /10


Jump Height - /10


Fall Speed - /10


Weight - /10


Height - 8/10
Rundas is slightly taller than Samus, his height is almost the same as it was in Prime 3

Tilt Attacks:
Jab 1: Rundas will punch forward with his right fist covered in ice
Jab 2: He'll repeat this with his left fist
Jab 3: He'll shoot a small blast of ice from his right arm, right in front of him
Dash attack: Rundas will slide forward creating a path of ice along the ground as he does which will stay there for a second causing anyone caught in it to slide around. This is similar to what he does in Prime 3 where he rides a path of ice.
Forward Tilt: Rundas will stick out his ice covered arm which will then explode into a burst of ice, similar to Samus' side smash when using the ice beam in Project M
Up Tilt: Rundas will shoot a short range blast of ice above his head which will explode causing ice crystals to fall around him
Down Tilt: Rundas will use his arms to blast a circle made of ice on the ground around him

Smash Attacks:
Forward Smash: Rundas will let out a stream of ice which will freeze opponents before exploding and sending them flying, this is similar to an attack he does in Prime 3. The move is rather slow with quite a bit of startup however the endlag is basically nonexistant
Up Smash: Similar to an attack he used against Samus in Metroid prime 3, Rundas will create a pillar of ice above his head which he'll swing around like a lasso before disintegrating
Down Smash: A 2-part attack, firstly rundas will shoot ice shots towards the ground with both arms which look visually similar to the ice shot by the ice beam, he will then slam his arms down causing them to explode. Anyone caught in the initaial his will be frozen making the second hit guaranteed

Aerial Attacks:
Neutral Air: Rundas will put his arms across his chest as ice forms on them before thrusting them out and swinging them downwards, leaving a trail of ice which gives the move much more range
Forward Air: Rundas will lift his arm as ice forms around it before swinging it down, leaving a trail of ice giving the attack more range
Back Air: Rundas will form ice around his hand and the proceed to swing it behind him leaving a trail of ice
Up Air: Rundas will swing his ice covered arm above him in a waving motion, leaving behind a trail of ice
Down Air: Rundas will grab his ice covered arm and thrust it below him and create an explosion of ice underneath him

Grab and Throws:
Grab: Rundas will reach out creating a beam of ice which will grab and pull in opponents similar to samus', based upon the pose he does in Prime 3 when charging his ice shots
Pummel: Rundas will release ice from his hand freezing the opponent, it's rather slow but pretty powerful
Forward Throw: Rundas will create a path up going diagonally upwards and then throw the opponent up it where they'll slide off the other end
Back Throw: Rundas will create a beam of ice and swing them behind him, similar to an attack found in metroid Prime 3, this is also the inspiration for his up smash
Up Throw: Rundas will throw the opponent above him and then release a stream of ice on them, based on an attack in metroid Prime 3
Down Throw: Rundas will throw the opponent onto the ground and release a blast of ice into their face

Special Attacks:
Neutral B: Ice Chunk
Rundas will reach above his head and spawn 3 chunks of Ice, as the move is charged these will grow in size and power. He can then shoot them straight forward one at a time. The move can be stored but as time passes they will begin to regress in size and power, It takes about 20-30 seconds for them to got back to normal. The charge rate is similar to Samus' although slightly slower. Charging the move will cause ice to form on his hand which glows at full charge.
Custom Neutral B 1:

Custom Neutral B 2:

Side B: Ice Spreader
It functions almost exactly like the item of the same name found in Metroid Prime. Rundas will shoot a homing ice blast which will freeze whoever it hits and then spread a sheet of ice below them, this ice sheet can then cause other opponents to slip
Custom Side B 1:

Custom Side B 2:

Up B:
Rundas will create a path of ice that he will ride upwards, this move acts similarly to Squirtle's up B except that it goes further horizontaly
Custom Up B 1:

Custom Up B 2:

Down B: Ice Pillars
Rundas will charge up before slamming down on the ground, this causes pillars of ice to spring up from below. Depending on how long it is charged the amount and size of the pillars will grow. A fully charged hit will kill pretty early and lower charges can knock opponents into the air allowing Rundas to chase them and follow up

Custom Down B 1:

Custom Down B 2:

Final Smash:

Extras:
Entrance: Rundas will ride in on a path of ice before getting into his battle stance

Stance:

Idle 1:
Idle 2:

Side Taunt:
Down Taunt:
Up Taunt:

Victory Pose 1:
Victory Pose 2:
Victory Pose 3:

Victory Fanfare: Rundas' victory animation uses an extract from his theme found in Metroid Prime 3: Corruption

Losing pose:

Alternate Costumes:
1) Default Rundas from Metroid Prime 3
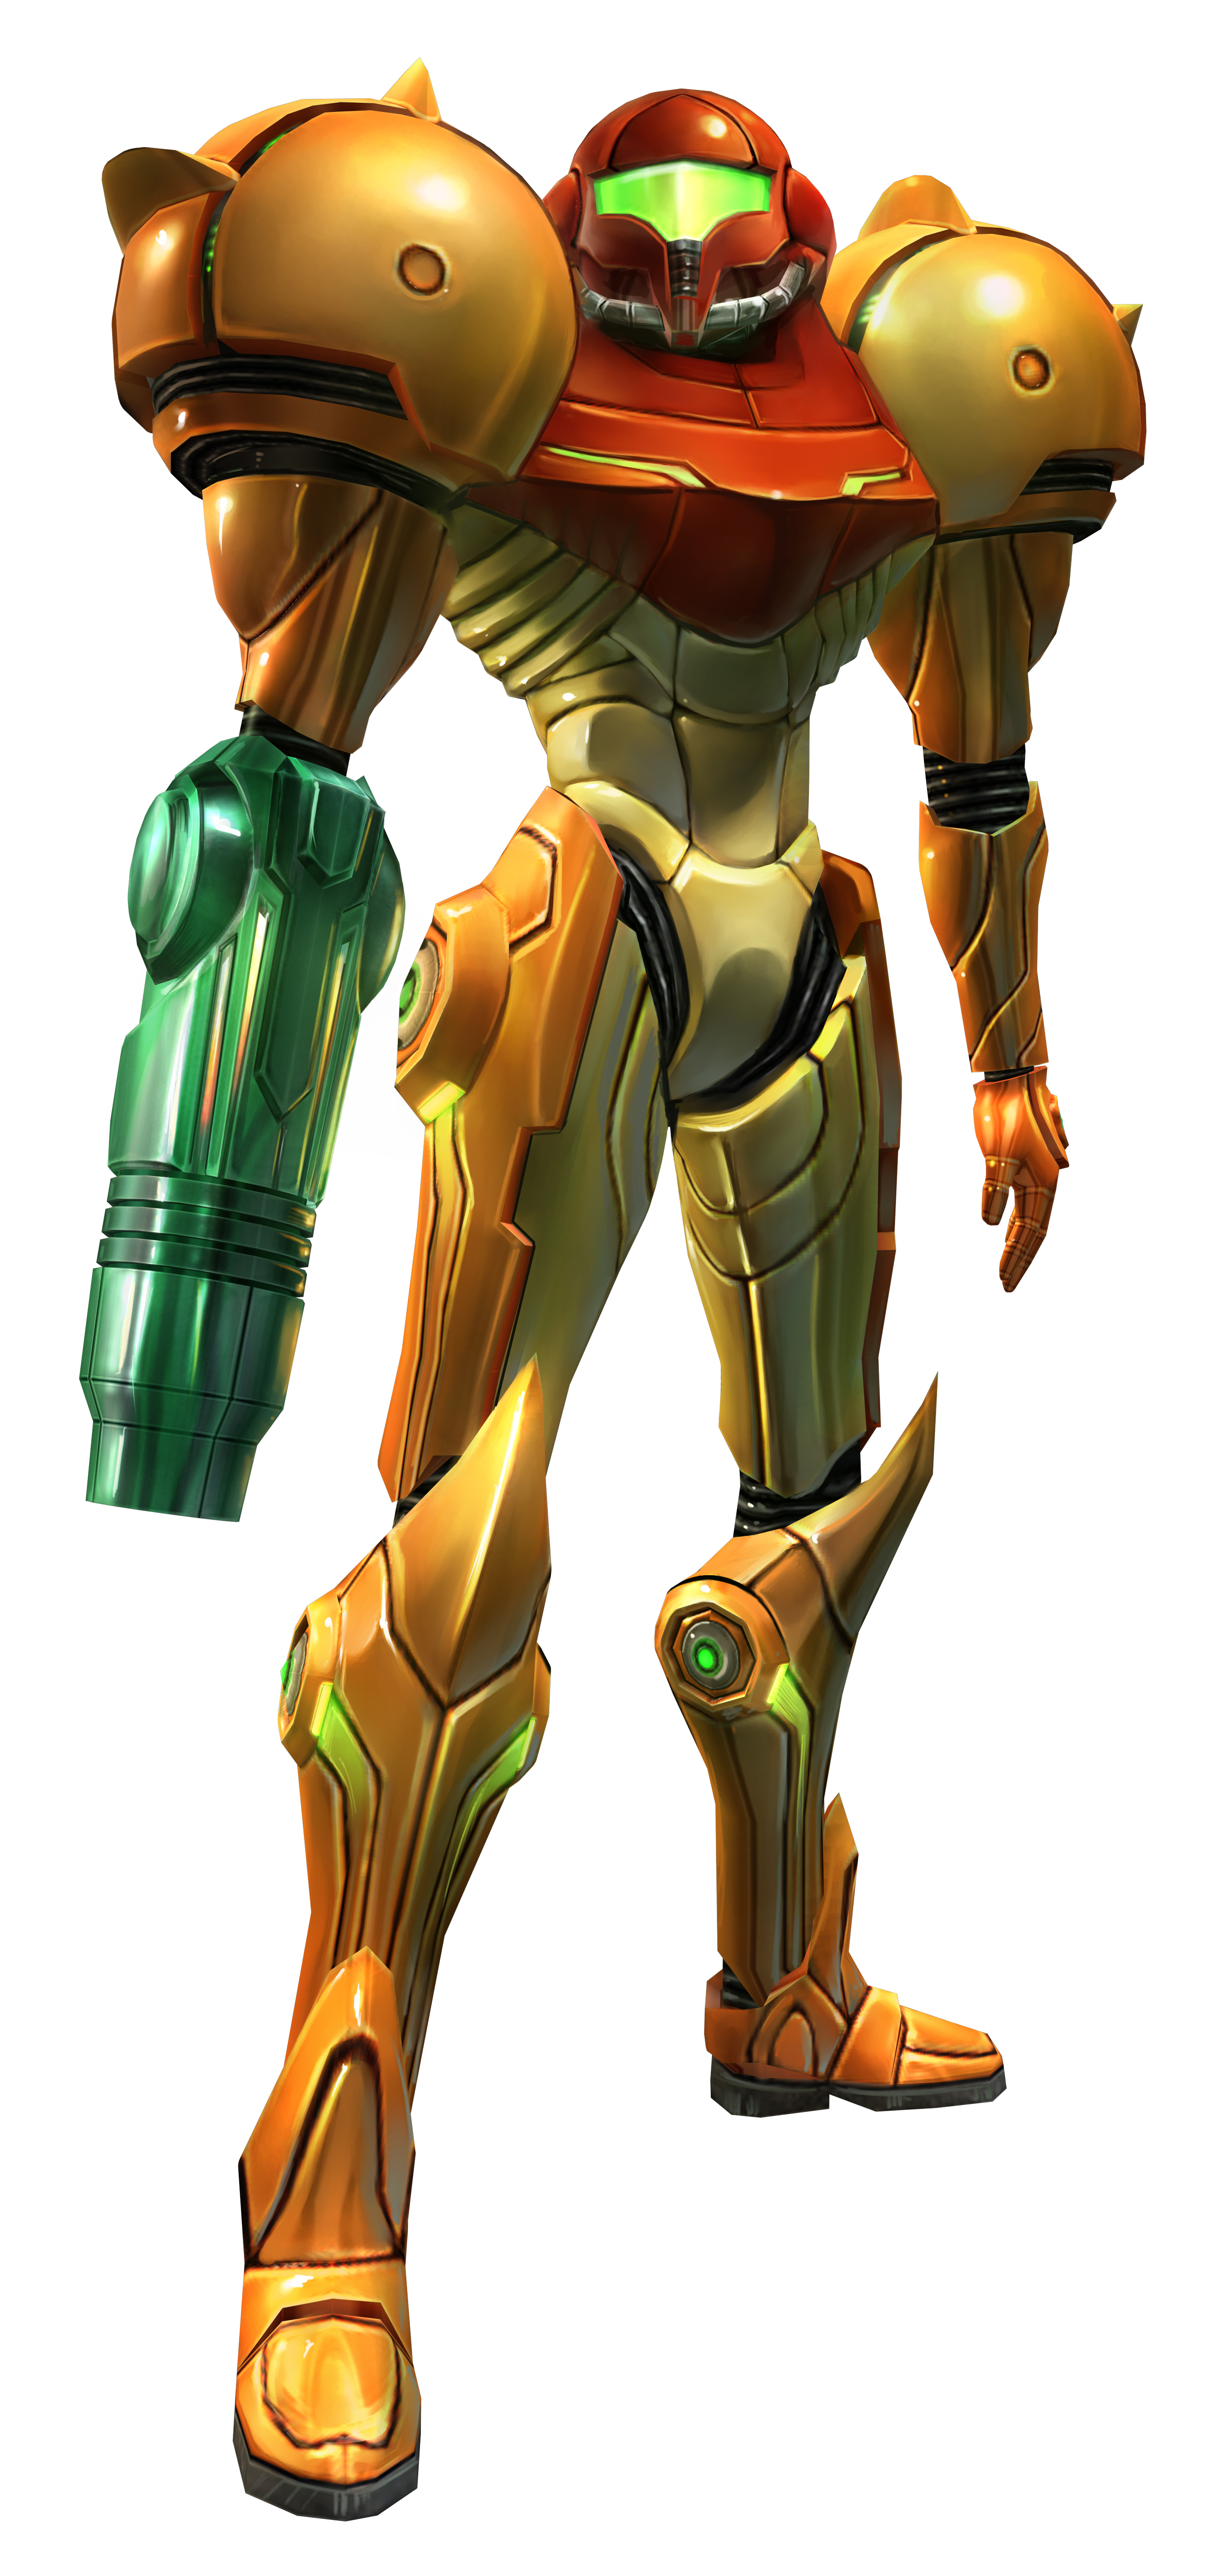
2) Samus wearing the varia suit
3) Ghor
4) Gandrayda
5) Rundas in his PED suit
6)
7)
8)

Unfinished right now but I'll expand on it more later
 
Last edited:

Katapultar

Smash Lord
Joined
Nov 24, 2008
Messages
1,284
Location
Australia
You can make a post and link it to the set in order to inform others of your progress, especially if it was on a previous page.
 

Tocaraca2

Smash Ace
Joined
Feb 22, 2015
Messages
557
Location
Wokingham
Only open the spoiler if you want to see my progress with my Roy moveset. I still haven't finished this but will be tomorrow. I'm not going to paste this into word because it will mess up all of the smashboard fonts and stuff.
Roy
Roy and Marth were almost identical in Melee. The only big difference was the charge time of Flare Blade, and of course, his awesome red hair. In Project M, however, he was reduced to a semi-clone, having some differences from Marth, though still not having very unique moves.
The purpose of this moveset is to make Roy even more different from Marth (and to, of course, show off my skills).
Most of his slices make an orange path, like before. His jump also no longer makes the annoying 'hoa' sound.
He holds the Sword of Seals.

Standard Attacks
Neutral Attack (Jab)
This is based on Marth's Dancing Blade. It is made up of 4 hits, starting with a small overhead swipe, followed by a forward stab, then a slash up through the space in front of him, finishing with an overhead slash. Holding down the A button without hitting an object will activate the first swing only, yet if making contact with something it will activate the first 2 swings. To actually finish this jab combo you have to mash the A button. If all hits connect it should do 12% (2+2+3+5).

Side Tilt
Roy slashes forward from across the space in front of him from his left to his right, like Ike's Side Tilt. Quick and without end lag, but isn't too powerful. Does 9% damage on the hilt, 7% on the lower end, and 8% on the tip. Low knockback.

Down Tilt
A lower stab, based off the second hit of Marth's Dancing Blade. Of course the animation adapts to his crouch position. Moves him forward slightly while doing it, which is also present in his old Down Tilt. Moderate end lag.

Up Tilt
Basically an uppercut. Based off the last hit of Marth's Dancing Blade, angled up. Does not hit behind him, and has low start lag but high end lag. Will do 11% damage on the hilt, 8% damage on the lower end, and 10% on the tip. Good for finishing off combos as it has the ability to KO at high percentages, and comes out fast. This move can be punished easily if your opponent manages to avoid it, due to the high end lag.

Dash Attack

Roy does the stabbing action, not as low as the Down Tilt but still slightly low. If it hits on the hilt, the opponent will be flung 45* up and forward, doing about 16% damage and high knockback. However if it hits on the tip, they will be launched 70* sideways, dealing 10% damage and average/low knockback. If it hits on the lower end, they will be knocked upwards 5*, doing 8% damage and low knockback. You must beware of spacing before you try and use this move. It takes Roy 0.8 seconds to go back into his original stance, meaning it is also punishable. Roy also takes more knockback while using this move, as is is pretty OP otherwise.

Aerial Attacks
Neutral Air
Based on the one from Project M, Roy spins his flaming sword around him quickly in almost a complete circle (290*). Has moderate/high range, much hitstun, and almost no start or end lag. Does 6% damage and burns the victim with a fire effect. Great to use in the air if you feel like you cannot hit your foe with any of your attacks.

Side Air
This attack is based around Marth's Side Tilt. Roy swings his sword forward through the space in front of him, performing an arc. Can be done twice in the air after jumping once, and will knock opponents up 55* if it hits in the tip, but will do the most damage and knockback if on the hilt; whereas the lower end will, funnily enough, spike opponents. Average/high landing lag.

Back Air
Similar to Ike, Roy sticks his sword out behind him, being as quick as his Neutral Air but not having much range, and it has a small hitbox. Great for when your foe is behind you and close to you. 8% on the hilt, and 7% on the lower end and the tip.

Down Air
Like Ike's Neutral Air, Roy swings his forward underneath him performing an arc, the whole attack lasting 0.7 seconds. Has better range than Ike's Neutral Air but doesn't hit beside him at all. Spikes if the lower end hits. Around 7% damage and low knockback.

Up Air
Roy swings his sword up above him, with a small hitbox but high vertical range, and if you pause and rotate the camera when he is doing this attack it will look like him using his old one. Basically it's his Melee Up Air except from a different angle. I don't know how else to explain it, because I only know the names of a few type of sword slashes. Does roughly 10% damage and moderately high knockback. Start and end lag is virtually non-existent, which is fine because the hitbox is tiny. Great for when opponents are right above you.

Smash Attacks
Forward Smash
Roy reels back while charging the smash, then lunges forward, sword outstretched. Does not emit any kind of flame effect, but is powerful anyway. Doesn't have as good a hitbox as Flare Blade, and takes 1 second for him to go back to his original stance, but there is less startup lag and is a good move to use if your opponent has a high percentage but is avoiding your Flare Blade. Does 10% damage if not charged and 24% if charged up to maximum. High knockback.

Down Smash
Similar to his Neutral air. He spins his sword low around him in almost a complete circle (325*). 7% if uncharged, 17% if charged to maximum. The spin takes 0.2 seconds to complete and the whole attacks takes 0.6 seconds. Low start and end lag. Average knockback.

Up Smash
Based off Marth's Up Tilt, Roy swings his sword above him in an arc, going around 155* and launching foes up high. Moderate startup lag, average/high end lag. Very high knockback, and does 12% if uncharged, 26% if charged to max.

Special Attacks
Neutral Special: Flare Blade
In Melee and Project M, Flare Blade was noticeably different from Marth's Shield Breaker, especially as in Brawl Marth's Shield Breaker animation is completely different to Roy's Flare Blade animation. But the explosion created after a fully charged one is almost identical to Ike's fully charged Eruption, so I felt like getting rid of the explosion but keeping all of the other properties. He also no longer makes his death sound after a fully charged one. This is Roy's most powerful attack.
If you don't know what Roy's Melee and Project M moves are, I suggest you go and do some research or watch some videos about it.

Side Special: Burn
This attack is named after Sethlon's nickname in Project M tournaments, although the attack has nothing to do with Sethlon at all. Roy rushes sideways and diagonally 80*, sword on fire and creating big flame particles. Hits 5 times in total and takes 1 second to connect all of the hits, and 1.5 seconds in total to finish. The sweetspot is the hilt of the sword, which will cause incredible knockback and hitstun, acting as a good KO move, except that it has moderately high startup lag. The first 4 hits each do 3% damage, and the last one does 6%. The flame particle the last one creates is slightly bigger, and Roy also tilts slightly upwards in the last hit. Will foil a lot of edge-guard attempts. Similar to his Up Special, Blazer.

Down Special: Earth Extracts
This move is complicated and it took me a while to actually think of. I was attempting a find a move which could act as a combo starter by giving a lot of hitstun and having very little lag. Roy sticks his sword into the ground, and holds it, charging up electrical energy from the floor (where this energy comes from, don't ask). When you press the special button again, he will promptly pick up his sword and swing it forwards in front of him, paralysing foes (time and damage depending on how long you charged it for), allowing you to follow up with an attack. If you don't follow up with an attack, your opponent will be rendered helpless and take 5% damage. If you hit someone in the air with this, they are as doomed as if you spiked them...

Up Special: Blazer
Based off the one in Project M, which is what I based Burn off. Roy soars upwards and diagonally 10* with his flaming sword, creating burn particles. Has very little startup lag and renders him helpless, with average/high landing lag. Hits 7 times rather than 5 times, although the whole attack takes even less than Burn to finish. It still takes 1 second to connect all of the hits, and the firat 6 hits do 2% damage, the last one dealing 6% damage. The sweetspot flings them into the air, while the tip will throw them backwards, and the lower end will launch them sideways. Moderate knockback.
 
Last edited:

Munomario777

Smash Master
Joined
Nov 18, 2014
Messages
3,253
Location
Charleston, South Carolina
3DS FC
0387-9596-4480
Switch FC
SW-8229-3157-8114
Only open the spoiler if you want to see my progress with my Roy moveset. I still haven't finished this but will be tomorrow. I'm not going to paste this into word because it will mess up all of the smashboard fonts and stuff.
Roy
Roy and Marth were almost identical in Melee. The only big difference was the charge time of Flare Blade, and of course, his awesome red hair. In Project M, however, he was reduced to a semi-clone, having some differences from Marth, though still not having very unique moves.
The purpose of this moveset is to make Roy even more different from Marth (and to, of course, show off my skills).
Most of his slices make an orange path, like before. His jump also no longer makes the annoying 'hoa' sound.
He holds the Sword of Seals.

Standard Attacks
Neutral Attack (Jab)
This is based on Marth's Dancing Blade. It is made up of 4 hits, starting with a small overhead swipe, followed by a forward stab, then a slash up through the space in front of him, finishing with an overhead slash. Holding down the A button without hitting an object will activate the first swing only, yet if making contact with something it will activate the first 2 swings. To actually finish this jab combo you have to mash the A button. If all hits connect it should do 12% (2+2+3+5).

Side Tilt
Roy slashes forward from across the space in front of him from his left to his right, like Ike's Side Tilt. Quick and without end lag, but isn't too powerful. Does 9% damage on the hilt, 7% on the lower end, and 8% on the tip. Low knockback.

Down Tilt
A lower stab, based off the second hit of Marth's Dancing Blade. Of course the animation adapts to his crouch position. Moves him forward slightly while doing it, which is also present in his old Down Tilt. Moderate end lag.

Up Tilt
Basically an uppercut. Based off the last hit of Marth's Dancing Blade, angled up. Does not hit behind him, and has low start lag but high end lag. Will do 11% damage on the hilt, 8% damage on the lower end, and 10% on the tip. Good for finishing off combos as it has the ability to KO at high percentages, and comes out fast. This move can be punished easily if your opponent manages to avoid it, due to the high end lag.

Dash Attack

Roy does the stabbing action, not as low as the Down Tilt but still slightly low. If it hits on the hilt, the opponent will be flung 45* up and forward, doing about 16% damage and high knockback. However if it hits on the tip, they will be launched 70* sideways, dealing 10% damage and average/low knockback. If it hits on the lower end, they will be knocked upwards 5*, doing 8% damage and low knockback. You must beware of spacing before you try and use this move. It takes Roy 0.8 seconds to go back into his original stance, meaning it is also punishable. Roy also takes more knockback while using this move, as is is pretty OP otherwise.

Aerial Attacks
Neutral Air
Based on the one from Project M, Roy spins his flaming sword around him quickly in almost a complete circle (290*). Has moderate/high range, much hitstun, and almost no start or end lag. Does 6% damage and burns the victim with a fire effect. Great to use in the air if you feel like you cannot hit your foe with any of your attacks.

Side Air
This attack is based around Marth's Side Tilt. Roy swings his sword forward through the space in front of him, performing an arc. Can be done twice in the air after jumping once, and will knock opponents up 55* if it hits in the tip, but will do the most damage and knockback if on the hilt; whereas the lower end will, funnily enough, spike opponents. Average/high landing lag.

Back Air
Similar to Ike, Roy sticks his sword out behind him, being as quick as his Neutral Air but not having much range, and it has a small hitbox. Great for when your foe is behind you and close to you. 8% on the hilt, and 7% on the lower end and the tip.

Down Air
Like Ike's Neutral Air, Roy swings his forward underneath him performing an arc, the whole attack lasting 0.7 seconds. Has better range than Ike's Neutral Air but doesn't hit beside him at all. Spikes if the lower end hits. Around 7% damage and low knockback.

Up Air
Roy swings his sword up above him, with a small hitbox but high vertical range, and if you pause and rotate the camera when he is doing this attack it will look like him using his old one. Basically it's his Melee Up Air except from a different angle. I don't know how else to explain it, because I only know the names of a few type of sword slashes. Does roughly 10% damage and moderately high knockback. Start and end lag is virtually non-existent, which is fine because the hitbox is tiny. Great for when opponents are right above you.

Smash Attacks
Forward Smash
Roy reels back while charging the smash, then lunges forward, sword outstretched. Does not emit any kind of flame effect, but is powerful anyway. Doesn't have as good a hitbox as Flare Blade, and takes 1 second for him to go back to his original stance, but there is less startup lag and is a good move to use if your opponent has a high percentage but is avoiding your Flare Blade. Does 10% damage if not charged and 24% if charged up to maximum. High knockback.

Down Smash
Similar to his Neutral air. He spins his sword low around him in almost a complete circle (325*). 7% if uncharged, 17% if charged to maximum. The spin takes 0.2 seconds to complete and the whole attacks takes 0.6 seconds. Low start and end lag. Average knockback.

Up Smash
Based off Marth's Up Tilt, Roy swings his sword above him in an arc, going around 155* and launching foes up high. Moderate startup lag, average/high end lag. Very high knockback, and does 12% if uncharged, 26% if charged to max.

Special Attacks
Neutral Special: Flare Blade
In Melee and Project M, Flare Blade was noticeably different from Marth's Shield Breaker, especially as in Brawl Marth's Shield Breaker animation is completely different to Roy's Flare Blade animation. But the explosion created after a fully charged one is almost identical to Ike's fully charged Eruption, so I felt like getting rid of the explosion but keeping all of the other properties. He also no longer makes his death sound after a fully charged one. This is Roy's most powerful attack.
If you don't know what Roy's Melee and Project M moves are, I suggest you go and do some research or watch some videos about it.

Side Special: Burn
This attack is named after Sethlon's nickname in Project M tournaments, although the attack has nothing to do with Sethlon at all. Roy rushes sideways and diagonally 80*, sword on fire and creating big flame particles. Hits 5 times in total and takes 1 second to connect all of the hits, and 1.5 seconds in total to finish. The sweetspot is the hilt of the sword, which will cause incredible knockback and hitstun, acting as a good KO move, except that it has moderately high startup lag. The first 4 hits each do 3% damage, and the last one does 6%. The flame particle the last one creates is slightly bigger, and Roy also tilts slightly upwards in the last hit. Will foil a lot of edge-guard attempts. Similar to his Up Special, Blazer.

Down Special: Earth Extracts
This move is complicated and it took me a while to actually think of. I was attempting a find a move which could act as a combo starter by giving a lot of hitstun and having very little lag. Roy sticks his sword into the ground, and holds it, charging up electrical energy from the floor (where this energy comes from, don't ask). When you press the special button again, he will promptly pick up his sword and swing it forwards in front of him, paralysing foes (time and damage depending on how long you charged it for), allowing you to follow up with an attack. If you don't follow up with an attack, your opponent will be rendered helpless and take 5% damage. If you hit someone in the air with this, they are as doomed as if you spiked them...

Up Special: Blazer
Based off the one in Project M, which is what I based Burn off. Roy soars upwards and diagonally 10* with his flaming sword, creating burn particles. Has very little startup lag and renders him helpless, with average/high landing lag. Hits 7 times rather than 5 times, although the whole attack takes even less than Burn to finish. It still takes 1 second to connect all of the hits, and the firat 6 hits do 2% damage, the last one dealing 6% damage. The sweetspot flings them into the air, while the tip will throw them backwards, and the lower end will launch them sideways. Moderate knockback.
Tocaraca, if you are just continuing a previous moveset, please just edit your previous post instead of making a new one.
 

Tocaraca2

Smash Ace
Joined
Feb 22, 2015
Messages
557
Location
Wokingham
I was planning to finish it today, but I like to take my time. :)
I put it in a spoiler for obvious reasons.
 

Munomario777

Smash Master
Joined
Nov 18, 2014
Messages
3,253
Location
Charleston, South Carolina
3DS FC
0387-9596-4480
Switch FC
SW-8229-3157-8114
I was planning to finish it today, but I like to take my time. :)
I put it in a spoiler for obvious reasons.
You can click on the floppy disk icon in the posting GUI to save a draft, so your work will still be there the next time you load the page. It also does this automatically from time to time.
 

MasterWarlord

Smash Champion
Joined
Aug 24, 2008
Messages
2,911
FATHER CORNELLO


Father Cornello is the starting antagonist of Full Metal Alchemist, getting nothing but the first episode to himself in the main series. While he technically works under the homunculi, he is largely an episodic character to generically start off the series with some action. Cornello uses alchemy, but passes it off as power from god to gain loyal acolytes, with the eventual goal of world domination. He is the sole voice of god due to his ability to perform these “miracles”.

Cornello started off as a non fighter in the manga/2003 anime, but has gained more and more abilities throughout various adaptions. Aside from the Brotherhood series giving him an actual fight, he is given several unique attacks in the FMA Warcraft 3 map where he’s a playable character, alongside other such beloved and memorable characters as Fu, Zampano, and Dolcetto.

STATISTICS
Traction: 10
Size: 8
Aerial Control: 7.5
Falling Speed: 5
Aerial Speed: 5
Weight: 4.5
Ground Movement: 1.5
Jumps: 1

Cornello’s a heavyweight without the weight in statistics. While he should realistically be heavier, his poor weight is used to represent his physical incompetence and frailty as an old man.

Cornello has a “rebound” meter below his portrait comparable to Little Mac’s. Whenever Cornello uses a move that uses alchemy (The majority of them), the meter will fill up a certain amount based off the attack. Every second, the meter will tick down by 1/18th, so he has to be somewhat spammy with his attacks in order to fill up the meter. When the meter completely fills, Cornello will enter his rebound form, gaining invulnerability for the 3/4ths of a second duration of the transformation.


Weight: 20
Size: 20
Traction: 10
Jumps: 10
Falling Speed: 10
Ground Movement: 6
Aerial Speed: 5
Aerial Control: 2

Turning into this form grants Cornello superarmor to attacks that deal 7% or less, and grants him 0.2 seconds of complete stun immunity after getting grab released or thrown. Cornello will stay in this form for 9 seconds before shifting back to his previous state. While Cornello will get a free invulnerable transformation back to normal, he will take 40% over the period of time he remains in the Rebound form. When he turns back, Cornello will go through a half second of lag, .3 seconds of which he is vulnerable for.

PRIEST SPECIALS

UP SPECIAL – MIRACLE

Cornello raises his hands above his head and looks to heaven as he gains an aura of red lightning around himself. This will cause him to begin healing at a rate of 3% per third of a second. While this would make him somewhat scary to leave around, this fills up Cornello’s rebound meter faster than absolutely anything else – 1/8th of the way per every 3% damage healed. The Rebound form’s self damage will of course outdamage the otherwise very good healing from this attack, with Cornello getting a net loss of 16%. Of course, if you just want to get into Rebound as fast as possible, this has the bonus of healing some of the damage. If used in the air, this will slow Cornello’s falling speed by a decent margin.

Cornello does not have a recovery on his Specials in his base form, making him even more frail. The rebound form has a very powerful recovery, though, meaning foes largely have to gimp you if they expect to stop your recovery. Granted, if you have to build up your meter from nothing in order to recover, you’ll have to be knocked fairly high in order to not drop off the bottom while transforming. Specifically because of how Cornello’s recovery works, he’ll always want to balance his Rebound meter at a fairly high position in order to recover.

NEUTRAL SPECIAL – MACHINE GUN

Cornello transmutes his cane into a machine gun and fires at will, laughing maniacally at random intervals if he holds out the move long enough. As he continues to spam the move, he simply transmutes more ammunition into the gun barrel. Cornello has full control over where he aims the move, having the full range of Final Destination! The bullets are the same size as Sheik’s needles and go just as fast, with each one dealing 0.5% with no stun. Cornello fires 36 bullets a second, working as a very powerful damage racker – imagine if Fox could freely aim his Neutral Special and you’ve got a comparable move.

The big problem with the move is there is strangely a very long amount of ending lag to leave the stance. If you just exit the stance as a foe comes up to you, you’ll be taking something on par with a Bowser fsmash as your punishment. As such, the move is largely reserved for attacking foes at very long range, most reliably those who are knocked off the stage for free damage.

The move fills Cornello’s rebound meter at a rate of 1/16th for every third of a second he stays in this stance. The move can be used as an amazing transition into rebound if you can force a foe to approach you, then bypass the move’s ending lag with the foe already at point blank range. This is a pretty big gamble based off whether you think the foe can punish you in time or not, as if it’s too painfully obvious you’ll transform the foe will likely just wait out your gunfire until you do.

DOWN SPECIAL – ALCHEMIC ABOMINATION


Cornello summons a chimera in front of himself – a lion fused with some other unidentifiable creature through alchemy, apparently making it stronger than a regular lion somehow. The chimera is about as tall as Luigi, but is as wide as a crouching Snake without counting the tail, which extends out to make them 1.5x as wide. Attacking the tail deals damage to the chimera, but not knockback or stun. The chimera is as heavy as Mario at 50% and is vulnerable to hitstun and grabs, but will simply keel over and die on the spot if its 30 HP is depleted. This has an awkward .4 seconds of lag to summon and doesn’t affect the rebound meter, but if Cornello is interrupted during the move the chimera will still be summoned anyway, possibly punishing his attacker.

The chimeras patrol the stage at Ganondorf’s walking speed, but will pursue foes at his dashing speed if they come within 0.75 platforms and will pursue them until they get 1.6 platforms away. Their basic melee attack is a quick bite that deals 8% and knockback that kills at 165%, but has noticable ending lag to punish them. The bite will heal the chimeras of 5%, adding slightly to their survivability. If a foe is a platform’s range away from the chimera and they’re on the chase, they will perform a swift pounce on top of them that deals 14% and knocks grounded foes into prone, dealing knockback that KOs at 200% to aerial foes and those already in some kind of stun state. The chimera will follow up with the bite instantly if the foe was put into prone, though foes have enough time to do an immediate action to avoid it – though this will make them more predictable.

SIDE SPECIAL – CHAIN LIGHTNING

Cornello fires a burst of red lightning out of the end of his cane. After the move’s brief startup, the range is 3 platforms long and the lightning instantly travels this distance like realistic lightning. it initially seems rather useless compared to the Up Special, as it simply heals the target of 5% (Including foes, though foes will take a flinch from it). However, the target will then begin to take damage over time at a rate of 2.5% per second, taking double the damage they were healed.

When the lightning hits a target or any form of terrain, it will bounce off of it at an angle comparable to Rob’s laser. Every target that is hit will take 3% more “healing” than the last one, and bouncing off the ground will still power up the move in this way. Cornello can angle the initial firing of the lightning, and can have a lot of fun with this move with no set-up on stages with platforms. Note that shielding the move will still power it up, enabling you to still use shielding foes as a target to bounce off of or rejecting the lightning from yourself if you don’t want to take the damage.

This gives the chimeras some more relevance, enabling them to act as “bumpers” and to power up the move. While the actual lightning jumps are instant, there is a very brief pause between the bounces between each individual target, so if you intend to save the foe for last for a big hit you’ll have to apply some pressure after shooting out the red beam. Aside from simply damage racking the foe with damage over time, chimeras will often like the nature of this brief healing, potentially expanding a short lifespan. The pounce attack chimeras use can also offer some more angles to bounce the lightning off of.

While firing the lightning fills up his meter by 1/12th, it will fill up far more if he hits himself with it. If he is the second target (The minimum, since he can’t target himself outright), his meter will fill up by 1/6th. For each target later he was in the Chain Lightning, the meter will fill up by an additional 1/6th. If Cornello enters rebound while taking damage from this move, any further damage he would take from it will be erased, meaning if he turns into it outright he’ll simply get the healing only. Every character can only be hit by this once per use and the lightning will expire once it travels the maximum distance, so Cornello can’t just bounce it off of a foe infinitely at point blank. Shielding the attack does not count as “being hit” by it.

PRIEST SMASHES

FORWARD SMASH – SPIKE IMPALE

A spike shoots out of the ground in front of Cornello at a 45 degree angle. Cornello can angle the move up or down to change this angle to 20 or 60 degrees to alter the slant of it. With no charge, the spike barely juts out of the ground at all, only around two thirds of Kirby’s height. At full charge, the spike is as long as a platform. If the move is charged at least a quarter of the way, the spike will be solid terrain, providing an interesting surface to bounce off of with Chain Lightning. Regardless of charge, the move deals 20% and knockback that kills at 130% as it comes out.

The spikes have 5-35 HP, though you can’t attack the tip which remains a hitbox that deals 5% and weak knockback. The uncharged version of this move is very fast to compensate for the horrible range, and the small status of the spike actually makes it nearly impossible to destroy from the front, potentially making it more “durable” in some situations.

While chimeras can jump to traverse stages with these spikes fine, they actually will sit and wait on top of spikes created with this move when created, getting ready to pounce on anything that comes into range. The move fills up 1/16th of Cornello’s meter, up to 1/8th if fully charged.

DOWN SMASH – HOMING SPIKE

Cornello creates a spike underneath the nearest foe’s current position, shooting straight up. The spike deals 16% and knockback that kills at 150%, and the size, HP, rebound meter filling, and solid status of the spikes increases in an identical manner to the fsmash. This is significantly laggier than the fsmash, even uncharged, given the range of the move. If the foe is off the stage or under it, the spikes will come out of the ledge or under the stage, respectively. While the spikes are solid, they will just become the new ledge if you create them in such a way to “block it”. If you create a spike on the ledge during a time where a foe is on it and they have ledge invulnerability, this won’t hit through it, but will cause them to get pushed back to the “new” ledge created by the spike.

This adds an obvious new option to your camping, and while it obviously can’t hit foes directly off-stage can be an interesting thing to use as the foe comes back to the stage. Even if they can easily recover high to avoid the ledge, they should ideally have run out of jumps so they be impaled upon landing.

UP SMASH – CHIMERA COMMAND

Cornello summons another chimera, but as it is summoned it immediately performs the pounce attack. Uncharged, the pounce is the same as the generic one chimeras will voluntarily perform, dealing 14% and knockback that KOs at 200% while traveling a platform through the air. This is largely used for the attacking portion of the move, as if you use this exclusively to summon the chimera you’ll find that the chimera only has 5 HP until they complete the ending lag of the pounce, after which they become a regular minion. Interrupting the move as the chimera is quickly summoned will result in it immediately dying, unlike the regular version of the summoning on Down Special. That said, the appeal of killing the chimera during the ending lag of his attack can potentially make you personally less vulnerable. If this is used next to a chimera already created, they will keep their durability in-tact for the leap and stand alongside you for the charging, and the move will start up instantly.

Charging the move will increase the distance of the pounce to a mighty leap, potentially traveling the entire distance of Battlefield at full charge and dealing up to 22% and knockback that KOs at 145%. Cornello can also slightly angle the chimera’s leap by about 15 degrees in either direction, also helping give him some good surfaces to bounce his Side Special off of. While using this to camp is stupidly impractical, this is decent at melee range to use the chimera as a meat shield. The low durability also won’t matter much if you send the chimera on a suicide mission to an off-stage opponent.

REBOUND SPECIALS

UP SPECIAL – LEAP OF FAITH

In the air, this is the standard heavyweight recovery you’d expect for Cornello in his rebound form. It’s Dedede’s recovery with heavy buffs, going up 1.5x as high with double the power. Cornello is invulnerable as he ascends rather than having superarmor, and on the way down he has superarmor against attacks that deal less than 20%. Instead of the stars that pop out under Dedede, bits of rubble pop out to either side of him when he lands, dealing 6% and knockback that KOs at 200%. This is a very safe recovery, which is well deserved considering what he has to go through in order to use it.

If used on the ground, Cornello will jump even higher due to having something to actually kick off of. Cornello will jump up a set distance comparably to Kirby’s suplex throws, specifically jumping up into the “magnifying glass” in the top blast zone above him assuming there’s nothing solid in the way. Cornello will jump up incredibly fast at Sonic’s dashing speed, becoming a weak hitbox that deals 7% and knockback that KOs at 250%, again with superarmor to attacks that deal less than 20%. Once he reaches the magnifying glass, the player can control his horizontal movement to move him up to 2 platforms in either direction over .35 seconds before he comes crashing down. As he comes down, he deals 25% and a spike 1.3x stronger than Ganon’s dair, along with making the rubble on either side of him like the aerial version of the move.

While the grounded version of the move isn’t very useful to Rebound Cornello, it can propel Priest Cornello to impossible heights that he could never reach before if Rebound Cornello jumps up there as he transforms back. If you’re not in immediate combat with the foe, this is one of your priorities before shifting back in order to prevent punishment.

SIDE SPECIAL – SHOULDER CHARGE

Cornello does a shoulder charge forwards, providing an alternative recovery for horizontal movement. He tramples forwards through the air at Captain Falcon’s dashing speed, dealing 19% and knockback that KOs at 125% to anyone who gets in his way. The mad dash can be stopped early at any time, and the earlier it is stopped the shorter the ending lag is. If Cornello just taps the input, he’ll do a shoulder charge motion in place, quite similar to Brawl Wario’s fsmash in appearance and lag. If he charges two platforms or more, the ending lag will cap out at a full second.

Cornello’s horribly mutated arm in Rebound Form is largely a result of his transmutations on his gun, as various gun parts can be seen sticking out of it. The last move you use to enter Cornello’s rebound form will have a visible impact on his arm – lightning/healing will cause it to crackle with red electricity, a gun move will just have a couple more gunbarrels on his arm, and a spike, of course, will have the spike jutting out of his arm. They apply various bonuses to this move in addition to the primary hitbox.

Lightning will cause the move to apply a version of the Side Special that heals the foe for 12% before damaging them for 4% per second for 5 seconds. If you hit the foe with a Side Special in Priest Form while they already have this effect, it will boost the power of the Side Special as if you bounced it off of 3 targets by hitting the foe.

Having some extra machine guns will cause them to spurt out a few bullets for you to aid your charge – you’ll fire 5 bullets a second and each will deal 1% and flinch the foe, making it much easier to hit with your charge.

Having a spike jut out of your arm requires the spike to be at least as tall as Mario in order to do anything. If it is, the spike specifically becomes a grab hitbox that you can impale the foe onto during the move, still dealing 19%. Cornello can still do whatever he wants with a foe impaled on his arm, though they will obviously be instantly released if Cornello shifts back to regular size.

NEUTRAL SPECIAL – STRENGTH OF GOD

Cornello goes to rip a Bowser sized boulder out of the ground with his “normal” arm with about .4 seconds of lag, having superarmor to attacks that deal less than 20% for the duration. If he’s interrupted during the later .2 seconds, the boulder will still get spawned, but he won’t generate a hitbox. After ripping it out, Cornello will bowl the boulder forwards along the ground, causing it to go at Wolf’s dashing speed and deal 17% and knockback that KOs at 140% as it goes. The boulder is solid, but given Cornello can’t throw it through the air it’s not especially scary as an on-stage gimp. The boulder will travel forwards 2.5 platforms on a flat surface, getting weaker as it goes before it slows to a stop. Cornello can much more quickly just pick up the boulder to throw it again, and foes can destroy it by depleting its 40 HP. The boulder will go faster/slower if it’s going down/up slopes, and will increase in power accordingly. The boulder caps out at 28% and knockback that KOs at 80% with 1.2x Captain Falcon’s dashing speed. Cornello –can- potentially launch a boulder into the air by rolling it off of an angled spike from fsmash, launching it into the air by using the spike as a ramp. Of course, this is pretty predictable for gimping.

If Cornello is standing in front of a spike, he will rip it out of the ground very casually with .15 seconds of lag. Cornello can carry the spike around while using his moveset normally, while inputting Neutral Special will cause Cornello to stab in the desired angle with it, dealing 10% and knockback that KOs at 170% for an extremely good “poke” with a full length spike. If he holds down the input for .4 seconds and then releases it, he’ll throw the spike like a spear 3 platforms in the desired direction, dealing 8% and knockback that KOs at 200%. If either of these spike attacks hit a grounded foe, they will get impaled, taking an additional 5% and having to escape at grab difficulty. So long as Cornello throws the end of the spike at the ground, it will end up impaled in the ground, enabling him to reangle spikes as he wishes and enabling him to make a spike ramp for a boulder on demand. Cornello can pick up spikes that have impaled foes on them before adding more creatures to the shish kebab, or just throw it off stage. Cornello can also rip out a spike growing from his mutated arm by using this move in the air.

The boulders can have spikes generated on them by Priest Cornello given they’re solid, and the spikes can be used to help “defend” the boulder for when Rebound Cornello comes back. If Rebound Cornello attempts to pick one of these up, he’ll pick the boulder up by the largest spike, assuming there’s a spike at least as tall as Mario available to use. Attempting to use it as a weapon will cause him to smash it in front of himself like a club with minimal lag. This will cause the boulder to be an immediate hitbox that deals 20% and knockback that KOs at 115% as it hits the ground, then pop off the spike Cornello was using and roll forwards along the ground normally. Afterwards, Cornello will still be holding the spike in his hand.

DOWN SPECIAL – ASHES TO ASHES, DUST TO DUST

Cornello scoops out a portion of the ground in front of himself in the form of gravel, not actually terraforming the stage with this move, before throwing it all forwards a relatively short distance of a platform. The debris deals many multiple hits as it goes forwards, dealing roughly 14 hits of 1% and set pushing knockback over the course of the attack.

If the debris comes in contact with a slope (which he can make with his rebound dsmash), it will slide to the bottom and collect there. Cornello throws about 1.5x Bowser’s size in debris with each use of the move, and it doesn’t go away after being created. Rather than being solid, characters can walk through it with three fourths of their regular dashing speed. If it’s piled up so high that a character is in an aerial state when wading through it, their falling speed will increase by 1.5x while inside of it. The debris can take knockback from attacks, as heavy as Jigglypuff at 80%, but it won’t hurt anybody when attacked in this way. If the knockback doesn’t knock it out of a pit and it lands on a slope, it will slide back down into it.

If Priest Cornello attempts to heal with his Up Special when his rebound meter is two thirds of the way charged, he will absorb a Bowser’s worth of the debris around him, heal 20%, then instantly enter rebound form. If Cornello enters rebound in this way, his mutated arm will have even more gravel around it when he enters that form. This will cause Cornello to shed some of his arm to create a Kirby’s worth of gravel when he hits foes with moves like Side Special that make use of mutated effects on his arm.

If Priest Cornello uses his fsmash or dsmash to create a spike in a pit with gravel in it and he is not in the pit himself, he will instead use his alchemy to fill in the gaps in the ground, terraforming the hole in the ground shut into solid ground, how it was before he terraformed it. Any foes inside will be pitfalled at the top of the ground and take 20%. This is fairly laggy and will need a pretty deep pit filled with debris in order for you to be able to pull it off. This also fills up a third of Cornello’s rebound meter, so if he enters rebound in this way he won’t be able to capitalize on the foe being pitfalled at all. This will give Cornello a “bulkier” arm if it’s the last use of alchemy that makes him enter rebound, identical to the previous paragraph.

REBOUND SMASHES

DOWN SMASH – STOMP OF JUDGEMENT

Rebound Cornello does a large stomp forwards, dealing 20-30% and knockback that KOs at 130-95%. While it’s not the fastest attack, it has superarmor and anti-grab armor specifically on Cornello’s stomping leg, making it easier for him to get the attack’s secondary benefit. Each use of this move makes an indent the height of Mario-Snake and the width of Bowser. The sides of the indent slope down into the pit – you won’t “fall” into this and enter an aerial state at any point, you’re largely just creating slopes with this move. On paper thin platforms/drop throughs, this will bend them. There isn’t really much that needs to be said about the implications of such a move – it’s incredibly beneficial to your boulders, and provides lots of new angles to generate spikes and use your chain lightning. Cornello will run down slopes 1.3x faster with his Side Special. Characters will slide down slopes at Mario’s dashing speed when in prone, making foes who get knocked into prone by a chimera’s pounce more predictable.

For all of the great possibilities this has and how quick it is to use, just keep in mind you don’t want to waste too much of your precious 9 rebound seconds that you take 40% for entering on set-up.

FORWARD SMASH – REPENT

Cornello gets on his hands and knees for the charging animation, furiously gritting his teeth, before smashing his head into the ground. While the move has some very noticeable startup, Cornello has both anti-grab armor and superarmor against attacks that deal 19% or less while in the charging stance and during the move’s start-up. This is extremely powerful on hit, dealing 29-40% and knockback that kills at 90-60% at a 45 degree downward angle, making it incredible to kill foes at the ledge. If the foe hits the ground due to the knockback, they will take a miniature pitfall effect, with their feet getting pitfalled rather than their entire lower torso. They will still take knockback in this state from the move, sliding along the ground, obviously getting freed from the effect if they slide off stage.

Having impaled feet bans the foe from moving or jumping. The foe will not take knockback during this effect (Other than the initial sliding from being hit by the fsmash) unless the knockback would send them at least 3 platforms, in which case the knockback will free them from the ground. After taking the initial hitstun of the attack, foes may attempt to escape this effect at grab difficulty. If a foe uses a leg based attack, the starting lag will be increased by 1.3x, but will cause them to escape the status effect early if they succeed. Using this move again on a foe already smashed into the ground will deal vertical knockback that KOs at 75-40%.

If the foe travels 2.5 platforms or more due to the knockback of this attack along the ground, the pitfalling will be more severe and they will use their regular pitfall animation, unable to attack. This is still only half as difficult to escape as a regular pitfall. If the foe travels an additional 1.5 platforms beyond the first 2.5, they will become completely buried in the ground, with nothing but a pile of dirt to indicate where their character is, with them having to escape at regular pitfall difficulty. Completely buried foes cannot be hit by most attacks, but if Cornello terraforms down with a dsmash stomp he will see them half pitfalled in the ground and be able to attack them normally. Cornello can also stab a spike into the ground and pick the foe out of the ground, impaling them on it.

While the described pitfalling effects are incredibly powerful, few to no stages are long enough to make practical use of this, and the massive power of the attack can work against you by knocking a foe too far away or even off the stage, nullifying the burying effects. This is where you can thank the downward portion of the knockback, though, as foes will stop sliding if they reach the bottom of a pit due to the knockback’s angle. While using this at the bottom of a pit will probably just get you punished as foes will only be pitfalled up to their feet and can still punish you, using it at the top or further away from a slope can let you roll down a boulder or toss a spike down on the foe to impale them before they escape. Because of this, Rebound Cornello actually prefers to be out of a pit most of the time, while Priest Cornello will seek refuge within it at high percentages due to it being harder to KO him and being able to better protect himself with spikes.

UP SMASH – GOD’S PROTECTION

Cornello raises his mutated arm above his head during the “charging” of the smash, causing it to become solid and invulnerable. Like the Side Special, mutations can happen in this move based off the type of alchemy move Cornello used to enter the Rebound Form. If he has extra guns, a few shots will fire out of his arm to juggle the foe lightly in the air above his arm, dealing 8 hits of 1% and flinching. If he has red lightning from Up/Side Special, it will actually crackle a bit above his arm, dealing 10 hits of 1% and flinching while sucking foes in. The reason the lightning isn’t simply better than the gunfire is because there is no hitbox up against Cornello’s arm, meaning while it will suck foes in it won’t hurt those who intentionally come to stand there. A spike, of course, will impale foes and deal 10% to them if it was at least Mario’s height. Having extra debris absorbed into Cornello’s arm will cause any attacks that hit Cornello’s invulnerable arm to cause him to shed an amount of gravel from his arm comparable to the power of the attack – a Bowser’s worth at max and a Kirby’s worth at minimum.

As soon as the charge is released, Cornello moves his arm out of the way, causing anyone standing on it to fall as he goes to do a tremendous headbutt above himself, with the veins in his head visibly pulsating as he does so. The headbutt deals 26-38% and knockback that KOs at 120-75% for an extremely powerful move. This is actually quite quick, too, almost as quick as Dedede’s utilt, the only difficulty being Cornello is so tall it’s rather hard to hit with his balding head. The idea of the move is to catch a foe, interrupt their attack by trigger landing lag supplemented by a mutation bonus on your arm, then hit them with the headbutt when they’re sitting ducks. Of course, the first half of the move is optional and you can just skip straight to the headbutt if you wish.

Note that if Cornello throws a spike into the air, he can catch it with this move in order to impale it into his arm, potentially skewering a foe on it. It can be a nasty surprise to grab a foe with it who thinks they’re safe in the air by producing artificial ground.

PRIEST AERIALS

NEUTRAL AERIAL – DIVINE SHIELD

Cornello performs some alchemy with his cane in order to produce a large amount of red lightning, crackling around himself in a ball shape as a “shield”. This lasts for about half a second, stopping immediately if the brief landing lag is triggered. The shield deals 6% and knockback that KOs at 250% on hit, rather unimpressive for how long and awkward the hitbox is. If Cornello exchanges blows with another aerial with this attack (Due to aerials having no priority system), the foe will take a small amount of extra damage and knockback in addition to the move’s natural power, one quarter that of their own attack. The foe will take their extra damage over time, at a rate of 2% per second. If Cornello hits somebody taking this damage with Chain Lightning, the damage will be “cured” from them and added to the power of the lightning. If Divine Shield is up when Cornello gets hit by Chain Lightning, it will bounce off of him without him absorbing it, and it will count as if it had bounced off of two surfaces, getting a small boost from the Divine Shield.

This move by default fills up an eighth of Cornello’s rebound meter, but if he clashes with another attack it will fill up an additional amount. For each 4% the enemy’s attack did, the meter will fill up by an additional one fifth. With the various Chain Lightning interactions, it’s possible to get a very powerful beam that can get you to Rebound form fast.

FORWARD AERIAL – SHOTGUN BLAST

Cornello transmutes his cane into a shotgun and fires a close range shot in front of himself, dealing 17% and knockback that KOs at 200%. This starts up very quickly making it a very appealing move regardless of long ending lag. The base knockback on the move is very good despite poor knockback growth, making it an excellent way to get Priest Cornello some space or more offensively to knock the foe off-stage to start a damage racking session.

Said long ending lag consists of Cornello taking the kickback of the gun backwards, propelling himself backwards roughly half a platform’s distance. His back is a weak hitbox that deals 3% and knockback that KOs at 500%. This gives Cornello some form of recovery without having to make use of his rebound form, with the hitbox on his back largely functioning as recovery self defense. It may not seem like much, but Cornello can use the move infinite times in the air.

Using the shotgun fills up one eighth of Cornello’s rebound meter, and that can obviously bypass the ending lag. Having the shotgun transmuted into Cornello’s arm when he uses his Rebound Side Special will enable him to shoot the shotgun by pressing the A button, generating the fair’s shotgun hitbox in front of him while slowing down his movement by a third for 0.2 seconds due to the shotgun kickback in order to potentially catch foes off guard. When the shotgun is used with the rebound usmash, no hitbox occurs unless the foe specifically steps onto the shotgun jutting out of Cornello’s arm, at which point it will fire. The shotgun is located on the far side of his arm, enabling him to catch a foe attempting to DI away from where he intends to headbutt.

BACK AERIAL – CANE DRAG

Cornello extends out his cane behind himself and attempts to hook people with the cane’s crook before raking them in to himself, dealing 7 hits of 1% and set dragging knockback. This is a very spammable attack and one of Cornello’s fastest, and it’s an interesting option to spam when it doesn’t raise your rebound meter. At a glance, you would think this move would be terrible defensively due to bringing foes up to Cornello in point blank range. However, if Cornello uses his DI to go towards the foe as he brings them to him, he can go past them and end with them in front of him, in perfect range for his shotgun fair which can create the space you need. This helps a lot just on the stage, but also helps significantly with defense against gimping. Even if the foe dodges the shotgun blast, they’ll be out of your way and you’ll be able to recover back to the stage in safety.

The followup to the bair is so obvious that foes will quickly learn to expect it and will often just instinctively dodge after you get in position for the second move. This can actually be a decent excuse to try to perform set-up in the foe’s face by summoning a chimera if you predict a dodge against an especially aggressive enemy. This is made more practical when you take into account that even if the foe hits you, the chimera will still get summoned. If the foe tries to outspeed your fair with their quickest poke, you can attempt to counter it with the nair.

UP AERIAL – TOWER OF BABEL

Cornello looks above himself and grins as he shifts his cane around to hold it upside down, then starts to extend the bottom of the cane out rapidly. The cane extends out extremely quickly a massive distance, potentially going up 2.15 platforms over .3 seconds if you hold down the button the whole time. The cane isn’t exactly a powerful blunt object by itself, though – the force of the attack comes from the speed at which it’s extending, meaning that it’s more powerful the further it has extended out. Using the move at point blank range is very weak, dealing 3% and knockback that KOs at 270%. At the top of the cane, the power caps out at an impressive 19% and knockback that KOs at 140%.

Keep in mind that only the top of the cane is a hitbox, though, making this awkwardly specific to hit with. The move’s ending lag increases the further you extend out the cane, going for half as long as you extended it out. Cornello will automatically stop extending it if he hits somebody. This fills Cornello’s Rebound Meter by anywhere from 1/16th to 1/7th based off how far he extends the cane, and if it’s the move that makes him enter his transformation will give him extra debris on his arm.

It is very difficult to get the full potential out of this move and it will often go ignored for new Cornello players, but having a pit greatly helps this attack. Rather than getting the foe higher into the air, you can simply get lower down, making the move an excellent way to poke at foes approaching into said pit. Another useful scenario for the move is to punish foes who recover high, who are terrified of your dsmash spike punishing them as they attempt to reach the ledge.

DOWN AERIAL – FALL FROM GRACE

Cornello extends his cane below himself as he transmutes a small spike out the end of it. He goes into a vertical position in mid-air as he goes into a quick stall then fall, headfirst. This move does a fairly unimpressive 11% and downwards knockback that would never kill if it weren’t for the fact it was downwards, enabling it to gimp on rare occasions. If Cornello actually hits someone, he’ll bounce off of them lighly, and after falling the distance of 2 platforms Cornello will automatically exit the stall then fall, making this less suicidal than most. This can actually see some use on-stage despite the horrible landing lag if you have a pit created by Rebound Cornello, as well if Cornello is very high in the air from Rebound Cornello’s Up Special.

This move fills a tenth of Cornello’s rebound meter. If it happens to be the move that triggers the Rebound transformation, it will generate a Mario sized spike out of Cornello’s arm like with the fsmash and dsmash. More interestingly, Cornello will actually transform as he uses the move. This means Cornello will not gain any invulnerability as he transforms, but the hitbox will stay out as Priest Cornello transitions from using his dair into Rebound Cornello’s dair. The cane will get absorbed into Rebound Cornello’s arm, punching downwards. The mutated arm will form very quickly to create the hitbox of the rebound version, with the rest of the body following along over the usual duration of .75 seconds. See the rebound dair for more details.

REBOUND AERIALS

DOWN AERIAL – GOD’S RIGHT HAND

Cornello goes vertical in mid-air and punches downwards with his mutated arm as he descends in an extremely quick stall then fall. Cornello’s fist deals 25% and a spike 1.4x as strong as Ganondorf’s, and his arm is superarmored against attacks that deal 19% or less. The landing lag of this is quite bad, as you’d expect. For a brief moment, Cornello stands upside-down, supported by his arm, before falling over into prone. You can choose which direction Cornello falls over in if he’s not on a slope where gravity dictates which way he must fall, and he will gain complete superarmor and anti-grab armor as he falls. Falling over deals 20% and knockback that kills at 100%. While being on a slope makes you a bit more predictable due to having to fall in one direction, you’ll slide down the slope while in prone to potentially make yourself less vulnerable.

If Cornello has a shotgun in his arm, it will fire in the opposite direction of the one Cornello falls in, generating the usual shotgun hitbox, while causing him to fall over much faster. If Cornello has red lightning, it will crackle and deal 10 hits of 1% and flinching around his arm when Cornello triggers the move’s landing lag, making it take longer but better defending him. If he has extra debris around his arm, a significant amount of it will fall off, a Bowser’s worth, not actually protecting Cornello at all but producing a very large amount of it. The debris gives Cornello further incentive to land in a slope, as it will cause all of to tumble down to the bottom of the pit. If he has a machine gun, it will fire several bullets as he descends during the stall then fall all the way to the ground, dealing 8 hits of 1% and flinching per second to try to stun them for Cornello’s fist to hit them.

If Cornello has a spike on his arm, it will specifically get fired out of his arm towards the ground, tip first, being as powerful of a hitbox as it is when thrown normally and potentially impaling foes who are on the ground. The spike will get impaled into the ground upside down with the flat side pointing up, but assuming Cornello is allowed to finish the move he will smack down the spike with his fist, driving it completely into the ground. Anybody who was impaled by the spike will get pitfalled inside of the stage while taking 29%, though the move’s ending lag means Cornello will rarely be able to exploit their stun. This is more of a way to get the most bang for your buck damage wise than anything else, in case their percentage is still low. In addition, even if no foe was on a spike, this can function as a way to “conserve” your spike so the foe can’t destroy it, enabling you to dig it up later with Rebound Down Special/Down Smash. Cornello will also fall over as soon as he finishes driving the spike into the ground, meaning his hurtbox will be a bit higher into the air during his vulnerable period.

NEUTRAL AERIAL – BALL UP

Cornello curls up into a ball and spins, dealing 12% and knockback that KOs at 170%. This is actually a fairly weak move by Rebound Cornello’s standards, but the appeal of the move is it grants complete superarmor for the duration. The starting and ending lag is quite brief, with the superarmored duration providing the majority of any “lag”. Should Cornello need one in Rebound form due to his size, this is a very good panic button.

While the move’s landing lag is normally bad, if Cornello makes contact with a slope the move will continue as he rolls down it. This provides him with a fully superarmored approach, enabling him to put this move to more offensive use. While spammable projectiles are typically far too weak to be a concern for Rebound Cornello’s health, enemies can use them to stall Cornello’s time in rebound form. Good approaches like this move and the Side Special are needed, as Cornello has no time for such childish games. The Side Special is the better move if you actually intend to hit the foe with the attack, while this grounded version of the nair functions better for clearing space.

FORWARD AERIAL – KICK OFF

Cornello tucks in his legs before shooting them out in front of himself at a 75 degree angle to do a fierce kick at foes with both his legs. The stomp deals 18% and knockback that would kill at 140% if at a more regular angle, but it’s more comparable to a spike when it goes down at the same 75 degree angle as the kick. The move is about as laggy as Ganondorf’s down aerial, and looks a bit similar to it. While the move is aimed downwards in addition to forwards, most enemies are so short in comparison to Rebound Cornello the move’s aim is doing you more of a favor if anything.

If the landing lag is triggered during the stomp (Not when Cornello tucks in his legs), Cornello will kick off the ground, propelling him at the same angle backwards into the air a platform with almost no lag at all. Despite having no bonus superarmor, the move is a surprisingly safe one to use against grounded opponents. Cornello tucking in his legs at the beginning will remove the portion of his hurtbox that grounded foes could reach, and should foes dodge he’ll kick off the ground back into the air by the time they come out of said dodge.

The move has some interesting applications on slopes. Obviously you can just keep your back to a slope to avoid hitting the ground, but kicking off the slope can allow you to propel yourself at different angles, with spikes providing even more variety. You can potentially punish people for rolling by kicking off one side of the slope to the other, then rolling down on top of them with the nair, all while staying fairly safe and not over committing yourself.

BACK AERIAL – ELBOW DROP

Cornello extends out his arm behind himself as he turns to look behind himself before attempting an elbow drop on the foe with his regular arm. Most of this move’s rather large lag is in the start-up, though Cornello’s upper torso gains superarmor against attacks that deal 12% or less after the first 10 frames of the move until the hitbox comes out. On contact with Cornello’s elbow, the foe is powerfully spiked, taking 23% and a spike 1.5x as strong as Ganon’s dair straight down.

While the move normally has very little ending lag, the landing lag on the move is quite extensive. Triggering the landing lag during the starting lag will speed up the move and cause the hitbox to spawn as Cornello elbow drops the ground, though Cornello will be suffering lag longer than the starting lag while on the ground.

While both versions of the move have obvious weaknesses, using this move next to a ledge or slope can make it more threatening as you don’t have to immediately commit to one or the other. If using it next to a slope, you can DI away from the slope towards the hole in the middle to keep it going if you predict a dodge. If using the move next to the ledge, you can do something far simpler – cancel the move by grabbing the ledge. If Cornello hits the ledge during the starting lag/hitbox animation, he’ll slam his elbow against it as he grabs it with his fist, spiking anybody on it without ledge invulnerability. This technique can be an excellent transition from Priest Cornello’s edgeguarding game – the priest knock the foe off the stage and transform while they make their way back to not allow the foe any free set-up time, then Rebound Cornello can attempt to wreck the foe who’s likely most of the way back by that point with his bair on the ledge.

UP AERIAL – GRIND TO DUST

Cornello turns to face the fore/background as he raises his hands above his head. His regular arm gets ready to catch the mutated one as it winds up the punch, then it smacks into Cornello’s open hand with great force. This performs yet another spike, dealing 12% and a spike on par with Rob’s dair. While Cornello has his usmash as an excellent defense against enemies approaching him from above, his uair allows him to knock foes back down into his comfort zone if he wants to take the extra risk for a more offensive approach with potential follow-ups. Cornello is very aware of how large he is in this form, and is intelligent enough to aim most of his attacks towards the ground to hit the pipsqueak SSB4 newcomers.

The move has a large amount of freeze frames when Cornello hits a foe with this move, “stunning” both him and his enemy in place. Rather than for dramatic effect, this is done so that an effect from Cornello’s mutated arm may be applied to the foe after hitting them. The machine gun simply adds an additional 9% as a few bullets are shot out of Cornello’s palm at the foe during the frames.

The red lightning will apply itself to the foe, leaving Cornello’s arm as it shocks the foe squished between his hands, but treating the foe as if they had been hit by Priest Cornello’s side special after it’s already bounced off two entities. If Cornello is going to downshift back to his regular state soon, there’s little better use he can make of it than this.

If he has extra debris in his arm, then a Wario’s worth of debris will get knocked off of his hand that will fall down after the foe as they take their knockback, briefly becoming a hitbox that deals 8% and knockback that KOs at 190% on the way down as an obstacle before losing its hitbox status. The debris gives Cornello some pressure on the foe to assist in his follow-up.

If a spike is growing out of Cornello’s arm, the foe will knock the spike off of the arm due to how forcefully their body is shooting downwards from the primary attack. Based off the size of the spike, the foe will take an additional 2-6%. If the spike was at least as tall as the foe was wide, then only a portion as large as the foe’s body will be taken off of his arm. The foe will enter prone on top of this spike, and if the spike hits a slope it will slide down it to the bottom at a fairly brisk pace. If the spike/foe is very small, it’s possible they’ll be able to destroy it on the way down with a get-up attack. Perhaps most impressive is the move’s potential off-stage, as the foe will have to get up from prone before they can attempt to recover. Of course, the foe will be granted the use of their first jump due to having ground to jump off of, but it’s a very respectable trade. If the spike is at least as wide as Mario, Cornello will be able to kick off of it with his fair, enabling him to quickly come back after the foe if he misses his gimp attempt.

The shotgun will attempt to shoot the foe as they get knocked down and fly past Cornello’s arm, just as powerful as it usually is dealing 17% and knockback that KOs at 200%. The shotgun generally fires too quickly before the foe is sent down to it, meaning that Cornello will generally want the foe at a high percentage. Fall speeds and weight factor into the equation of how fast the foe will reach this point – one thing Cornello can do to have some control over this is to perform the move inside of a pit of gravel, which will greatly increase the foe’s falling speed. Inside of a pit, the foe also won’t get knocked as far away by the high knockback when they hit the side of a slope, allowing Cornello to better pursue them.

PRIEST GRAB-GAME

GRAB – CHOSEN EMISSARY

Cornello extends out a hand for one of the best physical grab ranges by Brawl standards, but with awkward lag attached comparable to Falco’s grab. Upon successfully grabbing the enemy, Cornello restrains the foe by putting a hand on their shoulder.

Cornello can grab chimeras, allowing him to perform transmutations on them with his throws. If a foe is within range of the grab, Cornello will of course ignore any chimeras, so you don’t have to worry about them getting in your way.

PUMMEL - TRANSMUTE

Cornello’s hand pulsates with red electricity, dealing 0.5% per pummel in a spammable pummel on par with Lucario’s. Each pummel fills Cornello’s meter by 1/20th, serving as a way to potentially transform while having the foe already grabbed. The grab escape difficulty increases to 1.5x during the time Cornello is transforming, though even with this buff foes will generally always escape before you reach your second form. This is still helpful against foes who benefit from set-up time, though, as you can prevent them from making use of that time while you transform.

Used on a chimera, this will heal it by 0.5% with each use of the pummel while filling up your meter at a slower rate, 1/25th per pummel. Normally when transforming with the pummel, you will just gain lightning as your arm mutation. If you have given the chimera some kind of transmutation with your throws and then transform, though, Cornello will absorb the chimera into his arm and gain all mutations they have on his arm. If the effects of the transmutations would contradict each other in moves such as the Rebound Down Aerial, only the effects that can stack together will happen. While having all of the Rebound effects on a move such as the Up Smash may sound very powerful, keep in mind the chimera is quite easy to kill as you just waste time giving it transmutations with throws, this will kill that minion, and you’re only gaining these effects for 9 seconds anyway.

FORWARD THROW – EXECUTE

Cornello stabs the foe with his cane, knocking them into prone, then steps on their torso as he transmutes his cane into a shotgun. He then shoves the shotgun into the foe’s face before firing, dealing 11% and with knockback that kills at 250%, but very high base knockback. While the knockback will most of the time appear to be horizontal, it is actually at a 45 degree downward angle which can knock foes into slopes, and, more importantly, score kills when used at the edge. While this requires very high percentages to kill outright, it is Cornello’s single best move for beginning an on-stage gimping session. Cornello’s ability to make spikes come out under/the side of the stage if the foe is next to them can actually be useful in this scenario.

Cornello knocking the foe into prone at the start of the move may at first appear aesthetic, as the following shotgun blast will knock the foe out of prone immediately. If you knock the foe into prone on a slope, though, Cornello will slide on top of the foe briefly before firing. This enables Cornello to get into a pit while firing the foe out of it, serving as a superb reset into a defensive position. The move fills up 1/10th of Cornello’s rebound meter.

If this is used on a chimera, Cornello will transmute a shotgun barrel into the mouth of the lion. When the lion bites the foe, they will fire the shotgun, dealing 17% and knockback that KOs at 200% like in the fair. The kickback of the gun blast will knock the lion back a platform’s distance. Be aware this powerful new attack gives a lot of ending lag, so you’ll have to cover for the Chimera during its downtime. Aside from a generic buff to the lion’s attack, this can help lions recover when suicidally chasing foes off-stage, as foes will inevitably attempt to bait them for easy kills in this way.

BACK THROW – SMITE

Cornello channels yet more red lightning into the foe before sending an elongated blast of lightning to knock the foe behind him to deal 5%. This does a minimum knockback of a platform, after which point the foe will take knockback that KOs at 190%. Beyond the initial 5%, the foe will continue to crackle with red lightning for 10 seconds, during which time they will take 1.4% per second. If the foe hits another character or minion while they have this status effect, though, it will instead be passed on to that character. If Cornello can keep away and evade being hit for all that time, though, he’s looking at a damage output of 19% for pulling off this throw.

While this only fills up a mere 1/12th of Cornello’s rebound meter by itself, if Cornello hits the foe with Chain Lightning their damage will simply get added to the beam’s power and they will lose the ability to pass it around by hitting people. Not only does the foe have to go out of their way to hit Cornello, but they have to evade Chain Lightning on the way. While they can quite easily pass it off to a Chimera, this will grant Cornello the ability to easily “collect” the power of the lightning by hitting his minion with the Chain Lightning. Obviously using this throw on a chimera directly will just apply the effect to the chimera immediately, with the end goal of getting the chimera to land an attack on the foe to spread the lightning.

Not only does the foe have to watch out for Chain Lightning as they come to pass the lightning to Cornello, but Cornello’s nair can block the passing of the lightning to some degree. If a foe with this status effect hits Cornello, they will not pass the effect to Cornello but will instead have a quarter of the damage of their attack added to the length of their effect. Adding in the regular 1/4th of damage a foe instantly takes from attacking Cornello in his nair, and they’ll eventually be taking half the damage of their attack in total.

UP THROW – SOLIDIFY

Cornello transmutes a geyser of sand 1.2x Ganon’s height up underneath the opponent to propel them into the air. This deal 13 hits of 1% and pushing knockback into the air, with the last hit dealing vertical knockback that kills at 260%. While the knockback is weak, the sand geyser will push the foe up 1.3 platforms before they even take said knockback. Cornello’s rebound meter will fill up by 1/8th for performing this attack.

As the foe rides the sand geyser, some of the sand will stick to their body and start to harden into stone, encasing small portions of their body. This will give the foe the effect of traveling in debris from the Rebound Down Special, decreasing their dash speed by 1/4th and increasing their fall speed by 1.5x. This can stack if the foe is standing in actual debris. Foes can knock off the debris by attacking it like a leeching Pikmin, with the debris having 10 HP. It will take the knockback of the foe’s attack as they knock it off and become a small amount of regular debris after that point. If you used the move in a pit and foes attempt to remove their debris immediately, it will more than likely roll down into said pit as a nice small bonus.

If used on a chimera, they will have to have the debris knocked off of their bodies. Aside from creating debris, this serves as a small buff of 10 HP to the chimera, as they will not take damage from attacks that knock it off of them. The debris will be primarily located on the chimera’s torso and will function as a drop-through platform. If a foe comes to gank you off-stage and a chimera is chasing them like the suicidal idiot it is, you can potentially make use of the chimera to recover. Even better is that you can produce spikes on the chimera’s back. When a chimera is leaping at the foe, possibly through your usmash command, you can use the dsmash to make the spike come out from underneath the chimera’s belly to stab at the foe. Be aware if you make spikes underneath the chimera, though, that they will break off when it hits the ground (They can still be picked up by Rebound Cornello later).

DOWN THROW – BED OF SPIKES

Cornello produces 5 minimum charge spikes as powerful as the fsmash/dsmash in front of himself, then slams the foe down into them, dealing 10% and knockback at a slanted primarily vertical angle that kills at 200%. The 5 spikes will stick around as a weak trap afterwards like regular uncharged spikes, dealing 5% and weak knockback.

This throw can be looked at as a “free set-up” throw, but just 5 uncharged spikes by themselves don’t have all that much use. If Cornello uses an fsmash/dsmash where an existing spike that isn’t fully charged, though, it will extend out from the spike that’s already produced. Not only does this significantly decrease the lag, the resulting spike will be better protected by the small spikes surrounding it, largely forcing foes to get rid of them first to get rid of the spike that actually matters, during which time you can attempt a dsmash to extend those spikes. The move fills up a tenth of Cornello’s meter, and if this move triggers Cornello’s transformation he will have a fully charged spike growing out of his arm, combining the 5 smaller spikes into one.

If this is used on a chimera, the spikes will come out of the chimera’s stomach and impale into the ground, rooting the Chimera to that point. This turns the Chimera into a trap rather than a minion, preventing it from killing itself or taking knockback. It can also stay to be in a more reliable position for set-ups/as a Chain Lightning bumper, as well as keep it “safe” if you’re trying to dump multiple transmutation throws into it. The lion’s pounce attack will still be just as powerful, but will just be a swat of the chimera’s front claws in place. Performing a usmash command on a chimera affected by this will have Cornello release the chimera from the spikes with no additional lag. The 5 small spikes can also be unearthed at a later time by Rebound Cornello.

REBOUND GRAB-GAME

GRAB – IRON GRIP

Cornello goes to grab the foe with both his hands. The grab is Dedede’s with 1.2x the range, making it as fantastic as you’d expect. This is only with Cornello’s standing grab, though, as his dashing grab is much laggier, meaning you’ll largely be using the standing one exclusively. While the standing grab is still great, it’s a bit of an issue in making Cornello predictable when he only has 9 seconds to use it.

PUMMEL – CRUSH

Cornello squeezes the foe in a laggy pummel dealing 4%. Despite the power, the lag makes the pummel rather inefficient compared to that of a normal character’s. However, each pummel increases the grab escape difficulty by 1.15x, potentially allowing Cornello to keep a foe restrained if he’s about to deform into his regular form if the foe’s at a high percentage. Of course, the foe can still escape the grab during the time where Cornello changes back.

FORWARD THROW – CAST OUT

Cornello encloses his hands around the foe, obscuring their character model as he shakes them inside of his hands like a pair of dice. He then opens up his hands to let the foe tumble forwards, dealing 9% and strangely weak knockback that KOs at 250%. Foes will briefly enter their reeling animation as if they were footstooled, leaving them vulnerable. Cornello is able to capitalize on this extremely well, as this throw is quite fast, even by the standards of a regular character. Aside from using this as a set-up throw, this makes the throw quite useful when time is such a valuable resource for Rebound Cornello.

Cornello’s height means when he releases foes, they won’t immediately go and tumble along the ground with downward angled knockback, starting in the air. Outside of very low percentages, though, foes will hit the ground so quickly that Cornello won’t be able to make use of the footstooled effect. Sending them into a pit from the outside will keep them ripe for punishment for long percentages to come, though. The move can even set-up for the kill, beginning a gimping session at the edge.

UP THROW – ASCENSION

Cornello restrains the foe in such a way to perform a suplex on them before leaping high, high into the air at a speed a fair bit slower than his grounded Up Special. He goes up into the Smash Bros “magnifying glass” at the top blast zone like Kirby’s throw before coming back down to the ground, dealing the foe a minimum of 10% and knockback that KOs at 190%. The more distance Cornello had to travel to reach the top blast zone with this move, the more powerful the move becomes. Each Ganondorf traveled increases the power of the move by 4% and makes the move’s knockback to KO 10% sooner. Cornello will fall through drop through platforms on the way down.

This will be Cornello’s strongest throw in raw power if used in a pit, but starting the move on lower ground causes the move to take longer. While lag on throws is not normally a concern in 1v1, it means Cornello will have to aggressively grab at the foe early on in the transformation, and in a pit no less, if he wants to pull off the move with the full potential. While the knockback buff is nice, you’re mainly in this throw for the damage, as being lower when the foe actually takes their knockback somewhat negates the knockback boost anyway.

DOWN THROW – BURIAL

Cornello throws the foe to the ground, dealing 4%, leaps up and stomps on them with both feet, dealing 6%, then does it again for another 6%. This throw creates a Ganondorf deep “pit” as if Cornello had used his Rebound dsmash on the location of the throw, and will leave the foe at the bottom of that pit in the prone position. Due to foes sliding down the sides of a pit while in prone, it makes foes rather easy to tech chase if they attempt to roll up from the position, with Cornello’s primary techchasing moves being the nair and fair. The nair will enable Cornello to ignore get-up attacks with his superarmor and quickly roll to either direction the foe rolled, getting beaten out by the foe just standing up from prone immediately.

Aside from providing offensive pressure, which the move is great at, the move is very key because it enables Cornello to set-up while still attacking the foe. While this is something any character with set-up would love, Cornello screams for a move of this kind with his very strict 9 second schedule.


BACK THROW – OPEN ARMS

Cornello holds the foe in one hand before extending out both of his arms and spinning in place. After building up some momentum by spinning for some lag, he releases the foe as the arm holding them goes behind where he was originally facing, sending them flying with 12% and knockback that KOs at 130%. This is Cornello’s direct kill throw, and will deal 20% and knockback that kills at 110% to outside foes in a FFA.

Cornello’s height enables this move to become very convenient for him. While the knockback foes take is horizontal, they’re elevated to Cornello’s shoulder height before they take it. Cornello’s pits often won’t be that deep, meaning they’ll be lower than Cornello’s shoulder height. This lets you knock a foe directly out of a pit with a KO move without having to resort to something like vertical knockback, which will be penalized by the foe being lower down in the stage due to being in a pit. In the event you have a pit that’s so deep Cornello can’t throw the foe out of it with this move, you’d want to be using the uthrow anyway.

PRIEST STANDARDS

JAB – QUAKE

Cornello taps his cane on the ground, causing the ground a platform’s distance in front of himself to lightly shake. This is not forceful earthshaking that knocks people into the air – it simply slows the movement of enemies by a quarter while dealing 9 hits of 1% per second. This doesn’t flinch enemies, but every fourth hit will always cause enemies to trip as a small ripple goes through the ground. Each of the 9 hits per second fills Cornello’s rebound meter by 1/60th.

Simply using this on foes approaching you will cause anybody with half a brain to jump, or simply roll past the ripple as it shows up. This move has very little lag, though, with the portions of the move that aren’t the tripping essentially functioning as the move’s “lag”. Using this on a foe not impeded in any way can be used to try to bait some kind of punishable action.

Where the move truly shines is on opponents that are coming out of the air. You can “charge” the move in advance to trip them the moment they touch the ground, getting foes who recovered high ready for punishment. This will also wrap around edges to hit the ledge. The damage will still hit foes with ledge invulnerability, while the ripple will deal light downwards knockback to hit foes off the ledge if it connects.

DASHING ATTACK – RUN AND GUN

Cornello stops using his cane as a walking stick in his dash, lifting it up and transmuting it into a shotgun as he turns behind himself. The move deals 11%, with the usual knockback that KOs at 200% with high base knockback. Even should the move miss, it’s useful for running away considering it propels Cornello forwards a little under Bowser’s width. Cornello’s body deals 3% and knockback that kills at 400%, just so you don’t look like an idiot when the foe rolls in front of you with the move. This is a keep dashing dash attack, enabling Cornello to fire behind himself at will when fleeing from enemies. Cornello’s dash will be slowed briefly as he transmutes his shotgun back into a cane to prevent the move from being a faster method of transportation than just dashing normally.

The frail Cornello will fall onto his stomach when this move is used on a slope due to the force of the kickback. This can actually assist Cornello by enabling him to “dive” back into a defensive position pit, as sliding down a slope is faster than his rather crippled dash speed. The move also fills 1/8th of the Rebound meter, meaning if Cornello transforms because of this move he can potentially slide down a hill to “chase” a foe while transforming.

FORWARD TILT – HAND OF GOD

A hand of earth rises from the ground in front of Cornello. It arcs forwards as the “arm” behind the hand extends with it before coming back down to smash into the ground in an “arch” shape, hitting foes about a Wario width in front of where Cornello was standing. The hand is a hitbox throughout, dealing 6% and knockback that KOs at 275% in the direction the palm of the hand was facing. The hand and arm crumble to dust after the move is completed.

Cornello can hold down the A button to enable the arm to extend upwards further before completing the arch. At maximum, this will cause the hand to reach 1.5x Ganon’s height into the air and hit 1.2 platforms away from Cornello. This is impressive in how fast it is, but of course leaves a gaping blindspot on the ground for the move. The higher the hand was before it started to come down, the more powerful the move becomes as it does so, dealing up to 14% and a spike on par with Rob’s dair. Cornello gains anywhere from 1/16th to 1/9th of Rebound meter, gaining it progressively as the move “charges”.

The arc of this move provides useful for a multitude of purposes. It’s great at hitting enemies approaching downwards into a pit when you’re lower down, hitting foes jumping over a pit or even just a spike to reach you, and of course serves as an excellent punisher at the edge, especially on enemies recovering high.

UP TILT – SAND GEYSER

Cornello taps his cane on the ground, then .4 seconds later a geyser of sand 1.2x Ganondorf’s height erupts at that position. The sand geyser deals 13 hits of 1% and flinching as it pushes foes to the top of itself, with the last dealing vertical knockback that KOs at 260%. Cornello is free to move after the move’s very brief lag, waiting for the geyser to show up. If he taps the ground with his cane in the same position before the geyser shows up, it will double the height the geyser goes up and add an additional 5 hits. Foes will go up the taller sand geyser more quickly so they can’t just DI out. While the knockback is terrible, it can be enough to eventually kill enemies when they’re taking it at the top of multiple sand geysers. The move boosts the rebound meter by 1/16th.

While Cornello can only stack 2 sand geysers in the same position with this move alone, he still has enough time to grab a foe. If Cornello performs his uthrow when a sand geyser is about to erupt, the uthrow and utilt(s) will combine their power as if the uthrow was a “bonus” utilt. The uthrow will also cause additional portions of the foe to solidify. Each extra sand geyser will slow the foe’s movement by an extra 1/6th, while their falling speed will be increased by an additional 1.2x. Each extra portion of debris hardened on the foe’s body requires them to knock it off with an additional attack, creating another portion of debris to boot.

The utilt takes much too long to start-up to use as an offensive measure in most cases, and actively attempting to get the utilt/uthrow combo is laughably predictable. It functions as a great defensive measure, though. If a foe is approaching and about to reach you, you can use the utilt and step behind it to use it as a barrier. Even if the foe will get past the geyser before it erupts, you now have a big juicy reward to grab them at that position as they inevitably come past it. You can stack both utilts in the same position if you’re feeling overconfident, but placing two geysers slightly away from each other foes to approach you from will give you significantly more leeway in where you land the grab. Note that the geysers will erupt directly upwards regardless of whether or not they’re on a slope.

If a spike is buried underground for any reason (Caving in the ground with rubble, driving it in with rebound dair, etc), using the utilt or uthrow will cause the spike to get shot up out of the ground. The tip is just as powerful as always, and it will hit anybody hit by the geyser. The geyser will also cause the spike to flip over as it reaches the top, causing the spike’s tip to still be a hitbox as it comes back down. Larger spikes will retain their solid status during all of this, so even if the foe isn’t hit it will prevent foes from immediately rolling past the sand geyser, getting caught in it as their roll gets stopped short. Rather than just “running”, this version of the move largely will just have Cornello wanting to dance back and forth where the eruption happens to bait enemies.

DOWN TILT – QUICKSAND

Cornello causes the ground a Wario’s width in front of himself to start sinking for a very brief period over .4 seconds before making the ground solid again. Any foes hit by this attack will take 8 hits of 1% and flinching over the course of it before getting their feet stuck in the ground. Foes can still attack/dodge/etc from this position, but not move or jump until they either escape at grab difficulty or use a leg based attack with 1.3x the starting lag. Taking knockback from this position that would knock them back a platform or more will also release the foe. Using the move on a foe already caught in this effect will deal them knockback that KOs at 220%.

The most obvious follow-up to this attack is an fsmash or dsmash, as even if the foe dodges the primary hitbox they will automatically be hit by the spike tip’s passive hitbox afterwards, while also granting you a free spike in the process. The move fills 1/6th of Cornello’s Rebound meter, and if he hits a foe and transforms it’s ideal since they’ll be delayed from running away from him while he hulks out.

The move will cause spikes in the area of effect to sink into the ground Mario’s height. Larger spikes will still keep their HP despite looking like shorter spikes, and this actually makes them more obnoxious to destroy as foes have to aim multiple attacks at the ground. You can also bring spikes completely underground for you to use with either your utilt or Rebound Cornello. The move is particularly nice to use against a foe on the opposite side of a spike as yourself, as the spike should ideally block some of their attacks as you use the dtilt before functioning as ammo in a utilt followup. When the foe’s locked in place, it also becomes much more feasible to perform the utilt/uthrow combo.

REBOUND STANDARDS

JAB – STREGNTHEN FAITH

If the button is simply tapped, Cornello will punch forwards with his mutated arm, quickly dealing 9% and knockback that KOs at 160% in a very reliable spacer. If Cornello mashes or holds down the A button, he will flex his mutated arm for the duration, powering up the punch to come. Cornello can charge the punch for up to a second. At max charge, the punch deals 19% and knockback that KOs at 90%.

Based off what Cornello has on his mutated arm, different effects can happen if the move is charged. The shotgun is the simplest, with it firing as the punch goes off in the opposite direction in order to make Cornello’s punch more forceful and have 1.3x the power. This slightly increases the ending lag, but the shotgun will not fire if the move is uncharged.

With rubble on his arm, it will fall off it as he charges, creating falling hitboxes below his arm in front of himself that deal 12 hits of 1% and flinching over the charge’s duration, stunning foes for the punch. If Cornello releases the jab and punches as the rubble is falling, he will instead knock some of it forwards 2.5 platforms as a small stream of projectiles.

A spike on Cornello’s arm will get shot up out of his bicep during the charging, skewering enemies as if it were thrown. You need larger charge to shoot larger spikes out of your arm, requiring full charge for a fully charged spike. The spike will skewer enemies like when picked up and thrown, but will go much faster (In exchange for more lag and having to go straight up). When a foe is approaching you from the front in the air, this gives you responses for if they both jump towards you directly or over your head entirely. Charging the move can also function as a decent fake out as you fire off the move early in order to avoid shooting your spike.

If Cornello flexes with machine guns attached, the pressure put on them will cause them to explode if the move is fully charged, dealing 23% and knockback that KOs at 70%, while dealing Cornello a minimal 5% in recoil penalty. The hitbox will be Cornello’s entire arm as he releases the punch and will linger for quite some time. If you only partially charge the punch, the guns won’t instantly “cool down”, only doing so completely after 3 full seconds. This enables Cornello to somewhat “store” his charge, and makes slightly charged spams of the jab a lot more scary for the foe and gives you some degree of leverage by charging the attack. This obviously uses up the guns, but if you work up the charge gradually and use it as a threat it will last most of your transformation time anyway.

If Cornello has lightning in his arm, he will jut out his palm instead of punching forwards with a fist. This decreases the physical power of the attack by 1/6th. While charging, Cornello’s flexing arm deals 4 hits of 1% and flinchig throughout to slightly cover himself, then Cornello channels the lightning into his hand upon releasing the jab. This will cause the lightning to shoot out of his palm at a 45 degree angle towards the ground. The power of the beam is the same as the one that he used/absorbed in order to enter Rebound form, requiring a minimum of half charge to fire off, and increasing the power of it by up to 1.3x at full charge. This will cause Cornello to lose the lightning in his arm unless he manages to reflect it back to hit himself, and this becomes significantly easier for Rebound Cornello due to his size. Foes will actively seek to shield this attack at times in order to make it bounce off of them into the air harmlessly.

DASHING ATTACK - RAM

Cornello kicks off the ground to propel himself forwards, attempting to headbutt his opponent. Cornello will travel the distance of 1.3 platforms along the ground before falling into prone at the speed of Captain Falcon’s dash. His head deals a powerful 17% and knockback that KOs at 100%, and on hit Cornello will fall on the ground into prone early. This move has very little lag, with the penalty being forced into prone. This is certainly much better than ending lag, though. Cornello is very wide when he lays on his stomach, so unless he attempted to hit a foe at point blank he will likely be able to hit that enemy with a prone attack if they dodged the headbutt. If you want to hit foes farther back, you can use the move on a slope and slide back to them as you use the prone attack. Also note that Cornello will continue sliding while reverting his transformation, so this can help you to continue to control your movement.

If Cornello ends the move in the air, he doesn’t enter prone and basically doesn’t experience lag with the move. This makes the move a very scary ones for foes attempting to travel over the top of your pit, and can also just be used for outright transportation. The move can also of course provide an excellent transition into your off-stage game.

FORWARD TILT - PRAYER

Cornello claps his hands together in front of himself, attempting to crush his enemies. Contact with his hands deals 11% and knockback that KOs at 135%, with fairly high base knockback. This is one of Cornello’s best attacks in terms of the speed/power ratio, functioning as one of his most mindless and spammable spacers with his giant body providing it excellent range. Unlike Bowser’s ftilt, Cornello’s hands don’t have to magically enlarge.

If Cornello claps his hands on a spike, he will shatter it, causing the remains of it to fall out of his hands in the form of rubble. The rubble deals 4-12 hits of 1% and flinching as it falls based off the size of the destroyed spike. While weak, the ending lag of this move is short enough to follow up on foes getting hit by the rubble. The solid nature of the spikes before they are broken can also serve to catch rolling foes – if they roll into the spike and dodge the clap with it, they’ll get caught by the rubble.

UP TILT - PURGE

Cornello raises his arm behind his head before punching the ground in front of himself, dealing 12% and knockback that KOs at 140% at a 30 degree angle downwards. This creates a hitbox that spawns immediately above and in front of Cornello with nearly no lag whatsoever before it smacks down in front of him. The speed is still acceptable to hit grounded opponents, though the move is merely average against them rather than something exceptional. While the move doesn’t hit directly above Cornello, he’s so tall that you can generally bat enemies out of the air with this attack as they attempt to reach that point. The move of course also works well on opponents on a slope above you or those recovering high.

When Cornello’s fist hits the ground, a platform sized earthshaking hitbox will show up in front of himself comparable to the Priest’s jab. It lasts a second and deals 9 hits of 1% with no flinching, with the fourth hit tripping enemies. Just this alone isn’t nearly enough reason to use the attack, but it’s possible to knock foes into this with the punch at lower percentages. At higher percentages, this can still be accomplished by hitting enemies at a higher position on a slope than yourself. You can also get a small amount of mileage out of this by hitting a foe downwards off the stage with the punch, forcing them to take a small bit of bonus damage on the ledge when they come back.

DOWN TILT - DRAG

Cornello reaches out his hands in front of himself, then drags his hands back to himself as digging his fingers into the ground a bit. This deals 10 hits of 1% and weak set knockback back towards Cornello. The move will “wrap” around slopes rather than Cornello just dragging his hands through open air. The move is primarily to catch enemies attempting to just flee Rebound Cornello to stall out his timer, as it’s quite a fast attack. Even if foes don’t just run for the entire duration, running for the last couple of seconds can be a viable tactic. The move’s ability to “wrap around slopes” also applies to edges, enabling Cornello to easily hit foes attempting to plank his Rebound timer.

If Cornello wraps his hands around a boulder, he’ll bring it in to himself as you’d expect, taking a bit more lag. As he brings in the boulder, it will be a hitbox that deals 8% and knockback that KOs at 200%. If the boulder is in a slope, it will take longer for Cornello to bring it to himself and it will not be a hitbox, but Cornello can release the boulder at any time with another press of A. This makes the boulder a fair bit less predictable.

PLAYSTYLE SUMMARY

Cornello’s transformation is unique in that it can be seen as something of a “power-up”, despite having a complete moveset to call its own. Despite being such a boon, mindlessly transforming into it whenever possible is obviously a terrible idea when so much self damage is given to him. There are many moves and situations throughout his massive toolset that serve as good transitions, such as camping with moves that build up the meter and transforming as they reach you or transforming as you knock them off the ledge. Early on in the match, Cornello will probably just want to transform once primarily for set-up purposes – a dsmash or dthrow is mandatory, and a boulder or pile of rubble are nice bonuses. While Cornello can score kills fine as the priest, he will be relying on the Rebound transformation more and more as the match progresses regardless. The extra damage will matter less when Cornello’s damage is already high, and he will want to stay in the form primarily for the weight and recovery it provides, essentially making him invincible.

The many defensive moves available to the priest can allow him get set-up as you’d expect from a typical character of this archetype. While that’s nice and he will use them for that purpose to a degree early on in the match, most of his set-up is designed to work fairly well in the face of combat. The spikes are the most obvious example, but foes can’t even interrupt the summoning of Cornello’s chimeras. Beyond just set-up, though, Cornello needs his massive arsenal of defensive moves in order to survive at the stupidly high percentages that he’s going to reach. If foes want to kill Cornello in his Rebound form, they’ll have to take him to ridiculous percentages, at least 200%. Cornello needs to be able to survive long enough when he reverts back to the Priest to regain Rebound status, as well as be comfortable enough to actually do anything when he does. While Cornello’s Chain Lightning won’t have much of anything to bounce off of at low percentages when a normal character would actually want healing, late in the match there should be countless targets to extensively heal him and fill the Rebound meter. While the priest doesn’t particularly care whether he’s at 180% or 200%, it can actually be enough to enable the Rebound form to survive. With these insanely high percentages, the priest will want to be in the pit just to make himself harder to kill, let alone the new opportunities it provides for his attacks. Going out of his way to survive for as long as possible also means he will inevitably get some great set-up towards the end of his stock, worth going for since everything he does reverts to normal on his death.

Cornello’s favorite place for the foe to be when he goes on the offensive actually isn’t in a pit, but off the stage. The priest enjoys the foe being there for his opportunities to damage rack directly with the Machine Gun or give easy surfaces to bounce off his Chain Lightning to power it up, then punishing them horribly whether they come to the ledge or recover high with his multitude of options. The priest doesn’t expect to kill when he knocks his opponent off the stage, he just intends to impede them for as long as possible. This is also the most obvious opportunity for Cornello to perform set-up with absolutely no risk. One of the most popular forms of “set-up” is to transform into Rebound form. The Rebound form still loves to see the foe off the stage, but it has much more evil intent as it directly gimps foes or, in the least, horribly punishes them as they land back on the stage.

PRIEST FINAL SMASH - CRUSADE

Cornello summons five of his followers with comparable size to himself. They weigh as much as Captain Falcon and have 50 HP. Their attacks consist of Priest Cornello’s Machine Gun and his shotgun fair, though they’re able to use the shotgun on both the ground and in the air. This provides plenty of projectile clutter and huge fodder for you to bounce Chain Lightning off of, with the Final Smash lasting for 10 seconds.

If Cornello enters Rebound form while his minions are out on the stage, though, he will absorb the guns of any minions within a platform of him into his arm. This will give him access to the shotgun and machine gun at the same time, and increase the amount of hitboxes produced by 1.5x for each pair of guns he absorbs. All of Cornello’s minions will flee the stage and kill themselves upon his transformation.

REBOUND FINAL SMASH – GODHOOD

Cornello attempts to perform further transmutation while already in his rebound state. This increases his size and weight by an additional 1.5x, and causes his entire body to mutate into a black mess of alchemy like his arm. Cornello’s entire body is now solid, and every 2 seconds, a mutation will come out of Cornello’s body at the position nearest to the foe. If the foe is right up against him, a shotgun will jut out of his body and shoot the foe as powerfully as his fair. If the foe is within the distance of a max charged spike, one will jut out at the foe. If the foe is further away than that, a machine gun will sprout from Cornello’s body and fire in the foe’s direction for one second. After 9 seconds of this, Cornello will revert to his priest form.
 
Last edited:

FrozenRoy

Smash Lord
Joined
Apr 26, 2007
Messages
1,268
Location
Las Vegas, Nevada
Switch FC
SW-1325-2408-7513
You can click on the floppy disk icon in the posting GUI to save a draft, so your work will still be there the next time you load the page. It also does this automatically from time to time.
You can also do what I do, which is to save it to Notepad and just work on it in there, which also helps avoid XenForo errors and ensures you keep your drafts safe as long as you save frequently (Smashboards deletes drafts every few days if not updated in that time). You can also start convos and use those as workspaces.
 

Tocaraca2

Smash Ace
Joined
Feb 22, 2015
Messages
557
Location
Wokingham
You can click on the floppy disk icon in the posting GUI to save a draft, so your work will still be there the next time you load the page. It also does this automatically from time to time.
I don't know why I didn't think of this before. Thanks for the info!

FATHER CORNELLO


Father Cornello is the starting antagonist of Full Metal Alchemist, getting nothing but the first episode to himself in the main series. While he technically works under the homunculi, he is largely an episodic character to generically start off the series with some action. Cornello uses alchemy, but passes it off as power from god to gain loyal acolytes, with the eventual goal of world domination. He is the sole voice of god due to his ability to perform these “miracles”.

Cornello started off as a non fighter in the manga/2003 anime, but has gained more and more abilities throughout various adaptions. Aside from the Brotherhood series giving him an actual fight, he is given several unique attacks in the FMA Warcraft 3 map where he’s a playable character, alongside other such beloved and memorable characters as Fu, Zampano, and Dolcetto.

STATISTICS
Traction: 10
Size: 8
Aerial Control: 7.5
Falling Speed: 5
Aerial Speed: 5
Weight: 4.5
Ground Movement: 1.5
Jumps: 1

Cornello’s a heavyweight without the weight in statistics. While he should realistically be heavier, his poor weight is used to represent his physical incompetence and frailty as an old man.

Cornello has a “rebound” meter below his portrait comparable to Little Mac’s. Whenever Cornello uses a move that uses alchemy (The majority of them), the meter will fill up a certain amount based off the attack. Every second, the meter will tick down by 1/18th, so he has to be somewhat spammy with his attacks in order to fill up the meter. When the meter completely fills, Cornello will enter his rebound form, gaining invulnerability for the 3/4ths of a second duration of the transformation.


Weight: 20
Size: 20
Traction: 10
Jumps: 10
Falling Speed: 10
Ground Movement: 6
Aerial Speed: 5
Aerial Control: 2

Turning into this form grants Cornello superarmor to attacks that deal 7% or less, and grants him 0.2 seconds of complete stun immunity after getting grab released or thrown. Cornello will stay in this form for 9 seconds before shifting back to his previous state. While Cornello will get a free invulnerable transformation back to normal, he will take 40% over the period of time he remains in the Rebound form. When he turns back, Cornello will go through a half second of lag, .3 seconds of which he is vulnerable for.

PRIEST SPECIALS

UP SPECIAL – MIRACLE

Cornello raises his hands above his head and looks to heaven as he gains an aura of red lightning around himself. This will cause him to begin healing at a rate of 3% per third of a second. While this would make him somewhat scary to leave around, this fills up Cornello’s rebound meter faster than absolutely anything else – 1/8th of the way per every 3% damage healed. The Rebound form’s self damage will of course outdamage the otherwise very good healing from this attack, with Cornello getting a net loss of 16%. Of course, if you just want to get into Rebound as fast as possible, this has the bonus of healing some of the damage. If used in the air, this will slow Cornello’s falling speed by a decent margin.

Cornello does not have a recovery on his Specials in his base form, making him even more frail. The rebound form has a very powerful recovery, though, meaning foes largely have to gimp you if they expect to recover. Granted, if you have to build up your meter from nothing in order to recover, you’ll have to be knocked fairly high in order to not drop off the bottom while transforming. Specifically because of how Cornello’s recovery works, he’ll always want to balance his Rebound meter at a fairly high position in order to recover.

NEUTRAL SPECIAL – MACHINE GUN

Cornello transmutes his cane into a machine gun and fires at will, laughing maniacally at random intervals if he holds out the move long enough. As he continues to spam the move, he simply transmutes more ammunition into the gun barrel. Cornello has full control over where he aims the move, having the full range of Final Destination! The bullets are the same size as Sheik’s needles and go just as fast, with each one dealing 0.5% with no stun. Cornello fires 36 bullets a second, working as a very powerful damage racker – imagine if Fox could freely aim his Neutral Special and you’ve got a comparable move.

The big problem with the move is there is strangely a very long amount of ending lag to leave the stance. If you just exit the stance as a foe comes up to you, you’ll be taking something on par with a Bowser fsmash as your punishment. As such, the move is largely reserved for attacking foes at very long range, most reliably those who are knocked off the stage for free damage.

The move fills Cornello’s rebound meter at a rate of 1/16th for every third of a second he stays in this stance. The move can be used as an amazing transition into rebound if you can force a foe to approach you, then bypass the move’s ending lag with the foe already at point blank range. This is a pretty big gamble based off whether you think the foe can punish you in time or not, as if it’s too painfully obvious you’ll transform the foe will likely just wait out your gunfire until you do.

DOWN SPECIAL – ALCHEMIC ABOMINATION


Cornello summons a chimera in front of himself – a lion fused with some other unidentifiable creature through alchemy, apparently making it stronger than a regular lion somehow. The chimera is about as tall as Luigi, but is as wide as a crouching Snake without counting the tail, which extends out for double the chimera’s width. Attacking the tail deals damage to the chimera, but not knockback or stun. The chimera is as heavy as Mario at 50% and is vulnerable to hitstun and grabs, but will simply keel over and die on the spot if its 30 HP is depleted. This has an awkward .4 seconds of lag to summon and doesn’t affect the rebound meter, but if Cornello is interrupted during the move the chimera will still be summoned anyway, possibly punishing his attacker.

The chimeras patrol the stage at Ganondorf’s walking speed, but will pursue foes at his dashing speed if they come within 0.75 platforms and will pursue them until they get 1.6 platforms away. Their basic melee attack is a quick bite that deals 8% and knockback that kills at 165%, but has noticable ending lag to punish them. The bite will heal the chimeras of 5%, adding slightly to their survivability. If a foe is a platform’s range away from the chimera and they’re on the chase, they will perform a swift pounce on top of them that deals 14% and knocks grounded foes into prone, dealing knockback that KOs at 200% to aerial foes and those already in some kind of stun state. The chimera will follow up with the bite instantly if the foe was put into prone, though foes have enough time to do an immediate action to avoid it – though this will make them more predictable.

SIDE SPECIAL – CHAIN LIGHTNING

Cornello fires a burst of red lightning out of the end of his cane. After the move’s brief startup, the range is 2 platforms long and the lightning instantly travels this distance like realistic lightning. it initially seems rather useless compared to the Up Special, as it simply heals the target of 5% (Including foes, though foes will take a flinch from it). However, the target will then begin to take damage over time at a rate of 2.5% per second, taking double the damage they were healed.

When the lightning hits a target or any form of terrain, it will bounce off of it at an angle comparable to Rob’s laser. Every target that is hit will take 3% more “healing” than the last one, and bouncing off the ground will still power up the move in this way. Cornello can angle the initial firing of the lightning, and can have a lot of fun with this move with no set-up on stages with platforms. Note that shielding the move will still power it up, enabling you to still use shielding foes as a target to bounce off of or rejecting the lightning from yourself if you don’t want to take the damage.

This gives the chimeras some more relevance, enabling them to act as “bumpers” and to power up the move. While the actual lightning jumps are instant, there is a very brief pause between the bounces between each individual target, so if you intend to save the foe for last for a big hit you’ll have to apply some pressure after shooting out the red beam. Aside from simply damage racking the foe with damage over time, chimeras will often like the nature of this brief healing, potentially expanding a short lifespan. The pounce attack chimeras use can also offer some more angles to bounce the lightning off of.

While firing the lightning fills up his meter by 1/12th, it will fill up far more if he hits himself with it. If he is the second target (The minimum, since he can’t target himself outright), his meter will fill up by 1/6th. For each target later he was in the Chain Lightning, the meter will fill up by an additional 1/6th. If Cornello enters rebound while taking damage from this move, any further damage he would take from it will be erased, meaning if he turns into it outright he’ll simply get the healing only. Every character can only be hit by this once per use and the lightning will expire once it travels the maximum distance, so Cornello can’t just bounce it off of a foe infinitely at point blank. Shielding the attack does not count as “being hit” by it.

PRIEST SMASHES

FORWARD SMASH – SPIKE IMPALE

A spike shoots out of the ground in front of Cornello at a 45 degree angle. Cornello can angle the move up or down to change this angle to 20 or 60 degrees to alter the slant of it. With no charge, the spike barely juts out of the ground at all, only around two thirds of Kirby’s height. At full charge, the spike is as long as a platform. If the move is charged at least a quarter of the way, the spike will be solid terrain, providing an interesting surface to bounce off of with Chain Lightning. Regardless of charge, the move deals 20% and knockback that kills at 130% as it comes out.

The spikes have 5-35 HP, though you can’t attack the tip which remains a hitbox that deals 5% and weak knockback. The uncharged version of this move is very fast to compensate for the horrible range, and the small status of the spike actually makes it nearly impossible to destroy from the front, potentially making it more “durable” in some situations.

While chimeras can jump to traverse stages with these spikes fine, they actually will sit and wait on top of spikes created with this move when created, getting ready to pounce on anything that comes into range. The move fills up 1/16th of Cornello’s meter, up to 1/8th if fully charged.

DOWN SMASH – HOMING SPIKE

Cornello creates a spike underneath the nearest foe’s current position, shooting straight up. The spike deals 16% and knockback that kills at 150%, and the size, HP, rebound meter filling, and solid status of the spikes increases in an identical manner to the fsmash. This is significantly laggier than the fsmash, even uncharged, given the range of the move. If the foe is off the stage or under it, the spikes will come out of the ledge or under the stage, respectively. While the spikes are solid, they will just become the new ledge if you create them in such a way to “block it”. If you create a spike on the ledge during a time where a foe is on it and they have ledge invulnerability, this won’t hit through it, but will cause them to get pushed back to the “new” ledge created by the spike.

This adds an obvious new option to your camping, and while it obviously can’t hit foes directly off-stage can be an interesting thing to use as the foe comes back to the stage. Even if they can easily recover high to avoid the ledge, they should ideally have run out of jumps so they be impaled upon landing.

UP SMASH – CHIMERA COMMAND

Cornello summons another chimera, but as it is summoned it immediately performs the pounce attack. Uncharged, the pounce is the same as the generic one chimeras will voluntarily perform, dealing 14% and knockback that KOs at 200% while traveling a platform through the air. This is largely used for the attacking portion of the move, as if you use this exclusively to summon the chimera you’ll find that the chimera only has 5 HP until they complete the ending lag of the pounce, after which they become a regular minion. Interrupting the move as the chimera is quickly summoned will result in it immediately dying, unlike the regular version of the summoning on Down Special. That said, the appeal of killing the chimera during the ending lag of his attack can potentially make you personally less vulnerable. If this is used next to a chimera already created, they will keep their durability in-tact for the leap and stand alongside you for the charging, and the move will start up instantly.

Charging the move will increase the distance of the pounce to a mighty leap, potentially traveling the entire distance of Battlefield at full charge and dealing up to 22% and knockback that KOs at 145%. Cornello can also slightly angle the chimera’s leap by about 15 degrees in either direction, also helping give him some good surfaces to bounce his Side Special off of. While using this to camp is stupidly impractical, this is decent at melee range to use the chimera as a meat shield. The low durability also won’t matter much if you send the chimera on a suicide mission to an off-stage opponent.

REBOUND SPECIALS

UP SPECIAL – LEAP OF FAITH

In the air, this is the standard heavyweight recovery you’d expect for Cornello in his rebound form. It’s Dedede’s recovery with heavy buffs, going up 1.5x as high with double the power. Cornello is invulnerable as he ascends rather than having superarmor, and on the way down he has superarmor against attacks that deal less than 20%. Instead of the stars that pop out under Dedede, bits of rubble pop out to either side of him when he lands, dealing 6% and knockback that KOs at 200%. This is a very safe recovery, which is well deserved considering what he has to go through in order to use it.

If used on the ground, Cornello will jump even higher due to having something to actually kick off of. Cornello will jump up a set distance comparably to Kirby’s suplex throws, specifically jumping up into the “magnifying glass” in the top blast zone above him assuming there’s nothing solid in the way. Cornello will jump up incredibly fast at Sonic’s dashing speed, becoming a weak hitbox that deals 7% and knockback that KOs at 250%, again with superarmor to attacks that deal less than 20%. Once he reaches the magnifying glass, the player can control his horizontal movement to move him up to 2 platforms in either direction over .35 seconds before he comes crashing down. As he comes down, he deals 25% and a spike 1.3x stronger than Ganon’s dair, along with making the rubble on either side of him like the aerial version of the move.

While the grounded version of the move isn’t very useful to Rebound Cornello, it can propel Priest Cornello to impossible heights that he could never reach before if Rebound Cornello jumps up there as he transforms back. If you’re not in immediate combat with the foe, this is one of your priorities before shifting back in order to prevent punishment when turning back.

SIDE SPECIAL – SHOULDER CHARGE

Cornello does a shoulder charge forwards, providing an alternative recovery for horizontal movement. He tramples forwards through the air at Captain Falcon’s dashing speed, dealing 19% and knockback that KOs at 125% to anyone who gets in his way. The mad dash can be stopped early at any time, and the earlier it is stopped the shorter the ending lag is. If Cornello just taps the input, he’ll do a shoulder charge motion in place, quite similar to Brawl Wario’s fsmash in appearance and lag. If he charges two platforms or more, the ending lag will cap out at a full second.

Cornello’s horribly mutated arm in Rebound Form is largely a result of his transmutations on his gun, as various gun parts can be seen sticking out of it. The last move you use to enter Cornello’s rebound form will have a visible impact on his arm – lightning/healing will cause it to crackle with red electricity, a gun move will just have a couple more gunbarrels on his arm, and a spike, of course, will have the spike jutting out of his arm. They apply various bonuses to this move in addition to the primary hitbox.

Lightning will cause the move to apply a version of the Side Special that heals the foe for 12% before damaging them for 4% per second for 5 seconds. If you hit the foe with a Side Special in Priest Form while they already have this effect, it will boost the power of the Side Special as if you bounced it off of 3 targets by hitting the foe.

Having some extra machine guns will cause them to spurt out a few bullets for you to aid your charge – you’ll fire 5 bullets a second and each will deal 1% and flinch the foe, making it much easier to hit with your charge.

Having a spike jut out of your arm requires the spike to be at least as tall as Mario in order to do anything. If it is, the spike specifically becomes a grab hitbox that you can impale the foe onto during the move, still dealing 19%. Cornello can still do whatever he wants with a foe impaled on his arm, though they will obviously be instantly released if Cornello shifts back to regular size.

NEUTRAL SPECIAL – STRENGTH OF GOD

Cornello goes to rip a Bowser sized boulder out of the ground with his “normal” arm with about .4 seconds of lag, having superarmor to attacks that deal less than 20% for the duration. If he’s interrupted during the later .2 seconds, the boulder will still get spawned, but he won’t generate a hitbox. After ripping it out, Cornello will bowl the boulder forwards along the ground, causing it to go at Wolf’s dashing speed and deal 17% and knockback that KOs at 140% as it goes. The boulder is solid, but given Cornello can’t throw it through the air it’s not especially scary as an on-stage gimp. The boulder will travel forwards 2.5 platforms on a flat surface, getting weaker as it goes before it slows to a stop. Cornello can much more quickly just pick up the boulder to throw it again, and foes can destroy it by depleting its 40 HP. The boulder will go faster/slower if it’s going down/up slopes, and will increase in power accordingly. The boulder caps out at 28% and knockback that KOs at 80% with 1.2x Captain Falcon’s dashing speed. Cornello –can- potentially launch a boulder into the air by rolling it off of an angled spike from fsmash, launching it into the air by using the spike as a ramp. Of course, this is pretty predictable for gimping.

If Cornello is standing in front of a spike, he will rip it out of the ground very casually with .15 seconds of lag. Cornello can carry the spike around while using his moveset normally, while inputting Neutral Special will cause Cornello to stab in the desired angle with it, dealing 10% and knockback that KOs at 170% for an extremely good “poke” with a full length spike. If he holds down the input for .4 seconds and then releases it, he’ll throw the spike like a spear 3 platforms in the desired direction, dealing 8% and knockback that KOs at 200%. If either of these spike attacks hit a grounded foe, they will get impaled, taking an additional 5% and having to escape at grab difficulty. So long as Cornello throws the end of the spike at the ground, it will end up impaled in the ground, enabling him to reangle spikes as he wishes and enabling him to make a spike ramp for a boulder on demand. Cornello can pick up spikes that have impaled foes on them before adding more creatures to the shish kebab, or just throw it off stage. Cornello can also rip out a spike growing from his mutated arm by using this move in the air.

The boulders can have spikes generated on them by Priest Cornello given they’re solid, and the spikes can be used to help “defend” the boulder for when Rebound Cornello comes back. If Rebound Cornello attempts to pick one of these up, he’ll pick the boulder up by the largest spike, assuming there’s a spike at least as tall as Mario available to use. Attempting to use it as a weapon will cause him to smash it in front of himself like a club with minimal lag. This will cause the boulder to be an immediate hitbox that deals 20% and knockback that KOs at 115% as it hits the ground, then pop off the spike Cornello was using and roll forwards along the ground normally. Afterwards, Cornello will still be holding the spike in his hand.

DOWN SPECIAL – ASHES TO ASHES, DUST TO DUST

Cornello scoops out a portion of the ground in front of himself in the form of gravel, not actually terraforming the stage with this move, before throwing it all forwards a relatively short distance of a platform. The debris deals many multiple hits as it goes forwards, dealing roughly 14 hits of 1% and set pushing knockback over the course of the attack.

If the debris comes in contact with a slope (which he can make with his rebound dsmash), it will slide to the bottom and collect there. Cornello throws about 1.5x Bowser’s size in debris with each use of the move, and it doesn’t go away after being created. Rather than being solid, characters can walk through it with three fourths of their regular dashing speed. If it’s piled up so high that a character is in an aerial state when wading through it, their falling speed will increase by 1.5x while inside of it. The debris can take knockback from attacks, as heavy as Jigglypuff at 80%, but it won’t hurt anybody when attacked in this way. If the knockback doesn’t knock it out of a pit and it lands on a slope, it will slide back down into it.

If Priest Cornello attempts to heal with his Up Special when his rebound meter is two thirds of the way charged, he will absorb a Bowser’s worth of the debris around him, heal 20%, then instantly enter rebound form. If Cornello enters rebound in this way, his mutated arm will have even more gravel around it when he enters that form. This will cause Cornello to shed some of his arm to create a Kirby’s worth of gravel when he hits foes with moves like Side Special that make use of mutated effects on his arm.

If Priest Cornello uses his fsmash or dsmash to create a spike in a pit with gravel in it and he is not in the pit himself, he will instead use his alchemy to fill in the gaps in the ground, terraforming the hole in the ground shut into solid ground, how it was before he terraformed it. Any foes inside will be pitfalled at the top of the ground and take 20%. This is fairly laggy and will need a pretty deep pit filled with debris in order for you to be able to pull it off. This also fills up a third of Cornello’s rebound meter, so if he enters rebound in this way he won’t be able to capitalize on the foe being pitfalled at all. This will give Cornello a “bulkier” arm if it’s the last use of alchemy that makes him enter rebound, identical to the previous paragraph.

REBOUND SMASHES

DOWN SMASH – STOMP OF JUDGEMENT

Rebound Cornello does a large stomp forwards, dealing 20-30% and knockback that KOs at 130-95%. While it’s not the fastest attack, it has superarmor and anti-grab armor specifically on Cornello’s stomping leg, making it easier for him to get the attack’s secondary benefit. Each use of this move makes an indent the height of Mario-Snake and the width of Bowser. The sides of the indent slope down into the pit – you won’t “fall” into this and enter an aerial state at any point, you’re largely just creating slopes with this move. On paper thin platforms/drop throughs, this will bend them. There isn’t really much that needs to be said about the implications of such a move – it’s incredibly beneficial to your boulders, and provides lots of new angles to generate spikes and use your chain lightning. Cornello will run down slopes 1.3x faster with his Side Special. Characters will slide down slopes at Mario’s dashing speed when in prone, making foes who get knocked into prone by a chimera’s pounce more predictable.

For all of the great possibilities this has and how quick it is to use, just keep in mind you don’t want to waste too much of your precious 9 rebound seconds that you take 40% for entering on set-up.

FORWARD SMASH – REPENT

Cornello gets on his hands and knees for the charging animation, furiously gritting his teeth, before smashing his head into the ground. While the move has some very noticeable startup, Cornello has both anti-grab armor and superarmor against attacks that deal 19% or less while in the charging stance and during the move’s start-up. This is extremely powerful on hit, dealing 29-40% and knockback that kills at 90-60% at a 45 degree downward angle, making it incredible to kill foes at the ledge. If the foe hits the ground due to the knockback, they will take a miniature pitfall effect, with their feet getting pitfalled rather than their entire lower torso. They will still take knockback in this state from the move, sliding along the ground, obviously getting freed from the effect if they slide off stage.

Having impaled feet bans the foe from moving or jumping. The foe will not take knockback during this effect (Other than the initial sliding from being hit by the fsmash) unless the knockback would send them at least 3 platforms, in which case the knockback will free them from the ground. After taking the initial hitstun of the attack, foes may attempt to escape this effect at grab difficulty. If a foe uses a leg based attack, the starting lag will be increased by 1.3x, but will cause them to escape the status effect early if they succeed. Using this move again on a foe already smashed into the ground will deal vertical knockback that KOs at 75-40%.

If the foe travels 2.5 platforms or more due to the knockback of this attack along the ground, the pitfalling will be more severe and they will use their regular pitfall animation, unable to attack. This is still only half as difficult to escape as a regular pitfall. If the foe travels an additional 1.5 platforms beyond the first 2.5, they will become completely buried in the ground, with nothing but a pile of dirt to indicate where their character is, with them having to escape at regular pitfall difficulty. Completely buried foes cannot be hit by most attacks, but if Cornello terraforms down with a dsmash stomp he will see them half pitfalled in the ground and be able to attack them normally. Cornello can also stab a spike into the ground and pick the foe out of the ground, impaling them on it.

While the described pitfalling effects are incredibly powerful, few to no stages are long enough to make practical use of this, and the massive power of the attack can work against you by knocking a foe too far away or even off the stage, nullifying the burying effects. This is where you can thank the downward portion of the knockback, though, as foes will stop sliding if they reach the bottom of a pit due to the knockback’s angle. While using this at the bottom of a pit will probably just get you punished as foes will only be pitfalled up to their feet and can still punish you, using it at the top or further away from a slope can let you roll down a boulder or toss a spike down on the foe to impale them before they escape. Because of this, Rebound Cornello actually prefers to be out of a pit most of the time, while Priest Cornello will seek refuge within it at high percentages due to it being harder to KO him and being able to better protect himself with spikes.

UP SMASH – GOD’S PROTECTION

Cornello raises his mutated arm above his head during the “charging” of the smash, causing it to become solid and invulnerable. Like the Side Special, mutations can happen in this move based off the type of alchemy move Cornello used to enter the Rebound Form. If he has extra guns, a few shots will fire out of his arm to juggle the foe lightly in the air above his arm, dealing 8 hits of 1% and flinching. If he has red lightning from Up/Side Special, it will actually crackle a bit above his arm, dealing 10 hits of 1% and flinching while sucking foes in. The reason the lightning isn’t simply better than the gunfire is because there is no hitbox up against Cornello’s arm, meaning while it will suck foes in it won’t hurt those who intentionally come to stand there. A spike, of course, will impale foes and deal 10% to them if it was at least Mario’s height. Having extra debris absorbed into Cornello’s arm will cause any attacks that hit Cornello’s invulnerable arm to cause him to shed an amount of gravel from his arm comparable to the power of the attack – a Bowser’s worth at max and a Kirby’s worth at minimum.

As soon as the charge is released, Cornello moves his arm out of the way, causing anyone standing on it to fall as he goes to do a tremendous headbutt above himself, with the veins in his head visibly pulsating as he does so. The headbutt deals 26-38% and knockback that KOs at 120-75% for an extremely powerful move. This is actually quite quick, too, almost as quick as Dedede’s utilt, the only difficulty being Cornello is so tall it’s rather hard to hit with his balding head. The idea of the move is to catch a foe, interrupt their attack by trigger landing lag supplemented by a mutation bonus on your arm, then hit them with the headbutt when they’re sitting ducks. Of course, the first half of the move is optional and you can just skip straight to the headbutt if you wish.

Note that if Cornello throws a spike into the air, he can catch it with this move in order to impale it into his arm, potentially skewering a foe on it. It can be a nasty surprise to grab a foe with it who thinks they’re safe in the air by producing artificial ground.

PRIEST AERIALS

NEUTRAL AERIAL – DIVINE SHIELD

Cornello performs some alchemy with his cane in order to produce a large amount of red lightning, crackling around himself in a ball shape as a “shield”. This lasts for about half a second, stopping immediately if the brief landing lag is triggered. The shield deals 6% and knockback that KOs at 250% on hit, rather unimpressive for how long and awkward the hitbox is. If Cornello exchanges blows with another aerial with this attack (Due to aerials having no priority system), the foe will take a small amount of extra damage and knockback in addition to the move’s natural power, one quarter that of their own attack. The foe will take their extra damage over time, at a rate of 2% per second. If Cornello hits somebody taking this damage with Chain Lightning, the damage will be “cured” from them and added to the power of the lightning. If Divine Shield is up when Cornello gets hit by Chain Lightning, it will bounce off of him without him absorbing it, and it will count as if it had bounced off of two surfaces, getting a small boost from the Divine Shield.

This move by default fills up an eighth of Cornello’s rebound meter, but if he clashes with another attack it will fill up an additional amount. For each 4% the enemy’s attack did, the meter will fill up by an additional one fifth. With the various Chain Lightning interactions, it’s possible to get a very powerful beam that can get you to Rebound form fast.

FORWARD AERIAL – SHOTGUN BLAST

Cornello transmutes his cane into a shotgun and fires a close range shot in front of himself, dealing 17% and knockback that KOs at 200%. This starts up very quickly making it a very appealing move regardless of long ending lag. The base knockback on the move is very good despite poor knockback growth, making it an excellent way to get Priest Cornello some space or more offensively to knock the foe off-stage to start a damage racking session.

Said long ending lag consists of Cornello taking the kickback of the gun backwards, propelling himself backwards roughly half a platform’s distance. His back is a weak hitbox that deals 3% and knockback that KOs at 500%. This gives Cornello some form of recovery without having to make use of his rebound form, with the hitbox on his back largely functioning as recovery self defense. It may not seem like much, but Cornello can use the move infinite times in the air.

Using the shotgun fills up one eighth of Cornello’s rebound meter, and that can obviously bypass the ending lag. Having the shotgun transmuted into Cornello’s arm when he uses his Rebound Side Special will enable him to shoot the shotgun by pressing the A button, generating the fair’s shotgun hitbox in front of him while slowing down his movement by a third for 0.2 seconds due to the shotgun kickback in order to potentially catch foes off guard. When the shotgun is used with the rebound usmash, no hitbox occurs unless the foe specifically steps onto the shotgun jutting out of Cornello’s arm, at which point it will fire. The shotgun is located on the far side of his arm, enabling him to catch a foe attempting to DI away from where he intends to headbutt.

BACK AERIAL – CANE DRAG

Cornello extends out his cane behind himself and attempts to hook people with the cane’s crook before raking them in to himself, dealing 7 hits of 1% and set dragging knockback. This is a very spammable attack and one of Cornello’s fastest, and it’s an interesting option to spam when it doesn’t raise your rebound meter. At a glance, you would think this move would be terrible defensively due to bringing foes up to Cornello in point blank range. However, if Cornello uses his DI to go towards the foe as he brings them to him, he can go past them and end with them in front of him, in perfect range for his shotgun fair which can create the space you need. This helps a lot just on the stage, but also helps significantly with defense against gimping. Even if the foe dodges the shotgun blast, they’ll be out of your way and you’ll be able to recover back to the stage in safety.

The followup to the bair is so obvious that foes will quickly learn to expect it and will often just instinctively dodge after you get in position for the second move. This can actually be a decent excuse to try to perform set-up in the foe’s face by summoning a chimera if you predict a dodge against an especially aggressive enemy. This is made more practical when you take into account that even if the foe hits you, the chimera will still get summoned. If the foe tries to outspeed your fair with their quickest poke, you can attempt to counter it with the nair.

UP AERIAL – TOWER OF BABEL

Cornello looks above himself and grins as he shifts his cane around to hold it upside down, then starts to extend the bottom of the cane out rapidly. The cane extends out extremely quickly a massive distance, potentially going up 2.15 platforms over .3 seconds if you hold down the button the whole time. The cane isn’t exactly a powerful blunt object by itself, though – the force of the attack comes from the speed at which it’s extending, meaning that it’s more powerful the further it has extended out. Using the move at point blank range is very weak, dealing 3% and knockback that KOs at 270%. At the top of the cane, the power caps out at an impressive 19% and knockback that KOs at 140%.

Keep in mind that only the top of the cane is a hitbox, though, making this awkwardly specific to hit with. The move’s ending lag increases the further you extend out the cane, going for half as long as you extended it out. Cornello will automatically stop extending it if he hits somebody. This fills Cornello’s Rebound Meter by anywhere from 1/16th to 1/7th based off how far he extends the cane, and if it’s the move that makes him enter his transformation will give him extra debris on his arm.

It is very difficult to get the full potential out of this move and it will often go ignored for new Cornello players, but having a pit greatly helps this attack. Rather than getting the foe higher into the air, you can simply get lower down, making the move an excellent way to poke at foes approaching into said pit. Another useful scenario for the move is to punish foes who recover high, who are terrified of your dsmash spike punishing them as they attempt to reach the ledge.

DOWN AERIAL – FALL FROM GRACE

Cornello extends his cane below himself as he transmutes a small spike out the end of it. He goes into a vertical position in mid-air as he goes into a quick stall then fall, headfirst. This move does a fairly unimpressive 11% and downwards knockback that would never kill if it weren’t for the fact it was downwards, enabling it to gimp on rare occasions. If Cornello actually hits someone, he’ll bounce off of them lighly, and after falling the distance of 2 platforms Cornello will automatically exit the stall then fall, making this less suicidal than most. This can actually see some use on-stage despite the horrible landing lag if you have a pit created by Rebound Cornello, as well if Cornello is very high in the air from Rebound Cornello’s Up Special.

This move fills a tenth of Cornello’s rebound meter. If it happens to be the move that triggers the Rebound transformation, it will generate a Mario sized spike out of Cornello’s arm like with the fsmash and dsmash. More interestingly, Cornello will actually transform as he uses the move. This means Cornello will not gain any invulnerability as he transforms, but the hitbox will stay out as Priest Cornello transitions from using his dair into Rebound Cornello’s dair. The cane will get absorbed into Rebound Cornello’s arm, punching downwards. The mutated arm will form very quickly to create the hitbox of the rebound version, with the rest of the body following along over the usual duration of .75 seconds. See the rebound dair for more details.

REBOUND AERIALS

DOWN AERIAL – GOD’S RIGHT HAND

Cornello goes vertical in mid-air and punches downwards with his mutated arm as he descends in an extremely quick stall then fall. Cornello’s fist deals 25% and a spike 1.4x as strong as Ganondorf’s, and his arm is superarmored against attacks that deal 19% or less. The landing lag of this is quite bad, as you’d expect. For a brief moment, Cornello stands upside-down, supported by his arm, before falling over into prone. You can choose which direction Cornello falls over in if he’s not on a slope where gravity dictates which way he must fall, and he will gain complete superarmor and anti-grab armor as he falls. Falling over deals 20% and knockback that kills at 100%. While being on a slope makes you a bit more predictable due to having to fall in one direction, you’ll slide down the slope while in prone to potentially make yourself less vulnerable.

If Cornello has a shotgun in his arm, it will fire in the opposite direction of the one Cornello falls in, generating the usual shotgun hitbox, while causing him to fall over much faster. If Cornello has red lightning, it will crackle and deal 10 hits of 1% and flinching around his arm when Cornello triggers the move’s landing lag, making it take longer but better defending him. If he has extra debris around his arm, a significant amount of it will fall off, a Bowser’s worth, not actually protecting Cornello at all but producing a very large amount of it. The debris gives Cornello further incentive to land in a slope, as it will cause all of to tumble down to the bottom of the pit. If he has a machine gun, it will fire several bullets as he descends during the stall then fall all the way to the ground, dealing 8 hits of 1% and flinching per second to try to stun them for Cornello’s fist to hit them.

If Cornello has a spike on his arm, it will specifically get fired out of his arm towards the ground, tip first, being as powerful of a hitbox as it is when thrown normally and potentially impaling foes who are on the ground. The spike will get impaled into the ground upside down with the flat side pointing up, but assuming Cornello is allowed to finish the move he will smack down the spike with his fist, driving it completely into the ground. Anybody who was impaled by the spike will get pitfalled inside of the stage while taking 29%, though the move’s ending lag means Cornello will rarely be able to exploit their stun. This is more of a way to get the most bang for your buck damage wise than anything else, in case their percentage is still low. In addition, even if no foe was on a spike, this can function as a way to “conserve” your spike so the foe can’t destroy it, enabling you to dig it up later with Rebound Down Special/Down Smash. Cornello will also fall over as soon as he finishes driving the spike into the ground, meaning his hurtbox will be a bit higher into the air during his vulnerable period.

NEUTRAL AERIAL – BALL UP

Cornello curls up into a ball and spins, dealing 12% and knockback that KOs at 170%. This is actually a fairly weak move by Rebound Cornello’s standards, but the appeal of the move is it grants complete superarmor for the duration. The starting and ending lag is quite brief, with the superarmored duration providing the majority of any “lag”. Should Cornello need one in Rebound form due to his size, this is a very good panic button.

While the move’s landing lag is normally bad, if Cornello makes contact with a slope the move will continue as he rolls down it. This provides him with a fully superarmored approach, enabling him to put this move to more offensive use. While spammable projectiles are typically far too weak to be a concern for Rebound Cornello’s health, enemies can use them to stall Cornello’s time in rebound form. Good approaches like this move and the Side Special are needed, as Cornello has no time for such childish games. The Side Special is the better move if you actually intend to hit the foe with the attack, while this grounded version of the nair functions better for clearing space.

FORWARD AERIAL – KICK OFF

Cornello tucks in his legs before shooting them out in front of himself at a 75 degree angle to do a fierce kick at foes with both his legs. The stomp deals 18% and knockback that would kill at 140% if at a more regular angle, but it’s more comparable to a spike when it goes down at the same 75 degree angle as the kick. The move is about as laggy as Ganondorf’s down aerial, and looks a bit similar to it. While the move is aimed downwards in addition to forwards, most enemies are so short in comparison to Rebound Cornello the move’s aim is doing you more of a favor if anything.

If the landing lag is triggered during the stomp (Not when Cornello tucks in his legs), Cornello will kick off the ground, propelling him at the same angle backwards into the air a platform with almost no lag at all. Despite having no bonus superarmor, the move is a surprisingly safe one to use against grounded opponents. Cornello tucking in his legs at the beginning will remove the portion of his hurtbox that grounded foes could reach, and should foes dodge he’ll kick off the ground back into the air by the time they come out of said dodge.

The move has some interesting applications on slopes. Obviously you can just keep your back to a slope to avoid hitting the ground, but kicking off the slope can allow you to propel yourself at different angles, with spikes providing even more variety. You can potentially punish people for rolling by kicking off one side of the slope to the other, then rolling down on top of them with the nair, all while staying fairly safe and not over committing yourself.

BACK AERIAL – ELBOW DROP

Cornello extends out his arm behind himself as he turns to look behind himself before attempting an elbow drop on the foe with his regular arm. Most of this move’s rather large lag is in the start-up, though Cornello’s upper torso gains superarmor against attacks that deal 12% or less after the first 10 frames of the move until the hitbox comes out. On contact with Cornello’s elbow, the foe is powerfully spiked, taking 23% and a spike 1.5x as strong as Ganon’s dair straight down.

While the move normally has very little ending lag, the landing lag on the move is quite extensive. Triggering the landing lag during the starting lag will speed up the move and cause the hitbox to spawn as Cornello elbow drops the ground, though Cornello will be suffering lag longer than the starting lag while on the ground.

While both versions of the move have obvious weaknesses, using this move next to a ledge or slope can make it more threatening as you don’t have to immediately commit to one or the other. If using it next to a slope, you can DI away from the slope towards the hole in the middle to keep it going if you predict a dodge. If using the move next to the ledge, you can do something far simpler – cancel the move by grabbing the ledge. If Cornello hits the ledge during the starting lag/hitbox animation, he’ll slam his elbow against it as he grabs it with his fist, spiking anybody on it without ledge invulnerability. This technique can be an excellent transition from Priest Cornello’s edgeguarding game – the priest knock the foe off the stage and transform while they make their way back to not allow the foe any free set-up time, then Rebound Cornello can attempt to wreck the foe who’s likely most of the way back by that point with his bair on the ledge.

UP AERIAL – GRIND TO DUST

Cornello turns to face the fore/background as he raises his hands above his head. His regular arm gets ready to catch the mutated one as it winds up the punch, then it smacks into Cornello’s open hand with great force. This performs yet another spike, dealing 12% and a spike on par with Rob’s dair. While Cornello has his usmash as an excellent defense against enemies approaching him from above, his uair allows him to knock foes back down into his comfort zone if he wants to take the extra risk for a more offensive approach with potential follow-ups. Cornello is very aware of how large he is in this form, and is intelligent enough to aim most of his attacks towards the ground to hit the pipsqueak SSB4 newcomers.

The move has a large amount of freeze frames when Cornello hits a foe with this move, “stunning” both him and his enemy in place. Rather than for dramatic effect, this is done so that an effect from Cornello’s mutated arm may be applied to the foe after hitting them. The machine gun simply adds an additional 9% as a few bullets are shot out of Cornello’s palm at the foe during the frames.

The red lightning will apply itself to the foe, leaving Cornello’s arm as it shocks the foe squished between his hands, but treating the foe as if they had been hit by Priest Cornello’s side special after it’s already bounced off two entities. If Cornello is going to downshift back to his regular state soon, there’s little better use he can make of it than this.

If he has extra debris in his arm, then a Wario’s worth of debris will get knocked off of his hand that will fall down after the foe as they take their knockback, briefly becoming a hitbox that deals 8% and knockback that KOs at 190% on the way down as an obstacle before losing its hitbox status. The debris gives Cornello some pressure on the foe to assist in his follow-up.

If a spike is growing out of Cornello’s arm, the foe will knock the spike off of the arm due to how forcefully their body is shooting downwards from the primary attack. Based off the size of the spike, the foe will take an additional 2-6%. If the spike was at least as tall as the foe was wide, then only a portion as large as the foe’s body will be taken off of his arm. The foe will enter prone on top of this spike, and if the spike hits a slope it will slide down it to the bottom at a fairly brisk pace. If the spike/foe is very small, it’s possible they’ll be able to destroy it on the way down with a get-up attack. Perhaps most impressive is the move’s potential off-stage, as the foe will have to get up from prone before they can attempt to recover. Of course, the foe will be granted the use of their first jump due to having ground to jump off of, but it’s a very respectable trade. If the spike is at least as wide as Mario, Cornello will be able to kick off of it with his fair, enabling him to quickly come back after the foe if he misses his gimp attempt.

The shotgun will attempt to shoot the foe as they get knocked down and fly past Cornello’s arm, just as powerful as it usually is dealing 17% and knockback that KOs at 200%. The shotgun generally fires too quickly before the foe is sent down to it, meaning that Cornello will generally want the foe at a high percentage. Fall speeds and weight factor into the equation of how fast the foe will reach this point – one thing Cornello can do to have some control over this is to perform the move inside of a pit of gravel, which will greatly increase the foe’s falling speed. Inside of a pit, the foe also won’t get knocked as far away by the high knockback when they hit the side of a slope, allowing Cornello to better pursue them.

PRIEST GRAB-GAME

GRAB – CHOSEN EMISSARY

Cornello extends out a hand for one of the best physical grab ranges by Brawl standards, but with awkward lag attached comparable to Falco’s grab. Upon successfully grabbing the enemy, Cornello restrains the foe by putting a hand on their shoulder.

Cornello can grab chimeras, allowing him to perform transmutations on them with his throws. If a foe is within range of the grab, Cornello will of course ignore any chimeras, so you don’t have to worry about them getting in your way.

PUMMEL - TRANSMUTE

Cornello’s hand pulsates with red electricity, dealing 0.5% per pummel in a spammable pummel on par with Lucario’s. Each pummel fills Cornello’s meter by 1/20th, serving as a way to potentially transform while having the foe already grabbed. The grab escape difficulty increases to 1.5x during the time Cornello is transforming, though even with this buff foes will generally always escape before you reach your second form. This is still helpful against foes who benefit from set-up time, though, as you can prevent them from making use of that time while you transform.

Used on a chimera, this will heal it by 0.5% with each use of the pummel while filling up your meter at a slower rate, 1/25th per pummel. Normally when transforming with the pummel, you will just gain lightning as your arm mutation. If you have given the chimera some kind of transmutation with your throws and then transform, though, Cornello will absorb the chimera into his arm and gain all mutations they have on his arm. If the effects of the transmutations would contradict each other in moves such as the Rebound Down Aerial, only the effects that can stack together will happen. While having all of the Rebound effects on a move such as the Up Smash may sound very powerful, keep in mind the chimera is quite easy to kill as you just waste time giving it transmutations with throws, this will kill that minion, and you’re only gaining these effects for 9 seconds anyway.

FORWARD THROW – EXECUTE

Cornello stabs the foe with his cane, knocking them into prone, then steps on their torso as he transmutes his cane into a shotgun. He then shoves the shotgun into the foe’s face before firing, dealing 11% and with knockback that kills at 250%, but very high base knockback. While the knockback will most of the time appear to be horizontal, it is actually at a 45 degree downward angle which can knock foes into slopes, and, more importantly, score kills when used at the edge. While this requires very high percentages to kill outright, it is Cornello’s single best move for beginning an on-stage gimping session. Cornello’s ability to make spikes come out under/the side of the stage if the foe is next to them can actually be useful in this scenario.

Cornello knocking the foe into prone at the start of the move may at first appear aesthetic, as the following shotgun blast will knock the foe out of prone immediately. If you knock the foe into prone on a slope, though, Cornello will slide on top of the foe briefly before firing. This enables Cornello to get into a pit while firing the foe out of it, serving as a superb reset into a defensive position. Be aware this powerful new attack gives a lot of ending lag, so you’ll have to cover for the Chimera during its downtime. The move fills up 1/10th of Cornello’s rebound meter.

If this is used on a chimera, Cornello will transmute a shotgun barrel into the mouth of the lion. When the lion bites the foe, they will fire the shotgun, dealing 17% and knockback that KOs at 200% like in the fair. The kickback of the gun blast will knock the lion back a platform’s distance. Aside from a generic buff to the lion’s attack, this can help lions recover when suicidally chasing foes off-stage, as foes will inevitably attempt to bait them for easy kills in this way.

BACK THROW – SMITE

Cornello channels yet more red lightning into the foe before sending an elongated blast of lightning to knock the foe behind him to deal 5%. This does a minimum knockback of a platform, after which point the foe will take knockback that KOs at 190%. Beyond the initial 5%, the foe will continue to crackle with red lightning for 10 seconds, during which time they will take 1.4% per second. If the foe hits another character or minion while they have this status effect, though, it will instead be passed on to that character. If Cornello can keep away and evade being hit for all that time, though, he’s looking at a damage output of 19% for pulling off this throw.

While this only fills up a mere 1/12th of Cornello’s rebound meter by itself, if Cornello hits the foe with Chain Lightning their damage will simply get added to the beam’s power and they will lose the ability to pass it around by hitting people. Not only does the foe have to go out of their way to hit Cornello, but they have to evade Chain Lightning on the way. While they can quite easily pass it off to a Chimera, this will grant Cornello the ability to easily “collect” the power of the lightning by hitting his minion with the Chain Lightning. Obviously using this throw on a chimera directly will just apply the effect to the chimera immediately, with the end goal of getting the chimera to land an attack on the foe to spread the lightning.

Not only does the foe have to watch out for Chain Lightning as they come to pass the lightning to Cornello, but Cornello’s nair can block the passing of the lightning to some degree. If a foe with this status effect hits Cornello, they will not pass the effect to Cornello but will instead have a quarter of the damage of their attack added to the length of their effect. Adding in the regular 1/4th of damage a foe instantly takes from attacking Cornello in his nair, and they’ll eventually be taking half the damage of their attack in total.

UP THROW – SOLIDIFY

Cornello transmutes a geyser of sand 1.2x Ganon’s height up underneath the opponent to propel them into the air. This deal 13 hits of 1% and pushing knockback into the air, with the last hit dealing vertical knockback that kills at 260%. While the knockback is weak, the sand geyser will push the foe up 1.3 platforms before they even take said knockback. Cornello’s rebound meter will fill up by 1/8th for performing this attack.

As the foe rides the sand geyser, some of the sand will stick to their body and start to harden into stone, encasing small portions of their body. This will give the foe the effect of traveling in debris from the Rebound Down Special, decreasing their dash speed by 1/4th and increasing their fall speed by 1.5x. This can stack if the foe is standing in actual debris. Foes can knock off the debris by attacking it like a leeching Pikmin, with the debris having 10 HP. It will take the knockback of the foe’s attack as they knock it off and become a small amount of regular debris after that point. If you used the move in a pit and foes attempt to remove their debris immediately, it will more than likely roll down into said pit as a nice small bonus.

If used on a chimera, they will have to have the debris knocked off of their bodies. Aside from creating debris, this serves as a small buff of 10 HP to the chimera, as they will not take damage from attacks that knock it off of them. The debris will be primarily located on the chimera’s torso and will function as a drop-through platform. If a foe comes to gank you off-stage and a chimera is chasing them like the suicidal idiot it is, you can potentially make use of the chimera to recover. Even better is that you can produce spikes on the chimera’s back. When a chimera is leaping at the foe, possibly through your usmash command, you can use the dsmash to make the spike come out from underneath the chimera’s belly to stab at the foe. Be aware if you make spikes underneath the chimera, though, that they will break off when it hits the ground (They can still be picked up by Rebound Cornello later).

DOWN THROW – BED OF SPIKES

Cornello produces 5 minimum charge spikes as powerful as the fsmash/dsmash in front of himself, then slams the foe down into them, dealing 10% and knockback at a slanted primarily vertical angle that kills at 200%. The 5 spikes will stick around as a weak trap afterwards like regular uncharged spikes, dealing 5% and weak knockback.

This throw can be looked at as a “free set-up” throw, but just 5 uncharged spikes by themselves don’t have all that much use. If Cornello uses an fsmash/dsmash where an existing spike that isn’t fully charged, though, it will extend out from the spike that’s already produced. Not only does this significantly decrease the lag, the resulting spike will be better protected by the small spikes surrounding it, largely forcing foes to get rid of them first to get rid of the spike that actually matters, during which time you can attempt a dsmash to extend those spikes. The move fills up a tenth of Cornello’s meter, and if this move triggers Cornello’s transformation he will have a fully charged spike growing out of his arm, combining the 5 smaller spikes into one.

If this is used on a chimera, the spikes will come out of the chimera’s stomach and impale into the ground, rooting the Chimera to that point. This turns the Chimera into a trap rather than a minion, preventing it from killing itself or taking knockback. It can also stay to be in a more reliable position for set-ups/as a Chain Lightning bumper, as well as keep it “safe” if you’re trying to dump multiple transmutation throws into it. The lion’s pounce attack will still be just as powerful, but will just be a swat of the chimera’s front claws in place. Performing a usmash command on a chimera affected by this will have Cornello release the chimera from the spikes with no additional lag. The 5 small spikes can also be unearthed at a later time by Rebound Cornello.

REBOUND GRAB-GAME

GRAB – IRON GRIP

Cornello goes to grab the foe with both his hands. The grab is Dedede’s with 1.2x the range, making it as fantastic as you’d expect. This is only with Cornello’s standing grab, though, as his dashing grab is much laggier, meaning you’ll largely be using the standing one exclusively. While the standing grab is still great, it’s a bit of an issue in making Cornello predictable when he only has 9 seconds to use it.

PUMMEL – CRUSH

Cornello squeezes the foe in a laggy pummel dealing 4%. Despite the power, the lag makes the pummel rather inefficient compared to that of a normal character’s. However, each pummel increases the grab escape difficulty by 1.15x, potentially allowing Cornello to keep a foe restrained if he’s about to deform into his regular form if the foe’s at a high percentage. Of course, the foe can still escape the grab during the time where Cornello changes back.

FORWARD THROW – CAST OUT

Cornello encloses his hands around the foe, obscuring their character model as he shakes them inside of his hands like a pair of dice. He then opens up his hands to let the foe tumble forwards, dealing 9% and strangely weak knockback that KOs at 250%. Foes will briefly enter their reeling animation as if they were footstooled, leaving them vulnerable. Cornello is able to capitalize on this extremely well, as this throw is quite fast, even by the standards of a regular character. Aside from using this as a set-up throw, this makes the throw quite useful when time is such a valuable resource for Rebound Cornello.

Cornello’s height means when he releases foes, they won’t immediately go and tumble along the ground with downward angled knockback, starting in the air. Outside of very low percentages, though, foes will hit the ground so quickly that Cornello won’t be able to make use of the footstooled effect. Sending them into a pit from the outside will keep them ripe for punishment for long percentages to come, though. The move can even set-up for the kill, beginning a gimping session at the edge.

UP THROW – ASCENSION

Cornello restrains the foe in such a way to perform a suplex on them before leaping high, high into the air at a speed a fair bit slower than his grounded Up Special. He goes up into the Smash Bros “magnifying glass” at the top blast zone like Kirby’s throw before coming back down to the ground, dealing the foe a minimum of 10% and knockback that KOs at 190%. The more distance Cornello had to travel to reach the top blast zone with this move, the more powerful the move becomes. Each Ganondorf traveled increases the power of the move by 4% and makes the move’s knockback to KO 10% sooner. Cornello will fall through drop through platforms on the way down.

This will be Cornello’s strongest throw in raw power if used in a pit, but starting the move on lower ground causes the move to take longer. While lag on throws is not normally a concern in 1v1, it means Cornello will have to aggressively grab at the foe early on in the transformation, and in a pit no less, if he wants to pull off the move with the full potential. While the knockback buff is nice, you’re mainly in this throw for the damage, as being lower when the foe actually takes their knockback somewhat negates the knockback boost anyway.

DOWN THROW – BURIAL

Cornello throws the foe to the ground, dealing 4%, leaps up and stomps on them with both feet, dealing 6%, then does it again for another 6%. This throw creates a Ganondorf deep “pit” as if Cornello had used his Rebound dsmash on the location of the throw, and will leave the foe at the bottom of that pit in the prone position. Due to foes sliding down the sides of a pit while in prone, it makes foes rather easy to tech chase if they attempt to roll up from the position, with Cornello’s primary techchasing moves being the nair and fair. The nair will enable Cornello to ignore get-up attacks with his superarmor and quickly roll to either direction the foe rolled, getting beaten out by the foe just standing up from prone immediately.

Aside from providing offensive pressure, which the move is great at, the move is very key because it enables Cornello to set-up while still attacking the foe. While this is something any character with set-up would love, Cornello screams for a move of this kind with his very strict 9 second schedule.


BACK THROW – OPEN ARMS

Cornello holds the foe in one hand before extending out both of his arms and spinning in place. After building up some momentum by spinning for some lag, he releases the foe as the arm holding them goes behind where he was originally facing, sending them flying with 12% and knockback that KOs at 130%. This is Cornello’s direct kill throw, and will deal 20% and knockback that kills at 110% to outside foes in a FFA.

Cornello’s height enables this move to become very convenient for him. While the knockback foes take is horizontal, they’re elevated to Cornello’s shoulder height before they take it. Cornello’s pits often won’t be that deep, meaning they’ll be lower than Cornello’s shoulder height. This lets you knock a foe directly out of a pit with a KO move without having to resort to something like vertical knockback, which will be penalized by the foe being lower down in the stage due to being in a pit. In the event you have a pit that’s so deep Cornello can’t throw the foe out of it with this move, you’d want to be using the uthrow anyway.

PRIEST STANDARDS

JAB – QUAKE

Cornello taps his cane on the ground, causing the ground a platform’s distance in front of himself to lightly shake. This is not forceful earthshaking that knocks people into the air – it simply slows the movement of enemies by a quarter while dealing 9 hits of 1% per second. This doesn’t flinch enemies, but every fourth hit will always cause enemies to trip as a small ripple goes through the ground. Each of the 9 hits per second fills Cornello’s rebound meter by 1/60th.

Simply using this on foes approaching you will cause anybody with half a brain to jump, or simply roll past the ripple as it shows up. This move has very little lag, though, with the portions of the move that aren’t the tripping essentially functioning as the move’s “lag”. Using this on a foe not impeded in any way can be used to try to bait some kind of punishable action.

Where the move truly shines is on opponents that are coming out of the air. You can “charge” the move in advance to trip them the moment they touch the ground, getting foes who recovered high ready for punishment. This will also wrap around edges to hit the ledge. The damage will still hit foes with ledge invulnerability, while the ripple will deal light downwards knockback to hit foes off the ledge if it connects.

DASHING ATTACK – RUN AND GUN

Cornello stops using his cane as a walking stick in his dash, lifting it up and transmuting it into a shotgun as he turns behind himself. The move deals 11%, with the usual knockback that KOs at 200% with high base knockback. Even should the move miss, it’s useful for running away considering it propels Cornello forwards a little under Bowser’s width. Cornello’s body deals 3% and knockback that kills at 400%, just so you don’t look like an idiot when the foe rolls in front of you with the move. This is a keep dashing dash attack, enabling Cornello to fire behind himself at will when fleeing from enemies. Cornello’s dash will be slowed briefly as he transmutes his shotgun back into a cane to prevent the move from being a faster method of transportation than just dashing normally.

The frail Cornello will fall onto his stomach when this move is used on a slope due to the force of the kickback. This can actually assist Cornello by enabling him to “dive” back into a defensive position pit, as sliding down a slope is faster than his rather crippled dash speed. The move also fills 1/8th of the Rebound meter, meaning if Cornello transforms because of this move he can potentially slide down a hill to “chase” a foe while transforming.

FORWARD TILT – HAND OF GOD

A hand of earth rises from the ground in front of Cornello. It arcs forwards as the “arm” behind the hand extends with it before coming back down to smash into the ground in an “arch” shape, hitting foes about a Wario width in front of where Cornello was standing. The hand is a hitbox throughout, dealing 6% and knockback that KOs at 275% in the direction the palm of the hand was facing. The hand and arm crumble to dust after the move is completed.

Cornello can hold down the A button to enable the arm to extend upwards further before completing the arch. At maximum, this will cause the hand to reach 1.5x Ganon’s height into the air and hit 1.2 platforms away from Cornello. This is impressive in how fast it is, but of course leaves a gaping blindspot on the ground for the move. The higher the hand was before it started to come down, the more powerful the move becomes as it does so, dealing up to 14% and a spike on par with Rob’s dair. Cornello gains anywhere from 1/16th to 1/9th of Rebound meter, gaining it progressively as the move “charges”.

The arc of this move provides useful for a multitude of purposes. It’s great at hitting enemies approaching downwards into a pit when you’re lower down, hitting foes jumping over a pit or even just a spike to reach you, and of course serves as an excellent punisher at the edge, especially on enemies recovering high.

UP TILT – SAND GEYSER

Cornello taps his cane on the ground, then .4 seconds later a geyser of sand 1.2x Ganondorf’s height erupts at that position. The sand geyser deals 13 hits of 1% and flinching as it pushes foes to the top of itself, with the last dealing vertical knockback that KOs at 260%. Cornello is free to move after the move’s very brief lag, waiting for the geyser to show up. If he taps the ground with his cane in the same position before the geyser shows up, it will double the height the geyser goes up and add an additional 5 hits. Foes will go up the taller sand geyser more quickly so they can’t just DI out. While the knockback is terrible, it can be enough to eventually kill enemies when they’re taking it at the top of multiple sand geysers. The move boosts the rebound meter by 1/16th.

While Cornello can only stack 2 sand geysers in the same position with this move alone, he still has enough time to grab a foe. If Cornello performs his uthrow when a sand geyser is about to erupt, the uthrow and utilt(s) will combine their power as if the uthrow was a “bonus” utilt. The uthrow will also cause additional portions of the foe to solidify. Each extra sand geyser will slow the foe’s movement by an extra 1/6th, while their falling speed will be increased by an additional 1.2x. Each extra portion of debris hardened on the foe’s body requires them to knock it off with an additional attack, creating another portion of debris to boot.

The utilt takes much too long to start-up to use as an offensive measure in most cases, and actively attempting to get the utilt/uthrow combo is laughably predictable. It functions as a great defensive measure, though. If a foe is approaching and about to reach you, you can use the utilt and step behind it to use it as a barrier. Even if the foe will get past the geyser before it erupts, you now have a big juicy reward to grab them at that position as they inevitably come past it. You can stack both utilts in the same position if you’re feeling overconfident, but placing two geysers slightly away from each other foes to approach you from will give you significantly more leeway in where you land the grab. Note that the geysers will erupt directly upwards regardless of whether or not they’re on a slope.

If a spike is buried underground for any reason (Caving in the ground with rubble, driving it in with rebound dair, etc), using the utilt or uthrow will cause the spike to get shot up out of the ground. The tip is just as powerful as always, and it will hit anybody hit by the geyser. The geyser will also cause the spike to flip over as it reaches the top, causing the spike’s tip to still be a hitbox as it comes back down. Larger spikes will retain their solid status during all of this, so even if the foe isn’t hit it will prevent foes from immediately rolling past the sand geyser, getting caught in it as their roll gets stopped short. Rather than just “running”, this version of the move largely will just have Cornello wanting to dance back and forth where the eruption happens to bait enemies.

DOWN TILT – QUICKSAND

Cornello causes the ground a Wario’s width in front of himself to start sinking for a very brief period over .4 seconds before making the ground solid again. Any foes hit by this attack will take 8 hits of 1% and flinching over the course of it before getting their feet stuck in the ground. Foes can still attack/dodge/etc from this position, but not move or jump until they either escape at grab difficulty or use a leg based attack with 1.3x the starting lag. Taking knockback from this position that would knock them back a platform or more will also release the foe. Using the move on a foe already caught in this effect will deal them knockback that KOs at 220%.

The most obvious follow-up to this attack is an fsmash or dsmash, as even if the foe dodges the primary hitbox they will automatically be hit by the spike tip’s passive hitbox afterwards, while also granting you a free spike in the process. The move fills 1/6th of Cornello’s Rebound meter, and if he hits a foe and transforms it’s ideal since they’ll be delayed from running away from him while he hulks out.

The move will cause spikes in the area of effect to sink into the ground Mario’s height. Larger spikes will still keep their HP despite looking like shorter spikes, and this actually makes them more obnoxious to destroy as foes have to aim multiple attacks at the ground. You can also bring spikes completely underground for you to use with either your utilt or Rebound Cornello. The move is particularly nice to use against a foe on the opposite side of a spike as yourself, as the spike should ideally block some of their attacks as you use the dtilt before functioning as ammo in a utilt followup. When the foe’s locked in place, it also becomes much more feasible to perform the utilt/uthrow combo.

REBOUND STANDARDS

JAB – STREGNTHEN FAITH

If the button is simply tapped, Cornello will punch forwards with his mutated arm, quickly dealing 9% and knockback that KOs at 160% in a very reliable spacer. If Cornello mashes or holds down the A button, he will flex his mutated arm for the duration, powering up the punch to come. Cornello can charge the punch for up to a second. At max charge, the punch deals 19% and knockback that KOs at 90%.

Based off what Cornello has on his mutated arm, different effects can happen if the move is charged. The shotgun is the simplest, with it firing as the punch goes off in the opposite direction in order to make the force of Cornello’s punch more forceful and have 1.3x the power. This slightly increases the ending lag, but the shotgun will not fire if the move is uncharged.

With rubble on his arm, it will fall off it as he charges, creating falling hitboxes below his arm in front of himself that deal 12 hits of 1% and flinching over the charge’s duration, stunning foes for the punch. If Cornello releases the jab and punches as the rubble is falling, he will instead knock some of it forwards 2.5 platforms as a small stream of projectiles.

A spike on Cornello’s arm will get shot up out of his bicep during the charging, skewering enemies as if it were thrown. You need larger charge to shoot larger spikes out of your arm, requiring full charge for a fully charged spike. The spike will skewer enemies like when picked up and thrown, but will go much faster (In exchange for more lag and having to go straight up). When a foe is approaching you from the front in the air, this gives you responses for if they both jump towards you directly or over your head entirely. Charging the move can also function as a decent fake out as you fire off the move early in order to avoid shooting your spike.

If Cornello flexes with machine guns attached, the pressure put on them will cause them to explode if the move is fully charged, dealing 23% and knockback that KOs at 70%, while dealing Cornello a minimal 5% in recoil penalty. The hitbox will be Cornello’s entire arm as he releases the punch and will linger for quite some time. If you only partially charge the punch, the guns won’t instantly “cool down”, only doing so completely after 3 full seconds. This enables Cornello to somewhat “store” his charge, and makes slightly charged spams of the jab a lot more scary for the foe and gives you some degree of leverage by charging the attack. This obviously uses up the guns, but if you work up the charge gradually and use it as a threat it will last most of your transformation time anyway.

If Cornello has lightning in his arm, he will jut out his palm instead of punching forwards with a fist. This decreases the physical power of the attack by 1/6th. While charging, Cornello’s flexing arm deals 4 hits of 1% and flinchig throughout to slightly cover himself, then Cornello channels channels the lightning into his hand upon releasing the jab. This will cause the lightning to shoot out of his palm at a 45 degree angle towards the ground. The power of the beam is the same as the one that he used/absorbed in order to enter Rebound form, requiring a minimum of half charge to fire off, and increasing the power of it by up to 1.3x at full charge. This will cause Cornello to lose the lightning in his arm unless he manages to reflect it back to hit himself, and this becomes significantly easier for Rebound Cornello due to his size. Foes will actively seek to shield this attack at times in order to make it bounce off of them into the air harmlessly.

DASHING ATTACK - RAM

Cornello kicks off the ground to propel himself forwards, attempting to headbutt his opponent. Cornello will travel the distance of 1.3 platforms along the ground before falling into prone at the speed of Captain Falcon’s dash. His head deals a powerful 17% and knockback that KOs at 100%, and on hit Cornello will fall on the ground into prone early. This move has very little lag, with the penalty being forced into prone. This is certainly much better than ending lag, though. Cornello is very wide when he lays on his stomach, so unless he attempted to hit a foe at point blank he will likely be able to hit that enemy with a prone attack if they dodged the headbutt. If you want to hit foes farther back, you can use the move on a slope and slide back to them as you use the prone attack. Also note that Cornello will continue sliding while reverting his transformation, so this can help you to continue to control your movement.

If Cornello ends the move in the air, he doesn’t enter prone and basically doesn’t experience lag with the move. This makes the move a very scary ones for foes attempting to travel over the top of your pit, and can also just be used for outright transportation. The move can also of course provide an excellent transition into your off-stage game.

FORWARD TILT - PRAYER

Cornello claps his hands together in front of himself, attempting to crush his enemies. Contact with his hands deals 11% and knockback that KOs at 135%, with fairly high base knockback. This is one of Cornello’s best attacks in terms of the speed/power ratio, functioning as one of his most mindless and spammable spacers with his giant body providing it excellent range. Unlike Bowser’s ftilt, Cornello’s hands don’t have to magically enlarge.

If Cornello claps his hands on a spike, he will shatter it, causing the remains of it to fall out of his hands in the form of rubble. The rubble deals 4-12 hits of 1% and flinching as it falls based off the size of the destroyed spike. While weak, the ending lag of this move is short enough to follow up on foes getting hit by the rubble. The solid nature of the spikes before they are broken can also serve to catch rolling foes – if they roll into the spike and dodge the clap with it, they’ll get caught by the rubble.

UP TILT - PURGE

Cornello raises his arm behind his head before punching the ground in front of himself, dealing 12% and knockback that KOs at 140% at a 30 degree angle downwards. This creates a hitbox that spawns immediately above and in front of Cornello with nearly no lag whatsoever before it smacks down in front of him. The speed is still acceptable to hit grounded opponents, though the move is merely average against them rather than something exceptional. While the move doesn’t hit directly above Cornello, he’s so tall that you can generally bat enemies out of the air with this attack as they attempt to reach that point. The move of course also works well on opponents on a slope above you or those recovering high.

When Cornello’s fist hits the ground, a platform sized earthshaking hitbox will show up in front of himself comparable to the Priest’s jab. It lasts a second and deals 9 hits of 1% with no flinching, with the fourth hit tripping enemies. Just this alone isn’t nearly enough reason to use the attack, but it’s possible to knock foes into this with the punch at lower percentages. At higher percentages, this can still be accomplished by hitting enemies at a higher position on a slope than yourself. You can also get a small amount of mileage out of this by hitting a foe downwards off the stage with the punch, forcing them to take a small bit of bonus damage on the ledge when they come back.

DOWN TILT - DRAG

Cornello reaches out his hands in front of himself, then drags his hands back to himself as digging his fingers into the ground a bit. This deals 10 hits of 1% and weak set knockback back towards Cornello. The move will “wrap” around slopes rather than Cornello just dragging his hands through open air. The move is primarily to catch enemies attempting to just flee Rebound Cornello to stall out his timer, as it’s quite a fast attack. Even if foes don’t just run for the entire duration, running for the last couple of seconds can be a viable tactic. The move’s ability to “wrap around slopes” also applies to edges, enabling Cornello to easily hit foes attempting to plank his Rebound timer.

If Cornello wraps his hands around a boulder, he’ll bring it in to himself as you’d expect, taking a bit more lag. As he brings in the boulder, it will be a hitbox that deals 8% and knockback that KOs at 200%. If the boulder is in a slope, it will take longer for Cornello to bring it to himself and it will not be a hitbox, but Cornello can release the boulder at any time with another press of A. This makes the boulder a fair bit less predictable.

PLAYSTYLE SUMMARY

Cornello’s transformation is unique in that it can be seen as something of a “power-up”, despite having a complete moveset to call its own. Despite being such a boon, mindlessly transforming into it whenever possible is obviously a terrible idea when so much self damage is given to him. There are many moves and situations throughout his massive toolset that serve as good transitions, such as camping with moves that build up the meter and transforming as they reach you or transforming as you knock them off the ledge. Early on in the match, Cornello will probably just want to transform once primarily for set-up purposes – a dsmash or dthrow is mandatory, and a boulder or pile of rubble are nice bonuses. While Cornello can score kills fine as the priest, he will be relying on the Rebound transformation more and more as the match progresses regardless. The extra damage will matter less when Cornello’s damage is already high, and he will want to stay in the form primarily for the weight and recovery it provides, essentially making him invincible.

The many defensive moves available to the priest can allow him get set-up as you’d expect from a typical character of this archetype. While that’s nice and he will use them for that purpose to a degree early on in the match, most of his set-up is designed to work fairly well in the face of combat. The spikes are the most obvious example, but foes can’t even interrupt the summoning of Cornello’s chimeras. Beyond just set-up, though, Cornello needs his massive arsenal of defensive moves in order to survive at the stupidly high percentages that he’s going to reach. If foes want to kill Cornello in his Rebound form, they’ll have to take him to ridiculous percentages, at least 200%. Cornello needs to be able to survive long enough when he reverts back to the Priest to regain Rebound status, as well as be comfortable enough to actually do anything when he does. While Cornello’s Chain Lightning won’t have much of anything to bounce off of at low percentages when a normal character would actually want healing, late in the match there should be countless targets to extensively heal him and fill the Rebound meter. While the priest doesn’t particularly care whether he’s at 180% or 200%, it can actually be enough to enable the Rebound form to survive. With these insanely high percentages, the priest will want to be in the pit just to make himself harder to kill, let alone the new opportunities it provides for his attacks. Going out of his way to survive for as long as possible also means he will inevitably get some great set-up towards the end of his stock, worth going for since everything he does reverts to normal on his death.

Cornello’s favorite place for the foe to be when he goes on the offensive actually isn’t in a pit, but off the stage. The priest enjoys the foe being there for his opportunities to damage rack directly with the Machine Gun or give easy surfaces to bounce off his Chain Lightning to power it up, then punishing them horribly whether they come to the ledge or recover high with his multitude of options. The priest doesn’t expect to kill when he knocks his opponent off the stage, he just intends to impede them for as long as possible. This is also the most obvious opportunity for Cornello to perform set-up with absolutely no risk. One of the most popular forms of “set-up” is to transform into Rebound form. The Rebound form still loves to see the foe off the stage, but it has much more evil intent as it directly gimps foes or, in the least, horribly punishes them as they land back on the stage.

PRIEST FINAL SMASH - CRUSADE

Cornello summons five of his followers with comparable size to himself. They weigh as much as Captain Falcon and have 50 HP. Their attacks consist of Priest Cornello’s Machine Gun and his shotgun fair, though they’re able to use the shotgun on both the ground and in the air. This provides plenty of projectile clutter and huge fodder for you to bounce Chain Lightning off of, with the Final Smash lasting for 10 seconds.

If Cornello enters Rebound form while his minions are out on the stage, though, he will absorb the guns of any minions within a platform of him into his arm. This will give him access to the shotgun and machine gun at the same time, and increase the amount of hitboxes produced by 1.5x for each pair of guns he absorbs. All of Cornello’s minions will flee the stage and kill themselves upon his transformation.

REBOUND FINAL SMASH – GODHOOD

Cornello attempts to perform further transmutation while already in his rebound state. This increases his size and weight by an additional 1.5x, and causes his entire body to mutate into a black mess of alchemy like his arm. Cornello’s entire body is now solid, and every 2 seconds, a mutation will come out of Cornello’s body at the position nearest to the foe. If the foe is right up against him, a shotgun will jut out of his body and shoot the foe as powerfully as his fair. If the foe is within the distance of a max charged spike, one will jut out at the foe. If the foe is further away than that, a machine gun will sprout from Cornello’s body and fire in the foe’s direction for one second. After 9 seconds of this, Cornello will revert to his priest form.
I would read this, but the masses and masses and masses and masses and masses of words put me off.

El Jefe


El Jefe is a South American war criminal, illegally taking over many small countries across the world. He has a talent for making incredibly effective military strategies, and once claimed he could take down an entire army with only 3 blind mice, and a wooden spoon. However, due to his illegal activities, Interpol had been tracking him down. Luckily for him, he was hired by Le Paradox to go time travel back to Feudal Japan and steal Rioichi Cooper’s cane.


Tiger Stats:

Size: 8/10 (El Jefe is very tall, but he isn’t incredibly wide.)

Weight: 6/10 (El Jefe is surprisingly light, mostly due to his lanky physique.)

Speed: 8/10 (Being a cat, El Jefe has incredibly good speed.)

Jump: 9/10 (El Jefe’s cat-like reflexes allow him to jump amazingly well.)

Aerial Movement: 7/10 (Cats always land on their feet.)​


Tiger Specials:

Neutral Special: Fireballs:

El Jefe scrapes one of his swords across the ground, and then swings it, causing 4 small fireballs to fly out of the sword. The fireballs are about as big as a Pokeball, and fly at a decent speed, about as fast as Meta Knight’s dash, and travel about 3 Stage Builder blocks before petering out. The fireballs also fly off in random directions, and are capable of flying forward and diagonal, but they will always fly away from El Jefe. The fireballs also cause around 5% damage on contact.

If the button is held, El Jefe will scrape both of his swords across the ground, and then swing them both at the ground, creating a single large fireball the shoots forward. The total time the button must be held clocks in at around .75 seconds. The large fireball is a lot more powerful than the normal fireballs, doing around 12% damage on contact. The fireball also travels at a slower pace than the normal ones, travelling at about Mario’s dash speed, and going about 4 Stage Builder blocks before disappearing. The fireball is also very large, about half the size of El Jefe himself.


Side Special: Flame Dash:

El Jefe pulls out both of his swords and lowers them to the ground, and then dashes forward, with the sparks on the swords creating a trail of fire behind him. The dash is a bit faster than El Jefe’s usual dash speed, and travels as far as long as the button is held, or until an edge is reached. The flame trail, is fairly large, and is half as tall as Mario. Luckily, the flame stream doesn’t cause flinching, instead doing a steady stream of 4% damage as long as the opponents stands in it. The flames only last around 2 seconds before disappearing. The actual dash also has a hitbox to it, knocking opponents upward and above El Jefe, causing 13% damage.


Up Special: Flame Leap:

El Jefe bends down, and then launches upward, creating a shockwave of fire from his feet. The jump launches El Jefe upward about 3 Stage Builder blocks, and it creates a flame shield around El Jefe, which causes 7% damage on contact. The shockwave goes upward about 1 Kirby, and goes outward about 1.5 Stage Builder blocks before dissipating. The shockwaves cause around 14% damage on contact. If the move is used in the air, it will still launch El Jefe the same distance, but instead of a shockwave, it launches a fireball downward, which, when it makes contact with the ground, will create a patch of fire that acts similar to the Forward Special’s fire.


Down Special: Thunder Sword:

El Jefe holds his swords upward into the sky, causing a blue thunder bolt to strike down from right above El Jefe. The thunder strike acts similar to Pikachu’s Down Special, but comes down from the top of the screen in a single bolt at around Sonic’s dash speed. The thunder bolt will also go through platforms, due to its main function. The thunder bolt causes 13% damage.

When the thunder hits El Jefe’s swords, it will turn them into a singular gigantic thunder sword. The thunder sword acts as a hitbox, which El Jefe drags around behind him. The sword is large, almost as tall as El Jefe himself, and stretching about 1.3 Stage Builder blocks, and causes 6% damage on contact. The sword also reduces El Jefe’s speed to 3/10. He also loses the ability to use his standards and smashes. He also cannot jump.

The thunder sword gives El Jefe a brand new set of specials. If El Jefe is hit, someone touches his sword, or uses one of his specials, he will lose his thunder power. The move also has a bit of a cool down period, taking about 5 seconds before it can be used again.


Thunder Standard Special: Thunder Sword:

El Jefe lifts up the giant sword, and then swings it into the ground, creating a large electrical explosion around it. The explosion is rather large, spreading itself much farther from the sword, and causing 24% damage, with minor knockback. The sword itself causes 31% damage, with some incredibly powerful knockback, but due to the slow speed of the swing (It takes about 1.5 times as long as a Warlock Punch), it usually misses.


Thunder Side Special: Electrical Traps:

El Jefe holds his thunder sword forward and in front of himself, and causes the sword to spark up, and then shoot out three large spheres of electricity across the stage. The electrical spheres are fairly big, about half the size of Bowser, and each one travels forward at different speed and distance. The first one to come out goes out at around Meta Knight’s dash speed, and travels forward 2 Stage Builder blocks. The second sphere travels forward at Mario’s dash speed and lands 1.5 Stage Builder blocks forward. The final sphere to come out goes out at about Bowser’s dash speed and goes forward 1 Stage Builder block. The spheres will explode if an opponent touches one, with the resulting explosion being about as big as Bowser, and deals 16% damage with good knockback and a bit of stun.


Thunder Up Special: Blade Helicopter:

El Jefe pulls his swords apart, turning them into two large thunder blades. He then starts spinning around, with each blade sticking out at his sides, causing him to fly up into the air. The blades reach fairly far, about 2 Stage Builder blocks, and cause 17% damage with good knockback on contact with an opponent. The move will launch El Jefe upward about 3.5 Stage Builder blocks, before the swords disappear and El Jefe has to fall. The move has a long bit of start-up lag to it, making it fairly risky to use, as El Jefe can be knocked out of it, wasting his electricity.


Thunder Down Special: Blade Spin:

Similarly to the Up Special, El Jefe pulls his swords apart, turning it into two thunder blades. This time, El Jefe will place his sword onto the ground and spin them around incredibly fast, creating a suction effect. The blades will cause 12% damage on contact, and have a good chance of hitting the opponent twice before the move ends. When the move does end, the swords will create a wave of electricity, similar to El Jefe’s normal Up Special. The shockwave is about the same size, but instead of stopping at around 1.5 Stage Builder blocks, the shockwave will instead travel across the stage until they reach the edges of the stage, and will travel up and down walls in order to do that. However, the shockwaves get gradually weaker and smaller as they travel, ending up at their smallest after 3 seconds of travel. When first released, the shockwaves will cause 10% damage, while at their lowest point they will cause 5% damage.


Tiger Standards:

Jab: Tiger’s Claw:

El Jefe slashes forward with his claws, in a semi-generic Jab attack animation. The attack hits in a three hit combo, with the first hit doing 5% damage, the second doing 7%, and the last doing 5% again, totaling up to 17% damage.


Forward Tilt: Sword Slice:

El Jefe pulls out one of his swords, and then does a downward cut with it, in a single, fast motion. Any opponent hit by the slash will be slammed into the ground, stunning them for a moment, and doing 8% damage to them. The sword has a decent range to it, reaching about .4 Stage Builder blocks away from El Jefe himself.


Up Tilt: Tiger’s Paw:

El Jefe does a simple upward punch with one of his hands, before stretching his fingers out and revealing his claws. The punch itself is what most of the move’s hitbox consists of, but El Jefe will leave his claws out for a few milliseconds, creating a short lingering hitbox. The punch itself causes 7% damage, while the claws cause 4% damage.


Down Tilt: Sword Sweep:

From his crouching position, El Jefe grabs one of his swords, and then swipes it across the ground. If the swipe hits an opponent, it will cause them to fall to the ground, which behaves kind of like tripping, but doesn’t leave the opponent helpless long, for about one millisecond, and causes 9% damage. The sword reaches out about .4 Stage Builder blocks away from El jefe.


Dash Attack: Pounce:

From his dashing animation, El Jefe leaps into the air in an animalistic pounce, with his claws unsheathed. The pounce has a good range to it, launching El Jefe almost a full Stage Builder block forward from where the move was originally used from. However, this might also result in El Jefe going off ledges if the move is used too close to one. If the move hits an opponent, it will cause El Jefe to pin them down to the ground, and then swipe at them a few times, causing 12% damage and leaving the opponent in prone.


Tiger Smashes:

Forward Smash: Blade Mode:

El jefe pulls out both of his swords, and slashes rapidly in front of himself. The number of slashes he uses depends on how long the move is charged for. At lowest charge, El Jefe will only do three very fast strikes and do 17% damage with decent knockback. At medium charge, El Jefe will do 6 incredibly fast strikes and cause 22% damage with good knockback. At full charge, El Jefe will do 9 blindingly fast slashes, and do 29% damage and incredible knockback, which is able of KOing opponents if they are attacked near an edge. However, reaching full charge takes about 1.5 times as long to charge as a normal Smash move.


Up Smash: Tiger Uppercut:

El Jefe unsheathes his blade, and does an upward cut with it, and launches into the sky at the same time. The move launches El Jefe upward about 1.5 Stage Builder blocks, and also carries opponents upward if the blade hits them, causing 17% damage at lowest charge, and 27% at highest charge. If the opponent is carried up, the move will end with El Jefe hitting them back into the ground with an overhead swipe, which adds an additional 3% damage to the move. If El Jefe doesn’t hit an opponent while going up, it will instead cause the move to end with a bit of lag. El Jefe can also cancel out of the overhead swipe by using one of his aerials, allowing him to combo.


Down Smash: Spark Strike:

El Jefe pulls out both of his swords, and then scrapes them across the ground on both sides of him, creating sparks that fly off the ground and damage opponents. The sparks are incredibly small individually, but they are unleashed in groups about as tall and as wide as Kirby, and hang in the air for a second. If the sparks hit an opponent they will take 15% damage at the lowest charge, and 23% at highest charge. El Jefe’s swords also count as a hitbox, however, they will always cause 24% damage with minor knockback.


Tiger Aerials:

Neutral Aerial: Air Swipe:

El Jefe swipes forward with his paw, reaching a bit forward in front of himself. The swipe has an interesting ability, as it can keep opponents still in the air, allowing El Jefe to follow up with another attack. The move only does 10% damage, however.


Forward Aerial: Air Slash:

El Jefe pulls out his sword and slashes forward with it, hitting the opponent for 14% damage and decent knockback. The attack mostly acts as a basic combo finisher, most likely the follow up to the Up Smash or Neutral Aerial.


Up Aerial: Double Slash:

El Jefe pulls out both of his swords, and does an overhead slash with both of them, at the same time. If the move hits an opponent, it will bump them up into the air again, allowing for a second hit with the move, but the bump will not happen on the second hit. The attack does 18% damage.


Back Aerial: Spin Stab:

El Jefe pulls out one of his swords and spins around, sticking his sword out as he does, hopefully impaling his opponent. The attack has a very good KO move, as it’s fast, and has good knockback, and does a decent 15% damage.


Down Aerial: Sword Slam:

El Jefe pulls out both of his swords, and then fast falls down to the ground, with both swords sticking out. The move is a meteor smash, and as such is a good move for finishing off off-stage opponents. However, the move will go through opponents, and falls at a faster rate than most characters, meaning that the move will usually result in a suicide KO. It also does 18% damage.


Tiger Grab Game:

Grab & Pummel: Tiger Grab:

El Jefe has a fairly standard grab, with him simply reaching his hand out to grab the opponent. If he does grab the opponent, he will grab onto their neck and hold them up. With his free hand, El Jefe will scratch at the opponent for 3% damage.


Forward Throw: Have a Cigar:

El Jefe pulls out the cigar from his mouth, and shoves it into the opponent’s forehead, and then throws them off about 2 Stage Builder blocks forward. This throw is very quick, making for a decent KO move. The throw does a total of 8% damage.


Up Throw: Impalement:

El Jefe throws the opponent up into the air, and then unsheathes his sword, and points it upward, directly below the falling opponent. The opponent will be impaled on the sword, and El Jefe will then slam the sword onto the ground, and shake the opponent off the sword. The move does 12% damage, but it’s plagued by ending lag.


Back Throw: Fire Throw:

El Jefe throws the opponent over his shoulder, and then points his sword at them. The sword then shoots a fireball, which launches the opponent upward a bit. This move is interesting, as the fireball is a single projectile, and it can easily hit another opponent while it flies toward the opponent. The fireball causes 14% damage.


Down Throw: Predator Instincts:

El Jefe throws his opponent to the ground, and then leaps onto them, and then proceeds to scratch the opponent viciously, causing 13% damage and stunning the opponent for a second. This is a very quick move, but it’s not very likely to KO.
8/10. I like it overall, but the smashes seem a little overpowered, and I'm not sure i really like the Thunder Sword properties. The Back Air and Forward Throw also seem a little OP. I know this moveset is relatively old but I want to rate all of the movesets so I can vote!
 
Last edited by a moderator:

FrozenRoy

Smash Lord
Joined
Apr 26, 2007
Messages
1,268
Location
Las Vegas, Nevada
Switch FC
SW-1325-2408-7513
I don't know why I didn't think of this before. Thanks for the info!


I would read this, but the masses and masses and masses and masses and masses of words put me off.
There are many movesets with a large amount of words in Make Your Move, thanks to both all the effort that people put into their movesets and because of the fact that smash can often require explanations of how things work in order to actually visualize a set. While one cannot force you to read sets, reading wordier sets is simply something you will have to push through for voting, especially since some of the better sets this contest are wordier ones, such as Chou Chou Infinite and, in my opinion, Cornello himself.

On that note for everyone, I have updated my rankings with a variety of sets, including Father Cornello, Sokka, Accelgor, Zhu Li (Ft. Varrick), Clawgrip and many other sets: So many sets have been posted recently that I have yet to go through them all or have enough time to comment, but you can find what I do have here.
 

Tocaraca2

Smash Ace
Joined
Feb 22, 2015
Messages
557
Location
Wokingham
Spam Warning Received
Roy

Roy and Marth were almost identical in Melee. The only big difference was the charge time of Flare Blade, and of course, his awesome red hair. In Project M, however, he was reduced to a semi-clone, having some differences from Marth, though still not having very unique moves.
The purpose of this moveset is to make Roy even more different from Marth (and to, of course, show off my skills).
Most of his slices make an orange path, like before. His jump also no longer makes the annoying 'hoa' sound.
He holds the legendary Sword of Seals.

Standard Attacks
Neutral Attack (Jab)
This is based on Marth's Dancing Blade. It is made up of 4 hits, starting with a small overhead swipe, followed by a forward stab, then a slash up through the space in front of him, finishing with an overhead slash. Holding down the A button without hitting an object will activate the first swing only, yet if making contact with something it will activate the first 2 swings. To actually finish this jab combo you have to mash the A button. If all hits connect it should do 12% (2+2+3+5).

Side Tilt
Roy slashes forward from across the space in front of him from his left to his right, like Ike's Side Tilt. Quick and without end lag, but isn't too powerful. Does 9% damage on the hilt, 7% on the lower end, and 8% on the tip. Low knockback.

Down Tilt
A lower stab, based off the second hit of Marth's Dancing Blade. Of course the animation adapts to his crouch position. Moves him forward slightly while doing it, which is also present in his old Down Tilt. Moderate end lag. If it hits on the lower end, opponents will be flung backwards 350*.

Up Tilt
Basically an uppercut. Based off the second hit of Marth's Dancing Blade, angled up. Does not hit behind him, and has low lag. Will do 11% damage on the hilt, 8% damage on the lower end, and 10% on the tip. Good for finishing off combos as it has the ability to KO at high percentages, and comes out fast.

Dash Attack

Roy does the stabbing action, not as low as the Down Tilt but still slightly low. If it hits on the hilt, the opponent will be flung 45* up and forward, doing about 16% damage and high knockback. However if it hits on the tip, they will be launched 70* sideways, dealing 10% damage and average/low knockback. If it hits on the lower end, they will be knocked upwards 5*, doing 8% damage and low knockback. You must beware of spacing before you try and use this move. It takes Roy 0.8 seconds to go back into his original stance, meaning it is also punishable. Roy also takes more knockback while using this move, as is is pretty OP otherwise.

Aerial Attacks
Neutral Air
Based on the one from Project M, Roy spins his flaming sword around him quickly in almost a complete circle (290*). Has moderate/high range, much hitstun, and almost no start or end lag. Does 6% damage and burns the victim with a fire effect. Great to use in the air if you feel like you cannot hit your foe with any of your attacks.

Side Air
This attack is based around Marth's Side Tilt. Roy swings his sword forward through the space in front of him, performing an arc. Can be done twice in the air after jumping once, and will knock opponents up 55* if it hits in the tip, but will do the most damage and knockback if on the hilt; whereas the lower end will, funnily enough, spike opponents. Average/high landing lag.

Back Air
Similar to Ike, Roy sticks his sword out behind him, being as quick as his Neutral Air but not having much range, and it has a small hitbox. Great for when your foe is behind you and close to you. 8% on the hilt, and 7% on the lower end and the tip.

Down Air
Like Ike's Neutral Air, Roy swings his forward underneath him performing an arc, the whole attack lasting 0.7 seconds. Has better range than Ike's Neutral Air but doesn't hit beside him at all. Spikes if the lower end hits. Around 7% damage and low knockback.

Up Air
Roy swings his sword up above him, with a small hitbox but high vertical range, and if you pause and rotate the camera when he is doing this attack it will look like him using his old one. Basically it's his Melee Up Air except from a different angle. I don't know how else to explain it, because I only know the names of a few type of sword slashes. Does roughly 10% damage and moderately high knockback. Start and end lag is virtually non-existent, which is fine because the hitbox is tiny. Great for when opponents are right above you.


Smash Attacks
Forward Smash
Roy reels back while charging the smash, then lunges forward, sword outstretched. Does not emit any kind of flame effect, but is powerful anyway. Doesn't have as good a hitbox as Flare Blade, and takes 1 second for him to go back to his original stance, but there is less startup lag and is a good move to use if your opponent has a high percentage but is avoiding your Flare Blade. Does 10% damage if not charged and 24% if charged up to maximum. High knockback.

Down Smash
Similar to his Neutral air. He spins his sword low around him in almost a complete circle (325*). 7% if uncharged, 17% if charged to maximum. The spin takes 0.2 seconds to complete and the whole attacks takes 0.6 seconds. Low start and end lag. Average knockback.

Up Smash
Based off Marth's Up Tilt, Roy swings his sword above him in an arc, going around 155* and launching foes up high. Moderate startup lag, average/high end lag. Very high knockback, and does 12% if uncharged, 26% if charged to max.

Special Attacks
Neutral Special: Flare Blade
In Melee and Project M, Flare Blade was noticeably different from Marth's Shield Breaker, especially as in Brawl Marth's Shield Breaker animation is completely different to Roy's Flare Blade animation. But the explosion created after a fully charged one is almost identical to Ike's fully charged Eruption, so I felt like getting rid of the explosion but keeping all of the other properties. He also no longer makes his death sound after a fully charged one. This is Roy's most powerful attack.

If you don't know what Roy's Melee and Project M moves are, I suggest you go and do some research or watch some videos about it.

Side Special: Burn
This attack is named after Sethlon's nickname in Project M tournaments, although the attack has nothing to do with Sethlon at all. Roy rushes sideways and diagonally 80*, sword on fire and creating big flame particles. Hits 5 times in total and takes 1 second to connect all of the hits, and 1.5 seconds in total to finish. The sweetspot is the hilt of the sword, which will cause incredible knockback and hitstun, acting as a good KO move, except that it has moderately high startup lag. The first 4 hits each do 3% damage, and the last one does 6%. The flame particle the last one creates is slightly bigger, and Roy also tilts slightly upwards in the last hit. Will foil a lot of edge-guard attempts. Similar to his Up Special, Blazer.

Down Special: Unconventional Counter
It starts off like his old counter, but when you get hit during it, instead of striking back, the counter will end and you will absorb the power of the attack you countered. You can absorb up to 5 attacks in a row, which add up to make any of his next Smash Attacks or Flare Blade have much more power by adding on the power of the countered attacks. After absorbing 5 attacks in a row with the counter, the next counter will act exactly like his old one, and you will no longer have any of the absorbed power. Try not to overuse this move, otherwise you will waste everything.

Up Special: Blazer
Based off the one in Project M, which is what I based Burn off. Roy soars upwards and diagonally 10* with his flaming sword, creating burn particles. Has very little startup lag and renders him helpless, with average/high landing lag. Hits 7 times rather than 5 times, although the whole attack takes even less than Burn to finish. It still takes 1 second to connect all of the hits, and the firat 6 hits do 2% damage, the last one dealing 6% damage. The sweetspot flings them into the air, while the tip will throw them backwards, and the lower end will launch them sideways. Moderate knockback.
At first, this may just look like a vertical version of Burn. But in a combat situation, these are very different moves.


Throws
Grab
Same as original. A pretty generic grab animation. Nothing special.

Pummel
Like his old one, except he uses his foot and kicks, rather than using his knee. Does 2% damage each kick.

Forward Throw
He lets his foe drop for a second, then slashes them with his sword. 8% damage, average knockback.

Back Throw
Roy turns around and punches his opponent away. 5% damage, low knockback, lag virtually non-existent.

Down Throw
He drops his opponent, briefly letting them fall, then slaps them with his sword, knocking them behind him, doing 10% damage and average/high knockback. Quite high end lag.

Up Throw
Exactly the same as his old one. If you don't know what it is I suggest you go and look it up.

Miscellaneous
Ground Attack
Roy spins around with his sword out low. Goes around 270*.

Trip Attack
Like his old one, he swings from left to right.


Ledge Attack
A quick uppercut, with his sword flaming. 9% damage, low knockback, high hitstun. Low start and end lag.

Ledge Attack 100%+
An overhead swipe. High start and end lag. High hitstun. 10% damage, low knockback.

Playstyle
As I haven't changed any of Roy's stats (such as weight, speed, etc.) he should still play similar to his Project M version. But I can at least suggest some combos that may be useful if this moveset was actual in SSB.

There are different options for combos:
Jump + Side Air (tip) + Jump + Up Air + Blazer
Jab + Dash attack (lower end) + Jump + Jump + Burn
Up Smash + Jump + Side Air + Jump + Flare Blade
Down Tilt (lower end) + Jump + Back Air + Jump + Down Air + Up Tilt
Jab (3 hits) + Side Smash
The third hit of the jab also provides a lot of hitstun.
 
Last edited:

FrozenRoy

Smash Lord
Joined
Apr 26, 2007
Messages
1,268
Location
Las Vegas, Nevada
Switch FC
SW-1325-2408-7513
Whoa, this topic is popular. 6 people are viewing it. Hopefully this means my moveset will be seen...
Oh, and I know double posting is forbidden, but editing a post doesn't count as activity on the topic, as it's not counted as a new post, therefore nobody gets any notifications.
There is really no reason to double post things like small comments or moveset updates: Double posts are generally reserved for when activity is low (And thus a long time goes between posts) or when posting seperate completed movesets at the same time (Because it isn't possible to combine them into one post organically).
 

FrozenRoy

Smash Lord
Joined
Apr 26, 2007
Messages
1,268
Location
Las Vegas, Nevada
Switch FC
SW-1325-2408-7513
The Unidentified Fantastic Flying Girl

Nue
Houjuu


Nue Houjuu is a character from the Touhou Project series of shooters, first appearing in the game Undefined Fantastic Object. A devious trickster by nature, Nue's powers help cause the plot as she disguises the pieces of the Palanquin Ship with her power, causing the main heroines to investigate what appear to be strange UFOs flying in the sky. While she is usually actively malicious (though she's getting a bit better...supposedly), she did feel bad when she found out Byakuren was sympathetic to youkai and can now be sometimes seen at the Myouren Temple, though she is not very well acquianted with them. This means that she's quite frequently grouped or associated with them in some way when it comes to fans, though.

Nue is a "nue", a mythological species from which she is named, which was said to have "the head of a monkey, the body of a raccoon dog, the legs of a tiger, and a snake as a tail" and were said to bring back luck: The appearance means they are sometimes called the "Eastern Chimera". Elements of this can be seen in Nue's design, such as her snake accessory for the snake tail. Nue Houjuu's power is "making objects unidentifiable", which she has used to keep her true form hidden for many years: Naturally, being Touhou, her true form is that of a fancily dressed girl. Her power generally works by concealing the nature and "identity" of objects, which then appears as different objects depending on the viewer as their mind fills in the blanks. For example, the Palanquin Ship pieces appeared as UFOs because they were "unidentified flying objects" and that is what people thought of when they thought of them. She does seem to have some level of control over it, though, seeing as she disguises her true form with it and she shoots UFOs during the fight and such. Nue can also release a black mist to conceal everything in a position, which mythological Nue were said to be able to do, and has somehow managed to contact the outside world as well. How? Well, that's a mystery...

Here's the true playlist.

Statistics


Nue's form is not very large, somewhat larger than a single Ice Climber, nor is she particularly heavy, weighing just a touch less than Marth. Nue is at least fast, however, though not blazing slow: She travels at the speed of Diddy Kong on the ground with somewhat low traction, rushing and floating forward in a manner not unlike Meta Knight in appearance.

Aerially, Nue is quite floaty with good air control and air speed, making her a very nice air fighter. She has two extra midair jumps on top of the normal jumps: Her first jump is good, second jump is really good, but her extra midair jumps don't go as high as most other characters midair jumps, though this can be nice for a sort of aerial shorthopping. Nue can't do any extra special Brawl things.


Specials

"You human who's forgotten the fear of night!
Die from the terror of this unidentified flying object!!"

Side Special: Unidentified "Red UFO Invasion of Rage"

Nue raises a hand up with a gripping motion as a red UFO saucer forms in front of her, then points a single finger forward and sends the UFO flying forward. This UFO projectile travels quite far, it can go from one side of Battlefield to the other almost exactly, and at a moderate speed, it isn't especially fast or slow. Being hit by the UFO causes you to take 11% damage and some moderate knockback, though it won't KO until 190% or so, and it has somewhat long ending lag when fired off, though the starting lag is not especially noteworthy one way or another. In addition, the UFO releases bullets behind it as it travels in half Battlefield Platform intervals, which deal a mere 5% damage and very little knockback but are still a bother just because they can be numerous if the UFO keeps on going. Bullets travel at half the speed of UFOs and 3/4ths the distance. UFOs are somewhat chubby and wide, but not too high though not low either, and of course look like flying saucers. If you want to know what they look like exactly, take a look at the statistics image: The Blue and Red UFos there are in particular a good mental image.

The UFO is attackable and has a total HP of 20, though it will also be taken out by attacks that simply dish out a solid amount of knockback such as a strong tilt or most smashes, and cracking open the UFO in this way produces a special effect as it pops and fills its destroyer with energy! The person who killed it gains a red aura around them as their attacks are buffed to deal 1.25x damage and knockback! This might sound all downside for Nue, but it comes with two upsides: First off, the opponent also TAKES 1.25x damage and knockback, so this is a double-edged sword. Secondly, all the bullets released by that UFO will now home in on the foe in addition to now going 1.5x the UFO's speed! They do lose some distance, though...

Opponents should be careful about deciding when and if they want to crack open UFOs, though a general rule is that it is better to open these up before they go too far because you have less or even no bullets to deal with. The bullets will track much like Samus' missiles and are not especially great at it just like the missiles, but they're still pretty dangerous in numbers and can necessitate some pretty frantic dodging regardless. The buff/debuff lasts 10 seconds.

The entire UFO is a hitbox, unless being attacked, for opponents. However, while they are not really "solid" (They have a hurtbox and such but aren't like a moving wall), Nue herself and any other Nue in the match can stand on top of UFOs like a platform, and Nue can even let her UFO carry her there for protection! Nue can use all her ground attacks and whatnot while on an UFO, though her jumps do NOT refresh unless the UFO is just above ground, which allows various movement and approach options. Nue can even let the UFO carry her offstage while it still travels forward as a mobile platform to hit people offstage!

Whenever a UFO of any kind dies, it releases a cute little point amount graphic for a moment, just like in Nue's battle or those old time shmups. This has no effect on most battles, but in 1-P modes, it adds that score to your end of match score! Numbers range from 500 to 50: The quicker it dies, the higher the number!

Down Special: Nue Sign "Undefined Darkness"

Nue raises her trident to the sky, gathering cloudy darkness around her, which then disperses about her as the move ends. This is a chargable move and how big the dark cloud is depends on the charge: It can be as small as Nue or as big as just a bit under half of Battlefield, with Nue being able to have a total of just under half a Battlefield of this black mist out at once. This move isn't particularly slow to use on either end, but it has absolutely no hitbox, so Nue is pretty vulnerable when using and charging up this move: Perhaps those projectiles with hurtboxes to soak up moves could help with getting this off?

When the mist comes out, at first it merely makes the area slightly darker, but it gets progressively darker and hard to see over a second: After one second, the area is pitch black and cloudy and absolutely nothing can be seen inside, barring moves especially made to be seen in invisibility/hidden stuff. This state of total darkness then lasts inside the cloud for 15 seconds or until Nue dies. It can be quite hard to figure out what a Nue will do while she is inside her dark cloud, though opponents can just as well kick her out and use the cloud themselves: Things like her UFOs and leaving behind their bullets can be quite nice when you're hiding where they are exactly, though as long as one remembers the speed of the UFOs and bullets it can be foiled.

While inside a dark cloud, this move does the exact opposite of expanding it, and instead contracts it, allowing you to lessen the size of any one cloud to give you more overall cloud to put elsewhere given your limit: Nue can do this even to the point of making the cloud she is in disappearing entirely. Something to keep in mind!


Neutral Special: Nue Sign "Danmaku Chimera"

Nue points her trident forward as energy gathers into the tip of its middle prong, before firing out a laser! This move takes a while to start up, but the ending lag is pretty short, the laser dealing 10% damage and not much knockback, travelling at 3/4ths the speed of Pit's arrow and 3/4th the size. Nue can only have one of these lasers out: Instead, holding down B while the laser is out allows Nue to control the arrow and change its path, kind of like Snake's Nikita Missile but with more crisp turning that makes it similiar to a fusion of that and Pit's arrows. This is combined with the fact that, while it can be stopped by going off screen or hitting solid things or hitting foes or whatnot, the laser's range is infinite: If you want, you can keep looping it back around to keep it about, though you can't realistically keep the laser around forever simply due to it potentially hitting things, you potentially getting hit when you need to turn it and the fact that turning it back around is not always the best option over letting it go away and making another one later.

While holding down B allows you to control the laser, a double tap of B causes the laser to explode into a flurry of bullets! This flurry of bullets has little range, but there's a lot of them, each one dealing 3% damage and a flinch: You're liable to get hit by multiples if you're hit by 1, but not a large amount of them, expect something like 9%-15% damage unless you mess up, might do a bit more if you don't see it coming as well. it explodes essentially every direction except for forward, though it also has quite poor coverage behind itself, so the primary way to counter it is the opposite of countering the laser: Just stand in front of it and you won't be hit. Of course, if you stand in front of it and she doesn't blow it up, you get laser right to the face...the key is to look for the signs of Nue being about able to blow it up, as a single tap will just pause the laser in place, which serves as both a warning to the foe (though quite brief if quickly double tapped) and a way for Nue to be sure the tap registered, and the fact that Nue audibly and visibly snaps her fingers to cause the laser to explode, though it should be noted Nue can simply stutter her laser as a fakeout. Learn the signs and then play the chess game. Also note that Nue visibly directs the laser with her trident while controlling it, so it's not like you're totally in the dark about it...well, unless Nue is in the dark, I suppose.


Up Special: Ominous Clouds "Heian Dark Clouds"

Darkness gathers around Nue for this chargable attack, before she rushes in a chosen direction (Like Fire Fox) with her spear outstretched in front of her, dealing 14% damage and knockback that KOs at 160%, though it takes a while to start up: Nue releases a cloud of darkness when she rushes forward at where she rushed forward, starting somewhat as the opposite of her Undefined Darkness in the sense that it begins pitch black, but lightens over time, entirely dissipating after about 3 seconds, making it not something very permanant and more something temporary. Because the clouds are so transient, they don't count towards your Undefined Darkness maximum. Ending lag is pretty average.

When Nue launches in a direction, she will leave behind three lasers where she was, pointed in the direction that Nue went: One directly follows her path, while the other two take diagonal positions above and below the first laser. They deal 6-10%, light knockback and don't even hitstun unless you charge a little, but they still make edgeguarding this move without taking damage a pain: In addition, the primary purpose of the charge is to affect the delay on them, more charge means more delay, starting at a pretty brief delay and increasing to the point that it doesn't even fire until the clouds disperse. Not only can this allow Nue to keep the lasers around as traps, because their hitboxes are active before firing forward, but the cloud will generally disguise how the lasers fire off a little, since it starts in total darkness and then gets lighter, so a quick firing off can be a way to catch people unawares, especially if it looks like you're just setting them up as traprojectiles.

Nue does not enter helpless when using this move, but she cannot use it or any other recovery moves again until she lands on solid, non-UFO ground: This move is also like Wings of Icarus in that if you get hit out of it, you don't get it back, so be careful about that!


Standards

Jab: Perception Scrape

Nue performs a single right, swirling swing with her trident, followed by a left swing with reversed motion, finishing with an upwards swing of the trident. Each hit deals the same amount of damage, 6%, but each hit deals drastically different amounts of knockback: The first hit barely deals any at all, though it is pretty standard forwards knockback, while the second hit causes enemies to be hit behind Nue, and the last hit causes opponents to fly straight up. These hits only combo into each other at pretty low percentages, due to the odd knockback angles and the fact each hit has fairly large start-up lag for a jab (Though not laggy when compared to other types of moves, like say a smash), though the ending lag is quite short. The first hit will combo into other hits for longer though due to the lower knockback compared to the other two.

If you hold down A, then the jab combo will just go as normal, but tapping A causes you to perform the combo differently, as each tap advances you a hit instead, unless you just single tap the whole way. For example, double tapping allows you to perform the second hit of this jab without needing to perform the first hit, while triple tapping causes you to use the next hit, and you can keep tapping like that to use the three hits of the jab in any order you please. This allows Nue to use the unique properties of each jab hitbox to their fullest, and is also why this move has long starting lag: To adequately give you time to get in your taps if you so wish. All the hitboxes on this are a bit niche outside of normal jab situations, so learn where each one is good and when to use them: For example, rushing ahead of a UFO and then trying to lead off with a second hit Jab to smack them into the UFO or starting an aerial assault with the third hit. Also note that, since you can't tell which hitbox will occur until it comes out (Though once it does, the different animations make it obvious), the opponent's DI might get a bit wonky here, so be prepared to read unexpected situations. Identify them, if you will.


Forward Tilt: Tiger Claw

Nue brings her trident back and then stabs it forward for a very long ranged move: The trident's prongs are a sweetspot that deal 15% damage and KO at 120%, while the rest of it deals a more modest 11% and knockback that KOs at 170%: The sweetspot is a decent deal far from Nue, so it can be a bit hard to use this to supremely defend at close range, but it means you have great range on this pretty strong tilt sweetspot: Spacing is critical here. This move has somewhat long start-up lag for a tilt, though, and the motion of bringing the trident back makes it fairly telegraphed. Ending lag is average.

If the prongs of the trident touch a UFO with this move, said UFO will be held in place until the ending lag of this move is done, allowing Nue to "delay" UFOs or to stutter them, though this will affect how far they will go since they still count as being out during this time obviously, and you can also do this to manipulate, for example, where your red UFOs place their bullets. Since this move can be angled up or down like many F-Tilts, this can be used to stop basically any of your UFOs. Note that angling it, like many angled tilts in Smash, causes the knockback to change some: Downwards causes it to be weaker, but to hit at a semi-spiking angle, which situationally makes it kill a good deal earlier, and because you can use it off the top of a UFO and it will poke down off the UFO it can be used while going off stage via UFO or to edgeguard or whatnot, angling upwards causes a more sharp and diagonal angle and causes the knockback to be stronger, but more affcected by factors like fall speed.


Up Tilt: Thrush Puncture

Nue's wings quite suddenly swing and stab diagonally upwards, skewering anyone above and in front of Nue, which hurts considering half of them look like arrows and the other half appear to be sharp and almost metallic. This attack comes out very fast, dealing more damage the closer the opponent is to this move coming out: Being very close to Nue deals 14% damage and KOs at 125%, but at the tips it deals a mere 4% damage and a flinch, though the wings have quite long range as well. While this seems like a great move, it does have a few weaknesses: Most notably, the angling means it can't hit people directly above Nue and has no back coverage, and it has quite long ending lag. Throw this out suddenly when your opponent cannot identify it coming out for maximum value and try to mix up Up Tilt and Forward Tilt to dominate at multiple ranges with differences in which part of their lags are the longest.

Down Tilt: Unidentified "Blue UFO Invasion of Grief"

Nue waves her hand in front of her, as if lazily moving to part a sea singlehandedly, a blue UFO being created in front of her and travelling forward. It travels at half the speed of your red UFOs and travels half the distance of Battlefield, with the UFO itself only dealing 8% and rather weak knockback, though because it travels fairly slow it occupies a lot of space and cannot be safely spot dodged. When a character gets within 3/4ths of a Battlefield away and 2 Ganondorfs above these blue UFOs, and every second and a half that they stay within that range, these UFOs will give the foe grief by firing off a thin laser at their location that travels at a moderate speed. This laser also deals 8% damage, but it deals no knockback and strange hitstun: Specifically, the hitstun is much like hitting someone with super armor, in that it will "delay" any attacks but it will not actually hit the foe out of it, so you can't count on this to save you by peppering them with that kind of hitstun...but at the same time, it can certainly still help you escape a good deal of things. An opponent who keeps going in and out of the blue UFOs range will make lasers doing so, so it isn't advisable to hit and run with these out if you're fighting Nue.

Blue UFOs may be destroyed in the same manner as red UFOs and stood on by Nues in the same way, though destroying the blue UFOs produces a different though still symmetrical effect: Opponents who crack these ones open will heal half of the damage they deal as, well, healing, but in turn any attacks against them will heal that attack's user for half the damage it dealt! This effect can stack for a lot of potential healing, too...both for Nue's opponent and Nue herself. Players affected by this ability have a blue aura around them: If affected by a blue and red UFO, their aura will be part red and part blue, with the one that has more time left on it being more prominent: This is true for all additional UFO colors. Just like with red UFOs, this buff/debuff will last 10 seconds overall.


Dash Attack: Dance of Shadows

Nue releases a brief, dark cloud that encompasses her, before rushing out 1.5 Battlefield Platforms faster than her dash! ...Or perhaps not. Nue deals 14% damage while stabbing forward with her trident, dealing pretty good knockback, enough to KO at 115% or so. This start-up lag on this move is a bit long and the ending lag is similiarly long...or, by holding down A, Nue can simply stay in place and not attack at all, drastically reducing the ending lag in turn and leaving her where she started the attack. The dark cloud from this attack does not last long, enough time to get off about one attack if she stays behind, but that one attack and moment of hesitation from a foe is plenty.

The key here is to put the opponent in a bind if they can be hit by this and force a reaction from the foe, either a dodge anticipating the attack or an approach if you stay behind or whatnot, as the attack will generally help take care of approaches and vice-versa for staying behind. Try to follow the path that will be worst for the opponent and to get them to misidentify what you will do: Something to keep in mind is that an opponent may try to jump towards you as a combination of approach and the ability to use a Down Aerial on you, however this requires some spacing, as if the foe is too close to Nue they will be unable to clear her hitbox, too far and they won't be able to effectively approach, and if this is used too often staying behind and using an aerial can be a good counter. Still, this means you should keep elements of spacing even more in mind.


Smashes

Up Smash: Unidentified "Green UFO Invasion of Loyalty"

Nue gracefully waves a single arm above her, creating a green UFO above her as she opens her palm, which flies up until it is one Ganondorf above the ground it was made on and fires off a single green laser below it that is about the width of the Green UFO itself. This laser deals 16%-20% and upwards knockback with low KO power, though it is diagonal enough that enemies popped high enough will evade hitting the UFO itself unless they DI really poorly, though this does cut off certain DI strategies. Hitting the UFO itself deals a mere 5%-8% damage and weak knockback and it can be destroyed like any other UFO. Starting lag is fairly quick, but the ending lag is quite long.

The UFO remains stationary: If an opponent comes within a Battlefield Platform to either side of it (Height is irrelevent), the Green UFO will begin charging its green laser, then fire it off after 1.5 seconds of charging, regardless of if the foe is in range: This laser has the same properties as the normal laser and it has 6 "shots" aside from the initial laser, after which the Green UFO will disperse harmlessly. Because of this, straying in and out of range is a good way to get these things to fire off their payload if you don't want to destroy them directly, but doing so of course threatens Nue to push you right into the line of fire. Another good thing Nue can do is to make Green UFOs around each other that constrict space retreating from one to another, forcing them to destroy the UFOs directly or otherwise cut off routes to weave in and out by restricting horizontal movement, but do note that if Nue places them poorly the opponent will be able to just weave between both and have them both waste their shots while dodging both easily. These UFOs do not disappear after a time limit: Only if destroyed or if all their shots are depleted.

When a UFO is destroyed by the opponent, and not by it running out of shots, the opponent will gain a green aura around them, which gives them a buff and a debuff: The buff being that the opponent's shield will be slightly tougher and regenerate slightly faster, while the timing on their powershielding becomes larger, and finally that powershields allow that opponent to reflect projectiles in the same way as Power Shields did in Melee. The debuff, on the other hand, is that Nue's projectiles will home in on foes with green auras (Closest foe if there are multiple opponents), and her projectiles that may have already homed in gain much better homing AI, tighter and smarter compared to something like Samus' missiles, with further applications increasing turning ability and the like. So while the opponent gains more options to defend against you, they also will be pressured more and open up new options against them because of that. Something to tread carefully about.


Down Smash: Unidentified "Rainbow UFO Invasion of Terror"

Nue grins widely and snaps her fingers, creating a UFO in front of her that ocilates between red, green and blue. The UFO is the same size as all the otherrs and does not travel anywhere at first, simply floating in place as a trap: Getting caught in the initial creation will deal 8%-10% damage and weak knockback. The UFO remains stationary at first, simply spinning in place, but if an enemy gets half a Battlefield Platform to either side of it, it will chase after them at a decent speed and try to ram them for 15%-20% damage that KOs at 210%-165%: Not the strongest smash in terms of sheer power, but it has a total radius of one Battlefield Platform as a long lasting (15 seconds) trap, though it can be destroyed just like any other UFO. Creating the UFO isn't a laggy process to start, but it does have some ending lag associated with it.

Like any UFO, cracking open the UFO reveals a sweet prize inside, but the rainbow UFO is a bit different in this regard: Specifically, it simply gives the buff of the color of UFO it is, so red UFO gives red buff and so on and so forth, with the biggest difference being that the rainbow UFO's versions last for 1.5x the normal duration! The rainbow UFO stays on any one color for a bit under 2.5 seconds before switching colors and always goes red -> blue -> green, so the pattern is fairly predictable. If you're having trouble killing it on the color you want, try damaging it before it switches to the color you want and just delivering the killing blow then. Remember that you won't be hurt while attacking a UFO, so you can also try to use that to delay and escape it, maybe with a quick jab?

While the rainbow UFO contains a variety of treats, it also contains a nasty trick to anyone who breaks it open carelessly. Y'see, the rainbow UFO's buffs don't like stacking with normal ones, so if you already have a UFO buff of the same color when you break it open...well, then it becomes more of a curse, really. So if you're powered up by red UFOs, don't try to break open the rainbow UFO while it is on red. It'll refresh the timer, too. As for what happens if you break it open while having a buff of the same color up...

Breaking a red rainbow UFO open while having the red UFO buff simply means that you lose the actual damaging part of the buff, leaving only the extra damage taken, making it a decently big downside: In addition, any bullets from Red UFOs on the field will home in on the foe as if they broke open a red UFO, which is rather a bother. If you break open a blue rainbow UFO while having the blue UFO buff, Nue will heal for full when striking that opponent, but the opponent's heal will be converted into a slower heal which takes place over 8 seconds, making it less useful for survival. And if you hit the rainbow UFO while it is green and you have the green buff, then they'll keep their shield buffs...but now Nue's attacks will have half of their damage go through shields, making the shield itself a good deal less useful. Buffs AFTER getting debuffed are not affected by this, so you can try and kill some other UFOs to help counteract this with positive buffs to an extent. You can tell you're suffering from a cursed buff because the buff outlines will have an ominous, smokey darkness inside them.

Oh, and remember how Forward Tilt can stall a UFO? Stalling a rainbow UFO in place also causes it to stall changing color: If you're having a heated battle near a UFO, try using that to catch someone on a "bad" color. :)

[collapse="Fluff"]Rainbow UFOs give double the points![/collapse]

Forward Smash: Grudge Bow "The Bow of Genzanmi Yorimasa"

"The greatest bravery is to use the weapon you fear most."


[collapse="Fluff"]The move's namesake is Minamoto no Yorimasa, a samurai who was proported to have slain a nue in the palace of the emperor: As Nue's profile implies she is the nue of legend, this is where the name comes from. Genzanmi was his nickame by rank, hence, Genzanmi Yorimasa. It is Nue's final spell card in Undefined Fantastic Object.[/collapse]

Nue points a hand forward with two fingers pointing forward, her other hand "pulling" back as if she was readying a bow...and having an energy arrow appear between her fingers! She then "lets go" of this imaginary bow, sending the energy arrow flying forward. This arrow travels fast, about 3/4ths the speed of Pit's arrow, and deals 17%-23% damage to anyone it hits, sending them flying off the screen at 125%-100%, making it solid if unspectacular for damage and KO percentages. The starting lag on this is slightly high, but despite a small flourish after firing the ending lag is fairly short.

Normally, Nue cannot strike her own UFOs, but the Grudge Bow's arrows allow her to do so, and will in fact break them in a single shot: Doing so will cause them to apply any buffs they may have had to Nue herself! (NOTE: Red UFO bullets will not home in on her when breaking red UFOs: Green UFOs will cause enemy projectiles to home in on Nue, along with enemy melee attacks which essentially gain small range) Because they have impressive range, Nue can use them to snipe UFOs out from under the opponent as they try to kill them, though this is somewhat predictable. As the arrow can be aimed up or down a good deal, Nue can hit green UFos decently easy. Nue can even steal rainbow UFOs for longer buffs! Nue can't be cursed by her own UFOs, either, though the rainbow UFOs will still not stack buffs for her...they just won't harm her buffs, either.

Solid projectile, UFO abuser and a way to put people in a squeeze by just threatening to shoot the UFO (or to make them use the UFO as a meatshield by holding it while they destroy it, maybe even directing it up/down to miss the UFO as a feint), the Grudge Bow is a pretty neat tool.


Grab Game

Grab: Undefined Grab

Nue reaches her hand forward and attempts to grab the foe! Shocking, I'm sure. She has somewhat poor grab range, but the speed is high and lag is low. Her dash grab has above average range but additional ending lag compared to what one might expect, though.

Pummel: Pierce

Nue takes her trident and stabs the foe with it, dealing 3% damage. It has the high lag you'd expect from a 3% pummel.

Forward Throw: Undefined "Purple Mirror"

Nue takes her snake-accessorised hand and slams it into the enemy, sending them flying an okay chunk of distance away while dealing 9% damage, with a snake slithering from Nue and into the foe as she does this. The enemy has had a "Seed of Non-Identification" put inside them for the next 12 seconds. Enemies who have a Seed of Non-Identification inside them experience a most peculiar effect if Nue happens to hit them: The creation of another Nue popping out from where they got hit! It isn't really Nue, of course, it is an illusion, but one real enough to cause some damage, as the illusion will pursue foes and attack dealing real damage, though it deals half damage and knockback compared to Nue and its hitstun does not interrupt moves in addition to being halved, though it will "stall" them like hitting a super armored foe.

How strong these illusions are depends on the strength of the attack: The weakest attack, the jab, makes an illusion with about 12 HP that lasts about 5 seconds, able to be dispelled in about two tilts and a minor nuisance, while the pummel will not create anything at all. Illusions from the harder hitting of Nue's attacks will have around 35 HP and last indefinitely. Since red buffs could theoritically push this higher, even tougher illusions can be made. In general, expect an average strength attack to make an illusion of a little over 26 HP that lasts around 10-13 seconds. Illusions cannot, themselves, create UFOs or use this throw, nor will they cause the effect of this move itself to activate, which is one way to tell them apart from the real Nue. Dark clouds they make also dissipate significantly faster. Illusions's Forward Smash cannot break UFOs and will instead go right through them...which can be bothersome if you get used to using UFOs to shield you from the hit.

Because the illusions are fairly aggressive and the ability is on-hit, it tends to reward more aggressive Nue play or otherwise encourage it and is a good way to start converting UFOs/clouds to more offensive strikes. The throw itself is not that noteworthy as it deals average damage and knockback, but the knockback has a somewhat high base and thus is always good for a bit of breathing room.

[collapse="Fluff"]Seeds of Non-Identification are also what causes Nue's items to look like UFOs: She used them in Undefined Fantastic Object to turn the pieces of Byakuren's ship into the collectable UFOs, but nobody quite knows what Nue's UFOs are. Truly unidentified, there. Also, this is an actual spell card from Double Spoiler that has Nue make an illusionary duplicate.[/collapse]


Up Throw: Chain of Emotions

Nue takes her trident and stabs it upwards into the enemy's gut, the trident producing a colorful flash as the opponent is launched for 10% damage that KOs at 200%, though it has quite low base knockback with high scaling to get there. Pretty normal overall, but at the apex of their knockback, an energy chain will tether the opponent to the nearest object to them, with the exception of Nue herself who will never be tethered too: The tether's chain links are colored red -> green -> blue -> black in that order, which then repeats. The tether is 1.25 Battlefield Platforms long and has 40 HP to break it, though trying to doublehit with stuff like Down Smashes can help break it faster. Since the tether can be worked with, say, a UFO, it should be noted that whatever the enemy is tethered too WILL drag the enemy around and they can't drag stuff around themselves. If they are tethered to a UFO, they can break the UFO, but the chain will only disappear from the foe when it is destroyed. If Nue presses A at the end of a chain on the foe, Nue will use her trident to tether the foe to the nearest object, though she can use the control stick to instead tether to nearby objects in another direction: Nue can also use this to untether the foe from something if she does not want the foe tethered to what they are tethered too or wishes to tether them to something else.

Nue can angle this throw to the left or right while it is coming out, which lowers the power to 7% and cuts the knockback down a good deal (Though it has slightly more base) as Nue instead flicks the foe quickly in the chosen direction as she stabs them. This causes them to be sent almost straight to the left/right: Useful for if, say, you want to tether someone to something in that direction.


Down Throw: Trident Hop

Nue throws the foe to the ground and hops up, stabbing them with the trident as she does so, the trident remaining stabbed into the foe as Nue balances on the handle. This process deals 6% damage: Nue then can perform a variety of actions based on how the control stick is moved. The foe themselves is "prone" during this move, however they cannot move until the trident is taken off them. Nue can perform a variety of actions for a brief moment after. Pressing down causes Nue to flick the enemy into the air, which deals 10% damage and KOs at 185%, making it the most damaging throw of Nue's, however the trident will release for a brief moment while doing this, during which time the enemy can roll away or if they have a fast enough getup attack use that. Note that this is much faster than, say, Kirby's f-Throw, so you need good reactions to do this...and Nue might take her time a bit to throw you off.

Pressing up/jump will cause Nue to simply leap into the air, equal to her first jump (or a short hop if inputted that way), though she will be higher due to jumping from the handle. She takes the trident with her, which deals 5% as it exits the foe's body, the foe is then free to decide where to go prone-wise, with Nue feeling free to chase them from the air. Pressing left/right or jump + left/right will cause Nue to instead jump in that specific direction, dealing 7% damage and sending Nue in that direction, though it is a bit more horizontal and less vertical than a normal jump: This allows Nue to chase enemies who roll in that direction or to, say, catch up to a UFO, however, enemies can roll in the opposite direction and leave Nue without follow-up options compared to going up. There's a brief moment where the foe is free before Nue jumps, so you have to wait a moment to know where she will go...which is the opposite of what you want to do if she is flinging you up. The animations for the two are similiar, but NOT the same, so make a look and a split second decision to help. Finally, pressing shield or running out of time will simply cause Nue to hop off the trident while taking it out and land on the ground, dealing 3% damage: This is vulnerable to getup attacks and does the least damage, but it allows Nue the most control of what she wants to do after the foe makes their prone action.

Nue can also hit B to move her Danamku Chimera Laser during the brief moment, but she CANNOT fire one off, and it will cause her to cut it quite close on the duration before she automatically gets down. Keep this in mind, though, for trying to trap the foe or cut them off. Mix up your options, think about the surroundings and blast the foe!


Back Throw: Spear Spin

Nue skewers the foe with her trident and then spins them around for a while, dealing 8% damage, then two hits of 1% damage, then a final hit of 4% damage as the foe goes flying off of Nue's trident, the throw itself KOing at about 170%: While the spinning can be nice to hit foes into your UFOs or projectiles, this throw also provides the most damage and knockback with nothing to worry about when all of your other throws might have secondary effects you do not want.

This throw, however, does have one special property, which is that if Nue spins an enemy into one of her illusionary duplicates from the Forward Throw, her trident will glow dark for a moment and the illusion will become an illusionary duplicate of the foe, complete with their moveset, though no nametag or anything. This allows Nue to add a little variety to her illusions and will, in addition, heal the duplicate to full and add 3 to 8 seconds of time to how long it lasts, depending on how many of the spins hit the duplicate. If the duplicate is already of the foe, then this will not work, and thus it cannot be used to infinitely extend your magnificent illusions.


Aerials

Neutral Aerial: Illusionary Truth

Nue conjures up a red-and-purple bubble of magic around herself with a flick of her wrists, resembling the shield she generates around herself when bombed in UFO, which quickly dissipates but bounces foes away from her while dealing 12% damage when made existant, with knockback that KOs at 235% or so. Quick to come out, Nue's NAir is a great panic button on the ground or in the air, but the high ending lag makes it quite punishable of relied upon too much, so use it wisely.

Using this in darkness is when it is as its finest, though, as the shield will absorb the fine black mist and spit it back out as fine black lasers, one in each of the eight cardinal directions. These lasers only deal 8% damage and very weak knockback (KOs at 888%!), but they have somewhat elevated hitstun, and they get made in a lot of directions for great coverage, though it is pretty much impossible to hit with multiples of them as they are a bit thing, are spread out in largely opposite directions and have sizable gaps between them. This also eats up that bit of darkness, creating a circular patch to see in, which Nue can use to help herself but can also render her less sneaky. Nue's illusions will not eat up darkness when performing this attack, nor will they in turn make lasers.

If the lasers from this move hit one of Nue's illusions, then the illusion will pop and burst, its energy turning into a laser with the same attributes as the normal lasers from this move while deflecting the initial projectile at a logical angle (IE down and right turns into up and right if hitting from above, left and down from the sides, etc). This destroys the illusion but can put on a lot of pressure with additional lasers, and if you hit with a laser while Purple Mirror is up you'll make a duplicate, albeit a quite weak one. Hitting solid ground or another solid object, such as a UFO, will cause the laser to go poof, turning back into inky black mist as it hits said object, specifically 1/8ths (More if less of the circle hit darkness) of the amount of darkness used to make the laser...and lasers made from hitting duplicates will also do this, so in addition to being able to scatter smaller patches of darkness around it could, in theory, make extra darkness, though this is highly impractical given like half your shots go up.


Forward Aerial: Sanguine Scrape

Nue swipes her trident in downwards in front of her, starting from above like many Forward Aerials, cutting open anyone in front of her for 10% damage and some decent forwards knockback, though it will not KO until 180% or so. Pretty quick to start up, enemies who are hit by this will start to bleed out for about 3 seconds, taking 1% per second for a total of 3%, functioning mostly as a little additional damage. However, Nue's attacks will allow her to rend the enemy's flesh around the wound for as long as it is open, causing her attacks to keep the enemy's wounds ripped open for 2 seconds (and thus 2%) more each time she hits the foe, and even Nue's illusionary duplicates can get in on the action, though their attacks only rend the foe for 1 second each, which can mean some pretty nasty stuff when hitting the foe causes one to pop out. This caps at 20 seconds, but even getting that will be a challenge considering how much you have to just keep hitting the foe repeatedly. The ending lag is pretty long, as Nue unbalances herself a good deal in the action of swinging it.

Down Aerial: Nue Sign "Myserious Snake Show"

Nue sweeps her arm under her as the snake on her arm glows green, sending out a green, snake-like projectile which moves slightly left and right as it goes down. This snake doesn't deal much damage, 8%, and has somewhat weak downwards knockback as it goes down: You can spike people, but don't expect to kill them just for being offstage or anything with this. The snake projectile moves slightly left and right as it falls in an alternating pattern, so it can be somewhat tricky to dodge, and the snake itself has quite long range, only being stopped by going offstage or hitting the ground...

And even hitting the ground doesn't stop it, as it will be destroyed while a new snake is split from it and does the same thing, but going up, and instead of having infinite range, it goes as high as Nue was when she released it, meaning that the projectile is more effective as an aerial control projectile or sort-of aerial trap projectile the higher Nue is when using it, it should also be noted that since the projectile is destroyed and not bounced any effects on the projectile would end, such as if it was reflected to the enemy's side. The knockback it deals is upwards when moving upwards. Starting and ending lag on this attack is low, but the graceful arm sweep Nue provides is somewhat long to go through and there's no hitbox until the projectile comes out.


Up Aerial: Trident Whirlpool


Nue stabs her trident upwards and spins it in a somewhat long, multi-hitting attack: This move deals 3 hits of 3% damage followed by a fourth hit of 5% damage for a total of 14% damage, with the first three hits dealing knockback towards the trident and the last hit knocking enemies up weakly, it won't KO until like 333%. The multiple hits of this move cause multiple duplicates to be spawned if the foe is hit by them, but the attack is so weak that each one is going to be minimum strength, so they won't stick around long or be hard to dispel. Still, if you just want to throw out a bunch of them, this is one of your go-to moves, and since the knockback heads towards the trident for all but the last hit, you can use this to sort-of "drag" people along with you as you move through the air or shorthop.

Starting lag on this move is decently low, ending lag is a bit long but it isn't as long as you'd expect for this kind of move.


Back Aerial: From Makai's Heart


Nue provides a harsh thrust of her trident behind her, dealing 16% damage with strong knockback that KOs at 105%...if you hit at the tip of the trident, while hitting elsewhere (Such as with the starting thrust) deals 12%, albeit the knockback is still good enough to KO at 150%. The sweetspot is a bit hard to hit with, but the hitbox does stay out a moment, which can help, and it is a fine move to hit unsweetspotted as well, though the starting lag is slightly above average and the ending lag is long. It can even be used as a risky shorthop KO option as it comes out quick enough, but you will take the even worse landing lag to do so...

Final Smash: "Nightmare of Heiankyou"

Nue's Final Smash is a cinematic final smash similiar to Captain Falcon's that thus requires you to hit with an activation, specifically a quick swipe of her trident in front of her. The range is a bit small, but it comes out quickly, and you can snag multiple people with it. When she catches a foe like this, a cinematic will play as Nue leaps into the air and summons a maze of red bullets (Like the spell card this move is inspired bye), which continually changes shape and batters the foe, Nue directing the maze with her trident while making a brief speech about fear and the unknown, finally causing the mage to converge on the foe as Nue stabs her enemies from above with her trident. This move is a very damaging Final Smash, dealing about 90% total, but it has no knockback at all and instead leaves the foe in prone at Nue's feet with Nue having a frame advantage.

Playstyle: Unknown Fighting Opponent


Nue's playstyle is primed to plague the foe with doubt and decisions, then leap on the foe and take advantage of whatever they choose. Nue's UFOs offer powerful effects but are all destructable, which can provide buffs which can backfire for Nue, but also open up weaknesses that Nue can exploit with her moves: Furthermore, enemies have to take some time to actually kill the UFOs, which can open up enemies to Nue's moves from the cloud or a rebounded Neutral Special. In addition, enemies who destroy normal UFOs will have further issues with rainbow UFOs, possibly having to take an even worse downside if they wish to clear them out. Enemies could avoid taking out non-rainbow UFOs, however that means Nue can use their excellent spacial control abilities to help with her more aggressive kit parts, such as her grab game, Forward Aerial and Dash Attack. In that sense, it can be said that what Nue most puts under pressure is opportunity cost, to punish enemies for choosing to take one action over another, while Nue herself masks her actions or puts enemies under pressure, even indirect UFO pressure, to prevent enemies from doing the same to her.

I've got to do stuff now, so that's all the playstyle you get right now. Maybe I will add some more in later? It is a bit of an unknown right now...
 
Last edited:

FrozenRoy

Smash Lord
Joined
Apr 26, 2007
Messages
1,268
Location
Las Vegas, Nevada
Switch FC
SW-1325-2408-7513
(Author's Note: This moveset was started in MYM14 with JOE's Pinsir)

Heracross

"Heracross charges in a straight line at its foe, slips beneath the foe's grasp, and then scoops up and hurls the opponent with its mighty horn. This Pokémon even has enough power to topple a massive tree." - Pokedex (Ruby)
"This powerful Pokémon thrusts its prized horn under the enemies' bellies then lifts and throws them." - Pokedex (Gold)
"With its Herculean powers, it can easily throw around an object that is 100 times its own weight." - Pokedex (Crystal)

(Author's Note: Heracross is designed to work with JOE's Pinsir moveset in 2v2s. You will find your experience reading this set enhanced if you read Pinsir first!)

Statistics


Heracross size is, well, about what you'd seem above: it equates to roughly the same height as Samus when including Heracross' horn. The horn acts as a hurtbox, but will not take KB from attacks unless the attack does 7%+. Heracross' weight puts him in a class roughly equal to Wolf's: It should be noted that Heracross' height and weight are exactly the same as Pinsir's. Heracross, however, is much faster on the ground, opening up his beetle-y back and surging forward with his wings to get great speed on par with MK's. He also has traction equal to Metaknight's.


Heracross is quite aerially competent, accelerating quickly and maintaining speed, although his fall speed is relatively floaty. Heracross also has two extra jumps via use of his wings, although both are pretty small: His ground jump is quite high, while his second jump is average. While Pinsir had a Crawl, Heracross instead has a specialized float, called a "Hover", wherein he...uses his wings to hover:

- It lasts 1.5x as long as Peach's float.
- Heracross falls at half his usual falling speed, making him go quite slowly, allowing him to juggle aerial foes. Do note that he still, however, falls.
- Heracross ability to influence his direction in the air is increased highly (About 1.5x), allowing Heracross to "hover" under foes and follow them...or do excellent recovery.
- Heracross air dodging will cancel this effect, meaning he may find it hard to dodge...or he can use this to get under a foe by air dodging and fast falling at the same time, going through a foe's attack and under them.
- Heracross can only Hover one time per air trip.

...And that is all the special things Heracross can do.


Specials

Side Special: Strength

Heracross charges straight forward, wings buzzing, at its dash speed, lowering its horn as it does so...and upon connecting with the foe, strongly flips them up right above him! This attack deals a tidy 13% damage and set knockback: the foe ALWAYS lands a Ganondorf above Heracross, although with DI, they can land a little to the side...moreso with SDI. The key thing about this move is that the foe cannot actually act until they reach the apex of their knockback, which allows Heracross to form combos on the foe as they are sent flying up. The starting lag on this is about average for your "Rush forward SSpec", but the ending lag is dependant: It is actually very low if you hit, as Heracross practically ends up in his idle position, but is very bad if you miss, as Heracross uses his wings to skid to a stop. Because of this, it is very punishable on whiffing.

If Heracross runs into one of Pinsir's boulders or another heavy object (like a Crate) during this charge, he will instead fling it into the air about 2 Ganondorfs, wherein it becomes a strong projectile. Since there is such low ending lag on hitting, Heracross can use these delayed hitboxes to really make dodging his physical game a pain.


Up Special: Megahorn

Heracross wings pop out as he jump-flies upwards with herculean strength, leaping up 1.25 Ganondorfs with tremdendous strength packed into his horn! Being hit by this attack deals a devastating 21% damage and KOs as soon as 100%! Heracross can even move left or right during start-up to "launch" himself a bit in that direction! In addition, Heracross will instantly enter his Hover upon the completion of this move...in fact, he enters an enhanced Hover:

- His falling speed is instead reduced to 1/4th his normal falling speed.
- His ability to influence his direction is increased to 2x instead of 1.5x
- However, Heracross will always enter helpless when he exits this move, and will not regain use of his Up Special if hit before touching the ground, so it can be less risky to just Hover as per normal.

...making this a great way to recover or attack. Specifically, it forms a Semi-True Combo with his Side Special. You see, the starting lag lines up with a hit Side Special so that, with proper reflexes, the opponent cannot dodge a Side Special into an Up Special...however, the foe's DI can mess with this: DIing in either direction merely means that if Heracross "launches" himself in the opposite direction, he misses...but if you SDI it, Heracross MUST read it correctly and launch himself that way, or this will whiff! In addition, he'll miss the foe if they do not DI at all and he launches himself left or right.

Because of this, reading the foe's DI is key for landing this combo: It is always possible, but you need to read the foe's DI and adjust accordingly quite quickly in order to land it consistantly. On the plus side, this forms a VERY potent KO move with the Side Special, so foes in KO range (Or within 13% of it) must be very wary. Ending lag is a bit high.


Down Special: Counter

Heracross takes a defensive stance and flashing for his Counter! It has almost the exact same timing as Ike's counter, but comes out sliiiiightly faster. If Heracross is hit, he won't counter the foe for damage, but instead grip the foe in a submission hold appropriate for the opponent's body type (For example, he obviously isn't going to be using any Armbars on Gastly!), creating a Command Grab. You have a moment to input the command after countering. Like pretty much every counter, it won't work against grabs.

DOWN / NO INPUT) Heracross takes the opponent and, flipping them upside down, delivers a fierce spinning piledriver! This deals an excellent 14% damage and hits the opponent quite high up into the air: It actually starts to KO at around 180%. It is easily Heracross' strongest command throw, but you will quickly find it lacks follow-up chances past low %s, so you have to weigh in if it is worth foregoing a chance at more hits.
UP / B ) Heracross takes to the skies and jump-flies up about half of a Ganondorf, spinning as he reaches his apex before tossing the foe into the air for 8% damage and some fairly weak purely vertical knockback. Not very strong, but it sets the foe up for getting aerially dominated.
BACK / FORWARD ) Heracross switches the foe into a chokehold, then the player gains control: The opponent will take 3% damage per half second they are stuck in the Chokehold, while Heracross can move about the stage as per normal, though he cannot attack. Heracross can even go off-stage with this, if he wishes. If the opponent breaks out, they end up in their usual grab release state: Hitting a button such as A or B during this will instead cause Heracross to take them down and force them into prone like Snake's D-Throw while dealing 5%...or, if in the air, will cause Heracross to automatically footstool off the foe, offering a lot of potential gimping options. It is tricky to deal a lot of damage with this, but it offers the most options for what to do after you "throw" the foe.

Neutral Special: Reversal

Heracross wildly flails his horn around him for a move that has nice all-around-him range. As Heracross takes more and more damage, he puts more and more into this flailing with a desperate look on its face. The amount of damage and knockback the foe takes depends on how much damage Heracross has taken: At 0%, it deals merely 1% and a flinch, while at 300%, it is a OHKO. it starts to become a decent KO move at around 80% damage, KOing around 140% (16% damage) at that point, and becomes a great one at around 125% damage, wherein it KOs at 85% (22% damage). The longer you survive, the stronger this move becomes...and the longer its ending lag becomes: As you take more and more damage, Heracross needs more and more time to recover during the ending lag of this move, making it worse and worse to whiff. The move ranges from risky KO move to decent damage option and clearout move to worthless 1% damage move, depending on your damage %, and can serve as Heracross' "ace in the hole" when the time comes. Never forget it as a strong tool.

Standards

Jab: Fury Cutter

Heracross does a quick and furious swipe with one of its claws: Not much strength is put into this quick move, as it deals a mere 1% damage and some very weak knockback...but as Heracross gains more and more momentum with each swing of one of its claws, this move gains more and more power! Each time you hit with this, the next hit deals 1% more damage: So if you hit with this and kept up the rapid jabbing, the second hit would deal 2% damage, and so on and such forth. Utilizing this move, Heracross can very quickly rack up the damage, especially if the foe is against the a wall...

However, since this move is based on the momentum of using it consistantly, using other moves disrupts this: Every time you use a move that is NOT Fury Cutter, it deals 1% less damage the next time you use it, for a minimum of 1% AKA the original attack. Ergo, how much you want to rely on Fury Cutter will actually change how good it is. This move is not added to the Stale Move queue when it hits, otherwise its effect would be sort of...pointless. Note that Heracross does not need to hit a CHARACTER for this move's power to go up: Hitting something like a crate or boulder that can be dealt damage will also work just fine! It also decays at a rate of 1% per 3 seconds if Heracross does not use any other moves at all, so you can't just save it indefinitely.


Forward Tilt: Brick Break

Heracross reaches its arm back and puts all of its strength into a single, well-placed punch, dealing an excellent 13% damage and good knockback for an F-Tilt: It'll start KOing around 180%. The placement of this punch, however, is important: all that strength concentrated into a shield's weak point means it deals great damage and shield pushback, allowing Heracross to easily shield push people off of ledges and basically makes this move immune to shield grabbing. This move can be angled like many F-Tilts and each angle has a different effect on the foe's shield: Up causes them to be sent into prone by being pushed down, while down causes them to be popped into the air equal to the amount of pushback they'd take, although they are completely free to move and attack during this. However, if the foe angles their shield to match your angle up/down, it won't even deal increased damage or pushback...they've covered the weak spot!

Up Tilt: Take Down

Heracross raises a fist up and then slams it down in front of him, covering a nice area above and then in front of him. Aerial opponents struck by this move suffer knockback that sends them forward and at a slight downward angle, which can be deadly to certain recoveries. While it might seem odd for Heracross to want to drag down foes from the air when he has his hover and Megahorn, Heracross much prefers his foes in a specific aerial range, as set up by his moves, and his ground game has a variety of follow-up ability to a move like this. Grounded foes take more standard knockback. Both types of knockback KO at the same time, around 230%, and the move deals 11%% damage while having fairly quick start-up speed, if average ending lag.

Down Tilt: False Swipe

Heracross brings one of it's claws back, then swipes it forward along the ground, dealing a mere 5% damage and some light knockback with this quick move: The very tip of his claws is a quite small sweetspot that trips foes. Heracross can delay this move for a moment by holding down A, which while brief, is enough to snag a spot dodger or two, or otherwise mess with timing: Perhaps with a teammate, to give them time to nudge the foe into you? It's really quick either way, so if Fury Swipes is really low, this can be used as a substitute jab, and it can chain into itself at low %s.

Dash Attack: Double-Edge

Heracross dashes forward with its horn lowered and a sudden burst of speed that sends it forward at 1.5x its dash speed! Heracross travels about 1 Battlefield Platform with this move, making it a very long dash attack, and it has decently fast start-up while dealing strong damage: 16% damage and it'll KO at 130%! Sadly, as the name implies, this move carries recoil on it, to the tune of half the damage and knockback Heracross deals with this move, so following up is close to impossible and you're taking damage to use this. This move also has pretty horrendous ending lag, so it's really punishable if you miss.

One way to help avoid this is to hit a boulder, a Crate, or something like a solid wall, which will cause Heracross to use his horn to "flip" itself into the air, continuing the attack at a 90 degree angle up and behind it as it flips into the air, before taking drastically reduced ending lag: This is a good way to catch people hopping to stop you and cancels lag, so keep it in mind.


Smashes

Forward Smash: Horn Attack

Heracross' wings flutter rapidly in place while his shoulder turns forward, horn pointed straight forward with his head tilted down. Release this charging animation and Heracross goes flying forward, dealing 16%-21% damage that KOs at 125%-105%! He flies forward a Battlefield Platform before stopping and will go through multiple opponents if they are in the way. He travels at his dash speed. This has decently fast start-up and his ending lag is fairly average as he stops flapping his wings and comes to a more gentle stop than his Side Special due to the more upright position of his charge. A very nice alternate KO option and pretty good damage racking option.

If Heracross rams into a boulder with this, he'll continue right on through, crushing the boulder into many tiny chunks as a hitbox! 5 rocks shards fly in all directions for 3% damage each with this...if Pinsir properly places a boulder, dodging this can be downright difficult and shielding very potently painful. Heracross will also shatter large contains such as crates and barrels this way, although they will still release their item.


Up Smash: Horn Drill

Heracross' wings flutter rapidly in a duplicate of his F-Smash animation, but this time instead uses all of his momentum to strike upward with a vicious, drilling motion. This is one of Heracross laggiest attacks, with a great deal of starting lag and high ending lag, but it kills and damages even better than his Megahorn attack! Specifically, it deals 21%-26% damage and KOs extremely quickly, KOing pretty much as good as Ike's F-Smash. Like I said, though, very laggy: Heracross needs excellent predictive skills to land this move. If you can do so, though, the payoff is incredible.

Down Smash: Feint

Heracross once again replicates his Forward Smash's charging animation, this time putting the energy into a fierce spin, his horn striking anybody nearby for a cool 16%-20% with knockback that KOs at around 140%-125%. While this is well and good as an attack, with a bit of a quick start-up with bad ending lag, the animation and start of this move is part of what makes it great: If you quickly smash an input for one of your other smashes during start-up, Heracross will instead use that smash! There is an increase of starting lag on the move due to Heracross shifting the charges power to an angle better for one of the other smashes, but it allows Heracross to really ramp up the unpredictability when he goes into a Smash...just note the increase of lag means it is strictly worse than using one of your other smashes aside from the predictability aspect...though it also allows you to change your smash based on the situation!

Grab Game

Grab: Submission

Heracross reaches forward with it's arms and pulls a foe into a vicious hold. Heracross has decently long arms, so this has decent length, but the speed is pretty average. So it isn't a spectacular grab, but it is hardly poor.

Pummel: Fury Attack

Heracross furiously bashes the captured foe with its horn. This only does 1% damage, but it is a very quick pummel, so Heracross can tack on some good damage with this.

Back Throw: Seismic Toss

Heracross snags the foe by the legs and swings them around rapidly, before tossing them away for 12% damage and fixed knockback about one Battlefield Platform behind and one Heracross above Heracross. Heracross is too slow and the opponent too high to chaingrab this, but the consistancy in knockback allows Heracross to set the foe where he wants, on his terms. A pretty simple throw overall.

Forward Throw: Revenge

Heracross grabss the opponent by the neck and then performs a SWEET CHOKESLAM on them, which deals 8% damage and KOs at 240%...and the knockback is larger enough that, usually speaking, you'll have some trouble following up on them. The way to boost this move's effectiveness lies in your shield: Revenge gains additional damage and knockback if you shielded a move, signified by Heracross' hand glowing with an awesome power! Simply shielding any attack makes it deal 12% and KO at 180%: A pretty good KO throw that also racks damage and gains a good deal of space...and the grand prize is when you PERFECT SHIELD an attack, jumping the attack to 18% damage while KOing at 120%! Tons of damage and tons of knockback, so perfect shielding into a shieldgrab is a big deal for Heracross.

Down Throw: Smack Down

Heracross raises a single claw upwards and harshly strikes it down onto the foe, forcing them on their knees and into prone while dealing 9% damage. Knocking the foe into prone brings a few advantages, as Heracross is a decent tech-chaser, and movement attacks like Forward Smash might help take advantage of this...perhaps if you had a partner or some solid object to your sides, you could better take advantage of this?

Up Throw: Fling

Heracross gets its horn right under the opponent and then...FLING! Into the air they go! This deals a nice 13% damage and flips the opponent into the air with decent strength, enough to KO at 210% or so but with a good base, and at quite low %s it can follow into a Megahorn, though since the %s are so low you can't kill with it...later on, it makes a good way to put foes into an aerial chase position and allow some inventive ways to hit with Megahorn.

Aerials

Neutral Aerial: Air Punch

Heracross leans his fist back and then punches it downwards in front of him, his wings popping out if he is not hovering to decrease his fall speed slightly. The punch is held out for a long time and thus has sex kick properties, dealing 14%-7% damage that can KO at 225% when it first comes out. The long lasting hitbox means he can do wall-like strategies with it and if he catches someone at the end, he can try a footstool to combo off the foe. The starting lag is slightly elevated, though.

Up Aerial: Horn Flick

Heracross performs a quick upwards horn stab, skewering enemies above Heracross for 8% damage and light upwards knockback: Because lag is short on both ends and the knockback is light, this is a quintessential if standard juggler move, and if you can get below someone and hover you can play Space Invaders with them for a while. The move's coverage is pretty small, though.

Down Aerial: Earthquake

Heracross flaps his wings twice while winding up a punch, diving directly down with fist outstretched until he hits the ground (or self destructs, I suppose). Getting hit while Heracross plummets deals 8% and a moderately strong spike, while getting hit when Heracross actually slams into the ground deals 15% damage and results in the foe getting stuffed into the ground, proning them. When Heracross impacts the ground, he creates an earthshaking hitbox to both sides of him that deal 20% damage and KO upwards at 110%, which is pretty strong: It doesn't earthshake where Heracross lands exactly, so you don't get proned right into it unless you get a bit too overeager with your rolling.

Items caught in the earthshaking (or boulders) get flung up too, as if they had been Glide Tossed upwards. This move has pretty long starting and ending lag, however, so that's a fairly fine weakness for it.


Forward Aerial: Razor Wind

Heracross flaps his wings rapidly, generating a fairly sizable amount of razor sharp wind in front of him, which deals four hits of 4% damage, then knocks opponents away for knockback that KOs at 140%. The hitbox's size is quite nice and it comes out decently fast, but it is a bit easy to DI out of and the ending lag is fairly long, but Heracross can cancel the ending lag into his flutter so that's nice.

Back Aerial: Back Punch

Heracross swings his arm behind him in a coverage punch, not as strong as most back aerials but having solid range, dealing 12% damage that KOs at 160% with knockback more for spacing, but it is actually fairly fast on the start and not too laggy on the end. Try using it for a wall of pain or something.

Final Smash: Mega Megahorn

Heracross gathers power, seemingly about to enter his Mega Heracross form...then realizes Mega Heracross looks dumb, puts all that power into his horn and bumrushes forward for a MEGA Megahorn! Range is long, speed is fast, it deals 50% damage and KOs at 70%.

Playstyle: Aim For The Horn
 

ChaosKiwi

Smash Apprentice
Joined
Feb 1, 2014
Messages
104
NNID
ChaosKiwi
One day time. Activate Kiwi Set Pump Out Mode.

HOL HORSE


Hol Horse is one of Dio's minions, sent after Jotaro Kujo and his group to kill them all with his partner, J. Geil. Then, after failing that, he tried again with his 'friend' Boingo, which... ended poorly.

Fighting with his stand, Emperor (seen below), Hol Horse never works alone, always bringing with him some outside help into battle. It's better to be number two, he always says.


HOL STATS
Height- 8
Weight- 5
Jumps- 4
Ground Speed- 6
Aerial Speed- 6
Fall Speed- 6
Swagger- 11


SPOL SPECIALS

Neutral- Emperor

Hol Horse brings his hand in front of himself, Emperor materializing in his grasp from nothingness. Once Emperor is in place, Hol will fire a shot. This bullet travels quickly, and will continue on in a straight line until it hits something. On contact, the bullet deals 5% and high hitstun.

That's not all, however. You see, Emperor's main feature is that Hol Horse can mentally direct any bullets fired from it. In order to initiate this, the player needs to hold the button instead of merely tapping it. For as long as they hold the input, they have complete control of the bullet's course via analog stick inputs, similar to Pit's arrows. However, the steering on Emperor's bullets is much tighter and precise, allowing for more control. Hol Horse cannot move while controlling a bullet.

The other option, however, is pressing the input repeatedly instead of holding it, similar to the space animals' lasers, firing a series of bullets that you can't control.

If the player wants, they can fire a bullet then take control of it a bit later, by simply holding down the button while the bullet is already in flight. This causes it to come under their direct control as normal until the button is released again. Should there be more than one bullet out at the same time, then this will only affect the last one fired.

Side Special- The Hanged Man

Hol Horse takes out a glass bottle of water, and chucks it forward in an arc. Once it reaches the apex of its trajectory, about two battlefield platforms away, Hol Horse will shoot it, causing glass shards to scatter and a puddle of water to form on the ground below, about one SBB in width.

From there, the puddle acts as a sort of trap. Should any enemies walk over it, the Hanged Man jumps out and grabs them. Who is the Hanged Man? Well, it's the stand of Hol Horse's partner, J. Geil, who is hiding just off screen, out of the light. The Hanged Man is able to travel through reflective surfaces to attack enemies. Ain't it nifty?

When the Hanged Man grabs a foe, it stabs them in their leg/closest appendage, dealing 10%, while holding them in place for approximately three seconds before releasing them due to the puddle evaporating. This is more than enough time for Hol to get a shot off, no?

The bottle, should it hit somebody while flying, deals 4%.

Down Special- Tohth
Hol Horse whips out Boingo, his 'partner in crime', who reads from his stand, Tohth. This, essentially, acts as a preemptive counter. You see, Tohth is a book that tells its reader, Boingo, the future. So, Boingo is informing Hol Horse of the next attack that will come his way, allowing him to unconditionally avoid it. Ain't that nifty? I wouild say so. However, this only lasts approximately 7 seconds, before the counter wears off.

Hol Horse must then wait five seconds before using it again, if it wiffs. However, that's only in a wiff scenario. In a scenario where this actually works and he avoids somebody's attack, he has to wait a staggering ten seconds before using it again. Combine that with the long startup, and this move is hard to spam. Nay, it's... impossible!

Up Special- Hol Horse Loves the Ladies
Three lovely Hol Horse admirers appear in front of him, the gunman using them as a human staircase to travel three Battlefield platforms into the air. Don't ask where the ladies come from, they rush in too fast for the human eye to register. And, once Hol Horse is done with them, they disappear just as quickly.

Hol Horse is not made helpless after using this move, so he's still able to use other attacks once its over. What a great guy he is.


STOL STANDARDS

Jab- Quickshot
Hol Horse takes a quick shot angled 45 degress downward with Emperor, hitting about one Battlefield platform ahead and dealing 5%. Nice and quick.

Side Tilt- Hol Kick
Hol Horse delivers a sick roundhouse kick, something every cowboy and cowboy-type is a master of, dealing exactly 10% and hitting foes straight forward. It's a high kick, however, so crouching is an easy way to avoid it if the opponent is smart enough to see it comin'.

Up Tilt- Hol Ocelot
Our favorite gunman starts twirling Emperor above his head like some kind of showoff, the attack continuing for as long as the player mashes the input. Each mash equals roughly two spins, and every two spins deals out exactly 4%. Since there is no lag between attacks, this move is especially good for juggling.

Down Tilt- Every Cowboy Knows the Splits
Every cowboy knows the splits, and Hol Horse is no exception. Thus, he falls to the ground, shouting some sort of expletive from the pain, and does a sick split, hitting on both sides and tripping foes, while also dealing 4%. Admittedly, this isn't really based on anything he does in any JJBA media, but it's a funny visual, no?

Dash Attack- I'm Running Away Because I Love You, Baby!

Hol Horse gets on a whole horse, one appearing seemingly out of thin air, and dashes with it, mowing down any who dare to stand in his way. This trampling attack does 15%, and causes foes to fall prone. It travels two SBB before the horse trips and breaks its leg, disappearing back into the nether from whence it came while Hol Horse sticks the landing. What a champ.


SMOL SMASHES

Side Smash- Eye of the Tiger
Hol Horse's partner J. Geil's stand, the Hanged Man, can appear from any reflective surface. Any one at all. You know what's reflective? Your goddamn eyes. As such, Hol leans forward, and upon release from the smash charging, shouts "Now!". This gives the Hanged Man its cue, and it pops out of his eyes, slashing in front of Hol Horse with its wrist blades. At no charge, this deals 15%, and at full charge it deals 23%. If the Hanged Man is currently holding somebody in the puddle trap, however, Hol Horse simply shoots whoever's in front of him. Easy peasy.

Up Smash- Glass Rain
Our dashing hero whips out a small sheet of glass, and throws it above his head, charging up the smash. Once the charge is released, he'll shoot it, causing glass shards to fly out overhead, forming a sort of cone around him in which enemies take 15%, no matter how much he charges. Instead, the charge affects the size of the cone, with more charge meaning he shatters the glass higher up in the air, thus giving this attack more area of effect.

Down Smash- Around the World
Hol Horse shoots a bullet, which immediately begins circling him. From there, he's free to fight and move around, while the bullet will continue to orbit him, hurting anybody who makes contact with his hitbox. The bullet will deal 10% no matter how long the attack is charged, but it will orbit longer with more charge. The minimum time is one second, the max is four.


AOL AERIALS

Neutral Aerial- High Hollers
Hol performs an intense maneuver, a spinning pistol whip attack with a range roughly equivalent to his arm length plus the length of Emperor's barrel, dealing 7%. Quick and clean.

Forward Aerial- Just The Spot
Hol fires Emperor in front of himself, the bullet stopping midair after leaving the barrel, while Hol continues to move through the air. The bullet will float there for approximately one half second before disappearing into nothingness, but if it hits somebody it will deal a nice 10% to the poor schmuck.

Back Aerial- You Ain't Safe
The bullets from Emperor, despite being controlled by Hol Horse, can still travel at the speed of a normal bullet. So, when Hol fires one, it can be at a location in the blink of an eye, such as in his back aerial, seen here. Hol fires in front of himself, but the bullet quickly reverses direction and hits behind him, travelling one SBB back before disappearing, dealing 10% to anybody it hits.

Up Aerial- Hol-icane
Hol Horse fires three bullets in very quick succession, which travel upwards in a swirling vortex, circling each other as they fly. The move acts similar to Mega Man's up aerial, pushing foes as well as hurting them, dealing a total of 11% and travelling three SBB up.

Down Aerial- Hol Kick
Hol straightens his body, kicking directly below him similar to Ganondorf. Hey, is it generic? Perhaps, yes. But its a classic. It hits directly below, and spikes foes, dealing 7% in the process. Ain't that nifty?


GOL GRAB GAME

Grab- C'Mere
A simple grab. Nothing huge. However, it is worth mentioning that, should he be facing and within two stage blocks of a puddle he made while grabbing, the Hanged Man will reach out of the puddle to grab anybody withing one SBB of it on either side, effectively acting as a second, disjointed grabbox for Hol Horse. From there, Hol quickly rushes to the captive to perform throws or pummels.

Pummel- Emperor Whip
Hol pistol whips his captive, dealing 4%.

Up Throw- Target Practice
Hol throws his foe into the air above him, and fires six shots in quick succession. They home in on the foe, circling around them several times before hitting, dealing approximately 15% but doing almost no knockback, the foe simply falling to the ground instead of flying off.

Forward Throw- Head Start
Giving the foe a hard kick, Hol Horse smirks. "Run," he says, firing a bullet into the air. The bullet waits there for a bit while the enemy is free to move about, waiting exactly one second before flying after them. The bullet is now locked on to them, and will stop at nothing to get them. The only way to avoid it is to either put something in its way, or to die. Or shield, I guess.

And don't try projectiles, as the bullet will swerve around them. Other foes, walls, or what have you still work fine for getting it off your back, however. The bullet deals 13% on contact.

Back Throw- Get 'Em
Hol Horse gives the enemy a pat on the back, a wave, a smile, and then runs away as fast as he can. What's that about? Well, it turns out her was taping a small mirror to the enemy's back! Once he runs away, he fires, shattering the glass around the enemy.

What's this do? Well, it allows the Hanged Man to get them! Which it does, stabbing them through several glass shards in quick succession, even while the foe is free to move around (the glass is still stuck to the foe, so no matter where they are they are hit). This deals damage over time, with one stab each second, and 2% damage per stab. The stabbing fits continue for seven seconds, before the glass falls off and disappears.

Down Throw- Execution Style
Hol pushes his foe to the ground, and fires ten rounds into them. Short and sweet. Deals 17%, and leaves the foe prone for longer than normal, allowing Hol to make a clean getaway.


FOL FINAL SMASH
BULLET HELL

Hol Horse just starts firing like a maniac, unloading at least twenty shots in the space of two seconds. These shots fly around the stage, looping around obstacles and projectiles on their way to hit the enemies, each one dealing 7%. Its hard, but not impossible, to dodge that many bullets. Add on that Hol is free to move and fight as normal during this, and you're in trouble.​
 
Last edited:

Munomario777

Smash Master
Joined
Nov 18, 2014
Messages
3,253
Location
Charleston, South Carolina
3DS FC
0387-9596-4480
Switch FC
SW-8229-3157-8114

WONDER-RED
In celebration of reaching 101 movesets in the competition, I thought I'd post a character that sort of fit that number! My original plan was to make this the 101st moveset, but that didn't quite work out. Ah well, 103rd is close enough! Anyway, hailing from the Japanese manga-esque world of The Wonderful 101, Wonder-Red, AKA Will Wedgewood, is the fearless leader of the Wonderful Ones. He uses innocent bystanders as giant weapons, ranging from fists and swords to guns and hammers, to fight off the alien menace known as "GEATHJERK". In Smash, he uses his popularity to his advantage to take down the competition! As always, this moveset is designed from the ground up for Smash 4 for balance purposes and such. With the introductions out of the way, let's jump right into this set!

WONDER-STATS

Weight: Mario
Size: Mario
Ground Speed: Captain Falcon
Jump Height: Sonic
Air Speed: Mr. Game & Watch
Fall Speed: Captain Falcon

WONDER-MECHANICS

Wonder-Red's main attribute as far as unique mechanics go is straight from his game: the Citizens! These average Joes (and Jills) are members from the audience, and they will aid in Wonder-Red's attacks, increasing their range and damage. However, they won't just blindly follow him, oh no! Instead, they'll judge him based on his performance, which means how efficient he is at hitting opponents. Each 1% of damage dealt to an opponent will get him one Civilian, and combos will multiply the amount of Civilians gained by 1.5x per hit. However, this also applies in reverse; getting hit will cost him Civilians, and combos are devastating! The number of Civilians caps out at 100, and is represented by a face with a number above Wonder-Red's portrait. If one Wonder-Red hits another Wonder-Red, the Civilians will "jump" over to the appropriate percentage gauge in a similar fashion to Share Stocks. Wonder-Red will always have one Civilian with him (his number one fan!), but his attacks are pitifully weak in this state. A slight downside to having more Civilians is that Wonder-Red's moves are a bit more laggy since more Civilians are joining together to form the attack, but it's nothing too major. Also worth noting is that each Civilian is about the side of a leaf on a Pikmin's head, so the attacks aren't ridiculously huge like in the original game. Wonder-Red will start the match with twenty-five Civilians, which is enough to deal some decent damage and build up his fanbase.

WONDER-SPECIALS

Side Special: Unite Hand
Uses Civilians: Yes
Damage: 3~18%

Wonder-Red leans forward in a sort of quasi-kneeling pose as his Civilians form a circle around his fist by linking together during the startup of this attack, which takes about one tenth of a second to half of a second second depending on how many Civilians he has. Wonder-Red then gains a glowing red hand, ranging in size from about the same as his regular hand to about seven times that amount! Wonder-Red then leans and then leaps forward about two times his own width while punching at a low angle along the ground, pushing opponents along with him and dealing 5% of damage. At the end of this dash forward, Wonder-Red performs a meaty uppercut similar to Little Mac's KO Uppercut, dealing damage to opponents and sending them flying upwards. The knockback ranges from minor flinching at one Civilian to KOing at a whopping 80% with one hundred Civilians! A great KO move or combo finisher, but requires Civilians to unlock its full potential, and leaves Wonder-Red open for a little bit. Without any Civilians, Wonder-Red does a standard uppercut without any of the jumping forward, dealing 3% of damage and moderate knockback.

Neutral Special: Unite Gun
Uses Civilians: Yes
Damage: 1~15%

Wonder-Red stands firm on the ground, holding both hands forward as if gripping a pistol, while his Civilians form an "L" shape in his hands during the startup, taking about a tenth of a second to half of a second depending on his Civilian count. They then turn into a glowing green pistol, ranging in size from a typical handgun to the size of an RPG launcher! Wonder-Red then pulls the trigger and fires it forward (he also suffers from a bit of kickback, giving this move a bit of end lag), using a bullet made of Civilians as ammunition! The bullet moves at Sonic's dash speed in a completely straight trajectory unaffected by gravity, and won't disappear until it hits an opponent, a blast zone, a wall, or a powerful enough projectile (one that deals more damage than it does). At one hundred Civilians, this move KOs at around 100%, but there's a catch: using the move will lower Wonder-Red's Civilian count by ten percent! Those poor bullet people... Anyway, this happens after the gain from the damage dealt (whenever the bullet is destroyed), so if you use this at 100 Civilians, you're going down to 90, regardless of damage dealt. This is a great ranged attack, but it is a bit laggy and requires a sacrifice. Without any Civilians, Wonder-Red simply tosses his number one fan into battle, dealing 1% of damage and minor flinching.

Up Special: Unite Rocket/Unite Glider
Uses Civilians: Yes
Damage: 1~9%

Wonder-Red spins around rapidly, arms up and legs apart while the Civilians form a rocket-like shape around Wonder-Red during the startup, which ranges from about a tenth of a second to half a second. They then turn into, surprise, a rocket (a red one, even!), which blasts off straight up at a distance ranging from one Wonder-Red height to four Wonder-Red heights. This also deals 1~9% of damage and minor knockback. At the apex of the ascent, the Unite Rocket turns into a Unite Glider, which is basically a hang glider. Wonder-Red then hangs onto the hang glider and pilots it. This functions similarly to the gliding mechanics in Brawl, but the less Civilians Wonder-Red has, the smaller the Glider is and the faster he falls, ranging from normal gliding gravity to his normal falling speed. Wonder-Red is left in helpless after the gliding is cancelled, and doesn't have a gliding attack. Without any Civilians, Wonder-Red simply does a tiny jump upwards (the height of a short hop) and tries to use his number one fan as a parachute, but it doesn't quite work out.

Down Special: Unite Camp
Uses Civilians: Yes
Damage: 0%

Wonder-Red puts up a glowing red tent using some of the Civilians (which doesn't quite work in the air, so this can only be used on the ground), which takes a second, and enters inside. He gives a pep talk to the Civilians, which boosts their morale and makes them recommend Wonder-Red to all their friends via social media (although his biggest fan probably did that already). This can be held for up to ten seconds (Wonder-Red is rather wordy with his speeches apparently) making it quite punishable, but in return it causes Wonder-Red to enter a state where his attacks and combos earn him more Civilians. This move can be held, and the growth rate is a multiplier of 1.1x for every half second he remains in the tent, and lasts for three times however long he stayed inside. However, this also comes at a cost: if Wonder-Red is hit during this state, since he got their expectations so high, the same multipliers apply to how many Civilians will leave him! If Wonder-Red has capped out his Civilian count, these same multipliers apply to his attacks instead (and also to him getting attacked!). This is a risk-versus-reward move that requires skill to use correctly, but can be used to great effect if the player has that skill! Without any Civilians, he just sits down and has a chat with his number one fan, but it doesn't do anything since he's already so excited about being in battle with Wonder-Red. Because honestly, wouldn't you be excited to be the partner to the awesome manga superhero you always dreamt of meeting?

WONDER-STANDARDS

Jab: Wonder-Combo
Uses Civilians: No
Damage: 3%, 3%, 1% per rapid hit, 5%

Wonder-Red leans forward a bit puts his Unite Hand skills to good use to deliver some impressive punches for someone of his stature. These consist of a normal jab, a haymaker, and then a flurry of rapid punches leading into a powerful uppercut finisher. A nice, quick combo that can be used to deal some good damage.

Forward Tilt: Unite Sword
Uses Civilians: Yes
Damage: 1~10%

Wonder-Red enters a quasi-kneeling pose and turns slightly sideways, positioning his front hand as if he was holding a sword as the Civilians form a straight line in Wonder-Red's hand during the startup, which is rather short no matter how many Civilians he has. They then turn into a glowing blue sword, ranging in size from a dagger to an extremely long blade. Wonder-Red then leans forward and does a slash from above his head to the ground before his feet with this sword, dealing damage and KOing at around 110% at 100 Civilians. A good ranged attack for dealing damage and possibly KOing. Without any Civilians, Wonder-Red uses his number one fan as a makeshift sword, slapping opponents with him to deal 1% of damage. (Man, no wonder he has no fans; he slaps people with them all the time!)

Up Tilt: Unite Bowgun
Uses Civilians: Yes
Damage: 3~8%

Wonder-Red looks upwards and points his arms to the heavens as if he was holding a crossbow while the Civilians form a heart shape above him during the startup, which is rather short no matter his Civilian count. They then form a hot pink crossbow aimed upwards in Wonder-Red's hands, ranging in size from about the size of a handgun to twice the size of a regular crossbow! Wonder Red then grabs it, sets his sights (providing a bit of start lag), and fires the arrow. This travels up about one Wonder-Red height to two and a half depending on the Civilian count, but this is no ordinary arrow! It deals a good amount of damage, but also has a paralyzing effect that can last for up to two seconds depending on Wonder-Red's fanbase! However, if it doesn't hit an opponent, it comes straight back down and hits Wonder-Red for the same effects, so be careful when using this move! Wonder-Red can't simply move out of the way either, since the arrow is extremely quick, and combined with the end lag, this makes this move extremely risky. This is a great aerial combo starter and anti-air technique, but is devastating if misused. Without any Civilians, Wonder-Red does a punch upwards, dealing 3% of damage. Hey, at least he's not using his number one fan as a weapon anymore!

Down Tilt: Wonder-Kick
Uses Civilians: No
Damage: 6%

Wonder-Red does a sort of sitting pose, stands on his arms, and does a low sweep kick in front of him with both legs to deal a bit of damage. This move has good combo potential since it trips opponents, leaving them vulnerable, and the end lag is very low, but it has a bit of start lag.

Dash Attack: Unite Ball
Uses Civilians: Yes
Damage: 3~10%

The Civilians form a circle around Wonder-Red as he runs to create a giant, red, hamster ball-esque sphere for him to ride in. Having more Civilians won't increase the size, but instead the extra Civilians will run inside of the ball with Wonder-Red to keep it going! This travels a distance ranging from two Wonder-Red widths to six depending on the Civilian count, and can roll off of ledges. KOs at around 100% at maximum Civilian count. Without any Civilians, Wonder-Red simply does a weak somersault forward, dealing 3% of damage and minor knockback.

Ledge Attack: Wonder-Kick
Uses Civilians: No
Damage: 6%

Wonder-Red does a sweep kick along the ground as he climbs back onto the stage. Has a tripping effect, and is a nice, quick way to get onto the stage.

WONDER-SMASHES

Forward Smash: Unite Goggles
Uses Civilians: Yes
Damage: 1~20%

Wonder-Red leans forward at a 45° angle, arms backwards and one leg forwards, as the Civilians form a figure-eight on Wonder-Red's forehead during the charging period. This then turns into a brown helmet with a pair of goggles on it, which has a consistent size no matter the Civilian count or how long the attack is charged. However, the laser that is fired forward has immense power depending on these factors! Its damage ranges from 1~5% to 15~20% depending on the Civilian count, and the laser fires forward at Sonic's dash speed. It only stays on screen for a fraction of a second, but the knockback is immense, having potential to KO at 90%, and it won't stop until it hits something! However, the move has some serious end lag due to the immense kickback. This can be angled up or down. Without any Civilians, Wonder-Red cannot use this attack.

Down Smash: Unite Hammer
Uses Civilians: Yes
Damage: 1~18%

Wonder-Red faces the screen, both hands in the air while the Civilians split into two groups, and each group forms a line with a circle on the end in Wonder-Red's hand during the charging period. These then turn into yellow hammers, ranging in size from regular hammers to three times that size! Wonder-Red then kneels and slams these hammers down onto the ground on either side of him, dealing anywhere from 1~5% to 13~18% depending on the Civilian count. This also creates a shockwave about five Wonder-Red widths around Wonder-Red, dealing half of the main hammers' damage. Good for catching rolls thanks to its range, and KOs at around 100% with the best conditions, but the start and end lag makes it fairly punishable. Without any Civilians, Wonder-Red cannot use this attack.

Up Smash: Unite Tombstone
Uses Civilians: Yes
Damage: 3~22%

Wonder-Red leaps into the air about two Wonder-Red heights and stays there during the charging period, arms and legs outstretched, while the Civilians form a tombstone-esque shape around him. Once the charge is released, they turn into a large red tombstone about four Wonder-Reds wide, which Wonder-Red rides on as it slams onto the ground! Deals damage ranging from 3~7% to 17~22% depending on the Civilian count, and has a powerful meteor smash. The bounce back up will KO opponents at around 130% at optimal conditions, but will send offstage opponents to their doom! This move has some severe start and end lag, however. Without any Civilians, Wonder-Red cannot use this attack.

WONDER-AERIALS

Neutral Aerial: Wonder-Flip
Uses Civilians: No
Damage: 3 hits, 3% per hit, 9% total

Wonder-Red goes into a fetal position and does multiple midair somersaults in rapid succession for a nice, quick multi-hit attack. Deals moderate knockback, and each hit counts as a separate hit as far as combos go.

Up Aerial: Unite Bomb
Uses Civilians: Yes
Damage: 1~10%


Wonder-Red holds his hand low near his feet, palm on top, while some of Wonder-Red's Civilians form a small circle with a line on the end inside of Wonder-Red's hand. They then turn into a small black bomb, which Wonder-Red then tosses upwards. This travels about two Wonder-Red heights upwards, and explodes on contact, dealing up to 10% of damage and good knockback, potentially KOing at around 100%. However, like the Up Tilt, this attack can come back down to hit Wonder-Red, but thanks to aerial momentum, this can be avoided. If the bomb hits aerial opponents (or Wonder-Red!) on the way down, a powerful meteor smash occurs. Similarly to the Unite Gun, this costs ten Civilians to use (or less if there are less than ten in his possession). Without any Civilians, Wonder-Red simply throws his number one fan up into the air to deal minor damage and flinching to opponents.

Down Aerial: Unite Drill
Uses Civilians: Yes
Damage: 1~4% per hit

Wonder-Red stands in midair facing the screen, hands on his hips, as the Civilians form a spiral shape beneath Wonder-Red's feet, which then turns into a large yellow drill pointed downwards. This drill ranges in size from half that of the Drill Arm's drill to twice that item's size. Wonder-Red stands on the drill as it rockets downwards for a stall-then-fall, damaging opponents for one hit per half second. This is a great multi-hit attack and deals a powerful spike at the end of the attack (which is about four Battlefield platforms below the starting point), but this is risky to go for, since it can easily lead to an SD off the bottom blast zone! If Wonder-Red hits the ground during the fall, he spins around for a moment and gets a bit dizzy, leaving him vulnerable. Without any Civilians, Wonder-Red simply rockets downwards, holding his number one fan beneath him rather than the drill, dealing 1% of damage per hit and barely any knockback.

Forward Aerial: Unite Claw
Uses Civilians: Yes
Damage: 1~10%

Wonder-Red outstretches his arm in front of him as the Civilians form a zigzag pattern in front of Wonder-Red, which happens almost instantly. They then immediately turn into a claw, ranging in size from about that of Wonder-Red's hand to a Drill Arm item's size. Wonder-Red then slashes forward with this claw, dealing good damage and knockback. But wait, there's more! This attack will freeze opponents solid, allowing for great combo potential! Not only that, but this attack is devastating to shields, taking away up to three quarters of a shield. Due to how quick this attack is, it's great for starting combos. Without any Civilians, Wonder-Red simply slaps opponents with his number one fan, dealing 1% of damage and minor flinching.

Back Aerial: Unite Claw
Uses Civilians: Yes
Damage: 1~10%

Wonder-Red outstretches his arm behind him as the Civilians form a zigzag pattern behind Wonder-Red, which happens almost instantly. They then immediately turn into a claw, ranging in size from about that of Wonder-Red's hand to a Drill Arm item's size. Wonder-Red then slashes backwards with this claw, dealing good damage and knockback. But wait, there's more! This attack will freeze opponents solid, allowing for great combo potential! Not only that, but this attack is devastating to shields, taking away up to three quarters of a shield. Due to how quick this attack is, it's great for starting combos. Without any Civilians, Wonder-Red simply slaps opponents with his number one fan, dealing 1% of damage and minor flinching.

WONDER-GRAB GAME

Grab: Unite Whip
Uses Civilians: Yes
Damage: 1~5% (aerial version)

The Civilians form an S very quickly and then turn into a whip, which Wonder Red whips forward in a quasi-kneeling pose to grab opponents. The length ranges from one to four Wonder-Red widths depending on the Civilian count, and is rather quick at the start, but laggy at the end if it misses. The aerial version shares this length, but deals damage as well. The tether recovery this grants reaches twice that distance, however. Without any Civilians, Wonder-Red does a standard grab, and doesn't have an aerial version or a tether recovery.

Pummel: Wonder-Punch
Uses Civilians: No
Damage: 3%

Wonder-Red delivers a meaty punch to the grabbed opponent. Deals good damage, but is rather slow.

Up Throw: Unite Hand Toss
Uses Civilians: Yes
Damage: 1~10%

Wonder-Red uses the Unite Hand used in his Side Special to grab the opponent and fling them upwards after spinning them around a few times. The hand gets bigger with more Civilians, dealing more damage to both the grabbed opponent and opponents who happen to hit the spinning hand, as well as having better knockback, up to the point of KOing at 100%. Without any Civilians, Wonder-Red simply tosses the opponent upwards a tiny distance, dealing 1% of damage.

Forward Throw: Unite Hand Pitch
Uses Civilians: Yes
Damage: 1~10%

Wonder-Red uses the Unite Hand used in his Side Special to grab the opponent and fling them forwards after spinning them around a few times. Gets bigger with more Civilians, dealing more damage to both the grabbed opponent and opponents who happen to hit the spinning hand, as well as having better knockback, up to the point of KOing at 100%. Without any Civilians, Wonder-Red simply tosses the opponent forward a tiny distance, dealing 1% of damage.

Down Throw: Tiny People, Attack!
Uses Civilians: Yes
Damage: 1~16%

Wonder-Red pins the opponent to the ground and orders the Civilians to attack. They then climb all over the grabbed opponent, dealing good amounts of damage depending on how many of them there are. Wonder-Red then gets up and kicks the opponent backwards a short distance, but not enough to KO by any means; they are, however, left prone. Without any Civilians, the number one fan jumps on the opponent a few times and deals no damage, but Wonder-Red's kick still deals 1% of damage.

Back Throw: Unite Hand Spin
Uses Civilians: Yes
Damage: 1~10%

Wonder-Red uses the Unite Hand used in his Side Special to grab the opponent and fling them backwards after spinning them around a few times. Gets bigger with more Civilians, dealing more damage to both the grabbed opponent and opponents who happen to hit the spinning hand, as well as having better knockback, up to the point of KOing at 100%. Without any Civilians, Wonder-Red simply tosses the opponent backward a tiny distance, dealing 1% of damage.

MISCELLANEOUS

Final Smash: All The Rage
Uses Civilians: Yes
Damage: varies

Wonder-Red's number one fan decides to be useful for a change and posts on all of his social media sites ten times in a row to make Wonder-Red insanely popular. Wonder-Red's Civilian count then jumps to a whopping two hundred, causing his self esteem to boost tenfold. This makes him invincible for the duration of the Final Smash, as well as having the visual effect of his suit becoming golden and glowing. The added Civilian count also makes all of his attacks have twice the range, speed, attack power, and knockback that they did before, and the Unite Tent's effects are always active. The transformation lasts for about fifteen seconds before the number one fan posts that one embarrassing picture of Wonder-Red on his social media sites and spoils the whole thing, causing the extra one hundred Civilians to go home (he still has one hundred of them after the Final Smash ends, though). Way to go, number one fan. :facepalm:

Dodge Roll: Unite Spring

The Civilians turn into a long spring that bounces either left or right about one Battlefield platform. Luckily, this won't bounce off the edge.

Shield: Unite Guts

The Civilians turn into "Unite Guts" (AKA a large gelatin dessert) that covers Wonder-Red completely. This will bounce back any projectiles without the need to perfect shield, but has half the durability of a normal shield (which Wonder-Red will use instead without any Civilians).

Up Taunt:
Wonder-Red breakdances on the ground and strikes a pose at the end. This will earn him five Civilians for his skills.
Side Taunt:
Wonder-Red looks to either side of himself in a cautious manner.
Down Taunt:
Wonder-Red's Civilians gather around him and cheer him on as he rakes in the fame. This will earn him five Civilians due to peer pressure.

Victory Pose 1:
Wonder-Red does swift punches with the Unite Hand form, striking an uppercut-esque pose at the end.
Victory Pose 2:
Wonder-Red rides the wave of tiny Civilians, but his number one fan breaks under the weight of Wonder-Red and falls, causing Wonder-Red to land on his rear end. Naturally, Wonder-Red is very annoyed by this.
Victory Pose 3:
Wonder-Red does a Unite Hand-stand while striking a midair pose.

Victory Music:
The first five seconds of this.

Miscellaneous:
Wonder-Red's alternate costumes include other members of the Wonderful 100 as well as his alter ego Will Wedgewood.

WONDER-PLAYSTYLE
Wonder-Red is a character that thrives on popularity, and in turn, that popularity thrives on landing combos on the opponent and not letting them land combos on you. Right off the bat, Wonder-Red's speed lends itself wonderfully to a combo-oriented playstyle, and his Neutral Special, his signature Unite Hand, is a good combo finisher. The Side Special is good for keeping opponents at bay or continuing combos at a long range, but comes at a cost. The Up Special can be good for continuing or finishing combos vertically, but before you do any of that, you might want to use the Down Special to boost your effectiveness (that is, if you're confident that you won't get hit yourself). The Up Tilt is a great way to start an aerial combo or take care of opponents approaching from above, but this must be used with care since it can come straight back down and hit you! The Forward Smash can be used to continue comboing opponents flying away at odd angles thanks to the aiming feature, and the Down Smash can catch rolls easily thanks to the shockwave to start up, you guessed it, a combo! The Up Aerial is good for vertical KOs, the Down Aerial is a risky meteor smash, and the Forward and Back Aerials are great for setting up combos thanks to the freezing aspect. Wonder-Red's grab game is great depending on his Civilian count, and is good for starting, continuing, or ending strings of attacks. The Final Smash boosts Wonder-Red's performance significantly, and really drives home his reliance on popularity. Overall, Wonder-Red's greatest weaknesses are his mediocre weight, lag on some attacks, and how weak he is without any Civilians. That said, Wonder-Red and his immense fanbase are more than ready to take on the world of Smash! As always, feedback is appreciated, and I hope you enjoyed the moveset! :)
 
Last edited:

Tocaraca2

Smash Ace
Joined
Feb 22, 2015
Messages
557
Location
Wokingham
From the looks of things, you guys are just devoted your whole lives to making movesets. You guys are too busy making ones every single day that there's not really going to be much reading of other movesets if you're all just making your own all the time.
 

Reiga

He sold diddy for a switch
Joined
Dec 8, 2014
Messages
1,256
Location
White Noise
3DS FC
1461-7646-7368
From the looks of things, you guys are just devoted your whole lives to making movesets. You guys are too busy making ones every single day that there's not really going to be much reading of other movesets if you're all just making your own all the time.
I actually read the many movesets that are made while I'm passing the crapload of time that is me making a moveset (though usually only the ones that I like the series/character).
And yes people, I'm making a moveset! What is it, you may say? Well it's a 2.0 version of an existing Smash Character! That is all I can say for now.
 

Tocaraca2

Smash Ace
Joined
Feb 22, 2015
Messages
557
Location
Wokingham
I actually read the many movesets that are made while I'm passing the crapload of time that is me making a moveset (though usually only the ones that I like the series/character).
And yes people, I'm making a moveset! What is it, you may say? Well it's a 2.0 version of an existing Smash Character! That is all I can say for now.
If it's Lucina then I'm going to kill you, because that's my plan.
If it's Ganondorf then I am going to read every single word in your moveset.
If it's Toon Link then fine, but there is already a Toon Link 2.0.
 

Reiga

He sold diddy for a switch
Joined
Dec 8, 2014
Messages
1,256
Location
White Noise
3DS FC
1461-7646-7368
If it's Lucina then I'm going to kill you, because that's my plan.
If it's Ganondorf then I am going to read every single word in your moveset.
If it's Toon Link then fine, but there is already a Toon Link 2.0.
It's a character that everyone hates because the character's good competitively yet I love mostly because of the character itself(hint: it's not Diddy Kong).
 
Last edited:

Rychu

Thane of Smashville
Joined
Jul 5, 2010
Messages
817
3DS FC
1908-0105-4965
"I've covered wars, ya know..."
Frank West


Frank West is the photojournalist protagonist of the first Dead Rising game, the midquel comic Dead Rising: Road to Fortune, and Dead Rising: Case West, as well as the non-canon spin-off game Dead Rising 2: Off the Record. He has an incredible sense of determination and is a highly intelligent survivor, able to use the environment to his advantage and to craft weapons out of everyday items. Personally, Frank would rather go to a dangerous place to satisfy his craving for adventure than out of journalistic integrity, but if he can get a good story out it, well, two birds with one stone and all that. He's the quintessential zombie-and-psychopath killing machine of the Capcom universes, Chris Redfield and Leon Kennedy be damned. Despite this, he ironically struggles every day to control his own zombie infection via the use of Zombrex, an anti-infection drug that he helped develop.

Statistics

Size - 8
Weight - 8
Ground Speed - 4
Jump - 3
Aerial Speed - 4
Falling Speed - 8
Traction - 10

Frank is a not-so-average average man, and his age is catching up to him - even if he's in relatively good shape for his age and weight, he's still an overweight 41 year-old man. Luckily, he's got his weapons - and the environment - to use to his advantage.

Zombies
When Frank West is in the fray, you better believe that some zombie shenanigans are going to happen. When Frank jumps out of the helicopter he rides to the Battlefield, 3 zombies will already be spawned on the battlefield. From then on, a zombie will randomly spawn somewhere on the field every 8 seconds. Zombies will continue to spawn for as long as Frank is active in the match, but remaining zombies will not simply disappear when he's gone forever, just stop spawning. Zombies will only stop spawning if there are 12 on screen, after which they must be destroyed to spawn more.

The zombies are slow moving, to the point where a walking Ganondorf could keep his distance, albeit barely. Each zombie is a bit different, ranging in size from Link to Captain Falcon, though their size does not have any effect on how they work. Each zombie has a health of 30%, and take knockback as a lightly-damaged sandbag would. Zombies will turn around at edges and have a short jump and pull-up to move around to other platforms, but if a zombie is knocked off a stage, it's done for. Zombies may be grabbed like any normal character, though will break out within a second unless a throw is input, and if they do break the grab, they will grab the opponent right back.

Zombies will attack any foe within an arm's length of them, including upwards. If someone enters this distance, the zombie will first do a slow punch, dealing 5% damage, and then grab for it, with a grab that is 1.5x stronger than a regular grab, biting the opponent every second until they break free, dealing 10% every bite. While the punch-grab combo is easy to see and avoid with a single zombie, in groups, it's near impossible to avoid. And guess where zombies usually are?

Zombies are generally uninterested in the fight happening before them, and will not actively seek out prey. Frank is of course included on it's list of prey, just as vulnerable to the zombies as anyone else. Well, actually, maybe not as vulnerable.

Special Attacks
Neutral Special - Photography
Frank West is, above all, a hard-hitting photojournalist. At the press of the special button, Frank will quickly bring his camera to his face and snap a picture, checking the pic he's just taken afterwards. It's very quick coming out, but a bit laggy at the end, though Frank can cancel out the lag with an attack, either way preventing him from spamming his pictures.

If an opponent is within a BFP of Frank when he snaps the picture, they are dealt stun by the flash of the camera. However, if they are within 1/2 of Battlefield's main platform of Frank, they won't be dealt the stun, but they will still have had their picture snapped by Frank. What does this mean exactly?

Leveling Up
One of Dead Rising's biggest features was the Level Up system, achieved mainly through completing objectives and, yes, taking pictures. Each picture is worth a certain amount of PP, or prestige points. In smash, Frank can level up twice, gaining upgrades to weapons on certain attacks with each. Level 2 requires Frank to get 200 PP, and Level 3 requires another 400 in addition to the 200.

Frank can get his PP from taking pictures, with certain situations being worth certain points:

20 points for each opponent within the BFP range
10 points for each opponent within the half-stage range
1 point for each zombie within the BFP range

When Frank is defeated, he resets to the beginning of the level he was on, unless he was already a level 3, in which case he'll be reset to level 2. Franks level will be displayed right by his character portrait.

Side Special - Hunk of Meat
Frank rears himself back for a roundhouse punch. Should he make contact, be it with zombie or opponent, they get dealt a heavy hit of...10% damage, and stumble back a bit. See, Frank's not looking to punch them back with a special attack, no, he's got too many zombie killin' moves already for a special to be wasted on that. No, he's just placed a hunk of meat (a human arm for zombies, steak on other non-zombie or cannibal opponents) into their mouths. Zombies will naturally seek out this hunk of meat, shambling towards it at their normal pace. If he punches the opponent from behind, he shoves it into their clothing, circuits, or body hair,

For opponents, this is fairly easy to get rid of: simply dodging or rolling will take the hunk out of their mouths and place it onto the ground, where the zombies will swarm to it and devour it quickly, then go about their business. Zombies, however, have no roll or dodge, and will instead just shamble around with this meat in their mouths for 10 seconds before finally deciding it's good to eat. However, other zombies will still flock to te zombie with the meat, giving Frank (or the opponent) a way to control where the zombies flock. Remember, Zombies are just as grab-able as any opponent.

Down Special - Bottom's Up
Frank pulls out a bottle of vodka and chugs, taking almost a full second to do so. When he finishes, he is healed a pretty decent 25% damage. For the next ten seconds, Frank's speed is increased by 1, and all of his attacks not only deal 5% more damage each, but also will all be quicker to hit. In addition, when Frank uses his camera, he will instead take 3 pictures, reaping the benefits from all of them.

Once that ten seconds is up, however, Frank suffers 2 seconds of throwing up, leaving him vulnerable to attack. Note that he will stop in the middle of an attack to vomit, though will not vomit while in the air. In addition, he cannot drink while already drunk, and has a 15 second cool-down period before he will consider another drink, instead saying "No way, man" when the input is given, instead throwing the bottle forwards, smashing it against any surface or opponent, leaving them covered in the stuff for around 5 seconds before it evaporates. Any fire-attack will set that person (or zombie) on fire, dealing them 2% damage a second until they roll 3 times, putting it out. Since zombies can't roll, they slowly burn away, with their attacks increasing by 3% damage. This will light any zombie it's touching for more than 2 seconds on fire, which does the same thing, and so on.

Up Special - Zombie Walk
In the air, a zombie materializes under Frank, and he kicks off of it, sending it tumbling towards the ground, and propelling Frank upwards, and restoring one of his (pathetic) jumps. The zombie will get up and join the other zombies onstage, or simply fall to it's doom if it's offstage. If Frank uses this move on the ground, a pair of zombie arms push upwards from the ground, Frank stomping them back in when he jumps upwards.

Standard Attacks
Jab Combo - Firearm
(Pistol < SMG < Shotgun)

While Frank is more comfortable using melee weapons, he will sometimes resort to using guns. In Smash, the guns are about as effective as they are in Dead Rising itself: they are his Jab combo. Zombies that are killed with things like bullets, punches, lasers, or other types of attacks not specified in Frank's other attacks, their bodies simply fall to the ground, disappearing after about 4 seconds. Their bodies can be tossed around, lit on fire, and are affected by any sort of attack that they would be if they were still walking around.

Level 1: Frank whips out a pistol and fires, each bullet reaching about as far as one of Fox's blaster rounds. Each bullet does 1% damage and very little stun, though Frank can fire rather quickly, making it a good damage racking move from a distance, as one of Frank's very few projectiles.

Level 2: Frank pulls out an automatic rifle, firing forward at a rate of about 5 bullets per second, 5 times that of the pistol. Each round only does 1% damage like the pistol, though the rapid-fire makes up for that. Worth noting is that these rounds act closer to Fox''s blaster, dealing absolutely no hitstun when contact is made.

Level 3: Frank materializes a shotgun from his hammer-space inventory, firing as soon as it's out. The shotgun cannot be fired in rapid succession, instead having to be cocked and fired again, taking about half a second to do so. In addition, it only has about half the firing range of the previous two. However, it does substantially more damage, around 10% per shot, with enough knockback that could feasibly kill around 150%

Dash Attack - Slide
Frank, out of his suitably meh run, propels his body forward, sliding along the ground, with a kick. He travels about 1 and a half SBUs before coming to a stop, with no lag at the end. Frank deals 5% damage and dragging knockback to any foe or zombie this is used on, making it a very safe way to approach either.

Strong Side - Bladed Weapon
(Bowie Knife < Machete < Katana)


When a zombie is killed with any sort of bladed weapon, including those of other characters, they explode into 6 throw-able items (Head, 2 Arms, 2 Legs, Torso), which characters can pick up and throw, acting much like the throw-able Samus suit from Brawl, dealing 5% damage and some minor stun to any opponent it hits, interrupting any charge. On-fire zombie parts do more damage, around 9%, and more actual knockback to the opponent.

Level 1: Frank takes out a Bowie knife, swinging it forward. It has very little range outside of Frank's arm-length. Connecting with this attack deals a decent 10% damage, but only a bit of knockback, lending itself well to starting combos, especially when paired after your down tilt.

Level 2: Frank unsheathes a machete, swinging it forward. The Machete is about as long as Kirby's sword from his up special, extended from Frank's own arm-length. It deals 15% damage to anyone it hits, though again doesn't deal much knockback. The hitbox is long enough to hit multiple opponents if Frank is close enough.

Level 3: Frank slashes forward with a katana, then , with another press of the A button, spins and slashes again for a second hit. Chained together the two hits deal a grand total of 30% damage, with the first dealing 20% on it's own. Neither deals much knockback, though the second hit deals enough stun to follow up on, making up for the second hit's admittedly high lag. Both are great for starting combos or following up on approaches, and will, together, cut through Zombies like butter. The Katana has about the range of Marth's sword.

Strong Up - Blunt Weapon
(Wooden Plank < Golf Club < Spiked Baseball Bat)

Frank, regardless of which of the 3 items Frank swings, he will swing it like a golf club, creating a small arc hitbox that reaches both in front of Frank and i above him by the time the swing ends.

Much like the blades, zombies killed by blunt weapons from any character (not counting fists) have their bodies ravaged in a different way: their heads will be launched off of their bodied like a baseball, slamming into opponents or other zombies and dealing 13% damage and pretty decent knockback, enough to KO at around 150%. On-fire heads will deal 4% more and more stun than before, but not quite as much knockback.

Level 1: Frank pulls out a flimsy wooden plank and swings, without much range, about the same as most jabs have, but with some decent speed behind it. The plank deals 7% damage and okay upwards diagonal knockback. Frank tosses the plank behind him when he's done, and it becomes a minor-damaging throwing item that stays on-stage for about 3 seconds.

Level 2: Frank swings for the hills with his trusty launching item from Ultimate Marvel vs Capcom 3, his 9 Iron Golf Club. The golf club has about twice as much range as the wooden plank, and deals 10% damage to boot, with upwards diagonal knockback that KOs around 130%.

Level 3: Frank smashes the spiked baseball bat forward, with as much range as the golf club but with considerably more damage, around 17% damage and knockback that will KO around 100%.

Strong Down - Thrown Weapon
(Pie < Molotov Cocktail < Grenade)

From Frank's surprisingly low crouch, he throws an item forward in a small arc, the item ultimately traveling about 2 BFPs forward. Each has a different, though gradually more powerful, effect.

Level 1: Frank tosses a cream pie for his level 1, looking somewhat baffled that he's doing it himself. The pie deals 5% damage and some minor stun, but not much of anything else.

Level 2: Frank instead tosses a Molotov Cocktail, the first time he does so exclaiming "That's more like it!". The cocktail explodes into a burst of fire, dealing 14% damage, and being Frank's main way of lighting any alcohol he's set about on the stage on fire.

Level 3: Frank tosses a grenade forward, the first time he does so giving an enthusiastic yell of "Yeah baby!". 2 second later, the grenade explodes, dealing 20% damage and pretty decent knockback to anyone caught in the blast. Not only will this light any alcohol caught in the explosion on fire, any zombies that are killed in the explosion (or any explosion) will themselves explode, leaving a messy pile where they stood and sending their various body parts flying in random directions, dealing pretty decent damage of 7% and decent knockback.
Aerial Attacks

Neutral Air - Tools of Survival Light
(Wood Plank < Bat < Oar)

Frank will pull out the weapon of this level, and swings it down, bringing his feet up and the weapon down in an arc, hitting in front of and below himself. The knockback for each of these is lightly downwards knockback that's pretty easy to follow up with!

Level 1: Frank slams downward with that familiar wooden plank, with it's short range and quick attack speed and all. The damage dealt by this level of attack is around 9%.

Level 2: Frank brings that trusty wooden bat back into the battle, swinging it downwards with all the enthusiasm he usually enters a fight with. The bat has more range than the wooden plank, and deals a bit more damage, around 13%. The knockback is a tiny bit heavier, but not much. It won't knock an opponent all the way to the ground unless Frank himself is close to the ground.

Level 3: Frank swings a boat oar (just go with it, Willamette has everything!) in the same manner as the last two items, but with about 3 times the range. Unfortunately, the damage isn't too much better than before though, only dealing 16% damage.

Forward Air - Tools of Survival Medium
(Plunger < Broom < Paddlesaw)


Frank pulls out one of 3 weapons, depending on this current level, rapidly thrusting them out and in for a total of 10 hits in under a second, creating a "suction" effect on opponents, pulling them right next to Frank. The purpose of this attack remains the same through each level, though it's range and damage output increase with each.

Level 1: Frank uses a plunger, which has a fairly small range in front, dealing as total of 10% max
damage. It's still useful, but gets far better with upgrade.

Level 2: Frank sweeps the competition using a push broom, which has about 1.5 times the range of the plunger, this time dealing about 15% for it's maximum damage, assuming every hit hit.

Level 3: Frank whips out a paddlesaw, a magnificent weapon combination of two chainsaws, a canoe paddle, and some duct tape. This has about 2.5 times the range of level 1 and deals about 25% damage total.

Back Air - Tools of Survival Heavy
(Bat < Hammer < Ax)

As opposed to some of his other moves, this one is fairly simple, as Frank will simply twist in the air and smack anything that's behind him with a heavy object, turning him in the air. Nothing fancy, just death!

Level 1: That trusty bat comes back, as Frank turns and swings with it it his hands. Unfortunately, since he has no ground to stand on and get his power from, it's not as strong as it usually is, dealing 10% damage and decent downwards diagonal knockback.

Level 2: This is a bit more like it! Frank swings with a big hammer, which ends up dealing quite a bit more damage, 14%, and even heavier knockback downwards. The hammer has even more range than the bat, too!

Level 3: Hell yeah! Frank swings at his opponents with a glorious, ornate masterpiece of chopping action! The ax deals 20% damage and pretty great knockback downwards, sending opponents spiraling towards the no doubt by now zombie infested ground!

Up Air - Chainsaw Good
Frank don't need no upgrades for this one! Frank shoves a chainsaw straight upwards, holding it out for a second and just letting it rip! The chainsaw deals 23% damage upwards knockback that KOs around 100% damage, fitting for the greatest zombie killing weapon!

Down Air - Knee Drop
Frank immediately stops what he's doing and points his knee directly towards the ground, dropping it at a speed more closely associated with the king of the koopas. Frank dropping his knee is akin to a boulder being dropped directly at your head, and that's not a comment about bis weight, thank you very much. Getting hit with the knee of justice will deal an astonishing 13% damage to the opponent and knock them directly downwards, or simply knock them on their butts if they were standing on the ground. Frank will absolutely die if he uses this offstage, so, uh, don't do that. Oh, yeah, this move has huge priority, so use this if you're in a tough spot in the air.
Grab Game


Grab
Frank’s grab is simple swipe forward, having a decently long range thanks to Frank’s large build and long arms. Frank gets the opponent into a quasi-headlock, punching them in the gut for his pummel, dealing about 2% damage per hit.

Down Throw - Hard Kick
Frank pushes the opponent (or zombie) away, finishing with a heavy-hitting kick that deals 15% damage, and knockback that, while it will probably never KO, is enough to put opponents into a prone position. In addition, Frank’s kick is a long-reaching and slightly lingering hitbox, so that anything, be it foe or zombie, remotely in the way will be hit by it, though only dealt 5% and a bit of stun. For getting opponents next to zombies and in a position to snap a quick pic, it’s a very viable option.

Up Throw - Hammer Throw
Frank reaches down to grab the opponents by the legs, holding the appendages under his arms. The animation is of course varied for opponents who have no legs or whos legs are too stubby to grab this way. Anyway, Frank then spins them around twice, throwing them in whatever direction was input when he grabbed their legs, though up by default. Opponents who are thrown are dealt 20% damage and knockback that will KO around 200%, making this a great GTFO move.

Actually, it’s great in that regard in two ways, as in this move Frank literally weaponizes his opponent. For every spin, the opponent is made a hitbox, not unlike Link’s up special, with the first spin dealing 5% damage and stun, while the second deals 10% damage and decent knockback. In addition to THAT, when Frank is tossing a throw in a particular direction, he will step that way with each spin, making it a moving hitbox covering about 1 SBU.Foes hit with the opponent just as they are hit with a thrown foe or zombie are dealt an additional 10% damage and enough knockback to KO at around 100%, making Frank with a zombie a potentially dangerous slugger.

Backward Throw - Suplex
Frank wrestles the opponent into a headlock. He then lifts them up and slams them behind him with a suplex. Well this is his most simplistic throw it is also the most damage inducing, Dealing opponents 35% damage and knockback that will KO around 100%... When Frank is level three. This is one of Frank's only non-weapon moves that will upgrade with each level.It's still his most effective killer throw, but at level one will only deal 10%, and level 2 it will deal 15%. The knockback dealt at levels one and two are not great, but will still effectively KO at around 155%.

Forward Throw - Irish Whip
Frank steps behind his opponents, grabbing them by the arm or similar/convenient appendage. He then whips them by the arm behind him, performing the wrestling move of the same name. With opponents, they will simply be thrown 1 SBU forward, with very little lag or damage dealt, useful for throwing foes towards zombies, while still keeping them grab-able. If used on a zombie, it will instead run forward (at the pace of Ganondorf's run) for 1.5 SBUs, read to grapple any opponent that happens to cross his path.
Smash Attacks
Down Smash - Head Smash
(Bat < Lead Pipe < Sledgehammer)

Frank brings his level's weapon above his head for the charging animation, swinging it down hard for the actual attack. The knockback for every single one of these weapons is relatively similar, bouncing opponents off of the ground and a few feet into the air, though nothing that's ever going to KO, not reaching far above most character's attack range even at the highest of percents, making it a great move to set up for a follow-up attack or to leave opponents open for zombies. Against zombies, this ends up smashing their heads in, leaving their bodies onstage much like Frank's jab would.

Level 1: Frank must have some bad memories of playing ball as a kid, because he smashes the bat against the ground so hard that it snaps in half! Thanks to it being a simple, light, wooden bat, the lag is almost non-existent, though the range is nothing much to writer home about. The damage isn't incredibly heavy either, ranging from 11% to 20% damage.

Level 2: Frank utilizes his pipe in a much more efficient way than Nintendo's mascot: bashing the heads of anyone who wants to fight him right into their necks. The lead pipe has about the same amount of range and speed the bat has, though deals more damage, from 15% to 26% damage.

Level 3: Frank utilizes another Mario weapon in a very different way than our favorite PG Protagonist, smashing opponent's heads into little tiny pieces with a hammer! The sledgehammer has about twice the range of the former levels, and deals much more damage, from 20% to 35% damage, enough to massacre a couple of zombies with a full charge, at the cost of being about twice as laggy as the levels that came before, with lag comparable to Ganon's infamous splits-leg smash.

Forward Smash - Big Stab
(Sword < Pitchfork < Chainsaw)

Frank seems to be a big Fire Emblem fan as the charge and release for this attack looks almost identical to Marth's Neutral Special. The difference? Frank has a different weapon for each level he levels up! Much like his forward tilt, KOing zombies with this is much like KOing them with his forward tilt, cutting their bodies apart.

Level 1: Frank's Marth impression is strongest in this level, as he stabs forward with a broadsword, reaching forward about as far as Marth's Neutral Special reaches, dealing damage between 16% and 23% with knockback KOing around 135% damage at full charge.

Level 2: Frank goes medieval on his opponents, stabbing forward with a pitchfork, no torch included. The pitchfork has abut 2 and a half times the range as the sword, but actually deals less damage, but not incredibly so, between 14% and 22% damage, KOing around 140%. The upside is that Frank can hit more opponents and zombies with this hitbox at once, though!

Level 3: Finally, the greatest zombie killin' weapon! Frank stabs forward with a chainsaw, which lets out an incredibly satisfying roar as it rips through opponents. The range is a bit shorter than the Level 1 weapon, but without any charge, it deals 29% damage (oh, yeah!), and at full charge will deal an incredible 41% damage, and knockback that KOs at around 90%! Yeah, baby!

Up Smash - Big Guns
(Shotgun < Grenade Launcher < Rocket Launcher)

Oh, hell yeah, baby! Frank's got himself some heavy weapons now! For each of these high caliber killing contraptions, Frank aims straight up and shoots, sending his opponents flying!

Level 1: Boom! Frank shoots a shotgun straight up, the range not really being anything to be impressed by, but the damage and knockback really blowing the competition away! It deals between 18% and 26% damage, and upwards knockback KOing around 140%.

Level 2: This is more like it! Frank launches a grenade upwards, with it exploding about 1 BFP above Frank's head, the explosion dealing between 22% and 32% damage, depending on the charge, with upwards knockback KOing at around 115%!

Level 3: Where does he get all of these wonderful toys in a mall?! (from the military guys sent in to blow him to hell, that's where). Frank points that big beautiful rocket launcher straight up, letting it rip and sending that rocket sky-high, it reaching as far as 5 BFPs upwards, though exploding whenever it hits an opponent or wall or anything, dealing between 29% and 43% damage and knockback that's going to KO upwards at as low as 80%!

Final Smash
Psychopath Parade, Survive! ...crap
Frank has grabbed the smash ball! Frank makes a lunge for his opponent, perhaps realizing that they're stuck in this apocalypse with him, hoping to usher them to safety! Frank grabs them by the hand, running them through Willamette mall, avoiding all the psychopaths there! Adam the clown takes a swing at Frank with his chainsaw, missing him but hitting the opponent. Frank says "Sorry!" and grabs their hands again, running them right into the gunfire of Cletus Samson and the fire bottles of the young Paul Carson, shooting and burning them, but still keeping them alive, though worse for wear. Frank picks them up and continues carrying them, almost getting them to the safe house, only to be stopped by Larry Chiang, who grabs them and puts them on a meat hook, stabbing them, and KOing them. The cutscene final smash ends with Frank shouting "No!", only to be distracted by a young, attractive female survivor running away, chasing after her and putting his camera up, shouting "hey, wait up!". Frank then returns to the battlefield, the opponent flying upwards into a star KO.
 
Last edited:

ChaosKiwi

Smash Apprentice
Joined
Feb 1, 2014
Messages
104
NNID
ChaosKiwi
Did somebody say one day Chaotic set?

KHYBON
"Yeah, I could build that."


Khybon, a cyborg inventor from the Underworld who has created some of the most famous, effective Battlegear the tribe has. Battlegear, as the name may imply, is the umbrella term for any armor, weaponry, or vehicle creatures use during battle.

Khybon, in particular, is renowned all over Perim for his skills as an inventor, his greatest achievement being his self-augmentation, the likes of which had never been seen before. He has a drill, a taser, a plasma cannon, a cool grasper, and more, hidden just below the skin. Additionally, he always carries with him his Mech-Blade, a sword of his own design with an adjustable length. Let's see how he unleashes these weapons in Smash!

STATS
Size- 10
Weight- 9
Jumps- 4
Ground Speed- 3
Aerial Speed- 5
Fall Speed- 9


SPECIALS

Neutral- Blaze Barrage

Khybon readies his plasma blaster, and fires it once for every time the button gets mashed, up to a total of five times. Each blast can be angled by the stick in the split second before it is fired, and travels three Battlefield platforms at the speed of Fox's lasers before dissipating.

Each blast does 5% fire damage, and Khybon has to reload if he fires off all five at once (signified by replacing the heat sink in his gun arm with his grasper arm, an animation that doesn't interrupt anything else. It's pretty much purely a visual thing).

Side- Taser Attachment
Khybon's top left arm is a taser, a stungun, or whatever you wanna call it. Point is, it releases surges of electricity on Khybon's mental command, making it both an effective tool and an effective weapon. As such, it makes its home in Khybon's side special.

Upon input, Khybon shoves his taser hand forward, the range being about the width of Khybon's body. Should it hit somebody, Khybon releases a pulse of electricity into their body, dealing 13% and sending them flying after a short delay, KOing at 160%.

Up- Telebracers

Khybon activates his personal set of Telebracers, attaching them to his lower set of arms as he disappears in a mist of electrical energy. A moment later, he reappears, approximately three Battlefield platforms in a given direction. Like literally every other teleport in Smash Bros. ever, this direction is chosen by the player angling this control stick the way they want him to go.

When Khybon initially disappears, the cloud that is left behind lingers for a full second, dealing passive damage to anyone who enters it. 5%, specifically.

Down- Phobia Mask

The inventor puts on his Phobia Mask, a creation of his which can strike fear into the hearts of any soul, no matter how courageous they may be. In Smash Bros., it functions as a... deterrent of sorts. You see, once he puts it on, he wears it around for six seconds before taking it back of to recharge its fear energy. At that point, he must wait ten seconds before putting it back on. What does it do, you may ask?

Well I'm glad you asked! Should Khybon's body hitbox make contact with another character's while he's wearing the Phobia Mask, that character is grabbed by Khybon. From there, colored energies flow from the mask into the various orifices of Khybon's victim, filing them with terror! Essentially, it acts like a poison of sorts, causing their attacks to do half as much damage while simultaneously dealing them 2% damage per second. This effect persists for about seven seconds before dissipating.

There is a second way to use the mask, however. By pressing the input again while the mask is on, Khybon can send the fear energies in the mask forward like a projectile, forcing him to put it away as the rainbow of nightmares flies forth. The cloud travels as far Samus' Charge Shot at slightly faster than Khybon's run, but if it hits, it's a solid opening for the mechanist. You see, hitting with the fear cloud causes the enemy to be stunned with terror, for a length of time comparable to the Paralyzer. Ain't that nifty?


SMASHES

Up- Fire Stream

Khybon adjusts the setting on his plasma gun arm, before unleashing a long stream of super hot flames into the air above, an attack that can be slightly angled by the player while it's going on. The stream of fire's length is always set at two SBB, but the damage varies based on charge time. At the minimum charge, it deals a mere 17%, but at maximum charge, it will deal a nice 24% instead. It doesn't have much KO power, however, so it's really more of an anti-air defensive move than a KO move.

Down- Plasma Burst
Pressing it to the ground below, Khybon overloads his plasma gun while the player charges this smash. Upon release, a large blast of plasma energy escapes the gun, steam venting from his shoulders. The plasma blast forms a dome of destructive energy around Khybon, dealing a minimum of 20% and a maximum of 26%, but with very little range compared to his other smashes. However, its KO power is massive, KOing enemies, when fully charged, at as little as 90%, making it an absolute menace.

Side- Khybon's Mech-Blade

Khybon thrusts his totally sick sword forward in a single, powerful strike, dealing 10%. That's not all, however. He then pushes a button on the hilt, causing the sword's length (and this attack's effective range) to double in an instant. This second half of the move's damage depends on exactly how long you charge it up. At minimum, it deals 9%, but at max, it deals 15%! Ain't that cool?

The first half does almost no knockback to speak of, but the second half can KO at 100% when fully charged.


STANDARDS

Jab- Drill Punch
Khybon brings his drill arm forward as if he was punching with a regular hand, revving up the machinery as he does. This initially hit deals 4%. Should you keep mashing that input, however, he'll continue to rev the drill, keeping his arm out until the input ceases to be mashed. Each additional rev deals an additional 4% damage.

In case its unclear, his drill hand is the bottom right one. The drill extends out of the opening at the tip of the hand-thing.

Side- Plasma Pistol Pound
A simple right straight punch, delivered with the heavy metal Plasma Cannon arm. An attack so strong it physically pulls Khybon forward, this attack is slow but has a lot of knockback and damage for a tilt, dealing 15% and KOing at 150%. What a move, eh?

Up- Upshot
Khybon fires his a single plasma blast into the air above him, which travels half his height before dissipating. It's good for juggling as it can be slightly angled, and deals 3%. So, it doesn't do much damage, but its quick.

Down- Stomp Maneuver
Our great inventor may be a mechanical genius, but that doesn't mean he'll pass up a simple, easy, more brutish method of attack. Hence: The Stomp Maneuver, in which he lifts on of his large metal legs and steps on anybody in front of him, dealing 10% and causing foes to fall prone.
Dash- Thunderdrill
Khybon sticks his drill hand together with his taser hand as he charges forward. A simple bulldozing type move that deals electrical damage. Specifically, 13%.


AERIALS

Up- Flame Puff
The name may or may not give away the true nature of this move, admittedly. He lets out a puff of flame from his plasma blaster, though for him a puff is a blast of fire about the same size as his entire body right above him. This flame puff is weak, despite having high knockback, dealing 8% fire damage to anybody who comes in contact with it.

Forward- Mech-Swing
Khybon swings his sword in an arc in front of himself, hitting above, in front, and below him. This, all in all, deals 10% and knocks foes downward, making it good for getting airborne foes out of your hair. Metaphorical hair, I mean. Khybon is, like, a bird or something. No hair on him.

Back- Ventilation Destination
Khybon vents a lot of steam out of his shoulder ports, enough to physically push him forward a good bit, in fact. The steam has about one SBB of range, and deals 13% fire damage due to the intense heat of all that gaseous water. There's some ending lag to it, though, so no spamming it to travel forward similar to Jiggly's side spec.

Neutral- Khybon KICK
Khybon performs a spinning kick, venting air from various exhaust ports to give it some extra speed and force. This hits on both sides of Khybon, but not above or below him, unfortunately. It's still a strong kick, though, most likely because of all the metal and hydraulics and junk housed in this dude's, like, thighs and stuff. How strong, you ask? Well, strong enough to deal 14% damage and KO enemies at 110%, that's how strong!

Down- Downward Daerial Divekick
Khybon delivers a decisive, devastating, daring divekick, venting a deathly deluge of steam to boost his speed. The dynamic divekick dues Khybon to fall faster at a 45 degree angle, and deals a divine d'14% damage while spiking dopey dudes.


GRAB GAME

Grab- Khybon GRIP
A grab. Not every move can be super unique, you know. He grabs with the grasper hand, by the way.

Pummel- Taze Daze
Khybon sticks his taser to the enemy, dealing continuous damage for every tap of the input. Each surge of electricity deals 3%.

Down- Phobia Mask Part Dos
Khybon once more dons his Phobia Mask, and holds the foe close, making sure every bit of fear energy enters their mind, laughing maniacally as he does so. The foe is reduced to a prone, quivering mess of fright, dealing 12% from the sheer increased blood pressure alone.

Up- Target Practice
Because you can never have enough of the classic "throws the foe into the air, then fires a series of shots at them" Up Throw template, right? So, Khybon throws the foe into the air, then fires a series of shots at them, dealing a total of 14% and high knockback.

Back- Mech-Stab
Khybon walks past the foe, placing the tip of his Mech-Blade to their back without looking at them. Then, he presses the button, extending the blade through their chest to impale them, leaving them prone on the ground before Khybon kicks them away. The whole throw deals 14%.

Forward- Khybon THROW
Khybon chucks his foe in a Brawl style directional throw. The best type of throw, honestly, if you ask me. It deals 10%, and isn't just a sign that I'm out of ideas, no sir. Nooooo sir.


FINAL SMASH
OBLITERATORS


Khybon pushes a button on his shoulder, and a pair of hammerspace rocket launchers fold out of his back, firing two Obliterator missiles into the air above. After taking a second to get their bearings, they lock on to the closest enemy (if Khybon is fighting more than one foe, they'll lock on to the two closest enemies). When they hit an enemy, they explode, releasing a blast slightly larger than a smart bomb's which deals 30% and KOs enemies at 50%.​
 
Last edited:

Tocaraca2

Smash Ace
Joined
Feb 22, 2015
Messages
557
Location
Wokingham
As you guys seem to have the time to read all of the movesets, may I please have some feedback on my finished Roy moveset? What the hell should I have for the Down Special other than my unoriginal idea?
 

allison

She who makes bad posts
Joined
Jan 25, 2014
Messages
5,138
Location
Maple Valley, WA
NNID
crazyal02
3DS FC
0216-1055-4584
Super-Why
Dammit munomario, I'm making a Wonder-Red moveset! But my set's mechanics are quite different from yours, so you shall be allowed to live. These Civilians seem a lot more fickle than they were in the original game, considering that the ones from the game didn't leave until the end of the mission... It also seems weird that Red's suddenly only using Civilians rather than additionally relying on the standing members of the Wonderful 101. OOC aside, the Civilians are a somewhat interesting mechanic. Red is very much a combo-oriented character in his game, and your Civilian mechanic is designed to support that, but his actual moves are a bit lackluster in this regard. Unite Hand in particular is meant to be a combo finisher, but its most effective form has a full second of startlag, leading directly into the biggest issue with the Citizens mechanic: there's no practical way to get rid of them! You state in the mechanic description that the lag increase is negligible, but this simply is not the case. Gaining more Citizens is clearly meant to be a reward, but gaining more actually makes it considerably easier for opponents to avoid your attacks! Furthermore, on a psychological level, most players become more careful and reactive as they take damage, making the slower attacks as Red deals more damage exponentially worse. The only way to get rid of these guys is letting yourself take damage, which is, y'know, bad. Aside from this big flaw, there are a few little nitpicks: Switching Red's Neutral and Side specials would be more intuitive, and Unite Bowgun's "risk" element of its risk-and-reward is nullified by the fact that Red can easily step out of the way. At any rate, one thing is certain: that Final Smash is one of the most ridiculous ones I've ever seen.

That's enough reviewing for now, but I plan to review Roy and Zhu-Li sometime in the near future.
 

Munomario777

Smash Master
Joined
Nov 18, 2014
Messages
3,253
Location
Charleston, South Carolina
3DS FC
0387-9596-4480
Switch FC
SW-8229-3157-8114
Super-Why
Dammit munomario, I'm making a Wonder-Red moveset! But my set's mechanics are quite different from yours, so you shall be allowed to live. These Civilians seem a lot more fickle than they were in the original game, considering that the ones from the game didn't leave until the end of the mission... It also seems weird that Red's suddenly only using Civilians rather than additionally relying on the standing members of the Wonderful 101. OOC aside, the Civilians are a somewhat interesting mechanic. Red is very much a combo-oriented character in his game, and your Civilian mechanic is designed to support that, but his actual moves are a bit lackluster in this regard. Unite Hand in particular is meant to be a combo finisher, but its most effective form has a full second of startlag, leading directly into the biggest issue with the Citizens mechanic: there's no practical way to get rid of them! You state in the mechanic description that the lag increase is negligible, but this simply is not the case. Gaining more Citizens is clearly meant to be a reward, but gaining more actually makes it considerably easier for opponents to avoid your attacks! Furthermore, on a psychological level, most players become more careful and reactive as they take damage, making the slower attacks as Red deals more damage exponentially worse. The only way to get rid of these guys is letting yourself take damage, which is, y'know, bad. Aside from this big flaw, there are a few little nitpicks: Switching Red's Neutral and Side specials would be more intuitive, and Unite Bowgun's "risk" element of its risk-and-reward is nullified by the fact that Red can easily step out of the way. At any rate, one thing is certain: that Final Smash is one of the most ridiculous ones I've ever seen.

That's enough reviewing for now, but I plan to review Roy and Zhu-Li sometime in the near future.
Thanks for the feedback! :)
  • Another Moveset: Oh, I had no idea! I can't wait to see what yours looks like! :)
  • OOC: I tried mixing things up a bit from the original game, to give things a bit of a twist. I thought having the other playable characters as part of Wonder-Red's moveset would be a bit much, so I kept it to just the Civilians.
  • Lag: Hmm, very true. I'll reduce the lag increase when I go through the set.
  • Neutral/Side Special: Yeah, that seems like it might be better. I'll go ahead and do that.
  • Unite Bowgun: The implication is that the arrow is fast enough that he would still be in the way. I'll make that a bit more clear.
  • Final Smash: I decided to give the attack a lot of personality, and I think I succeeded. :p
Thanks again for the feedback! :) I'll go back through the set and tweak some things. EDIT: Moveset updated! Check it out and see what you think. :)
 
Last edited:

ChaosKiwi

Smash Apprentice
Joined
Feb 1, 2014
Messages
104
NNID
ChaosKiwi
Another one day? My god... the Kiwi output gauge is at MYM 15 LEVELS!

SYLVEON
The Intertwining Pokemon

Sylveon. One of the near infinite eeveelutions, Sylveon is a Fairy type, introduced in Generation VI and met with a more or less warm reception. Sylveon is Pokemon #700, and is overall quite pacifistic. It is said to be able to calm people down by transferring its aura to them with its ribbon-like feelers, and its potential moveset in Smash Bros reflects this generally non-violent personality.


STATS

Sylveon, being quadrupedal, is low to the ground, its size equal to Pikachu's when it runs on all fours. Its weight reflects this small stature, as its weight is, again, about equal to that of Pikachu.

It's a Pokemon of average speed, travelling only slightly faster than, say, Mario, while simultaneously being very floaty, with a quick aerial speed and slow, slow falls.


SPECIALS

Neutral Special- Disarming Voice
Sylveon, as previously stated, is generally quite opposed to violence in all forms. As such, it utilizes the move Disarming Voice. Though it functions quite differently in its home games, the move, in Smash Bros., acts as such: When the input is pressed, Sylveon will release from its mouth a wave of visible sound, shown as a ring of pink, zig-zaggy lines with a heart in the middle. It travels three and a half Battlefield platform lengths before dissipating, and travels quite slowly. Slow enough that Sylveon can actually catch up to it, in fact.

So, what does this move do? Well, it acts as an anti-attack move. When the sound wave makes contact with an enemy who is in the process of using or charging an attack, they will be forced from the attack animation/charge into their idle animation, or, if they are airborne, their falling animation. Should they have been charging an attack, they lose the charge. No damage is dealt to the affected foe, and they suffer no hitstun.

This only affects enemies, though, and will merely pass through projectiles or items without affecting them at all, so keep that in mind.

Side Special- Fairy Wind

Sylveon's ribbon feelers flutter for a second, as if in a light breeze, foreshadowing the move to come. From there, a gust of powerful wind is summoned from behind Sylveon, creating a windbox that is three times the Pokemon's height and stretching two and a half Battlefield platforms.

Any projectiles that enter Sylveon's Fairy Wind from the direction it's blowing towards will have their speed cut in half, while projectiles travelling with the grain will have their speed doubled (this includes Disarming Voice, making them a potent combination). Fairy Wind deals no damage, and lasts two seconds. Only one windbox can be out at once. Enemies who enter Fairy Wind are under the same effects as the projectiles, for the most part: Their speed is halved against the grain and double when travelling in the same direction. Additionally, if Sylveon is airborne in the the wind, it will glide until it exits the windbox.

Up Special- Double Team
Sylveon flickers, and several transparent Sylveons appear in a line in whatever direction the stick is held. After a second, the line disappears except for the one at the end of the line opposite where Sylveon originally was, who is now the real Sylveon. Sylveon cannot be hit while the trail is out, but can be during the startup and ending lag. This attack deals no damage.

Down Special- Draining Kiss

Sylveon reaches out with the feelers on its chest, the ribbons extending to one and a half battlefield platforms in length before snapping back in to place. Should they make contact with somebody while extending, however, they will latch on to that person, and Sylveon will pull itself to them.

Once Sylveon has reached the poor schmoe, it gives them a delicate kiss on the cheek, a small heart rising from the point of contact. What does this do, other than look cute? Well, the move is called Draining Kiss, isn't it? For as long as you hold the input, Sylveon will maintain the smooch, dealing 3% to the enemy per second while simultaneously healing Sylveon the same amount at the same rate, for up to four seconds/12%.

The foe is able to break free, however, the same way they would any other grab type move: stick wiggling and button mashing. However, Draining Kiss's ease of escape changes depending on certain factors. For one, the more damage Sylveon currently has, the harder it is to escape, while a Sylveon with little damage will be easy to break free of. Conversely, it will also be easier if the foe has more damage for them to escape, but near impossible to break free from when under 10%.


STANDARDS

Jab- Tail Whip
Well, not so much Tail Whip as, like, Weird Ribbon Tentacle Whip. And, as the name I just provided may imply, this attack utilizes Sylveon's two chest ribbons, which alternate whipping forward with each press of the input. This has a surprisingly long range for a jab, longer than Sylveon's whole body in fact! Ain't that just peachy keen? It is, however, still just a jab, so it doesn't do much damage, only dealing 3% with every hit.

Side Tilt- Tackle
In a manner similar to playful nudging, Sylveon takes a small leap, performing a small, quick headbutt that carries it about half a SBB forward in the process. The tackle attack does only 5%, but has oddly high priority.

Up Tilt- Tail Whip 2
Sylveon, without looking up or batting an eyelash, whips its gross tendril things, this time ones on its ear, into the air above it, with a range of one Battlefield platform. This one is stronger than the one it does in its jab, in exchange for not being mashable, dealing 8% on contact.

Down Tilt- Sand Attack
Sylveon closes its eyes and smirks, kicking up the dust on the ground below it into a cloud around its feet... a strangely painful cloud, for the enemies! That's right, though small, this cloud of dust actually hurts the enemies and causes them to fall prone on contact, most likely due to.... giving them a rash, perhaps? Who knows. Point is, it does 7%.

Dash Attack- Quick Attack
Sylveon suddenly gains a lot of speed, and travels about the length of a battlefield platform in the blink of an eye, before continuing its run as if nothing happened. During this quick speed boost, Sylveon deals 14% damage and knocks foes behind itself.


SMASHES

Side Smash- Echoed Voice
Sylveon sings a siren's song, releasing another, different looking set of visible sound waves, this time pale green and completely circular, a thin tube of sound that fires one point five SBBs forward. When uncharged, it deals 14%, and when it is fully charged, it deals 19%. Fairly weak, no?

Well, not exactly. You see, Echoed Voice will bounce off of anybody it hits, flying back in the direction from whence it came, making it possible to hit foes on both sides of Sylveon. It will also bounce foes away, making this Sylveon's best KO move, getting foes at 130%.

Down Smash- Dazzling Gleam
The Intertwining Pokemon jumps into the air about one SBB, and releases from its bows a flash of sparkling pink and blue light, forming a cone below it, hitting where it was once standing. This deals only 10%, at any charge, but has an excellent amount of stun, comparable to ZSS's paralyzing smash. It will stun longer at higher charges, giving Sylveon the opening it may need to turn the tides!

Up Smash- Misty Terrain

Sylveon yawns, accidentally releasing a fog of minty green mist that fills the air directly above it, the area of effect being dependent on the length of the charge, with the minimum being the size of Sylveon's body and the maximum being about the size of two and a half Sylveons. Wait... this smash doesn't have a hitbox? It doesn't do any damage? What a useless smash!

Not necessarily. It's got an odd effect, Misty Terrain. It lingers for approximately ten seconds before dissipating. During that time, any enemies who enter it are 'poisoned'! Poisoned, as in, for the next five seconds they take 4% per second. Additionally, energy based projectiles that pass through Misty Terrain disappear mysteriously... odd.


AERIALS

Neutral Aerial- Round
Sylveon releases from its mouth another visible form of sound, this time a bubbly musical note with a yellow color. It travels lazily forward for a single battlefield platform's distance, dealing 13% on contact. It has oddly high priority.

Up Aerial- Psyshock
Sylveon turns to face upwards, wiggling its gross, vomit-inducing feeler things in the air above it and releasing from them pink, sharp psychic waves, hitting any foes directly above it, dealing 5%. Not a lot of damage, but high knockback, KOing at 90%! What a cool trick!

Forward Aerial- Swift
From its mouth, Sylveon fires a single, quick, star shaped projectile that travels twice as far as the Round projectile and twice as fast to boot, with very slight homing properties. On contact, it deals 8%.

Back Aerial- Tail Whip 3
Sylveon twists to face the rear, using its horrible, disgusting feelers once more as a weapon, angled slightly downward and extending the length of Sylveon's body. The ribbons deal 7% and minimal knockback if they hit with the 'body' of them. However, this attack has a tipper, dealing 15% and spiking the enemy!

Down Aerial- Light Screen
Sylveon creates a screen of light directly below its feet, stalling midair as it stands on the invisible force field. Should an enemy hit this force field, they are spiked downwards immediately, and take 9%. Additionally, Light Screen blocks projectiles.


GRAB GAME

Grab- Helping Hand
Sylveon wiggles its gross-- you get the point, it uses the ribbons to grab the enemy. Long range for a grab.

Pummel- Weird Ribbon Tentacle Whip
Sylveon uses its ear ribbons to slap the foe in the face like the fool they are, trying to knock some nonviolence into them. Deals 4%.

Back Throw- Swift 2
Sylveon slowly backs away from the enemy, unleashing a stream of Swift stars into them as it does, dealing a total of 15%, making it the strongest throw in Sylveon's arsenal. However, it has abysmal knockback, KOing at 190%.

Up Throw- Sylveon Sling
After throwing the foe into the air with its ribbons, Sylveon shows and unprecedented amount of... violent impulse. It Quick Attacks into the air to meet the foe, wrapping them again in ribbons before spinning, throwing the enemy either to the left or to the right, depending which direction the player presses (however, the default will be the direction Sylveon was originally facing). This deals 10%, and has low KO percentage, making it a very good killing throw.

Down Throw- Dazzling Gleam 2
Sylveon shoves the foe to the ground, once more unleashing a blast of bright light, dealing only 8% but causing the foe to fall prone. Once the foe gets back up, they'll be disoriented, their movement speed cut in half for the next four seconds, making this a good "use it and get away" throw for Sylveon.

Forward Throw- Whiplash
Sylveon sends a whipping motion through the ribbons holding the enemy, the ripple causing them to fly forward at high speed once it reaches the captive. They take 9%, and are KOed at 140%, making it an alright directional throw.


FINAL SMASH
MOONBLAST

A huge Moon appears, behind the stage but obscuring the background, and Sylveon quickly charges a large, white sphere of energy. After half a second of charging, the sphere is launched, and can have it's vertical direction controlled by the player, but it will always go in a relatively straight line. The sphere itself is about as wide as one and half battlefield platforms. It deals 40% on contact, and KOs at 80%.


And that's that, the best eeveelution of all time.​
 
Last edited:

ForwardArrow

Smash Ace
Joined
Aug 17, 2011
Messages
503
"You could have stopped it."- Grandma


The Grandmatriarchs
"We Rise."- Grandma

The Grandmatriarchs are the closest thing to an antagonist in the admittedly very pointless game Cookie Clicker, where you build structures in a never-ending loop to create a larger and larger amount of cookies. The second structure, the Grandma, eventually reaches a point where you can start having them do research in a Bingo Center, and they eventually develop a hivemind and several eldritch cooking substances that allow them to transform into a humongous mass of elderly flesh, cookie dough, and vague semblances of old lady faces. They terrorize the landscape, devouring entire cities in their wake and spitting out threats at the player, while changing the ever beneficial Golden Cookie into a "Wrath" Cookie which can actually damage the player's production, though it also promises the extremely powerful Elder Frenzy a portion of the time. They also produce Wrinklers, bug-like monsters that drain your cookie production but can be popped for a net gain. It is actually somewhat disputed within the community whether or not to appease the Grandmatriarchs and make them leave, as there are clear benefits to playing with them there or gone, though no matter what the planet's populous is going to suffer.


Statistics
Size 30
Weight 30
Fall Speed 15
Traction 10
Jumps 1
Air Speed 1
Movement Speed 0.5

So you're probably wondering, how is this thing even supposed to be playable in Smash Brothers? Well a portion of the collective has joined the fight, appearing to be about six grandma heads in a mass of cookie batter and disgusting old woman flesh. It oozes along the ground rather slowly, having a dash speed that makes Jigglypuff look like she's breaking the sound barrier and pathetic jumps and air movement as the grandmothers try to writhe their mass through the air. On the upside, they can't trip and have very controlled movement, which'd be more relevant if they weren't less mobile than molasses. That said, their weight is quite incredible, and usually won't get KO'd until around 400% as their recovery, despite their terrible jumps, is more respectable than you'd expect. This is a result of their huge size, like Bowser ate Donkey Kong and that Bowser proceeded to consume a second Bowser.

Given their size, they actually do come with a small amount of resistances, taking no hitstun from throws, and have super armor against attacks that deal under 10% or only deal flinching knockback to them. However, they do come with one noticeable weakness, and that's that if an attack hits more than one Grandma at once, its power is increased significantly as more of the collective takes damage. For example if Marth FSmash'd them at close range, he'd hit 2 Grandmas instead of one, and they'd take 1.4x damage and knockback. This can increase even further if 3 or more are hit(1.6x with 3, 1.8x with 4, maxing out at 2x with 5), but most hitboxes aren't big enough to accomplish that given their sheer size. That said foes in very close quarters with you can kill you a bit more easily than you might think on account of this. Also note that the two Grandmas who are the easiest to hit at the same time are the top two, as they are the closest together, making you a bit more vulnerable to an opponent approaching you from the air rather than the ground.


Specials
"You make me sick."- Grandma
Neutral Special Cookie Sacrifice

A mere press of the Neutral Special will cause the mass of grandmas to churn for a moment before they spit out a... mouse cursor? This thing is the Clicker, the most basic tool in the game for cookie production, producing cookies much slower than manually clicking without any upgrades, which says a lot when even Grandmas outclass manually clicking fairly fast. Regardless, creating one is a very fast process, and afterwards it sticks around on stage, clicking, AKA twitching forward slightly, at a rate of once every second. If it clicks an opponent or for that matter anything which has stamina, it will deal 2% to it and light hitstun, as well as causing the target to drop a cookie.

What are these cookies, you might ask? Well the Grandmatriarchs create a lot of them throughout their moveset, and they are a healing item that can be consumed to heal 2%. Foes can do this in fact, so they can immediately heal off damage dealt by cursors, making them utterly useless. In fact, if the Grandmatriarchs pick up a cookie themselves, they don't even get healing. What kind of rip off is this? On the plus side, the Grandmatriarchs have it a bit easier with food items than most characters, absorbing all of them in contact with them at once rather than one at a time, which given their size can be a lot. It can be said that if you do find a use for them, they are fairly versatile as they can be knocked around by your attacks, treated like Jigglypuff at 150%. They'll actually click much faster the more momentum they have behind them, meaning if you launch them with a smash attack they might deal 14% and drop 7 cookies in a single go.


Well consuming cookies allows you to expend them by charging this move, taking 15 frames of charge and 3 cookies absorbed to create the first object, which is... a grandma, standing at about the size of Marth. And she's angry, though not integrated into the hivemind yet unfortunately. Instead she serves as a rather weak minion with 25 stamina, attacking foes who come within half a battlefield platform of her charging them and beating them with a rolling pin. This deals weak hits of 5% that can potentially add up to 15%, though its easy to DI out of. They take some end lag after the rolling pin beatdown.

Grandmas when not provoked into attacking will simply sit back and bake cookies at a rate of 2 cookies per second, which are placed much more conveniently than the cursors in that they are being defended actively by the grandma, rather than dropped right into the foe's greedy little hands. In fact, grandmas are defensive enough of their cookies that if they have 4 or more within half a battlefield platform of them, they'll attack foes from a further distance that are approaching by spitting their dentures at them, a projectile that travels up to 1.5 battlefield platforms and deals 10%.

The last feature of grandmas is that they can be picked up and assimilated into the hivemind like an item, at which point over 3 seconds they will have their brain reprogrammed by one of the existant grandmatriarchs before merging into the mass. The Grandmatriarchs themselves can still fight at this time, but the grandma is not functional until assimilated and can be killed during the assimilation process. Once it is assimilated, it adds 3 to the Grandmatriarch's Size and Weight, increases their cookie count by 1 every five seconds, and powers up certain attacks. Its without a doubt the safest way to acquire cookies in the moveset once achieved, but it'll take a little work to actually assimilate one.


The third level is achieved with half a second of charge and 15 cookies, a considerably larger investment, which creates a shipment, a small rocket ship about the size of Pikachu. It sits there with its 40 stamina until depleted by opponent's attacks, and when destroyed drops 10 cookies, less than your initial investment and ripe for the opponent to obtain. What gives?


Well you see the Grandmatriarchs can set off the shipment by pressing A and a direction next to it, which will cause it to be launched in the chosen direction at Mario's dash speed. On contact with an opponent, it will explode in a bomb-omb blast sized explosion, dropping the 10 cookies and dealing the opponent 18% and knockback that KOs at 120%, serving as a fairly powerful KO move, but at the same time causing a net loss of 5 cookies, possibly more if the foe is off stage or manages to reclaim any.

The rewards can improve though, if the shipment travels off a blast zone. If it does, it will return the way it came 3 seconds later with 1.5x as many cookies in tow, and explode with 1.2x as much damage, knockback, and range. If it reaches the stage it will land, ready to be set off again, so its potentially possible to stack more multipliers on this to make it absurd and more than pay itself off.


The portal is the second most powerful type of construct you can make, and its pretty costly, costing 30 cookies and 3/4ths a second of charge to make. For such an investment it better be fairly powerful, and it is, especially in terms of stamina, taking 130 damage before dying. It alternates every 2 seconds between one of three effects. The first has it spew out 10 cookies, which it will only use if the foe is not within a battlefield platform of it. It repays itself after 3 uses of this, so if you want to push your cookie economy through the roof this is the building to do it with.

The second, which it will use if a foe is in range, is have an eldritch tentacle covered in cookie dough reach out and slap in front of it, dealing 12% and knockback that KOs at 155%. This is a fairly fast, hard to predict attack, and it likes to use it when the foe is nearby at fairly unpredictable intervals, making it both harder to dodge and a little harder for the Grandmatriachs to play off.


The third, which it will use occasionally with nearby foes or no, is to summon a little minion of its own.

The Doughling is a creature of about Kirby's size that with 20 stamina, and its only attack is a weak headbutt that deals 5% and knockback that KOs at 250%. Its main helpful aspect is that it will consume cookies it walks by, healing itself for 3% and increasing the damage of the headbutt by 1% while lowering the KO percent by 5%. It eats rather slowly so it doesn't exactly turn into a force to be reckoned with most of the time, but it can be used to make nabbing cookies a more painful task for foes. The Grandmatriarchs can casually suck out its lifeforce and all its cookies by simply grabbing it like a food item, which takes slightly longer than eating a normal food item but heals them 5% of the hapless Doughlings lifeblood in addition to giving them all the cookies the Doughling consumed.


Now the last thing about portals that's worth mentioning is that if you have two or more, they will be linked to each other in the order they were created and will transport things that travel through from one portal to another, whether that be traps, minions, projectiles, or player characters. You have all sorts of room to get creative with this, especially with later moves in the set, and like the other objects that aren't cursors you can press A next to them to mess with them, as whatever order you do that in will be the new order in which portals transport things, though you have to do this next to all portals to change it. Subsequent portals after a change like this are just linked at the end of the current chain.

Notably, if a foe goes through a portal, they take 10%, and enemy projectiles are weakened immensely when they travel through portals, making them rather hard for opponents to use for themselves. Also if a shipment goes through, its applied a slightly weaker boost than if it travels across a blast zone of 1.3x cookies and 1.15x damage, blast radius, and knockback, though it also lets the shipment continue on its path afterwards. With all the positives though, keep in mind elaborate portal circuits are super expensive to make.


The prism is the final available object the Grandmatriarchs can summon, and is rather unassuming when it first appears, being a small object half the size of Pikachu that lies on the stage with 25 stamina. And the cost you ask? 150 cookies, and a full second of your time. It seems like a fairly terrible reward for all the time and effort invested, but over 5 seconds it charges up rapidly, glowing brighter and brighter as it begins the process of transmuting light itself into cookies. By the end its shining brilliantly and fluctuating with violent amounts of power.


And the resulting attack is incredible, as it fires out a whopping 100 cookies that will spray across the entire screen in front of it, each dealing 1% and a stacking amount of knockback that if all 100 cookies hit will instant KO just about anyone short of the heaviest bosses(even another Grandmatriarchy wouldn't last), but they'd have to be right in front of the rather fragile Prism for that to happen. That said, hitting with 20-25 isn't unrealistic and has plenty of KO power, nevermind that it can be way deadlier than that if the foe is near the prism when it fires. Any cookies that are fired at the Grandmatriarchs from this will instantly be absorbed into them, and god help the opponent if you have some kind of elaborate portal setup on top of this to make dealing 40% or so much more practical.

This is a high risk, high reward item to build, as it can cost the Grandmatriarchs a massive amount if its destroyed early, and if it doesn't do much damage to the foe and the Grandmatriarchs aren't prepared it can easily end up healing more than it hurts. But the payoff is absolutely massive if used well, so use them with care.

Side Special Wrinkler

From the mass of the grandmatriarchs the little worm like creature shown above lurches forth, attempting to latch onto an opponent as it lunges forwards half the length of Final Destination. If it misses, it will splatter on the ground and leave behind a single cookie. If it latches onto an opponent, it acts similarly to a Pikmin from Olimar's side special, requiring the same amount of effort to knock off and dealing hits of 3% at the same rate. Well, rather than hits of 3% actually, they extract a cookie from the opponent, undoing the healing obtained by eating said cookies. Upon death they drop all the cookies they extracted from the opponent plus one. They can potentially make up for all the damage they took and then some, but this actually allows the Grandmatriarchs to reclaim cookies the opponent has eaten.

Now, what happens if a Wrinkler latches on without an opponent having eaten any cookies, they'll just start draining them more violently in a desperate attempt to get any form of nutrition, dealing damage at double the former rate, making them as bad as a Purple Pikmin. This sounds really scary, especially when there's no limit to how many of these the Grandmatriarchs can have out, but killing a Wrinkler nets a cookie to prevent this from really being all that powerful when spammed, never mind the fact that the move is MUCH slower than Pikmin Toss. Its still a very important damage racker for the Grandmatriarchs.

Up Special One Mind
The eyes of every Grandmatriarch in the collective glow red as they begin to levitate with free flight, declaring "WE ARE ONE" as they do so. The free flight lasts for a full 3 seconds so you might think that the Grandmatriarchs are suddenly aerial masters. They're not. The free flight moves them at the speed of Charizard's walk, so this is not going to get them particularly far as a recovery, though given their weight they don't need all that insane of one to live to a couple hundred percent anyway. The main function of this move is simply a way to keep in the air and use your air game with remote consistency, as otherwise your 15/10 Fall Speed is not letting that happen.

The Grandmatriarchs can grab items or your traps/minions while levitating around like this, but what they do with them is a tad different than a normal item grab. Rather, it causes them to start moving the object around at a speed depending on its weight, light objects like cursors or cookies being possible to move at up to Fox's dash speed, while larger ones like portals move at Ganondorf's dash speed. This allows you to shift around your set ups to your liking, provided you have yourself the set up time.

Down Special Dough Mass
The collective begins bloating in size a bit as you charge this move, which can be stored and charged to a maximum of four seconds, before they release a huge glob of elderly flesh and dough in front of them. Without any grandmas in it, it just functions as goop, slowing movement of all forms(dashing, falling, rolling, etc) through it a good deal while dealing 3% per second to foes in contact with it. The blob varies in size, from that of Wario at minimum charge to about ten times that at max charge.

Wario sized areas of the blob can be destroyed by dealing them 40%, at which point they will break up into 4 cookies. Of course parts of the blob above it will just fall back in to keep the slow effect and damage per second going, meaning this isn't a horrible thing to just throw over cookies to defend them. This is helped by the fact that Wrinklers can actually thrive inside a dough mass, swimming around in it in relatively set patterns and latching onto foes that come near. If the mass with Wrinklers in it is destroyed, they fall to the ground and die if there is not another mass for them to enter below.

Structures made in your Neutral Special can be stuck to the mass of dough, which isn't super relevant but allows you to place them off the ground... until you get into the fact that the Up Special can shift the dough's position at a rather rapid rate, allowing you to sculpt it into any shape you wish as you can move around Wario sized segments of it with the rest of it stretching to follow. Obviously you can use this for more room to place traps in the air, or more idealized positioning of portals/grandmas/prisms. For that matter, the fact that cursors get stuck on this allows you to launch them with massive knockback for a really powerful burst of clicks, and then it'll get stuck on the structure to be preserved for later use. Rockets travelling through a mass will travel through it at a much slower pace than usual, but slowly grow more powerful as they travel through, gaining about as much as they would traveling through a portal after about three Wario widths of distance covered as the ship extracts cookie dough from its surroundings.


Standards
"We are not satiated."- Grandma

Jab Arcane Sugar

One Grandmatriarch lurches forward from the mass and creates a puff of glowing red dust in front of itself. This deals an initial hit of 3% and slight push back, and can be repeated up to 3 times in extremely rapid succession, each Grandma stretching out from the mass slightly further than the last. This can be combo'd an additional time for each Grandma added to the mass by assimilating them. The base version is an okay spacer, but this gets you a lot of room if you have say, 5-6 of them. There's moderate end lag at the end of this move, but the lag between each attack is fairly minimal.

This red dust is actually Arcane Sugar, which you can dust your onstage objects in, the first of which being cookies that are on the ground. This causes them to heal an additional percent when the opponent eats them... that's not beneficial at all now is it? Well if a cookie is in motion, for one of a fair few possible reasons in the set, instead of dealing the standard 1% and flinch this adds 3% and a small amount of knockback to it as a moving hitbox. This can theoretically be stacked to make cookies of all things into decent projectiles and even scary bullet hell, though if you want to stack it with a decent amount of practicality you'll want the cookies placed at points where the hitboxes overlap. The power also caps at 16% and knockback that KOs at 150%.

Dusting your structures will damage them for the normal amount that this move does, which likewise to increasing the healing from cookies, sounds like a bad thing, and it is. However, it will amplify the given structure if they take a certain amount of damage from this move, easier on something larger like a portal than something small like a prism, so the amount required varies a bit from object to object. Lets go over the buffs in full detail now.

Grandma(6 damage): After taking 6 damage from this move, Grandma is driven into a bit of a frenzy, and will not only attack slightly faster, on occasion she will wind up her rolling pin like a bat and smash it forward with every bit of force she can muster, dealing 15% and knockback that KOs at 135%. This is a bit on the slow side, but for a minion that is fairly easy to make this is a fairly powerful KO move to have on hand.

Grandma(12 damage): At this point Granny is truly crazy, and will mix up her denture firing with throwing the rolling pin as a projectile, which has a ton of windup. The rolling pin is fairly powerful though, especially considering it catches fire as it leaves her hand, dealing 17% and knockback that KOs at 120%. They tend to only use this when the opponent is otherwise preoccupied too, as otherwise it is fairly easy to dodge.

Rocket(6 damage): While a fairly minor upgrade, the rocket will come back from its trip off blast zones much faster, only taking 1 second. In addition its speed is increased about 1.5x, allowing it to make trips much faster.

Rocket(12 damage): About 2 battlefield platforms before going off the blast zone and during its first 2 battlefield platforms back, which is closer to it than it sounds given players spend some amount of distance in the magnifying glass before dying, the rocket will speed up massively, doubling the damage and knockback it deals on explosion and spreading the cookies much further upon exploding, so even that far from the stage you'll get some amount of investment back. The sheer speed it comes out means that if the opponent got knocked near the rocket they basically have no time to react, and on top of everything else allows it to complete its trips even faster.

The portal upgrades are a bit simpler than the other ones, in that it simply effects the Doughlings that pop out, or rather, how many. 2 stumble out after a portal takes 9 damage, and 3 will come out after 18 damage. The doughling population will get scary rather fast from this, and though that will deprive you of much in the way of onstage cookies, Doughlings are generally more valuable anyway as you can absorb them all the same.

Prism(3 damage): The prism will charge up its laser beam 1 second faster. Not exactly complex, but it significantly improves the overall damage output.

Prism(9 damage): While the prism glows brighter, it will begin to heat up the area around it, initially dealing a simple 4% per second for the first 3 seconds in a Bowser sized area, but the last second before it becomes a hitbox as powerful as Bowser's fire breath in an area around it slightly larger than Wario as well as the other damage per second outside that. This makes the Prism slightly safer from attack as it discourages foes from being near it and even sets up the actual hitbox if the opponent is knocked into it the last second before it fires.

Forward Tilt Dentures
The collective has 3 of its grandmas launch their dentures from their mouths, dealing half as much damage as the dentures from your grandma minions. However, they travel slightly further, 2 battlefield platforms to be precise, and follow each other in a rapid succession that makes them somewhat difficult to dodge. Each grandma assimilated will add another denture to the mix, which can make this attack a potentially powerful damage dealer.

Dentures will simply disappear upon hitting the ground, unless there happens to be a cookie within half a battlefield platform of the end of their arc, at which point they will swerve towards the nearest one, grab it, and lunge back to the grandmatrirachs with it in its teeth. This only deals 1% on the way back as its no longer capable of biting anyone, but that can be amplified via Arcane Sugar into a projectile that's actually more capable on the way back. If the dentures return to the Grandmatriarchs with a cookie in tow, its added to their cookie count, giving you a nice way to pick up cookies scattered across the stage, though keep in mind foes can simply try to outprioritize/shield the dentures and its not an especially fast attack.

If dentures come in contact with a mass of dough, they'll begin to chomp their way through it, moving around in it for 2 seconds as a continued hitbox inside the dough, kind of like how the wrinklers work but much more temporary. Aside from just making dough more dangerous to traverse, it gives them more range to find cookies in should there be none within the initial travel distance, and it will hop back to you regardless of where it finds the cookies.

Down Tilt Moistburst
Part of the dough mass of the Grandmatriarchs begins to swell in size. After a fairly long bit of start up lag, especially for a tilt, the swelled mass bursts in an explosion of cookie dough, dealing 10% and knockback that KOs at 155%. What's interesting about this knockback is that it has a very high base but scales slowly, meaning this is always strong as a GTFO move, but due to the start up lag its very unsafe. The move has fairly low end lag though, so its not TOO punishable.

Until you realize the move does function as a pseudo counter, at least during the later parts of the start up lag so it requires some amount of timing. If hit during the later 2/3rds of the start up, not only will the attack still go off, it will explode MORE violently, adding half the damage and knockback of the opponent's attack to its own. Given the high base knockback, the amount added from the opponent's attack can actually KO at really low percentages, making this a surprising and powerful KO move. The Grandmatriarchs still take the full damage and knockback of the hit though, so its not exactly perfect, and it spews out between 3-6 cookies when this happens depending on how powerful the countered attack is, though they're sprayed fairly far away so you have to do some work to claim them for yourself if the foe wasn't KO'd by this.

Up Tilt Prune Juice
In possibly the most disgusting method of self defense in their moveset, which is saying a decent amount considering the previous move, the Grandmatriachs spray prune juice above them. Being old ladies, of course they drink the terrible stuff, probably to build it up to spray as self defense later, kind of like a skunk if skunks drank their own odor spray. The spray deals a small 7%, but lingers above them as it flies up as a fairly slow projectile before falling back down and being reabsorbed into the Grandmatriarch's hideous flesh.

The slow speed makes this actually a fairly powerful upwards coverage move, amplified further by the fact that it deals some damage over time, 1% every second for 6 seconds. Eating a cookie will shave 2 seconds off this timer as they cleanse themselves of the disgusting fluid with something actually edible, so this is hardly a fantastic damage builder if the opponent has easily accessible cookies around the stage, but its fast speed and lingering properties still make it a strong defense if nothing else... though the hitbox is rather small. The good news is it can be angled left or right to give it better coverage, just keep in mind you have to be at all precise with this. One thing that should make them fear this status a bit more though is that Wrinklers will gain an extra 10 stamina if they latch onto an opponent with prune juice on them, as it gives them necessary nutrients.

Dash Attack Collapse
The Grandmatriarchs have a horrible dash, but it actually is still essential to their movement, largely because of this move. The whole mass collapses forwards, the old lady heads pulling back into the mass as it oozes along the stage into a flatter and flatter puddle. This deals 20% and diagonally upwards knockback that KOs at 115% during the initial, slightly laggy collapse. As they spread further along the ground they deal less damage and knockback, almost immediately reducing to 12% and horizontal knockback that KOs at 225% and reaching a minimum of 6% and a flinch at the end of the spread of their mass. They can spread forwards 3 battlefield platforms, though they stop when they reach a ledge which they often will, as this covers the whole stage.

This goes forward at Mario's dash speed, and automatically absorbs any cookies along the way, which makes it perhaps the most powerful cookie collection tool in your arsenal, as well as the only way to move around at a halfway reasonable speed. The problem arises from the end lag, as while the start up isn't so bad the end lag is as bad as the start up of a Warlock Punch. You're just begging to get punished unless you have traps to defend yourself, easier said than done when your mass is 3 battlefield platforms wide and you're still kind of tall, though your super armor is somewhat increased during this attack to nullifying up to a moderate amount of knockback and attacks that deal less than 15%. You can cancel it earlier in the spread to have the Grandmatriarchs reform a shorter distance along the ground with less end lag, though its still pretty high. Still, this attack is very powerful as a collection/movement tool if you land the initial hit and have something to cover for you afterwards, like say, a rocket coming back from the blast zone.

As an aside, the Grandmatriarchs can travel through their portals during this move, which are normally too small for them to fit through. If you come out a portal in the air though, their body becomes a hitbox as powerful as the initial collapse, which will occasionally come up as a trick to KO people, albeit a risky one on account of the end lag still being huge.

Smashes
"Rot."- Grandma

Forward Smash Wrath Cookie

The signature feature of the Grandmacalypse, as mentioned in the introduction, is the Wrath Cookie, a replacement for the Golden Cookie that can potentially harm the user, but also has a higher potential payoff thanks to the ridiculously powerful Elder Frenzy. In Smash Brothers, the Grandmatriarchs summon one for their Forward Smash, appearing to be about the size of Bowser in front of them and having power based on where the opponent is in relation to the cookie. If part of them just skims the edge, all they take is 4%-6% and knockback that KOs at 160%-145%, fairly underwhelming. However, if they're hurtbox is inside the cookie, the attack gets stronger the closer the center of their hitbox is to the center of the cookie. If you have the center of the cookie and the center of the foe overlap, they'll take an unholy 35%-49% and knockback that KOs at 40%-10%. This is insanely specific to hit with having a knee of justice sized sweetspot.

Unfortunately, this move has a lot of start up lag and end lag, and in all honesty, the Grandmatriarchs are not all that great at spacing, given a lot of their set is mostly just powerful hits, though its easier to land than say, Dedede's Fsmash, though that one doesn't require you to be nearly as precise for the full power. The good news is that the more grandmas you assimilate, the more the lag on this move is reduced, which makes it much much easier to land.

Now given this is a wrath COOKIE, you'd expect it to do something cookie related right. Well yes, there's one point about this attack I have yet to mention. It makes a lot of cookies, and I do mean a lot, the hitbox produces 1 cookie for every percent dealt, meaning the max charge centered hitbox produces a ridiculous /49/ cookies. Needless to say the more powerful hits produce so many the foe can't possibly collect them all, especially when they're launched away. Though if they shield the move this still drops the cookies, which means they're going to get a lot of healing, making this move very risky.

If you tap A while the cookie is visible, it will disperse its power to all structures it overlaps, which has an effect depending on how many it overlaps at once. If it only overlaps one, it multiplies the damage and knockback of all potential sources of both by 1.5-1.8x, while causing its attacks to drop cookies equal to the damage dealt. The effect of both the power boost and the cookie drop is reduced the more structures are within the area, down to a minimum of 1.1x-1.2x and dropping 1/5th the cookies. If you don't want the cookie effect to do too much(as with wrinklers having the full effect on them is fairly disastrous, and yes they count as does your goop which just causes them to shed cookies as they take the damage from it) you can try to use the attack in a pile of structures to not drop nearly as many.

Lastly this launches cookies as projectiles, with power depending on how close they are to the center. At the edge they are launched 1.5 battlefield platforms for 1% and a flinch, though it can be buffed by Arcane Sugar to potentially be respectable. At the very center they're launched for 12% and knockback that KOs at 160% with nigh infinite range and three times the speed. And keep in mind this still recieves buffs from Arcane Sugar. While due to lying on the ground its usually impossible to get a cookie in the center of the hitbox, its possible with some setup, or use of the other Smashes. Say if you have a high up portal and fire this off when it dispenses cookies, you can make some decent bullet hell of varying speed, distance, and power.


Down Smash Elder Pact
The Grandmatriarchs cackle as they create a red circle on the ground in front of them. The initial creation of the circle deals 6%-9% and a slight stun, longer than a normal flinch but nothing you can really follow up on given the attack has decent end lag, though its at least not particularly laggy to start up. One second later, the half battlefield platform sized area releases a flash of red light that deals 18%-25% and upwards knockback that KOs at 135%-100%. The main useful thing about the delay is the amount of spacial control it gives you, serving as some extra room to set up, though it doesn't protect you from aerial assault.

If you want a little more aerial coverage, try using this with cookies on top of the circle, which will cause them to get launched upwards as weak projectiles that deal 5% and low upwards knockback, but increases with the buff from Arcane Sugar. In addition, if you use your FSmash on cookies that are already projectiles from this, it adds the distance, speed, and power it would normally deal by itself to the cookies, which allows you to fire them in all sorts of different directions. The move however, sacrifices them and they disintegrate at the end of their flight, though that may be for the best to make sure the foe doesn't get them.

If one of your Neutral Special structures is on the circle, it will be sacrificed, disintegrating in the red flash as you regain 3/4th the cookies used to make it. It also causes a bit of a change in the hitbox depending on which structures were sacrificed. Clickers will cause it to shoot out three wisps of energy that deal the same damage as cookies turned into projectiles, though are otherwise impossible to manipulate so they're a fair bit worse. Grandmas cause the blast to leave behind 5 cookies in the ground for each one sacrificed, meaning you can potentially net a profit of cookies... or heal the foe if they dodge the attack so be careful. Rockets simply increase the size and power of the blast by 1.3x and cause it to start stretching into the air, while portals create a strong suction effect into the blast. Prisms cause the whole explosion to linger an extra 2 seconds as a gigantic fireball of death, which considering you sacrificed like 50 cookies has to be worth the price.


Up Smash Doughblast
The flesh of the grandma's pulsates for a moment before they launch a ball of cookie dough the size of Kirby from the mass, travelling upwards all the way off the top blast zone. This is a fairly strong projectile, dealing 22%-29% and upwards knockback that KOs at 80%-55%, but it is very predictable to come out and given the Grandmatriarch's enormous size, isn't at a position the opponents will often be at. With that said, they will target that part of your body more as its the easiest place to get 2-3 grandmas in their attacks at once. The projectile travels very fast, making it rather easy to avoid. Between 2-10 seconds later depending on charge, it will fall back down at half its initial power, before splattering on the ground into 9-15 cookies.

The blob is rather small, so unlike your gigantic dough masses from Down Special, it can actually be interacted with using your Up Tilt, which will cause the cookie dough to become contaminated and result in some terrible cookies that don't even heal the opponent when eaten. You can still absorb them yourself for full benefit, so it makes producing cookies with this move a lot less potentially problematic, but that particular sequence is admittedly very predictable, and given your size and lack of mobility predictable is the last thing you can afford to be with your attack patterns. Its a useful trick to keep in mind though. As an aside the ball will create an interesting visual if you somehow manage to shoot through a field of cookie dough above the Grandmatriarchs as the dough ripples where the projectile would be before launching a new one as the ripple reaches the top, but its entirely aesthetic as the hitbox remains the same.

If you tap B during the start up or charging, the Grandmatriarchs will fire an additional projectile identical to the first one at the cost of 10 cookies immediately after, and this can be repeated as many times as you have the cookie to spend. Fully charged this can actually yield a net profit of cookies if you can consume them all, though don't push your luck on that. They will also space out the cookies more to the left and right and also in terms of timing with the firing, so its not as easy as it sounds to avoid all the projectiles produced here.

Aerials
"It tried to get rid of us, the nasty little thing."- Grandma

Neutral Aerial Rot and Decay
The whole mass of the Grandmatriarchs appears to rot to an outright dead state, starting from the upper Grandmatriarchs and traveling down their body. This is a hitbox that gets more powerful as it goes down, dealing 9%-16% and knockback that KOs at 180%-130%, and gives the opponent a slightly "decayed" look, becoming an old man or woman if their body was human, a zombified husk of an old man or woman if they were already that, or a more broken down/rusted/elderly version of whatever non-human thing they are. This move is a bit slow on a whole, even if the first part of the hitbox does come out quickly, largely because of the long duration, to the point that at low percentages hitting with the top part of the hitbox is rather unproductive at countering aggression. The hitbox also only really covers their body and nothing more, so you're not getting much defense past yourself.

That being said, the Grandmatriarchs are huge. A move that hits their whole body is not common in the moveset, and it actually is a shockingly big, easy to land hitbox, making it decent for getting remotely aggressive with when the opponent is under fire from literally anything else. And the rewards are there too, especially if you hit with the lower part of the hitbox, as not only is the damage/knockback solid, but it causes a rather nasty little status effect on hit. It deals 1% every 2 seconds for 4-12 seconds depending on the part of the hitbox you hit with while the foe looks aged... and also delays all healing until the end of the duration. This means the foe has to be much more careful against KO moves during the duration of this effect, as they can't just heal out of range of them with all the cookies scattered across the stage, giving the Grandmatriarchs some incentive to actually play a bit aggressively. You cannot stack the delay, though at the very least you can increase it to the higher amount if you hit first with an upper part of the hitbox and then a lower part.


Forward Aerial Flesh of the Elderly
One of the Grandmatriarchs closer to the center of the mass pulls in some of the flesh of the others in a rather disgusting animation and sends it forwards as a large tentacle of wrinkled flesh. This has very large range, nearly 1.5x Bowser's length, and deals damage based on where the tentacle hits. At the base of the tentacle, it deals 12% and horizontal knockback that KOs at 160%, and gradually gets weaker as it goes along to a minimum of 3% and a flinch. However the very tip deals 12% and knockback that KOs at 100%, and also extracts 2 cookies from the foe, undoing their healing and potentially allowing the Wrinklers to go into overdrive, while also netting you a small amount to further create Neutral Special structures. This effectively gives the move two sweetspots, and if you can fill the middle with a Down Smash hitbox this can be a fairly powerful move with some close to ground levitation, or possibly be used to space your opponent into the most powerful FSmash hitbox. Just keep in mind its a lot less effective when you are high up in the air.

Back Aerial Crust and Shatter
The back half of the Grandmatriarchs cast a quick spell, and begin to crust over, as though the cookie dough in their mass is being baked into cookies. This is made a lot more disgusting with all the old woman flesh baked into said cookies naturally. After a long period of crusting, about as much as a Warlock Punch, they all squeeze together and a huge burst of shards of hardened dough fly out as they do, dealing damage and knockback varying on where you were hit. If you're just hit by a stray shard or two, which is a good ways away from the center of the hitbox even a short period of time after the initial hit, you'll only take 2%-4% and a flinch. If you're hit by a bunch of shards, think more in the range of 12%-16%. If you're actually so stupid as to be stuck in the center of grandma's agonizing embrace, you take 30% and enormous knockback that KOs at 50%. The sweetspot that does this is insanely small though, so its not like any remotely sane foe is going to get hit by it anyway, and the rest of the grandma crush, while still powerful, is no more powerful than most FSmashes which this move is laggier than anyway. That said, with how much debris is flying around, even if you dodge this move you're probably going to get hit by something, and shields will take a beating from it.

The cookie dough armor on the front end of this move is super armor that also causes you to only take half damage, one third damage near the end of the duration. The easiest way to avoid this move, frankly, is to just go around it. The Grandmatriarchs are so slow in general that just moving away can avoid this move... the problem being naturally, what they move away into. If you use this near an edge, they'll have to go underneath the Grandmatriarchs and possibly right into some scary part of your set up, like I don't know, near a rocket landing or a prism. Similarly to forcing them into a scary part of your set up, it can do the same for getting them away from a large stash of undefended or poorly defended cookies, making it serve double duty.

That said, the way the dough armor works is a bit more nuanced to allow opponents to play around it a bit more. You see if the opponent hits the dough armor, an equal amount of healing to the damage they'd deal that is ignored, rounded up, is shed in cookies, and the end lag of their attack is increased some. This means two things. One if they use a particularly punishable attack on your back and get intercepted with this, it puts them in a situation that either they'll get hit by the attack or have to dodge and let you claim a large amount of cookies. Two, if they don't use a particularly punishable attack but just whiff some kind of poking manuever, they can get a small amount of consolation healing for their troubles. Also, at the start of this move's lag, while not a particularly large portion of it, the armor crust hasn't solidified enough to give you any protection and you can just get interrupted, though keep in mind their innate super armor is enough that weak pokes won't be enough to trigger this.


Up Aerial Elder Strike
The upper 2 Grandmatriarchs lurch out of the mass and swing a pair of rolling pins above them, with the two rolling pins colliding in the very center in a powerful sweetspot. This sweetspot is harder to hit with than the Up Smash by a good margin and only deals 17% and upwards knockback that KOs at 125%, but this attack is a fair bit faster than that move, though this otherwise deals 8% and upwards knockback that probably won't ever realistically KO. This is actually a fairly fast move, continuing in the tradition of the character having good anti-air, though hitting an opponent above you when you're both in the air is not a terribly common thing for this character. The whole hitbox can also deflect your rockets to be angled upwards, and hitting with the sweetspot gives them a small power boost and a large speed boost for the remainder of this trip.

Now the sweetspot has another interesting effect if landed on one of your more liquid-y projectiles, in that it will cause them to explode in a huge splattering hitbox with 1.3x the power of the actual projectile. This is particularly relevant as your two liquid-y projectiles, Up Tilt and Up Smash, are both angled up to start with, making them fairly easy to catch with this. Notably, if you fire several off at once with Up Smash, due to the fast nature of this move, you can force the foe to avoid the giant splatter hitbox multiple times. It will also fling residue all along the stage, in the case of the prune juice just being tiny bits of the stuff that only deal the poison effect, but its still extra damage if there aren't cookies around for the opponent to pick up. If it hits the Up Smash projectile, it will simply scatter the resulting cookies everywhere, largely further away from the Grandmatriarchs. This is potentially very useful as while it moves the cookies away from you, it may also place them on some of the more hazardous areas of the stage, though unlike following Up Smash with Up Tilt the opponent still has the potential to get them anyway, so this technique is best used when you know you can blast most of them to a more convenient location to grab them.

Down Aerial Descent of the Ancients
The mass of grandmas comes crashing downwards as it deforms even more than usual, dealing 22% and a spike on par with Ganon's Dair on the way down, and 28% and upwards knockback that KOs at 80% to grounded opponents. Given the size and mass of the Grandmatriarchs, them landing on you is as powerful as you'd expect, but its not really something that will happen often, as this move is a bit telegraphed in the start up lag, and getting above an opponent with a character this giant and with as lacking of aerial mobility as they have is not a common thing.

That being said, take note that as far as lag to power ratios go, this is just about the best way to launch cursors ever. Frankly, sending cursors upwards may be the better path of knockback for them to take too, as the Grandmatriarchs have far more upwards angled bullet hell thanks to the Up Smash than horizontal bullet hell. So while its only situational to land this on foes, you can definently get some powerful projectiles in the air with this move if just used out of your float even if getting above the foe themself is not as practical.


Grab Game
"Shrivel."- Grandma

Grab Ancient's Grip
The whole mass lurches forward a little bit, multiple grandmas reaching out to grab the opponent. This is a fairly good grab, a bit laggier than normal but almost as long range as Dedede's.

Pummel Beatdown
The Grandmas all draw rolling pins and begin beating the tar out of the opponent, taking turns doing so. This is a pretty fast pummel that also deals 3%, which is pretty insane but unless you're not using moves that produce cookies, which is really depriving yourself, their damage racking potential is rather limited anyway by the opponent's ability to heal it off. Adding more grandmas makes this pummel even faster, to the point it can become the fastest pummel in the game.

Forward Throw Parasite
Using their dark magic, the Grandmatriarchs breathe life into some of the cookie dough on their body, causing it to develop the face of an old lady and latch on to the opponent. This creepy little thing clings to them like a Pikmin, in a similar manner to the Wrinklers introduced earlier in the set, but with a fair bit more stamina at 25. While attached to the foe, it will occasionally constrict them and drain the life force out of them for hits of 3% each second, and a flinch on every other hit.

This is fairly non-threatening in and of itself but it can interrupt some actions and generally be a nuisance, but this thing also leeches off the cookies the player eats, reducing the healing to 1.8% per cookie(so every 5th cookie they heal a bit less). The more important thing is that the leech gets stronger every 5 cookies consumed, gaining an extra 5 stamina, and a new ability. It starts to glow with dark magic, increasing the amount of damage it deals every second by 1.3x for every 5 they consume, which isn't overwhelming but it is annoying. What's scarier is that it does the same for every damage over time effect in your set. The prune juice, the wrinklers, your dough mass even the aging curse, they all get a small damage buff from that. Of particular note is the wrinklers as they extract cookies from the foe much faster and as such will hit the high damage mode much more quickly.

The leech, once it falls off, will have its corpse remain on the ground for 8 seconds afterwards, which is largely irrelevant... unless there are at least 3 cookies nearby. In which case it will absorb them into itself and reanimate over a second, before latching back onto the foe, though it will only do this if the foe is within 1/3rd of a battlefield platform of it. It even gets one stack of buffing from this, making it way more durable. Obviously the Grandmatriarchs shed a lot of cookies with their attacks, but perhaps more importantly, so do your structures, so the more structures you have out on stage, the more likely this leech is to keep sustaining itself. Mind you, they can kill it just fine as its reanimating. The opponent may just want to avoid cookies altogether with this leech on them, as it is fairly easy to remove, but its pretty easy to flood the stage with them to make that difficult once you have a few structures out and if the foe isn't eating the cookies for themselves, you're the one claiming them.

Back Throw Cookie Multiplier
The Grandmatriarchs absorb the opponent into their mass, along with anything particularly nearby like cookies or structures, and fire them out of their back, dealing 14% and knockback that KOs at 200%. Other opponents can be absorbed in matches that aren't 1v1 with this, and take the same damage/knockback. Cookies the same distance as opponents, the furthest one if multiple are launched, while structures only go a battlefield platform. While this is a fairly strong throw, the bad thing about it is it does leave the opponent with any nearby cookies you had... in fact, any cookies absorbed by this move are doubled in quantity when fired out of the back, meaning the opponent can potentially net even more healing than normal. Any structures fired out will also produce double cookies on their next cookie producing action.

This side effect can obviously be converted to your advantage too, but its really depending on how good your set up is. If you have say, a wall of dough behind you and enough power on this move to launch the opponent past it, the cookies can get stuck on it and you can snag them for yourself. You can also just launch structures with it and take advantage of how their production is a fair bit more delayed and as such, a bit more up in the air as to who can grab it. You can also just use this to launch a foe and cookies off a cliff as, shockingly, the Grandmatriarchs might not always want massive amounts of cookies on stage that the opponent can grab to heal themselves.


Down Throw Elder Covenant
The Grandmatriarchs laugh at the foe as they draw their satanic pentagram from the Down Smash right on the opponent's face before slamming them into the ground, dealing them 8% and putting them in prone. For the next 10 seconds, the opponent will act as normal, but at the end of those 10 seconds, the sigil will flare up on the opponent, draining them of any cookies they ate at that time period and sending them to the Grandmatriarchs, undoing all the healing and dealing knockback based on the amount of healing undone, at around 20% healing undone it deals knockback that KOs at 100%. If the cookies the foe has eaten were already removed from them by the wrinklers, the move deals twice as much damage for each cookie they weren't able to pay back and knockback scaling accordingly, but doesn't fund the Grandmatriarchs back any cookies.

This is all fairly powerful, but one thing worth noting is that the opponent can dodge or shield the sigil perfectly fine, in fact it deals abnormally low shield damage and has a very very brief hitbox so both of those options are not hard to do. Amongst "time bomb" moves its rather unique in that you want to hit with the time bomb itself rather than using it as a distraction for some other attack because the effect is very powerful, though only if the foe eats a lot of cookies during the time span, if not its better to just use it as a distraction to help land your strongest Smashes/aerials.


Up Throw Elder Mockery
The Grandmas all start toying with the opponent for a bit, tossing them between each other towards the top of the mass and batting them with rolling pins on occasion, before the highest grandmas blast them away with a burst of dark magic. This is a long duration throw that deals 13% and upwards knockback that KOs at 135%, serving as your most powerful KO throw and also giving your structures more time to work on idle production due to the long period the foe is distracted both by getting back to the ground and away from upwards angled bullet hell, and also just because the attack keeps them in the throw for a fairly long timespan.

Final Smash - Elder Frenzy
"It'll all be over soon."- Grandma
A chorus of old woman laughter occurs across the stage as every structure on stage begins working at 2.5x their normal speed for the next 15 seconds, meaning they produce cookies and attack incredibly quickly, creating a huge mess for the opponent to deal with. This is fairly bearable with a small amount of set up, but lategame this is ungodly hard to avoid getting destroyed by. The Grandmatriarchs also get an extra bonus during this period, any cookies they consume heal them like they would an opponent, which given that was the only thing preventing them from being nigh invincible until now is very scary indeed.

Opponents can eat the cookies produced by your structures during this time period just fine, but this time there's a consequence they pay for it. At the end of the time period, small slimy grandmas resembling the leech from the Forward Throw will start bursting out of their mouth, eye sockets, ears, and other unpleasant places, which aside from being horrifying to look at also deals them back all the damage they would've healed off in double. They don't take knockback, but are horribly crippled movement and attack power wise for 2 seconds for each 10% taken from this.
 
Last edited:

n88

Smash Lord
Joined
Oct 10, 2008
Messages
1,547
I take it my comments are invisible?
I understand that you're probably pretty antsy for some feedback by now, but try to be patient. The thread's been bustling lately and the readers and commenters just haven't had time to catch up. The next time I do a comment block (within a week or so), I'll get Roy in there. In the meantime, just sit tight; you've certainly been noticed in the thread, so you'll get your feedback sooner or later.
 

Tocaraca2

Smash Ace
Joined
Feb 22, 2015
Messages
557
Location
Wokingham
Warning Received
I understand that you're probably pretty antsy for some feedback by now, but try to be patient. The thread's been bustling lately and the readers and commenters just haven't had time to catch up. The next time I do a comment block (within a week or so), I'll get Roy in there. In the meantime, just sit tight; you've certainly been noticed in the thread, so you'll get your feedback sooner or later.
OK, thanks for the reply.

I feel really guilty now for not reading the long movesets. I feel like a hypocrite asking for feedback when I don't give feedback to sets that obviously have taken lots of time and effort to make. I'm going to read them now.

Rundas Moveset:

Rundas is an intergalactic bounty hunter much like Samus and As a member of the Phrygisian race, Rundas can generate and manipulate ice, an ability which he uses to his advantage in combat. His personality differs depending on the situation; he can be arrogant in front of others, but is quiet and dutiful in following commands when working alone. Rundas prefers to work by himself, even against large numbers of enemies; however, he remains sensitive to the safety of his allies.​

Universe:
Metroid

Game of Origin:
Metroid Prime 3: Corruption


Playstyle:
Almost every attack Rundas has has a ice effect meaning the have the potential to freeze opponents

Stats:
Ground Speed - /10

Air Speed - /10

Attack Speed -

Overall Attack Power - /10


Jump Height - /10


Fall Speed - /10


Weight - /10


Height - 8/10
Rundas is slightly taller than Samus, his height is almost the same as it was in Prime 3

Tilt Attacks:
Jab 1: Rundas will punch forward with his right fist covered in ice
Jab 2: He'll repeat this with his left fist
Jab 3: He'll shoot a small blast of ice from his right arm, right in front of him
Dash attack: Rundas will slide forward creating a path of ice along the ground as he does which will stay there for a second causing anyone caught in it to slide around. This is similar to what he does in Prime 3 where he rides a path of ice.
Forward Tilt: Rundas will stick out his ice covered arm which will then explode into a burst of ice, similar to Samus' when using the ice beam in Project M
Up Tilt: Rundas will shoot a short range blast of ice above his head which will explode causing ice crystals to fall around him
Down Tilt: Rundas will use his arms to blast a circle made of ice around him

Smash Attacks:
Forward Smash: Rundas will let out a stream of ice which will freeze opponents before expoding and sending them flying, this is similar to an attack he does in Prime 3
Up Smash: Similar to an attack he used against Samus in Metroid prime 3, Rundas will create a pillar of ice above his head which he'll swing around like a lasso before disintegrating
Down Smash: A 2-part attack, firstly rundas will shoot ice shots towards the ground with both arms which look visually similar to the ice shot by the ice beam, he will then slam his arms down causing them to explode. Anyone caught in the initaial his will be frozen making the second hit guaranteed

Aerial Attacks:
Neutral Air: Rundas will put his arms across his chest as ice forms on them before thrusting them out and swinging them downwards
Forward Air: Rundas will lift his arm as ice forms around it before swinging it down
Back Air: Rundas will form ice around his hand and the proceed to swing it behind him
Up Air: Rundas will swing his ice covered arm above him
Down Air: Rundas will grab his ice covered arm and thrust it below him and create an explosion of ice underneath him

Grab and Throws:
Grab: Rundas will reach out creating a beam of ice which will grab and pull in opponents similar to samus', based upon the pose he does in Prime 3 when charging his ice shots
Pummel: Rundas will release ice from his hand freezing the opponent, it's rather slow but pretty powerful
Forward Throw: Rundas will create a path up going diagonally upwards and then throw the opponent up it where they'll slide off the other end
Back Throw: Rundas will create a beam of ice and swing them behind him, similar to an attack found in metroid Prime 3, this is also the inspiration for his up smash
Up Throw: Rundas will throw the opponent above him and then release a stream of ice on them, based on an attack in metroid Prime 3
Down Throw: Rundas will throw the opponent onto the ground and release a blast of ice into their face

Special Attacks:
Neutral B: Ice Chunk
Rundas will reach above his head and spawn 3 chunks of Ice, as the move is charged these will grow in size and power. He can then shoot them straight forward one at a time. The move can be stored but as time passes they will begin to regress in size and power, It takes about 20-30 seconds for them to got back to normal. The charge rate is similar to Samus' although slightly slower. Charging the move will cause ice to form on his hand which glows at full charge.
Custom Neutral B 1:

Custom Neutral B 2:

Side B: Ice Spreader
It functions almost exactly like the item of the same name found in Metroid Prime. Rundas will shoot a homing ice blast which will freeze whoever it hits and then spread a sheet of ice below them, this ice sheet can then cause other opponents to slip
Custom Side B 1:

Custom Side B 2:

Up B:
Rundas will create a path of ice that he will ride upwards, this move acts similarly to Squirtle's up B except that it goes further horizontaly
Custom Up B 1:

Custom Up B 2:

Down B: Ice Pillars
Rundas will charge up before slamming down on the ground, this causes pillars of ice to spring up from below. Depending on how long it is charged the amount and size of the pillars will grow. A fully charged hit will kill pretty early and lower charges can knock opponents into the air allowing Rundas to chase them and follow up

Custom Down B 1:

Custom Down B 2:

Final Smash:

Extras:
Entrance: Rundas will ride in on a path of ice before getting into his battle stance

Stance:

Idle 1:
Idle 2:

Side Taunt:
Down Taunt:
Up Taunt:

Victory Pose 1:
Victory Pose 2:
Victory Pose 3:

Victory Fanfare: Rundas' victory animation uses an extract from his theme found in Metroid Prime 3: Corruption

Losing pose:

Alternate Costumes:
1) Default Rundas from Metroid Prime 3
2) Samus wearing the varia suit
3) Ghor
4) Gandrayda
5) Rundas in his PED suit
6)
7)
8)

Unfinished right now but I'll expand on it more later
TOO MUCH ICE!!!!!

Apart from that, this was incredibly easy to read and I would love to see this character with this moveset in SSB. I don't care about the stuff you haven't finished, because you told me all of the attacks. 9/10!

FATHER CORNELLO


Father Cornello is the starting antagonist of Full Metal Alchemist, getting nothing but the first episode to himself in the main series. While he technically works under the homunculi, he is largely an episodic character to generically start off the series with some action. Cornello uses alchemy, but passes it off as power from god to gain loyal acolytes, with the eventual goal of world domination. He is the sole voice of god due to his ability to perform these “miracles”.

Cornello started off as a non fighter in the manga/2003 anime, but has gained more and more abilities throughout various adaptions. Aside from the Brotherhood series giving him an actual fight, he is given several unique attacks in the FMA Warcraft 3 map where he’s a playable character, alongside other such beloved and memorable characters as Fu, Zampano, and Dolcetto.

STATISTICS
Traction: 10
Size: 8
Aerial Control: 7.5
Falling Speed: 5
Aerial Speed: 5
Weight: 4.5
Ground Movement: 1.5
Jumps: 1

Cornello’s a heavyweight without the weight in statistics. While he should realistically be heavier, his poor weight is used to represent his physical incompetence and frailty as an old man.

Cornello has a “rebound” meter below his portrait comparable to Little Mac’s. Whenever Cornello uses a move that uses alchemy (The majority of them), the meter will fill up a certain amount based off the attack. Every second, the meter will tick down by 1/18th, so he has to be somewhat spammy with his attacks in order to fill up the meter. When the meter completely fills, Cornello will enter his rebound form, gaining invulnerability for the 3/4ths of a second duration of the transformation.


Weight: 20
Size: 20
Traction: 10
Jumps: 10
Falling Speed: 10
Ground Movement: 6
Aerial Speed: 5
Aerial Control: 2

Turning into this form grants Cornello superarmor to attacks that deal 7% or less, and grants him 0.2 seconds of complete stun immunity after getting grab released or thrown. Cornello will stay in this form for 9 seconds before shifting back to his previous state. While Cornello will get a free invulnerable transformation back to normal, he will take 40% over the period of time he remains in the Rebound form. When he turns back, Cornello will go through a half second of lag, .3 seconds of which he is vulnerable for.

PRIEST SPECIALS

UP SPECIAL – MIRACLE

Cornello raises his hands above his head and looks to heaven as he gains an aura of red lightning around himself. This will cause him to begin healing at a rate of 3% per third of a second. While this would make him somewhat scary to leave around, this fills up Cornello’s rebound meter faster than absolutely anything else – 1/8th of the way per every 3% damage healed. The Rebound form’s self damage will of course outdamage the otherwise very good healing from this attack, with Cornello getting a net loss of 16%. Of course, if you just want to get into Rebound as fast as possible, this has the bonus of healing some of the damage. If used in the air, this will slow Cornello’s falling speed by a decent margin.

Cornello does not have a recovery on his Specials in his base form, making him even more frail. The rebound form has a very powerful recovery, though, meaning foes largely have to gimp you if they expect to recover. Granted, if you have to build up your meter from nothing in order to recover, you’ll have to be knocked fairly high in order to not drop off the bottom while transforming. Specifically because of how Cornello’s recovery works, he’ll always want to balance his Rebound meter at a fairly high position in order to recover.

NEUTRAL SPECIAL – MACHINE GUN

Cornello transmutes his cane into a machine gun and fires at will, laughing maniacally at random intervals if he holds out the move long enough. As he continues to spam the move, he simply transmutes more ammunition into the gun barrel. Cornello has full control over where he aims the move, having the full range of Final Destination! The bullets are the same size as Sheik’s needles and go just as fast, with each one dealing 0.5% with no stun. Cornello fires 36 bullets a second, working as a very powerful damage racker – imagine if Fox could freely aim his Neutral Special and you’ve got a comparable move.

The big problem with the move is there is strangely a very long amount of ending lag to leave the stance. If you just exit the stance as a foe comes up to you, you’ll be taking something on par with a Bowser fsmash as your punishment. As such, the move is largely reserved for attacking foes at very long range, most reliably those who are knocked off the stage for free damage.

The move fills Cornello’s rebound meter at a rate of 1/16th for every third of a second he stays in this stance. The move can be used as an amazing transition into rebound if you can force a foe to approach you, then bypass the move’s ending lag with the foe already at point blank range. This is a pretty big gamble based off whether you think the foe can punish you in time or not, as if it’s too painfully obvious you’ll transform the foe will likely just wait out your gunfire until you do.

DOWN SPECIAL – ALCHEMIC ABOMINATION


Cornello summons a chimera in front of himself – a lion fused with some other unidentifiable creature through alchemy, apparently making it stronger than a regular lion somehow. The chimera is about as tall as Luigi, but is as wide as a crouching Snake without counting the tail, which extends out for double the chimera’s width. Attacking the tail deals damage to the chimera, but not knockback or stun. The chimera is as heavy as Mario at 50% and is vulnerable to hitstun and grabs, but will simply keel over and die on the spot if its 30 HP is depleted. This has an awkward .4 seconds of lag to summon and doesn’t affect the rebound meter, but if Cornello is interrupted during the move the chimera will still be summoned anyway, possibly punishing his attacker.

The chimeras patrol the stage at Ganondorf’s walking speed, but will pursue foes at his dashing speed if they come within 0.75 platforms and will pursue them until they get 1.6 platforms away. Their basic melee attack is a quick bite that deals 8% and knockback that kills at 165%, but has noticable ending lag to punish them. The bite will heal the chimeras of 5%, adding slightly to their survivability. If a foe is a platform’s range away from the chimera and they’re on the chase, they will perform a swift pounce on top of them that deals 14% and knocks grounded foes into prone, dealing knockback that KOs at 200% to aerial foes and those already in some kind of stun state. The chimera will follow up with the bite instantly if the foe was put into prone, though foes have enough time to do an immediate action to avoid it – though this will make them more predictable.

SIDE SPECIAL – CHAIN LIGHTNING

Cornello fires a burst of red lightning out of the end of his cane. After the move’s brief startup, the range is 2 platforms long and the lightning instantly travels this distance like realistic lightning. it initially seems rather useless compared to the Up Special, as it simply heals the target of 5% (Including foes, though foes will take a flinch from it). However, the target will then begin to take damage over time at a rate of 2.5% per second, taking double the damage they were healed.

When the lightning hits a target or any form of terrain, it will bounce off of it at an angle comparable to Rob’s laser. Every target that is hit will take 3% more “healing” than the last one, and bouncing off the ground will still power up the move in this way. Cornello can angle the initial firing of the lightning, and can have a lot of fun with this move with no set-up on stages with platforms. Note that shielding the move will still power it up, enabling you to still use shielding foes as a target to bounce off of or rejecting the lightning from yourself if you don’t want to take the damage.

This gives the chimeras some more relevance, enabling them to act as “bumpers” and to power up the move. While the actual lightning jumps are instant, there is a very brief pause between the bounces between each individual target, so if you intend to save the foe for last for a big hit you’ll have to apply some pressure after shooting out the red beam. Aside from simply damage racking the foe with damage over time, chimeras will often like the nature of this brief healing, potentially expanding a short lifespan. The pounce attack chimeras use can also offer some more angles to bounce the lightning off of.

While firing the lightning fills up his meter by 1/12th, it will fill up far more if he hits himself with it. If he is the second target (The minimum, since he can’t target himself outright), his meter will fill up by 1/6th. For each target later he was in the Chain Lightning, the meter will fill up by an additional 1/6th. If Cornello enters rebound while taking damage from this move, any further damage he would take from it will be erased, meaning if he turns into it outright he’ll simply get the healing only. Every character can only be hit by this once per use and the lightning will expire once it travels the maximum distance, so Cornello can’t just bounce it off of a foe infinitely at point blank. Shielding the attack does not count as “being hit” by it.

PRIEST SMASHES

FORWARD SMASH – SPIKE IMPALE

A spike shoots out of the ground in front of Cornello at a 45 degree angle. Cornello can angle the move up or down to change this angle to 20 or 60 degrees to alter the slant of it. With no charge, the spike barely juts out of the ground at all, only around two thirds of Kirby’s height. At full charge, the spike is as long as a platform. If the move is charged at least a quarter of the way, the spike will be solid terrain, providing an interesting surface to bounce off of with Chain Lightning. Regardless of charge, the move deals 20% and knockback that kills at 130% as it comes out.

The spikes have 5-35 HP, though you can’t attack the tip which remains a hitbox that deals 5% and weak knockback. The uncharged version of this move is very fast to compensate for the horrible range, and the small status of the spike actually makes it nearly impossible to destroy from the front, potentially making it more “durable” in some situations.

While chimeras can jump to traverse stages with these spikes fine, they actually will sit and wait on top of spikes created with this move when created, getting ready to pounce on anything that comes into range. The move fills up 1/16th of Cornello’s meter, up to 1/8th if fully charged.

DOWN SMASH – HOMING SPIKE

Cornello creates a spike underneath the nearest foe’s current position, shooting straight up. The spike deals 16% and knockback that kills at 150%, and the size, HP, rebound meter filling, and solid status of the spikes increases in an identical manner to the fsmash. This is significantly laggier than the fsmash, even uncharged, given the range of the move. If the foe is off the stage or under it, the spikes will come out of the ledge or under the stage, respectively. While the spikes are solid, they will just become the new ledge if you create them in such a way to “block it”. If you create a spike on the ledge during a time where a foe is on it and they have ledge invulnerability, this won’t hit through it, but will cause them to get pushed back to the “new” ledge created by the spike.

This adds an obvious new option to your camping, and while it obviously can’t hit foes directly off-stage can be an interesting thing to use as the foe comes back to the stage. Even if they can easily recover high to avoid the ledge, they should ideally have run out of jumps so they be impaled upon landing.

UP SMASH – CHIMERA COMMAND

Cornello summons another chimera, but as it is summoned it immediately performs the pounce attack. Uncharged, the pounce is the same as the generic one chimeras will voluntarily perform, dealing 14% and knockback that KOs at 200% while traveling a platform through the air. This is largely used for the attacking portion of the move, as if you use this exclusively to summon the chimera you’ll find that the chimera only has 5 HP until they complete the ending lag of the pounce, after which they become a regular minion. Interrupting the move as the chimera is quickly summoned will result in it immediately dying, unlike the regular version of the summoning on Down Special. That said, the appeal of killing the chimera during the ending lag of his attack can potentially make you personally less vulnerable. If this is used next to a chimera already created, they will keep their durability in-tact for the leap and stand alongside you for the charging, and the move will start up instantly.

Charging the move will increase the distance of the pounce to a mighty leap, potentially traveling the entire distance of Battlefield at full charge and dealing up to 22% and knockback that KOs at 145%. Cornello can also slightly angle the chimera’s leap by about 15 degrees in either direction, also helping give him some good surfaces to bounce his Side Special off of. While using this to camp is stupidly impractical, this is decent at melee range to use the chimera as a meat shield. The low durability also won’t matter much if you send the chimera on a suicide mission to an off-stage opponent.

REBOUND SPECIALS

UP SPECIAL – LEAP OF FAITH

In the air, this is the standard heavyweight recovery you’d expect for Cornello in his rebound form. It’s Dedede’s recovery with heavy buffs, going up 1.5x as high with double the power. Cornello is invulnerable as he ascends rather than having superarmor, and on the way down he has superarmor against attacks that deal less than 20%. Instead of the stars that pop out under Dedede, bits of rubble pop out to either side of him when he lands, dealing 6% and knockback that KOs at 200%. This is a very safe recovery, which is well deserved considering what he has to go through in order to use it.

If used on the ground, Cornello will jump even higher due to having something to actually kick off of. Cornello will jump up a set distance comparably to Kirby’s suplex throws, specifically jumping up into the “magnifying glass” in the top blast zone above him assuming there’s nothing solid in the way. Cornello will jump up incredibly fast at Sonic’s dashing speed, becoming a weak hitbox that deals 7% and knockback that KOs at 250%, again with superarmor to attacks that deal less than 20%. Once he reaches the magnifying glass, the player can control his horizontal movement to move him up to 2 platforms in either direction over .35 seconds before he comes crashing down. As he comes down, he deals 25% and a spike 1.3x stronger than Ganon’s dair, along with making the rubble on either side of him like the aerial version of the move.

While the grounded version of the move isn’t very useful to Rebound Cornello, it can propel Priest Cornello to impossible heights that he could never reach before if Rebound Cornello jumps up there as he transforms back. If you’re not in immediate combat with the foe, this is one of your priorities before shifting back in order to prevent punishment when turning back.

SIDE SPECIAL – SHOULDER CHARGE

Cornello does a shoulder charge forwards, providing an alternative recovery for horizontal movement. He tramples forwards through the air at Captain Falcon’s dashing speed, dealing 19% and knockback that KOs at 125% to anyone who gets in his way. The mad dash can be stopped early at any time, and the earlier it is stopped the shorter the ending lag is. If Cornello just taps the input, he’ll do a shoulder charge motion in place, quite similar to Brawl Wario’s fsmash in appearance and lag. If he charges two platforms or more, the ending lag will cap out at a full second.

Cornello’s horribly mutated arm in Rebound Form is largely a result of his transmutations on his gun, as various gun parts can be seen sticking out of it. The last move you use to enter Cornello’s rebound form will have a visible impact on his arm – lightning/healing will cause it to crackle with red electricity, a gun move will just have a couple more gunbarrels on his arm, and a spike, of course, will have the spike jutting out of his arm. They apply various bonuses to this move in addition to the primary hitbox.

Lightning will cause the move to apply a version of the Side Special that heals the foe for 12% before damaging them for 4% per second for 5 seconds. If you hit the foe with a Side Special in Priest Form while they already have this effect, it will boost the power of the Side Special as if you bounced it off of 3 targets by hitting the foe.

Having some extra machine guns will cause them to spurt out a few bullets for you to aid your charge – you’ll fire 5 bullets a second and each will deal 1% and flinch the foe, making it much easier to hit with your charge.

Having a spike jut out of your arm requires the spike to be at least as tall as Mario in order to do anything. If it is, the spike specifically becomes a grab hitbox that you can impale the foe onto during the move, still dealing 19%. Cornello can still do whatever he wants with a foe impaled on his arm, though they will obviously be instantly released if Cornello shifts back to regular size.

NEUTRAL SPECIAL – STRENGTH OF GOD

Cornello goes to rip a Bowser sized boulder out of the ground with his “normal” arm with about .4 seconds of lag, having superarmor to attacks that deal less than 20% for the duration. If he’s interrupted during the later .2 seconds, the boulder will still get spawned, but he won’t generate a hitbox. After ripping it out, Cornello will bowl the boulder forwards along the ground, causing it to go at Wolf’s dashing speed and deal 17% and knockback that KOs at 140% as it goes. The boulder is solid, but given Cornello can’t throw it through the air it’s not especially scary as an on-stage gimp. The boulder will travel forwards 2.5 platforms on a flat surface, getting weaker as it goes before it slows to a stop. Cornello can much more quickly just pick up the boulder to throw it again, and foes can destroy it by depleting its 40 HP. The boulder will go faster/slower if it’s going down/up slopes, and will increase in power accordingly. The boulder caps out at 28% and knockback that KOs at 80% with 1.2x Captain Falcon’s dashing speed. Cornello –can- potentially launch a boulder into the air by rolling it off of an angled spike from fsmash, launching it into the air by using the spike as a ramp. Of course, this is pretty predictable for gimping.

If Cornello is standing in front of a spike, he will rip it out of the ground very casually with .15 seconds of lag. Cornello can carry the spike around while using his moveset normally, while inputting Neutral Special will cause Cornello to stab in the desired angle with it, dealing 10% and knockback that KOs at 170% for an extremely good “poke” with a full length spike. If he holds down the input for .4 seconds and then releases it, he’ll throw the spike like a spear 3 platforms in the desired direction, dealing 8% and knockback that KOs at 200%. If either of these spike attacks hit a grounded foe, they will get impaled, taking an additional 5% and having to escape at grab difficulty. So long as Cornello throws the end of the spike at the ground, it will end up impaled in the ground, enabling him to reangle spikes as he wishes and enabling him to make a spike ramp for a boulder on demand. Cornello can pick up spikes that have impaled foes on them before adding more creatures to the shish kebab, or just throw it off stage. Cornello can also rip out a spike growing from his mutated arm by using this move in the air.

The boulders can have spikes generated on them by Priest Cornello given they’re solid, and the spikes can be used to help “defend” the boulder for when Rebound Cornello comes back. If Rebound Cornello attempts to pick one of these up, he’ll pick the boulder up by the largest spike, assuming there’s a spike at least as tall as Mario available to use. Attempting to use it as a weapon will cause him to smash it in front of himself like a club with minimal lag. This will cause the boulder to be an immediate hitbox that deals 20% and knockback that KOs at 115% as it hits the ground, then pop off the spike Cornello was using and roll forwards along the ground normally. Afterwards, Cornello will still be holding the spike in his hand.

DOWN SPECIAL – ASHES TO ASHES, DUST TO DUST

Cornello scoops out a portion of the ground in front of himself in the form of gravel, not actually terraforming the stage with this move, before throwing it all forwards a relatively short distance of a platform. The debris deals many multiple hits as it goes forwards, dealing roughly 14 hits of 1% and set pushing knockback over the course of the attack.

If the debris comes in contact with a slope (which he can make with his rebound dsmash), it will slide to the bottom and collect there. Cornello throws about 1.5x Bowser’s size in debris with each use of the move, and it doesn’t go away after being created. Rather than being solid, characters can walk through it with three fourths of their regular dashing speed. If it’s piled up so high that a character is in an aerial state when wading through it, their falling speed will increase by 1.5x while inside of it. The debris can take knockback from attacks, as heavy as Jigglypuff at 80%, but it won’t hurt anybody when attacked in this way. If the knockback doesn’t knock it out of a pit and it lands on a slope, it will slide back down into it.

If Priest Cornello attempts to heal with his Up Special when his rebound meter is two thirds of the way charged, he will absorb a Bowser’s worth of the debris around him, heal 20%, then instantly enter rebound form. If Cornello enters rebound in this way, his mutated arm will have even more gravel around it when he enters that form. This will cause Cornello to shed some of his arm to create a Kirby’s worth of gravel when he hits foes with moves like Side Special that make use of mutated effects on his arm.

If Priest Cornello uses his fsmash or dsmash to create a spike in a pit with gravel in it and he is not in the pit himself, he will instead use his alchemy to fill in the gaps in the ground, terraforming the hole in the ground shut into solid ground, how it was before he terraformed it. Any foes inside will be pitfalled at the top of the ground and take 20%. This is fairly laggy and will need a pretty deep pit filled with debris in order for you to be able to pull it off. This also fills up a third of Cornello’s rebound meter, so if he enters rebound in this way he won’t be able to capitalize on the foe being pitfalled at all. This will give Cornello a “bulkier” arm if it’s the last use of alchemy that makes him enter rebound, identical to the previous paragraph.

REBOUND SMASHES

DOWN SMASH – STOMP OF JUDGEMENT

Rebound Cornello does a large stomp forwards, dealing 20-30% and knockback that KOs at 130-95%. While it’s not the fastest attack, it has superarmor and anti-grab armor specifically on Cornello’s stomping leg, making it easier for him to get the attack’s secondary benefit. Each use of this move makes an indent the height of Mario-Snake and the width of Bowser. The sides of the indent slope down into the pit – you won’t “fall” into this and enter an aerial state at any point, you’re largely just creating slopes with this move. On paper thin platforms/drop throughs, this will bend them. There isn’t really much that needs to be said about the implications of such a move – it’s incredibly beneficial to your boulders, and provides lots of new angles to generate spikes and use your chain lightning. Cornello will run down slopes 1.3x faster with his Side Special. Characters will slide down slopes at Mario’s dashing speed when in prone, making foes who get knocked into prone by a chimera’s pounce more predictable.

For all of the great possibilities this has and how quick it is to use, just keep in mind you don’t want to waste too much of your precious 9 rebound seconds that you take 40% for entering on set-up.

FORWARD SMASH – REPENT

Cornello gets on his hands and knees for the charging animation, furiously gritting his teeth, before smashing his head into the ground. While the move has some very noticeable startup, Cornello has both anti-grab armor and superarmor against attacks that deal 19% or less while in the charging stance and during the move’s start-up. This is extremely powerful on hit, dealing 29-40% and knockback that kills at 90-60% at a 45 degree downward angle, making it incredible to kill foes at the ledge. If the foe hits the ground due to the knockback, they will take a miniature pitfall effect, with their feet getting pitfalled rather than their entire lower torso. They will still take knockback in this state from the move, sliding along the ground, obviously getting freed from the effect if they slide off stage.

Having impaled feet bans the foe from moving or jumping. The foe will not take knockback during this effect (Other than the initial sliding from being hit by the fsmash) unless the knockback would send them at least 3 platforms, in which case the knockback will free them from the ground. After taking the initial hitstun of the attack, foes may attempt to escape this effect at grab difficulty. If a foe uses a leg based attack, the starting lag will be increased by 1.3x, but will cause them to escape the status effect early if they succeed. Using this move again on a foe already smashed into the ground will deal vertical knockback that KOs at 75-40%.

If the foe travels 2.5 platforms or more due to the knockback of this attack along the ground, the pitfalling will be more severe and they will use their regular pitfall animation, unable to attack. This is still only half as difficult to escape as a regular pitfall. If the foe travels an additional 1.5 platforms beyond the first 2.5, they will become completely buried in the ground, with nothing but a pile of dirt to indicate where their character is, with them having to escape at regular pitfall difficulty. Completely buried foes cannot be hit by most attacks, but if Cornello terraforms down with a dsmash stomp he will see them half pitfalled in the ground and be able to attack them normally. Cornello can also stab a spike into the ground and pick the foe out of the ground, impaling them on it.

While the described pitfalling effects are incredibly powerful, few to no stages are long enough to make practical use of this, and the massive power of the attack can work against you by knocking a foe too far away or even off the stage, nullifying the burying effects. This is where you can thank the downward portion of the knockback, though, as foes will stop sliding if they reach the bottom of a pit due to the knockback’s angle. While using this at the bottom of a pit will probably just get you punished as foes will only be pitfalled up to their feet and can still punish you, using it at the top or further away from a slope can let you roll down a boulder or toss a spike down on the foe to impale them before they escape. Because of this, Rebound Cornello actually prefers to be out of a pit most of the time, while Priest Cornello will seek refuge within it at high percentages due to it being harder to KO him and being able to better protect himself with spikes.

UP SMASH – GOD’S PROTECTION

Cornello raises his mutated arm above his head during the “charging” of the smash, causing it to become solid and invulnerable. Like the Side Special, mutations can happen in this move based off the type of alchemy move Cornello used to enter the Rebound Form. If he has extra guns, a few shots will fire out of his arm to juggle the foe lightly in the air above his arm, dealing 8 hits of 1% and flinching. If he has red lightning from Up/Side Special, it will actually crackle a bit above his arm, dealing 10 hits of 1% and flinching while sucking foes in. The reason the lightning isn’t simply better than the gunfire is because there is no hitbox up against Cornello’s arm, meaning while it will suck foes in it won’t hurt those who intentionally come to stand there. A spike, of course, will impale foes and deal 10% to them if it was at least Mario’s height. Having extra debris absorbed into Cornello’s arm will cause any attacks that hit Cornello’s invulnerable arm to cause him to shed an amount of gravel from his arm comparable to the power of the attack – a Bowser’s worth at max and a Kirby’s worth at minimum.

As soon as the charge is released, Cornello moves his arm out of the way, causing anyone standing on it to fall as he goes to do a tremendous headbutt above himself, with the veins in his head visibly pulsating as he does so. The headbutt deals 26-38% and knockback that KOs at 120-75% for an extremely powerful move. This is actually quite quick, too, almost as quick as Dedede’s utilt, the only difficulty being Cornello is so tall it’s rather hard to hit with his balding head. The idea of the move is to catch a foe, interrupt their attack by trigger landing lag supplemented by a mutation bonus on your arm, then hit them with the headbutt when they’re sitting ducks. Of course, the first half of the move is optional and you can just skip straight to the headbutt if you wish.

Note that if Cornello throws a spike into the air, he can catch it with this move in order to impale it into his arm, potentially skewering a foe on it. It can be a nasty surprise to grab a foe with it who thinks they’re safe in the air by producing artificial ground.

PRIEST AERIALS

NEUTRAL AERIAL – DIVINE SHIELD

Cornello performs some alchemy with his cane in order to produce a large amount of red lightning, crackling around himself in a ball shape as a “shield”. This lasts for about half a second, stopping immediately if the brief landing lag is triggered. The shield deals 6% and knockback that KOs at 250% on hit, rather unimpressive for how long and awkward the hitbox is. If Cornello exchanges blows with another aerial with this attack (Due to aerials having no priority system), the foe will take a small amount of extra damage and knockback in addition to the move’s natural power, one quarter that of their own attack. The foe will take their extra damage over time, at a rate of 2% per second. If Cornello hits somebody taking this damage with Chain Lightning, the damage will be “cured” from them and added to the power of the lightning. If Divine Shield is up when Cornello gets hit by Chain Lightning, it will bounce off of him without him absorbing it, and it will count as if it had bounced off of two surfaces, getting a small boost from the Divine Shield.

This move by default fills up an eighth of Cornello’s rebound meter, but if he clashes with another attack it will fill up an additional amount. For each 4% the enemy’s attack did, the meter will fill up by an additional one fifth. With the various Chain Lightning interactions, it’s possible to get a very powerful beam that can get you to Rebound form fast.

FORWARD AERIAL – SHOTGUN BLAST

Cornello transmutes his cane into a shotgun and fires a close range shot in front of himself, dealing 17% and knockback that KOs at 200%. This starts up very quickly making it a very appealing move regardless of long ending lag. The base knockback on the move is very good despite poor knockback growth, making it an excellent way to get Priest Cornello some space or more offensively to knock the foe off-stage to start a damage racking session.

Said long ending lag consists of Cornello taking the kickback of the gun backwards, propelling himself backwards roughly half a platform’s distance. His back is a weak hitbox that deals 3% and knockback that KOs at 500%. This gives Cornello some form of recovery without having to make use of his rebound form, with the hitbox on his back largely functioning as recovery self defense. It may not seem like much, but Cornello can use the move infinite times in the air.

Using the shotgun fills up one eighth of Cornello’s rebound meter, and that can obviously bypass the ending lag. Having the shotgun transmuted into Cornello’s arm when he uses his Rebound Side Special will enable him to shoot the shotgun by pressing the A button, generating the fair’s shotgun hitbox in front of him while slowing down his movement by a third for 0.2 seconds due to the shotgun kickback in order to potentially catch foes off guard. When the shotgun is used with the rebound usmash, no hitbox occurs unless the foe specifically steps onto the shotgun jutting out of Cornello’s arm, at which point it will fire. The shotgun is located on the far side of his arm, enabling him to catch a foe attempting to DI away from where he intends to headbutt.

BACK AERIAL – CANE DRAG

Cornello extends out his cane behind himself and attempts to hook people with the cane’s crook before raking them in to himself, dealing 7 hits of 1% and set dragging knockback. This is a very spammable attack and one of Cornello’s fastest, and it’s an interesting option to spam when it doesn’t raise your rebound meter. At a glance, you would think this move would be terrible defensively due to bringing foes up to Cornello in point blank range. However, if Cornello uses his DI to go towards the foe as he brings them to him, he can go past them and end with them in front of him, in perfect range for his shotgun fair which can create the space you need. This helps a lot just on the stage, but also helps significantly with defense against gimping. Even if the foe dodges the shotgun blast, they’ll be out of your way and you’ll be able to recover back to the stage in safety.

The followup to the bair is so obvious that foes will quickly learn to expect it and will often just instinctively dodge after you get in position for the second move. This can actually be a decent excuse to try to perform set-up in the foe’s face by summoning a chimera if you predict a dodge against an especially aggressive enemy. This is made more practical when you take into account that even if the foe hits you, the chimera will still get summoned. If the foe tries to outspeed your fair with their quickest poke, you can attempt to counter it with the nair.

UP AERIAL – TOWER OF BABEL

Cornello looks above himself and grins as he shifts his cane around to hold it upside down, then starts to extend the bottom of the cane out rapidly. The cane extends out extremely quickly a massive distance, potentially going up 2.15 platforms over .3 seconds if you hold down the button the whole time. The cane isn’t exactly a powerful blunt object by itself, though – the force of the attack comes from the speed at which it’s extending, meaning that it’s more powerful the further it has extended out. Using the move at point blank range is very weak, dealing 3% and knockback that KOs at 270%. At the top of the cane, the power caps out at an impressive 19% and knockback that KOs at 140%.

Keep in mind that only the top of the cane is a hitbox, though, making this awkwardly specific to hit with. The move’s ending lag increases the further you extend out the cane, going for half as long as you extended it out. Cornello will automatically stop extending it if he hits somebody. This fills Cornello’s Rebound Meter by anywhere from 1/16th to 1/7th based off how far he extends the cane, and if it’s the move that makes him enter his transformation will give him extra debris on his arm.

It is very difficult to get the full potential out of this move and it will often go ignored for new Cornello players, but having a pit greatly helps this attack. Rather than getting the foe higher into the air, you can simply get lower down, making the move an excellent way to poke at foes approaching into said pit. Another useful scenario for the move is to punish foes who recover high, who are terrified of your dsmash spike punishing them as they attempt to reach the ledge.

DOWN AERIAL – FALL FROM GRACE

Cornello extends his cane below himself as he transmutes a small spike out the end of it. He goes into a vertical position in mid-air as he goes into a quick stall then fall, headfirst. This move does a fairly unimpressive 11% and downwards knockback that would never kill if it weren’t for the fact it was downwards, enabling it to gimp on rare occasions. If Cornello actually hits someone, he’ll bounce off of them lighly, and after falling the distance of 2 platforms Cornello will automatically exit the stall then fall, making this less suicidal than most. This can actually see some use on-stage despite the horrible landing lag if you have a pit created by Rebound Cornello, as well if Cornello is very high in the air from Rebound Cornello’s Up Special.

This move fills a tenth of Cornello’s rebound meter. If it happens to be the move that triggers the Rebound transformation, it will generate a Mario sized spike out of Cornello’s arm like with the fsmash and dsmash. More interestingly, Cornello will actually transform as he uses the move. This means Cornello will not gain any invulnerability as he transforms, but the hitbox will stay out as Priest Cornello transitions from using his dair into Rebound Cornello’s dair. The cane will get absorbed into Rebound Cornello’s arm, punching downwards. The mutated arm will form very quickly to create the hitbox of the rebound version, with the rest of the body following along over the usual duration of .75 seconds. See the rebound dair for more details.

REBOUND AERIALS

DOWN AERIAL – GOD’S RIGHT HAND

Cornello goes vertical in mid-air and punches downwards with his mutated arm as he descends in an extremely quick stall then fall. Cornello’s fist deals 25% and a spike 1.4x as strong as Ganondorf’s, and his arm is superarmored against attacks that deal 19% or less. The landing lag of this is quite bad, as you’d expect. For a brief moment, Cornello stands upside-down, supported by his arm, before falling over into prone. You can choose which direction Cornello falls over in if he’s not on a slope where gravity dictates which way he must fall, and he will gain complete superarmor and anti-grab armor as he falls. Falling over deals 20% and knockback that kills at 100%. While being on a slope makes you a bit more predictable due to having to fall in one direction, you’ll slide down the slope while in prone to potentially make yourself less vulnerable.

If Cornello has a shotgun in his arm, it will fire in the opposite direction of the one Cornello falls in, generating the usual shotgun hitbox, while causing him to fall over much faster. If Cornello has red lightning, it will crackle and deal 10 hits of 1% and flinching around his arm when Cornello triggers the move’s landing lag, making it take longer but better defending him. If he has extra debris around his arm, a significant amount of it will fall off, a Bowser’s worth, not actually protecting Cornello at all but producing a very large amount of it. The debris gives Cornello further incentive to land in a slope, as it will cause all of to tumble down to the bottom of the pit. If he has a machine gun, it will fire several bullets as he descends during the stall then fall all the way to the ground, dealing 8 hits of 1% and flinching per second to try to stun them for Cornello’s fist to hit them.

If Cornello has a spike on his arm, it will specifically get fired out of his arm towards the ground, tip first, being as powerful of a hitbox as it is when thrown normally and potentially impaling foes who are on the ground. The spike will get impaled into the ground upside down with the flat side pointing up, but assuming Cornello is allowed to finish the move he will smack down the spike with his fist, driving it completely into the ground. Anybody who was impaled by the spike will get pitfalled inside of the stage while taking 29%, though the move’s ending lag means Cornello will rarely be able to exploit their stun. This is more of a way to get the most bang for your buck damage wise than anything else, in case their percentage is still low. In addition, even if no foe was on a spike, this can function as a way to “conserve” your spike so the foe can’t destroy it, enabling you to dig it up later with Rebound Down Special/Down Smash. Cornello will also fall over as soon as he finishes driving the spike into the ground, meaning his hurtbox will be a bit higher into the air during his vulnerable period.

NEUTRAL AERIAL – BALL UP

Cornello curls up into a ball and spins, dealing 12% and knockback that KOs at 170%. This is actually a fairly weak move by Rebound Cornello’s standards, but the appeal of the move is it grants complete superarmor for the duration. The starting and ending lag is quite brief, with the superarmored duration providing the majority of any “lag”. Should Cornello need one in Rebound form due to his size, this is a very good panic button.

While the move’s landing lag is normally bad, if Cornello makes contact with a slope the move will continue as he rolls down it. This provides him with a fully superarmored approach, enabling him to put this move to more offensive use. While spammable projectiles are typically far too weak to be a concern for Rebound Cornello’s health, enemies can use them to stall Cornello’s time in rebound form. Good approaches like this move and the Side Special are needed, as Cornello has no time for such childish games. The Side Special is the better move if you actually intend to hit the foe with the attack, while this grounded version of the nair functions better for clearing space.

FORWARD AERIAL – KICK OFF

Cornello tucks in his legs before shooting them out in front of himself at a 75 degree angle to do a fierce kick at foes with both his legs. The stomp deals 18% and knockback that would kill at 140% if at a more regular angle, but it’s more comparable to a spike when it goes down at the same 75 degree angle as the kick. The move is about as laggy as Ganondorf’s down aerial, and looks a bit similar to it. While the move is aimed downwards in addition to forwards, most enemies are so short in comparison to Rebound Cornello the move’s aim is doing you more of a favor if anything.

If the landing lag is triggered during the stomp (Not when Cornello tucks in his legs), Cornello will kick off the ground, propelling him at the same angle backwards into the air a platform with almost no lag at all. Despite having no bonus superarmor, the move is a surprisingly safe one to use against grounded opponents. Cornello tucking in his legs at the beginning will remove the portion of his hurtbox that grounded foes could reach, and should foes dodge he’ll kick off the ground back into the air by the time they come out of said dodge.

The move has some interesting applications on slopes. Obviously you can just keep your back to a slope to avoid hitting the ground, but kicking off the slope can allow you to propel yourself at different angles, with spikes providing even more variety. You can potentially punish people for rolling by kicking off one side of the slope to the other, then rolling down on top of them with the nair, all while staying fairly safe and not over committing yourself.

BACK AERIAL – ELBOW DROP

Cornello extends out his arm behind himself as he turns to look behind himself before attempting an elbow drop on the foe with his regular arm. Most of this move’s rather large lag is in the start-up, though Cornello’s upper torso gains superarmor against attacks that deal 12% or less after the first 10 frames of the move until the hitbox comes out. On contact with Cornello’s elbow, the foe is powerfully spiked, taking 23% and a spike 1.5x as strong as Ganon’s dair straight down.

While the move normally has very little ending lag, the landing lag on the move is quite extensive. Triggering the landing lag during the starting lag will speed up the move and cause the hitbox to spawn as Cornello elbow drops the ground, though Cornello will be suffering lag longer than the starting lag while on the ground.

While both versions of the move have obvious weaknesses, using this move next to a ledge or slope can make it more threatening as you don’t have to immediately commit to one or the other. If using it next to a slope, you can DI away from the slope towards the hole in the middle to keep it going if you predict a dodge. If using the move next to the ledge, you can do something far simpler – cancel the move by grabbing the ledge. If Cornello hits the ledge during the starting lag/hitbox animation, he’ll slam his elbow against it as he grabs it with his fist, spiking anybody on it without ledge invulnerability. This technique can be an excellent transition from Priest Cornello’s edgeguarding game – the priest knock the foe off the stage and transform while they make their way back to not allow the foe any free set-up time, then Rebound Cornello can attempt to wreck the foe who’s likely most of the way back by that point with his bair on the ledge.

UP AERIAL – GRIND TO DUST

Cornello turns to face the fore/background as he raises his hands above his head. His regular arm gets ready to catch the mutated one as it winds up the punch, then it smacks into Cornello’s open hand with great force. This performs yet another spike, dealing 12% and a spike on par with Rob’s dair. While Cornello has his usmash as an excellent defense against enemies approaching him from above, his uair allows him to knock foes back down into his comfort zone if he wants to take the extra risk for a more offensive approach with potential follow-ups. Cornello is very aware of how large he is in this form, and is intelligent enough to aim most of his attacks towards the ground to hit the pipsqueak SSB4 newcomers.

The move has a large amount of freeze frames when Cornello hits a foe with this move, “stunning” both him and his enemy in place. Rather than for dramatic effect, this is done so that an effect from Cornello’s mutated arm may be applied to the foe after hitting them. The machine gun simply adds an additional 9% as a few bullets are shot out of Cornello’s palm at the foe during the frames.

The red lightning will apply itself to the foe, leaving Cornello’s arm as it shocks the foe squished between his hands, but treating the foe as if they had been hit by Priest Cornello’s side special after it’s already bounced off two entities. If Cornello is going to downshift back to his regular state soon, there’s little better use he can make of it than this.

If he has extra debris in his arm, then a Wario’s worth of debris will get knocked off of his hand that will fall down after the foe as they take their knockback, briefly becoming a hitbox that deals 8% and knockback that KOs at 190% on the way down as an obstacle before losing its hitbox status. The debris gives Cornello some pressure on the foe to assist in his follow-up.

If a spike is growing out of Cornello’s arm, the foe will knock the spike off of the arm due to how forcefully their body is shooting downwards from the primary attack. Based off the size of the spike, the foe will take an additional 2-6%. If the spike was at least as tall as the foe was wide, then only a portion as large as the foe’s body will be taken off of his arm. The foe will enter prone on top of this spike, and if the spike hits a slope it will slide down it to the bottom at a fairly brisk pace. If the spike/foe is very small, it’s possible they’ll be able to destroy it on the way down with a get-up attack. Perhaps most impressive is the move’s potential off-stage, as the foe will have to get up from prone before they can attempt to recover. Of course, the foe will be granted the use of their first jump due to having ground to jump off of, but it’s a very respectable trade. If the spike is at least as wide as Mario, Cornello will be able to kick off of it with his fair, enabling him to quickly come back after the foe if he misses his gimp attempt.

The shotgun will attempt to shoot the foe as they get knocked down and fly past Cornello’s arm, just as powerful as it usually is dealing 17% and knockback that KOs at 200%. The shotgun generally fires too quickly before the foe is sent down to it, meaning that Cornello will generally want the foe at a high percentage. Fall speeds and weight factor into the equation of how fast the foe will reach this point – one thing Cornello can do to have some control over this is to perform the move inside of a pit of gravel, which will greatly increase the foe’s falling speed. Inside of a pit, the foe also won’t get knocked as far away by the high knockback when they hit the side of a slope, allowing Cornello to better pursue them.

PRIEST GRAB-GAME

GRAB – CHOSEN EMISSARY

Cornello extends out a hand for one of the best physical grab ranges by Brawl standards, but with awkward lag attached comparable to Falco’s grab. Upon successfully grabbing the enemy, Cornello restrains the foe by putting a hand on their shoulder.

Cornello can grab chimeras, allowing him to perform transmutations on them with his throws. If a foe is within range of the grab, Cornello will of course ignore any chimeras, so you don’t have to worry about them getting in your way.

PUMMEL - TRANSMUTE

Cornello’s hand pulsates with red electricity, dealing 0.5% per pummel in a spammable pummel on par with Lucario’s. Each pummel fills Cornello’s meter by 1/20th, serving as a way to potentially transform while having the foe already grabbed. The grab escape difficulty increases to 1.5x during the time Cornello is transforming, though even with this buff foes will generally always escape before you reach your second form. This is still helpful against foes who benefit from set-up time, though, as you can prevent them from making use of that time while you transform.

Used on a chimera, this will heal it by 0.5% with each use of the pummel while filling up your meter at a slower rate, 1/25th per pummel. Normally when transforming with the pummel, you will just gain lightning as your arm mutation. If you have given the chimera some kind of transmutation with your throws and then transform, though, Cornello will absorb the chimera into his arm and gain all mutations they have on his arm. If the effects of the transmutations would contradict each other in moves such as the Rebound Down Aerial, only the effects that can stack together will happen. While having all of the Rebound effects on a move such as the Up Smash may sound very powerful, keep in mind the chimera is quite easy to kill as you just waste time giving it transmutations with throws, this will kill that minion, and you’re only gaining these effects for 9 seconds anyway.

FORWARD THROW – EXECUTE

Cornello stabs the foe with his cane, knocking them into prone, then steps on their torso as he transmutes his cane into a shotgun. He then shoves the shotgun into the foe’s face before firing, dealing 11% and with knockback that kills at 250%, but very high base knockback. While the knockback will most of the time appear to be horizontal, it is actually at a 45 degree downward angle which can knock foes into slopes, and, more importantly, score kills when used at the edge. While this requires very high percentages to kill outright, it is Cornello’s single best move for beginning an on-stage gimping session. Cornello’s ability to make spikes come out under/the side of the stage if the foe is next to them can actually be useful in this scenario.

Cornello knocking the foe into prone at the start of the move may at first appear aesthetic, as the following shotgun blast will knock the foe out of prone immediately. If you knock the foe into prone on a slope, though, Cornello will slide on top of the foe briefly before firing. This enables Cornello to get into a pit while firing the foe out of it, serving as a superb reset into a defensive position. Be aware this powerful new attack gives a lot of ending lag, so you’ll have to cover for the Chimera during its downtime. The move fills up 1/10th of Cornello’s rebound meter.

If this is used on a chimera, Cornello will transmute a shotgun barrel into the mouth of the lion. When the lion bites the foe, they will fire the shotgun, dealing 17% and knockback that KOs at 200% like in the fair. The kickback of the gun blast will knock the lion back a platform’s distance. Aside from a generic buff to the lion’s attack, this can help lions recover when suicidally chasing foes off-stage, as foes will inevitably attempt to bait them for easy kills in this way.

BACK THROW – SMITE

Cornello channels yet more red lightning into the foe before sending an elongated blast of lightning to knock the foe behind him to deal 5%. This does a minimum knockback of a platform, after which point the foe will take knockback that KOs at 190%. Beyond the initial 5%, the foe will continue to crackle with red lightning for 10 seconds, during which time they will take 1.4% per second. If the foe hits another character or minion while they have this status effect, though, it will instead be passed on to that character. If Cornello can keep away and evade being hit for all that time, though, he’s looking at a damage output of 19% for pulling off this throw.

While this only fills up a mere 1/12th of Cornello’s rebound meter by itself, if Cornello hits the foe with Chain Lightning their damage will simply get added to the beam’s power and they will lose the ability to pass it around by hitting people. Not only does the foe have to go out of their way to hit Cornello, but they have to evade Chain Lightning on the way. While they can quite easily pass it off to a Chimera, this will grant Cornello the ability to easily “collect” the power of the lightning by hitting his minion with the Chain Lightning. Obviously using this throw on a chimera directly will just apply the effect to the chimera immediately, with the end goal of getting the chimera to land an attack on the foe to spread the lightning.

Not only does the foe have to watch out for Chain Lightning as they come to pass the lightning to Cornello, but Cornello’s nair can block the passing of the lightning to some degree. If a foe with this status effect hits Cornello, they will not pass the effect to Cornello but will instead have a quarter of the damage of their attack added to the length of their effect. Adding in the regular 1/4th of damage a foe instantly takes from attacking Cornello in his nair, and they’ll eventually be taking half the damage of their attack in total.

UP THROW – SOLIDIFY

Cornello transmutes a geyser of sand 1.2x Ganon’s height up underneath the opponent to propel them into the air. This deal 13 hits of 1% and pushing knockback into the air, with the last hit dealing vertical knockback that kills at 260%. While the knockback is weak, the sand geyser will push the foe up 1.3 platforms before they even take said knockback. Cornello’s rebound meter will fill up by 1/8th for performing this attack.

As the foe rides the sand geyser, some of the sand will stick to their body and start to harden into stone, encasing small portions of their body. This will give the foe the effect of traveling in debris from the Rebound Down Special, decreasing their dash speed by 1/4th and increasing their fall speed by 1.5x. This can stack if the foe is standing in actual debris. Foes can knock off the debris by attacking it like a leeching Pikmin, with the debris having 10 HP. It will take the knockback of the foe’s attack as they knock it off and become a small amount of regular debris after that point. If you used the move in a pit and foes attempt to remove their debris immediately, it will more than likely roll down into said pit as a nice small bonus.

If used on a chimera, they will have to have the debris knocked off of their bodies. Aside from creating debris, this serves as a small buff of 10 HP to the chimera, as they will not take damage from attacks that knock it off of them. The debris will be primarily located on the chimera’s torso and will function as a drop-through platform. If a foe comes to gank you off-stage and a chimera is chasing them like the suicidal idiot it is, you can potentially make use of the chimera to recover. Even better is that you can produce spikes on the chimera’s back. When a chimera is leaping at the foe, possibly through your usmash command, you can use the dsmash to make the spike come out from underneath the chimera’s belly to stab at the foe. Be aware if you make spikes underneath the chimera, though, that they will break off when it hits the ground (They can still be picked up by Rebound Cornello later).

DOWN THROW – BED OF SPIKES

Cornello produces 5 minimum charge spikes as powerful as the fsmash/dsmash in front of himself, then slams the foe down into them, dealing 10% and knockback at a slanted primarily vertical angle that kills at 200%. The 5 spikes will stick around as a weak trap afterwards like regular uncharged spikes, dealing 5% and weak knockback.

This throw can be looked at as a “free set-up” throw, but just 5 uncharged spikes by themselves don’t have all that much use. If Cornello uses an fsmash/dsmash where an existing spike that isn’t fully charged, though, it will extend out from the spike that’s already produced. Not only does this significantly decrease the lag, the resulting spike will be better protected by the small spikes surrounding it, largely forcing foes to get rid of them first to get rid of the spike that actually matters, during which time you can attempt a dsmash to extend those spikes. The move fills up a tenth of Cornello’s meter, and if this move triggers Cornello’s transformation he will have a fully charged spike growing out of his arm, combining the 5 smaller spikes into one.

If this is used on a chimera, the spikes will come out of the chimera’s stomach and impale into the ground, rooting the Chimera to that point. This turns the Chimera into a trap rather than a minion, preventing it from killing itself or taking knockback. It can also stay to be in a more reliable position for set-ups/as a Chain Lightning bumper, as well as keep it “safe” if you’re trying to dump multiple transmutation throws into it. The lion’s pounce attack will still be just as powerful, but will just be a swat of the chimera’s front claws in place. Performing a usmash command on a chimera affected by this will have Cornello release the chimera from the spikes with no additional lag. The 5 small spikes can also be unearthed at a later time by Rebound Cornello.

REBOUND GRAB-GAME

GRAB – IRON GRIP

Cornello goes to grab the foe with both his hands. The grab is Dedede’s with 1.2x the range, making it as fantastic as you’d expect. This is only with Cornello’s standing grab, though, as his dashing grab is much laggier, meaning you’ll largely be using the standing one exclusively. While the standing grab is still great, it’s a bit of an issue in making Cornello predictable when he only has 9 seconds to use it.

PUMMEL – CRUSH

Cornello squeezes the foe in a laggy pummel dealing 4%. Despite the power, the lag makes the pummel rather inefficient compared to that of a normal character’s. However, each pummel increases the grab escape difficulty by 1.15x, potentially allowing Cornello to keep a foe restrained if he’s about to deform into his regular form if the foe’s at a high percentage. Of course, the foe can still escape the grab during the time where Cornello changes back.

FORWARD THROW – CAST OUT

Cornello encloses his hands around the foe, obscuring their character model as he shakes them inside of his hands like a pair of dice. He then opens up his hands to let the foe tumble forwards, dealing 9% and strangely weak knockback that KOs at 250%. Foes will briefly enter their reeling animation as if they were footstooled, leaving them vulnerable. Cornello is able to capitalize on this extremely well, as this throw is quite fast, even by the standards of a regular character. Aside from using this as a set-up throw, this makes the throw quite useful when time is such a valuable resource for Rebound Cornello.

Cornello’s height means when he releases foes, they won’t immediately go and tumble along the ground with downward angled knockback, starting in the air. Outside of very low percentages, though, foes will hit the ground so quickly that Cornello won’t be able to make use of the footstooled effect. Sending them into a pit from the outside will keep them ripe for punishment for long percentages to come, though. The move can even set-up for the kill, beginning a gimping session at the edge.

UP THROW – ASCENSION

Cornello restrains the foe in such a way to perform a suplex on them before leaping high, high into the air at a speed a fair bit slower than his grounded Up Special. He goes up into the Smash Bros “magnifying glass” at the top blast zone like Kirby’s throw before coming back down to the ground, dealing the foe a minimum of 10% and knockback that KOs at 190%. The more distance Cornello had to travel to reach the top blast zone with this move, the more powerful the move becomes. Each Ganondorf traveled increases the power of the move by 4% and makes the move’s knockback to KO 10% sooner. Cornello will fall through drop through platforms on the way down.

This will be Cornello’s strongest throw in raw power if used in a pit, but starting the move on lower ground causes the move to take longer. While lag on throws is not normally a concern in 1v1, it means Cornello will have to aggressively grab at the foe early on in the transformation, and in a pit no less, if he wants to pull off the move with the full potential. While the knockback buff is nice, you’re mainly in this throw for the damage, as being lower when the foe actually takes their knockback somewhat negates the knockback boost anyway.

DOWN THROW – BURIAL

Cornello throws the foe to the ground, dealing 4%, leaps up and stomps on them with both feet, dealing 6%, then does it again for another 6%. This throw creates a Ganondorf deep “pit” as if Cornello had used his Rebound dsmash on the location of the throw, and will leave the foe at the bottom of that pit in the prone position. Due to foes sliding down the sides of a pit while in prone, it makes foes rather easy to tech chase if they attempt to roll up from the position, with Cornello’s primary techchasing moves being the nair and fair. The nair will enable Cornello to ignore get-up attacks with his superarmor and quickly roll to either direction the foe rolled, getting beaten out by the foe just standing up from prone immediately.

Aside from providing offensive pressure, which the move is great at, the move is very key because it enables Cornello to set-up while still attacking the foe. While this is something any character with set-up would love, Cornello screams for a move of this kind with his very strict 9 second schedule.


BACK THROW – OPEN ARMS

Cornello holds the foe in one hand before extending out both of his arms and spinning in place. After building up some momentum by spinning for some lag, he releases the foe as the arm holding them goes behind where he was originally facing, sending them flying with 12% and knockback that KOs at 130%. This is Cornello’s direct kill throw, and will deal 20% and knockback that kills at 110% to outside foes in a FFA.

Cornello’s height enables this move to become very convenient for him. While the knockback foes take is horizontal, they’re elevated to Cornello’s shoulder height before they take it. Cornello’s pits often won’t be that deep, meaning they’ll be lower than Cornello’s shoulder height. This lets you knock a foe directly out of a pit with a KO move without having to resort to something like vertical knockback, which will be penalized by the foe being lower down in the stage due to being in a pit. In the event you have a pit that’s so deep Cornello can’t throw the foe out of it with this move, you’d want to be using the uthrow anyway.

PRIEST STANDARDS

JAB – QUAKE

Cornello taps his cane on the ground, causing the ground a platform’s distance in front of himself to lightly shake. This is not forceful earthshaking that knocks people into the air – it simply slows the movement of enemies by a quarter while dealing 9 hits of 1% per second. This doesn’t flinch enemies, but every fourth hit will always cause enemies to trip as a small ripple goes through the ground. Each of the 9 hits per second fills Cornello’s rebound meter by 1/60th.

Simply using this on foes approaching you will cause anybody with half a brain to jump, or simply roll past the ripple as it shows up. This move has very little lag, though, with the portions of the move that aren’t the tripping essentially functioning as the move’s “lag”. Using this on a foe not impeded in any way can be used to try to bait some kind of punishable action.

Where the move truly shines is on opponents that are coming out of the air. You can “charge” the move in advance to trip them the moment they touch the ground, getting foes who recovered high ready for punishment. This will also wrap around edges to hit the ledge. The damage will still hit foes with ledge invulnerability, while the ripple will deal light downwards knockback to hit foes off the ledge if it connects.

DASHING ATTACK – RUN AND GUN

Cornello stops using his cane as a walking stick in his dash, lifting it up and transmuting it into a shotgun as he turns behind himself. The move deals 11%, with the usual knockback that KOs at 200% with high base knockback. Even should the move miss, it’s useful for running away considering it propels Cornello forwards a little under Bowser’s width. Cornello’s body deals 3% and knockback that kills at 400%, just so you don’t look like an idiot when the foe rolls in front of you with the move. This is a keep dashing dash attack, enabling Cornello to fire behind himself at will when fleeing from enemies. Cornello’s dash will be slowed briefly as he transmutes his shotgun back into a cane to prevent the move from being a faster method of transportation than just dashing normally.

The frail Cornello will fall onto his stomach when this move is used on a slope due to the force of the kickback. This can actually assist Cornello by enabling him to “dive” back into a defensive position pit, as sliding down a slope is faster than his rather crippled dash speed. The move also fills 1/8th of the Rebound meter, meaning if Cornello transforms because of this move he can potentially slide down a hill to “chase” a foe while transforming.

FORWARD TILT – HAND OF GOD

A hand of earth rises from the ground in front of Cornello. It arcs forwards as the “arm” behind the hand extends with it before coming back down to smash into the ground in an “arch” shape, hitting foes about a Wario width in front of where Cornello was standing. The hand is a hitbox throughout, dealing 6% and knockback that KOs at 275% in the direction the palm of the hand was facing. The hand and arm crumble to dust after the move is completed.

Cornello can hold down the A button to enable the arm to extend upwards further before completing the arch. At maximum, this will cause the hand to reach 1.5x Ganon’s height into the air and hit 1.2 platforms away from Cornello. This is impressive in how fast it is, but of course leaves a gaping blindspot on the ground for the move. The higher the hand was before it started to come down, the more powerful the move becomes as it does so, dealing up to 14% and a spike on par with Rob’s dair. Cornello gains anywhere from 1/16th to 1/9th of Rebound meter, gaining it progressively as the move “charges”.

The arc of this move provides useful for a multitude of purposes. It’s great at hitting enemies approaching downwards into a pit when you’re lower down, hitting foes jumping over a pit or even just a spike to reach you, and of course serves as an excellent punisher at the edge, especially on enemies recovering high.

UP TILT – SAND GEYSER

Cornello taps his cane on the ground, then .4 seconds later a geyser of sand 1.2x Ganondorf’s height erupts at that position. The sand geyser deals 13 hits of 1% and flinching as it pushes foes to the top of itself, with the last dealing vertical knockback that KOs at 260%. Cornello is free to move after the move’s very brief lag, waiting for the geyser to show up. If he taps the ground with his cane in the same position before the geyser shows up, it will double the height the geyser goes up and add an additional 5 hits. Foes will go up the taller sand geyser more quickly so they can’t just DI out. While the knockback is terrible, it can be enough to eventually kill enemies when they’re taking it at the top of multiple sand geysers. The move boosts the rebound meter by 1/16th.

While Cornello can only stack 2 sand geysers in the same position with this move alone, he still has enough time to grab a foe. If Cornello performs his uthrow when a sand geyser is about to erupt, the uthrow and utilt(s) will combine their power as if the uthrow was a “bonus” utilt. The uthrow will also cause additional portions of the foe to solidify. Each extra sand geyser will slow the foe’s movement by an extra 1/6th, while their falling speed will be increased by an additional 1.2x. Each extra portion of debris hardened on the foe’s body requires them to knock it off with an additional attack, creating another portion of debris to boot.

The utilt takes much too long to start-up to use as an offensive measure in most cases, and actively attempting to get the utilt/uthrow combo is laughably predictable. It functions as a great defensive measure, though. If a foe is approaching and about to reach you, you can use the utilt and step behind it to use it as a barrier. Even if the foe will get past the geyser before it erupts, you now have a big juicy reward to grab them at that position as they inevitably come past it. You can stack both utilts in the same position if you’re feeling overconfident, but placing two geysers slightly away from each other foes to approach you from will give you significantly more leeway in where you land the grab. Note that the geysers will erupt directly upwards regardless of whether or not they’re on a slope.

If a spike is buried underground for any reason (Caving in the ground with rubble, driving it in with rebound dair, etc), using the utilt or uthrow will cause the spike to get shot up out of the ground. The tip is just as powerful as always, and it will hit anybody hit by the geyser. The geyser will also cause the spike to flip over as it reaches the top, causing the spike’s tip to still be a hitbox as it comes back down. Larger spikes will retain their solid status during all of this, so even if the foe isn’t hit it will prevent foes from immediately rolling past the sand geyser, getting caught in it as their roll gets stopped short. Rather than just “running”, this version of the move largely will just have Cornello wanting to dance back and forth where the eruption happens to bait enemies.

DOWN TILT – QUICKSAND

Cornello causes the ground a Wario’s width in front of himself to start sinking for a very brief period over .4 seconds before making the ground solid again. Any foes hit by this attack will take 8 hits of 1% and flinching over the course of it before getting their feet stuck in the ground. Foes can still attack/dodge/etc from this position, but not move or jump until they either escape at grab difficulty or use a leg based attack with 1.3x the starting lag. Taking knockback from this position that would knock them back a platform or more will also release the foe. Using the move on a foe already caught in this effect will deal them knockback that KOs at 220%.

The most obvious follow-up to this attack is an fsmash or dsmash, as even if the foe dodges the primary hitbox they will automatically be hit by the spike tip’s passive hitbox afterwards, while also granting you a free spike in the process. The move fills 1/6th of Cornello’s Rebound meter, and if he hits a foe and transforms it’s ideal since they’ll be delayed from running away from him while he hulks out.

The move will cause spikes in the area of effect to sink into the ground Mario’s height. Larger spikes will still keep their HP despite looking like shorter spikes, and this actually makes them more obnoxious to destroy as foes have to aim multiple attacks at the ground. You can also bring spikes completely underground for you to use with either your utilt or Rebound Cornello. The move is particularly nice to use against a foe on the opposite side of a spike as yourself, as the spike should ideally block some of their attacks as you use the dtilt before functioning as ammo in a utilt followup. When the foe’s locked in place, it also becomes much more feasible to perform the utilt/uthrow combo.

REBOUND STANDARDS

JAB – STREGNTHEN FAITH

If the button is simply tapped, Cornello will punch forwards with his mutated arm, quickly dealing 9% and knockback that KOs at 160% in a very reliable spacer. If Cornello mashes or holds down the A button, he will flex his mutated arm for the duration, powering up the punch to come. Cornello can charge the punch for up to a second. At max charge, the punch deals 19% and knockback that KOs at 90%.

Based off what Cornello has on his mutated arm, different effects can happen if the move is charged. The shotgun is the simplest, with it firing as the punch goes off in the opposite direction in order to make the force of Cornello’s punch more forceful and have 1.3x the power. This slightly increases the ending lag, but the shotgun will not fire if the move is uncharged.

With rubble on his arm, it will fall off it as he charges, creating falling hitboxes below his arm in front of himself that deal 12 hits of 1% and flinching over the charge’s duration, stunning foes for the punch. If Cornello releases the jab and punches as the rubble is falling, he will instead knock some of it forwards 2.5 platforms as a small stream of projectiles.

A spike on Cornello’s arm will get shot up out of his bicep during the charging, skewering enemies as if it were thrown. You need larger charge to shoot larger spikes out of your arm, requiring full charge for a fully charged spike. The spike will skewer enemies like when picked up and thrown, but will go much faster (In exchange for more lag and having to go straight up). When a foe is approaching you from the front in the air, this gives you responses for if they both jump towards you directly or over your head entirely. Charging the move can also function as a decent fake out as you fire off the move early in order to avoid shooting your spike.

If Cornello flexes with machine guns attached, the pressure put on them will cause them to explode if the move is fully charged, dealing 23% and knockback that KOs at 70%, while dealing Cornello a minimal 5% in recoil penalty. The hitbox will be Cornello’s entire arm as he releases the punch and will linger for quite some time. If you only partially charge the punch, the guns won’t instantly “cool down”, only doing so completely after 3 full seconds. This enables Cornello to somewhat “store” his charge, and makes slightly charged spams of the jab a lot more scary for the foe and gives you some degree of leverage by charging the attack. This obviously uses up the guns, but if you work up the charge gradually and use it as a threat it will last most of your transformation time anyway.

If Cornello has lightning in his arm, he will jut out his palm instead of punching forwards with a fist. This decreases the physical power of the attack by 1/6th. While charging, Cornello’s flexing arm deals 4 hits of 1% and flinchig throughout to slightly cover himself, then Cornello channels channels the lightning into his hand upon releasing the jab. This will cause the lightning to shoot out of his palm at a 45 degree angle towards the ground. The power of the beam is the same as the one that he used/absorbed in order to enter Rebound form, requiring a minimum of half charge to fire off, and increasing the power of it by up to 1.3x at full charge. This will cause Cornello to lose the lightning in his arm unless he manages to reflect it back to hit himself, and this becomes significantly easier for Rebound Cornello due to his size. Foes will actively seek to shield this attack at times in order to make it bounce off of them into the air harmlessly.

DASHING ATTACK - RAM

Cornello kicks off the ground to propel himself forwards, attempting to headbutt his opponent. Cornello will travel the distance of 1.3 platforms along the ground before falling into prone at the speed of Captain Falcon’s dash. His head deals a powerful 17% and knockback that KOs at 100%, and on hit Cornello will fall on the ground into prone early. This move has very little lag, with the penalty being forced into prone. This is certainly much better than ending lag, though. Cornello is very wide when he lays on his stomach, so unless he attempted to hit a foe at point blank he will likely be able to hit that enemy with a prone attack if they dodged the headbutt. If you want to hit foes farther back, you can use the move on a slope and slide back to them as you use the prone attack. Also note that Cornello will continue sliding while reverting his transformation, so this can help you to continue to control your movement.

If Cornello ends the move in the air, he doesn’t enter prone and basically doesn’t experience lag with the move. This makes the move a very scary ones for foes attempting to travel over the top of your pit, and can also just be used for outright transportation. The move can also of course provide an excellent transition into your off-stage game.

FORWARD TILT - PRAYER

Cornello claps his hands together in front of himself, attempting to crush his enemies. Contact with his hands deals 11% and knockback that KOs at 135%, with fairly high base knockback. This is one of Cornello’s best attacks in terms of the speed/power ratio, functioning as one of his most mindless and spammable spacers with his giant body providing it excellent range. Unlike Bowser’s ftilt, Cornello’s hands don’t have to magically enlarge.

If Cornello claps his hands on a spike, he will shatter it, causing the remains of it to fall out of his hands in the form of rubble. The rubble deals 4-12 hits of 1% and flinching as it falls based off the size of the destroyed spike. While weak, the ending lag of this move is short enough to follow up on foes getting hit by the rubble. The solid nature of the spikes before they are broken can also serve to catch rolling foes – if they roll into the spike and dodge the clap with it, they’ll get caught by the rubble.

UP TILT - PURGE

Cornello raises his arm behind his head before punching the ground in front of himself, dealing 12% and knockback that KOs at 140% at a 30 degree angle downwards. This creates a hitbox that spawns immediately above and in front of Cornello with nearly no lag whatsoever before it smacks down in front of him. The speed is still acceptable to hit grounded opponents, though the move is merely average against them rather than something exceptional. While the move doesn’t hit directly above Cornello, he’s so tall that you can generally bat enemies out of the air with this attack as they attempt to reach that point. The move of course also works well on opponents on a slope above you or those recovering high.

When Cornello’s fist hits the ground, a platform sized earthshaking hitbox will show up in front of himself comparable to the Priest’s jab. It lasts a second and deals 9 hits of 1% with no flinching, with the fourth hit tripping enemies. Just this alone isn’t nearly enough reason to use the attack, but it’s possible to knock foes into this with the punch at lower percentages. At higher percentages, this can still be accomplished by hitting enemies at a higher position on a slope than yourself. You can also get a small amount of mileage out of this by hitting a foe downwards off the stage with the punch, forcing them to take a small bit of bonus damage on the ledge when they come back.

DOWN TILT - DRAG

Cornello reaches out his hands in front of himself, then drags his hands back to himself as digging his fingers into the ground a bit. This deals 10 hits of 1% and weak set knockback back towards Cornello. The move will “wrap” around slopes rather than Cornello just dragging his hands through open air. The move is primarily to catch enemies attempting to just flee Rebound Cornello to stall out his timer, as it’s quite a fast attack. Even if foes don’t just run for the entire duration, running for the last couple of seconds can be a viable tactic. The move’s ability to “wrap around slopes” also applies to edges, enabling Cornello to easily hit foes attempting to plank his Rebound timer.

If Cornello wraps his hands around a boulder, he’ll bring it in to himself as you’d expect, taking a bit more lag. As he brings in the boulder, it will be a hitbox that deals 8% and knockback that KOs at 200%. If the boulder is in a slope, it will take longer for Cornello to bring it to himself and it will not be a hitbox, but Cornello can release the boulder at any time with another press of A. This makes the boulder a fair bit less predictable.

PLAYSTYLE SUMMARY

Cornello’s transformation is unique in that it can be seen as something of a “power-up”, despite having a complete moveset to call its own. Despite being such a boon, mindlessly transforming into it whenever possible is obviously a terrible idea when so much self damage is given to him. There are many moves and situations throughout his massive toolset that serve as good transitions, such as camping with moves that build up the meter and transforming as they reach you or transforming as you knock them off the ledge. Early on in the match, Cornello will probably just want to transform once primarily for set-up purposes – a dsmash or dthrow is mandatory, and a boulder or pile of rubble are nice bonuses. While Cornello can score kills fine as the priest, he will be relying on the Rebound transformation more and more as the match progresses regardless. The extra damage will matter less when Cornello’s damage is already high, and he will want to stay in the form primarily for the weight and recovery it provides, essentially making him invincible.

The many defensive moves available to the priest can allow him get set-up as you’d expect from a typical character of this archetype. While that’s nice and he will use them for that purpose to a degree early on in the match, most of his set-up is designed to work fairly well in the face of combat. The spikes are the most obvious example, but foes can’t even interrupt the summoning of Cornello’s chimeras. Beyond just set-up, though, Cornello needs his massive arsenal of defensive moves in order to survive at the stupidly high percentages that he’s going to reach. If foes want to kill Cornello in his Rebound form, they’ll have to take him to ridiculous percentages, at least 200%. Cornello needs to be able to survive long enough when he reverts back to the Priest to regain Rebound status, as well as be comfortable enough to actually do anything when he does. While Cornello’s Chain Lightning won’t have much of anything to bounce off of at low percentages when a normal character would actually want healing, late in the match there should be countless targets to extensively heal him and fill the Rebound meter. While the priest doesn’t particularly care whether he’s at 180% or 200%, it can actually be enough to enable the Rebound form to survive. With these insanely high percentages, the priest will want to be in the pit just to make himself harder to kill, let alone the new opportunities it provides for his attacks. Going out of his way to survive for as long as possible also means he will inevitably get some great set-up towards the end of his stock, worth going for since everything he does reverts to normal on his death.

Cornello’s favorite place for the foe to be when he goes on the offensive actually isn’t in a pit, but off the stage. The priest enjoys the foe being there for his opportunities to damage rack directly with the Machine Gun or give easy surfaces to bounce off his Chain Lightning to power it up, then punishing them horribly whether they come to the ledge or recover high with his multitude of options. The priest doesn’t expect to kill when he knocks his opponent off the stage, he just intends to impede them for as long as possible. This is also the most obvious opportunity for Cornello to perform set-up with absolutely no risk. One of the most popular forms of “set-up” is to transform into Rebound form. The Rebound form still loves to see the foe off the stage, but it has much more evil intent as it directly gimps foes or, in the least, horribly punishes them as they land back on the stage.

PRIEST FINAL SMASH - CRUSADE

Cornello summons five of his followers with comparable size to himself. They weigh as much as Captain Falcon and have 50 HP. Their attacks consist of Priest Cornello’s Machine Gun and his shotgun fair, though they’re able to use the shotgun on both the ground and in the air. This provides plenty of projectile clutter and huge fodder for you to bounce Chain Lightning off of, with the Final Smash lasting for 10 seconds.

If Cornello enters Rebound form while his minions are out on the stage, though, he will absorb the guns of any minions within a platform of him into his arm. This will give him access to the shotgun and machine gun at the same time, and increase the amount of hitboxes produced by 1.5x for each pair of guns he absorbs. All of Cornello’s minions will flee the stage and kill themselves upon his transformation.

REBOUND FINAL SMASH – GODHOOD

Cornello attempts to perform further transmutation while already in his rebound state. This increases his size and weight by an additional 1.5x, and causes his entire body to mutate into a black mess of alchemy like his arm. Cornello’s entire body is now solid, and every 2 seconds, a mutation will come out of Cornello’s body at the position nearest to the foe. If the foe is right up against him, a shotgun will jut out of his body and shoot the foe as powerfully as his fair. If the foe is within the distance of a max charged spike, one will jut out at the foe. If the foe is further away than that, a machine gun will sprout from Cornello’s body and fire in the foe’s direction for one second. After 9 seconds of this, Cornello will revert to his priest form.
I'm not sure I understand the Side Special. What does it do to him and what does it do to opponents? From the looks of things it just heals opponents and damages you, which seems pretty pointless.
 
Last edited by a moderator:

TheDarkKnightNoivern

Smash Master
Joined
Jun 24, 2014
Messages
3,641
Location
Croft Manor
OK, thanks for the reply.

I feel really guilty now for not reading the long movesets. I feel like a hypocrite asking for feedback when I don't give feedback to sets that obviously have taken lots of time and effort to make. I'm going to read them now.


TOO MUCH ICE!!!!!

Apart from that, this was incredibly easy to read and I would love to see this character with this moveset in SSB. I don't care about the stuff you haven't finished, because you told me all of the attacks. 9/10!
What can I say? I WAS FROZEN TODAY
 
Last edited:

MasterWarlord

Smash Champion
Joined
Aug 24, 2008
Messages
2,911
I'm not sure I understand the Side Special. What does it do to him and what does it do to opponents? From the looks of things it just heals opponents and damages you, which seems pretty pointless.
Please stop quoting entire movesets. Just saying the name of the moveset you're talking about would be fine.

To summarize Cornello's Side Special, it deals double the damage the foe was healed in damage over time. If he hits himself and transforms because of the Side Special, he'll only get the healing and will stop taking the damage over time.

While I have nothing against movesets that are 15K words, Cornello isn't really one in the traditional sense, he has a very good reason for being so long. It's a full transformation character with 2 complete movesets. Individually, the two movesets are of comparable length to that Accelgor moveset you commented on (which, granted, you also complained about for being too long).

As far as your Roy moveset, I will say that there is a lot used from the old Roy and even Marth directly to prevent it from being a fully realized unique set. He doesn't really have much of anything specific to make him play in a unique fashion, like Marth's spacing playstyle with his sword tip sweetspots. Yes, Roy is a very hard character, but it's bad when you're making so many comparisons to say the move is basically the same as an existing one and saying yourself that the Up B and Side B are very similar. You then proceed to say they're different, without any real explanation as to why other than you saying so.
 

Moon Monkey

Smash Hero
Joined
Nov 20, 2006
Messages
7,897
Location
The Moon
NNID
Mr.MoonMonkey
Switch FC
SW-0550-3588-6412

FATHER CORNELLO


Father Cornello is the starting antagonist of Full Metal Alchemist, getting nothing but the first episode to himself in the main series. While he technically works under the homunculi, he is largely an episodic character to generically start off the series with some action. Cornello uses alchemy, but passes it off as power from god to gain loyal acolytes, with the eventual goal of world domination. He is the sole voice of god due to his ability to perform these “miracles”.

Cornello started off as a non fighter in the manga/2003 anime, but has gained more and more abilities throughout various adaptions. Aside from the Brotherhood series giving him an actual fight, he is given several unique attacks in the FMA Warcraft 3 map where he’s a playable character, alongside other such beloved and memorable characters as Fu, Zampano, and Dolcetto.

STATISTICS
Traction: 10
Size: 8
Aerial Control: 7.5
Falling Speed: 5
Aerial Speed: 5
Weight: 4.5
Ground Movement: 1.5
Jumps: 1

Cornello’s a heavyweight without the weight in statistics. While he should realistically be heavier, his poor weight is used to represent his physical incompetence and frailty as an old man.

Cornello has a “rebound” meter below his portrait comparable to Little Mac’s. Whenever Cornello uses a move that uses alchemy (The majority of them), the meter will fill up a certain amount based off the attack. Every second, the meter will tick down by 1/18th, so he has to be somewhat spammy with his attacks in order to fill up the meter. When the meter completely fills, Cornello will enter his rebound form, gaining invulnerability for the 3/4ths of a second duration of the transformation.


Weight: 20
Size: 20
Traction: 10
Jumps: 10
Falling Speed: 10
Ground Movement: 6
Aerial Speed: 5
Aerial Control: 2

Turning into this form grants Cornello superarmor to attacks that deal 7% or less, and grants him 0.2 seconds of complete stun immunity after getting grab released or thrown. Cornello will stay in this form for 9 seconds before shifting back to his previous state. While Cornello will get a free invulnerable transformation back to normal, he will take 40% over the period of time he remains in the Rebound form. When he turns back, Cornello will go through a half second of lag, .3 seconds of which he is vulnerable for.

PRIEST SPECIALS

UP SPECIAL – MIRACLE

Cornello raises his hands above his head and looks to heaven as he gains an aura of red lightning around himself. This will cause him to begin healing at a rate of 3% per third of a second. While this would make him somewhat scary to leave around, this fills up Cornello’s rebound meter faster than absolutely anything else – 1/8th of the way per every 3% damage healed. The Rebound form’s self damage will of course outdamage the otherwise very good healing from this attack, with Cornello getting a net loss of 16%. Of course, if you just want to get into Rebound as fast as possible, this has the bonus of healing some of the damage. If used in the air, this will slow Cornello’s falling speed by a decent margin.

Cornello does not have a recovery on his Specials in his base form, making him even more frail. The rebound form has a very powerful recovery, though, meaning foes largely have to gimp you if they expect to recover. Granted, if you have to build up your meter from nothing in order to recover, you’ll have to be knocked fairly high in order to not drop off the bottom while transforming. Specifically because of how Cornello’s recovery works, he’ll always want to balance his Rebound meter at a fairly high position in order to recover.

NEUTRAL SPECIAL – MACHINE GUN

Cornello transmutes his cane into a machine gun and fires at will, laughing maniacally at random intervals if he holds out the move long enough. As he continues to spam the move, he simply transmutes more ammunition into the gun barrel. Cornello has full control over where he aims the move, having the full range of Final Destination! The bullets are the same size as Sheik’s needles and go just as fast, with each one dealing 0.5% with no stun. Cornello fires 36 bullets a second, working as a very powerful damage racker – imagine if Fox could freely aim his Neutral Special and you’ve got a comparable move.

The big problem with the move is there is strangely a very long amount of ending lag to leave the stance. If you just exit the stance as a foe comes up to you, you’ll be taking something on par with a Bowser fsmash as your punishment. As such, the move is largely reserved for attacking foes at very long range, most reliably those who are knocked off the stage for free damage.

The move fills Cornello’s rebound meter at a rate of 1/16th for every third of a second he stays in this stance. The move can be used as an amazing transition into rebound if you can force a foe to approach you, then bypass the move’s ending lag with the foe already at point blank range. This is a pretty big gamble based off whether you think the foe can punish you in time or not, as if it’s too painfully obvious you’ll transform the foe will likely just wait out your gunfire until you do.

DOWN SPECIAL – ALCHEMIC ABOMINATION


Cornello summons a chimera in front of himself – a lion fused with some other unidentifiable creature through alchemy, apparently making it stronger than a regular lion somehow. The chimera is about as tall as Luigi, but is as wide as a crouching Snake without counting the tail, which extends out for double the chimera’s width. Attacking the tail deals damage to the chimera, but not knockback or stun. The chimera is as heavy as Mario at 50% and is vulnerable to hitstun and grabs, but will simply keel over and die on the spot if its 30 HP is depleted. This has an awkward .4 seconds of lag to summon and doesn’t affect the rebound meter, but if Cornello is interrupted during the move the chimera will still be summoned anyway, possibly punishing his attacker.

The chimeras patrol the stage at Ganondorf’s walking speed, but will pursue foes at his dashing speed if they come within 0.75 platforms and will pursue them until they get 1.6 platforms away. Their basic melee attack is a quick bite that deals 8% and knockback that kills at 165%, but has noticable ending lag to punish them. The bite will heal the chimeras of 5%, adding slightly to their survivability. If a foe is a platform’s range away from the chimera and they’re on the chase, they will perform a swift pounce on top of them that deals 14% and knocks grounded foes into prone, dealing knockback that KOs at 200% to aerial foes and those already in some kind of stun state. The chimera will follow up with the bite instantly if the foe was put into prone, though foes have enough time to do an immediate action to avoid it – though this will make them more predictable.

SIDE SPECIAL – CHAIN LIGHTNING

Cornello fires a burst of red lightning out of the end of his cane. After the move’s brief startup, the range is 2 platforms long and the lightning instantly travels this distance like realistic lightning. it initially seems rather useless compared to the Up Special, as it simply heals the target of 5% (Including foes, though foes will take a flinch from it). However, the target will then begin to take damage over time at a rate of 2.5% per second, taking double the damage they were healed.

When the lightning hits a target or any form of terrain, it will bounce off of it at an angle comparable to Rob’s laser. Every target that is hit will take 3% more “healing” than the last one, and bouncing off the ground will still power up the move in this way. Cornello can angle the initial firing of the lightning, and can have a lot of fun with this move with no set-up on stages with platforms. Note that shielding the move will still power it up, enabling you to still use shielding foes as a target to bounce off of or rejecting the lightning from yourself if you don’t want to take the damage.

This gives the chimeras some more relevance, enabling them to act as “bumpers” and to power up the move. While the actual lightning jumps are instant, there is a very brief pause between the bounces between each individual target, so if you intend to save the foe for last for a big hit you’ll have to apply some pressure after shooting out the red beam. Aside from simply damage racking the foe with damage over time, chimeras will often like the nature of this brief healing, potentially expanding a short lifespan. The pounce attack chimeras use can also offer some more angles to bounce the lightning off of.

While firing the lightning fills up his meter by 1/12th, it will fill up far more if he hits himself with it. If he is the second target (The minimum, since he can’t target himself outright), his meter will fill up by 1/6th. For each target later he was in the Chain Lightning, the meter will fill up by an additional 1/6th. If Cornello enters rebound while taking damage from this move, any further damage he would take from it will be erased, meaning if he turns into it outright he’ll simply get the healing only. Every character can only be hit by this once per use and the lightning will expire once it travels the maximum distance, so Cornello can’t just bounce it off of a foe infinitely at point blank. Shielding the attack does not count as “being hit” by it.

PRIEST SMASHES

FORWARD SMASH – SPIKE IMPALE

A spike shoots out of the ground in front of Cornello at a 45 degree angle. Cornello can angle the move up or down to change this angle to 20 or 60 degrees to alter the slant of it. With no charge, the spike barely juts out of the ground at all, only around two thirds of Kirby’s height. At full charge, the spike is as long as a platform. If the move is charged at least a quarter of the way, the spike will be solid terrain, providing an interesting surface to bounce off of with Chain Lightning. Regardless of charge, the move deals 20% and knockback that kills at 130% as it comes out.

The spikes have 5-35 HP, though you can’t attack the tip which remains a hitbox that deals 5% and weak knockback. The uncharged version of this move is very fast to compensate for the horrible range, and the small status of the spike actually makes it nearly impossible to destroy from the front, potentially making it more “durable” in some situations.

While chimeras can jump to traverse stages with these spikes fine, they actually will sit and wait on top of spikes created with this move when created, getting ready to pounce on anything that comes into range. The move fills up 1/16th of Cornello’s meter, up to 1/8th if fully charged.

DOWN SMASH – HOMING SPIKE

Cornello creates a spike underneath the nearest foe’s current position, shooting straight up. The spike deals 16% and knockback that kills at 150%, and the size, HP, rebound meter filling, and solid status of the spikes increases in an identical manner to the fsmash. This is significantly laggier than the fsmash, even uncharged, given the range of the move. If the foe is off the stage or under it, the spikes will come out of the ledge or under the stage, respectively. While the spikes are solid, they will just become the new ledge if you create them in such a way to “block it”. If you create a spike on the ledge during a time where a foe is on it and they have ledge invulnerability, this won’t hit through it, but will cause them to get pushed back to the “new” ledge created by the spike.

This adds an obvious new option to your camping, and while it obviously can’t hit foes directly off-stage can be an interesting thing to use as the foe comes back to the stage. Even if they can easily recover high to avoid the ledge, they should ideally have run out of jumps so they be impaled upon landing.

UP SMASH – CHIMERA COMMAND

Cornello summons another chimera, but as it is summoned it immediately performs the pounce attack. Uncharged, the pounce is the same as the generic one chimeras will voluntarily perform, dealing 14% and knockback that KOs at 200% while traveling a platform through the air. This is largely used for the attacking portion of the move, as if you use this exclusively to summon the chimera you’ll find that the chimera only has 5 HP until they complete the ending lag of the pounce, after which they become a regular minion. Interrupting the move as the chimera is quickly summoned will result in it immediately dying, unlike the regular version of the summoning on Down Special. That said, the appeal of killing the chimera during the ending lag of his attack can potentially make you personally less vulnerable. If this is used next to a chimera already created, they will keep their durability in-tact for the leap and stand alongside you for the charging, and the move will start up instantly.

Charging the move will increase the distance of the pounce to a mighty leap, potentially traveling the entire distance of Battlefield at full charge and dealing up to 22% and knockback that KOs at 145%. Cornello can also slightly angle the chimera’s leap by about 15 degrees in either direction, also helping give him some good surfaces to bounce his Side Special off of. While using this to camp is stupidly impractical, this is decent at melee range to use the chimera as a meat shield. The low durability also won’t matter much if you send the chimera on a suicide mission to an off-stage opponent.

REBOUND SPECIALS

UP SPECIAL – LEAP OF FAITH

In the air, this is the standard heavyweight recovery you’d expect for Cornello in his rebound form. It’s Dedede’s recovery with heavy buffs, going up 1.5x as high with double the power. Cornello is invulnerable as he ascends rather than having superarmor, and on the way down he has superarmor against attacks that deal less than 20%. Instead of the stars that pop out under Dedede, bits of rubble pop out to either side of him when he lands, dealing 6% and knockback that KOs at 200%. This is a very safe recovery, which is well deserved considering what he has to go through in order to use it.

If used on the ground, Cornello will jump even higher due to having something to actually kick off of. Cornello will jump up a set distance comparably to Kirby’s suplex throws, specifically jumping up into the “magnifying glass” in the top blast zone above him assuming there’s nothing solid in the way. Cornello will jump up incredibly fast at Sonic’s dashing speed, becoming a weak hitbox that deals 7% and knockback that KOs at 250%, again with superarmor to attacks that deal less than 20%. Once he reaches the magnifying glass, the player can control his horizontal movement to move him up to 2 platforms in either direction over .35 seconds before he comes crashing down. As he comes down, he deals 25% and a spike 1.3x stronger than Ganon’s dair, along with making the rubble on either side of him like the aerial version of the move.

While the grounded version of the move isn’t very useful to Rebound Cornello, it can propel Priest Cornello to impossible heights that he could never reach before if Rebound Cornello jumps up there as he transforms back. If you’re not in immediate combat with the foe, this is one of your priorities before shifting back in order to prevent punishment when turning back.

SIDE SPECIAL – SHOULDER CHARGE

Cornello does a shoulder charge forwards, providing an alternative recovery for horizontal movement. He tramples forwards through the air at Captain Falcon’s dashing speed, dealing 19% and knockback that KOs at 125% to anyone who gets in his way. The mad dash can be stopped early at any time, and the earlier it is stopped the shorter the ending lag is. If Cornello just taps the input, he’ll do a shoulder charge motion in place, quite similar to Brawl Wario’s fsmash in appearance and lag. If he charges two platforms or more, the ending lag will cap out at a full second.

Cornello’s horribly mutated arm in Rebound Form is largely a result of his transmutations on his gun, as various gun parts can be seen sticking out of it. The last move you use to enter Cornello’s rebound form will have a visible impact on his arm – lightning/healing will cause it to crackle with red electricity, a gun move will just have a couple more gunbarrels on his arm, and a spike, of course, will have the spike jutting out of his arm. They apply various bonuses to this move in addition to the primary hitbox.

Lightning will cause the move to apply a version of the Side Special that heals the foe for 12% before damaging them for 4% per second for 5 seconds. If you hit the foe with a Side Special in Priest Form while they already have this effect, it will boost the power of the Side Special as if you bounced it off of 3 targets by hitting the foe.

Having some extra machine guns will cause them to spurt out a few bullets for you to aid your charge – you’ll fire 5 bullets a second and each will deal 1% and flinch the foe, making it much easier to hit with your charge.

Having a spike jut out of your arm requires the spike to be at least as tall as Mario in order to do anything. If it is, the spike specifically becomes a grab hitbox that you can impale the foe onto during the move, still dealing 19%. Cornello can still do whatever he wants with a foe impaled on his arm, though they will obviously be instantly released if Cornello shifts back to regular size.

NEUTRAL SPECIAL – STRENGTH OF GOD

Cornello goes to rip a Bowser sized boulder out of the ground with his “normal” arm with about .4 seconds of lag, having superarmor to attacks that deal less than 20% for the duration. If he’s interrupted during the later .2 seconds, the boulder will still get spawned, but he won’t generate a hitbox. After ripping it out, Cornello will bowl the boulder forwards along the ground, causing it to go at Wolf’s dashing speed and deal 17% and knockback that KOs at 140% as it goes. The boulder is solid, but given Cornello can’t throw it through the air it’s not especially scary as an on-stage gimp. The boulder will travel forwards 2.5 platforms on a flat surface, getting weaker as it goes before it slows to a stop. Cornello can much more quickly just pick up the boulder to throw it again, and foes can destroy it by depleting its 40 HP. The boulder will go faster/slower if it’s going down/up slopes, and will increase in power accordingly. The boulder caps out at 28% and knockback that KOs at 80% with 1.2x Captain Falcon’s dashing speed. Cornello –can- potentially launch a boulder into the air by rolling it off of an angled spike from fsmash, launching it into the air by using the spike as a ramp. Of course, this is pretty predictable for gimping.

If Cornello is standing in front of a spike, he will rip it out of the ground very casually with .15 seconds of lag. Cornello can carry the spike around while using his moveset normally, while inputting Neutral Special will cause Cornello to stab in the desired angle with it, dealing 10% and knockback that KOs at 170% for an extremely good “poke” with a full length spike. If he holds down the input for .4 seconds and then releases it, he’ll throw the spike like a spear 3 platforms in the desired direction, dealing 8% and knockback that KOs at 200%. If either of these spike attacks hit a grounded foe, they will get impaled, taking an additional 5% and having to escape at grab difficulty. So long as Cornello throws the end of the spike at the ground, it will end up impaled in the ground, enabling him to reangle spikes as he wishes and enabling him to make a spike ramp for a boulder on demand. Cornello can pick up spikes that have impaled foes on them before adding more creatures to the shish kebab, or just throw it off stage. Cornello can also rip out a spike growing from his mutated arm by using this move in the air.

The boulders can have spikes generated on them by Priest Cornello given they’re solid, and the spikes can be used to help “defend” the boulder for when Rebound Cornello comes back. If Rebound Cornello attempts to pick one of these up, he’ll pick the boulder up by the largest spike, assuming there’s a spike at least as tall as Mario available to use. Attempting to use it as a weapon will cause him to smash it in front of himself like a club with minimal lag. This will cause the boulder to be an immediate hitbox that deals 20% and knockback that KOs at 115% as it hits the ground, then pop off the spike Cornello was using and roll forwards along the ground normally. Afterwards, Cornello will still be holding the spike in his hand.

DOWN SPECIAL – ASHES TO ASHES, DUST TO DUST

Cornello scoops out a portion of the ground in front of himself in the form of gravel, not actually terraforming the stage with this move, before throwing it all forwards a relatively short distance of a platform. The debris deals many multiple hits as it goes forwards, dealing roughly 14 hits of 1% and set pushing knockback over the course of the attack.

If the debris comes in contact with a slope (which he can make with his rebound dsmash), it will slide to the bottom and collect there. Cornello throws about 1.5x Bowser’s size in debris with each use of the move, and it doesn’t go away after being created. Rather than being solid, characters can walk through it with three fourths of their regular dashing speed. If it’s piled up so high that a character is in an aerial state when wading through it, their falling speed will increase by 1.5x while inside of it. The debris can take knockback from attacks, as heavy as Jigglypuff at 80%, but it won’t hurt anybody when attacked in this way. If the knockback doesn’t knock it out of a pit and it lands on a slope, it will slide back down into it.

If Priest Cornello attempts to heal with his Up Special when his rebound meter is two thirds of the way charged, he will absorb a Bowser’s worth of the debris around him, heal 20%, then instantly enter rebound form. If Cornello enters rebound in this way, his mutated arm will have even more gravel around it when he enters that form. This will cause Cornello to shed some of his arm to create a Kirby’s worth of gravel when he hits foes with moves like Side Special that make use of mutated effects on his arm.

If Priest Cornello uses his fsmash or dsmash to create a spike in a pit with gravel in it and he is not in the pit himself, he will instead use his alchemy to fill in the gaps in the ground, terraforming the hole in the ground shut into solid ground, how it was before he terraformed it. Any foes inside will be pitfalled at the top of the ground and take 20%. This is fairly laggy and will need a pretty deep pit filled with debris in order for you to be able to pull it off. This also fills up a third of Cornello’s rebound meter, so if he enters rebound in this way he won’t be able to capitalize on the foe being pitfalled at all. This will give Cornello a “bulkier” arm if it’s the last use of alchemy that makes him enter rebound, identical to the previous paragraph.

REBOUND SMASHES

DOWN SMASH – STOMP OF JUDGEMENT

Rebound Cornello does a large stomp forwards, dealing 20-30% and knockback that KOs at 130-95%. While it’s not the fastest attack, it has superarmor and anti-grab armor specifically on Cornello’s stomping leg, making it easier for him to get the attack’s secondary benefit. Each use of this move makes an indent the height of Mario-Snake and the width of Bowser. The sides of the indent slope down into the pit – you won’t “fall” into this and enter an aerial state at any point, you’re largely just creating slopes with this move. On paper thin platforms/drop throughs, this will bend them. There isn’t really much that needs to be said about the implications of such a move – it’s incredibly beneficial to your boulders, and provides lots of new angles to generate spikes and use your chain lightning. Cornello will run down slopes 1.3x faster with his Side Special. Characters will slide down slopes at Mario’s dashing speed when in prone, making foes who get knocked into prone by a chimera’s pounce more predictable.

For all of the great possibilities this has and how quick it is to use, just keep in mind you don’t want to waste too much of your precious 9 rebound seconds that you take 40% for entering on set-up.

FORWARD SMASH – REPENT

Cornello gets on his hands and knees for the charging animation, furiously gritting his teeth, before smashing his head into the ground. While the move has some very noticeable startup, Cornello has both anti-grab armor and superarmor against attacks that deal 19% or less while in the charging stance and during the move’s start-up. This is extremely powerful on hit, dealing 29-40% and knockback that kills at 90-60% at a 45 degree downward angle, making it incredible to kill foes at the ledge. If the foe hits the ground due to the knockback, they will take a miniature pitfall effect, with their feet getting pitfalled rather than their entire lower torso. They will still take knockback in this state from the move, sliding along the ground, obviously getting freed from the effect if they slide off stage.

Having impaled feet bans the foe from moving or jumping. The foe will not take knockback during this effect (Other than the initial sliding from being hit by the fsmash) unless the knockback would send them at least 3 platforms, in which case the knockback will free them from the ground. After taking the initial hitstun of the attack, foes may attempt to escape this effect at grab difficulty. If a foe uses a leg based attack, the starting lag will be increased by 1.3x, but will cause them to escape the status effect early if they succeed. Using this move again on a foe already smashed into the ground will deal vertical knockback that KOs at 75-40%.

If the foe travels 2.5 platforms or more due to the knockback of this attack along the ground, the pitfalling will be more severe and they will use their regular pitfall animation, unable to attack. This is still only half as difficult to escape as a regular pitfall. If the foe travels an additional 1.5 platforms beyond the first 2.5, they will become completely buried in the ground, with nothing but a pile of dirt to indicate where their character is, with them having to escape at regular pitfall difficulty. Completely buried foes cannot be hit by most attacks, but if Cornello terraforms down with a dsmash stomp he will see them half pitfalled in the ground and be able to attack them normally. Cornello can also stab a spike into the ground and pick the foe out of the ground, impaling them on it.

While the described pitfalling effects are incredibly powerful, few to no stages are long enough to make practical use of this, and the massive power of the attack can work against you by knocking a foe too far away or even off the stage, nullifying the burying effects. This is where you can thank the downward portion of the knockback, though, as foes will stop sliding if they reach the bottom of a pit due to the knockback’s angle. While using this at the bottom of a pit will probably just get you punished as foes will only be pitfalled up to their feet and can still punish you, using it at the top or further away from a slope can let you roll down a boulder or toss a spike down on the foe to impale them before they escape. Because of this, Rebound Cornello actually prefers to be out of a pit most of the time, while Priest Cornello will seek refuge within it at high percentages due to it being harder to KO him and being able to better protect himself with spikes.

UP SMASH – GOD’S PROTECTION

Cornello raises his mutated arm above his head during the “charging” of the smash, causing it to become solid and invulnerable. Like the Side Special, mutations can happen in this move based off the type of alchemy move Cornello used to enter the Rebound Form. If he has extra guns, a few shots will fire out of his arm to juggle the foe lightly in the air above his arm, dealing 8 hits of 1% and flinching. If he has red lightning from Up/Side Special, it will actually crackle a bit above his arm, dealing 10 hits of 1% and flinching while sucking foes in. The reason the lightning isn’t simply better than the gunfire is because there is no hitbox up against Cornello’s arm, meaning while it will suck foes in it won’t hurt those who intentionally come to stand there. A spike, of course, will impale foes and deal 10% to them if it was at least Mario’s height. Having extra debris absorbed into Cornello’s arm will cause any attacks that hit Cornello’s invulnerable arm to cause him to shed an amount of gravel from his arm comparable to the power of the attack – a Bowser’s worth at max and a Kirby’s worth at minimum.

As soon as the charge is released, Cornello moves his arm out of the way, causing anyone standing on it to fall as he goes to do a tremendous headbutt above himself, with the veins in his head visibly pulsating as he does so. The headbutt deals 26-38% and knockback that KOs at 120-75% for an extremely powerful move. This is actually quite quick, too, almost as quick as Dedede’s utilt, the only difficulty being Cornello is so tall it’s rather hard to hit with his balding head. The idea of the move is to catch a foe, interrupt their attack by trigger landing lag supplemented by a mutation bonus on your arm, then hit them with the headbutt when they’re sitting ducks. Of course, the first half of the move is optional and you can just skip straight to the headbutt if you wish.

Note that if Cornello throws a spike into the air, he can catch it with this move in order to impale it into his arm, potentially skewering a foe on it. It can be a nasty surprise to grab a foe with it who thinks they’re safe in the air by producing artificial ground.

PRIEST AERIALS

NEUTRAL AERIAL – DIVINE SHIELD

Cornello performs some alchemy with his cane in order to produce a large amount of red lightning, crackling around himself in a ball shape as a “shield”. This lasts for about half a second, stopping immediately if the brief landing lag is triggered. The shield deals 6% and knockback that KOs at 250% on hit, rather unimpressive for how long and awkward the hitbox is. If Cornello exchanges blows with another aerial with this attack (Due to aerials having no priority system), the foe will take a small amount of extra damage and knockback in addition to the move’s natural power, one quarter that of their own attack. The foe will take their extra damage over time, at a rate of 2% per second. If Cornello hits somebody taking this damage with Chain Lightning, the damage will be “cured” from them and added to the power of the lightning. If Divine Shield is up when Cornello gets hit by Chain Lightning, it will bounce off of him without him absorbing it, and it will count as if it had bounced off of two surfaces, getting a small boost from the Divine Shield.

This move by default fills up an eighth of Cornello’s rebound meter, but if he clashes with another attack it will fill up an additional amount. For each 4% the enemy’s attack did, the meter will fill up by an additional one fifth. With the various Chain Lightning interactions, it’s possible to get a very powerful beam that can get you to Rebound form fast.

FORWARD AERIAL – SHOTGUN BLAST

Cornello transmutes his cane into a shotgun and fires a close range shot in front of himself, dealing 17% and knockback that KOs at 200%. This starts up very quickly making it a very appealing move regardless of long ending lag. The base knockback on the move is very good despite poor knockback growth, making it an excellent way to get Priest Cornello some space or more offensively to knock the foe off-stage to start a damage racking session.

Said long ending lag consists of Cornello taking the kickback of the gun backwards, propelling himself backwards roughly half a platform’s distance. His back is a weak hitbox that deals 3% and knockback that KOs at 500%. This gives Cornello some form of recovery without having to make use of his rebound form, with the hitbox on his back largely functioning as recovery self defense. It may not seem like much, but Cornello can use the move infinite times in the air.

Using the shotgun fills up one eighth of Cornello’s rebound meter, and that can obviously bypass the ending lag. Having the shotgun transmuted into Cornello’s arm when he uses his Rebound Side Special will enable him to shoot the shotgun by pressing the A button, generating the fair’s shotgun hitbox in front of him while slowing down his movement by a third for 0.2 seconds due to the shotgun kickback in order to potentially catch foes off guard. When the shotgun is used with the rebound usmash, no hitbox occurs unless the foe specifically steps onto the shotgun jutting out of Cornello’s arm, at which point it will fire. The shotgun is located on the far side of his arm, enabling him to catch a foe attempting to DI away from where he intends to headbutt.

BACK AERIAL – CANE DRAG

Cornello extends out his cane behind himself and attempts to hook people with the cane’s crook before raking them in to himself, dealing 7 hits of 1% and set dragging knockback. This is a very spammable attack and one of Cornello’s fastest, and it’s an interesting option to spam when it doesn’t raise your rebound meter. At a glance, you would think this move would be terrible defensively due to bringing foes up to Cornello in point blank range. However, if Cornello uses his DI to go towards the foe as he brings them to him, he can go past them and end with them in front of him, in perfect range for his shotgun fair which can create the space you need. This helps a lot just on the stage, but also helps significantly with defense against gimping. Even if the foe dodges the shotgun blast, they’ll be out of your way and you’ll be able to recover back to the stage in safety.

The followup to the bair is so obvious that foes will quickly learn to expect it and will often just instinctively dodge after you get in position for the second move. This can actually be a decent excuse to try to perform set-up in the foe’s face by summoning a chimera if you predict a dodge against an especially aggressive enemy. This is made more practical when you take into account that even if the foe hits you, the chimera will still get summoned. If the foe tries to outspeed your fair with their quickest poke, you can attempt to counter it with the nair.

UP AERIAL – TOWER OF BABEL

Cornello looks above himself and grins as he shifts his cane around to hold it upside down, then starts to extend the bottom of the cane out rapidly. The cane extends out extremely quickly a massive distance, potentially going up 2.15 platforms over .3 seconds if you hold down the button the whole time. The cane isn’t exactly a powerful blunt object by itself, though – the force of the attack comes from the speed at which it’s extending, meaning that it’s more powerful the further it has extended out. Using the move at point blank range is very weak, dealing 3% and knockback that KOs at 270%. At the top of the cane, the power caps out at an impressive 19% and knockback that KOs at 140%.

Keep in mind that only the top of the cane is a hitbox, though, making this awkwardly specific to hit with. The move’s ending lag increases the further you extend out the cane, going for half as long as you extended it out. Cornello will automatically stop extending it if he hits somebody. This fills Cornello’s Rebound Meter by anywhere from 1/16th to 1/7th based off how far he extends the cane, and if it’s the move that makes him enter his transformation will give him extra debris on his arm.

It is very difficult to get the full potential out of this move and it will often go ignored for new Cornello players, but having a pit greatly helps this attack. Rather than getting the foe higher into the air, you can simply get lower down, making the move an excellent way to poke at foes approaching into said pit. Another useful scenario for the move is to punish foes who recover high, who are terrified of your dsmash spike punishing them as they attempt to reach the ledge.

DOWN AERIAL – FALL FROM GRACE

Cornello extends his cane below himself as he transmutes a small spike out the end of it. He goes into a vertical position in mid-air as he goes into a quick stall then fall, headfirst. This move does a fairly unimpressive 11% and downwards knockback that would never kill if it weren’t for the fact it was downwards, enabling it to gimp on rare occasions. If Cornello actually hits someone, he’ll bounce off of them lighly, and after falling the distance of 2 platforms Cornello will automatically exit the stall then fall, making this less suicidal than most. This can actually see some use on-stage despite the horrible landing lag if you have a pit created by Rebound Cornello, as well if Cornello is very high in the air from Rebound Cornello’s Up Special.

This move fills a tenth of Cornello’s rebound meter. If it happens to be the move that triggers the Rebound transformation, it will generate a Mario sized spike out of Cornello’s arm like with the fsmash and dsmash. More interestingly, Cornello will actually transform as he uses the move. This means Cornello will not gain any invulnerability as he transforms, but the hitbox will stay out as Priest Cornello transitions from using his dair into Rebound Cornello’s dair. The cane will get absorbed into Rebound Cornello’s arm, punching downwards. The mutated arm will form very quickly to create the hitbox of the rebound version, with the rest of the body following along over the usual duration of .75 seconds. See the rebound dair for more details.

REBOUND AERIALS

DOWN AERIAL – GOD’S RIGHT HAND

Cornello goes vertical in mid-air and punches downwards with his mutated arm as he descends in an extremely quick stall then fall. Cornello’s fist deals 25% and a spike 1.4x as strong as Ganondorf’s, and his arm is superarmored against attacks that deal 19% or less. The landing lag of this is quite bad, as you’d expect. For a brief moment, Cornello stands upside-down, supported by his arm, before falling over into prone. You can choose which direction Cornello falls over in if he’s not on a slope where gravity dictates which way he must fall, and he will gain complete superarmor and anti-grab armor as he falls. Falling over deals 20% and knockback that kills at 100%. While being on a slope makes you a bit more predictable due to having to fall in one direction, you’ll slide down the slope while in prone to potentially make yourself less vulnerable.

If Cornello has a shotgun in his arm, it will fire in the opposite direction of the one Cornello falls in, generating the usual shotgun hitbox, while causing him to fall over much faster. If Cornello has red lightning, it will crackle and deal 10 hits of 1% and flinching around his arm when Cornello triggers the move’s landing lag, making it take longer but better defending him. If he has extra debris around his arm, a significant amount of it will fall off, a Bowser’s worth, not actually protecting Cornello at all but producing a very large amount of it. The debris gives Cornello further incentive to land in a slope, as it will cause all of to tumble down to the bottom of the pit. If he has a machine gun, it will fire several bullets as he descends during the stall then fall all the way to the ground, dealing 8 hits of 1% and flinching per second to try to stun them for Cornello’s fist to hit them.

If Cornello has a spike on his arm, it will specifically get fired out of his arm towards the ground, tip first, being as powerful of a hitbox as it is when thrown normally and potentially impaling foes who are on the ground. The spike will get impaled into the ground upside down with the flat side pointing up, but assuming Cornello is allowed to finish the move he will smack down the spike with his fist, driving it completely into the ground. Anybody who was impaled by the spike will get pitfalled inside of the stage while taking 29%, though the move’s ending lag means Cornello will rarely be able to exploit their stun. This is more of a way to get the most bang for your buck damage wise than anything else, in case their percentage is still low. In addition, even if no foe was on a spike, this can function as a way to “conserve” your spike so the foe can’t destroy it, enabling you to dig it up later with Rebound Down Special/Down Smash. Cornello will also fall over as soon as he finishes driving the spike into the ground, meaning his hurtbox will be a bit higher into the air during his vulnerable period.

NEUTRAL AERIAL – BALL UP

Cornello curls up into a ball and spins, dealing 12% and knockback that KOs at 170%. This is actually a fairly weak move by Rebound Cornello’s standards, but the appeal of the move is it grants complete superarmor for the duration. The starting and ending lag is quite brief, with the superarmored duration providing the majority of any “lag”. Should Cornello need one in Rebound form due to his size, this is a very good panic button.

While the move’s landing lag is normally bad, if Cornello makes contact with a slope the move will continue as he rolls down it. This provides him with a fully superarmored approach, enabling him to put this move to more offensive use. While spammable projectiles are typically far too weak to be a concern for Rebound Cornello’s health, enemies can use them to stall Cornello’s time in rebound form. Good approaches like this move and the Side Special are needed, as Cornello has no time for such childish games. The Side Special is the better move if you actually intend to hit the foe with the attack, while this grounded version of the nair functions better for clearing space.

FORWARD AERIAL – KICK OFF

Cornello tucks in his legs before shooting them out in front of himself at a 75 degree angle to do a fierce kick at foes with both his legs. The stomp deals 18% and knockback that would kill at 140% if at a more regular angle, but it’s more comparable to a spike when it goes down at the same 75 degree angle as the kick. The move is about as laggy as Ganondorf’s down aerial, and looks a bit similar to it. While the move is aimed downwards in addition to forwards, most enemies are so short in comparison to Rebound Cornello the move’s aim is doing you more of a favor if anything.

If the landing lag is triggered during the stomp (Not when Cornello tucks in his legs), Cornello will kick off the ground, propelling him at the same angle backwards into the air a platform with almost no lag at all. Despite having no bonus superarmor, the move is a surprisingly safe one to use against grounded opponents. Cornello tucking in his legs at the beginning will remove the portion of his hurtbox that grounded foes could reach, and should foes dodge he’ll kick off the ground back into the air by the time they come out of said dodge.

The move has some interesting applications on slopes. Obviously you can just keep your back to a slope to avoid hitting the ground, but kicking off the slope can allow you to propel yourself at different angles, with spikes providing even more variety. You can potentially punish people for rolling by kicking off one side of the slope to the other, then rolling down on top of them with the nair, all while staying fairly safe and not over committing yourself.

BACK AERIAL – ELBOW DROP

Cornello extends out his arm behind himself as he turns to look behind himself before attempting an elbow drop on the foe with his regular arm. Most of this move’s rather large lag is in the start-up, though Cornello’s upper torso gains superarmor against attacks that deal 12% or less after the first 10 frames of the move until the hitbox comes out. On contact with Cornello’s elbow, the foe is powerfully spiked, taking 23% and a spike 1.5x as strong as Ganon’s dair straight down.

While the move normally has very little ending lag, the landing lag on the move is quite extensive. Triggering the landing lag during the starting lag will speed up the move and cause the hitbox to spawn as Cornello elbow drops the ground, though Cornello will be suffering lag longer than the starting lag while on the ground.

While both versions of the move have obvious weaknesses, using this move next to a ledge or slope can make it more threatening as you don’t have to immediately commit to one or the other. If using it next to a slope, you can DI away from the slope towards the hole in the middle to keep it going if you predict a dodge. If using the move next to the ledge, you can do something far simpler – cancel the move by grabbing the ledge. If Cornello hits the ledge during the starting lag/hitbox animation, he’ll slam his elbow against it as he grabs it with his fist, spiking anybody on it without ledge invulnerability. This technique can be an excellent transition from Priest Cornello’s edgeguarding game – the priest knock the foe off the stage and transform while they make their way back to not allow the foe any free set-up time, then Rebound Cornello can attempt to wreck the foe who’s likely most of the way back by that point with his bair on the ledge.

UP AERIAL – GRIND TO DUST

Cornello turns to face the fore/background as he raises his hands above his head. His regular arm gets ready to catch the mutated one as it winds up the punch, then it smacks into Cornello’s open hand with great force. This performs yet another spike, dealing 12% and a spike on par with Rob’s dair. While Cornello has his usmash as an excellent defense against enemies approaching him from above, his uair allows him to knock foes back down into his comfort zone if he wants to take the extra risk for a more offensive approach with potential follow-ups. Cornello is very aware of how large he is in this form, and is intelligent enough to aim most of his attacks towards the ground to hit the pipsqueak SSB4 newcomers.

The move has a large amount of freeze frames when Cornello hits a foe with this move, “stunning” both him and his enemy in place. Rather than for dramatic effect, this is done so that an effect from Cornello’s mutated arm may be applied to the foe after hitting them. The machine gun simply adds an additional 9% as a few bullets are shot out of Cornello’s palm at the foe during the frames.

The red lightning will apply itself to the foe, leaving Cornello’s arm as it shocks the foe squished between his hands, but treating the foe as if they had been hit by Priest Cornello’s side special after it’s already bounced off two entities. If Cornello is going to downshift back to his regular state soon, there’s little better use he can make of it than this.

If he has extra debris in his arm, then a Wario’s worth of debris will get knocked off of his hand that will fall down after the foe as they take their knockback, briefly becoming a hitbox that deals 8% and knockback that KOs at 190% on the way down as an obstacle before losing its hitbox status. The debris gives Cornello some pressure on the foe to assist in his follow-up.

If a spike is growing out of Cornello’s arm, the foe will knock the spike off of the arm due to how forcefully their body is shooting downwards from the primary attack. Based off the size of the spike, the foe will take an additional 2-6%. If the spike was at least as tall as the foe was wide, then only a portion as large as the foe’s body will be taken off of his arm. The foe will enter prone on top of this spike, and if the spike hits a slope it will slide down it to the bottom at a fairly brisk pace. If the spike/foe is very small, it’s possible they’ll be able to destroy it on the way down with a get-up attack. Perhaps most impressive is the move’s potential off-stage, as the foe will have to get up from prone before they can attempt to recover. Of course, the foe will be granted the use of their first jump due to having ground to jump off of, but it’s a very respectable trade. If the spike is at least as wide as Mario, Cornello will be able to kick off of it with his fair, enabling him to quickly come back after the foe if he misses his gimp attempt.

The shotgun will attempt to shoot the foe as they get knocked down and fly past Cornello’s arm, just as powerful as it usually is dealing 17% and knockback that KOs at 200%. The shotgun generally fires too quickly before the foe is sent down to it, meaning that Cornello will generally want the foe at a high percentage. Fall speeds and weight factor into the equation of how fast the foe will reach this point – one thing Cornello can do to have some control over this is to perform the move inside of a pit of gravel, which will greatly increase the foe’s falling speed. Inside of a pit, the foe also won’t get knocked as far away by the high knockback when they hit the side of a slope, allowing Cornello to better pursue them.

PRIEST GRAB-GAME

GRAB – CHOSEN EMISSARY

Cornello extends out a hand for one of the best physical grab ranges by Brawl standards, but with awkward lag attached comparable to Falco’s grab. Upon successfully grabbing the enemy, Cornello restrains the foe by putting a hand on their shoulder.

Cornello can grab chimeras, allowing him to perform transmutations on them with his throws. If a foe is within range of the grab, Cornello will of course ignore any chimeras, so you don’t have to worry about them getting in your way.

PUMMEL - TRANSMUTE

Cornello’s hand pulsates with red electricity, dealing 0.5% per pummel in a spammable pummel on par with Lucario’s. Each pummel fills Cornello’s meter by 1/20th, serving as a way to potentially transform while having the foe already grabbed. The grab escape difficulty increases to 1.5x during the time Cornello is transforming, though even with this buff foes will generally always escape before you reach your second form. This is still helpful against foes who benefit from set-up time, though, as you can prevent them from making use of that time while you transform.

Used on a chimera, this will heal it by 0.5% with each use of the pummel while filling up your meter at a slower rate, 1/25th per pummel. Normally when transforming with the pummel, you will just gain lightning as your arm mutation. If you have given the chimera some kind of transmutation with your throws and then transform, though, Cornello will absorb the chimera into his arm and gain all mutations they have on his arm. If the effects of the transmutations would contradict each other in moves such as the Rebound Down Aerial, only the effects that can stack together will happen. While having all of the Rebound effects on a move such as the Up Smash may sound very powerful, keep in mind the chimera is quite easy to kill as you just waste time giving it transmutations with throws, this will kill that minion, and you’re only gaining these effects for 9 seconds anyway.

FORWARD THROW – EXECUTE

Cornello stabs the foe with his cane, knocking them into prone, then steps on their torso as he transmutes his cane into a shotgun. He then shoves the shotgun into the foe’s face before firing, dealing 11% and with knockback that kills at 250%, but very high base knockback. While the knockback will most of the time appear to be horizontal, it is actually at a 45 degree downward angle which can knock foes into slopes, and, more importantly, score kills when used at the edge. While this requires very high percentages to kill outright, it is Cornello’s single best move for beginning an on-stage gimping session. Cornello’s ability to make spikes come out under/the side of the stage if the foe is next to them can actually be useful in this scenario.

Cornello knocking the foe into prone at the start of the move may at first appear aesthetic, as the following shotgun blast will knock the foe out of prone immediately. If you knock the foe into prone on a slope, though, Cornello will slide on top of the foe briefly before firing. This enables Cornello to get into a pit while firing the foe out of it, serving as a superb reset into a defensive position. Be aware this powerful new attack gives a lot of ending lag, so you’ll have to cover for the Chimera during its downtime. The move fills up 1/10th of Cornello’s rebound meter.

If this is used on a chimera, Cornello will transmute a shotgun barrel into the mouth of the lion. When the lion bites the foe, they will fire the shotgun, dealing 17% and knockback that KOs at 200% like in the fair. The kickback of the gun blast will knock the lion back a platform’s distance. Aside from a generic buff to the lion’s attack, this can help lions recover when suicidally chasing foes off-stage, as foes will inevitably attempt to bait them for easy kills in this way.

BACK THROW – SMITE

Cornello channels yet more red lightning into the foe before sending an elongated blast of lightning to knock the foe behind him to deal 5%. This does a minimum knockback of a platform, after which point the foe will take knockback that KOs at 190%. Beyond the initial 5%, the foe will continue to crackle with red lightning for 10 seconds, during which time they will take 1.4% per second. If the foe hits another character or minion while they have this status effect, though, it will instead be passed on to that character. If Cornello can keep away and evade being hit for all that time, though, he’s looking at a damage output of 19% for pulling off this throw.

While this only fills up a mere 1/12th of Cornello’s rebound meter by itself, if Cornello hits the foe with Chain Lightning their damage will simply get added to the beam’s power and they will lose the ability to pass it around by hitting people. Not only does the foe have to go out of their way to hit Cornello, but they have to evade Chain Lightning on the way. While they can quite easily pass it off to a Chimera, this will grant Cornello the ability to easily “collect” the power of the lightning by hitting his minion with the Chain Lightning. Obviously using this throw on a chimera directly will just apply the effect to the chimera immediately, with the end goal of getting the chimera to land an attack on the foe to spread the lightning.

Not only does the foe have to watch out for Chain Lightning as they come to pass the lightning to Cornello, but Cornello’s nair can block the passing of the lightning to some degree. If a foe with this status effect hits Cornello, they will not pass the effect to Cornello but will instead have a quarter of the damage of their attack added to the length of their effect. Adding in the regular 1/4th of damage a foe instantly takes from attacking Cornello in his nair, and they’ll eventually be taking half the damage of their attack in total.

UP THROW – SOLIDIFY

Cornello transmutes a geyser of sand 1.2x Ganon’s height up underneath the opponent to propel them into the air. This deal 13 hits of 1% and pushing knockback into the air, with the last hit dealing vertical knockback that kills at 260%. While the knockback is weak, the sand geyser will push the foe up 1.3 platforms before they even take said knockback. Cornello’s rebound meter will fill up by 1/8th for performing this attack.

As the foe rides the sand geyser, some of the sand will stick to their body and start to harden into stone, encasing small portions of their body. This will give the foe the effect of traveling in debris from the Rebound Down Special, decreasing their dash speed by 1/4th and increasing their fall speed by 1.5x. This can stack if the foe is standing in actual debris. Foes can knock off the debris by attacking it like a leeching Pikmin, with the debris having 10 HP. It will take the knockback of the foe’s attack as they knock it off and become a small amount of regular debris after that point. If you used the move in a pit and foes attempt to remove their debris immediately, it will more than likely roll down into said pit as a nice small bonus.

If used on a chimera, they will have to have the debris knocked off of their bodies. Aside from creating debris, this serves as a small buff of 10 HP to the chimera, as they will not take damage from attacks that knock it off of them. The debris will be primarily located on the chimera’s torso and will function as a drop-through platform. If a foe comes to gank you off-stage and a chimera is chasing them like the suicidal idiot it is, you can potentially make use of the chimera to recover. Even better is that you can produce spikes on the chimera’s back. When a chimera is leaping at the foe, possibly through your usmash command, you can use the dsmash to make the spike come out from underneath the chimera’s belly to stab at the foe. Be aware if you make spikes underneath the chimera, though, that they will break off when it hits the ground (They can still be picked up by Rebound Cornello later).

DOWN THROW – BED OF SPIKES

Cornello produces 5 minimum charge spikes as powerful as the fsmash/dsmash in front of himself, then slams the foe down into them, dealing 10% and knockback at a slanted primarily vertical angle that kills at 200%. The 5 spikes will stick around as a weak trap afterwards like regular uncharged spikes, dealing 5% and weak knockback.

This throw can be looked at as a “free set-up” throw, but just 5 uncharged spikes by themselves don’t have all that much use. If Cornello uses an fsmash/dsmash where an existing spike that isn’t fully charged, though, it will extend out from the spike that’s already produced. Not only does this significantly decrease the lag, the resulting spike will be better protected by the small spikes surrounding it, largely forcing foes to get rid of them first to get rid of the spike that actually matters, during which time you can attempt a dsmash to extend those spikes. The move fills up a tenth of Cornello’s meter, and if this move triggers Cornello’s transformation he will have a fully charged spike growing out of his arm, combining the 5 smaller spikes into one.

If this is used on a chimera, the spikes will come out of the chimera’s stomach and impale into the ground, rooting the Chimera to that point. This turns the Chimera into a trap rather than a minion, preventing it from killing itself or taking knockback. It can also stay to be in a more reliable position for set-ups/as a Chain Lightning bumper, as well as keep it “safe” if you’re trying to dump multiple transmutation throws into it. The lion’s pounce attack will still be just as powerful, but will just be a swat of the chimera’s front claws in place. Performing a usmash command on a chimera affected by this will have Cornello release the chimera from the spikes with no additional lag. The 5 small spikes can also be unearthed at a later time by Rebound Cornello.

REBOUND GRAB-GAME

GRAB – IRON GRIP

Cornello goes to grab the foe with both his hands. The grab is Dedede’s with 1.2x the range, making it as fantastic as you’d expect. This is only with Cornello’s standing grab, though, as his dashing grab is much laggier, meaning you’ll largely be using the standing one exclusively. While the standing grab is still great, it’s a bit of an issue in making Cornello predictable when he only has 9 seconds to use it.

PUMMEL – CRUSH

Cornello squeezes the foe in a laggy pummel dealing 4%. Despite the power, the lag makes the pummel rather inefficient compared to that of a normal character’s. However, each pummel increases the grab escape difficulty by 1.15x, potentially allowing Cornello to keep a foe restrained if he’s about to deform into his regular form if the foe’s at a high percentage. Of course, the foe can still escape the grab during the time where Cornello changes back.

FORWARD THROW – CAST OUT

Cornello encloses his hands around the foe, obscuring their character model as he shakes them inside of his hands like a pair of dice. He then opens up his hands to let the foe tumble forwards, dealing 9% and strangely weak knockback that KOs at 250%. Foes will briefly enter their reeling animation as if they were footstooled, leaving them vulnerable. Cornello is able to capitalize on this extremely well, as this throw is quite fast, even by the standards of a regular character. Aside from using this as a set-up throw, this makes the throw quite useful when time is such a valuable resource for Rebound Cornello.

Cornello’s height means when he releases foes, they won’t immediately go and tumble along the ground with downward angled knockback, starting in the air. Outside of very low percentages, though, foes will hit the ground so quickly that Cornello won’t be able to make use of the footstooled effect. Sending them into a pit from the outside will keep them ripe for punishment for long percentages to come, though. The move can even set-up for the kill, beginning a gimping session at the edge.

UP THROW – ASCENSION

Cornello restrains the foe in such a way to perform a suplex on them before leaping high, high into the air at a speed a fair bit slower than his grounded Up Special. He goes up into the Smash Bros “magnifying glass” at the top blast zone like Kirby’s throw before coming back down to the ground, dealing the foe a minimum of 10% and knockback that KOs at 190%. The more distance Cornello had to travel to reach the top blast zone with this move, the more powerful the move becomes. Each Ganondorf traveled increases the power of the move by 4% and makes the move’s knockback to KO 10% sooner. Cornello will fall through drop through platforms on the way down.

This will be Cornello’s strongest throw in raw power if used in a pit, but starting the move on lower ground causes the move to take longer. While lag on throws is not normally a concern in 1v1, it means Cornello will have to aggressively grab at the foe early on in the transformation, and in a pit no less, if he wants to pull off the move with the full potential. While the knockback buff is nice, you’re mainly in this throw for the damage, as being lower when the foe actually takes their knockback somewhat negates the knockback boost anyway.

DOWN THROW – BURIAL

Cornello throws the foe to the ground, dealing 4%, leaps up and stomps on them with both feet, dealing 6%, then does it again for another 6%. This throw creates a Ganondorf deep “pit” as if Cornello had used his Rebound dsmash on the location of the throw, and will leave the foe at the bottom of that pit in the prone position. Due to foes sliding down the sides of a pit while in prone, it makes foes rather easy to tech chase if they attempt to roll up from the position, with Cornello’s primary techchasing moves being the nair and fair. The nair will enable Cornello to ignore get-up attacks with his superarmor and quickly roll to either direction the foe rolled, getting beaten out by the foe just standing up from prone immediately.

Aside from providing offensive pressure, which the move is great at, the move is very key because it enables Cornello to set-up while still attacking the foe. While this is something any character with set-up would love, Cornello screams for a move of this kind with his very strict 9 second schedule.


BACK THROW – OPEN ARMS

Cornello holds the foe in one hand before extending out both of his arms and spinning in place. After building up some momentum by spinning for some lag, he releases the foe as the arm holding them goes behind where he was originally facing, sending them flying with 12% and knockback that KOs at 130%. This is Cornello’s direct kill throw, and will deal 20% and knockback that kills at 110% to outside foes in a FFA.

Cornello’s height enables this move to become very convenient for him. While the knockback foes take is horizontal, they’re elevated to Cornello’s shoulder height before they take it. Cornello’s pits often won’t be that deep, meaning they’ll be lower than Cornello’s shoulder height. This lets you knock a foe directly out of a pit with a KO move without having to resort to something like vertical knockback, which will be penalized by the foe being lower down in the stage due to being in a pit. In the event you have a pit that’s so deep Cornello can’t throw the foe out of it with this move, you’d want to be using the uthrow anyway.

PRIEST STANDARDS

JAB – QUAKE

Cornello taps his cane on the ground, causing the ground a platform’s distance in front of himself to lightly shake. This is not forceful earthshaking that knocks people into the air – it simply slows the movement of enemies by a quarter while dealing 9 hits of 1% per second. This doesn’t flinch enemies, but every fourth hit will always cause enemies to trip as a small ripple goes through the ground. Each of the 9 hits per second fills Cornello’s rebound meter by 1/60th.

Simply using this on foes approaching you will cause anybody with half a brain to jump, or simply roll past the ripple as it shows up. This move has very little lag, though, with the portions of the move that aren’t the tripping essentially functioning as the move’s “lag”. Using this on a foe not impeded in any way can be used to try to bait some kind of punishable action.

Where the move truly shines is on opponents that are coming out of the air. You can “charge” the move in advance to trip them the moment they touch the ground, getting foes who recovered high ready for punishment. This will also wrap around edges to hit the ledge. The damage will still hit foes with ledge invulnerability, while the ripple will deal light downwards knockback to hit foes off the ledge if it connects.

DASHING ATTACK – RUN AND GUN

Cornello stops using his cane as a walking stick in his dash, lifting it up and transmuting it into a shotgun as he turns behind himself. The move deals 11%, with the usual knockback that KOs at 200% with high base knockback. Even should the move miss, it’s useful for running away considering it propels Cornello forwards a little under Bowser’s width. Cornello’s body deals 3% and knockback that kills at 400%, just so you don’t look like an idiot when the foe rolls in front of you with the move. This is a keep dashing dash attack, enabling Cornello to fire behind himself at will when fleeing from enemies. Cornello’s dash will be slowed briefly as he transmutes his shotgun back into a cane to prevent the move from being a faster method of transportation than just dashing normally.

The frail Cornello will fall onto his stomach when this move is used on a slope due to the force of the kickback. This can actually assist Cornello by enabling him to “dive” back into a defensive position pit, as sliding down a slope is faster than his rather crippled dash speed. The move also fills 1/8th of the Rebound meter, meaning if Cornello transforms because of this move he can potentially slide down a hill to “chase” a foe while transforming.

FORWARD TILT – HAND OF GOD

A hand of earth rises from the ground in front of Cornello. It arcs forwards as the “arm” behind the hand extends with it before coming back down to smash into the ground in an “arch” shape, hitting foes about a Wario width in front of where Cornello was standing. The hand is a hitbox throughout, dealing 6% and knockback that KOs at 275% in the direction the palm of the hand was facing. The hand and arm crumble to dust after the move is completed.

Cornello can hold down the A button to enable the arm to extend upwards further before completing the arch. At maximum, this will cause the hand to reach 1.5x Ganon’s height into the air and hit 1.2 platforms away from Cornello. This is impressive in how fast it is, but of course leaves a gaping blindspot on the ground for the move. The higher the hand was before it started to come down, the more powerful the move becomes as it does so, dealing up to 14% and a spike on par with Rob’s dair. Cornello gains anywhere from 1/16th to 1/9th of Rebound meter, gaining it progressively as the move “charges”.

The arc of this move provides useful for a multitude of purposes. It’s great at hitting enemies approaching downwards into a pit when you’re lower down, hitting foes jumping over a pit or even just a spike to reach you, and of course serves as an excellent punisher at the edge, especially on enemies recovering high.

UP TILT – SAND GEYSER

Cornello taps his cane on the ground, then .4 seconds later a geyser of sand 1.2x Ganondorf’s height erupts at that position. The sand geyser deals 13 hits of 1% and flinching as it pushes foes to the top of itself, with the last dealing vertical knockback that KOs at 260%. Cornello is free to move after the move’s very brief lag, waiting for the geyser to show up. If he taps the ground with his cane in the same position before the geyser shows up, it will double the height the geyser goes up and add an additional 5 hits. Foes will go up the taller sand geyser more quickly so they can’t just DI out. While the knockback is terrible, it can be enough to eventually kill enemies when they’re taking it at the top of multiple sand geysers. The move boosts the rebound meter by 1/16th.

While Cornello can only stack 2 sand geysers in the same position with this move alone, he still has enough time to grab a foe. If Cornello performs his uthrow when a sand geyser is about to erupt, the uthrow and utilt(s) will combine their power as if the uthrow was a “bonus” utilt. The uthrow will also cause additional portions of the foe to solidify. Each extra sand geyser will slow the foe’s movement by an extra 1/6th, while their falling speed will be increased by an additional 1.2x. Each extra portion of debris hardened on the foe’s body requires them to knock it off with an additional attack, creating another portion of debris to boot.

The utilt takes much too long to start-up to use as an offensive measure in most cases, and actively attempting to get the utilt/uthrow combo is laughably predictable. It functions as a great defensive measure, though. If a foe is approaching and about to reach you, you can use the utilt and step behind it to use it as a barrier. Even if the foe will get past the geyser before it erupts, you now have a big juicy reward to grab them at that position as they inevitably come past it. You can stack both utilts in the same position if you’re feeling overconfident, but placing two geysers slightly away from each other foes to approach you from will give you significantly more leeway in where you land the grab. Note that the geysers will erupt directly upwards regardless of whether or not they’re on a slope.

If a spike is buried underground for any reason (Caving in the ground with rubble, driving it in with rebound dair, etc), using the utilt or uthrow will cause the spike to get shot up out of the ground. The tip is just as powerful as always, and it will hit anybody hit by the geyser. The geyser will also cause the spike to flip over as it reaches the top, causing the spike’s tip to still be a hitbox as it comes back down. Larger spikes will retain their solid status during all of this, so even if the foe isn’t hit it will prevent foes from immediately rolling past the sand geyser, getting caught in it as their roll gets stopped short. Rather than just “running”, this version of the move largely will just have Cornello wanting to dance back and forth where the eruption happens to bait enemies.

DOWN TILT – QUICKSAND

Cornello causes the ground a Wario’s width in front of himself to start sinking for a very brief period over .4 seconds before making the ground solid again. Any foes hit by this attack will take 8 hits of 1% and flinching over the course of it before getting their feet stuck in the ground. Foes can still attack/dodge/etc from this position, but not move or jump until they either escape at grab difficulty or use a leg based attack with 1.3x the starting lag. Taking knockback from this position that would knock them back a platform or more will also release the foe. Using the move on a foe already caught in this effect will deal them knockback that KOs at 220%.

The most obvious follow-up to this attack is an fsmash or dsmash, as even if the foe dodges the primary hitbox they will automatically be hit by the spike tip’s passive hitbox afterwards, while also granting you a free spike in the process. The move fills 1/6th of Cornello’s Rebound meter, and if he hits a foe and transforms it’s ideal since they’ll be delayed from running away from him while he hulks out.

The move will cause spikes in the area of effect to sink into the ground Mario’s height. Larger spikes will still keep their HP despite looking like shorter spikes, and this actually makes them more obnoxious to destroy as foes have to aim multiple attacks at the ground. You can also bring spikes completely underground for you to use with either your utilt or Rebound Cornello. The move is particularly nice to use against a foe on the opposite side of a spike as yourself, as the spike should ideally block some of their attacks as you use the dtilt before functioning as ammo in a utilt followup. When the foe’s locked in place, it also becomes much more feasible to perform the utilt/uthrow combo.

REBOUND STANDARDS

JAB – STREGNTHEN FAITH

If the button is simply tapped, Cornello will punch forwards with his mutated arm, quickly dealing 9% and knockback that KOs at 160% in a very reliable spacer. If Cornello mashes or holds down the A button, he will flex his mutated arm for the duration, powering up the punch to come. Cornello can charge the punch for up to a second. At max charge, the punch deals 19% and knockback that KOs at 90%.

Based off what Cornello has on his mutated arm, different effects can happen if the move is charged. The shotgun is the simplest, with it firing as the punch goes off in the opposite direction in order to make the force of Cornello’s punch more forceful and have 1.3x the power. This slightly increases the ending lag, but the shotgun will not fire if the move is uncharged.

With rubble on his arm, it will fall off it as he charges, creating falling hitboxes below his arm in front of himself that deal 12 hits of 1% and flinching over the charge’s duration, stunning foes for the punch. If Cornello releases the jab and punches as the rubble is falling, he will instead knock some of it forwards 2.5 platforms as a small stream of projectiles.

A spike on Cornello’s arm will get shot up out of his bicep during the charging, skewering enemies as if it were thrown. You need larger charge to shoot larger spikes out of your arm, requiring full charge for a fully charged spike. The spike will skewer enemies like when picked up and thrown, but will go much faster (In exchange for more lag and having to go straight up). When a foe is approaching you from the front in the air, this gives you responses for if they both jump towards you directly or over your head entirely. Charging the move can also function as a decent fake out as you fire off the move early in order to avoid shooting your spike.

If Cornello flexes with machine guns attached, the pressure put on them will cause them to explode if the move is fully charged, dealing 23% and knockback that KOs at 70%, while dealing Cornello a minimal 5% in recoil penalty. The hitbox will be Cornello’s entire arm as he releases the punch and will linger for quite some time. If you only partially charge the punch, the guns won’t instantly “cool down”, only doing so completely after 3 full seconds. This enables Cornello to somewhat “store” his charge, and makes slightly charged spams of the jab a lot more scary for the foe and gives you some degree of leverage by charging the attack. This obviously uses up the guns, but if you work up the charge gradually and use it as a threat it will last most of your transformation time anyway.

If Cornello has lightning in his arm, he will jut out his palm instead of punching forwards with a fist. This decreases the physical power of the attack by 1/6th. While charging, Cornello’s flexing arm deals 4 hits of 1% and flinchig throughout to slightly cover himself, then Cornello channels channels the lightning into his hand upon releasing the jab. This will cause the lightning to shoot out of his palm at a 45 degree angle towards the ground. The power of the beam is the same as the one that he used/absorbed in order to enter Rebound form, requiring a minimum of half charge to fire off, and increasing the power of it by up to 1.3x at full charge. This will cause Cornello to lose the lightning in his arm unless he manages to reflect it back to hit himself, and this becomes significantly easier for Rebound Cornello due to his size. Foes will actively seek to shield this attack at times in order to make it bounce off of them into the air harmlessly.

DASHING ATTACK - RAM

Cornello kicks off the ground to propel himself forwards, attempting to headbutt his opponent. Cornello will travel the distance of 1.3 platforms along the ground before falling into prone at the speed of Captain Falcon’s dash. His head deals a powerful 17% and knockback that KOs at 100%, and on hit Cornello will fall on the ground into prone early. This move has very little lag, with the penalty being forced into prone. This is certainly much better than ending lag, though. Cornello is very wide when he lays on his stomach, so unless he attempted to hit a foe at point blank he will likely be able to hit that enemy with a prone attack if they dodged the headbutt. If you want to hit foes farther back, you can use the move on a slope and slide back to them as you use the prone attack. Also note that Cornello will continue sliding while reverting his transformation, so this can help you to continue to control your movement.

If Cornello ends the move in the air, he doesn’t enter prone and basically doesn’t experience lag with the move. This makes the move a very scary ones for foes attempting to travel over the top of your pit, and can also just be used for outright transportation. The move can also of course provide an excellent transition into your off-stage game.

FORWARD TILT - PRAYER

Cornello claps his hands together in front of himself, attempting to crush his enemies. Contact with his hands deals 11% and knockback that KOs at 135%, with fairly high base knockback. This is one of Cornello’s best attacks in terms of the speed/power ratio, functioning as one of his most mindless and spammable spacers with his giant body providing it excellent range. Unlike Bowser’s ftilt, Cornello’s hands don’t have to magically enlarge.

If Cornello claps his hands on a spike, he will shatter it, causing the remains of it to fall out of his hands in the form of rubble. The rubble deals 4-12 hits of 1% and flinching as it falls based off the size of the destroyed spike. While weak, the ending lag of this move is short enough to follow up on foes getting hit by the rubble. The solid nature of the spikes before they are broken can also serve to catch rolling foes – if they roll into the spike and dodge the clap with it, they’ll get caught by the rubble.

UP TILT - PURGE

Cornello raises his arm behind his head before punching the ground in front of himself, dealing 12% and knockback that KOs at 140% at a 30 degree angle downwards. This creates a hitbox that spawns immediately above and in front of Cornello with nearly no lag whatsoever before it smacks down in front of him. The speed is still acceptable to hit grounded opponents, though the move is merely average against them rather than something exceptional. While the move doesn’t hit directly above Cornello, he’s so tall that you can generally bat enemies out of the air with this attack as they attempt to reach that point. The move of course also works well on opponents on a slope above you or those recovering high.

When Cornello’s fist hits the ground, a platform sized earthshaking hitbox will show up in front of himself comparable to the Priest’s jab. It lasts a second and deals 9 hits of 1% with no flinching, with the fourth hit tripping enemies. Just this alone isn’t nearly enough reason to use the attack, but it’s possible to knock foes into this with the punch at lower percentages. At higher percentages, this can still be accomplished by hitting enemies at a higher position on a slope than yourself. You can also get a small amount of mileage out of this by hitting a foe downwards off the stage with the punch, forcing them to take a small bit of bonus damage on the ledge when they come back.

DOWN TILT - DRAG

Cornello reaches out his hands in front of himself, then drags his hands back to himself as digging his fingers into the ground a bit. This deals 10 hits of 1% and weak set knockback back towards Cornello. The move will “wrap” around slopes rather than Cornello just dragging his hands through open air. The move is primarily to catch enemies attempting to just flee Rebound Cornello to stall out his timer, as it’s quite a fast attack. Even if foes don’t just run for the entire duration, running for the last couple of seconds can be a viable tactic. The move’s ability to “wrap around slopes” also applies to edges, enabling Cornello to easily hit foes attempting to plank his Rebound timer.

If Cornello wraps his hands around a boulder, he’ll bring it in to himself as you’d expect, taking a bit more lag. As he brings in the boulder, it will be a hitbox that deals 8% and knockback that KOs at 200%. If the boulder is in a slope, it will take longer for Cornello to bring it to himself and it will not be a hitbox, but Cornello can release the boulder at any time with another press of A. This makes the boulder a fair bit less predictable.

PLAYSTYLE SUMMARY

Cornello’s transformation is unique in that it can be seen as something of a “power-up”, despite having a complete moveset to call its own. Despite being such a boon, mindlessly transforming into it whenever possible is obviously a terrible idea when so much self damage is given to him. There are many moves and situations throughout his massive toolset that serve as good transitions, such as camping with moves that build up the meter and transforming as they reach you or transforming as you knock them off the ledge. Early on in the match, Cornello will probably just want to transform once primarily for set-up purposes – a dsmash or dthrow is mandatory, and a boulder or pile of rubble are nice bonuses. While Cornello can score kills fine as the priest, he will be relying on the Rebound transformation more and more as the match progresses regardless. The extra damage will matter less when Cornello’s damage is already high, and he will want to stay in the form primarily for the weight and recovery it provides, essentially making him invincible.

The many defensive moves available to the priest can allow him get set-up as you’d expect from a typical character of this archetype. While that’s nice and he will use them for that purpose to a degree early on in the match, most of his set-up is designed to work fairly well in the face of combat. The spikes are the most obvious example, but foes can’t even interrupt the summoning of Cornello’s chimeras. Beyond just set-up, though, Cornello needs his massive arsenal of defensive moves in order to survive at the stupidly high percentages that he’s going to reach. If foes want to kill Cornello in his Rebound form, they’ll have to take him to ridiculous percentages, at least 200%. Cornello needs to be able to survive long enough when he reverts back to the Priest to regain Rebound status, as well as be comfortable enough to actually do anything when he does. While Cornello’s Chain Lightning won’t have much of anything to bounce off of at low percentages when a normal character would actually want healing, late in the match there should be countless targets to extensively heal him and fill the Rebound meter. While the priest doesn’t particularly care whether he’s at 180% or 200%, it can actually be enough to enable the Rebound form to survive. With these insanely high percentages, the priest will want to be in the pit just to make himself harder to kill, let alone the new opportunities it provides for his attacks. Going out of his way to survive for as long as possible also means he will inevitably get some great set-up towards the end of his stock, worth going for since everything he does reverts to normal on his death.

Cornello’s favorite place for the foe to be when he goes on the offensive actually isn’t in a pit, but off the stage. The priest enjoys the foe being there for his opportunities to damage rack directly with the Machine Gun or give easy surfaces to bounce off his Chain Lightning to power it up, then punishing them horribly whether they come to the ledge or recover high with his multitude of options. The priest doesn’t expect to kill when he knocks his opponent off the stage, he just intends to impede them for as long as possible. This is also the most obvious opportunity for Cornello to perform set-up with absolutely no risk. One of the most popular forms of “set-up” is to transform into Rebound form. The Rebound form still loves to see the foe off the stage, but it has much more evil intent as it directly gimps foes or, in the least, horribly punishes them as they land back on the stage.

PRIEST FINAL SMASH - CRUSADE

Cornello summons five of his followers with comparable size to himself. They weigh as much as Captain Falcon and have 50 HP. Their attacks consist of Priest Cornello’s Machine Gun and his shotgun fair, though they’re able to use the shotgun on both the ground and in the air. This provides plenty of projectile clutter and huge fodder for you to bounce Chain Lightning off of, with the Final Smash lasting for 10 seconds.

If Cornello enters Rebound form while his minions are out on the stage, though, he will absorb the guns of any minions within a platform of him into his arm. This will give him access to the shotgun and machine gun at the same time, and increase the amount of hitboxes produced by 1.5x for each pair of guns he absorbs. All of Cornello’s minions will flee the stage and kill themselves upon his transformation.

REBOUND FINAL SMASH – GODHOOD

Cornello attempts to perform further transmutation while already in his rebound state. This increases his size and weight by an additional 1.5x, and causes his entire body to mutate into a black mess of alchemy like his arm. Cornello’s entire body is now solid, and every 2 seconds, a mutation will come out of Cornello’s body at the position nearest to the foe. If the foe is right up against him, a shotgun will jut out of his body and shoot the foe as powerfully as his fair. If the foe is within the distance of a max charged spike, one will jut out at the foe. If the foe is further away than that, a machine gun will sprout from Cornello’s body and fire in the foe’s direction for one second. After 9 seconds of this, Cornello will revert to his priest form.
This has way more effort put into it than it should have! LOOOL
 
Last edited:

FrozenRoy

Smash Lord
Joined
Apr 26, 2007
Messages
1,268
Location
Las Vegas, Nevada
Switch FC
SW-1325-2408-7513
The end date of Make Your Move 16's Submission Period is now being announced! Make Your Move 16's Submission Period will end on April 10th at roughly midnight pacific standard time! Please try and get your sets in before then!
 

ForwardArrow

Smash Ace
Joined
Aug 17, 2011
Messages
503
Jack Atlas
I'm not entirely sure if you're viewing the thread anymore, but regardless given I've always been interested in what you could do with a duelist character in Yugioh, I find this set kind of interesting. The problem mostly just comes in the implementation, there's no real indication he's using cards to do a lot of these actions, which could maybe be excused at points when he's just summoning monsters to assist him, but it gets really bizarre when he spontaneously turns into the Big Piece Golem and starts shooting laser beams for reasons that are rather hard to understand. Some of the effects are also rather bizarre too, I kind of like that you go for a theme with the specials with all the risk-reward of the attacks, but I'm pretty sure his ace monster spontaneously exploding and hurting Jack 8 seconds after its summoned is not in the least bit in character for him or the monster. The dimensional travel also feels very out of place next to the other specials as it doesn't keep the theme at all, and honestly I found the effect a bit hard to really understand, it seems like its mostly just used for stalling? Even the melee attacks end up a bit... unusual at points, what with Jack somehow dealing some pretty solid damage and knockback by, of all things, shrugging. Regardless, I can't say I didn't come out of the set entertained, albeit probably for the wrong reasons, but I honestly think if you were able to reel it in and interpret the characters you make in an even slightly more realistic fashion, you could make something that would pleasantly surprise some people.

Zhu Li and Varrick
Alright Kiwi, let me be blunt with you for a moment when I say I'm a little frustrated at the lack of any real improvement in your style lately, a trait this set exemplifies pretty heavily. Barring the tether special, your specials fail to introduce anything you can play off later and the tether is used entirely to make a move or two into a different attack with the same amount of relevance to Zhu Li's overall gameplan. It doesn't help that some of the specials are flat out bad, the one where you ditch the mech suit gives you an absolutely awful moveset with several inputs missing and the way the mech suit respawns is so abrupt and random it would definitely bother a lot of players from the visuals. Maybe have Varrick supply her with another one, given he does literally nothing in the entire moveset, making you wonder why his background visual is there for anything other than as an easter egg, let alone why the set would be named after him. Honestly though, the set's problems really don't go particularly deep, its just very very bland and doesn't try anything new once you get past the specials, and the specials don't provide anything to give the set real depth or substance to the blander melee. If I had to suggest anything, just read some popular sets and comment on them, and try to figure out what you like about them and implement it. I imagine you do some amount of reading all things considered, but if you're still not seeing it maybe try to be more thorough or analyze it a bit more. You absolutely can write some interesting inputs, Hol Horse actually had some moves I found genuinely enjoyable in there, so I think if you'd learn how to play off them more it'd be great.

Genjo
I'm sure you're not going to be surprised when I say this set is worse than Clawgrip given it was made earlier and with less of an idea how to connect attacks. It honestly isn't bad though, I remember I played with a character modifying the range of their weapon before a long time ago and it was spread over too many inputs and had far too many messy mechanics attached to it. You make it a lot simpler here, with the higher range variations feeling more satisfying and powerful but the shorter range ones benefit from having little in the way of lag, and also being able to be buffed more effectively with the spinning barrier. As far as the actual playstyle goes, its mostly just simple spacing, but at the very least the staff mechanic supplements it fairly strongly and some of the attacks make use of the changing staff size in interesting ways. I'd say more but honestly, its obvious you know how to improve off this from Clawgrip, and this has its own merits in that it has a stronger idea of how to make a melee game interesting.

Nue
Oh its good to see veteran sets again, thank you Froy and Warlord. Nue's main appeal is clearly meant to come from the UFOs, which give something that functions as both a buff and a nerf to foes when destroyed while being a fun pseudo minion that is somewhat controllable through the FTilt. The grab game does have a lot of your cliches in there but they at least feel fun in the context of these UFOs and the darkness, my main problem being I feel like the UFOs were intended to create more depth than it feels like they do, Nue being able to grab them for herself with FSmash is probably something that the set should've played off more. Also on account of how general they are, I don't feel Nue really plays off the existance of these buffs on enemies enough, probably because you don't want to make them too strongly in Nue's favor, but there are still directions I feel you could've take it that you failed too. The set when its not focusing around them just has a fairly generic smokescreen that you try to play off of in ways that at least aren't too frustrating like a lot of mindgame sets, but I've reached the point where I just can't bring myself to care about this kind of mindgame-y material. At least unlike a lot of older smokescreen sets, the opponent can use it too, which is rather nice, with Nue being a bit more suited to use it than the average character. I'm probably coming across as more negative than I intend too because I enjoyed the set, but its not as good as the upper end Naxxamus stuff for me, and its obvious you can do better.

Cornello
I feel like this set is a bit more obvious in its flaws than a lot of your more recent works, with how the spikes feel like they could be used for some potentially scary stunlock-y stuff, and given you were stretched over 46 inputs, a lot of the moves near the end come across as rather strained to add to the playstyle. Its nothing really particularly terrible, but I could see it bugging some people more than it does me. With that out of the way, this is one of your best sets ever and like Leopold way better than your MYM15 works, because it does something I don't feel has ever really been succeeded at before and creates 2 sets that are deeply intertwined with an interesting way to transform between them. The self damage of going into rebound form is something you can try to balance out with proper use of the chain lightning or creating a pit to keep yourself a live for a long time, something I wanted out of Deadpool but it never really succeeded in delivering, but here its pulled off excellently, especially considering the balance is tipped hard enough towards self damage that it puts pressure on the player to create really cool chain lightning stuff and make good use of Cornello's rebound form whenever he takes it. A lot of even the blander moves the rebound form has become really exciting in the context of how little time he gets to use it and the price he pays for entering it, and that's before we even get into the especially good material like the use of the mutant arm and all the crazy things you can do with spikes and rubble and terraforming.

That's not to say Priest Cornello lacks his high points too, as you squeeze a lot out of the basic alchemy mechanics of FMA to transmute interesting effects onto the chimeras while actually giving them highly relevant effects on foes in the fantastic grab game. Its a set that gets very creative with the already existing stuff the character has too, the mutant arm being able to have all those things transmuted into it is likely not something any other source material for this character really brought to light and its not an obvious implementation, but its something that makes sense and is used to incredibly cool effect, giving Priest Cornello a similar amount of care in how he uses his moves to monster Cornello to give you an ideal arm type when the transformation finally does happen. It seems like a very challenging set to play for sure, but its not unintuitive and highly rewarding to play well with the kind of power you can potentially get out of rebound Cornello. This is sounding more like an advertisement than a comment at this point, but this is basically the potential of a highly integrated transformation like N. Brio's, but fully realized and made for modern audiences, and given how much I loved just the idea of having an interesting to achieve transformation that interacts so heavily with what the main moveset does, its really great to see that all fully realized in Cornello.

By the way, last thing but I want to make mention that, small of a detail as it is, the attack names in this set are pretty great for this character, and its pretty hilarious to me the amount of effort put into what is basically just a goofy starter villain, even if it does entirely pay off.
 
Top Bottom