• Welcome to Smashboards, the world's largest Super Smash Brothers community! Over 250,000 Smash Bros. fans from around the world have come to discuss these great games in over 19 million posts!

    You are currently viewing our boards as a visitor. Click here to sign up right now and start on your path in the Smash community!

Make Your Move 16: MYM 17 Starting June 1st

JamietheAuraUser

Smash Lord
Joined
Jan 11, 2010
Messages
1,196
Location
somewhere west of Unova
[collapse=Victini]This is a surprisingly analytical and extremely in-depth moveset for what it shows, almost as though you were starting a thread for an existing Smash character. It's rather crazy that you've gone into this much thought about not only how your own set would play in different areas, but also the different situations in which the moves would apply, and as such is highly respectable. There are some MYM'ers such as myself whom would note a move's uses in the actual attack rather than list them all at the end of the set, but I can understand what you're doing to a degree since the reader will have already read all the moves, not to mention you want them to feel the same way about your set as you do. It's not really a good idea to reference moves before they're introduced though, given we don't know what they do yet.

Most of the moves are simple and easy to understand, and there's not as much "Pokemon Syndrome" as one would think, which is a term used in Make Your Move to describe pokemon sets which take moves from the Pokemon's TM list and translate their effects to a T in which sacrifices the feel of the Pokemon. I think if anything, Victini's playstyle feels especially bare, even for Smash Bros standards, his moveset almost being the epitome of basic without a lot to make him stand out or any move that feels especially interesting, no huge focus in the set - something the playstyle section seems to acknowledge. Even Sakurai prioritizes newcomers based on those who would offer something new to the series. You can go into much depth about how a character would work and have it sound interesting, but sometimes it really doesn't change what's on the surface, what's already there. I know I was that way with one of my sets once, a character for whom I wanted to envision in Smash. [/collapse]
Well, for Victini his single biggest gimmick is the momentum from Flame Charge. You can literally walk away from an opponent during startup, then slow-dash towards them. You can fire off a U-turn and interrupt with Flame Charge at the peak of the rebound to slowly drift away diagonally while preparing to charge straight back at them, or away from them if you so choose. Real mastery of Victini comes with giving your foes headaches in the way he is able to move in the air and on the ground through the momentum abuse of Flame Charge (and Fire Fang during its startup) and the momentum cancellation of U-turn. The main reason Flame Charge and U-turn got mentioned up in the stats section is simply because they're such a core component of Victini's mobility. Without Flame Charge, movement stats like that would be useless on a character with such short reach overall. He simply wouldn't stand a chance, he'd never be able to get in. Instead, however, he's able to clear Hyrule Temple in a hop, skip and a jump to Fire Punch you in the face.

In fact, Fire Fang was one of the first moves I wanted to put on the moveset the way I did. Just this image of this savage but cute little Pokémon spiraling down from the sky with fangs cloaked in flame was what really defined Victini to me in this moveset, even if he doesn't actually learn the move. I've always envisioned Victini as sort of a hyperactive, kind-hearted savage. Flame Charge and U-turn came up as an extension of that, this sort of oddly hyper-aggressive hit-and-run style using momentum to confound and troll his opponents. Flame Burst exploding in a very wide, low-damage burst on the walls and floors even if it doesn't hit directly is another example of that sort of trolling, especially with that slight delay before the explosion goes off just to mess with the foe and lock them in hitstun or shield-stun that much longer, and the super-low damage coupled with that wide area almost makes the explosion add more insult than injury, especially when completely uncharged. Inferno is an example of this as well: it's an impossibly slow-moving block of near-instantaneous death that Victini just sort of places in the air to slowly travel the length of New Pork City over the course of over half a minute. There's something about that that almost makes one feel as if it's not a fiery death spiral but actually one of these :troll: with a hitbox on it casually floating in the air in the middle of the stage. And on the subject of moves that just sit there and annoy you with a massive hitbox, there's his Up Smash. Out of the standard Brawl cast, Victini has one of the rudest Up Smashes around, second only to Lucas in pure disrespect. But compared to Lucas's Up Smash, Victini's has a fair bit more horizontal range, especially relative to his body, though its knockback is significantly weaker at the edges.

Part of the reason Victini seems so simple and possibly even a little shallow is that his moves all have their own slight gimmicks to them. There's no one, single gimmick that defines his entire moveset; the closest thing to that is Flame Charge, his Up Special. And while he does have some simple moves, he's more defined by the less-simple ones. Victini should above all feel both aggressive and mischievous, and while other playstyles such as straight-up camping are a legitimate possibility with him they're not as much in the spirit of Victini and most often not as effective aside from situational use. Despite a preference towards aggressive, combo-heavy play using his ability to attain ridiculous momentum in both a literal sense and the more meta sense, Victini's mischievous nature means he's very versatile and can adopt whatever strategy is most frustrating to his opponent at any given time. Including his own unusual version of spacing, despite his short range on the majority of his moveset.

Victini's playstyle is such that if he doesn't have any particular strategy he's working towards at any given time, he should be throwing pokes from neutral unless facing an opponent whose style specifically discourages that kind of play. He's a firm believer in idle aggression as a default strategy. It's a perfectly legitimate — and even encouraged — tactic for Victini to throw in a U-turn any time he's safe to do so and not otherwise occupied, and it's quite easy for that move in particular to be safe. Any time the foe is in hitstun or otherwise unable to hit you before you can reach them is a legitimate time to bounce a U-turn off of them, especially if they're shielding as it's safe from shieldgrabbing unless they have a tether-grab or similar. The main caveat is that he wants to mix it up a little to keep U-turn from become too stale, as it can become less safe if it's too stale, and also don't become too predictable with it as it can be denied if read too heavily. So don't just spam U-turns. Get a combo off, finish with U-turn. Zone and space with Flame Burst and Flame Charge, bounce a U-turn off them. Maybe just throw a U-turn out there from standing every once in a while. Mess with the timing and the rebound distance to throw them off.

Flame Charge is part recovery, part spacing, part approach, part combo extender, part combo finisher, and all mindgames thanks to the way its momentum works. Find odd times to start it so that you move unpredictably during the startup and come at the foe at varying speeds. Occasionally mix it up and don't attack the foe with it directly, instead using it to approach and hit with some other move, such as performing Flame Charge into the ground to interrupt with a boosted dash and Brick Break. While Victini can use Flame Charge to drastically increase his dash speed and air speed, he can also use it to drastically decrease them by performing a dash or jump out of a particularly slow Flame Charge.

Overall, Victini's playstyle is aggressive in the air and on the ground, but also has an element of versatility that he uses to be disruptive and disrespectful.
 

BridgesWithTurtles

Smash Champion
Joined
Apr 18, 2013
Messages
2,177
Location
The long road to nowhere
3DS FC
3523-2059-7939
[collapse=some comments]
El Jefe
I can see that what you're trying to make here is a rushdown character with a bit of a stance gimmick. El Jefe largely succeeds in being a basic rushdown set, but I'm not sure the thunder specials really have room here. Getting hit just once makes Jefe lose his buff, and I think it's just far too restrictive to be of any use because of that. This would encourage the player to simply restrict themselves to Jefe's more efficient default stance. Jefe's main playstyle focus seems to be an interesting "stay clean" approach to rushdown, in which his goal is to keep himself from being hit as much as possible. His standards and aerials largely accomplish this feat, and Electrical Traps would play well into this concept if the requirements for keeping your thunder sword weren't so demanding, but overall, it is a move balanced well enough to space reliably most of the time. Jefe's thunder mode really should play more into his keep-away game, I feel, so that it's actually worth making use of. Losing the ability to access standards and smashes, let alone so much as jump, gimps the tiger hard, which is sad because his standards and smashes are highly effective at playing keep-away and spacing effectively. El Jefe's a solid first entry for the contest, but I hope it's an indicator of better things to come, both from you and others. That being said, in my opinion, it's your strongest set of the three.

Sheriff Toothpick
You have a solid spacing-focused projectile character here, with an overall statistical composure that works interestingly with this archetype. More character comes out in this set's writing than in the others, I feel. Adding disjoints to a great number of Toothpick's moves makes him somewhat unique and obviously leads well into the intended playstyle. The electrical field move is a unique and interesting one that adds a great deal of zoning prowess to the character, but its infinite range is troubling when one considers how difficult it is for opponents lacking projectiles to beat back this move without getting hit. Moves like Back Aerial are a nice sight to see, adding extra uses for some of Toothpick's attacks while also contributing to his "my range is better than yours" fighting style. The use of the props in the throws doesn't bug me much, but the grab game and aerials so seem to be where the set loses a lot of focus, and it feels like you practically gave up at that point.

The Grizz
This is probably an unpopular opinion, but is anyone really surprised when I say that anymore? I actually think that this may be your weakest of the three, though it does have its merits. While The Grizz is certainly the most ambitious of the trio, it toys with a concept or two, and mostly, the execution is hit-or-miss, depending on the move or scenario. As others have said, I have no idea what's going on with the rocky wall, but I'm not sure it really meshes well with the set anyway. The Grizz has some problems with numbers as well, with insanely off-the-chart damage percentages that just really go too far beyond what is necessary. Most of The Grizz's ice interactions are fairly questionable, and don't seem to make much sense. A few interactions, such as Dsmash and to an extent Fsmash, make sense, and these moves are among the better and more creative tools in The Grizz's arsenal. Most of the interactions, however, seem to make no sense, relegated to things such as generic buffs or completely changing the entire animation altogether. The Grizz has some great offensive tools at his disposal, but for the most part, plays like a defensive character who's more effective using his ice to move around quickly and throw up ice shards and icicles to defend himself with. While the two styles are not incongruous, I think they could stand to use a little more integration with one another to make The Grizz a little more cohesive as a whole.

Rich Uncle Pennybags
I know that this set's been discussed to hell and back, but I wish to share my thoughts nonetheless. Pennybags, first of all, is a remarkable improvement over Bob Ross. He actually has a cohesive playstyle, and while the prop use is still rather heavy, it's handled mostly effectively, especially in consideration of the character. I can tell that you spent a great deal of thought devising the playstyle here, and your work indeed bears fruit. Pennybags has possibly the most efficient core formula for a monetary system that I've seen in MYM. The execution, however, is a bit sloppy. As has been said, money doesn't seem to circulate with this move. It's of little chance that you'll ever be knocked back down to Silver status once you've attained $1000, as the housing tax brings in more money more quickly than Pennybags ever has the threat of losing. There isn't a major sense of risk or reward here, so the playstyle ends up becoming a case of gradual buffs...and that's it. Pennybags goes bankrupt when killed, but a competent player will often find themselves working themselves back up to Gold in no time flat. I can see that you diligently took to heart what others have said before me, and I'm very glad to see you made well thought-out alterations to the set that fix many of Pennybags' issues. However, I think that more could be done to increase the cash flow, as it's still too easy for Pennybags to stockpile money.

Pennybags also substantially shows your improvement because it shows a much stronger grasp of gameplay, incorporating effects such as tripping to tie into how Pennybags' other moves work. So many of Pennybags' moves having a chance to trip is a solid way to work with his area of effect playstyle, and it's appropriately in-character as well, what with all of the chances and luck reliance. It's good that you toned down the random factor on his smashes, however, making the set mostly reliable to play with. I actually think the set could've used a bit more prop-usage, considering the source material, but it's perfectly fine in that department as is. As a bonus, the "Rising Profits" recovery move is hilarious and one of the most creative recoveries I've ever seen. It's also excellent for how it is tied into Pennybags' profits, rewarding him for playing well. However, I can't help but consider that this move may be one of the reasons why it's so easy for Pennybags to hold onto his money, as it only makes him harder to kill the more ahead he is, and thus keeping him and his money safe even longer.

In the end, I do find this to be an above average moveset, and with a few minor tweaks, it would certainly be worthy of anyone's vote. I'm glad that you came back to participate again, and I'm looking forward to seeing what else you may have up your sleeve for us in the future.[/collapse]
 

JamietheAuraUser

Smash Lord
Joined
Jan 11, 2010
Messages
1,196
Location
somewhere west of Unova
I edited the Playstyle section of my Victini moveset to, well, better reflect his actual playstyle. I also made some general formatting corrections, though those are obviously less important.

Edit: Also went and looked at the Plaza to see their comments about range, and used the Stage Builder Block screenshots to go through and take a look to fix the ranges of Victini's moves, many of which were stupidly short.
 
Last edited:

The Nerd

Smash Journeyman
Joined
Nov 3, 2007
Messages
427
Location
Canada
Hello all! I was wondering if the rules that two people can never make the same character from MyM and you cannot update old characters between contests still exists? I couldn't find mention of them, but I recall them being part of the original rules. I have a few older sets I wish to update.

Also, have you guys done away with the catagories, and is there a list of all sets ever created? I imagine it must be quite extensive.
 

n88

Smash Lord
Joined
Oct 10, 2008
Messages
1,547
Hello all! I was wondering if the rules that two people can never make the same character from MyM and you cannot update old characters between contests still exists? I couldn't find mention of them, but I recall them being part of the original rules. I have a few older sets I wish to update.

Also, have you guys done away with the catagories, and is there a list of all sets ever created? I imagine it must be quite extensive.
We're a little less restrictive now; feel free to make a set for someone you've already made, someone that someone else has made, something already in Brawl... whatever! Over at the Plaza you can find every moveset ever made, broken down by contest, under the "Movesets" tab. And we don't really do the categories bit any more, but we do have a list of movesets through MYM13 or 14 broken down by franchise over here.
 
Last edited:

The Nerd

Smash Journeyman
Joined
Nov 3, 2007
Messages
427
Location
Canada
We're a little less restrictive now; feel free to make a set for someone you've already made, someone that someone else has made, something already in Brawl... whatever! Over at the Plaza you can find every moveset ever made, broken down by contest, under the "Movesets" tab. And we don't really do the categories bit any more, but we do have a list of movesets through MYM13 or 14 broken down by franchise over here.
Thanks! That is... an extensive list of movesets. It's kind of amazing how far this has come...
 

FrozenRoy

Smash Lord
Joined
Apr 26, 2007
Messages
1,268
Location
Las Vegas, Nevada
Switch FC
SW-1325-2408-7513
We're a little less restrictive now; feel free to make a set for someone you've already made, someone that someone else has made, something already in Brawl... whatever! Over at the Plaza you can find every moveset ever made, broken down by contest, under the "Movesets" tab. And we don't really do the categories bit any more, but we do have a list of movesets through MYM13 or 14 broken down by franchise over here.
As a note, I have updated the all franchises post to be more up to date.
 

JamietheAuraUser

Smash Lord
Joined
Jan 11, 2010
Messages
1,196
Location
somewhere west of Unova
So I saw that the last time anyone did a Paint Roller moveset was way back in MYM 5! Not only that, the moveset was prop-heavy, inherently flawed in its base concept, underpowered as all ****, and generally just bad. The only gimmick worth salvaging is its ability to swap paint colours with Neutral Special, but even that just contributed to its terrible gimmick of "needing the right paint for the right job", with inputs being outright locked if you don't have the right colour of paint equipped.

So I decided I'd do my own moveset for Paint Roller. It's almost finished, too, so it'll be up soonishly.
 

MasterWarlord

Smash Champion
Joined
Aug 24, 2008
Messages
2,911
So I saw that the last time anyone did a Paint Roller moveset was way back in MYM 5! Not only that, the moveset was prop-heavy, inherently flawed in its base concept, underpowered as all ****, and generally just bad. The only gimmick worth salvaging is its ability to swap paint colours with Neutral Special, but even that just contributed to its terrible gimmick of "needing the right paint for the right job", with inputs being outright locked if you don't have the right colour of paint equipped.

So I decided I'd do my own moveset for Paint Roller. It's almost finished, too, so it'll be up soonishly.
I apologize for not having got around to reading your actual moveset, but I just have to ask what possessed you to go all the way back and read that.

Regardless, I heavily approve of this post.
 

JamietheAuraUser

Smash Lord
Joined
Jan 11, 2010
Messages
1,196
Location
somewhere west of Unova
I apologize for not having got around to reading your actual moveset, but I just have to ask what possessed you to go all the way back and read that.

Regardless, I heavily approve of this post.
Um... there was an article on The Plaza specifically dedicated to lampooning the **** out of wizzerd's movesets. And I ended up wanting to see just how bad Paint Roller was in particular, since they accused him of things like having minions that needed to be channeled. (Which is in fact incorrect. Actually, he summons enemies from the Kirby series as props to perform a single attack before disappearing. Assist moves aren't inherently bad, though.... unless the character calling the assist is completely incapable of movement while the assist is underway, and they can only be used once per stock on top of that.)

And before even reading the moveset myself, just based on what I saw in the article, I was inspired to make my own Paint Roller set with paint-switching as his Neutral Special. This Paint Roller doesn't use it to perform different moves, though... well, with two exceptions, those being his Up and Down Specials. I'll leave the rest until I actually post the moveset, but just know that playing Paint Roller is going to involve pressing B by itself a lot for a completely different reason than having to recharge your moves: he actually gains an inherent advantage to switching colours, and can do so laglessly during other attacks.
 

Bionichute

Smash Champion
Joined
Jun 30, 2012
Messages
2,151
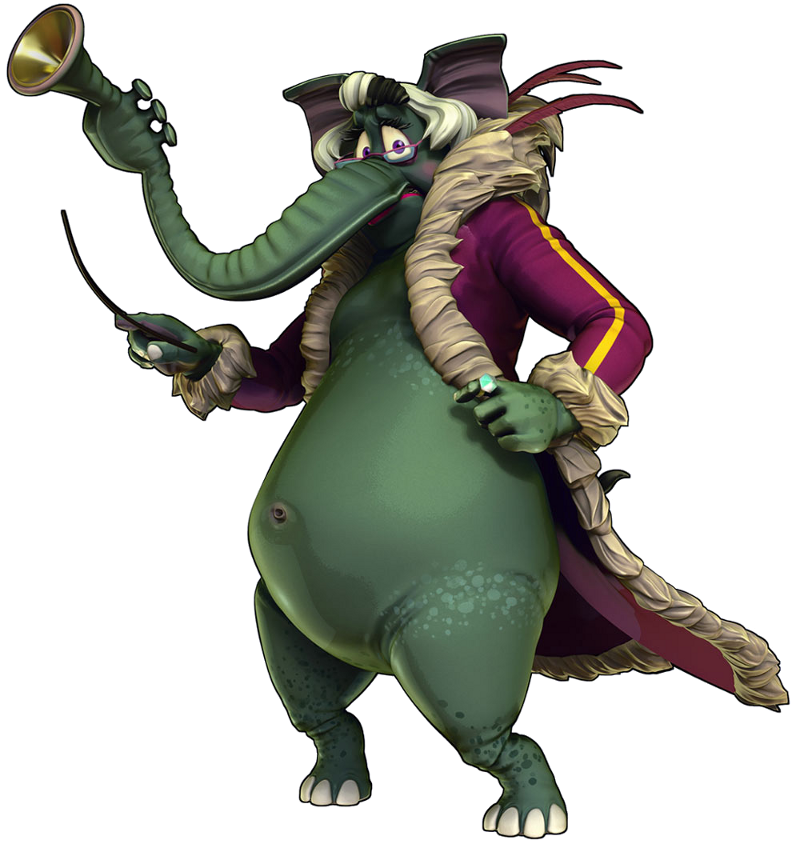
Ms. Decibel


Ms. Decibel was once a very rich girl who had a love and passion for music of all kinds. It’s just too bad that she was terrible at all music. After an accident that winded up lodging a trumpet into her trunk, Ms. Decibel found that she could control people using the music from her nose trumpet, which she used to make people rob banks without any trouble. Later on in life, she was hired by Le Paradox to go back to ancient Arabia and forge fake royalty documents for him, thus giving him tons of power in the future. She was also hired to steal Salim Al-Kupar’s cane, but winded up stranded in Arabia when Le Paradox abandoned her after she completed the task.


Musical Stats:

Size: 10/10 (She is by far the largest of the Sly 4 bosses, even bigger than the Black Knight and The Grizz.)

Weight: 9/10 (She’s also incredibly heavy, slightly heavier than the Black Knight.)

Speed: 7/10 (Despite her size and weight, she can move at surprisingly fast speeds.)

Jump: 7/10 (She has a very average jump, especially considering her weight.)

Aerial Movement: 4/10 (Like most heavy weight characters, not good at aerial control.)​


Musical Specials:

Neutral Special: Musical Blast:

Ms. Decibel starts playing the trumpet stuck in her trunk, creating pink stream of deadly musical notes from it. The stream acts similar to Bowser or Charizard’s Neutral Special, except the stream can be angled even more than those, with the maximum height being at a 45 degree angle. The stream shoots forward about 1.5 Stage Builder blocks, and like the previously mentioned moves, shortens about .2 Stage Builder blocks every second as long as the button is held down. The move also causes flinching, and deals 3% damage every flinch the opponent takes.


Side Special: Elephant Charge:

Ms. Decibel moves backwards a bit, and then dashes forward at surprisingly fast speeds, roughly as fast as Meta Knight’s dash speed. The charge can continue as long as the button is held, and it will also go straight through enemies when it hits one, allowing the charge to continue for as long as you want, or at least until you reach a ledge, as the move can go off ledges. The move will also give Ms. Decibel super armor, allowing her to shrug off 15% total damage before taking heavy knockback. Any opponent hit by the move will take 19% damage, and will be trampled into the ground, stunning them for a bit.


Up Special: Trumpet Blast:

Ms. Decibel points her trunk at the ground, and then let’s loose a big blast of air, launching her upward into the sky. What seems like a standard recovery move has a few interesting properties to it, as the gust of air creates some interesting functions. If used on an opponent whilst on the ground, the gust of air will slam the opponent into the ground as soon as it comes out, causing 7% damage to the opponent. If used on an opponent while in the air, the gust will cause them to be flung down towards the blast zone at the bottom of the screen, and will also stun them briefly, making it almost impossible to escape. However, the move can be dodged if the opponent dodges at just the right time, allowing them to escape.


Down Special: Homing Note:

Ms. Decibel plays her trumpet, creating a large pink-purple bubble. The bubble is about the size of Kirby, and will chase after the opponent closest to it when it was created. It moves around at a very fast speed, somewhere in-between Meta Knight and Sonic. The bubble is very determined to get to the opponent, as it will go through every platform, including solid platforms, in order to reach the opponent. Luckily, the bubble doesn’t last that long, only lasting 3.5 seconds before popping, and due to its speed, it will simply go through the opponent and keep going if dodged, only circling back to the opponent once they have finished their dodge animation, meaning that you can easily keep tricking the bubble. If the bubble does hit the opponent, it will cause 18% damage, and will stun the opponent for a moment.


Musical Standards:

Jab: Trunk Swing:

Ms. Decibel swings her trunk from side to side. This is an odd jab, as it can manage to infinitely continue as long as time button is tapped, but it will always knock the opponent away from her after 2 to 3 hits. The move also has a much longer range than most jabs, as it can reach forward about half a Stage Builder block. Each trunk swing causes 5% damage.


Forward Tilt: Trunk Slam:

Ms. Decibel turns around a bit, and then swings forward fast, causing her trunk to swing forward as well. The move is incredibly fast, and has a fairly decent range to it, but the peak of its range only lasts for a split second, making it rather difficult to hit with. The move causes 10% damage, and causes some rather decent knockback.


Up Tilt: Trunk Flip

Ms. Decibel flicks her trunk upward incredibly quickly. This move has some impressive range to it, stretching out about half a Stage Builder block, and reaching upward about half a Stage Builder block upward as well. The move has some rather impressive upward knockback to it, as it manages to fling any opponent, no matter how heavy, at least somewhat into the air, while doing a decent 8% damage.


Down Tilt: Trunk Smash:

Ms. Decibel leans back a bit, and then quickly slams her trunk into the ground. The move has less range than all of Ms. Decibel’s other standards, only going about .3 Stage Builder blocks forward, but it is far more powerful than the others, doing a great 12% damage with some impressive knockback. The move does have a bit of start-up lag, though.


Dash Attack: Elephant Fall:

During the dash, Ms. Decibel loses her balance and starts to fall, ending up flat on her face. Due to Ms. Decibel’s large frame, the attack has an incredibly large hitbox, with her entire body consisting of it. The move has some fairly bad start-up and ending lag to it, but the move does a decent 9% damage to make up for it.


Musical Smashes:

Forward Smash: Sound Blast:

Ms. Decibel strains a bit, before letting loose a large blast of music from her trumpet. The blast is fairly large, about half as tall as Decibel herself, and going forward about 2 full Stage Builder blocks. The force of the blast is incredibly powerful, being able to launch opponents off stage at relatively low percentages, but the move has a rather long start-up time, allowing opponents to avoid it. The attack causes 26% at lowest charge, and 38% at highest charge.


Up Smash: Trunk Whip:

Ms. Decibel leans her head up, and then waves her trunk back and forth multiple times. The trunk reaches up about 1.5 Stage Builder blocks when at its peak height. The amount of times Ms. Decibel swings her trunk, and the speed they travel at, depends on the level of charge. At lowest charge, Ms. Decibel will only swing her trunk a total of 3 times at a relatively fast pace, which will also cause 25% damage in total. At highest charge, the attack will swing 6 total times at lightning fast speed, causing 37% damage. The moves also have some juggling abilities, and can launch opponents up fairly high, leading into a combo.


Down Smash: Pachyderm Pound:

Ms. Decibel jumps up into the air, and then slams down, creating a shockwave. The jump only goes up a bit into the air, just enough for smaller characters like Pikachu and Kirby to run under, if they could run under, as Ms. Decibel falls down fairly quickly. However, even if the fall is quick, the ground pound still manages to do a lot of damage, 24% at lowest charge, and 38% at highest charge. Anyway, the attack also creates a pink shockwave once Ms. Decibel hits the ground. The shockwave travels about 1 Stage Builder blocks forward, and is about as tall as a Motion Sensor Bomb when placed. The shockwave, no matter the charge, will always do a clean 23% damage, with some good upward knockback.


Musical Aerials:

Neutral Aerial: Surround Sound:

Ms. Decibel plays her trumpet, creating a pink shield of musical energy around her. The shield doesn’t last for very long, only about half a second, but it is very large, since it has to surround Ms. Decibel in her entirety. The shield also has the ability to grant super armor, and can take 10% damage before breaking. Any opponent who touches the shield will be dealt 13% damage.


Forward Aerial: Spear Trunk:

Ms. Decibel pulls her trunk in a bit, and then spears it forward quickly. The move is very fast when it comes to the animation and hitbox, but the move has a bit of lingering to it. The move has decent range to it, being able to stretch out about half a Stage Builder block forward before it ends, and causes 12% damage with some good knockback.


Up Aerial: High Note:

Ms. Decibel points her trunk upward, and then creates a pink musical note that floats right above her head. The musical note is fairly big, about as wide as one Mr. Saturn, and as tall as two Mr. Saturn’s standing on top of each other. The note stays in the air for about .75 seconds before disappearing. If the note is touched by an opponent during this time, it will explode, causing 15% damage, and decent knockback.


Back Aerial: Back Trunk:

Ms. Decibel flicks her trunk behind her, hitting any opponents behind her. The attack reaches about .4 Stage Builder blocks behind Ms. Decibel. The move has some ending lag to it, but has good knockback if it hits. The move also does an okay 13% damage.


Down Aerial: Elephant Air:

Similarly to the Down Smash, Ms. Decibel does a ground pound type move. However, this move acts more like a meteor smash instead of a normal Smash, increasing her speed and causing heavy knockback if the opponent is hit from directly above. However, the move cannot be cancelled out of, so if you use it at the wrong time, you’re screwed. Causes 15% damage.


Musical Grab Game:

Grab & Pummel: Trunk Tussle:

Ms. Decibel reaches out with her trunk to grab an opponent. This move has by far one of the best reaches, as it can stretch a full 1 and a half Stage Builder blocks. However, the farther away the opponent is from the grab, the easier it is for them to break free. At normal grabbing range, the opponent will need to struggle for the same amount of time as a normal grab, and if the opponent is grabbed by the tip of the trunk, it will take about 1/5th of the amount of struggle to escape. The pummel has Ms. Decibel constricting the opponent with her trunk for 3% damage.


Forward Throw: Trunk Unfurl:

Ms. Decibel turns to her side, and then whips forward, unfurling her trunk, and sending the grabbed opponent flying. The attack has good knockback, and causes 8% damage.


Up Throw: Feel the Music:

Ms. Decibel flings the opponent upward, and then blasts them with her trumpet, knocking them upwards even more. Causes 10% damage.


Back Throw: Body Crush:

Ms. Decibel throws the opponent over her head, and as soon as they hit the ground behind her, falls on top of them, crushing them. The move does not cause any knockback due to its nature, but it does do a decent 13% damage.


Down Throw: Stampede:

Ms. Decibel drops the opponent to the ground, and then stomps on them a few times, before kicking them away. The move has some good knockback, and does 12% damage.


Final Smash:

Le Paradox:


This Final Smash isn’t just limited to Ms. Decibel, as this is the Final Smash for all of Le Paradox’s minions.

The move summons in Le Paradox’s giant Time Blimp, which appears in the background of the stage. At this time, Le Paradox’s gas mask wearing rat minions will begin to shoot from the blimp, and land on the stage. These minions will flood the stage, around 7 of them at a time. Their main attack is to fire stunning gas from their guns, which poisons opponents, which causes a steady stream of 2% damage. The rats will always go after the closest opponents, but they have a stamina of 10%, meaning they can be taken down by most attacks.

After about 7 seconds of this, Le Paradox will drop from the top of the screen in his giant multi-armed mech. He’ll slash at the stage a few times, hoping to finish off the remaining opponents. Each swipe causes 30% damage with heavy knockback. Le Paradox slashes about 3 times, with each swipe being about half as tall as Battlefield. The move lasts about 10 seconds in total.
 

MasterWarlord

Smash Champion
Joined
Aug 24, 2008
Messages
2,911
Um... there was an article on The Plaza specifically dedicated to lampooning the **** out of wizzerd's movesets. And I ended up wanting to see just how bad Paint Roller was in particular, since they accused him of things like having minions that needed to be channeled. (Which is in fact incorrect. Actually, he summons enemies from the Kirby series as props to perform a single attack before disappearing. Assist moves aren't inherently bad, though.... unless the character calling the assist is completely incapable of movement while the assist is underway, and they can only be used once per stock on top of that.)

And before even reading the moveset myself, just based on what I saw in the article, I was inspired to make my own Paint Roller set with paint-switching as his Neutral Special. This Paint Roller doesn't use it to perform different moves, though... well, with two exceptions, those being his Up and Down Specials. I'll leave the rest until I actually post the moveset, but just know that playing Paint Roller is going to involve pressing B by itself a lot for a completely different reason than having to recharge your moves: he actually gains an inherent advantage to switching colours, and can do so laglessly during other attacks.
I am the author of that article, and thank you for your patronage.

The Down Special is a channel, based off this line.

Paint Roller's Down Special said:
"Note that, for the duration of time when the enemy is out, Paint Roller is paralyzed and can be interrupted at any time"
Also, upon going back to look at it, apparently the move -can- only be used once per stock. I guess I missed that, there was just so much wrong with that old moveset.

I don't know how good of a concept switching paints is, but so long as it doesn't dictate which inputs he can even use like the old one it's a tremendous step in the right direction. I and others look forward to how this moveset unfolds.
 

Katapultar

Smash Lord
Joined
Nov 24, 2008
Messages
1,284
Location
Australia
[collapse=Green Elephant]I applaud you for going all the way with your Sly 4 boss movement, given some of those fights would be pretty awkward to translate or somewhat lack set potential. It's a bit hard to comment Decibel due being similar to BK and that I can sympathize with that character's supposedly terrible boss fight (I watched the 1st 3 boss fights) but this extra set has allowed me to see a few recurring quips maybe you could improve on. You don't always have to follow a boss's attack effects to a T if it would result in uncomfortable effects like stun, freezing or pitfall like on the Side Special, whereas making them deal knockback could be more interesting for the set. Also, I found that maybe 0.5 SBBs was too short a range for high-ranged melee attacks and that maybe you could compare them to existing smash attacks. It's mostly just nitpick however, and I do look forward to seeing take on something new after this.

Also, the Final Smash was a great way to end the "movement", tie in with the rest of the character's lack of Final Smashes and introduce an elusive character whose name popped up in all the intros to those unfamiliar with the game. Good job on that.[/collapse]
 

JamietheAuraUser

Smash Lord
Joined
Jan 11, 2010
Messages
1,196
Location
somewhere west of Unova
I am the author of that article, and thank you for your patronage.

The Down Special is a channel, based off this line.


Also, upon going back to look at it, apparently the move -can- only be used once per stock. I guess I missed that, there was just so much wrong with that old moveset.

I don't know how good of a concept switching paints is, but so long as it doesn't dictate which inputs he can even use like the old one it's a tremendous step in the right direction. I and others look forward to how this moveset unfolds.
It's not that Paint Roller's Down Special wasn't a channel, it's that it wasn't a minion. He merely summoned an enemy from the Kirby series as a prop to perform an attack. There's one exception to that, the Flamer, and for the Flamer's attack it also specifically states that it is the one exception as he does not have to channel. Granted, a minion that lasts 5 seconds is hardly much of a minion, and I aim to remedy that as well with my set. That said, Kirby foes are never particularly durable, and the same can be said of my Paint Roller's assortment of minions.

[collapse=Green Elephant]I applaud you for going all the way with your Sly 4 boss movement, given some of those fights would be pretty awkward to translate or somewhat lack set potential. It's a bit hard to comment Decibel due being similar to BK and that I can sympathize with that character's supposedly terrible boss fight (I watched the 1st 3 boss fights) but this extra set has allowed me to see a few recurring quips maybe you could improve on. You don't always have to follow a boss's attack effects to a T if it would result in uncomfortable effects like stun, freezing or pitfall like on the Side Special, whereas making them deal knockback could be more interesting for the set. Also, I found that maybe 0.5 SBBs was too short a range for high-ranged melee attacks and that maybe you could compare them to existing smash attacks. It's mostly just nitpick however, and I do look forward to seeing take on something new after this.

Also, the Final Smash was a great way to end the "movement", tie in with the rest of the character's lack of Final Smashes and introduce an elusive character whose name popped up in all the intros to those unfamiliar with the game. Good job on that.[/collapse]
Also this, especially the part about melee reach. For reference, Bowser's jab reaches one small stage builder block away from him. His hand and arm actually grow cartoonishly to increase the horizontal and vertical size of the hitbox. And this is a recurring theme among many Brawl characters who use primarily jointed attacks, so don't be afraid to do similar things yourself.
 

BridgesWithTurtles

Smash Champion
Joined
Apr 18, 2013
Messages
2,177
Location
The long road to nowhere
3DS FC
3523-2059-7939
With the impending release of Super Smash Bros. 4, this is my first moveset designed to work with that game's engine. However, since we have yet to explore the game in its entirety as of this time, comparisons drawn with veteran characters and their moves' properties will be strictly referring to their Brawl incarnations, unless otherwise stated. This set is a bit of a diversion of mine that I ended up taking farther than I expected. I'm honestly not too sure how I feel about this set, but having mulled over it and made changes in a tireless attempt to satisfy myself, this is the best I could decide upon. Regardless of its quality, I'm choosing this set to be my MYM16 debut. Hope you enjoy.


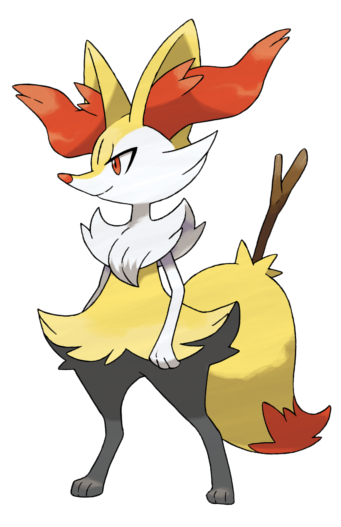
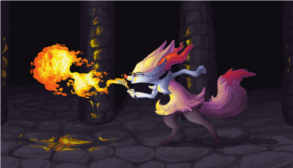
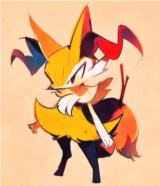
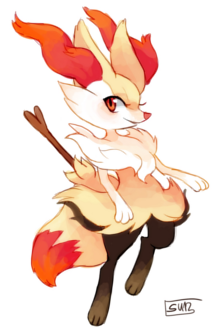
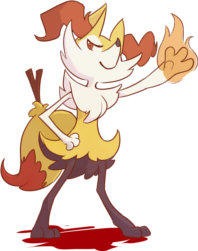
Pokémon #654, Braixen is the second stage in the evolutionary line of the Kalos region's Fire-type starter, Fennekin. When Fennekin evolves into Braixen, it becomes bipedal and takes on a humanoid stance, allowing it to hold the twig it carries in its tail. The fox-like Braixen draws inspiration from witches and other practitioners of sorcery, and it uses the twig it carries as a makeshift wand of sorts to channel its pyrokinetic abilities. Because of its association with witchcraft, Braixen displays some traits and abilities indicative of the Psychic-type, which it eventually adopts as a secondary element upon evolution into its final stage, Delphox.
In Super Smash Bros., Braixen uses mostly Fire-based abilities in order to do battle, putting to use its twig as a wand with which to manipulate the element. Braixen almost always holds its twig in its right hand, only occasionally returning it to its tail for storage. Specifically, Braixen will return its twig to its tail when holding an item that requires both hands.


Size ~ 5
Weight ~ 4 (93)
Ground Speed ~ 6
Traction ~ 7
Air Speed ~ 5
Fall Speed ~ 5
Jumping Ability ~ 6

Typical for a mid-staged starter form, Braixen is very much middle-of-the-road in statistics. Braixen stands at just around fellow vulpine Fox McCloud's height, but is slightly larger due to its bushy tail. Much slower than Fox, however, Braixen makes due with a dash speed matching Toon Link, and an air speed at around Mario's level. Generally, Braixen feels much like Mario in the air, but falls a little bit faster, at Lucas' fall speed. It matches Diddy Kong in weight, but is nimble enough in the air to not feel entirely floaty. Braixen has an average jumping ability, with more horizontal distance than vertical height. At max jump height, Braixen can reach its own height above Battlefield's top platform. Not the most aerially-inclined character, Braixen is nonetheless as effective when jumping as most of the cast. On the whole, as a low midweight with average speed and control, Braixen is an easy character to pick up and begin learning, as it feels very similar to Mario, and doesn't specialize in any one statistical area.

Due to its agility and lithe figure, Braixen is capable of wall-jumping. It can also Fox-trot effectively, much like Fox himself in Melee and Little Mac in this game.


Idle
Similar to its idle animation in Pokémon X/Y, Braixen stands calm and collected, smirking with that basic smug expression on its face, and its arms held out at its sides. It will sometimes put its hand on its hip, or bring the back of its hand to its chin and look on in contemplation.

Ground Movement
Braixen walks with a confident sashay, holding its arms down at its side and moving its hips back and forth. After breaking into a run, Braixen stops playing games and bolts. Leaning slightly forward, Braixen makes quick movement with its legs and holds out its wand, small flares shooting out of the tip, beside itself like a sparkler.

Jumping
For its first jump, Braixen leaps with a one-legged kick off of the ground, transitioning into either a skipping hop or a backflip. For its second jump, Braixen performs either a standard frontflip or backflip. When falling, Braixen holds onto the tufts of fur on its waist, and presses its legs together, as if trying to use its “skirt” to soften its descent.


Down Special – Pyrokinesis
Braixen leans forward a bit, holds up its twig, and gives a quick twirling gesture with it in a short process about as fast as Villager's Pocket. This activates Braixen's pyrokinesis, allowing it to psychically manipulate fire. Any nearby fire within a 1.5 SBB-radius around Braixen is pulled toward Braixen's wand, disassembled into a thin stream of fire, the length of which is determined by the amount of fire attracted. A very short stream will result from pulling Mario's fireballs, while a much longer stream will result from a Smart Bomb explosion. As fire is pulled toward Braixen's wand, it damages enemies, burning them slightly and dealing 3% per second spent in the flames, with slight stun. Longer streams will take longer to congregate fully at Braixen's wand, but the fox is able to move freely while fire is being pulled in. However, if Braixen leaves the vicinity of the move's normal area of effect, any remaining section of a fire strand not yet repossessed will not come to Braixen, and simply fade away.

On a fresh stock, Braixen's twig will be unlit when not in use, but if Braixen uses Pyrokinesis to absorb fire, it can repurpose the flames for its own use and increase the amount of fire burning on the end of the stick. As fire is absorbed, Braixen's wand goes from unlit to almost entirely blazing in flame. The amount of fire absorbed is visually indicated by the size of the flame atop the wand's tip. Small sparks are an indication of low fire absorption; if the stick begins to resemble a torch, then that means Braixen has repurposed a larger amount of fire. The amount of fire stored can cap out, and at max capacity, the twig is almost wholly lit ablaze, with a large burst of flame engulfing the entire top half of the twig.

For reference, Braixen's wand can store about 11 seconds' worth of a maximum-length Flamethrower from Charizard. Attacks or items that produce a significant amount of fire, such as a Smart Bomb, cannot have their output absorbed fully. When Braixen uses its wand to attack, it will always produce a minimal amount of fire. Some of its attacks, however, can be buffed through the absorption of auxiliary fire, courtesy of Pyrokinesis.

Neutral Special – Mystic Flame


Braixen again draws its wand for this move, taking on a confident stage posture while do so. Lifting its wand gently but dynamically upward and outward, Braixen flicks the small branch, casting a spell with which to manipulate fire. The fire used in this move is recycled from whatever Braixen has used to power up its wand, and this is visually shown by the flame atop the wand emitting gleaming blue particles of magic. As long as the input is held, Braixen will continue holding its wand upward. Using the control stick, the player can control where to cast the attack. Braixen will fire a narrow, whip-like stream of fire, not unlike fire in its form during absorption, in whichever direction is mapped with the control stick. This causes Braixen to create a “whip” of flame in midair, and it will use its wand to snap the whip in the direction inputted as it is being created. For example, if the player inputs an upward command and then a backward command, Braixen will shoot out a stream of flame upward (with length based on how long the input is held), and then whip it backward while extending it in that direction for however long that input is held. The length of the whip is calculated via increments, with about 1 Mario fireball's worth of fire producing a standard increment of 1/2 of a SBB. Enemies whipped by the Mystic Flame suffer 16% damage and moderate, low-scaling knockback, making the move a poor finisher, but good at dealing damage.

The ability to control whip length based on charge time means that Braixen can attack in any combination of the eight basic directions with a single attack. If used smartly, Braixen can cover itself from a myriad of angles. However, this uses up fire, as the length of Braixen's whip represents the length of fire streams it initially absorbed. The longer the whip, the more fire expelled, and thus, the less of a charge stored in Braixen's wand. Elaborately long whips leave Braixen punishable when being constructed, obviously, and they require a lot of fire to create for just a single attack. While a full-length whip can be a deadly dance of fire as Braixen twirls around and whips in all directions, it can deplete its wand of all of its storage in one fell swoop. It's usually more reliable to end the move earlier, after creating a short whip. This can be done by simply releasing the special button. It is not possible for Braixen to end the move by shielding; there is a modest amount of ending lag on this move as Braixen, in no rush due to its attempt to appear majestic, slowly lowers its wand.

If Braixen has no fire stored with its wand, it will produce its own fire to give the whip a length of ¾ of a SBB, so the move will always be usable, but in a vastly inferior state, without additional charge.

Up Special – Fire Spin
Confident in its ability to recover, Braixen, smiling and looking upward, orients itself on the tip of one foot, the other bent backward. Holding its wand straight upward, Braixen instantly conjures a vortex of flame beneath its foot, which roars and crackles as Braixen is boosted straight upward. The vortex of swirling fire beneath Braixen travels with the Pokémon, lengthening in the brief few frames it takes for Braixen to launch up the whole height of Sonic's Spring Jump. The vortex is conical, widening more toward the bottom. It has a vacuum effect, which pulls in and traps enemies below the fox, dealing multiple payments of 1-2% hits that can add up to 18% total. Braixen itself deals no damage to opponents, and is free to act out of the move, even able to use its specials before landing, save for Fire Spin itself. When used on the ground or in the air, the move is essentially the same, functionally. The vortex lingers for a few frames even after Braixen has exited its recovery animation, and if quick enough, the player can fast-fall down to the tornado of fire and recycle some of it with Pyrokinesis.

Since Braixen can create its own fire, it doesn't need a stored charge on its wand to use this move. However, if the Special button is held from the start of the move, Braixen shouts, and releases a surge of magical energy from its wand. Fire Spin becomes twice as fast, launching a flame-coated Braixen like a missile almost twice as high as normal. The flaming tornado itself explodes with a forceful burst when created, so it disappears immediately as Braixen is launched. Enemies hit by the pillar of flame for its brief existence take a solid hit of 24% damage and mid-high knockback in a variable direction. If Braixen collides with an opponent during its ascent, it will rocket straight through them with light armor, dealing 19% damage and high knockback that kills vertically at as low as 90%. However, the extra energy put into this version of the move makes Braixen enter special fall at the end of the attack.

Side Special – Incinerate


Braixen coolly crosses its arms, lifts its head slightly, and forms a small circle with its mouth, emitting a stream of flame. The attack comes out just a smidgeon slower than a Fire Flower, but produces somewhat similar results. The tiny stream of fire forms an airy cloud of flame a few inches in front of Braixen, and as long as the input is held, it continues to burn. Initially about Bowser's size in area, the flames slowly grow by 50% after 2.5 seconds of continual use (but will not grow larger than this). The attack can be held indefinitely, and can be ended at any time either by releasing the input or shielding.

Enemies caught by Incinerate take many incremental hits of 1% damage that can add up to a possible 12%, and take constant hitstun and pushback until they exit the flames. It is relatively safe on shield, due to having high shield push, but due to its width and size, as well as its push effect, Incinerate makes for a good spacing tool, despite its moderate range. The large amount of fire produced makes it the go-to option for Braixen's Pyrokinesis, if it needs to build up more of a charge.

As an additional bonus, enemies hit by this move have a 40% chance, for every second they take damage, to have any item they may be holding destroyed. This is increased to 100% for wooden or vegetative items, such as Peach's Vegetables, the Maxim Tomato, and crates, as well as the Beehive. As with all fire-based attacks, it will cause explosives to destruct. Items made of fire, such as the Hothead and Fire Bar, as well as the Fire Flower, will not be effected, and react as they normally would when hit by other flames.


Braixen's Smash Attacks all make use of its twig wand, and they are all effected by the amount of fire stored upon it. Charging Braixen's smashes increases their power as normal, but factors such as hitbox size are directly linked to Braixen's wand charge. Generally, a decent charge on Braixen's wand yields greater range or extra application, as well as a slight boost in power.

Forward Smash – Scorching Torch
With a light grunt, Braixen raises its twig above its head with both arms, setting it on fire if it's not already as such, and lets out a small shout as it swings it downward like a torch, leaning forward and slamming it overhead but stopping at the height of its own midsection. The attack comes out with the same speed as Falco's Fsmash, so it's largely telegraphed and easy to avoid or intercept. With a small ember blazing, the attack is, as one might expect, not very impressive. The attack has generally dismal range for a disjointed move, hitting just a Pikachu's length in front of Braixen, and without much firepower, enemies suffer very little knockback, making the move generally punishable, if the opponent doesn't shield. With more of a charge to its wand, however, the move becomes much more effective, with a full charge providing a flaming hitbox as large as Kirby. When hit by the tip of the wand, foes are burned, and take anywhere from 11% (15% if fully charged) to 23% (32% if fully charged). With larger charges, the attack can become a semi-effective kill move, sending foes into the horizontal blast zone at 160%. Hitting enemies with just the twig, however, is a sourspot that deals just 1-4% damage and is highly punishable.

Braixen ends the attack with its wand pointed straight forward, leaning into the motion, which gives the move about 90° of coverage in front of the Pokémon. With its face at wand-level, inputting an additional Fsmash input causes Braixen to pull back forcefully on its wand, withdrawing its own hurtbox backward slightly and casting the flame on the end of its wand straight forward. The projectile, still in the form of an ember, travels at the speed of Mega Man's Fsmash for the length of 1.5 SBBs, and implodes upon impact. Enemies may take an additional 6 (8% charged) to 10 (14% charged) and moderate knockback. Until ~80%, the first hit can usually link into the second, especially with a smaller flame. However, a larger flame obviously makes the projectile more effective. Braixen can recall the projectile with Pyrokinesis to recover ¼ of the fire used in the attack. For reference, using Fsmash with a fully charged wand uses about 1/3 of Braixen's stored fire.

Down Smash – Fire Twirl
In a manner similar to Marth's Dsmash, Braixen twirls its wand around its body along the ground, hitting in front of itself and then behind itself. The move is a few frames longer than Marth's similar attack, making it slower and a bit more punishable. It also has a shorter range, only covering Braixen in the immediate area beside itself. However, it comes out slightly faster, like Roy's Dsmash in Project M. The larger the flame stored, the larger the hitbox. While hitting with the unlit portion of the stick deals just 1-4% damage, the ember at its tip sets foes ablaze and launches them upward, dealing 10% (14% charged) to 18% (25% charged) in damage. The move has decent vertical knockback, but low knockback growth, putting enemies above Braixen, but generally failing to KO them.

Braixen's wand leaves an inches-high ring of flame burning on the ground in a circle around itself, which burns enemies that stand or pass over them, dealing 1% per second with no stun before fading away after 8 seconds. If Braixen used the move with a max charge, the ring of fire will be enchanted with magic, giving off a particle effect to indicate this fact, and deal 2% per second as well as lasting for 12 seconds. Braixen can use Pyrokinesis to recover ½ of the fire used in attacking.

Up Smash – Tinder Twig
Braixen forcefully jabs its twig, unlit, straight into the air with one arm, piercing anything above it. The move comes out relatively quickly and has very low endlag, allowing Braixen to act out of it very quickly. The move has a relatively short range for a disjointed attack, just barely hitting opponents standing on Pokémon Stadium's platforms. Enemies unlucky enough to be above Braixen are struck upward and take 13% (18% charged) damage for their troubles. A sweetspot at the very tip of the twig deals 16% (22% charged), and can kill off the top at 130%.

Half a second after Braixen's initial attack ends, a burst of flame, the size of which is determined by wand charge, appears just above where the tip of the wand had been. Lasting for only 10 frames, this portion of the attack, which ranges in size from that of a Smart Bomb to that of a Din's Fire explosion, sets foes who may have dodged the initial hit ablaze with 7% (10% charged) to 12% (18%) damage and moderate diagonal knockback. Braixen can call this explosion to its wand using Pyrokinesis, but doing so nullifies the brief hitbox frames of the attack itself. Braixen must either commit to either channeling the fire or letting it play out as normal. For those wishing to use only the initial portion of the attack, there's good news. Recycling the fire from this move will restore all of that which is used, so long as the player is fast enough, but given the defensive options opened up by this move, it may sometimes be best to simply flee outside of Pyrokinesis' effective range.


Braixen's standard moves, like its Smashes, mostly revolve around use of its wand. These moves are “safe” moves, being unaffected by the charge on Braixen's wand. This means that Braixen will always produce the same consistent effect regardless of how much fire it's repossessed. The size of the attacks on its hitboxes, however, will vary slightly with charge.

Jab – Witch's Wand
Braixen smoothly swipes at the opponent with its unlit twig twice with its eyes closed, neatly swinging the wand diagonally upward and outward, and then horizontally across its front. The entire motion is very quick, and requires two inputs to perform, with each hit dealing 2% damage. A third input causes Braixen to reach out, standing on one leg and holding the other one behind it, in a position similar to the Wii Fit Trainer's Ftilt. It hold its wand out, slightly elevated in front of itself, and holds it in place while it emits a small burst of crackling embers at its tip, making the twig resemble a sparkler firework. This move can be held for up to 4 seconds, dealing minuscule stun via rapid hits that deal 1% damage each, or about 9% per second. As with all rapid jabs in Smash 4, Braixen will end the move if it's continued to its entirety, flicking the wand ever so slightly to create a small burst of fire that deals 4% and sends foes a short distance away.

With relatively short range and a minor amount of endlag, the move is generally punishable for a jab. However, the attack literally burns away at shields. Enemies attempting to shield the attack will find themselves suffering before too long, as the attack rapidly chips away at shields, reducing the average shield almost completely in less than two seconds.

Forward Tilt – Pyromancy
With a graceful motion of the arm, Braixen raises its wand from in an arcing motion from its waist to above its head. This creates an arcing trail of fire from the wand's tip that rises up in front of Braixen, covering a good 180° in front of the Pokémon. The arc lingers for 4 frames after the end of the animation, all the while dealing 9% to those that contact it and “nudging” knockback that pushes foes forward. Enemies that are hit by the move during the rising of the wand are lightly tapped into the air above Braixen, suffering 11% from the full brunt of the attack, or 5% if hit by the sourspot of just the twig itself.

Braixen's wand will control all fire, however, not just the fire it produces. All fire hitboxes within a character space of Braixen's Ftilt will also be controlled by the pyromancy, and redirected in the same pattern and speed as the fire arc. For example, Mario's fireballs will be sent upward, and Bowser's Fire Breath will be redirected to shoot vertically. The move works as a specially-coded reflector, so pyromanced fire from enemy attacks is counted as beloning to Braixen. When positioned correctly, this move can afford Braixen extra coverage, and disrupt enemy attacks.

Coming out quickly and offering decent protection (albeit limited in range), this attack is fantastic for reliably getting enemies into the air quickly, and stopping some specific approaches. Like Braixen's jab, it also does excellent (albeit, less) shield damage.

Up Tilt – Ember Crest
Crouching down as low as possible and reducing its hurtbox in the process, Braixen slowly swipes its twig overhead from back to front in a half-circle. The twig sends out 6 small embers in a 180° arc above Braixen, which linger very briefly before disappearing. The full extent of this move's range is ¾ of Braixen's own height. Enemies hit by the sourspot near the twig's base take 6% damage and negligible knockback, and those singed by the embers will take 5% and similar knockback. The burning tip if Braixen's wand is the primary hitbox of the attack, and the one that will make contact most often. This attack deals 10% damage and moderate knockback, dragging foes along the tip of the wand as Braixen swings it, before dispelling them forward at the end of the animation. At low percents, this flinging motion puts enemies almost directly in front of Braixen, making a grab or other such follow-up possible. The attack has low cooldown but somewhat slow start-up for a tilt.

Down Tilt – Firecracker
Braixen, knees bent and wand angled at the ground in front of itself, pulls back while standing up, creating a popping, sparkling burst of embers at the tip of the way. The burst is about as big as Kirby. Only dealing 5% damage, enemies are popped up in front of Braixen with very low launch power. The move is rather quick to end, and feature IASA frames that allow Braixen to instantly act just before the embers trickle away. This allows Braixen to, among other options, grab a shielding opponent, easily leading to a situation more favorable for Braixen than if this move actually hits. Down Tilt makes for a very effective and starling surprise out of a turn-around cancel.

Dash Attack - Broomstick Brush
Smiling coyly, Braixen quickly and seemlessly turns to face backward, gripping its skirt, and kicks off the ground to launch itself backward a distance of 1 SBB. In an attack similar to the Peach Bomber, Braixen plows into foes with its rear end, hitting with its large, fluffy tail. If Braixen manages to hit the foe, it will bounce off of the enemy and a few feet into the air, much as if Captain Falcon were to use Falcon Kick into a wall. The opponent takes 9% damage from a small explosion that is created by Braixen's impact, and is either launched horizontally a short distance or tripped (40% of the time), while Braixen is put into a largely advantageous position. It can, from the air, attempt the read the opponent and continue attacking, make a quick getaway, or quickly use Pyrokinesis to recover the fire from the explosion. The attack is very punishable on shield or if missed, however; if Braixen misses, it will pout, wiping a tear from its eye as it gets up off of the ground. As one of Braixen's most open-ended pace-changers, it's best used smartly, and not as a commonly thrown out attack.


Braixen's aerials, much like its standard attacks, are not largely effected by the stored charge on its wand. Unlike either its Smashes or standards, Braixen's aerials are more individual in their uses, and may have a variety of different applications and characteristics that supplement the rest of its moveset.

Neutral Aerial – Fire Ring
Holding out its twig wand with a straight arm, Braixen performs a quick yet graceful horizontal spin in midair, creating a circular trail of fire around itself. Sourspotted opponents can expect 5% damage, while those who take the full brunt of the attack are dealt 11% damage. The range of the move reaches sufficiently far enough to protect Braixen rather well, keeping enemies at bay and knocking them generally far enough for Braixen to recover from the move safely. While not a reliable finisher by any means, the Nair can assist getting opponents off of Braixen long enough for it to try another approach, so it's a good “reset button” in a scrap. The move has moderate landing lag but quick start-up, and its vulnerability upon landing is somewhat mitigated by its moderately high shield damage.

Forward Aerial – Flare Shot
Smiling with its mouth open and holding its twig vertically in front of itself, Braixen mischievously uses its left arm to pull back on the top of the twig and quickly let go. This sends a small ember outward in a downward-arcing trajectory. The flare is very small, at the size of a Deku Nut, and travels at the speed of one of Mega Man's buster shots. The ember's range is a nifty 1.5 Battlefield platforms in front of Braixen, and it falls about 2 Villagers before fizzling out and disappearing. Any enemy the ember collides with take 8% damage and a large amount of hitstun, with a small amount of diagonal knockback.

Braixen can fit two Fairs into its first jump, and the move has practically no landing lag. An effective tool for keeping enemies at bay, this attack can be used to pelt enemies repeatedly from a distance. However, the small size of the projectile fired and the nature of the attack make it punishable in the close-range.

Back Aerial – Witch's Foot
Playfully toying with the opponent, Braixen smiles and puts a hand over its mouth as if to stifle a chuckle, as it raises one of its back legs to kick just behind itself. Due to Braixen's size and the nature of the maneuver, this move has poor range, only contacting foes threatening Braixen's personal space. The attack has mildly good stun, however. While it deals just 7% damage, the move can reliably link into itself several times, as it does very low knockback. It's not to be the most commonly used move in Braixen's repertoire, but its uses in starting something potentially greater can come in handy.

Up Aerial – Vulpine Kick
Orienting itself to face upward, Braixen stops mid-flip and delivers a bicycle kick maneuver upward. Hitting first with its right leg and then its left, Braixen quickly delivers two blows that deal 6% and 7%, respectively. The move is similar to Captain Falcon's Nair, and as with that move, the first kick usually links into the second, with the second launching enemies, albeit vertically. If Braixen manages to connect both kicks, it will shout “Uuuh-huh!” and deliver a burning kick on the second hit, upping its damage output to 10%, with an additional few freeze frames for effect. Both versions of the move deal somewhat high knockback on the second hit, with the burning version killing vertically at 150% (the normal version will usually not kill). While not the strongest kill move in the game, it's one of Braixen's best options, though at such a high percent, it is harder to land the second kick. This move comes out and ends very quickly, capable of being used twice in a short hop. However, the move has bad landing lag which makes spamming it unwise. Nonetheless, as one of Braixen's few moves not involving its wand, it is one of the Pokémon's most reliable damage-building moves and is a relatively universally applicable attack.

Down Aerial – Tinder Tumble
Braixen performs a highly acrobatic flip forward while holding out its wand. Braixen spins twice in an aerial somersault that leaves a wheel of fire around its body. The flaming ring deals 8% and moderate knockback, while Braixen's spinning body also serves as a weak hitbox, dealing 5% damage. Because Braixen spins twice, the move is somewhat lengthy, and it can only fit in one and a half rotations out of a shorthop.

However, this is not necessarily a bad thing. If Braixen contacts the ground mid-move, it will continue rolling forward along the ground by transitioning into a forward-facing cartwheel, without the fire ring. The later in the move that Braixen lands, the more momentum it will have worked up, allowing it to roll farther. Braixen can jump out of its cartwheel, retaining momentum from its speed. While on the ground, Braixen can be interrupted, but its cartwheel will deal 6% and light knockback to enemies. Braixen's ground roll moves at the speed of Little Mac's Jolt Haymaker, and its distance ranges from 2 character spaces to 2.5 SBBs.


Braixen's grab game is tailor-made to satiate its hunger for building damage. From starting combos to applying gradual damage to the opponent, Braixen's grab-based options have everything you need to leave your opponent cowering behind Braixen's raging flames. As a secondary perk, two of Braixen's throws are also excellent ways to distance itself from the opponent, when need be.

Grab
Like Mewtwo, Braixen grabs using its telekinetic abilities. Braixen brandishes its wand and swipes upward and outward, conjuring a stream of magical blue sparkles immediately in front of itself. The visual effect indicates Braixen's grab range, and it extends a Kirby's length in range. Characters grabbed by Braixen are held in place by a psychic force as Braixen keeps a steady hold on its wand. The animation is slow to start and punishable if whiffed, and Braixen's dash grab is particularly cumbersome.

Grab Attack – Will-O-Wisp
Braixen dramatically waves its wand, enchanting its captured enemy with Will-O-Wisp. This creates a mystic flame that burns within the opponent. While an opponent afflicted with Will-O-Wisp receives an ember on their chest to represent their status, the fire is actually emerging from the character's inside core. Each time Braixen uses its grab attack, it worsens the condition of Will-O-Wisp, causing the enchantment to last longer. The attack itself is rather slow for a pummel, making it difficult to stack more than two Will-O-Wisps at a time. The attack maxes at 3 uses.

Foes afflicted by Will-O-Wisp suffer 1% damage per second for a duration based on how many times they were hexed. One grab attack afflicts the opponent for 5 seconds, two lasts for 10 seconds, and three lasts for 15 seconds. If Braixen regrabs an opponent already affected and uses its grab attack again, it will count as a consecutive hit but reset the timer. For example, an opponent afflicted with a first stage burn will be given a second-stage burn, but will not suffer any burn time remaining on its previous account, instead receiving a timer of 10 seconds.

Characters under the Will-O-Wisp status are at unique danger, as the fire infused within them is still subject to be manipulated by Pyrokinesis. If Braixen uses Pyrokinesis in the vicinity of a burn victim, the character will be pulled toward Braixen. Braixen will repossess the fire within the victim, removing the status. However, the character will be pulled in toward Braixen, automatically locking them into another grab by the Fox Pokémon, where they can be burned yet again. Luckily for its enemies, Braixen's opponent can break free from Pyrokinesis' pull with 1.25x the normal grab break difficulty. More fire will be absorbed by Pyrokinesis if the opponent's remaining status is within the time frame of a more serious affliction, but the opponent will be dealt more gradual damage if left to burn longer, so it's important to make careful decisions when using this move. The opponent, of course, will also be wise to try and avoid Braixen while in this condition.

Forward Throw – Magic Toss
Levitating the opponent in front of itself already, Braixen performs a simple maneuver. Leaning into a forward and upward thrust of its wand, Braixen balances gracefully on the tip of one foot, the other raised behind itself with Braixen's free arm touching its toes in a ballet-like position. With the raise of its wand, the opponent is flung diagonally into the air with 10% damage. Decent base knockback and low knockback growth ensures that the enemy is usually sent just far enough from Braixen for the Pokémon to recover and perform another action.

Backward Throw – Magic Launch
Braixen flexibly bows low to the ground while turning to face backward, and waves its wand upward and away from itself with a quick twirling of the wrist. The opponent is flung backward and dealt 9% damage. This throw is Braixen's best option for getting opponents a decent distance off-stage, and the move can kill easily on walk-offs.

Upward Throw – Skip Kick
Braixen smiles and performs a hopping kick to the opponent, using one leg to hop an inch off of the ground, and swinging the other upward into the foe. The enemy is sent upward with 8% and moderately low knockback, not dying off the top until 200%. This throw is quick to start, perform, and end, taking after such throws as Mario's Dthrow and Squirtle's Fthrow.

Downward Throw – Cauldron
Surpressing a giggle by covering its mouth, Braixen holds its wand straight out while gently raising its arm. The opponent is put into a horizontal position and is raised upward, following Braixen's wand. A Bowser-length patch of flame, meanwhile, roasts the opponent from below, dealing 6% damage over the 1.5 seconds that this move lasts. At the end of the move, the opponent briefly glows a heated red color, causing Braixen to bring both of its hands over its mouth in shock, and ending the attack. The foe falls to the ground, immediately cleared of fire, and is put into a supine (prone) position. The only of Braixen's throws which is on the slow side, Inferno is a more situational technique than its alternatives. Luckily, this allows it to rack up extra damage while stalling out its burned victims' timers.

Balancing daintily on one set of toes, Braixen, giggling, holds out its wand and flicks a small ember from its tip. The projectile lands 3 SBBs away from Braixen, and instantly EXPLODES into a raging inferno of flames. Opponents caught in the fire as it expands suffer 50% damage and high knockback. The massive flame which results, which lasts for 13 seconds, takes up 1.5x the area of a Smart Bomb explosion. This cursed mass of flame singes to the bone all enemies that enter it, dealing 13% per second with rapid flinching. Those who manage to escape the fires will find themselves continually lit aflame, similar to having been hit by Will-O-Wisp. They will continue to take damage until the main source of flame disappears, at 5% per second with an additional flinch.

Braixen can be described as an offensive character disguised as defensive. With an excellent spacing game due to its wand and flames, Braixen can pluck apart the strategy of a large amount of melee fighters. However, its ultimate goal is not so much to keep itself safe as it is to deal immense amounts of damage by building up its flames and letting loose with high-powered attacks. In this way, it is a character that seeks to use its defenses as a great offense. One of Braixen's main tools is its Mystic Flame, which allows it to play keep-away from any angle it chooses. By absorbing fire with Pyrokinesis, it is able to create a truly devastating spacing option that, while able to deplete fire incredibly quickly, can be used to keep enemies at bay long enough for Braixen to set up more flames for itself to use. And while the flame size of Braixen's wand is in no way necessary for the effectiveness of most of its moves, the slight increase in hitbox size can be helpful in avoiding that dreaded sourspot on Braixen's wand.

While the use of Pyrokinesis is important, it is not a centralizing gimmick on which the character's entire playstyle rests. Rather than acting as a generic way to buff any all of its attacks, Braixen's ability to appropriate additional fire for itself comes as a bonus to the fact that it can produce fire on a whim at any time. The power stored in Braixen's wand is not a buff used in all of its attacks, instead being relegated to certain specials and its smashes. The only universal aspect of Braixen's wand is the fact that its stored fire determines the size of the disjointed hitbox on Braixen's wand-based moves. The large majority of hits Braixen will be trying to land are standards and aerials, most of which are difficult to interrupt or punish due to their tendency to come out and/or end quickly, and to leave lingering hitboxes. Moves such as Jab come out quickly and are great to just throw out every now and then in order to shield pressure opponents. Foes attempting to run up and shield will often meet a quickly deteriorating shield in the wake of Braixen's sizzling flames. Generally, wand-based moves are slightly more punishable and require more commitment and better prediction, while moves not involving the wand are “safe” moves that can often be thrown out freely without a major risk of punishment. These latter attacks tend to be Braixen's best damage-rackers. Up Aerial is a great aerial to just throw out every now and then, as despite its landing lag, its very fast two hits are difficult to avoid individually. Back Aerial, Neutral Aerial, and Ftilt are also great all-purpose options due to their good speed and coverage.

Braixen exceeds most at, like any sly fox, escaping danger to fight another day. Incinerate and Mystic Flame keep enemies at bay, while Braixen can make quick escapes with Down Aerial, or change both it and its opponent's gameplan with a hit from Dash Attack; such actions can shift the pace of a match in Braixen's favor when used smartly. Forward Aerial and Forward Smash are both capable of safely zoning, while the former is also a great way to bait or push foes to approach toward Braixen's lingering flames. Down Smash can aid Braixen in stage control, and helps provide yet another damage-racking hitbox for enemies to dance around. By pressuring enemy shields with hungering flames and keeping foes comfortably out of range, even reversing the effects of enemy attacks with Ftilt, Braixen is a master at waiting out heated battles. With the ability to burn its foes with Will-O-Wisp, Braixen can keep foes on their toes by scaring them to flee away, out of the fear of being grabbed again with Pyrokinesis. Whether a burned foe remains nearby or attempts to flee, Braixen can craftily capitalize on their situation by stalling out their burn damage with its superior spacing capabilities, or pursue an afflicted foe and use it as an opportunity to turn the tables and deal some damage. Dealing damage is a skill Braixen excels at, with high-damage, multi-hit attacks being the norm in its moveset. By skillfully playing the baiting and stalling game, Braixen can burn away at its opponent's health, withering them down until it acquires enough of a flame storage to finally deal the finishing blow. Rather than use its stored flames as the key feature of its playstyle, Braixen's true colors shine when it uses its more basic standard attacks to whittle away at the foe, only using its stored flames when truly needed to escape (an unfortunate reality due to its susceptibility to strong melee combos) or finish the opponent.

All things considered, Braixen is a character that aims to be simple to control, with little technical depth. Intended to be easy to pick up and understand, yet still requiring skill to master, Braixen uses a mechanic that, while admittedly not the most simple, is used in a manner that players can understand. Its middling stats and ease of control allow players to ease into the greater depth of its playstyle, which mostly encourages a crafty, wily approach to battle, with a larger emphasis on understanding the character's physics and the general gameplay than on advanced techniques. Braixen's simple combos are designed to work well with the sort of environment introduced in Smash 4. A very bait-and-switch character, Braixen is best played by those who are able to understand hitbox and hurtbox size, spacing, and reads. It is a great character for any player that likes to dominate the pace of a match, and is capable of switching their game's momentum on the fly.
 

Katapultar

Smash Lord
Joined
Nov 24, 2008
Messages
1,284
Location
Australia
[collapse=Braxien]Your sets have lovely presentation and are rather well-written. Your dedication to Pokesets almost rivals Joe's, though it'd be interesting to see you adopt other projects that reflect your tastes.

The Pokemon being from 6th Gen, references to the upcoming SBB4 sets and fire-based attacks give this set an interesting "new-generation" flavor. I've never played a SSB4 demo unlike you lucky guys over in the U.S, but the references don't detract or feel obscure for me, which is good. In any case, Pyrokinesis does well in linking to existing smash attacks and is nice that it can be fueled by your own attacks, but it doesn’t seem to specifically say how long it would take to reach full power with some simpler attacks such as your own. Being able to absorb residues of your own attack to become stronger is a pretty interesting playstyle that could have a risk-reward factor in it, but that doesn’t seem to be the case here – in fact, pyrokinesis seems almost too effective. From what I get, you can just pull the fire back from some of your moves and have it stun opponents, making it a very strong defense and almost invalidating shielding against the sweetspot, though I could be wrong. Of course, you could easily make it so Pyrokinesis doesn’t inflict stun so there’s actually a risk factor to absorbing it if you don’t use it to send enemies flying, preventing you from spamming it for defense or something.

If the enemy doesn’t have fire attacks, you’ll be forced to awkwardly absorb your own fire from the Side Special, as while the Up Special and Dash Attack also let you do this, they’re even more awkward to pull off for the sake of doing such, and the Smashes require you to have fire in order to absorb any in the first place. The melee game, which don’t get me wrong is fairly decent and has a nice feel to it character-wise, and I can respect what you were trying to go for with their independent nature, is very weak without any fire-based attacks and thus you’ll need fire in the first place in order to properly get a kill outside of a few token moves like the B-throw. The pyrokinesis pummel pulling appeared interesting at first, but from what you say it seems that it’s just a chaingrab and not what could have been an interesting way of bringing enemies towards you, which wouldn’t have been -that- great in the first place given Pyrokinesis’ limited range and the fact that enemies will be stunned by the fire coming out of them as they’re pulled in… I think. I’m not all that sure here. There was certainly potential in the grab game.

Overall, I’d say Braxien is respectable, but I don’t think the set resonates with me all that greatly. I do believe that the base concept has iffy execution and is not taken as far as it could have been with the Standards that don’t do all that much for it. To be fair, you obviously weren’t expecting much what with the set’s intended target, but it’s still a nice piece of art and there’ll obviously be those out there that enjoy it. [/collapse]
 

BridgesWithTurtles

Smash Champion
Joined
Apr 18, 2013
Messages
2,177
Location
The long road to nowhere
3DS FC
3523-2059-7939
[collapse=Braxien]Your sets have lovely presentation and are rather well-written. Your dedication to Pokesets almost rivals Joe's, though it'd be interesting to see you adopt other projects that reflect your tastes.

The Pokemon being from 6th Gen, references to the upcoming SBB4 sets and fire-based attacks give this set an interesting "new-generation" flavor. I've never played a SSB4 demo unlike you lucky guys over in the U.S, but the references don't detract or feel obscure for me, which is good. In any case, Pyrokinesis does well in linking to existing smash attacks and is nice that it can be fueled by your own attacks, but it doesn’t seem to specifically say how long it would take to reach full power with some simpler attacks such as your own. Being able to absorb residues of your own attack to become stronger is a pretty interesting playstyle that could have a risk-reward factor in it, but that doesn’t seem to be the case here – in fact, pyrokinesis seems almost too effective. From what I get, you can just pull the fire back from some of your moves and have it stun opponents, making it a very strong defense and almost invalidating shielding against the sweetspot, though I could be wrong. Of course, you could easily make it so Pyrokinesis doesn’t inflict stun so there’s actually a risk factor to absorbing it if you don’t use it to send enemies flying, preventing you from spamming it for defense or something.

If the enemy doesn’t have fire attacks, you’ll be forced to awkwardly absorb your own fire from the Side Special, as while the Up Special and Dash Attack also let you do this, they’re even more awkward to pull off for the sake of doing such, and the Smashes require you to have fire in order to absorb any in the first place. The melee game, which don’t get me wrong is fairly decent and has a nice feel to it character-wise, and I can respect what you were trying to go for with their independent nature, is very weak without any fire-based attacks and thus you’ll need fire in the first place in order to properly get a kill outside of a few token moves like the B-throw. The pyrokinesis pummel pulling appeared interesting at first, but from what you say it seems that it’s just a chaingrab and not what could have been an interesting way of bringing enemies towards you, which wouldn’t have been -that- great in the first place given Pyrokinesis’ limited range and the fact that enemies will be stunned by the fire coming out of them as they’re pulled in… I think. I’m not all that sure here. There was certainly potential in the grab game.

Overall, I’d say Braxien is respectable, but I don’t think the set resonates with me all that greatly. I do believe that the base concept has iffy execution and is not taken as far as it could have been with the Standards that don’t do all that much for it. To be fair, you obviously weren’t expecting much what with the set’s intended target, but it’s still a nice piece of art and there’ll obviously be those out there that enjoy it. [/collapse]
Thanks for the brisk review, Kat. I want to elaborate a bit on the points you've made. If I skip over any point you brought up, it's likely that I agree with you either and have nothing else to input.

The idea underlying Pyrokinesis' ability to stun has to do with using it to zone out opponents and keep Braixen relatively safe while charging its fire, as it's relatively vulnerable otherwise. Braixen's fire absorption is not the core of its playstyle, and is really intended more as a way to give it a little extra oomph when needed, when its normally already great spacing game isn't enough, or when it needs enough power to score a KO. Pyrokinesis' limited range is useful in keeping balance, or at least, it does in my imagination. It prevents chain excessive chain-grabbing, as Braixen's throws will typically send the opponent far enough that regrabbing them instantly will rarely ever happen. This is in line with the grab games of most characters in Smash 4; throws are very rarely able to be followed up on in this game, and they seem to have largely been retooled as KO options. Additionally, enemies can break free of the pull before they are regrabbed, so they do have an option to fight back, and most characters can easily outmaneuver Braixen by running (if they're faster) or jumping (since Braixen isn't the best at air movement).

Braixen being able to absorb remnants of its own flames is certainly intended to give the use of Pyrokinesis a risk/reward factor. Whether or not this would actually manifest, I am not the best judge to say for sure. However, I think you've overanalyzed the amount of fire that can be absorbed from Braixen's own moves. It is my own fault, I must admit, that I did not do a very good job at describing how fire levels can be measured. While writing the set, I imagined about one unit's worth of Mystic Flame to be somewhere between 2-3 Mario Fireballs. The fire that Braixen produces in the majority of its absorbable non-Smash attacks, for example, would be about that amount. Typically, Braixen can only recover a fraction of this fire, meaning that it's getting a very small amount of fire back from its moves. Over time, it could theoretically keep building its charge, but the opponent would never allow it to do that. Other moves, such as its smashes, use up a lot more fire when charged up, and again, Braixen can't recover much. Absorption for briefly-lingering fire hitboxes requires incredibly strict timing, and oftentimes, you won't even be in the right situation to spend time absorbing, so you're really not getting much fire from most of Braixen's moves. This is one of the purposes of Incinerate, which produces a relatively large amount of fire in short time. Unlike its other moves, however, Incinerate is a bit slower and more punishable, so it's not like Braixen will always be relying on it, and never run out of a charge. Being able to throw out a move is one thing. Being able to throw it out and take the time to absorb the fire is another thing entirely. This is why moves such as Dash Attack and Up Smash, which produce a bit more fire than normal, give Braixen the option to easily opt out of absorption, as it will often be in situations, after using these moves, where Pyrokinesis is clearly not a good option.

Braixen's standard moves being so weak is completely intentional. Braixen's wand-charge mechanic isn't the cornerstone of its playstyle, and is only really necessary for earlier kills. Braixen isn't expected to always used charged-up flames to kill; it's expected to kill very late because it's not a powerhouse character. It's designed to win through whittling away the enemy with crippling fire damage. Charging Braixen's wand to deliver finishing blows is a smart way to clench earlier kills, but it's not the sole intended gameplan; it's simply an additional option for smart players who are able to make the most of the mechanic.

Perhaps I should clarify Pyrokinesis's interaction with Will-O-Wisp in the set. Burned enemies pulled in toward Braixen would not take damage or stun from the fire within them being vacuumed. I probably should have just said so, but I figured that much would just be obvious. One of my movesetting problems has traditionally been run-on sentences and excessive wordiness, so I've trying to cut down on that. I felt that this was just one of those details I assumed I wouldn't have to mention.

Once again, thank you for the commentary, Kat. I really appreciate it and I've taken everything you've said into consideration. I hope I sufficiently addressed some of the points you brought up and cleared up any confusion you may have had. Please let me know if you have any thoughts in response, and if there's anything else I can do to explain the set better.
 
Last edited:

Katapultar

Smash Lord
Joined
Nov 24, 2008
Messages
1,284
Location
Australia
Please let me know if you have any thoughts in response, and if there's anything else I can do to explain the set better.
To be fair, I didn't have a problem with the main moves being weak and in fact think it was a very good call for characterization on your part, as Braxien is not a fully-evolved Pokemon. The set certainly wasn't under-elaborated, just the Pyrokinesis really (grab might have been ridiculous assumption on my part), as your sets tend to be quite detailed.

Overall, even with everything you'd said, I don't think I can quite like the set (but it's fairly close to such) if simply because it doesn't seem as though the base concept in the Specials would be used as much as I'd like, partly due to being difficult to utilize and you stating that it's second priority in the playstyle. Of course, I can see where you were going with the Smash-esque feel of the set, and I can totally respect that. Can't say I felt 100% confident if the things I was saying in my comment were right, but we'll see when others get around to commenting the set.
 

JamietheAuraUser

Smash Lord
Joined
Jan 11, 2010
Messages
1,196
Location
somewhere west of Unova
Speaking of commenting, I'm sorry for not doing any myself. I'm still trying to finish up the Paint Roller set. A friend of mine showed up at my house somewhat unexpectedly, and of course I wasn't gonna spend time writing MYM sets when I had a friend over.
 

ChaosKiwi

Smash Apprentice
Joined
Feb 1, 2014
Messages
104
NNID
ChaosKiwi
Hey look a one day set

DUCK HUNT DOG


The hound with no need for introductions. He's been called by many names over the years, like... Dog, Laughing Dog, and "Why Can't I Shoot Him". But here, he's called Duck Hunt Dog. From the classic game Duck Hunt, this happy go lucky pooch is ready to bring the hunt to Smash Bros., with a variety of duck-based weaponry to choose from.


STATS

Size- 3
Weight- 3
Ground Speed- 5
Aerial Speed- 5
Falling Speed- 6
Jumps- 4

The Duck Hunt Dog walks on all fours, but can stand on his hind legs during certain attacks, just to help you better visualize how he acts.


SPECIAL MOVES


Neutral Special- Light Gun
Duck Hunt Dog briefly gets up on his back legs, and whips out a NES Zapper, seemingly from thin air (The chord doesn't even attach to anything). Grinning ear to ear, he fires a blast of pixelized energy in whichever direction the player holds the stick. The pixels travel four SBB before dissipating, and only one blast can be out at a time. The blast does 12%.

Say, this special seems somewhat garden variety, doesn't it? Well, read on, kids.

Side Special- Clay Shooting
Once more standing on his hind legs, the Duck Hunt Dog throws a clay pigeon forward like a Frisbee, letting it fly until it hits something, at which point it will shatter. If it hits a foe, it'll deal 5% in the process, whereas if it hits a wall, item, or other projectile, it'll shatter completely harmlessly.

Unless, however, the "other projectile" that it hits is one of Duck Hunt Dog's own Light Gun shots! You see, the shots travel faster than the Clay Pigeons, meaning that the Duck Hunt Dog can throw a pigeon, then allow it to travel a bit before hitting it with a Light Gun shot. On contact, the Clay Pigeon will, instead of shattering harmlessly, explode! This explosion deals 15%, and deals a lot more knockback than the Clay Pigeon would have on it's own.

There can only be one Clay Pigeon out at a time.

Up Special- Duck Flyer
The Duck Hunt Dog rustles around in his pocket (?), before pulling out a pair of ducks! Holding on to the legs of these ducks with one paw, Duck Hunt Dog is lifted into the air! The ducks flap their wings furiously, struggling to keep the heavy hound airborne (though carrying him fairly far up in the process). This special travels at a 70 degree angle upwards/forwards, for a total of three Battlefield Platforms of recovery distance at a speed faster than Duck Hunt Dog's dash. Additionally, Duck Hunt Dog is able to use his Neutral Special while flying, though he can only shoot straight forward.

This recovery just sounds too good to be true, doesn't it? Well, it isn't completely invincible. If any attacks hit the pair of ducks, one of them will comically fall out of Duck Hunt Dog's grasp, cutting the total recovery distance and speed in half! Should the second duck get hit, Duck Hunt Dog will fall helpless! That ain't good! But, should an attack come close to hitting the ducks, but miss, Duck Hunt Dog will instead laugh at the enemy's failure, as he is known to do.

Down Special- Tall Grass
Giving a chuckle, Duck Hunt dog creates a patch of grass on the ground in front of himself, about one SBB wide and about half as tall as he is (that is, when he's on his hind legs). He can create four patches of grass total, but overall they seem merely cosmetic. What's the deal?

Glad you asked. You see, when Duck Hunt Dog crouches in one of these patches of grass, he can, by pressing a direction on the stick, teleport to the nearest patch of grass in that direction! Using this form of teleportation, a myriad of options become available.

Say you're on the run from an enemy: You can disappear into one patch of grass, then reappear on the other side of the stage, or perhaps sneak up behind them! Or perhaps, you could pop from one patch to another, then surprise an enemy by jumping out and hitting them with a Light Gun shot! Or, when the fighting gets a bit too rough, you can use the grass as a hiding spot to recovery in.

The grass isn't invincible, though. Each patch has a total 30 HP, meaning it can be destroyed by any foe determined enough. Additionally, a fire attack can destroy a patch more easily, and a shot from Duck Hunt Dog's own Light Gun can destroy them instantly (use this when you wanna make a new patch but already have four out!). Grass will disappear when Duck Hunt Dog is KO'd. Finally, if Duck Hunt Dog is in the grass patch when it's destroyed, he will be momentarily stunned and open to attack, so make sure you're quick on your feet!


STANDARD MOVES


Jab
As a dog, the Duck Hunt Dog has a somewhat limited range of natural weaponry. But he makes the most of it, I assure you. As such, his jab is a simple swipe of one of his front paws, dealing 4% damage to enemies.

Side Tilt
For his side tilt, DHD leans forwards, giving a comically oversized chomp of his jaws to anybody in front of him. This deals 13%, and is, overall, a standard jab.

Down Tilt
What do dogs like to do? Dig! Thus, Duck Hunt Dog starts diggin' in place, kickin' up dirt in all directions, dealing 11% to unlucky foes. It also gets 'em dirty, because, dirt. Overall, somewhat standard, admittedly.

Up Tilt
Duck Hunt Dog jumps upwards, pawing at the air above his head, as if trying to knock his enemies out of the sky. The swipes do 10% over a series of hits, and the initial jump allows you to hit foes who'd normally be out of reach.

Dash Attack
Getting a running start from his dash, Duck Hunt Dog pounces forward, aiming to tackle his luckless enemies to the ground with all the strength a dog can muster. This attack makes enemies fall prone instead of knocking them back, dealing 12% and leaving them open to another attack, such as the Down Tilt.


SMASH MOVES


Up Smash
Duck Hunt Dog laughs a bit, before releasing a single duck into the air above him. The duck, on it's own, travels upwards at a slight angle, dealing 15% to anybody it hits. After it travels two stage builder blocks, it stops being able to damage enemies, and flies off screen.

The Duck Hunt Dog can, if the player so chooses, shoot the duck with the Light Gun! When he does, the duck will fall to the ground, dea- unconscious, I mean. This is a kids game, after all. While falling, the duck deals 24% instead of the usual 15%!

Upon hitting the ground, the duck becomes an item that any player can pick up. It acts as a melee weapon, dealing 7% per hit.

Side Smash
Once again utilizing ducks for a Smash attack, the Duck Hunt Dog holds a red duck by the neck, swinging it overhead like some sort of duck-based sword. The duck is apparently tougher as it looks, seeing as this attack deals 24% and can KO at 130%.

Down Smash
The Duck Hunt Dog faces the camera, as a pair of ducks fly out from behind him, one on the left and one on the right. These ducks both fly horizontally in opposite directions, though they can be angled slightly upwards or downwards by the player in the split second after they are released. Each duck does, on it's own, 22%, and travels two thirds of a Battlefield platform before becoming harmless.

That's not all they're good for, however. Like the duck from the Up Smash, Duck Hunt Dog is capable of shooting these ducks down, at which point they take on the properties of the aforementioned Up Smash duck when it's shot down.


AERIAL MOVES


Neutral Air
Utilizing his inherent dog skills, Duck Hunt Dog pounces forward mid-air, aiming to claw and/or bite at the face of some unlucky foes. All in all, a fairly simply attack, dealing 10% and bringing both Duck Hunt Dog and any foe he hits down a bit faster.

Forward Air
Duck Hunt Dog reels back, before chomping his large teeth forward, doing what dogs do best. He aims to bite an enemy or two, in the process dealing them 8% damage and unusually high knockback for an aerial.

Back Air
Leaning back, Duck Hunt Dog holds onto a single duck, which pulls him back. The bill of the duck deals 7% damage, and this can act as a slight recovery move if the player is smart enough. Additionally, the player can use this at the same time as Duck Hunt Dogs forward aerial, creating one hundred and eight degrees of pain for the enemy!

Down Air
The Duck Hunt Dog takes a clay pigeon and steps on it midair, the shatter shards of it creating a hitbox below him that deals 13% and spikes enemies unlucky enough to touch it downward.

Up Air
Duck Hunt Dog releases a red balloon into the air above him. Fun! The balloon floats upwards fairly fast, popping if it reaches the top of the screen. It will also pop if it hits an enemy, or if DHD shoots it with his Light Gun! When it does pop, it'll deal 10% damage, and send foes flying! It's like a small explosion of sorts!


GRAB GAME


Grab
The Duck Hunt Dog's grab is a simple grab, as he pounces forward, aiming to capture an enemy.

Pummel
Mimicking the pose he takes in Duck Hunt, Duck Hunt Dog grabs the foe by the neck (as he does with shot ducks) and shakes them, dealing 3% per shake.

Up Throw- Trick Shooting
Tying a single, red balloon to the grabbed foe, the Duck Hunt Dog chuckles as he lets them go, waving goodbye as the foe floats helplessly upwards. The balloon carries them up without limit, unless the foe can escape (the same way they'd escape a grab). If used near the top of the screen, it's an easy way to KO your foe! Just let the balloon carry them away. This throw, however, does no damage...

...Normally, that is. However, if the Duck Hunt Dog deems it necessary, he can shoot down the balloon with the Light Gun! When he does, the balloon with POP with such force that it deals 13% to the foe, and spikes them downwards! What a neat trick, doggy!

Forward Throw- Flock Shock
Duck Hunt Dog starts laughing uncontrollably, as he is wont to do. Why is he doing this, you ask? Well, the answer becomes clear well quickly, as a quartet of ducks descend on the enemy, before lifting the unlucky foe away. They carry the captured victim three stage builder blocks forward at a 45 degree angle, before DHD fires a shot from his Light Gun, hitting the enemy and scaring off the ducks, dealing 15% and causing the foe to drop!

Down Throw- We Need a Distraction!
The Duck Hunt Dog jumps up and down, as if distracting some unseen entity, just on the other side of the TV screen. While this happens, the confused foe will attempt to use their Jab, only to be shot by said entity, being spiked downwards and being dealt 16%!

Back Throw- Free Bird
Taking his enemy and flipping them behind him, the Duck Hunt Dog turns to face them. He lets out a single duck, which flies to the enemy and starts pecking at their face, dealing 10% over five hits. This isn't so much a throw, as a way to create an opening. The enemy is thrown one battlefield platform away, so you have a few options.

Let's say you line up the distances just right, and jump into one Tall Grass patch while the enemy is distracted, then pop into another one behind the foe, that you set up beforehand! Sneak attack! Or, you can use this as a moment of relief, and escape from a foe who outmatches you in close range!


FINAL SMASH


DUCK HUNT

Duck Hunt Dog starts to laugh, as an veritable flock of ten ducks floods the screen, stunning enemies that they hit. Meanwhile, a target cursor appears on screen, controlled by the player's movement of the stick. Similar to Snake's final smash, the player tries to shoot enemies, dealing 10% per shot to enemies they hit. You get ten shots, total, so make 'em count. Additionally, if you, for some reason, shoot Duck Hunt Dog, he'll get a comical face full of soot. How cartoony!​
 

JamietheAuraUser

Smash Lord
Joined
Jan 11, 2010
Messages
1,196
Location
somewhere west of Unova
@ ChaosKiwi ChaosKiwi : Four small stage builder blocks for a projectile that you can only have one of at a time? And that you're expected to hit another projectile with to make it do things? Yeah, that's way too short a range. Unless you're talking about large stage builder blocks, in which case that's 12 stage builder units. Stage builder units are, of course, the length of one small stage builder block. It's just one less word to say "stage builder units" than it is to say "small stage builder blocks".

For the record, four small stage builder blocks is less distance than a Fox Illusion covers.

Edit: On second thought, such a short range might make sense if he wants to avoid destroying his own Tall Grass, or if it's more meant to be a utility move to interact with other moves. But if he wants to not destroy his own grass, can't he just throw Clay Pigeons?

Also, his recovery is actually pretty bad, thanks to it automatically traveling forward. While this has its useful moments, more often than not this is going to result in him being Meteor Smashed offstage close to the ledge and quickly gimped as his Up Special puts him under the stage.

Double Edit: Don't mind my criticisms too much though. Aside from those issues and his throws looking like they deal a whackton of damage, it actually seems like a pretty cool set! As Katapultar noted, though, it's missing knockback...
 
Last edited:

Katapultar

Smash Lord
Joined
Nov 24, 2008
Messages
1,284
Location
Australia
[collapse=Trolldog]It's interesting to see a one-day set from you. As weird logic it is for clay pigeons to explode for high damage upon being shot by a light gun, it's fun, but I reckon it'd be even more fun if you could specifically lock into your most recent pigeon by double-tapping B... but then that'd sort of ruin the shooter-nature of the set, I guess. The standards are... standard, namely because they're missing knockback, but the other moves are surprisingly good for a one-day set, the Smashes being hilarious and U-Smash/U-throw being genuinely interesting moves. Perhaps the grass Down Special doesn't do a lot for the set, despite being funny in hindsight, but it's acceptable for the flavor and timeframe the set was made in. Likewise, the D-throw is funny stuff, but I wouldn't normally accept forcing the foe to act against their will on a serious set. It feels funnier than usual simply because it's almost like a joke about how throws would be rushed near the end of a one-day set.

Overall, the set was actually much better than I expected for how quickly it was made and your level of skill, as the concepts and humor are fairly consistent and don't get overly stale unlike some past one-day set attempts. Good job![/collapse]
 

ChaosKiwi

Smash Apprentice
Joined
Feb 1, 2014
Messages
104
NNID
ChaosKiwi
@ JamietheAuraUser JamietheAuraUser When measure via Stage Builder Block I use the standard, well, block, pictured here.

As for the "no knockback" issue, I will attribute that to the comical nature of the set, not the fact that I completely spaced and forgot to go back and add the knockback in. Yeah. It was... all planned.

I'll edit it in later.
 

JamietheAuraUser

Smash Lord
Joined
Jan 11, 2010
Messages
1,196
Location
somewhere west of Unova
@ JamietheAuraUser JamietheAuraUser When measure via Stage Builder Block I use the standard, well, block, pictured here.

As for the "no knockback" issue, I will attribute that to the comical nature of the set, not the fact that I completely spaced and forgot to go back and add the knockback in. Yeah. It was... all planned.

I'll edit it in later.
Yeah, okay. That's a pretty short range for any projectile, though. 4 blocks is about right for a dash+attack side special, to be honest. I mean, Kirby's neutral special covers an entire block by itself, as does Bowser's jab. I think the only projectile that covers that short a range, aside from Lucario's Force Palm, is Mario's Fireball. Well, there's also Mega Man's buster shot in Smash 4.
 

Substitution

Deacon Blues
Joined
Dec 27, 2013
Messages
28,756
Location
Denial
NNID
MisterVideo
Edit: Decided to work on the moveset elsewhere. Will be here soon.
 
Last edited:

Rychu

Thane of Smashville
Joined
Jul 5, 2010
Messages
817
3DS FC
1908-0105-4965
"Potter, you cannot win against me! I was and am the Dark Lord's most loyal servant. I learned the Dark Arts from him, and I know spells of such power that you, pathetic little boy, can never hope to compete!"

BELLATRIX LESTRANGE

Bellatrix Lestrange was Lord Voldemort's most loyal Death Eater, by far his craziest thanks in large part to her years in the wizarding prison Azkaban, and most likely his strongest ally in the Second Wizarding War. She is incredibly sadistic, violent, unhinged, intelligent, and powerful, being described by the main character himself as "just as mad as her Master". Despite being incredibly arrogant and prideful of her family name, she murdered several blood relatives throughout the Harry Potter series for being "pureblood traitors".

Bellatrix is an extremely capable witch who is proficient in dueling, charms, dark magic, and occlumency, and has mastered the ability to fly, much like her master. In addition, unlike most of the characters in the Potter-verse, she's not shy about using blades, as she's been seen using (and expertly throwing) knives. Seriously, Bellatrix is one bad witch.

Statistics

Size -------{ 7
Weight -----{ 5
Ground Speed ------{ 6
Jump -------{ 7
Aerial Speed -------{ 7
Falling Speed ---{ 3

Flight
-
Bellatrix has a float very much in the vein of Project M's Mewtwo, albeit much faster and longer lasting. After jumping once, she can hold the jump button, shrouding herself in black smoke and able to control her flight around in much the same vein as a PK Thunder, moving at the same speed and control-ability. This flight may last for up to 2 seconds. Bellatrix will fall helpless after this is completely used up, though not if she simply releases the jump button: if she does so, she can re-use the float for the remainder of the time, provided she is still in the air. Landing replenishes the flight, getting hit while flying causes her to go helpless.​

Grab Game
Grab - Lunge
Bellatrix's grab is pretty long range, but punishable as all hell: she will physically attempt to tackle the foe and pin them to the ground. She suffers from some decently heavy lag if she misses, but if she succeeds, Bellatrix slams foes to the ground and pins them there with her knife.

Pummel - Cruciatus Curse
Bellatrix points her wand directly at the opponent's brain, laughing "Crucio!", as her victim begins to squirm beneath her. The pummel deals 1% damage to the opponent's body per hit, which Bellatrix can very rapidly deal out, but also depletes the opponent's shield with each hit, as if the shield had been dealt 5%. (for reference, shields have around 50 HP and take 30% less damage from attacks) As the shield depletes, it will regenerate 2 times slower than usual after Bellatrix depletes it, though it goes back to normal when it fully repletes. Bellatrix cannot break a shield using the Cruciatus Curse, but she can get it down to 1% strength, though probably not after one use. Opponents can button mash out of the pummel at regular grab difficulty, though Bellatrix should be able to throw the opponent away before they do so. At higher percents, Bellatrix will obviously be able to do more damage to the opponent's sanity (aka, shield), so she has quite a bit of incentive to torture the opponent as much as possible before using it.

Down Throw - Imperio
Bellatrix points her wand forward, shouting the incantation. A thin blast of opaque magic erupts from her wand, hitting her downed foe. This foe immediately takes their hands (or other such appendages) and wraps them around their own throat or breathing apparatus (robots or otherwise non-sentient opponents have special animations for this, and are rather being controlled through a charm).

This is primarily a damaging throw, with the damage being directly linked with how low their shield (or "sanity, as in the pummel) is. The more damaged a shield is, the more damage this forced choke will do, starting at a paltry 1% at a full strength shield, to a pretty devastating 35% on a shield that's been almost fully depleted. As well, the higher the damage output on the attack is, the more ending lag Bellatrix has for herself, as she takes more time to revel in her opponent's pain at the end of the attack, ranging from absolutely no lag to almost 3/4ths of a second. Afterwards, Bellatrix uses her magic to violently throw the opponent away from her, not dealing incredibly large knockback, but getting them out of her face.

Forward Throw - No Magic Required
Bellatrix pulls her knife out, before plunging it into her opponent's belly. And then doing it again. And again. And once more. Quite a few times actually, and very quickly too. Regardless of how many times she stabs the opponent (it's 7 times, by the way, within half a second), it ultimately deals about 7% damage, without much knockback, either, simply pushing (or kicking, rather) opponents into prone just a few steps away from Bellatrix. At higher percentages, this can most certainly be (rather easily) be chained, though should an opponent be pushed of of an edge they regain control immediately, rather than a moment or so once the initial stun wears off. Bellatrix has very little lag at the end of the attack, allowing her to follow up easily.

Up Throw - Leviosa
Bellatrix swishes and flicks her wand, levitating her opponent off of the ground, before slamming them back down, dealing 10% damage, before tossing them up into the air. This deals set knockback of a few SBUs into the air, never able to kill, but allowing Bellatrix a target to follow up on with using an aerial.

Back Throw - Dismissal
Bellatrix laughs and gets up, walking away from her opponent, who's still recovering from their bout with Crucio. Without even looking back, Bellatrix throws a small explosion spell (muttering Bombarda) at her tortured foe, dealing 15% damage and decent knockback, able to KO at around 115%.

Special Attacks

Neutral Special - Avada Kadavera
The Avada Kadavera, the killing curse, in addition to being one of her favorite spells, is by a very wide margin the most powerful spell that Bellatrix knows. Bellatrix yells the titular curse's name, almost laughing with pleasure at the very though of it. Unfortunately, this relishing of death comes at a price, and that price is fairly hefty starting lag, nearly half a second, during which time, she can be interrupted. If she's able to yell the name, she fires forth a green sphere of glowing, deadly energy the size of a half-charged Charge Shot, which flies at a slightly slower pace than the aforementioned attack. The curse has a pretty great range, usually able to reach the blast zone on normal-sized stages.

When the attack hits, it's devastating, though not quite as potent as her master's: it deals only 15% damage, but high upwards knockback that will KO opponents at around the 85% mark. The trouble is actually hitting with it: it's notorious for being unwieldy against opponents who are able shield, barricade, or avoid it themselves, and there's no exception here: shields, dodges, walls, constructs, minions, decently high-priority attacks, and any or all other things that may keep it from hitting it's intended target will render it useless, meaning that Bellatrix must find some way of crippling her foe.

Up Special - Dark Apparation
Bellatrix laughs and disappears in a puff of black smoke. After .75 seconds, she reappears in another puff of smoke, 3 SBUs away from where she had initially been, in any direction the player had input in that time. With no extra input, she will always Apparate directly upwards.

Bellatrix is able to input any move while she's disappeared, and she will perform them as soon as she reappears, though any sounds that she may make while doing the attack will still be heard, so don't think that you'll be able to sneak in a teleporting Avada Kadavera, though if you space it right, you might be able to apparate into a grab. Ending up in the air will not put Bellatrix into helpless, and she will even still be able to perform her float, giving her overall excellent recovery. Like most Recoveries, she can't re-use this until she's landed on solid ground.

Down Special - Protego
Bellatrix throws her hands out, wand pointed forward, casting the titular protection spell. An opaque shield bursting to life in front of her instantly.The shield is around the size of a vertically turned battlefield platform, and floats slightly off the ground, having a slight curvature of the edges. The initial release of the shield deals damage and knockback much like Fox's reflector, a slight hit of 5% damage and a combination of stun and pushback, sliding opponents away if they were on the ground, but slight upwards knockback should the opponent have been airborne.

The shield will linger on the stage for around a second after it's been summoned, and does all the lovely things that shields are wont to do, and reflecting any projectiles that hit it though dealing nothing to physical attacks outside of the initial release. It is, however, useful against opponents who still (for whatever reason) have the peace of mind in them to reflect a spell of hers back to her.

Side Special - Expelliarmus
Bellatrix points her wand forward, with an exclamation of "hah!", releasing an opaque spell that travels the length of 2 battlefield platforms before disappearing. This is the Expelliarmus, which acts as a counter to any attack it hits, and will bounce any projectile back the way it came, including inducing movement in stationary projectiles (including Bellatrix's own Protego!). The counter is fairly simple: if it hits an attacking opponent, the attack is interrupted and the opponent takes the damage that the attack would have dealt, as well as 1/3 knockback. If an opponent is not attacking, the spell will hit the opponent, dealing 5% damage and minor hitstun, but nothing too major.
Standard Attacks
Jab - Knife Combination
Bellatrix is not scared of getting up close and personal with her victims, pulling out her trusted knife for her jab. She slashes forward incredibly quickly, delivering hits that deal 2% damage and knockback that's barely noticeable. However, it does deal some small amount of stun to the opponent, giving Bellatrix some time to follow up or teleport away.

Side Tilt - Sectumsempra
Sectumsempra is a curse that was invented by Bellatrix's own cousin, Severus Snape, for whom it can be considered a "signature move". In terms of gameplay, one could consider it the exact opposite of the Avada Kadavera: Bellatrix uses the curse nonverbally, giving it very little beginning lag, save for her making an "X" motion with her wand, and not a second later, two quick slashes in the shape of an "X" occur 2 SBUs away. Anyone who even slightly touches this (admittedly small) area for the short time it's onscreen is dealt a rather devastating 15% damage, and a bit of stun in the form of falling into their prone position for a brief moment.

While Bellatrix can throw this out many times in a row without hitting anything, the moment she actually secures a hit with this attack is marked with significant ending lag, as she takes a moment to enjoy the pain she's cause for her opponent with a laugh - a laugh, unfortunately, that will usually prevent her from making many (if any) dramatic follow-ups to the curse, unless she's prepared for it. Bellatrix may be insane, but she's not stupid.

Down Tilt - Depulsio
Bellatrix utters the banishing charm, pointing her wand diagonally downwards. The starting lag in near non-existent as the small, opaquely-white charm bursts onto the stage. This funny little charm works in a number of ways: first of all, it will bounce opponents backwards about 2 SBUs, with a sort of FLUDD effect kicking in, dealing them 12% damage in the process. On the other hand, it also works as a sort of low-to-the-ground projectile counter, simply nullifying any projectile or attack that would happen to occur near the ground like, say, small fires or bobombs.

Up Tilt - Lightning Strikes
Bellatrix's wand sparks with electricity, as she swipes up, creating an arc of electricity above her. The arc isn't right on top of her, being a bit higher than her wand's reach. The hitbox for the lightning lingers for about a second, dealing 10% damage, though initial hitstun followed by downwards knockback, making it a pretty great anti-aerial attack.

Dash Attack - Stab
As she runs, Bellatrix pulls out her knife and lunges forward, arm outstretched. Should she make contact, the knife plunging into the opponent's belly deals a pretty ghastly 12% damage, knocking them back a ways, though not dealing anything that will kill until way too high percents. Bellatrix has some nasty ending lag if she misses, so watch out, she'll be falling flat on her face if she does.
Aerial Attacks
Neutral Aerial - Secondhand Smoke
Bellatrix spins while mid-air, briefly exploding into a puff of smoke before reforming into her regular self. This attack hits much like Mewtwo's Neutral Air, dealing almost nothing in knockback, but (usually) multiple hits of 4% damage.This is a quick move to start up, with the added bonus of effectively getting rid of her hurtbox for almost a half a second (the duration she remains smokey), and while the ending lag isn't -terrible-, it leaves her in a committed movement for that time, and has absolutely awful landing lag, making it easy to counter if she whiffed or did not space properly.

Down Aerial - Thunderous Impact
Bellatrix becomes shrouded in smoke almost instantly, then speeds directly towards the ground, at a speed similar to Sonic's down aerial. Flying downwards, the tip of the smoke is a hitbox, which deals 6% damage and downwards diagonal knockback. However, once she comes into contact with solid ground, the smoke bursts from her, creating a "shock-wave" that hits on both sides of her, reaching around a BFP out. The shock wave deals 8% damage and stun, as well as a pushing effect similar to that of Mario's F.L.U.D.D. There is almost no lag on Bellatrix's part on either end of this attack.

Up Aerial - Descendo
Bellatrix points her wand upwards, shouting "Descend"!. Blue sparks erupt from her wand, reaching upwards of 2 SBUs to hit opponents. Once they hit the opponent, they latch on, dealing small hits of 1% damage to the opponent, though with pretty nifty downwards knockback that should be able to bring opponents decently close to the ground.

In addition to all of that, it also gives her a pretty insane anti-gimping game, let alone offstage game in general, when applied with her flight and recovery. Getting Bellatrix off of an edge is dangerous for any opponent wishing to follow up, as she can very easily turn that against them.

Back Aerial - Expulso Minuet
Bellatrix, without looking, lifts her wand above her head, pointing it backwards and causing a small cluster of explosions to occur half an SBU behind her. The cluster deals many needling hits of 1% damage for the short amount of time it lasts. The lag on this almost doesn't exist it's so quick, actually allowing Bellatrix to attack again before the hitbox of the last attack leaves, letting her string together multiple hits. This is awesome at eating away shields, and can even be shot forward using a Expelliarmus.

Forward Aerial - Knife Rush
Bellatrix pulls out that big ol' knife of hers, slashing it forward in a manner that's not unlike Mario's FAir. Bellatrix adds a little flair to hers, though, as she uses the smoke to propel herself forward a bit as she slashes, giving this attack some pretty admirable range for a melee attack. The actual slash does around 13% damage, dealing high downwards diagonal knockback to aerial foes, but only knocking them back a little bit if they're grounded. Bellatrix can follow this up with a quick DAir though, pushing them back into the range of her other magical attacks.

Smash Attacks

Forward Smash - Expulso
Bellatrix holds her wand above her head, pointing forward with her unoccupied hand for the charge. Upon release, Bellatrix yells the incantation "Expulso!", causing a small, blue explosion to occur half a Battlefield Platform in front of her. The explosion deals small 1 to 3% hits, depending on charge, for one second, sucking in the foes should they touch it. The last hit, regardless of the charge deals a final blow of 10% damage that also deals some decent knockback, KOing around 150%. By using an expedient Expelliarmus, Bellatrix may be able to launch this spell forward.

Down Smash - Confringo
Bellatrix puts a hand to her hip, chin up, pointing her wand daintily downwards, a flame growing at the tip of her wand. Upon release, she chuckles and releases the cursed fire onto the ground before her, the reach of the pyre varying between 1 SBU and 2 SBUs depending on charge, also lingering on the stage for a varying length of time, between 3 and 7 seconds, also depending on the charge. The flame will always deal the same amount of damage, 4% damage per second it is stood in, though no knockback or stun whatsoever, with a curious affliction.

The cursed fire will inflict a burn onto those who spend time within the flame, a burn that lasts an extra 2 seconds per second spent within the fire. The burn deals 1% per second, which will burn even when they are shielding, and does not start until the opponent has left the flame. A fully charged Confringo, with an opponent who stands in the flame for the duration of the fully charged flame will be dealt 42% damage, though to be fair that is a pretty unlikely scenario, given that opponents can shield while inside the fire. The fire, obviously, eats away at their shields.

Up Smash - Bombarda
Bellatrix flings her arm upwards, charging the attack with the incantation of "Boooomb...", upon release finishing the thought with a shout of "BARDA!". Instantly, an explosion occurs 1 SBU directly above her, dealing between 15% and 30%, depending on charge. Unlike most of Bellatrix's attacks, this one deals in knockback, able to KO opponents at around 95%. This is Bellatrix's premier anti-air attack, though it's not an incredibly reliable killer due to it's somewhat awkward hitbox and relatively small area of effect, only about the size of a Bob-omb blast.

Playstyle
Torture them or something. I dunno, ***** is crazy, I just wanna get out of he-OHGOD HERE SHE COM-
 
Last edited:

Katapultar

Smash Lord
Joined
Nov 24, 2008
Messages
1,284
Location
Australia
@ Substitution Substitution : I'd really love to see a set for Billy Mays. Hope you get that set done and post it in a future post!

[collapse=Wicked Witch of the West] Previewing this set gave some sense of attachment to it, so I was looking forward to seeing the final product. The greenness look pretty snazzy.

As I mentioned on the Whiteboard, the concept presented in the pummel is a sweet one; its execution isn't -brilliant- or totally convincing, but it's certainly fine for the characterization if you want to make the killing curse the final step in KOing an opponent. I also like the air game for what little reason Bellatrix has to place opponents there, and though your U-air was a little different than what I had in mind it has me sold nonetheless for its offstage gimping potential.

For nitpicks, D-throw could do with only dealing 25% at most, just simple number crunching. I also think there are times when a certain type of knockback can get a bit redundant: the F-throw also puts foes into prone like the D-throw, but I think it would benefit more from not doing such since it would allow Bellatrix the chance to follow-up immediately since you can't grab prone opponents. F-air should knock foes on a low angle instead of downwards like the D-air, as it feels a bit overpowering for offstage. Finally, I still think the Side Special is lacking in detail like the lag and how fast it travels. The hitbox manipulation seems like it would be difficult to pull off on most of your stuff (and somewhat impractical with the Down Special barrier), the counter effect not having a lot of flow in the set. I probably should have told you earlier, but it seemed like a good fit character-wise and it had the manipulation. It would be good if there was emphasis on dealing shield damage from afar with projectiles, though the current SSpec projectile seems a bit too weak for that (or is it? Wouldn't it make sense to expel a shield aka deal damage to it?). Really, I guess I just want a projectile that can pressure shields to capitalize on the pummel, and you could possibly have the counter serve as a mix-up for the killing curse.

Overall, I'd say this is a pretty nice set, and it's probably your best right now. Man, reminds me of Weird Rider, except it's early in the contest - if you can put this much dedication into the rest of your sets, I think you'll have a great showing![/collapse]
 
Last edited:

Katapultar

Smash Lord
Joined
Nov 24, 2008
Messages
1,284
Location
Australia
"I'm no angel. I'm a demon! A vile, wicked demon!"


} Altis {


Amazing Angel

Altis used to be a demon, but she was booted out of the Netherworld and reincarnated into an angel due to her actions doing more good than evil. Not one to give up so easily, Altis wandered the vast reaches of space until she encountered the amnesic Chou-Chou, learning of a plan so evil that seeing it through could turn her back into a full-fledged demon! Thus, Altis became Chou-Chou's very first and faithful (?) companion in her ambitious quest to conquer all 7 Worlds.

Altis is a bit of a sadist who enjoys causing and observing minor bouts of chaos between other crew members, but she’s mostly harmless and otherwise serves as a freeloader who randomly voices her opinion on things from time to time. She's also incredibly incompetent when it comes to doing anything major herself, often screwing up any plans she has for a conquered world due to her own lack of knowledge or resilience - hence why she unwittingly does more good than evil. She also seems to be rather self-conscious and sometimes puts too much thought into whether her actions are evil enough, even wondering whether Chou-Chou’s way of doing things is even evil to begin with. All and all, it could be said that Altis is the textbook definition of self-contradiction, what with her class name being “Amazing Angel” and the fact that she considers herself a demon. She’s also a very “Disgaean” character with how satirical her intentions are and that she’s an angel/demon with ties to the Netherworld, and Mugen Souls even has ties to said series with its tone and composer having worked on some of the music for the game.


} Stats {

Sadist
Height: 156cm
Weight: 4
Ground Speed: 4
Jumps: 10
Air Speed: 2
Fall Speed: 3
Traction: 4


Altis comes equipped with her her signature gun! Contrary to her extreme clumsiness, she's actually rather good at making things. Sadly, her stats aren't all that great in comparison, except she has 6 fairly good midair jumps and a glide that provide her with an excellent recovery. How deliciously evil!


"Well now. What should I do to you?"


} Specials {

<Neutral Special -x- Evil Scheme >
Altis chuckles menacingly as a comical dark aura envelops her while she tinkers with the barrel of her gun. This takes mere frames to execute, but it's evilness cannot be understated: the genius Altis has increased the output on her gun to make any shot she fires from it 0.3x stronger, strong enough to push her back by 0.3-3 SBBs each time she fires it based on the attack's power. It's flawless I tell you, being able to move back whenever you fire a projectile so you can fire even more projectiles! Or at least until you start running out of stage, wherein it can start turning against you. If Altis every finds herself in a jam due to overwhelming incompetence-er, genius, she can tinker with her gun again to mod it back to normal just as quickly as she tuned it.

<Side Special -x- Fearful Fire >
Snickering, Altis stylishly points her gun ahead of her before firing a small fireball that rockets across the screen at high speeds and deals 4% with flinching while bouncing off surfaces. This can be angled by up to 60 degrees and charged for up to 1.5 seconds to increase the fireball's size and power, in which case it becomes a Kirby-sized projectile that deals 14% and good mostly-horizontal knockback that scales poorly, only KO'ing at 200%. This is a very basic projectile that's good for sniping foes with, and if backed-up with an Evil Scheme it'll push Altis back by 0.3-2 SBBs depending on the level of charge attained, always pushing her back horizontally regardless of which way the attack was aimed.

<Up Special -x- Master of Love and Lust >
Altis grins evily and hoists her gun in a direction of your choosing, after which the “teeth” on the midsection open up to reveal a golden cuff that gets fired out as far as a platform. This is a standard tether recovery, but if the cuff connects with something it'll clip around them and connect them to Altis via a chain tether! The tether is ruled by speed and weight like with those from most popular sets, but unfortunately Altis doesn’t excel in either department, meaning she can easily be dragged around... unless she propels herself back with her Neutral Special, in which case she can easily drag opponents back with her! In the event where the propellant effect would clash with an opponent’s knockback, the greater pull will be prioritized, that usually being the latter. The chain can be broken by dealing 30% to it or sending Altis flying past its length, it taking damage from enemy projectiles but not doing anything to obstruct them. Altis can remove the tether anytime if she feels it to be inconvenient.

<Down Special -x- Blast Off! >
Named after an in-game mechanic that lets characters send enemies flying across the map as though they were in the game we're making sets for, Blast-Off is a blast to use in more ways than one.

Altis releases a comical-looking bomb from her gun ahead of her, laced with cute white wings to keep it afloat, a skull at the center and a curious fuse that always stands upright. The bomb is initially the size of a Pokeball, but you can mash B for up to one second to inflate it to the size of a Party Ball. You can also hold B for up to 1.2 seconds before or after the inflation to fire the bomb 1-10 SBBs across the stage, turning it into a projectile that deals 1-4% and flinching before immediately coming to a stop. The bomb can be aimed diagonally by holding the control stick back or forth, and it'll bounce off anything it hits along the way, including hitboxes - the bomb can end up bouncing right back at Altis if she isn't careful!

Bombs can be grabbed and launched like gravity-defying soccer balls (dealing their usual damage when shot out by Altis), though bigger bombs have more knockback resistance to the point where the largest only travel half the distance of a small one. A bomb has 14-32HP based on its size, taking 2% each time it collides with something or something collides with it, and once that HP is depleted it'll start flashing red before exploding upon losing all its momentum. The impending blast reaches out 1.5x as far as the bomb's diameter and deals anywhere between 5-17% with very weak-high knockback that'll KO between 440-100%, making for a rather scary, chaotic KO move. Fire attacks that collide with the bomb and have similar/more strength than its explosion will instantly detonate it, while fire attacks that specifically make contact with the fuse will light it up and cause the bomb to go off after 5-2 seconds based on the attack's power, but if the fuse if lighted up again it'll begin sparking violently and make the bomb explode as soon as somebody touches it. This is largely situational based on whether the opponent has fire attacks or not, but Altis can easily use her Side Special to interact with bombs from a distance and specifically aim at the fuse or the bomb itself. Altis can have up to 7 bombs out, and if one bomb collides with another the latter will be launched in the direction the former was traveling with however much momentum it had left, similar to a game of billiards.

Altis can tether herself to a bomb at least Kirby's size and drag it around, though it still keeps its gravity-defying properties. The bomb can be used as a substitute for opponents and even used to approach, providing Altis is careful about her spacing so the bomb doesn't bounce back in her face. Altis can also use the bomb to launch herself upwards, though it can't really be used to stall since the bomb's gravity-defying properties mean that Altis will have to use her midair jumps to get in range for an U-air, not to mention she won't cover that much distance in the first place.


} Standards {

<Jab -x- Gatling Pelt >
Altis snickers and pokes her gun forth as a medium-ranged hitbox that deals 4% and mild mostly-horizontal knockback that scales poorly (KO’ing at 400%). If you hold A afterwards, Altis will hold out her gun and fire a wide spread of weak shots that cover 4 SBBs and deal 6 non-flinching hits of 2% every second, having transcendent priority. This is a fun little troll move to pester foes with, especially if you combine it with your Neutral Special to get some slow but sure spacing.

<Dash Attack -x- Fantasy Spin >
Altis flies along the ground and throws out her arms to the side with a happy look on her face, spiraling a SBB forward at a rather mild pace. This deals 8 hits of 1% that drag opponents along with Altis before sending them away on a low angle for okay knockback that won't KO until 205%. The move doesn't have much lag (just a bit of starting lag), but it does have a rather long duration, being good for dragging opponents along with you to throw them off-balance... or maybe to drag a bomb along with you if you're feeling dangerous. While spinning, the player can hold the control stick backwards or forward to respectively halve or increase the distance Altis travels by 1.5x, alongside being able to curve her flight very slightly by holding the control stick up or down. This move can leave Altis in the air and take her offstage if she's close enough to the ledge.

<F-tilt -x- Assault Shot >
Altis thrusts her gun forward to release a small blast of fireworks ahead of her, popping in an opponent's face for 4% and rather low knockback that won't kill until unreasonably high percentages. The attack can be angled and repeated up to 2 more times for a total of 3 hits that can each be thrown out on different angles, each hit slightly more powerful than the last (6%, 8%) and knocking opponents 45 degrees higher than the direction the attack was angled - low attacks launching enemies horizontally and high attacks launching them vertically.

The move does a decent job at deterring approaches with its potential multi-hitting nature, but it gets especially interesting when Altis's Specials are thrown into the mix: each shot pushes Altis back in the opposite direction she aimed her gun by roughly 0.5-0.8 SBBs when she had her NSpec active, a rather modest distance that's good for light spacing. Being pushed diagonally downwards along solid ground will cause Altis to only slide back as little as half the normal distance, while being pushed upwards can let her cancel into her airgame. Having an opponent tethered makes this extra fun, as Altis can steadily drag a foe back with her and make it hard for them approach due to the move's hitbox, able to propel herself up into the air if she senses trouble like a quick oncoming projectile. Overall, a good move for when you need precise control over extreme, spontaneous movements.


<U-tilt -x- Pervert! >
Even Altis has standards! She throws out a wide "football" kick that flashes suggestive material ahead of her, just like in the game's opening dance, albeit unintentionally, a rather annoyed look on her face as she yells the attack's name with the occasional use. This punishes foes for 10% and very reliable knockback that KOs at around 170%, knocking them on a high angle if they were closer to Altis or on a low angle if they were hit by her foot. The move comes out fast and can hit diagonally above Altis, but it suffers from quite a bit of end lag that leaves Altis open to punishment if she misses, so caution is a must when punishing perverts! Y Altis isn't all that comfortable fighting up-close, so this move serves as both a panic button and a basic launcher for when she needs some space to herself, indifferent to whether the NSpec is active or not. Its speed, launch ability and varying knockback trajectory make it very useful with a tether, bomb or opponent, just so long as you position yourself well enough to launch on a favorable trajectory.

<D-tilt -x- Chicken Run Trap >
Yep, that's actually the name of an in-game attack, but it had nothing to do with chickens or running - and neither does this attack.

Crouching down, Altis pokes her gun right down in front of herself and lets out a small jet of fire that deals 7 hits of 1% over a rather long duration for a D-tilt, in turn resulting in fairly low knockback that doesn't really scale. While not really practical for a melee attack partly due to a bit of lag on both ends, it does have good reach and creates a trap ahead of Altis on the first hit: a small fiery crack that releases a small burst of flame upon anything that steps on it, which deals 4% and minimal disruptive flinching. Altis can have up to 7 of these fiery traps out and they each last for 20 seconds, but they're rather small, disappear upon use and can be triggered harmlessly simply by rolling around them. Altis is of course vulnerable to her own fire, which can screw her over if she places them mindlessly - especially taking her spacing game into account.

Having the NSpec active causes Altis to be pushed back by 1 SBB over the course of the attack, letting her set-up traps while moving away from the opponent. What's also interesting is that foes hit at the start of the move as Altis moves back will be dragged along for the ride, acting as a substitute for the tether (especially close-up, where more spacing is required to push players around) while positioning them between the Amazing Angel and her newfound fire trap. For how much a fire trap can interfere with Altis's dragging tether game with bad positioning, they can also greatly assist it by stunning foes forced over them, not to mention make it outright difficult to push her around if they're littered all over the place. While foes can easily get around the traps by rolling past or jumping over them, a clever Altis can read this and use it as a chance to strike back.

Fire traps will make any bombs that go over them explode, letting you use them to threaten nearby opponents.


} Smashes {

<F-Smash -x- Devil Bomber >
Another evil look on her face, Altis tinkers with her gun at such comical speeds that she appears almost insane, after which she fires it off hastily to have a fairly large black explosion (about a SBB radius) somehow manifest a good distance ahead of her. This fierce-looking blast deals 17-24% in darkness damage and launches foes intimidatingly far on a 60 degree angle, but it scales badly enough to not be a reliable killer until 140-115%. The move has fairly low start-up lag, but it has a large blindspot directly in front of Altis and some rather rough end lag, though such can be covered by the 2-3 SBBs of pushback an active NSpec would provide. The constant spacing Altis gets from her NSpec helps in positioning for this attack.

What's especially interesting about the blast is that it's positioned in such way that it'll barely catch opponents a platform away from Altis, which happens to be the exact length of the tether. This makes it impossible for a tethered opponent to escape the blast just by moving back along the ground, a necessity given the intimidating size of the hitbox, and even if they do get in Altis's blindspot she can just deliberately fire off the blast to push herself back along with them! The blast's reach means that both characters will always be pulled one way or another if both the NSpec and USpec were active, either by landing the blow or hitting a shield, overall making the move excellent for starting offstage gimps combined with the extreme launch ability and self-pushback.


<U-Smash -x- Cloud Nail >
Altis raises her gun skywards with one hand and uses the other to cover her ear, wincing for what is a rather hilarious animation. She then fires a comical, dusty blast that hits directly above her, dealing 14-20% with decent vertical knockback that scales well enough to KO between 140-110% or 18-24% with high vertical knockback that KOs between 108-75% for hitting with the center of the blast. The blast actually reaches out quite far from Altis given she has her hand fully extended, but it doesn't have a huge radius and thus there's a very small blindspot above her. Regardless, the move is fairly fast and doesn't leave a lot of room for punishment. Using this move with the NSpec active actually pushes Altis down through platforms, whereas it pushes her back a small distance on solid ground.

Using this move causes a dusty cloud platform to get left behind, stationed barely above where a Battlefield platform would stand. Hitting the cloud with an attack that deals a reasonable amount of knockback will cause it to darken over 0.75 seconds before building up static, causing it to become a hitbox that inflicts half the damage of the attack and radial flinching knockback to those that touch it before it dissipates, doing so anyway after 5 seconds if nobody makes contact with it. Also, if someone gets under a static cloud, it'll flash for a moment before sending down a large bolt of lightning from the center which deals the same damage and knockback as the attack used to trigger the static, meaning players can't simply camp underneath it. Clouds last for 15 seconds, and Altis is not exempt from being damaged by the lightning. Fire traps can be made on clouds.

If Altis uses this move atop of a cloud, she'll shoot it downwards and send it plummeting downwards while still standing on it, depositing her on the ground before rocketing 2-4 SBBs back up and automatically gaining static upon reaching its apex, the likes of which will release a thunderbolt dealing identical damage to Altis's sweetspotted attack - in other words, very powerful. The cloud deals 10% and decent knockback to anyone it hits along the way, now higher up and having its vertical range increased. Altis can also shoot clouds diagonally down by angling the control stick in the opposite direction, not only providing her with mobility but also letting her bounce clouds specifically so they end up off the stage. It's possible to shoot a cloud off the stage, though it's not all that practical of a position for it to be in given it won't be able to hurt anyone.


<D-Smash -x- Ice Age >
Altis once caused an ice age, but she ended up freezing over the world's tyrants and thus did more good than evil. She replicates such by pointing her gun diagonally downwards and firing off an icy blast that's comparable to Zero Suit's D-Smash in terms of size and lag, only it deals 13-19% and average knockback on a 110 degree angle that won't KO until 145-115%, leaving opponents in prone if they're still onstage during the apex of their knockback. The move pushes Altis back diagonally upwards by 1.4-2 SBBs if she had her NSpec active, making for an interesting pseudo-jump, but that's not all it does either: the icy blast freezes over 1-3 platforms of ground around Altis! Mwhahaha! The ice can make ground movement awkward for opponents attempting to drag Altis around, but what makes the icy flooring especially interesting is that it doubles the distance Altis slides back when she has her NSpec active! Does she even need that!? Ice sticks around for 8 seconds before melting away, but it can also be destroyed prematurely through fire attacks like Altis's Side Special or F-Smash.

Icy flooring will freeze over any fire traps Altis had out along with their timers, letting her reactivate them from a distance using her Side Special to melt the ice. The icy blast will freeze over bombs and render them inactive for 2-5 seconds, say maybe you want to preserve an impending blast, but otherwise they keep their gravity-defying properties. If Altis uses this move atop a cloud, she'll turn it into an ice cloud that sends out a SBB-wide shower of hail from the center on an angle based on where specifically the ice blast hit: either straight down by striking the center or diagonally by striking the very edge of the cloud. The hail lasts for 2-5 seconds and deals rapid damage of 8% per second to anyone under it, including Altis, while also freezing over any floors it makes contact with. Clouds can still build up static while hailing, and if struck again by this move during such, a medium-sized ice chunk will instead be fired down rather quickly, acting as a projectile that deals the attack's damage and knockback in diagonal form, along with all its other freezing effects.

This is move you actually need to be careful when using, due to the fact that the ice takes up much of the stage and bears heavy consequences to Altis's game. It can screw up her D-tilt traps if she's not careful, but worse yet it wrecks the positioning of her F-Smash during a tether since F-Smashes cause characters to slide along icy terrain during their charging phases. This isn't so bad with no tether, nor even with one since Altis will slide back even further with an opponent, making it easier to drag them off the stage.


} Aerials {

<N-air -x- Netherveil >
Altis throws out her hands out playfully and starts spinning around, a faint veil of holy energy surrounding her body which gradually blackens over the course of the spinning. The attack dishes out 6 very fast hits of 1.7% that drag opponents with Altis before weakly knocking them away in the direction they came from, not good for KO'ing until around 220%, but there is a sweetspot at the center of Altis's body which deals 13% in light/darkness damage and very good diagonal knockback that'll KO at 140%, automatically ending the move and actually being one of her better KO moves. Only Altis's body is a hitbox and thus the move has short range, but virtually no lag to speak of, making it safe to land in the middle of. It's unlikely you'll land the sweetspot against regular opponents given Altis isn't a fan of melee, but it can easily be utilized against bombs and clouds.

If Altis was tethered to something, her spinning will cause the tether to form a mildly spacious ring around her body that pulls the target a SBB towards her over the duration of her spinning, which is half the length of the tether. This temporarily shortens the tether and can be done again to bring the target right up to Altis, but it does nothing to stop foes from moving back to return it to normal and will do so anyway if the target is launched a reasonable distance. Bombs won't resist and will temporarily stay close to Altis until she decides to knock them away, whereas with foes it can be used to somewhat disorientate them with some skill, maybe even pull them into the attack.


<F-air -x- Air Bazooka >
Altis holds her gun ahead of her for a laggy attack, firing out a fairly large blast of air that deals 12% and good knockback on a 70 degree angle that can KO at 160%. This serves as Altis's basic means of assaulting foes during a gimp, and while not especially powerful for the lag it does have very good reach and coverage that makes it favorable in mid-ranged situations, like the one created by the tether. Having the NSpec active causes Altis to be pushed back by 2 SBBs when she fires the blast, a trait that can not only assist her recovery when she's done gimping but also used to drag foes further off the stage. That being said, the distance covered isn't immense, and foes can take advantage of the starting lag to pull themselves back onto the stage or attack Altis out of it. It also goes without saying that Altis can screw herself over if she goes too far off the stage, as while her recovery is very good it's rather slow and fairly easy to gimp/edgeguard against.

If you hold A anytime during the starting lag, Altis will trigger a very weak suction effect from her gun that reaches out roughly 2 SBBs ahead of her, possibly bringing foes into the hitbox. Continuing to hold A will cause Altis to skip the air blast and continue the suction into the attack's end lag, which for what it's worth can be used as a fake-out and to stop the pushback effect as an emergency. The suction is capable of pulling in clouds and bombs if necessary, giving Altis a little extra means of playing around with them.


<B-air -x- Gunsaw >
Altis pokes her gun behind her with one hand and looks back with an evil smile on her face, revealing small hidden blades that circulate around the rim of her gun like a chainsaw! Now that's evil, but maybe not as evil as the attack itself: 3 quick hits that strike for 3%, 3% and 5% before dishing out decent knockback -behind- Altis with the likelihood of KO'ing at around 175%, dealing horizontal knockback near the tip of the hitbox or on a 35 degree angle closer to Altis. Such madness!

The move might seem a bit useless for gimping given its hitbox properties and the nature of the input, but it's not as situational as you'd think since Altis can easily turn around in midair by either using her Side Special or spending a midair jump, and it can at least be used to catch opponents trying to get behind her to escape a gimp. It can also be used to stagespike near the bottom of the stage, but that rarely tends to happen. Multiple hits make the move good for pressuring shields, especially if opponents roll behind Altis to say, avoid a fire trap, and it can be used to start or position for a gimp. The backwards knockback is also incredibly useful for sending bombs towards opponents, especially since Altis will be constantly dragging them behind her with her tether, doubling as a way to easily position them ahead of her.


<U-air -x- Fanciful Floaty Kick >
Altis performs a flip-kick, though she appears surprisingly relaxed due to her flight abilities, her arms crossed in content. Is she mocking her opponent? The kick is a fast attack with reasonably good range, dealing 10% with good radial knockback close to her that'll KO at 200% or 5% with low radial knockback near her foot, hitting all around the upper-half of Altis. It goes without saying that this is a basic juggler that'll get quite a bit of use out of a tether or gimp, given Altis can knock her opponent in a myriad of different directions if she positions herself specifically, even attempt to use the move as a pseudo Side Aerial. The sourspot will easily position opponents closely enough that Altis can possibly follow into a combo, while the sweetspot can KO at higher percentages but requires commitment due to only working close-up, usually needing a jump or 2 expended when juggling with a tether.

<D-air -x- Heavy Village Rain >
Altis takes some time to aim her gun downwards, a focused look on her face, before she fires a thin blue beam that zips down a platform beneath her before dissipating - the exact length of a tether, need I say. The beam normally deals 10% and average knockback on a high angle that'll KO at 180%, but there's a sweetspot at the end of the beam that deals 16% and high knockback that KOs at 135%, which is deadly for launching opponents off the ground or punishing those beneath Altis in a tether to keep them in midair. The beam also has spiking properties against those fairly close to Altis when hit, a staple for early KO gimps, if a bit hard to land because of the starting lag. Using this with the NSpec active propels Altis up a little, but it's not enough to stall due to starting lag. Much like the B-air, this can be used to stagespike foes beneath the lip of a stage if you've got good timing.

<Glide Attack -x- Spinning Angel >
Altis's glide is rather slow when she's descending, but she picks up speed when she's ascending, making it easier for tethered foes to drag her around during the former but easier for her to do so during the latter. In any case, the glide is a last resort recovery for Altis if she's used up all her jumps and is far from the stage, something that can happen after getting too into a tether-gimp and producing a KO.

Altis's glide attack has her spin around like with the N-air, except she produces no veil around herself and goes through opponents instead of dragging them around. This is more suited to keeping opponents in place, though it's possible to knock them away if you time it so you run into foes during the last hit or try to go for the sweetspot.


} Grab {

Altis uses one hand to reach out and hold opponents by their collar, a sadistic look on her face. She must have something evil in mind for her opponent! Or maybe for a bomb, as remember they can grabbed like normal characters.

For her pummel, Altis lightly smacks the opponent with her gun for 2%, a naughty smile on her face! It can be used to damage a bomb to a specific extent, just so long as you're careful not to completely deplete its HP - lest it blow up in your face. Bombs can be released by holding the pummel input.


<F-throw -x- Landmine Assault >
Altis boots the foe back a set 1.5 SBBs for 2% before almost immediately following up with a blazing fireball from her gun that deals 10% and pretty good horizontal knockback, just with rather low scaling that prevents it from KO'ing before 150% - even taking the knockback from the initial kick into account. With just the NSpec active, this is Altis's ultimate move for retreating from close-combat, pushing her back by 2 SBBs upon firing. With a tether, it becomes a a clean way to slide enemies across the stage to maintain spacing and set-up for gimps near the edge of the stage, keeping both characters at frame-neutral. The move can also be used to kick bombs before detonating them on demand, just so long as Altis is not too close to the foe... or else the bomb will bounce towards her and blow up.

<B-throw -x- Dismiss >
Altis uses one hand to toss her opponent behind her with looking back, a seemingly bored look on her face. Is her new toy not pleasing her? This deals 4% and flings the opponent on a 70 degree angle nearly 1.5 SBBs away from Altis, knockback scaling being almost non-existent. The throw's main purpose is to keep foes close to Altis (ironically enough) while turning them the other way round, something that lets her set-up for dragging them in a specific way if the current positioning was inadequate for such - like wanting to pull a foe back with you via NSpec/USpec tether combination for an offstage gimp when you were facing the ledge, for example. It can also be used for easy follow-ups (foes are usually within range for a tether attempt) and a quick way of releasing bombs, due to how fast it is.

<U-throw -x- Kidnapping? >
Locking her arms around the target's shoulders, Altis suddenly takes off into the air with them! She flies up 4 SBBs off the ground before lightly tossing them above her for 6% and relatively low knockback that won't KO from its position until around 225%. Altis can angle her flight slightly to cover a SBB of horizontal distance at most if the control stick was angled, which has the interesting effect of giving her a slight momentum boost in that direction that in turn makes it easier to follow-up with her F-air or B-air, possibly starting an early gimp.

The throw becomes especially interesting if Altis had an outside foe/bomb tethered, letting her drag them up into the air with little resistance and position them beneath her. It can be used on a bomb just for the sake of pulling around a tethered foe, or vice-versa if you think placing a bomb in midair beneath you would be a good strategy for the current situation.


<D-throw -x- Tricky Rain >
Altis swings her gun into the foe's torso to deal them 8% and good knockback that'll KO at 200%, but then she follows up with an evil smile and 3 fast bullets from her gun to seal the deal. But what's this - the bullets deliberately curve around their target and fly off the top of the screen, resulting in a complete miss! Or maybe it's all part of the genius Altis's plan, as 2 seconds later these same bullets come flying down on their target to individually deal 4% and negligible (almost no) set upwards knockback, going through all drop-through platforms in their way. The bullets will make a slight curve to reach their target, but otherwise they're easy to bypass with rolls or fast movement. The bullets can assist in landing blows and possibly keeping foes under control for tether movement, but they're made hilariously invalid when Altis is dragging her foe around and can even damage her if she's above them! The move can also be used on bombs to inflict delayed damage or in hopes that a stray bullet might hit the foe. You never know.


} Playstyle {

<Overwhelming Contradiction >

What's this, a character with a playstyle that contradicts itself? You betcha! Altis is a bit of an ambitious troll character, but she can easily screw herself over if handled poorly (kind of like a moveset...). She space and camp with incredible ease thanks to her NSpec and versatile SSpec, but therein lies a contradiction: her true calling is to use her USpec to tether herself to an opponent and drag them along for the ride, which requires her to get close to them! Altis does not have a fantastic approach given her overall low speed, but she sure has no problem egging on opponents to approach her. If Altis simply must approach or get around, she'll have to tether herself to a bomb and knock it around using a strong move like her F-Smash.

With all the spacing Altis gets, sitting back and making traps becomes a viable option, the Down Specials bombs, D-tilt fire trap, U-Smash cloud and D-Smash ice all being viable options. These are all particularly handy with the tether, but an Altis player should never go about making them just for the sake of such: all of Altis's traps are harmful to her, and if she's not careful they'll come back to bite her later on. For example, she makes a fire trap in hopes that an opponent will step over it or be dragged into it by a tether, but if she's forced to have her back to it either by stepping over it to approach or the opponent gets around it in midair, the fire trap will impede her when she tries pushing herself back with her NSpec. The D-Smash can be used to temporarily erase the mistakes of D-tilt traps so Altis won't be impeded by them, but this can also screw her over due to how ice has the potential to mess up the positioning of her F-Smash and also possibly benefit opponents in landing their own F-Smashes, and they won't have to worry about the fire traps that were once there. It's what you might call "digging your own grave deeper", and Altis sure has a thing for doing that in Mugen Souls.

The reason why Altis's tether game is so pronounced is because she's not an especially powerful fighter, thus why she needs to make use of her multi-jumping ability to gimp opponents for an earlier KO. The tether is key for this given Altis is slow, but that's not to say it's impossible to gimp without it given Altis has pretty good attack range, just that means that Altis has the option to pull opponents offstage without directly damaging them when combined with her NSpec, if say she uses extreme measures like sliding back with her F-Smash or similar move while on ice. Having the NSpec active with the tether at the same time and attempting to knock opponents offstage for a gimp can be pretty crazy too, even contradictory: if Altis succeeds in hitting her opponent, she'll likely go flying back with them, but if she misses or hits a shield she'll slide back and the opposite will occur. Such 50/50 chance will likely occur if Altis wants to take advantage of the power boost via NSpec to increase the knockback on her attacks so gimping is made easier, as well as actually get something out of the deal if she misses, but if she's not careful she can end up pushing an opponent towards the stage and saving them, thus contradicting herself. Attempting to have both the NSpec and USpec active seems as though it would always be ideal, but there are times when it won't be good to have either active in a certain situation, usually the NSpec. Thus, a careful Altis player would want to manage these 2 moves so they don't work against them, or else they'll pay the price. Yeah, being an evil genius sure is hard.

Overall, Altis has a degree of convenience on her side given her camping, flight and spacing abilities, as well as tether, but she must plan carefully or else she'll become her own undoing, as has been the case in many of her attempts at evil. In the hands of a master, however, she'll be the one having the last laugh as opponents are utterly overwhelmed by her evil intellect.


} EX Skill {


Deciding that enough is enough, flames flare around Altis as she puts on a serious look and points ahead. She then flies into space at high speeds and brandishes a new, stylish gun more befitting of her apparel that appears in a greenish-blue flash of light. Once she's gotten a comfortable vantage point, Altis charges energy in her gun and fires a meteor from it....at a planet! Oh noes! The poor planet fears for its life, but thankfully the meteor curves around it - likely due to Altis's incompetence - and instead heads for earth. The skies turn red once the meteor enters the atmosphere, where it plunges into the earth and collides for a massive, mushroom cloud explosion as Altis returns and murmurs to herself about the results of her evil, thinking it to be... somewhat okay. If you're wondering how it's possible for Altis to go into space, it's because God took a cue from the Sonic universe and made it possible for anyone to breathe in space, be they human or demon. Even if that wasn't the case, angels and demons of the Disgaea universe have been known to not require oxygen and were able to stand on the moon in one installment, so no worries.

Once Altis flies into space, a cinematic begins and ends once the meteor enters the earth's atmosphere, whereby foes are given time to move around so they can dodge the meteor that's due for collision in a couple of seconds. They're gonna need it too, because the meteor lands smack in the middle of the stage and creates a colossal explosion that would cover most of Final Destination, not to mention it lingers for a fair while, dealing 66% before sending enemies flying for very knockback on a low angle that can KO at around 66%. Using this EX Skill breaks any tether Altis had going, but thankfully it does not harm her traps in any way whatsoever, which can be used to limit a foe's space as try to avoid the impact. Also, if Altis -didn't- have an Evil Scheme going for her upon breaking the Smash Ball the meteor will automatically land on a random foe instead of the middle of the stage! How evil!
 

Katapultar

Smash Lord
Joined
Nov 24, 2008
Messages
1,284
Location
Australia
"Amazing, as expected of Lady Chou-Chou! I'll follow you to the edge of the universe!"


} Ryuto {


Chou-Chou's Vassal

Ryuto was originally a wandering adventurer who dreamed of sailing the universe on his vessel, the G-Castle, but one day he met a stranded Chou-Chou and instantly became smitten with her overwhelming cuteness, becoming her second companion and very first peon - or at least the first to keep his original form. Afterwards, Chou-Chou immediately claimed the G-Castle as hers and Ryuto just handed it over like it was nothing, showing just how crazy he was for the Undisputed God.

Ryuto is pretty much the errand boy of Chou-Chou's group who takes care of every little chore from piloting the G-Castle to arranging the Shampurus, but unfortunately he gets overshadowed sucks at most tasks and gets nosebleeds easily when turned on, essentially making him the butt-monkey of the series. That being said, he does have a friendly personality and has more than enough common sense to act as a voice of reason in the event where someone says or does something stupid. He can even make good suggestions at times, being the one who came up with the idea that Chou-Chou should conquer each world by turning their respective hero and demon lord into her peons since they're the two strongest beings. Sure beats turning -every- living thing into a peon.
He is actually the hero of Soil World, explaining why he kept his original form upon becoming a peon and why he knew about heroes and demon lords in the first place.

} Stats {

Masochist
Height: 152cm
Weight: 6
Ground Speed: 6
Jumps: 5
Air Speed: 5
Fall Speed: 8
Traction: 5
Wall Jump: 5


"Watch me Lady Chou-Chou!!"


} Specials {


<Neutral Special -x- Power Arms >
Ryuto puts his oversized gloves to use by firing one off like a rocket through a simple punch, but rather than go straight forward the glove instead performs a shuttle loop before coming back behind Ryuto as a projectile version of Meta Knight's Up Special, dealing 7% and decent radial knockback that KOs at 200% to anyone it hits. This can be charged for up to one second to double the size of the loop, which is good because Ryuto is free to move around and attack after shooting his glove off. The glove will automatically re-attach itself to Ryuto once it makes contact with him, but if he wasn't standing/falling in place or dodging at the time the glove will hit him square in the back! This causes the glove to go flying in the direction it hit Ryuto, pushing him along for a rather painful super-armored ride that covers 2 SBBs and forces him to take oncoming projectiles like a man before ejecting him for 10% and moderate knockback in the direction he was shot off at that'll KO him at 200% without DI (which is very easy to do). This also comes with a hilariously pained noise from Ryuto's mouth along the lines of "AWOOOGAH!!" or "OOOOOHMIGAWD!!", but that's not all as anyone struck by Ryuto gets hit for a harsh 19% and are pushed along with him before being ejected for stronger knockback that usually KOs at around 150%. Whatever you do, don't try to be a smartass and cut corners with the rocket; if you try to run from as it starts to chase you down, it WILL accelerate and catch up to you. You can shield or use super-armor frames to resist the rocket, but either way you don't act as a hitbox and are merely being pushed forward with a hefty catch, taking big shield damage or suffering 10% anyway. Oh, and absolutely DO NOT USE THIS MOVE OFFSTAGE, because your high fall speed will cause the glove to fly at you from above and push you down to your death. What the hell are you doing, Ryuto? You should really test your moves before before bringing them to Brawl!

<Side Special -x- Full-Course Strike >
Having nothing to do with food or cooking despite both being in Ryuto's job description, our favorite peon rears an arm back dramatically as the glove on that arm quickly flares up and expels bigger flames of greater intensity as you hold down B. These flames burn at their brightest after 0.7 seconds, but if you hold the input for even a mite longer they'll instantly die down at the same rate they grew, only to expand once again after fully shrinking in a cycle that endlessly repeats itself until you let go of B. Once you do that, Ryuto will throw out a punch to fire the glove off as a spinning, blazing rocketing projectile that moves at incredibly varying speeds based on the intensity of the flames at the time, ranging from that of Mario's fireballs all the way to Pit's arrows. This in turn affects the damage dealt by the glove, which pierces through foes for either 10% and alright knockback that KOs at 220% or rather high knockback that can KO as early as 85%! The latter sounds oh so deadly, but it's actually very difficult to time exactly when to release the glove and as such the speed and power of a glove charged to 0.69 seconds is very different to one charged for 0.7 seconds - you could even say that getting to that speed is damm near impossible and requires a miracle. At the very least you can predetermine the flight path of the rocket glove as though it were one of Pit's arrows by moving the control stick up or down while charging.

But we can't very well let Ryuto have a good projectile that travels across the entire screen, now can we? Well thankfully there is one big thing holding it back from being as good as I made it out to be. You see, Ryuto, being the fail peon he is, screwed up with the glove's AI maintenance somewhere along the line: if his rocket glove is so much as even hit by an opponent's attack, no matter how weak it is, it'll spark and lose its hitbox before malfunctioning, turning right back to where Ryuto is in an attempt to target him! Ryuto's glove outright ignores everyone else in its attempt to attack him and will shrug off any projectile he tries to use against it, save for powerful throwing items he does not have in his moveset. That's not even the worst part either, as the glove will take on the power and appropriate travelling speed of the attack that hit it if it did more damage than it would have dealt, not to mention Ryuto is not able to use this move until one second has passed after his glove has left the stage... not that he'd want to when it causes him so much trouble. If Ryuto is hit by his glove he'll let out a pained cry that's blatantly recycled from the NSpec as he suffers impact stall, making it almost fun to watch him get hit providing he's not killed in the process. Speaking of the NSpec, Ryuto uses a different glove for that move and this one, allowing him to use both at the same time.

Do you still want to use this move even knowing that it's deadlier to its user than the opponent? The erratic speeds the projectile can travel -can- throw off an opponent, yet at the same time it's also somewhat predictable given Ryuto will absolutely not want to fire off the uncharged version from a distance when it's so hilariously predictable. If there's one redeeming factor behind the move however, it's that Ryuto suffers practically no end lag after firing off the rocket and can even outrun the uncharged version so it actually has a chance of hitting. Yes, I know I just contradicted myself in that last sentence.

<Up Special -x- Justice Braver >
Ryuto bends down and performs a rocket-powered uppercut that makes him spin in midair once, propelling him 3 SBBs when used on the ground and 1.8 SBBs when used in midair. Seriously Ryuto, I know you're not the smartest peon out there, but did you really have to rip-off another character's recovery? This deals 14% and strong knockback when you hit a foe in front of you at the start of the move (KOs at 145%), whereas going through a foe during your uppercut deals 5% plus decent hitstun and hitting with your fist deals 8% and decent knockback that'll KO at 220%. This does not put Ryuto into helpless despite he being such a butt-monkey, and if you use it on the ground you can in fact use it in midair once. Getting hit by your own attack, such as the NSpec or SSpec, does not refresh this recovery.

Something Ryuto players love to do is to uppercut through an enemy after firing off a looping rocket glove and then have the glove hit them from below so they ram into an enemy for a powerful 3-hit combo (5%, 7%, 18% = 30%) that also assists with off-stage recovery since the uppercut propels Ryuto into the air far enough that his glove won't come at him from above. You can also retrieve your looping glove if you time the recovery so that you make contact with them along the way, like in case you have second thoughts about hurting yourself or just want to hit the foe from above. Speaking of rocket gloves, if you're wondering how Ryuto is above to use this and his other glove-based moves after firing them off for one of his attacks, it's because he takes out an extra set for those moves. He's surprisingly prepared like that.

<Down Special -x- Bracer >
For his last Special, Ryuto gets the absolutely GENIUS idea to uhh, brace himself. Adopting a defensive stance, the little guy calls out "I can do this!" - either confidently or nervously depending on whether his damage is under or over 100% - and gets a slight yellowish aura around him. If Ryuto is struck by an attack he'll go through impact stall as he tries to brace himself and will not take hitstun as a result, but using this move also instantly cancels his momentum. Yep, that's all it does. For what it's worth it keeps Ryuto alive for longer and even lets him get in a counterattack with his NSpec or SSpec just as he's being sent flying away, but we all know what will result from being in midair after using those. Anyways, Ryuto can't use this move again for 3 seconds afterwards, because otherwise he'd be able to fully negate his knockback from any successful counter and actually become -great- at something - surviving -, and we all know how terribly unfitting it'd be for Ryuto to be great at anything.


} Standards {

<Jab -x- Struggling Peon >
Ryuto does a quick 3-hit combo consisting of a left jab (2%), a right jab (2%) and then a kick (3%) that does okay knockback, but has sucky scaling that only gives you a KO at 200%. I guess it's okay in that Ryuto moves forward a bit with each hit, but seriously dude, think of something better.

<Dash Attack -x- Drive Thruster >
Ryuto rears a hand before throwing out a punch that ignites his glove and propels him a platform's distance at super-high speeds. This deals 11% and strong mostly-upwards knockback behind Ryuto if it connects close-up at the start (KO'ing at 160%), but otherwise it inflicts 10 hits of 1% while dragging foes along (except if they were shielding) before knocking them away an okay distance on a rather low angle for knockback that won't KO until 250%. This is fairly fast and safe for the most part unless shielded against near the end of the attack, but more importantly you can DACUS this any time one of the hitboxes are active and exploit the dragging hitbox on the attack. You can also be cheap and set-up for a free human missile just by successfully connecting with this attack when you have a rocket glove on your trail, but I'm sure you're already sick of me mentioning that.

<F-tilt -x- Peon Hammer >
Ryuto steps forward and performs a hammering motion with his hands, almost like trying to imitate Falco's F-Smash just to look cool, which is then followed-up with a headbutt as a result of the momentum from the swinging. Ryuto's gloves deal 7% if they hit at the tip and 10% elsewhere, along with extremely subpar radial knockback that will never KO, but Ryuto's head is also a hitbox that deals 6% and decent knockback on a low angle that'll KO at 180%... to both foes AND Ryuto. This can prove to be a good spacer, but it can also be quite dangerous to Ryuto and as such most players tend to get into the habit of holding the control stick during the attack so they take less knockback with DI. The hand-swing has a decent duration to it and makes for a nice defensive move, whereas Ryuto's headbutt doesn't stay out for long at all and leaves that part of his body sticking forward and open to punishment if foes block this at close-range. Speaking of punishment, Ryuto lets out a small, satisfying yelp of pain if he hurts himself on an opponent, because really only idiots literally use their heads as weapons.

<U-tilt -x- Attention Hungry >
Ryuto imitates a fat, pudgy man by facing the screen and throwing both his hands up into fists, except with phenomenally less lag, paying tribute to his peppy pose on the Japanese Mugen Souls Z boxart that makes it look like he's saying "Look at me!". This deals 7% and low upwards knockback that KOs at 220%, though it does have a fair bit of duration to it that can uhhh, throw enemies off-guard and leave you open if you're not careful. This can hit enemies next to Ryuto, but only within the first few frames of the attack given he sucks. All and all, it's a pretty generic attack that sadly doesn't flow into the NSpec no matter how much you want it to, but it's still better than Ganon's U-tilt, right?

<D-tilt -x- Peeping Tom >
Ryuto's crouch involves him squatting down and holding his hands over his head like a coward, a common crouch animation I don't usually give to characters but thought it was particularly fitting this time round - this even comes with a hilarious shuffling crawl that you'll never use. In any case, Ryuto's D-tilt has him build up the courage to poke one hand across the ground while covering his face with the other hand, peeking through the space between two of his fingers like that anime pervert who tries to peep into the girls' side of the hot spring using a tiny hole drilled through the wall (not that Ryuto would actually do that...). This is a moderately fast attack that deals 6% and weak knockback on a high angle if you hit at the tip, whereas hitting elsewhere does 4% and very weak upwards knockback behind Ryuto. You could use this for generic combos and follow-ups at moderate percentages since the knockback scaling is low, because knocking enemies into the range of your rocket glove is soooo exciting.


} Smashes {

<F-Smash -x- Dead Script >
Ryuto braces himself as he summons a patterned, neon-red screen in front of him with a bit of pre-charge lag, but then he decides to shatter it with a solid roundhouse kick to send shards of immaterial glass flying a small distance ahead of him, wasting a perfectly good wall that could have given him lots of set potential. Seriously. Anyways, the roundhouse kick deals 11-17% and good knockback that KOs at 150-110%, whereas beyond that the shards do 8-14% and decent knockback near the center (KO'ing at 180-140%) while at the tip they only deal 3-5% with good hitstun. Not the best damage one could hope for, but in a surprisingly creative twist for Ryuto, the wall he summons actually... acts like a wall when you're charging the move, blocking off foes with its decent 25HP. This makes for a surprisingly good defensive counter move, but if the wall is destroyed you'll only get a roundhouse kick out of the attack; some moves that deal exceptionally high knockback will still get Ryuto even if they don't deal enough damage to destroy the wall.

One more thing about this attack is that you can DACUS out of it, allowing you to get a lot more out of the wall as Ryuto pushes foes and other small objects along with him. Yes, we're gonna DACUS a F-Smash, but this is MYM we're talking about. Weirder things have happened.

<U-Smash -x- Transitory Big Fireworks >
Ryuto faces the screen and thrusts a hand above him dramatically, sending out a small burst of vividly colorful fireworks out of his glove over a rather long duration that rivals Pikachu's D-Smash. This comes in 5 individual bangs that cover Ryuto's glove, each one dealing 10-13% and low knockback that scales well enough to KO between 160-120% before the final, bigger bang hits harder for 15-19% and high knockback that KOs between 120-90% - the move can hit next to Ryuto in all cases, but each hit only deals half the knockback that launches foes on a very high angle. Though it has a bit of start-up lag, the move covers quite a lot of area above Ryuto and makes for a good anti-air given its long duration, even being able to hit foes more than once at lower percentages given the low knockback of the first 4 hits. DACUS makes this a very good approach and attacking move that combos into itself as foes are knocked into the overhead attack by the weaker horizontal attack, making for a great launcher with utmost timing.

<D-Smash -x- Comical Misfire >
Ryuto attempts to use the Side Special with an actual consistent flare behind the glove, but it misfires and does an NSpec uncharged shuttle loop while dragging Ryuto around! This also deals radial knockback, 15-21% and strong knockback that KOs between 140-100% if you hit at the start and 10-14% that KOs between 170-140% elsewhere. Unfortunately, you're not gonna get to capitalize on the knockback since the move immediately puts Ryuto into prone once the move ends, making it very easy for foes to punish if they manage to block the first hit despite its decent power. That being said, you can have a bit of fun with this move using your NSpec by using the former shortly before the disjointed rocket glove proceeds to crash into you, though since it's constantly accelerating you'll need to use this move as soon as you fire an uncharged rocket in order to actually make it fully loop around you - should the rocket his Ryuto while he's prone, it'll hit him from a diagonal downwards angle and send him sliding along the stage, posing the very threat of knocking him down off the stage to his death but also doing the same to foes who are hit. By timing this move well, you can make the rocket glove hit you from any angle if you're really, really gunning for such a suicidal approach. You probably know by now that it's the only thing that makes Ryuto viable...


} Aerials {

<N-air -x- Power Grind >
Ryuto holds his hands apart before slamming them together as fists diagonally downwards, an attack that deals 12% and solid diagonal downwards knockback that can KO offstage at around 140%. Afterwards, the attack acts as a 'sex-kick' that deals 8% and flinching knockback to anyone who makes contact with Ryuto's fists. This is actually a decent move for approaching, edge-guarding and playing defensively for what it's worth thanks to the sizable disjointed hitbox, but unfortunately it has a sucky side to it in that the landing lag Ryuto suffers from is pretty horrendous. It's not all that bad if you -do- land the first hit, but given Ryuto falls pretty fast he'll have to be rather high-up to not suffer from any landing lag... and that's where it hits you that the knockback will be at its least effective at that point, and that there are better aerials for KO'ing. Oh, and if you try and go off-stage to spike someone to their deaths Ryuto will have practically no chance to making it back given sex-kick properties and his high fall speed work -against- him, not to mention just trying to hit with the second attack is useless given you'll refresh the foe's recovery. In short, this move sucks.

<F-air -x- Drill Fronter >
Ryuto lies on his front and throws both his arms in front of him before spinning like a drill, doing 5 hits of 4% that each inflict decent knockback that'll KO at 190%. This is decently fast and has a nice duration that makes it good for horizontal approaches, or simply backing away from an enemy when you're going full-wimp as a result of your damage percentage being too high. Landing lag sucks, though.

<B-air -x- Backhand >
Great name, Ryuto. Great name. For this marvelous attack, our favorite slave-driven kid does exactly what the title entails, resulting in a fairly fast attack that deals 7% and mediocre diagonal upwards knockback behind Ryuto if you hit with the fingers (KO'ing at 300%) whereas hitting with the palm is a beefy strike that deals 11% and good knockback that can KO at 160%. The sourspot is actually more useful than you'd think given it can generically set-up into a rocket punch or knock foes into its line-of-fire when it hits you, but only providing you were moving upwards at the time like if you used your second jump. You may also get the crazy idea to actually backhand your rocket glove as it flies into your back, and if you actually follow through with that the glove will be reflected and loop back to the front of Ryuto! How revolutionary! Unfortunately you can't really do this in midair since the rocket glove won't connect with Ryuto's back due to his vertical position changing, so you'll really only pull it off through short-hops in the event where you want to loop de loop again. Sadly, this is Ryuto's only move that can reflect his looping rocket and can't be used to reflect his SSpec rocket, which you could -probably- tell from the fact that it's spinning and on fire and all. You'll probably only discover this upon initially assuming that you could have reflected it since you could do so with the NSpec rocket, only to fail hard and be embarrassed about it. Tends to happen to a lot of newcomers.

<U-air -x- Thick-Headed >
Ryuto decides to use his head for once by swinging it above him, a very fast and surprisingly strong attack that deals 16% plus decent juggling knockback that'll KO at around 180%...while dealing 8% to himself. What the hell kind of peon has to hurt himself to throw out some decent damage? I guess it's still pretty tempting to spam at lower percentages given you can dish out heaps of damage even considering the possibility of staling (which doesn't lessen the self-damage), and if you barely hit an enemy you'll instead deal 8% and much lighter knockback without hurting yourself in the process, though this doesn't KO until 400%. Another fun reason to spam this attack is the sound-byte that comes with the stronger version, as Ryuto will cry "OUCH!" or "OWOWOWOW!" when he hurts himself. You can never get sick of watching Ryuto play the butt-monkey, given it's the only redeeming part of his character.

<D-air -x- Drillfall >
Ryuto flips in midair before diving down as though jumping into a pool, his rocket gloves making him spin at dizzying speeds that make him appear to be a fiery drill. This deals 10% and knockback that KOs at 180%, but deals 2% more and KOs 20% for every SBB height Ryuto fell from while continually accelerating (maxing out at 20% that KOs at 80%), even doing a good number of shields he makes contact with at higher power. Unfortunately for sadists like Altis, Ryuto does not crash into the ground headfirst and injure himself, but rather he actually drills through it and pops out half a second later as a brief hitbox that deals the same damage he did at his best to anyone directly above him, only in vertical form. By holding the control stick horizontally, you can actually make Ryuto tunnel underground at the same speeds he fell at as a neat little way to surprise attack foes or get around the stage quickly, but know that while this seems like a good attack to spam it in fact leaves Ryuto open to punishment if he misses with it, his underground movement actually being quite hard to control. Speaking of downsides, Ryuto unfortunately cannot escape the wrath of his terrible rocket gloves by escaping underground as they'll actually follow him, though this can help throw foes off since they're not visible when underground and even follows into a cheap human-rocket combo if you hit an enemy when popping out. You can bet this move is a great way to make use of your gained height from all that self-inflicted damage, and while it might not make a lot of sense for Ryuto to dig underground it actually does. Trust me.


} Grab {

Surprisingly enough, Ryuto's grab does not actually suck, seeing as how he's wearing a pair of gloves. His pummel is a very fast headbutt that deals 2% to the foe and 1% to himself, but it does quite a good job at racking up damage.

<F-throw -x- Drive Forward >
Ryuto's rocket gloves ignite and propel him 2 SBBs along the stage at blistering speeds before the foe is launched for a good 12% yet only medicore knockback that won't KO offstage until 220%. This is good for putting foes in a position where you can easily attack them again while moving them forward despite the fact that the F-Smash already does the latter, though what's different here is that Ryuto can go off-stage with his foe despite being somewhat risky. You can also use this to outrun an accelerated rocket looping towards your back and still have time to figure out what you want to do. Ryuto and his foe have Super Armor while being propelled, so the move can be used to bypass traps or go through a backfiring SSpec rocket without trouble.

<B-throw -x- Generic Throw >
Lost for options, Ryuto swings the opponent behind him and chucks them away for 9% plus good mostly-horizontal that can KO at 160%. This is generically your safest throw for generically KO'ing that also generically follows into tossing the foe into a glove that's going to fly into your back. Generically.

<U-throw -x- Drop Impact >
Ryuto lightly flings his opponent into the air to the best of his ability, but he foolishly throws his gloves off at the same time! Just when you think this is going to be one of those throws that immobilizes the foe for an extended period of time, the back of the gloves suddenly ignite and prepare to shoot off... directly into a terrified Ryuto! The helpless foe is dragged along for the ride as the gloves explode upon impact, dealing 14% and fairly high upwards knockback that can KO at 150%... wait, what are you doing up there with your opponent, Ryuto!? This can lead into all sorts of different situations depending on how much damage the fighters have and how much they weigh, but also how they DI since the animation is drawn out for long enough to give both players a chance to take more or less knockback from the attack. You also have the pained sound-bytes from the U-air recycled when Ryuto gets hurt.

<D-throw -x- Wimpy Toss >
Ryuto punches his opponent down against the floor for 7% and knockback on a low angle that's easy to follow into before 150%.


} Playstyle {

<Overwhelming... Butt-Monkey >
So you want to play as the generic butt-monkey Ryuto, huh? I dunno what on earth would possess you to do such a thing, but I guess I can humor you for a bit.

Ryuto cements himself as a nimble defensive character with a solid poking game thanks to his fast, disjointed melee attacks and a speedy projectile that covers a good area around him, letting him get through most enemies' comfort zones without too much problem. He also has a strong defensive approach in his DACUS F-Smash, though it's not perfect.

For all his defensive abilities, Ryuto ironically possesses several moves that dish out self-damage or are capable of backfiring on him, but are arguably his most powerful moves - the Neutral Special, Side Special, F-tilt, U-air and U-throw. These are all very effective in one way or another, but if overused they'll be the ones to do in Ryuto before his opponents have the chance to, especially when it comes to his two Specials. To give an idea of just how good these Specials can be, the Neutral Special sends out a projectile that quickly hits on many different angles, the Side Special can hit foes fast and hard from any distance, the F-tilt can be used for strategic retreat, U-air can be used for heavy damage-racking and U-throw for getting into the air with foes. Perhaps the deadliest thing about these moves is that Ryuto can seamlessly transition into them from his defensive play with a moment's notice, especially his Neutral Special - the rocket arm already makes for a good defensive move, but it only gets deadlier when you realize that Ryuto is perfectly capable of letting himself be hit by that arm to turn himself into a powerful living projectile. It then hits you that Ryuto is perfectly capable of going back to defensive play when he feels he's taken too much damage, though given his base power level, he won't be scoring KOs very easily unless he managed to pile a lot of damage onto his opponent.

Ryuto has the means to pressure foes from a distance through his high-risk Specials, but he himself will also feel pressured by their painful drawbacks. With these being his main moves, Ryuto is often forced to play an opponent's game like the generic character he is until he's within comfortable attacking range. This doesn't usually fare well for his punishable air game that's better for dealing with foes from above rather than below. In any case, Ryuto's playstyle is surprisingly easy to overcome with a solid defensive game, projectile and when you can give him a lot to worry about, baiting him into using his high-risk attacks with the intent of using these against him. Any character with remotely spammable projectiles can lock Ryuto into stun and let him get hit by his own rocket, and all the better if these can be fired out on an angle as to avoid getting hit by the rocketing Ryuto. Likewise, a miscalculated human rocket attack will leave Ryuto horribly vulnerable, and even a simple move like the U-air can inflate his damage percentage if he wastes it, such as on a minion or makeshift obstruct.

Overall, Ryuto is something of a generic high-risk, high-reward character whose gotta go through some pain to gain. It might seem funny to see him hurt himself half the time, but the little guy really does try, and if you underestimate his tenaciousness he might actually get the job done... for once.


} EX Skill {


A mint-green light shimmers in front of Ryuto as he summons a familiar, legendary golden sword in his hand (excalibur?). Where the hell did he get that from? Leaping and holding out his newfound weapon, Ryuto proceeds to catch a foe by the tip of his sword and drag them along for the ride, letting sparks fly out that deliver constant, rapid hits and a scraping SFX. After a short while, Ryuto then flips off his spark-covered opponent and back a short distance, whereby he turns around and poses before the target is engulfed in a purple blast.

This is a rushing EX Skill that has Ryuto travel 4 SBBs across the stage and deliver 37 hits of 1% through the sparks before the blast deals 32% and knockback on a high angle that KOs at 50%. It only targets one enemy, and if it misses, it leaves Ryuto where his enemy would have otherwise ended up before the blast, possibly even off-stage if he's not careful.
 

allison

She who makes bad posts
Joined
Jan 25, 2014
Messages
5,138
Location
Maple Valley, WA
NNID
crazyal02
3DS FC
0216-1055-4584
Wild comment appears!

Most Definitely Not Tai Lung
And so we have the first set of the contest, El Jefe by Bionichute. First off, I like the idea of using Dspec to segue into a Thunder KO move (but I was thinking of using a similar mechanic in a Demise set so I hate you forever), plus the lightning strike itself could open up some interesting combo opportunities... right? I don't know, because the set has a tendency to not specify knockback values. It kinda bugs me that Fsmash takes 1.5 seconds to fully charge. Landing a fully charged smash is already pretty difficult (even in Brawl), so I feel that nerfing the moves KO potential a bit instead may have been a better choice; what use is a KO move if you can't land it? Anyways, he seems to be characterized as a comboer, but it's hard to tell without specified knockback or a playstyle summary. And no Final Smash, 0/10

Most Definitely Not Dillon
Next up is Sheriff Toothpick, also by Bionichute. Electric Traps are a neat idea (but then you stole my Sylux idea. YOU SHALL DIEEE). They seem really useful for stage control, yet isn't overpowered as the traps are destructible. Oh, and we have a mechanic very similar to El Jefe's at play here too, but standards being usable deviates it pretty well. Meanwhile, the Giant Side Special is interesting and all, but it seems pretty OP against characters with no projectiles, as Toothpick can just keep spamming tornadoes, possible infiniting them. On the other hand, if the move has cooldown, or only one tornado can be onscreen at a time, this isn't an issue. We have the long Fsmash thing again, too. I do like the characterization present in the set, especially in the throws.

---

As a note, I have updated the all franchises post to be more up to date.
*looks at list*
*scrolls to OCs*

"MYM14 Khold’s Harem by Kholdstare

MYM14 TWILT’s Harem by TWILTHERO

MYM14 Junahu’s Harem by Junahu

MYM14 Tirk’s Husbandos by tirkaro"

I don't think I want to know.
 
Last edited:

PixelPasta

Smash Lord
Joined
Jul 27, 2013
Messages
1,147
Hello again! Today I'm going to be doing something a little different than my other sets. I'm taking on a more traditional character selection - this one won't be as 'out there' as Bob Ross or Mr. Monopoly.
This character is from one of my all time favorite anime films, and just films in general.
As a big Studio Ghibli fan, I am excited to be making a set for... Howl, from Howl's Moving Castle!
So let's jump right in...

Howl

About
Howl's Moving Castle is a 2004 anime film directed by the great Hayao Miyazaki. The film is based on the novel by Diana Wynne Jones, which was published in 1986.
The story follows Sophie, an eighteen year old hatter, and her encounter with the wizard, Howl. Sophie is cursed by the Witch of the Waste, the antagonist of the film, who transforms her into a ninety year old lady. Sophie then travels to Howl's Castle in hopes of getting her curse lifted. Howl is a kind, flamboyant, but rather vain sorcerer who uses his magic powers for peacemaking, rather than violence.
At the same time, Sophie's country is caught up in a war with its neighboring territory. Howl is demanded to fight in the war by the royal council, but he refuses, as he finds fighting pointless. Throughout the film, viewers will find out about Howl's backstory, and will see the lovely romance between Sophie and Howl blossom.

Stats
Height: 8 (Howl is a fairly tall man, comparable to Snake)
Weight: 4 (Howl isn't very heavy, as he is quite slim and very floaty)
Walk Speed: 1 (Howl does not walk very fast; he prefers to take his time)
Run Speed: 6 (Howl can run fairly quickly, if it is necessary)
Air Speed: 7 (Howl is quite in-tune with flying, so he is good in the air)
Fall Speed: 3 (Howl is very light and floaty, so he falls down quite gently)
Other Skills/Attributes:
-Howl can float similar to Peach. If Howl holds the jump button, he will start walking on the air!
-As Howl gradually receives more and more damage, his clothes become torn and tattered, and his hair disheveled.

Special Moves
Neutral Special: Invincible Double
Howl snaps his finger (quarter-second startup), and then a ghostly copy of him steps one small stagebuilder-block forward (creating about a second of lag). Said copy is an AI, programmed to evade the other players.
Now here is where it gets important: The real Howl is in an invincible state for as long as his double is alive.
This means that the opponents will need to beat Howl's double before they can get to him.
The double is very light, and can be knocked away easily (almost as if it perpetually has 200% accumulated damage).
True Howl will want to use his magic to keep opponents away from his double, as they will surely be targeting it.
Unfortunately, the double is prone to walking off ledges...
After the clone is KO'd, there is a 20 second cool-down before Howl can use this attack again.
This move creates an interesting mind game, in which the opponents usual tactics are interrupted because their attention now must be on the copy.

Side Special: Kinetic Magic
Howl points forward, and a green ball of energy emerges from his finger. This energy ball can be controlled in a similar manner to PK Thunder, but will fizzle out after 6 seconds on-screen. As this energy is being controlled, Howl is stationary - and if he is attacked, this move will be forcefully cancelled (the magic ball will immediately fizzle out).
If the energy ball hits an opponent, they will be enveloped in a green aura, frozen in their tracks. They are under Howl's control!
This means that they are now essentially in a long-distance grab: with a flick of the wrist, Howl can use any of his throws to fling the opponent away. Much like a regular grab, the opponent can break out of it by mashing buttons.
This move is harder to set-up, because he is quite vulnerable while he is controlling this magical projectile... But if he succeeds, this move is very helpful to Howl's playstyle - it is quite good for keeping distance from opponents, or for batting opponents away from his ghostly double. Because it freezes them right in their tracks, this maneuver can really mess with an opponents game plan.


Up Special: Bird Form
Howl transforms into a bird monster and leaps into the air. In this form, he can freely soar and glide through the air. His air mobility increases to that of Yoshi, in this form.
Rather than have him fall from the sky after the usual 'hidden timer' finishes, this move is measured in a visible meter found by his character portrait. This meter appears when he initiates this move, and decreases for as long as he is in this form. He cannot spend too much time in his bird form, so this meter allows players to regulate how long they are flying.
If this meter reaches the bottom (which will take about 7 seconds), he will fall from the sky and be stunned, so watch out for that.


Down Special: Shapeshift Disguise
Howl assumes a stance, ready to cast some magic! He plants his knees firmly in the ground, and his hands start to glow with magic power.
If he is attacked while in this stance, he will counterattack by transforming into whoever attacked him and retaliating with one of their special moves (the special move he uses is determined by the direction the control stick is tilted). As soon as he uses the attack, he will revert back to Howl and will jump backward, out of harm's way.
This move isn't very effective against countering projectiles, as he will likely retaliate with a close-range attack despite the fact that he was hit by a long-ranged one.
However, it is great for countering melee attacks, because Howl can hit the foe with their own attack and then dodge out of the way immediately after.


Final Smash 1: Howl's Moving Castle
If Howl is below 100%, this is the Final Smash he will use.
"Calcifer! Move the castle sixty miles on to the battlefield!"
Howl calls out for Calcifer to drive the castle in! He smirks as the ground starts to tremor... suddenly, Howl's colossal abode begins stomping its way across the stage!
It's massive footsteps create quakes that bury other players. It also kicks opponents wildly with its spindly metal legs, which deals up to 40% and can KO at under 100%.
It takes about 10 seconds to walk across the entire stage.
The best bet for other players is to stay near the top of the stage, and off the ground - so they can avoid being buried or kicked away.


Final Smash 2: Spirits of Darkness
If Howl is above 100%, this is the Final Smash he will use.
"I see no point in living if I can't be beautiful..."
Howl looks at his tattered clothes with disgust. He shamefully curls into a ball, and becomes coated with a sticky green gel. He is much too vain to battle in such an awful state!
Suddenly, the stage becomes dark... he's throwing a temper tantrum!
Many shady spirits fly onto the stage, and begin beating up the opponents. They use a flurry of dark attacks that can deal up to 60% and can KO at around 75%.
This chaos lasts about 8 seconds, and then Howl gets up and returns to normal.


Standards
Jab: Jumping Slap
This move is a three-hit combo. With one press of the A button, Howl lifts his right hand above his left shoulder and slaps the opponent with the back of his hand, which does 2%. If A is pressed again, he will diagonally up from right to left, which does 3%. With the third press of the A button, Howl will do a powerful front-hand smack from left to right. For the final press in the combo, Howl will jump back about one stage builder block, kicking the opponent has he goes. This final portion deals 4% and only KOs at 250%.
The slaps have nice range due to Howl's slender build; his arms allow for some surprisingly good range in his physical attacks. Since his arms are full outstretched in this particular attack, his hands are somewhat of a tipper. Jumping back allows Howl to quickly hit the opponents twice and get out of the way before they can retaliate.

F-Tilt: Magic Ring
Howl jumps back slightly (which can dodge some close-range attacks) and points his ring finger at the foe. A short-distance red beam blast will quickly burst out of the gem on his magic ring. This small beam deals 10% and can KO at 200%. It has pretty good knockback; it will launch foes forward at a 40° angle.
This move is great for batting foes away from Howl.

U-Tilt: Flamboyant Flick
Howl strikes a pose: he throws his head backward, places his left hand on his hip and the other hand high in the air, and makes a rather flamboyant flick with his wrist. The flick deals 6% and knocks opponents directly upwards. This move can KO at 210%. There is a half second of ending lag for Howl to resume his regular stance.
This tilt has excellent range, as Howl's arms are quite long when he stretches them completely. Since his hand is the main sweetspot, this move is not as effective on grounded opponents, as they will likely only get hit by his arm.
Thus, this move is mostly used for keep opponents in the air for juggling combos or just spacing them away from Howl.


D-Tilt: Twirling Kick
Howl kicks his foot out a short distance, and twirls around on his other in a counter-clockwise direction. He makes a full spin, and will knock opponents in whatever direction he is facing during his spin (ie; near the start of the move, an opponent would be knocked backward, but if he was just finishing the animation, they would be knocked forward.)
This move is not as good range-wise (at least, when compared to his other tilts), but it makes up for it in power and skill. The kick deals 9% and can KO at 200%. It also has a 40 percent chance of causing opponents to trip, which allows Howl a little bit of time to get some distance from his foe.
Because of its ability to sweep foes in multiple directions, this move is very good for swatting away up-close opponents who are giving Howl a hard time.

Dash Attack: Cape Flick
Howl skids to halt and quickly whips his cape in front of him. The cape deals 6%, and has a 30 percent chance of tripping opponents.
The cape knocks opponents in a low horizontal arc, and can KO only at 250%.
It is risky for Howl to rush close to the opponent (since he is a poor melee fighter) - but if Howl
needs to move
towards/past an opponent, this attack can allow Howl to charge in and quickly swat opponents out of the way. The cape comes out fast enough for Howl to get in without the opponent giving him trouble.


Aerials
N-Air: Air Twirl
Howl twirls around in the air, arms outstretched. The foe is whacked rapidly by this arms, and also the sleeves on his cloak/coat. This deals rapid and quick damage (1% every half second, usually hits up to 6-8 times).
This move does not have much KO power. Instead, this move is used for knocking opponents away from Howl.
Foes hit by this attack will be launched quite far from Howl, usually in a downward-diagonal plummet to either side of Howl.
Because it this attack comes out so fast and has good knockback range, this move is excellent for breaking up aerial combos and distancing Howl from his enemies.

F-Air: Wizard's Kick
Howl extends his long leg forward. Like any sex kick, this move is stronger on the initial extension and then weaker as the hitbox fades.
On the initial thrust, this kick deals 9%; but only deals 5% on the subsequent hitbox.
Howl's long legs give this attack some excellent range. It can KO at 180%, and causes opponents to blast directly ahead of Howl.

B-Air: Spinning Slap
Howl quickly flips backward for about a half-second. He outstretches his arms and slaps his opponents with both his hands behind him.
Each slap deals 5%, obviously totalling 10% if both hit. This move comes out quick and bats opponents behind him in a downward arc. It can KO at only 200%.
Again, his height allows for some nice range on this attack, comparable to even Marth's range.
Furthermore, this move flips opponents around, like Mario's cape. This allows for many tactics that can interfere with the opponent's ability to hit Howl. While it doesn't directly interrupt their attacks, it can leave a recovering character unable to grab the ledge due to facing the wrong way.

U-Air: Backward Flip
Howl flips backward in the air with one leg outstretched. He does a full spin, so his leg can sweep into any opponent above or beside him. This attack moves his a fair bit, so it is good for dodging out of the way. It's almost like an aerial roll, in a sense.
The kick deals 8%, and can KO at 190%. This move will knock opponents in a different direction depending on when they are hit in his spin.
During the first half (the upward flip), they will be launched upward, which is good for juggling.
During the final half (the downward kick), they will be launched downward, which works as a semi-meteor smash that can be devastating for recovering opponents.
If timed well, Howl can juggle the opponents in the air and then smash them downward with his little spike. This is one of Howl's few truly offensive tactics.

D-Air: Downward Kick
Howl lifts one knee in the air and points his toes downward on his other leg. He will drive his foot downward at a 290 degree angle until he hits the ground, or an opponent. He descends at about the speed of the Ice Climber's d-air.
If Howl hits the opponent with the very bottom of his foot, he will to a short footstool hop off of the opponent. This deals 5% damage and meteor smashes the opponent down.
This attack can usually KO at around 180%. It is mostly used as a means of removing players attacking from below Howl while he is flying/gliding (as it can be used in conjunction with his 'walking on air' float).

Smashes
F-Smash: Potion Toss
Howl lifts a flask above his head (half-second startup) and then throws it half a battlefield-platform ahead of him. The flask shatters and a cloud of potion vapor poofs where it hit. Getting hit by the potion inflicts 16% damage and can KO at 150%.
The potion also has a number of magic effects, which are selected at random. These effects can be:
-Making the opponent slow for 4 seconds
-Inflicting the 'flower' status
-Temporarily shrinking the opponent
The disjointed hitbox of this attack allows for some defensive options, such as getting hits on the opponent from distance, without giving the opponent a chance to retaliate.


U-Smash: Star Spirit
Howl gracefully swipes his hand downward, as a shooting star spirit quickly zips down from above (this has a similar range to Pikachu's thunderbolt, except at an angle). Getting hit by the spirit deals 14% electrical damage and can KO at 120%.
If the Smash is fully charged, Howl will catch the spirit, which will fizzle in his hands, powering up his next few attacks. For the next 5 seconds, his physical attacks will have a 1.5x damage multiplier.
If the Smash is simply tapped and not fully charged, the little spirit will hit the ground and run forward about the distance of a battlefield platform. It will stay on the stage, fizzling for about 7 seconds. Any opponent who touches to the shimmering sprite will receive gradual damage (1% per second). Howl can have many on the stage at once, so this move is good for racking up damage without directly attacking your opponents.
This move has a very disjointed hitbox, so it is good for defensive play.


D-Smash: Spell Rune
Howl quickly draws a rune on the ground with some chalk (1-second startup lag). Then he places his fire-demon friend, Calcifer, onto the rune, who bursts into a massive blue flame. The initial burst deals 18% and can KO at 100%.
Calcifer will stay on top of the rune for the next 10 seconds. Any players who touch him will again receive damage.
There can only be on of these runes on the stage at once. If Howl attempts to use his Down Smash while Calcifer is already on the stage, he will simply use his Down Tilt instead.
This move has a few combo possibilities. For example, if Howl uses his Forward Smash and smashes a potion into the flame, the magic vapor will burn and Calcifer will flicker a different color - his flame is now imbued with that spell! This means that touching the fire now inflicts whatever the potion's magic effect was.


Grabs
Note that these are the throws used for his Side Special, when he takes control of opponents with his kinetic magic

Grab: Wizard's Grasp
Howl grabs the opponent by the shoulder.

Pummel: Rapid Slap
Howl slaps the opponent's face with the back of his hand, dealing 2% for each smack. He can use this pummel fairly quickly.

F-Throw: Magic Spin
Howl, using magic, spins the opponent around himself once and then lets them go flying! They are flinged away in a high horizontal arc. When the opponent lands, they receive 7%. This move can KO at 180%.

B-Throw: Backward Blast
Howl quickly spins around and fires the opponent away with a powerful blast of magic! They fly at a long horizontal arc. The magic blast does 6%, an the opponent receives 4% when they hit the ground. This move can KO at 160%.

U-Throw: Levitation
Howl uses his magic to levitate the opponent above his head (which takes a second of lag), before he lets them fall! They are slammed onto the ground and receive 9% damage. This throw does not have much KO power, but leaves the opponent in a prone state for 1.5 seconds.

D-Throw: Sorcerer's Blitz
Howl gently places the opponent on the ground - he still has some some common courtesy on the battlefield. This creates a little bit of start-up lag, for about a half-second. But then, he quickly casts some magic onto the grounded opponent - he gestures down at the opponent with both hands, and creates a small explosion of sparkles that sends the opponent flying!
The explosion deals 11%, making this Howl's strongest throw. It can KO at 140%, and launches the opponent in a random upwards direction.


Playstyle
Howl is a pacifiist by heart, so he doesn't rely on a lot of physical attacks when battling. Playing as Howl is all about evading opponents attacks and causing them to backfire. He has a number of moves that contribute to this playstyle; for example:
His Neutral Special allows him to create a replica of himself that renders him invincible, while the double diverts the opponents' attention away from him. His Side Special allows him to keep opponents away from him (or his double) from a distance. His Down Special is a counter that turns his opponent's abilities against them. He has a very mobile recovery that is good for fleeing opponents and evading larger attacks.
Even his tilts are good for keeping his distance from his enemies - they are always good for swatting away opponents to get some distance, and a few even have tripping properties to buy Howl some time. His excellent range alone can keep him out of reach, as the hitboxes for his tilts and aerials extend quite far due to the length of his limbs.
He is rather weak to projectiles, however, as most of his disjointed and/or evasive attacks will not remove him from a projectile's danger. Another downside is the fact that he has plain terrible kill percents, and that his standards and aerials don't dish out that much damage.
Further contributing to his evasive nature, Howl has a second, much more powerful Final Smash that is utilized only when he has accumulated a lot of damage - this is another incentive for opponents to refrain from bothering Howl. If they don't attack him as much, they will not have to worry about a deadly Final Smash. Thus, damaging Howl creates a threat for opponents.
Howl used his magic to interfere with his country's war, so that has translated into his moveset here. A lot of his magic-based moves involve meddling with the opponent and inflicting many status effects that hamper their ability to fight. His Smashes also function as 'traps' that he can set around the stage to interfere with the opponent without directly confronting them.

_________________________________________________________________________________________________

Well, that's it. I'm not sure how well received this set will be, but I'm hoping its a fair improvement from my last two.
I've toned down the 'randomness' of my sets, and I tried to create more of a coherent playstyle to which the other moves contribute well.
I hope you've all enjoyed, and I'm looking forward to seeing your comments.
 
Last edited:

Katapultar

Smash Lord
Joined
Nov 24, 2008
Messages
1,284
Location
Australia
[collapse=Hayao Miyazaki Tribute]Now this looks nice! I'm a big fan of anime myself, perhaps not -so- much towards Studio Ghibli works, but this is an interesting tribute towards the retired Miyazaki. Glad to see you've put a lot of effort into this set.

Neutral Special is a very fun and interesting concept that just feels right for Howl's passive, somewhat playful nature. It does feel too spammable though since Howl can just throw it back up once the foe has finished KO'ing the clone, but that can be fixed by adding more lag onto the attack (maybe 0.6-1 second would be good) and a cooldown period where he can't use it when the clone is KO'ed. This would be very easy to fix, and would make a world of difference. Also, I assume that using the move again will dispel the clone so you can throw it back out again. The Side Special isn’t as bad as you’d expect since it’s just a grab, and the Down Special is definitely very cool.

Pacifist playstyles are very, very tricky to pull off in fighting games, as weak execution can make the sets very boring to play as if they don’t go about attacking enough, but the way you’ve done it isn’t too bad with the clone and traps. The Specials and Smashes are pretty good, but I don’t think most of the Standards and Aerials have the right feel: they’re all slaps or kicks that can be used competently, which doesn’t feel all that right on the pacifistic Howl, as you can just beat up the opponent without worry when you’re invincible and they have to deal with your clone first. I can understand that you wanted to incorporate some good knockback for spacing purposes, but I’d much rather if many of these standard attacks were more evasive moves that disrupt opponents weakly and maybe involved a bit of gimmicky magic. The Down Special also doesn’t have a lot of flow in the set due to foes mostly going after the clone and Howl being weak against projectiles, as cool a move it is. Howl actually has some frighteningly powerful standards, aerials and throws for how “pacifistic” he is, and these can be made even more powerful by his U-Smash!

Overall, I’d say that Howl falls short in execution, sadly, though to be fair the playstyle you were attempting is a very difficult one that even veterans would have a hard time with. The set is a good improvement over your other 2 sets however, having some very unique ideas and not as many pitfalls (pun intended) as the Monopoly Guy. If you maybe went for an easier playstyle and continued to throw out some of these interesting ideas, I could see you making a very good set in the future.

Also, I like how the Specials are written in this set – broken up into simple little line-by-line sentences. It’s almost like reading a poem, maybe.

[/collapse]
 

JamietheAuraUser

Smash Lord
Joined
Jan 11, 2010
Messages
1,196
Location
somewhere west of Unova
[collapse=Hayao Miyazaki Tribute]Now this looks nice! I'm a big fan of anime myself, perhaps not -so- much towards Studio Ghibli works, but this is an interesting tribute towards the retired Miyazaki. Glad to see you've put a lot of effort into this set.

Neutral Special is a very fun and interesting concept that just feels right for Howl's passive, somewhat playful nature. It does feel too spammable though since Howl can just throw it back up once the foe has finished KO'ing the clone, but that can be fixed by adding more lag onto the attack (maybe 0.6-1 second would be good) and a cooldown period where he can't use it when the clone is KO'ed. This would be very easy to fix, and would make a world of difference. Also, I assume that using the move again will dispel the clone so you can throw it back out again. The Side Special isn’t as bad as you’d expect since it’s just a grab, and the Down Special is definitely very cool.

Pacifist playstyles are very, very tricky to pull off in fighting games, as weak execution can make the sets very boring to play as if they don’t go about attacking enough, but the way you’ve done it isn’t too bad with the clone and traps. The Specials and Smashes are pretty good, but I don’t think most of the Standards and Aerials have the right feel: they’re all slaps or kicks that can be used competently, which doesn’t feel all that right on the pacifistic Howl, as you can just beat up the opponent without worry when you’re invincible and they have to deal with your clone first. I can understand that you wanted to incorporate some good knockback for spacing purposes, but I’d much rather if many of these standard attacks were more evasive moves that disrupt opponents weakly and maybe involved a bit of gimmicky magic. The Down Special also doesn’t have a lot of flow in the set due to foes mostly going after the clone and Howl being weak against projectiles, as cool a move it is. Howl actually has some frighteningly powerful standards, aerials and throws for how “pacifistic” he is, and these can be made even more powerful by his U-Smash!

Overall, I’d say that Howl falls short in execution, sadly, though to be fair the playstyle you were attempting is a very difficult one that even veterans would have a hard time with. The set is a good improvement over your other 2 sets however, having some very unique ideas and not as many pitfalls (pun intended) as the Monopoly Guy. If you maybe went for an easier playstyle and continued to throw out some of these interesting ideas, I could see you making a very good set in the future.

Also, I like how the Specials are written in this set – broken up into simple little line-by-line sentences. It’s almost like reading a poem, maybe.

[/collapse]
On the idea of a "pacifistic" playstyle, though, I'd had a thought to maybe use Klonoa. I wouldn't necessarily actually call it "pacifistic" because really it's just gratuitous abuse of gimmicky windboxes on everything to gimp the **** out of people, but that seems to be somewhat in the spirit of this set anyway. Neutral Special would naturally be Wind Bullet and would actually be an attack with normal hitstun, but that's really all I've got for Specials as unfortunately I'm insufficiently familiar with Klonoa games to make a good moveset with canon abilities. Basically though, his DAir would be a damaging windbox beneath him with wide horizontal reach, forcefully pushing foes and objects from in front of Klonoa to behind him. BAir would be a damaging windbox behind Klonoa with wide vertical reach, lifting objects and foes upwards forcefully. UAir would be a damaging windbox above Klonoa's head with wide horizontal reach, forcefully pushing foes and objects from behind Klonoa to in front of him. FAir would be a damaging windbox in front of Klonoa with wide horizontal reach that forcefully shoves foes and objects away from him. Of course, even though they can damage foes, his wind aerials wouldn't damage items. Wouldn't want Bob-ombs to explode while you're trying to fling them around with wind, after all.
 

PixelPasta

Smash Lord
Joined
Jul 27, 2013
Messages
1,147
Thanks a lot for the review Katapultar, and I'm glad that this set was a bit more successful than my last two.

Neutral Special is a very fun and interesting concept that just feels right for Howl's passive, somewhat playful nature. It does feel too spammable though since Howl can just throw it back up once the foe has finished KO'ing the clone, but that can be fixed by adding more lag onto the attack (maybe 0.6-1 second would be good) and a cooldown period where he can't use it when the clone is KO'ed. This would be very easy to fix, and would make a world of difference.
Darn, I never thought to add cooldown. Does a minute sound like a fair cooldown period?

The Specials and Smashes are pretty good, but I don’t think most of the Standards and Aerials have the right feel: they’re all slaps or kicks that can be used competently, which doesn’t feel all that right on the pacifistic Howl, as you can just beat up the opponent without worry when you’re invincible and they have to deal with your clone first. I can understand that you wanted to incorporate some good knockback for spacing purposes, but I’d much rather if many of these standard attacks were more evasive moves that disrupt opponents weakly and maybe involved a bit of gimmicky magic.
You have a point here, I never thought of it like that. Because his standards and aerials are all quite physical, Howl can actually be used in an offensive way, which is not what I want for a Howl playstyle.
I don't exactly know how to make standard attacks 'evasive', though - like, should he physically jump/dodge out of the way? Or is there a better way to make 'evasive' attacks?

Howl actually has some frighteningly powerful standards, aerials and throws for how “pacifistic” he is, and these can be made even more powerful by his U-Smash!
You're absolutely right - he definitely should not be that strong. I'm going to make them a lot less powerful.
 
Last edited:

Katapultar

Smash Lord
Joined
Nov 24, 2008
Messages
1,284
Location
Australia
Thanks a lot for the review Katapultar, and I'm glad that this set was a bit more successful than my last two.

Darn, I never thought to add cooldown. Does a minute sound like a fair cooldown period?

You have a point here, I never thought of it like that. Because his standards and aerials are all quite physical, Howl can actually be used in an offensive way, which is not what I want for a Howl playstyle.
I don't exactly know how to make standard attacks 'evasive', though - like, should he physically jump/dodge out of the way? Or is there a better way to make 'evasive' attacks?

You're absolutely right - he definitely should not be that strong. I'm going to make them a lot less powerful.
A minute cooldown would be -very- long; it would basically mean you only get to use the move once-per stock given the clone is quite easy to kill putting its evasiveness aside. Foes of course need a fair amount of time in which they'd be able to actually fight against Howl considering the clone might lead them away from him, so I'd say that 15-20 seconds in cooldown would be fair - around the same length of time some item effects and Assist Trophies last for.

It would take quite a bit of editing to have all the attacks reach an evasive standard, and it's not very easy to think of such moves. You can still have the moves dish out some -okay- damage and keep-away knockback, just have their KO percentages be very low so that actually killing normally with Howl would be very difficult. The most obvious way to be evasive is to just have Howl move around for a lot of his standard ground attacks, though this would get redundant quite quickly. If Howl loses the uncharacteristic power on his standard attacks, he'll really be only left with his Smashes for KO'ing power and be forced to set-up traps while his opponents are distracted by his clone, which would be a rather bottle-necked and boring playstyle. It might even make the set weaker than what it was like if originally posted.

Thinking about it, you could actually make the basic moves evasive while still having a bit of power, though it might be forced. Jab could be a 3-hit combo that ends with Howl flipping back a set distance and deals very poor knockback, but prevents Howl from being punished if say the foe shielded the attack. He could perhaps have a tilt that serves as a counter to use the foe's power against them, a F-tilt maybe, and one with the power to reflect projectiles. D-air could result in Howl performing a footstool jump off the opponent in a similar manner to Greninja's D-air. Howl could even have a tilt trap that deals some good damage and knockback to opponents who stay in it for too long. There's a lot of stuff you could do really.

Editing the set to the point where all the moves fit in with your intended playstyle and is seen as such would be quite the challenge, though seeing it through would be worthy of admiration.
 

JOE!

Smash Hero
Joined
Oct 5, 2008
Messages
8,075
Location
Dedham, MA


The Bear and Bird duo starred in probably one of the most beloved games to ever grace the N64 era, and were even considered as candidates for the original Smash64 roster!

For those unfamiliar, Banjo and Kazooie starred in "Banjo-Kazooie" as well as "Banjo-Tooie" on the N64. They were action platformers that combined amazing level design, funny dialogue and probably the best music in gaming (click above!) to deliver a gaming crown jewel.

They have since left Nintendo due to Rare being bought up by Microsoft, but I wonder what Smash4 may have done with the Duo....?


Standing about as tall as Falco, and with weight like Link, BK has a nice mix of offensive and defensive statistics. Being heavier than average and with a high fall speed, Banjo often can be juggled but can also use the ability to return to earth swiftly to his advantage as he can alternate between aerial and grounded play.
Banjo can offset his fall speed thanks to Kazooie with their trademark Feathery Flap! Banjo's grounded jump can reach a platform in one go with a full hop (his fall speed also gives him an amazing short hop for short hopped aerials), and a second jump using Kazooie gives essentially the same height. However, holding the jump button will have Kazooie continue to flap her wings and slow the pair's fall speed down to 1/10 for up to one second! You can drift forward while doing this, similar to a glide given the pair's above average air speed, but you only get one Feathery Flap per air time. It is an interesting spacing tool as it can also be canceled into an aerial by letting go of jump and immediately doing an attack. While it cannot move freely like Peach's or other floats, this unique drifting ability allows Banjo and Kazooie interesting spacing and recovery opportunities.


Like all characters in Smash Bros, Banjo and Kazooie have 3 variations of each special for players to mix and match. Their Neutral Special is "Egg Shoot" and allows the pair to use various eggs as projectiles for a nice ranged assault!


The pair's default special and one of the first moves that Bottles taught them, Blue Eggs are a reliable projectile. Crouching as seen above, Kazooie can fire up to 3 Mr. Saturn sized eggs rapidly (think around the speed of Mario's jab combo) that travel up to 3 platforms before breaking. Blue Eggs can also be single fired, allowing for some mix up potential.
Dealing 2% each and mere hit stun, Blue Eggs' rapid fire rate make for excellent zoning tools and combo extenders. Especially while airborne, the varying burst or single fire of the Eggs allow a barrage of projectiles at varying heights to cover multiple options at once! Just be mindful of the slight start/end lag as Banjo enters and exits a crouched position. A Barrage of Blue Eggs can make a great approach along with a Feathery Flap to close the distance with an aerial under some covering fire!


HailFire Eggs alternate between Ice and Fire Eggs based on how long you hold the input. Taught by JamJars in Banjo-Tooie, each offers utility or damage in exchange for speed.
A tap of B will fire an Ice Egg with Kazooie making a "Caw-HrRrRrrr" sound as opposed to the Blue Egg's "Caw-Caw-Caw", which has double the actual "shoot" animation of Blue Egg which while not slow, is noticeable. The Ice Egg travels at half the speed of normal eggs, and only deals a mere 1% on impact if it doesn't break naturally after two platforms. When the ice egg does hit however, the foe is frozen solid! Differing from normal freezing, this acts more like a paralyze as the foe stops on the frame of animation they were in and are coated in a thin icy veil until they mash out with grab difficulty and go back to a neutral pose. Hitting foes while frozen will break the effect (further Ice Eggs will merely damage them, not stacking the freeze), but that shouldn't matter as it allows one for free even if you freeze them midair!
Fire Eggs are shot if you hold down the B Button for half a second, launching at twice the speed of Blue Eggs with a "Caw-Haww!" sound and for 4 platforms before breaking. On impact, foes are set ablaze for 8% and experience diagonally downwards fixed knockback of about a "Bowser length" that can leave them prone or even gimp some recoveries. Given the charge and animation, you can really only have one Fire Egg on screen at a time, but the next one can begin to be shot the moment the prior fizzles out to give a sense of timing.
Either egg can be a great set up to a harder follow up hit, with the decision between risk and reward with an easy to shoot ice egg or rewarding but more difficult fire egg.


The Grenade Egg was taught to the pair by JamJars in Banjo-Tooie and is the slowest yet most powerful Egg Shooting option available.

Tapping the B Button will have Kazooie launch a Grenade Egg with a "Caw-Hoo!" sound, mimicking a mortar shot. This launch takes the same amount of time as the Fire Egg, but has the drawback of not being able to shoot again until the current Grenade Egg detonates or leaves the screen. Grenade Eggs travel as fast as Blue Eggs but do not detonate until they hit something, at which point the explosion will cause 12% and strong radial knockback able to kill your average foe at about 110% or so if they are offstage. Grenade Eggs also follow a slight arc as they travel forward, starting at a slightly upward angle compared to the others and then slowly working it's way downward. For a mental picture, if Banjo were to start the move at the outside edge of a Battlefield Platform, the egg will fire and reach it's apex height between the platforms, then hit the ground at the edge of the other platform. As you can imagine, this makes a great off-stage killer with how it will travel indefinitely down towards foes recovering low, but at the same time you must be careful with your aim as you wont get to fire another till that one is gone!

A powerful tool, Banjo should be careful with it's use both due to how often he can actually get one into play, and with how a misguided egg can blow up in their face!


Banjo and Kazooie's Down Specials all focus on placing a new entity on the field. Whether it be a Clockwork Kazooie, or one of the pair themselves using Split-Up!


Clockwork Kazooie eggs are spawned by default, and use the humorous "Egg Fart" animation from the BK games where the egg comes from behind a crouching banjo in an arc before hitting the ground and spawning the Clockwork minion, taught to them by Jam Jars in Banjo-Tooie.

Taking a smidge longer than a normal Egg Shot, the Clockwork Egg will hatch with a "Doo-doodo-doo!" and act by itself in order to home in on the closest foe in a suicide mission. The little guys move at about a 7/10 dash speed, and have a little hop that allows them to just graze below platforms to intercept aerial foes! On contact with a foe, the Clockwork Kazooie will detonate for 16% and strong radial knockback that can KO around 120% near an edge.

While impressive, the CK's can be attacked and detonated relatively harmlessly as they will fall apart with a good smack. Even worse, they can detonate on Banjo himself if you're not careful! Contact with the egg itself will only detonate no matter what, making for an interesting option from up high as an enemy attacking it will have them take an explosion to the face, and allows for more options to mess with foes recovering from below. You can only have 1 CK on stage at a time, with a second input of Down B manually detonating the CK for half the damage and knockback. Try and use your robotic buddy to your advantage to get into your opponent's head as they try to avoid/detonate it instead of attacking Banjo, just make sure to take care of yourself as well!


The second Down Special available to the pair allows you to Split-Up and take control of Kazooie as she flips out of Banjo's backpack with a triumphant "Breegull!". Banjo in the meantime hops into his Snooze Pack where you left him, with comical "Z"s floating from him for as long as you don't press Down B or Grab near him again. As Banjo sleeps, he will periodically get a big "Z" that is tinted yellow with the iconic honeycomb sound from the BK series. Occurring about twice a second, this indicates that Banjo has healed 4% worth of damage for when you reunite!

In the meantime, Kazooie needs to protect Banjo while he regains health for the duo with a mini-set of her own. If Banjo is hit, he will take damage (taking away from any stored up HP) and end Snooze Pack momentarily before going back into it naturally after about half a second of idling. If Banjo or Kazooie happen to be KO'ed while split up, the pair will still lose a stock and return to stage on the re-spawn platform with the other disappearing ala Nana when Popo is KO'd.

To protect Banjo on his restorative nap, Kazooie puts her speed and acrobatics to good use:
  • Size: 3/10
  • Weight: 2/10
  • Run: 9/10
  • Air: 10/10
  • Fall: 5/10
She is much smaller and frailer than Banjo, but has incredible speed and Falco-calibur jumps, along with access to the Feather Flap that can be done twice and gain height! Kazooie's wing attacks are transcendent thanks to golden feathers being found in them, and she has a couple to choose from while on the offense:
  • A: Kazooie will do alternating swats with her wings for 5% each and low knockback, traveling forward slightly per swing.
  • Dash A: Kazooie will do a spinning Wing Whirl attack that deals 16% total of multihit that sucks foes in then pops them upward.
  • Aerial A: Kazooie will do a spinning Wing Whirl that deals 12% up front and high knockback that lingers the same amount as the dashing version (about a second) that deals 8% and mediocre knockback after the strong hit.
  • B: Kazooie uses Egg Shoot to launch Blue Eggs, regardless of the eggs selected for your normal N special. Seeing as Eggs are a specialty of Kazooie's, she can fire each type depending on whether side, up or neutral B is used while solo!
  • Side B: Kazooie uses HailFire Eggs, this time with a smash input being used for Fire Eggs. It should be noted that Kazooie needs to wait until after the animation of one type of egg shot to use another. Slower eggs used incorrectly can ruin your camping and allow the enemy to hit you or Banjo!
  • Up B: Kazooie fires a Grenade Egg at a much steeper angle, almost like Yoshi. The same rules apply with 1 grenade allowed at once, but at least solo she can cover the air much more reliably.
Kazooie is incredibly nimble with large, high priority attacks and even multiple projectiles she can abuse well with high speed. However, without Banjo she is incredibly fragile herself, even if it is incredibly hard to gimp her she is suceptable to juggling due to only a wing attack and air dodge to get to the ground. It is recommended that you use Split up sparingly to try and get a sizable percent lead as while Kazooie's aerial attack can kill (that or grenade eggs), it is tricky at best to land the moves in neutral. Try and abuse your movement to combo foes and keep them off of Banjo for maximum effect!

It should be noted that when reuniting, you will heal the full amount that Banjo accrued during his nap. So, if Banjo snoozed up 16% worth of healing and Kazooie took 10% defending him, you will end up with a net 6% heal. Take care to use your range and speed to your utmost advantage!


The final down special allows you to take control of Banjo while Kazooie hatches a Mystery Egg! Like with Kazooie, Banjo has his own mini set as well as his own stats, just in his case weight goes down by 1 and fall speed by 2. While Banjo takes the stage, the mystery egg that falls out of the backpack alongside Kazooie rolls about a character length behind him as a temporarily invincible Kazooie lands upon it and gets comfortable, being the longest of the Down B's by a hair.

As she warms up the egg, it's color will slowly change from Purple to Red over the course of about 30 seconds, hitting every color on the spectrum in between. This obviously will indicate the power of the Egg when you decide to hatch it with a second press of down B, otherwise an attack of yours toward Kazooie will result in the pair reuniting automatically and taking the egg back into the pack. If you return the Egg to your backpack, another press of Down B will place it back on the field after letting it cook for 1/3rd-speed in the safety of your pack. After 90 seconds or so, splitting up can result in a fresh, powerful Red-Egg to play with! The maxed out Egg is indicated by mysterious sparkles floating around Banjo's backpack.

Depending on the color, Hatching the Egg will result in an exponentially stronger and stronger explosion as it cracks open with the trademark Banjo-Kazooie sparkle effects, with the lowest Purple form dealing merely 14% and mediocre radial knockback within a hitbox that is about the size of the Egg + Kazooie as seen in the picture above. A Cyan Egg (half done charge) will deal 1.75x that amount for 24.5% and strong Radial knockback, able to KO rather decently with bad DI or near ledges at around 130% or so. A Red Mystery Egg however is at peak power after a whole 60 seconds worth of warming up, and will deal a mighty 49% in one go and kill at around 70% or lower depending on positioning! Once detonated, Kazooie will automatically flip towards Banjo as he himself halts what he's doing to accommodate her in his backpack for some punishable lag. Kazooie and the Egg have super armor while they are on the field, but are still attack-able, with enemy attacks reversing time spent trying to hatch the egg with 1% of damage dealt equaling -1 second of time, visually represented as the egg going backwards toward purple with each hit. If the Egg gets negative time, it will shatter harmlessly and send Kazooie careening back towards Banjo with the same end lag as breaking it manually, only without the reward. Luckily, Banjo can store the egg's timer whenever he wants, and it even saves between stocks! Just be careful with the egg and it's secrets will surely be worthwhile.

Tasked with protecting the Mystery Egg, Banjo has a few new tools to get the job done:
  • A: Banjo performs his standard "Claw Swipe" jab combo (seen below) just like normal.
  • Dash A: Banjo performs his standard "Forward Roll" dash attack (seen below) just like normal.
  • Aerial A: Banjo flails mid-air just like with his "Failed Flip" when you crouch and jump with him in Banjo-Tooie. The bear's flailing arms and legs form a lingering hitbox that deals 6-8% multiple times with mediocre knockback each swing over his whole body, making an excellent defensive "get off me!" tool for high pressure situations. Better yet, this actually can hit multiple times allowing for actually sizable damage if you play your cards right over the 4 total hits of the move.
  • B: Banjo takes his pack and puts it over his head swiftly to enter the Shack Pack! While covered in his backpack, he is about 1/3rd shorter, and enjoys Heavy Armor for as long as you hold the B Button down. Able to walk and even hop through nearly any attack until higher %, where the armor starts to give way to Knockback, with obviously higher values starting to effect Banjo earlier. The Shack pack is a great defensive tool as it allows Banjo to absorb a hit, let go then retaliate with a move of his choice, or simply block projectiles and the like to increase the timer on the egg at the expense of some % taken (as well as prevent some would be early KOs given his lack of powerful recovery unlike Kazooie).
  • Side B: Without Kazooie taking up space, Banjo can fill up his pack with other things! Using the Taxi Pack, Banjo takes off his backpack and swings it forward in a scooping motion that takes about the same time as Mario's Cape overall. Foes caught in the pack will be scooped into it, with Banjo shoving them forcefully in with a free hand to cause 5%. From here, Banjo is free to walk slowly left or right (turning as he does) and even hop with a second press of B or A having him pop the foe out for an added 5% and set knockback up and away from Banjo as he goes through the normal end lag of the Taxi pack. Useful for moving foes away from Kazooie.
  • Up B: Banjo takes off his backpack and spins it around himself twice while proclaiming "Whirr Wallop!" for a large disjointed hit. The Backpack is empty, making each hit only count for 6%, but Banjo is allowed to halt momentum and even rise by holding the B button down for a form of recovery without special fall! this Pack-Whack will come into play later, but while solo this allows Banjo some form of recovery for him to get to an edge as well as smack foes around with a disjointed hitbox with some reach to it. He can only do this once per airtime, but lack of special fall means he can perform the rising Pack Whack then jump again for a mix up.
Overall, Banjo takes on an almost puzzle-like playstyle as you time the Egg and protect it from lowering too far, or otherwise tricking foes to approaching it to detonate it early (though Kazooie has to hop off with a "Bree!" before it detonates a split second after as a very brief cue) for punishment. With the option to always hop over to Kazooie and attack to reunite, you can easily extend the timer with careful play for a very powerful KO option later into a match when the foe least expects it.


Banjo and Kazooie's side specials all have a generally defensive use to them, either avoiding or straight up plowing through enemy attacks!


Wonder Wing was taught to the duo by Bottles back in Banjo-Kazooie, and has been an invaluable tool in all their adventures. Granting the pair limited invulnerability, they could defeat many a foe with a touch and pass through treacherous terrain unscathed, granted they had enough golden feathers for the job!

In Smash Bros, Wonder Wing begins with the nostalgic "Dee-deede-dee-daDee!" as Kazooie pops out to shield Banjo's front as he charges forward about a Platform's distance, shedding visible Gold Feathers as they do so. From the time the Jingle begins to play, to where the move ends, the duo is impervious to harm from the front, yet still grabbable as they barge forth with a 10% horizontally inclined hitbox with set knockback of about a platform and a half away. It should go without saying the sheer usefulness of an invulnerable charge to get toward your foes. Projectiles? No problem. Lingering or heavy atacks? Brush them off. The charge even pushes the pair forward in mid air!

So, what weaknesses does the Wonder Wing have you may ask? Well, for starters it only protects them from frontal assault. this means a mis-spaced charge leaves their back wide open to attack. Secondly, the beginning has some start up as Kazooie comes out that cues the move just before the jingle/charge begins, allowing for an observant and reflexive foe to react to the Wonder Wing and go for a shield-grab through it. It also has a bit of end lag as Kazooie goes back into the pack that can be punished on whiff. So, it requires careful use with timing and spacing replacing Gold Feathers as your resource to manage. When used well however, you can enjoy the benefits of an unstoppable charge forward to gain offensive pressure!


Trading damage for Speed, Talon Trot was another early ability taught by Bottles in Banjo-Kazooie that has had incredible utility for the pair throughout the years. AT the press of the input, Kazooie will pop out of either end of the backpack (making us wonder what is keeping her in there in all honesty...) as Banjo leans back and lets her do the legwork. The move is interestingly faster to B-Reverse than it is to do standard, as a few frames are used to turn the pair around for the standard "Forward" direction Banjo was facing, and as a result BK players may opt to use the new-found 9/10 dash speed to retreat away and shave a smidge of lag off. Better yet, thanks to the bird's long legs, Banjo doesn't have to worry about any non-explosive types of patches or traps on the ground, able to run over things like Bananas or Ice Slicks with ease!

Holding B will allow you to stay in Talon Trot as long as you like, able to do a long-jump (running), short jump (from standstill), Dash Dance, and even slight damage as Kazooie's feet flail mid-air (weak multihit). In the air, Talon Trot will boost the duo forward as if they did a long jump, however there is a good deal of lag that is only able to be acted from after Kazooie's "Brrrreeeeeeee!" ends, which can be useful for recovering at times as when you land you can go right to a dash, though highly intercept-able.

Letting go of the B Button allows Banjo to regain control and attack once more, which is great when you get a jump from Talon Trot adding to your momentum from the ground for a chase as Banjo automatically turns the way Kazooie was traveling when TT is canceled. Holding "Back" when cancelling will allow Banjo to face "Forward", if that makes sense. All in All, Talon Trot is a great mobility tool for the pair with interesting depth in which way they face in the air and on stage.


Beak Bayonet is the final side special for the Bear and Bird, and the most offensive-minded. Reaching back, Banjo pulls Kazooie from the pack and lunges forward with Kazooie exclaiming "Breee-Hah!". The move is as slow as Marth's Shield Breaker, and actually has similar reach as the pair lunge forward to stab at foes. Unlike Marth, Banjo and Kazooie do not enjoy any disjoint but instead have heavy armor while using the move! Indicated by a couple frames of flashing Red as the actual lunge occurs, Banjo will plow through most any attack until higher percents (Like with his solo Shack pack Neutral B), making it almost like a counter.

When you hit a foe, Kazooie's beak will deal a whopping 20% at the tip with her body/Banjo's arms dealing just 12%, both hitboxes sending foes at a sharp diagonal angle upwards though with the tip obviously being a killer at around 90% near an edge. While powerful, Beak Bayonet has the least effective range of the side specials, and has tremendous ending lag on whiff of about half a second as Banjo goes "Dohhhh" and puts Kazooie back in the pack. On hit, he will exclaim "Guh huh!" happily and experience only 1/3 of that lag.

The Bayonet can be treated almost like a 4th smash that hits straight ahead. Useful both in the air and on the ground, Banjo just has to be very careful of when he uses the move as to avoid huge punishment on a miss. Try and outdo other meaty attacks thanks to the heavy armor, or as a landing option to get the jump on foes by B-Reversing it as you jump behind them!


Banjo and Kazooie are known for their high-flying antics in their games, featuring uniquely vertical level design thanks to their quirky movement. In smash, this is reflected by their variety of Up-B's.


Shock Spring Jump is the duo's "basic" Up Special, providing a balance of offense and safety in one nice package. Like with Talon Trot, Kazooie appears nearly fully out of the backpack as Banjo leans back to act as the weight on a large spring before the two launch upward nearly as high as Sonic's Spring Jump at a controllable angle with a "WaHoo!" from Banjo.

In the air the wind-up slows your fall speed to an average level and does not incur special fall on the pair, allowing for an attack to be used pretty much the moment the 1/3 of a second wind-up animation ends and Banjo starts to ascend. Additionally, Kazooie's feet at lift-off provide a strong meteor hitbox for 10% to any foes she may happen to leap from making for a potentially flashy, if hard to hit KO as Banjo launches up and away to safety. Once in the air, if you have not used your jump or Feathery Flap you can also cancel the jump with those. Be wary of your usage however, as whiel the Shock Jump gets refreshed when you are hit off stage again, your jumps do not!

While limited in horizontal recovery, the jump has great offensive and defensive utility thanks to the meteor hitbox and ability to cancel into attacks and jumps for high altitude follow-ups.


Flight is probably one of the most iconic abilities of Banjo and Kazooie and for good reason: it is one of the safer recoveries in Smash! The ability to just soar over would-be edge-guarders cannot be understated, especially when you can cancel the flight into a neutral air state with a second press of B!

At the press, Banjo launches up as Kazooie emerges from the pack, reaching high enough to just go over the middle Battlefield platform from the ground with a "whoosh". From here, the pair enter a flight state that allows them to cruise at a 7/10 dash speed in the air with a whopping 6 jumps that each push them about a Banjo height upward to safety. They can even turn around mid air!

So, what is flight's weakness you may ask? Well unlike the Shock Spring Jump, Flight is fragile in that it consumes your ability to Double Jump and Feathery Flap when used. Additionally, you lose two "Flight Flaps" each time you are hit while in Flight, combined with the inability to Fly again if you exit the move without touching the ground, the duo may feel like sitting ducks if they aren't careful! This said, once in Flight the two are masters of aerial maneuverability with the unique ability to pivot mid-air and cancel to use an aerial or special for safe descent. All in all, as long as you weren't spiked at high %, Flight -will- get you back on stage as long as you are smart about your path.


Beak Bomb is an odd case in that it is both the slowest and fastest recovery available to Banjo and Kazooie, making for a high risk/high reward maneuver. Once pressed, all of Banjo's momentum in any direction will stop as Kazooie emerges and the pair flash red, indicating the period where the two can choose any cardinal or diagonal direction in which to launch as Banjo exclaims "Duh-ohhh....". After about half a second of that, Kazooie launches the pair in the direction trailed by glowing red feathers and a loud "Breeeeeeeeeeee!" as they zoom at Sonic's dash speed for the length of Battlefield!

After the distance is traveled, the pair brake suddenly with a sort of forward-facing Feathery Flap then go into special fall, making it punishable when mis-spaced. On hit however, one of two things can happen: firstly, if you hit the ground the duo will take 10% and be left knocked-down on the ground for their crash landing, though with a feathery radial hitbox for 10% and strong knockback that while it won't ever kill until ungodly %, it is useful to clear the area so to speak. A direct hit from Kazooie to their opponent will deal a whopping 25% damage and knockback in the direction they were traveling that can KO as low as 80%! After hitting, the pair do a flip and return to a neutral aerial state with no special fall, able to use Beak Bomb once more if they wish.

Beak Bomb is scary for all parties involved. On the opponent's end, they don't want to die. On Banjo and Kazooie's, they don't want to be punished for a whiff or hurt themselves by hitting the stage. So on the enemy's end, they will always want to be avoiding the move unless they can perfectly time a meaty attack to try and intercept the bomb or try and go out to hit the Bear and Bird as they wind-up. Given the distance they can do this from however, few characters can jump out to swat them then make it back themselves. Banjo players may find it very difficult to sweet-spot the edge with this move, which makes actually missing the edge highly probable but not too hazardous thanks to Banjo's high fall speed allowing him to drift in special fall to the stage quickly enough.


As he charges, Banjo will reach into his backpack and grab Kazooie by the feet much to her squawking displeasure. Upon release, banjo slams Kazooie out before him onto the ground with a happy "Guh-huh!" while his feathery companion lets out a painful "Bree-guhhh......".

Taking about as long as DK's Fsmash with reverse lag times (faster to come out, with longer end lag as he puts Kazooie pack in the pack), Breegull Bash is deservedly strong. Dealing 16-22% and very high meteor knockback the moment Kazooie slams down, and 10-14% with medial radial knockback at any other part of the swing, this Fsmash is great to getting foes into the air with a wide hitbox, of even smashing recovering foes back down hilariously!


Used frequently to get to just out of reach areas by themselves, the Flap Flip allowed Banjo and Kazooie to get to new heights before they even entered Gruntilda's Lair in the original game. In Smash, this acts as a high-reaching smash attack as the duo crouch for the charge before launching up high enough to scrape below the high battlefield platform before flipping right-side up and entering their aerial state for little overall lag.

At launch, the Flap Flip will deal 13-18% and directly vertical knockback, and an additional 5-7% at the ending flip for just hit stun. This makes for an excellent combo tool into an aerial at lower % as it leaves the duo airborne, but not really that much of a killer unless comboed into a killing aerial or special. It is also useful defensively due to overall only taking about as long as Mario's Usmash to actually "come out" to make for a quick escape from pressure and into an aerial state.


Using his pack as a weapon once again, Pack Whack is a great disjointed attack for Banjo. Unlike his Solo Up B from DownB-3, he will only swing the pack once around before returning to neutral, being similar in time to DDD's own Dsmash but with range akin to Link's grounded Spin Attack.

Having Kazooie in the pack adds some punch to the hit, dealing 14-20% and mid-high diagonally away knockback on each side of the swing. This move can kill around 130% or so near an edge, and is a great "keep off me!" move for Banjo due to the grounded area it covers. However, the animation itself takes a bit of time leaving the bear vulnerable from above or to shield grabs.


Claw Swipe has Banjo do an overhead swing with each of his claws in a left-right-left motion, taking a step forward each time. The first two swipes each deal merely 3% and hit stun, with a 3rd stronger swipe dealing 4% with a "huh!" from Banjo that deals a bit of knockback away. You can Jab-cancel the 1st two hits for mix ups on your ground game, which given their speed and arcing hitboxes make for a very reliable tool that even has the bonus of letting you approach!


Side Tilt is your standard "poke" option with a bit of a twist given it's high arcing motion as seen above. Taking about twice as long as a single Claw Swipe, this angle-able Peck from Kazooie starts high then swings forward to deal 5% and light horizontal knockback. Mixing up Peck and Claw Swipe makes up your bread and butter on the ground, with Peck having more priority due to minor disjointedness on Kazooie's head and better range, while the Swipes have a bit better combo utility in terms of leading to a Peck or grab. Not to be underestimated, it makes for a solid zoning tool due to it's high angle and speed.


Kazooie pops out of the top of the pack as Banjo does a little hop and swings her wings back and forth with a "Gulllll!" . This Arcing attack hits 4 times for a total of 12%, with the final hit popping foes straight up with mediocre knockback. With speed like Metaknight's Up Smash, it is a great juggling tool that even pokes just through the bottom of platforms. It does have a bit of end lag however due to Banjo landing and Kazooie going back to the pack, but the hitboxes alone can make you favor it over Peck at times for an anti-air.


Beak Barge is one of the strongest, yet sluggish moves the pair have in their arsenal. Taught by Bottles at the start of Banjo-Kazooie, from a crouched position Banjo can do a bird-assisted tackle with Kazooie leading beak-first into the fray. Having a notable bit of start up to it, Beak barge makes up for slowness with power and range. The initial hit just as Banjo lunges deals an impressive 15% and high radial knockback that can kill around 140%. The following lingering hit deals 10% and more horizontally inclined knockback as Banjo travels the distance of Wolf's Fsmash from Brawl. There is then end lag as the pair go back to a neutral state.

A tricky tilt to utilize, it has a lot of duration as the entire move taking about 4/5 of a second to perform in total yet has start up and end lag that can cue a foe into it. Luckily, your ground game allows you mix up your foe's expectations in order to sneak in this powerful hit. Additionally, Banjo becomes rather low to the ground which can allow a crafty approach under some attacks and obstacles only to stab through their offenses.


Dash Attack is another staple of Banjo's ground game, as it surprisingly leads to his air game! Forward roll hits foes diagonally up and away for 8% as Banjo makes contact with them over his platform-long journey. Once Banjo's feet touch the ground about 1/3rd of a platform in he can cancel the animation with a Jump (or any time after that). This turns Forward Roll into an excellent combo starter as you can go right to an aerial, jump-cancelled Up Smash, Jump Cancelled grab, and so on! As an added bonus, Forward roll does not stop at edges and is still a hitbox even if you roll into the air with it, still allowing you to jump from ti with your double jump.


Breegull Roll must feel a bit familiar after using Forward Roll on the ground. While airborne, Kazooie envelops Banjo as they spin twice in the air with a "Ha!" from Banjo before returning to a neutral state. Taking slightly less time than Forward Roll, Nair hits for 12% on the first roll with strong radial knockback that can KO at higher % near the sides / with bad DI, and then lingers for 8% just like Dash Attack, but only dealing what amounts to hit stun. Useful for comboing due to it's lingering nature, as well as late kills in a pinch, Breegull Roll is surely a staple of your air game.


Speaking of staples, Rat-a-Tat Tap is probably the most used attack in both BK games! Taking barely any time at all, Kazooie emerges and delivers 3 pecks in a random order of high/low/mid. Each peck deals 3% damage for 9% total of hit stun before retreating swiftly back into Banjo's backpack. Banjo and Kazooie's fastest aerial, RaTT is a staple combo tool from most any position as it deals merely hitstun quickly and in a wide area, even auto cancelling after each hit when landing! Few characters can ask for a better combo extender when combined with the various aerial options the Bear and Bird possess.


Opposite of Fair, Bear Bash is a solid, beefy KO move that puts Banjo's weight to work. Laying flat out in the air, Banjo kicks both legs back with a grunt as he also pivots slightly as if Sky Diving. Dealing 13% and pure horizontal knockback, Bear Bash makes an excellent edge-guarding option if used correctly, if not outright kill move at higher %. Unlike most of their aerials, this kick is only brief if powerful, taking about the same time as Ganon's Dair in total for the bear to keep foes back off the stage.


Hunching forward, Banjo makes way for Kazooie to rush up out of the back pack to perform a lingering peck upwards like a lance! The initial stab takes barely any time to come out, about 1/10th of a second and deals 12%. The Bird then lingers for about half a second further to deal a mere 6%, both hits dealing directly vertical KB with the strong hit obviously able to kill at high percents. Along with Nair and Utilt, this rounds off Banjo's juggling game as the lingering Lance Peck can keep foes from coming down for quite a while.


Beak Buster is another classic move learned from Bottles, it is your standard stall n' fall aerial in most regards, but it has a couple quirks to it. First things first, Banjo flips over and actually rises up about his own height while doing so as Kazooie appears below. This start up lag is really notable, but the utility of that small rise cannot go unnoticed, as one technique is to climb of edges just out of reach using the Beak buster's rise! Right before the fall, a hitbox appears that will meteor foes touching Kazooie only for 16%, before the pair crash down like an anvil either until they hit somebody/the floor, or go about 10 Banjos worth of distance. On impact, the bear and bird do a laggy flip before returning to a neutral state, which makes the move a bit safer on shield than one would expect due to the bounce but otherwise easy to punish when you miss. Foes hit by the Beak buster will take 10% and radial knockback that doesn't really kill, but is comboable from the initial Kazooie-Meteor for a devestating 1-2 punsh as the pair meteor then chase after the foe to bounce off and to safety. Given moves like Usmash and most of the Up Specials, Beak buster makes for a high risk high reward aerial that can make or break good BK mains in how they flow into and out of it.


Banjo's grab isn't anything special, like most characters he reaches out with a paw to try and snag anybody in front of him. Once caught, pressing A will have Banjo kick his foe repeatedly for about 3% at a medium rate. Nothing really out of the ordinary here.


Banjo displays his bearlike strength as he lifts his opponent overhead with a light "oof", just like he does with many items from the games. From here, Banjo can then press Forward again or even Backwards as a mix-up to heave the foe in an arc for 9% damage and light-medium knockback. A great comboing throw as it gives just enough hit stun and distance to follow with eggs, Dash Attack, Dtilt, Aerials, you name it! The backwards option gives a nice variety to the throw as the opponent may DI for one direction yet you toss the opposite, leading to more damage down the line or even a re-grab on faster fallers/bigger targets.


Tossing the foe behind himself, Banjo crouches as Kazooie appears and performs a shock spring jump at the opponent for 10%. With banjo acting as a brace on the ground, all the power gets sent into the foe as they are rocketed diagonally away with strong knockback as the duo recover from the somewhat laggy throw. Talon Trounce is easily Banjo and Kazooie's most powerful throw in terms of knockback, able to KO at 150% or so on most characters while aiming for a blast zone, but can also at times combo into eggs and aerials at low % depending on the character.


Jam Jars taught the duo early on in Banjo-Tooie how to freely aim their eggs, and with their UThrow they use it to full effect! Tossing the foe up high for 2%, Banjo crouches down as Kazooie appears to fire a volley of Blue Eggs, each dealing 2% for a total of 6%. Each egg can be aimed slightly left or right by the player in order to follow the foe's DI, which is always useful but a bit of a 50/50 given you can guess wrong and only get 1 egg on them if any. Once Kazooie fires the last egg Banjo is free to move about, making this the functionally fastest throw as well as possibly the safest as a projectile can cover any action you take next as the foe suffers from hit stun above you.


Another throw given to the pair by Jam jars, the Bill Drill is a modified Beak Buster used to bash through tough objects. In Smash, after slamming the foe to the ground, Banjo hops up as Kazooie pops out and drills to foe into the ground for 14% worth of multi-hit! The final hit pops foes out and away either left or right with medial knockback that is useful for combos at low % as a sort of midway between Uthrow and Fthrow on most characters in terms of follow ups. What it lacks in guaranteed combo potential, it more than makes up for with damage as 14% off a throw is nothing to scoff at.


With the power of the Smash Ball, Banjo and Kazooie stop the match as the Mighty Jinjonator is summoned!

Last seen at the end of Banjo-Kazooie as it helped defeat the evil witch Gruntilda, the Jinjonator will emerge from it's statuesque prison with a powerful yawn then levitate to the air, the screen darkening as it spins round and round for a moment before launching itself into foes! Each lunge is unstoppable aside from avoidance at the last second and deals 20% with high hitstun but low knockback. The 5th lunge however has the jinjonator pause and say "JINJO....." in a low, powerful voice before zooming in on an enemy for 40% and Warlock Punch knockback, sure to finish them off and send them tumbling to their final fate!

All the while Banjo and Kazooie are free to move about to take advantage of their Jinjo Ally while he lasts, which can give them time to set up their Down B's or simply take out foes in hit stun from the Jinjonator in a multiplayer match. After his time is up, the Jinjonator waves goodbye to banjo and Kazooie before spiraling away up off the top of the screen.


Banjo and Kazooie's greatest strength is variety. Their 12 specials all offer different takes on Projectiles, Defense, Movement and placing a new object on the field which when combined create a large array of possibilities for them to tackle any challenge. This on top of an excellent aerial game and poking ground game make for a character that is hard to keep off of you! That isn't to say they are without weaknesses however. Banjo is very easily comboed himself, and while Kazooie provides great aerial acrobatics, each hit offstage means they lose options and eventually lose out to edge-guards by patient and clever foes.

In general, BK mains would tend to go for all out aggro, defensive or variable styles. Aggro players would probably enjoy the Blue Eggs, Shock Spring Jump, Beak Bayonet and Clockwork Kazooie combo as it provides a spammable projectile for damage alongside a homing bomb they can deploy to chase down their foes with them, atop an aerial or grounded KO move that can be done from a Super Jump. Defensive minded folks would probably like the HailFire Eggs for their utility in keeping a foe pinned down, the Talon Trot to make space between themselves and a foe, Banjo/Hatch to use their camping for time management and a great payoff, and the Beak Bomb for a recovery that makes opponents think twice about challenging. Variable players may then opt for Grenade Eggs as they can damage and kill, despite their speed, Wonderwing for it's protective and offensive use, Flight to manage the air any way they wish, and Kazooie/Snooze pack to change the pace of the game for the foe suddenly.

Any way you slice it, Banjo and Kazooie got the moves for just about everyone to enjoy. An easy to pick up but difficult to master character, dedicated mains will have fun with the pair just as much as if they were playing the original games.


Last edited:

Katapultar

Smash Lord
Joined
Nov 24, 2008
Messages
1,284
Location
Australia
[collapse=BanJOE!]I'm genuinely impressed at what you've done with the Specials, having played the games myself. It's basically the pioneer of incorporating Custom Specials into movesets, doubling as an especially clever way to show off the duos' armada of attacks, though Custom Specials are not something I'm interested in pursuing in my own movesetting. If anything it does sort of make the set a bit hard and awkward to judge when one needs to consider that for once the moves they're reading are not all incorporated into the moveset at the same time, making it partially feel like an unnecessary slog. Given you're throwing 12 Specials at us from the get-go, I can safely assume that BK is a unique experience where you want players to mix-and-match their preferences for the Specials like with Smash 4 characters. Hmmmmm.

When you get past the Specials, the Standards are shown to be quite refreshing, feeling distant from the Specials. You only have so much choice when most of these moves and their effects are based off attacks in the series, but they're perfectly translated to a T and their standalone feel works well with fact that you're doing full-blown Custom Specials. I think you reached your intended goal perfectly - a definite Banjo-Kazooie set geared towards SSB4 players. The set is very good in that regard.

It's kind of hard to find complaints considering what you set out to do in the set, but I do find the 3rd Down Special somewhat awkward on many levels. It's a bit hard to understand visually in that the explosion does not feel all that pronounced in the writing. That being said, it's the one move I don't really remember from the series, to be fair (did it even happen?). It also feels awkward game-play wise in that it's essentially a trap you can manually detonate, strange for Banjo and Kazooie despite their eggs, and it has an absolutely massive timer and doesn't seem to have a lot of flow in the set. It's sort of the bad egg among an otherwise well-crafted set of Custom Specials. My other, lesser nitpick is that radial knockback seems -slightly- abused in the Specials without that much reason to be to the point where it could lead into overpowered situations, mainly the Clockwork Egg that could spike recovering opponents without too much trouble. I'm sure there's a reason for the design, though.

This is definitely a good set that I could see having a lot of fans, but I can't really like it any more than that because of how it was handled; it's not especially focused and leaves a lot of how it works up to readers, or at least that's how it seemed to me through the playstyle section. That's what you were going for though, I can understand that, and it works for the characters.[/collapse]
 

ChaosKiwi

Smash Apprentice
Joined
Feb 1, 2014
Messages
104
NNID
ChaosKiwi
ROUND ONE...


FIGHT!


SCORPION


His clan, destroyed by the Lin Kuei. His family, murder in front of his eyes by Sub-Zero. His name, lost, and replaced... with Scorpion. Scorpion is a specter, killed and then raised from the dead by an evil sorcerer. His new life has only one purpose: Revenge.

STATS
Height- 8
Weight- 7
Ground Speed- 5
Jumps- 7
Aerial Speed- 5
Fall Speed- 7


SPECIAL KOMBAT

Neutral Special- Spear
Scorpion flings forward his arm, releasing a spear on a chain from his sleeve. The spear travels three Battlefield Platforms at a reasonable speed, before retracting back into Scorpion's sleeve. Should the spear miss, Scorpion will be wide open to attacks while the chain is retracting. However, if somebody is unlucky enough to be in the spear's path, the fun can then begin.

Upon contact with a foe, the spear will embed in their body, dealing an immediate 15% damage. Afterward, Scorpion will tug on the chain, pulling the foe close to him while shouting "Get over here!". Once the foe is in front of Scorpion, they'll open to attack for a fraction of a second, making them easy pickings for the ninja.

Due to the fact that Scorpion is left vulnerable for a good amount of time if the spear misses, the player will need to make sure they time it right if they don't want to be attacked.

The spear can also act as a tether, if aimed correctly.

Down Special- Hellfire
Raising his hands, Scorpion summons a patch of flame in front of himself about 2/3 SBB in size. The longer the player holds the input before releasing the attack, the farther away from Scorpion the flame patch will be, up to one and a half Battlefield Platforms.

The patch of fire lasts for about a second, during which time Scorpion cannot attack. If somebody is caught in it, they too are stunned for the duration of the move, as they're roasted alive. People caught take 13% fire damage, and scream in horrific agony.

The meat of this attack however is that Scorpion will be free to move just a split second before the fire fades, while a captured foe is trapped for the entirety of the flame's duration. What this means is, essentially, Scorpion leaves the foe open to one free hit if the player using him is smart enough to capitalize on the opportunity Hellfire presents.

Side Special- Inferno Punch
Upon input, Scorpion leans back, disappearing in a puff of smoke. This initial lean can also act as a dodge of sorts. Then, he reappears, two Battlefield platforms away, delivering a fiery punch in the direction opposite the one he was originally facing.

Well, no. You see, if somebody, anybody, should be within that two and a half battlefield platforms, Scorpion will instead appear behind them, facing the direction they are, and deliver a powerful punch wreathed in flames, aimed at the center of the opponent's mass (meaning shorter opponents will be hit downwards, while taller or higher up opponents will be hit with a dose of upwards knockback). The punch deals a total of 14% damage.

This move is pretty good for horizontal recovery, by the way.

Up Special- Backflip Kick
Scorpion leaps up into the air, performing a backflip, kicking with a foot wreathed in flame. A fairly straightforward move, all things considered, carrying Scorpion up one Battlefield platform and knocking foes back with 14% fire damage. It kicks people to the direction opposite the one Scorpion is facing when he uses it, so keep that in mind when you play him.


STANDARD KOMBAT

Jab
Scorpion punches forward, dealing 4%. If the button continues to be mashed, it will turn into a three punch kombo, each doing 4%, followed by an upwards slash of one of Scorpion's swords, dealing 6%.

Side Tilt
Scorpion delivers a strong kick to any foes unlucky enough to be in front of him, doling out a decent 12% damage to all comers. This is a good keepaway type move, holding foes at bay with Scorpion's long legs of fury.

Up Tilt
A flaming uppercut, which lifts Scorpion slightly off of the ground. The punch deals 12% fire damage, with the flame extending just a bit above Scorpion's actual fist, creating a taller hitbox than you'd expect from this attack. Since this attack will leave you airborne, it allows you to kombo into one of Scorpion's aerial moves, should you so choose, making this good for taking a kombo offstage or starting one on somebody above you, with the best followup being the UAir, elaborated upon later.

Legend says that, occasionally, a cry of "Toasty!" can be heard when this move connects.

Down Tilt
Scorpion quickly throws his hands over his shoulders, unsheathing and quickly swiping downwards with his pair of swords. The swords travel in an arc from above his head to the ground, where they clip through the ground just enough to hit people below you when you're on a thin platform. The swords are trailed by flame, but this is purely cosmetic. Once the attack ends, the swords dissipate and reappear in their sheathes.
The attack does 13%, and is good for gimping people as they try to make it back to the stage, as they extend slightly lower than you'd think they would. The tips of the swords also act as a sweetspot, dealing more knockback than the rest of the blades, capable of KOing in most cases at 160%. There is a bit of ending lag as the swords disappear, however.

Dash Attack
Scorpion delivers a classic, the flying jump kick, with his own special twist added. The twist is fire. So, trailing fire behind him, Scorpion kicks his foes at a speed about equal to his dash, dealing 14% and rather good knockback, KOing at 180% damage.


SMASH KOMBAT

Down Smash
Scorpion's down smash is a takedown move, called... Takedown. He quickly falls to the ground, sticking out his legs and twisting. This trips up opponents who are caught by it, and deals 22% damage, making it good for keeping foes near you while simultaneously racking up damage. At full charge, his legs are covered in fire, dealing an additional 3% damage.

Up Smash
Scorpion holds up his arm, and after a brief delay a portal appears above him. Out of the portal kicks another, shadowy Scorpion, angled at a 45 degree angle downward. This klone will kick to the ground, covered in flames. The kick spikes foes downward, and deals 24% fire damage to anybody fool enough to be hit by a flaming shadow ninja clone demon... guy. The klone will disappear as soon as it's on the same level/height/plane as Scorpion, regardless of if there's any ground there. The klone's kick kan KO at 140%.

Side Smash
Crouching low and extending his forward leg, before sliding forward (followed by a trail of fire, naturally) one Battlefield platform in distance. This attack knocks foes into the air, and deals them 24% damage (fire damage, also naturally). This has the best range of all Scorpion's smash attacks, making it good for hitting foes just out of range. However, it's fairly low to the ground, meaning Scorpion can easily be jumped over. So time it right, and you can KO as early as 130%!


AIR KOMBAT

Neutral Air
Scorpion throws a downward arcing punch with his dominant hand, letting out a battle grunt as he does. The punch hits in front of and slightly below Scorpion, dealing 10% and knocking foes downward every time. Kombo into your Down Air, kids!
Down Air
Scorpion turns and contorts his body to face downward releasing a short ranged fireball from his palm that travels just shy of a Stage Builder Block before dissipating. The fireball deals, who would've guessed, fire damage, racking up 12% on anybody it hits. If somebody is caught with this just as the fireball is forming in Scorpion's hand, they're spiked downwards and dealt 15%, instead of the usual 12%.
Up Air
Earlier, in the description of the Up Tilt, it was mentioned that the perfect followup to a successful Up Tilt strike was to kombo into the Up Air. What is the Up Air, you may ask? Why, it's an overhead slash of Scorpion's twin blades, covered in his totally rad hellfire. This attack's hitbox is an arc, covering just above Scorpion as well as slightly to his upper sides.

The reason this is a perfect followup to the UTilt is that, as stated earlier, the UTilt leaves Scorpion airborne, meaning you'd nearly need to push the same input again to hit the enemy with this overhead slash before the knockback from the UTilt sends them flying, doubling up on damage (as this attack also deals 12%), and change the knockback from vertical upwards to diagonally forwards/upwards, meaning you can then followup the UAir with yet another followup, like Scorpion's Spear or Teleport attacks.

Forward Air
Scorpion twists, then performs a flaming spin kick in the air, angled slightly downwards. This kick deals 14% fire damage and sends foes flying downwards and forwards, in some sort of revolutionary diagonal knockback. Scorpion can KO with this move at as early as 160%, but only if he hits with the sweet spot: the tip of his foot, where the flames are most concetrated.

Back Air
Scorpion pulls a knife from his belt, and quickly whips around, slicing anybody who's behind him with a short range slash, dealing 15% in the process (though very little knockback). The startup on this attack is near nonexistent, though if Scorpion whiffs then he's stuck with hefty ending lag as he resheathes the knife. If it hits, the knife will be embedded in an enemy, so there's no need to resheathe (and thus much less ending lag). Easily performed out of a short hop.


GRAB KOMBAT

Grab
Scorpion simply reaches his arms forwards, trying to latch on to a foe. Standard grab, all things considered, yeah? Well, no, not exactly.

You see, Scorpion can air grab. If he successful grabs somebody in the air, he will immediately throw them down. If they hit the ground, they will take 10% and be prone.

Pummel
Scorpion punches his captive in the stomach, causing them to keel over and take 4% per hit.

Forward Throw
Scorpion does a totally rad kombo on his foe, kicking them once in the chest, then slashing them up and down several times with his swords before headbutting them away, dealing a kombined total of 15% and leaving them wide open to a second attack, like his Spear or Teleport, perhaps his Side Smash.

Back Throw
Scorpion disappears in flame, before reappearing behind the enemy. He punches them in the face with all his might, dealing 14% and sending them flying in that direction. We are given a glimpse of the internal damage this causes, via an X-Ray shot of Scorpion's fist shattering the unlucky captive's jaw (or nearest equivalent).

Up Throw
Chucking his foe high into the air, Scorpion whips his arms in their direction. In a split second, a pair of spears on chains, one from each sleeve, fly towards the airborne enemy. The first one makes contact with their stomach area, jerking them to a stop midair. The second hits them square in the forehead area, accompanied by a rather graphic X-ray of their face-impalement, before Scorpion grabs both chains and pulls down as hard as he can, causing the enemy to fall to Earth at high speeds. Overall, the attack does 15%, 5% for each spear and one for when they hit the ground. However, should they be pulled down over an area where there is no ground below them, they'll only take 10%, but have a harder time recovering!

Down Throw
Scorpion skips any theatrics, simply throwing his foe to the ground and stomping as hard as he can on their chest, dealing 13% damage. This is accompanied by another X-Ray view, showing Scorpion cracking the foe's ribs (or nearest equivalent). Scorpion follows this up by picking up the foe and throwing them forward,


FINAL SMASH
NETHERREALM


Scorpion lets loose his spear, and, should it make contact with an enemy, it will carry them through a portal that opens behind them. After a second of off-screen cries of horrific pain and torment, a second portal opens on the ground in front of Scorpion. The enemy is launched straight upwards from this portal, having taken 40% damage in Netherrealm.


PLAYSTYLE
Scorpion's playstyle is about never letting up. His attacks hit fast and do quick damage. His specials focus on approaching the enemy, making them come to you, or making sure they can't escape. Essentially, the player has every tool at their disposal to make sure they hammer the foe into oblivion before they can run away or fight back.


Last edited:
Top Bottom