• Welcome to Smashboards, the world's largest Super Smash Brothers community! Over 250,000 Smash Bros. fans from around the world have come to discuss these great games in over 19 million posts!

    You are currently viewing our boards as a visitor. Click here to sign up right now and start on your path in the Smash community!

Make Your Move 15: Top 50 up! Make Your Move 16 starts August 25th!

ChaosKiwi

Smash Apprentice
Joined
Feb 1, 2014
Messages
104
NNID
ChaosKiwi
Lucky seven, let's do this.

BORTH-MAJAR
"This don't work. Me strong, but dumb. You smart, but weak. Let's work together."
"That's the best...and possibly only idea you've ever had. Agreed."


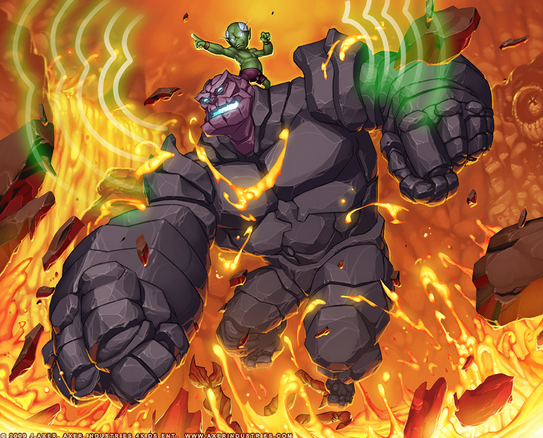
Hailing from the most underrated gosh darn card game ever, Chaotic, Borth and Majar were once separate beings. Borth, the small green one, was a weak, yet intelligent Underworlder who was minding his own business when he came across Majar, a hulking, idiotic creature hewn from the solid stone of the Underworld. They hated each other very, very much. Unfortunately, they were bound together by a sudden rock slide, Borth strapped to Majar's back. This wasn't fun for either of them.

They stayed like this for days, bickering with each other so much that they couldn't concentrate long enough to figure out a way to separate. Then, a mighty centauric creature known as Staluk attempted to destroy them for intruding on his land, his attack's force causing the two to split up. At first they were elated, but they soon realized that neither was strong enough to defeat the mighty centaur on their own. Begrudgingly, they deemed it necessary to recombine, combining Borth's smarts with Majar's strength. They defeated their enemy, and Borth-Majar was born!

STATISTICS

Size- 10
Weight- 8
Jumps- 6
Ground Movement- 5
Fall Speed- 7
Aerial Speed- 4

SPECIALS
Neutral Special- Power Pulse


Borth places his hands on Majar's head, causing the stony creature to glow as he raises his own arms in front of himself. After an incalculably short delay, a flurry of lightning fast energy fists start to spew from Majar's hands, their power boosted by Borth's psychic help. The fists have a range of two thirds of a Battlefield platform, and this attack continues on for as long as the button is held, for a maximum of four seconds, dealing 5% per second for a total of 20% should it be used the whole time and hit all four seconds.


Meanwhile, Borth is free to act. Not moving from his perch on Majar, he can perform his standard attacks, as in his jab and tilts, with the stipulation that his jab and side tilts are only able to be used to the rear.
Up Special- Telekinetic Bolt

Borth-Majar, using Borth's considerable psychic abilities, lifts their body telekinetically into the air, about two stage builder blocks platform in height and at the speed of Lucario's Extremespeed. They hover there for a third of second, before Borth releases a burst of telekinetic energy, allowing them to rise an extra half-stage builder block while also creating a (purely aesthetic) indent in the ground directly underneath (should there be any ground, that is). The initial rising does no damage, but anybody directly below them in a straight line, so long as there isn't a platform or other obstacle in the way, takes 10% from the second pulse and is spiked should they be in the air.

While Borth is busy psychically lifting the pair, Majar is free to attack, capable of using modified versions of his Up, Forward, and Back Aerials. Modified meaning that any aspect of them involving Borth is altered to be Majar acting on his own while Borth does his mind thing.

Side Special- Strengthening Bond

Borth-Majar begins to juggernaut forward at a good pace, slightly faster than their dashing speed. Through the attack, they have super armor, and deal 15% to anybody they run in to, along with dealing to them high vertical knockback capable of KOing at 120%. Unfortunately, this move is... less than easy to stop, with a noticeable delay between inputting something to end the charge and Majar actually stopping. But, this attack comes with an added bonus, in that any items (As in, say, a crate. This doesn't include things like attacks or explosives) that Majar puts in his path get crushed and destroyed, along with anything the opponent was holding when they got hit.


Meanwhile, Borth fell off at the start of the charge, meaning he can now move freely for the duration of Majar's run! He can only use his standards and smashes, however. Should the player attempt to use specials, it will end Majar's charge (though with the previously mentioned delay), and the two will attempt to rejoin each other, moving towards a point in between them both, where, when they meet, Borth will remount Majar. While trying to rejoin, they can both use their standards/smashes, with both using their version of whichever attack is input.

Essentially, this attack temporarily turns Majar into a projectile and Borth into his own mini-character. Keeping track of both is tough, though! Only focus on Borth, and Majar could run off a cliff! Only watch Majar, and Borth is defenseless!

Down Special- Outwit

Borth starts doing some calculations in his head, indicated by him scrawling some words on Majar's head and whatnot. In the heat of battle, however this could be hard to notice. Majar can still attack and move around while Borth is working, but any attacks that depend on Borth's involvement can't be used. The calculating lasts for a good second and a half, but this hefty wait time is greatly rewarded. The next time Borth-Majar is attacked physically, Majar will grab the aggressor, then throw them into the air, where Borth blasts them with a psychic bolt of mind-energy, dealing a total of 10%. If they are hit with a non-pyshical attack, however, Borth will instead create around them a psychic shield, reflecting the attack back at their source, with a slight homing element added.

Should Borth-Majar be hit with an attack that deals more than 8% while Borth is calculating, Outwit will be negated and Borth's calculations will have to be restarted if the player still wishes to use the counter. If Borth-Majar is not attacked within ten seconds of the calculations' completion, then Outwit wears off and has to be reused.​


STANDARDS
Jab
Borth-Majar alternates between two attacks with each input of the jab. The first jab is always Majar, throwing a slow-ish punch that deals 5%. After that, it's Borth placing his hands on his temples and firing a short range bolt of psychic energy, which deals 3%. From then on, they alternate. Majar's jab is slower but has more range, while Borth's is quick and good for keeping foes away. The order doesn't reset when a stock is lost, as well, so if Majar jabs, then Borth-Majar is KO'd and respawns, Borth's jab will be used next time the input is pressed.

Side Tilt
Borth-Majar, again, alternates between two moves for their side tilt, with the same mechanics as their jab. In this tilt, the first is always Borth, firing a wave of swirly, psuedo-telekinetic energy from his high capacity cranium. The wave travels a stage builder block's distance before evaporating, dealing 7% to those who it hits. Majar's attack, used when the input is input after Borth's side tilt is used, is a strong clap in front of him, the force of which is so unimaginably powerful that it deals an incredible 9%.
Up Tilt
This tilt functions the same as the other tilts/the jab, in that it's two attacks that alternate with each other. The first if Majar grabbing a handful of rock, then throwing it into the air above him while Borth covers his head. The rock cloud does 8% and has a lot of knockback for a tilt. Borth's version of the up tilt is to stand up on Majar's back and hold up his arms, creating a small orb of energy above his head, which deals 5% and can be used to do a small combo, as it keeps those it hits in range of Majar's up tilt.

Down Tilt
The first down tilt is Borth, holding out his hands to either side while firing purple waves of energy, which travel one stage builder block and deal 6%. Unfortunately, due to Borth's location being rather high on Majar's back, this has trouble hitting foes who are low to the ground. The second is Majar's, where he punches the ground below him to create shockwaves around him, extending 1.5 stage builder blocks on either side of Borth-Majar, the waves only hitting grounded foes and dealing to them 9%.
Dash Attack
This attack, unlike the other standards, has only one form. Majar charges forwards, keeping the dash going as Borth fires a stream of psychic energy behind them as a sort of jet booster, causing Majar to speed up and deliver a strong, overhead punch, which deals 9%.

SMASHES
Side Smash
Alternating, again. Majar slams his fists down in front of himself, throwing up rocks and dealing a good 12%, while Borth follows that with a psychic explosion of energy, dealing 10% but high knockback.​
Up Smash
This attack, amazing, also alternates! Borth came up with an incredible technique, where Majar throws him up about 1.5 stage builder blocks. While in the air above his partner, Borth releases a psychic bolt, hitting above him, dealing 11%. Since Borth stalls in the air, there's just enough time for Majar to get off one good attack of his own during the smash. Perhaps he could hit somebody into Borth's energy beam, creating a mini-combo? Food for thought.

Afterwards, their roles switch, with Majar doing a handstand that allows him to kick in the air above him, dealing 14% while Borth stays on the ground.
Down Smash
This one doesn't alternate, actually! Borth points down, and Majar punches his fist into the ground, embedding it within! Then, Borth channels his psychic prowess into his rocky companion's body, filling the ground around them with it about a stage builder block to either side. Should anybody step on the ground in that area while the move is going on (about a third of a second), they are electrocuted with great force, taking 13% and high vertical knockback straight up! Capable of KOing at as low as 120%, so time it well!
AERIALS
NAir
Borth stands on Majar's back, before creating circular waves of blue energy around the two of them, dealing a measly 5% but also momentarily stunning (half a second) anybody caught in them, allowing for a quick, easy combo into the next move! Plus, the aura lasts a little bit after the input is pressed, allowing for a combo into the next move with the auru still around Majar/Borth, giving said next attack the same stun affect!

FAir
Majar, in his less than infinite wisdom, uses Borth as a mid-air baseball bat, swinging him ahead while chuckling. The attack does 10%, as Majar is quite strong, but the very tip of Borth's cranium deals an additional 3% electrical damage, should the move be timed just right! The attack is quick enough that it can pretty much be safely completed, no matter how high you are, before hitting the ground.
BAir
Borth turns around on Majar, facing behind the rocky giant. He shouts a command of sorts, and Majar quickly spins around, his large, bedrock fists swinging in the air to spike foes downward, dealing the unlucky enemy 10%. More ending lag than the rest of their aerials, but it's very short startup lag makes up for it.

UAir
Borth points upwards, a spark of energy coming from his fingertip which deals 1%. Should this rather short range attack hit, however, his buddy Majar delivers a powerful airborne uppercut to the foe in question, dealing high upward knockback and 11% damage! Teamwork! there is a slight stall when Borth points, and the whole thing can be completed in one shorthop.
DAir
Borth psychically alters Majar's weight to make him heavier (as if he needed to!), causing the duo to fall faster, while Borth holds on for dear life. The cometting Majar deals a whopping 12% to anybody under him, and falls at around double the duo's normal falling speed.

GRAB GAME
Grab
Majar extends his hand, while Borth psychically draws enemies toward it, meaning that people who should be out of their reach (within a quarter of a stage builder block) can be captured!

Pummel
Borth and Majar alternate smacking their captive, 4% each.​

Up Throw
Majar throws his enemy into the air straight up, followed by Borth! Borth latches on to the foe, and shouts "Delerium!", releasing into their brain a surge of psycho energy that causes them to suffer high horizontal mid-air knockback, 11% damage, and a throbbing headache!
Down Throw
Borth hops off Majar and stands behind the enemy. Borth starts to psychically shock the captive while Majar crushes them in his grip, dealing a combined total of 12% damage! After a good second of this onslaught, Borth psychically blasts the victim into the air, and Majar punches them in the face on their way out, altering their trajectory to be at a forty-five degree angle!

Forward Throw
Borth quickly does some physics in his head, calculating the perfect trajectory for what comes next. After whispering it to Majar, he gives the signal to fire, causing his stony buddy to fling their enemy forward in an arc, only to be met by a psychic lightning bolt fired by Borth that deals a good 10% and a good amount of downward knockback.
Back Throw
Majar doesn't bother checking this plan with Borth, unfortunately for the little green dude, as this throw involves spinning around a little too fast for the little guy to handle! Majar spins in place, holding his captive by the feet or nearest appropriate substitute, before releasing them, allowing the momentum to carry them through the air! He follows this up by firing a power pulse, just one, at the airborne enemy, dealing 8% and high knockback straight up. Meanwhile, Borth holds back vomit.

FINAL SMASH
MIND MASH

Borth-Majar got the Smash Ball! To start things off, Majar releases a primal scream, punching the ground over and over, creating shockwaves throughout the stage that knock anybody they hit into the air, where they mysteriously freeze in place! The freezing is courtesy of Borth, who is psychically suspending them midair. He and Majar shout, in unison, "MIND MASH!", causing the whole screen to turn purple in an instant, before it "shatters", indicating the destruction of the minds of those held in the air. This does a whopping 45% to those affected and additionally causes them to trip randomly for the next ten seconds, but more often than normal random tripping.

The portion of the attack where Majar ground pounds lasts three seconds, and if can manage to not touch solid ground in that time, they're safe from the Mind Mash.

PLAYSTYLE
Borth-Majar is all about managing the duality of the character(s), knowing when to act smart and when to act strong. Think like Borth, fight like Majar. Since their speed is less than optimal, get in close with Strengthening Bond, then Outwit your foes to create an opening for yourself, perhaps leading into a flurry of Power Pulse? From then on, everything depends on how well you alternate between Borth and Majar's different tilts and smashes, using the generally shorter range yet higher knockback attacks of Borth to keep from hitting you, while attacking with the might Majar when they do.​
 
Last edited:

ForwardArrow

Smash Ace
Joined
Aug 17, 2011
Messages
503
Borth-Majar
Man how many sets does Kiwi have to post before someone comments them? Not that I'm not guilty of skipping over them too, but this has a fair bit more effort put into it than the previous ones I feel, lacking any mirrored inputs and having a decent mechanic on the standards of having them both attack separately, which potentially allows for some interesting combo set ups. I don't feel it's really used all that well here though, as while the desync is fun you never really let them do anything like, oh say throwing Borth across the stage and letting him use another attack you can choose before returning to Majar. The one thing I do like that you did though was the special where Borth goes off to prepare something else to let Majar work solo until he's done and then gives them a free counter. That's fun, and I wish you did more little things like that to play off their duality mechanic. The specials would be a good place for stuff like that, rather than just more bland things like a roll. Regardless, I don't feel this set is bad, as the characters come across nicely and the ideas at work here are fairly fun, I just wish there was a bit more substance.

Shy Guy
The main thing I really wish Shy Guy did, when it comes down to it, is find a way to acknowledge all the items he drops on the ground. He has moves which drop a ton of things all over the stage, and that's a perfectly good set up but you never actually do anything with the items you just leave everywhere, which becomes rather crippling when the foe can just start picking them up and using Shy Guy's own set against him. I guess it is possible to just leave a large number of them around and then just chuck them at the foe in mass to utilize them for a fast stream of damage, but really it's a shame you used the concept only as something of a gimmick rather than trying to make items that work off each other a bit. The Shy Guy tower, as Smady mentioned, is a fairly obvious place to start, and the mere existence of them grabbing items rather than being items, which is really inconsistent with the way the playable Shy Guy works, would improve the set enormously. As is, it does show a great increase in effort from you and I can tell you put effort into this, I think when it comes down to it the set just needed a strong centerpiece as the components for a fun moveset are here.
 

Bionichute

Smash Champion
Joined
Jun 30, 2012
Messages
2,151
Cartoon Donkey Kong


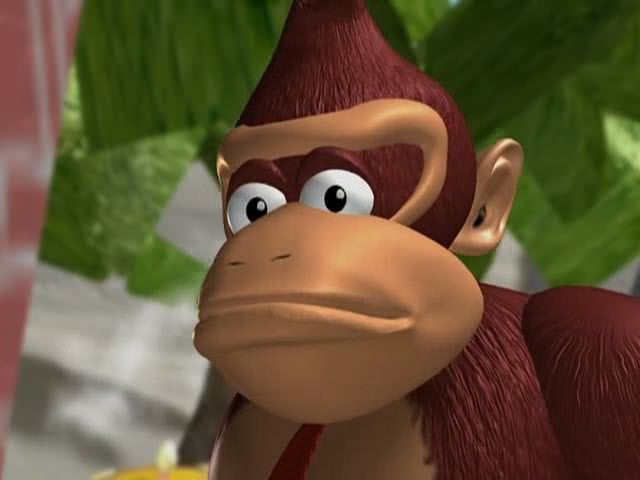
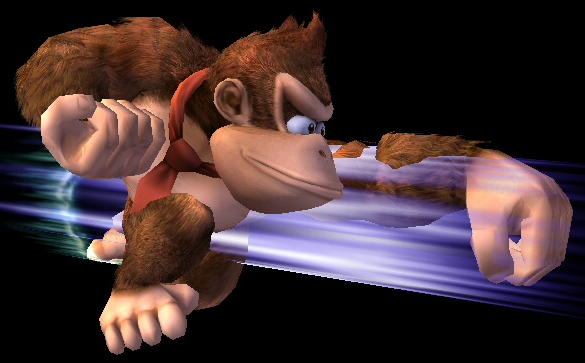
He’s finally here! Preforming for you! Yes the king of kongs has returned, to stop Kuhrool from stealing the magical Crystal Coconut through various comical means! And on the side of that, he must deal with wacky situations and silly characters! He’s gonna show that imposter Scooby Kong who the real hero of Kongo Bongo is! Banana Slamma!


Stats:

Size: 9/10 (TVDK stands upright like Captain Falcon, while still retaining the bulk of his inferior version, making him quite large.)

Weight: 10/10 (he’s still DK, so he’s one of the heaviest characters in the game.)

Speed: 5/10 (Since he’s a big ape, he’s fairly slow, but not incredibly slow.)

Jump: 8/10 (Monkey’s gotta jump, right? DK is a pretty good jumper I guess.)

Air Movement: 6/10 (Being big makes DK harder to move around in the air.)


Specials:


Neutral Special:


Coconut Cream Pie:

DK pulls out a coconut cream pie and throws it. The pie is about as tall as Kirby, and goes about 1 and a half Stage Builder blocks forward. If the cream pie hits an opponent, they will be showered in coconut cream pie, which reduces their speed by three points. The cream pie also causes 14% damage with knockback that KOs at 215%. DK can throw multiple cream pies at once, and up to 6 cream pies can be on screen at once. If the cream pie hits the ground, it will cause it to become slippery, which reduces the traction of a character by half. The cream pies can also be slightly aimed, with DK being able to throw them at a higher arc, or at a lower arc.


Side Special:


Giant Punch:

TVDK’s Giant Punch is slightly similar to Scooby Kong’s Giant Punch, except instead of having to charge the punch, with a simple input, TVDK can release a fully charged punch. It has a few kinks to it though, as activating the move without hitting anyone, he’ll fall down and be stunned for 1 second. The move also has a bit less reach to it, and it’s up higher, so the move cannot hit very small characters. The punch does 30% damage and knockback that KOs at 130%


Up Special:


Barrel Cannon:

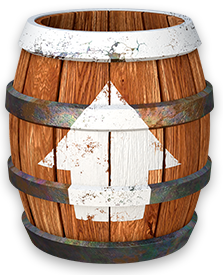
DK summons a large barrel with a white arrow painted on it, which he then jumps into. The barrel is about as big as Scooby Kong in total size. The barrel will launch DK out of it after about 3 seconds, turning DK’s gigantic ape body into a gigantic ape projectile, which does 25% damage and knockback that KOs at 153%. DK can control where the barrel faces for the three seconds, and it can move in any direction on a 2D plane, and fires DK about 3 Stage Builder blocks in the direction he chooses.


Down Special:


Bongo Dongo:

DK pulls out a pair of bongos and starts playing them. The move is a toned down version of Scooby Kong’s Final Smash. The bongos create a giant rhythm shield around DK, which is about as big as Giant Kirby. While using the move, using DK’s attacks will cause him to hit the bongo instead. Hitting the attack button to a rhythm is the key, and the screen will flash in order to indicate the timing. A non-timed hit will cause around 4% damage with no knockback, while a timed hit will cause 9% damage that also causes no knockback, making this move a perfect trapping move. DK can only play the bongos for about 3 seconds before putting them away.


Standards:


Jab:


Coconut Gun:

DK pulls out his coconut gun, and fires off a coconut. The gun fires in spurts, which means it takes about .7 seconds for DK to fire it again. The coconut flies about 2 Stage Builder blocks away before bursting open. The coconut is also about the size of a fully charged Super Scope shot. IF the coconut hits you, it’s gonna hurt, as it does 8% damage, with knockback that KOs at 300%.


Forward Tilt:


Expand Dong:

DK pelvic thrusts forward. This move is by far DK’s most powerful, as at certain times (Specifically the Kongo Bongo Festival of Lights), the move will be an instant KO, doing about 100000% damage, with knockback that KOs at 1%. Normally however, the move has a very short range, only going about one third of a Battlefield platform forward. The move does slightly inch DK forward, but it’s hardly noticeable. The move does around 11% damage with knockback that KOs at 280%.


Down Tilt:


Hand Slap:

DK slaps the ground with his hands, copying Scooby Kong’s Down Special. The slap’s hitbox is only about a quarter of a Battlefield platform away from DK on both sides. DK can use the move rapidly, like Scooby Kong, but after 5 slaps in a row, DK’s hands will start hurting, and he will have to wait 1 second before using the move again. Rarely, the slap will summon up a barrel, which DK can use as a projectile. The barrel acts like the regular barrel item, going forward until it either falls off the stage or hits an opponent. The slap does around 14% damage with knockback that KOs at 253%, and the barrel does 23% damage, with knockback that KOs at 123%.


Up Tilt:


100 Banana Bunches on the Wall:

DK rapidly swings his arms up while dancing in a circle and singing “100 Banana Bunches on the Wall”. The move has a lot of lag, taking a full 2 seconds to stop. The hitboxes are DK’s flailing arms, which cause 13% damage and do knockback that KOs at 290%. However, every time the move is used, the number counts down, going from 100 all the way to 1. Once the banana bunches reach zero, the move will become an instant kill, dealing 10000% damage that KOs at 1%. However, once the instant kill move is used, it will revert back to 100 banana bunches.


Dash Attack:

Skiddy Kong:

DK will come to a halt while running after doing a cartoonish skidding animation. The skid completely halts all momentum DK had while running, and has a very small hitbox, which is directly at DK’s feet. Getting hit by DK’s feet will cause 9% damage, with knockback that KOs at 350%. It’s basically an awful move, don’t ever use it.


Smash Attacks:


Forward Smash:


Big Foot Kick:

DK pulls out a transparent coconut, not unlike the Crystal Coconut, which he throws up into the air and kicks. The coconut acts as a projectile, going at a high diagonal angle when kicked. If the coconut hits a platform or opponent, it will bounce off it and continue flying. The coconut can bounce off 3 objects before shattering like glass. The coconut also causes 10% damage, with very little knockback at all. The kick itself is far more powerful, but it has very short range, reaching just in front of DK. The kick deals 28% damage with knockback that KOs at 140%. When fully charged


Up Smash:


Spinning Kong:

Similar to Scooby Kong’s Up Special, DK spins around incredibly fast with his arms stretched outward. DK spins for around 4 seconds, at least when fully charged. DK’s entire body becomes a whirling hitbox, and any opponent who comes near will be sucked into the vortex of kong. The move does a maximum of 34% damage when fully charged, but has very little knockback to it.


Down Smash:


Banana Slamma:

DK jumps up high into the air and slams back down to the ground, creating a shockwave. How high DK jumps and how big the shockwave is depends on the charge, as it can go from a short hop and a tiny shockwave to a gigantic leap and a big shockwave. At maximum charge, DK will leap about 3 Stage Builder blocks into the air, and come back down at the speed of a Bowser Bomb. The shockwave stretches out to around half a Battlefield platform out when at full charge. The shockwave causes 26% damage when fully charged, and has minor upward knockback. The stomp has a bit more punch to it, causing 37% damage, and a meteor smash ability.


Aerial Attacks:


Neutral Aerial:


Driving Around in a Fancy Car:

DK rocks his body back and forth while in the air, turning his entire body into a hitbox. The move pushes DK forward about half a Battlefield platform, and does around 14% damage with very little knockback.


Forward Aerial:


Vine to Vine, Passing Time:

DK materializes two vines from out of nowhere, which he can swing on. DK can simply grab onto the vines by pressing the attack button, which will lock him into place until DK is either hit or goes all the way down the vine. DK can move between the vines at his leisure, easily jumping to one by double tapping the control stick. DK can attack while on the vines, but all his moves are replaced by him swiping his arm in front of himself. The swipe causes about 8% damage with very little knockback. The vines disappear after a total of 10 seconds of DK being latched to them.


Down Aerial:


Thanks Eddie:

DK loses all momentum in the air and falls straight down. The fall acts as a meteor smash, spiking any opponents below DK downward hard. The move has ungodly lag to it, as once DK hits the ground, he’ll look up, wave, and say “Thanks Eddie!” which, all in all, takes 5 seconds to finish. However, during this, DK’s waving hand becomes a hitbox, which causes 4% damage with practically zero knockback. The fall itself causes 17% damage, with heavy downward knockback.


Back Aerial:


TFW No Bananas:

DK stretches out his arms and his legs, and falls down, with his back to the ground, turning DK’s back into a hitbox. This move acts very similar to the Down Aerial, except the 5 seconds of stun, and with a bit of backwards motion when used. The fall still acts as a meteor smash, but with a bit less downward knockback when compared to it. The fall also causes 18% amount of damage.


Grab Game:


Pummel:

Punchy Kong:

DK punches the opponent in his grasp for 3% damage.


Forward Throw:


James Kong:

DK lets go of the opponent, leaving them dazed from the grip of the monkey. He then proceeds to uppercut the opponent incredibly hard, causing them to go flying. The move has knock back that can KO at 170%, and causes 34% damage.


Back Throw:


Anyone can Dance:

DK spins his opponent behind him. He starts dancing in front of them, causing them to fall into a trance, allowing him to grab them and spin throw them away. The throw has a lot of lag to it, taking about 3 seconds before the spin throw begins. However, if an opponent comes near DK while he’s dancing, about half a Battlefield platform close, they will also be entranced by DK’s sick dance moves and become immobile. This usually results in the other opponent being hit while DK spins the grabbed opponent around. The throw has knockback that KOs 190%, and causes 29% damage to the thrown opponent, while any other stunned opponents take 15% damage.


Down Throw:


More than One Way to Open a Lock:

DK bear hugs the opponent, and then starts viciously biting them. After biting them, DK will let go of them, causing the opponent to fall to the ground. The move has a good bit of lag to it, taking about 3 and a half seconds to finish. The move also causes a good deal of stun to the opponent, as after DK lets go of them, they fall down, prone, for 2 seconds. The move has no knockback, and does 32% damage.


Up Throw:


Banana Do Si Do:

DK grabs the opponent’s hands and starts square dancing with them. Eventually, DK will grab their hips and throw them up in the air. He winds up throwing them really high up in the air, so high, in fact, that they will need intensive care when they land. DK throws the opponent up about 3 and a half Stage Builder blocks. The move does around 28% damage to the opponent.


FINAL SMASH:

THE END IS HERE:

DK summons one of his three divine punishments:


After the chosen punishment stops playing, all opponents die and DK instantly wins the match.
 

ChaosKiwi

Smash Apprentice
Joined
Feb 1, 2014
Messages
104
NNID
ChaosKiwi
Very few men, nay, people could capture Donkey Kong with such incredible skill as you have, Bionichute. He's an all around powerhouse, which fits the character considering he's a gorilla. It seems as though he's perfect for keeping enemies at close range, what with specials like his Coconut Cream Pie and Bongo Dongo. In fact, I'd even say he's overpowered, what with that super scope jab of his and other such moves. Although, I'd say that Final Smash is a bit weak.

And now, I'd like to comment on the Lich. While this set has a good concept, with stages that have to manually progressed through and completely different playstyles for each. However, what it lacks is a sense of timing. The progression from one stage to the next takes far too long. Over a minute and half to get to three is a long time, man. Coupled with the pool needing to be remade every ten or so seconds, it'd be less work to just whittle away the opponent's health with stage one.
 

ChaosKiwi

Smash Apprentice
Joined
Feb 1, 2014
Messages
104
NNID
ChaosKiwi
Here's a set for the inbetween of Borth-Majar and my next, big project.

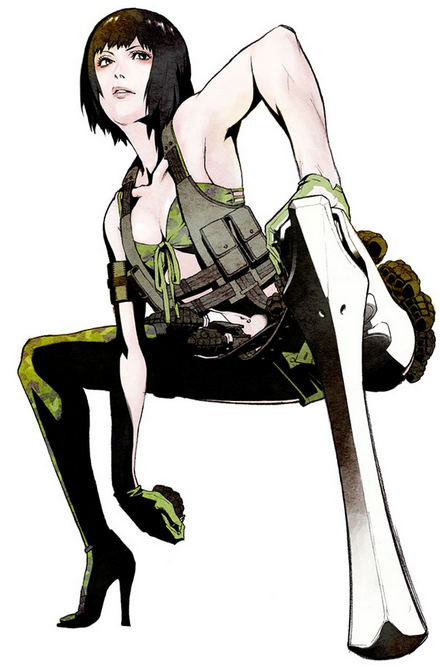
Holly Summers


From No More Heroes, it's Holly Summers, everybody! Stylish and deadly, this model slash assassin is the sixth best in the world. Hailing from Northern Europe, she's equipped with a load of grenades, rockets, an a shovel! With a weapon for any situation, she'll knock your socks off, along with most of your torso!

STATISTICS

Size- 7
Weight- 4
Jumps- 4
Ground Movement- 5
Fall Speed- 6
Aerial Speed- 7

SPECIALS

Neutral Special- Grenade Squad
In an attack similar to Snake's neutral special, Holly pulls out a grenade, and throws it in the direction the stick is angled. However, if you were to hold the input down, she would throw more than one grenade at once, up to three after a full second and a half. Each grenade does 10% damage when it explodes, and travels a different distance when thrown, with the first grenade reaching two battlefield platforms unless angled otherwise, the second reaching one platform and a half, and the third reaching half of one platform. Should she hold the grenades too long or be hit by an attack dealing 10% or more while charging, however, the grenades will detonate in her hand and deal her 8%, as well as upward knockback. To set off her grenades prematurely, simply press the input again with grenades already on the screen, and they will explode.

Also, she can use her grenade as a sort of recovery, as the explosion can knock her with great force in opposite direction. Use this well, as the explosion only damages Holly if she's still holding the grenade. So, should you, say, throw the grenade at her feet, she'll be rocketed into the air, acting as her best recovery move.

Side Special- Laser Guided Missiles
You see that prosthetic left leg of Holly's? Well, it's not just stylish, it's also functional! As a weapon! She turns around and strikes a pose, as laser guided missile begin to fire from the back of her leg! Like Grenade, this can be charged, up to four missile after one and a half seconds. The missiles all do, individually, 7%. Additionally, should she fire just one single missile, it has very good tracking, able to seek an opponent as well as you'd expect from a heat seeking missile. As the number of missiles increase, however, the tracking accuracy lessens, meaning that while one missile is good for hitting a long range or tricky foe, a full barrage is better for large, slow moving or very close targets. Also, she's vulnerable while the missiles are firing, and for a bit after, meaning that this attack takes very good timing to master!

Down Special- Surprise Pitfall
Holly breaks out her trusty shovel, and very quickly digs an almost unnoticeable pitfall trap. The only indication that it's there is that the ground where it is is slightly darker than the ground around it. The pitfall functions the same as a pitfall item, except that it won't disappear unless a) Holly is KO'd, B) Somebody falls in, or C) Holly digs a new pitfall. Since a lot of Holly's moves take a bit to charge to full power, a pitfall could be just the delay you need to get your opponents with a full missile barrage!

Up Special- Tactical Sand
Seeing as Holly's primary form of recovery is blowing up grenades a bit too close to herself, she instead opts to use a less orthodox attack as her up special. She digs her shovel into the ground, and quickly shovels out some dirt/sand/whatever in a large cloud. The sand cloud does 4% and no knockback, while reaching two stage builder blocks forward. How it makes up for the lack of offensive prowess, however, is stun anybody it hits, allowing for easy comboing into other attacks.

STANDARDS

Jab- Holly, grabbing the hilt of her shovel, thrusts the spade forward quickly, dealing 4%.

Side Tilt- Holly swings her shovel similar to how somebody would swing a baseball bat, giving those she hits a nice 6% damage. Additionally, should she hit a grenade with this tilt, she'll send it flying forward in an arc like a baseball, making this a good move for hitting those pesky far away enemies.

Down Tilt- Holly brings her shovel down from above her head in an arc, dealing a good 7% and, should she time it right, slamming her foes into the ground. Perhaps into a pitfall?

Up Tilt- Everyone's favorite model/mercenary/assassin delivers a high kick with her prosthetic leg, propping herself on her shovel as she does. This attack. though slower than her other tilts, deals a rather large amount of damage compared to her other tilts, at 9%, and gets foes into the air long enough to set up a pitfall or chuck a grenade their way.

Dash Attack- Holly, while continuing to run, does a sort of pole-vault kick with her shovel and prosthetic leg, dealing 6% and knocking foes down.

SMASHES

Side Smash- Stabbing her shovel into the ground, Holly delivers a very stylish spinning kick, using the handle of the shovel as a base. She hits both sides with this attack, but because of its height it's difficult to hit shorter or crawling foes with the kick. All in all, it deals 14%-19%.

Up Smash- Holly, while charging, takes the pin of a grenade. Upon release, she throws it into the air above her (about one stage builder block), plugging her ears as it explodes with a smaller radius than her other grenades and deals 16%-21%, along with the highest knockback of her smashes.

Down Smash- Holly quickly whips out a land mine from her vest, and shoves it underground, before ducking the side and, again, plugging her ears. Should somebody other than Holly pass over the mine within the next second, they trigger the mine, taking 15%-20% in the explosion and being sent upward.

AERIALS

NAir- Drawing from her years of modelling, she strikes a pose, with her leg hitting below her and dealing 8%, and her arms each hitting to one side and dealing 7%.

FAir- Our good friend Holly does a spinning drill kick forward, actually pulling her as she does and dealing a hood 9%, as well as spiking foes she hits downwards.

BAir- Holly turns around, and releases a string of grenades, pulling the pins all at once with a thread, causing them to explode all at once, dealing 11% and actually blasting Holly back as well.

UAir- Holly holds her shovel above her, spinning it in her hands to make it act as a sort of upward drill. This deals multiple hits, about five, and deals 2% per hit for a total of 10%.

DAir- Flipping onto her back mid-air, Holly releases a single rocket from her leg. It's smaller than the ones from her side special, and travels only one stage builder block before exploding, but deals 8%. Should the missile hit somebody before exploding, it will explode prematurely and deal 9%.

GRABS AND THROWS

Grab- Holly simply outreaches with her arm, aiming to grab her foe.

Forward Throw- Holly straps a pair of grenades to her foe, kicking the victim away before the explosives... explode, dealing 17% and high knockback.

Back Throw- Holly does a flip over the foe, firing leg rockets at them mid-air, which catch the foe and carry them away before exploding, dealing 16% and horizontal knockback like you would not believe.

Down Throw- Holly throws her foe into a pit, then drops in three grenades with them. They explode in a comical mushroom cloud/pillar of fire, launching the enemy straight upwards while dishing out 15%.

Up Throw- Holly scoops her foe into the air with a shovel, at a forty-five degree angle. She then leaps onto their body, placing a grenade in their mouth before leaping off, letting it explode and spike the enemy down as they take 16%.

FINAL SMASH
Beach Party Blast Zone Barrage

A rocky, beachside cliff suddenly appears on the left side of the stage, onto which Holly jumps. After a brief pause, she unleashes a barrage of tracking missiles and grenades onto the stage! These grenades and missiles have the same properties as the ones in her specials, although the missiles can track people from a farther distance than normal.

PLAYSTYLE

Holly is about keeping her foes away and messing with them from afar. Since her attacks tend to be heavily reliant on charging or timing, she doesn't do well in close range combat. She's plays somewhat like Snake, setting up traps and using long range explosives to dominate the stage while having her own specific drawbacks. She's, as stated, less than stellar in close quarters, and can be easily punished during the long charge for a full barrage of missiles or grenade squad if the player hasn't planned ahead enough.
 
Last edited:

n88

Smash Lord
Joined
Oct 10, 2008
Messages
1,547
Some comments! I've been out of the game for a little while, so apologies if my input isn't quite what it should be. Maybe it'll get a little more sophisticated once I'm warmed up.

Batman

As a life-long Batman fan, I'm more or less obligated to pitch in some thoughts here. This is a really solid early set; there are some creative moves and you do a good job of making this feel not just like any Batman, but specifically a set for Arkham Batman. The acrobatics in the standards even capture a bit of Arkham's rhythmic combat, which is no mean feat.

Echoing some of darth meanie's concerns with the set, I think your biggest issue right now is with getting your attacks to suit your inputs well. Batman's got two tilts that deal no damage. You might be able to get away with that on a less physical character but Batman, especially in the Arkham games, is too much of a hand-to-hand guy for it to work here. A few of the Specials also feel awkward to me; Dive Bomb is a cool attack, but it doesn't feel quite Batman enough to merit a Special. I think you would have been better off using your Explosive Gel or Line Launcher ideas in the Specials. The placement of the Batarangs on Side Special also feels counter-intuitive; their form and function is very typical of Neutral Special attacks, where they might fit better.

You've got some fun ideas and you've done pretty decently at capturing the feel of the Arkham games. I hope we see another set from you sooner rather than later.

Sloth
This one's already got a lot of attention, and it's not hard to see why. It's pure Warlord in top form. I do have a few quibbles with it. Some kind of visual indicator when Sloth can use Effort again would be nice, and I would almost prefer a more absolute system for the chain inputs. Tap once for left chain, twice for right chain, or somesuch. But those are, as I said, quibbles. This is a really superb set for the patron saint of MYM, as I'm sure all sorts (a couple of sorts, at least) of people have already told you.

Borth-Majar
Man, you've really been cranking out the sets, Kiwi. And if Borth-Majar is any indication, you're doing a pretty darn solid job. Borth-Majar doesn't quite capitalize on its concepts as much as it could. I understand from chat discussion that it was intended to be more mechanically complex with a focus on separating Borth and Majar, but you reined it in for characterization reasons. While it would have been nice to see the set build a little more in that direction, the restraint is more impressive to me. The attack animations are very fun here; you do a good job mixing up the visuals and there's a great sense of character.

Normally I end my newcomer-comments by encouraging the writer to keep at it, but frankly I doubt there's anything that could stop you from writing movesets. Keep dishin' 'em out and I'll try and keep up with the comments.

Cartoon DK
Wow, Bionichute. You've really crafted something great here. It's like you've become one of us.

Holly Summers
As a small note, you don't seem big on introducing the source material for your characters. Borth-Majar didn't explain where they were from either and I'm guessing Holly is a No More Heroes thing (the art style/assassin ranking seems about right?) but I don't really know. That might be a good inclusion, especially if you're trying to share an interest.

Holly actually has a very strong set-up, with a handful of projectiles and her pitfall trap. The moveset tapers off a bit as it goes on, though, losing quite a bit of momentum in the aerials. Like Borth-Majar, Holly doesn't entirely live up to her initial concepts, but I think she does a better job playing off of them, and feels a little tighter in terms of playstyle. Even if this is just intended to be a quick set as a hold-over until your next "big" project, I think it shows a lot of promise. You're coming along pretty darn fast.
 
D

Deleted member

Guest
MYM15 User Rankings - Update 3
Post #229 - Post #247

Raw Data
FAQ


ChaosKiwi
Movesets: King of All Cosmos, Lion-O, Jet Jaguar, Clockwork, Zatch Bell, Astrodactyl, Borth-Majar, Holly Summers
161

Di-dara
Movesets: Tommy Wiseau, Scarlet Freshbrew
30

n88_2004
25


darth meanie
20


ForwardArrow
Movesets: Don Thousand, [Usami]
10

Bionichute
Movesets: Swap Force, The Lich, [Cartoon DK]
10


Junahu
Movesets: Profiteur
5


Getocoolaid
Movesets: Doopliss, Tangela
4


Smash Daddy
1

StaffofSmashing
Movesets: Mach Rider

1

crazyal02
Movesets: Commander Video, Batman, Ratchet & Clank

1
Score Breakdown
Moveset - 30 points
Joke Moveset - 10 points
Comment - 5 points
MYmini - 4 points
Post - 1 point

Bolded sets are new this update.

Joint movesets - made by more than one author - are counted towards both users.

Bracketed sets are joke sets.

The point you gain for a post is negated by anything higher - for example a post of one comment is worth five points.

I will not give any points out to posts that have an infraction.

Update 3 Summary

Chaos Kiwi was on a rampage since the last update and clocked up five new sets, batting an average of around one new moveset per two days. This puts him into a comfortable first on the total scoreboard; really impressive stuff. That aside, it was a quiet week, a new moveset all that was needed to get second and a slew of comments getting you third, just barely ahead of fourth.

I hope that leaving this update a bit late means I don't have to post more than two on the same page. Essentially, the more posts we get, the sooner I will post a new User Rankings update.

MYM15 User Rankings - Total Scoreboard
 
Last edited by a moderator:

D-idara

Banned via Administration
Joined
Jul 8, 2012
Messages
3,240
Location
Venezuela
NNID
D-idara
3DS FC
4511-0670-4622
Second...? How did that happen? :O On another note, I'm thinking about a moveset that reminds me of a puzzle!
 
Last edited:

Chris Sifniotis

Smash Journeyman
Joined
Aug 19, 2013
Messages
265
Location
Sydney, Australia
NNID
chrissifniotis

I'm alive!!! This is a moveset idea in the works...


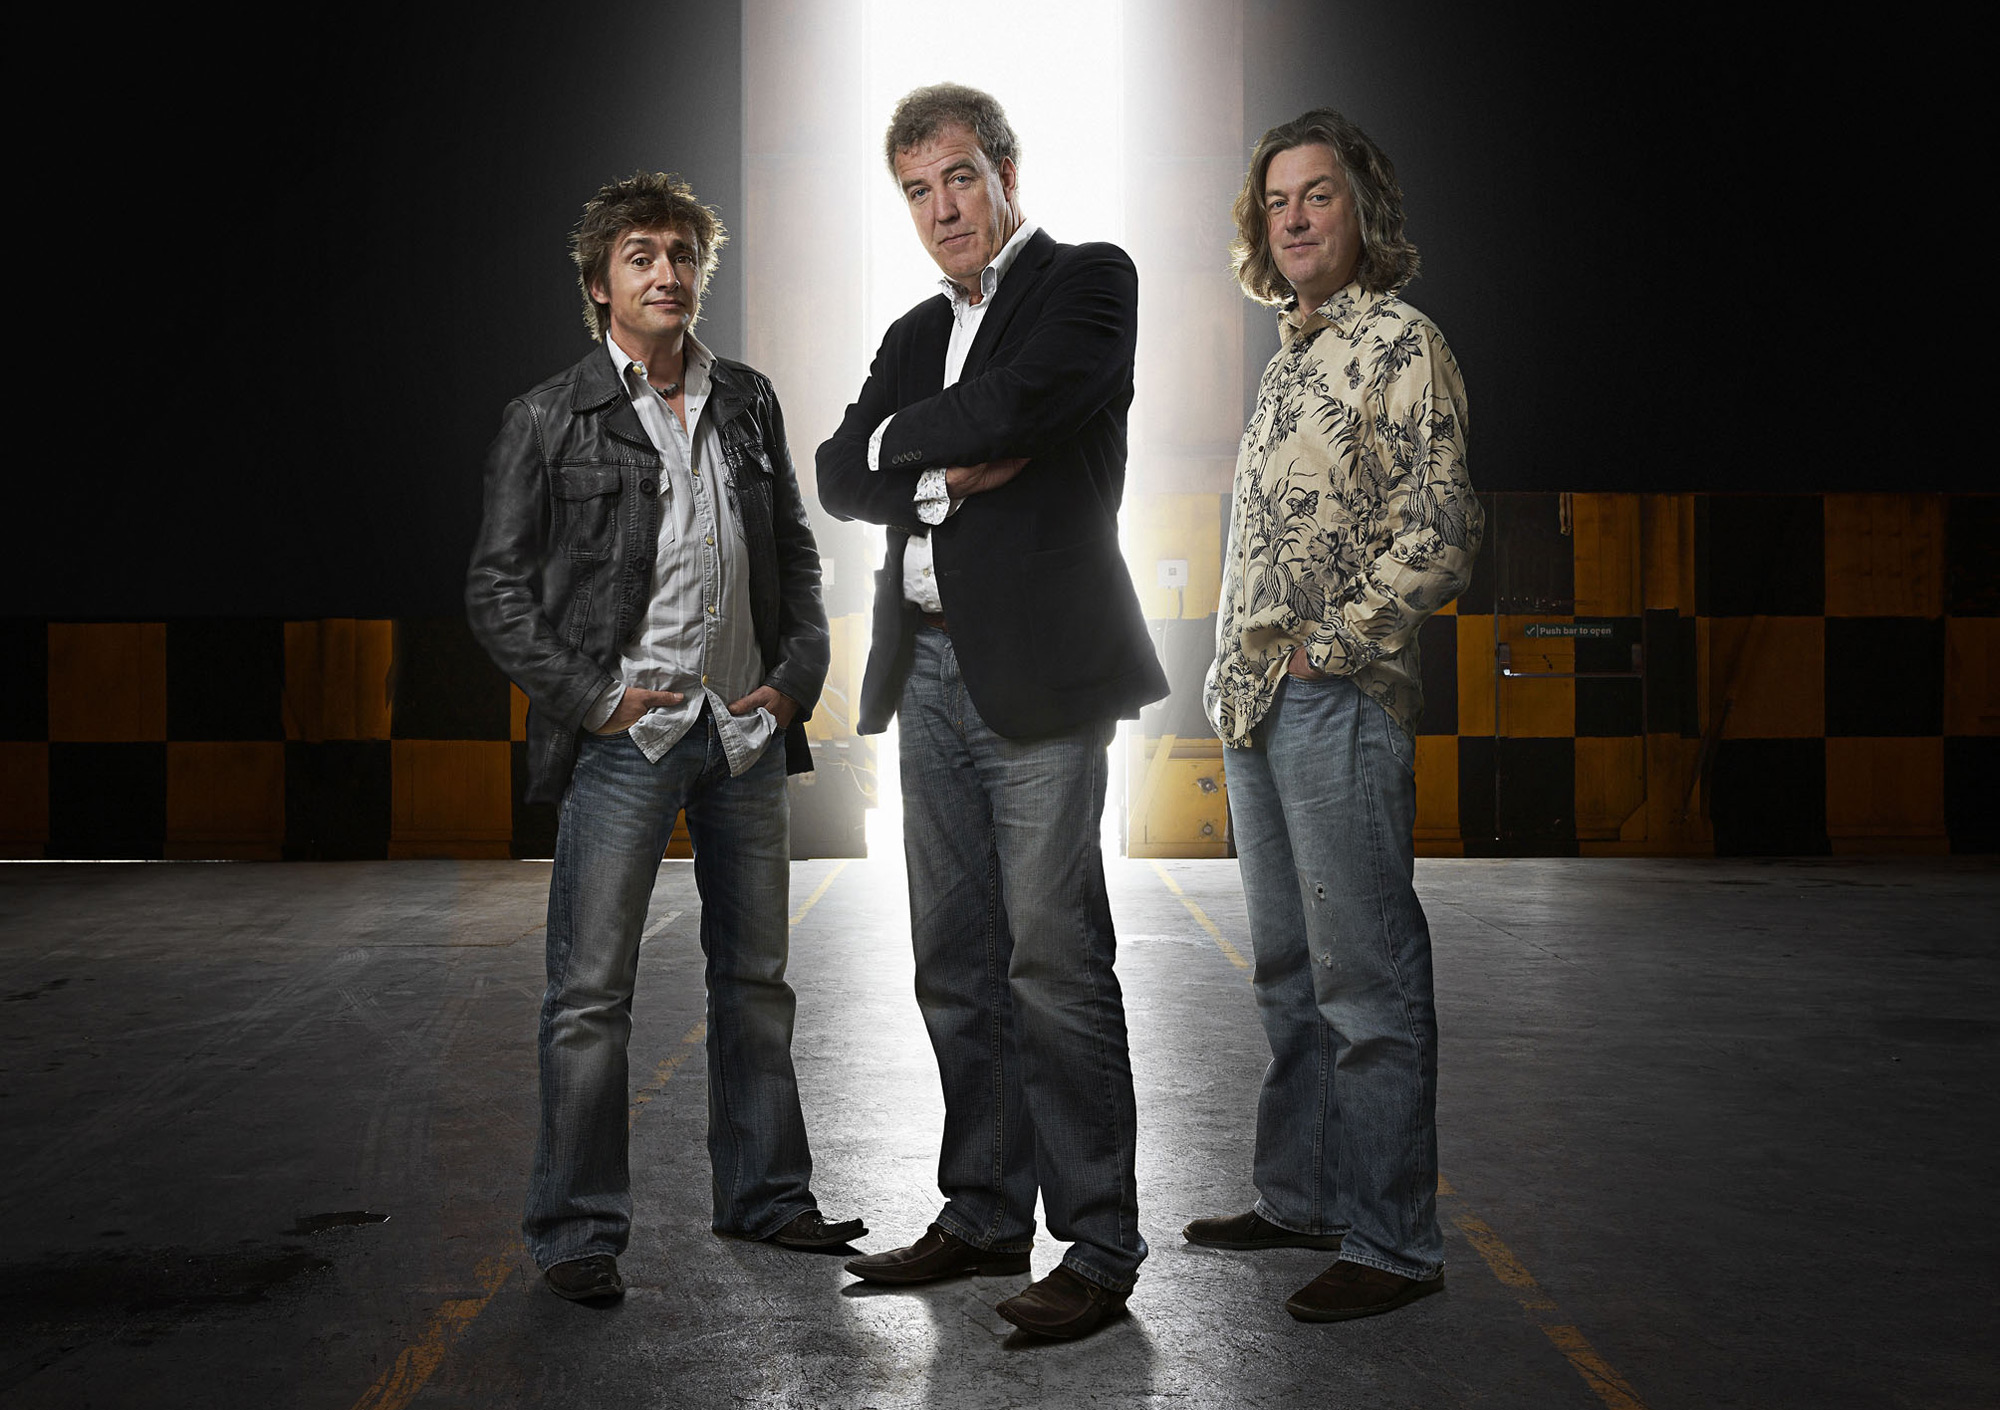
Jeremy Clarkson: Hello and welcome to a Top Gear special here......on the internet.
Richard Hammond: Yes, we've......borrowed this chap's old abandoned account on this site;- *looks at the top left corner* er, Smash Boards, and we all seem to be in a dark room with a dim light.

James May: Right, and the producers have asked us to be here, although we aren't really sure why.
Er, I've got no idea.
No, neither have I. We've not been given a challenge or a brief about what we're actually doing here.
We haven't got any cars either.

*slight pause, they look around a little*
Uuum, what uh- *looks about further* What do we do now?
With no cars, no challenges and not even any producers, we stood about, and did nothing.

*plays with his iPhone*
What are you doing?
I'm just- yes, there's no reception here at all.
*pause*
Is anyone else slightly alarmed that we've got nothing to do in a dark room and we're the only ones here?
Now that you mention it- Yea, I was going to say yes, this is a little bit...odd now.

We should at least find an exit.
Yes, Hammond, could you have a look around and find a door of some sort?
Why do I have to? Well, I'm not going to, I don't much like the dark.
Yea I'm not looking, I've had trouble with the dark since Peru and that....whatsit road, that road to La Paz.
So you're just letting the short bloke get killed in the dark? No Hammond, we're the only ones in this box, there's noone here. Stop moaning and look about would you? Alright, alright, fine. *backs away and out of the light* Thanks mate. Thanks awfully.
With Hammond searching for a way out, Jeremy and I started pondering about why it is we were here.
Are we going to be beheaded?
What?!
See a thought's just occurred to me, maybe the Israelites found out about us in Syria.
*slight pause* We- if- if that really were the case I'm quite sure we wouldn't have lasted this long.
I'm not so sure,-
Hammond returned, with terrible news.

No door.
What? No door?

No door, we appear to be stuck in a room, I can't seem to find a door, a knob, anything that seems to be a door frame.
Knob?! *chuckles under his breath* What about a handle?
No, none of that.
It really looked like we were in a world of trouble, but then,
PRODUCER! Oh 'ello. Finally! There is a producer in the building!

*producer hands Jeremy a golden envelope* Thank you very- Oi! Hang on.
Can we leave now? He's just gone.
No matter! *open the envelope and reads* *pause*
Go on... WHAT?! What? What? *checks the back* Is it bad?
No, it's not a challenge. What? Really?
Really, all it says is this- *pauses and turns to the camera*


Jeremy Clarkson: "Some say that his racing suit is powered entirely by the Triforce, and that his absolute favorite game is Tetris Party Deluxe. All we know is his not the Stig, but is is the Stig's Nintendo gaming cousin."
Richard Hammond: What his name?
Super Stig Brothers
James May: .....brother.

...What?
It's Super Stig Brother, it's just one of him isn't it? Doesn't work that way. Well why not.

It's Super Mario Brothers, it's Super Smash Brothers, it's Super Stig Brothers; it's just how it is.
It's not. It is. It's not. It is. It's not.

Okay, okay. Let's not get bogged down over a name.

*the lights of the room switch on revealing the Stig and another producer* LIGHT! Look at this. We have light!
*producer gives Jeremy another envelope* Right chaps, another challenge.
Might not be. Well, it's something else. *opens envelope and clears his throat* "Since Masahiro Sakurai takes reservations against using third party characters, much less any old bloke from the telle in his smash games, you three must now try to develop a.....move-set for the Make Your Move contest on SmashBoards, which you've been entered into using this hacked account."
Wow! What's a move-set?
Moveset, James.... One word. I've got one of these games, a moveset is, like, what the person is doing when you....press the buttons. Oh, the controls. Yes, something like that.
So we need to make a moveset....for- Yes, we need to develop a fighting moveset for the Stig. Well how can we do that? The Stig is a racing driver.
While the Hamster was right, James and I could remember at least one Stig with a bit of a bad temper.
Back in China James and I met Attack Stig, a ball of raging......er...rage.
And it would be Attack Stig that would be the backbone of our attempt at making a workable fighter for Super Smash Brothers.
First released in early 1999, the popular Super Smash Brothers series is a collection of fighting games where popular characters from the Nintendo games rip each others faces off. The game is made by the same bloke who made the Kirby games;
:4kirby: whose main character is a fat pink ball. After 15 years of success the game now features; :4pikachu: a yellow mouse, :4dk:King Kong, :4samus: a lesbian, :4zss: the lesbian's highly attractive girlfriend, :4mario: and quite possibly the most widely accepted racist cliche in the world. The new game coming out late this year even features a wanna-be Stig. :4megaman:
Noone can replace the Stig. No, who's this Megaman chap? He's some sort of robot-man isn't he?
 
Last edited:

ChaosKiwi

Smash Apprentice
Joined
Feb 1, 2014
Messages
104
NNID
ChaosKiwi
Top of the world, baby.

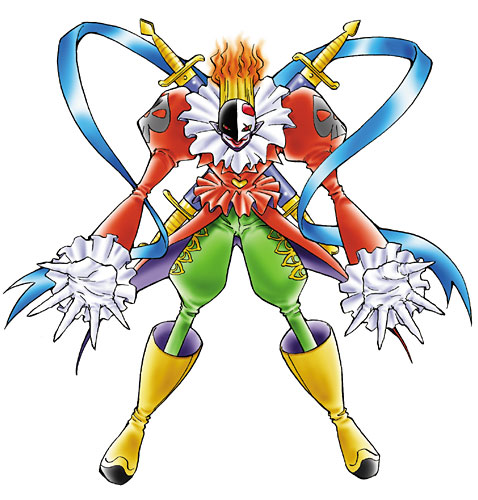
PIEDMON


Piedmon is one of the deadliest Digimon in the Digital World. As Demon Man type Digimon, his origins are shrouded in mystery. He's a master of deception and trickery, using a myriad of weapons that would, in other situations, be darkly humorous. In practice, however, they add to his intimidating persona. He is known to appear without warning, and should you stumble across him, you won't be able to do anything more than curse your fate. With his inescapable Trump Swords that skewer enemies and magical Clown Trick, he's an evil force to be reckoned with.

Plus, clowns are creepy.

STATISTICS

Size- 8
Weight- 6
Jumps- 7
Ground Speed- 5
Aerial Speed- 7
Falling Speed- 4

SPECIALS

Neutral Special- Trump Sword
The four swords on Piedmon's back teleport magically to the front of him, the blades facing the same direction as he is. With a shout of "Trump Sword!" from our favorite flamboyant fiend, the swords fly forward, covering a distance of two battlefield platforms. The swords travel in a tightly packed group, acting as a single hitbox and flying at the speed of one of Link's arrows. They deal 14%, and deliver medium knockback. Once they either travel the preset distance of two platforms or once they hit an opponent, they teleport back into their sheathes, also magically! Unfortunately, Piedmon isn't able to use this attack again until his swords return, but once the swords do return there is nearly zero lag in using the move again, the attack firing before the attack's name is even done being called.

This attack is able to be angled, but only ever so slightly, meaning it can be changed to a 45 degree angle either up or down, and anywhere in between.

This attack doesn't require much movement from Piedmon, allowing him to continue attacking while Trump Sword is starting up. Should he not have any available swords (i.e. after his FAir is used 4 times), the attack will do nothing until they return to him.

Side Special- Ending Snipe
Holding out his hand in a gun gesture, Piedmon charges blue energy in his fingertip before calling out "Ending Snipe!" in his cacophonous chorus of a voice. A blast of magical, mostly transparent energy then fires from the readied hand. The blast travels one point five whole battlefield platforms before dissipating. It deals 10% to those it hits, and travels somewhat slowly, but has a neat bonus effect that makes up for that. The knockback dealt from this attack is always in the opposite direction of where the target wants to go. That is to say, if the opponent is facing right while on the ground, they will be sent to the left, and vice versa, no matter what direction the attack hit them from. Opponents who are falling, instead of horizontal knockback, are sent up, and jumping foes are sent crashing down.

Is that pesky enemy trying to escape? Hit them with an Ending Snipe and send them right into a Trump Sword! Endless trapping capabilities!

Up Special- Toy Wonderness
This attack comes in two different forms, depending on whether Piedmon is in the air or if he's on the ground.

On the ground, this attack takes the form of Piedmon swiping his hand in front of himself, creating a visible wave of air that pushes away foes and reflects their projectiles right back at them! Oh that Piedmon, what a trickster. The air wave travels one stage builder block and travels a little slower than Piedmon's dashing speed.

If Piedmon is in the air, however, he'll swipe his hand above his head instead, creating a twister around his body that carries him one battlefield platform straight up while spinning. The twister around him also acts as a reflector, reflecting any projectiles that hit Piedmon in the brief instant between the creation of the twister and the end of the attack. But the twister does no damage of its own.

Down Special- Masks Square
This move is the special that sets Piedmon apart. It's a two part move, meaning it takes a little longer to set up, but the payoff is worth it. When the command is input the first time, Piedmon will briefly pause wherever he is, allowing the player to quickly angle the stick in any direction they like. After the pause, Piedmon will, using one of his swords, cut a line that is about as long as half of one stage builder block in the air, in addition to dealing 7% to those caught in the slash. The line will stay there, a white line in space that appears the same from every angle.

On it's own, the line does nothing but look pretty. Once Piedmon creates a second cut, however, the two become magically linked, as a pair of portals! When something goes in one line, it'll come out the opposite side of the other.

To be more specific, anything smaller than the line, as in anything that could reasonably fit through a space that line, can travel between Masks Square portals, provided Piedmon was the source of the thing traveling. Therefore, things like Trump Swords, Ending Snipes, thins reflected by Toy Wonderness, and items thrown by Piedmon will pass through.

When something enters a Masks Square portal, it will exist the from the corresponding side of the other line. As in, if it enters on the side that Piedmon was facing when he created the portal, it will come out the side that as facing away from Piedmon on the other portal.

What about the king of killer clowns himself, you ask? Well, Piedmon cannot normally travel through these portals (unless he's shrunken!). He's too tall, you see! However, if he were to enter it either headfirst or feet first, he's just thin enough to make it through! So if you jump straight up into one or fall into one, it'll work!

Piedmon can have no more than two portals on the field at once, and attempting to make a third will cause the first two to disappear and be replaced with a new one, not linked to any prior portals.

STANDARDS

Jab- Piedmon whips out a deck of magical playing cards, swiping off the top card to use it as a projectile weapon that deals 3% and can travel through Masks Square portals. The cards will travel 2/3 of a battlefield platform before falling harmlessly to the ground.

Side Tilt- Piedmon thrusts one of his fours swords forwards, giving it a twist at the end, and dealing 9% damage.

Up Tilt- Piedmon holds his hand above his head, releasing a clearly fake dove looking thing, which travels a short distance, even through a portal, before promptly exploding, dealing 10%.

Down Tilt- Piedmon crouches down low, stabbing one of his swords at the area where his foe's foot would most likely be. A sneaky maneuver, indeed! This trips foes, and does 9%.

Dash Attack- Piedmon summons one of those weird circus walky rolly balls, you know the ones, under his feet, and rolls forward on it, dealing 13% to those he hits while rolling.

SMASHES

Side Smash- Our favorite jester magically transports one of his swords into the space in front of himself, crossing his legs while inexplicably floating in place as the sword, suspended in air all on it's own, spins in place, acting like a sort of saw, and dealing 22% fully charged.

Up Smash- Piedmon throws three magical playing cards above his head in a spread, each traveling a a medium distance before popping in a small, confetti filled explosion and dealing 10% each at full charge. The more the charge, the farther they travel. And yes, these can go through Masks Square portals.

Down Smash- The demon man (magically) teleports his four swords to his sides in the air, two to his left and two to the right, blades facing down. They stab into the ground, dealing 23% to those caught under them. Should there be a portal underneath where a sword is meant to go, it can pass through.

AERIALS

NAir- Piedmon stabs one of his swords in front of him, at a forty five degree downward before arcing it up, dealing 12% damage.

FAir- Piedmon teleports one of his swords to his front, pointing straight out while also staying in place, dealing 11% to those who touch the blade, before it teleports back into its sheath. There can be four swords on the field at once, but he can't use this attack if all the swords are preoccupied, and there is so little lag that all four can be placed within the second and a half a the first sword is on the field.

BAir- The deadly digital harlequin flips upside down, holding his hand out to fire an explosion of confetti behind (?) him. Magically! This does 10% and the blast sends him propelling forward (?).

UAir- Piedmon holds both hands above his head in a jazz hands formation, which normally does nothing. But if he hits somebody, he (Piedmon) will be sent downward at a high speed (good for getting through portals quickly!) while the one hit will be sent flying upwards trailed by playing cards.

DAir- Piedmon spins in place, his legs becoming a hitbox that deals 12% and spikes downwards.

GRAB GAME

Grab- Piedmon pulls out, from his pocket, a large white cloth, shouting "Clown Trick!" as he throws it in front of him. It travels about a stage builder block before falling to the ground, and can travel through portals. Once it catches somebody, they will be grabbed even if they are far away from Piedmon, as all of his throws can be done remotely at the cost of not being able to move while a foe is grabbed.

Pummel- The cloth tightens around the foe, dealing 3%.

Up Throw- The cloth creates a large explosion, with the captive at the epicenter! They are sent into the air, taking 14% as they do.

Forward Throw- The cloth lifts up to reveal an evil duplicate of the captive! The clone chuckles, before using the target's side smash on them, dealing the same amount of damage and the same amount of knockback as it would deal fully charged.

Back Throw- Piedmon snaps his fingers, and the foe disappears! But fear not, they reappear right in front of Piedmon, taking 12% as Piedmon impales them on a sword and spins them around, throwing them back.

Down Throw- The cloth slams the foe into ground, allowing Piedmon to magically teleport to the restrained enemy and jump up and down on their prone body, dealing them 13% before kicking them away.

FINAL SMASH
Clown Trick

Piedmon chuckles, before magically appearing at the top of the screen. He sticks his hands into his pocket, before unleashing a flurry of fast falling white cloths (about fifteen in total). These cloths are slightly bigger and, as stated, faster than the ones in his grab. If they hit somebody, the cloth will envelop that person, keeping them in place...

Once every cloth has caught an enemy/touched the ground/fallen off screen, those caught in a cloth will MAGICALLY become a keychain in their likeness for the duration of the Final Smash/until they are KO'd! They cannot attack in this form, and their movement is limited!

PLAYSTYLE

Piedmon is centered around trickery and fancy moves that disorient foes. Using Ending Snipe, he can get an opponent where he needs them to be, like, say, in the path of a Trump Sword sent through a Masks Square? With his Masks Squares, he can get anywhere or attack anywhere with proper planning, so forward thinking and being a few steps ahead is the best plan of action for anybody looking to play as Piedmon.​
 
Last edited:

JOE!

Smash Hero
Joined
Oct 5, 2008
Messages
8,075
Location
Dedham, MA
Due to my busy schedule between work, school and a massive project of my own, I havent really been able to comment much at all...

To make up for this, I propose that whoever would like my thoughts on a particular set give me a shout out in any way they like. Tell me what set you'd want me to critique and ill post a full review of it soon after. :)


In the meantime to build hype, which team do you support?

GRASS, FIRE, WATER
 

Rychu

Thane of Smashville
Joined
Jul 5, 2010
Messages
817
3DS FC
1908-0105-4965
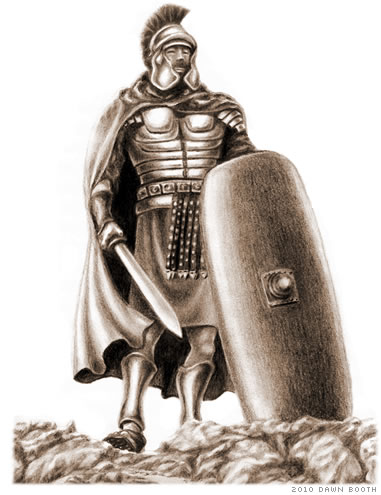
Roman Centurion
Roman Centurions were commanders in the Roman Legion, chosen to lead because of their skill, bravery and valor on the battlefield. These were not horseback generals giving orders from behind: they fought on the front lines, inspiring their troops (called "centuries") to fight harder, leading by example.

In Brawl, the Centurion appears with several weapons at his disposal: his Gladius (Short Sword), which has about the same general reach as Toon Link's sword, two Pilum (Javelin, one heavy, one light), which are 1.25 SBUs long and will usually be extended fully, and his Scutum (Shield), which is a shield that he always holds before him, and is as tall as Ness.


Statistics
Size - 8
Weight - 9
Ground Speed - 3
Jump - 2
Aerial Speed - 2
Falling Speed - 10
Traction - 10

Mechanics of the Centurion
  • Much like fellow shield-wielder Link, the Centurion has immunity to weak projectiles from the front when standing perfectly still. Unlike Link, this improves with his crouch: while it's not an incredibly low crouch, it improves his defense in the front, allowing him to take attacks the deal under 14% damage with halved damage and very low pushback, as if he'd been hit by a weak FLUDD.
  • That said, when he actually shields, it's incredibly strong, protecting him completely from the front, with no depletion: this does, however, make him completely vulnerable in the back. This comes with the added benefit of being able to perform attacks directly out of the shield, though with no form of reduced lag, just protection from the front. If he does attack out of the shield, he must re-enter the shield after the attack is completed.
  • While the Centurion utilizes two separate weapons, he does not need to switch between them in order to use attacks, as they will simply appear in his had as he's using them, and stay there until he uses an attack that uses the other weapon. This has no bearing on lag duration or anything, it's just an aesthetic change. However, the Centurion will always begin the match holding his Gladius.
Special Attacks
Neutral Special - Shield Bash/Counter Strike
The Centurion pushes forward with his Scutum, giving this the range and beginning lag of a jab. Should he make contact with a foe, they are dealt 10% damage and rather minor knockback, with the move having some rather heavy ending lag regardless if you hit or miss. However, contact the opponent during an attack, they will be knocked into a dizzy state for a small amount of time dealt the same 10%, with the Centurion immediately able to capitalize on their misfortune, having absolutely no ending lag to deal with. In the case of projectiles, this attack acts as a reflector, bouncing them back at their owners, now able to harm them.

The best part of this attack is how quickly it comes out, making the Centurion an absolute monster in close-range encounters, where he feels most comfortable, despite his rather defensive style of play and lack of many projectiles. Once again, due to this attack's speed, it can be used immediately out of a shield.


Side Special - Testudo Approach
The Centurion takes a stance much like that of his shield, ducking his head and body behind his Scutum, leaving only his feet and back exposed to the fight, moving forward at his walk speed. In fact, this acts so much like his shield, that he is completely protected from the front while using the Testudo Approach. The main difference is that he is able to move forward (and backwards, by tilting the control stick backwards while using this attack) and that he must exit the stance before he is able to attack, though the ending lag is fairly short.

There are a few setbacks to the Testudo Approach that also encompass the flaws in the overall defense of the Centurion, the most major of which being that during any of his defensive poses, he cannot turn around, meaning he must exit defense in order to do so. The Centurion isn't remarkably speedy either, and while approaching with the Testudo Approach moves very deliberately: he won't just rush into a battle with no regard for his own life. Instead, he'd rather sit back and let the enemy try to attack him from afar, then overpower them at close range when they realize they are attacking to no avail and rush in to attack him.

Used in the air, this is simply a short rush forward, the Centurion bashing opponents with his shield for 15% damage and decent horizontal knockback, acting as at least a somewhat decent horizontal recovery.

Up Special - Pilum Toss
The Centurion tosses his heavy Pilum in a very egg-like manner, in an arc that's aim-able in the same way that Yoshi's is. The range is fairly far-reaching, at it's longest able to travel from one edge of Battlefield to the other. This is actually not as laggy as you might imagine, thanks to the Centurion's years of training and battlefield experience, but still taking as long as Yoshi's egg toss to execute. The tossed Pilum does 18% damage, but no knockback, instead posing a very different threat to the foe.

Foes who are hit with the flying Pilum are trapped with tiny flinch-inducing hits of 3% while mid-air (which can be DI'd out of )or pinned to the ground in their prone animation if they were on the ground. It's not -quite- as scary as one might think, taking the exact same precautions to escape as a regular grab on the part of the foe, tossing it to the ground when they escape, but it's still damn intimidating, and a hell of an only projectile on the part of the Centurion. The Centurion can recover his heavy Pilum by simply walking over it and pressing Up B, but foes can also pick it up and use it as a battering item or toss it offstage, stealing it (and his only slight recovery option) away from the Centurion for the remainder of his stock.

Now, don't be -too- upset at the loss of his heavy Pilum, as he does have a spare with his light Pilum, so he IS able to perform all of his spear attacks sans Up Special, but at the cost of halved damage, as a rule. Other than the power loss, the attacks will have the same basic animation and range, with the only difference between the two being that the heavy Pilum is a darker shade of grey than it's light counterpart.

Oh yeah, almost forgot to mention how you actually recover with this Up Special: when used in the air, he does get a slight vertical boost during the throw, in addition to the ability to use this without losing his second jump. He will automatically aim at the edge of a stage, and when it contacts with it, it extends the grab-able edge by 1.25 SBUs. On stages with walls of of the edges, grabbing this extra edge restores his second jump.


Down Special - Warrior's Plunge
The Centurion, now wielding his Gladius, stabs directly downwards, screaming with power, using all of his might to deliver the most powerful blow he possibly can. While this doesn't have much in the way of horizontal range, it's absolutely devastating to anything directly in front of or below you, dealing 25% damage and awesome knockback KOing around 95%.

In the air, this is about what you'd expect, with the warrior general plummeting down towards the ground as fast as possible, the Gladius clearly pointed downwards. Once he hits the ground, or even when the move is used on the ground, he suffers from the same end lag as Link's Dair when it's plunged into the ground, having to pull the deeply implanted sword out. The main downsides to Warrior's Plunge on the ground are the short range and lag on both ends, making this most useful as an anti-juggling tool.

Standard Attacks
Jab - Slashing Combo
The Centurion quickly slashes forward with his Gladius, at a very fast pace, able to complete the 4-hit combo in underneath a second.. Each his deals about 3% damage, though the fourth and final one deals 5% and a little bit of knockback. While it's not huge, the total damage output of this attack is 14%, provided every single one hits, with very little ending lag because it's a jab, easily setting up for other close-range attacks.

Forward Tilt - Stab
The Centurion, with very little beginning lag, thrusts his Gladius forward, reaching as far as Tink's Forward Tilt. This initial hit deals 7% damage, but not very much knockback, easily keeping foes in range for a second attack...which the Centurion can do, with another press of the A button, which causes him to quickly spin and slash forward with the Gladius, this time for 9% damage and significantly more knockback, enough to KO at around 110%. This is an extremely effective close-range attack that will most definitely be getting foes out of your face, and even KO at higher percentages. Also works as a quick follow up to a Counter Strike.

Up Tilt - Testudo Roof
The Centurion brings his Scutum up over his head, creating a flat surface directly above him and holding it there for as long as the A button is held. While it is held above, the shield holds all of its properties, blocking any incoming attacks, as well as actually creating a solid piece of ground opponents can land on. While the A button is held, the Centurion player can let go and press Up on the analogue stick again to have the Centurion execute a sweep upwards with his Gladius, which deals 8% damage and decent upwards knockback.

Once A is released, the Centurion bashes the shield upwards, dealing 10% damage but very little knockback, actually comboing very well into your Up Smash. Against aerial-dominating foes, this is actually quite a good defense as it forces them to try and attack you from the ground, to take advantage of the attack's admittedly longer-than-average lag on both ends. Either that, or have them retreat, making them perfect fodder for your Pilum Toss.

Down Tilt - Cutter
From behind his Scutum, the Centurion quickly raises his Gladius and cuts downwards, reaching as far outward as Tink's sword. This is an incredibly quick attack, able to be performed several times in the span of a few seconds, and obviously it has a lot of front-facing protection thanks to it being performed out of Centurion's crouch. The damage dealt by the cut is around 6%, though not much knockback, at low to mid-level damage won't knock opponents out of his attack range.

Smash Attacks
Forward Smash - Pilum Spear
The Centurion's Forward Smash is equal parts predictable and effective: The Centurion spears forward with his Pilum, having an insane 1.25 SBUs of reach, being completely deadly the entire way out. For a Smash, this comes out super quick also,though it has very heavy ending lag. The smash deals a pretty sweet 38% damage fully charged, knocking down to a less impressive but still great 24% uncharged. Fully charged, this move will KO opponents at around 70%. The offset of that power obviously is the ending lag, which, if whiffed, blasts a giant hole in the Centurion's iron defense.

Up Smash - Upward Strike
The Centurion looks towards the sky and, after releasing the charge, thrusts his Pilum straight upwards, extending the full 1.25 SBUs, and lingers as a hitbox for a brief moment before he brings it back to his side, with lag that is admittedly a bit longer than average. The thrust is extremely powerful, at full charge dealing upwards of 36% damage and KOing around 85%. This is a great follow up to attack such as your Up Tilt and Up Throw, but has a similar setback to his forward smash, in that a missed smash will open you up to counterattack. Keep in mind that, as with all attacks featuring the Pilum, once your heavy spear is gone, your attacks only deal half the damage and knockback they normally would.

Down Smash - Impale!
The Centurion holds his Scutum more in the center than usual, lifting up onto one leg, the stabs diagonally downwards, only reaching about 1/2 the length of his normal spear attacks. Should the move hit, the foe will be afflicted by that brutal grab hitbox, pinned to the ground along with a brutal 38% damage, but no knockback. Instead, the Centurion rips the spear from their body, pulling them in slightly when he does so, bringing them in range for a brutal close-up beatdown.

Aerial Attacks
Neutral Aerial - Scissor Kick
The Centurion delivers a fierce kick forwards, bringing his leg up and then downwards as hard as he can muster. This deals foes a not-all-that-horrible 6% damage and weak downwards-diagonally forwards knockback, enough to put them on the ground quickly with how low-to-the ground in the air the Centurion is likely to be, allowing him to quickly fastfall to the ground to resume his defense of follow it up with another aerial, thank to this moves incredibly fast speed, coming out as fast as one of Pikachu's Jabs, with very little ending lag to boot.


Forward Aerial - Pilum Charge
The Centurion plummets forward with his Pilum held aloft over his head, screaming for a good .5 second free-fall with a fairly quick starting time. During the fall, The Centurion performs what is essentially a manned version of the Pilum Toss, with the Centurion directing himself at a 45 degree angle straight towards the ground. Anyone touched by the spearhead will be impaled, unless the attack is being used while the light Pilum is in effect, in which case they will take minor knockback and will go along for the ride until he hits solid ground....or not.

Once impaled, they take 12%, then another 6% once they hit the ground. At this point, the Centurion will yank his Pilum from them, leaving them with little time to roll away/etc as he re-positions. While not as damaging, nor as safe as Pilum Toss, Pilum Charge offers similar effects and great damage, along with incredible speed (compared to Toss) and a far more offensive position, in exchange for range and safety.

Pilum Toss also acts as a form of "recovery", alongside Pilum Toss and Testudo Approach, in that he can stab the edge of a stage/wall, and create a temporary ledge for himself out of his spear. Standard edge rules apply here, although jumping for him is a tad laggy as he must yank out his weapon while doing so.

Up Aerial - Gladius Stabbing Up
The Centurion takes hold of his Gladius and stabs directly upwards, hitting opponents with the pointiest edge of his extremely sharp blade. This, obviously, hits directly above himself, dealing 17% damage and very, very good upwards knockback, able to KO opponents at around 130% to the top blast zone, it's main weakness being the very short amount of time that the strong hitbox is actually in effect, and the surprisingly long ending lag that follows. This is a potent killer used out of a short hop, which definitely helps with the ending lag, if one cannot muster an up smash, adding to the Centurion's great defense to anything directly above or in front of him.

Down Aerial - Stomp
The Centurion takes note from a fellow warrior leader, and stomps downwards, dealing 15% and meteor-smash downwards knockback, making this a decent gimping tool in a pinch. However, the Centurion has an incredibly weak recovery, so using this offstage is extremely risky. Onstage, it's a decent quick damage builder out of a short hop. Actually, the Centurion's entire aerial game is best out of a short hop, considering how weak and vulnerable he is if he gets more than a foot offstage.

Back Aerial - Back Spin
The Centurion quickly spins around in midair, performing a blindingly fast slash with his sword that deals 5% damage but not much knockback, though the attack happens so quickly that it begins, happens, and ends in less than half of a second. This, above all else, actually gives some use to the Centurion's Bair: should an opponent somehow get behind you, you have an extremely quick defensive option that can be performed out of a short hop, which is quick enough at the end to allow you to fastfal back into your defense.

Grab Game
The Centurion grabs with his right hand, which is holding his Scutum on the arm. It's a relatively fast, if low-range grab, with a pummel that involves quick headbutts, dealing hits of 5% damage at the cost of being relatively slow.

Up Throw - Push-off
The Centurion raises the opponent above his head, them resting on his shield, and pushes them off, dealing 8% damage, but not any sort of significant knockback. Actually, this is great set up to your Up Tilt and Up Smash, giving the Centurion some decent juggling prowess with these three attacks. In addition, it's very quick to end, actually allowing you to do these follow-ups.

Forward Throw - Disembowel
The Centurion holds his opponent close to him, before using his Gladius to stab straight through their abdomen, then ripping it out and pushing them away. This deals 2 hits of 7% damage, totaling to 14%, obviously, but very, very little knockback, placing them in range of any one of your up close Gladius or Pilum attacks.

Back Throw - Slam
The Centurion lifts the opponent up above his head, turns, and slams them to the ground, dealing 12% damage and very little diagonal knockback. The Centurion turns his entire body during this, allowing him to stay facing the opponent. As well, if used right next to an edge, which is another danger the Centurion faces, this throw will throw the opponent off of the edge, though without any damage and only decent downwards knockback, only able to KO at insanely high percents.

Down Throw - Scutum Beheading
The Centurion back-leg trips the opponent to the ground, standing over them so that his legs are straddling them. He then lifts his Scutum above his head, then slams it directly into their throat. This deals insane damage, upwards of 15% damage, but very little knockback - just enough to knock them out of your normal melee range.

Final Smash
Century
The Roman General summons part of his army, as 3, smaller, lighter Centurion clones (without the helmet poof) appear behind him. They each have 75% stamina and all know how to use the Centurion's moveset, though each carry only a light Pilum. These three stay on until they are defeated: if the Centurion is KOed before his troops, the most damaged one immediately becomes the playable Centurion, sprouting the poof, at 0%, without any respawn time.

Playstyle
Testudo
The Roman Centurion is the "immovable object" in that famous phrase, as it would truly take an unstoppable force to break his incredible defense. He is almost impenetrable from the front or top, unless he himself leaves an opening. In close range, his fast attacks are easily comboed, particularly his Jab, Forward and Down Tilts, Forward and Down Smashes, Neutral and Forward Special, and pretty much all of his throws minus Up Throw, with the unfortunate downside of having very limited range. From above, pretty much all of his up inputs can punish those foolish enough try and get the best of him.

His greatest strength also comes with a great weakness: outside of his Side Special and a landed Up Special, he has virtually no chance at approaching, being much better at stopping or nullifying approaches. His low speed and incredible lack of recovery make a risky, mobile game very impractical. Indeed, incredibly speedy opponents do pose a problem to him, though he has precautions to take against opponents getting behind him, if it happens, and he gets hit, he's almost no better than a sandbag when it comes to taking combos.

The Centurion must play defensively, slowly, intelligently, and reactionary, always rely on your incredible shield and capitalize on your opponent's mistakes. When the opportunity arises, counterstrike and use your combination of fast and powerful attacks to dominate them, and embarrass them for even thinking that they're going to approach you.

Roman Centurion vs Spartan Warrior
Ancient Warfare 55/45
This is such a close match that it could easily go either way, but the Centurion takes it more often than the Spartan by just a smidge.

Both of them rely on being an insurmountable wall, so it all comes down to who is the most insurmountable-est, and in terms of pure defense, the Centurion beats out the Spartan, who relies far more on approaching and attacking than the Roman. The Spartan is more mobile than the Centurion, but not nearly enough to outmaneuver him, and is almost comparable to him in close combat, though relies far too much on his laggy Duru, which is easily counterable with Shield Bash/Counterstrike, then allowing the Centurion to take advantage.

THAT SAID, the Spartan who plays more defensively against the Centurion is more likely to put up a fight: this match will be like a game of chess, each warrior's moves being almost a match-for-match counter to the other's, each of which merely relies on the patience of the player. The Spartan's armor helps with this quite a bit, but the Centurion's slow and patient defense should be enough to best the more Brash Spartan.
 
Last edited:

BridgesWithTurtles

Smash Champion
Joined
Apr 18, 2013
Messages
2,175
Location
The long road to nowhere
3DS FC
3523-2059-7939
Dewgong

Dewgong is Pokémon #087, debuting in the first generation of games, so it's been around since the original Red and Blue days. It is the evolved form of Seel, and upon its evolution, it gains a nifty Ice-typing on top of its original Water-type. At 5 feet and 7 inches (1.7m) and 264 pounds (120 kg), it's rather large. Bearing a pinniped-like form despite its sirenian name, Dewgong most closely resembles a leopard seal or sea lion. It uses its powerful tail and streamlined frame to jet through arctic waters at intense speeds, using the horn on its head to poke holes in ice sheets. Its short white coat allows it to disguise itself from predators, and in the past, humans have mistaken it for a mermaid.

Stats

Size ~ 9
Weight ~ 9
Ground Speed ~ 4
Traction ~ 7

Air Speed ~ 6
Fall Speed ~ 8
Jumping Ability ~ 4
Dewgong is obviously not the most traditional of fighters. Due to its build, it normally rests on its belly while on the ground, in a pose similar to the picture above. Supporting itself with its front flippers, its head only raises up to about Link's chest. Nonetheless, it's a size 10 character due to its length, taking up two Bowsers in that area, from snout to tail. The fact that it stays low to the ground mitigates the defects of what would normally be a very vulnerable hitbox, though there are times where Dewgong takes on a more vertical orientation that should be noted. Dewgong has a very low crouch and the ability to crawl, in a manner you'd probably imagine a pinniped doing. [example]

With great size comes great weight. The blubbery seal that it is, Dewgong falls relatively quickly and has pretty great launch resistance, which is good, because as you can tell by its jumping ability, it isn't very aerially inclined under basic circumstances. It isn't very fast on the ground either, moving sluggishly along dry terrain as one would expect of its species. When on normal terrain, Dewgong has just so-so traction. It can stop immediately to turn, but takes a while to whip its body and tail around into the correct position, so it's not really a good idea to run around recklessly unless you want to get frequently punished.

Because it lacks hands, Dewgong holds most throwing and battering items in its mouth, but will also use its flippers as makeshift hands for firearms, as well as for holding onto ledges. To hold up Assist Trophies, Dewgong balances the item on its nose.


Special Moves
Up Special - Aqua Jet
This move comes out almost immediately, in just two frames. Coating itself in water, Dewgong bursts in any direction input, with incredible sensitivity, like Fox's Fire Fox. Similar in animation and function to Squirtle's Aqua Jet in Project M (example), Dewgong will create a brief splash of water while popping itself up, but in this case, it's head-first in whichever direction you choose to go. Dewgong's short burst of speed takes it Smashville's platform in length at Super Sonic's movement speed, putting it into special fall afterward, though it can be used on and along the ground as well. Jetting upward vertically or diagonally is an obvious way to recover, but Dewgong can also jet toward the ground to approach or escape, and even jet straight forward along the ground as an attack or movement option. The move itself deals average knockback in whichever direction Dewgong is jetting in, with its horn piercing the foe for 11% damage. Because of the move's insane speed and one-way direction, however, it can be difficult to land an attack. As a compensation, however, unless Dewgong ends the move on the ground, inputting the command for an aerial will cause Dewgong to immediately use it at the end of Aqua Jet, though it will still enter special fall after using the move. While quick, the move cannot be used again until at least one second has passed.

Aqua Jet is not just Dewgong's recovery move. Acting more as a way to move this lumbering sea mammal around, it's an impressive display of speed on the part of this normally sea-faring Pokémon. It's also a useful way to help keep combos going, or for escaping attacks when being combo'd.

Neutral Special - Ice Beam
Dewgong fires a beam of frigid energy from its horn (stalling its descent if in midair), in the premier offensive technique employed by Ice-type Pokémon. The thin blue beam provides for a narrow but long-ranged hitbox that reaches as far as 1 Smashville platform. By moving the control stick up or down, the beam can be aimed at a relatively slow speed similar to Samus' Final Smash. Enemies hit by the attack are dealt high hit-stun and flinch repeatedly so long as the beam is passing through them, suffering 1% per flinch and occasionally becoming frozen in a block of ice, as with the Ice Climbers' Blizzard. If trapped, foes will eventually be released when the move automatically ends after 3.5 seconds of use. Gasping for a breath and raising up on its flippers, Dewgong suffers from some endlag after ending the move, but the cooldown is much more brief if ended early.

Slow to move and easy to DI out of, Ice Beam isn't a powerful finishing move, nor can it rack up very much damage, especially at higher percents. Its main utility instead derives from its ability to freeze nearly any surface on contact. Firing the beam at the ground, a ceiling, wall, or platform will freeze that spot instantly, creating an inch-thin layer of ice atop that surface. Moving the beam will "drag" it along a surface to freeze a wider area. Shallow pools of water, such as that on Rumble Falls, will also be frozen solid. For other characters, frozen surfaces act just like any normal ice terrain, lowering their traction and causing them to trip somewhat more frequently. For Dewgong, however, there are benefits. Dewgong can move much more efficiently over ice than rough ground, and when moving along an ice-covered surface, its speed is increased to a base 10, completely reversing the speed table in its favor against all but the fastest characters. Beyond making it faster, ice terrain changes Dewgong's dash animation entirely. Rather than squirming along the ground as normal, Dewgong gives off one push from its flippers, and slides on its stomach in a streamlined and much more graceful manner, practically jetting across any icy surface until normal terrain is contacted again. Dewgong can attack while sliding, and will continue sliding while doing so, of course sliding further the faster it's going initially. You can even crouch while sliding, reducing Dewgong's Y-axis even further to make approaches against projectiles tactical and difficult to counter. Coupled with Aqua Jet, Dewgong can move and attack extremely quickly, albeit with some mild loss of control. The physics used in relation to ice are meticulously realistic, with Dewgong sliding farther the faster it's going, and flying off of slopes with varying height depending on speed attained.

Ice Beam also freezes anything made of water. Squirtle's Water Gun and Mario's F.L.U.D.D. stream will become solid objects frozen in mid-flight. Dewgong can even slide across these streams if it wishes. All ice, however, will melt after 20 seconds, and individual "tiles" will melt when contacted by fire of any sort. Enemies can also attack Dewgong's ice (in any of its forms) to destroy it, with any tile taking 8% damage to be shattered. Sections of platform that are frozen over become solid from the top; that is to say, they are still passable from below, but cannot be fallen through.

Down Special - Aqua Ring
Dewgong gets into a vertical position, with its flippers toward the ground and its tail up in the air, and quickly spins around horizontally thrice, forming a horizontal ring of water that extends twice Dewgong's own diameter around its torso. If the input is given a slight horizontal direction, then Dewgong will instead flip around to a straight horizontal position and spin, forming a vertical ring of water instead. The move takes .80 seconds to execute, so it's possible to interrupt, but it can be used either on the ground or in the air. After the move is completed, Dewgong sparkles and recovers 3% damage.

The ring of water will remain on the stage and in the same place where it was summoned for 10 seconds, acting completely transparent to other players. Every time Dewgong passes through a ring, however, it will recover 1% damage (or 1% per second if you choose to simply stay in between one). Recovering a lot of damage is difficult, due to Dewgong's poor jumping and aerial ability, but if multiple rings are passed through in quick succession (within a half-second of one another), Dewgong will heal off 1% more damage for each ring in the chain. Dewgong may only have 3 rings present on the stage at once, however, with a fourth ring created replacing the first. Of course, Aqua Rings are made of water, so they can be frozen by Ice Beam. Frozen rings will remain in place as normal, and while they lose their restorative properties, they also last just as long as all other ice. Enemies that pass through these rings instead suffer from 1% damage and icy stun, and passing through multiple rings quickly stacks damage given just as they stack damage healed for Dewgong. Furthermore, Dewgong itself will get a speed and distance boost every time it passes through an icy ring. These boosts do not stack, and are instant, very similar to Aqua Jet. Ice rings are solid structures where they intersect with the arena's axis, and they and all frozen structures elsewhere in the set can be destroyed as with all of Dewgong's ice, by being dealt 8% damage, or by being melted if fire is used near them.

Players can stand on the very narrow edges of horizontal ice rings, but they will collapse and break after 2 seconds of standing.

Side Special - Water Pulse
Dewgong opens its mouth wide, charging up a blue ball of energy/water, which it then fires when the input is released, or after 2 seconds. The Water Pulse projectile will be larger and more powerful based on charge time, ranging from Smart Bomb-sized (6%) to Jigglypuff-sized (13%), so as you can tell, it charges quite quickly. Unlike most charged projectiles, Dewgong cannot shield to exit the move, and cannot store a charge for later resumption or firing.

So, it's not the most charge-oriented charging attack out there, but what are its advantages, you ask? Water Pulse is a fairly useful, albeit niche, technique. The projectile itself splashes enemies on contact and dissipates then and there, and has just so-so knockback, KOing horizontally at ~190%. However, it travels very slowly, at only 3/4 the speed of Wolf's Blaster shots. While its maximum range is only 1.75 Battlefield platforms in distance, this slow speed means that the projectile stays on-screen for some time, making it an annoying hitbox for Dewgong's enemies to contend with. Yeah, it's one of those slow but lingering projectiles. So creative.


Dewgong can, of course, freeze the Water Pulse projectile. This can be done either by using Ice Beam, or having it pass through an already frozen Aqua Ring. Water Pulses spherical shape will translate instantly into a perfectly round Ice Ball, which falls to the ground and rolls like a bowling ball. An Ice Ball rolling at sufficient speeds will damage enemies (8%) and knock them upwards, much like the Red Shell item in Melee, but with high power that can KO at 130%. The more speed, the more knockback is dealt. Ice Balls will pass through enemies unharmed, though they can be destroyed or melted, and will shatter if they hit an unfrozen surface with enough force. If they are rolling slowly or idle, Dewgong can pick them up like a normal item, and will balance them on its nose, able to toss them upward, forward, downward, or backward as normal. Some functionality is also borrowed from the soccer ball item in that Dewgong can knock Ice Balls around with its other attacks; other characters will simply damage the item.
Trivia: Ice Ball is the name of an actual move in the Pokémon series, which Dewgong cannot actually learn, but its functionality is very different from that seen here.


Standard Attacks

Dewgong isn't a very fancy Pokémon, and its generally mundane standards reflect this. While they don't appear all too visually interesting, they all share a mutual usefulness in their ability to get enemies into position for Dewgong to make something happen, with each move being more appropriate in certain situations than others.
Jab - Cold Clap
Smiling with mouth agape, Dewgong rises up slightly and extends both flippers outward, both limbs growing in an exaggerated fashion as with many Brawl moves, and claps them together for 1% damage. If pressed repeatedly or simply held, the input will be repeated rapidly at an incredibly quick rate, much like a Fan. Also like the Fan, enemies are dealt very low knockback that will never KO, and high stun that keeps enemies trapped with repeated use of the move at lower percents. The move's hitbox extends a modest difference in front of Dewgong, so it's not the easiest move to land, but its quick startup and almost non-existent cooldown keeps Dewgong mostly safe whether or not it misses. It can be thrown out with relative safety, and is great for interrupting combos and starting strings of your own.

Forward Tilt - Aqua Tail
Dewgong turns to its right, bending its torso to reduce its hurtbox, and extends its tail outward 3/4 of a Battlefield platform out in front of it. Sticking its tail out, with just a few frames of delay, Dewgong then flicks its flipper horizontally, smacking the foe in a splash of accompanying water and dealing 9% damage with moderate horizontal knockback that KOs at 160%. With endlag comparable to Ike's Ftilt, it's punishable if missed. However, the range of the move and its reduction of Dewgong's hitbox make it relatively safe overall, with its main application being for spacing and knocking approaching foes away, giving you more time to freeze things up. Only the end of Dewgong's tail has a hitbox, however, so the range between the flipper and Dewgong's body is a safe zone for the enemy; proper spacing is crucial, lest you find yourself on the receiving end of punishment.

Up Tilt - Flipper Slap
Dewgong hops onto its flippers and raises itself vertically, swishing its tail backward and then forward for 6% and 7%, respectively. Its tail flipper coated in water, it sloshes foes around with two hitboxes, the first of which has a weak pulling effect and links rather reliably into the second. The move is an excellent anti-air thanks to its superb vertical range, though it's an obviously predictable move, and its start-up isn't the fastest. With the second hit, Dewgong smacks the enemy forward at a low trajectory with low knockback growth. This puts the enemy in dangerous territory, even with moderately good DI, and a quick player will be quick to follow-up this move with a short-hopped aerial or move out of a slide. It's also a great way to smack an opponent through a low-laying vertical ice ring.

Down Tilt - Sweeping Splash
Confidently smirking, Dewgong curls its tail alongside its body and swipes the end of it upward in front of itself, hitting at the feet of opponents directly in front of the Pokémon. Dealing 7% damage when direct contact is made, the attack has a weak vertical trajectory that puts the enemy into the air above Dewgong, and an additional watery damage effect that sends a bit of spray into the air in front of Dewgong that deals 2% and no knockback, but minuscule stun. At lower percents, poor DI will link this move into Up Tilt quite easily, and a variety of other move options near the ground make for equally viable follow-ups. It's a move with average speed in all respects, and not much power, but just enough range and safety to throw out every now and then to get something started.

Dash Attack - Horn Attack
Getting its game face on, Dewgong sternly focuses itself as it thrusts itself forward with its flippers into a short hopping ram attack similar to Pikachu's dash attack, all while lowering its head so that the horn faces forward. If Dewgong successfully spears an enemy with the small horn's hitbox, they will be butted forward and take 10% damage, or 14% if only the very tip of the horn connects, and decent knockback that finishes foes by 120%. The move comes out at a fair speed, but cooldown is high as Dewgong, as you can imagine, ungracefully flops and lands on its belly, completing halting its momentum (unless it's sliding on ice).
Horribly predictable and very punishable, it's not a move best used often, but rather as a combo-finisher to send enemies packing, most effectively carried out when sliding.
Trivia: Like Ice Ball, Horn Attack is the name of an actual Pokémon move, and Dewgong, inexplicably, cannot learn this attack either.


Smashes

Dewgong's Smash Attacks are, as a rule, more technical and flashy than its standard moves, and each of them have some sort of way to interact with other moves. They are also all capable of producing new options for Dewgong to play off of. Generally, these moves involve water, and as such, incorporate features such as true disjoints and rapid-fire hitboxes that assist Dewgong in playing it safe while also harassing its opponents.
Up Smash - Waterfall
Coating itself in a surging layer of water, Dewgong bursts upward into the air, twirling gracefully before posing at the height of its rise with flippers outstretched. Dewgong will always make this acrobatic leap the same distance, at the height of 2 Ganondorfs. However, the longer the move is charged, the more quickly Dewgong will ascend, with a minimum charge being similar in speed to Little Mac's rising uppercut, and a maximum charge mirroring the speed of Aqua Jet. Until the apex of its jump, Dewgong's entire body is a danger zone of constant hitboxes, which trap foes and rack up damage before shooting them out at the end of the attack with strong vertical knockback. Generally, this move will range in damage output from 13-24% based on charge and number of hits. Enemies hit by the initial frames of the attack are more than likely to take the full brunt, and the vertical knockback is a good reward for landing the move, putting the foe into a compromising position above the pinniped.

During the start of the move, Dewgong actually forms a pool of water below itself, which it jumps out of, creating a tall wave that splashes into the air and acts as a weak, flinch-inducing hitbox that deals 5% to those below Dewgong. Falling slowly in a dramatic effect, the pillar of water will collapse 1.6 seconds after Dewgong ends its attack, and as such, can be frozen by Ice Beam within that short window. This creates a vertical column in the shape of a narrow wave, which acts as both a wall and a ramp of sorts, and if you're really quick, you can create walls of varying heights based on when you decide to freeze the falling pillar. If Dewgong slides into a wall at quick enough speeds, it'll slide right up the wall and into the air. While under most occasions you'll only be able to clear the top of it and not much else, when traveling quickly enough, Dewgong will fly a good distance into the air and gain a good deal of altitude. Here's a tip: If you fast-fall, Dewgong will orient itself headfirst, picking up speed and putting itself into a prime position to slide down a slope. While sliding up an icy wall will slow Dewgong down once it enters the air, you can quickly recover your speed by fast-falling back down onto either side of the slope to carry on your way, making navigation around these obstacles both helpful and efficient.

Forward Smash - Surf
Dewgong, taking on a serious expression, brings its tail back, in a somewhat lengthy start-up, then swipes it forward forcefully, sending out a briny wave along the ground before it. The wave roars forward along the ground at 3/4 the speed of Pikachu's Thunder Jolt, following the flooring until it falls off of a platform or reaches 3/5 of FD in distance. The wave itself is nearly as tall as Falco, so enemies will have to commit to the air to avoid it, and if they find themselves hit by it, they'll be pushed away with it until they either DI out or the wave ends, taking 12-18% damage and light knockback at the end of the wave's travel, when it splashes apart. If a wave travels off of a ledge, it'll drop straight down and deal minor hitstun and 8% damage to anyone below.

Dewgong can, of course, freeze these waves to make swirling ice sculptures that stay in place. These create short ramps with more curvature to them than Waterfall ice walls, allowing Dewgong to slide right up them and launch itself into the air at an angle, or send itself flying backward in the direction it came if you so choose to DI that way. Aqua Jet in particular can create some interesting results when used to boost into ramps from various angles. There's a lot of ways to move around these structures, based on directional input.

Surf waves will travel along all flooring, and that includes icy flooring and ice structures as well. They will break if they hit ice rings in their wake, and will also splash up walls and ramps in relatively realistic fashion.

Down Smash - Arctic Splash
In a manner similar to Squirtle's Up Smash, Dewgong hops onto its flippers, putting weight down in front of itself, and slams against the ground, sending a splash of chilling water upward and around itself. The move has great range but slow start-up, covering its entire body and 1 character space on either side of Dewgong. Enemies suffer 11-17% damage and weak knockback, with a 30% chance to be frozen a la Ice Climbers' Blizzard. The attack will rarely if ever KO, sending even battered enemies only 3/4 of the way to the ceiling on the average stage. On top of its start-up, the move also has its fair share of endlag, seeing Dewgong hop back onto its belly and take a quick breath to recuperate.

The move covers Dewgong well from above, with the splash of water acting as a veil of sorts that deals 4% on its own and blocks Dewgong from aerial opponents above as well as projectiles from the side. At its height, the disjointed hitbox extends about 3 feet above the lower platforms on Battlefield, making enemies think twice about dropping down from above. If the water from this move hits the bottom of a platform or a ceiling, it will soak the surface, causing it to drip large droplets of water for 8 seconds. These droplets, on their own, do nothing but add a lingering aesthetic effect, but if Dewgong freezes the surface with Ice Beam, the droplets will harden into pointed icicles, which extend the length of a baseball bat and deal 7% damage individually, each one shattering after being contacted. They can be destroyed by fire or enemy attacks, but they're a lot harder to avoid if the foe is slipping around on ice.

Aerials

Dewgong's aerial game isn't its strongest suit, but it's more potent than you might think. The ability to attack out of Aqua Jet opens up aerial options for the nautically-inclined Pokémon. Most of its aerial moves are simple attacks with specific uses, usually meant to keep foes at bay or end the chases that Dewgong is fond of carrying out.

Down Aerial - Dive
Dewgong takes on a position close to its fastfalling animation, facing downward. In this instance, however, it coats itself with a veil of water and plummets to the ground at an 80° angle at Sonic's Dair speed, knocking enemies weakly into the air behind it with 7% damage. While Dewgong will fall a good distance with this move, and will continually stay in the animation if the input is held, it will normally end the move after falling a distance comparable to that between the top and bottom platforms in Kongo Jungle 64. The move comes out quickly, though not as quickly as Aqua Jet, and Dewgong, colliding with the ground headfirst, suffers a good deal (about 42 frames) of landing lag, though it never appears shaken by this. It's not the best attack, but it's a great way to reach the ground quickly as an alternative to the helpless-inducing Aqua Jet.

If Dewgong touches ground while this move is active, it'll slam down hard and shake the screen just slightly. Any icicles that happen to be hanging from the platform it lands on will instantly be shaken out of place and drop at the speed of Mega Man's Hard Knuckle, spearing anyone unlucky enough to be below them for 14% damage.

Back Aerial - Winter's Whip
Dewgong extends its tail behind it, and flicks the end of it upward, smacking foes with the flipper. Obviously, this move is similar to Mewtwo's Bair, and adopts that move's great range as well, with as much reach as Mewtwo's move in its Project M incarnation. Enemies take 8% damage from Dewgong's pinniped pimp-slap, suffering from horizontal knockback with a middling launch that rarely KOs unless the move is used off-stage. The move is an excellent spacer, and can keep Dewgong safe from behind, making it great for both approaches and retreats. The move has high landing lag and 20 frames of endlag, but it comes out quickly and is probably the most commonly useful option to use out of Aqua Jet.

Up Aerial - Ice Pick
Dewgong headbutts upward, striking foes above it with its horn. While the range leaves a lot to be desired, Dewgong will jolt itself upward just slightly to give the move just enough oomph to make it somewhat reliable. While Dewgong is thrusting with its horn, its entire head is a hitbox during this attack, which lasts about as long as Falco's Uair. The general hitbox of Dewgong's head and horn will deal 9% damage and relatively weak vertical knockback, but sweetspotting with the tip of the horn will spear enemies for 12% damage and decent knockback that will KO off the top at ~130%. Compared to Dewgong's other aerials, this move has little landing lag, so it's great out of a short-hop, but also useful higher up in the air, such as after a vertical Aqua Jet.

As its name suggests, if this move contacts ice, Dewgong's horn will shatter it, just as it uses the horn to poke holes in ice floes. It's a great move for hitting naive, platform-bound enemies, but keep in mind that you'll be destroying your icy terrain if that platform's frozen over.

Neutral Aerial - Circus Flip
Putting to use its acrobatic ability, Dewgong curves its body inward, forming a half-circle shape, and spins forward, slamming the top of its tail into the foe and knocking them forward with the strength of Peach's Fair (and dealing 10% damage). The move has deceptive range due to the length of Dewgong's tail, but because it's curved inward, it's not nearly as disjointed as the Back Aerial. Dewgong makes a full rotation during this move's animation. While the start-up speed is just average, the endlag and landing lag are both rather bad, so it's not a good idea to miss with this move. The best application for the attack would be to use it sparingly as a mix-up or to combat foes head-on when other options aren't available.

Forward Aerial - Aurora Beam
With the speed of Samus' Fair, Dewgong tucks its body inward and shoots a fan-shaped, polychromatic beam in front of itself. The projectile covers a 45° angle and 1/2 of a SBB in front of Dewgong, and due to its lingering nature, is a great way to punish foes who get too close. The start-up is a tad slow, and cooldown prevents the move from being used in quick succession, but landing lag is minimal. Enemies hit by this beam will take 9% damage accumulated through multiple hits, and be pushed back (excellent for edgeguarding). The move has high hitstun, similar to an uncharged shot from Samus' paralyzer. It's a great move for pushing foes into position and pressuring enemies into respecting your space.

Throws

Dewgong's grab game is a somewhat technical one, with each throw being rather simple in function but specialized in application. Generally, Dewgong's throws forego raw KO power for the ability to set up for more potent kills and combos, though it does have one primarily offensive throw. As it lacks hands, Dewgong grabs by lunging out its neck and snatching the foe in its mouth. This is a rather safe grab, coming out quickly and sporting a fast grab-miss animation. This is offset by its paltry range, which extends very minimally beyond Dewgong's normal hurtbox.
Grab Attack - Shake and Shiver
Holding its foe by the neck in its tusked maw, Dewgong does all it can, and shakes its head vigorously, dealing damage to the foe in the process. The animation for this move is seamless and quick, so it can be used repeatedly and appear to be a continuous motion. Each swing of its head deals an average of .5% damage, so generally, every two shakes will deal 1% damage.

Up Throw - Balancing Act
Dewgong flips its head back and playfully tosses the foe onto its snout, positioned toward the air, and bounces them off of its nose three times at a steady pace: 1, 2, 3. Each bounce sends the foe a little bit higher than the last by a few short inches, except for the final hit. The entire animation is lengthy for a grab, and comparable in speed to Jigglypuff's Dthrow. Opponents will take a modest 8% damage, totaled from 1%, 3%, and 4%, and then bopped upward at the final hit. Knockback growth is very low, almost to the point of being set, and enemies will rarely be sent above the top platform on Battlefield. Of course, the best use of this throw is to put enemies above Dewgong, but it's possible to score a cheap star KO with this on very high platforms on certain stages.

Forward Throw - Headbutt
Releasing the enemy from its bite, Dewgong tactfully swings its tail upward, swatting the enemy up to its face-level. It follows this with a quick hop off of the ground and a cracking headbutt that sends the foe forward at a slightly downward angle. A move of sufficient strength, enemies are dealt 10% and can be KO'd at 125%. One of the few techniques in Dewgong's arsenal with a downward trajectory, it's a great throw to finish combos or chases that end up by the ledge.

Backward Throw - Tuck and Roll
Dewgong solidifies its grip on the foe, bringing them close to its stomach, and performs a somersault backwards, rotating three times in a manner akin to Pikachu's Bthrow. At the end of the roll, Dewgong releases the enemy at ground-level with 6% damage. The enemy continues to roll due to centrifugal forces. On normal terrain, they will roll a short distance of 1 Battlefield platform, but won't fall off of ledges. On ice, they'll roll twice as far and will slip off of ledges, but will instantly enter normal aerial state when doing so. Players can mash out of the roll early as they would when put to sleep. While rolling, foes are at the mercy of Dewgong's wintry wonderland, and they will roll up structures such as ice walls, up into ice rings, or up ice slopes.

Down Throw - Belly Flop
Dewgong does as the name of this move suggests: a belly flop. Dewgong drops the enemy to the ground, performs a backwards flip as it hops a few feet into the air, and comes crashing down, flippers held out and smiling in glee. Rather than flatten the foe like a pancake, Dewgong uses the enemy as a springboard, bouncing itself off of its captive and high into the air at the height of Mega Man's Rush Coil. From here, Dewgong is free to do whatever it wishes, while its opponent is left in a supine state on the ground with a payment of 10% damage.

Final Smash - Sheer Cold


*Gonging intensifies*

Dewgong grabs a Smash Ball! What to dew about that? How about freezing your enemies to near death? That's the spirit!

Dewgong, innocently chipper as always, begins "gonging" by shouting its name and prolonging the second syllable. As this happens, it horn begins charging with energy, turning a deep, icy blue and crackling with electrical/icy particle effects. After a somewhat lengthy startup of just over a second, Dewgong bows its head forward and releases the energy from its horn, sending out a chilling wave of icy wind across the stage, in an area of effect roughly equivalent to that of Ganondorf's final smash. Any enemies caught in this blizzard are chilled to the bone, becoming completely frozen in a layer of ice that covers their entire body. 80% damage is dealt immediately upon freezing, and after 2.5 seconds, the ice will shatter, launching the enemy inside high into the air. Enemies under Wario's weight will almost always be star-KO'd from 0% by this move, making it quite potent. The move is highly telegraphed, however, and it can be avoided easily on stages with plentiful platforms, an instance in which platforms ironically work against Dewgong.


Extra
Up Taunt - Encore
Smiling with mouth agape, Dewgong performs a backflip low to the ground, makes a perfect landing, claps its flippers together once, and says "Dew-gong-gong!"

Side Taunt - Power Snow
Dewgong solemnly bows its head down as a visible arctic wind blows across its body.

Down Taunt - Thick Fat
Dewgong playfully lounges around, rolling around back-and-forth on its side before returning to its normal stance.

Victory 1 - Whirlpool of Victory
Dewgong energetically Aqua Jets itself into the middle of the screen, then rises up into the air with a vortex of water surrounding it. The whirlpool breaks as Dewgong reaches the apex of its jump, and the Pokémon lands on the ground, smiling at the camera.

Victory 2 - Slippery Celebration
Dewgong slides into view of the camera, attempting to break its momentum by turning on its side as it reaches the center of the screen. It stares at the camera eagerly.

Victory 3 - Slap Slap Slap, Clap Clap Clap
Dewgong simply claps for itself, eyes closed and mouth wide in excitement.

Defeat - Internal Gonging
Ironically, despite its propensity for clapping, Dewgong doesn't applaud its opponent when it loses. Instead, an emotionally distraught Dewgong gongs out its woes, crying "Dew-goo-oooo-oong!" [example]


Playstyle
Dewgong's moveset largely explains itself. Dewgong is a large, heavy character with a solid mixture of offensive and defensive capabilities, all of which revolve around momentum, pressure, and controlling the match. Because it's large and easy to combo, Dewgong is at a severe disadvantage when the fight tips in the opponent's favor, so the best way to circumvent this is to deny the enemy's access to breathing room. In order to control the match, Dewgong will want to ensure it can move around quickly and efficiently in order to keep itself safe and able to transition back and forth between offense and defense. To do this, it must keep much of the stage icy so that it may slip and slide around, opening up an entirely different world of options for itself. While moving on ice, Dewgong's normally slow and punishable attacks become much more reliable, and coupled with Aqua Jet, it can move around and attack surprisingly - and for the opponent, irritatingly - quickly. Its dopey appearance betrays the facts: like a leopard seal hunting its prey in freezing arctic waters, Dewgong is a lean, mean, killing machine...in the right environment. On rough, unaltered terrain, Dewgong is mediocre at best, being slow and easy to hit. To start off any match, Dewgong's primary means of movement should and would be Aqua Jet, which allows it to move quickly enough to get to a safe place and start setting up its coldly calculated plan.

As stated, Dewgong is all about momentum and pressure, and where it excels the most at is nullifying aerial characters. It can snipe at jumping foes with Ice Beam, or use any number of anti-air moves such as UTilt, Usmash, or Uair to keep aerially-inclined combatants at bay. Water Pulse is an excellent way to trap jumpers and keep them off-guard, and is the perfect punishment for those looking to jump in order to avoid slippery terrain. Dewgong's excellent vertical coverage makes it almost immune to being approached from above, but at the same time, Dewgong itself is easily dealt with from below, as it's easy to juggle and has little in the way of strong downward attacks. As such, Dewgong works best when it stays on the ground, only venturing into the air to end attacks or escape the opponent. The air is a risky place for Dewgong to be, as it can be rewarding if Dewgong is in control, but can just as easily put it into a very dangerous spot if the reigns of the match are pried from its flippers.

Luckily, Dewgong is great at keeping control so long as it can attain it to begin with, and the player is attune to the intricacies of ice physics, which are absolutely crucial to playing the character. Dewgong is great at extended combo chains, often starting them with low knockback/high stun moves such as Jab, Dtilt, or Fair, which are prone to getting enemies into the air for some vertical combo action and juggles. Enemies sent upward can be nailed hard by Up Aerial out of Aqua Jet, Aqua Jet itself, or Usmash, and if they DI diagonally or horizontally, Dewgong can make a read and catch them in midair with long-range moves such as Bair, after boosting into the air via Aqua Jet and/or an icy slope or wall. Dewgong's goal is to give its enemy little way to react; even a seemingly lost cause of a combo can be restored due to Dewgong's insane speed and ease of control on ice. If the proper DI and terrain is available, Dewgong can go from any point on the stage to any other point with relative ease.

While it has an advantage on the ground when on ice, Dewgong prefers its foes in the air; more specifically, directly above itself. Dewgong can deter foes from staying on the ground by freezing it, threatening poor traction and tripping, and by using moves such as Water Pulse and Fsmash to encourage taking to the air. The platform is Dewgong's natural ally, with moves like Usmash, Uair, and Aqua Jet allowing it to get the better of foes directly above it. When Dewgong has frozen a platform, the inability for foes to drop below makes the enemy even more vulnerable. A Dewgong crashing through a platform with a high-speed Uair can be extremely painful for platform-bound enemies, especially those having trouble maneuvering quickly on and off the ice. Icicles suspended from the bottoms of platforms can also deter enemies from dropping through those platforms that aren't frozen up-top, in addition to serving as excellent traps for tripping, sliding enemies. Opponents can find themselves between a rock and a hard place when forced to choose between taking a Fsmash or jumping onto the icicle-laden platform above them. With obstacles such as ice rings and Water Pulse to contend with as well, it's plain to see why Dewgong's stage presence is a powerful component of its playstyle. Icicles in particular are very useful, as they force enemies into taking the middle road in height in order to avoid the majority of Dewgong's obstacles, which is exactly where Dewgong excels at fighting back. If players have trouble forming icicles on higher surfaces, they can always try to stand on the narrow rims of horizontal ice rings in order to give themselves some height.

Dewgong, once it gets going, can be extremely difficult to contend with. Zipping around with Aqua Jet; healing itself as it passes through Aqua Ring; and dodging attacks by slipping down slopes, curves, bends, and pillars, Dewgong can be a nightmare to counter. Able to rush in quickly from most any angle, Dewgong can string together powerful combos. A few examples (not always possible, based on percentage and positioning):

  • Jab, Dtilt, Utilt, and Uair out of Aqua Jet
  • Ftilt, Aqua Jet and/or slide into Dtilt, short-hop Fair, Utilt or Usmash
  • Jab, grab, Fthrow, boost into Dash Attack or short-hop Aqua Jet into Nair
  • Ftilt, Fsmash, boost and meet, Usmash or grab/Uthrow, finish with a launched or thrown Ice Ball based on enemy DI
These are just very general examples that mostly work at lower percentages, but they illustrate the technical demands of Dewgong's offensive game. Some very devastating combos in one situation may be completely impossible in another due to slight differences in timing and move combinations, or variation in the angle at which a slope is approached or Aqua jet is angled. Strict positioning and tight control are rewarded, with more powerful combos and graceful, ice-sliding movements opening up doors to intricate ways in which to move and attack. Skilled passage through strings of Aqua Rings not only looks cool, but it rewards Dewgong with even more longevity. Just as much positioning is required to send enemies, Water Pulse, and Ice Balls through and around rings as well.

Dewgong's weaknesses lay in its status as easy combo fodder, and its poor responses to pressure from below. While these disadvantages are few, they are powerful and crippling in certain match-ups. Dewgong can also have trouble setting up for its "sweeping" early match, which stunts its overall effectiveness greatly in the long run. Many characters, especially fast fighters like Fox and Meta Knight, can maneuver around the arena and pressure Dewgong significantly. Characters with many fire attacks can clear large portions of the stage of Dewgong's ice quickly, which is highly crippling to the Sea Lion Pokémon.

Overall, Dewgong is a rushdown type of character with a strong emphasis on stage control and anti-air defensive capabilities. Its terraforming is highly self-rewarding but does not cripple the opponent too severely, instead requiring precise use of many different hazard interactions in culmination to keep the opponent under immense pressure. To play Dewgong, a player should be aware of when to fight and when to retreat, backing off when head-on engagement is too risky, and going in for the kill, like a ruthless arctic predator, when the prey is teetering on an ice floe with nowhere to run.


Last edited:

allison

She who makes bad posts
Joined
Jan 25, 2014
Messages
5,138
Location
Maple Valley, WA
NNID
crazyal02
3DS FC
0216-1055-4584
RIDLEY


Samus Aran's eternal enemy, Ridley is the monstrous leader of the Space Pirates that clash with the GF at every turn. Hailing from the Metroid series, he swoops into battle!


Stats

Size: 11
Weight: 9
Ground Speed: 2
# of jumps: 10
Glide: Yes
Wall Jump: Yes
Wall Cling: Yes
Air Speed: 5
Fall Speed: 2
Traction: 1


Ridley is huge, even larger than Bowser; his hitbox is roughly square when not lashing out with his tail or the like. He's also quite heavy (though not to the extent of Bowser). His ground speed is low but his air speed is reasonably good. He has fairly good ground speed, and... Whoa. Look at all those jumps! It's important to note, however, that only the first 5 of these allow him to cover vertical distance; the remaining 5 merely allow him to hover. This, combined with his glide ability and low fall speed, allows him to stay in the air for a long time indeed. However, his glide isn't nearly as good as Peach's, and his traction is terrible.


Specials

Neutral Special – Kinetic Breath Weapon
Ridley fires a red plasma beam, with a maximum range of 2 SBBs. It's about as wide as R.O.B.'s fully charged Neutral special, but has some interesting traits. It's charged manually by holding B, and the beam appears for 1.5 times as long as you charged it. The beam starts out horizontal, but can be aimed 15 degrees up or down. Enemies caught in the beam will receive 5% damage per second. Getting hit by the beam will lock you in place until the beam stops or moves away, at which point it will KO at 175%. If used in midair, Ridley flaps his wings to stay in place for the duration of the beam (but not its charge).

Side Special – Floor Grind
This move functions similar to an ordinary Brawl grab (think Bowser's Side Special). Upon grabbing the foe, Ridley dives downward and grinds his opponent along the stage's floor. Grinding deals 8% per second, and he moves at Sonic's walk speed. He continues doing so until the player presses Shield or he reaches a ledge or wall. When he stops grinding, he throws the opponent upward, KO'ing at 190%.

Up Special – Incendiary Loop
Ridley performs a loop while on fire. This deals 7% and KO's at 130%. In essence, it behaves like Mata Knight's Up Special, but doesn't go into a command glide at the end.

Down Special – Tail Grind
Ridley dives downward to the stage if in the air. He then flies forward with his tail grinding against the ground, causing sparks to fly. He continues grinding until Shield is pressed, or he reaches a ledge or wall. Upon colliding with the tail's tip, opponents are dealt 10%, KO'ing at 150%.

Standards

Jab – Talon Slash
A natural three-hit combo. The first two hits are Ridley slashing with his talons, dealing 5% and flinching. The last hit is Ridley slashing with both at the same time, and deals 7% and KO's at 195%.

Dash Attack – Talon Grind
Ridley grinds his talons along the ground, dealing 10% damage and flinching to enemies.

Side tilt – Wing Block
Ridley wraps one wing in front of him and lunges forward, dealing 7% and KO'ing at 180%.

Up tilt – Tail Arc
Ridley swings his tail upwards in an arc, similar to Link's up tilt. It deals 6% damage and KO's at 165%.

Down tilt – Tail Sweep
Hey look, a Brawl tail sweep! He spins his tail around on the ground, dealing 9% damage and KO'ing at 200%.

Smashes

Side Smash – Lunge
Ridley leaps forward the same distance as Fox's Side Special, dealing 8-25% damage and KO'ing at 190%.

Up Smash – Meson Bomb Launcher
Ridley launches an energy bomb up into the air. Similar to Snake's Up Smash, charging time affects distance rather than damage. Bombs deal 8% and KO at 170%.

Down Smash – Ultrathermal Flamestrike Projector
Ridley slams his talons into the ground, causing a fiery shock wave to appear around him with a diameter of 2 Stage Builder Blocks. Enemies hit by it will be dealt 7-18% damage, KO'ing at 125%.

Aerials

Neutral air – Wing Smash
Ridley faces away from the camera and expands his wings in both directions, dealing 8% and KO'ing at 195%.

Forward air - Fang Slash
Ridley bites the opponent, dealing 10% and KO'ing at 200%.

Backward air – Talon Swipe
Ridley slashes a talon behind him, dealing 7% and KO'ing at 172%.

Up air – Upward Tail Stab
Ridley stabs his tail upward (hence the name), dealing 7% damage and KO'ing at 187%.

Down air – Tail Fling
Ridley swings his tail below him in a way that causes his opponent to be flung upward. This deals 6% damage and KO's at 200%.

Grab

Ridley's grab is pretty weird. It involves him swooping towards the nearest opponent; how exactly this works depends on positioning. If Ridley is in midair and somewhere above the target, he swoops in a U shape, down to the opponent then back up. He grabs the opponent with his talons upon collision, which doesn't hinder Ridley's movement in any way. (If Ridley collides with a wall, floor, or ceiling, he grinds his foe along the surface, dealing 8% damage per second.) He then turns around and keeps the opponent in the grab, hovering in place. Apart from the fact that Ridley is stationary in midair, it works just as if his opponent in a normal grab. If used while Ridley's on the ground or below the target, he simply flies towards them in a straight line, then flies upward for 2 Stage Builder Blocks, and then changes direction. Ridley moves very quickly when using this move, but he doesn't alter his trajectory when the opponent moves, so attentive foes can dodge it. Upon using a throw or if his foe escapes, he can't use the move again for a full second. Whew!

Pummel – Talon Clench
A basic pummel, Ridley squeezes his talons, dealing 2% damage with a second of lag.

Forward throw – Talon Stab
Ridley throws the opponent very slightly upward, then stabs with his talons, dealing 7% damage and KO'ing at 130%.

Backward throw – Wing Bash
Ridley throws his opponent over and behind him, quickly performing a 360° rotation as he does so. He then quickly extends his wings backward, sending the foe flying. The move deals 10% damage and KO's at 165%.

Up throw – Gnaw
Ridley throws thee opponent into his gaping maw. He shakes his head around, viciously chewing on the opponent for a full second. This cumulatively deals 15% damage. He then throws the opponent further upwards with his head, KO'ing at 200%. A good combo starter, not so good of a finisher.

Down throw – Tail Spike
Ridley throws his opponent down and slightly backward, then viciously stabs his tail downward, dealing 8%. Although this deals downward knockback, it is NOT a Meteor Smash, so foes can still cancel and try to recover. Although it KO's at 200% onstage, it's a potent finisher offstage that can KO much sooner as long as you try to keep him from recovering.


Final Smash

Wall Grind
Ridley has obtained the Smash Ball! Upon pressing B, he grabs the nearest opponent. This grab has range on par with Dedede's grab, and it is possible for him to grab two opponents at once. After doing so, the camera zooms in on him, and he flies off the top of the screen. He then triggers a cinematic final smash similar to Captain Falcon's, in which he grinds his victims against a metal wall (dealing 50% damage in the process) then throwing them to oblivion. Cut back to the stage, where foes are flung away, suffering an OHKO.

Playstyle

Ridley plays a primarily offensive game. He has three main finishers: His Uspec is an aerial finisher, his Dsmash a ground finisher, and his Fthrow is a grab finisher. The rest of his moveset is seemingly dedicated to racking up damage, but things aren't quite as simple as they seem...

Ridley has a trait that sets him apart from every character in Smash, and possibly even MYM: he wants to be offstage. For starters, his many jumps, glide, and low fall speed allow him to safely remain there. The real star of the show, however, is his grab. Ridley's bizarre grab is, when used right, uniquely suited to getting Ridley safely offstage. With careful positioning, any of Ridley's throws can thus act as a potent finisher. His bthrow is quite useful, as the fact that Ridley turns around after swooping causes him to usually end up facing the stage. Although his dthrow isn't a Meteor Smash, the fact that Ridley is offstage much more frequently than other characters makes it much more useful. Despite the fact that his Uthrow is (as stated in the description) primarily suited to causing damage, it too can be a finisher if Ridley finds himself near the upper blast zone.

Ridley's grab game isn't the only element that capitalizes on his offstage mastery. His aerials are low-knockback moves that are great for combos, and his Neutral Special allows him to deal heaps of damage if aimed carefully. Just watch out, as somebody could get you from behind! His Up Special can act as a finisher against speedy foes that can dodge his grab.

Not that Ridley is limited to offstage attacking. He has ground prowess as well. He has a plethora of moves dedicated to dealing more and more damage. His Side Special can gradually cause more and more damage, and is particularly effective on larger stages due to its nature. His Down Special, on the other hand, is more useful on smaller stages, as they allow him to use it without being easily dodged. His Down Smash, as mention previously, is a good ground finisher, and the rest of his standards and smashes are building blocks for combos. His Up Smash, as his only projectile, allow to easily segue into aerial approaches. However, he lacks an actual sideways projectile, being forced to rely on his laggy Neutral Special to bridge gaps.

Overall, Ridley has a reliance on gradually dealing damage to his foe, like a nemesis that will never disappear. He pushes the opponent gradually offstage, and only then can reliably finish him off. Players of Ridley have to be constantly aware of their position on the stage; not only are there obvious move interactions like his grab, but there's also an even greater need than normal to bring the opponent offstage, which no serious player will allow easily.
 

Conren

Smash Apprentice
Joined
Feb 17, 2009
Messages
90
Location
Boston
NNID
Conren1
3DS FC
5086-4445-8944
[collapse="Key"]
→, ↘, ↓, ↙, ←, ↖, ↑, ↗, - Knockback Angle

↻ - Knockback equals direction of attack


Attack Timing

Falcon Punch
□□□□□■■■■□□ - This bar represents how long an attack takes to complete, broken up into different parts:


Wind-up
□□□□□
■■■■□□


Hit
□□□□□■■■■□□


Cooldown
□□□□□■■■■□□

The longer the bar is, the slower the attack.


Jab
■□


Warlock Punch
□□□□□□■■■■□□□□

Note: Meta Knight's jab does have a wind-up, It's just so quick that I'm rounding down.

Aerial attacks have an extra segment that's separated. This represents landing lag.

Landing Lag
□□□■■■□□□ □□□


[/collapse]


ANNA


TROPHY INFO

One of many identical sisters and cousins that share the same name. The Annas are a family of merchants that exist in many worlds. This particular Anna is obsessed with treasures and wealth.

Fire Emblem

ATTRIBUTES

8/10 Dash Speed
6/10 Air Speed
5/10 Fall Speed
8/10 Jump
6/10 Air Jump
5/10 Traction
3/10 Weight

Anna is about the size of Zelda, counting heels. She uses a sword for most of her attacks, which she holds in a reverse grip. Although it seamlessly switches to a standard grip for some attacks. Anna's attacks tend to be somewhat fast in both start-up and ending lag.

Anna can Wall Jump and Crawl.

Special Ability: Feinting
Anna can feint her attacks, where she pretends she's going to attack, only to interrupt her start-up animation. There are two ways to feint an attack. The first way is to input a taunt during the first six frames of an attack. The second way is to input a taunt after the first six frames, in which case the next attack will be feinted.

Notable Animations

Idle - Anna alternates bending each knee in a dance-esque stance.

Roll - Anna does a flip jump for either roll.

Crawl - Anna holds her sword at her back while using her free hand and legs to move.


SPECIALS

Standard Special - Treasure Hunt
□□

Using her treasure senses, Anna notices a something partially buried and crouches down to pick it up, kicking up some dirt in the process. Anna takes about as much time doing this as Peach does pulling a turnip. If Anna is air born, she will instead take out a Throwing Knife from her personal inventory, which takes a bit faster.

Item Spawn
Anna can pick up one of several different items. 10% of the time, she'll pick up a common smash item from among the list of items that are turned on. Otherwise, she'll find one of the below items. Only one of each item can be on the stage at any moment, except for throwing knives. As each unique item is found, the other items gain a better chance of being found.

[collapse="Item: Throwing Knife"]

25/66 Starting Chance
25/25 Best Chance

As expected, Throwing Knife is a thrown item. Unlike the other items, there is no hard limit as to how many throwing knives can be on the stage, although they have a short lifespan when not held.

Tap Thrown - 5%↗
Smash Thrown - 7%↗
Z-Drop - 6%↑[/collapse]

[collapse="Item: Sleep Staff"]

4/66 Starting Chance
4/29 Best Chance

A staff that inflicts sleep with each attack, which acts exactly like Jigglypuff's sing attack. Can only inflict sleep 3 times before it's magic runs out. Although it's still a perfectly functional bashing weapon afterwards. Albeit a bit weak.

Standard Swing - 1%↗
Tilt Swing - 3%↗
Dash Swing - 4%↗
Smash Swing - 5%↗ - 7%↗ If fully charged, will inflict sleep on a random opponent, even if it doesn't actually hit an opponent.
Thrown - 3%↗
Smash Thrown - 5%↗
z-Drop - 4%↗[/collapse]

[collapse="Item: Landmine"]

10/66 Starting Chance
10/35 Best Chance

A clay jar filled with an explosive compound. Can be thrown, in which case it'll just bop the opponent for 3% damage. When used with neutral attack however, the user buries it into the ground, forming a trap. If an unsuspecting victim steps on it, it'll erupt into a large fireball that does 18%↑ damage but surprisingly low knockback. More useful for weakening an opponent than to outright kill them.[/collapse]

[collapse="Item: Delphi Shield"]

10/66 Starting Chance
10/35 Best Chance

A protective shield that is used as a battering item. Not exactly the most powerful weapon, but it can reflect projectiles Whenever it is used in an attack or when thrown.

Standard Swing - 4%
Tilt Swing - 6%↗
Dash Swing - 5%↗
Smash Swing - 7%↗ - 9.8%↗. The reflected projectile gains 1.5x damage.
Thrown - 3%↗
Smash Thrown - 8%↗. The reflected projectile gains 2x speed.
z-Drop - 4%↗[/collapse]

[collapse="Item: Spear Trap"]
10/66 Starting Chance
10/35 Best Chance

Sometimes dark caverns and secret fortresses are protected by menacing traps. The Spear Trap is one of these. A kit filled with gears and components, the Spear Trap first acts like a heavy item. When used, Anna will use her mechanic skill to set the trap in the ground. Or whichever fighter is using it for that matter. Once planted, the spear trap becomes hard to see, only leaving a small whole in the ground. Any fighter that steps on it will be greeted with a spike suddenly shooting up and dealing 12%↑, then retracting back. Compared to the landmine, the spear trap does less damage, but it is repeatable, and has actual KO potential, at 170%.
[/collapse]

[collapse="Item: Light Rune"]

2/66 Starting Chance
2/27 Best Chance

A small white orb. It can be thrown at an opponent to deal 4% damage. If it hits the ground, it creates a white rune that is a little wider than Bowser. This rune can't go over corners, and will actually move if it would appear over a ledge. Once placed, the rune shoots up a pillar of light that acts as a wall that still lets projectiles through, including thrown items. This wall is tall enough that most characters need to triple jump to get over it. The pillar of light lasts for 5 seconds before disappearing.

With a pillar separating Anna and her opponent, she can keep throwing items the keep the opponent at bay. But watch out! Those items can easily be snatched up and thrown back by skilled opponent. This creates a sort of mini-game of item volley. The Light Rune is pretty rare, so not all matches will have one appear. [/collapse]

[collapse="Item: Levin Sword"]

4/66 Starting Chance
4/29 Best Chance

The Levin Sword is a special battering item that hits with electric attacks.

Standard Swing - Continuous electric hits of 1% damage, regardless of the animation the character uses for this move, so total damage varies between characters.

Tilt Swing - 8%↗. Also shoots out a ball of electricity that travels half the length of Final Destination and does 8% damage. It only has 15 shots so use wisely.

Dash Swing - 7%↗. Has a paralyzing effect. Great for complementing an approach game.

Smash Swing - 10%↗ - 14%↗. Also shoots out a large spark of electricity that does 11% ⇨ 15.4% damage. Uses up the same ammo as Tilt Swing.

Thrown - 8%↗. Has a paralyzing effect.

Smash Thrown - 10%↗. Even greater paralyzing effect than regular throw.

Z-Drop - 10%↑. With high knockback scaling, can KO at 80%.[/collapse]

[collapse="Item: Berserk Staff"]

1/66 Starting Chance
1/26 Best Chance

A very insidious staff. With each swing, this staff inflicts berserk on the victim. Just like the other staff, it only has 3 charges before it's magic runs out.

Standard Swing - 3%↗
Tilt Swing - 9%↗
Dash Swing - 7%↗
Smash Swing - 10%↗ - 14%↗ If fully charged, will inflict berserk on a random opponent, even if it doesn't actually hit an opponent.
Thrown - 5%↗
Smash Thrown - 10%↗
z-Drop - 6%↗

Status Effect: Berserk
When a fighter is berserked, that fighter glows red and looses the ability to shield, roll, and spotdodge. It's not all bad however, as that fighter now does x1.5 knockback with each attack, making this condition a double-edge sword. The berserk condition lasts for 5 seconds plus 0.05 seconds for every damage% that the victim has.

With that power bonus it becomes very tempting for the opponent to attack Anna, which benefits her since Anna does better when the opponent is aggressive. If Anna wants the effect for herself, she can just throw the staff up and let it hit her. The Berserk Staff is a unique weapon, it's very rare so not player should depend on it, and it's appearance mixes up the match. [/collapse]

Side Special - Steal
□□■■□□ (□□□ Missed)
1%

Anna grabs forward with her free hand. This grabbing motion can be angled diagonally. Once she grabs her opponent, she positions herself on the other side of them, then boots the opponent away, making them stagger. This move does not actually do damage, but the staggering motion can leave the opponent open to a quick attack. Missing with this move results in a punishable end-lag.

Item Theft
If the opponent is holding an item when Anna completes her throw, she'll take that item for herself, complete with the standard item grab sound. If the opponent isn't holding an item, she'll spawn an item, provided there's any items turned on. Anna can steal items the opponent didn't even know they had! Anna can also use this move to grab items that are in any state, whether they are flying, buried in the ground, or being used in special moves. She can even take Warrio's bike right from under him! Grabbing a free item this way results in a much shorter end lag.

Stealing is very useful for getting back any items spawned from Down Special, as well as dig up any planted landmines, spear traps, and pitfall traps. The throw is too fast for Anna to commit Annacide, but it is still useful for recovery if one is so bold to use it.

-Smashed Side Special
□□■■□□□

If the move is smashed, Anna will leap forward to perform the grab. This results in more range for the move, but the ending lag will last longer so Anna won't be able to follow-up with another attack.​

One trick to use with the Smash Steal is to leap right over a trap item (landmine, spear trap, pitfall, etc.) and stagger the opponent into it. This requires precise timing to avoid grabbing the buried item, however. A variation of this trick is to feint the move, prompting the opponent to either dodge or jump out of the way, which has some follow-ups that will be explained later.

Anna is not a thief, she just has thief skills.

Item Side Special - Item Mastery
X%

When Anna is holding an item, she has a separate side special. This means she can't steal when she's holding an item, I want to be very clear about that here. This move is a dancing blade style attack with three hits and can be performed pretty fast.

For her first hit, Anna does a simple bash with her item, doing that item's standard attack damage and effects, and won't leave Anna's hand if it's a throwing item. A simple move which acts as a setup for one of the following hits:

-Forward Second Hit
6%→

Anna slashes forward. This is the most powerful second hit and it actually does some knockback, but it may knock the opponent away from the last hit.

-Down Second Hit
4%

A slash to the feet. This move has a chance of tripping, although that's more for style seeing as how these attacks move fast. This is the most reliable hit to link with the last hit.

-Up Second Hit
5%↑

An upwards slash. This hit's power is right in between the other two second hits, and has a bit of an upwards knockback.​

Each of those hits can lead into one of the following hits:

-Forward Third Hit
2%, 2%, 2%, 2%, 2%↗

Anna does a flurry of thrusts with her item, each hit doing 2% damage. The last hit does some moderate knockback. This hit is mostly useful as a damage racker.

The Levin Sword adds in a few extra hits, doing a total of 13% damage overall.

-Down Third Hit
X%

Anna rolls along the ground while performing a z-drop. The item will bounce off surfaces up to two times while doing it's standard z-drop damage.

-Up Third Hit
X%

Anna spins once then throws her item, doing 1.2X that item's smash throw damage. With certain items, this is a pretty good KO move. It's also a good follow-up if the previous hit knocked the opponent out of melee range.​

This move can't be used with heavy items, like crates and barrels. Each individual hit can be feinted, but the hits are so fast that it's not really useful, exept for maybe the up and down third hits.

Down Special - Lucky Seven
Stance□□□□□ Attack□■□
6%↗ - 50%↗
KO:150% - 50%

Counter-Attack
Anna goes into a stance where she holds her sword with both hands and close to her body. When hit, she blocks the attack then she stands on her left leg, while bending up her right leg, and slices forwards and upwards, ending with her sword pointed up and a little to her left. This attack reflects x0.9 the damage of the countered attack, with a minimum of 6%↗ damage, and caps at 50%↗. The start-up time is faster than Marth's counter but leaves her vulnerable for a bit longer after her counter frames end.

Return Fire
If Anna counters a thrown item, she will grab that item and immediately smash throw it back. Only works if Anna is not already holding an item.

Item Counter
If Anna is holding an item, she will instead attack with that item, doing the same damage as her normal counter, but with that item’s standard attack properties and knockback. This can result in a ranged counter if Anna is holding a throwing item.

When used with a Delphi Shield, it won't reflect a countered projectile since the shield will come out too late to interact with the projectile. It will reflect any further projectiles it comes in contact with, however.

The Levin Sword will keep its multi-hit properties. However, the move is so fast that it'll only hit twice, and with lowered knockback than other items. Still, double damage is a nice trade-off.

One trick to do is to feint Lucky Seven and make it look like you mistimed a counterattack, then strike quickly. You could even do a real Lucky Seven after a feinted one.

Up Special - Acrobat
Jump:□□□ Attack:□□■■□□□
7%→
KO:200%

In a fairly quick move, Anna does a high midair jump where she flips once. If she touches a wall during this time, she will automatically wall jump, and can do several automatic wall jumps in a row. If an attack button is pressed during this time, Anna will slash forward with her sword for 7%→ damage. Acrobat does not leave Anna helpless, but she can only usually use it once before landing.

Trickster Dodge
If Anna is attacked during the first few frames of the midair jump, she will auto-dodge out of the way of the attack. The direction she dodges depends on the attack, moving left or right if the attack is from above or below, or moving up or down if the attack from the side. Naturally, if she's grounded she can't dodge downwards. Triggering Trickster Dodge cancels Acrobat and gives Anna another use of the move before landing.

While it is possible to trigger Trickster Dodge several times in a row, one misstep and Anna leaves herself open to an attack, so it's best to use it as a surprise move, or just for recovery purposes.


STANDARD ATTACKS

Standard Attack
■□■□□
3%, 6%↗

This attack starts with Anna rearing her sword back in what looks like a typical attack start-up animation, except that it can actually hit a foe that's right behind her. She then slashes forward for the main attack. Both attacks hit with just one button press. The entire attack is mederately slow for a jab.

Delayed Attack
By holding A, Anna will stay in her "reared back" position, and attack normally when the button is let go. Anna can alternatively cancel the attack by shielding or dashing in either direction.

Delaying Anna's jab is a good way to hide a taunt button press to make the next move a feinted attack. It's also a good way to make you're opponent think that you're hiding a taunt button press. You might think that the second option is always preferable, but it's better to mix them up so that your opponent may think that you might actually be crazy enough to do an obvious feint attack set-up with this move.

Item Standard Attack Combo
□■■□□■□■□□
X%, 1%, X%

Anna thrusts her item, and then slashes with her sword for 1% damage, then finishes by bashing with her item.

Held Attack
The first hit can be held indefinitely with the attack button. This simply extends the animation, and is mostly for show or as a sort of taunt.

With the Delphi Shield, Held Attack will give Anna a persistent reflector. The Levin Sword will do continuous damage for as long as the attack is held, but will quickly push away any opponents.

When using the Fan, Anna can only use the first hit of the move.

Side Tilt
■□□□■■□□
3%, 9%↗
KO: 180%

The start-up of this move is very similar to the Standard Attack, even damaging anyone right behind Anna. She then leaps forward while doing a simple slash. Due to the delay before the leap attack, this move can be confused for a feinted Standard Attack.

Side Tilt can be angled up or down, resulting in a different animation for the second hit. When angled down, Anna rolls on the ground while striking the feet of her opponent. This version does 1% less damage. When angled up, Anna jumps diagonally up while doing a forward-up slash. This version of the move does 1% more damage, and has a slightly longer end lag as Anna has to fall back to the ground.

When leaping with the forward or up-angled version of the move, Anna can go right over "trap items", such as the landmine or spear trap, without triggering them, giving Anna an option to attack from behind them.

Due to the distance this move covers, it's a really good attack to use after trickster dodging. It's also a good move to use after baiting an attack with a feinted move. This is due to the attack avoiding properties of the move; Anna can either leap over a move, or roll under one, depending on the attack.

Item Side Tilt
□□■■□■■□□
X%, X%

Anna does an up-to-down swing. If the attack button is pressed again, she'll combo into a down-to-up swing. The two hits can be combo’ed indefinitely. Anna steps forward a little bit with each swing. With the Levin Sword and Delphi shield this gives her good approach options.

Down Tilt
□□■■□
10%↘
KO: 210%
Meteor KO: 90%

A simple and quick slice to the heels. This attack allows Anna to remain low on the ground while crawling, so there's really no need to overcomplicate it since that would bog down the main use of this move. Also, it's a meteor smash.

Up Tilt
□□■■□□□
11%↗
KO: 180%

Anna does a back flip while doing an arc-slash from in front towards above and behind her. She ends this move with a handstand before doing an "arm jump" and landing on her feet.

Stance: Handstand
During the brief moment she's hand standing, Anna can perform one of the following moves:

-Neutral A
□□□■■■□
12%↑
KO: 170%

Anna drops flat on the floor then does a rising slash. Since she can duck under most attacks with this move, it can be used as a counter. This counts as a seperate move, and thus, can be feinted.

-Side A
□□■■□□
11%↗
KO: 200%

Anna flips in that direction while doing a full circle-slash. This can be used a follow-up to the initial Up Tilt, or as just a surprise attack in general. This can also be feinted.​

This is another move that can make Anna go right over a trap item without triggering them (both the initial flip, and the side A from hand-standing). Combined with Anna's side tilt, she can freely dance around her trap items, and might even make her opponent forget that she has trap items buried. Using this trick too much however can make it obvious that there is a trap item burried. Or make the opponent think that there is a trap item in a spot that in fact does not have one.

Dash Attack
□□■■■■□□
8%↘
KO: 170%
Meteor KO: 85%

Anna cartwheels, doing a vertical slash as her blade comes down. She uses the momentum of the cartwheel to jump forward, transitioning into her air game. Using this as a meteor smash is a bit tricky.

Item Dash Attack
□□■■□
X% + 12%↗

Anna jumps forward and thrusts with her sword and item at the same time. That sword strike does a lot of damage for a hit that assists an item attack.


SMASH ATTACKS

Side Smash
□□■□■□■■□□□
5%→ - 7%→, 5%→ - 7%→, 6%↗ - 8.4%↗
KO: 120% ⇨ 114%

While charging, Anna holds her sword behind her back and has her knees much more bent than normal. Anna then slashes horizontally, then steps forward with one spin and slashes again, before one final spin-step with a final slash.

Mid-Attack Roll
Anna can roll between each hit by tapping the control stick in the desired direction. If she rolls forward, she'll turn around before continuing with her next hit.

Item Side Smash
□□■□■□□■□■□□□
1%→ - 1.4%→, X%, 3%↗ - 4.2%↗, X%

Holding her sword and item outwardly, Anna spins, hitting with her item, then her sword, then quickly repeats with another set of item-then-sword attack. The ending lag has Anna bent at the knees, with her sword held in front of her and her item held behind, before straightening herself out.

Mid-Attack Roll
Anna can roll in between the 2nd and 3rd hit of this move by tapping the control stick in the desired direction. There is a fairly large window for tapping the control stick, as it can be tapped even before the 2nd hit starts. If she rolls forward, she'll turn around before continuing with the 3rd hit.

When using one of the staves fully charged, Anna can quickly inflict two opponents with a status effect.

Down Smash
□□■□■□□□
12%↗ - 16.8%↗, 12%↗ - 16.8%↗
KO: 130% - 125% (either hit)

The charging stance for this attack is similar to Forward Smash, with the exception of the sword being held a little higher and tilted a little lower. Anna then does a single sweep-slash that hits on both sides of her. Anna goes really low with this attack, to the point where she can dodge some mid attacks. Due to the similar charge animation as Forward Smash, this move can be used to trick an opponent, especially one that tries to attack from behind.

Up Smash
□□■■■□□■■□□□
3%↑ - 4.2%↑, 16%↗ - 22.4%↗
KO: 110% ⇨ 103%

The charging stance for this attack is similar to Forward Smash, with the exception of the sword being held a little lower and tilted a little higher. Anna then leaps into the air, doing a very quick hit at the start of the leap. When in the air she turns once, holds her sword with both hands, then comes down with a drop slash. The second hit can be replaced with a Drop Spin by pressing A after the move is initiated and before the second hit starts.

-Drop Spin
■□■□■□□□
6%↗ - 8.4%↗ X3
KO: 150% - 143%

While holding her sword with both hands, Anna does three vertical spins while falling, hitting 3 times. While it loses its KO potential, it's a nice surprise attack against anyone trying to hit Anna while she's seemingly vulnerable in her jump. Drop Spin can be feinted, effectively cancelling out the second hit of Up Smash entirely.​


AIR ATTACKS

Standard Air
□■■□□ □
5%

Anna spins once with her sword outstretched, and one knee bent, in a pose reminiscent of a circus performer.

Forward Air
□□■□□■□□■□□■■□□ □
4%, 5%, 5%, 6%↘
KO: 150%
Meteor KO: 80%

A four hit combo, Anna starts by doing an up swing, followed by a down swing. Then she thrusts her sword, and finishes by winding up her sword and doing a spin-slash. It's a bit tricky to connect with all hits, but it does have a high damage payoff. The last hit is a strong meteor smash, giving more motivation to connect with all hits. It takes a moment for Anna to complete this move, leaving her open should she miss with the first hit.

Down Air
□□■□■□■□■□■□■□ □□□
2%↓ X6
Meteor KO: 110%

Anna turns upside-down, and while holding her sword below her with both hands, she spins propeller-style. Without missing a beat, she then flips back rightside-up.

Stance: Handstand
If Anna lands while she's upside-down, she will be on her handstand stance, just like in Up Tilt.

Up Air
□□■■□□□ □□□
16%↗
KO: 100%

Anna holds her sword below her, and then does a large arc-slash that hits above her. The effort she puts into this move makes her continue the rest of the single spin during her end lag, making this move somewhat slow, but it's one of Anna's strongest finishers, especially on opponents that are high up.

Back Air
□■□ □□
10%↖

Anna turns around and slashes. Very similar to Marth's back air in that she stays turned around. This is a very fast turnaround back air, and can easily be chained into a forward air.


GRAB ATTACKS

Grab & Pummel
□□■■□ & □■■□
1%

Anna reaches with her free hand for her pretty standard range grab. She has a fairly fast pummel where she knees the opponent. Pretty standard fare FE grab and pummel. All her throws can be feinted, which is not really useful on a one-on-one match.

Forward Throw
□□■□
6%↗

Anna jumps to her opponent's mid level then kicks-off them. Anna, of course, lands on her feet. The fast ending lag makes follow-ups a little easy, especially Side Tilt.

Down Throw
□□□□■■□□
8%↗

Anna performs a false grab release, then fakes out the opponent by jump-slashing them before their grab release animation finishes. Occasionally you may want to let an actual grab release happen, then use any attack when you're opponent is expecting a Down Throw. The feinted version of this move is hardly noticeable, just don't do it.

Up Throw
□□■□□□□□■□□□
5%, 6%↗
KO: 150%

Anna starts by pulling the opponent towards her as she drops backwards, and then she uses both feet to kick the opponent straight up. Using the motion of the kick, she gets off the ground and lands on her feet. Then she jumps up while spinning, then grabs her opponent and uses the spin to throw her opponent up higher. Her only throw with a KO potential.

Back Throw
□■□■□■□
7%, 1%, 1%

Anna throws her opponent behind her, and then throws two Throwing Knives at them. These knives are exactly the same as the one from her Neutral Special.


PLAYSTYLE

True to her class name, Anna is a trickster, spending much of the fight doing feint attacks and surprise hits. Anna's effectiveness is largly dependent of play level. On low level play her feints may not even have an effect, making her more of an item spammer. As play level progresses, she'll be able to bait attacks with what may be feints. This forces the opponent to either play defensively, or take risks.

For example, say Anna does plenty of feinted Down Specials in a match. This can make her opponent hesitate whenever he sees what looks like a mistimed counter, which means Anna can be bolder with her counterattacks. Or her opponent could take the risk and possibly get forward smashed in the face.

With a battering item in hand, her moveset becomes a bit more aggressive. She has great proficiency with items, as most of her item attacks hit multiple times. Anna is reliant on a few KO moves though, particularly her Up Smash and Up air attacks, so a match can be a long grind for her.


FINAL SMASH

Charged Levin Sword

The camera zooms on Anna as she sees an amazing treasure. So amazing that she'll toss aside any item she's holding. "What do we have here?" She asks in a coy voice as she pulls out a shining, brilliant, lightning-bolt shaped sword out of the ground. It's the Charged Levin Sword!

[collapse="Item: Charged Levin Sword"]

A sword enchanted with powerful electric magic. When held, the user gets a visible electric aura. This aura grants the user super armor, a speed boost, and a knockback boost to all their non-item attacks. The Charged Levin Sword lasts for 20 seconds before it's magic runs out and it breaks, turning it into a Broken Sword that does 1% damage with all attacks and has no special properties.

Standard Swing - Continuous electric hits of 1% damage, regardless of the animation the character uses for this move. This move does damage every single frame.

Tilt Swing - 8%↗. KO: 90%. Also shoots out three balls of electricity that travels half the length of Final Destination and do 10% damage each and KO at 85%. It has unlimited ammo!

Dash Swing - 15%↗. KO 90%. Has a paralyzing effect.

Smash Swing - 10%↗ ⇨ 14%↗. KO: 50% ⇨ 46%. Also shoots out a gigantic spark of electricity that does 18%↗ ⇨ 25.2%↗ damage.

Thrown - 8%↗. Creates a large electric explosion that does 30%↗ damage and KOs at 50%.

Smash Thrown - 10%↗. Same explosion as regular throw.

Z-Drop - 10%↑. Again, same explosion.[/collapse]


EXTRAS

Match Entrance

Anna gets ferried in by one of her sisters riding a pegasus. The sister drops Anna off and flies away as Anna waves goodbye.

Up Taunt

Anna faces the player and puts her finger on her chin in a girlish pose.

Side Taunt

Anna begins doing the starting animation of a random attack, and then suddenly stops. This taunt has some possible tactical use.

Down Taunt

Anna notices a bag of coins on the ground. With great delight, she picks it up then pockets it.


Happy Hunting!​

[collapse="Changelog"]

Presentation:
-Understanding "timing bars" is no longer necessary to understand the moveset (her typical attack speed is explained in the attributes section, while attacks that differ from what's typical are given their own speed description). Just think of those bars as a form of abstract art.
-But for those few that still like the timing bars, the "key" spoiler has been revamped to give a clearer explanation.
-Items are now given a "best chance" rating, which shows the chance of an item appearing when all other unique items are already out on the stage.
-An item's normal chance of appearing has been re-dubbed as "starting chance".
-Many moves have been given more descriptions on how they can be used. These descriptions are usually placed in the paragraphs right after the special effects of the attack.
-Clarifications have been given: Light Rune and Berserk Staff are really rare, Anna's side special gets replaced when she's holding an item, and Anna can normally only use her up special once before landing.
-Playstyle section expanded.

General:
-New Item: The Spear Trap
-As a result of the above, all items have a lower starting chance, but their best chance remains the same
-Feinting is now a general mechanic explained in the attributes section

Side Special (Steal):
-Is now a grab & throw attack.
-Can be smashed for a leaping steal attack.
-Damage increased from 0% -> 1%

Item Side Special
-Revamped to be a Dancing Blade style attack.

Light Rune:
-Now wall instead of push effect.
-Allows projectiles through.
-Can be jumped over.
-Duration decreased from 6 Seconds -> 5 Seconds

Berserk Status:
-No longer removes control from player.
-Increases knocback but removes shielding and dodge.
-Can no longer be shaken out of
-Base timer increased from 3 seconds -> 5 seconds

[/collapse]
 
Last edited:

BridgesWithTurtles

Smash Champion
Joined
Apr 18, 2013
Messages
2,175
Location
The long road to nowhere
3DS FC
3523-2059-7939
Heads-up: I made a few suggested alterations to Dewgong. Specifically, Ice Beam has been reduced in range, and the functionality of Fair has been altered.

Here's three comments. Have a nice day, everyone.


Youmu

@ FrozenRoy FrozenRoy
I think this set is one of your most solid this contest, and I applaud your ability to convince me of that, because before I got to the standards, it felt a little weak. Youmu is a little extreme in her lack of moveset interactions with her specials, something that is scarce but usually present in some way with these sets. Instead, Youmu has two unique mechanics that make both specials and standards (and smashes, and aerials, etc.) completely viable on their own, and it works in a lovely fashion. It's rare, I think, to see a set that successfully marries two gimmicks/mechanics so masterfully, but I think Youmu is a good example of success in that area.

Every of Youmu's moves has some sort of overall application in her playstyle, and can be amplified in effectiveness because of Myon and/or her afterimage. These uses range from simple in nature (such as the 5-hit jab), to the more technical (such as Dtilt's disjointed hitbox coupled with Myon's range and the mindgame utility in Dash Attack and Fsmash), but never does the set feel too difficult for the average player to get a hold of. The decision to have Youmu move so quickly in exchange for a lack of control is an interesting one that I believe works well in making her stand out from her compatriot movesets. I'd say that my only real gripe with the set would be the mentioning of her dodge mechanics in the grab section...kinda weird. But that's also kind of your thing; it's an issue of personal taste, for me. I would've liked to know that information earlier on.

Anyway, that's all I can really think to say at the moment, so I hope that this comment will suffice.


Shy Guy
@ Bionichute Bionichute

That Bullet Bill move is a bit ironic, given the thing is now revealed to be an actual item in Smash 4, isn't it?

Anyway, I agree with Smady in that Shy Guy feels more like a collection of disparate moves than a cohesive moveset. Shy Guy's emphasis on spawning random items is unique, but doesn't lend itself to any sort of flow between any of his moves. Actually, I'd say it probably detracts from that if anything. I too would recommend having the spear be used in place of things such as the scythe, etc. Another problem that I see is the inherent randomness for the sake on randomness on some of his moves, such as the recovery, which can randomly fully heal everyone instead of exploding and dealing damage. That's pretty darn overpowered there, I think. A full heal in the midst of battle completely resets any flow either player has going. My biggest problem with the set derives from the charging of moves. Usually, charged moves allow both uncharged and charged application within battle, but for moves like Up Special, Side Special, and Down Special, aside from very situational scenarios, I can't imagine why there'd be any incentive to use the uncharged versions. Up Special, especially, is so risky to use due to it putting Shy Guy into special fall when hit, that it'd almost always be preferable to use the superior version of the move.

The one thing I actually really enjoy about the set is the Utilt Shy Guy tower, which, while I think could have been implemented in a better fashion, is still pretty interesting. The ability to extend the height and range of certain moves by stacking more Shy Guys is a pretty cool idea. You know, I think this set would've been a lot more interesting if this move/feature was the core focus of the character.

Snorlax
@ Rychu Rychu

I came into Snorlax expecting something simple. What I got was...something simple, but surprisingly deep. Can I just say it? I love this set. While it lacks the extreme creativity and flow needed for me to super vote it, I love the set anyway. It's simple, it's sweet, and it's terse. It never commits to any one thing for too long, and reading it was over before it started. It's the ultimate personification of Snorlax itself. I really like the writing style in particular, here. It's goofy and doesn't take itself seriously at all, and it's a nice little charming touch that really "works" for this Pokémon.

Now, about the moves themselves. As I said, what I love about Snorlax is that it's simple. You have one real mechanic that you've committed to, and everything Snorlax does is based upon that one thing. Snorlax tanks some hits, sleeps off damage, and tries to keep enemies from disturbing its slumber. The way you've managed to make sleeping a viable combat strategy is actually pretty darn praise-worthy. Essentially, Snorlax is about timing and playing a guessing game. You're going to want to wake up and attack at just the right time to ambush opponents, and try to fit in a snooze at other opportune moments. There are some pretty long incapacitation times on moves like Yawn and Dizzy Punch, but I don't mind that much because Snorlax is so ridiculously slow, so I think that's passable here. Generally, Snorlax's ground attacks serve some variety of purpose that contributes to the playstyle as a whole. Snore deters approaching opponents from disrupting Snorlax's sleep, for example, while Belly Drum wards off foes and stalls for time before Yawn puts their lights out. The grabs get their jobs done and are in-character, while the aerials are mostly phoned in but work because it's Snorlax. Really, I don't have much to complain about. This is a Snorlax set, through and through. It's in-character, it's fitting, it's entertaining, and I quite enjoyed it.

Will comment...other stuff...soon...When I get around to it.
 

allison

She who makes bad posts
Joined
Jan 25, 2014
Messages
5,138
Location
Maple Valley, WA
NNID
crazyal02
3DS FC
0216-1055-4584
For anyone wondering what happened to Samurai Jack: I had a neat mechanic where Jack filled up a meter by scoring consecutive hits on an opponent without letting them hit the ground. His Nspecial would become more powerful if the meter was higher. Although I liked the idea, I ended up scrapping the set because Jack ultimately ended up amounting to a generic comboer with only one KO move.

Anyways, for my 60th post, I give you MORE COMMENTING

First off, I love the presentation used for Anna. The symbols are a neat way to express the technical properties of a move without trying to awkwardly work it into the description. As for the moveset itself: Although I can't be certain of this as I'm not familiar with the Fire Emblem series, an item-centric moveset seems fitting for a merchant. Impressively, you've created one that doesn't fall apart when items are disabled; she creates her own with Treasure Hunt instead! I like how the Nspecial merely equips the item rather than instantly using it; I always found it annoying that Brawl Dedede's minions all had different properties, and yet you couldn't properly plan approaches with it as you didn't know who your next minion was. In this way, Treasure Hunt reminds me of Luigi-M's misfires. Her Side and Down Specials are simple yet unique concepts that tie into strange usage of items. As with most sets, however, the real depth is in her A moves. Anna has woven a web of feints and tricks, and having an item only adds to the fun. Nearly every move has a way to branch into an alternate attack, allowing players to keep opponents on their toes. I especially like her jab, which can have as much lag as you want! Despite this, perhaps my favorite attack isn't an attack at all: her Side Taunt. The idea of starting a random attack animation even though you aren't using it is a cool one, and I chuckle at the thought of foes running away from what appears to be Anna using her Side Special while carrying the Berserk Staff! The main troubles are a few oversights; it seems to be possible to get infinite recovery with her Up-B, and I'm not sure how she can reach out with her free hand to grab if she's dual wielding an item and her sword. Regardless, it's a very solid set!

"Dewgong largely explains itself", you say, before launching into an epic essay-sized playstyle section. This alone shows that you put a great deal of care and time into this set. Dewgong is that guy who's crazy powerful in great players, but a bit ineffectual otherwise. This is very competitively appealing; players would keep unlocking endless tactics (hence the aforementioned epic playstyle section). He has a playstyle involving mindgames, carefully planning the match. Although that isn't a bold concept, the execution is masterful; every move ties into his game.

As for why Dewgong got a much shorter comment: I'm tired. sorry
 

StaffofSmashing

Smash Lord
Joined
Jul 5, 2013
Messages
1,100
Location
When you're not looking, I'm there.
NNID
Lolu83
3DS FC
1590-5734-6768
I can not keep promises when it comes to move setting, can I... You know what? I'll make a little spoiler here. These are sets I promise to create, between this moment and MYM 999999 Billion. About 1-2 month difference, as I want to attain perfection to the max.


List of characters I will do move sets for;


Nabbit

Baby Bowser

Kamek

Kat and Ana

Shake King

Donkey Kong Junior

Funky Kong

Jumpman

Stanley

Young Link

Classic Link

Ganon

Impa

Phantom Zelda

Bandana Dee

Dark Matter

Daroach

Knuckle Joe

Prince Fluff

Mewtwo

Pichu Revamped

Blaziken

Genesect

Grovyle

Rival

Black Shadow

Roy

Black Knight

Chrom and Lucina

Masked Man

Ninten

Palutena

Eggplant Wizard

Ayumi Tachibana

Captain N

Captain Rainbow

Daitoryo

Devil

Tamagon

Duck Hunt Dog

Harry

Fossil Fighter

Fossil Fighter

King Hippo

Laborador

Lark

Lolo and Lala

Mii

Mike Jones

Mr. Resseti

Ryota Hayami

Karate Joe

Sakura Samurai

Sheriff

Shulk

Starfy

Takamaru

Tempo

Battletoads

Simon Belmont

Moogle :3

Goemon

Ryu Hayabusa

Professor Layton

Maxwell

Nightmare

Lloyd Irving

Geno

Viewtiful Joe


Who is first? PM me to say, say as many as you want

Operation Rebirth commence!
 

powergoat

Smash Rookie
Joined
May 30, 2014
Messages
2
Introducing Puck, the Faerie dragon


This is for the project M engine, not Brawl

While Puck seems at first glance a mischievous, childish character, this quality masks an alien personality. The juvenile form of a Faerie Dragon, a creature that lives for eons, Puck spends countless millennia in its childish form. So while it is technically true that Puck is juvenile, it will continue to be so when the cities of the present age have sloughed away into dust. Its motives are therefore inscrutable, and what appears to be play may in fact indicate a darker purpose or just its endless fondness for mischief
Cooldowns

A particular trait about Puck's special ability's is that they work on a cool-down system. This means that the only factor that limits special ability's is not start and end lag
Stats
weight- Kirbyfallspeed- Luigi
walk spreed- Gannondorf
runspeed-Bowser
jump- Ness
size- Jigglypuff
airspeed- Kirby
Air control- Kirby
Jumps- 2
Crawl-No


Moveset
Specials

Neutral special-waning rift


Puck releases a burst of faerie dust is an AOE around puck, doing decent damage, hitstun, and "silencing" the opponent
While silenced a fighter cannot use his/her Specials

Radius of effect- Slightly larger then Bowser
Damage- 14%
Knockback- 0
Scilence duration- 1.2 seconds
Cooldown-4 seconds

Side special- Illusionary Orb


Puck launches a magic orb after a short delay in the direction he chooses. The Orb does a little knockback and has a repeating hitbox. As well, If Puck uses side special again when their is an orb flying, Puck will immidiatly teleport to that orb. Puck does not go into freefall after using this move and can still use specials

Throw delay- 0.3 seconds
Damage- 2% per hit, hits 2 times per second
Knockback-Very low, just enough to keep traveling the speed of the orb
Orb speed- 1.5 battlefield platforms per second
Orb distance- 2 Battlefield platforms
Cooldown- 3.5 seconds

Up special- Blink


Puck uses the Blink Dagger, instantly teleporting a fixed distance strait up. Puck does not go into freefall after using this and can use other specials. If puck takes damage, he cannot use blink for 1 second

Blink distance- 2 battlefield platforms, Upwards
Cooldown- 4 seconds

Down special- Phase shift


Puck briefly shifts into another dimension, where he is immune from harm. In this state, Puck does not move, cannot take damage, will lose all momentum. Puck can teleport to his orb, blink, or use waning rift from his phase shift, immediately popping out of the shift. puck can also manually leave phase shift at any time by pressing the basic attack button. If Puck does not manually leave the sift before the duration, he goes into freefall. Puck can use this to refresh blink from damage taken

Shift duration- 1.4 seconds
cooldown- 4.5 seconds

Smash attacks

Up Smash- Eul's scepter


Puck charges up, Then shoots skyward in a riding a tornado. the Initial hit from puck himself has knockback, the tornado does damage and hitstun in a repeating hitbox for the duration. During the duration Puck is at the maximum tornado hight. knock strait up. Very easy to hit, ok killing move. Tackes 0.3 seconds to rise before and fall after.

Tornado hight- 1.4 battlefield plat
Tornado duration- 1 second
Initial damage- max 16%
Initial knockback- max moderate, kills Mario at 120%
Tornado damage- 1% per hit, hits 3 times a second

Down smash- shiva's gaurd


Puck charges up, the emits a freezing wave that damages and slows both movespeed and airspead greatly. Does no knockback, only hitstun. No startup delay, .4 seconds of end delay

Damage- max 16%
radius- 0.9 battlefield platforms up and to both sides in a sphere
Move slow- minimum 10%, max 60%

Forward smash- dagon


Puck charges up, and blasts an enemy in-front of him with a burst of high knockback energy. Only shows an effect if there is an enemy within range. range increases from charge. Cast is Instant. Very obvious animation, charging red particles. Very good kill move. 0.5 seconds of end delay

range- min 0.2 battlefield platforms, max 1 battlefield platform
damage- min 5%, max 15%
knockback- Very high at max, can kill Mario at 90% full charge

Normal attacks
Jab- 0.2 seconds of startup, shoots a tiny blue ball that breaks on hit, has 0.4 seconds of end delay deals 4% damage, and little knockback

Dash attack- puck flys forward, covering himself in a ball of blue energy the same size and moves double the speed as the illusion orb. deals 6% damage, hits once, no startup lag, 0.5 seconds of end lag, and decent knockback. Kills Mario at 160%. knockback goes behind the puck.

Forward tilt- Puck Uses the force staff. If there is an enemy within 0.5 battlefield platforms infront of you, you push them a fixed distance. If not, you move a fixxed distance. has 0.3 seconds of startup and end lag. distance is 1.2 battlefield platforms. If puck used it on himself, does 2% damage and very low upwards knockback.

up tilt- Puck does a little flip, and hits anyone above him with his tail. Hits one Puck above puck. Does 4% damage and Small knockback very little startup and end lag

down tilt- Puck activated radiance. This does a constant 3% damage in 0.5 second intervals with no histun or knockback for as long as the buttons held. has 0.5 seconds of startup and no finish lag. will be active for as long as held down. radius is about 2.5 battlefield platforms in a full circle around puck

Aerials

N air- Puck charges himself with dagon energy, falling slower and damaging any units he hits with little knockback and good hitstun. lasts 0.6 seconds, deals 2% per hit, hits 10 times a second

F air- Puck Blasts the area in front of him with a little bit of pixie dust, doing decent damage and sending the opponent forward. Hitbox the size of 1.5 pucks infront of him. deals 5% damage. kills Mario at 130%

B air- Hits his enemy's with a magic wand, wich unfortunately does not turn them into a pig. Hits a small area behind puck, quick startup, deals 7 damage, little knockback

U air- Uses hand of Midas. Turns a little bit of the enemy into gold, doing damage and causing hitstun. Hits a large area above Puck. Deals 4% damage

D air- Uses force staff. Has 0.8 seconds of startup, then any enemy imminently below Puck gets sent exactly 1.5 battlefield platforms down. great for gimping fighters with bad recovery.

Grab

Grab- Scyth of Vyse Short grab range, Instant startup.
Pummel- Right Click. very slow pummel, does 8 damage

F throw- Puck uses Orchid of Malevolence. This move does no damage, a little forward knockback, and scilences the opponent for 2 seconds. As well, all damage from specials and dagon is doubled for 2 seconds

U throw- Puck uses Euls scepter on the enemy, throwing them up in the air for 1 second., with 0.3 seconds of startup and end on the tornado. after the 0.3 seconds of startup, puck can move and attack, and can knock the enemy out of the tornado. If not, the enemy will fall, take 5% damage, and be thrown up slightly.

B throw- Puck Blinks Behind the opponent and thrown an Orb. This Orb Behaves exacly like the side special, and buck can teleport to it

D throw- Puck uses the etherial blade, knocking the enemy downward and forward, and putting them bot in an ethirial state for 2 seconds. In this state only specials can be used, and they deal double damage

Edit.

FINAL SMASH- DREAM COIL


Puck does a little flip and attaches any nearby enemy to the the dream coil. Any opponents within 1 battlefield platform in any direction will be attached to the coil. The coil's starting point is where puck casts it. When coil is cast, enemies take 15% damage and have 0.5 seconds of hitstun. If any Opponent leaves the coil radius through ANY means, the opponent will take 25% damage and strong knockback, killing Mario at 60%

Play style

I chose Puck as the ideal candidate as a representative for smash bros from Dota for a couple of reasons. Puck in Dota is classified as 4 things- Initiator, Nuker, Disabler, and escape. Through this moveset I believe Puck works very similarly to his Dota counterpart. He is very slippery, hard to hit. He can jump on you at any time, and deal a large amount of damage quickley. He is also very fragile, but has a good recovery (akin to "escape").
His burst and disable is hard to deal with, but a misstep from puck can end his life easy.

Other

Up taunt
http://hydra-media.cursecdn.com/dota2.gamepedia.com/0/09/Puck_battlebegins_01.mp3

Side taunt

http://hydra-media.cursecdn.com/dota2.gamepedia.com/f/fa/Puck_rare_02.mp3
Down taunt
http://hydra-media.cursecdn.com/dota2.gamepedia.com/d/d2/Puck_inthebag_01.mp3


This is my first moveset. I do not care to much about presentation, just getting my Idea of the character across.

I would love to hear a responce on the validity of the charicter, and on any imbalances in his playstyle

With 107 heroes in Dota 2, I would love to make more of these. Criticism is welcome.

Edit- Next Hero I will be converting, CARL
 
Last edited:

allison

She who makes bad posts
Joined
Jan 25, 2014
Messages
5,138
Location
Maple Valley, WA
NNID
crazyal02
3DS FC
0216-1055-4584
I had an interesting thought.

Since its inception, MYM has used the Brawl engine as a base. Now, however, Smash 4 has been announced, and its release is coming up fast (3DS in particular). When Smash 4 comes out (and the MYM it's released during is finished if necessary), will we switch to Smash 4 or continue using Brawl?
 

FrozenRoy

Smash Lord
Joined
Apr 26, 2007
Messages
1,268
Location
Las Vegas, Nevada
Switch FC
SW-1325-2408-7513
I had an interesting thought.

Since its inception, MYM has used the Brawl engine as a base. Now, however, Smash 4 has been announced, and its release is coming up fast (3DS in particular). When Smash 4 comes out (and the MYM it's released during is finished if necessary), will we switch to Smash 4 or continue using Brawl?
MYM has always allowed movesets from all Smash Brothers game, not just Brawl, but has primarily used Brawl as the most recent game around. Smash 4 will likely become the primary engine for MYM after a while of it's release, to get used to it's engine and all, but as it is now Brawl and other Smash Brothers movesets will continue to be allowed.
 

JOE!

Smash Hero
Joined
Oct 5, 2008
Messages
8,075
Location
Dedham, MA
I've made at least 2 sets using P:M's engine, and 6 sets for a speculative Smash4 engine about 2 years back.

Use whatever you want, just make sure to let the readers know!
 

FrozenRoy

Smash Lord
Joined
Apr 26, 2007
Messages
1,268
Location
Las Vegas, Nevada
Switch FC
SW-1325-2408-7513
"Red is one of the "prime" colors. It is the color most associated with the red rose, a passionate flower, and has long been a color that stands for courage, strong emotions and in asian cultures happiness. It is also the first color, aside from black and white, to known to have a name. However, red is also commonly associated with danger and sacrifice, and it is the color of blood. The ruby is one of the four precious stone and it's worth is largely determined by it's color: The most valuable rubies are the ones that shine a truest blood red."

"White is the color of freshly fallen snow, a color long associated with innocence and light in the western world: If you ask somebody what white means, they will probably give answers such as goodness, honesty and innocence. White is the color of weddings and beginnings and contrasts with the color black, often forming symbolism in many cultures. In the asian world, white is the color of mourning and funereals and of death: Similiarly, snow is also associated with coldness and unyieldingness, something without compassion and a harbinger of death, yet something many find wonderous. Truly, white is a color of many meanings."

"Opposing the color of white is the color of black. Black is associated with the coldness of outer space, of death and of decay, in addition to a color associated with the wonders of magic and the evil of "witches" and their black cats. It is the darkest of all colors and comes from the complete absence or consumption of light. It is also the color of secrecy and the night, and to many it holds it's own alluring appeal, drawing those who are entranced by it's wonder to it. In asian cultures, black is the symbol of disorder, both the bad and the good: The kind of disorder that destroys nations, yet also which leads to change and new life, and it is commonly associated with experience in contrast to naivete for white. It's elegance and allure has led to it become a very trendy fashion statement: "X is the new Black" is a common phrase. Could you read this text without highlighting or did it remain a secret?"

"Yellow is another prime color. It is commonly associated with light and goodness, much as white, but it is also associated with light and vibrancy, optimism and the warmth of a summer's day, in addition to the sun. In China, the color yellow signalled authority, regality, glory and wisdom, and was the color of the Emperors and distingushed visitors to the royal palace were rolled out with yellow carpetry and not red. It has also been used as a color of caution alongside red. Gold has long been one of the primary precious metals in Earth's history and for many years backed up the currency in many countries, known as the "Gold Standard": This in turn became a phrase meaning that something is up to high standards. If any metal is known for it's value, it is probably gold."


]

(P.S: That there image has a link embedded in it, you should click it!)
 

FrozenRoy

Smash Lord
Joined
Apr 26, 2007
Messages
1,268
Location
Las Vegas, Nevada
Switch FC
SW-1325-2408-7513
Red like roses fills my dreams and brings me to the place you rest...

Ruby Rose


Ruby Rose is the main character of the Web/Western animation RWBY. Originally a student at Signal Academy, a combat school, she was advanced two years into the prestigious Beacon Academy by the Headmaster Ozpin, allowing her to advance at the same time as her sister. However, because of this, she is still a bit immature and childish. She dreams to become a Huntress, a weaponmaster who protects those who cannot protect themselves and fights monsters called "Grimm"s, the best of which are trained at Beacon Academy.She designed her weapon Crescent Rose with help from her Uncle, who also helped teach her how to properly use it, and it is considered both an extremely dangerous weapon and a weapon that is very difficult to master. A "High Velocity Sniper-Scythe", the red crescent-shaped weapon can form both a full scale scythe and a rifle form for more practical sniping purposes: However, it is still able to fire in it's scythe form, from the center of the weapon (Watch "Red" up there to get some nice visual aid). It can also transform into an easier to carry form. However, because of the fact that the weapon is created to be so light, the knockback is immense on it's shot. It is said that because of this, Crescent Rose can only be utilizied properly by someone who can fully master using the recoil of the weapon as part of their fighting style and not compensate for it, such as Ruby or her uncle Qrow. Ruby often uses this recoil as a short ranged mobility option and in addition can fire her weapon to add it's recoil to the kinetic force of the swing, can use it to propel herself through the air or plant her scythe into the ground to keep it steady, allowing her to use it as a sort of gun platform. She also can switch to stronger "Cross Clip" ammunition, which greatly increased the power at the cost of even more absurd recoil, allowing Ruby to fire a shot and propel her forward into very brutal scythe spins, slashes and the like. It is likely only someone who has trained with Crescent Rose for a long time could properly utilize Cross Clips. Ruby's Semblance, a manifestation of innate and personal power, is her incredible speed, to the point that she is able to seemingly teleport in a flash of rose petals from moving at such incredible speeds. In addition, she seems to have the most endurance of any of the main characters.

Personality-wise, Ruby is an excitable and somewhat childish person who nonetheless has the desires and drive to become a great hero. She's not very good at socializing, but her leadership skills shine more and more as the series goes on. She is a caring individual who wishes to be a hero like those in old child fairy tales of heroes and monsters. In battle, Ruby tends to be very reckless and aggressive, though not as much as her sister Yang, and seems to show off an attack first mentality. At the same time, she shows a good mind for quickly coming up with strategies based on what she sees and for executing them. Like all of the main characters, she has allusions to a fairy tale character, in her case Little Red Riding Hood: she is often seen with a red cape and hood, the food she is commonly seen eating is cookies and wolf motifs tend to show up around her, such as her wolf pajamas and wolf sleeping mask, in addition to the fact that her trailer has her fighting off beowolf enemies and her first enemies are wolves in the series, plus an attitude befitting "Little Red Riding Hood".


Little Red Statistics

Ruby Rose is not a particularly tall girl and stands at a size a bit larger than Sheik but a bit smaller than Marth, though her apparent size is larger than her actual hitbox due to her huge scythe. As mentioned Ruby's Semblance is her speed and this makes her an appropriately quick character in Brawl: She dashes about at a slightly faster speed than Captain Falcon. In addition, by double tapping your control stick, Ruby will dash forward one Battlefield Platform so fast that she appears to teleport, leaving behind merely a cosmetic spray of rose petals. Ruby suffers a few frames of lag upon appearing, so this is a pretty valuable movement tool but is not an instant follow-up, though it should be noted it has a bit of limited application due to it's range. By air dodging and double tapping a direction while doing so, Ruby can also do this teleportation in the air once per air trip. Ruby has somewhat low traction, though, and she weighs about as much as Peach.

Aerially, Ruby is slightly floaty, but only just, owing to her scythe's light weight. Her aerial control is a bit jerky, though. and she travels through the air faster than you'd expect from this. She also has a pretty potent first jump, though her second jump is fairly poor, and Ruby has a high wall jump. She does not have other special Brawl techniques, though.


Little Red Specials

Neutral Special: Sniper-Scythe

With a simple button press, Ruby fires a single sniper round from Crescent Rose forward, which travels a fairly long 1.25 Battlefield Platforms. How strong this projectile is depends on how close the foe is: The closer to Ruby, the more damage it deals, topping out at 16% damage that KOs at 160% at very close range. At the very edge of it's range, it deals 4% and very low knockback, but foes will usually be between both ranges, so it's usually a solid 8% or so with low knockback. It takes a moment for Ruby to prepare the shot, but she has surprisingly short ending lag, especially because the recoil from the shot propels her half a Battlefield Platform backwards. Because of the low ending lag, Ruby can actually begin to move before she comes to a halt, allowing her to perform attacks while moving backwards. You can also dash forwards from that point to reduce the total length propelled by half. However, this is not the only use of your recoil, because this move can be angled in any of the 8 directions: by doing so, Ruby will be appropriately launched in the opposite direction if possible, for example if Ruby aims up she will be sent downwards if possible. Since she is still able to move, this allows Ruby to both fire a projectile and allow for movement attacks. In addition, the Neutral Special can be used in the air, and Ruby will indeed take recoil whenever she fires bullets, allowing her to use this as a recovery OR for extreme aerial mobility by utilizing this to change directions with more ease than any Brawl character by propelling yourself in any direction and still having low enough ending lag to strike, especially when combined with your air dash. However, note that each time you use this in the air, you get a little less boost: After about 5 strikes, you won't gain any distance at all and in fact lose distance.

That's not all that your Neutral Special allows you to do, though, as by hitting the Neutral Special button during the start of your scythe moves, Ruby will fire off a round to allow her scythe to accelerate, increasing the power and knockback of the move in question or adding a special effect to it, usually at the cost of making the move faster and longer ending lag: I'll point this out during each move, but if I miss or do not say so in the move, assume it gains a 1.25x damage and knockback increase, goes 1.25x faster and has 1.25x the ending lag. This cannot be used to power up any gun moves of Ruby's, on the basis of the fact it is working by using the recoil to power the swing of the scythe. This also sends a bullet out at whatever angle the scythe happened to be at, but because Ruby is just using it to power her scythe it's got half power in terms of damage and knockback, though you CAN use this to fire at odd angles outside of the 8 directions.

However, the cartridge in Crescent Rose is not infinite: It packs only a total of 30 bullets. If you don't have any in stock, you'll have to reload it with this move. HOWEVER, Ruby is perfectly able to use any of her scythe moves since they do not require bullets, so she is hardly helpless when she needs to reload. Ruby needs to steady her scythe to reload, thus reloading can only be performed on solid ground and not in the air: Ruby should try to avoid being hurtled into the air when she needs to reload, while her opponent's should try to put her there. Lag on the reload is not all that long on either end, but it is existant, and she is helpless during the also relatively small reloading animation. Adding to this, Ruby can hold down B instead of tapping B at any time she could reload to instead load Cross Clip ammunition. Cross Clip ammunition is much more power, having point blank power on every shot no matter where Ruby is, and instead of a 1.25x buff provides a 1.50x buff as a baseline for if other buffs do not exist and otherwise provides more potent effects when used with the scythe speeding. In addition, Ruby's recoil is equal to a full Battlefield Platform when she has Cross Clip ammo equipped, and while the starting lag on this move is increased a lot the ending lag remains the same, so Ruby can use this to zoom around on the ground or in the air while shooting out projectiles. However, Cross Clip carts have a lot less ammo in them, so Ruby will need to reload after a mere 10 shots, so make every one count. Reloading Cross Clips also takes slightly longer. You can hold down B to have Ruby exchange her Cross Clip ammunition back for normal ammunition. How much ammo you have left is displayed for all to see above Ruby's portrait and stock count (Hey, Little Mac has a meter!), so don't worry about losing count.

To properly utilize Ruby, you will have to master her recoil as well as she did, in addition to managing your reload and when to properly utilize Cross Clips. After all, just use all of your ammo trying to shoot the foe camping and you'll have a lot less aerial mobility...but if you save it all for mobility, your projectile options are greatly reduced, not to mention expending ammo to boost your scythe attacks at close range. Be aware of when to properly use the many properties of this move. As a cosmetic note, any shots that Ruby fires will also have a cosmetic spray of rose petals to them, as will connecting with any hit that has been enhanced by the Neutral Special.


Down Special: Crescent Rose Rebound

Ruby takes Crescent Rose and spins it very swiftly around herself, the animation as she slices around herself so fast that it is almost impossible to follow the scythe during this, just Ruby's hand as she deftly controls it. The starting lag on this move is also fast, though not quite as fast as you might think, but the ending lag is a bit harsh as Ruby has to stop Crescent Rose's momentum. Ruby actually has some superarmor at the start of the move, not during the starting lag, so this can function as a sort of psuedo-counter and a neat defensive move. In addition, due to this it is one of your best moves out of your teledash and there is in fact a brief period during the starting lag where she can still teledash, allowing her to instantly use this move when she comes out of the teledash, though this takes the ending lag from a bit harsh to very harsh. While this attack IS a multi-hit move, it is not designed for multiples of the hits to actually strike the foe, dealing 12% each and KOing at 155%. But your opponent won't get hit by this more than once unless, I dunno, they have super armor on them or they're somehow stuck in place or something.

By using your Neutral Special at the start of this move, the additional speed on the move not only adds 4% damage and makes it KO at 135%, but it causes Crescent Rose to be fast enough to reflect projectiles away from Ruby, making it an even BETTER defensive move. Not only will it reflect them like, say, Fox's reflector, it will also refresh the duration of the projectiles. Ruby can actually reflect her own bullets and while she is not someone who likes to play a lot of projectile tennis, she can use this as a nice little way to sometimes catch dodgers off guard and can teledash past a bullet to reflect it back if it is needed. Utilizing Cross Clips to boost this move further doesn't do much but add 2% more damage and KO at 125%, though. This move can be in the way and just about the only difference is that Ruby will continue to fall and gracefully flip through the air as she does so.


Up Special: Rose's Thorns

Ruby raises her scythe up and performs a quicker slice that starts from the top and comes inwards. This deals a fairly low 9% damage, but the knockback is very useful as the knockback will drag the foe a small bit of front of Ruby, which combined with it's low ending lag gives her decent follow-up options, and it is decently easy to land the move due to slightly fast starting lag. In the air, this move will be a somewhat weak spike that also puts the foe a bit behind Ruby, so it isn't a bad edgeguarding tool. Ruby can also use this to "hook" Crescent Rose into the stage like a tether, though unlike a tether she can hook it into any part of the stage, then use it to wall jump off of (removing Crescent Rose as she does so), giving her an alternate move. While attached to a wall, she can also shoot off her Neutral Special, allowing her to pop off the wall directly behind her...if you try to angle the shot, Ruby will remove her scythe before angling and firing, allowing her to use a wall as a place to stick for a bit before blasting off. This does not reset how high her bullets take her in the air, does not count as grabbing a ledge and Ruby can only hang on for about 3 seconds, in addition she can only snag the stage once per air trip.

If Ruby uses her Neutral Special in the air, she can use that to blast herself around right when she launches this move, both changing where the hitbox is if Ruby is angling the move and changing it's hitbox some, as instead of spiking it will "drag" the foe along with Ruby to wherever she blasts too, allowing Ruby to help control her opponent's aerial movements. It also has some other uses: For example, if Ruby particularly wishes to try and reposition the foe on the ground, she can shorthop and Neutral Special + This move to try and snag the foe and drag them to where she wants, landing on the ground as the ending lag finishes. She can also do things like drag minions who cannot recover off stage for a nice kill. Ruby does not enter helpless after using this Up Special, much like when Zero Suit Samus uses her Up Special. While Ruby can use this move to recover, it is mostly a fairly short range psuedo-tether, so you'll generally want to shoot yourself forward with the Neutral Special or use your air dash to recover and use this to cover any extra distance needed.


Side Special: Red Rose Rondo

Ruby performs an underhand swing with Crescent Rose, causing it to slice at the foe's gut from the bottom, a decently fast technique that deals 12% and KOs at a late 170%, with slightly above average base knockback and slightly below average knockback growth. Upon hitting with this move, the foe suffers "freeze frames" like if they were hit by Wolf's Forward Tilt. By utilizing your Neutral Special, Ruby will complete her swing by carrying the opponent on the scythe while using her bullet blast to throw the foe off, which thanks to the angle-ability of the Neutral Special essentially means that you can control where this move knocks the foe back by using your Neutral Special, giving you 8 directions of knockback to choose from. Since this move also has decently low ending lag, you can sometimes then shoot a Neutral Special shot at where you sent the foe to give them a projectile to worry about...or even shoot it in the direction they are exptected to go, either forcing them in a direction they didn't want or predicting where they went. This is especially nice at gaining space, thanks to the recoil of your shots. plus in general you can place the opponent nicely as you wish, and use your teledash as a very dangerous approaching option, though this isn't something you can really specifically combo into.

Little Red Standards

Jab: Full Moon Slash

Ruby performs a very quick circular slash around herself, an extremely quick jab in both animation, starting lag and ending lag that makes it very safe to throw out, however it deals a mere 2% damage. Like the end hit of Fox's Jab and Mr. G&W's Jab and the like, you can hold down A to keep spinning, but this move provides absolutely zero cover from the top and the starting lag is ever so slightly higher if you just hold it down. The knockback is very neglible and Neutral Specialing this move does almost nothing. However, Ruby can use this as a nice way to add a little damage to foes around her before following up with another move and it is a true combo with her Up Special on the ground to hit with this at least once. On characters below about 20% or so, it will also true combo into your close range Neutral Special projectile. Finally, it is also just a simple and nice way to hit foes around you.

Forward Tilt: Cross Strike

Ruby swings her scythe in front of her with a somewhat of a hooking motion, snagging anyone in front of her for 10% damage and freeze frames only slightly longer than Wolf's Forward Tilt, before ranging them behind her in one strong motion that KOs them at 155% by knocking them behind her. Similiar to your Side Special, you can utilize your Neutral Special during these freeze frames for an effect, though this is a bit different, though you cannot angle it behind you. Rather than changing the direction of your knockback, it is a bit of a niche use in that it allows you to fire your Neutral Special without recoil by snagging an opponent while also, since it is sort of hooked "behind" the foe, allowing you to strike around a foe essentially. Against minion charatters and the like, you can use this to snag a minion and then blow away their master, while in free for alls and team matches it has some utility for, say, snagging one foe and then blowing away the foe behind them. In singles matches, this utility is not always as pronounced, but the fact it hits the foe behind you allows you a nice chance to use your Neutral Special in a variety of ways, such as flipping around to shoot at them while gaining space or controlling space in front of you while using it to rocket back some and follow the foe. At low to mid percentages, following this into a backwards teledash will also put you right in the foe's face, though there is too much lag for it to not give the foe time to react. The starting and ending lag on this move are fairly average.

Down Tilt: Blur


Ruby spins her scythe vertically next to her, essentially using it to cover her body, fast enough that it appears like a blur with very quick start-up lag. This deals 3 hits of 3% that are hard to DI due to their quick speed, so unlike a lot of multi-hit moves it is not easy to DI all the hits to get out quicker. The ending lag on this move is long, though, since the scythe's quick momentum is very hard to stop. The last hit knocks foes away a bit better, but it still doesn't provide much knockback, jsut enough to be safe on hit. Despite being a fast move, it has juuuust enough duration that it will beat spot dodges, giving Ruby a nice tool for her offensive arsenal. By utilizing the Neutral Special with this move, you get no damage boosts or anything, but instead add on two more hits of 3% (With the new last hit having the knockback), in addition to a massive increase in how fast the scythe spins: In fact, it actually completes FASTER than when there were only 3 hits...sadly, so fast it can no longer beat spot dodges. This adds even more ending lag, though. With Cross Clip ammo, two more hits are added on top of that, and the hits complete so fast that if you aren't paying attention you won't even see what hit you...but this adds even MORE ending lag, making it an extremely punishable move, especially since it goes even FASTER so the duration it actually covers you is very small. A very useful coverage move, damage racker and a quick strike to interrupt foes with more power than the jab.

Up Tilt: Rising Rose Reversal

Ruby performs a hooking upwards strike with Crescent Rose. If she connects with the foe, she'll quickly jump up and sort of footstool off of the foe, with the foe still on Crescent Rose, spinning once and throwing the foe up. This does a fairly impressive 14%, but it's upward knockback is not very impressive, though it appears moreso because Ruby ends up a Ganondorf in the air and thus the opponent is launched from there. This is one of your most effective ways to get the foe into the air, but as an anti-air move it has a bit of a blind sp[ot in hitting foes in the air behind you, though it is just able to hit most characters on the ground, with smaller ones out of range. Using the Neutral Special at the start of this move essentially just shoots a projectile, but by using it during the hooking strike or while spinning Ruby can either shoot herself in a direction with the foe in toe to throw them around or rocket away from the foe, or towards them, right when they are released. Ending lag on this move is fairly light. If she misses, she basically has just pulled Crescent Rose back to her for light ending lag too.

Dash Attack: Ruby Red Rose

Ruby holds Crescent Rose so that the scythe head is facing behind her as she rushes forward, before jumping forward with a sudden burst of speed that travels her a Battlefield Platform, performing a graceful spinning strike as she does so that deals 15% damage and KOs at 120%. This move has some decently long starting lag, though, and also fairly long ending lag as she skids to a stop a Battlefield Platform ahead. This also gives her a very strong DACUS, which is enhanced by the fact that rather than being limited to a dash attack cancelled up smash, Ruby can cancel any scythe move from her Dash Attack + her Up Smash, for even more nice mobility options. This gets especially crazy if you have nimble fingers, due to the fact that hitting Neutral Special at the start of this move causes Ruby to not only be launched forward in the actual attack as far as the recoil, but also increases her speed even further, in addition to adding a second hit of the same power if Cross Clip ammo is used.

With Cross Clip, she moves reasonably faster than Sonic as she does so, and you can Dash Attack Cancel into attacks to do that too, though this SUBSTANIALLY increases the ending lag, to "Get hit by Warlock Punch or even possibly Volcano Kick" levels of ending lag. In addition, rocketing yourself forward two Battlefield Platforms can be a bit of a recipe for just going right over the edge of the stage. With a boost from the Neutral Specials, Ruby actually moves far and fast enough that she can complete some of her quicker moves before she stops moving forward, allowing her to do something like use a Jab plus another move in the same dash attack cancelled motion, letting her string potency together in a single movement. Opponents who would normally be dragged or hooked by moves will also be carried along for Ruby's ride. Opponents just be wary of this move, as it can be powerful when used but is also punishable when missed, so don't miss your chance to punish it!


Little Red Smashes

Forward Smash: Flash Strike

Ruby prepares Crescent Rose for a strike, before suddenly disappearing as if she teledashed in a flurry of rose petals, dashing forward one Battlefield platform faster than can be seen, suddenly striking at anyone in her way for a very strong 25%-32% damage and KOing at 95%-75%. While the actual technique itself is quick, the starting lag is a tad long and the ending lag is quite long, in addiiton because Ruby travels the distance so fast it doesn't have a very long duration of a hitbox. However, it is definitely Ruby's primary killer. Utilizing the Neutral Special with this move is very tricky, as the strike happens in a split second, and you have to hit Neutral Special the moment that you strike the foe, but the reward of increasing the potency of the move to 29%-36% damage that KOs at 85%-65%, 33%-40% that KOs at 75%-55% with a Cross Clip, is quite immense. Just be aware that throwing that out there will increase your ending lag by a lot since it makes it a lot harder for Ruby to stop and if you mistime it you'll end up just taking the ending lag increase without the power boost. This also has a lot of practical applications with your Dash ATtack, allowing you to even increase it's range by another Battlefield Platform or even use this attack in the opposite direction as a feint to catch people who try to roll in the opposite direction, catch spot dodgers and just plain create a very unexpected opposite hitbox.

Up Smash: Sky Snipe

Ruby points Crescent Rose so that the scythehead is upwards, before shooting off a sniper round high into the sky. This round deals 16%-22% and travels a large 3-5 Ganondorfs into the air, which given that it is fairly average in lag to shoot off and decently low ending lag is quite nice, as you can shoot this off decently easy to control space as they come down as hitboxes. Of course, these shots still take ammunition from your carts, so using your bullets to control space like this leaves you less to boost your attacks and move. This move can also be angled slightly left or right with the control stick, but it is VERY slight, like how Snake's Up Smash can drift left or right. Because of this, it is bad at being an anti-air at opponents coming from an angle. As a bullet move, you can't pump it up with Neutral Special, but you can shoot off 2 with a single dash attack cancel + Neutral Special and three with a Cross Clip Dash Attack Cancel, allowing you to make the battlefield quite deadly for your foes for a bit.

Down Smash: Rose Trimming

Ruby swings Crescent Rose circularly around her, raised slightly, striking any foes around Ruby for 12%-16% damage and freeze frames that set the foe up perfectly as she uses the moment of the swing to perform a lower swing, dealing 4%-6% damage and tripping anyone it hits, forming a true combo at all percents with the first hit of the move. This move has fairly fast start-up, but since Ruby needs to use Crescent Rose's momentum to stop herself it has a laggy end, which is made up on-hit by tripping the foe but leaves her vulnearable if she whiffs it. By utilizing your Neutral Special to start this move, Ruby gains enough momentum to actually gain a second strike that deals 8%-10% damage and still puts the foe in freeze frames for the trip, essentially tacking on some extra damage and duration, but it also changes the duration of the time between each swing to be longer, meaning that it is a bit easier to dodge and that now, theoritically, a foe could actually side step between each hit to avoid the attack, then counter against Ruby's ending lag with a strong strike, which is bad because Ruby suffers even longer ending lag. Using Cross clip ammo adds a short amount of time, it can be measured in single digit frames, to the trip where the foe cannot get up yet, in addition to knocking the foe ever so lightly away with it, putting Ruby out of range of most getup attacks, and does not add a lot of substantial lag compared to normal ammo, but also adds no additional power or anything. Still, one of your better moves to Cross Clip.

Little Red Grab

Grab: Thorned Grip

Ruby reaches out with a free arm, grabbing the foe. Since holding Crescent Rose while grabbing is slightly awkward, Ruby's grab is one of the longer non-tether grabs, and she doesn't have a particularly large grab range to compensate for it.

Pummel: Prickle

Ruby slams the head of Crescent Rose into the foe, dealing 3%. Slow pummel.

Down Throw: Pruning

Ruby takes her scythe and wraps it around the foe's neck, if they have a body type that doesn't allow this she simply wraps it around their body, and gives it a HARD yank downwards, as if attempting to decapitate the foe. Of course, she doesn't quite manage to do that, but it still deals 10% and the foe slams to the ground in prone, unlike your Down Smash you can tech chase with this, but it tends to deal a lot less damage...by utilizing your Neutral Special with this move, you'll increase the damage by 5%, 10% with Cross Clips, and the animation looks even more harsh, but Ruby will still take the recoil of the move, limiting your tech chasing options or totally eliminating them with Cross Clips, but in exchange allowing you a 20% damage throw at the cost of follow-ups and one of your 10 Cross Clips.

Back Throw: Falling Petals

Ruby digs Crescent Rose deep into the foe, before brutally ripping it out by pulling it backwards, sending the foe backwards for 12% damage and a gaping wound in their body, rose petals hiding blood falling out of their body from it. The foe takes 1% damage for 4 seconds from this wound, but hitting the wound with your scythe will open it up some more and thus cause it to stay around longer, one extra second every time the foe is struck with your scythe, while blowing the wound open with a bullet will add two seconds. Multi-hit moves like your Down Tilt become especially dangerous if the opponent has been opened by by wracking on the additional damage over time and it is a nice move to utilize to open up an offensive onslaught. Both normal ammo and Cross Clips only serve to keep the initial wound open for 6 seconds to start with and not 4.

Forward Throw: Rose Ride

Ruby swings Crescent Rose so that the opponent is struck by the blade as she spins once, the opponent stuck being cut as she spins, before it throws the foe away for 8% damage as the spin finishes, Ruby then firing off a bullet that deals 8% to the foe aimed at them with moderate knockback. Since Ruby aims it at where the foe is, DIng doesn't stop it from being on a path from hitting the foe, but they still have enough time to dodge it at all but the lowest percentages...of course, since Ruby can move very quickly after this throw, she can chase after them and try to use this dodge as an opening, but the foe can also choose to just take the hit to foil this, but doing so is a free 8%. If this move is used with no bullets in it, then Ruby will simply not shoot anything. In addition, Cross Clip shots deal 12% instead of 8%. A pretty nice throw to start things off with.

Up Throw: Rose Rocket

Ruby, still holding on to the opponent, points Crescent Rose straight down and fires a blast, sending her and the opponent into the air equal to the same distance she normally would go firing it into the ground, then flips the opponent up and over her for 9% damage and knockback that KOs at 220%. However, by hitting Neutral Special repeatedly, you can go higher and higher into the air with the foe, up to 5 times as normal. If you go max height, foes can start getting KO'd at around 145% (Around 115% with Cross Clips + 5 shots). Ruby automatically throws the foe when you stop pressing Neutral Special.

Little Red Aerials

Neutral Aerial: Crescent Pop

Ruby spins her scythe around herself, similiar to her D-Tilt, in a fairly quick motion with a fairly quick start up, dealing 8% to anyone she strikes with some light knockback. If Ruby hits a foe with this move, she'll "pop" off them a little with very little ending lag, putting her in a good place to either straight up shoot at them, rocket towards them with your air dash or Neutral Special or even just strike them with a normal aerial. By using the Neutral Special when she strikes the foe, she can also pop a little higher while dealing 2% damage, or with Cross Clips dealing 4% damage and increasing the knockback to KO at 170%, allowing her three seperate ranges to set herself up at with this move. The move has decently long ending lag if you whiff it, though, and low landing lag, so you either want to hit this in aerial combat or use it to pop off grounded foes off a shorthop. It also goes excellently with your aerial Up Special and tends to be hard to avoid out of it.

Back Aerial: Turning Rose Cut

Ruby turns around with Crescent Rose firmly gripped, allowing her to swing it in one fluid motion in tome with her body, a fairly potent blow that deals 12% damage and knocks foes away with enough power to KO them at 130%, though closer if you can get this off stage. It's a move with pretty average start-up, but the ending lag is fairly long. Ruby can use this move instead of simply wall jumping off of the stage when she hooks onto it with her Up Special, getting a larger initial leap in exchange for having less total distance due to the ending lag, in addition to gaining a hitbox. By utilizing your Neutral Special at the start of this move from hooking, though, you can add it's normal recoil to the start of this move, in addition to slightly boosting the vertical distance you get, at the cost of a bullet and it taking longer for the attack to come out.

Forward Aerial: Grimm Reaping

Ruby raises Crescent Rose high, to the point that the scythe head is quite far behind her, before she brings it down in one glorious, strong overhead swing. Getting crushed by this move is quite harsh, dealing 18% and sending the foe flying with enough knockback to KO them at 90%, but the lag on both ends of this move is severe. However, by utilzing the Neutral Special during the starting lag, you can shoot yourself forward by it's recoil before the move starts, combined with the fact the scythe has relatively long range and you have an attack that has a fairly wide attacking zone. Still slow, though.

Up Aerial: Rising Moon

Ruby takes Crescent Move and gives it a nice, swift swing above her. This is your nice and quick start up, decently small ending lag juggler for 8% damage and some light knockback, but your Neutral Special makes it a bit modal, turning it into more of an aerial killer if you Neutral Special it up during the starting lag, doubling the damage to 16% and KOing at 140% in addition to a quicker animation at the cost of a longer starting lag and a good deal longer ending lag in addition to being rocketed downwards, which kind of sucks because this move has massive landing lag, Cross Clips don't really co much for this move and just make the starting lag a bit better compared to normal ammo. You can also use it outside of a scythe cling, which lets you rise just a little with a swift hitbox.

Down Aerial: Night Bloom

Ruby raises her scythe before a moment, before it comes screeching in a downward swing, a powerful spiking move that deals 19% damage to anyone it hits, in addition to knockback that is about 3/4ths of Ganondorf's Down Aerial. It takes a while to start and it's ending lag is quite bad, though it has not much landing lag, but it is one of Ruby's killers over edges and can work into her Down Smash and Down Throw well. In addition, Ruby can use her Neutral Special to pump this up into a full 360 swing, giving her two chances to strike the foe in addition to adding the hitbox on the full swing, meaning she can hit foes in any direction as Crescent Rose swings. On the downside, the ending lag on this is absurd and the landing lag becomes much worse. Cross Clips add a third swing of this move, but Ruby gains even more ending lag, though the landing lag is about the same as normal ammo.

Final Smash: Little Red Fighting Hood

Ruby very quickly exchanges her ammo with Cross Clip ammunition, even if she has Cross Clips in (so she has a full cartridge), and rockets forward with a single shot of it 1.5 Battlefield Platforms, catching anyone in that range in Crescent Rose. She then fires off the next cartridge, blasting her across the stage and into the sky a little, repeating this with increasingly more elaborate and graceful slashes, pierces and strikes as they rise through the air, sent back and forth repeatedly via the recoil of the Cross Clips, until all ten have been exhausted, Ruby finishing it off with a fierce yell and a decapitating strike with Crescent Rose at the very top of her ascend. Foes caught into it from start to finish take a total of 100% damage and are sent flying as if hit by Marth's Final Smash, which is to say, a OHKO, Ruby gracefully falling to the ground and posing after. Enemies hit by each combination back and forth but not caught in the first hit will still take damage, but they won't get stuck in it, and thus will usually avoid the OHKO strike. There are a lof of rose petals flying about with each strike and the final strike particularly creates a storm of them, a purely cosmetic effect. If Ruby misses the first strike, the Final Smash fails and she simply resumes battle with a 9/10 full Cross Clip cartridge equipped.

Playstyle: Victory is in a simple soul.


Last edited:

FrozenRoy

Smash Lord
Joined
Apr 26, 2007
Messages
1,268
Location
Las Vegas, Nevada
Switch FC
SW-1325-2408-7513
Everyone is entitled to their own sorrow, for the heart has no metrics or form of measure. And all of it...irreplacable.

Weiss Schnee


Weiss Schnee is the second member of Team RWBY and heiress to the Schnee Dust Company. Like all of Team RWBY, her name is derived from a color: The word "Weiss" comes from the German word for White, while "Schnee" means Snow...thus, she is Snow White in the recurring theme of fairy tale characters. She is directly partnered up with Ruby. Haugty and arrogant, Weiss is confident in her powers and not afraid to show it. At the same time, she is known as the kind of person who tries hard to turn people she actually likes into friends, and she is hardly incapable of acting nice and over the course of the series she warms to Ruby. In addition, while she seems like someone who would be prim, proper and listen to her parents, Weiss actually has a decent deal of a rebellious streak to herself, partially because of the fact that so much of what she does has been decided by her parents: This manifests in her appearance, wearing a ponytail to one side which breaks up the symmetry of her appearance, and some of her smugness can simply be rebellious contrarianism. She's also someone who might not be quite as above it all as she seems: She confesses she really /did/ always want bunk beds as a kid and does things like low five with Ruby once they become actual friends. In addition, Weiss is hardly all talk: She is by far the most studious member of RWBY and makes sure to back up her talk with performance. She seems to be well trained in terms of fighting, but perhaps slightly lacking in actual combat experience, though this is mostly manifested in the fact she has clearly never had to trudge through the woods before. She has the lowest endurance of any of the RWBY girls and while her "White" trailer shows her with incredible speed, this has been dialed down in the series to the point she is merely very fast and not a blur like Ruby. It is also implied that Weiss may have endured some parental abuse thanks to the action of the group White Fang, which has been at war with her company for years and took quite a toll on her father, and this has given her a bit of a distrustful view towards Faunus, which are human-like people with animal characteristics.

Her weapon is Myrtenaster, German for a family of flowers (Myrtle) typically found to be white but which comes in multiple colors, which is a "Multi-Action Dust Rapier": a rapier with a chamber to hold Dust. Weiss, like Ruby with Crescent Rose, wields this weapon left handed. Dust is a strange substance in RWBY which comes in multiple forms, from crystals to dust itself to some form of liquid, and while it is not magic per se it can create abilities that seem much like it, it is also a highly volatile substance, especially in dust form. Weiss' Myrtenaster utilizes this dust for a wide variety of effects and comes in six types in the "chamber" on it's hilt: These are Red, Light Blue, Violet (Though it can appear black), White, Yellow and Blue. These form a multitude of effects, especially when combined with her Semblance "Gylph", which allows her to create magical Gylphs around her or on the ground, which can further have their effects enhaned by the use of her dust ability, in addition to just directly channeling the Dust. Effects of this include but are not limited to: Shooting Fire/Ice, creating ice, the ability to repulse or to stop momentum in place as if it has become sticky, creating a mid-air Glyph to jump off of (a technique called "Air Step"), enhance her agility or strength, run up walls and minor gravity manipulation. It is the only of RWBY's weapons to not have a "gun" form and may be the weakest in terms of sheer power, but it makes up for it by being an excellent quick finesse weapon with a wide variety of moves.

Weiss' associated Fairy Tail is Snow White: Her song is named Mirror, Mirror, after the mirror in Snow White, the food she is seen eating is an apple and her role as Heiress to the Schnee Dust Company may allude to the Seven Dwarves, who were jewel miners, in addition to her name being translatable as "Snow White". In addition, the pendant she wears has an apple shape on it and such.


Snow Statistics

Weiss is roughly the same size as Ruby, so she stands around Marth and Sheik size, likely somewhat smaller due to being less wide and weighs right between Marth and Zelda. Her ground speed is roughly on par with Zero Suit Samus' and she has pretty good traction.

Weiss is a graceful and floaty character with very fine aerial control, but who also goes through it quite slowly, so she is quite a fine aerial performer. Both of her jumps go a fairly high distance, so she has a good recovery, and she has the ability to wall jump off a wall. However, she also has the ability to perform a "wall run": By holding the control stick against the wall (IE if you're moving left against a wall while the wall is to your left, including in the air), Weiss will run right up it at her normal ground speed, gylphs appearing under her as she does so. Weiss can wall run for about 1.25 Battlefield Platforms, after which she will pop off the wall no matter what. In addition, Weiss can only run that far total before she must touch normal ground to recharge this ability. Weiss doesn't have to strictly run up it, either, you can simply stop holding the stick and she will stand in place, as if standing on solid ground. Weiss can still only stay on for 3 seconds max though and standard recharge rules apply. To get off, simply jump, though if you don't need to recharge you can jump then resume wall running if you prefer.


Snow Specials

Neutral Special: White is Cold

Weiss takes Myrtenaster and closes her eyes in concentration, stepping a single foot forward in perfect stance, before plunging her sword into the ground as a light blue glow envelopes it. Ice then begins to form where Myrtenaster was stabbed into: By holding down B and directing it with the control stick, you can cause the ice to travel very freeform in whatever directions you desire, moving it almost like a cursor was at the end as it formed. The ice is formed and travels at Marth's dashing speed and if you do not direct the ice it will simply create a Ganondorf high wall in front of her, say by tapping B instead of holding it. To finish creating your ice, simply release B or press the Shield button: You can also be hit out of it, naturally. The ice is pretty thin in it's width and measured in Ganondorf height chunks for the purpose of damage. Or in other words, Weiss gets to make a lot of ice in an incredibly freeform style. Please not that in the air, Weiss will merely stab Mysternaster below her for an 8% damaging, weak spike.

Any one Ganondorf height chunk of ice can take 30 HP of damage before shattering. Further parts of whatever structure you made will break after this based on logical and realistic physics (IE if you support something with just one thing connected to the ground, breaking that will cause the whole thing to tumble down and shatter). If the ice is laid flat, then it can be stood on like a platform, but otherwise it will either slide people off it ala a slope or will be a wall or whatnot: Because it's ice, most characters cannot wall jump, wall cling or whatnot to it (If the Ice Climbers had a wall jump, they probably would be, like how they have a lot less affect on ice). Weiss herself, however, can treat these slopes and walls like normal walls for her wall run, essentially allowing her to freely move about the structure she creates, even if it is an upside-down loop. This ice does not count as "normal ground" for the purpose of recharging your wall run. In addition, Weiss' attacks will not damage her ice, unless otherwise stated. This means that Weiss can't easily accidentally destroy her structures...however, that also means it will be solid, meaning she cannot just hide herself inside of it and try to poke through it, because it will be stopped as if it was a solid wall. Attacks which DO hurt the ice, including your opponent's, will go through it just like with other breakable objects in Brawl. The ice will also melt after around 40 seconds, though usually it will be broken by then.

If an opponent is hit by the ice as it pops up, they will take 8% damage and a fixed knockback of one Battlefield Platform of distance away from where the ice structure ends/is being created (Or where it would logically throw them and not hit them again. For example, if it was going up and then took a sharp dive down, it would hit them one Battlefield Platform up and not cause them to dip down with it). Cover the stage in a perfect winter redoration for your fighting style and take advantage of all of it's unique properties to out-move and out-hit your foe...and be aware of it's weaknesses, too.


Side Special: Red is Hot

Weiss points Myrtenaster forward, the chamber inside spinning to red dust, and concentrates, shooting forward a crescent-shaped projectile of fire forward, which is about the size of Weiss herself. This is a fairly fast projectile, though by no means Fox fast or anything, that travels about 1.25 Battlefield Platforms, igniting those that get in it's way for 10% damage and some light knockback. While not only a nice projectile for battle purposes, it's a fairly nice controller of space, can be angled up or down some and can be fired at pretty much angle on an appropriate ice structure, it also has a very nice secondary effect on ice, burning right through it and creating a Weiss-height hole in it, without actually destroying it or hurting it's HP. By doing this, Weiss can melt a path for her to move freely through the ice structure, or can use it to do things such as create a hole to fall through or jump through on wall/slope/platform structures and the like. In addition, by angling it you can create even odder holes by either only hitting it partially with this move (Creating a smaller hole) or hitting it from an angle that creates a whole that isn't exactly perfect, or even just take off a small piece of a structure without really creating a hole per se. This move has fairly quick start-up and doesn't have a ton of ending lag, so while it isn't Fox/Falco spammable you can certainly use it repeatedly.

And that is just the un-smashed (and aerial) version. By smashing this move, Weiss will instead plunge Wyrtenaster into the ground, causing a streak of fire to race forward 1.25 Battlefield Platforms on the ground, curving with the stage if need be. This deals only 6% on contact and light upwards knockback, but remains as a trap for about one second after use: Not enough to really be a useful stalling option, but it does punish spot dodgers and make movement hard, especially since Weiss herself is not hurt by the inferno, though since it is so short it essentially does not cover her hurtbox at all, so an aerial assault is still very viable. It can also be used to burng a much smaller hole in the ice, small enough that no character can get through without crawling and only ones with a particularly low crawl can do so. While Weiss cannot go through it herself, she can create this hole to allow her projectiles which travel along the ground through, in addition to perhaps quite low pokes, while still having much more of the wall there. Just remember that foes can hit you right through the ice. The fire will not travel across ice (IE if a wall of ice is in front of you and use this, it melts it's path through and continues on normal ground), fire and ice not mixing all that well of course, and using this on top of an ice structure will cause no fire trap, though the initial hitbox will persist, but instead melt a layer off of the ice, allowing you to make it so that it dips down further or is not as thick. This has a bit more starting lag than the normal version and cannot be used in the air.


Down Special: Repulsive Red

Once again switching to red Dust, Weiss stabs Myrtenaster up, a red field of energy bursting from it's tip as she does so around her. This move acts as a counter: hitting the red, repulsing field will cause your damage and knockback to be sent right back into you. The timing on this is a good deal less strict than Marth's or Ike's, but she has the starting lag of Ike's and the ending lag of Marth's, or in other words is longer than either in time she is not countering. However, unlike theirs, this field will also reflect projectiles perfectly fine, refreshing their length as well. And like all counters, grabs go right through it. By smacking the B button again, though, Weiss will actually shoot the red field forward as a bit of a slow moving projectile that goes one Battlefield Platform. It is not a projectile that deals damage or knockback, though it does have extremely minor no hitstun pushback like a wind effect, but rather it simply retains all of it's countering properties as it goes along, allowing Weiss to function with a moving counter. By hitting any of the 8 directions when you hit B as well, Weiss will fire it in that direction, making it a very versatile tool. This does increase the ending lag a good deal, though. Still, especially considering you can shoot this off while standing in a ton of directions, the power of a moving counter is not to be underestimated.

Up Special: Air Step

A white gylph appears at Weiss' feet, before she rockets forward in the chosen direction 1.5 Battlefield Platforms at a bit faster than Captain Falcon's dash speed, a lot as if she just wall jumped without a wall. While this recovery itself does not have a hitbox, Weiss has almost no ending lag on it, meaning that Weiss can simply use her own move during it to essentially give it a hitbox, not to mention crazy mobility options with it. This is especially true because of the fact that it can actually be used twice in the air (never going into helpless even after two uses), giving Weiss not only a horrifically potent recovery but also allowing her to gracefull glide across the stage, effortlessly transitioning into fierce assaults by starting with a fast paced Air Step to begin the assault. Weiss can also instantly transition into a dash or wall dash after launching herself, suffering no landing lag, allowing her to effortlessly shoot around the stage and strike at the foe on the ground or in the air. She can even use it on the ground as a means of faster travel, at the cost of the fact this move DOES have a noticable amount of starting lag. This isn't even mentioning that it is an invaluable tool with your imagination's-only-limitation ice structures, as it lets you move between them with much more freedom than your foe, using this to jump to the ground to recharge your wall run for a bit before zipping back to them and so on. It may be "just" a movement move, but it is ultimately one of your best tools for a variety of options.

Snow Smashes

Forward Smash: Ice Queen

Weiss raises Myrtenaster high before plunging it into the ground with a brilliant light blue glow, ice bursting out of the ground and forwards about 1.25 Battlefield Platforms, slightly longer really. The ice is also just under a Ganondorf in height. Opponents struck by the ice as it forms 1/4th of a Battlefield Platform at a time, though very quickly one after another, takes 19%-24% damage, without knockback at all. Instead, the foe is stuck in place for a moment: Still perfectly able to attack, though movement attacks go nowhere, shield, defend and so on, just not able to move or, if on the ground, jump. This effect lasts for about two seconds before the ice shatters, freeing the opponent, with a few frames of immunity from any other Forward Smashes as a just-in-case for infinite holding in place. Weiss is perfectly free to move across the ice herself, allowing her to strike at the foe if she so wishes, while the ice remaining there is a weak 6% hitbox that knocks foes not initially caught in it up a little. A good idea is to fire a Down Special counter projectile across the either or forward before planning to try and hit the foe with this: With no ability to move, it is a pretty big pain. This move also follows the curvature of the stage, but since it is ice it will also climb up and follow ice structures, allowing you to pretty heavily modify the direction this hitbox will take with loops, ice curves and so on and such forth.

Since it follows the ground it starts on, you can burn a small path with your smashed Side Special, then send a Forward Smash through it, though it will essentially not exist on the bite of ice you melted because it hits the "ceiling" of the ice so quickly, but this allows you to instead continue to fire your Forward Smash over the stage and not your ice structures without destroying the ice structure or creating a large hole. Decently fast start-up on both ends, but still not blazingly fast, just...you know, slightly faster than average. Using another Forward Smash causes the ice to shatter as soon as it contacts the old Forward Smash ice, preventing you from locking the foe in place with multiples of it. If an opponent in the air gets caught on it, such as if they get snagged by the Forward Smash travelling up a wall, they'll still get "caught" on it in midair, allowing you to also use this for aerial strikes.


Down Smash: Gravity Gylph

Weiss waves her hand in front of her as she stabs just the tip of Myrtenaster into the ground, causing a multicolored Glyph to appear on the ground, which quickly fades into the mere outline of a Glyph on where it was used. This move does not deal anything initially, but leaves that little Gylph trap there, ready to be sprung as soon as someone steps on it, whereupon it activates with a bright and multicolored glow, sending the foe hurting a set 1.5 Ganondorfs into the air in addition to taking 13%-18% damage based on charge and, finally, having their fall speed reduced by 1/3rd, with a minimum set so that characters with particularly anomalous fall speeds do not fall at too ridiculously slow speeds. This lasts until they touch the ground again, get hit for about 25% damage (Not counting the Glyph's hit) or after 4 seconds, whichever is first. Weiss herself can be "hit" by this, but does not take damage, merely being launched into the air the set distance fully able to act and getting the lower fall speed.

An excellent little launcher for aerial assaults, the fact that Weiss can use her wall run or wall run on ice to place it in a ton of locations is pretty amazing, especially because hitting the foe is perfectly possible and they will be launched "up" based on the direction the Glyph is on. So if you hit the foe into a Glyph that is on a wall to your right, they'll be "launched" to the left, and with how you can place it on loops and stuff you can send people hurtling at diagonals and all kinds of directions, in addition to them floating there. And, of course, Weiss can use this placement of it on such structures to enhance her already large mobility, launching herself in various directions while lowering her already floaty fall speed to control and take the air with grace. This move does have a bit longer start-up lag and only average ending lag and placing the Glyph itself is not a hitbox, like Snake's mine, but taking the time to set this trap is worth it. You may only have 1 Glyph on stage, replacing the one you have out if used again, and it disappears if it is not activated in 7 seconds.


Up Smash: Slush Slash

With a switch to light blue dust, Weiss performs a well practiced sweep above her head with Myrtenaster, dealing 15%-19% to anyone who is hit by the blade in addition to enough knockback to KO at 180%-150%. In addition, however, Weiss will shoot out an icy, crescent-shaped projectile upwards about 1.5 Ganondorfs, striking all who get in the way for 10%-14% damage and knockback to KO at 220%-180%, though getting hit by the first part of this move generally means you do not get hit by the projectile. It travels a bit slower than Snake's Up Smash. Since Weiss can end up standing sideways, upside downm, diagonal and such, however, she can perfectly use this fact to shoot this projectile every which way...which is cool, because it boomerangs back to her after it goes the distance, and will boomerang back to where she is when it starts to come back, though it will not follow her.

For example if, when it reaches the top of it's range, Weiss is one Battlefield Platform away, it will aim to land one Battlefield Platform away, but will not follow Weiss if she begins to travel another Battlefield Platform away. This allows Weiss to heavily customize the flight path of her projectile, in addition to providing quite a lot of use when DACUSing for controlling space...especially when you consider the fact that, thanks to your ability to run up structures, you can DACUS on all kinds of angles DACUSing on would not be normally possible. If this move has one problem, it is that it is somewhat laggier than usual on both ends, so it isn't something you want to spam. If the ice projectile hits an ice structure, it will end it's path right there and boomerang towards Weiss right then. If, however, it runs into an ice structure on the way back, it will embed itself into an ice structure, cracking as it does so and slowly shattering over the course of 2 seconds, remaining a trap with half the projectile's power in it as it does so. An extremely versatile and quite potent projectile with a useful upwards launching melee attack built in.


Snow Standards

Jab: Fencing Force

Weiss, with lightning fast speed, stabs Myrtenaster in front of her, repeatedly doing so for a repeatable jab. Each hit only deals 2%, but the knockback is very light and it is one of the quickest jabs in the game, so you'll usually chain at least a few together before a foe DIs out, especially since Weiss moves eeeeeeeever so slightly forward with each strike. A nice and quick option for Weiss to poke at the opponent for an advance or to interrupt an advance and retreat herself.

Forward Tilt: Sword of Fire and Ice

Weiss, with a quick switch to red Dust, stabs Myrtenaster forward in front of her, dealing 10% damage with fairly good, but not great, knockback. Sweetspotting it at the tip will add in a residual flaming effect, dealing 1% damage per second for 5 seconds, but in turn the flames will deal damage to any ice structures it is touching at the same rate. One of the cooler, or rather hotter, things about this move though is that you can use it to puncture smaller holes in your ice structures, helped by the ability to aim it up and down. These holes are quite small, only small enough for pretty small projectiles to fit through, but you can also poke it a few more times to add a bit more to the hole, with two pokes being about enough for a small character or Weiss while using her Air Step to fit through. It's a good way to open up smaller holes or to be a bit more customizable than your Down Special, but it is also slower. The move itself is slightly slow on both ends, but nothing too bad.

Down Tilt: Black Ice

Weiss sticks Myrtenaster into the ground, a Glyph appearing under her as it glows blow, causing a bunch of ice to burst up around her albeit without much tallness, striking those it hits for 13% damage while popping them up a fair deal high. This is an attack that is pretty quick to come out, albeit with a fair deal of ending lag, and it covers about 1/3rd of a Battlefield Platform to both sides of Weiss, while being low enough to the ground to go under smashed Side Special melted walls. After the initial strike, the ice shatters, revealing the now black Glyph underneath, which is the same width as the attack was. This Glyph lasts for five seconds and it's primary ability is the holding of momentum: Projectiles, both yours and your opponent's, that pass over this (maximum of 2 Ganondorfs above) Glyph will stop in place, remaining a hitbox at half power (After all, their momentum is stopped) for as long as the Glyph is active. The projectiles will then resume what they were doing before.

This allows Weiss to do some pretty neat stuff, especially by placing the Glyph on structures to, say, allow her to stop her projectiles in spots she couldn't on the ground. It is an especially nice combo with your Up Smash, as you gain a lot more control over where it boomerangs towards when it is held in suspension. Even your projectile-counters can be held this way, though doing so means it only counters at half damage and knockback, and you can even use it to keep flaming projectiles suspended to melt newly grown ice easily. Only one black Glyph may be out at once, with the previous Glyph breaking down if you use Down Tilt again...which allows you to release the projectiles early by utilizing this move again.


Up Tilt: Swift Strike

Weiss performs a very quick upwards slash, switching her Dust inside to yellow, starting in front of her and ending behind her, dealing 9% damage and knockback that is actually pretty good, but has extremely low knockback growth, though this makes it very consistant: You can pretty much always expect your foe to be somewhere in range of a non-100% follow-up. This move has pretty low starting and ending lag and it's primary use is to get your foe in a nice position for your ice structures, stuff like stuff projectiles on Down Tilt on structures and the like, with a short enough ending lag to nicely follow up with an Air Step or a wall run and the like. Simple, but effective and fitting.

If you scrape against the bottom of an ice structure with this move, small bits of ice will fall down from the top, proving 1% damage and a mere flinch of cover over Weiss for a brief moment, even less than this move's ending lag. However, this can be frozen in your Down Tilt as a pretty minor trap for a while, which is fairly nice. In addition, a sufficiently melted down ice chunk will allow Weiss to "poke" through it with this move, at the cost of opening up small holes in the ice that get bigger with repeated uses.


Dash Attack: Gold Rush

Weiss pulls Myrtenaster back, preparing herself as she switches the Dust inside to Yellow, as a white Glyph appears at her feet, rocketing her forward an impressive 1.5 Battlefield Platforms at a very fast speed. Upon meeting an enemy, Weiss proceeds to unleash a lightning quick series of fencing stabs on the foe, dealing 5 hits of 4% damage to them in nearly frame-by-frame succession with the lightest of suction effects, making it impossible to DI out of. The last hit knocks foes away a good deal as well, sending them flying enough to KO foes at about 130% or so. As all of Weiss' moves, she is entirely capable of utilizing this on a wall run, even allowing her to rocket forward on it in a great amount of time and thus preserve some wall run time. This also makes an absolutely amazing DACUS due to the amount of ground it covers, which considering how your Up Smash works is doubly awesome, just note this move has somewhat long starting lag and very long ending lag, so only the actual attack is quick. However, Weiss CAN Air Step during the ending lag of this move, allowing her to move and chase after foes, at the cost of adding this move's ending lag to the ending lag of the Air Step.

Snow Grab

Grab: Cold To The Touch

Weiss takes a graceful step forward as she grabs the foe with her free hand, enhancing her range thanks to the step, though it is still not much longer than average. It is also a fairly quick grab, but oddly it has more ending lag than you'd expect from it, as Weiss gets back into her perfect posture.

Pummel: Spine Chill

Weiss grips the foe and pokes them with Myrtenaster, sending an icy chill through their body. 2% damage and a bit quick for a 2% pummel, but not all that much moreso.

Forward Throw: Stone Cold Heart

Weiss stabs the very tip of Mysternaster into the foe, if the foe has an obvious visible chest region it will be stabbed into where the heart would be, freezing them solid, before giving them a strong push forward via white glyph. The foe takes a total of 12% damage and a move that has KO power that sends foes clear off the screen at 160%. However, this move generally KOs a bit sooner, as the opponent will remain frozen until they either complete their knockback OR are hit by any attack, meaning that they cannot really DI nor can they use their momentum cancelling moves until, well, their momentum is already done. Finally, a foe who slams into an ice structure from this move will have the frozen ice loudly shatter, dealing 8% damage to the foe and releasing them with almost no lag on their end. A versatile throw for KOing and damage racking, depending on your setup.

Down Throw: Ground Step

Weiss pins the foe to the ground for a moment by stabbing them with Myrtenaster, quickly waving a hand bathed in white as a white Glyph appears under the foe. You now have a moment to input any direction, whereupon the Glyph will activate and send the foe flying in that direction with a force strong enough to KO them at 190% or so while dealing 14% damage. Any of the down directions will prone the foe, with down + left and down + right proning the foe a bit in that direction, and the default direction is down, but you are free to launch the foe in any direction you desire. In fact, if you tap the control stick in a direction a second time, Weiss will send herself flying too (with no damage obvs), enough to keep pace with her opponent for a while (Though if it goes to the point she'd be flung particularly far away, IE the foe is at very high %s, she will not send herself flying off the screen and cut it short). Weiss and the foe will recover at the same time, so there are no 100% follow-ups, but you can still get into an ideal aerial combat situation with this...or, if you so desire, you can send yourself rocketting away in whatever direction you like, perhaps leaving your opponent in prone for a particularly helpful getaway, especially considering you can run places the foe will have trouble reaching.

Up Throw: Ice Shot

Weiss kicks the foe straight into the air before slashing the foe with the very tip of Myrtenaster, sending out three ice shots upwards as she does so, one straight up and two more next to it, which travel at a 45 degree angle to each side of the straight shot. The kick deals 6% and Myrtenaster itself deals another 6%, while each of the ice shots deals 6% with light knockback. However, much like Fox's laser shots from his throws, DIing can pretty easily avoid this, though Weiss has a lot of ways to make use of these projectiles, unlike Fox. For example, these ice shots will rebound off of ice just once, which combined with the freeform ice making means you can bounce it at many angles, and you can use it to throw a foe up with a black glyph above you, leaving them as slightly painful traps for the foe who is coming down, possibly even using Down Tilt to release them if the foe is at the right angle to strike them. A good throw, if properly set up, and even without projectile setup the knockback it does tends to owe well to an Air Step approach into the air.

Back Throw: Snow Chariot

Weiss takes the opponent and with lightning speed stabs them six times, for 1% damage each, before skewering them and hurtling them behind her for 10% more damage and some fairly nice knockback, ice travelling up Myrtenaster as she does so. Opponents who are snet flying have a thin layer of ice and snow covering them, which shatters upon being struck by any of Weiss' physical strikes, dealing 5% damage and weak knockback, but the knockback is added to the move you hit with. This debuff lasts 5 seconds before melting, but can be stacked via further throws, which not only allows you to stack effects but to reset the timer on all your stacks, possibly building up to one big blow.

When smacked with fire, the ice will instead melt over the course of the foe's knockback and fall to the ground, one drop for each percentage dealt. These drops don't serve as any inpediment to the foe, but they will heal ice structures for 5% HP each as they freeze into them, or add 5 HP to new ice structures built over them.


Snow Aerials

Neutral Aerial: Schneex Kick

Weiss extends her leg out in a quick kick, dealing 12% damage and KOing at about 165%, and leaves it out there in a classic Smash Brothers style sex kick that deals less damage as time goes on. While it has pretty fast start-up, the duration and ending lag are quite long indeed...which is made up by Weiss' ability to, by hitting A when next to a wall or whatnot, transition from this directly into a wall jump, allowing you to bypass this move's ending lag or even end it early. And with your ice structures, you can freely use this to "wall jump" off of, say, ceilings or angled parts of the stage, allowing you to jump from a lot of angles, not to mention the utility of being able to jump right back into the fray when approaching with this close to a wall and whatnot.

Forward Aerial: No Two Snowflakes

Weiss takes Myrtenaster and performs a quick one-two strike with it, the first hit dealing 5% damage while the second deals 10%, at an extremely quick pace, with the knockback done so that with the speed the two will always link into each other. The second hit also knocks foes away relatively far, enough to KO at 200% or so. Combined with fairly quick starting lag and somewhat long ending lag, though with substantially less landing lag, this is an excellent move for a shorthopped approach and a quick move to pull out for your aerial combat tricks. Furthermore, you can hold down A at the start of the move and Weiss will adjust her Dust setting to violet for the second hit of the move, adding starting lag in exchange for making it deal 15% damage and substanially more knockback, KOing at 120% or so. While it makes it an excellent KO move, the added lag on the second hit means that you need to get the foe into position to hit after the first strike or it'll whiff, and it has even longer ending lag. Perhaps if the opponent was given less room to move, this would be a more effective KO move and damage racker?

Down Aerial: Snow Stab

Weiss takes Myrtenaster and stabs it straight down, striking and spiking foes who happened to get hit by this move as a sweetspot for a strong 18% damage and a strong spike, though not nearly as much as say Ganondorf's DAir, with quite quick start-up like Ganondorf's Down Aerial but a lot more ending lag. This, however, can be avoided with the help of planting this move right into the ground, whereupon a simple press of A can instead allow Weiss to use her momentum to spin her around, using it to turn direction and provide a slight upwards boost, though unless she has another jump or her Air Step to work with she won't be able to get another off before hitting the ground. What this does mean, though, is that with it's fairly quick starting lag, Weiss can use it to quickl and efficiently change her direction when ice structures are around and, since she can jump from many angles this becomes very useful for orienting from odd positions. And, of course, a fairly strong spike for a floaty character lacking in a lot of KO power is an obviously valuable tool.

Up Aerial: Graceful Swing

Gripping Myrtenaster firmly, Weiss performs a graceful backswing above her, a quick and efficient movement practiced again and again. This deals 9% damage and is a nice little juggling tool, though with a bit more knockback than expected, which makes it a perfect compliment to Weiss' Air Step, Gravity Glyphs and ice structures in the ability to efficiently follow the opponent, though she has no "True" combos with it. It's Weiss' quickest aerial in both starting and ending lag, coming out quite fast and not taking long before she can move again, and since the very start of the attack is in front of her she can shorthop to hit foes with this at extremely close range. Overall, a nice little popping tool.

This move has a similiar mechanic to the Up Tilt, where scraping against the bottom of your ice will shave some off for an attack, but bigger chunks are used, which fall to the ground for 4% and very weak spiking knockback and break when they hit a solid surface, but this also slightly eats through the ice structure more and will also poke larger holes in it if the structure is thin.


Back Aerial: Cold Blood

Performing a quick slice behind her with Myrtenaster on it's light blue setting, Weiss releases a nicely sized icy chunk projectile out from behind her and effortlessly combines it with some nice melee. The projectile heads about one Battlefield Platform at a 90 degree back and down angle, dealing 10% damage and upwards popping knockback, while Myrtenaster itself has two hit boxes: The first, caused by hitting any bit but the tip, sends foes behind Weiss for 10% damage and okay but nothing special knockback. However, hitting with the very tip causes foes to be frozen for the briefest of moments (Think: Ice Climber's Down B) as they take fairly strong knockback at the same trajectory as the projectile, in addition to 12% damage. Combine with it's quick start-up, a sweetspotted back aerial is quite an effective retreating tool, while the projectile can be utilized with your black glyph and is one of your few nice ways to shoot projectiles down, especially in the air, though the ending lag on this move is slightly long. An especially effective move if properly spaced.

Final Smash: Snow is Death

Weiss performs a quick stab to the foe, stunning them in place for just a moment as she makes her gravity glyph at the foe's feet, sending them flying into the air. She then quickly follows them with her Air Step glyph, Myrtenaster switching to white Dust as she does so, the entire blade glowing with runes as she rockets forward via another Air Step glyph, stabbing into the opponent in a grand show of light and ice, dealing 40% and damage that KOs at 70%. If this would KO the foe, then instead of them flying away, they will dramatically fall behind Weiss and dissolve into snowflakes, like the Knight at the end of her trailer.

Playstyle: A Heart Cold as Ice

Mirror, tell me something... tell me who's the loneliest of all? Fear of... what's inside me- tell me can a heart be turned to stone?

 
Last edited:

FrozenRoy

Smash Lord
Joined
Apr 26, 2007
Messages
1,268
Location
Las Vegas, Nevada
Switch FC
SW-1325-2408-7513
Born with no life- into subjugation. Treated like a worthless animal! Stripped of all rights, just a lesser being- crushed by cruel, ruthless human rule!

Blake Belladonna


Blake Belladonna is the third main character of the show RWBY, making up the B part of the title obviously. The name Blake meaning black in old English. Aloof and distant at a glance, Blake seems content to be left alone to her books, but once she starts to actually bond with team RWBY she opens up we see someone who is pretty goofy herself and probably just does not make friends easily. She's also largely a mellow person, so her getting into heated arguments with Weiss over Faunus and her strong reaction to Faunus bullying is somewhat odd. Faunus are an in-series species with an origin we do not know about: They appear as people who appear like humans, but maintain animal traits, such as ears, tails or horns and as things in the series suggest may also have tastes and other such things commonly associated with the animal. For example, Sun Wukong (A Monkey Faunus) appears to enjoy bananas. They suffered a large amount of discrimination from humans, but managed to eventually fight for relative freedom during The Faunus War (Also known as The Faunus Rights Revolution by Faunus themselves) after they were attempted to be confined to ghettos such as the city of Menagerie. The war was almost lost, but the crucial battle at Fort Castle where Faunus used their superior night vision to get up on an arrogant commander in charge of a large amount of forces led to a resurgance which allowed them to bring humanity to the negotiating table, giving them rights that seem if nothing else similiar to humans as they are seen living in human areas and the like. Though some people consider this conflict ancient history, it appears to still be a relatively fresh event in actuality that colors much perception, and Faunus still suffer serious amounts of discrimination in the present day. Some time after this war, the organization White Fang was founded: Originally meant to serve as a peaceful means to bring humanity and Faunus together, but a combination of failure in this and change of leadership has led to the White Fang becoming little more than terrorists fighting for a reasonable goal.

As you may have guessed by me going on about that, Blake herself is a Faunus, using her bow as a slightly flimsy disguise to cover her cat ears (Faunus appear to have both a set of human ears and animal ears when they have animal ears), hence her sharp reaction to such things. It is fairly probable that this also contributes to why she is generally more of an aloof loner who takes some time to open up. This also fits into her Fairy Tale motif: Beauty and the Beast. She was once a member of the White Fang, beginning when it was peaceful, and even remained with them as they turned violent for a time, but eventually left the organization due to their increasingly violent policies: It is likely this is what "Black" is showing.

Blake's weapon is Gambol Shroud, Gambol meaning to leap playfully around while I doubt I need to explain the meaning of shroud to you, a "Variant Ballistic Chain Scythe" which is one of the odder weapons in the series. Gambol Shroud is a katana kept inside a metallic sheathe, which appears almost like a blade-cleave and itself can be wielded as another sword-like weapon, allowing her to strike foes without the need to even unsheathe her weapon or to dual wield swords when appropriate. It also means she retains physical options when the katana part of the weapon transforms into a pistol, resembling a Glock, and the katana itself also has an apparently quite sturdy cloth attacked to it. By giving the katana a double edged blade, this allows the pistol to be used with the cloth in a way not dissimilar to a kusarigama or sickle + chain, in addition to allowing her to use the gun part of the move to make the sickle and chain part move quite quickly. It is believed the scattershot nature of the weapon may due to it being improvised or using whatever parts Blake could find during her time with the White Fang when she was likely quite poor. She can also use the sickle and chain as a grappling hook. Blake's Semblance is known as Shadow and allows her to create shadow duplicates of herself which are solid, but appear to fade easily upon hit, do not appear to last long or are able to travel far from Blake: She uses them as a close range attack or defense ability, in addition to utility, for example the fact that she can jump off of a Shadow clone to give herself height, in addition to her seemingly flash stepping as they are created. Blake overall shows to be one of the more powerful offensive members of RWBY, but she has a particularly low defensive capability, likely due to the complexity in wielding her weapon.

As mentioned, Blake's associated Fairy Tail is Beauty and the Beast: In "Black", Adam represents The Beast and Blake is Beauty. Adam was The Beast's name in the Disney version of Beauty and The Beast and The Beast was cursed by a wilting rose, which is Adam's symbol in addition to him having a weapon named Wilt. Blake is Beauty, introduced by reading a book in a similiar way to Belle, and the last name Belladonna may be intended to enforce this connection. Her personality and backstory can also be seen as an inversion of the idea of Beauty and The Beast: Blake is someone who disguises herself as human, but is actually a beast inside, the reversal of The Beast being a beast on the outside but truly a human.


Beauty and the Statistics

Blake is roughly the same size as Marth with the weight of Falco while she has a very high dashing speed, around the same as Fox. She has a high traction that limits the amount of necessary sliding about she wishes to do.

Aerially, Blake is a fairly fast falling character with excellent speed through the air and a high degree of control, giving her a swift striking capability in the air but making her a bit worse in prolonged aerial battles. However, both of her jumps are very good, and she is able to wall jump in addition to having a very fast crawl. I will also take this moment to explain just how Gambol Shroud works due to it's oddity: Normally, Blake can freely switch the katana around between gun, chain and sickle and the like just with the move, but while in chain and sickle form Blake will simply use her sheath in place of the katana, sometimes at a small penalty or change, allowing her to continue to use the sickle and chain instead of switching every time she wants to use a melee move. If the move dual wields the sheath and the katana, it will suffer a power loss and/or animation change. Aside from that, it works just like RWBY's weapons, simply changing form automatically to match the move you use.


Beauty and the Specials

Neutral Special: Glock Shock

Blake's katana quickly transforms into it's pistol form, allowing her to shoot out a bullet that travels 1.25 Battlefield Platforms, angle-able in any direction during start-up. This bullet deals 8% damage and quite light knockback, enough that you can't just infinitely shoot the foe or anything but nothing too notable, and serves as your bread and butter projectile in Blake's game. Don't worry about reloading with Blake's pistol, she's got enough ammo to last a whole match, by which I mean infinite. This is quick on both ends and easy to use in the air as well, and it has some more applications we'll get to throughout the moveset.

Up Special: Kusarigama

Quickly transforming her katana into it's pistol form, she grabs the cloth attaching it to her arm tightly and shoots it, rocketing it forward very quickly at a length a bit longer than Zero Suit Samus' Up Special, also angle-able in any direction. As one may have guessed, this is a tether, one that works on any part of the stage and not just the ledge, but it will also not automcatically reel you in: You can either press B to reel yourself in or use it to swing across the stage from the point you gripped into it at an accelerated pace (About 1.5x air speed), recalling it to yourself via use of an air dodge or an attack. As an attack, it isn't bad at all either: Sweetspotting with the katana-pistol-sickle deals a clean 16% damage and actually KOs at around 110% or so. If you instead get hit by the cloth, it's 8% damage and some okay knockback in the direction the cloth was travelling. In addition, by hitting B when the foe is struck by this move, Blake can drag the foe towards her, either having the sickle puncture them and be shot towards her or have the cloth wrap around her and use the sickle-pistol to shoot them towards her, this allows her a very nice and angle-able move to drag foes into her strong close combat. The starting lag is a bit long, but there is little in the way of ending lag.

If the sickle misses any stage or foe, it will not be automatically retrieved, but instead stay out on the ground like Sheik's chain. By utilizing the B button + any direction, Blake can swing it around much like said chain, either holding it down to have Blake toss it around with her own strength or tapping B to shoot it quickly in a direction (This replaces her Neutral Special essentially, since she does not have her katana on hand to use it). Using it with Blake's own power allows a finer degree of control over where it goes, you can even adjust it in mid-flight, but the hitbox is half power, while shooting it around deals the full damage that it usually deals when used as an Up Special, but the control is more jerky as you must shoot it around in chunks of about 1.5 Ganondorfs worth of movement, though the attack is also much faster...which is both good and bad, as it is harder to avoid but it covers space less. If an opponent is hit by the sickle part of this move, pressing B will allow you to drag them to you like normally, but you can no longer do it with the cloth. To reel the sickle and chain in, you can press either Shield + B or press B or Up B while atop the sickle. It will NOT be reeled in when you are hit: Instead, it will be dragged along if it follows logically it would or otherwise be left in position, allowing Blake to swing it back at the foe quickly to counter strike. Starting lag on swinging the sickle and chain is pretty minor and so is the ending lag.


Down Special: Shadow

Shadow has a few different animations, depending on how it is used. However, if you simply hit Down Special, then a copy of Blake will rush forward one Battlefield Platform dealing a slash with it's katana for 10% damage and some decent fixed knockback. This copy of Blake is completely solid like a normal character and can use any of Blake's moves save for another Down Special and all damage it does is real. It functions as an AI of around level 8 of yourself, but with less ability to stupidly kill itself. However, at the same time, Blake has little use for this copy in the sense of more traditional mindgame means: It is ultimately shortlived, as it fades into darkness after it's small 20 HP is depleted, meaning they can be dispelled with a fairly good smash attack or just about any two tilts. Instead, Blake will use them for a variety of other, usually more close range options. By quickly hitting an attack button combination when Down Special is used, the shadow clone will instead perform that move (With, again, the exception of Down Special) after travelling forward just a bit, allowing you to use moves in a safer manner by putting the Shadow on the line and not you. since this move starts up quite quickly, however, you must have very nimble fingers to input move combinations and since you have to use Down Special they will be slightly slower, players beginning with Blake will likely have trouble fully utilizing this move.

By smashing this move instead of tapping it, Blake will instead rush forward herself, with the clone staying back, and Blake able to use any move out of this just like the clone. By using this move when the opponent hits you, with much more strict timing than a counter like Marth's or Ike's, Blake will dodge the move that would hit her by hopping back just a bit, letting the Shadow take the hit, allowing her to counter the foe after the end of their move, especially if she has her Up Special out to yank to her. Like all counters, grabs go through it. By pressing the jump button or tapping up without any input given, Blake will instead footstool off of her clone, allowing her to gain height off of it with almost no ending lag while leaving the clone on the ground, most differing from a jump in that it is slightly shorter, but quick fingers can input any direction after the jump button is pressed or control stick is tapped, allowing Blake to footstool off of her clone in eight directions. This can also be used as an alternate recovery, though she gains less distance with each use, and after 3 in mid-air she will no longer gain height and will begin to lose it until she touches normal ground to refresh it. Also just summoning them as minions as you get to close range is a good use of them, but the fact they are so easy to dispel and last so little time means that using them at a camping range will usually end poorly. Don't forget that since she can create these in mid-air she can also use it to attack while creating a clone in mid-air, rushing forward one Battlefield Platform replaced with a rising slash that deals the same damage: This gains a good deal less jump height than footstooling, and becomes negative in height after only it's 2nd use, but you can use it to better have a lot of aerial hitboxes or more easily get a clone in mid-air to help you and the like. This move also generally has quite low ending lag.


Side Special: Sickle Stickle

Blake takes Gambol Shroud, in sickle and chain form, and flings it forward with the firing of the gun, sending it forward the same length as the Up Special. If Blake hits a foe with this, the cloth will wrap around the foe's body some and the sickle will stab itself into them for 14% damage and very light knockback. This move allows Blake to tether herself and the foe together, keeping the foe within a fairly ideal range for you to strike at them. While the foe is tethered like this, the gun part of the sickle will stick out and away from the foe, allowing Blake to shoot out her Neutral Special bullets from the foe in multiple player matches or to mess with the foe by simply shooting projectiles close to them. It will point forward on the foe's body if Blake hit them while they were facing Blake and the opposite if they were facing the other direction.

In addition, Blake can utilize the Neutral Special to subtly "scoot" the foe around: By shooting a projectile from it, the foe will be lightly pushed about 1/4th of a Battlefield Platform in the opposite direction you angled the shot (Though the shot itself has more limited options to shoot the projectile, since obviously it is more stationary right now, and it cannot just turn around and shoot the foe), not dealing any damage or hitstun, but allowing Blake to subtly control and space the foe as long as they are tethered. However, Blake loses access to her katana and Up Special while the tether is active for fairly obvious reasons...but, of course, Blake's Shadow clones do not do so, and you can, for example, temporarily use your Shadow clones using this move to tether the foe to them, or even use it to tether the foe to multiple Blakes at once. Blake is always the one who controls where they will go if both players are pulling at the max length in opposite directions. By dealing 30% of damage to the cloth connecting Blake and the foe, the foe can escape the tether, the cloth snapping back to Blake much like a rubber band, though she catches it effortlessly. Blake can also retract the tether at any time by using this move again, by using her Up Special or by using Shield + Special, which will cause it to return to her extremely quickly. This move has fairly long start-up, but the ending lag is actually quite quick to finish.


Beauty and the Standards

Jab: Deflecting Strike

Blake rapidly slices and slashes Gambol Shroud's katana in front of her, dealing extremely rapid hits of 1% in front of her as she does so, with enough speed that the blade is almost impossible to follow. This is one of those continuous attack, hold down A jabs. Blake will actually deflect projectiles during this move, though she will NOT reflect them, they will simply be deflected away from her and she won't be hurt by their hitbox. In addition, by using the control stick during this move, Blake can dash forward at about 3/4ths her normal dashing speed with this move out, making it an excellent approaching move. It doesn't really cover Blake much at all above her and none behind her, though, nor will it deflect projectiles behind her, so it is far from perfect. Very quick in lag on both ends. Only Blake's katana can actually deflect projectiles, so if she is forced to use her sheath out due to it being in sickle form and out it is merely just a hitbox. If Blake double taps the A button while making a Shadow clone, then instead of just using the jab for a bit and then going off to do AI things, the Shadow clone will continue to use the jab as long as it is left alive, allowing Blake to leave it behind as a nice, but fragile and shortly timed, projectile deflector.

Forward Tilt: Sheath and Sword

Blake holds Gambol Shroud's sheath in front of her, a quick motion that prevents physical strikes from hitting her from the front. However, with a single press of the A button, Blake can perform a second strike with the katana part of Gambol Shroud, a strong but slow strike that deals about 16% damage and KOs at around 125%, fairly powerful for a tilt. This has a decent deal of starting lag, however, so it is best used when set up by stopping an attack with the first part of this move. The first part of this move is also ineffectual against grabs and projectiles and does not protect your top or rear. Ending lag on the guard is quite low and even the follow-up strike recovers pretty quickly. If the katana is in use as sickle, Blake will instead just perform the attack portion of this move, harder to hit with given no defensive motion but hardly impossible.

Down Tilt: Spin Strike

Blake spins forward, swinning her sheath in a downward-travelling-upwards arc as she does so and moving herself ever-so-slightly forward. This strike deals a cool 14% damage and pops foes nicely up and slightly forward, offering a variety of follow-up options, moreso if used with a Shadow due to the fact this move actually has fairly long ending lag, though it comes out quite quick. If Blake has access to her Katana, she can press A for another attack as she uses it to fire off a standard Neutral Special bullet in front of her, moving backwards as she does so and allowing herself to retreat after advance. If you double tap A when this move is used with a Shadow, they will use the second hit of the attack in addition to the first.

Up Tilt: Overhead Swing

Blake swings Gambol Shroud's katana above her, starting behind and above her and ending it above and in front of her, a fairly powerful swing that deals 13% damage and sends foes hit by it at a shallow, forward angle, combining with quick starting and ending lag to become a very effective anti-air move, with the shallow angle in particular providing good follow-ups from the ground and generally offering some good follow-up play with your Up Special. It's also very nice to smack foes right at your duplicates if they stick around for a bit or to intercept foes they send flying your way with this, but it hardly hits in front of Blake and is mostly for catching people in the air. Using the sheath over the katana here changes nothing.

Dash Attack: Cat's Grace

Blake takes her katana and rushes forward with it, slashing in one smoth movement as she does so, going a fairly impressive Battlefield Platform in the movement. Hitting the foe with this move deals a nice 12% damage, with pretty much no knockback, as Blake "pops" off the foe a little in front of them, allowing Blake a nice though not 100% follow-up: The one exception is her Neutral Special, which is pretty much 100% (Particularly odd foes, body shapes or stage structures may make this not 100%). If you're particularly quick, though, and input your Down Special right when you strike the foe, you can seamlessly transition to cloning against the helpless foe, allowing you a nice way to start an offensive: Again, there is very little that is 100%, mostly just stuff like your jab, but it puts the pressure on them. While this move has fairly quick start-up, the ending lag is very bad if you miss the foe, so it's a risky move to freely throw out. Since it goes a fairly long distance, Blake can use it for a fairly effective dash attack cancelled up smash.

Beauty and the Grab

Grab: Pawing

Blake's grab is a very quick but also quite short ranged beast. Blake is pretty mobile, so she has a bit of a better time handling the short range grab than most. Blake can actually grab her Shadows with this as well, though it will always prioritize the foe over Shadows, and holding down A during the entire move will keep Blake from grabbing a Shadow if you do not wish to do so by accident. Shadows cannot grab Blake.

Special Grab: Gambol Shroud

Blake also has a second grab, one which functions as a much longer ranged grab. It is performed by pressing the Shield button and the Special button. Remember how I said that Gambol Shroud's sickle form can be retracted from the Up Special and Side Special by pressing those buttons? Doing so has Blake yank it in a way that attempts to catch any foe on it's cloth in it, wrapping them up and bringing them into Blake's grab, much like a tether grab. The grab hitbox to snag foes with this is only at the start of retracting, but it does mean foes have to be careful about standing around on cloth while it is merely about. Blake is even free to use this move upon a hit confirm with her Up Special and Side Special, allowing her to snag foes right out of mid-air with the Up Special for example. With Side Special, this will grab the foes almost all of the time, unless they side step or dodge extremely quickly, but the tether will be ended by doing so. If Up Special or Side Special is not in effect, this is an extremely laggy but quite long tether grab, the laggiest in the game really. This just puts your opponent into your normal grab, by the way, if you were confused. Unlike your normal grab, this cannot grab your Shadows.

Pummel: Cat's Speed

Blake extremely quickly slashes the foe three times for 1% each, at the lag of about your standard 3% pummel, with her katana. If your cloth and sickle is out, Blake instead slams the foe with her sheath for 2% at the same lag. If Blake has a Shadow grabbed, then this move simply releases it near instantly.

Down Throw: Meat Shield

Blake changes her grabbing stance to instead grab the foe by the arms, placing her katana if she has it in front of the foe (if the foe has a neck, it will be placed close to there) with the gun part of it's hilt pointed forward (Remember how the blade is double-edged? This allows it to work). You can now move back and forth with the foe at 1/3rd your normal movement speed, holding them in front of you, and completely free to fire off your Neutral Special during this time. The foe is hardly acting the part of a helpless hostage, of course: They are free to escape as per usual, continuing whatever progress they had on being released from beforehand, and will break free without any damage if Blake is not quick enough to also hit A or the Shield/Grab button, which causes her to slash at the foe('s neck) while giving them a swift kick at the legs (if they have any, otherwise it's a body kick), dealing 13% damage and putting the foe into prone, though the foe has an extremely slight frame advantage over Blake, not enough to 100% hit her with a getup attack though. As you may have guessed from the name, this move is great for using the foe as a meat shield against other enemies, or you can even use minions or other things the foe summons as a meat shield while slowly advancing and shooting at the foe.

If you grab a Shadow with this, Blake will hardly threaten herself with the katana part, but will still hold the Shadow in front of herself and use it as a meat shield for her, with the same mechanics as the usual throw, except the Shadow will not try to escape and thus can be held until it either dies or it's time limit stops existing. Pressing A or the Shield/Grab Button then simply releases the Shadow in front of Blake. While the duplicate is weak, a mere 13 HP and all that, it can serve as an effective way to tank a hit if need be and you can use it with all the fun stuff you might use a meat shield for. If Blake does not have her katana, because it is in sickle form, she simply performs the proning part of this throw instantly with the sheath, with the same damage and effects.


Forward Throw: Toss

Holding onto the foe, Blake spins with them once before launching them forward, sending them at an extremely shallow distance that KOs at 190%, but KOs earlier against foes with crappy vertical recovery, while dealing 12% damage. The foe is actually a weak projectile as they fly through the air, dealing 4% and extremely minor knockback to all they hit, so flinging characters at other characters is perfectly possible. You can even have a sickle and cloth out to smack them as they go flying thanks to the shallow angle, but the foe cannot be grabbed by your Special Grab until their hitstun is done. And, of course, you can do stuff like throw minions right back at their master. By grabbing a duplicate, you can throw them forward as a much more forceful projectile that deals 10% and KOs at 240%, in addition to being angle-able up and down. The Shadow will not take damage from this, being sent about 1.5 Battlefield Platforms, nor hitstun, allowing the Shadow to not only be a projectile but attack the foe in addition to this, though if you throw them right into a foe using a decent attack they might just get easily dispelled.

Back Throw: Shadow Step

Blake quickly knees the foe in the gut, assuming they have a gut, before flipping backwards, leaving a Shadow duplicate grabbing the foe instead of her. The kneeing itself only deals 4%, but obviously the foe will take more damage from whatever the Shadow does with it's grabbed foe, though the foe retains any grab release progress they made from the Blake grab. The key thing with this move is allowing a nice way to set yourself up to play off of your duplicate grabbing the foe, as you will generally take advantage of the foe being thrown more than a Shadow will, but at the same time this is generally worse than the Shadow grabbing the foe naturally because of the foe breaking out faster due to keeping grab release progess, with the benefit of being more on demand. If Blake wants, she can also simply use this as a spacer or quick getaway, leaving the foe to handle the Shadow. Since the Shadow itself cannot create duplicates, a Shadow that uses this move will knee the foe for 4%, then send them flying behind her with a strike with the base of Blake's katana, dealing 6% and some decent backwards knockback, with no difference if the sheath is used.

Up Throw: Leaping Strike

Blake holds the foe in place as she takes her katana and swings it from beneath, sending the foe a fixed 1.5 Ganondorfs into the air with 11% damage as it strikes them, Blake herself jumping in time with the foe. Because of this, they both ascend the 1.5 Ganondorfs in the same amount of time and leaving both you and the foe frame neutral in the air at quite close range, a good position for Blake to be in as she is good at said range. Using the sheath doesn't really change this move.

Beauty and the Smashes

Forward Smash: Cat Cutter

Blake takes her sword and sheath and slices them in front of her, starting at opposite sides before meeting in the middle, like an X, to complete the slash. Getting hit by almost any part of the slash deals 18%-23% damage and KOs at around 140%-120% or so. But if you manage to get the foe right in the middle of the X, the sweetspot that is roughly in the middle of the attack, the damage shoots up to 23%-28% and the KO percentage rockets up to 90%-70%. This can be a hard to pull off manually, but you can knock foes around with your Up Special or tether to get them into position, quickly retract them and then bam, sweetspot the Forward Smash. Shadow duplicates can also help with this, Back Throw particularly good, or snip the foe with the Shadow directly. Starting lag is fairly average, but the ending lag is pretty long.

If you do not have your katana, this move changes to an underhand swing with a lot of power put behind it with the sheath, which actually deals more damage and knockback than the move even sweetspotted: 28%-33% damage that KOs at 75%-60%. However, this attack is much laggier, like a slightly laggier Ike F-Smash, with poorer range. However, it should be considered that you have such a powerful laggy smash when you're much more free to whip or tether the foe than the normal FOrward Smash. If you double tap the A button when telling a Shadow to use the Forward Smash, it will use this version and not the base version.


Up Smash: Leaps and Bounds

Blake crouches down before quite suddenly leaping upwards about 3/4ths of a Ganondorf and 1.25 Battlefield Platforms, similiarly close to Wolf's Side Special, slashing with her katana as she does so. Opponents in her path receive a nasty cut for 20%-26% damage that KOs at 110%-95% at basically the same trajectory that Blake herself was travelling. The starting lag on this move is slightly quick and Blake travels VERY fast, but Blake takes pretty heavy ending lag from this. However, Blake can skip the ending lag for this by creating a Shadow duplicate with her Down Special, footstooling off of it and allowing it to take the ending lag for Blake. This move is a great anti-air for people above AND in front of you, but it has 0 backside coverage and basically no coverage right above you. This can also be used to quite rapidly drag someone tethered to you in one direction if they are near it's max range and is a good attack to snipe people with via a Shadow. With her sheath, this move loses no power but the starting lag is increased to be a fair deal slower, to the point it is considered "laggy".

Down Smash: Leg Buster

Blake performs a quick spin with one leg extended, dealing 18%-24% damage to anyone she hits in her 360 degree hitbox while launching them strong enough to KO at 120%-105%. This move has very high knockback growth but a low base knockback, so it can be used for different purposes depending on the foe's damage %s. At low %s, Blake can use it as a close range move with quick start-up and a fast duration that doesn't knock the foe out of her melee range, allowing her a quick finisher or strong start. At mid damage percentages, it often spaces the foe well for a more midrange assault, such as your Neutral Special, Up Special, Side Special, Up Smash and the like. And at higher percentages, it serves as an easier to land but weaker KO move for Blake to use. This move has slightly long ending lag, but not as much as you might think, so follow-ups are possible, but it can still be decently punished. It is particularly useful from a Shadow at low percentages as a damage dealing move that can put Blake in good range to keep pressure on the foe.

Beauty and the Aerials

Down Aerial: Always Lands on Her Feet

Blake prepares herself, points her katana straight down and plunges with it, a classic stall than fall maneuver that deals 18% damage and knocks foes who get hit by it a good ways up, though not really enough to KO or nothin'. Like many stall than falls, though, it can spike if you hit with it at the very start of the move, though it is a bit of a weak spike. It is a bit of an oddity as a stall than fall, though, as it has quite high starting lag, but very little landing lag: In fact, Blake barely takes more ending lag with this move plunging into the ground than her normal landing lag, though she suffers quite a bit of landing lag if she lands during the starting lag. Because of this, Blake can use it not only to plunge to the ground, but to quickly begin a grounded assault or resume her assault on the ground. If Blake hits a foe in mid-air with this move, then if she presses A or the jump button (or tap jumps) right when she hits the foe, she'll use the foe to stop her stall than fall and jump up a bit from it, allowing her to effectively use this to also begin an aerial assault and chase after the foe. Finally, pressing Down Special will allow Blake to get out of the stall than fall and leave a Shadow doing it for her, though this is a bit laggy and she cannot gain height off of this. Otherwise, she will fall for 3.5 Ganondorfs before this move ends, assuming she does not hit the ground.

Forward Aerial: Three Slash Path

Blake performs two quick slashes with her katana in front of her, each hit dealing 4%, before finishing it with a strong kick that deals 8% with a spike about as powerful as R.O.B.'s in terms of knockback. The first two slashes will draw in people hit at their tips or the edge of their top/bottom hitboxes, allowing Blake's kick to more often connect, but the attack is laggy on both ends. It is one of Blake's few reliable ways of killing people off stage, though. When her katana is busy, Blake merely performs the kick itself but with much faster starting lag, making it an interesting option to shorthop against foes you wish to bring to the ground and a quick hitbox to throw out.

Neutral Aerial: Variant Knockback

Blake performs a quick, spinning slash with her katana, an extremely fast move that deals 8% damage and some okay knockback in whatever direction the swing was heading (IE the swing heading behind Blake deals backwards knockback). This move is EXTREMELY fast in startup lag, ending lag and animation: Blake can even use two of them in the same shorthop. This makes it quite a great tool to use off of Shadow footstools, you can shorthop it as an approach or a retreat, and it is an invaluable, jab-like tool in your aerial assault. With the sheath, the knockback is always forwards instead of going the direction of the slash.

Back Aerial: Sheath Slash

Blake performs a strong slash behind her with her sharp sheath, a laggy but flawlessly performed strike for 15% damage that KOs at around 120% or so. It's some pretty BAir fair in terms of lag, laggy at the end and a bit laggier than usual on the front, but it KOs well. Too laggy to shorthop.

Up Aerial: Pop

In contrast, Blake's up aerial is more of a popper in it's functionality, a quick upwards katana slash that deals 9% and pops the foe up, though the knockback has some unexpectedly high growth that allows it to KO at around 190% or so, with quick ending lag to finish, and is an all around solid move for juggling, getting breathing space and shorthopping against aerial foes.

Final Smash: Beautiful Belladonna

Blake takes Gambol Shroud and convers it to sickle and cloth mode, returning it to her if need be, before shooting it forward one and a half Battlefield Platforms. Opponents in the way are snagged and returned to Blake, who quickly shifts the glock back into a katana as they get close, performing a quick, six hit combo with slashes, before performing a seventh rising slashed, followed by four swings with the sickle and cloth, ending with the foes in front of her and shot up with Gambol Shroud's glock form. Ultimately, a long Final Smash that deals about 80%, but it has low KO potential.

Playstyle: Beauty the Beast

Your hopes have become my burden. I will find my own liberation...

 
Last edited:

FrozenRoy

Smash Lord
Joined
Apr 26, 2007
Messages
1,268
Location
Las Vegas, Nevada
Switch FC
SW-1325-2408-7513
Scathing eyes ask that we be symmetrical, one-sided and easily processed. Yet every misshapen spark's unseen beauty is greater than its would be judgement.

Yang Xiao Long


Yang Xiao Long is the 4th and final member of team RWBY and is actually Ruby's sister (How, exactly, two people named Yang Xiao Long and Ruby Rose are blood sisters is a mystery...though we know that RWBY naming customs do not always follow real life ones). Like all of the characters, Yang's name is in some way connected to her color, Yang Xiao Long being able to be translated to Sun Little-Dragon, Little Light Dragon or Small Dragon of the Sun (As you may know, the sun is often associated with being yellow). Yang is energetic, confident and a bit of a blood knight, hurtling into life threatening situations with a grin and being the member of the team most likely to quip or otherwise enjoy combat. She is also shown to be quite protective of the team, and her little sister Ruby in particular, but she has a high amount of faith in them and thus avoids smothering them. She is also shown to be somewhat of a vain person and is extremely protective of her hair, the latter trait likely reinforcing her Fairy Tale theme: Goldilocks.

Yang's weapon is Ember Celica, ember being a dying or small body while celica roughly represents celestial or heavenly and further playing into her sun theme, are "Dual Ranged SHot Gauntlets" and are a pair of gauntlets on top of fingerless black gloves which appear as bracelets before being activated. With Yang's strong physical strength, even a punch from these metallic knuckles is a pretty painful event, but included inside Ember Celica are bullet rounds which Yang can use to "punch" bullets out of her knuckles via a barrel concealed in the front of the gauntlets. These rounds appear to not be true slugs, but explosive rounds of some kind, as while they leave behind shells they do not leave behind the other tell-tale appearance of normal bullets, and when cut in half produce two explosions for example. Considering that Yang's Semblance allows her to emit fire, and possibly even explosions, it is likely that the bullet shells contain something she can ignite to cause the reaction. Yang is also able to shoot herself around with the power of the shots, however the recoil is much less than Ruby's Crescent Rose. Another possibility of Yang's bullets is simply that they explode on contact. Regardless, Yang is further able to use this as a way to simply create a very powerful blow in the opponent's face, detonating it by firing it when connecting with a punch, and it seems to be quite powerful, able to emit quake-like shockwaves upon a leap and punch wth the floor. Yang also appears to be knowledgable in forms of boxing and martial arts, given how she fights, and her high levels of strength are mixed with a high durability and dexterity. When Yang uses her Semblance, her eyes can end up turning red, which is called a side effect of it, if this has any purpose aside from looking cool is unclear.

As mentioned, Yang's associated Fairy Tale is Goldilocks (and the Three Bears), though considering that she gets less screen time than the rest of the team less of this has been visibly seen. This most obviously makes itself evident by the fact that Yang is extremely angered whenever her hair, or golden locks, is cut off or otherwise injured. In addition, her enemies in the trailer have references to bears (Such as the bear headed DJ) and the first enemies she fights in the series are Ursa, or Grimm Bears, in addition the name of Junior in the trailer is intended as a reference to Baby Bear in the tale (His last name is additionally Xiong, meaning bear, so his name would literally be Junior Bear). Yang's confident and straightforward personality may also be meant to mirror aspects of Goldilock's character.


Golden Statistics

In terms of size, Yang stands about the same size as Marth, while having weight between Luigi and Sonic, in addition to dashing speed equal to Charizard, making her a somewhat tall and fast middleweight in stats, with a high degree of traction.

Yang's air speed is slightly above average, while she falls at a slightly slower than normal pace and has pretty average aerial control, making her a fairly average aerial fighter. Her first jump goes up a decent height, with a relatively high second jump, and she has the ability to wall jump but that is it for special Brawl things.


Golden Specials

Neutral Special: Ember Celica

Yang pulls her fist back before punching forward with Ember Celica, shooting out a round that travels 3/4ths of a Battlefield Platform in distance, but is quite a strong projectile: it deals 12% damage and KOs at 130%, making it a sort of short ranged/mid ranged projectile. Yang has 24 rounds of ammo in Ember Celica before she needs to reload by stylishly popping out the used rounds, throwing some new ones up and having them land perfectly in Ember Celica, which is done by hitting this move when you're out of ammo, and ammo can be seen above Yang's stock count. Yang uses her rounds for a lot more than just this move, too, so you should be nice and attentative to your ammo count. Yang's explosive rounds from this move will clash against any projectile, causing it to go poof right up with the round, so Yang can stand here firing to knock down the projectiles of enemy campers who try and just shoot at her...but, of course, Yang only has 24 ammunition, so she needs to choose agood time from this to approach. In addition, this attack can be aimed in 8 directions, so Yang has a lot of freedom in where to shoot it.

Yang can fire it rapidly either by holding down B or tapping B: Tapping B will fire slightly slower, but Yang can choose a new direction with each shot, while holding down B allows Yang to move at 3/4th Ganondorf's dash speed back and forth while using the move, in addition to firing faster, but she can only fire in one direction without releasing the B button and starting it again. This move can also be used perfectly feasibly in the air, though with no ground to support her, Yang takes 1/4th of a Battlefield Platform in recoil with each shot, lessening more and more with each midair shot, Yang not gaining distance with this. By pressing the Shield button in conjunction with your Special button, you can reload early. Starting lag on this move is pretty fast while the ending lag is a bit long, and remember this projectile only goes 3/4th of a Battlefield Platform, so...good luck camping.


Down Special: Pyromineia

Yang punches the ground with her Ember Celica knuckles, shooting an explosive round from Ember Celica into them, which then remains embedded in the ground as a trap. This uses up one round of ammunition, of course. Stepping on this round will cause it to go off right then and there, dealing 14% and KOing upwards at about 125%. However, attacking this explosive round will also set it off, and opponents are free to set it off with an attack that will clash if they noticed the small, red object, a bit more visible than Snake's mine largely due to the coloring. If you smash this input, however, it is not a strict motion sensing round, but is a timed motion round, not going off immediately from attacks but instead two and a half seconds after being touched or attacked. Since Yang is vulnearable to her own rounds, and can set them off with her own attacks, this allows Yang some more control over them as she sends her Neutral Special bullets around, and with her fast paced melee game. Going right over a time mine, smashing the foe and putting them in it's path before it explodes is quite a viable option.

In addition, Yang can shoot them from afar to activate them, either blowing them up right before the opponent planned to safely deactivate it or activating a little timed monster they have to avoid. Making use of both types of bulletmines is something that Yang should do, as they are a bit vulnearable otherwise with wide weaknesses such as the default one's ease of disarming (Or rolling over etc, though since Yang can blow them up this is a bit dangerous) while the timed one requires pressure for the foe to not just ignore it. Starting lag is decently fast, ending lag is a bit long. If this move is used in the air, Yang will by default shoot them their normal length diagonally and downwards, but Yang can actually aim them in any of the 8 directions: Doing so allows her to embed her mines in a lot more places, such as on the bottom of platforms or on places on the stage one cannot normally stand. Yang is totally free to spam these as long as she has ammo, so she can create quite a deadly field of mines, but naturally she has to make sure she won't just blow herself up, and she can set up little reactions with timed bulletmines activating other bulletmines or using an easily tripped one to activated a timed one and whatnot.


Up Special: Nailed It

Yang takes both knuckles of Ember Celica, grinning, and shoots them in the opposite of whatever direction you directed while starting the move up, rocketing you in the direction you were pointing at a little faster than Captain Falcon's dash speed., somewhat similiar to Fire Fox. Yang rockets forward one Battlefield Platform if this move is used on the ground or very close to ground, while it gains you one Ganondorf height in direction if used in the air, due to the fact that you don't get nearly as much push when shooting off of nothing. In addition, how far you go in the air will decay with each use until you hit the ground, after 3 uses of this move you'll no longer gain height and after 4 you will lose height. Getting hit by Emver Celica when it fires the close range blast to rocket Yang forward deals 10% damage and some okay knockback in whatever direction it was pointing.

Since Yang is using both knuckles of Ember Celica, this takes two bullets, but it has very little in the way of starting lag and almost no ending lag: Indeed, Yang can use this attack to rocket around, and then strike at foes quite suddenly, retreat while utilizing attacks or her Neutral Special to cover her, attack while moving and more, especially since it gives a very large amount of aerial mobility as well, with Yang able to rocket around in 8 directions three times to follow-up on foes. Another use of it is to better rocket past your mines: a Yang who uses this going over a timed mine can get away from it quicker and Yang will actually pass by the explosion of a normal mine before it hits her if properly spaced, having to make sure not to start it too close (or you'll get hit before you get going) or too far (or you'll stop too early) or you'll still get exploded. So while it is a slightly expensive use of your bulletry, it is worth every shot. If Yang uses this move to recover a long distance and grabs the ledge, she'll grin and let out a little "Nailed it" to herself.


Side Special: Nimble Flames

Yang rushes forward one Battlefield Platform with one knuckle of Ember Celica held in front of her. If someone gets in her way, she'll snag them with it, flames bursting out of Ember Celica, and throw them to the ground for 11% that puts the foe into prone, with Yang and the foe then entering a frame neutral situation. A pretty nice move when you've got some bulletmines around, as you can better limit their prone options to more poor ones, and it is a good way to help an offensive assault by proning the foe and following up. In the air, Yang will snatch onto the foe for just a moment, before using Ember Celica to blast right off of them for 10% damage and giving her a boost equal to the boost she would normally get from blasting the ground. An alternate recovery method with it's side distance already, this is a good way to add a lot of vertical distance to it if Yang can snag a foe, but she'll end up falling into helpless if she misses, so it is a bit risky.

Golden Smashes

Down Smash: Flamequake

Yang performs an acrobatic flip into the air, combining it with a leg strike that will take anyone around her up with her alongside 4%-6% damage, before punching straight down, taking foes hit by the first attack or otherwise hit into it along for the ride with 10%-14% damage, finishing it with a little fiery explosion that causes a shockwave as she impacts the ground, which deals 14%-19% damage, for a total of 28%-39% damage and the last hit dealing knockback that KOs at 90%-65%. While it is a big damage dealer, if the first hit is dodged than the meat of the attack is fairly easy to dodge as well, due to the somewhat long animation. The hit, upon impact, sends a shockwave that ranges from half a Battlefield Platform to 1.5 Battlefield Platforms to both sides of her based on it's charge, dealing 6% and a trip as it does so, in addition to being one of your excellent options to trigger your bulletmines from a distance. The shockwave will curve along with the stage, as well, which is a good way to start the timer on mines that you've placed in odd locations via the aerial version of the Down Special.

If you smack the Neutral Special when this move hits the ground, Yang will fire two explosive charges right at the ground, not really aiming to hit the foe so it has a very minute hitbox, though it deals 16% and some good knockback, but to instead cause an "aftershock" effect from the quake: 3 seconds after this, another shockwave shoots across the stage from the very same point Yang hit, with the same strength, allowing Yang to take advantage of a nice delayed quake. This costs 2 bullets of ammo. The starting lag on this move is a bit long and as mentioned it has a pretty long animation, it also has slightly long ending lag.


Forward Smash: Sunspot

Yang leans back and punches forward, sending a shot from Ember Celica forward with much force, enough to send it one Battlefield Platform. Opponents hit by the punch will have Yang detonate it at close range, creating a strong closed range strike that deals 23%-31% damage that KOs at 95%-80% or so, with somewhat average starting lag with laggy ending lag. If hit by the bullet once it gets flying, however, it will embed itself into the body of whoever it strikes, dealing 1% with a flinch on first hit and proceding to explode in 2.5 seconds for 12%-15% damage and some good knockback that doesn't have KO power behind it. An opponent can dodge or shield this, of course, which is a fairly easy way to avoid it, but Yang should take advantage of this short ticking close to form an exquisite approach, forcing them to deal with the short fused explosive and a flurry of melee moves in front of the opponent, not to mention you're free to stack these as long as you have the ammo to do so. A very useful move in Yang's toolbox.

Up Smash: Sunset

Yang leaps into the air about a Ganondorf in height and half a Battlefield Platform in width, spinning for a vertical spin kick as she does so, before crashing down with the leg as a somewhat more vertical dropkick. This attack deals 21%-29% damage, but the knockback it deals differs based on if the foe is aerial or grounded: In the air, foes are grounded at a downward but also quite sharp forward angle, allowing you to nicely aim where you want foes to go, while on grounded foes in smushes them hard and causes them to land into a proned state, though they recover a moment before Yang does. This is a very nice move to pluck foes right out of the air and slam them back to earth or to give foes a ground thumping, but it takes good skill timing, has a bit of a long animation and long ending lag, though the starting lag is actually not too bad. It is also a way to get around your mines while putting a hitbox to prevent enemies from jumping your mines, especially if combined with an Up Special push for even more distance.

Golden Standards

Jab: Explosive Swing

Yang performs a quick repeating punch jab, filling the space in front of her with a flurry of jabs for 2% each. They're quick enough that it is pretty hard to escape without being hit around three times, unless you happen to be at high percentages. If you hold down B at the same time as this move, Yang will add explosive components to this, adding in 3% per hit and making this a very nice damage racker that can be a quick way to get in 15%+ damage, but which drains your ammo very quickly (Especially since it still uses it up if you miss) and which becomes less effective as time goes on. Starting lag is slightly high for a jab but still jab level, while there is little in the manner of ending lag.

Forward Tilt: Knuckle Guard

Yang raises Ember Celica in front of her for a moment in a defensive posture, before quickly following up for a 1-2 punch that deals 7% damage each, with the second hit dealing knockback that KOs at 160%. The guarding part of this move only lasts for a moment, but it can totally block attacks from the front, allowing Yang's actual hitbox part of the attack to be a swift counterstrike, though the guard comes down fast enough this is still an okay attack when not blocking, especially since the two hits combo into each other until a fairly large percent. It won't defend against hits from the to, back or bottom though, so something like your mines will just blow up at your feet. Quick on both starting and ending lag.

Down Tilt: Knuckle Duster

Yang performs a quick, sweeping kick in front of her, a very fast move that deals 8% damage and pops foes up very lightly with little hitstun. They'll end up just a bit above the ground, and thus in the air, but not very high in it, putting the foe in a bit of an awkward situation of either using an aerial and getting landing lag or landing and possibly being struck by a preidcting Yang, as the ending lag is around the same amount as the hitstun of this move. An also especially nice move to use when moving with your Up Special, letting you "pop" people into awkward situations either just behind you or just as you come to a stop for some odd offensive moves or near the middle of it for a good defensive safety. Quick starting lag.

Dash Attack: Shoulder Barge

Yang charges with her shoulder held forward, shocking I know, for about half a Battlefield Platform of distance, dealing 11% damage and "dragging" knockback that puts the foe right in front of Yang with frame neutrality, a good spot for her to be in with a variety of close and mid range moves, especially since enhancing this move's range with Up Special isn't too hard. If you hit A upon hitting the foe, you'll instead "pop" off them at the end, leaving them in a frame neutral situation where you've essentially got a shorthop in front of them, allowing you to surprise enemies with a shorthopped assault instead of the more grounded approach, in addition to using it to escape a bulletmine at the end of the dash attack. Starting lag is slightly long, but the ending lag is short, as evidenced by the frame neutrality.

Up Tilt: Flaming Strike

Yang performs a swift upwards swing with Ember Celica, flames bursting around it as it does so, which deals 13% damage and knocks foes a good distance upwards with low knockback growth: Generally, it is just inside the range of having follow-up potential, but far enough you can just use it to get a foe out of your hair or into the air as well. It's quick to come out with somewhat long ending lag and it has short range, but it is pretty powerful and your most solid true upwards launcher.

Golden Grab

Grab: Celica Grab

Yang grabs in front of her, unsurprisingly. It's a quick grab and it has a bit longer range than average, but that's about it. Use it to grab people.

Pummel: Pounding

Yang pounds the opponent's face, or other body parts if they have no face, with Ember Celica for 1% each in a fast pummel. If you hit B instead, you can pummel for 3% at the speed of a 2% pummel as she adds explosive force behind each strike, but it'll cost some ammo for each strike.

Forward Throw: Flame Boost

Yang singlehandedly lifts the foe up (unless it obviously doesn't make since, like Vorinclex or something) as her eyes burn red, flames flowing out of Ember Celica and trailing over the foe's body. This causes rapid hits of 1% to hit the foe, accumulating to about 5% by default, however by holding down A or the grab/shield button Yang can continue to hold out this part of the attack without throwing the foe away until they break out. Otherwise, Yang then tosses the foe about a fixed 1.25 Battlefield Platforms forward for 4% damage, not enough to reasonably follow up on. In addition, for each hit that the foe took of flaming hits, the inferno will continue to rage about their body, dealing 1% per second for one second per earlier hit, so about 5% by default. While the opponent is enflamed, it stretches out slightly from their body, not strong enough to become a hitbox...but strong enough to trip things like Yang's bulletmines or Neutral Special bullets, allowing Yang to, say, fire short a little and hit the fire, and making it a good deal more difficult to avoid Yang's explosives. Additional flaming moves will further build upon this inferno, causing it to last for one second more every time the foe is hit with a fire move, though the Forward throw itself will only add the amount it usually does. If the foe breaks out before Yang tosses them out, then Yang will take a largely increased amount of lag from the grab release, giving foe's a free chance to smack her.

Down Throw: Stomping

Yang throws the foe to the ground for 3% damage, then stomps on them four times for good measure, dealing 4% damage with each blow, the final blow popping foes up very lightly as Yang backflips away from them half of a Battlefield Platform. This throw takes a bit longer than Jigglypuff's Down Throw to complete, so it is a pretty good option to throw out on top of timed bulletmines and then backflip away before they explode, and is also a good spacer simply because of the fact the foe is put in an awkward, close to the ground but not quite position similiar to the Down Tilt, with some defensive backflipping to help you get away. Make sure not to just backflip into a mine yourself!

Up Throw: I Hope You're Hungry!

Yang rears back and begins quite rapidly and repeatedly slamming the foe in the face, releasing an explosive round with each punch, dealing 4% each for four times and then finishing with a 6% uppercut that sends the foe flying fairly far into the air. This is a pretty great damage dealer, 22% all told, but it takes four bits of ammo to fire off, which between your bulletmines, usage of Up Special and Neutral Special and other attacks might come less easily than one might expect. Each use without a bullet lowers a 4% hit to 2%, meaning this can do as little as 14%.

Back Throw: Foequake

Yang takes the foe and begins rapidly spinning with them, much like Mario and Luigi's back throws, before ending it with a grab and a chokeslam into the ground, bouncing them behind her for 15% damage and some actually pretty potent knockback, enough to KO at 140% or so. When the foe hits the ground, they'll be crushed against it hard enough to make a small shockwave, which travels 1/4th of a Battlefield platform to both sides of the foe and deals 4% with tripping. The foe, just like in the aforementioned back throws, becomes a weak hitbox while spun around, in this case for 3% damage and a flinch, so this is a good crowd control move. You can also dip the foe up or down some on the control stick while spinning them, allowing you to angle them in the way of some attacks, or in the case of angling down to brush against a mine and go ka-boom.

Golden Aerials

Neutral Aerial: Fire Spin

Lighting one knuckle of Ember Celica on fire, Yang performs a quick, vertically oriented spin, punching outwards as she does so. Getting struck by this flaming fist deals 15% damage to the foe and some pretty good knockback, enough to KO at 155% or so, though this move has some decently long starting lag, with some fairly fast ending lag. You can use your Up Special at the start of the move to rocket her in a direction right as the attack starts, like a destructive wheel, and the flames are a good way to re-energize your Forward Throw.

Down Aerial: Airquake

Yang raises her head above herself and plummets to the ground as a stall than fall, dragging people with her to the ground for 1% damage, before bringing both fists down as she impacts the ground, dealing 19% damage and very strong upwards knockback to anyone there, enough to KO at 105% or so. The force of this hitting the ground is strong enough to cause a tremor to eminate from the ground, with a base of 2% damage and a trip going 1/4th of a Battlefield Platform to both sides of Yang. With each Ganondorf of height that Yang gains, however, it goes another half of a Battlefield Platform in each direction and adds 2% damage to it. On a stage where Yang can get appropriate height or that is especially small, these shockwaves can even loop around the stage. By using the Neutral Special when she hits the ground, Yang can add explosive force to the attack at the cost of massively increased ending lag and two bullets: Doing so, however, bumps it to an attack able to do 26% damage and KO at 85%, in addition to starting the shockwaves with a base 1.25 Battlefield Platforms with the same gain, but with a base of 6% damage. The starting lag of this attack is a bit long and the ending lag is very long, and with explosive force added is the kind of length that gets you hit by Warlock Punch, but it is quite a powerful move.

Forward Aerial: Phoenix Boost

Yang engulfs Ember Celica in fire and launches a powerful forward and downward strike with one fist aflame. This attack deals 16% damage and is a spike with about the same power as the aerial version of Captain Falcon's Side Special, perhaps slightly stronger, and on hit Yang will use the momentum from the connecting blow to boost herself in the air a bit more than the same Side Special. In addition to the obvious anti-gimping usages, Yang can use this as a way to get higher into the air for a Down Aerial quake and puts the foe in a prime spot under her to do so, in addition to providing Yang with a decently reliable spike, as this move is fairly quick to start-up. It actually has quite low ending lag on hit, but a whiff will cause Yang to easily lose her balance and suffer great ending lag. If you just want to slam a foe straight down into your bulletmines or something, it is also a good option, and it is a good shorthop approaching move.

Up Aerial: Cross Strike

Yang sets both knuckles of Ember Celica ablaze and swings them above herself, forming a cross pattern as they intersect, dealing 14% damage to the foe and not serving as much of a juggler, but more of a KO move, KOing foes off the top at 170%...but of course if you get them further into the air, that'll go down more and more. The flames from this attack will actually linger in the air for roughly 2.5 seconds, forming a very weak mid-air hitbox that deals 5% damage and some light knockback, enough that it cannot combo into itself, but Yang has no problems with smacking the foe into it herself, especially since it will add on to your Forward Throw's flame timer. It can also make it a bit more difficult to come down from being high by the attack. The starting lag on this move is pretty long, but the ending lag is actually quite short, so Yang is able to make use of the trap quickly.

Back Aerial: Punch Out

Yang performs a strong swing behind her with Ember Celica, dealing 15% damage that KOs enemies at 165% to those it hits, with a pretty nice and fast start-up time to boot, though the ending lag is pretty severe. If Yang snags the edge of a platform or ledge with this move, she can hit A to swing herself up onto it and drastically reduce the ending lag, which is a pretty neat trick, and makes it a neat edgeguarding tool where you can smack a foe away and swing onto the ledge at the same time...or smack someone under a ledge/platform onto it, then swing onto it and quickly chase them.

Final Smash: Golden Locks

Yang's Final Smash is a Counter Final Smash, as her hair glows magnificently and she poses, grinning. If a character hits her in this time, they will snip off a piece of Yang's golden hair with it, with a special little cinematic ala Captain Falcon's Final Smash playing to show it (IE Link accidentally slashing it and looking confused at Yang's response). Yang will instantly let out a shout of anger as she sees it fall to the floor, hair and body blazing as her eyes turn red, beating the absolute pulp out of the enemy for a full 23 hits of furious, explosive-fueled gauntlet-y anger, reloading if necessary, before rushing right at the foe with one final, fierce blow, the entire stage save for Yang's coloration turning white as she impacts the foe's face, dealing the final blow in a glorious explosion. This attack ultimately deals 100% damage and KOs extremely early, on some characters at 0%, but as a counter Final Smash is very hard to use. At least it works on grabs, too!

Playstyle: And That One's Juuuuuuust Right

Gold

Sending out your army but you still can't win, listen up silly boy 'cause I'm gonna tell you why— I burn!

 
Last edited:

FrozenRoy

Smash Lord
Joined
Apr 26, 2007
Messages
1,268
Location
Las Vegas, Nevada
Switch FC
SW-1325-2408-7513
Dewgonging Intensifies

Dewgong may not be up to the same standard as Whiscash, Turtles, but it is still a fine moveset all it's own. Indeed, Dewgong feels in some ways similiar to the mudfish, but instead of creating a muddied and watery stage, it focuses on the chilling depths with water. I was pleased to see you take to heart what other people thought of the set and fix some things like the FAir and Ice Beam's length. As for the moveset itself, it is a nice thing and fitting for Dewgong: He creates water and ice from that water and by doing so he can create rings like a circus seal, slopes to fly off of and land on and generally turn the world into an icy wonderland, then use his size, strength and superior speed on ice to bully the foe to their destruction. It could be said that Dewgong using ice in such a manner is slightly odd, but the way that the ice creation flows into the general characterization keeps it from being intrusive or particularly negative. Aqua Ring was a particular favorite for me: The desicison between setting up healing and damaging rings is a good one and the way it is presented mixes it into Dewgong and Dewgong's playstyle nicely. Further moves make sure to use the seeds set up in the Specials in simple yet fairly deep ways: The smashes are a particular highlight, perhaps Surf being slightly weak, but Waterfall was a nice gem in the moveset that really helped bring everything all together, and I enjoyed moves like Forward Tilt and Down Aerial in their simplicity working into the playstyle...though using Kongo Jungle 64 as a unit of measurement was quite an odd thing.

Problems in this set largely extend to the fact that while what does fit into Dewgong nice and easily is good, there is a fair deal that seems a bit odd, pointless or not particularly connected to the rest of the moveset. This largely shines through in the grab game, which has some good character moments inside it, but feels like it largely plays little into the rest of Dewgong's game, though perhaps this is understandable given how hard a Dewgong grab game is to make. Dash Attack is also a bit of an example of this: While Dewgong can keep pressure up, he does not feel much like a "combo" character, so the use of it as a combo finisher can feel a bit puzzling, and it is perhaps a bit difficult to see how it fits into the style even afterwards. Overall, though, I would say more works into what Dewgong does than doesn't, and it ends up being a moveset that will be said to be good, even if it will not be remembered for MYMs to come.

Et Tu, Geto?

The rest of this contest has gone...less than stellar-y for your sets, Geto, but I feel proud to say that Centurion has broken that MYM15 chain. The choice of a roman Centurion for a moveset is not the most obvious, and it isn't a very "high potential" set as it may be, but it is executed admirably here, creating a simple and effective moveset. The differences between the Gladius, Pilum and Scrutum are good and the fact a weapon change mechanic is not used here is appreciated, as it would have felt odd on the Centurion. The mechanics at the start of Centurion are simple and effective ones which give a good idea of the playstyle right away, leading into some fairly nice Specials, moreso now that the Side Special's grab hitbox has been removed, though the Down Special can at times feel redundant within the set and perhaps could have had something new onto it. Up Tilt was a nice variant on the Lexaeus' Forward Tilt I so enjoy and while the moves are unexciting, their functionality and working into the Centurion's advancing wall style of play is appealing. The immovable object, as you say.

Where this set falls into problems generally occurs in the aerials and grab game: While the aerials are not strictly bad, they feel the least connected to the rest of Centurion's game plan, mostly in the BAir/FAir, while the grab game feels a bit more connected but feels like it adds little, though the Forward Throw seems suitably fitting. The Centurion is not exactly someone who would be able to go crazy on these inputs, but a bit more of them working into the Centurion would have been welcome. The smashes also sit on a precarious point of balance, needing much damage and the like to remain usable with the lighter Pilum involved, which while handled okay does create a delicate and easily fractured balance and there could be issues. The attacks themselves are fairly good, though, and overall the Centurion is certainly more enjoyable than not. Personally, I look forward to the possibility of seeing more history sets from you Geto, as this set had a fairly nice quality to it and it's status as a historical set felt enjoyable. Perhaps that could be a special niche for you.

Broth Major

Borth-Majar is definitely your best set, Kiwi, and a good sign that you can throw in quality to go with your quantity. Much of what I like from Borth-Majar can be found in the Specials: The idea of a delayed counter like that, with a vulnearable channeling time, is not only an appealing and good concept but works well into the fact Borth-Majar is a "two in one" type of character. The Side Special's ability to send half of yourself forward, almost like a charging wall, offers up interesting, desync-style options to appear from there and works fairly well into it all. The Up Special is a nice move, I feel, and it adds good functionality with the core concept, while Neutral Special is a bit bland, but effective none-the-less. The standards and smashes method of alternating strikes may outlive it's welcome at time, but it still ends up fairly nice, and they tend to work well into the core concept, though it is lightly so. The aerials and grab game are largely the worst part of this set: The duality theme running throughout the moveset is least pronounced in gameplay here and the effects generally tie most loosely into how Borth-Majar plays. At the same time, they are less particularly bad moves and more moves that sit very well into the realm of not being good enough or "average", which combined with a strong enough start allows Borth-Majar to definitely be an enjoyable experience, and the writing in the moveset is very pleasant. If you can make more sets that capture the magic in Borth-Majar, Kiwi, then I think you have some good potential in you.

Annabomination

I apologize profously, Conren, for not responding to Anna's Whiteboard preview and helping with the moveset. Problem #1 from Anna stems from her unconvential organization: While the idea is not necessarily bad, what it mostly does is confuse the reader and make figuring out the information more difficult. I had to read the legend spoiler at the top about 3 times to fully comprehend what it meant and then had to check the little squares before each move, which felt intrusive to the reading experience and made things more difficult rather than easier. Anna's item generation isn't exactly a bad idea, but the problem is that many of the items Anna can spawn are horrifying: The light rune is particularly horrifying, as you can throw one out, and then dig for many items until you get a light rune or one of your other potent items, particularly the worst one, the Berserker Staff. Even worse than stun is losing total control of your character and then watching the AI flip out over the light rune well and it combined with the sleep staff form a truly horrifying combination, especially with light rune protection, while the other items do not feel like they do much, though the landmine is not bad. Side Special is also a bit poor: Since it only steals items, it is a totally wasted special in itemless enviroments or if you have control over your weapons or have no more room to hold weapons, in addition to feeling slightly awkward, perhaps Anna swiping the foe for some damage and quickly nabbing the item would be superior? Past that, sadly, is not much else to it, as the rest of the moveset largely does not flow or take advantage of it's weapons. I am sure it is dissapointing to hear this after Vespiquen last contest, Conren, but I am confident in you. Just need to chin up, move on to the next moveset and I'm sure it will be better.
 

powergoat

Smash Rookie
Joined
May 30, 2014
Messages
2
No response to mine? I know it is not very well presented, But its the concept I care more about personally.
 

ChaosKiwi

Smash Apprentice
Joined
Feb 1, 2014
Messages
104
NNID
ChaosKiwi
I must retain my throne.
ISABELLE

It's everyone's favorite assistant, Isabelle! From the latest Animal Crossing game, Isabelle acts as the most helpful and trusted adviser to the mayor, and is going to bring her town management skills to Smash! Wait, what do you mean she'll have to fight people?! She isn't prepared for that!

Isabelle has her own special mechanic, called Donations. Basically, the more damage that she is dealt or deals, the more bells (money) she collects, indicated by a counter over her damage percentage. These bells affect her specials. The longer the input for a special is held, the more bells the player uses for that special, the number of bells being spent shown by a second number next to the counter, which is then subtracted from the total number of bells when the input is released. If an input isn’t held, instead just quickly pressed, then it uses zero bells, but the attack is likely to be pretty weak! If you'd like to cancel out of a special for whatever reason, simply press A while charging! Finally, Isabelle can move while charging, meaning she can let out a surprise attack if the foe isn't looking at her percentage! She gets 2 bells for every 1% damage dealt, and 1 bell for every 2% she deals.


STATISTICS

Size- 4
Weight- 4
Ground Speed- 6
Jumps- 5
Aerial Speed- 5
Falling Speed- 6

SPECIALS

Neutral Special- Public Works Project
Using some of her own hard earned cash, Isabelle creates a Public Works project in front of her, the work depending on the number of bells she uses! If she uses none at all, Lloid the Gyroid appears, does his cute little dance that he does, and disappears. This will do no damage, so I don't recommend using it! As for other amounts, however:
  • 1-20: A do not enter sign pops up, which is about as tall as her and does 5% damage.
  • 21-50: She summons a streetlight, which is twice her height and does 15% damage.
  • 51-150: She summons a Maoi statue, which is 2.5 times her height, does 20% damage does high knockback.
  • 150-On: She summons what looks like the Tokyo Tower, which is three times her height, does a whopping 35%, and can KO at 80%. Public Works Projects remain on the stage until they go off screen, or another of the same kind is made. However, players can demolish them by attacking them enough.
Down Special- No Sleeping on the Job!
Smash Bros. is hard work! It's understandable that Isabelle would take a nap every now and again, right? So that's just what she does! If she is hit while she's asleep, she wakes up with a jolt, and a speech bubble which covers the lower half of her body and stretches a Kirby length to either side of her appears! This speech bubble is full of profuse apologies from Isabelle, which stuns anybody it touches in addition to doing 10% damage, leaving them open for another attack! In short, this is a counter attack, which is good for racking up bells!

Up Special- Town Tree
Suddenly, a large oak tree sprouts under Isabelle, carrying her upwards! The leaves act as a pass through platform, with the top of the tree being inexplicably flat. The trunk, however, is not solid. The tree will remain on screen until either Isabelle is KO'd or until she uses this attack again.

If used in the air, the tree will sprout from the ground under her, but it will not grow to meet her, instead staying the height it would normally be. If it's used in the air and there isn't any solid ground below her, it'll instead grow from beneath the bottom of the screen, with the same properties as normal.

The more bells used for this attack, the larger the tree. No bells to ten bells and the tree is one point five SBB's high, with the maximum being thirty or more bells, at which point the tree is three SBB's high.


Side Special- Hired Help
Isabelle has a lot of friends! It's easy when you're so nice! So, for her side special, she'll summon one of these pals into the battle, paying them with an amount of bells to do something to help! The bell amounts and corresponding summons are listed here:
  • 0: Her brother Digby appears and gives her a hug. No actual effect, but it is adorable@
  • 1-10: Dr. Shrunks, the "comedian", shows up and does a spin attack in front of Isabelle, which she mimics! The spins both do 8%, and if somebody is caught in between the two they're launched upwards!
  • 11-20: Brewster prepares a cup of coffee for Isabelle, but drops it (What a klutz!), creating a puddle on the ground. The puddle sticks around for ten seconds before drying up, and dealing 8% fire damage and causing those who step in it (sans Isabelle, of course) to slip and fall on their tush.
  • 21-30: Isabelle summons a manhole on the ground directly in front of her. At first, nothing happens, but if another player walks within one Kirby length of it, Mr. Resetti pops out! He stuns the victim with a short character-specific rant, dealing them no damage but giving Isabelle a few free hits!
  • 31-40: Reese the Llama (or is she an Alpaca) appears in front of her, and produces a random item for Isabelle to use. She won’t produce food/health items or the Smash Ball?
  • 41-On: The mystical psychic Katrina appears, predicting the future for Isabelle. This, essentially, allows her to dodge the next attack that comes her way, by way of Isabelle taking a safety step into the background until the attack passes her by/runs its course, with the addition of momentarily stunning the foe who used the attack with confusion! How did she know that was coming? It defies all logic! This doesn’t allow her to dodge final smashes or items thrown her way, however.
STANDARDS
Jab- Isabelle swats the air in front of her with her clipboard very quickly, dealing a swift 4% damage!

Up Tilt- A question mark appears above Isabelle's head, and she gains an inquisitive look! This deals 10%, and deals downwards knockback to airborne foes, allowing Isabelle to bring them down to her level for a sweet combo!

Side Tilt- Isabelle slips, haha whoops, and a stack of papers in escapes her grasp, flying into the air immediately in front of herself! There are three loose sheets in total, and this attack has a bit more ending lag than is normal for a tilt, but each paper deals 6% and it's likely that at least two will hit if you time this attack right! A good ender to a quick combo, as it's got little startup and high knockback for a tilt!
Down Tilt- Isabelle hums to herself, creating oddly powerful musical notes on either side of the shih tzu! These launch foes into the air, and deal 11% each!

Dash Attack- Isabelle slips, a peach inexplicably slipping out of her pocket (perhaps she was saving it for later!) and flying forward in an arc, dealing 9% to anybody unfortunate to be hit by it!

AERIALS
Nair- Isabelle delivers swift air jab that deals 7%! Although some of you may say this attack is "uninspired", "generic", and "I hate you, Kiwi", what more do you expect from a poor puppy like Isabelle, who's never been trained in fighting?

Fair- Isabelle throws papers again, this time in airplane form! Hey, even hard workers need to have fun from time to time!

Bair- Isabelle turns around a bit to fast accidentally swings her clipboard in such a manner that it could almost be misconstrued as malicious, accidentally breaking it over the head of any poor sucker it hits! Poor guy or gal! The concussion they receive comes with a free side of high downward knockback and 8% damage!

Uair- Isabelle holds up a parasol and spins it, which also allows her to stall quickly midair via the extra lift gained through the parasol! It deals 9%, and is great for air juggling!

Dair- Isabelle drops a bag of bells by accident, allowing it to fall and accidentally crush those below! Despite being a bag of bells, it doesn't detract from her Donation pool, but it DOES get bigger with every bell she collects, dealing an additional percent for every three bells she has, with a baseline damage of 8%. If she has more than 60 bells, this attack meteor smashes!


SMASHES
Side: Isabelle sticks her hands into the ground, as if to grab something just below the surface! Once the smash is released, she whips out- Woah, is that a Tyrannosaurus skull?! We've been needing one in our museum! Er, the skull takes a quick bite before disappearing, doing 21% and sending the foe flying!

Up: Isabelle cheers as a firework shoots above her, releasing a dazzling damaging display, dealing delightful damage! 20%, in fact! This attack shortly stalls opponents it hits midair, allowing Isabelle to get in at least one good hit before the high upward knockback kicks in!

Down: Isabelle sits on a bench which inexplicably appears below below her, the sides of which hit to her left and right for 23% and high downward knockback.

GRAB GAME

Grab- A simple grab with one of her cute little paws!

Pummel- Isabelle holds a sparkler a little too close to her captive! Unlike other pummels, this one must be held to be effective, dealing multiple hits every second and 3% per hit!

Down Throw: Booker the Police Bulldog helps Isabelle out by hitting the captive with his police baton into the ground a couple times, bouncing them into the air on the last hit and leaving them with 15% damage! Must be part of the Scare 'Em Straight program.

Up Throw: Isabelle releases a rolls of lit firecrackers beneath her foe's feet, oh no! They all go off at once, the explosion sending the enemy into the air and dealing them 14%.

Forward Throw: Isabelle tries to show off a sea bass she caught, but it flails and smacks the enemy away before itself escaping! Aw, and the sea bass is so rare too (it's not)! The enemy is sent either forwards or backwards randomly, taking a fishy 14%!

Back Throw: Isabelle trips, bicycle kicking her foe into the air behind her completely by accident! Oh that Isabelle, what a card! They take 13%.

Final Smash

DREAM SUITE
Isabelle pulls out a bed and takes a nap in it, as the landscape around her shifts into a dreamy, cherry-blossom filled town! This town is full of villagers, who chase down other players once Isabelle wakes up (immediately after the town transforms). Once a player is caught by a villager, the villager will start talking to them, causing the player to be stuck there until the Final Smash's time limit is reached. During this time, Isabelle is able to go crazy on her foes, which is even better since her attacks do 1.5x as much damage, allowing her to rack up donations. HOWEVER, all enemies have super armor while captured, meaning they'll take damage but not be knocked back.

PLAYSTYLE

Clumsiness and sound investments.
 
Last edited:

allison

She who makes bad posts
Joined
Jan 25, 2014
Messages
5,138
Location
Maple Valley, WA
NNID
crazyal02
3DS FC
0216-1055-4584
Isabelle, overall, feels rushed. First off, it's not stated how quickly charging her specials depletes her Bell count, which is vital to understanding the set's balance and mechanics. You have some neat concepts in the specials here, but it's difficult to tell whether they're OP or UP. It'd also be neat if some of her A-button moves depleted Bells: I mean, the Dair was asking for it! There are a couple of other neat moves; I like her unique pummel, but overall the rest of the moveset is basically generic moves hastily covered up with props. Perhaps the biggest sign of lack of effort, however, is the playstyle section, which encompasses a grand total of 4 words. You stated back at the top of the post that "I must retain my throne", but it's better from every perspective to spend time on just a few sets rather than farting them out at the speed of sound.

What!? A challenger approaches and his set is ignored? Let's take on Puck. First off, the cooldown system is a simple yet effective way to prevent spamming spells without immobilizing the character for crazy amounts of time. However, it'd be nice if there was some kind of visual cue to signify that a spell is available for use. Also, his Fthrow is better than Waning Rift in basically every way; longer duration, no cooldown, plus it buffs all of Puck's specials? That's quite OP in a set that was already teetering over the edge. Even considering Project M's more stringent hitstun, Puck is also crazy good at recovery; he can stopp all momentum with Phase Shift, then teleport to his Illusionary Orb or simply use Blink to travel 2 Battlefield platforms. Also, there doesn't seem to be anything stopping players from using Phase Shift, hitting A to exit, then reentering Phase Shift, allowing near-infinite stalling. It's important to look out for mechanics exploits like this. Despite these flaws, however, this is a very solid set! Welcome to MYM, powergoat!
 

ForwardArrow

Smash Ace
Joined
Aug 17, 2011
Messages
503

Intoner Three
Three is one of the antagonists of Drakengard 3, and is also my third set this contest, and that's 3 iterations of 3 and I'm sure that absolutely nobody else cares about that. Anyway, on a more serious note she's one of a group of sisters given power by the song, which bestowed upon them powerful magic to overthrow the current rulers of the land. Three herself is by far the least outgoing of the sisters in terms of personality, generally prefering to work with dolls and create experimental variations on monsters for her military, in addition to of course, soldiers who are rather infatuated with her for being more fair than their previous leader. Her hair grows out at a rather absurd rate, to the point she carries scissors on her person to prevent it from getting too long. She also uses them for combat despite having a perfectly good pair of swords on her person. Maybe she's too lazy to take them out?

In actuality she shares another trait with all but two of her sisters, is that she's actually an incredibly vile individual, mostly on the basis of her experiments going a little bit beyond their bounds. The doll like monsters in her military were actually made from her own soldiers, and in her DLC mission where she is forced to go out and kill her old creations, it's revealed that she tried to combine humans with monsters to power them with human emotions, claiming to have killed 56 people in total in ways so morbid the game actually censors them and leaves them up to the player imagination. The two she fights on that particular occasion? A mother and child merged into colossal monsters, who were powering the monster with hatred as she tore the father of that family apart in front of them before forcing their transformation. The servant she brought along with her is, naturally, absolutely horrified.

Stats
Jumps 8
Dash Speed 7
Aerial Speed 7
Size 6
Fall Speed 5
Traction 5
Weight 2.5


Three's stats are definently on the lightweight side of the spectrum, she's fast on both the ground and in the air, and has good recovery, while being about the size of Marth. The problem of course, is that she's actually very light, weighing only slightly more than Pikachu. There's not terribly much to say about her specifically aside from that, aside from the fact that most of her jumping prowess is from her first jump, which goes nearly as high as Falco's.

Specials
Neutral Special Summoning Ritual
Three summons up a small white rune circle in front of her, expanding as the move is charged. This move can be charged for up to 3 seconds, and the charge can be stored like Samus' Neutral B. Entering or exiting the stance has very little lag. The actual summon is about 3/4ths as laggy as a Waddle Dee toss, with the minion in question materializing in the circle and becoming active. The minion that is summoned from the circle depends on exactly how much you charged the move.

With no charge, the summon is an imp, a minion that looks to be a lot bigger than it is due it's huge wingspan, but in reality is a demon about the size of Mario. It is a pretty fragile minion, only having 15 stamina, but it flies at a pretty solid air speed and can follow opponents into the air. It has two attacks, a fast claw slash that deals 7% and weak horizontal knockback, or charging at the opponent up to a battlefield platform in length at Fox's dash speed, dealing 12% and knockback that KOs at 180%. Unfortunately, the second strike is rather slow and easy to see coming in terms of lag. That said if you do manage to summon a few of them they can certainly prove to be an annoyance to the opponent, and given you do not have to charge to summon one, a swarm of imps is actually somewhat realistic to have around.

After 0.5 seconds of charge, Three will instead summon an Ogre, which stands at slightly less than Ganondorf's height and is a much better damage sponge, having a whopping 45 stamina. They wield large metal clubs, and attack and move at a fairly slow pace, trudging along at about 3/4 Jigglypuff's dash speed. That doesn't mean they aren't aggressive, they'll pursue foes who are quite a distance away from them, but they'll take some time get there. They have 3 attacks in total, the first of which being a sideways club swing in front of them that deals 14% and horizontal knockback that KOs at 150% with a bunch of lag on both the start up and cool down. The second is an overhead swing similar to Link and Ike's Up Smashes, dealing 20% and upwards knockback that KOs at 100%, but with the lag being even worse than that on Dedede's FSmash. Under heavy offensive pressure, an Ogre can also hold it's club in front of itself to guard, and if it is struck during that time, the attack will be blocked and the ogre will counterattack by thrusting out the club to deal 12% and straight horizontal knockback that KOs at 180%. It's not effective without some amount of back-up, but the Ogre can take hits and strike back hard, if nothing else.

After 1 second of charge, we get into a more exciting minion, an Almisael doll. This thing looks vaguely like a skinny stone infant covered in purple markings, and makes noises like those of an infant as well. The creepy little things are the same size as Three, and have 35 stamina. They serve as possibly the most aggressive minion in Three's arsenal, attacking opponents no matter where they go on the stage, and being able to dash at Mario's dashing speed, though that's not their main method of movement.

They have a few methods of attack, their most spammed one being to jump up into the air a ridiculous 3.5 Ganondorf heights and divebomb for nearby foes, dealing 12% and upwards knockback that KOs at 175%. This is harder to avoid than it sounds given the things travel at disturbingly high speeds during their lunge. Aside from that, they can fire a laser blast from their stomach that stretches about Bowser's length in front of them, and deals 8% and high hitstun. They won't use this attack unless the foe is really close to them, preferring to just go for a divebomb, but once they're already in the foe's sights they have nothing better to do.

The dolls have a somewhat interesting property of being possible to decapitate. 20 damage is dealt to the head of the doll, it will pop off and start rolling around at Three's own dash speed, not particularly intent on chasing down opponents and pretty much just acting entirely randomly until it tries to return to its body 4 seconds later. The head deals 10% and moderate horizontal knockback that won't KO until irrelevant percents if it hits someone, and the Almisael doll can still perform the other attacks in its arsenal without a head, albeit the head was a huge portion of its body so it both loses a large chunk of the hurtbox on it's diving attack and also becomes considerably harder to hit. The head, however, does share damage with the body, and if one is destroyed the other will be as well.

At 2 seconds, Three will summon a much more powerful monster, a Gigas, which is vaguely similar to an Ogre in that it wields a club whilst being slow and a damage sponge. Unlike the Ogre, it stands at 1.8x the height of Ganondorf and the width of Bowser, and has a somewhat different set of attacks. It also has a great 70 stamina, though given it's sheer size and how fast most characters can take out the stamina of minions that will go down faster than you might think. The first is a stomp in front of it, dealing 15% and upwards knockback that KOs at 120%. What makes the stomp so dangerous despite it's lag is for .2 seconds afterwards it causes an earthshaking hitbox about Bowser's width where it stomped, dealing 8% and upwards knockback that KOs at 200%, making dodges far less effective at avoiding this things strikes.

The next attack is pretty standard, as the Gigas imitates Ike's Forward Smash. While it has even more lag than Ike's version, the attack does manage to do slightly more damage and knockback than the move it imitates, as well as having nearly 2.5x the range, giving this attack an absolutely enormous hitbox that must be dodged or shielded in time. Though, it does have a blindspot right in front of the Gigas that the foe can hide in. The Gigas' final attack is to slam its club into the ground directly in front of it, dealing an ungodly 35% and upwards knockback that KOs at 60%. The problem with this attack is of course, the hilarious telegraphing, as it takes a full 3 seconds to wind this up. It does however, cause a wave of earth shards to fly up in front of it that travel a Ganondorf into the air up until the end of the platform it stands on, dealing 13% and upwards knockback that KOs at 200%. The Gigas, unlike the Ogre, is a threat despite it's slowness due to the lingering, gigantic nature of its attacks.

At 3 seconds of charge, Three summons the most powerful minion she has available, a Cerberus. The massive three headed dog is still somewhat smaller than the Gigas, being 1.5x Bowser's width and about the same height, but it ultimately is the more powerful of the two. It has 80 stamina, is very aggresive, moves at Ganondorf's dash speed, and has four attacks at its disposal. The first is to shoot a fireball, which travels at the speed of Falco's laser and deals 13% and knockback that KOs at 150%, and travels the length of final destination. It can angle this up or down, and each head of the Cerberus can fire separately. A single Cerberus can actually manage to create a small amount of bullet hell with this, though after shooting a fireball that head experiences a great deal of end lag.

The Cerberus also can chomp at foes that come close, dealing 8% and a flinch on it's own, but this attack is fairly fast and since it has 3 heads, it can rack up very large amounts of damage on foes directly in it's face. It can also cover for itself if the foe rolls towards it while it's shooting fireballs with any heads that haven't fired yet, though if all its heads are in end lag, the foe has plenty of opportunity to punish. The Cerberus also has a more powerful melee strike, being able to lunge forward it's own body length and deal 22% with knockback that KOs at 90%. The best part about this move is it actually starts pretty fast, making it the best KO move in your entire minion arsenal, but the end lag is pretty horrific for the Cerberus.

Its final and most powerful attack is to charge up for 2 seconds, before unleashing a massive torrent of fire in front of it from all 3 heads. This deals rapid flinching hits that will about 35% to the foe over the second long duration of the attack, before a final hit that deals 9% and upwards knockback that KOs at 110%. This covers a huge chunk of the stage and unlike the Giygas' shockwave, actually is powerful for it's entire area of effect, just keep in mind that while the Cerberus does this it is incredibly vulnerable.

As an aside, Three can in fact hurt her own minions, and they can hurt her but they will do everything in their power not to hit her. Oddly enough, Three may actually want to hurt her own minions, for reasons you'll find out soon enough.

Side Special Augmentation
Three hums to herself and casts a small violet spell in front of her, which like the Neutral Special, can be charged for a more dramatic effect, up to 1 second. Unlike the Neutral Special, you cannot hold the charge on this move. While this spell is meant for use on minions, it's not entirely useless on foes, as it will scorch them for 5%-12% and a flinch depending on charge, as well as causing them to take 1% per second for ten times as long as you charged the move. The magic doesn't seem to react well with enemies, it seems. This burn damage can be stacked once over to deal 2% per second, which is true of the status effects you use on minions as well.

If used on a minion, it will have one of four effects depending on charge. While Three has the first effect prepared, you can see the purple magic in her hand seemingly focusing towards the center. With no charge, it will shrink the minion into a tiny version of itself, which halves it's stamina and reduces the power of it's attacks considerably. So why would you shrink a minion? Well, it can reduce the size of blindspots in the case of a Gigas, or in the case of the first 3 minions, make them small enough that they're actually somewhat annoying to hit. You can stack this once to make them even tinier, only about a tenth of their original size. At this point they're operating on a quarter the stamina and all but their biggest attacks only scratch the foe, but the fact is only low hitting attacks are reasonably going to ever land on them, and they do keep their speed from the larger sizes. In fact, smaller minions are programmed to be a bit more evasive, and will sometimes dash out of the way of opponents attacks at whatever their movement speed may be. Lastly, this can be used as sort of a "dodge" for minions, as you shrink them to be smaller and as such not having part of their hurtbox where the opponent strikes.

At a third of a second of charge, the energy Three is charging will simply become a solid sphere, and it will coat the minion in armor, which slows it down a fair bit but gives it a covering which has half the stamina of the minion, which must be broken before the minion takes damage. It also buffs the damage of their contact attacks, so it wouldn't buff the Cerberus' fire blast but it would power up the charge, for example. Slowing down a minion with clunky armor may seem like an inconvenience, but when it is at low health this can provide a way to keep it alive. Aside from that with how slow the Ogres and Gigases already are, making them a little slower to be more effective at their jobs is perfectly fine, since they're already not landing attacks practically most of the time and will only really do so when the foe is under other forms of pressure. You can tack on a second layer of armor with this move, but you can't stack more than 2 layers.

At 2/3rds of a second of charge, the energy sphere will begin rapidly swirling, and the minion undergoes no major visual change... except now they're blessed with a great deal of speed. They move a fair bit faster than before, have the lag on their attacks cut to 2/3rds of its usual, and if tiny, will use more erratic movements to dodge the foes attacks due to their increased maneuverability allowing for them to dodge foes more easily. This is the only change that is strictly upside, but there's basically no chance you'll get to use it on every minion. Its most effective on minimal sized nuisances or maximally buffed up monsters, as your miniscule minions become nigh impossible to actually hit and your empowered ones become more able to land their super charged attacks.

After a full second of charge, the sphere seems to trying to expand outwards, and the minion will grow a good deal in size, gaining power and range while multiplying their stamina by 1.5x. This will overwrite any tiny status effects on a minion, just as making a minion tiny will overwrite this status effect entirely. This of course allows for tricks such as massively enlarging a tiny minion the foe is fighting, so that it's next attack gains a great deal more range than the foe was anticipating, though given the second long charge time this isn't an extremely practical trick, though of course shrinking down a giant minion when its close to death is a viable plan. The main problem with giant minions is the blindspots on their attacks get bigger, and it also makes them easier targets. Regardless, the extra power and range is usually worth it... though again, keep in mind your minions can hit you, if you're not careful.

Down Special Intoner Mode
Three lets out a loud, songlike note and attempts to channel the true power of the Intoner sisters... which will work, if she has already coated herself in blood... okay, at this point in the set, you haven't exactly been told about this yet, but Three's actual melee moves tend to spill blood from the opponent, covering the ground as well as Three's garments. If the foe happens to be robotic it'll spill oil instead which works just the same, and if they have different color blood that will spill instead. She needs to soak herself pretty thoroughly in blood, which usually requires the foe to take about 200% worth of blood spilling attacks while Three's in close range before it will really work. That sound ambitious? Well it is, but the good news is with the exception of Almisael dolls, due to not containing anything Three could use as blood or a replacement for blood, your minions spill blood when you strike them, in addition to foes. This naturally gives minions the secondary purpose of providing a blood supply for Three to empower herself.

So what does this buff do? Well first of all, it boosts your aerial control, movement speed, aerial movement, jumps(you now have 4 instead of just 2), and traction to ludicrous levels, making Three both easy to control and insanely mobile. This may not sound like terribly much but the extra mobility makes comboing a lot easier than before. It also modifies your attacks, giving general power and speed buffs while also providing additional effects to certain moves. Three even gains a weight buff during this time, to about a 6.5, which makes her have actual durability to make melee combat a lot more comfortable for her. This mode lasts for 9 seconds, but can go on longer if you cover yourself in more blood during your power boost, whether from the foe or a minion. Of course the effect of additional blood has diminishing returns, and trying to extend this mode for more than 20 seconds is generally not going to happen.

This input isn't entirely worthless while Three has Intoner mode active either, serving a secondary function as she lets out a second yell similar to the first that actually materializes as a burst of white energy in front of her. This deals 12% and pretty strong set horizontal knockback, but the main talking point isn't using this as an attack itself. Rather, you use this on a minion and instead of taking the damage, it will infuse them with the power of the song, causing them to glow a violet color, and perform a special attack. These attacks are usually fairly powerful, but it costs 3 seconds worth of Intoner mode to use and the song will start having... rather averse effects on the minion after Intoner mode ends. They'll start staggering a bit when not attacking and take 10% per second, before keeling over dead. It's a bloodless death too, sadly. If nothing else the effects are pretty powerful. If multiple minions are in the blast radius, only the one that requires the highest charge to summon will get the command.

Imp: Imps sadly lack a particularly amazing move to use with this and shouldn't really be the target. They'll surround themselves with a dark aura and rush at the nearest opponent at Sonic's dash speed. This deals 16% and knockback that KOs at 110%. If they miss they'll continue charging until they hit the ground or fly off the blast zone, and if they do the later they'll fly back at their usual speed to the stage. If they hit the ground, it releases an explosion of violet nearly the size of a Bomb-omb blast around them that deals 12% and upwards knockback that KOs at 150%. Imps also become entirely invincible during this move, so foes have to dodge it.

Ogre: The Ogre will not actually make any strikes with this until it runs out of stamina and normally would die. At that point, it will use it's dying breath to deliver a huge swing with it's weapon infused with energy dealing 30% and horizontal knockback that KOs at 65%. This is actually really fast too... the one problem is, if the ogre dies via decay or a projectile the foe can reasonably stay out of reach of this move, which is probably what will happen considering the foe no longer has any reason to attack the ogre at all. For that matter, you might want to be careful hitting it yourself, as the Ogre will mindlessly perform the deathblow whether or not Three is there.

Almisael Doll: The targetted doll will float up into the air and begin charging up energy. All other dolls on the stage will turn to it and fire their laser in projectile form, only now it's only the size of Wolf's laser but has the same power. The projectile isn't aimed for the opponent though, it's aimed for the Almisael Doll, though they can still be hit by it. The Almisael Doll will absorb all the bolts that touch it, then fire a huge laser blast the same size as all of them combined at the opponent, dealing 8% x the number of lasers absorbed and knockback that KOs at 200% minus 30% for each laser absorbed. The preparation lasers are fired at the speed of Mario's dash, and the final laser's speed is that multiplied by the amount absorbed.

While this is potentially very powerful, keep in mind foes can soak up the projectiles with their shield or own body, and that if there aren't any other Almisael Dolls out this move is entirely a waste.

Gigas: The Gigas roars and starts whirling it's club around itself as fast as it can, striking at all different locations on it's body seemingly at random. This lasts for one second and getting hit deals 28% and knockback that KOs at 85%. The strikes are actually reasonably fast but you get a que as to where the Gigas will strike next with each attack, meaning even foes close to the Gigas can reasonably avoid it, though less so if the Gigas is speeded up. The most straightforward of your minion super attacks, but arguably the most powerful.

Cerberus: The Cerberus will point all of it's heads upwards and shoot a volley of four fireballs each up to near the top blast zone, before they rain back down. Each deals 15% and upwards knockback that KOs at 200%. They fly up fairly quickly and fall much more slowly, meaning that this is fairly predictable... but having a bunch of slow moving projectiles all over the stage means Three, especially in Intoner mode, can go absolutely nuts with comboing off them for as long as they're in the air. They'll all have hit the ground after 3.5 seconds.

Up Special Rising Stab
Three lunges upwards about the distance of Marth's Up Special, before going into helpless if she hits no-one on the way. This is a fairly straightforward recovery, with the one exception that you can actually angle it a little bit in a similar manner to Fox's Up Special, although it only covers a 30 degree arc above her so this doesn't give too much freedom. If Three reaches the foe with this she will stab her scissors into them, dealing 9% and upwards knockback that KOs at 150% and covering her in a small amount of blood, while giving her a bit of leverage to allow her to use her first 2 jumps again in a similar manner to Captain Falcon, though she cannot use another Up Special. As an aside, you can do this on minions too, though the only ones you'll ever really get leverage out of for recovery are Almisael dolls and Imps.

You can hold this input down for a quarter of a second, at which point Three will instead travel 1.5x the normal length of her recovery, and home in on the opponent. This makes using the foe to recover a little more practical even if they're out of the move's normal range, but it also makes this a lot more predictable.

In Intoner Mode, this move goes 1.5x as far and does not send Three into helpless, and if you land the hit she gets another use out of her Up Special in addition to all 4 of her jumps. This obviously makes her aerial combo potential absolutely insane during that time... if you keep landing this anyway. Should the foe dodge it once there's still enough end lag for them to punish and you won't be able to pursue them any further. Ah well.

Shield Special Human Hybrids
Pressing Shield and B at the same time produces a similar result to the Neutral Special actually... in fact you won't be able to immediately tell the difference in the minions Three summoned. However, she called in a very different variation on her usual fair, ones hybridized with humans in the rather morbid ways mentioned in the introduction. They have an extra 1.2x health and are faster than their regular counterparts. One difference however is, they retain some semblance of their humanity... and naturally, they hate Three for what she's done to them. They'll try and attack her just as aggressively as they will opponents. This makes them rather risky to utilize, given while they have some clear upside they're also a bit more dangerous to Three.

Given they're powered on human emotions, there is one other thing worth mentioning. As the health of these minions gets depleted, their attacks get stronger, dealing more damage and knockback. This is based off what percentage of their health is depleted, if they have lost 90% of their health(say a Cerberus has taken 72% or a Gigas has taken 90%), they gain a +90% boost to their damage and knockback. This makes them scarier as they take damage, actually giving Three incentive to hurt them herself, and then pile on the armor to slow them down but preserve them in their empowered state(damage dealt to armor does not count towards this buff, sadly). Do this at your own peril though, between your light weight and these monsters having just as much interest in killing you as the opponent, utilizing your human resources can backfire on your horribly.

As an aside, minions summoned this way will cry out at Three, usually swearing at her, screaming in pain, sobbing, begging for death, demanding Three be destroyed, etc. You're doing this for science and you should be used to what they say about you, they just don't understand.

Standards
Jab
Three opens one pair of scissors and stabs it forwards, dealing 3% and a flinch. She then will lazily click the blades together in the second hit of the jab, dealing another 3% and flinch in a manuever that's actually pretty laggy for a jab and makes the first strike punishable on hit if you go for this one. Now that sounds like a disaster, but remember Three has minions around to give her a little cover if she goes for the second hit.

If she lands the first and second hits of this, the foe has a greatly reduced ability to DI out of the third part of the move due to her scissors being hooked into the foe, where holding A has her twist the scissors back and forth, dealing very rapid hits of 2%-3%, at the same rate Captain Falcon's jab does 1%. That's a pretty horrific amount of damage even if the foe won't take much in the way of knockback, making this one of the best ways to cover yourself in blood.

In Intoner mode, the first hit of the Jab is no longer punishable on hit and she rushes forwards slightly when using the first hit. This means that comboing into the second hit of the jab is pretty much the expectation, and not only that they'll be closer to you so they'll take longer to DI out.

Dash Attack
Three rushes forwards 1.25 battlefield platforms at nearly twice her current dash speed, dealing damage based on how early in the dash she hits a target. If she hits someone at the very start, they take 14% and knockback that KOs at 150%, while at the end they take 4% and weak knockback. For the first half of this move's length, it actually pierces through anyone it hits, allowing Three to keep moving regardless of whether she cut through someone or not. A particularly ideal set up for this move is to have a minion and the foe right up close to you, so you can cut through both of them and then once you get past you're protected during the attacks ending lag by the fact that there's a minion between you and them. That said, the end lag of this move is horrific and you WILL get punished for it if you misuse the move. This even works with a human hybrid minion because their attention will be on the foe with Three now behind them.

In Intoner Mode, this move's range is buffed to a ridiculous 1.75 battlefield platforms and the damage and knockback decreases much less, to only 10% and KOing at 220% at the end. This is a pretty amazing DACUS but aside from that, it can allow for you to pierce through more minions for a big boost in Intoner Mode time early on, as well as creating a larger amount of defense between you and the foe. That said, the move is a lot more versatile in Intoner Mode because with everything it pierces through, the damage increases by 5%, and the knockback goes up accordingly. So it may be better to use this into a foe in a group of your minions, as the slight weakening of the attack is mitigated by the fact that Three just powered up several times over from the minions she pierced through. Just keep in mind that this also makes the move much more likely to outright kill minions too.

Forward Tilt
Three raises both pairs of scissors of her head before slashing them in an X-shape in front of her, dealing 6% and horizontal knockback that KOs at 225%. The X-shape actually becomes a magic projectile after the swipe that flies forwards at Dedede's dash speed and deals 10% and the same knockback as the melee hitbox. This projectile travels only a battlefield platform before disappearing, and the move has a lot more start up lag than you'd like for a tilt. The good news is the end lag is almost non-existant, so it can potentially be used as a set up for another attack. If you're really quick about it you can actually set it up so that the second hit of the jab becomes a true combo with the first hit, but the problem is that you need to have a very high skill level to pull that off to start with because of how fast it is, and second of all that's a rather predictable follow up that the foe will probably be anticipating, since the combo only really works if you immediately follow the Forward Tilt with the first hit of the Jab in time. As an aside, the projectile will pierce through minions and characters, to prevent minions from getting in the way.

There's a sweetspot on this move at the exact center of the hitbox, which will cause the foe to get hit by both the projectile and the slash and take the combined damage and knockback of both. While this is a hitbox smaller than the Knee of Justice so it's basically impossible to hit with normally, if the foe is stuck in a mess of imps or increased speed minions you have a shot at landing it. The majority of the blood from this move comes from the projectile, so it's a tad difficult to harvest unless you land the sweetspot.

In Intoner Mode, this move has the same large lag as usual and the power is the same on both the slice and the projectile. The key difference is, however, the number of projectiles, as instead one X projectile being spawned, you get a total of three. They all move at different speeds, one moving at double the normal speed and one at half, and they all travel 1.5 Battlefield platforms before disappearing. This turns the move from a "decent set up projectile" to an insanely powerful one, due to how difficult it is to dodge. Hell, dodging is actually worse since the back projectile will combo the foe into the projectiles in front of them. Naturally, this makes for much scarier potential combos than the standard version ever did. For that matter, if you land the still insanely tiny sweetspot, you get 36% and enormous knockback out of the deal, a fairly hard thing to do but none-the-less potentially terrifying.

Up Tilt
Three raises one hand above her and snaps with her scissors, dealing the recipient 5% and larger than normal hitstun. She follows up with 3 cuts with her other pair of scissors, dealing 2% each and the last knocking the foe upwards with weak upwards knockback. This leads into aerial combos and because of the multi-hit nature sets up for a big minion's attack pretty decently as well.

If the foe DIs out of this, the first pair of scissors holding them in place will end up cutting them deeply as they yank away from it, dealing them 7% and very large amounts of upwards knockback, though it has very slow knockback growth so it will only KO at 220%. This sounds like it makes escape through directional influence not an option, but it only makes it somewhat worse, as actually if the foe escapes they'll be way out of reach of combos with your aerials/FTilt projectile or an minion attacks you were setting up. There's another upside if they do decide to escape like this, in that they drop three times as much blood as a 7% dealing attack normally would.

Minions will not attempt to escape Three's cuts, meaning that harvesting extra blood from them with this is sadly a fruitless endeavor. That is, your standard minions. Your human hybrid minions aren't terribly smart and will always try to escape this move, which will end in you getting a ton of blood... but the problem is, most of them are too slow to do so. Only the imps will escape fast enough and that will most likely end in killing them. If you want a minion that's not an imp to escape this, you'll have to give it a speed buff.

In Intoner mode, she performs 9 cuts instead of 3, meaning DIing out becomes a much better answer... if weren't for the fact that the escape hit now deals 14% and upwards knockback that KOs at 85%. Triple blood still applies too. This turns it into a genuinely terrifying move for combos, especially with the greatly powered up FTilt projectile.

Down Tilt
Three snaps her scissors low to the ground in front of her from her, and if she hits an opponent, twists them, turning them and dealing 6% and light upwards knockback to the foe. This leaves them in the air with their back facing to you, so aside from being fairly good as a combo move due to it's speed, it means if you do follow up with a combo that ends with the foe in the air, they'll be facing towards you with their back and basically have to use their bair, which makes them a fair bit more predictable, though considering a lot of characters have fairly insane Bairs this isn't always a great benefit.

This attack actually has a follow up hit from pressing Down Tilt a second time, which simply has Three kick the foe forwards and into the ground dealing 6%. This prones the foe and has decent enough knockback as well that it can provide for some half decent stalling/spacing, but lacks the potential follow-up options of the regular version. Being a kick, this is a rare move in Three's arsenal that also doesn't spill any blood.

The scissor twisting motion will actually turn your minions around without proning them, and in fact not even interrupting their attack animations, allowing you to turn a human hybrid minion that was attacking you on a foe. The problem with this, though, is that it only really works on the first three varieties of minion, the Imps/Ogres/Dolls. Therefore, the really powerful/large ranged attacks you would more likely want to reflect aren't an option with this move, but weaker human hybrids become easier to control with this. The other thing you can do with this is spin the heads of Almisael Dolls around, changing the direction they're rolling, giving you some extra ability to pressure foes with them.

In Intoner mode, the attack is mostly just faster and stronger, and has a slight glowy animation on the turning motion of the blade. The key difference is, this can finally turn around your Gigas or Cerberus with your additional magic power from Intoner mode, finally allowing you to properly redirect the attacks of your large minions. Aside from that, turning a minion during an attack boosts it's power by 1.05x, which is extremely small but still occasionally relevant for KOs.

As a final aside, more than one turn of a minion during an attack will start slowing up the strike a bit, which on the surface sounds bad, but you can actually use this to mess with the timing of the strike. Due to Intoner mode's version of this attack being faster, this actually makes it somewhat practical to do this, allowing you to potentially mess with the opponent's dodges, while buffing the attack a little to boot due to the boost stacking. Note you can't just keep a minion spinning forever with this to endlessly buff the attack, not that any sane foe would get hit by that or let you do that, but the delay is small enough that the attack will execute after 5-6 turns no matter what.


Smashes
Forward Smash
In a fairly simple attack, Three cuts in front of her with one pair of scissors, then follows up with a stab with the other. The first hit deals 4%-6% and the second deals 3%-4%, both hits being fast and the later one popping the foe forwards a short distance. While this is a very fast FSmash, it lacks in power compared to traditional smash attacks, serving as a bit of a bread and butter melee move for Three in this form. It does however, follow nicely into an FTilt as the last hit does give some nice space between you and the opponent. It actually also follows up an FTilt decently too, as it'll combo the foe into the projectile pretty cleanly, and gives you a little more time and space than landing the second hit of your jab would, making it less predictable and a decent mix up.

Like Link's FSmash, this attack has a follow up, which can be angled. Three will dart forwards for a another cutting motion with her scissors, which deals 2%-3% and a flinch, before delivering another stab. The stab is aimed in the direction you angled the move and deals 6%-9%, and knockback that KOs at 135%-95%, which is either diagonal, mostly upwards, or down and forwards for potential gimps near the edge, depending on how the move was angled. It doesn't actually follow up perfectly out of the first combo, while the first hit of the second combo will combo out of the first until absurdly high percents, the foe has room to DI away to avoid the fourth hit. Now if you get the spacing perfectly or angle in the right direction, you might be fine however, and a minion providing extra pressure can also end in the second part of this working out.

There's a third follow up hit, which can also be angled, which is a single strike of Three lunging 3/4 a battlefield platform in the chosen direction(hopping up slightly before stabbing downwards in the down variation) and stabbing with both scissors. A note is that as the move progresses, the ends of the scissors glow with light, and that animation comes to fruition in this move. The initial stab deals 5%-9% and hitstun similar to lightning kick, before 4 thin blade like projectiles burst out of the foe, dealing 17%-24% and knockback that KOs at 90%-60% to the foe and anything else hit by the blades, which pierce your minions. They travel 2 battlefield platforms, pierce through minions and the foe, and deal the same damage and knockback to anyone they hit as when they initially burst out of the foe. Landing this hit is hard, as Three actually will take a little bit of time to prepare it, giving it significantly more lag than other parts of the combo. Nevermind that, chances are the last hit knocked the foe out of the combo, and if you missed with it the foe will chances are punish you for this maneuver rather than getting hit by it.

This part of the move in particular is where the minions contribute to your melee game, as intentionally whiffing the second hit of combo #2 will allow this to make this follow up possible instead is a perfectly reasonable option when Imps or Almisael Dolls flinch them after they escape, or your stronger minions force the foe into awkward dodging/spacing situations that allow you to more easily land this. The projectile will damage your other nearby minions as well so it may have the unfortunate side effect of killing a few you want around off if you're using them to help you land this, though you can get blood rewards as a side effect anyway. Aside from that, you can just combo the foe with the main strikes, and then deliver this particular strike to a nearby minion. The projectile will still fly out at full power and pressure the foe, and you get a large amount of blood out of the minion. The general existance of this projectile aspect makes this move very nice for simultaneously pressuring a foe and harvesting blood from a minion, even if it harvests blood much more slowly than the Jab.

In the Intoner Mode variation, the 4 projectiles will burst out of the recipient on every strike, dealing the same damage and knockback as the initial hit except on the last one, which is buffed to deal 1.3x as much damage and knockback as before. This allows you to cut through a group of minions and provide tons of hitboxes for the foe to avoid, which could lead to them being combo'd into the now extremely powerful final hit. The extra hits from the projectiles bursting out will more reliably allow the actual strikes to combo together on the opponent too.

Down Smash
Three lets out what sounds like a scream as a white magic barrier appears around her, functioning as a hitbox that deals 4%-9% and KOs at 200%-100%. This attack is pretty fast by Smash attack standards(though not terribly so overall) but the hitbox only covers an area about twice Three's width, and she's not a very wide character, as well as her height. The main good thing about this move is it's function as a defensive input, as it nullifies all hitboxes that come into contact with it entirely, and reflects projectiles, at their normal power and speed-1.5x that, based off charge. While this is hardly an amazing defensive measure against opponents, it does cover for their attacks and the attacks of Human Hybrid minions at the same time, something a shield or dodge can't do very well. This attack does have a reasonably long duration, but the end lag isn't so bad that you'll be punished horribly for it.

There's another benefit to blocking attacks with this, in that the barrier will actually absorb the impact of Melee hitboxes, and on a second use of the move later on, grow in size based off how much damage it absorbed. Now how much is a little disappointing, only about a Kirby size worth per 10% soaked up. While it doesn't sound like you'd realistically be able to absorb a ton of power with this move, you have to consider how insanely hard Human Hybrid minions hit at low amounts of health. This move can cover a pretty big area if say, a Human Hybrid Cerberus uses it's fire breath on you, especially if another minion or the foe hits you at the same time. Of course if you want to make this move's hitbox really large, it will realistically require you have multiple human hybrid minions out.

Now why would you want to expand the hitbox on this move? While the range is nice, it rather lacks in power and it's not useful for combos or bleeding. Well, the hitbox I talked about only applies to the edge of the move's hitbox, which is thick enough that Three will actually never be able to hit with the inner hitbox barring some insanely weird circumstance involving Lizard/Kyubey/mini-Hannibal Bean under a poison mushroom effect, and with Brawl characters it's flat out impossible without double poison mushrooms. The inner hitbox being, the energy of the song flowing to make the barrier, and the song's energy in it's raw state is incredibly dangerous. If a foe is hit by the inside of the hitbox, which is anywhere within the barrier barring her own body width around the edge, they take a whopping 30% total and knockback that KOs at 100%, regardless of charge. Their body is also visibly torn up by this, causing them to bleed everywhere for the next 3-9 seconds, taking 2% per second. They also shed about 6% worth of blood per second, which Three can reap if she's nearby.

If a minion is trapped inside, the song will simply kill it, no questions asked, causing it to explode in a ludicrous fountain of blood and guts that will provide Three with the minion's entire stamina worth of blood. Getting something like a Gigas in here for a full 70% worth of blood is almost never going to happen, unfortunately. However, the minion getting torn apart turns their flying body parts and organs into hitboxes that add even more damage to the hitbox, and the extra damage even causes the foe to bleed like the original hitbox. Suffice to say, the rewards for this attack if the hitbox is massive enough can literally be an instant Intoner Mode, but as said, you need powerful human hybrid minions everywhere to get that, and that's extremely dangerous for you with your low weight and mediocre recovery, not to mention requiring prep time to make said minions. Still, the absolutely ridiculous amount of blood this can generate makes it an effort possibly worth pursuing.

The one downside to this variation, which is worth keeping in mind, is the energy will flow near instantaneously to form the barrier, and then the inside of the hitbox will be empty, in which case, the foe can take advantage of the combination of the moves duration AND end lag to punish you, probably with a smash attack of their own. Not to mention, if their were any minions inside, they're dead now and you have absolutely nothing to cover you and even if you recover, you may not be in Intoner mode and down a couple minions. As said, using this move to activate Intoner Mode is really high risk, high reward.

Speaking of Intoner mode, the barrier hitbox isn't even formed in that mode, just the raw energy is released, with a tad more starting lag but the normal end lag of the move, turning this into a quick and powerful smash attack that you can sacrifice minions too in order to make even more ludicrously deadly. In Intoner mode, since there's no other way to increase the size of the hitbox, you can simply do so by charging the Smash Attack, and the range starts out as the size of the barrier in Intoner mode and can be charged to be double that.

Up Smash
Three opens both pairs of scissors and performs a manuever similar to Link's spin attack, while also kicking off the ground to get herself into the air. As she rises and spins her scissors around, they do 5 hits of 3%-4%, before she slashes them both together over head for a final hit of 16%-22%, and high knockback that KOs at 90%-70%. The rising slashes don't combo the foe into the final hit, just sending them away at the end with knockback that KOs at 200%-120%. As such, the final hit mostly serves as a KOing sweetspot... if the foe is a considerable distance above Three. If they're directly above her but within under a Ganondorf height, the move will just whiff them entirely, making it a slightly questionable anti-air, nevermind the fact that it has high end lag while leaving her in the air afterwards.

The AI of Imps allied to you IS pretty smart in regards to this move though, and if they get caught in the hitbox along with the foe, they'll briefly hit the foe into the overhead slash before dying, as the move deals the 15 damage required to kill them. If they're armored up they'll be too slow to do this so that's not a valid method of saving them, though any other possible buff works. Besides whether or not it costs you an imp at least you get blood out of the deal. And as a blood harvesting attack, this is actually pretty good, it hits minions on both sides of you and deals a reasonable amount of damage. It's especially nice because it can often do so without any real cost to the minion in question, hitting a few different ones with only 2-3 hits each, not a terrible loss of stamina.

Aside from that, if Three would be hit with a non-solid projectile at the start of the attack, she will instead catch it in the attack, causing it's energy to flow through her scissors and makes the attack deal the same amount of damage and knockback on the projectile on all the hits, barring the final one. This is especially nice since the hits come out so fast the foe won't get a chance to take knockback from former hits before the next one connects, meaning the move will end up dealing a huge amount of damage, AND all that damage comes out as blood too for Intoner mode. That said, given the timing of this move the opponent is probably not so dumb as to feed you a projectile for it while they're right up in your face... however, consider the fireballs of the Cerberus or the lasers of Almisael dolls. While timing it is very tricky, you can potentially catch those with this move, and you're more likely too get them fired in your direction in the first place if you have out Human Enhanced minions.

In Intoner mode this attack goes up twice as high and deal twice as many hits, which sounds like a downside as it makes the final hit less practical to land... but then realize that instead of having high ending lag, in Intoner Mode this attack doesn't have that much to speak of, so missing the final hit really isn't absolutely terrible anyway. Given the final hit is less practical to land, it now deals 26%-34% and KOs at 70%-50%.

Aerials
Neutral Aerial
Three crosses her pairs of scissors in front of her for a brief instant, before performing a cross slash in front of her that deals 8% and knockback that KOs at 250%. Thanks to the low-ish end lag, it actually can potentially serve as a combo starter, but the crossing motion gives it too much lag to really work as a part of a combo, and given the knockback has a decent rate of growth it can't combo past 50%.

That said, this attack is actually fairly hard to punish, as if something would hit Three during the crossing motion, it's nullified if it hits around the area she was "blocking". This isn't actually a very large part of Three's body but if it's the first thing an attack collides with, she can reasonably block it, making it an acceptable aerial defense. It also adds 1/4th of that attack's damage and knockback to the subsequent strike, which honestly isn't all that incredibly much, but this is the closest thing Three has to a true counter in her set as Down Smash is rather unusual, something that with human enhanced minions running around she really does appreciate, as the foe can dodge their attack but Three can absorb it's power with this and at least get them for some of the damage and knockback. That said, don't think the move is a perfect defense or even close, a foe is a lot smarter than one of your minions and may very well just hit you around this relatively small defense.

In Intoner mode, this attack is more or less the same... except that now the power boost is stored for the next 3 seconds, rather than just for the follow up strike. Note that a lot of Three's attacks are multi hit and it's only applied to the final hit, though attacks with follow ups like the Forward Smash/Down Tilt all get the boost. This boost doesn't stack, only override the old power buff if a new one is larger. However, this does make Three scary for a brief period, especially if she soaks up a big minion's strike and subsequently creates a huge amount of powerful projectiles using the Forward Smash.

Down Aerial
Three takes out both scissors and starts rapidly making cuts below her with the scissors, as if attempting to gouge the foe apart. This deals several rapid hits of 2% that can potentially add up to 24%, though this isn't as easy as it sounds to pull off for similar reasons to Yoshi's Dair, though it's easier to pull off than said move at the cost of more start lag. At the very end, Three tears both scissors violently out of the foe, dealing half the total damage dealt by the attack and a fairly strong spike to boot, as well as extracting the same amount of blood as all the previous hits.

There are a couple nuances to this move worth learning, the first of which being that in addition to the long duration, this move has AWFUL landing lag, enough that a foe can very easily punish Three with a smash attack for it. Aside from that, it can be cancelled into any other aerial during the first half of the duration, during the second half you're basically committed to the attack. If the foe DIs out early you can always go for cancelling into a Nair for safety reasons.

Lastly, the landing lag bit is more relevant when you realize that the move does something slightly different if the opponent is on the ground for the last hit, instead dealing the .75x as much damage as all previous hits and giving 1.5x as much blood. It also deals upwards knockback that KOs at 110%. This is a move that becomes a fair bit easier to pull off if you have imps or Almisael Dolls in the air for additional pressure, especially if the foe made the decision to DI out an Up Tilt first. This also can serve to harvest a large amount of blood from a minion, up to 60% worth, while being a bit safer than your Jab for that purpose due to the ability to cancel the first part of the move into another aerial, though you have to be very deliberate in your timing of this if you want blood, making it more predictable than your jab despite being safer.

In Intoner Mode, the damage is increase to 3% per hit to a maximum of 36%, and the opponent on ground final hit gets an absurd knockback buff, now KOing at 80%, meaning that setting this up can mean a very easy kill. The problem is, the landing lag remains on this move, actually slightly more severe, in exchange for cutting out some of the start up lag.

Forward Aerial
Three cuts in front of her with her scissors, dealing 7% and weak horizontal knockback. This move is very fast and can be angled up or down to either pop the foe up slightly into the air or very very weakly spike them to the point it will probably never get used as a gimp. There's a sweetspot at the very tip of the scissors that deals 10% and largely the same knockback, largely just a reward if you want to go through a little extra effort to space yourself for this move. The move serves one fairly important purpose despite being so simple, Three is trying to combo and this is probably your best straight up combo move in your entire set, setting up subsequent strikes either above, below, or in front of you while also being fast enough to work in the middle of a combo.

Intoner Mode very slightly increases the speed and damage(to 8%) of the move, nothing terribly noteworthy. The main difference is that sweetspotting is a lot better in Intoner mod, dealing 16% while still dealing the same easy to follow up on knockback. Still it serves mostly the same function as Three's basic combo move.

Up Aerial
Three swipes upwards with her scissors, dealing 10% and moderate upwards knockback, in another fairly quick hit that largely serves as a juggler. Given Three's Up Special and "misfired" Up Tilt, she probably does want some ability to continue juggling the foe once they are high in the air. The move isn't that insanely fast, but it serves it's purpose.

In Intoner Mode, this attack is largely the same, with one key difference, it leaves behind a path of purple-ish energy where she swiped for 1 second, serving as a lingering hitbox that deals 5% and weak upwards knockback. This pushes the move from good juggler to insane one, even if it lacks the typical property of aerial lingering hitboxes of gimping the foe, in conjunction with your buffed Up Speical this gives you a very strong aerial chasing game.

This gains a bit more utility in the context of your minions and projectiles. Your minions are actually very smart about these lingering hitboxes, hiding behind them if possible to cover their attacks, or specifically aiming their moves to bash the foe against it repeatedly like an electric barrier. Given it only lasts one second they won't get a ton of mileage out of it... that said, if a projectile from your set hits the energy it will give it an additional second of lifespan while still continuing on, meaning if you short hop this and then get a bunch of Forward Smash hits in right below it, you may have a surprisingly useful little trap left behind.

Back Aerial
Leaning back, Three snips behind her with her scissors, in a move that is a fair bit laggier than her other aerials, but deals 12% and lightly upwards horizontal knockback that KOs at 160%. In Intoner mode, she whips around and cuts much faster, dealing the same damage and knockback but turning it into a fairly spammable wall of pain Bair.

Grab Game

Grab
Three reaches forwards with one hand, grabbing in what is basically a standard Brawl grab. Its range is slightly above average for Brawl grabs.

Pummel
Three takes out her scissors and starts cutting into the foe, performing invasive surgery on them. Each press of the pummel is moderately fast and deals 1% as she disects her victim alive, but the real benefit is what happens for the next 1.5 seconds per pummel. Whenever the opponent attacks during that time, they take 2% as the muscles they use to perform the attack have been disfigured and cause the foe to spurt blood when they try to utilize them, actually providing 5% worth of blood for Intoner mode as well. A foe attempting to pressure Three at this point will have to contend with the fact that they're effectively building her up to Intoner Mode unless they're camping her.

Aside from that, if the foe is interrupted out of an attack, it will cause their internal organs to rupture further than they already did, causing them to take 1.3x the usual damage and knockback of an attack that hits them at this time, as well as spewing twice as much blood as usual. So not only is pressure automatically building Three to Intoner Mode, if she can properly punish the foe for it she gets to reap a much larger reward while they're under this effect. This pushes the opponent to want to play on the defensive, which seems reasonable until you remember minions provide additional pressure if there are multiples at close range, and on top of that if you have some kind of must kill threat like a Cerberus or a reasonably buffed up other type of minion out, at that point the best defense is a good offense. But wouldn't it be a shame if a fluke in attacking the Cerberus or buffed minion ended in the vastly more dangerous Intoner Mode being activated.

In Intoner Mode, this attack is largely the same, but the foe suffers a slight increase in attack lag too, making them even easier to punish. It may be worthwhile to use this at the end of an existing Intoner Mode to make setting up the next one a bit easier.

Forward Throw
Three stabs her scissors deep into the opponent and twists them carefully, causing the foe 4% and mild horizontal knockback. This is a very weak throw at first glance, but the tweak Three made to the opponent's body was a very deliberate one, that will cause blood to violently burst out of them 3 seconds later, dealing 9% and upwards knockback that will KO at 180%. This drops double as much blood as the damage would indicate, making this a very powerful way to acquire blood.

Obviously this move is fairly hit or miss in terms of effect, because if Three is actually near the foe, not only does she get 18% worth of blood, she may be able to combo them for even more due to the delayed nature of the hitbox. On the other hand, if the foe outplays her, she'll only get 4% worth of blood out of this, as she has to be fairly close to the foe at the time to benefit.

In Intoner Mode, the burst of blood is even more violent and there's a small amount of gore involved too, and it gives triple blood while dealing 13% and upwards knockback that KOs at 100% on the subsequent hit, providing a fantastic extension to Intoner Mode. It's a bit less useful for extending combos than the previous version given the increase in knockback, but it serves as a great KO move instead.

Back Throw
Three steps in front of the foe as she skewers them behind her with one pair of scissors, while preparing the other pair to strike with. While you can release this immediately to have her perform a strong slash that deals 12% and huge horizontal knockback that KOs at 185% due to the slow growth, but still gives her tons of space at low percents. This is actually somewhat important, one of Three's main weaknesses is that she doesn't get a lot of set up time as a rule due to her set being rather dedicated to comboing, making the prospect of expending minions a tad more difficult than you might want it to be(though imps are easy enough to make that at the very least, having a few of those out is easy). Having the extra space provided by this move is rather essential, it being the best option she has for this. Aside from that, this has the minor side effect of the foe serving as a meat shield against Human Enhanced minions behind you.

Charging the move largely does nothing unless you manage to get a full .7 seconds of chage in, at which point Three will, in addition to knocking the foe away, fires a projectile after them out of the blade, dealing 6% and a flinch while travelling slower than the foe takes their knockback. This gives something to impede the foe on their way back, and like the other projectiles in Three's set it does pierce minions. An additional .7 seconds will add another projectile at a slightly different angle and speed for more coverage, but getting that much grab time isn't common. That said, occasionally this will come up, and every .7 seconds afterwards will add yet another projectile to the mess.

In Intoner Mode, the projectile bit of this move becomes vastly more practical, as the amount of time required to create a projectile is reduced to a third of what it was before. If you grab the foe at high-ish percents, you can leave some borderline bullet hell on their way back to you, and with Three's ludicrous dash speed in Intoner Mode she can actually dash in and potentially play off this small storm of projectiles too.

Up Throw
Three tosses the foe above herself before stabbing her scissors into them thrice, dealing 3 hits of 3% with the final hit dealing reasonable upwards knockback as a way to set up foes in the air. While the final hit's upwards knockback is too high to follow up with an Up Smash and too low for an Up Tilt, it's still a reasonable way to start a juggle. Not terribly much else to this move though it serves as Three's best set up throw, aside from it having knockback that puts them into Up Smash range as well as 6 hits in Intoner Mode, meaning they have to immediately start reacting, at which point you can chase them with your ludicrous Intoner Mode speed.

Down Throw
Three slams the foe into the ground and makes a few incisions in the foe, the incisions seeming to vary randomly, but in reality they do based off the last attacks that hit the foe, as she's reopening their wounds. The initial throw deals 6% and leaves the foe in prone, but they start violently leaking blood for the next 3 seconds. The amount of damage they take from this is equal to the total amount of cutting based damage they took in the last 10 seconds, dealing them a total of only 1/6th that damage, but causing them to leak a full half the blood over that time span. That's a pretty insane reward potentially, especially off a throw.

The thing about this move is, unlike Forward Throw, it requires you to basically be on top of the foe for the next 3 seconds, and believe it or not prone is hardly Three's favorite position for the foe to be in, having next to no follow ups on a prone foe. Not only that they come out of this move with a slight frame advantage.

That said, if the foe is already bleeding out from Down Smash, this move will become a fair bit more powerful as it causes them to take 1/4th the damage and leak 2/3rds the blood, and for that matter, the blood will actually spray further, meaning you don't have to be quite as close to the foe. In general if you sacrificed a bunch of minions to Down Smash, even if you hit the foe with it, and you don't get Intoner Mode, you're not in an amazing spot, but this throw can at least cover for that.

This move starts out as powerful as the Down Smash buffed variation in Intoner Mode, and can go further in combination with Down Smash and Intoner Mode to give a full 1/3rd damage and the entirety of blood spilled, as well as spraying a good distance beyond the opponent's body.

Playstyle

So, you want to play Three right? Well at a very casual level, she can play the traditional campy summoner character, having a projectile on Forward Tilt that goes through her minions and a decent variety of ones to play with... unfortunately, that will only get her so far. Three is rather frail once they get through, her options to support her minions are honestly a tad limited outside of buffs. Nevermind the fact that outside the Cerberus, all her minions are weak and/or highly predictable, and while storeable charge is nice, it's less amazing on someone who is just trying to fortify themselves as much as possible. You can go for more powerful minions via buffs... or the ever risky Human Hybrids which can backfire.

No, if you want to win you're going to have to actually play a somewhat aggressive character, albeit one who supplements her approach with minions. This isn't bland MYM7 Sho stuff though, Three has a lot of moves, such as Down Tilt, her Smashes, and her Dash Attack that play rather nice with minions around. The problem is, Three's minions get hurt by these attacks often, but frankly sacrificing them is usually worth it, as once Three reaches Intoner Mode, she's effectively a god in combat, and hardly needs her minions help. However, it's best to try to be careful and leave a few alive, as her interactions with them during the song make her far more likely to score a KO, and being able to hack them apart for extra Intoner Mode time never hurts either.

The minions themselves have fairly varied functions. The only one you can expect to summon often while engaging the foe in melee combat is the Imp, because the lag on the summon isn't too bad. The problem with the imp is it's frail stamina, but it can provide some assistance in combos or landing big hits. Almisael Dolls serve a similar purpose, but are a fair bit more versatile due to their varied range and the ability to decapitate them for an extra hitbox, though summoning Almisael Dolls is a rare commodity unless you go out of your way to do so. Ogres are actually fairly easy to summon even in the head of combat due to not requring much charge, but their incredibly lacking speed makes them far less useful for setting up combos. However, they're great for building Intoner Mode with their large stamina, and slow as their hitboxes are they give something else for the foe to prioritize avoiding over Three's much quicker hits.

You have to go out of your way to summon a Gigas, but it serves as a similar boon to the Ogre, but on a much larger scale, and has a presense on the match over a huge chunk of the stage, meaning simply avoiding it's attacks is much harder. Aside from that, hanging around a Gigas is great for gathering blood. The Cerberus provides a target for the foe that isn't you, and something they actually have to prioritize killing due to how powerful it is, which in particular in combination with the pummel is very useful, and dodging combos is much more difficult when you have a giant oppressive target existing that NEEDS to be killed. For that matter, the buffs can do that to almost any minion. If you need something oppresive and the Ogre on stage isn't cutting it, buff his speed. The opponent will DEFINENTLY prioritize him now.

Human Enhanced minions are very interesting, because there's a very delicate balance to how you use them. On one hand, they're extremely powerful, especially the higher varieties, due to the buff they get when low on health, but on the other hand, they're a threat to Three. I say a threat, but not AS much as to the foe, as Three has moves like Down Tilt, Nair, Dash Attack, and Down Smash specifically designed to provide her with some measure of profit despite them being equal opportunity threats. How willingly you use them will depend on your skill as a Three player, this aspect of her game may get a low level player killed more often than not, but a high level player will be reaping the benefits of soaking up a hugely powerful Gigas smash on her Nair or Down Smash.

As for her comboing, Three's a tad straightforward when you take the minions out of the picture, but a lot of her attacks have minor nuances, sweetspots and the like, which will require clever use of spacing, minions, and some of the small number of delayed hitboxes in her set to take full advantage of. Her aerial game is probably her strongest point for combos, her Smashes provide the most advanced uses of minions, and her grab game can reap huge blood rewards and set up nicely for any stage of her game. You already read the moves and they all have plenty of description of their uses, I shouldn't have to repeat that here.

Overall Three's a minion character who suffers a bit from her lack of summoning time and her inherant damage to her minions, but makes up for it with the massive benefits of fighting alongside them and the side effects of sacrificing them. Conduct experiments and find your ideal minion gameplan, and eventually you'll become an effective Three main.

Final Smash

A thunderous roar is heard as Three's watcher, Ezrael flies over the battlefield, sending down a rain of 10 fireballs in a manner simlar to PK Starstorm as Three hops on his back. The fireballs fall a fair bit slower than PK Starstorm's and deal 15% and knockback that KOs at 200%, making them very bad for a final smash on their own, but as Ezrael floats in the background, you can control a purple reticle, and if you press B on it, he will shoot a fireball from the background at it, functioning in a similar manner to Snake's final smash and dealing the same damage and knockback as the falling fireballs. There is more of a delay before the hit than there is with Snake's final smash, sadly.

The advantage of having both is, if you hit a falling fireball, it will bounce back up into the air, adding it's size as the two fireballs combine, as well as increasing it's power by 6% and causing it to KO 30% earlier. The fireball will bounce in a direction based off where you hit it, to the side causing it to bounce in the opposite direction it was hit from. Fireballs can combine with existing falling ones too to further boost their power, giving this final smash a ton of variety. Do you want a bunch of random chaos, or to juggle around one big fireball with immense power, or something in between. The choice is yours.

In Intoner mode, the number of projectiles falling increases to 15, and the delay on the shots is reduced to that of Snake's final smash, making this a much scarier final smash. You won't always get Intoner Mode AND the final smash at the same time, but when you do manage it the result is impressive. Three will ride Ezrael for up to 9 seconds or until she's used all her shots, and during this time it does not subtract from Intoner Mode. Afterwards, Ezrael drops her off on the stage and vanishes into the sky.

Match-Ups
Three vs. Sherry Cromwell - 65/35 Sherry's Favor
Ellis is both blessed and cursed in this match-up, being so huge is a pretty insane boon to him when Three is trying to get a reasonable sized guard of minions, as he can just plow through them all at once. The sheer presence of something so big in the match-up makes creating a Cerberus/Gigas fairly difficult too, as Three will never get a break even at the start of the match to start preparing with something so huge and honestly rather hard to avoid constantly attacking her. The main problem for Ellis however, is his HP. 50 HP is not exactly amazing under any circumstances, but Imps will actually chip away at it at a reasonable rate, and a lot of Three's attacks are vastly more damaging on something so gigantic, as for example she can reasonably land the final hit of Up Smash on him in addition to all the other hits.

In general Three will probably not want to bother with Ogres or Almisael Dolls in this match-up, and Human Hybrids carry a pretty big risk with the sheer amount of pebbles flying around that could potentially interrupt whatever use she was trying to make of them, while Ellis can shield Sherry from them to a decent degree. Imps however, can be summoned pretty fast and actually do serve a purpose in chipping away at Ellis' health bar while she goes after Three. As soon as Ellis goes down, this is your chance as Sherry is rather vulnerable and won't have much luck fighting Three during this time. Summon a Gigas or(preferably) a Cerberus, which will make Ellis' return a much more brief one until they manage to take down the minion. During periods where Ellis is fighting one of Three's own giant monsters, Three can easily start wrecking havoc on Sherry herself, as Ellis dying frequently means he won't be around to protect her.

That said, Sherry still has a decently large advantage in this match-up, on the basis that Three is rather fragile, especially without much in the way of support minions early on. This is great news for Ellis, who can easily take advantage of her somewhat lacking defense when his attacks come from all sorts of crazy angles(even Three's Down Smash isn't saving her from underground attacks) and proceed to brutalize her with heavy attacks, and repeatedly pitfall her so she can't summon as much and Ellis can heal off his damage. The moment a Gigas or Cerberus gets involved the match becomes much closer, which it likely will in a match that goes on for more than 1 or 2 stocks, but at that point Sherry will have enough of a lead that Three will struggle to come back.

Three Vs. Sloth - 70/30 Three's Favor
In the battle of their respective series Sin of Sloth, the FMA Sloth immediately runs into a huge problem... specifically, his own huge size. Like with Ellis in the previous match-up, being gigantic is great for Three whose set is loaded with sweetspots and combo moves, and is absolutely fine with a character surviving to higher percents when she can just abuse that to get to Intoner Mode and kill him anyway with her ridiculous speed and both damage racking and KO ability.

Obviously this is any match-up with a lightweight comboer for Sloth, and he has tools to fight back, specifically effort mode. And effort mode is great... but there's the ever present problem of Three having multiple options for high speed minions in Imps, Almisael Dolls, and the Cerberus. Sloth only needs to take 16% before he gets knocked out of his beloved Effort, and once that happens he's an even bigger target then before.

So he has some other options he can go for. He can try and tie Three to himself to keep her from camping too much, but she wins at close range anyway and she can even turn Sloth's own huge strength against him with Down Smash/Nair. If he tries to stall in the pit, he's going to get damage racked like crazy and Intoner Mode WILL become a problem for him, nevermind that it provides Three with the longevity she wants. What an ugly match-up for Sloth!

Well it would be entirely hopeless, but for all the bad I've said about Effort mode, it's hardly a lost cause. Sloth can certainly use it to bulldoze through minions in rapid succession, and Three's minions aren't terribly unpredictable. Nevermind that in that mode, he actually is faster than the lightweight female, so if the minions go down, Three is under serious pressure fighting back unless she has her own super mode active. That said, not getting smacked out of effort mode and then utterly destroyed while asleep requires the Sloth player to be heavily outplaying the Three player, and a tanky minion like the Cerberus or Gigas can potentially hold out long enough to knock Sloth out of effort anyway. Sloth's gotta put in a lot of hard work to win this match-up, I'm sure he won't like that...

Three vs. Michael Reynolds - 55/45 Three's favor
Michael Reynolds welcomes his dear daughter to his own personal amusement park, now in Smash Brothers... oh wait that's NOT Eriko? Oh these purple haired girls are confusing. Regardless, a little secret about Three is that while she's not good at getting set up time, she IS scary when the opponent just gives it to her. Reynolds is about as intense of a trap character as they get, even if he's not incapable of fighting, and Three's going to get plenty of time to build up minions. The one you probably want to start out with is the Gigas, possibly the Human Hybrid Gigas for that matter as the willingness to attack Three may help when he whiffs due to a dodge and wipes out a whole line of Reynolds' traps. The usual imp crew works for approaching, but you do want Almisael Dolls too, as they're good at preventing Reynolds from setting up.

The main thing Reynolds has going for him is that, well, his traps will be going off like crazy this match. Three's minions will almost always be triggering some trap or another, giving the imps rather short lifespans. Shadow Traps are especially nice, as Three's ways to kill them are actually rather lacking barring Dair, and the shadow copy is fairly scary when it gets to copy a powerful blow from a minion. Swapping triggers around makes this even easier to pull off, and when Three enters Intoner Mode she has to cope with the fact that the Shadows may be redirecting her powerful Intoner Mode attacks at her.

While at close range Three obviously has the advantage over Reynolds, it's not as huge as you'd think, because Reynolds does have a massively durable, albeit rather flawed shield that he can't just throw up whenever, and the dummy men actually deal a pretty large amount of damage. For that matter, Three's not a fan of having to fight against slow projectiles like Reynolds' cash, as they can throw off her offensive and allow the opponent to take a few extra hits if she's not covered by imps.

One thing worth keeping mind about this match-up is that Reynolds is going to prevent Three from getting a lot of blood. Dummy Men don't drop it, his traps don't drop it, and Three's minions will be constantly being destroyed by Reynold's traps. Not surprising the master of IllBLEED controls the bloodflow of the match, but the lack of Intoner Mode is going to make it rather hard for Three to actually pressure Reynolds that heavily. That being said, Three's own minions are tearing into Reynolds' traps, creating a weird form of stalemate as the minefield that is the Illbleed amusement park takes out Three's army, but not without it's own casualties.

The match will go on until one or the other gets a foot in the door, but once they do things get ugly. If Reynolds manages to create enough or empower enough traps to overwhelm Three's minions, he'll break through and win the match. If Three's minions get too large in number of Reynolds' fortifications are all destroyed, then Three will take over and apply too much pressure for him to realistically recover from, especially since she can actually access Intoner Mode on a common basis at that point. Three does have a mild edge here, as Reynolds doesn't have anything quite as inevitable as Intoner Mode in his arsenal, as even if he holds her off it he can't forever, though Reynolds does have a bit more versatility than Three due to his ridiculously wide array of traps and trap interactions. Whoever wins though, glorious, bloody entertainment will be had as structures are smashed and monsters are torn limb from limb.
 
Last edited:

FrozenRoy

Smash Lord
Joined
Apr 26, 2007
Messages
1,268
Location
Las Vegas, Nevada
Switch FC
SW-1325-2408-7513
Shoot the Iron Tail

I actually remember Dr. Mario 64! It was a fun game, though it was basically just what it said, Dr. Mario...on the Nintendo 64! But anyway, Shoot the Rabbit.

Shoot himself is a tough character to tackle, but this attempt is pretty good, with some dissapointment in that I feel Shoot did not really take much advantage of the actual soccer balls that were his core idea: He seems much more to play around with reflecting items than anything, especially since he summons his own Soccer Balls so you could give him some special effects on how they get knocked around by moves, like maybe a move that loops it up some or something. The soccer balls are still fine enough here, though, and the item reflection looks okay and it forms a fairly nice and simple playstyle, though at times some things feel a bit too complex and/or obtuse, like the way the turtles work and the exact way of momentum gain on Down Special and the like. Turning the foe into a soccer ball is perfectly in character for Shoot, even if it takes a moment to get over how it feels, but I feel that the problem is that this doesn't lead to accomplish much, aside from perhaps some weird grab gimping, likely due to the fact that turning the foe into a soccer ball is something that just doesn't offer a lot of options without feeling very tacky or against what the set is doing. The Forward Throw in particular is a move that feels odd and I would argue Shoot turning himself into a ball, while interesting as a move, also feels quite bizarre as turning into a ball is how Shoot is defeated, not how he accomplishes much, though perhaps this is more forgivable due to Shoot's limited character appearances. I felt the smashes were actually pretty good, though, generally being simple yet effective moves that played into Shoot's playstyle and took advantage of the use of soccer balls. It's still ultimately a set that is above average, though, so you can put away the shotgun and let the rabbit live. :)

Pie, mon

This comment will be short, in part because I have advice that more pertains to help in my Isabelle comment below, but suffice to say I did not find Piedmon very good. However, Piedmon actually has a fairly solid set of Specials, with the Neutral and Side Specials being good, NSpec a bit moreso, while the Down Special actually opens up many possibilities and is a fresh take on portals. the Up Special is a bit dissapointing, though, since it doesn't do much. The real issue with this set is past the Specials. The Specials are good because they set up a lot of things for the rest of the set to play off of: You have a lot of different angles to hit the foe off of with Side Special, allowing Piedmon powerful long ranged projectiles at the cost of being without use of it and possibly other moves on the Neutral Special creates an interesting scenario of mixing it in without becoming helpless and when to use it, and the portal path for projectiles opens up a new dimension for Piedmon to play with what projectiles he does have. It's not that the attacks do horrible things or even, necessarily, that they are "generic", but that they do not feel like they enhance the playstyle nor have clearly defined uses. For example, how do different uses of the Jab, Up Tilt and Trump Sword projectiles work into how he plays? Are they more offensive, for close ranged strikes, or does he prefer to attack at long range with things such as portals and Trump Sword's long range? How does the F-Tilt work into things, for example: Perhaps it is good at spacing the foe away from Piedmon for follow-ups, or maybe it keeps them close for other strikes, or maybe it sends them away from Piedmon that is advantageous to him? I feel the playstyle section truly shows this up: Everything that it suggests working into each other is in the Specials. I am not saying that they need to combo or anything, just that they work towards a goal. Even something simple, non-flashy and "generic" can become good when used like this. For example, Ike's variety of moves gives him a cohesive feel of being a strong bruiser, who wants to use his jab and other moves to best space and poke foes, before smashing them right off the edge with one of his stronger moves and using Down Special to become a fairly dominant close range fighter while approaching projectile characters with Side Special. Ike isn't the strongest example, per se, but one that is a bit self-evident to see. The problem with Piedmon is it does not feel like his attacks truly connect to his Specials or to an overall feel of his moveset: Aside from characterization, everything past the Standards feels like it could be replaced with Captain Falcon's moveset and not feel much different. In my opinion, this stems from something I will get to more in Isabelle: I feel that you should take more time on your sets.

Royal Sticker Star Bowser

K. Rool is a moveset I've been going back and forth on a lot and even now I'm honestly not sure how much I like it, with rereading done earlier today for good measure, and frankly I am sure I will reread it again before voting period to try and figure it all out. Part of the problem is that a lot of K. Rool does is actually things he uses to fight in the various Donkey Kong games, however just throwing them all onto one moveset can feel very odd and create a somewhat disjointed feel. No more do I feel this is more apparent than the three or so Baron Roolenstein moves on the set. Yes, K. Rool using Roolenstein stuff is something he can do since K. Rool IS Roolenstein, but it feels totally at odds with the feel of the set, which is entirely K. Rool and Kaptain material, and adds very little to the moveset: Up Aerial's effect could be replicated with the blunderbuss, the Down Tilt's effect is fairly good but nothing to shed tears over losing and it isn't worth the oddity of it's feel in the moveset, and Up Special being replaced by Up Smash would probably be preferred anyway. I think a lot of my problem with this set, though I am not a Donkey Kong affeciando, is that it feels this is less a well characterized set of K. Rool and more a collection of things K. Rool does to fight in a moveset, and I did not feel I had a better understanding of K. Rool as someone who is not hugely into DK as much as I felt it was pulling from every possible thing. Some things like the Dash Attack feel like this too: K. Rool turning invisible IS something he can do...but SHOULD he do so? Should he be doing so on a Dash Attack of all inputs and does it really add anything to his playstyle? I don't really think it contributed much.

I'm not a big fan of the klouds, or rather, I am not a big fan of the effects on most of the klouds: The middle one is okay, but the other two are just...ugh, why? Control reversal mostly serves as a way to let a chip gimp or whatnot at the foe, nobody likes getting control reversed with Palkia and nor will they this, and in all other situations it feels like it's flow is minimal and when it does happen is mostly just sorta cheap, I think it would legitimately be better if it was just a projectile with the same flight path but it just did damage and knockback or even just the poison effect without the control reversing. The last projectile is just very generic and long stun that does not feel like it works with anything interestingly and is extremely frightening on a projectile that travels the entire width of Final Destination. Especially since it takes only half a second of charge on such a long range projectile. The Down Special is a decently good effect, but I do somewhat worry about it's animation, I know that is just how it is in the fight but maybe if he shot them out of his blunderbuss here? The Side Special is quite nice, at least, the minions do their job without being intrusive too much given K. Rool isn't really a minion character, what they do is interesting and generally fun and they work into the playstyle and so on. Oh, and the Up Special allowing grabs is a bit scary, especially since K. Rool has throws that feel like they can gimp (Up Throw), similiarly this is problematic moreso for not feeling fitting to the K. Rool playstyle, though it also might be a bit imbalanced.

I also actually enjoy Forward Smash, good projectile that lands as a trap, very fitting for K. Rool and a good move, though the fully charged version is a bit absurd to imagine, just travelling so absurdly fast and stupidly far (Same problem Falco's laser has on the length, really). Up Smash feels a lot like just D3's Up Special, which admittedly isn't bad, but it feels like making this a chargable Up Special, axing the current Up Special and making a new Up Smash would be better anyway. Down Smash being a counter feels somewhat odd on K. Rool and while I understand this move comes from the game, it can also feel at times odd, especially the bit about K. Rool's bloodshot eye pulsing, something me and Smady both agreed felt an odd touch, though the move itself is at least fine for the most part. The grab game is an odd beast and while I do not dislike the idea, it reminds me of what I planned (and still plan) for Roy Koopa, it feels extremely complex when it could be very simplified in terms of text at no loss and the absence of a pummel is simply inexcusable when it would be so easy to add one...also, three of K. Rool's throws send the foe in the opposite direction of their input (Back Throw shoots forward, Up Throw shoots the foe into the ground, Down Throw shoots the foe up). I actually quite love the Forward Throw, though, the range being perhaps a bit absurd but it feels very fitting and gives K. Rool just the kind of move he wants. One issue it and the Back Throw have is that no effort is expended on the throw when actually using it to grab foes at all, not even a token mention of how they might fit into the playstyle, just kind of plopped at the end of the projectile grabbing part of the throw, making them feel very useless. The Up Throw's effect on foes also feels like something is off on it, the view of the foe bouncing and all feeling odd, but I will say that I also enjoy this throw's use on the projectiles, the Down Throw and Back Throw feel much more iffy, the Down Throw's effect in particular feels like something K. Rool can do but which feels kind of tacky on a throw all the same, I honestly feel a throw without an added effect and with a bigger focus on what it does with the foe instead of the projectiles would have really enhanced this grab game.

The standards, to me, felt a bit crisper overall and a nice part of the set: The crown boomerang feels odd, but the effect is fairly nice on K. Rool and I do feel that it's use of being a boomerang fits into the playstyle. On the other hand, I quite dislike the Dash Attack, it feels extremely awkward on the input and K. Rool simply does not have invisibility flow into his game in any appreciable manner. But on the other OTHER hand, Forward Tilt is actually one of my favorite inputs in the set, an attack that feels perfectly fitting to K. Rool, flows into his playstyle nicely, has a pretty nice effect and overall fits it's purpose perfectly. Is it the most creative move ever? No, but it is an extremely well executed move that fits what K. Rool needs perfectly. The Up Tilt is also a very fitting use of K. Rool's in game talents done in a way for K. Rool as a character to use, provides a useful effect to the character that fits into the playstyle, and overall is well executed, while the Down Tilt...well, the effect is something I don't mind, but I dislike the fact that Baron just has like 3 moves here, it really either needed to be more (Which IMO would have been a poor descisions) or just cut. Neutral Aerial is a fine and fitting move that does it's job well...and who can resist that hypnotic dancing of King K. Rool? The Forward Aerial is an okay move, but K. Rool gaining superarmor on the move is a bit odd, considering it makes his whole body apparently gain knockback resistance but he is only holding it in front of him, why not just make it block attacks from the front and give it some more weaknesses, fit more naturally and would still work well with the original intention? Back Aerial isn't necessarily a bad move, but from what I know K. Rool basically NEVER uses his tail for actual combat, so this mostly serves to give him a bit more of a generic lizard feel I guess? The effect isn't anything you couldn't accomplish with the blunderbuss, after all. The Up Aerial similiarly can have it's effect just on the blunderbuss, I mean he alright inhaled with it earlier so why not have it inhale/suction here, and again just has the Baron theme randomly crop up, the Down Aerial is good with perhaps slightly weak playstyle relevance, but the Bowser butt bomb with shockwaves works well enough into the playstyle that I'd hardly complain.

AAAAANYWAY, this comment is getting ABSURDLY long, so to summarize my thoughts...honestly, I am not even sure if I like K. Rool or not, but I have ultimately put him as liked for now because I ultimately enjoy the playstyle it has a fair deal and I do feel it had a deal of good moves, like Forward TIlt, Forward Smash, Forward Throw (Keep up those forward inputs, apparently), Up Tilt and the like. However, I feel the Baron parts of the moveset were extremely out of place and that a lot of times instead of having K. Rool shine as a character, everything he did was just thrown in there for the sake of character, and ironically this hurt the characterization overall. In addition, many effects I did not like really dragged down my enjoyment of the set, and overall I could see it slip into unlikeability, for now it hits the likeable range...and of course, all of me spewing stuff over it there is because of 2 (I think I actually started to half-read it again before today, so 2.5) readings that really served to highlight what I felt about it more clearly and is, of course, only one man's opinion: A lot of people enjoy this set, after all.

Isabelle of Spain

Isabelle has a lot of problems inside of it: While Isabelle may herself not be a fighter, the Villager isn't either really, but the Villager still actually uses his items as intentional attacks, while Isabelle trips and flops her away across the moveset, with very awkward things such as summoning minions, sometimes on bizarre inputs. But first I want to tackle a key line in this moveset, though I am pretty sure it was intended to be humorous: "Nair- Isabelle delivers swift air jab that deals 7%! Although some of you may say this attack is "uninspired", "generic", and "I hate you, Kiwi", what more do you expect from a poor puppy like Isabelle, who's never been trained in fighting?"

I will use this to transition into some general discussion from reading your movesets. It isn't that the moves are "generic" or "uninspired", it is that they don't tend to work towards anything. You don't necessarily need to work towards one unified goal, as a character does not always have one, however most good sets have a playstyle, which is how they play, and how it works into it, be a strength or a weakness. Ike's playstyle is that of a heavy, swordsmanship laden bruiser, who uses strength and range to muscle through other characters and moves like counters as a dominator at close ranges and Side Special to close in on far away foes, but with a distinct weakness in lag he must compensate with moves like jab, playing for the right moment, and to projectiles. Fox is a fast, fragile speedster who hits hard, and the like. The problem with a large amount of your sets, Borth-Majar the most major exception, is that they lack this playstyle. The attacks are often described as such that, even if there is something to be seen, it is very hard to do so, and rarely do many moves work into the playstyle or even really attempt to. Borth-Majar's Specials and the attempt, and sometimes success, of the Tilts and Smashes was a great step forward in this department, even if the grabs and aerials were lackluster for not following through. Isabelle has a mechanic, sure, but how does she best want to use it? It feels like a collection of random attacks with sometimes tacky effects without cohesion. Does Isabelle prefer to play at a range? How does she spend her bells and what are the choices here, does she want to change up how she sets up depending on the type of opposing character, what are ideal setups for Isabelle and what counters her setups and how does she react to these counters? And how do Isabelle's attacks work into this, even in the simplest of ways, and further enhance how she plays?

It isn't that they're generic: A punch, a kick, a slash, they can all be interesting if utilized properly, if you use it not as a collection of attacks but instead as working towards one playstyle, perhaps instead of just saying they slash forward and they deal a damage % and knockback, it tells us more, say talking about how the Forward Tilt is ideal for getting a foe into a midrange for some other moves or for attacking/retreating, but that in turn this knockback is not great at truly getting breathing space, and so on, and those are just very simple applications. In my opinion, this in part stems from the fact that you write your movesets fast: I am a fast movesetter and my movesets usually take 1-3 days, and usually unless it is a quickie one day set it will not just be a few hours of work, or if I do it will be a fair deal of intense thought.

I also feel that you are harmed by your lack of commenting: Commenting is not just a tool to help the skill of others, but to help your own. By understanding and articulating the reasons you enjoy other sets, you can further apply the knowledge to your own sets, to better understand what you enjoy in a moveset and ergo what you can make in a moveset for yourself and others to enjoy. I would recommend taking a handful, 5 or so, of sets that you have a strong opinion on, be it liking ot disliking, and sitting down and making a comment on it, maybe even reread the moveset. Consider what you enjoyed and did not enjoy about the moveset, even what you may have enjoyed in a moveset you found bad and vice versa, and articulate it into a comment, post it in the thread and whatnot. Consider how their playstyle worked, how their moves worked into each other, and apply this knowledge to a set you will make. Take more time on the next set, take longer sessions and think for a longer amount of time than you may find usual on the moves, close your eyes and perhaps imagine how it would play out in a game, preview it out to people as you complete it and even as it is completed and try to get the best feedback you can. You won't become an amazing movesetter overnight, nobody does, but I sincerely believe you have the talent to at least make quality sets: Borth-Majar may not be a set that blows people away, but it got pretty consistant 5+ stars, it shows that you have potential inside of you, it just needs to grow. Don't get discourage, take heed of advice and do not be afraid to ask other people for help. If you do not do so already, you may also find it enlightening to read other peoples comments on sets that are not yours often: By understanding the mind of people and how they perceive sets, including in how they do so differently from you and what they look for in a set (Note that you do not have to look for the same things, people are not carbon copies of each other, but even just gaining knowledge of this helps you) and consider such things in your own sets and what you think of it and whatnot.

I hope this advice has been sincerely helpful to you, ChaosKiwi, and I look forward to perhaps seeing that set, if you take my advice.

Three's a Crowd

So it's ForwardArrow's third moveset, aptly named...er...Three. I look forward to more direct titles like this, such as "Non-Humanoid Antagonist". Getting past some jokes, though, Three is one fine moveset, and something I think is truly great here. The start of Three with her minions is exquisite, and might I add I do love the coloring of the headers here, as the minions are wide and varied and all have apparent playstyle uses, things like Imp as a basic but somewhat poor minion who nonetheless has some point, Ogres and Gigas as big damage soakers and dealers, the Almlsael dolls as ranged components, and finally the Cerberus as the big, bad wolf of the minions, all with varied uses and take pains to be used in different ways as to be parts of Three's playstyle excellently. I especially enjoy how much that, aside from perhaps the Ogre and Gigas, it feels like every minion serves a purpose and you do not just want to automatically jump to the next tier of minion just because it is stronger. The additions of buffing them on Side Special and other utilizations of them with your scissors, from movement to shedding blood for your Intoner Mode for comboing or even comboing them with your enemies, is handled in a lovely and flowing way, though perhaps the shrinking effect is arguably a bit poor. I liked the restraint shown here: While some may say that Three needed more minion manipulation, I feel that she has plenty, especially when combined with the fact she needs a combo game and the like, not to mention that with a good deal of complexity and depth in what she can do already and how redundant much would be that adding more to this part of the set would just be making it more soupy. Intoner Mode might not revolutionize the world, but it is a very well executed buff, and the idea of utilizing minion "super attacks" like that seems like something rarely seen and appealing, especially when combined with the fact you much assess using it against more time in Intoner Mode and such, and the fact that Intoner Mode encourages a more offensive onslaught works well with Three wanting to get much more up close and personal like this. It also feels fitting character-wise: Three goes from being a bit more lazy and laid back to more motivation and striking. Even the Up Special, with it's many similiarities to Marth's, adds it's own flair that works into the playstyle, while remaining un-intrusive. The Shield Special also offers a fun choice between power and control that works doubly well with Intoner Mode and which I further feel plays off of Three's minion selections: What the minions can do takes on a whole new meaning when you consider how they will strike Three on the Human Hybrids and how the minion's moves work when they fight against Three as well. It is an effective way to add a new dimension to them and almost feels like a fitting extension of one of Sho's throws, the one that let the opponent somewhat have Taboo control.

The Standards don't let up this high quality as they continue: Simple little things like how the Jab works are nice and the Up Tilt is an especially nice move, Three having to react to the opponent DIing or not and how her scissors affect that, while giving the foe a fine descision even when being hit, a snap action to make, with Three having a variety of options to follow-through. The DACUS usage in the Dash Attack is nice, especially when you consider that Three's Up Smash seems nicely built with it, considering it's multi-hit nature, just how the last hit works (Such as allowing her to approach afoe and try to ONLY hit with enough to set into it), and my favorite of DACUSing right into an energy projectile to absorb it into Three's scissors and strike right back at the foe. The Forward Tilt is a nice tool for Three that works into both her minions and her combos, making one of a few nice bridges between the two, while being a fine yet simple move in it's own right, adding depth to it in the context of all others, such as the larger and sweeping attacks of the Ogres and Gigas, to produce a projectile opposite of the Cerberus fireball and such, in addition to some general nice stuff with the sweetspot, and the Down Tilt while nothing especially special works excellently into the playstyle, a tool in Three's arsenal that gets the job of turning about minions, flowing with human hybrids and being a useful attack on foes and wraps them all into one nice, neat strike.

Three's Forward Smash and Down Smash may take an extra read to fully understand, but both are pretty nice: Forward Smash is a good tool in her combo melee game, or even just a general melee game, and feels like a miniature but appropriate take on Dancing Blade almost, with a variety of follow-ups that while not differing as much in direction allows Three a great deal of choice and the foe a good deal to keep aware of when dodging, not to mention a fairly decent blood generator and the flow it has with the minions. Down Smash's defensive abilities are logical and fit a nice part of Three's moveset, giving her a much needed option to defend against enemies, yet making it fit into the playstyle as a more niche defensive move and not be overwhelming as to remain a bit of a weak spot for Three. The good use of turning it into an interesting risk/reward hitbox in addition to that is grand and the Up Smash in general is a fine move that I already talked about some earlier. The aerials are also largely good, with the notable exception of the Back Aerial, perhaps the only move in the set I would say is truly bad, though moreso because it does not feel that it fits into the set more than anything the move itself does. Up Aerial is perhaps slightly bland, but the trap left behind it is fairly interesting (Reminds me of Yang's UAir, for that matter) and Three frankly needed a nice and simple juggler like this. Indeed, it is the gentle touches on the grab game and aerials that pushed this set truly over the edge for me: Neutral Aerial's semi-blocking nature, Forward Aerial's perfectly fitting into it's necessary role and good move properties on it's own, Down Aerial's working into playing with big minions and the way it interacts with air and ground, it is all very solid stuff on the aerials, and the grab game itself also forms a solid part of the moveset that fits exactly what it needs to, with perhaps a bit more flair. The Up Throw is a move again sme may deride as a bit "bland", but I feel it is exactly what Three needed, as she lacks a "true" launcher but aerial play is still a good part of her moveset and it helps fit a simple use of it that is also not particularly amazing and thus helps keep Three grounded. I actually quite enjoy the effects of the pummel and Forward Throw, though I expect this to be a slightly descisive topic, and the character in it combined with things like the damage over time (essentially) potential combined with close ranged striking or minion play and the way the Forward Throw asks for Three to work extra for some more blood is great. Down Throw is probably the iffiest overall, but I did enjoy the effect: I am perhaps unsure of the exact numbering, but this seems...about okay and it helps give Three a throw that truly rewards proper setup.

So overall, yeah, I REALLY liked Three. Her combo playstyle mixed with minions, the interplay of the normal minions with the Human Hybrids, the characterization and the way everything fits, and truly the use of simple yet deep moves in the last 1/3rd of the moveset or so spoke to me, it gave Three room to breathe and kept her from being too stuffed with irrelevancies or with frivolities and made both of her playstyles stronger in their presence. If I am to have complains, I am guessing there are some numbers in here I didn't really fully notice but could use tweaking, perhaps on the Down Throw or in the number of hits on a move or two, and I am sure that an argument could be made that Three did not "go far enough", though I heavily disagree with this, and the Back Aerial, are my only true overall complains. And that is why I am proud to award this moveset my first 10 star rankings of the contest and ForwardArrow's first offical 10 Star ranking on my rankings (Urabrask is 10 stars, but I was not around in MYM11!).

And with that...a very, very long comment block draws to a close. I'll see you next time, everyone.
 
Last edited:
D

Deleted member

Guest
MYM15 User Rankings - Update 4
Post #248 - Post #276

Raw Data
FAQ


FrozenRoy
Movesets: Reimu, Marisa, Lucemon, Kaguya, Youmu, Ruby, Weiss, Blake, Yang
168

ChaosKiwi
Movesets: King of All Cosmos, Lion-O, Jet Jaguar, Clockwork, Zatch Bell, Astrodactyl, Borth-Majar, Holly Summers, Piedmon, Isabelle
60

crazyal02
Movesets: Commander Video, Batman, Ratchet & Clank, Ridley
51

BridgesWithTurtles
Movesets: Mr. Mime, Dewgong
45

powergoat
Movesets: Puck
31

Getocoolaid
Movesets: Doopliss, Tangela, Snorlax, Roman Centurion
30

Conren
Movesets: Anna
30

ForwardArrow
Movesets: Don Thousand, [Usami], Three
30

StaffofSmashing
Movesets: Mach Rider
2

JOE!
Movesets: Zoroark, Barbaracle
2

Smash Daddy
1

Di-dara
Movesets: Tommy Wiseau, Scarlet Freshbrew
1

Chris Sifniotis
Movesets: Commander Keen
1

Score Breakdown
Moveset - 30 points
Joke Moveset - 10 points
Comment - 5 points
MYmini - 4 points
Post - 1 point

Bolded sets are new this update.

Joint movesets - made by more than one author - are counted towards both users.

Bracketed sets are joke sets.

The point you gain for a post is negated by anything higher - for example a post of one comment is worth five points.

I will not give any points out to posts that have an infraction.

Update 4 Summary

This update saw a large amount of sets and comments in impressive spurts of activity, including a four-set project by Roy that put him back in the overall lead. There was also one of, if not the first DotA sets by a newcomer, powergoat and a fair amount of other good sets by other members. In the build-up to one or two big group projects around E3, I hope the next user ranking update is just as big.

MYM15 User Rankings - Total Scoreboard
 
Last edited by a moderator:

peeup

Smash Lord
Joined
Sep 3, 2007
Messages
1,618
Location
Hartford/Mass
I've been briefly reading some of these sets for a while, but I haven't really had any strong desire to make a moveset. After seeing a set for Puck, though, I think I'm motivated enough to try to port other DotA heroes to Smash, seeing as I'd done so with Invoker, Meepo, and Techies in previous MYMs. So, expect a DotA inspired set from me in the next few days =D
 

FrozenRoy

Smash Lord
Joined
Apr 26, 2007
Messages
1,268
Location
Las Vegas, Nevada
Switch FC
SW-1325-2408-7513
The Comment Corner is now up (first page), existant and updated to the current point in the contest, I will be trying to keep it much more up to date as well. If anyone sees any problems, just tell me so I can fix 'em. Enjoy!
 

allison

She who makes bad posts
Joined
Jan 25, 2014
Messages
5,138
Location
Maple Valley, WA
NNID
crazyal02
3DS FC
0216-1055-4584
The Comment Corner is now up (first page), existant and updated to the current point in the contest, I will be trying to keep it much more up to date as well. If anyone sees any problems, just tell me so I can fix 'em. Enjoy!
This is pretty cool! It's a good way to see what sets need some commenting love. *coughRidleycough*
 
Top Bottom