Welcome to Smashboards, the world's largest Super Smash Brothers community! Over 250,000 Smash Bros. fans from around the world have come to discuss these great games in over 19 million posts!
You are currently viewing our boards as a visitor. Click here to sign up right now and start on your path in the Smash community!
It appears that you are using ad block :'(
Hey, we get it. However this website is run by and for the community... and it needs ads in order to keep running.
Please disable your adblock on Smashboards, or go premium to hide all advertisements and this notice. Alternatively, this ad may have just failed to load. Woops!
Basically, a full moveset is all that's required. Stats and character description/pictures aren't required but heavily recommended to give an idea of the character you're making. Another thing not totally required but recommended is a "playstyle" section explaining how the moves all work together and what the overall goal is. A major unspoken rule here is that, unlike many other moveset making threads, the quality of a moveset is generally judged by how original, flowing, true to the character, and uniquely executed a playstyle is, rather than how good individual moves are. Hope this helps!
Generally, you want a decent number of inputs. I.E. not just specials. You can skip out on some moves (i.e. throws) if you give a good reason, but it's generally not a good idea and likely give you bad reception. As long as you have most of your inputs, you should be fine. A picture is welcome too, of course. I'd recommend using a moveset by a more experienced MYMer (i.e. Warlord or FrozenRoy) as a template to get you started.
Generally, you want a decent number of inputs. I.E. not just specials. You can skip out on some moves (i.e. throws) if you give a good reason, but it's generally not a good idea and likely give you bad reception. As long as you have most of your inputs, you should be fine. A picture is welcome too, of course. I'd recommend using a moveset by a more experienced MYMer (i.e. Warlord or FrozenRoy) as a template to get you started.
I was wondering more along the lines of what characters can I use...is there a set of specific characters for each installment of MYM or can I just grab a character I want a make a moveset for them?
You can make a moveset for any character you like, and you don't have to worry about whether someone else has made a moveset for them before if that's what you mean. If you, say, wanted to make a moveset for Nightmare you still could even though he already has a moveset in this contest.
I was wondering more along the lines of what characters can I use...is there a set of specific characters for each installment of MYM or can I just grab a character I want a make a moveset for them?
What Kat said. It doesn't matter whether or not someone has made them before, you can use them regardless (though if you want to base it off their moveset, it's generally advised that you ask permission first). In terms of character choice, everyone is open. You can even make real people, though it'd probably be advised you don't make it derogatory if you decide to go that right (we've had sets for fighters before, i.e. Joe Calzaghe, Jeff Hardy, Colonel Sanders, Stuart Ashen, Randy Johnson).
Welcome to MYM ClubbyBear! Doraemon is a character I'm not sure anyone else is really familiar with, but I recognize him at least, and I think a few other MYMers know at least a little bit about the character, if that's something you were worried about. I'd recommend you try using some bbcode and image editing software, even a free website like imgur to scale down images and spruce up your moveset, it's a bit of a mess to read through, and probably part of the reason you haven't gotten much of a response yet from anyone on your set.
As for the set itself, it's got some decent creativity for a first-time set. The Dokodemo door is the most interesting move in the set, as both Doraemon and other players can use it. It would have been nice to expand on how Doraemon could use it to his advantage, if opponents followed him through and he attacked them back for trying to do so. Ideas like that are fun to include in moves... not just what they do, but how they're useful. Some people like to save all that information for a separate playstyle section though, it's up to you. Unfortunately, a lot of the rest of the set falls a bit flat... people aren't generally fans of movesets that pull out random props to attack with, although with Doraemon you didn't have much else of a choice. There could have been some more thought put into each individual move though... the aerials are all the same extender punch, in different directions.
There's also a tragic lack of juicy details in these moves. You neglect to mention, for instance, how much damage many moves do, including the all-important neutral special, or what it means for a player to be 'paralyzed'. Is it identical to Zero Suit Samus's paralyzer? At what charge? Questions like this should be answered by your writing. You also completely missed adding a section for Doraemon's grab and throws... those are considered essential for a moveset to be considered complete, so you might want to add some in for that.
All in all, the best recommendation I have is to read more movesets, emulate what they do successfully, and improve with your next entry. Good luck!
Tepig
I can tell that you definitely love the character you chose for this set. It's what your name is after all, Tepig. And you definitely spared no effort in finding images for every single attack that Tepig uses, which is impressive in its own way. I'd recommend using smaller images next time if possible though, the images you chose are a bit big. Also, a bit problematically, only one image is actually of Tepig! It becomes a bit problematic, because imagining a Tepig performing Sucker Punch and an Absol performing Sucker Punch are two very different things... or a Lucario using Double-Edge, for that matter. Having images is great and all, but only when they really help understand what your vision of the moveset is.
What I really took away from reading this set though is that you had lots of ideas... creative ideas too. There's plenty of interesting moves and interesting Pokemon attacks being used here... but that came at the cost of really losing the vision of what made this a moveset for Tepig. It looks like you scrolled down a list of moves that Tepig could use, and picked an input and effect for each one... moves like the forward tilt, Round, are pretty egregious examples. It's a very easy, cheep creativity, and it makes it hard to imagine this set as a moveset for Tepig, as opposed to any other Pokemon that can learn these moves. For that reason, it's important, when making a moveset for a Pokemon, to not just use Pokemon moves willy-nilly, but focus on what the Pokemon's personality and characteristics are, and choose moves that emphasize that. Without it, you get a messy set like Tepig, where nothing sticks together into a cohesive fashion. Lots of flashy attacks here, but no playstyle.
All that being said, I think there's definitely potential here for you to improve with your next set if you focus on thinking of a more central idea or playstyle to start with, and avoid using Pokemon moves on every input like you have here. In MYM talk, we sometimes call this 'Pokemon Syndrome' and it is sort of frowned upon. No sweat though, this was your first moveset. I'm looking forward to seeing what you put out next.
Just a quick question, can I improve the submission and resend it? I'd like to improve my first set xD
Thanks for the suggestions / critique, I'll totally try to fix the issues next MYM / In the next version
Just a quick question, can I improve the submission and resend it? I'd like to improve my first set xD
Thanks for the suggestions / critique, I'll totally try to fix the issues next MYM / In the next version
You can edit your current entry and post a link leading to it in the thread. You might want to make a list of changes you make in the linking post too, since that'll get people's attention more than saying you just made changes and helps them look out for specific things when re-reading the set.
Question!: Is it best to sway away from a Pokemon's actual move pool in the games for fan-sets? I believe someone mentioned that Pikachu can't actually learn Skull Bash outside gen 1
Question!: Is it best to sway away from a Pokemon's actual move pool in the games for fan-sets? I believe someone mentioned that Pikachu can't actually learn Skull Bash outside gen 1
Using attacks from a Pokemon's movepool somewhat comes down to asking yourself whether it would make sense for it to use that attack and whether it feels right. For one, it'd feel pretty freaking stupid to have a moveset for Blissey and give it something like Flamethrower on any of the inputs, or god forbid make it a Special attack in the vein of Bowser's Fire Breath - or worse, giving Tyrantum -charm- as an input when it makes no sense for a scary dinosaur. There are actual cases in Pokemon where a certain Pokemon doesn't learn a move, yet it would make perfect sense for it to use that move. Let's see...the first thing that comes to mind would probably be how it would make sense for Goodra to use surf in a moveset despite not being able to learn it in X and Y. Or how Rayquaza can't learn dig but uses it in Brawl anyway. There are also times where how a Pokemon can learn a move, but the way it would execute it could somewhat be left up to imagination - using Tyrantum again as an example, it can learn Horn Drill, but rather than magically summoning a horn on its head you'd expect it to rotate its teeth like drills and bite down if you wanted to put it on a move.
Using attacks from a Pokemon's movepool somewhat comes down to asking yourself whether it would make sense for it to use that attack and whether it feels right. For one, it'd feel pretty freaking stupid to have a moveset for Blissey and give it something like Flamethrower on any of the inputs, or god forbid make it a Special attack in the vein of Bowser's Fire Breath - or worse, giving Tyrantum -charm- as an input when it makes no sense for a scary dinosaur. There are actual cases in Pokemon where a certain Pokemon doesn't learn a move, yet it would make perfect sense for it to use that move. Let's see...the first thing that comes to mind would probably be how it would make sense for Goodra to use surf in a moveset despite not being able to learn it in X and Y. Or how Rayquaza can't learn dig but uses it in Brawl anyway. There are also times where how a Pokemon can learn a move, but the way it would execute it could somewhat be left up to imagination - using Tyrantum again as an example, it can learn Horn Drill, but rather than magically summoning a horn on its head you'd expect it to rotate its teeth like drills and bite down if you wanted to put it on a move.
LUCARIO RETURNS! His aura stronger than ever, Lucario uses strong close and mid range attacks to get an edge on foes!
JAB: AURA PAWS
Lucario does two jabs while his paws are covered in Aura energy. These two are incredibly fast and deal about 2% each, but are boosted by his current damage percent like all his aura moves! For reference, his new Aura is based around the % you all see in the game. So at 50% taken, all his moves do 50% more damage (2% -> 3%), and at 100% they do double (2% -> 4%)!
Aura Paws can end in a kick for 4% that does not have the aura effect, but decent knockback for spacing purposes. Players can either choose to use the two jabs as a "Magic Series" for other ground moves, or simply as a spacing option with the kick.
FTILT: IRON SPIKE
Spinning on his heel, Luc takes a step forward and does a vicious backhand with the spike on his left Paw with a bit of Aura effect. When it lands, the foe takes no Knockback but instead a whole lot of hit-stun on top of 5% that grows with damage. Thanks to Aura, this can be another follow-up from his jab at later %'s as the hit-stun covers the move's rather lackluster end lag allowing for great ground pressure.
DTILT: LOW SWEEP
From a crouch, Lucario juts his foot out far, poking at foes and popping them up with 6% dealt for their troubles. This is his only tilt that doesn't benefit from aura, but instead has set knockback meaning it will always send foes up about 2/3 of his own height off the ground. Like nearly all his ground moves, it makes a great option out of Jab (especially into jab again!).
UTILT: HALF-MOON KICK
Facing towards / away from the camera, Lucario's foot is coated in Aura as he does a sweeping kick upwards that starts behind him and ends in front of him, covering an entire 180* ! This is a fantastic juggler at 7%, but may leave him open at times on the ground as it takes a while to cover in front of himself, so spacing it against aerial foes, or foes behind yourself is ideal.
DASH: FLYING KICK
Dashing forwar-
~~WHACK!~~
ZOROARK APPEARS!
Introduced as the 1st Pokemon of Generation V, the Illusion Pokemon quickly became a fan favorite and rival of Lucario. Zoroark joins the cast as an incredibly tricky character, relying on deception to win fights as if a foe manages to see through him, his frailty often spells defeat.
ILLUSION
His signature ability, Zoroark takes the form of another fighter when he first appears into a battle... or at least he would if it wasn't blatantly obvious you hovered over and selected him. If you go that route you ignore one of his best traits!
Instead, to activate illusion you simply have to hold down the Zbutton while selecting another character. Once selected, you can let go of the button as the trick is in place, you will start the match as a totally different character, such as Lucario. From here, you have a Knockback threshold that dictates how long you can keep up your disguise, in this case it is High meaning that most any move with high base power (IE: most smashes) will knock Zoroark out of the illusion in a puff of black smoke. Zoroark can also manually get out of the illusion, but we'll save that bit for a moment.
As for the use of Illusion itself? Trickery of course! While active, you control the moveset of whoever you're disguised as, able to use all of their abilities with a catch: you deal Illusion Damage. This type of damage is rather self explanatory: the pain the enemy feels is merely an illusion of injury that begins to heal once the illusion fades away. In other words, damage dealt while masquerading as another character will begin to rapidly heal (10% a sec!) once the illusion is broken. While surely detrimental to be found out early on, being able to use anybody's abilities early in a match can surely be a great advantage! If you are particularly skilled, illusionary attacks can even net KO's, but it is highly unlikely against foes actively trying to get rid of illusions and thus healing faster than you can re-damage them.
STATS
Size: 7
Weight: 3
Fall Speed: 7.5
Air Speed: 9
Ground Speed: 9
Traction: 8
About the size of Marth and with the same weight as Fox, Zoroark is an incredibly fast character (when not impersonating somebody slower) with outstanding jumps comparable to Luigi's, and a dash as fast as Captain Falcon with air speed of which few can compare. That said, he is a bit of a Fast Faller which combined with his size and middling weight makes it somewhat easy to combo him and eventually KO.
SPECIALS
NEUTRAL B: DOUBLE TEAM
With a Tap of the B button, Zoroark performs a simple roll as the character he is disguised as, a back roll by Default that you can turn into a front one by inputting the direction quickly after pressing the button. After the roll if complete, you'll notice that you no longer control the illusion, it having become a lvl 9 AI with High KB Threshold and all.
So wait, what happened to Zoroark? Well, he is right where you left him: Invisible at the spot you performed Double Team!
While invisible, you have access to Zoroark's normal moveset (except for Double Team again) with the catch of tossing out any move will reveal yourself to the world, so you better be crafty in your approach: use the decoy to lure the foe into a powerful attack / grab, or just capitalize on a hit to perform an extended combo from the shadows! If you manage to get hit while invisible, you only have Medium KB Threshold, meaning most things that just cause knockback (not just stun/etc) will be enough to reveal you, so be careful!
As for when you are visible, the input will have Zoroark split in two! Zoroark will roll backwards or forwards (based on your input) and your Double Team shadow will roll opposite. Your shadow looks identical to you in every way, even down to the player tag above your head so be careful not to be confused yourself. The Shadow Clone is the same as a normal illusion, with it just being Zoroark instead. The clone can use all of your moves except for Neutral B and Side B, the former due to it being Zoroark who makes the illusions and the latter for reasons we'll see in a moment.
A second press has you perform the split once again! This time however, you reduce the KB threshold from High to Medium for both of your clones. Additionally, double tapping the input quickly has your clone split this time into two clones, allowing for even more trickery against your foe. You then have to wait for both clones to be defeated to use Double Team again (and as a side note, your illusions go away when you lose a stock, including your starting one if for some reason you suicide).
In the air, the illusion will double jump if used while disguised, while Zoroark falls back down invisibly. Otherwise, one of you will double jump while the other falls down normally, control is given up the same way with Up giving control to the Jump and no input / Down giving control to the faller.
Clearly the cornerstone of Zoroark's mind games, learning when to pull off your illusionary mischief is critical to mastering Zoroark. Never give away your secrets or else you'll be caught!
UP B: PURSUIT
Zoroark leaps forward, trailed with a dark aura into a somersault that deals 10% and moderate KB before bouncing back to the spot he used it from, with him being able to home in on enemies if you direct the analogue in their direction just after the input. From the air it mirrors Lucario's extreme speed in appearance, but Sonic's Homing Attack in function as he is safe from special fall if he hits a foe, but a miss can spell trouble.
As a recovery, it only goes a far as Sheik's Up B, with it squeaking out to 2 platforms total distance if you chase a foe down with it. But otherwise is just a decent "chase" attack with a bit of start up not unlike his fighting/steel rival's (even if said rival can recover further away...)
SIDE B: FAINT ATTACK
Zoroark leaps forward , trailed with a dark aura into a somersault that deals 10% and Moderate KB before going right through you and skidding to a halt. He then just stays there for a brief moment before fading to nothingness. Unknown to the enemy, the REAL Zoroark has been invisible since the first frame of Side B, the Pursuit knock-off being a decoy to cover his tracks!
Your main method of attaining invisibility again, the decoy dealing merely illusionary damage is a small price to play to escape into your invisible state once again. The standard invisibility rules apply here, but there is something of note in regards to his normally lackluster Up B:
INVISIBLE UP B: FOUL PLAY
Pursuit is the one attack that does not take you out of invisibility, and that is because it is replaced by Foul Play. What the new move does is have Zoroark zoom toward the foe from up to 2 platforms away in a barely visible blur and then perform the action of his choosing. The trick to this is to wait however, as each second you spend in invisibility adds 1% to the damage of the attack you pop out with (and subsequently the power due to more damage). The catch here being that in order to get a huge pay off you need to remain hidden and let your illusions do the work as long as possible else the boost is wasted, that and your opponent being tricked / mid hit in order to be hit when you reveal yourself as well.
While invisibility is a powerful tool, it is also incredibly dangerous for the Zoroark player. It can be easy to lose track of yourself at times especially if you jump around often while invisible. Zoroark naturally will NOT go off edges while invisible, but he can still leap off them if you aren't careful!Luckily his fast aerials can reveal himself quickly if you fear losing yourself in the air, but you may also pop out at a bad time. Mastery over invisibility is another core of Zoroark's gameplay, allowing him to land tons of free hits, escape offense and even KO more efficiently.
DOWN B: NIGHT DAZE
His signature move, Night Daze is a localized explosion of Dark Energy that is about the size of Bowser, dealing 18% and moderate-high (at high %) Radial KB. For a time after detonation, the area is completely dark, fading slowly over 5 seconds. Despite the slow start up, Night Daze allows Zoroark to act very quickly after the hitbox emerges, and start playing under the cover of darkness.
Aside from being one of his premiere KO options, the darkness created is a nice asset to your bag of tricks. Covering the start-up of many moves, or just anything in general can give an edge similarly to invisibility for a time if you manage to pull it off safely. While not -as- useful a setup as say, Faint Attack, the offensive use of Night Daze cannot be ignored, especially when you and your clones use it!
STANDARDS
JAB: FURY SWIPES
Zoroark puts his claws to use as he does two incredibly quick swipes back and forth for 2% each in a repeating pattern as long as you mash the A button. The move has a bit of surprising reach given his long arms, but especially given how he takes a small step forward with each swipe, making for as easy pressure tool to tear at opponents if they don't wise up and simply out-prioritize it.
FTILT: SHADOW CLAW
His hand covered in dark energy, Zoroark tears through the air in front of him in an angle-able, horizontal slash that leaves a trail of 3 distinct marks in it's wake. Hitting foes for a solid 7% and 45* medial 45* knockback, the shadowy claw mark remains in the air where he created it for a second afterwards to deal 3.5% and flinching to foes who touch it. A second may not sound like much, but when the move is as fast as it is you could easily surprised by the shadows!
DTILT: SCRATCH
From a crouch, Zoroark stretches out a claw and sweeps the floor in front of him, slashing at his foe's ankles for 5% and tripping them / dealing light-medium 45* downward knockback. Like with his jab, the maneuver is lightning fast, nearly comparable to Meta Knight's own sword poke!
UTILT: SHADOW BALL
His claws glow with dark energy yet again as he tucks it to his side, charging the energy a brief moment before lifting his claw directly above him as the shadows literally burn around his paw! Having the most start-up of his standards, Shadow Ball also has the longest duration (not counting Shadow Claw). The multi-hit attack lingers above his head, dealing 5 hits of 2% and flinching followed by a hit for 4% (14% total) and mediocre radial knockback, the entire attack taking about as long as Mario's Up Smash to perform. Again, given the height and reach of Zoroark it isn't hard to use this as a poke through platforms or easy juggler/anti-air, you just need to be wary of the lacking horizontal reach of the move.
DASH: NIGHT SLASH
While dashing ahead on all fours, a press of the A button has Zoroark's claws glow with dark energy once again as he does a quick hop and a sweeping slash, before halting his momentum briefly as he lands and recovers. While most of the time the slash does a decent 7% and vertical knockback, hitting with the slash the moment it appears will deal 14% and suprisingly high diagonal knockback, enough to start killing around 160%+ !
While only active for about a frame or two, the slash can be a great finisher in a critical situation if you think you can land it, otherwise it is a decent cross-up and pop-up move given his speed to follow up on both the normal vertical and diagonal hits.
SMASHES
FSMASH: FLAMETHROWER
Crossing his arms as he charges, his eyes glowing a feint red before unleashing a dark spray of crimsonflames from his mouth! Contrary to appearance, this attack still hits with the darkness element and is a favorite scare tactic for Zoroark, as despite the start up, the dark flames actually reach a rather nice distance of about his height away from him and linger for about 2/3 of a second as they deal damage similar to Charizard's own maneuver. Better yet, the range extends with charge to a max of the Fire/Flying type's as well!
However as you may have guessed by the hint, "scare tactic" is a pretty accurate statement, as the flames are Illusionary. The damage begins to heal as soon as the flames end, but while active the hit-stun is all too real: take advantage of foes who fall prey to the trick by dashing forward the moment you spray out the fire!
The jet of fire is merely a trick, but that doesn't mean there isn't a real attack here. The moment he spews the dark fire, Zoroark creates a hitbox the size of the fireball from Mario's Fsmash that deals 14-20% and high radial KB just outside of his mouth, the move only taking about a 10th of a second to complete before Zoroark can move freely through his fake flames. Great when used from the shadows to cover the start-up weakness, it is also an amazing move to take advantage of when shadow clones perform it. So while weak for a smash (the base KB is about the same as Dash Attack), the utility can really get under your foe's skin quite quickly.
USMASH: U-TURN
Zoroark's left claw glows with dark energy as he brings it down and to his side during the charge up, crouching slightly as well before springing up and back with a somersault for an acrobatic slashing attack. Dealing 15-21%, the slash is only really active while he leaps up, sending foes flying up at a near vertical diagonal that can kill around 140% with low ceilings.
The fun part comes from the flip however, as he somersaults a whole platform behind himself! For reference, the leap is enough that if performed below a platform on the edge of one end, he would land swiftly on top the other edge with no landing lag, facing the opposite direction due to the spin attached. This creates some fun movement options as once the flip is done he is free to DI, jump, fast fall, etc one in the air, or if he lands go right into a dash / another U-Turn. Be wary of spacing however, as the attack isn't really reliable on shields given it only hits briefly unlike his Fsmash's flames, but is stellar for pestering a foe and retreating as other illusions (or yourself) take advantage of your victim's frustration.
DSMASH: DARK PULSE
Charging one paw at a time with darkness as he charges up this smash, upon release Zoroark directs the energy downward to create a localized shockwave of darkness on the floor around him! Foes how are adjacent to him as he performs the more receive 16-22% and very high horizontal knockback, while foes within half a platform radius take only 8-11% and light-medium diagonal knockback for their trouble.
An almost "alternate" version of Night Daze, while strictly ground bound in both input and hitbox, Dark pulse can net some early KO's at around 120% (compared to Night Daze which can be around 100 or less in the air / off stage) but also act as a poking / AoE option due to the pulse that travels along the ground to hit multiple foes surrounding you. It also doesn't hurt that it is a bit faster than Night Daze to come out as well, although it has some end lag unlike his Down Special which may be costly on a whiff.
AERIALS
NAIR: SLASH WHEEL
Performing a super quick somersault, Zoroark spins in a tight ball about 3 times within a half second, raking foes with the claws on his hands and feet for 6 hits of 3% for a possible total of 18%! Given it's low ending lag, it makes for a perfect "drill" to be used from a running leap, or just air to ground conversion as he cuts through enemies and leaves them open for a follow-up.
FAIR: DARK CLAWS
Zoroark reaches back with both arms, before making a huge vertical slash in front of him, comparable in many ways to Marth's of Fair except with only about 1/2 of the range of that maneuver. The move deals a solid hit of 11% with medium KB, the upper half of the move sending foes diagonally upward and the lower half being a very slight diagonal downward angle, both great for follow-ups.
Like with his Ftilt however, the claws create a dark tear through the air and leave a lingering hitbox for 5% and flinching around for a second in the shape his claws traveled! Though not as abuse-able as Ftilt due to the move being substantially longer, being airborne allows for many different placements of your claws for various extra hits if you are crafty, as well as easy capitalization on the illusionary versions your shadow clones may create.
BAIR: SHADOW SLASH
Eyes flashing red as he draws his right claw back, Zoroark whips around after a moment to deliver a devastating crimson slash behind himself for 15%! Dishing out extreme horizontal knockback, the move can be a pain to land due to the start up, end lag and very narrow hitbox, but it has the same power as his sweet spotted Dash Attack. The ability to land it off stage is where it really counts however as the angle and power when close to a boundary can spell a quick defeat for many a foe.
UAIR: SNARL
Leaning forward slightly as his eyes glow, Zoroark whips his head back in an arc as he releases a close ranged spray of crimson flames again with what almost sounds like a cackle. The Dark fire covers a decent arc above himself, about the range of MK's up aerial (though nowhere near as fast) and deals 7% with radial knoackback except for the very end of the move, where shutting his mouth with a fiery bite deals 12% and medium diagonal knockback. A useful juggle option with style, it also has some neat spacing aspects with the ending bite that can send foes offstage much easier or even KO if you're both up high enough at the right %'s.
DAIR: SHADOW ASSAULT
Looking down, Zoroark leans back mid air, turning himself to face toward/away from camera as he covers his claws in dark energy and does two jabs downward before righting himself swiftly. Each jab deals 5% and pops foes up on top of stalling his aerial momentum briefly. A great cross up next to Nair to get people off the ground, the slightly unique hitbox placement of left-right can make for interesting spacing and poking opportunities.
THROWS
GRAB & PUMMEL: PUNISHMENT
Zoroark's grab has average range, but above average speed as he reaches out with his right claw to nab his prey (presumably from the shadows). Once caught, mashing the A button has Zoroark rapidly stab the foe's midsection with glowing claws, mirroring the speed and damage of his rival Lucario.
DTHROW: EVISCERATE
Dropping the foe down on their back, Zoroark stands over them and begins slashing down at his victim viciously, hitting 6 times for a total of 12%! The last hit deals diagonal knockback in front of Zoroark, popping foes up just slightly and easily tech-able outside of extreme percentages, allowing for potential re-grabs and more claw action.
UTHROW: SLASH
Zoroark tosses the foe up lightly before in the same motion following up with a violent slash from below with the other claw. Dealing 9%, Slash always deals a set amount of Knockback high enough for foes to touch the top platform of battlefield from below, making for an excellent juggle-starter and mix-up to his Dthrow which while rewarding, requires more reading on Zoroark's part than Uthrow to follow up on.
SIDE THROW: DARK ILLUSION
Zoroark's eyes glow red as he grabs his victim with his other claw, grinning wickedly as his whole body glows like with Night Daze before creating a brief energy pulse surrounding the two! Dealing 9% the victim is send out in front of Zoroark with mediocre knockback... as well as behind Zoroark.
Wait, where is Zoroark exactly? Well, he has disguised himself as his foe!
Like with Double Team, the direction (Back, Forward) dictates which of the two is Zoroark and which is the Enemy, with only the Zoroark player knowing who's who at first, which can terribly mess with your victim's actions temporarily.
While disguised as your opponent, you behave just like any other disguise: able to dispel it as a shadow clone with Neutral B, and otherwise having access to illusionary versions of their moves (Dark illusion itself deals illusionary damage to boot). A nice, final trick under your belt that allows you to make players double take once again as if you restarted the match!
FINAL SMASH
SUPER NIGHT DAZE With the power of the Smash ball at his disposal, Zoroark is able to unleash his full power with a Smart-Bomb sized night daze that deals an incredible 36% damage and extreme radial KB to all enemies in range, leaving nothing but destruction in it's wake!
PLAYSTYLE Zoroark is a master illusionist and trickster, and while his claw based moveset may be simple, the best tricks always seem so on the surface.
In order to get a firm grasp on how to best use his abilities, you have to master the art ofobservation, prediction and timing. While his illusions are certainly powerful, using them at the wrong time, place or even frequency can land Zoroark in trouble as once caught he is relatively easy to combo and KO due to his limited recovery and fall speed. As an easy example, most of the time Zoroark will be chosen via the Illusion method of starting under the guise of a different character for his first stock. This allows you to predict how the foe may react to said character as opposed to Zoroark normally. Choice really comes into play here due to your neutral special separating you from your illusion, so characters that really enjoy using Neutral B may cause suspicion if you disguise yourself as them and avoid using it for a time. Immediately rolling (Double Team) may also cause suspicion at times, but is more subtle due to using it to possibly avoid a projectile. A better time to split would usually be when you would roll anyways, in order to not tip off the foe that you are actually Zoroark in disguise!
From this point, you can safely observe how your prey behaves as they fight off your illusion for a moment, and calculate how to abuse the situation the best. That said, it usually is not easy as you are merely invisible, not invulnerable and can still be hit and discovered by foes who send out a flurry of attacks. Either netting a free grab and starting a combo, or biding time for Foul Play to give you a strong first impression are examples of invisible "traps" you can use against foes as they unknowingly fall right into your claws.
Once visible however, you have to fight the foe more or less head on s after a while your Faint Attack mix-up shouldn't be as reliable as a smart opponent can use Prediction and Observation against you as well, which is where timing comes into play. While Zoroark could try being merely aggressive with his slashing claws, he lacks overall power and priority to really contest with other fighters despite his speed. Instead, he has the ability to redirect where they attack with Double Team and Faint Attack! These maneuvers can throw off the foe's observations and in turn make them take all the wrong actions when trying to fight Zoroark, most notably wasting a laggy KO move on nothing but a puff of smoke while the real Zoroark prepares Night Daze from behind, or shielding what they thought was Pursuit only to be grabbed by an invisible assailant soon thereafter.
On the less "tricky" side, Zoroark has amazing special attacks at his disposal with Illusionary Damage. Given his shadow clones of both himself and other characters (chosen at the start or borrowed via Dark Illusion) are capable AI in their own right, they can be a great source of damage while they last, and can allow for some amazing combos and damage racking for Zoroark to take advantage of. He must be quick on his feet however as the illusions are incredibly frail, and only having two out at once makes for a 1/3 chance of foes figuring out which to chase based on how you move about. In some cases, it may be an advantage to "play dumb" as the player may not recognize you as a player, but rather one of the AI and ignore you temporarily!
Either way, Zoroark is one of the most cerebral characters out there for all parties involved when he joins into a match. Getting in your head from the character select screen all the way to the end, the Illusion Pokemon's endless bag of tricks will keep players occupied for years to come.
Zoroark: You have a talent with Pokemon that no other MYMer posesses, which makes it something of a joy to read your movesets. Of course, it also helps that you put actual effort into the reading experience, as opposed to slapping giant images around run-on sentences and calling it 'presentation'.
I simply must applaud the moveset's introduction, playing on not only Zoroark's ability (relative to your moveset) but also the rivalry that his fans have with Lucario supporters. Your organisation is also clean and well spaced, with the awkwardly indented context up special being the only jarring element (though it seems to be deliberately so, in order to draw the reader's attention)
It takes some reading between the lines to figure out that Illusionary Damage applies to your double teams Zoroarks, but not to an invisible player Zoroark when his initial illusion is still active. Some additional explanation on this front would help a lot.
Gameplay-wise, Zoroark is very tight, and adheres to the way he functions in the Pokemon games. Someone else will probably elucidate on Zoroark's quality as a moveset, and you already know full well how Zoroark works; so I won't bother to talk about it. It's all very clever gameplay, albeit frustrating for the opponent when push comes to shove.
Zoroark is bit of a masterclass on the sheer potential of a handheld Smash Bros game. With a private POV for every player, there'd no need for such archaic concessions as button combos to secretly select the character, or invisibility that isn't announced properly to the player using it.
Invisibility is fun in theory, but grossly impractical otherwise. But having a personal screen with your character clearly shown would aleviate that issue (at the miniscule cost of losing that oh-so tedious meta of the keeping-track-of-your-invisible-self gameplay)
Given that Katapultar JUST gave Flamethrower as an example of a pokemon syndrome-eske move that shouldn't be coming out of the mouth of most Pokemon, it's surprising to see Zoroark embrace that syndrome as a means of expressing character. It's clever, albeit too roundabout for the average player. The players who would care most about characterisation won't be the kinds to observe the language of illusion you use. Invisibility and clones are self evident expressions of illusion, flames that heal off their damage after the fact are much more hazy.
Nintendotard said:
Question!: Is it best to sway away from a Pokemon's actual move pool in the games for fan-sets? I believe someone mentioned that Pikachu can't actually learn Skull Bash outside gen 1
I'll just link you to this article I wrote some time back [link] [bonus-link]
It talks about how to analyze a pokemon within context of making a moveset (though much of it also applies to interpretting the Pokemon for any kind of fan-work). The general thrust of the article, is that you should look at every bit of information available about the Pokemon, and think about exactly what these facts say about the Pokemon.
Starting in Warcraft 3, Thrall is the chieftain of the Orcish horde. After the constant bloodlust and demon worshipping nature of the Orcs in the past games, Thrall attempts to act as a voice of reason to lead the Orcs towards a more shamanistic path. He acts in the best interest of the Orcs in getting them a longstanding settlement and making allies of as many races as he can rather than slaughtering their longstanding human rivals. Unsurprisingly, as more of an intellectual and “political” Orc, Thrall has to rely more on magic than brute strength as a means of accomplishing his goals, not nearly as strong as most of the brutes like Grom.
Then in World of Warcraft, he resigns his position to the insane Garrosh who then murders second in command Cairne Bloodhoof. His liberal racial tolerance also makes him think allying the Undead is a good idea.
Thrall is constantly mounted on a wolf, as in Warcraft 3, which is as wide as Bowser and as tall as Ness (While standing on four legs) while Thrall himself is Ganon sized ignoring his wolf. This makes Thrall one of the biggest characters in MYM, let alone Brawl. Thrall’s shield only covers him personally and ignores his mount, leaving it very exposed. Thankfully, his mount and he can attack and take stun separately. The wolf cannot be grabbed while mounted by Thrall so that foes can easily grab Thrall himself, though the wolf can still attack (Not move) while Thrall is grabbed. Thrall’s wolf can grab the ledge normally as Thrall clings onto the wolf, neither able to do anything but the usual ledge mechanics this time with a combined ledge attack.
Any attacks from any of Thrall’s minions, including his spawned wolf, do not deal any form of stun unless stated otherwise to prevent clutter of stun. They can knock enemies out of attacks if the knockback they deal knocks a foe in a grounded attack into the air or visa versa, but that’s about it, and they’ll be able to immediately start up another attack. To do hitstun, Thrall will have to personally hit foes most of the time.
SPECIALS
DOWN SPECIAL – FERAL SPIRIT
Thrall shakes his hammer above his head as a spirit wolf comes into existence in front of Thrall, identical to the one he rides. Thrall can have up to three wolves out at a time, with the one he spawns with counting as one. Lag on this move is roughly .55 seconds, meaning Thrall cannot immediately summon a horde of wolves at the start of the match but it’s not hard to get up three before the stock goes on too far. Wolves not mounted by Thrall take knockback (Weight of 4 with their own invisible damage percentage) as well as stun, and can even be grabbed and thrown, dying upon taking 50 damage.
If Thrall already has out 3 wolves, this move enables Thrall to swap control of the wolf he directly commands, gaining control of its movement instead of the wolf he’s riding and gaining access to any wolf attacks. Inputting a straight Down Special selects Thrall’s wolf, diagonal and to the right the one to the right, and diagonally to the left the one in that direction. If, say, both of the other wolves are to the right and not on either side of Thrall, inputting right will control the farthest wolf, nothing the second closest, and left Thrall’s personal wolf. Thrall can do this when in lag or stun.
Wolves patrol the stage back and forth at Ganondorf’s dashing speed. How they use their moves when controlled by the AI runs on specific scripts detailed in each move rather than a dynamic AI. They can run up to Meta Knight’s dashing speed if a foe is within their viewing range of a single platform to go after them and attack. This will apply to Thrall’s wolf if he swaps control to another wolf while riding it, though he can still make inputs that correspond to himself personally.
DOWN SPECIAL SMASH – RAIDERS
Thrall shakes his hammer above his head to summon a raider, a muscly 65 HP Orc as tall as he is with a doubled hornet helmet and a giant cleaver sword. Anything that can be done to a wolf can be done to a Raider. They will stand in place unless a wolf comes by, in which case they’ll automatically and laglessly mount it. If you grab one of a raider/mounted wolf pair, you’ll only hit one of them and cause them to separate as soon as you grab one of them. Prone still separate them, but the “prone” of both minions is just a generic stun state. Raiders take .7 seconds to summon and are slightly more of a luxury in comparison to wolves, what with how they cannot be directly controlled, having to control the wolves they’re mounted on rather than them themselves. Thrall can have up to two out at a time, summoning a third replacing the oldest.
Raiders have three attacks they will choose from based on the distance the foe is from them. The closest range attack requires the foe to be within a Marth width of them on either side as they perform a giant cleave with their sword, starting in front of them and ending behind themselves. The move has very good range and covers distance comparable to a standard get away dsmash of an actual character, dealing 15% and knockback that KOs at 160% away from where the foe was hit. If the Raider uses the cleave attack when mounted, they will starts the cleave in front of themselves as they go on to cleave along the side of the wolf and then behind themselves, making it an excellent move to hit foes as a wolf passes by the victim. This is easily the Raider’s laggiest attack, with some degree of start-up time, a long duration, and long ending lag.
The next attack the raider can choose from is more of a poke, but a very long range one. The Raider stabs his giant cleaver sword in front of himself, giving the move range nearly on par with Dedede’s ftilt with comparable lag. This deals a light 4% and knockback that KOs at 220%, but the hitbox lingers briefly enough that if mounted on a wolf the attack can serve as a decent wall of a hitbox getting pushed forward by the wolf’s constant movement.
The Raider’s signature move is their ability to ensnare enemies with nets. They will only actively choose to use the net if the foe is 1.5 platforms from them in any direction, at which point they will throw it. The Bowser sized net has similar speed to Yoshi’s egg toss when thrown, though it takes longer for the “lob” part of the arc to come in and the net to fall, and the net will never vanish after going a certain distance. If it captures a foe, they will be stuck going along with the net’s traveled arc as they take a single flinch, often right off stage, though it will fall at the foe’s falling speed and change the net’s trajectory if they fall faster than it. While inside the net, foes have no control over their movement, but can still attack/dodge/etc regularly. To escape, foes must deal 30 damage to the net and destroy it, which is a very small amount when it deals a single flinch to the foe as it ensnares them as far as resistance.
This is actually a very fast attack, with the Raiders able to use other attacks besides this one quite quickly. The net will vanish after 6 seconds whether or not it hits something, and Raiders cannot use the move during this cooldown period even if the foe destroys it. Raiders are of course absolute idiots with this move with the specific range they demand to use it, so you will often have to directly bring them/the foe to this specific range and/or occupy the foe to make the net hit.
UP SPECIAL – TELEPORT
Thrall teleports to another wolf of his choice, automatically mounting it. Selecting which wolf is identical to selecting which wolf you want to control when you use Down Special with 3 wolves already out. Once Thrall activates the move, he poofs out of existence before coming back into existence .2 seconds later on the chosen wolf with a small electric explosion that has power comparable to Zelda’s Up Special. This can be the same wolf if necessary, serving as a pseudo dodge and counter.
If a Raider is mounted on the target wolf, he will swap positions with Thrall. If the Raider was doing either of his two sword attacks, he will be frozen mid-animation as he phases out of existence, briefly invulnerable like Thrall, before picking up the attack where he left off on the new wolf, making far more of a counter than just using the move in place.
If Thrall has no other wolves other than the one he’s riding, he gets a copy of Zelda’s Up Special when he uses this move, teleporting the wolf along with him. Thrall can still use this version even if other wolves are out by double tapping the move.
UP SPECIAL SMASH – INVISIBILITY
While this is considered a Thrall attack, the wolves are the ones with the ability to go invisible, and once Thrall selects the wolf with the usual method that wolf will go invisible, giving both Thrall and the wolf .25 seconds of lag, attacking either interrupting the process. The wolf will remain invisible for 10 seconds and will stay invisible at all times except when their hitboxes hit something they can damage or when they die. The wolf cannot get the full benefit of this unless it has no rider, at which point it becomes an invisible minion the foe has to be wary of. . .Though you can’t make much use of it yourself, really, as undoubtedly you’ll lose track of it. If you make a mounted wolf invisible, it’s obvious where it is, but the attack animations it performs will be masked. Aside from more passive benefits, this makes it much more difficult to tell when you are actively controlling a wolf.
SIDE SPECIAL – EARTHQUAKE
Thrall’s ultimate technique, his earth magic is so powerful that he can demolish multiple buildings with a single use of the spell. A flat transparent green rectangle spawns on the ground in front of Thrall, 1.5x as wide as Bowser. If Thrall holds the button, this cursor will go forwards along the platform Thrall is on at Captain Falcon’s dashing speed, wrapping around the sides of a stage and going up walls before coming down the other side. On release, whatever portion of stage Thrall has selected will become an earthshaking hitbox as the green cursor vanishes and Thrall starts waving his hammer around as a channeling animation. Thrall’s earthshaking, rather than doing knockback, deals constant damage of 5% and no flinching while drastically reducing the movement and attack speed of anybody standing on it by three quarters. This includes Thrall himself or any minions. This move is very quick on all accounts, but Thrall must channel the move. That said, he can still play as a wolf while keeping up this move, whether it’s the one he’s riding or not. Of course, this is also a prime target to net a foe onto with a Raider.
SIDE SPECIAL SMASH – EARTH PILLAR
The same targeting system/animation happens with this move as with the regular version of the move, though the cursor’s size is decreased to a Bowser width. Once the button is released, Thrall has a brief period of time (.25 seconds) where he can directly move the green cursor rather than just have it go forward. Pressing up or down will cause it to raise or lower at Mario’s dashing speed, while inputting left or right will tilt it in that direction. If the selected piece of ground was horizontal (The ledge), these controls are unsurprisingly inversed. After the .25 seconds are up, Thrall will start channeling to create an earth pillar up out of the ground in that direction, moving it a Kirby height per third of a second (It’s actually constantly moving, but this is the rate it moves at). If the cursor was selected above the ground, a pillar of earth will come up out of the ground to connect the ground selected with the position of the cursor. If the cursor was placed inside of an existing created earth pillar or below it, Thrall will cause the earth to crumble to reach the desired position. Thrall’s earth pillars vanish on death. Like the Side Special, Thrall can start up and cancel this move largely whenever he feels like it.
To clarify, Thrall cannot destroy existing ground at all with this move, only create earth pillars and destroy them. The earth pillar is a set model and is not terraformed up from the stage. Every DK’s worth of an earth pillar has 60 HP, and this prevents you from making a wall too tall for the foe to climb among other silly things. If you make less than this amount of earth, it will have proportionately less HP to destroy it as well. If you make an earth pillar out of a grabbable ledge in such a way to block it, the earth pillar will also become one.
While the most obvious use for terraforming will come in the next move, simply having walls in general gives Thrall a lot of ability to run from enemies as he just constantly teleports back and forth to wolves on the opposite sides of the wall as a foe chases after him. Thrall’s wolves also have a wall “cling” that is actually a wall climb, enabling them to run up walls at Mario’s dashing speed for up to 2 seconds before they can’t use it again before touching ground. They will use this wall climbing ability to traverse stages as they patrol them. If you want to pen in the wolves instead of letting them climb over the obstacles, all you have to do is create a reverse L shaped (The Waluigi emblem) wall with two uses of this move, as wolves obviously cannot wall cling/climb to ceilings.
NEUTRAL SPECIAL – CHAIN LIGHTNING
Thrall holds onto his hammer with both hands as he points it in front of himself before lightning comes out of it, going in whatever direction you choose. This is comparable to a fully charged Rob laser in terms of hitbox, but in exchange for needing no charge has some .6 seconds of starting lag. Like the Rob laser, Chain Lightning can bounce off of solid surfaces based off the angle it’s shot at, but it goes much faster (About 3x the speed) can rebound near infinitely (Up to 9 times), and will rebound off of the foe themselves rather than just going through them.
Contact with the lightning deals 10% and knockback that KOs at 170%. Each time the lightning rebounds, the damage decreases by 1% and the move KOs 10% later. Needless to say, this move is the main appeal of terraforming by giving you excessive space to rebound Chain Lightning off of. Once it goes off, there’s no ending lag, giving you plenty of time to play off of the hitbox bouncing around or potentially even fire off another one before the first one expires. The most obvious shapes for rebounding again include the reverse L wall, though even the simplest of pits can have lightning rebound inside of it several times on a poor foe stuck inside.
SMASHES
FORWARD SMASH - POUNCE
The wolf gets low down to the ground during charging before leaping forwards, attempting to take down the victim with his weight and pin them under his claws. The wolf goes up a Peach height-1.25x Ganon’s, and forwards Bowser’s width-a platform based on charge. On contact with a foe, the wolf will unfortunately not pin anyone, but he will knock them downwards and diagonally towards the ground with 17% and knockback that KOs at 130%, quite good but not KOing people easily due to the knockback being mostly downwards but not enough to make it that great of “vertical” knockback on grounded foes.
The wolf is considered aerial during this move, which doesn’t mean much other than the fact that any rider will also be considered aerial, giving Thrall access to those moves while having the Wolf do an attack. This can also be used as a powerful gimping tool on off-stage foes, and while you may think you have to sacrifice your wolf to do it you can just DI back towards the side of the stage afterwards and climb back up.
AI Wolves will only bother to use this if the foe is in the air and they are a within the move’s max charge range both vertically and horizontally. In such a scenario, the wolf will start charging the move and release when their charge will bring them as close to the foe as possible, charging to full if the foe goes out of range. The wolf makes no exception for off-stage foes, though if they go off-stage the wolf will DI back to the stage and climb up the side after the attack is over, getting back on the main ground before doing anything else. If you take control of a wolf and start charging this move then swap away from them, they will still follow their normal AI protocols when you leave them. This means they will keep charging if the foe is not in range, but if you knock them into their range the wolf will already be charged up and will spring on the foe at the ideal time. If you input this move as an invisible wolf, the wolf will have the courtesy to turn around to face the nearest foe before beginning the move, and once that’s said and done you can just swap to another wolf and let the AI do the rest.
UP SMASH – LIGHTNING BOLT
Thrall holds his hammer with both hands and raises it over his head before lightning comes from the top blast zone to reach him. Lag and power are both very similar to Pikachu’s Down Special without charge, with the move able to become up to 1.3x as powerful by charging it as a smash. The melee hitbox when the thunder collides with Pikachu is still present in Thrall’s version, though it’s not sized up for Thrall and is centered around his hammer he’s holding above him in the air, leaving him fairly vulnerable during the entirety of the move.
Pikachu can create thunder “walls” by jumping and DIing forward as he uses the move at the cost of the melee hitbox when it connects with him, and Thrall can do much the same. . .Simply because he can move while using this since it’s not a wolf move, with the lightning still coming down at the point where he activated the move. Thrall has the decency to not say anything during this move, and you’ll be appreciative when he spams this move to high heaven when retreating.
DOWN SMASH – LIGHTNING FLASH
Thrall holds his hammer above his head as it pulsates with electricity, causing an electric ball of energy to come up out of it a Ganon above his head with lag comparable to Ike’s usmash. Based off charge, it will either be Pokeball, Kirby, Wario, or Bowser sized, nowhere in-between. After shooting up the initial Ganondorf, the projectile will slowly fall down to the ground, coming down in 3 seconds. All characters, including Thrall, are vulnerable to this projectile. The move has 4 powers based off the size of the lightning ball. 25% and knockback that KOs at 135%, 18% and knockback that KOs at 150%, 12% and knockback that KOs at 180%, and 7% and knockback that KOs at 230%.
If the move is hit by any hitbox, the attacker will not be hurt and they will cause the lightning ball to split into the next size down of orbs. The two created orbs will take the knockback of whatever attack hit them, though they will split away from each other taking the knockback at slightly different angles. These orbs can linger around for a considerable time period if hit with a weak attack and barely get knocked forwards at all, and will keep drifting in the direction of their knockback after it’s over at a minimum speed of Jigglypuff’s dash. If they come into contact with the ground, or anything it can damage, the projectile will be used up.
Wolves will ignore their normal behavior if a projectile from this move other than a minimum size one comes within a Bowser of them, in which case they will use whatever attack can best bat it towards the nearest enemy. The AI can be in the middle of another attack or the ball can come at the wolf faster than the starting lag of the attack the AI picks, though, so don’t consider this automatic. Another minion or Thrall being in the way does not concern them, so while having lots of minions around can help bounce lightning towards the foe it also increases the likelihood of friendly fire, especially when the stage can get cluttered with up to 8 of these projectiles when the move is fully charged and they all get broken up.
Chain Lightning can rebound off of the projectiles in this move, as it can rebound off of anything that it is allowed to damage. This can let you play a sort of bizarre game of lightning pool with this move and Chain Lightning together, as you potentially aim Chain Lightning at an electric orb before having it bounce off of something behind it and into one of the projectiles it’s bounced off of and so on. Possibilities are high, and the skill ceiling is higher.
GRAB-GAME
GRAB – GRAB
Thrall performs a fairly standard looking physical grab on the opponent, that is actually leaning towards the worse grabs available. He has no “dashing grab”, but can move forwards as he goes with his wolf like any other move, making the grab usable. Thrall aims more towards the ground to ensure he can grab short characters, though a crouching Kirby/Jigglypuff/Snake can evade this grab. Upon successfully grabbing the enemy, he will let the wolf take over the grab as they chomp onto the foe. In this state, neither Thrall or the wolf can do anything until a throw is input.
PUMMEL - TRACK
The wolf sniffs the foe for a very quick and spammable pummel comparable to Lucario’s for speed. For each pummel successfully input, the wolf will be tracking the foe for 4 seconds after the foe is thrown. This will change the wolf’s AI pattern when not controlled by Thrall to pursue the foe relentlessly regardless of how far away they get from him. An ideal situation is to knock a foe towards another wolf before teleporting to that wolf, leaving the one you were one to start hastily coming over. The wolf will remain aggressive for the rest of the stock, until it dies/gets replaced.
It’s not always preferable to have wolves chasing after the foe rather than patrolling when it’s a lot easier to kill them this way (Left to their own devices, they’ll just keep Diing into a foe’s jab forever and kill themselves), but having one attack in this manner can provide some more strategies. It’s also very nice for invisible wolves, as it makes them significantly easier to keep track of while preventing the foe from responding to them quite as easily. If you want to damage a foe with your pummeling, you’ll largely need other wolves to do it.
FORWARD THROW – THUNDER STRIKE
Thrall smashes the foe over the head with his electrified hammer, dealing them 12% and knockback that KOs at 170% due to being diagonally upwards/forwards at a 45 degree angle. An electric orb will then appear above the foe’s head (With a disjointed hitbox that sticks out a way downwards) and attempt to zap the foe for 6% and knockback that KOs at 190%. This can be easily and mindlessly dodged, and there’s not terribly much Thrall can do about it. The electric orb will stick around harmlessly after that, following the foe around above their head. After2.5 seconds, the orb will zap again, damaging the foe if they don’t dodge, and zapping a final time after 2.5 more seconds. This orb cannot be outrun, and in fact travels faster than the foe – so fast that it will get a bit ahead of them if they keep dashing. The orb goes to where the foe will be, not sitting magnetically attached to them. If the foe was dashing and keeps dashing, they will inevitably get hit, having to slow down and roll past it or just wait if they’re going across the stage after Thrall. Foes can attempt to fake out the electricity by jumping and making their DI go back before it’s about to hit them, but it’s still an annoying impediment to chasing after Thrall regardless.
BACK THROW – WOLF PACK
The wolf chomps down on the foe with his teeth, dealing 13%. He then flings the foe out of his mouth with knockback directly towards the nearest wolf’s position. The knockback can go up to KOing at 140%, but the wolf will always throw the foe directly towards the nearest wolf’s position. The wolf that is being passed the foe will have the decency to stop when this throw is used, only resuming behavior when the foe comes within a platform and they chase them down. The knockback on this throw can even have the wolf lob the foe in an arc to go over small obstacles to reach the other wolf if necessary, but the lobbing arc can only be comparable to Yoshi’s Up Special at best.
Uses for this throw are obvious as you get to attempt an immediate follow up attack on the foe, though it’s not a combo given wolves deal no stun, just forcing the foe to have to react to the new wolf while Thrall and his personal wolf are free to do whatever. If the foe chooses to not attack the wolf they’re being thrown at, Thrall can teleport to the new wolf to potentially go for another grab if he wants, though it’s far from guaranteed for obvious reasons. This throw is also amongst the best to interact with an invisible wolf, as you don’t even have to care about their position as the wolves presumably know each other’s location by smell.
To prevent this from being a bit too perfect and automatic of a spacing move, this move is aware of the fact it’s a back throw, meaning the wolf will only pass to any wolves behind him. If the other wolf is directly above him or even slightly in front of him, the wolf will ignore it when he uses the bthrow. If there are no viable wolves to pass to when the wolf inputs bthrow, he will just fling them backwards for horizontal slightly diagonal knockback that KOs at 140%.
UP THROW – ASCENSION
Thrall slams the foe to the ground in untechable prone in front of him half a platform (Set knockback), dealing 10% to them. He then proceeds to generate a Ganondorf height/Bowser width earth pillar from Side Special Smash underneath them very suddenly and forcefully, causing the foe to rocket up into the air with further vertical knockback that KOs at 165%, Koing earlier than it would otherwise with the boost.
Thrall may choose to make the pillar underneath himself or between himself and the foe instead of underneath them. Thrall’s usual cursor from his Side Specials appears during this move and moves to go underneath the foe by default, but pressing any button before then will have the cursor stop early and create the pillar at the dictated point. The most raw distance can be created by putting it underneath the foe given this will do knockback to them, but you can place an obstacle for the foe to pass in-between you or immediately go on top of the pedestal if you wish to better be able to camp at them. It also serves as an obvious set-up move, enabling you to do so while combating the foe and getting ideal spacing.
DOWN THROW – LIGHTNING SHIELD
Thrall generates three lightning Kirby sized lightning projectiles in a circle pattern around the foe that are equal distances from each other. They orbit out a considerable distance from the foe by default, 1.5 platforms, and rotate around at Jigglypuff’s dashing speed. If Thrall holds down the input, the rotation will enclose around the foe over the course of a second, encircling the foe completely (But not overlapping) them once the second is done. Thrall can press any button to cancel out of this early, and the foe can escape during this throw with the grab timer carried over from it. If the foe does not escape the grab, Thrall will hit them forward lightly with his hammer for 8% and knockback that KOs at 200%.
On contact, the individual projectiles deal 5% per quarter second with no stun or knockback. The Lightning Shield moves around at three quarters of the foe’s dashing/air speed based off of if they’re in the air or not, and will continue moving at that speed to get the foe back at the center if they leave it. This lasts for a very long 20 seconds, and while very powerful at slowing the foe’s approach and/or giving you free damage, you and your minions are vulnerable to the Lightning Shield. You will have to apply proper pressure if the foe has the Lightning Shield orbiting a ways away from them, or just effectively camp them if the shield is very tight around their body.
On top of the ways you can pressure a foe as they come out from inside of their shield/flee from it as it catches up, the Lightning Shield projectiles are valid targets for Chain Lightning. Having three constantly orbiting surfaces going around the foe is quite useful to say the least, and also gives more various advantages to how far out you have the Lightning Shield orbit the foe, varying at different ranges.
STANDARDS
JAB – FEED
The wolf chomps forward three times, chomping further forward with each bite, for a jab on par with those of most Brawl characters for speed, each hit dealing 3%. Wolves do not deal hitstun on nearly any of their attacks, and this one is no exception but does not deal knockback either.
AI wolves will only bother to use this attack if the foe is in some sort of stun state such as being grabbed, not wanting to knock them out of it. If the wolves come over when Thrall has a foe grabbed, you’re looking at a considerable damage racker, possibly the best reason to grab the foe in the first place. Aside from this, if you specifically order a wolf to use this move on something that is not a stunned foe before swapping away from them, the wolf will continue to just use the jab in place until ordered to do something else or is stunned out of it. Nice to prevent wolves from going to their deaths, keeping track of an invisible wolf’s position, or just using it as more of a trap ready to be sprung.
DASHING ATTACK – HUNT
The wolf snarls a bit as it goes faster than usual for a platform’s distance. For the first half of the move, the wolf is a hitbox that deals 10% and knockback that KOs at 170%. For the first third, the wolf gets superarmor to boot. The second half of the hunt still has the wolf go at the slightly accelerated pace, but for all intends and purposes is ending lag as the wolf is locked into the action.
AI wolves will use this move to help close the gap if they are 3 platforms or more away from the enemy. They will also use this move if an enemy projectile is coming their way, tanking through it and continuing on their way to hopefully hit the foe. If the wolf finds themselves in a foe’s face (A Wario width) and there is a hitbox of some kind (Such as one connected to the foe) between the wolf and the foe, they will also use this move to muscle through. Note that AI wolves can still be grabbed out of this attack. This is also a very nice move for invisible wolves for rather obvious reasons – even if it has a rider of some kind, there’s only a small visual cue to the move as the rider moves along very slightly faster, allowing the superarmor to be fairly abusable. In the brief instant where you’re dashing towards a foe and about to reach them, it’s very doubtful a foe will be able to tell and will have to rely on instinct more than anything.
Thrall can use the wolf’s superarmor to block low attacks such as earthshaking, and because Thrall is the one who shields he can cover himself with it while the wolf puts on some superarmor. Needless to say a very abusable defensive move. In addition, you can have a wolf use this move before quickly swapping to another to force it to run away from the foe briefly rather than rushing at them, useful in particular for the wolf Thrall is riding.
UP TILT – HAMMER SWING
Thrall swings his hammer in an arc over his head for a very ordinary utilt, covering a half arch above him. This can pop up characters in front of Thrall, though like with his grab some low crouches can evade it. On hit, this deals 10% and knockback at a 45 degree angle behind Thrall that KOs at 155%, foes getting knocked behind him in the direction he’s swinging. This makes for an obvious move to use while fleeing as you hit foes with the second half of the arc to knock them away. This unique knockback behind Thrall is also nice to knock foes into other minions/hitboxes for more offensive purposes.
FORWARD TILT – ELECTRIC ARCH
Thrall shoots out a projectile that appears comparable to Pikachu’s Neutral Special, having the same power, speed, and initial size. The most important carried over property is the ability this has to wrap around stages, which is already better than the Hothead at it in Brawl (Yes, the Hothead is –that- bad). The projectile will go up walls created by you, and potentially even go around the stage.
Where this projectile differs from Pikachu’s is that with each “step” the projectile makes, it extends out further than it did with the last one by a Kirby width, similar in appearance to an electric slinky toy. The height of the projectile also gets taller and taller with each step, extending up by a Pokeball height with each step. While this doesn’t last much longer than Pikachu’s projectile, the fact that it travels in this way causes it to traverse a much greater distance. The catch is that with how far out the thunder jolt steps out in front of itself, it quite quickly makes an arch that characters can comfortably fit inside, getting into position and waiting for it to pass over them. This can actually make it harder to hit with than Pikachu’s version, and harder to camp with especially due to the giant blind spot in the middle if the projectile has to travel a ways to hit a foe.
If you are running from the foe, you can fire this in the same direction you’re going and outrun it, giving you a very unique shield behind yourself that the foe will have to awkwardly get through. You can also attempt to hide in the middle yourself, though this will obviously make you slower in getting away. On top of everything else, it’s possible that if the foe avoids it the thing can loop around to hit them again. The penalty for actually being hit by this is next to nothing, but if a foe insists on never suffering the damage it can be incredibly annoying. If foes don’t want to suffer the damage but find this thing obnoxious enough, they can go out of their way to walk up to this thing and shield it to waste some time.
This move also works well with terraforming, the most obvious thing being having the arch directly go over a wall to take up some of the blind spot. In addition, if a foe casually dodges it only to have it go up the wall behind them, the tallest part of the arch can potentially reach out to hit them again when it goes horizontal climbing up a structure, very annoying.
DOWN TILT – SPIKE
Thrall extends his hand down towards the ground and opens his palm, generating a spike out of the ground a platform in front of himself, short as a Pokeball is tall. On contact, this deals 5% and knockback in the direction the spike is pointing that KOs at 200%. The spike will stick around a brief 2.5 seconds before retracting back into the ground, serving as a brief impediment for the foe beyond the initial hitbox. You still generally have to actively hit foes with this move, but you can use it as a one time trap obstacle for a foe to pass before fleeing. Considering the move is spammable, it’s also possible to make two or three spikes lined up in a row briefly, with a foe only expecting to avoid the first spike you produce.
The “platform” distance in front of Thrall will wrap around any stage, able to be produced coming out of the ledge, under the stage, and most importantly out of any part of a pillar you want. If a pillar is a platform tell or less, Thrall can make a spike on top of it for a foe who lands upon it. Making it out of the side of a pillar also works, knocking a foe directly away from you and preventing foes from standing right next to a pillar as they jump up it like they normally would. All of these things also make it the most painfully obvious follow-up to uthrow, regardless of where you put the pillar.
Aside from using this as an obstacle which is already great, you can use pillars to make horizontal spikes that face you, causing them to deal knockback that sends foes back towards you. Thrall isn’t offensive enough to capitalize on this as much as he might want, though he can use this to send a foe back towards some wolves that just hit them. Thrall cannot chaingrab with this, as while his grab would be good enough to make it happen none of his throws send the foe directly forwards like he would need to chaingrab.
AERIALS
FORWARD AERIAL – HAMMER SMASH
Thrall uses some of his racial strength as he swings his hammer forwards in a laggy attack that deals 14% and knockback that KOs at 105%, his best KO move if he can hit it. The startup is very laggy at some .6 seconds, but the entirety of it is superarmored. The wolf is unfortunately not superarmored, meaning while Thrall cannot be knocked out of this move directly before it starts his wolf can be attacked to knock him away leaving Thrall swinging at open air.
The superarmor is the key to using this attack well. Using it on enemies above Thrall while falling at a speed to “block” the wolf with Thrall can work, absorbing a hit. If Thrall lands on the ground before the move begins, landing lag is near non existent, enabling him to also use it as a counter of sorts. Use this move solely for the superarmor on a hit from above, land, then use usmash or something, possibly making actual use of the melee hitbox above Thrall with it. This whole scenario works a lot better with pillars around, not just to land on early to abuse superarmor (Though that’s still nice), but to give Thrall the option of landing early or actually going through with the entirety of the attack, potentially DIing to the side of a pillar while the foe lands on it and swinging his hammer at the foe on said pillar, blocking off the wolf.
BACK AERIAL – PURGE
Thrall extends out his hammer behind him as electricity crackles throughout it, dealing 11% and stunning the foe as long as an uncharged Zamus dsmash in front of himself, having comparable start-up to said move but slightly longer ending. Unlike the stun found in moves such as Zamus’ dsmash, this does not prevent the foe from DIing if in the air, it’s just essentially a long flinch.
The use of this move is quite simple – the wolves cover most of Thrall’s melee game, and they don’t deal stun. This can give wolves the time they need to actually put the hurt on the foe, and also serves as something of a panic button. It’s too laggy to truly be a simplistic get-away move, though, far from spammable. In addition, Thrall most of the time will have to settle for hitting aerial foes with this move, and they can DI away. Thrall would really appreciate this move being usable on the ground so they’d just be stuck there forever, and while Thrall can still hit foes on the ground with this it’s quite difficult to say the least, having to jump up, come down, use the move, then suffer landing lag (Suffering landing lag will give both Thrall and his wolf lag). As far as when to expect the foe to just casually jump off the ground to use this move, giving them Earthquakes and pillars to jump over are fairly reliable ways to make it happen.
UP AERIAL – CRACKLE
Thrall raises his hammer over his head horizontally as it crackles with electricity. This makes a hitbox similar to Pikachu’s dsmash above Thrall that deals 11 hits of 1% and flinching along with a small suction effect on the hitbox comparable to said move, the final hit doing light downwards knockback that KOs at 230%. The range is not nearly as large as Pikachu’s dsmash, but it’s large enough to reaches down to cover some of Thrall’s hurtbox.
This is useful to drag foes down to the ground where your wolves are most comfortable, as well as most of your projectiles (Ftilt and dtilt are groundbound, while Chain Lightning needs walls to rebound off of). It also serves as a move to move downwards to safety with, fastfalling through foes who are trying to juggle your giant hurtbox. While you’ll have to fall a good ways through them to hit them with the hitbox at all, the wolf is unsurprisingly the owner of the dair and can provide an additional hitbox to dodge to give you time to get the uair’s hitbox lower.
NEUTRAL AERIAL – FLIPTAIL
The wolf does what amounts to a brawl flipkick up aerial, dealing 8% and knockback that KOs at 160% away from himself. The wolf, being a quadruped, cannot really “flipkick”, and is instead putting most of the momentum to flip themselves around into a headbutt. The wolf can “cancel” this move at any time by inputting nair again, causing it to chomp his head wherever it is to deal a slightly stronger 11% and knockback that KOs at 135%. Given this move actually does knock foes back and doesn’t leave the wolf easy to punish, this is the AI wolf’s main go to move for melee combat if no other conditions are met. On foes in the air, the AI will only actively try to use the actual flip to hit people, only using the bite if a foe just so happens to come into range. On grounded enemies the AI will always hit foes with the bite rather than the flip.
If Thrall is riding the wolf, this move obviously gets a lot more interesting as Thrall holds onto the wolf with his legs. This works so long as the landing lag is not triggered, which is absolutely god-awful for both Thrall and the wolf unsurprisingly. Regardless, Thrall only clings onto the wolf with his legs, still free to use his other moves as normal. This can let Thrall hit with his aerials in any direction he feels like, dodge Thrall’s personal hurtbox when it’s in ending lag, or move a superarmored Thrall using the fair in front of the wolf to block for it briefly.
DOWN AERIAL – CHOMP
The wolf chomps downwards in an attempt to latch onto the foe. On contact, they deal 10% and latch onto the enemy from above. The foe can still act completely normally during this time, and can knock the wolf off with any attack that does stun or knockback, and your own attacks on the foe will not deal knockback during this brief time. The wolf will then flail the foe upwards before flinging them down and releasing them from his jaws over a .35 second process, dealing knockback downwards that KOs at 120%. This can be a powerful “spike” on the foe, but even if the foe gets hit they have plenty of time with which to react to the wolf and smack them in the face, freeing themselves, and the foe still has their normal DI and falling speed during the brief .35 seconds, with the exception of getting swung slightly up early on. Given the fact that the wolf swings the foe up before slamming them down and his mouth is connected to them, just about any aerial can hit the wolf over the course of this move bar a move aimed behind them. This move does no stun either, so if a foe starts up a move in advance they can still hit the wolf out of this move if it’s laggier than .35 seconds. Interaction from Thrall is generally required to occupy the foe to actually get slammed downwards.
If this is used close to the ground, it’s possible for a wolf to slam the foe into the ground and interrupt a move with landing lag, most often the move the foe was trying to interrupt the wolf with. Aside from using it directly on grounded foes, having pillars can make this aspect more of a reality in actual aerial combat. While the wolf cannot complete the .35 seconds of lag to throw the foe down if he grabs a foe on the ground, he can still pick them up into the air briefly, dealing 10%, before landing back on the ground. This will interrupt whatever grounded non special attack they were doing, and will also put them back on the ground before they can get off laggier aerials.
AI wolves will use this on grounded foes who are in starting lag instead of the jab, and will use this move instead of the nair if they are in the air and the nearest target is below them.
PLAYSTYLE SUMMARY
Thrall is a very campy character with lots of stage control elements. While he has a fair handful of projectiles, he can’t really dominate with them to the degree he’d like to “own” the stage unless he has Chain Lightning bouncing around everywhere as a longstanding hitbox for the foe to deal with. Aside from Chain Lightning, Thrall mostly “camps” with his wolves as more of a “minion” character, letting them do the brunt of the work while he peppers in some support. If the foe is ignoring Thrall entirely, you can take matters into your own hands and control the wolves attacking them directly.
Thrall will be spending a lot of time running away, with earth pillars becoming worth their weight in gold by just serving as simple walls without having to do much of anything else complex. Teleporting back and forth between wolves is Thrall’s best tactic for this, though he has moves like dashing attack, utilt, usmash, and bair to aid aim without any form of set-up, as well as all of his throws in one way or another, uthrow being recommended early for some bonus set-up. Aside from just direct running away, Thrall can put obstacles in the foe’s path as they come to him. Walls are amongst the most obvious, but ftilt and dtilt are better used and more likely to hit foes when used as impediments rather than straight methods of attack. This is one of the best ways to get mileage out of invisible wolves, too, as foes constantly rushing after Thrall will be more likely to run into them along the way without knowing where they are.
While Thrall can do some more hardcore camping if at higher percentages are trying to achieve more set-up, he can “camp” somewhat at mid-range in more offensive ways. He should still be staying far-enough away to be out of the foe’s melee range, but close enough he can contribute and knock them back to the other wolves with dtilt spikes, bthrow, or support with bair. Perhaps the biggest reason is dsmash, as if Thrall is too far away he won’t be able to effectively bounce around the projectiles at the foe as he could otherwise. If Thrall is closer up, foes also generally can’t systematically kill the wolves as easily with Thrall threatening to punish them if they do. If in this closer range, Chain Lightning can be used more as cover then for camping, trying to keep it bouncing around as long as possible to protect you and your allies by overlapping them with the hitbox.
Thrall’s ability to have two attacks going at once thanks to his wolf can be used for defensive and offensive purposes. When trying to just get away, it’s very feasible to cover your huge hurtbox from all sides, or if you prefer you can have Thrall and his wolf cover each other’s lag to force foes to target either Thrall or his wolf specifically. If nothing else, it can give enough time for another minion or lingering projectile to show up to save the day. This also has more obvious offensive application in simply giving the foe more to dodge, though, and with your minions and projectiles can do a decent job of simply overwhelming the foe with too many hitboxes when fighting the foe at “midrange” alongside minions.
3V1 BOSS MODE, THE BEASTIARY
If Thrall is pit against three enemies, a Kodo Beast and a Wyvern show up in the background of his portrait, the overall portrait looking something like Pokemon Trainer’s. If you want to use Boss Thrall in something other than 3v1 for a laugh, you may change the match type back to whatever else you want after this has been activated. To play as regular Thrall again, move the token off of Thrall and pick him again.
Thrall gains access to four new minion types when under his boss mode, two beasts from his Down Special, and two more orc riders from his Down Special Smash. Thrall can mount any of these beasts, and regardless of the orcs being used to riding particular beasts normally, can ride whatever animal their warchief commands them to, mounting whatever passes them first and behaving the same regardless of what they ride. Thrall needs to charge his Down Specials up to .4 seconds to summon the other minion types. No charge is the usual minions, half charge to 99% summons Wyverns/Wind Riders, and full charge summons a Kodo Beast/Wardrummer. Thrall may have up to two of every minion type, with the exception of a cap of 3 on wolves.
Controlling a beast is now done by double tapping Down Special instead of having max beasts. When selecting a beast to teleport onto or control with Up Special, Up Special Smash, or Down Special, you will not simply cycle through them, inputting left or right bringing the cursor over the next minion instantly. The first press brings up the cursor, pressing B again will do the action.
The wyvern is flat but very wide, similar to a wolf but more extreme. It has 60 HP, as well as jumps/a glide on par with Meta Knight. The wyvern’s glide is significantly more controllable than Meta Knight’s, not putting you into helpless if you go too high up though canceling out the glide and preventing you from doing so again until touching ground. The wyvern is a favorite of Thrall by using its aerial nature to run the hell away from his many foes and camp more effectively from on high.
WIND RIDER
These orcs (Pictured riding the wyvern) are comparable to Marth in size and have 60 HP, with their weapon of choice being venomous spears. They have two attacks, one being comparable to the raider’s sword stab as they stab forwards with their spears. This deals 4% and knockback that KOs at 220% with range comparable to Dedede’s ftilt, like said sword stab, but has the bonus of dealing an extra 5% poison damage over 5 seconds. They will only use this attack when in range, and it is slightly faster than their other attack due to no reloading necessary.
At all other times, the wind riders will throw their envenomed spears at the foe, which deal the same damage as the stab but travel in an arc comparable to Yoshi’s egg toss. They can alter the “angle” of the “egg toss” based on the foe’s position, actually attempting to aim at them. Any poison damage from these spears will stack the duration of the poison, making it very feasible to make foes taking 1% at all times if these guys are allowed to spam their spears as much as they want. They are less able to defend themselves when a foe comes into melee range than a Raider, but provide a general much better service with their projectile spam.
If a thrown spear hits a foe next to a wall, it will pin them against it as they attempt to escape at half grab difficulty (They are immune to being pinned by further spears while pinned). Nothing spectacular, but it’s a nice bonus to make their lives more difficult when climbing over pillars.
JAB – GUST OF WIND
The wyvern begins to flap his wings in front of himself rapidly, not needing them to fly what with being planted on ground with his feet. The wings themselves are a hitbox that deals 6% and knockback that KOs at 165%, but they generate a long wind hitbox as tall as Bowser that reaches out a platform in front of the wyvern, pushing foes away from the wyvern at the pace of Dedede’s inhale with a wind hitbox. This will stack if you have two wyverns doing this next to each other, and if you have two wyverns face each other and spam this move then foes in the middle will struggle to move much of anywhere. If you have a wyvern stand up on a pillar as a perch before spamming their jab, their gust will be elevated and force foes to approach past it while jumping in the air and presumably over the wyvern’s perch. The wyvern does not have a glide attack, so as to not lock Thrall out of his other moves while the wyvern is gliding.
AI wyverns do nothing but mindlessly spam this move. They prefer to stand on an earth pillar before doing this, and will face inwards towards the stage if possible unless 2 or more foes in the other direction, in which case they will turn around. If a wyvern is already taking up a pillar, the other AI will not sit on it. The AIs will enter “defense mode” if a foe comes within a Bowser of them and use other moves, luckily the jab having nearly no ending lag to enable them to do so.
DASHING ATTACK – TAILWIND
The wyvern zooms forwards a platform, a hitbox that deals 9% and knockback that KOs at 175%. Behind him, there is a constant Wario sized wind hitbox that pushes foes back a platform. Wind hitboxes hit foes who dodge, enabling the wyvern to actually better flee from enemies if they do dodge in anticipation of the attack. This is the wyvern’s preferred panic move in defense mode, though it prefers the fsmash if it has a rider. That’s not to say it won’t ever use the opposite move in the either situation.
FORWARD SMASH – TAKE OFF
The wyvern goes to fly through the Z plane towards/away from the camera before coming back into it a platform in front of where it began, entering aerial state if it goes off-stage. The wyvern cannot hit “dodging” foes with this, but it is invulnerable as it goes through the Z planes. The move can be angled up to cause the wyvern to fly up a platform as well. This move can enable the wyvern to go past solid structures such as earth pillars.
The move has a second hit akin to moves like Link’s fsmash and Snake’s ftilt, triggered by pressing A as Thrall comes back into the main plane. This will cause the wyvern to swoop back down towards the original horizontal position it was at. You can again angle the move up to potentially end up 2 platforms above where the move began, though you can also angle the first hit up and angle the second hit down to go back to your original position. Each time the wyvern enters the main plane, it becomes a hitbox that deals 14-21% and knockback that KOs at 165-130%.
The wyvern has fair shares of lag on both ends of the move to prevent the invulnerability from being too easy to abuse. Regardless, Thrall can still attack during this time, and while his melee attacks can’t hit anything in the Z planes, his earthshaking Side Specials work normally and his Chain Lightning will be fired into the main plane where it will work normally once it rebounds off of something. Thrall can also teleport off the wyvern, summon more minions, or control another minion during this time directly. AI wyverns will use this move in defense mode only if they have a rider, with raiders and wind riders able to throw their projectiles normally during this move.
PUMMEL – SOAR
The wyvern flies up a Mario height per press of Z near instantly – he can fly as fast as you can press the button. This enables you to get a vantage point before using your throws, or simply get you away from other foes before performing a throw without getting casually interrupted. Notably, this can also enable fthrow to KO if you get high enough. If you use uthrow while too high off the ground for the earth pillar to hit you, it will instead spawn underneath the nearest foe.
BACK THROW – FLY
The wyvern grabs the foe in his mouth before turning around and flying off horizontally at Mario’s dashing speed. If there is a rider other than Thrall on the wyvern’s back, it will get off before the wyvern goes off to carry the foe to their deaths on a suicide mission. Foes can escape at grab difficulty, and have immunity to grabs for a quarter second after escaping this.
Thrall can hit the foe out of the wyvern’s clutches with an fair after the wyvern carries the foe far enough out for the kill. Foes can knock you out of this and save their friend, but ideally this throw should enable you to run from the other enemies a decent ways before you use it. That said, Thrall can also just teleport onto another animal and let the wyvern take care of the foe, as using this throw causes the AI to enter a separate state of mind entitled “gimping mode”. In gimping mode, the wyvern will use his two aerials to try to kill the foe relentlessly, only recovering to the stage when necessary for survival. Even if they survive, it’s a good way to occupy a foe for a while.
NEUTRAL AERIAL – SHUTTLE LOOP
The wyvern performs a very large shuttle loop, but it’s still as fast as Meta Knight’s Up Special regardless. There is enough room for a character 1.2X as large as Bowser to fit inside of this area, and a wind hitbox is generated in this area that will push foes forwards as far as Game & Watch’s uair. The wyvern itself is a hitbox that deals 8% and knockback that KOs at 200% away from itself.
The wind hitbox here can be used to move foes over towards a portion of the ground where there’s lots of hitboxes, away from other foes, or whatever else you want. The wind hitbox will not interrupt the foe’s attack while the wyvern moves his hurtbox around considerably, enabling him to use this as something of a counter response to a foe’s attack while keeping them in lag. The AI will only use this move in gimping mode, and will use it instead of the dair if the foe has a hitbox anywhere on their body or is using whatever move is mapped to Up Special.
DOWN AERIAL – BEAK BUSTER
The wyvern headbutts downwards for 13% and a spike as strong as Rob’s dair. The wyvern will spam this move on foes when in gimping mode if they don’t trigger the nair, and this is also a move the wyvern will use liberally in defense mode.
The kodo beast is 1.5X the size of Bowser, and while taller than Bowser most of the size comes from the kodo’s massive width. Even so, Thrall will be elevated a large height above the ground while mounting a kodo, making it difficult to stun him. The kodo’s weight also helps massively with Thrall’s survivability, making this the definite choice for survivability, occasionally going to a wyvern for recovery and mobility. Kodo Beasts have a ridiculous 150 HP, meaning foes should really never bother with killing them if there’s anything else remotely productive they could be doing. AI kodos patrol the stage back and forth and have a sight range of a platform where they will pursue foes, identical to wolves.
ORCISH WARDRUMMER
The wardrummer (That fellow riding the kodo beast) is a stout fellow comparable in Wario to size, and constantly beats on his drums. He has no method of attack and only 40 HP, but any allied hitboxes within 1.5x a smart bomb blast of him will deal 1.15x the damage and knockback. These guys are most at home on wyverns, and can be whisked away out of the foe’s range on their backs. If you get two of these guys out at once and their wardrum auras overlap, they will stack together to do 1.3x the damage and knockback at the point they overlap.
These guys can’t do much to win you a match, but they’re a great way to boost you over the top when things are already going your way. You can easily defend them by just swapping your position with them over and over, though you’ll be putting yourself in harm’s way to do it and with 3 enemies one can just stay at your position to beat on the poor wardrummer. Keeping these guys safe up on wyverns is one of the better ideas, and your ability to keep them around is generally indicative of your skill level with the character.
JAB - CHOMP
The kodo beast chomps forwards for a fairly standard brawl grab. This is fairly necessary, given the fact that Thrall is so high up he can’t grab foes on the ground with his regular grab when mounted on a kodo.
This is the kodo’s favorite and most mindless move to spam as an AI, and AIs will follow up with their bthrow immediately after grabbing the foe. If a kodo grabs a foe when Thrall already has a foe grabbed, they will treat it as if they had grabbed as an AI.
DASHING ATTACK - HEADBUTT
Very similar to the wolf’s dashing attack, the kodo becomes superarmored as it headbutts forwards a small distance as it rushes forwards with the great speed of Ganondorf’s dash. While superarmor is nice, this causes the kodo’s entire body to become a hitbox, which is nice for blocking off grounded foes from reaching Thrall without awkwardly jumping over the kodo to hit Thrall. The kodo deals 11% and knockback that KOs at 120% during this move, though it has considerable ending lag. AI kodos will use this move on a foe who is currently in the process of attacking.
PUMMEL - CHEW
The kodo chomps down on the foe in his teeth, dealing 3% in a slightly above average pummel for speed/power ratio. If an AI kodo grabs a foe, they will pummel once if the foe has 60% or more before performing the bthrow.
BACK THROW - DEVOUR
The kodo beast devours the victim whole, dealing 8% to them and causing them to take 1% per sixth of a second. If the foe reaches 200%, they spontaneously die, dissolving inside of the kodo and prompting it to belch up the foe’s bones in front of itself. Foes can still act inside the kodo, and can kill it from within and come out in a bloody explosion on the kodo’s death, and assuming their percentage wasn’t ridiculously high. Foes inside of a kodo cannot hit anybody outside of one, though they are invulnerable to everything outside of the kodo.
Other foes can come help in killing the kodo to free their devoured ally, something they’ll need to do if they need that particular guy or the foe is actually close to dying. While it’s very rare you’ll actually kill somebody with this, it’s a good way to occupy foes while you set more things up. In addition, it can motivate foes to attack a kodo randomly, as having to take down all of a kodo’s 150 HP upon being devoured can become quite a massive chore.
The kodo can waltz off the stage for a very casual kill after devouring a foe, but it’s pathetically slow (Speed of Ganon’s walk) and foes on the outside can do knockback to it. That said, this can give a larger sense of urgency for another foe to actually help their pal out.
FORWARD SMASH – VOMIT
The kodo barfs up a stream of green puke that will cover a platform’s length in front of him, dealing 8-16% and knockback that KOs at 190-150% to foes immediately hit by it as it comes out. The vomit will lay on the ground for 10 seconds afterwards, causing anybody who sits on it to have traction as if they were on Brawl ice except for kodos and wyverns due to their slowness/hovering off the ground. Brawl ice might not sound amazing, but it can be enough to make people slip into other minion attacks and Thrall’s many projectiles.
If a foe was devoured by the kodo, they will be barfed out in prone and slide along the ground with knockback that KOs at 120-90%. AI kodos will always attempt to barf a foe out once they reach 45 HP, attempting to save themselves from being killed from within. AI kodos in general adore this move, as they will vomit every 3 seconds a foe is not in their sight range of a platform.
NEUTRAL AERIAL – BUCK
The kodo thrashes around a bit during the starting lag before bucking his rider off of his back, shooting them at a 60 degree angle upwards/forwards as they take the knockback of the kodo’s attack, which KOs at 130% (Deals 11%, though not to your allies). This will flinch the rider, but will turn them into a hitbox that deals 9% and KOs at 150% along the way. This can turn your rider into a projectile, but is most useful for simply saving them and moving them around, such as when the kodo will die or to play keep away with a wardrummer. AI kodos will only use this move to save their rider when they are off-stage, or their rider is a wardrummer and has 19 HP or less left. You will have to take control to make use of the “projectile”.
The Kodo largely just thrashes around if Thrall is riding the kodo, Thrall having tamed it better. This makes the kodo’s whole body a hitbox that deals 7% and knockback that KOs at 180%, and is comparably fast to the kodo’s other moves, though still has bad landing lag.
DOWN AERIAL – DROP
The kodo falls at a 20/10 fastfall speed down to the ground, spiking foes twice as powerfully as Ganon’s dair while dealing 25%. On contact with the ground, the kodo beast goes through an absurd amount of landing lag, two seconds. Their smash to the ground is so forceful it will cause the ground 1.5 platforms on either side of them to shake violently for 1.6 seconds, wrapping around the stage and pillars created by Thrall. The earthshaking hitbox deals 10% and vertical knockback that KOs at 170%, or horizontal knockback if it’s on a ledge/the side of a pillar.
While the lag on this move would be far too much to use on a real character, Thrall can abuse this move extensively considering he’s not suffering any of the penalty for it. Use it to create earthshaking while Thrall is free to use his attacks as usual, or sent is as a suicide bomber off the stage.
AI kodos will use this whenever forced into the air on-stage, and activate it the moment somebody goes under them off-stage. The sole exception is if the kodo jumped with the specific intention of using an nair.
UP SPECIAL SMASH – MAGNETIZE
This is a new move for Thrall replacing the invisibility. He does not have the power to make things invisible, it is an ability of the wolves. Wolves will now automatically be invisible if the Down Special is charged .1 seconds but doesn’t reach charge needed to produce a wyvern.
Thrall reaches out with his hammer in front of him as it crackles with electricity. On contact, the foe will take 8% and knockback that KOs at 200%, very unimpressive especially for a unique boss move. However, this will cause all of your electric projectiles to home in on the foe. In the case of Chain Lightning, it will specifically choose to go in the direction of the nearest magnetized foe whenever it rebounds. Inputting fthrow or dthrow on a foe when a magnetized one is near will even cause those projectiles from those moves to move over to the magnetized one. If one foe is a weak link or particularly strong, this can be nice to hit an easy target with the pay-off of hitting a stronger one, or just lets you focus on one particular foe more quickly. Foes will remain magnetized for 12 seconds.
If you magnetize multiple foes, this will be magnetically attracted to each other and move towards each other constantly at Ganon’s walk speed. If they connect with one another, they must dash away from each other for half a second before they’re allowed to move. They cannot separate from each other in the air, but they can still DI around normally there assuming they don’t DI against each other, with them having the higher of their two falling speeds. If all three foes are magnetized, the one in the middle will be pulled towards the nearest magnetized foe.
OTHER MOVESET CHANGES
All minions now deal standard hitstun like a character. The wolf’s dair is the exception.
Rider minions can no longer be separated from their mounts by enemies.
Wolf HP buffed to 70, Raider HP to 80.
Raider net HP buffed to 45.
Lag on the Down Specials for actually summoning a minion reduced to .1 seconds.
Side Special Smash now terraforms up ground thrice as quickly.
Chain Lightning damage is doubled, the first hit dealing 20% and every bounce after that reducing the damage by 2%.
If you bother to stick around for the lightning to hit Thrall in usmash, the melee hitbox will cover the body of Thrall and his entire mount. This makes a huge hitbox on a Kodo Beast, and a Wyvern can still move while Thrall uses this move if it goes straight up.
Dsmash produces a Kirby sized projectile (The one above the minimum) at worst, though Pokeball sized projectiles can still be made by breaking up Kirby sized ones. Fully charging the move generates a projectile 1.5X the size of power that’s 1.3X as powerful as the normal max size, and bursts into two of the Bowser sized projectiles.
Dthrow closes in all the way around the foe in just .25 seconds.
Ftilt does not vanish on hit and has doubled duration.
Dtilt spikes last 10 seconds, and if the move is input where an existing spike is, the spike will jut out of the ground further doubling in size and power.
FINAL SMASH
Thrall doesn’t gain full access to the entirety of his boss mode, but he will summon 6 minions from it. He will summon at least one kodo and wyvern, with him getting a bonus kodo or wyvern chosen at random. Each kodo will have a wardrummer, and each wyvern a wind rider already mounted on their backs.
If Thrall is in his boss mode already, he will summon Cairne Bloodhoof as a level 9 AI partner with a single stock (Which can get stretched due to Reincarnation). If Thrall gets another smash ball with Cairne already out, it will be transferred to Cairne.
Thanks for the comment, and yeah I had Wifi (and by proxy the 3DS) in my mind for his illusion ability at first, but then it came to my attention "how would you pick it in live multiplayer on a console? Or select a character to masquerade as in general?" And thought it'd be the best course of action.
Flamethrower is a bit odd yeah, but it also is a bit "meta" in it's own right as Zoroark is actually semi-known for being able to learn flamethrower as a competitive option. Given he is also a Fox, which canonically is associated with Fire in Pokemon (Fenniken line, Vulpix line), it seemed fitting.
I'll just link you to this article I wrote some time back [link] [bonus-link]
It talks about how to analyze a pokemon within context of making a moveset (though much of it also applies to interpretting the Pokemon for any kind of fan-work). The general thrust of the article, is that you should look at every bit of information available about the Pokemon, and think about exactly what these facts say about the Pokemon.
Comments. Sorry to anyone I've taken long to comment, and to those I haven't commented.
Sloth
It took me a while to get around to Sloth since I tend to read sets in odd patterns, but this was my first priority to get to after the sets I've already given feedback on. Another WL set means another interesting read, as usual. Following off the coattails of Gluttony, Sloth is a piece with just as much quality to it, as well as a slight improvement in characterization and writing style. The defining aspect of the set, at least in my eyes, is the very high-risk, high-reward nature I've come to expect from your sets. At first, Sloth's notable lack of invincibility frames had me intrigued, and as I expected, a satisfactory explanation was given that made it all come together. The multitude of complexities that arise from move conjunctions and their interactions with every imaginable scenario is worth much praise, with some personal favorite pieces being the way effort-induced sleeping interacts with slopes, and the surprising utility of the standard boulder item that a lot of sets try to twist in creative new ways; Sloth largely succeeds in making it interesting, though I am curious as to why further exploration of boulders as projectiles or short-ranged weapons wasn't used. Such application is highly unnecessary, so I don't mind (and am rather glad that boulders don't centralize the set) though I would've expected something more anyway. This lack of excessive boulder use is most surely for the better, and I know that's why it's excluded. It is, after all, a very well-crafted work.
My only problem at all with the set, aside from a few typos, is the mentioning of how sustaining 16% knocks Sloth out of his Effort state much farther into the set than it needs to be. While I understand why this was done, I think that different wording could have catered to both requirements. Regardless, an absolutely fantastic opening set, and one I'm glad I got to comment after seeing some of the other sets, for the sake of perspective.
Kaguya
A visitor from the moon in a traditional Japanese legend? Must be...
I disagree with FA in that I believe much of your work, including Sho, is better than this, so I apologize if this clash in reception makes integrating feedback difficult for you (again, take my input with a grain of salt). There's nothing fundamentally wrong with Kaguya, aside from the Nair I suppose, which has already been pointed out. Personally, I don't think it's too bad of a problem, since it can't stack with other fields, but some number crunching on its duration or something would probably do good to fix its problem. Fundamentally, Kaguya has an intricate and deep, naturally-explorable combo game, which is something I definitely appreciate. I would, however, like to point out that my main gripe is that I feel as if the set tries to overextend itself. You get a little ambitious with the effects in the aerials, but I'd have preferred to have seen them interact with the already established effects just a little more intricately instead. Definitely nothing majorly wrong with this moveset, but overall, I find some of your other Touhou project sets to be a bit more interesting, so this one gets a little overshadowed, and I feel I won't remember it as much. Still a definite B+ at the very least.
Profiteur
I noticed that there's been some mixed reactions about Profiteur, which is good. A nice, healthy diversity of opinions is usually something I welcome. I'm personally of the opinion that the set manages to be both highly clever and a bit messy. What I mean by that is this: Profiteur successfully juggles a surplus of ideas and pockets them into a workable playstyle, but at the same time, some of these ideas appear to devalue the characterization just a bit, putting a tax on the overall integrity of it. Generating money while shielding, for example, seems a bit odd, and while I admit I haven't played the game (though I'm interested; how is it anyway?) it just seems to be stretching way too much logic for my tastes. Similarly, I feel that other such oddities hinder the set's effectiveness. The way that shielding adds more cash to a pile for every pg earned feels like a clunky concept that isn't overall too necessary in the long run, and having to pay the Ciggma Knight for something as essential as recovering seems a bit crippling, even for a character who's obviously designed to be rescinded when the opponent plays well/the player plays poorly.
That being said, Profiteur is surely not bankrupt of good ideas, and of the many things it does well, I believe it does so rather excellently. A very deep psychological game is developed by the grab game, indebtedness, and the cash pick-up mechanic. Forcing enemies to shield as they slow down and become more susceptible to attack makes for an excellent opportunity to grab repeatedly, which is obviously something that Profiteur wants to do in order to pile on massive debt and make the most of his Bthrow. The set is altogether well interconnected, much like any complex and thriving economy, what with a setback or gain in one part of the playstyle affecting everything else in Profiteur's standing during a match, and I find that really cool. Profiteur match-ups in particular are very amusing. 1v1 sees the villain, much like an exploitative boss, trying to compete against his opponent by accumulating enough wealth to stay comfortably in control. Dittos instead play out more like an effort between two businesses to sabotage one another, and free-for-alls capture the spirit of an over-saturated market where the two largest firms try to squeeze out the weaker ones before turning on one another. Based on the playstyle, I imagine a doubles match with two Profiteur on the same side would resemble a massive conglomeration attempting to simply drown out the enemy with absolutely insane amounts of capital. These interactions are the highlight of the set, which goes a long way in demonstrating the brilliant characterization at play here, and the very well thought-out implementation of an economical playstyle into the Smash formula. Despite a few minor gripes with how it's handled, the characterization and intended playstyle really shine through here.
The legend...the actor...the director...the, man? With his true origins remaining a mystery, Wiseau's one of the most widely-recognized figures of modern cinematography, although probably not for the reasons he'd want to, he always shows an unnaturally-happy demeanor and a questionable knowledge of the english language, one of his trademarks being his tendency to start most of his dialogues with "Oh hi *insert name here*!".
On the year 2003, Tommy Wiseau released The Room, a drama that would later be recognized as one of the worst films of all time, this film gave him all of his popularity of course! Even though Wiseau has claimed that The Room was intended as black comedy, the other actors of the film state that he always intended it to be a true attempt at a good film, and that the 'black comedy' claims are just a way of disguising his failure. With a playstyle based on his general awkwardness (Especially while acting) and his uncanny ability to turn any line from his movie into an individual joke, Tommy Wiseau's tearing apart the competition!
Tommy Wiseau's moveset can feel a little disjointed, awkward and forced at times, but so is everything this actor/director does. An interesting little detail about his moves is that most of them have small, disjointed hitboxes that make him a high-risk/high-reward character, most of the moves hard to land but with very good results. Tommy relies a lot on sweetspots for KO power.
STANDARD MOVES: A - Flower Combo: Tommy swipes forward with a bouquet of roses (A price tag hanging from them) before swiping once more in the opposite direction, ending with a quick stab forward, this attack's last strike leaves Tommy open for attack if it doesn't land, and it can be omitted from the combo by just pressing A two times.
Forward Tilt - Flower Swipe: A simple, longer swipe with the bouquet of roses, using both hands as if using a baseball bat.
Up Tilt - Come See The Room!: Tommy throws his hands upwards as he releases a flurry of late-night screening tickets for The Room, the tickets doing minimal damage for a second or two, the number of tickets decreases if this attack's used repeatedly, but it's a great damage-racking tool if used sparingly.
Down Tilt - Homeless In America: Tommy swipes the blue tent from the Homeless In America cover in a circle around him, causing a little damage and possible tripping to the fighters he hits.
Dash Attack - Digital/Analogue Mayhem: Tommy slides along the ground while holding a camera, the camera flashing forward after a few seconds.
SMASH ATTACKS: Forward Smash - Oh Hi Doggy!: Tommy holds Doggy in his arms as the attack charges, saying "Hi Doggy!", the dog freaking out and leaping forward when the A button's released, causing slashing damage with his fangs, the attack having great horizontal knockback but a small hitbox due to the size of the dog. Depending on how much the attack is charged, Doggy will leap forward a slightly bigger distance.
Up Smash - I'm Fed Up With This World!: Tommy holds his hands at chest level as he charges, saying "Everybody betrayed me!" and then shouting "I'm fed up with this world" as the attack's released, Tommy throwing his arms upwards quickly, doing damage and knockback above him for a few frames.
Down Smash - Cheep Cheep Cheep Cheep!: Tommy stands on the spot as he charges, mocking the other players with "You're just a little chick..." before releasing the attack, waving his hands to the sides and creating small, damaging shockwaves with each little wave and twitch of his hands, shouting "Cheep Cheep Cheep Cheep!" as he attacks.
AERIAL MOVES FAir - Flower Spin: He uses the bouquet of roses to spin forward, dealing slashing damage. BAir - Lisa's Dress: He whips backwards with a red cocktail dress, the attack sweetspoting for one frame. UAir - Flingin' Scotchka: He waves a glass upwards, making a string of Scotchka shoot upwards, the drink tasting so awful that it has burning properties, like Brinstar's acid. DAir - Football Dunk: Tommy grabs the football and shows his amazing knowledge of the rules of actual American Football by dunking downward like a basketball player, a small shockwave forming on the ground as he lands, hurting anyone that gets caught on his descent.
SPECIALS Neutral B - Don't Touch Me ************...: This move acts like a counter, Tommy holding his hand up on the animation and grabbing the user of any physical move againist him, shouting "Don't Touch Me ************!" and throwing them backwards with force, the thrown character acting like a projectile, anyone they hit receiving damage and knockback. If someone's KO'd with this move, Tommy will add "Get Out" to the sentence.
Forward B - I Didn't Hit Her!: This attack acts like a projectile that can be charged, the power depending on how much of the infamous line you let Tommy read. The projectile's a bottle that bounces off the wall and characters, the resistance and overall damage/knockback getting higher with each charge. At first, Tommy says "I didn't hit her!" as the first charge level, then "It's bull****!" as the second charge level, and then "I did NAAAAAHT" as the third level. The charge from this attack can be stored too, Tommy shouting his trademark "Huh" when the stored charge is used.
Up B - Catch That, Johnny: Mark (Greg Sestero) appears floating behind Tommy as he throws the football upwards, Tommy blasting from the spot to grab the football, this recovery move being a little higher than Sheik's recovery, Tommy dunking the football againist any opponent that gets hit by the projectile, acting like Captain Falcon's YESZ and preventing him from becoming helpless.
Down B - YOU'RE TEARING ME APART!: As the button's pressed, Tommy says "You're lying, I never hit you!" before the attack is released, the character shouting "YOU'RE TEARING ME APART LISA!". The interesting part of this attack being that the first portion has a little suction effect that draws enemies closer, while the second bit blasts them in a random direction, a red shockwave appearing behind Tommy as he screams.
THROWS Grab: Tommy whips out Lisa's red dress, working as a tether grab. Pummel: Tommy punches the character, blurting out a "Huh" with every hit. F-Throw: Mark appears behind Tommy as he helps him shoving the character forward, making them trip after a few steps. U-Throw: Tommy throws the character upwards. B-Throw: Mark appears and rushes towards the victim as Tommy holds them, the victim being kicked back. D-Throw: Tommy repeatedly pummels the character againist the ground shouting "WHY, WHY...WHY!?"
FINAL SMASH WHY LISA, WHY!?
Tommy grunts for a moment and goes through a Hulk-ish transformation, his skin turning red and him becoming more muscular as he roars like a monster, his moveset changing drastically as he becomes much stronger and dangerous, also resilient to damage and knockback.
On this form, Tommy keeps most of his moveset, except most of his punches emit shockwaves and fire element...and the Bottle-Throwing move turns into a TV & Furniture throwing move, Tommy's voice clips running through a filter that makes him sound like a monster as he keeps shouting "WHY LISA WHY!? YOU *****!".
Before I begin, I want to apologize for my previous movesets. I put little effort into them, and I wish for them to be ignored and not rated. That being said, I want to present my new moveset, with much more detail.
Spirit Zelda
Stats
Weight: 10
Size: 8
Ground Speed: 2
Air Speed: 3
Fall Speed: 10
Jumps: 2
As you can see, Spirit Zelda (referred to as Zelda for the rest of the description) is a very bulky character, even more than Bowser and Ganondorf. However, Spirit Zelda is one of the most powerful fighters in the game in terms of strength.
Playstyle
Spirit Zelda is not meant to be the most agile character, but instead a character who can rush in and deal lots of damage. Luckily, Spirit Zelda can take hits with little knockback, increasing its potential for this strategy. Her most fearful weapons are her Smashes, which deliver massive knockback and damage. However, when the going gets rough, it is an easy target for quick foes. Spirit Zelda is for players who prefer melee attacks.
Standards
Jab:
Zelda pushes her shield forwards, bashing into a foe in front of her (5%). The second jab is the same, but on the third jab, Zelda pierces her sword forwards, doing moderate damage and knockback (7%).
Forward Tilt:
Zelda swings her sword in front of her, doing good damage, but leaving a bit of lag (15%). This delivers a moderate amount of knockback and has a good hitbox, the distance about 1.5 as much as a Stage Builder block.
Down Tilt:
Zelda swings her sword downwards, creating a horizontal hitbox. This gives low damage but some knockback (8%).
Up Tilt:
Zelda crouches down, pushing her shield upwards. This propels opponents into the air and giving a good amount of damage (15%).
Dash Attack:
Zelda charges forward, bashing into opponents with her shield. This deals a good amount of knockback, but low damage (10%).
Smashes
Side Smash:
Zelda travels backward a few inches, and chops her sword down in front of her (24%). This has both startup and ending lag, but it’s a very powerful killing move. When fully charged, her sword is imbued with fire (32%).
Up Smash:
Zelda thrusts her sword upwards, propelling nearby enemies into the air (21%). The sword is flaming and delivers massive knockback and damage when fully charged (35%). However, it leaves quite a bit of lag.
Down Smash:
Zelda crouches down, swinging her swing in a 360 degree spin around her (19%). When fully charged, the attack deals quite a bit of damage (30%). Little lag is given to Zelda afterwards.
Specials
B: Heavy Slash:
Zelda charges up a slash as long as B is held. When released, she slashes towards the ground, creating a verticle hitbox (18-24%). If charged long enough, a shockwave made of ghostly energy is released, damaging all nearby fighters (13%). Side: Phantom Dash:
Zelda slides to the side using levitation at a moderate pace, damaging any fighter she slides into (25%). However, this leaves a little bit of cooldown. Up: Phantom Warp:
A Phantom Eye appears in whichever direction is inputted on the joystick, and Zelda warps to that location. A slight charge period determines distance like Din’s Fire. Phantom Warp has a small maximum range an puts Zelda into helpless state after the move is used. Down: Mystic Shield:
Zelda crouches, putting up her shield. This protects her from A combos and projectiles. This works like Pit's Shield move from Brawl.
Final Smash Spirit Overload:
The Possessed Armor releases dozens of stray spirits, automatically homing in on nearby enemies. They take health from the targets and deliver it to Zelda, healing her (23-35% each opponent).
Costume Swaps
Regular
Blue armor with green eyes
Black armor with blue eyes
White armor with red eyes
Wooden armor with yellow eyes
Obsidian armor with black eyes
Taunts
Up: Zelda looks around before closing her eyes.
Down: Zelda throws her shield in the air and catches it.
Side: Zelda holds her sword and hunches over menacingly.
Idle Poses
Zelda taps her foot patiently, as if waiting for commands.
Why Spirit Zelda Could Be Added
Spirit Zelda would add another female character, which in my opinion, Smash Bros. needs more of. Not only this, but it would be an interesting one as well.
Spirit Zelda would give more attention to Spirit Tracks, which in my opinion is an underrated game. Not only that, but a Spirit Tracks stage has been announced.
Spirit Zelda would add a unique playstyle to the game, one where the player can take down enemies very easily and can survive a few Falcon Punches herself.
Since we've had two movesets posted in a row with missing inputs, that means it's time for
TEACH ME, DEE EHM!
So, without further ado, let's talk about
INPUTS
Did you know that a standard moveset has twenty-three different inputs? There are four specials, five standard attacks, three smashes, five aerials, a grab, a pummel, and four throws. Most inputs are differentiated by how the control stick is used in the move, as well as which button is pressed. Specials are important because they can be used both on the ground and in the air. Every moveset has an Up Special, a Down Special, a Side Special, and a Neutral Special for when you don't touch the control stick. Most people get this one easily. This is where your creative moves can really take the center stage and shape the playstyle for the rest of the set. Standard moves are your basic attacks on the ground, and are a bit trickier. There's the jab, for when the control stick isn't moved at all, and usually has multiple different attacks when pressed rapidly, but not always. Then you have your forward, up and down tilts, which are used when the control stick is held in the direction pressed. Last there is the dash attack, which is the only attack you can use when dashing besides specials. It's an easy one to use when playing, but it's easy to forget about when moveset making.
Smashes are moves that are used on the ground when you quickly press the control stick to the side and press attack at the same time. They can be charged for up to a second, which increases their strength by 40%! These are usually some of the most fun moves to land. There's an up smash, a down smash, and a forward smash.
Aerial moves are the attacks you use when you press the A button in the air. Did you know there are five different aerials? One for up, down, forward, backward (forward and backward are always different!) and one for when the control stick is neutral. These are usually written in shorthand as the Uair Dair Fair Bair and Nair.
Grab is usually used by pressing the Z button, but it can also be used by pressing the A button while shielding. It's a very important move, and every character has a grab with a different speed and range. Some characters have tether grabs, some have great grabs, some have poor grabs, and they're always important to include. Grabs are super-important because they can hit people who are using their shields as well. The pummel is the move that you hit someone with while you've grabbed them. It's usually pretty fast and weak, but sometimes people do creative stuff with it. Last are the throws: forward, backward (backward is usually stronger!) up and down throws. Most movesets should have details on the grab and what every throw does as well.
Try to make sure you have every one of these moves in your moveset! Or at least if you don't, have a good reason not too! Plenty of sets have also eschewed these rules and created whole new kinds of inputs as well instead. But this is the basic guideline to follow.
CommanderVideo Well warm welcomes to you, crazyal02! Commander video is certainly a colorful character! I'd like to start off by saying I quite like the mechanic in place here, the modes that gradually get weaker as the fight goes on. Cool stuff there. The smashes and tilts aren't very interesting, but ooh boy do you have fun with those aerials and a few of the throws, which are based around moving enemies around and taking as little damage as possible. Unfortunately, that interesting mechanic really explored in depth in this set, though you do acknowledge it a few times. While I can't say I "like" this moveset, I CAN say that it has lots of creativity! I'd encourage you to talk to some MYMers and read sets to channel that creativity into something really cool! I'd love to see what you could do with a focused moveset!
GETO'S COMMANDER VIDEO RATING: 1 RAINBOW OUT OF 1 IIIIIII
Doraemon Welcome to you too, ClubbyBear! I unfortunately haven't heard of this character before, but he certainly looks like something else! With all of those pictures, I can certainly see that you have a love for this character! The moves themselves are all fine, they seem like they fit him, but the problem here is that he has no flow, or central goal behind the moves, besides the obvious doing damage and KOing. When you have a moveset, it's great to really get inside the character's mind and think "what would they do to try to win this match?". For a cowardly character, it might help to have moves designed to help him in attacking and then run away. I'd reccommend the same as I did to crazyal and say that you should read more sets by veterans andtalk to some established MYMers to help get your ideas out, really make something super incredible for all of the characters you love!
GETO'S DORAEMON RATING: GOOD AS A GOOD BASEBALL GAME
Tepig I'll cover this one ion my next set of comments seeing as it's not finished yet. I like it so for, though!
Nightmare Nightmare is pretty admirable for a first effort, with a lot of thought put into it obviously. Something I will say is that while having lots of video references is fun, most of us aren't going to go back and recheck every video, especially when you already do a pretty good job at explaining animations in the moveset proper anyway. That's certainly a strength of your that's apparent: you're good at giving exactly what detail we need to understand what"s going on in a move at any given time. You even have a tangible playstyle at the ready, one that makes sense for the character, and is, while not very complex, obviously a focus point of the set. You've got some seriosu potential here, man, keep it up, read, maybe preview any new movesets to some of the leaders and I think you've got a bright MYMing future ahead of you.
GETO'S NIGHTMARE RATING: AS MANY MOVES WITH THE WORD "SOUL" IN THEM AS HUMANLY POSSIBLE.
Rosalina Wow, just wow, Nintendotard. For a first moveset, hell for any moveset, this is very good. You've got a very good grip on a number of fundamental setmaking skills, notably your focus on playstyle, your writing, and your presentation. You've got a great voice in this, being at once funny, warm, and good at getting information across. The most you could do from here is refine, refine, refine: I'll give the same advice to you I gave the others: talk to veterans, preview your movesets to leaders, and then read, read, read. You've got a load of potential and I hope you keep writing in this contest!
This was the actually third moveset I had done. The previous two were in the last moveset thread. Hopefully this one is better than the last two. I do appreciate the positive feedback nonetheless. I'll try to refrain from using videos in other movesets I might make later on. But I couldn't find many good pictures of certain attacks, so I had to make due. Again, thanks for the feedback.
Since we've had two movesets posted in a row with missing inputs, that means it's time for
TEACH ME, DEE EHM!
So, without further ado, let's talk about
INPUTS
Did you know that a standard moveset has twenty-three different inputs? There are four specials, five standard attacks, three smashes, five aerials, a grab, a pummel, and four throws. Most inputs are differentiated by how the control stick is used in the move, as well as which button is pressed. Specials are important because they can be used both on the ground and in the air. Every moveset has an Up Special, a Down Special, a Side Special, and a Neutral Special for when you don't touch the control stick. Most people get this one easily. This is where your creative moves can really take the center stage and shape the playstyle for the rest of the set. Standard moves are your basic attacks on the ground, and are a bit trickier. There's the jab, for when the control stick isn't moved at all, and usually has multiple different attacks when pressed rapidly, but not always. Then you have your forward, up and down tilts, which are used when the control stick is held in the direction pressed. Last there is the dash attack, which is the only attack you can use when dashing besides specials. It's an easy one to use when playing, but it's easy to forget about when moveset making.
Smashes are moves that are used on the ground when you quickly press the control stick to the side and press attack at the same time. They can be charged for up to a second, which increases their strength by 40%! These are usually some of the most fun moves to land. There's an up smash, a down smash, and a forward smash.
Aerial moves are the attacks you use when you press the A button in the air. Did you know there are five different aerials? One for up, down, forward, backward (forward and backward are always different!) and one for when the control stick is neutral. These are usually written in shorthand as the Uair Dair Fair Bair and Nair.
Grab is usually used by pressing the Z button, but it can also be used by pressing the A button while shielding. It's a very important move, and every character has a grab with a different speed and range. Some characters have tether grabs, some have great grabs, some have poor grabs, and they're always important to include. Grabs are super-important because they can hit people who are using their shields as well. The pummel is the move that you hit someone with while you've grabbed them. It's usually pretty fast and weak, but sometimes people do creative stuff with it. Last are the throws: forward, backward (backward is usually stronger!) up and down throws. Most movesets should have details on the grab and what every throw does as well.
Try to make sure you have every one of these moves in your moveset! Or at least if you don't, have a good reason not too! Plenty of sets have also eschewed these rules and created whole new kinds of inputs as well instead. But this is the basic guideline to follow.
STILL BETTER MASCOT THAN LUCARIO
Zoroark is a pretty fun moveset based off invisbility and duplicates. I find Junahu insulting the difficulty of using the invisibility fairly offensive when it was actually handled here very well in terms of its ease of use, with Zoroark not having to know where he is with moves that home in on the enemy, not being able to walk off ledges, and even bothering to address Junahu’s pet peeve of name tags. It’s something I’ve dabbled in with my most recent moveset and I respect what you did with it. I also thought the way to choose him from the select screen was intuitive enough, what with Z for Zoroark and what-not. The addition of letting him play as any enemy at start, not just his enemy, brings a lot of depth to his game and can give him more interesting options if he, say, plays as another invisibility based character or produces some lingering objects to make use of. The illusion damage I like along with an actual illusion move in the flame breath felt a lot more natural than it could be, I actually think the flavor of the set is very good for the character/abilities.
The moves actually flow a fair bit better than I was expecting after getting past the specials, with the aerials being the only moves I especially want thrown out. Aside from aerials, dsmash and uthrow also feel a bit pointless, and Side Throw could still be selected in another way. Side Throw still serves any purpose and feels good regardless, it’s mainly the aerials that are keeping me from loving the set. Outside of just being filler, I actually actively dislike the fair, as it’s a cloned version of the ftilt and just feels too powerful in the air. Spamming these in the way of a foe’s recovery path off-stage just sounds outright obnoxious, especially if the AI partners help.
AERIALS
I like the concepts presented by the set in the specials, and it does a good job of following up on them with varied combos throughout most of the moveset and you know it. I will say the dsmash lost most of its point with the relevant quality of it removed for balance without anything to replace it, but the aerials are the main thing preventing this set from achieving greatness.
The nair is just a lot of bizarre exploits waiting to happen, and Uka Uka was publicly flogged in a memeish fashion over a very comparable move. Ignoring these exploits, I still hate the move because it cheapens her gameplay by accomplish too much for her all at once, all very easily. She gets free damage on the foe, positions herself around perfectly to continue her combo. She is able to punish almost any enemy meeting her in the air, and in combination with her other aerials makes her very obnoxious to play against. The dair, uair, and fair are bad on a fillerish level for copying the unique effects of each other and I already disliked them for that, but they’re also very annoyingly powerful. The fair is very comparable to Zoroark’s which I already disliked, but is worse as it lasts for 2.5 seconds and Kaguya has other moves to spam in the way of a recovering foe to create lingering hitboxes at no risk to herself. If the nair can punish anything, it’s a recovering foe, and it makes her very obnoxious at the ledge. Bair and zair aren’t broken, but are very fillerish making my have a distate for this set entirely because of this one section.
PAY TO PLAY
This is a very uncomfortable set, there’s a lot to like but it’s a very strange ride through with the raw tackiness. Some of it seems to just be from the character with raw magical manipulation over money, but the weirdest part is how Profiteur has to bring the foe into this mess. Forcing them to subconciously steal money and have that strange mechanic when they shield is where my tolerance for the tacky ends. Beast characters are amongst the weirdest to picture fighting the character, and I agree with Bridges that he’s rather impractical to play for a set made by you. Potentially banning his recovery of all things without the needed capital, needing extensive set-up. . .Sure, he has plenty of hitboxes thrown around throughout his set, but they’re not all that great at getting him the space needed for set-up to get lots of separate piles. If he wants to get money on the stage, he’s going to be very behind in damage percentage. . .But he can kill people with next to no damage with enough set-up, so it kind of works balance wise, if very bizarre for a Junahu set.
I’ll give you the benefit of the doubt on the raw magic and destruction of physics in the set. The more questionable things are just which input does what for gameplay purposes, making him more difficult to play and making him feel less like a Junahu set. Why does only jab make them drop coins? Why do certain moves make coins explode forever and others not? Why do only dtilt and uair knock coins up into the air? The moveset makes a lot of mechanics that make sense, like how coin piles are passively flattened out or built up by how foes walk into them, so it could use a more consistent way for how attacks react to it and just giving him some moves that specifically are designed to work with those mechanics, rather than being the only arbitrary moves that move coins. Regardless of all this, it still flows and has a vaguely interesting playstyle, so I like it, but as said, it’s a very strange set.
"Who're you calling a monster? What's your problem? Why do you need to pick a fight? I'm busy thinking up new pranks and stuff! It's not easy, either! Now get lost!"
Doopliss is a Duplighost from Paper Mario: The Thousand Year Door, specifically the main villain from Chapter Four, and then a recurring villain from then on out. He resides is Creepy Steeple, terrorizing the residents of Twilight Town by turning them into pigs every time his cursed bell rings. He's an evil mastermind, sure, but he's also extremely childish and prone to fits of rage.
In addition, Doopliss has a hover that lasts as long as Princess Peach's, as well having the maneuverability of Project: M's Mewtwo, and the movement speed of his already great aerial speed, essentially giving him limited flight. He also has a glide comparable to Meta Knight's. Combine this along with his great air speed and slow fall, it makes him a dominating force in the air.
* * * Standard Attacks * * *
Jab - Doopy Combo Doopliss alternates between punching and kicking, each with pitiful range. Each punch and kick deals only 2% damage each, but come out extremely fast and can be held to be used infinitely, giving this the same sort of use as Fox's jab.
Forward Tilt - Ghostly Kick Doopliss closes his eyes and does a big kick, his foot even enlarging a bit as he does so. The kick is a mite more powerful than his karate-lookin moves in his jab, dealing 4% damage and a bit of knockback that, while never having any sort of hope of KOing, will usually suffice in getting the opponent out of your hair...er, party hat.
Down Tilt - Prankster Doopliss spins in place, his...bedsheet thing flapping around him as he does so. He drops a banana peel on either side of him, both working exactly like the brawl item, but paper-ized. Doopliss can leave these in place, or choose to pick them up and hinder opponent's movements by throwing them and tripping them.
Up Tilt - Drill Headbutt Doopliss jumps up a short distance, doing a spinning attack. The move hits directly above him, though being a ghost and possessing flight, he stays up and spinning for a bit longer than most Up Tilts will, leaving a slightly longer-lingering attack than most. Opponents hit while he's spinning will be dealt 6% damage, and decent angular knockback upwards, but nothing to write home about.
Dash Attack - Bonk As he runs forward, Doopliss jumps a battlefield platform length, attempting to headbutt his opponent. Should he succeed, the opponent is dealt 4% damage, with a catch: if Doopliss connects, he can continue to headbonk for staled 2% damage for as long as he likes, provided the foe stays in place. He IS able to bounce off of shields, and this attack will eat away at a shield quickly, but if the foe runs or rolls out of the way before he finishes his final bonk, he'll fall flat on his face.
* * * Grab Game * * *
Grab - Sissy Doopliss reaches his pitifully short arms out and tries to grab the foe. Absolutely the shortest grab in the game. His pummel involves him noogying the foe, dealing 1% per second.
Forward Throw - Ghostly Possession Doopliss cackles and becomes transparent, then enters the foe's body and disappears. Doopliss has 3 seconds to do what he pleases with the foe's body before he's ejected, including using any healing moves on himself, detonating any troublesome traps, or trying to get a cheap KO on the opponent (protip, when Doopliss is ejected, he's put into helpless. Not a good idea).
Back Throw - Post-hypnotic Suggestion Doopliss brings the foe to his eye level, his own eyes turning to swirls. The opponent's do too and Doopliss gives a little chuckle before pushing them away, for 3% damage and weak knockback. Their eyes stay the same swirly way, but otherwise, they are free to move around...until they try to roll or dodge that is. For the next 6 seconds, the opponent can do neither, relying on their movement and shield to keep Doopliss away. Fortunately for the foe, Doopliss has to actually grab them first in order to do this, and on top of that, the effects of this move cannot be stacked.
Down Throw - Into Darkness Doopliss cackles, and a purple shadow appears underneath him and the foe. Doopliss quickly sinks into this underworld, holding the foe against their will. They reemerge a second later, the foe dealt 5% damage and a normal poison effect, dealt 1% damage each second for the next 5 seconds.
Up Throw - Dodgy Doopliss summons a dodge cape above the foe, inflicting them with the dodgy status effect, essentially turning them intangible for a brief period of 5 seconds. This means neither can the foe attack Doopliss nor Doopliss attack the foe, physically at least: they can still summon objects and minions freely if their moveset allows them to.
* * * Aerial Attacks * * *
Neutral Aerial - Party Favors Doopliss drops tiny "p" embellished bombs from where his hands should be with each successive press of the A button. Each bomb falls slowly, usually exploding before they hit the ground, unless they end up hitting an opponent first. The bombs deal 4% damage upon contact and exploding, also dealing the tiniest bit of downwards knockback.
Forward Aerial - Swoop da Woop Doopliss stalls in the air for a brief moment before swooping down in the direction he was facing, stopping about 1.5 SBUs away and a full SBU below where he started. Contact with Doopliss while he's swooping deals enemies 5% damage and stops any kind of aerial momentum they had, causing them to fall (though NOT go into helpless). Doopliss will pass straight through the foe, always ending at the same place unless he was hit while swooping.
Back Aerial - Evade Doopliss smiles, then shoots backwards, cackling. This is an almost instantaneous transport, though Doopliss immediately begins to fall after moving. Opponents hit by this are dealt 4% damage and no really damaging knockback. It IS an excellent evading tool, however.
Down Aerial - Lighter than Air Doopliss pumps his arms, running his feet while falling. He slows his descent even further while doing this. His feet deal tiny hits of 1% damage per hit, as well as "sucking" knockback, enough to pull enemies in for multiple hits. He can hold these kicks for up to 1 second while in the air. When the one second is up or the A button is no longer held, he delivers a slightly more powerful kick, dealing 4% damage and enough knockback to get the foe out of his face.
Up Aerial - Dive Bomb Doopliss flips, kicking upwards. However, should he make contact with a foe, he doesn't deal damage: instead, he kicks off on them and dives straight towards the ground, acting almost like a reverse footstool. He's able to angle the trajectory of his dive. Despite Doopliss' A+ aerial movement and hover, he still falls extremely slowly: using this allows him to quickly escape any foe who has caught up and is dominating in the air!
* * * Smash Attacks * * *
Side Smash - Duplighost Magic Doopliss' eyes flash red, growing ever brighter as the charge grows. Upon release, he will...wave his arms in front of him as rather weak-looking magical multicolored geometric shapes dance in front of him, extending out further the longer the charge was held. They linger on the stage after Doopliss releases them too, from 3 second to 7 seconds depending on the charge. This attack will extend into the foreground and background, hitting any opponents who can pull shenanigans there as well. The shapes will always deal the same amount of weak 3% hits and stun to any foe standing within their reach, ranging from 1 SBU to 2.5 SBUs depending on the charge. These little buggers absolutely eat away at shields, even cursing them to grow back half as slowly for the next 10 seconds if an opponent shields within them (or if Doopliss if he has control of their body...). It's a nice little trap Doopliss can lay to deal some nice damage to anyone who wants to get close.
Down Smash - Winds of Change Doopliss' eyes glow red as his bedsheet-esque body billows with power. Upon release, Doopliss brings his arms up and then down, with a yell of "GO AWAY!". On either side of him, a powerful wind effect blows opponents away, at it's weakest being only as strong as a reverse DeDeDe inhale and reaching only half a SBU. At full charge, it's as strong as wispy woods' blowing, reaching as far as the same tree. Unfortunately, it does no damage, but DOES deliver the most knockback of any of your attacks, though usually not powerful or far-reaching enough to actually KO.
Up Smash - Into the Purple Smoke Doopliss' eyes glow a similar shade of red, again becoming brighter as the move is charged. Upon release, Doopliss' eyes flash, and he summons a giant cloud of purple smoke to cover where he's standing. With absolutely no charge, the cloud will only cover as far as an explosion from one of Toon Link's bombs, actually having a similar look to the dust cloud from that attack. At full charge, the cloud will cover near 2/3 of battlefield, obscuring everything completely. The purple cloud lasts on stage for 5 seconds before dissipating, leaving Doopliss able to do it again after. He can't have more than one cloud at a time.
* * * Special Attacks * * *
Neutral Special - Paper Thin Doopliss, ever the clever fellow, uses his paper-thin body to...slip into the background of the stage! Here, he's in a realm of his own, able to move about freely and such and so forth. He's immune to most attacks, besides the ones that very obviously it in the background (such as explosions), though he's also completely unable to hit into the foreground with physical attacks unless they explicitly hit in multiple dimensions. Any items he carries with him and drops will stay in the background until he comes to claim them, as they will not disappear while in the background.
This is a nice escape tool for Doopliss in his base form, allowing him to slip out of sticky situations like a particularly aggressive foe, or to hide while he uses his down or up special (the cocky ******* leaps into the battleground ready to fight after either, though).
Side Special - Veil Doopliss sinks into the ground, leaving only a purple shadow where he once stood. The shadow then moves forward several spaces, before Doopliss reemerges onto the battlefield, able to fight immediately after coming up. This move is extremely quick, allowing Doopliss almost instant travel over about half of Battlefield at any given time, passing through walls and stopping short of ledges. If foes are within 1 BFP of Doopliss when he comes up, he will make a scary face as he reappears, causing them to be stunned for a brief moment while he is free to do as he wishes. Use this to come in for Doopliss' grab to make up for it's pitiful range! If used in the air, this acts as a teleport, simply bringing Doopliss 3 SBUs away.
Down Special - Transform Doopliss cackles in a way that he must find maniacal, as a green aura surrounds both him and the nearest foe. This is almost immediate, though not starting until Doopliss' hands are completely up and his short chuckle is finished. The aura ring quickly moves from the foe and Doopliss' feet upwards, magically transforming him into a carbon copy of the foe. Doopliss' stats change to affect this, with the exception of his aerial stats and abilities, which remain the same. After this move is used, Doopliss can switch freely between his base form and the foe by pressing the down special, having Doopliss transform into the foe like Zelda to Shiek, though instantaneous. Of course, he can only use the foe's moveset while imitating them. This obviously means Doopliss does not copy the foe's Down Special. The green aura will appear visible even through Doopliss' purple smoke.
This works in his favor in a number of ways, specifically giving him some actual staying power in terms of weight, of which he has very little. This may again work to Doopliss' favor as he himself has no really powerful killing moves, and may or may not come in favor for his recovery, which, while good, is hover-dependent. Imagine the likes of Meta Knight with Doopliss' hover!
The attack does more than physical appearance changing and giving him a second moveset: he and the foe become magically linked, sharing any damage taken by either as long as Doopliss is transformed: If Doopliss attacks a foe while Transformed, he takes any damage he dealt to them himself, though no other drawbacks. The same is true for the foe. Healing does not effect the other party. If Doopliss summons a minion as the foe, damage the minion does will not count towards the curse, though minions will automatically switch allegiances if he goes back to base form while they are under his command. If Doopliss takes 20% damage by any means while Transformed, he will be knocked back into Doopliss form, loosing the transformation, having to get it all over, and being stunned to boot.
This creates an interesting dynamic for Doopliss: he can finally attack and knock out the foe, but has a very small window of opportunity to do so before that 20% threshold is met. Obviously, he has to take full advantage of it, but he also need to be mindful of himself and his very vulnerable nature when not transformed.
This move is definitely dodge-able by shielding, rolling (or if they can, teleporting) out of the the way before Doopliss has finished his laugh, though simply walking or dashing will cause the aura to follow. Smacking Doopliss before he's able to finish his laugh will also cancel the move. If the move is cancelled by attack or misses in any way, Doopliss must wait a full 30 seconds before he can attempt the transformation again, having used his minuscule magic up on the attack. In addition, he loses the foe's moveset if either of them are KO'd.
Up Special - Magic Bell Doopliss points upwards, again laughing, as a bell materializes above him, ringing once before disappearing. Upon the ring, the foe nearest to Doopliss is transformed into a cute li'l piggy that resembles them and has their most dominant traits (Mario's hat and stache, Pit's wings, etc.). As a pig, the foe weighs 5, is as slow as Bowser's walk, and has extremely slow and short rolls and jumps. Adorably, they still have their moveset at their disposal, though each move has some significamt lag (lasting 1.2x longer than the lag normally would) on both ends tacked on. The foe doesn't stay a piggy for too terribly long, the effect lasting only up to 5 seconds, with a 30 second cool-down period. The best part of this, though? Transforming the foe, albeit briefly, into something not resembling themselves, meaning Doopliss' curse to take all of the same damage is lifted for as long as the foe is a pig!
Dodging will not help enemies avoid this, though shielding will prevent the bell's sound from penetrating a foe's ears until it's at 25% strength. Hitting Doopliss while he's laughing will, again, interrupt his attack. Attempting to use this to help you transform into the foe won't help, as if you DO try, Doopliss will transform into the pig himself, with his own weak moveset to boot!
* * * FINAL SMASH - MOCK PARTY * * * Doopliss holds up the red Crystal Star in his hand as his enormous Bell Tower emerges from the background. The bell rings thrice, and then purple copies of any character in the match (minus the Doopliss using the Final Smash) fall from the bell. These 3 are copies of Doopliss' opponents, and fight with a level 3 intelligence. Once they are defeated, they are lost forever. The bell tower disappears after 10 seconds.
A Guide to Doopliss - Brought to You by the Letter "p" Doopliss is a pathetic little bugger on his own, obviously more content to pull pranks than actually practice fighting. As such, he's pretty far on the weak side: as you may have possibly noticed, he doesn't deal in knockback, like, at all. And while he is a behemoth in the air, his light weight and middling speed make him a prime target for attacks.
Offensive attack is usually out of the question, but, unfortunately, he needs to do a bit of offense if he ever wants to get a powerful enough attack to KO enemies. Wearing down their shield and disabling their rolls and dodges with your Back Throw are major helpers.
On that note, how DOES one disable a shield, at least to the point at which he can bust pass it and copy the foe? Disabling rolling and forcing that as their only defense is one way, and is certainly a major way. One of the other best methods is to set your Side Smash trap and then taking control of the foe with your Forward Throw, simply walking them into it and shielding for them: it's a bit tricky to pull off given then scant time both of them have to overlap, but with the assistance of your Side Special it should make life a LOT easier.
Persistence is key, here: you need to be playing as Doopliss to do any sort of damage to the foe, while simultaneously keeping yourself from being utterly decimated as the lightweight floater. Doopliss has tricks to keep himself from getting damaged TOO badly, including making the foe intangible, making the foe a pig, and even slipping into the background. He even has banana peels to trip the foe up if their in pursuit!
Likely, you'll be playing a very tricky game of hit-and-run throughout most of the match, as even playing as the foe for too long is extremely damaging to Doopliss, making him extremely vulnerable. He has to choose carefully when to actually attempt a Transformation or he'll be strapped with a very long time penalty: time is NOT Doopliss' friend.
Integrating all of your tricks, as juvenile and short as some may be, into your plan of attack is absolutely necessary. A good Doopliss needs to be able to weasel his way out of any situation and then cover his tracks. Your smoke is a good thing to lead into your grab/throws, so the foe never quite knows what you've done to them, as well as a great way of escaping into the background with some item (such as his own banana peels) or something of the foe's, or even just to escape in general.
Slanting away from how bad Doopliss is in all other aspects, don't underestimate your aerial prowess at any time. The air is a wonderful place to be for a down-and-out Doopliss: a place to rethink and get away.
Starting to wrap this up: Doopliss is a prankster at heart, and absolutely needs what almost every other character has at their disposal but he does not: a kill move. However, he MUST significantly damage his opponents enough on his own, as well as bring their defenses down long enough, to steal this from them. Doopliss may look doofy, but he absolutely needs to play cunningly to survive and win, if only by the skin of his teeth.
PAY TO PLAY
This is a very uncomfortable set, there’s a lot to like but it’s a very strange ride through with the raw tackiness. Some of it seems to just be from the character with raw magical manipulation over money, but the weirdest part is how Profiteur has to bring the foe into this mess. Forcing them to subconciously steal money and have that strange mechanic when they shield is where my tolerance for the tacky ends. Beast characters are amongst the weirdest to picture fighting the character
I'll admit, Profiteur was not an easy moveset to create. jRPGs are extremely abstracted from reality, particularly when it comes to a gag class like Merchants. It felt like my choices were between making a janky moveset, and choosing a different character. I'm pretty happy people consider Profiteur a decent albeit weird set.
Clever visual communication can compensate for a lot of tackiness in a moveset. But I didn't want to get bogged down in describing visual elements like how Profiteur's cane glows when it interacts with coins. In regards to opponents subconsciously stealing coins; the excuse I like to make to myself is that the coins are magical, and spitefully absorb themselves into the opponent who strikes them.
The more questionable things are just which input does what for gameplay purposes, making him more difficult to play and making him feel less like a Junahu set. Why does only jab make them drop coins? Why do certain moves make coins explode forever and others not? Why do only dtilt and uair knock coins up into the air? The moveset makes a lot of mechanics that make sense, like how coin piles are passively flattened out or built up by how foes walk into them, so it could use a more consistent way for how attacks react to it and just giving him some moves that specifically are designed to work with those mechanics, rather than being the only arbitrary moves that move coins.
I believe that hard interactions have their place in the world, and are consistant in their own way. Having only X moves have Y effect on a pile of money can actually simplify things, provided the action is at least tangentally related to the outcome. It really boils down to where the focus should be. Soft interactions work when
those interactions form the very core of the gameplay. Hard interactions work when the player's attention is expected to be elsewhere.
The Soccer Ball is an item based on Soft interactions. It is a brilliant interactive tool for teaching knockback vectors, and it is fairly deep, as every character's attacks work with it in different ways. However, it is patently frustrating when you hit a Soccer Ball and it doesn't go in the direction you tilted the analogue stick. The soft interaction reveals a wrinkle in the way knockback is designed, whereas Hard interactions would make the experience more consistant to the player's understanding of how inputs function.
Pardon me for asking, but how many movesets can a person post on each MYM? I think I posted plenty enough for this one, but I would like to know for future reference.
Pardon me for asking, but how many movesets can a person post on each MYM? I think I posted plenty enough for this one, but I would like to know for future reference.
There's no limit. Usually there's at least one person each contest who runs up a set total of around 10. And of course, there will also be people who post just one set. Write as much or as little as you want, but keep in mind that the contest will probably still be open for the next 2-3 months. If you want to write a moveset in that time, go for it!
The Obzedat is the phantasmal ruler of the Orzhov Syndicate of Ravnica, a plane in the Magic: The Gathering universe.
The Orzhov guild is founded on the beliefs that wealth is power, that structure breeds wealth, and that guilt creates structure. The guild is run like a combination religion, credit-lending agency, and crime syndicate. An ostentatious hierarchy of priests, enforcers, and ghostly councilors rules over a congregation of guilt-bound loyalists, indebted undead, and thrull servants. Many Orzhov guild members truly believe that their rule is necessary for making Ravnica the best it can be, and they are unscrupulous in their methods of seizing power. Most Ravnicans see the Orzhov for the corrupt organization they are, but many are lured in by their promises of wealth, prestige, and longevity.
The Orzhov guild is ruled by the Obzedat, a council of ghostly autocrats who have maintained their wealth and power even as they’ve shed their mortal forms. Members of the Obzedat have managed to cheat mortality, maintaining their consciousness (and their greed) beyond the threshold of death. They are paranoid and spiteful dictators, often going out of their way to thwart ambitious underlings, crush rumormongers, and spy on potential enemies. The Obzedat rarely speak directly with those outside the guild; instead they communicate through their official envoy, Teysa Karlov.
In Brawl, a the player appears to control a single member of the Ghost Council of Orzhova. However, the other members are present, choosing to reveal themselves as they deem necessary; because of this behind-the-scenes nature of most of the members, the Obzedat is always referred to as a single entity. Each other member counts as a hitbox for the entire character as they appear.
The Obzedat stands as tall as Captain Falcon. They are very light, as they can only partially manifest into this plane of existence. Exerting energy is not something the Obzedat enjoys, and they take their time getting around while on land. Gliding through the air is exceptionally easy for them, and is generally considered a more dignified method of movement. Instead of fully crouching, the Obzedat merely hunches over, as dropping to their knees is beneath them.
SPECIALS
SIDE SPECIAL: CHAINS OF DEBT
All living beings owe a bit of their life to the Orzhov Syndicate. With a flick of its wrist, the Obzedat sends out a shimmering wave of energy, the size of Kirby. A character who comes in contact with this wave is stunned for a moment as phantasmal chains appear around their body and bind to the character. A length of chain as long as a Battlefield platform lags behind the character. Any character that is wrapped in Chains of Debt are inflicted with 1% damage per second as the chains constrict them. This damage then takes the form of a spectral coin, which swiftly flies into the Obzedat, healing them by 1% for every two coins they recieve. These chains persist for 10 seconds or until the Obzedat is KO'd before breaking; any attack that would add more chains simply adds 10 more seconds to the time the chains persist, and the chains can not be broken otherwise.
Characters can pick up the end of the chain as if it were an item. Characters connected by the chain cannot move more than a Battlefield platform apart, and the character holding the chain counts as the center of the radius. Throwing the chain does nothing unless thrown into the ground, in which case it is planted into the ground, preventing the bound character from moving more than a Battlefield platform away from where the end of the chain was planted. Picking up the chain again removes this limit; a bound character can free themselves from the ground in this way.
This is the Obzedat's primary method of ensuring a steady bleed on the opponent, causing steady damage to their enemies while elongating their own life.
UP SPECIAL: GIFT OF FLIGHT
The Obzedat can grant wishes to mortals... for a price. The Obzedat raises a hand in the air and creates a flash of magical energy that radiates out in front of it to a Kirby length away. Foes hit by this flash of white light are given a gift from the Obzedat: a pair of stained glass-like wings that protrude from the character's back.
Characters given the gift of flight gain an increased jump height of 50%. However, each time they jump, the Obzedat is instantly healed by 3%. After 30 second pass, the wings vanish and the gift expires. Granting an opponent with the Gift of Flight while they already have the gift counts as a new gift.
In multiplayer matches, this can be a very useful diplomatic tool, allowing the Obzedat to boost an opponent in exchange for a favor, while in a one on one match, it provides another steady stream of healing to the Obzedat while simultaneously discouraging the opponent from taking to the air.
DOWN SPECIAL: GIFT OF POWER
Holding out a hand low, the Obzedat generates a pulse of white energy in front of it. Enemies hit by this wave receive the gift of power.
Physical attacks and throws made by characters granted the gift of power receive a knockback bonus of 25%. Each physical attack they make that connects, though, heals the Obzedat by 3%. The gift persists for 30 seconds before fading away, and multiple instances of the Gift of Power do no stack.
Aside from obvious multiplayer implications, this gift can also screw with characters that rely on precise combos, allowing the Obzedat to slip out of chains of attacks.
NEUTRAL SPECIAL: EXTORT
A staff ending in the shape of a screaming human head appears in the hands of the Obzedat, which then hold it out in front of itself. As long as the special button is held, the mouth of the staff glows a soft pink life, and every 1.5 seconds, each opponent on screen receives 5% (but no knockback or hitstun), and the Obzedat is healed by 2% for each opponent hit by the attack. Even shielding, dodging, or otherwise taking defensive action can't avoid this attack, although invisibility effects such as the Starman will prevent this damage.
Another bleed tool in the Obzedat's arsenal, extortion allows the ghost council to punish heavily defensive players.
SMASHES
UP SMASH: MARK OF THE SYNDICATE
The Obzedat holds up an open palm above its head, creating a burst of purple energy in the shape of the Orzhov's sun-shaped insignia. This burst has very high knockback but slow growth, KOing around 130%. It also punishes the foe with 15% damage, or, if charged, dealing up to 20% and KOing at 100%.
This attack punishes foes who dare try to rise above the ghost council, and should dissuade opponents from attacking the Obzedat from above. The move's strong knockback also gives the ghost council a bit of breathing room.
SIDE SMASH: GRASPING GHOULS
The Obzedat clenches its fist as the ground at its feet ripples, then points forward, sending the writhing mound of earth forward at the rate of Kirby's walk speed. If an opponent comes in contact with the mound of earth, the skeletons of several debtors bursts out from the ground and grapples the foe. The opponent is treated as if in a regular grab, and are dealt 7% every half second they are grabbed as the skeletons rip and claw at their flesh. Charging this smash increases the speed at which the skeletons travel underground, up to Kirby's run speed.
The Obzedat can easily place a debuff on an opponent while they're grappled by this move, or try to set up one of their slow finishing moves.
DOWN SMASH: CALL FOR THRULL
The Obzedat holds out its hand, palm facing down as the ground in front of it begins to ripple. A moment later, a thrull as tall as Pikachu erupts from the earth, dealing 13% and decent upwards knockback to opponents hit by it, though it won't score a KO until beyond 180%. Charging the attack increases the initial damage up to 17% and the KO power to about 160%, but doesn't otherwise affect the thrull once it's been spawned.
A race created from the dead flesh of guild members, thrulls are the signature race of the Orzhov Syndicate. They are used as unthinking servants, blindly following the orders of members of their guild. Once summoned, the thrull meanders about the stage, following the Obzedat like a slow, dumb puppy. Its prime directive is to block attacks from hitting the Obzedat; not only does it act as a small wall, but it will even throw itself onto things that it deems unsafe for the Obzedat to come in contact with if they come within a Battlefield platform of them, such as mines, traps, and explosives, setting them off in the process.
The Obzedat can bestow Gifts upon the thrull. If given the Gift of Flight, the thrull will hover swiftly about the Obzedat, trying to keep between the ghost council and enemies. The Gift of Power puts the thrull on the offensive, causing them to follow the enemy closest to the Obzedat, and occasionally attack them with weak punches that deal 6% and flinching knockback. Receiving both gifts turn the thrull into a little terror, flying about enemies like a mosquito and making occasional attacks for 6%. Thrulls attack twice as often as the Waddle Dee of King Dedede's special do. Keep in mind, though, that bestowing gifts to a thrull does not heal the Obzedat as bestowing to a normal character would.
The thrull has an invisible health meter, and perishes upon taking 30%. It is also very light and lacks recovery, making it easy to KO.
The Obzedat can only create a single thrull at a time. Creating a new one instantly destroys any old ones on screen.
GROUND ATTACKS
JAB: RAP OF THE CANE
A spectral cane materializes in the Obzedat's hand, which it then swing in front of themselveforwards in an over-the-head fashion. Characters struck by the shaft of the cane take 8% and weak knockback, while those hit by the very tip of the cane on the head take 11% and are knocked into a trip. The startup is fast, making this a good spacing move, but has terrible lag if whiffed.
DOWN TILT: TASTE OF FREEDOM
The Obzedat points at the ground as the skeletal ghost of a debtor bound in chains bursts from the ground in front of it, shooting up as high as two Ganondorfs before catching the end of its chain and being pulled back into the ground a half second later. The ghost deals 10% on its ascent and surprisingly strong knockback, KOing at 140%. The knockback diminishes greatly the further away from the ground the opponent is struck. The ghost is a disjointed hitbox, and can even absorb attacks. Upon taking 10%, it vanishes.
The Obzedat isn't above calling upon the aid of its debtors, even if all they offer in return is a breath of fresh air.
UP TILT: IMPOSING ASCENT
The Obzedat softly chants as a ghostly blue smoke surrounds it; then, in a burst of smoke, it vanishes, the burst of energy dishing out 13% and moderate horizontal knockback to any opponent hit by it. A quarter of a second later, the ghost council reappears three Ganondorf heights midair in another burst of smoke that deals 13% and knockback that KOs around 150%.
Freedom of movement is something members of the Obzedat greatly enjoy, and this move gives them just that, allowing them to swiftly transition from the ground to the air.
SIDE TILT: BECKON
With a "come here" gesture, the Obzedat beckons to its enemies. Enemies within a body length of the front of the Obzedat are stunned as if hit with a Deku Nut, or, if they're already stunned, recieve 5% and very low horizontal knockback. Enemies further away than that are pulled towards the Obzedat with a weak wind effect; a character not resisting the wind would be moved a full Battlefield platform towards the ghost council, while a character walking against the wind would have their speed cut in half for a fraction of a second. There is no length limit to the wind effect, and can be used against characters far away from the Obzedat, even those off stage.
This ability can mess with an enemy's recovery, or put a character into a vulnerable position.
DASH: FLICKER
A puff of blue smoke surrounds the Obzedat as it fades out of existence, creating a weak hitbox that deals 7% and negligible knockback. Suddenly, it reappears a Battlefield platform ahead in a burst of white light, dealing 10% and knockback that KOs at 160%. Similar to Shiek's up special, the Obzedat is invulnerable while teleporting. Walls and other obstacle prevent the Obzedat from moving through them, and the Obzedat will not go off of the edge of a stage with this attack.
AERIAL ATTACKS
FORWARD AIR: ALMS
With a grandiose gesture, the Obzedat flings a fistful of coins forwards. The move creates 8 coins which fan out in a 45 degree cone in front of the Obzedat and arc downwards. The coins vanish after traveling as far as Mario's fireball would. Any opponent hit by one of these coins flinches from being pelt with a bit of metal, but heals 1% for each coin they are hit by. Five seconds later, they are forced to pay back their debt to the Orzhov, and take 2% for each coin they took and flinch. Shielding, dodging, or taking any other defensive action negates this second flinch, although the damage is unavoidable.
NEUTRAL AIR: SUDDEN DISAPPEARANCE
Upon pressing the attack input, the Obzedat fades into the background and becomes invisible. A moment later, it reappears in flash of white light, dealing 12% and strong knockback, KOing at 150%. The ghost council is invulnerable while invisible, but the attack has terrible cool down lag, making it an impractical defensive move.
DOWN AIR: SHADOWY SPIRAL
The Obzedat conjures a spiral of blue smoke around itself, swiftly spreading from its feet to its head. The attack generates a quick sequence of 6 hitboxes around the Obzedat, each dishing out 2% and the final hit dealing weak knockback. The smoke has high priority against projectiles, and even negates ranged attacks that would deal 4% or less.
This is the Obzedat's primary form of aerial advancement, protecting it from weak projectiles as it plows its way towards enemies.
BACK AIR: VAMPIRIC STRIKE
With a hand curled into a vicious claw, the Obzedat does a lunging open-hand punch behind it. The startup is slow, but it deals 14% with decent knockback, killing at 125% with its low knockback trajectory. The punch also siphons some life from the enemy, healing the Obzedat 5% on a successful hit. The punch is sexy, dealing 8% and healing the Obzedat 2% after the initial hitbox but rather weak knockback.
UP AIR: BECKON APPARITION
The Obzedat opens up a side of its robe, and a skeletal, humanoid ghost the size of Olimar rises above it. The ghost then seeks out the nearest opponent, flying towards them at Kirby's air speed. If it comes in contact with an opponent, it lashes at them with its claw-like fingers, dealing 6% and tearing a spectral coin out of them. It then floats back to the Obzedat, clutching the coin to its chest. Once it reaches the ghost council, it vanishes back into it, healing the Obzedat by 6%. The ghost is very fragile, however; any attack that strikes it causes it and any coin its clutching to vanish in a puff of blue smoke.
GRAB GAME
GRAB & PUMMEL: BEAR HUG
A big, deformed ghost dressed in the roves of the Obzedat suddenly appears in front of the Obzedat a character length away, wrapping his massive arms around any enemy in his space. Pummeling causes the primary member of the Obzedat to place its hand upon the opponents face as a blue energy radiates out from them and into the ghost, dealing 1% to the opponent and healing the Obzedat 1%. This grab has a pretty good reach for a non-tether grab, but will miss if the opponent is too close to Obzedat, and the pummel is on the slow side. Nevertheless, it generates a decent damage gap between the two characters.
DOWN THROW: BLIND OBEDIENCE
The Obzedat holds its arms to the heavens as a white light shines upon the enemy. The grabbed character stares into the light and falls to their knees, enthralled by the light. While in this state, the opponent is immobile and vulnerable for a half a second, but immune to grabs and granted very strong super armor for the duration of the stun. This sets them up perfectly to be afflicted with a Gift or Chains of Debt.
UP THROW: COUNCIL MEETING
The Obzedat places its hand on the shoulder of the grappled character. Several other members of the Obzedat appear, leering at the grabbed character as they all vanish into the ethereal realm. A moment later, they both reappear midair as the enemy is sent flying, taking 11% and strong upwards knockback that KOs at 140%.
FORWARD THROW: EYE FOR AN EYE
The Obzedat points out a gnarled finger behind the grabbed character, who then looks over their shoulder. A spectral version of the character appears right behind them, who then performs the same attack that character last hit the Obzedat with. All properties of the attack are the same, including damage dealt, knockback, and any secondary effects caused by the attack. Projectiles can also be recreated. If the character has yet to land an attack against the Obzedat, the spectral character simply performs its jab on the enemy.
BACK THROW: EXECUTIONER'S SWING
A ghost dressed as an Orzhov guard wielding an axe fades into existence behind the enemy, poised to bring it down on their neck. The damage and knockback this attack does depends on the amount of damage the character has dealt to the Obzedat this stock. If they've dealt under 100% to the ghost council, they receive 8% and knockback that merely pushes them away a bit. Dealing between 100% and 200% causes the executioner to swing a little harder, dealing 11% and knockback that KOs at 165%. If they've caused over 200% to the Obzedat, though, the executioner lives up to his name, dealing a whopping 17% and KOing at 110%.
FINAL SMASH: IMMORTAL SERVITUDE
Several other members of the Obzedat appear out of thin air as they all begin a rhythmic, deep chant. The level becomes dark as a ghostly blue light radiates from the bottom of the screen; a second later, a phantom version of each opponent enters the battlefield. These spectral opponents fight as level 9 CPUs and are identical to the character they appear as, possessing an invisible damage meter. They target their mortal counterparts in a fight to the death, and vanish once their quarry loses a life.
PLAYSTYLE
The Obzedat is a bleeder character, designed to win by slowly dealing racking up damage while simultaneously healing itself bit by bit. Its side special, Chains of Debt, is its primary method to bleed out the enemy, ensuring a steady stream of damage and healing. Its forward aerial, Alms, fills a similar, though more offensive, role, disrupting characters and forcing them to deal with an inevitable flinch a few seconds later. If the opponent decides to play defensively to avoid receiving one of the Obzedat's close ranged debuffs, the ghost council can still keep up the bleeding by sending out minions or using its Extortion special. Extortion is also useful when used directly after one of the Obzedat's numerous high knockback attacks, furthering the gap between your damage meter and theirs.
Keeping opponents busy with minions is another thing the Obzedat excels at, allowing them to stall the enemy out and wring a little more life out of their victim. Grasping Ghouls and thrulls force the opponent to take to the air to get to the ghost council, while Beckon Appartion makes it difficult to approach the Obzedat from above. The Obzedat hates those who see them as above the Orzhov, in any sense of the word.
Of course, the Obzedat's most obvious weakness is its physical properties. It is a tall, light character, making it extremely easy to combo; if caught in a chain of attacks early in the game, the Obzedat is essentially doomed. They can try to mitigate their combo weakness by granting an opponent with the Gift of Power, reducing their damage output by 3% and causing attacks that would normally lead to combos to push the Obzedat out of combo range due to the knockback increase. The Obzedat is also far more mobile in the air, and attacks such as Imposing Ascent and Meeting With The Council put them directly midair.
Finishing off the opponent is a matter of waiting an opportunity to strike once the opponent is weak enough. The Obzedat excels in KOing opponents above it, as its Mark Of The Syndicate smash and Imposing Ascent both deal strong knockback and come out deceptively fast. If the match has dragged on long enough, Executioner's Swing becomes a very viable and very scary KO option.
The Obzedat
My main issue with the set is the somewhat weird choice of how to represent the character, I get not wanting to make a multi-character set for them but the only place the other ghosts in the council assist is in the grab, which feels weird. Especially so when you refer to them as Obzedat rather than merely "Ghost Council", as Obzedat has much more distinguished designs than the old card and I feel each of them could have their own unique additions to the moveset. It feels more accurate to the original Ravnica card and even then, I wish you did more with the other ghosts as opposed to some of the random effects you have here. The Fair in particular feels really bizarre, and some of the more random summons could've been handled better if it were another member of the council.
What I actually did like about the set amounts too that it does faithfully represent the Ghost Council once you get past the awkward way of implementing them, with their playstyle essentially being a slow bleed in the opponent's percent while constantly healing themselves, compensating for their rather lacking weight due to being a ghost. The buffs on Up and Down Special are particularly interesting in this regard, and I'm rather fond of how you capitalize on them later in the set with the slightly customizable thrull minion on Down Smash. The constant small ways Obzedat has of healing themselves are also rewarded in a fairly cool way in the execution throw, which I liked although I felt the payoff may be a tad too low given the amount of effort you have to put in to really get it to work, since Obzedat lacks a proper recovery move and has 2/10 weight, and I wish you did more stuff with the healing. Aside from that, while the implementation of Extort is very cool, I feel the ways Obzedat has of defending themselves are rather lackluster if they want to use it, outside maybe the Thrull and FSmash. Maybe you could have given them more lingering hitboxes to get in the way?
It actually is a decent set overall despite how heavily I nitpicked it, mostly because I've wanted to make this character myself for a while and the actual healing/percentage bleed mechanics and characterization are really good stuff, just not supported nearly as well as I'd hope. Hopefully you can take a few lessons from this set and improve from here, as I do believe this is my favorite of yours in spite of it's many flaws.
I'm working on a project and I'd like everyone's input! My plan is to include a handful of sets from this contest and the last, but if you'd like to see a specific set of your's included, please tell me here or PM me. If not, I'll likely be pulling from the highest-placing sets of those who don't send in.
I'd say most people are polishing up their sets, which can take a wee while. They may also be occupied with real life, or busy with stuff like VCGW. Things were a lot busier years back.
I've been very busy with things like school. Barely any time to work on movesets, but I'm working on a few at the moment that I'm hoping will be worth the wait. They're definitely better than Mr. Mime at least. In the meantime, I'll be reading sets as others post them, and commenting when I can.
Thrall
Really, absolutely no-one comments the most recent Warlord set? It's a bit of a shame too, because while Thrall is admittedly playing straight camper, the set does a lot of interesting things with that concept. His most clear cut camping projectile in DTilt is actually a little tricky to straight up camp with and has to be used smartly and along with that it goes well with his terraforming, while he has the fun mechanics of utilizing wolves, both visible and invisible, to carry him and raiders around. It is a little disjointed admittedly, what with it trying to focus on wolves, terraforming, camping, and wolf invisibility, it really doesn't go as far with any of them as it could have had the set focused a little more on a smaller number of individual concepts. That said, it's still pretty fun, and the boss mode really improved my opinion of the set, with the options for 3 different kinds of mounts and raiders giving some incredibly varied options, and the Kodo Beasts do some enjoyable things with the concept of being in 3v1. Good work on this one Warlord.

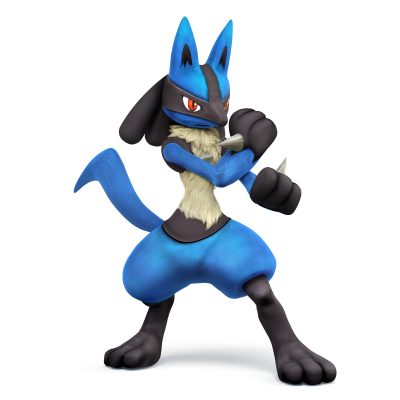
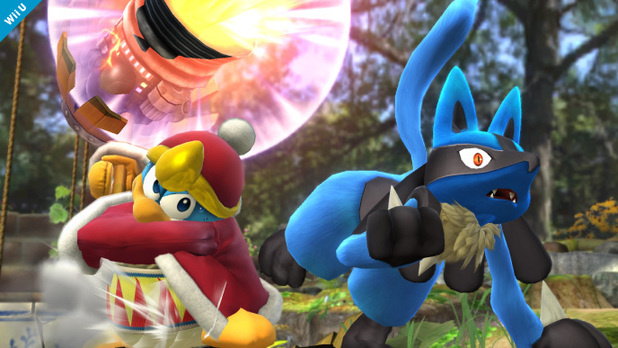


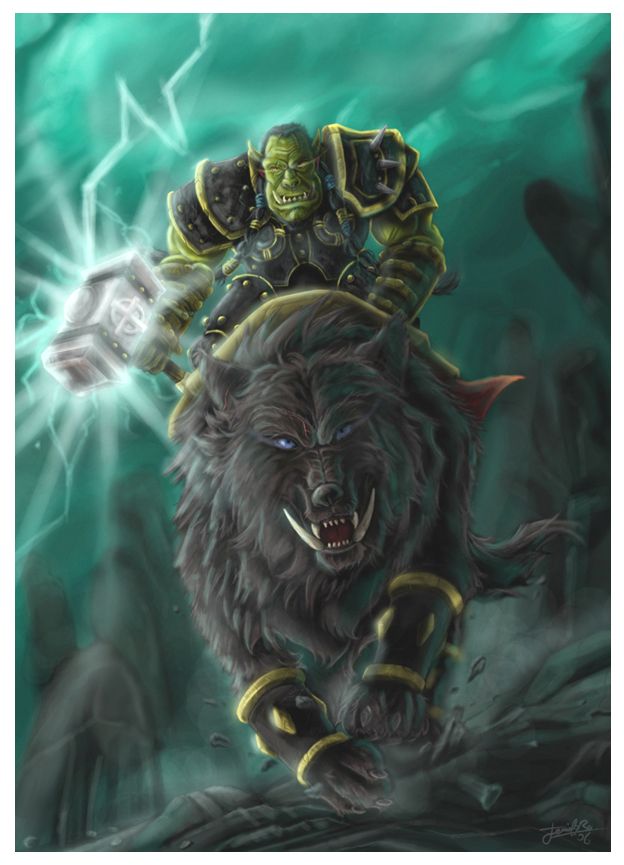


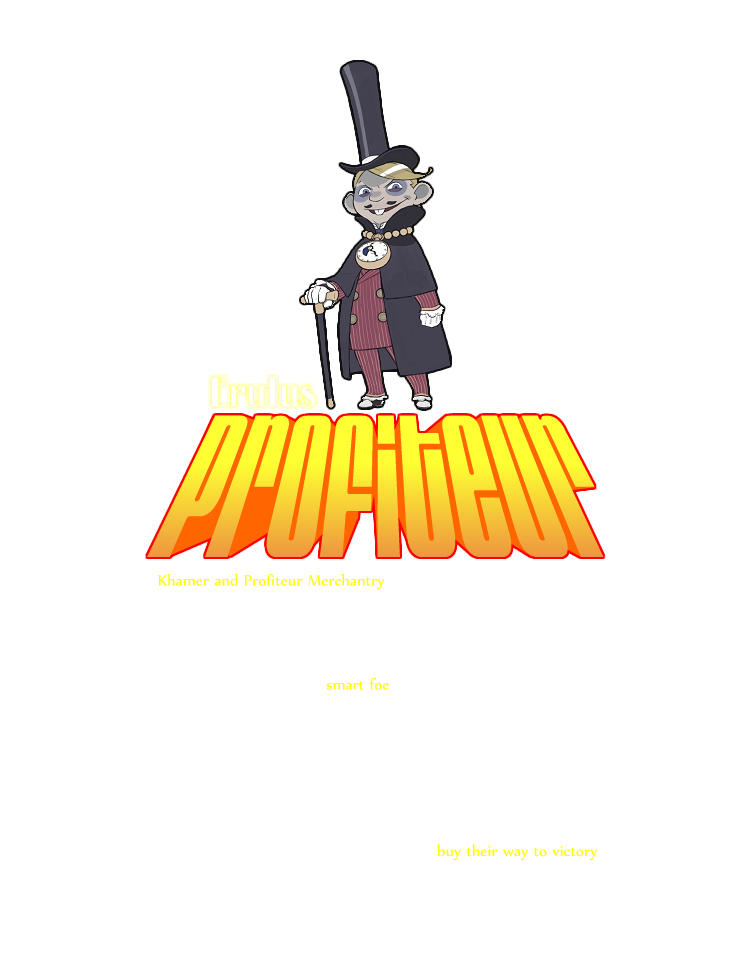
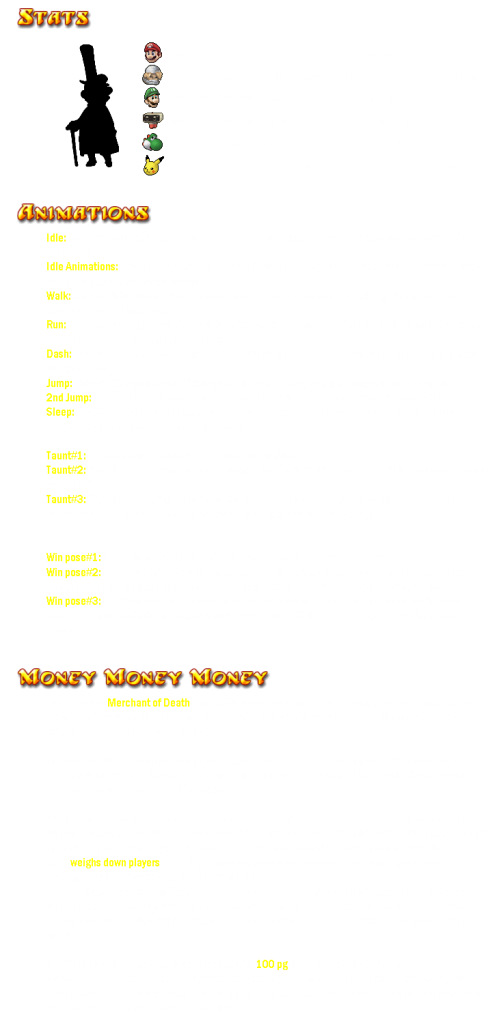
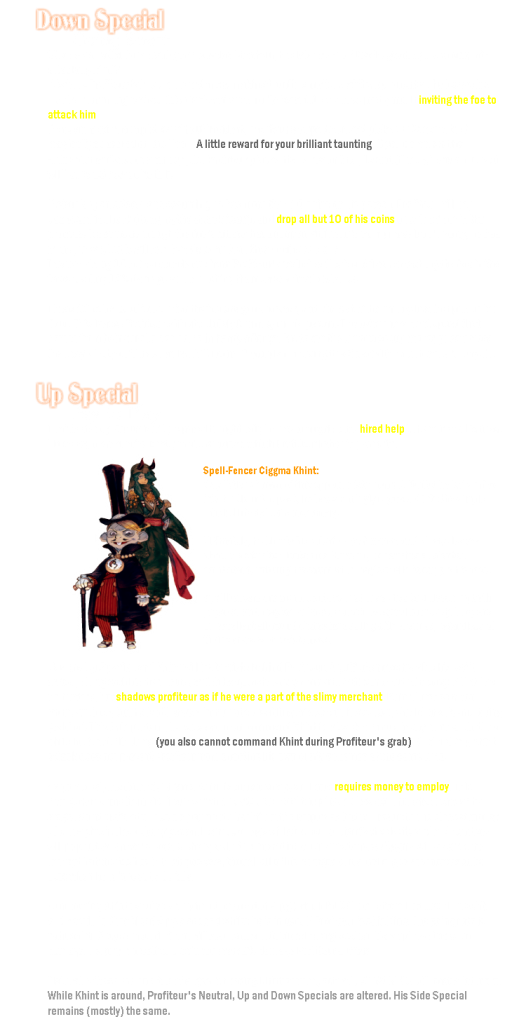

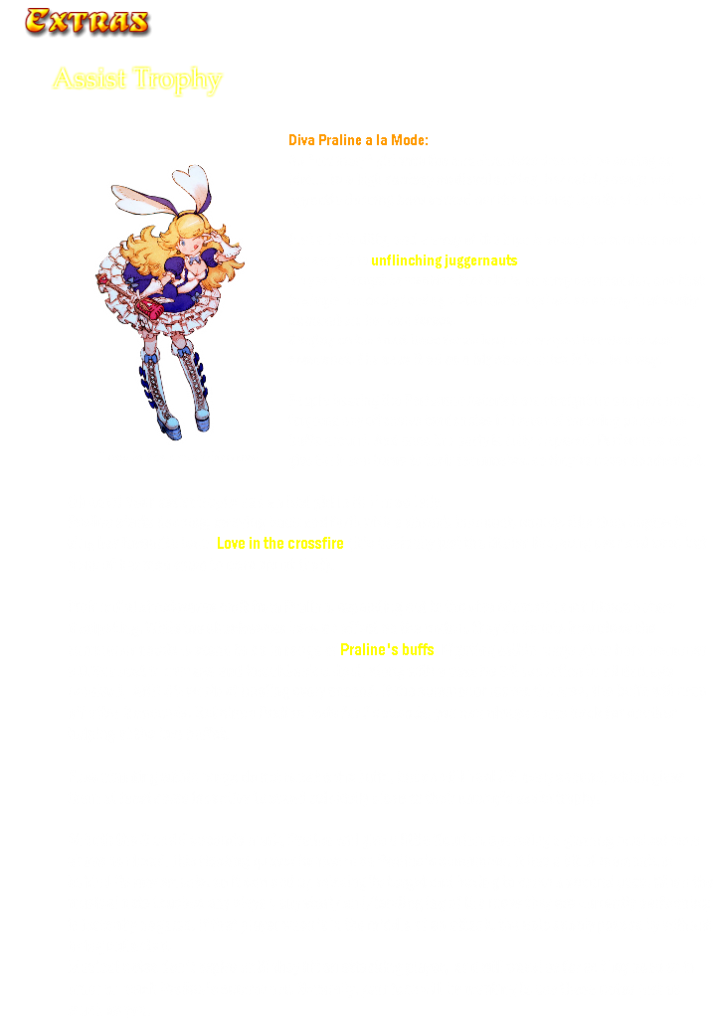
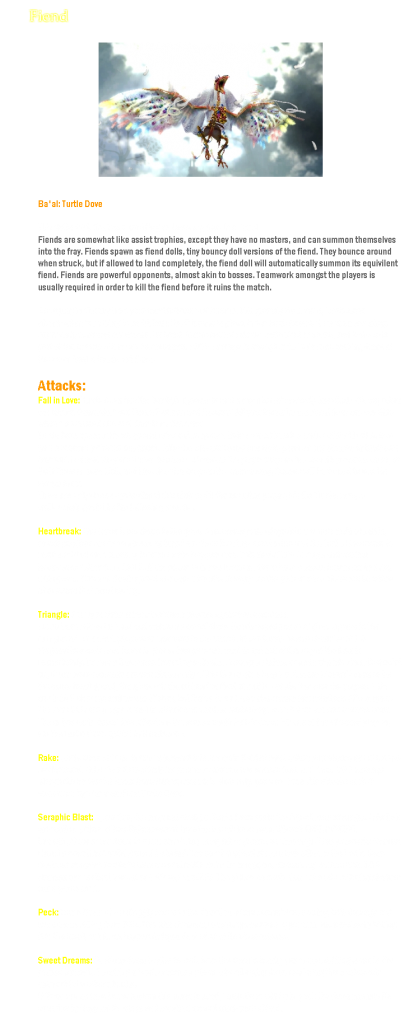
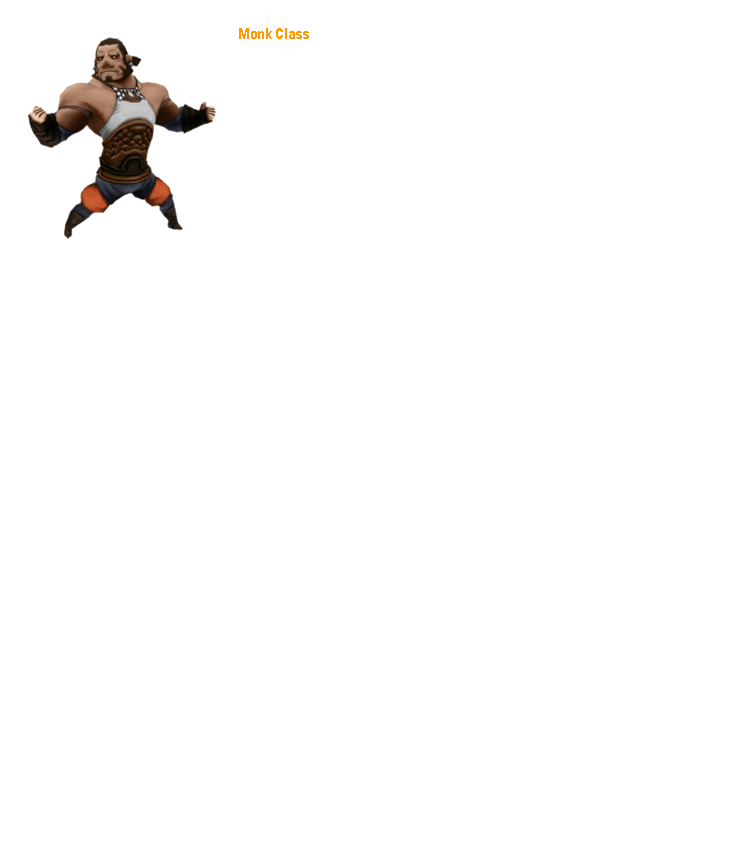


 .
.