Welcome to Smashboards, the world's largest Super Smash Brothers community! Over 250,000 Smash Bros. fans from around the world have come to discuss these great games in over 19 million posts!
You are currently viewing our boards as a visitor. Click here to sign up right now and start on your path in the Smash community!
It appears that you are using ad block :'(
Hey, we get it. However this website is run by and for the community... and it needs ads in order to keep running.
Please disable your adblock on Smashboards, or go premium to hide all advertisements and this notice. Alternatively, this ad may have just failed to load. Woops!
Shadow is the sometimes rival, sometimes friend to Sonic the Hedgehog, actually considered the second most popular character besides the blue blur himself. He's an anti-hero who's not afraid of using his fists (or cars...or guns...) in a fight. Created to be the "Ultimate Life-Form", Shadow possesses natural abilities that give him a huge advantage in battle, most notably his seemingly natural connection with Chaos Energy.
Shadow himself can be considered an embodiment of Chaos Energy, and can, in addition to having virtually identical abilities to Sonic, manipulate that energy naturally, making him a far more varied fighter than the blue blur.
Shadow clenches his fists and bows his head, closing his eyes and gritting his teeth. As he glows red, he gives a shout: "Chaos..." that continues for as long as the move is charged. When the button is released, Shadow can resume fighting, though he glows with a peculiar red tint. Upon second input (meaning this is not a move you are able to charge over long periods of time), Shadow's eyes snap open, his head shooting up, and his arms flying to each side (resembling very much his Chaos Control animation from Brawl), shouting "Blast!", unleashing a red explosion of Chaos energy from his center. By not charging up the attack at all, Chaos Blast will barely reach beyond Shadow's frame, and deal only 2% damage and slight pushback, though with thankfully little lag.
The blast itself will grow to the size of a Smart Bomb Blast within about 2 seconds of charging, and at it's peak will deal 25% damage and great knockback that kills around 130%, though that's damage all at once, as the blast itself never lasts more than .5 seconds. Since that charge time is a bit unrealistic, the median of charge time, range, and damage output is about .7 seconds, with a range of 1.75 SBUs in all directions (the blast is circular), and with a damage output of about 15, dealing fairly decent knockback in whatever direction the opponent was hit in.
Up Special - Chaos Snap
Shadow snaps his fingers, disappearing in a flash of blue light. Shadow reappears a brief moment later, 2 SBUs away in whatever direction the player chooses. This deals no damage to anyone, though is extremely quick, with absolutely no lag at the end for Shadow. Shadow has the ability to charge smashes while waiting to reappear, though once he does, the smash is released immediately.
Unlike many other Up Specials, Shadow does not enter freefall after one use of this move: he can use it up to 3 times in the air, in a row or not, letting him zip around the air like he would on the ground. Touching the ground resets this limit, as well.
Forward Special - Chaos Spear Shadow gestures forward, yelling "Chaos Spear!". A purple, arrowhead-shaped gathering of energy materializes in front of him, shooting forward at a very slow speed (about Ganondorf's walk), traveling up to 5 SBUs. When it comes in contact with an opponent, they are dealt 10% damage and some knockback, but more importantly, huge amounts of hitstun, which, while it doesn't stun them totally, it does leave them vulnerable for longer than most attacks.
Shadow can fire multiple spears , one after the other, as there is almost no lag at the end of this attack, though there is a bit of starting lag. As said, Shadow can outrun these should he immediately start to run after launching, able to follow up with some quick attacks. In the air, Shadow is able to angle because of a slight delay between press and throw, though only up and down 45 degrees each.
Neutral Special - Chaos Control
With an animation that mimics his Chaos Blast, Shadow instead yells "Chaos Control!". This isn't a charged attack, always having the same effect: around Shadow, a circle with a radius of 1 SBU (being 2 SBUs wide across) becomes distorted, and everything within slows down, much like the Shadow assist in Brawl, on a smaller scale, slowing things down to 40% of their original speed.
Shadow (and allies) are the only ones not affected by this. The zone stays up for 5 seconds, unless Shadow puts a new one up, which replaces any older one onstage. Shadow can of course fire projectiles into these fields, which causes them to slow down immensely, force opponents into them, and put them up unpredictably with Chaos Snap. Very useful for holding opponents or projectiles down in one spot for extended periods of time. Once that time is up, projectiles continue on their way as if nothing happened. Unfortunately, due to the nature of the time-slow, most knockback dealt to opponents is negated while inside the zone.
Standards
Jab - Chaos Rift Shadow holds his right hand out in front of him, creating a purple rift of energy. Opponents hit by this are dealt 3% damage and very little knockback. Visually, it's quite similar to the Jab of Mewtwo, from Melee. The attack can hit many multiple times, but will knock opponents away before long, along with decaying to 1% per hit after the first 4, and has very low priority, as to be expected from a Jab.
Dash Attack - Slide Shadow, while running, does a baseball slide, kicking his feet in front and sliding along the ground. He slides for 1 SBU, before doing a spinning kick while getting up. If an opponent is caught while he slides, he rides them forward as he continues sliding, dealing 1% for every .25 SBU they travel. At the end, if they are in range, they are dealt 4% as he kicks his way up, in addition to some hitstun. This is a great approaching tool for Shadow, though he has no shortage of these.
Up Tilt - Flame Kick Shadow kneels for a brief moment, before kicking up, doing a back flip, his shoes flaming. The shoes hit directly above him, forming a small arc of fire that deals 5% damage and upwards knockback, though not much. The fire itself shoots upwards as a fast-moving projectile, keeping it's same properties. It's a good anti-air attack, and a good way to attack foes within an aerial control zone.
Forward Tilt - Chaos Punish Shadow waves his hand in front of him, shooting a small, arc-shaped projectile forward. The projectile travels at Shadow's dash speed, reaching about 4 SBUs before petering out. They deal 3% damage and pushback, able to deal multiple hits to opponents. Shadow can fire these away, leading up to a Chaos Spear, which these easily outrun, leading to some great projectile combos, especially with foes trapped inside of your Control zones.
Down Tilt - Sweep Shadow kicks his leg out, spinning in a circle low to the ground, sweeping with his leg. Opponents hit by the attack are dealt 4% damage and are tripped, put into prone after having their feet swept from beneath them.
Smashes
Up Smash - Black Tornado Shadow curls up in the series' iconic ball, spinning rapidly to build speed. When the charge is released, Shadow quickly begins circling a 1 SBU portion of the stage, creating a black tornado, which is as tall as Ganondorf to 2 Ganondorfs tall depending on charge.
Also depending on charge is how great the suction of the tornado is. If an opponent is in the middle of a tornado, they're basically screwed no matter what charge, though the larger the tornado, the stronger the pull, ranging from the range and strength of King DeDeDe's Neutral Special to twice that strength and four times that range at full charge. Not only are opponents sucked in, but any nearby projectiles flying about or items are sucked in too. The tornado is strong enough to forcibly pull anything out of the Chaos Control zones.
When opponents are sucked it, they are tossed around the tornado, being dealt a set 10% damage, along with being pelted by whatever projectiles were caught, then tossed into the air, just above the top of the tornado, where Shadow is waiting for them. Obviously, great set up for an aerial attack, but also a great way to deal massive amounts of damage if you've got a lot of projectiles thrown around, or even inside you're Chaos Control zones!
Down Smash - Spin Dash
Shadow once again curls up into a ball, spinning rapidly to build speed. When the charge is released, he shoots forward at a speed of 11 to 15, depending on charge, still in the ball. He's fully controllable, much like Sonic's Spin Dash, lasting about the same amount of time as that with all the same charges, and has huge priority over most moves in the game, only getting beaten out by the very strongest.
Opponents caught by the dash are dealt 3% constant damage and are constantly pushed back, being dealt multiple hits in very short periods of time. At the end of the attacks, Shadow pops out of the ball with a powerful kick, dealing an extra 10% damage and lots of knockback, though he can cancel out of the attack at any time before this by rolling or shielding out of it, allowing him to push opponents along the ground and position them where he pleases.
Side Smash - Chaos Nightmare
After the charge, Shadow snaps his fingers, causing a small explosion to occur 1 SBU away from him. At minimum charge, the attack is about to scale with the .gif above, dealing an okay 10% damage and decent knockback. At full charge, the attack is easily 3 times that size, dealing 35% damage and very good knockback, KOing at around 95%.
The attack itself is a bit on the slow size, a it unusual for Shadow, but as long as he can hold opponents down in one place for a while, he's got a great KOing tool on his hands. Unlike the Chaos Blast, however, another powerful killing tool, it's not as varied in how you can approach using, nor can it be pulled out unexpectedly. As a result, you've got a choice between a more versatile move vs a more powerful one.
Aerials
Jab Air - Homing Attack Shadow locks in on the nearest opponent, flying in their direction, reaching a total range of about 3 SBUs. The homing attack itself deals 7% damage, though doesn't knock opponents too far away, allowing you to follow up. The attack gets far less effective the more you use it, and after the 4th time using it consecutively, Shadow simply curls into a ball, not moving at all. Touching ground resets this.
Down Air - Gravity Dive Shadow stalls for a brief moment, the shoots downwards foot first, with an attack that looks very similar to Sonic's own Down Air. It doesn't continue downwards until stopping, though it does fall for a very long time. It has quite a bit of lag for hitting the ground without hitting an opponent, though Shadow can cancel the move with a Chaos Snap after the first few frames. It deals 8% damage and is a spike downwards.
Forward Air - Chaos Attack Shadow opens up the attack with a swift kick, followed by a flurry of quick punches, then another kick, knocking them away. The entire attack deals a total of 9% damage, and deals diagonal knockback downwards. Shadow can continue to attack by following with a Chaos Snap.
Back Air - Boost Kick Shadow kicks his legs out behind him, his rocket shoes flaring, dealing 6% damage and decent downwards knockback. Even Shadow can let an opponent sneak up on him sometimes, ya know?
Up Air - Drag Down There's no point in pretending this isn't what it is: Shadow reaches up above him, attempting to grab whatever it is above him. If he's successful, he pulls whatever it is downwards, throwing them diagonally towards the ground. This isn't a Spike, and the knockback downwards isn't very much, but it is enough to get the opponent at least 2 SBUs away from Shadow in a reeling state. Deals 5% damage
Grab Game
Grab Shadow reaches forward with both hands, leaning into it, though his reach isn't exactly stellar due to his short arms. When he does grab them, he holds them by the scruff of their neck, basically strangling them. For the pummel, Shadow merely releases some Chaos Energy from his hands in short spurts, dealing small bouts of 1% damage. Fairly standard as far as grabs go.
Down Throw - Saw Spin Shadow throws the opponent to the ground, then curls into a ball and spins on top of them, imitating Sonic's similar throw. Opponents are dealt 12% damage, and once the throw is over, opponents end it the prone position, with Shadow dangerously in range for an attack.
Forward Throw - Chaos Beam Shadow throws the opponents forward, diagonally upwards, and blasts them with a purple beam. The beam itself does no damage or knockback, but it DOES do something very important: Shadow has just focused Chaos Control into a beam, and the opponents will be frozen in place for 1 second, yes, even in the air. Luckily, Shadow has all sorts of ways to follow up on the freezing.
Up Throw - Snap Teleport Shadow snaps his fingers, teleporting both him and the opponent upwards 2 SBUs, letting go. Shadow suffers from no lag at the end, allowing him to follow up easily. Much like your Up Special, Shadow is able to control where he teleports to by pressing a direction on the control stick before he reappears. Great for positioning, especially when you can use another Chaos Snap out of it.
Back Throw - Rollout Shadow curls into a ball, curling the foe with him, and rolls back 1.5 SBUs. When he uncurls, he keeps the foe in his grab, along with an extra 5% damage for their troubles. Shadow can do this for as many times as he wants, though the foe will usually be able to break his grip after 1 or 2 times, as he isn't entering a new grab, and any attempts to break the grab carry over when they uncurl. Still, it's a good positioning tool.
Super Shadow
After smashing the Smash Ball, Shadow removes his inhibitor rings as the 7 Chaos Emeralds surround him, transforming him into Super Shadow. Unlike the other hedgehog, Shadow has more to his super form than just fast speed:
1. Shadow can now fly around the stage at free will, much like Super Sonic. It's a bit slower, but far easier to control, though doesn't automatically damage opponents who are flown into. 2: Super Shadow's specials are different from that of regular Shadow's. 3: This form lasts for 15 seconds.
Down Special - Chaos Blast The move is now instantaneous, rather than having to be charged. The blast now covers 4 SBUs in every direction. Even though it's great, it takes up a ton of power, and can only be used once, ending the transformation, actually automatically happening at 15 seconds. Deals 40% damage and knockback KOing around 70%.
Up Special - Chaos Boost Bears a resemblance to Fox's Up Special in both charge and animation, though it;s far faster and hits much harder, dealing 30% damage and awesome knockback to any opponent who is hit. It can be controlled while boosting, and also aimed before it even takes off.
Side Special - Spear of Light Shadow fires a white arrow forwards, which deals 15% damage and decent knockback. The arrows fly very fast, and can indeed be spammed because they have absolutely zero lag.
Neutral Special - Chaos Control Shadow instantly stops time for 10 seconds. Used at the very beginning of the move. Opponents hit will be dealt no knockback while frozen in time, taking all of it stacked once time moves again. Can be turned off by using the neutral special, and turned on again by using the neutral special again.
Playstyle
(Rather than give a terrible summary of how I think a match should go, I'll give you instead a list of his specials, his base, and how other moves tie into that attack. I'm still not great at writing these, you guys.)
Chaos Snap:
Chaos Snap is most likely the asset that Shadow will utilize most in battle. Most of it comes down to just how much it can be used for: recovery, approaching tool, and retreat option are the most obvious. As an approach, Chaos Snap allows not only for at attack that can basically put you anywhere you need to be, but also allows for a bit of trickery: feinting, fake outs, and even forcing of approaches because of just how dangerous Shadow can be from afar.
Chaos Snap lends itself naturally to Shadow's aerial game, allowing him to follow up attacks more easily than most, and, mostly, gives him just far better control over the air. As suck, combining Chaos Snap with, say, Homing Attack, gives that aerial (which is arguably his best offensive aerial tool) a range of about 5 SBUs. That, and he can pull off some neat tricks with it too. You know those combinations that teleporting characters always seem to have, where they knock an opponent into themselves to deliver another hit? Yeah, He can to those.
It also meshes well with Shadow's Smashes, for the simple fact that you can cover up ANY starting lag on the smash and attack directly out of it. Granted, the attack won't have an incredibly high charge on it, but still, this means that the tornado, one of Shadow's most important moves, can come out of anywhere. Of course, it's also an invaluable tool for his grab game as well, as an attack on an already incredibly fast character that allows him to sneak and catch opponents off guard.
Chaos Spear:
As an actual attack, or means of dealing damage, Chaos Spear will definitely be Shadow's most used special. As a slow moving projectile, shadow's got a couple of ways he can use this from a purely attacking mindset, Shadow can use these to actually add knockback, albeit small knockback, to ground assaults, something his tilts lack. Of course, used in tandem with his forward tilt, you've got something resembling a projectile assault.
In general, it's best not to rely on these as your soul means of attack, simply because of how damn easy it would be to see them coming and react. Chaos Spear can put you closer to opponents before or after firing. In fact, on the ground or in the air, one of Shadow's best methods of using these is to actually knock opponents into them as they're coming in!
The biggest interaction is with the Tornado, a move that, in all honesty, might have potential to be the highest damage output of any attack in the game, as it sucks in every projectile within it's range, and throws ALL of them at the enemy, who takes the combination of all of their damage (but, luckily for them, none of their knockback), leading to absolutely huge damage output...luckily for them, Shadow's not exactly great at dolling out knockback, having only 3 or 4 attacks that deal anything substantial at all.
Chaos Control:
Shadow's signature ability plays an absolutely huge role in his matches, arguably being his bread and butter. Shadow needs to force opponents into these zones, along with some projectiles. Half of this is because Shadow desperately wants time to charge up his main KO move, half because he wants opponents within range of his Tornado.
Actually getting opponents into zones requires a lot of up close attacking on Shadow's part, meaning he's not going to be able to charge up that Chaos Blast for a while. Generally, approaching with your Down Smash or Dash Attack is the way to go here, especially with the help of Chaos Snap, they both allow Shadow very precise area control.
This set-up is really where your grab game shines, because it allows even further control over where the foe is, and exactly where you want your Chaos Control zone to be. In general, Shadow wants to throw it up when he is right next to opponents, so as to keep them near the center, an therefore in the zone longer. If you're still reading this, I recommend you go check out the Sonic Movie. It's available for free on YouTube and is awesome!
Due to the nature of the zone, this isn't an attack plan of "hold opponents down to one spot, use powerful attack to kill", as knockback it negated while opponents are in the zone, meaning, if you want to kill them, they need to be at least in a position to actually fight back. Of course, this doesn't stop you from CHARGING your attack while they're held down.
Chaos Blast: Shadow does not fare well in the knockback department. With the exception of this attack and his Side Smash, the only other moves that knockback that's of any use are a Down Aerial that doesn't spike and is more used to force opponents back down onto the ground, a Back Aerial, and a Up Tilt that is mostly meant for stopping aerial approaches.
This leaves Shadow with two main methods of KOing: Chaos Blast and Chaos Nightmare. Chaos Blast is usually your first option, as it can be charged, saved, and then promptly brought out of nowhere for a devastating finished. Of course, that's assuming they don't see it coming with Shadow glowing red and all. Luckily, Shadow is great at approaching: it's actually finishing the approach with this attack that's a bit of a challenge, because when opponents see you, they'll do everything in their power to stop you and delay the attack. Shadow's great positioning throws are again especially helpful to you here.
Chaos Nightmare is far more predictable, but way more powerful, being almost a guaranteed kill later in the match. Unfortunately, opponents can also see THAT coming, as it has a distinctly different charging animation from your other two Smashes. Basically, Shadow can deal tons of damage, but it's actually capitalizing on that damage that's hard for him.
Comment I'm such a grouch, I'm only giving you one comment
Shadow The Hedgehog
There's a sort of concomitant attack-flow going on here that's easy to grasp, incidental to the business of explaining the moves, but there all the same. I find this sort of thing more rewarding than movesets that explain their playstyles and interactions in patronising detail. Of course, you do still need to work on writing playstyle sections that don't bury the best parts of the sets they're trying to sell. The way you write it, Shadow's aerials don't exist and he has no business being up in the air. [Geto has since editted the playstyle section]
And there is MUCH in the way of setting up for extended aerial play. Chaos snap slots in well with Shadow's aerials, giving him innate control over the flow of battle in mid-air and opening the potential for follow ups and feints that no other character would be capable of. In the end, that's what makes this moveset uniquely rewarding to play as.
Giving him a chargeable attack as his main KO option is a particularly slick choice, as it forces him to find time for himself, making him shun others, or set-up specfically to buy enough alone time to charge the attack. I like what that says about Shadow as a character, and I approve of giving the player the option to enact such behaviour.
I worry that the moveset's mission of giving Shadow his own identity forces him to do some strange things. But then again, I'm one of the few folks who enjoyed Sonic's predisposition to curling into a ball for every attack, so I'd naturally be put-off by a hedgehog spewing set-up and projectile hell.
A Backstory biography rarely ever helps the reader enjoy a character, and this rings especially true for Shadow. "I wish Shadow had more plot" said no-one ever.
As a general rule, chargable moves such as Samus' Neutral B and ROB's Down B, aren't charged by holding the button, but rather by tapping it and then by either rolling left/right to store the charge, or by pressing B again to use it. Attacks that use hold inputs, such as Diddy Kong's Neutral B, are fired when the button is released.
Chaos Control is numerically rediculous; a 3 SBU diameter space that slows everything (but himself) down to 1/10 of its normal speed.. that lasts for 15 whole seconds. Even if Shadow couldn't create three of these things this would be broken, and intrinsically infuriating to play against. Coupled with the throws which are themselves perfect set-ups (and having Sonic's Speed, grabs aren't exactly going to be super hard to land), Shadow sounds obscenely unbalanced.
Super Shadow still has his inhibitor rings. Don't have your cake and eat it too
To be honest, I wrote it more as a joke for that one thing, though I'll work on it.
EDIT: Made some changes to Chaos control, changed the wording of Chaos Blast a bit (hopefully it's a bit more clear), and made a shiny new playstyle section.
It’s the hammer bro, The most elite member of the Koopa Troop who rains down an endless barrage of hammers from hammer-space (no pun intended!). Pestering Mario & Luigi ever since their 8-bit adventures, Hammer Bros. wear headgear and have larger shells than Koopa Troopas. Hammer bros. commonly appear in pairs (hence the name) patrolling on pair of lines of brick blocks, and can be annoying obstacles to the Mario Bros.
Statistics
Hammer Bros. is medium heavy character, weighing a bit more than Ivysaur, and having a size similar to Wario. He is as fast as Mario with average traction.
He is equipped with a high initial jump (a little less than Luigi, but higher than everyone else, except Falco). Also his shell and headgear offer him a degree of protection, so any attack from behind or from above will deal only 60% of the usual damage.
Most of his attacks are ground based, and he is floaty and a better than average air speed.
(I got confused by the numbers and felt that this way of explaining would be better.)
Specials
Side Special: Hammer Throw
His signature move. He throws a hammer in a high arc, which causes 6% bamage and vertical knockback. The trajectory can be altered a bit by holding the analog stick in a particular direction.
He has a 1/10 chance of throwing a wooden mallet instead of the claw hammer. As it’s made of wood, it causes slightly less damage (4%) but deals more knockback.
Claw hammers also do more shield damage than a wooden mallet. Being heavier, perfect shielding a claw hammer will cause it to fall down straight and disappear, but a wooden mallet will bounce off the shield instead.
Up Special: Brick Jump
Hammer Bro summons a line of brick blocks and jumps upward from them. He can do this twice in a row. The analog stick can be tilted to alter his direction forwards or backwards. His jump is as high as Luigi’s initial jump in the first case, and half of it in the second one.
The blocks disappear two seconds after Hammer bro. jumps from them. So it can be also used for gimping recoveries like PK thunder. However, any physical attack can break them. So, any tethers, while latching onto them, will still break them.
However, this move does not do any damage, and if hammer bro. is attacked while recovering using this move, he will be helpless. If he is hit early enough and fast-falls, he might land on his bricks, which can help him.
Neutral Special: Hammer Time
Its name comes from a move used by Hammer Bros in Super Mario RPG. It basically functions as a damage racking move. Hammer Bro throws four hammers in a cycle, one at a time. After the player throws the first hammer, when he later presses down B again, he throws the second hammer and so on. If any hammer misses, the cycle is reset.
The hammers travel in a much straighter arc compared to hammer throw, and each hammer differs in damage and knockback.
1st hammer: 4% damage, very less knockback
2nd Hammer: 7% damage, slightly more knockback
3rd hammer: 10% damage, medium knockback
4th hammer: 13% damage, high knockback
Down Special: Sledge Bro. stomp
Hammer bro leaps into the air, bulks up into a sledge bro amd comes crashing down, releasing shockwaves which can stun opponents nearby. Also, any character who is hit while he is coming down takes 10% damage and is spiked downwards.
Standards
Neutral jab -
Swipes his hammer vertically, then horizontally, then kicks with his foot. 5%, 5%, 4%. The hammer strikes actually pull the enemy towards the hammer bro., so that his kick, which has a higher knockback can is sure to land, if the opponent does not use DI.
Up tilt-
Hammer bro. swings his hammer above his head. It is useful for launching foes into the air, to juggle them and can be followed up by Hammer Throw. 8% damage
Down tilt –
He sweeps his hammer along the ground in front of him. Has a 30% possibility of tripping foes. It can hit opponents hanging on the ledge if they are not in invincibility frames. 7% damage.
Forward tilt –
He thrusts his hammer forward. Slightly disjointed range. Deals 9% damage. Has a quick start-up, but a bit of ending lag.
Dash Attack -
Hammer Bro retreats into his shell with his hammers sticking out and slides ahead, spinning. 4 hits, 3% each. All hits have low knockback. Moreover, it has notable ending lag, so it can be punished quite easily.
Smash Attacks
Up Smash –
Hammer bro throws his hammer above vertically and catches it. The charging animation consists of him spinning his hand holding his hammer. It has a disjointed range, con go a height equal to Mario's height above him when fully charged, and half of it when uncharged. Good for juggling enemies. It does 18 % when fully charged and 14& uncharged.
Down smash –
He crouches while charging, then jumps a short height up and falls down with tremendous force, sending waves of fire on both sides of him. A fully charged move has 50% more range (covering a total area equal to the floating platform of Smashville) than an uncharged one. The fire wave is stronger further away from Hammer Bro. For fully charged move, the outer reaches cause 22% damage, while being near hammer bro deals 15%. However, if the character is in physical contact with Hammer Bro’s body, they instead receive 18% electrical damage instead.
Side Smash –
This move change depending on how much it is charged. Since a smash attack can be charged for roughly 2 seconds, it is a different attack when it is charged for more than 1.5 seconds.
The uncharged one is a simple hammer swing. 10% uncharged, 16% fully charged.
The charged-for-more-than-1.5-seconds- one is a two hit move. The change in the attack is signaled by “chink” sound and Hammer Bro holding the hammer backwards. The first hit draws the foe towards him, while the second hit deals high knockback. The first hit deals 8%, and the second 15%.
Aerials
Neutral Aerial:
Hammer bro sticks out his hands and feet and spins around. The hand which holds his hammer does 9%. His other hand does a measly 3%. Each leg does 6%. Moderate knockback on his hammer arm, low knockback from his feet, and none from his other arm.
Forward Aerial:
He strikes his hammer horizontally forward. Quick start-up but a small amont of ending lag. 8% damage, moderate knockback.
Back aerial:
He attacks by sticking his legs behind him. It has slightly less range than his F-aerial, but more knockback . It can be stringed together with another B-air in a short hop. 10% damage.
Up aerial:
It is a two hit move. Hammer Bro. swings his hammer over his head in a 180 degree arc first front to back and then back to front. The first hit deals 5% damage with no knockback and the second one causes 7% with vertical knockback.
Down Aerial:
A stall-then-fall attack. Hammer Bro. retreats into his shell except his head and plunges downwards, headfirst. If an opponent is hit by the head, they are spiked downwards. The rest of his body causes horizontal knockback. It can be cancelled mid-air by tiliting the analog downwards, which causes his hands and feet to come out of his shell and makes him helpless. If not cancelled, the move has a bad ending lag as hammer bro has to pull out his head from the ground. His head causes 7% damage and his body 8%.
Grabs
Hammer bro has better than average grab range as he uses his hammer to pull his opponents, as he does in the Mario baseball games. However, his throws are comparatively poor.
Pummel –
He hits with the hilt of his hammer. 4%
Up Throw –
He jumps and throws his opponent in a high arc, much like how he throws his hammers. 8%
Down throw -
Throws his opponent into the ground and lands on them. 9%
Forward throw -
Drops the opponent in front of him and headbutts them forward. 7%
Back Throw -
Drops opponent behind him and lunges backwards, hitting with his shell. 10%
[Final Smash]
Amazing Flying Hammer Bro.
Hammer Bro summons flying platform made from spinning blocks from Super Mario World and throws an endless barrage of hammers. The platform’s movement can be controlled by the player. Among regular hammers, there are also wooden mallets and golden hammers (like those used in Mario and Luigi: Superstar Saga.) Normal hammers do 15% damage and above average knockback, wooden mallets do 12% and high knockback, while golden hammers explode on contact with the force of a bob-omb explosion, causing 20% damage. The final smash lasts for 7 seconds.
However, the final smash has a blind spot directly below hammer bro. Any character who can move fast enough can stay below hammer bro and be safe for the duration of the final smash.
Playstyle
Hammer Bro. is mostly a of hit-and-run sort of character who needs to rack up lots of damage, and has problems landing early KO's. However, unlike a hit-and-run character, he only has average speed, so he often needs to put himself in harm's way while attacking. But his above average weight and his shell's protection (which reduces damage received by 40% as noted before) help him cover up for it. Most of his moves serve to increase his opponents damage before he can go for the kills. His grab game also supports that playstyle, as his throws do not send the opponent very far, so Hammer bro. can attempt to follow up with another grab, while making use of his above average grab range.
Now onto his killing moves. His killing moves are few, so they must be conserved otherwise they might turn out to be too stale if overused. His down special (Hammer Time) is his best killing move, but it must be used wisely and lest a whiff resets the cycle. His other notable killing moves include his down aerial and his forward smash.
(I'd appreciate some help writing more about his playstyle).
And with this I end my first MYM moveset.
EDIT 1: Changed his Up-Smash as suggested by Junahu.
Shadow is a moveset that is deceptively simple, but actually quite enjoyable. Combo characters are difficult to make enjoyable, and in a way harder when it is a Sonic character at that. I have to start my comment unfortunately with the observation that Chaos Control is terrifyingly, obscenely strong. 20% speed is slower than players behave when affected by a timer item, and he can put three of these areas down? They last for ten seconds? And on top of that the 'nerf' that they have is low knockback that makes it even harder to escape? That's too good by any measurement, and the problem is more pervasive than just a couple of lower numbers. The move should either last so briefly that an opponent inside it can't be completely demolished by it, or take long enough to start ip that Shadow can't easily get opponents into it. As Junahu mentioned, he's already tied with Sonic for speed, he doesn't exactly struggle with maneuvering and punishing anyways.
Now I can move on to the part that I really do enjoy, the combo and projectile game. Having the fastest character also have the slowest projectile allows for some crazy maneuvers and possibilities, especially with the hitstun the moves have. I do think that having unlimited out is too much though, especially since he can outrun other players and throw them out all over the stage, then rush in for attacks. Heck, the projectiles are also too slow... Ganon walk speed is slow enough that players who spot dodge will still be caught in the move.
The way it all interacts with mobility and his combo options is what makes it so cool. Up special cancelling into smashes was a brilliant move, and gives him a very unique feel, using charging moves while quickly moving into range. It's very fun to imagine, and funner still, I would think, to play. Warping around with a forward smash or down special for a KO feels challenging yet rewarding. You do a good job of limiting the power of his standards whilr still feelinf like powerful, useful moves, which is especially apparent with the air game. His throw game is a bit strong in the context of chaos control, his forward throw inexcusably so (throw into chaos control, receive five seconds of free attack time!) I really feel that the move is so strong it undermines the far more interesting premise of feints and stun as you try to pull out one of your limited kill moves. If you work in a solution to some of these balance issues, I'd really like this set, but for now its merely my favorite out of all that have been posted so far.
Point taken for the Chaos Control. Lowered to 5 seconds, with only one field in play at a time, on top of slowing the foe down to 40% of their original speed.
Lord Magnemite, to me, signals a marked improvement over Magnemite, even if it is an April's Fools Day set. So good to see you make another set Conren!
What makes Lord Magnemite a marked improvement from it's predecessor's? A fair deal, I feel: First off is the Specials, which show some nice effort put into them. The Neutral Special is the best example of this: Lock-On in the original Magnemite was a fairly automatic beam, while Lord Magnemite's crosshairs are far less automatic, in addition to the fact that by expanding the magnetization to non-damaged objects you can create tons of more exciting situations. The Down Special is itself not interesting, but the fact it summons basically a full moveset in Magnemite and he can have two is interesting...plus, I don't think any moveset has considered footstooling off minions for a recovery boost, which I like. Magnet Bomb and Magnet Shield are also improved in their own ways. And Down tilt, while underdetailed for the sake of comedy, does seem to show off inklings of thinking about cool moves and some nice description of the animation is good.
Downsides to the set? The joke about underdetailing leaves the set underdetailed of course and the flow is sparse, though there and moreso than Magnemite, and there are of course some moves I dislike, like BAir...but then again, BAir is meant to be a joke. Really, one could argue a fair deal of what I dislike is a consequence of it being an April Fools set, with the other being flow and the like.
So, ultimately, I felt it was an improvement...but you'll notice it I put it at a 5. The reason for that is reading this and seeing the changes you made to Magnemite makes me feel I probably should have put Magnemite at 5 last contest, so Lord Magnemite will be a high five, which would be a higher five than Magnemite! Continuity mantained.
All Hail Shadow
I actually didn't mind the introduction, but I can see why others would.
I didn't think of it when you previewed it to me, but Junahu is right, charging moves like that are usually not held. Oh well.
The combination of Chaos Spear and Chaos Control, to me, forms the crux of the set. Shadow can create zones of Chaos Control and launch Chaos Spears at foes near them or into them, causing them to slow to a crawl and become almost like slowly moving traps, before using their properties of high hitstun and low knockback inside the zone to really put the hurt on foe in a somewhat combo manner, but because of the way it is set up DI is still in play and Shadow has little in the way of "true" combos. Chaos Punish is a good way to add onto this with it's different projectile properties that non-the-less work well with the Spear. He can even use Chaos Snap to teleport himself around for excellent chasing and escaping!
The problems with my set boil down to the fact it's flow seems small, as neither the projectile game or melee-combo game seem particularly developed, the latter in particular seeming a bit small despite there being on enough moves it wouldn't have to be, some numer crunching issues (Shadow's attacks are largely very weak, with the exception of the Smashes being fine, Chaos Control should slow less but that has been fixed it seems since I posted), and a fair few moves I just don't like: Up Throw should deal at least a little damage, Forward Throw stunning for a second is very annoying on a throw and I feel like you could have done much better than a drag down Up Aerial (even a random flipkick!). The fact that the Spear/Control combo isn't mentioned in the playstyle section is dissapointing. It is a nice looking set at least, even if it is not great.
So overall, I like the concepts presented here, but they simply did not flesh out well and mold together into something more than a set with some interesting ideas. A decent first set this contest, Geto!
Hammer Orphan
Welcome to MYM! Glad to see you've already got a set out this early, FatKoopa!
Something you can always consider while making a set is if it makes sense for the character. For example, the Down Special: Why is this Hammer Bro able to bulk up into a Sledge Bro? Does it make sense for Hammer Bro to do so? And if so, perhaps instead of being for a single move, it could be for more: Maybe he could be like Zelda/Sheik or change his stats by switching between Sledge Bro and Hammer Bro, for example. And the Down Smash: Does it make sense for Hammer Bro to be able to stomp the ground to send out waves of fire? Personally, I do not think so.
The playstyle here is sparse, but his types of hammer throwing could be used to start a basis of one, and the flow is even more sparse, as there is little in the way of overarching gameplans being worked into. When making a set, try considering the ways you could make the character work towards a goal or have moves work well together: For example, maybe Hammer Bro throws a hammer really high up (or multiple hammers), so he gets a chance to swoop in and try to hit the foe while they have to worry about the hammer dropping.
Not as good of a newcomer set as Jinbe, but certainly not the worst I've seen. I hope you'll post more sets, FatKoopa!
AXEL the Dark Hero
This guy is just the coolest. He's the Dark Hero, a sort of not-really-a-hero kind of person, if that makes any sense. He's a celebrity from the world of Disgaea2:Cursed Memories who's left for dead by his publishing company after falling from their graces. Fueled by love for his impoverished family, he claws his way back into the spotlight. He comes back in Disgaea4 as the Warden of Hades, being the superior of the main character; Valvatorez and getting up to various unrelated hijinks.
Axel's an idol of sorts, using his guitar and his wits to escape from sticky situations
Stats
Size: Typical human size. Luigi's height, maybe taller. His massive collar spikes up way higher though Weight: Axel's pretty frail, being on the lower end of average Walk: He walks with a swagger, swinging his shoulders quite far as he strides. It's not very fast though, you'd usually just use it to show off. Dash: Axel leans forward as he runs, keeping a low profile, yet turning his face towards the audience (us). Sometimes when you start dashing, Axel gives a little peace sign, as an easter egg. Jump: His first jump is really terrible bad. His second jump sort of makes up for it, and he doesn't fall very fast. Trip: When Axel trips over, there's a slight delay where the player can decide which direction he falls in. If someone gets in his way as he pratfalls, they get hit and are knocked away. Entrance: There's a screech of a guitar, and a puff of stagesmoke as Axel appears. Confetti pops around him, and some little spotlights shine up through the smoke.
Special Attacks N-Special: "Ze Flute"
It may not be manly, but this flute has saved Axel's life before. It allows him to control terrifying beasts (Their class is "Rifle Demon") to a certain extent. Holding the B button makes Axel play the flute for as long as you want, but you can't move or anything.
A second after playing the flute, a Rifle Demon appears in front of Axel! It's slightly smaller than Bowser, and roughly the same weight. If you held the B button for longer, then the Demon will weigh more and be harder for the enemy to KO. The demon can be attacked and grabbed as if he were a real player.
[COLLAPSE="Rifle Demon"]It fights for Axel, shooting lasers from its hand-gun towards the nearest enemy once every two seconds. Lasers can be shot in any direction, travel as fast as Falco's laser, and hurt the enemy for 9% damage while knocking them backward a little bit. The lasers go as far as they need to, but vanish when they hit something. These lasers may hit Axel, but the demon will not shoot if Axel is in the way, waiting until he has a clear shot before firing.
The demon prefers to attack targets that are in the air, and will shoot those first if he has a choice. He won't do anything to save himself if knocked over an edge, and if that happens, Axel cannot bring another demon into the fight for at least 10 seconds.
If the demon suffers a hit to the head that does 8% or more damage, then it will counter by rampaging forwards a large distance, knocking everyone out of its way. It will calm back down once it reaches the edge of the stage.
If the demon is hurt a lot (30% damage or more, and axel can accidentally hit him too) it will turn red and start to attack everyone, including Axel. When angered like this, the Rifle Demon fires once every second until it is knocked out of bounds or Axel tries playing his flute again, which will calm the demon.
Playing the flute when the demon is around, but not angered, will make the demon walk over to where Axel is. This will also stop him from rampaging when his head is hit.[/COLLAPSE]
btw Axel can only summon one demon at a time.
S-Special: "Stunt Punch"
After a little windup, Axel throws an epic punch at the enemy. It's like a Falcon Punch, but quicker.
When you hit the enemy, instead of flying away, they take only 1% in damage instead. It's just a stunt for Axel's new movie, but the punch has hidden strength to it. The enemy staggers backward a fair distance, and then explodes! But it's okay, it was just pyrotechnics, the enemy is fine.
Other enemies, and Axel himself, should stay away from that explosion though, because it'll hurt them a lot more than it hurt the enemy you punched. Anyone else touching the explosion would take 20% in damage and fly away as if a bob-omb exploded, KOing them very easily
If you use this attack in mid-air, it works exactly the same. When the enemy staggers backward, they stop falling as they do it.
U-Special: "Invisible Laser"
Axel is struck by an attack that nobody else can see. It makes him fly away in the direction you slide the control stick. Axel also suffers 20% in damage, and he might end up flying out of bounds if you use this attack too much. Axel can use this attack as many times as he wants in mid-air, though it might not be a good idea to do so.
D-Special: "Axel Axe"
Axel has a really sweet guitar that he loves to riff on during battles. Press the B button to whip it out, and press it again to end the move. With your guitar out, Axel can only walk left or right, he cannot run, and he can only jump once. You can use the A button to play the guitar, which will cause his iconic theme to start playing. It'll be quiet at first, but if you start mashing on it, or play the guitar for long enough, the music will swell and become loud and clear. Each press of the A button creates a circular shockwave to shoot out from Axel, hitting everyone nearby. But the way you press A, and how often you press it, will alter the kind of shockwave that appears;
Mash A button wildly: This creates a smallish, constant shockwave to form around Axel. Enemies who touch it take multiple hits of 2% damage and flinch constantly. Axel begins shredding on the guitar, creating an audible screech that is similar to a guitar solo.
Tap A button in a regular rhythm: If it's not fast enough to be "mashing", then each press of A creates one pulse of a shockwave, slightly bigger than the previous kind. It repels enemies, makes projectiles travel slower, and does 4% damage. Axel strums the guitar pretty strongly, the music plays at an audible level, with its tempo increasing or decreasing depending on how fast you tap A.
Tap A button after a pause: If you leave at least 1 second of deadair before tapping A, Axel will forcefully stroke the strings once, creating a larger shockwave that extends to almost the size of Bowser. Anyone hit by this wave would fly away as if hit by a weak smash attack. The shockwave does 15% damage and can also reflect projectiles that touch it. Doing this kind of attack results in the music peaking very loudly, then cutting back to almost silence.
Hold A button: Holding the A button has basically the same effect on all three kinds of attack. It lengthens the amount of time the shockwave stays out, but makes the shockwave weaker. The shockwave also quickly deteriorates in power until it barely does anything at all. Axel holds the note whenever you hold the A button, causing the music to hang on whatever part of the track it was on. The music gradually fades if you keep holding A.
Release A button after holding it a while: If you hold the A button for at least one and a half seconds, then releasing it will create a suck-effect that makes enemies come towards you. The longer you held A down, the bigger the effect, and the further the effect reaches. During this, the music quickly climbs back up in both tempo and volume, cutting out again if you don't press A again afterwards.
Later on, I'll describe some other moves that can be used while Axel is playing guitar. These attacks will have "Guitar Move" next to their names. Axel will use the described attack, and then go back to playing the guitar normally
Final Smash-Special: "A-Virus"
Everyone turns into Axel. Things like Olimar's Pikmin also turn into Axel (controlled by the CPU). All of the Axels can hurt eachother, but cannot hurt the real 'original' Axel. The real Axel is free to hit anyone he wants. This final smash lasts 20 whole seconds, before everyone turns back to normal
Ground-Normals Jab-Attack: "Slap" [4%]
Axel slaps the enemy broadly across the face. If they weren't facing him already, then this slap turns them around so that they are. It's kind of funny to slap a Rifle Demon you called using the flute, though it's not very useful unless you have many enemies on both sides and you want the Demon to shoot the right one.
There's a second slap if you press attack again. Axel steps forward as he slaps, giving it extra range. If the enemy is facing Axel, then the second slap turns them back around again. It's a good idea to use the second slap, as it prevents enemies from hitting you back since they won't be facing you.
S-Attack: "Whammy" [8%] Guitar Move
Axel swings the guitar from his head, down to his feet, smacking it against the ground. This does some damage and clears the area in front of Axel of enemies. It knocks them down slightly too, which can make them trip over. It's a little slow after the swing, which can be bad if you miss.
If you were playing guitar just before using this move, the attack will cause a little damaging star to pop out of the ground where the guitar hits (Like the stars from King Dedede's Up Special)
U-Attack: "My heart Aches" [2%] Guitar Move
Axel lifts his guitar over his head, and begins spinning it around and around, like a helicopter. You have to keep pressing A for Axel to keep spinning the guitar. This does many little hits that do 2% damage to the enemy. The attack lifts the enemy off the ground and into the air.
If you use this attack in the middle of playing guitar, it will make the shockwaves you make afterwards a little bit bigger.
D-Attack: "Tripping with Axel" [5%]
Axel bends down, then kicks out with one foot whilst balancing against his free hand. This attack taps the enemy into the air very slightly. If they haven't been damaged much, they won't leave the ground and will just trip over. When they have more damage, they'll go very slightly upwards, before hitting the ground quickly. This lets Axel kick them again and again, until they manage to get away from the kicks.
Dash-Attack: "Finale" [8%]
Axel drops to his knees and slides forward while screaming into a microphone. This creates a shockwave around Axel that throws enemies up into the air. If you time this attack just right, Axel will stop sliding while underneath the enemy you hit, letting him use the Up Attack on them. The dash attack lasts for a while, so missing with it would be a bad idea.
Ground-Smashes S-Smash: "Headbutt" [24%]
Axel leans back, then thrusts his head forward in a powerful headbutt that sends enemies flying away. It's a little like Bowser's S-Smash, but it's cooler here because Axel's doing it. If he hits an enemy, Axel winces as if in pain, leaving him open to attack from other players. This attack can be cancelled partway, but only if you input Axel's Side Special. Doing so strongly increases the power of the explosion caused by the Side Special
U-Smash: "Burning Soul" [20%]
Axel channels some sort of inner power, which erupts out of him for this attack. The more you charge, the higher up this attack reaches, possibly reaching up to just above Ganondorf's height. If you charge this all the way, Axel gets a little bonus; he'll move slightly faster and do slightly more damage for 5 seconds after the attack ends. Enemies hit by this move are launched into the air, potentially KOing them
D-Smash: "I voted for Pedro" [16%]
Axel stoops down and throws both arms outward. This causes the floor either side of him to spark with electrical energy. Enemies near Axel become temporarily stunned. The longer you spend charging this attack, the longer the enemy spends stunned. At full charge, Axel might be able to hit the enemy with an uncharged Side Smash.
Air-Normals N-Air: "Mic Spin" [6%]
Axel grabs the cable attached to his microphone, lets the mic dangle, then twirls it around and around. This hits anyone around Axel twice, with the last hit knocking them away. This attack hurts shields a lot
F-Air: "Shoulder Check" [5%]
Axel quickly shunts the enemy away with his shoulder. He moves forward slightly during this attack, and stops falling until the move ends. If Axel has already used this attack in mid-air, then any more times he uses it before he lands will not move Axel forwards, and will not stop him from falling. It can be a useful move for hitting the enemy out of bounds, but it doesn't make the enemy flinch.
B-Air: "Pandora Ignition" [9%]
Axel kicks at the enemy behind him. If it hits, the enemy flies away for a second, before bursting into flames. The flames deal a second hit, which stops them from being knocked any further away by the move. The two hits do 18% damage in total, making it a great attack for damaging the enemy.
U-Air: "Shocking Soul" [11%] Guitar Move
Axel holds his guitar above his head in one hand, and spins it around once, like a pinwheel. This hits a wide area above Axel, and knocks foes upward. If you were playing guitar beforehand, then this attack features significantly increased power, turning it into a KO move.
D-Air: "Love Dynamite" [16%] Guitar Move
Axel swings his guitar down at the ground, striking enemies in a wide arc ahead and below him. This spikes enemies downward. If Axel lands during this attack, he lands clumsily, resulting in more end lag. If you were playing guitar before using this attack, then the attack becomes much faster. And if you were playing guitar beforehand AND Axel lands during this attack, a bolt of lightning sparks out of the ground in front of Axel. It deals 20% in damage, has a wide reach, and launches enemies up into the air. If the enemy shields this lightning attack, they are stunned briefly and cannot lower their shield.
Grab and Throws Grab: "Hostage"
Axel grabs the enemy ahead of him, and holds them by pinning their arm against their back. Attacks that hit the enemy will still do damage, but will not release them from Axel's hold. In fact, any attack the enemy suffers will make it harder for them to escape from Axel's hold.
However this grab will not stop the grabbed enemy from using attacks during it. The enemy struggles free briefly, uses the move, then is returned to the grab before they have a chance to escape. The enemy cannot hit Axel with any attack while they are grabbed, even if the attack would otherwise hit him. And every time they attack, it becomes harder for them to escape from Axel's hold.
Pummel: "Negotiate"
Axel, unlike other characters, doesn't have a normal grab/throw system. If you press A to "pummel", then Axel will reach out towards whichever enemy happens to be closest (who isn't already grabbed). If he grabs someone, then his original hostage is released, and the newly grabbed enemy is his new hostage. The grab range of this is much larger than his normal grab, because Axel leans significantly in the direction he's trying to grab in.
If you hold the A button instead of tapping it, then Axel releases his hostage with no harm done.
F-Throw: "March"
Axel pushes the enemy forward, marching both him and the enemy in that direction until you do a different throw. If you smash the control stick forwards instead of sliding it, then Axel will push the enemy away, making it fall over onto their face. This does 10% damage to the enemy, and anyone who touches the enemy as they fall over.
B-Throw: "Switch"
Axel turns the enemy around, so now the two of them are facing the opposite direction. Use this and the previous throw to move yourself around whilst holding an enemy. This is also useful if you've got enemies on both sides, so you can turn your hostage to face the one who's attacking you.
D-Throw: "Hello, babies"
Axel turns the enemy to face him, the flashes them with his sparkling pecs. This stuns them temporarily, while Axel himself runs away in the opposite direction.
U-Throw: "Candy" [10%]
Axel throws a fistful of candy into the enemy's face. He then knocks them away with a powerful kick. This throw knocks the foe away in whatever direction you slide the control stick. However, this is a pretty weak throw, so you need the enemy to have a lot of damage already for them to not be left near you afterwards.
Play-Style
Axel is a bit of a jerk I guess. He'll gang up on you, abuse cheap tricks, and leave you to fend for yourself if it suits him. And it usually does suit him.
Dealing damage is a bit of a problem, but he can play a coward's game until an opportunity appears. The Rifle Demon is a nice distraction for the enemy to punch up instead of you. But you might want to keep an eye on it, because having it go berserk is kind of bad, and losing it entirely is really bad. You can't really hide behind it too much, because the enemy can hit its head to make it rampage forwards away from Axel.
Axel has a much better time when he's surrounded by enemies. He doesn't enjoy it, but I don't think anyone does. Stunt Punch doesn't really hurt the victim, but anyone else nearby is in for a surprise. Not only that, but Axel is quite effective at getting people to ignore him. With everything else going on, it can be really hard for enemies to punch through Axel when he's playing guitar. They may as well go attack someone else.
If Axel's hurting really bad, you can try to out with a bang by using his Up Special to launch him into the enemy, though there may be times when you'd want to launch Axel around before then, such as to help him chase enemies.
Holding the enemy still with his grab is useful even if there's only you and him in the fight. The Rifle Demon will helpfully still shoot towards the enemy while they're trapped. You can then use Down Throw to flee, or Up Throw if you want to stay on the offense.
I'm probably missing a lot of stuff here. But I think Axel would be fun to play as.
Haven't seen you around, but n8 says you've been 'ere before, so welcome (back) to (Corneria) MYM!
Anyway, as for the moveset...you certainly seem to like the character and that shows in the moveset, given mentions of Axel's awesomeness of awesomniscity. That's good! Movesets for people you like is good.
Unfortunately, the moveset is not too good. Side Special seems very awkward...I imagine it is a game reference of some kind, but the fact that it looks and feels really awkward does not help, and it seems like it'd mess with characterization (Why is Ganondorf taking a stunt fall for this guy?). Invisible Laser is fine, at least, references an amusing moment. There's a fair deal of other moves I do not enjoy, such as the F-Smash (Why does it make Stunt Punch stronger?), D-Throw, and to an extent D-Smash. And I get what you were going for with the grab, but it just...feels really bad, I am sorry to say, it doesn't work all that well with his game and sounds kind of OP.
One thing I do like, though, is the Down Special, which offers a variety of attacking options and does so in quite an interesting manner. I wish the moveset took more advantage of it, though, which it...doesn't. The NSpec is also a pretty decent minion. My recommendation? Read, write more, and think about how the moves work together: Why do these throws do anything for Axel, how does he use the air game compared to everything else (DAir actually felt good about this!) and so on. In short, add in more flow to a gameplan, and to an extent add more of a gameplan. Well...that and think about how your effects work on the foe more, I suppose, given stuff like the SSpec that feels weird as a move and on characters.
[collapse=Axel]I got so excited when I saw a set for Axel, since Disgaea is my favorite video game franchise ever and Axel being such a badass. He was one my favorite characters and one I considered making a set for.
I don't really approve of Axel using Ze Flute to make people walk away from him, partially because it seems forced on the opponent and is a bit out-of-character for Axel to want to shoo people away (he's a celebrity, he should enjoy having people around him!). I do very much approve of Axel using minions, because as mentioned in Axel Mode it's Dark Hero-like to get others to do your work for you while you sit back (the hypnosis would get in the way of players wanting to summon a demon). The Rifle Demon is pretty fun in itself, and I enjoy the idea of it being able to go berserk and go against Axel, creating chaos and all. Also, Invisible Laser is win and a very fitting recovery for Axel's butt-monkey nature, though for visual indication it'd be cool if Axel called out "Invisible Laser!" when he's struck - I'd seriously love to spam the hell out of a recovery you can use repetitively at the cost of killing yourself. Down Special would be a very fun move, not just because it replaces the music with Axel's Theme but also the interesting depth within that'd be fun to mess around with, and it's effectiveness against a whole bunch of enemies around Axel.
The rest of the set shows some nice promise, with a hilarious slap that has some nice flow with the Rifle Demon or just plain messing with opponents. I do have some problems with the overall flow, though, which is a shame because there are some pretty cool ideas that mesh with Axel's character and mannerisms but don't mesh together that well. I get you can use the Rifle Demon as a turret while you approach the enemy and attack them or grab the enemy and hold them for a shot, but there's little purpose to moving away from the enemy given Axel has no projectiles and really that'll just leave the Demon ripe to go berserk. The urge to get in an enemy's face to attack them to prevent them from making your minion go berserk actually feels incredibly fitting for Axel, though in this case I guess it just kinda feels a bit redundant if you're just stunning the opponent in place to be shot by the same mediocre projectile over and over. In this case it might be nice if you had more control over the Rifle Demon, such as being able to use B to make it charge up a powerful shot when it's out and so on. Even some grab interactions or being able to deliberately provoke the Rifle Demon with your normal attacks would be fun (I can understand why you wouldn't be able to use it as a hostage, but still...), or maybe a projectile you could use while hiding behind it such as Axel playing his guitar to summon a lightning bolt ahead of him (somewhat like his Love Dynamite attack in the games). It could replace the awkward Side Special.
Overall I'll say you actually captured the spirit of the Dark Hero quite nicely and showed some great promise, using minions and dirty tricks I didn't think of, though there could be more to the Rifle Demon when it's the main threat in the set. Just giving the Rifle Demon more attention could make me like this set a fair bit.[/collapse]
Axel's Side Special, named "Aching Heart" in-game, is a recurring skill of his in the games, which can be seen here in this video. I never really thought of the opponent wanting to take a stunt for Axel but rather they were really knocked back despite the move doing no damage in-game. Disgaea can get a bit forceful on the characterization of enemies this way, which is something you kind of have to be careful of with the Brawl transition since said game is meant to cater to any kind of character.
[COLLAPSE="click here for a rant kinda aimed towards FrozenRoy"]Is this what we're doing now? Complaining about an attack (on a newcomer moveset) for reasons of characterisation-by-proxy?
That's pretty high-concept stuff you know. And why is it always Ganondorf whenever this problem comes up? Can't Ganondorf just chill out and have his diaper changed, or play on the slide, or share his jelly beans with the other kids?
I do understand how characterisation-by-proxy is considered important, I don't totally ignore FA whenever he talks about it. And there are certainly instances where one moveset can overly-insist a motive onto an incompatible character (e.g. Lunge, most Pheonix Wright sets).
But I think there's a limit to what can be reasonably protested against, especially when it comes to individual moves that are for all intents and purposes, hilarious and cool.[/COLLAPSE]
[COLLAPSE="click here for a comment on Hammer Bro"] I think everyone has vivid memories about tackling these menaces as a child. You can never just keep running and jump over a hammer bro, you always have to stop and assess the situation. Personally, I always feared that a Hammer Bro would decide to jump just as I make my move, intercepting me in midair and killing me. The Hammer Bro is really the only classic Mario bros enemy to create that sort of terrifying tension.
As far as I can tell, you seem to have a good moveset going here. Littering the sky with hammers, and being a really scrappy foe in close-quarters, it's the kind of character who forces opponents to space themselves effectively and punishes anyone who fails to do so. There's a neat twist in that you're encouraged to do everything you can to make your hammers hit the opponent, even in situations where it would be more efficient to simply throw another hammer. Basically, your moveset makes players obsess over their hammers, which is a cool way of making the player 'feel' like a hammer bro. I love that.
I personally found his Down special to be pretty cool too. He fattens up and performs a stomp, which is a nice little reference to not only the Sledge Bro, but also to Bowser himself. But I do wish the Hammer Bro would remain fat afterwards for a little while, increasing his weight and fallspeed or something. Having him bulk up and then immediately revert back to normal after the attack is a little too abrupt for me.
The Up Special is neat. But with it encouraging the player to get the high ground and keep the foe on the floor, there's not much he can actually do there. He seems a lot more comfortable when he's below the opponent, when the Hammer Bros in the games are a threat no matter which height they're at. I wish there was a balanced way to make this platform more permanent, so the Hammer Bro could actually use it.
I'd reccommend giving Up-Smash excellent vertical range, instead of "low range". And I'd like to see his Down Smash sending fire dropping through fallthrough platforms. Speaking of the Down Smash, the animation is a little awkward. Considering how lean the Hammer Bro is, it sounds odd how he could send flaming shockwaves by stomping with only one foot.
I think Hammer Bro needs aerials that are good for punishing and juggling. None of the aerials you have seem all that powerful, and having a stall-then-fall for the Down Air is a bit redundant when you have a similar move for the Down Special.
[/COLLAPSE]
[COLLAPSE="click here for a comment on Axel"] Right from the get-go I was bowled over by the enthusiasm you have for the Dark Hero. There hasn't been a moveset that starts with "This character is awesome" in a long time. It helps that the presentation of the moveset itself looks pleasingly crisp. It's clear you put a good deal of thought into Axel.
And that enthusiasm translates very well into a moveset that honestly sounds like it'd be really fun to play. There are plenty of attacks that feel satisfying to use, or just simply sound cool in some way. Stunt Punch, beyond being an awesome move in its own right, feels like it actively wants you to use it on your Rifle Demon. Since it's not doing damage, the Rifle Demon won't get mad, and the explosion is a free shot at a KO against the opponent. I see both FrozenRoy and Katapultar are recommending you drop Stunt Punch and replace it with something else, but I sincerely hope you don't. It's just so well pitched and vital to the way Axel treats matches, that I worry that any replacement move would be woefully inadequate. Axel's guitar playing is another thoroughly fun part of the moveset, with all kinds of branches and options that are entertaining to use, regardless of whether or not you even hit anything. I would totally begin jamming away, then spin the guitar above my head with Up-Tilt, before jumping up and slamming the guitar on the ground with Down-Air. I kind of wish there were even more moves that used the guitar, just so I'd have more moves to showboat with.
If I had a complaint, it would be that the moveset doesn't quite bring across its full potential. There's a lot of stuff that would be fun to use together (using Grab on your Rifle Demon for example) that you either didn't realise, or neglected to write down. For some moves, I had trouble envisioning what they would be useful for (e.g. the Pummel). The Playstyle section in particular felt like you were having trouble expressing what the moveset was ultimately about. This is something you'll find yourself getting better at naturally through practice, so I hope you keep making movesets.
And I see what you did there with that D-Tilt's name. "Tripping with Axel" indeed.[/COLLAPSE]
I'm perfectly okay with Stunt Punch now, because the notion of enemies wanting to play along is gone (forced characterization is one of the biggest put-offs for me when judging sets by my own standpoint). I also realized that the explosion doesn't damage the enemy you punched, thus making perfect sense to want to use it on a Rifle Demon from a playstyle and characterization point of view, with the minion being kind of like an extra in a film.
Swallowman.EXE
A bit surprised absolutely no-one has commented this set yet, so I may as well do the honors. The unfortunately named robot master's set relies on the fairly basic concept of a bird that will jet towards him once every 3 seconds as somewhat interesting concept for a projectile. That said, trying to use this concept as the centerpiece for a set feels a bit misguided, since the only really obvious way to make use of this thing is to stun the foe into the blade. And you can also move around it's starting position and wall it off with a couple moves. I can forgive simplicity, but if all you're doing is stunning a foe into another attack that's a pretty weak playstyle, with no real flow outside of that other than just some generic "better in the air" stuff, when the aerials are hardly remarkable or relevant, just he happens to have a lot of flight in the air. With how bloody obvious the set is to play and how little substance it has I don't even think it is particularly good as a Brawl set, though at the very least the most I can really level against the set is that it is extremely boring.
Ultron
I will say this set started off pretty promising, with the prospect of creating huge quantities of minions that function as copies of Ultron minus the specials, and then the specials bar the recovery are all pretty cool. I particularly like the Side Special, if solely because the prospect of making the foe's perform specific attacks to sow distrust between partners is great in 3v1, as well as making the AIs of your robotic partners programmable. The problem with this set for me though, comes down to 2 things. It's one of those sets where it introduces a lot of cool stuff in the specials and then the standards are just bland and don't really ever play into it. There is some okay stuff with him being able to use the FSmash laser to build up some massive damage and set off drone explosions while piercing through all your enemies, but a lot of the moves don't really serve any actual purpose and don't feel they'd be interesting to use in the context of a large quantity of clones.
Aside from that, the set just had a wide array of things that annoyed me slightly, and they do add up by the end of the set. I know shields aren't that useful on a 3v1 boss... except for the fact the fact that foe's might be preoccupied with your absolutely ludicrous minion army and you'll be engaging them 1v1 every once in a while, at which point a shield would be something Ultron could definently use. Losing access to your shield for another tool is kind of similar to my problem with the otherwise cool Side Special too, in that it's used to both reprogram your drones and also quickly destroy them... but that kind of feels like a waste of drones. I mean, I'm getting them to do what I want so this means I have to kill them? Seems counter intuitive. I guess that does help to balance out how obnoxiously powerful this set is even by 3v1 standards though. I mean this is a character who is creating a clone of his already powerful self with a few nerfs every 4.5 seconds(so in the course of a stock which I would guess would last at least a minute against this guy, you'd have to mow through literally 12+ clones), which for that matter create a massive explosion upon death that will stun the foes and push them into KO range for the main Ultron to easily do the honors. It's stuff that could be number crunched, but what is also scary is against so many opponents Ultron can just disable most of their defensive options. What the heck happened to using actual strategy to make sure your attacks hit?
Gruesome Twosome
Unlike the previous two sets, it's hard to say that Gruesome Twosome doesn't catch the reader's attention. It provides a lot of crazy concepts throughout the entire set, like a raincloud trap that can become a very complex nuisance if the foe doesn't climb on the absolutely massive opposing vehicle to destroy it, or a somewhat simplified version of Banbollow's wire with the dragon building up flames in it's neck. Plus you go out of your way to try and make this apparently horrifyingly character beatable, with the ability to deny it it's movement and utterly ridiculous free flight and source of fire. Pretty much every input introduces something new and apparently fun to this character's game, so on that premise I should like it right?
...well I really hate to say it, but no. I think the set ultimately made the mistake of trying to do way too much and ended up screwing itself over, especially in the balance department. The dragon's neck I don't think is so impossibly durable that the foe will never take it down(150HP sounds like a lot, but on a static hurtbox that large it's not going to take long to take out), but moreso it's pretty easy to keep that thing out of the foe's reach until the time is right, then rain down hellfire on them. It's not like the Twosome desperately need the dragon to be working for them at all times, because they have the bedsheets and snakes to keep the foe away. The snakes on their own are pretty much completely obscene with the fact that they probably won't die until they get in a hit on the foe, at which point you can just drop a bed sheet or another snake on them to gradually increase the amount of hell the foe is in until they can no longer do literally anything. And we may as well just add that you have spiderweb set ups to hold the foe still and the sky is fast becoming a storm of fire and tornadoes, and the fact that your opponent is a 40 Weight giant moving hitbox that can fly, and the snakes can repair and protect one of the set's main weaknesses with hilarious ease. I mean, how are wheels that are so easy to defend and replace being destructible a sufficient weakness? I feel a bit bad for not pointing out this balance stuff when I initially previewed it, but it's one of those things that you kind of realize when thinking about it. This set is frankly far more powerful than Garbage Man, as at least Garbage Man had weak points that weren't so bloody easy to defend and didn't dominate the battlefield to the degree the Twosome does.
And for as much as I do appreciate some of the concepts in the set, sometimes it feels awkward as a member of the vehicle genre because it is extremely rare the vehicle mechanics are brought up in set. I mean... you can place traps on yourself to move them around which is basically the point of the set as you say in the playstyle, but what of all the momentum stuff and the character's massive size and solid nature. That stuff just feels like it's all there to serve as a way to make this character even more obscenely broken. I appreciate when you do acknowledge it in the Nair and FSmash, but even in the FSmash it doesn't really flow into the rest of the set to modify your momentum slightly or trip yourself on the water. As for the boss mode since you did bring it up to Froy, it's not that the set is so much bland as a boss moreso that the set was designed to be 1v1, with 3v1 being very clearly an afterthought. And frankly, this character doesn't work in 1v1, nor do it's concepts really flow in 3v1. Which is kind of a shame, because it is pretty loaded with cool stuff that sounds satisfying to play with.
Comment Don't worry, we'll soon return to our regularly scheduled "Junahu not commenting anything"
Croagunk
There are many things to give this moveset credit for in terms of pacing, writing and a compelling impression of flow. You tie simple ideas together convincingly, and it's alltogether a good read.
Characterwise, you leave the dirty fighting up to the player, which is great. The way Croagunk is mostly reactive in his fighting style is an exact match to the Pokemon's approach to encounters. And theoretically, the pressure of time poison-damage compels the foe to attack in a way that would (if it worked) promote pessimistic self-prognosis, provoking the foe into stupid, confused, mistakes. That characterisation is very well planned out, and it deserves recognition.
But, regrettably, you have a lot of convincing to do if you want me to believe that this poison mechanic actually works the way you wish it to. I've seen this aggressive anti-camping poison approach before, in Croagunk's spiritual predecessor Toxicroak. It's admirable that you'd want to emulate this concept, as it makes MYM feel just that little bit more connected. But it's an idea that swiftly contradicts itself and falls apart once the players begin utilising even the slightest bit of meta-gaming. Players will do what gives them the best chances of winning, and approaching into a character you KNOW can punish the hell out of you is never going to be the optimal strategy. All the poison damage in the world wouldn't convince a man to give himself to Croagunk's optimal-range. They'd much rather force Croagunk to approach (which he needs to do in order to achieve anything at all, including the magic poison that is supposed to make THEM approach) and punish that in relative safety.
The bizarre lack of mud throwing in the moveset is also quite shocking, considering how well you otherwise encapsulate Croagunk as a character. Mud-Slap and Mud-Bomb are both natural moves for Croagunk, and pretty blatantly indicative of how he gets the upper hand on predators in his natural habitat.
More promisingly, the options for shield pressure are satisfying and effective (ignoring the shield poisoning which is so weak that it isn't remotely worth the effort of inflicting). This lends some actual fear to the procedings, breaking open the foe's defenses to give Croagunk's own options that much more bite.
I think this should be a hard rule, if the character canonically learns TAUNT by level up, you should include taunts in your moveset.
Camping is a worse option for the foe than charging at Croagunk, though. He has multiple ways to force through camping, such as Side Special, and he'll outdamage campers with his damaging poison. The best way to beat Croagunk is to outdamage him due to his predictable recovery and low weight, with the best options generally trying to play mid-range and just out of reach. It's simple easier to out-damage Croagunk in a good old fashion brawl by reading him (and, in turn, trying not to be read) then it is to camp him, as he'll match your damage output from camping quickly with poison when he gets in close via SSpec and such unless your camping is so OP that you're broken anyway.
Man, I forgot to do the Mini...
also, wouldn't it be worse if he learned Taunt as a level-up, then his taunts did nothing but be taunts? That'd be even worse character-wise!
So he forces them to approach... by being really good at approaching? I don't think that's how it works. If the Croagunk can just do that, then he doesn't have tools for forcing approaches, he's just really good at approaching.
The best way to deal with Croagunk is to not idiotically play right into the playstyle you designed him to exploit. You don't need to out damage him, he's light and has a predictable recovery. Trying to outdamage him takes you directly into his killzone. And considering how many options you give him that are explicitly designed to make Croagunk harder to read than his opponent, I don't think an old fashioned brawl is what the opponent should be aiming for.
It's very rare to find a reason to make taunts be anything but taunts. I didn't say that Pokemon with TAUNT should have that move implemented via their taunts, I said that the moveset should include taunts.
I suppose it is just something we disagree on, then. It seems to me like when camping becomes ineffective, you want to approach, not ineffectually camp. You could say his options at approaching force an approach, or an otherwise different strategy. It's probably something we'll never agree on.
I was just pointing out that if the fact it learns Taunt is the reasoning, it should probably do something. Taunt itself does, after all.
Yes, when camping is detrimental, you've been forced to approach. But if you're a camper, chances are that you need that camping, you need that control and that zoning, and you can't throw that away regardless of what happens because Croagunk would just murder them if they tried to play the close-range game that he wants. The meta-game is about understanding what the opponent wants and playing counter to that.
In fact, there's no reason for Croagunk to even want to be at range against a camper. He'll approach, then he'll maintain that closed distance to lock them out of their camping, the poison wouldn't have anything to do with that. The only playstyle poison actually harms, are those who need to play in close range and have no options when Croagunk poisons them and runs away.
I'm not saying Croagunk doesn't work, but I am saying it's not working in the way you explicitly claim throughout the moveset.
The Ant Hill Mob are a group of seven gangsters from Wacky Races, lead by Clyde (middle) in the “Bullet Proof Bomb”. They oftentimes find themselves having to evade the law in the middle of a race, though lord knows why they go into a public race to draw attention to themselves. After Dastardly, they’re the most common cheaters in the series, though they are not the butt monkey of the series and are thus actually allowed to succeed.
The limo is 1.25x as long as a Battlefield platform. The front portion of the limo is as tall as Wario, while the meat of it is as tall as Marth. The mob’s vehicle of choice being a limo makes them pretty awkwardly large, without nearly as much weight to show for it as other gigantic vehicle sets get. The vehicle is solid from the top and bottom, enabling it to be stood upon/crush things but enabling you to still be able to “overlap” with it. This can often be more of a disadvantage than a positive, as you’re going to have to constantly be knocking characters off who are standing on top of you and damage racking you.
The ability to stand in front of the drivers lets any character easily grab them. If you grab the Ant Hill Mob, you can deal damage, stun, and any status effects you wish to them. Shockingly, you –CAN- deal knockback to the actual gangsters with throws! Each throw will remove one gangster from the car, more details found in the Down Special. You will never remove Clyde, the leader, with a throw, though, only the other 6 gangsters. As far as stun, attacking the drivers with a non-throw attack deals stun to them, just not status effects and knockback. Using a throw to remove a gangster from the car will deal stun/status effects to the removed gangster, not clyde, though. Throwing Clyde once he’s all alone in the car can stun and do status effects to him, but not remove him.
If you grab the car instead of the drivers, you can deal damage and knockback to the car, but no other effects. The car in general is immune to the vast majority of status effects. If you want to apply them, do so to the gangsters once they’re knocked out of the car.
The gangsters do have a shield that shields any gangsters currently in the car. They are immune to being shield pushed, and if any move would deal shield push to them the attacker will get pushed back instead so you still get some space between you. This thankfully makes it more difficult to combo against their shield.
The limo will not turn around by default and will simply attempt to drive backwards when you hold back on the control stick – a double tap is required to turn the truck around, which is a very laggy process. The limo has to accelerate from a 2.5-10 in movement speed, and won’t reach 10 until traveling the entirety of Battlefield. When the truck is moving, it’s a hitbox based off how fast it is, capping at 27% and knockback that KOs at 85%. If you attempt to stop a dash and start up your beyond awful traction, the Ant Hill Mob will spin the limo around to face the opposite direction, moving a platform forward as they do so and keeping their hitbox in-tact with 1.35x the power. If they had 4/10 or less movement speed, they’ll come to a complete stop by doing this. Attempting to turn around while having no momentum at all results in a much laggier process. If the Ant Hill Mob was moving faster than 4/10, the limo will tip over, increasing the power of the hitbox to 1.5x how fast the limo was going. If it was going fast enough, it will roll forwards a good distance with this hitbox in-tact. When you’re tipped over, you can “wiggle” back up by pressing left and right in turn.
If you want to stop when moving over 4/10 movement without tipping over, you can input back to slam on the brakes, slowing down 1.5x as fast as you speed up. Just don’t expect the foe to be so kind as to not poke you over the edge if you come to a stop there. Because of the limo’s terrible traction, it can drive in reverse without turning around if you attempt to –walk- backwards instead of double tapping to dash. Due to all of these natural hitboxes, the limo has no dashing attack, but can use all attacks while moving.
The limo –can- be put into prone and pitfalled. Both of these status effects must target the tires to function. Putting the limo in prone only works if he’s moving, in which case he will spin out like if he triggers his traction. Pitfalling the limo causes those wheels to fill into the ditch, causing the limo to be unable to move and banning the limo’s Up Special until the Ant Hill Mob escape at grab difficulty. Because of the angle the limo will now be at while pitfalled, many of the limo’s attacks will now be aimed diagonally downward when they otherwise wouldn’t, making them awkward to hit with.
A gangster opens up the side door of the vehicle currently facing the screen and gets out of the vehicle. You can mash B as the gangster gets out to cause more gangsters to get out, one per press of B, up to 6 (All of them but Clyde). If you use this in front of a gangster outside of the vehicle, Clyde will open the door himself as the gangster pops back in. If multiple gangsters are standing there, you can again mash B to cause one more to get in for each time you push B.
Once gangsters are out of the car, they have their own damage percentages, with 1/10 weight, 3/10 size, 4/10 movement speed, and 5/10 jumps. Damaging them will not damage the damage percentage of the car (The one displayed at the bottom of the screen), but they can be individually killed fine, and when killed they stay dead for the whole stock. They have one of two AIs. By default, they have the offensive AI, but smashing the input will give them the defensive AI.
The defensive AI will aim to get as far away from the foe as possible and stand a Bowser width away from the edge with their back to it. Once at that distance, they will shoot at the foe once every half a second. Their projectile has infinite range and goes at the speed of Sheik’s needles, dealing 5% and flinching on contact. If a foe comes within a Bowser width of a defensive gangster, they will flee to the opposite end of the stage. If there are multiple foes/the foe has minions, they will just aim to get at a distance where nothing is within a Bowser width of them. This desire to get away from the foe will not override their desire to recover, which both AI types do know how to do.
The offensive AI will attempt to get in the foe’s face. Once up close, the gangster will attempt to jam the handle of the gun at the foe for a quick melee attack, dealing 6% and knockback that KOs at 270%, able to attempt the attack once every .4 seconds. The gangsters are surprisingly intelligent enough to keep some distance at all between themselves and the foe (A Bowser width) during their brief “cooldown”, as their attack has minimal ending lag, just a period where the AI won’t attack again. The offensive gangsters are also intelligent enough to not be baited off-stage to their deaths. If a foe jumps off-stage, the gangster will wait at the edge for them to come back, changing their attack to the defensive gangster’s until they do.
While this character has a shield, it does not have dodges. Inputting roll will cause you to switch control to a gangster outside of the car as they start shielding to signify you’ve switched control to them, or just air dodge if they’re in the air. By continuing to input roll left and right, you will swap to the next gangster in that direction. Inputting dodge and down for a spot dodge will immediately switch you back to the gangsters in the car no matter where you are, though. The gangsters in the car are all considered one unit for the purpose of this switching. Defensive AI gangsters will consider wherever you stop controlling them as their new position to defend. If you use a move that is exclusive to the car, you will immediately swap back to the car upon using it.
Pressing this input with no gangsters in the car and not being in front of one will cause Clyde to yell at the gangsters to get back in the car. This will cause them to come to the position of the door when you used the move, not actually enter the car, making it useful for moving your gangsters around in bulk, or just fetching one or two of them back to help defend Clyde.
UP SPECIAL – BLAST OFF
All of the gangsters currently under control, including Clyde if applicable, shoot their guns downwards. If you’re using this as the car, the gangsters will actually spread out to use this attack throughout the car rather than staying bunched up at the front. In the car, the gangsters take put their arms outside of the car before shooting down, of course. This attack lasts for 2 seconds at max (You can cancel it sooner), during which you can DI the car back and forth at a 4/10 aerial movement speed if it wasn’t moving in the first place. This generates 50 hits of 1% and no flinching over the 2 seconds. Having more gangsters in the car increases the horizontal range of the attack, not the power. If you have all of them in, the whole main portion of the car will have a hitbox constantly being generated below it, the bullets going downwards until they hit something or go off the bottom blast zone.
This propels the car a varying distance into the air based off how many gangsters are in the car. With all 7, this will propel the car a massive 5 Ganondorfs into the air, while having just Clyde will net you a mere half a Ganondorf height, over 2 seconds no less. The car, in addition to being solid from below, is also a powerful hitbox from below while falling, dealing 20% and a spike on par with Ganondorf’s dair. This move does not put the car into a helpless state (The car can’t use it in the air twice), but will put any gangsters that use it into one. Using this move as a gangster propels you 3 Ganondorfs into the air over the 2 seconds, though you’re only looking at 30 hits over the move’s duration rather than 50.
If you double tap this input, or any other input that isn’t an exclusive one for the car, all gangsters will perform the attack regardless of location, unless they’re in stun obviously. This move is quite useful on offensive gangsters, as they will constantly DI over the foe’s location while using it if left to their own devices.
SIDE SPECIAL – GET-AWAY POWER
All of the gangsters, including Clyde, go to move down out of their main position and spread out throughout the car, then lower themselves as their feet poke out through the bottom of the limo. From here, this gives you the potential to move at a faster speed based off how many gangsters are in the car, without any need to accelerate. For each gangster at the car, you’re moving 0.5/10 movement speed units faster than normal, without having to accelerate at all, capping at 3.5/10 with all 7 gangsters, and potentially making your movement speed cap go up to 13.5/10 and making the passive hitbox on the car 36% and knockback that KOs at 70%! While you’d think this movement speed bonus would largely be suicide in terms of rushing off the edge of the stage, the great thing about this move is that you can instantly remove this acceleration bonus whenever you want without having to slow down to do so. Just pressing back on the control stick will cause them to stop immediately. Pressing back a –second- time will cause them to start running backwards, going against the car’s momentum and slowing it down with what their movement’s worth. To give you an idea, with just the car’s base movement speed of 4/10, this lets you speed up to 7.5/10 for a nice fairly powerful passive hitbox before slowing all the way down to 0.5/10 the moment you’re too close to the edge! Indeed, you can do some classic mob style hit and run.
The Ant Hill Mob gains a single ground jump in this stance that goes up a Ganondorf, more useful than something like Up Special for more casually doing something like traversing the platforms of Battlefield. Note that for any of the movement based parts of the move to work, you must be on the ground. Their pattering feet are also constantly a hitbox below the car so long as they’re moving, dealing 8 hits of 1% and flinching per second. They’re out-prioritized by anything bar a grab hitbox (Which won’t work), though, and getting hit by something will force them to exit this stance. This can be a decent panic button to get the gangsters away from an enemy on top of the car hoping to grab them, without even using the movement properties at all, but you’ll just be delaying the inevitable if you don’t have a couple gangsters outside the car to deal with the foe.
Used as an individual gangster, this is essentially Luigi’s dashing attack with their whirling legs as hitboxes instead of their arms as they go forwards a platform, dealing 8 dragging flinching hits of 1% as they go, useful enough for positioning the enemy or delaying them a bit.
NEUTRAL SPECIAL– BOMB
After a charge period of a maximum time of DK’s Neutral B, the gangster takes out a large bomb the size of Kirby, the charge time determining whether the bomb will explode in a mere 5 seconds or in 12. Once it does explode, it deals 18% and knockback that KOs at 95%. The Ant Hill Mob are entirely vulnerable to these bombs. Holding a bomb is like throwing an item, disabling you from using A button attacks until you throw it away. Unlike most items, you can press jab up in front of a bomb to steal it from the person holding it. Throwing the bomb at somebody will not cause it to explode, though if you throw it at an AI gangster they will automatically catch the bomb unless the bomb is a second or less away from exploding, in which case the gangster will adamantly avoid the bomb. The only way to make it explode early is to attack it. Yes, you can explode your own bombs by attacking them. Gangsters who have been left to AI will automatically throw their bomb towards the nearest foe when a second is left on the bomb’s fuse.
Offensive AI gangsters can put significant pressure on the foe as they keep constantly coming up in the foe’s face, blocking attacks with their bombs. While the gangsters are light, they’re durable enough to take a single one of these bombs generally, and even if they weren’t you’d be coming out on the winning end since it’s just one gangster who’s getting hit. Because of this, foes will have to adamantly ignore these gangsters constantly running up shoving the bombs in their face, or have to take the time to pick up the bomb and throw it off-stage, as throwing it at another gangster will just have them catch it and take the foe back to square one. This, of course, is all assuming the foe doesn’t have projectiles, though. If they have one, they can just spam their lasers or whatever to blow up the bomb before the gangsters can rush up. You will either have to control the gangster with the bomb and air dodge/shield around these projectiles, or simply chase the foe adamantly enough with the other gangsters that they can’t get the distance they need to shoot the one with the bomb without getting caught in the explosion themselves or their projectile being blocked by a different gangster.
Worse comes to worse, you can just throw the bombs at projectiles before they reach you so that nobody is hit by the bomb. You can also use the bombs in a less risky manner, and throw them where no gangster is before firing a projectile of your own at it in mid-air to explode it.
Rather than doing a massive suicide bombing by double tapping Neutral B, it’s actually a command for this particular move. It still only causes the current gangster to throw out a bomb, but it will have him immediately throw it towards the nearest gangster. From there on, the gangsters will play hot potato with it, AI gangsters always throwing it to the nearest gangster when they receive it. This helps keep it not on the person of any gangster but as an ever-present threat, though it will consistently give your gangsters lag as they throw and catch it so much. The gangsters will specifically throw it at the foe when one second is left on the timer, as normal.
STANDARDS
NEUTRAL ATTACK – DRIVEBY SHOOTING
As an individual gangster, this is the individual gunshot they have with a defensive AI that they can use every half a second for 5% and flinching. Used in the car, though, the gangsters will automatically alternate their shots in such a way that if you have even only have 5 gangsters, you’re firing one shot every tenth of a second. With 7, you get 2 bonus shots thrown in at a random point. You can angle this shot slightly up or down, but the primary direction of the attack is set at being forwards. This lets you shoot foes on the ground in front of you fine and even ones approaching a decent ways into the air, but not foes standing on the ground overlapping the door or beyond, or the top portion of the limo.
This is a very spammable attack with 5+ gangsters in the car and one of your bread and butter ones, enabling you to soften up foes to prevent them from casually dodging your momentum based hitbox as you go to run them over. This move is also why you don’t need a large amount of defensive options for foes standing on the front of the car, as this monster of a move is more than enough to typically get the job done.
Just beware, because as the car you can only hold this move out for 2 seconds before having to reload, which takes a full laggy second. Canceling out of the move and re-entering the move is fairly fast, but if you, say, shoot with the jab for one second, then stop and restart over the process of half a second, you will only have 1.5 seconds to shoot before being forced to reload.
FORWARD TILT – CROWBAR
The gangster takes out a crowbar and attempts to smack the foe with it in an overhead swing. This deals 10% and knockback that KOs at 155%, not too shabby for the move’s speed, decent range (The crowbars have only slightly less length than Marth’s sword) and disjointed priority. If you use this as Clyde, he will smack the portion of the car in front of himself where foes can stand to grab/stun him, making this a good defensive option there whereas it’s a good basic pressuring option for individual gangsters.
If you hit something with this that can be damaged or you clank this with another disjointed hitbox, you’ll dent the crowbar. If you hit somebody with a size of 6/10 or more, this will cause the crowbar to instantly become too dented to use. Otherwise, you need 2 uses, or 3 uses on a foe of 3/10 or less size. As far as clanking with an attack, it depends on the size of the hitbox how dented the crowbar will become. Crowbars that are dented but still usable will keep their distinctly dented shape the next time you hit with them, which can either be good or bad based off situation. Note that the crowbar also becomes dented from hitting a shield, and shields are often large enough on a 5/10 size character or so to fully dent the crowbar in one hit. They also dent the crowbars in an interesting half circle shape.
Upon a crowbar becoming too dented to use, the gangster will drop it on the ground as trash, it becoming an item you can pick up like Wario’s bike parts. It’s still a battering item, unlike the bike parts, though it’s quite weak unless you just throw it, and throwing/the dashing attack are the only moves with it that are actual attacks, dealing 6% and knockback that KOs at 206%. The jab is simply rotating it around in your hands to get a better aim for it, and the ftilt and fair (A new input for this battering item) input for the battering broken crowbar item is just placing it upright on the ground/air in front of them. The jab is at least slightly useful for giving you a more interesting potential hitbox on the dashing attack/item toss, but the ftilt/fair seem entirely useless at the moment. . .
UP TILT – WHEELIE
All the members inside the car besides Clyde go to the back of the seating area to shift their weight there as Clyde causes the car to do a large wheelie. This causes the front of the car to lift up into the air at such an angle that the nose of the car is pointing directly diagonally upwards. The car will stay in this position for a minimum of half a second, or up to 1.5 seconds if you hold the input. During this time, the back wheel of the car is a hitbox that deals 20 hits of 1% and flinching per second. When you release the input and the car falls back down, the usual hitbox of when the cars fall down to the ground is present underneath the car, quite threatening.
This can be useful against foes attempting to approach from the front and land in front of Clyde, before you lift up that portion of the car so they can’t reach it, the foe falls in front of you, then you slam on top of them. It’s a rather obvious and predictable response, but obvious and predictable isn’t as big of an issue with other gangsters around to help.
This move is also a way to build speed up in place, as if you go forwards after using this move, you will start at a speed of 7/10 instead of 4/10. If you use this move while moving, you will slow your speed temporarily by 2/10 during the move’s duration, but will get the 3/10 boost when you stop using this move.
DOWN TILT – RAT-A-TAT-TAT
A gangster in the car/the gangster you’re controlling takes out a jackhammer. If in the car, the gangster using the jackhammer leans out the window and drills onto the ground next to the limo. The jackhammer itself deals 10 hits of 1% and flinching per second, while the ground within a platform of the jackhammer becomes an earthshaking hitbox that deals 10% and vertical knockback that KOs at 175%.
Once input as the car, that gangster will continue to use the jackhammer forever if in the car until an attack that requires all gangsters in the car is input/the gangsters is told to leave/you input the move as the car again. If only Clyde is in the car and you tell him to use it, he’ll use the move for as long as you hold down A and will be unable to drive until you stop.
If you use this move as a gangster, you can move while using this as the ****** gangster hops onto the jackhammer, albeit at a slower 2/10 movement speed. Defensive gangsters will just use this move in place forever, quite useful all by itself, a good position being on top of the car to defend it. Don’t write off the offensive ones either, though, as they constantly will move towards the foe’s horizontal position. They’ll only attempt to move within a Bowser width of them while using this move, though, and if the foe gets closer than that will attempt to shy away.
SMASHES
SIDE SMASH - CEMENT
This move is a side smash rather than an fsmash for a reason, as if you use this move as the car it will cause a pipe to extend out either the front or the back of the car. This will cause the car to shoot out cement for 2 seconds. This is a fairly laggy period that can be interrupted by attacking the gangsters in the car, though the car can still move and be defended by outside gangsters. The cement will coat any stage that the car drives over. The charge determines how deep into the ground the cement goes, from just coating the surface of the ground to sinking down a Kirby height into the ground. Using this as an individual gangster is faster, but just involves them dumping a single barrel of wet cement at their current position over 1.2 seconds, creating a Bowser width cement patch.
Cement hardens 5 seconds after being created. If somebody enters wet cement but leaves it before it hardens, their feet will still be dripping with it. If they dash for half a platform along the ground, they’ll spread the cement there and off their feet. This is useful with regular gangsters, enabling you to potentially spread the cement further.
If your cement dries outside of a cement pool, then your feet will turn to concrete, a status effect that lasts 10 seconds. This prohibits you from being able to walk/dash and increases your falling speed to 10/10 or by 5/10, whichever is more, but you can still jump regularly.
If you dry inside a larger portion of cement, then you will get stuck in that actual ground there. You will have to jump in place 3 times to escape to the status effect described above as you drag out the concrete with you, each jump giving you .33 seconds of lag. You can work towards escaping while in stun, a necessary feature due to the fact you don’t take knockback during this time. You can still attack during this time, but cannot move in any way shape or form or use feet attacks. Using feet attacks during this time can also work towards having you escape, with their lag roughly the same amount as usual while stronger attacks make you escape faster.
Using the dtilt jackhammer on cement will destroy it in a mere 3rd of a second, enabling gangsters to easily free themselves if they get a portion of themselves covered in cement, as well as the car. Using this on foes stuck in concrete on the ground frees them over half a second, but the move deals quadruple damage to them as it does so, meaning you’re looking at 20% over half a second. The jackhammers will destroy any actual terrain that’s concrete as well, at a rate of one Kirby per half second. This enables you to terraform of all things if you want to, and a defensive gangster you leave dtilting over concrete will go to terraform the rest of the ground until it’s all destroyed. This can enable you to make slopes to slide future wet cement down, as it will indeed slide down sloped terrain. Aside from this, the only way you can get a slope is to slide it down the car with a move like utilt or nair. This will also boost the momentum of the car if you make a big enough slope for it to drive down, but is pretty absurdly impractical.
Of course, there are far simpler and less absurdly large scale purposes of the terraforming. One such example is simply terraforming down into a ditch in such a fashion there’s a wall for the car to run into to prevent it from driving off-stage. It’s a bit difficult, but if you can spam this move enough in one place to make a hole in one portion of the stage that goes out through the bottom you can get a lot of mileage out of it. Due to the car’s insane width, it can sit on top of holes entirely fine. So long as you don’t park a wheel on top of a hole, you can whizz right over them so long as you’re going at 4/10 dashing speed or more and the hole is no wider than a Bowser width, and even sit on top of it as you attempt to knock foes into it and block them off from recovering with your solid underside. Just beware that while amazing, it isn’t foolproof, as you’re still capable of taking knockback. Foes can knock you up enough to escape typically, most commonly doing it simultaneously as they recover with their Up Special.
While it might seem dumb to make concrete when it’s so awkward for the car to drive over it normally, the only portion that can really matter getting covered with cement is the wheels. Getting them covered disables attacks like utilt, and more importantly the movement of the car. This is easily remedied by using the Side Special Getaway Power to carry the wheels over the cement, even if it does mean the gangsters will get cement covered feet. If you already have the cement on the tires, using dtilt as the car will cause the gangster to automatically angle it towards the back wheel if it’s stuck, and a gangster outside the car can get the front wheel with dtilt fine. If you don’t want to get over the car and don’t want to use Side Special either, you can utilt over the concrete until the front wheel is past, then just dtilt the back wheel.
Throwing a holdable item like a bomb or dented crowbar into wet cement works the same way as it does against a character. Notably, in the case of the bombs, their fuse will be put on hold, and attacking them will no longer set them off. If hit by a jackhammer, though, even just the earthshaking hitbox from a distance, the bomb will instantly explode. This is quite nice as it gives you a trap you can blow up on demand with a lot less worry. They also gain the ability to roll down slopes in this form, enabling you to utilt to roll down cement bombs at enemies before jackhammering them open. Characters who carry –wet- cement items will get their hands covered in cement by this procedure, so taking the bomb away from the gangster becomes much less of an option for foes in this scenario.
As far as crowbars, they will become completely solid once the cement on them hardens. They can still be picked up if they’re not stuck to cement, but once they’re plopped down they become completely solid walls with 50 HP. Notably, you can put wet cement on top of the car before sticking on a crowbar to create an obstacle foes will have to go over to get past the vehicle, assuming they don’t want to run past the main car on the ground. If you cover a cement crowbar stuck to something with even more wet cement, you can also stick crowbars to the crowbar! With how customizable the shapes are you can make by denting a crowbar, you can have just about anything. The great thing about this wall is if you stick it to the top of the car, it will always be getting in the foe’s way but never in yours. You can make “branches” out from the main tree of concrete rather than building a full tower as well, enabling you to make little perches to place defensive gangsters. If you destroy the individual pieces of multiple crowbars stuck together, any crowbars further down the crowbar “tree” will still stay stuck to each other, but will fall down limp. You can restick the base to something else, though if the crowbar tree has more than 3 crowbars in it, you will need one gangster to help carry it for every 3 in the tree.
UP SMASH – STILT EXTENSION
The car’s body suddenly hoists itself a massive distance into the air via stilts extending up out of the wheels. This leaves the wheels on the ground and the car’s body up in the air, with nothing but steel support stilts in-between to connect them. These stilts are not in any way solid, meaning if the wheels can fit under some construct this can enable you to go through a lot of constructs you normally wouldn’t be able to. The car’s body is hoisted 2-4 Ganondorfs up into the air, and once it reaches its’ apex the entirety of the top of the car becomes a brief hitbox that deals vertical knockback that KOs at 135-100%, which is actually very high considering how high up in the air the car body then is. You just have to time a proper shorthop to avoid this as an enemy, though if you do it too early the car will come up under you too fast.
The car will stay in this position until you can usmash again, at which point the car slams back down onto the wheels just as quickly. The hitbox on the move is just the usual one of the car coming down in this case. If you double tap the input when using usmash with stilts already out, the wheels will retract up to the car, causing the car to enter its’ aerial state. Since this move has no individual gangster version, you don’t have to worry about this double tap interfering with them. This is the quickest way to get the car into the air on-stage to actually make use of your aerials, hands down. Obviously you can’t use it over and over to gain more and more height, though, as it’s a ground input.
You can do everything you could normally in this state with the car extended above the wheels, though the wheels/stilts will never become hitboxes from momentum and such, just the car’s body. You can still damage the car by attacking the wheels, but this does no knockback or anything of the sort. Attacking the stilts does not damage the car, but dealing 60 damage will cause the stilts to collapse and the car to collapse back onto the wheels in a very laggy fashion. This prevents the car from camping up on the stilts forever.
The hitbox on the top of the car when the move is first used can affect constructs and liquids. While it obviously won’t affect solid concrete or similar things stuck to the car, it can knock up some wet cement, it taking the full knockback, before you move out of the way and let it rain down on foes from on high. You could always just utilt it down while it’s extended out in this position, but this is useful for attempting to catch foes attempting to dodge the initial hitbox on this move. The dtilt also functions a bit differently, given how useless it is high up in the air as is. If there is no platform or anything in range to drill, the gangster using the jackhammer will go to use it on the back stilts holding up the car, generating the hitbox on a platform’s worth of the back stilts.
DOWN SMASH – BLOWTORCH
The gangster takes out a blowtorch and either shoots it straight down in the car, leaning out the window, or spinning in an arc around themselves if outside the car. Either way, it deals 15-25 hits of 1% and flinching, with the last hit doing knockback that KOs at 150-120%. After this, the gangster drops the blowtorch on the ground, where it becomes a trap. The blowtorch has 60-100 HP and attacks once every 3 seconds. While the HP is very sizable, the blowtorch can be knocked away very easily, weighing as much as Jigglypuff at 80%. When it does attack, it shoots out a Wario sized cone of flame in front of itself that deals 10 hits of 1% and flinching over a third of a second. There can be one blowtorch trap out per gangster at a time, it vanishing if that gangster uses dsmash again or dies.
This simple and direct trap wouldn’t be notable if it wasn’t for your ability to stick it down to something with cement, preventing it from being capable of taking knockback and letting you utilize the blowtorch’s great HP. Just be cautious you don’t cover the actual portion where the fire comes out with concrete, otherwise the trap won’t function and this is largely useless. In any case, this trap only realizes it’s true potential when stuck to the car with cement, at which point you’re essentially attaching turrets to your vehicle. You can stick one on the nose of the car pointing back towards the drivers to hit foes attempting Clyde for a very nice defensive trap. You can also stick it to some tower of dented crowbars to potentially alter the angle of the blowtorch from being completely straight by, presumably pointing it at a diagonally downwards angle to hit foes down on the car, or perhaps at an angle to defend a particular gangster sitting in the tower or something.
AERIALS
NEUTRAL AERIAL - ROTATION
Clyde yells out “Push, you shmucks, push!”, causing the gangsters to push down their weight on the front of the car, jumping up and down forcefully, causing the limo to start rotating. They will continue doing this for as long as you hold A. With all 7 gangsters, you’re looking at a rotation speed of once per half of a second, while with just Clyde it takes an absurd 3 seconds. This turns the entirety of the car into a hitbox that deals up to 10% and knockback that KOs at 150% with all the gangsters, to the point of not turning into a hitbox at all with just Clyde.
If you land on the ground in any position that’s not right side up or upside down, the car will let gravity do the rest as it falls into the more logical of those two positions. As it falls to do so, it does indeed keep the usual flattening hitbox of 20% and a Ganon dair spike. Ideally, you want to position yourself so that the nose of the car hits the ground and the entirety of the limo falls backwards to put you right-side up. This is a pretty threatening tool, but you still can potentially fall upside down, which removes your passive movement hitbox and, well, prohibits you from moving or using utilt until you move back into the air and flip back over using this move again, so you have to be cautious with it. You can use usmash upside down, but all that accomplishes is extending out the wheels and the usual distance instead of the car’s body, them briefly becoming a hitbox that deals 10-20% and vertical knockback that KOs at 150-130% at their apex.
There is –some- benefit to being upside down, in that the entirety of your new “top” is completely straight and thus you can have the entirety of it being jackhammered, and the position where Clyde and the other gangsters are bunched up in the front now requires the foe to approach from the ground rather than jumping up onto the front portion of the car, meaning you don’t have to awkwardly defend that spot.
You can still move upside down with the Side Special in the awkward manner pictured above, at a pathetic 1/10 dashing speed and with a ground jump that goes up a Mario height. This version of the Side Special has no hitbox. It’s not much, but you’re not entirely forfeiting the capability to move with this more turtling stance.
One of the main purposes of this stance is to stick stuff to the underside of the car with cement. While you might think this is incredibly impractical once you turn right-side up, what with whatever you stick to the underside of the car just getting smashed underneath the car, when you extend the car up into the air with usmash/go into the air by other means whatever you stuck down there with cement will still be there. Most notably, this enables you to “camp” with usmash. What would normally be a tower of dented crowbars will be something to reach down to the foe on the ground, presumably with plenty of blowtorches stuck to it. Obviously you can’t camp at foes with this alone, but it can serve as an excellent way to deter the approach of foes up or, if the blowtorches are positioned precisely, to defend the stilts from enemy attack. Meanwhile, you’ll be shooting down at them from on high.
If you want something easier to construct, you can just throw on a pair of blowtorch underneath the car facing each other. This alone is good, but if you extend them out just a bit further underneath the car with a single crowbar underneath them, you’ve got a real nice set-up. These blowtorches, especially if they alternate shortly after one another, can catch foes you’re trying to fall on top of so you can hit them with the meaty main hitbox quite nicely.
Used as an individual gangster, this is a generic spinning nair that deals 5 hits of 1% and flinching, then a last hit of 1% and knockback that KOs at 200%. A decent move to double tap and have a horde of offensive gangsters go to gang **** the foe with.
FORWARD AERIAL – IN DA HOOD
The hood of the car springs open, knocking foes who were standing there in the general area in front of Clyde with diagonally backwards knockback. The knockback is mostly horizontal and is quite strong, the horizontal knockback alone capable of killing at 110%, very impressive. There is some slight vertical knockback on it as well, though, meaning you pretty much have to outright kill an enemy with it or this knockback will typically help them to recover back from it. In addition, the fact you have to hit enemies in front of the car and knock them all the way past it behind you also significantly limits the kill potential of the move.
That said, the high knockback makes this an excellent defensive option even at low percentages to get enemies away from Clyde, this functioning as the move’s most obvious purpose. Enemies can shorthop to avoid the hitbox, but if you have a blowtorch attached to the hood via concrete it will go up into the air as the move is used and potentially catch an enemy who just thought they could jump over it. If the blowtorch has a dented in crowbar under it or two, the fair can also serve as an excellent means of changing the angle of where this blowtorch is firing, potentially changing a blowtorch that was aimed to hit enemies standing on the hood to one that can hit enemies standing on top of the seating area, and so on.
BACK AERIAL – TIRE SPINNER
The tire on the back of the car suddenly extends outwards via an extension on the back of the car pushing it out, the tire spinning as this happens. This is quite a fast move as the tire/extension come out as far as Dedede’s ftilt, the tire dealing 13 hits of 1% and dragging knockback as it quickly goes out with the last hit dealing horizontal/downwards angled knockback that KOs at 150%. The extension itself is a weak hitbox, again much like Dedede’s ftilt, dealing 3% and weak knockback that sends foes into the tire. The move has pretty bad ending lag as the tires retracts back into regular position as the extension goes back into the car, no longer a hitbox.
If the move is double tapped (No individual gangster move here), the starting lag and end lag is reversed. Foes who air-dodge in anticipation of the fast attack will find themselves dodging starting lag as the tire harmlessly goes past them, then suddenly gets dragged back in towards the car very quickly, becoming a hitbox at that point. The tire drags foes back towards the car in this version. The last hit is still angled somewhat downwards as before, meaning this version is a prime way to knock enemies under the car and crush them.
This is definitely the version you want to hit with, but it’s significantly harder to do so. In order to make it work, you largely have to make them expect the other version from heavy use, which is largely just a simple defensive move. That said, in a scenario where the foe is coming up from under the car to avoid getting crushed, going around the back and jumping up on top of the vehicle, they will generally be quite panicky and may air dodge impulsively. Opportunities are there, you just need the prediction.
UP AERIAL - HATS
The gangsters spread out throughout the car as they take off their hats and place them above the car, causing the hats to puff up. If you have all 7 gangsters in the air, you will have enough hitboxes to cover the entirety of the top portion of the limo. As the hats first puff out, they are hitboxes that deal a fairly laughable 5%, but surprisingly decent knockback that KOs at 140%.
The gangsters will hold their hats out for as long as you hold down A. While the hitboxes on the hats will be gone, this will decrease the falling speed of the limo. For each gangster you have, you’re looking at decreasing the falling speed of the limo by 1.3/10. With all 7 gangsters in the car, you’re going from 10/10 falling speed to 1/10! While your falling speed is decreased, the hitbox on the bottom of the limo is gone, but the solid status of it is left in-tact. Aside from recovery purposes, this lets you maneuver the car over foes to crash down on them. While it’d be pretty predictable, you don’t need every last gangster in the car to have a fairly low falling speed. 1 or 2 stray gangsters outside can try to pressure the foe to get smashed under the limo.
Used as an individual gangster, you’ll always be decreasing your falling speed from 4/10 to Jigglypuff’s. Gangsters are plenty intelligent enough to use the Up Special then the uair to get the max distance from their recovery, though they won’t use both moves if they don’t need to of course. While the gangsters have rather embarrassing weight, their absurd recovery prevents them from being too easy to take down.
DOWN AERIAL – CHAIN LINK
In the car, this causes the gangsters to bunch up in the middle of the seating area rather than the front, then for Clyde to “cast out a line” of the gangsters, with each one grabbing the feet of the next one in turn. This by default goes straight down, but can be angled somewhat to the left or right. The gangster at the bottom will attempt to grab a foe through this link, and if successful when Clyde pulls his gangsters back in during the ending lag, he’ll pull the foe back into the car too and automatically grab them. More gangsters obviously means more range. This move is also capable of grabbing an individual gangster and pulling them back into the car, potentially enabling you to save gangsters the foe is trying to casually gimp.
You might think because this is basically an awkward tether grab that it’d have bad lag associated with it, but shockingly, this is not the case, this move being quite fast on both ends, making this at first appear to be an incredibly potent weapon. The downside of the attack, though, is that if you hit anywhere on the long line of gangsters that does not have a hitbox during the move, you screw over the Ant Hill Mob tremendously. The ones that you directly hit with your attack will suffer the effects of your attack, including knockback. The ones below the gangsters hit in the chain will fall to the ground, becoming separated. This is an incredibly foolish move to spam.
Used as an individual gangster, this turns into a generic lunge either straight down, or at a diagonally downwards angle. If a gangster successfully latches onto the foe, he will deal 1% per quarter second to them as he punches at them, which can’t be shielded or dodged. If the foe somehow has a falling speed less than 4/10, it will be increased to that with the gangster latched on to them. If the foe generates any hitbox other than a grab hitbox, not some arbitrary hitbox to specifically hit their position, the gangster will be hit by the hitbox and knocked off.
Multiple gangsters can latch onto the same foe. This stacks the damage, as well as adding on an extra 2/10 falling speed to the foe’s for every extra gangster that latches onto them. Perhaps even more importantly, for each hitbox the foe generates, they will only knock off one gangster. Sure, they can do something like a generic Brawl multi-hitting spinning nair to knock them all off near instantly, but that will barely knock them away at all and you can just double tap dair again to have the gangsters lunge back onto them again. Speaking of which, yes, if you double tap dair, the gangsters will be intelligent enough to automatically angle it towards any foes in range.
GRAB-GAME
GRAB/PUMMEL - KIDNAP
The gangster attempts to grab out the window for the nearest foe/performs a generic grab. Due to the gangsters being *******, this grab is much like the Brawl ones of being fast but bad range, to an even more severe degree. The short range is less of an issue if you have separated gangsters, though. If you have two offensive gangsters approaching the foe from opposite sides, you can double tap Z to have both of them grab at the foe.
Once you grab the foe in the car, you can continue driving around with the foe trapped inside. To throw them, press any button and a direction. If you grab the foe as an individual gangster, the gangster will automatically start running towards the car and will get in upon reaching the car. If you remain in control of this gangster, pressing any button outside of shield will cause the next nearest individual gangster to start to come running towards the foe and grab onto them as well to help out. Once they reach the car, the grab escape difficulty timer resets.
Pummeling as the car deals a token 2% regardless of gangster quantity as they rough the foe up. Also note that if a gangster in the car is holding a bomb and you input pummel, they will give said bomb to the foe. This obviously eliminates the most difficult part of it, but due to the nature of your throws and your huge hurtbox will often end up in the car also getting caught in the explosion. The uthrow, which sends the enemy up, is the only one that really works for this, but even then, if you do it too early you’ll hit yourself as you throw the foe past up the car, too late they’ll fastfall back down onto the car. The only real guarantee is to have momentum before using the bthrow/uthrow.
The individual gangster’s grab escape difficulty is half that of a regular grab. For each one added on after that, it increases by .15X. With all 6 outside the car grabbing onto the foe, that gives you 1.35X grab escape difficulty. If all of them are in the car so you can add on Clyde, you have 1.5X regular grab escape difficulty. While the grabs are pathetically easy to escape with only a few gangsters, you have to keep in mind you can switch control back to the car and start backing up/driving forwards to let them into the car more quickly, working especially well if the car was already going that way and had some momentum. Each extra gangster added onto the grab outside of the car will also increase the speed they run into the car to by 1.5/10. The mob’s grab is a bit stronger than normal if you keep all the gangsters together, but you generally –want- 2 or 3 outside of the car.
Oh, and if it wasn’t obvious enough, foes take no lag whatsoever from being grab released by the Ant Hill Mob, ever. Foes grabbed inside the car are invulnerable until thrown/escape the grab, though can obviously die if the car does.
BACK THROW – RUN OVER
The mob goes to throw the foe under the car, dealing 5% and knocking them into prone when they hit the ground. From here, it varies from if you were already moving or not. If you were moving, the car just keeps driving forwards to automatically hit it with the passive hitbox it has, knocking the foe out from behind the car. This makes the throw quite powerful naturally when you’re driving up quick to catch a foe a gangster in front of you has grabbed.
If you do not have any momentum when you use this move, then after throwing the victim under the car the car will drive forwards a tad to get the foe under the rear wheel. The car will then perform the utilt, doing a wheel. The relevant hitbox here is the 20 hits of 1% and flinching dealt from the back wheel the foe’s pinned under. Of course the foe can DI out, but if they DI underneath the car they’ll either get crushed by it when it falls back down or get whizzed past by it when the car zooms forward with the extra momentum, should they DI out quick enough and dodge the crush. Naturally, this means foes can just DI to the right out from underneath the car, which is generally safe, but if you have some wet cement on top of the car it will slide down of it behind the car to block off that area as well! Granted, this is quite a time sensitive set-up, given the cement on the car will harden in 5 seconds, so you have to work for this win-win.
Note that foes do not get knocked out of prone by the flinching hitbox, this is intentional to prevent them from getting re-grabbed.
UP THROW – BACKROOM BRAWL
The gangsters perform the heave ho on the foe up through the window, dealing 6% and vertical knockback that KOs at 160%. After throwing up the foe, the gangsters throw up one of their own up after them into the air at point blank. Control automatically shifts to this gangster after performing the throw, though you can always change back. In this super close aerial combat scenario, nair is largely your fastest move, though you have to follow the foe’s DI so you don’t get much spacing out of it. Dair can drag the foe back down onto the roof of the car, whereas Side Special can drag the foe down to either side of the car. Essentially, this is your main way to get the foe into cement if you can predict how the foe will react in close quarters aerial combat, peppering in an nair and/or an air dodge before going for your move of choice.
DOWN THROW – SLEEPING WITH THE FISHES
The gangsters dip the foe’s feet in cement, waiting a brief moment for it to harden. Rather than just their feet themselves turning to concrete, though, their feet are stuck in a large concrete block as wide as a crouching snake and a Kirby height tall. Once this happens, the gangsters drop the foe out of the car. This gives the foe a mix of the status effects from the fsmash or where you’ve got concrete feet and are stuck to the ground. The foe’s falling speed is increased the same way, but they can’t take knockback, move, or perform feet based attacks. To escape, they must escape the same way when they’re stuck to the ground in concrete with fsmash. The main difference here is the foe –can- move, just not with their ground movement, having to jump around.
Wheeling the car door off-stage/over a pit before using this move is a great way to score some gimps. The foe still –can- use their Up Special to knock you away if you just sit on top of them with the car while simultaneously recovering, though, mind, so the gimp is far from automatic. This throw can also function as a damage racking one, as dtilting the ground next to where the foe’s cement block is sitting will still hit them much like in the fsmash. Just beware of the fact that when the foe busts out of their cement block, it explodes and splatters any cement around the foe a ways away, the foe briefly gaining .25 seconds of invulnerability to prevent potential exploits of dropping them right back into wet cement.
FORWARD THROW – REV UP
The gangsters throw the foe in front of the car for a token 5% and set knockback, placing them directly in front of it. As this happens, Clyde puts the car in reverse and slams on the gas and breaks simultaneously, causing the front wheel to become a hitbox that does 20 hits of 1% and flinching per second. The foe will be too far away from the wheel to be hit by this, but the wheel knocks up dirt over the distance of half a platform, dealing 16 hits of 1% and flinching before the foe ever touches the ground. Foes can DI out of this, to the back very quickly, though it’s possible there could be a gangster waiting to re-grab them there. They can just as easily DI upwards out of it, though, where such a thing isn’t possible.
If the throw is used over wet cement, that will get shot up at the foe instead of dirt. This does no damage, but applies the status effect to the foe. While it’s not immediate like the dthrow, there is a more psychological effect to this version, as it lets you bait the foe towards where you want them to go by not having any wet cement there. The inverse can also apply, as you choose to keep them away from a certain spot. Almost undoubtedly, this spot, whether you want to lure them or keep them away, will be on top of the car.
If this throw is used while the car has momentum, Clyde will slam on the breaks, bringing the car to an abrupt alt. This will cause more dirt to get shot up based off how fast the car was going, enabling you to translate your momentum into direct damage, much like the bthrow. Whereas the bthrow is for killing, the fthrow is for damage. It also increases just how far the dirt gets shot, unimportant unless it’s wet cement, which enables you to spread it about the stage, your only method of moving wet cement already laid out.
FINAL SMASH - CRUSHER
All of the gangsters out attempt to grab the foe with their regular grab, including Clyde. If it was a gangster outside the car who did it, they will gain brief super speed as they come back to the car immediately with the foe. The gangsters will then bound and gag the foe before tossing them into the back as a cutscene plays similar to Captain Falcon’s Final Smash. This cutscene shows the mob driving into a junk yard with the foe in the back, before they drive the vehicle up to a crusher. They get out of the vehicle before a magnet picks up the car, drags them over to the crusher, then drops them in before the foe is crushed for an instant KO. One of the gangsters is randomly selected in this cutscene and does not show up for the meat of it, and shows up with a new car at the end of it that the gangsters get into as a replacement. This unfortunately gets rid of any concrete alterations to the car, but it’s a fairly small price to pay.
PLAYSYLE SUMMARY
While there’s plenty of other factors involved in playing the character slot well, the most important is undoubtedly micromanaging the gangsters properly. You can keep them all in the car to be a super heavyweight that has recovery to match among other various benefits, but leave yourself generally more vulnerable. You can also let most of the gangsters out to maximize offensive potential with a plethora of hitboxes and just have the car use moves that don’t rely on gangsters, like utilt, fair, and bair. Of course, the ideal is a balance, with around 3 gangsters out at a time. You’ll want 2 gangsters on offense, as having only one generally makes them too easy to pick off, with a defensive one on top of the car. Definitely something of a guideline, but it’s one of the safer strategies.
As far as set-up with concrete, you don’t have to dedicate quite as much time to it as you’d think. A sole defensive gangster on the car can take care of most of it, setting up patches of cement on top of the car and sticking on blowtorches. As far as crowbars, ideally you can just have the defensive gangster spam ftilt when the foe shows up to get a nice dented crowbar. If you want one faster, though, you can have the offensive gangsters spam ftilt, then have them swap roles with the defensive gangster.
If the match-up you’re in is comfortable enough to allow for more set-up than that, the main thing you probably want to look into for further set-up is flipping over and sticking some crap to the underside of the car. You can certainly get some mileage out of terraforming concrete on the actual ground to make a hole in the stage, but this is largely reserved for only when you’re at your most defensive in a match-up. Having to deal with wet cement on the actual stage can prove annoying, it generally being preferable to just place it on top of/under the car so you don’t have to worry about it, though you certainly have your methods of dealing with it otherwise.
You constantly have to keep swapping around gangsters as they get more heavily damaged. While the car probably will be around for a long time to come, foes will generally make progress by killing off gangsters, vastly decreasing your offensive potential, versatility, and perhaps most importantly recovery. All the weight in the world will do little to help when you can be poked off-stage to your death. While foes will grab a random gangster when they use a grab hitbox on the gangsters in the car, do note that when you use Down Special to manually let a gangster out the least damaged gangster will be the one chosen, if applicable. Setting up blowtorches can serve as substitutes for the gangsters as extraneous hitboxes, but they too can be destroyed.
The outside gangsters’ purpose largely fluctuates back and forth from defending the gangsters in the car, something typically done early during set-up, to functioning as extra hitboxes to briefly flinch the foe while the car goes for a big hit. Said “big hit” is almost always either ramming them with your momentum or dropping down on them from above. In the case of momentum, grabbing the foe with the outside gangster can not only guarantee the hit, but transfer the momentum into use with a fthrow or bthrow. A decent transition from the first state to the second is camping from on high with usmash, before dropping down on the foe as they get close to finally making it up to you.
This playstyle summary paints how the mob play in more general terms, but despite being a vehicle set the mob are very non-committal to a specific playstyle and like to keep their options open for a multitude of match-ups. Hell, they can go through crap like moving stages a lot better than most regular MYM sets with their surprisingly varied options for movement, and letting gangsters out of the car to do anything that the car can’t. More importantly, they drag their “traps” with them on their body, so nothing is lost along the way.
BLOOPERS
UP THROW - SCUFFLE
The gangsters perform the heave ho on the foe up through the window, dealing 6% and vertical knockback that KOs at 160%. After throwing up the foe, the gangsters throw up one of their own up after them. Pressing the A button during this time will cause one more gangster to be thrown up after the foe for each press of A, potentially using up all of the gangsters besides Clyde, who has nobody to throw him after the foe.
With a single gangster being thrown at the foe, the gangster and foe become enveloped in a cartoon dust cloud the size of Bowser, with limbs and such of the characters involved poking out every so often. For each additional gangster thrown into the cloud, the size of the cloud increases by 1.25X to a max of 2.25X Bowser’s size. Anyone who comes into contact with the cloud outside of the car will get absorbed into the scuffle. With just one gangster and the foe inside the cloud, the foe has control of the cloud’s movement speed, able to move it at Ganon’s walking speed. With two gangsters, the cloud no longer moves at all. With three, -you- now have control of it at Ganon’s walk speed. Every gangster after that increases the speed by Ganon’s walk. To move around the dust cloud, you simply have to select a gangster inside the cloud with your shield selection system, with you still being able to go back to the car/other gangsters if you so choose.
Everyone inside the cloud, including gangsters, takes 1% per half second X the amount of characters involved in the scuffle. So 2% at minimum, 7% at maximum in 1v1. Any projectiles that go into the scuffle will damage everyone inside, while hitting them with a non projectile move as the car will hit everyone, end the scuffle, and deal the knockback to everyone but in a random direction out from the cloud. Obviously grabs do nothing to the cloud.
Foes involved must button mash to escape. For every grab escape difficulty the foe button mashes out of, a random character that is –not- them will get knocked out of the scuffle, getting dealt 15% and knockback that KOs at 120%. If you are controlling that particular character, the direction you are currently holding on the control stick will be the way you are knocked out. Yes, at low percentages the gangsters can just run back in to keep the foe inside the cloud for longer, though you have to keep in mind this not only is quite suicidal for the gangsters in general, but their very light weight. Foes escape the dust cloud once they have knocked every gangster away from them. Note that after knocking 3 gangsters away, though, there is 10% chance that the foe will knock themselves out of the scuffle, which increases by 10% again for each further character they knock out.
Note if you want to end the throw, you can take control of a gangster and have them button mash to “grab escape”, in which case the foe will get tossed out. If there’s nothing but gangsters left in the cloud, they won’t stop fighting, giving you a rather threatening (Though self damaging) potential trap to work with.
As far as throw applications, the fact the foe is knocked upwards makes it easiest to just use it to DI into wet cement on the car/the side of the car, bringing foes into a hole in the stage due out with concrete/dtilt, and other such spacing. While more general, this also works for extremely quick damage racking in the early game, even if it means you will be taking heaps of damage in return. You don’t –have- to have the gangsters keep running into the foe, though, so when they’re in danger of dying from getting knocked out of the cloud you just have them spam jab at the foe before getting back in the car and just being more protective of the gangsters in the car.
Yes, when camping is detrimental, you've been forced to approach. But if you're a camper, chances are that you need that camping, you need that control and that zoning, and you can't throw that away regardless of what happens because Croagunk would just murder them if they tried to play the close-range game that he wants. The meta-game is about understanding what the opponent wants and playing counter to that.
In fact, there's no reason for Croagunk to even want to be at range against a camper. He'll approach, then he'll maintain that closed distance to lock them out of their camping, the poison wouldn't have anything to do with that. The only playstyle poison actually harms, are those who need to play in close range and have no options when Croagunk poisons them and runs away.
I'm not saying Croagunk doesn't work, but I am saying it's not working in the way you explicitly claim throughout the moveset.
It is entirely possible that the playstyle is misconstrued, though I remain unconvinced that it does not necessarily work at least somewhat how I intended, though disagreement is encouraged, as I do quite enjoy seeing some deep thought on it.
I love Wacky Races, but I don't really like the Ant Hill Mob. However, I'm not a ****, so I decided to read the set anyway. And Holy Cow does I like it!
The Down B is really an high-risk high-reward move: while having gangsters around is very important and crucial for victory, it's also pretty dangerous, so of course, it must be rewarding. And with it's crazy normals and smashes, they can easily flood the stage with cement, blowtorches, cemented blowtorches, blowtorched cement and cemented crowbars, making the fight a kind of... turret hell? Once the turrets are set, the mob can just go back to the car, or stay on stage, safely protected by cement walls and flames. While the terraforming and the stances are not as needed as the other moves, they still are very nice features. While I was a bit tired by the end of the moveset (blame my lack of sleep), the aerials and grabs looked cool too ("Let's kidnap that big turtle, shmucks!").
It already is one of my favorite movesets, and you can be sure I'm gonna vote for you.
The time has come for the final phase of the first Challenge Mini, and we have 2 entrants remaining! Seeing as they are the only two who got in their week 4 submissions, we will be skipping right to the final part.
Each contestant will finish their sets and incorporate Shield Specials as stated by UserShadow. Once completed, the COMMUNITY will vote on who created the best set! As stated, the winner will get their pick of custom avatar, custom award on their avatar, or custom signature by your's truly.
Things to look out for from voters:
Who used their defensive mechanic best?
Who used the community mechanic best?
Who had the cooler shield specials?
Which set had better overall ideas given the character?
While we wait on the final part of last contest's challenge mini, lets get cracking on the new one!
To recap, a Challenge Mini is a weekly Mini event that builds upon itself with each iteration. At the due date of each part, I will collect the entries together and judge them similarly to the rankings various people have done. Judging will be based on things such as creativity, balance, practicality, etc, and each week the submissions will be averaged to create each entrant’s overall score. At the end of the process, the top (two) entries will be put up for the community to vote upon, with the winner receiving glory and a custom avatar/signature from me!
Now, for the premise of the 2nd challenge mini:
CASUAL COMPETITION
This time around we will be trying the impossible: merging the competitive and casual aspects of smash! The goal is simple, taking the aspects usually seen as non-competitive or "just for fluff" and putting a unique spin on them to incorporate into every level of play equally, as well as provide learning tools for players wishing to advance their game. Each week will be building up a new metagame!
WEEK 1:
ITEMS
This week you are not only tasked with creating a new item, but changing how items behave when they appear!
The rules are:
Your item must either be neutral, or cater to certain character archetypes with explanation of how they help.
Your item must not do too much to the characters using/being effected such as what happens with Starman / Spicy Curry, etc. Aim for things like the Home Run bat.
Even better, your item should play off the character! Lord Magnemite won't use a held item the same way as the Ant Hill Mob for example.
Speaking of MYM sets, try using the cast of MYM14 for examples!
As for the latter portion, the main issue with item play in high level smash is how they spawn randomly on the stage. There is no set timer, no particular area, no nothing determining when that Bob-omb will fall in front of your Fsmash, or that starman lands on the opponent you were going after.
Think of ways either through the item menu or by revamping the way the items spawn altogether to alleviate this issue!
Loosely inspired by Gradius and scrolling shoot'em ups of similar standing, the Orbiting Option spawns as a brightly colored sphere roughly the size of a Pokeball that floats slightly off the ground. Once someone picks it up, the item orbits around their hurtbox at the speed of Ganondorf's walk, producing an effect depending on what color it was. The option lasts for 10 seconds or until it suffers 15% damage.
Red: Turret Option. Fires a single shot with the qualities of Falco's Neutral B laser at the nearest foe once every second.
Blue: Shield Option. A blue barrier wraps around the Option once it activates, reflecting enemy projectiles and clashing with melee attacks that deal 10% or less damage.
Green: Guard Dog Option. Sparks with electricity, dealing 5% damage and light knockback on contact.
Purple: Cannon Option. Similar to the Turret Option, this takes after the laser generated by Wolf's Neutral B, activating whenever the user attacks (maximum rate of fire being once every 3/4ths a second). Disappears after 10 shots are fired or the normal conditions are fulfilled.
Item Mechanic Change: Smash Deployment Unit
The possibility of a bomb-omb spawning in the path of your smash attack or a starman landing on a foe when you had them on the ropes without any warning or means with which to prevent it from happening is what keeps items out of the competitive circuit. No matter how you work the item switch, there's always the chance of a booby-trapped crate getting in your way at the least, not to mention the imbalance of certain characters' Final Smash moves or speed allowing them to better snatch away items from opponents who prefer a slow but steady character.
At the same time, items are loved on the casual side of things. The constant chaos and changes to the match is one of the big draws to Super Smash Bros, among other things, and many feel that the game rings empty without them. Indeed, the item system adds a whole dimension to the combat that simply isn't present in more traditional 2d fighters. Removing this system isn't the answer. Instead, why not offer players a little control? With this option on, items no longer randomly appear anywhere on the stage without warning.
From either edge of the screen, in the air above the fighters, a small, flying contraption bearing a yellow and black color scheme floats above the fray (always a minimum of 2 Stage Builder Blocks above the highest elevated fighter, and a minimum 2 SBBs away from all fighters, if possible). A spinning ring near its top, below a set of helicopter-like rotors that keep it airborne, shines colored lights in the area around it, granting the players forewarning of its approach even when it is off screen.
Its bottom half is a glass sphere with sections of it colored to create the smash logo, contained in which is a slowly, horizontally rotating reel with pictures of various items. How it works is simple. The bizarre device- named the Smash Deployment Unit- moves from one side of the screen to the other at the rate of Ganondorf's run. Its exact movement pattern tends to vary, but it is always slow and predictable enough that gauging its position is only difficult when splitting your attention between it and your opponents. Like the statues on the Castle Siege stage, players can move past it without harm, and attacks that pass in front of it damage it without stopping the attacks themselves.
The lights shining from it are one of three colors: green, yellow, or red, starting with Green. Every two seconds, or when the device is hit by an attack, the light changes color- from green to yellow, and from yellow to red. When it reaches red, the reel stops on an image of a certain item. After the device is struck again or two more seconds pass, the glass ball opens with a fanfare, dropping the item chosen by the reel. The SDU halts its horizontal movement and quickly ascends off stage and out of the way of any fighters.
With this set up, players not only receive forewarning to an item's appearance and can adjust accordingly, they even have some say in what item drops, when, and where. Dropping an item early to get the kind you want or deny the foe an item they desperately need, or focusing on the fight and letting it produce something useless or drop a handy item close to you, it forces players to adapt without ever blindsiding them unfairly. The one exception to this mechanic is Smash Balls. The coveted item appears and acts normally, highlighting its uniqueness among the other items of the game.
The complete version of Marin will be up by the deadline.
There isno set timer, no particular area, nonothing determining when that Bob-omb will fall in front of your Fsmash, or that starman lands on the opponent you were going after.
Yes there is, it's called the items menu. Turn off bob-ombs and starmen if you don't like them appearing. Also try using the low and high settings on item appearances. Or did you forget that exists?
Crowbar
The Crowbar is a battering weapon. It has about the same properties of a normal Beam Sword (range, speed) but deals 7% damage. If you hit a trap or item with it, it will instantly break it, rendering it obsolete. It can be used up to seven times before disappearing. This also counts for hits. If used on a character with a special mechanic, that special mechanic will be rendered inoperable for seven seconds, however this can only happen once- it disappears after doing so. It's a magic crowbar, I aint gotta explain ****.
Notes:
Mace Windu and similar weapon-wielders hold the Crowbar in their free hand, much like characters with swords already do in Brawl. It enables double strike versions of their melee moves.
It is unable to be thrown away like a normal item when Lord Magnemite uses it. Poor magnetism. He'll have to smack it on something until it 8r8ks. I mean breaks.
Hammer Bro tosses it in an arc if he throws it.
The Ant Hill Mob, and similar crime-themed characters, can get an extra use out of it, due to extensive handling and knowledge of this tool.
New Capsule
This new version of the Capsule is a slightly more balanced alternative to the item spawn system. Instead of the active items simply appearing on the stage, capsules will spawn. They are throwable items that you can carry around with you. In fact, they're only activated by throwing. Once it hits something, the capsule opens and deposits the item. It could be any item. Shielding negates the capsule from opening, bouncing it harmlessly off you, if an opponent uses it against you as a projectile. This prevents evil explosives from doing you in. You then can throw it to claim the item for yourself. Throwing it at the ground would be the simplest way to get the item you seek. Be warned that you yourself may fall victim to a random explosion chance if it opens! But that's the risk and reward of using the item. You can always just toss it off-stage if you're a scaredy cat.
This handy little throwing item is just the ticket for anyone (everyone) who enjoys throwing a spanner into the opponent's spacing. It shatters on contact with the ground or object (or person), releasing a purple swirling gas into the area. This small pocket of smoke isn't harmful to touch or breathe, but it does have the funny side effect of being a localised black hole. Not a very strong one, btw, but it'll get the job done. The gas slowly attracts everything within 1.3 battlefield platforms of where it lies. It does so for the entirety of its 5 second lifespan.
As previously noted however, the pull of this black hole is fairly weak, anyone can run away from it with only a minor dashing speed penalty to show for it. Still, even a slight pull in the wrong direction at the wrong time can spell disaster for characters who rely on quick movements and precise spacing. The gas affects the player who threw the vial, less than it does anything else
If a vial thrown into an opponent, the opponent takes 12% damage and light backwards knockback. The gas also forms around that foe, and follows them about, meaning that the opponent becomes the host of a little black hole for 5 seconds. It won't affect them directly, but having things dragged towards them, like projectiles or other opponents, can be pretty harrowing. Don't underestimate the usefulness of having all your projectiles home in on the foe.
Another, less obvious effect of the gas is that certain items will be more likely to "target" things around or in that gas (For example, getting Lyn from an Assist Trophy will make her target whomever is closest to the gas, Latias/Latios will occasionally pass directly through the gas on one of their attack runs, etc). This has obvious implications if the gas happens to be following an opponent you smashed the vial on...
Item Mechanic: Set Seeds:
Solving the random item-issue is a terrifying task in marrying two entirely different types of player together. It comes with the unfortunate implication (and bias) of changing the system radically in order to acommodate/reward the victory-driven player, whilst punishing the less skilled player who just wants to have fun. Considering the main purpose (and primary demographic) of items, making a huge change to the random system is an untennable solution.
The ultimate goal is to not change a single thing from the casual player's perspective, so that their games still play as chaotically and dynamically as they did before. A secondary goal is to make sure that the changes effected will not grant a competitive player any more of an edge in a casual match. Thirdly, the system used should be the same for both casual and competitive players alike (I.E. no "Competitive Items" Option in the menu). With these three goals in mind...
Here's how we do this. We're going to modify how the seeds (which determine exactly what "random" numbers are given whenever they're needed) are generated. Usually, a seed is generated based on things such as date/time, or length of time since powering on the device. This makes it virtually impossible to game the system into generating the same seed (and thus the same random numbers) twice in a row.
For a casual match, this is ideal, preventing the same items from spawning at the same times in two different matches. But for a more competitive mindset, not being able to replicate the specific conditions for a match is problematic, and not in keeping with the general state of 'competitiveness'.
The solution is somewhat complicated, yet ultimately is the simplest of changes.
We will change the manner in which seeds are generated, shifting it away from timer values that cannot be replicated easily, and making them reliant on match settings instead, which can be replicated easily.
The following values will be used within an equation that spits out our random seed that determines when and where items appear in a match;
1) The Stage being used for the match
2) The Time Limit of the match (if applicable)
3) The Stock Limit of the match (if applicable)
4) The "Speed Rating" of each combatant in the match. A Speed Rating is simply a value estimating how effectively each character can move from point A to point B. This value takes into account things such as teleporting abilities. Summon and Trap characters have higher Speed Ratings than they'd normally have otherwise, due to being able to control areas of the stage for themselves.
What this boils down to, is that if you play two matches on the same stage with the same characters with the same ruleset, you will get the same item spawning pattern*. Because of this, competitive players can learn the item patterns that occur in matches they're likely to end up playing, such as when the opponent counterpicks a character and a stage. However, because of the sheer number of character/stage combinations, the entire system cannot be completely learned by one person, and thus it cannot be "solved" and stale as a meta-game.
*It's important to note that items will not spawn in the EXACT same places in both matches, because the positions of the combatants is a factor in determining where the item spawns. For example, if the match is set to spawn something near the loser, then it will do so regardless of where the loser happens to be situated, just so long as there is an area nearby that supports items (i.e. a platform or some ground).
So now every single matchup/stage combination has its own set item spawns that appear to be random but really aren't. Casual players are unlikely to stumble across this, and competitive players cannot actively manipulate this to gain an unfair advantage in a casual FFA.
But we're not quite done yet, while the players can now figure out WHEN and WHERE an item appears, the item itself is still a mystery.
For the seed that determines WHAT items appear, we will use the following values in the seed equation;
1) The Stage being used for the match
2) The Time Limit of the match (if applicable)
3) The Stock Limit of the match (if applicable)
4) The "Speed Rating" of each combatant in the match.
5) The number of matches that have been played since last time the rules were altered or the player exited out to the main menu. Simply flicking one setting to a different value and then moving it back will count for this, so tournaments can reset this value without leaving the character select screen.
What this means, is that even if you play the exact same match twice, the items themselves will be different the second time. This is neccessary to prevent a casual rematch from producing the exact same items. Tournaments can decide for themselves whether or not to reset the 'No of Matches' counter after every match, or after every set of matches (i.e. "best of 3" matches).
So yeah, that's my idea. It's not very exciting to read, it doesn't change the surface gameplay at all, but it solves the problem, whilst also giving competitive players a whole new branch to their meta-games. It also happens to be simple, pragmatic and somewhat realistic.
Item Mechanic: Thoughtful spawning: [Do not count this as an entry, or part of an entry for this week's MYmini]
I thought it would be unfair to bundle this in with the Set Seed mechanic, because this mechanic is a tweak to the manner in which items actually spawn.
In the explanation for the "Set Seed" Mechanic, you may have noticed that the game has a Speed Rating associated with each character. It refers to how easily a character is expected to be able to collect items, and thus how far away an item should spawn in order for it to be "fair". These values are used as weighting factors in order to shift spawning items towards players who would have the most trouble getting the item. The effects of these factors are slight, but they do make a difference.
Another somewhat obvious alteration to the spawning mechanics is that items are generally forbidden from spawning within a certain range of any player. Items that activate/explode when struck will also be intangible for a short period of time after spawning
The Skateboard is an item to be jumped upon: A is pressed, the character will pick it up and immediately hop on anyway. The skateboard immediately reduces all traction to 0.5 when attempting to stop, though characters can surprisingly turn on a dime without losing any speed. All speed is increased (or decreased) to a 9, as well, which they build up to in less than a second. While on the skateboard, characters can preform all attacks, but preform them while moving. So, you can start moving from one side of the stage while charging your smash, and be able to still approach while charging! Vehicle of large characters get comically over-sized skateboards, while multi-character sets just put the player controlled character onto it. Jumping is set at a 5/10 for the first jump, with the second jump jumping of of the skateboard, making it disappear.
Newfangled Item Thingy: Item Boxes
Yeah, you know! That thing in every game ever? Basically, these things replace the boxes and capsules, showing up on the ground of the stage. Instead of items randomly appearing, they show up in this, with a cute little picture to show what it is! Luckily, this feature can be toggled on or off in the item menu, so smashers can still have their random bob-omb-in-front-of-forward-smash-that-cost-you-your-match-and-ruined-your-reputation-amongst-your-friends fun!
They aren't even super simple to open, requiring a DOWNWARDS TILT to be used specifically! That way, if an item shows up, it doesn't linger on stage or really interrupt the match much, as they disappear within 10 seconds. The items that show up inside of these can be controlled via the items menu.
CROAGUNK
The consensus on Croagunk thus far appears to be solidly positive, which, for the most part, I’m happy to echo. His pitiful weight is offset by his solid offensive properties, bolstered by his relentless stacking of poison to keep characters in his face. Once there, the option of baiting them into Revenge or an F-Tilt so as to keep victims on a slippery slope toward their eventual KO at a high percent is a compelling one as well. A more subtle aspect of the set of which I am a fan are Croagunk’s more subtle follow-up options, such as his crouch-jumping enabling him to follow opponents up into the air, while he can follow behind his F-Smash projectile to creep up on and overwhelm opponents. Admittedly, a handful of attacks come across as filler and reliant on being pieced into straightforward combos to make much of an impact. The set flows together well enough for the most part to give this a pass, of course, and I’m guessing it will certainly stick in minds due to its own merits, in addition to being the contest’s first set.
TOMOE MAMI
Mami’s best features are cut from the same cloth as those of Croagunk in that they are relatively simple, yet bring a handful of intriguing new possibilities to the playstyle’s forefront. Seriously, I can’t recall any other set that has made explicit reference to glide tossing, let alone one that has the technique incorporated into its strategies. Her methods for spawning items, with and without ammunition, and uses for both types of weapons also solidifies the ZSS parallels while beefing her playstyle up with their sheer versatility. Perhaps most refreshing of all is the playstyle format; it’s quite astute of you to recognize that flatly stating what Mami can do would be far less interesting than more reflectively informing readers ‘why.’ That, along with her superb reeling grab, is reason enough for new and old MYMers alike to look back to Mami, ready to be inspired by her concealed depth.
Because Nintendo loves his NES accessories, here is the Power Glove! It's function is quite simple and awesome: any projectile you fire will be controllable, in any direction! With the Power Glove, characters like Jinbe or the Gruesome Coupee will certainly get a lot stronger!
Nah, I'm just kidding. It's as crappy as you expect, the controlled projectiles moving like a drugged QWOP, randomly moving backward, in the Z-Space, on the ground... They are actively working to avoid the opponent at all costs, hitting only if the opponent pity you and throw himself in the attack. The Power Glove is a demonic item, destroying any chance of winning you might have; because since it's really crappy, your character will take 20 seconds to remove it. Yup, only a twisted mind could come up with that apocalyptic item. (Alternatively if you're playing Marth then it's just an ugly glove)
Item Mechanic: Crowd Appeal
Ah, the audience. Such an heartwarming presence, cheering for you, being your most loyal supporters no matter what... Now they don't help you that much in the actual match. Let's change that, shall we?
Now getting your supporters to cheer for you is an important part of the gameplay. You see, a fanbase must be taken care of, lest it stops being, well, a fanbase. You will gain their approval by perfoming cool moves and combos, that is to say, perform the flashier juggle ever throwing everything you've got into the battle, be it grabs, specials, normals or smashes. Of course, a successful Final Smash will send their enthousiasm up the roof. Now, if you were awesome enough, then they are probably cheering for you. To receive your item, you only need to perform a taunt, proving you don't fear the opponent a single bit. They will then throw an item on-stage: a SuperScope if you're away from a camper, a Light Saber if you're a bare-handed guy going against a swordsman... Every item is given for a specific situation, to allow you to kill your opponent by defying them on their own ground thus proving you are the king of the brawl.
Now of course, you can also disappoint your supporters, by spamming the same move over and over and doing practical but boring combos. (However, you don't lose approval when you get comboed, only when you lose a stock) After a while, they will start booing you, and shortly thereafter throw tomatoes at you. Don't worry, it's only cosmetic but it's still a warning.A warning for what? Well... If they really dislike you... They will throw the dreaded Power Glove at you. It is inescapable, serving as the punishment for your betrayal. Man, do they hate you now... After the mandatory 20 seconds, you will gain a new fanbase out of nowhere, resetting the approval meter.
How does this change both casual and competitive play? For the casual players, it creates an even more frantic atmosphere, while it forces the competitive players to show off; this enforces awesome and flashy combos over practical and boring combos. Camping is still okay, but you will need to mix up projectiles and strategies, just hiding in a corner shooting your blaster at incoming fighters decreasing your popularity.
To put messages in a spoiler, you simply insert them between a collapse tag. You can also add a title onto the spoiler by adding collapse=___ and somewhere where the empty space after the plus sign should be. No brackets in this post because otherwise it'd create a real collapse tag, like this
It looks like an ordinary basketball, but is actually a b-ball. It's a typical throwing item that deals a little less than you're used to, but unlike every single other freaking item in Brawl it will actually bounce off anything it hits! (with the proper laws of physics might I add) This allows for combos and slick damage racking if you've got good tech'ing skills, but one mistake and it'll go out-of-bounds, which is not good at all. Another thing is that the b-ball helps channel the user's inner b-ball energies, mildly increasing their jump height and aerial speed while reducing their fall speed, meaning you might want to keep it on you to compliment your aerial game before actually throwing it.
The b-ball also makes your character awesome if they already weren't, and makes awesome characters even more awesome. Enjoy.[/collapse]
[collapse=Item Mechanic: Item Battle]Every player gets to choose an item to spawn with at the start of each stock providing multiple copies of it can exist at the same time, even if it's a transformation item in which case they start out with all its effects, though Starman's invincibility only lasts for half as long to prevent other transformation items like Super Mushroom form being invalidated. This not only allows the players control of items but also adds an extra layer of strategy to the game: will you get 7.5 seconds of free invincibility with Starman to set-up those traps without disruption, or go for something more lasting like the deadly Homerun Bat? You can even assign up to 3 items to cycle between with each stock! Casuals don't have to worry their pretty little heads over other items not appearing in the match either, because Item Battle is entirely independent from the Item Menu, meaning you can make those items the only ones that appear in the match or just the ones players start off with. You can even choose to not start with an item if you're particularly cocky or just want to give that Ganon player a handicap. [/collapse]
Special MYmini MYmini ɸ Project Pokemon Trainer [Start of MYM - End of MYM15]
Pokemon movesets (pokesets) have always been a core aspect of MakeYourMove, with literally hundreds of the little blighters being given movesets. Almost everyone who is anyone knows Pokemon, and almost every MYMer has tried their hand at making a Pokeset at some point.
Occasionally forgotten is their bigger brother; the Pokemon Trainer movesets. Trainers usually tie more than one pokemon moveset together, much like how Brawl's Pokemon Trainer uses Squirtle/Ivysaur/Charizard, with the player switching between them on the fly. Many exceptions exist, with some Pokemon Trainers joining the fight themselves, but all Pokemon Trainer movesets share the common theme of 'Teamwork'
That brings us to this MYM's "Special MYmini"; create a Pokemon Trainer moveset. The only hard rule is that the trainer needs to use at least one pokemon in fights, otherwise they're not really a Pokemon Trainer, right?
Every Pokemon Trainer moveset we already have has been included retroactively in this MYmini, so you'll be in good company. If you're still not sure what kind of moveset you're supposed to make in order to be part of this MYmini, go ahead and read up on some of our past Trainer movesets.
The Magic Carpet spawns on the floor, two thirds as wide as a Battlefield Platform. You cannot pick up the item, so to activate it you must simply land on it, the carpet functioning as a drop-through platform. Once somebody has claimed ownership of the carpet, other characters landing on it will not interfere at all. While standing on a carpet, you can move in any direction at all at a 6/10 dashing speed while still being able to attack. This lets you use ground attacks in the air, and while earthshaking effects will work on the carpet you cannot terraform/place things inside of it/pitfall enemies in it. Because of this, you cannot use your dashing attack while on the carpet, as your character stands in place while you control the carpet's movement. To get off the carpet, simply use your first jump.
The carpet will actively avoid other characters once it has an owner but the owner has left it, though it is still possible to land on it if you want to for whatever reason. If you own a carpet but are not on it, pressing Up Special will cause it to rush underneath your feet at a 8.5/10 dashing speed. If you want access to your regular Up Special, you just need to double tap it. The carpet lasts for 16 seconds.
Item Roulette
All items that spawn are now done via a roulette box the size of a crate. Once they spawn, a picture of an item shows up on it, but it will quickly scroll through several different items randomly chosen. The full loop of items is 15 items long, with almost always there being some duplicates of more common items in the mix. Hitting the roulette box with any attack will cause it be destroyed, releasing the item that was currently on the face of the box at the time. At first, the roulette scrolls so quickly that it's impossible to choose a particular item you want, you just having to burst it open to choose randomly. As it gets slower, though, it becomes more and more possible to actively choose an item. There is certainly a means to the madness, here, but if somebody else doesn't want you waiting to actively choose an item, they can just rampage into the box and make it just be something random entirely, probably aiming to attack you more than the box, what with the nature of FFA.
The Item Switch is now altered to be based off likelihood of items showing up in the roulette, with you editing the exact percentages. You can of course still turn down particular items to 0% to turn them "off".
The Wonder Launcher is a crazy new item available for use in Brawl. A device that generates and shoots items at will, it adds a layer of hecticness no other item does, able to summon any other item in the game (sans another Wonder Launcher or Smash Ball)
It is picked up and aimed like a Cracker Launcher, but you can actually charge it up, with the screen changing colors to show different levels of charge. It shoots mostly meek items at Green level, smoke balls, food, maybe a banana peel or fire flower, that sort of thing. At yellow, it starts to produce more dangerous items, like beam swords and green shells and freezies and hot heads. Red starts to shoot super scopes, home run bats, live bob-ombs and smart bombs, yikes! You can charge it up, half a second to yellow and a full second to red. Once it hits red though, it starts rapidly cycling through each level after lingering on red for only half a second.
Where to aim it is a difficult question. You might be able to KO opponents with powerful items flung their way, but you might also give them a powerful item like a home run bat to use against you! You could aim low to the ground so you can pick up items, but it might backfire as well. And the different levels of charge are more 'guidelines' than hard and fast rules. Occasionally you might shoot out an explosive crate from your green charged Wonder Launcher... that'll be a surprise for everyone!
Point Purchase
In fitting with the actual goal of making items more usable in matches, Point Purchase is a new available game mode that can be played, like stock or coin matches. Players earn points that are totaled at the bottom of their character icon over the course of a match: earning them by dealing damage, taking damage, shielding attacks, getting KOs, taunting, or some of the other silly elements that were in score matches back in Melee. Points stale just like moves do, so doing the same thing too much decreases how many points you earn.
For players though, before the match starts they can map an item to each of their taunts. Each item costs a different amount of points based on how powerful it is. If you have enough points to purchase the item, you can summon it instead of taunting, paying the points required. The animation takes a half of a second, so it isn't instantaneous, but still quite useful. Very powerful items like hammers are summoned on a stand that takes a couple more seconds to unlock, and either player can grab it once it does, so be careful!
On top of this though, each character has a few of their own SIGNATURE ITEMS that they can purchase at a greatly discounted rate. Mario for instance can buy a Fire Flower at almost no cost, giving him a decent item that he can use regularly through the match, completely changing his playstyle! With Samus, you can grab the Screw Attack, making her air game more complex and giving her new defensive options! With Point Purchase, your character's style is customizable, and you can create all sorts of crazy new tactics.
Give Bowser a discounted Green Shell, and open up new approach and ranged combat opportunities for the King of the Kupas. He can use several in a stock, so don't be stingy. Or maybe instead you'd prefer to get the metal box, and wait up for the right opportunity to take your power to the next level!
Give ROB a Super Scope! He should be able to unlock it right before KOing the opponent thanks to his discount, and combine a charged shot with a charged Neutral Special to create a combo of projectiles to finish off the opponent!
Give Donkey Kong crates! Use his ability to pick up large items to give him new depth when fighting projectile characters and controlling space!
Give Ganondorf banana peels! Watch as the wake-up game with his Side Special becomes even more sadistic as you follow up trip after knockdown after trip!
Frustrated by an opponent camping you with projectiles? Counterpick with a Franklin Badge, or a Ray Gun and bring the fight back to them!
Go full stage control as Snake! Grab a motion sensor bomb, pitfall trap, and smoke ball, and litter the stage with more traps than most MYM characters, and make it impossible to see where you put them all
Pick a Poison Mushroom! Watch it slide ahead of you and plan your approach accordingly!
Struggling with KOs as Kirby? Discounted Dragoon parts mean you can create a whole new gameplan. Get all three and finish the opponent off with style!
Use cheap springs as Sonic for a useful throwable item? Or save up and plant a bumper later in the match for the perfect opportunity? Weigh your points carefully...
Will you pick a powerful, expensive item! Or prefer to use multiple weaker ones! It's up to you to experiment and play around, until you get a character and item combination that fits your playstyle as you see it. Just keep in mind what your opponent is planning too. They can buy items too, y'know.
[collapse="Item: Eggplant Staff"]
This shooter item holds the powers of the Eggplant Wizard. When you pick it up you become... an eggplant person, complete with a new moveset. The staff has 5 shots in it. Using the staff shoots a magical blast that can turn other characters into eggplant people! The transformation lasts for 6 seconds, plus two extra seconds for each additional blast of the staff. The holder of the staff stays an eggplant person for 4 seconds after dropping or otherwise loosing the staff.
[/collapse]
[collapse="Item Mechanic: Enemy Interference"]
With this option turned on, enemies join the brawl! Every 20 seconds, one enemy will spawn for each contestant. Enemies depend on the stage, so goombas will only appear in Mario series stages, for instance. Although subspace emissary enemies can appear in any stage. If an enemy is defeated before it decides to leave, it'll drop an item. Enemies will have a better chance of dropping items related to their own series. Sometimes, instead of regular enemies spawning, you'll get one miniboss. Minibosses are of course tougher than regular enemies, and when defeated will drop better items. So if you want a heart container, you'll have to defeat a darknut.
[/collapse]


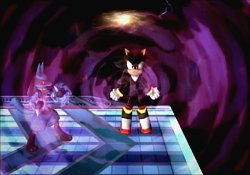


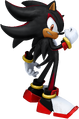
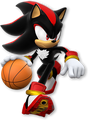


")

 [/COLLAPSE]