Crescent Valley : Bayonetta Data & Research Repository
Recommended: Wait several seconds before attempting to scroll down a lot; the page needs to load a lot of spoilers.
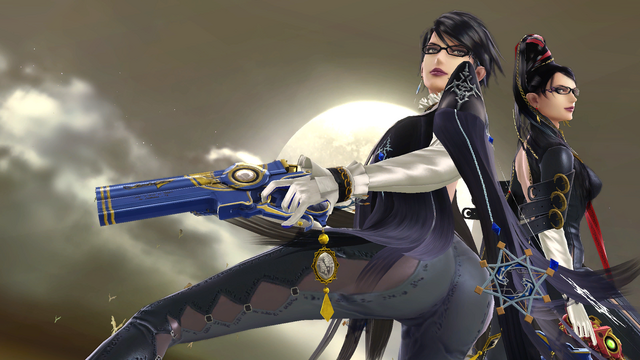
Welcome to Crescent Valley! This is the place for all things data regarding Bayonetta. Here you can find just about all of the raw data on any of her hit-boxes, as well as her frame data, and a few bonuses. All displayed in a clean format for your viewing pleasure.

If you'd like to see what I hope to have accomplished in this thread, you can check out my thread for Zelda.
I'll also be getting a better picture for the top down the line of course~
Recommended: Wait several seconds before attempting to scroll down a lot; the page needs to load a lot of spoilers.
Welcome to Crescent Valley! This is the place for all things data regarding Bayonetta. Here you can find just about all of the raw data on any of her hit-boxes, as well as her frame data, and a few bonuses. All displayed in a clean format for your viewing pleasure.
If you'd like to see what I hope to have accomplished in this thread, you can check out my thread for Zelda.
I'll also be getting a better picture for the top down the line of course~
~ Information ~
Bayonetta's Statistics Table (Run & Fall Speeds, Weight, etc.)
Maximum Jumps|2|--
Wall Jump|YES|--
Wall Cling|YES|--
Tether|NO|--
Crawl|NO|--
Walk Speed |0.9|45th
Run Speed |1.6|28th
Jumpsquat |4 frames|--
Soft Landing|2 frames|--
Hard Landing|4 frames|--
SH Air Time|38 frames|--
FH Air Time|54 frames|--
Weight |84|45th
Air Speed |0.97|36th
Fall Speed |1.77|9th
Fast Fall Speed |2.832|9th
Air Acceleration |0.085|--
Gravity |0.12|--
What do each of the terms in the "BnB Data Table" mean?
Move Name |The move's name. Most names given are hopefully going to be directly from Bayonetta's games, or heavily inspired by attacks from Bayonetta 1 & 2.
Hit-Frames |The frame window(s) when a hit-box is active.
FAF |First Actionable Frame. This is the first frame upon which you can execute another action.
Damage |The base damage(s) the move deals.
Hit-Angle |The knock-back trajectory of the hit-box. Note the unique trajectory types of the Sakurai Angle , and the Auto-Link Angle .
Clank? |Whether or not the move will "clank" with other moves that can clank. If a move cannot clank it has transcending priority . An asterisk next to "yes" denotes that while the move will interact with other clankable moves, the animation will not be interrupted by the rebounding animation.
KO Potential |A rough number to estimate KO timings around, used by taking Mario's earliest percent on an omega stage at which he was KO'ed by the move even with correct survival DI or Vectoring. The heaviest characters will cap at about 20% higher, while the lightest characters can be KO'ed around 20-30% earlier. I eventually cut off some moves with "N/A" if they couldn't KO by around the mid 200s. Red coloring means 3DS %, aqua coloring means WiiU %.
OoS |The abbreviation for " Out of Shield ". The earliest frame an attack can hit when used as an out of shield option.
Charge Frame (Smash Attacks) |The frame at which the character pauses to charge a smash attack.
AC Window (Aerials) |The Auto-Cancel Window. The frame windows during an aerial in which Bayonetta will land with normal landing instead of landing lag.
Landing Lag (Aerials) |The duration of time you will be forced to wait until you can act if you land an aerial during the landing lag window.
Invincible / Intangible Frames |A frame of time during a move where Bayonetta is invincible/intangible, meaning she won't take any damage. If the invincibility only covers part of her, it is denoted by "Partial" on the table label.
What do each of the terms in the "Complex Data Table" mean?
Hit-Frame |The first frame a hit-box is present.
Duration |The total amount of frames a hit-box lasts.
ID |The order of priority if two or more hit-boxes are touching a target's hurt-box at the same time.
GID |Group ID. This signifies whether or not two hit-boxes will both hit if they're both overlapping on a hurt-box. If they are in the same group, only the one with the lowest ID will hit.
Bone |Which or whether the hit-box is connected to a certain bone on Bayonetta during its duration. If the bone is set to 0 the hit-box is not attached to any bone, but rather floating in a specified (By z/y/x) place.
Damage |The base damage the hit-box deals.
Angle |The knock-back trajectory of the hit-box. Note the unique trajectory types of the Sakurai Angle , (361) and the Auto-Link Angle . (365, 366, or 367)
BKB |Base Knock-back. The set minimum distance a hit-box will launch a target.
WKB |Weight-based Knock-back, also known as Set KB or Weighted KB. A set KB distance calculated using the target's weight that does not scale larger with damage. It is affected by rage, though.
KBG |Knock-back Growth, also known as KB Scaling. This acts as a multiplier that increases the KB distance with damage.
Size |The length of the radius of the hit-bubble. (Hit-boxes in SSB4 are spherical.)
z/y/x |The displacement coordinates of the hit-box relative to any bone it is attached to. If the hit-box is set at Bone 0, then the origin starts exactly at the character's central axis and at the ground. (Note: If a hit-box attached to a bone has an altered y or z coordinate, this likely means it is actually actually displaced horizontally, like an x-axis change, from the bone due to how some bone-connections work.)
Hit-Lag |The "freeze-frames" when a hit-box connects with a target. Aside form increased or decreased multipliers, these freeze frames' length is partially dependent upon the damage of the move.
SDI |Smash Directional Influence. This is the multiplier of how strongly you can Smash Directional Influence the hit.
Clank? |Whether or not the hit-box will "clank" with other hit-boxes that can clank. If a move cannot clank it has transcending priority . An asterisk next to "yes" denotes that while the move will interact with other clankable hit-boxes, the animation will not be interrupted by the rebounding animation.
Shield Damage |How much additional shield damage the hit-box inflicts. 0 means it does no extra shield damage.
Notes |A place to note various other occasionally used quirks in hitboxes, such as angle flippers, rehit rates, stretchy/"extended" hitboxes, and airborne/grounded target modifiers.
What do each of the terms in the "Block Advantage Data Table" mean?
First Frame [Drop] |The advantage if the first hit-frame of the move in question hits the target's shield, and the target decides to shield drop after the hit on their shield.
Last Frame [Drop] |The advantage if the last hit-frame of the move in question hits the target's shield, and the target decides to shield drop after the hit on their shield.
First Frame [OoS] |The advantage if the first hit-frame of the move in question hits the target's shield, and the target decides to use an Out of Shield option in response.
Last Frame [OoS] |The advantage if the last hit-frame of the move in question hits the target's shield, and the target decides to use an Out of Shield option in response.
Credits
Aerodrome : <3
Spritzee : Halped me with the lore and making the thread name high tier!
Spritzee : Halped me with the lore and making the thread name high tier!
Note: Red KO Potential numbers signify that the number was recorded in the 3DS version. The Aqua colored numbers were recorded in the WiiU version for that same move/hitbox.
~ Grounded Moves ~
STANDARD ATTACK - JAB
--
Bayonetta performs a three-hit punch, backhand, and upward strike combo with her hand guns. She can then follow up by attacking with a barrage of blue skulls. It is identical to her standard three punch input combo, and a finisher variation from her own games.
Bullet Art : After each attack, Bayonetta can fire rounds from her hand guns. The rounds for each attack fire straight forward, with additional rounds firing upwards on attack three.
BnB Data Table
Punch A|9-12|16-|26|1.5%|55/85|YES|N/A
Punch B|9-11|18-|31|1.5%|48/68/82/70|YES|N/A
Punch C|11-12|17-|34|2.7%|68/85/68/90|YES|N/A
Skull Barrage|4, 11, 18, 26...|??|--|0.3% (Per hit; 4 hits minimum) |8/172|YES|N/A
Skull Finisher|12-13|--|46|6%|55|YES|N/A
Bullet Art A |14, 21, 28...77 [10] |37 [1] / 100 [10] |0.5% × 10||
Bullet Art B |14, 21, 28...77 [10] |42 [1] / 105 [10] |0.5% × 10||
Bullet Art C |15/18, 22/25, 29/32...78/81 [10/10] |48 [1] / 111 [10] |0.5% × 10 (Per gun) ||
Bullet Art Finisher |16, 23, 30...79 [10] |57 [1] / 120 [10] |0.5% × 10||
Hit 1|-7|-4|-14|-11
Hit 2|-12|-10|-19|-17
Hit 3|-12|-11|-19|-18
Finisher|-21|-20|-28|-27
Code:
DASH ATTACK
--
After a short delay, Bayonetta blasts forward a good distance across the ground. It is almost identical to her Stiletto technique from her own games.
Bullet Art : After performing the lunge, Bayonetta can fire rounds from her frontward aimed hand gun. The rounds fire straight forward.
BnB Data Table
Stiletto|15-20, (Early) 21-26 (Late) |47|10% (Early) / 8% (Late) |50|YES|N/A
Bullet Art |28, 35, 42...91 [10] |58 [1] / 121 [10] |0.5% × 10||
Early|-17|-12|-24|-19
Late|-12|-7|-19|-14
Code:
FORWARD TILT
--
Bayonetta performs a fancy triple kick combo, with the final kick throwing opponents into the air. It is identical to her standard three kick input combo from her own games.
Bullet Art : After each kick, Bayonetta can keep her leg in place and fire rounds from her raised feet guns. The rounds for each kick fire at roughly 0, 35, and 80 degree angles.
BnB Data Table
Kick A|12|16-?|32|3.5%|60/40/75/80/45|YES|N/A
Kick B|12|16-?|40|3%|43/75|YES|N/A
Kick C|14-15|--|43|8.5%|81|YES| 245%
Bullet Art A |14, 21, 28...77 [10] |43 [1] / 106 [10] |0.5% × 10||
Bullet Art B |13, 20, 27...76 [10] |51 [1] / 114 [10] |0.5% × 10||
Bullet Art C |16, 23, 30...79 [10] |54 [1] / 117 [10] |0.5% × 10||
Kick 1|-8|-8|-15|-15
Kick 2|-17|-17|-24|-24
Kick 3|-15|-14|-22|-21
Code:
DOWN TILT
--
While crouching, Bayonetta quickly brings her foot around from behind and sweeps it across the ground in front of her. It strongly resembles a low attack finisher from her own games.
Bullet Art : After the leg sweep, Bayonetta can keep her leg in front of her, and fire rounds from one of her hand guns, as well as both feet guns, hitting low in front and behind her.
BnB Data Table
Low Sweep|7-9|27 [1.1.6] |6% (Close) / 7% (Tip) |85 (Close) / 78 (Tip) |YES|N/A
Bullet Art |20/23, 27/30, 34/37...83/86 [10] |40 [1] / 103 [10] |0.5% × 10 (Per gun) ||
Close|-6|-4|-13|-11
Tip|-5|-3|-12|-10
Code:
Patch 1.1.6
    FAF 26 -> 27
    all hitboxes size 3.5 -> 2.7
UP TILT
--
Bayonetta quickly swipes her gun upwards in a half arc in front of her, making a pop of light above her, and ending in a subtle pose.
Bullet Art : After the attack, Bayonetta can stay keep her gun pointed upwards and fire rounds out of the gun in that hand. The rounds shoot straight upwards.
BnB Data Table
Pistol Whip|7-8, (Hit 1) 9-10, (Hit 1, late) 11-12 (Hit 2) |27|5% (Hit 1) / 2% (Hit 1, late) / 6% (Hit 2) |68/110 (Hit 1, grounded/aerial) / 128 (Hit 1, late) / 93 (Hit 2) |YES|N/A
Bullet Art |12, 19, 26...75 [10] |38 [1] / 101 [10] |0.5% × 10||
Hit 1|-8|-7|-15|-14
Hit 2|-3|-2|-10|-9
Code:
FORWARD SMASH
--
Bayonetta creates a large portal behind her, and summons the fist of Madama Butterfly to unleash a massive punch as she swings the portal to face forward.
Bullet Art : After unleashing the massive fist, Bayonetta can stay in pose and fire rounds from her fist movement-matching hand gun. The rounds fire straight forward.
BnB Data Table
Wicked Weave|15|19-21|68|14% (Sour-spot) / 16% (Sweet-spot) |Sakurai Angle|YES ("Item priority") | 110% (Sweet-spot) / 127% (Sour-spot) [1.1.5]
Bullet Art |22, 29, 36...85 [10] |74 [1] / 137 [10] |0.5% × 10||
Sour-spot|-31|-29|-38|-36
Sweet-spot|-30|-28|-37|-35
Code:
DOWN SMASH
--
Bayonetta creates a large portal up above in front of her, and summons the heel of Madama Butterfly to rain down a powerful stomp through the portal.
Bullet Art : After unleashing the massive stomp, Bayonetta can stay in her fabulous pose and fire rounds out of both feet guns directly into the ground.
BnB Data Table
Heel Stomp|12|20-21, (Bayonetta) 25, (Foot, early) 26-27 (Foot, late) |69|5% (Bayonetta) / 16% (Foot, early) / 15% (Foot, late) |0 (Bayonetta) / 72 (Foot, grounded target) / 270 (Foot, aerial target) |YES ("Item priority") | 150% (Foot, grounded target)
Bullet Art |28/31, 35/38, 42/45...91/94 [10/10] |78 [1] / 141 [10] |0.5% × 10 (Per gun) ||
BayoFoot|-37|-36|-44|-43
DemonFoot, early|-25|-25|-32|-32
DemonFoot, late|-25|-24|-32|-31
Code:
UP SMASH
--
Bayonetta creates a large portal on the ground in front of her, and summons the fist of Madama Butterfly to perform a massive uppercut through the portal.
Bullet Art : After the uppercut, Bayonetta can fire rounds from both of her hand guns. The rounds fire both straight up and straight forward.
BnB Data Table
Wicked Weave|12|18-23|19|65|17% (Frames 18-19) / 16% (Frames 20-21) / 15% (Frames 22-23) |86|YES ("Item priority") | 101% (Frames 18-19) [1.1.5]
Bullet Art |25/28, 32/35, 39/42...88/91 [10/10] |78 [1] / 137 [10] |0.5% × 10 (Per gun) ||
Frame 18-19|-28|-27|-35|-34
Frame 20-21|-26|-25|-33|-32
Frame 22-23|-25|-24|-32|-31
Code:
~ Aerial Moves ~
NEUTRAL AERIAL
--
Bayonetta tucks one leg in, and kicks the other outward, doing a midair spin that hits on both sides of herself with her leg.
Bullet Art : Bayonetta continues to spin around, firing rounds from all four guns. The rounds fire at roughly 0 and negative 45 degree angles in front of and behind her. The move resembles the Aerial Bullet Climax attack from her games.
BnB Data Table
Aerial Bullet Climax|9-17, (Clean) 18-25 (Late) |13|33|34>|10F|8% (Clean) / 6% (Late) |Sakurai Angle|YES| 205% (Clean)
Extended Attack|26-36 / 26-46 / 26-56 / 26-66 (1, 2, 3, & 4 rotations) |43 / 53 / 63 / 73 (1, 2, 3, & 4 rotations) |4.5%|Sakurai Angle|
Bullet Art |26/29, 33/36, 40/43...61/64 [6/6] |--|0.5% × 6 (Per gun) ||
Code:
FORWARD AERIAL
--
Bayonetta performs a three hit punch, backhand, and downward kick combo in midair with her hand and feet guns. It is identical to her aerial three punch input combo from her own games.
Bullet Art : After each attack, Bayonetta can fire rounds from her guns. The shot styles for the first two hits are single hand gun shots fired straight forward. The shot style for hit three is rounds fired from all four guns. One aimed straight upwards, and the other three in three different downward directions.
BnB Data Table
Attack A|7-9|11|13-?|27|1, 28>|14F|3% [1.1.6] |50/26/70|YES|N/A
Attack B|7-9|--|13-?|32|32>|--|2.2% [1.1.6] |50/28/70|YES|N/A
Attack C|12-15|--|--|40 [1.1.6] |35> [1.1.6] |--|6%|44|YES|N/A
Bullet Art A |11, 18, 25...74 [10] |33 [1] / 96 [10] |0.5% × 10||
Bullet Art B |11, 18, 25...74 [10] |38 [1] / 101 [10] |0.5% × 10||
Bullet Art C |18/21, 25/28, 32/35...81/84 [10/10] |50 [1] / 113 [10] |0.5% × 10 (Per gun) ||
Code:
BACK AERIAL
--
Bayonetta whips her leg out behind her in midair, performing a powerful, long-ranged kick.
Bullet Art : After the kick, Bayonetta can leave her leg raised behind her and fire rounds form that foot gun. The rounds fire at a roughly 30 degree angle behind her.
BnB Data Table
High Kick|11-14|15|30|1, 29>|12F|13% (Clean) / 10% (Late) |Sakurai Angle|YES| 144% (Clean) / 187% (Late)
Bullet Art |15, 22, 29...78 [10] |41 [1] / 104 [10] |0.5% × 10||
Code:
DOWN AERIAL
--
Bayonetta holds her leg out and performs a midair somersault into a high speed fall, attacking with her outstretched leg. It is identical to her downward aerial kick input from her own games.
Bullet Art : Should Bayonetta land during the plummeting kick, she can fire rounds from her front facing foot gun upon landing. The rounds fire straight forward along the ground.
BnB Data Table
Waning Umbran Eclipse|18-24, (Early) 25-35, (Late) 1-2 (Landing hit) |22|48 [1.1.5] |1-2, 50>|28F|7% (Sour-spot) / 8%/9% (Sweet-spot) / 5% (Landing hit) |70 (Sour-spot) / 270 (Sweet-spot) / 45 (Landing hit) |YES| 155%* (Landing hit)
Bullet Art |7, 14, 21...70 [10] |35 [1] / 98 [10] |0.5% × 10||
Code:
UP AERIAL
--
Bayonetta performs an acrobatic midair flip, attacking with her leg in a full 180 degree arc above her.
Bullet Art : After the first flip, Bayonetta can continue to spin several more times, firing rounds from her hand and feet guns. The bullets fire outwards at seemingly random angles all the way around her.
BnB Data Table
Waxing Umbran Eclipse|9-18|13|30|1-2, 26>|12F|9%|75|YES| 195%
Extended Attack|21-32 / 21-43 / 21-54 / 21-65 (1, 2, 3, & 4 rotations) |41 / 52 / 63 / 74 (1, 2, 3, & 4 rotations) |4%|48|
Bullet Art |20/23, 27/30, 34/37...62/65 [7/7] |--|0.5% × 7 (Per gun) ||
Code:
~ Miscellaneous Moves ~
KNOCKED DOWN : GETUP ATTACK
--
[Description not yet available]
BnB Data Table
Code:
TRIPPED : GETUP ATTACK
--
[Description not yet available]
BnB Data Table
Code:
ON THE LEDGE : GETUP ATTACK
--
After bringing herself up from the ledge, Bayonetta performs a dramatic kick close to the ground in front of her before rising up fully.
BnB Data Table
Code:
Last edited: