• Welcome to Smashboards, the world's largest Super Smash Brothers community! Over 250,000 Smash Bros. fans from around the world have come to discuss these great games in over 19 million posts!

    You are currently viewing our boards as a visitor. Click here to sign up right now and start on your path in the Smash community!

Make Your Move 13 - Most Recent Movesets: The Advertisement Period Begins

Davidreamcatcha

Smash Ace
Joined
Feb 9, 2011
Messages
629
(Almost) One-Night Set

STRONG BAD

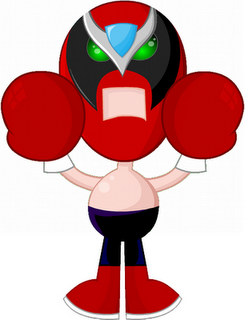
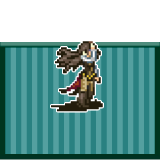
Strong Bad is one of the principal characters in Homestar Runner (rest in peace), a web-cartoon that was extremely popular before starting to decline after the release of the first video game. Strong Bad is a troublemaker around Free Country, USA. He's constantly pranking, conning, insulting and on occasion, attacking the general populace. He often does this with his cronies, The Cheat and Strong Mad. While he's not an actual threat by any means, especially given what appears to be Free Country's lack of laws, he does act as an occasional annoyance to the characters of the Homestar Runner universe. When not found doing vile and despicable things, he can often be found checking his email or playing old video games. His true moment of glory came in Strong Bad's Cool Game For Attractive People, a 5-episode game series made by Telltale Games that puts him in the spotlight. The last "real" Strong Bad appearance was a separate game by Telltale, Poker Night In the Inventory - in which he bluffs against familiar faces like The Heavy Weapons Guy or Tycho Brahe.

Statistics

Traction: 8
Aerial Movement: 7
Weight: 6
Size: 6
Movement: 6
Falling Speed: 5
Jumps: 5

In the vein of Iron Tail and Clayton, Strong Bad is a multiminions set. He's accompanied in Smash by his two cronies, The Cheat and Strong Mad. The two follow Strong Bad around, unless being commanded to attack, in which case they will leap into the foreground and attack before retreating back into the foreground. The Cheat moves alongside Strong Bad at a brisk 5/10 dash speed, while Strong Mad is much more slow-paced at 3/10 dash speed.

The two can be KOed, but will retreat into the background if hit under most circumstances (i.e. hits without knockback), and will retreat back into the background once landing on the ground if they're in the air. However, the Cheat has a 5/10 weight and Strong Mad has a 8/10 weight and both have their own damage meters (which are only shown when they're hit), just to be sure. They will never follow Strong Bad if he goes offstage. They will also pick up any items they run by, and can throw/use them like normal items.


Specials

Idle Stance

Strong Bad stands in place, arms at his side. Occasionally, he'll pat them together, impatiently.

Walk
Strong Bad moves his arms at his side as he walks, looking around on occasion.

Run
While Strong Bad pumps his arms as he runs and leans forward a tad, he doesn't hunch over to the extremes that most MYM characters do.

Crouch
Strong Bad gets down on one knee, looking around occasionally.

Dizzy
Strong Bad staggers back and forth, boxing glove hands at his side.

Sleep
Strong Bad sleeps, occasionally mumbling the names of video games as he sleeps. "R-R-Rhino Feeder....D-D-Duck Guardian...W-W-Where's an Egg?..."

Down Special: Kick The Cheat
The Cheat quickly jumps into the foreground next to Strong Bad. Strong Bad will kick him - launching him a Battlefield Platform forward by default, at Mario's dash speed. If the Cheat hits anything during his flight, whether it be an object or an opponent, he'll bounce off of it, moving the opposite direction. He'll deal it 8% damage and some good knockback should he come in contact with it. He can attack during his flight, as should be expected.

Strong Bad can charge the kick, as well as aim it, if the B Button is held. In this case, Strong Bad can aim the Cheat's kick in any direction, as well as charge it for him to fly forward a maximum of 2 Battlefields. This increases the speed he travels, of course, to that of Fox's. He'll deal 8-15% depending on how long it was charged.

Did I mention that The Cheat can actively take knockback in this state, while retaining his hitbox all the while? Thanks to this, The Cheat can build up a bit of momentum - actively dealing 1% more for each speed increment he gains past Yoshi's. The Cheat can be launched around as an excellent projectile, one that can be knocked around and given momentum, while retaining a massive degree of powerfulness.


Up Special: Grabbo Arm


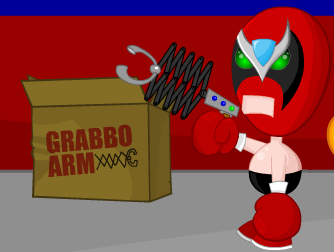
Strong Bad quickly pulls out the Grabbo Arm, aiming it at the nearest foe, and fires it. The Grabbo Arm extends two Battlefield Platforms, lingers for a moment, before retracting with some bad lag if Strong Bad missed the foe. Should The Grabbo Arm hit the foe, it will lock on to them in a grab hitbox before retracting back to Strong Bad, leaving them in prone in front of him. This acts as an obvious tether, as it will automatically aim towards the ledge if in midair. This won't send him into helpless if whiffed.

By holding the input, in the air or otherwise, Strong Bad aims the Grabbo Arm at his nearest ally in the freedom. He will pull them to him as he does the foe - they will still perform any hitboxes they had out before they were grabbed, allowing you to position them as they attack. More importantly, this can allow you to move a flying Cheat out of a tight spot if something looks like it might go wrong.


Side Special: Cardboard Prop

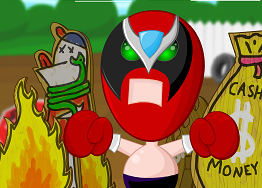
Strong Bad, chuckling, pulls out a cardboard prop and places it in front of himself. This prop is random - cycling between giant sacks of cash, Homestar Runner being choked by snakes and cardboard flames. These are all entirely cosmetic and have no real differences of note. The cardboard acts as a wall and attack sponge with 10% HP. If this is depleted, it will fall over on it's side and disappear. Strong Bad has a limit of 3 of these out at a time - thanks to how quickly these can be placed, Strong Bad can create projectile sponges to take some heat off himself will he builds the Cheat's momentum or does some otherwise sinister plan. Given it's wall-like status, The Cheat and can also crash into one of these and bounce off of it to build his momentum, giving Strong Bad yet another tool to make it work.

Neutral Special: Fthoom-Bang

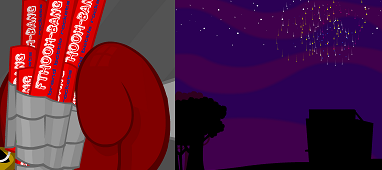
Strong Bad places a pack of bootleg fireworks on the ground in front of himself, quickly lighting them before you regain control of him. A full 3 seconds later, the fireworks become a dragging hitbox that deals 5% damage and drags the foe with them as they zoom straight up 5 Ganons, before exploding in a Bowser-sized hitbox that deals 17% damage. This is, as you might expect, an incredibly awkward hitbox to actually hit foes with, considering they primarily have to be hit by the initial fireworks zoom or the explosion, though it helps to have even more stuff lying around in the air. These can help you significantly in terms of abusing the Cheat, this being your best tool to deal straight knockback - but being wildly unpredictable as a result. Hitting the fireworks before they go off will cause them to detonate prematurely in a bob-omb sized explosion that deals 10% damage and good knockback.


Standards

Dash Attack: Windmill Punch
Strong Bad rapidly swings his arms in front of himself for a second before stopping, acting much like Yoshi's dair in terms of it's hitbox, dealing multiple hits of 2%. This can be DIed out of, but will usually be able to drag foes around into all of the cool junk that Strong Bad's been layin' 'round..

Jab: Lighter
The Cheat pulls out his lighter, and after some very small start lag, swings it above himself, creating a small bit of fire above himself. This fire lingers for a second, dealing some light flinch and 3% to anyone who falls on the fire. Given the fact that the fire lingers for a moment, The Cheat can be positioned with some aerial protection above himself - as well as giving him some aerial defense in general. The Cheat can also use this while flying around to create traps underneath foes who are above him.

Forward Tilt: Gnaw
The Cheat leans forward and gnaws in front of himself - if this is to connect with the foe, they are stunned in place for a brief moment and take 7% damage before taking the actual knockback. This is especially useful when The Cheat is being launched due to the large hit in front oh himself - especially since the stun can potentially leave them open for a firework or a rocket to come in and hit them.

Up Tilt: Leap
During some start lag in which you can pick a direction, the Cheat crouches a bit. After the start lag, the Cheat bounds upwards in the direction you picked, 2 Ganons upwards to be precise. He is a hitbox that deals 2% during this time, making this rather awkward to hit with. Rather, it's more practical for last-ditch recovery purposes - though like an actual recovery, you can only use this once while you're in midair, even though you can still attack afterwards. Make the most of it. You can also use this to put you in place for bazooka shots and whatnot, as well as a good way to position the Cheat in general if you want him to move across the stage without being dragged along by Strong Bad or Strong Mad.

Down Tilt: Boundin'
The Cheat leaps forward with his dtilt, rather than straight up, going exactly one Battlefield Platform. If he meets a foe in his travels, he will latch on to them much like DM's favorite monkey - unlike Diddy, however, The Cheat has a bit of say in this matter. The Cheat can move left or right to control which way the foe goes, much like a horse jockey. The foe has some influence against this, such as moving the stick away from where the Cheat is going, though this can actively help the Cheat in some places. It acts like an amateur positioner until they button mash out.

If The Cheat uses this against Strong Bad or Strong Mad, he will latch on to their backs, piggybacking on to them - this causes the two to count as one character, combining their weight and damage percentages. While useful if you're starting to get closer to a KO, any attack you do now will immediately hit the Cheat, sending him flying in that direction - which can be rather bad in most cases. Still, the Cheat is still a hitbox, much like Kick The Cheat, meaning this is useful when he's at higher percentages to send him flying even farther than that move.


Smashes

Down Smash: Strong Slam
Strong Mad steps into the foreground, sneering as he faces the screen. He slams both arms down onto the ground, covering a decent range. If you are hit by his arms, you take 15-20% damage and excellent knockback, whereas if you are within a small stage builder block of either arm, you take 8-12% and are launched upwards as the ground around him shakes.

All traps, regardless of if they are Strong Bad's or not, within range of Strong Mad, will be launched up into the air - this allows you to create even more midair projectiles as you can temporarily turn your own traps into them. Using this while the Cheat is on your back will cause him to jump upwards for the duration of this attack, then go back down on to your back after it's over.


Forward Smash: Bazooka
A bazooka appears over Strong Bad's arm - even without charging, he still has some brief startup before firing it forward. If he wishes to aim, he can while charging it. Once the time has passed, Strong Bad fires the bazooka - releasing a projectile that travels in the aimed direction at Fox's dash speed. Upon contact with anything, the projectile explodes in a bob omb-sized hitbox that deals 11-16% damage and high explosive knockback, being an excellent KO move in the right circumstances. Typically, you'll want foes overwhelmed by the mass amount of hitboxes on-screen if you actually want to hit them with this, as it's highly predictable. You can aim it at a foe who Strong Mad has grabbed, if you don't mind hitting him as well - aiming this at the Cheat is a legitimate strategy, however, as you can build his momentum easily with the knockback provided by this. It's not as effective as the fireworks, to be sure, but this is a much easier tool to manipulate. Fun fact: if the projectile comes in contact with a fireworks explosion, it will immediately explode.

Should you have the Cheat on your shoulder when you do this, he will jump in the bazooka and Strong Bad will fire it - the Cheat is launched with knockback that deals him 20% damage, turning into a hitbox. While this is pretty easily your best way of launching the Cheat, it also deals the most damage.


Up Smash: Double Deuce
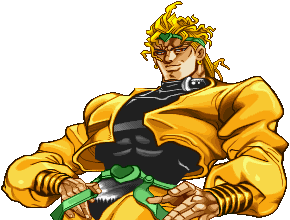
Strong Bad strikes the pose in the header pic, swinging his arms in front of himself and upwards to accomplish it. This deals 5-12% damage and knocks foes upwards into the air - this is a good way to get them in the path of the Cheat and whatnot, as well as a way to actually get them high by fireworks when they're at a higher percent and more likely to be launched high enough. More importantly, it's an actual physical ground attack for the largely projectile-trappy Strong Bad.

Special Smashes

Forward Special Smash: The Tire
Strong Bad places a tire down in front of him. The tire is the width of a small stage builder block, but not very tall (tall enough that it has to be jumped, at least). If the foe touches this tire, they'll find it's been booby-trapped! It applies an electric shock that stuns for .50 - 1.10 seconds the moment the foe is hit by it, acting similar to the paralyzer. In addition, this triggers something else...


Yowza! It's the dreaded bear holding a shark! The shark pops out of the top of tire, being the size of Ganon, as a hitbox dealing 9-14% damage that launches foes hit upwards. If not hit by this initial hitbox, fear not - the bear lingers for a second afterwards, acting identical to the cardboard props found in side special, before sinking back behind the tire. Even if the cardboard was destroyed during the second the tire was out, another bear will pop up if it's triggered.

The tire can provide Strong Bad with some on-stage defense, forcing foes to jump over the tire and into the air to maneuver. Not only does it stun for Strong Bad to land a hit if they land on it, there's an opportunity for them to be knocked into the air - and getting Strong Bad some temporary cover! That's quality for a cruddy cardboard cutout - you can have 2 of these out at a time.


Up Special Smash: Heavy Lourde

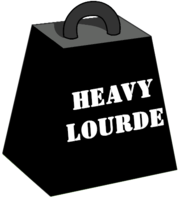
Strong Bad, replicating the cartoony laws of physics of the Homestar universe, points upwards - causing a Heavy Lourde to appear 1-3 Ganons above himself, depending on the charge time. The Heavy Lourde floats in midair, only coming down when an opponent walks underneath it - in which case it quickly moves downwards at a speed ranging from Shiek's to Sonic's, depending on charge. If this hits a foe, they are dealt 8% and are stuck under the Lourde - when it goes back up a second later, it will reveal that the characters are stuck in a "pancaked" state, appearing flattened. 4 seconds later, they immediately come out of their pancaked state, popping upwards. Until this time passes, they are able to move at their normal speed, but cannot attack or jump - on the bright side, they also can't be grabbed, and any actual attack will cause them to immediately unflatten. Flattening them effectively allows a free hit from Strong Bad or either of his cohorts, as well as forcing them to trudge about a trap-ladden stage. Alternatively, any of the Strongs can stand up on the Lourde and use it as a camping platform - from which you can use Strong Bad's bazooka or kick the Cheat, as well as making it a decent place for the Cheat to land, for this reason.

The foe might also get the same idea when you keep sending projectiles into the air, and might attempt camping on the platform themselves - this only makes it easier for the Bads to hit them. They shouldn't let themselves act that predictable...Strong Bad can have two of these out, each lasting 8 seconds.


Down Special Smash: A Wagon Fulla Pancakes

Strong Bad brings out his old love: a wagon. The wagon is exactly what you might expect: it acts almost identically to the Rolling Crates in terms of physics/hitbox, as well as being completely solid similar to this. By walking into the wagon, anyone can simply push it - allowing them to move it slowly without turning it into a hitbox. By dashing against it, they'll push it and turn it into a hitbox similar to the Wario Bike, with it going on a small bit after you leave it. The wagon can be used to lug traps about the stage - or even have The Cheat or Strong Mad on the back of it. If you have the Cheat on your back when you use this, he will automatically jump off into the wagon - that is, if it's uncharged.


By charging this input, Strong Bad pulls out the wagon once more - this time filled with pancakes, the amount of which depends on how much you charged. The pancakes, much to Freaky Fred's dismay, act like pancakes should: not creating slip and slide hitboxes. Instead, they're actual food items that heal 1% per pancake. The amount of pancakes on the wagon ranges from 9-21, depending on charge. They will fly off as the wagon is sent dashing - as actual food items, not hitboxes, mind you. Still, you can send the wagon dashing while pancakes are on it to scatter them about, if foes want to reap the healing benefits. Alternatively, just camp on the wagon filled with pancakes and eat them all (you can also have The Cheat or Strong Mad eat it by tapping A while they're on it). You can only have 1 of these wagons out at a time, and you can't summon any more with pancakes on it until they are all eaten or disappear.


Aerials

Neutral Aerial: Cartwheel
A note: whenever you input a Standard Input, you will automatically attack as the Cheat, even if in midair (as should be obvious). However, if Strong Bad enters the air, this overrides the Cheat's command(os).

Strong Bad cartwheels in mid-air - lasting for 2 seconds, going extremely fast at a rate of 7 spins. Each spin deals 1% and just enough stun to hold foes in place, while the fist pump deals 3% and knocks them upwards. Strong Bad can use this to prevent foes from coming back down to the ground, as this typically releases foes above himself - and he can immediately cancel into his up air, considering how little lag he actually has.


Forward Aerial: Punch-AAH!
Strong Bad punches forward with this aerial, acting like a standard forward aerial that deals 5% and deals some neat little forward knockback. Obviously one of Strong Bad's best attacks in terms of defending himself in midair, as well as one of his few physical attacks in general.

The Cheat, if facing Strong Bad when he punches, will recognize this as a command. He will turn around in a spinning hitbox that deals 4% damage, allowing Strong Bad some degree of control over which direction the Cheat is facing - useful in terms of his attacks. You can also use this when the Cheat is on your back to send him flying forward - which is good against offstage foes, as you can just have the Cheat hit the foe and knock them down before you retrieve him with the Grabbo-Arm.


Back Aerial: Elbow
Strong Bad elbows behind himself, before turning in the direction he faced. This deals 7% damage and decent knockback, the primary seller to this move being that it causes Strong Bad to turn around. Considering the gameplay he has as he fills up the screen with projectiles, this helps massively in terms of allowing him to aim his projectiles.


Down Aerial: "Super Powers"

Strong Bad's blue diamond glows for a moment - anything 1.5 Ganons below him (as well as things slightly in front of him) will get pulled up in front himself if they're around him at that moment. This is typically only used for childish things such as pranks and opening Cold Ones, but Strong Bad has put this to more nefarious uses - he can bring up foes still on the ground, as well as saving The Cheat if he's falling below him (The Cheat will jump on Strong Bad's back automatically if you pull him up with this). This is also perhaps, your only way of getting Strong Mad in air. You can also, of course, bring up traps for a brief moment to serve as a defense.

Up Aerial: Fist Pump
Strong Bad pumps his fist into the air as though he were some sort of rock star, dealing 6% and upwards knockback with no real landing/end lag, allowing him to chain this. This can possibly knock foes off the top for a star KO if you get high enough.

Grab-Game

Grab - Strong MAD!
Strong Mad does the heavy lifting here: he steps into the foreground, reaching forward for as long as you hold the grab input, making this somewhat easier to land. This is good, as Strong Mad both has no dash grab due to you not controlling him, and has one of the slowest grabs in the game regardless. Still, you can actively move foes into him, or use the grabbo-arm to move him towards the foes, for an easier time.

Once Strong Mad has the foe in his clutches, he angrily sneers at them. If he has The Cheat in hand instead of the foe, he'll be much less aggressive (The Cheat will also immediately jump into Strong Mad's hands if he's on his back, this allowing you to automatically grab him). He can also grab cardboard cutouts, acting as though they were foes.

His pummel causes him to stretch the foe, being more of a "hold" pummel than a mash pummel. The longer you hold this, the more damage it deals when Strong Mad snaps them back - doing so the moment you let go of the input. This deals 1% for every half second you stretch them. Strong Mad refuses to stretch the Cheat - though stretching a cardboard for 3 seconds will cause it to break in half, effectively destroying it.


Up Throw - Boomerang
Strong Mad uses his massive cartoony strength to shape the foe into a boomerang. tossing them upwards - they go up about 3 Ganons before heading back down into the waiting hands of Strong Mad, who grabs them again and smashes them facefirst in to the ground in front of himself, dealing 9% damage and good knockback. If the foe is hit at any point before they come back down, they revert back to normal.

With the foe in particular, this is Strong Mad's only real way of stalling them out a bit - toss them up in to the air and wait for them to come back down. It's an opportunity Strong Bad absolutely relishes in terms of getting some work done.

As Strong Mad does hate hurting the Cheat to the extent he hurts the foe, he doesn't stretch the Cheat into a boomerang - he simply throws him into the air. The Cheat will not come back down once he's in the air, allowing you to launch him directly upwards for further manipulation.

Using this on cardboard can have you boomerang it upwards into the Cheat's path, if it's not high enough for him for him to bounce off of. This will cause the cardboard to no longer be usable once it comes back down to Strong Mad, however.


Forward Throw - Balled Up
Strong Mad crushes his foes into a ball, throwing them forward - this deals 7%. The foe will automatically unball themselves in 2.3 seconds, though can be attacked before then to unball, and will be able to use all jumps upon recovering. Your primary purpose here is dealing some knockback that can't be DIed, making them more likely to get hit by attacks they would normally dodge or avoid.

Strong Mad uses this as a way to simply throw the Cheat forward if he's grabbed, turning him into a hitbox without Strong Bad kicking him. Likewise, Strong Mad will turn the cardboard into a hitbox dealing 8% as he tosses it forward - though it will be unusable after this, like always.


Back Throw - Tony Stony

This is Tony Stony, a large rock Strong Mad got for Decemberween. Strong Mad grabs a large stone from hammerspace, throwing the foe before throwing the stone at them, dealing 12% before Tony lands onstage. Tony has the weight of Ganon, being able to be thrown about and manipulated like most traps, dealing 12% damage if hitting the foe again. Strong Mad can also grab Tony - throwing him as though he were the Cheat.

With The Cheat and cardboard, Strong Mad will throw them behind himself, acting like fthrow (but reversed). Strong Mad then places Tony behind himself, giving you a way to place him without the possibility of it flying offstage. Tony lasts until the 25% stamina the stone has is depleted.


Down Throw - Marshmallow's Last Stand
The other characters dim when you activate this, showing that you have control over Strong Mad for now, as he takes the foe with one hand. You have 2 seconds in which you can move Strong Mad with Bowser's movement stats. After which, Strong Mad will slam the foe down on both sides of himself - dealing 7% every time they hit the ground, dealing no damage if they're in the air. Strong Mad can use this to slam the foe on to some traps, such as fireworks or what have you. There's also the legitimate possibility of suicide KOing with them, though given Strong Bad nor the Cheat will respond to inputs while you move with Strong Mad, meaning Strong Bad will have to be nearby ready to use his dair or uspecial if you attempt this.

Strong Mad will throw the Cheat behind himself with this move - allowing some mindgames with this and bthrow. With Tony Stony or Cardboard, however, he will immediately executing the smashing part rather than carrying them around, allowing Strong Bad or The Cheat to still be able to attack and move during this time. Cardboard is destroyed after this, while he places Stony back on the ground after this is done if it isn't destroyed. This does indeed give Strong Mad some more direct non-Grab attacks outside dsmash, getting some heat off the back of the others if the opponents are near him.


Trogdor
Trogdor, one of Homestar Runner's breakout characters - a dragon drawn by Strong Bad, is drawn in on the side of the screen - becoming a fully green monster as he is colored in. He roars, the Brothers Strong running away and hiding for the Final Smash's duration. From here, Trogdor proceeds to stomp across the stage, being the size of Giga Bowser. His stomps deal 20% damage if you are unkind enough to get crushed underneath him, and he periodically launches fireballs at opponents from afar, them dealing 15% damage and high knockback, as well as leaving a fire trap onstage that deals the same amount. All of Strong Bad's onstage traps will become fire traps, for as soon as Trogdor enters, he burninates them. After Trogdor circles the stage twice, or after 15 seconds/all foes are KOed, all of the color is removed from him and he is erased, after which Strong Bad and his cronies come back out from hiding.

Extras

UP TAUNT - WHAM!
Strong Bad faces the camera and does the pose seen in the header pic, exclaiming "THE DOUBLE DEUCE!"

SIDE TAUNT - DELETED!
Strong Bad stutters "Da-da-da-deleted!", while making an accompanying fist pump animation.

DOWN TAUNT - NO MUSCLES
Strong Bad "flexes", trying very hard to look cool doing so.

VICTORY POSE 1 - LAUGHTER
Strong Bad lets out an uproarious laugh, Strong Mad and the Cheat by his side. When he finishes, he nudges Strong Mad, who laughs, prompting the Cheat to join.

VICTORY POSE 2 - EGGING
Strong Bad and The Cheat are seen throwing eggs, and the occasional fun-sized candy bar, at the losers, laughing as they coat the foes.

VICTORY POSE 3 - NEW PAPER
Strong Bad chuckles with glee as a large piece of paper comes down from the top of the screen announcing "Strong Bad wins!"

LOGO - U.S.S. HOMESTARRUNNER.COM


"Please: stop trying to handle my style!"
 

Katapultar

Smash Lord
Joined
Nov 24, 2008
Messages
1,284
Location
Australia
[collapse="Strong Bad"]It seems you've singlehandedly created a moveset genre. On that note, I would suggest that in the future you or anyone else doing this kind of thing use some sort of coloring in the attack headers or the name of the character using the attack to differentiate, as there comes time where one needs to read over it twice (there are two characters in this set with very similar names) even when some of the attacks would be designated to certain characters.

Oddly fitting given his webcomic nature, Strong Bad strikes me as doing a lot but not really doing -anything- special in particular. I guess you could call it a lack of focus in the set, or at least being too focused in controlling the flight path of Cheat when that in itself doesn't seem special...the idea behind being able to control a moving hitbox had good promise though. The set seems to simply boil down to using Cheat to to latch on and stall the foe while you hit them with a rocket launcher and/or fireworks. There are Special Smashes, though I don't see what purpose any of them serve in the set aside from being props meant to represent Strong Bad's character given not much is mentioned in regards to the playstyle - I guess he -is- the kind of character who will want to have a lot representing him in a similar manner to Calvin and Hobbes due to having so much source material. [/collapse]
 

The Warrior of Many Faces

Smash Apprentice
Joined
Mar 22, 2012
Messages
101
Location
Everywhere and nowhere, as location is meaningless
STRONG BAD

Special Smashes. I never really liked that sort of thing (how fair is it for certain characters to have extra inputs?), and here it is also combined with the “not enough detail syndrome”: you never specify what exactly you have to do to use a Special Smash, which really destroys any use they could possibly have. If you’re really going to give Strong Bad extra inputs, make sure the player knows how to use them.

So, basic playstyle: throw the Cheat around a lot and use your standards to command him to attack in midair. Okay, it’s a good idea, but therein lies a problem with this sort of set: having to devote standard inputs to commanding minions. Strong Bad has practically no standards, which makes it kinda difficult for him if someone gets up close and personal. That’s probably why you included things like cardboard walls, tires, the anvil thingies, the fireworks, and the pancakes, but how is the player supposed to juggle laying enough traps to keep Strong Bad alive while punting the Cheat around? It’s not as if the Cheat attacks on his own, so he can’t help cover Strong Bad while he sets traps. Admittedly, Strong Bad’s inability to deal with people close up may be a characterization choice, but even so, it’ll be hard to play. At least Clayton pretty much revolved around one trap, which made it a lot easier to get it out, and was heavy enough to take a good number of hits.

This is a rushed set, so I suppose I can’t expect genius, but Strong Bad’s basic strategy is fairly flawed.
 

Big Mac

Banned via Warnings
Joined
Sep 13, 2012
Messages
38
ZAK GRAMARYE


Zak Gramarye is a child killing, woman beating, backstabbing magician from Apollo Justice, and is also Apollo’s step father, for good measure. After such petty crimes as throwing out his children, murdering his wife, and framing his partner for his master’s murder, Zak now seeks to ruin the law career and the entire life of Phoenix Wright, the man who dared to take care of his child.

While Zak Gramarye is indeed a jerk, he has a good set of stats, being a wider, heavier, and faster Ganondorf – his movement speed is actually half-decent, better than Mario’s, given how known Zak is for escapes.

Zak has several assistants which stay in the background until called upon:


From left to right, Thalassa, Valant, and Trucy. They stay in the background, invulnerable, and follow Zak around until ordered to do something by one of his inputs, during which time they are vulnerable until their attack ends/they get out of hitstun. Multiple characters can do attacks at the same time. All other characters will vanish if Zak is KO’d, and only KOing Zak takes a stock away from the character.

Down B: Zak moves two stage builder blocks in the direction he’s facing, Valant moves two stage builder blocks in the opposite direction, while Thalassa stands in the middle. Valant and Zak then take out pistols and start shooting mass projectiles at Thalassa, causing the area between Zak and Valant to become a non-stop constant hitboxes of 50 hits of 1% and flinching per second. Thalassa will take the damage from all of these hits in addition to any foes, and will be left in prone after the move. She will not automatically get up out of prone unless Zak hits “A” next to her like an item. Valant will reunite with you after the move is over. Zak can cancel out of this move whenever he wants and still have Valant go through with it if he so desires, though Zak’s side of the hitbox will be removed obviously.

Neutral B: Zak vanishes into thin air with a “poof”. From this point onwards, you gain control of Valant instead of Zak, who has the same stats except with a middleweight flavor, and identical moves. The only difference is Valant does not have access to his Specials outside Up B (which is generic and does not involve Trucy), and any interactions with Trucy and Thalassa are gone as they just stand in the background. If Valant dies, Zak will respawn where he originally used this move. Pressing this input again early causes Zak to reappear.


If Zak waits 10 seconds or more before respawning, he will respawn in a (terrible) disguise. His moveset still functions normally, but one cop (As seen in Von Karma’s moveset) will spawn every 12 seconds. These cops will be hostile to Zak specifically and intend only to attack him, but can accidentally attack other characters.


There is a 5% chance Kristoph will spawn instead of a cop. Kristoph is identical to the cops, but has all the lag of Ganondorf while still being just as weak as Captain Falcon.


Up B: It’s a clone of Zelda’s recovery, but the start-up animation is the same as Neutral B. In addition, Zak teleports along any of his assistants along with him. Zak spawns facing away from the camera with this move before you regain control of him. If you input this move as a smash, though, only Trucy will get teleported where you input the move while Zak respawns in place with a tiny bit more lag than usual. During the teleport, Trucy will take out Mr. Hat.


Mr. Hat will also face away from the camera and will appear to be Zak largely due to his cape when seen from behind. Mr. Hat does appear to have a hitbox when he spawns, but it doesn’t actually do anything. Considering how completely and utterly useful Trucy is, though, this is a good way to abandon her and get some use out of her as a distraction. She will come rushing back to you after the move is complete if she does not get destroyed horribly, though unlike Valant in the Down B she will run through the main playing field rather than the background.

Side B: Zak takes out a gun, which becomes an item that he can use and fired like a Ray Gun. It’s a single projectile that goes as fast as Shiek’s needles, and will knock characters over into prone while dealing 23%. The gun only has one bullet, though, meaning Zak must input Side B again to reload it with another bullet. Inputting Side B with a loaded gun out will have Zak put it away.

Grab: Zak sweeps his cape forwards, causing a poker table to appear in front of him and forces the foe to play Poker with him yelling some gibberish threat at them if they’re standing in front of the table. Otherwise, Zak sweeps his cape again to get rid of the poker table. This move is actually faster in Zak’s disguise mode, as he’ll simply slam the table down in front of him, making the move much faster, while the table will simply vanish otherwise. Zak can indeed grab allies with this, as well.

Pummel: Zak swaps items with the foe. If Zak shot somebody, including one of his own minions or a cop, then gives the gun he shot that person with to somebody else, the next cop that spawns from Neutral B will go after that character instead. Zak can also steal guns from cops and use them to frame characters for future cops that show up. Zak can even, theoretically, make cops attack each other due to how much of a jerk he is.

Down Throw: Zak cheats at Poker, causing him to deal 15% and the foe to be damaged for 15% in a very laggy throw. This is very laggy, so cops will almost inevitably interrupt this throw before the animation finishes. Valant will not cheat at poker, meaning it’s a 50/50% chance for who gets the damage/healing.

Up Throw: Zak has Olga come over to the table to bring him a bottle of booze.


Zak then proceeds to take the bottle from Olga, smash it over her head, then do the same thing to the foe, dealing them 12% and decent vertical knockback. More importantly, Olga is now a useless “minion” that will run about the main stage, and is another character you can very easily frame for murder. Using this throw again will have Zak take the bottle out of hammerspace. Valant will just drink the beer politely, healing himself of 15%.

Back Throw: Zak has Olga subtly plant some cards on the foe before she again becomes his minion again, then Zak calls out the foe on cheating. This causes Olga to be a minion if she isn’t already (This throw is unusable if she’s dead), and causes the foe to stumble backwards a stage builder block and fall into prone, though they take no damage. 12 seconds later, a criminal will spawn next to the foe and start attacking them, yelling about how they got “cheated” by the character, being clones of Ganondorf with a gun item like the cops have. Cops will go after criminals if they shoot someone, but they will go after both them and their intended target, they won’t simply forget about their original one. Valant cannot use this throw.

Forward Throw: Zak flips the poker table onto the foe, dealing 16% and actual knockback that can KO. The flipped poker table will stick around as a solid wall afterwards, only having 15 stamina, but immune to projectiles, AKA the bullets which are going to be flying every which way.

Forward Smash: Zak takes out a box and opens up the top, leaving a trap where he used the move. If anybody falls in, the top will magically seal the character in at grab escape. Inputting this move with a box already out will cause Zak to take out a saw item, which he can again use with his jab, and it actually works like a jab in that you must mash/hold A to saw back and forth for lots of multiple hits. You can saw apart the box to be able to make a new one, but if you saw it apart with a foe inside you quadruple the regular damage from it. Used on a character that’s not a foe, this will actually kill the character inside, and you can give the saw to someone else to frame them for the murder. If Valant uses the saw on the box with a character inside it outside the foe, the character will come out safe and sound afterwards, causing any cops/criminals/Olga to applaud the trick, interrupting them for 4 seconds, useful if they’re breathing down your neck too heavily.

Up Smash: A magic poof occurs over Zak’s position, doing nothing if Thalassa isn’t with him. If she is, you can see Zak having not so subtly done a throwing motion once the smoke clears, and Thalassa will be an overly high distance into the air, 3-7 stage builder blocks. After this, she will glide forwards with her robe 5-10 stage builder blocks. As she goes up, she deals 15% and decent “Get away” knockback. While gliding forwards, she is a hitbox like Piplup’s, and can easily drag foes off-stage for a suicide KO much like the dumb Pokemon. It’s a good idea to use her for this after you’ve already framed her for killing someone.

If the move is fully charged, Thalassa will catch on fire, causing her to slip out of her robe and fall back down to the ground as the robe glides forwards twice as far on its’ own, a hitbox twice as powerful. She will indeed be walking around in a bikini after this, until you use this move again to give her a new cloak. Valant cannot use the fully charged version of the move.

Down Smash: Valant vanishes and stays where he was ordered to as a trap. If anybody passes him, he will re-appear with a burst of flame, dealing 20-35% and very strong knockback. Using this move again will cause him to re-appear early if Valant is still gone. Using this move as Valant causes him to disappear before immediately reappearing.

Neutral A: Zak takes out a tacky magic mirror prop, thrusting it forwards. If it connects with somebody, it shatters, dealing them 12 hits of 1% and flinching. This out-prioritizes all jointed attacks. More importantly, it reflects projectiles, AKA the countless bullets flying around every which way. Valant has a much less tacky version of the move where he simply spins his cane around, as seen in his sprite. This is largely the same, but without the good priority, though this move enables you to deflect the projectiles that come at you to potentially any angle based off how you time the move.

Dashing Attack: Zak stomps the ground stupidly/Valant taps the ground lightly with his cane before a secret compartment in the stage is revealed. Zak will come up out of the stage 3 stage builder blocks ahead, doing a meaty uppercut, separating himself from his allies. Trucy specifically will come out onto the field to look around, making her an excellent meat shield. Valant will take Trucy and Thalassa with him with this move.

Forward Tilt: Zak takes a bunny rabbit out of his hat before beating the foe over the head with it, dealing 11% and good knockback. The bunny will then leap away horrified afterwards. If you shoot the rabbit, Trucy will go over to the rabbit’s corpse and cry for 6 seconds, creating a tripping trap that lasts 15 seconds. Zak is immune to his daughter’s tears and thus cannot be tripped by this attack. Valant will have the rabbit kick forwards with its’ rabbit legs before putting it away. The kick is just as powerful as Zak’s slam, and the kickback from the move causes Valant to slide backwards along the ground 2 stage builder blocks.

Up Tilt: Zak takes out a deck of cards before throwing them up into the air above him, creating 52 hitboxes that each deal one fourth of a percent very quickly for a total of 13%. He will then tell either Trucy or Thalassa to pick them up, preferably Trucy if he has them both, over 6 seconds. If anybody attacks the woman left behind to pick up the cards, including a gunshot, all of the cards they’ve picked up so far will splatter above their heads, recreating the original hitbox. The woman has superarmor here unless they’re shot, at which point they fall into prone and abandon picking up the cards. Zak can indeed shoot the women to re-create the hitbox. In Valant’s version, the cards vanish instantly after the main hitbox is done.

Down Tilt: Zak stomps down on the ground in front of him powerfully, dealing 9% and decent knockback. If he hits a prone character, it will count as a grab hitbox as Zak goes to slide the character forward with his boot before he puts his hands on his hips and laughs. This causes the character in prone to slide forwards 5 stage builder blocks as a hitbox dealing 16% and strong knockback. This is most useful on the women, but can be used on anybody really. Valant simply stabs downwards with his cane for a similar hitbox, but this has no effect on characters in prone.

Neutral Aerial: Zak takes off his hat and causes mass smoke to come out of it, enough smoke to cover the radius of a blast from a Smart Bomb. As the smoke first expands out, it pushes foes to the edge of the hitbox with flinching hits of 1%, 8 in all. This is a very laggy move, needless to say. Cops and criminals are disoriented by the smoke just as much as enemy players, as well as any of your allies attempting to reunite with you. The smoke lasts 12 seconds.

Forward Aerial: Zak takes his hat off his head and swats forward with it, being a weak hitbox in front of him that deals 6% and weak knockback. It can absorb up to 3 projectiles, say, bullets. Once you have 3, the next time you use this move the 3 projectiles will fly back out of the hat with the same power they had originally.

Back Aerial: Zak grabs behind him. If successful, he will throw any character he grabbed forwards 2 stage builder blocks as a hitbox that deals 8% and okay knockback. If any of his assistants are directly overlapping him, he will grab one of them if he doesn’t grab a foe. Preferably Trucy, then Thalassa, then Valant. The down tilt is much stronger for this purpose, but the purpose of the bair is more to make use of other people as meat shields. Valant will not throw Thalassa or Trucy.

Up Aerial: Zak takes off his hat as birds fly out of it, creating 5 random projectiles that fly off the top of the screen at random angles dealing 4% and very weak set knockback away from themselves. If any of the birds get shot as they go up, Trucy will mourn their death like the rabbit.

Down Aerial: The first preference of this move is for Zak to wrestle away a newborn baby Apollo from Thalassa. After this, Zak throws Apollo to the ground, making him a projectile that deals 20% and fantastic spiking knockback. Thalassa will mourn his death like Trucy does for the dead animals, but if you walk over the area you can pick up Apollo’s corpse to use it again if you did not throw it off-stage. Otherwise, Zak will wrestle away Mr. Hat from Trucy and throw him to the ground instead, again making Trucy cry. You can go pick up Mr. Hat like with baby Apollo to throw him again, and he’ll still be in good enough condition for his cape to obscure his body to work for mindgames in Up Special. If both Mr. Hat and Apollo are dead, Zak just steals a dair from his fellow black villain, Ganondorf, stomping downwards. Valant will just send a magical fiery blast downwards for this attack, which is only half as powerful.

Final Smash: Manfred Von Karma comes on-screen and screams “OBJECTION!”, instantly KOing Zak and anybody near him, but not taking a stock off his counter. Instead, for the rest of the match you now play as Von Karma. All cops that are out will now be hostile only to the foe. If Thalassa, Trucy, Valant, or Olga are still alive, they will now function as witnesses. If Kristoph is out, he will laugh maniacally before committing suicide.

Playstyle Summary: Abandon everyone as soon as possible, leave everything up to Valant. Come back 10 seconds later in disguise, then start framing the foe en mass by shooting your allies then giving them the gun. All of the cops don’t have to go on them, considering there’s so many, but they keep showing up at an annoyingly common enough rate that you’ll have to blame your allies. Inevitably, one or two will come after you, to which you can just make heavy use of your allies as meat shields. In general, you want to cause as much chaos as possible, preferably summoning some criminals from the grab-game to fight the cops. If they come after you specifically, just spam the nair to confuse them as well as the foe while you wait for more cops to spawn. The best idea of all is to frame cops for the murder of other cops to cause even more chaos if you can’t set them directly on the foe, then just cover the stage in smoke so the foe will inevitably get shot up. Once utmost chaos is out on the stage, you can feel free to abandon the stage – your work is done. Leave everything in the capable hands of your dear partner, Valant.
 

Katapultar

Smash Lord
Joined
Nov 24, 2008
Messages
1,284
Location
Australia
[collapse="Zak Gramarye"]This is an incredibly proppy set to a ridiculously high degree, though in some ways it's a relief because it means such thing is acceptable. It's not had to tell that the attacks and such are a parody of the events that occurred in Apollo Justice given how incredibly scripted it all is, as well as being a parody of Von Karma. Set-wise it's pretty decent with some fun ideas, though a little hard to take seriously sometimes and the pacing is uncomfortably quick, which is probably not helped by the presentation and unviewable pictures.

EDIT: the set looks a hundred times better with the pictures. The whole thing is actually pretty amusing to imagine, and I do genuinely like it despite the impression I may have given out before.[/collapse]
 

FrozenRoy

Smash Lord
Joined
Apr 26, 2007
Messages
1,268
Location
Las Vegas, Nevada
Switch FC
SW-1325-2408-7513
Meta Knight Tier / Good Plorf Set

First off, I want to give major props for the presentation of this piece, as having to step through the looking glass so to speak is quite nice, then the actual set itself carries a simple yet effective and aesthetically pleasing look through it's entirity.

The set itself is a favorite style of mine, taking simple yet effective steps to create a playstyle best described as "fun", with some nice inklings of creativity: The Down Special guard/counter is particularly fun, making up for Dark MK's projectile weakness(One is non-spammable, the other not hitting foes most of the time), plus I enjoy that the time and strength don't increase at the same time, especially as it makes perfect sense for Dark MK to power up his power before it's lasting.

The standards and smashes follow this, with sweetspotting in the Forward Tilt(I always wished we saw more movesets with an emphasis on sweetspots...), the Up Tilt provides a nice attack that gives playstyle relevance with a simple block-and-strike, especially since aerial approaches are likely common against Dark MK thanks to his tornado, the Dash Attack being able to go off the side and being, well, Drill Rush but more relevant makes for some nice MK/Dark MK paralell even moreso and being playstyle useful. The Forward Smash's nice range and projectile destruction properties are also nice, while the Up Smash is a tricky little beast and the Down Smash is a basic but effective move.

The aerials are also nice, though I dislike the Up Aerial, as it feels a bit forced: The back aerial placing even more importance on spacing with it's strong ability to semi-spike is also nice, the Forward Aerial giving you nice soft reactions with the tornado and launchers like the Down Tilt and the use of a ZAir when it's not entirely obvious pleases me: It's an input not often used to any relevant context or seen.

The throws, however, tie it all together for me: The Forward/Back throw especially, bouncing the tornado's long time around or messing with their ability to Air Dodge followups with your Side Special, plus some general fun knockback play, with some basic prone for the tornado and a personal favorite in the Down Throw, as it leads to great rewards for he who can read the Directional Influence and plays so well in with Dark MK's spacing game, all without going over the top.

Of course, no set is beyond criticism, and so too does Dark MK have things to complain about: The Side Special only hitting dodging foes feels extremely "hippo" here: Perhaps you could have included a light push/wind effect for non-shielding/dodging foes? It fits well into the spacing game and the Up Smash shows Dark MK can do that anyway. And as I mentioned, the Up Aerial seems like forced creativity, when I feel something more playstyle relevant could have been included in this. Some might complain flow is a bit sparse, but it feels so dedicated to it's craft that the moves flow naturally into a singular game of spacing and wits.

In other words, "Good Plorf Set".

"I have only one wish. Box up that moveset."

I love seeing you continue to do movesets for Madoka witches. Their designs are absolutely phantasmigorical and they usually end up doing something interesting, even if it's an Elsa Maria that I don't always get.

This moveset follows that suit, with a fun and engaging start with the odditity of the televisions. Move over Persona 4: We've got a new TV boss in town! I do quite love the TVs: Their multiple uses are quite well thought out and I feel it's use of chain reactions is much more palatable than Ratigan's, reminding me of Alice's dolls in how they work as projectile platforms or bombs, but done in a refreshingly different manner. Her minions being so weak is nice as it makes the fly harder to accomplish: With the Fly itself being more interesting than an average Fly, though I do wish a little bit of time had been devoted to saying how the foe can use both tilts and aerials. Something I truly love about this Fly is that it captured the spirit of Madoka's witching realms and especially Elly's own, with it's free flight and floaty feel, the battle being "televised" so to speak behind the scenes in FFAs, that sort of thing. It also feels much easier to survive than some Flies we've seen, while still providing a notable boost.

The jab's simple television interactions also tickle my fancy, especially since it means foes will have to be active against destroying them: Even if Elly does often destroy them herself, she can always just keep healing off TVs and overwhelm a foe too passive. It fits well given Elly seems to be categorized as a bit aggressive, if weak. Forward Tilt's ability to re-organized televisions is also well liked, being organic and simple and not putting your minions at risk. Up Tilt being able to NOT teleport is also a nice improvmenet over the preview I saw.

This moveset does have some downsides, to me: I'm not entirely sold on the aerial minion formations as being a good idea, they don't always feel quite as organic or playstyle intensive as I'd like, though you do solve the issue of "Sometimes, I don't want you to do that!" nicely. I also feel that the Forward Throw just seems...weird and sort of useless, kind of out there, but not in the most pleasant of manners. The Pummel is superb, however.

A final complaint is I feel that, after the standards/smashes, Elly seems to lose her playstyle in the shuffle so to speak, as the aerials seem a bit...disjointed from the rest of the set, I suppose, even if it does regain some of it's flair there in the throws. Still, the playstyle is solid enough that combined with the cool aspects of the set, it's good. I just feel it could have been better.

Komment Kong

I had the pleasure of previewing this pretty set before it was posted, so I'm quite happy to have to read it twice(Since I read it once, didn't comment for a while and thus am rereading it).

The ground chunk playstyle is a nice little throwback to the time of Nappa and Golem, though I'll say right now, I prefer Nappa to Koala Kong, even if Nappa is infinitely more broken. One area that Kong does excel over the old overpowered fogey, however, is the emphasis on the beyond-the-ledge game, especially with that fantastic dash attack, a great and fun abuse of the ground chunk.

...Can't Koala Kong infinitely stall off the stage with U-Tilt? Or can he not put the platform under him via pressing down in midair? Easy enough to fix it doesn't matter, but worth asking. I also do find it kind of odd he has so many aerial grabs, though not necessarily bad: His gimping game is gratuitously well developed, with the (cool) F-Tilt spike, Up Smash reminding you of stage spiking and the like.

"If you grab something with more depth than Wario, Froy and HR will be displeased to find that Kong doesn’t swing that way." Let me just admit that made me smile and laugh. I will say, though, I'm not much of a fan of the Up Aerial: It seems a bit complicated without a ground chunk and perhaps a tad situational, the breaking and refusing the ground chunks seems kind of odd since I don't see how he'd be able to actually keep them together(And it misses the chance to let us see what wielding two split up ground chunks might be like!) and the aerial pitfalling doesn't seem all that worth all this. Similiarly, the ground chunked Up Throw seems less fun and to an extent playstyle relevant/useful than the normal Up Throw.

Overall, though, Koala Kong is quite good. He's at his best when he works on the pure and simple chunk-based gimping game and basic manipulation of the chunk's solid nature, IMO, alongside that splendiforously wonderous(Whee, long words!) dash attack. Sometimes, however, it feels like the set delves more into other playstyles that don't seem to mesh as well with the overall plan or just are not as well done(Such as the ground chunk swinging with UAir) and on ocassion it feels like it's doing complexity for complexities sake(To me, anyway). But this is not nearly enough to overcome the better parts of this set, assuring this will be a nice contender for MYM13.

Oh, also, props for the awesome MUs. Always love to see those!

Silly Warlord, Trixie is for Kids!

Hm. I was gonna make a Trixie set. I suppose I should make it next contest, then.

The hat mechanic seems awkward to me: Trixie is many things, but one to hide her magical talent's source, she is not. And she never seems to care to hide her horn in the show, the hat is basically just for show! I suppose it does work in the sense Trixie is intentionally doing this to try and trick the foe, but I feel better means could have been accomplished for this.

Trixie using Poison Joke? Why? The fact it's effects are random seems a bit odd, too: Just limiting it to the first effect, the one that seems most fitting for how Poison Joke works, seems better and more reliable to me. I also don't really like the Down Tilt: Brawl ice from a hay smoothie? And why is Trixie fighting with a smoothie, of all things? Also, 3 SSB platforms is definitely KO material, seeing as that is essentially the entire length of Battlefield. Use that near a ledge and unless the foe has a great recovery they're probably screwed.

That down aerial is ridiculously situational, even if you can activate it yourself. And that grab game is sad!

I can't say I like this...the playstyle seems weaker than, say, Larfleeze, the set doesn't feel particularly Trixie-ish(it doesn't feel...magician-y, to me), I dunno...not my cup of tea, even if it doesn't have enough bad that I'd go ranting at it. The extras are nice, though, especially the symbol you've got there.

And...I think that's all my commenting for tonight, actually. Hopefully I'll get to Lizard(Best character choice) and Putata tomorrow. or I guess maybe if I get bored, later tonight. Rankings have been updated both with the four sets I have commented, but with some sets movin' on up and droppin' on down in the world. Check it out if you've had a set ranked there already!
 

Grizzlpaw

Rawr~ ♪
Joined
Mar 15, 2012
Messages
1,765
Location
Charific Valley
3DS FC
1289-9519-4206
Zigzagoon Moveset

A rough of my zizgagoon moveset :)

All the moves, and attack nechanics are there...

...but the move descriptions aren't very consise. (to say the least)


Will post the a much more condensed version in a few hours:)

[COLLAPSE="Zigzagoon draft - Not for the faint of heart"]
Zigzagoon


Stats
Traction: 10
Movement: 7
Weight: 1.5
Areal Movement:8.5
Size: 2
Falling Speed: 4
Jumps: 2


Traits

A wild Zigzagoon appeared and he's ready to brawl!

Zigzagoon is about as odd as they come. He's feather-light, floaty, fairly shortranged in the air, and a bit on the weak side. Zigzagoon isn't going to cause his opponents to see stars any time soon. This little pup boasts has few powerful K.O. moves. All of which, are quick to stale. Heavy fatties like Bowser and DDD are going to be hard for this little pup to take down. To make matters worse for the striped racoon. He boasts 2nd lightest character in the game, reaching reliable K.O. percentage at as early as 65% without stellar DI.

So then, does that mean Zigzagoon is a bad character? Nothing can be further from the truth! Zigzagoon has a lot of intresting characteristics that can make him quite unpredictable and difficult to take down. His most prominent trade being a mind blowing Frame 1 Pivot!

You heard right. Zigzagoon can change directions on a dime. Allowing him to litterally zigzag in and out of his opponent's range with ease. (This will be explained further in the AT's section)Alongside this, Zigzagoon is blessed with an immunity to tripping, excellent air speed, fantastic recovery, decent walking and running speed, decent priority, low lag attacks, and a fairly large shield for his small size.Zigzagoon also has two has decent projectiles, and variety of interesting sweetspots on his moves that might make make his opponents second guess thier approaches.


Moveset

Each move will be rated based on Speed, Start/ End lag, Priority, Damage, Range and Knockback. Each move rated out of 5 :pokeball:


Standards


A - Headbutt/ Bite

Speed :pokeball::pokeball::pokeball::pokeball::pokeball:
Lag :pokeball:
Priority:pokeball::pokeball::pokeball::pokeball:
Damage :pokeball::pokeball:
Range.:pokeball:
Knockback:pokeball: / :pokeball::pokeball: (with bite)

Zigzagoon's fastest option.

Zigzagoon jumps forward about half a character distance and headbutts the opponent. The hitbox comes out on frame 1 and is zigzagoon's entire hurtbox as he moves forward.

This attack will also connect if zigzagoon is facing backwards; provided, part of Zigzagoon's tail is touching the opponent when the hitbox comes out.

Zigzagoon's jab doubles as a two hit combo. The headbutt itself deals little stun and near-zero knockback, and only hits for about 2-3%. However, zigzagoon can immediately hit A again after the attack connects to bite the opponent for annother 4-5% with little knockback. Totalling up to about 6-8%.

While the 2nd hit is almost always guaranteed if the first hit connects, this move is NOT safe on shields, since it puts Zigzagoon directly into the opponent, and has near zero shield stun on the first hit. Even if not perfect-shielded.

Interestingly enough however, the bite portion of the attack will practically eat shields, greatly reducing the size, and dealing respectable stun as well.Both the one hit and two hit versions have have very little end lag, allowing for quick followups.

Ftilt - Shadow Claw

Speed: :pokeball::pokeball::pokeball::pokeball:
Lag::pokeball::pokeball:
Priority::pokeball::pokeball::pokeball::pokeball:
Damage::pokeball::pokeball::pokeball:
Range::pokeball::pokeball::pokeball:
Knockback: :pokeball: (Sourspot) / :pokeball::pokeball::pokeball: (Sweetspot)

One of Zigzagoon's primary ground spacing moves.

Zigzagoon raises up a bit and swipes at the opponent, causing a shadow-like claw to appear a small distance from Zigzagoon's paw. The move has a small disjoint away from the shadowy claw both above and away from it. This move an be angled upwards or downwards.

The sourspot of this move (zigzagoon's paw) deals the same amount of damage as the sweetspot, but gives no stun or knockback, making it very punishable.The sweetspot, however (everything else), deals decent stun and knockback. It will also slightly push back sheilds. (The pushback is significantly less on powershields however).

The sweetspot on this attack will usually K.O. at around 185%

Dtilt - Shadow Ball

Speed: :pokeball::pokeball::pokeball::pokeball:
Lag: :pokeball::pokeball::pokeball:
Priority: :pokeball::pokeball::pokeball::pokeball::pokeball:
Damage: :pokeball::pokeball:
Range: :pokeball::pokeball::pokeball::pokeball:
Knockback: :pokeball: / :pokeball::pokeball:(explosion)

Zigzagoon's other spacing option of choice.

This move functions slightly different that most Dtilts in that it technically doubles as a projectile.

Zigzagoon quickly hops back and spits a tiny shadowball diagonally downward towards the ground. The shadowball travels down at a 45 degree angle, and will create a cute little explosion whenever it hits either the opponent or solid surface (usually a wall or the floor).

The attack has two variations: One where the shadow ball connects, one where the explosion connects.

  • The shadowball itself deals no knockback but will put the opponent into the "stunned" animation (similar to ZSS's uncharged shot), allowing for some amazing followups on zigzagoon's part.
  • The explosion (more of a small "poof" really) will deal a small amount of stun and knockback, and give Zigzagoon a small frame advatage over the opponent (about 2 frames worth). Please note though, the opponent has to be completely grounded for the explosion to connect.
  • This attack can be shot off of platforms
  • If Zigzagoon is at any kind of edge, he hops in place.

Both the explosion and the shadow ball also have transcending priority so they'll hit through practically anything.

In a nutshell: Zigzagoon shoots a small projectile at the ground and retreats about 1/2 of a character distance away.

Utilt - Flip

Speed: :pokeball::pokeball::pokeball::pokeball:
Lag: :pokeball::pokeball:
Priority: :pokeball:
Damage :pokeball::pokeball:
Range: :pokeball:
Knockback: :pokeball:

Zigzagoon jumps up and does a cute little circus flip.

Just like his jab, Zigzagoon's hurtbox is the hitbox for this attack.

This move has no priority to speak of.

It will combo into itself at lower percents.

Fsmash - Illusion

Speed: :pokeball::pokeball:
Lag::pokeball::pokeball::pokeball::pokeball:
Priority: :pokeball::pokeball::pokeball::pokeball:
Damage: :pokeball::pokeball::pokeball:
Range: :pokeball::pokeball::pokeball:
Knockback: :pokeball::pokeball::pokeball:

Zigzagoon crouches like a cat ready to pounce. This suddenly dashes back and forth through the opponent. Slashing him/her with it's claws both times along the way.

The second hit of the smash is the K.O portion of the attack.

Other Notable Properties:

  • The opponent cannot DI the first hit to escape the second hit
  • The move has a fairly long startup, but Zigzagoon gains super armor as he moves forward.
    • Zigzagoon can be launched on the retreating portion of the attack
  • The second hit is the K.O. portion of the attack.
    • It will K.O. reliably at around 170% fresh

Usmash - Thunder

Speed: :pokeball::pokeball::pokeball:
Lag::pokeball::pokeball::pokeball::pokeball:
Priority::pokeball::pokeball::pokeball::pokeball:
Damage::pokeball::pokeball::pokeball::pokeball:
Range::pokeball::pokeball::pokeball::pokeball:
Knockback: :pokeball::pokeball::pokeball::pokeball::pokeball:

This basically is Zigzagoon's K.O move.

This move has two segments.

Zigzagoon raises his head and barks. The bark creates a surprisingly large popup hitbox around Zizgagoon's body. (front and back).Once the opponent is directly over Zigzagoon's body, he barks again and releases a mighty thunderbolt from his body, dealing high knockback and launching the opponent directly upwards.

Note: Basically Ivysaur's bulletseed, except a few frames slower, and with lightning.

Oddly enough, if the opponent blocks the pop up hit, Zigzagoon will cover his head and cower on the ground for a bit. Adorable, but not exactly good for us.

K.O's reliably at around 100% fresh even on heavy characters.


Zigzagoon: "Have Mercy! *wimper*"


Dmsash - Seed Bomb?

Speed: :pokeball::pokeball::pokeball::pokeball::pokeball:
Lag: :pokeball::pokeball:
Priority: :pokeball::pokeball::pokeball::pokeball::pokeball:
Damage: :pokeball::pokeball::pokeball:
Range: :pokeball::pokeball::pokeball:
Knockback: N/A

Zigzagoon thinks he's a Ninja.
Too bad he's not very good at it. :(

Quick as a flash, Zigzagoon tosses a small seed at the ground where it explodes in a brilliant flash of light.

It's exactly like tossing a Deku Seed down on the ground...

Except... Zigzagoon gets hit by it too. Every time.

This move is TERRIBLE if it whiffs. But when it hits, Zigzagoon will regain control about 5 frames before his opponent.


Ninja.


Specials

B - Pivot

Speed: :pokeball::pokeball::pokeball::pokeball::pokeball:
Lag: :pokeball:
Priority: :pokeball::pokeball::pokeball::pokeball::pokeball:
Damage: :pokeball:
Range::pokeball::pokeball:
Knockback: :pokeball:


"But wait a second! - Xigzagoon already has a Pivot! Why do I need two?"​


This move works much like Zigzagoon's regular pivot. Except that it's slightly slower and doubles as an atack!
You can even use this move to quickly turn around in Midair!

Zigzagoon switly turns around and creates a small virtical shockwave a short distance away from his feet.
The pivot isn't instantaneous like his regular pivot (It takes 6 frames instead of 1), but it works in mid-air, and can be a great way to retreat while simultaneously doing a small bit of extra damage.

The move only deals about 4-5% in damage, but it deals just enough hitstun for Zigzagoon to successfully make it to safety.

Unlike his regular pivot, Zigzagoon will always enter his dash animation at the end of this move.

If he's in the air, It will completely reset his horizontal momentum in the opposite direction.
This also applies to horizontal momentum cancling.

Other Notablie Properties:

  • Using this in midair will not cause Zigzagoon to enter freefal
  • This move does not waste Zigzagoon's recovery
  • In the air, Zizgagoon can still use this move even if his horizontal areal movement is 0
    • This move will cause Zigzagoon to immediately hit his maximum air speed in whichever direction he isn't facing
  • This move does nothing if Zigzagoon is standing still.
  • Zigzagoon's feet, the shock-wave, and everything in-between is included in the hitbox

Side-B - Seed Cannon

Speed: :pokeball::pokeball::pokeball::pokeball::pokeball:
Lag: :pokeball::pokeball::pokeball::pokeball:
Priority:pokeball::pokeball::pokeball:
Damage: :pokeball::pokeball:
Range: :pokeball::pokeball::pokeball::pokeball::pokeball:
Knockback: :pokeball:

You guessed it. More seeds.

When on the ground, Zigzagoon spins in place, and tosses a seed at the opponent.

These seeds don't immobilize the opponent like his D-Smash does, but they still pack quite a punch.

The seed travels in a straight line at speeds equivalant to sheik's needles in SSBB.

There's quite a bit of endlag after this attack, so Zigzagoon can only toss about 1.5 seeds per second. But the seeds can travel up to 3/4 the legnth of Final Destination without hitting anthing before it explodes on their own.

In the air is where this attack really shines.
Zigzagoon meerely tosses his head, magically makes a seed appear... and throws a seed at the opponent. Not only is there almost half less here, but you can also tilt the Analog stick slightly up or down to adjust the trajectory of the seed toss.

Zigzagoon can fire off about 2.25 seeds a second while airborn.

This attack deals damage and hitstun, but almost no knockback.

Up-B - Quick Attack

Speed: :pokeball::pokeball:
Lag: :pokeball:
Priority: N/A
Damage: N/A
Range: :pokeball::pokeball::pokeball::pokeball::pokeball:
Knockback: N/A

This move is basically what Zigzagoon wishes his ExtremeSpeed was like.

On the ground, Zigzagoon crouches, and then suddenly vanishes.

At this point, you can input any direction on the controll stick to cuase him to move about 1/4 a FD legnth in that direction. This move can be used twice before Zigzagoon reappears. You can even tap the same direction twice to move in that direction again.
Hitting down while grounded will waste one of his uses, but is great for stalling.

This move has the exact same properties in the air, except that the start up delay is halfed.

Notable properties:

  • This attack can move through opponents
  • This attack can NOT go through impassable objects
  • It CAN go through passable objects (e.g. platforms)
  • This attack does not effect the opponent in any way, even if Zigzagoon passes through them.
  • This move has a lot of start up lag, even in the air.
    • Start up Frames: 21 Grounded--/--11 airborne
  • using this move does not put Zigzagoon into freefall, but his horizontal areal movement speed is cut down significantly until he lands.
  • This move has zero end lag, so Zigzagoon can do any action immediately afterwards.

Down-B - Covet
Speed: :pokeball::pokeball::pokeball::pokeball::pokeball:
Lag: :pokeball: / :pokeball::pokeball::pokeball::pokeball::pokeball: (Whiffed)
Priority: N/A
Damage: Varies
Range: Varies
Knockback: Varies


Be careful, Zigzagoon wants your stuff!​


Zigzagoon goes up on his hind legs and begs like a dog asking for treat. Who can resist those puppy dog eyes right?

This move acts a little strangely.
First of all, It has only 1 start up frame.​
Second, it's a simi-counter.​

Basically, if the opponent is within 1/2 a character distance in front of Zigzagoon's hurtbox, and isn't either dodging or shielding, the attack will connect.

There are three varients of the attack after this.

  1. Opponent has no item
  2. Opponent has a projectile item (e.g. Capsule, banana, ZSS suit piece)
  3. Opponent has a Meele Item ( e.g. Beam Sabre, Lipstick, Home-Run Bat )

Opponent has no item
  • If the opponent is in the middle of the attack and hits Zigzagoon while he's begging, the attack won't connect, and instead the opponent will get hit by a giant pink heart.
  • In the animation, a giant pink heart grows rapidly outward from the center of Zigzagoon's body and hits the opponent, dealing electrical damage.
    • Whent he heart vanishes and Zigzagoon is visible again, he will be in his normal standing animation.
  • The heart is surprisingly powerful and will deal around 15-19% along with respectable knockback (K.O's at around 150%).
  • If the opponent isn't attacking, but is still within range. Zigzagoon will paw at the opponent's feet. The opponent will then enter the "footstooled" animation, recieve no damage, and will regain control at the exact same time that zigzagoon does.

Opponent has a projectile item

  • Zigzagoon will beg as usual and the opponent will reach over and place their item in his mouth.
  • Zigzagoon will then resume his regular standing animation and will regain control 5 frames before his opponent does.
  • If the opponent has an item, and tosses it at the same time that Zigzagoon begs, zigzagoon will catch it in his mouth, then toss it right back at them. The opponent cannot block this.
    • If the opponent is out of the attack's range and tosses an item at zigzagoon, the item will connect as usual
    • If the opponent tosses a bob-omb at zigzagoon, or any other similar exploding item --> It Zigzagoon will still catch it and toss it back. If the explosion hits him he will get hurt as usual

Opponent has a meele item

  • Zigzagoon will beg for the item and the opponent will reach over and put it in his mouth
  • Afterwards, Zigzagoon will smile sweetly at his opponent and whack them with it. They cannot block this.
    • The "whack" counts as a normal standard "A" attack while holding the item
  • If the opponent is in the middle of an attack and hits zigzagoon with the item while he's begging. The pink heart will come out as usual, but then the item will fly out of the opponent's grasp when they're knocked back, and Zigzagoon will automatically catch it
  • It the oponent throws the item at zigzagoon at the same time that he begs, Zigzagoon will catch it and toss it right back at them. The opponent cannot block this.
This attack is, like his D-Smash is TERRIBLE if it whiffs. It will whiff if:
  • The opponent has up their shield
  • The opponent dodges or is invincible
  • The opponent is in the air
    • Zigzagoon will not counter the opponent's attack if the opponent is airborne when the attack connects.
  • The opponent is out of range

If the attack whiffs, Zigzagoon will stop begging and instead start pawwing at the ground for about 5 seconds.

  • The Begging frames last from Frame 1 --> Frame 49
  • The "Whiffed" Frames last from Frame 50 onward
  • Although Zigzagoon doesn't actually go up on his hind legs until Frame 21, the "counter" portion of the attack still comes out on frame 1.
  • If the opponent isn't in range of the attack at first, but then comes within range --> the counter will still activate.
  • This attack won't worn neither in the air, or for a short ammount of time after zigzagoon takes damage.

    In other words, it's not a combo breaker. (unfortunately)

Areals

Nair - Spike Ball

Speed: :pokeball::pokeball::pokeball::pokeball::pokeball:
Lag: :pokeball:
Priority: :pokeball:
Damage: :pokeball::pokeball:
Range: :pokeball:
Knockback: :pokeball::pokeball::pokeball:

Zigzagoon curs into a ball, extends his fur outwards like tiny hairy spikes, and spins.

This move hits multiple times.

It also has has a very small disjoint away from Zigzagoon's hurtbox.Unfortunately, the move has terrible priority, so it won't go through anything.

U-Air - Ice Rush

Speed: :pokeball::pokeball::pokeball::pokeball:
Lag: :pokeball:
Priority: :pokeball::pokeball::pokeball::pokeball:
Damage: :pokeball::pokeball: (sourspot) / :pokeball::pokeball::pokeball: (sweetspot)
Ramge: :pokeball::pokeball:
Knockback: :pokeball: (sourspot) / :pokeball::pokeball::pokeball: (sweetspot)

Not many people know that Zigzagoon can learn Ice type attacks.
So your opponent might be a little bit surprised when the sweet spot lands at higher percents.

Yup. This move can freeze.
Zigzagoon faces his tail upwards in mid air and sticks it straight out. Then starts to spin, hitting the opponent multiple times.

This move acts alot like any other multi-hit Uair if the sourspot hits...

... But if the sweetspot hits, the oppoennt has a tiny chance at getting frozen with each hit that connects.

The % chance of the oppoennt getting frozen per hit rises as by a small amount their damage % rises.

Zigzagoon's entire hurtbox is the hitbox for this attack, but the sweetspot it located at the very tip of zigzagoon's tail. The final hit launches the opponent away.

Other Notable properties:

  • There is a weak vaccum around the sweetspot for this attack. All the opponent has to do it get hit by any part of the sourspot, and they will be slowly sucked towards the sweetspot with each hit.
    • This attack cannot be DI'd except for the final hit, which launches.
    • The knockback final knockback for the sourspot is significantly less than the sweetspot.

B-Air - Slam

Speed: :pokeball::pokeball::pokeball:
Lag: :pokeball::pokeball::pokeball::pokeball:
Priority::pokeball::pokeball::pokeball::pokeball:
Damage::pokeball::pokeball::pokeball:
Range::pokeball::pokeball:
Knockback:pokeball::pokeball::pokeball:

Zigzagoon's laggiest areal.
Zigzagoon sticks his tail straight out and does a graceful little backflip...

...That also doubles as a powerful spike

Like many of his other attacks, Zigzagoon's hurtbox is the hitbox for this attack. This is helped somewhat by the face that zigzagoon sticks his tail out during the attack.

There is no sourspot on the spike, so it will connect as long as any part of the hitbox connects.

F-Air - Scratch​

Speed: :pokeball::pokeball::pokeball::pokeball:
Lag::pokeball::pokeball:
Priority::pokeball::pokeball::pokeball:
Damage::pokeball::pokeball:
Range::pokeball:
Knockback::pokeball:

Scratch. It's been in Zigzagoon's moveset since Lvl. 1, and it's not going anywhere anytime soon.

As the name implies, Zigzagoon reaches a single claw out mid flight and swipes it at the opponent.

This is one of a few of Zigzagoon's moves with a disjointed hitbox. The hitbox on this attack is located at Zigzagoon's claw as well as a small distance away from it.

This attack deals low damage and knockback, but the hitstun allows for some decent follow ups at low-mid percents.


D-Air - SpitFire

Speed: :pokeball::pokeball::pokeball:pokeball:
Lag::pokeball::pokeball::pokeball::pokeball:
Priority::pokeball::pokeball::pokeball::pokeball::pokeball:
Damage::pokeball::pokeball:
Range::pokeball::pokeball::pokeball::pokeball::pokeball:
Knockback::pokeball::pokeball:

"Look out! It's Raining... Seeds?"​

Xigzagoon, master of the seed-based arts comes in with another seed based attack. And no, Zigzagoon doesn't have to worry about hitting himself this time either...

Zigzagoon flips upside-down in mid air and spits tiny invisible projectiles down on his opponents.

This attack is excellent for aerial camping and pairs well with quick attack because it allows him to spit fast-traveling seeds down at the ground. That explode on impact!

Unlike his side-B, these seeds don't have a set timer, and won't explode until they hit either the opponent, or anything else solid.

This is a great way to annoy opponents while in the air, and will deal a slight bit of and knockback as well.

Surprisingly enough, while this move travels directly downward, this attack will typically launch the opponent off upward at a 45 degree angle. This doesn't mean much since the attack can't K.O., but it's worth noting.


Note: This attack comes out fast, but has a lot of end lag (slightly more than his Side Special). As a result, zigzagoon is only able to spit seeds out at a rate of about 1.3 per second.


Grab Game

Z - Grab

Range: :pokeball:

Zigzagoon snips at his opponent and tries to snag them in his tiny jaws. Maaaaybe not the most threatening grab in the game, and certainly not very long ranged.

A - Nuzzel

Speed: :pokeball::pokeball::pokeball::pokeball::pokeball:
Damage::pokeball:

Just a Pummel.
It's extremely weak, but it comes out super fast. Watching Zigzagoon nuzzle his opponents to death never simply gets old!

F-Throw - HeadShot

Damage::pokeball::pokeball::pokeball:
Knockback::pokeball::pokeball::pokeball:

Zigzagoon's most damaging throw.

Zigzagoon tosses his head, and throws his opponent a short distance away from himself. Then fires of a ShadowBall at the opponent's head

An interesting face about Zigzagoon's F-Throw is that the trajectory of the shadow ball varies depending on the opponent he tosses. So it will always blast the opponent in the right head, no matter their size!

HeadShot K.O.'s reliably at around 175%


D-Throw - SteamRoller

Damage: :pokeball:
Knockback: :pokeball:

Zigzagoon bruitally slams his opponent down on the ground. Then curls into a spike ball and rolls over them while they're down. Ouch.
Hits up to 10 times.

This is zigzagoon's weakest throw both in terms of damage and knockback. However, it has some of the best follow ups, allowing Zigzagoon too pull of some pretty surprising combos off. Even at Mid-High percents!


U-Throw - Rejoice!

Damage: :pokeball::pokeball:
Knockback: :pokeball:

Zigzagoon tosses his opponent into the air like a hat at a parade!

This definately isn't zigzagoon's most damaging throw, and doesn't give much more knockback than his dthrow. Although, it can lead into some pretty nasty juggles.

That, and zigzagoon looks so happy when he does it!


B-Throw - Pivot Kick

Damage: :pokeball::pokeball:
Knockback::pokeball::pokeball::pokeball::pokeball:

Zigzagoon turns around --> Tosses his opponent a short distance away from himself --> Runs toward them --> Jumps at them --> And then uses his pivot to kick them away.

...All within the process of about a second.

This is Zigzagoon's most powerful throw, and the best choice when looking for a K.O. \
And to top it all off...

It looks plain awesome!

Pivot Kick will K.O as early as 149%

Advanced Techs​

Strafing

Function: Zigzagoon Neutral-B's away from his opponent, then immediately shoots his seed cannon at them with reduced start up lag. The seed cannon cannot be blocked at higher percents if the pivot connects. This only works in the air.

Explanation: While airborne, input Zigzagoon's Neutral B, and then immediately input his side special (towards the opponent).

Note: This is nearly impossible to do without setting the C-Stick to specials because the attacks have to be inputted within 3 frames of each other.

Pivot Canceling

Function: Input Zigzagoon's Neutral-B whenever he gets launched in order to completely reset his horizontal movement in the opposite direction.

Please note that while this tech has absolutely no effect on vertical momentum. For example: If Zigzagoon gets hit by an attack that launches him upwards and to the right at a 45% angle and he uses this tech --> His momentum will immediately shift upwards and to the left at a 45 degree angle.


Closing Comments​

While this little guy isn't running away, he's usually pelting you with seeds. Zigzagoon is about as annoying as they come, boasting excellent speed, and two extremely annoying projectiles to make up for his pitifully short range. He might not be able to take many punishes before he finally kicks the bucket, but played smartly and safely, he won't be going down without one heck of a fight.


[/COLLAPSE]
 

Katapultar

Smash Lord
Joined
Nov 24, 2008
Messages
1,284
Location
Australia
[collapse="Zigzagoon"]This is a very cute moveset with its heart set in many right places. It has a lot of detail for something so simple, and a pretty inviting writing style. The presentation has a lot of weaknesses to it however, as listing an attack's properties as statistics is completely unnecessary when you're already doing it in the actual attack. Nobody will want to pay attention to them as such. As good as the writing is on certain levels too, it can get pretty fragmented and weakens the experience a little (there are times when you create too many sentences that could otherwise be one). While the detail put into the moves is easy to respect, using seeds, electricity, shadow balls and ice on such a casual basis for essentially over half its attacks don't make it feel like Zigzagoon despite being able to learn some of those moves. Covet also seems to be a pretty problematic move, as it sounds rather unbalanced when it comes out so quickly and cripples foes who aren't attacking, pretty much forcing them to always be doing so whenever they're near him. Five seconds of lag upon whiffing is pretty heavy stuff, but then again Jigglypuff goes through the same thing with Rest.

Despite my criticisms, I did greatly enjoy the little moments the set had to offer with its writing - it has a good eye for detail with the animations, making it appealing to visualize...my favorite move was Seed Bomb with its hilarious opening line and the idea of Zigzagoon being hit by the Seed Bomb. Sure, it's inconvenient in practice, but fun to imagine - easily one of your best movesetting traits to be able to bring out such character. In all honesty, with a bit of polish to your presentation, attack choices and sentence structuring your potential could lead to some amazingly unique set outlooks.[/collapse]
 

Grizzlpaw

Rawr~ ♪
Joined
Mar 15, 2012
Messages
1,765
Location
Charific Valley
3DS FC
1289-9519-4206
^ lol, saw this just as I finished editing my post.

This my first time trying soethimg like this...

I maaay have gotten a bit too happy with the details...

:phone:
 

Bionichute

Smash Champion
Joined
Jun 30, 2012
Messages
2,151
Mr. Dark, master of evil!


Mr. Dark is Rayman's arch-nemesis. He has dark magical powers which he uses in many ways. His most infamous deed was stealing the Great Protoon, which keeps the world in balance.

STATS:
Weight: 5
Height: 6
Traction: 4
Aerial Movement: 8
Falling Speed: 3
Jump: 7
Ground Movement: 4


SPECIALS:
Standard Special: Magic Spell:
Mr. Dark flicks his finger, sending out one of three magic spells.

The first is the Fireball spell, which is the most basic of the specials. The Fireball is as big as an Unira, travels at a slow to medium speed, and goes as far as three Bowsers before petering out. The Fireball will cause 15% on contact, and also sets opponents on fire, causing them to rapidly take 1%. The move can be aimed by holding the button and moving the control stick up and down. There are only three directions Mr. Dark can shoot the fireball: Straight forward, diagonally upward, and diagonally downward.

The second spell happens very rarely, with only a 30% chance of happening instead of the regular Fireball. The spell is the powerful Double Fireball, which is two criss-crossing Fireballs. These Fireballs are the same size, but move even slower then the normal Fireball. They can travel incredibly far, as far as Final Destination is long. Being hit by one Fireball does the same amount of damage as the normal Fireball, but being hit by both Fireballs, which can only happen when both Fireballs meet, the Fireballs do 30% damage, plus the damage from setting the opponent on fire. The spell can be aimed like the regular Fireball.

The final spell can only be cast in mid-air. This spell is the Thunderbolt spell, which fires two thin strips of blue thunder. Unlike the Fireball spell, the Thunderbolt moves very fast, and travels until it hits a platform. When the Thunderbolt hits an opponent it causes 8%, and stuns them for 1 second if they're on the ground, and until they hit the ground if they're in the air. When the Thunderbolt hits a platform, it will become electrified for 5 seconds. The electrified area is as wide as Kirby, and as tall as Kirby crouching. Touching the electrified area will cause 5% and stuns the opponent for half a second. Also unlike the Fireball spells, Mr. Dark can only fire the Thunderbolt diagonally downwards due to being in the air.

Side Special: Fire Prison:
Mr. Dark waves his hand over his head, shooting out two arching Fireballs.

These Fireballs are about the size of a Pokeball, and travel at a medium speed. The Fireballs fire at the same time, but one lags slightly behind the other. When the Fireballs hit the ground with no one in between the Fireballs they create two walls of flames as tall as Mario. The Fireballs themselves cause 4% damage when touched in the air.

If both Fireballs hit the ground with an opponent in the middle, the flame walls will close in on the opponent, creating a prison. The height of the flame walls are proportionate to how tall the opponent trapped is. If the opponent jumps, the flames become as tall as how high they jump, keeping the opponent trapped. When the Fireballs trap an opponent they will start moving on their own, left and right, until 7 seconds pass. The flame walls cause 14% damage when touched, keeping opponents on their toes.

Of course, the main downside of the move is that it is incredibly hard to capture opponents, making it more of a obstacle then a trap.

Up Special: Shape Shift:
Mr. Dark's robe surrounds him, changing him into a dark, electrified sphere.

This sphere can move in any direction, and moves at a slow pace. The sphere has a visible timer on it, shrinking every second until it transforms back into Mr. Dark. The move lasts ten seconds. The sphere can also be used to attack, with the electricity it can damage opponents. The sphere causes 6% and can stun opponents, making it perfect for juggling.

Down Special: Crystal Shield:
Mr. Dark flicks his cape, causing three crystals to appear and spin around him.

These magical crystals give Mr. Dark his evil powers. While mostly acting as a shield, it also acts as a projectile. The crystals protect Mr. Dark from any projectile, but also transform the projectile into 1 of 8 different projectiles. These projectiles are:

Fire: A small Fireball shoots out, causing 6% and setting the opponent on fire.
Ice: A small shot of ice fires out, which does 4% and freezes opponents, with no knockback.
Hammer Bullet: A bullet shoots out, with a hatch opening and a large wooden mallet coming out. The bullet and the hammer both have different hit-boxes, with the bullet being small and doing 7%, and the hammer being bigger, but only doing 6%.
Spiked Berry: A small purple berry covered in spikes shoots out, and bounces slowly along the stage until it falls off. The berry causes 7% damage and slight knockback.
Music Note Bomb: A purple bomb with a sinister face shoots out in an arc. When the bomb reaches a certain point it explodes into 8 music notes, which separate as the fly off. If the bomb is hit it will explode prematurely and cause 7%, while the notes themselves cause 4%.
Boulder: A boulder as large as Bowser shoots out and rolls and a fast pace. If hit, the boulder will explode into 6 pieces and fly off. The boulder causes 8%, while the shards do 3%.
Pot: A pot will appear in front of Mr. Dark. The pot will shake for half a second before flying in the direction it was facing, leaving the lid behind. The pot causes 9%.
Scorpion Claw: A large red scorpion claw will fire out, and after a bit of travel it will travel backwards like a boomerang. Mr. Dark can jump over the claw to make it travel farther. The claw causes 10% when traveling forward, and 7% when traveling backwards.

STANDARDS:
Jab: Mr. Dark swings his hand vertically, with a trail of fire following it. He then swings it horizontally, with a trail of fire following it, too. Finally, he swings both hands horizontally, but both his hands going in opposite directions. Each attack does 3%, with the final hit knocking opponents backwards a bit.

Dash Attack: Mr. Dark stretches his hands outward and spinning around quickly, with trails of fire following his hands, creating a small fire tornado. The attack does 5% and knocks opponents upward.

Forward Tilt: Mr. Dark sticks his hand out and creates a small burst of flame from it. The attack causes 4% and knocks opponents backwards.

Up Tilt: Mr. Dark sticks both his hands upward and creates a small burst of flame from his hands. The attack causes 6% and launches opponents upward.

Down Tilt: Mr. Dark snaps his fingers, creating an explosion of fire in front of him. This attack does 3% and launches opponents upward.

SMASHES:
Forward Smash: Mr. Dark sticks both his hands out, and creates what looks like a large ball of fire. The ball is about as big as Bowser. The large ball can be left on the field, creating a trap for opponents. The large "ball" is actually a fire vortex, which sucks in any items, and opponents near it. If the vortex sucks in an item, it will be incinerated, but an opponent will be trapped in it until it explodes. The vortex can be left on the field for 7 seconds, after which it will explode. The vortex rapidly causes 2%, and 15% once it explodes. The size of the vortex depends on how long you charge the smash.

Up Smash: Mr. Dark raises both his hands, and shoots off many balls of fire out of his hands. These balls fly in an arc, going up and then falling down. When the balls hit the ground they create small flames which stay on the stage for 4 seconds. The flames cause 2% and set opponents on fire, while the balls themselves cause 5%. How many fireballs get fired off depends on how long you charge. There can be as many as 7 fireballs fired at a time.

Down Smash: Mr. Dark presses his hands onto the ground and creates a large wall of flame. The wall will stay on the field for 3 seconds, stopping anyone from passing through it. The wall can cause 7% when going up, and causes 4% when up fully. How tall the wall is depends on how long you charge it. The wall can be as tall as three Bowsers.

All of Mr. Dark's smashes take upward to 8 seconds to charge fully.

AERIALS:
Neutral Aerial: Mr. Dark sticks his index finger out and creates a burst of flame from it. This attack knocks opponents forward, and does 4% damage. This move is prefect to combo with Mr. Dark's down tilt.

Forward Aerial: Mr. Dark claps his hands together and creates a small flame in the air. The flame will stay where it was placed until it is hit by another character. If an opponent hits the flame, they will be set on fire and will cancel any jumps they have. The flames cause 3% when touched.

Back Aerial: Mr. Dark back flips three times, leaving spirals of fire behind him. This move functions much like the forward aerial, but only setting the opponents on fire, and not cancelling their jumps. It also causes 4% when touched.

Up Special: Mr. Dark sticks his hand upwards and spins his index finger around in a circle, creating a small spiral of fire. This move functions like the last two moves, but only cancels out the opponents jumps. The spiral will cause 2% when touched.

Down Aerial: Mr. Dark sticks his feet out, which then set on fire, and falls down rapidly. This move creates a shockwave when it hits the ground. The shockwave can knock opponents upward. If an opponent is caught under Mr. Dark's feet, they will take 8%, but if caught in the shockwave's area of effect, they will take 4%.

GRAB GAME:
Grab: Mr. Dark sticks his hand out, after which a quick flash or fire will appear in front of him. When a grab is successful, the opponent will be trapped in a ball of fire, which they will be trapped in for several seconds.

Pummel: Mr. Dark will snap his fingers, causing the ball to burst into flames, hurting the trapped opponent for 2% each time.

Up Throw: Mr. Dark grabs the ball, holds it upwards, and shoots it into the air with a powerful explosion of fire, and the ball will fall to the ground and shatter. The process of the ball falling takes around 4 seconds to happen. The explosion will cause 7%, while the ball shattering will cause 8%.

Forward Throw: Mr. Dark will make a chain of fire and connect it to the ball, making a ball and chain weapon. Mr. Dark will swing the opponent in the direction he's facing. Any opponent caught in the chain's length will be damaged for 7%.
The ball will shatter when it hits the ground, like the up throw. The ball shattering will cause 8%.

Back Throw: Mr. Dark kinetically grabs the ball and slams it into the ground behind him, shattering the ball and sending the opponent flying. The ball shattering will cause 6% and will stun the opponent for 1 second.

Down Throw: Mr. Dark will create an intense flame on the ball causing it to boil and explode, launching the opponent upward. The move does an incredible amount of damage, with a total of 20%. The downside is that Mr. Dark is vulnerable while using it. An opponent could prematurely make the ball explode by hitting Mr. Dark, but causing Mr. Dark to be launched and take the damage instead. The move takes around 7 seconds to activate.

FINAL SMASH: RAIN OF FIRE:
Mr. Dark is surrounded by his magic crystals, and from them he gains the power of flight. With this move Mr. Dark can fly around the screen, similar to his up special, and can shoot fire from the bottom of his cloak. These fireballs create large flames that are similar to his up smash. These flames cause 8% damage when touched and set opponents on fire. The fireballs that Mr. Dark can drop cause 15% on direct touch.

PLAYSTYLE:
Mr. Dark is a weak character, meant for far hitting attacks. Trapping and keeping the characters far away is his main thing, with his throws being the main finishers.
--------------------------------------------------------------------------------------------------------
There's my Rayman boss moveset, Smady.
 

Agi

Smash Lord
Joined
Jul 27, 2008
Messages
1,120
Location
SE Washington
Mr. Dark

I kind of feel as if I've been a bit unfair to you in Xat, Bionic, and am thus breaking my three/five-month long no-posting streak to give you some valid feedback on your Mr. Dark set, here. It's been a while since I've commented, and standards have certainly changed since then, but I'll do my best to provide some constructive criticism.

Now then, I'm embarassingly unfamiliar with the source material, but I'll trust you did your best to accurately represent it here. I mean, it'd be hard to go wrong with a generic evil wizard.

One thing you may want to consider mentioning is how quickly moves activate. I imagine this input having recoil comparable to Samus's Neutral Special, but maybe I'm wrong. All the other relevant stats seem to be here though, and I appreciate the balance issue addressed by limiting the range.
- I'm curious why the Double Fireball needs to exist as a random chance. I think I'd prefer to have a bit more control over it, as a double tapped input with a bit of cooldown. The range does seem to be skewed to be fairly long.
- The trapping aspect of the thunderbolts seems to be a little bit tacked on. Is it really necessary?
Oof, there are a few key details missing on the Fire Prison, most notably the actual range and the distance between the two fireballs when they land. It'd also be nice to know if they penetrate enemies or if they're disippated if they deal damage before they fall. 7 seconds is also an absurdly long time to be trapped. This move certainly has potential though.

Recovery is kind of a standard flying move. There is, however, a reason this type of move does not usually have a hitbox on it. You realize this is essentially Pikachu's Final Smash, right?

While I appreciate you're trying to be true to the game with the various Crystal Shields, I think it'd be more useful if the crystals Dark summoned were themself random, instead of the projectile type. Controlling the rotation of the crystals to create the desired counterattack could actually be pretty nifty. This move also fails to indicate any sort of cooldown.

Not much to comment on with the standards, really. They all seem to be fairly similar. If you're going to fill up a set with moves like this, try to let us know a bit more detail on how they function - execution speed, potential follow-ups, etc. Was really hoping for interaction with the Crystals here.

Minor nitpicks on the smashes.
- Overall, 8 seconds is an absurdly long time to need to charge a smash fully. Or any attack, for that matter. Are you familiar with Ike's Eruption? 5 second charge. Normal smashes? 1 second. Of course, this is meant to be used after you've trapped the opponent with a Fire Prison, but you could easily stand to crank both the times down.
- Actually, why is Fire Prison even needed when the Forward Smash does the same thing?
- Up Smash could stand to indicate how high up the balls go.
- Aaand very minor as I assume it's right in front of him, but Down Smash never states where the wall is actually formed.
Alright, so you did follow up with how the simpler moves mesh together, very good. I'm not entirely sure where the jump cancelling logic is coming from, though it is very anti-air which Mr. Dark certainly loves. Not really much to say here.

I have no idea whatsoever where the timestamps are coming from on these throws. Four seconds for the opponent and ball to fall down in an UThrow? Isn't Kirby's near identical UThrow about half a second?
- Unrelated, but I think a constant damage effect might be a bit more fitting on this particular grab. The pummel could perhaps do something in addition to damage.
- Wait, the opponent can shatter the ball of fire they're trapped inside? That's kind of cool, why didn't you mention that in the grab's description instead of waiting for the DThrow?

Alright, so, overall, Mr. Dark is portrayed as a character which uses a variety of practical fire spells to keep his opponent occupied. With options for ranged attacks, various methods which shut the opponent down entirely, and fairly weak but effective moves to push the opponent back when they get up close and personal, he should be able to handle most situations with flair. It's riddled with balance issues, as many attacks are entirely unusable or broken to hell and back as written, but there are some interesting concepts here with the throwable prison, particularly if you were to consider stunning the opponent via an aerial Neutral Special beforehand, so walls, floors, AND ceiling would be hostile. (electricity really feels out of place here, by the way, since most everything else uses fire, but whatever)

As a whole, I don't feel it explores any particularly interesting new concepts, which does drag it down a bit. Take this as you will, but it is significantly better than I expected going into it. I... probably would not give it a vote, even if I were voting this contest, but it's a very notable step up from your previous efforts. Keep at it.
 

Katapultar

Smash Lord
Joined
Nov 24, 2008
Messages
1,284
Location
Australia
[collapse="Mr. Dark"]You've garnered quite a bit of presence in the chat, making Rayman the franchise you're synonymous with, so it's nice to see you follow up on this. It's also natural you'd improve over time, and it does show when the greater detail and much more balanced numbering (though I don't think enough detail is given about the shielding properties of the crystals via the Down Special, and being able to trap the foe in a ball of fire for 7 seconds via F-Smash seems pretty lengthy).

Mr. Dark almost seems a little less interesting than Bigfoot to me despite being an improvement, if only due to the general simplistic nature of his moves and Up Special being a bit too varied for its own good. It seems like Mr. Dark would be pretty good at gimping with his aerials that cancel out jumps and lightning bolt variation of his Neutral Special he'd use in the air - with that, the set does manage to work given you have those fire traps like the F-Smash and what not you can use to get the foe in the air in the first place and cancel their jumps, pushing them into the fire. (I realized that the end 8 seconds is a very, very long time to charge. While you were probably trying to balance the moves out, it wouldn't be too bad if they even took twice as long as a normal smash to fully charge given nobody would want to charge them for that long unless they were flashy screen-filling projectiles one could keep the foe in suspense with) While it's probably due to this character being a boss or there being no extras, there doesn't seem to be a lot of character that pops out when reading, and as such it would have been nice to have a link or two to this guy's boss fights (we do that in the chat all the time, remember, and it would help us relate to the character's attacks. I'm aware you made this set in a fairly quick timespan given what you mentioned in the chat, but it's a good improvement with some nice ideas to it nonetheless, so props to you there. [/collapse]
 

Katapultar

Smash Lord
Joined
Nov 24, 2008
Messages
1,284
Location
Australia
(Tabitha Orleans)


Tabitha is one of the main characters of Zero no Tsukaima (The Familiar of Zero/Zero's Familiar). As you can probably tell by her appearance, she's a high-ranking mage with an affinity for wind and ice spells albeit a stoic person who'd prefer to sit in solitude reading a book instead of engaging in idle conversation. Because of this, not many people know anything about her so she ends up being quite mysterious until later on. She's apparently quietly gathering up power for a certain important task. Tabitha is comparable to Zelda in stats only with the stature of a child at 142cm tall and flight magic to float around at a subtle pace for up to 4 seconds, though unlike other floats the input only needs to be tapped rather than held for ease when inputting attacks.​


(Specials)

[Neutral Special ~ Icicle Edge]
Tabitha's signature attack. She points her staff forward, creating a double-sided icicle the size of a crouching Kirby that fires out at Sonic's dashing speed, dealing 5% with flinching...but sends enemies flying at 200%. Icicles spawn at various heights (they can appear at Tabitha's feet or even above her head) with each tap of B and about 4 are created each second with enough leeway between each one to give the foe time to jump over or out-prioritize the next. Unlike a lot of other spammable projectiles icicles can't be completely avoided through crouching due to their erratic spawning and inflict surprising damage against shields, destroying a full one within 7 hits. Icicles stale quickly however, and stop flinching foes if held out for over 2 seconds.

If B is held, the icicles will spawn in a cluster of 1 every 0.1 seconds with a maximum of 20 this way. These icicles are solid and can be angled, dealing 5% and flinching knockback to those who touch their tips while bouncing characters knocked into them. Icicles can be destroyed, though unless you have a strong hitbox it's ill-advised to attack their tips. When B is held again Tabitha will point her staff forward to fire them out at the same rate they spawned; this has some start-up lag as a forewarning but no end lag which Tabitha can use to follow up on the foe's reaction. Icicles and other projectiles will move around Tabitha if they'd hit her, as she's not the kind of mage who lets her own spell backfire. If an icicle hits an icy surface it'll embed itself halfway as a spike trap you can push foes into. If an icicle embeds itself directly into another one that's been embedded that icicle will split into two smaller icicles which stick out from the sides of the one that embedded it, dealing half damage and knockback. You can have up to 30 icicles embedded in objects at once, with the first summoned disappearing from there.​

[Side Special ~ Ice Wall]
Tabitha points her staff forward, materializing a wall of ice in front of her or at the closest ground if she was in the air. The wall is 0.5 SBBs wide and 1.5 SBBs tall with 30HP but gains 3HP for each icicle embedded inside it instead of taking damage from them. Tabitha can create walls from a distance if the input is held, whereby a blue magic circle travels across the ground much like a Hothead and causes the wall to form from that spot with the bonus of being 0.1 SBBs wide, 0.5 SBBs taller and having 2HP extra for every SBB's distance the circle traveled, but once it goes full-circle across the stage and returns to Tabitha it'll automatically create itself behind her.

If Tabitha uses her Neutral Special in front of an icy structure, she'll tap her staff against it to transform it into a group of neatly-aligned icicles, one for every 0.2 SBBs tall or wide based on which was greater. If the structure was taller than it was wider the icicles will be fired forward in a vertical formation, while wider structures make the icicles fire upwards in a horizontal formation, or downwards if the control stick is quickly directed that way. It's possible for Tabitha to transform icy structures she's standing on if down is pressed quickly in which case she'll automatically jump if the structure was wider to prevent herself from being injured by the spikes. At the same time an ice wall is transformed, any icicles that were embedded on it will join the cluster. Existing icicles can be transformed into walls if you try to make an ice wall in front of them, you even being able to add mass and HP to an existing ice wall this way if there are icicles embedded in it.

If an ice wall or part of it somehow ends up floating in mid-air it will slowly descend while characters or items stand atop it to prevent infinite stalling.​

[Up Special ~ Gone with the Wind]
A whirlwind envelops Tabitha for a moment before completely obscuring her for as long as the input is held, her fall speed drastically reduced while in the air. Once the input is released Tabitha vanishes with the wind and re-appears 1.3X the distance of Zelda's recovery with no lag and ability to use aerial game, going through makeshift walls and appearing atop platforms if she was beneath one. The interesting part of the move comes -before- the teleportation however, where the whirlwind surrounding Tabitha slowly draws in everything from across the stage much like the wind seen in SSE after being held for 0.4 seconds. Even projectiles are attracted to it and stay on their new flight path afterwards, including stationary icicles which are drawn in after one second of exposure providing they weren't being blocked off by the wall they were embedded in. Tabitha just wants to be by herself, and if the foe doesn't give her that privilege just teleport to another part of the stage whilst punishing them with her onstage projectiles.​

[Down Special ~ Spell of Attraction]
If the input is tapped, Tabitha is instantly surrounded in a blue hue which she can dispel with another use of the move. This hue is passed onto the next icicle(s), ice wall any other projectile Tabitha creates which subsequently pass onto foes they hit, staying on them for 3 seconds in that case. The hue itself doesn't do anything to the target in question but rather causes some of Tabitha's attacks to target them, namely her icicles and ice wall which appear behind them (unless otherwise stated) for what could be an uncomfortable 3 seconds for foes who have to keep jumping about to dodge incoming icicles. If Tabitha summons icicles or an ice wall while the same kind has the hue they'll appear in front of them and in the case of ice walls they'll fuse together, but in the opposite summoning case Tabitha can transform the two ice components into each other from afar. It's easy enough for Tabitha to remove the spell of attraction from something by inputting this move again if she doesn't need it. If Tabitha wishes to apply the hue onto an existing object, one only needs to hold B and she'll create a ball of magic at the tip of her staff which the player can aim in any direction as it travels at Sonic's dashing speed (moving forward by default).​


(Grab)

Tabitha gently holds her staff out with both hands, gaining control of a small blue sphere she can move in any direction and through all surfaces. Once the input is released, the ball erupts into a burst of magic that telekinetically holds anything overlapping it in place. If the input is merely tapped the grab has all the lag and range of a tapped Din's Fire, but as the sphere is held out in one direction it begins to accelerate at a frightening pace and come out faster until after traveling a whole Battlefield it moves at Sonic's dashing speed and has no lag upon being released. Tabitha can not only grab foes, but also items, projectiles, most traps and her own ice structures be it ice walls or a set of icicles, making the spell of attraction a useful applicant when it causes the sphere to lock onto the target. Tabitha can also grab frozen foes, who'll have to escape from being frozen before they can escape the grab.

Pressing B during the grab lets Tabitha place the spell of attraction on the target without having to have applied it beforehand.​

[Pummel ~ Direct]
Tabitha gains the ability to move her seized object in any direction while the input is held. Foes and ice walls are moved about at Ganon's run speed while smaller objects such as clusters of icicles or platforms are moved about at Ike's dashing speed. If Tabitha wanted to she could levitate an ice wall while standing atop it to fly about, though to prevent infinite stalling the structure will begin to break apart from pressure this way over the course of 2 seconds once the grab is released or if you move it around for any longer than 4 seconds. You don't have to worry about the ice structure breaking if somebody else is atop it while you're levitating it, however...​

[F/B-throw ~ Rotation Toss]
Tabitha holds her staff back before swinging it out in the chosen direction, flinging the foe for 6% and rough mostly horizontal knockback that KOs at 150%. Items and projectiles are sent back/thrown in the chosen direction, while stationary objects like ice walls and icicles are rotated clockwise/anti-clockwise at a decent pace. If the input is smashed while a structure is being rotated Tabitha will imbue her levitation magic into it used for the grab so it keeps on rotating at the subtle pace the Brinstar Depths stage does until she uses the grab input again, even in the air. Making an elaborate ice structure rotate at its own accord is quite useful for decorating all its sides with icicles without having to move around too much.​

[U-throw ~ Afloat]
Tabitha swings her staff upwards, sending foes flying for 5% and upwards knockback that KOs at 200% while launching projectiles and items upwards. Ice walls and icicles are merely kept in place like they would have been by default.

If the input is held, Tabitha will create a stream of wind from the bottom of the screen that lifts the target upwards, 1.2X wider than they are and lasting until the input is released and for twice as long as it was held for after that. Although the rate foes are pushed around is indefinitely slower than moving them around manually, this lets Tabitha attend to other matters while they try to move away. The wind not only pushes projectiles and icicles upwards in a similar manner to the Up Special but also breaks off 0.1 SBBs worth of horizontal mass from your ice walls every 0.2 seconds that easily catches up to foes whilst dealing them 2% with flinching, not only shaving bits off your ice walls but also creating several damaging projectiles that help drag the foe up to their deaths. The ice chunks can even be attracted towards Tabitha with the Up Special to put a projectile between herself and foes, and if said ice structure had the spell of attraction the ice chunks will pass it onto foes they hit to create further incentive not to get hit. Tabitha is unaffected by the wind.​

[D-throw ~ Drop]
The name says it all; use this to drop frozen foes offstage to their deaths or more commonly drop items atop them, even render projectiles useless. This also forces ice walls and icicles to adhere to the laws of gravity, dealing foes 1% + flinching if they're hit by the sides of an icicle and similar combined damage if they're hit by an ice wall based on how much mass was directly above them when being crushed.​


(Standards)

[Standard ~ Blizzard]
Tabitha lightly swings her staff down using one hand, putting little to no effort into it. It works however, and is hilarious when foes are comically bonked on the head with the ouchies for 5% and pretty decent base knockback on a 60 degree angle that KOs at 250%, being capable of bouncing foes off stray icicles...just make sure to hit with the tip of the staff or Tabitha will be the one getting hurt given the handle is a sourspot. In any case, if A is held afterwards Tabitha will continue to hold her staff out as she creates a beam of freezing air that spans out across the stage, roughly as tall as she is, and can be aimed in any direction at a moderate pace. This blizzard is a magical one that bounces off surfaces and gets stronger for the further it travels out, dealing 1% per second to foes plus another 0.1% for every SBB distance it spanned out, as well as pushing them back at Ganon's walking speed plus a little further as it spans out (make the blizzard bounce off ice walls to increase its power). When foes take 15% while inside the blizzard, summons 3%, even from outside interference such as icicles, they'll be frozen and ripe for being dragged offscreen by Tabitha's grab. If foes have the spell of attraction on them Tabitha will aim the blizzard on them no matter where they go.

In addition to hindering foes, blizzards ice up any surface they come into contact with so Tabitha can embed them with icicles. It also smooths over L-shaped areas of the stage so they become more circular and thus provides more interesting angles to bounce projectiles off and embed icicles in conjunction with ice walls. The blizzard will go through icicles on contact, increasing their width to twice their usual amount over a second whilst causing them to deal double damage at the cost of moving slower, making them more threatening in the face of freezing foes with the blizzard as well as making thicker ice walls when transforming them. Hitting the edge of an ice wall with the blizzard causes that edge to grow out roughly 0.2 SBBs distance, which while seemingly does nothing at first makes the wall a slightly bigger obstacle for foes to move around and creates a new angle to fire things off from. Turning an ice wall into a set of icicles from there creates an extra icicle that points and fires in the direction of that edge.​

[Dash Attack ~ Wind Sphere]
Tabitha's not one for running when she has many other methods of transportation, but it's not like she's at all frail. As the input is held, Tabitha begins muttering an incantation with her staff held to the side while still running. Once the input is released, Tabitha becomes surrounded in a wind sphere that moves at twice her dashing speed for thrice as long as she spent chanting. The wind sphere inflicts 6% with decent upwards knockback that KOs at 255% to those who make direct contact with it along with protecting Tabitha, though foes can knock it in the other direction with a stronger attack much like Squirtle's Withdraw, even pushing it back further than it came with enough force. The wind sphere will also bounce off any walls it comes into contact with, even if they're armed with icicles. Tabitha can attack and set-up while she's being moved around in her wind sphere, presenting her with a slew of options. She could fire icicles at the foe while moving towards them, or even fire them while moving away after having been bounced off her own ice wall. In the case of Tabitha creating floating icicles instead of firing them off right away she'll be bounced off them right away and will continue creating them on that same spot even if she moves. Ice walls are created in front of where the wind sphere is and can be used to bounce Tabitha back. Tabitha can dispel the wind sphere by jumping out of it or shielding, and can even use it for some interesting projectile directing with her Up Special in which case the sphere will stay out even when she teleports out of it. Also, the sphere will go up slopes and if you've smoothed over an L-shape area of the stage to make it circular it'll act as a ramp for the sphere and make it go up, which is convenient given Tabitha can use her ground game inside the sphere even while in the air.​

[F-tilt ~ Wind Guider]
Tabitha holds her staff like a lance and pokes it forward with both hands in a more serious take on Dedede's F-tilt that can be angled. Getting jutted in the gut with a wooden staff doesn't hurt all that much and only deals 6% which KOs at 300%, but it's a good attack for poking at mid-range none the less. The attack has a second hit too which has Tabitha fire out a tiny ball of wind that travels at the casual pace of Zelda's dashing speed while bouncing off walls, being another basic projectile you can attract with your Up Special. The ball stays out until it goes offscreen, hits a foe or you use this move again to make another, though it isn't even that threatening, only dealing 2% with flinching and is all to easy to shield or out-prioritize. What makes this attack deadly is not the projectile itself however, but rather what you can do with it in tandem with the spell of attraction: icicles are summoned a SBB behind the hue and travel right past it in the direction it was moving, while ice walls are created right in front of it to further bounce it. If foes think they can casually shield or attack the ball when it approaches they'll have another thing coming to them when your deadly icicles hit them - when the ball makes contact the hue will wear off, so with good positioning you could hit the foe from two different angles. Not to mention the wind ball passes its hue onto those hit like with the icicles, so letting one's self be hit is not the most wise idea.​

[U-tilt ~ Frost Beat]
Tabitha pokes her staff upwards in a blunt manner made all the more convenient that she holds it upright by default, making this a very fast anti-air that can even be angled. The move deals 4% with extremely weak knockback, but it has a second hit where Tabitha creates an icy blast at the tip of the staff which deals 6% and freezes foes. It's indeed almost too easy to freeze foes, though the effect is somewhat balanced out by the fact that you're hitting foes from above and thus will generally never gimp them. Platforms and undersides of the stage can be frozen to embed your icicles into, with Tabitha even being able to hit foes standing on the former.​

[D-tilt ~ Cold Enchanting]
Tabitha's crouch has her kneel in what appears to be a meditative post as she lets her staff rest on her. From here, she motions downwards subtly as the floor beneath her and 0.5 SBBs on either side freezes over, dealing 5% with GTFO knockback on a horizontal downwards angle that's good for killing small characters like Kyubey and Lizard. Since the ice hugs ground it can hit foes attempting to recover or trying to approach Tabitha from below while she's standing on a platform, turning said platform into a solid in the process so they can't go through it. While A is held Tabitha focuses her magics on making the floor ultra-cold as cold air rises from it, dealing a token 2% per 0.5 seconds a foe stands there but doesn't flinch them. This is made even deadlier on an ice surface where the passive damage extends all the way. Tabitha doesn't quite have the fastest crouch in the game, but this move comes out in a flash and helps Tabitha create ice beneath her which can be used to give icicles attracted to her via the Up Special a place to sit. Said ice will also connect with any ice walls within range of Tabitha, meaning she can fully box herself in if you created a inverted U-shape ice wall structure by making said walls off each other. If you want to destroy an ice surface due to it being in the way simply double-tap this move while standing on it, a decent way to destroy your ice structures for whatever reason.

If this move is used while Tabitha is in her wind sphere via the Dash Attack the ice will form outside the sphere, allowing Tabitha to cover a lot of ground with ice and damage foes who step on it. This has no effect in the air, however.​


(Smashes)

Tabitha's Smashes can be used out of her float.​


[F-Smash ~ Wind Arrow]
Tabitha points her staff ahead as wind gathers in front of her, forming a wind arrow that can be angled and bounces off walls but travel up slopes/ramps such as those you might have created using a blizzard. The arrow deals a fixed 17% that KOs at 120%, with an uncharged version making the wind arrow over twice the time Tabitha would have charged the move for that can be capitalized upon. There's nothing much to say other than the fact that this is a basic projectile with KO'ing power behind it, and if you're quick enough it can be attracted to Tabitha with her Up Special, forming a temporary wind barrier around her if reaches her that has 17HP and lasts until she teleports, and this can stack with multiple arrows for some protection. Two wind arrows are immediately formed behind targets with the spell of attraction, appearing on each side of a foe or ice wall before bouncing off of them, and in the case of icicles and other projectiles they appear behind them in an X-shape so they intersect with the projectile in question in which case they usually won't hit the foe but can if they try to move around the projectile. Wind arrows bounce off the sides of icicles too, so in said case they can catch foes off-guard with their delay and deliver damage when they least expect it.​

[U-Smash ~ Wind Club]
One of Tabitha's signature attacks, and apparently her strongest spell - the ideal move for finishing foes off. Holding her staff upwards with both hands or even sideways if the control stick is tilted, a small ball of wind is created at the tip which excretes a swirling funnel of wind extremely comparable to PK Thunder in terms of size and control, only being 1.5X bigger and faster with a full charge and accelerating when traveling in a straight line. The funnel dissipates on contact with a foe whilst inflicting 13-19% that KOs at 140-110%, but sucks up any of Tabitha's ice it comes along to gain power, becoming 0.2-0.5X stronger for each icicle worth to the point where it can become a OHKO that invalidates the necessity to damage-rack beforehand. The move can also be used, to a lesser extent, to rid yourself of certain set-ups and puncture holes in your ice walls to mess with their shape or even divide them. If you had an ice wall rotating and split it up the divided pieces will all rotate on their own and push off each other if they connect.​

[D-Smash ~ Starfall]
Tabitha focuses as a blueish vortex opens up in the sky and releases two very large icicles that fall to either side of her, similar to Pikachu's Thunder. The icicles are fairly powerful projectiles that deal 20% and KO at 90%, but even more fearsome is how they embed themselves halfway into the first surface they come across as massive obstacles 1.5X wider than a platform. Charging this attack doesn't increase the quality of the icicles but rather delays their summoning by the time spent charging before appearing above Tabitha, giving her time to set-up something in conjunction. The icicles would almost be perfect as substitute walls for the Side Special were they not destroyed by an attack that deals at least 10% (or sufficient knockback), but have their own perks when their tips inflict 10% and vertical knockback that KOs at 130% while bouncing characters knocked into them. Giant icicles can be skewered through ice walls to add 8HP each to the heap, disappearing when another set comes into creation.

If the spell of attraction is active the giant icicles will be created on the sides of that target with the same distance between them as if being summoned above Tabitha - foes that are particularly wide or moving around have to be careful not be impaled. Being able to summon giant icicles at foes trying to maneuver past your wind ball projectile with the spell of attraction can lead to an interesting surprise attack. Also, Tabitha can transform giant icicles into a set of smaller ones with the Neutral Special and even summon an ice wall beneath one, resulting in the wall being split in half with each section forming a "shell" for the icicle.​


(Aerials)

[N-air ~ Wind Void]
Tabitha swings her staff down a short distance so it also hits behind her, dealing 8-4% with decent-weak base horizontal knockback that KOs at 235-385% based on the direction foes were hit. While the attack comes out quickly it drags out for a bit afterwards, but by pressing A then Tabitha will create a Kirby-sized ball of wind at the tip of the staff that serves as a black hole of sorts, attracting nearby projectiles and storing them within itself without limitation. The wind void is a nice means of placing some defense between yourself and foes you've knocked back, and if they overlap it with at least one projectile stored they'll take half their combined damage and knockback (Tabitha can go through the void just fine). At the very least foes can destroy the void by inflicting 10% plus another 1% for every projectile it has stored inside itself, ruining Tabitha's set-up if she's fired a lot of projectiles into it. If Tabitha creates another wind void any projectiles stored inside the previous one will be fired towards the new one in the exact order they were stored in what is effectively a projectile chain; you can even create a third wind void, but any projectiles that hadn't been fired out of the first will be lost as the second void proceeds to fire into the third. Tabitha can fire projectiles out of the wind void manually by taking control of it with her grab and aiming the control stick in the desired direction, also being able to move the void around with the pummel or cancel out with B.

The spell of attraction makes wind voids even more fearsome. With it, Tabitha can fire her wind arrows and giant icicles into it and store endless amounts to use later (though in the case of giant icicles you can still only have 2 out at once). If a foe has the spell of attraction on them when you make a second wind void it'll be created in such a direction that they'll be in-between both voids and open to being shot by all those projectiles.​

[F-air ~ Frost Powder]
Tabitha pokes her staff diagonally downwards before flinging it upwards in a quick motion. The first hit deals 3% and knocks foes at said angle with relatively decent knockback while the second packs more of a punch, dealing 9% while sending foes on a high angle that can KO at a fairly luxurious 165% if you manage to get the sweetspot. The second hit has an easy time sending foes over ice walls, and the move's special effect even follows up on this when the input is held in which Tabitha strikes a concentration pose while a ball of volatile wind travels outwards in a similar manner to Din's Fire before exploding upon release, dealing the same damage but with a bit more upwards knockback. The wind conveniently moves through Tabitha's icicles, and if it reaches an ice wall it'll go through and destroy the whole thing from the inside, causing it to separate into 0.2 SBB sized pieces that fly out to cover twice the mass of that wall before defying physics and floating in place, embedded icicles doing the same. Foes hit by any of the pieces while they fly out take 6% and flinching knockback, but otherwise nothing major as the pieces can not only be moved through but easily destroyed individually. After 4 seconds the pieces will suddenly fly back together at the same time to reform the destroyed wall, which will naturally have missing parts if any of them were destroyed. If a foe was overlapping the area where the ice wall would be re-created they'll be frozen in the structure itself, destroying the section their body overlapped upon being released. This freezing effect is more convenient than the normal type in that the icicles will still embed themselves at that area while damaging the foe, and even when they escape those icicles will stay afloat so they have to be careful not to mash the control stick to the sides lest they want to move into those icicles. Foes also take damage from your blizzard if you aim it at them, and you can even re-use this move to destroy the wall they're frozen in while hitting them with a powerful attack. The only downside to freezing foes inside ice walls is that they're not immediately subject to the laws of physics and as such aren't easy victims to gimping.

It's not even all that hard for Tabitha to freeze foes inside ice walls if she really wants to, as she can move its fragments as a unit with her grab and direct them into foes, though she has to be careful of them destroying the pieces easily. The individual ice pieces can be rotated with the Side Throw to turn them into a static hitbox similar to when they fly out, and even pushed upwards with the U-throw's wind or made subject to gravity with the D-throw to turn them into damaging pebbles, with the ice wall keeping these changes upon reforming. The ice pieces can be attracted with the Up Special and even be sucked into the wind void in which case their reforming timer is delayed and it uses up one of your ice walls, with the ice wall reforming on the spot where the first fired out. If the ice pieces fly into Tabitha when she's attracting them with her Up Special they'll swirl around her and form a perishable shield before being teleported along with her and reforming in front of her.​

[B-air ~ Wind Break]
Being the taciturn she is, Tabitha doesn't even bother turning around to use her B-air. Instead, she casts a wind barrier behind her with seemingly no gesture, dealing 7% and okay set knockback to those very close to her. The barrier protects Tabitha from attacks that deal 10% or less and pushes her icicles and ice walls vertically outwards as to make room for if she's trying to back out, staying out until Tabitha lands or uses another attack so it's particularly useful if she wants to retreat and needs to do something about her own traps. You'll actually be using this move from your Up Special recovery a fair bit for defensive purposes in conjunction with your set-ups, and the fact that Tabitha can hide behind a couple of icicles and adjust their vertical position for when foes try to move around them can be quite annoying to them. Once the barrier disappears or Tabitha moves away from her ice structure it'll go back to its normal position, so you can use this in tandem with your other aerials to mess with the foe.​

[U-air ~ Ice Halter]
Tabitha holds her staff out sideways and thrusts it upwards. This attack deals 5% with weak upwards knockback that KOs at 300%, and while it has poor reach Tabitha's sides are covered in what is a deceptively useful tool for preventing foes from getting around her, potentially juggling them in conjunction with the float even. If the input is held out Tabitha will create a platform of ice above her, solid enough that not even the likes of Bowser Bomb and stage-indenting moves will break through as a good defensive measure (if there's an obstruction in Tabitha's way when she tries to create the platform she'll create it above it). The platform only lasts for 7 seconds and fades 3X quickly if Tabitha stands on it, not refreshing her recoveries to prevent her from stalling infinitely, and there can only be one out at a time. An ice platform can be created during the delay of the giant icicles to form a u-shaped platform that can potentially cage foes before moving to the top of the screen for a Star KO. Because this move has less vertical reach than the U-tilt, it can be short-hopped or used right before Tabitha lands so the latter attack reaches the ice platform and freezes foes standing on it, letting you relocate the platform with the foe on it or lift it towards the top of the screen if the foe's damage is high enough. One thing that's useful about the platform disappearing over time is that any giant icicles embedded inside will fall as traps that can skewer foes standing underneath.​

[D-air ~ Below Zero]
Tabitha swings her staff downwards for a good ranged attack that deals 12% and decent downwards knockback on a 170 degree angle that can KO offstage at 130%, greatly increasing the base knockback if struck at the sweetspot. While the attack comes out decently fast it drags out for an uncomfortable amount of time, having sex-kick properties that make it a bit weaker as time passes. Like Tabitha's other attacks, this has a special effect if the input is held in which Tabitha creates rectangular block of ice with semi-octagonal dimensions on the ground beneath her no larger than Bowser inside his shell. This block of ice doesn't seem all that harmful, only having 10HP and can be walked over, but if there were any icicles embedded on the floor it was summoned at they'll transition into a flower-like formation that can potentially cover all available sides of the block, letting Tabitha knock foes into the spikes and back above her if they were struck. The block can be transformed like a mini ice wall that produces two icicles, and shaved off into several little projectiles in tandem with the U-throw. It can also be used to bounce projectiles due to its dimensions, as well as place giant icicles in a V-formation when they land atop it, or even use it as a slope for the Dash Attack wind sphere. Tabitha creates the block if ice while the hitbox of her staff is still out, and if foes are knocked into it they'll be knocked horizontally along the ground in front of where she was. Only 1 ice block can exist from this attack.​


(Playstyle)

In conjunction with her unsocial nature, Tabitha revolves around camping to compensate for her weak yet existent close-range attacks and awkward grab game. She's a master mage who can alter the properties of that around her to suit her needs, and this shows with her ability to transmute her various set-ups. Her flight magic is also an amazing gift, allowing her to float offstage and shoot projectiles from a higher point or set-up with more comfort.

Tabitha can play like a typical Brawl camper with her powerful Neutral Special, but can put it to further use with her obstructive ice walls. Tabitha can create an ice wall in front of herself she can transform into icicles on a whim or use to hide behind and set-up, or even place it on the opposite side of the stage between herself and the foe to shoot icicles into it that can be bounced back and forth with the use of the Up Special. While placing an obstruct behind the foe might seem contradictory to the idea of knocking them away and the fact that Tabitha wants to camp, she can always move it around with the grab, and has a lot of ways to manipulate it anyway so that foes won't want to be anywhere near it.

Tabitha has numerous paths to victory. If she's created so many ice walls or gathered a bunch of icicles in one place from having had a lot of time to set-up and the foe hasn't taken all that much damage she can use the U-Smash to sweep them all up and score a KO instantly, and if she's clever enough foes can be lured into icicles you're trying to suck up for the attack anyway or be made to get on your structures. Tabitha might also want to pester the foe with a blizzard which she can bounce off a wall positioned behind them, and if they're foolish enough to be hit by a stray projectile like the wind ball, wind arrow, giant icicle, or moving ice chunk they're likely to be frozen, and if they're not fast enough you can cool them over for as long as you like. Once the foe is frozen you can lift them up to the top of the screen or hit them with your icicles to rack up their damage to make them more dangerous as remember icicles can technically KO at 200%. Icicles will KO before most of Tabitha's weak melee attacks, but she can also get a KO in with her wind arrows or giant icicles which the foe has to fear. Of course it's quite easy for Tabitha to create a whole bunch of icicles on a wall, create a wind void then use the Up Special to attract them there, move the wind void around with the grab and fire it along ice ground and fire away if you want to cause them bullet hell.

Tabitha is fairly open-ended in how she plays. Do you want to pressure the foe with icicles right away and not worry about setting-up/do it later? Do you want to set-up a wall and then exploit it in tandem with icicles or vice versa? Or perhaps you simply want time to yourself in which you can create a fortress around yourself you can fly around with the grab and decorate with the likes of the U-air and D-Smash? If you're up against Brawl characters Tabitha can certainly pressure them good like any other, but against those who would spare her the time to set-up she can make use of that too.​


(Final Smash)

Tabitha puts on a serious look, holding her staff out firmly as a powerful blizzard cyclone appears around her. This monstrosity can only be compared to Ho-Oh's blazing inferno of an attack, though this variant is a bit more merciful, simply damaging the foe for about 0.1% a second and freezing them if they stay in place for half second, along with carrying them to the top of the screen at Mario's dashing speed. What makes this scary however, is how Tabitha can move and attack while the cyclone is out, which actually moves along with her. Not to mention the fact that all projectiles, items, traps, minions and makeshift obstructions are swirled around in the cyclone as damaging hitboxes with a lethal touch to foes. The cyclone lasts for a surprisingly short 3 seconds, though the damage it can inflict is rather impressive if you had the right set-up.​


(Extras)

[Opening ~ Sylphid]


Tabitha jumps down from her dragon familiar as it soars across the arena, using magic to gently float to the floor just as she's about to land.​

[U-Taunt ~ Book]
Tabitha takes out a book and stands there, reading. Tabitha loves reading. On Brawl home-stages or ZnT stages the book will be the same one she holds in her picture, though at other times it might be one from the world she's fighting in as an Easter Egg. If one glances closely enough Tabitha will appear to be studying a certain topic form her own world, but at times she's actually reading what appears to be a fairy-tale...​

[F-Taunt ~ Mute Magic]
Tabitha points her staff forward, muting the sound effects and voice clips of any character/item/summon/whatever in her line of sight and releasing the spell when used on them again. She actually did this in the series if somebody was bothering her, and as such can be used against foes with annoying voice clips. It also has a more practical use in mind-gaming, able to be cast upon allies whose sound effects are big giveaways to their attacks or against enemies who -need- the sounds in order to perform their attacks effectively, and also removes effects from sound-based attacks. Donkey Kong doesn't appreciate being hit by this spell because it completely negates his Final Smash, and neither does Demyx when he can't rock-off. Sebastian doesn't appreciate it either when his catchy song is muted (both the MYM5 set AND the MYM9 mini fiend doll).​

[D-Taunt ~ Mute Magic]
Tabitha points her staff to the screen, using a spell to turn the music off and back on with another use. If an annoying BGM is playing or you're up against King Ramses' theme this puts you at greater ease, with the latter's flinching effect being negated as such. It also has a more practical use against human players who are getting an adrenaline rush from the music that's playing in the background, or wrecking the timing of Ludicolo's beats.​

[Win 1~ Illococoo]


Sylphid is next to her master in her human form "Illococoo", showing physical affection while cheering "You did onee-sama!". Tabitha doesn't seem embarrassed, but rather a little uncomfortable.​

[Win 2 ~ Feast]
Tabitha is seen packing in a lot of food whilst sitting at a table. Her food-loving familiar tries to sneak in a bite in human form, but Tabitha comically bonks her on the head whenever she tries...this cycle repeats itself.​

[Win 3 ~ Meditation]
Tabitha is seen sitting on her knees, eyes closed while muttering something, possibly an incantation....didn't she already win the match?​

[Win Against Cold Enchanter, Young Xehanort, Kammy Koopa, Witch, Zak, Trixie, Lizard, Mr. Dark or Zigzagoon]
Illococoo rests her hand on Tabitha's shoulder while boasting "No one can beat onee-sama when it comes to wielding magic!"​

[Win Against Madolche or Wily Wonka]
Sylphid eats all the candy, putting them out of business.​

[Win Against H.N Elly]
The Witch is not there, because after all, I can hardly imagine them applauding the victor and they're meant to be destroyed. In their place is an Incubator or what appears to be a different variation of Kyubey, telling Tabitha that "she could become a Super Magical Girl." by giving someone who can already use magic without being a magical girl the ability to use magic. Sylphid thinks the Kyubey look-alike looks tasty however, and eats him. Yum!​

[Win Against JOE! or Clayton]
"What kind of mage treats their familiar so badly? You'd never make me go through something so horrible, right onee-sama?"​

[Lose]
Tabitha actually claps for the victor while her staff rests on her body.​


[Assist Trophy ~ Kirche]


Tabitha's classmate and best friend (despite being ignored half the time); she's effectively the polar opposite of her friend in almost every way possible down to being a fire mage if it wasn't obvious from her hair color. She's very proud of her body, even more so than Reggie, and will use it to fondle the very crowd watching the game....first, she lowers her chest so her hanging cleavage can be seen, prompting the camera to zoom in on her as the Announcer hilariously yells "Wow! Incredible!" just like what happens when you beat Classic or All-Stars on Intense. The crowd also goes wild too, making loud noises and obscuring the camera for about 3 seconds before Kirche blows a kiss to the screen and leaves to seduce some men in her world - at the very least magnifying glasses are available to all the players to track their positions, but not being able to see stuff like items and traps is unpleasant.

If the player who summoned was Kirche was a male or Tabitha and they stayed around for the short time Kirche spends preparing her seduction, she'll instead wrap her arms around their neck while rubbing her large breasts against their back for disturbing visual. This has the same effect as before, only Kirche will disappear prematurely with a somewhat dissatisfied look on her face if the player chooses to break away from her due to a need to move around the stage. Staying with Kirche is beneficial however, because if the player is attacked close-up or grabbed she'll point her wand at the offender and yell "Hands off!", blasting them with a stream of fire that accumulates roughly 30% before finishing with great knockback (KOs at around 80%). Kirche disappears after executing the attack, but not before saying "Got for it (Tabitha)!" as she winks to them.​


JOE!

Smash Hero
Joined
Oct 5, 2008
Messages
8,075
Location
Dedham, MA


Well, we're here in the latest Generation, and my personal favorite: Black and White! By the time this rolled around, I was already deep into the series again, especially the metagame with Pokemon Online and learning about the "inner workings" of Pokemon, so to speak. The games also saw a revolution in terms of the story (as seen in the first Trainer JOE!) as well as a slew of new abilities, moves and Pokemon, the most of any gen so far! Hmm, speaking of all this metagame stuff, I think we've gone through enough so far to introduce part of the set within the set:


DUAL COMMANDS
What are they?
Dual Commands are inputs that can control the Team2 Pokemon's actions while playing as the Team1 Pokemon as JOE! commands the second team with his other hand at the same time as the first. An important aspect of both the next member of the team, as well as gameplay with ATJ in general. There are 5 commands total, and each have their own nuances to keep track of, but mastering these can really give you an edge in teamwork vs the opposition.

Note: Team2 will not perform their Team2 special if within 1 platform of Team1 unless Team1 isn't performing any actions in said range for at least 1/2 a second.


TEAM1 SHIELD :rtrigger:/:ltrigger: = TEAM2 GRAB :zbutton:
Pressing Shield at any distance will have Team2 perform their grab. By default, the Pokemon will then simply perform their pummel over and over with the normal properties unless commanded to do something else during that time. Upon grab-release, the victim has anti-grab armor for 1 second.

If the Team2 Pokemon is airborne, they will perform their Zair. Neutral Air Dodge will also count as a "shield" input for this command.


TEAM1 DODGE :rtrigger:/:ltrigger:+:stick5: = TEAM2 F-TILT :stick6:+:abutton:
Dodging/Rolling while within a platform of Team2 will have them perform their Ftilt, which can be especially useful with the likes of Alakazam, Feraligatr and Breloom as their tilts are all long ranged (and powerful in Gator's case) to use as cover when rolling past them.

Directional Air Dodge also works for this, and as such Wavedashing near the Pokemon can command them to attack. If the Pokemon is airborne or has the foe grabbed, they will perform their Fair or Fthrow when this command is issued. In the case of the latter, the foe has only a mere 1/2 second worth of anti-grab armor.


TEAM1 TAUNT :dpad: = TEAM2 N-SPECIAL :bbutton:
Inputting a Taunt will command Team2 to perform it's Nspec, no matter the distance. Be wary of the positioning of this however, as laggy taunts of wrong-facing Pokemon can end up being punished hard. The taunt command can be done in the air as well, but will cause the Team1 mon to be inactive for 1/4 of a second as JOE! gives the other his command.

Note: Specials that are either held or charged will have the Pokemon hold it until instructed to do otherwise, with pressing taunt mid-taunt being able to cancel the special. Z is a special case here, as Conversion will select the Top Left color on the selection wheel for the Pokemon in Team1 with him, and then go clockwise from there with each press of Taunt.


TEAM1 JUMP :xbutton:/:ybutton: = TEAM2 THROW :stick7:/:stick9:
If your partner has the opponent grabbed, Jumping within a platform of them will have them perform their Uthrow. Alternately, if you are jumping within range of another throw (Usually Bthrow, but they can Fthrow at times too), they will attempt to throw the opponent towards you with that throw instead. As with the Ftilt command, opponents have 1/2 a second worth of anti-grab armor.


TEAM1 THROW :stick7:/:stick9: = TEAM2 JUMP + N-AIR :xbutton:/:ybutton:+:abutton:
Opposite of the last command, if you have an opponent grabbed and throw them into the air near your Team2 partner, they will jump up and attempt to intercept with their Nair. Depending on the throw, it is also possible to buffer in Fair with a Dodge, Zair with a Shield (you do not give foes grab-armor), or even Nspec with a taunt!


With that all said, It's time to introduce somebody who not only has special Dual Commands of his own, but was also almost in the original Trainer JOE!...


It leads a group of Pawniard. It battles to become the boss, but will be driven from the group if it loses.


STATS
SIZE 6 Bisharp is rather tall, sitting between Ike and Link in this aspect (minus their swords).
WEIGHT 8 Given his metal armor and size, Bisharp is fittingly heavy, and actually mirrors ROB's weight.
RUN 4 Bisharp is tied with Breloom in run speed.
AIR 5 Bisharp has average air speed, and his jumps aren't really much to write home about with both being about equivalent to Link's.
FALL 9 Bisharp has metal armor, of course he's not gonna be floaty.
TRACTION 5 Bisharp also has average traction, allowing for decent wavelands/dashes unlike the previous Pokemon.

Bisharp has mostly average stats, with outliers in both Weight and Fall Speed. Like Feraligatr, his sheer weight will add a lot of staying power to him and allow him to survive well past 100% naturally. Unlike Gatr, his recovery isn't as versatile, which may hamper him slightly in the long run.


NEUTRAL
METAL BURST
Bisharp goes from his neutral pose to the one seen in his official art above, with the hand raised and all that, as B is held. As the move is charged, Bisharp appears shinier and more metallic as a shining GFX travels up his arm to indicate the amount of charge up till it hits his fingertips after a full second. Once done, he will wipe his arm to the side (also seen above) and take on a metallic sheen and/or flash silver indicating a maximum charge. If you are curious about all the metal talk with the shinier texture and silver flash, well that's because the more he charges the more of a Metal Box effect he gains. Specifically, every 1/10 of a second of charge will gain him 1/10 of a Metal Box effect, ultimately increasing his weight and fall speed by up to 2x their current values, adding 10% worth of Heavy Armor, but reducing his Dash to 1/2 it's normal value.

While taking damage will reduce the timer of your Iron Defense like the normal item (Base of 10 seconds, getting an actual Metal Box will not stack), Bisharp can manually shed the coating by Tapping B to create a shock-wave from the middle of his body the size of Lucario's Dsmash for 10-20% and enough Horizontal KB to kill Mario at 160-140%!

While great on it's own for additional defense, it is amazing when you consider how it stacks with his ability: Defiant. In Smash, Defiant allows Bisharp to both keep his focus while clashing with an opponent's attacks by allowing him to "Parry". Parrying has a small window of activation just as you clash with an attack, during which you can send out another attack (or the same one) without any start-up lag, and half the ending lag! On top of this, attacks out-of-shield are 1.2x more damaging to allow him to counter those who try and give him any pressure. When combined with Metal Coat Defiant can allow him to simply plow through other attacks using the Heavy Armor even as he clashes with them, resetting the foe as he continues attacking, and even use up his Metal Burst charge by parrying as he clashes and causing the attack to deal 1.4x the normal damage on hit!

Given the shorter range on most all of his attacks, Bisharp's ability to parry and deal more damage from shield is something very important to adapt to while playing him, especially when you can build up some armor and choose to make your counter attacks all the more devastating.


SIDE
METAL CLAWS
Bisharp reaches to his chest and pulls out a circular blade that looks a lot like one of his Torso-Blades, and tosses it forward like a frisbee from hell with speed like Toon Link's Boomerang. The blade itself travels as fast as one of Shiek's needles, and will curve back to Bisharp with great homing ability after traveling a maximum of 3 platforms, hitting foes for 5% and some hit-stun, before ricocheting off of them and back to Bisharp. Bisharp can have two of these blades out at once with one of them having to return to his body to toss another, and can angle the toss at 45* intervals.

Speaking of ricochets, the Metal Claws will ricochet off of anything, including platforms, opponents, and each other! While they return to him automatically after ricocheting off of something (unless they hit more stuff on the way back), Bisharp's own hitboxes can hit them back out easily for more spacing and damage opportunities!


UP
NIGHT SLASH
With start-up of about 1/4 of a second as Bisharp brings one of his arms to the side in a "ready" position, you will then move in the direction pressed during this time at speed similar to DK's run speed, much like a Spacy Up-B, and hit anyone in your path for 5% and mediocre KB as you cut a dark trail in the stage about a character length behind you that can hit foes as well. Once released, Nigh Slash behaves more like one of Sonic's Spin-dashes than a Spacy Recovery as you can move back and forth, and even jump by pressing Up as long as you hold down the B button for up to 2 seconds before skidding to a halt with noticeable sparks from his steel feet. Releasing the move will also have Bisharp bring the "dark" blade forward for a final slash as he skids to a halt, dealing 10% and stronger, but still mediocre KB unless he releases directly on top of a foe, in which case the Night Slash will deal 15% and strong enough KB to kill Mario vertically at 150% or lower depending if you jumped with it.

If you start this move in the air, Bisharp will lunge forward in the direction chosen about the same distance as Lucario's Extreme Speed, but with slightly less angle-ability in exchange for the damage. Ending Night Slash mid-air will put him into Special Fall. Unlike all his other attacks, Night Slash is actually Transcendent, meaning it is exempt from his Defiant-Parry system (though it still does more % out-of-shield).


TEAM 2 / DOWN
SUCKER PUNCH
If any hitbox is present within 1/2 a Platform of Bisharp as he activates this special, he will lunge out at 2x his dash speed in any direction as he homes in, as well as 10% heavy armor (stacking with Metal Burst!) to rip at the offender with a 12% hitbox that leaves a black "tear" effect on the field like with Night Slash, able to kill most foes at around 130% near edges.

Unlike other counters, this can be evaded if you move more than a platform away from Bisharp as that's the max distance he'll lunge, as well as just move sporadically/shield/roll just in time. Or, given that it has essentially the same end lag as Falcon's Side B on whiff, it's equally as punishable if Bisharp messes up his prediction. That said, this makes for an amazing Team2 maneuver given the opposition most likely won't be watching for a surprise attack from Bisharp while dealing with the controlled Pokemon. By himself, Bisharp can also lure Foes into this with Metal Claws in order for them to try and approach, only to then hit them with this and maybe even chase with Night Slash.


NEUTRAL
FURY CUTTER
Alternating swipes with his blades, Bisharp will slash at a speed comparable to Wario's jab in a loop of: Horizontal Right, Vertical Up, Horizontal Left, Vertical Down, repeat, indefinitely as long as you tap A. Interestingly, each swipe only does a mere 1% with hit-stun unless you end up hitting something, at which point the next swipe will hit for an additional 1%, capping at 5% per strike! While it might not sound like much, each hit will add up very quickly if the foe stays put.

Metal Claws are best bounced back with this move, and when they hit, they count as a strike to add damage!


SIDE
BRICK BREAK
Bisharp pivots counter-clockwise and slashes his left blade forward in a "backhand" like fashion, traveling forward a character length as he pivots around. The hit only deals 8% and a small amount of KB, but it's speed and range make it ideal for following a parry, especially when you can angle it. Especially useful when you use it to parry by itself, as you can move forward twice, or if the opponent tries to defend themselves seeing as the backhand from the blade will deal 2x shield damage as it hits with the hook of the blade (40/177hp to be precise).


UP
IRON HEAD
Mimicking DK, Bisharp swings his axe blade down in a huge vertical arc that covers above and directly in front of him for 12% and strong diagonal KB.

His slowest tilt (again, DK side B), it at least leaves a huge hitbox above himself to clash with aerial approaches, since in Smash4 they'll be bringing back the ability to clash with those, haven't you heard?


DOWN
LOW SWEEP
Bisharp swings his legs out while digging a hand into the floor to use as a pivot, swinging himself out like Mario's Dsmash and hitting for 6% and low vertical KB. Extremely quick, it works great as a counter to then hit a foe with any of his other standards as it can pop them up or parry other "pokes" easily.


DASH
CIRCLE KICK
Bisharp speeds up just a tad as if you pressed dash again and flings his body head over heels to strike out at foes in a devastating double-kick maneuver. Acting as sort of a reverse sex kick, the hitbox as he flips hits for 8% and is rather lackluster in terms of power, whereas the aerial stomp forward deals 13% and has enough horizontal power to kill a foe near 130% at an edge. After the kicks he lands in a crouch position as he skids on the floor with a bit of end lag.

Similar to both Ftilt and Utilt, the moving hitbox is perfect for intercepting attacks to make use of your unique spacing game. Delving deeper, you remember how he dashes again to get the momentum for this? Well, that momentum also carries over to Dash-Attack-Cancel maneuvers! DACUS, Boosted Grabs, and Boosted Item Tosses will travel very far and have a cool "skid" effect when Bisharp uses them, and interestingly he can also Jump-cancel this move, giving him about 50% more air speed than your average dash-jump.


DUAL COMMANDS
MULTI-SMASHES
As stated before, Bisharp has some unique Dual Commands with his smash attacks. No matter the distance, when Bisharp begins to charge a Smash, his partner in Team2 will perform said smash! Thanks to his experience as a pack leader, the other Pokemon will take some command from Bisharp and look to him for combat advice, which allows for this. That's not to say Bisharp's smashes aren't special on their own though, as you'll see they each come with a dark side-effect...


SIDE
VENGEFUL SLICE
Bringing both bladed arms to the side as he charges, Bisharp will unleash a 3-part frenzy of slashes forward with each tap of A, much like Link's Fsmash. The first two hits are each diagonally downward slices in front of him, taking a step between the first and second and dealing 7-10% each, with surprisingly light KB for a smash. The third hit has Bisharp stab both arms forward for 10-14% however, taking another step and hitting hard enough to start KOing Mario around 135-115% near edges.

As you may have assumed, this has multiple hits for a reason: Parrying. You see, if Bisharp uses this to counter an attack with one of the first two hits, the next hit will not only be faster, but make him take a quicker step to extend the range as well as dealing the same increased shield damage as Ftilt (anywhere between 35/177 to 70/177 shield damage) regardless of whether nor not the opponent is shielding the attack! Noticeable from the sparks flying from his blades once continued from a Parry, Bisharp will make sure to punish the foe for trying to test his blades by lowering their defense significantly.


UP
TYPHOON'S EDGE
Taking an arm to both his front and back as he charges, upon release Bisharp will jump and spin his body in a deadly pirouette as all the various blades on his body hit repeatedly for a total of 18-25% and KB similar to Samus' Dsmash when Bisharp lands, sparks flying from his feet as he skids to a halt.

Taking as long as Mach Tornado when tapped to perform, the intense spinning caused by Bisharp hopping to the air will actually pull foes in towards the blades with strength like DDD's Inhale! Once sucked into the blender, landing with Bisharp will spike foes down into their prone state, forcing them to get up in some manner which can lead to a delicate tech-chase situation.


DOWN
PAYBACK
Crossing his arms in front of him as he charges, Bisharp will then swing his arms behind him, slashing for 8-11% and mediocre KB, and after a brief moment swing both arms blade-first outward in front of him to rake at foes for 10-14% and KB that can kill diagonally at 140-125%. Although Usmash may take a bit longer overall, this is usually considered his slowest smash due to the pause between hits, making it as slow as Wario's Dsmash overall.

That said, the pause is actually beneficial to Bisharp as he has Super Armor during it! If a foe were to strike him during the pause, he will immediately lash out with the second hit with visible "dark" trails like with his specials. This indicates that the foe now has Bleed Damage, as well as the feint black slashes over their midsection. Bleed Damage will deal 1% every 1/3 second for the next 5 seconds to the victim, and 1/4 of a second is added per every successful strike by Bisharp thereafter. If planned right, this can be an amazing way to punish foes through sheer damage alone.


NEUTRAL
AERIAL ACE
Bisharp does a diagonal Slash in front of himself for 4%, a Kick for 5%, then swings in a 360* arc with his head-blade for 6%. Each hit does weak KB, except the spin which does mediocre KB in the diagonal the foe got hit from. Like in the games, it is near-impossible to avoid the myriad of attacks thrown out here, and it's a great tool for a variety of situations for Bisharp including intercepting other aerials, and just general combo set-ups.


FORWARD
X-SCISSOR
Bisharp crosses his arms before lashing out in an X slightly diagonally down before him. Lingering a moment and hitting for 7% and mediocre KB, hitting at the exact point his blades cross (indicated by a few sparks) will deal 14% and high horizontal KB, enough to kill Mario at 120% off-stage! If you don't want to kill just yet, the sweet spot isn't active for a moment which allows Bisharp to put on the pressure well enough with the initial hit, and doesn't come out at all if you L-cancel the move. The large hitbox and placement makes this a good option for air-to-ground parrying.


BACK
SLASH
Bisharp turns around mid-air with a Diagonally upwards slash from his right arm at a speed comparable to Wolf's Bair. Hitting for 11% and with enough KB to kill at around 130% at an edge, Slash is great for aerial conflicts due to both it's turn-around and speed, as well as how Bisharp actually reaches out for the slash with range comparable to MK's Dair (if turned sideways).


UP
DUAL CHOP
Slashing one blade above his head in a small arc, Bisharp swipes the other as the first retreats in one fluid motion to create a long-lasting hitbox that hits 4x for 4% each hit, one for each blade either swiping in or out. If a foe manages to get hit by all 4 hits, the last will have vertical KB similar to Yoshi's Uair and able to kill off the top at higher %, but otherwise this can be of great use when attacking foes from below platforms, or when hopping up from below the edge when recovering.


DOWN
BUZZSAW DROP
Making a "T" pose, Bisharp will spin rapidly like with his Usmash and fall a short distance before regaining control. The drill does up to 22% damage total, and interestingly will not cancel unless you complete the animation mid-air, or manually L-cancel the move. Short Hopping this will allow Bisharp to remain spinning on the ground (with the neat sparks GFX at his feet) until the attack is done, really putting pressure on the foes!


PUMMEL
ASSURANCE
Bisharp has a rather unremarkable grab, and his pummel is no better at 3% every 1/3 second as he smacks the opponent back and forth with his hand.

If the grabbed victim is taking any sort of damage while grabbed however, such as bleed damage or Team1/2 attacks, Bisharp will instead stab the wound with his metal hand repeatedly, causing 5% every 1/4 sec instead!


FORWARD
FOUL PLAY
Bisharp delivers a vicious headbutt with his axe blade, stunning the foe for a moment as they clutch their face (like with the Curry animation) for 4%, and as they're stunned he has just enough time to deliver a grounded X-Scissor to them for 6% and high horizontal KB, but generally not enough to kill until very high %. At least the X-Scissor can hit multiple targets.


BACK
SAWMILL TOSS
Bisharp hooks the opponent with one of his blades and takes them for a ride: spinning twice at a different diagonal each turn like with his Dair and Usmash before launching the foe either straight or at a diagonal based on your input during the spins. While Bisharp winds up, his various blades slice up both the foe and anyone around him for a total of 12%, but neither this or the throw have any real knockback power to speak of as the flung foe has a set KB of about 2 platforms, with very little added on with %.


UP
FLING
Letting go of the opponent, Bisharp will perform a flip-kick to their chin that sends them vertically for 7% and surprising KB that sends them flying hard enough to start KO'ing off the top around 140% when you're on a platform, and lower the higher you go. While fairly standard for a throw, the flung opponent also serves as a handy tool for Bisharp, as they act like a projectile with a hitbox for 3-13% and decent KB depending on their weight as they travel upwards.


DOWN
BLADE-DROP
Bisharp rolls backwards with the foe in tow, landing on his back as they fall face-first into his torso blades and take some nasty damage, 9% with Bleeding! As the foe gets knocked behind Bisharp in a reeling state, he performs his standing-tech to get back up and hopefully keep on the foe to keep them bleeding out.


ZAIR
FAINT ATTACK
Bisharp's Zair is somewhat unique in that it works like a traditional Zair, except without a tether. Pressing Z instead will have Bisharp flash black like with his Special Darkness slashes, and phase slightly like Lucario's Double Team. As this occurs, he is also seen bolting forward up to a Platform's distance in a pose reminiscent of Fox/Falco's Side B for 6% and light KB to those he touches at the end of it, unable to perform it again until he touches ground. Like with all Zairs, if used after/during an air dodge, he will special fall after the animation finishes, and like with Tethers he will snap to an edge if in range, though it's significantly shorter than both normal Tethers and Night Slash.

Unlike other Zairs however, Faint Attack itself can be canceled into either an Aerial, Air Dodge, or Jump (if he hasn't already) while giving him his max air speed right away, making cool things such as Fair > Faint Attack > Cancel into Bair or another Fair possible. Mastering this Zair can be a real boost to Bisharp's overall mobility in the air when used right, even taking in his fall speed and mediocre jumps into account.


UP
METAL SOUND
Bisharp runs his blades against each other slowly, creating a really cool "Shhhhhiiiinnngg!" noise. If an opponent is within a platform of him as he performs this, the noise will make them face him if they weren't already, unless they were performing any sort of action.


SIDE
TAUNT
Bisharp raises his hand up, then waves it in front of his face while mocking the foe with "Bish..... arp", the latter as he ends the taunt (sounds like something else at first, huh? :troll:). Like with Metal sound, this will make foes turn to face him, except it has half a platform's range but with a guaranteed turn-around towards him if the foe isn't doing any sort of attack that moves them like Wolf's Fsmash.


DOWN
SCARY FACE
Bisharp does the kind of thug "thrust" forward with his face and shoulders as his eyes glint, saying "Sharp!" as he does so. Like all his taunts, this will turn the foe's attention if they are within half a platform of him, but unlike the other two, this scares foes and makes them turn away from him.

These effects aren't really vital to his gameplay at all, but at least they're fun to mess around with if the foe wasn't paying attention.


TRAINER TIPS:

Bisharp is the tactician of the bunch when you boil everything down: using quick, short movements, tricky moves, clashing parrys, shield play both vs his and opponent's shields, and spacing/priority in general to get the edge on the opposition.

That said, it never hurts to play dirty with him. Setting up foes to approach you with Metal Claws is what most Bisharp strategies start off with, but running in with Night Slash or Faint Attack can work too, but those two don't buy you a little time to charge up Metal Burst. From here you essentially keep baiting and punishing attacks, hard, and take full advantage of Dual Commands to send out long ranged smash attacks, sending foes into your aerials, or shielding just for your partner to grab, then charge a smash out of shield so that it's stronger. The options for **** mo... excellent team combos are nearly endless given the nature of Bisharp's attacks to keep foes at bay in order for you to position everything just right to finish them off. Even on Team2 he's a menace as any attack geared toward your controlled Pokemon can be met with a Sucker Punch to the gut from Bisharp, swinging the momentum in your favor once more (especially if sucker punch clanks, holy crap...). Essentially, Bisharp being on the field turns the game almost into a chess match with both you and the opponent having to think twice and out-predict the other due to his dark blades and commanding presence being able to change the flow of battle off of just one misjudged attack.


TEAM OPTIONS & SUPER SMASHES:


WITH ALAKAZAM : GUILLOTINE
This super smash requires a foe to not only be within range of the pair in order to work, but also be -between- them, it's definitely worth it though.

Once initiated, Alakazam will hold the foe in place with confusion, them visibly struggling as Alakazam recedes to the background slightly with Bisharp walking away from the two, up to a Platform away unless A or B is pressed, otherwise he'll start the attack once he reaches max distance. Once a platform away, Bisharp will raise his arm up in his signature pose and glance back at the trapped foe with a glint in his eye, before dashing back with both blades leaving dark trails like with Night Slash, striking the foe for 20% and high KB normally, unless you manage to tap A or B -just- as you touch the foe. In that case, the crossing blades will deal an incredible 40% with base KB rivaling Jigglypuff's rest. Yeah, they are pretty much toast at that point.

Unlucky for you, Alakazam's grip weakens as the foe struggles, with them being able to escape with normal grab difficulty and turning Bisharp's lunge into a normal Night Slash for all intents and purposes. This is where interrupting the move may come in handy, as although it's at it's best when Bisharp has the time to prepare the move fully, manually striking will hit for 7-14% and have either mediocre or "decent" KB depending on the distance and f you hit A/B at the right time.

Timing is crucial for this Super Smash Killer to work, as not only is the clock against you with the foe being able to escape (better wrack up that damage!), Alakazam and Bisharp can only attempt to do Guillotine only once per 2 minutes, and that's with the other requirements!
------​
Alakazam works *very* well on Team2 in this pairing, with all his throws, smashes and Ftilt (more on that in the next set!) working extremely well with Bisharp's normal game-plan. An especially mean trick is to Dsmash or Usmash in close proximity, as the respective multihit moves will trap foes perfectly to be hit by the finishers that follow. Other than just meshing well with their "bread and butter" so to speak, Bisharp can really have fun with Metal Claws with proper spacing, as hitting them off of Alakazam's Reflect against an opponent, only to then bounce of him, back to the opponent, and back to Reflect, etc, can really frustrate a foe into making some stupid decisions, and maybe make them face the Guillotine for it. Alakazam may be seen in the backdrop more often than playable due to his relative frailty, but depending on the situation he can really take the spotlight with his ability to switch places with Bisharp to mix up both of your positioning, and Sucker Punch in general making foes weary of trying to punish Teleport.


WITH FERALIGATR : HONE CLAWS
Bisharp and Feraligatr face each other and swipe their claws/blades at each other, making clank/shing noises and visible sparks. Once that is done, you will notice that each of their hands now have a "glint" to them for the next 15 seconds. What does this mean? Well, they both just sharpened each other's attacks to now activate Bleed Damage on every attack (except any pure-water hitboxes like Hydro Pump (moves that can hit with Gatr's body will still do bleed damage), and any non-blade moves like Dash Attack). A truly fierce combination, the effect is even put on pause if one of them switches out, the timer resuming when they're in play!

Unfortunately, Hone Claws can only be performed twice per match with a little "blade" ammo indicator next to the playable Pokemon's portrait when both are on the field. Make use of the effects wisely!
------​
This pair is best played apart from each other, and with constant switching involved as Bisharp's ability to send out a foe to be Fsmashed by Aqua Tail at range, or Hydro Pump pushing a foe in range of Sucker Punch is just too good to pass up. Making use of their various burst mobility tools, the two should try to keep ample space for the foe to be juggled between them and to make use of throw commands from the two, especially Hydro Cannon > Pretty much any charged smash of your choice. Unlike most of Feraligatr's pairings, this one is really up to preference on who gets more playtime over the other, especially when they both can get Hone Claws.


WITH BRELOOM : ASSIST
Bisharp will do a short hop only to lunge forward with Faint Attack, and cancelling it into a Dair as soon as he's at the opponent's position. Otherwise he'll just do Dair at the end of it. Once Dair hits, depending on his distance from the ground he will Lcancel and immediately perform Usmash, continuing his re-inaction of a living Buzz-saw and absolutely tearing into the foe. During all this, Breloom is of course free to launch leech seeds at the trapped opponent to get free heals for Bisharp as all the hits add up to % gained, or add to the offense by using him as a spinning substitute of pointy death to charge up a Focus Punch behind, and hitting the prone foe left behind!

Like all assists, this can only be done every 5 seconds.
------​
Bisharp and Breloom work best when they stick very close to each other, with Bisharp usually in front of Breloom as commanding him will almost always reach through Bisharp to hit foes with Grabs, Leech Seeds, Seed Bombs (especially funny when his taunts turn the foe around to get seeded in the face (smirk) ), Mach Punches, and even his Grab all reach past Bisharp's width. This can be abused either way as with Bisharp in front, Breloom is free to just do his cool fighting shenanigans with a Sucker Punch/Ftilt/Grab safety net he can attack past for protection, and support while Metal Bursting with leech seeds. An especially potent trick is to have Bisharp grab a foe then Dynamic Punch them fully, the increased pummel + free hits from the multi-jab can totally ruin somebody's day. Like most of Bisharp's pairings it boils down to preference, but be careful with these tow as while they like to stay close, that opens them up to both being hit and sent offstage, their least favorite place to be.


WITH Porygon-Z : SHARPEN_APP
Z creates a mini-trick room before him, only for Bisharp to slash at it with his dark energy, turning into a black, D20-shaped object that floats in place, and resembling a Smash Ball in size. When hit by melee attacks, the warped trick room will send out 3-10 pixels depending on the strength of the attack, that actually home in on enemy targets and hit for 1% each and some hit-stun, traveling as fast as Metal Claws with near perfect homing within a Platform's distance. This "App" lasts indefinitely, but only has 75% stamina before it shatters in a small explosion for 10% and mediocre KB. Hitting it will also push it away a bit in the direction the attack would normally send the object, and yeah bigger hits move it slightly more.

This Super Smash is great not only for the two of them by supplementing their ranged game, but also for the 3rd team member who wants to give it a go (such as Breloom who can hit it fast and from afar!). Unfortunately, Z only has enough juice in him to make 4 over the course of a match.
------​
Porygon-Z definitely takes a back-seat here as Bisharp shreds the oppostion, using not only SHARPEN_APP, but Z's awesome projectiles (Air Cutter, Dark Pulse, Flash Cannon) to confound the foe to fall prey to Bisharp's tricks and punishes. The fact that Trick Room slows down foe reaction is a god-send to Bisharp as well, given that he can really just take his time to play with his prey as they try to fight back once he's got the positioning he wants. Just be careful with Bisharp given his pretty limited recovery distance, or you'll find your trick rooms being used up more often than you'll like.

Oh, and remember Z's weird Fsmash? Well, that's a perfect move to launch foes back towards Bisharp with here! Really, Z goes all out on the "Support" role here and unlike Alakazam, doesn't have much business being in the foreground once he's set up the field for Bisharp to command.


Well, we made it through all 5 generations! Next up is a brand-new Pokemon from my own Zelend region, maybe you can guess it's type from the clues in Porygon-Z?
 

ForwardArrow

Smash Ace
Joined
Aug 17, 2011
Messages
503
Strong Bad
http://www.youtube.com/watch?v=wtmhtJi9l6A
Audio comment. Be warned, it's slightly awkward and randomly cuts at one point.

Zak Gramayre
I actually enjoy Zak's concepts, just create complete chaos by blaming everyone else for your own crimes. Get cops firing at foes, your teammates, and even each other to create a crazy battlefield which you just leave behind and force Valant to do all the work on. That's actually really good, but given it's a jokeset the rest of the set obviously doesn't hold up. It's pretty damn hilarious though in a very morbid way though, just showing off how much you hate this stupid character and how pathetic it is that he's supposed to be bloody SYMPATHETIC. There's also some stuff with using your allies as meat shields which feels better here than in most multi character sets, given the point of your non-Valant minions is really just to make them suffer in your place. It isn't that far off from me liking it even as a serious effort, just could use a little more focus, though given your hatred of the character it's fine he's demoted to joke set. Oh and of course the final smash is the best thing ever.

Mr. Dark
Mr. Dark is definitely better than Bigfoot or Soundwave Superior in a lot of ways, given the former was the better of the two and still had a grand total of two moves that weren't just bland and slow melee moves. Mr. Dark here actually throws out a cage, some projectile spam, and a couple of traps for him to capitalize on, particularly in landing his Down Throw which would otherwise be very difficult to pull off. It's an alright base, and the moves are actually a bit creative at points, the Side Special and the varieties of projectiles created by the Down Special are decent... albeit I would prefer it if there were some way for Dark to absorb his own projectiles via Down Special, perhaps to even choose which type he wants? Maybe it's a bit much to ask, I don't like moves that solely work as projectile reflectors and nothing else.

Now here comes the negative part of the comment. Having the traps stick around for the times you mention is fine, but the attacks REALLY need to last for shorter periods of time. 7 seconds is upwards of 7 Falcon Punches. I'm not kidding. That makes the Forward Smash obscenely broken and the Down Throw which I praised earlier absurdly hard to use. It's number crunching, but a bit jarring. I also wish the flow was a bit stronger, it amounts to making a cage around the foe, maybe with a trap or two inside, and launching projectiles at them, which is pretty boring and stuff we've all seen before to begin with. Maybe I'm being harsh, but I do think you can do better than this given how much of a step up from the other two this already was.

Tabitha
Generally, I've been known to like stage construction and projectile manipulation, but oddly I cannot bring myself to like Tabitha at all. You create ice walls, a bunch of spikes which you can put in those walls, use those walls to reflect your projectiles about at different angles... obviously, as the set goes along, you create flashier stuff to do with the basis, such as the wind voids, being able to absorb all the ice into one big hit, splitting up the ice and recapturing foes inside it. It's okay stuff but it really feels like the whole set just amounts to more and more ways you can angle your projectiles by rounding off stuff or putting them in portals. Conjuring stuff around the projectiles is actually okay, and probably the best part of the set, but all it really does is just allow Tabitha to spawn ice walls in different places or yet more angles for your icicles to be shot from.

The set's pretty obscenely redundant too, honestly. You have the Dair cube thing which basically functions as an inferior ice wall to start with. Several ways to round things off to create new angles to launch yourself or a projectile spawner(really, that's what the wind orb FTilt is) around with so you can launch projectiles from those angles, or just a wind void which is yet another way to control your projectiles. Or a big icicle that just serves as exactly that with the only other point really being "oh it's an icicle that also KOs and is stronger as a trap". I kept hoping with all this magic syndrome you were going to do a bit more with her than just make more ways to redirect projectiles, perhaps more stuff like the spawning enchantment? Doesn't help that the set just feels very clunky with how much minor tweaking she does to the structures for some of her attacks. At the very least, you do have the occasional bit that is actually quite fun in here with the rotating ice blocks.

Now all this really does to do is serve to make the set mediocre, but what made me outright dislike it was a very minor but still relevant detail. What makes stage construction characters that Tabitha seems to try to be emulating fun is the fact that they can have an unlimited quantity of set-up to make whatever they wish. Now with Tabitha it seems like you're trying to make interesting set ups, but what dramatically reduces her ability to make them is that ridiculous 3 wall limit you impose. I don't even know why you put that in there, but if I could do an unlimited amount of wall creation with Tabitha then maybe there'd be a lot more depth in creating the set-ups. As is, it just makes for what feels like a very handicapped character.

Bisharp
Bisharp's not a fantastically flowing set, but believe it or not I actually like the playstyle you set up for this guy. A melee playstyle based around sort of clashing through and countering the opponents moves is something I sort of wanted to see done for a while, and Bisharp actually pulls it off well enough with the armor he can give himself and that the moves are sort of designed to work as counters. The perks to countering are also alright, particularly the bleed damage which he can capitalize on with the pummel and his innate rushdown nature. I sort of wish the bleeding was just something he could do in conjunction with Feraligatr and otherwise trigger solely via Down Smash(having it on the throw is a bit disappointing, I liked the challenge in obtaining it)... though actually, I do think that having the bleed damage attached to his attacks helps Feraligatr nicely, given that it works well in conjunction with his high movement and rushdown style. Not to say anything less of the team attacks with Porygon Z and Alakazam, which were both highly enjoyable additions to the set. Speaking of Z, the synergy between Bisharp's desire to "counter" the foe and Z's Steel type projectile is quite good. A minor thing I do want to bring up though is that you have an attack that increases the shield damage after countering something... am I the only one who thinks that this would almost never come up? Regardless, a solid addition to JOE, and if the last team member is good I will definitely have liked this set overall(Feraligatr and Breloom definitely benefit both from the existence of Bisharp and the ability to attack with Team 2 Pokemon).
 

Katapultar

Smash Lord
Joined
Nov 24, 2008
Messages
1,284
Location
Australia
Tabitha
Generally, I've been known to like stage construction and projectile manipulation, but oddly I cannot bring myself to like Tabitha at all. You create ice walls, a bunch of spikes which you can put in those walls, use those walls to reflect your projectiles about at different angles... obviously, as the set goes along, you create flashier stuff to do with the basis, such as the wind voids, being able to absorb all the ice into one big hit, splitting up the ice and recapturing foes inside it. It's okay stuff but it really feels like the whole set just amounts to more and more ways you can angle your projectiles by rounding off stuff or putting them in portals. Conjuring stuff around the projectiles is actually okay, and probably the best part of the set, but all it really does is just allow Tabitha to spawn ice walls in different places or yet more angles for your icicles to be shot from.

The set's pretty obscenely redundant too, honestly. You have the Dair cube thing which basically functions as an inferior ice wall to start with. Several ways to round things off to create new angles to launch yourself or a projectile spawner(really, that's what the wind orb FTilt is) around with so you can launch projectiles from those angles, or just a wind void which is yet another way to control your projectiles. Or a big icicle that just serves as exactly that with the only other point really being "oh it's an icicle that also KOs and is stronger as a trap". I kept hoping with all this magic syndrome you were going to do a bit more with her than just make more ways to redirect projectiles, perhaps more stuff like the spawning enchantment? Doesn't help that the set just feels very clunky with how much minor tweaking she does to the structures for some of her attacks. At the very least, you do have the occasional bit that is actually quite fun in here with the rotating ice blocks.

Now all this really does to do is serve to make the set mediocre, but what made me outright dislike it was a very minor but still relevant detail. What makes stage construction characters that Tabitha seems to try to be emulating fun is the fact that they can have an unlimited quantity of set-up to make whatever they wish. Now with Tabitha it seems like you're trying to make interesting set ups, but what dramatically reduces her ability to make them is that ridiculous 3 wall limit you impose. I don't even know why you put that in there, but if I could do an unlimited amount of wall creation with Tabitha then maybe there'd be a lot more depth in creating the set-ups. As is, it just makes for what feels like a very handicapped character.
Playing out the possible receptions for the set in my head, I should have known something like this would occur when two of the Specials merely support the first two...a pretty big pit to fall into. To be honest though, I didn't create this set out of the context that the character had a good concept to make use of (that makes itself pretty obvious after having read it, no?), but rather because I genuinely like her as a character. As a result however, seeing the way I messed up on this one (it has to be for me what Dark Falz was for you last contest) isn't so much as a little saddening that I did so in the first place but rather I did it with a character I wanted to represent well, but will never get the chance to do so again. The 3-wall limit was kinda designed to balance the set as to prevent the foe from never being able to break your wall when their HPs are combined, though I guess I could very, very -easily- edit said detail so they're not combined and you can simply make infinite without mishap....I've already edited in fact, being as easy as removing a few lines from Side Special. I guess I should be grateful the set isn't outright -bad- or dysfunctional, and you did not utter the T-word of which you are famous for in my eyes.

While bad came from this experience, there was also good and a whole lot to learn from it. I believe this all came out as a result of me wanting to make a set for a character I liked without having a good concept behind them and trying too hard to make them interesting with what potential they had...complex playground isn't something that appeals to -everybody- in MYM, and as such if you cannot appeal to the particular crowd that does like it there's no luck at all. What I was trying to attempt wasn't so much of a playground as bouncing the same thing back and forth, which did occur to me, and as such there wasn't really any diversity and that brought out the redundancy you called out. Something about me is that I tend to get -really- focused on a certain concept in a set and strive to make as many ways to have the player manipulate it as possible in order to give every move meaning and make them interesting, without bothering about anything else and at times things that might be more practical or simple, which is probably why you've been seeing me do a lot of the stuff I've done (if you think back a little it adds up). Something else that likely contributed to the set's reception was the fact that, I'm 98% sure or so, that the playstyle did not feel fun to imagine, being a bit too mechanical for its own good...I might have been blinded by the fact that she had functional melee attacks and as such could function decently in a fight. One can always tell they're set will be good if the playstyle is fun to imagine.

And with that, I have new experiences under my belt. What's funny also is that this negative comment didn't make me feel as down as I thought it would. Well, at least I won't go back to the way I felt at the start of the competition.
 

ForwardArrow

Smash Ace
Joined
Aug 17, 2011
Messages
503
I think the set is better with that edit, although I still don't think I like it overall. Glad you took my criticism well at least.
 

Plorf

Smash Apprentice
Joined
Jan 28, 2009
Messages
124
Location
Silver Spring, MD
I'll die before the set's done...

The quest... has finally ended.


Subject DWN-028, or "Pharaoh Man," is one of eight battle robots built by the Russian mechanist Dr. Mikhail Cossack at the behest of Dr. Albert Wily in the year 20XX. Situated in the heart of the Egyptian wastelands, Pharaoh Man wasted no time fortifying his defenses with all manner of robotic slaves, garnering their loyalty through guile or threat of force. His recruits hold no special place in his empathy circuits; they are all of them expendable. Pharaoh Man is slightly delusional, maintaining extended visions of grandeur - though his recent efforts have raised worries that he may be capable of attaining them. His abilities stem from ancient Egyptian lore, most prominently Ra, Horus and Osiris.

♒ Statistics ♒

Pharaoh Man is shorter than the average human by about half a head, putting him at around Pit's height. He is surprisingly maneuverable, with above-average top speed and jump. Of course, this is accompanied by a decrease in weight. Unlike many speedier characters, much of Pharaoh Man's moveset is somewhat telegraphed.

¤ Specials ¤
Neutral Special ¤ Pharaoh Shot

Pharaoh Man turns to face the screen and raises one hand above his head, releasing three thin streams of fire which coalesce into a tiny ball of churning flame about half a Ganondorf over him. Releasing B at any point will cause Pharaoh Man to reach for the orb and hurl it forwards, dealing 6% and minor knockback. When tapped, especially while in midair, this is a fairly quick maneuver, but its effects can be charged for extra utility.

After the half-second starting animation, Pharaoh Man can continue to grow the Pharaoh Shot by holding B. He can walk, run, jump, and perform most moves while charging (no Side/Down special), but he cannot shield or dodge. In fact, he can even begin charging a shot while using another attack altogether! So long as that move does not itself require charging or use fire effects in some way, that is. The shot takes two seconds to charge fully, at which point it has grown to the size of a party ball and deals 22% with knockback that kills at 140%. It even acts as a hitbox before thrown, acting as an anti-air shield of sorts. While throwing the shot, you can angle it up or down 45 degrees.

Apart from being a highly versatile projectile, a charged Pharaoh Shot enables Pharaoh Man to smoothly transition into some of his more powerful moves. Such attacks are designated with a
¤ in the header. When Pharaoh Man uses any of these attacks, he reabsorbs the shot into his body as he glows with white energy, gaining temporary super armor for a split second before unleashing the move. If the attack is interrupted, the charge is lost, but if it follows through then it's treated as if it was already fully charged!

Up Special ¤ Sunrise

Striking an identical pose to his header image, Pharaoh Man folds his arms over his chest as an aura of heat and flame slows his descent. This slowdown grants him ample time to charge his recovery for a maximum of two seconds. If you hadn't guessed by now, this is indeed nearly identical to the space animals' recovery in that it causes him to spontaneously ignite and dash straight upward, a battlefield platform to battlefield's entire distance depending on charge. This can only be slightly angled left or right. The mad dash deals 9-13% damage, and strictly vertical knockback, not capable of KOing until the opponent is well into the red.

As indicated by the
¤, this move can be precharged via Pharaoh Shot. Being a special, it requires a slightly different input - after releasing B to hurl the shot forward, but before it leaves his hands, tap B again to make Pharaoh Man absorb the stored energy to dash forward at up to full speed in the direction the shot was angled.

Down Special Unhallow

Pharaoh Man claps once, echoing louder than one would normally imagine. Immediately, a battlefield platform's worth of area of space beneath him takes on a darker sheen and begins to release shadow particles. The process takes half a second, with the clap taking place smack dab in the middle. Two areas may be designated as "unhallowed" at once.

Two seconds later, and every eight seconds after that for a full 30 seconds, a Mario-sized
Mummira crawls its way out of the ground onto the stage (yes, even on fall-through platforms). These Mummira are far from intelligent, only capable of shambling around aimlessly, no faster than a Waddle Doo. To their credit, they take fewer pauses than their one-eyed companions. Mummira possess 15 HP, take double damage from fire, and take half damage while in an unhallowed area. When a Mummira finds an opponent, it will attempt to grab them. They have a tether grab comparable to Zero Suit Samus's, for which they whip forward their bandaging to entangle the opponent. This is highly predictable and punishable.

A maximum of three Mummira can be on the stage at any given time, and Pharaoh Man is free to unhallow new areas without fear of dispelling his servants. If a Mummira is killed, it will be a minimum of eight additional seconds before its replacement can spawn - that is to say, if there were not three on stage at the time, the timer continues as normal. Friendly fire is active both ways - Pharaoh Man can easily destroy his servants if he deems it necessary, but by the same token, should he somehow get in the way of one of their attempts to grab the opponent, he will be grabbed instead, as the mortified Mummira desperately tries to release his grip, only making matters worse. Pharaoh Man, needless to say, is irate, and incinerates his former servant with a snap as soon as he manages to free himself.


Side Special ♒ Pharaoh Wave

Pharaoh Man raises a single arm some distance in front of his face, inviting the hot, desert wind. His order is manifested in the form of a visible emanation of air, waving his headdress as it tears through. This heatwave carries incredible force, capable of lifting enemies into the air and carring them up to half battlefield's length. It travels at Mario's dash speed and does not have any special properties beyond the wind hitbox. This move has a decay similar to Bowser's fire breath, requiring eight seconds of cooldown before it regains its full potency.

Mummira hit by the wave are also picked up. They lazily drift about, sometimes spinning around, arms outstretched, basically enjoying the ride as much as a decaying robot can. If a Mummira passes over an enemy, it wraps all four limbs around them, and the two are carried for as long as the wave lasts. Normal grab difficulty persists from the instant it grabs on. Unlike most grab hitboxes, this one -CAN- be shielded, though it deals a very large amount of shieldstun.

Standards

Dash Attack ¤ Horus's Egress

An instant after inputting this attack, a blue eye about Bowser's size opens slightly in front of Pharaoh Man, dealing 6% of shadow damage as it does so. He continues dashing directly into the eye, which dissolves into sand behind him and blows away in the wind. Shortly after, Pharaoh Man appears a few Bowser lengths ahead, delivering an open-palmed strike for 5% of shadow damage and 240%-killing knockback as he exits from another eye. With good timing, he can appear any distance between the two points with an attack by pressing A, and cancel the attack with a shield.

If there are Mummira in the direction this attack was aimed, they will stop in place, go slack-jawed, and look towards the sky upon use, though they will maintain their grip on any opponent they may be holding. For an extra .5 seconds for every Battlefield worth of distance between himself and the target Mummira, Pharaoh Man can use them as anchor points for teleportation purposes - instead of forming an eye, Pharaoh Man bursts out of his servant. It explodes in a cacophony of bandages and shadow, dealing no additional damage to Pharaoh Man's usual strike.

And of course, should a Pharaoh Sun be charged, it follows Pharaoh Man through the eye at the attack's beginning, catching up to him in the void. This doesn't increase the power of the first eye's appearance, but changes his open-palm strike to a forceful punch to the gut, wreathed in flame, which deals 5% plus half the damage of the charged shot. The killing percentage is reduced to a minimum of 110%.


Forward Tilt Enervation

Pharaoh Man steps forward with his opposing foot, pointing forward, as a small burst of shadow energy is released from his fingertip. This is a somewhat weak hitbox, complete with a sweetspot/sourspot - it does 8% with knockback that kills at 250% at the fingertip, and 3% with set knockback that drags the opponent towards Pharaoh Man on the arm.

If there is a Mummira in a direct line of sight from where Pharaoh Man was pointing, then in addition to the normal hitbox, Pharaoh Man gains a limited amount of control over his servant. The invisible psychic missile creates a small, harmless burst of shadow energy when it strikes, momentarily causing the Mummira to enter a T-stance, after which it sluggishly emulates Pharaoh Man's actions. It has no capability to use any of Pharaoh Man's energy attacks, but its melee attacks are about 1.5x more powerful. It gains access to a limited shield (no dodge/roll), covering its face to guard against half of any incoming damage. Its usual grab is retained. Pharaoh Man can take advantage of its sluggishness and inability to run to position himself at any distance from his reluctant soldier.

Downward Tilt Hands of Osiris

Pharaoh Man points towards the ground in front of him, and after a moment's delay multiple mummified hands reach out and flail around for a target. This deals minor shadow damage, about 4%, and roots grabbed enemies in place. They can fight out with about half normal grab difficulty, incapable of using leg-based attacks (which serve as maximum-speed button mashing for the purpose of escaping) but fully capable of fighting back otherwise. If this attack is used by a Mummira under Pharaoh Man's command, it will instead dive forward and attempt to grab the opponent's legs. It has super armor during this grab (can still be KOed, however) and is left lying on the ground if it fails, picking itself up after three seconds.


Upward Tilt ¤ Solar Flare

Pharaoh Man firmly raises both of his arms over his head, as a weak pulse of fire forms and flashes to deal 7% with diagonally down knockback. If Pharaoh Man had a shot active, it rapidly shrinks before flaring to 1.5x its size, dealing 75% of the shot's usual damage, with scaling knockback. Sadly, this causes the shot to lose its integrity. It will dissolve to nothingness in three seconds, leaving a small trail of fire behind itself which lasts for half a second, dealing 4% and flinch.

Neutral A ♒ Windless Zephyr

Pharaoh Man closes his eyes and turns his head slightly towards the screen before releasing a silent, shifting zephyr of force about half a Battlefield forward from an outstretched palm. Should this attack hit an opponent, it deals about 3% of damage with knockback that pushes them backward slightly. It’s impossible to chain this attack into itself without a very cooperative opponent. While it does not damage a shielding enemy, they are nonetheless subjected to this move’s side effect…

A second and a half after being embedded with this zephyr, a strong burst of air launches them upwards about Mario’s jump height. This does not deal any additional damage, nor does it interrupt any attacks they were in the middle of using. It does, however, put them in an ideal position to be hit by Pharaoh Shot’s idle hitbox.

♒ Smashes ♒

Forward Smash Fatal Glyph

Brimming with dark energy as he charges this attack, Pharaoh Man appears to be tracing an outline of something in midair. Whatever it is, when the attack is done charging, Pharaoh Man motions to sweep forward his inscription – immediately followed by a purple explosion with the faint tracing of an ankh directly in front of him. The size of the explosion varies from Kirby's to Bowser’s size, the ankh taking up 75% of the space and outlined in black. Naturally, this is a highly laggy move. It deals 14-25% and knockback which kills from 90-65%.

When used on your Mummira, the negative life energy heals them for half the damage it would normally do, rounded up. This can even "overheal" them for up to 10 HP.


Upward Smash ¤ Pharaoh Nova

If he has not done so already, Pharaoh Man stops in place, points upward, and begins charging a Pharaoh Shot over his head. This has the same properties of the regular Pharaoh Shot, but owing to the decreased charge time, can only be prepared up to half its maximum size, which would normally deal 14%. When released, the shot emits a large burst of yellow light, coloring nearby players and objects, and burns with a visible increase in intensity. This acts as a multi-hit hitbox which holds opponents 'til the last, all in all dealing 1.3x the damage of an equivalent-sized Pharaoh Shot.

If there is already an active Pharaoh Shot when this move is activated, Pharaoh Man can continue to charge it further – he raises both hands towards the sky in intense concentration, capable of adding another 8% to the base damage of the shot and an extra Pokeball to its radius. As a recap, if the opponent is hit by the precharged shot, this move deals anywhere from 6% to 30%, and the churning nova can deal 8% to 39% from multiple hits over the course of .25 to .75 seconds. Whatever the case, Pharaoh Man cannot begin charging a new Pharaoh Shot until double the length of the nova.

Downward Smash ♒ Desert Gale

Pharaoh Man folds his hands and lowers his head in meditation while this move charges, quietly mumbling incomprehensibly to himself in an ancient tongue. Minor wind effects kick up around him, blowing dust in spirals around his immobile body. This does have a minor wind effect, slowly pushing opponents and items away. Upon release, these spirals are reabsorbed into Pharaoh Man, and after coming to a conclusion in his babbling he states a single word of power -

"
!!"


- which is pronounced "Ra-towsh," or similar. I doubt there are any majors in Egyptian culture here, so I could say just about anything and get away with it. Anyway, he claps once, which creates a powerful burst of excruciatingly hot wind searing from himself, spreading out in an aura which spreads from one to two Bowserlengths. This deals minor damage, 10-13%, and rapidly decays towards the edge of the effect. Knockback likewise decays, a powerful wind effect which can kill at 100-80% towards the center and a nearly unnoticeable push at the edge.

¤ It is important to note that while this is a wind effect, it is still capable of being precharged by Pharaoh Shot. Doing so multiplies the damage by a factor of 1.3x, but has no effect on the knockback.

♒ Aerials ♒

Neutral Aerial ♒ Pharaoh's Pulse

Easily the lengthiest of his myriad aerials, Pharaoh Man stops in place when this move is activated, curling into a ball with his arms wrapped around his legs. He then bursts out of this position, striking his arms and legs in an X shape, as a wind hitbox very similar to the above DSmash emits from his body. This is equivalent to a halfway-charged DSmash, sans damage-dealing capacity (instead, each limb can do 6% to nearby foes), and leaves Pharaoh Man in helpless after use.

Forward Aerial ♒ Noble Strike

Striking forward with both arms, Pharaoh Man delivers two hits of 4-5% with knockback that sends the foe diagonally down on the second. Quick to execute but with a touch of ending lag, this can nonetheless be an effective way to get the opponent back on terra firma.

Backward Aerial Regal Elbow

Pharaoh Man forcefully shoves his elbow behind himself, using his opposing arm as support. This executes fairly quickly and does moderate damage (12%) and knockback, but has a cripplingly short range.

Downward Aerial ¤ Arc Shot

Pausing in the air momentarily, Pharaoh Mah hurls an arcing fireball towards the ground, which travels at an average walking speed horizontally and Bowser's fall speed vertically. When it reaches three Ganonheights below its starting position, or hits a surface, it smoothly transitions to an upwards arc, shooting towards the top of the screen. The projectile deals 7% on impact, with minor knockback which is unlikely to KO even at 999%. When a Pharaoh Shot is charged, Pharaoh Man absorbs it to fire up to three projectiles at once.

Horrible quality, I know. Was the best I could do

Upward Aerial ¤ Phoenix Wave

Pharaoh Man presses his hands together to create a fiery glow before raising them upwards, releasing a Kirby-sized wave of fire which travels upward for a Ganonheight. This deals 8% and juggling knockback, though don't expect to juggle with it.

If a charged Pharaoh Shot is used instead, the wave can increase to the size of a battlefield platform, travel halfway to the blast zone on a decent-sized map, and deal up to 16% with vertical knockback that KOs at 140%. This move is not interrupted if Pharaoh Man lands.

Grabgame

Grab/Pummel Pharaoh's Grasp

Pharaoh Man's grab is somewhat unimpressive, though you wouldn't guess it by the chilling look of determination he gives when using it. Reaching forward with a single hand, he grasps for the opponent (reach/speed comparable to Marth's grab), pushing them by their head onto their knees with brutal strength if he finds one. If they don't have knees, he settles for lowering them down to the best of his ability. For his pummel, he unerringly smacks the side of their head with a closed fist, dealing 2-3% at a somewhat slow pace.

Forward Throw Pharaoh's Dismissal

Giving precisely zero interest in his opponent's fate, Pharaoh Man calmly uppercuts them to deal 7% of damage and fairly weak knockback which KOs at around 230%. There's a faint glimmer in his eyes to indicate that he's somewhat pleased with himself.


Backward Throw Entomb

Pharaoh Man slides his hands down to the opponent's shoulders before hoisting them above his head and slamming them into the ground opposite him. After bouncing off the ground for 9%, the opponent continues to slide along the ground for some distance. Mummira along the way will attempt to grab them anew.

Downward Throw ¤ Immolation

Pharaoh Man deftly changes his grip on the opponent's head, pushing their face into the ground with his foot. He then steps on the back of their neck and raises both hands into the air. The ground beneath the opponent ignites, coursing with fire to do 12% damage with no knockback. If Pharaoh Man was maintaining a shot at the time, he reabsorbs it to add a quarter of its power, rounded up, to the damage of the throw. The foe is left prone with a few frames of invincibility at the end of the attack, momentarily giving them enough time to escape.

Up Throw ¤ Ring of Fire

Tapping a finger to the side of his head, Pharaoh Man lifts the opponent upwards technokinetically. A faint ring of fire forms around them, which stays in place for about a second before rapidly shrinking around the opponent, dealing 8% and launching them upwards (knockback kills at 150%). Of course, any prepared Pharaoh Shot will increase the strength and size of the ring... this can result in a ring of fire Mario's width that deals 20% and KOs at 95% at full charge.

¤ Final Smash - Pharaoh's Wrath ¤

Commoners beware, your undisputed ruler has grabbed the Smash ball! The camera zooms in on Pharaoh Man as he burns with energy, crossing his arms before raising up into the air, growing to gargantuan size. The background ripples into a living Sahara Desert, wind kicking up the sand but ultimately having no effect on the brawl. The stage courses with corruption, and multitudes of weaker (5 HP) Mummira crawl up into the land of the living. Pharaoh Man himself levitates comfortably above the stage, and for seven seconds, gains the ability to fire gigantic, quick-moving fireballs which deal 30%, one every second and a half. An enormous Pharaoh Shot continuously grows above his head. At the end of the final smash, Pharaoh Man reaches for it, grasps it with both hands, and spirals down toward the stage while holding it. This final blast deals 50% and has an absurd radius, almost guaranteeing a KO unless the opponent is able to time their dodge perfectly. The screen blazes in a fire effect, dealing 20% even to those not affected by the final burst, and Pharaoh Man is left in the middle of a charred expanse when it's all over, the background and his size having returned to normal.


¤ Playstyle - Cruel Overseer ¤

¤ Pharaoh Man can be a very challenging opponent to fight against. With access to a powerful, multi-directional projectile that can be charged as a subroutine, disabling moves of varying utility, minor aid and meatshields in the form of his Mummira, and the ability to erupt into one of several fully-charged attacks at the drop of a pin, Pharaoh Man is a highly aggressive brawler who is not afraid to put on the pressure. He functions best at mid-range, about 1-2 battlefield platforms away from his opponent. This distance grants him the space he needs to comfortably charge Pharaoh Shot while simultaneously allowing him to adapt to the flow of the battle.

It would be a mistake to rely on your Mummira, but their importance as a distracting role cannot be overstated. Like all minions, they become more effective on smaller stages. General placement tips: Unhallowing area near an edge is great, as it makes gimping via Pharaoh Wave all the more practical. It may be tempting to place one on each edge, but generally speaking such a "divide and conquer" strategy will stretch your resources too thin. Recall that Mummira take reduced damage while in an unhallowed area. Using this to your advantage by placing two side-by-side will create the greatest coverage for your now nearly-indestructable - if wholly useless - army of shadow.

While this is the ideal setup for a dedicated camper, hidden behind continually respawning walls of flesh, Pharaoh Man's primary ranged option can be seen coming from a mile away - almost literally - at such a distance. For that matter, even at slightly above half charge, it will incinerate every last Mummira it passes through in a single shot, defeating the purpose of their cover in the first place. Certain measures can be taken to fight at range in this way, such as utilizing a DSmash to launch Mummira at the foe from a distance and hoping one gets lucky, but as a rule they are impractical and predictable. Mummira are not a fighting force, even though creative direct control via FTilt may make it tempting, and in rare circumstances, practical. They are mooks, made to spawn en masse as support for the real combatants.

¤ A mix-up game consisting of Pharaoh Shots directed at aerial foes and Waves along the ground can be an effective way to pressure foes into a Mummira-heavy area - shots aimed at the air to prevent you from accidentally disintegrating your army. UTilt can be another effective method of herding the opponent, sacrificing damage output for staying power and coverage. Pharaoh Man lacks quick-executing moves, so most of his damage output is going to be done in short bursts, empowered by a charged or partially-charged Pharaoh Shot. When under pressure, his Neutral A will guarantee a window of escape in the near future should it connect, but sacrificing your charge on a shot is another way of getting distance between yourself an the opponent. Never forget the utility of Horus's Egress for getting around the stage - you're a busy ruler, you don't have time to walk! Finally, allowing for a bit of foresight, Sunrise, your Up Special, can allow you to rocket into the air to taking advantage of your aerial mobility to land behind your troops.

♒ A large part of playing as Pharaoh Man is continually moving around the stage, bombarding your foe from all directions with your three primary projectiles and, if you're lucky, distracting your foe to the point where they get grabbed by a Mummira. Waves or DSmash to blow them offstage while grabbed can result in an early KO, though a Fatal Glyph will serve the dual purpose of healing your minion while dealing extreme knockback and damge. Pharaoh Man exceeds in shutting down aerial foes himself, both by his projectiles and his idle hitbox of the Pharaoh Shot over his head - which can be enhanced to absurd extremes via USmash. If the opponent is earthbound by nature, Pharaoh Man can force them to take to the air either manually - Neutral A - or through projectile spam/placing Mummira along the way. He has a hard time dealing with foes immune to grabs and those that can reflect or otherwise safely ignore his projectiles. Learn to approach the foe, don't stay in the same place too long, and keep a Pharaoh Shot charging as often as you can, and you'll be well on your way to becoming the lord of the desert.
 

Katapultar

Smash Lord
Joined
Nov 24, 2008
Messages
1,284
Location
Australia
[collapse="Pharaoh Man"]I did not expect you to get another set out so soon, and with similar impressive presentation to DMK. Despite not knowing much about the Megaman franchise this character seems pretty cool and actually has a personality, something I didn't expect from a Robot Master. The animations are also surprisingly pleasant to read, with some new ideas presentation wise, and some well-written attacks owing to the set's simplistic nature. If I had a nitpick, I'd say Pharaoh Man has very few if any melee attacks he can let his minions use, though I doubt any player would want to take control of a minion in the first place except to land the grab and buy Pharaoh Man some time. I believe something you refrain from mentioning in the playstyle is how good Pharaoh Man is at restraining his foe and getting them onto the plane he wants them at to prey on their weaknesses: Side Special and Standard get the foe in the air very easily, while minions and D-tilt easily keep the foe on the ground to be hit by powerful Smashes. Pharaoh Man strikes me as a character who'd always want to be on the ground, only using her air enforcers to take advantage of the foe's limited options.

While the set's playstyle doesn't directly appeal to me, as much as I hate to say, it has a very good atmosphere in every area minus the subpar aerials, which puts it at a like for me.[/collapse]
 

SirKibble

Smash Champion
Joined
May 2, 2008
Messages
2,400
Kibble Needs to Finally Post in the Thread / We Don't Have Enough Jokesets These Days

Wind Waker Bang Head Against Wall Guy


This is the guy from Wind Waker who bangs his head against the wall. Supposedly he has a name or something, but who cares. What you need to know is that he is a master bang-your-head-against-the-wall-er. In the beginning of the game, he teaches Link the ways of the Head-Wall-Bang, and if Link collects enough Knight’s Crests, Wind Waker Bang Head Against Wall Guy teaches him the Hurricane Head-Wall-Bang. His brother is the big-headed Wind Waker Stomp Floor Violently Guy.

STATS

SIZE: Tall-ish
WEIGHT: Medium-ish
MOVEMENT: Medium, but faster when moving toward a wall

SPECIALS

Neutral Special
Wind Waker Bang Head Against Wall Guy throws his spear into the background as he headbutts forward. If he hits a wall, the whole stage will shake and everyone takes 10% damage. His spear is now gone, which would kind of suck if he had any spear attacks, but he doesn’t, because that’s not his specialty, so don’t worry about it.

Side Special
In a fit of rage and unintelligible grunting, Wind Waker Bang Head Against Wall Guy starts running forward at high speed. He’ll continue until he hits a wall. He won’t even fall if he’s in midair, because he’s so committed to banging his head against a wall. The blast zones count as walls. When he hits a wall, he’ll completely destroy it, dealing a boatload of damage to anyone who was touching it.

Up Special
Wind Waker Bang Head Against Wall Guy bangs his head against the nearest ledge, destroying it so no one can ever grab it again. This is kind of better for edge-guarding than recovery.

Down Special
Wind Waker Bang Head Against Wall Guy produces a wall from hammerspace, then bangs his head against it. This can be angled in any direction as a temporary shield technique.

SMASHES

Forward Smash
If Wind Waker Bang Head Against Wall Guy has his spear, he will bang his head against the nearest wall (including the floor). If he doesn’t have his spear, he will still do the same thing, just without holding a spear at the same time--slightly less impressive.

Up Smash
Wind Waker Bang Head Against Wall Guy bangs his head against the wall that is the sky. This causes the entire sky to shake and damage everyone in it.

Down Smash
I know you’re bothered by the inclusion of the floor in the list of walls Wind Waker Bang Head Against Wall Guy can bang his head against. Well, for this attack, Wind Waker Bang Head Against Wall Guy turns the entire stage 90 degrees so that the floor is definitely a wall now, then bangs his head against it. Most of the time, this causes everyone to fall off the edge of the stage. If the blast zone was destroyed, you will all fall forever and never die.

STANDARDS

Neutral Attack
Wind Waker Bang Head Against Wall Guy meditates deeply. This improves Head-Wall-Banging ability by 60%.

Dash Attack
Wind Waker Bang Head Against Wall Guy keeps running, banging his head against every wall he comes across. It looks like so much fun, everyone he runs past will join him.

Forward Tilt
Wind Waker Bang Head Against Wall Guy headbutts forward, glowing with a mysterious aura that sends a ghostly duplicate of himself forward. The duplicate keeps moving forward until it hits a wall, then Wind Waker Bang Head Against Wall Guy teleports to the duplicate and bangs his head against that wall.

Up Tilt
Wind Waker Bang Head Against Wall Guy jumps very high, all the way to the top blast zone, then bangs his head against it and destroys it. The broken pieces rain down all over the stage, reminding the other players how they wish they could bang their heads against walls.

Down Tilt
Wind Waker Bang Head Against Wall Guy jumps up high, then plummets to the ground and bangs his head against it. We established it is a legitimate wall. Get over it.

AERIALS

Neutral Aerial
Being airborne, Wind Waker Bang Head Against Wall Guy pulls the stage up to himself with his mental mind powers, then bangs his head against the wall. It’s good for your brain, too, kids.

Forward Aerial
Wind Waker Bang Head Against Wall Guy causes his lower half to become a wall, then bends it up to his head such that he may bang his head against it. He continues to do this until he lands on the ground, moving forward a little bit the whole time.

Back Aerial
Wind Waker Bang Head Against Wall Guy plays the Ballad of Gales to cause a cyclone to appear and suck the nearest wall toward him so that he can bang his head against it. thebairsuckslolololol

Up Aerial
Wind Waker Bang Head Against Wall Guy is really tired of me writing his whole name out like that, so he bangs his head against the wall to vent frustration. You decide how.

Down Aerial
Wind Waker Bang Head Against Wall Guy becomes tired and decides to fall asleep in midair. He falls to the ground, instinctively banging his head against the wall (the ground is a freaking wall already) when he hits it. He then continues to bang his head against the wall for the next five seconds while he sleeps, healing 20% damage.

GRAB GAME

Grab
Wind Waker Bang Head Against Wall Guy bangs his head against the nearest wall. This somehow grabs the foe.

Pummel
Wind Waker Bang Head Against Wall Guy TURNS INTO A WALL. The foe bangs their head against him, causing them to take damage, because they’re totally not very good at this. Wind Waker Bang Head Against Wall Guy then transforms them into a wall so he can show them how it’s done.

Forward Throw
Wind Waker Bang Head Against Wall Guy pulls out a wall and puts it behind the foe. He pushed the foe up against the wall, then bangs his head against the foe and the wall at the same time. Holy smokes, man, that’s some serious skill.

Back Throw
Generic Head-Wall-Bang (except not, because such awesome attacks can never truly be generic) that in some manner or another ends up sending the foe backward or at least does something in a backward direction. Maybe some debris from a head-banged wall flies off that way or something unexpected like that.

Up Throw
Remember Wind Waker Stomp Floor Violently Guy who lives upstairs? For this attack, he is tired of the racket, and stomps the floor/ceiling violently, causing Wind Waker Bang Head Against Wall Guy to not notice or care and continue doing whatever he feels like doing (hint: it’s not playing checkers).

Down Throw
Walls appear all over the entire stage. Key playstyle component on D-Throw ftw.

FINAL SMASH

Hurricane Head-Wall-Bang. Wind Waker Bang Head Against Wall Guy spins in circles while moving anywhere you want. The more walls he bangs his head against while doing this, the better. Causes lots of damage to the foe and could probably KO them if there are any blast zones left.​
 

rockon4life93

Smash Rookie
Joined
Sep 28, 2012
Messages
14
That moveset wouldn't work on most stages sorry.

EDIT: I realize now it's a joke... lol. I'm dense sometimes xD

EDIT 2: How many Paper Mario series movesets have there been?
 

Katapultar

Smash Lord
Joined
Nov 24, 2008
Messages
1,284
Location
Australia
How many Paper Mario series movesets have there been?
We have a list complied of Every Single Moveset and Its Franchise, so feel free to check that out in regards to your question. Aside from them there's also a Kammy Koopa set posted this contest which hasn't been added there yet. If you feel like posting a set for a character from PM who hasn't had a set yet, feel free to!
 

rockon4life93

Smash Rookie
Joined
Sep 28, 2012
Messages
14
We have a list complied of Every Single Moveset and Its Franchise, so feel free to check that out in regards to your question. Aside from them there's also a Kammy Koopa set posted this contest which hasn't been added there yet. If you feel like posting a set for a character from PM who hasn't had a set yet, feel free to!
Thanks a tonne.

EDIT: Can I use the layout of this moveset:

http://www.smashboards.com/showpost.php?p=5948538&postcount=8

for mine since I don't know how to do all that stuff? It'll save me time. I would ask the creator except he is banned
 

Davidreamcatcha

Smash Ace
Joined
Feb 9, 2011
Messages
629
You are indeed welcome to borrow that organization/layout, as I don't feel many creators would actually mind if you borrowed their organizations, but would encourage it. This goes to other newcomers as well: especially those who want to use fantastic organizations like the ones seen in Koala Kong, Luke Atmey, Breloom or Willy Wonka.
 

Hyper_Ridley

Smash Champion
Joined
Dec 21, 2007
Messages
2,298
Location
Hippo Island
You know what this thread needs? More MYMini contests!


If it Sounds Like a Duck...


If you don't know who this man is, you've lost your video game privileges, as that is none other than the legendary Charles Martinet, voice actor for Mario himself! Love 'em or hate 'em, voice actors are a critical part of any animated media that wants their characters to have a, well, voice, and their skills (or lack thereof) can have a profound effect on the effectiveness of a character.

For this special HR edition of MYMinis, I want you to think of your favorite VA, or find the one for your favorite character. Then, I want you to make either an event match or a matchup involving movesets of characters done by that VA. You're free to include other characters if you want (such as if your VA of choice only has 1 moveset) but the VA's characters must be the focus of the entry.
 

Kholdstare

Nightmare Weaver
Joined
Oct 10, 2008
Messages
1,441

Player Character: Twilight Sparkle (Tara Strong)
Enemy: Anonymous (Hentai Form) (Brony Costume)
Time: 2:00
Stage: Smashville
Music: Pixel Peeker Polka


Twilight Sparkle needs help! Bronies have appeared, and are trying to have their way with her! You must survive the wave of never-stopping Bronies for two minutes. Three Bronies are always on the stage at the same time, and are aggressive. Their moveset is Anoynmous's Hentai form, but with everything MLP themed. Can you save Twilight?
 

Junahu

Smash Ace
Joined
Nov 15, 2005
Messages
899
Location
Shropshire Slasher
It's been 4 long years since I first slapped a moveset in everyone's face, four years full of slapping and movesets, and bizarre psuedo sex with MT. It seems I'll never leave this community, but that's totally cool. It's wacky, awesome and sad in equal measure.
I don't think I ever expected to hang around so long that these anniversaries would become expected traditions, and I earnestly hope this year's offerings don't disappoint.
To see this event in its original format, click [here]​
So, as is traditional round these parts, we start with a moveset.
We also start with some cute little Xat Avatars. If you're hanging around the Xat today, I'd totally appreciate you wearing one
 

Katapultar

Smash Lord
Joined
Nov 24, 2008
Messages
1,284
Location
Australia
[collapse="Clumsy Assassin"]Good old Junahu straying away from the normal people stuff. So technically Sheena's playstyle revolves around hitting the foe and inflicting stats effects that you try to follow up on beforehand, a fairly interesting notion to work by. While I usually like some of your simple stuff due to the interesting twists you create, and the playstyle you're trying to pronounce is respectable, I was expecting some interesting way to bring some of this stuff together given the way your sets usually work, especially with the potent Up and Down Special spirits, but the Specials had a feel of being supportive rather than bases of their own and as such it weakened a little from there. I'd say it's basic at best, but then again the implied warnings at the start and end should have made themselves obvious enough. In any case, part of it probably stems from how people have extremely high expectations from you, but there's still more to come...

Also, Clumsy Assassin is totally not clumsy. The idea of being clumsy could have been a great base for a set, but maybe that'll happen later...[/collapse]
 

Junahu

Smash Ace
Joined
Nov 15, 2005
Messages
899
Location
Shropshire Slasher
did someone call for midday filler that took forever to make that no one cares about?

Junahu Extras
A compilation
Items
[COLLAPSE="Open"]

Pocket Camera
It's a pick up and shoot item (Like raygun), pressing A causes a flash and takes a snapshot. The player with the camera has to idle for 3 seconds to develop the photo, which saves that snapshot to the console's memory. Once the camera has been used up (it has 4 shots in its film), throwing/dropping it causes it to dissapear. As a thrown item, Pocket Camera is roughly the same as a thrown smoke ball.


Kinder Surprise
These eggs are container items that frequently house 1 high tier item, or 2 bottom tier items. These tiers are based on casual standards, which explains why bananas are classed as bottom tier;

  • High Tier: Golden Hammer, Smash Ball, 2 pieces of Dragoon, Baseball Bat, Starman, Pokeball with Legendary inside, Smart Bomb, CD, Trophy not yet owned, Another High Tier Kinder Egg
  • Bottom Tier: Stickers, Food, Bananas, Mr Saturn, Goomba, Pokeballs with useless pokemon inside, Regular capsule, Another Bottom tier Kinder Egg
Unlike other containers, Kinder Eggs are a right pain to get into. Whether one will open up when thrown, depends on a timer that is randomly set when the egg spawns. The timer only decreases while someone is carrying it, and the timer could be anywhere between 5 and 40 seconds long. When the timer passes the halfway point, the person carrying it whill stop very briefly to eat the chocolate exterior. The delicious mix of Milk and White chocolate heals 15% damage (although Pikachu, being a rodent, can only metabolise 10%).
From then on, the remaining orange capsule of surprise will continue counting down until the fiddly bugger can finally be opened. There is a tiny chance of 2% that it can be opened immediately after eating the chocolate (Kinder eggs opened in this way are ALWAYS low tier)
Upon finally opening the capsule (it opens upon any kind of impact, provided the timer has fully counted down to 0), The items inside and scraps of useless paper will emerge. Though the paper can be picked up, it has no purpose other than to infuriate anyone who wanted to pick up the item and got the paper instead. The paper does not deal damage, knockback or anything when thrown at others
Kinder Eggs are double the size of regular capsule containers and deal slightely less knockback due to being mostly hollow. Kinder eggs are unique in that they float in water (although the chocolate will melt away, making the egg all gunky and hard to open, yuck!).


Sock Incense
Whoever picks up this putrid object will reek of something awful for 10 seconds. Other players will be pushed away by an invisible force if they try to approach.
If attacked, the smelly player will pass his stench onto the person who hit him, leading to a bad smelling game of tag between players.


Lance
Lances are in a similar class to battering items, though the unique handling of a lance alters the attacks that can be performed. Forward Smash jabs the lance foreward, the tip acting as a grab hitbox and dealing between 10-15% damage. Up tilt lunges the lance straight up into the air. If it connects the foe is usually knocked towards the wielder, taking 8% damage in the process. Foreward tilt performs the same attack at a 45 degree angle, making it great for anti-air. Jab and Dash attacks are unchanged from the character's usual attacks
The lance has a range of 1.1 stagebuilder blocks, and also outprioritises all sword attacks, without exception. They lose out against Axe hitboxes, however.


Blood Sword
The Blood sword restores health to the wielder whenever they strike an opponent with it, the amount restored equaling the damage inflicted. In most cases, the blood sword only deals 1% damage per hit, with a F-tilt strike dealing 2 hits and a F-smash dealing 5 super swift hits. The Blood sword has very little knockback, even used as a F-smash, so it is best used to steal health from a foe. If a blood sword is thrown, it will drain 5% out of whoever it hits, and restores 5% to whomever next picks it up (usually the person who was hit, since blood sword has so little knockback)


Small Shield
Picking up a shield instantly grants the wielder a standing-still-shield (AKA, Link's shield). It is possible to pick up a second shield while carrying the first, which grants a similar shield but one that works while moving too. Duel wielding shields in this manner has a steep price however, as all attacks become feeble shield jabs which deal 0.5% damage each. Players can also use a shield and battering item symultaneously. After 15 seconds of being equipped, shield shatter by their own accord. Shields can be discarded early by pressing GRAB (R+A, or Z), though if you have anything else in your hands, you must discard that first. Being hit by a thrown shield it like being hit by a smokeball.


Pokedex
This handy fliptop device is your guide in the Pokemon world, handing you helpful hints and facts about the creatures you encounter. When one spawns, pick it up and keep ahold of it (it's a pick up and equip item, like the Franklin badge). The Pokedex reveals the 3D bone structure of any opponent who comes near its wielder, and flashes will appear indicating the locations of the hitboxes of enemy attacks. Of course, most players won't care about that kind of stuff. But if they perform a Smash Taunt while holding a Pokedex, the Pokedex will inform you about one of your opponents, in its classic robotic voice (e.g. "ROB. Electric surges through its bones enable ROB to move plastic discs from one place, to a directly adjacent place")


Item Seed
The Item Seed is a deku nut sized object the player picks up and throws at the ground. It then buries itself and begins growing into small shrub over 15 seconds. If the sapling is kept safe from 30% damage, it will blossom and produce 5 high rank items (hammers, smash balls and so on..). And that's all there is to it. But the question is, will you be still around once the shrub finally bears fruit? Or will you have to sacrifice it to keep the items from enemy hands?


Transmigration Aura
Don't let the angelic wings fool you, the Transmigration aura is more than dangerous. When it appears, it simply hovers in place, waiting for some unsuspecting player to touch it. When that happens, the wings latch onto the player, fly them off the top of the screen, and "KO" them instantly. However, they do not lose a stock, and merely respawn at 0%. The "dangerous" part of touching a Transmigration Aura, is that upon respawning the player will have turned into a completely random character. They've reincarnated! The player remains in their new form until KO'd.
It's hard to weigh up whether it's worth getting the free heal, but being forced to play someone completely different until you're next KO'd.
Transmigration Auras never appear near or on the ground, spawning relatively high in midair instead.


Item2
Item2, is a simple rocket propelled hoverboard. It's a throwable item, which "sets itself" once thrown, like how a bumper can set itself in midair. Once set, and then stood on, the board will jet forewards until it leaves the stage entirely. Obviously enough, the board will also take anyone standing on it along for the ride. Players on the board can do anything they normally would on the ground, which makes Item2 an excellent approach/recovery tool.


Petal Sack
This little bag, spews a random assortment of 6 petals out of the top (the same kinds of petals Cutesy Beau uses in her moveset) when struck, or thrown.
For all intents and purposes, this bag strikes any player above it with a somewhat random effect (various shades of knockback and damage), every time the bag is hit with an attack.
The easiest way to use this, is to stand behind the bag, and jab it whenever the foe attempts an aerial approach. Or you could get underneath the foe and throw it directly upwards.


Manhole Cover
A Manhole cover is picked up and "equipped" just like the Franklin badge. The character tapes it onto what they consider their weakest point (usually the stomach or back), and from there, the manhole will mitigate half the damage and knockback from any incoming attack, but only if it hits the manhole cover first. In the case of attacks that only deal flinching knockback, the manhole cover negates the entire attack.
The usage of this item should be obvious enough, just remember to keep the unprotected part of you out of harm's way.


Familiorb
The Familiorb, a ruby crystal of energy, is a simple enough item. Like an assist trophy, picking one up grants the player a helpful summon picked at random. These "familiars" are explained in their own section later in this post.


Summon Circle
Summon circles can be placed on the ground or in the air, in the same way bumpers can. The circle itself does nothing to the foe if they touch it, but instead summons random enemies from the Subspace Emmissary, allied to whoever placed the circle. If left to its own devices (the circle can be destroyed if the foe hits it three times) it will summon 7 random enemies over the course of its lifespan of 18 seconds. Sub-boss enemies like armanks cannot be spawned from a summon circle, and all enemies created are at their "easy" level of power. In addition to this, a summon circle can change its alliegence. If a foe stands within the circle for 3 seconds (1.8 seconds if the circle was placed in midair), the summon circle will become "theirs" and begin churning out enemies allied with that player.
When a summon circle changes alliegence, it's lifespan and stamina are also refreshed, so the match could very well turn into a protracted "king-of-the-hill", with everyone vying for control of the circle.


Badman
Yes, Badman himself has decided to grace the match with his presence. There is only one Badman, so you can't more than one "Badman" in a match at once. He's like a Smash Ball in that sense! Lucky you!
The player picks him up and sets him on the ground, as if he were a motion sensor bomb or something, and then he gets to work. Basically, from the moment he is set, until he is knocked offstage by the foe, the player is gifted a couple of buffs. They gain 7% flinch armor, and increased movement speed. They'll also recover health at a rate of 2% per second.
Unfortunately, Badman is very light, and does absolutely nothing to stop foes from KOing him.


Volcanic Ash
It's an item. it looks like a pile of dust. You pick it up, and then you throw it.


It flies a short distance before "detonating" into a small cloud of airborne ash. This cloud expands a little depending on how high up it was thrown, up to 6 stagebuilder blocks in size or as few as 1.5


The cloud also expands as it gently falls down to the ground, gaining 1 stagebuilder block in volume every 2 seconds. It collects on the ground as several smaller piles of ash. which are basic throwing items which cause a little flinch and 2% damage


As a cloud, the effects of ash are quite nasty.


  • You get a whooping cough, that's 3% damage every second you're in there
  • and for another 2 seconds even after you get out.
  • Fallspeed goes right up, or rather down--er YOU FALL FASTER, OK!?
  • Aerial acceleration gets cut in half
  • Jumps and such also lose effectiveness
  • Fire attacks get MANLY (more manly) 3% damage boost and 1/3 extra knockback! rawwr!
  • Water attacks become Sludge attacks, which is basically the same as water, but with poisonous damage (6% over 2 seconds)
  • Inhaling/ingesting moves fail, because, you know, TOXIC ASH?

MegaMilk
Who doesn't love milk? And this isn't just regular milk, it's MEGA milk. This is the kind of stuff Young Link would chug just before beating Ganondorf into submission with his bare hands.


When this item spawns in the midst of a Brawl, you definitely want to go grab it, as it acts as a recovery item (restores 40% stamina after a brief 'chugging' animation), and we all know how great those are.


There is a downside to this healing however. About 5 seconds after consumption, that player will begin to feel a tingling pain, just below the neckline. And then suddenly... boing!


The player's chest inflates to gratuitous levels. If the player is already 'ample', Mega Milk simply doubles what they already have. The abruptness of the metamorphisis stuns the player in place for just as long as the 'stun' when picking up a Super Mushroom. Naturally, this opening is definitely something the foe can capitalise on.
Similarly, when the effect wears off 6 seconds later, the player will again be stunned, while the fat shlumps back into their body. So while healing 40% stamina sounds great, you'll be leaving yourself wide open to attack, not once, but twice.


Worst of all for the Mega-fied character, having enormous assets does not make them stronger in any way. Though it's naturally pretty funny to see jugs on Bowser, and total nightmare feul to feed Mega Milk to already well endowed characters.


and by the way, "Mega-milked" is an option you can turn on for a Special-Brawl. When switched on, in addition to grossly engorged jubblies, all players recover stamina at a rate of 1% each second.


Goo Chain
In a match, a single smilie face appears onstage as an item. Whoever picks it up first initiates the Goo chain, and recovers 2% health for their trouble. The Goo is a regular hold item, which means it can be thrown, dropped and picked up by other players. If thrown into another player, that player will automatically grab it, instead of being hit by the flying smilie.


Every time another player picks up the happy little thing, they will recover ever increasing amounts of health (4%, 8%, 16%, 24%, 30%, 40%, 50%, 75%, 80%, 80%, etc). That means, in order to recover lots of health, you need to pass the Goo onto the other players, and then pick it up again after they've held it. Of course, there is nothing stopping them from throwing the Goo offstage, thus breaking the Goo chain...


Waru​


Very similar looking to the Goo, this shifty looking guy is nowhere near as friendly. Once picked up, it will stick to the player's hand for 1.5 seconds, during which time it cannot be thrown away. As the Waru's eyes dart back and forth, a ticking noise is audible. After 8 seconds, this thing is going to blow!


... not really. When it detonates, the Waru emits a sleep inducing gas onto the player currently holding it, or simply in a cloud around itself if the Waru isn't being held at the time. While you can just throw the thing away well before it detonates, it's better to throw it at another player, just as it's about to blow. Like the Goo, touching a thrown Waru automatically makes the receiving player grab it, which in turn means they can't throw it away for 1.5 seconds. Don't be the one holding the hot potato Waru when it goes off!


Lego Guns
These randomly come in submachine, and pistol varieties, but they are both technically the same item (in regards to the item options menu at least). As you may expect, lego guns work like... well, guns. The Pistol handles like a Ray Gun, and the sub-machine gun is much like a Super Scope, including the ability to rapid-fire. Both guns have an ordinary shot, and a charged shot which is achieved in the same manner you'd make a charged super scope blast.
So blah blah blah, what do these guns do? When fired, they shoot tiny red lego bricks on a heavy arc. While the bricks will quickly drop to the floor, they do hang around for a while, allowing anyone to pick one up and chuck it at anyone else. Regardless of how it happens, if a lego brick collides with a foe, it will cling to them, dealing 1% damage and slightly reducing their movement speed and jump height for 5 seconds. These bricks can cling to the foe en mass, stacking their individually weak effects until the foe is almost entirely immobile. If the foe is struck by an attack while they have lego clinging to them, a few bricks may fall off early, moreso if the attack was particularly brutal.
By the way, if one lego brick hits another, they will click together, essentially combining the two into one handy throwable lump. doing so also increases the damage the bricks will do when tossed into an opponent. If you connect many bricks in this way, the lump will become so large that it becomes as heavy as a crate, and starts dealing roughly as much knockback as one too.
If the player charges up a shot from the lego gun, it comes out as a slowly moving mass of lego bricks, orbiting around themselves like a miniature solar system. This projectile meanders forth until it leaves the screen or hits an opponent. In the latter case, it will (after dealing 14% damage) turn the foe into a statuette made of lego bricks. Foes in this state will helplessly plummet to the ground. If they fall from great enough a height, the impact will shatter the statue, releasing the foe but dealing another 14% damage in the process. If, on the other hand, the statue remains intact after landing on the floor, the foe will need to mash buttons in order to break out of it from the inside. Until then, the trapped foe is immune to attacks and grabs. You can prolong the time the foe spends in their lego cocoon, by shooting it with a few regular shots from the lego gun.
Lego guns have a random alottment of ammo, between 14 and 18 shots, or between 2 and 3 charged shots. Use them wisely and creatively .


Woody
Woody in Brawl is demoted right down to a common item, a "toy" of the casuals if you please. He is tiny (he stands as tall and mighty as a puny Pikmin), can be knocked off the stage with ease, and is entirely immobile. If a player picks him up, he does nothing worth noting. It's only when thrown that things become slightly less boring.
When thrown, the player keeps ahold of Woody's draw string, drawing out that familiar line of elastic as Woody sails through the air. Woody is a fairly reasonable item when thrown, averaging at around a Pokeball's level of knockback and damage. Once Woody lands on the floor, or hits some poor guy, the elastic pulls taut, and Woody is returned to the player's hand (while saying "There's a snake in my boot!"). If the player was in the middle of something else, Woody will be discreet enough to not interrupt the player's action. If the player has another item in his hand however, woody will knock that crap right off the player in order to nestle once again in their palm.
And so the player is again ready to throw Woody away. He's like a creepy boomerang, always returning to the player who threw it, regardless of whether or not they even want it back. Hey! He's like a Pixar sequel!
To actually drop Woody, the player needs to be beaten upon by the other players. Hopefully, one of the many poundings you're receiving will make you drop your item (which in this case, is the demonic Woody that you WANT to drop but can't).
Now, obviously enough, no player really wants to hold Woody at all, so everyone is going to simply avoid picking him up. And... bizarrely enough, that actually works. Just avoid picking him up, or better yet, kick his butt off the stage.


Cork the Toy Hunter
Cork and Woody look so alike, that trying to tell the two apart, is like seperating Super mushrooms from Poison mushrooms. And just like the afformentioned fungal items, mistaking Cork for Woody is a bad mistake. If struck by an attack, the draw string becomes stuck on whichever of the player's limbs hit Cork. And just like a tetherball, after flying a certain distance, the bungee-like elastic drawstring sends Cork flying right back into the player's face. And this, naturally, causes damage and knockback to the poor sap who hit Cork to begin with (somewhere close to a thrown bat, in terms of knockback power). So yeah, DON'T HIT CORK!
Luckily, if you just pick up and throw Cork, nothing untoward will happen. So, unlike Woody, the best thing to do with Cork is to throw him away.


Strife Ball
This orb, no larger than a Smash Ball, hovers in place, floating where it spawns with no care for the battle in progress. Touching the orb directly flinches the player, and deals 2% damage.
Players can attack the ball, in order to shunt it around, reposition it, or perhaps even knock it into another player. This appears to be a poor man's soccer ball at first glance, dealing 5% fire damage when knocked into a foe (regardless of how strongly you hit the orb, it moves a fixed distance). The fact it hovers instead of following gravity means it can be used as a decent spacing technique.
However, its true power does not show unless two players attack the orb either symultaneously, or one right after the other. With two players striking the orb, the ball shatters, releasing a wave of light that envelopes the nearby area. Three stagebuilder units worth of stage are trapped inside an impenetrable auric sphere. Any players who were nearby are now stuck there, together, for the next five seconds. They can't get out, others can't get in. The edges of the sphere, are for all intents and purposes, solid.
In short, it's like the two players who hit the orb are pitted against one another in a cage match!
If you're feeling sneaky, try triggering the orb with a projectile, rather than striking it directly, in order to trap only one player inside the sphere.


Party Bag
These delightful bags of treats only appear from Party Balls (though party bags can spawn outside of party balls on certain days of the year, such as a Mii's birthday, Easter, Halloween, Christmas etc).
A simple paper bag, the Party Bag will spew out one candy food item every 2 seconds if left alone. This will happen until the bag has exhausted its supply of 15 treats, at which point the bag vanishes.
You can hit the bag with attacks to knock more candies out of it, though the treats will pop out of the bag when it lands after being hit, so strong attacks will just send the delicious sugary goods to the far corner of the stage.
Alternatively, you can pick up the Party Bag, carrying it around like most items. When some greedy porker picks up a Party Bag, it stops giving out treats until it is put back down (though it will drop a treat every time the person carrying the bag is struck)


A Quid
The British Pound coin, otherwise referred to as a Quid, is a specific coinage of "Pound Sterling", the official currency of the United Kingdom.In Brawl, Quids are the same general size and shape as a gold coin from a coin match. They do not rotate however, and are fully 3 dimension, instead of the wafer thin coins Brawlers usually find.
Incidentally, the quids you'll find in Brawl are counterfeit, and thus have no real value as coins. I suppose I had to mention this, because you will not find Quids outside of coin matches. Unlike other items, Quids spawn in or near to other coins.
Quids are throwing items, you pick one up, and toss it.. hopefully into an opponent. If you try to walk/run past a coin instead of picking it up, it rolls away at 1.2x the speed you ran into it. So keep a sharp eye out when collecting coins, because one might be a Quid in disguise.
Through the magic of jumpcut, hitting someone with a quid, transforms them into a toy, a terrible toy, chosen at random. Oh, and the quid disappears too, because you get nothing for nothing.
Some of the "toys" your opponent may find themselves turning into, are as follows;
Clefable ~ by Junahu
Slimoss ~ by Junahu
Zigzagoon ~ by Junahu
Kirby Enemy Team ~ by Junahu
Etranger ~ by Junahu
Firebar ~ by N88_2004
Battleheart ~ by Smashbot226
QWOP ~ by Kholdstare
Kyubey ~ by ForwardArrow

The toys all have a unique plastic sheen to their appearance, and have limited points of articulation, making their motions and attacks look stifled and awkward. They also have off-center doll's eyes, brrr-rr-rr.
The transformation lasts for 22 seconds, or until the victim is KO'd. Every time they are struck by an attack, 2x the usual number of coins sprays out of them.


Vortex Vial
This handy little throwing item is just the ticket for anyone (everyone) who enjoys throwing a spanner into the opponent's spacing. It shatters on contact with the ground or object (or person), releasing a purple swirling gas into the area. This small pocket of smoke isn't harmful to touch or breathe, but it does have the funny side effect of being a localised black hole. Not a very strong one, btw, but it'll get the job done. The gas slowly attracts everything within 1.3 battlefield platforms of where it lies. It does so for the entirety of its 5 second lifespan.

As previously noted however, the pull of this black hole is fairly weak, anyone can run away from it with only a minor dashing speed penalty to show for it. Still, even a slight pull in the wrong direction at the wrong time can spell disaster for characters who rely on quick movements and precise spacing. The gas affects the player who threw the vial, less than it does anything else

If a vial thrown into an opponent, the opponent takes 12% damage and light backwards knockback. The gas also forms around that foe, and follows them about, meaning that the opponent becomes the host of a little black hole for 5 seconds. It won't affect them directly, but having things dragged towards them, like projectiles or other opponents, can be pretty harrowing. Don't underestimate the usefulness of having all your projectiles home in on the foe.
Another, less obvious effect of the gas is that certain items will be more likely to "target" things around or in that gas (For example, getting Lyn from an Assist Trophy will make her target whomever is closest to the gas, Latias/Latios will occasionally pass directly through the gas on one of their attack runs, etc). This has obvious implications if the gas happens to be following an opponent you smashed the vial on...[/COLLAPSE]

Tardballs
Tardball items are much like Pokeballs, except they are black&white, and the Pokemon they summon are goofy looking sprites from Pokemon Green. Few Pokemon from Tardballs are actually useful, so they are mere fun distractions.. for the most part.
[COLLAPSE="Open"]

Sandtard
This delightful little fellow will immediately burrow into the ground, leaving a pitfall in its wake. When someone falls in (suffering 10% damage) Sandtard appears and shrugs. He didn't plan this far ahead...


Venustard
Stomping to and fro and simply getting in everyone's way like some manner of slow moving wall, Venustard will leave after taking 100% damage. However, this durable grass type heals 20% every second for some reason


Tardapie
After crying its name aloud, Tardapie will do a thing that is relevant and important.
Just what that thing is however, is up for interpretation and outside the scope of this descriptive blurb


Tardeot
This foul fowl will fly off screen, then swoop across it several times, attempting to smack against the foe it dislikes the most (14% damage and medium knockback). It has 5 possible attacks, but they are all the same thing.


Dratans
Just like any snake, Dratans can shed its skin on command to escape attacks, and puke a toxic sludge that dissolves a portion of the stage and/or deal 15% poison damage to the foe. Dratans does not like Down Throws


Ardrat
This obvious Cobra attempts to snipe foes from afar with rapid poison needles dealing 7% poison damage. If a Dratans is also on stage, Ardrat will ignore everything else and spitefully attack the Dratans constantly.


Sandtard2
From out of literally nowhere, Sandtard2 summons a sandstorm that covers the entire screen and damages the foe 10% over the next 7 seconds. Sandtard2 is also invisible, and this is good somehow.


Ninetards
Ninetards summons floating star platforms underneath every player which the players pilot by moving the analogue stick. Ninetards will not leave until someone grabs her, which will inflict 30% burn damage to them.


Tardbat
As any bat does, Tardbat sends visible echolocation waves bouncing around in every direction. They inflict any and all status effects at random. Luckily, Zubat is light and can't fly very well, so KO him quickly.


Psytard
Waddling around and scratching at the foe inefectively, this pokemon's attacks can be made to do actual damage if the foe deals 40% damage to its head. That also happens to be when the pokemon is KO'd... so.. yeah.


Tardbra
Now that is one smart psychic type! It just teleports away from this ******** fight
Abra may reappear briefly throughout the match from that point, eating a potato chip, or napping etc.


Belltard
Belltard ingrains its roots into the stage, achoring it in place and rendering it invincible to anything less than the stage itself dissapearing. Of course, Belltard doesn't attack or anything.. but it's the principle of the thing...


Tardem
He rolls around, which is pretty devastating considering his size (17% damage and high knockback or pitfalling)
Tardem may occasionally try to stomp the stage, thinking it might magically change shape or something.


Slowtard
...he doesn't even appear from the tardball. Slowtard only shows up occasionally on the Results screen after matches, wandering up to the winner and just looking at them incredulously.


Tardmer
Tardmer melts into a puddle of temporary toxic goo that deals only 1% per second standing in it. Any attack with an attack interaction that hits the goo will automatically have the interaction happen. How random...


Tardix
Now you will witness Tardix and all of his lv3 failtier wrath. Awww, he's smaller than Bowser, how cute. And he's trying to use a tackle attack, awwwww what a cutie! :3


Tardiskhan
What a terrible mother! Tardiskhan swells out her cheast and taunts the foe into smacking her child in the mush. And if the foe doesn't hit her kid? Kangaskhan gets mad and tries to ram everyone. What the hell!?


Tautard
The random bull charges across the stage dealing 24% damage and severe knockback to anyone in its path, before a pokeball comes out of nowhere and accidentally catches it.


Magitard
Magitard used HYPER BEAM!
but nothing happened...


Clefatard
Clefatard may do any two of the things mentioned above, though she's more likely to spam Pikachu's thunder attack two or three times before the foe KOs her.[/COLLAPSE]

Cosplay Mask
Cosplay Masks are an item that may spawn mid-battle. The lucky man who picks up the mask, wears it over their face, and assumes the identity of the mask. Basically, the player's Specials and Final Smash are replaced by those of the character depicted on the mask. If the cosplay character uses a prop (such as a sword) for its attacks, the player will magically have that prop when using those attacks, and the prop will vanish afterwards
The player may remove a Cosplay mask they are wearing, by taunting, or by being KO'd.
[COLLAPSE="Open"]Since my Cosplays have their own posts with links already, I'll simple paste in the links for you to peruse.


[/COLLAPSE]

Assist Trophies
[COLLAPSE="Open"]

Kamen
The undisputed king of the P1A-ground, Kamen, joins as an assist trophy. Kamen stands back from the main action, and observes the match around her. "Impress me" she asks. 5 seconds later, and after a little pensive thought, Kamen points to the brawler she thought fought the best in that timeframe, and says "you" as she does so. That player then, suddenly, gains a final Smash Aura for free. Kamen then leaves.
Kamen shows a little bias towards her summoner when deciding who gets the Final Smash, but if everyone gangs up on one person, she'll instantly grant that person the Final Smash.


Eddie
What a cute robot! Eddie appears from the Assist Trophy and does the only thing he knows how. He flips his top and scatters 7 random health restoring items across the stage. They generally land around him, but he will make an extra effort to make them reach any Megamen currently on the stage. Eddie can be picked up and thrown (impact is similar to that of a hammer head), but if you do that before he has a chance to dish out his goodies, he will teleport away.


Count Waltz:
This regal Assist Trophy does not move, instead choosing to attack with long range magic. He can be knocked back slightly by hitting him, and if he falls off the stage, he won't try to get back on.
With a effeminate wave of his wand, Waltz will pick a random foe to attack. No matter where they are, no-one escapes from this guy!
Billowing clouds of darkness gather underneath the enemy, and will follow the victim where ever they scarper to.
The only way for the target to avoid the climactic explosion, 5 seconds later, is to shield or dodge at the EXACT moment of the explosion.
The explosion is easily the size of a full grown person, so anyone else nearby will feel the brunt of it too. The explosion deals a whopping 30% damage and upward knockback that can KO at as little as 90%


Wild Professor OAK
After bursting from the assist trophy, Wild Professor Oak will stand there motionless. Pokeballs fall from his open book at a rate of 2 per second. These pokeballs activate automatically upon touching the ground, and appear regardless of whether the player has pokeball items switched on or not. After "throwing" 6 pokeballs, Wild Professor Oak makes a Charizard cry and flickers out of existance.
The pokeballs Wild Professor Oak uses, can contain any pokeball pokemon.


Dr May D Ire
Once a professional Dr, then a love struck Maid, now a desecrated corpse, Dr May D. Ire is an Assist Trophy of tragic origins.
After losing her job to a failng economy, Dr May fell in love with a Duke and hid her credencials so she could work as a maid at his manor.. While working herself ragged for the Dukes sake, she suffered an untimely heartattack. Of course, the Duke was blamed for this and, in a subsequent string of events, stripped of his title and most of his lands. The Duke persistantly believed May killed herself just to spite him. Broken and abandoned by everyone he though he could trust, he stole away with Dr May's corpse and mangled it in a fit of rage. He left it outside his old manor with the entire bottom jaw cut out, the eyes gouged, and her accursed weak heart torn from her chest and placed on a platter.
So, what happens when Dr May appears in brawl? Not much actually, she just stiffly falls to the ground. Anyone who touches Dr May will immediately and automatically start carrying her around (she counts as a heavy object such as a crate), but they can simply throw her away to get rid of her. The key to actually using the corpse then is to throw her off-stage into an opponent trying to recover. They start carrying her and plummet to their doom. When thrown, May's gangly, flailing limbs make her quite difficult to avoid.
Dr May does not dissapear until thrown off-stage or 60% damage is dealt to it.


Priscilla
When Priscilla appears from the trophy she will gallop to and fro, looking for people to heal. She has a single low jump, and can warp back on-stage in emergencies.
Contact with her as she gallops deals 18% and fairly high knockback. If she gets close to a person (without trampling them accidentally) she will cast Heal on that person, restoring 10% damage. The summoner is of course immune to the trampling, but can still be healed.
Priscilla leaps off-stage after 7 seconds.


Sonia
Appearing from the trophy, Sonia tries to keep herself from moving too much, but will attempt to recover and seek out a quiet spot for her spell casting.
If persistantly hounded by foes, she will unleash a shockwave that forces everyone within a 2 stagebuilder unit radius to fall asleep/enter freefall.
Her most common spell is ELFIRE, a small fireball that shoots directly towards the nearest opponent then explodes on contact, dealing 23% damage and KOing at 80%. She can also rarely use EXCALIBUR, which summons a roving tornado in front of her, similar in form and function to the tornados in Smash Bros 64. The tornado does not deal damage, but can KO at as little as 50%.
Sonia dissolves away, against her will, after 12 seconds.


Limstella
Limstella acts as a much more aggressive Sonia, firing off her spells much more frequently. She can warp around the stage of her own free will, and will automatically fire off a sleep shockwave if a foe comes anywhere near her.


Garland
With a terrifying battle cry of "I, Garland, shall knock you all down!", he unleashes a infinite range, shock wave that proceeds to... spike everyone downwards... ...well, you've got to give him credit for being consistant, as even the summoner is affected. It is kind of a pathetic assist, but anyone off-stage will be doomed. And getting pwned by the first ever Final Fantasy boss is embarrassing.


Seth Fortune
Anne's sole employee and past student of the Forde Macoughan law school, Seth is a simple man who does random things (hence the name)
So, what happens when he appears from the Assist trophy? He whips out his pocket computer and furiously begins typing on it. For every 2 seconds of uninterrupted typing, his summoner will gain one of the following random buffs (they last until Seth leaves. And yes, they can stack);

  • All attacks deal 1% more damage
  • Every attack suffered deals 1% less damage
  • Traction becomes 1.5x more efficient
  • Super Armor against a single hit
  • Regeneration (1% every 2 seconds)
  • Next attack will induce sleep/freefall
  • Immunity to the next "additional effect" from an attack
  • No damage from the next hit
  • All current negative status' purged
Seth will leave after 16 seconds. Obviously, opponents will try attacking him, to keep him from typing long enough to give you a buff, so keep him well defended! Seth can be knocked off-stage and will not try to recover.


Suzu Fujibayashi
Suzu behaves much like all the other "run around like a lv1 CPU" assists. She has 2 midair jumps and decidedly average movement ability. Whenever she spots a foe (it doesn't matter how far away they are, just so long as they are at the same height and suzu is facing the right way) Suzu will throw one of her many shurikan at them. These shurikans travel surprisingly fast, dealing 4% and medium ninja knockback on contact. Suzu tends to short hop everywhere, making her a tricky target to hit. And although she can be battered away as easily as Starfy, Suzu automatically dodges 75% of all incoming attacks, dissapearing into a ninja cloud and reapearing somewhere else on-stage. Like all ninjas, Suzu lingers in battle for 12 seconds, before leaping away... to avenge her ninja parents.


Shanoa (non canon due to being a moveset)
Through the power of Ecclesia's Glyphs, Shanoa can use any attack from any character in brawl (as a holographic projection naturally). She has the build and movement of Zelda, and acts rather much like a lv7 CPU for the 8 seconds of her life. Since she has access to the whole of Brawl's moveset, Shanoa is a rather dangerous assist trophy, and there is no real safe place to hide. Surviving this assist trophy mostly comes down to how cheaply the foe can abuse the AI, though the summoner will want to keep them from doing that.
Obviously, loading every move from brawl at once is infeasible. To create the illusion of her having every attack in the game;

  • She can use any attack from characters currently in the fight
  • She can use 10 completely randomly chosen moves from Brawl's catalogue
  • She can use 5 moves that are specifically "counters" to the foe's playstyle (that's 5 moves per foe)
  • She can use 4 generic strike moves, one for each cardinal direction
These attacks are loaded and processed before an Assist Trophy containing Shanoa is spawned.


Greater Gorgon
As an Assist Trophy, the Gorgon does what you'd expect; Chase people slowly and try to eat them, Gulpin style. While a mobile Gulpin is really all this Assist Trophy can claim itself to be, there are a couple of things making the Gorgon slightly different/scarier.
In terms of scale, this Gorgon is already quite engorged on blood, managing to tower over even Ganondorf. This makes it surprisingly easy to get caught.
The second thing, is that the Parasite has a limited motor function, and will attempt to grab food that is just out of the Worm's reach. She can even pull down airborne prey, though she always telegraphs her grab attempt quite blatantly
The Gorgon lasts 11 seconds before burrowing underground forever...


Yajirobe
When tubby old Yajirobe slinks outta that Assist Trophy, he will get right to work. And by that, I of course mean he will run away like a snivelling coward. Goddamn it! Come back here! Aghhh!
So that's Yajirobe, a true coward who spends his entire allotted time fleeing from any and all sources of danger. You may beat him up if you wish, but that'd just be wasting your time.
On second thought though, maybe your opponent shouldn't write Yajirobe off so soon, because, when he senses the foe letting down their guard, he will run up behind them, and give them a precision slice with his sword. After delivering that 14% damage, high knockback sword swing, Yajirobe will get right back to running away.
Hit and run tactics at their finest, ladies and gentlemen.
Yajirobe lasts all of 10 seconds overall, before he becomes exhausted and leaves the field of battle. But not before muching down on one of the mystical Senzu Beans he always seems to carry with him...


Chiaotzu
He will stand stock still, almost like a lifeless doll, until a foe draws near. Suddenly, he will throw his hands down to the ground, and via some invisible force, the foe will be hurled down into the prone position. They'll be stuck like this, until either Chiaotzu leaves, or until someone else hits the foe. While the trapped foe can use their prone attack, Chaiotzu will immediately slam them back down to prone afterwards.
If, for some reason (maybe it's your ally that Chiaotzu has trapped) you decide to attack the little twerp, he will indeed release his victim. But he will also use self destruct, blowing himself up, and hopefully taking down whoever was attacking him. Maybe he'll even catch his original victim in the blast too.


Mia Fey
Crack her outta that glass ornament, and the ghostly apparition of Mia will trail behind you. She doesn't seem to do much, other than look smoking hot. But that's use enough, right?
Well, for those who want actual utility, Mia won't act until she feels her summoner is in genuine mortal peril. When such an event occurs, Mia will swiftly possess the nearest foe, distracting them hopefully long enough for her summoner to come back from the brink.
Mia lasts a heady 14 seconds, before ditching you.
Incidentally, whilst possessing a player, that player takes the physical form of Mia, yet retains their original clothing and hair colour. If Mia possesses some naked thing, like a Pikachu, Pikachu will just look a bit feminine.


Ada Wong
Ada is rather concerned with her own well being. She spends her time retreating from all sources of danger, and only lasts a disgustingly short 5 seconds in the fight before ditching her summoner. "Ada, wait!" indeed. She will only attack if cornered, or if she finds a perfectly fine spot to snipe from.
Her weapon of choice is a simple Handgun. She can aim it in any of 8 directions, and fires 2 shots per second towards her target. Sounds underwhelming enough, but please be aware that these are actual bullets, and bullets are LETHAL. They travel at an instantaneous speed, appearing onscreen for only a single frame, and have a limitless range. Basically, when she pulls the trigger, if you're anywhere in the path of the bullet, you'll be struck instantly. These babies deal 23% damage, and spike the foe down to the ground too, so you seriously do not want to be hit. She'll shoot you down into the prone position, then shoot you again the moment you get back up, or worse, shoot you again while you're down.
The best way to handle Ada, is to keep her from getting into a comfortable position. Continually hassle her with projectiles or traps, but always leave her somewhere to retreat to. If you leave her with no other option, she'll start shooting, regardless of the danger she's in.


Mikaru
aww, so cute. I'm sure someone just got diabeetus from her sweetness.
So, you summon this girl via an Assist Trophy, and she simply stands around, meekly looking towards her opponents. Maybe she doesn't want to fight? It takes her quite a while for the girl to actually make her move, but when she does...
Mi-mi-Mikuru...BEEEEEEEEEEEAAAaaaaaaaaammm!
Effectively, it's Samus' Final Smash beam, just travelling a bit faster. She'll try her best to angle the beam and fire it towards actual people, but most opponents can easily get behind her before she fires (she takes nearly twice as long to attack as the Lyn Assist Trophy), so her summoner REALLY needs to hassle the foe in the meantime.

The Warlordion​
When he appears from an Assist Trophy, the music warps into G-Major, which is the lazy way to make music sound dramatic. It will remain this way until the point when he leaves, which could be any length of time really. It's up for debate whether the Warlordion actually leaves at all (no match has ever stalled out long enough for anyone to find out).

First off, the Warlordion hates flat stages. He will turn to face the screen, then angrily stomp himself a medium sized (It's the size of some Ganondorfs) pit to hide inside. The Wii then melts from all the dynamic geometric restructuring neccessary to visually display this act of terra-forming. But don't worry, because Warlordion only appears on the SuperfutureBox7800 version of Smash Bros, which apparantly has a gfx chip dedicated to making pits... or something.

From this super cool ground fort (no girlz allowed), warlordion sits and waits for foes to approach him. If noone draws near within 3 seconds, he will start stomping around in his pit, which causes the entire platform he's on to shake. Anyone standing on the same platform takes 12% damage and is forced to roll towards Warlordion. He can also squeeze his bellows tightly, an action that jolts every airborne thing in the match towards him slightly.

Once a victim has been 'convinced' to come close enough, the Warlordion will strike out with a lasso, hoping to grab the foe with it. While grabbed like this, the foe can run around at 2/3 of their normal speed, but cannot move further than two Ganondorfs away from Warlordion, on account of the lasso tied around them.

And that's about it, Warlordion keeps the foe strung up like that goat from Jurassic Park until the other players have beat on him enough. Once the foe is struck with an attack powerful enough to KO them, Warlordion releases the lasso, sending his victim flying off into the blastzone.

Oh yeah, and Warlordion has super armor against anything 'generic', which to be honest, is just about everything.
So... he's invincible, good.


KingK.Rool​
This delightfully eccentric rogue turns up from time to time inside of Assist Trophies (though he insists he is not an extra) in order to dispense useful (?) words of advice.

He trails behind his summoner, studying their movements and patterns, analyzing them with all the insight of a CPU player. Once convinced he knows you better than you know yourself, he turns his back to the stage, and a speech bubble appears, spouting some helpful hints. Most of them are simple things such as "shielding attacks stops them from harming you" and "some characters are good in the air", but they are still for the most part relevant to your current character and behaviour.

Sometimes he might impart some slightly more helpful guidance, such as "Your movements are too predictable. They lack passion." or "Your foe jumps at the sight of you. Jump too, and follow the coward.". Such comments are based on actual analysis of the match thus far, helping the player change their style to better defeat their opponent. Of course, since the foe can also see these hints, KingK.Rool may end up inadvertantly helping the opponent.

Once three hints escape Rool's sleazy, mustached lips, he departs, possibly forever, or maybe just until tommorrow.


Raine Sage
This shapely light mage will appear occasionally from Assist Trophies. Sensing blood in the air, Raine steps into the background to avoid harm, then sets about trying to end the conflict, in her own unique way.
From the moment she is safe in the background, to the moment she leaves (after 16 seconds) Raine casts a healing aura with a conical radius of 1.8 stagebuilder units. Anyone this close to Raine's position, heals 4% damage every second. Yay! Thanks Raine!
Naturally however, this is not all the aura does. While inside its healing range, any attacks that player performs, deals only 3/4 of their usual damage, making it rather counterproductive to camp from within the aura.
In addition, and this is actually the important part, if a player inside the aura is struck with an attack, a transclucent orb flies out of them at a random trajectory. It'll roll along the floor, before eventually coming to a stop. And you might want to chase this orb, because whoever picks it up, gets healed. The amount healed, is identical to the amount of damage that was originally dealt to the player who spawned the orb in the first place.
So, if some chump is lured into standing in Raine's healing spot, bean them in the face with a powerful attack, then scoop up the orb prize they leave behind. Just don't join them in the aura, or they could do the same to you too


Aika
So, from out of the assist trophy she comes, and boy, does she ever want you to know it. Confetti sprays everywhere, Aika strikes a V for victory sign, and two cannons behind her fire a salute in her honor. None of this does anything mind you, it's just something fun to see.
She then acts much like any other "aggressive" Assist Trophy, roaming around looking for targets to slice up. She may randomly opt to hurl her boomerang at her foe, just to mix things up. Most of her attacks deal a flat 11% damage and she'll be around for at least 12 seconds before leaping off the top of the screen. She has just one jump, but it's decent enough, and Aika is not so aggressive as to jump offstage.
If she spots an item spawning in, she'll make a mad rush to pilfer the "treasure" for herself. If left to her own devices, the next 12 seconds will be an itemless borefest. So to get any of those items back, you can hit her with an attack, which has a random chance of making her drop one of her items.
If her summoner attacks her, be warned, Aika will start attacking them too. It's her treasure, not yours!


Vigilant
With a little fanfare, and from out of an obscuring puff of smoke, Anne Elmtod leaps into the fray as her alter ego; Vigilant. If Anne herself is already in the match beforehand, Vigilant will not appear (some other Assist will instead). Though there is a bit of an exception here; If Anne herself is the one who grabbed the Assist trophy, she will actually transform into Vigilant, remaining fully playable in her new form.
Where Anne is an intelligent, occasionally sadistic camerawoman, Vigilant is a ruthless vigilante "hero". (By-the-by, Vigilant does typically wear a helmet which obscures her hair and eyes)
Disenfranchised with the corrupt media, Anne commits various beats of espionage and cyber terrorism, under the guise of Vigilant.
But in Brawl, Vigilant just wants to get her hands dirty. Vigilant shares much the same moveset and stats as Anne, albeit with a slew of minor buffs and a copious share of invulnerability. She'll go out and cause some havoc for a generous 12 second, before slinking back, turning back into Anne if she was the summoner. Compared to the usual Anne moveset, Vigilant enjoys the following buffs

  • Invulnerability: All the cool Assists have it so Vigilant should too.
  • Dash Speed up: Now you can streak around the stage like nobody's business
  • Darkness element: Having little aesthetic inky clouds spew from your attacks is a "buff"... right?
And also these individual move buffs

  • Taking a picture of someone with Vigilant's camera no longer has the finicky Action/HD mode stuff to bother with. Just point and shoot. The camera's flash also stuns the foe, leaving them in a bit of a daze. Follow up with a generic combo!
  • If Vigilant takes a photo of a foe who is not attacking, the photo will somehow depict whichever of the foe's moves has the least amount of stale accumulated. The reason? Magic. (Also because opponents try to keep their KO moves fresh)
  • When Vigilant uses Down+B while holding a photo of a foe's attack, she will learn to counter that specific attack. For the next 12 seconds (and yes, this effect can carry over past the end of the Final Smash itself) if Vigilant is struck by that move, she will block the strike, then hit back at the foe with all the damage, and 1.4x the knockback of that attack.
  • When Vigilant uses Up+B while holding a photo of a foe's attack, she will take the knockback from that attack, but can angle it in any direction she wishes. This allows, for example, a meteor smash to be used to recover. The foe will also (magically) suffer a little staling on the move in question.
  • When Vigilant uses Side+B while holding a photo of a foe's attack, she will throw the photo at them. If it hits, the foe will lose the ability to use any other attack for 5 whole seconds. I guess the opponent is so impressed by that pic, that they cannot think of anything else? Or maybe it's magic, again
  • Landing the Forward Smash as Vigilant, makes it so that the foe suffers the knockback of the next attack that her summoner performs. Still not sure how that works.
  • Vigilant's grab works as both a regular grab, and as a grab counter. I have no idea what use a grab counter is when you also do a normal grab..but whatever.
  • After sitting on the foe's shoulders with Down-Air, Vigilant stabs down through her victim's throat, dealing 13% damage and rendering them incapable of acting for 1.3 seconds. Usually this leads to suiciding with the foe, which is notoriously stupid, given that Vigilant is Invulnerable anyway.
  • Vigilant really, really enjoys performing her pummel. Also, unlike Anne's, Vigilant's pummel doesn't suddenly start healing the foe for no reason.:luigi: (unless it's used on Luigi)

Junahu Jr/Snr
This mismatched duo, a metaphor for Junahu's inconsistant attempts to pander to an audience that doesn't exist, appears from the Assist Trophy. They wander the stage together, with the elder woman occasionally slapping the younger sibling on the back. As she does so, the younger sibling coughs up an entire cheesecake. The delicious dessert flies towards the nearest foe until it connects, or slams into something else solid. Being pasted in the face by these crustless pies deals 6% damage.
Whether they hit or not, chessecakes lie wherever they land, sticking around for a little while, or at least until some fatty eats it. Eating cheesecake heals 6% damage. Considering all the domestic abuse that this Assist Trophy will be dealing out, there will be plenty of cheesecake to go round.
If, for some dumb reason you hate cheesecake, you can attack the older woman in order to distract her from her happy slapping duties.[/COLLAPSE]

Crate Enemies
Whenever you destroy a Crate, there will be a tiny chance of a small, worthless enemy appearing inside. The standard set includes such threats as Goomba, Mite and regular Primid. But there are others too, as useless as they are;
[COLLAPSE="Open"]

Oh how cute :)
Octoroks are what they are, and firing stones at adventurers is what they do. It's... all they do... actually. One pepple, straight forewards, every 2 seconds. They may also turn around, though that is rare. The pebble travels as far as Fox's laser and deals 5% damage with the lamest knockback imaginable.
Kill it by dealing 15% damage to this monster. Any attack from behind kills it instantly.


Barrel monsters, they don't come with barrels, so that tiny creature underneath is all you get.
They act like little hermits, getting underneath the largest item they can find, lifting it up, and then running away to the most isolated corner of the stage.
They don't jump, so they're pretty easy to corner, and they only have 7% health so they're not hard to dispatch. You could also leave the monster alive and just take the item from it.
If a Barrel moster happens to take a bob-omb, or "dud" explosive, it will not explode while being held.


Scienstein is such a feeble geezer, that he doesn't even attack. He's quite light, making him easy to boss around, but has a rather staggaring 200% health.
Of course, since all he does is potter around, to and fro, looking for treasures, there's not much point in paying attention to him. Just leave him alone, or practice your chain-grabs on him (¬_¬ yes, you can grab this enemy, and ONLY this enemy)


You rescued an animal! No, you can't proceed to kill it straight after.
The animal, tiny as it is, simply bounces off towards the nearest edge, and tosses itself into the abyss. You can't stop them, and they don't affect the match in any way. Well... watching a pixellated bunny commit suicide might have psychological effects on the player, but everyone else is totally fine.


A Brigand was inside the crate!? Well, not quite, he's a ****** in the Brawl universe, so he's actually kinda cute.
Brigands are poor sports, opting to destroy items and containers with their axe swings, rather than engaging any of the players. They have 24% health, and do not move particularly fast, though if their axe happens to hit you as it swings to kill an item, that's 7% damage and an uncharacteristically high amount of knockback to your character. There's a simple fix for that, don't stand directly over an item like a gormless idiot.


A basic heartless like this is no threat to you, just 14% damage is required to obliterate it. It's attacks are slow, telegraphed, swipes that deal 4% damage and some amount of hitstun. The real threat however, is if you leave one alone. The shadow will slink under the surface of the stage, reappearing directly behind whoever it doesn't like, and attacking shortly thereafter. If you were busy with something else, then say hello to annoying hitstun!


Now this one is quite fun. And by that I mean it's needlessly complicated. I mean, look at all these paragraphs!
Muffy only appears if Food items are turned on, for some reason. When she appears inside a crate, the rest of the contents are all Food (namely, juices, coffee, tea and wine). It seems she had a bit of a wild night and ended up in a crate? Wow, what a catch.
Muffy doesn't really attack, but she can 'be' attacked. She has her own, invisible damage meter, and is KO'd the same way any player is (off a blast zone, dummy). She also has an invisible counter for every player, which keeps track of how much she 'likes' each player. Simply hanging around near her increases the counter, and attacking her sharply decreases it. Hitting the opponent who last hit Muffy also increases her feelings towards you, so go nuts.
As a visual indicator; if you do something she likes, a heart shape appears above her head. If you do something to displease her, a broken skull shape appears above her head. If someone is near enough to her, a pink tinge indicates that she's enjoying the company. A blue tinge would indicate otherwise, but that only happens if someone she truly loathes is near.
She will wander aimlessly around mostly, jumping/double jumping only in cases that require it. She tends to gravitate towards whomever she likes the most (or simply flees from everyone if she happens to hate everybody) the extent of which depends on just how much 'more' she likes that person.
If there is any recovery item onstage, she will endeavor to consume it. If successful, her feelings towards the nearest player will sharply increase. However, now that she's "full" (i.e. Drunk as a lark) her feelings go totally out of whack for the next 10 seconds. She might randomly decide that she doesn't like people being near her, or she might totally forgive the person she hates the most, or... she might start ENJOYING getting hit, or start liking people who try to EAT her. If in doubt, just stay away from her for the 10 seconds. Let some other loser figure that lush out.
If by toil and labor you manage to woo Muffy enough, she will begin dropping gifts (items) for you. This isn't frequent, and it's mostly junk, but it least it's something, right? You also earn a Muffy sticker for being such a casanova.
oh, if you set yourself a player profile before the match, Muffy's affections are saved, so that next time you see her with that profile, she'll remember you. "Most loved" is also a new 'Record' on the Brawl Records screen, so you can see more directly who she'll follow next time she appears.


They're pretty small, but they make a mad dash for the closest player, attempting to latch onto them like a Pikmin. Any attack at all will dispatch a G-larva instantly, even once it has latched onto a player. But if a G-larva manages to stay attached to a player for 4 seconds, it will tunnel into their body, making a nice cosy home for itself to grow and feast. Yum.
After about 12 seconds inside, the G-larva bursts out from their host, dealing 20% damage and crippling them with hitstun for 2 seconds. And the bad news doesn't end there. The G-larva, quite full of tasty meat, mutates rapidly into a G-adult, a monstrous hulking creature, that vomits out a new G-larva once every second. That could end up real bad, real fast, so the best course of action is to kill the G-adult by dealing 100% damage to it. If you don't, you'll find yourself quickly swamped my numerous G-larva, and eventually, even more G-adults making even more G-larva. Yikes.


Pingu appears rarely and randomly from crates. He does nothing other than wander about the stage, expressing playful interest in the match. If you're mean, you can hit him.:c[/COLLAPSE]

Minions
Minions are essentially Assist Trophies. They're summoned by breaking Minion Crates that spawn during matches. Rather than getting a random helper however, the minion you get is specific to the character who broke the crate.
[COLLAPSE="Open"]

Saibaman
This happy little guy is literally cultivated from a seed. If Krillin (or any other Dragon Ball character) opens up a minion crate, their reward is Saibaman. He's pretty miniscule, being shorter than even Olimar, and he's light as a feather to boot too. So it shouldn't be too hard to kick their butt. But the foe had better watch out, because Saibaman will take any and all opportunities to run up to a foe, and latch onto them. If Saibaman catches someone, he holds them in his clutches for as long as he can. If the foe fails to break free of the grab within 2.3 seconds, Saibaman blows himself to smithereens, dealing explosive knockback and damage to his victim. This also kills the Saibaman, but really... it's the best outcome he could have hoped for.


Meekins
Oh hey! It's that guy! Mike, or whatever!
Mike is pretty enthusiastic, especially for a Minion. When he comes out of that Minion Crate (that Mask deMasque has destroyed), he bum rushes the nearest opponent (or dies trying), handcuffing himself to the foe.
From there, he will make a mad dash towards suicide KOing the foe off the nearest edge. Counteracting Mike's pull is not too hard for the foe, but that's naturally when you come in to help Mike out. Mike gives up after 10 seconds, or after taking 40% damage..


Scrooge McDuck
He occupies over 50% of all minion crates in Coin Matches, regardless of who opens them. But only one Scrooge may appear at any one time, so all the other crates will just have their default contents in the meantime.
As you may have guessed, Scrooge only appears in coin matches, because he's only interested in coins. He will endeavor to collect every last one he spots resting on the ground, even tripping and nudging players out of his way en route. The person summoning scrooge is exempt from being tripped by Scrooge, but that still won't deter him from pilfering any coins you happen to get beaten out of you.
If cornered, or if there's simply nothing for him to collect, scrooge will attempt to mug coins out of other players. He places his top hat on the hook of his little cane, and proceeds to rap foes over the head with it repeatedly, using the hat to automatically catch the coins that come out. Being attacked by Scrooge is a bit embarrassing, as it's a lot like most repeating jabs; easy to escape. It also deals no damage, simply snatching coins instead.
Attacking Scrooge is quite encouraged, and even the summoner can do so. Hitting Scrooge has the same effect as hitting any other foe in a coin match; coins come out! All those coins he's been hoarding, can be taken right back. Of course, having the summoner smacking Scrooge about makes him turn against his 'master', and 'align' with a random opponent. When scrooge 'turns' he performs one charging tackle that, if it successfully hits the player, drains 1/2 of their coins out of them! That could be disasterous. Luckily, it's the kind of gambit that will only hit you if you are extremely selfishly devoted to attacking Scrooge with your biggest, laggiest attacks.
Scrooge lasts until he is KO'd, which is not too difficult to achieve. He's rather sluggish, and has no recovery outside one midair jump. However, he doesn't have a stamina meter. Instead, his weight is proportional to the amount of money he has tucked away. So, it will be much easier to KO him immediately, but progressively harder as he accrues more and more cash.[/COLLAPSE]

Cellphone Summons
Cellphones are an item that may appear in matches. They're, compact, clamshell mobile telephones, though they are a little bigger than real cells (so the players can actually see where one appeared). Cell phones can be picked up, whereupon they summon a character to fight alongside them, much like Assist Trophies. Unlike those trophies however, just picking up the phone is not enough.
The player needs to hold onto the phone for 4 uninterrupted seconds while they dial a number on it. Whoever has the phone can still move around just fine, but cannot attack, and will drop the cell if they are struck with any attack.
It'll be quite a hassle, but if you do manage to call someone, it'll be worth it. Unlike Assist Trophies, which run off and do their own thing (i.e. fall offstage), most of these summons follow your every movement, as if they were permenantly glued to your position. Of course, the exact nature of the summon differs between summons, but most will stick with you and attack whenever something gets within range of them. Each of these summons lasts a hearty 12 seconds.
[COLLAPSE="Open"]

Anise the Cat Witch
Instead of following behind your back, Anise stalks you from the background. Every few seconds, she stops to cast a spell ("Are you reeeeady?"). A magical circle, angled 45 degrees down towards the ground, appears a short distance above the head of whoever summoned Anise. After a small pause, a short, sharp black laser fires out of the magic circle and into the ground. The laser, quick as it may be, is absolutely lethal to anyone hit by it. If you're the opponent and you hear Anise casting her spell, you need to get away from the summoner quickly (or hope you have good spot dodging reflexes)

Asagi
Flavour Hunter Asagi is the star of this game, and she will go to absolutely any lengths to prove it!
Asagi stays directly in front of you no matter what, and unfortunately her hurtbox counts as part of yours too. She also adds her weight to yours, effectively turning you into aheavyweight. That might be good, or it could be disasterous.
Asagi is a master of dual wielded pistols, and won't wait for enemies to enter her field of vision to try them out. She'll just start spraying her pellet shaped bullets in every direction (except behind you) the moment she appears. These bullets aren't terribly fast, but they do push the foe back a fair ways and also deal a significant level of hitstun. When a bullet actually hits a foe, Asagi officially "locks onto" that opponent, concentrating her rapid shooting towards wherever that foe is until they are dead.
It'll be hard NOT to get at least one KO with Asagi around, but if you somehow fail to KO anyone, Asagi will become notoriously upset with this. Having failed to KO anyone else, Asagi will turn on you, whip out a large RPG and blast you off into an unavoidable KO

Flonne
This is Fallen Angel Flonne on a pogostick. And while she will stick by her summoner, she will also roam (hop?) around slightly, and she will do so completely randomly.
Obviously, since she is on a pogo stick, each time Flonne lands on the ground, she will bounce up again. The nature of each hop she makes is completely random, and could be any of these;
1) A sharp, horizontal hop towards the summoner
2) A tall, vertical leap to either side of the summoner
3) A tiny hop somewhere near her current position
4) A tall bounce straight upwards.
If the summoner has moved away, Flonne will exclusively use #1 and #2 hops to get near them again. In all other circumstances, all four hops are equally likely.
Touching Flonne herself during a hop won't hurt the foe all that much, but if Flonne's pogostick lands on them, the opponent will take severe damage, and will be spiked downwards.
Many opponents will be caught out if they think this is one of the weaker summons, as she could randomly hop into them at any time.

Tumeric
Compared to the rest of them, Tumeric is a relatively simple summon. He will stay directly behind the summoner, until that summoner hits an opponent directly in front of them. At this point, Tumeric will rush forewards and deliver a crucial blow before the foe can recover. The swing is wide enough to catch other foes in it too, and the KO power is quite marvelous.
But that's not all Tumeric will do for you. If a foe tries to take you from behind, Tumeric will turn around and begind thrusting his sword wildly to discourage any backdoor shenanigans. These attacks are absolutely puny however, and are just intended to buy you some time to either turn, or flee

Prinny?
Well, this is a wierd looking Prinny. Unfortunately, this guy is not only powerful, but hotheaded. Instead of following you around, he forces the SUMMONER to tag along instead. Basically, you'll be dragged around by this Prinny while he darts around all over the place, attacking whoever he can reach.
He uses all the regular attacks that normal Prinnies use... but he adds explosions to every last one. Flimsy sword swings? Now they're exploding swings of death! A cute little hipdrop to the ground? Now it literally causes flames to erupt from the impact.
While this Prinny is extremely fast, and deadly, it's all too easy for him to end up leaping offstage, dragging you off along with him. If you see him about to do something stupid like that, you can force this Prinny to stop, by using your grab on him. Then you can either wait for him to escape the grab (he'll continue dragging you around on his rampage) or you can throw him to put an end to this (he'll explode just like normal Prinnies)
[/COLLAPSE]

Familiars
More than a mere minion, and yet not quite an irreplacable partner, familiars are an odd breed of summon indeed. Most can fly, or at least have a couple of midair jumps. But they are very dainty targets, and can be attacked and KOed (via knockback) quite quickly. Once KO'd a Familiar only returns on the player's next stock.
Familiars are something that can be "turned on", on the character select screen, and are little selectable minion helpers that accompany each player during a match. Press the small capsule next to the character's name after selecting your character, to open up a little scrolling menu of familiars you can pick (the scroll menu is much like the one used to select the player's profile name, albeit with little icons of the familiar, next to the name of the familiar).
[COLLAPSE="Open"]

Tails
It's Sonic's little sidekick, back from when Sonic was cool! Tails lags behind the player, following their movement about a second later, flying if need be. He has no physical attacks, and can be KO'd at 36%.
If the player touches Tails in midair, and uses their midair jump, Tails will grab ahold of the player, granting you 3 seconds of helicopter style flight (press jump repeatedly to ascend). If the player attacks during flight, Tails will automatically release him, as to not get in the way


Tink
Tink is only selectable for female characters, pokemon that are exclusively female (i.e. Jynx, Miltank etc), and characters that are relatively androgenous in gender. Normally, this blue floating frog will buzz around, acting as a meat shield (even purposely flying into attacks to stop them hitting you). Though if the player taunts, Tink's perverse orange personality comes to the surface and he will nuzzle up to you. If the enemy hits him in this state, Tink will aggressively stalk the foe, flying just out of reach, and occasionally bombing into them, dealing 5% damage and light knockback. The player can call him back by taunting again, or calm him down by striking him with an attack.
Tink is quite hardy. Despite being light enough to be KO'd at 45%, he has some pretty mean DI, and if he hits the ground during knockback, he will skid to a halt.


Parakoopa
This flying member of the Koopa Troopas will fly behind the player, though he will attack nearby foes the same way their SSE cousins do. The main use for Parakoopa though, is to provide the player with a shell to throw. Bounce off his head to ground him, then bounce again to reduce him to his shell, then throw it at the foe. Acting as a mix between green and red shells Parakoopa will automatically home back to the player after reaching an edge or wall, then pop back out of his shell upon reaching them.
ParaKoopa is quite weak, automatically being KO'd after recieving 23% damage, and is easily gimped by jumping on his head, though jumping off Parakoopa can help you recover from offstage.


Redead
Like any zombie, redeads are slow, and they cannot jump, so use this familiar only if you plan on staying put. What a redead does is mount any foe the player grabs, extending the amount of time they stay grabbed and adding 4% damage every second. The player can also grab a redead, though not many characters would want to do this...
Redeads are among the best tankers of the familiar world, lasting up to 70% before the knockback gets them offstage. Problematically, redeads try to stay behind their player, making them rather tricky to use as meat shields.


Dwarf Bulborb
Mostly useless to any other character than Olimar, Dwarf Bulborb simply stands in place, acting as solid ground/platform. Dwarf Bulborb will chase after any pikmin in front of it, which is why only Olimar can extract much use from the beast. Stand on top of it, and toss pikmin to the ground, to ride the Bulborb to where you want it. It's tall enough a creature that most characters would have to jump to hit a player standing atop of it, and when moving, Bulborb will knock foes away, dealing 10% damage.
Much more than Redeads, Dwarf Bulborbs are almost impervious to knockback, usually lasting in excess of 200% damage. It also helps that it recovers 3% whenever it eats a Pikmin.


Otacon
Generally a familiar best paired with a floating character, Otacon tends to leave puddles of a mysterious warm liquid that causes tripping, on the floor whenever he is struck. He will pretty much wander off on his own, stopping to look at the various sights of the stage, almost oblivious to the fight going on. Otacon has a single midair jump and will generally last until 30%.
If Snake performs his smash taunt on Shadow Moses, with Otacon in the match...
Snake: Otacon! What are you doing on the battlefield?
Otacon: Oh, hey Snake. I've wanted to come back here for a while now. Guess I chose a bad time huh?
Snake: I'll say.
Otacon:...
Snake: .. Still thinking about her?
Otacon: What? Oh, no, actually I was thinking about when we first met.
Snake: .. I didn't know you had such fond memories of wetting yourself
Otacon: Hey!


Rikku
This spunky Al Bhed is actually mostly laid back, simply nipping to and fro to find the safest point on the stage. It's only when a foe picks up an item that her thieving instincts kick in. She charges straight into whoever has an item, knocking them to the floor and snatching the item for herself. She then proceeds to use/shoot/throw the item in question, on the foe (she throws battering items rather than trying to wield them)
Since she takes the straightest path towards the foe, she is rather easy to intercept, so the player really does have to distract the foe in the meantime. Rikku can be KO'd from 34% onwards.


Navi
This familiar is invincible, so don't bother picking it just to exact your revenge on her. Other than constantly assaulting your ears with HEY and LOOK and LISTEN and WATCH OUT, Navi acts as a dynamic aide for less experienced players. Frequently, a speech bubble containing an icon of a reccommended input will appear (tilt the analogue stick left, press A, Press R etc). This is generally based off of what the CPU would do in a similar situation, so it's dynamic enough to be character specific in its hints. Navi will hover near a reccommended target for your attacks and turn yellow, flashing red when reccommending an attack to use, though she will return to the player and turn blue when reccomending a defensive/recovery input. If more than one Navi is in a match at the same time, they will colour themselves differently to reduce confusion.


Bat Familiar
This friendly fellow will fly a small ways ahead of the player, making him a reasonable, yet weedy, meatshield. The Bat familiar won't last much further than 15% due to its light weight.
The bat familiar will mimic projectile attacks, adding his salvo of flame to yours. It deals 6% damage and a teensy bit of knockback


Faerie Familiar
Constant sprinkling dust from the faerie's wings will heal 1% every second to anything within 1.3 stagebuilder units of her. She has trouble keeping up with the player, constantly trailing behind him, so foes will frequently abuse the free healing she gives, or simply eliminate her (she's light enough to be KO right off the bat). If the player idles for more than 3 seconds, the Faerie will sit on his shoulder and sing to him, instantly curing him of any "status ailment".
Once the player reaches 120%, the faerie will throw a potion to them, restoring 15%. She only has one, so you have to wait until the next stock for another one.


Sword Familiar
The Sword is unique in that it will patiently sit still, and await your commands, rather than buzz around and get itself killed. To command an attack from the Sword, the player must use any one of his regular attacks, while touching the familiar.
So, once he has the order, the Sword Familiar will dart towards the nearest foe, at a surprising pace. There's enough of a pause between the sword aiming for the foe, and the attack itself, for most foes to casually escape, so make sure the foe is too preoccupied to avoid the skewering thrust. If you do connect, the foe will be sent flying with 10% more damage, and knockback that KOs at 165%.
Problematically, the Sword will not move after attacking, until you go to it and order it to attack again. Foes can take advantage of this to knock the sword offstage, where it will patiently wait for the player to give it another order. And since you need to be touching it to even GIVE an order to the sword...


Skull Familiar
The Skull drifts listlessly around the point he was summoned, gently moving towards the nearest foe at a pace that is barely noticeable. On contact with a foe, the skull will drain 1/5 of any magic counter, stored charge or ammo stockpile the foe may have. That's 1/5 of the maximum value for the counter, not simply 1/5 of what the foe currently has. The foe is also incapable of initiating an attack while touching the skull. The player also suffers from this should he should touch the skull, making it a double edged sword to use the skull in a close range fight


Demon Familiar
This tiny flying Demon is not particularly helpful in combat, his downwards spear jabs dealing barely 1% damage. However, this familiar won't simply flutter after foes. The demon will go after traps and minions, before the opponent is even considered an option. He wanders right up to the side of his target, pauses for a moment, then delivers a single weak jab.
While foes and summons will barely notice the Demon's presence, traps are instantly detonated/activated/dismantled when the Demon strikes them. The Demon can be, and usually is, caught by a trap when he detonates it, particularly explosive traps.
The demon defines traps as anything static he can hit (obviously discounting foes and summons that occasionally stand still). For this reason, he will ignore traps that he cannot hit, such as clouds of gas. He will also treat most destructable objects as traps, regardless of whether or not they have a trap like effect.[/COLLAPSE]

Fiends
Like ATs and Pokeballs, fiends are crazy characters that can appear midmatch and cause havok.
Fiends appear as tiny dolls, which will bounce around until eventually coming to a stand-still (they are suprisingly bouncy). When that happens, the fiend itself appears from the doll in a puff of smoke. The fiends do not have any allegience and will simply attack whoever they can. The dolls can be attacked and launched, and are as heavy as the Soccer ball item. Since the fiends are extremely powerful, most players will team up to launch the doll off-stage, in order to prevent the fiend appearing. Like ATs, only one fiend can be in battle at any one time.
In addition to the listed Fiends, any Brawl-SSE boss can come out as a fiend, whereupon they will do their (Normal difficulty) thing for 12 seconds.
[COLLAPSE="Open"]

Tonberry
Tonberrys walk extremely slowly towards their nearest target And KO their foe with a single stab of the knife.
Other than walking very slowly, they cannot move particularly fast, but they are utterly imprevious to attacks (even though attacks do "hit" them).
Once Tonberry is close enough, it will perform a slow stab with its knife. Getting hit by it deals OHKO style knockback. Tonberry can be attacked and knocked away, but not only is he heavier than Bowser, he will counter every 2nd attack with GRUDGE. A super quick homing aura, that deals damage equal to the number of attacks that player landed in the current match.
Don't think you're safe just by running to the other side of the stage. If Tonberry has no nearby targets, it will take out a voodoo doll of a random character and stab that instead. In order to avoid the high knockback attack from this voodoo attack, the character in question must dodge at the precise moment Tonberry stabs the doll.
Tonberry lasts for 23 seconds, or until he KOs 3 people.


Demon Wall
The Demon wall slowly advances on the players, attempting to literally shove them off the stage. It can occasionally exert itself and charge.
The Demon wall is a meaty 4 stagebuilder units tall, extends into both the foreground and background (so it cannot be rolled past) and will push along literally anything that isn't the stage itself. Speaking of which, Demon wall will pass through obstacles presented by the stage itself, but will fall from higher platforms to lower ones and travel up ramps. There is a demon on both sides of the wall, so it can change direction, should its targets try to escape that way. Once it reaches the end of a main platform, it will stay there to make it harder for people to recover. Although usually slow, every 7 seconds for 2 seconds, the wall will charge at twice the usual speed.
Demon wall will pass over pitfalled players, but if it stops on top of one, they will not be able to come out until the wall itself leaves.
Demon wall lasts for 25 seconds, though it will leave early if it finds itself trapped in a pit or similar construction (i.e. certain game breaking custom stages)


Tiamat
Tiamat flies offscreen and reappears at either the right or left side of the stage, sweeping almost the entire field with a high charged beam attack.
Tiamat is pretty damn big, and he can hit you when he first appears (20% and knockback like being hit by a pokeball)
Once offscreen he waits 10 seconds before swooping in at either the left or right hand side of the stage. Tiamat hovers at 6 stagebuilder units above the main platform, then begins the fire his Megaflare at the closest edge to him. He will then slowly begin to aim upwards, sweeping the stage with the beam in the process. Megaflare ends the instance the beam reaches the opposite end of the stage. If struck by the beam, the player will be dragged along with it and take 1% damage every 0.1 seconds. The final hit, when the attack ends, can KO off the side of the screen at 40%.
Avoiding Tiamat is quite simple, go to the opposite end of the stage and jump up when the beam approaches. Of course, cruel players will try to knock their opponents into the beam while saving their own hides.
Since the beam can only travel in a straight line, obstacles in the stage will render certain cubby holes safe from harm.
Tiamat dissapears once he has finished firing his attack, making him one of the more short lived Fiends.


êúô0 (áñ)
ENCOUNT ERROR. If you found this message then please call staff
This guy are sick! The êúô0 (áñ) expresses a desire to "become a blitzball when it grows up", then tries to cast Cure on itself, despite not knowing the spell. It then proceeds to sketch a random player, but misses, causing its inventory to fill up with Dirks.
êúô0 (áñ) has an extremely high INT and EVADE stat, though those stats are not used in any calculations so they do nothing (off course!).
If attacked the creature will respond by saying "monster 'I'm sorry'". Also, even though it should, you won't deal any additional damage to this spoony bard if you attack it from behind. Gives 1000 exp and 10000 gil when defeated.
This is a "joke" fiend, who does not attack, but rather causes random error messages to pop up on the screen.


Barbatos
For the 30 seconds he graces the match for, anyone who picks up, throws, or uses an item will be subjected to an unescapable, instant KO. It doesn't matter where Barbatos is, or where the offender is, he will instantly teleport to the foe, grab them by the neck, teleport offstage, and hurl them down into the abyss. All while screaming his #1 rule about items.
You might think this is a weak Fiend, but can you really avoid using items for 30 seconds, you casual***?


Sword Dancer
This towering, 4 armed, skeleton from the demonic realm is the rarest fiend by far. And for good reason too, when he comes out, everyone will have no choice but to drop their petty squabbling, and join forces against a TRUE opponent. Sword Dancer stands almost as tall as Gigabowser, and his swords have a range that's just shy of a landmaster in scale. Whenever he is not attacking (rare) he will slowly lumber towards the nearest player. He can't jump, but he can step over or onto obstacles lower than 2.5 stagebuilder units tall.
Sword Dancer cannot be made to flinch from attacks, but you'll HAVE to attack him, because he will not dissapear until 250% damage has been dealt to him. In addition, Sword Dancer counts as an official combatant in the match, and he CAN win the match for himself if not dealt with. Defeating Sword Dancer for the first time unlocks the Sword Dancer trophy along with the strongest set of stickers for SSE.
His attacks are as follows;

  • Sword Dancer slashes down at the ground with one sword, then another, then the remaining two. Each sword strike pitfalls or spikes the foe and deals 20% damage. If the final double sword strike hits a pitfalled foe, they will be launched out of the bottom of the platform (usually to their death). This is the most common attack, and it is thankfully slow. Sword Dancer will also use this attack if there is a destructable obstacle in his path.
  • Sword Dancer spins with his 4 swords outstretched, much like ROB's Side-B. Also like ROB's Side-B, Sword Dancer can angle his spinning deathbox up and down, like the total jerk he is. Anyone caught in this deceptively large attack will suffer 7 hits of 5% per second, for 1.5 seconds. The final flourish as Sword Dancer ends the attack, deals heavy knockback that KOs horizontally at 80%. This attack destroys shields with ease, and is generally difficult to avoid. This is most frequently the attack he'll pull out when the players try to surround him, but he can choose to do it at random too.
  • Sword Dancer infuses his soul with the souls of those who live for battle. After a brief fiery charge effect, Sword Dancer's attacks become permanently buffed and deal 1% more damage. This doesn't stack, but the buff increases by 1% every time Sword Dancer KO's a player. Try not to die too much, as it'll only serve to feed his strength. Sword Dancer typically infuses his soul after every KO, though he may not do it immediately.
  • Sword Dancer casts Indignation with no cast-time. The indignation appears around the furthest foe, rather than around Sword Dancer himself. Sword Dancer generally brings this out against campers, forcing them to approach into his sword attacks.
  • Sword Dancer casts Explode with no cast-time. The speck of light appears above the nearest foe, rather than above Sword Dancer himself. This is the rarest of Sword Dancer's attacks, if you see it happen, get right up to the Sword Dancer and make that Explode hit him instead.
  • Sword Dancer casts Thunder Blade with no cast-time. This spell usually comes out in situations where none of his other attacks would be a good idea.
  • Sword Dancer casts Grave after a brief cast-time. The stalagmite appears under the nearest foe, rather than under Sword Dancer himself. This is the only spell with a cast-time that isn't zero, so if you see Sword Dancer casting, get ready to shield.
Darn Fabulous
Like some rejected Power ranger, Darn Fabulous appears from a colourful explosion of confetti (which happens to KO at 180%). A brief pose, a brief pause, and off he/she goes, on a ballistic torrent of attacks! He/she doesn't tend to stay in one place very long, and if he flies off one side of the screen, he/she appears instantly at the other side. This is a trick he/she uses a lot, so get used to it.
When moving around, and not attacking, Darn Fabulous continuously spins his/her hammer around him/her, dealing 15% damage and significant knockback in a random direction to anyone stupid enough to get near it. Darn Fabulous uses the following attacks;

  • Darn Fabulous hovers 2 stagebuilder units above the ground, then pounds it with his hammer, causing an explosion and sending debris flying off in various random directions. Getting pounded causes 40% damage and a lengthy pitfall effect, while being struck by debris deals 10% and medium knockback. The recoil from this attack, causes Darn Fabulous to pause briefly, so getin a quick attack!
  • Darn Fabulous flies in a wide circle and then flings an explosive bomb at his/her nearest target. The bomb doesn't explode immediately, but does cause noticeable hitstun on contact. The explosion itself, causes 27% damage and KO's at 95%, while the various chunks of debris which fly out have the same effect as the debris from Attack #1
  • Darn Fabulous flies to the ground, then rapidly pounds the hammer left and right 4 times, arcing the hammer over his/her head each time. Being struck by the hammer here KOs at 110% and deals 21% damage.
  • Darn Fabulous uses the hammer as a pogo stick, Pogoing from player to player which each bounce. If the hammer lands on a player, they suffer 18% damage and will be pitfalled. Darn Fabulous bounces a total of 8 times, and tends to be harder to avoid with less players to bounce between.
Darn Fabulous lasts for 35 seconds, or until he/she is struck once by every player in the match. If he/she leaves of his/her own accord, he/she will blow an effeminate kiss toward the player he/she damaged the most.


Death (not canon, due to being a moveset now)
Alright, here's a tip for free. Don't touch death, you'll die, literally.
You'd think that would be easy enough, but Death loves to float around haphazardly, crashing into you and attacking you as if it was your fault. What a jerk
In addition to Death reaping souls, tiny spinning scythes spawn all over the stage, one every 0.75 seconds, each shooting off in the direction of the nearest player. They deal 14% damage and knock the foe upwards, turning the foe into the perfect target for Death to "bump" into.
Death lasts for 25 seconds.


Deranged Scientist
Deranged through the loss of his wife and attempting to "help" his daughter in the only way he feels he should, by killing everyone else. He does succeed, and he does indeed cause the apocalypse, leaving only his child daughter alive and alone.
In Brawl, his appearance as a Fiend will cause similar feelings of dread. Surprisingly for a fiend, he resists attack very little, and can be KO'd offscreen with ease. And if the players leave him alone? He will kill himself, collapsing in a heap in the middle of the stage. Feeble man..
But that is when the fun begins.
In the final moments of his madness, the good doctor detonates a device in his coat, spreading a vicious poison gas in a wide circle around him. It spreads extremely slowly, taking minutes to engulf the entire stage. But it WILL spread that far, it will never stop spreading, and it will never stop being a potent poison. Anyone within the gas takes a staggering 15% damage every second. And when escaping from the cloud after even the slightest exposure, the poison lingers for a further 2 seconds.
That is indeed a vicious gas. See a quick end to the match, if you wish to avoid contamination.
Note// If knocked offstage or off a blastzone, that's where he'll detonate the device, so it may take longer for the gas to spread everywhere.
However, there is a small chance that any attack that hits him, will detonate the device prematurely, so knocking him offstage is still a bit risky...


Cyber Frieza
If you allow Frieza to emerge from a fiend doll you're in for a world of hurt.
Frieza flies high above the stage, raises his hand, and forms a gigantic molten ball of death, which he then sends crashing down to the stage. Once it hits, the stage, and everyone remotely nearby, is obliterated, leaving absolutely nothing where there used to be a Brawl. After another 2 seconds or so, Frieza takes pity on the remaining players who have nothing to stand on, and summons some debris and boulders, which hover in midair and function as the new stage. They roughly form the shape of the Battlefield stage, though the debris bobs up and down slightly. Frieza may even occasionally (at his whim) flip the stage upside down, or on its side, or briefly dip it down below the bottom blast zone. Yikes, what a jerk.
But it's not all doom and gloom. If you all work together, you can stop that supernova from hitting the stage, by hitting it upwards with all the attacks you can muster. The 'weight' and stamina of the ball is determined by the number of players in the match, though in general every single player needs to pitch in to successfully repel it. If enough damage and knockback is dealt to the supernova, it will fly up and off the screen, taking Frieza with it.
(Note, If Frieza destroys a scrolling/animated stage, it will no longer scroll/animate)


Dahlia Hawthorne
Dahlia Hawthorne. If you see THIS spirit come out of a Fiend Doll, be prepared for a guelling battle.
See, Dahlia has no phsyical form here, she's just a 'harmless' little ghostie. But once she's set loose, she wastes no time in possessing a random player. Not only does this take control of that character out of the player's hands, but Dahlia also loads her host with some egregious buffs. Most notable among them, is 3% healing per second, and transcendant priority on every attack.
Dahlia stays until the player she is possessing is KO'd. Sounds simple huh? Well, no. Dahlia is no idiot, if she notices her host is in danger, she will hightail it outta there, and possess someone else.
Unless everyone vows to suicide themselves just as Dahlia switches targets, then she will be staying for pretty much the entire match.
And yes, if the player Dahlia is possessing wins the match... Dahlia wins.


William Birkin
In comparison to other fiends, William is not initially much of a threat, but he does hang around for 2:30 minutes, so it's hard to just ignore him. William can always be made to flinch, if an attack hits him in an eye. Sounds tricky? Don't worry, this guy has massive eyes.
Still, attacking William is not the best of ideas. As he takes damage, he mutates into new forms, each one being more dangerous than the last. Expert players may wish to make William mutate on purpose, and lure him into attacking the other players...

Form 1
This is William's initial form. Still human, but mad as hell. He strides towards any foe he can, before slamming his pipe down on their heads. His walking is actually the second fastest of all his forms, but the attack itself is as laggy as a Warlock Punch. If it somehow does hit someone, they take 17% damage and are buried in the ground temporarily. Birkin will take this opportunity to prepare another swing, so his victim needs to retreat as soon as they can to avoid another pounding.
If William takes 50% damage in this form, he will mutate into..

Form 2
Birkin's trademark claw is now fully developed, and he has sadly lost his original face. He's a lot more sluggish in approaching his victims now, and that eye is an easy target to target. However, he has a few new attacks that can actually be a threat. His first is a simple horizontal slash. It has terrific range, deals 22% damage, and KOs from 80%. The slash also reflects projectiles. It's still a bit on the slow side, but it's much faster than that stupid pipe.
If the foe strays a bit closer to Birkin, they'll find themselves grabbed suddenly, by his human hand. He lifts the foe up into the air, and skewers them with his claw, dealing 35% damage, though very little knockback.
Finally, Birkin can perform a quick punch with his human arm, dealing 4% damage and spacing the foe well for a slash.
After 75% damage in this form, william mutates AGAIN...

Form 3
In his third form, William becomes completely unrecognisable, growing a multitude of additional arms and claws. He's a little faster than his second form, and a lot bigger. He walks with his main claws raised above his head. This is a permenant natural hitbox that acts like spikes on contact. The fact that he is so tall, and his arms so long, makes it very difficult to jump over him.
Once he is close enough, he typically uses his main attack, which is a series of 4 approaching slashes with his four arms. He takes one step forth with each slash, beginning with the two vestigial limbs, and finishing with those gigantic main arms. The first two hits rack a total of 23% damage, comboing smoothly into the third and forth hits, which deal a total of 30% damage and knockback that KOs from 90%. Retreating from this is simply not an option, given how far the attacks reach, and the fact he moves forwards during them.
Occasionally, Birkin will attempt to grab using the two vestigial limbs. It's a sluggish grab that leaves his eye very exposed if it misses. But if it lands, Birkin will immediately slam his two main claws into the squishy foe, dealing 40% damage and knockback that KOs from 60%.
His final possible attack is much like his first, even having the same startup animation. But, just before he starts slashing, he turns around and swipes once behind him, catching any foe who tried to roll behind him with 24% damage and upward knockback KOing at 95%.
A further 100% damage to this form sends Birkin into his fourth form...


Form 4
Form number 4 is no longer even a humanoid. He's a monster dog from hell, and the fastest of all the forms by a huge margin. He dashes around the stage, jumping on and off platforms at complete random. So long as he's moving, he deals 17% damage on contact, and horizontal knockback that KOs from 140%. If he lands on a foe after a jump, he will bury them, and spend some time ripping them apart with his gaping mouth (dealing 12% damage every second). This is typically the best time to try to attack him, as otherwise he is too fast to consistantly hit.
Occasionally, Birkin slows down by just a bit. This indicates that he will try to grab the next foe he comes in contact with, impaling them in his innumerable fangs (20% damage). He'll then dash to the edge of the stage, and toss the foe away. This is usually a KO, no matter what the foe does. But they can still be saved if Birkin is made to flinch (hit that eye!) before he manages to throw them.
A final note, if there are no platforms on the stage, Birkin may still jump occasionally, especially if there are airborne foes to nail.
75% damage is needed to reduce Birkin to his 5th, and final form...


Form 5
No longer even resembling anything at all, this amorphous blob wishes nothing more than to devour. If anything touches that mouth of his, he will eat it. Even if you hit is with a disjointed attack, he'll still chow down on you. Not that you'd want to attack him now anyway, as he's invincible for the rest of his stay (In SSE, he has 120% stamina). In this form, Birkin counts as solid ground, so foes may stand on him, if they so wish.
But, other than the threat of instant death, this form of Birkin is actually the easiest, simply because of how immobile it is. He can send tentacles out to drag himself around, or turn around, but not only is this especially slow, but if the tentacles recieve 30% damage each, they will retract, preventing Birkin from doing.. anything for 5 seconds. However, if you just blunder into a tentacle, it will grab you, and attempt to drag you into his mouth. By this stage, you may have too much damage to be able to escape in time, so avoid those tentacles like the plague.
If foes are just standing on him like cowards, Birkin may send a couple of tentacles to snatch them off of him. Again, this is not too hard to avoid, the tentacles have a maximum range of 3 stagebuilder blocks, and have a very sluggish movement speed.


Scanty and Kneesocks
Two demonic (possibly incestuous?) sisters who organise repeated monster attacks on Daten city. While continuously foiled by the Anarchy sisters (Panty and Stocking) the pair are still something of a threat, possessing fighting skills just under that of the Anarchy's. Scanty can transform her underwear into two guns, while Kneesocks can turn her... kneesocks into swords.
But that doesn't matter, because this Fiend is all about one thing;
Rrrrrrrrrrrrrrrrrrrrrrrrrrrruuuuullles (rules)
Scanty and kneesocks love rules. They love how something so simple can control people so utterly.
The moment they appear in Brawl, they recline in deckchairs and sup champagne, leaving them wide open to attack. But, for every 5 seconds they spend in the match, a rrrrrule will apear onscreen (in the background above their deckchairs, as a hologram. It will move and expand/shrink as the camera pans and zooms, so that it is always visible and llegible). It's reccommended that each rrrrule, whatever it is, should be followed by the players, because otherwise they will suffer. Before we get into that, here are the rules scanty and kneesocks may summon;
  • No attacking Red skinned characters (they always summon this rule first, to make attacking Scanty/Kneesocks a crime)
  • No missing with attacks
  • No tripping
  • No fastfalling
  • No instant shielding (i.e. bringing a shield up for just a couple of frames)
  • No dash/pivot grabs
  • No dodging during a stopclock effect
  • No KOing during starman invincibility
  • No using Final Smashes
  • No using dragoon
  • No KOing via Baseball bat
  • No hitting with Star rod (using the star projectiles is fine)
  • No hitting with a thrown Pokeball
  • No picking up a dropped hammer head
  • No being healed (via ANY means)
  • No throwing/dropping explosives
  • No explosions (even aesthetic ones)
  • No hitting with fire attacks
  • No hitting with ice attacks
  • No hitting with water attacks
  • No hitting with head based attacks
  • No time controlling attacks
  • No creating summons
  • No eating/biting
  • No up-input attacks
  • No down+special attack
  • No standing completely still
  • No running
  • No taunting
  • No regrabbing a ledge after letting go of it
  • No repeating a single attack more than twice in a row
  • No attacking a projectile
  • No KOing summons
  • No self damage
  • No Glancing-Blows
  • No beVis
  • No Vibes
Rules in blue won't be summoned if there is no way in the current match for that rule to be broken.
That's a lot of rules. Scanty and Kneesocks can only ever have 7 rules active at once, though even that can severely limit your options. So then, what happens when a rule is broken?
The person breaking the rrrrule will chased down by either Scanty or Kneesocks, and hit with damage/knockback. The exact amount dealt for breaking a particular rule, is randomly set when Scanty and Kneesocks summon that rule, and graphically displayed next to the rule onscreen(as an extendo-boxing glove icon with a number over it. The length the boxing glove is extended represents knockback strength, and the number is obviously the amount of damage. Knockback is always dealt towards the nearest blastzone).
Basically, it's a crapshoot. You could have a pretty lame punishment of 2% and knockback that KOs from 260%, or 60% damage and knockback that KOs from 70%. So be sure to read the rules that Scanty and Kneesocks are enforcing, and make sure to avoid breaking any that have severe punishments attached.
In case you're curious, Scanty attacks by shooting from mid-range, though she can only aim in the four cardinal directions. Kneesocks on the other hand, uses a flurry of sword swings, which have transcendant priority, to attack. Neither one will break their own rrrules while chasing/attacking you (e.g. with the No running rule, they won't run)
Also, while you can run from Scanty/Kneesocks, they won't stop chasing you until you've been punished. And if you break any further rules before being punished, Scanty/Kneesocks will simply combine the two punishments into a single, stronger, attack.
You can also attack Scanty/Kneesocks, and even try to KO them, though that is deeply discouraged, especially considering that the first rule they enforce is that you're not allowed to hit them. They will also join up and take you on together if you continue to pester one of the sisters with attacks
Scanty and Kneesocks will leave of their own accord (luckily taking their blasted rrrrules with them) after 2 minutes.


Roomba
This tiny little appliance is actually a fiend (crazy powerful summons that attack everyone), but you can all breathe easy, because it's the 'magikarp' of all fiends. You won't be runny scared of this tiny roving vacuum as it patrols the platform it's on. It may spray a little water in your face if you get especially close, but that's not really anything to be scared of. If you want, you can even stand on TOP of a Roomba, in order to ride the Roomba wherever it's going.
The Roomba has a paltry sum of 33% stamina, so one well placed smash attack is all you need to send this fiend packing. But it's reccommended you kill it quickly, as Roomba is a learning robot. Noone knows "how" exactly, but as time passes, Roomba will improve itself, little by little. Perhaps it will increase its maximum stamina by 5%, or maybe it will start travelling a bit faster. It might learn how to jump, or boost the power of its water gun a little. It could even learn more moves, such as a charging tackle, and then begin improving THOSE attacks too.

They are all small improvements individually, and they don't come particularly fast (the first comes after 7 seconds, and the rest come at 10 second intervals). But the thing is; these buffs are permenant, and no, I don't mean just for the rest of the current match. Any improving that a Roomba does, will be permenantly saved, and all subsequent Roombas you encounter in later matches will start off with these buffs already installed. By improving itself little by little, Roomba gradually becomes a fiend that you should fear.

You can still ride it though, Roomba never could figure out how to get at anything on its back.
oh yeah, and Roomba dissapears of its own free will after 27 seconds onstage, so you can't just have one appear and let it improve itself indefinitely while you wait.
[/COLLAPSE]

Stages
[COLLAPSE="Open"]

The P1A-Ground is the Forde Macoughan Law School's playground area. The stage is mainly flat asphalt, with part of a school building on the far right side.
In the background of the main platform are 2 groups of 7 students cheering the fight on. 1 Group cheers the Winner on, while the other group cheers on the Loser. If a player does something that causes an audience chant to start, then both groups briefly start cheering for that player. Each student will move around, following their favourite brawler if they can.
If a student finds themselves behind a player that students of the other group are cheering for, they will occasionally try to reach forward and attack that player (roughly 3 second intervals). These attacks do 1% damage but interrupt whatever it was the player was doing at the time.

Robot Master Room​
The famous Robot Master rooms just became even more precarious! Like the Electroplankton stage, characters are rendered in 2D here. The Default stage is the picture on the left. There are three shutter doors which open and close randomly during battle. At least one door will be open at all times.

If you hold R as you pick this stage, the Brawl will instead take place on Breakman's Boss Room (middle picture).
And if you hold L as you pick the stage, the Brawl takes place in Clashman's Boss Room (right picture).


The whole stage is musical! Anyone stepping on the many platforms will trigger a xylophone note of random pitch. The keys on the ground trigger low pitched notes at the left, through to high pitched notes on the right.
The stage's music will also vary in volume according to how much action is going on (70% volume with no action, +10% volume for every attack or explosion)


The actual stage area of Lake of Rage is a simple 3 platform setup, with two fall-through platforms above a larger, solid platform. Like Delfino Plaza, the platforms in Lake of Rage fly around the lake, offering nice views and stopping briefly at various locations. The order it visits stops at is random, but all stops are flat, walk-off areas. The stops are;
  • South of the lake: It is the lowest area the platform lands on so, other than the lake itself, its hard to see very far in any direction. There is an old man nearby, staring into the lake.
  • North of the lake: This is the highest area the platform lands on, granting players a view of the entire lake, along with the surrounding forest and even Mahoggany Town way off in the distance. From here, the 2 story checkpoint controlling visitors to the lake is clearly visible, and part of the forest labyrinth from the western side of the lake can be seen too.
  • East of the lake: This is right behind a small group of trees, meaning the view of the lake is somewhat impeded. The checkpoint is just visible on the far left of the screen
  • West of the lake: From this bank, it is possible to see Mt Silver on the horizon, along with the sea of forest leading to it. A young lad is sitting on top of the ledge overlooking the lake
  • Forest Labyrinth: A clearing in the trees to the West of the lake. The hidden house is visible only when landing or taking off from this location, not when fighting at it.
Other Johto landmarks are visible on the horizon as the platform zips from place to place. These landmarks include Bellsprout Tower, Tin Tower and Goldenrod's Radio Tower. The mountain region hiding the ruins of Alph is also visible.
Whenever battling on this stage, you will be constantly assaulted by a Red Gyarados living in the lake. Though the Gyarados will not follow the platform away from the lake, you are only really safe from it when the platform lands in the Forest Labyrinth area. If it lands in any other area, Gyarados will, in a manner similar to the Halberd, fire a hyper beam towards a random player.
When travelling over the lake, the Gyarados will directly attack the stage by biting it at least once. Yet again, this works in a manner similar to the halberd's claw. While biting, it is possible to attack/capture the Gyarados. Dealing more than 40% damage to it will make it retreat for 20 seconds.


This large stage, set in the azure cave that links death and afterdeath is a campers dream. But that's not the main reason competitive people will hate this stage. Just like the Spear Pillar, there will be a gigantic entity, screwing with the match in all sorts of unfair ways.
This entity is a massive spider that enternally fills the background of the stage. Every 35 seconds, the spider will lean its face in, smacking away anyone on the top platform and dealing 20% damage. After leaning in, the players have 5 seconds to take advantage. Basically, it's a race to the top platform, to see who can hit the spider's face first. The boon the spider grants depends on the action the player hits it with;

  • If the player grabs the spider's face, the spider will heal that player 30%
  • If the player hits the spider with an actual attack, the player in first will take the damage and knockback, regardless of whether they dodged or not. Remember the blue shell rule in Mario Kart? DON'T HIT THE SPIDER IF YOU'RE ALREADY IN FIRST!!
  • If the player throws a pokeball into the spider, the pokeball is guaranteed to contain a legendary (with a 5% chance of a triple size Piplup)
  • If a player is thrown into the spider, either from a throw, or from knockback, the spider will teleport that player off-stage (but always at a range that they can recover from)


You get to fight on top of the Final Fantasy battle screen! Better yet, the screen itself will actually depict an endless random battle while you fight! White mage, Black mage, Fighter and Thief will square off against a host of random monsters, the four fiends, or even Garland/Chaos himself! Yay!
If either side is completely defeated in battle, reinforcements for that side will quickly appear (so no matter how long you wait, the "battle" will never end).
If the monster's side is completely defeated, the Final Fantasy victory jingle will play briefly before the next set of monsters arrive. You'll even see the warriors gain Exp and Gil
Of particular note is that the battle on the screen occasionally has some effect on the brawl going on on top of it. First of all, if one of the warrior's of light perishes, their status box (far-right of the screen) will be removed entirely, altering the shape of the stage in the process.
Secondly, whenever the white mage uses a cure spell (usually once every "turn"), anyone standing on the warriors of light's side will be healed of 6% damage. Similarly, whenever the Black Mage uses a spell (again, usually once a turn), anyone standing on the monster's side of the screen will be popped up into the air and take 4% damage.
This stage has an awesome secret; the warriors can level up if they defeat enough monsters. Levelling up is a permanent change that is saved, so even if you come back to this stage at a later date, the warriors will still be at the level they were last time. Levelling up boosts their stats and unlocks harder monsters for them to fight (you obviously can't face off against the four fiends at lv1, now can you?).
It can be quite fun to play on this stage constantly, and watch your warriors of light, grind for some level-ups. In fact, the extra music for this stage can only be unlocked by levelling the warriors to Lv5, Lv20, Lv30 and Lv65, and there's a trophy in store for whoever levels them up to Lv99.
And as a final easter egg, any Gil collected in these battles will be added to your coin launcher coins


Dhaos' Castle in the sky, its inner halls are forboding. As the image suggests, this is quite a boring walk-off stage with two relatively high walls to keep the fighting bound in. The sheer size of the stage makes it seem a lot less cramped than the Shadow Moses stage. And the walls don't impossibly resist attempts to jump over them too, a definite plus. The top blast zone is very low however.


The Forest of Tales is a basic stage, two main platforms and some trees that prevent dodges and rolls from taking place.


The very stage upon which Goku and Krillin fought many of their earliest foes, this basic platform, surrounded by grass, will be the setting for many a heated brawl.
Unlike the actual tournament, touching the grass here does not forfeit you the match, though if you still want to pretend, just have whoever touches the grass KO themselves.
Actually, if you play this stage in Stamina mode, touching the grass IS fatal, which will likely result in some fierce battles, and unlikely comebacks. Give it a try sometime, if you're sick of generic, 3 stock 8 minute matches.


Pirate Land
Welcome to Pirate land, where you too can be a terror of the seas! Or maybe not, since no actual sailing or pirating occurs on this stage.
It's a pretty tall stage, with all kinds of platforming to be done. The long platform above the main stage drifts left and right, much like the platform on SmashVille does. The Thwomps up there come crashing down on anyone who stands underneath one, and they pack a nasty whallop. If you're lucky, the moving platform will interrupt the thwomp's fall (and if you're unlucky, you were on that platform). You can actually stand on thwomps just fine, or even lure them into falling, just so you can ride back up on them.
The two platforms either side of the thwomps dip down then rise back up again, forming a U shape with their movements. Above that, is another platform, this one rotates at a steady pace, so sometimes it's a platform, and other times its a steep. The wall supporting the mushroom platform is just that, a wall. Though it's only solid from above the thwomps
And finally, the set of platforms on the right, all descend when someone stands on one of them, ascending back up when there's no one on the contraption at all.
Not shown in the image, is Toad, who will show up from time to time in a random location onstage. Above his head hovers a nice item, which is gifted to the first player who makes it to Toad. If no one makes it to Toad, or no one even bothers, he'll change the item he's offering.
But! Not all Toads are Toads. Some of them are Baby Bowsers in disguise, and the item they give (which is otherwise indestinguishable from normal items) will explode shortly after being gifted, dealing 20% damage and average vertical knockback to the poor player. The difference between Toads and disguised Toads, is that only real Toads will switch items
The possible items are as follows (and are included regardless of item settings)

  • Star: The rarest item on offer. Obviously grants invulnerability for a short time
  • Mushroom: The most common place item. Enlarges the player for a short time
  • Metal Box: Turns the player to metal, increasing their density for a short time
  • Yoshi's Wings: Not just for Yoshi, anyone wearing these wings gains two additional mid-air jumps for a short time
  • Maxim Tomato: Yummy! 50% healing
  • Fire Flower: allows the wielder to spew forth a stream of flames
  • Ice Flower: See above, but with ice properties. Deals less damage and slower hits, but has a possibility to freeze the opponent.


Festive Floats
As one of the worst scripted action sequences of any Christmas movie ever, the TurboMan Parade is something no Brawl can go without. Sadly, Arnold himself doesn't turn up in this stage. But that's because he totally deserves a moveset of his own. I refuse to take that awesome right from him.
Instead, we have... Festive Floats, a bunch of parade floats driving down an endless street.
This stage, theoretically, is a slower paced version of Big Blue, with massive parade floats in place of cars. Falling off a float, and onto the road, is nowhere near as fatal as in Big Blue, and almost anyone can simply run to keep up with the screen. Also like Big Blue, players can jump onto the road, and run under the floats.
Above the floats, are giant balloons shaped like various random Brawl characters. Touching these from any angle will bounce the player away with some force, so be careful how high you jump.


It's an entirely flat stage, with the church looming ominously in the background. Despite what you may think, this is NOT a walk-off stage. The stage is much like Battlefield, a flat chunk of earth suspended miles above the ground. The backdrop of Ashmyany is also very similar to te idyllic hills of Battlefield, though since it's set in Lithuania, it's a bit more geographically accurate.
During gameplay, several villagers toil away at meaningless daily tasks such as carrying pails of water, tilling soil and chasing chickens. They do so in both the background and the foreground, making the stage seem rather busy, when in reality it's a pretty standard empty platform.
Though usually green and grassy, if certain "wintery" music is chosen for this stage, it will likewise become snowy, with the entire surface of the stage losing traction, and the villagers concentrating on more snow based chores
90 seconds into the match, dusk falls on the church, and whatever music was set for that stage gradually fades out into eerie silence. From behind the church, a 12 strong line of Russian Cavalry, storm out, sweep across the front of the stage, then disperse, chasing the distraught villagers into the church. As they sweep across the stage, the Cavalry are rather dangerous, dealing 34% damage and trampling players into the ground. There are too many of them to attempt to roll past, or to shield the onslaught, so your only chance is to either jump over all twelve of them (the cavalry don't travel particularly fast, and the line is as long as the stage itself, so to clear all of them, most characters will need to use all their jumps), or just hang onto a ledge like the planking coward you are.
After this event, night falls, some screaming is heard from inside the church and... that's it. The music gradually fades back in, but the stage is now completely empty, and remains so for the remainder of the match.
What? Did you expect the stage to loop? People DIE when they are killed you know.


Luca Concert​
Anyhow, the stage itself is a flat glowing platform atop a golden drum playing Buddha. You can also stand on the two cymbals either side of the buddha, though that is not entirely reccommended. That buddha loves to bash on those cymbals, so every so often he will hit one or both of the cymbals acting as platforms. If you happen to be standing on one when that happens, not only will you be stunned from the sheer force of the vibration, but it will also catapult you straight into the air, where you will be at the mercy of your opponents and the inevitable meteor smash they will clonk you with.

Like certain moving stages (e.g. Space Armada) the stage tends to roam around, exploring the stadium. The platform is also constantly (and slowly) spinning, like a chicken in a microwave, though the camera does a good job of keeping itself perpendicular to the action, so it rather looks like the stadium itself is rotating around the stage. There's also spotlights, floodlights, discolights, deadlights, and other luminous junk to make everything look colourful and active.

tl:dr? Flashy stuff is going on all around you, but it doesn't affect any of the fighting.

Something that does happen from time to time that will annoy you, occurs when the spotlights shine directly into the camera, blinding everything in an array of strobe colours. When the lights pass, everything is suddenly flipped horizontally. Things on the left are now on the right, and vice versa. Unlike that annoying effect on Spear Pillar, this isn't an illusion; so if you push right on the analogue stick, you will move right.
..So what happened? It's nothing terribly magical or anything. The camera has merely moved from in front of the stage, to behind it.
Hence the only thing different, is the angle you're looking at the brawl from. It'll still be disorientating for anyone new to the stage, to suddenly find everything flipped around, but at least it isn't outright lieing to you (unlike that OTHER stage :mad:)


Hear now the Requiem of Blood
The most notable feature of this stage, is the center two sections of the bridge, which are weak from age and will collapse if enough damage is dealt to them. Essentially, a cross between Bridge of Eldin and Skyworld. If both sections are destroyed in short order (i.e. without giving them a chance to respawn, Bridge of Eldin style) the entire main platform of the stage sinks into the lake, forcing players to seek temporary refuge on the two tiny platforms either side. The main platform will eventually rise back up, fully repaired, but in the meantime players will be busy knocking eachother off the tiny platforms.
The other feature of this stage, is the various candlesticks lining the area. They don't affect anything in the match, but drop retro-hearts when struck out by an attack. Retro-hearts recover about as much health as food does if a player scarfs one down. Note that if Items are turned off, hearts will not appear out of candlesticks[/COLLAPSE]

Event Matches
[COLLAPSE="Open"]
Event Name: You're too slow!
Description:"You heard me! Betcha can't KO us all with the same picture!"
Character: Donna
Stage: Temple (melee)
Items: Smash Balls, Bunny Hood, Poison Mushroom, Bumper
This event is Donna Vs three Lv4 Sonics. Infinite stock each but 3 minute limit. Smash Balls are more frequent in this event. The aim of the event is to KO all 3 Sonics in a single Final Smash. The Sonics will just keep coming back until you KO them all with a Final Smash.

Event Name: The Slumber Party
Description:"They can't stay up all night. Make sure everyone goes to bed soon, ok?"
Character: Peach
Stage: Fountain of Dreams (melee)
Items: Smash Balls, Pokeball (Belossums only), Smoke Balls, Sandbag, Food, Gooey Bomb, Bob-omb, Ray Gun
This event is a Free-For-All involving Peach, Lv9 Donna, Lv9 Jigglypuff and Lv9 Zero-Suit-Samus. Infinite stock but 5 minute limit. The aim of this event is to have everyone else asleep at the same time.

Event Name: Defeat Airman
Description:"If I had the leaf shield I'd be just fine..."
Characters: Megaman
Stage: Bridge of Eldin (King Bulbin doesn't appear)
Items: Gooey Bomb, Starman, Mr Saturn, Food
This is a Stamina match between Megaman and an Airman(Lv8) that is 4 times its usual size. The Airman has 300% health while Megaman has 100%.

Event Name: The Mega Royale
Description:"Take that, everlasting peace!"
Characters: Wily Machine 9
Location: SmashVille (no floating platform)
Items: Bob-ombs
This is a 3 stock match between Wily Machine and a team consisting of Megaman, Protoman and Doppelori (All Lv7). Wily Machine automatically loses a stock whenever it has 250% damage or more.

Event Name: "Test of Sight"
Description: "One of these girls is not like the others. Eliminate them"
Characters: Any Female
Location: SmashVille
Items: Assist Trophy (Nintendog, Devil, Tom Nook), Pokeball (Togepi using Night Shade, Manaphy), Smoke Ball, Smash Ball.
You begin this event all alone. However, soon a new challenger appears, a carbon copy of your character, whoever she is (on Normal and Hard difficulties, two new players appear, both of whom are identical to your character). The new player(s) falls down to the stage, and innocently begins strolling back and forth across it. No one in this event will fight back, but they will do their best to avoid getting hurt.
Very soon, another new character appears; that cute, big bollocked Tanooki you see in the image up top. He's a mischievous sort, and instantly transforms into yet another carbon copy of your own character, before mimmicking the other pacifist players.
The aim of this event then, is to KO the Tanooki, but NOT any other player. This is easier said than done, as it can be easy to lose track of who your target really is. KOing the wrong target results in FAILURE.
You can potentially save yourself a whole lot of hassle by immediately grabbing the Tanooki player, then throwing them up and onto SmashVille's moving platform. Then you can jump up there yourself and beat the snot of them without the others getting in your way. Something to seriously watch out for, is Manaphy. If Manaphy swaps the Tanooki with someone else, you need to KO the Tanooki's new body. And of course, once they switch back, you go back to KOing the original body.
Also be aware that the Tanooki WILL take full advantage of any moment in the match where your vision is impaired, using the time to dash right up to the nearest other player, in order to confuse you

Event Name:Hamsterz Dood!
Description: "Persue the art of the Prinnysplosion, Dood!"
Characters: Prinny
Location: Battlefield
Items: Baseball Bat, Smash Ball
It's 500 Prinnies Vs 2 Hamsterz (1 on Easy, and 4 if playing Co-op), If you die as Prinny, another one simply spawns right in to replace it. And with 500 lives, who could possibly mess this one up?
Unfortunately, it seems as though these Hamsters are the strongest beings in all the cosmos. They are blindingly fast, absolutely tiny, have an array of quick slashing attacks that recall the feats of one "Meta-Knight". And, oh yeah, ANY attack whatsoever from a Hamster will OHKO a Prinny.
They're also pretty heavy buggers, and it pays to bear in mind that Prinnies do not have very many ways to KO. Beyond pathetic A button slashes and Down air hip drops, the only thing Prinnies can do that causes knockback, is Explode (by pressing B). And, naturally, Hamsterz will not just walk blindly into Explosion after explosion until they die. In fact, they tend to specifically take advantage of the fact that their attacks have a greater range than your explosions. So you need to either get in close yourself, or avoid the Hamster for so long that they decide to draw in closer to kill you.
Fair warning to you, Prinnies cannot use items. So all those Baseball bats? They're just there to give the Hamsterz a throwing projectile to KO you with. They can destroy Smash Balls though, so absolutely go after every Smash Ball you see. Using a Final Smash turns that Prinny into Hero Prinny, who has far more durability, and can even survive multiple attacks from a Hamster.
Incidentally, Hamsterz do have a Final Smash too; it's a simple cinematic cutscene of thousands of hamsters trampling the Prinny. It's an unavoidable KO basically.

Event Name:Return to the Beautiful Dark
Description: "The great king has returned to full power. Defeat him, Simon!"
Characters: Simon Belmont
Location: Hear now the Requiem of Blood
Items: Mushroom, Fire Flower, Starman
Your opponent for this Brawl, is none other than the king of evil himself.... Bowser. Not only is he 1.3x bigger and stronger in this event, but he's also completely invulnerable to damage and knockback (outside of throws, and explosions). You have an AI Mario on your side, though Bowser will focus exclusively on making him die as soon as possible.
Don't worry, you don't have to save Mario, or anything like that. Your goal is simply to find a way to KO the king of the koopas, twice. Simon himself only has the one stock, as does Mario, so let Mario take all the hits while you figure out how to KO Bowser.
You actually have two options here, both based directly on famous Bowser weaknesses. The first option, is to lure Bowser into hitting the weak spots on the stage with his Down-B slam. If the slam ends up breaking that section, Bowser will fall to his demise. On Hard difficulty, Bowser needs a lot more coaxing in order to make him whip out his Down-B in the right place, and is fond of directly destroying a weakened section himself in order to avoid accidentally Down-Bing it later. In contrast, on Easy, Bowser uses Down-B with a rather distressing frequency. In fact, he alternates between this and his Neutral B flames, almost exactly like in SMB3's Bowser battle.
For the second option, note that the stage has spiked bombs resting atop both of the tiny platforms (a feature exclusive to this event). They explode if anyone touches one, so the obvious idea is to hurl Bowser into the bombs. They do enough damage and knockback so that Bowser will be KO'd if you throw him into both bombs. On Easy, and sometimes on Normal, Mario likes to focus on grabs and throws. Between you and Mario's concerted efforts, throwing Bowser onto the bombs for massive damage shouldn't be too hard.

Event Name:The Enemy Shall Taunt You
Description: "Use your taunt to bring these creatures out of hiding!"
Characters: Kirby (5 stocks)
Location: N64 Green Greens
Items: Default
Whoa! You're up against a whole gaggle of Kirbies, one for each character in the game! They've been shrunk however, so KOs won't be 'too' difficult. Naturally, each Kirby wears a different Kirby Hat. These hats cannot be knocked off of Kirby, nor will they dissapear when the Kirby's Taunt.
But, here's the problem. All the Kirby's are invisible! It seems like they have cloaking devices, each and every one of them. Don't worry though, you can short-circuit the devices simply by Taunting, thus revealing your Kirbish foes and rendering them vulnerable.
However! Don't think the miniature kirby's are just going to lie down and take it. Not only will they try to interrupt you any time you taunt, but the Kirby's can raise their cloaks back up again... by Taunting.
You see where this is going, yes?
Hiiiii! Hiiiii! Hiiiii! Hiiiii!

Event Name:I Can't Reach It
Description: "These targets are making a monkey outta you!"
Characters: DK
Location: Delfino Plaza (frozen in midair)
Items: Barrels only
At first glance, it looks like a simple Break The Target stage (albeit on Delfino Plaza). The problem? You're DK, and none of the targets are within reach! Plenty of Barrels spawn to help you hit most of the targets, but that still leaves a few that'll stump you for sure. You only need to destroy 8 of the targets to win, but only by nabbing all 10 do you get the reward.
#1 High above the stage. Only reachable by smash tossing a barrel straight up
#2 Far off the right hand side of the stage. Smash toss a barrel while right at the right hand edge of the stage
#3 Slightly above #2. Smash toss a barrel while standing on the right side of the right hand platform
#4 Off the left-hand side of the stage, near the very bottom blastzone. Gently roll a barrel off the left edge
#5 Somewhat to the left of #4. gently toss a barrel off the left hand side of the stage
#6 Halfway between the left hand side of the stage, and the left blastzone. Smash toss a barrel left, while standing on the right hand platform.
#7 Right in the center of the stage, easily within reach... except it dissapears everytime DK comes anywhere near it. Roll a barrel into it from afar.
#8 Atop the highest platform, again within reach of DK. However, it dissapears whenever DK is facing it (or when he's close enough to attack it directly). DK needs to stand right where the target is, then toss a barrel straight up, then move away so that the target can reappear.
#9 Directly UNDERNEATH the main platform. This one is actually easy to get, stand over it, and use DK's Down B
#10 Similar to #1, except it's not above the stage itself, but rather off to the right. To get this one, you have to use the barrels to rack damage on yourself, and eventually launch DK up into the air, whereupon he can directly attack that target.

Event Name:Only idiots may pass
Description: "Learn how to play Brawl!"
Characters: Anyone
Location: Wifi Waiting Room
Items: None
Oh? A tutorial Event? How quaint. Too bad this is one of the latter events in the game, and you already know exactly how to play. The tutorial takes the form of the ever frustrating "I'll describe something for you to do, and you will then do it" format, and it covers everything, from movement and jumping, to how to perform every single kind of attack, to how to use every single type of item in the game (which the game will ever so helpfully spawn for you). At one point, you even have to let yourself be KO'd, by a Sandbag that somehow gains the ability to attack... but not to move. If you try to skip ahead in the tutorial at any time, or fail to do what the tutorial tells you to do, you will lose.
This is a true test of stamina. Can you survive a 20 minute tutorial?
[/COLLAPSE]

Challenges
[COLLAPSE="Open"]Challenge: "Scrooge Visits the Moon"
How to complete: Whenever Scrooge appears on the Termina Bay stage (or any stage set in Termina, for that matter... or even Luigi's Mansion), the music will be temporarily replaced. During this period of time, Star KO Scrooge
Unlocks: CD[The Moon Theme]

Challenge: "follow the rrrrrules for 2 minutes"
How to complete: Basically, have Scanty and Kneesocks appear in a match, and have no player break any rrrule until they leave 2 minutes later. AI players tend to break the rrrules frequently, so turn those off when going for this Challenge.
Unlocks: CD[I want you]

Challenge: "Anarchy is best. Break rrrrrules and get away with it..."
How to complete: Like the previous challenge have Scanty and Kneesocks appear in a match. But this time, you want to deliberately break at least two different rules, and not be punished for it until scanty and kneesocks leave. You can also simply KO the sisters outright. Easiest way to get this challenge done, is when one of the rules is "no running". Break two rules in the last 5 seconds Scanty and Kneesocks are around, and just flee
Unlocks: CD[Technodildo]

Challenge: "find the lost penguin"
How to complete: Just see Pingu in a match. Straight forward.
Unlocks: Trophy[Pingu]

Challenge: "Return the penguin to his home, dude"
How to complete: Have Pingu appear in any winter themed stage. Nope. This challenge is deliberately misleading. What you actually have to do is KO Pingu, using a certain character...
Unlocks: CD[Flying Chorus]

Challenge: "Samus and Mikuru; the once in a lifetime beam cross"
How to complete: Have Samus fire her Final Smash while Mikuru fires her beam. This is quite a nasty challenge to complete. It requires a specific Assist Trophy, while having a Final smash ready on a specific character
Unlocks: Trophy [Mikuru Beam], Golden hammer

Challenge: "Ressetti rides a Roomba/Roomba is trying really hard"
How to complete: Not exactly the easiest of challenges, you need a Roomba and Mr Ressetti to appear on the same platform. As Roomba passes Ressetti, he will put the mole onto his back, completing this challenge. Alternatively, you can complete this challenge just by having Roomba improve to its maximum capacity. It'll take a while, but it's probably better than hoping a specific Fiend and a specific Assist Trophy will appear together.
Unlocks: Trophy[Roomba], + a new submenu in the items menu that allows you to set how often each specific Assist Trophy/Fiend appears (once Roomba is fully improved, you can also use this menu to switch between this uber Roomba, and the original unimproved model)
[/COLLAPSE]

Opressor Vs Opressed Mode
[COLLAPSE="Open"]This Brawl Mode is a third team-up option during multiplayer. Compared to Free-For-All, where it's every man for himself, and Team-Brawl, where players are placed into static teams for the duration of the match, Opressor Vs Oppressed is a bit more fluid, constantly changing to match the chaotic politics of the match at hand.
(Oppressor Vs Oppressed will be referred to as OvO) The match begins with no functional difference between it and a regular Free-For-All, just go attack and KO and whatever. As blows land and winners and losers become more clear-cut, players begin glowing with newly assigned Team-colours. Three outcomes are likely from this;

  • 2v2: If players are naturally forming alliances on their own, then the match morphs into a 2v2.
  • 2v1v1: If two of the players are failing to play nice with one another, they'll end up on seperate teams. This outcome is more likely if the two uncooperative players are otherwise winning.
  • 3v1: If one player is completely dominating the match, then everyone will gang up against them.
Team Attack remains switched on in all three of these outcomes, and team arrangements can be reassigned by the game throughout the match (the match could even revert back to a FFA). Basically, the game continually assigns teams based on who actually needs the extra help. A crafty player might play 'wounded dog' in order to force other players onto his team.

While the match ultimately ends in the same way a normal match would (Stock or Time, depending on which are selected), the winner(s) are determined via points. Even in a Stock match, it doesn't matter if you survive or not, just so long as you accrue the most points.
KO opposing player: +1 point
KO opposing player who is on their last stock: +2 points
KO allied player: 0 points
Self Destruct: -1 point

There is, however, one exception to this arrangement: Coin matches. In OvO Coin Matches, coins obviously dictate the winner. However, when collecting coins in OvO, everyone on your current team receives 1/2 of the coins that you got (i.e. you collect 100 coins, you receive 100, and your teammates receive 50)
[/COLLAPSE]

Trap Battle Mode
[COLLAPSE="Open"]This new Brawl mode (selected in the same way you'd opt to play a Coin match) is very similar to any normal match. In fact, it's functionally identical in almost every way.

However, on the character select screen, players are prompted to assign "cards" to each of their three Taunt inputs. They can only select one of each card (no duplicates). It's also possible to select "Random" in order to get a randomised loadout of cards.

So, what do these cards do? In the match, when a player uses a taunt, they take out the card they assigned to that input. They then carry that card around like a throwable item. You could throw it at the foe, which usually deals 5% damage and flinching (and maybe other effects, depending on the card) destroying the card in the process, but it's usually better to throw it onto the ground, or on a wall. Like a proximity mine or gooey bomb, cards stick to the surface they're thrown onto. Each card has a different effect when placed, but almost all of them can be classified as "traps".
There are only two ways to dismantle a trap card once it has been set. First, you can KO the player who placed it. Secondly, you can place a second card nearby. Cards cannot get along with one another, and violently explode if placed in close proximity to one another. These explosions deal 18% damage and medium knockback.

Players have a highly limited supply of each card. After using one once, they won't get another of that type until their next stock.

Card Types

Blank Card
This card has absolutely no effect as a trap. It still sticks to the floor/wall when tossed, and can still detonate other traps when thrown in close proximity. Most notably, you get THREE Blank cards per stock, instead of just one. Simply taunt again after having thrown the first card, to take out the second, and then again for the third.
Bringing a Blank Card into a match gives you an edge over the other trap layers, as you have more cards to detonate other traps with.

Portable Hole
When thrown onto a surface, this card allows players to pass through the solid ground around that point. You can throw it to the ground to make a death pit, or into a wall to create a passage through to the other side. There is no visual indicator of a portable hole's existance, other than the card itself on the stage.
When thrown into a player, this card spikes them sharply

Poison Bubbles
When thrown onto a surface, bubbles begin frothing around the card. When players stand within this area, they take 4.5% passive damage per second. The thrower of the card is immune to this damage.
When thrown into a player, this card poisons them for 4 seconds.

Super Jump
When thrown onto a surface, this card propels any player who stands on it high into the air. If placed on a wall, it will still propel upwards anyone who touches the card.
When thrown into a player, this card propels them high into the air, whilst robbing them of their mid air jump.

Brick Wall
When thrown onto a surface, this card erects a chest high brick wall that impedes movement and blocks attacks. It breaks apart after taking 22% damage, but regenerates itself 14 seconds after its destruction. If thrown on a wall, the protruding brick structure can be used as a stepping stone of sorts.
When thrown into a player, this card deals somewhat sharp horizontal knockback

Reflect
When thrown onto a surface, this card erects a curved barrier that reflects projectiles and thrown objects. The direction the projectiles are reflected, is completely random. The barrier has no other physical effect on players.
When thrown into a player, this card locks that player's Special attacks for 5 seconds.

Black Hole
When thrown onto a surface, this card summons a purple swirl, which enacts a slight gravitational pull on all nearby objects and players. The thrower of this card is immune to this effect.
When thrown into a player, this card generates its gravitational pull around that player, attracting objects, projectiles and other players towards them for 7 seconds.

Teleporters
These cards come as a set, and must both be equipped to different slots. In fact it's impossible to 'just' select one or the other. When selected on the character select screen, both cards are equipped.
As one may guess, placing both these cards onstage allows players to teleport from one card to the other, by standing on either one of them.
When thrown into a player, the second teleport card automatically warps the player to where the first card was placed. The player is also stunned temporarily

Mega Mushroom
When thrown onto a surface, this card turns any nearby players into giants. This only lasts for as long as the player remains nearby, and straying too far will see the player instantly revert to normal size.
When thrown into a player, this card grants them the Giant status, acting exactly as if they collected a real mega mushroom


Poison Mushroom
Same as Mega Mushroom, albeit with a shrinking effect instead

Skate Rink
When thrown onto a surface, this card renders a small area of the stage impossible to stand on. Players simply slip from one side of the area, to the other, being incapable of stopping at all. If a player lands on the area using a stall-then-fall technique, they automatically trip upon landing.
If placed on a wall, that entire wall can no longer be used to wall cling or wall jump.
When thrown into a player, this card drastically lowers their traction for 4 seconds.
Vanish
When thrown onto a surface, this card renders players who stand on it invisible (including particle effects and HUD graphics for that player). This effect lasts until 1.3 seconds after the player steps away from the card, making it's usefulness limited.

When thrown into a player, this card renders that player invisible for 4 seconds
[/COLLAPSE]

Retraux Physics
[COLLAPSE="Open"]A subset of Brawl Physics which automatically presents itself whenever you play on one of Brawl's atrocious 8-bit stages. If the stage is going to be retro, why not force everything else to be too?
  • Appearances and Sound
    • Only the Keyframes of each player's animations will be shown. The actual attacks and such happen as normal, just with chunky jerky animations (Like Mr.G&W)
    • Character specific noises and voice clips are put through a low fidelity filter, lowering their pitch and making things sound rather grainy. Generic 8-bit sounds replace everyone's jumping, walking, skidding, dodging, and KO noises.
  • Stat kerfuffiling
    • Characters are brought closer together in terms of size and weight. Bowser will be smaller for example.
    • Similarly, movement speeds have very little variance between them. Ganondorf's walk and Sonic's dash won't be all that different.
    • Jumps too are similar across all characters. Even characters who cannot jump at all in other modes of play, are given two jumps here. Jumps in Retraux mode are fairly low, and extremely slow. Then again...
  • Physics
    • Everything is noticeably slower and more inertic than before. Rolls in particular are extremely punishable.
    • Jumps cannot be short hopped
    • Moving around in midair is much less responsive. It's Ghouls and Ghosts style jumping!
    • Shields are represented numerically, with a number between 5 and 1 appearing above the bubble shield. This represents the number of attacks the shield can absorb before breaking. This number restores itself at a rate of 1 every 4 seconds. Different characters have different amounts of shield to use (3 minimum).
    • Grabs can be blocked via shields, but take 2 off of the shield, instead of the 1 taken off via any other attack.
    • Hardcoded combo ejection routines. After suffering a certain amount of damage (exact amount varies between characters) in a short period of time (or one continuous chain of attacks), the player is knocked 1.4 stagebuilder units away from the opponent, and is given 2 seconds of mercy invulnerability. Combo ejection costs 2 shield, and thus won't occur if the player does not have at least that much shield.
    • Initial knockback on all attacks is boosted, but knockback growth is universally nerfed
    • Priority is calculated via (S*C)/T. Where S is the start lag of the attack (in frames), C is a character specific value (certain characters having higher priority than others), and T is the length of time the attack's hitbox(s) have been out. Aerial priority is calculated by C+[(S*A)/T], where A is the length of time the player has been airborne (in halfseconds). Projectile Priority is calculated by C+[(D/T)], where D is the amount of damage the projectile will deal. There are no other forms of priority, and no type of priority inherantly 'beats' another by default. Clashing can occur in midair, using the default ground clashing animations.
    • A hard limit of 3 projectiles onscreen at any one time. If another is fired before any of the others leave, this 4th projectile will move as normal, but will be translucent, and have no effect on anything whatsoever. Once one of the original projectiles leaves play, the 4th projectile pops into life, regaining its hitbox.
    • Moving around constantly for long periods of time will build up fatigue, which gradually slows the player down until they stop still to rest. Slower characters are less subsceptible to this than faster characters.
    • Higher window of opportunity for players to catch thrown items
[/COLLAPSE]

Item Spawning Mechanics: Set Seed
[COLLAPSE="Open"]Solving the random item-issue is a terrifying task in marrying two entirely different types of player together. It comes with the unfortunate implication (and bias) of changing the system radically in order to acommodate/reward the victory-driven player, whilst punishing the less skilled player who just wants to have fun. Considering the main purpose (and primary demographic) of items, making a huge change to the random system is an untennable solution.

The ultimate goal is to not change a single thing from the casual player's perspective, so that their games still play as chaotically and dynamically as they did before. A secondary goal is to make sure that the changes effected will not grant a competitive player any more of an edge in a casual match. Thirdly, the system used should be the same for both casual and competitive players alike (I.E. no "Competitive Items" Option in the menu). With these three goals in mind...

Here's how we do this. We're going to modify how the seeds (which determine exactly what "random" numbers are given whenever they're needed) are generated. Usually, a seed is generated based on things such as date/time, or length of time since powering on the device. This makes it virtually impossible to game the system into generating the same seed (and thus the same random numbers) twice in a row.
For a casual match, this is ideal, preventing the same items from spawning at the same times in two different matches. But for a more competitive mindset, not being able to replicate the specific conditions for a match is problematic, and not in keeping with the general state of 'competitiveness'.

The solution is somewhat complicated, yet ultimately is the simplest of changes.
We will change the manner in which seeds are generated, shifting it away from timer values that cannot be replicated easily, and making them reliant on match settings instead, which can be replicated easily.

The following values will be used within an equation that spits out our random seed that determines when and where items appear in a match;
1) The Stage being used for the match
2) The Time Limit of the match (if applicable)
3) The Stock Limit of the match (if applicable)
4) The "Speed Rating" of each combatant in the match. A Speed Rating is simply a value estimating how effectively each character can move from point A to point B. This value takes into account things such as teleporting abilities. Summon and Trap characters have higher Speed Ratings than they'd normally have otherwise, due to being able to control areas of the stage for themselves.

What this boils down to, is that if you play two matches on the same stage with the same characters with the same ruleset, you will get the same item spawning pattern*. Because of this, competitive players can learn the item patterns that occur in matches they're likely to end up playing, such as when the opponent counterpicks a character and a stage. However, because of the sheer number of character/stage combinations, the entire system cannot be completely learned by one person, and thus it cannot be "solved" and stale as a meta-game.

*It's important to note that items will not spawn in the EXACT same places in both matches, because the positions of the combatants is a factor in determining where the item spawns. For example, if the match is set to spawn something near the loser, then it will do so regardless of where the loser happens to be situated, just so long as there is an area nearby that supports items (i.e. a platform or some ground).

So now every single matchup/stage combination has its own set item spawns that appear to be random but really aren't. Casual players are unlikely to stumble across this, and competitive players cannot actively manipulate this to gain an unfair advantage in a casual FFA.

But we're not quite done yet, while the players can now figure out WHEN and WHERE an item appears, the item itself is still a mystery.

For the seed that determines WHAT items appear, we will use the following values in the seed equation;
1) The Stage being used for the match
2) The Time Limit of the match (if applicable)
3) The Stock Limit of the match (if applicable)
4) The "Speed Rating" of each combatant in the match.
5) The number of matches that have been played since last time the rules were altered or the player exited out to the main menu. Simply flicking one setting to a different value and then moving it back will count for this, so tournaments can reset this value without leaving the character select screen.

What this means, is that even if you play the exact same match twice, the items themselves will be different the second time. This is neccessary to prevent a casual rematch from producing the exact same items. Tournaments can decide for themselves whether or not to reset the 'No of Matches' counter after every match, or after every set of matches (i.e. "best of 3" matches).

So yeah, that's my idea. It's not very exciting to read, it doesn't change the surface gameplay at all, but it solves the problem, whilst also giving competitive players a whole new branch to their meta-games. It also happens to be simple, pragmatic and somewhat realistic.

...oh, and uh, items spawning inside of a player's attack range can be solved by... NOT spawning items inside of a player's attack range. I mean, that's kind of obvious really.[/COLLAPSE]
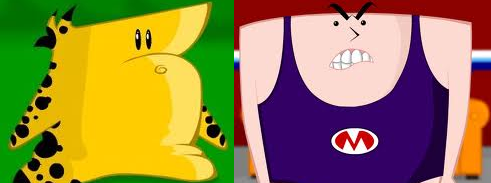
 

Junahu

Smash Ace
Joined
Nov 15, 2005
Messages
899
Location
Shropshire Slasher
Halloween starts early

Yoshika~
The Jiang Shi
This fetid lass is one of the many many "Touhou" girls, She appears in the 13th Touhou game "Ten Desires. In it, you shoot women and dodge bullets. It's exactly the kind of brainless endeavor Yoshika would approve of. Because, well, she's basically a zombie


In-Brawl
Stats and Such
As a denizen of the dead, Yoshika is in no hurry to play the rat-race of life. She 'lives' at her own pace, by which I mean she moves super slow.
But, I'm getting ahead of myself, Yoshika is a Jiang Shi, which sounds foreign and mysterious, but is pretty mundane really. The paper seal covering her face is what keeps her true powers at bay. You know those tags on mattresses you aren't supposed to remove? Yoshika's seal is like that, except a million times worse, so handle with care, ok?
Her state of decomposition is quite advanced. You might not be able to spot it at a glance, but that's because beauty is skin deep. Just trust that her insides are quite fetid, and her joints completely rigid. Bending an arm or twisting a hip are things Yoshika simply cannot do, so she gets around by hopping, with her arms stretched out ahead of her. As you might guess, this isn't very fast. Or, to put it in more quotable terms: Ganondorf can out-walk her dash-speed.
Her left/right movement in midair is better, so you'll typically find yourself hopping around by... hopping around. Her first jump can reach pretty high up on its own, which is good, because her second jump is not.
Weightwise Yoshika is a strange beast, in that she "weighs" much more while grounded, than when in midair. She also won't flinch from attacks, at all (Pain? What's that?). She also suffers less shield push when attacked while shielding. I.E. if she shields an attack, that attack won't push her backwards very far.


Grab-Game
The only game in town
Grab
Yoshika rests her hands on the foe's shoulders, gripping them tight. She then folds her arms in, wrapping the foe in a cold cadaverous embrace.
While I could just say "this is a normal grab" and leave it at that, Yoshika is something of a special case, in that landing grabs is essentially all you'll be doing as her.
Speedwise, it's actually kind of slow, with a slightly above average range. It's best to use her Grab out-of-shield, so the foe will be too preoccupied to interrupt it with their own grab.

Pummel
After getting her paws on a foe, there's only one thing on her mind; feed. She leans in and begins taking massive gouging bites out of the foe's flesh. Each deals 5% damage, and heals Yoshika for the same amount. Not only is this a monstrously strong pummel, but it's also one of the fastest, so go ahead and pummel until their blood runs cold.

Back-Throw
Hugging the foe tightly to her chest, Yoshika falls backwards and lands face up on the floor, like a vampire descending into his coffin for a nap. Both the foe and Yoshika take 7% damage from the impact. This damage can be increased however, if you use this throw from the edge of a platform, causing Yoshika to fall much farther to the ground (assuming there is ground to land on). Each stagebuilder unit of falling, adds 8% damage to the throw.
After landing on your back, Yoshika transitions into her Prone Grab-Game, though any button mashing the foe has contributed to escaping your clutches thus far will count towards escaping your Prone Grab.


Down-Throw
Yoshika's putrid form abruptly becomes formless, crumbling to the floor in a big mulchy pile of gore, which quickly burns away in a ghostly ember. The foe is free to start running away, since Yoshika no longer has them grabbed.
But this is a mere illusion of freedom, because 3 seconds later, those ghostly embers reappear under the foe's feet, and Yoshika erupts out of the flames, completely reassembled. The foe cannot outrun this, and as the asian vampire appears, her body deals 12% damage and vertical knockback that KOs from 80%.
Of course, the foe can still shield or spotdodge to avoid the actual attack.


Up-Throw
The ethereal corpse grips the foe nice and tight. With a supernatural aura, Yoshika begins to hover upwards, and will do so until either the player cancels the throw (with Shield), or the foe escapes (with quadruple the difficulty of escaping a typical grab). If the foe isn't careful, they could find themselves being spirited away off the top of the screen. Of course, Yoshika perishes too, but she's not too fussed about that.
If the foe does escape, they drop out of Yoshika's clutches, and fall helplessly for 1.4 seconds.


Forward-Throw
Still holding the foe, Yoshika's arms detach at the shoulders. Floating with ghostly power, they begin spinning the opponent around and around, like a meat grinder. After 5 drilling hits of 3% damage, a sickening 'crack' signals the final hit, which hurls foes forward at a velocity that would KO from 135%.
During this, Yoshika herself can hop around and reposition herself, though she'll still have to wait until her arms float back to their rightful places before she can consider doing anything else.


Prone-Game

Prone Attack
While she lies on the floor, Yoshika's arms flail about, attempting to grab the foe. This grab has excellent vertical range (considering she's lieing face up on the ground). And, of course, since she doesn't flinch when attacked, she can safely grab a foe, even after they've hit her with an aerial.
Since grabbing the foe in prone means she doesnt have to concentrate so much on keeping herself upright, this grab keeps the foe held for 1.5x as long as usual.

Prone Pummel
Munch! With the foe laying on top of her, how could Yoshika NOT think about eating them? 5% per pummel, with the rotten girl healing that much back herself.

Prone Down-Throw
Yoshika sinks back into the earth from whence she came. But she's not going alone! The foe can still escape from this 3.4 second long throw, but if they don't, they'll be completely buried below the stage's surface. With a sickeningly wet cracking noise, Yoshika reamerges from the sod, alone.
Shortly thereafter, a cute ghostly form of the foe, rises from the grave, and ascends up off the top of the screen (signifying that, yes, they have been KO'd).
If used on thin platforms, the foe will not be buried, but rather hurled out of the bottom of the platform. It's just as deadly, since the foe falls helplessly, unable to recover.

Prone Forward-Throw
Rise and shine! Yoshika rises up into her standing position, transitioning the foe into her standing grab. Don't ask me how she manages to stand up without moving or bending her limbs. It's magic. Creepy magic.

Prone Backward-Throw
Holding the foe straight up, Yoshika wheels her arms backwards, suplexing the foe into the ground behind her head. This pitfalls the foe and deals 10% damage, giving Yoshika enough time to rise from prone.

Prone Upward-Throw
For almost not reason whatsoever, our deceased little girl bursts into flames, dealing 14% damage every second to both her and her grabbed opponent (and anyone else nearby), until 1.2 seconds after they escape from the grab.
Don't worry. Yoshika may be a bit singed, but that's nothing a bite to eat won't fix.


Ground-Game

Jab
Yoshika draws her stiff arms inwards, grabbing foes standing close to her. And by close, I mean reeeeally close. This grab, while one of the fastest in the whole game, relies on the foe being a lot closer to you than they'd ever want to be. Take advantage of Yoshika's general flinch armor and bizarre movement to get in close to the foe when they aren't expecting it.

Forward-Tilt
Rearing back as far as her rigid spine will permit, Yoshika throws her arms forward in a grab attempt that slightly beats out King Dedede's for range. It is, of course, somewhat slow. But then again so is her actual ground-grab.

Upward-Tilt
Angling her arms up at a 60 degree angle in order to perform an anti-air grab, that is what Yoshika does for her Upward Tilt. It has a generally average amount of lag for a grab, though you won't be grabbing any grounded foes with this (and shame on you for being dumb enough to try).
If you grab-release the foe out of an Upward Tilt, the foe will always be released into the air.

Downward-Tilt
For her crouch, Yoshika's torso bends 60 degrees forwards, which looks both creepy and unnatural. More importantly, her dangling arms now reach towards the ground.
Upon inputting a Down Tilt, Yoshika swiftly clutches at any foe down there. It can grab foes out of prone, foes who are rolling, and foes who are crouching (Along with foes who have been shrunk via a Poison Mushroom), but it won't grab much else.

Forward-Smash
A surge of ghostly qi overtakes her arms, ripping them out of their sockets and launching them 1.2 stagbuilder units forward. If the wreched hands collide with a foe, they'll snatch them up and drag them back to Yoshika over the next 1.5 seconds. The arms then reattach, transferring the foe into Yoshika's regular grab-game. If you miss, then you'll still need to let the arms return to you.
During your arms' round trip, Yoshika herself can move around (though obviously cannot perform any arm based attacks). Use this to drag the foe to a more... suitable location.

Downward-Smash
Again the forces of life-energy rip Yoshika's arms away from her, this time launching straight into the ground in front of her. Using some arcane art, the arms disappear into the ground.
Almost immediately, the two arms resurface 2 stagebuilder units ahead of Yoshika (or closer, if the attack was charged up), and grope around for any foes standing nearby. If they find someone, they'll grab their legs, immobolising them for as long as a standard grab (2x as long if the smash was fully charged). If they find nothing, they'll slink back into the ground and return to Yoshika.
Just like with her Forward Smash, Yoshika is free to approach the foe while her arms are busy fondling them.

Upward-Smash (As previous seen in: a better undead moveset)
With a wretched snapping sound, Yoshika's entire torso tears away from her legs and begins hovering in midair. The height she floats depends on how long this smash was charged (up to 2.3 stagebuilder units in the air).
While her Torso and legs have seperated, they are still connected via Qi energy. This allows her to move around and attack like she was on the ground, but while having her actual torso in midair.
This bizarre state of being lasts until either she crouches for 0.7 seconds, reuses her Up Smash, or she manages to grab a foe. When any of these events occur, her Torso elastically snaps back down and reattaches itself to her legs

Incidentally, even Yoshika's Up Smash has a grab-box. She'll automatically snatch up any foe her torso collides while flying upwards.


Aerial-Grab-Game

Aerial Grab
(That's "Z-air" for all you Brawlers out there) Following on from her Smash Attacks, Yoshika again uses the disgusting power of qi to launch her arms away from her. It's a little less dramatic this time, with the arms popping off with little resistance and drifting slowly towards the nearest foe. After travelling 1.8 stagebuilder units in any direction (which takes roughly 2.3 seconds), the arms about-face and swiftly fly back to Yoshika. The arms also fly back if they've managed to grab a foe.
Yoshika herself is free to move around and attack while her arms are off doing their thing, though her options are kind of limited when she's missing two of her limbs.

If you grab a foe with an aerial based grab, it will only be 0.75x as strong as her grounded grabs are. Also, while grabbed, both Yoshika and company will continue falling to the ground. And when they land, both parties will take 4% damage for every stagebuilder unit they fell. The foe is also slammed off the floor with enough force to KO vertically from 130% (noticeably less if you slammed them into the ground from higher up)

Aerial Pummel
It's time for an in-flight snack, the foe's flesh! As always, this deals 5% damage, and heals Yoshika for the same amount. Though the fact you're in midair, and falling fast, means you probably won't get too many bites in.

Aerial Forward Throw
Qi power coalesces on everyone's favourite decaying loli, resulting in an explosion that deals 18% damage and horizontal semi-spike knockback that KOs from 140%. Yoshika is not immune to this explosion, and indeed takes the full brunt of it too, sending her and her opponent flying away from one another.

Aerial Backward Throw
Yoshika's torso bends backwards by a sharp 90 degrees. At the end of this creepy looking bend, she hurls the foe down behind her with moderate knockback and 9% damage. If Yoshika lands during this throw, she suplexes the foe into the ground behind her, pitfalling them. It's all kinds of satisfying to leap into the air, grab the foe, then suplex them into the floor.

Aerial Downward Throw
Yoshika's arms awkwardly arc downwards, hurling the foe into the ground below. The foe takes 10% damage and average downwards knockback, potentially proning them, if they were thrown while close enough to the floor. You could potentially use this off stage to throw the foe to their doom, but that's not exactly reccommended.

Aerial Upward Throw
A simple utility throw, that ironically does not throw the foe at all. Instead, Yoshika holds them above her head, until the foe escapes, or they both land on the floor.
If they land, the foe is not slammed away as they normally would be, but is rather transitioned into Yoshika's ground grab-game.
Yoshika still takes damage from the fall however, while the foe remains relatively unharmed.


Aerial-Game

Neutral Aerial
Yoshika splays her arms and legs out as if performing a frog splash, then wraps them around any foe who touches her. This aerial lingers for a while, and has some terrible landing lag, so try to save this until you're absolutely sure you have a chance to smother the foe.
Admittedly it looks kind of hilarious to hop around the stage, performing frog splashes. If she wasn't so dead, it'd be cute.

Forward Aerial
The corpse child, with no hint of irony, reaches out and tries to grab any foe directly in front of her. Due to her general rigid stance, approaching with a Forward Aerial is not reccommended, as it is easily ducked/avoided. And if you thought you could counter the foe knocking you into the air by grabbing them with her forward aerial.. you'll be dissapointed.
Still, it's a relatively fast grab, so it finds use in snatching foes out of midair

Backward Aerial
Yoshika sharply arcs her spine 90 degrees backward, in an awkward and painful looking motion. It's as if she wanted to have a lie down in mid-air. How queer.
She also reaches out behind her (technically above her head, but since her torso is rotated 90 degrees...) in an attempt to grab the foe.
Due to the bizarre posture of this grab, it reaches quite far behind Yoshika, though it is somewhat laggy to actually come out, again due to the posture.
If she lands during this aerial, she is caught offbalance and falls into prone. She does so pretty quickly, so this aerial does find a niche use in deliberately getting Yoshika into prone.

Upward Aerial
Yoshika thrusts her arms into the air, then sweeps them in a downward arc, ending with her arms pointing straight ahead. If the foe is caught in this attack at any point, Yoshika grabs the foe (like you were expecting something else).
While a nice broad grab, that covers a wide area, its pretty easy to see coming, especially if you're trying to grab anyone who isn't directly above you.
If she lands during this attack, Yoshika will continue the move during her landing lag, which can come in handy when trying to hop in and approach from mid-range.

Downward Aerial (Third most common Junahu Aerial)
The only attack in her arsenal that doesn't involve grabbing with her hands, this attack involves... grabbing with her legs.
Her legs part slightly for 0.4 seconds. If she falls onto a foe in this time, she'll hitch a ride on their shoulders and lock their head in between her vice like legs. The foe is free to move around and attack, though their fall speed is increased due to the extra weight of carrying around a little dead girl. Neither the foe, nor Yoshika, can hit the other player until the foe escapes from the grab (or Yoshika releases the foe by jumping).
This grab is relatively hard to land, though you'll generally be relying on it whenever your hands are off doing something else.


Specials

Neutral Special:- Yin Wisp
Chuckling to herself, Yoshika releases some of her Qi in the form of a ghostly hand that floats around in mid-air. It wanders constantly, but generally moves towards the nearest foe, at a speed of 0.4 stagebuilder units per second. Yoshika can have up to 5 of these wisps out at once, and trying to summon another after that point will erase the oldest one still out.

Its homing pattern has a wide turning circle. And the wisps are generally adverse to staying too close to the ground, which is odd, since they can travel through it just fine. They prefer to strike from above or behind, so expect to see them floating around above the foe, rather than in front of them.
Hands are immune to all attacks, and are more or less transcendant in terms of priority. They have no effect on enemy projectiles either (and vice versa)

If a hand touches a foe, it'll latch on, immobilising and holding them in place until they escape from the hold (with 0.4x the difficulty of escaping a normal grab). Other hands in the area can, and will, latch on and extend how long the foe will be trapped for. In fact, when a foe has been grabbed by one hand, all the other ghostly hands will head straight towards that foe, at a speed of 0.6 stagebuilder units per second.
In addition, Yoshika herself can grab the foe during all this ghostly hand groping, and the hands will help keep the foe in her clutches while she dines on them.
Once the foe escapes from a hand's grasp, that hand is destroyed.

Side Special:- Yan Wisp
Very, eerily, similar to the Yin Wisp. Yoshika produces a ghostly red hand that tracks the foe, at a rate of 0.2 stagebuilder units per second. Unlike Yin Wisps, the Yan wisp takes no detours, so the foe will mostly be dealing with it on the ground, as opposed to the Yin Wisps, which prefer to attack from the air.
Yoshika can only ever have one of these wisps out at any given time, and reusing this Special will dispel the current wisp.

Once the Yan Wisp has finally found its mark, it will drag the foe through itself, turning the wisp inside out to form a brief portal that teleports the foe straight to Yoshika herself. The foe is deposited directly in front of Yoshika, with a little hitstun to boot, making grabbing that foe a piece of cake.
So basically, if the foe won't let you come to them, use the Yan Wisp to bring the foe to you.

Up Special:- Cartilage Tether
Angling her arms up at a 45 degree angle, Yoshika then elastically stretches them outwards as a tether that reaches up to 1.8 stagebuilder units away. With all the snapped tendons and torn skin, it's little wonder that this Special suffers from some start lag. If you're in a situation where you need to actually recover with this, you've already lost. Don't let the foe knock you offstage, that's the lesson here kids!

But you can still use this Special as a ranged grab, as her arms will snag airborne foes and drag them right back down to you. The grab only has 0.5x the strength of a normal grab, so don't expect to get much mileage out of it.

Down Special:- Qi Counter
Yoshika, for the briefest of moments, glows with that oh so familiar blue aura that Qi energy is made from. During this time, Yoshika will counter attacks and grabs by grabbing the offending foe. The actual grab of the grab counter has a limited range, so a lot of foes can simply poke at Yoshika and avoid the counter grab.

While you can just use Qi Counter as a counter against grab happy foes, it does have an additional effect.
When used, Qi Counter will signal any Yin/Yan Wisps that are out, to start homing in on Yoshika instead of the foe. They'll still attempt to grab foes if they stray close enough, but the wisps will primarily concentrate on getting closer to their master. If you use Qi Counter a second time, you'll dispel this command, and the wisps will return to their normal behaviour.

Final Smash
huh? She can get these?
Rigid Paradise
As something of a mercy to a girl without hitboxes, Yoshika can actually acquire Final Smashes in ordinary fights. All, that needs to happen, is for the foe to accidentally destroy the spell tag that limits her power. It's affixed to her forehead, so only aerial attacks from above her will strike the tag normally. When crouching, any attack hitting Yoshika from the front will damage the tag. Note that any attack that hits the tag, still deals damage and knockback to Yoshika.
In order to destroy the seal on Yoshika, 40% damage must be dealt to it. Losing a stock resets this count, so it's not something you can build up over the course of a match.

But let's say you do go through the trouble of unleashing Yoshika's true power;
Gravestones begin popping up all over the stage, as a thick mist coats the floor (the number of graves differs with the size of the stage). The gravestones crop up in random spots, and deal 7% damage plus light vertical knockback on contact with the foe. But that's not really why they're there. They've appeared to mark the final resting places of Brawlers at peace.

Once erected, any foe that stands in front of a gravestone, will find themselves assaulted by the ghastly hands of the undead. These rotten arms burst up out of the ground and hold the foe in place, along with dealing 8% damage per second to them.
Counter-intuitively, foes can only rid the stage of these "dead"ly traps by destroying the gravestones themselves. 50% to one will reduce it to rubble. Since the gravestones won't disappear over time, the foe's only recourse is to destroy them, and Yoshika will certainly be wanting to capitalise on that fact.

Playstyle Section
Duuuuuuh, eat brains, get KOs
It's a moveset comprised completely of grabs. Just say that aloud and you'll realise what kind of issues Yoshika will be facing in matches. They're compounded twenty fold by her limited ability to move, yet alleviated somewhat by her thick skin and ability to gain Final Smashes.
Playing as Yoshika couldn't possibly be simpler; grab the foe, munch on them, grab the foe, munch on them. Keep going until one of her KOing throws comes into play. Every grab has its own utility, which helps reduce what the foe can do to stay safe.
It's almost like Junahu deliberately made the zombie like Yoshika have a brainless playstyle :bee: (2/10; Worse than Airman)

For the more discerning player, which for some reason is pretty much everyone reading this, the Yin and Yan wisps play a huge role in locking down the foe, aiding approaches, and even setting up potential grab combos (not chain grabs, because that implies spamming the same grab over and over). It should be noted that wisps can grab foes while they're still flinching from knockback, which basically means you can toss a foe into a wispy hand, which holds the foe while you catch up and grab them again.

And Yoshika's defenses should never be underestimated, as they make her a real threat, a determinator that just won't ever quit.
The destructable spell tag that triggers her final smash, forces foes to be mindful of how they attack her. While standing straight, aerials will hit her tag. While "crouching", ground attacks will hit her tag. When in prone, any attack hitting her head first will hit her tag. It's a simple system, but an effective one.
Yoshika can also counter grabs, and of course cannot flinch whatsoever, both gigantic boons for someone who spends most of her day chasing meat.
 

Katapultar

Smash Lord
Joined
Nov 24, 2008
Messages
1,284
Location
Australia
[collapse="Yoshika"]I don't think we've had a set this dedicated to grabbing for a while, and though a lot of inputs are dedicated to being able to grab from better angles it does create a sense of mindless dedication for a ghost who only wants to feast on the foe, showing that sometimes less is better with certain characters. Combined with the fact that Yoshika can't flinch and hops along the ground at a disturbingly slow pace, and you've done a pretty good job setting up the character. Junahu doing Pummel KOs at all in the set is of slight surprise given it goes against one of his philosophies, but there is indeed a sense of terror for the foe and satisfaction for the player that can be found in such despite not knocking foes away normally (or getting the satisfaction from knocking them away as such), but Pummel KOs don't exist in Brawl so we can't really relate to them in practice, only theory. I personally enjoy Pummel KOs for the atmosphere they add onto characters, and I do believe you've structured this character quite well. Add that touch to the Final Smash at the end and one realizes they have a -lot- more to worry about, especially when the tag's destruction would come out of nowhere in a real fight - just when things couldn't get better. I'm glad the Final Smash is well-balanced too, contributing to Yoshika's playstyle as well as letting her deal the finishing blow instead of letting the Final Smash do so. I could imagine a cocky player deliberately destroying the tag just to activate the Final Smash for more of a challenge if Yoshika isn't fighting to their fancy.

My only minor qualms rest with how disturbingly effective the red hand is at grabbing foes compared to the rest of Yoshika's methods of grabbing, completely invalidating her need to approach as well as the unfair fact that said hand can't be destroyed so foes might as well consider themselves grabbed already. While you could have the hand be destroyed by attacks I doubt you'd do that given you'd want these hands to remain ghostly and intangible. Instead, perhaps you could make the mechanics surrounding the hand a bit more advanced? How about making it so the hand continues to travel past foes upon missing? You could even have the hand make a sharp turn towards that same foe in order to grab them again before disappearing for good so Yoshika can "pressure" them (a rather taboo thing in this set, now that I think of it), but then again that seems too intelligent of a method. Regardless I don't like the idea of this one red hand doing all the work for you, and it seems overpowered when not much detail is given about how is disappears.

Nonetheless, a pretty good experiment and my favorite of your stuff this contest thus far...[/collapse]
 

emergency

Smash Journeyman
Joined
Dec 7, 2008
Messages
251
Location
Junahu's Box


This set has been in the progress of being made ever since I made Yukari, and I just couldn't keep up with the demand and died in the process of making this set. The ideas would predated of things now in creation, but keep in mind that the core of this set was made around MYM7. I'm sorry if it isn't in the standard of today's making. But I grabbed a hand and babysat me for ages and ages. And this is what we've come up with! Scroll slowly! Every detail counts!


Junahu and Merge


Hey look, it's that guy!
*
*
*
*
*
*
*
*
*
*
*
*
*
*
1 Day JOJO SET!! = Dio Brando!
*

*
Dio Brando is A big bad from the Jojo's Bizzare Adventure anime/manga series, and is pretty much made of WIN. Internet memes were made because of him, paticuarlly ZA WARUDO, which means The World (I learnt that from Khold's Anon set by the way). Because of that, I decided to read the manga, AND, make a moveset for him. Don't know why nobody else has done that yet. If you want more information on this epic character and his backstory, look on his wikia page, which is linked in the image of him.*


Dio Brando is A big bad from the Jojo's Bizzare Adventure anime/manga series, and is pretty much made of WIN. Internet memes were made because of him, paticuarlly ZA WARUDO, which means The World (I learnt that from Khold's Anon set by the way). Because of that, I decided to read the manga, AND, make a moveset for him. Don't know why nobody else has done that yet. If you want more information on this epic character and his backstory, look on his wikia page, which is linked in the image of him.


Dio Brando is A big bad from the Jojo's Bizzare Adventure anime/manga series, and is pretty much made of WIN. Internet memes were made because of him, paticuarlly ZA WARUDO, which means The World (I learnt that from Khold's Anon set by the way). Because of that, I decided to read the manga, AND, make a moveset for him. Don't know why nobody else has done that yet. If you want more information on this epic character and his backstory, look on his wikia page, which is linked in the image of him.


Dio Brando is A big bad from the Jojo's Bizzare Adventure anime/manga series, and is pretty much made of WIN. Internet memes were made because of him, paticuarlly ZA WARUDO, which means The World (I learnt that from Khold's Anon set by the way). Because of that, I decided to read the manga, AND, make a moveset for him. Don't know why nobody else has done that yet. If you want more information on this epic character and his backstory, look on his wikia page, which is linked in the image of him.


Dio Brando is A big bad from the Jojo's Bizzare Adventure anime/manga series, and is pretty much made of WIN. Internet memes were made because of him, paticuarlly ZA WARUDO, which means The World (I learnt that from Khold's Anon set by the way). Because of that, I decided to read the manga, AND, make a moveset for him. Don't know why nobody else has done that yet. If you want more information on this epic character and his backstory, look on his wikia page, which is linked in the image of him.

: "All I do is win, win, win, no matter what..."


*
*
*
*


W A I T *
A *
S E C O N D


*


*
*
*
: "That ain't Falco..." Also, spell my name right...
*
*
*
**
*
*
*
*
*


*
*
Junahu and Merge


Young Xehanort


One of the main antagonists of the Kingdom Hearts franchise, introduced in Dream Drop Distance but having appeared beforehand in Birth By Sleep as a (very difficult) secret boss under the name of Mysterious Figure. Originally but a teenager with dreams in his heart, he was approached by the Heartless of his older self and gLorem ipsum dolor sit amet, consectetuer adipiscing elit. Aliquam nisi lorem, pulvinar id, commodo feugiat, vehicula et, mauris. Aliquam mattis porta urna. Maecenas dui neque, rhoncus sed, vehicula vitae, auctor at, nisi. Aenean id massa ut lacus molestie porta. Curabitur sit amet quam id libero suscipit venenatis.Lorem ipsum dolor sit amet.Consectetuer adipiscing elit.Nam at tortor quis ipsum tempor aliquet.


*** sociis natoque penatibus et magnis dis parturient montes, nascetur ridiculus mus. Suspendisse sed ligula. Sed volutpat odio non turpis gravida luctus. Praesent elit pede, iaculis facilisis, vehicula mattis, tempus non, arcu.Donec placerat mauris commodo dolor. Nulla tincidunt. Nulla vitae augue.Suspendisse ac pede. Cras tincidunt pretium felis. *** sociis natoque penatibus et magnis dis parturient montes, nascetur ridiculus mus. Pellentesque porttitor mi id felis. Maecenas nec*
augue. Praesent a quam pretium leo congue accumsan.Lorem ipsum dolor sit amet, consectetuer adipiscing elit. Aliquam nisi lorem, pulvinar id, commodo feugiat, vehicula et, mauris. Aliquam mattis porta urna. Maecenas dui neque, rhoncus sed, vehicula vitae, auctor at, nisi. Aenean id massa ut lacus molestie porta. Curabitur sit amet quam id libero suscipit venenatis.Lorem ipsum dolor sit amet.Consectetuer adipiscing elit.Nam at tortor quis ipsum tempor aliquet.*** sociis natoque peatibus et magnis dis parturient montes, nascetur ridiculus mus. Suspendisse sed ligula. Sed volutpat odio non turpis gravida luctus. Praesent elit pede, iaculis facilisis, vehicula mattis, tempus non, arcu.Donec placerat mauris commodo dolor. Nulla tincidunt. Nulla vitae augue.Suspendisse ac pede. Cras tincidunt pretium felis. *** sociis natoque penatibus et magnis dis parturient montes, nascetur ridiculus mus. Pellentesque porttitor mi id felis. Maecenas nec augue.*


Praesent a quam pretium leo congue accumsan.Lorem ipsum dolor sit amet, consectetuer adipiscing elit. Aliquam nisi lorem, pulvinar id, commodo feugiat, vehicula et, mauris. Aliquam mattis porta urna. Maecenas dui neque, rhoncus sed, vehicula vitae, auctor at, nisi. Aenean id massa ut lacus molestie porta. Curabitur sit amet quam id libero suscipit venenatis.Lorem ipsum dolor sit amet.Consectetuer adipiscing elit.Nam at tortor quis ipsum tempor aliquet.*** sociis natoque penatibus et magnis dis parturient montes, nascetur ridiculus mus. Suspendisse sed ligula. Sed volutpat odio non turpis gravida luctus. Praesent elit pede, iaculis facilisis, vehicula mattis, tempus non, arcu.Donec placerat mauris commodo dolor. Nulla tincidunt. Nulla vitae augue.Suspendisse ac pede. Cras tincidnt pretium felis. *** sociis natoque penatibus et magnis dis parturient montes, nascetur ridiculus mus. Pellentesque porttitor mi id felis. Maecenas nec augue. Praesent a quam pretium leo congue accumsan.​


OKAY FOR REALZ NOW.*
NO*
MORE*
WASTING*
TIME.


LETS GROOVE. FT SNOOOP DOGG LION


Introduction dedicated to the most hilarious MYMers in history. Tirkaro and TheSundanceKid


Suddenly...


A flock of silver, maid of time, and guardian of the Scarlet Devil Mansion...
Sakuya Izayoi joins the Brawl!


Within the Dread Mansion of the Scarlet Devil, where men fear to tread, resides a human servant by the name of Sakuya Izakoi. While working under the infamous vampire Remilia would be beyond most people, Sakuya is no normal maid. She is possessed of the power over Space and Time (the latter in particular) which allows her to keep pace with her master's demands. These powers, along with a seemingly never ending supply of throwing knives, ensure Sakuya will be more than a match for the Brawl fighters...
Stats:
Size
▫▫▫▫▫▫▫▫▫▫
Not a waif, yet not a collossus, Sakuya is somewhat on par with small adults. She is a maturing girl after all.

Weight
▫▫▫▫▫▫▫▫▫▫
Just the right balance between flab and fab. She is stoic enough to resist a blow, but nimble enough to dodge one too.

Jump
▫▫▫▫▫▫▫▫▫▫
Strictly adequate, Sakuya's first jump is somewhat favored over her second, though not by much.

Float
▫▫▫▫▫▫▫▫▫▫
Sakuya's skirt catches air as she descends, billowing out and slowing her fall.

Dash
▫▫▫▫▫▫▫▫▫▫
Hers is a fairly mundane dash speed, Sakuya focuses more on having decent traction.


Shield Mechanic:
Whenever Sakuya's bubble shield is broken, a short ranged wave emits from her. Anyone particularly closeby (and not dodging or invincible) when this happens will be frozen in time for 2.4 seconds. The foe will be unable to move, unable to attack.. they won't even be capable of receiving damage or knockback due to their temporary temporal purgatory.
Sakuya herself only suffers 0.7 seconds of stun after suffering a shield break, and isn't knocked to the ground from the shield break itself.
However, after breaking her shield, Sakuya's shield will not begin to grow back for the next 5 seconds. Trying to shield before it starts growing back, results in absolutely nothing happening.

Because deliberately breaking her shield has its advantages, Sakuya players are encouraged to play her dangerously, keeping her shield close to its breaking point at much as possible.​


▫▪▫▪▫▫▪▫▪▫▫▪▫▪▫▫▪▫▪▫▫▪▫▪▫▫▪▫▪▫


Sakuya almost inperceptively draws breath, preparing for the move to come. This "attack" ends as soon as it begins, and the only lag involved, is the lag of the player pressing this input.
Obviously, that's not all this attack is about, otherwise it'd be a pretty boring move.

▫▪▫▪▫▫▪▫▪▫▫▪▫▪▫▫▪▫▪▫▫▪▫▪▫▫▪▫▪▫

What you do in the following 0.5 seconds after using this input is vital, as it will alter the outcome of this special in some deliciously awesome ways.
But, the gist of it is as follows;
0.5 seconds after using the input, Sakuya will create a doppelganger of herself (from a different timeline) that will continue her current action briefly. Afterwards, it will just laze around in place for 3 seconds, during which time Sakuya cannot use Misdirection again.
If the doppelganger falls offstage, or is struck by an enemy attack, they vanish. If this happens, the 3 second cooldown period does not apply, and Sakuya will be free to use Misdirection again at any time.

When used on the ground, Sakuya steps backwards to create room for the doppelganger, in the air, she leaps up the height of her mid-air jump. Doppelgangers can attack, if that's what Sakuya was doing at the time.

Doppelgangers have a blue tint to them and are slightly translucent, making them easy to tell apart from the real thing. So don't go thinking you can use these duplicate Sakuyas for mindgames.​

▫▪▫▪▫▫▪▫▪▫▫▪▫▪▫▫▪▫▪▫▫▪▫▪▫▫▪▫▪▫
Alright, so what can you make a Doppelganger do precisely?
First of all, let's say that Sakuya managed to get hit in that short timeframe, and is now flying away with knockback. Oh no!

But that's okay, once Misdirection activates, Sakuya leaps up out of the knockback, leaving her [doppelganger behind to continue taking it for her. Yup, she cancels herself out of knockback, and dumps that responsibility on a duplicate. What a jerk...

Be careful though, as Sakuya is vulnerable during her little vertical hop. You could end up being combo'd by an observant foe, and that's not fun at all.

Okay, once we've graduated from getting smacked in the face, and have managed to use this special without being hit, you might just stand still and do nothing. This is dumb, and you just wasted a whole doppelganger on standing around. But if you're smarter, you'll have shielded instead, and created a Doppelganger that sits in place, burning through its own shield. You can naturally use this to block attacks whilst throwing out your own counterattack symultaneously.

If you decided to start dashing towards a foe after activating Misdirection Sakuya will create a doppelganger that rushes straight towards the foe (jumping if need be). After passing the foe harmlessly, the doppelganger just sits around, twiddling their thumbs. Likewise, you could run away from foes instead, to create a doppelganger that spends its lifetime retreating to the furthest annals of the stage.

You could also try rolling, in which case your doppelganger will perform the rest of the roll for you, while Sakuya cancels out of it. It's a cool trick for baiting out attacks from the foe.

Creating a doppelganger when Sakuya is moving through the air, results in one that will simply continue in that direction for as long as it possibly can. Once it hits the ground, it'll stop still and do nothing. Great.

And, of course, if you ATTACK after using Misdirection, Sakuya will create a doppelganger that performs the rest of that attack while Sakuya herself is free to do something else (like perform another attack). After its attack though it'll, you guessed it, stand around and do nothing for 3 seconds.
▫▪▫▪▫▫▪▫▪▫▫▪▫▪▫▫▪▫▪▫▫▪▫▪▫▫▪▫▪▫

Sadly, Sakuya cannot use Misdirection again until the Doppelganger she has, disappears. But, that doesn't mean you shouldn't try pressing this input again anyway. Because if you do, Sakuya and the Doppelganger will trade places using the ancient art of the teleport! This action is relatively quick to perform, and can be done even if the Doppelganger was still in the middle of doing something. Marvelous!

It bears mentioning, that once you swap places with a Doppelganger, you can't swap again with that particular Doppelganger.​
▬▬▬▬▬▬▬▬▬▬▬▬▫◘□◘□■▫▫■□◘□◘▫□◘□◘□▫◘□◘□■▫▫◘□◘□■▫▫◘□◘□■▫▬▬▬▬▬▬▬▬▬▬▬▬


▫▪▫▪▫▫▪▫▪▫▫▪▫▪▫▫▪▫▪▫▫▪▫▪▫▫▪▫▪▫

With a flicker and a twinkle and a cloud of buttery petals, Sakuya vanishes into the gap between spaces. Without delay, she reappears elsewhere, ready to continue kicking butt.
Heck, you can use this Special even while doing some other attack, and she'll warp and attack at the same time. Now that's flexible!​

▫▪▫▪▫▫▪▫▪▫▫▪▫▪▫▫▪▫▪▫▫▪▫▪▫▫▪▫▪▫

Okay, but exactly where does she warp?
In a technical sense, she warps to the past, teleporting to where she used to be a few seconds ago. But that's only the simplest way of putting it. The exact position Sakuya will warp herself to, is marked by a small bell, that is attached to her via a ribbon which is 3 stagebuilder units long.

When Sakuya moves around, running, jumping or whatnot, a flowing length of ribbon behind her, traces her movements, essentially showing exactly where she's been. The ribbon is only 3 stagebuilder units in length altogether, so the bell at its end can never be further from Sakuya than that. This means, quite obviously, that Sakuya can only teleport up to that distance, and no further.​
Be warned, however, that the foe can knock Sakuya's bell around with attacks, to mess with where she can Time Anchor to. You can do so too, by-the-way, in case you wanted to knock both the bell and the foe in one direction, then use this Special to warp after them.

▫▪▫▪▫▫▪▫▪▫▫▪▫▪▫▫▪▫▪▫▫▪▫▪▫▫▪▫▪▫


To further complicate matters, if the player holds the B button while Sakuya warps to the bell, she "slingshots" past it, giving her additional momentum once she reappears. Basically, when used in this manner, the ribbon could be considered like a Belay, "catapulting" Sakuya in the direction she warped. The extra momentum gained is fairly mundane, but it's enough to facilitate recoveries offstage.

Being able to warp back to where you used to be, is obviously useful, and being able to attack as you warp is even more so. You can pressure, follow-up, set up and even escape using the flexible power of Time Anchor. And I believe we can all imagine how useful this can be as a recovery, not only for when Sakuya's in trouble, but also for when you leap off-stage to finish off a recovering opponent.

Once you do use Time Anchor, there is a 2 second cooldown period before Sakuya can use it again. Though you wouldn't find much use in performing it again right away anyway, since the bell you'd warp to, would be right where you're standing now.

Incidentally, if Sakuya is in midair, she can only perform this Special once, then she'll need to touch solid ground again.

▬▬▬▬▬▬▬▬▬▬▬▬▫◘□◘□■▫▫■□◘□◘▫□◘□◘□▫◘□◘□■▫▫◘□◘□■▫▫◘□◘□■▫▬▬▬▬▬▬▬▬▬▬▬▬


▫▪▫▪▫▫▪▫▪▫▫▪▫▪▫▫▪▫▪▫▫▪▫▪▫▫▪▫▪▫

Sakuya sets to work creating a space/time distortion, a circular area not unlike the Negative Zone, wherein time flows a little differently than normal...​
▫▪▫▪▫▫▪▫▪▫▫▪▫▪▫▫▪▫▪▫▫▪▫▪▫▫▪▫▪▫
Sakuya fingers the pocket watch adorning her waist with one hand, while the other swiftly draws out the shape of a circle all around her. This creates a holographic aqua clock-face around Sakuya. Sakuya continues to focus power on her watch, expanding the size of this "Luna Dial", until the player taps left/right, down, or waits until the attack is charged to its full size. You could, if you found time enough to let the move fully charge, create a massive clock face 1.5x as large as a smart bomb blast.

Pressing Down (or letting the move fully charge) results in an ordinary, vanilla Luna Dial. It has no immediate effect on the match, simply being a big holographic clock that tells the current time. The Luna Dial gradually shrinks away to nothing over the next 25 seconds.

Tapping Right creates a "Speed Zone" Luna Dial. This variant of the Luna Dial takes on an orange hue, and the hands of the clock rotate around quickly, indicating that, yes, time is sped up within this area. This Luna Dial, shrinks away over 15 seconds.

Within a Speed Zone, everything moves at 1.7x its normal speed. Likewise, attacks occur at an increased speed too, making them super fast. Projectiles also receive a speed boost from the temporal distortion, with Sakuya's projectiles in particular moving drastically faster within the zone (tripling in speed).
Conversely however, attacks become weaker when used inside the dial. Hitstun and flinch times are reduced, as are damage and knockback. Essentially, you'd be a super fast, super weak brawler while inside a 'speed zone'.
Conversely, tapping Left creates a "Slow Zone" Luna Dial. This Luna Dial assumes a deep purple glow, and its minute hand rotates backwards and then freezes at 12:30. Woo, creepy. Like its faster counterpart, Slow Zones shrink away and vanish after 15 seconds.​

You can probably guess what this zone is like. Attacks are performed slower, and movement is hampered, yet hitstun, damage and knockback are all increased to compensate. You could become quite a hard hitter inside the slow zone. Projectiles in the slow zone move slower, obviously. But Sakuya's projectiles move with even less haste, almost slowing to a crawl.​
Both types of zone have their advantages and disadvantages. And with careful setup and a solid plan, both can be used to overwhelm the foe with fluid, astounding combos.

▫▪▫▪▫▫▪▫▪▫▫▪▫▪▫▫▪▫▪▫▫▪▫▪▫▫▪▫▪▫
But here's the fun part.

If you, after creating your Luna Dial, tap neutral special whilst inside it, Sakuya will snap her fingers and trigger a Time Stop using that Luna Dial. The entire Luna Dial freezes white, and anyone/anything within it (except Sakuya herself) is frozen in time for 3 seconds. Sadly, you'll lose the Luna Dial, as it cracks and falls to pieces from the stress of the Time Stop, but having a frozen foe to play with is a good trade-off.​

Foes trapped in a Time Stop cannot take damage or knockback, so Sakuya should use the time to setup a nasty surprise for when they escape.

You can also use Time Stop when you're in the middle of creating a Luna Dial, in order to freeze the foe in exchange for sacrificing the Luna Dial Sakuya was making. This version of Time Stop is slightly laggier, and lasts only 2 seconds

You can have up to 3 Luna Dials out at any one time, and yes they can overlap, with their effects stacking together. Stacking a Fast and a Slow zone together just cancels their effects out, but you can stack Fast with Fast and Slow with Slow to create some extreme zones. In addition, should you use Time Freeze within a Luna Dial that is overlapping another, both will Time Freeze simultaneously, potentially catching more flies in your web.​
And finally, this attack functions identically in midair, albeit with Sakuya halting her fall/momentum until she creates her Luna Dial. In any one trip to the air, Sakuya can use Luna Dial only once before landing.

▬▬▬▬▬▬▬▬▬▬▬▬▫◘□◘□■▫▫■□◘□◘▫□◘□◘□▫◘□◘□■▫▫◘□◘□■▫▫◘□◘□■▫▬▬▬▬▬▬▬▬▬▬▬▬


▫▪▫▪▫▫▪▫▪▫▫▪▫▪▫▫▪▫▪▫▫▪▫▪▫▫▪▫▪▫
With a flick of the wrist, a single knife appears in Sakuya's hand. It is lodged between Sakuya's fingers, and if the player holds the input, Sakuya will stock a second and a third knife in the same hand. So the longer you charge up, the more knives she'll summon.

▫▪▫▪▫▫▪▫▪▫▫▪▫▪▫▫▪▫▪▫▫▪▫▪▫▫▪▫▪▫
Once you decide to release the attack, Sakuya swiftly tosses the knife (knives) forward. If you don't like throwing straight ahead, you can instead angle the knife up or down by 30 degrees.

Knives travel as fast as Falco's lasers, and have a shelf life of 6 seconds, which is more than enough time to hit a foe at any range. On contact with a foe, a knife deals 3% damage and light backward knockback. On shields, knives deal a decent amount of shield stun, without pushing the foe backwards. Unless shielded, these knives do not disappear when they hit a player.

If Sakuya has charged up the attack enough to throw two knives, she'll throw the second at a 25 degree upward angle. And for her third knife, should you charge that far, she hurls it 25 degrees downward. She'll throw all three of her knives at the exact same time, making for a somewhat effective "shotgun blast" of knives.

However, Sakuya has a trick up her sleeves, for what would otherwise be a bog standard projectile. The knives thrown via her Side Special have been imbued with a subtle crimson aura, a concentrated burst of time manipulation. Once "thrown", these knives will remain completely motionless for 3 seconds, only flitting forth after that time has elapsed. Because of this delay, it is quite possible to fill the air with motionless knives in the mean time. You can actually increase this delay to 6 seconds if you hold backwards on the analogue stick as Sakuya throws the knives. And you'll definitely want to try that, because even motionless knives deal 1% damage and flinching if the foe accidentally touches one.
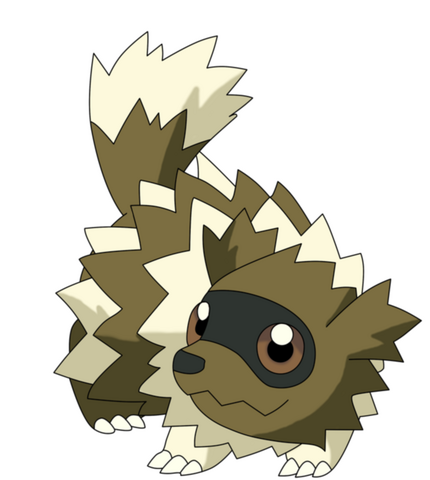
▫▪▫▪▫▫▪▫▪▫▫▪▫▪▫▫▪▫▪▫▫▪▫▪▫▫▪▫▪▫


If you want a knife to fly off before its 3 seconds are up, using one of Sakuya's regular attacks will simultaneously cause her oldest suspended knife to fly ahead. If you want all of Sakuya's knives to fly off at the same time, use Side Special whilst touching one of her suspended knives.
Another important property of these particular knives is that they will bounce off of the outside rim of any Luna Dials Sakuya has out. Obviously, foes will be a lot more willing to enter your Luna Dials in order to avoid having to deal with your time delayed knives.​
However, the reflective rim of the Luna Dials work both ways. If you create a knife inside a Luna Dial, it will be unable to leave it, due to the outside rim. Thus it will bounce around inside it until its 6 seconds of life are finally up.​
And finally, if you charge this special for 1.2 seconds, Sakuya will re-sheathe her knives, storing their power for later. More specifically, the next time she uses a regular attack that involves knives (spoiler: she uses knives in this moveset), she will utilise her Side Special's time delayed knives instead of her usual fare. Alternatively, you could spend this newfound charge on using Side Special again, which will lagglessly throw out a full three, time delayed, knives.
▬▬▬▬▬▬▬▬▬▬▬▬▫◘□◘□■▫▫■□◘□◘▫□◘□◘□▫◘□◘□■▫▫◘□◘□■▫▫◘□◘□■▫▬▬▬▬▬▬▬▬▬▬▬▬


[collapse="Playstyle: Parte Eins"]
  • Misdirection creates a doppelganger to perform the rest of Sakuya's current action in her stead
  • Time Anchor warps Sakuya to her Bell, which trails behind her as she moves
  • Luna-Dial creates a Time Zone in which time is either sped up or slowed down. These Luna Dial Time Zones can also be used to perform a Time Stop, freezing anything it hits.
  • Luminous Ricochet throws time delayed knives. If charged up, Sakuya can apply the time delay property to any of her attacks that involve knives.

Sakuya very clearly has a strong affinity to controlling areas of the stage. She spaces and zones exceptionally well, thanks to her versatile teleporting, timed knife projectiles, and "Luna Dials", those big circular areas that slow down or speed up time. These are all the core moves that together form the fundamental style of Sakuya, and it's worth taking some time out to examine this in greater detail.

Know that the end goal (outside of KOing, which is obvious) is to trap the foe in an extended buffet of comboing and pressure. Doing so requires set up, knives primed at the right time, the time anchor spaced exactly so, and plenty of luna dials. We'll get to the fun of combos later, but for now we should concentrate on set-up.

Time anchor is a great escape and psyche-out tool, though setting it up requires that you first have Sakuya pass through the area you want her to warp to later. This is a very obvious tell, opponents will quickly pick up on Sakuya players trying to keep their Time Anchors spaced behind the foe. A beginner's combo trick is to launch the foe towards your Time Anchor, then warp there in order to follow up. With good planning, and some deftly placed knives, Sakuya may even be able to warp to her Time Anchor twice in the same combo-string.

Something that many new players ignore, is the set-up potential of using Misdirection to create another target for Sakuya to warp to, or in using it to bait out a smash attack from the foe. You can even use it as an assist for setting up her set-up. For example, making her Doppelganger focus on creating a Luna Dial. Bear in mind that it'll be an ordinary, vanilla Luna Dial, unless you warp to the doppelganger and take over her duties. The foe will likely want to attack the Doppelganger to stop the Luna Dial from being set up. You can either punish the foe while they try, or let the Doppelganger distract the foe, and set up some other element of your eventual trap in the mean-time.

Setting up Luna Dials largely depends on the kind of foe you're facing. As a general rule, you want Fast foes to be in Slow Luna Dials, and Slow foes in Fast Luna Dials. You can create an incentive for the foe to hide inside a Luna Dial by spamming Luminous Ricochet Knives, since those will bounce harmlessly off of Luna Dials. If you've made a Luna Dial for yourself to abuse, you can similarly create a bunch of knives inside the Luna Dial, to keep the foe from coming in to join you.
[/collapse]

▬▬▬▬▬▬▬▬▬▬▬▬▫◘□◘□■▫▫■□◘□◘▫□◘□◘□▫◘□◘□■▫▫◘□◘□■▫▫◘□◘□■▫▬▬▬▬▬▬▬▬▬▬▬▬


A broad, open palmed, smack to the opponent's face. While the Jab consists of only this one hit, there is little lag in simply spamming it until the foe DI's away from the barrage of slaps. It deals a scant 1% damage... for the first hit.

For every slap Sakuya manages to land in succession, her hand glows a little brighter with a cool blue aura, and the damage dealt by her slap increases by 4%.

1%, 5%, 9%, 13%, if the foe lets themselves get caught in a bad situation, their damage will start rising catastrophically. Of course, the moment Sakuya misses with a slap, or even decides to stop slapping, the damage of the attack will reset back to 1%.

To land many hits with Sakuya's jab, you'll want plenty of knife support. Ideally, one delayed Knife right behind the foe, so her jab will continually bounce the foe off of the knife and back to her smacking. Alternatively, you can space a Slow Zone Luna Dial so that only the foe is inside it, sharply restricting their ability to respond to a spammed Jab. Put yourself in a Speed Zone directly next to the slowed foe, and you'll be able to unleash lightning fast punishment. Of course, foes will never willingly walk into setups as obvious as that, but Sakuya is resourceful, I'm sure she can figure out a way to trick the foe into the spacing she wants.

▬▬▬▬▬▬▬▬▬▬▬▬▫◘□◘□■▫▫■□◘□◘▫□◘□◘□▫◘□◘□■▫▫◘□◘□■▫▫◘□◘□■▫▬▬▬▬▬▬▬▬▬▬▬▬


Sakuya swings her back leg round to perform a classic roundhouse kick on the foe ahead of her. At the apex of the kick, just as her leg snaps out, a fantastic cloud of petals explode from her foot. This explosive hitbox is not only the source of the attack's knockback and damage (8%, sharp horizontal knockback KOing from 190%), but is also what shunts Sakuya herself backwards 0.3 stagebuilder units. It's pretty brutal recoil, for an explosion made of petals, and it's capable of sending Sakuya tumbling off the edge of the stage, if you happen to use this attack while too close to one.

The attack itself has a decent horizontal range, and the petal explosion acts as a transcendant hitbox, disjointed from her actual foot. The leg itself has its own hitbox too, though it deals a sad 4% damage and pithy knockback.

Unfortunately, the recoil of the attack gives Backpetal more end lag than it would be comfortable with, though it's generally safe on whiff. The attack also has little effect on shields, with little damage, stun or push being dealt to them. This makes it possible for foes to punish this attack, if they know it's coming.

▬▬▬▬▬▬▬▬▬▬▬▬▫◘□◘□■▫▫■□◘□◘▫□◘□◘□▫◘□◘□■▫▫◘□◘□■▫▫◘□◘□■▫▬▬▬▬▬▬▬▬▬▬▬▬


With a trio of blades fanned between her fingers, Sakuya slashes in a wide arc above her head whilst Stooping down. The single swipe deals 3 quick fire hits of 3% damage that pop the foe into the air. While the attack does hit foes standing immediately in front of Sakuya, its range in that regard is extremely limited.

The hitbox also lingers slightly after the swing, though foes who wander into it only take a single 3% hit.

If you've charged Luminous Ricochet before using this move, Sakuya leaves her three knives suspended in midair above her head. The three knives are angled upwards, with one angled 20 degrees left, and another 20 degrees right. At low percentages (or with fast-fallers), a foe could be hit by the swipe from Up tilt, then fall immediately onto the knives left behind, setting them up for a simple combo.

▬▬▬▬▬▬▬▬▬▬▬▬▫◘□◘□■▫▫■□◘□◘▫□◘□◘□▫◘□◘□■▫▫◘□◘□■▫▫◘□◘□■▫▬▬▬▬▬▬▬▬▬▬▬▬


From her crouch, Sakuya draws back her hand while holding two knives between her fingers. She lunges forward 0.6 stagebuilder units, while slashing horizontally at the foe. This deals 5% damage and slight downward knockback at a 75 degree angle. Typically it will floor bounce the average foe from 60% onwards, and trip them if they have less damage than that.

The attack itself is almost instantaneous, and to the untrained eye, Sakuya looks like she's teleporting behind the foe. If you press the Attack button a second time before the move finishes, Sakuya lagglessly repeats the attack in the opposite direction, leaving her back where she started.

It's important to note that the attack's start lag is uncharitably long, at least for a tilt. It's still worth using when the foe is preoccupied with DI'ing away from your jab, or otherwise hassled with dealing with Sakuya's projectiles. If you whiff with this attack, you can hope to mindgame the foe into missing their window to punish you, by mixing up whether or not you perform the extended version of the move.

If you've charged Luminous Ricochet before using this move, Sakuya will leave one suspended knife, facing forward and angled 20 degrees upward, halfway through her slash. If you go on to perform the extended attack, she'll leave a second knife, facing the opposite direction, right on top of the first knife.

▬▬▬▬▬▬▬▬▬▬▬▬▫◘□◘□■▫▫■□◘□◘▫□◘□◘□▫◘□◘□■▫▫◘□◘□■▫▫◘□◘□■▫▬▬▬▬▬▬▬▬▬▬▬▬


With a knife in hand, Sakuya thrusts forth, bringing an end to her dash and plunging the blade into the opponent. This lightly bounces the foe off the floor with set knockback and deals 4% damage. The attack is abrupt, and reasonably quick to come out, though is extremely easy to punish, if used incorrectly.

However, that's only part of the Dash Attack. During the attack's start lag, a doppelganger from a split timeline splinters off behind her. This version of Sakuya thinks that a leaping downward slash would be a better choice than a thrust. So, the doppelganger does just that, hopping towards the foe and performing a slashing attack that lands shortly after the "real" Sakuya's thrust. The slash has a decent aerial coverage, deals 7% damage and 2 stagebuilder units of set knockback away from Sakuya (at a 40 degree upward angle).

Because of this attack's unique double-approach, simply outpriotising, interrupting or clanking against the first hit won't save the foe from the second.

If you've charged Luminous Ricochet before using this move, Sakuya will leave a suspended knife right where she performed the thrusting attack. If the attack actually hit a foe, then Sakuya leaves the knife embedded in the foe's flesh. They'll then carry this "time bomb" of sorts with them until the knife activates 3 seconds later, at which point the foe will flinch as the knife flies out of them. The foe can shield this hit, though the knife will deal severe shield stun instead.

▬▬▬▬▬▬▬▬▬▬▬▬▫◘□◘□■▫▫■□◘□◘▫□◘□◘□▫◘□◘□■▫▫◘□◘□■▫▫◘□◘□■▫▬▬▬▬▬▬▬▬▬▬▬▬


Pressing the Attack button at the end of the Dash Attack will, if the initial attack hit, lead into the extended Dash Attack+.

The doppelganger from the Dash Attack, flips the real Sakuya into the air, kicking her towards the still reeling opponent. Sakuya is then free to perform any aerial on the foe, with Neutral Air and Forward Air being the likely suspects. While Sakuya takes 3% damage from being kicked, it is still almost always worth using the Dash Attack+, unless you were just knocking the foe into a Luna Dial, and don't actually want to follow them in there.

▬▬▬▬▬▬▬▬▬▬▬▬▫◘□◘□■▫▫■□◘□◘▫□◘□◘□▫◘□◘□■▫▫◘□◘□■▫▫◘□◘□■▫▬▬▬▬▬▬▬▬▬▬▬▬


Sakuya tucks her hand into her blouse pocket whilst you charge this smash attack. She's gathering up a mess of knives, so the longer you charge, the more knives she'll grab (between 3 and 7 knives).

Upon release, Sakuya flings her arm out in a wide arc ending up behind her back. By doing so, the knives she had stocked, are flung out in a uniform, yet scattershot fashion. These knives, arranged one above the other in a rough arc, fly forward like any thrown knives would. However, each knife flies at a slightly different angle; the bottom knife flies at a 20 degree downward angle, the second at a 10 degree downward angle, the third flies straight and true, the forth at a 10 degree upward angle, and so on and so forth. Basically the knives scatter outwards from where they are summoned. If you need to, you can actually aim the whole attack up or down by 30 degrees.

These knives can bounce off of floors and walls, unlike their "suspended" peers, and you can use this to rebound knives off of things to achieve some sneaky tricks.

On contact with a foe, each knife deals its typical 3% damage and slight backward knockback. If multiple knives hit the foe all at once, the damage and knockback stack together, potentially leading to a decent KO move if you shotgun blast 5 or more knives into the foe at close range.

By the way, this stacking property is not unique to this attack's knives. All of Sakuya's knives can stack their knockback together, so long as they somewhat synchronised in hitting the foe.

If using this after charging Luminous Ricochet, the 3-7 knives will appear in the exact positions Sakuya would normally throw them, suspended in place. Once freed to move again, the knives fly ahead as normal. The knives sadly lose the ability to rebound off of solid objects when used with Luminous Richochet.

▬▬▬▬▬▬▬▬▬▬▬▬▫◘□◘□■▫▫■□◘□◘▫□◘□◘□▫◘□◘□■▫▫◘□◘□■▫▫◘□◘□■▫▬▬▬▬▬▬▬▬▬▬▬▬


As with the Side Smash, Sakuya collects knives from her blouse pocket while you charge, this time she's going to throw them straight up into the air, and she betrays this fact by looking upwards while grabbing her blades.

Regardless of charge, Sakuya flings 3 blades upwards, with one firing 15 degrees to the right, and the other 15 degrees to the left in a spread not completely unlike the Side Smash.

The knives fly off, shooting quickly up to 2 stagebuilder units above Sakuya. If the foe is struck by the knives at this stage, they take moderate vertical knockback and 10% damage, typically comboing the foe into the next stage of the attack.
Yes, there is a second stage; the knives fly back to Sakuya.

But before that, each knife shatters into 3-5 (based on charge) identical knives. They arc around in a tight circle before flying straight back to where they came from in a rain of death. Each of these splintered knives deals 2% damage on contact, and slight knockback down towards the ground. This effect obviously stacks when a whole multitude of knives stabs into the foe all at once.

While an excellent move for dragging a foe into a specific spot for you, it does have something of a problem. Sakuya herself cannot move until the attack completes in full, so you'll have to wait until the knives boomerang back. However, you could delegate that task to a Doppelganger via Misdirection. Alternatively, if you have Luminous Ricochet charged, using Up Smash will result in the three knives thrown at the start of the attack being suspended in time. Sakuya will then be free to move and do other things, while the knives themselves perform the full Up Smash attack (sans Sakuya) once freed from suspension.

▬▬▬▬▬▬▬▬▬▬▬▬▫◘□◘□■▫▫■□◘□◘▫□◘□◘□▫◘□◘□■▫▫◘□◘□■▫▫◘□◘□■▫▬▬▬▬▬▬▬▬▬▬▬▬


As you charge this Smash Attack, Sakuya begins scattering soft petals around herself whislt spinning on the spot. Depending on how long the attack is charged, she could have anywhere from 4 to 15 petals, all blustering around her body in a thin tornado formation. This harmless pink tornado of cuteness is 0.4 stagebuilder units wide by 1.1 stagebuilder units tall. But, petals are pretty harmless things, on contact with opponents they deal only 1% damage without flinching. After all, whoever heard of a petal that could cause flinching? That'd be stupid!

But when Sakuya releases this smash, those petals all turn inside out, revealing knives in their place! The equally spaced mass of knives forming a tornado around Sakuya now deal multiple hits of 3% while knocking the foe ever upwards. The more knives involved, the more hits that occur, and the harder it'll be for the foe to escape. At the end of the attack, the knives abruptly halt in midair, aim themselves towards the foe who was caught in the move, and then shoot into them. Individually the knives deal 2% damage and low vertical knockback. Since this damage/knockback stacks, 10 knives at once will deliver some brutal knockback overall, potentially KOing at around 130%.

If the attack missed, then instead of the knives firing towards the foe, half of them will fire left out of the tornado, and the other half will fire right. They will sadly vanish after travelling 2.4 stagebuilder units, but each knife deals 4% damage and average horizontal knockback. They do their job of covering the attack's end lag very well.

Just like with the Up-Smash, Sakuya is rooted to the spot until Down Smash ends.

But Naturally she can use Misdirection to let her doppelganger handle it. And she can use Luminous Ricochet to lay out suspended petals, then go do something else while the attack itself plays out without her presence. If you do use Luminous Ricochet however, note that the knives in the Down Smash will act as if the attack missed, even if it hits the foe.


▬▬▬▬▬▬▬▬▬▬▬▬▫◘□◘□■▫▫■□◘□◘▫□◘□◘□▫◘□◘□■▫▫◘□◘□■▫▫◘□◘□■▫▬▬▬▬▬▬▬▬▬▬▬▬


Twirling around in midair, Sakuya's nimble fingers summon a bevvy of knives, 6 in total, which all begin orbiting swiftly around her waist. This "disc" of spinning knife death is a multi-hit attack, dragging the foe along with multiple 2% hits. The last hit (as the knives return to Sakuya) deals a very small amount of knockback in the direction you're currently tilting the analogue stick. All in all, you can use this to drag foes to where you want them to go, or simply as something fast to keep a combo going. The horizontal range of this attack is fairly weak however, and the vertical range is virtually nill.

If used with Luminous Ricochet, the disc of knives lie suspended where Sakuya summons them. Once reactivated, the knives spin around twice (dealing 4 hits of 2% damage) then vanish, dealing a final hit of 3% damage that knocks the foe lightly towards Sakuya herself.

▬▬▬▬▬▬▬▬▬▬▬▬▫◘□◘□■▫▫■□◘□◘▫□◘□◘□▫◘□◘□■▫▫◘□◘□■▫▫◘□◘□■▫▬▬▬▬▬▬▬▬▬▬▬▬


Sakuya leaps forwards 0.3 stagebuilder units in midair. As she does so, she takes two knives in each hand, and performs a brutal cross slash in front of her. The slash, which deals 11% damage and knockback that can KO from 110%, leaves a bloody cross in its wake, which lingers for a brief moment after the attack. Touching this gory aftermath deals 8% damage and somewhat lighter backwards knockback.

This is a great attack for advancing on the foe. It's also functionally sakuya's simplest KO attack. You may want to limit you usage of this move however, since stale move negation hits this attack particularly hard.

If you've charged Luminous Ricochet before using this move, Sakuya will leap forward, leaving her knives behind in midair. The knives will then later perform the slashing motion of the F-air, albeit with a little less power than normal.

▬▬▬▬▬▬▬▬▬▬▬▬▫◘□◘□■▫▫■□◘□◘▫□◘□◘□▫◘□◘□■▫▫◘□◘□■▫▫◘□◘□■▫▬▬▬▬▬▬▬▬▬▬▬▬


Bamf! Sakuya vanishes, leaving behind a small mess of petals where she used to be. The petals deal 1% damage to the foe, but won't flinch them unless a whole bunch strike the foe at once. After a brief moment, Sakuya reappears 0.8 stagebuilder units below where she used to be (1.3 if you tap down after vanishing), and the petals she left behind will fly back to her new position. If you tilt left/right after you vanish you can aim the 'teleport' slightly in those directions (though no matter what she's going to be teleporting downwards at least 0.8 stagebuilder units).

Overall the attack has a little end lag, which can be negated if Sakuya ends up hitting the ground when reappearing.

Using this attack in conjunction with some of your specials can lead to interesting results. Use Time-Anchor while vanished for example, and you will alter where you reappear, which in turn alters the direction the petals will fly as they home back to you.

If you time Misdirection so that it activates while Sakuya has vanished, and she will remain vanished, and capable of moving around freely (though unable to attack) until her doppelganger has finished the attack in her place.

Both Specials essentially allow Sakuya to reposition herself without the foe seeing her, which can be immensely useful for stageing counterattacks and feints.

▬▬▬▬▬▬▬▬▬▬▬▬▫◘□◘□■▫▫■□◘□◘▫□◘□◘□▫◘□◘□■▫▫◘□◘□■▫▫◘□◘□■▫▬▬▬▬▬▬▬▬▬▬▬▬


Sakuya tosses a single knife directly overhead. But no sooner does the knife leave her hands, it explodes! Into a ball of more knives! This cloud of knives quickly expands outward to fill 0.8 stagebuilder units of air, before disappearing whence they came.

Functionally, the attack is similar to Zelda's Up Aerial, in that it has an explosion and deals good vertical knockback (along with 14% damage).

If you hold this input, Sakuya delays the knife from exploding, allowing it to fly upward until she decides to release the input (it automatically explodes after travelling 3 stagebuilder units). Potentially useful for sniping at foes from below.

If you've charged Luminous Ricochet before using this move, the knife she throws will lie suspended in midair, exploding once its allotted time has passed.

▬▬▬▬▬▬▬▬▬▬▬▬▫◘□◘□■▫▫■□◘□◘▫□◘□◘□▫◘□◘□■▫▫◘□◘□■▫▫◘□◘□■▫▬▬▬▬▬▬▬▬▬▬▬▬


In a single flipping motion, Sakuya hurls two knives down at the ground, and then drop kicks her way in between them. In other words, its a stall then fall dropkick, with Sakuya throwing two knives down during the "stall".

The knives are angled 20 degrees left and right respectively, so that they spread apart as they fly to the floor. These knives also rebound off of solid objects (like the floor), typically at neat 45 degree angles. Like most of Sakuya's repetoir, touching a knife deals 3% and a small amount of repellent knockback.

The dropkick she performs after throwing the knives, deals 10% damage, but no knockback (only hitstun). In most cases, Sakuya will dropkick right through the opponent, leaving them in midair, and her on the floor below them. if the foe is already on the floor when Sakuya drop kicks them, the foe is bounced up off of the ground 1.2 stagebuilder units.

If you've charged Luminous Ricochet before using this move, the knives Sakuya throws will obviously be frozen in place temporarily, though her dropkick continues unabated.

▬▬▬▬▬▬▬▬▬▬▬▬▫◘□◘□■▫▫■□◘□◘▫□◘□◘□▫◘□◘□■▫▫◘□◘□■▫▫◘□◘□■▫▬▬▬▬▬▬▬▬▬▬▬▬


Grab and Pummel: Stopwatch


Sakuya grabs the foe by the collar and holds their chin under her free hand as if their head was a tray of orderves she was serving. The grab itself is comparatively slow for its range, with her dash grab being particularly stubborn to work with. The grab release of this grab heavily favours the opponent, so make sure you throw them.

As a pummel, Sakuya grabs her pocket watch with her free hand, closes a fist around it, and then punches the foe in the stomach. This deals 2% damage, and is not particularly fast. However, each pummel you successfully strike the foe with, inflicts them with slowed movement (including movement via knockback) and attack speed for the next 3 seconds after the foe is released from the throw. This stacks up to 5 pummels, which reduces their movement by 2/3.However, each pummel also gives the for 0.4 seconds of grab armor, so Sakuya can't create simple grab loops using her pummel.


Up Throw: Drosophyllum Drop
Starting with a sweep kick to pop the foe upwards, Sakuya shifts underneath them and launches them 1.3 stagebuilder units up into the air with a quick uppercut. As the foe flies upwards, Sakuya leaps up and gives chase, cutting through the foe multiple times along the way. At the peak of the foe's trip, Sakuya appears above the foe and drop kicks them back to the floor.

All in all, the entire assault deals 17% damage (1% for the sweep kick, 3% for the uppercut, 4x2% through the multiple cuts, and 5% for the final drop kick) and results in the foe on the floor and Sakuya up in the air.

Something to note with this and other throws; Time-Anchor can be used even in the middle of a throw. Doing so will abandon the throw at that current point, which may have different uses and advantages depending on the throw in question. For example, with this particular throw, you can leave the foe in midair by warping away just before Sakuya delivers the coup de grace


Forward Throw: Byblis Barrage
Grabbing the foe firmly in both hands, our miraculous maid hurls the foe, launching them 2 stagebuilder units straight forward. Not one to just let that be the throw, Sakuya tears forward after the foe, ramming into them and then dragging the hapless chump along with a flurry of knife slashes. This continues until the foe "escapes" from the throw, at which point they push Sakuya away and come to a stop. Until then, this throw drags the foe 1.5 stagebuilder units forward every second, potentially taking the foe offstage, or even offscreen. It also deals 7% damage per second, by the way.


Backward Throw: Nepenthes Strike
Sakuya vanishes into a cloud of petals, leaving the foe quite befuddled. Before they can react however, Sakuya reappears behind them to deliver a brutal straight kick into the opponent's back. This deals 12% damage and launches foes backward at a 25 degree angle. The initial knockback is great, but the throw will not KO until at least 150%, due to its low knockback growth.

If you make sure Sakuya's bell (the point where she warps to when using Time Anchor) is spaced correctly, you could potentially follow up on the foe by using Time Anchor immediately after the throw itself.


Downward Throw: Stylidium Uppercut
Much like the previous throw, Sakuya disappears into thin air, leaving only petals behind to show she was there at all. Shortly afterward, she surprises the foe by appearing right in front of them again and striking them with a rising uppercut. This deals 9% damage, but more importantly; a little knockback that can be aimed in any of the 8 main directions.

This throw allows Sakuya to respace the foe using a grab, or to deliberately throw them right into some crazy machination she had perpared in advanced. If you time Misdirection so that it activates during this throw, the doppelganger aims the throw directly towards the real Sakuya. You could potentially pull off a few neat combos with this, that her other attacks simply don't set up for. And that's without things like luminous ricochet knives or luna-dials being used.

▬▬▬▬▬▬▬▬▬▬▬▬▫◘□◘□■▫▫■□◘□◘▫□◘□◘□▫◘□◘□■▫▫◘□◘□■▫▫◘□◘□■▫▬▬▬▬▬▬▬▬▬▬▬▬


Sakuya's World is a Final Smash the mercilous maid can be proud of. With something of a personal flourish, Sakuya floats in place while a massive sphere grows outward from her. This large boundary, lasting 8 seconds, is an area completely devoid of time. With the exception of Sakuya herself, anything within or created within the boundary (or anything that tries to enter it once it's already up) is frozen in time, unable to move or act. Like any instance of Time Stoppage, attacks will not deal knockback to anything frozen. However, attacks will still deal half their normal damage. After Sakuya's World vanishes 8 seconds later, everything that was frozen will simultaneously begin moving again.

It's important to remember that even Sakuya's knives are affected by time, making this Final Smash an ample opportunity to set up plenty of projectiles. She can also create Luna-Dials within the Final Smash boundary. Their effects will still work, and they will not begin shrinking until after the Final Smash ends.

Getting Sakuya's World to engulf the foe when it's first summoned can be something of a pain, since it's not instantaneous, and many foes can reactively dash away from Sakuya once the Final Smash has been activated. You can still go out and drag foes into the boundary directly, or you could spend the duration of the Final Smash setting up knives and luna dials for her to use afterwards.

Since dealing with the pressures and problems of setting up is something Sakuya has to contend with normally, this Final Smash gives her the opportunity to really cut loose and get creative with combo set-ups.

[collapse=Parte de Junahu]Sakuya has a copious array of tools for crafting some clever and uniquely entertaining combos. Using her timed projectiles, warping techniques, and even alternate timeline versions of herself, Sakuya can string a lot of punishment together out of just one lapse in the foe's judgement.

The key problem however, is setting up for something like that. Unlike a lot of characters who might have trouble getting their summons and tricks up, but otherwise get to keep them forever once they do, Sakuya suffers the opposite issue. She can get things up pretty easily, but anything she sets up has to be used in the short term. If Sakuya places a static knife, you know it's going to start moving in a few seconds. If she summons a Luna Dial, it's going to start shrinking the moment it comes into being. That's not to say you can't get creative in the limited time you have to use these things, but a 0-death combo is simply not going to happen without some absurd prep and a very cooperative foe. Ingenuity and flexibility will serve Sakuya far better than plotting and scheming anyway.

Sakuya has a few of attacks that invoke or involve travel, allowing her to press the attack or escape from harm with equal success. Taking a foe on naked is a bad idea, so being able to dance around at close/mid-range without taking too many hits is an important skill for Sakuya players to get familiar with. On the flip side, those same attacks can give Sakuya some spacing issues, in that she has fewer options that don't move her about. Most importantly for these attacks however, is that the mobility they grant lets her combo in situations that lesser brawlers would fail at. Even the simplest of Sakuya's combos usually involve moving around to chase the foe.

Fully charging Luminous Ricochet will allow Sakuya to create time delayed versions of a lot of useful attacks, such as her smashes, or her Neutral/Up-aerial. And used with lesser attacks such as tilts, she can use them to begin combos or apply additional pressure to otherwise punishable attacks. Fully charging it isn't the problem, she can buy an opportunity to get away with that quite easily. The problem is that once you have a full charge, there are very few attacks Sakuya can use without using that charge. This severely limits what Sakuya can do, with her Jab/Side-Tilt/Back-Aerial and grab-game being her options. Thankfully these attacks at least function well enough to let Sakuya play defensively until a chance to use that Luminous Ricochet charge arises.

Time Anchor is monstrously useful for chasing foes mid-combo. Knock the foe toward the bell Sakuya warps to, and she can use Time Anchor to get there before the stunned foe does. You can also use it to warp into close-range, while firing off an attack at the same time. Controlling where the bell is can make Sakuya's movements somewhat predictable, since the bell only passes through areas she's just previously been in, and the foe can smack the bell away in order to ruin its spacing.
Nonetheless, the foe needs to consider that wherever the bell is, Sakuya can warp to at a moment's notice, not just as an escape measure, but also as a means of applying pressure and maintaining a combo. It's like being in two places at once, except without the hassle of actually being in two places at once.

But on that note, Misdirection is another of Sakuya's trump cards. She has to call it in advance, but Misdirection literally lets her step out of any action she was currently doing, and have some alternate timeline Sakuya take over. At the most basic level, you can use Misdirection to combo, simply by letting the doppelganger perform one attack while you prepare another. If you have the prediction necessary to grab the foe before Misdirection activates, you can have a Doppelganger holding the foe nice and still for you, ripe for a Time stop, or simply a smash attack to the face. Using attacks that invoke movement, such as Forward/Downward aerial in conjunction with Misdirection let her poke and prod at the foe while the real Sakuya is free to punish the foe regardless of how they react to the doppelganger.

And last, but not least, Luna-Dial. Whether Sakuya needs to slow down, or speed up the foe, obviously depends on the foe, but Sakuya herself can benefit from either one. Faster attacks and movement let Sakuya set up things at a quicker pace, while stronger attacks obviously help when the foe is in a combo and you need to finish them off. Spacing and overlapping these areas properly can result in a complex mesh of time zones, which can throw off any foe's timing, or even outright open them up to attack. Alternatively, a varied spread of luna dials can make Sakuya herself feel all the more unpredictable, or they can help box in a foe or lure them to a particular spot.

The zones you create can superficially act as cages for Luminous Ricochet knives to bounce around in, peppering poor foes with numerous hits. Getting the foe right into the thick of one of these can give Sakuya plenty of time to set up a more elaborate combo for when the foe escapes
And don't you dare forget about Time Stop either. Either through Luna Dial, or by simply breaking her shield when right next to the foe, freezing the opponent in place has so many obvious uses that it would be an insult to your intelligence for me to try and list them all.

As for attacks to use for combos;
Neutral Aerial and Down Throw let the player choose the direction the foe is knocked away, making them great tools for steering the foe into specific places, into knives or Luna-Dials etc. Neutral Aerial in particular is good fodder during a combo, since it deals little knockback, and doesn't reposition Sakuya herself. Down Aerial typically leads straight into Up Tilt, provided Sakuya actually lands on the floor during the Down Aerial. Backward Aerial can also lead to an Up Tilt, but you'd need to use the B-air right on top of the foe, so that the petals flinch the foe. The incremental damage of repeated Jabs forces foes to find the fastest direction to DI away, which in many scenarios leads to either a Side Tilt or a Down Tilt. Up Smash, if it successfully snares the foe, can lead to a Jab/Tilt or a Grab. Sakuya can chase after a Side Smash and hit the foe with a Forward Aerial once a knife from the smash connects.
And all that's without using any of Sakuya's specials.
[/collapse]

[collapse=Parte de Emergency]
My write-up may be quite similar to Yoon's so bear with me with my perspective. (And much shorter, and in 3000% less quality.)
Sakuya is a very spacious character who creates a lot of opportunities and pressure. Her abilities are short term setups that interact with her afflicting assault toward an enemy or general location. Her specials create helpful tricks to further your already passive pressure against the enemy.

In a mixture of creating time bubbles via Luna Dial, you can literally create an area of advantage, such as building up damage in a Speed Zone, and when you want to go in for the kill, place up a Slow Zone and ensure that your opponent is effectively trapped within with your Ricochet. Setting up overlapping zones, at the expense of time will give you a greater advantage to control space. Making sure that you are using the bubbles effectively are very important because your foes can also use them to their advantage. But if they are abusing it while you aren't in it, just touch the bubble blow it up into a Time Stop, punish them for using it.
Misdirection and Time Anchor are probably the most godly move that Sakuya possesses. It allows her great mobility and juking potentials. It heavily punishes a misplay by your foe, and you get to be in a better position if you play it right. The timing won't be consistent if you're inside bubbles too, so you can really mess with the jumps and onslaught of attacks done by your clones and yourself. Misdirection and setting up are made for each other, make a move, continuously string it together with other moves, Anchor back to a better position, and there you go! Setting up in a jiff!

Using Ricochet is actually the above demonstration without any bubbles or positioning setup. It allows you to freeze knives in place without any uses outside of the move itself. Locking those potential knives into bubbles is a nice damage racker, and you can bounce foes off the suspended knives for a small infinite combo. And to finish them off you can just release the knives with a normal attack. Setting the firing time with bubbles makes the utility of spam and combo infinities possible.

Juking out with Time Anchor is amazing at baiting your opponent to try to punish you. Heck, half of the things you can do are part of baiting your opponent so you can punish them for trying to 'punish' you! Make it look like you made a mistake, hop back, punish. Already being hit because you couldn't react? Misdirect out of it to punish!

I summarized more or less a very small section of Special potential. I'm sure you guys are competent enough to look beyond these play style write ups and play it out as your own character.

Sakuya's Specials are the tools to paint a picture and her colors are her tools to flesh it out. Become the artist.[/collapse]

And that's all folks! Thanks for reading! We hope you enjoyed it!


SHES IN THE THREAD NOW JUN
 

Junahu

Smash Ace
Joined
Nov 15, 2005
Messages
899
Location
Shropshire Slasher
Aaaand we're done!


Many thanks to everyone who turned up for my fourth annual soiree of extreme self indulgence. Regardless of whether you had fun or not, I'm grateful to those who were with me today.

See ya'll next year!
 
Top Bottom