
-----------------------------------------------------------------------
I. Intro
-----------------------------------------------------------------------

I. Intro
-----------------------------------------------------------------------
Ness comes from Mother 2 (Earthbound), an SNES game where he starred as a young boy with psychic powers destined to help save the world from an evil menace. The game was very different from traditional role-playing games since it was set in modern times. He could equip baseball caps and badges as armor, baseball bats and yo-yos as weapons, and eat jerky and hamburgers to recover HP.
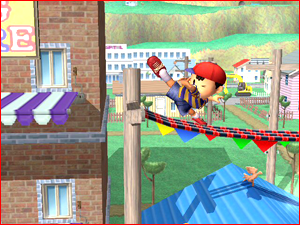
In Super Smash Bros., Ness was top tier, capable of recovering from nearly anywhere and having high priority attacks and great hit power. In Melee, his attacks were downgraded and his grabbing range was severely shortened. His overall movement was floaty and easily abused by faster characters. He did, however, become somewhat of an aerial specialist. With Brawl’s new physics and overall floaty feel, Ness has recovered his awesome potential and overall killing power.
-----------------------------------------------------------------------
II. Move List
-----------------------------------------------------------------------
II. Move List
-----------------------------------------------------------------------
•••••••••••••••••••••••••••••••••••••••••••••••••••••••••••••••••••••••
Tilts
•••••••••••••••••••••••••••••••••••••••••••••••••••••••••••••••••••••••
A: Punch [3%]
- A x 2: Punch, punch 3%, 2%
- A x 3: Punch, punch, kick 3%, 2%, 4%
A+Down: Piston Kick [4%]
A+Up: Volley [7%]
A+Side: Karate Kick [11%]
- Tilt up: [12%]
- Tilt down: [10%]
All of Ness’s tilts have good range and priority and a lot of them are good for setting up great aerial combos.
[A x 3]
When close to your opponent, you could grab him, or you could simply do your punch combo to distance yourself from him. After the first punch, the following ones come out fast and can deliver some decent damage.
[A+Down]
The fastest and most versatile tilt he has is his insanely fast piston kicks. You can also trip opponents with repetitive kicks and you can lead into or out of combos with this move.
[A+Up]
His up tilt also send them flying straight up so it’s a good move for setting up aerial combos.
[A+Side]
This move is actually a lot stronger than it seems. When used on someone with high percentage, it can knock them horizontally knock them away from you pretty far. Its startup time is a bit slow, but it has decent rage as well.
•••••••••••••••••••••••••••••••••••••••••••••••••••••••••••••••••••••••
Smash Attacks
•••••••••••••••••••••••••••••••••••••••••••••••••••••••••••••••••••••••
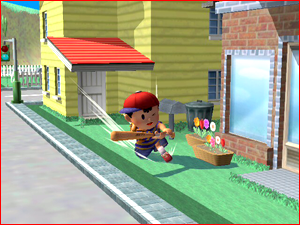
Uncharged Side Smash: Bat [ 18% – 24%] (sweet spot)
Charged Side Smash: [25% – 33%] (sweet spot)
Down Smash: Walk-the-Dog
- [4%] (ground hit), [13%] (swung around hit)
Up Smash: Around-the-World
- [4%] (first hit), second hit [9% – 13%] (sweet spot)
Ness’s smash attacks have been improved in terms of how much damage they give, and slightly changed.
[Side Smash]
or starters, his bat is now a bit laggy and much slower than its fast Melee counterpart. It’s more situational now to hit someone with your bat than it was before since by the time you swing it around, your opponent could have rolled behind you or shielded. Still, it if it hits, it’ll send them flying quite high and, at moderately high percentages, will lead to a KO. Sweet spots will always send them flying further. You can use the bat as a projectile reflector as well.
[Down Smash]
His Walk-the-Dog smash has been improved in terms of how far the second hit sends flying. Because this puts the yoyo behind Ness, it’s good to use it when your back is to your enemy. When you start charging the yoyo, this first hit sends floes up slightly. Then, as your opponent is falling back down, release the charge and hit them with the snap of the yoyo. This second hit will send them flying forward. You can also hit them with the second push of the yoyo if they are in front of you from the beginning, though this obviously takes longer to hit.
[Up Smash]
Similar to his other trick, the Around-the-World also does two hits, the first being the actual spinning yoyo, and the second being the snap. Use it when someone is facing you to send them up slightly, and then hold it until they come down to hit them with the snap of the string. This sends them up. Conversely, you can hit someone from behind if you wait until the yoyo loops around you. This second method obviously takes longer.
•••••••••••••••••••••••••••••••••••••••••••••••••••••••••••••••••••••••
Dash Attack
•••••••••••••••••••••••••••••••••••••••••••••••••••••••••••••••••••••••

Run+A: Dash Sparkles [13%]
- 3 hit total: 5, 4, 4%
Depending on how far you are from your opponent, this attack can hit up to three times. Its range isn’t as long as it was in Melee, but it still entraps foes and sends them up slightly each hit. I don’t advise using this move too much since Ness slows down while he does this move and if your opponent shields, you’ll get grabbed. It’s better to use at different times in a match to throw off your opponent.
•••••••••••••••••••••••••••••••••••••••••••••••••••••••••••••••••••••••
Special Attacks
•••••••••••••••••••••••••••••••••••••••••••••••••••••••••••••••••••••••
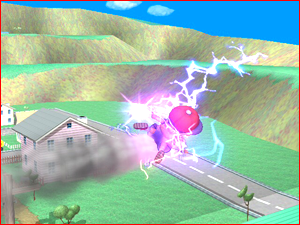
B: PK Flash [9% - 37%]
B+Side: PK Fire: [2%] each hit, [22%] total (if all hits connect)
B+Down: PSI Magnet 0%
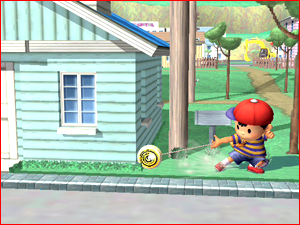
B+Up: PK Thunder
- Thunder Ball: [8%]
- Tail: [1%]
- PK Missile: [21%] (side hit), [25%] (direct hit)

[Neutral B]
PK Flash still takes a while to charge up, and its hit box has been decreased slightly. Its knockback, however, has been increased meaning a small hit will stun opponents and a fully charged one will send them flying high. Because you are defenseless while using it, it’s best to use this when someone is trying to get back on the stage or coming down from up top. But, because Ness is mostly an aerial machine, this move isn’t as special as some of his other potentially devastating ones.

[B+Side]
PK Fire is now faster and racks up more damage than before. The maximum damage PK Fire does can be increased by doing additional attacks while your enemy is stuck in the fire. You can layer PK Fire over and over until your enemy escapes or you can do other repetitive attacks. It’s best to use this move when your opponent is at low percentages so that it’s harder for them to escape the massive wall of fire that engulfs them. At higher percentages, enemies simply get knocked upwards and this move loses its potential. Abuse it on heavier foes.

[B+Down]
PSI Magnet once again can help Ness recover damage from energy projectiles. Ness recovers 1.5% of damage from each energy hit. Electric jolts, fireballs, beam shots, and lasers are a few of the types of energy that gives Ness health. Be careful to discern solid projectiles from energy-based ones. A missile, Link’s arrows, and Razor Leaf will not be absorbed. Interestingly enough, after Ness releases his magnet, he pushes foes forward a bit with his hands, causing no damage, but acting like Squirtle’s charged water gun.

[B+Up]
And now, for Ness’s true show of style and strength: his PK Thunder mind games.
•••••••••••••••••••••••••••••••••••••••••••••••••••••••••••••••••••••••
PK Thunder
•••••••••••••••••••••••••••••••••••••••••••••••••••••••••••••••••••••••
B+Up: PK Thunder
- Thunder Ball: [8%]
- Tail: [1%]
- PK Missile: [21%] (side hit), [25%] (direct hit)
If you want to send your opponents up, hit them with the ball of a PK Thunder. It shocks them and knocks them up a bit. The more percentage they have, the higher they will bounce up. Doing this while they are under a stage will cause them to bounce off it and perhaps fall to their doom. You can also keep doing it to your opponents as they are in the air to continually juggle them until they land or escape your juggles. It also helps to encircle them with the tail so that even they dodge, they’ll get hit eventually.
Another method to using PK Thunder is to hit them with the tail it produces as you maneuver it around. The tail is much longer than it was in Melee meaning you have more time to play around with enemies in the air and to juggle them with either direct hits or tail hits. Each tail hit causes stuns them and prevents them from moving meaning it’s great to do on someone trying to recover with their third jump or as a way to keep them still while you attack them with Ness’s true threat, his PK Missile.
Some people call it PK Thunder 2, PK Jibaku (in Japan), PK Rocket, PK Bomber etc., but they are all the same devastating move. PK Missile lets you get back on the stage while also protecting you from getting hit. Ness becomes a projectile and can act as such (be reflected, shielded, etc.) In Brawl, it also has intense knockback.
The trick to using PK Missile successfully is to learning how to aim correctly with it. If you hit yourself from the bottom, you’ll straight up. If you hit yourself at an angle, you’ll fly in that direction. Learn how long you can aim with it before hitting yourself with it. You don’t want to stall it too much in the air or else you might end up losing it. On land, you can play around with your opponent, tail them a few times, and then finally hit yourself and knock back your unsuspecting opponent.
The massive knockback PK Missile causes can easily send many foes flying to their deaths at low percentage. In Melee, if you hit yourself on the ground with it, the great amount of lag afterwards would leave Ness defenseless. There is practically no lag after recovering from a PK Missile for Ness in Brawl, and because rolling is a lot more common, a lot of your hits might occur on land. The success of hitting someone with a PK Missile depends on how you read your opponent and how well you time your maneuvers in the air or on land. Be careful though, since if someone hits or touches your Thunder Ball when you’re trying to use it for yourself, you’ll lose it and won’t be able to recover.
You can also protect yourself from getting knocked back with the tail of PK Thunder. If you are aiming with it and know you’ll get hit, aim it behind you and when your opponent’s hit sends you flying, the tail of your own PK Thunder will stop you from moving too far. It’s very situational, but very surprising.
•••••••••••••••••••••••••••••••••••••••••••••••••••••••••••••••••••••••
Aerials
•••••••••••••••••••••••••••••••••••••••••••••••••••••••••••••••••••••••
Air+Neutral: Flail [11%]
Air+Forward: Aerial Sparkles
- 5 Maximum hits (2, 2, 2, 2, 3%), [11%] total
Air+Back: Drop Kick [8% – 15%] (sweet spot)
Air+Up: Headbutt [13%]
Air+Down: Step Kick [9% – 12%] (sweet spot)

[Air+Neutral]
Ness’s flail has a lot of priority and it provides good damage. It’s also his fastest aerial move. Not many suspect you’d use this move as Ness relies on his other aerials to do the job for him so take advantage of using it a lot often to break combos, escape from juggles, and even distance yourself from your foe.

[Air+Forward]
His aerial sparkles are what can really rack up a lot of damage if you chain them with fast falling. You can use them to trap your opponent with each hit, and at higher percentages, you can knock them away from you. Use it defensively when you’re trying not to get hit or approach a grounded opponent from the air with them.

[Air+Back]
Ness still has his powerful back kick and it’s easier to hit someone with its sweet spot. If you fast fall, you can continuously use it as you’re jumping backwards towards your opponent. Or you can simply use it twice in the air since it comes out fast enough before you land.

[Air+Up]
Ness’s head butt comes out faster than it did in Melee and you can chain it in the air. His whole body flips each time he does it too, and after each rotation, you can perform it again. It’s a good move to use to keep your opponents airborne, and coupled with a PK Thunder, it’s a good juggling move as well. A well-timed head butt can KO your opponent off the top if you know when to use it.
[Air+Down]
In Melee, you’d fall down when you used his step kick, but in Brawl you seem to stall in the air and then kick downwards. This move is still a good spike and when timed correctly off a ledge, can lead to a really quick and cheap KO.
•••••••••••••••••••••••••••••••••••••••••••••••••••••••••••••••••••••••
Throws
•••••••••••••••••••••••••••••••••••••••••••••••••••••••••••••••••••••••
Down Throw: [9%]
Up Throw: [10%]
Back Throw: [11%]
Forward Throw: [11%]
Grab Hit: [1%]
Ness still has the grabbing range of a T-Rex, but that doesn’t mean his throws are useless. In fact, his range has improved a bit. Once you grab onto someone, they should expect to go far.

[Down Throw]
At low percentages, it’s best to use his Down Throw to rack up damage and also to begin combos. You can follow up with many attacks after a down throw.

[Up Throw]
The up throw usually doesn’t KO, but it can lead to aerial assaults and also PK Thunder tricks.

[Back Throw]
His Back Throw is still Ness’s punisher and sends opponents flying at or below 100%. Sometimes you need to decide whether to back throw an opponent all the way across the stage, or to simply forward throw him when on the edge of the stage. While the back throw might not KO him at this point, it will send him flying nearly all the way across the stage and, depending on the stage, it might KO your unsuspecting opponent too. Remember that attacks, as well as throws, get weaker the more you use them during your stock. This especially applies to his back throw. Save it for when the time is right and you can KO anyone at below 100%.

[Forward Throw]
Again, this is a good move to use when wanting to distance yourself from your opponent or when getting ready to charge into him. If you are near the edge of the stage and your opponent has high percentage, the forward throw might not KO him as easily as you’d think. His forward throw always needs moves to follow it up.
•••••••••••••••••••••••••••••••••••••••••••••••••••••••••••••••••••••••
Final Smash: PK Starstorm
•••••••••••••••••••••••••••••••••••••••••••••••••••••••••••••••••••••••


Ness doesn’t learn PK Starstorm in his game, but his other psychic friend taught him this move. This attack is best to use off an edge since the meteors come down in a fan-like shape away from Ness. You are invulnerable while using the move until a few seconds before the last meteors hit the stage.
Trophy Description:
Ness as he calls down a host of damage-dealing stars in his Final Smash. Everyone on the screen must dodge like crazy to avoid getting hurt, but that's no easy task. This attack appeared in the Mother series, but it was Poo, not Ness, who wielded it. Perhaps Poo taught Ness the secret of the attack for use in Super Smash Bros. Brawl.
•••••••••••••••••••••••••••••••••••••••••••••••••••••••••••••••••••••••
Taunts
•••••••••••••••••••••••••••••••••••••••••••••••••••••••••••••••••••••••

Up: “Okay”

Side: Bat Display

Down: Finger Sparks
•••••••••••••••••••••••••••••••••••••••••••••••••••••••••••••••••••••••
Costumes
•••••••••••••••••••••••••••••••••••••••••••••••••••••••••••••••••••••••
Ness got two new costumes in Brawl, and these costumes aren’t simple palette swaps. Choose your favorite and represent!

Classic Ness
- Red hat with blue tip
- Yellow + blue striped shirt
Bumblebee Ness
- Yellow hat with black tip
- Yellow + black striped shirt

Green Ness
- Green hat with orange tip
- Green + orange striped shirt

Blue Ness
- Blue hat with purple tip
- Blue + yellow striped shirt

*New: Fuel’s** Shirt Ness
- White hat with red tip
- White shirt with red Sleeves and yellow shorts
**A character in Mother 3

*New: Grunge/Dark/Mr. Saturn Ness
- Pink hat with black tip
- Black shirt with Mr. Saturn sprite
-----------------------------------------------------------------------
III. Combos and Strategies
-----------------------------------------------------------------------
PK Barrage to PK Missile (Sparkles, Tail, Missile)
Best done at higher percentages, start off by spamming Ness’s aerial sparkles until your opponent is somewhat away but still close to you. Then take out a PK Thunder and hopefully hit him with its tail. Loop it back towards yourself and hit him with a PK Missile while he’s stunned.
Step Kick to Piston Kicks
In the air, perform Ness’s meteor smash on your opponent to send him flying straight down. It’s best to do this when you’re not so high off the ground so that you can fall faster back on land and begin hitting him with piston kicks. Your opponent will be trapped as you continue to kick him while he’s down.

Hot Feet (PK Fire to Piston Kicks)
Best done at low percentages to rack up lots of damage (up to 50%). Perform PK Fire and engulf your opponent in flames, then simply continue doing piston kicks until he escapes the barrage.
PK Hellfire (PK Fire, PK Fire, Down Throw)
Again, low percentages are good for PK Fire combos. Perform PK Fire twice to capture your opponent in two walls of fire. Before he escapes all of the second PK Fire’s hits, grab him and he’ll continue to get hit by the PK Fire. You can hit him while you grab him if you want since the hits from the PK Fire will prevent him from escaping your grab. Then, simply down throw him to burn him some more.
Stunned Missile Attack (Down throw, PK Missile)
After performing a down throw, your opponent will fly up and most likely try to hit you on the way down. During this situation you can take out a PK Thunder and wrap it around your opponent and slowly bring it back to hit yourself. The tail will stun them and then you’ll Missile into their stunned bodies and mostly likely KO them. You can try this tactic simply after doing down throws or link it with a PK Hellfire to hit them at high percentages.
Electrolysis (PK Thunder, Tail, Tail, Missile)
In the air, you can encircle your opponent with PK Thunder tails and hit him as many times as you can with it before it wears off. If you manage to do it in the air right next to him, you can hit him with the tail as soon as you use PK Thunder, hit him again with it as your circle it around him, and finally hit yourself with it and aim at him.
PK Juggles (PK Thunder, Ball, Ball, etc.) to Drop Kick or Head Butt
If your opponent is heavy or has low percentage, you can continuously juggle him from the ground with PK Thunder. Each time it hits him, you’ll need to do PK Thunder again, so make sure you don’t get hit in transition. After enough hits you can finish it off with a drop kick or a head butt.
•••••••••••••••••••••••••••••••••••••••••••••••••••••••••••••••••••••••
Finishers
•••••••••••••••••••••••••••••••••••••••••••••••••••••••••••••••••••••••
Uncharged Side Smash: Bat [ 18% – 24%] (sweet spot)
Charged Side Smash: [25% – 33%] (sweet spot)
You can still KO opponents with the bat as you could in Melee, but it’s not as fast, so it’s very situational to finish them with a swing in Brawl. If they roll towards you at high percentages, however, one swing can send them flying – especially, if you hit them with the sweet spot of the bat.
Air+Neutral: Flail [11%]
Air+Back: Drop Kick [8% – 15%] (sweet spot)
Air+Up: Head butt [13%]
Air+Down: Step Kick [9% – 12%] (sweet spot)
You can edgeguard with drop kicks, attack a falling opponent with a head butt, or meteor smash someone trying to get up to the stage. Any one of these hits will hit hard and will send foes flying. Even a flail can KO someone off the edge.
B+Up: PK Thunder
- PK Missile: [21%] (side hit), [25%] (direct hit)
My most favorite way of getting KOs in a match is with mind games. It not only becomes difficult for your opponent to predict where you will aim or if you’ll even hit yourself with it, but once it hits, it hits hard. At low percentages, foes can also be edgeguarded and destroyed upon their recovery back onto the stage.
Back Throw: [11%]
Off an edge, a back throw can easily KO someone that forgot to dodge or shielded at the wrong time. Because of his range, be advised when you use this move. Also don't spam this move when your opponent is at low percentages. Save it for when his percentage is up there and when he's near the edge of the stage. Throws get weaker the more you use them during one stock!
-----------------------------------------------------------------------
IV. Ness Stages
-----------------------------------------------------------------------
IV. Ness Stages
-----------------------------------------------------------------------
Ness is mostly an aerial fighter. His PK Thunder can be abused if he has no distractions and a lot of space to them. Likewise, smaller spaces make his opponents fear the unpredictability of his aim and his back throw. Let’s take a look at some stages and see how Ness can use their layouts to his utmost potential.
[Final Destination]
This stage is big, flat, and uncluttered. You won’t ruin your PK Thunder on any ledges, so be sure to know when to use it. You’re free to use any technique with Ness on this stage. Remember, your opponent might have an advantage or disadvantage here too especially when fighting heavy, hard-to-KO characters off the sides. Killing them off the sides can be a hassle since the stage is relatively wide.
[Battlefield]
You might use the ledges as a way to combo and short hop into aerials, so make sure you know where they are. You might tend to ruin aiming your PK Thunder on the ledges since the camera doesn’t zoom out to show where the ball is, so be sure to memorize the length and location of the platforms. Once you know where it is, you can use your knowledge and the camera to surprise your opponent with a low percentage KO.
[Delfino Plaza]
The entire bottom floor is a platform with an edge! This means you jump from underneath the floor into your opponents. If you miss your aim, you can safely grab onto the ledge while the whole stage is in the air. Once you land on land, the beach scene gives you a slope that requires getting used to. You can stay on the water and use your PK Thunder to annoy your opponent and draw them closer to you. Then, once in the water, you can easily spike him with a short hop off the water! You can do a water spike in the hilltop scene too using the same method. Of course, if your opponent catches on to this, you’ll need to change your strategy!
[Smashville]
I personally don’t like Smashville simply because it gives your opponent a ledge to fall on when recovering. Also, the moving ledge can sometimes mess up your PK Thunder aiming. But, on the plus side, the moving platform helps you recover safely far from where your opponent is and it gives you time to figure out what to do next. The stage is relatively not as wide horizontally, so be careful to not get KOed easily off the sides or even off the top from a strong attack. But again, because it’s so small, back throws and PK Missiles can definitely kill at lower percentages than on other stages. Be careful the balloon doesn’t ruin your approach.
[Yoshi’s Story]
The stage is small and Shyguys fly around meaning they might mess you up when aiming your PK Thunder or when using PK Fire. Quickly dispose of them with flails and focus on KOing your opponent off the sides of the stage. The middle platform changes angles as the stage transforms, so don’t let it ruin your recoveries or PK Thunder. The stage itself isn’t flat, meaning when you use PK Fire, you might end up hitting the floor instead of your opponent.
[Lylat Cruise]
I don’t personally like this stage simply because there are many ledges that can ruin your Thunder and because the stage rocks a lot, hitting with PK Fire can accidentally hit the floor instead of your target. There aren’t any obstacles, minus the ledges, on this stage, so it shouldn’t obstruct you from your usual approach. The only real problem is the sloped floors.
-----------------------------------------------------------------------
V. Character Matchups
-----------------------------------------------------------------------
V. Character Matchups
-----------------------------------------------------------------------
VS. Mario
Mario has a lot of solid hits that can send a light-weight character like Ness flying if he’s not careful. Be sure to avoid his back airs and his other potential aerial combos. Mario can start comboing you with up kicks after a down throw, so aerial dodge them. Some Mario players tend to spam fireballs at a distance, so be sure to use your Magnet accordingly, but don't use it when close to him or else you'll get fmashed. Watch out for his cape when using your projectiles. Also, avoid getting blown off course by his FLUD when aiming your Thunder! Be advised that his FLUD water can actually cancel out your Thunder or even push you while you are aiming it back to hit yourself with it.
VS. Donkey Kong
DK is a big walking target for Ness. You can easily trap him with PK Fire, piston kicks, and even aerial sparkles. Be sure to watch out for his tilts and don’t get grabbed. It's also really easy to get Giant Punched after landing from a PK Missile, so really be careful when aiming back onto the stage. Your Missile will out-prioritize his punch and you'll end up hitting him while you simply get stopped, so it's not all bad.
VS. Link
Link’s sword hits hard and his smash side attacks can stun you enough to make you get hit by his second sword slash. Because he’s heavy and laggy at times, he’ll suffer from PK Fire hazards and also aerial sparkles. After you PK Fire him, don't get too close to him or else you'll get grabbed by his clawshot. Instead of continuing a PK Barrage, jump and do some aerial sparkles to prevent this from happening. In the air, beware his up and down sword hits. His bombs give some hefty damage, so make sure he gets hit by your aerial attacks when throwing or holding on to his bombs. If he drops them, he’ll obviously get hit too. Make sure his Boomerang doesn’t throw you off course when aiming with your Thunder!
VS. Samus
Her Power Beam is hard to predict, so don’t try using Magnet at the wrong times. She is also a bit slow, so you can trap her within PK Thunder tails and send her flying. It's easier to get her trapped with PK Fire than it is in the air, since Samus is too heavy to benefit from aerial As usual, beware her missiles and down smashes. You can actually block her missiles and even a fully charged Power shot by simply using your up smash yo yo. Either that, or you can absorb it.
VS. Yoshi
Yoshi doesn’t flinch when you sparkle him as he’s performing his second jump, so don’t get carried away with it. Likewise, when he lands after his second jump, he’s open to get hit by a drop kick or you can also follow him with your PK Thunder and finish with a Missile.
VS. Kirby
Kirby can ruin your air game if you don’t watch out, so be sure to keep him busy defending your barrage of attacks on land and mid-air as well. PK Fire may not work as well against him, but a hit by a PK Missile will KO him at low percent. He is especially hard to combo in the air due to this unpredictable Stone attacks and his quick and long-range forward airs.
VS. Fox
Fox is really light as well, so you can easily KO him with PK Missiles at low percentage. Though light, he’s a fast faller so PK Fire should be used accordingly. But, his aerials can sometimes over power yours, especially his forward aerial kicks and his down airs. Beware his reflector when casting PK Thunder.
VS. Pikachu
Pikachu’s down smash is dangerous, so it’s best to attack him from far away or trap him in fire before getting to close to him. His Thunder can surprise you from below if you don’t watch out, so use Magnet accordingly during this match as well.
VS. Luigi
Luigi has three different recoveries, so be sure to exploit each one. When he does a Tornado back on stage, stop him with PK Fire. If he uses his Missile from the side of the stage, you can jump in front of him to stop his trajectory. If he uses his up B, spike him with your step kick.
Beware his aerial game too.
VS. Captain Falcon
Falcon doesn’t have the quick reflexes of Melee to perform quick KOs on Ness anymore, so you can exploit it by attacking him in the air. His knee has lost some of its knock back and it’s harder to pull off. If Falcon jumps around a lot, juggle him with Thunder.
VS. Ness
You know how to play as Ness, but playing against him might be tricky if you’re not used to it. Don’t fall victim to your own tricks. This is a match of wits and adaptability. If you think you’ll get PK Missiled, it’s better to shield than to attack. Defense is key in this match if your opponent plays in a similar style to yours. ou can be really mean and cancel out his PK Thunder ball with your own and thus cause him to die before he even hits himself back onto the stage. Likewise, watch out for when he does it to you and use Magnet to take some free health when he's circling it around you (avoid his mind games by absorbing it before he hits himself with it). You can also abuse his slow reaction time to grab cancels by grabbing, hitting him a few times, (he then releases from the grab), and then running and grabbing him again and repeating it until he's off the stage. Then you can simply cancel his PK Thunder or down smash him.
VS. Bowser
His large frame and weight make him prey to PK Fire combos and traps. You can destroy him on land at low percentages, and then later you can trap him with PK Thunder tails until you drop kick or back throw him to do his doom. Be cautious when he has high percentages since he might try to Koopa Claw you to death. In the air, beware of his strong up air and butt stomp.
VS. Peach
She might try to invade your aerial territory with her neutral airs and vegetables, so try to keep her in the air with your Thunder. On land, abuse your drop kicks and mind games with your Missile. Her attacks don’t give you too much knock back, but her up smash is dangerous if you land on it.
VS. Zelda
Never forget to use your Magnet when coming back onto the stage. Most Zelda users tend to rely on Din’s Fire to KO opponents off the edge of the stage, but since its hit box gets bigger the longer its out, that means you can absorb it even better. Back throws and Missiles can destroy her at low percentage. Don’t get trapped in her damaging up smash when coming down from the air. If the Zelda you fight spams up smash, then you should spam PK Fire.
VS. Sheik
Sheik is still quite nimble and her attacks can still give Ness problems if you don’t know how to space yourself. Her forward tilts can trap you if you don’t DI correctly. Because she has two ways of coming back to the stage, make sure she has high percentage before throwing her off. Rack up some damage with PK Fire. Your strong aerials and a back throw can devastate Sheik at medium percentages. Sheik is fast enough to get in your way while aiming PK Thunder, so make sure she gets hit!
VS. Ice Climbers
Ice Climbers can be ruthless if you let don’t watch your back. Because there is some delay when the player controlled climber shields, chances are the other one will get hit by your PK Fire followed by your down throw. This is your chance to separate them and begin attacking. When coming down from the air, be careful to avoid their up air hammer as it can KO you easily if you’re high up in the air and you have high percentage.
VS. Falco
Like Fox, Falco’s attacks come out relatively fast and his laser can give you problems. Don’t get tricked into using Magnet at the wrong times! He’s a fast faller, so be sure to use PK Fire well. Most Falco users come back to the stage using their Phantasm from the side, so prepare yourself with Thunder and hit them if they land on the stage instead of the edge. Falcos like to combo using their down special Reflector. This can easily make you trip and leave you open to an attack, so either roll the opposite direction or simply get up.
VS. Marth
Marth’s sword can hit your Thunder in the air and destroy it. At the same time, you can attack Marth with your forward airs and follow up with throw combos. If you try juggling him from below using PK Thunder, chances are you’ll get hit by his counter, so defend yourself a lot more than you would normally do. When he is charging his Shield Breaker on land, don’t keep your shield up or it’ll be quickly eaten away. Sometimes it's better (depending on how much percentage you have) to get hit by the Shield Breaker than to shield it. In the air, prepare yourself and aim at him with your Missile. Don't get grabbed.*
VS. Ganondorf
Ganondorf’s attacks come out slow, but when they hit, they give you lots of damage. Avoid getting too close to him on land, but attack him in the air to rack up damage. He’s heavy, so trap him in Fire. Don’t leave yourself too open with Thunder or missed grabs or else you’ll get smash attacked from all directions. Harass him on land with fire and you should be fine.
VS. Mr. Game & Watch
Definitely don’t use your projectiles as often as you would, and when you use them, make sure he’s attacking instead of defending or else he’ll eat them up and store them for later. G&W’s attacks quickly lead into each other with little lag, so beware of leaving yourself open in the air or on land. He’s light, so you know how to hit him. When he grabs you, you will almost always be thrown downwards only to get hit by a quick lagless down smash. Avoid this by quickly rolling out of the way or by kicking after a down throw.
VS. Wario
He’s an unpredictable underestimated opponent. Don’t let his chunky demeanor fool you though, his attacks are relatively fast and strong. He’s heavy, so Fire is your friend. When on his bike, aim for Wario’s head to make him get off it and follow up with aerial attacks. Some Wario players wait until their Fart is fully charged up to use it, so if the matches is dragging on, be sure to keep your distance from Wario. His Smash attack gives him some heavy armor so be sure you hit him first or you shield and then grab him.
VS. Zero Suit Samus
Zamus is fast and her side B and up airs can really hurt and KO Ness at relatively low percentages if near the edge or off the top of the screen. Because she becomes open after using her side B, hit her with PK fire to rack up some damage and follow up with fairs or even more PK Fire. If Zamus is grappling and hanging from the edge, you can wrap PK Thunder around her and have her fall to her doom.
VS. Meta Knight
Clearly, an annoying match if you're facing a really good Meta Knight. On the plus side, Meta Knight is really light, so even a PKT Missile to him at around 50-60% can KO him relatively easily. Save your back throw for when he has at least 70% and he's dead. PK Fire does its job, but because he is so light, it won't trap him as often unless you hit him really close up. Watch out for his Up B in the air. If your MK spams Tornado, time your PKT Missile just right and hit him when he's vulnerable after he finishes spinning.
VS. Pit
Similar to Meta Knight, Pit is annoying in the air, and if you're in the air, it's a bit scary. Luckily, Pit is also very vulnerable in the air, so make sure to annoy him and use PK Thunder to throw him off course. The thing is, he can actually block your Missile with his Palutena Shield instead of using a shield, but of course, he is only protecting his front side, while his head and back are open. If you try to barrage him with PK Fire, he might eventually reflect it back, so grab him as soon as you can. He's also really light and easily KOable in the air.
VS. Ike
Ike is a challenge to fight, BUT he's not impossible to beat. In fact, if you know how to play your cards right, he's pretty easy. He lags a lot after his attacks, but that leaves him open to grabs and PK Fire, and even the surprising PK Thunder Missile (especially if it's done to him right after he recovers using his side B). He can be annoying to KO simply because he's heavy and doesn't die until high percentages. But, a back throw off the edge of the stage at around 100% can surely KO him. Watch out for his simple, yet effective, AAA combo. Remember, Ness isn't that heavy...
VS. Squirtle
Squirtle seems to die from nearly any high impact attack, so rack up his damage, combo him a little, and then back throw. Because Squirtle's light, he might not be easily trapped by PK Fire all the time, but a headbutt, Missile, or or back kick can KO him easily. He's very fast and uses the air a lot, so use your fairs to stop him.
VS. Ivysaur
Fire is super effective on Ivysaur in the Pokemon games, and it works here too. Because he is somewhat heavy and his body is long, PK Fire traps him easily. Avoid his whips by shielding and use fairs to hit him from above. Watch out for his destructive up smash and his long ranged fmash. Like with Zamus, if you hit him with PK Thunder as he is hanging from the ledge, he might just fall to his doom.
VS. Charizard
Charizard is heavy and tough to KO, but because he is big and heavy, he's easy to abuse with damage. PK Fire is super effective on him, and fairs are too fast for him to shield if done right. Overall, Charizard has the potential to KO Ness at below 100%, and yet because he is slow and heavy, Ness can have 100% and survive by annoying Charizard with aerial Thunders and ground combos.
VS. Diddy Kong
Diddy Kong is fast and he's strong too. His fmash traps you for lots of little damage, so you need to watch out to give him so space and attack from a distance. When you're close to him, approach him as you would anyone other relatively light character (use PK Fire close up) and watch out for his banana peels. You can pick them up and use them against him, but don't waste your time unless you want to set up a banana combo. You can really screw up his special recovery with your PK Thunder.
VS. Lucas
Almost like Ness in shape and size, but with a totally different style. You have PSI Magnet so you use it wisely. Don't use it and get fmashed with his stick. You can be really mean and cancel out his PK Thunder ball with your own and thus cause him to die before he even hits himself back onto the stage. His is a lot slower, so follow it and it's gone. Likewise, watch out for when he does it to you and use Magnet to take some free health when he's circling it around you. You can also abuse his slow reaction time to grab cancels by grabbing, hitting him a few times, (he then releases from the grab), and then running and grabbing him again and repeating it until he's off the stage. Then you can simply cancel his PK Thunder or down smash him.
VS. Dedede
Dedede can be annoying, especially all that chain grabbing nonsense he does a lot. When he DOES miss a grab, AAA him or grab him and juggle him in the air a little bit. His hammer doesn't always block PK Fire on the ground, so use it when it's extended and when you're a safe distance away from him. A constant barrage of PK Fire, and even some aerial PK Fire pillars can help you trap him as you rack up his damage and end it with a back throw or even a back kick. Seriously watch out for his back kicks. They tend to hit a lot more vertically than they appear, so watch out when approaching him in the air after he finishes a back kick.
VS. Olimar
Olimar can combo you after a grab, an upsmash, and then an up air. If you use PK Fire on him, you might end up hitting a Pikmin instead of his small body. I'm not saying you should use it, but don't overdo it in this match. A safer and more effective strategy is using PK Thunder when he's in the air. If you wrap PK Thunder around him and then Missile yourself into him, he's probably dead. Olimar is light enough to die at 60% from a well aimed PK Missile. Back throws also end his day.
VS. Lucario
Lucario is annoying. Not only do his attacks hit you from far away (including fsmash and up smash) but he has his Aura Sphere that he can release at any time. His down air can actually cancel out your PK Thunder quite easily, so watch out for it when using it against him in the air. He is medium weight, so he can be trapped by PK Fire while also an easy target for a Missile. Don't forget that when he has high percentage, he can hit you much harder. But, you do have that back throw of yours, so don't worry too much about that. Worry more about actually catching him and back throwing.
VS. R.O.B.
ROB is an aerial threat to Ness more so than Meta Knight. ROB has amazing attacks that can easily send Ness flying if he's approaching ROB in the air. His nair hits at odd angles, so overall, just air dodge it. His down air can KO you off the stage while at the same time negate your PK Thunder. His gyro can really send you flying if you're careful and it can even block your attacks like PK Fire. ROB is heavy though, so use PK Fire on him and some aerial Fire pillars to trap him. In the air, watch out for his aerial attacks, and while landing really watch out for his up smash. His down smash can annoy you while giving you lots of percentage, so don't get too close. This is another challenging match.
VS. Jigglypuff
In the air, Jigglypuff is supreme, but on land, you can grab and hit and PK Fire Jiggly until a simple back throw kills it. Seriously though, if you are coming back onto the stage and you are about to use a PK Thunder, watch out for Jiggly's body and where she's moving. If you're not lucky, it might intercept (by getting hit by it) it and cause you to fall to your death. You can avoid getting your Thunder canceled out by releasing it from different sides of your body (left or right). If you're coming from the right side of the stage, chances are you might release PK Thunder from the right and loop it back to hit you. But, try releasing it from the left and looping it backwards for a recovery.
VS. Toon Link
Toon Link is an aerial machine, similar to ROB, but he's a lot faster. Unlike ROB, he can die pretty easily from a PK Missile. When you're in the air, be really careful to avoid getting up smashed by his sword, and don't let him combo you with back airs into an up air. Avoid this by dodging out of the way, using fairs, and also grabbing him once he lands back on the stage. Simple nairs come out quickly and mess up his combos. On the ground, his projectiles can annoy you, but simply jump over the arrows, dodge the boomerang, and hit him. A safer approach would be to KO him from the ground and avoid trying any head butts on him. You don't want to get poked.
VS. Wolf
Wolf's blaster can be annoying, especially when you're about to jump. Don't Magnet too much or else his long-ranged fmash might reach you. Overall, Wolf is not that hard to fight, but his disjointed smash attacks and his deadly back air can pose some problems for you. A simple approach would be to use PK Fire enough to get him to high percentages and then harass him off the edge. His recovery isn't so nice, so abuse it by wrapping PK Thunder around him.
VS. Snake
Most people say this is Ness's hardest matchup, but to be honest, Snake is heavy and gets easily trapped by PK Fire - so much so that you can trap him with multiple Fire shots similar to how you can trap Bowser. Unlike the heavy Bowser, Snake's simple AAA combo can seriously hurt Ness and his up air up tilts can hurt him if they hit. His C4 down special can really hurt if Ness lands on it after a PK Missile (the same can be said about a planted down smash.) Snake is really hard to defeat, but with enough mind games and traps, you can destroy any Snake that decides to lay grenades down your path. Speaking of which, don't use many fairs if there are grenades on the ground. Simply jump over them or air doge near Snake and begin the assault.
VS. Sonic
Sonic is fast - of course he is - but he lacks strong killing moves. This is good news for Ness because, while it might be hard to trap him in combos and PK Fire barrages, many aerial hits can easily KO him (head butts, back airs etc.). A good thing to do when he's rolling around or running at you is to stop him with your down tilts. These little kicks stop his roll and trap him in front of you. If he trips, grab him or continue kicking him. He dies at low percentages, so don't worry too much.
-----------------------------------------------------------------------
VI. Misc.Infinite grab/cancel Trap of Doom
So here it is folks. Before it was revealed to the masses, a few of us Ness players (Simna, Ademisk, and I) knew about the dangers of Marth grabbing Ness (Charizard can do this as well.)
Basically, Marth grabs Ness or Lucas, hits them a few times, Ness (or Lucas) escapes his grab, lands on the ground stunned, and Marth simply grabs again (without moving an inch) and continues hitting/escape releasing/grabbing until Ness gets enough percentage to fmash him to death. A cruel "glitch" indeed.
Sometimes, and this is the part that makes me want to ban it from my matches, Ness or Lucas might escape and jump into the air, preventing Marth to grab him on the ground. BUT, this situation is random and cannot be created at will, meaning this is really CHEAP!
This is like wobbling (in Melee). Wobbling was easy to set up and quite cheap because you'd get grabbed and trapped until you had ridiculous percentage and then killed. It was hard to pull wobbling off, so some people didn't ban it at tourneys, and others did. This infinite grab is easy for anyone to do, even by accident, it's not even fair.
I personally ban if from matches. But if you don't, play Marth on a slanted stage like Yoshi's Story or Lylat Cruise, at leas you'll get more distance if there is a slant on the ground.
Marth is the best abuser of this glitch, but anyone can take advantage of a laggy Ness on the ground and pretty much dash grab him. Watch out!
-----------------------------------------------------------------------
Ness videos
http://www.youtube.com/user/PKstyIe[/size]
*Thanks Chrono for the images!
")
 , put that in