
Egg.
Smash Journeyman
Yoshi's double jump has a property called heavy armor, which allows him to absorb attacks without taking any knockback until a certain threshold is passed. So the question is, what does it take to break that armor?
To be precise, it takes 120 units of knockback, and if an attack does more than that, Yoshi is knocked out of his jump. Using the knockback formula, I made some simple (and pretty inefficient) code that calculates the percent at which this threshold is broken given the properties of each attack, and through a lonngg process of data entry, I calculated the percent at which EVERY* move that every character has will break Yoshi's armor.
*Missing data: Cloud Neutral+B, Dedede Ftilt multihit, Fox Down+B, Lucas Neutral+B and Side+B, Mii Gunner Stealth Burst, Mii Swordfighter UpB1 and SideB3, Mewtwo Neutral+B, Pac-Man Neutral+B, Sheik Side+B, Villager Side+B(Riding), Wario Side+B(Hit&Projectile), Wii Fit Side+B (Ball), Zelda Down+B.
I plan on testing these using old-fashioned trial and error since they were missing on KuroganeHammer...
Some disclaimers:
All that being said, remember that these calculations are not always exact given all the variables that go into a match, but they should at least give you a good idea of when your jump armor will fail.
The basic format of the data is this: for each character, I wrote a brief paragraph talking about the main moves to look out for. Next is a list of "dangerous moves", or anything that breaks jump armor under 90%, followed by a complete list of their moves.
Characters are put in alphabetical order as follows:
 /
/
Downloading the Calculator:
Here's the code if you want to test the calculator out. All the data is in this thread, but if you want to test out how rage affects armor percents for a specific character or reduce the percent range for dangerous moves (currently set at 90%), go ahead and download it. You need some sort of Java environment like jGRASP or Eclipse to use it.
Special thanks to KuroganeHammer for compiling all of the frame data that I used to make these calculations. Onto the list!
![]()
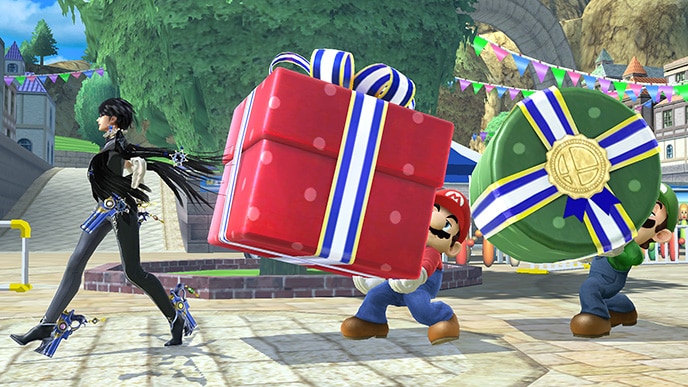
Though she was heavily nerfed in the last patch, Bayonetta still has proven to be a viable and dangerous opponent. Be careful of her Up-B and the landing hitbox of Dair, which break armor at 0% and 20% respectively, as well as Late Side+B(Aerial) which can also break it at 0% sweetspotted or 43% sour. More of her moves start to break armor around 50%, including her Dash Attack, Fsmash, and Usmash.
Notably, her Dair spike and Dsmash don't actually break armor until 74% and 69% respectively (unstaled, uncharged), so don't worry about being gimped by these until higher percents.
Dangerous moves:
Normals
Aerials:
Specials:
![]()
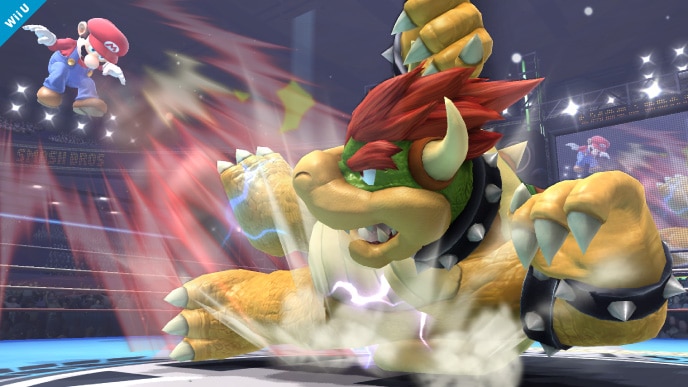
The heavy-hitting Koopa king may not be an incredibly popular pick, but his powerful area-covering attacks have the potential to break armor pretty early. Grounded attacks you should look out for are Dash Attack, breaking armor at 0% and Usmash/Fsmash, which can break you out in the 20-40% range (including the "falling" hit of Usmash).
Be careful around Bowser off-stage especially after the ≈60% range, since his quick Bair and Fair can break armor at 48% and 67% respectively. The first hit of aerial Up+B can also break armor at 50%, and His Down+B can break even earlier at 30% about. While he has many options to break Yoshi's armor, he is still pretty slow in the air, so try to use that to your advantage when recovering.
Dangerous moves:
Normals:
![]()
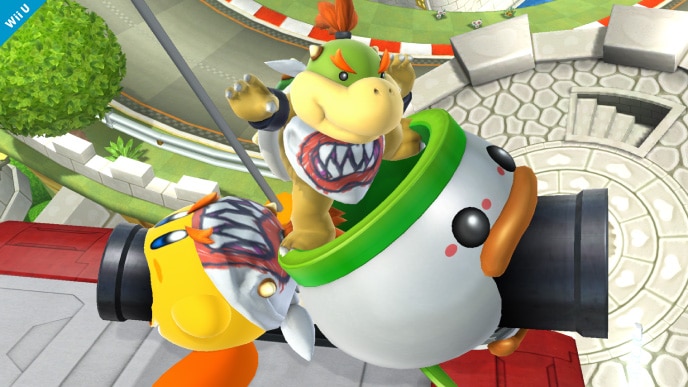
Bowser Jr's decent mobility, projectiles, and disjoints make him a formidable foe, despite being somewhat uncommon. Fortunately his aerials don't break armor until higher percents, with Bair being able to knock you out the earliest at 59%, and the rest breaking closer to 70-80%. His only main grounded threat is Dsmash, which extends somewhat far and breaks armor at 35%.
Be wary of his special moves also - Fully charged Neutral+B breaks armor at 33% (or 59% on the late hit), and Up+B can be dangerous with the explosion breaking it at 19% and the hammer at 37%. The "Spin-out" of Side+B breaks armor later, at 76%, though it's more likely if he uses this attack that he's going to jump-cancel it into a Fair or Uair, which break armor in a similar range.
Dangerous moves:
Normals:
![]()
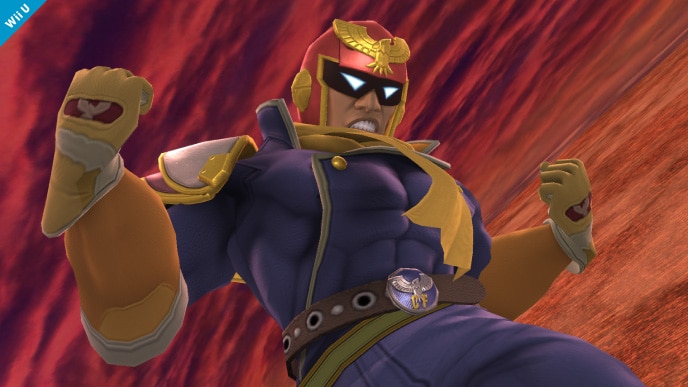
He may not be a top tier, but Falcon's speed paired with his great combos and aerials are nothing to sleep on. Not only can his smashes break armor pretty early, but so can his aerials - watch out for Sweetspot Fair and Dair which can break armor at 36% and 42% respectively. His Nair(2nd hit) and Bair can also break armor starting in the 60's, so try to recover high against Falcon if possible. His specials also have the potential to break armor early, but they are pretty telegraphed and shouldn't be too hard to avoid.
Dangerous moves:
Normals
Aerials:
Specials:
![]()
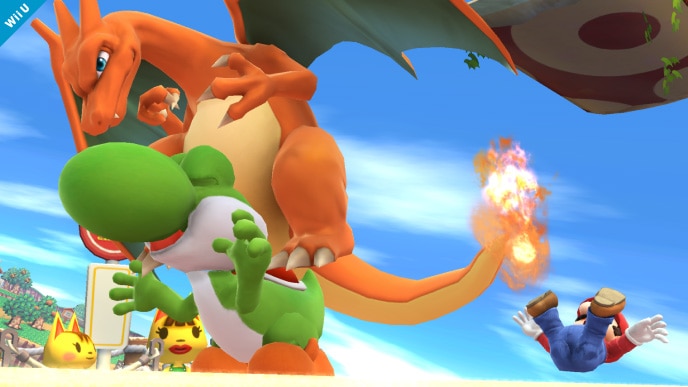
A heavyweight whose throw buffs have made him quite a force to be reckoned with, Charizard's powerful hits unsurprisingly threaten to break Yoshi from his armor pretty early. All of his aerials except Nair are capable of breaking armor around 50-60%, with Bair notably breaking it even earlier at 33-41%. Also watch out for his specials: the first hit of Up+B breaks armor at 0% with the multihit breaking between 6-42% depending on sweet/sour, and his Side+B can break it at 21%. Keep in mind that in addition to breaking armor early, all of his specials (besides flamethrower) have super armor, so it's probably best not to challenge them most of the time.
Down+B and Dsmash are also moves to be aware of when jumping near the ledge, since both can break armor around 40%. The "launcher" hit of Usmash can also break armor at 0%, though this is more situational. Fortunately, his Neutral+B will never break armor before 200%, so you can always jump through that safely even if he's trying to cover the ledge with it
Thanks to Marrow for typing up this data!
Dangerous moves:
Normals:
![]()
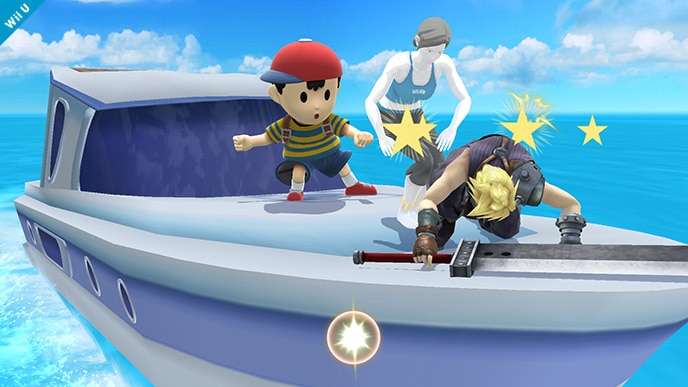
A very solid character and a difficult matchup for Yoshi thanks to his buster sword, Cloud has a fair ( ) number of moves that break through our armor pretty early. Some of the biggest ones to look out for are his Dash Attack (7%, 25% late), Fsmash/Dsmash (20-30%), Limit UpB (35%), and the Descending hitbox of UpB which will knock you out at 0%.
Aside from those, you also have to look out for Limit Attacks which will break armor around 50% or less, as well as his strong Fair/Dair spikes which will break armor at 61% and 64% respectively. There wasn't data available for Cloud's Neutral B, but in general just try to avoid it, especially in Limit Form since it's a multihit.
Dangerous moves:
Normals
Aerials:
Specials:
![]()
That one kid from dragon high school, Corrin can be kind of tough to deal with thanks to his/her disjoints and their ability to break our eggs pretty easily, but fortunately they don't have a lot of tools to break through our armor too early...
The big thing to watch out for are their Tipper smashes, which can break through armor at about 40% and can poke you from pretty far off-stage, as well as Tipper side+b, which breaks it at 47%. Also, don't be dumb and jump into Corrin while they are kicking after side+b, since that will knock you out at 28%.
Aside from that, the bite that follows neutral+b can break armor at 54% uncharged and 41% charged, and Bair is able to break it a bit later at 59%. In general, be very cautious past 80%, since that's when most of their moves will start to break armor.
Dangerous moves:
Normals
Aerials:
Specials:
![]()
The infamous character who most agree to be Yoshi's worst matchup due to his ability to control the stage and outrange us in the air, he fortunately does not have very many tools at all to break through our armor. The only move that majorly threatens Yoshi's jump off-stage is the Side+B attack, which is able to break armor at 43%, or 53% on the late hit.
Dair is also something to look out for, breaking at 56%. His Fsmash and Usmash are also able to break armor around 50%, though their range is small enough that you shouldn't be in a situation where you need to armor through them. Notably, his bananas have set knockback which is low enough where you will never be hit out of your double jump by them. (theoretically... need to test this)
Dangerous moves:
Normals
Aerials:
Specials:
![]()
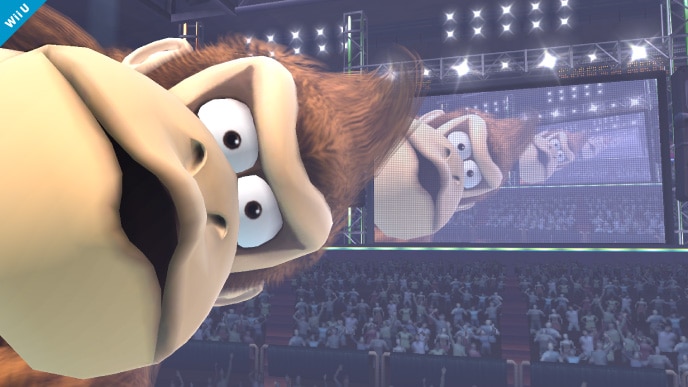
You know him well as the most dangerous ultra-heavyweight thanks to his gigantic hitboxes and infamous cargo combo. Most of his aerials surprisingly don't start breaking armor until the 60-70% range, aside from Fair and Dair sweetspots which can break it near 50% - an interesting advantage to keep in mind. Be wary of Utilt breaking armor at 47%, as well as his 9-wind punch which can break it at 15%. The aerial punch breaks armor about 20% later, but is still pretty dangerous.
Considering how hard he hits though, his attacks really don't start breaking armor too early compared to some characters. Just be careful once you're past 70-80%, because at that point pretty much everything he has starts to break armor. It's noteworthy that his Aerial Up+B (besides the first hit) cannot break armor until past 200% (First breaks at 90%), so jumping through his recovery and countering with a Nair is possible if you're below him.
Dangerous moves:
Normals:
![]()
Just like his plumber counterpart, Dr. Mario doesn't really have that many moves that break armor obscenely early, though he does have a few to watch out for. The Normal (non-early) hit of Fair can break armor at only 38%, making it his most dangerous move, though it has a decent amount of windup. Bair is the only other aerial you really have to watch out for, and not until 79%.
His Up+B doesn't break armor at 0 like Mario's, but the early hit can knock you out at 55% in the air or grounded, and it comes out pretty fast. The Last hit of Down+B also breaks armor at only 32%, so it might not be a good idea to mash jump if you find yourself caught in the multihit. And of course, watch out for that cape.
Dangerous moves:
Normals:
![]()
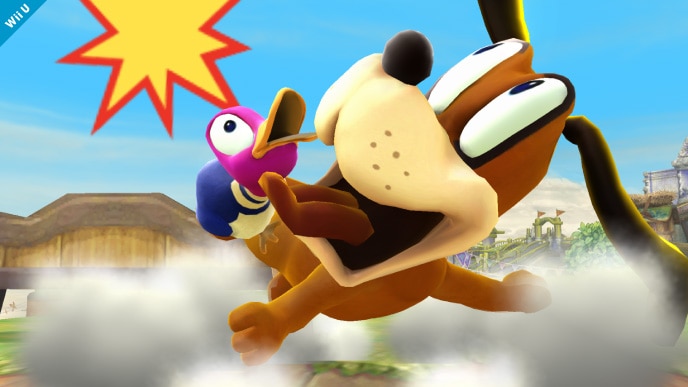
Duck Hunt doesn't have many tools to break armor, but the explosion of Neutral+B is a pretty threatening projectile that can break armor at 72%, so be wary of it off-stage. Aside from that, the first and second hits of Dsmash both knock you out at 0% and send you at a pretty low angle, making it dangerous move on the ledge.
Duck Hunt's more threatening aerials are Nair and Bair, both breaking armor around 70%. You don't have to worry about their other projectiles as much, with Side+B's last hit not breaking at 145%, and Down+B breaking between 100% and 160% depending on the gunman.
Dangerous moves:
Normals:
![]()
Since many of Falco's aerials are multihits, he doesn't have a lot of options to break armor, though a few moves he has can be dangerous. The biggest threat is Bair, which breaks the earliest of his aerials at 60%. The last hit of Nair and Fair break in a similar range, though you can safely jump through the multihits. Surprisingly, Dair doesn't break until closer to 100%.
Additionally, the first hit of Utilt can break armor at only 0%. Also watch out for his Side+B at higher percents, since in the air it can knock you out at 105%, which can spell certain doom due to the strong meteor effect it has.
Dangerous moves:
Normals:
![]()
The star of Melee who's been making waves in Smash 4, Fox's general lack of strong, single hits fortunately makes it hard for him to break Yoshi's armor until higher percents for the most part. The main aerial you have to look out for is Bair, which will knock you out at 80%, with the First and Last hit of Fair also breaking around 80-85%.
His earliest breaking attacks are Usmash and Fsmash, but even these don't start until 47% and 63% respectively. As for specials, watch out for the last hit of Up+B, which can break it at 61%, and Side+B at higher percents, though it doesn't become a threat until 105%. Fox can be a pretty tough matchup to play if they know what they're doing, so try to abuse his difficulty with breaking armor as much as you can.
Dangerous moves:
Normals:
![]()
As a read-based powerhouse, it shouldn't be surprising that basically everything Ganondorf has breaks armor at pretty low percents. Fair, Bair, and Dair all break armor at around 40-50%, and his smashes break it in the 20-30% range. In addition to his aerials, watch out for his Down+B off-stage, which sends him flying pretty quickly and can break armor at 50% grounded or about 30% in the air. Also note that his Neutral+B and Utilt both break armor at 0%, so don't even think about trying to challenge those head-on.
Fortunately, Ganon's poor mobility paired with Yoshi's great air speed often makes it possible to just drift around his attacks - just be respectful of his options and how quick that a lot of his moves can come out and you should be fine.
Dangerous moves:
Normals:
![]()
A character whose potential has recently begun to surface, Greninja does not have any particularly outstanding tools for breaking Yoshi's armor, but definitely some to keep in mind. The most dangerous moves are his specials, with Fully charged Neutral+B's last hit breaking it at 55% and Side+B breaking at 30% or 39% depending on the hit. Note that the multihit for Neutral+B doesn't pose a threat to recovery, but the Uncharged Neutral+B does at higher percents, breaking armor at 120%.
All of his aerials start to break armor at 70%, with the only outlier being Dair at 54%, though it's pretty unlikely Greninja's just going to throw this out off-stage. Just be aware of his Side+B and Shuriken, especially the quick uncharged ones once you're past 120%.
Dangerous moves:
Normals:
![]()
The heavy-hitting swordsman who's gotten some buffs since the game came out, it's not too surprising that pretty much all of his moves can break armor pretty early. Most of his aerials start to break armor at 50% (Bair, Uair, Dair), with the remaining breaking at 60% (Fair) and 70% (Nair). Additionally, the Launching and Falling hits of Up+B can both break armor at 0%, so be very careful when challenging Ike off-stage.
Besides this, his uncharged smashes all break armor around 30% (so the charged versions obviously break earlier), plus charged Neutral+B can break it at 15%, and it has a gigantic hitbox that pierces the stage. Basically, recover high against Ike (or try to bait these out and dodge) whenever you can.
Dangerous moves:
Normals:
![]()
The eternally unbuffed puffball, Jigglypuff lacks very many options at all to break through armor until higher percents, with one notable exception being Bair which breaks it at only 43%. Once you're past 70%, you need to start watching out more since Nair and Side+B will both start to break armor at this point, with Fair breaking it a bit later at 89%.
Of course, Rest comes out on frame 2 and can break armor at 0%, but chances are you aren't going to have to worry about that as an option off-stage. Even her smashes don't break armor until around 50% (with Dsmash being all the way at 100%), so you can take advantage of this in the off-chance you do run into a Jigglypuff.
Dangerous moves:
Normals:
![]()
As one of the hardest hitting characters in the game, you have to watch out for pretty much all of Dedede's moves past low-mid percents. Nair, Bair, and Dair all break around 50-60% (non-sourspotted), and Fair breaks later at 91%. Also watch out for Fsmash near the ledge, which can knock you out at 21%, and the Multihit of Ftilt which can apparently break armor at only 42% (will need to check this though - WBKB is weird).
His Side+B can break armor between 39% and 64% depending on how early that it hits, but remember you can send it flying back with a simple Nair/Egg. His Up+B(descending/landing) and Down+B (charged) both break obscenely early (20-40%), but they have long enough wind up that you shouldn't be getting hit by them anyway. Note that you can jump through a Gordo stuck to the wall until about 140%, so don't be too afraid if he tries to trap you with it.
Dangerous moves:
Normals:
![]()
An uncommon but powerful character with great combos, Kirby doesn't have a lot of attacks that break armor early, but he does have some dangerous tools to watch out for. Of his aerials, Bair is the largest threat with the ability to break armor at 63%. His Fsmash also breaks armor surprisingly early, with the late hit breaking around 15-20%, as does the last hit of Dash Attack at 22%.
Also keep an eye out for his special attacks, since while they may have lots of startup, his Side+B can knock you out at 20-30% uncharged, and both early hits of Up+B can knock you out at 0%, making it a viable ledge option for Kirby that we have to respect at any percent. Note that the late hit of Up+B doesn't break armor until 115%, so for the most part you only have to watch out for the early hit.
Dangerous moves:
Normals:
![]()
Link may have one of the worst air speeds in the game, but his strong and relatively fast sword swings can be dangerous when he's trying to intercept your recovery. Both hits of Fair can break armor at about 56%, and his long-lasting Uair and Dair break it around 70%. For some reason, the non-meteor hit of Dair breaks it even earlier, around 50%.
Also watch out for Up+B, which breaks armor at 30-80% uncharged on the ground (depending on whether it's the early, normal, or late hit). the Aerial Multihit also has surprisingly high weight-based knockback, and can knock you out at 42%, so be careful of reverse Up+B on the ledge. Dash Attack also covers a large area and breaks armor at 24%.
Dangerous moves:
Normals:
![]()
As a fighter who's not going to be chasing you off-stage very much for his own safety, Yoshi's double jump usually isn't at much risk of breaking against Little Mac. His only real option is waiting on the ledge and charging a Dsmash, which can break armor at 68% uncharged and at 43% fully charged. Also note that the Launcher hit of Up+B breaks armor at 0%, so it's not always possible to jump out of this move. In general though, getting back to stage against Little Mac is going to be hard even with our armor just considering how fast he can get around.
Dangerous moves:
Normals:
![]()
Lucario's aura can make it really hard to guess when exactly his attacks are going to break your armor. If you're not familiar with the precise mechanics of aura then here's a crash course: at 0% his attacks do 0.66x the damage they should, with the damage slowly rising until 70%, at which point they do the "true" amount of damage. From here, damage continues to scale until it caps at 190% with a 1.7x damage multiplier. The data I put in is the "true" damage of Lucario's moves, or how much they do at 70%.
At this medium aura level, his aerials are somewhat threatening, with Bair breaking armor at 47%, and Fair and Uair breaking around 60-70%. Also watch out for fully charged Neutral+B, which travels quickly and will break armor at 32%. His grounded moves aren't very notable, though the Launcher of Usmash will knock you out at 0%.
I calculated a few examples of when Lucario's moves break at different levels of aura if you want to take a look below, but as general rule, Minimum aura results in attacks breaking about 30% later than listed, and max aura results in them breaking about 30% earlier. Be very cautious around a high percent Lucario, since most of his moves can break our armor in the 20-30% range or earlier.
Dangerous moves: (Calculated with aura at 70%)
Normals:
![]()
While not to the extent of Ness, Lucas still has a variety of disjointed attacks that can threaten Yoshi's double jump at middling percents. Both his Fair and Bair break armor around 70% sweetspotted, and his Uair breaks it at 77%. His Dsmash is also a pretty meaty hitbox that breaks armor at 35% on the first hit, with the next two hits breaking it about 30% after the previous, and his massive Usmash breaks armor at 0% with the launcher, and from 34-95% depending on how early it hits.
Contact with his Up+B isn't as dangerous as Ness's, though the first and last hit are somewhat dangerous, breaking armor at 46% and 18% respectively. Also watch out for his Down+B, since while it doesn't break until 85%, keep in mind that it has a moderate disjoint on its deactivation which can easily catch you if you aren't careful.
Dangerous moves:
Normals:
![]() \
\
As a version of Marth without the tippers, Lucina's attacks pose slightly less of a threat to Yoshi's double jump at earlier percents, but since her aerials still have a good amount of range and don't require as much precision, it's still important to be careful off-stage at mid-high percents. Her earliest breaking aerials are Nair's 2nd hit and Bair at about 60%, with the remaining aerials breaking closer to 80%.
Also watch out for her Neutral+B, which can poke you out between 77% uncharged, and 13% at full charge. The Early hit of Up+B is also pretty dangerous if you're recovering low, breaking at 45%. As for near-stage threats, the launcher hit of Usmash can knock you out at 0%, and Fsmash can knock you out at 29%.
Dangerous moves:
Normals:
![]()
Everyone's favorite number two, Luigi doesn't have many options to break Yoshi's armor off-stage - his most threatening aerial is Bair which breaks armor at 68%, with Nair breaking later at 85%. Misfire can knock you out at 20%, though the 1/10 chance means it's rarely a threat.
His Sweetspot Up+B can also break armor at 15% on the ground and 49% in the air, but it's pretty unlikely he'll be throwing that out just to intercept your jump. Also remember that his Down Taunt can break you out at 0%, so don't get reckless near the stage or you might be struck with eternal shame.
Dangerous moves:
Normals:
![]()
The well-rounded combo machine, most of Mario's moves (including the fair spike) don't break armor until 70% or later, though there are a few exceptions to watch out for. Up+B actually breaks Yoshi out of armor at 0%, and while this doesn't mean much in terms of edgeguarding, this does mean that we can't rely on double jump to escape from his dthrow/uair --> up+b combos.
Additionally, the final hit of Dair breaks armor at only 41%, so be careful about jumping into Mario if he follows you off-stage with it. Besides these two attacks, his smashes can also break through armor between 40% and 60%. And obviously, try not to get caped.
Dangerous moves:
Normals
Aerials:
Specials:
![]()
Ever since getting some serious damage/range buffs a few patches ago, Marth has become a serious threat in the tournament scene. His tippers have the power to break Yoshi out of armor fairly early, with some notable moves being the Second hit of Nair (44%), Early/Tipper Up+B (45%) and Tipper Neutral+B, which can break armor at 47% uncharged, and at 0% fully charged.
A lot of his grounded attacks also break armor pretty early, with Tipper Fsmash breaking it at only 6%, and most tilts breaking starting around 40-50%. If he doesn't space his attacks correctly, you're safe for about another 30% depending on the move, but the fact that so many of his moves threaten to break Yoshi's armor at low percents means you should be very careful about using your double jump.
Dangerous moves (Tipper hits only - see all moves for non-tipper):
Normals:
![]()
Megaman's projectiles/disjoints can be hard to deal with, and some of his stronger hits can break armor pretty early. His most notable projectile is his Fsmash, which can break at 70% uncharged and 31% at full charge. Also note that the Last hit of Side+B's explosion will break armor at 0%, so you have to airdodge through it or just take the hit if you're stuck with it in midair.
As for physical moves, Bair is probably the largest threat due to its fast and disjointed hitbox, with the second hit breaking at 74% and the last hit at 62%. His Usmash and Dsmash also break armor pretty early (40-60%), and the launcher of Usmash can knock you out at 0% if you find yourself jumping close to the stage.
Dangerous moves:
Normals:
![]()
What used to be an unwinnable matchup before the patches is now a challenging, but doable one. With his moveset being mostly weak hits, most of his attacks don't start breaking armor until around 60-70% with the exception of the First hit of Up+b which can break armor at 0%. Be careful around Fsmash and Ftilt3 near the stage, since those can also pop you out relatively early (around 40%). Start watching out for Nair and Bair3 at mid-high percents, which break armor at 66% and 56% respectively.
Dangerous moves:
Normals
Aerials:
Specials:
![]()
The iconic clone who shocked everyone with his addition to Smash 4, Mewtwo has been making waves in the tournament scene ever since his major buffs in a previous patch. Fortunately, none of his attacks break armor obscenely early, but several of his aerials do break armor slightly earlier than the average character, the major offender being Fair, which breaks at 48%.
While he doesn't have any major outlying attacks to look out for, it is definitely important to play safe off-stage against Mewtwo when you consider the massive range that some of his attacks have, as well has his Side+B command grab which will obviously break you out of armor regardless of percent. Neutral+B when fully charged is probably also a dangerous attack, though I was unable to find data to determine when exactly it breaks armor.
Dangerous moves:
Normals:
*MISSING NEUTRAL+B
![]()
Huge thanks to Marrow for typing up the data for this one!
Mii Brawler's normal attacks don't pose much of a threat to Yoshi's double jump aside from a few outliers (Jab finisher - 0% and Dash Attack - 14%), but several of their specials can be pretty dangerous when recovering. The Multihit of Piston Punch (Up+B-3) breaks armor at 0%, which can easily result in a stage spike if you're jumping too close to the ledge. The Ground hits of Foot Flurry (Down+B-3) also have the ability to break armor at 0%.
Other dangerous specials include the projectile Shot Put (Neutral+B-1) which can knock you out at 64%, and the ZSS-esque Feint Jump (Down+B-2) which can break at 72%. Aside from these moves though, Mii Brawler seems to struggle to break through Yoshi's armor, so you can use this to your advantage when recovering or edgeguarding.
Dangerous moves:
Normals:
![]()
Mii Gunner's normal attacks break armor in pretty standard ranges, but some moves to look out for are the Samus-like Dtilt that breaks armor at 31%, and the Toon Link-esque Dsmash that also breaks it around 30-40%. Bair and Dair both break armor around 60% when sweetspotted, with the meteor hit breaking it slightly later.
As for specials, there's a few projectiles to watch out for: Charge Blast (NeutralB1) can break armor at 62%, and Bomb Drop (DownB2) breaks it at 50% on contact. The last hit of Grenade Launcher (NeutralB3) can also knock you out at 76%.though you can safely jump through the multihit.
Dangerous moves:
Normals:
![]()
In addition to being one of the most uncommon characters, Mii Swordfighter lacks very many tools to break through Yoshi's double jump. Their grounded attacks pose a minimal threat, and of their aerials, Bair and Uair are the strongest, breaking at 70% and 55% respectively.
As for specials, some notable moves are Gale Strike (NeutralB1), which breaks armor around 50-60%, and Airborne Assault (SideB1) which breaks at only 21%. Both of these have significant windup though and are easy to avoid. Hero's Spin (UpB3) is probably their most dangerous attack, being a clone of Link's spin attack that breaks armor at 42% in the air with the multihit. Also be aware of Reversal Slash (DownB2), which is a clone of Mario's cape and can put you in a bad position offstage if you aren't careful.
Dangerous moves:
Normals:
![]()
Game & Watch doesn't have too many outlying attacks that break armor outside of standard ranges - most of his grounded moves break around 70-80% (smashes between 30-40%), as do his Dair and Fair at 75% and 83% respectively. The Landing hitbox of Bair breaks it earlier at 18%, and Uair's second hit breaks it at 56%, though neither are particularly threatening.
His specials aren't particularly threatening, but Up+B can break armor around 100%, and an 8 or a 9 on Side+B will knock you out at 34% and 0% respectively. Mostly you just have to be careful of his smashes near the stage, which extend pretty far and can knock you out early if you aren't careful.
Dangerous moves:
Normals:
Additionally, here are some percents that bucket breaks armor at for reference:
![]()
The PSI kid with a seriously dangerous grab, Ness has several attacks that pose a major threat to Yoshi's recovery. Most notable is the PK Thunder body hit, which breaks armor at 0% with the initial hit and 36% on late contact, meaning it's important to be very careful when trying to intercept Ness's recovery. His Fsmash also breaks armor very early (10-20%), as well as both Yo-yo smashes to a lesser extent (30-60%), so be wary when double jumping near the ledge.
Aerials to be aware of are Bair and Uair, which both break armor around 60%. One fortunate break we get is that PK Fire cannot break armor below 200%, so it's pretty much always safe to double jump through/out of it if he's using it on you. Be careful of the Up+B projectile at higher percents though, since it can break armor at 112%.
Dangerous moves:
Normals:
![]()
An uncommon, yet still threatening character in the right hands, Olimar's attacks mostly break armor at standard percents with one catch: due to the increased damage that red and purple pikmin cause, attacks using red pikmin can break about 10-20% earlier, and purples 25-35% earlier than the listed percents. I included a few examples under the list of dangerous moves.
In general, you don't have to watch out for too many of his attacks until high percents, with his strongest aerials being Bair and Uair, breaking at about 80%. A Purple Fair also breaks armor around 80%. Also keep an eye out for Fsmash, which is disjointed and breaks armor at 56% with the early hit, or even at 32% with a purple. It's likely that a Purple Side+B also breaks armor around 50-60%, though this is something I'll have to manually test since data was missing.
Dangerous moves:
Normals:
Missing: Purple side+B
Also, here's a comparison for the knockback of a few attacks between Pikmin colors:
![]()
As a character who relies more on traps for damage rather than single powerful hits, Pac-Man struggles to break Yoshi's armor even into higher percents with his standard moves. Some of the earlier breaking moves are the last hit of Dash Attack (27%) and of Dair (43%), but these are easy to see coming and avoid. His remaining aerials break armor into the 90% range, with the main threats being Nair and Bair.
The most threatening answer Pac-Man has to Yoshi's double jump is his Fire Hydrant, which can not only be sent falling rapidly when it's not already in play, but it can also be launched horizontally to create a fast-moving hitbox. It breaks armor at 67% in either case, making it vital to avoid if you see it coming your way. It's likely that his bonus fruit like Apple, Melon, and Key also threaten to break armor, though there was no data for these items. Keep in mind that you can try to grab these out of the air with grab/airdodge to avoid getting hit, plus you can hold onto them to take his item out of play for a while.
Dangerous moves:
Normals:
![]()
An uncommon pick who has seen some niche use in recent tournaments, Palutena lacks any major tools to break armor until higher percents, but she still has some moves to look out for. Her massive Usmash breaks armor at 34% at the base and 49% at the tip of the column, making it a moderate threat when jumping on/near the stage.
Her aerials aren't too threatening for the most part, but keep in mind that the last hit of both of her multihitting aerials (Nair/Uair) break armor the earliest, at around 50-60%. The rest break later, with Bair at 72%, Dair at 87%, and finally Fair at 96%. Of these moves, Fair has the fastest and largest hitbox, so be careful once you reach about 100%. Fortunately none of her non-custom specials break armor, but keep in mind that Side+B can push you a little bit.
Dangerous moves:
Normals:
![]()
Peach's float allows her to travel pretty far off-stage, allowing her to pressure Yoshi well when edgeguarding at middling percents. Fair is her strongest aerial, breaking armor at 47%, with the rest of her aerials breaking closer to 70%. Her Side+B also breaks at 74%, coming out about as fast as her Fair and having a burst of speed that you should watch out for.
The main grounded threat to look out for is Fsmash, which has a low hitbox and breaks armor at 25% (except the golf club, which breaks at 49%). Her Up+B's launcher hitbox can also break armor at 0%, with the "open" hitbox breaking at 32%, though it's not likely that she'll be throwing it out to try and stop your recovery.
Also note that none of her turnips really pose a threat to armor, even the stitch can't break it until around 100%. Obviously if she pulls a bomb though, you might want to avoid getting hit by it.
Dangerous moves:
Normals:
![]()
The mascot of the Pokemon franchise, results have shown that Pikachu is definitely not a character to sleep on. Notably, all 4 of his standard aerials are unable to break armor until 75-80%, but after this threshold you have to be very careful offstage considering Pikachu's tendency to go deep for edgeguards. Also watch out for his disjointed Fsmash, which can break armor at 28%.
Another scary move to watch out for is his Down+B, due to the power it has off-stage as well as out of his Up-throw. The bolt itself breaks armor at 78% and the physical hit when it strikes Pikachu will knock you out at 35%, so it's important to respect the move as you get to higher percents. The Cloud hit of Down+B breaks armor later, at 101%, so keep in mind that you can safely escape his Uthrow->Down+B combo as long as you're before the 80-100% range.
Dangerous moves:
Normals:
*MISSING UP+B AND CHARGED SIDE B
![]()
Pit (and his evil twin) break Yoshi's armor at pretty standard percents for the most part. His most dangerous aerial is probably Bair, since it covers a decent amount of space and breaks armor at 67%. The rest of his aerials break closer to the 80% range, including the multihit of Uair (though not the multihit of Fair), so that's something to watch out for at higher percents.
Other notable moves include his Dash Attack, which breaks armor at 59%, as well as Side+B, which despite having a lot of lag when used in the air can break at 34%, or at 2-7% on the ground. Also, while Pit's charged Neutral+B doesn't pose a threat until about 170%, be wary of Dark Pit's charged Neutral+B which breaks it at 118%.
Since the majority of these guys' moves have the exact same frame data, I decided to merge their information together. Unless otherwise stated, the listed moves apply to both characters.
Dangerous moves:
Normals:
![]()
While none of ROB's attacks break Yoshi's armor incredibly early, he does have some dangerous options to keep in mind as you reach mid-high percents. His Nair and Bair both break armor in the 60-70% range, and Uair's last hit breaks it at 54%, all slightly earlier than the average character's aerials. His Neutral+B at full charge can break armor at 90% as well, which is important to be aware of considering how fast it comes out and travels.
While there wasn't knockback data for it (for some reason), it is likely that you are able to jump out of the multihit of Uair until later percents, so this may be a safe option to escape from the robo hoo-hah. From testing (courtesy of Crome), it was found that Down+B breaks armor around 120% when fully charged/smash thrown, or about 140-150% when uncharged/weak thrown, so be careful off-stage if he's holding one at higher percents.
Dangerous moves:
Normals:
![]()
An uncommon but powerful zoner, Robin's Levin sword aerials break armor at pretty low percents, with Fair and Bair breaking near 40% and Uair/Dair breaking around 50%. The Bronze sword variations are less dangerous, but still break armor around 70-80%. Robin's grounded attacks also break armor in similar thresholds for both swords.
As for projectiles, Robin's fast-travelling Thoron will knock you out at 37%, so be careful when the tome is fully charged. Elthunder (second stage of charge) is also somewhat dangerous, being another quick projectile that knocks you out at 74%. Note that the Multihits of Side+B and Arcthunder CANNOT break armor, though the last hits can break it relatively early (27% and 16% respectively).
Dangerous moves:
Normals:
![]()
A strong contender for best character in the game, Rosalina herself can't start breaking armor until about 50%, but be careful when she still has Luma at low percents. Luma up-tilt can break armor at 0, and even more notably, Luma uair and Luma dair can break it at 0% and 15% respectively. Be sure to respect Luma whenever you're trying to recover, regardless of percent.
Start watching out for Rosalina's attacks starting around 70%, when her Nair and Uair start to break armor. Bair and Dair start breaking it in the 90's-100's, so you don't have to worry about those until a bit later. Be wary of Luma Shot popping you out around 80% also.
Dangerous moves (Pretty much everything past 80%...):
Normals:
Aerials:
Specials:
![]()
As the reverse-Marth, Roy's strong "hilt" hitboxes can pose a moderate threat to Yoshi's double jump, which can be dangerous when paired with his surprisingly good dash and air speed. All of his Sweetspotted Aerials besides Uair break armor around 65%, with the sourspotted versions breaking about 40% later. Also notable is that his Up+B's multihit breaks at 0% - something to look out for when trying to intercept his recovery or attempting to escape Dthrow -> Up+B.
Also be careful if he's charging Neutral+B on the ledge, since this one can break you out at 109% uncharged all the way down to 0% at full charge. The Launcher of Usmash can also break armor at 0%.
Dangerous moves:
Normals:
![]()
The technical Street Fighter (who was a pain in the butt to put in all the data for...), Ryu has a lot of attacks that can challenge Yoshi's double jump from low percents. Watch out for the sweetspot of Fair as well as the late hit, which can break it at 40/50% respectively. His true input Heavy Side+B and Heavy Up+B can both break armor around 20-30%, with the medium/light/non-true variants breaking it a bit later, but still being equally dangerous.
Fortunately, none of his projectiles break armor below 200%, and when you combine that with Ryu's horrible aerial mobility, Yoshi should be able to outmaneuver him and get back to the stage safely in most situations. Just keep in mind that you can't armor out of Shoryuken most of the time, and don't double-jump too close to the ledge if Ryu's ready to counter with a Dash Attack or Tatsumaki.
Dangerous moves:
Normals:
Aerials:
![]()
Samus breaks armor at pretty standard percents for the most part, though she has several tools that you have to watch out for in particular. Of her aerials, Bair is the most powerful, with the sweetspot breaking at 43%, and Nair is next in line at 66% for the first hit and 74% for the second. Of her multihit aerials, you only have to worry about the last hits, which can break armor around 70-80%.
As for specials, her Fully charged Neutral+B is the biggest threat, being able to break armor at 44%. Also, Super Missiles don't break armor until 99%, but she can shoot off a lot of them pretty fast, so be cautious at high percents. For her Up+B, you can always count on armoring through the multihit, though the Launcher hits of grounded Up+B will knock you out at 0%, and the last hit does at 54%.
Dangerous moves:
Normals:
![]()
As the character who many consider to be the best in the game, Sheik has a dangerous arsenal of moves that can easily trap most characters in long combos, but fortunately for Yoshi, she doesn't actually have any moves that break our armor below 40%, so double jump is a great option to escape any non-true combos at these low percents.
Some moves to watch out for are both hits of Up+B, which can break armor at 41%, as well as her Usmash and Fsmash which also break it around that threshold. Really though, Sheik doesn't have nearly as many options as most characters do to break our armor, so try to abuse that. Just be careful around Bouncing Fish at higher percents (78%), where it can easily eat your jump and leave you helpless off-stage if you aren't careful.
Dangerous moves:
Normals:
![]()
Though Shulk's moves are infamous for having a lot of startup time, his long range combined with the insane mobility that his Jump and Speed arts provide can make him pretty threatening off-stage. Of his aerials, Bair is the largest and breaks armor somewhat early at 55%. Nair and Fair are also dangerous at higher percents, breaking armor at 78% and 74% respectively when sweetspotted (towards the base of the sword). Also be careful about jumping out of his uthrow-uair, since Uair's first hit breaks armor at only 38%.
Near the stage, be careful of a Reverse Up+B, since the first "launcher" hit is capable of breaking armor at 0%, and the "regular" hits can break it around 40-60%. Also watch out for Dsmash1 and Fsmash2's large hitboxes which break armor around 40% (with the following hits of Dsmash breaking armor about 10% later per hit).
Also note that the Smash art increases the knockback of his attacks pretty significantly, causing all of his moves to break about 15-25% earlier than they normally would. I included some examples of this below the dangerous moves.
Dangerous moves:
Normals:
And for reference, here are the breaking points for some relevant aerials when the Smash art is active.
![]()
As the quickest hedgehog around, Sonic's sound-surpassing speed makes him quite a formidable opponent. Besides the ability to threaten you from any position on-stage, he has some aerials that can be hard to deal with, most notably his first hit of Uair that can break armor at 0% sweet and 32% sour, which makes it very dangerous to try and jump out of things like his Uthrow-Uair combo. His remaining aerials break armor at more standard percents, but Uair is definitely one to look out for.
Some other notable moves are Neutral+B (57%), Dair's early hitbox (50%), and the first hit of Utilt (6%) if you find yourself jumping near the ledge. In general, you shouldn't have to worry about armor breaking against Sonic much more than any other character, just be very careful around his Uair.
Dangerous moves:
Normals:
![]()
This version of Link has been on the rise with his quick speed and powerful bomb setups, and while none of his moves break armor at ridiculously low percentages, all of his aerials start threatening to break armor around 60% (except for Nair). Considering how fast Toon Link can get around, it's important to be very careful against him past this threshold.
Besides this, also keep in mind that the first hit of Up+B can pop you out at 26%, so watch out for this when challenging Toon Link near the ledge. One advantage we do have is that none of his projectiles can break us out of armor before 170%, so if he's just trying to edgeguard using arrows/bombs/boomerang we don't have much to worry about.
Dangerous moves:
Normals:
![]()
A character unrivaled in zoning and recovery distance, Villager's amazing stage control can be difficult to deal with. His stronger projectiles threaten to break Yoshi's armor pretty early, with Fsmash and Down+B(Tree) both breaking it near 10%. The Initial hit of Usmash can also break it at 0%.
Other moves to watch out for are Axe, which comes out fast and can break armor at 52%, as well as the strong(early) hit of Bair and Fair, which break it in the 50-70% range. It's worth noting that the later hits of both slingshot attacks don't really threaten to break armor until far higher percents (170+), and that Side+B cannot break armor until 110% given the Villager is not riding it. The 3-turnip variations of his aerials also break armor somewhat early (around 60%), with the 1-2 turnips breaking it about 20% later.
Dangerous moves:
Normals:
![]()
Wario's lack of strong hits make it hard for him to break Yoshi's armor until higher percents for the most part. Of his aerials, Bair is the most dangerous, breaking at 74%. Uair and Nair also break armor in a similar range, though these are less likely to hit you when recovering.
His specials pose a larger threat to armor, with the Multihit of Up+B breaking at 9%, and the Medium & Max Charge Down+B breaking at 37% and 11% respectively (48% on late hit). Additionally, be wary of Neutral+B, being a command grab that can break you out at any percent. While there wasn't any data for it, Side+B as a physical hit or as a projectile can probably break armor at early percents as well, so be wary of it.
Dangerous moves:
Normals:
![]()
Wii Fit Trainer is a pretty uncommon pick, but some dedicated mains have shown that she is not a character to sleep on. Her grounded moves all break armor in pretty standard ranges, and of her aerials, be most careful of Bair, which breaks armor at about 45% and has a pretty meaty hitbox.
Other than that, be aware of her Charged Neutral+B, which is similar to a Samus charge shot and breaks armor at 59%. Also remember that with the Deep Breathing buff, all of her moves are a bit more damaging and will break your jump a bit earlier.
Dangerous moves:
Normals:
Aerials:
Specials:
![]()
It's that one character! While the mirror is awkward in more ways than one, fortunately (or unfortunately?) Yoshi has trouble breaking his own heavy armor for the most part. You're not at any risk of getting hit out of double jump before 40%, and Yoshi's aerials don't really start breaking armor until middle-high percent ranges.
Some useful aerials that break armor earlier are the last hit of both Bair and Dair, which start having an effect at 60% and 58% respectively. Early Nair and Fair start to break it at about 80%, and eggs have no chance of breaking armor before 200%.
Since our better aerials don't break until later percents, It's pretty much pointless to go for an off-stage edgeguard against another Yoshi (that still has their jump) until they're past the 80% threshold, unless you want to try going for a footstool. Likewise, if you're below 80% and trying to edgeguard a Yoshi above 80%, know that you have the option to safely armor through their Nair/Fair and counterattack with your own.
Another piece of data that's somewhat relevant is the percents at which the weaker hits of Nair break armor:
Nair: 110%
Nair(Late): 145%
These may be worth remembering considering how often Yoshi dittos end with both players reaching really high percentages.
Dangerous moves:
Normals:
Aerials:
Specials:
Aerials:
Specials:
![]()
Zelda mains are few and far between, so if you run into one then you know you're fighting a very dedicated player. Her grounded moves aren't particularly dangerous, but be careful of the last hits of Fsmash and Usmash which can break you out around 40-50% (though you can jump through the multihits). Ftilt also breaks armor in a similar range, and comes out pretty fast.
In the air, be looking out for Sweetspot Fair and Bair which will both break you out in the early 30% range, as well as Nair to a lesser extent, which can break the jump at 85% even with the multihit. Also watch out for her Up+B, a surprisingly potent kill move that will break armor at 0-10% with either hit, except Aerial(Hit1) which isn't dangerous until 71%.
Dangerous moves:
Normals:
![]()
Another top tier threat with a varied arsenal, her Usmash (First Hit) and All hits of Up+B (except the last one) can break Yoshi's armor at 0%, and with the last hit breaking it at 34%, it's important to be wary of her Up-air -> Up+b chains.
Be careful when you're off-stage also: Bair can break armor at 53% and the Second hit of Fair at 67%, both of which are pretty non-committal moves that she's likely to throw out when you're trying to recover. Her Down+B is also dangerous, breaking at 37% with the normal hit and at 54% with the meteor hit.
Dangerous moves:
Normals:
Hopefully this information helps some Yoshis out!
To be precise, it takes 120 units of knockback, and if an attack does more than that, Yoshi is knocked out of his jump. Using the knockback formula, I made some simple (and pretty inefficient) code that calculates the percent at which this threshold is broken given the properties of each attack, and through a lonngg process of data entry, I calculated the percent at which EVERY* move that every character has will break Yoshi's armor.
*Missing data: Cloud Neutral+B, Dedede Ftilt multihit, Fox Down+B, Lucas Neutral+B and Side+B, Mii Gunner Stealth Burst, Mii Swordfighter UpB1 and SideB3, Mewtwo Neutral+B, Pac-Man Neutral+B, Sheik Side+B, Villager Side+B(Riding), Wario Side+B(Hit&Projectile), Wii Fit Side+B (Ball), Zelda Down+B.
I plan on testing these using old-fashioned trial and error since they were missing on KuroganeHammer...
Some disclaimers:
- Percentages are calculated from the move's raw data - not taking into account staling or freshness. A fresh move (not used in the last 10 attacks) will break armor slightly earlier, and a stale move will break it slightly later.
- Similarly, Rage also influences knockback, so a damaged attacker will be able to break Yoshi's armor slightly earlier. I have added functionality to the calculator that allows it to account for rage given the attacker's percentage, download the code if you want to test this for yourself!
- I don't know how exactly to interpret the WBKB that certain attacks have, so it's possible that attacks involving this value may not be 100% accurate.
- Smash attacks are calculated to break armor as if they were uncharged, so a charged smash attack will break armor slightly earlier.
All that being said, remember that these calculations are not always exact given all the variables that go into a match, but they should at least give you a good idea of when your jump armor will fail.
The basic format of the data is this: for each character, I wrote a brief paragraph talking about the main moves to look out for. Next is a list of "dangerous moves", or anything that breaks jump armor under 90%, followed by a complete list of their moves.
Characters are put in alphabetical order as follows:
/Downloading the Calculator:
Here's the code if you want to test the calculator out. All the data is in this thread, but if you want to test out how rage affects armor percents for a specific character or reduce the percent range for dangerous moves (currently set at 90%), go ahead and download it. You need some sort of Java environment like jGRASP or Eclipse to use it.
Special thanks to KuroganeHammer for compiling all of the frame data that I used to make these calculations. Onto the list!
Though she was heavily nerfed in the last patch, Bayonetta still has proven to be a viable and dangerous opponent. Be careful of her Up-B and the landing hitbox of Dair, which break armor at 0% and 20% respectively, as well as Late Side+B(Aerial) which can also break it at 0% sweetspotted or 43% sour. More of her moves start to break armor around 50%, including her Dash Attack, Fsmash, and Usmash.
Notably, her Dair spike and Dsmash don't actually break armor until 74% and 69% respectively (unstaled, uncharged), so don't worry about being gimped by these until higher percents.
Dangerous moves:
Normals
- Jab-Finisher (breaks at 63%)
- Dash-Attack (breaks at 46%)
- Dash-Attack(Late) (breaks at 59%)
- Ftilt3 (breaks at 83%)
- Fsmash (breaks at 45%)
- Usmash(Early) (breaks at 45%)
- Usmash (breaks at 49%)
- Usmash(Late) (breaks at 54%)
- Dsmash(Hit2) (breaks at 69%)
- Dsmash(Hit2-Late) (breaks at 75%)
- Nair (breaks at 83%)
- Bair (breaks at 69%)
- Uair (breaks at 85%)
- Uair(Hold) (breaks at 89%)
- Dair (breaks at 74%)
- Dair(Late) (breaks at 74%)
- Dair(Landing) (breaks at 20%)
- MidairSideB(Late) (breaks at 0-42%)
- UpB(Grounded) (breaks at 0%)
- UpB(Aerial) (breaks at 0%)
- Jab1: >200(sweet or sour)
- Jab2: >200(sweet or sour)
- Jab3: >200(sweet or sour)
- Jab-Finisher: 63
- Dash-Attack: 46
- Dash-Attack(Late): 59
- Ftilt1: >200(sweet or sour)
- Ftilt2: >200(sweet or sour)
- Ftilt3: 83
- Utilt(Hit1): 166
- Utilt(Hit1-Late): >200
- Utilt(Hit2): 144
- Dtilt: 126(sweet), 144(sour)
- Fsmash: 45(sweet), 54(sour)
- Usmash(Early): 45
- Usmash: 49
- Usmash(Late): 54
- Dsmash(Hit1): 166
- Dsmash(Hit2): 69(sweet), 81(sour)
- Dsmash(Hit2-Late): 75
Aerials:
- Nair: 83
- Nair(Late): 124
- Nair(Hold): 113
- Fair1: >200(sweet or sour)
- Fair2: >200(sweet or sour)
- Fair3: 122
- Bair: 69(sweet), 92(sour)
- Uair: 85
- Uair(Hold): 89
- Dair: 74(sweet), 86(sour)
- Dair(Late): 74(sweet), 83(sour)
- Dair(Landing): 20
Specials:
- NeutralB(Uncharged): >200
- NeutralB(Charged): 149
- SideB(Early): 174
- SideB: >200
- SideB(Late): >200
- SideB(Later): 185
- SideB2: 126
- MidairSideB(Early): >162(sweet), 180(sour)
- MidairSideB: >200(sweet or sour)
- MidairSideB(Late): 0(sweet), 43(sour)
- Down-angled-SideB: 121
- Down-Angled-SideB(Landing): 125
- UpB(Grounded): 0
- UpB(Aerial): 0
- UpB(Finisher): 182
- UpB(Finisher-2nduse): >200
The heavy-hitting Koopa king may not be an incredibly popular pick, but his powerful area-covering attacks have the potential to break armor pretty early. Grounded attacks you should look out for are Dash Attack, breaking armor at 0% and Usmash/Fsmash, which can break you out in the 20-40% range (including the "falling" hit of Usmash).
Be careful around Bowser off-stage especially after the ≈60% range, since his quick Bair and Fair can break armor at 48% and 67% respectively. The first hit of aerial Up+B can also break armor at 50%, and His Down+B can break even earlier at 30% about. While he has many options to break Yoshi's armor, he is still pretty slow in the air, so try to use that to your advantage when recovering.
Dangerous moves:
Normals:
- Jab2 (breaks at 83%)
- Dash-Attack (breaks at 0%)
- Ftilt (breaks at 64%)
- Utilt (breaks at 56%)
- Dtilt1 (breaks at 61%)
- Dtilt2 (breaks at 90%)
- Fsmash (breaks at 24%)
- Fsmash(Late) (breaks at 52%)
- Usmash (breaks at 40%)
- Usmash(Landing) (breaks at 35%)
- Dsmash(LastHit) (breaks at 49%)
- Nair3-4 (breaks at 83%)
- Fair (breaks at 67%)
- Bair (breaks at 48%)
- Uair (breaks at 56%)
- Dair (breaks at 43%)
- UpB(Ground-LastHit) (breaks at 34%)
- UpB(Aerial-FirstHit) (breaks at 50%)
- DownB1 (breaks at 26%)
- DownB2 (breaks at 35%)
- DownB(Shockwave) (breaks at 63%)
- Jab1: 114(sweet), 170(sour)
- Jab2: 83
- Dash-Attack: 0
- Dash-Attack(Late): 131
- Ftilt: 64
- Utilt: 56
- Dtilt1: 61
- Dtilt2: 90
- Fsmash: 24(sweet), 33(sour)
- Fsmash(Late): 52(sweet), 67(sour)
- Usmash: 40(sweet), 53(sour)
- Usmash(Landing): 35
- Dsmash(FirstHit): 151
- Dsmash(Multihit): >200
- Dsmash(LastHit): 49
- Nair1: >200
- Nair2: 144
- Nair3-4: 83
- Fair: 67(sweet), 81(sour)
- Bair: 48
- Uair: 56
- Dair: 43
- Dair(Landing): >200
- NeutralB: >200
- UpB(Ground-Multihit): 155
- UpB(Ground-LastHit): 34
- UpB(Aerial-FirstHit): 50
- UpB(Aerial-MultiHit): >200
- DownB1: 26
- DownB2: 35
- DownB(Shockwave): 63
Bowser Jr's decent mobility, projectiles, and disjoints make him a formidable foe, despite being somewhat uncommon. Fortunately his aerials don't break armor until higher percents, with Bair being able to knock you out the earliest at 59%, and the rest breaking closer to 70-80%. His only main grounded threat is Dsmash, which extends somewhat far and breaks armor at 35%.
Be wary of his special moves also - Fully charged Neutral+B breaks armor at 33% (or 59% on the late hit), and Up+B can be dangerous with the explosion breaking it at 19% and the hammer at 37%. The "Spin-out" of Side+B breaks armor later, at 76%, though it's more likely if he uses this attack that he's going to jump-cancel it into a Fair or Uair, which break armor in a similar range.
Dangerous moves:
Normals:
- Rapid-Jab-Finisher (breaks at 48%)
- Dash-Attack(LastHit) (breaks at 22%)
- Ftilt (breaks at 85%)
- Fsmash(LastHit) (breaks at 35%)
- Usmash(LastHit) (breaks at 53%)
- Dsmash (breaks at 35%)
- Nair(Early) (breaks at 89%)
- Fair(Early) (breaks at 74%)
- Bair (breaks at 59%)
- Uair (breaks at 78%)
- Dair(LastHit) (breaks at 73%)
- NeutralB(Charged) (breaks at 33%)
- NeutralB(Charged-Late) (breaks at 59%)
- SideB(Spinout) (breaks at 76%)
- UpB(Explosion) (breaks at 19%)
- UpB(Hammer) (breaks at 37%)
- Jab1: >200
- Jab2: >200
- Rapid-Jab-Finisher: 48
- Dash-Attack(Multihit): >200
- Dash-Attack(LastHit): 22
- Ftilt: 85
- Utilt: 94
- Dtilt(Hit1-2): >200
- Dtilt(LastHit): 97
- Fsmash(Multihit): >200
- Fsmash(LastHit): 35
- Usmash(Launcher): 106
- Usmash(Multihit): >200
- Usmash(Hit6): >200
- Usmash(LastHit): 53
- Dsmash: 35
- Nair(Early): 89
- Nair: 125
- Nair(Late): >200
- Fair(Early): 74(sweet), 92(sour)
- Fair: 92(sweet), 116(sour)
- Fair(Late): 116(sweet), 153(sour)
- Fair(Landing): 151
- Bair: 59(sweet), 145(sour)
- Bair(Late): 118
- Uair: 78
- Uair(Late): 156
- Dair(Multihit): >200
- Dair(LastHit): 73
- Dair(Landing): 95
- NeutralB(Uncharged): 102
- NeutralB(Uncharged-Late): 141
- NeutralB(Charged): 33
- NeutralB(Charged-Late): 59
- SideB(Dash): 135
- SideB(Spinout): 76
- UpB(Initial): >200
- UpB(Explosion): 19
- UpB(Hammer): 37(sweet), 63(sour)
He may not be a top tier, but Falcon's speed paired with his great combos and aerials are nothing to sleep on. Not only can his smashes break armor pretty early, but so can his aerials - watch out for Sweetspot Fair and Dair which can break armor at 36% and 42% respectively. His Nair(2nd hit) and Bair can also break armor starting in the 60's, so try to recover high against Falcon if possible. His specials also have the potential to break armor early, but they are pretty telegraphed and shouldn't be too hard to avoid.
Dangerous moves:
Normals
- Jab3 (breaks at 62%)
- Rapid-Jab-Finisher (breaks at 0%)
- Dash-Attack (breaks at 41%)
- Dash-Attack(Late) (breaks at 71%)
- Utilt (breaks at 65%)
- Fsmash(Up) (breaks at 36%)
- Fsmash (breaks at 39%)
- Fsmash(Down) (breaks at 45%)
- Usmash2 (breaks at 54%)
- Dsmash1 (breaks at 61%)
- Dsmash2 (breaks at 50%)
- Nair2 (breaks at 67%)
- Fair (breaks at 36%)
- Bair (breaks at 62%)
- Dair (breaks at 43%)
- Pawnch (breaks at 38%)
- Pawnch-Aerial (breaks at 49%)
- Pawnch-Reverse (breaks at 29%)
- Pawnch-ReverseAerial (breaks at 38%)
- SideB(Ground) (breaks at 3%)
- SideB(Aerial) (breaks at 76%)
- Kick(Early,Ground) (breaks at 43%)
- Kick(Ground) (breaks at 53%)
- Kick(Late,Ground) (breaks at 72%)
- Kick(Early,Aerial) (breaks at 76%)
- Kick(Aerial) (breaks at 90%)
- Jab1-2: >200
- Jab3: 62
- Rapid-Jab-Finisher: 0
- Dash-Attack: 41
- Dash-Attack(Late): 71
- Ftilt(Up/Down): 102(sweet), 113(sour)
- Ftilt: 113(sweet), 127(sour)
- Utilt: 65(sweet), 79(sour)
- Dtilt: 93
- Fsmash(Up): 36
- Fsmash: 39
- Fsmash(Down): 45
- Usmash1: >200(sweet), 94(sour)
- Usmash2: 54(sweet), 53(sour)
- Dsmash1: 61
- Dsmash2: 50
Aerials:
- Nair1: 111
- Nair2: 67
- Fair: 36(sweet), 155(sour)
- Fair(Late): >200
- Bair: 62
- Bair(Late): 105
- Uair: 93(sweet), 102(sour)
- Uair(Late): 139(sweet), 153(sour)
- Dair: 43(sweet), 70(sour)
Specials:
- Pawnch: 38
- Pawnch-Aerial: 49
- Pawnch-Reverse: 29
- Pawnch-ReverseAerial: 38
- SideB(Ground): 3
- SideB(Aerial): 76(sweet), 91(sour)
- Kick(Early,Ground): 43
- Kick(Ground): 53
- Kick(Late,Ground): 72
- Kick(Early,Aerial): 76
- Kick(Aerial): 90
- Kick(Late,Aerial): 107
- Kick(Landing): >200
A heavyweight whose throw buffs have made him quite a force to be reckoned with, Charizard's powerful hits unsurprisingly threaten to break Yoshi from his armor pretty early. All of his aerials except Nair are capable of breaking armor around 50-60%, with Bair notably breaking it even earlier at 33-41%. Also watch out for his specials: the first hit of Up+B breaks armor at 0% with the multihit breaking between 6-42% depending on sweet/sour, and his Side+B can break it at 21%. Keep in mind that in addition to breaking armor early, all of his specials (besides flamethrower) have super armor, so it's probably best not to challenge them most of the time.
Down+B and Dsmash are also moves to be aware of when jumping near the ledge, since both can break armor around 40%. The "launcher" hit of Usmash can also break armor at 0%, though this is more situational. Fortunately, his Neutral+B will never break armor before 200%, so you can always jump through that safely even if he's trying to cover the ledge with it
Thanks to Marrow for typing up this data!
Dangerous moves:
Normals:
- jab3 (breaks at 54%)
- dashAttack (breaks at 19%)
- dashAttack(late) (breaks at 63%)
- ftilt (breaks at 59%)
- utilt (breaks at 56%)
- dtilt(hit) (breaks at 90%)
- fsmash (breaks at 19%)
- usmash(launcher) (breaks at 0%)
- usmash(hit1) (breaks at 83%)
- usmash(hit2) (breaks at 53%)
- dsmash (breaks at 46%)
- nair (breaks at 90%)
- fair (breaks at 58%)
- bair (breaks at 33%)
- bair(middle) (breaks at 41%)
- uair (breaks at 53%)
- dair (breaks at 61%)
- sideB(hit2) (breaks at 21%)
- upB(hit1) (breaks at 0%)
- upB(middleHits) (breaks at 6%)
- upB(middleHits,weak) (breaks at 42%)
- upB(lastHit) (breaks at 34%)
- downB(hit1) (breaks at 38%)
- jab1: >200(sweet or sour)
- jab2: >200(sweet or sour)
- jab3: 54
- dashAttack: 19
- dashAttack(late): 63
- ftilt: 59(sweet), 94(sour)
- utilt: 56
- dtilt(hit): 90
- dtilt(windbox): >200
- fsmash: 19(sweet), 28(sour)
- usmash(hit1,100bkb): 0
- usmash(hit1,60bkb): 83
- usmash(hit1,30bkb): 145
- usmash(hit1,10bkb): 187
- usmash(hit2): 53
- dsmash: 46(sweet), 52(sour)
- nAir: 90(sweet), 121(sour)
- fAir: 58(sweet), 66(sour)
- bAir: 33(sweet), 57(sour)
- bair(middle): 41
- uair: 53
- dair: 61(sweet), 112(sour)
- neutralB: >200(sweet or sour)
- sideB(hit1): 135
- sideB(hit2): 21
- upB(hit1): 0
- upB(hit1,sour): 0
- upB(middleHits): 6
- upB(middleHits,weak): 42
- upB(lastHit): 34
- downB(hit1): 38
- downB(pebble): >200
A very solid character and a difficult matchup for Yoshi thanks to his buster sword, Cloud has a fair (
) number of moves that break through our armor pretty early. Some of the biggest ones to look out for are his Dash Attack (7%, 25% late), Fsmash/Dsmash (20-30%), Limit UpB (35%), and the Descending hitbox of UpB which will knock you out at 0%.Aside from those, you also have to look out for Limit Attacks which will break armor around 50% or less, as well as his strong Fair/Dair spikes which will break armor at 61% and 64% respectively. There wasn't data available for Cloud's Neutral B, but in general just try to avoid it, especially in Limit Form since it's a multihit.
Dangerous moves:
Normals
- Dash-Attack (breaks at 7%)
- Dash-Attack(Late) (breaks at 25%)
- Ftilt (breaks at 81%)
- Utilt (breaks at 74%)
- Dtilt (breaks at 51%)
- Fsmash2 (breaks at 26%)
- Fsmash3 (breaks at 36%)
- Usmash(Early) (breaks at 51%)
- Usmash (breaks at 51%)
- Dsmash1 (breaks at 28%)
- Dsmash2 (breaks at 64%)
- Fair (breaks at 61%)
- Bair (breaks at 72%)
- Uair (breaks at 69%)
- Dair (breaks at 64%)
- Dair(Late) (breaks at 72%)
- SideB(FinalHit) (breaks at 79%)
- Limit-SideB(Hit1&2) (breaks at 41%)
- Limit-SideB(FinalHit) (breaks at 40%)
- UpB(Hit1) (breaks at 62%)
- UpB(Hit2) (breaks at 86%)
- Limit-UpB(Hit1) (breaks at 35%)
- Limit-UpB(Hit2) (breaks at 53%)
- UpB(Descending) (breaks at 0%)
- UpB(Landing) (breaks at 65%)
- DownB (breaks at 0%)
- Jab1: >200(sweet or sour)
- Jab2: >200(sweet or sour)
- Jab3: 188
- Dash-Attack: 7
- Dash-Attack(Late): 25
- Ftilt: 81
- Utilt: 74
- Dtilt: 51(sweet), 59(sour)
- Fsmash1: >200
- Fsmash2: 26(sweet), 149(sour)
- Fsmash3: 36(sweet), 40(sour)
- Usmash(Early): 51
- Usmash: 51(sweet), 69(sour)
- Dsmash1: 28
- Dsmash2: 64
Aerials:
- Nair: 105
- Fair: 61(sweet), 75(sour)
- Fair(Late): 91
- Bair: 72
- Uair: 69
- Uair(Late): 102
- Dair: 64(sweet), 53(sour)
- Dair(Late): 72
Specials:
- SideB(Hit1): >200(sweet or sour)
- SideB(Hit2): >200
- SideB(Hit3): >200(sweet or sour)
- SideB(Hit4): 187
- SideB(FinalHit): 79
- Limit-SideB(Hit1&2): 41
- Limit-SideB(Hit3): >200(sweet or sour)
- Limit-SideB(Hit4): >200
- Limit-SideB(FinalHit): 40
- UpB(Hit1): 62
- UpB(Hit2): 86(sweet or sour)
- UpB(Hit2-Late): >200(sweet or sour)
- Limit-UpB(Hit1): 35
- Limit-UpB(Hit2): 53(sweet), 67(sour)
- UpB(Descending): 0(sweet or sour)
- UpB(Landing): 65
- DownB(Ground): 0
- DownB(Ground-Late): 0
- DownB(Aerial): 0

That one kid from dragon high school, Corrin can be kind of tough to deal with thanks to his/her disjoints and their ability to break our eggs pretty easily, but fortunately they don't have a lot of tools to break through our armor too early...
The big thing to watch out for are their Tipper smashes, which can break through armor at about 40% and can poke you from pretty far off-stage, as well as Tipper side+b, which breaks it at 47%. Also, don't be dumb and jump into Corrin while they are kicking after side+b, since that will knock you out at 28%.
Aside from that, the bite that follows neutral+b can break armor at 54% uncharged and 41% charged, and Bair is able to break it a bit later at 59%. In general, be very cautious past 80%, since that's when most of their moves will start to break armor.
Dangerous moves:
Normals
- Jab3 (breaks at 62%)
- Ftilt (breaks at 74%)
- Fsmash (breaks at 59%)
- Fsmash(Tipper) (breaks at 39%)
- Fsmash(Late-Tipper) (breaks at 34%)
- Usmash (breaks at 49%)
- Usmash(Tipper) (breaks at 40%)
- Dsmash (breaks at 64%)
- Dsmash(Tipper) (breaks at 37%)
- Nair (breaks at 80%)
- Fair (breaks at 89%)
- Bair (breaks at 59%)
- Bair(Late) (breaks at 74%)
- Uair (breaks at 55%)
- Dair(sweet?) (breaks at 79%)
- NeutralB(bite-uncharged) (breaks at 54%)
- NeutralB(bite-charged) (breaks at 41%)
- SideB(Tipper) (breaks at 47%)
- SideB(Kick) (breaks at 28%)
- SideB(Kick-Behind-Early) (breaks at 53%)
- SideB(Kick-Late) (breaks at 54%)
- UpB(Hit1-7) (breaks at 0%)
- UpB(FinalHit) (breaks at 39%)
- Jab1: >200(sweet or sour)
- Jab2: >200(sweet or sour)
- Jab3: 62(sweet), 68(sour)
- Dash-Attack(Hit1-5): 170
- Dash-Attack(FinalHit): 91
- Ftilt: 74
- Utilt: 105
- Utilt(Late): 105(sweet), 151(sour)
- Dtilt: 100
- Fsmash(Chainsaw): >200
- Fsmash(Early): 59(sweet), 66(sour)
- Fsmash: 59(sweet), 66(sour)
- Fsmash(Tipper): 39
- Fsmash(Late): 59(sweet), 66(sour)
- Fsmash(Late-Tipper): 34
- Usmash: 49(sweet), 41(sour)
- Usmash(Tipper): 40
- Dsmash: 64(sweet), 65(sour)
- Dsmash(Tipper): 37
Aerials:
- Nair: 80
- Nair(Late): 99
- Fair: 89
- Bair: 59
- Bair(Late): 74
- Uair: 55
- Dair(sweet?): 79
- Dair: >200(sweet or sour)
- Dair(Landing): 130
Specials:
- NeutralB(uncharged): >200
- NeutralB(charged): 94
- NeutralB(bite-uncharged): 54
- NeutralB(bite-charged): 41
- SideB(Aerial-Sour): 105
- SideB(SpHop-Sour): 118
- SideB(Tipper): 47
- SideB(Kick): 28
- SideB(Kick-Late): 54
- SideB(Kick-Behind-Early): 53
- UpB(Hit1): 0
- UpB(Hit2-7): 0
- UpB(FinalHit): 39

The infamous character who most agree to be Yoshi's worst matchup due to his ability to control the stage and outrange us in the air, he fortunately does not have very many tools at all to break through our armor. The only move that majorly threatens Yoshi's jump off-stage is the Side+B attack, which is able to break armor at 43%, or 53% on the late hit.
Dair is also something to look out for, breaking at 56%. His Fsmash and Usmash are also able to break armor around 50%, though their range is small enough that you shouldn't be in a situation where you need to armor through them. Notably, his bananas have set knockback which is low enough where you will never be hit out of your double jump by them. (theoretically... need to test this)
Dangerous moves:
Normals
- Dash-Attack3 (breaks at 75%)
- Utilt (breaks at 73%)
- Fsmash2 (breaks at 47%)
- Usmash1 (breaks at 53%)
- Usmash3 (breaks at 63%)
- Dsmash1 (breaks at 85%)
- Fair (breaks at 96%)
- Bair (breaks at 85%)
- Uair (breaks at 76%)
- Dair (breaks at 56%)
- NeutralB(Explosion) (breaks at 24%)
- SideB(Attack) (breaks at 43%)
- SideB(Attack-Late) (breaks at 53%)
- UpB(Launch) (breaks at 83%)
- UpB(Travel) (breaks at 96%)
- Jab1&2: >200(sweet or sour)
- Jab3: >200(sweet or sour)
- Rapid-Jab-Finisher: 132
- Dash-Attack1: 170
- Dash-Attack2: 144
- Dash-Attack3: 75
- Ftilt: 102
- Ftilt(late): 142
- Utilt: 73
- Dtilt: >200
- Fsmash1: 120(sweet), 150(sour)
- Fsmash2: 47(sweet), 59(sour)
- Usmash1: 53(sweet), 166(sour)
- Usmash2: 173(sweet), 183(sour)
- Usmash3: 63
- Dsmash1: 85
- Dsmash2: 104
Aerials:
- Nair: 107
- Fair: 96
- Fair(Late): 119
- Bair: 85
- Uair: 76
- Dair: 56(sweet), 76(sour)
Specials:
- NeutralB(Explosion): 24
- SideB(Attack): 43(sweet), 53(sour)
- SideB(Attack-Late): 53(sweet), 66(sour)
- UpB(Launch): 83
- UpB(Travel): 96
- DownB: Never breaks armor
You know him well as the most dangerous ultra-heavyweight thanks to his gigantic hitboxes and infamous cargo combo. Most of his aerials surprisingly don't start breaking armor until the 60-70% range, aside from Fair and Dair sweetspots which can break it near 50% - an interesting advantage to keep in mind. Be wary of Utilt breaking armor at 47%, as well as his 9-wind punch which can break it at 15%. The aerial punch breaks armor about 20% later, but is still pretty dangerous.
Considering how hard he hits though, his attacks really don't start breaking armor too early compared to some characters. Just be careful once you're past 70-80%, because at that point pretty much everything he has starts to break armor. It's noteworthy that his Aerial Up+B (besides the first hit) cannot break armor until past 200% (First breaks at 90%), so jumping through his recovery and countering with a Nair is possible if you're below him.
Dangerous moves:
Normals:
- Dash-Attack (breaks at 49%)
- Utilt (breaks at 47%)
- Fsmash (breaks at 34%)
- Usmash (breaks at 48%)
- Dsmash (breaks at 44%)
- Dsmash(Late) (breaks at 44%)
- Nair (breaks at 81%)
- Fair (breaks at 65%)
- Fair(Late,Meteor) (breaks at 47%)
- Bair (breaks at 70%)
- Uair (breaks at 65%)
- Dair (breaks at 51%)
- NeutralB(Uncharged) (breaks at 79%)
- NeutralB(9-wind-punch) (breaks at 15%)
- NeutralB(Max-charge) (breaks at 31%)
- NeutralB(Max-charge-Aerial) (breaks at 56%)
- NeutralB(Max-charge-Aerial-Shoulder) (breaks at 40%)
- UpB(Hit1-Ground) (breaks at 72%)
- UpB(Final-hit-Ground) (breaks at 67%)
- UpB(Hit1-Aerial) (breaks at 90%)
- Jab1: >200(sweet or sour)
- Jab2: 107
- Dash-Attack: 49
- Dash-Attack(Late): 101
- Ftilt(Up-angle): 93
- Ftilt: 102
- Ftilt(Down-angle): 113
- Utilt: 47(sweet), 69(sour)
- Dtilt: 187(sweet or sour)
- Fsmash: 34(sweet), 41(sour)
- Usmash: 48
- Dsmash: 44(sweet), 68(sour)
- Dsmash(Late): 44(sweet), 58(sour)
- Nair: 81
- Nair(Late): 112
- Fair: 65
- Fair(Late,Meteor): 47(sweet), 57(sour)
- Bair: 70
- Bair(Late): 97
- Uair: 65
- Dair: 51(sweet), 78(sour)
- NeutralB(Uncharged): 79
- NeutralB(Uncharged-Late): 96
- NeutralB(9-wind-punch): 15
- NeutralB(Max-charge): 31(sweet), 130(sour)
- NeutralB(Uncharged-Aerial): 119
- NeutralB(Uncharged-Aerial-Late): 153
- NeutralB(Max-charge-Aerial): 56
- NeutralB(Max-charge-Aerial-Shoulder): 40(sweet), 114(sour)
- SideB(Grounded): >200(sweet or sour)
- SideB(Aerial): >200(sweet or sour)
- UpB(Hit1-Ground): 72
- UpB(Multihit-Ground): >200
- UpB(Final-hit-Ground): 67
- UpB(Hit1-Aerial): 90
- UpB(Hit2-5-Aerial): >200(sweet or sour)
- UpB(Hit6-8-Aerial): >200
- DownB: 121
- DownB(Hit1-Aerial): 133
- DownB(Hit2-Aerial): 126

Just like his plumber counterpart, Dr. Mario doesn't really have that many moves that break armor obscenely early, though he does have a few to watch out for. The Normal (non-early) hit of Fair can break armor at only 38%, making it his most dangerous move, though it has a decent amount of windup. Bair is the only other aerial you really have to watch out for, and not until 79%.
His Up+B doesn't break armor at 0 like Mario's, but the early hit can knock you out at 55% in the air or grounded, and it comes out pretty fast. The Last hit of Down+B also breaks armor at only 32%, so it might not be a good idea to mash jump if you find yourself caught in the multihit. And of course, watch out for that cape.
Dangerous moves:
Normals:
- Dash-Attack (breaks at 63%)
- Dash-Attack(Late) (breaks at 83%)
- Utilt (breaks at 78%)
- Fsmash(U) (breaks at 34%)
- Fsmash (breaks at 38%)
- Fsmash(D) (breaks at 35%)
- Usmash (breaks at 55%)
- Dsmash1 (breaks at 69%)
- Dsmash2 (breaks at 55%)
- Fair(Early) (breaks at 74%)
- Fair (breaks at 38%)
- Bair (breaks at 79%)
- Dair(Landing) (breaks at 87%)
- UpB (breaks at 55%)
- DownB(LastHit) (breaks at 32%)
- Jab1: >200
- Jab2: >200
- Jab3: 166
- Dash-Attack: 63
- Dash-Attack(Late): 83
- Ftilt: 132
- Utilt: 78
- Dtilt: 123(sweet), 164(sour)
- Fsmash(U): 34(sweet), 45(sour)
- Fsmash: 38(sweet), 45(sour)
- Fsmash(D): 35(sweet), 46(sour)
- Usmash: 55
- Dsmash1: 69
- Dsmash2: 55
- Nair: 152
- Nair(Late): 126
- Fair(Early): 74
- Fair: 38
- Fair(Late): 96
- Bair: 79
- Bair(Late): 152
- Uair: 130
- Dair(Multihit): >200
- Dair(LastHit): 107
- Dair(Landing): 87
- NeutralB(Early): >200
- NeutralB: >200
- NeutralB(Late): >200
- UpB: 55
- UpB(Late): 105
- DownB(Ground-Multihit): >200
- DownB(Aerial-Multihit): 139
- DownB(LastHit): 32
Duck Hunt doesn't have many tools to break armor, but the explosion of Neutral+B is a pretty threatening projectile that can break armor at 72%, so be wary of it off-stage. Aside from that, the first and second hits of Dsmash both knock you out at 0% and send you at a pretty low angle, making it dangerous move on the ledge.
Duck Hunt's more threatening aerials are Nair and Bair, both breaking armor around 70%. You don't have to worry about their other projectiles as much, with Side+B's last hit not breaking at 145%, and Down+B breaking between 100% and 160% depending on the gunman.
Dangerous moves:
Normals:
- Jab3 (breaks at 70%)
- Jab-Finisher (breaks at 49%)
- Dash-Attack (breaks at 29%)
- Dash-Attack(Late) (breaks at 45%)
- Utilt (breaks at 70%)
- Fsmash(Hit3) (breaks at 42%)
- Usmash3 (breaks at 55%)
- Dsmash(Hit1&2) (breaks at 0%)
- Dsmash3 (breaks at 65%)
- Nair (breaks at 70%)
- Bair (breaks at 74%)
- Bair(Late) (breaks at 86%)
- Uair3 (breaks at 68%)
- NeutralB(Explosion) (breaks at 72%)
- Jab1: >200
- Jab2: >200
- Jab3: 70
- Jab-Finisher: 49
- Dash-Attack: 29
- Dash-Attack(Late): 45
- Ftilt: 119
- Utilt: 70
- Dtilt: 136
- Fsmash(Hit1-2): 98
- Fsmash(Hit3): 42
- Usmash1: 151
- Usmash2: 97
- Usmash3: 55
- Dsmash1: 0
- Dsmash: 0
- Dsmash3: 65
- Nair: 70
- Nair(Late): 185
- Fair(Early): 135
- Fair: 105(sweet), 135(sour)
- Fair(Late): 138
- Bair: 74(sweet), 77(sour)
- Bair(Late): 86
- Uair(Hit1-2): >200
- Uair3: 68
- Dair1: >200
- Dair2: 117(sweet), 136(sour)
- NeutralB(Kick): >200
- NeutralB(Reticle-Hit): >200
- NeutralB(Explosion): 72
- SideB(Physical-Hit): >200
- SideB(Reticle-Hit1-3): >200
- SideB(Reticle-LastHit): 145
- DownB(Sombrero): 103
- DownB(Brown-Coat): 118
- DownB(Black-Coat): 136
- DownB(White-Shirt): 148
- DownB(Black-Vest): 161
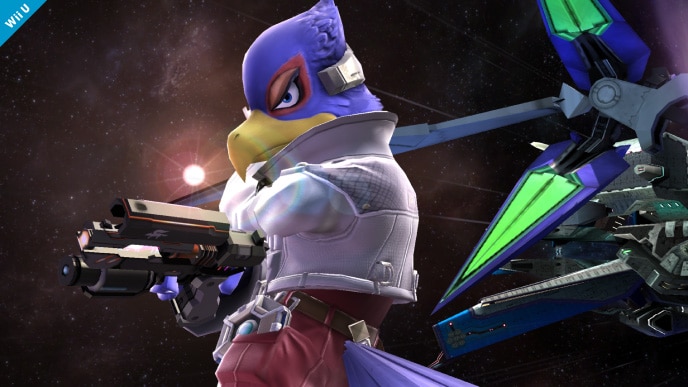
Since many of Falco's aerials are multihits, he doesn't have a lot of options to break armor, though a few moves he has can be dangerous. The biggest threat is Bair, which breaks the earliest of his aerials at 60%. The last hit of Nair and Fair break in a similar range, though you can safely jump through the multihits. Surprisingly, Dair doesn't break until closer to 100%.
Additionally, the first hit of Utilt can break armor at only 0%. Also watch out for his Side+B at higher percents, since in the air it can knock you out at 105%, which can spell certain doom due to the strong meteor effect it has.
Dangerous moves:
Normals:
- Dash-Attack (breaks at 43%)
- Utilt1 (breaks at 1%)
- Utilt2 (breaks at 83%)
- Dtilt (breaks at 51%)
- Fsmash (breaks at 40%)
- Fsmash(Late) (breaks at 90%)
- Usmash2 (breaks at 59%)
- Dsmash (breaks at 80%)
- Nair(Hit4) (breaks at 74%)
- Fair(LastHit) (breaks at 62%)
- Bair (breaks at 60%)
- Uair (breaks at 83%)
- Jab1: >200
- Jab2: >200
- Rapid-Jab-Finisher: 120
- Dash-Attack: 43
- Dash-Attack(Late): 92
- Ftilt: 127
- Utilt1: 1
- Utilt1(Late): 184(sweet or sour)
- Utilt2: 83
- Dtilt: 51(sweet), 96(sour)
- Fsmash: 40(sweet), 44(sour)
- Fsmash(Late): 90
- Usmash1: >200
- Usmash1(Late): >200(sweet or sour)
- Usmash2: 59
- Dsmash: 80(sweet), 103(sour)
- Nair(Hit1): >200
- Nair(Hit2-3): >200
- Nair(Hit4): 74
- Fair(Multihit): >200
- Fair(LastHit): 62
- Fair(Landing): 109
- Bair: 60
- Bair(Late): 110
- Uair: 83
- Dair: 104
- Dair(Late): 128
- NeutralB: >200
- SideB(Ground): 94
- SideB(Aerial): 105(sweet or sour)
- UpB(Multihit): >200
- UpB(Hit8): >200
- UpB(Multihit2): >200
- UpB(LastHit): 135
- DownB: >200
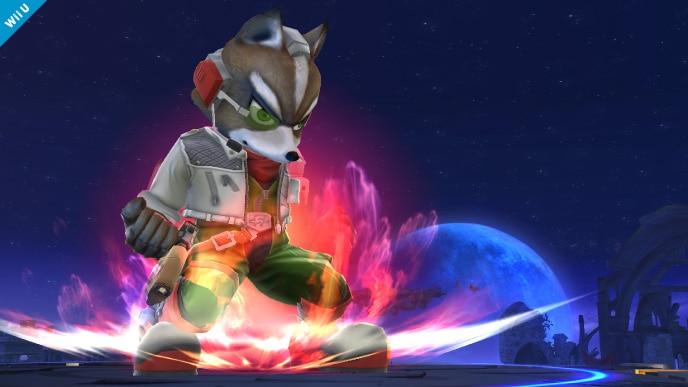
The star of Melee who's been making waves in Smash 4, Fox's general lack of strong, single hits fortunately makes it hard for him to break Yoshi's armor until higher percents for the most part. The main aerial you have to look out for is Bair, which will knock you out at 80%, with the First and Last hit of Fair also breaking around 80-85%.
His earliest breaking attacks are Usmash and Fsmash, but even these don't start until 47% and 63% respectively. As for specials, watch out for the last hit of Up+B, which can break it at 61%, and Side+B at higher percents, though it doesn't become a threat until 105%. Fox can be a pretty tough matchup to play if they know what they're doing, so try to abuse his difficulty with breaking armor as much as you can.
Dangerous moves:
Normals:
- Utilt (breaks at 86%)
- Fsmash (breaks at 63%)
- Fsmash(Late) (breaks at 81%)
- Usmash (breaks at 47%)
- Dsmash (breaks at 79%)
- Fair1 (breaks at 86%)
- Fair5 (breaks at 80%)
- Bair (breaks at 80%)
- Uair2 (breaks at 70%)
- UpB(Last-Hit) (breaks at 61%)
- Jab1: >200
- Jab2: >200(sweet or sour)
- Jab-Finisher: 126
- Dash-Attack: 93
- Dash-Attack(Late): 169
- Ftilt(Up): 112
- Ftilt: 144
- Ftilt(Down): 126
- Utilt: 86(sweet), 131(sour)
- Utilt(Late): 124(sweet), 151(sour)
- Dtilt: 94(sweet), 135(sour)
- Fsmash: 63
- Fsmash(Late): 81
- Usmash: 47(sweet), 57(sour)
- Usmash(Late): 93
- Dsmash: 79(sweet), 95(sour)
- Nair: 113
- Nair(Late): 180
- Fair1: 86(sweet), 101(sour)
- Fair2-4: 116(sweet), 123(sour)
- Fair5: 80
- Bair: 80
- Uair1: 102
- Uair2: 70
- Dair1-6: >200(sweet or sour)
- Dair(Final-Hit): 91
- Dair(Landing): >200
- SideB(Grounded): 134
- SideB(Aerial): 105
- UpB(Hit1-7): >200
- UpB(Last-Hit): 61
- UpB(Last-Hit-Late): 112
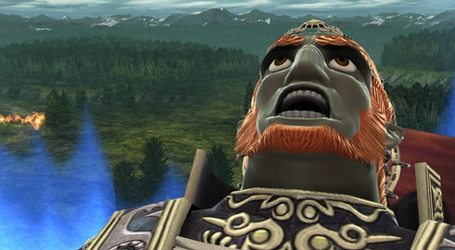
As a read-based powerhouse, it shouldn't be surprising that basically everything Ganondorf has breaks armor at pretty low percents. Fair, Bair, and Dair all break armor at around 40-50%, and his smashes break it in the 20-30% range. In addition to his aerials, watch out for his Down+B off-stage, which sends him flying pretty quickly and can break armor at 50% grounded or about 30% in the air. Also note that his Neutral+B and Utilt both break armor at 0%, so don't even think about trying to challenge those head-on.
Fortunately, Ganon's poor mobility paired with Yoshi's great air speed often makes it possible to just drift around his attacks - just be respectful of his options and how quick that a lot of his moves can come out and you should be fine.
Dangerous moves:
Normals:
- Jab (breaks at 90%)
- Ftilt (breaks at 69%)
- Utilt (breaks at 0%)
- Dtilt (breaks at 57%)
- Fsmash (breaks at 24%)
- Usmash (breaks at 30%)
- Dsmash1 (breaks at 53%)
- Dsmash2 (breaks at 25%)
- Nair1 (breaks at 67%)
- Nair2 (breaks at 63%)
- Nair2(Late) (breaks at 86%)
- Fair (breaks at 48%)
- Bair (breaks at 39%)
- Uair(Early) (breaks at 53%)
- Uair (breaks at 87%)
- Dair (breaks at 38%)
- NeutralB (breaks at 0%)
- UpB(Attack) (breaks at 85%)
- DownB(Grounded) (breaks at 48%)
- DownB(Aerial) (breaks at 30%)
- DownB(Aerial-Late) (breaks at 34%)
- Jab: 90(sweet), 99(sour)
- Jab(Sourer): 100
- Ftilt: 69(sweet), 76(sour)
- Utilt: 0(sweet), 24(sour)
- Dtilt: 57
- Fsmash: 24(sweet), 34(sour)
- Usmash: 30(sweet), 36(sour)
- Dsmash1: 53
- Dsmash2: 25(sweet), 32(sour)
- Nair1: 67
- Nair1(Late): 87(sweet or sour)
- Nair2: 63
- Nair2(Late): 86
- Fair: 48(sweet), 52(sour)
- Bair: 39(sweet), 43(sour)
- Uair(Early): 53(sweet), 58(sour)
- Uair: 87(sweet), 105(sour)
- Uair(Late): 174(sweet or sour)
- Dair: 38(sweet), 46(sour)
- NeutralB: 0
- NeutralB(Aerial): 0
- NeutralB(Reverse): 0
- NeutralB(Reverse-Aerial): 0
- UpB(Attack): 85
- DownB(Grounded): 48(sweet), 59(sour)
- DownB(Aerial): 30
- DownB(Aerial-Late): 34
- DownB(Landing): 133
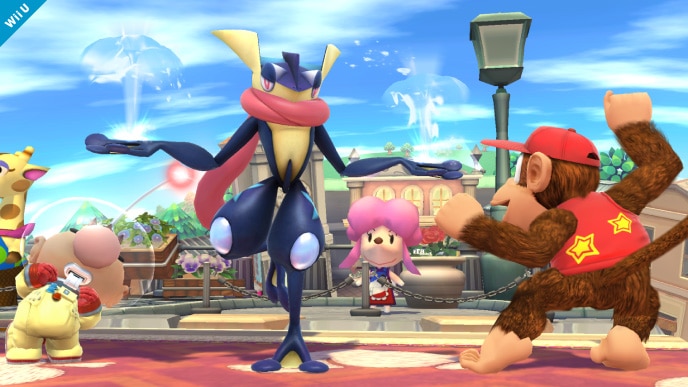
A character whose potential has recently begun to surface, Greninja does not have any particularly outstanding tools for breaking Yoshi's armor, but definitely some to keep in mind. The most dangerous moves are his specials, with Fully charged Neutral+B's last hit breaking it at 55% and Side+B breaking at 30% or 39% depending on the hit. Note that the multihit for Neutral+B doesn't pose a threat to recovery, but the Uncharged Neutral+B does at higher percents, breaking armor at 120%.
All of his aerials start to break armor at 70%, with the only outlier being Dair at 54%, though it's pretty unlikely Greninja's just going to throw this out off-stage. Just be aware of his Side+B and Shuriken, especially the quick uncharged ones once you're past 120%.
Dangerous moves:
Normals:
- Dash-Attack (breaks at 45%)
- Utilt (breaks at 90%)
- Fsmash (breaks at 46%)
- Usmash2(Early) (breaks at 49%)
- Usmash2 (breaks at 70%)
- Usmash2(Late) (breaks at 80%)
- Dsmash (breaks at 63%)
- Nair (breaks at 76%)
- Fair (breaks at 68%)
- Bair3 (breaks at 74%)
- Uair(LastHit) (breaks at 84%)
- Dair (breaks at 54%)
- NeutralB(Charged-LastHit) (breaks at 55%)
- SideB(Front-attack) (breaks at 39%)
- SideB(Back-attack) (breaks at 30%)
- DownB(Neutral/Up/Down) (breaks at 34%)
- DownB(DiagonalUp) (breaks at 26%)
- DownB(DiagonalDown) (breaks at 48%)
- Jab1: >200
- Jab2: >200
- Jab3: 108
- Jab-Finisher: 115
- Dash-Attack: 45
- Ftilt: 107(sweet), 122(sour)
- Ftilt(sourer): 144
- Utilt: 90
- Dtilt: >200
- Fsmash: 46
- Usmash1: 114
- Usmash2(Early): 49(sweet), 70(sour)
- Usmash2: 70
- Usmash2(Late): 80
- Dsmash: 63(sweet), 77(sour)
- Down-Taunt(lol): 187
- Nair: 76
- Nair(Late): 134
- Fair: 68
- Bair1: >200
- Bair2: >200
- Bair3: 74
- Uair(Multihit): >200
- Uair(LastHit): 84
- Dair: 54
- NeutralB(Uncharged): 120
- NeutralB(Charged-Multihit): >200
- NeutralB(Charged-LastHit): 55
- SideB(Front-attack): 39
- SideB(Back-attack): 30
- UpB: 133
- DownB(Neutral): 34
- DownB(Up): 34
- DownB(DiagonalUp): 26
- DownB(Down): 34
- DownB(DiagonalDown): 48
The heavy-hitting swordsman who's gotten some buffs since the game came out, it's not too surprising that pretty much all of his moves can break armor pretty early. Most of his aerials start to break armor at 50% (Bair, Uair, Dair), with the remaining breaking at 60% (Fair) and 70% (Nair). Additionally, the Launching and Falling hits of Up+B can both break armor at 0%, so be very careful when challenging Ike off-stage.
Besides this, his uncharged smashes all break armor around 30% (so the charged versions obviously break earlier), plus charged Neutral+B can break it at 15%, and it has a gigantic hitbox that pierces the stage. Basically, recover high against Ike (or try to bait these out and dodge) whenever you can.
Dangerous moves:
Normals:
- Jab3 (breaks at 83%)
- Dash-Attack (breaks at 28%)
- Dash-Attack(Late) (breaks at 47%)
- Ftilt (breaks at 63%)
- Utilt (breaks at 41%)
- Utilt(Late) (breaks at 63%)
- Dtilt (breaks at 70%)
- Fsmash (breaks at 31%)
- Fsmash(Late) (breaks at 24%)
- Usmash (breaks at 32%)
- Usmash(Late) (breaks at 69%)
- Dsmash1 (breaks at 43%)
- Dsmash2 (breaks at 31%)
- Nair (breaks at 67%)
- Fair (breaks at 57%)
- Bair (breaks at 52%)
- Uair (breaks at 47%)
- Dair (breaks at 47%)
- NeutralB(Uncharged) (breaks at 74%)
- NeutralB(Charged) (breaks at 15%)
- SideB(Uncharged) (breaks at 65%)
- UpB(Launcher) (breaks at 0%)
- UpB(Launcher-Late) (breaks at 0%)
- UpB(Sword-Hit1) (breaks at 79%)
- UpB(Falling) (breaks at 0%)
- UpB(Landing) (breaks at 76%)
- Jab1: 149
- Jab2: >200
- Jab3: 83
- Dash-Attack: 28(sweet), 41(sour)
- Dash-Attack(Late): 47
- Ftilt: 63
- Utilt: 41
- Utilt(Late): 63
- Dtilt: 70
- Fsmash: 31
- Fsmash(Late): 24(sweet), 34(sour)
- Usmash: 32
- Usmash(Late): 69
- Dsmash1: 43
- Dsmash2: 31
- Dsmash2(Late): 97
- Nair: 67
- Nair(Late): 95
- Fair: 57
- Bair: 52
- Uair: 47
- Dair: 47(sweet), 65(sour)
- NeutralB(Uncharged): 74
- NeutralB(Charged): 15(sweet), 39(sour)
- SideB(Uncharged): 65
- UpB(Launcher): 0(sweet), 0(sour)
- UpB(Launcher-Late): 0(sweet), 1(sour)
- UpB(Sword-Hit1): 79
- UpB(Sword-Hit2): >200
- UpB(Falling): 0
- UpB(Landing): 76
The eternally unbuffed puffball, Jigglypuff lacks very many options at all to break through armor until higher percents, with one notable exception being Bair which breaks it at only 43%. Once you're past 70%, you need to start watching out more since Nair and Side+B will both start to break armor at this point, with Fair breaking it a bit later at 89%.
Of course, Rest comes out on frame 2 and can break armor at 0%, but chances are you aren't going to have to worry about that as an option off-stage. Even her smashes don't break armor until around 50% (with Dsmash being all the way at 100%), so you can take advantage of this in the off-chance you do run into a Jigglypuff.
Dangerous moves:
Normals:
- Dash-Attack (breaks at 78%)
- Utilt (breaks at 56%)
- Utilt(Late) (breaks at 63%)
- Fsmash (breaks at 52%)
- Usmash (breaks at 57%)
- Nair (breaks at 70%)
- Fair (breaks at 89%)
- Bair (breaks at 43%)
- Uair (breaks at 87%)
- NeutralB(Aerial) (breaks at 76%)
- SideB (breaks at 71%)
- DownB (breaks at 0%)
- Jab1: >200
- Jab2: >200
- Dash-Attack: 78
- Dash-Attack(Late): 129
- Ftilt: 105
- Utilt: 56
- Utilt(Late): 63
- Dtilt: 123
- Fsmash: 52
- Fsmash(Late): 109
- Usmash: 57(sweet), 69(sour)
- Dsmash: 109
- Nair: 70
- Nair(Late): 144
- Fair: 89
- Fair(Late): 196
- Bair: 43(sweet), 67(sour)
- Uair: 87
- Dair(Multihit): >200
- Dair(LastHit): 151
- NeutralB(Ground): 123
- NeutralB(Aerial): 76
- SideB: 71
- DownB: 0

As one of the hardest hitting characters in the game, you have to watch out for pretty much all of Dedede's moves past low-mid percents. Nair, Bair, and Dair all break around 50-60% (non-sourspotted), and Fair breaks later at 91%. Also watch out for Fsmash near the ledge, which can knock you out at 21%, and the Multihit of Ftilt which can apparently break armor at only 42% (will need to check this though - WBKB is weird).
His Side+B can break armor between 39% and 64% depending on how early that it hits, but remember you can send it flying back with a simple Nair/Egg. His Up+B(descending/landing) and Down+B (charged) both break obscenely early (20-40%), but they have long enough wind up that you shouldn't be getting hit by them anyway. Note that you can jump through a Gordo stuck to the wall until about 140%, so don't be too afraid if he tries to trap you with it.
Dangerous moves:
Normals:
- Rapid-Jab-Finisher (breaks at 23%)
- Dash-Attack (breaks at 35%)
- Dash-Attack(Late) (breaks at 53%)
- Ftilt(Multihit) (breaks at 42%)
- Ftilt(LastHit) (breaks at 83%)
- Utilt (breaks at 61%)
- Dtilt (breaks at 66%)
- Fsmash(Early) (breaks at 53%)
- Fsmash (breaks at 21%)
- Fsmash(Shockwave) (breaks at 83%)
- Usmash (breaks at 46%)
- Dsmash (breaks at 43%)
- Nair (breaks at 57%)
- Bair (breaks at 53%)
- Uair(LastHit) (breaks at 55%)
- Dair(Meteor) (breaks at 65%)
- Dair (breaks at 56%)
- SideB(Early) (breaks at 39%)
- SideB (breaks at 46%)
- SideB(Late) (breaks at 54%)
- SideB(Latest) (breaks at 64%)
- UpB(Descending) (breaks at 27%)
- UpB(Landing) (breaks at 14%)
- DownB(Uncharged-Ground) (breaks at 70%)
- DownB(Charged-Ground) (breaks at 19%)
- DownB(Uncharged-Air) (breaks at 78%)
- DownB(Charged-Air) (breaks at 43%)
- Jab1: >200(sweet or sour)
- Jab2: >200(sweet or sour)
- Rapid-Jab-Finisher: 23
- Dash-Attack: 35
- Dash-Attack(Late): 53
- Ftilt(Multihit): 42(sweet or sour)
- Ftilt(LastHit): 83
- Utilt: 61(sweet), 75(sour)
- Dtilt: 66
- Dtilt(Late): 107
- Fsmash(Early): 53
- Fsmash: 21
- Fsmash(Shockwave): 83
- Usmash: 46(sweet), 78(sour)
- Dsmash: 43
- Nair: 57
- Nair(Late): 101
- Fair: 91
- Bair: 53
- Uair(Multihit): >200(sweet or sour)
- Uair(LastHit): 55
- Dair(Meteor): 65
- Dair: 56(sweet), 112(sour)
- SideB(Early): 39
- SideB: 46
- SideB(Late): 54
- SideB(Latest): 64
- SideB(Wall): 139
- UpB(Descending): 27(sweet), 34(sour)
- UpB(Landing): 14(sweet), 25(sour)
- UpB(Stars): >200
- DownB(Uncharged-Ground): 70
- DownB(Charged-Ground): 19(sweet), 48(sour)
- DownB(Uncharged-Air): 78
- DownB(Charged-Air): 43(sweet), 97(sour)
An uncommon but powerful character with great combos, Kirby doesn't have a lot of attacks that break armor early, but he does have some dangerous tools to watch out for. Of his aerials, Bair is the largest threat with the ability to break armor at 63%. His Fsmash also breaks armor surprisingly early, with the late hit breaking around 15-20%, as does the last hit of Dash Attack at 22%.
Also keep an eye out for his special attacks, since while they may have lots of startup, his Side+B can knock you out at 20-30% uncharged, and both early hits of Up+B can knock you out at 0%, making it a viable ledge option for Kirby that we have to respect at any percent. Note that the late hit of Up+B doesn't break armor until 115%, so for the most part you only have to watch out for the early hit.
Dangerous moves:
Normals:
- Rapid-Jab-Finisher (breaks at 54%)
- Dash-Attack(LastHit) (breaks at 22%)
- Fsmash(U) (breaks at 41%)
- Fsmash(U-Late) (breaks at 15%)
- Fsmash (breaks at 46%)
- Fsmash(Late) (breaks at 18%)
- Fsmash(D) (breaks at 50%)
- Fsmash(D-Late) (breaks at 21%)
- Usmash(Early) (breaks at 43%)
- Usmash (breaks at 63%)
- Dsmash (breaks at 49%)
- Dsmash(Late) (breaks at 75%)
- Nair(Earliest) (breaks at 90%)
- Fair3 (breaks at 85%)
- Bair (breaks at 63%)
- SideB(Ground-Uncharged) (breaks at 22%)
- SideB(Ground-Charged) (breaks at 0%)
- SideB(Aerial-Uncharged) (breaks at 36%)
- SideB(Aerial-Charged) (breaks at 3%)
- UpB(Hit1) (breaks at 0%)
- UpB(Hit2-Meteor) (breaks at 6%)
- UpB(Landing) (breaks at 0%)
- DownB(Aerial) (breaks at 27%)
- Jab1: >200
- Jab2: >200
- Rapid-Jab-Finisher: 54
- Dash-Attack(LastHit): 22
- Ftilt: 124(sweet), 139(sour)
- Utilt: 102
- Utilt(Late): 129
- Dtilt: >200
- Fsmash(U): 41
- Fsmash(U-Late): 15
- Fsmash: 46
- Fsmash(Late): 18
- Fsmash(D): 50
- Fsmash(D-Late): 21
- Usmash(Early): 43(sweet), 53(sour)
- Usmash: 63(sweet), 76(sour)
- Usmash(Late): 190(sweet or sour)
- Dsmash: 49
- Dsmash(Late): 75
- Nair(Earliest): 90
- Nair(Early): 112
- Nair: 144
- Nair(Late): 196
- Fair1: >200
- Fair2: >200
- Fair3: 85
- Bair: 63
- Bair(Late): 122
- Uair: 100
- Dair(Multihit): >200
- Dair(LastHit): >200
- Dair(Landing): >200
- SideB(Ground-Uncharged): 22
- SideB(Ground-Charged): 0
- SideB(Aerial-Uncharged): 36
- SideB(Aerial-Charged): 3
- UpB(Hit1): 0(sweet), 0(sour)
- UpB(Hit2-Meteor): 6
- UpB(Hit2-Late): 115
- UpB(Landing): 0
- UpB(Projectile): >200
- DownB(Landing): 152
- DownB(Aerial): 27
Link may have one of the worst air speeds in the game, but his strong and relatively fast sword swings can be dangerous when he's trying to intercept your recovery. Both hits of Fair can break armor at about 56%, and his long-lasting Uair and Dair break it around 70%. For some reason, the non-meteor hit of Dair breaks it even earlier, around 50%.
Also watch out for Up+B, which breaks armor at 30-80% uncharged on the ground (depending on whether it's the early, normal, or late hit). the Aerial Multihit also has surprisingly high weight-based knockback, and can knock you out at 42%, so be careful of reverse Up+B on the ledge. Dash Attack also covers a large area and breaks armor at 24%.
Dangerous moves:
Normals:
- Dash-Attack (breaks at 24%)
- Ftilt (breaks at 47%)
- Utilt (breaks at 59%)
- Dtilt (breaks at 81%)
- Fsmash1(Launch) (breaks at 52%)
- Fsmash2 (breaks at 8%)
- Usmash3 (breaks at 39%)
- Dsmash1 (breaks at 39%)
- Dsmash2 (breaks at 36%)
- Nair (breaks at 79%)
- Fair1 (breaks at 56%)
- Fair2 (breaks at 57%)
- Uair (breaks at 69%)
- Uair(Late) (breaks at 83%)
- Dair(Early/Late) (breaks at 67%)
- Dair (breaks at 51%)
- UpB(Ground-Early) (breaks at 34%)
- UpB(Ground) (breaks at 57%)
- UpB(Ground-Late) (breaks at 81%)
- UpB(Aerial-Multihit) (breaks at 42%)
- UpB(Aerial-LastHit) (breaks at 62%)
- Jab1: >200(sweet or sour)
- Jab2: >200
- Jab3: 166
- Dash-Attack: 24(sweet), 17(sour)
- Ftilt: 47
- Utilt: 59(sweet), 65(sour)
- Dtilt(Spike): 186
- Dtilt: 81
- Fsmash1(Launch): 52
- Fsmash1(Setup): >200
- Fsmash2: 8(sweet), 11(sour)
- Usmash1: 111
- Usmash2: 134
- Usmash3: 39(sweet), 50(sour)
- Dsmash1: 39(sweet), 53(sour)
- Dsmash2: 36(sweet), 46(sour)
- Nair: 79(sweet), 97(sour)
- Nair(Late): 153
- Fair1: 56
- Fair2: 57
- Bair1: 178
- Bair2: 107
- Uair: 69
- Uair(Late): 83
- Dair(Early/Late): 67(sweet), 174(sour)
- Dair: 51
- Zair1: >200
- Zair2: >200
- NeutralB: >200
- SideB: 126
- SideB(Late): >200
- Up+B(Ground-Early): 34(sweet), 46(sour)
- UpB(Ground): 57(sweet), 73(sour)
- UpB(Ground-Late): 81(sweet), 101(sour)
- UpB(Ground-Latest): 162(sweet), 194(sour)
- UpB(Aerial-FirstHit): 147
- UpB(Aerial-Multihit): 42
- UpB(Aerial-LastHit): 62
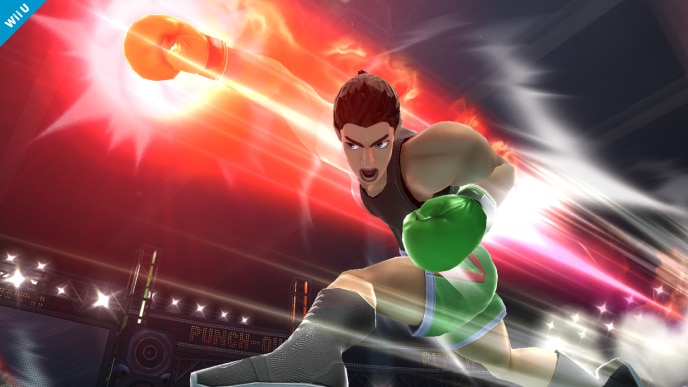
As a fighter who's not going to be chasing you off-stage very much for his own safety, Yoshi's double jump usually isn't at much risk of breaking against Little Mac. His only real option is waiting on the ledge and charging a Dsmash, which can break armor at 68% uncharged and at 43% fully charged. Also note that the Launcher hit of Up+B breaks armor at 0%, so it's not always possible to jump out of this move. In general though, getting back to stage against Little Mac is going to be hard even with our armor just considering how fast he can get around.
Dangerous moves:
Normals:
- Jab-Finisher (breaks at 16%)
- Dash-Attack (breaks at 38%)
- Ftilt2 (breaks at 56%)
- Utilt (breaks at 84%)
- Fsmash(U) (breaks at 42%)
- Fsmash (breaks at 33%)
- Usmash (breaks at 35%)
- Usmash(Late) (breaks at 50%)
- Dsmash(Hit1&2) (breaks at 68%)
- Dsmash(Mid-charge) (breaks at 52%)
- Dsmash(Max-charge) (breaks at 43%)
- KO-Punch (breaks at 0%)
- KO-Punch(Aerial) (breaks at 67%)
- NeutralB(Uncharged) (breaks at 41%)
- NeutralB(Uncharged-Late) (breaks at 71%)
- NeutralB(Charged) (breaks at 7%)
- NeutralB(Charged-Late) (breaks at 19%)
- NeutralB(Aerial-Uncharged) (breaks at 90%)
- NeutralB(Aerial-Charged) (breaks at 51%)
- SideB (breaks at 51%)
- UpB(Launcher) (breaks at 0%)
- UpB(LastHit) (breaks at 60%)
- Jab1&2: >200
- Jab3: 110
- Jab-Finisher: 16
- Dash-Attack: 38
- Ftilt1: 123
- Ftilt2: 56
- Utilt: 84
- Dtilt: 170
- Fsmash(U): 42(sweet), 50(sour)
- Fsmash: 33(sweet), 41(sour)
- Fsmash(D): 153
- Usmash: 35
- Usmash(Late): 50
- Dsmash(Hit1&2): 68
- Nair: >200
- Fair: 156(sweet), 184(sour)
- Bair: 135(sweet), 184(sour)
- Uair: 156(sweet), 184(sour)
- Dair: >200(sweet or sour)
- KO-Punch: 0
- KO-Punch(Aerial): 67
- NeutralB(Uncharged): 41(sweet), 51(sour)
- NeutralB(Uncharged-Late): 71
- NeutralB(Charged): 7
- NeutralB(Charged-Late): 19
- NeutralB(Aerial-Uncharged): 90
- NeutralB(Aerial-Uncharged-Late): 126
- NeutralB(Aerial-Charged): 51
- SideB: 51
- UpB(Launcher): 0
- UpB(Multihit): >200
- UpB(LastHit): 60
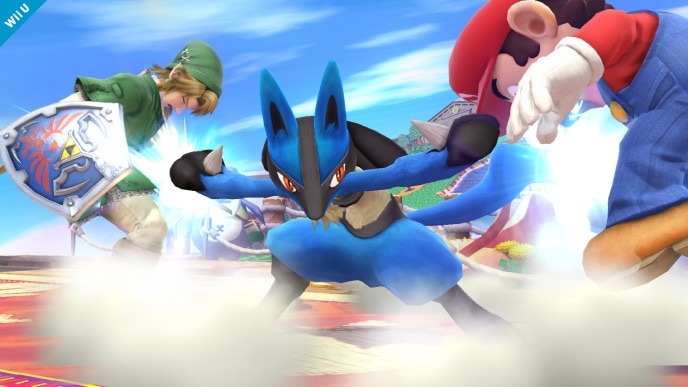
Lucario's aura can make it really hard to guess when exactly his attacks are going to break your armor. If you're not familiar with the precise mechanics of aura then here's a crash course: at 0% his attacks do 0.66x the damage they should, with the damage slowly rising until 70%, at which point they do the "true" amount of damage. From here, damage continues to scale until it caps at 190% with a 1.7x damage multiplier. The data I put in is the "true" damage of Lucario's moves, or how much they do at 70%.
At this medium aura level, his aerials are somewhat threatening, with Bair breaking armor at 47%, and Fair and Uair breaking around 60-70%. Also watch out for fully charged Neutral+B, which travels quickly and will break armor at 32%. His grounded moves aren't very notable, though the Launcher of Usmash will knock you out at 0%.
I calculated a few examples of when Lucario's moves break at different levels of aura if you want to take a look below, but as general rule, Minimum aura results in attacks breaking about 30% later than listed, and max aura results in them breaking about 30% earlier. Be very cautious around a high percent Lucario, since most of his moves can break our armor in the 20-30% range or earlier.
Dangerous moves: (Calculated with aura at 70%)
Normals:
- Dash-Attack (breaks at 83%)
- Dash-Attack (breaks at 83%)
- Utilt (breaks at 78%)
- Fsmash (breaks at 31%)
- Fsmash(Late) (breaks at 43%)
- Usmash1 (breaks at 0%)
- Usmash2 (breaks at 48%)
- Usmash2(Late) (breaks at 81%)
- Dsmash (breaks at 53%)
- Fair (breaks at 66%)
- Bair (breaks at 47%)
- Uair (breaks at 61%)
- Dair2 (breaks at 71%)
- NeutralB(Full-Charge) (breaks at 32%)
- UpB(Hitbox) (breaks at 53%)
- DownB(Attack) (breaks at 32%)
Here are a few examples of Lucario's attacks, and when they start to break armor at minimum, medium, and max aura.
For reference:
Min Aura(x0.66): 0%
Medium Aura(x1): 70%
Max Aura(x1.7): 190%
Fair
For reference:
Min Aura(x0.66): 0%
Medium Aura(x1): 70%
Max Aura(x1.7): 190%
Fair
- Min: 92%
- Mid: 66%
- Max: 37%
- Min: 78%
- Mid: 47%
- Max: 13%
- Min: 66%
- Mid: 32%
- Max: 0%
- Jab1: >200
- Jab2: >200(sweet or sour)
- Jab3: 115
- Dash-Attack: 63
- Dash-Attack: 83
- Ftilt1: 196
- Ftilt2: 96
- Utilt: 78(sweet), 100(sour)
- Dtilt: 115
- Fsmash: 31
- Fsmash(Late): 43
- Usmash1: 0
- Usmash2: 48(sweet), 59(sour)
- Usmash2(Late): 81
- Dsmash: 53
- Nair: 112
- Nair2: 153
- Fair: 66
- Bair: 47
- Uair: 61
- Uair(Late): 111
- Dair1: >200
- Dair2: 71
- NeutralB(Charging): >200
- NeutralB(ReleaseFromCharge): >200
- NeutralB(Full-Charge): 32
- SideB(Projectile): 133(sweet or sour)
- UpB(Hitbox): 53
- DownB(Attack): 32
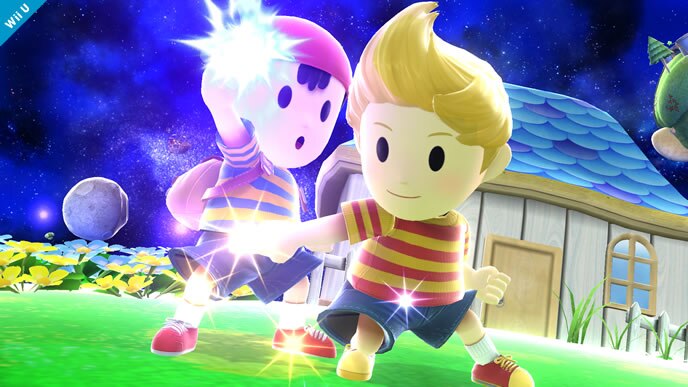
While not to the extent of Ness, Lucas still has a variety of disjointed attacks that can threaten Yoshi's double jump at middling percents. Both his Fair and Bair break armor around 70% sweetspotted, and his Uair breaks it at 77%. His Dsmash is also a pretty meaty hitbox that breaks armor at 35% on the first hit, with the next two hits breaking it about 30% after the previous, and his massive Usmash breaks armor at 0% with the launcher, and from 34-95% depending on how early it hits.
Contact with his Up+B isn't as dangerous as Ness's, though the first and last hit are somewhat dangerous, breaking armor at 46% and 18% respectively. Also watch out for his Down+B, since while it doesn't break until 85%, keep in mind that it has a moderate disjoint on its deactivation which can easily catch you if you aren't careful.
Dangerous moves:
Normals:
- Dash-Attack (breaks at 53%)
- Utilt2 (breaks at 68%)
- Fsmash (breaks at 38%)
- Usmash(Launcher) (breaks at 0%)
- Usmash(Earliest) (breaks at 34%)
- Usmash(Early) (breaks at 43%)
- Usmash (breaks at 57%)
- Usmash(Late) (breaks at 74%)
- Dsmash1 (breaks at 35%)
- Dsmash2 (breaks at 61%)
- Fair (breaks at 70%)
- Bair (breaks at 74%)
- Uair (breaks at 77%)
- UpB(Contact-Hit1) (breaks at 46%)
- UpB(Contact-LastHit) (breaks at 18%)
- DownB (breaks at 85%)
- Jab1: >200
- Jab2: >200
- Jab3: 135
- Dash-Attack: 53(sweet), 72(sour)
- Ftilt: 104(sweet or sour)
- Utilt1: 174
- Utilt2: 68
- Utilt2(Late): 104
- Dtilt: >200(sweet or sour)
- Fsmash: 38(sweet), 43(sour)
- Usmash(Launcher): 0
- Usmash(Earliest): 34
- Usmash(Early): 43
- Usmash: 57
- Usmash(Late): 74
- Usmash(Latest): 95
- Dsmash1: 35
- Dsmash2: 61
- Dsmash3: 94
- Nair: >200
- Nair(LastHit): 92
- Fair: 70(sweet), 113(sour)
- Fair(Late): 168
- Bair: 74(sweet), 117(sour)
- Bair(Sourer): >200
- Uair: 77
- Dair(Hit1-3): >200
- Dair(LastHit): 134(sweet), 166(sour)
- Zair: >200
- Zair(Late): >200
- UpB(Contact-Hit1): 46
- UpB(Contact-Multihit): >200
- UpB(Contact-LastHit): 18
- DownB: 85
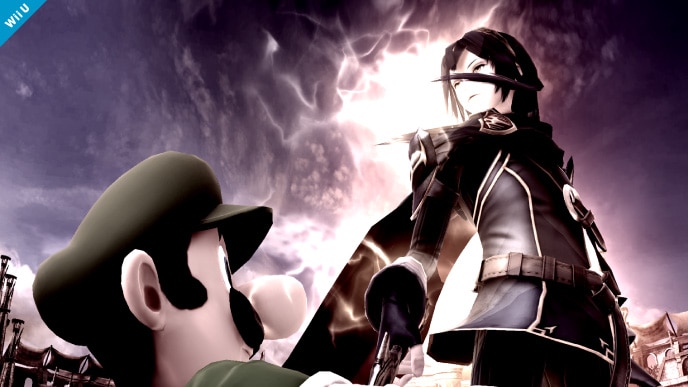
As a version of Marth without the tippers, Lucina's attacks pose slightly less of a threat to Yoshi's double jump at earlier percents, but since her aerials still have a good amount of range and don't require as much precision, it's still important to be careful off-stage at mid-high percents. Her earliest breaking aerials are Nair's 2nd hit and Bair at about 60%, with the remaining aerials breaking closer to 80%.
Also watch out for her Neutral+B, which can poke you out between 77% uncharged, and 13% at full charge. The Early hit of Up+B is also pretty dangerous if you're recovering low, breaking at 45%. As for near-stage threats, the launcher hit of Usmash can knock you out at 0%, and Fsmash can knock you out at 29%.
Dangerous moves:
Normals:
- Ftilt (breaks at 83%)
- Utilt (breaks at 49%)
- Utilt(Late) (breaks at 65%)
- Fsmash (breaks at 29%)
- Usmash(Launcher) (breaks at 0%)
- Usmash (breaks at 48%)
- Dsmash1 (breaks at 55%)
- Dsmash2 (breaks at 32%)
- Nair2 (breaks at 62%)
- Fair (breaks at 79%)
- Bair (breaks at 64%)
- Uair (breaks at 76%)
- Dair(Meteor) (breaks at 83%)
- NeutralB(Uncharged) (breaks at 77%)
- NeutralB(Charged) (breaks at 13%)
- SideB4(U) (breaks at 49%)
- SideB4(S) (breaks at 48%)
- UpB(Early) (breaks at 45%)
- Jab1: >200
- Jab2: >200
- Dash-Attack: 120
- Ftilt: 83
- Utilt: 49
- Utilt(Late): 65
- Dtilt: >200
- Fsmash: 29
- Usmash(Launcher): 0
- Usmash: 48
- Dsmash1: 55
- Dsmash2: 32
- Nair1: >200
- Nair2: 62
- Fair: 79
- Bair: 64
- Uair: 76
- Dair: 92
- Dair(Meteor): 83
- NeutralB(Uncharged): 77
- NeutralB(Charged): 13
- SideB1: >200
- SideB2(U): >200
- SideB2(S): >200
- SideB3(U): >200
- SideB3(S): >200
- SideB3(D): >200
- SideB4(U): 49
- SideB4(S): 48
- SideB4(D-Multihit): >200
- SideB4(D-LastHit): 92
- UpB(Early): 45
- UpB: 144(sweet), 164(sour)
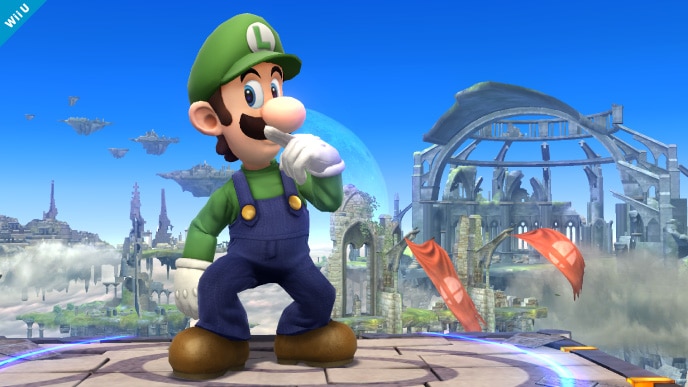
Everyone's favorite number two, Luigi doesn't have many options to break Yoshi's armor off-stage - his most threatening aerial is Bair which breaks armor at 68%, with Nair breaking later at 85%. Misfire can knock you out at 20%, though the 1/10 chance means it's rarely a threat.
His Sweetspot Up+B can also break armor at 15% on the ground and 49% in the air, but it's pretty unlikely he'll be throwing that out just to intercept your jump. Also remember that his Down Taunt can break you out at 0%, so don't get reckless near the stage or you might be struck with eternal shame.
Dangerous moves:
Normals:
- Dash-Attack(LastHit) (breaks at 82%)
- Fsmash (breaks at 41%)
- Usmash (breaks at 49%)
- Dsmash1 (breaks at 51%)
- Dsmash2 (breaks at 36%)
- DownTaunt (breaks at 0%)
- Nair (breaks at 85%)
- Bair (breaks at 68%)
- SideB(Misfire) (breaks at 20%)
- UpB(Sweetspot-Ground) (breaks at 15%)
- UpB(Sweetspot-Aerial) (breaks at 49%)
- DownB(Ground-LastHit) (breaks at 35%)
- DownB(Aerial-LastHit) (breaks at 42%)
- Jab1: >200
- Jab2: >200
- Jab3: 101
- Dash-Attack(LastHit): 82
- Ftilt: 138
- Utilt: 98
- Dtilt: 190
- Fsmash: 41(sweet), 44(sour)
- Usmash: 49(sweet), 60(sour)
- Dsmash1: 51(sweet), 56(sour)
- Dsmash2: 36(sweet), 40(sour)
- DownTaunt: 0
- Nair: 85
- Nair(Late): 144
- Fair: 130
- Bair: 68(sweet), 124(sour)
- Bair(Late): 124
- Uair: 104
- Uair(Late): 159
- Dair: 120
- Dair(Late): 112
- NeutralB: >200
- NeutralB(Late): >200
- SideB(NoCharge): 120
- SideB(Misfire): 20
- UpB(Sweetspot-Ground): 15
- UpB(Sweetspot-Aerial): 49
- DownB(Ground-Multihit): >200(sweet or sour)
- DownB(Ground-LastHit): 35
- DownB(Aerial-Multihit): 132
- DownB(Aerial-LastHit): 42

The well-rounded combo machine, most of Mario's moves (including the fair spike) don't break armor until 70% or later, though there are a few exceptions to watch out for. Up+B actually breaks Yoshi out of armor at 0%, and while this doesn't mean much in terms of edgeguarding, this does mean that we can't rely on double jump to escape from his dthrow/uair --> up+b combos.
Additionally, the final hit of Dair breaks armor at only 41%, so be careful about jumping into Mario if he follows you off-stage with it. Besides these two attacks, his smashes can also break through armor between 40% and 60%. And obviously, try not to get caped.
Dangerous moves:
Normals
- DashAttack (breaks at 34%)
- FsmashU (breaks at 40%)
- FsmashF (breaks at 43%)
- FsmashD (breaks at 41%)
- Usmash (breaks at 55%)
- Dsmash1 (breaks at 78%)
- Dsmash2 (breaks at 63%)
- Fair(early) (breaks at 87%)
- Fair (breaks at 73%)
- Bair (breaks at 88%)
- Dair(5) (breaks at 41%)
- UpB(Hit1-5) (breaks at 0%)
- UpB(Hit6) (breaks at 82%)
- Jab1: >200(sweet or sour)
- Jab2: >200(sweet or sour)
- Jab3: 180
- DashAttack: 34(sweet), 46(sour)
- Ftilt: 146
- Utilt: 98
- Dtilt: 136(sweet), 179(sour)
- FsmashU: 40(sweet), 51(sour)
- FsmashF: 43(sweet), 54(sour)
- FsmashD: 41(sweet), 52(sour)
- Usmash: 55
- Dsmash1: 78
- Dsmash2: 63
Aerials:
- Nair: 112
- Nair(late): >200
- Fair(early): 87
- Fair: 73
- Fair(late): 120
- Bair: 88
- Bair(late): 168
- Uair: 96
- Dair(1-4): >200
- Dair(5): 41
- Dair(landing): 151
Specials:
- NeutralB: >200
- NeutralB(late): >200
- NeutralB(later): >200
- UpB(Hit1-4): 0
- UpB(Hit5): 0(sweet), 58(sour)
- UpB(Hit6): 82

Ever since getting some serious damage/range buffs a few patches ago, Marth has become a serious threat in the tournament scene. His tippers have the power to break Yoshi out of armor fairly early, with some notable moves being the Second hit of Nair (44%), Early/Tipper Up+B (45%) and Tipper Neutral+B, which can break armor at 47% uncharged, and at 0% fully charged.
A lot of his grounded attacks also break armor pretty early, with Tipper Fsmash breaking it at only 6%, and most tilts breaking starting around 40-50%. If he doesn't space his attacks correctly, you're safe for about another 30% depending on the move, but the fact that so many of his moves threaten to break Yoshi's armor at low percents means you should be very careful about using your double jump.
Dangerous moves (Tipper hits only - see all moves for non-tipper):
Normals:
- Dash-Attack (breaks at 45%)
- Ftilt (breaks at 49%)
- Utilt (breaks at 41%)
- Utilt(Late) (breaks at 58%)
- Fsmash (breaks at 6%)
- Usmash(Body) (breaks at 0%)
- Usmash (breaks at 34%)
- Dsmash1 (breaks at 53%)
- Dsmash2 (breaks at 31%)
- Nair2 (breaks at 44%)
- Fair (breaks at 66%)
- Bair (breaks at 55%)
- Uair (breaks at 63%)
- Dair (breaks at 84%)
- Dair(Meteor) (breaks at 77%)
- NeutralB(Uncharged)+ (breaks at 47%)
- NeutralB(FullCharge) (breaks at 0%)
- SideB4(U) (breaks at 40%)
- SideB4(F) (breaks at 39%)
- SideB4(D:5) (breaks at 76%)
- UpB(Early) (breaks at 45%)
- UpB (breaks at 45%)
- Jab1: >200(sweet or sour)
- Jab2: 103(sweet), 141(sour)
- Dash-Attack: 45(sweet), 79(sour)
- Dash-Attack(Sour): 155
- Ftilt: 49(sweet), 138(sour)
- Utilt: 41(sweet), 62(sour)
- Utilt(Late): 58(sweet), 86(sour)
- Dtilt: 181(sweet or sour)
- Fsmash: 6(sweet), 49(sour)
- Usmash(Body): 0
- Usmash: 34(sweet), 51(sour)
- Dsmash1: 53(sweet), 49(sour)
- Dsmash2: 31(sweet), 29(sour)
- Nair1: >200(sweet or sour)
- Nair2: 44(sweet), 90(sour)
- Fair: 66(sweet), 112(sour)
- Bair: 55(sweet), 92(sour)
- Uair: 63(sweet), 95(sour)
- Dair: 84(sweet), 89(sour)
- Dair(Meteor): 77
- NeutralB(Uncharged): 47(sweet), 112(sour)
- NeutralB(FullCharge): 0(sweet), 28(sour)
- SideB1: >200(sweet or sour)
- SideB2(U): >200(sweet or sour)
- SideB2(F/D): >200(sweet or sour)
- SideB3(U): >200(sweet or sour)
- SideB3(F): >200(sweet or sour)
- SideB3(D): >200(sweet or sour)
- SideB4(U): 40(sweet), 54(sour)
- SideB4(F): 39(sweet), 54(sour)
- SideB4(D:1-4): >200
- SideB4(D:5): 76(sweet), 105(sour)
- UpB(Early): 45
- UpB: 45(sweet), 144(sour)
- UpB(Late): 144(sweet), 164(sour)
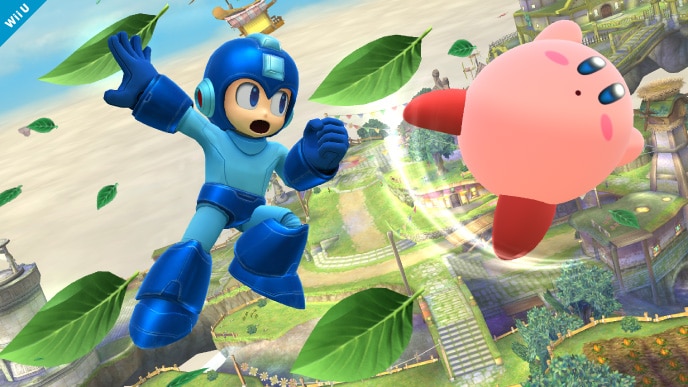
Megaman's projectiles/disjoints can be hard to deal with, and some of his stronger hits can break armor pretty early. His most notable projectile is his Fsmash, which can break at 70% uncharged and 31% at full charge. Also note that the Last hit of Side+B's explosion will break armor at 0%, so you have to airdodge through it or just take the hit if you're stuck with it in midair.
As for physical moves, Bair is probably the largest threat due to its fast and disjointed hitbox, with the second hit breaking at 74% and the last hit at 62%. His Usmash and Dsmash also break armor pretty early (40-60%), and the launcher of Usmash can knock you out at 0% if you find yourself jumping close to the stage.
Dangerous moves:
Normals:
- Utilt(Early) (breaks at 33%)
- Utilt (breaks at 74%)
- Utilt(Late) (breaks at 57%)
- Dtilt (breaks at 50%)
- Fsmash (breaks at 70%)
- Fsmash(Charged) (breaks at 31%)
- Usmash(Launcher) (breaks at 0%)
- Usmash(LastHit) (breaks at 64%)
- Dsmash(Early) (breaks at 39%)
- Dsmash (breaks at 48%)
- Bair2 (breaks at 74%)
- Bair3 (breaks at 62%)
- Uair (breaks at 79%)
- Dair (breaks at 86%)
- SideB(LastHit) (breaks at 0%)
- Jab(Physical): >200
- Lemon(Early): >200
- Lemon: >200
- Lemon(Late): >200
- Dash-Attack(Multihit): 179(sweet or sour)
- Dash-Attack(LastHit): 120
- Utilt(Early): 33
- Utilt: 74
- Utilt(Late): 57
- Dtilt: 50
- Dtilt(Late): 107
- Fsmash: 70
- Fsmash(Charged): 31
- Usmash(Launcher): 0
- Usmash(Multihit): >200
- Usmash(LastHit): 64
- Dsmash(Early): 39
- Dsmash: 48(sweet), 57(sour)
- Dsmash(Late): >200
- Nair(Physical): 106
- Fair: 117(sweet), 123(sour)
- Fair(Late): 183
- Bair1: 91(sweet or sour)
- Bair2: 74(sweet or sour)
- Bair3: 62
- Uair(Early): 91
- Uair: 79
- Uair(Late): 106
- Uair(LastHit): 94
- Dair: 86
- Dair(Late): 103
- SideB(Multihit): >200
- SideB(LastHit): 0
- DownB(Physical): >200
- DownB(Thrown): >200
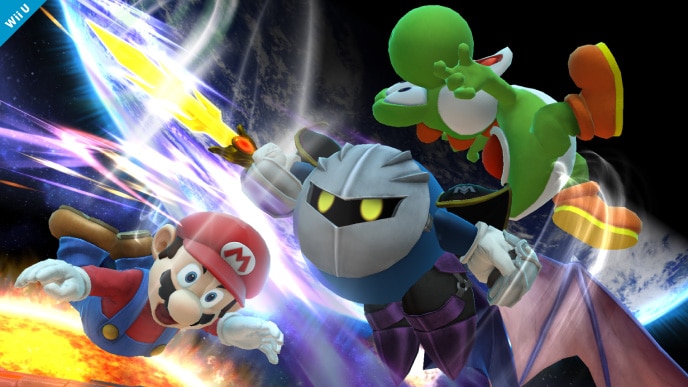
What used to be an unwinnable matchup before the patches is now a challenging, but doable one. With his moveset being mostly weak hits, most of his attacks don't start breaking armor until around 60-70% with the exception of the First hit of Up+b which can break armor at 0%. Be careful around Fsmash and Ftilt3 near the stage, since those can also pop you out relatively early (around 40%). Start watching out for Nair and Bair3 at mid-high percents, which break armor at 66% and 56% respectively.
Dangerous moves:
Normals
- Rapid-Jab-Finisher (breaks at 89%)
- Dash-Attack (breaks at 63%)
- Ftilt3 (breaks at 44%)
- Utilt (breaks at 72%)
- Utilt(Late) (breaks at 72%)
- Fsmash (breaks at 37%)
- Usmash3 (breaks at 33%)
- Dsmash2 (breaks at 84%)
- Nair (breaks at 66%)
- Nair(Late) (breaks at 88%)
- Fair3 (breaks at 70%)
- Bair3 (breaks at 56%)
- NeutralB(FinalHit) (breaks at 56%)
- SideB(FinalHit) (breaks at 62%)
- UpB1(Grounded) (breaks at 0%)
- UpB2(Grounded) (breaks at 53%)
- UpB1(Aerial) (breaks at 0%)
- UpB2(Aerial) (breaks at 62%)
- DownB (breaks at 36%)
- Rapid-Jab: >200
- Rapid-Jab-Finisher: 89
- Dash-Attack: 63(sweet), 74(sour)
- Ftilt1&2: >200
- Ftilt3: 44
- Utilt: 72(sweet), 97(sour)
- Utilt(Late): 72(sweet), 91(sour)
- Dtilt: >200
- Fsmash: 37(sweet), 44(sour)
- Usmash1: >200
- Usmash2: >200
- Usmash3: 33
- Dsmash1: 118
- Dsmash2: 84
Aerials:
- Nair: 66
- Nair(Late): 88
- Fair1&2: 176(sweet or sour)
- Fair3: 70
- Bair1&2: 149(sweet), 49(sour)
- Bair3: 56
- Uair: 124
- Dair: 113
Specials:
- NeutralB: >200
- NeutralB(FinalHit): 56
- SideB: >200(sweet or sour)
- SideB(FinalHit): 62
- UpB1(Grounded): 0(sweet or sour)
- UpB1(Grounded-Late): >200
- UpB2(Grounded): 53
- UpB1(Aerial): 0(sweet or sour)
- UpB2(Aerial): 62
- DownB: 36(sweet), 44(sour)
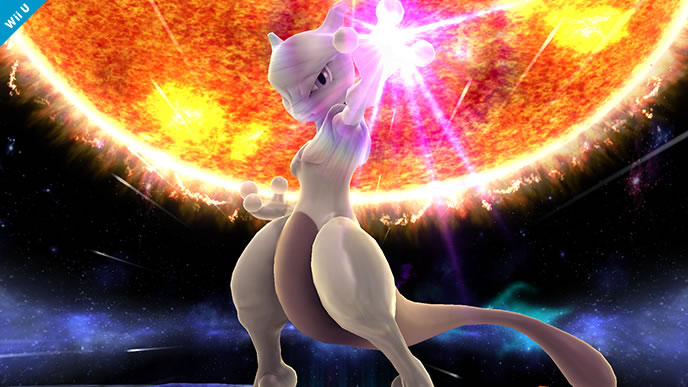
The iconic clone who shocked everyone with his addition to Smash 4, Mewtwo has been making waves in the tournament scene ever since his major buffs in a previous patch. Fortunately, none of his attacks break armor obscenely early, but several of his aerials do break armor slightly earlier than the average character, the major offender being Fair, which breaks at 48%.
While he doesn't have any major outlying attacks to look out for, it is definitely important to play safe off-stage against Mewtwo when you consider the massive range that some of his attacks have, as well has his Side+B command grab which will obviously break you out of armor regardless of percent. Neutral+B when fully charged is probably also a dangerous attack, though I was unable to find data to determine when exactly it breaks armor.
Dangerous moves:
Normals:
- Jab-Finisher (breaks at 71%)
- Dash-Attack (breaks at 38%)
- Dash-Attack(Late) (breaks at 66%)
- Ftilt (breaks at 90%)
- Utilt (breaks at 42%)
- Utilt(Late) (breaks at 68%)
- Fsmash (breaks at 50%)
- Usmash(Initial) (breaks at 58%)
- Usmash(LastHit) (breaks at 37%)
- Dsmash (breaks at 43%)
- Fair (breaks at 48%)
- Bair (breaks at 78%)
- Uair (breaks at 62%)
- Dair (breaks at 64%)
*MISSING NEUTRAL+B
- Jab1: >200(sweet or sour)
- Jab-Finisher: 71
- Dash-Attack: 38(sweet), 56(sour)
- Dash-Attack(Late): 66(sweet), 115(sour)
- Ftilt: 90(sweet), 112(sour)
- Utilt: 42(sweet), 68(sour)
- Utilt(Sourer): >200
- Utilt(Late): 68(sweet), 150(sour)
- Dtilt: 110(sweet), 161(sour)
- Fsmash: 50(sweet), 51(sour)
- Usmash(Initial): 58
- Usmash(Multihit): >200
- Usmash(LastHit): 37
- Dsmash: 43
- Nair(Multihit): >200
- Nair(LastHit): 129
- Fair: 48
- Bair: 78(sweet), 94(sour)
- Bair(Sourer): 115
- Uair: 62(sweet), 77(sour)
- Dair: 64(sweet), 63(sour)
Huge thanks to Marrow for typing up the data for this one!
Mii Brawler's normal attacks don't pose much of a threat to Yoshi's double jump aside from a few outliers (Jab finisher - 0% and Dash Attack - 14%), but several of their specials can be pretty dangerous when recovering. The Multihit of Piston Punch (Up+B-3) breaks armor at 0%, which can easily result in a stage spike if you're jumping too close to the ledge. The Ground hits of Foot Flurry (Down+B-3) also have the ability to break armor at 0%.
Other dangerous specials include the projectile Shot Put (Neutral+B-1) which can knock you out at 64%, and the ZSS-esque Feint Jump (Down+B-2) which can break at 72%. Aside from these moves though, Mii Brawler seems to struggle to break through Yoshi's armor, so you can use this to your advantage when recovering or edgeguarding.
Dangerous moves:
Normals:
- RapidJabFinisher (breaks at 0%)
- Dash-Attack (breaks at 14%)
- Dash-Attack(Late) (breaks at 53%)
- Dtilt (breaks at 80%)
- Fsmash (breaks at 35%)
- Usmash (breaks at 56%)
- Usmash(Late) (breaks at 84%)
- DsmashFront (breaks at 70%)
- DsmashBack (breaks at 52%)
- Nair(Early) (breaks at 90%)
- Dair(Late) (breaks at 63%)
- NeutralB1-Shot Put (breaks at 64%)
- NeutralB2-Ultimate Uppercut(UnchargedGround) (breaks at 83%)
- NeutralB2(FullChargeGround) (breaks at 31%)
- NeutralB2(FullChargeGroundLate) (breaks at 63%)
- NeutralB2(FullChargeAir) (breaks at 71%)
- NeutralB3-Falcon Punch (breaks at 24%)
- NeutralB3(Air) (breaks at 35%)
- NeutralB3(Turnaround) (breaks at 19%)
- SideB1-Onslaught(FinalHitGround) (breaks at 36%)
- SideB1(FinalHitAerial) (breaks at 44%)
- SideB2-Burning Dropkick (breaks at 79%)
- SideB3-Headache Maker (breaks at 43%)
- SideB3(Late) (breaks at 76%)
- UpB1-Axe Kick(Landing) (breaks at 60%)
- UpB2-Helicopter Kick(FinalHitGround) (breaks at 32%)
- UpB2(FinalHitAir) (breaks at 35%)
- UpB3-Piston Punch(Hit1-7) (breaks at 0%)
- UpB3(Hit8) (breaks at 26%)
- DownB1-Self-Inflicted Concussion(Falling) (breaks at 82%)
- DownB2-Feint Jump (breaks at 72%)
- DownB3-Foot Flurry(GroundHits1-7) (breaks at 0%)
- DownB3(GroundFinalHit) (breaks at 47%)
- DownB3(AirFinalHit) (breaks at 53%)
- jab1: >200(sweet or sour)
- jab2: >200(sweet or sour)
- RapidJabFinisher: 0
- DashAttack: 14
- DashAttackLate: 53
- FtiltHigh: 117(sweet), 131(sour)
- Ftilt: 124(sweet), 139(sour)
- FtiltLow: 120(sweet), 134(sour)
- Utilt: 91
- Dtilt: 80
- Fsmash: 35
- Usmash: 56
- UsmashLate: 84
- DsmashFront: 70
- DsmashBack: 52
- NairEarly: 90
- NairLate: 189
- Fair1: 147
- Fair2: 135
- Bair: 102
- Uair: 128
- Dair: 104(sweet), 57(sour)
- DairLate: 63
- NeutralB1: 64
- NeutralB2(UnchargedGround): 83
- NeutralB2(UnchargedGroundLate): >200
- NeutralB2(UnchargedAir): 102
- NeutralB2(UnchargedAirLate): >200
- NeutralB2(FullChargeGround): 31
- NeutralB2(FullChargeGroundLate): 63
- NeutralB2(FullChargeAir): 71
- NeutralB2(FullChargeAirLate): 119
- NeutralB3: 24
- NeutralB3(Air): 35
- NeutralB3(Turnaround): 19
- SideB1(AttackGround): >200(sweet or sour)
- SideB1(FinalHitGround): 36
- SideB1(AttackAerial): 155(sweet or sour)
- SideB1(FinalHitAerial): 44
- SideB2(NoCharge): 79
- SideB2(NoChargeLate): 110
- SideB2(FullCharge): 110
- SideB2(FullChargeLate): 110
- SideB3: 43(sweet), 78(sour)
- SideB3(Late): 76
- SideB3(Landing): 98
- UpB1(Landing): 60
- UpB2(Hit1Ground): 91
- UpB2(FinalHitGround): 32
- UpB2(FinalHitAir): 35
- UpB3(Hit1): 0(sweet or sour)
- UpB3(Hits2-3): 0
- UpB3(Hits4-7): 0
- UpB3(Hit8): 26
- DownB1(Hit1): >200(sweet or sour)
- DownB1(Falling): 82(sweet or sour)
- DownB2(Attack): 72
- DownB3(GroundHits1-7): 0(sweet), 155(sour)
- DownB3(GroundHits1-7): >200
- DownB3(GroundFinalHit): 47
- DownB3(AirHits1-6): >200
- DownB3(AirFinalHit): 53
Mii Gunner's normal attacks break armor in pretty standard ranges, but some moves to look out for are the Samus-like Dtilt that breaks armor at 31%, and the Toon Link-esque Dsmash that also breaks it around 30-40%. Bair and Dair both break armor around 60% when sweetspotted, with the meteor hit breaking it slightly later.
As for specials, there's a few projectiles to watch out for: Charge Blast (NeutralB1) can break armor at 62%, and Bomb Drop (DownB2) breaks it at 50% on contact. The last hit of Grenade Launcher (NeutralB3) can also knock you out at 76%.though you can safely jump through the multihit.
Dangerous moves:
Normals:
- Dash-Attack (breaks at 38%)
- Ftilt(Early) (breaks at 87%)
- Utilt (breaks at 54%)
- Dtilt (breaks at 31%)
- Fsmash(LastHit) (breaks at 55%)
- Usmash(LastHit) (breaks at 47%)
- Dsmash1 (breaks at 26%)
- Dsmash2 (breaks at 38%)
- Bair (breaks at 62%)
- Uair(LastHit) (breaks at 82%)
- Dair (breaks at 56%)
- Dair(Meteor) (breaks at 82%)
- NeutralB1-ChargeBlast(Charged) (breaks at 62%)
- NeutralB3-GrenadeLauncher(LastHit) (breaks at 76%)
- UpB1-LunarLaunch (breaks at 78%)
- UpB2-CannonUppercut(Hit1) (breaks at 61%)
- UpB2(Hit2) (breaks at 42%)
- UpB2(Hit2-Late) (breaks at 57%)
- DownB2-BombDrop(Contact) (breaks at 50%)
- Jab1: >200
- Jab2: >200
- Jab3(Hit1): >200
- Jab3(Hit2): 129
- Dash-Attack: 38
- Ftilt(Early): 87
- Ftilt(Late): 126
- Utilt: 54(sweet), 84(sour)
- Utilt(Late): 112
- Dtilt: 31
- Fsmash(Multihit): >200
- Fsmash(LastHit): 55
- Usmash1: >200(sweet or sour)
- Usmash2: >200(sweet or sour)
- Usmash3: >200(sweet or sour)
- Usmash4: >200(sweet or sour)
- Usmash(LastHit): 47
- Dsmash1: 26
- Dsmash2: 38
- Nair: 132
- Fair: 102
- Fair(Late): 165
- Bair: 62(sweet), 76(sour)
- Uair1: >200
- Uair(Multihit): >200
- Uair(LastHit): 82
- Dair: 56(sweet), 90(sour)
- Dair(Meteor): 82
- NeutralB1-ChargeBlast(Uncharged): >200
- NeutralB1(Charged): 62
- NeutralB3-GrenadeLauncher(Explosion): >200
- NeutralB3(LastHit): 76
- SideB1-FlamePillar(Initial): 196
- SideB1(Pillar): 170
- SideB2-StealthBurst(Uncharged): 135
- SideB3-Missile(Homing): >200
- SideB3(Super): 99
- UpB1-LunarLaunch: 78
- UpB2-CannonUppercut(Meteor): 120
- UpB2(Hit1): 61
- UpB2(Hit2): 42
- UpB2(Hit2-Late): 57
- DownB1-Reflector: >200
- DownB2-BombDrop(Explosion?): >200
- DownB2(Contact): 50

In addition to being one of the most uncommon characters, Mii Swordfighter lacks very many tools to break through Yoshi's double jump. Their grounded attacks pose a minimal threat, and of their aerials, Bair and Uair are the strongest, breaking at 70% and 55% respectively.
As for specials, some notable moves are Gale Strike (NeutralB1), which breaks armor around 50-60%, and Airborne Assault (SideB1) which breaks at only 21%. Both of these have significant windup though and are easy to avoid. Hero's Spin (UpB3) is probably their most dangerous attack, being a clone of Link's spin attack that breaks armor at 42% in the air with the multihit. Also be aware of Reversal Slash (DownB2), which is a clone of Mario's cape and can put you in a bad position offstage if you aren't careful.
Dangerous moves:
Normals:
- Dash-Attack (breaks at 50%)
- Dash-Attack(Late) (breaks at 83%)
- Ftilt (breaks at 78%)
- Utilt (breaks at 76%)
- Fsmash (breaks at 44%)
- Usmash(Launcher) (breaks at 0%)
- Usmash(LastHit) (breaks at 56%)
- Dsmash2 (breaks at 72%)
- Fair(Hit3) (breaks at 62%)
- Bair (breaks at 70%)
- Uair (breaks at 55%)
- Dair(Landing) (breaks at 62%)
- NeutralB1-GaleStrike(Early) (breaks at 49%)
- NeutralB1(Normal) (breaks at 57%)
- NeutralB3-BladeFlurry(Uncharged-LastHit) (breaks at 88%)
- NeutralB3(Charged-LastHit) (breaks at 28%)
- SideB1-AirborneAssault (breaks at 21%)
- SideB2-SurgingSlash (breaks at 65%)
- UpB2-SkywardSlashDash(LastHit) (breaks at 58%)
- UpB3-Hero'sSpin(Grounded-Early) (breaks at 31%)
- UpB3(Grounded) (breaks at 54%)
- UpB3(Grounded-Late) (breaks at 75%)
- UpB3(Aerial-Hit1) (breaks at 74%)
- UpB3(Aerial-Multihit) (breaks at 42%)
- UpB3(Aerial-LastHit) (breaks at 62%)
- DownB2-ReversalSlash (breaks at 71%)
- DownB3-PowerThrust(Grounded-Early) (breaks at 55%)
- DownB3(Grounded) (breaks at 67%)
- DownB3(Aerial-Early) (breaks at 67%)
- DownB3(Aerial) (breaks at 86%)
- Jab1: >200
- Jab2: >200
- Jab3: 166
- Dash-Attack: 50
- Dash-Attack(Late): 83
- Ftilt: 78
- Utilt: 76(sweet), 84(sour)
- Dtilt: 94
- Fsmash: 44(sweet), 52(sour)
- Usmash(Launcher): 0
- Usmash(Multihit): >200
- Usmash(LastHit): 56
- Dsmash1: 92
- Dsmash2: 72
- Nair: 121
- Fair(Hit1-2): >200
- Fair(Hit3): 62
- Bair: 70
- Uair: 55
- Uair(Late): 114
- Dair(Multihit): >200
- Dair(Landing): 62
- NeutralB1-GaleStrike(Early): 49
- NeutralB1(Normal): 57
- NeutralB1(Late): 105
- NeutralB2-ShurikenofLight(Close): >200
- NeutralB2(Medium): >200
- NeutralB2(Far): >200
- NeutralB2(Farthest): 139
- NeutralB3-BladeFlurry(Uncharged-Multihit): >200
- NeutralB3(Uncharged-LastHit): 88
- NeutralB3(Charged-Multihit): >200
- NeutralB3(Charged-LastHit): 28
- SideB1-AirborneAssault: 21
- SideB2-SurgingSlash: 65
- UpB2-SkywardSlashDash(Hit1): >200
- UpB2(Multihit): >200
- UpB2(LastHit): 58
- UpB3-Hero'sSpin(Grounded-Early): 31(sweet), 56(sour)
- UpB3(Grounded): 54(sweet), 96(sour)
- UpB3(Grounded-Late): 75
- UpB3(Grounded-Latest): 167
- UpB3(Aerial-Hit1): 74
- UpB3(Aerial-Multihit): 42
- UpB3(Aerial-LastHit): 62
- DownB2-ReversalSlash: 71
- DownB3-PowerThrust(Grounded-Early): 55(sweet), 90(sour)
- DownB3(Grounded): 67(sweet), 112(sour)
- DownB3(Grounded-Late): 112
- DownB3(Aerial-Early): 67(sweet), 107(sour)
- DownB3(Aerial): 86(sweet), 146(sour)
- DownB3(Aerial-Late): 133(sweet or sour)
- DownB3(Landing): >200
Game & Watch doesn't have too many outlying attacks that break armor outside of standard ranges - most of his grounded moves break around 70-80% (smashes between 30-40%), as do his Dair and Fair at 75% and 83% respectively. The Landing hitbox of Bair breaks it earlier at 18%, and Uair's second hit breaks it at 56%, though neither are particularly threatening.
His specials aren't particularly threatening, but Up+B can break armor around 100%, and an 8 or a 9 on Side+B will knock you out at 34% and 0% respectively. Mostly you just have to be careful of his smashes near the stage, which extend pretty far and can knock you out early if you aren't careful.
Dangerous moves:
Normals:
- Rapid-Jab-Finisher (breaks at 54%)
- Dash-Attack (breaks at 55%)
- Dash-Attack(Late) (breaks at 86%)
- Ftilt (breaks at 72%)
- Utilt2 (breaks at 79%)
- Dtilt (breaks at 78%)
- Fsmash (breaks at 27%)
- Usmash (breaks at 40%)
- Dsmash (breaks at 31%)
- Nair(LastHit) (breaks at 82%)
- Fair (breaks at 83%)
- Bair(Landing) (breaks at 18%)
- Uair2 (breaks at 56%)
- Dair(Early&Late) (breaks at 75%)
- SideB(6) (breaks at 87%)
- SideB(8) (breaks at 34%)
- SideB(9) (breaks at 0%)
Additionally, here are some percents that bucket breaks armor at for reference:
- DownB(Weak-Fox-Lasers:4.2%) (breaks at 89%)
- DownB(Med-Fox-Lasers:6%) (breaks at 57%)
- DownB(Strong-Fox-Lasers:9%) (breaks at 26%)
- Jab1: >200
- Rapid-Jab-Finisher: 54
- Dash-Attack: 55
- Dash-Attack(Late): 86
- Ftilt: 72(sweet), 80(sour)
- Ftilt(Late): 159
- Utilt1: 92(sweet), 94(sour)
- Utilt2: 79(sweet), 92(sour)
- Dtilt: 78
- Fsmash: 27(sweet), 39(sour)
- Usmash: 40
- Dsmash: 31(sweet), 105(sour)
- Nair1: >200
- Nair(2-3): >200
- Nair(LastHit): 82
- Fair: 83
- Fair(Late): >200
- Bair(Multihit): >200(sweet or sour)
- Bair(LastHit): 99
- Bair(Landing): 18
- Uair1: >200
- Uair2: 56
- Dair(Early&Late): 75
- Dair(Landing): >200
- NeutralB(Pan): >200
- NeutralB(Sausage): >200
- SideB(2): >200
- SideB(3): >200
- SideB(4): >200
- SideB(5): >200
- SideB(6): 87
- SideB(7): 134
- SideB(8): 34
- SideB(9): 0
- UpB: 98
- DownB(Base-Damage): >200
- DownB(Weak-Fox-Lasers:4.2%): 89
- DownB(Med-Fox-Lasers:6%): 57
- DownB(Strong-Fox-Lasers:9%): 26
The PSI kid with a seriously dangerous grab, Ness has several attacks that pose a major threat to Yoshi's recovery. Most notable is the PK Thunder body hit, which breaks armor at 0% with the initial hit and 36% on late contact, meaning it's important to be very careful when trying to intercept Ness's recovery. His Fsmash also breaks armor very early (10-20%), as well as both Yo-yo smashes to a lesser extent (30-60%), so be wary when double jumping near the ledge.
Aerials to be aware of are Bair and Uair, which both break armor around 60%. One fortunate break we get is that PK Fire cannot break armor below 200%, so it's pretty much always safe to double jump through/out of it if he's using it on you. Be careful of the Up+B projectile at higher percents though, since it can break armor at 112%.
Dangerous moves:
Normals:
- DashAttack3 (breaks at 46%)
- Utilt (breaks at 65%)
- Fsmash (breaks at 13%)
- Fsmash(Sourest) (breaks at 24%)
- Usmash (breaks at 34%)
- Usmash(Late) (breaks at 51%)
- Dsmash (breaks at 60%)
- Nair (breaks at 81%)
- Bair (breaks at 59%)
- Uair (breaks at 65%)
- NeutralB(Full-Charge) (breaks at 15%)
- UpB(Physical) (breaks at 0%)
- UpB(Physical-Late) (breaks at 36%)
- Jab1: >200
- Jab2: >200
- Jab3: 147
- Dash-Attack1: 62(sweet), 103(sour)
- DashAttack2: 115
- DashAttack3: 46
- Ftilt(Angled): 100
- Ftilt: 111
- Utilt: 65(sweet), 87(sour)
- Dtilt: >200(sweet or sour)
- Fsmash: 13(sweet), 18(sour)
- Fsmash(Sourest): 24
- Usmash: 34
- Usmash(Late): 51
- Dsmash(Multi): >200
- Dsmash: 60
- Nair: 81
- Nair(Late): 142
- Fair: >200
- Fair(Final-Hit): 95
- Bair: 59
- Bair(Late): 141
- Uair: 65
- Dair: 118
- Dair(Late): 125
- NeutralB(Uncharged): 176
- NeutralB(Full-Charge): 15
- SideB(Initial-hit): >200
- SideB(Lasting-hit): >200(sweet or sour)
- UpB(Projectile): 112
- UpB(Physical): 0
- UpB(Physical-Late): 36
- DownB: >200
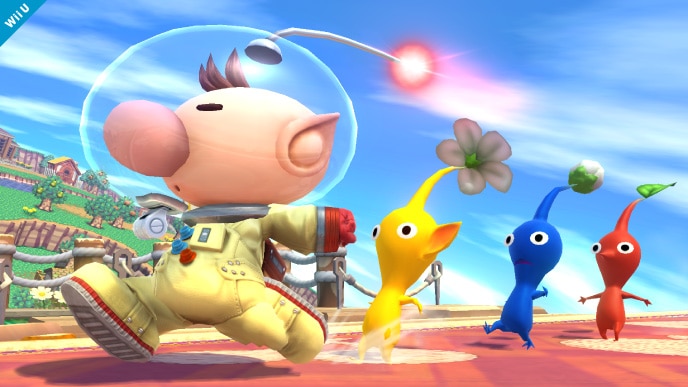
An uncommon, yet still threatening character in the right hands, Olimar's attacks mostly break armor at standard percents with one catch: due to the increased damage that red and purple pikmin cause, attacks using red pikmin can break about 10-20% earlier, and purples 25-35% earlier than the listed percents. I included a few examples under the list of dangerous moves.
In general, you don't have to watch out for too many of his attacks until high percents, with his strongest aerials being Bair and Uair, breaking at about 80%. A Purple Fair also breaks armor around 80%. Also keep an eye out for Fsmash, which is disjointed and breaks armor at 56% with the early hit, or even at 32% with a purple. It's likely that a Purple Side+B also breaks armor around 50-60%, though this is something I'll have to manually test since data was missing.
Dangerous moves:
Normals:
- Ftilt (breaks at 68%)
- Fsmash(Early) (breaks at 56%)
- Fsmash (breaks at 87%)
- Usmash (breaks at 49%)
- Usmash(Late) (breaks at 65%)
- Dsmash (breaks at 83%)
- Fair(Purple): 82%
- Bair (breaks at 83%)
- Uair (breaks at 78%)
Missing: Purple side+B
Also, here's a comparison for the knockback of a few attacks between Pikmin colors:
- Fsmash(Early): 56%
- Fsmash(Early-Red): 43%
- Fsmash(Early-Purple): 32%
- Fair: 116%
- Fair(Red): 97%
- Fair(Purple): 82%
- Jab1: >200(sweet or sour)
- Jab1(Late): >200
- Jab2: 196(sweet or sour)
- Dash-Attack(Hit1): 191
- Dash-Attack(Hit2): 98
- Ftilt: 68
- Utilt(Multihit): >200(sweet), 94(sour)
- Dtilt: 104
- Fsmash(Early): 56
- Fsmash: 87
- Fsmash(Late): 140
- Usmash: 49(sweet), 76(sour)
- Usmash(Late): 65
- Dsmash: 83
- Dsmash(Late): 114
- Nair(Multihit): >200
- Nair(LastHit): 103
- Fair: 116
- Bair: 83
- Uair: 78
- Dair: 99(sweet), 128(sour)
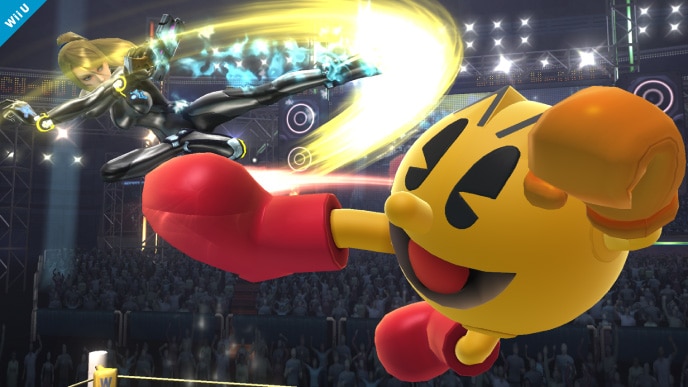
As a character who relies more on traps for damage rather than single powerful hits, Pac-Man struggles to break Yoshi's armor even into higher percents with his standard moves. Some of the earlier breaking moves are the last hit of Dash Attack (27%) and of Dair (43%), but these are easy to see coming and avoid. His remaining aerials break armor into the 90% range, with the main threats being Nair and Bair.
The most threatening answer Pac-Man has to Yoshi's double jump is his Fire Hydrant, which can not only be sent falling rapidly when it's not already in play, but it can also be launched horizontally to create a fast-moving hitbox. It breaks armor at 67% in either case, making it vital to avoid if you see it coming your way. It's likely that his bonus fruit like Apple, Melon, and Key also threaten to break armor, though there was no data for these items. Keep in mind that you can try to grab these out of the air with grab/airdodge to avoid getting hit, plus you can hold onto them to take his item out of play for a while.
Dangerous moves:
Normals:
- Dash-Attack(Last-Hit) (breaks at 27%)
- Utilt (breaks at 78%)
- Fsmash (breaks at 48%)
- Usmash2 (breaks at 53%)
- Dsmash (breaks at 72%)
- Nair(Early) (breaks at 90%)
- Bair (breaks at 86%)
- Dair(LastHit) (breaks at 43%)
- SideB (breaks at 90%)
- DownB(Dropping) (breaks at 67%)
- DownB(Attacked) (breaks at 67%)
- Jab1: >200(sweet or sour)
- Jab2: >200(sweet or sour)
- Jab3: 125
- Dash-Attack(Hit1-2): >200
- Dash-Attack(Last-Hit): 27
- Ftilt: 112
- Utilt: 78
- Dtilt: 121
- Fsmash: 48(sweet), 52(sour)
- Fsmash(Late): 91
- Usmash1: >200
- Usmash2: 53
- Usmash2(Late): 106
- Dsmash: 72
- Dsmash(Late): 105
- Nair(Early): 90
- Nair: 178
- Nair(Late): >200
- Fair: >200
- Bair: 86
- Uair: 99
- Dair(Hit1-3): >200
- Dair(LastHit): 43
- SideB: 90
- SideB(Pellet): >200(sweet or sour)
- UpB(Early): 108
- UpB: 124
- UpB(Late): 143
- DownB(Dropping): 67
- DownB(Attacked): 67

An uncommon pick who has seen some niche use in recent tournaments, Palutena lacks any major tools to break armor until higher percents, but she still has some moves to look out for. Her massive Usmash breaks armor at 34% at the base and 49% at the tip of the column, making it a moderate threat when jumping on/near the stage.
Her aerials aren't too threatening for the most part, but keep in mind that the last hit of both of her multihitting aerials (Nair/Uair) break armor the earliest, at around 50-60%. The rest break later, with Bair at 72%, Dair at 87%, and finally Fair at 96%. Of these moves, Fair has the fastest and largest hitbox, so be careful once you reach about 100%. Fortunately none of her non-custom specials break armor, but keep in mind that Side+B can push you a little bit.
Dangerous moves:
Normals:
- Rapid-Jab-Finisher (breaks at 72%)
- Dash-Attack (breaks at 41%)
- Utilt(LastHit) (breaks at 39%)
- Dtilt (breaks at 78%)
- Fsmash (breaks at 37%)
- Usmash(Base) (breaks at 34%)
- Usmash(Pillar) (breaks at 49%)
- Dsmash (breaks at 37%)
- Dsmash(Late) (breaks at 67%)
- Nair(LastHit) (breaks at 62%)
- Bair (breaks at 72%)
- Uair(LastHit) (breaks at 54%)
- Dair (breaks at 87%)
- Jab1: >200
- Rapid-Jab: >200
- Rapid-Jab-Finisher: 72
- Dash-Attack: 41
- Dash-Attack(Late): 136
- Ftilt1: 177(sweet or sour)
- Ftilt2: 102(sweet), 140(sour)
- Utilt(Multihit): >200(sweet or sour)
- Utilt(LastHit): 39(sweet), 52(sour)
- Dtilt: 78(sweet), 129(sour)
- Fsmash: 37(sweet), 51(sour)
- Usmash(Base): 34
- Usmash(Pillar): 49(sweet), 67(sour)
- Dsmash: 37
- Dsmash(Late): 67
- Nair(Multihit): >200
- Nair(LastHit): 62
- Fair: 96
- Bair: 72(sweet), 97(sour)
- Uair(Multihit): >200(sweet or sour)
- Uair(LastHit): 54
- Dair: 87(sweet), 100(sour)
- NeutralB: >200
- SideB(Hit): >200
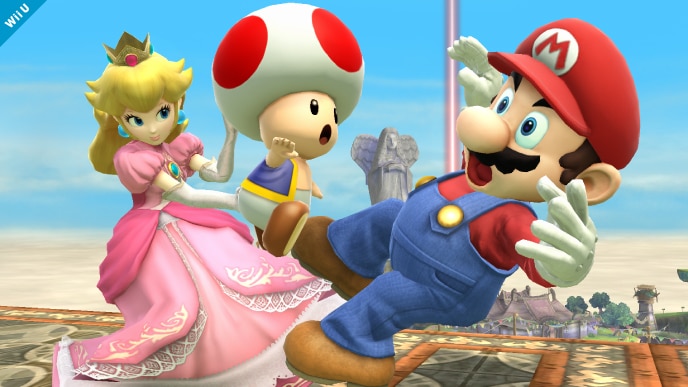
Peach's float allows her to travel pretty far off-stage, allowing her to pressure Yoshi well when edgeguarding at middling percents. Fair is her strongest aerial, breaking armor at 47%, with the rest of her aerials breaking closer to 70%. Her Side+B also breaks at 74%, coming out about as fast as her Fair and having a burst of speed that you should watch out for.
The main grounded threat to look out for is Fsmash, which has a low hitbox and breaks armor at 25% (except the golf club, which breaks at 49%). Her Up+B's launcher hitbox can also break armor at 0%, with the "open" hitbox breaking at 32%, though it's not likely that she'll be throwing it out to try and stop your recovery.
Also note that none of her turnips really pose a threat to armor, even the stitch can't break it until around 100%. Obviously if she pulls a bomb though, you might want to avoid getting hit by it.
Dangerous moves:
Normals:
- Dash-Attack1 (breaks at 74%)
- Dash-Attack2 (breaks at 53%)
- Ftilt (breaks at 59%)
- Ftilt(Late) (breaks at 83%)
- Utilt (breaks at 48%)
- Dtilt (breaks at 57%)
- Fsmash(Tennis/Pan) (breaks at 25%)
- Fsmash(Golf) (breaks at 49%)
- Usmash (breaks at 46%)
- Usmash(Sourer) (breaks at 56%)
- Usmash(Late) (breaks at 32%)
- Dsmash(LastHit) (breaks at 75%)
- Nair (breaks at 78%)
- Fair (breaks at 47%)
- Bair (breaks at 72%)
- Uair2 (breaks at 76%)
- Dair(LastHit) (breaks at 72%)
- SideB (breaks at 74%)
- UpB(Launcher) (breaks at 0%)
- UpB(Multihit) (breaks at 58%)
- UpB(FinalHit) (breaks at 57%)
- UpB(Open-Hitbox) (breaks at 32%)
- Jab1: >200
- Jab2: >200
- Dash-Attack1: 74(sweet), 123(sour)
- Dash-Attack2: 53
- Ftilt: 59(sweet), 75(sour)
- Ftilt(Late): 83
- Utilt: 48(sweet), 105(sour)
- Dtilt: 57(sweet), 126(sour)
- Fsmash(Tennis): 25(sweet), 39(sour)
- Fsmash(Golf): 49
- Fsmash(Pan): 25
- Usmash: 46(sweet), 32(sour)
- Usmash(Sourer): 56
- Usmash(Late): 32(sweet), 41(sour)
- Dsmash(Multihit): >200(sweet or sour)
- Dsmash(LastHit): 75
- Nair: 78
- Nair(Late): 180(sweet or sour)
- Fair: 47
- Bair: 72
- Bair(Late): >200
- Uair1: 171
- Uair2: 76
- Dair(Multihit): >200(sweet or sour)
- Dair(LastHit): 72
- SideB: 74
- UpB(Launcher): 0
- UpB(Multihit): 58
- UpB(FinalHit): 57
- UpB(Open-Hitbox): 32
- Turnip(Normal): >200
- Turnip(Winking): >200
- Turnip(Dot-Eyes): >200
- Turnip(Stitch): 107
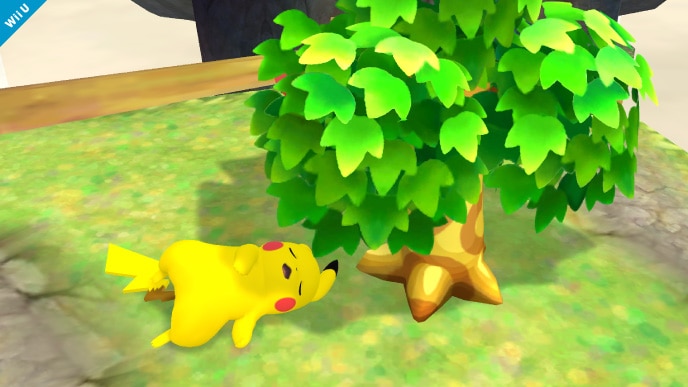
The mascot of the Pokemon franchise, results have shown that Pikachu is definitely not a character to sleep on. Notably, all 4 of his standard aerials are unable to break armor until 75-80%, but after this threshold you have to be very careful offstage considering Pikachu's tendency to go deep for edgeguards. Also watch out for his disjointed Fsmash, which can break armor at 28%.
Another scary move to watch out for is his Down+B, due to the power it has off-stage as well as out of his Up-throw. The bolt itself breaks armor at 78% and the physical hit when it strikes Pikachu will knock you out at 35%, so it's important to respect the move as you get to higher percents. The Cloud hit of Down+B breaks armor later, at 101%, so keep in mind that you can safely escape his Uthrow->Down+B combo as long as you're before the 80-100% range.
Dangerous moves:
Normals:
- Dash-Attack (breaks at 36%)
- Dash-Attack(Late) (breaks at 35%)
- Utilt (breaks at 88%)
- Fsmash(Early) (breaks at 52%)
- Fsmash (breaks at 28%)
- Fsmash(Late) (breaks at 51%)
- Usmash(Early) (breaks at 42%)
- Usmash (breaks at 81%)
- Dsmash(LastHit) (breaks at 45%)
- Nair (breaks at 87%)
- Fair(LastHit) (breaks at 81%)
- Bair(LastHit) (breaks at 75%)
- Uair (breaks at 87%)
- DownB(Bolt) (breaks at 78%)
- DownB(Contact) (breaks at 35%)
*MISSING UP+B AND CHARGED SIDE B
- Jab: >200(sweet or sour)
- Dash-Attack: 36
- Dash-Attack(Late): 35
- Ftilt(Up): 96
- Ftilt: 107
- Ftilt(Down): 119
- Utilt: 88(sweet), 97(sour)
- Dtilt: 158
- Fsmash(Early): 52
- Fsmash: 28
- Fsmash(Late): 51
- Usmash(Early): 42(sweet), 46(sour)
- Usmash: 81(sweet), 106(sour)
- Usmash(Late): 184
- Dsmash(1-5): >200(sweet or sour)
- Dsmash(LastHit): 45
- Nair: 87
- Nair(Late): 154
- Fair(1-4): >200
- Fair(LastHit): 81
- Bair(1-7): >200
- Bair(LastHit): 75
- Bair(Landing): 165
- Uair: 87(sweet), 103(sour)
- Uair(Late): 196
- Dair: 94
- Dair(Landing): 123
- NeutralB(Air): >200
- NeutralB(Ground-Early): >200(sweet or sour)
- NeutralB(Ground): >200(sweet or sour)
- NeutralB(Ground-Late): >200(sweet or sour)
- SideB(Uncharged?): 197
- DownB(Cloud): 101
- DownB(Bolt): 78
- DownB(Contact): 35
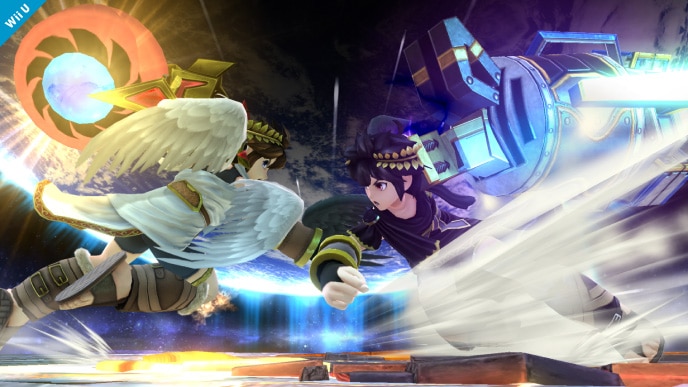
Pit (and his evil twin) break Yoshi's armor at pretty standard percents for the most part. His most dangerous aerial is probably Bair, since it covers a decent amount of space and breaks armor at 67%. The rest of his aerials break closer to the 80% range, including the multihit of Uair (though not the multihit of Fair), so that's something to watch out for at higher percents.
Other notable moves include his Dash Attack, which breaks armor at 59%, as well as Side+B, which despite having a lot of lag when used in the air can break at 34%, or at 2-7% on the ground. Also, while Pit's charged Neutral+B doesn't pose a threat until about 170%, be wary of Dark Pit's charged Neutral+B which breaks it at 118%.
Since the majority of these guys' moves have the exact same frame data, I decided to merge their information together. Unless otherwise stated, the listed moves apply to both characters.
Dangerous moves:
Normals:
- Jab3 (breaks at 83%)
- Dash-Attack (breaks at 59%)
- Ftilt(Pit) (breaks at 66%)
- Utilt1 (breaks at 0%)
- Utilt2 (breaks at 62%)
- Utilt3 (breaks at 79%)
- Fsmash2 (breaks at 46%)
- Usmash1(Late) (breaks at 0%)
- Usmash3 (breaks at 43%)
- Dsmash1 (breaks at 65%)
- Dsmash2 (breaks at 76%)
- Fair(LastHit) (breaks at 88%)
- Bair (breaks at 67%)
- Uair(1-4) (breaks at 79%)
- Uair(LastHit) (breaks at 88%)
- Dair (breaks at 90%)
- Dair(Late) (breaks at 75%)
- Pit-SideB(Grounded) (breaks at 7%)
- Pit-SideB(Aerial) (breaks at 34%)
- D.Pit-SideB(Grounded) (breaks at 2%)
- D.Pit-SideB(Aerial) (breaks at 34%)
- Jab1: >200
- Jab2: >200
- Jab3: 83
- Rapid-Jab-Finisher: 94
- Dash-Attack: 59
- Ftilt(Pit): 66(sweet), 94(sour)
- Ftilt(D.Pit): 96(sweet), 134(sour)
- Utilt1: 0
- Utilt2: 62(sweet), 120(sour)
- Utilt3: 79
- Dtilt: 144
- Fsmash1: 97(sweet), 177(sour)
- Fsmash2: 46
- Usmash1: 178
- Usmash1(Late): 0
- Usmash2: 188(sweet or sour)
- Usmash3: 43
- Dsmash1: 65(sweet), 80(sour)
- Dsmash2: 76(sweet), 93(sour)
- Nair(1-7): 172(sweet), >200(sour)
- Nair(LastHit): 98
- Fair(1-2): >200
- Fair(LastHit): 88
- Bair: 67(sweet), 103(sour)
- Uair(1-4): 79(sweet or sour)
- Uair(LastHit): 88
- Dair: 90(sweet), 151(sour)
- Dair(Late): 75(sweet), 90(sour)
- Pit-NeutralB(Uncharged): >200
- Pit-NeutralB(Charged): 166
- Pit-SideB(Grounded): 7
- Pit-SideB(Aerial): 34
- D.Pit-NeutralB(Uncharged): >200
- D.Pit-NeutralB(Charged): 118
- D.Pit-SideB(Grounded): 2
- D.Pit-SideB(Aerial): 34
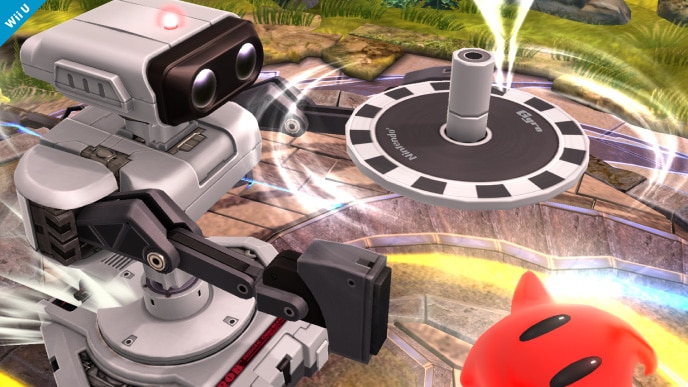
While none of ROB's attacks break Yoshi's armor incredibly early, he does have some dangerous options to keep in mind as you reach mid-high percents. His Nair and Bair both break armor in the 60-70% range, and Uair's last hit breaks it at 54%, all slightly earlier than the average character's aerials. His Neutral+B at full charge can break armor at 90% as well, which is important to be aware of considering how fast it comes out and travels.
While there wasn't knockback data for it (for some reason), it is likely that you are able to jump out of the multihit of Uair until later percents, so this may be a safe option to escape from the robo hoo-hah. From testing (courtesy of Crome), it was found that Down+B breaks armor around 120% when fully charged/smash thrown, or about 140-150% when uncharged/weak thrown, so be careful off-stage if he's holding one at higher percents.
Dangerous moves:
Normals:
- Dash-Attack (breaks at 80%)
- Fsmash (breaks at 45%)
- Usmash (breaks at 44%)
- Dsmash(LastHit) (breaks at 66%)
- Nair (breaks at 68%)
- Bair (breaks at 61%)
- Uair(LastHit) (breaks at 54%)
- Dair (breaks at 61%)
- NeutralB(Full-charge) (breaks at 90%)
- SideB(LastHit) (breaks at 56%)
- Gyro(Full-charge) - 118%
- Gyro(Uncharged) - 150%
- Gyro(Strong-Toss) - 116%
- Gyro(Weak-Toss) - 144%
- Jab1: >200
- Jab2: 139
- Dash-Attack: 80(sweet), 92(sour)
- Ftilt: 97(sweet), 145(sour)
- Utilt: 120(sweet), 149(sour)
- Utilt(Late): 110(sweet), 127(sour)
- Dtilt: >200
- Fsmash: 45(sweet), 65(sour)
- Fsmash(Sourer): 122
- Usmash(Launcher): 0
- Usmash: 44(sweet), 49(sour)
- Dsmash(Multihit): >200
- Dsmash(LastHit): 66
- Nair: 68(sweet), 92(sour)
- Fair: 126
- Bair: 61(sweet), 75(sour)
- Bair(Late): 126(sweet), 157(sour)
- Uair(LastHit): 54
- Dair: 61(sweet), 84(sour)
- Dair(Sourer): 162
- Dair(Late): 97
- NeutralB(Uncharged): 101
- NeutralB(Half-charge): >200
- NeutralB(Full-charge): 90
- SideB(Multihit): >200
- SideB(LastHit): 56
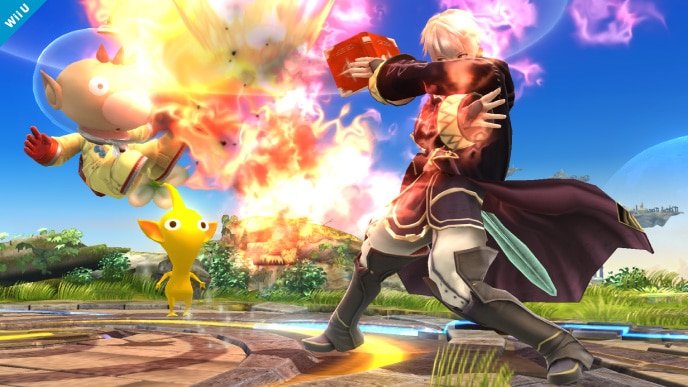
An uncommon but powerful zoner, Robin's Levin sword aerials break armor at pretty low percents, with Fair and Bair breaking near 40% and Uair/Dair breaking around 50%. The Bronze sword variations are less dangerous, but still break armor around 70-80%. Robin's grounded attacks also break armor in similar thresholds for both swords.
As for projectiles, Robin's fast-travelling Thoron will knock you out at 37%, so be careful when the tome is fully charged. Elthunder (second stage of charge) is also somewhat dangerous, being another quick projectile that knocks you out at 74%. Note that the Multihits of Side+B and Arcthunder CANNOT break armor, though the last hits can break it relatively early (27% and 16% respectively).
Dangerous moves:
Normals:
- Jab3(Fire) (breaks at 42%)
- Jab-Finisher(wind) (breaks at 24%)
- Dash-Attack (breaks at 42%)
- Dash-Attack(Late) (breaks at 83%)
- Utilt (breaks at 76%)
- Fsmash(Levin) (breaks at 35%)
- Fsmash(Bronze) (breaks at 74%)
- Usmash(Levin) (breaks at 47%)
- Usmash(Bronze) (breaks at 86%)
- Dsmash(Levin) (breaks at 33%)
- Dsmash(Levin-Late) (breaks at 43%)
- Dsmash(Bronze) (breaks at 74%)
- Fair(Levin) (breaks at 40%)
- Fair(Bronze) (breaks at 73%)
- Bair(Levin) (breaks at 44%)
- Bair(Bronze) (breaks at 82%)
- Uair(Levin) (breaks at 48%)
- Uair(Bronze) (breaks at 85%)
- Dair(Levin-Early) (breaks at 81%)
- Dair(Levin) (breaks at 54%)
- Elthunder (breaks at 74%)
- Arcthunder(LastHit) (breaks at 16%)
- Thoron (breaks at 37%)
- SideB(LastHit) (breaks at 37%)
- Jab1: >200
- Jab2: >200
- Jab3(Fire): 42
- Jab-Finisher(wind): 24
- Dash-Attack: 42
- Dash-Attack(Late): 83
- Ftilt: 119
- Utilt: 76(sweet), 121(sour)
- Dtilt: >200
- Fsmash(Levin): 35
- Fsmash(Levin-Late): 136
- Fsmash(Bronze): 74
- Usmash(Levin): 47(sweet), 45(sour)
- Usmash(Levin-Late): 136
- Usmash(Bronze): 86
- Dsmash(Levin): 33
- Dsmash(Levin-Late): 43
- Dsmash(Levin-Electricity): 94
- Dsmash(Bronze): 74
- Nair(Hit1&2): 141
- Fair(Levin): 40
- Fair(Levin-Late): 153
- Fair(Bronze): 73
- Bair(Levin): 44
- Bair(Levin-Late): 153
- Bair(Bronze): 82
- Uair(Levin): 48
- Uair(Levin-Late): 153
- Uair(Bronze): 85
- Dair(Levin-Early): 81
- Dair(Levin): 54(sweet), 90(sour)
- Dair(Levin-Late): 103
- Dair(Bronze): 93
- Thunder: >200
- Elthunder: 74
- Arcthunder(FirstHit): >200
- Arcthunder(Multihit): >200
- Arcthunder(LastHit): 16
- Thoron: 37
- SideB(Multihit): >200
- SideB(LastHit): 37
- UpB(Hit1): 142
- UpB(Hit1-Late): 97
- UpB(Hit2): 136

A strong contender for best character in the game, Rosalina herself can't start breaking armor until about 50%, but be careful when she still has Luma at low percents. Luma up-tilt can break armor at 0, and even more notably, Luma uair and Luma dair can break it at 0% and 15% respectively. Be sure to respect Luma whenever you're trying to recover, regardless of percent.
Start watching out for Rosalina's attacks starting around 70%, when her Nair and Uair start to break armor. Bair and Dair start breaking it in the 90's-100's, so you don't have to worry about those until a bit later. Be wary of Luma Shot popping you out around 80% also.
Dangerous moves (Pretty much everything past 80%...):
Normals:
- Jab3(L) (breaks at 50%)
- Jab-Finisher (breaks at 62%)
- Jab-Finisher(L) (breaks at 80%)
- Dash-Attack2 (breaks at 46%)
- Utilt (breaks at 50%)
- Utilt(L)-Early (breaks at 0%)
- Fsmash (breaks at 54%)
- Fsmash(L) (breaks at 40%)
- Usmash (breaks at 57%)
- Usmash(L) (breaks at 39%)
- Usmash(L)-Late (breaks at 46%)
- Dsmash2 (breaks at 74%)
- Dsmash1(L) (breaks at 78%)
- Dsmash2(L) (breaks at 65%)
- Nair1(L) (breaks at 67%)
- Nair2(L) (breaks at 82%)
- Fair(LastHit) (breaks at 76%)
- Fair(L) (breaks at 83%)
- Uair(Early) (breaks at 68%)
- Uair(L) (breaks at 0%)
- Dair(L) (breaks at 15%)
- NeutralB(FullCharge) (breaks at 80%)
- Dash-Attack(L): >200
- Ftilt: 134(sweet), 155(sour)
- Ftilt(L): 103
- Utilt: 50
- Utilt(L)-Early: 0
- Utilt(L): 94
- Utilt(L)-Late: 139
- Dtilt: 150
- Dtilt(L): 137
- Fsmash: 54
- Fsmash(L): 40(sweet), 66(sour)
- Usmash: 57
- Usmash(L): 39
- Usmash(L)-Late: 46
- Dsmash1: 91
- Dsmash2: 74
- Dsmash1(L): 78
- Dsmash2(L): 65
Aerials:
- Nair: 131
- Nair(Late): 100
- Nair1(L): 67
- Nair2(L): 82
- Fair: >200
- Fair(LastHit): 76
- Fair(L): 83
- Bair: 111
- Bair(L): 99
- Uair(Early): 68
- Uair: 128
- Uair(Late): >200
- Uair(L): 0
- Dair(Early): 112
- Dair(Meteor): >200
- Dair: 117
- Dair(Late): >200
- Dair(L): 15
Specials:
- NeutralB(NoCharge): >200
- NeutralB(FullCharge): 80
- SideB: >200

As the reverse-Marth, Roy's strong "hilt" hitboxes can pose a moderate threat to Yoshi's double jump, which can be dangerous when paired with his surprisingly good dash and air speed. All of his Sweetspotted Aerials besides Uair break armor around 65%, with the sourspotted versions breaking about 40% later. Also notable is that his Up+B's multihit breaks at 0% - something to look out for when trying to intercept his recovery or attempting to escape Dthrow -> Up+B.
Also be careful if he's charging Neutral+B on the ledge, since this one can break you out at 109% uncharged all the way down to 0% at full charge. The Launcher of Usmash can also break armor at 0%.
Dangerous moves:
Normals:
- Dash-Attack (breaks at 35%)
- Ftilt (breaks at 60%)
- Utilt (breaks at 56%)
- Fsmash (breaks at 16%)
- Usmash(Launcher) (breaks at 0%)
- Usmash(LastHit) (breaks at 36%)
- Dsmash1 (breaks at 49%)
- Dsmash2 (breaks at 40%)
- Nair2 (breaks at 64%)
- Fair (breaks at 67%)
- Bair (breaks at 63%)
- Dair (breaks at 65%)
- NeutralB(Charged) (breaks at 0%)
- SideB4(U) (breaks at 47%)
- SideB4(S) (breaks at 46%)
- SideB4(D-LastHit) (breaks at 88%)
- UpB(Multihit) (breaks at 0%)
- UpB(LastHit) (breaks at 56%)
- UpB(LastHit-Aerial) (breaks at 83%)
- Jab: 170(sweet or sour)
- Dash-Attack: 35(sweet), 100(sour)
- Ftilt: 60(sweet), 100(sour)
- Utilt: 56(sweet), 110(sour)
- Dtilt: 165(sweet or sour)
- Fsmash: 16(sweet), 24(sour)
- Fsmash(Sourer): 104
- Usmash(Launcher): 0
- Usmash(Multihit): 151
- Usmash(LastHit): 36
- Dsmash1: 49(sweet), 110(sour)
- Dsmash2: 40(sweet), 100(sour)
- Nair1: >200(sweet or sour)
- Nair2: 64(sweet), 104(sour)
- Fair: 67(sweet), 106(sour)
- Bair: 63(sweet), 113(sour)
- Uair: 100(sweet or sour)
- Dair: 65(sweet), 90(sour)
- NeutralB(Uncharged): 109
- NeutralB(Charged): 0(sweet), 0(sour)
- SideB1: >200(sweet or sour)
- SideB2(U): >200(sweet or sour)
- SideB2(S): >200(sweet or sour)
- SideB3(U/S): >200(sweet or sour)
- SideB3(D): >200(sweet or sour)
- SideB4(U): 47(sweet), 64(sour)
- SideB4(S): 46(sweet), 65(sour)
- SideB4(D-Multihit): >200
- SideB4(D-LastHit): 88(sweet), 127(sour)
- UpB(Launcher): 0
- UpB(Multihit): 0
- UpB(LastHit): 56
- UpB(Launcher-Aerial): 0
- UpB(Multihit-Aerial): 0
- UpB(LastHit-Aerial): 83
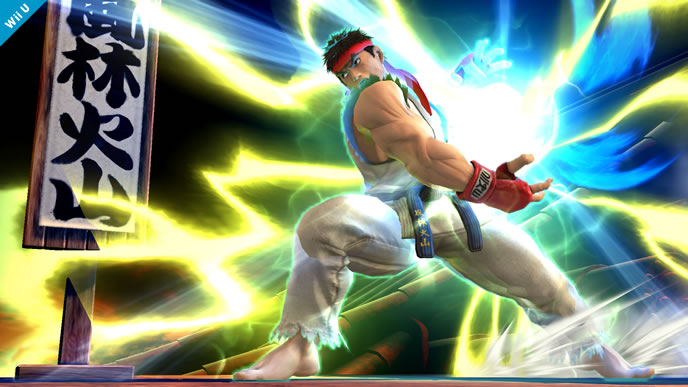
The technical Street Fighter (who was a pain in the butt to put in all the data for...), Ryu has a lot of attacks that can challenge Yoshi's double jump from low percents. Watch out for the sweetspot of Fair as well as the late hit, which can break it at 40/50% respectively. His true input Heavy Side+B and Heavy Up+B can both break armor around 20-30%, with the medium/light/non-true variants breaking it a bit later, but still being equally dangerous.
Fortunately, none of his projectiles break armor below 200%, and when you combine that with Ryu's horrible aerial mobility, Yoshi should be able to outmaneuver him and get back to the stage safely in most situations. Just keep in mind that you can't armor out of Shoryuken most of the time, and don't double-jump too close to the ledge if Ryu's ready to counter with a Dash Attack or Tatsumaki.
Dangerous moves:
Normals:
- Jab(Strong) (breaks at 57%)
- Dash-Attack (breaks at 34%)
- Dash-Attack(Late) (breaks at 63%)
- Ftilt2(Strong) (breaks at 83%)
- Utilt(Strong) (breaks at 44%)
- Fsmash (breaks at 45%)
- Usmash (breaks at 58%)
- Usmash(Late) (breaks at 72%)
- Dsmash (breaks at 83%)
- Fair (breaks at 40%)
- Fair(Late) (breaks at 49%)
- Bair (breaks at 67%)
- Uair2 (breaks at 89%)
- Dair (breaks at 88%)
- T.SideB(Early) (breaks at 33%)
- T.SideB(H-Grounded) (breaks at 26%)
- T.SideB(H-Aerial) (breaks at 31%)
- T.UpB(H-Grounded-Early) (breaks at 12%)
- T.UpB(Grounded) (breaks at 26%)
- T.UpB(Grounded-Late) (breaks at 60%)
- T.UpB(H-Aerial-Early) (breaks at 21%)
- T.UpB(Aerial) (breaks at 43%)
- T.UpB(Aerial-Late) (breaks at 84%)
- DownB(Stage3) (breaks at 62%)
- Jab(Light): >200
- Jab(Strong): 57
- Jab2: >200
- Jab3: 166
- Dash-Attack: 34
- Dash-Attack(Late): 63
- Ftilt(Light): 158
- Ftilt1(Strong): >200
- Ftilt2(Strong): 83
- Utilt(Light): >200
- Utilt(Strong): 44(sweet), 70(sour)
- Dtilt(Light): >200(sweet or sour)
- Dtilt(Strong): >200(sweet or sour)
- Fsmash: 45(sweet), 52(sour)
- Usmash: 58
- Usmash(Late): 72
- Dsmash: 83(sweet), 115(sour)
Aerials:
- Nair: 112
- Nair(Late): >200
- Fair: 40(sweet or sour)
- Fair(Late): 49(sweet or sour)
- Bair: 67(sweet), 87(sour)
- Uair1: 166
- Uair2: 89
- Dair: 88(sweet), 154(sour)
- T.NeutralB(L): >200
- NeutralB(L): >200
- T.NeutralB(M): >200
- NeutralB(M): >200
- T.NeutralB(H): >200(sweet or sour)
- Shakunetsu(L): >200
- Shakunetsu(M): >200
- Shakunetsu(H): >200
- Shakunetsu(Final): 196
- T.SideB(Early): 33
- SideB(Early): 39
- T.SideB(L-Grounded): 63
- SideB(L-Grounded): 74
- T.SideB(M-Grounded): 42
- SideB(M-Grounded): 51
- T.SideB(H-Grounded): 26
- SideB(H-Grounded): 34
- T.SideB(L-Aerial): 71
- SideB(L-Aerial): 83
- T.SideB(M-Aerial): 48
- SideB(M-Aerial): 57
- T.SideB(H-Aerial): 31
- SideB(H-Aerial): 38
- T.UpB(L-Grounded-Early): 27
- UpB(L-Grounded-Early): 37
- T.UpB(M-Grounded-Early): 18
- UpB(M-Grounded-Early): 27
- T.UpB(H-Grounded-Early): 12
- UpB(H-Grounded-Early): 20
- T.UpB(Grounded): 26
- UpB(Grounded): 35
- T.UpB(Grounded-Late): 60
- UpB(Grounded-Late): 72
- T.UpB(L-Aerial-Early): 43
- UpB(L-Aerial-Early): 55
- T.UpB(M-Aerial-Early): 31
- UpB(M-Aerial-Early): 42
- T.UpB(H-Aerial-Early): 21
- UpB(H-Aerial-Early): 31
- T.UpB(Aerial): 43
- UpB(Aerial): 54
- T.UpB(Aerial-Late): 84
- UpB(Aerial-Late): 99
- DownB(Stage1): 178
- DownB(Stage2): 114
- DownB(Stage3): 62
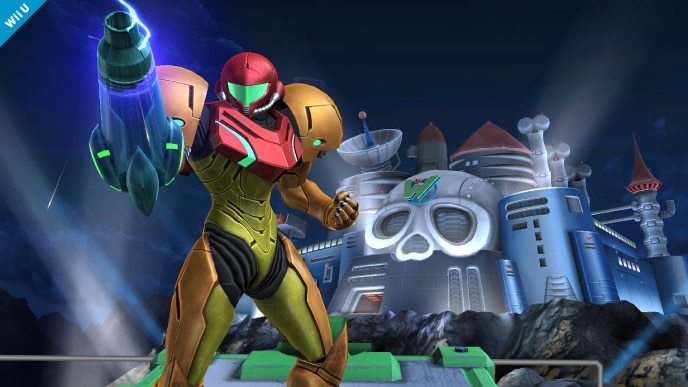
Samus breaks armor at pretty standard percents for the most part, though she has several tools that you have to watch out for in particular. Of her aerials, Bair is the most powerful, with the sweetspot breaking at 43%, and Nair is next in line at 66% for the first hit and 74% for the second. Of her multihit aerials, you only have to worry about the last hits, which can break armor around 70-80%.
As for specials, her Fully charged Neutral+B is the biggest threat, being able to break armor at 44%. Also, Super Missiles don't break armor until 99%, but she can shoot off a lot of them pretty fast, so be cautious at high percents. For her Up+B, you can always count on armoring through the multihit, though the Launcher hits of grounded Up+B will knock you out at 0%, and the last hit does at 54%.
Dangerous moves:
Normals:
- Dash-Attack(Early) (breaks at 72%)
- Dash-Attack (breaks at 50%)
- Dash-Attack(Late) (breaks at 83%)
- Ftilt (breaks at 70%)
- Utilt (breaks at 48%)
- Dtilt (breaks at 56%)
- Fsmash (breaks at 39%)
- Usmash(LastHit) (breaks at 47%)
- Dsmash2 (breaks at 78%)
- Nair1 (breaks at 66%)
- Nair2 (breaks at 74%)
- Fair(LastHit) (breaks at 77%)
- Bair (breaks at 43%)
- Uair(LastHit) (breaks at 74%)
- Dair(Early) (breaks at 84%)
- Dair(Meteor) (breaks at 72%)
- Dair(Late) (breaks at 76%)
- NeutralB(Charged) (breaks at 44%)
- UpB(Ground-Hit1-4) (breaks at 0%)
- UpB(LastHit) (breaks at 54%)
- Jab1: >200(sweet or sour)
- Jab2: 104
- Dash-Attack(Early): 72
- Dash-Attack: 50
- Dash-Attack(Late): 83
- Ftilt: 70(sweet), 196(sour)
- Utilt: 48(sweet), 53(sour)
- Dtilt: 56
- Fsmash: 39(sweet), 73(sour)
- Usmash(Hit1): 91
- Usmash(Multihit): 149
- Usmash(LastHit): 47
- Dsmash1: 101
- Dsmash2: 78
- Nair1: 66
- Nair2: 74
- Nair2(Late): 130
- Fair(Hit1): >200
- Fair(Hit2-5): >200
- Fair(LastHit): 77
- Bair: 43(sweet), 65(sour)
- Bair(Late): 115
- Uair(Hit1): >200
- Uair(Hit2-5): >200
- Uair(LastHit): 74
- Dair(Early): 84
- Dair(Meteor): 72
- Dair(Late): 76
- Zair1: >200
- Zair2: >200
- NeutralB(Uncharged): >200
- NeutralB(Charged): 44
- SideB(Homing): >200
- SideB(Super): 99
- UpB(Ground-Hit1): 0
- UpB(Ground-Hit2-4): 0
- UpB(Ground-Hit5-10): >200
- UpB(Air-Multihit): >200
- UpB(LastHit): 54
- DownB(Contact): >200
- DownB(Explosion): >200
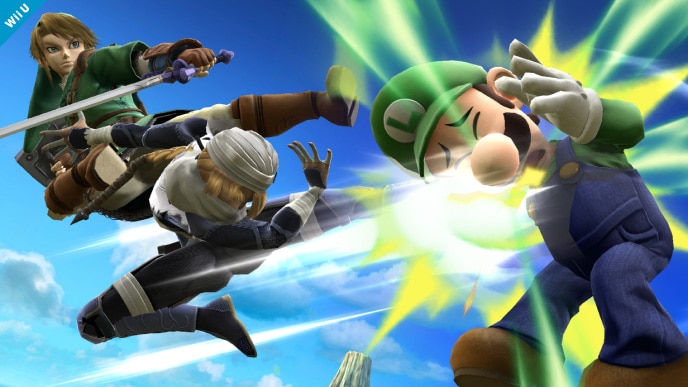
As the character who many consider to be the best in the game, Sheik has a dangerous arsenal of moves that can easily trap most characters in long combos, but fortunately for Yoshi, she doesn't actually have any moves that break our armor below 40%, so double jump is a great option to escape any non-true combos at these low percents.
Some moves to watch out for are both hits of Up+B, which can break armor at 41%, as well as her Usmash and Fsmash which also break it around that threshold. Really though, Sheik doesn't have nearly as many options as most characters do to break our armor, so try to abuse that. Just be careful around Bouncing Fish at higher percents (78%), where it can easily eat your jump and leave you helpless off-stage if you aren't careful.
Dangerous moves:
Normals:
- Dash-Attack (breaks at 58%)
- Fsmash1 (breaks at 79%)
- Fsmash2 (breaks at 46%)
- Usmash1 (breaks at 40%)
- Usmash2 (breaks at 61%)
- Dsmash2 (breaks at 62%)
- Fair (breaks at 84%)
- Uair(Finisher) (breaks at 76%)
- UpB(Disappear) (breaks at 41%)
- UpB(Reappear) (breaks at 41%)
- DownB (breaks at 78%)
- Jab1: >200
- Jab2: >200
- Jab-Finisher: 97
- Dash-Attack: 58
- Dash-Attack(Late): 180
- Ftilt: 106
- Utilt1: 166(sweet), 192(sour)
- Utilt2: 107
- Dtilt: 179
- Fsmash1: 79(sweet), 114(sour)
- Fsmash2: 46
- Usmash1: 40
- Usmash2: 61
- Dsmash1: 193
- Dsmash2: 62
- Nair: 112(sweet), 126(sour)
- Nair(Late): 166(sweet), 196(sour)
- Fair: 84(sweet), 95(sour)
- Bair: 97(sweet), 110(sour)
- Bair(Late): 185
- Uair: >200
- Uair(Finisher): 76
- Dair: 112
- Dair(Late): 91
- Dair(Landing): 127
- NeutralB: 180
- NeutralB(Late): >200
- UpB(Disappear): 41
- UpB(Reappear): 41
- DownB: 78
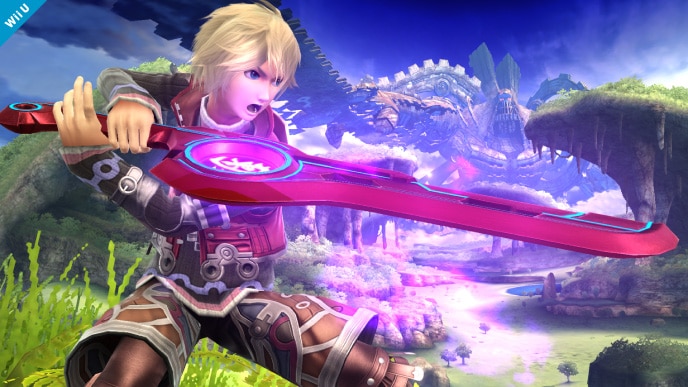
Though Shulk's moves are infamous for having a lot of startup time, his long range combined with the insane mobility that his Jump and Speed arts provide can make him pretty threatening off-stage. Of his aerials, Bair is the largest and breaks armor somewhat early at 55%. Nair and Fair are also dangerous at higher percents, breaking armor at 78% and 74% respectively when sweetspotted (towards the base of the sword). Also be careful about jumping out of his uthrow-uair, since Uair's first hit breaks armor at only 38%.
Near the stage, be careful of a Reverse Up+B, since the first "launcher" hit is capable of breaking armor at 0%, and the "regular" hits can break it around 40-60%. Also watch out for Dsmash1 and Fsmash2's large hitboxes which break armor around 40% (with the following hits of Dsmash breaking armor about 10% later per hit).
Also note that the Smash art increases the knockback of his attacks pretty significantly, causing all of his moves to break about 15-25% earlier than they normally would. I included some examples of this below the dangerous moves.
Dangerous moves:
Normals:
- Jab3 (breaks at 79%)
- Dash-Attack (breaks at 37%)
- Ftilt (breaks at 62%)
- Utilt (breaks at 44%)
- Utilt(Late) (breaks at 65%)
- Dtilt (breaks at 74%)
- Fsmash2 (breaks at 40%)
- Usmash1 (breaks at 0%)
- Usmash2 (breaks at 42%)
- Dsmash(Hit1-5) (breaks at 37, 46, 56, 63, 83%)
- Nair (breaks at 78%)
- Fair (breaks at 74%)
- Bair (breaks at 55%)
- Bair(Late-Sour) (breaks at 85%)
- Uair1 (breaks at 38%)
- Uair2 (breaks at 45%)
- Dair2 (breaks at 58%)
- SideB(Back-Aerial) (breaks at 43%)
- SideB(Back-Landing) (breaks at 51%)
- SideB(Front-Aerial) (breaks at 78%)
- SideB(Front-Landing) (breaks at 84%)
- UpB(Hit1-Early) (breaks at 0%)
- UpB(Hit1) (breaks at 41%)
- UpB(Hit2) (breaks at 57%)
And for reference, here are the breaking points for some relevant aerials when the Smash art is active.
- Nair (breaks at
7853%) - Fair (breaks at
7447%) - Bair (breaks at
5537%) - Bair(Late-Sour) (breaks at
8560%)
- Jab1: 161
- Jab2: 129
- Jab3: 79
- Jab3(Late): 72
- Dash-Attack: 37
- Ftilt: 62(sweet), 72(sour)
- Utilt: 44
- Utilt(Late): 65
- Dtilt: 74(sweet), 93(sour)
- Fsmash1: >200
- Fsmash2: 40(sweet), 47(sour)
- Usmash1: 0(sweet), 90(sour)
- Usmash1(Sourer): >200
- Usmash2: 42
- Dsmash1: 37(sweet), 52(sour)
- Dsmash2: 46(sweet), 58(sour)
- Dsmash3: 56(sweet), 72(sour)
- Dsmash4: 63(sweet), 83(sour)
- Dsmash5: 83(sweet), 115(sour)
- Nair: 78(sweet), 88(sour)
- Fair: 74(sweet), 90(sour)
- Bair: 55
- Bair(Late-Sour): 85
- Uair1: 38(sweet), 77(sour)
- Uair2: 45(sweet), 61(sour)
- Dair1: 119(sweet), 144(sour)
- Dair2(Meteor): 101
- Dair2: 58(sweet), 109(sour)
- SideB(Back-Aerial): 43(sweet), 52(sour)
- SideB(Front-Aerial): 78(sweet), 87(sour)
- SideB(Back-Landing): 51(sweet), 62(sour)
- SideB(Front-Landing): 84(sweet), 94(sour)
- UpB(Hit1-Early): 0(sweet), 0(sour)
- UpB(Hit1): 41
- UpB(Hit1-Late): 118
- UpB(Hit2): 57
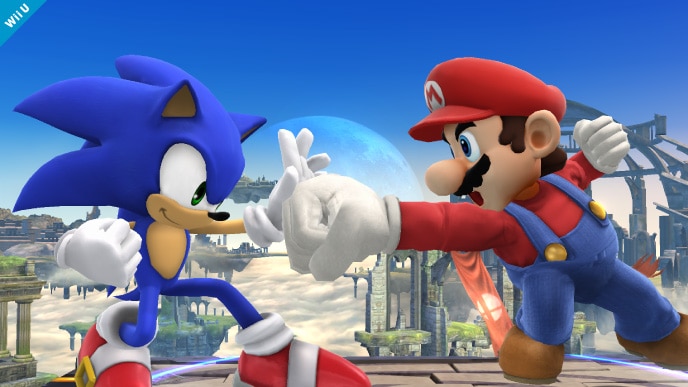
As the quickest hedgehog around, Sonic's sound-surpassing speed makes him quite a formidable opponent. Besides the ability to threaten you from any position on-stage, he has some aerials that can be hard to deal with, most notably his first hit of Uair that can break armor at 0% sweet and 32% sour, which makes it very dangerous to try and jump out of things like his Uthrow-Uair combo. His remaining aerials break armor at more standard percents, but Uair is definitely one to look out for.
Some other notable moves are Neutral+B (57%), Dair's early hitbox (50%), and the first hit of Utilt (6%) if you find yourself jumping near the ledge. In general, you shouldn't have to worry about armor breaking against Sonic much more than any other character, just be very careful around his Uair.
Dangerous moves:
Normals:
- Dash-Attack(LastHit) (breaks at 38%)
- Utilt1 (breaks at 6%)
- Utilt2 (breaks at 83%)
- Fsmash (breaks at 51%)
- Usmash(LastHit) (breaks at 16%)
- Dsmash (breaks at 61%)
- Nair(Early) (breaks at 87%)
- Fair(LastHit) (breaks at 75%)
- Bair (breaks at 61%)
- Uair1 (breaks at 0%)
- Uair2 (breaks at 82%)
- Dair(Early) (breaks at 50%)
- Dair (breaks at 50%)
- Dair(Late) (breaks at 57%)
- NeutralB (breaks at 57%)
- Jab1/2: >200
- Jab3: 107
- Dash-Attack: >200(sweet or sour)
- Dash-Attack(LastHit): 38
- Ftilt1: 161
- Ftilt2: 91(sweet), 121(sour)
- Utilt1: 6
- Utilt2: 83
- Dtilt: 167
- Fsmash: 51
- Usmash1: 105
- Usmash(Multihit): >200
- Usmash(LastHit): 16
- Dsmash: 61(sweet), 77(sour)
- Nair(Early): 87
- Nair: 138
- Nair(Late): 189
- Fair(1-5): >200
- Fair(LastHit): 75
- Bair: 61(sweet), 66(sour)
- Uair1: 0(sweet), 32(sour)
- Uair2: 82
- Dair(Early): 50
- Dair: 50(sweet), 112(sour)
- Dair(Late): 57
- NeutralB(Weak): 131
- NeutralB: 57
- UpB(Spring): 196
- SideB/DownB: 140
This version of Link has been on the rise with his quick speed and powerful bomb setups, and while none of his moves break armor at ridiculously low percentages, all of his aerials start threatening to break armor around 60% (except for Nair). Considering how fast Toon Link can get around, it's important to be very careful against him past this threshold.
Besides this, also keep in mind that the first hit of Up+B can pop you out at 26%, so watch out for this when challenging Toon Link near the ledge. One advantage we do have is that none of his projectiles can break us out of armor before 170%, so if he's just trying to edgeguard using arrows/bombs/boomerang we don't have much to worry about.
Dangerous moves:
Normals:
- Dash-Attack (breaks at 70%)
- Fsmash2 (breaks at 45%)
- Usmash (breaks at 50%)
- Usmash(Late) (breaks at 68%)
- Dsmash1 (breaks at 71%)
- Dsmash2 (breaks at 39%)
- Fair (breaks at 54%)
- Bair (breaks at 67%)
- Uair (breaks at 61%)
- Uair(Late) (breaks at 81%)
- Dair (breaks at 51%)
- Dair(Late) (breaks at 53%)
- UpB(Ground-LastHit) (breaks at 48%)
- UpB(Air-Hit1) (breaks at 26%)
- UpB(Air-Hit2-4) (breaks at 49%)
- UpB(Air-LastHit) (breaks at 67%)
- Jab1: >200(sweet or sour)
- Jab2: >200
- Jab3: 111
- Dash-Attack: 70(sweet), 92(sour)
- Ftilt: 91
- Utilt: 92
- Dtilt: 130
- Fsmash1: >200(sweet or sour)
- Fsmash2: 45(sweet), 51(sour)
- Usmash: 50(sweet), 64(sour)
- Usmash(Late): 68(sweet), 86(sour)
- Dsmash1: 71(sweet), 94(sour)
- Dsmash2: 39
- Nair1: 106
- Nair2: 126
- Fair: 54
- Bair: 67
- Uair: 61
- Uair(Late): 81
- Dair: 51
- Dair(Late): 53
- Dair(Landing): 166
- Zair: >200
- NeutralB(Uncharged): >200
- NeutralB(Charged): >200
- SideB: 170
- SideB(Late): >200
- UpB(Ground-Multihit): >200(sweet or sour)
- UpB(Ground-LastHit): 48
- UpB(Air-Hit1): 26
- UpB(Air-Hit2-4): 49
- UpB(Air-LastHit): 67
A character unrivaled in zoning and recovery distance, Villager's amazing stage control can be difficult to deal with. His stronger projectiles threaten to break Yoshi's armor pretty early, with Fsmash and Down+B(Tree) both breaking it near 10%. The Initial hit of Usmash can also break it at 0%.
Other moves to watch out for are Axe, which comes out fast and can break armor at 52%, as well as the strong(early) hit of Bair and Fair, which break it in the 50-70% range. It's worth noting that the later hits of both slingshot attacks don't really threaten to break armor until far higher percents (170+), and that Side+B cannot break armor until 110% given the Villager is not riding it. The 3-turnip variations of his aerials also break armor somewhat early (around 60%), with the 1-2 turnips breaking it about 20% later.
Dangerous moves:
Normals:
- Dash-Attack (breaks at 80%)
- Utilt1 (breaks at 71%)
- Utilt2 (breaks at 49%)
- Dtilt (breaks at 56%)
- Fsmash (breaks at 13%)
- Fsmash(Late) (breaks at 8%)
- Usmash(Initial) (breaks at 0%)
- Usmash(LastHit) (breaks at 59%)
- Fair(Early) (breaks at 70%)
- Bair(Early) (breaks at 54%)
- Uair(3) (breaks at 57%)
- Uair(2) (breaks at 78%)
- Dair(3) (breaks at 57%)
- Dair(2) (breaks at 78%)
- DownB(Axe) (breaks at 52%)
- DownB(Tree-Grow) (breaks at 35%)
- DownB(Falling) (breaks at 14%)
- Jab1: >200
- Jab2: 188
- Dash-Attack: 80
- Dash-Attack(Late): 129
- Ftilt: 100
- Utilt1: 71
- Utilt2: 49
- Dtilt: 56(sweet), 96(sour)
- Fsmash: 13
- Fsmash(Late): 8
- Usmash(Initial): 0
- Usmash(Multihit): >200
- Usmash(LastHit): 59
- Nair: 100
- Nair(Late): 166
- Fair(Early): 70
- Fair: >200
- Fair(Late): >200
- Bair(Early): 54
- Bair: 187
- Bair(Late): >200
- Uair(3): 57
- Uair(3-Late): 126
- Uair(2): 78
- Uair(2-Late): 145
- Uair(1): 97
- Uair(1-Late): 171
- Dair(3): 57(sweet), 91(sour)
- Dair(3-Late): 126
- Dair(2): 78
- Dair(2-Late): 145
- Dair(1): 97
- Dair(1-Late): 171
- SideB: 110
- SideB(Late): >200
- DownB(Axe): 52
- DownB(Tree-Grow): 35(sweet), 57(sour)
- DownB(Falling): 14
Wario's lack of strong hits make it hard for him to break Yoshi's armor until higher percents for the most part. Of his aerials, Bair is the most dangerous, breaking at 74%. Uair and Nair also break armor in a similar range, though these are less likely to hit you when recovering.
His specials pose a larger threat to armor, with the Multihit of Up+B breaking at 9%, and the Medium & Max Charge Down+B breaking at 37% and 11% respectively (48% on late hit). Additionally, be wary of Neutral+B, being a command grab that can break you out at any percent. While there wasn't any data for it, Side+B as a physical hit or as a projectile can probably break armor at early percents as well, so be wary of it.
Dangerous moves:
Normals:
- Jab2 (breaks at 83%)
- Dash-Attack (breaks at 57%)
- Ftilt(U) (breaks at 61%)
- Ftilt (breaks at 67%)
- Ftilt(D) (breaks at 74%)
- Ftilt(Sour) (breaks at 81%)
- Utilt (breaks at 59%)
- Fsmash (breaks at 39%)
- Usmash (breaks at 46%)
- Usmash(Late) (breaks at 61%)
- Dsmash(Early) (breaks at 79%)
- Nair2 (breaks at 86%)
- Bair (breaks at 74%)
- Uair (breaks at 82%)
- Dair(LastHit) (breaks at 68%)
- UpB(Launcher) (breaks at 20%)
- UpB(Multihit) (breaks at 9%)
- UpB(LastHit) (breaks at 46%)
- DownB(Min-Charge) (breaks at 87%)
- DownB(Med-Charge) (breaks at 37%)
- DownB(Max-Charge) (breaks at 11%)
- DownB(Max-Charge-Late) (breaks at 48%)
- Jab1: >200(sweet or sour)
- Jab2: 83
- Dash-Attack: 57
- Dash-Attack(Late): 123
- Ftilt(U): 61
- Ftilt: 67
- Ftilt(D): 74(sweet), 90(sour)
- Ftilt(Sour): 81
- Utilt: 59
- Utilt(Late): >200
- Dtilt: >200
- Fsmash: 39
- Usmash: 46
- Usmash(Late): 61
- Dsmash(Early): 79
- Dsmash: 113
- Dsmash(Late): >200
- Nair1: 117
- Nair2: 86
- Fair: 115
- Fair(Late): >200
- Bair: 74
- Uair: 82
- Dair(Multihit): 185
- Dair(LastHit): 68
- UpB(Launcher): 20
- UpB(Multihit): 9
- UpB(LastHit): 46(sweet), 65(sour)
- DownB(Min-Charge): 87(sweet), 120(sour)
- DownB(Med-Charge): 37
- DownB(Max-Charge): 11
- DownB(Max-Charge-Late): 48

Wii Fit Trainer is a pretty uncommon pick, but some dedicated mains have shown that she is not a character to sleep on. Her grounded moves all break armor in pretty standard ranges, and of her aerials, be most careful of Bair, which breaks armor at about 45% and has a pretty meaty hitbox.
Other than that, be aware of her Charged Neutral+B, which is similar to a Samus charge shot and breaks armor at 59%. Also remember that with the Deep Breathing buff, all of her moves are a bit more damaging and will break your jump a bit earlier.
Dangerous moves:
Normals:
- Dash-Attack (breaks at 64%)
- Ftilt (breaks at 60%)
- Dtilt (breaks at 87%)
- Fsmash (breaks at 44%)
- Usmash (breaks at 36%)
- Usmash(Late) (breaks at 59%)
- Dsmash (breaks at 64%)
- Fair (breaks at 88%)
- Bair (breaks at 45%)
- Uair (breaks at 57%)
- Dair (breaks at 81%)
- NeutralB(Max-Charge) (breaks at 59%)
- SideB(Physical) (breaks at 79%)
- Jab1: >200
- Jab1(Back): 141
- Jab2: >200
- Jab3: 164(sweet or sour)
- Dash-Attack: 64
- Ftilt: 60
- Utilt: 107
- Dtilt: 87
- Fsmash: 44(sweet), 51(sour)
- Usmash: 36(sweet), 45(sour)
- Usmash(Late): 59(sweet), 89(sour)
- Dsmash: 64(sweet), 79(sour)
Aerials:
- Nair1: 160
- Nair2: 98
- Fair: 88
- Fair(Meteor): 184
- Fair(Late): 140
- Bair: 45(sweet), 79(sour)
- Bair(Sourer): 111
- Bair(Late): 122(sweet), 140(sour)
- Uair: 57
- Dair: 81(sweet), 55(sour)
- Dair(Late): 95
Specials:
- NeutralB(Min-Charge): >200
- NeutralB(Max-Charge): 59
- SideB(Physical): 79
- SideB(Physical-Late): 123
- UpB: 166
It's that one character! While the mirror is awkward in more ways than one, fortunately (or unfortunately?) Yoshi has trouble breaking his own heavy armor for the most part. You're not at any risk of getting hit out of double jump before 40%, and Yoshi's aerials don't really start breaking armor until middle-high percent ranges.
Some useful aerials that break armor earlier are the last hit of both Bair and Dair, which start having an effect at 60% and 58% respectively. Early Nair and Fair start to break it at about 80%, and eggs have no chance of breaking armor before 200%.
Since our better aerials don't break until later percents, It's pretty much pointless to go for an off-stage edgeguard against another Yoshi (that still has their jump) until they're past the 80% threshold, unless you want to try going for a footstool. Likewise, if you're below 80% and trying to edgeguard a Yoshi above 80%, know that you have the option to safely armor through their Nair/Fair and counterattack with your own.
Another piece of data that's somewhat relevant is the percents at which the weaker hits of Nair break armor:
Nair: 110%
Nair(Late): 145%
These may be worth remembering considering how often Yoshi dittos end with both players reaching really high percentages.
Dangerous moves:
Normals:
- Dash-Attack (breaks at 44%)
- Dash-Attack(Late) (breaks at 67%)
- Fsmash (breaks at 46%)
- Usmash (breaks at 50%)
- Usmash(Late) (breaks at 61%)
- Dsmash1 (breaks at 84%)
- Dsmash2 (breaks at 73%)
Aerials:
- Nair(Early) (breaks at 82%)
- Fair (breaks at 84%)
- Bair(Hit3) (breaks at 60%)
- Uair (breaks at 69%)
- Dair(Hit14) (breaks at 58%)
Specials:
- DownB1 (breaks at 50%)
- DownB2 (breaks at 41%)
- DownB(Aerial) (breaks at 46%)
- Jab1: >200
- Jab2: 175
- Dash-Attack: 44
- Dash-Attack(Late): 67
- Ftilt(Up): 94
- Ftilt: 106
- Ftilt(Down): 94
- Utilt: 137
- Dtilt: >200(sweet or sour)
- Fsmash: 46(sweet), 60(sour)
- Usmash: 50
- Usmash(Late): 61
- Dsmash1: 84(sweet), 135(sour)
- Dsmash2: 73(sweet), 95(sour)
Aerials:
- Nair(Early): 82
- Nair: 110
- Nair(Late): 145
- Fair: 84(sweet), 92(sour)
- Bair(Hit1-2): 91(sweet), 85(sour)
- Bair(Hit3): 60
- Uair: 69
- Dair(Hit1-6): >200
- Dair(Hit7-13): >200
- Dair(Hit14): 58
- Dair(Landing): >200
Specials:
- SideB: 196
- UpB(Weak): >200
- UpB(Hit): >200
- DownB1: 50
- DownB2: 41
- DownB(Aerial): 46
- DownB(Stars): >200
Zelda mains are few and far between, so if you run into one then you know you're fighting a very dedicated player. Her grounded moves aren't particularly dangerous, but be careful of the last hits of Fsmash and Usmash which can break you out around 40-50% (though you can jump through the multihits). Ftilt also breaks armor in a similar range, and comes out pretty fast.
In the air, be looking out for Sweetspot Fair and Bair which will both break you out in the early 30% range, as well as Nair to a lesser extent, which can break the jump at 85% even with the multihit. Also watch out for her Up+B, a surprisingly potent kill move that will break armor at 0-10% with either hit, except Aerial(Hit1) which isn't dangerous until 71%.
Dangerous moves:
Normals:
- Dash-Attack (breaks at 22%)
- Ftilt (breaks at 53%)
- Utilt (breaks at 73%)
- Fsmash(LastHit) (breaks at 43%)
- Usmash(LastHit) (breaks at 51%)
- Nair(Multihit) (breaks at 85%)
- Nair(LastHit) (breaks at 86%)
- Fair (breaks at 36%)
- Bair (breaks at 32%)
- Uair (breaks at 52%)
- Dair (breaks at 82%)
- SideB(MaxDistance) (breaks at 36%)
- SideB(MinDistance) (breaks at 81%)
- UpB(Hit1-Grounded) (breaks at 0%)
- UpB(Hit1-Aerial) (breaks at 71%)
- UpB(Hit2-Grounded) (breaks at 9%)
- UpB(Hit2-Aerial) (breaks at 4%)
- Jab1-2: 178
- Jab3: 133
- Dash-Attack: 22(sweet), 74(sour)
- Dash-Attack(Late): 107
- Ftilt: 53(sweet), 65(sour)
- Utilt: 73
- Dtilt: 122
- Fsmash(Multihit): >200
- Fsmash(LastHit): 43
- Usmash(Hit1-4): >200
- Usmash(Hit5-7): >200
- Usmash(LastHit): 51
- Dsmash1: 91
- Dsmash2: 95
- Nair(Multihit): 85(sweet), 111(sour)
- Nair(LastHit): 86(sweet), 109(sour)
- Fair: 36(sweet or sour)
- Fair(Late): >200
- Bair: 32(sweet or sour)
- Bair(Late): >200
- Uair: 52
- Dair: 82
- Dair(Late): >200(sweet or sour)
- NeutralB: >200
- NeutralB(LastHit): 104(sweet), 147(sour)
- SideB(MaxDistance): 36(sweet or sour)
- SideB(MinDistance): 81(sweet or sour)
- UpB(Hit1-Grounded): 0
- UpB(Hit1-Aerial): 71
- UpB(Hit2-Grounded): 9(sweet), 54(sour)
- UpB(Hit2-Aerial): 4(sweet), 47(sour)

Another top tier threat with a varied arsenal, her Usmash (First Hit) and All hits of Up+B (except the last one) can break Yoshi's armor at 0%, and with the last hit breaking it at 34%, it's important to be wary of her Up-air -> Up+b chains.
Be careful when you're off-stage also: Bair can break armor at 53% and the Second hit of Fair at 67%, both of which are pretty non-committal moves that she's likely to throw out when you're trying to recover. Her Down+B is also dangerous, breaking at 37% with the normal hit and at 54% with the meteor hit.
Dangerous moves:
Normals:
- Dash-Attack (breaks at 25%)
- Utilt2 (breaks at 54%)
- Dtilt (breaks at 69%)
- Fsmash1 (breaks at 58%)
- Fsmash2 (breaks at 64%)
- Usmash(1) (breaks at 0%)
- Usmash(7) (breaks at 46%)
- Dsmash (breaks at 80%)
- Fair2 (breaks at 67%)
- Bair (breaks at 53%)
- Uair (breaks at 87%)
- Dair(Landing) (breaks at 48%)
- NeutralB(charged) (breaks at 62%)
- SideB(FinalHit) (breaks at 75%)
- UpB(Hit1) (breaks at 0%)
- UpB(Hit2-5) (breaks at 0%)
- UpB(FinalHit) (breaks at 34%)
- DownB(Attack) (breaks at 37%)
- DownB(Spike) (breaks at 54%)
- Jab1: >200(sweet or sour)
- Jab2: >200(sweet or sour)
- Jab3: 120
- Dash-Attack: 25
- Dash-Attack(Late): 166
- Ftilt(Angled): 97(sweet), 117(sour)
- Ftilt: 110(sweet), 126(sour)
- Utilt1: 104(sweet or sour)
- Utilt2: 54
- Dtilt: 69(sweet), 90(sour)
- Fsmash1: 58(sweet), 104(sour)
- Fsmash2: 64(sweet), 67(sour)
- Usmash(1): 0
- Usmash(2-6): >200
- Usmash(7): 46
- Dsmash: 80(sweet or sour)
- Nair: 91
- Fair1: >200
- Fair2: 67
- Bair: 53(sweet), 65(sour)
- Uair: 87
- Dair: 134(sweet), 155(sour)
- Dair(Landing): 48
- Zair1: >200
- Zair2: 144
- NeutralB(uncharged): >200
- NeutralB(charged): 62
- SideB1: 176
- SideB: >200
- SideB(FinalHit): 75
- UpB(Hit1): 0
- UpB(Hit2-5): 0
- UpB(Hit6): >200
- UpB(Hit7): >200
- UpB(FinalHit): 34
- DownB(Attack): 37(sweet), 52(sour)
- DownB(Spike): 54(sweet), 167(sour)
Last edited:
