- Joined
- Jul 30, 2007
- Messages
- 15,341
- NNID
- VenusBloom
- 3DS FC
- 0318-9184-0547
Advisory Notice: The creation of alternate accounts to cast more costs, submit more content, or otherwise cheat the system is not only against the thread rules but also will earn an account ban for that alternate account as well as a warning on the original account.

Many moons ago, we had a dedicated user group of individuals led by our trusted leader
Premise
Nintendo wants a successor to Smash Ultimate for their new next-Gen console and they want it like Ultimate but bigger and better. Everyone is here....again!! The entire Smash Ultimate cast is here with even dmore characters and content! But Sakurai needs help so we’ve been hired to help out with the conceptualizing, planning, and pre-development phase. Our job is to listen to what Ninty wants and implement it successfully into Smash! Can we do it or will our product flip? Will we add tripping or will we add wavedashing? What characters will we include? Welcome to
Super Smash Bros. Infinite
Please take a minute to read up about the project and how to participate. Shout out to
Hello potential developer!
Welcome to the Super Smash Bros. Ultimate Sequel Project - now known as Super Smash Bros. Infinite! We are very excited to see that you have expressed interest in joining our project. Here are some FAQs regarding our project:
Is this actually going to be a fan game?
Unfortunately, this is just a creative brainstorming project. We are only coming up with ideas on how this game will function, what characters it will have, and how different it will be from its predecessor, Ultimate.
Cool! How do I submit a character/stage/assist trophy/etc.?
This project is run on a job-by-job basis. This means that the thread creator,
What about Spirits and Music?
As with other parts of the game, we will be submitting spirits on a case-by-case basis, in order to account for the work our Spirit Team does. The two main times we will submit spirits will be after a new character is revealed and when a spirit event is made. Spirit events are week long submissions that are themed around a particular... theme. This can be things like holidays, such as Easter, genres, such as fighting games, to more abstract concepts, like inanimate objects. We do have set rules, about submitting spirits, however. During spirit events, we will only accept 3 submissions per user and each submission is approved based on the discretion of the Spirit Team. Some examples of spirits that will be rejected are real life hardware, such as gaming consoles and accessories, spirits with no official art, and spirits that will increase the age rating. Additionally, when submitting spirits, it is highly encouraged to follow the format listed below to provide the Spirits Team with the information required to add them to the wiki.
While we're on the topic of submitting spirits I just want to mention the formatting of spirit posts. Right now the way that the inforamtion for a spirit battle is displayed varies depending on the submitter, so its not very cohesive, and some are missing information or use inconsistent language to describe the same things. This is the format I use and Venus has encouraged others to adopt it as well.
[Picture] [Name] [(Game of Origin)]
Class:
Type: [Primary/Support)(Attack/Shield/Grab), # of slots
Effect:
- Puppet Fighter: Fighter (Describe which alt)
- Stage:
- Music Track:
- Match:
- Conditions:
For Example: (This is a spirit I submitted already so it doesn't need to be added again)

Lana (Legend of Zelda: Hyrule Warriors)
Class: Ace
Type: Primary Shield, 2 Slots
Effect: Electric Attack ↑
- Puppet Fighter: Robin (Blue)
- Stage: Temple
- Music Track: Push Forward
- Match: Stock (1)
- Conditions: The enemy favors neutral special, Hazard: Zap Floor
Here are some resources that I use when making my spirits that helps with keeping the skills they have accurate, as well as not creating a spirit thats already in the game.
Primary spirit
Primary spirits are a type of spirit in Super Smash Bros. Ultimate. A spirit team can include only a single primary spirit, and must include a primary spirit in order to have any support spirits. Primary spirits have one of four types: Attack ,...www.ssbwiki.com
I use this one to see which traits come alongside primary spirits
Support spirit
Support spirits are a type of spirit in Super Smash Bros. Ultimate. A spirit team can include up to three support spirits, depending on the number of slots provided by the primary spirit and the number of slots occupied by each support...
I use this to see which effects can be given by support spirits.

Conditions
Conditions are a mechanic in the Spirits mode and Adventure Mode: World of Light in Super Smash Bros. Ultimate. Each Spirit Battle contains one or more special conditions themed around the opposing spirit that the player is facing. There are many...
I use this to see what the in game text is for certain conditions.
I've also found that the Mario wiki has the most viewable list of already existing spirits, with the spirit battle details alongside it for inspiration.
I think that using the Wikia and the already existing google sheets will work going forward. Another thing to think about if we're regulating spirit submissions is that right now quite a few spirits use in the game sprite as their spirit art. There is precedent in Smash Ultimate for this happening with the Mother, Ice Climber, and Pac-Man series using in game sprites but usually if there's no official art of the character then its likely that they're not the kind of character who would get a spirit.
Personally I think R.O.B. is an exception and should be the only real world spirit since he's a fighter.
In terms of music, we have a document on the main page. Music will be added periodically to prevent the document from filling up too fast. Each universe has a cap number, such as 40, that will be the maximum number of allowed songs. Additionally, this cap will be capped by a second, temporary cap, so you it is presented as 15/40. This means that of the 40 songs that will be added throughout the project's lifespan, only 15 will be accepted at the moment. This cap is raised every so often, and the maximum may be increased by adding a stage/character to the project later on. Like with spirits, we will be accepting music on a case-by-case basis. Songs that have difficulty negotiating for, songs with little to no relation with Nintendo or the characters in the project, or series with too many songs will be removed. Fan remixes are allowed, provided you give credit.
Wait, a wiki?
Yeah, we have a cool wiki. You'll find almost everything related to the project on this site.
That's about all I can think of for the project right now! Please enjoy your stay and we look forward to working with you!
Super Smash Bros. Infinite Content
Below is a list of content confirmed for Super Smash Bros. Infinite and has a presence on the Super Smash Bros. Infinite wiki
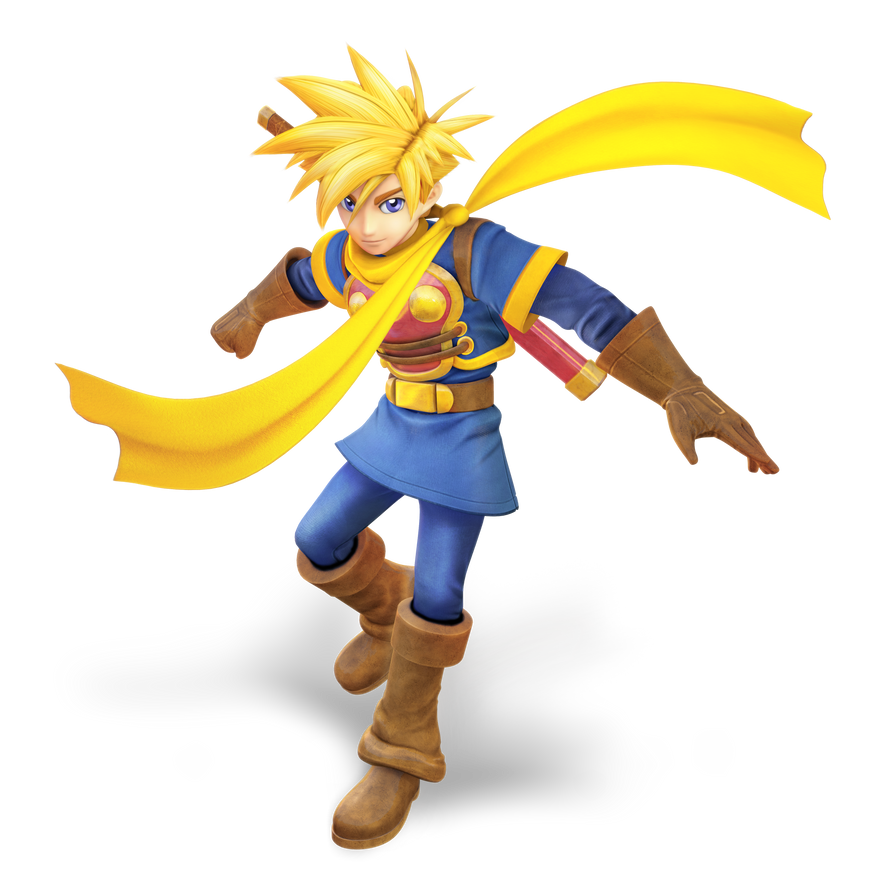
Isaac Golden Sun | 
Bandana Waddle Dee Kirby | 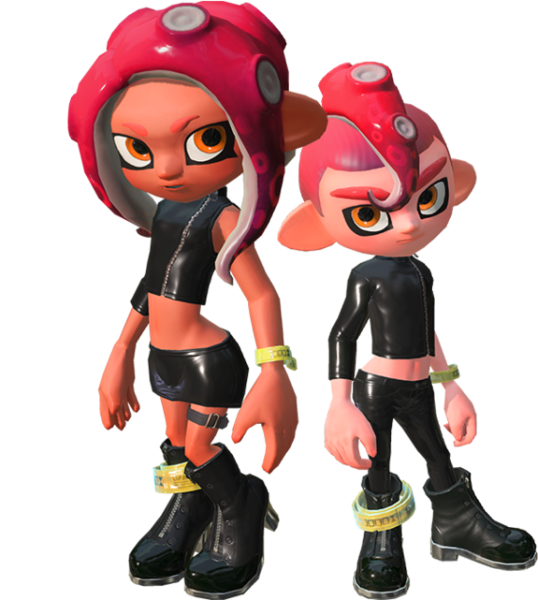
Octoling Splatoon | 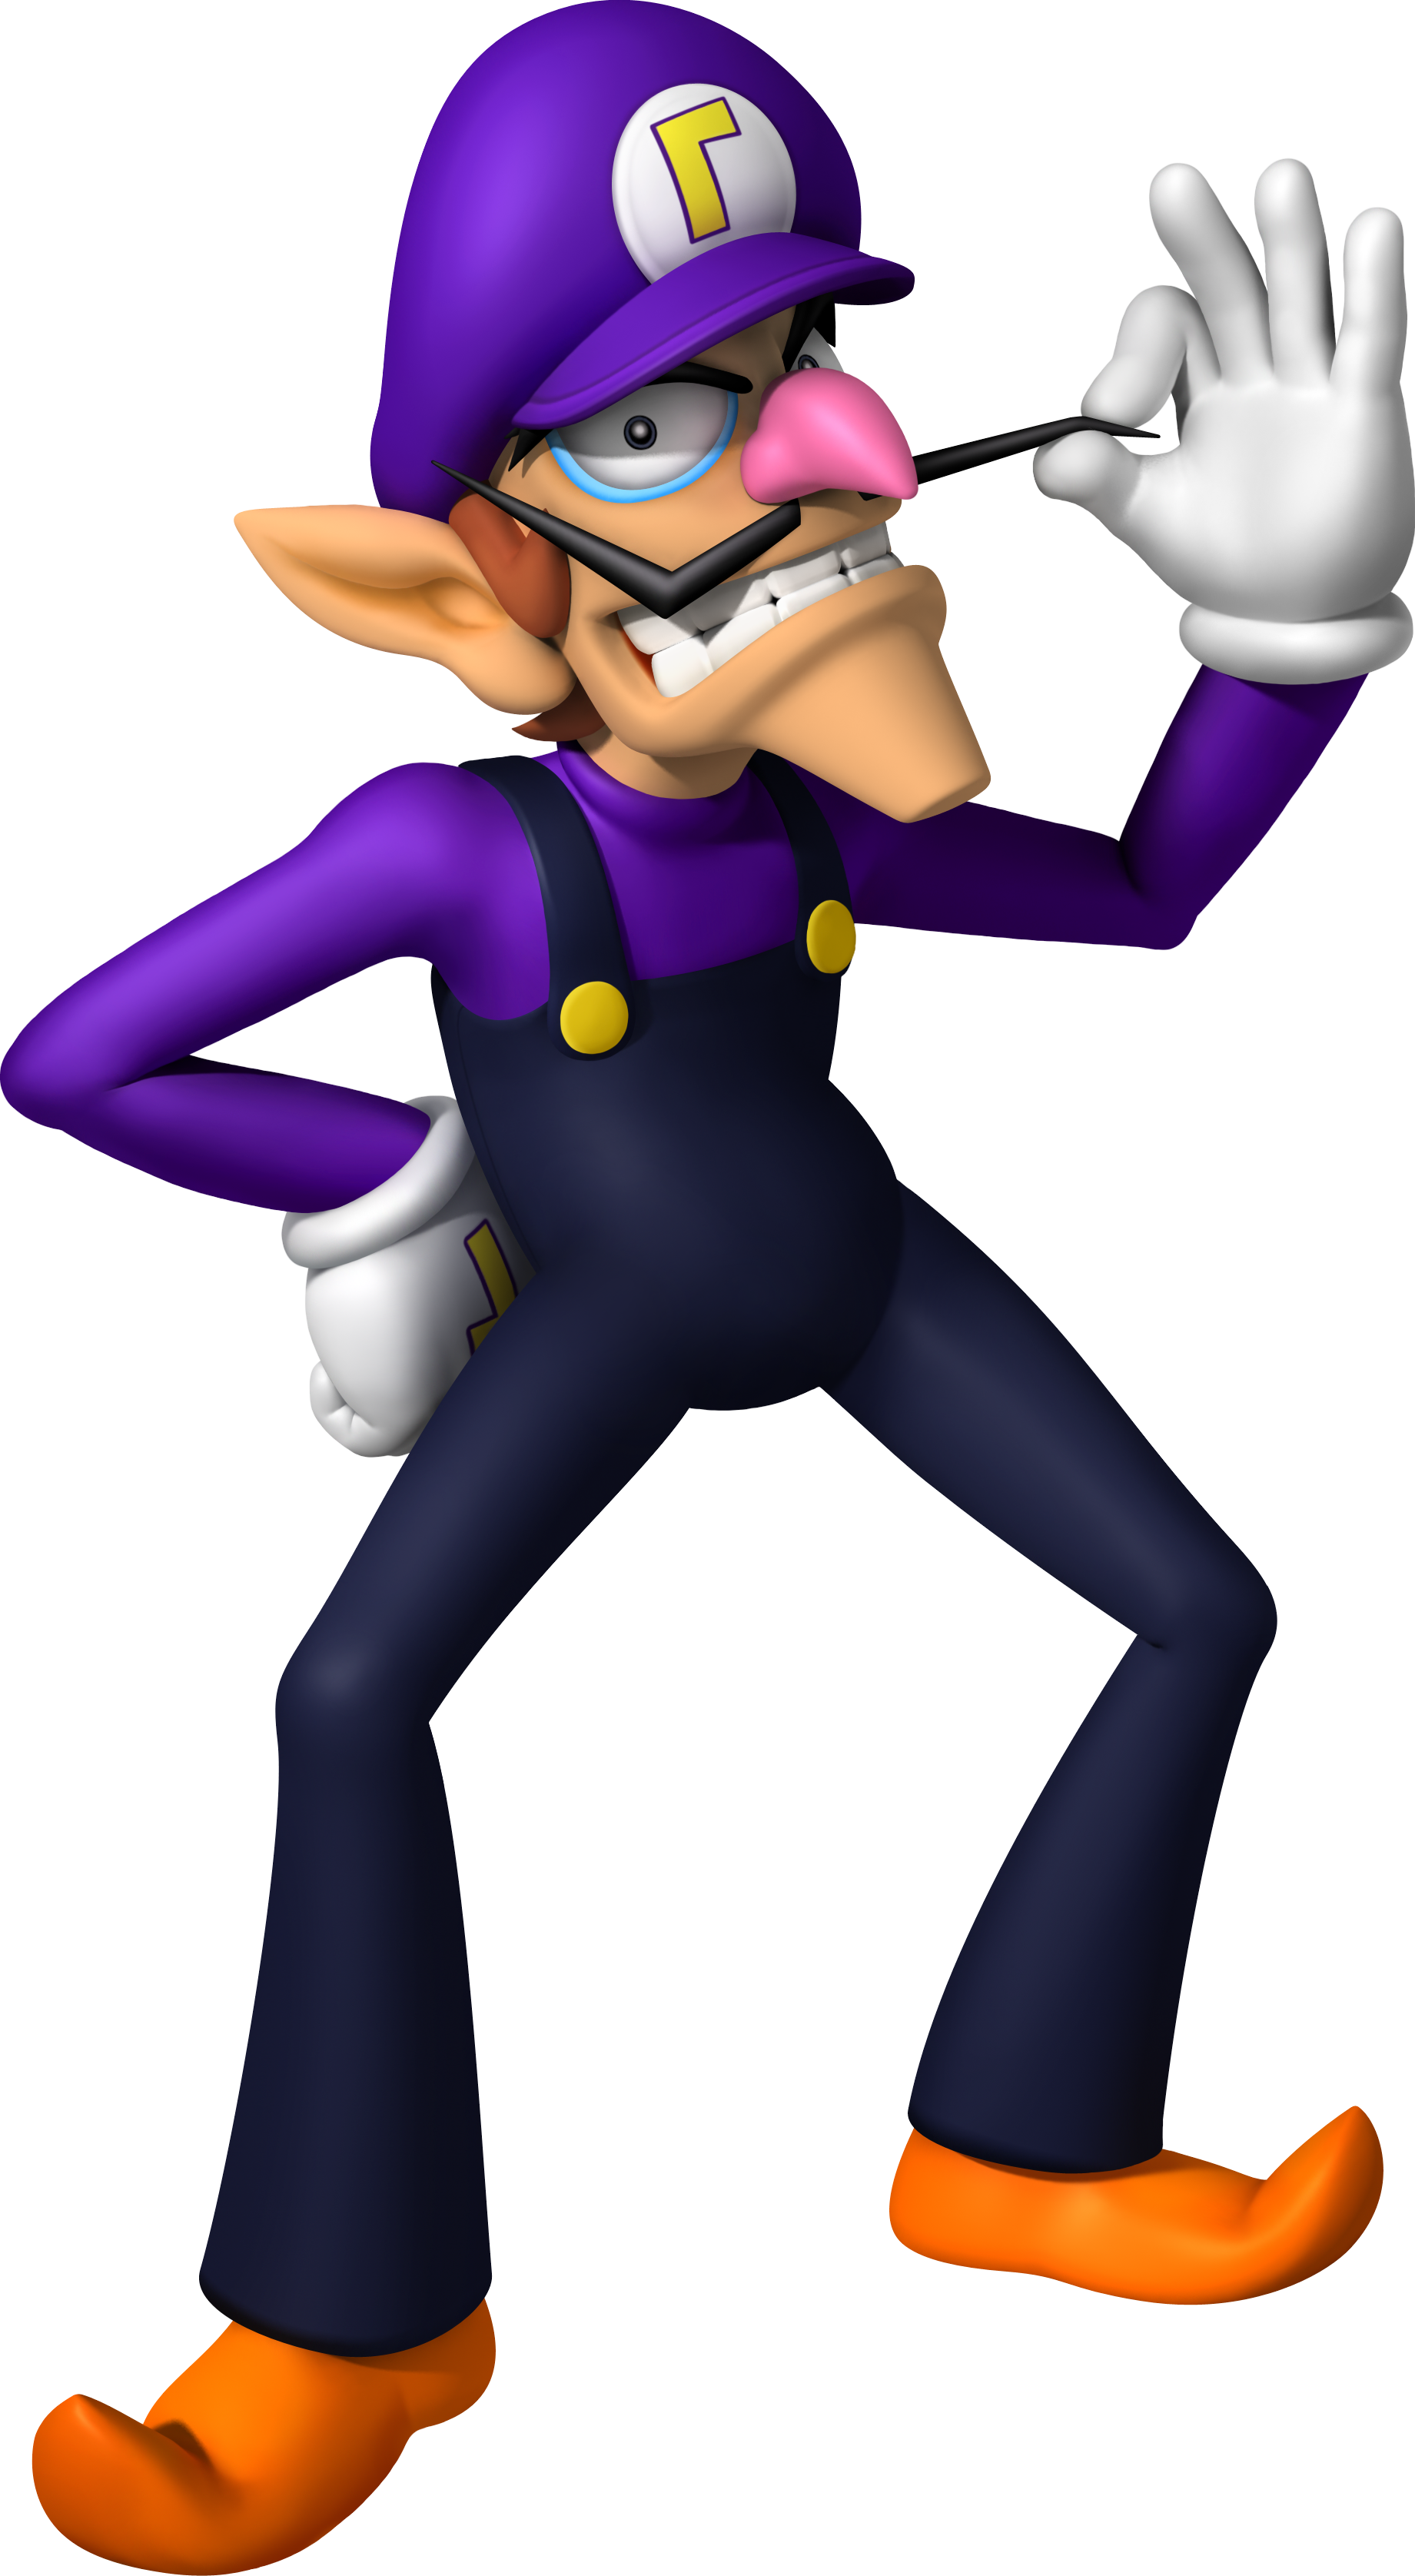
Waluigi Super Mario Bros. | 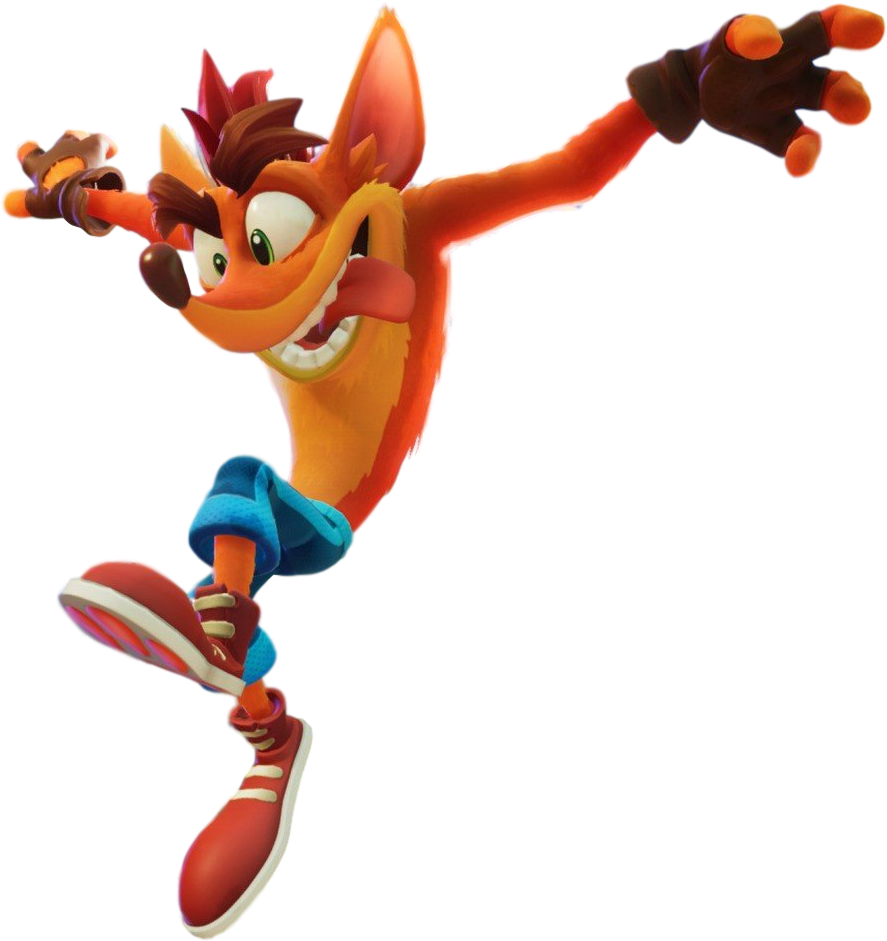
Crash Bandicoot Crash Bandicoot | 
Stylist Style Savvy |
Ashley WarioWare | 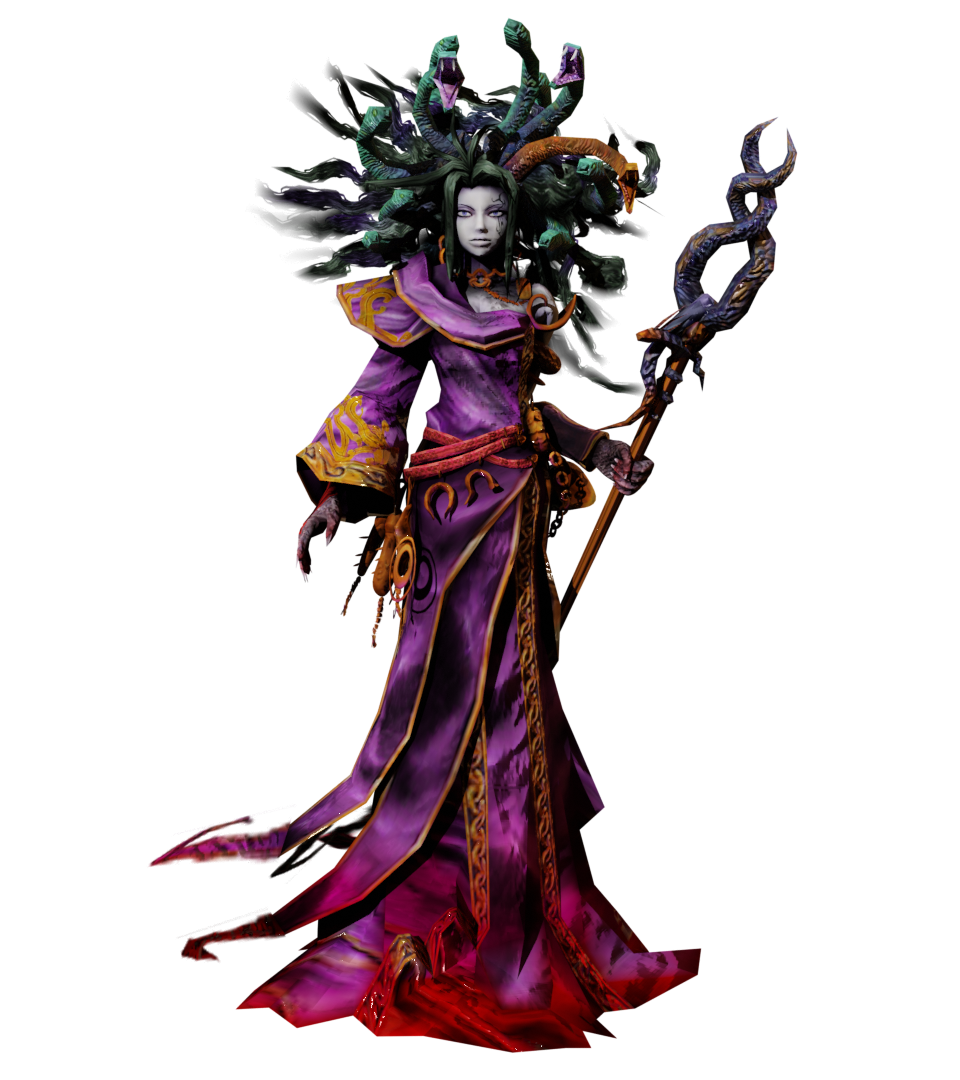
Medusa Kid Icarus | 
Barista Rhythm Heaven | 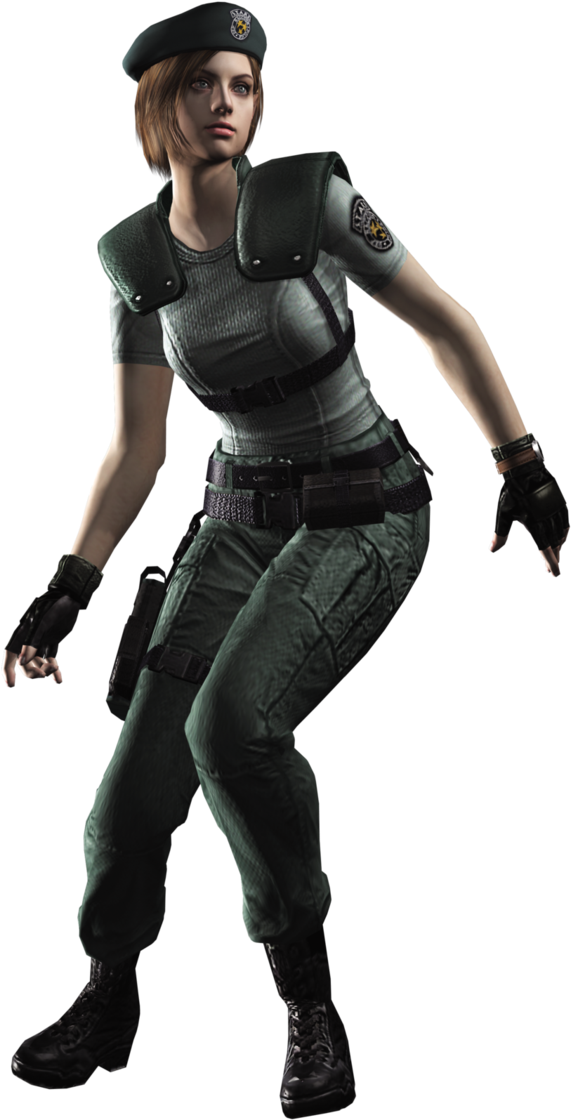
Jill Valentine Resident Evil | 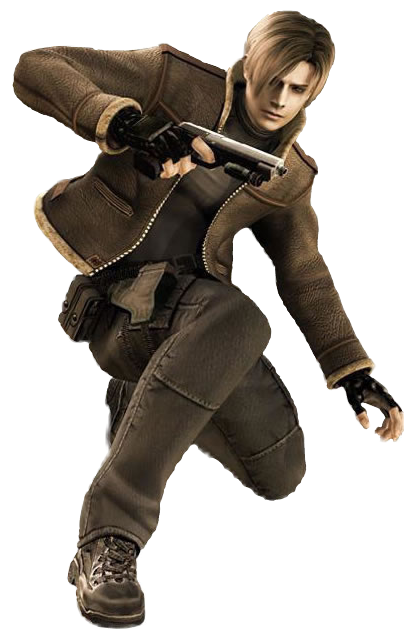
Leon Kennedy Resident Evil | 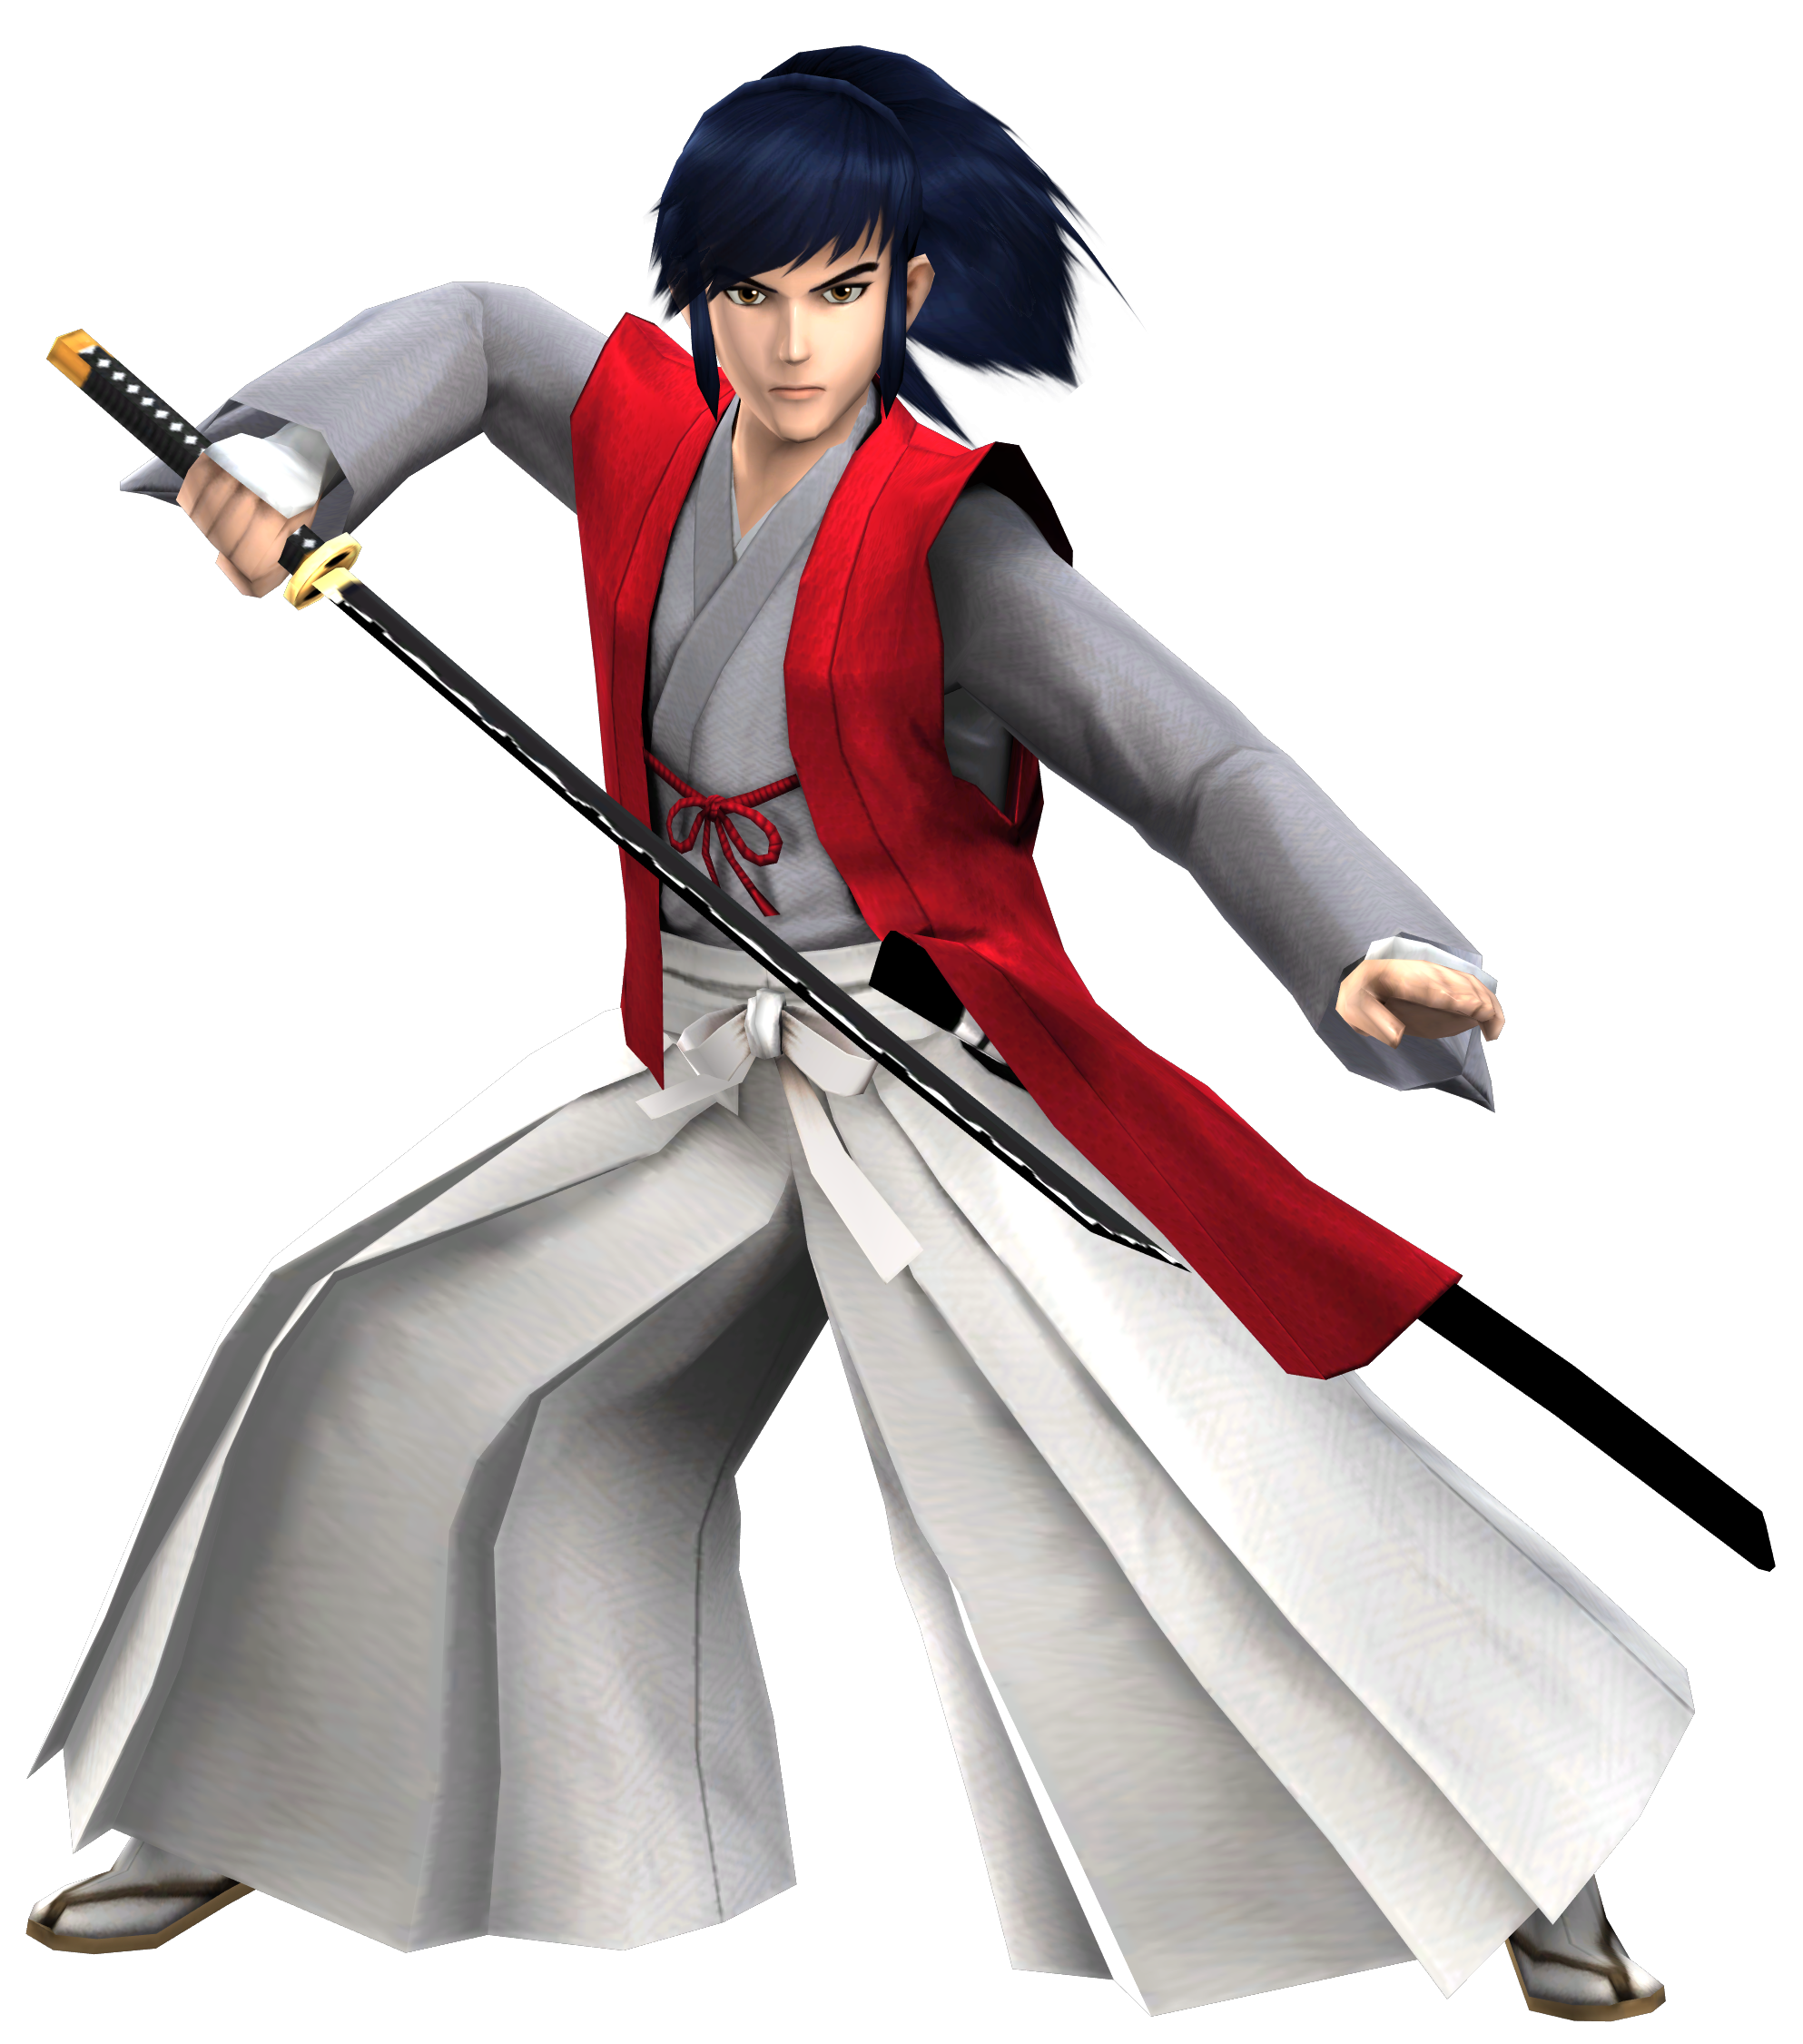
Takamaru Mysterious Castle Murasame |
Galacta Knight Kirby | 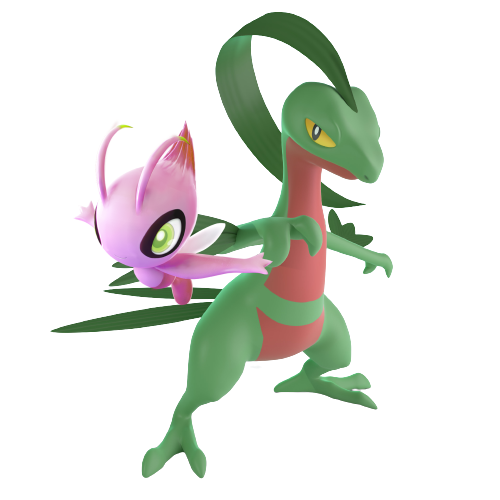
Grovyle & Celebi Pokemon | 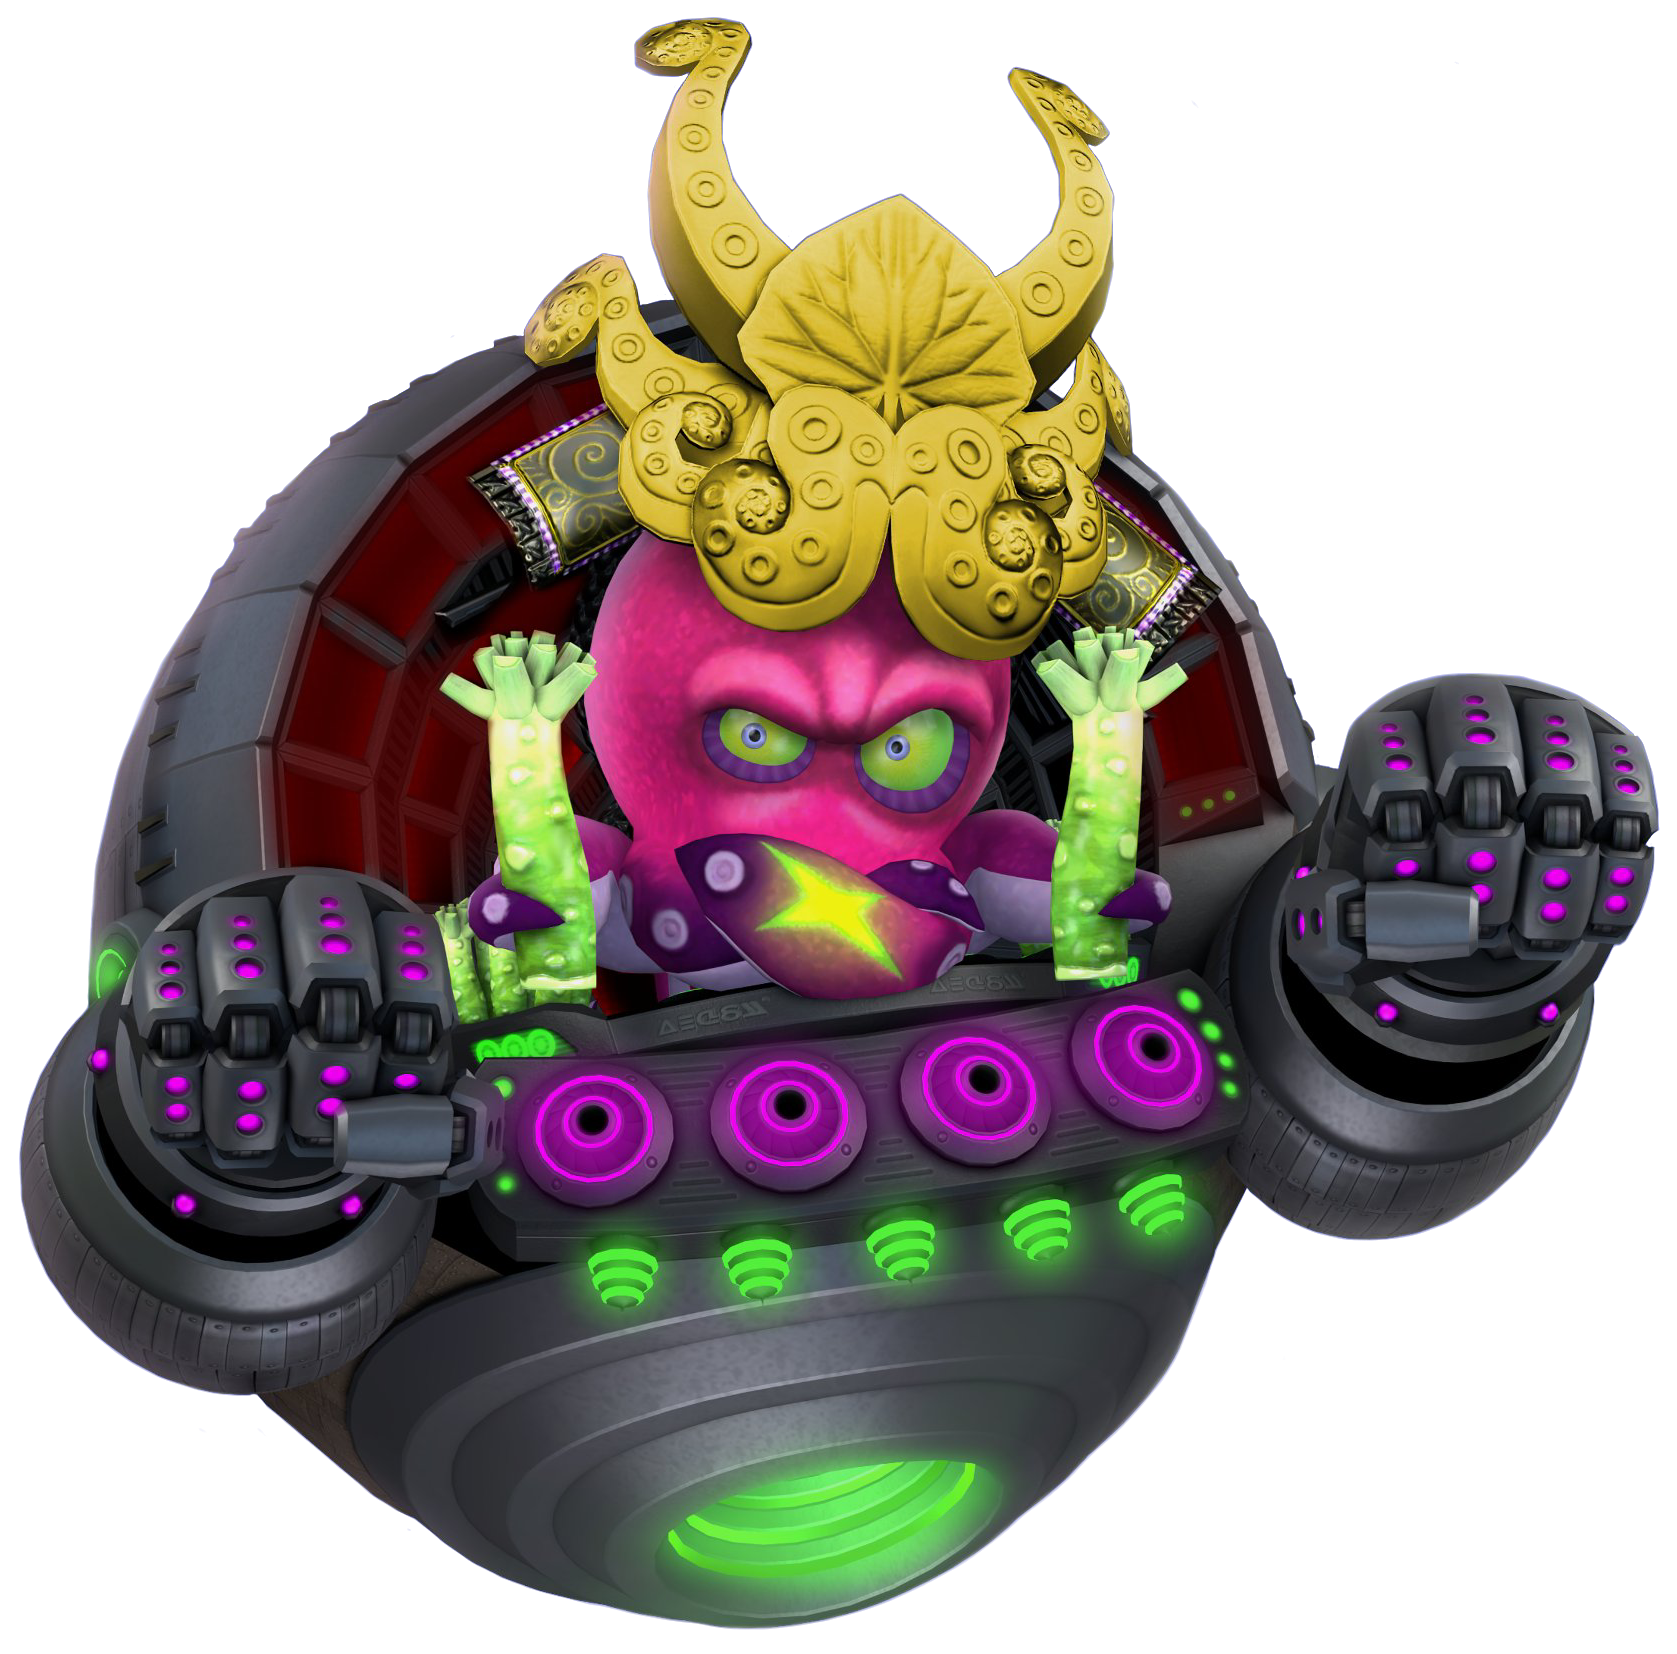
DJ Octavio Splatoon | 
Reimu Hakurei Touhou Project | 
Officer Howard Astral Chain | 
Dr. Eggman Sonic the Hedgehog |
Marin The Legend of Zelda | 
Impa The Legend of Zelda | Crazy Dave Plants vs Zombies | 
Dixie Kong Donkey Kong | 
Sami Advanced Wars | 
Ms. PAC-MAN Mr. Pac-Man |
Iori King of Fighters | 
Anna Fire Emblem | 
King Boo Super Mario Bros. DLC | 
Zagreus Hades DLC | Phoenix Wright Ace Attorney DLC | 
Jim Kazama Tekken DLC (Kazuya Echo - Echo Pack 1) |

Rock Howard Fatal Fury/Garou DLC (Terry Echo - Echo Pack 1) | Sakura Shinguji Sakura Wars DLC | Agumon Digimon DLC | 
Sol Badguy Guilty Gear DLC | 
Lara Croft Tomb Raider DLC | 
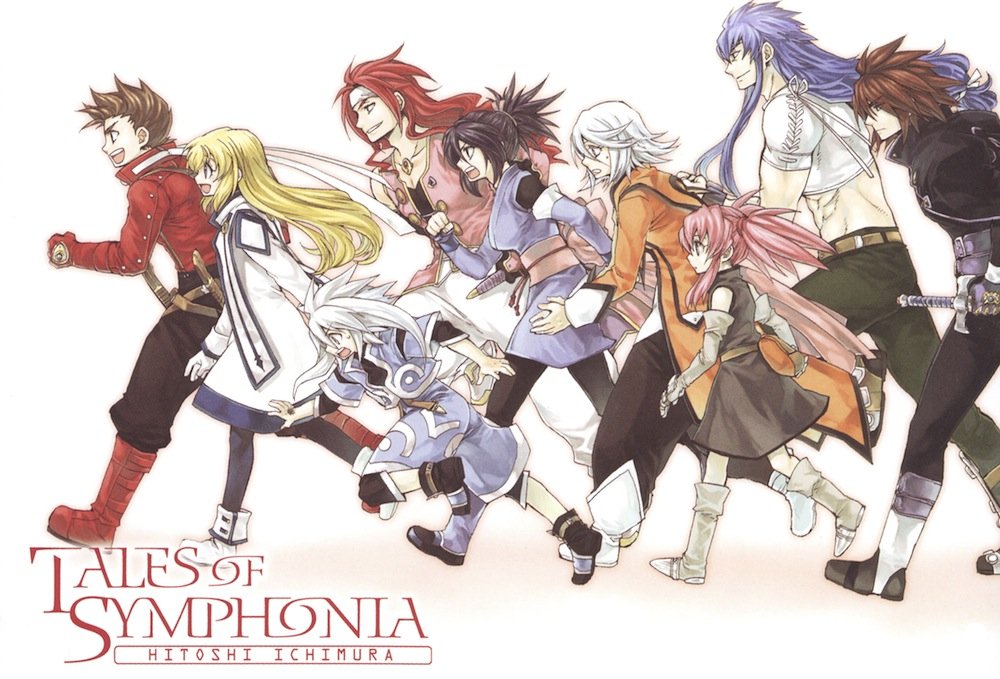
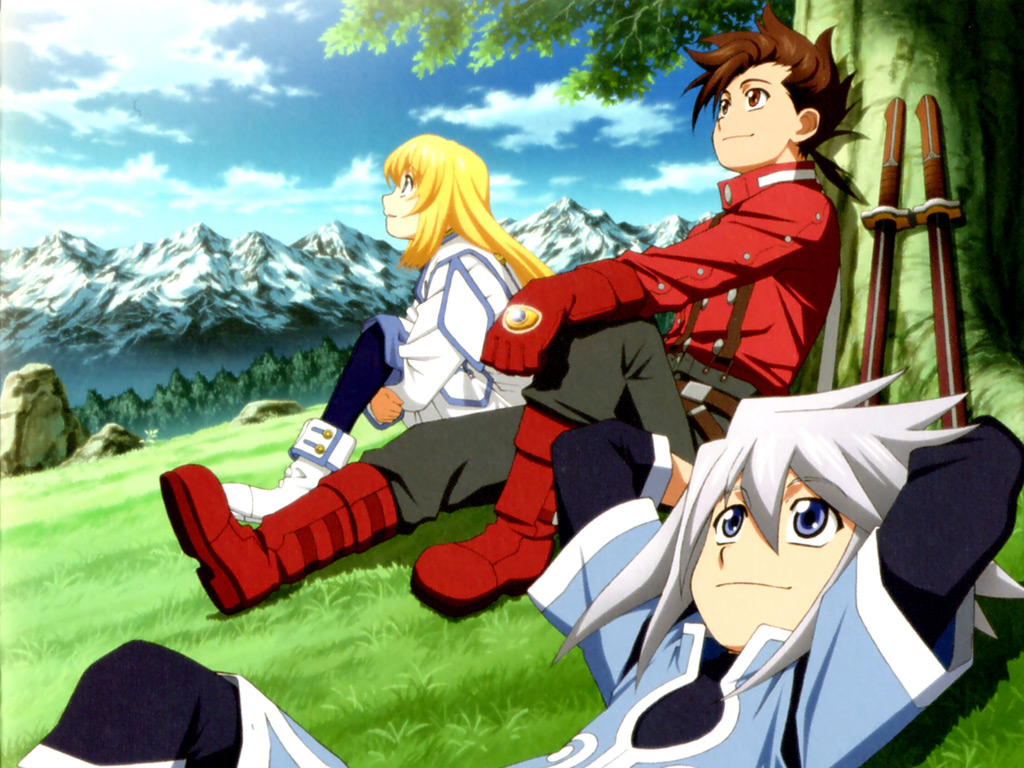
Lloyd Irving Tales of Symphonia DLC |
Ninten MOTHER/Earthbound DLC (Ness Echo - Echo Pack 2) | Jeanne Bayonetta DLC DLC (Bayonetta Echo - Echo Pack 2) | 
Geno Super Mario RPG DLC | 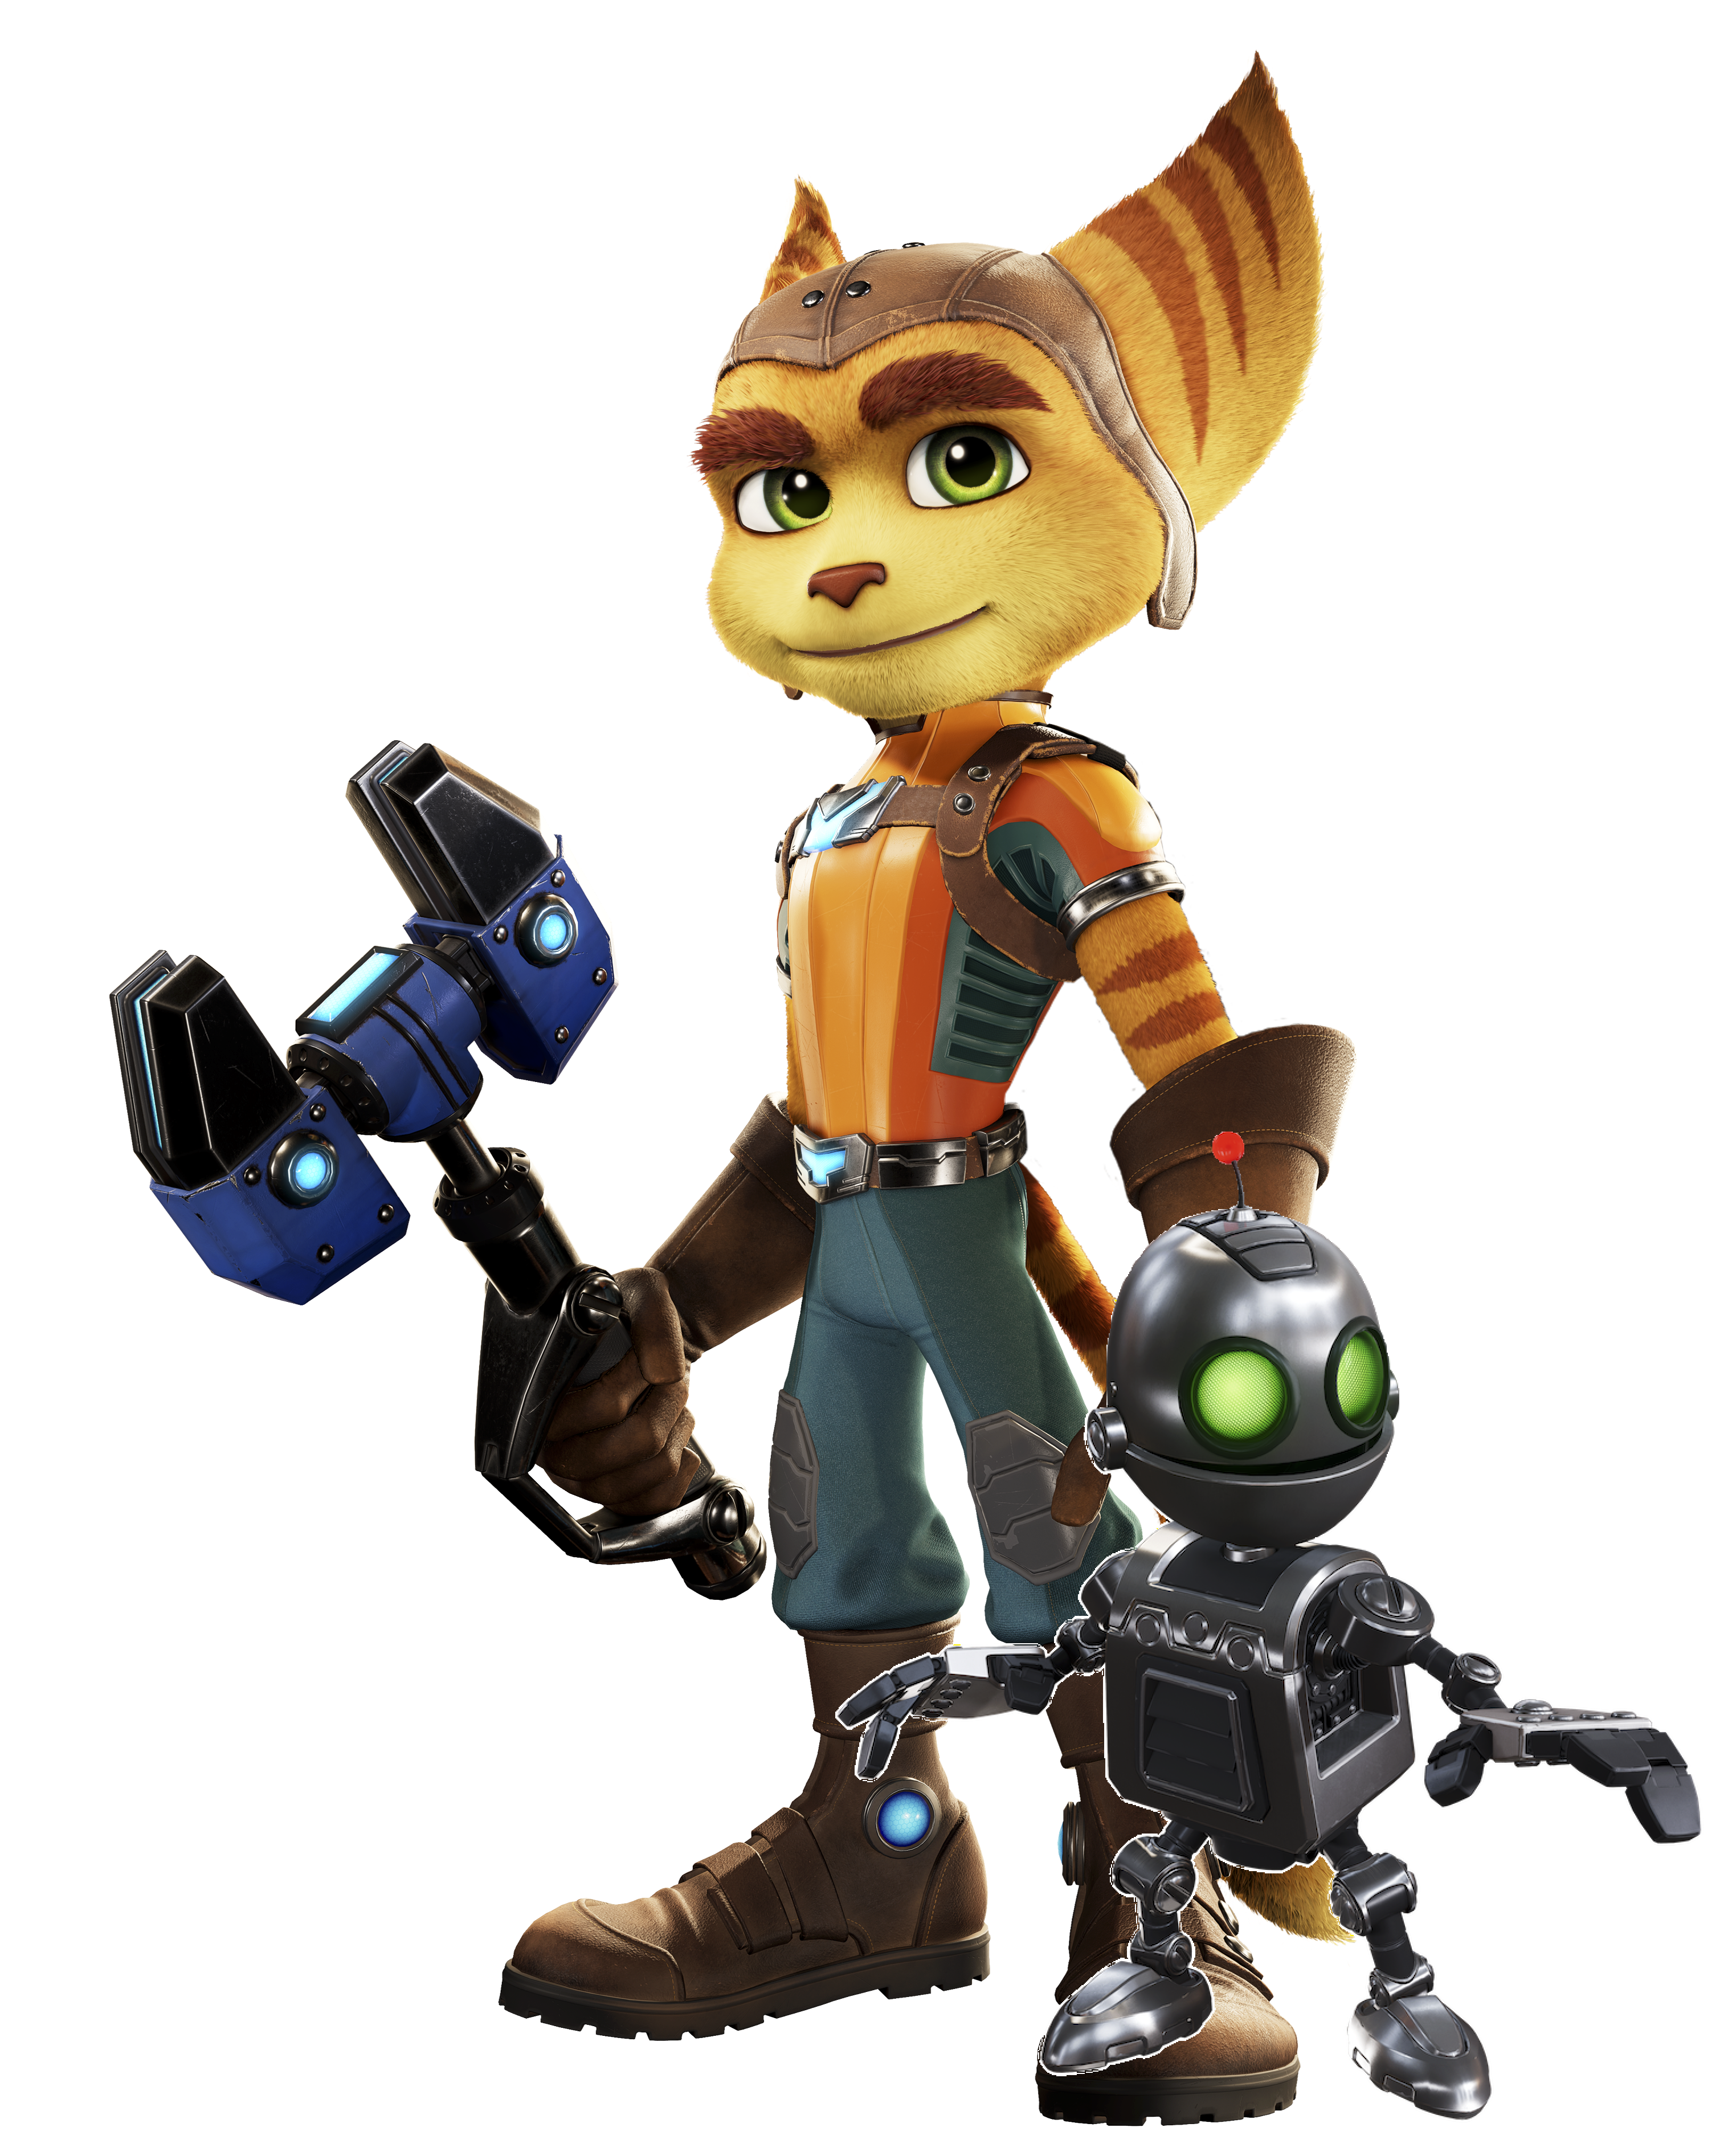
Ratchet and Clank Ratchet and Clank DLC | 
Red Angry Birds DLC | Ahri League of Legends DLC |

Nightmare Soul Calibur DLC | Black Shadow F-Zero DLC | Roll Mega Man DLC | 
Noah Xenoblade DLC | 
Mio Xenoblade DLC | 
Doomslayer Doom DLC |
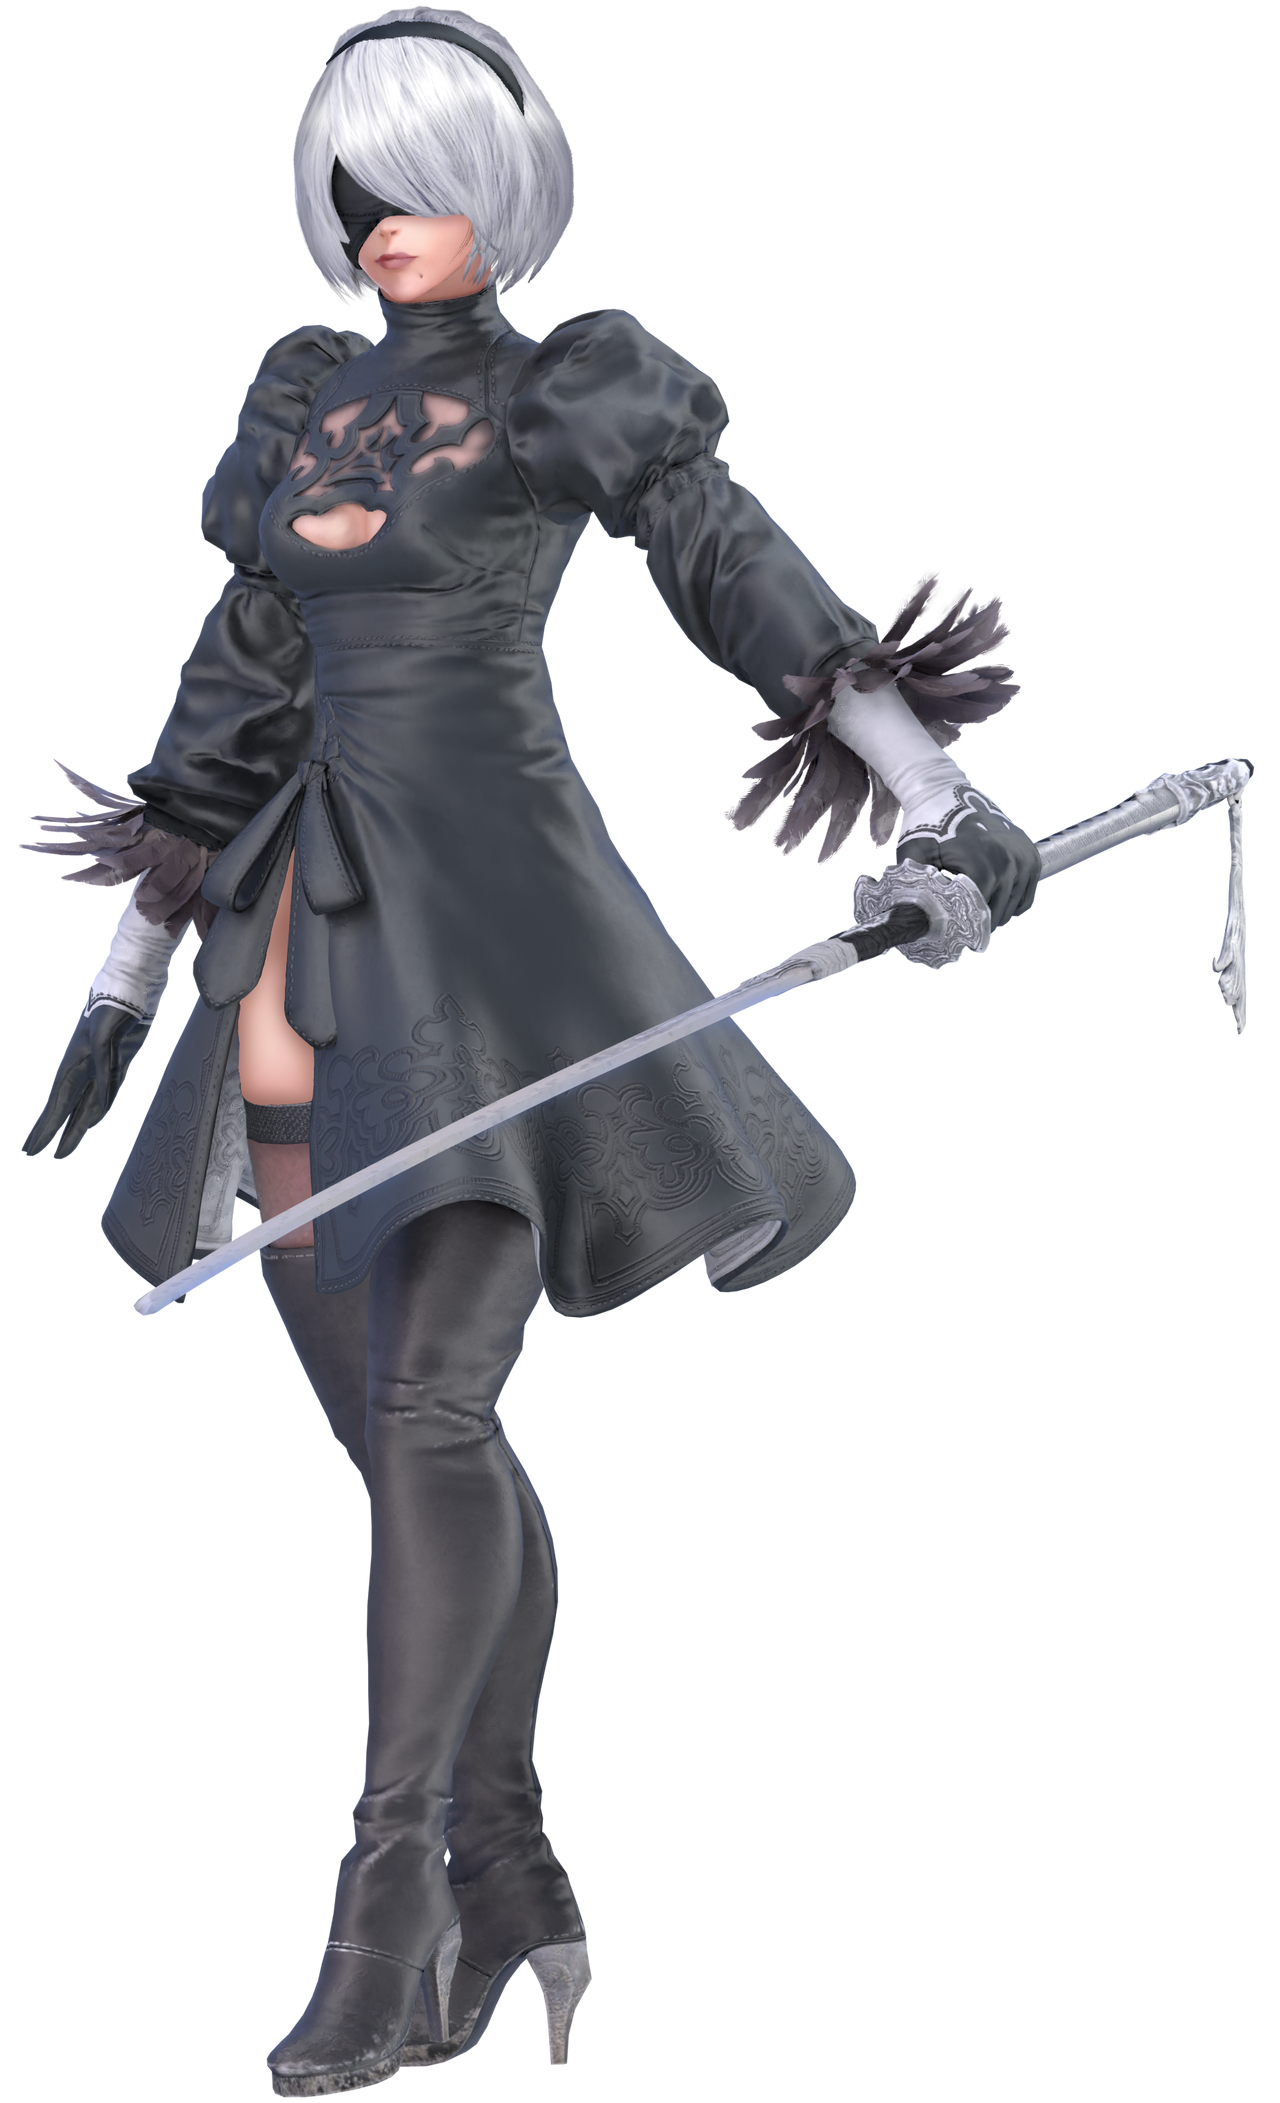
2B Nier Automata DLC |
Characters (SSBI)
 super-smash-bros-infinite.fandom.com
Roster
![]()
26 (including Echoes)
 Golden Icarus
�
Veteran Changes
Forward Air
The beam she has selected actually affects the way in which Samus performs this move.
Forward Tilt
Samus’ forward tilt has her shoot a shot from her arm cannon. This attack can be performed while moving, like Mega Man’s forward tilt, but it can be angled.
Forward Smash: Charge Beam
Samus’ forward smash has her switch to the Ice Beam and charge a shot. This move can be angled. Its projectiles are basically bigger, more impressive versions of the shots fired by her forward tilt.
Neutral Special: Charge Combo
While similar to Charge Shot, this move is drastically affected by which beam she has equipped, and is now inspired by Special Charge Beam Attacks from Super Metroid and Charge Combos from Metroid Prime. Just like before, though, it’s a chargeable projectile that can be canceled while still keeping the charge.
Final Smash: Hyper Beam
Replacing the Zero Laser is this Final Smash, based on the ending of Super Metroid. Samus actually gets a fifth beam type, the Hyper Beam, marked with a rainbow Metroid icon. It combines the best traits of all the beams: the speed of the Ice Beam, the power of the Wave Beam, and the range of the Spazer Beam. It fires glowing rainbow beams. Samus gets to use the Hyper Beam for about 12 seconds before going back to whatever beam she had before.
Ganondorf
Daisy
Dark Samus
Richter
Hero
Bowser
Donkey Kong
Pac-Man
Jigglypuff

26 (including Echoes)
�
Special Moves Neutral Special: Gaia Causes a pillar of earth energy to shoot up in front of him. Side Special: Move Shoots out a hand made of energy which pushes opponents bakcwards. Up Special: Growth/ Wild Growth Creates a bouncy plant which catapults Isaac up. Charging it creates Wild Growth which launches him even more. Down Special: Quake/Spire Fires a quick burst of energy that can trip others nearby. Creates a earthen spear which creashes down while in the air. Final Smash: Judgement Summons Judgement which unleashes a massive amount of Venus Psyenergy into the targeted opponent. | Taunts
On-Screen Appearance
Idle Poses
Victory Poses
Classic Mode: The Power of Friendship The opponents are based off actual enemies from Golden Sun. Two allies accompany Isaac in battle.
Alternate Costumes 
| |||||||||||||||||||||||||||||||||||||||||||||||||||||||||||||||||||||||||||||||||||||||||||||||||||||||||||||||||||||||
Special Moves Neutral Special: Spear Throw Throws his spear like a javelin. Charging it increases the power. Side Special: Parasol Drill Rushes out while holding the Parasol in front. Can reflect projectiles. Up Special: Waddle Copter Spins his spear rapidly which levitates him off the ground. Down Special: Ground Spear/Crescent Swing Slams his spear down and then rushes and slashes it upwards. Performs a wide-sweeping aerial swing while in the air. Final Smash: Waddle Dee Army Summons Waddle Dees, Waddle Doos, Gordos, and other enemies to wildly attack. | Taunts
On-Screen Appearance
Idle Poses
Victory Poses
Classic Mode: Helper to Hero The theme is that it’s fighting characters who transition from a generic character to that of an unique and personal one, like his own character arc. ALl stages are news stages to Infinite in the same manner that Bandana Waddle Dee is a newcomer.
Alternate Costumes 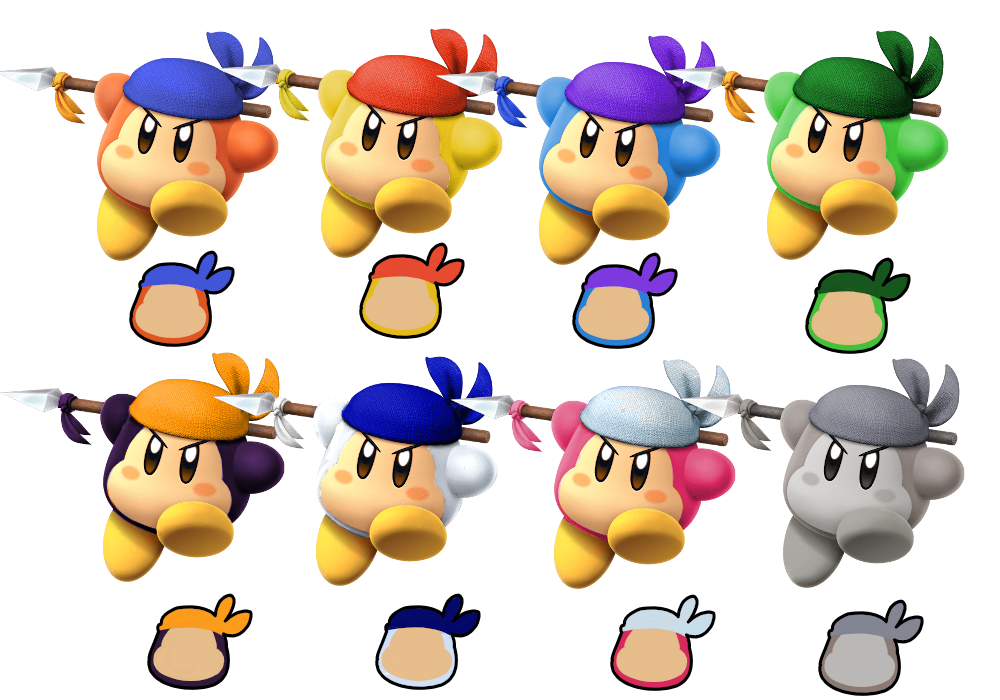
| |||||||||||||||||||||||||||||||||||||||||||||||||||||||||||||||||||||||||||||||||||||||||||||||||||||||||||||||||||||||
| Special Moves Neutral Special: Dapple Dualies Fires forward with both of their Dapple Dualies. As these are two weapons, the damage output is increased (1.5x). Side Special: Dynamo Roller A variation of the Splat Roller. It moves slower but deals more damage with better killing poyential. Up Special: Super Jump Performs a Super Jump just like the Inkling. Down Special: Splat Bomb Throws a Splat Bomb, which explodes on contact or after a fixed time, covering opponents in ink. The damage and amount of ink applied increase based on how long the player holds the special button. Final Smash: Inkjet The Octoling uses Inkjet, one of the Special Weapons from Splatoon 2. Functionally, it’s almost Identical to Diddy’s old Final Smash, with the Octoling flying around and shooting ink. | Taunts
On-Screen Appearance
Classic Mode: OctoPARTAY!!!
Player fights against eight opponents in waves of 1 against 4. Stages are also based on the idea of 8.
Alternate Costumes | |||||||||||||||||||||||||||||||||||||||||||||||||||||||||||||||||||||||||||||||||||||||||||||||||||||||||||||||||||||||
| Special Moves Neutral Special: Serve Waluigi throws a tennis ball into the air and serves it at the opponent with his racket. this can be angled slightly, and cancelled out of. The Tennis Ball will remain and bounce if cancelled, and can be hit with his forward air and forward smash. Side Special: Kart Waluigi gets into the Waluigi Racer and charges forward at the opponent. This move can be charged into 4 tiers, no sparks, blue sparks, orange sparks, and purple sparks, from weakest to strongest. Up Special: Swimming Return Waluigi wims in the air in a slower version of Pikachu's quick attack. Waluigi swims in 4 bursts, and can change direction for each burst. There is a weak hit box on it. Down Special: Trick Shot Waluigi slows down time and does a moonwalk like in Mario Tennis Aces. this moves functions as a counter if hit during the moonwalk. However, the move has large ending lag so Waluigi can be punished if not hit. Final Smash: Bomb-ombs Away!
| Taunts
On-Screen Appearance
Classic Mode: Waluigi's the Best!
All Waluigi's opponents are previous assist trophies or game elements that weren't made playable until later.
Alternate Costumes | |||||||||||||||||||||||||||||||||||||||||||||||||||||||||||||||||||||||||||||||||||||||||||||||||||||||||||||||||||||||
| Special Moves Neutral Special: Death Tornado Spin Pressing B once performs a short, quick spin that reflects projectiles (11%, OK knockback). Holding B turns into a much faster spin that lasts for a few seconds (26%, medium knockback); not only is it faster, it can help Crash glide a good distance. Side Special: Super Slide Crash slides at lightning speed, which trips opponents (9%, OK knockback). He can use it in the air to kick diagonally downward, and cancel it by pressing the Shield button. Up Special: Rocket Jump Crash will jump high off a TNT Crate, damaging opponents in the process (13%, OK knockback). The attack has a good amount of collateral damage to the opponents nearby as the crate explodes. Damage hitboxes are also applied to Crash as he catapults into the air which can be used as a good defensive air attack. Down Special: Fruit Bazooka Crash takes out a bazooka that he can aim by tilting up or down (10%, OK knockback). The Wumpa Fruit juice that sticks on opponents is a weaker variation of the Inklings' Ink that adds a 1.3x multiplier to all other attacks, including another Wumpa Fruit. Final Smash: Most Missed Boxes Crash will don on the Aku mask and will dash into an opponent (8%). The opponent is then taken into a cutscene were hundreds of TNT and Nitro boxes rain down from the sky and Crash runs away (62%, devastating knockback) | Taunts
On-Screen Appearance
Classic Mode: A Crash-tastic Adventure
Boss fights from the first Crash Bandicoot game, with the final round referencing the final bosses from Crash Bandicoot 2 and 3 as well.
Alternate Costumes 
| |||||||||||||||||||||||||||||||||||||||||||||||||||||||||||||||||||||||||||||||||||||||||||||||||||||||||||||||||||||||
| Special Moves Neutral Special: Hairspray Stylist starts shaking a hairspray canister in her hand, in a charging like attack similar to Samus' CS. When finished, she can press B again to spray. It has a small hitbox, but a lasting one-for a visual aid, a purple, almost invisible cloud right in front of Stylist. You'll need to be pretty close to land it-but if you do, the opponent will be stunned! How long they are stunned depends on how long you charged the hairspray and how much damage your opponent has. However, after being used five times, the canister is empty. If you try to use the move again, Stylist will toss it behind her (it can hit opponents and be picked up), and a new one immedeatly appears in her hand, setting her back $30. Side Special: Lipstick Stylist winds up, and then throws a lipstick thing (don't know the name of it) forward. It travels in an arc similarly to Young Link's Fire Arrows. This is pretty strong for a projectile. The longer you hold B, the stronger the lipstick projectile will be. However, while this move can be spammed, it does set you back $10 per container, so be wary. Up Special: Hair Dryers Stylist pulls out two electric hair dryers and aims them down before turning them on, and they propel her upwards. This causes a windbox beneath you, so it's pretty good for gimping an opponent offstage. It's also a pretty fast move. However, the move only has decent horizontal range, and good vertical range, so you can't go too far left or right offstage. Down Special: Try It On The Stylist pulls out a changing curtain and can choose between several outfits based on a mood. Each outfit will give her a particular state boost until she loses that outfit, is KO’d, or changes her outfit. Each outfit costs $100 and she has $800 per stock. Final Smash: Fashion Show Fix When activated, a curtain will be thrown up in front of Stylist, however this time it is much larger and is her FS activation box. The player closest to Stylist before the curtain was thrown up will be launched into the cutscene, and all other players hit by the curtain will be launched by a semi-strong hit that does 20% and kills Mario from the center of Final Destination at 100%. We see a first person view of the opponent, as Stylist brushes, irons, and curls their hair, shines their shoes, holds up dresses, etc. She moves extremely fast while doing this, inhumanly fast-as if it's some kind of time lapse video. After a few seconds, Stylist swings the chair around, and the camera changes perspective to a third-person view of Stylist and the opponent-who is now sporting the same outfit and hairstyle as Stylist! They'll look a bit surprised on their predicament. The cutscene ends and they are launched offstage (if they have enough damage done to them). | Taunts
On-Screen Appearance
Note: All of Stylists victory animations features her walking down a fashion show catwalk as cameras flash all around her.
Classic Mode: Fashion Show Victim
Her classic mode consists of fighting a sequence of fighters with questionable fashion choices, including weird accessories and color palettes.
Alternate Costumes | |||||||||||||||||||||||||||||||||||||||||||||||||||||||||||||||||||||||||||||||||||||||||||||||||||||||||||||||||||||||
| Special Moves Neutral Special: Dark Magic Zone Ashley casts a field around her like her assist trophy and much like her assist, the spells are random, the longer she holds the button the larger the field becomes, and it lingers for 3 seconds at full size. The effects that can happen within the zone are as follows:
Side Special: Guitar Blast While the button is held a reticle appears, you can move this reticle around in a certain radius, letting go shoots a blast from Ashley's guitar Up Special: Broomstick While the button is held a reticle appears, you can move this reticle around in a certain radius, letting go shoots a blast from Ashley's guitar Down Special: Potion Ashley summons a cauldron and starts to stir it if you hold the button, if you let go of the button at the right time, A potion will be tossed out of the cauldron in an arc, and it can either hit someone individually or it can splash on the ground and it effects an area, each potion has a random effect. If you let go of the button too early, Ashley takes some damage, if you let the meter run out, the Cauldron explodes dealing big damage to Ashley and opponents around her, the bomb from WarioWare appears above her as an indicator. Here are the different potions:
Final Smash: Hocus Pocus Ashley summons a swarm of Fronks that move forward once opponents are hit they are launched into a cutscene where up to 3 opponents are put into a dark room The camera zooms out and Ashley is there and she starts to summon a large amount of objects and people (Including but not limited to Crazy Galaxy and Ashley's Creepy Crew) that batter the opponents, Then Dark Lord Hum Gree enters the room and eats the opponents. The cutscene ends and the room explodes and the opponents get launched, There is also a chance for the opponents to have random effects applied to them. the effects include.
| Taunts
On-Screen Appearance
Classic Mode: Double, Double, Toil, and Trouble
The opponents in this Classic Mode a come in a pair to reflect how Ashley & Red also fight together. In addition, the opponents all have a magical aspect (or something related to as such) to them much like Ashley. Every secondary opponent is tiny to reflect the small stature of Red.
Alternate Costumes | |||||||||||||||||||||||||||||||||||||||||||||||||||||||||||||||||||||||||||||||||||||||||||||||||||||||||||||||||||||||
| Special Moves Neutral Special: Eye Turret This functions much like Palutena’s Autoreticle but the reticle targeting graphic is far more sinister and monstrous looking. This appearance is borrowed over from Uprising as are the energy shots that are fired. Side Special: Dark Mines This functions exactly like Palutena’s Explosive Flame but emits a darkness-infused explosion with dark purple and black flames instead. Up Special: Warp This functions much like Palutena’s Up Special with a more darker and shadowy appearance. Down Special: Counter/Reflective Barrier Functions much like Palutena‘s Counter in that it can reflect damage back regardless if it’s a melee or projectile. The only difference is that the melee counter will deal a darkness-infused counter while the projectile counter will cause a slight dark effect she reflected. Final Smash: Monstorus Medusa Medusa will detach her head, and it will fly forward sending any opponent hit to a cutscene final smash. Once in the cutscene opponents will face an onslaught from Medusa's army before being hit with a final laser from Medusa. Medusa's Head will fly back to Medusa'a body and the battle will resume. | Taunts
On-Screen Appearance
Classic Mode: Extinguish the Light
Medusa fights characters that are holy or based on light in some way.
Alternate Costumes | |||||||||||||||||||||||||||||||||||||||||||||||||||||||||||||||||||||||||||||||||||||||||||||||||||||||||||||||||||||||
|
#89. Barista Rhythm Heaven | Special Moves Neutral Special: Packing Pests Barista will lob either a spider or a candy from its mouth towards the opponent. The candys will bounce once before despawning, and the spiders will crawl and do weak damage after landing before they despawn. If the B button is pressed before the projectile lands, it will be swatting down in mid air, starting the second bounce of the candy early, or starting the crawl phase of the spider. Side Special: Karate Joe Barista will chuck a flower pot forward from its mouth, similar to duck hunt’s Side special, but faster and travelling further. Side B will be held for this move, and when it is released Karate Joe will appear wherever the Flower Pot was, and perform a Punch. If The Karate Punch connects with an opponent, a Karate combo will be performed, and if The B Button is pressed when the uppercut connects, it will have increased kickback, and Karate Joe will smile at the camera before despawning. Up Special: Launch Party Barista will take the place of the rocket ship from the Launch Party Mini Game. A box will spawn underneath Barista, and a 1,3,5, or 7 will appear. If the B Button is pressed when the number hits 0, then Barista will be launched upward, but not put into free fall, similar to mega man and sonis’s recovery moves. There is a hitbox on this move, but it is not very strong. If the B Button is missed, then the Barista will not travel very far, only About the Vertical distance of Dr. Mario’s recovery. Down Special: Chorus Kids The Chorus Kids will appear in a stack behind the Barista, and will sing (scream?) a pulsing note. This will have a visual effect similar to jigglypuffs, where there is a circle of notes around the Chorus Kids. In function this will be similar to Charizard’s and Bowser’s Flames, dealing multiple small hits of damage, with the radius of the scream getting smaller and smaller the longer the note is held. If the B Button is released on one of the Chorus Kid’s pulses then there will be a strong final hit instead of the move just ending. Barista will be singing with its mouth open during this, but will not add to the damage or hitbox. Final Smash: Ringside Reporter The Reporter will appear, and a camera flash will appear beside her, and any opponents caught in the flash will be sent to a cutscene. The ringside reporter minigame will play for a couple seconds, before ending in a final flash and zooming out to see the opponent pictured against the screen on a newspaper. The better score you get while in the minigame portion, the more damage and knockback will be dealt to the opponent. | Taunts
On-Screen Appearance
Classic Mode: Rhythm Melodies
Barista's route revolves around different kind of music genre in which a music that closely matches each theming plays in the background with character and stages all based on that. [Note; the song that is used are all from Rhythm Heaven)
Alternate Costumes | ||||||||||||||||||||||||||||||||||||||||||||||||||||||||||||||||||||||||||||||||||||||||||||||||||||||||||||||||||||||
|
#90. Jill Valentine Resident Evil | Special Moves Neutral Special: Handgun Jill takes her handgun from her hip and fires it once with a tap of the special move button, consecutive taps will make Jill keep firing it. If you hold the Special button and input any horizontal movement she will slowly walk to that direction while having her gun in her hands. Side Special: Grenade Launcher Jill takes out her Grenade Launcher and fires a Grenade in an arc in front of her. You gain some aim of the launcher by holding the Side-Special instead of tapping. It starts out with 3 normal Grenade Shells, but once depleted you’ll have to reload by picking one of the Shells in your inventory. This powerful weapon exclusive to Jill can be loaded with three different varieties of shells; Grenade Shells, Acid Shells and Incendiary Shells. Up Special: Hookshot Jill Shoots out a Hookshot at an upward angle. It functions as your typical tether recovery. As an attack however, the grounded version can grab opponents, dragging them towards Jill. Down Special: Survival Inventory Jill swiftly goes into a crouching pose, low enough to avoid mid-level attacks and projectiles. Once in the pose an inventory appears over her character UI. You’ll consistently be able to make the choice between 6 iconic consumables from the Resident Evil franchise. The inventory closes once you’ve either made a choice by pressing B on an item, if you’ve been hit or shield out of it. Final Smash: Reach for the S.T.A.R.S. Jill takes out her trusty Rocket Launcher and shoots once in front of her, everyone caught in the initial blast gets sent into a cinematic. The opponents seem to be in some... Mansion? Then suddenly behind them a Tyrant appears! Though luckily, Jill wasn't done with her Rocket Launcher just yet as she starts to fire consecutive rockets exploding the entire place in the process. | Taunts
On-Screen Appearance
Classic Mode: My Last Escape
Fights characters on a 2:00 time limit, referencing the series’ staple escape sequences. Stages are chosen for their dark ambience.
Alternate Costumes | ||||||||||||||||||||||||||||||||||||||||||||||||||||||||||||||||||||||||||||||||||||||||||||||||||||||||||||||||||||||
|
#90ε. Jeon Kennedy Resident Evil | Special Moves Neutral Special: Handgun Leon takes his handgun from his hip and fires it once with a tap of the special move button, consecutive taps will make Leon keep firing it. If you hold the Special button and input any horizontal movement he will slowly walk to that direction while having her gun in his hands. Side Special: Grenade Launcher Leon takes out his Grenade Launcher and fires a Grenade in an arc in front of him. You gain some aim of the launcher by holding the Side-Special instead of tapping. It starts out with 3 normal Grenade Shells, but once depleted you’ll have to reload by picking one of the Shells in your inventory. This powerful weapon exclusive to Leon can be loaded with three different varieties of shells; Grenade Shells, Acid Shells and Incendiary Shells. Up Special: Hookshot Leon shoots out a Hookshot at an upward angle. It functions as your typical tether recovery. As an attack however, the grounded version can grab opponents, dragging them towards Leon. Down Special: Survival Inventory Leon swiftly goes into a crouching pose, low enough to avoid mid-level attacks and projectiles. Once in the pose an inventory appears over his character UI. You’ll consistently be able to make the choice between 6 iconic consumables from the Resident Evil franchise. The inventory closes once you’ve either made a choice by pressing B on an item, if you’ve been hit or shield out of it. Final Smash: Reach for the S.T.A.R.S. Leon takes out his trusty Rocket Launcher and shoots once in front of him, everyone caught in the initial blast gets sent into a cinematic. The opponents seem to be in some... Mansion? Then suddenly behind them a Tyrant appears! Though luckily, Leon wasn't done with her Rocket Launcher just yet as he starts to fire consecutive rockets exploding the entire place in the process. | Taunts
On-Screen Appearance
Classic Mode: Survive the Horror
All opponents are Giant and based on various monsters Leon faced off against. All battles are Stamina matches.
Alternate Costumes | ||||||||||||||||||||||||||||||||||||||||||||||||||||||||||||||||||||||||||||||||||||||||||||||||||||||||||||||||||||||
|
#91. Takamaru Mysterious Castle Murasame | Special Moves Neutral Special: Windmill Swords Takamaru throws out a pair of windmill swords, dealing minor damage but reaching pretty far. Holding the button charges them, cloaking them in fire and adding a third projectile to the mix, at the cost of some range. The charged version is a solid damage-dealer and kill tool, but it's also rather risky. In Mysterious Murasame Castle, Takamaru can use throwing knives as a ranged attack. Various power-ups can be found that increase the number of knives thrown, or change them to long-range windmill swords and high-power fireballs. This special pretty much combines all the power-ups, ironically skipping the original knives entirely. Side Special: Iajutsu Rush Takamaru sheaths his sword, then rushes forward, slashing all in his way. Uniquely, the initial attack deals decent damage, but doesn't actually launch the opponent. Pressing the button again has Takamaru sheath his sword, causing the knockback to kick in. However, it also has a sizeable amount of endlag, making just the rush on it's own better for starting combos. This move is wholly original, based on the famous image of samurai and their quick-draw skills Up Special: Ring Slash Takamaru sheaths his sword, then rises straight up while slashing around himself. Holding the button increases the distance traveled and sets the sword on fire, greatly increasing the damage output. While mostly original, this move is loosely based on the rook Shogi piece power-up, which allows Takamaru to throw four knives all around himself. It also draws inspiration from the Fireball projectile, and it's combination with the aforementioned rook piece. Down Special: Quick-Draw Counter Takamaru sheaths his sword. Anyone who hits him gets hit with a powerful slash, reaching wide enough to hit multiple opponents. This attack also works as a reflector, throwing back any projectiles that hit Takamaru. This move is based on Takamaru's ability to reflect projectiles with his sword, which is also demonstrated in his smash attacks. Final Smash: Inazuma Rush Takamaru sheaths his sword, then releases a burst of lightning, paralyzing all who are hit. He then unleashes a devastating barrage of slashes, ending with one final rush. He caps off the assault by sheathing his sword, after which the opponents are launched. This move is a stylized representation of the powerful Inazuma technique. | Taunts
On-Screen Appearance
Classic Mode: Fashion Show Victim
The opponents features both swordsman and ninjas.
Alternate Costumes
| ||||||||||||||||||||||||||||||||||||||||||||||||||||||||||||||||||||||||||||||||||||||||||||||||||||||||||||||||||||||
|
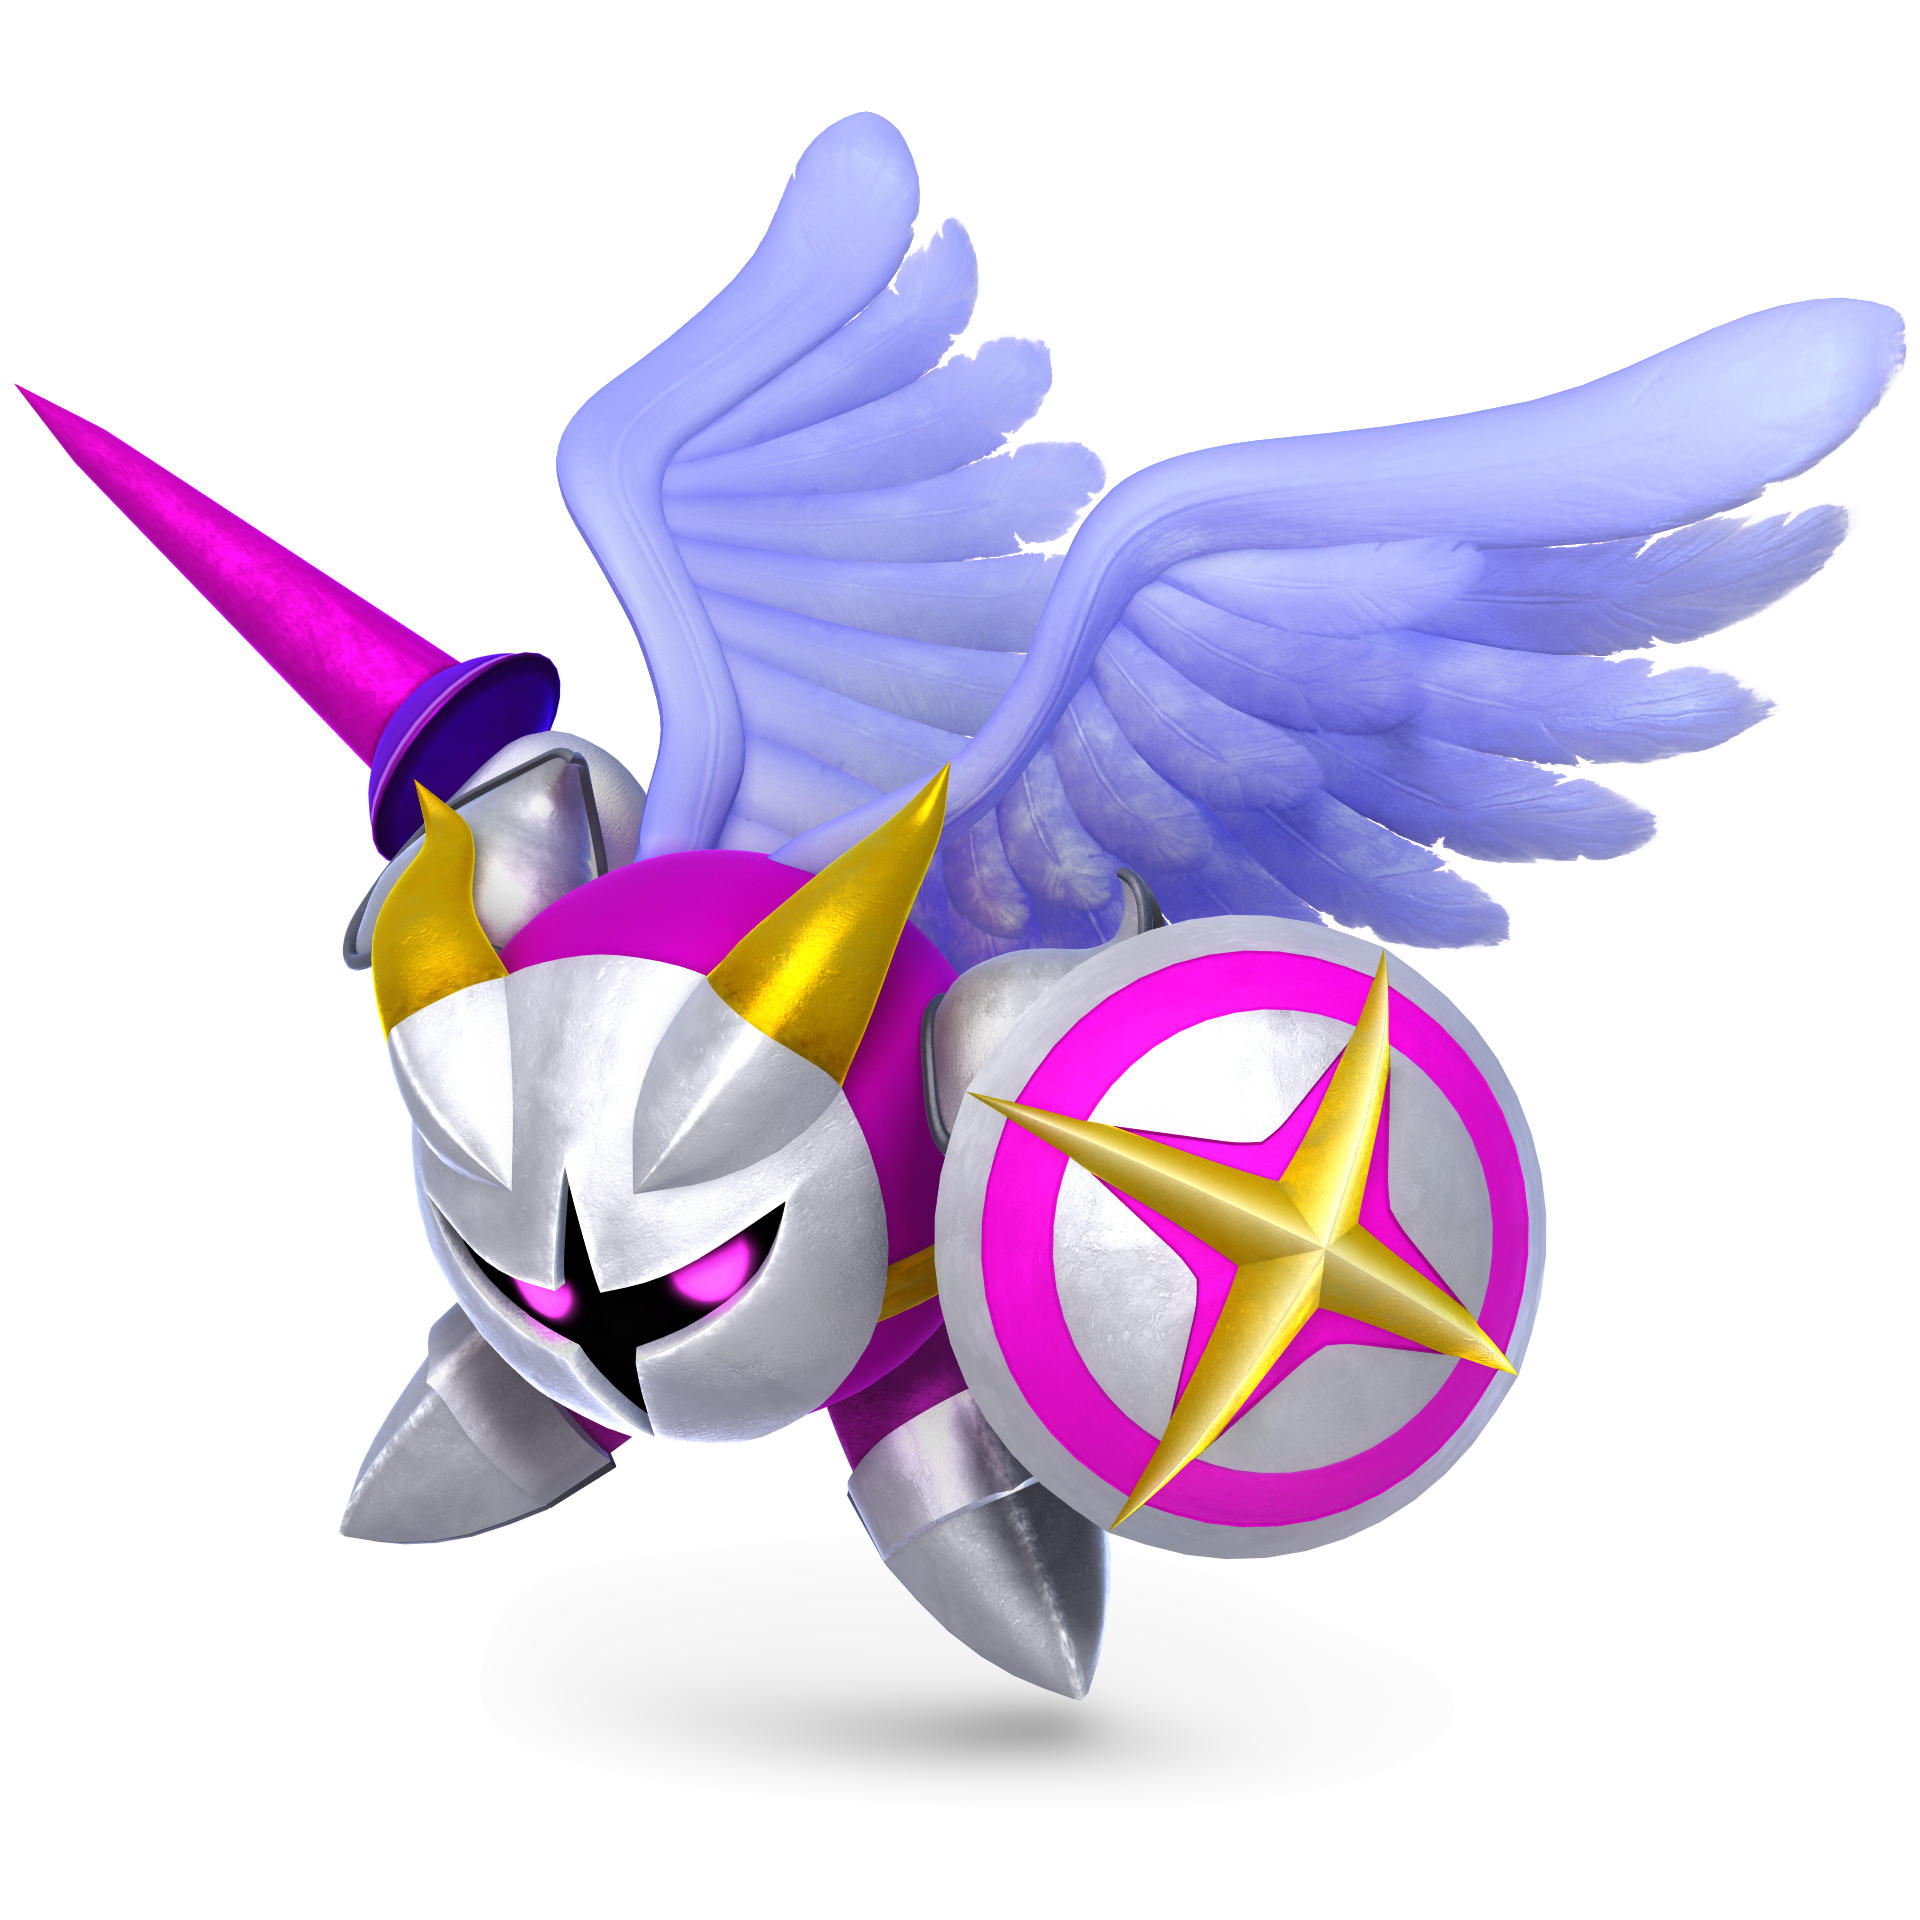
#27ε. Galacta Knight Kirby | Special Moves Neutral Special: Mach Tornado Spins rapidly and forms a tornado around himself. Button mashing both increases the move's duration and makes Galacta Knight ascend slightly; he can also move left and right. Unlike Meta Knight, the attack does multiple hits of damage like its earlier iterations. Galacta Knight’s has a pinkish hue. Side Special: Drill Rush Galacta Knight rushes sideways, spinning in the fashion of a drill with his spear outstretched. The flight path can be maneuvered up or down, allowing it to function as a recovery option (although it will render him helpless). Up Special:Shuttle Loop Galacta Knight soars high into the air, slashing with his lance pointed upwards. He then swoops downward and rises upward in a fast loop, slashing a second time during the ascent. Down Special: Knight Beam He summons three light swords, with quite a bit of startup, which will then release at an angle one after the other. After being released they will last for quite a while, and will bounce off of platforms and walls. This move can be angled in every direction except beneath him, unless this moved is used in the air in which every direction can be angled. Final Smash: Judgement Day When Galacta Knight triggers his final Smash, a butterfly will land on his spear, transforming him into Morpho Knight. Morpho Knight will lunge, forward and fly upwards. Any opponent caught in the attack will be teleported to the center of the stage for a Greninja/Ike/Cloud style final smash, where Morpho Knight will bertate the opponent with his flame sword. Rather than spike the opponent down however, this final smash will be located at ground level. For the final hit, Morpho Knight will summon two massive swords, Slashing them on both sides of him sending the opponent upwards, and damaging any opponents caught in the crossfire. | Taunts
On-Screen Appearance
Classic Mode: The Strongest Warrior
All opponents are characters noted for their immense strength and abilities within their universe. This is because Galacta Knight is seen as the strongest warrior in history and seeks other strong opponents in order to defeat them.
Alternate Costumes | ||||||||||||||||||||||||||||||||||||||||||||||||||||||||||||||||||||||||||||||||||||||||||||||||||||||||||||||||||||||
|
#92. Grovyle & Celebi Pokemon | Special Moves Neutral Special: Tossed Item One of the Storable projectiles pulled from the treasure bag is thrown by Grovyle. If you have no items available then Grovyle will throw a Gravelrock, which travels slowly and does weak damage. Side Special: Bullet Seed / Leach Seed Grovyle and Celebi's Side Special is Bullet Seed and Leech Seed. When held down, more seed will come out starting at 2, and ending at 5. Grovyle will shoot down at an angle, and the Seeds will become lodged in the floor similar to Isabelle's Down Special. If the opponent walks over them, they will explode dealing relatively minor damage. They are clumped together, with 5 seeds having a larger hitbox than the 2 seeds. They will all be detonated at once, so the more seeds out will result in more damage being done to the opponent. Leach Sees instead will come out if switched with Celebi. This is identical in function, except it deals significantly less damage and heals Grovyle & Celebi a fraction of that damage. Up Special: Aerial Ace / Warp Orb This is a pretty standard recovery, with Grovyle dashing in the air using the move Aerial Ace. This range is pretty poor, somewhere between Falco and Wolf's recoveries. It can also be angled in any direction. Celebi warps and reappears where Grovyle ends up at the end of his recovery during this animation. This move has a single hit hit box on it as well, which is weak but still there. However, If you have a Warp Orb from your Treasure bag, you will instead Teleport when using your Up Special, giving you intangibility and a recovery with a much larger range. Down Special: Treasure Bag Like Hero's Down Special, Grovyle & Celebi's Down Special will open the treasure bag menu from PMD over their stock profile. Unlike Hero's Menu, only one item will appear at a time, with it still being random each time. Additionally, instead of having to cancel out to get a new selection, you can input down to scroll to a new item in the bag. However, you can't scroll back up, so each scroll is a risk, as you may pass on a decent item only to get a worse item, or you can get just the item you need. You can scroll unlimited times, albeit with some frames between each scroll, however being hit will knock you out of the inventory. Grovyle will pull the treasure bag out from behind him during this animation and look through it. Like Hero's menu, this will also require a meter to use. This time it's the Belly Meter from PMD. It starts at 100, and every scroll of the inventory will decrease the amount of belly you have five per scroll. Unlike Hero's MP bar, this will slowly decrease over time, not increase, to better mirror how it functions in the source game. The bar can be refilled by pulling Food from the inventory, which will be relatively common. If your Belly meter does reach zero, which will take quite a bit longer than Hero's bar does, you can use your neutral air to eat a blast seed to fill your belly meter by enough to pull one item. If its an apple or another food item that is pulled then you can eat it to refill your belly. If it's another item, eat another blast seed to try again. However, as mentioned earlier eating a blast seed will deal self damage so there's a price to letting you belly reach zero. A sprite of the items you have available will appear above your belly meter, the same sprites from PMD, with up to 8 items being holdable at a time. If a new item is pulled when at your limit, the first item in your inventory will be replaced. Final Smash: Future of Darkness Dusknoir appears in front of Grovyle and grabs any opponent and takes them through a time portal. They appear in the dark future, and are ravaged by Sableyes before Dialga performs a Roar of Time, dealing heavy damage and returning them to the present match. | Taunts
On-Screen Appearance
Note: All voice lines appear as text boxes with portraits as a reference to the source material. These appear above the results HUD.
Classic Mode: Baack to the Past
Opponents are all characters who have traveled back in time. In addition, the stages are set to stage morph and include those within the same series, unless not applicable, to simulate “time travel”.
Alternate Costumes | ||||||||||||||||||||||||||||||||||||||||||||||||||||||||||||||||||||||||||||||||||||||||||||||||||||||||||||||||||||||
| Special Moves Neutral Special: Octorpedo It travels in an arc, quite slowly, however dealing heavy damage if it connects and applying the ink effect as well. two missiles can be fired at once, making it quite hard to avoid since they arc, if one is launched in the air followed by one launched on the ground. Additionally, if Neutral B is held down, a larger version of the Octorpedo will be launched instead, which comes out much faster and deals much more damage, almost breaking a full shield. Side Special: Octowhirl DJ Octavio's mech would flip one its side, begin to charge, and spin horizontally, traveling across the stage or in the air similar to Jigglypuff's or Bowser Jr's Side B. This gives him a much needed movement option, as well as leaving a trail of ink behind giving him stage control. Up Special: Octoshower 4 Octocopters would appear and lift Octavio up. These octocopters can be killed similar to how Villager and Isabelle's balloons can be popped. This distance traveled would be comparable to that of Isabelle's, with it decreasing with consecutive uses, as fewer Octocopters will appear. The octocopters will fly away once the recovery is over or the ledge is released, with an extremely weak hitbox on them, similar to Snake's recovery. Down Special: Takoyaki Bomb DJ Octavio will launch a Takoyaki bomb, and it will briefly roll before coming to a stop. after one or two seconds it will swell and explode into a geyser of ink. While the geyser won't last as long as they do in his boss battle, it would deal more damage than Isabelle's Down Special, in a multi hit fashion. If the bomb is hit before it can explode it will be disarmed and not explode, instead simply disappearing. Final Smash: Dubstep Disco Destruction DJ Octavio's mech turns into a Disco Ball and it floats up to the center of the screen, similar to Lucario and ZSS. Then DJ Octavio drops a beat and his Octarian army is summoned while an Octarian remix of Calamari Inkantation plays. The Octarian army includes Octocommanders firing their Gatling guns from floating platforms, Octocopters firing Ink balls, Octobombers firing Splat Bombs, and Flooders covering the floor with ink. The attack ends with an Octozeppelin crashing into the stage causing an explosion of ink, dealing strong knockback and damage. Similar in effect to Ness and Lucas's final smashes where a barrage of projectiles come down, this time ink edition. | Taunts
On-Screen Appearance
Classic Mode: Mech-tacular Performance
All opponents are characters who, at one point in time, piloted a giant mech or there were allusions that they did in their home series.
Alternate Costumes | |||||||||||||||||||||||||||||||||||||||||||||||||||||||||||||||||||||||||||||||||||||||||||||||||||||||||||||||||||||||
|
#94. Reimu Hakurei Touhou Project | Special Moves Neutral Special: Hakurei Amulet Reimu throws out a homing amulet at her opponent. Holding the button increases the size, speed, and power of the amulet, at the cost of weakening the amulet's homing capabilities. The Options fire smaller amulets alongside Reimu's, with similar properties. Based on the iteration of the move used in the fighters. Side Special: Yin Yang Orb Reimu throws a large Yin-Yang Orb at the opponent. If it hits a solid surface, it will bounce off of it. The attack can be angled diagonally upwards or downwards, depending on the input. Based on the Yin-Yang Orb moves from the fighters, specifically her held B from Antimony of Common Flowers. Up Special: Ability to Float Reimu rises into the air, much like R.O.B.'s up special. Like R.O.B., Reimu does not go into freefall after using the move, allowing her to continue moving and attacking as usual after the button is released. During this move, Reimu is capable of Grazing. An adaptation of Touhou's common ability of flight, Reimu's personal ability to float, and the Focus mechanics of the shooters. Down Special: Cautionary Border Reimu uses her talismans to form a square-shaped barrier in front of herself. This barrier will linger for a short amount of time, and destroys all but the strongest projectiles, but will also take damage over time. After taking about 20%-40%, the barrier will break. The size and durability of the barrier increases the more Options Reimu has. Reimu cannot send out a second barrier until the first has dissipated. Based on her Cautionary Border special from Hisoutensoku. Final Smash: Fantasy Seal Reimu creates a storm of multicolored orbs that home in on opponents, dealing damage all over the stage. She then ends with one final giant rainbow orb, dealing massive damage to the closest opponent. Based on her signature move and most common Bomb/Spell Card.
| Taunts
On-Screen Appearance
Classic Mode: Radiance of Chromatic Cross Stamina battles against projectile-heavy females who mainly utilize their projectile attacks. Stages are also traveling or transformative stages.
Alternate Costumes | ||||||||||||||||||||||||||||||||||||||||||||||||||||||||||||||||||||||||||||||||||||||||||||||||||||||||||||||||||||||
| Special Moves Neutral Special: Summon Legion / Send Legion / Dismiss Legion Lightly tapping the special button will call the Legion. The Limiter Gauge will begin to decrease. If the Legion is called in the air, it will fall along with Officer Howard. It can be moved as it is falling. Holding the button while moving the move button will move the Legion. The Legion is free to move on the ground while holding the button, though it cannot exceed the distance of the Astral Chain. Lightly tapping the special button again will dismiss the Legion. The Limiter Gauge will stop decreasing and begin to recharge. Side Special: Legion Action The current active Legion will perform its Legion Action. Every action will call it towards Officer Howard. Using this move without a Legion active will summon it to use the action and dismiss it right after. See the Legion section for actions. Up Special: Chain Jump Officer Howard will send the Sword Legion out (regardless of which Legion is active or selected) and throw it a set distance. After it is thrown, it will pull Officer Howard towards it, Officer Howard dealing light damage as they fly towards their Legion. If used offstage, it will become a Tether Recovery. Down Special: Legion Skill The current active Legion will perform a set skill. Each action will decrease the Limiter Gauge by one bar, unless stated otherwise. Using this move without a Legion active will summon it to use the skill and dismiss it right after. See the Legion section for specific skills. Shield Special: Legion Switch Officer Howard will switch Legions. Legions can be switched while active. Functions similarly to Monado Arts, where the player can either continuously tap the button for the Legion they want, or hold to choose Legion. The order will be Sword -> Arrow -> Arm -> Beast -> Axe. The selection menu will have that order clockwise. The currently selected Legion will have its icon displayed in the damage display. This selected Legion will be the one to be sent out if no Legion is currently active. Final Smash: Legion Sync Attack Finish Officer Howard begins by riding the Beast Legion a short distance with the Gladius equipped. Anyone hit by this hitbox will be sent into the cutscene, based on the final combo against the true final boss of the game, though sped up to decrease time taken. It begins with Officer Howard dragging the opponent on the ground with the Gladius while the Beast Legion dashes forward, then the opponent is launched into the air, where Officer Howard summons and wears the Arm Legion to do a rapid flurry of punches. As the opponent is suspended in the air, the Arrow Legion fires a charged shot at the opponent. Officer Howard calls the Axe Legion to jump up and bring the enemy downwards with a slash. As the opponent is on the ground, Officer Howard and the Sword Legion perform a Chain Bind. This part will deviate from the cutscene and FILE 10 SPOILER Officer Howard will tear out the Legatus core and implant it into their heart, fusing officer and Legion and performing a final attack which ends the cutscene and launches the enemy. | Taunts
On-Screen Appearance
Classic Mode: Legion Assault
Opponents are based on enemies found in AstralChain; in particular Chimeras. Stages are also based techno/sci-fi themes.
Alternate Costumes | |||||||||||||||||||||||||||||||||||||||||||||||||||||||||||||||||||||||||||||||||||||||||||||||||||||||||||||||||||||||
| Special Moves Neutral Special: Badnick Releasing his hand from his trusty mech, and briefly taking out a comical-looking hand radio, Eggman yells "Attack!" or "Deploy here NOW!", before one of six Badniks arrive to fight alongside him. One of the following may be summoned in a cycle, and only one of each Badnik can be out at a time. There is no time limit to these grunts, as they stay on the field till they are defeated. This is Eggman’s main gimmick, which he uses to overwhelm his opponents. Say hello to Eggman's lovely cycle of Badniks! (Move by


Side Special: Egg Hornet The E-Mech starts to transform, until it becomes a miniature version of the Egg Hornet from Sonic Adventure. Afterwards, Eggman will fly forward in the Hornet in an arc somewhat similar to Shiek's Bouncing Fish. The Hornet gains a fire outline like in the clip, dealing chip damage to those who touch it, with the Hornet being the main hitbox. While the move has an abysmal startup, it pays off, dealing a hefty amount of damage to opponents hit by it. When they are hit by the move, they will either be launched diagonally upwards, forwards, or diagonally downwards (spike), depending on which part of the move they were hit by. This move kills around 80% and is a good burst option to catch your opponents off guard. But just like in Sonic Adventure, if Eggman hits the ground at the end of the move, he'll become lodged into it for about as long as Luigi would be stuck in the side of the stage from a Misfire. This is your chance to strike! This move can also be used as a recovery option as it does snap the ledge. However, it will not stop for a while if it doesn't hit the ground, so be wary of that. (Move by Up Special: Egg Mobile His up special, Egg Mobile, folds the legs of the Egg Walker E-Mech in and allows players to make Eggman fly - more like controlling a spaceship in a shmup than a platformer character. During Egg Mobile mode, Eggman can perform aerial attacks and specials without leaving the mode, and can disengage it with the shield button. However, there's a catch - the Egg Mobile has limited fuel, pictured next to Eggman's damage meter. It's modelled after his health meter from Sonic Adventure 2. Egg Mobile mode drains fuel. It's a little similar to R.O.B.'s Up Special that way. However, unlike Robo Burner, it recharges based on proximity to an opponent. The closer to an opponent, the more of those squares on the top of the gauge will light up yellow, and the faster the gauge will recharge. This applies while active, too - normally, the drain is pretty quick, but the proximity recharge rate cancels out some of the drain. In fact: at close distances, you won't use any fuel at all. Heck, depending on balance, you might even get a little bit back. The importance of this whole fuel mechanic is that Eggman can't just park himself too high to hit, but can still be in this flight mode for a majority of the time good while, as long as he uses it to approach his opponent instead of running away. After all, Eggman is usually in a flying machine. (Move by Down Special: Giant Laser An allusion to the Giant Eggman Robo Boss Fight in Sonic & Knuckles. The E-Mech’s belly opens up and by using the powers of the Master Emerald, it fires a huge one-hit laser that goes offscreen. This attack has a 10-second cooldown between uses, and Eggman can move slowly left or right with before he actually fires the laser. This move deals 35% damage with huge knockback. (Move by Final Smash: Death Egg Robot The iconic boss of Sonic 2, Eggman leaves the stage and enters the Death Egg Robot. It functions much like the Sonic Generations iteration - Or Giga Bowser - Where Eggman aims at an opponent and delivers a mighty punch from the background. This deals 45% damage and has the knockback you expect from a strong Final Smash. (Move by | Taunts
On-Screen Appearance
.
Classic Mode: Blue Blur Battle Dr. Eggman's opponents are against characters who are blue, a reference to his nemesis, Sonic.
Alternate Costumes | |||||||||||||||||||||||||||||||||||||||||||||||||||||||||||||||||||||||||||||||||||||||||||||||||||||||||||||||||||||||
|
#97. Marin The Legend of Zelda Wikia Link Moveset Link | Special Moves Neutral Special: Legend of Songs Pressing the special attack button will cause Marin to pull out her Surf Harp, and 6 empty rectangles would appear above her. During this time, Marin can’t move during this but can cancel out by hitting the Neutral Special again. Please note that attacking out this in the middle of battle results in a significant attack startup lag, since you will have to input the entire song. When initiating the harp sequence, players can input the control stick to the right, left, up or down which will initiate a song, these directions would appear within the empty rectangles when inputted. Please note doing this attack while in the air and over the ledge can result in a self-destruct if not performed quickly enough. While Marin is technically from Link’s Awakening, she has appeared in various Zelda games in different forms and names. One such form is Malon from Ocarina of Time. It’s fitting that she would be able to use music from these games to use in battle. Once the first 6 notes have been played, Marins performs the move she's chosen as the rest of the song she played quietly plays out in the distance. She has a total of 11 songs pulled from various Zelda games. Side Special: Sea Bubble Marin releases a watery bubble, its course of trajectory heavily depends on what side you tilt the Side-Special. If held to the side in the center, it will follow a completely horizontal path, if tilting upwards the sea bubble will slowly follow an upward arc, opposite applies to tilting it a bit downwards. Compared to other projectiles, it is only a bit slower to get out. Up Special: Cucco Wings Marin rapidly takes out a Cucco and lifts it above her. The Cucco flies upward while carrying Marin with all of its power before getting visibly tired and slowly falling to the ground. It is maneuverable and covers a decent amount of vertical and horizontal distance depending on how it is maneuvered. Once Marin either lands with the Cuccoo in her hands, or once the Cucco gets tired, the Cucco would simply flap out of her hands and vanish away. Down Special: Conch Horn Marin takes the Conch Horn out and starts playing on the conch shell. As she leans a bit forward facing the screen while blowing it, coming out the other side of the Horn comes a big sound that takes form around her. This results into all her water attacks getting slightly buffed (a 1.2% multiplier in both damage and knockback) for around 15 seconds, this multiplier cannot stack and if performed again within the 15 seconds it will not be applied. This move takes a while to get out, and everyone caught in the sound gets dealt 8% damage, with medium knockback. To give an idea, it kills around 90% at the ledge. This horn is based on one of the eight instruments in Link's Awakening. Final Smash: Ballad of the Wind Fish Marin will call forth a splash of water that will transport the opponent caught in it into a cutscene. (8%) The cutscene will be reminiscent of the ending of Link's Awakening. Marin will play the 8 instruments near a sleeping Wind Fish, causing it to wake up. Its awakening will cause the dream world to disappear, and the opponent to disappear along with it in a light. Marin is returned to gameplay, where she wipes her eyes groggily, and the opponent is sent flying. (46%, instant KO at >100%) | Taunts
On-Screen Appearance
.
Classic Mode: The Ocean Maiden All opponents are against fantasy-based characters in a seaside setting which is a reference to the ocean-focused theme of Link's Awakening. Also, every character comes equipped with one item from Legend of Zelda from the start of the match.
Alternate Costumes | ||||||||||||||||||||||||||||||||||||||||||||||||||||||||||||||||||||||||||||||||||||||||||||||||||||||||||||||||||||||
|
#16ε. Impa The Legend of Zelda | Special Moves Neutral Special: Knife Storm Impa accumulates up to three knives and throws them forth at light speed similarly to Sheik's Needle Storm but half the projectiles. This variation uses knives instead of needles which is more in line with what Impa uses in her playable appearances. Knife Storm will also go through players and does more damage to shields taking inspiration from Sheik's second custom move for her neutral special, Penetrating Needles. Side Special: Flashbang This is a slower version of the Burst Grenade that Impa uses to her advantage. The difference in effect is also apparent, as she deals 9.5% damage as opposed to Sheik's 14.6%, but in turn, anyone facing the explosive will be immediately stunned, as though they were hit with Mewtwo's Disable. Being directly in the blast radius, meanwhile, will stun regardless of orientation. However, the stun doesn't affect airborne opponents, and being inside the blast will simply launch them. You would think she was using a Deku Nut on a trigger with this, and she just might be. Up Special: Vanish This would be very similar in function to Sheik’s but, instead of simply producing a cloud of smoke, it produces paper talismans that swirl about upon vanishing and reappearing. Down Special: Bouncing Fish Final Smash: Shiekah Dance | Taunts
.
Impa will fight characters that relate to being stealthy fitting with her nature as a member of the Sheikah tribe. The stages will also be night themed stages.
Alternate Costumes | ||||||||||||||||||||||||||||||||||||||||||||||||||||||||||||||||||||||||||||||||||||||||||||||||||||||||||||||||||||||
| Special Moves Neutral Special: Defensive Plants Dave has access to five total Defensive Plants that he can use with two being upgradeable. These are: Sunflower: Costs 15 Sun. It bounces idly and produces 50 Sun every 3 seconds. The Sunflower would glow a bright yellow as it does so and the Sun would automatically add itself into Dave’s counter. Twin Sunflower: Costs 125 Sun. The Twin Sunflower would behave exactly as its downgrade, but instead of spawning 25 Sun, it would spawn 50 Sun (25 per Sunflower, of course). It also spawns Sun in 3 second intervals, but it is more durable (though not by much) Torchwood: Costs 100 Sun. Any pea that passes through the torchwood will have its damage multiplied by a factor of 2, leading to massive amounts of damage if a full gatling pea + torchwood combo lands. It has more health than a standard plant, and does not deal contact damage despite the fire. Wall-nut: Costs 50 Sun. Pretty simple, a wall-nut will sit there and soak up damage. Acting like a Minecraft block, it cannot be passed through, and will need to be jumped around. However regular peas and other Dave plant projectiles will be able to pass through it. Tallnut: Costs 125 Sun. The Wall-nut can be upgraded to the Tall-nut. It will act the same as a wall-nut, except it will be twice as sturdy and around 2.5 times as tall, requiring multiple jumps for some characters to climb over. Garlic: Costs 100 Sun. In Smash, the Garlic will release smelly fumes every few seconds with a radius equivalent of a 50-MP Magic Burst that flips opponents, like Mario’s cape does, making it difficult for opponents to hit Crazy Dave while he's close by, as well as a dangerous edge guarding tool. Escape Root: Costs 225 Sun. When placed, the Escape Root won’t do anything at first, however, when neutral special is inputted on the ground while the Escape Root is planted, Dave will be taken to the Escape Root’s location and it will disappear after. This can be used for extreme combos and avoiding nasty situations. Side Special: Turret Plants Dave has access to five Plants with three upgradeable ones. Peashooter: Costs 100 Sun. When a Peashooter is planted, they will routinely fire peas at the closest enemy damageable entity in a medium interval. Whichever way Crazy Dave was facing when he planted them will be the direction it will fire too. The Peashooter will automatically aim either up or down depending on where the closest player is but only slightly. Their peas are also fairly weak doing minimal damage and flinching but this will put some pressure on the opponent and can lead into combos from Crazy Dave. Split Pea: Costs 125 Sun. The Split Pea will fire weaker shots behind it and has less of an angle when aiming but keeps pressure on both sides of the stage. Repeater: Costs 200 Sun. The repeater will act identically to the peashooter, except will fire two peas instead of one, dealing twice as much damage in total. Gatling Pea: Costs 250 Sun. The Gatling Pea can be upgraded from the repeater, and will fire four peas at once, dealing four times as much damage as the peashooter in total. This will keep the opponent in hit stun or in their shield for quite a while, leaving them open to be punished, however it costs a lot of sun to get to this plant. Kernal Pult: Costs 100 Sun. When planting this guy, the Kernel-pult will throw nuggets of corn the size of Pikmin at opponents, dealing a measly 4% damage per kernel and deals hitstun. However, there's a 25% chance that they will launch a large block of butter if all things that deals double the damage, and inflicts the Butter effect, which is essentially a stun. Melon-pult: Costs 300 Sun. The last of the pult family in the first Plants vs. Zombies, the Melon-pult is the heaviest hitting of the three. It will lob melons every few seconds at opponents, which deal 17% per successful hit and 4% in splash damage if anyone gets hit by melon shrapnel. Winter Melon: Costs 200 Sun. One of the plants Dave sells at Crazy Dave's Twiddydinkies, the Winter Melon is an upgrade to the Melon-pult. It hits even harder than its counterpart and has a slowing effect to boot. It will attack at the same rate as the Melon-pult, but it will deal slightly more damage (24%) and its projectiles will inflict a slowing effect on the enemy's movement for a short amount of time. Bloomerang: Costs 175 Sun. The Bloomerang will fire off boomerangs at a slower rate than that of a peashooter, which will fly around 3/4 of a stage distance before traveling back, being able to hit the opponent once in both directions, similar to K. Rool's crown. It is a relatively slow moving projectile, but deals more damage than a peashooter. Up Special: Blover Crazy Dave raises his a pot with a Blover that grew out of it. It would then spin its leaves, causing it to propel Crazy Dave upwards. It’s very similar to K. Rool’s Up Special, but the Blover can last longer than K. Rool’s propeller pack in exchange for not dealing as much damage. Once finished, the Blover would retreat back into its pot, causing Dave to go into free fall with a confused look on his face. Down Special: Trap Plants Dave can access five plants with one plant being upgradeable. Potato Mine: Costs 100 Sun. This explosive land mine functions much like Snake’s Down Special. Dave buries the Potato Mine who lies in wait for opponents to walk by. Once they do, the mine explodes with a SPUDOW!, provided its had enough time to arm itself. It has a high radius of damage with more damage dealt to those who stepped directly on the mine with less damage dealt to those on the outside. Hypno Shroom: Costs 125 Sun. When placed, the Hypno-shroom will sway from side to side in a trance. Any opponent that comes into contact with the Hypno-shroom beware, as the Hocus Pocus of Dave’s kit, they will randomly gives the opponent a status effect to their detriment. Tangle Kelp: Costs 75 Sun. In Smash, they will function sort of the same, being planted in a flower pot with water. When an opponent makes contact with the Tangle Kelp, they will be held in place for a few seconds, similar to a grab. At this point, Dave can rush over and attack or sic more plants on the enemy. After being used once, it will go away. Spikeweed: Costs 100 Sun. The spikeweed will be placed on the floor, Keeping a low profile. Any enemy that steps over it will be launched up with extremely low knock back, dealing 6% damage. Its good for ledge control as well as comboing with other plants. Spikerock: Costs 125 Sun. For 125 sun, the Spikeweed can be upgraded to the Spikerock, which deals twice as much damage, and has three times the amount of health. Phat Beet: Costs 150 Sun. Whenever opponents get near it will jump up and slam back down, sending out a shockwave. This shockwave doesn't deal much damage, only around 1.2%, but has a guaranteed trip on the opponent. This sets up for roll chases or just standard punishes as well as stage control. In order to combat the power of a trip with such a large radius it doesn't stay out for very long, and is vulnerable from attack from above, as it cannot attack there. Final Smash: Garden Warfare Penny speeds past Dave, who gets inside. This triggers a hitbox around the truck, which when activated, would take up to three opponents into a Final Smash. The opponents would fly through time to be dropped onto Dave's lawn and pool, where a large defense awaits them. Twin Sunflowers glow with large amounts of solar energy, Gatling Peas fire rounds of peas at rapid speed through Torchwoods, Winter Melons lob melons, Cattails throw swathes of their homing spikes, and Gloom Shrooms spew their spores at the opponents, still trapped on the lawn. All while this is happening, Dave upgrades some awaiting Kernel-pults into Cob Cannons. He launches several corn nukes, blasting the opponents and ending the cutscene with a screen of popcorn. | Taunts
.
All opponents are against the Zombie Villager on Omega stages with allies that can`t move which represent Plants.
Alternate Costumes Adjust sh | |||||||||||||||||||||||||||||||||||||||||||||||||||||||||||||||||||||||||||||||||||||||||||||||||||||||||||||||||||||||
|
#36ε. Dixie Kong Donkey Kong | Special Moves Neutral Special: Bubblegum Popgun A chargeable projectile like Diddy's Peanut Popgun, but charging is indicated by a large pink bubble being blown out of the barrel of the gun. It is usually slow upon release, but deals 1.3x more damage than a peanut. However, if you're hit while charging this attack or your attack reaches maximum charge, it deals as much as a peanut, but your opponent will be dealt the Gum effect, which limits their movement to about 1 Pichu to the left or right, and greatly reduces their jump height. This lasts for about as long as K. Rool's pre-nerf D-throw or until the afflicted is hit. Side Special: Monkey Flip Up Special: Haircopter Dixie quickly uses her ponytail to pop off and then be sent into free fall, however this freefall is unique in that she can guide it more accurately and lightly damage enemies that collide with her. Based off her rolling attack from DKC classic. Down Special: Banana Final Smash: Rocketbarrel Family Barrage Dixie calls forth her cousin, Kiddy Kong. Together, they straight on Rocketbarrels and zip zap about the stage; dealing generally more hits than Diddy but with less damage to balance it out. Kiddy will loose his rocket which homes into the opponent as Dixie lets her go and floats back down to the stage | Taunts
All opponents are natural tail users which is a reference to her lack of one which she makes up for with her tail.
Alternate Costumes
| ||||||||||||||||||||||||||||||||||||||||||||||||||||||||||||||||||||||||||||||||||||||||||||||||||||||||||||||||||||||
| Special Moves Neutral Special: Quad Launcher This wasn’t based off on one aspect of the games but an entirely new move. Sami pulls out a rocket launcher which will fire a single homing rocket. Charging it up not only increases the homing strength of said rocket but can fire up to four homing rockets in quick succession. It has a dramatic shaking sensation when fired which causes smoke to billow out when it’s fired. Side Special: Sniper While not an actual unit but, rather, a general unit in warfare. A crosshair appears which allows the player to momentarily allow player to control it while Sami remains still. When the player lets go, Sami pulls off a sniper shot which has large amounts of damage up to 42%. if its a dead on target. Players can see if the target is in focus by the green crosshair turning red. Up Special: Bomber Transport A Bomber appears and Sami stands on top of it. You can control the planes direction. The plane occasionally unloads bombs from below the plane. The plane can be destroyed which will damage Sami but also propel her slightly into the air which aids her. Down Special: Light Machine Gun Sami Pulls out an LMG a weapon she is seen with in artwork. Sami is prone while using it but she can freely aim her LMG in any direction in front of her. Pressing A while in this form shoots her gun. you can leave prone by jumping Final Smash: Dual Strike Sami throws out a Smoke Grenade which traps opponents into the Final Smash. This transports any caught opponents into the map featured in the very first Advance Wars. Sami moves her tank to encounter the opponent which quickly transitions to an actual battle. However, it seems luck is on Sami`s side as she comes with Infantry, Tanks, and even aerial support. Infantry units tear into the opponent while the Tanks fires off several shots. Finally, two Stealth Bombers roar overhead and carpet bomb the location; decimating the opponent. This then moves back to the match with the opponent being launched. | Taunts
All opponents are based on the COs from Advance Wars. Omega forms represent actual warzones.
Alternate Costumes
| |||||||||||||||||||||||||||||||||||||||||||||||||||||||||||||||||||||||||||||||||||||||||||||||||||||||||||||||||||||||
|
#55ε. Ms. PAC-MAN Pac-Man | Special Moves Neutral Special: Bonus Fruit Ms. Pac-Man still has the bonus fruit special, but this time it includes the fruit from Ms. Pac-Man, in order: Cherry, Strawberry, Orange, Pretzel (new), Apples, Pears (new), and Bananas (new). The cherry, strawberry, orange, and apple work the same way they do with Pac-Man. The Pretzel bounces erratically, Pears bounce along the floor, and the Banana is thrown like a Boomerang. Side Special: Power Pellet Power pellet moves in a rigid 4 directions, but also goes farther. Up Special: Pac-Jump Becomes a pixel version of Ms. Pac-man which includes a ribbon. Down Special: TNT Block Ms. Pac-Man drops a timed block of TNT at her position that starts slowly counting down from 3 seconds. Unlike with Steve's TNT, damage does not hasten the timer nor is it able to be knocked around. However, Ms. Pac-Man can push it around to a different position before it explodes, and the blast radius is rather enormous. Final Smash: Super Ms. Pac-Man Much like Pac-Jump, Ms. Pac-Man turns into a gigantic version of her pixel self complete with a ribbon. | On-Screen Appearance
All opponents are against male fighters with a female ally.
Alternate Costumes | ||||||||||||||||||||||||||||||||||||||||||||||||||||||||||||||||||||||||||||||||||||||||||||||||||||||||||||||||||||||
| Gimmick Stock Meter, Max Mode, & Desperation Moves Iori gains the "Stock" Meter - Another SNK original, this is a gauge with 3 black squares on the right which signify the many “stocks” you have. This meter fills the same way as in most other fighting games: You build meter for hitting the opponent (wether shielding or not), getting hit yourself and blocking attacks. When you get a stock, a bright green light appears in one of the squares. In KOF you’d normally get more meter for whiffing special moves, but as that would only encourage camping behavior in Smash, I decided to not include this method of meter obtainment. 
The stock meter itself will be based on the one found in King of Fighters ’98 UM, although instead of "ADV" nothing would be written there. Up to three stocks could be saved up, these stocks can be used for certain Supers which we’ll call Desperation Moves from now! These function like Terry's GO! supers, but will cost a stock each. But that’s not the only thing the Stock Meter can do, you’ll be able to activate Max Mode! You’ll activate this by hitting performing a neutral special while shielding at the same time. Once Iori is in Max Mode, a timer will appear above the Stock Meter, indicating how long Max Mode will last, which is about 20 seconds. Although the timer drains more when performing special attacks, even when missed. When activated, Iori will strike a pose, gain somewhat of a yellow tint, and the timer will start to drain. This mode makes Iori deal more damage and knockback (a multiplier of about 1.2x) and allow him to use not only stronger variants of his Desperation Moves, but if Iori is above 80%, he’ll be able to use a Hidden Super Desperation Move only during Max Mode! When performing any Desperation Move under Max Mode, the timer will instantly end regardless of time left. 
The stock meter filled with 3 stocks (in Smash these red lights would be green instead) with the Max Mode timer (in this pic being about 3/4th full) Also, useful thing to note, but to try and simulate the 3v3 aspect of KoF. The Stock Meter does NOT reset in-between Iori’s stocks. So when he loses a life, he still has his meter to try and make a comeback! The Stock Meter doesn't fill up that fast as well, if you'd only hit, it would take about 50% to get a stock. Special Moves Neutral Special: 108 Shiki Yamibari Iori throws his purple flame like a fireball that skims the ground. It is a low projectile that comes out faster than most, but with average recovery. Can be held instead of tapped to increase the energy wave's size, travel speed, travel distance, damage and knockback. If used in the air, Iori will generate a short-ranged burst of purple instead. The aerial variant offers decent knockback and can KO opponents offstage, especially when held instead of tapped. Side Special: 108 Shiki Tsumakushi A rushing move in which Iori hops and take a big flaming swipe downward. Can be held instead of tapped for more travel distance, damage and knockback. Special input is 
+ attack/special, which increases its damage output and knockback in addition to granting intangibility to his attacking arm. The special-inputted version is indicated by a bigger flame being produced. Can cancel into his Final Smash. In the source material, this is normally a dragon punch motion, but as that is already In use, I had to modify it to being a quarter-circle forward. Hey, Terry's Burning Knuckle isn’t a quarter circle forward either in his games! This is a special move that made its debut in the King of Fighters ’98. Back Special: 127 Shiki Aoibana Iori quickly slides forward with three motions, punching for the first 2 and jumping with an overhand for the third, in which he slams the opponent into the ground. The active hitboxes are on Iori's arms, and will always get knocked back into the following motion's hitbox for the first 2 motions, no matter the percentage. With the last motion having great knockback. This move is very rewarding to cancel into, especially from jab, as it’s a surefire way to rack up damage. You are going to have to repeat the input for every motion to complete the move (these are what we call rekkas!). Which means if you use the standard version, you’ll have to input back special in succession 3 times. Whereas for the traditional input, you’ll have to perform 
in succession 3 times. There’s no difference between holding or tapping for this move, as it would be counterintuitive since you’ll have to tap anyways. As for the traditional input variation, that one significantly covers more distance and is slightly more powerful. When performed in the air, only the last motion will come out (Iori will jump forward and deliver an overhand, can be used as an horizontal recovery), so no need to input it 3 times in that scenario. Up Special: 100 Shiki Oniyaki Iori performs a spinning jump while being accompanied by spinning purple flames that cycle around him. Can be held instead of tapped for more distance and damage. If inputted with a 
motion, the move will render Iori's entire body intangible on startup, the move itself will have slightly increased travel distance, it will deal more damage and knockback, and the move will consist of 3 hits instead of one. The inputted version is indicated by Iori's howl when successfully activated. It is also much more powerful compared to the regular version, KOing middleweights at around 125% and being an excellent out-of-shield option. Down Special: 212 Shiki Kotsuki In Iori shortly runs up to the opponent, slams their head on the ground, then blasts them with fire. In the air this move would differ slightly, as Iori would simply grab the opponent in front of him, and once grabbed, start to descend quite a bit while Iori is blasting fire into their face until they are automatically freed. And yes, this can be used a suicide KO if used low enough beneath the stage to reach the lower blast zone, due to the descent not being that long you’ll really have to go deep to make it happen, however Iori himself will always lose if he and his opponents are on their last stocks in that case. Due to functioning as a grab, it bypasses shields and counterattacks. To perform the input version of this move, you'll have to input 
+ attack/special. On the ground, despite having long reach, it has a very slow startup and is quite readable when performed raw as when Iori will have a very notable howl when he starts to run. It is a faster move in the air, as it has to sacrifice range. On the ground, the tapped version only covers about a quarter of Final Destination. The input for this move is half circle back, and when using this variation on the ground, it covers about a third of Final Destination and delivers more damage. When used in the air, the tapped version’s descent is just about a quarter of Final Destination’s vertical length. The input version however goes about a third of FD’s vertical size and largens the hitbox size of Iori’s grab. Even when canceled into this move, it has a moderate enough start up to give the opponent a chance to attack Iori when he performs it. Desperation Moves Little thing to preface, all grounded special cancelable moves are also able to cancel into the normal Desperation Moves, except for the Hidden Super Desperation Move, which will always need to be performed raw. When in Max Mode and performing a Desperation Move, the Max Mode timer will instantly end regardless of time left.
Final Smash: Three Sacred Treasures Based on the ending of the King of Fighters '97, and somewhat of a Smash original. As a result of the Orochi blood coursing through his veins, Iori suddenly enters the Riot of the Blood phase. His eyes light up and he makes a mad dash while slashing with his arms. This is an activation hitbox that hits at most 3 opponents, which takes 1 opponent into a cutscene and has the other two take only the claw damage. Iori lunges towards the opponent, eyes blinded by Orochi and grabs the opponent by the neck. A huge pillar of flames erupts, engulfing both the opponent and Iori. Iori is still holding on tight. Meanwhile, Kyo Kusanagi and Chizuru Kagura are standing by, and Kyo rushes in with a flaming punch, dealing massive damage. The original KOF '97 ending ends here, but in his Final Smash, Chizuru makes the final blow, using the Yata Mirror to seal the opponent (similarly to Zelda's Final Smash). The cutscene ends and Iori returns to normal, waking up from his feral state. | On-Screen Appearance
Defeat Quote When defeated by Star KO, he will say:
| |||||||||||||||||||||||||||||||||||||||||||||||||||||||||||||||||||||||||||||||||||||||||||||||||||||||||||||||||||||||
|
#101. Anna Fire Emblem | Special Moves Neutral Special: Anna’s Secret Shop Anna is stingy, so she doesn’t just use her best wares all wily-nily. Instead, she buys them from her own shop to make sure she never makes an investment she can’t back up with her credit value. With her coins though, she can buy stronger weapons. Hold longer to spend more coins for a stronger weapon, Pac-Man Neutral B style. This then results in her sword/dagger being upgraded to variants like a Brave Sword, Levin Sword, Killer Sword etc. with different properties and different strengths etc.. The upgraded weapon is implemented set-wide like Robin’s aerials. Side Special: Ballista Inputting the side special readies a Ballista. Due to the nature of the attack, it suffers from significant start-up lag. The trade-off is the damage potential of the attack. She can aim in from up to down after inputting the attack. It has high damage potential and can OHKO as low as 25% when hit dead center. Up Special: Fodlan Thrust Anna thrust her Noatun in Air like FE's Dolphin Slash move, but its stabbing the Opponent with her Sweet Spot. The Damage 7.6% and she goes upwards little longer than Marth for her Recovery. Down Special: Convoy Anna puts bullions in a chest, investing her coin count in the stash which she then buries underground. If she dies and loses her accrued coins, she can use Down B again on the spot the chest was buried to immediately get back the coins she invested into them at the expense of Anna having less liquid assests on-hand if she’s invested gold into a chest. Final Smash: What a Deal! Owing to Anna's unique status as a character within the series, I opted to go for a mostly unique Final Smash. It still does have some ties back to the franchise, similar to that of Byleth and Corrin, but it would mostly reference her multiple appearances in the series. Like with Marth, Roy, and Lucina, the Final Smash starts out with a Critical Hit. Anna spins her dagger in her hand and runs forward, dragging at most 3 opponents into a cutscene, similar to the one that Hero has. Here, every single Anna that has appeared over time would deal a quick strike with a different weapon, before the main Anna swings a bag of gold coins and ends the cutscene with a "Come again soon!" and a finger to her chin. | On-Screen Appearance
| ||||||||||||||||||||||||||||||||||||||||||||||||||||||||||||||||||||||||||||||||||||||||||||||||||||||||||||||||||||||
|
#102. King Boo Super Mario Bros. Promotional DLC | Special Moves Neutral Special: Spike Ball The King throws an explosive Spike Ball that rolls forwards until it either hits a player, projectile, hazard or slows down enough to the point of stopping. In each case the Spike Ball will explode and King Boo can’t use the attack again until it’s gone. If the Spike Ball is eaten by a character like Kirby, King Dedede or Wario, it will explode as well. The Spike Ball has a unique property with Luigi’s Poltergust G-00 where Luigi can grab it and shoot it back. Side Special: Big Boo Blow King Boo inhales huge amount of air and blows off so hard that could send opponents far away with far horizontal knockback. It can be used as anti-recovery move when King Boo stands on Edgs and blows off Opponent to Blast Zone. It doesn't give any damage, but it can blow you off to Oblivion. Up Special: Boo Bomb Similarly to Super Dedede Jump, King Boo will leap into the air and slam downwards dealing a lot of damage with enough power to kill at 60% and will break shields. The ground pound will emit shockwaves that travel along any solid ground and it might just protect him from the attack’s slow getup animation. King Boo will always leap into the air whether he is on the ground or in the air but his vertical distance will be determined by how long the special button is held. Down Special: Boo Crown Storm King Boo will gain an intense glint in his eyes as he charges his crown with power. Upon releasing the B button, at least one bolt of lightning will come striking down, similar to Thundaga. However, there's a trick to it: Every 20 frames you can charge up to 5 bolts of lightning, and you can influence where it strikes, starting directly in front of you, in between strikes. Each lightning bolt does 6% damage and medium-low knockback. Final Smash: Frightening Portrait Based partially on how he traps Mario and the gang in a portrait in LM3, King Boo pulls up an empty portrait which acts similar to Mega Man’s FS where it sucks in opponents nearby. Once it finishes, it will transport the player to a Mansion-type setting where King Boo will cackle. He then takes an empty portrait and slams it down onto the opponent. While the attack can technically capture up to 7 characters, it will only capture 5 total with the remaining trapped just getting minimal damage. This is rendered by the first characters who get sucked in. The reason why this mentioned is because when the portrait is pulled back up, the players who were hit get stuck in the portrait. This causes them to be visible in the portrait would could lead to some fun compilation videos of every Infinite character getting trapped. They could even get unique poses and such. After that, King Boo will cackle while next to the portrait with lightning flashing. They are then transports players back to the stage and will launch them. | On-Screen Appearance
Taunts
Idle Poses
Classic Mode: From The Grave Villainous characters who have died or passed into a death equivalent state but were later revived.
Alternate Costumes | ||||||||||||||||||||||||||||||||||||||||||||||||||||||||||||||||||||||||||||||||||||||||||||||||||||||||||||||||||||||
| Special Moves Neutral Special: Cast Zagreus casts a bloodstone, it is a slow long range projectile that can redirect itself to an opponent if aimed close enough, dealig 12.5% damage with no knockback on impact if zagreus has no boon equipped. Zagreus has three reusable bloodstones and when the Cast hits an enemy, it stays lodged inside the foe until they are killed or 15 seconds elapse, which means Zagreus can't just mindlessly spam these whenever. When the bloodstone falls it can be collected to be launched again. Each god's boon also modifies the speed, area of effect and additional mechanics of the cast. Three casts, Dionysus, Demeter and Ares, create a projectile that does damage on its own instead of lodging into enemies. Also, to make multi-Zagreus battles less confusing, the bloodstones will change color depending on Zagreus' color costume. All boons will affect this special, and their properties are as follow:
Side Special: Bull Rush Another way to recover. Zagreus equips the shield of chaos and charges up. Releasing the special button will cause Zagreus to charge forward and deal a heavy hit of damage and tremendous knockback if charged. As he charges, you'll notice Zagreus accumulating energy around him. When charged to the max, a flash appears and Zagreus is able to travel the half of Final Destination. The shield can also block projectile attacks and melee attacks that deal less than 6% damage, but if hit with something strong, the Shield will break and Zagreus will be left invulnerable for a while. If you're still charging after already being maxed, which is signified by the flash, then the move decreases in power after that point. The same boons as the normals pretty much apply here as well.
Zagreus charges, and once the special button releases, dashes to the direction which is indicated by a directional arrow which points towards Zagreus' travel direction before he begins moving. It travels similarly to moves like Fire Fox. Grounded versions of both moves will stop at edges, and the aerial versions can pass through platforms if down is held on the control pad. If tapped, Zagreus will only perform 1 dash, if held moderately, Zagreus will perform 2, and when held to the end, he will perform 3. Each Dash can be redirectioned. The standard dash with no boons will deal no damage, but cover a lot of distance. All boons will affect this special, and their properties are as follow:
Down Special: Boon Select Pressing Down-B will cause Zagreus to hold out his hand and say, “in the name of Hades!” as three glowing orbs appear above his head. Use the control stick to choose which of the orbs you wish to select, these orbs are called "Boons" and harness the powers of the gods of Olympus! When choosing a boon, that god’s symbol will appear above of Zagreus’ percentage to indicate which god is helping him. Each god’s Boon gives Zagreus’ special attacks a unique spice to them for a limited amount of time, some will even affect normal moves too! The three Boon options will be random, and an Olympian Boon remains in effect for 30 seconds before Zagreus loses that Boon and returns to normal, in the meantime, Zagreus will not be able to select another Boon and his Down-Special will be rendered futile for the time being. There is then a 5 second cooldown before Zagreus can choose another Boon. Also just because it's fun, when selecting a certain Boon, a voiceline and certain sound effect will play from that Boon's god upon accepting their gift like in the game. Gotta love fanservice! The Boons and their respective symbols are as follows.
| Entrance Animations
Idle Poses
Classic Mode: Escape from Hades Every battle is modeled after boss battles in Hades.
Alternate Costumes | |||||||||||||||||||||||||||||||||||||||||||||||||||||||||||||||||||||||||||||||||||||||||||||||||||||||||||||||||||||||
#104. Phoenix Wright Ace Attorney Part of the "A Smashing Turnabout Bundle" DLC | Special Moves Neutral Special: Objection/Take That! The one thing everybody seems to remember Ace Attorney by. With this move, Phoenix will wind up, taking a deep breath and readying his arm, before pointing it forwards and hollering, "OBJECTION", his pointing finger summoning the speech bubble and text you see in the above picture. This doesn't give you much when it comes to damage, only dealing a measly 7% damage, but if you're hit while winding this up, you can counter it for a base of 1.2x, + 0.1x per piece of Evidence you have in your possession. Phoenix raises a pointed finger up into the air, winding up and breathing in slightly, before placing a fist on his side, pointing forwards and shouting, "TAKE THAT!" As he does so, the speech bubble above will be summoned, but will be much smaller than the "OBJECTION" from Side Special. This does not have the Side Special's counter properties, but in turn, it's a fast attack that can deal upwards of 16% if you hit. Side Special: Missile Missile the dog pounces forth from Phoenix's magical hammerspace. Missile acts as a semi-summoned character but only temporarily. Think of him more like a very high quality projectile. Missile's initial action will be to pounce forward dealing damage if he hits anyone. Missile will then attempt to jump to Phoenix if he is nearby. If he isn't, Missile will waot unril Phoenix gets close to his range. When Missile runs back to Phoenix, the player may input side special attack to command him to bounce off of Phoenix and to pounce forward again in the direction pressed. After this, Missile will definitively disappear. The purpose of this attack will be to extend combos and for the second strike from Missile to be a KO option at higher percentages. Up Special: Step-ladder In the air Phoenix will throw a Rope Ladder that can cling onto the stage which he proceeds to climb up, On the ground Phoenix pulls out a stepladder which he climbs, The Stepladder can be knocked down and it deals damage to enemies that it falls on to. Down Special: Evidence
Final Smash: Turnabout Trial Phoenix will throw out a Magatama which will fly forward similar to Kazuya's start up. The main caught opponent is front and center at the defendant stand. Phoenix says "Your fingerprints were at the scene of the crime!" Cuts to the opponent. The opponent looks shocked. "You make no attempt to reform yourself!" Cuts. Opponent looks desperate. "YOU CAN'T HANDLE THE TRUTH!" while raising his finger. Opponent looks completely at wits end as a gigantic Judge gavel appears behind the opponent and slams down onto the opponent. After the cinematic ends, Phoenix says "I rest my case". | On-Screen Appearance
Victory Poses
All opponents are enemies who have done wrong to the opponents with Phoenix defending them. For this reason, they cannot attack but stand still. Them getting KOd results in a loss.
Alternate Costumes | ||||||||||||||||||||||||||||||||||||||||||||||||||||||||||||||||||||||||||||||||||||||||||||||||||||||||||||||||||||||
|
#81ε. Jin Kazama Tekken Part of the "Echo Fighter Pack #1" DLC | Rage Drive: Jin's Rage Drive requires the input of both A+B during a Crouch Dash. The result is a 4-hit combo: Twin Pistons followed by a shorthop straight kick and capped off with a haymaker. This deals a total of 21% with strong knockback. Rage Drive can be activtated by down special when in Rage Drive, grab, or via input Special Moves Neutral Special: Devil Blaster Side Special: Demon's Spear Up Special: Devil Fly Down Special: Heavens Door Final Smash: Rage Art Jin takes flight and swoops under his opponent before shooting them into the sky with a red forehead laser. He then grinds their face along the ground and finishes them off with a second forehead laser. | On-Screen Appearance
Victory Poses
All opponents are characters who have had bad interactions, or, outright battles with their fathers.
Alternate Costumes | ||||||||||||||||||||||||||||||||||||||||||||||||||||||||||||||||||||||||||||||||||||||||||||||||||||||||||||||||||||||

#74ε. Rock Howard Fatal Fury/Garou Part of the "Echo Fighter Pack #1" DLC | Special Moves Neutral Special: Reppuken The "strong" version is Double Repukken and in the air is a close-ranged burst of wind similar to Terry's Round Wave. Forward Special: Hard Edge The input version would also deal the second hit that it has in the games. Also like Terry it would have the reversed input being QCF + Attack instead of the original QCB. Back Special: Overhead Kick It covers a more vertical range that horizontal so is a better recovery and it also carries the meteor effect that it has Terry's Power Dunk. The input of Overhead Kick is QCB, different to the one given in KOF XV but that it makes sense considering the context. Up Special: Rising Tackle Down Special: Crack Counter Rock's counter move where the counterattacks with a Crack Shoot if connects. Crack Counter's input is a DP, while he never used this input for Crack Counter it resembles the input that it has his father Geese Howard from where the moves originates (since is a combination of Geese's Atemi Nage technique and Terry's Crack Shoot). Super Special Moves Number 1: Raging Storm Instead of attacking at the front of the character Rock's attack is AoE around him so attacking vertical. Number 2: Shine Knuckle if you are fast enough you can connect a Rising Tackle in the end of the move that it would have an enhanced effect. Final Smash: NEO Deadly Wave Rock starts using a move similar to Rage Run (considering that we wouldn't use the move in his regular moveset), if connects he will start a cinematic where he spreads a pair of ki wings and prepares to do an autocombo to the opponent that ends with a burst of energy. | On-Screen Appearance
Victory Poses
Alternate Costumes | ||||||||||||||||||||||||||||||||||||||||||||||||||||||||||||||||||||||||||||||||||||||||||||||||||||||||||||||||||||||
Sakura Shinguji Sakura Wars Part of the "Grand Smash Revenue Bundle" DLC Submitted by: | Special Moves Neutral Special: Ouka Hoshin On the floor Sakura shoots a pink projectile that is similar to Power Wave, in the air she shoots an arcing projectile. eleasing a pink projectile about the height of Cloud's Blade Beam, but travelling with the speed of Terry's Power Wave. The spiritual energy wave applies a 0.8x damage and knockback debuff to a target's attacks (if it hits) for 8 seconds. Side Special: Hyakka Ryoryan Sakura dashes a little bit forwards and slashes her now fiery sword, this reflects. Press B again immediately after to slash a second time but with no dash. This move goes through shields, but deals minimal shield damage. It does not leave her in free fall if used in the air, and allows her to act almost immediately out of it. Knockback is great, but damage is minimal, and though it deals multiple hits, each hit is a launcher. Designed to provide a "Get-Off-Me" burst movement option. Up Special: Showtime Effects A wire appears connected to Sakura from atop the stage, dropping and attaching to her in about half a second, and pulls her upwards as she poses similarly to her neutral air. A sparkle effect trails behind her. Sakura's an actress, and for a good play, sometimes you need special effects, like flight! It does not leave her in free fall; always gotta have a backup plan in case the effects fail! Down Special: Makiwara-Giri A Makiwara board appears and sakura slashes it, if someone is in between her and the board Sakura does a quick flurry of slashes in addition. The straw deals light flinching damage and keeps them flinching, as the move acts as a counter as well, dealing weak damage but great knockback. Final Smash: Cherry Blossom Blade Sakura dashes forward with a more powerful Hyakka Ryoran, shouting "Ogami-san!", catching up to four opponents in her dash, before the stage fades to city background, as cherry blossom petals float through the air. Ichiro Ogami's Koubu appears alongside her own, and the two both rush forward, striking the enemy three times, before Sakura's Koubu raises it's blade as in her FSmash, sending out a massive Ouka Hoshin projectile to launch the enemy, and a wave of cherry blossoms transitions the screen back to battle. | On-Screen Appearance
Victory Poses Note: Whenever Sakura wins, the transition screen is a wave of cherry blossom petals into the victory screen.
Each round includes a female character as an ally to represent Sakura forming her combat revenue in Smash
Alternate Costume | ||||||||||||||||||||||||||||||||||||||||||||||||||||||||||||||||||||||||||||||||||||||||||||||||||||||||||||||||||||||
#106. Agumon Digimon Part of the "Smash is the Champions Bundle" DLC | Special Moves Neutral Special:
Side Special:
Up Special:
Down Special:
Final Smash: Terra Force Otherwise known as "Gaia Force", and a signature move of WarGreymon. Agumon/Greymon/Metal Greymon Warp-Digivolves into WarGreymon and flies into the background of the stage. There, the player will have 8 seconds to aim as he's charging. Upon release, the massive orb of energy will fly towards the stage ominously like Bahamut ZERO's Teraflare in Midgar and generates an explosion that makes the Bomber item look like a firecracker in comparison and hits multiple times like the Smart Bomb, dealing 76% damage total. | On-Screen Appearance
Victory Poses
All fighters are monster-like in appearance. In addition, they first fight against a Tiny version, than a medium sized version, and then a Giant to reference the stages of Digivolution.
Alternate Costume | ||||||||||||||||||||||||||||||||||||||||||||||||||||||||||||||||||||||||||||||||||||||||||||||||||||||||||||||||||||||
|
#107: Sol Badguy Guilty Gear Apaart of the " Bundle" DLC | Character Gimmick: Tension Gauge
Sub Gimmick #3:Gatling Combos: Sol's Jab, F-tilt, U-tilt, D-tilt are interweaved together to make a Dancing Blade-style system, and as such all of the aforementioned inputs have three stages of hits, allowing Sol players to mix up their combos. This means that instead of the usual sequential hits on some foes, Sol can use D-tilt 1, Jab 2, and U-tilt 3 instead of only 3 hits of D-tilt. Special Moves Neutral Special: Gunflame/Blockhead Buster A ground projectile like Terry's Power Wave or Iori's Yami Barai, but unlike their projectiles Sol has more height than distance in his own move, the distance depends if you tap or held the button but both version still being quite short. The aerial variant is a different move called Blockhead Buster (more especifically is the Lvl 1), a move that comes from Order-Sol where Sol does a explosion around the hilt of his weapon. 

Side Special: Bandit Revolver/Bandit Bringer Sol does a series of two jumping kicks regularly, since if you held the button you can do instead the Bandit Bringer, where Sol does a powerful dive punch in a similar way to Terry's Power Dunk. You can make the attacks stronger using the input 236 + attack button ( ↓→ + attack), the Bandit Revolver gains a follow up kick meanwhile the Bandit Bringer gains meteoric propierties. 

Back Special: Ground Viper/Riot Stamp In the ground Sol performs the Ground Viper, a strong, louder, high risk and high reward attack where he charges forward at the ground delivering a strong uppercut at the end, you can mash the button to increase the distance. Using the input 214 + attack button ( ↓← + attack) instead of a regular uppercut the moves ends with a Volcanic Viper. 

In the air the move changes to Riot Stamp, Sol hops backwards and then he impulses himself with a glyph that appears behind him to do a flying flaming kick. Using the input 214 + attack button ( ↓← + attack) the attack gains knockback. 
Up Special: Volcanic Viper Sol's own DP, he does a powerful burning uppercut using his sword, similar to Ken's Strong Shoryuken but trading some height for a bigger hitbox. The only problem is that the move isn't a very good recovery. Use the command version 623 + attack button ( →↓  + attack) for increase a little the height. Sol also has an input exclusive follow up called Knockdown, where Sol strikes the opponet to the floor with a kick, the input being 214 + attack button ( ↓← + attack). + attack) for increase a little the height. Sol also has an input exclusive follow up called Knockdown, where Sol strikes the opponet to the floor with a kick, the input being 214 + attack button ( ↓← + attack).
Down Special: Fafnir/Breaker Fafnir is a powerful forward punch that has the same kill power of a Falcon Punch without the needing of being charged (but still being a very slow and easy punishable attack) and a perfect shield breaker. You can use the command 41236 + attack ( ←↓→ + attack) for deal more damage. 
In the air this move changes for Breaker, a flaming dive kick that you must be careful to use since it has a slighlty diagonal direction and when you use it, doesn't have any stop, so if you use it in a risk, have a nice fall! Should be noted that Breaker doesn't has any motion unlike Fafnir. 
Down Special: Roman Cancel Using Shield-B while possessing 50% Tension Gauge allows Sol to do a Roman Cancel, which comes in 4 different colors based on conditions, slowing down the foe in a Witch Time-style effect and allowing Sol to follow up with certain moves.
Similar to Terry and (more like) Iori, Sol has Super Special Moves (in his case are called Overdrives), to use a Overdrive you require a certain amount of Tension acummulated in the meter. Overdrive 1: Tyrant Rave A 2-hits megaton punch starting explosive uppercut with his free hand before delivering a second punch wreathed in fire magic amplified with his sword. Requires 50% tension and can't be perfomed in the air. The motion is 632146 + attack button ( →↓←→ + attack). 
Overdrive 2: Dragon Install Sol removes his Gear Suppresor and unleash his original power has a Gear. A high-risk high-reward super in which Sol’s movement speed is increased, his normals become noticably faster and safer, his specials are all buffed significantly (see below) and his air grab changes to P.B.B., all this for a max amount of time of 12 seconds (the timer stops during the grab attacks) and with the additional bennefit that the time slows a little at the start of the transformation with Sol being invulnerable in the starting frames. When the mode’s natural duration ends and Sol returns to neutral on the ground, he is forced into a lengthy recovery animation, making him incredibly vulnerable to a counter-offensive, the transformation can also be interruped with a high damaging move. It can be used at the moment you have 50% tension but that would reduce the amount of time you will have so it's preferible do it at 100% tension (also you can use Tyrant Rave during Dragon Install if you have 50% or more). The motion is 214214 + attack button ( ↓←↓← + attack). 
Spoiler: Changes in the moves during Dragon Install 
Final Smash: Branding Breach In the start Sol uses a variant of his DI version of the Ground Viper (being his original Instant Kill, All Guns Blazing). The explosions behind Sol will do damage but only the first character hitted will be transported to the rest of the cinematic. In the cinematic part Sol charges his Junkyward Dog to finish his opponent with a fulminating explosive blow. 

During the Dragon Install, instead of just charge against the opponent he uses the Overdrive Heavy Mob Cemetery (the explosions behind will still be there, tho), grabbing the first foe will also leave them to the cinematic part, but it will have some changes in the animation, any of this changes will variate the damage. 

If the opponent has 100% or more damage at the end of the Final Smash the enemy will be Instant-Killed and if apart of that it was their last stock, a DESTROYED text will appear in the screen. | On-Screen Appearance
Victory Poses Note: Like Joker, Lloyd has an unique victory transition where the screen fades to white and then fades back into the victory screen. A bit different than the usual graphics but points to the original source.
Classic Mode: Heaven and Hell Opponents are based on both heavenly and infernal properties. Matches are stamina matches at 150% with normal gravity to mimic the way Guilty Gear is played. All stages are Omega forms.
Alternate Costume | ||||||||||||||||||||||||||||||||||||||||||||||||||||||||||||||||||||||||||||||||||||||||||||||||||||||||||||||||||||||
|
#108: Lara Croft Tomb Raider Apart of the "One Woman Army Bundle" DLC | Character Abilities Lara can wall cling, wall jump, and crawl. Run n Gun Lara's neutral attack, forward tilt, neutral air, back air, and forward air are all tied to her twin guns. When close to a opponent though, she switches to her daggers automatically. Climbing Gear When clinging to a wall, she can tilt up and use her climbing gear to climb up the side of the wall. Special Moves Neutral Special: Competition Bow 
Lara will stand up as she brings out her bow, which she used in the 2013 game and Rise of the Tomb Raider, and pulls back it's string by holding the button. When released, she will shoot an arrow forward that flies a medium distance. Similarly to Sora's Neutral Special, Lara will shoot one of the five different arrows through a rotation every time she uses the special move. This is signified with a white icon next to Lara in her damage percentage.
Taking out the Sword of King Arthur, Lara winds up in a stance similar to Mythra's Lightning Buster, the blade building up with bright green energy. After a maximum of 4 seconds of charge, Lara unleashes a large bolt of green power that travels across the stage and deals 10%-22% damage based on charge, killing anyone at 110%-50% from the center of the stage. Regardless of charge, there's also a hitbox at the start that deals an additional 10% damage and enough knockback to kill at 82%. The range of the sword is on par with Ragnell, and the energy blast is about as far-reaching as Byleth's fully-charged Failnaught. In turn, however, using Excalibur requires a lot of upper-body strength, so she may need a moment to cool down after use. Lara throws out a grappling hook. It is longer than the average tether grab, and is able to be aimed holding the button. If it lands, Lara climbs up the rope, and then can continue to climb up the stage by another half of the rope’s length. Down Special: Philosopher's Stone Lara holds the Philosopher's Stone in her hands as long as the button is held down, changing her bullets to gold bullets at a rate of 1 bullet per gun for each 0.5 seconds. Gold Bullets deal an additional 2% damage and cause fighters to flinch when used, though they fire slightly slower. Lara will automatically use gold bullets as her primary ammo until they're gone, and she can hold up to 12 at a time, as indicated by a bullet gauge above her fighter portrait. Final Smash: Tomb Raider Lara Croft pulls out a rock and throws it. Once it makes contact with the opponent, it triggers a cinematic where the opponent finds themselves in the middle of a dungeon tomb. The thrown rock triggers a series of booby traps which includes stinging darts shot from the walls, biting snakes which fall from overhead, and finally the opponent being dropped via trap door to their doom. There, they are caught by a sarcophagus which explodes. The opponent is then launched. If the opponent becomes over 100%, Lara uses the Amulet of Horas for an instant kill. | On-Screen Appearance
Victory Poses
Classic Mode: Protect the Relics All the matches are based in locations that aretomb/ruin/dungeon-like with opponents who seem the kind to steal from said ruins.
Alternate Costume | ||||||||||||||||||||||||||||||||||||||||||||||||||||||||||||||||||||||||||||||||||||||||||||||||||||||||||||||||||||||
#10ε Ninten MOTHER/Earthbound Apart of the "Echo Fighter Pack #2" | Special Moves Neutral Special: PK Boomerang This has all of the functions of PK Flash but unleashes a boomerang instead. Forward Special: PK Fire Up Special: 4th-D Slip Ninten is the only one of the MOTHER kids who has a different Up Special. Instead, it functions exactly like Mewtwo's Up Special but utilizes various aspects of Earthbound Beginning's battle black and white menu. Down Special: PSI Magnet Final Smash: PK Starstorm Summons Ana and Teddy and then call forth PK Starstorm like Ness and Lucas. | On-Screen Appearance
Victory Poses
Classic Mode: New Beginnings All matches are based on bosses found in the first Mother game.
Alternate Costume | ||||||||||||||||||||||||||||||||||||||||||||||||||||||||||||||||||||||||||||||||||||||||||||||||||||||||||||||||||||||
#63ε Jeanne Bayonetta Apart of the "Echo Fighter Pack #2" | Much like how Bayonetta has Madam Butterfly who appears within Wicked Weaves, Jeanne has Madame Styx as the Wicked Weaves. Special Moves Neutral Special: Bullet Climax Similar in function to Bayonetta's with higher attack and stopping power. Forward Special: Heel Slide/After Burner Kick Up Special: Witch Twist Has less aerial recovery ability in exchange for launching power. Down Special: Witch Time It has a smaller window to conenct but, when it does, it has a longereffect. If it doesn't fully connect, Moth Within activates. Final Smash: | On-Screen Appearance
Victory Poses
Classic Mode: Thirst for Revenge Jeanne partners up with characters who have forcibly taken to fight against theiraggressors. This mirrors Jeanne's brainwashing by Balderin the first Bayonetta and then kidnapped by the demons in Bayonetta 2.
Alternate Costume | ||||||||||||||||||||||||||||||||||||||||||||||||||||||||||||||||||||||||||||||||||||||||||||||||||||||||||||||||||||||
|
#109: Lloyd Irving Tales of Symphonia DLC Part of the "Tales of Smash Bundle" DLC Submitted by: | Character Gimmick: Strike and Technic Artes Lloyd can skip through his Arte selection by performing the Up Taunt while on the ground. This will allow Lloyd to access two additional Artes aside from his normal one. These Artes are trade offs in terms of attributes. Sub-Gimmick: Overlimit Mode When Lloyd suffers over 100% damage or 25% damage in Stamina, he gains increased superarmor, no longer flinches, and his attacks do far more damage. He also gains a new Up Special, Rising Phoenix. Special Moves Neutral Special: Demon Fang/Double Demon Fang/Fierce Demon Fang Lloyd fires of a single wave projectile that moves forward along the ground like Terry's Power Wave. When performed in the air, it does a single power-infused slash with out the projectile
Side Special: Sonic Thrust/Super Sonic Thrust/Hurricane Thrust Lloyd thrusts his blade forwards like he does his "Sonic Thrust" move. It does 6%.
Up Special: Tempest/Omega Tempest/Psi Tempest/Rising Phoenix 
Lloyd will jump into the air and perform a buzzsaw attack. This will propel him in an arc overhead. This particular up special attack is notable for covering on all sides which gives Lloyd a literal swirling hitbox of death as he travels in the air. That being said, the recovery distance is not the best. The above gif is Omega Tempest which lengths then attack and allows Lloyd vertical traveling. I propose the baseline Tempest as its that initial jump spin you see in the gif.
When in Overlimit Mode, Lloyd has access to Rising Phoenix. This attack causes Lloyd to jump into the air with great speed, turn, and plummet at an angle while engulfed with a fire effect. This protects him from all incoming damage and his high priority. Down Special: Beast/Raging Beast/Hunting Beast 
Beast has been apart of the Tales series for really as long as time itself. Many characters aside from Lloyd can use Beast. In Smash, this is his best killing move with the ability to unleash an ethereal beast-like head which shoots up upon release. Lloyd will forgo utilizing his swords and will slam his shoulder forward. This attack is quite unique as it would have a shockwave affect that pulls in opponents before release and then blows them outwards. It has an extended hitbox as the beastial head grows large and moves forward.
Final Smash: Falcon's Crest The attack will cause cause Lloyd to shine just like in the above gif and then unleashes a torrent of spiraling energy that, like Beast and Demonic Circle, traps in opponents and vacuum in nearby ones. During this portion, the Final Smash has yet to trigger. Anyone to manages to stay in with the field of effect for 3 seconds will get then get launched into the air. Lloyd's Final Smash is the only one that lacks the trembling character banner seen when most Final Smashes starts but, rather occurs before he unleashes the attack last hit. This also differs in that it shows Lloyd's ToS character banner as seen in the second gif rather than his character banner for Smash. Prior to unleashing the attack, his two swords changes to that of the Material Blades. This aspect is quick and hard to catch unless paying attention as to not take up too much time. He then gathers a whole bunch of energy before swinging it down, carrying the opponent down in an overdramatic/overpowered stall-and-fall attack that slams the opponent into the ground and then proceeds to launch them up into the air. This can also damage nearby opponents who are near the crash zone. He then hops away. | On-Screen Appearance
Victory Poses Note: Like Joker, Lloyd has an unique victory transition where the screen fades to white and then fades back into the victory screen. A bit different than the usual graphics but points to the original source.
Classic Mode: Journey of Rejuvenation This classic mode focuses on Lloyd fighting Summon Spirits which were required in order to gain the Material Blade.
Alternate Costume | ||||||||||||||||||||||||||||||||||||||||||||||||||||||||||||||||||||||||||||||||||||||||||||||||||||||||||||||||||||||
|
#110: Geno Super Mario RPG Apart of the "Beware of the Forest's Mushrooms Bundle" DLC | Character Abilities Geno has a characte rmechanic where he will emit an aura right before his Specials connects. When this happens, hitting the special button again will do more damage right when the attack hits. This refrences his source material from Super Mario RPG. Special Moves Neutral Special: Geno Beam Geno shoots out an energy beam from his arm cannon in front of himself, dealing 9.7% per hit. However, if you press B before it hits the foe, it increases it's damage, spead and length, making the attack stronger. Also if you hold B, you could continuously shoot the beam at opponents. Side Special: Geno Whirl A highly-telegraphed attack and one of his most infamous. Geno will form a disk of Golden energy in his hand and throw it out on frame 14. Normally if you hit a foe with this it'll deal a measly 6% damage and flinches, allowing Geno some good set-up potential. But there's a catch! If you press the B button the exact frame before it touches a foe's hitbox, you'll deal a critical hit with much stronger knockback! Not even Kazuya's Electric Wind God Fist was as precise in Smash as this! Glowing as bright as the star he was before possessing the doll, Geno bolts upwards for a bit. Geno can stop his flight to perform an omnidirectional follow-up at any point in the recovery, adding to his mix-up game. Usually, this does 8% damage and some low-medium knockback, but pressing the button just before hitting a foe allows him to barrage foes with multiple hits, dealing a total of 13% damage and medium-high knockback. Down Special: Geno Boost Hold down the Down Special input to raise up your attack stat slightly to deal more damage. Letting go for the duration will cause Geno to recieve the full benefit but letting go early will have less attack damage modifiers. Letting go right before the last arrow vanishes will not only see an attack modifier added but will also give Geno a knockback resistant buff. Final Smash: Geno Flash Geno willsummon a pillar of light which envelopes him and anyone else nearby. This transports the player to a recreation of a battle from Super Mario RPH with Geno alongside Mario and Mallow. He will then transform into a cannon and lob oa powerful projectile which creates a star-shape burst before launching the opponent. This attach sequence is unique as it renders every character in isometric styling. | On-Screen Appearance
Victory Poses
Classic Mode: STar-Sent Savior Classic mode is based on the series of events that transpired in Super Mario RPG.
Alternate Costume | ||||||||||||||||||||||||||||||||||||||||||||||||||||||||||||||||||||||||||||||||||||||||||||||||||||||||||||||||||||||
|
#111. Ratchet and Clank Ratchet and Clank Part of the "Rifting Together Bundle" DLC Submitted by: | Special Moves Neutral Special: Fire Weapon Side Special: OmniWrench Ratchet throws the Omniwrench like a makeshift boomerang that travels 3/4 the distance of Mega Man's Side Smash before it comes flying back to him. The attack deals a minimum of 13% and hits multiple opponents in its flight path. Up Special: Thruster-Pack With the Thruster-Pack, Clank will spawn two jet wings and boost him & ratchet in the air. Unlike the original game were you fly straight you can aim the control stick to send the duo flying straight forward to any direction. Down Special: Weapon Select Holding down special brings up a weapon wheel which allows Ratchet to select from a number of weapons. These includes:
Final Smash: Black Sheepinator Ratchet fires a beam that can travel through fighters, turning anyone it hits into a helpless sheep for a total of 8 seconds. The sheep can jump once, can't shield or dodge, and have only a single input: Pressing attack or special will result in them going "Baaaah." Ratchet can freely attack opponents around, though their fluffy wool reduces damage and knockback to them. Opponents with over 100% damage get turned into Black Sheep, which baa, then explode, KO'ing them and dealing damage and knockback to nearby opponents. | Please Note that Ratchet and Clank have an Alternate Costume composed of Rivet and Kit so they will also be sharing animations as well. On-Screen Appearance
Victory Poses
All fighters are those found on Sony Playstation consoles.
Alternate Costume | ||||||||||||||||||||||||||||||||||||||||||||||||||||||||||||||||||||||||||||||||||||||||||||||||||||||||||||||||||||||
|
#?: Nightmare Soul Calibur Apart of the "A History of Stage Bundle" DLC | Character Abilities Guard Impact: By tilting forwards slightly while triggering a Perfect Shield, Nightmare generates a wind box in front of himself that slightly pushes his for away and gives him an opening to strike. Revenge: Some of Nightmare's moves have counter-frames during start-up. Triggering these frames allows Nightmare to counterattack with Dire Vengeance, an omnidirectional blast the size of Thwack that deals 1.4x the damage he would've taken and also gives him a temporary boost to his stats. Night Stance: Nightmare has access to three different stances that he can use to mix up his foes. Night Side: A stance where Nightmare holds the sword with his monstrous hand. A: Soul Biter: A lunging horizontal chop with Soul Edge. Deals 7% damage and stuns on hit. Hold A to transition back into Night Side Stance after the attack. Forward Tilt: Night Front Kick: A lunging thrust kick. Deals 5.2% damage and low knockback. Back Tilt: Phantom Splitter: An underhanded upwards slash. Can hit above Nightmare and has great horizontal range, to boot. Deals 11.2% damage and medium-high knockback. Up Tilt: Phantom Star: A telegraphed upwards slash that crumples on hit. Deals 9% damage. Hold A to transition into Night Behind Stance. Down Tilt: Skull Chopper: An upwards-angled horizontal sword slash advancing forwards. Is great for trading with shorthopping opponents as Nightmare can avoid many aerials with this attack. Deals 7.7% damage and low-medium knockback. Night Behind: A stance where Nightmare holds Soul Edge down his back. A: Knee Kick Rush: An advancing two-hit knee attack. Deals 4% and 5% damage and low-medium knockback. Side-Tilt: Terror Sweeper: A leaping sweeping sword strike. Deals 7.5% damage and low knockback with a high chance to trip. Hold A to transition from Terror Sweeper to Night Side Stance. Up-tilt: Terror Vortex: An underhanded upwards strike with Soul Edge, dealing 7.2% damage and strong knockback. Double-tap side: Transition into Dash Attack. Night Lower: A stance where Nightmare crouches, holding Soul Edge level with the ground. A: Leg Hacker: A hitstun-inducing slice of the legs. Deals 6.1% damage. Hold A to transition into Night Side Stance. F-tilt: Death Horn Charge: A lunging stab with Soul Edge. If anyone hits, he will smash them into the earth while they’re hung onto Soul Edge. The attack deals 4% and 9% respectively, with the second hit dealing strong horizontal knockback. Hold A to trade the grab from Death Horn Charge with a transition into Night Behind Stance. U-tilt: Death Lifting Kick: An upwards-angled knee followed by an upwards kick. Deals 3% and 5% respectively and deals medium-level knockback. Double-tap joystick: Transition into Dash Attack. Special Moves Neutral Special: Soul Wave A telegraphed, omnidirectional blast around Nightmare 1.5x the size of his Shield. Deals 10% damage and medium-high knockback. If hit during start-up, this attack initiates Dire Vengeance. Side Special: Double Avenger
Sprout fiery wings and ascend upwards with a force of a meteor. Tap B again to follow up with a Devil Blaster-like beam downwards. The ascent deals 8% damage and medium-high knockback while the downwards beam deals 14% damage and high knockback. Down Special: Reversal Edge A two-stage Special that starts with Nightmare performing a delayed downwards slash dealing 6% damage. If he hits, both Nightmare and his opponent (with the closest being prioritized in free-for-alls) will engage in a rock-paper-scissors match that uses the A, B, and Y buttons. Nightmare has a unique set of attacks when engaging, though enemies that aren't another Nightmare will default to their tilts. B beats A, Y beats B and A beats Y. A: Calculated Slaughter: A quick and strong horizontal swing that deals 11.5% damage and strong downwards-angled knockback. The opponent uses F-tilt with this button. B: Crown Splitter: A leaping downwards slash that deals 15.3% damage, strong knockback, and spikes anyone in collateral. The opponent uses U-tilt with this button. Y: Crimson Fountain:Nightmare reaches forward and grabs the foe, draining a portion of their soul to gain Terror Charge before tossing them away. Deals 9.4% damage and low knockback. The opponent uses D-tilt with this button. Nightmare raises Soul Edge heavenwards and causes a massive Soul Wave that catches foes in his wake. In an entirely new environment, Inferno appears and bathes the entire place in fire, damaging them slowly for a brief moment before he flies down with meteoric force and causes an explosion that completely immolates the foes. As the explosion occurs, the camera zooms out to reveal this is happening inside of Soul Edge itself, its single eye an empty gaze at the camera. The entire Final Smash deals a total of 44% damage and extremely strong knockback, and instantly kills at 100%, healing Nightmare for 15% for every kill done this way. | On-Screen Appearance
Victory Poses
Each character has been a guest fighter in the SoulCalibur series before. Each fight is an Omega form stamina matches.
Alternate Costume | ||||||||||||||||||||||||||||||||||||||||||||||||||||||||||||||||||||||||||||||||||||||||||||||||||||||||||||||||||||||
|
#?: Red Angry Birds Apart of the "Seeing Red Bundle" DLC | Special Moves Neutral Special: Bied Swap/Bird Launch Red is capable of swapping between various Birds (Chuck, The Blues, Bomb, Boomerang Bird, Terence, Bubbles, Silver, and Mighty Eagle. This gives Red8 total potential uses. That being said, there is a 25 second cooldown after using one of the birds before it can be reused. If the bird is damaged and "dies" by an attack, the cooldown timer isn't applied. This also applies is the bird flies off the stage. The attack is a too step process. Like Bonus Fruit, the player can cycle through the birds which appears as an icon above Red. By selecting it, the player can then press the neutral special once again to launch the bird. It can be used both on the ground and the air. This also allows Red to "save" a brid before launching them. This can be used for midn games by delaying launching the bird. Getting KO'd removes any cooldown timers for any given bird. Each bird has its own propertieis which I will highlight in another post. Side Special: Red Launch Unlike the neutral special, Red launches himself. This is done by inoutting and holding down the special button which allows Red to be fired the direction of where the Slingshot is facing. Now, this is where it gets interesting. After holding down the input, the player can then direct the angle at which to launch Red with the availkable angle being 360 degrees. This allows this move to be extremely affective as bioth and offensive and recovery move. It's not as useful as other ones due to having to "swing" the slingshot to look upwards or any angle to aids in recovery. Still, this is an extremely flexible move. Red is the second character to not get a typical recovery move because this will be tied to another move later. Instead, Red can utilizie one of several power-ups which can affect all of his specials in some way. The power-ups are: Shockwave, Power Potion, Homing Bird, Birdquake, Space Egg, and Mighty Feather. These power points only affect the s[ecials (for now) includiong the Neutral, Side, and Down. Once you use this power-up, then you are stuck with it unless you die or swap up by pressing up special again and selecting the power up. Once you swap out, you can't use that power up again until you are KO'd. Down Special: Bad Piggy Tower Yes, even the Bad Piggies makes an appearance. By holding down the down special, a "blueprint" for a Bad Piggy Tower appears. Red can "cause" it to appear directly in front of him to, like Grenjnja's Shadow Sneak, can move the blueprint on a horizontal plane in front of him. Releasing the input causes the Bad Piggy Tower to appear. There are three variations of the Bad Piggy Tower but they are some rather medium in szie with have 6 total Bad Piggies on them. Just the design of the tower changes along with its color. In a team battle, the color of the tower correlates with the color of the team. Doing it in the air will cause the Tower to be taller since it scales Red's height in the air in coomparison to the ground. This tower serves many purposes with it's main one being a deteerent and obsctale with the dame properties as Aloan Exeggutor. That being said, the main use is to destroy the tower. By launching either one of the birds viua Neutral Special or Red via the Side Special, it will cause the Bad Piggy Tower to collapse which causes widespread collaterial damage in a way that is somewhat similar to Villager's Down Special. The atatck is unique as it as Bomb Rush-like physics where the demolition of the tower is highly dependent on where it was hit, which type of Bird was used, and if any Power-Ups was utilized. This results in no one Down Special resulting in the same amount of damage. This attack is extremely varied. The tower can also dbe destroyed by other attacks as well by other opponents which can result in Red being damaged or any allies if they are close by. This is the perfect crowd control attack and is absolute mayhem in 8-player Smash. One funny animation is, once spawning the tower, Red adopts a rather angry look. Only one tower can be built at one time. Final Smash: Super Red Red launches himself via Slingshot which, upon hitting the opponent, will trap them in the Final Smash. It transports them to a scene similiar to the Angry Birds game. The opponent is trapped in a large Bad Piggy with other Piggies. Red jumps into a super large slingshot which fires him at supersonic speeds. As he reaches near the tower, he passes through a wormhole making him become Super Red. He crashes into the tower which causes a burst of red waves to pulsate out. This has two effects: First, it destroys the tower and greatly damages the opponent. Upon destruction, all of the Bad Piggies and any caught opponents crash down around themsleves. Anyone past 150% damage will be instantly KO'd. The second efefct is those red waves continue after the Final Smash cinemeatic ends and will pulsate out from where Red initially hit the opponent and will continue until they reach the blast lines. It's possible to avoid these waves as they move in the four cardinal directions rather than a 160 degree radius, getting hit pushes the opponents backwards in a wave similar to Mario Finale but with less damage overall. It's more akin to Mario's F.L.U.D.D> in properties. | On-Screen Appearance
Victory Poses
All of the opponents are green variations of fighters except for Yoshi on stages that have wall-off blast zones.
Alternate Costume | ||||||||||||||||||||||||||||||||||||||||||||||||||||||||||||||||||||||||||||||||||||||||||||||||||||||||||||||||||||||
|
#?: Doomslayer Doom Apart of the "Thy Smash Ball Subsumed Bundle" | Gimmicks and Mechanics Special Moves Neutral Special: Weapon Wheel Byholding down the special button, players can cycle through numerous guns within Doomslayer's inventory that allows him access to the gun via his Jab, Forward Tilt, Neutral Air,and Dash. The weapons are as follows:
Not selecting a gun causes the weapon wheel to cancelout. Each weapon has it's own ammo pool and reducing the ammo count to 0 causes the gun to be unable to be selected though Doomslayer can still carry the gun. Performing physical, melee attacks, KOs, or a Glory Kill can cause the ammo count to increase. When carrying an inactive gun that is out of ammo, being close to an opponent causes a punch attack that can help regain ammo. Side Special: Crucible/Glory Kill/Hell Fist More detailed write up coming soon. Doomslayer does a an upward swing with the Crucible. When the gauge is filled up, the Mark of the Slayer icon appears above the opponent. Getting in close and hitting side special will change the attack to Glory Kill. This keeps ALL attacks available intact without having to change them during a given situation. Doomslayer can still do a grab while in the Glory state, can still use the Crucible, and has the Glory Kill attack available. If used after landing a Glory Kill, this becomes Blood Punch, a dashing AoE strike that's good for dealing great burst damage. Up Special: Meathook/V-Jump Boots The Doom Slayer takes out his Super Shotgun and fires the Meat Hook in the direction of the joystick, automatically snapping to the ledge if he aims there. If aimed at a fighter, they will remain suspended in the air as the Slayer drags himself towards their position. There, one of two options can be done: Press B to release the fighter without sacrificing the Slayer's momentum. Press A to fire a Super Shotgun blast that deals either 16% up close or 8% from far away. If holding the up special neutral will cause a momentary pause before boosting Doomslayer in the air with a midair jump. Down Special: Equipment Launcher The Slayer deploys his shoulder gun and shoots one of three options depending of how much you hold the button.
Final Smash: BFG-10000 

The move starts with the Slayer using The Crucible who does a wide front slash, all the opponents who get caught by this attack are send to a cinematic where The Slayer brings his BFG-9000....just for attach it to a different place, then the camera in first person would show the Slayer pointing to the surface of Mars and a shot of outside shows that he was using the upgrade version of the weapon the BFG-10000 to shoot a hole in Mars that destroys the opponents in the process (think in King K. Rool Final Smash but in a bigger scale). If the opponents had 100% of damage or more it would be an instant kill. | On-Screen Appearance
Victory Poses
Every opponent is based on a dark, demonic like creature with every opponent being giant-sized versions of themselves.
Alternate Costume | ||||||||||||||||||||||||||||||||||||||||||||||||||||||||||||||||||||||||||||||||||||||||||||||||||||||||||||||||||||||

#11ε Black Shadow F-Zero Apart of the "Echo Fighter Pack #3" | Special Moves Neutral Special: Shadow Menace Winding up similarly to his enemy's Falcon Punch, Black Shadow readies his own version. Instead, however, when he punches, the shadowy silhouette of a bull appears around his fist and explodes with shadow on contact with anybody he hits, while retaining the explosive damage that Falcon Punch possesses, although now it is more of a disjoint. Side Special: Tauros Charge Retaining the properties of Melee Ganondorf's Gerudo Dragon, Black Shadow rushes forwards for a mighty uppercut that deals 17% damage on the ground and 16% in the air. Unlike Gerudo Dragon, however, Black Shadow also possesses armor frames during the charge, much like Dark Pit's Electroshock Arm. Black Shadow jets upward but, when he latches onto the opponent, he unleashes a surge of shadow energy before launching the opponent away with a blast of shadow power. Down Special: Bull Kick Dashes forward while unleashing a powerful kick that unleashes dark flames which can even damage opponents as he passes by. Final Smash: Black Bull Functions much like Blue Falcon but Black Shadow is laughing hysterically in the cockpit. | On-Screen Appearance
Victory Poses
Every opponent is based on a dark, demonic like creature with every opponent being giant-sized versions of themselves.
Alternate Costume | ||||||||||||||||||||||||||||||||||||||||||||||||||||||||||||||||||||||||||||||||||||||||||||||||||||||||||||||||||||||
#46ε Roll Mega Man Apart of the "Echo Fighter Pack #3" | Special Moves Neutral Special: Shadow Blade It would do more damage than Metal Blade and travel further. However, it cannot be picked up like a regular item, which means DLN mains will have to adapt to losing a lot of crazy setups. Side Special: Drill Bomb Roll will fire a projectile similar in shape to the Crash Bomber. Unlike with the Crash Bomber, however, the damage on a foe it latches onto builds up the moment it happens before it performs a single-hit explosion. This mechanical difference does not offset that it deals the same amount of damage and knockback as the Crash Bomber. Functions exactly like the Custom Move in Smash 4, I think beat is a good choice for roll as it not only fits her personality a bit better but also it adds some extra visual variety when compared to Mega Man Down Special: Star Clash Functions just like Leaf Shield but the stars spin slightly faster. Final Smash: Roll Legends Roll takes a bucket of water and splashes it out. If it makes connection with the opponent, it triggers a cinematic where Roll utilizes her Roll Buster along with Roll Caskett from Mega Man Legends, Roll.EXE from Mega Man Battle Network, Alia from Mega Man X, Ciel from Mega Man Zero, and Harp Note from Mega Man Star Force. | On-Screen Appearance
Victory Poses
Every opponent is based on a dark, demonic like creature with every opponent being giant-sized versions of themselves.
Alternate Costume | ||||||||||||||||||||||||||||||||||||||||||||||||||||||||||||||||||||||||||||||||||||||||||||||||||||||||||||||||||||||
#?: Ahri League of Legends Part of the " DLC" Bundle | Special Moves Neutral Special: Orb of Deception Works exactly like in LoL, does more damage on the way back to her. Functions like TLink boomerang, will always attempt return to her Side Special: Charm Ahri takes a little to strike a...playfulpose then performs an equally-playful wink to release a heart projectile the size of a Kafrizz that travels as fast as Marth's walk speed. Anybody within 1/3 BF that's hit will take 2% damage, but will be forced to go at max walking speed towards Ahri's location for 2 seconds, or until she strikes them for 1.2x the normal damage and knockback. This Special also has the unique flavor of changing their eyes, similar to when they have a Smash Ball, except this time, their eyes are glowing a bright pink while Charmed. In my head, this works like a combo between Bayonetta's Side B and Pikachu's Up B. Down Special: Fox-Fire Ahri summons 3 balls of foxfire that constantly float around her like Mega Man's Leaf Shield for 5 seconds. If anybody gets within 1/4 BF of Ahri during that time, the foxfire balls will automatically lock onto them and deal 9% damage total with medium-low knockback at Level 0, prioritizing anybody under the effects of Charm. Final Smash: Nexus Destruction When activating this Final Smash, Ahri will rush forwards with a powerful Spirit Rush. If she hits anybody, a cutscene plays out: all caught fighters collide with a Nexus (Pictured above), and the camera pans to see Ahri alongside Jinx, Yasuo, Ashe and Teemo rushing forwards to go whole ham on the Nexus with their respective abilities. After a bit of relentless barraging, Ahri throws her Orb of Deception at the Nexus, causing it to explode and KO'ing anybody above 100% damage. This Final Smash also affects the victory screen if finishing a match with it: The traditional "GAME!" is replaced with the League of Legends "VICTORY" banner, and it seamlessly transitions to a unique victory animation wherein Ahri and her teammates celebrate their victory. | On-Screen Appearance
Victory Poses
Every opponent is based on a character archetype found in League of Legends.
Alternate Costume | ||||||||||||||||||||||||||||||||||||||||||||||||||||||||||||||||||||||||||||||||||||||||||||||||||||||||||||||||||||||
|
#?: Noah Xenoblade Chronicles Apart of the " DLC" Bundle | Special Moves Neutral Special: Overclock Buster The Swordfighter Talent Art. Noah leaps upwards and performs a spinning downwards slash. There are two hitboxes: the physical part that deals 17% damage and strong knockback along with immense shield break potential, and the heavily-disjointed energy blade it sprouts that deals 12.5% damage and medium knockback. Because Noah is leaping in the air to do this, there is some major risk of SD'ing off-stage when he uses this, similar to Shulk's Back Slash. Forward Special: Chain Attack: Brave Assault Noah will slash forward. If the attack connects fully, the opponent will be momnentarily be stunned which allows Noah to initiate a number of attacks by pressing the special button with reduced frame input lag and damage output. It works much like Marth's side special with the final attack being the most powerful where it launches opponents. Up Special: Overfall A Master Art from Taion's starting class, the Tactician. Noah summons a swarm of Mondo and uses them to flow upwards causing him to fly upwards and deal several hits of damage, racking up 13% damage in the process. This move kills at 171% damage from center stage and propels Noah 5 Units upwards. Down Special: Sword Strike One of the Arts of his starting class, Swordfighter. Noah leans back while charging a hefty, downwards-angled sword slash in front of himself that deals 17% damage and strong horizontal knockback. Press B while charging to have Mio do her Down Smash instead. Final Smash: Limits Unbound Noah and Mio strikes the opponent together starting a cinematic where they both beat the rival and using the Ouroboros form release the Critical Art Limits Unbound where he do three devastator slashe | On-Screen Appearance
Victory Poses
Defeat Quote
The fighters that were involved in the match are splayed across the ground. Noah & Mio take out their flutes and do their duties as Off-Seers for the fallen foes.
Alternate Costume Factiosholds | ||||||||||||||||||||||||||||||||||||||||||||||||||||||||||||||||||||||||||||||||||||||||||||||||||||||||||||||||||||||
|
#?: Mio Xenoblade Chronicles Apart of the " DLC" Bundle | Special Moves Neutral Special: Gemini Strike The Zephyr Talent Art. Mio will enter a stance and charge ether into her chakrams for a moment before throwing one of her chakrams forwards. Press B within 1 second after throwing and Mio will throw the other. Each chakram deals 9% damage and medium-high knockback on hit. This move also has invulnerability frames leading up to a throw of each chakram, making it a great pseudo-counter. Forward Special: Chain Attack: Lightning Quick Works similar to Noah's Side Special but with quicker cuts with even more reduced damage as a result. Up Special: Ether Cannon A Master Art from Eunie's starting class, the Medic Gunner. On the ground, Mio uses the gun staff to fire a shot straight ahead that deals 8% damage and very weak knockback, but is about as spammable as Wolf's Neutral B. In the air, Mio aims the staff opposite of the joystick's direction and uses the blast to propel herself in the direction of the joystick.. Down Special: Wide Slash One of the Arts of her starting class, Zephyr. Mio crosses her arms with chakrams in hand, then performs a scissor motion that strikes at both sides of her that deals 13% damage and medium horizontal knockback. Press B while charging to have Noah do his Down Smash instead. Final Smash: Death of 1,000 Cuts Very similar startup to Noah's but when they take the Ouroboros form she quickly spins to lunge the opponent, then she jumps and does a final strong slash with her body. | On-Screen Appearance
Victory Poses
Defeat Quote
The fighters that were involved in the match are splayed across the ground. Noah & Mio take out their flutes and do their duties as Off-Seers for the fallen foes.
Alternate Costume |


Veteran Changes
Samus
Crawl: Morph Ball
Samus now has a crawl wherein she enters the Morph Ball.
Down Tilt: Bomb
Samus’ down tilt is her old down special. It can be used while moving, but not in the air.
Down Special: Beam Select
Samus’ new down special allows her to switch which beam she uses, which affects the attacks that use her arm cannon (her new forward tilt, new forward smash, up smash, and forward air). You select them similarly to Shulk’s Monado Arts, but they’re permanent and don’t switch back between stocks. You can tell which beam Samus has equipped via an icon next to her damage meter, and by the color of her arm cannon. She has four options:
- Plasma Beam: Located on the bottom, with a green fiery icon. Samus starts with this beam equipped by default at the start of the match. It behaves similarly to her old moveset, being associated with close-range fire attacks. The most notable difference is that the fire is green now, in reference to the beam’s coloration in Super Metroid. Basically, this is the “balanced beam” of the four.
- Ice Beam: Located on the top, with a blue snowflake icon. This beam fires blasts of ice with low damage and low knockback, but good frame data. Some of its moves have a freezing effect that can allow you to extend combos. Basically, this is the “speed beam” of the four.
- Wave Beam: Located on the left, with a purple icon that has circles and a lightning bolt. The Wave Beam uses purple, circular energy with electric effects, and attacks with it tend to be slow but powerful. In addition, Wave Beam attacks tend to send the opponent at odd angles or move in a sine wave pattern themselves. Basically, this is the “power beam” of the four.
- Spazer Beam: Located on the right, with a yellow icon that depicts three beams. The Spazer Beam goes out the furthest from Samus’ blaster, making it most suited for zoning. In addition, the Spazer always fires three projectiles at once, which changes some of Samus’ multi-hitting attacks like her forward-air and up-smash. Basically, this is the “range beam”.
Forward Air
The beam she has selected actually affects the way in which Samus performs this move.
- With the Plasma Beam, she fires five green explosions from top to bottom, same as she always has (except for the color).
- With the Ice Beam, she instead fires five blasts of freezing air from the lowest position to the highest - the opposite of how she normally does it.
- With the Wave Beam, she has a blast of purple energy in the highest position, then in the lowest, then in the second highest, then in the second lowest, then in the middle.
- With the Spazer Beam, she only shoots three lasers at the top, middle, and bottom positions. Unlike the rest, these lasers are actually projecties, albeit ones that don’t travel too far. This same change actually applies for her up smash as well.
Forward Tilt
Samus’ forward tilt has her shoot a shot from her arm cannon. This attack can be performed while moving, like Mega Man’s forward tilt, but it can be angled.
- The Plasma Beam’s shot is a simple green projectile shot.
- The Ice Beam’s shot is a blue shot that freezes.
- The Wave Beam’s shot is a purple shot that moves slower and travels in a sine wave motion. It can travel through the stage.
- The Spazer Beam fires three shots, which go further than those of the other beams.
Forward Smash: Charge Beam
Samus’ forward smash has her switch to the Ice Beam and charge a shot. This move can be angled. Its projectiles are basically bigger, more impressive versions of the shots fired by her forward tilt.
Neutral Special: Charge Combo
While similar to Charge Shot, this move is drastically affected by which beam she has equipped, and is now inspired by Special Charge Beam Attacks from Super Metroid and Charge Combos from Metroid Prime. Just like before, though, it’s a chargeable projectile that can be canceled while still keeping the charge.
- Like with most moves, the Plasma Beam’s Charge Combo is simply the old move with some new visuals. This time, it’s a circular shot with four rings spiralling around it.
- The Ice Beam’s Charge Combo is a blast of ice surrounded by four twinkling sparks. Upon hitting something, it has a wide-ranged “explosion” of ice that freezes anything it comes into contact with.
- The Wave Beam’s Charge Combo is an unbroken stream of purple, wavy electricity whose length depends on how long it’s charged. It has the highest charge time of all of them.
- The Spazer Beam’s Charge Combo goes the furthest, and fires three lasers that have slight homing properties.
Final Smash: Hyper Beam
Replacing the Zero Laser is this Final Smash, based on the ending of Super Metroid. Samus actually gets a fifth beam type, the Hyper Beam, marked with a rainbow Metroid icon. It combines the best traits of all the beams: the speed of the Ice Beam, the power of the Wave Beam, and the range of the Spazer Beam. It fires glowing rainbow beams. Samus gets to use the Hyper Beam for about 12 seconds before going back to whatever beam she had before.
Ganondorf
There are a couple of things I wish to accomplish with this Ganon moveset, so let's go over those before we begin.
Firstly, even though a majority of his moves are changing, I want his playstyle to remain similar. He'll still be a super heavyweight, and his moves will have roughly the same power, timing, knockback angles, and space coverage. However, his new moves will give him an increase in range, attack speed (if only slightly), and recovery. In short, I want the new Ganon to feel like an upgrade, even though his lessened weaknesses will of course be counterbalanced.
Secondly, even though it'll still say "Ganondorf" on the CSS, I want this to be an all-encompassing Ganon, referencing not just all of Ganondorf's appearances, but all of Ganon's appearances period, whether as a Gerudo or as a massive porcine beast.
With that out of the way, let's get started. Ganon's differences are apparent even before he begins fighting. While his appearance remains based on Ocarina of Time, he wields two swords the way he did as the Demon King Ganon in that game, as well as as Ganondorf in Wind Waker. For his dash, he levitates similarly to Cloud. For some animations where his hands are necessary, he extends that levitation power to his swords, which will float near him until the animation is done. Some of his moves have him float the swords so he can summon a trident from the darkness.
Tilt Attacks
Ganon's jab is one of his few normal attacks whose range and timing is not based on its predecessor. Instead, it's now a three-hit jab consisting of an outward slash with both swords; a downward slash with his left hand; and a spin attack that deals two hits (one with each sword). This is based off of an attack he does in Wind Waker.
His forward tilt is a backhanded slash with his left hand. This, too, is based on an attack he does in Wind Waker. It hits at roughly the same timing and damage of his old forward tilt, but with a bit more range.
While no longer the Volcano Kick, Ganon's up tilt retains its most notable properties. Here, Ganon levitates his swords and dark energy slowly swirls into the shape of a trident in his hands. Like Volcano Kick, this creates a windbox that pulls opponents into the attack. Once finally complete a full second later, Ganon stabs the trident into the ground. Unlike the Volcano Kick, this attack has armor, but it's not exactly difficult to get out of the way.
His down tilt is an inward slash with both swords. It hits the opponent at an upward angle. It hits at roughly the same timing and damage of his old down tilt, but with a bit more range. This is based on an attack he does when landing from a jump in Wind Waker.
His dash attack has him point his swords forwards (as opposed to during his dash when they're pointed behind him in a reverse grip) and drive them forward and up for a devastating double stab. Like his old dash attack, this is a reliable followup in tech-chase situations.
There's actually one more "attack" to mention: in Ganon's side taunt, he puts his right sword away with a spinning flourish for the sole purpose of giving a dismissive swing of the hand. This is based off of a scene in Wind Waker, but the reference only becomes complete if you're standing right next to someone, at which point this taunt turns into a mean-spirited backhand. Like most attack taunts, this one doesn't do much damage and can't be canceled, but landing it will prove Ganon is still the King of Disrespect. For the record, his up-taunt is still his floating taunt, and his down-taunt is his palm-punching taunt, both with new floating-sword action.
Smash Attacks
Ganon's forward smash has him summon his trident and spin it diagonally above and behind him once before stepping forward with a heavy stab. The spin will actually drag opponents into the stab, so this attack has considerable range comparable to that of his previous forward smash.
Ganon's up smash has him summon his trident and spin it above his head for a multi-hit attack. A very powerful smash attack that hits on both sides of Ganondorf, but is about as slow as his previous up smash.
Ganon's down smash performs an outward slash with both swords while facing the camera. Like most down smashes, this attack hits on either side of him.
Aerial Attacks
His neutral aerial has him conjure up a ball of fire in front of him that burns brightly (dealing multiple hits) before exploding. This attack has decent range, comes out quickly, and lasts a while; just like his previous neutral air. This is inspired by the fire attacks occasionally used by Ganon in some of the 2D games.
His forward aerial is an overhand slash with his right sword, which has good reach and is quite powerful in the middle of the sword.
His back aerial has him flip both his swords into a reverse grip and thrust them backwards. Fast, but still quite powerful. However, its range is quite low.
Ganon's up-air kind of serves as a replacement for his up-tilt when fighting on the ground due to the latter's long startup time. He conjures dark magic around his upper body that hits opponents away. This move covers a fair distance around Ganon.
Like before, Ganon's down-air is a devastating spike. This time, however, he causes his swords to float before delivering a downward palm strike infused with black magic. If you hit the sourspot, the enemy merely gets launched at a diagonal angle. However, if you hit the sweet spot, both you and the opponent will stop in midair while Ganon electrocutes them with his magic. Then, with a final blast of darkness, he shoots the enemy directly downward. Visually, this is inspired by his old up-special, and serves to keep his fan-created role as the "King of Disrespect" alive even with a more game-accurate moveset.
Special Moves
Ganon's new neutral special is Dead Man's Volley, a slow but devastating homing projectile. Similarly to the Warlock Punch, it's slow to fire but can be turned around. He levitates his swords, then holds his left hand skyward and begins charging yellow, electric energy.The projectile can be reflected if hit with a melee attack - and once it is, it'll be heading right for the nearest other player with increased speed, power, and homing capability. Ganon, however, has a trick up his sleeve: if you're not in the middle of an attack, Ganon can reflect the volley automatically. However, it doesn't get any stronger when reflected this way - and if it's been reflected too many times, he'll just catch it instead of reflecting it. Other characters, meanwhile, have to do this the old-fashioned way. One final note - this move's startup is armored, and hitting it point-blank means it does more damage and can't be reflected. Overall, this move plays into Ganondorf's gameplan of punishing unsafe moves, references a Zelda mainstay, and still incorporates the gameplay of the Warlock Punch with its point-blank functionality.
Ganon's side special is still Flame Choke. After all, it's the only one of his specials to be completely unique, and it leads to unique tech-chase situations not really caused by other moves in Smash. However, it's had something a little special added - when used in the air, you'll create a fancy shockwave of golden, electric magic upon hitting the ground, which will deal damage to other opponents in a free-for-all. This is in reference to his shockwave attack in Ocarina of Time, used most prominently at the very beginning of the fight.
Ganon's new up special is named Black Whirlwind. While the name is entirely made up, it's inspired by the fight against Ganon in A Link to the Past. Ganon spins his trident around before throwing it (still spinning) in one of 8 directions, teleporting ahead of it, and catching it. After that, you can hit B while holding another direction to do it again. You can even do it a third time for good measure. And THEN, you can hit B one final time - but this time, he lunges forward for a stabbing attack with the trident, which serves as killer knockback for anyone who got caught in the move. There's a catch, though. This move is already pretty unsafe if you just do the one warp - it has high endlag, and Ganon has to pull his swords back out upon landing from being helpless, which means he's there for a relative while. It gets even LESS safe the more you do with it, so don't overdo it. When fighting against this move, patience is key.
Ganon's down special is called Malice Trident, but it's more of a reflavoring of his old down special. Instead of a kick, he flies forward with his trident instead.
His final smash remains Ganon, the Demon King. I feel that move does a great job of showing Ganon's beastly form in one explosive show of force.
Daisy
Like many of Ultimate’s Echo fighters, Daisy received a slight upgrade in the form of two new attacks: a new Side Smash and a new Final Smash:
Side Smash: Super Ball
Final Smash: Daisy Cruise
Side Smash: Super Ball
Final Smash: Daisy Cruise
Dark Samus
Dark Samus will be updated along with Samus and will have her updated attacks and special attacks. Aside from that, she also gains a new Final Smash and a Down Smash:
Down Smash: Phazon Tendrils (She smashes down into the ground which causes tendrils of Phazon to shoot up all around her.)
Final Smash: Aurora Unit 313
Down Smash: Phazon Tendrils (She smashes down into the ground which causes tendrils of Phazon to shoot up all around her.)
Final Smash: Aurora Unit 313
Richter
Since Simon and Richter share so much in common, it didn’t seem right to give him several new moves but, like Dark Samus, he does gain a new Final Smash.
Final Smash: Hydro Storm
Final Smash: Hydro Storm
Hero
Under Hero’s Command Selection, icons now appear next to the text allowing for easier visibility.
Bowser
Donkey Kong
Pac-Man
Jigglypuff
© 2021 Nintendo
Original Game: © Nintendo / HAL Laboratory, Inc.
Characters: © Nintendo / HAL Laboratory, Inc. / Pokémon. / Creatures Inc. / GAME FREAK inc. / SHIGESATO ITOI / APE inc. / INTELLIGENT SYSTEMS / Konami Digital Entertainment / SEGA / CAPCOM CO., LTD. / BANDAI NAMCO Entertainment Inc. / MONOLITHSOFT / CAPCOM U.S.A., INC. / SQUARE ENIX CO., LTD. / ATLUS / Microsoft / SNK CORPORATION. / Mojang AB / Disney / Activision Blizzard, Inc. / Team Shanghai Alice / PopCap Games, Inc. / Supergiant / ArcSystem Works / Enhancer Group/ / Sony Interactive Entertainment / Rovio Entertainment / Bethseda/ Extremely OK Games / Koei-Tecmo / Twitter
Last edited:


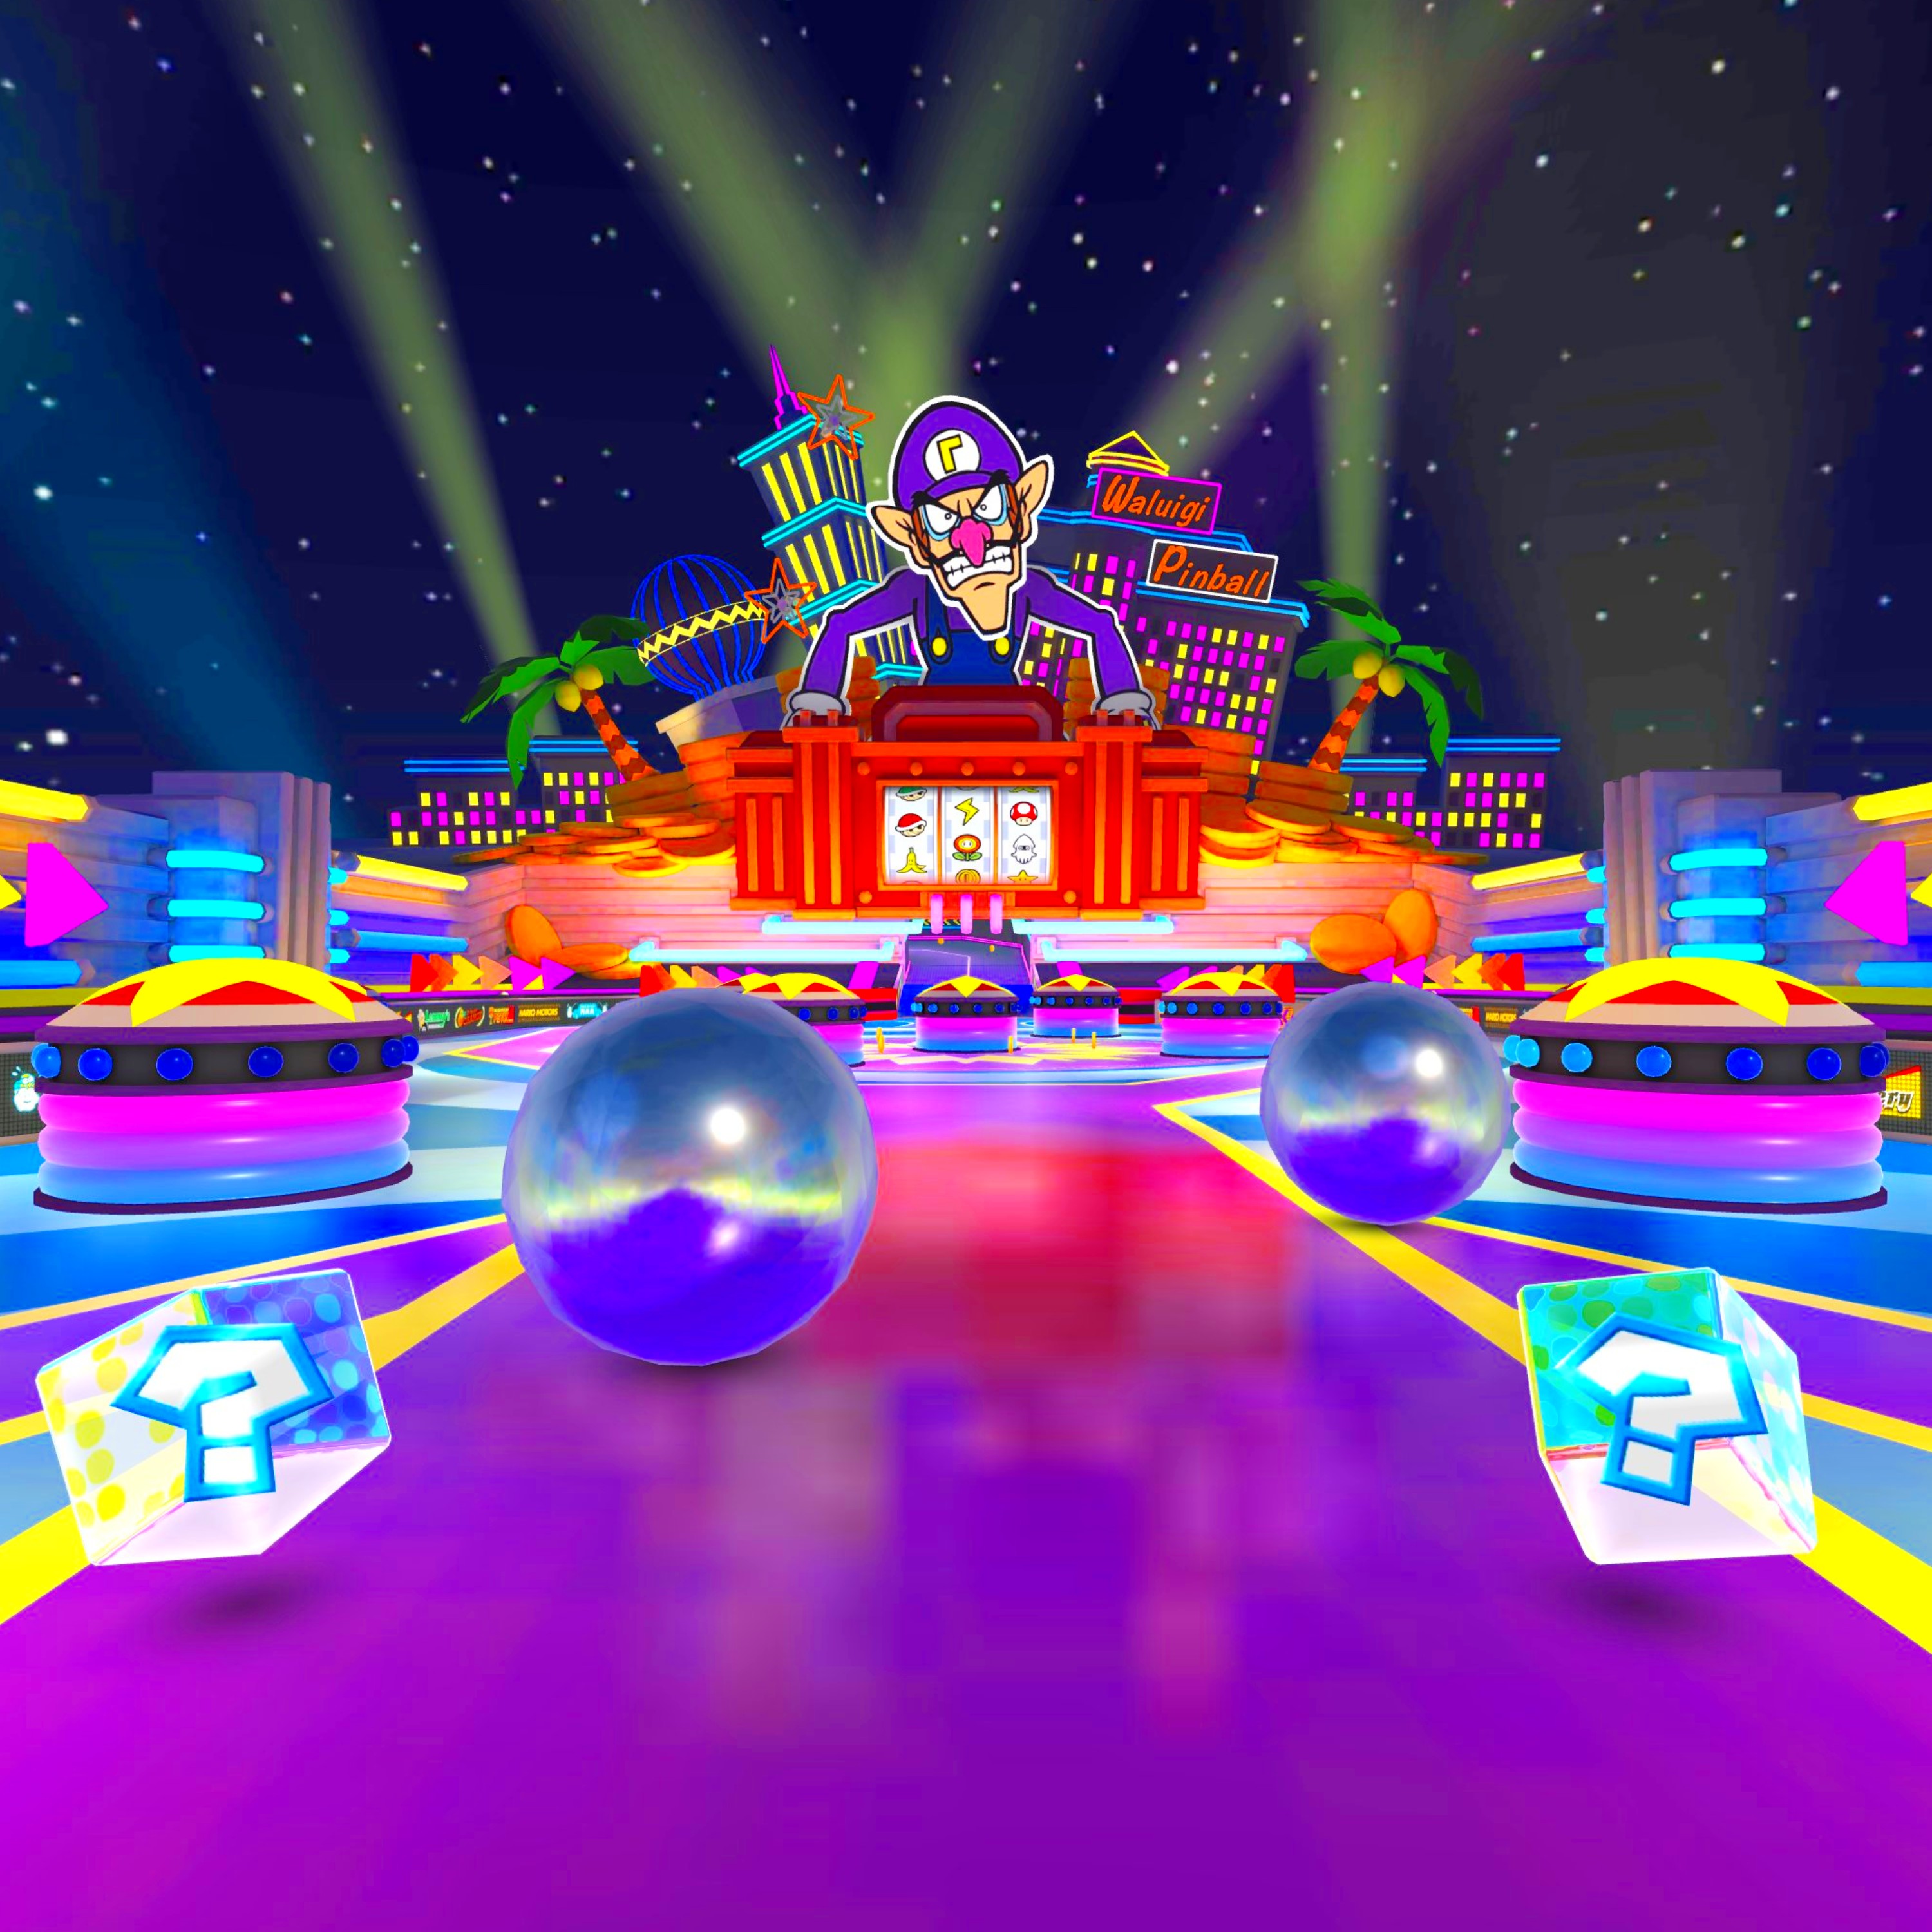

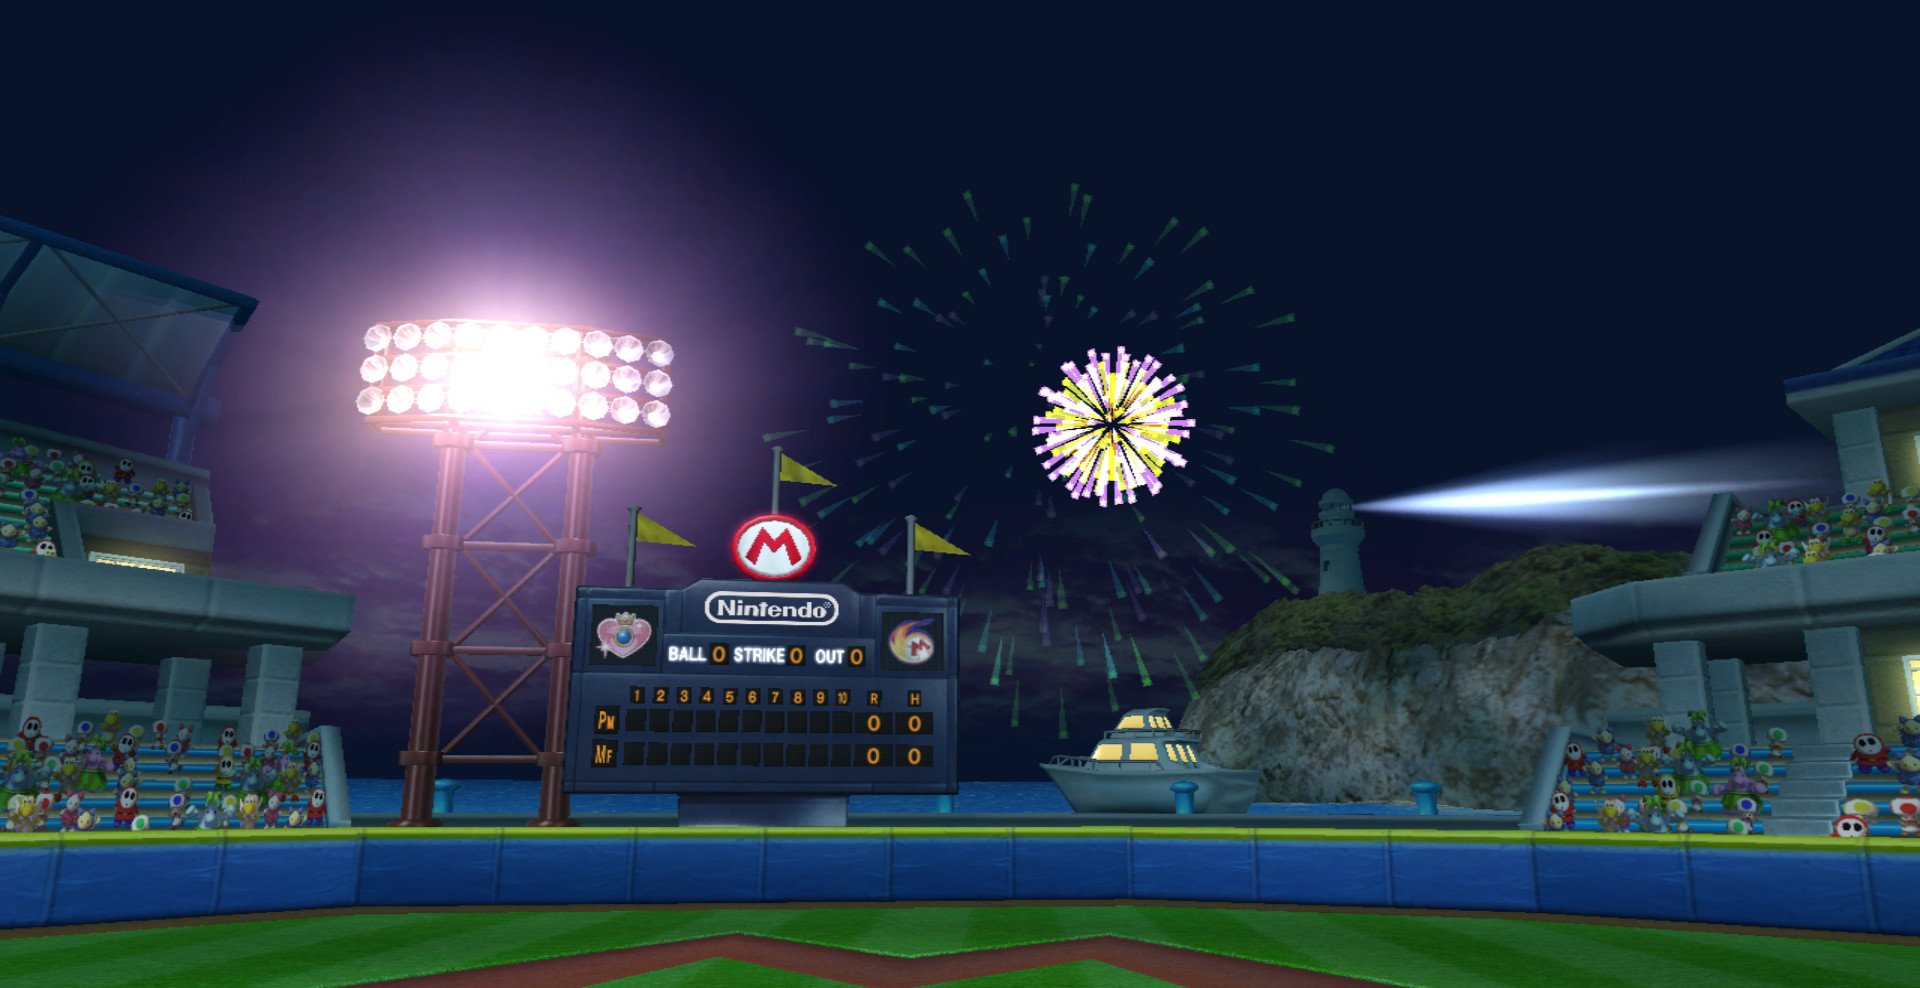

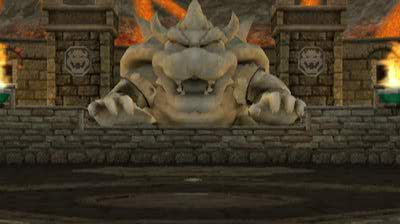


/cdn.vox-cdn.com/uploads/chorus_image/image/69974574/Metroid_Dread_Burenia_walkthrough.0.jpg)


 Wishing Stars