
What's a Tri-CSP you ask? These!
(CSP = Character Select Portrait)
Originally conceived by @krvntn, these allow you to browse the L/R alternate costumes right on the Character Select Screen! Each CSP image group is identical in size & position, so they transition seamlessly as you cycle through the costume colors in-game. Variations of these have been created in the past, particularly for 20XX, but they often aren't easily reproducible by others, which means that as new costumes come out, they can't be used with the old CSP sets (or at least, you will see jarring size/position changes of the images as you cycle through them). This project solves this by standardizing and simplifying the process for creating and sharing Tri-CSPs.
What you'll find here:
A full set of these tri-CSPs for the default costume set in 20XXHP 4.06 or 4.07.
A methodology to create your own matching CSPs using any costumes, all pixel-perfect, so they'll blend right in as you cycle through costumes in-game.
A methodology to create new Tri-CSPs using whatever poses you want, while keeping your set pixel-perfect and reproducible. This allows for easy sharing to others so that they too can use and add to them with their own costumes.
A modded FD to remove the background stars, and a modded Classic Mode VS Screen to remove the background globe.
The Classic Pose Grabber AHK Script (optional. Explained in the section The "AHK Method" and Classic Mode Poses)
And finally, the Tri-CSP Creator, a program to automate the image editing portion of making the above CSPs.
Video Guides - Look in the post following this one.
Downloads:
Vanilla-Res Full Set (MnSlChr.usd for 20XX) | High-Res Full Set (Textures for Dolphin)
Raw CSP Screenshots (For 20XX HP v4.06 & v4.07. 148 MB). These are what the CSPs in the above CSS file were created from, and includes what's needed for making new CSP costume cobinations to match them, if you want to change some of your costumes. If this download is a bit too big or you just don't need everything, you can download packs for individual characters in the spoiler below:
Setup:
The first file in the downloads section is the CSS (Character Select Screen) file containing the full set of Tri-CSPs for the default 20XXHP 4.06 costumes. To import this, open your 20XX iso in DTW, navigate to the MnSlChr file (the Disc Shortcut to Menus is useful for this), select it, click import, choose the new CSS file, and save.
If you have a lot of other custom stuff on the CSS and just want to import the images, you can load the CSS file in DTW, and then extract the CSP textures. You can use the Image Filters (Settings -> Adjust Texture Filters), as pictured below, to make this a bit easier:

Once you've extracted all of the CSPs, load up your copy of the game, and while on the Disc File Tree tab, import the CSPs you extracted from the CSS file. [You'll need to use a version of DTW before 5.0, or, if it's out by the time you're reading this, use v5.1 or higher.] They should all be imported to your game's CSS file without affecting any other textures.
The High-Res textures are used with Dolphin's Load Custom Textures feature, explained here. You can find more high-res textures for Melee in the Melee HD Texture Pack thread and the HD Texture pack for 20XX for Dolphin.
If all you want to do is use the default costumes and CSPs for 20XXHP 4.06, you can just download and install the MnSlChr (CSS) file from the downloads section and add it (or just the images from it) to your game. Instructions for that are in the spoiler above. The procedure in the rest of this section is done if you want to create new CSPs; whether to match existing sets using new costumes, or to make new CSP sets.
- - - - - -
- - - - - -
Video Guide by Stache:
Dolphin Settings:
First, you need to set some settings in Dolphin to ensure your screenshots will be 1920x1080. Start by going into Dolphin's Graphics Configuration, and set these on the Enhancements tab:- Internal Resolution: 3x (1920x1080)
- Anti-Aliasing: 8x
- Anisotropic Filtering: 16x
The most important aspect of these settings is to have your screenshots to be 1920x1080. Other settings such as Anti-Aliasing and Anisotropic Filtering can be lower if needed. If you go too much lower than what's recommended though then you might start to notice a difference in the quality of your screenshot when compared to the original set that we've gathered.
The Faster Melee Dolphin builds have a really handy feature, called "Full Resolution Frame Dumps", which is found in the Advanced tab of the Graphics settings. This will force your screenshot to be based only on Dolphin's internal rendering resolution, rather than the size of the window displaying the game. Now, if you're using Faster Melee for this, check that option and you're done. If not, continue on to the directions in the spoiler below.
For non-FM builds of Dolphin, screenshots are always based on the actual size of your game window. So set your system's desktop resolution to 1920x1080.
Now in Dolphin, go to Tools -> Graphics settings (or use the button in the main interface) and set these on the General tab:
Now in Dolphin, go to Tools -> Graphics settings (or use the button in the main interface) and set these on the General tab:
- Aspect Ratio: Stretch to Window
- Check the box that says "Use Fullscreen"
Make sure that Gecko codes are enabled: in Dolphin go to Options -> Configure, and then near the top of the General tab you should find "Enable Cheats".
Other software:
Download and unzip the Tri-CSP Creator from the downloads section above. Copy the GALE01.ini file found in the download and place it into your GameSettings folder, found in "C:\Users\[userName]\Documents\Dolphin Emulator\GameSettings".
Also in the download, you'll find a special copy of Final Destination. Normally, even if you disable all stage and background elements in Melee's debug mode, or use the 'Every Stage has a Plain Magenta Background' code, you will still see animations of stars from FD's background. The FD included here is modded to remove those stars. Use DTW to import this stage into your game. (FD is used to get screenshots for its particular lighting.)
Finally, the program to create the CSPs uses GIMP on the backend for its image editing, which you'll need to install if you don't already have it. You can get it here (it's a pretty quick and strait-forward installation).
Once GIMP is installed, open the folder in the Tri-CSP Creator's download named "Gimp plug-ins". Copy the two .py scripts there, and then click on the batch file there in the same folder. That should open up the plug-ins folder for GIMP. Paste the scripts you just copied to there. You're now ready to start grabbing screenshots of your new costumes.
Creating CSPs to Match an Existing Set
(Getting & processing screenshots for the Side Images)
You can find notes and a walkthrough of this below, but this whole section is also covered in Stache's excellent instructional video found in the Setup section. You can also find a video explaining how to use high-resolution CSPs with Dolphin here. If you're interested in more high-res textures, check out the HD Texture pack for 20XX for Dolphin.
First of all, be sure you've read the "Setup" section above this one. One of the main purposes of that section is to get your screenshots to come out a specific way. If you want to make a new CSPs to match an existing set (i.e. use the exact same poses with a new costume), then your screenshots need to turn out just like the raw screenshots of the other costumes in that set. Otherwise your CSPs will also definitely turn out differently. You can compare a screenshot you get with one of the raw screenshots from the CSP set you want to reproduce. If they're the same, then you'll be able to use that with the Tri-CSP Creator to create a new matching CSP.
Open Dolphin, right-click on the game you'll be using for getting screenshots, and go to Properties.
Go to the Gecko Codes tab, and set it so that these codes are enabled:
Note the action mentioned in parenthesis to the active pose code before you close the window.
Boot the game, and set the game type to Time.
Select the character and costume you want to take a screenshot of.
Hold Start to force loading the Stage Select Screen without needing an opponent.
Load Final Destination (there are two cases that ask for Stadium, which are stated in the name of the character's pose code, which you noted above)
Perform the action that you noted by the pose code above, and the character should freeze at some point during the move.
Pause the game, and the camera should automatically move to its required position. Now just press F9 to take a screenshot with Dolphin. (Dolphin's default screenshot output is "C:\Users\[userName]\Documents\Dolphin Emulator\ScreenShots".)
You can now exit out of the match and go on to another character if you have multiple to do. You'll need to change the pose code currently enabled though, but you don't actually have to stop and restart the game to do it. Instead, ALT+TAB to the main Dolphin window, go to Tools -> Cheat Manager, and go to the Gecko Codes tab. The benefit of using this method to set Gecko codes rather than the first mentioned method is that any changes that you make can be updated while the game is running! Disable the current pose code and enable the next one that you want to use, hit Apply, and close the window.
Go to the Gecko Codes tab, and set it so that these codes are enabled:
Every Stage has a Plain Magenta Background and No Stage Textures
Disable Effect Textures
Disable Color Overlays
Unrestricted Pause Camera
Remove HUD (Percentages, Stock Icons, Timer)
One (and only one) of the Character Pose codes (e.g. "Bowser Pose (Side-b right)")
Note the action mentioned in parenthesis to the active pose code before you close the window.
Boot the game, and set the game type to Time.
Select the character and costume you want to take a screenshot of.
Hold Start to force loading the Stage Select Screen without needing an opponent.
Load Final Destination (there are two cases that ask for Stadium, which are stated in the name of the character's pose code, which you noted above)
Perform the action that you noted by the pose code above, and the character should freeze at some point during the move.
Pause the game, and the camera should automatically move to its required position. Now just press F9 to take a screenshot with Dolphin. (Dolphin's default screenshot output is "C:\Users\[userName]\Documents\Dolphin Emulator\ScreenShots".)
You can now exit out of the match and go on to another character if you have multiple to do. You'll need to change the pose code currently enabled though, but you don't actually have to stop and restart the game to do it. Instead, ALT+TAB to the main Dolphin window, go to Tools -> Cheat Manager, and go to the Gecko Codes tab. The benefit of using this method to set Gecko codes rather than the first mentioned method is that any changes that you make can be updated while the game is running! Disable the current pose code and enable the next one that you want to use, hit Apply, and close the window.
Load up an image for each of the Left, Center, and Right Images. These are the raw screenshots taken of the character costumes. Multiple images may be given for each field, while one set (one finished CSP) will be created for each line that has a file path in each field. The usual magenta backgrounds with black bars will automatically be removed. If the given images already have their backgrounds removed, that's fine, and it may be preferred if the image has a complex or difficult background to remove, or needs other things specifically removed from the shot.
You may also give the program a different reference image to use for removing backgrounds. This is the optional "Mask" field. Provide an image for this, and that will be used as a basis for removing the backgrounds on all of the other files provided for the Left and Right image. This can be useful if all of the characters to process have the same outline, but also have other things in their frames that need to be removed.
The "Config" field is required. This is a text file that contains the sizing and positioning information for a set of images in order to turn them into a Tri-CSP. You should be able to find this in the same folder as the raw screenshots.
Setting a folder path for the Output field is optional. If you don't specify anything there, the default output folder will be the same folder as the right side image.
The "Create in High-Res" checkbox will result in a high-resolution CSP of 544x752 (4x the vanilla size of 136x188). These are for use with Dolphin's Load Custom Textures feature.
Creating a New Set with New Poses
If you want to share a new set of CSPs, you'll need to create and offer at least 3 things: The Gecko Pose Code for capturing raw screenshots, a config file for specifying sizing and position of the CSP's images, and images for the center/default costume of the CSP. It'd be great to include the raw screenshots you have for the side costumes too (or many of the more common costumes), but these aren't absolutely necessary, as they can be created as needed using the Pose Code.
To create a new code, there are just three values in the code that you need to modify: the action state ID, frame number, and pause camera position:
$Bowser Pose (Side-b right)
C216CDA0 00000009
81EDC18C 81EF0020
81EF002C 820F0010
2C10015b 40820018
A20F0894 2C104120
4082000C 3A000007
9A0F2219 81EF0000
81EF0008 2C0F0000
40A2FFD0 9421FFD0
60000000 00000000
04452f88 4172526c
04452f8c c00727ed
04452f90 426f382b
2C10015b: The Action State ID to freeze on, in hex.
2C104120: The frame number to freeze on during the action. This is represented by the first 4 characters (2 bytes) of a signed float. You can get the value for a signed float by entering a decimal number into a converter online, or the converter in MCM's tools tab. So, for example, 10 = 0x41200000 as a signed float. 4102 is then used in the Gecko code above; meaning the pose code above freezes the character on frame 10 of the chosen action.
Camera Position: These are X, Y, and Z coordinates for the pause camera, found consecutive in RAM at 0x80452f88. You can grab these in debug Dolphin while the game is in a match and the game is paused. But keep in mind that if you use the C-Stick and/or D-pad to move the camera, the game switches to [what I call] camera mode 8, and will stop updating the values for the pause camera (thus rendering the values you see there meaningless for this application). So just stick to using the main joystick and the X & Y buttons for zoom. Thanks to the unrestricted pause camera code though, you'll still have a good amount of freedom.
$Bowser Pose (Side-b right)
C216CDA0 00000009
81EDC18C 81EF0020
81EF002C 820F0010
2C10015b 40820018
A20F0894 2C104120
4082000C 3A000007
9A0F2219 81EF0000
81EF0008 2C0F0000
40A2FFD0 9421FFD0
60000000 00000000
04452f88 4172526c
04452f8c c00727ed
04452f90 426f382b
2C10015b: The Action State ID to freeze on, in hex.
There are a couple different methods:
- During a match in debug mode, you can press Y + Dpad-Down to add displays for action and subaction names to the HUD. For actions that are common to the cast, like dodges, tilts, smashes, dash attacks, etc., these names are usually strings such as "WAIT", "KNEEBEND", or "ATTACKAIRF". For these kinds of things, you can get their associated Action State ID by looking up the string name in the Action State Reference in the SSBM Data Sheet. However, character-dependent things like many B moves often show up as a number on the HUD instead, in decimal. Convert it to hex to use it in the pose code.
- An Action State Gecko code:
$P1 % = P1 Action State, P2 % = P1 Subaction State (1.02) [Achilles]
C206CA78 00000006
89C3000C 2C0E0000
4082001C 3DC08045
61CE30E0 81E30010
B1EE0000 81E30014
B1EE0E90 8803221F
60000000 00000000
- And finally, the most surefire way: In debug dolphin during a match, take the pointer at 0x80453130, add 0x70 to it, and then that address will hold the action state ID that P1 is in.
2C104120: The frame number to freeze on during the action. This is represented by the first 4 characters (2 bytes) of a signed float. You can get the value for a signed float by entering a decimal number into a converter online, or the converter in MCM's tools tab. So, for example, 10 = 0x41200000 as a signed float. 4102 is then used in the Gecko code above; meaning the pose code above freezes the character on frame 10 of the chosen action.
Camera Position: These are X, Y, and Z coordinates for the pause camera, found consecutive in RAM at 0x80452f88. You can grab these in debug Dolphin while the game is in a match and the game is paused. But keep in mind that if you use the C-Stick and/or D-pad to move the camera, the game switches to [what I call] camera mode 8, and will stop updating the values for the pause camera (thus rendering the values you see there meaningless for this application). So just stick to using the main joystick and the X & Y buttons for zoom. Thanks to the unrestricted pause camera code though, you'll still have a good amount of freedom.
threshold: 40
centerImageXOffset: 0
centerImageYOffset: 0
centerImageScaling: 1
sideImagesXOffset: 0
sideImagesYOffset: 0
sideImagesScaling: 1
reverseSides: False
You'll probably need to use some trail-and-error to do your fine tuning in config file creation, but for a basis to start with, this is what the values mean:
Threshold: This value is used to distinguish between the magenta background and a character during the background removal process of image processing. Lower numbers mean a stricter (more conservative) selection area to remove, while higher values are more liberal, and may start selecting parts of the character if too high. Most cases should be able to keep this as the default value of 40.
All of the offset values are pixel offsets between the top-left corner of the CSP and the top-left corner of the original raw screenshots. This alignment is done after the initial, relative scaling phase (for example, to scale the center image so that it takes up 3/4 of the CSP area or so), but before the
The scaling values are decimal fractions between 0 and 1. High-res CSPs will use a direct result of this scaling factor, while vanilla-res CSPs will be 1/4 of that factor. So for example if you used a scaling of .4, Then the image in the finished high-res CSP would be 40% of the original, and would be 10% of the original in the vanilla-res CSP. Using a value of 1 will cause the processing for scaling to be skipped.
reverseSides is a True/False value, which simply indicates whether or not to horizontally flip the images for the side poses.
Since you're here, I'm guessing you like playing with alternate costumes. I definitely do. But there are also a lot of people who don't, and may be quite annoyed if they have to play tournament matches with them (some may be distracting or difficult to see on some stages). For this reason, many tournament organizers may not want to use your setup for tournament if the default costumes are custom costumes. So 20XX in the competitive scene, to keep it universally accepted, should really keep these character costumes vanilla.
If a CSP set does use vanilla costumes, and a full complement is made (images for all of that character's default costumes) then it's not as important if the pose can be easily reproduced by others, as one shouldn't really need any more copies of it. But some might still find it useful. And if you're using non-vanilla costumes for the center poses, there will probably be those that would like to recreate them with the default costumes, so you might want to include a method to reproduce it.
As a final note, as with the side images/poses, you'll want to capture the images at a high resolution, so that they can also be used for High-Res CSPs for those playing on Dolphin with high-res texture packs.
Some tips:
- Keep in mind that, on the CSS, part of the bottom of the CSP will be covered up by the nametag. Which is why the Pikachu example at the top of this post (and other characters too short to fill the whole space) aren't standing on the bottom of the image, and instead kinda hover in the middle. Load up the game to take a look at how these appear in-game.
- To make all of the CSPs in the game appear more alike one another, as if they're all part of one full-game, master set, pay attention to how much space the side poses take up. And also the height and size of the center pose. This will make all of the CSPs more homogeneous, and help prevent certain ones from looking like they're out of place on the CSS.
The "AHK Method" and Classic Mode Poses
This is an alternative method of getting screenshots for characters, for cases outside of matches where you can't use the Gecko pose codes. So far, there are just two examples that used this method: Samus' side poses, and Peach's default pose. Both of these are taken from the 1P Classic Mode. Before matches in this mode, there is a VS screen depicting the player and an opponent. These are unique poses that use the character models and textures rather than just being images. Each character has two poses, depending on whether they appear as the player or opponent (or that respective team), thus I've been calling these a character's Classic Pose 1 or Classic Pose 2.
There are a couple of issues with getting good screenshots in this mode. First, the globe in the background makes image editing to remove it and the rest of the background difficult. This is remedied by the classic mode VS screen file (IrAls.usd) in the downloads section. In that copy I've made the globe textureless and black, so it essentially disappears. Second and third issues are the black bars across the upper and lower portions of the screen, and the fact that the character models are typically facing each other rather than the screen. These two issues are solved by moving the camera using Dolphin's Free Look feature. This can be enabled in the Advanced tab of Dolphin's Graphics settings.
[Update!: The issues in the above paragraph have largely been solved thanks to the "Remove Classic Mode Vs. Screen HUD" code, by UnclePunch.]
Moving the camera to an identical place for consistent (reproducible) screenshots is tricky, because the game doesn't seem to use one of its usual camera modes, and the free look feature works in analogue according to key press duration rather than in discrete steps. This means that manual Free Look input (especially with regard to mouse movements for camera rotation) can't give consistent and reproducible results. So I wrote an AutoHotKey script, the Classic Pose Grabber, that can be configured to give these inputs for us for various poses. (The script can also be used elsewhere, such as Debug Mode's Results Test screens.)
The first thing that needs to be done is to make sure the script is able to see the game window for your build of Dolphin.
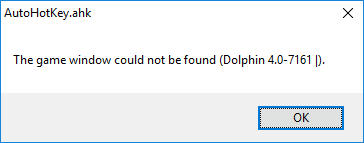
To do this, run the AHK script (it will now be a process running in the background, waiting to be activated) and then start running a game in Dolphin. Press CTRL+SHIFT+G to activate the AHK script. Dolphin should automatically pause, and the in-game camera should move a bit. If the script can't find the game window, you'll instead you see an error similar to this one:
![]()
In this case, go to line 96 in the script, and you should see a variable named "gameWindowName". Set this equal to the name your build of Dolphin uses for the window. You don't need to use the entire name; just up the "|" character is enough, in order to distinguish it from the main Dolphin window.
The main configuration for this script is seen later in the file; look/search for a section toward the end of the script labeled "Specify Camera Steps and Rotations Here". This is where you can set what actions the script takes to move the camera. You can use any combinations of the 'look' (for camera rotations) and 'move' (moving the camera up/down, left/right, or forward/back) commands.
To do this, run the AHK script (it will now be a process running in the background, waiting to be activated) and then start running a game in Dolphin. Press CTRL+SHIFT+G to activate the AHK script. Dolphin should automatically pause, and the in-game camera should move a bit. If the script can't find the game window, you'll instead you see an error similar to this one:
In this case, go to line 96 in the script, and you should see a variable named "gameWindowName". Set this equal to the name your build of Dolphin uses for the window. You don't need to use the entire name; just up the "|" character is enough, in order to distinguish it from the main Dolphin window.
The main configuration for this script is seen later in the file; look/search for a section toward the end of the script labeled "Specify Camera Steps and Rotations Here". This is where you can set what actions the script takes to move the camera. You can use any combinations of the 'look' (for camera rotations) and 'move' (moving the camera up/down, left/right, or forward/back) commands.
- Run the Classic Pose Grabber AHK script. It will now be a process running in the background, waiting to be activated by a hotkey.
- Go to 1-P Mode -> Regular Match -> Classic, and select any character
- Create a save state.
- Press start and as soon as the VS screen appears, Press F10 to pause Dolphin.
- Activate the AHK script with the hotkey CTRL+SHIFT+G. The camera should move to a new location.
- Press F9 to take a screenshot.
If the camera position was slightly off, simply re-run the script (the script will start by resetting the camera when it runs). The occasional inaccuracy of the script I believe is due to what I mentioned before, about how the input for Free Look movements is based on key press duration, rather than discrete steps. So sometimes a key may be "pressed"/simulated for very slightly more or less than it should. But for simple camera re-positioning that doesn't have a lot of steps, like the Samus example, the script works pretty well.
In the more complex case of Peach, successful re-positioning was down to around 60%. So I just added a line to the camera positioning script to take a screenshot once it's done, and then made another hotkey (which you can still find in the AHK script) to execute that script multiple times. Then I just went to my screenshots folder and picked out the screenshot that was correct.
That's all for now!
Shoutouts and thanks go out to @UnclePunch for starting this project, and to
If you guys come up with some new good sets or poses, post them, and they may be added to future versions of 20XX. And I'll probably later edit the second post here to be a repository of different CSP sets.
Last edited:
 it's fine though, i might just have to find someone who wouldn't mind doing this for me then


