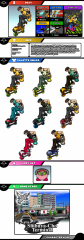
Baseline Info
Jumps: 2, same as baseline amount.
Weight: 93, the same as that of Joker. (51st heaviest in-game.)
Falling Speed: 1.49, just a hair above that of the Pits. (61st fastest in-game.)
Air Speed: 1.302, the same as that of Roy and Chrom. (4th fastest in-game.)
Run Speed: 2.43, slightly above that of Sheik but still below Little Mac. (4th fastest in-game.)
Basic Animations, Visuals, and Tools
Entrance Animation
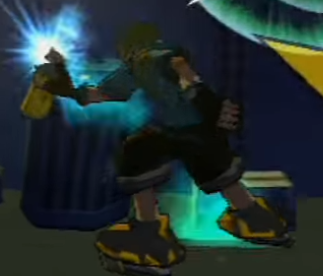
Beat “leaps” from somewhere off-screen, doing a random trick from behind and landing on the stage, before quickly turning around and entering his base idle animation before the match starts.
Idle Animations
Beat generally has a fairly combat-ready animation similar to most of the others, looking relatively normal. However, where he differs is that after being idle for a certain period of time, he enters a dancing animation similar to that seen in his entrance. This doesn’t affect the ability to act, similar to Incineroar’s taunts after hard-hitting attacks, but instead acts more as a reference to his idle animation in JSRF. The idle dancing animations will actually be unique to each alt, but I’ll get into that later.
Grounded Movement
Beat moves on the ground very much unlike any other character in the game. Rather than having an ordinary walk and run like anyone else, the skates on Beat’s feet mean that his walking mechanic differs somewhat. Holding a sideways direction when grounded, Beat will quickly enter a “walking” speed, but accelerate to a full “running” speed over a short period of time. If you let go of the stick at that point, Beat will continue to move but decelerate, a little like Luigi’s wavedash from Melee (albeit slower.)
However, if you flick the stick at full speed, Beat will rapidly do a heel-turn and turn himself around. Notably, when at full speed, doing this will activate a secondary dash attack (which I’ll get into more in the Dash Attack section.) However, if not at full speed, this will simply turn Beat around - though his momentum will continue moving “forward,” with Beat facing backwards. Holding this will result in him quickly moving in the opposite direction, facing the correct way.
Interestingly, Beat’s jab, tilts and smash attacks are all able to function when he’s in his momentum state, though he is unable to actively move in a chosen direction when performing these attacks until they are over (similar, once more, to Luigi’s wavedash from Melee.) It’s also notable that he’ll only fly off the ledge at full speed - he’ll stop himself at the ledge at any slower speed, though this doesn’t have the added benefit of the dash attack in question.
Shield
Beat actually has a completely normal shield, though as with his other basic moves, it’s able to be used whilst he’s still rolling in his momentum state.
Kirby Hat
For the Kirby Hat, Kirby basically gets Beat’s distinctive goggles and headphones. His Neutral B is the Tagger’s Tag, though without the need for a counter like Beat’s - and does slightly more damage than Beat’s does.
Boxing Ring Title
“The Rudie King of Dogenzaka Hill!!”
K.O. Animations
As well as Beat screaming as he falls off the stage, if he’s playing on Shibuya-Cho Terminal on the normal music setting, DJ Professor K will chip in with some voicelines as needed.
Crowd Chant
They basically just chant “Goooo G.G.s - Jet Set Radioo!” This is to avoid having to record a separate chant for each alt…
Taunts
Side Taunt - Beat spins in place, tossing a spray can up in the air and catching it whilst exclaiming something to the effect of “Aw yeah!” depending on the alt.
Up Taunt - Beat enters one of his dance animations, and says something like “This turf is mine.”
Down Taunt - Beat sprays a random Super Small (SS) tag on the floor, which can be any of the SS tags from JSRF. It has no actual effect.
Alts
Each Alt here represents a different character or gang from JSRF, though apart from their appearance and voice lines, they differ in no way whatsoever.
Alt 1 - Beat’s normal appearance in Jet Set Radio Future. His default spray colour is yellow.
Alt 2 - Gum’s normal appearance in Jet Set Radio Future. Her default spray colour is a light, turquoise-ish blue.
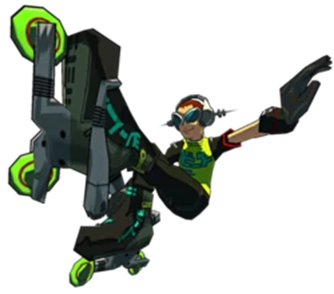
Alt 3 - YoYo’s normal appearance in Jet Set Radio Future. His default spray colour is green.
Alt 4 - Corn’s normal appearance in Jet Set Radio Future. His default spray colour is a dark teal.
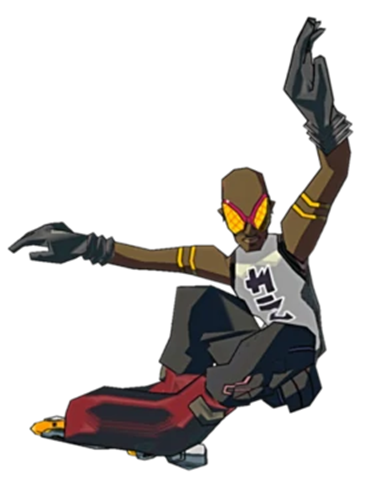
Alt 5 - Garam’s normal appearance in Jet Set Radio Future. His default spray colour is orange.
Alt 6 - Cube’s normal appearance in Jet Set Radio Future. Her default spray colour is red.
Alt 7 - The Noise Tanks’ normal appearance in Jet Set Radio Future. Their default spray colour is grey.
Alt 8 - Zero Beat’s normal appearance in Jet Set Radio Future. Its default spray colour is black.
Main Gimmick
Spray Cans
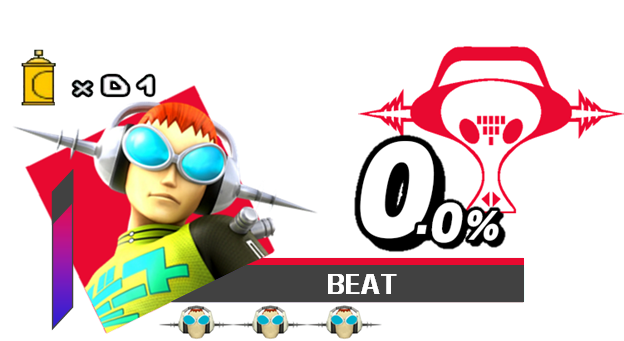
Besides Beat’s bizarre means of movement, he also has a secondary gimmick in the form of his spray cans. Now, this does have to be adapted somewhat from the original game, but has a unique appearance in this scenario. To display this, let’s look at his UI.
Battle UI
As you can see, Beat’s UI has a very unique appearance. First up is the meter beside him, which indicates his speed in a similar way to the original game. It reaches full when Beat is at full “sprint” speed, and glows yellow when Beat uses his Side-B.
The presence of the can can also be seen here. Beat, in some moves, will use spray cans to add power to his attack or to even use them outright, and the number of cans he has is displayed above his character art as seen there. He can hold up to 30 in total. When he has 0 cans, the can takes a red colouration as opposed to yellow, and when he has 30, it takes a green colouration, again in reference to the classic UI and also as a quick indication of your can count before having to look at the number. Unlike Inkling’s paint, the cans will slowly replenish over time, though comboing moves together in a string will result in them recharging faster.
Normal Attacks
Beat’s normal attacks have an unusual property of their own, being that they all get given some form of “name” which is displayed on his UI, slightly similarly to how it is in the game. Stringing together more attacks in a combo will result in you getting more and more cans back. Replenishing cans is usually a slow process, and landing heavy hits can help to get a couple, but stringing together combos will result in the cans replenishing progressively faster until the combo is over, pushing Beat into a heavy rushdown playstyle.
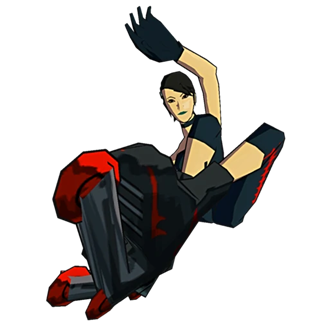
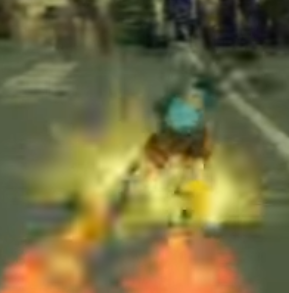
Please bear in mind that the images may not contain Beat himself, but are intended to represent his movements.
Dash Attack
Beat doesn’t actually have a traditional dash attack like most. Given Beat’s unusual movement mechanics, his dash attack isn’t activated by him tapping A when dashing, but actually by turning around when at full speed. When he does turn around, his own “dash attack” will activate, though this only works at his “full speed” (which is pretty quick to reach.) To activate dash attack, it’s best to tap the control stick in the opposite direction rather than hold it.
Being a heel-turn, it kicks up “sparks” and a small dust cloud as in the original game. It deals moderate knockback, but slightly higher than average damage. It’s actually quite useful for ledge-guarding, being able to kick up some “sparks” in a downward direction - though this is a risky move that needs to be timed pretty well to prevent you flying off the stage.
Most notably, it actually turns Beat around to the opposite direction after use, stopping him in his tracks. If you hold down the opposite direction, you’ll begin to pick up speed again as normal.
Get-Up Attack
Dubbed “Wildstyle,” Beat’s Get-Up attack involves him leaping onto his hands, helicopter spinning to hit on both sides, and then getting back into his fighting stance.
Jabs
Beat’s jabs are actually pretty standard fare. His basic jab combo is a three hit combo - a left hook which he slightly rotates into, a right uppercut, and then a unique one in which he turns around, kicking up a few sparks like a mini dash attack. As with his other normals, he can use these whilst moving - and his jab combo is actually best used whilst moving, in order to combo into each other as effectively as possible. However, his final jab will result in his momentum stopping, so that you can’t just infinitely jab combo across the entire stage.
Tilt Attacks
Side Tilt
Beat’s side tilt essentially relies on him moving. What it actually is happens to be a floor slide, which decreases his momentum, though has a high number of active frames - basically, active as long as Beat’s moving. However, if Beat stops, hits something, or hits a shield, he’s not exactly safe and can be punished. The damage of this move isn’t much, but it does have pretty fair knockback.
Up Tilt
Somewhat of an original move, Up Tilt relies on the primary “gimmick” of Beat, the spray-can mechanic. (This was mentioned above.) In this case, it uses one spray can, spraying directly above him when used with a high number of active frames and a multi-hitting effect, though with low knockback and a disjointed hitbox directly above that struggles to catch opponents on the side. He then chucks the can aside, though as with Robin’s tomes and Levin Sword, it can be caught and used as an item before it despawns. If Beat doesn’t have any cans, he just jumps and does a flip - with moderate damage and knockback and slightly lower lag, though much more lag before the attack.
Down Tilt
Beat’s down tilt works similarly, though this is based on the “Farside Stab Soul” grind that can be performed on rails. Balancing seamlessly on one foot, Beat moves forward and begins to decelerate, having a lower hitbox than his side tilt. Notably, there is a sweet spot, specifically when coming out of the animation - doing so has Beat kick his leg over his other to stand on two, which has relatively high knockback. Once more, though, the move has moderate knockback at best and low damage output, and suffers high endlag upon hitting a shield or object, or slowing to a complete stop.
Smash Attacks
Side Smash
For his side smash, Beat gets low and almost in a ball shape, before leaping forward into a “1080 Method,” invented for Smash but based on his actual tricks. Spinning whilst in the Method pose three times, it’s a multi-hit with the last hit doing the most damage and knockback. However, it’s best used when moving to ensure the most distance and combo potential.
Up Smash
Beat’s Up Smash is actually quite quick, simply involving him somersaulting (based on the LK Backflip.) It’s unusual for Beat, as it’s actually slightly more powerful when he’s stationary. The somersault covers an arc above him, useful for anti-airing, though the sweet spot is directly above him. It is, however, quite possible to hit by his side as well, though without much damage.
Down Smash
Beat’s Down Smash is rather unusual for him. In this case, it acts as a hand plant, at which point he spins around his legs in a breakdance, damaging opponents around him. However, this completely halts his momentum as he does so. It’s another multi-hit, though the scissor he does at the end before flipping back to his feet launches upward.
Aerials
The Aerials in Beat’s moveset are all quite unique for many reasons. Perhaps most notably, none of them are actually “kill” moves - rather, they take the form of the various “aerial tricks” that you can perform in Jet Set Radio Future. They also have a very combo-heavy nature, though at some loss to their damage and knockback.
Neutral Air
NAir in this case is an aerial trick called “Abstract 360,” in which Beat curls into a ball and spins around before unfurling himself. Whilst this doesn’t do much damage, it does surprisingly high knockback - though there’s a little bit of endlag to deal with if you whiff it.
Forward Air
The FAir of Beat in this case is the “Rocket,” another aerial trick. This is a little like the BAir, though has more reach than its counterpart, coupled with slightly more damage and knockback, albeit less active frames. It’s Beat’s only real “kill aerial,” though works best if hit at the sweet spot - right at Beat’s feet.
Back Air
The Back Air in this case is an aerial trick called “Method,” taken from the original game. It’s a lot like FAir, though has less overall reach. Hitting behind (obviously,) BAir has a single hit that’s similar in many ways to a normal NAir, being useful as a walling tool due to relatively low damage and knockback, but a high amount of active frames.
Up Air
In this case, UAir had to be a little inventive, so I sort of invented a move that pays homage to an aerial trick from the base game. Based loosely on the “Method 540,” and the “Stale Mute Corkscrew,” Beat flips upside down and spins around, though not outstretched like in his DAir. UAir doesn’t do an awful lot of damage, though the final hit involves Beat flipping back around and stretching out - a final hit with a surprising amount of diagonal-forward knockback, though not active for long.
Down Air
In this case, DAir is an aerial trick called the “1080.” Functioning a little like that of Samus and Joker’s UAir, Beat brings himself straight and twirls three times in the air, with a multi-hit hitbox which has a sweet-spot on his lower body. However, it doesn’t actually do much knockback, though it does moderate damage. Where this is different is that it is angled first in a slightly forward direction, the second is angled directly downward, then the third rotation is angled in a slightly backward direction - unlike the aforementioned diagonal-forward UAirs of Samus and Joker.
Special Attacks
Neutral B - Tagger’s Tag
The Neutral B of Beat is arguably one of the most important mechanics in the original game, allowing him to spray a can of spray paint and place a “tag” in front of him. If an enemy is caught in the cloud of spray paint, they get “tagged” - shown by Beat’s tag being placed upon them. This does 5% damage at first, then minimal progressive damage as with the effect of the Lip’s Stick, though the effect will eventually wear off.
If an enemy gets caught inside the spray, then a “target” similar to Sonic’s homing attack will appear over them to indicate that they’ve been hit, that appears like the graffiti areas in the source game.
Notably, if it misses an enemy, then the tag will just be sprayed onto the floor in most stages (basically anywhere this is possible, so he can’t do it in 2D stages like Flat Zone.) It doesn’t actually do anything, but acts as a sort of reference to how it’s, well… graffiti. Notably, it actually sprays the SS symbol on opponents (the colourful one) but sprays the S symbol on the floor (the blue one.)
Side B - Boost Dash
Beat’s Side B, the Boost Dash, requires 10 spray cans per activation - as with the original game. What it does upon use is similar to the Wonderwing - Beat begins moving much faster than normal, having an active hitbox and actually being intangible, though possessing a hitbox that does minor damage but surprising knockback, when in this state. It actually also boosts the height of his jump from the ground, though doesn’t act as a status effect. However, attacking on the ground - whether it’s a normal or a special - will result in the effects of Boost Dash being cancelled. Jumping will maintain the speed of Boost Dash, but it loses its intangibility if you do so. Of course, after a short time, the attack ends even if you’re on the ground.
Naturally, Boost Dash is a surprisingly effective recovery tool too! When used in the air, it gives a lot of horizontal movement to Beat, though still in a slightly downward arc. However, if used in the air, it doesn’t get any intangibility - though it still has a hitbox. The hitbox is more effective, however, on the ground. Interestingly, it’s actually better to use the Boost Dash before jumping, as it increases the height of your double jump and gives a lot more distance!
Up B - Grind Rail
Beat’s Up B might be one of the most unusual yet. Being completely unique, what it does is essentially summon a “rail” underneath his feet when used in the air, which then “expands” horizontally upward and forward. The angle of the new bit of rail forward or upward can be altered as you skate up it, and you can leap off at any time. Notably, leaping off doesn’t leave you in freefall, though you can’t use Grind Rail again until you’re on the ground. If you tap the B button when on the rail, Beat does a variety of tricks on the rail, including but not limited to the Makio, Torque Soul, Acid Soul, Star (renamed from “Pornstar” for that E rating) and others. Each trick has a small amount of damage and knockback that can combo into each other. However, you need to time them perfectly for optimum speed and distance, because if you do it too late, you lose speed, and if you do it too early, you lose much more speed.
When used on the ground, the rail simply “pops up” from the ground in front of Beat, and can be used right up until he reaches the edge, at which point he shorthops off… and, well, off the stage. When ground-based, using the tricks will result in Beat maintaining his momentum, as well as being able to combo into enemies. However, hitting an enemy on the rail will slow Beat down a little even if perfectly timed for balancing purposes.
Down B - Graffiti
Whilst the fun little side effect of Neutral B doesn’t actually do anything when used on the floor, Down B does. Bringing up a few more of those targeting reticles, it gives Beat the opportunity to use his cans (with it requiring 5 cans in total) to fill them all in. He’ll need to move a little to one side or the other, but can leave and return to it if needed. However, the whole graffiti will last only 30 seconds from the first use, after which it can be placed anywhere else on the stage.
Should Beat fill in the whole graffiti on the floor, he gets a buff for the remaining time until the graffiti disappears. (There’s also a little jingle when it’s completed, which is actually the jingle for when Beat completes graffiti in JSRF. There’s a small chance that the jingle of when Beat collects a Graffiti Soul will play instead, though this has no gameplay effects.) This specifically gives a slight buff to his speed, jump height, and attack power, though notably slightly decreases his defence.
Final Smash
Graffiti Soul
Beat’s Final Smash, named “Graffiti Soul,” involves him breakdancing as he does sometimes in the game at the end of missions. Picking up two spray cans (please note that these cans aren’t dependent on the number of cans Beat has to his disposal), he begins breakdancing with inputs similar to those of the original Jet Set Radio placed on the screen above him. The more of these inputs you get successfully, the more effective his attack will actually be. Throughout the attack, there’s a cloud of spray paint around Beat, and enemies caught in it will get minor constant damage as well as flinching - a little like Piranha Plant’s Side B. The amount of damage it does will depend on the success rate of your inputs. At the end of the attack, Beat does a flip and upon landing, the cloud disperses, dealing high damage and knockback to opponents caught within it. Again, the level of damage and knockback is dependent on how well you input the commands.
Stage
Shibuya-Cho Terminal
JSRF’s third stage, the Shibuya-Cho Terminal has become near-synonymous with JSRF as a whole, mostly due to its presence in crossover media like Sega Superstars Tennis, as well as Shibuya being present in games like Sonic and Sega All Stars Racing. Notably, the layout of this stage is a flat, run-off one, with the bus shelters acting as platforms you can stand on. Occasionally, a bus will pass through and stop under the platform, making it essentially a solid block.
There’s also a stage hazard in the form of Hayashi and a couple of members of the Rokkaku Police in tanks. Every so often, they’ll enter the stage and start attacking pretty much indiscriminately. This, of course, can be turned off by turning off stage hazards. They also interact with each other via voicelines!
Characters not referenced in one of Beat’s alts will also occasionally skate by in the background, and sometimes stop to dance behind the stage. They can’t be interacted with.
Music
Because what would a JSR rep be without music, hmm?
Shibuya-Cho Terminal Gimmick
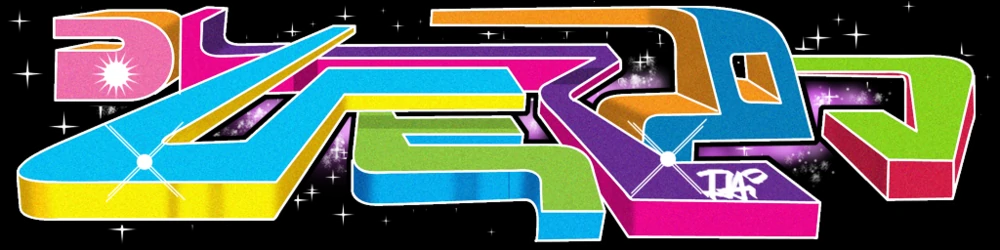
On the stage Shibuya-Cho Terminal, it’s actually possible to select a new “default” musical option. This essentially has DJ Professor K running the actual Jet Set Radio station by means of playing various musical tracks on his station, as well as providing brief commentary and speaking in general between tracks. This can be turned off if you don’t like it by simply selecting an alternative track you wish to have played more commonly. He can also, rarely in this mode, start doing his freestyle rap hidden on the Jet Set Radio Dreamcast disk!
As a side note, as opposed to the normal black and white, the music selection will appear in static in a unique font, seen here.
Tracks - 53 Total
JSR:
Jet Grind Radio Soundtrack - Humming the Bassline
Jet Grind Radio Soundtrack - Let Mom Sleep
Jet Grind Radio Soundtrack - Miller Ball Breakers
Jet Grind Radio Soundtrack - Everybody Jump Around
Jet Grind Radio Soundtrack - Electric Toothbrush
Jet Grind Radio Soundtrack - Magical Girl
Jet Grind Radio Soundtrack - Funky Radio
Jet Grind Radio Soundtrack - Moody's Shuffle
Jet Grind Radio Soundtrack - Sneakman
Jet Grind Radio Soundtrack - 'Bout the City
Jet Grind Radio Soundtrack - Sweet Soul Brother
Jet Grind Radio Soundtrack - That's Enough
Jet Grind Radio Soundtrack - Rock It On
Jet Grind Radio Soundtrack - Yellow Bream
Jet Grind Radio Soundtrack - On the Bowl
Jet Grind Radio Soundtrack - Grace & Glory
JSRF:
Hideki Naganuma - The Concept of Love
Hideki Naganuma - Fly Like a Butterfly
bis - Statement of Intent (Remix)
Hideki Naganuma - Funky Dealer
Hideki Naganuma - Shape Da Future
Bran Van 3000 - The Answer (The Latch Brothers Remix)
Hideki Naganuma - Teknopathetic
Hideki Naganuma - Oldies But Happies
Hideki Naganuma - Like It Like This Like That
Guitar Vader - I Love Love You (Love Love Super Dimension Mix)
Aisle 10 (Hello Allison)
Hideki Naganuma - Humming the Bassline (D.S. Remix)
Richard Jacques - What About the Future
Richard Jacques - Bokfresh
Hideki Naganuma - Let Mom Sleep (No Sleep Remix)
The Latch Brothers - Me Likey the Poom Poom
The Latch Brothers - Count Latchula
The Latch Brothers - Koto Stomp
BS 2000 - The Scrappy (The Latch Brothers Remix)
Hideki Naganuma - Rock It On (D.S. Remix)
Hideki Naganuma - Sneakman (Toronto Mix)
Hideki Naganuma - That's Enough (B.B. Rights Mix)
Hideki Naganuma - Sweet Soul Brother (B.B. Rights Mix)
Hideki Naganuma - Grace & Glory (B.B M.H. Mix)
Hideki Naganuma - Jet Set Medley Future
Other:
Teknopathetic (e-Pop 'n' Disco 80's Mix)
Sonic & Sega All Stars Racing DS OST - Fly Like A Butterfly (Jet Set Radio Future)
Graffiti City (Intro) - Sonic & All-Stars Racing Transformed [OST]
Graffiti City - Sonic & All-Stars Racing Transformed [OST]
Ollie King OST - Funk To The Top
Ollie King OST - Something Jazzy For Your Mind
Ollie King OST - The Concept of Love (Concept of Passion)Ollie King OST - Brother Goes Away
Ollie King Soundtrack - Too Fast
Boarder 70 - Ollie King OST [HD]
HIDEKI NAGANUMA - LUV CAN SAVE U [luv can extend u mix]
Never 4ever - Hover : Revolt Of Gamers Original Soundtrack
HIDEKI NAGANUMA - DEAD HEAT RIDERS Music Preview
There’s likely to be some medleys and new remixes here too, though I’m not sure for which songs. Just imagine there’s a few tossed in there for good measure. Also, Persona gets a bonus song courtesy of Naganuma himself! This specifically is:
YUMI KAWAMURA - When The Moon's Reaching Out Stars [HIDEKI NAGANUMA LONG REMIX]
Victory Themes (picked randomly, one of the three)
Hideki Naganuma - Jet Set Station #2
Jet Set Groove #3
Ollie Groove 1 - Ollie King OST [HD]
Game Modes
Classic Mode
Tagger’s Tag!
Intended to represent the various gangs and missions in Jet Set Radio Future, this Classic Mode will be as follows. Bear in mind that the generic DJ Professor K music setting will be active here.
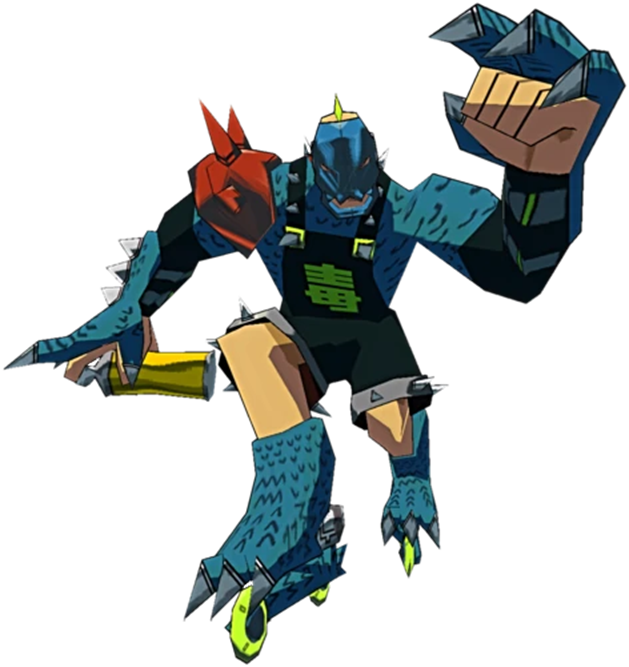
- Fight against 3 King K. Rool’s, in their blue alts, on Wrecking Crew. This references Poison Jam and Dogenzaka Hill.
- Fight against 3 Zero Suit Samus’s in their blue bikini alts on Midgar, in reference to the Love Shockers and 99th Street as a whole.
- Fight against 3 R.O.Bs in their grey alts on Arena Ferox, in reference to the Noise Tanks and Rokkaku Expo. A large amount of Football items will spawn here in reference to Deathball.
- Fight against 3 Simons in brown alts on Fourside, in reference to the Immortals and the Skyscraper District.
- Fight against 2 Zero Beats on Shibuya-Cho Terminal.
- Fight against Snake in his blue alt on Shibuya-Cho Terminal, in reference to Hayashi himself. Hayashi won’t appear here, but the tanks and police will.
- Fight against Master Hand on Final Destination.
Credits Picture
A photograph of Beat and the GGs, with Beat in the centre and all of the GGs managing to get into the shot. Zero Beat can be seen in the far background, watching from a distance...
All-Star Mode
Jet Set Radio Future, which we’ll be counting here, was released in Japan on February 22nd, 2002. This places him between Olimar (October 26th, 2001) and Roy (March 29th, 2002.) I decided due to Beat’s design here not to count the game of origin as the original Jet Set Radio - though just for fun, Jet Set Radio was released in Japan on June 29th, 2000, placing it between Pichu (November 21st, 1999) and Villager (April 14th, 2001.)
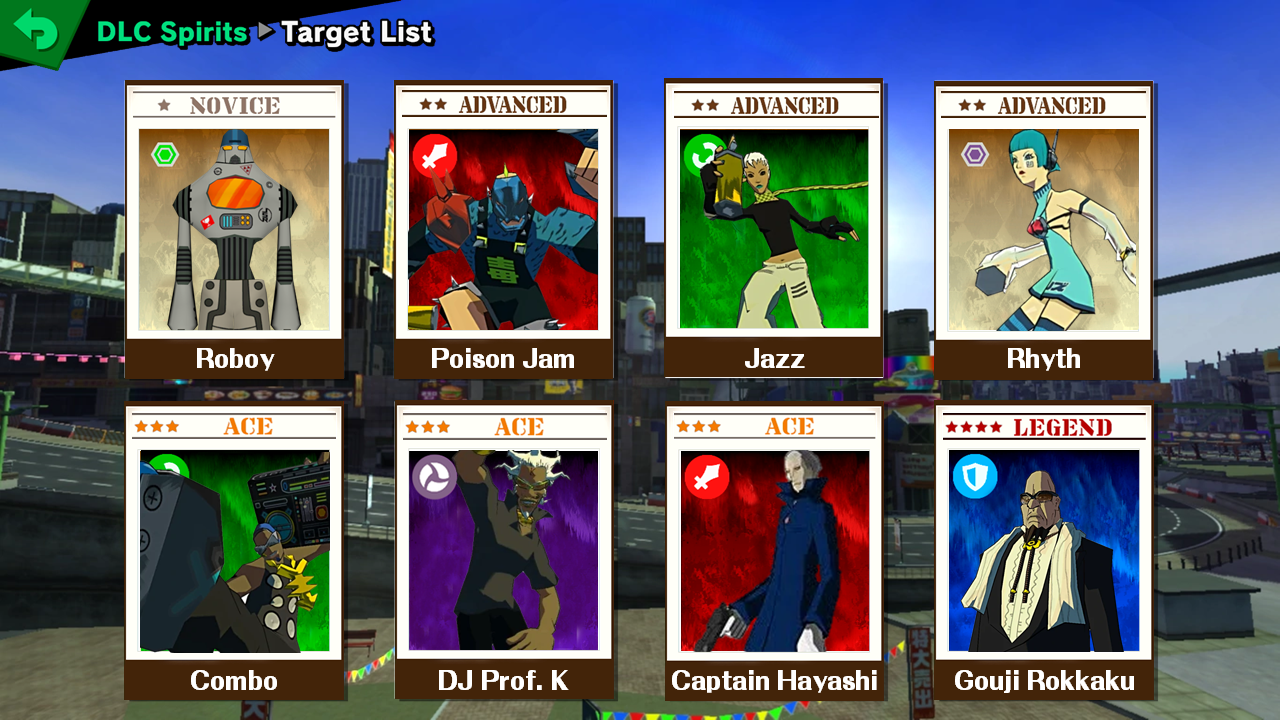
Spirits
Roboy (☆)
Support Spirit (Grab) [3 Slots]
Music: Electric Toothbrush (JSR)
Fighters: Mega Man (Alt 8)
Conditions:
- (Mega Man) The enemy is metal
Stage: Shibuya-Cho Terminal
Poison Jam (☆☆)
Primary Spirit (Attack) [2 Slots] (Impact Run)
Music: The Scrappy (JSRF)
Fighters: 3 King K. Rools (Alt 3) [Mii Fighters will replace these if you have Poison Jam costumes]
1 Zero Suit Samus (Alt 4) [Appears after K. Rool’s have been defeated]
Conditions:
- (King K. Rool’s) The enemy has increased movement speed
- (King K. Rool’s) The enemy has increased jump height
Stage: Shibuya-Cho Terminal
Jazz (☆☆)
Primary Spirit (Grab) [3 Slot] (Thrown Items ↑)
Music: Count Latchula (JSRF)
Fighters: Wii Fit Trainer (Alt 7)
Conditions:
- (Wii Fit Trainer) The enemy has increased movement speed
- (Wii Fit Trainer) The enemy favours Side B
Stage: Arena Ferox
Rhyth (☆☆)
Support Spirit (Attack) [1 Slot] (Trade-Off Speed ↑)
Music: Oldies but Happies (JSRF)
Fighters: Sheik (Alt 8)
Conditions:
- (Sheik) The enemy has increased movement speed
- (Sheik) The enemy has increased jump height
Stage: Midgar
Combo (☆☆☆)
Primary Spirit (Grab) [2 Slots] (Instadrop)
Music: Statement of Intent (JSRF)
Fighters: Donkey Kong (Alt 1) [A Mii Fighter will replace DK if you have the Combo outfit.)
Conditions:
- (Donkey Kong) The enemy has increased ground movement speed
Stage: Shibuya-Cho Terminal
DJ Professor K (☆☆☆)
Primary Spirit (Neutral) [2 Slots] (Item Gravitation)
Music: Jet Set Medley Future (JSRF)
Fighters: 4 Beats (Alts 1, 2, 3 & 4)
1 Cloud (Alt 5) [Appears after Beat’s have been defeated]
Conditions:
- (Items) Boss Galagas will spawn at a high rate.
Stage: Wrecking Crew
Captain Hayashi (☆☆☆)
Primary Spirit (Attack) [2 Slots] (Shooting Items Power ↑)
Music: The Scrappy (JSRF)
Fighters: Snake (Alt 1)
Conditions:
- (Snake) The enemy has increased special move power
Stage: Shibuya-Cho Terminal
Gouji Rokkaku (☆☆☆☆)
Primary Spirit (Attack) [1 Slot] (Weight ↑)
Music: Grace and Glory B.B.M.H Mix (JSRF)
Fighters: 2 Beats (Alt 8)
1 Ganondorf (Alt 6) [Appears after Beat’s have been defeated]
Conditions:
- (Beat) The enemy has increased movement speed
- (Beat) The enemy has increased jump height
- (Ganondorf) The enemy has super armour
Stage: StreetPass Quest
A.K.U.M.U (Evolves from Gouji Rokkaku) (☆☆☆☆)
Primary Spirit (Attack) [1 Slot] (Slow Super Armor)
Mii Costumes
Wave ???
Jet Set Radio Future - Combo Costume (Brawler)
Jet Set Radio Future - Hayashi Costume (Gunner)
Jet Set Radio Future - Poison Jam Costume (Brawler)
Streets of Rage - Axel Stone Costume (Brawler)
NiGHTS Into Dreams - NiGHTS Costume (Brawler)
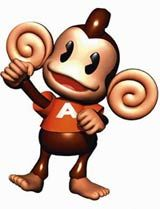
Super Monkey Ball - AiAi Hat (Any)
Deluxe Costume
Lethal League Blaze - Candyman (Swordfighter)
Comes with bonus music track!
Hideki Naganuma - AIN'T NOTHIN' LIKE A FUNKY BEAT [Lethal League Blaze OST]


 Everlong
 CodakTheWarrior
 KneeOfJustice99
 fleshdude.gov
 Ornl
Ornl
 733.9 KB Views: 1,697
")