• Welcome to Smashboards, the world's largest Super Smash Brothers community! Over 250,000 Smash Bros. fans from around the world have come to discuss these great games in over 19 million posts!

    You are currently viewing our boards as a visitor. Click here to sign up right now and start on your path in the Smash community!

Rate & Create the Moveset

Perkilator

Smash Legend
Joined
Apr 8, 2018
Messages
10,515
Location
The perpetual trash fire known as Planet Earth(tm)
8.5/10 - Really good moveset! The first three specials are on point, the down special seemed not the best gameplay-wise at first but I actually think it's really good. Having a Nuts & Bolts FS is a bit weird but I can dig it. N&B seems kinda cool actually (just forget it's a B-K game lol)

Video reference for Diskun: https://www.youtube.com/watch?v=X-yyTdxl6v0

NEUTRAL B - Disk Toss - Diskun raises his hands and a large floppy disk (slightly larger than him) appears above him. While holding the B button down, you can actually move around, turn and jump (once). Upon release, Diskun throws the disk forward, and it slides through the air at roughly the speed of Samus' Charge Shot. It deals around 12% and knockback killing around ~165%, at a slightly upward angle.
If you land on it from the top, it acts as a (pretty fast) moving platform! It's usually not possible for Diskun himself to jump onto one, but you could catch landings with it and get foes away from you pretty quickly. Finally, if you throw the disk at a wall (or the side of the stage) it sticks to it (a la Gordo), wobbling up and down slightly. This acts as a bounce pad, although not a particularly strong one (sends you about as high as a regular jump). You can jump through it from the bottom like any regular platform. It disappears after 8.5 seconds.

SIDE B - Disk Form - Diskun transforms into his disk form, and flies forward at a speed slightly faster than his dash speed, for a maximum of 3.5 seconds. It can be angled slightly upwards (decreasing its speed somewhat) and downwards. The speed is somewhat dependent on Diskun's momentum at the time of use, so using it during a dash tends to give the best results.
At maximum speed, hitting a foe deals around 10% and knockback killing around ~180%. Diskun will also bounce back slightly and revert back to his regular form. This makes it a good, albeit risky, edgeguarding tool (as well as being obviously great for horizontal recovery).

UP B - Toaster Jump - Diskun squeezes himself downwards, and upon release of the B button, fires upwards. If the B button was held for at least .75 seconds, Diskun will reach as high as G&W's Parachute. Diskun can move slightly left and right as he's rising. Doesn't leave him in freefall.
Hitting opponents deals around 9.5%, and knockback killing at ~180% (at diagonal upwards angles).

DOWN B - Memory Write - The first time this move is used, Diskun will 'store' the number corresponding to his current damage %. This number will affect the amount of damage and knockback he deals on all of his moves. If the number is 10, his attacks will deal 1.1x more damage and knockback. If the number is 50, his attacks will deal 1.5x more damage and knockback. If the number is 100, his attacks will deal 2x more damage and knockback.
If he uses the move again, the number he'll store will be the amount of damage he's received since his previous use of the move. So if he hasn't received any damage, the number will go back to 0. If he's received 25% more damage, the number will be 25. Losing a stock resets the value to zero. This is probably his most important move overall, and also requires a fair bit of strategy to use effectively.

FINAL SMASH - Disk Error - Suddenly the stage goes silent and an extremely annoying 'error' sound-effect starts playing in the background. A ring appears around Diskun and starts expanding rapidly. Any foes caught in the radius receive around 30% damage with extremely long hit-stun lasting around 5 seconds. The knockback dealt at the end kills from centre-stage at around 50%. The ring covers pretty much the whole stage although you can evade it by either going off-screen or hiding behind an element of the stage.

Ok, for my request I'd like to see the Chorus Kids!
9/10 Not bad!

I’ll have to turn over to BluePikmin11 for the Chorus Kids, tho. In the meantime, here’s my moveset for FE7 Hector:

Intro: Same intro for all other FE characters.
Notable Palette Swaps: Lyn, Eliwood, Ninian, Nergal, Lilina, Zephiel, FE6
Idle Animation: Hector puts Armads down onto the ground after lifting it briefly.

Grab: Hector grabs the opponent with his open hand.
Pummel: Hector knees whoever he’s grabbing.
F-Throw: Hector throws the opponent forward.
U-Throw: Hector throws the opponent up and calls down thunder.
D-Throw: Hector slams Armads down on the ground.
B-Throw: Hector swings Armads backwards.

Special Moves:
B : Shield Smasher; Hector charges Armads with the power of thunder. When charged completely, it will destroy the opponent’s shield and send them flying.
B + Forwards : Hand Axe Throw; Hector throws a Hand Axe, which does minimal damage but flies and comes back very quickly.
B + Up : Armads’ Blessing; Hector spins Armads like a Helicopter and it takes him up for about 3 seconds.
B + Down : Ostian Counter; this counter works two ways. If Hector is hit by a physical attacks, he will do a close counter with Armads. If he is hit by ranged attacks, he will throw a Short Axe to the opponent who attacked him.

Final Smash: Critical Impact; “Enough chit-chat!” Hector slams Armads down upon the ground, spins it once, and jumps up and deals a powerful OHKO.

Now I request a moveset for Neku Sakuraba from TWEWY.
 
Last edited:

ZagarTulip

Smash Journeyman
Joined
Nov 11, 2016
Messages
323
8/10 Hector isn't really a character I have a lot of knowledge on but you've explained it well enough

Neku Sakuraba is also a character I don't know much about but I'll leave some references of my inspiration
---
B- Pyrokinesis - Neku summons a stream of flames that can be moved freely while you hold B (Lasts a limited amount of time)
Side B- Force Rounds - Neku shoots a rapid fire of glowing bullets that move fast from his hand
Up B- Vulcan Uppercut - Neku jumps up creating a shockwave that can carry enemies with him.
Down B- Splish Splash Barrier - A stream of water and a blue ring will form around Neku and protects him from projectiles
Final Smash - Final Fusion - Read below
"Neku summons Shiki and as Neku and Mr. Mew unleash a fury of attacks all over the screen. When Neku aquires the Smash Ball, he can activate this attack. After activation, everything will instantly stop. Shiki will then appear allowing Neku and Mr. Mew to flash all around the screen and attack everything. It will hit all enemies, will go through all shields, and hit regardless of the position on the stage (although it can be dodged with a sidestep or air dodge). Due to the ease of landing it, it will do minimal damage in comparison to other final smashes, and although it can kill, wont kill until medium to high percentages."

I request Eevee because Pokemon Let's Go games are coming real soon
 

FirestormNeos

Smash Lord
Joined
Apr 4, 2013
Messages
1,647
Location
Location Machine Broke
NNID
FirestormNeos
I give Neku an easy 9.5/10. Never played the game, but the moveset looks fun and was explained well so we good.

Eevee? Oh h**k yeah I can do this.

Neutral-B: Swift
Quickly fires small stars that hone in on enemies in from of Eevee and bypass shields, invincibility, etc. but as a trade-off only do 1% each and does absolutely no stun or knockback whatsoever, so it's basically a slightly better :ultfox: Neutral-B.
Vaporeon: Water Pulse. See Corrin's Neutral-B, but without the clamp-down at the end.
Jolteon: Pin Missile. Similar to Swift, but it doesn't hone in on enemies and doesn't bypass shields, instead dealing massive damage to the shield itself.
Flareon: Will-O-Wisp. Fires a small orb of fire that creates a damage-over-time effect on the fighter it lands on. Bypasses shields but isn't as fast of a projectile as Swift.
Espeon: Future Sight. Espeon's eyes begin to glow as you charge this attack. Upon pressing B again, Espeon fires a small orb that hones in on a foe. After a few seconds, that foe takes damage (depending on how much you charged the attack). If fully charged, the attack insta-shatters the foe's shield (if they're shielding), launches them airborne (if they're not shielding), and launches them downward if they're airborne (allowing the attack to spike). All damage Espeon takes while charging the attack or waiting for Future Sight to hit is doubled.
Umbreon: Dark Pulse. Long wind-up animation with Armor Frames (similar to Warlock Punch), then releases a ring of energy (Tabuu's off-wave attack?) that slowly moves away from Umbreon and damages enemies that get hit by the ring.
Leafeon: Magical Leaf. Same effect as Swift, but 2% instead of one and hones in on multiple foes.
Glaceon: Ice Beam. Similar mechanics to R.O.B.'s lazer, except it freezes enemies at max charge instead of having a larger hitbox. Can be angled just like R.O.B.'s Neutral-B as well.
Sylveon: Draining Kiss. Sylveon grabs a foe by with its mouth and drains their health.

Side-B: Take Down
Hold down the B button to rev the attack up, then release to watch Eevee shoot forward. Does recoil damage to Eevee if it hits the enemy, but covers great difference and doesn't put Eevee into helplessness when used in midair. Also, unlike Charizard's Flare Blitz, Eevee cannot careen off the edge if used on the ground. When used on the ground, you can jump to hold the momentum created, similar to a spin dash, but doing so means it won't connect as an attack if you collide with an enemy this way.
Vaporeon: Aqua Jet. Functions similar to Take Down, except slower and Vaporeon takes no Recoil Damage. Additionally, Vaporeon is immune to none-projectiles during this attack's animation.
Jolteon: Volt Switch. Functions similar to Take Down, except slower and Jolteon takes no Recoil Damage. Additionally, if the attack hits, the enemy is electrocuted, and Jolteon leaps away from the foe after the attack connects.
Flareon: Flare Blitz. Basically Charizard's Side-B but less range and Flareon is more lightweight so it's possible to recover if you careen off the stage like a sillyhead.
Espeon: Psybeam. Fires a rainbow-colored ring from its eyes that hits enemies. The projectile does more damage at the top and bottom of its hitbox then the middle.
Umbreon: Pursuit/Bite. Umbreon rushes forward. If it hits an enemy, Umbreon grabs them with its teeth and slams them downward... Okay fine, it's just Ganondorf's Flame Choke.
Leafeon: Leaf Blade. "Hey guys, look, it's Dancing Blade from Fire Emblem except a grass pokemon is doing it. HA!"
Glaceon: Icy Wind. Glaceon summons a gale of wind that pushes it as well as its foes in the direction it was facing at the time. Enemies take damage from this wind in addition to being pushed back (they cannot be pushed off the edge with this attack)(they are pushed back less when shielding, but the shield drains faster), and enemies dizzy from popped shields become frozen. Can be used as a recovery when used airborn or for edgeguarding. That's right, it's the ****ing Gust Bellows item made into an attack.
Sylveon: Fairy Wind. Similar to Icy Wind, except no freezing effect, dizzy enemies can be pushed off a ledge (they will enter a helpless state if this happens), and Sylveon (as well as anyone on their team) is healed by up to 5% if used on the ground.

Up-B: Run Away
Eevee exits the stage through the fourth wall, then reappears a set distance away from where you started. Is completely invulnerable while this is happening.

Down-B: Evolve
Hold down the B button to bring up a wheel of Eevee's various forms. While this is held down, Eevee will stop in midair and gain armor frames. Upon selecting one, Eevee evolves (Warning: Eevee loses armor frames and regains gravity while doing this and can't recovery/defend itself until the transformation is complete). Press the B button mid-evolution to cancel it. The form you pick will affect its regular attacks, throws, smash attacks, taunts, idles, etc. as well as its Neutral- and Side-B's. You revert back to Eevee upon pressing Down-B while transformed or are KO'd.
Vaporeon: An impressively defensive tank stance.
Jolteon: Superfast rushdown stance.
Flareon: Slow #BigDamageEnergy offensive grappler stance.
Espeon: Fragile #BigDamageEnergy offensive zoning stance.
Umbreon: Do you like Ganondorf?
Leafeon: "I can't believe it's not Fire Emblem"
Glaceon: Do you want a character that deals Ice Damage? More importantly, do you want it NOW?
Sylveon: For when spamming Ness, Lucas, Wii Fit Trainer and Robin's Down-B just aren't enough.

Final Smash: Beat Up
Various Eeveelutions show up and use quick attack on the enemy fighters. Picture the Latios/Latias Poke Ball from Brawl, but faster, more varied angles, and deals more damage. As an odd little note, Eevee triggers its Final Smash by pressing Down-B as opposed to the standard Neutral-B.


It's a bit derivative, but it cements Eevee as the goddang stance fighter it should be. No Eeveelution goes unrepresented. Plus, it lets future smash titles incorporate future Eeveelutions accordingly.

Can I get uhhhhhhhhh Big Daddy from uhhhhhhhhhh Bioshock?
 
Last edited:

ZagarTulip

Smash Journeyman
Joined
Nov 11, 2016
Messages
323
I think I'm willing to revive this... I would give Eevee an easy 9.5/10. I like how you incorporated the eeveelutions

I don't know Bioshock so I used this and this as references

Neutral Special - Incinerate
Big Daddy unleashes a small explosion from its hand. Hold button to unleash a bigger explosion that knocks the opponent away.

Side Special - Charging Rush
Big Daddy dashes forward, stopping only when striking an opponent. If the charge connects and if the button is pressed a second time, Big Daddy slams the opponent down with an overhead swing of the drill arm.

Up Special - Drill Skewer
Big Daddy does a multi-hit uppercut with his drill, knocking back the opponent

Down Special - Little Sister Gather
Big Daddy summons a Little Sister to stab the opponent

Final Smash - Flood

Big Daddy floods the screen causing the enemies to float around and you can rush through your opponents

I will suggest AiAi from Super Monkey Ball!
 

Mamboo07

Smash Hero
Joined
Mar 23, 2019
Messages
9,385
Location
Hollow Earth
AiAi? now that's gonna be interesting. (I'm giving Big Daddy 9/10.)
AiAi's Moveset:
Neutral-Monkey Fight
AiAi will thrust a Boxing glove covered fist forward dealing DMG to foes- after a moment it springs forward dealing additional DMG and knock back. If "B" is held down AiAi will become encased in his Super Monkey Ball and it will behind to spin in place as a Boxing Glove appears on the outside of the ball it springs forward striking foes in front and behind AiAi as it spins. Players can Move AiAi like this- a projectile or attack from above or below will disrupt this attack - the attack will also end if players use it for too long causing AiAi to become dizzy.
Damage: 12% (tapped) 5% (per hit during spin hit)

------------------------
Side-Bowling Bomber
AiAi retreats into his Super Monkey Ball and the ball begins to spin- faster and faster- all while AiAi looks as if he is winding up to throw a bowling ball. When the move is fully charged, the Super Monkey Ball will flash and begin to glitter- at this point players should release "B" and AiAi will look as if he's thrown that invisible Bowling Ball- the Super Monkey Ball then takes off much like Jigglypuff's Rollout attack, Bowling Bomber will dash across any surface until it strikes a foe or looses momentum. when the Super Monkey Ball connects however it will unleash an explosion dealing DMG and knockback AiAi will rebound off foes a short distance. when AiAi land he will come out of the Super Monkey ball- again like Rollout, if "B" is taped, AiAi will slowly roll forward without momentum- this will deal no DMG.
Damage: 8%-13% (depends on charge level)

-------------------------
Up-Monkey Ball Glider
AiAi retreats into his Super Monkey Ball as a rainbow swirl sends AiAi into the air- music notes and sparkles spew from AiAi's ascent players will receive DMG and knock back if they touch AiAi as he travels in this state. at the top of AiAi's ascent, the Super Monkey Ball will pop open forming wings allowing AiAi to glide with them- pressing down on the control stick will cause the Wings to vanish allowing for a quicker drop- though this will render AiAi helpless.
Damage: 3%-10%

------------------------
Down-Pink Volcano
AiAi takes out MeeMee's Hammer and twirls it around himself before slamming it down into the ground creating pillars of pink energy to burst upwards from the ground and spread out away from him. the initial pillars that appear on either side of AiAi have high launching power while the following pillars can push foes away from AiAi- If used in the air AiAi will slam down until he makes contact with a platform.
Damage: 9%-27%

------------------------
Final Smash-Stage Tilt
AiAi floats up in the air with his other monkey friends as they do their EI EI POO! spell as the stage gets tilted a lot damaging fighters several times before slamming down said stage launching them to the blast zone.
Damage: 24%-31%


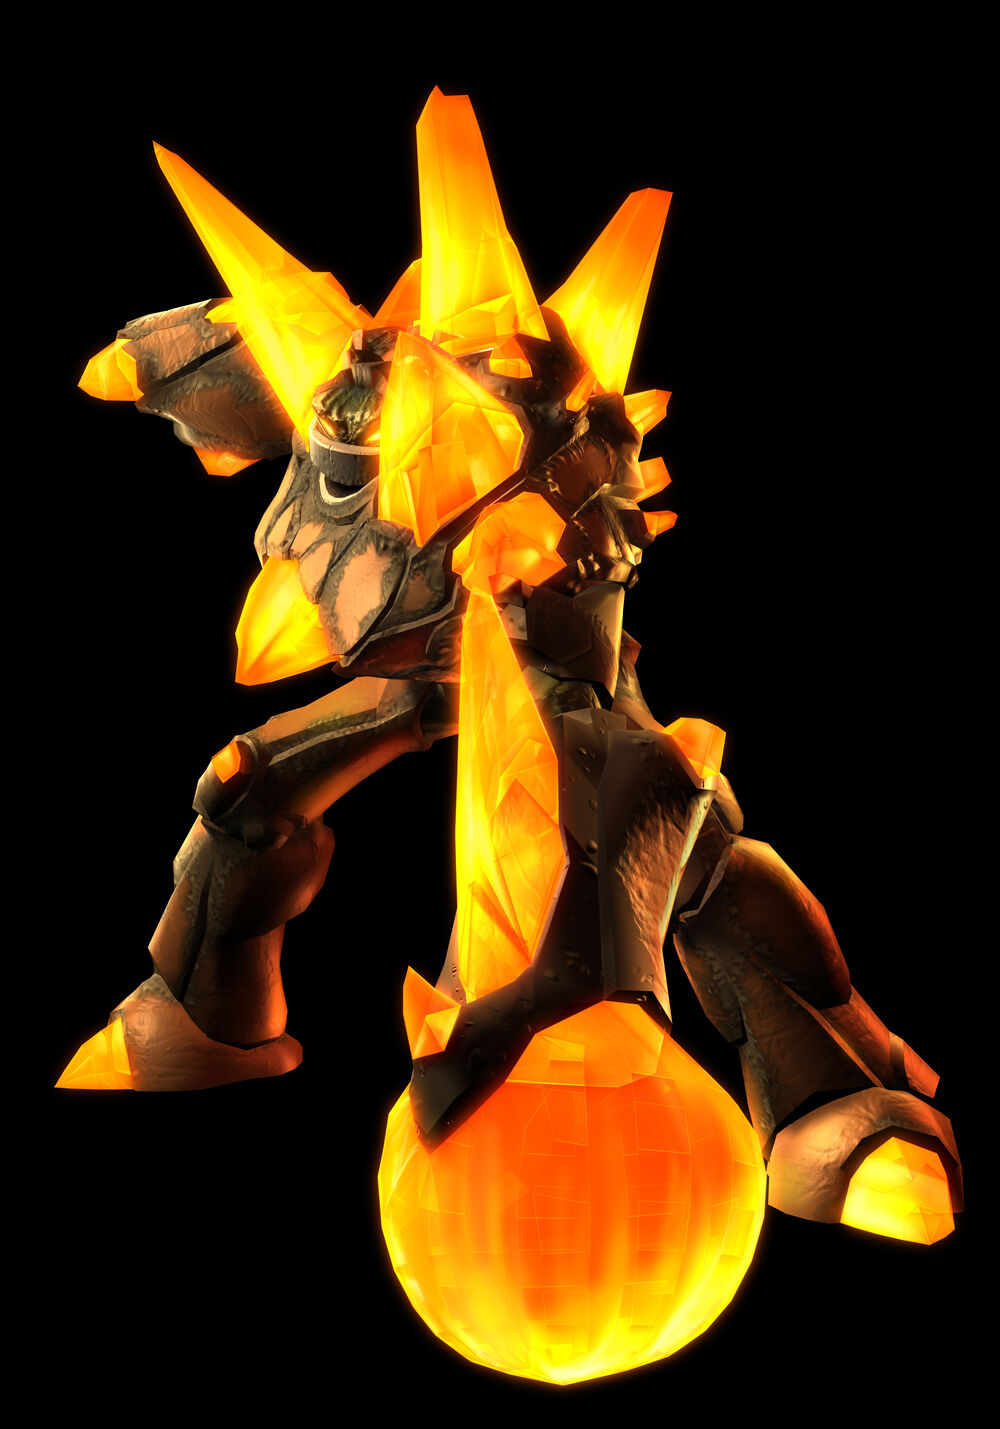
I request a moveset for Shake King from Wario Land Shake It!
 

ZagarTulip

Smash Journeyman
Joined
Nov 11, 2016
Messages
323
I am going to give AiAi a 9/10

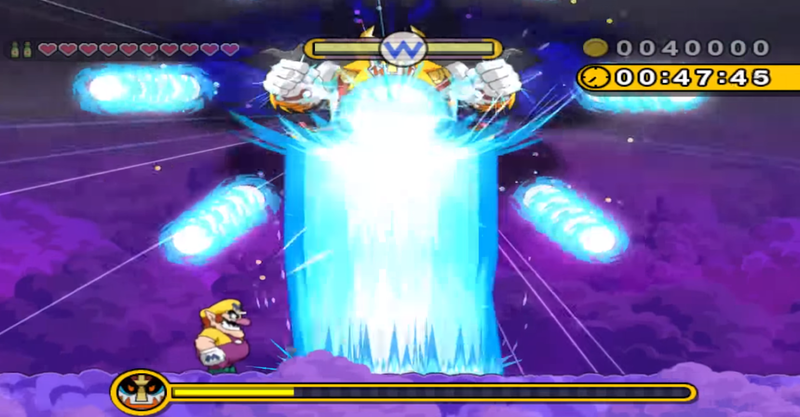
Shake King, I didn't feel good with naming the moves so i just did descriptions and a pic for the Final Smash, I hope you enjoy
B - Shake King punches the ground and Fireballs come forward
Side B - Shake King charges straightforward and
Up B - Shake King leaps up in the sky with dark blue energy around it and ground pounds
Down B - Shake king ground pounds and shockwaves appear on both sides
Final Smash - It looks like this:

I will suggest Groose!
 

Mamboo07

Smash Hero
Joined
Mar 23, 2019
Messages
9,385
Location
Hollow Earth
I give Shake King a 8/10
Groose's Moveset
Neutral B-Pompadour Charge: Groose charges up a powerful headbutt, does major damage when charged.
Side B-Sickest Hair in Skyloft: Groose uses his pompadour as a whip, can be used as recovery.
Up B-He has my hair too: Groose uses his loftwing to fly to safey.
Down B-I ran out of moves OK?: Groose throws eggs at his opponent are used to stun but does damage.
Final Smash-Groosinator: Groose starts firing bombs out of his catapult, each bomb does 10%-15% of damage.

I suggest the T. Rex from Mario Odyssey!
 

Aerospherology

Smash Lord
Joined
Nov 9, 2015
Messages
1,206
Location
Michigan
10/10 Groose moveset


B: Bite
Side B: Tail swipe
Up B: Flies up like that sequence-breaking glitch
Down B: Stomp

Final Smash: Fossilize (The opponent(s) get buried and become fossils, and get covered with rocks that make them immobile and increase their weight)

I suggest Uniracer from Uniracers!
 

Mamboo07

Smash Hero
Joined
Mar 23, 2019
Messages
9,385
Location
Hollow Earth
I give T. Rex a 10/10
Btw i would have the T. Rex's final smash summoning a giant meteor that crashes down on stage causing a giant explosion. But it's good.

Uniracer moveset:
B-Zip
Side B-Twist
Up B-Head Bounce
Down B-Flip
Final Smash: Uni-Dash
Not much but tried my best.

I suggest the G.U.N Truck from Sonic Adventure/Generations! (Said truck in Generations has sawblades along with rocket boosters.)
 
Last edited:

ZagarTulip

Smash Journeyman
Joined
Nov 11, 2016
Messages
323
WOW, over a Year LOL
8/10 Sounds Fun

B- Sawblade Toss (Basically MegaMan's Metal Blade)
Side B- Sawblades
Up B - Rocket Booster
Down B - Bomb
Final Smash - City Crashdown
IDK, I just picked out random things from the wiki and ended up looking at GUN as a whole

How about Sothe from Fire Emblem?
 

Wario Wario Wario

Smash Legend
Joined
Sep 3, 2017
Messages
11,588
Location
Ed Bighead for NASB 2
5/10 - lacking in detail and a little projectile-heavy, but really what can you do for a truck?


B: Steal - An absorption move that can take in any projectile - however, it does not heal, charge an attack or reflect but rather makes Sothe heavier, which can be an advantage or disadvantage depending on how liberally it's used and when. I made it a B move since it could benefit Kirby quite a bit.

Down B: Stab - Sothe lunges his knife forwards and stabs a foe. This deals decent damage and causes a stun instead of knockback, allowing Sothe to follow it up with any of his non-knife moves while the knife is non-lethally placed on the foe's chest

Side B: Peshkatz - it's Fox's neutral B but with knives. That's all there really is to it.

Up B: Levitation - Sothe gets out his staff and levitates, This is a slow recovery but goes really high and may just have the best vertical distance of a single move (this is a completely original concept)

Final Smash: just marths cuz im lazy


Bugs Bunny
 
Last edited:

Doc Monocle

Smash Ace
Joined
Dec 24, 2020
Messages
814
Location
The seventh lantern.
5/10 - lacking in detail and a little projectile-heavy, but really what can you do for a truck?


B: Steal - An absorption move that can take in any projectile - however, it does not heal, charge an attack or reflect but rather makes Sothe heavier, which can be an advantage or disadvantage depending on how liberally it's used and when. I made it a B move since it could benefit Kirby quite a bit.

Down B: Stab - Sothe lunges his knife forwards and stabs a foe. This deals decent damage and causes hitstun instead of knockback, allowing Sothe to follow it up with any of his non-knife moves while the knife is non-lethally placed on the foe's chest

Side B: Peshkatz - it's Fox's neutral B but with knives. That's all there really is to it.

Up B: Levitation - Sothe gets out his staff and levitates, This is a slow recovery but goes really high and may just have the best vertical distance of a single move (this is a completely original concept)

Final Smash: just marths cuz im lazy


Bugs Bunny
Approximately ?/10 if I have to rate based on my knowledge, and 4-5/10 if based on imagining the moveset itself.
In a likewise condition of ignorance, here is the moveset for Bugs:

Neutral special: Bugs leaps onto a nearby opponent for a command grab. He then proceeds to kick the opponent repeatedly in the head, alternating the foot he kicks with as the opponent slowly falls to the ground, 'cartoon style.'

Side special: Walks in reverse while restraining a rocket-powered shopping cart. When the player releases B, Bugs lets go of the cart, which then rolls along the ground (or flies if ysed in the air) horizontally at an astoundingly fast velocity (faster than Pit's arrows). However, in anti-convential jest, it inflicts less damage with increasing time that B is held.

Down special: Bugs sets down a crate of TNT and lights a fuse. The rest I shall leave as an exercise to the reader.

Up special: Bugs wiggles for a moment, and then bounds into the air to a staggering, verrtical distance, and with such little warm-up. The descent is not a helpless fall either. However, he cannot use the move in the air, making it useless for recovery.

Taunt: "What's up, Doc?" (I had to do it.)
Me: Nothing special, Bugs. Thank you for asking.
----------------------------------------
Swanky Kong (I would like to see someone else's idea, even though he is probably not that popular.)
 

Freduardo

Smash Champion
Joined
Jan 8, 2014
Messages
2,330
7/10: It’s fun and toony. Not really giving me specific bugs bunny vibes outside of the taunt. But most looney tunes games didn’t, and I still played a couple of crazy castles.

Swanky Kong? Alllllright. Going to go with the taller DKC3 bowler hat and cane with vest, shirt and tie, and long pants appearance as opposed to DKC2’s shorter blue jacketed design (though maybe have the clothes as an alt, but keep him tall in proportions). The reason? That cane as a beat-stick will help with his A button attacks. Spin it and twirl it like a circus ringmaster.

B Up: One Up balloon. A DKC style red one up ballon is taken from inside the vest, immediately inflates, and floats Swanky to safety like animal Crossing’s balloon based upBs. Celebrates what you win from a correct question in swanky’s bonus bonanza.

BForward: Sideshow Target. Swanky throws out a sideshow target with a tiny kremling behind it that kind of moves like a bowser jr mechakoopa. When it latches onto someone, instead of exploding, it just makes them take double damage like inkling ink.

B neutral: Ball: Chucks one of the target balls from swanky’s sideshow. Aimable by holding b. Does good damage. If it hits a target, does even more amplified damage. If it hits a target that isn’t latched on someone, causes an explosion of damaging coins that spell out “Bonus”

downB: VR Headset trap: lays the vr headset from swanky’s dash below and in front of him if he is in the air, and in front of him on the ground. If a person is in front of him on the ground, attaches the headset as a command grab. Does about 10 damage if lands on someone or done as a grab. About 3 if someone walks into one on the ground. If someone has it on, acts like Curry except without the fire breath in that it removes a character’s ability to stand still without blocking. Possibly where they are even locked to moving forward at least at their walk speed.

final smash: bonus family reunion: swanky lays a barrel down in front of him, Cranky, Candy, and the ghost of wrinkly beat up he opponent inside the barrel.

and suggested character is...

Popeye the sailor man
 
Last edited:

Perkilator

Smash Legend
Joined
Apr 8, 2018
Messages
10,515
Location
The perpetual trash fire known as Planet Earth(tm)
Alright, time to bump this thread!
Intro: Sora appears from a save point and gets into his fighting stance

Stance/Idle 1: Sora holds his Keyblade near his right hip and looks around
Idle 2: Sora rests his Keyblade on his right shoulder for a second
Idle 3: Sora bares his teeth in the direction he's facing

Notable Palette Swaps:
  1. KH3 outfit (default)
  2. KH2 outfit (alternate costume)
  3. Riku (KH3 black)
  4. Roxas (KH2 white/red)
  5. Kairi (KH3 pink)
  6. Limit Form
  7. Donald Duck (KH3 blue)
  8. Goofy (KH2 green)
Walk: His walk from the games when in combat
Jog: His run from the games when in combat
Dash: Sora rests the Keyblade on his shoulders while running
Damage: His damage animation from the games
Jump: High Jump and Doubleflight
Crouch: Crouches down on one knee with his Keyblade pointing forwards

Normal Attacks
Jab: Slapshot / Speed Slash; Sora performs a sideways uppercut with his Keyblade (2%, OK knockback), then slashes twice (2% each hit, small knockback), and follows up with a quick circular slash (3%, OK knockback)
Forward+A: Guard Break; Sora thrusts his Keyblade forward (6%, small knockback), dealing considerable shield damage
Down+A: Sliding Dash; Sora performs a slide across the ground, slightly farther than Cloud’s but takes a bit more windup (7%, OK knockback)
Up+A: Upper Slash; Sora swings his Keyblade upwards (6%, OK knockback)

Aerial Attacks
Air+A: Magnet Burst; Sora briefly surrounds himself with an array of magnetic orbs that attract nearby opponents (3%). Pressing A again, if necessary, sends these orbs flying out (9%, OK knockback)
Air Forward+A: Aerial Finish; Sora performs a strong slash with slight startup lag (15%, OK knockback)
Air Back + A: Aerial Sweep; Sora slashes behind himself three times (8%, small knockback)
Air Up+A: Hurricane Blast; Sora performs three vertical moonsaults (9%, OK knockback)
Air Down+A: Diving Strike; Sora pauses for a bit before diving down and striking the ground with his Keyblade (11% with a meteor effect, OK knockback); he can slightly move to the left or right just before he dives

Dash Attack: Prism Windmill; Sora spins Keyblade in front of him, protected by a shield of light (8%, OK knockback)
Edge Attack: Last Charge; Sora lifts himself up and slams down to create a pillar of light (11%, OK knockback)
Get-up Attack: Vicinity Break; Sora sweeps the floor with his Keyblade in a 360 spin (9%, OK knockback)

Smash Attacks
Forward+A: Strike Raid; Sora throws his Keyblade forward as it spins (21%, medium knockback). This attack can be slightly angled in the direction the control stick is titled, and goes a bit further when the stick is flicked.
Up+A: Ripple Drive; Sora swings upwards and summons a barrier of light with rectangular patterns (21%, medium knockback)
Down+A: Explosion; three orbs of light surround Sora as he thrusts his Keyblade down to the ground (22%, medium knockback)

Grab Game
Grab: Sora casts Magnet and binds the opponent
Pummel: Sora headbutts the opponent with that thick skull of his (2%)
Forwards+Throw: Quick Blitz; Sora hops up and swings in a downward arc (9%, OK knockback)
Down+Throw: Fail-Safe; Sora spins once before tossing the opponent on the ground, leaving a small explosion (8%, small knockback)
Back+Throw: Merge; Sora spins around backwards before hurling the opponent in that direction (11%, OK knockback)
Up+Throw: Lunge n' Launch; Sora hops and slashes upwards to launch the opponent (10%, OK knockback)

Special Moves
B : Magic Selection
; Sora can select a magic spell from his list, similar to the Hero. Once a spell is selected, it will stay on that spell until another is selected, which can be done on the fly. You can cancel the selection by pressing the Shield button.
  • Firaga: Sora summons two rings of fire that encircle him (11%, OK knockback)
  • Blizzaga: Sora shoots three snowflakes that have a chance of freezing the opponent (5% each, small knockback); using this in the air has Sora shoot them diagonally downward
  • Thundaga: Sora summons electricity from his Keyblade that locks on to any nearby fighters, up to three at a time (11% on a single opponent, OK knockback; 9% on two opponents, OK knockback; 7% on three opponents, small knockback)
  • Aeroga: Sora surrounds himself in a windy barrier that halves damage taken and reflects projectiles; the spell lasts for 18 seconds
  • Curaga: Sora heals up to 100% taken damage, and can also heal allies in team battles by ⅓ regardless of how far away they are. This spell can only be used once per stock.
B + Forwards : Sonic Blade; Sora swiftly thrusts left and right up to six times with consecutive button presses (3%-4% each hit, small knockback) and finishes with a much more powerful thrust (7%, OK knockback); you can tilt the control stick to move either left or right, and the attack is faster on the ground
B + Up : Airstep; Sora travels in the pointed direction at the speed of light after releasing B (holding it slows him down for six seconds); when he locks on to a ledge, he grabs it,
B + Down : Ars Arcanum; Sora charges up and unleashes a flurry of ten slashes (1.3% each hit, OK knockback), then finishes with three stronger slashes (5.2% each hit, OK knockback). The charge is canceled when the player lets go of B.

Final Smash: Ragnarok; Sora jumps up and fires 24 shots of energy that home in on every opponent on the stage (2% each, OK knockback)

Gimmick: Grand Magic; after pulling off successful combos, three arrows appear by Sora's HUD, one by one. Once a combo is successful with all three arrows, a command appears above Sora's icon, and pressing B will activate one of four Grand Magic spells, which are obtained by using one spell consistently. Only one Situation Command appears at a time, and that spell will appear for 20 seconds.
  • Firaza has Sora summon a giant fireball that travels offscreen when it doesn't hit any opponents (27%, medium knockback)
  • Blizzaza has Sora summon an actual blizzard that freezes every opponent on the stage for a bit (20%, small knockback)
  • Thundaza has Sora rain down a pillar of electricity in front of him (25%, medium knockback)
  • Aeroza has Sora summon a tornado that circles around him, sending opponents flying (20%, far knockback)
  • Whenever you use a Grand Magic tier of a spell, that spell enters a 15-second cool down period
Taunts
1: Sora wipes his nose and smiles
2: "My friends are my power!" Sora puts his hand to his chest and looks down
1+2: Sora performs performs the Funny Face Special

Winposes
1: "That's the power of the Keyblade!" Sora's first victory animation from KH1, whenever he wins a tournament in Olympus Coliseum
2: “Nothing to it!” Sora's second victory animation from KH1, whenever he wins a tournament in Olympus Coliseum
3: “Oh yeah, take that!” Sora's third victory animation from KH1, whenever he wins a tournament in Olympus Coliseum; however, at the end of this version, Sora strikes a very familiar pose

Applause: Sora claps for the opponent
Icon: The heart and crown in KH series logo
Boxing Ring Title: The Keyblade's Chosen One
Star K.O.: https://youtu.be/XgtJ3E5-I_A?t=558
Victory Music: A remix of Sora's theme
Kirby Hat: Sora's hair and necklace
 

ZagarTulip

Smash Journeyman
Joined
Nov 11, 2016
Messages
323
10/10 I would play

Popeye, I haven't seen really so I found a moveset that I'll share
B- Twister Sock
Chargeable punch that can be angled on the final hit, which will send the foe hit flying away in that direction. Popeye winds his fist back before doing so, and his arm cartoonishly curls around itself before unfurling and then releasing. A curious property of this move is that Popeye can also punch away projectiles and items. Be careful with timing when using it in this way, though.

Side B- Anchor Chain
Popeye tosses forward an anchor on a chain, which can be angled before use, used as a tether recovery or to hit into, then grab foes from long distances. The anchor at the end does more damage than the chain itself, and can be effective for stun and damage generally, but it has a somewhat slow drawback after release, due to the heaviness of the anchor. This anchor chain can also grab items from a distance.

Up B- Pipe Jet
Popeye shoots upward as a jet of flame comes down from his pipe. This can go for about as long as ROB’s Up-B, and you can angle Popeye mid-flight, as well. In addition, the flames themselves can deal damage to those approaching Popeye from the front or underneath him, allowing him to keep foes away in certain areas.

Down B- Punching Bag
A punching bag on a stand pops up in the ground in front of Popeye. Popeye can do a bunch of light attacks to make it smack into foes nearby, or he can do a strong attack to send it flying away to smack into foes. This is an interactable item that can also be hit around by foes, though it will not damage Popeye if he summoned it. It can also be picked up and thrown, though due to its stand, this is heavier and trickier to pull off.

Final Smash- I Eats Me Spinach
Popeye pops out a can of spinach and eats from it. Once he’s eaten the entire can, he throws it aside as a small item that can be interacted with even after his Final Smash has finished, but that’s not the important part. Rather, Popeye rushes forward and, if he catches an opponent or two, he unleashes a flurry of punches onto them, followed by his weird foot-juggling kick thing he sometimes does, then finishes off with a mighty uppercut, with a small explosion released upon use that can also damage opponents approaching Popeye’s beat-down area, though the primary use is to finish off foes he already has locked into his Final Smash. This FS can also work in the air.

Next Character: Sothe from Radiant Dawn
 

Freduardo

Smash Champion
Joined
Jan 8, 2014
Messages
2,330
10/10 I would play

Popeye, I haven't seen really so I found a moveset that I'll share
B- Twister Sock
Chargeable punch that can be angled on the final hit, which will send the foe hit flying away in that direction. Popeye winds his fist back before doing so, and his arm cartoonishly curls around itself before unfurling and then releasing. A curious property of this move is that Popeye can also punch away projectiles and items. Be careful with timing when using it in this way, though.

Side B- Anchor Chain
Popeye tosses forward an anchor on a chain, which can be angled before use, used as a tether recovery or to hit into, then grab foes from long distances. The anchor at the end does more damage than the chain itself, and can be effective for stun and damage generally, but it has a somewhat slow drawback after release, due to the heaviness of the anchor. This anchor chain can also grab items from a distance.

Up B- Pipe Jet
Popeye shoots upward as a jet of flame comes down from his pipe. This can go for about as long as ROB’s Up-B, and you can angle Popeye mid-flight, as well. In addition, the flames themselves can deal damage to those approaching Popeye from the front or underneath him, allowing him to keep foes away in certain areas.

Down B- Punching Bag
A punching bag on a stand pops up in the ground in front of Popeye. Popeye can do a bunch of light attacks to make it smack into foes nearby, or he can do a strong attack to send it flying away to smack into foes. This is an interactable item that can also be hit around by foes, though it will not damage Popeye if he summoned it. It can also be picked up and thrown, though due to its stand, this is heavier and trickier to pull off.

Final Smash- I Eats Me Spinach
Popeye pops out a can of spinach and eats from it. Once he’s eaten the entire can, he throws it aside as a small item that can be interacted with even after his Final Smash has finished, but that’s not the important part. Rather, Popeye rushes forward and, if he catches an opponent or two, he unleashes a flurry of punches onto them, followed by his weird foot-juggling kick thing he sometimes does, then finishes off with a mighty uppercut, with a small explosion released upon use that can also damage opponents approaching Popeye’s beat-down area, though the primary use is to finish off foes he already has locked into his Final Smash. This FS can also work in the air.

Next Character: Sothe from Radiant Dawn
10/10, I'm just happy I got someone to do a Popeye moveset... and frankly Rob's UPB with a tether for sideB just sounds nice.

-

Okay, Sothe.

We'll make him his promoted class of "Whisper", and he'll have Heather as an alt. Because I'm going to use both the Whisper class characters. He's fast with a high and agile jump.

Weapon is a knife. Lot of quick slashy attacks for your A button moves where things look spinny. Think how Joker fights with his knife for the most part.

B Neutral - Shove - Sothe/Heather slashes outward in both directions in a way that (similar to moves like Water Gun) does not do damage, but offers a good 6 character-lengths of knockback. Useful for edging, and can be done out of a block where the shield is only dropped for the duration of the move (like a dodge).

B Forward - Pass - Sothe/Heather covers themselves in a unique aura that makes them have some visible indicator (the tails on their massive coats becomes transparent), for a brief period while active, unless there's a hitbox present, opponents will not touch you. You can run through them, jump through them, etc. However, attacks will still land. There's just no delay because of solid objects that would otherwise impede your movement. Best use, steal someone's juggle kill by jumping higher underneath them with your Whisper-speed.

B Down - Bane - t's like Ridley's meme-tail with a little of Cloud's Fallen One mixed in. It's hard to hit with the version that does massive damage, but after a very telegraphed wind up and knife attack, Sothe/Heather can do up to 50% damage with high knockback (no, you don't get to reduce someone to 1 hp).

Final Smash - Ike's fights for his friends - Honestly, it's similar to Robin's final smash of having zero issue using a playable character for the final smash. Ike and Micaiah show up, and the three of them wail on an enemy.
 

Perkilator

Smash Legend
Joined
Apr 8, 2018
Messages
10,515
Location
The perpetual trash fire known as Planet Earth(tm)
8/10 I think Shove and Pass should be swapped, but not bad
Intro: Arthur’s MvC3 intro

Stance/Idle 1: His idle animation from MvC3
Idle 2: Arthur raises a fist in the air
Idle 3: Arthur briefly strokes his beard

Notable Palette Swaps:
  1. Silver Armor (default)
    • Holy Armor has gold highlights
    • White boxers with strawberry patterns
  2. Warrior Armor (purple/yellow)
    • Holy Armor has brown and yellow highlights
    • Blue boxers with white vertical stripes
  3. Gold Armor (yellow)
    • Holy Armor has red highlights
    • Yellow boxers with black stars
  4. Bronze Armor (green)
    • Holy Armor has orange highlights
    • Green boxers with white polka-dots
  5. Old Arthur (blue/white)
    • Holy Armor has white highlights
    • Blue boxers with white polka-dots
  6. Pink Gold Armor (pink)
    • Holy Armor has red highlights
    • Pink boxers with red and white hearts
  7. Zombie Arthur (blue/grey)
    • Holy Armor is based off the alternate Holy Armor from MvC3
    • Boxers are the same as default, but now he’s a skeleton
  8. Firebrand (red/white)
    • Holy Armor has deep blue highlights
    • Red boxers with black bat patterns
    • Arthur's face is changed to white skin, a purple beard and red eyes, resembling Astaroth
Walk: His run from the GnG games
Dash: His run from the GnG games, but faster
Damage: His damage animation from the GnG games
Jump: His jump from the GnG games
Crouch: His crouch from the GnG games

Normal Attacks
Jab: Arthur slashes twice with his sword (4%, small knockback)
Forward+A: Arthur throws a dagger (2%, small knockback)
Down+A: Arthur throws a dagger while crouching (2%, small knockback)
Up+A: Arthur tosses an axe over his head (5%, small knockback)

Aerial Attacks
Air+A: Tri-Blade; Arthur summons a magical sword that flies around him (8%, OK knockback)
Air Forward+A: Arthur throws a dagger in the air (6%, small knockback)
Air Back + A: Arthur does a short backwards air dash with his shield (8%, OK knockback)
Air Up+A: Arthur does an overhead slash with his sword (7%, small knockback)
Air Down+A: Arthur swings downward with his sword (7%, small knockback)

Dash Attack: Arthur charges forward with his lance (7%, small knockback)
Edge Attack: Arthur swings his sword down as he climbs back up (6%, small knockback)
Get-Up Attack: Arthur hastily swings his sword around himself (6%, small knockback)

Smash Attacks
Forward+A: Torch; Arthur throws a torch that inflicts multiple hits (17%, OK knockback)
Up+A: Discus; Arthur spins a Discus above himself (18%, OK knockback)
Down+A: Nuclear Magic; Arthur fires two blasts of magic on both sides of himself (17% each, OK knockback)

Grab Game
Grab: His Grab from MvC3
Pummel: Arthur headbutts the opponent (1%)
Forwards+Throw: His forward throw from MvC3 (9%, OK knockback)
Down+Throw: His air forward throw from MvC3 (12%, OK knockback)
Back+Throw: His back throw from MvC3 (8%, OK knockback)
Up+Throw: Arthur tosses the opponent diagonally upward in the direction he's facing (6%, small knockback)

Special Moves
B : Lance Toss
; Arthur tosses a lance that goes somewhat slow and can be tossed straight forward or upwards (8%, small knockback)
  • With Holy Armor, the lances fly much faster and go slightly further
B + Forwards : Crossbow; Arthur fires two arrows in a 45o arc (6% each, small knockback); each arrow deals 1.5x more damage and knockback to opponents in the air
  • With Holy Armor, Arthur fires three arrows that become orbs of energy; the added third one goes straight in the direction it's facing
B + Up : Shatter Armor; Arthur deliberately sheds his armor to jump sky-high (with opponents taking damage from the broken armor pieces) (12%, OK knockback), halving his magic charge meter. Arthur doesn’t immediately go into freefall when this happens, but he can only manage a measly hop when he tries to use this special again.
  • With Holy Armor, he goes up higher and can possibly Meteor Smash opponents close to him, but the magic charge meter is completely drained
B + Down : Armor / Thunder Magic; Using the magic charge meter from Ghouls ‘n Ghosts (which fills up as he deals and takes damage), Arthur can either upgrade his armor by one stage or cast thunder magic that surrounds him in electricity (30%, far knockback), immediately reducing him to his boxers
  • If Arthur loses his armor through damage, the meter stays as is

Final Smash: Goddess Bracelet; based on one of his Hyper Combos from MvC3, Arthur fires 19 energy shots that paralyze opponents in place (2% each) and then finishes with a huge orb of light that can hit multiple opponents (20%, far knockback)

Gimmick: Armor; Arthur loses his armor when he takes about 50% damage or if a strong enough attack hits him, reducing the knight to his boxers
  • In his armor, Arthur is committed to whatever direction he jumps in
  • Armorless Arthur has greatly increased movement speed and jump height and can jump freely, but takes 1.2x more damage from enemy attacks and is easier to launch
  • Arthur with Holy Armor is harder to launch, has increased movement speed and stats, and his attacks do 1.3x more damage with less endlag, but his jumps are slightly heavier despite also being able to jump freely in this state
    • Losing this armor still reduces Arthur to his boxers, but it only needs 70% damage to break and can withstand any attack
  • He can regain his armor faster by getting K.O.’d
  • When Arthur loses a Stamina Battle, his death animation is the same as his home series
Taunts
1: “Huzzah!” Arthur’s taunt from MvC3
2: “Still going!” Arthur mimics his in-game portrait from from UMvC3
1+2: Arthur mimics his artwork from the original Ghosts ‘n Goblins

Winposes
1: “You have faced a knight and lost!” Arthur’s victory animation from MvC3
  • “Huzzah! Cleared without a miss!” (When Arthur wins without getting K.O.'d)
2: Arthur receives a kiss from the Princess, mimicking the ending from the original Ghosts ‘n Goblins
3: “Wait for me, my princess!” Arthur gets ready to keep going after the Princess, and then runs offscreen to the right

Applause: Arthur’s bones appear on the ground
Icon: The Red Arremer in the series logo
Boxing Ring Title: Knight in Shining Boxers
Star K.O.: “Tis unfaiiiirrr…!”
Victory Music: https://youtu.be/zbmix8ySutw
Kirby Hat: Arthur’s helm and beard
 

Freduardo

Smash Champion
Joined
Jan 8, 2014
Messages
2,330
8/10 I think Shove and Pass should be swapped, but not bad
Intro: Arthur’s MvC3 intro

Stance/Idle 1: His idle animation from MvC3
Idle 2: Arthur raises a fist in the air
Idle 3: Arthur briefly strokes his beard

Notable Palette Swaps:
  1. Silver Armor (default)
    • Holy Armor has gold highlights
    • White boxers with strawberry patterns
  2. Warrior Armor (purple/yellow)
    • Holy Armor has brown and yellow highlights
    • Blue boxers with white vertical stripes
  3. Gold Armor (yellow)
    • Holy Armor has red highlights
    • Yellow boxers with black stars
  4. Bronze Armor (green)
    • Holy Armor has orange highlights
    • Green boxers with white polka-dots
  5. Old Arthur (blue/white)
    • Holy Armor has white highlights
    • Blue boxers with white polka-dots
  6. Pink Gold Armor (pink)
    • Holy Armor has red highlights
    • Pink boxers with red and white hearts
  7. Zombie Arthur (blue/grey)
    • Holy Armor is based off the alternate Holy Armor from MvC3
    • Boxers are the same as default, but now he’s a skeleton
  8. Firebrand (red/white)
    • Holy Armor has deep blue highlights
    • Red boxers with black bat patterns
    • Arthur's face is changed to white skin, a purple beard and red eyes, resembling Astaroth
Walk: His run from the GnG games
Dash: His run from the GnG games, but faster
Damage: His damage animation from the GnG games
Jump: His jump from the GnG games
Crouch: His crouch from the GnG games

Normal Attacks
Jab: Arthur slashes twice with his sword (4%, small knockback)
Forward+A: Arthur throws a dagger (2%, small knockback)
Down+A: Arthur throws a dagger while crouching (2%, small knockback)
Up+A: Arthur tosses an axe over his head (5%, small knockback)

Aerial Attacks
Air+A: Tri-Blade; Arthur summons a magical sword that flies around him (8%, OK knockback)
Air Forward+A: Arthur throws a dagger in the air (6%, small knockback)
Air Back + A: Arthur does a short backwards air dash with his shield (8%, OK knockback)
Air Up+A: Arthur does an overhead slash with his sword (7%, small knockback)
Air Down+A: Arthur swings downward with his sword (7%, small knockback)

Dash Attack: Arthur charges forward with his lance (7%, small knockback)
Edge Attack: Arthur swings his sword down as he climbs back up (6%, small knockback)
Get-Up Attack: Arthur hastily swings his sword around himself (6%, small knockback)

Smash Attacks
Forward+A: Torch; Arthur throws a torch that inflicts multiple hits (17%, OK knockback)
Up+A: Discus; Arthur spins a Discus above himself (18%, OK knockback)
Down+A: Nuclear Magic; Arthur fires two blasts of magic on both sides of himself (17% each, OK knockback)

Grab Game
Grab: His Grab from MvC3
Pummel: Arthur headbutts the opponent (1%)
Forwards+Throw: His forward throw from MvC3 (9%, OK knockback)
Down+Throw: His air forward throw from MvC3 (12%, OK knockback)
Back+Throw: His back throw from MvC3 (8%, OK knockback)
Up+Throw: Arthur tosses the opponent diagonally upward in the direction he's facing (6%, small knockback)

Special Moves
B : Lance Toss
; Arthur tosses a lance that goes somewhat slow and can be tossed straight forward or upwards (8%, small knockback)
  • With Holy Armor, the lances fly much faster and go slightly further
B + Forwards : Crossbow; Arthur fires two arrows in a 45o arc (6% each, small knockback); each arrow deals 1.5x more damage and knockback to opponents in the air
  • With Holy Armor, Arthur fires three arrows that become orbs of energy; the added third one goes straight in the direction it's facing
B + Up : Shatter Armor; Arthur deliberately sheds his armor to jump sky-high (with opponents taking damage from the broken armor pieces) (12%, OK knockback), halving his magic charge meter. Arthur doesn’t immediately go into freefall when this happens, but he can only manage a measly hop when he tries to use this special again.
  • With Holy Armor, he goes up higher and can possibly Meteor Smash opponents close to him, but the magic charge meter is completely drained
B + Down : Armor / Thunder Magic; Using the magic charge meter from Ghouls ‘n Ghosts (which fills up as he deals and takes damage), Arthur can either upgrade his armor by one stage or cast thunder magic that surrounds him in electricity (30%, far knockback), immediately reducing him to his boxers
  • If Arthur loses his armor through damage, the meter stays as is

Final Smash: Goddess Bracelet; based on one of his Hyper Combos from MvC3, Arthur fires 19 energy shots that paralyze opponents in place (2% each) and then finishes with a huge orb of light that can hit multiple opponents (20%, far knockback)

Gimmick: Armor; Arthur loses his armor when he takes about 50% damage or if a strong enough attack hits him, reducing the knight to his boxers
  • In his armor, Arthur is committed to whatever direction he jumps in
  • Armorless Arthur has greatly increased movement speed and jump height and can jump freely, but takes 1.2x more damage from enemy attacks and is easier to launch
  • Arthur with Holy Armor is harder to launch, has increased movement speed and stats, and his attacks do 1.3x more damage with less endlag, but his jumps are slightly heavier despite also being able to jump freely in this state
    • Losing this armor still reduces Arthur to his boxers, but it only needs 70% damage to break and can withstand any attack
  • He can regain his armor faster by getting K.O.’d
  • When Arthur loses a Stamina Battle, his death animation is the same as his home series
Taunts
1: “Huzzah!” Arthur’s taunt from MvC3
2: “Still going!” Arthur mimics his in-game portrait from from UMvC3
1+2: Arthur mimics his artwork from the original Ghosts ‘n Goblins

Winposes
1: “You have faced a knight and lost!” Arthur’s victory animation from MvC3
  • “Huzzah! Cleared without a miss!” (When Arthur wins without getting K.O.'d)
2: Arthur receives a kiss from the Princess, mimicking the ending from the original Ghosts ‘n Goblins
3: “Wait for me, my princess!” Arthur gets ready to keep going after the Princess, and then runs offscreen to the right

Applause: Arthur’s bones appear on the ground
Icon: The Red Arremer in the series logo
Boxing Ring Title: Knight in Shining Boxers
Star K.O.: “Tis unfaiiiirrr…!”
Victory Music: https://youtu.be/zbmix8ySutw
Kirby Hat: Arthur’s helm and beard

Gah, both of us forgot to suggest someone for the next poster.

Uhm... 9/10 for Artie the One Man Party, the Up-B gave me what I was pretty much looking for out of his moveset.

I also thought of swapping Pass and Shove, but I figured it was easier to do a B neutral out of block than a B forward.

I got to throw another quick character here so I can suggest a new one properly.

Optimus Prime (War for Cybertron Series):

B Neutral: Ion Blaster: Optimus has a big rifle. It shoots a repeating shot a little slower but larger/more powerful than Falco's.
B Forward: Axe Spin - The soldier class move from War for Cybertron meeting the fact that Optimus Prime uses a lot of axes. He runs around the map as a large thing spinning around with an axe that hits hard. Kind of like if Incineroar's spinny punch was easier to time around, but the person could walk while doing it.
B Up: Rocket Uppercut: we've seen this Up B. Rockets under the boots. Fist pointing upwards. Go Prime.
B Down: Transform - Optimus Prime becomes a truck (well just the front-half. He's not getting his trailer). The truck does not have any a-button attacks, but can ram people like wario's bike.

Truck Moves:
B Neutral: Rocket - A missile that shoots out quickly with a fair bit of knockback, but doesn't do more than 5% damage per hit.
B Up: Runover - An Insecticon appears infront of Prime, Prime runs over the insecticon's head, sending it downward and launching prime's truck upwards (think the 86 movie)
B Forward - Roller - Optimus summons his little vehicle drone Roller onto the battlefield. It goes around like a if Bowser Jr's Side-B had a mini-mushroom first. Then it does it in the opposite direction. Then it goes away. One at a time. Can be picked up but difficult.

Final Smash - Powermaster Optimus Prime/Ginrai (japanese version) - The trailer shows up. Optimus becomes one with it to be a much larger powermaster optimus prime. Then he hits people. Hard.

Character suggestion: Any Metroid Prime Hunter that isn't Sylux. You're choice. Or hell, Sylux is fine.
 

FirestormNeos

Smash Lord
Joined
Apr 4, 2013
Messages
1,647
Location
Location Machine Broke
NNID
FirestormNeos
9.5/10. Personally, I wouldn't have bothered with the Truck form because the transformers' vehicles forms would frankly be a crapshoot trying to incorporate into smash, but you did the best with what you had.

Character suggestion: Any Metroid Prime Hunter that isn't Sylux. You're choice. Or hell, Sylux is fine.

Neutral-B: Magmaul
Spire fires a ball of burning magma in an arc upon releasing the B-button. On contact with either the ground or an enemy, the orb detonates; anything caught in the explosion are damaged/knockback'd but also recieve a %-Damage-over-Time effect that lasts several seconds. Spire can be damaged and knocked back by the explosion if he's caught in it himself, but does not recieve the DoT effect. Holding the B-button down longer increases the explosion radius and the duration of the DoT effect, while tilting the movement stick while holding B changes the trajectory angle of the orb being launched.
The orb fired directly can be absorbed (Ness/Lucas Down-B), but cannot be shielded, reflected or countered. The explosion can be shielded or countered, but cannot absorbed or reflected.
Side-B: Dialanche
Spire switches to his alt-form-- a flaming boulder called "Dialanche" --and rolls forward. When Side-B is simply pressed, Dialanche is active until the player inputs a new direction (which cancels the animation) or it collides with an object (enemies, walls, items)-- the latter of which will have Spire bounce off whatever it collided against. Enemies hit this way take damage and knockback.
ALTERNATIVELY. if the player is holding the B-button down, Dialanche remains active even if the player mid-air jumps or collides with objects, and can change the direction its rolling in by inputting the inverse direction (this will be ignored when in midair). If Dialanche collides with a wall or ceiling, it will scale the wall/ceiling (the most extreme example off the top of my head being the sides of Battlefield & Final Destination). Enemies hit this way still take damage, but only take a fraction of the knockback they would've recieved if Dialanche had bounced off of them.
Using the attack button while in Dialanche causes Spire to use his Fire Blade attack.
EDIT: Similar to being unable to change the rolling direction of Dialanche form while in midair, you also cannot change the rolling direction whilst scaling a ceiling or wall. Also, when scaling a wall or ceiling, Dialanche always goes the "upwards" direction (example: using Dialanche underneath Final Destination or Battlefield will always result in Spire rolling towards the edges of the stage; never towards the center).
Up-B: Reverse Meteor
Spire quickly enters Dialanche form and rockets straight upwards. Can be used while in Dialanche form without any animation lag. If the B-button is held, Spire enters Dialanche form; however, because Reverse Meteor can't be angled and offers zero horizontal momentum on its own, it cannot save you from being spiked unless you're close enough to the bottom of the stage that your Up-B would buy enough time to latch onto the wall beneath the stage (see below picture because I'm bad at explaining stuff). Exiting Dialanche in mid-air after using Reverse Meteor puts you in a helpless state.
visual demonstration because words is hard.png

Down-B: Lava Field
Toggle-based special. While active, Dialanche turns all terrain it travels on-- floor, walls, ceilings --into lava. Magmaul's explosion and Spire's smash attacks all also leave Lava on terrain caught in them while the Down-B is toggled on. This lava functions the way custom stage lava works, though Spire is immune to knockback caused this way. The Lava does not disappear until the player that laid down the lava as Spire turns off their toggle. A toggle can be turned off by pressing Down-B again, or can be turned off by force through either KOing, throwing, or shieldbreaking Spire. Numerous specials (Command Grabs, Counters, :ultbanjokazooie:'s Side-B, Cloud's Limit attacks, :ultdk::ultlucario::ultmewtwo::ultsamus::ultdarksamus::ultwiifittrainer:'s fully-charged Neutral-B) all also have various chances of abruptly disabling Spire's Toggle if they connect and thus removing the Lava. When Lava Field's toggle is turned off in any way other than by pressing Down-B while it's already active, it cannot be turned back on for at least 30 seconds (this cooldown is lengthened by 1 second for every 5% of damage Spire takes from other players while it's on cooldown). If multiple players are playing as Spire and have Lava Field active, disabling one player's Lava Spire disables them all and removes all lava from the stage regardless of which Spire put the lava down, but only the player who was directly Thrown/Shield-popped/Special'd/KO'd can have their cooldown lengthened by taking damage.

Final Smash: Magma Storm
Blobs of Magma and fireballs are materialized and drenched all over the stage, dealing calamitous AoE damage to everyone except Spire. The FS Meter version of Spire's final smash has a much shorter duration than when the Smash Ball version.

My little sister's big into Sesame Street (she's 2), so... do Hellmo:


i'm not posting again until we figure out how we can utilize Cole Phelps' terrible driving (warning: link contains explicit language) into Smash.
On second thought, Cole Phelps' terrible driving-- while hilarious --is not bad enough to be fully weaponized into its own unique movement. Master Chief's driving, on the other hand, could work for Mr. 117's Final Smash.

Master Chief Final Smash: The Warthog
The Warthog is dropped in front of Master Chief. Everyone it falls on top of it forcefully put into the warthog as Master Chief goes to take the wheel. The Warthog drives off to one of several random Halo locales-- only ones that had ground vehicles in them, so not the infamous Library level from the first game. However, Master Chief hits a speed bump too hard causing the Warthog to flip in the air multiple times before landing on the ground upside-down, causing everyone to exit the vehicle automatically. Master Chief tries to flip the Warthog back up, but this causes the Warthog to fall on top of the passengers it kicked out, KO'ing them if they're at a high enough %.
 
Last edited:

Doc Monocle

Smash Ace
Joined
Dec 24, 2020
Messages
814
Location
The seventh lantern.
6 - 7/ 10. Because I have not played many Metroid games, I can strictly read to understand the nature of the moveset, and strictly reading, it sounds somewhere in between authentic and difficult to imagine. I think it primarily loses points because the side special has a potential hole in it if I read it correctly-- Spire could theoretically roll beneath a stage or remain on a wall/ceiling ad infinitum by using Dialanche, and reversing direction repeatedly, possibly allowing Spire to dominate a timed match. Otherwise, the moveset contained some interesting elements, such as an up special that has a distinctive flaw when Spire has gained too much velocity moving away from the stage, diminishing the effectiveness of recovery. It would balance nicely if (assuming I am correct in my interpretations) there were constraints on Dialanche's movement control to prevent unfair situations.

As for Elmo (You do mean Hellmo only in humor, yes?), I would craft a moveset around the theme of Elmo being a 'cheer' character. He would be a light-weight character that has few if any disjointed attacks, and the moves would revolve about making each player have mixed feelings about what Elmo does... So much happens in Elmo's world...

Neutral Special- Childish Laugh: Elmo laughs heartily while spreading his arms towards the screen. All players slowly recover health at an equal rate for as long as the special move is held.

Down Special- Oh, look!: Elmo opens a door in front of him, and there appears, for a limited time, one of two things-- Mr. Noodle and a bowl with a goldfish. The former performs a variety of miming antics that block small portions of the stage at a time for as long as he does so. He clumsily moves about, pushing items and characters around the stage, and shielding Elmo (unless Mr. Noodle falls down. In that case, he disappears early). The gold fish, which has a small chance of appearing, does nothing, like a certain fish pokémon I know, whose name may or may not be Goldeen . Inputting this special while either the fish, or Mr. Noodle is active results only in an animation of opening a door. There is a cooldown time of eight seconds between each use.

Side special- Joy Ride: Elmo rides a tricycle at a leisurely or fast pace on the ground or in the air, in accordance with the tilt of the control stick. He cannot turn around, but he can stop and resume. Only at the fastest pace does he damage opponents (22%). If he hits an opponent and damages them, he declares, "Elmo, loves you!" and receives 5% damage. Perhaps he thinks love hurts?

Up special- Suppper Grover : Grover flies from the nearest edge of the screen to catch Elmo as he falls, or lifts him from the stage, delivering him upwards before dropping him. It is possible to launch Elmo away before Grover reaches him. It is also possible to launch Grover himself!

Final smash: Elmo sings in the tune of "Jingle Bells "... Smash, smash, smash, smash, smash, smash, smash, smash, smash, smash, smash, smash, smash, smash, smash, smash, smash, smash, smash, smash, smash, smash, smaa-aash, ... smash, smash, smash, smash, smaaaaaash! The opponents both laugh, and cry, as they hear Elmo nearing the end, where an instant K.O. awaits them all. Elmo takes 30% damage, however.


The next character is Dr. Clash ( F-Zero).
 
Last edited:

FirestormNeos

Smash Lord
Joined
Apr 4, 2013
Messages
1,647
Location
Location Machine Broke
NNID
FirestormNeos
~~SKIP~~

I think it primarily loses points because the side special has a potential hole in it if I read it correctly-- Spire could theoretically roll beneath a stage or remain on a wall/ceiling ad infinitum by using Dialanche, and reversing direction repeatedly, possibly allowing Spire to dominate a timed match. ... It would balance nicely if (assuming I am correct in my interpretations) there were constraints on Dialanche's movement control to prevent unfair situations.
Ah, didn't even notice that possibility. Introduced some extra restraints to the Side-B to hopefully prevent that glaring oversight.

(You do mean Hellmo only in humor, yes?)
 
Last edited:

Freduardo

Smash Champion
Joined
Jan 8, 2014
Messages
2,330
6 - 7/ 10. Because I have not played many Metroid games, I can strictly read to understand the nature of the moveset, and strictly reading, it sounds somewhere in between authentic and difficult to imagine. I think it primarily loses points because the side special has a potential hole in it if I read it correctly-- Spire could theoretically roll beneath a stage or remain on a wall/ceiling ad infinitum by using Dialanche, and reversing direction repeatedly, possibly allowing Spire to dominate a timed match. Otherwise, the moveset contained some interesting elements, such as an up special that has a distinctive flaw when Spire has gained too much velocity moving away from the stage, diminishing the effectiveness of recovery. It would balance nicely if (assuming I am correct in my interpretations) there were constraints on Dialanche's movement control to prevent unfair situations.

As for Elmo (You do mean Hellmo only in humor, yes?), I would craft a moveset around the theme of Elmo being a 'cheer' character. He would be a light-weight character that has few if any disjointed attacks, and the moves would revolve about making each player have mixed feelings about what Elmo does... So much happens in Elmo's world...

Neutral Special- Childish Laugh: Elmo laughs heartily while spreading his arms towards the screen. All players slowly recover health at an equal rate for as long as the special move is held.

Down Special- Oh, look!: Elmo opens a door in front of him, and there appears, for a limited time, one of two things-- Mr. Noodle and a bowl with a goldfish. The former performs a variety of miming antics that block small portions of the stage at a time for as long as he does so. He clumsily moves about, pushing items and characters around the stage, and shielding Elmo (unless Mr. Noodle falls down. In that case, he disappears early). The gold fish, which has a small chance of appearing, does nothing, like a certain fish pokémon I know, whose name may or may not be Goldeen . Inputting this special while either the fish, or Mr. Noodle is active results only in an animation of opening a door. There is a cooldown time of eight seconds between each use.

Side special- Joy Ride: Elmo rides a tricycle at a leisurely or fast pace on the ground or in the air, in accordance with the tilt of the control stick. He cannot turn around, but he can stop and resume. Only at the fastest pace does he damage opponents (22%). If he hits an opponent and damages them, he declares, "Elmo, loves you!" and receives 5% damage. Perhaps he thinks love hurts?

Up special- Suppper Glover : Glover flies from the nearest edge of the screen to catch Elmo as he falls, or lifts him from the stage, delivering him upwards before dropping him. It is possible to launch Elmo away before Glover reaches him. It is also possible to launch Glover himself!

Final smash: Elmo sings in the tune of "Jingle Bells "... Smash, smash, smash, smash, smash, smash, smash, smash, smash, smash, smash, smash, smash, smash, smash, smash, smash, smash, smash, smash, smash, smash, smaa-aash, ... smash, smash, smash, smash, smaaaaaash! The opponents both laugh, and cry, as they hear Elmo nearing the end, where an instant K.O. awaits them all. Elmo takes 30% damage, however.


The next character is Dr. Clash ( F-Zero).
9/10 Oh, look is perfect and childish laugh gives the correct tickle me elmo vibes, but Super Grover should be Grover’s move.
-

Dr. Clash - A not-very-fast light heavyweight. His jabs are done with his fists and while the flurry catches, it’s only the final hit with the metal arm on his back that does significant damage. His tilts and smashes use the metal arms on his back for significant damage.

B Neutral - Double laser - The claws on his back arms shoot two lasers (one each). It does not do much damage or have significant knockback, but they can be aimed and the first catches for the second.

B Forward - Crazy Bear Hug - He takes a three point stance and if not knocked out of it (with fair super armor) he charges forward with a quick burst behind him into a command grab where the metal arms squeeze and toss their opponents

B Up - Damaging spring - Puts down a tile below him that to him acts as a spring and to opponents acts as a boundary tile from F Zero.

b Down - Rev Engines - He does a charge, if allowed to complete until he soaks 20 damage his b neutral will ‘charge’ like Rob’s, his b forward will be able to have button inputs for multiple hits or direction throws, and his up b will have a capture effect causing most people to take two or three hits even for graised hits (and significantly more if they land dead center on one).

If he soaks 20 damage, effect wears off.

if he does a down b while charged, he’ll smash the ground (or below him to a clap if he is airborne) causing a dome shockwave of knockback/safety as well as impact damage. This will also eliminate the effect of the charge.
 

Perkilator

Smash Legend
Joined
Apr 8, 2018
Messages
10,515
Location
The perpetual trash fire known as Planet Earth(tm)
7/10

Intro: Azura appears from a circle of water, mimicking her battle intro animation from Fates

Stance/Idle 1: Her fighting stance from Fates
Idle 2: Azura’s pre-battle pose from Fates
Idle 3: Azura puts her left hand on her chest

Notable Palette Swaps:
  1. Azura (default)
  2. Phina (red/yellow)
  3. Sylvia (green/white)
  4. Ninian (turquoise)
  5. Tethys (red/black)
  6. Leanne (gold/white)
  7. Olivia (pink/white)
  8. “Mysterious lady” (purple)
Walk: Azura carefully walks forward
Dash: Taken from Fates
Damage: Taken from Fates
Jump: Similar to Palutena’s jump
Crouch: Similar to Palutena’s crouch

Normal Attacks
Jab: A horizontal slash (2%) followed up by a rising slash (3%) and finishes with an overhead slash (5%, OK knockback)
Forward+A: Azura slashes downward (7%, small knockback)
Down+A: Azura jabs along the ground (6%, small knockback), potentially tripping opponents
Up+A: Azura quickly slashes upwards, attacking opponents both in front of and above her (7%, small knockback)

Aerial Attacks
Air+A: Azura spins in the air once, slashing anyone in the vicinity (8%, small knockback)
Air Forward+A: Azura brings her lance down for a powerful slash (11% with a meteor effect, OK knockback)
Air Back + A: Azura delivers a wide horizontal blow (10%, OK knockback)
Air Up+A: Azura delivers a rising slash (9%, OK knockback)
Air Down+A: Azura delivers a downward diagonal slash (11%, OK knockback)

Dash Attack: Azura delivers a diagonal cut while performing a Ballerina’s Jete (12%, OK knockback), which can launch foes above her
Edge Attack: Azura stabs the opponent with an overhead jab (7%, small knockback)
Get-Up Attack: Water bursts around Azura as she gets back up (6%, small knockback)

Smash Attacks
Forward+A: Azura launches foes in front of her with a rising slash (18%, medium knockback)
Up+A: Azura stabs upwards (16%, medium knockback) as two small pillars of water rise on both sides of her (11% each, OK knockback)
Down+A: Azura slashes diagonally downwards on both sides (14% each hit, OK knockback)

Grab Game
Grab: Azura snags the opponent in a circle of water
Pummel: Azura spins the water circle (1%)
Forwards+Throw: Azura stabs forwards (8%, OK knockback)
Down+Throw: Azura brings her lance down for a downward slash (9%, OK knockback)
Back+Throw: Azura tosses the opponent behind her with the water circle (6%, small knockback)
Up+Throw: Azura backflips while launching her opponent upwards (11%, OK knockback)

Special Moves
B : Inspiring Song
; Azura sings for 3 seconds, healing 30% of her current damage when it is completed; this is divided up among her allies. If she is attacked or uses her Dragon Vein during the song, she won’t receive its benefits.
B + Forwards : Javelin Throw; Azura throws her lance on the ground, which can hit multiple opponents at once (15%, OK knockback). She is then limited to unarmed combat; all of her jabs, Smash attacks and aerial attacks are reduced to water-bending, which is faster but deals much less damage.
B + Up : Ballerina Twirl; Azura rises moderately high upwards as she twirls under a spiral of water (17%, OK knockback)
B + Down : Stream; Azura twirls once, pulling in opponents, and then raises her lance upwards; a huge stream of water then appears, launching opponents upwards (25%, medium knockback)

Final Smash: Dark Song; Azura raises two columns of water around herself (7%). Opponents are taken into a cutscene (based on the Opera House scene from Fates) where Azura sings her song as ripples go rapidly across the water (50%, devastating knockback)

Gimmick: Dragon Vein; Pressing B in the middle of a Special allows Azura to perform a secondary Special. She can perform any Dragon Vein attack during any Special, but she enters a helpless state when she does this midair.
  • Neutral Dragon Vein: Azura surrounds herself in a barrier of water that pushes opponents away (10%, OK knockback) and reflects projectiles
  • Side Dragon Vein: Azura calls back her lance, which twirls three times (5% each, small knockback) and instantly warps back to her
  • Up Dragon Vein: Azura is pushed up extremely high by water, dealing no damage
  • Down Dragon Vein: Azura pushes a stream of water (similar to the Gust Bellows) in front of her, pushing away opponents and dealing no damage
Taunts
1: “Take your final bow.” Azura mimics her pose in her official artwork
2: “Look me in the eyes.” Azura mimics her talking portrait from Fates
1+2: “I must not lose here.” Azura mimics her battle entrance animation from Fates

Winposes
1: “I’m so happy, I could sing.” Azura’s victory animation from Fates
2: “I had no choice.” Azura mimics her map sprite when dancing, putting her lance up to the camera
3: Azura dances while singing the victory theme

Applause: Azura looks down in disappointment
Icon: The Fire Emblem series icon
Boxing Ring Title: Lady of the Lake
Star K.O.: Azura screams in a near-singing voice
Victory Music: A snippet of “Lost in Thoughts All Alone” suited to Azura
Kirby Hat: Azura’s coif

Bulborb (Pikmin)
 

ImpostaWithDrip

Smash Rookie
Joined
Jun 14, 2021
Messages
10
7/10

Intro: Azura appears from a circle of water, mimicking her battle intro animation from Fates

Stance/Idle 1: Her fighting stance from Fates
Idle 2: Azura’s pre-battle pose from Fates
Idle 3: Azura puts her left hand on her chest

Notable Palette Swaps:
  1. Azura (default)
  2. Phina (red/yellow)
  3. Sylvia (green/white)
  4. Ninian (turquoise)
  5. Tethys (red/black)
  6. Leanne (gold/white)
  7. Olivia (pink/white)
  8. “Mysterious lady” (purple)
Walk: Azura carefully walks forward
Dash: Taken from Fates
Damage: Taken from Fates
Jump: Similar to Palutena’s jump
Crouch: Similar to Palutena’s crouch

Normal Attacks
Jab: A horizontal slash (2%) followed up by a rising slash (3%) and finishes with an overhead slash (5%, OK knockback)
Forward+A: Azura slashes downward (7%, small knockback)
Down+A: Azura jabs along the ground (6%, small knockback), potentially tripping opponents
Up+A: Azura quickly slashes upwards, attacking opponents both in front of and above her (7%, small knockback)

Aerial Attacks
Air+A: Azura spins in the air once, slashing anyone in the vicinity (8%, small knockback)
Air Forward+A: Azura brings her lance down for a powerful slash (11% with a meteor effect, OK knockback)
Air Back + A: Azura delivers a wide horizontal blow (10%, OK knockback)
Air Up+A: Azura delivers a rising slash (9%, OK knockback)
Air Down+A: Azura delivers a downward diagonal slash (11%, OK knockback)

Dash Attack: Azura delivers a diagonal cut while performing a Ballerina’s Jete (12%, OK knockback), which can launch foes above her
Edge Attack: Azura stabs the opponent with an overhead jab (7%, small knockback)
Get-Up Attack: Water bursts around Azura as she gets back up (6%, small knockback)

Smash Attacks
Forward+A: Azura launches foes in front of her with a rising slash (18%, medium knockback)
Up+A: Azura stabs upwards (16%, medium knockback) as two small pillars of water rise on both sides of her (11% each, OK knockback)
Down+A: Azura slashes diagonally downwards on both sides (14% each hit, OK knockback)

Grab Game
Grab: Azura snags the opponent in a circle of water
Pummel: Azura spins the water circle (1%)
Forwards+Throw: Azura stabs forwards (8%, OK knockback)
Down+Throw: Azura brings her lance down for a downward slash (9%, OK knockback)
Back+Throw: Azura tosses the opponent behind her with the water circle (6%, small knockback)
Up+Throw: Azura backflips while launching her opponent upwards (11%, OK knockback)

Special Moves
B : Inspiring Song
; Azura sings for 3 seconds, healing 30% of her current damage when it is completed; this is divided up among her allies. If she is attacked or uses her Dragon Vein during the song, she won’t receive its benefits.
B + Forwards : Javelin Throw; Azura throws her lance on the ground, which can hit multiple opponents at once (15%, OK knockback). She is then limited to unarmed combat; all of her jabs, Smash attacks and aerial attacks are reduced to water-bending, which is faster but deals much less damage.
B + Up : Ballerina Twirl; Azura rises moderately high upwards as she twirls under a spiral of water (17%, OK knockback)
B + Down : Stream; Azura twirls once, pulling in opponents, and then raises her lance upwards; a huge stream of water then appears, launching opponents upwards (25%, medium knockback)

Final Smash: Dark Song; Azura raises two columns of water around herself (7%). Opponents are taken into a cutscene (based on the Opera House scene from Fates) where Azura sings her song as ripples go rapidly across the water (50%, devastating knockback)

Gimmick: Dragon Vein; Pressing B in the middle of a Special allows Azura to perform a secondary Special. She can perform any Dragon Vein attack during any Special, but she enters a helpless state when she does this midair.
  • Neutral Dragon Vein: Azura surrounds herself in a barrier of water that pushes opponents away (10%, OK knockback) and reflects projectiles
  • Side Dragon Vein: Azura calls back her lance, which twirls three times (5% each, small knockback) and instantly warps back to her
  • Up Dragon Vein: Azura is pushed up extremely high by water, dealing no damage
  • Down Dragon Vein: Azura pushes a stream of water (similar to the Gust Bellows) in front of her, pushing away opponents and dealing no damage
Taunts
1: “Take your final bow.” Azura mimics her pose in her official artwork
2: “Look me in the eyes.” Azura mimics her talking portrait from Fates
1+2: “I must not lose here.” Azura mimics her battle entrance animation from Fates

Winposes
1: “I’m so happy, I could sing.” Azura’s victory animation from Fates
2: “I had no choice.” Azura mimics her map sprite when dancing, putting her lance up to the camera
3: Azura dances while singing the victory theme

Applause: Azura looks down in disappointment
Icon: The Fire Emblem series icon
Boxing Ring Title: Lady of the Lake
Star K.O.: Azura screams in a near-singing voice
Victory Music: A snippet of “Lost in Thoughts All Alone” suited to Azura
Kirby Hat: Azura’s coif

Bulborb (Pikmin)
I haven't played any of the Fire Emblem games myself, so my knowledge on the series is quite limited outside of what is generally in Super Smash Bros, but I like the moveset you came up with for Azura! The gimmick helps to make her a bit more unique then the other Fire Emblem characters, and I like how it expands on her special attacks which already sounded fun to use. I also love just how much you showed here for Azura just beyond the moveset, such as the victory music, boxing ring title, winposes, etc. Overall, I'd give your moveset a solid 10/10, a solid showing of detail and explanation for the character.

-

Bulborb - (Pikmin Series)

Just like with Azura, I haven't played any of the games in the Pikmin series, but I am more familiar with this series through watching let's plays of the games and also doing some quick research on the Bulborb for some inspiration. I only focused on the specials for this moveset as that is what I saw others in this thread focusing on, but I'd love to expand further on the moveset whenever I get the chance to as I had a fun time coming up with it.

Description of the Character - Bulborb as a character is an amalgamation of the different Grub-Dog enemies found in the Pikmin games, meaning that it does borrow certain methods of attacks from others. I also figure for some of its neutral attacks it could call in the help of other enemies unrelated to the grub-dog family. When playing as the Bulborb you want to make sure that you keep up close and personal to your opponent as that is where the Bulborb exceeds at. It doesn't have much range attacks though with the exception of the neutral special, and the outcome of the fight could be disastrous if the opponent approach the Bulborb from the back. It also excels more as a grounded fighter then a air fighter as it cannot jump that high.(edited)

Neutral Special ("Whiptongue Leash") - The Bulborb will whip its long tongue forward ala an attack like Zero Suit Samus's Plasma Whip. This attack would serve as a command grab where any fighter who gets attacked by the whip would get pulled closer to the Bulborb who could then pummel the opponent by biting before finishing the attack off with any of its throws. This attack references the Whiptongue Bulborb and its method of attack in Pikmin 3. The regular Bulborb does not use this attack, but I feel like we could bend the rules a bit with this attack.(edited)

Side Special ("Snack Rush") - The Bulborb would march in place, revving its feet up for a bit and getting ready before rushing forward in a biting frenzy. The longer you hold down the attack the farther the Bulborb will rush forward. This attack references the method of attack used by the Bulborb enemies and the Bulblord in the Pikmin Adventure attraction in Nintendo Land.(edited)

Up Special ("Swooping Snitchbug") - A Swooping Snitchbug would appear underneath the Bulborb and fly up, snatching the Bulborb and carrying it in the process. The snitchbug would then carry the Bulborb for a set distance before letting go and dropping the Bulborb, which would leave the Bulborb in free fall. This attack references the Swooping Snitchbug enemy found in the Pikmin games and its method of attack.(edited)

Down Special ("Snooze Break") - The Bulborb will let out a yawn before falling asleep on the stage. They will be asleep for a five second duration. If the Bulborb happens to get attacked while in this state they will retaliate by waking up and attacking back with a quick, damaging bite. If they are not attacked in this five second state then they will wake back up, which costs some time and leaves you open. This references the Bulborb's sleepy nature in the games and how it will wake up to attack if provoked.(edited)

Final Smash ("Bulblax-Attack") - A larger Spotty Bulborb would appear infront of the Bulborb, leaning down to bite at any fighters in front of it. Any fighters that are bitten by the Bulborb would be taken to a cinematic final smash where the large Spotty Bulborb would throw the bitten opponents into a sand pit surrounded by different members of the grub-dog family such as the Orange Bulborb, Spotty Bulbear, Hairy Bulborb, etc. The camera would then show the Bulborb next to the Emperor Bulblax, which would proceed to whip its tongue at the caught fighters before ending the cinematic final smash with a huge leap and jumping down on the fighters for huge damage. This final smash references the Final Boss fight of the first Pikmin game while also referencing several of the enemies often found in the Pikmin games through cameos.

-

As for the next character that I would like to request, how about we continue the trend of having basic enemies be given a moveset? I'll go with the Ghost Gang (Blinky, Pinky, Inky and Clyde) from the Pac Man series.
 
Last edited:

Doc Monocle

Smash Ace
Joined
Dec 24, 2020
Messages
814
Location
The seventh lantern.
9/10. It scores high for sounding natural and filling what I would not have been able to. I think the bulborb should have hardly an option for recovery outside of a tether perhaps, but it was a nice moveset altogether.

As for the ghosts, I used my moveset from a support thread I made.

In keeping with the character and theme of the Pac Ghosts, they would be a 'tag-team' character like Olimar and pikmin, Popo and Nana, Rosalina and Luma, etc. They would have exceptionally low (if not the lowest, but there is more to be said shortly, and it cannot be left so simply put...) weight, gravity, falling speed, aerial acceleration, ground speed, and traction, but exceptionally high max aerial speed ( rivaling or surpassing even Yoshi's ), thus they would be incredibly difficult to control (in varying degrees depending on which ghost you have in front, but I shall explain this momentarily...). Furthermore, their collective 'hit zone' is rather large (when they are together...), despite each ghost having a small figure. Therefore, the Pac Ghosts have risky movement in close-quarters, and are thus easy to K.O. (somewhat...). To worsen matters, their melee attacks are either non-disjoint, or slow enough to leave room for reaction. In all, I can imagine them as having a rather high learning curve.

The Pac Ghosts are not off to a good start in many respects, however, their assets are very... unorthodox. They have plethora of interesting, unusual gimmicks and mechanics:

1. Start Area - The Pac Ghosts always start at or near the center of the stage, swapping start positions with the otherwise rightful player. This does not necessarily amount to much in many cases, but depending on the player's strategy, it can be more or less convenient, and it references their initial condition in the Pac Man arcade game.

2. Float/Glide - Upon inputting a jump, the player does not see the ghosts perform a traditional 'jump.' Rather, they move slightly upward, and for a few (perhaps 5 seconds), the player can control midair movement as the ghosts are suspended (without any directional input, the ghosts will descend at about Jigglypuff's fall speed). Inputting a jump again will cancel this. This can only be done once at a time, but can be use on the ground, or in the air, making it an effective recovery option. They can also attack without ending the float, so any attemp to edge-guard against them should proceed with caution.

3. Wall-cling - The ghosts do not wall-jump, but they can cling. This is treated almost as a landing, so they can float again (once) if they have exhausted their float.

4. Desynching - This is the only tag-team whose constituents may be controllably dispatched to different areas of the stage (I shall explain this in the partial moveset). As a result, a skilled player can control most or all of a small stage, or make it very difficult for the opponent to retreat safely. Although this requires extensive reflexes in multi-tasking, once mastered, it enables the player to keep the opponent from maintaining a neutral game, maintain an advantage state, set up and execute combos creatively, unpredictably, and effectively (thereby providing potential for great damage output in seconds. this would be very difficult, advanced material, however.), and have one or more ghosts to fall back on when one is launched to a K.O. at high damage. Therefore, they can hold an extended game, but you certainly must use your tools well.

5. Leader Properties - Using the neutral special (again, I shall explain later...), the player may select a 'lead' ghost by repeatedly tapping the B button (cycling through Blinky, Pinky, Inky, and Clyde in this order). This is the ghost controlled by the player and followed by the other ghosts when they are not 'scattered' (explained later). Each ghost has its own attributes. Blinky is the fastest, and offers what the others lack in agility. His attacks have high priority, and he attacks with side B without being set as the lead. However, he is the easiest to launch. Pinky is more controllable than the others (she has highest traction and air acceleration), and can set platforms with up B (see Pinky in Pac Man World 3) without being set as the lead. She is the slowest though. Inky has intangibility while near the other ghosts, but has the the weakest attacks. Clyde has low priority, low controllability, and is easily launched, but his attacks are very strong, and are quick to start and finish (his smash attacks would hit about as hard as Mr. Game and Watch's). He is best reserved as an 'insult to injury' when the player has the upper-hand.

6. While the ghosts are subject to 'footstooling,' (only one ghost at time) and cannot footstool, they are not put into the helpless fall, and merely descend with no landing lag. They can recover by floating, which they can use (once) after taking a footstool. A footstool causes one ghost to 'scatter' from the rest.

7. Impressively, there is no lag for landing, even after an aerial attack!

I know this is a lot (and we have not seen the moveset yet!). The Pac Ghost gang would be a highly technical character that is very difficult to master, perhaps even the most difficult.

Partial Moveset (very mischievous and unconventional of them!):

Jab (A/AA/ AAA/ AAAA): Depending on how many ghosts are 'unscattered', the gang takes turns throwing between one and four forward punches, each ghost floating to the front, moving away, and allowing the next one to punch. Seldom will all the punches connect (there are many factors that affect this, including opponent damage and lead ghost). The damage output is 3%-23%.

Dash Attack: The lead ghost shoulder tackles an opponent in front (4%-9%).

Ftilt- The lead ghost flies forward and shoves an opponent, tripping them on contact. If contact is made with a light item, it is grabbed; if with a heavy item, it is pushed along the ground for as long as the control stick is held forward; or if with a wall, there is a straining animation to no effect except endlag (1%-8%).

Utilt- I have no ideas.

Dtilt- I have no ideas.

Fsmash- The lead ghost drops a flower pot in front of them (similarly to Villager's bowling ball). If it lands on an opponent, or from a high enough distance onto the ground, it is broken, launching the opponent, and the precipitating shards can be picked up and thrown. Otherwise, the pot is intact, and will absorb projectiles (up to 10%). The pot can be picked up and thrown as a heavy item, but it is usually faster to use Ftilt to push it into an opponent, or off a ledge (11%-26% uncharged, depending on use and ghost). It is an excellent edge-guarding tool, but it is slow, short-ranged, and can only be used when there are no other pots or shards on the stage.

Dsmash - The gang circles around a fixed spot on the ground, slowly moving outwards and launching any foes they make contact with (12% uncharged). The move lasts long for a smash attack, hits as many times as it touches an opponent, has excellent range for a down smash, and launches a considerable distance for its damage. It also causes extensive shield damage and pushes a shielding opponent back a significant distance each time a ghost makes contact with a shield, allowing it to pressure shields fairly well when properly timed. It has some atypical weaknesses though. It is not very useful for reading rolls due to the start lag, slow execution, and blindspot at the center of the ghosts' orbit.

Usmash - The ghosts abruptly fly outward, covering multiple directions, depending on the number of unscattered ghosts (6%-24% uncharged, depending on how many ghosts make contact. The highest value only happens when the opponent is right 'on top' of you though). This is their quickest and most reliable smash attack, but it is also quite weak in most cases. The range, however, makes it useful as an anti-air attack. The move scatters each ghost.

Grab - A grab can only occur with two or more unscattered ghosts. They surround and harass the opponent 'bully' style. The grab has the gimmick of causing a periodic 2% damage in addition to 3% pummel damage offered by the lead ghost, making the grab alone a superb 'extra-damage' tool. The more unscattered ghosts there are, the more difficult it is to escape the grab.

Uthrow - Each grabbing ghost levitates slowly, and then tosses the opponent upward (6%-15%)

Dthrow - I have no ideas.

Fthrow - The ghosts grabbing ghosts line up and each ghost in the line tosses the opponent to the next ghost until the end of the line is reached, at which point the final ghost throws the opponent away (5%- 18%). This scatters the grabbing ghosts.

Bthrow - The lead ghost traps the opponent in a sack and carries them over the shoulder (3%). During this time, the player may move around freely in any direction for as long as the opponent is in the sack. The opponent may struggle free by 'mashing,' and the player may swing and throw the sack forward at any time by pressing A, potentially leading to many amusing, offstage victories (or accidental suicides). If you need 'salt' on your fish, try getting a K.O. on the opponent with this move!

Nair - The lead ghost makes a 'scary' face (see), and their whole body becomes a lingering hit-box (2%-7% depending on ghost). It is also an effective taunt!

Fair - The lead ghost flies forward a short distance with a boulder in hand. They then drop the boulder (21%) which , after landing can be shoved with Ftilt, or treated as a heavy item.

Dair - I have no ideas.

Uair - I have no ideas.

Bair - I have no ideas.

Neutral Special (Swap) - This move changes which ghost, you are actively controlling (the lead ghost). Any unscattered ghosts follow the lead ghost, while scattered ghosts remain in one place, and do nothing until commanded by the player. This happens almost instantaneously, so it is helpful (pivotal even) to the ghosts' combo and trapping games.

Up Special (Pinky Platform) - Pinky generates a platform that can be used by any player. I imagine that in order to be fair, there should be some cooldown time, but that is all I can say until I see the home series' rendition personally. The move cannot be used if Pinky has been K.O.'d, but she does not have to be set as the lead ghost to use it.

Down Special (Scatter) - The unscattered ghosts spread out in a horizontal line, scattering them. A ghost is unscattered if it follows the lead ghost. Due to the 'scattering' mechanic, it is possible forone ghost to launch a foe into another attack if the player is fast enough in transitioning from an attack to Swap, making it powerful for planned combos. Unfortunately, scattered ghosts are 'sitting ducks,' and are vulnerable to attack if you do not keep the opponent on the defense. However, if you use Scatter again, all of the unscattered ghosts fly to the leader and regroup, but only if all ghosts are scattered.

Side Special (Cruise Elroy) - Named for a condition in the arcade Pac Man, where after Pac Man eats enough pellets, ghosts speed up, this special move causes Blinky to rush forward at high speed, causing tremendous damage and knockback. It can also be used without setting Blinky as the lead. The move can only be used once every thirty-four seconds, and cannot be used if Blinky has been K.O.'d .

Final Smash - I could not say for sure... Perhaps something involving a bus (?

Next is Eddy (Tekken).
 

ZagarTulip

Smash Journeyman
Joined
Nov 11, 2016
Messages
323
8/10 Seems fun

Eddy's Moveset, it was really hard to find names for these moves especially the first one so bear with me, I put links to the timestamped moves because I ain't the best at descriptions, although I plan to work on that skill soon

B- Splits Handstand Kick - (Tekken 3)
Side B- Dos Sole - (Tekken 7)
Up B- Helicopter - (Tekken 7)
Down B- Back Summy to Firekick (Tekken 7)
Final Smash- Rage Art

Next Character: Ashnard from Fire Emblem Path of Radiance
 
Top Bottom